50 Studio Apartment Kitchen Ideas

This post may contain affiliate links: full affiliate disclosure.
A studio kitchen has to work at dinner and still feel like part of the room when you sit down on the sofa. Start with the part that frustrates you.
Compare layouts if an open oven door blocks your path. If the layout works, a foldaway table, better dish storage, or a quieter finish may do more.
As an Amazon Associate I earn from qualifying purchases.
Fit the kitchen into the studio
1. Keep the kitchen on one wall
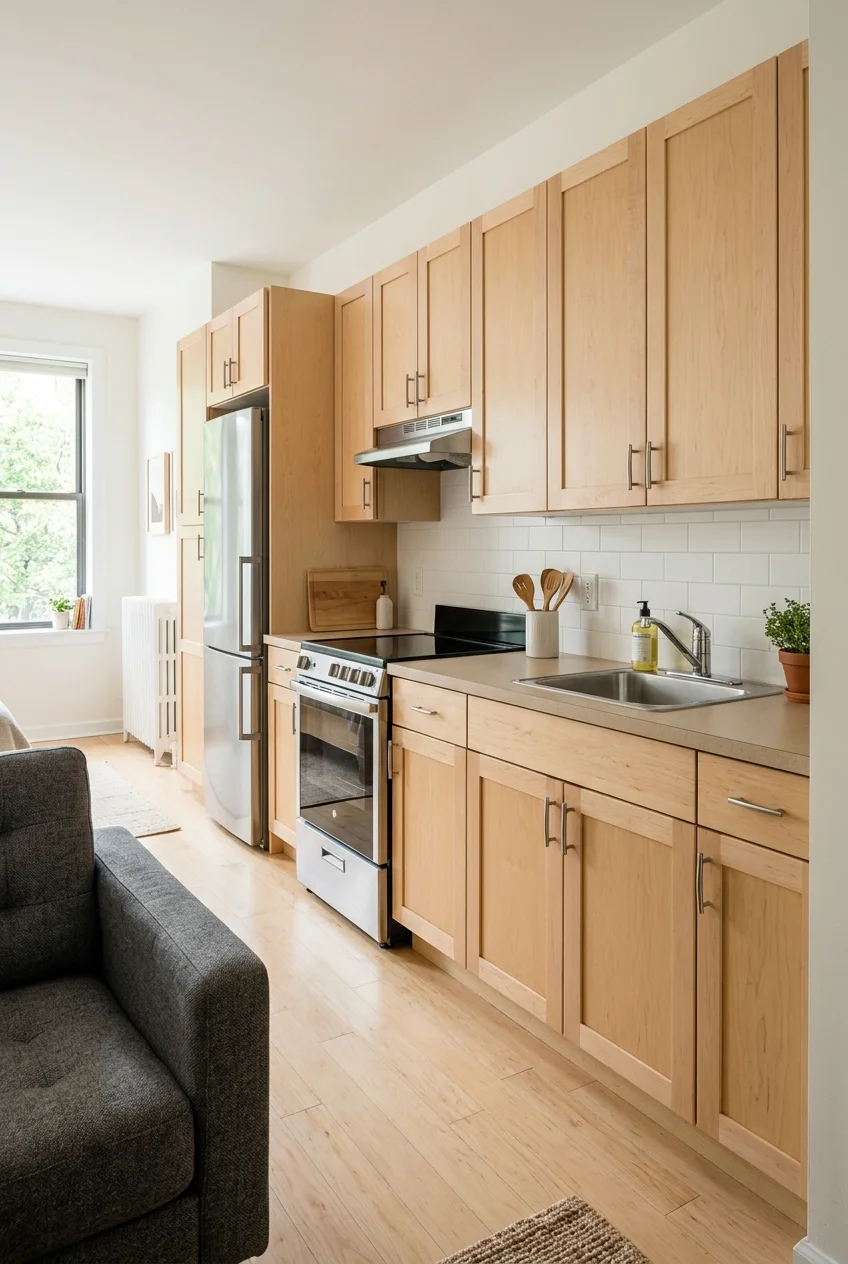
A straight cabinet run leaves the middle of the studio open for walking, eating, or pulling out a sofa bed. Give the longest uninterrupted counter stretch to prep.
Put groceries down near the refrigerator and keep a landing spot beside the cooking surface. On a short wall, one clear counter can serve both jobs at different times.
Open the refrigerator, oven, and entrance-side drawers before positioning furniture. Tape out the table footprint, then test the route with a dining chair pulled back.
In a remodel, sketch the sink, existing services, and appliance doors first. Cabinet sizes are easier to settle once you can see which stretch of counter will stay usable.
2. Tuck an L into the corner
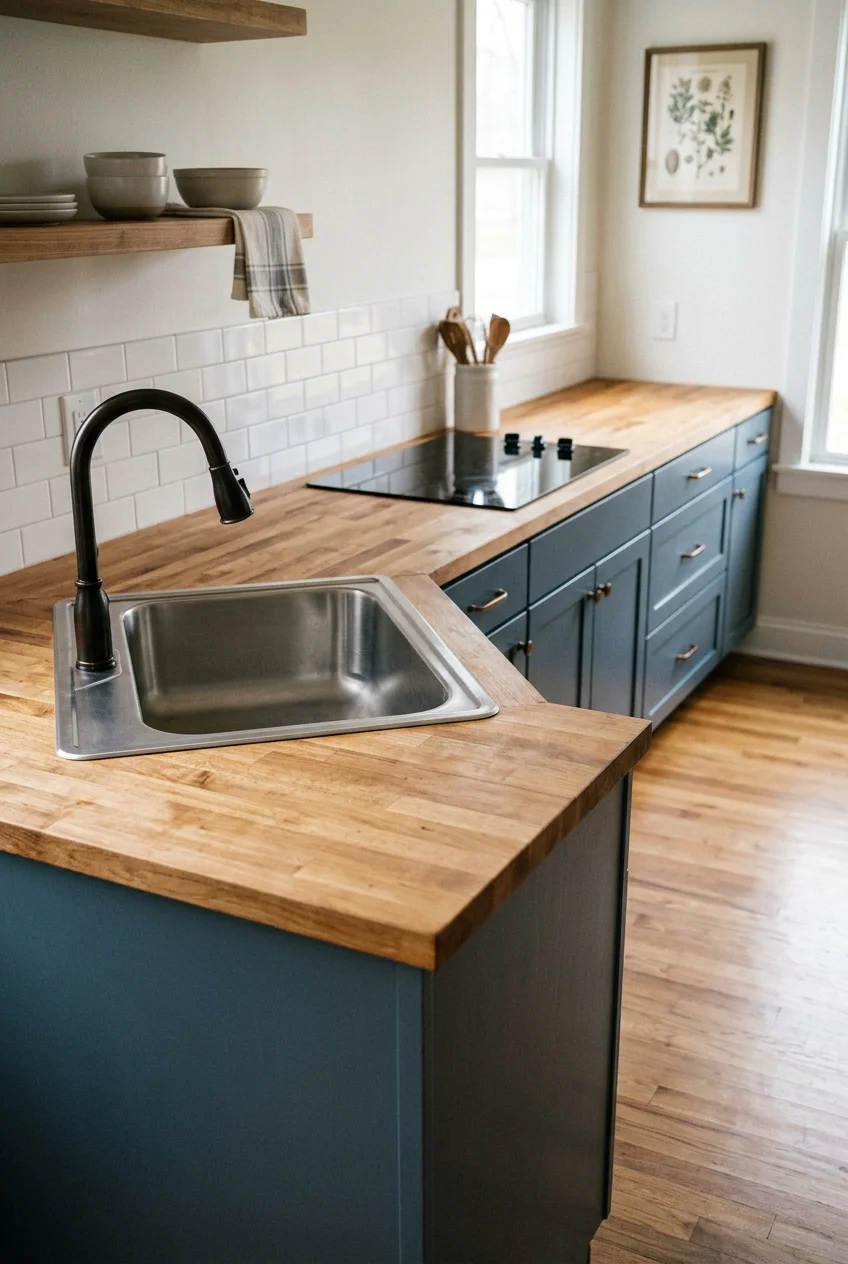
A short return gives the sink or a drawer stack its own spot while leaving the long wall free for cooking and prep. It also marks where the kitchen ends.
Have adjacent base doors and drawers drawn open on the plan. Handles can catch at the inside corner, so allow for the cabinetmaker’s filler and hardware requirements before ordering fronts.
Keep bulky everyday items in a drawer you can reach straight on. Save a deep blind corner for the roasting pan you pull out a few times a year.
3. Frame a recessed kitchenette
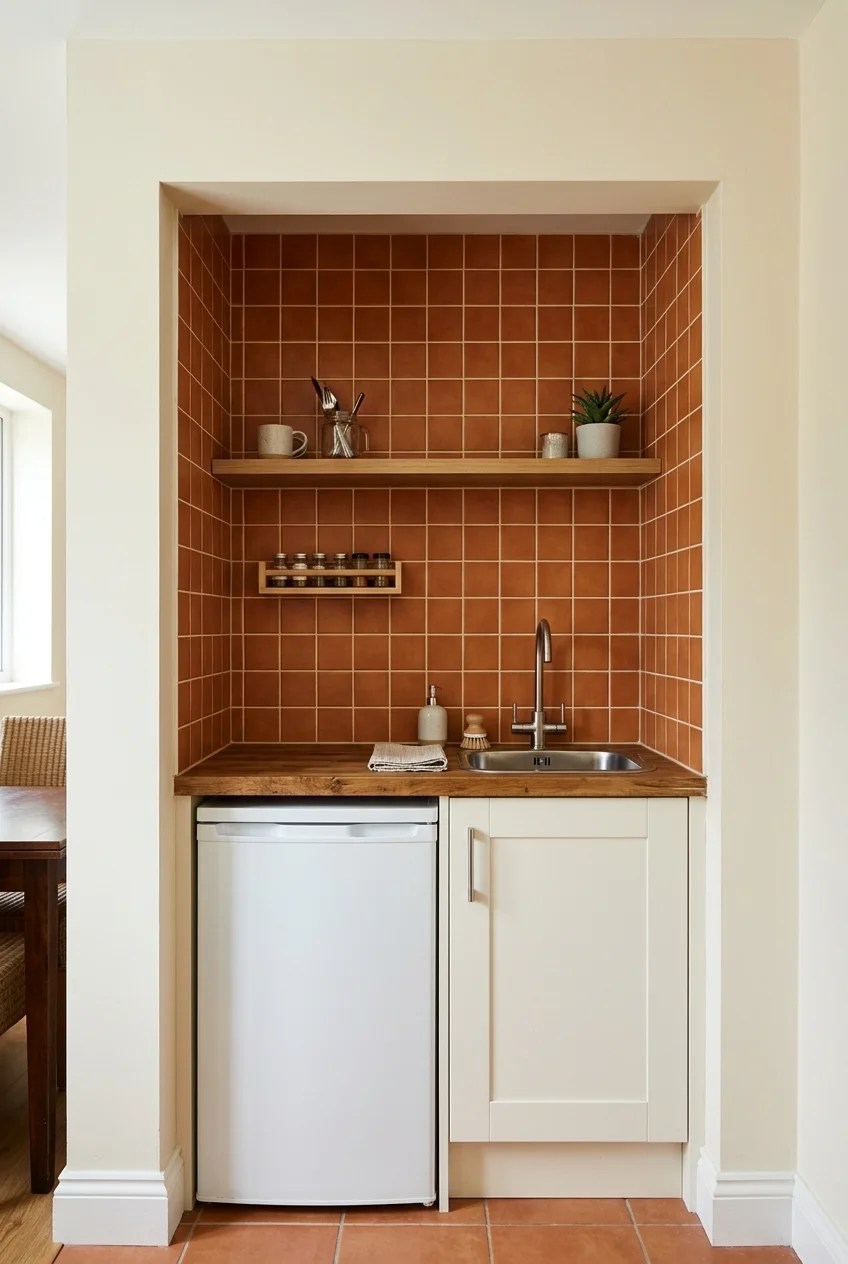
When the kitchen sits in a recess, take one backsplash finish across the back and end it cleanly at the side walls. The niche reads as a single inset.
Keep the furniture outside its opening. A small dining table off to one side leaves the alcove accessible when the refrigerator is open or someone is washing dishes.
If a full-height cabinet belongs in the recess, put it at the end farthest from the brightest part of the room, provided its door can open fully.
4. Use the short end of a long studio
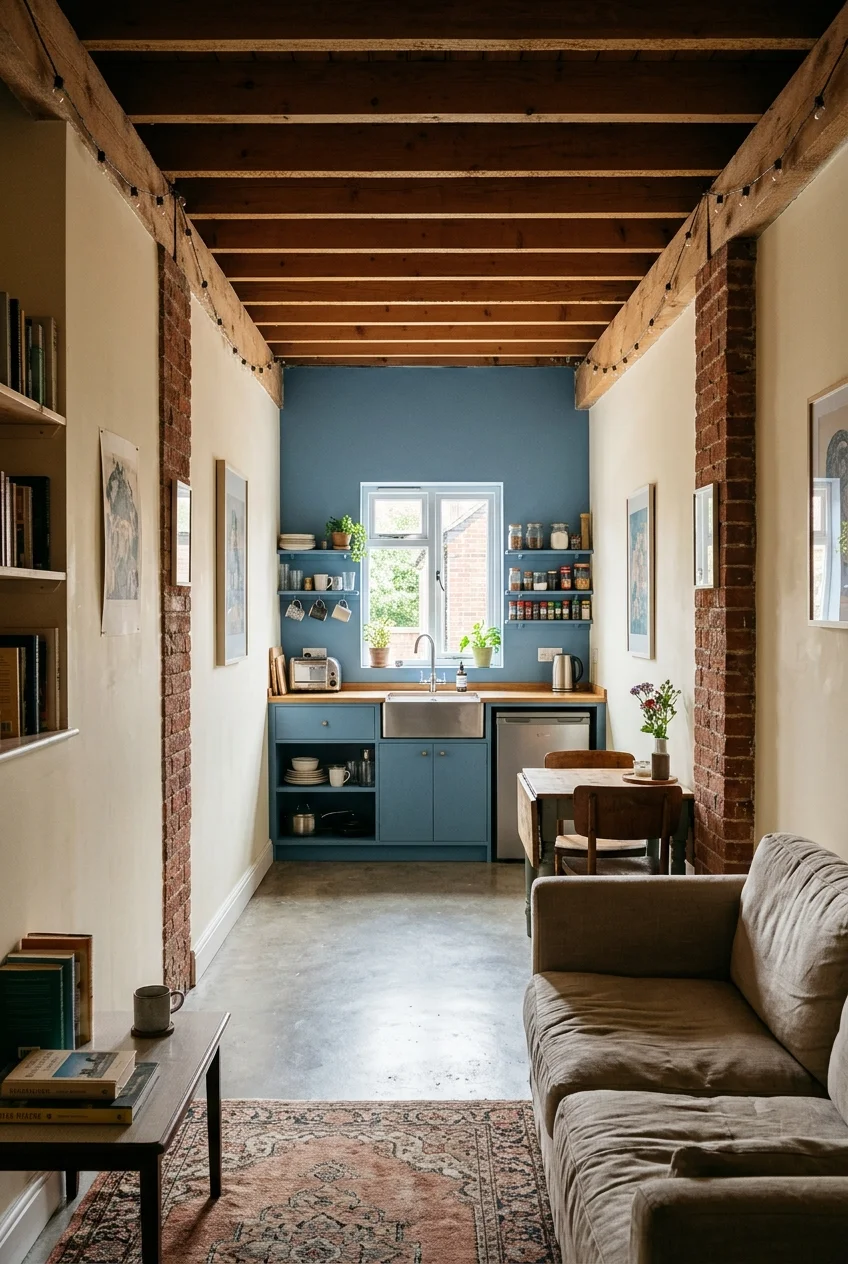
Run the kitchen across the end wall so the long sides can hold seating and a bed. A ceiling or wall color change can mark the kitchen footprint.
Measure the turn from the open apartment into the work area. The nearest chair or sofa arm can steal room you need to step aside when the oven opens.
If the end wall has a window, leave room to operate it and check the faucet height against the sash or handle before finalizing the sink position.
5. Make a two-sided alcove work as a galley
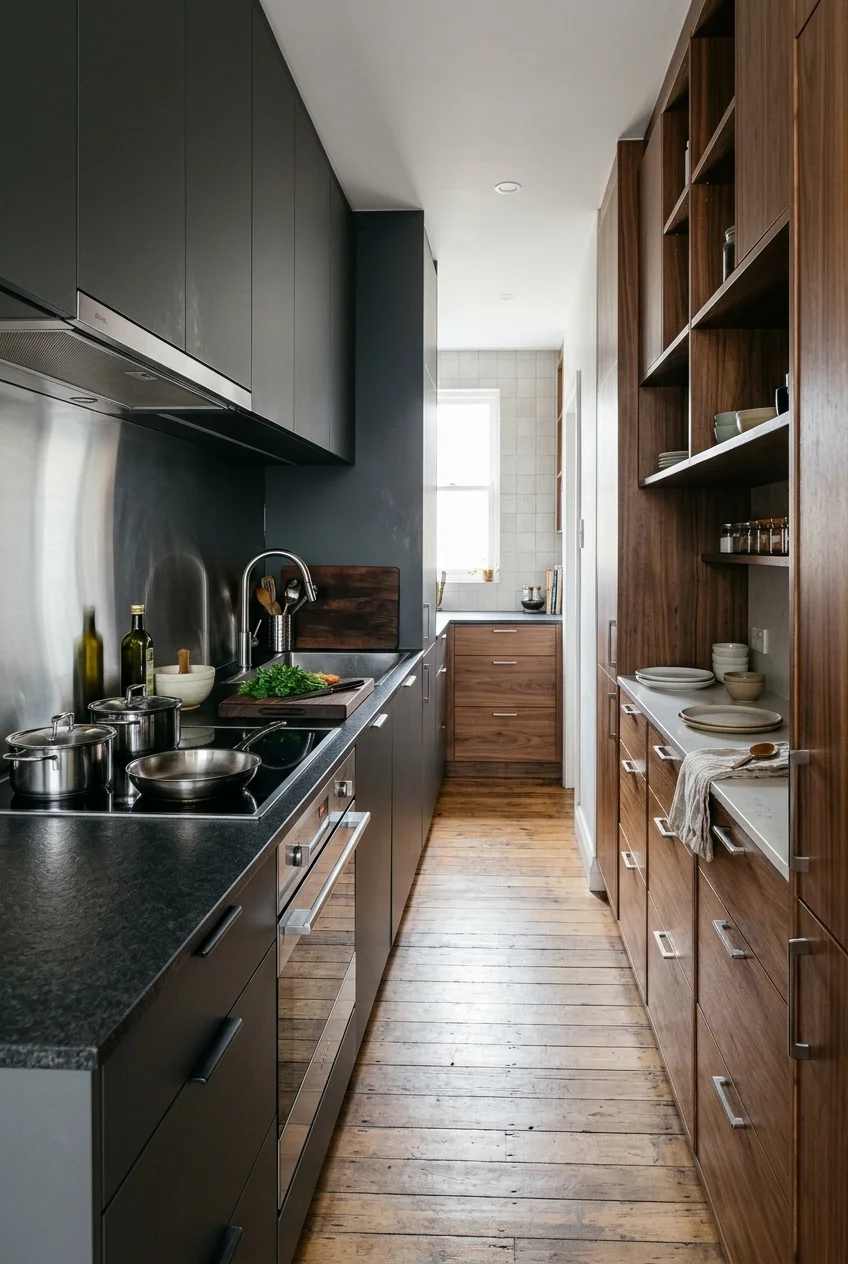
Keep the busy side for cooking and cleanup, with a shallow run opposite for dry storage or plating. This works best when that second run leaves a comfortable work aisle.
For a remodel, the National Kitchen & Bath Association suggests a work aisle of at least 42 inches for one cook and 48 inches for multiple cooks.
Measure to the opposing fronts and projecting appliances, then test the open doors separately. The recommendation gives you a starting point for laying out the actual room.
- Keep a clear path from the alcove to the apartment.
- Check whether the opposing drawers and appliance doors can clear one another.
- Use shallow storage on one side if full-depth cabinets would crowd the aisle.
6. Let a short peninsula mark the kitchen edge
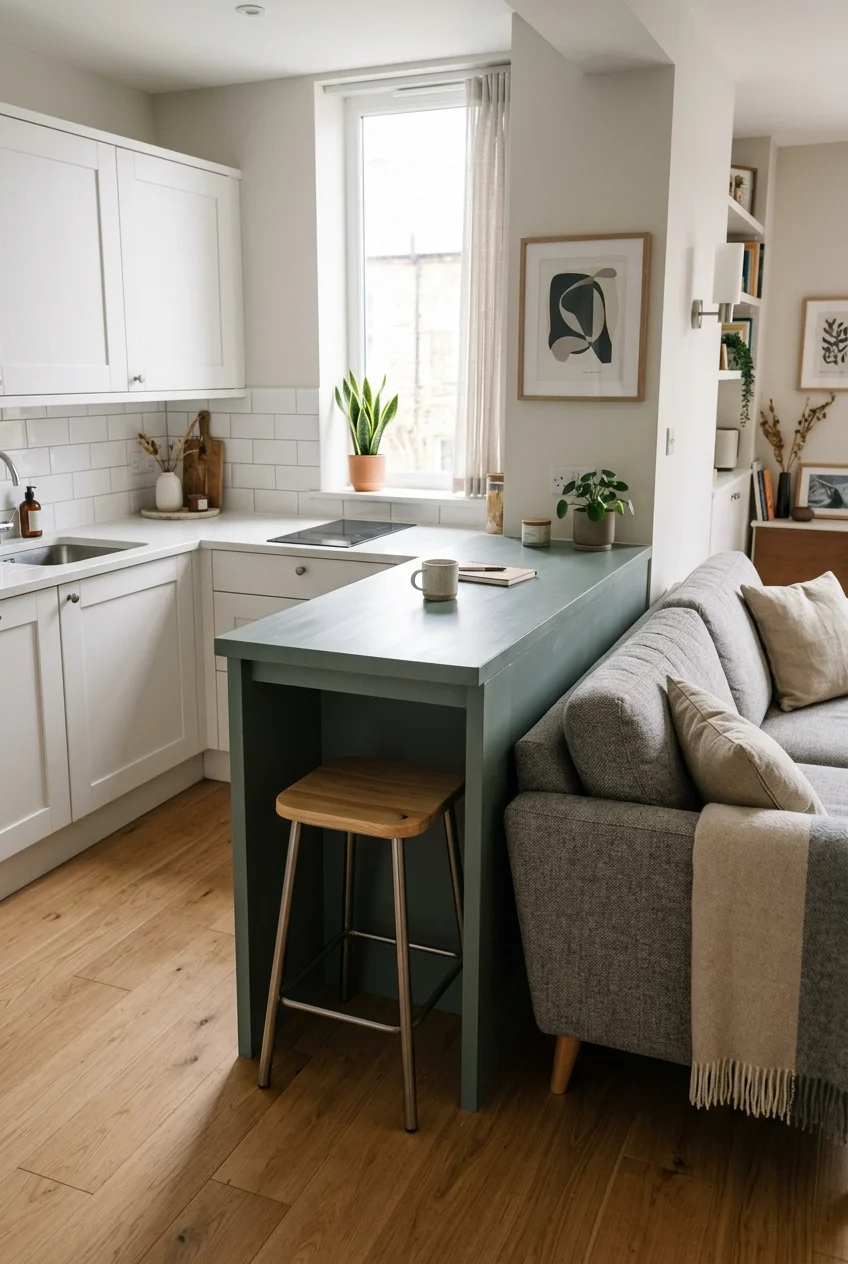
A peninsula connected to the end of a cabinet run gives you a place to set out dinner and creates a boundary you can see from the sofa.
Keep the outer end short enough to walk around comfortably. If you plan to sit there, mock up the overhang and measure with a stool occupied and pulled back.
Before adding a permanent peninsula, have the cabinet support and countertop overhang checked for the chosen material. The kitchen side should still have room for appliance doors and drawers.
When there’s only room for one seat, align it with the straight run of the counter so the turning space at the peninsula’s end stays clear.
For more ways to compare a peninsula with a movable piece, see islands that fit tiny kitchens. Pay particular attention to how seating affects the route around it.
7. Bring in a prep cart with a parking spot
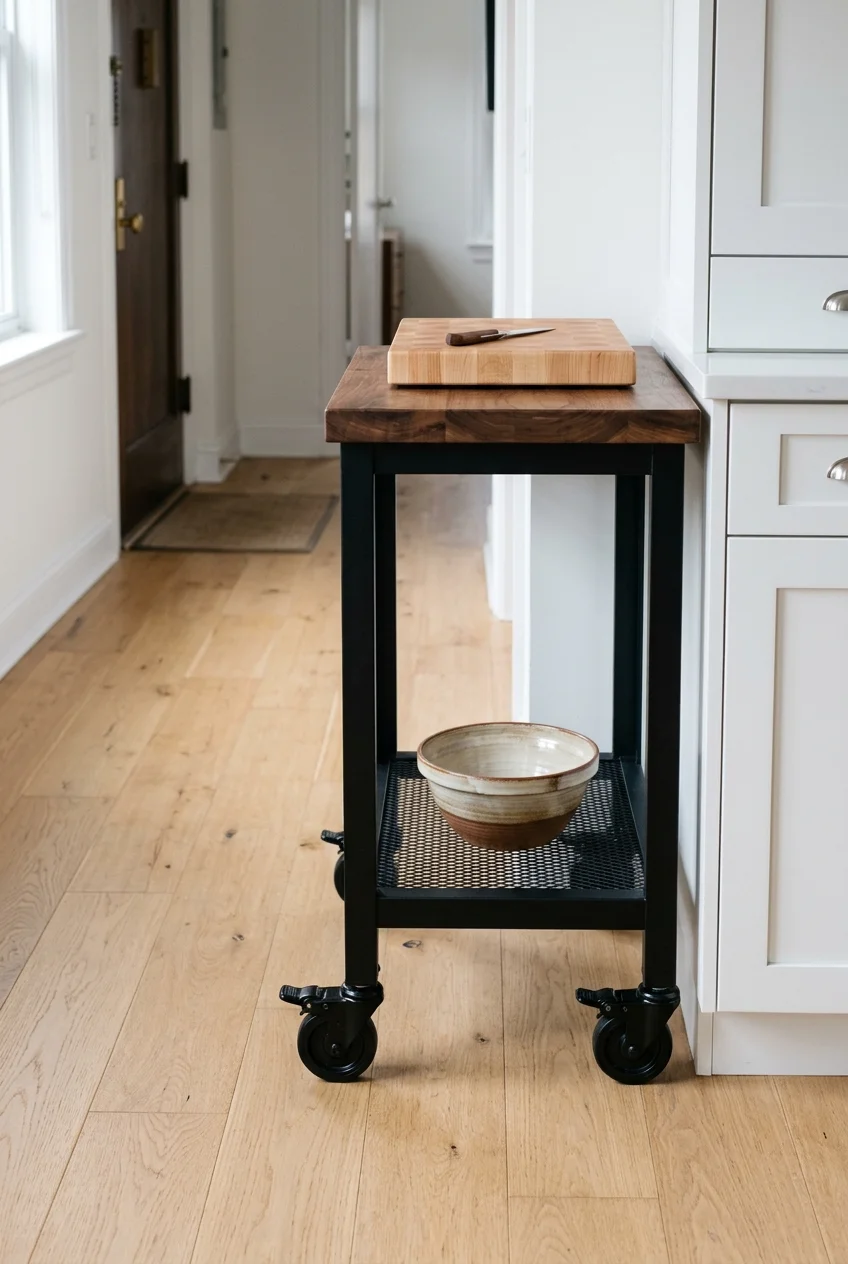
A cart can supply the chopping space a kitchenette lacks. Pick its parking spot first, ideally on a blank stretch of wall beyond the end of the cabinets.
Use a narrow, sturdy cart with locking casters, then measure across it at the handle or wheels. Those projections matter most when you turn out of the work area.
Keep the top mostly empty and use a lower shelf for a mixing bowl or colander. That way the cart is ready whenever groceries take over the counter.
Practical tip Mark both cart positions with painter’s tape and open the oven. It may fit beautifully when parked and still block the door when you move it out to chop.
8. Use one tall cabinet as the kitchen’s bookend
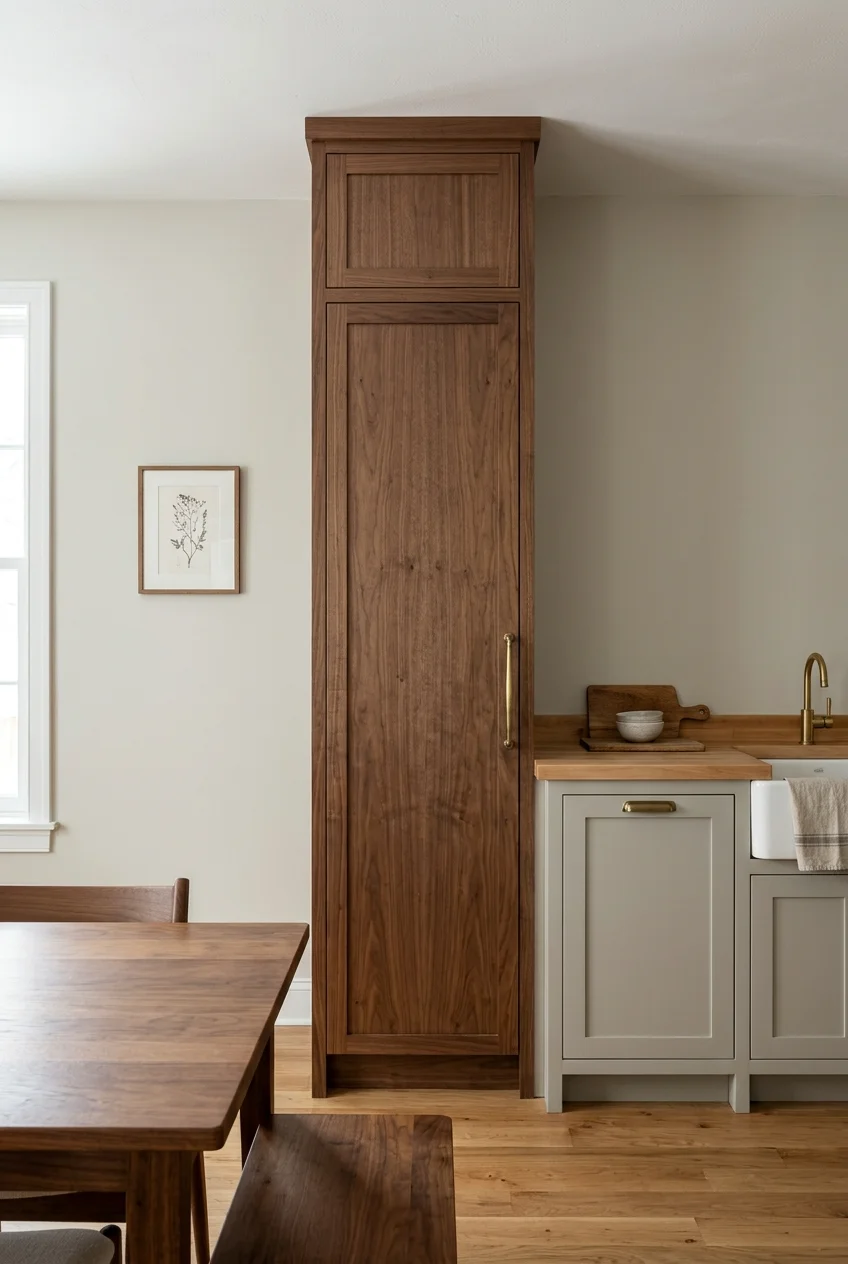
A single pantry tower can collect the things that otherwise spread across the kitchen wall. Position it at one end to leave the neighboring counter and wall visually open.
Give the middle shelves to everyday food or dishes, the bottom to heavier gear, and the top to light extras. Shallow inner shelves keep packages easy to scan.
Check the ceiling height needed to install the cabinet and the swing of the pantry door beside walls or appliances. Use the required anchoring for the unit.
9. Give the kitchenette doors that park out of the way
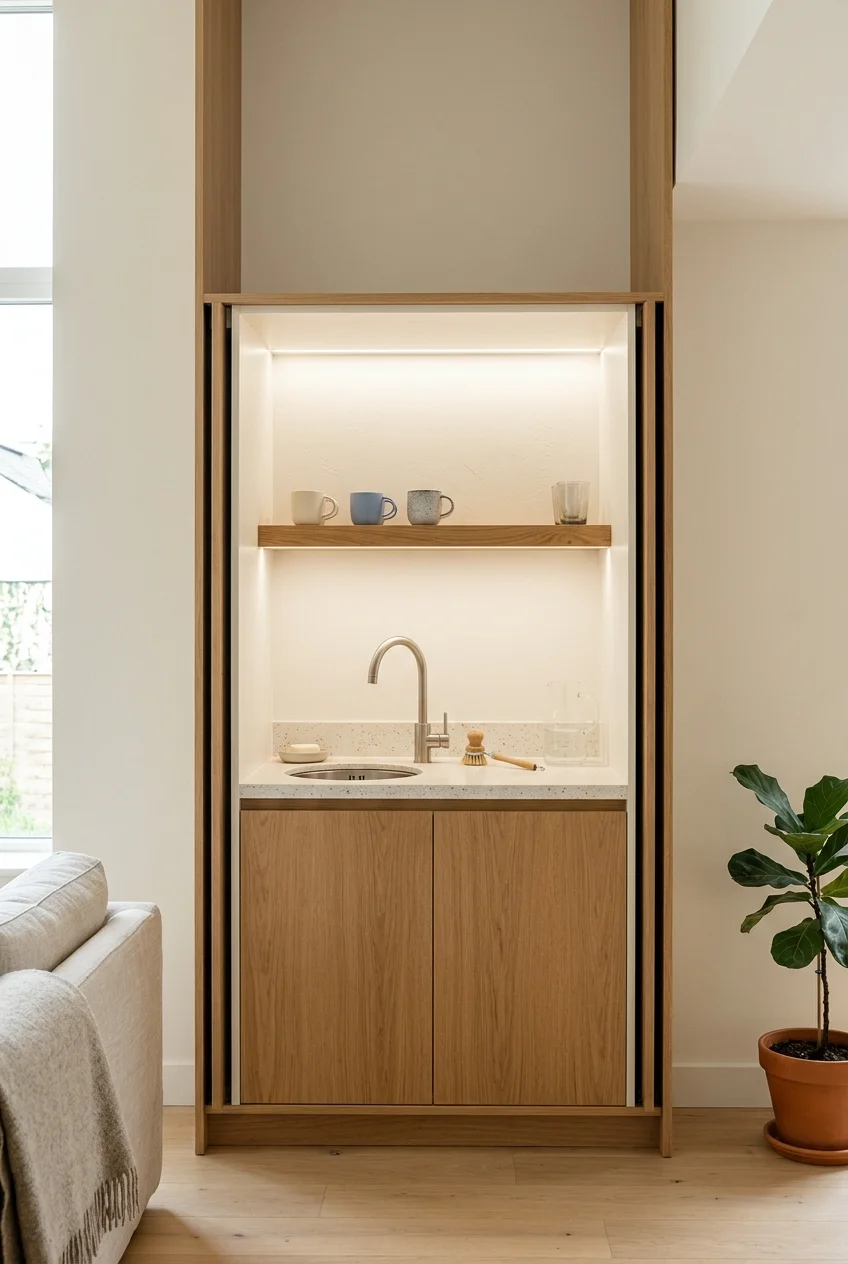
If the kitchen is directly opposite the bed, retracting cabinet doors can hide the worktop after cleanup. They need space to slide beside the cabinet opening when fully open.
Plan the enclosure as a system with a cabinetmaker and appliance installer. The doors, cabinet depth, airflow, and access for cleaning or service all need to work together.
Decide which items you’ll use with the cabinet open and where they’ll land afterward. A pullout trash bin or dishwasher door can overlap the opening if its position is overlooked.
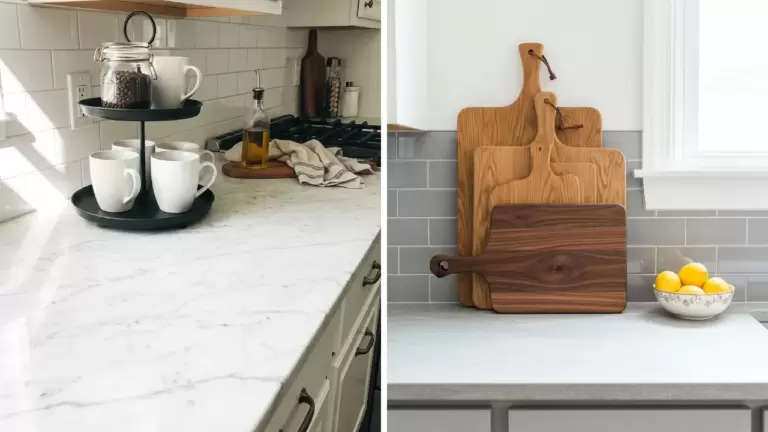
A beverage or cleanup niche is a simpler candidate than a full cooking run. Keep doors open during appliance use and cooling, following each model’s enclosure and clearance instructions.
- Verify how much interior width the retracted doors take up.
- Check faucet height, handle projection, and shelf depth against the closed doors.
- Confirm that the open doors leave outlets, controls, and air openings accessible.
Make room to eat without crowding the cook
10. Put a round pedestal table just outside the kitchen
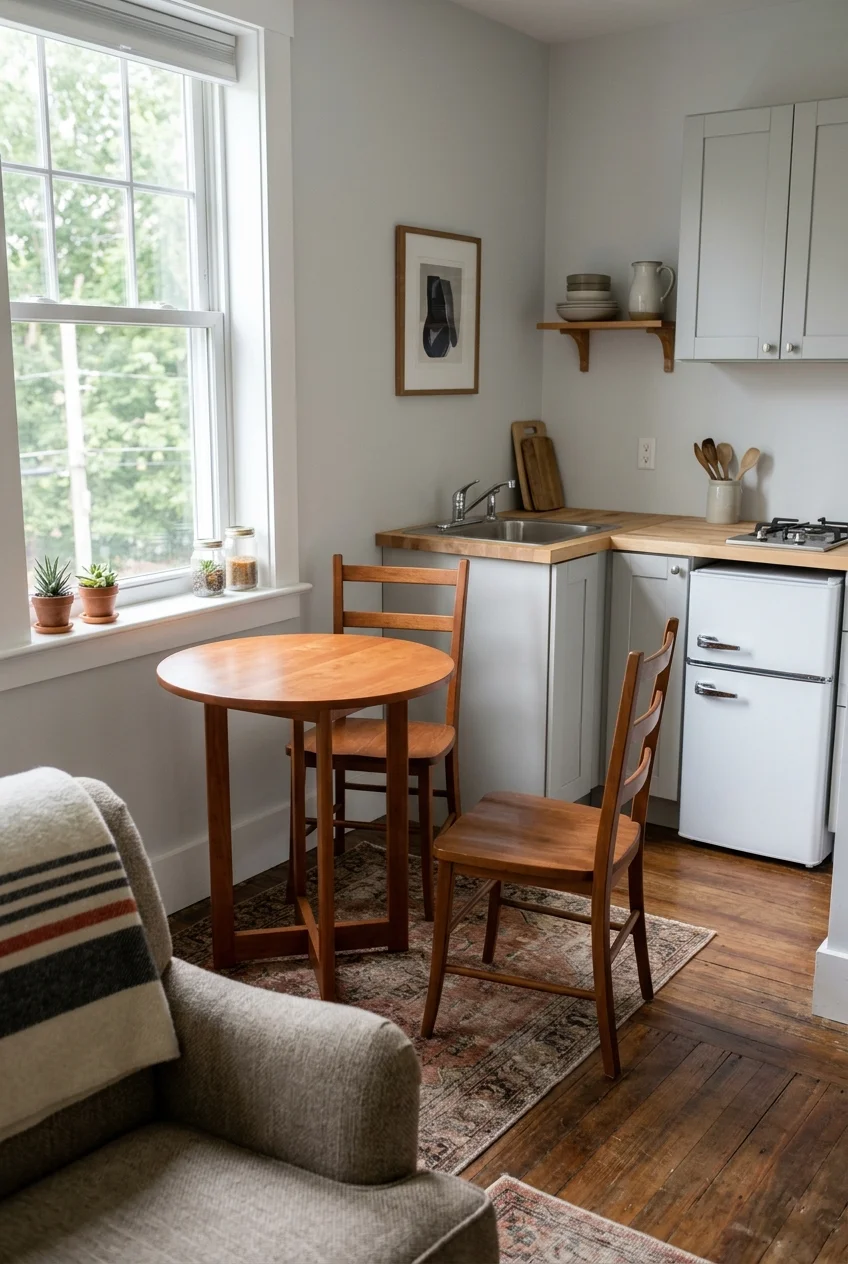
A round top softens the corner you pass on the way to the sink. A central pedestal gives two chairs more ways to tuck in after meals.
Place the table outside the main work area, with enough room to sit and stand without stepping into an open appliance door. Test the pedestal base with the chairs, too.
11. Fold a wall-mounted table down for meals
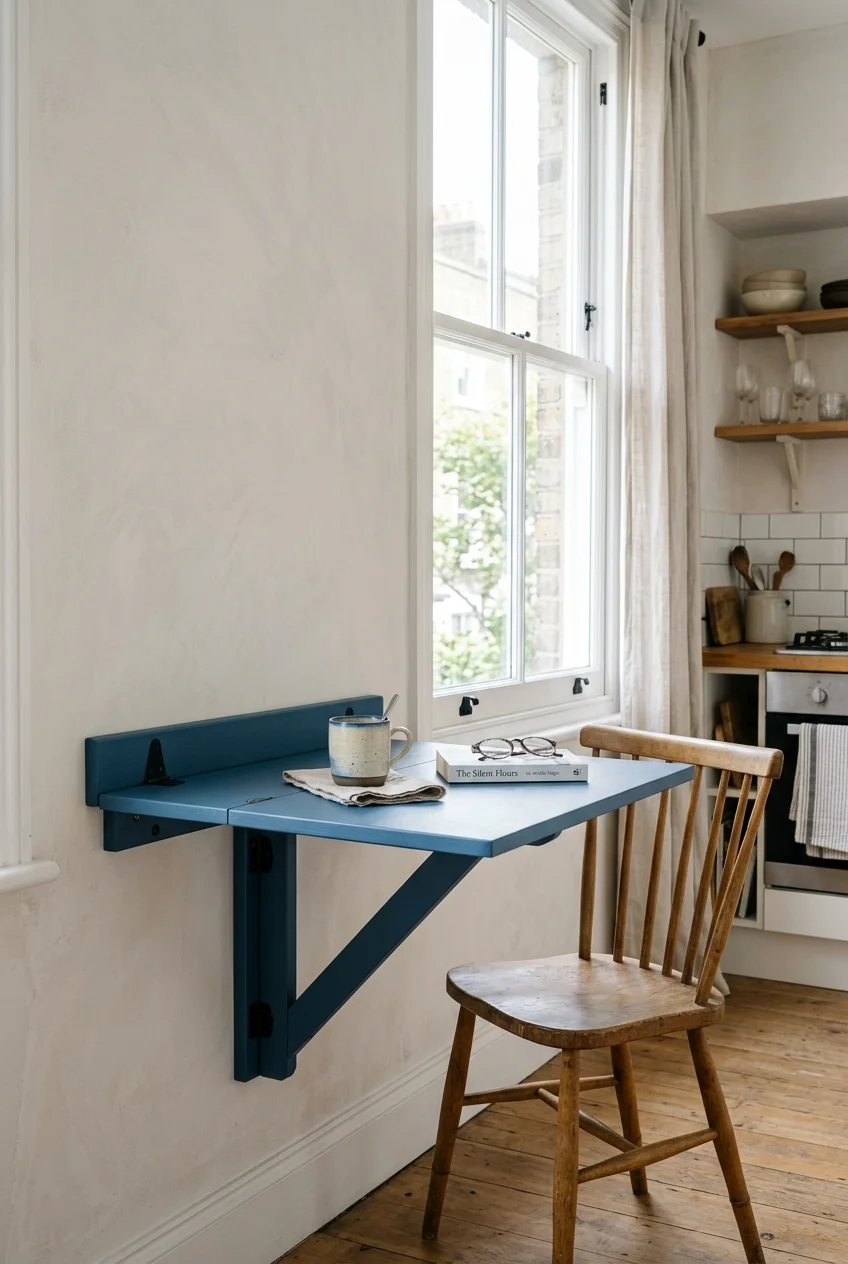
A wall-mounted leaf can disappear after breakfast. Mount it on a dining-side wall where it has room to open and chairs can move without blocking the kitchen.
Mark the tabletop height and both positions before mounting. Include the space needed to sit down, then check how easily the leaf folds and locks in place.
Ask the landlord before drilling in a rental. Use the mounting hardware and wall support specified for the table, and check the rated load before relying on it for prep.
Practical tip If chairs are what crowd the room, pair the leaf with lightweight folding chairs you can hang from a properly mounted rack or store in a closet.
12. Slide a freestanding drop-leaf table against the wall
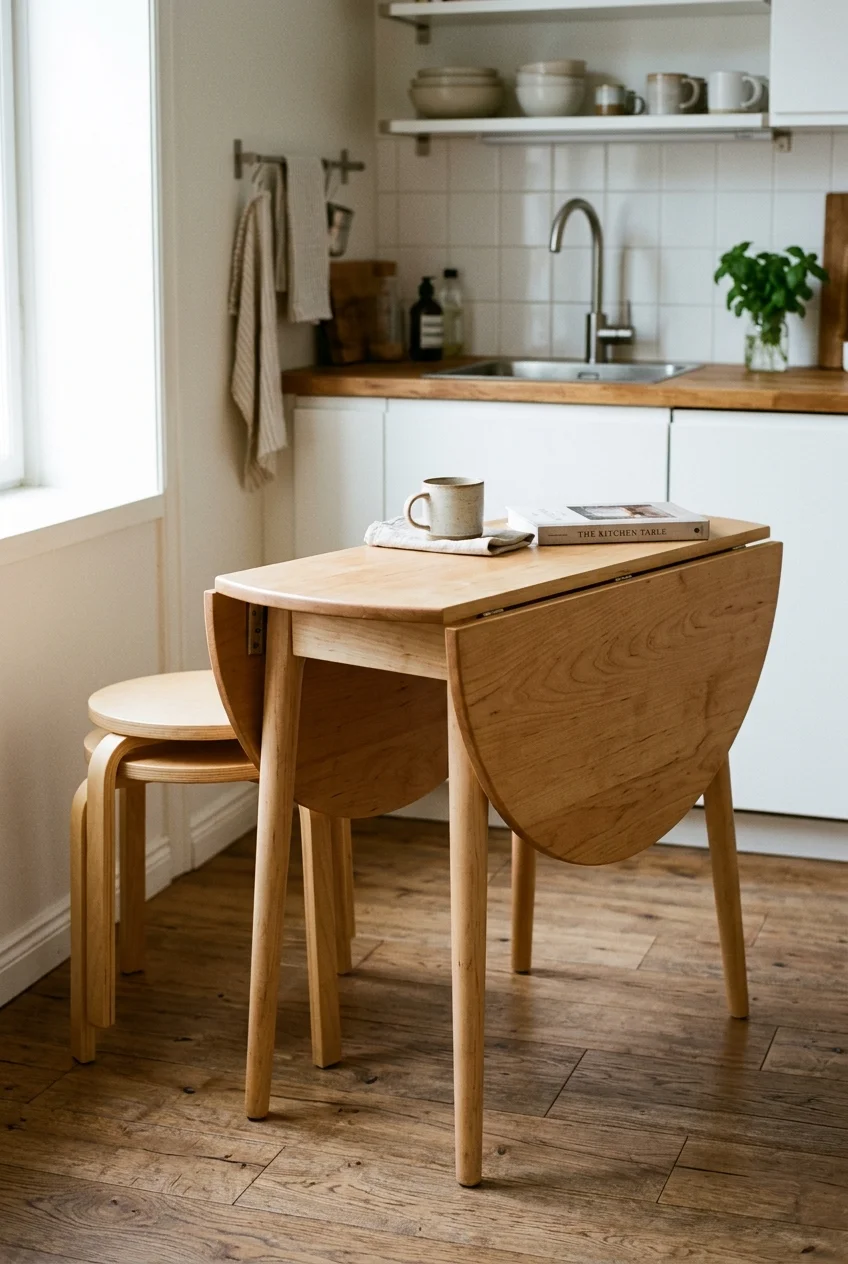
A freestanding drop-leaf table suits a rental where you can’t mount a dining surface. Park it with the leaf down and expand it when you need another place.
Before buying, check whether the support swings out or slides beneath the leaf. Make sure it clears the wall and gives the extra chair a place for knees.
13. Use a half-round table along the wall
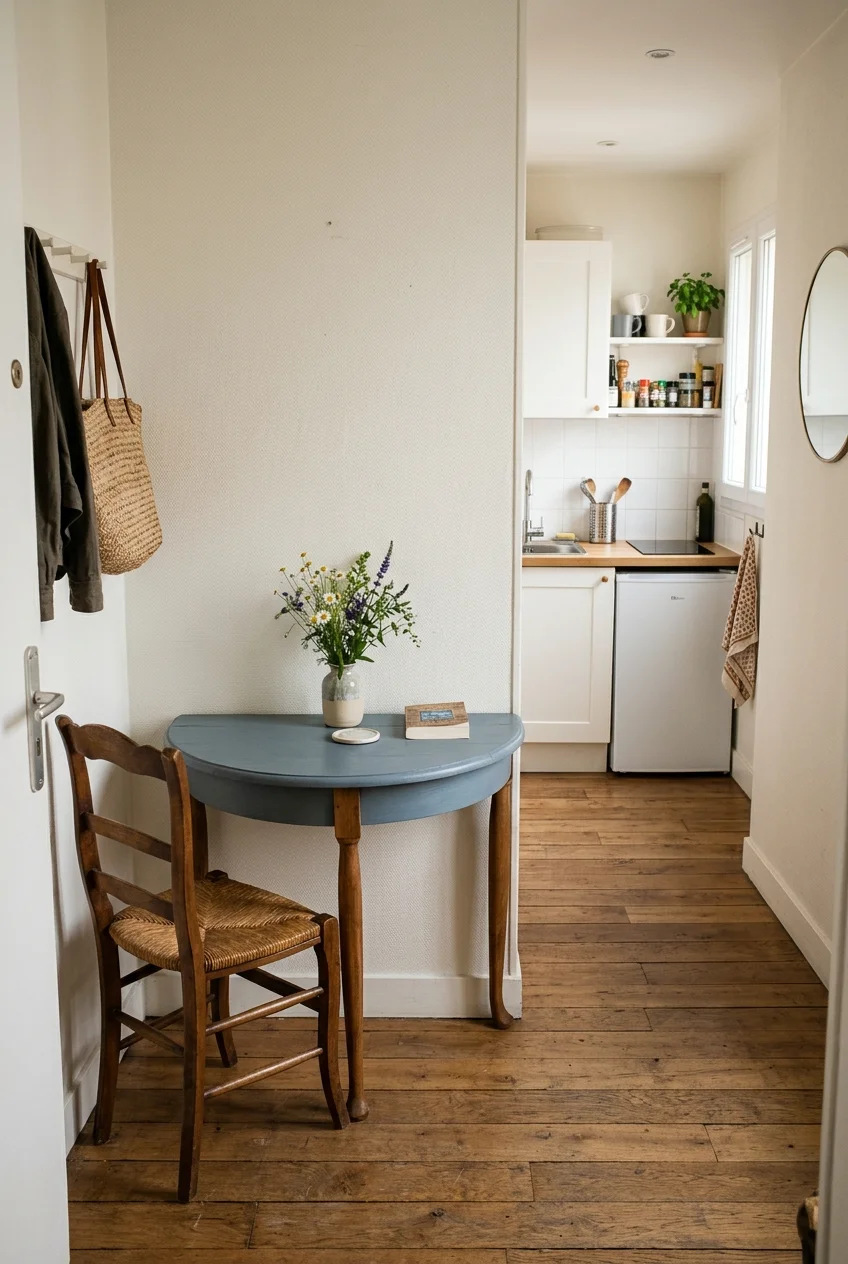
A half-round table gives one or two people a place to eat on a narrow strip of wall. Its curved outside edge leaves the room’s main path easier to round.
Check where the legs sit and whether two plates fit when you’re facing each other. A shallow top works especially well for coffee and a quick breakfast.
14. Tuck a stool under the open end of a counter
Image pending: No image is attached to this draft for idea 14 (image-14).
An existing counter with an open end can become a seat for one. Look for real knee space and a stool that disappears beneath the edge when pushed in.
Measure from the floor to the underside of the counter, including any apron or support. Test the seat height with your feet resting comfortably on the stool’s footrest.
Keep that seat on the living side of the counter. Sitting next to the sink or across from an oven door makes a quick meal compete with cooking.
15. Make a bench seat do double duty
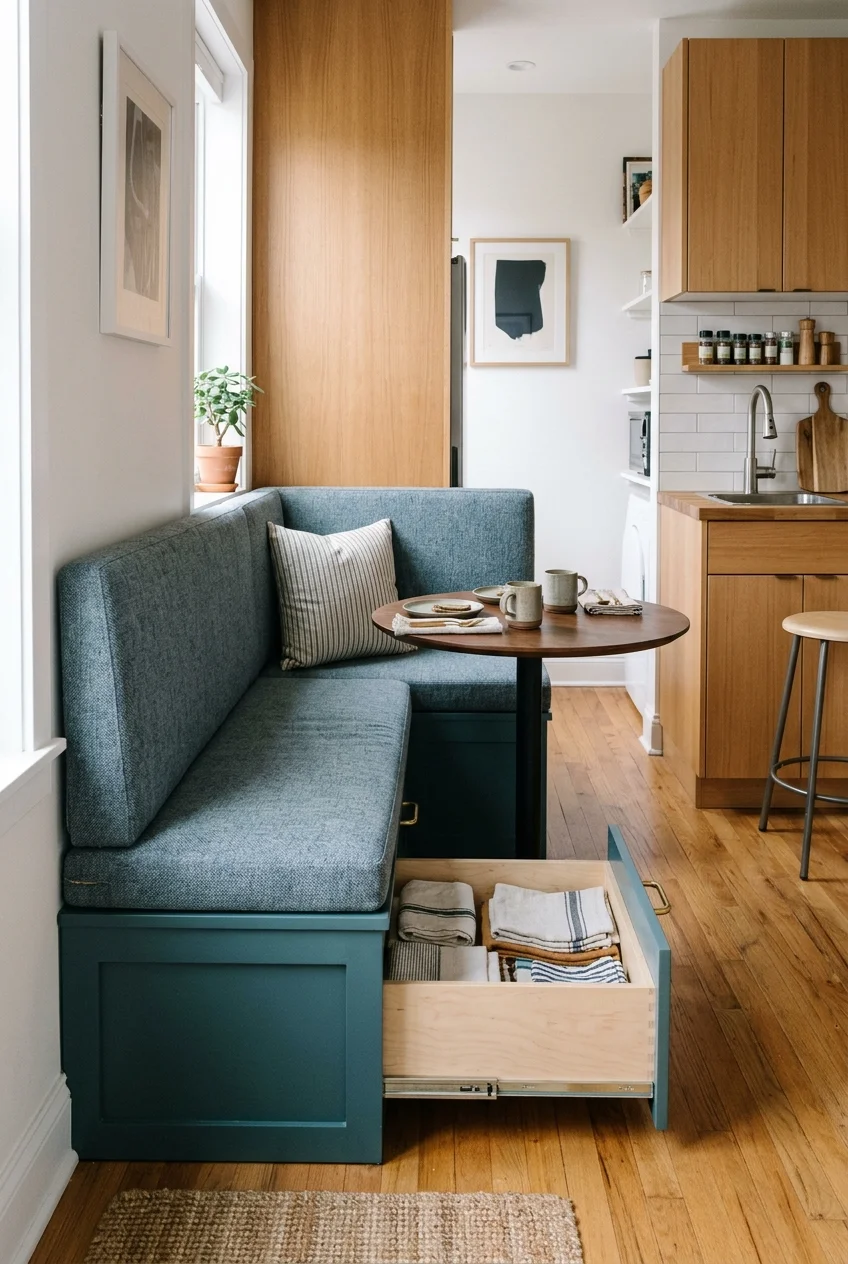
A storage bench can put seating against the wall and give bulky table linens a home. Use it on the dining side of the studio where people can slide in.
A pedestal table leaves more room for knees beside a fixed bench. If the bench has a lift-up lid, check how far the table must move to open it.
For everyday storage, a bench with drawers that open at the end may be easier to reach. Confirm the drawers have room beside the bench before setting the furniture.
16. Let a narrow table serve as your desk and dinner spot
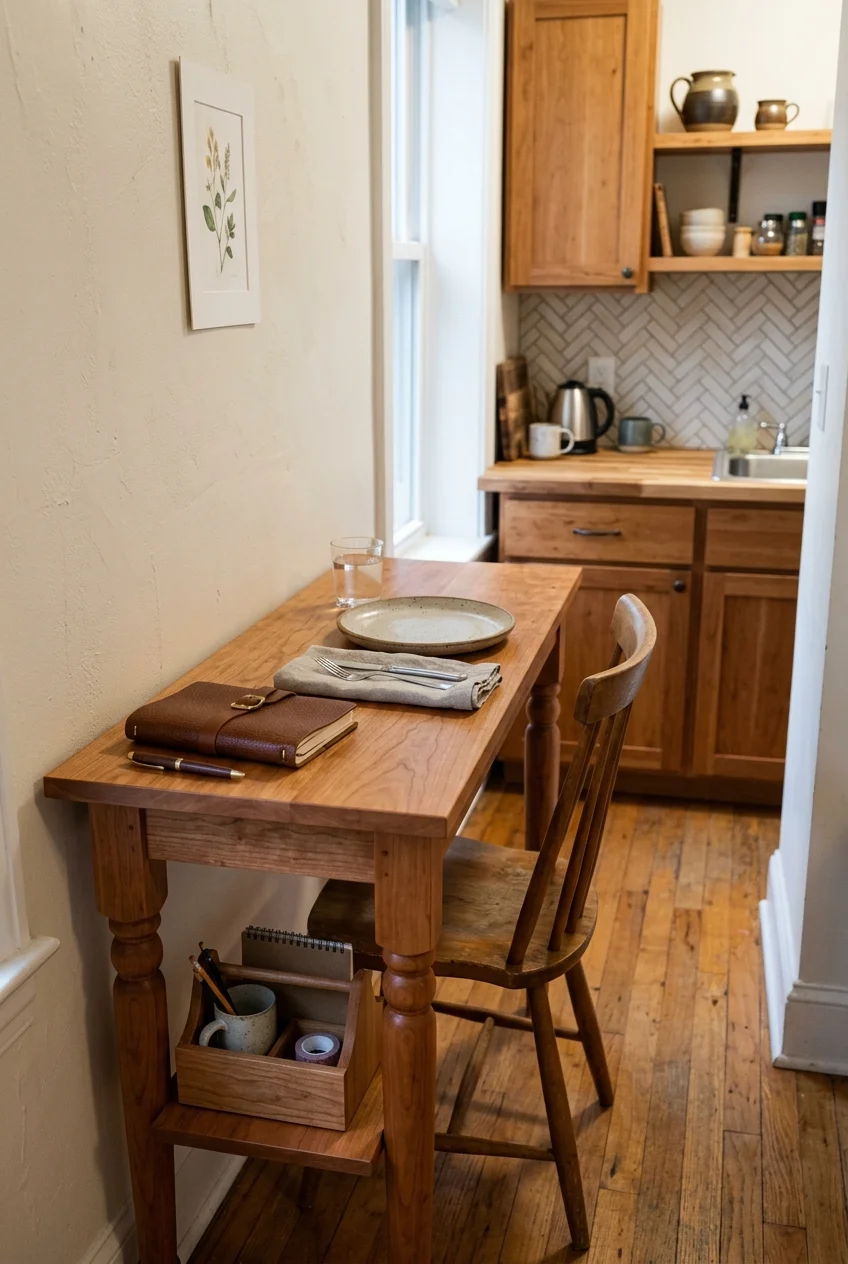
A slim rectangular table can handle a laptop by day and dinner by night. Set it close enough to the kitchen to serve a meal from the counter.
Keep a takeaway caddy for chargers and papers on a nearby shelf. Measure the tabletop against your laptop and a dinner plate before choosing a particularly shallow model.
17. Stack extra dining seats after guests leave
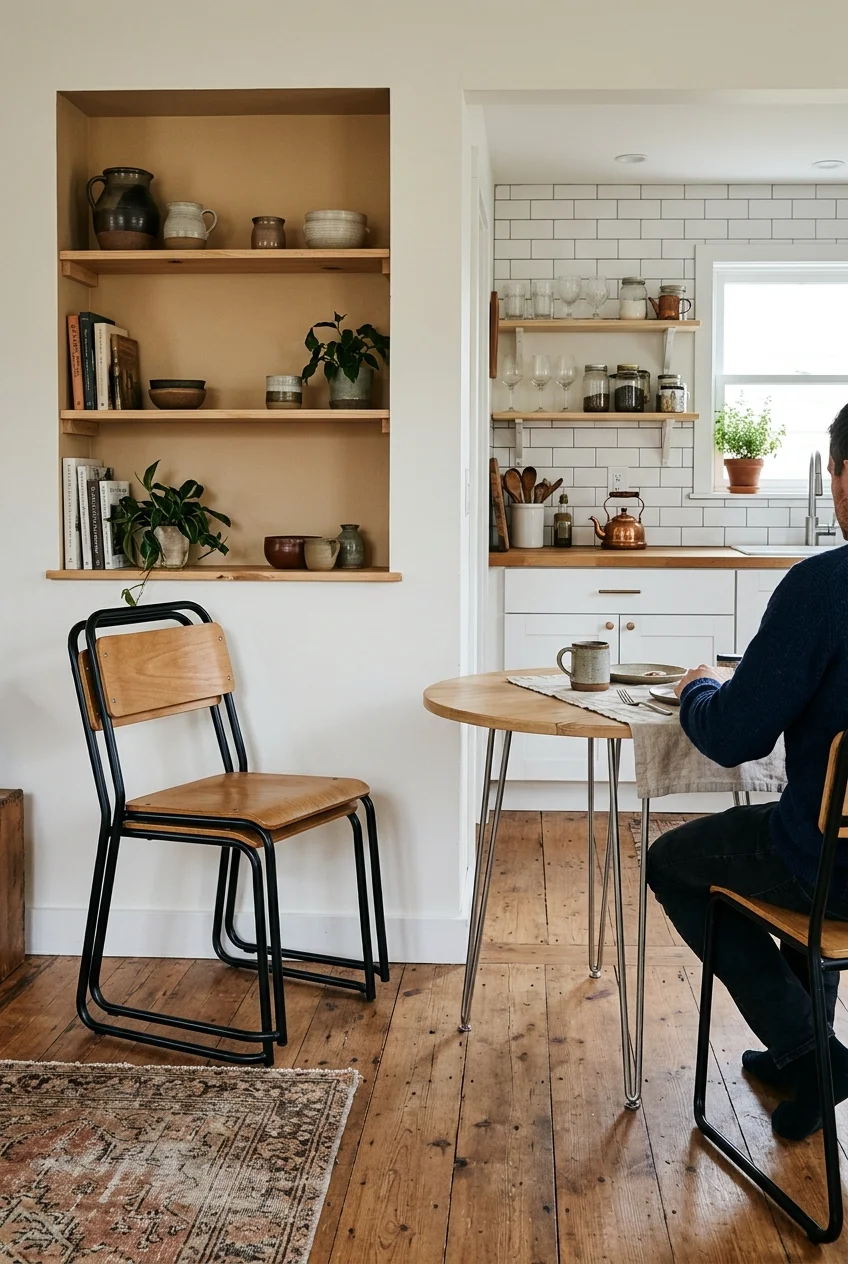
Keep one comfortable chair out and stack the extras in an alcove. That leaves floor space for everyday circulation without making a second guest perch on the bed.
Choose chairs made to stack and check the height of the full stack where you plan to store it. A pair may fit under a shelf that three would hit.
Use the space inside and above the cabinets
18. Put everyday dishes on one open shelf
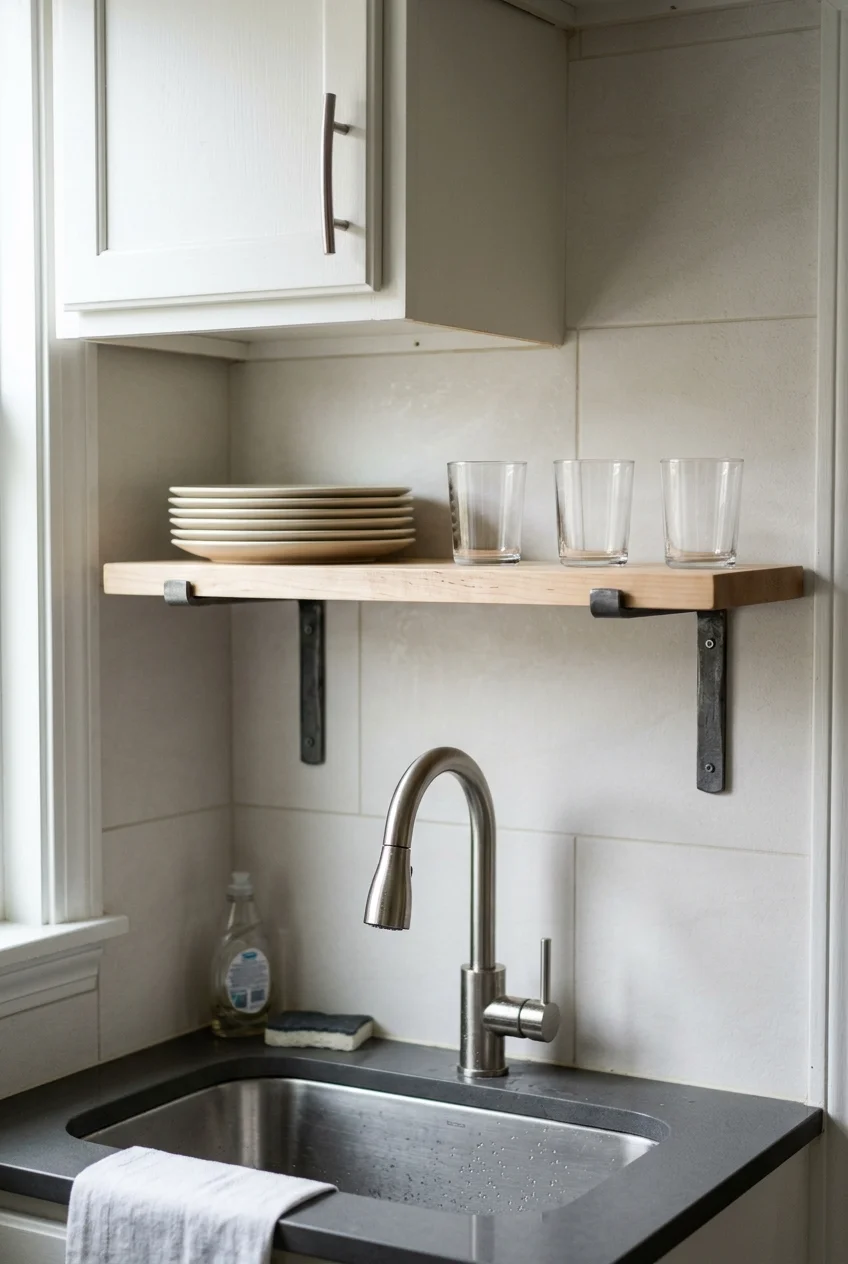
A single shelf above the cleanup end gives everyday dishes a home you can reach with wet hands. It also leaves a break in a wall of upper cabinets.
Use a depth that supports the full base of your largest plate. Keep the shelf to pieces you reach for often so it stays easy to wipe and restock.
Place it away from the cooktop, and choose hardware rated for the shelf and its loaded weight. In a rental, check what you can safely attach to the wall.
19. Carry storage up to the ceiling
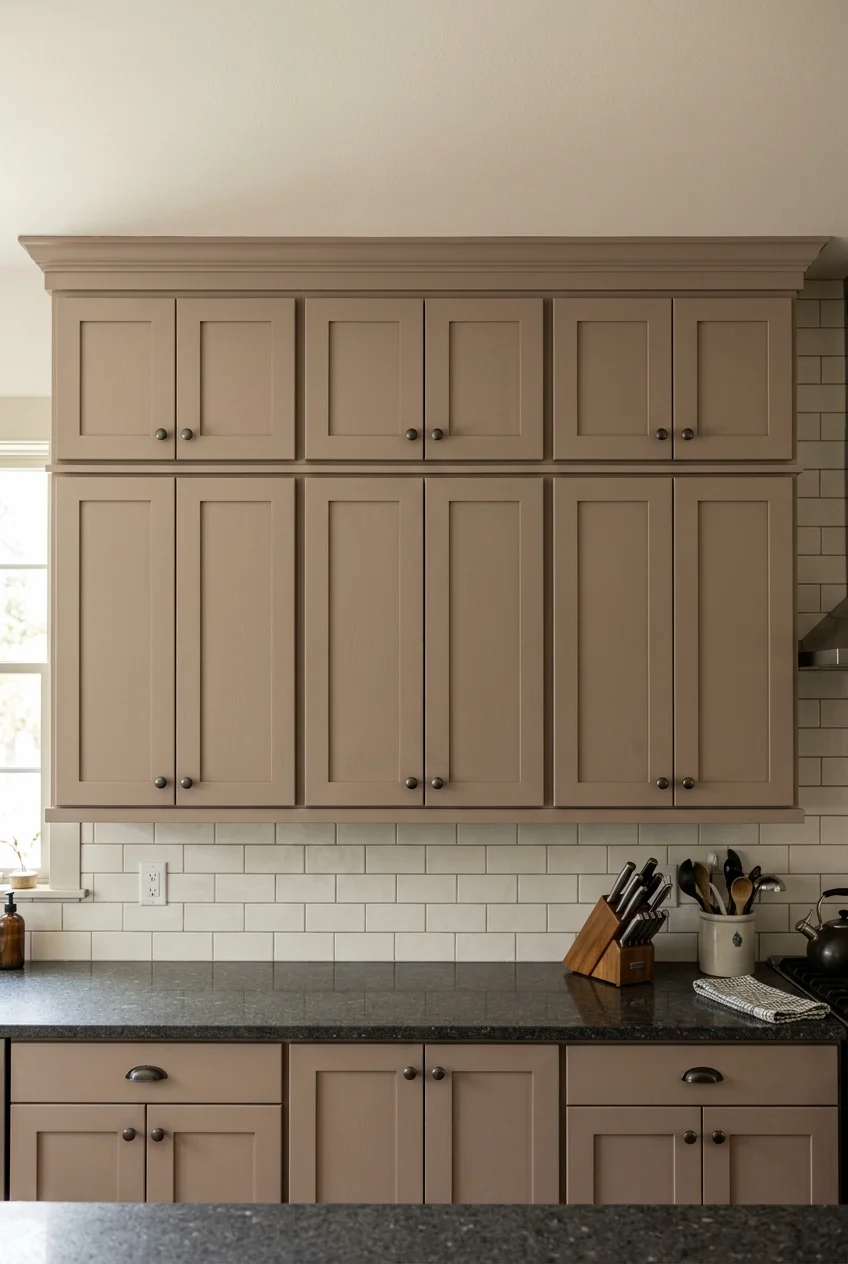
When upper cabinets stop short of a high ceiling, a second row can replace the boxes collecting dust above them. Use it for light items you rarely need.
Line up the door breaks where it makes sense, and use a fitted top trim piece if the ceiling is uneven. Plan how you’ll safely reach the top row.
Ask an installer to verify the wall support and door clearance above the existing run. A clean ceiling line also needs room for hinges, trim, and nearby fixtures.
20. Put a shallow pegboard on a blank side wall
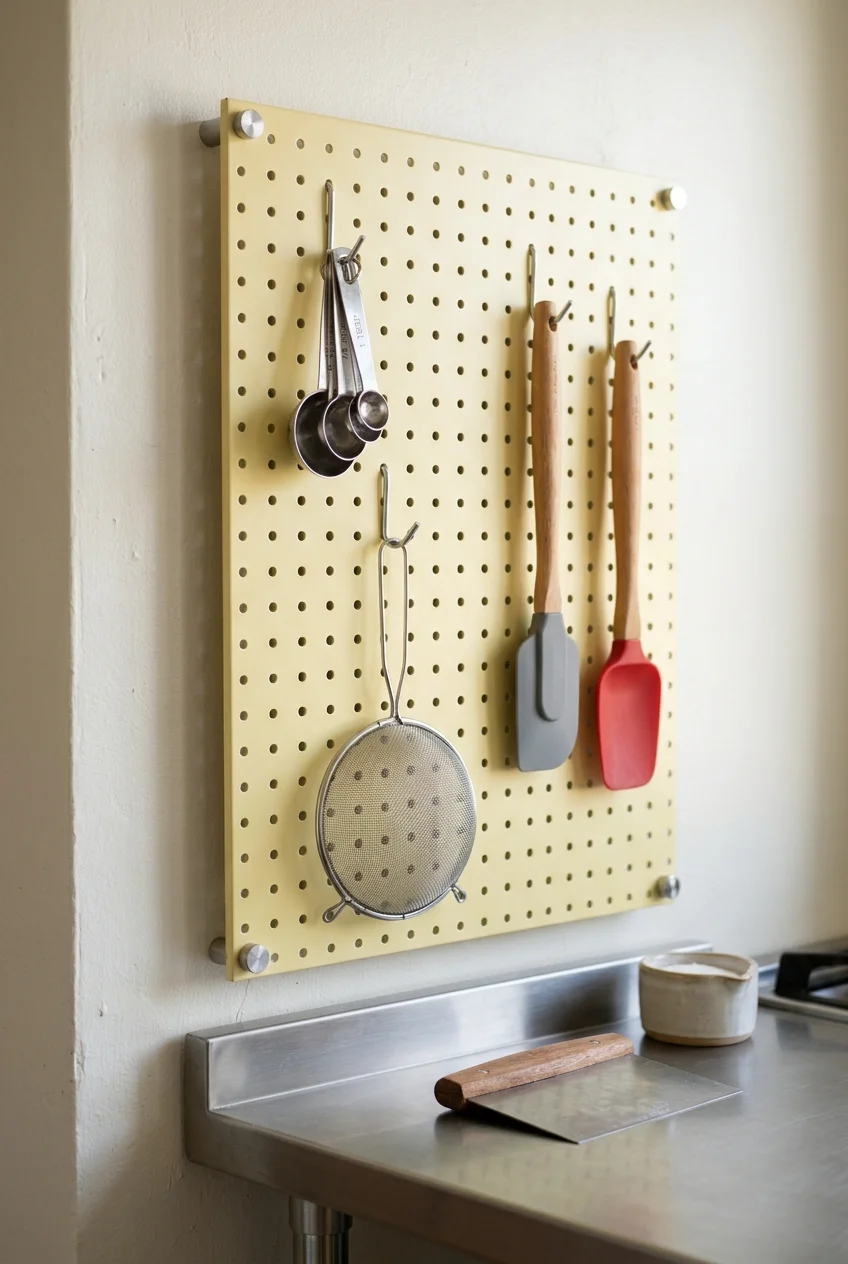
A small pegboard can free a jammed utensil drawer and turn a blank wall into a working surface. Hang flat pieces near prep, where you’ll use them.
Leave space behind the board for the hooks to seat. Check the board’s mounting instructions and keep protruding items clear of the traffic lane and away from the stove.
- Start with a small colander, measuring spoons, and flat utensils.
- Leave space to lift each item off its hook.
- Keep bulky pots inside cabinets if they would project into the walkway.
21. Mount a short rail at the cleanup end
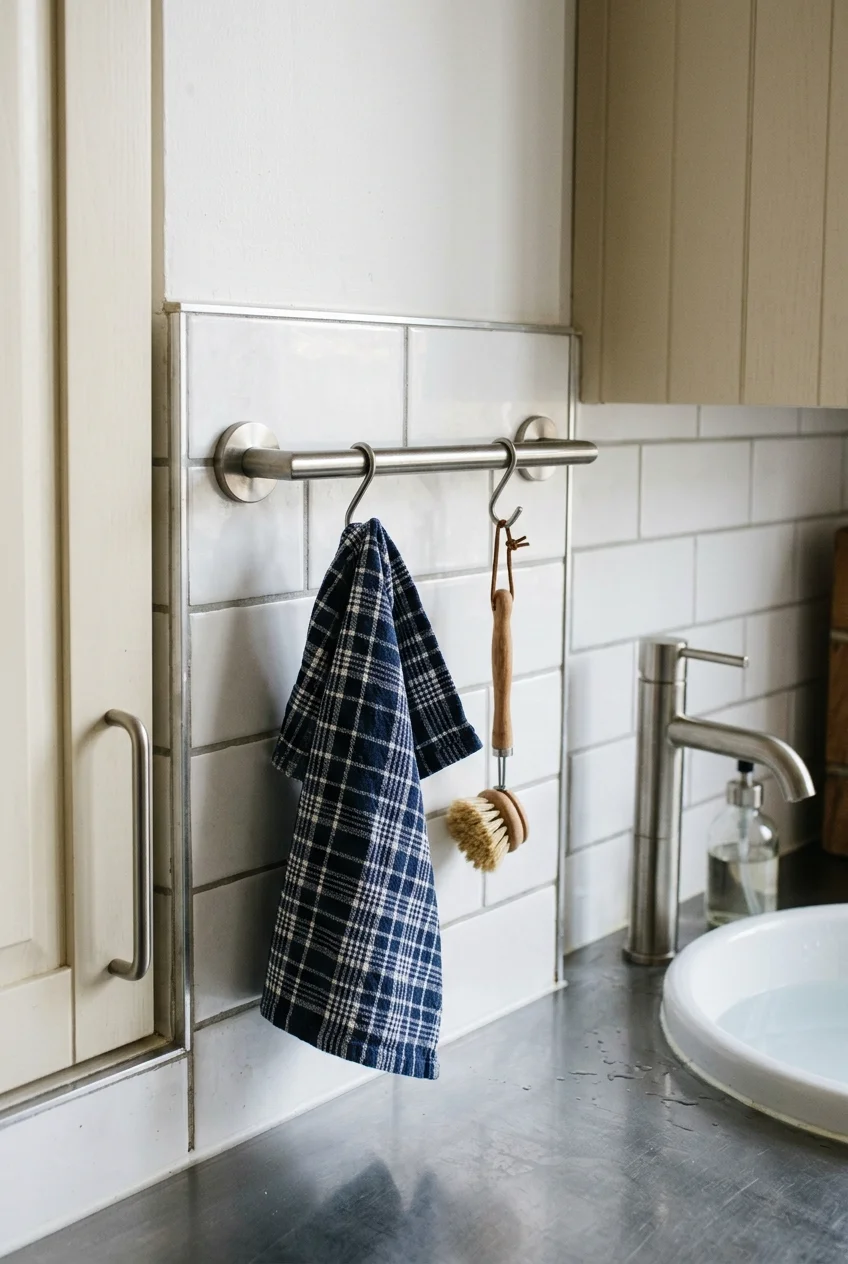
Keep a hand towel and a pair of light cleanup tools on a short rail near the sink. They’ll be handy without claiming the counter beside the basin.
Pick a spot where hanging items stay clear of cabinet doors, the faucet handle, and cooking heat. Space the rail ends so the hooks can slide without falling off.
22. Fit a shallow pantry into a spare alcove
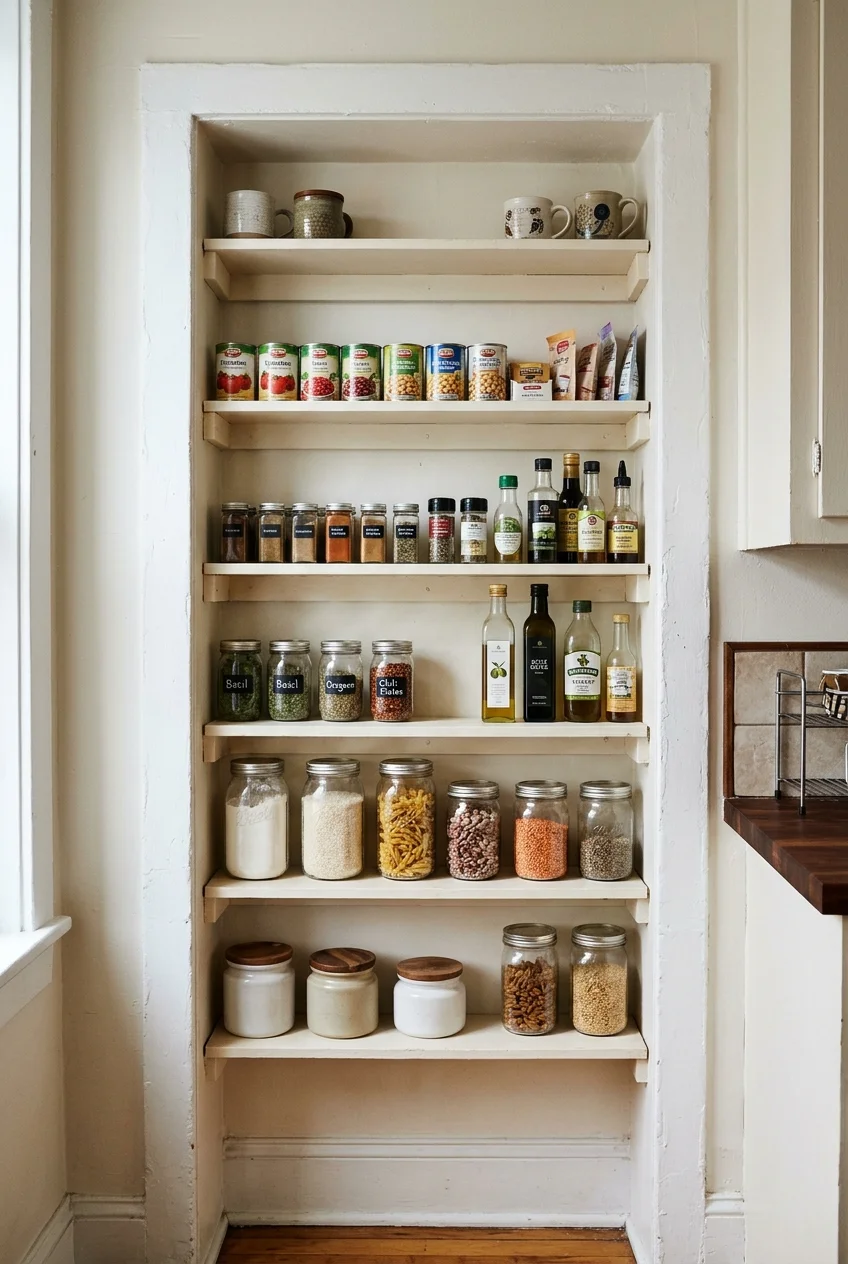
A narrow alcove beside the kitchen can become a pantry with shelves shallow enough to see the back. Give every category a visible front edge so shopping is easier.
Measure the opening at several heights, especially if baseboards or trim narrow it. Set the shelf spacing from the actual boxes, jars, and bins you plan to keep.
Choose a fitted unit or a freestanding piece installed according to its anchoring instructions. Check that doors or curtains, if used, remain clear of the kitchen’s heat and main path.
For more ways to use odd corners outside the kitchenette, these small apartment storage ideas cover other spots that can take pressure off the cabinets.
23. Put a shelf riser inside the dish cabinet
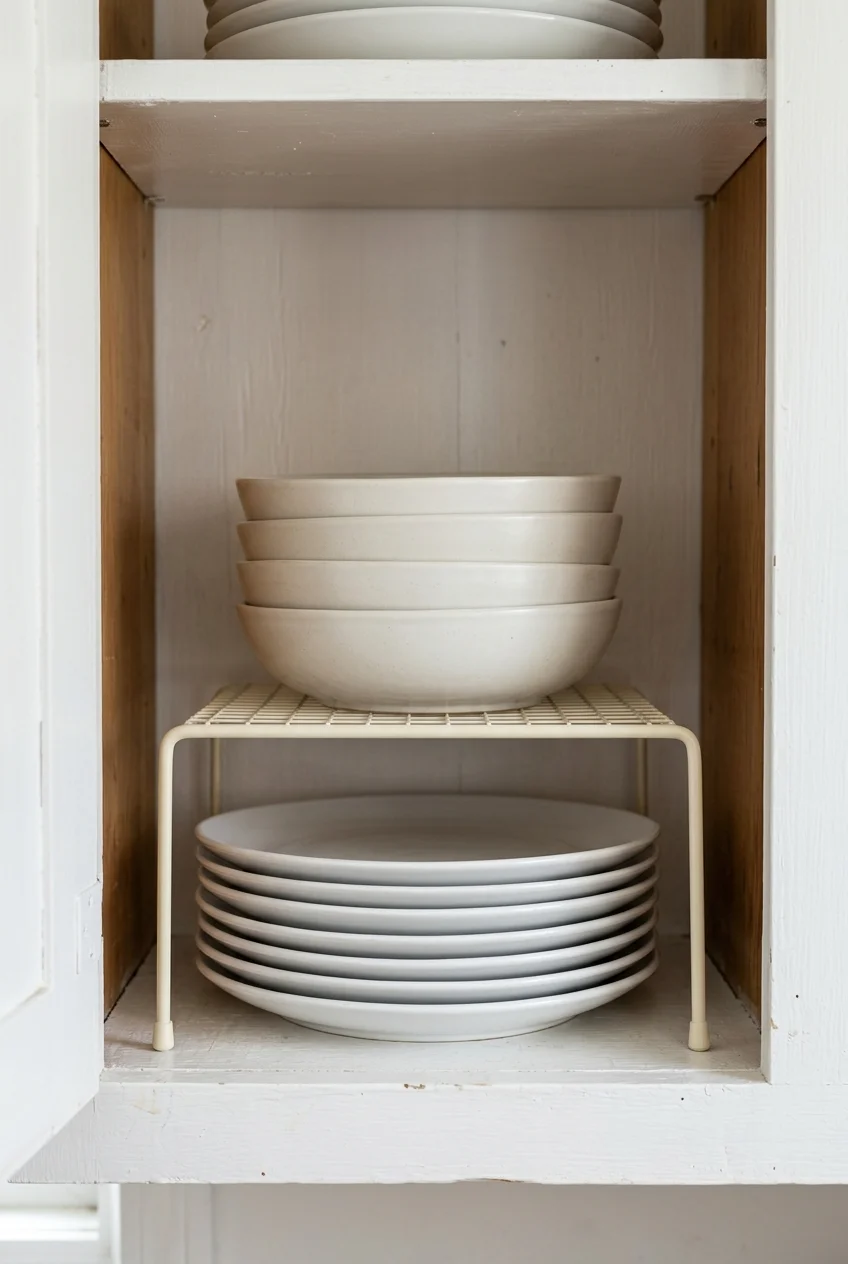
A small riser lets bowls sit above plates so you can lift either stack directly. It makes particular sense when there’s a tall gap between fixed shelves.
Measure both stacks, including the height you need to grip the top item. Choose a riser deep enough for the plate bases and stable under a full load.
24. Stand baking sheets upright
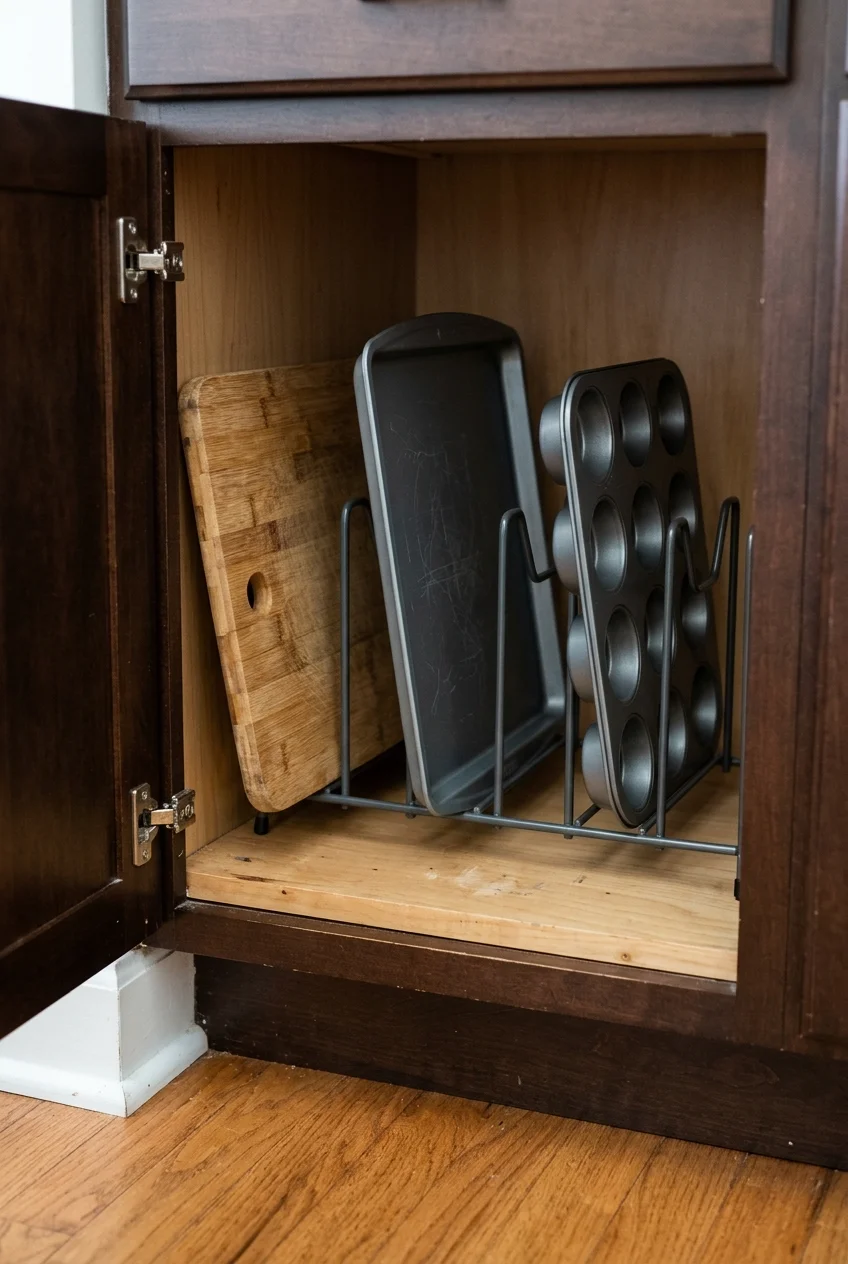
Dividers turn a stack of baking sheets into individual slots. Keep your most-used tray near the front edge where you can grip it with one hand.
An adjustable bakeware rack lets you set wider gaps for muffin tins and narrower ones for trays. Measure the tallest piece on edge before choosing a shelf.
Check the width at the cabinet opening, where the door and hinge can reduce usable space. If a tall tray catches, try turning the rack to face sideways.
25. Contain lids in a divided drawer
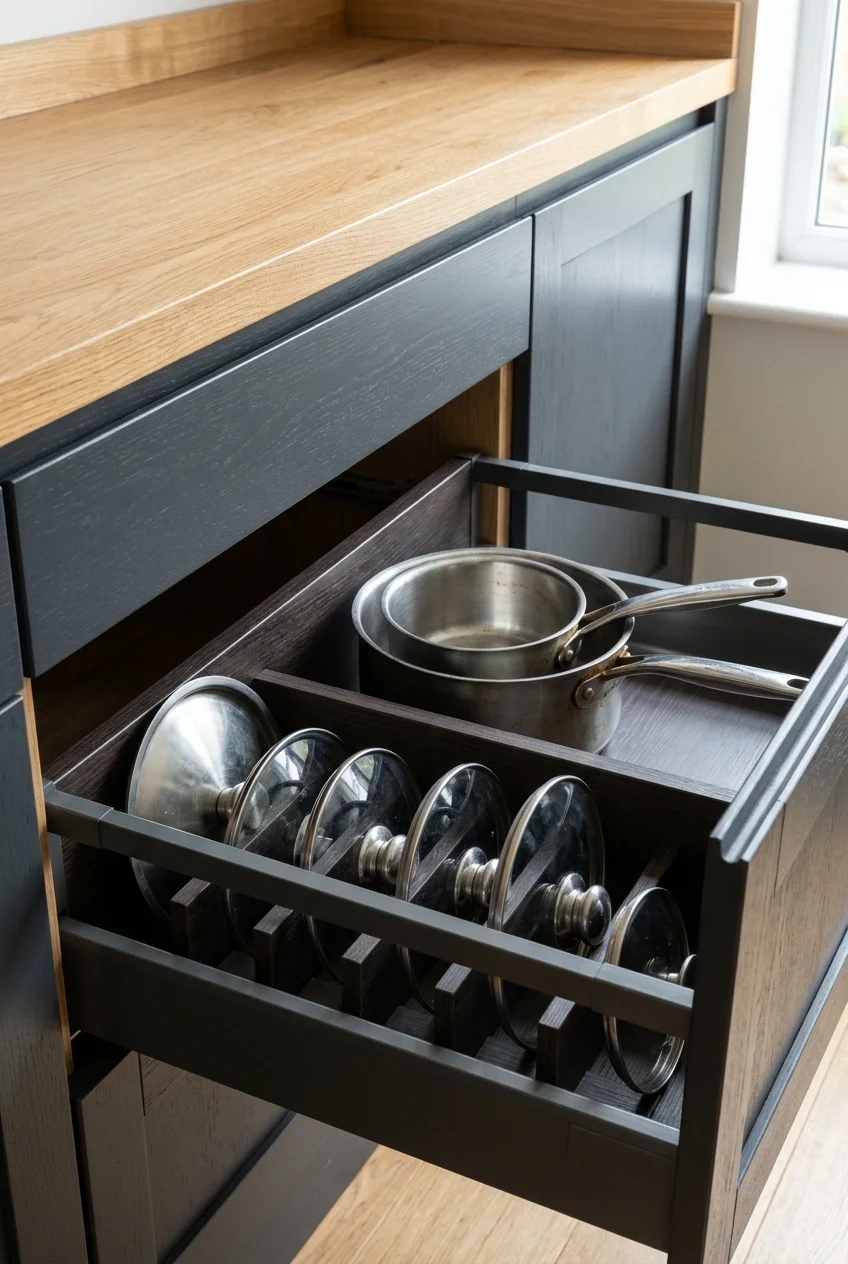
A front row for lids makes a deep cookware drawer easier to use. Group the lids by diameter and keep any that nest neatly together in the same slot.
Choose dividers that hold lids securely and leave room for handles. Place the tallest lid in its slot and slide the drawer closed slowly to test the fit.
26. Put condiments on a turntable in a blind spot
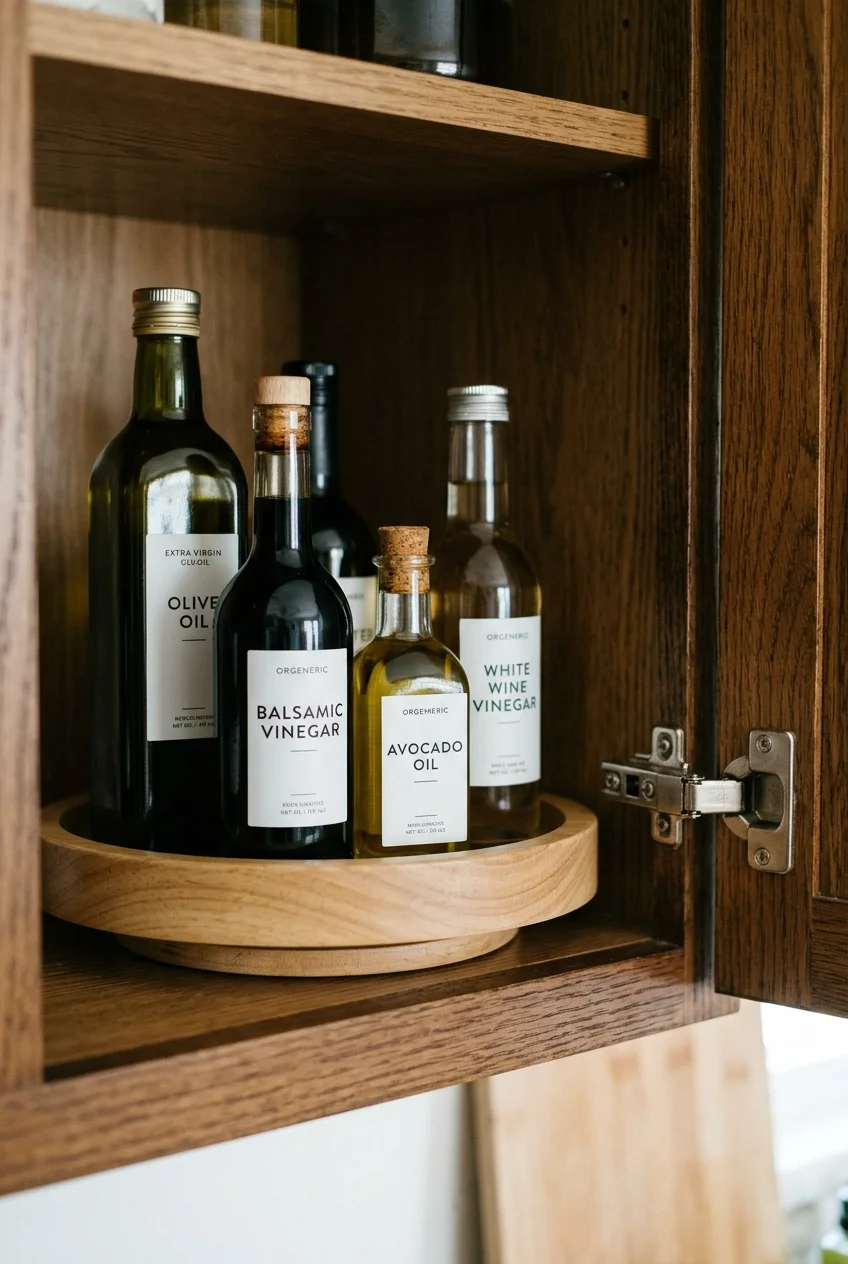
A low turntable brings bottles at the back of a shelf into reach. Use it for a group you use together, such as vinegars and oils for dressing.
Give tall bottles a full test spin with the cabinet door open. A raised rim can keep bottles from sliding, but it also takes up some of the usable diameter.
27. Divide the space around the sink plumbing
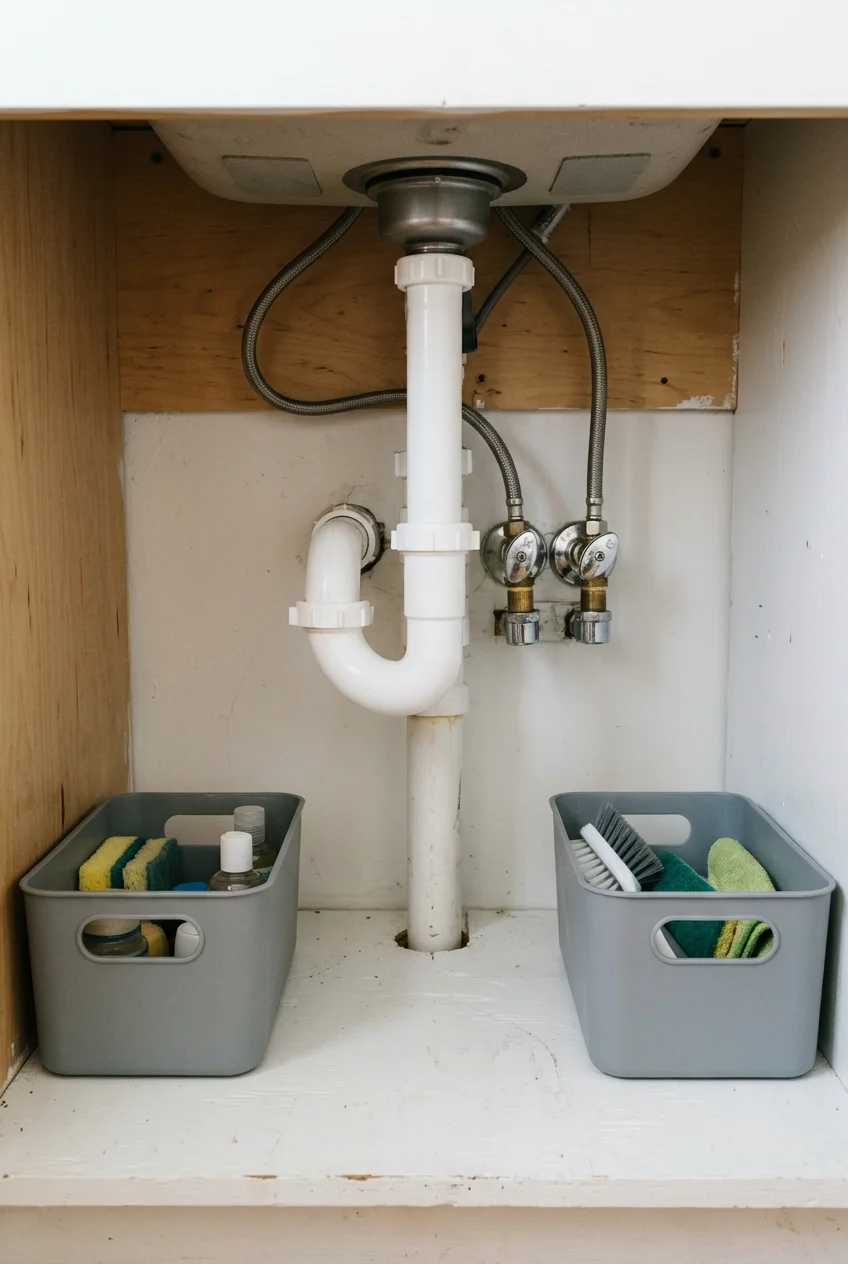
Think in two narrow zones on either side of the drain trap. A low pullout or handled bin can fit where a single wide shelf would hit the pipes.
Check the hinge positions and measure the route the bin takes when you pull it out. Leave the shutoffs and drain connections easy to reach for service.
Keep the supplies you use often in the easiest bin to lift, and follow label storage instructions. A washable liner makes drips from damp brushes easier to spot.
Practical tip Cut a paper template the size of the organizer’s base. Slide it in and out beside the plumbing before you commit to a rigid bin.
28. Put a removable tray inside a shallow drawer
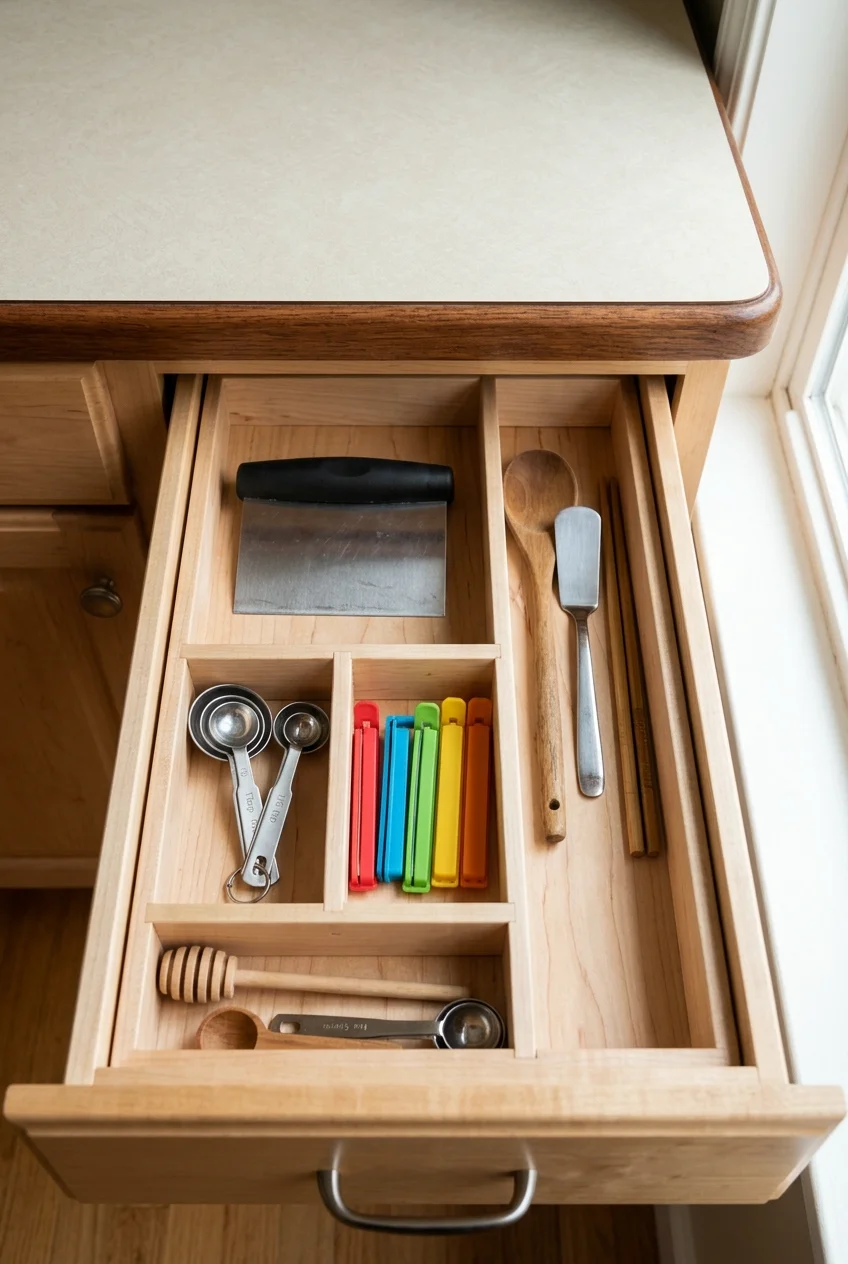
A slim insert can free the top of the counter from loose gadgets. Set it in the drawer nearest where you pack lunches or measure ingredients.
Leave one long channel for the tools that won’t fit in standard silverware slots. Take the tray out to clean crumbs from the drawer corners.
Make room for prep, cooking, and cleanup
29. Fold the dish rack away after cleanup
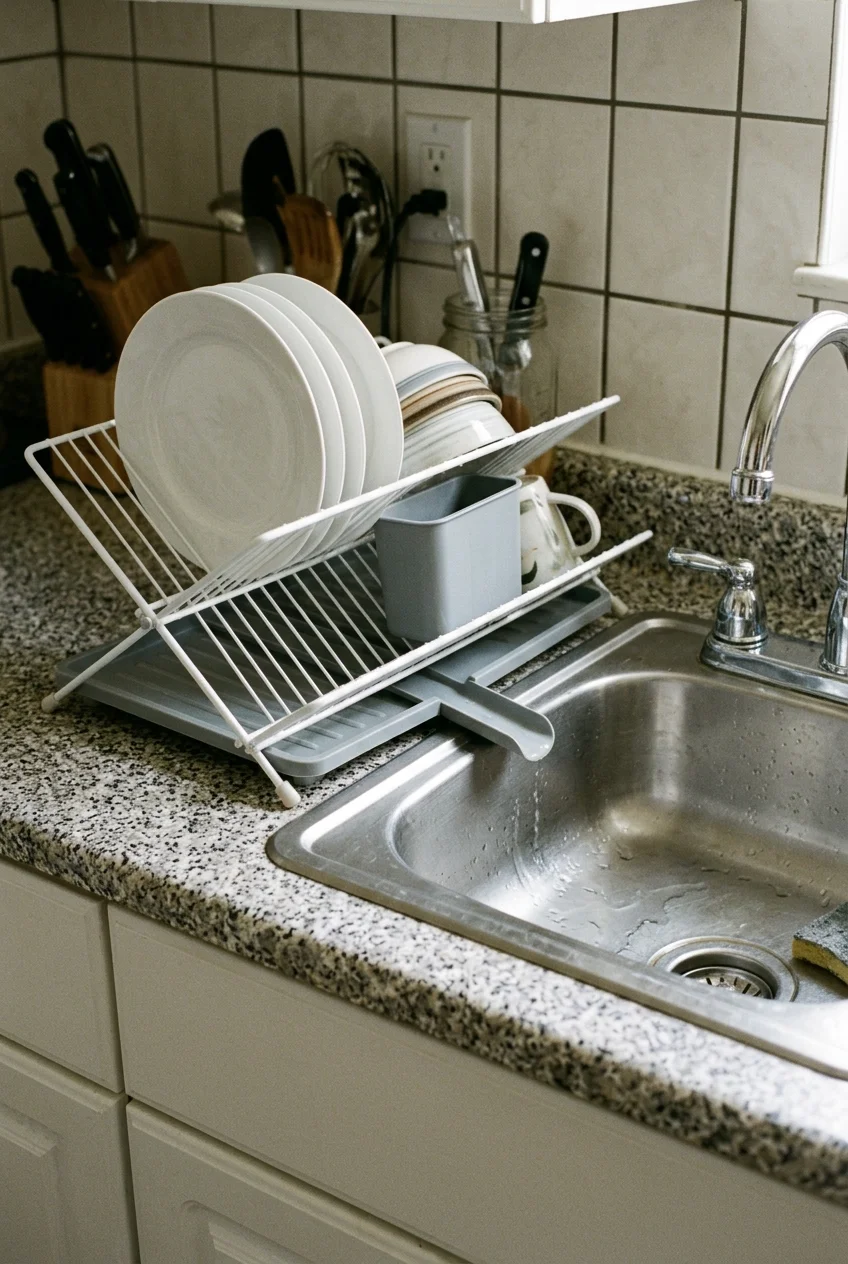
A drying rack earns its counter space while dishes are wet. Choose one that folds for storage if the same stretch of counter doubles as your prep area.
The OXO foldaway dish rack has a spout that drains into the sink. Measure the open footprint and check whether the spout will reach over your sink edge.
Let the rack dry before storing it. A low shelf or a roomy cabinet slot beside the basin makes it easier to put away between loads.
30. Roll a drying mat across part of the sink
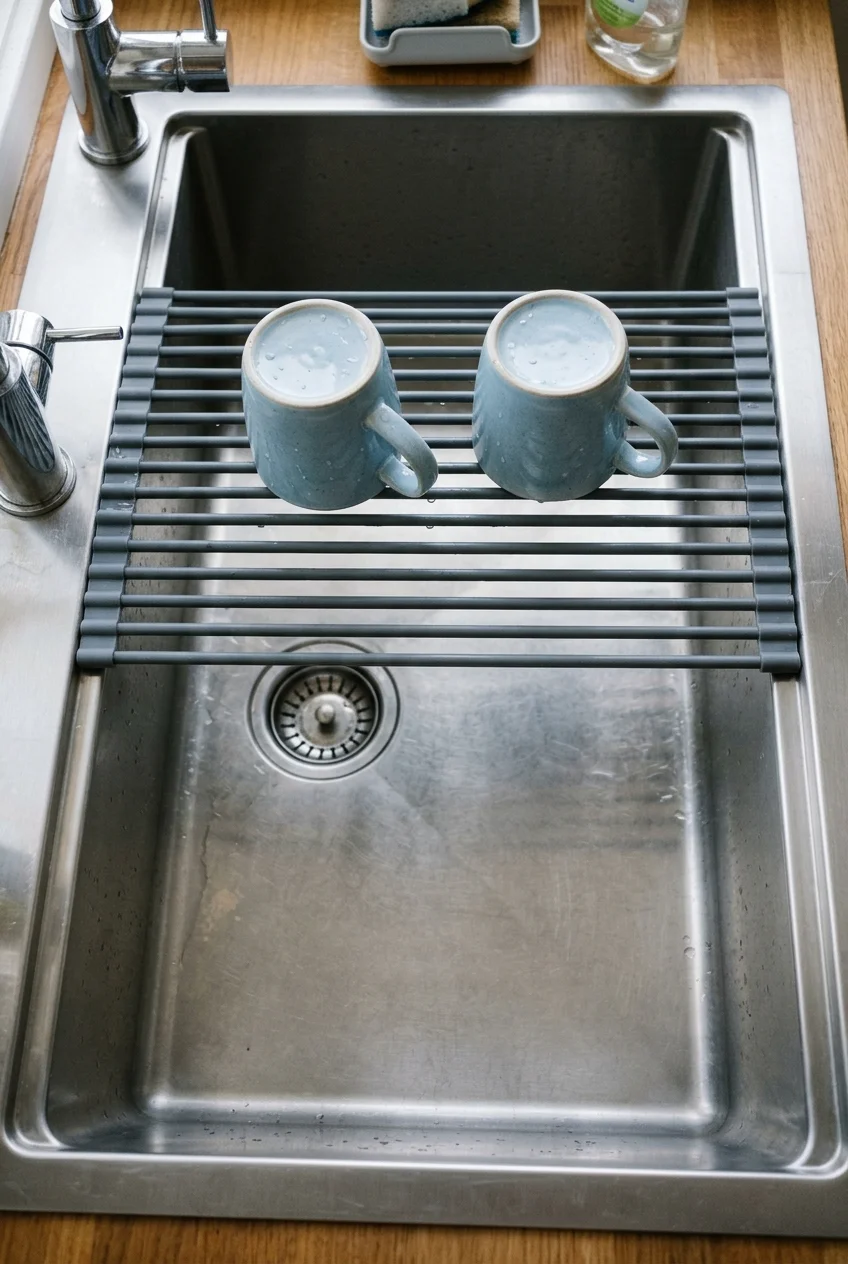
A roll-up rack gives one or two washed items a place to drip over the basin. Roll it back when you need the entire opening to wash cookware.
Measure the opening front to back at the spot where the rack will sit. Both ends need solid support, and the rolled bundle should fit in an easy-to-reach drawer.
Keep heavy pots on a surface suited to their weight. Check the rack’s load rating and whether it can sit securely on your particular sink rim.
31. Trade a split sink for one useful bowl
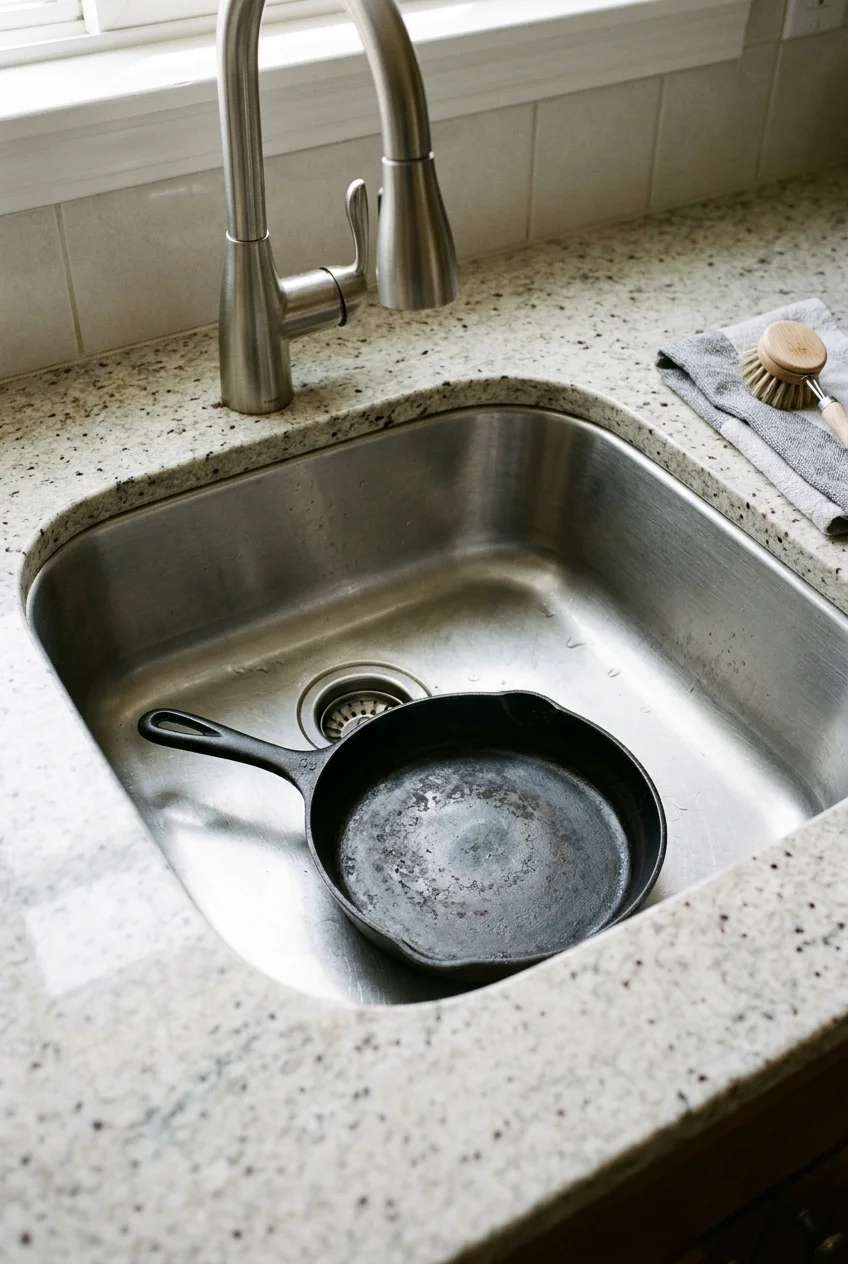
A compact single bowl helps when the divider in a double sink keeps your largest pan from lying flat. Bring a measurement of that pan when you compare basins.
Look at the bowl’s interior width and depth. A roomy exterior measurement can include a thick rim, and a deep bowl can eat into the cabinet space below.
If you’re replacing a sink, verify the cutout, cabinet width, faucet position, and drain alignment before buying. A new sink can leave gaps in an existing countertop opening.
32. Put the refrigerator under the counter
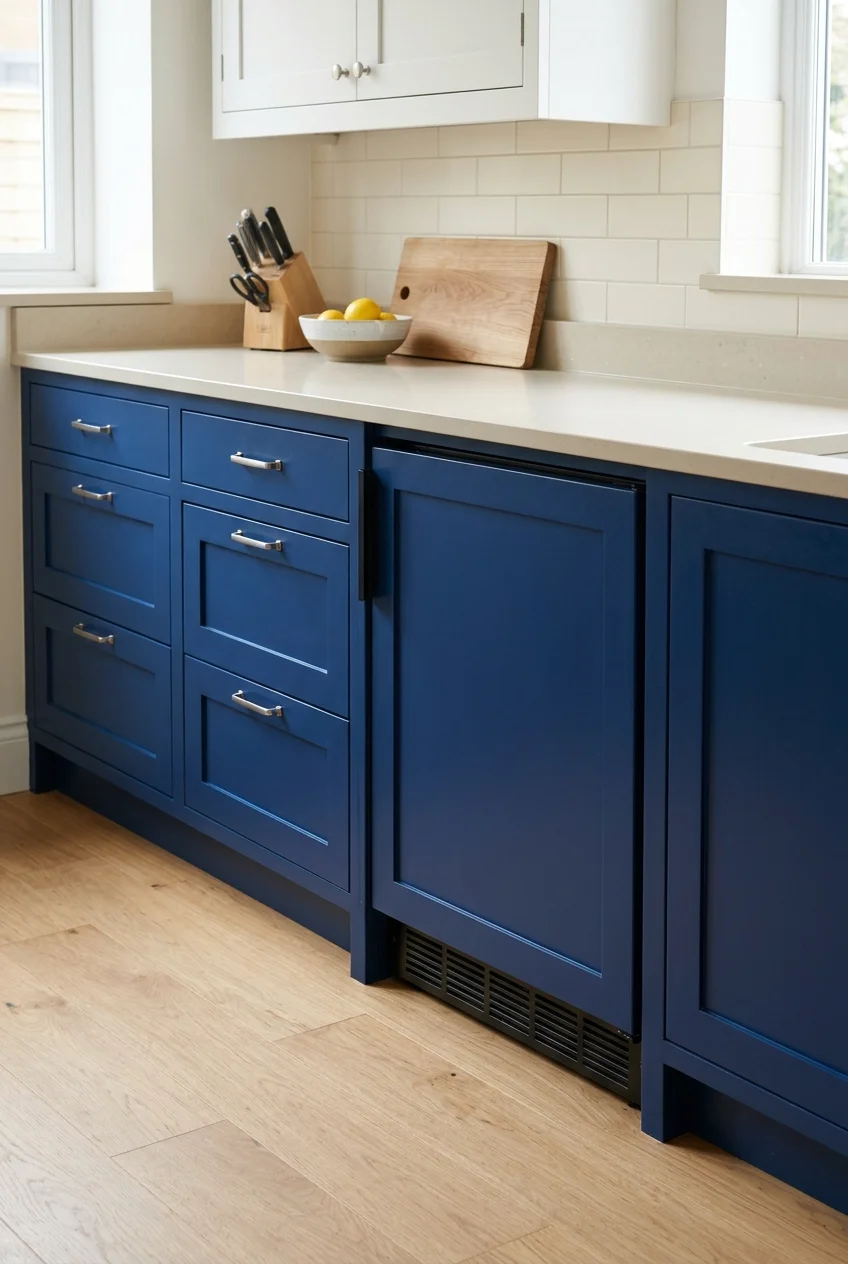
An undercounter refrigerator trades tall storage for a continuous work surface above. It suits a studio kitchen where the refrigerator would otherwise break up the only usable counter.
Check its capacity against a real grocery trip, including tall bottles and leftovers. If you batch cook or depend on frozen meals, keep a separate freezer compartment in mind.
Look for a model approved for the proposed installation. Follow its manual for ventilation and door swing, and verify that drawers inside the refrigerator can come out fully.
- Compare actual interior storage and freezer capacity.
- Measure the opening’s depth with the plug and required clearances in mind.
- Check whether nearby walls or handles limit the door swing.
33. Choose a narrower range if it fits your cookware
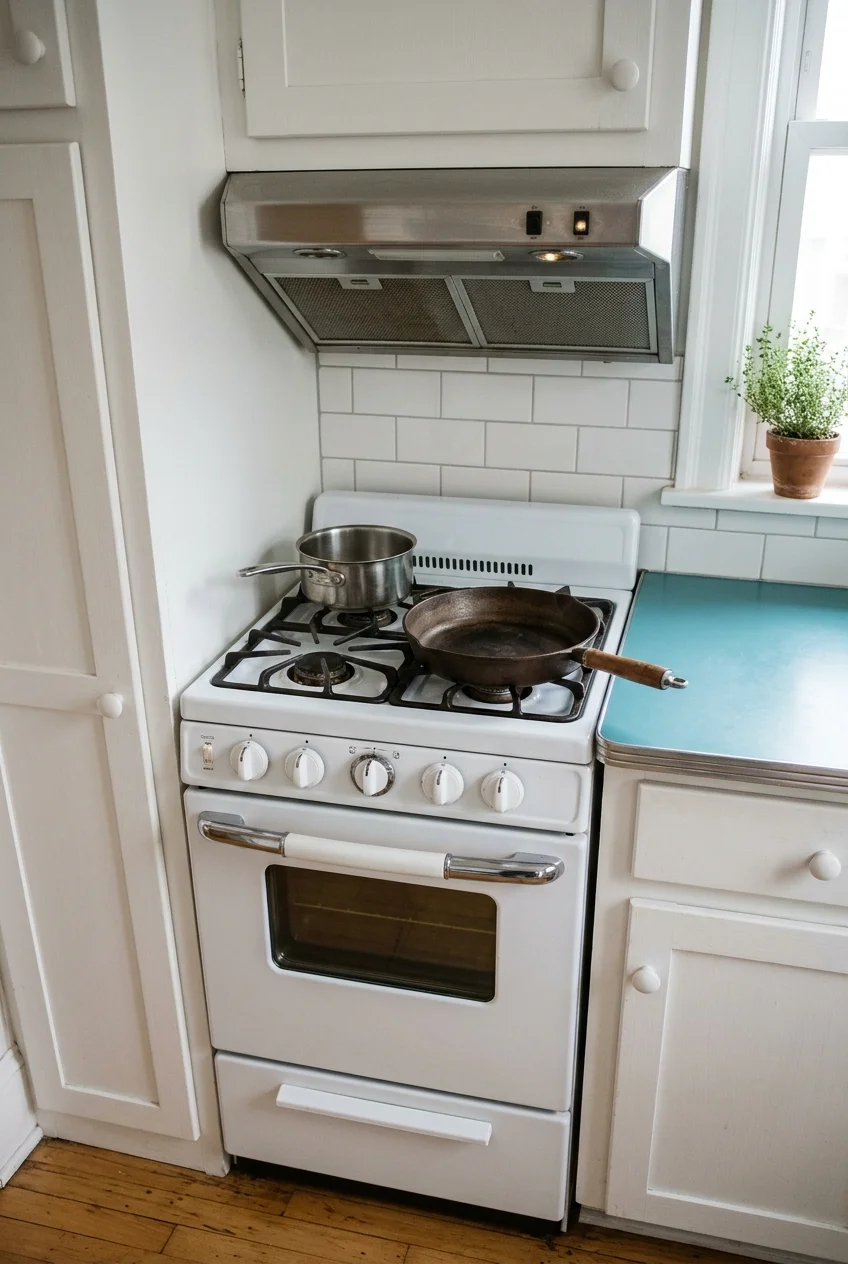
A slimmer range can make room for a drawer stack or a strip of worktop. Check the burner spacing with the two pans you tend to use together.
Measure your largest baking sheet and compare it with the oven’s usable width and depth. The outside width alone tells you little about cooking a sheet-pan dinner.
Before purchasing, confirm the exact cutout, utility connection, ventilation and heat clearances in the installation instructions. Have a qualified installer verify the setup, including the anti-tip hardware.
Decide where a hot pan can land before settling the layout. Keep that surface clear and use a heatproof trivet suited to the pan and counter.
34. Fit a slim dishwasher beside the sink
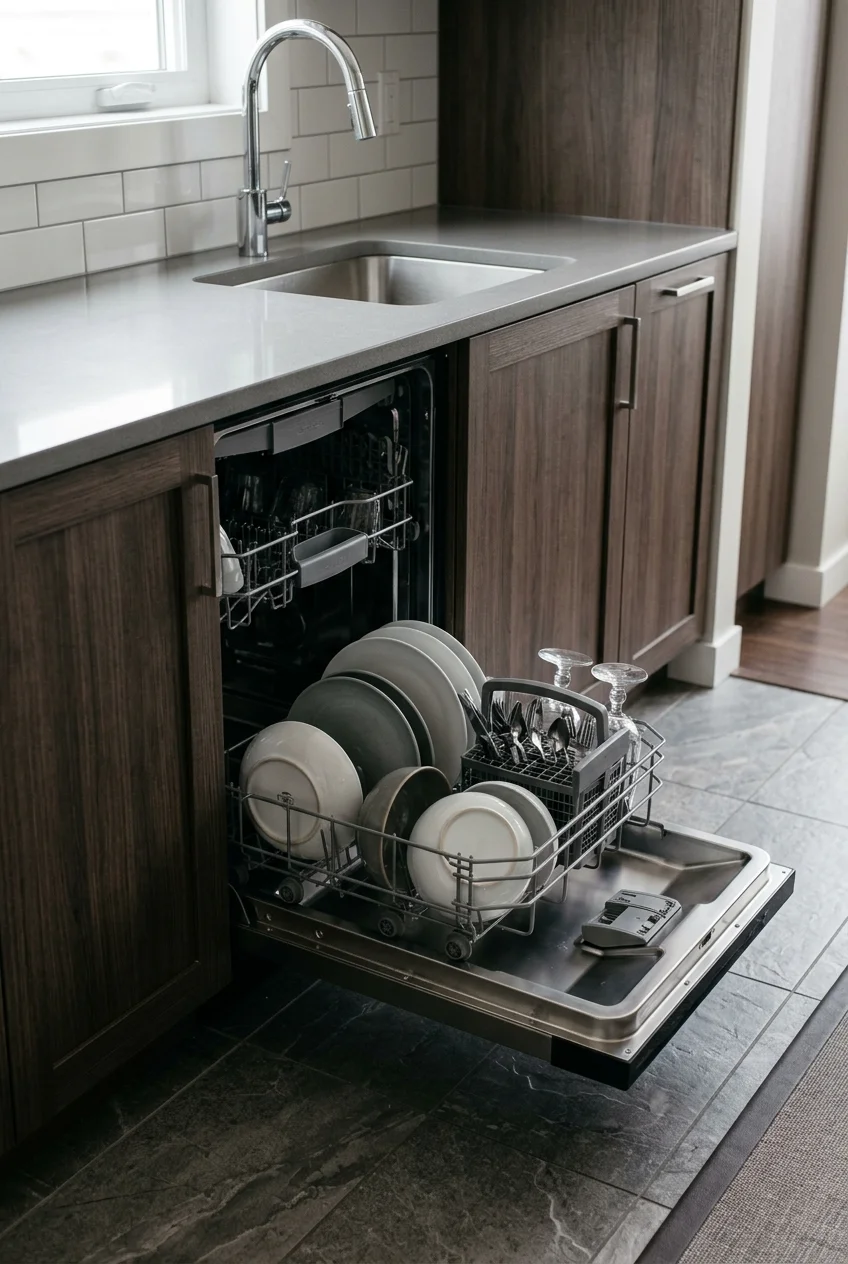
A slim dishwasher can earn its cabinet bay if a drying rack spends most days on the counter. Place it where dishes can move straight from the sink.
Compare interior rack layouts using your largest plates and everyday bowls. A narrow model is useful only if it holds the mix you actually wash and load.
Measure the door in its fully open position, especially in a galley or beside an apartment entry. Test whether you can stand comfortably beside it while unloading.
A dishwasher still needs the connections and installation clearances its manual specifies. Confirm the route for water, drain, and power while you can still change the cabinet plan.
35. Put the microwave in a bay designed for it
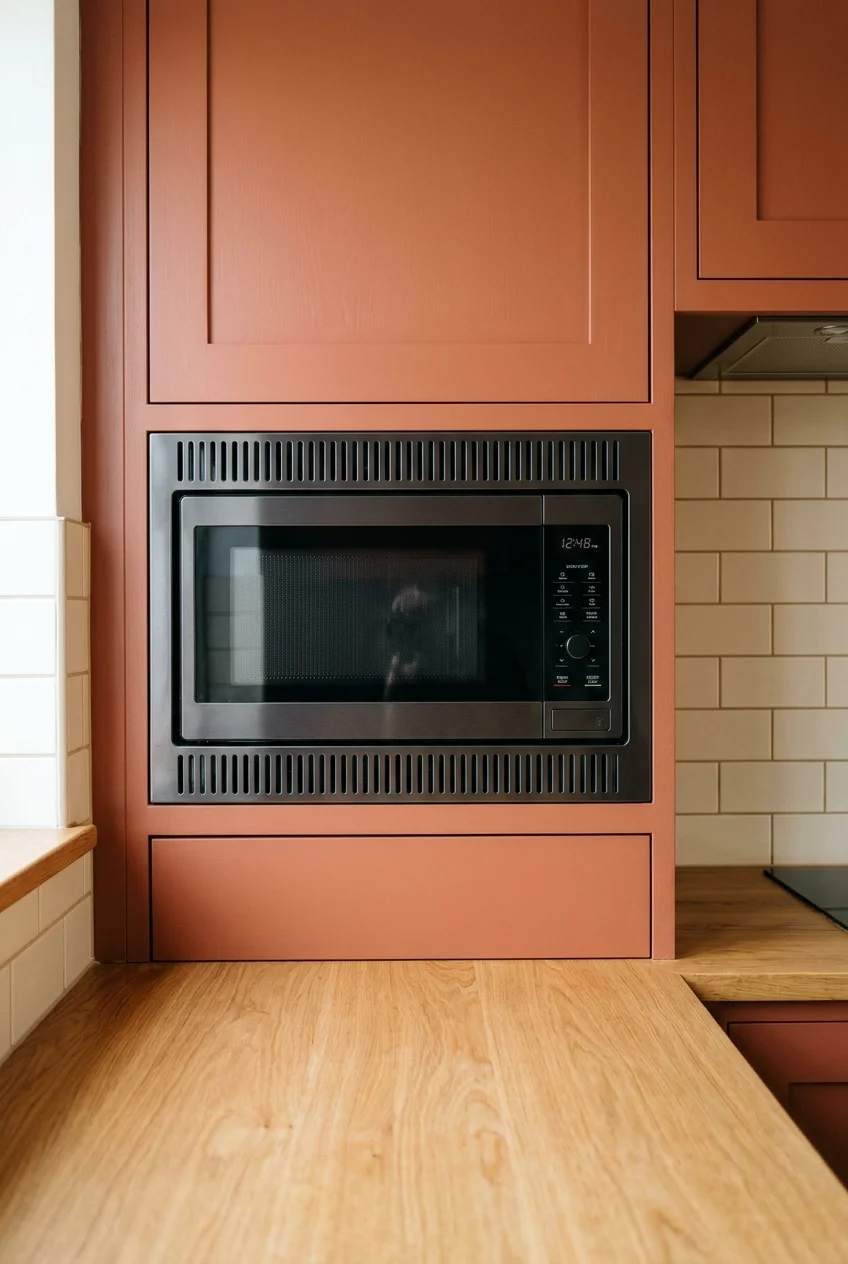
Moving the microwave off the counter makes extra prep space, especially on a one-wall run. Choose a height where you can see and lift a hot bowl comfortably.
Use a model approved for the built-in setup, with the exact trim kit or vent paths its instructions require. A countertop microwave needs the clearances specified for its placement.
Leave a nearby landing surface and check which way the door opens. In a tight kitchen, it should open toward an area where you can stand and reach safely.
36. Give the range hood a clear spot above the stove
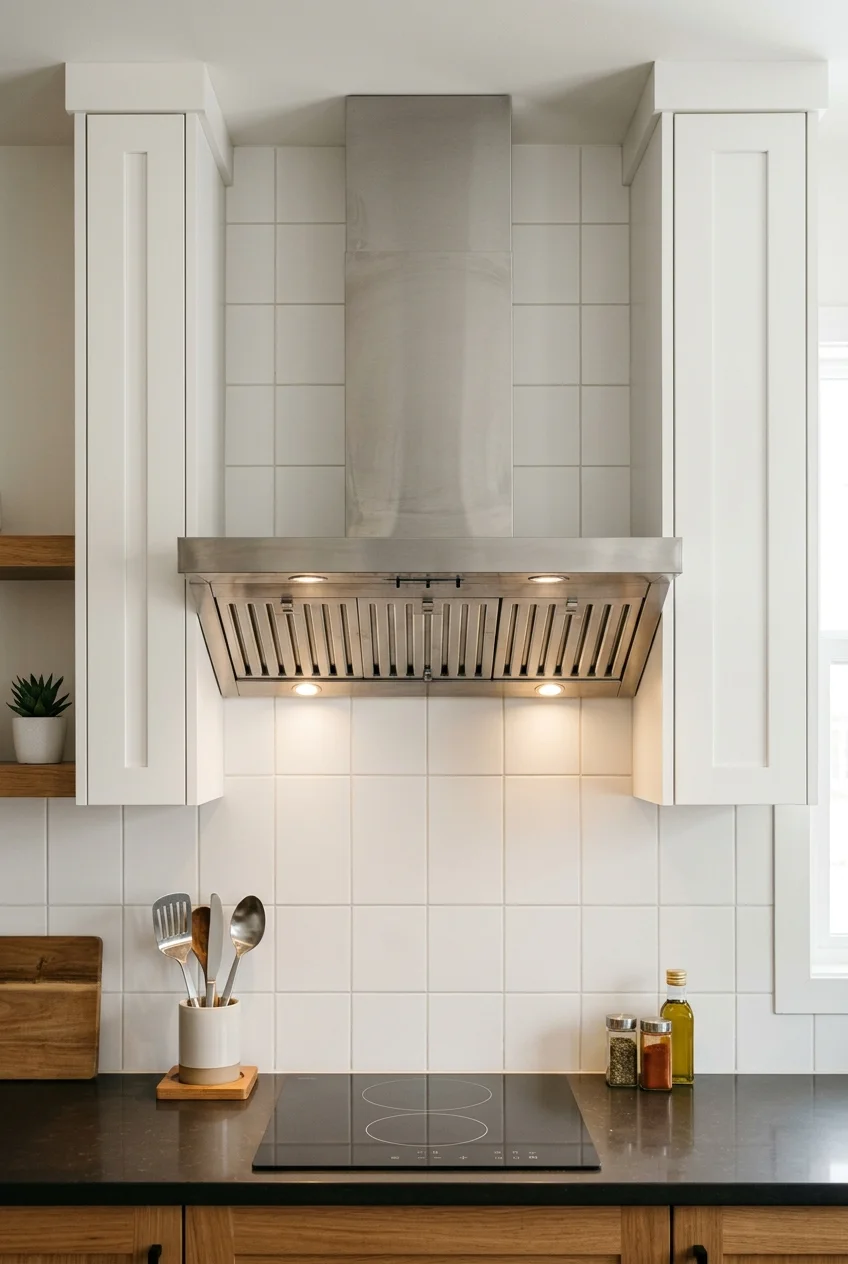
In a studio, the sofa and bedding share air with the kitchen. If the building can accommodate it, choose a hood that vents outdoors and use it during cooking.
Keep the area directly above the stove for the hood and its required clearances. Let nearby shelves end before the cooking zone so they stay easier to clean.
For a replacement, have the hood location, mounting height, and duct path checked against the range and hood manuals. Clean the grease filter according to the manufacturer’s instructions.
If the building lacks an outdoor-venting hood, open a window when outdoor air quality and safety allow. Keep flammable items well away from the cooktop.
Pick finishes you want to see from the sofa
37. Paint the uppers to match the wall
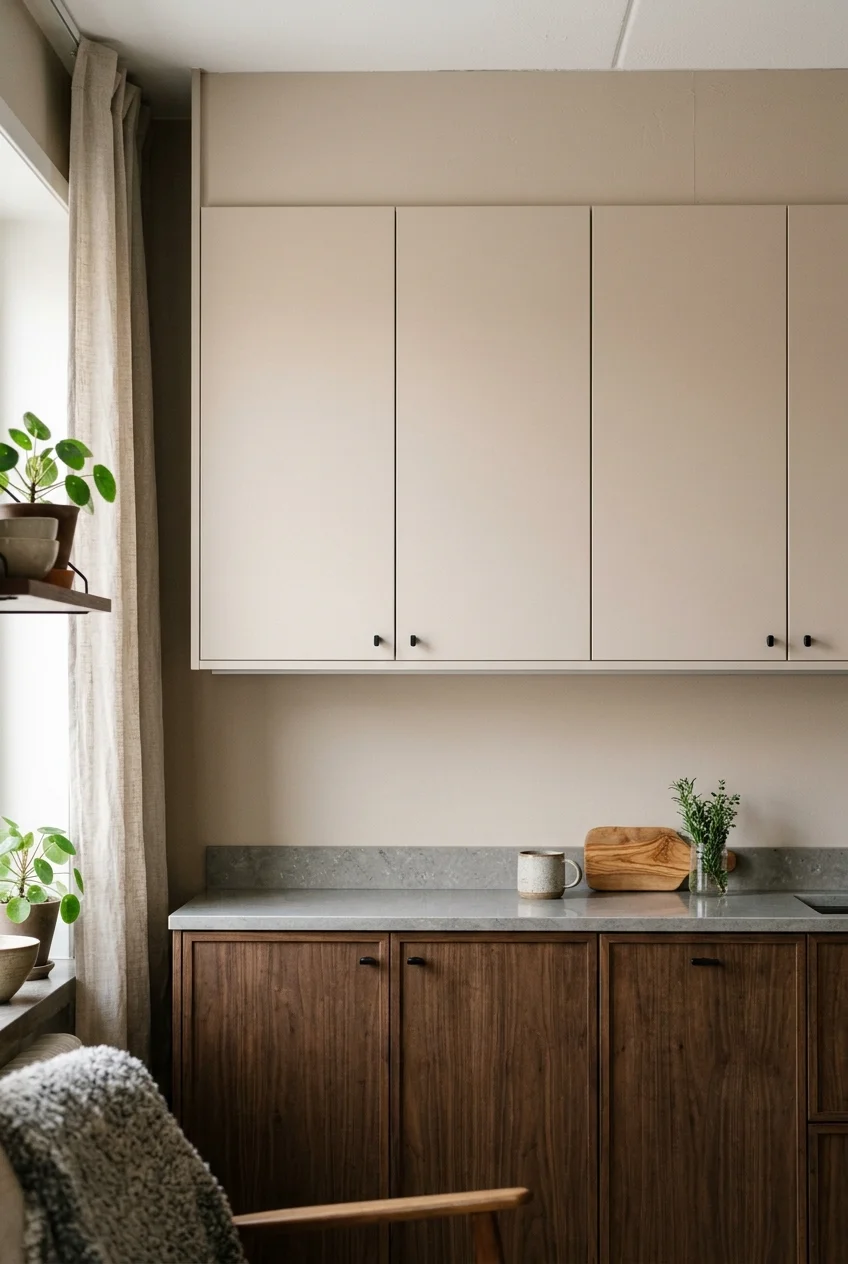
Matching wall cabinets to the surrounding paint softens the outline of a kitchen you see from bed. This works especially well when the uppers end midway along a shared wall.
Look at a sample beside the wall in daylight and evening light. Different sheens can make the same color look slightly lighter or darker, especially on smooth doors.
38. Put the strongest cabinet color below the counter
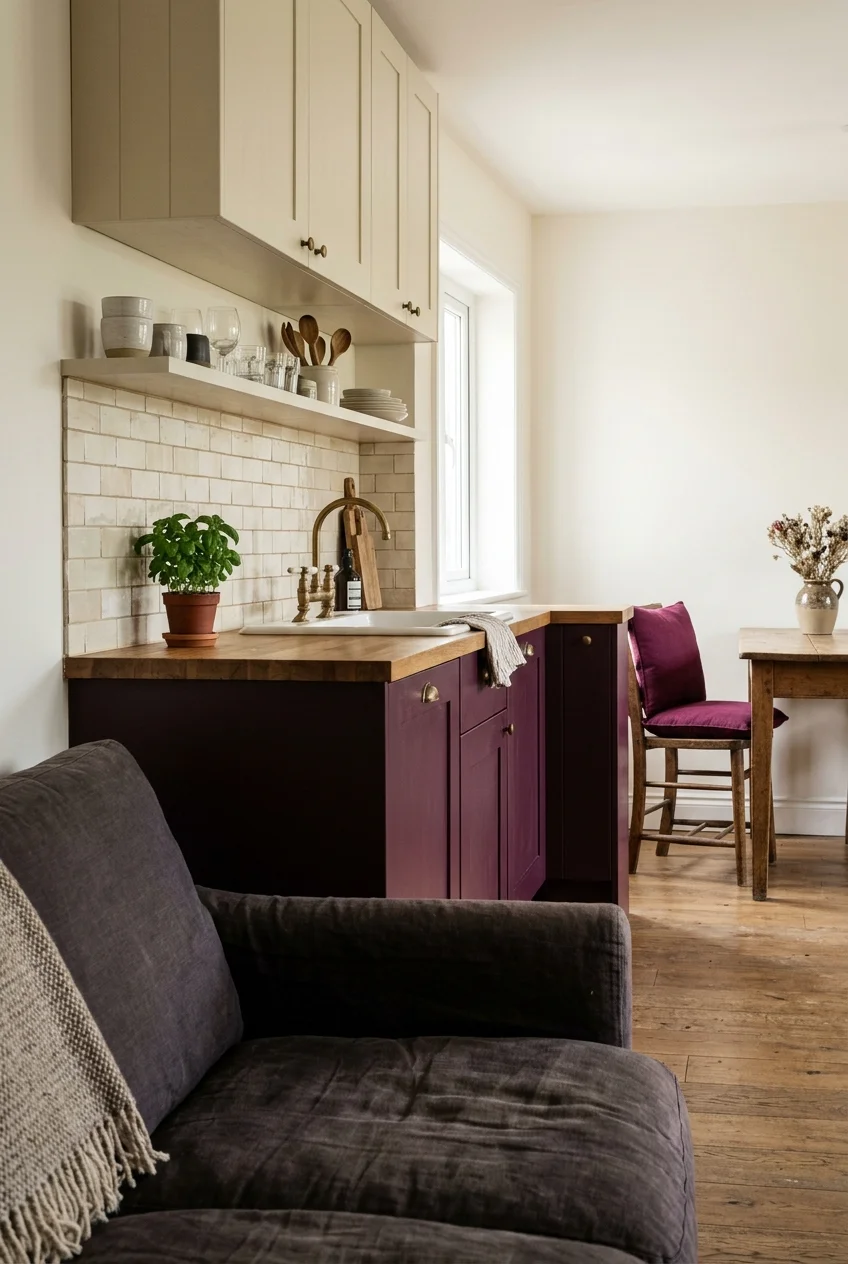
A saturated base color gives the kitchen a clear edge while leaving the wall above open or pale. One small repeat in the living area can connect the two zones.
Choose the cabinet sample against your actual counter and flooring. Deep berry can look brown in low light, while a warm bench fabric can bring out the red.
For a rental, try that relationship with a freestanding low cabinet or a pair of dining chairs in the color you like. Ask before painting fixed cabinet fronts.
39. Stop the backsplash at a deliberate edge
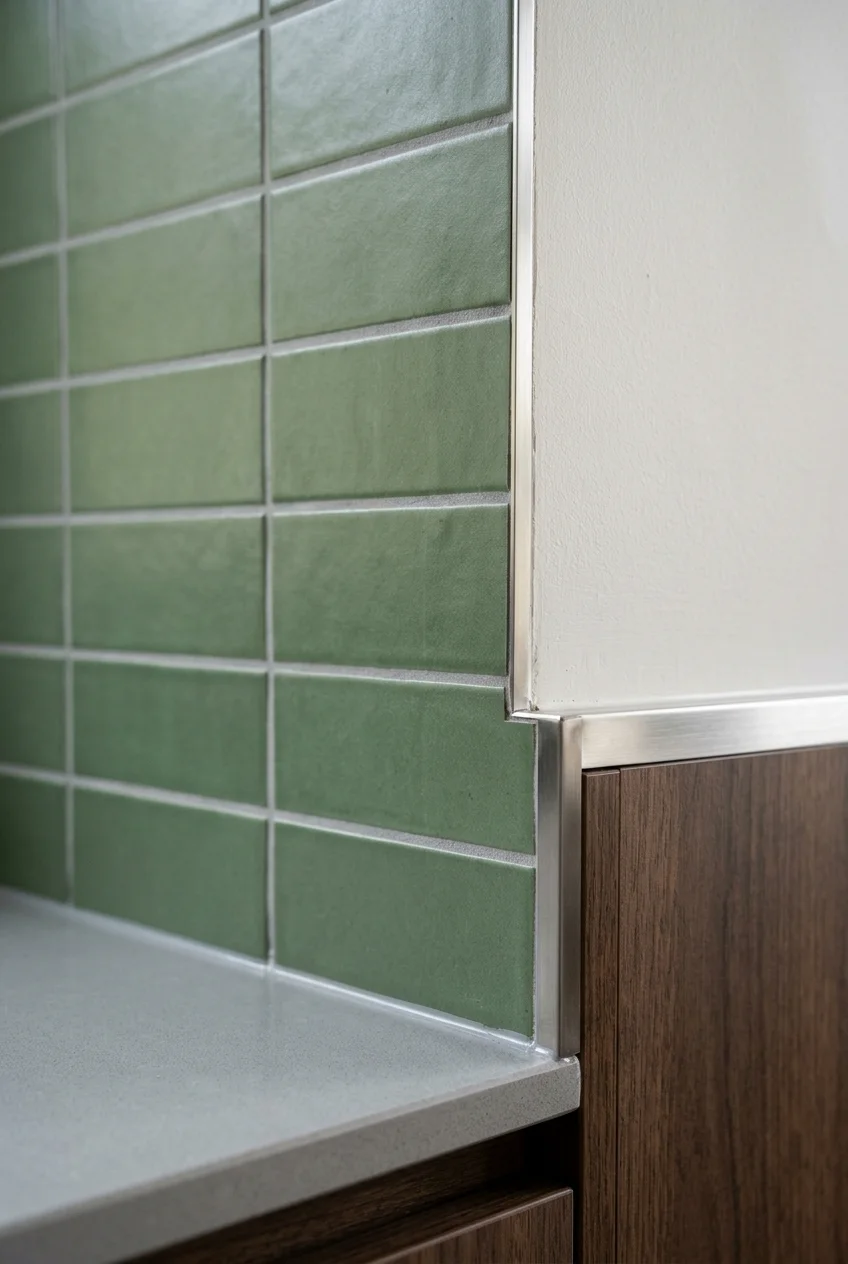
A short kitchen wall looks more settled when the backsplash ends at a cabinet side or inside corner. Decide where the visible edge should land before choosing the tile.
Check the layout from the sofa as well as from the sink. A cut edge that barely registers up close can stand out across a small studio.
Ask the installer how the edge will be finished. A trim profile or suitable finished edge tile can make the transition from tile to painted wall feel deliberate.
40. Run one backsplash material around the corner
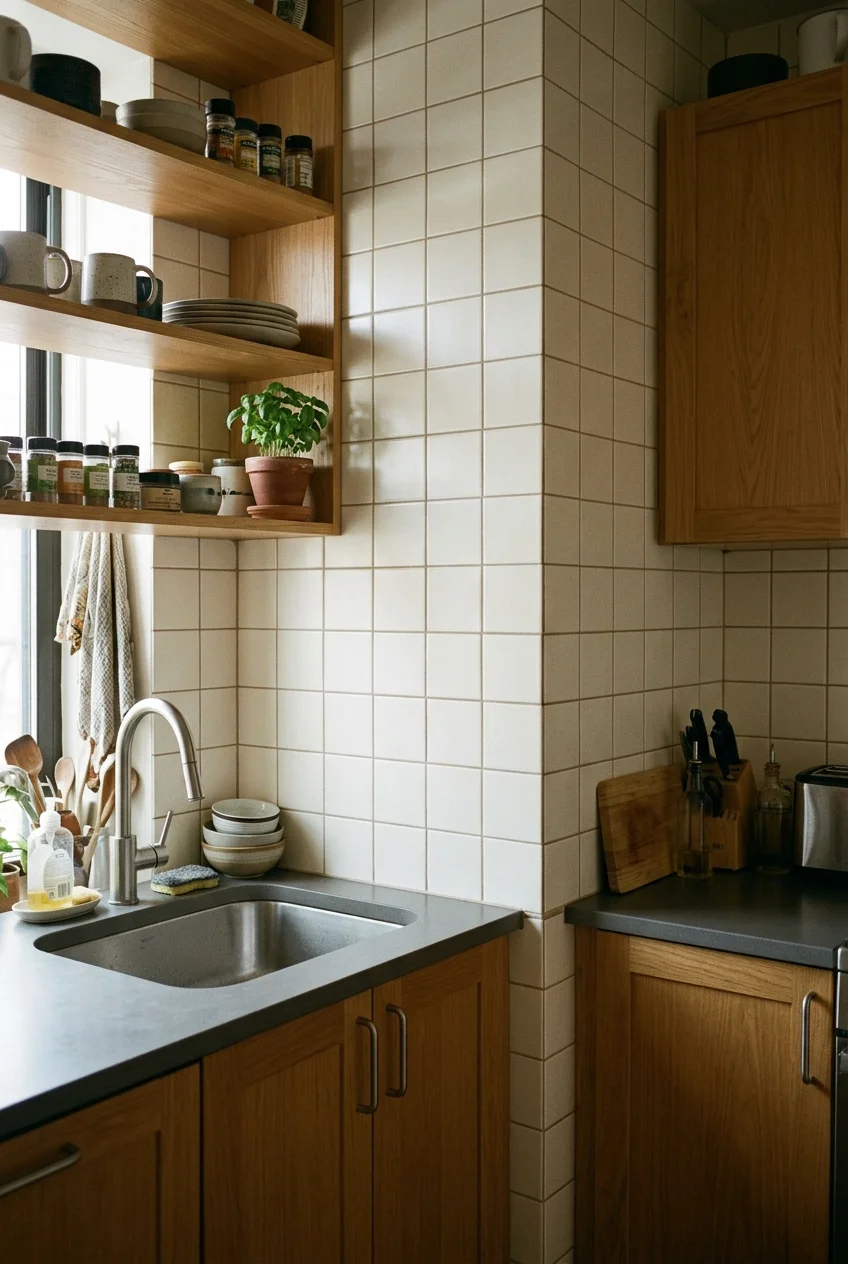
Wrapping the backsplash onto the short return visually joins two work surfaces. Use the same finish through the corner where both sides need splash protection.
Lay out the joints so the inside corner looks coherent from the main sightline. Pick the end height from a cabinet, shelf, or window detail that already exists.
41. Put ribbed glass on one upper cabinet
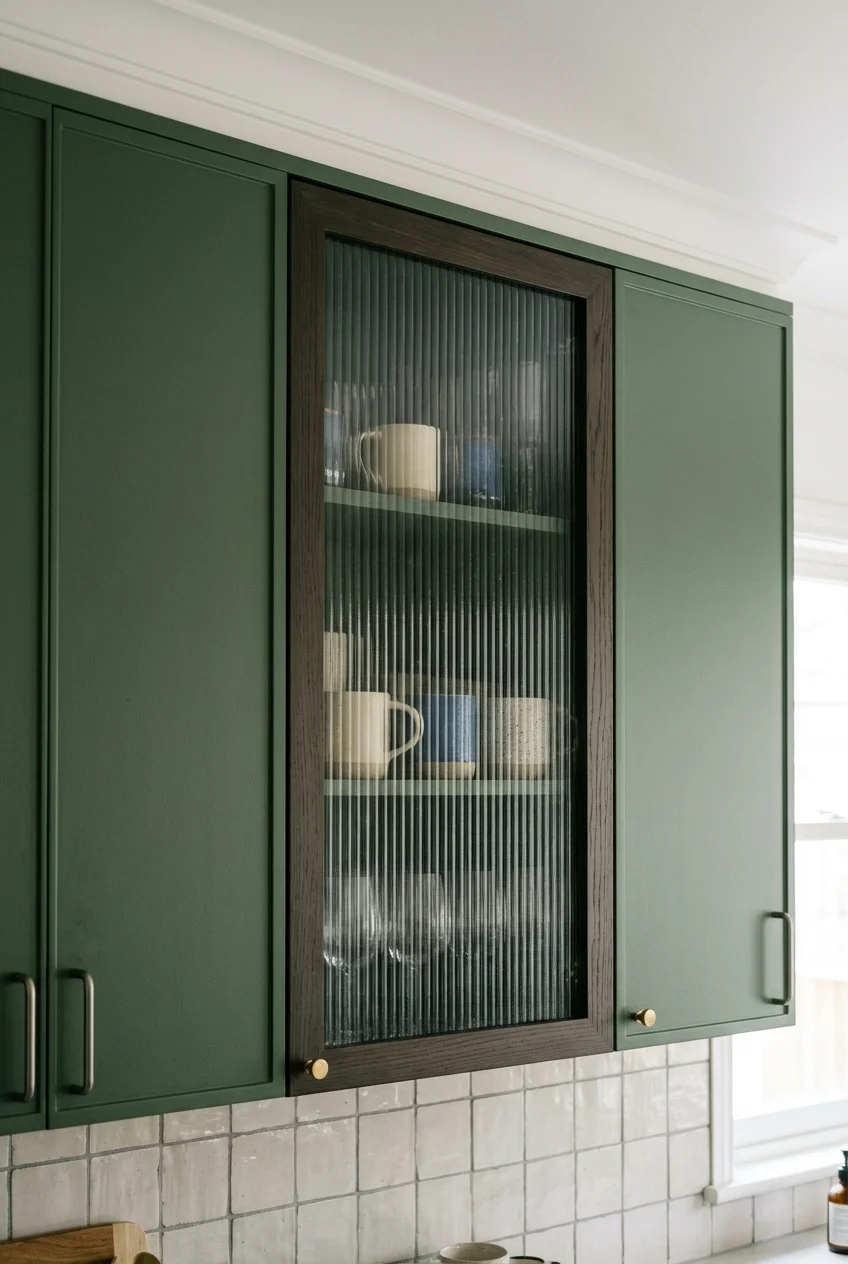
Ribbed glass breaks up a wall of solid doors and softens the outlines of what’s inside. Use it over a cabinet filled with glasses, mugs, or pale dishes.
Hold a sample in front of the things you’ll store. Strongly colored packages can still show through, especially when the cabinet catches daylight from the side.
42. Replace cabinet pulls using the existing holes
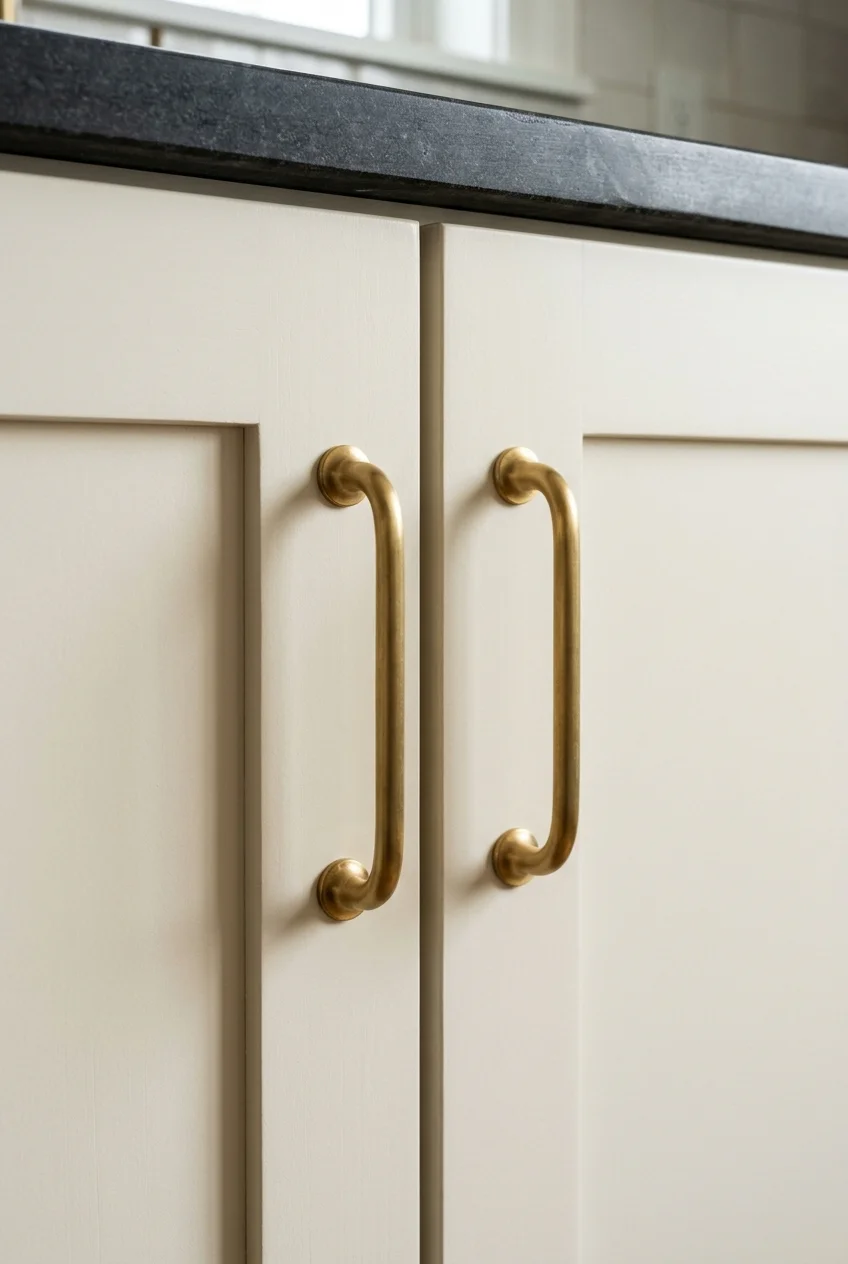
A pull with a simpler shape can make older fronts look more deliberate from across the room. Choose a grip that’s comfortable when opening the heaviest drawer.
Measure between screw centers before choosing a replacement. Check the screw length and pull projection as well, especially where two doors meet at the inside corner.
Renter tip Get permission for the swap and keep the old hardware together. A labeled bag with the original screws makes it easier to put everything back before moving.
43. Carry one floor finish through the open studio
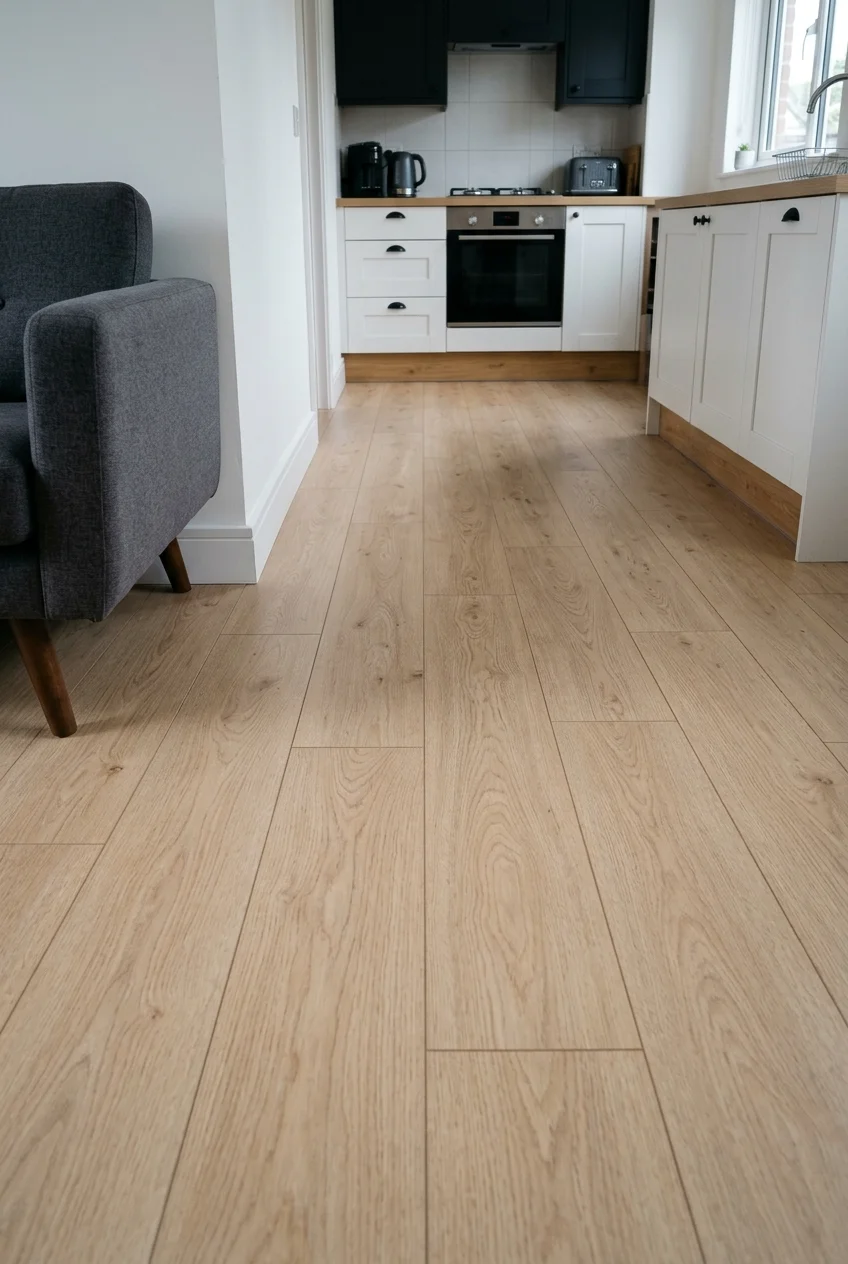
A continuous floor lets a small kitchen and lounge read as one room. Consider it when replacing both floors and the existing threshold cuts across the main view.
Choose a finish approved for kitchen use and follow the product’s moisture and installation guidance. Check the finished floor height against appliance removal and doors that swing across it.
If a single finish is impractical, line up the transition with a cabinet edge or alcove opening. A visible seam can belong to the layout when it lands somewhere logical.
44. Repeat one kitchen finish at the dining table
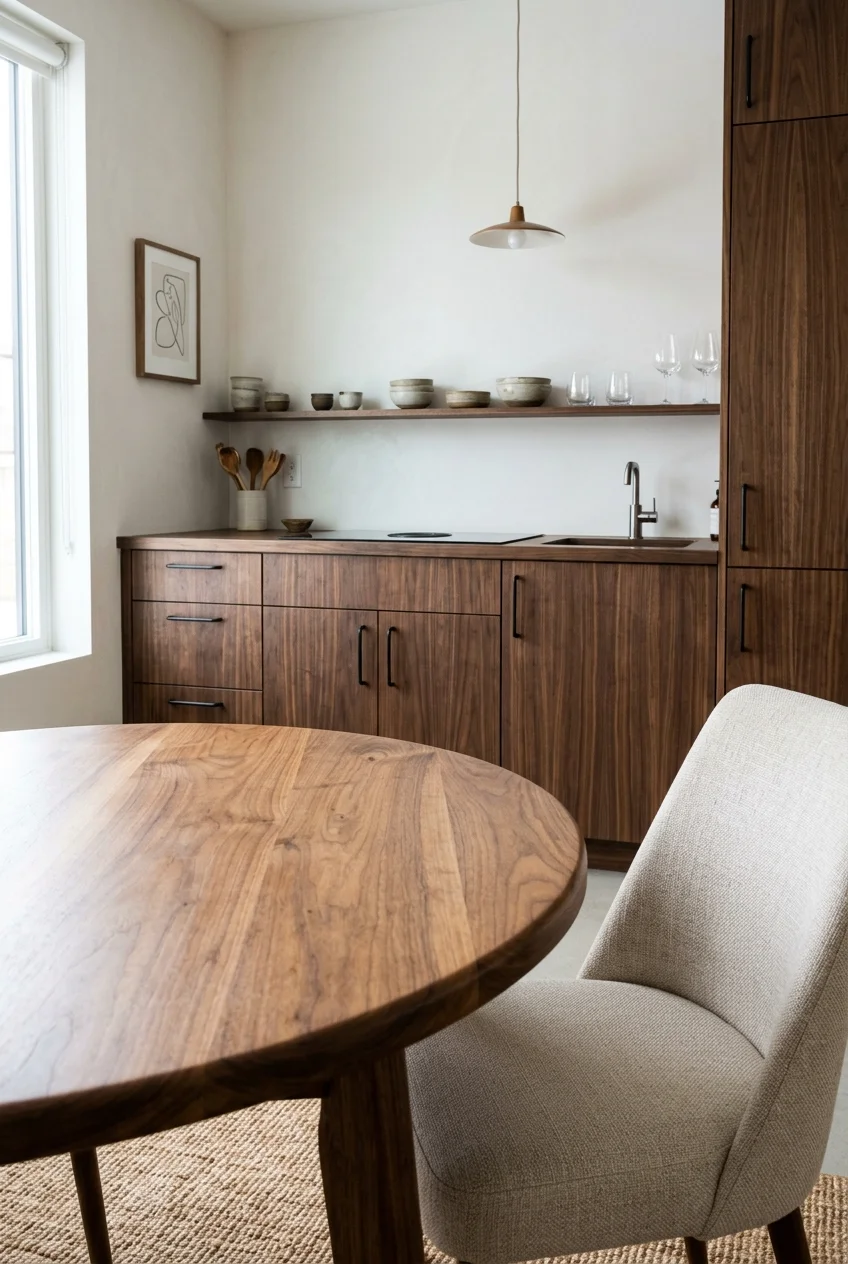
Borrow a finish from the kitchen for the nearest piece of furniture. A table in the same wood family as the cabinet fronts can connect two separate zones.
Compare undertones in the actual room. A slightly darker finish can work beautifully if both pieces have a similar warmth and the table still feels like its own piece.
Light and finish the kitchen’s shared space
45. Light the worktop from beneath the uppers
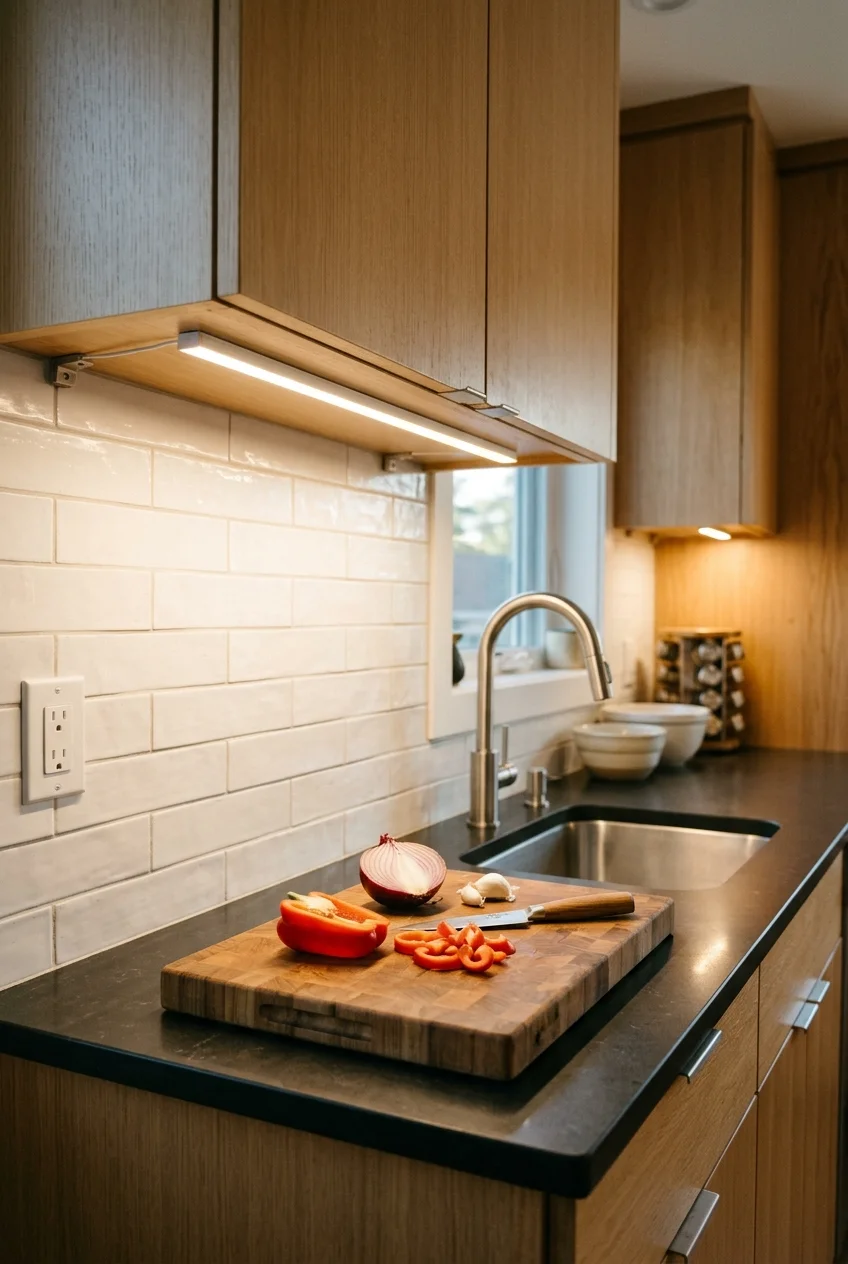
A light under the cabinet puts illumination on the cutting board when your body blocks the overhead fixture. A diffused bar gives the counter an even wash of light.
Mount it where the light can reach the working area and the fixture stays out of your seated sightline. Test the position from the couch before fixing it.
Use a fixture approved for its location and route the cord according to the instructions, away from water and heat. A rechargeable model can avoid a cord crossing the backsplash.
46. Hang one pendant over the dining table
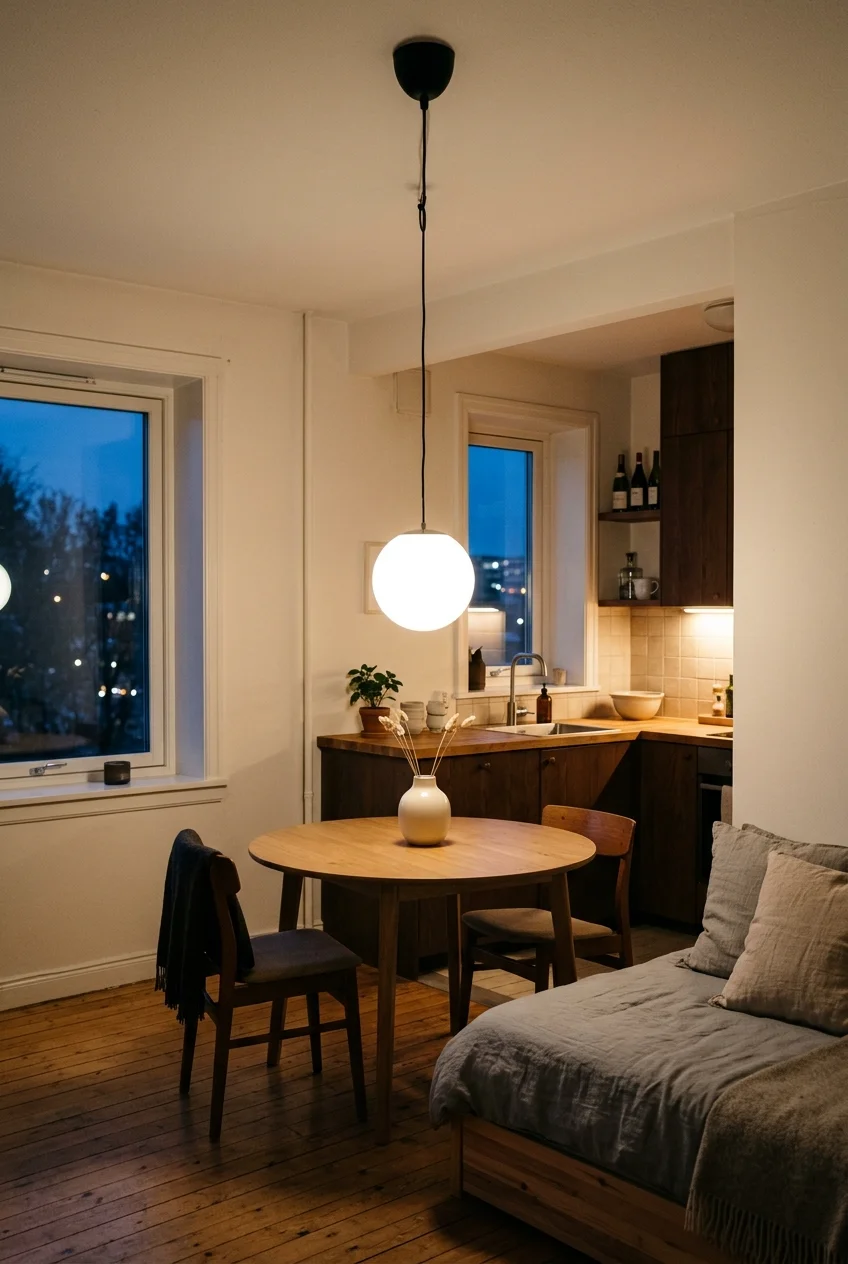
A single pendant gives the dining table its own center in an open studio. A shade that shields the bulb keeps it comfortable to look toward from the bed.
Center it over the actual table, then check the view and headroom with a chair pulled back. Use a qualified electrician for a new hardwired ceiling fixture.
47. Hang one washable-framed print on the dining side
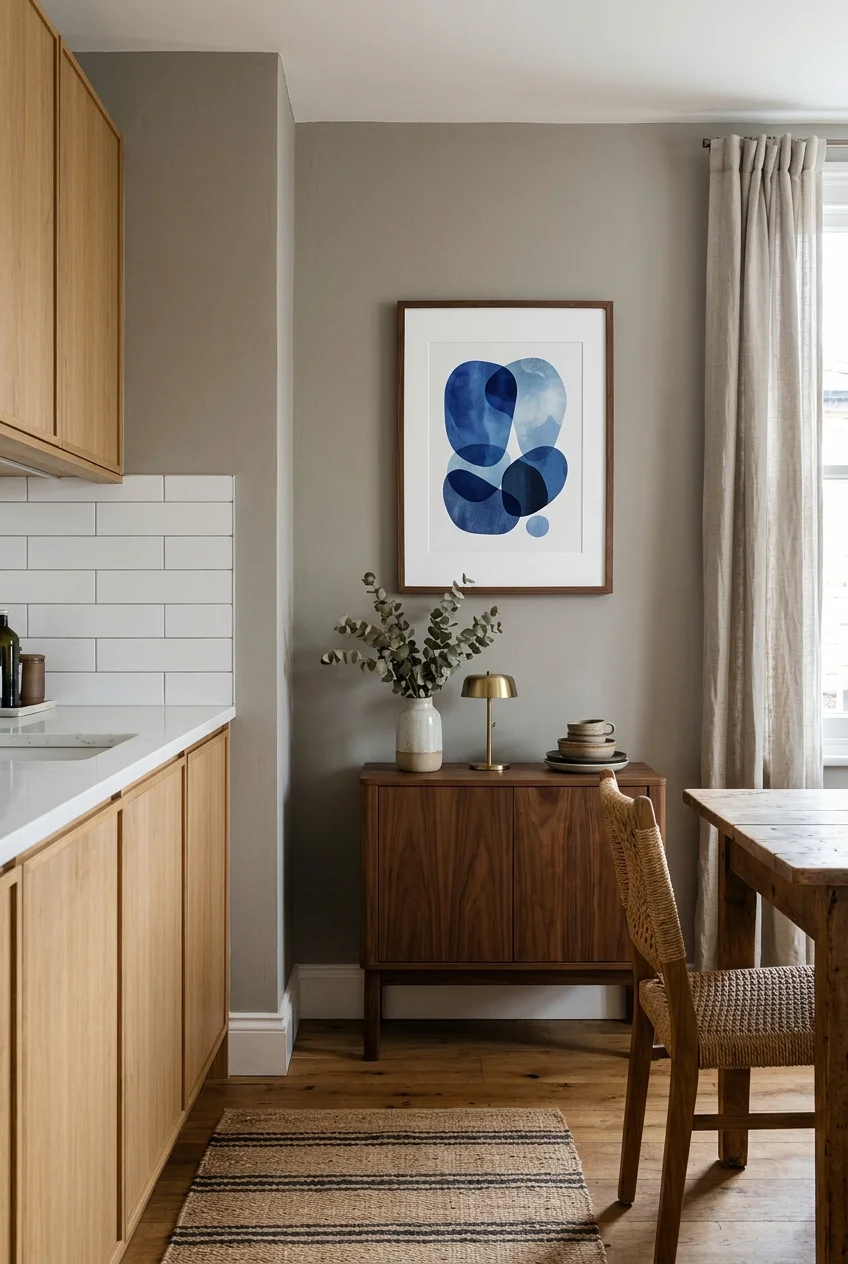
A single piece of art beyond the last cabinet can make the kitchen feel like part of the studio. Pick a frame you can wipe with a damp cloth.
Use a wall that stays clear of splashes and cooking heat. Center the piece over a small dining table or sideboard so it has a clear relationship to the furniture.
48. Try a removable backsplash on the cool stretch
Image pending: No image is attached to this draft for idea 48 (image-48).
A removable panel can add pattern to the dry counter end of a rental kitchen. Look for a smooth compatible surface and enough room for a neat edge.
Check the lease and the manufacturer’s restrictions on heat, moisture, and wall finishes. Keep the material away from the range and choose a spot beyond the regular sink splash.
Test a sample where it’s easy to see how it sticks and removes. Paint condition matters, and a product marked removable can still lift weak paint.
49. Gather coffee supplies at the counter’s quiet end
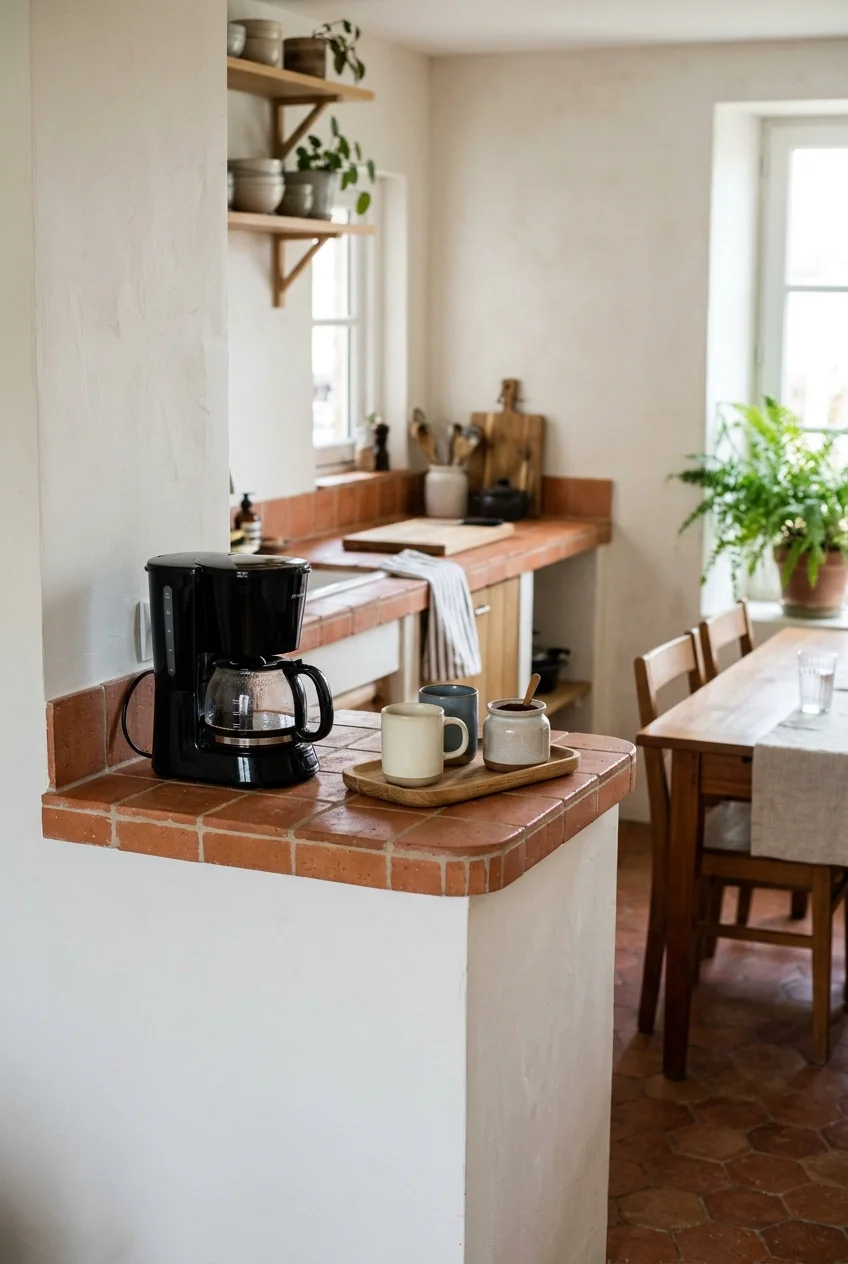
Put the mugs, grounds, and filters beside the coffee maker where they’re easy to reach in the morning. Use the end of the worktop farthest from active prep.
Keep the coffee maker on a stable surface with room to open its lid and fill the reservoir. Follow its placement instructions, especially if steam rises toward overhead cabinetry.
Use a small tray for packets and spoons so you can lift them all to wipe the counter. More kitchen storage ideas can help find homes for the extras.
50. Move serving pieces to a slim living-side sideboard
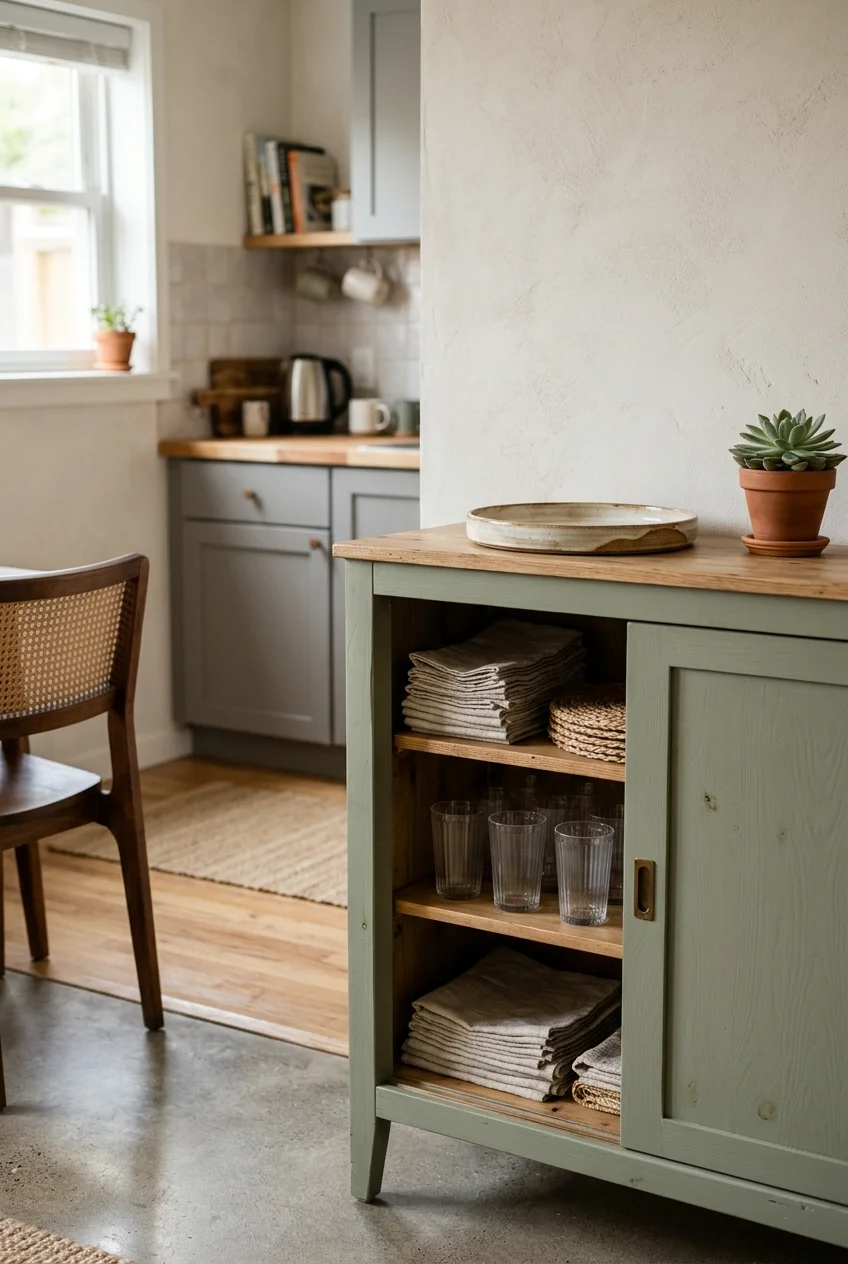
Keep the serving platter, extra glasses, and table linens near the dining table. A shallow sideboard can free kitchen shelves for the cookware you use every day.
Measure the deepest platter before buying. Sliding doors can help along a narrow route, provided the divided interior still lets you lift out your biggest piece comfortably.
Choose a sideboard that leaves room to walk behind occupied chairs. Follow its anchoring instructions, and use the top as a serving surface when the kitchen counter is busy.