60 Tiny House Kitchen Ideas That Make Every Inch Work

This post may contain affiliate links: full affiliate disclosure.
A tiny house kitchen has to cook, store, wash, and share space without turning the whole home into one crowded work zone.
These ideas begin with layouts you can picture, then move through flexible surfaces, storage, compact equipment, daily organization, and finishes that clarify the room.
Choose according to your cooking habits, exact appliance requirements, and walking paths. A clever feature earns its place only when it improves everyday use.
This post may contain affiliate links. Please see our full affiliate disclosure.
Layouts That Protect the Work Zone
Begin with the path through the house, not the cabinet style. A compact kitchen works best when cooking stays outside the busiest route.
1. Keep Every Function on One Carefully Ordered Wall
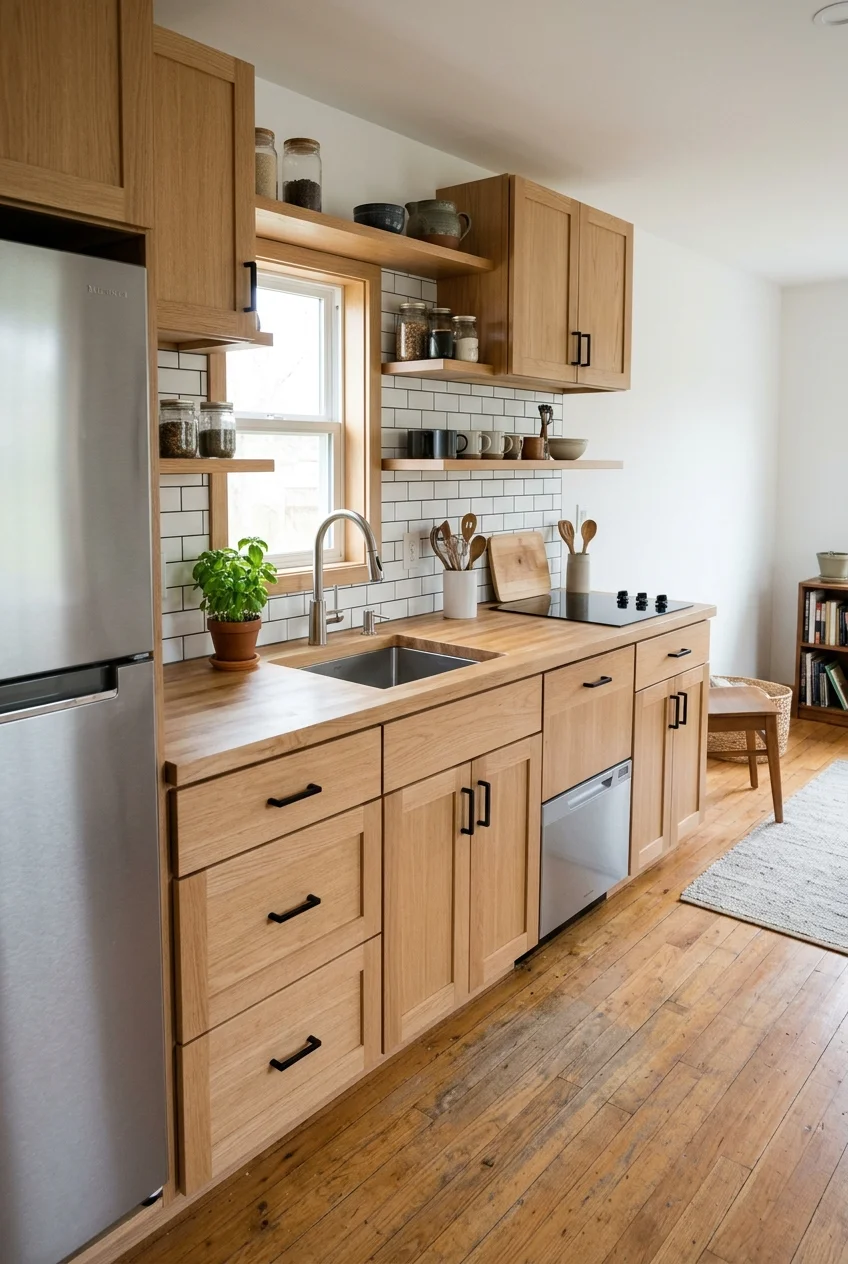
A single-wall kitchen leaves the opposite side open for dining and circulation. Place the refrigerator near the entrance so snack traffic avoids the cook.
Arrange a landing surface, sink, preparation stretch, and cooktop in a workable sequence. Even a modest counter gap prevents every task from competing.
2. Use a Galley Only When the Aisle Is Not a Hallway
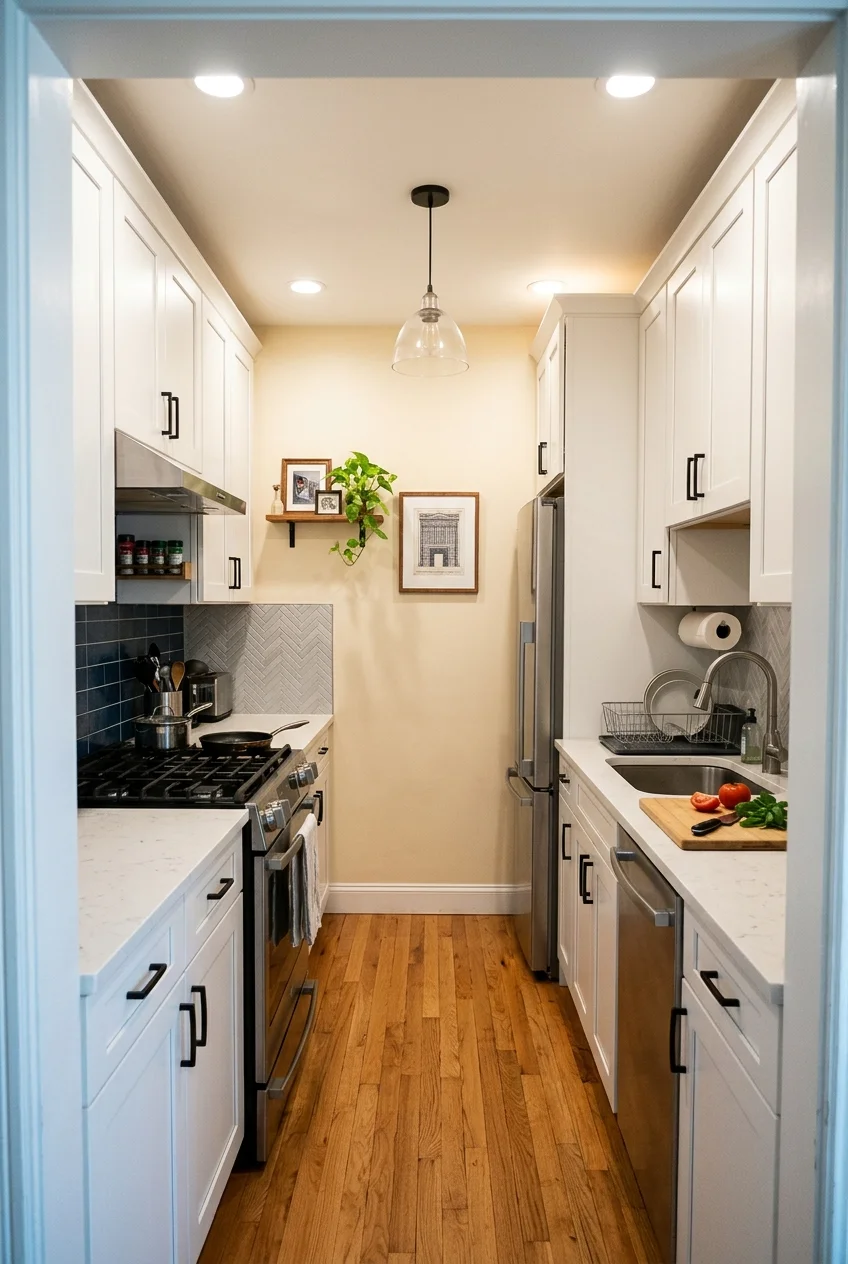
Two short parallel runs can deliver generous storage and counter space. The layout becomes frustrating when residents must cross the cooking zone to reach another room.
Put the sink and main preparation surface together, then place the refrigerator where its open door will not pinch the passage.
Layout check Draw every appliance and cabinet door open at once. Adjust opposing positions before ordering cabinetry, especially where an oven faces a drawer bank.
3. Wrap an L Shape Around a Bright Corner
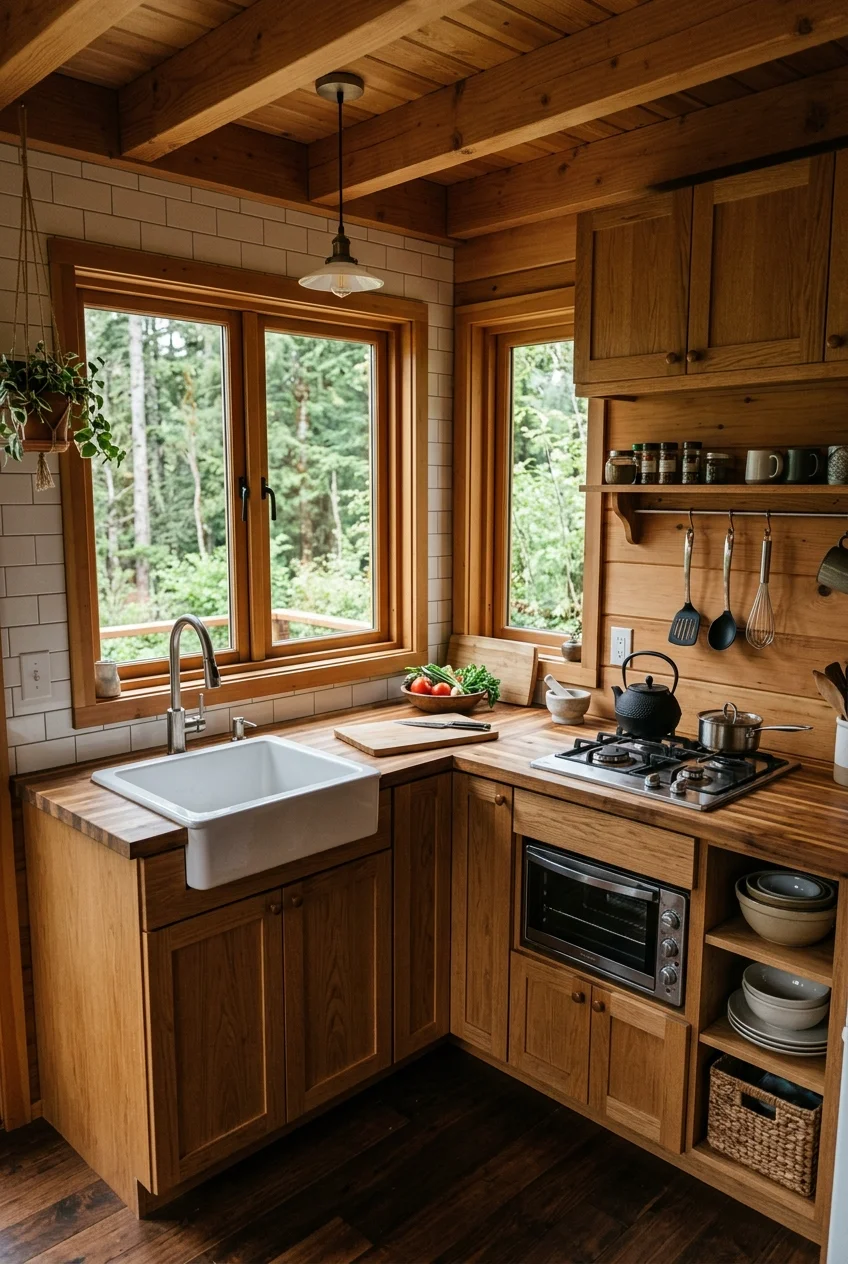
An L-shaped plan creates two useful counter directions without enclosing the room. It suits a tiny house where cooking occupies one open corner.
Keep the corner itself for preparation or storage rather than a cooktop. Pot handles, wall edges, and adjacent backsplashes can crowd active burners.
4. Open One Side of a Compact U Shape
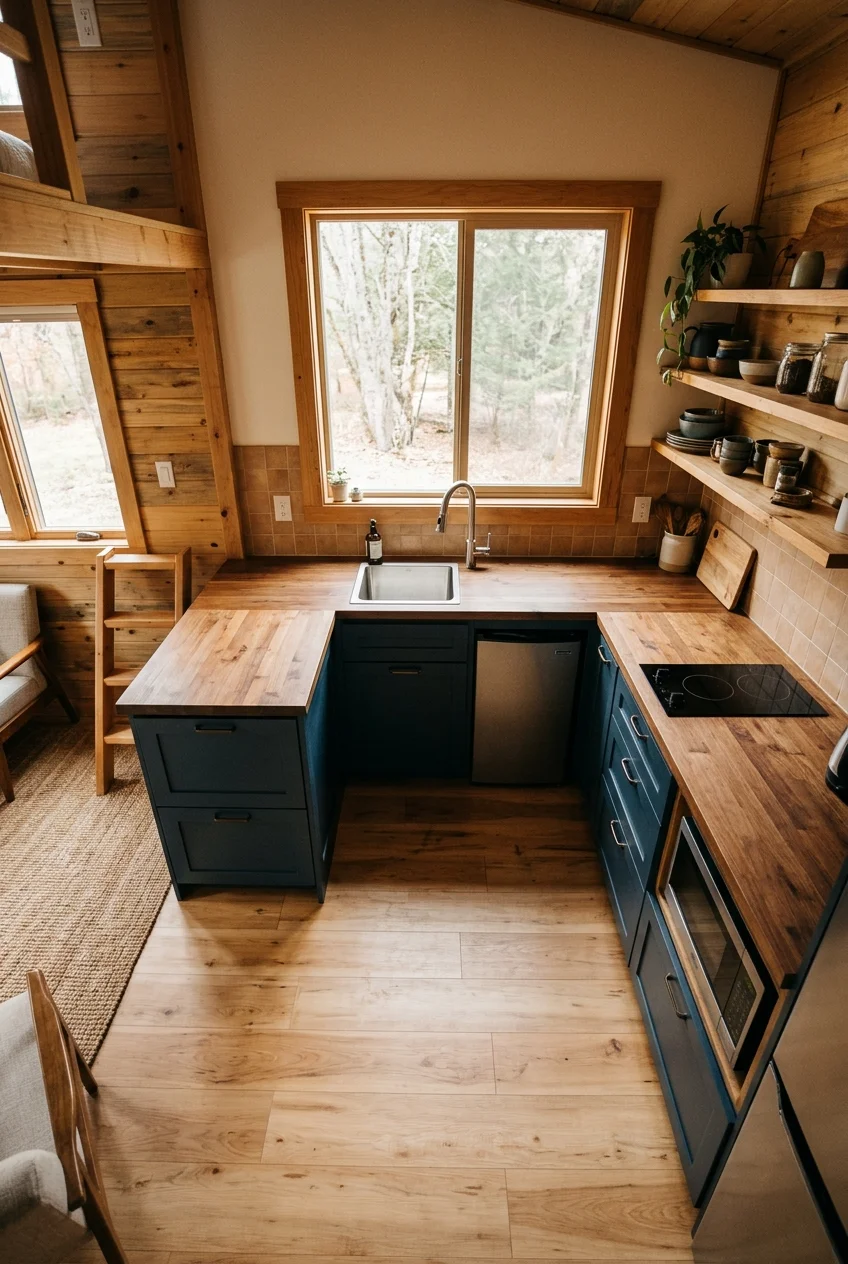
A shallow U can surround one cook with storage while preserving a connection to the living area. Use the open end as the only entry.
Reserve the short return for preparation instead of tall cabinetry. A lower counter keeps sightlines open and gives elbows room near the corner.
This layout needs a careful door study because base cabinets face one another. Wide drawers may work better than hinged doors in the tightest positions.
5. Let a Short Peninsula Replace a Full Island
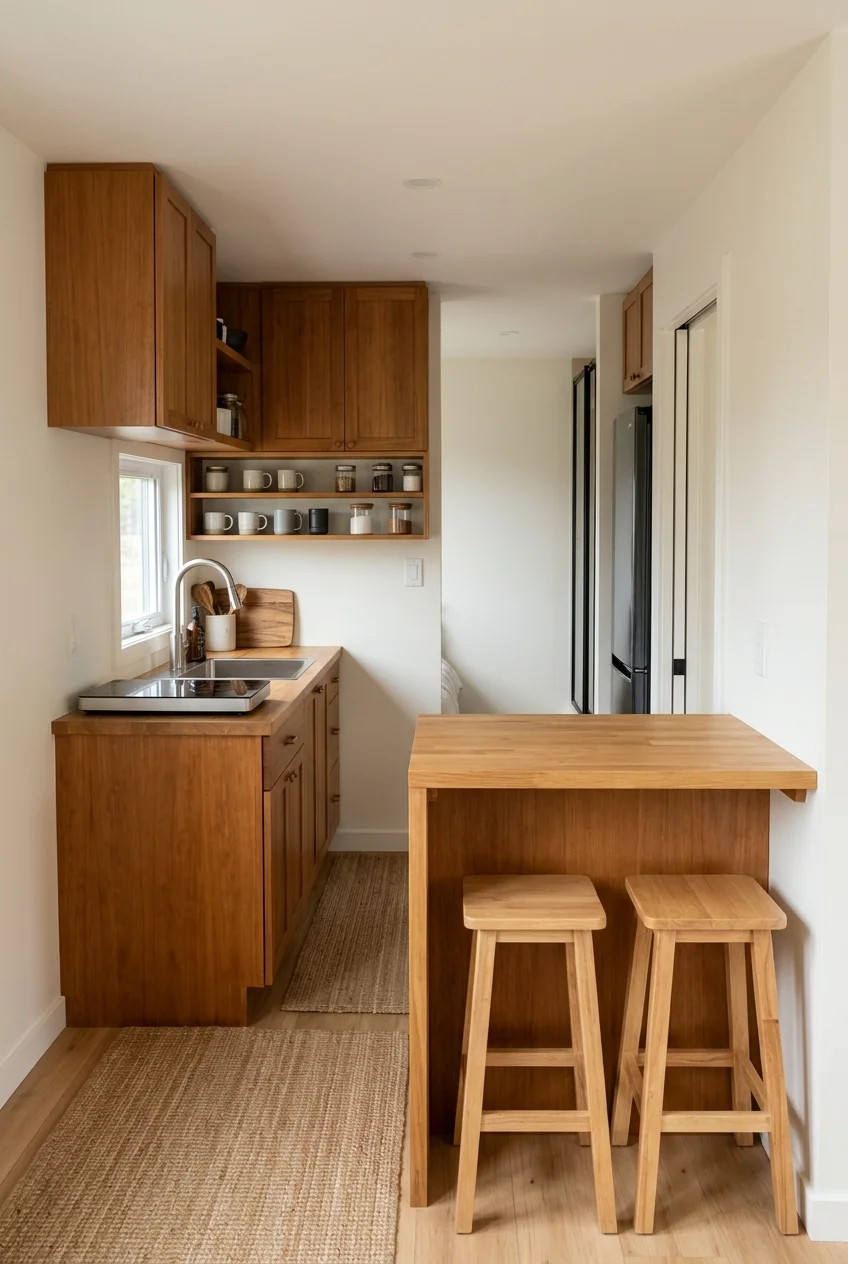
A peninsula can add preparation space and define the kitchen without demanding clearance on four sides. Keep its depth proportional to the room.
One or two backless stools may tuck beneath an overhang, but seating should not block the refrigerator, main entrance, or stair route.
Setup note Mock up the peninsula with taped cardboard before building. Walk past it carrying a laundry basket and open nearby doors during the test.
6. Fit the Kitchen Beneath a Loft Without Crowding the Ceiling
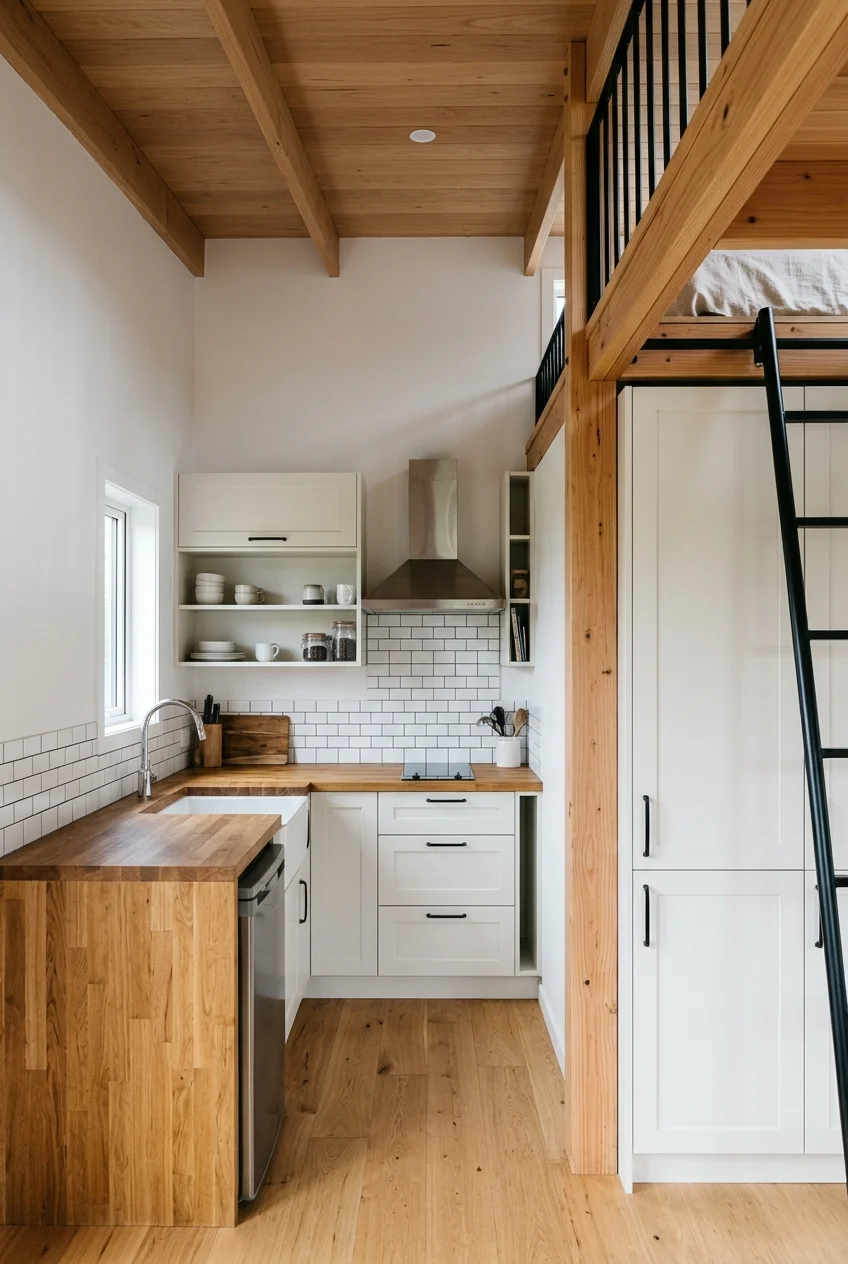
The area beneath a sleeping loft can hold a practical kitchen when headroom, ventilation, and upper storage are planned together. Avoid deep cabinets overhead.
Use full-height storage at the loft edge, then transition to shallower uppers above active counters. That change reduces the boxed-in feeling near the cook.
Confirm the hood and cooking appliance installation requirements before framing. Loft structure cannot substitute for the clearances specified by each product manufacturer.
Place occasional supplies in the deepest loft-edge cabinets, while daily dishes stay lower. Useful storage should not require reaching above hot equipment.
7. Split Wet and Dry Tasks Across Opposing Runs
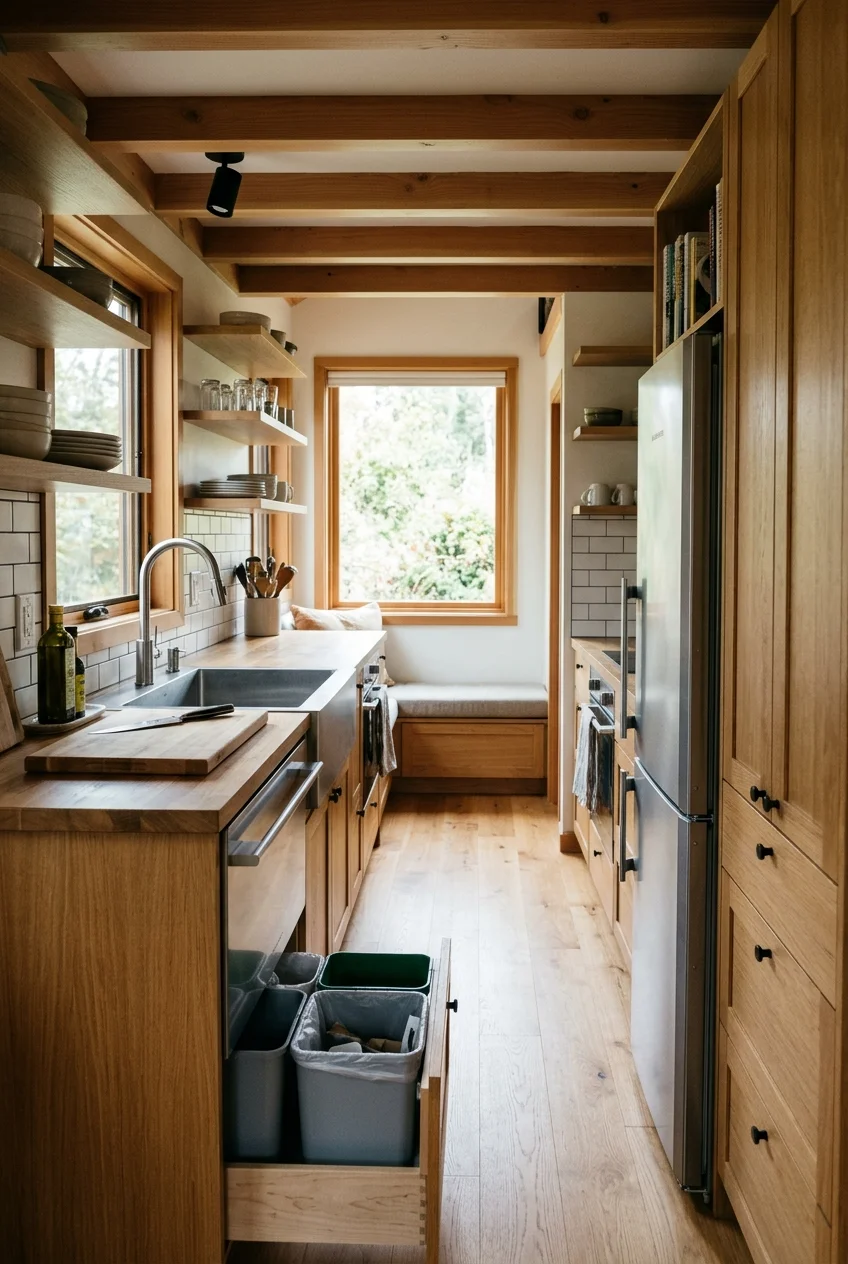
Keep the sink, dishwasher, and plumbing on one wall, then place pantry storage and refrigeration opposite. Concentrated utilities can simplify a new build.
Leave the strongest preparation surface beside the sink, not across the aisle. Carrying dripping produce between runs turns a clever plan into daily cleanup.
- Wet run: sink, dish storage, and waste
- Dry run: refrigerator, pantry, and small appliances
- Either end: cooking, when ventilation and clearances allow
8. Turn the Stair Wall Into a Stepped Kitchen
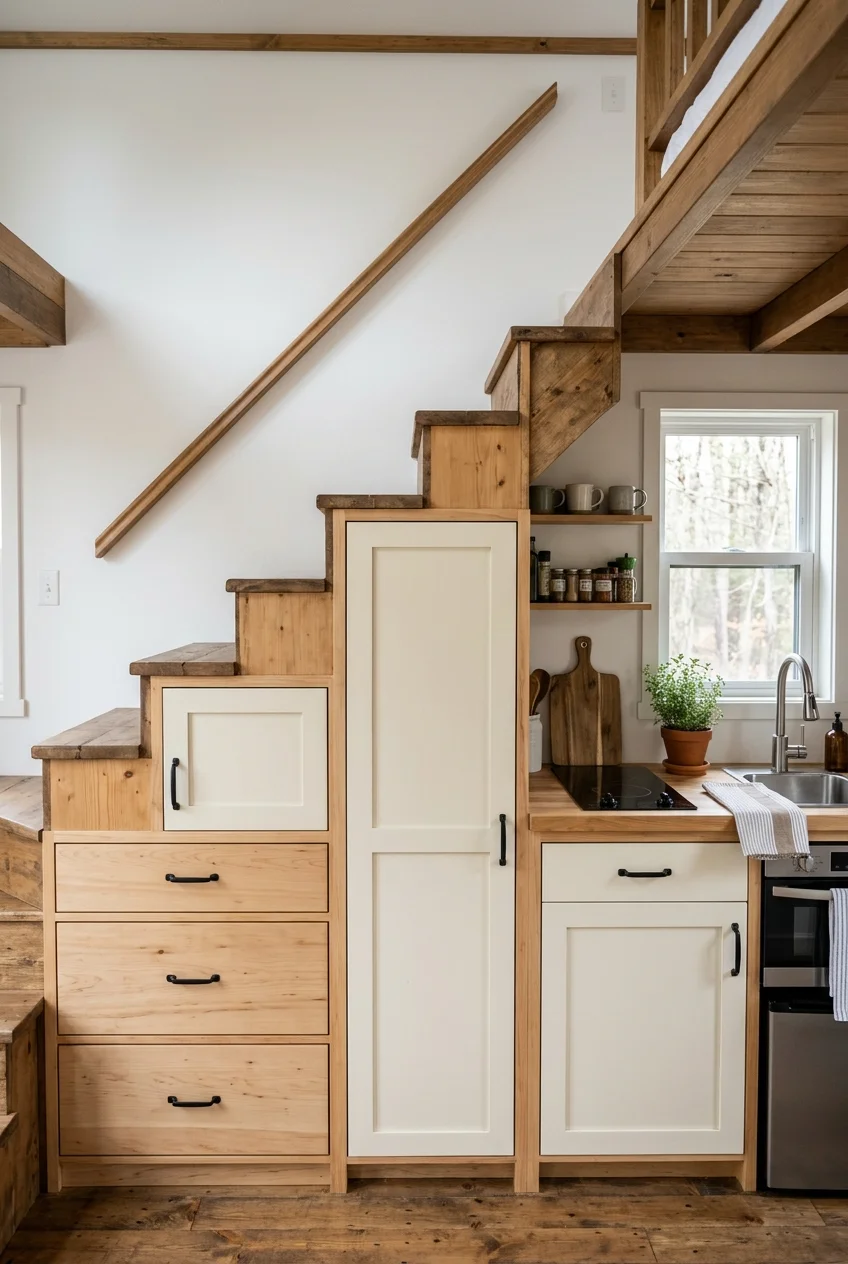
Cabinetry can follow the underside of a loft stair, using low sections for drawers and taller sections for pantry storage. The changing height becomes intentional.
Keep food preparation on a standard, continuous counter rather than forcing it beneath the lowest steps. Irregular niches suit trays, linens, or seldom-used cookware.
A stair and its surrounding cabinetry require coordinated structural planning. Do not cut stringers or conceal required access points to gain another shelf.
Template each sloped compartment before ordering drawers. A front may look generous while the stair angle removes most useful depth behind it.
9. Place the Kitchen Across the Short End Wall
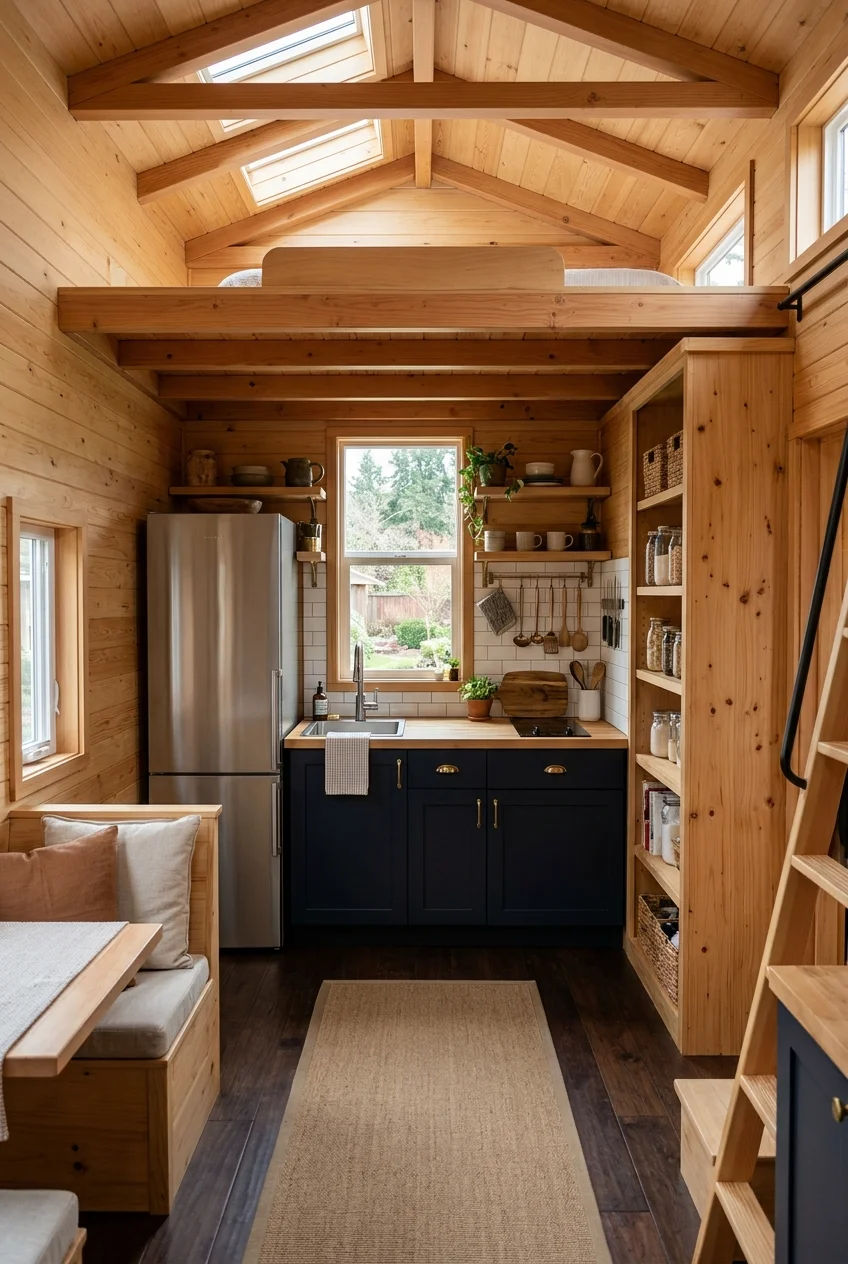
An end-wall kitchen can make a long tiny house feel calmer because cabinetry occupies one visual destination. It also preserves flexible floor area.
Choose a compact sink and cooking setup, then protect one usable preparation stretch between them. Tall units belong at the outer edges, not the center.
This plan suits simple cooking better than elaborate meal production. Add a nearby dining table as overflow only when it does not interrupt the main aisle.
10. Park a Movable Island Against the Wall
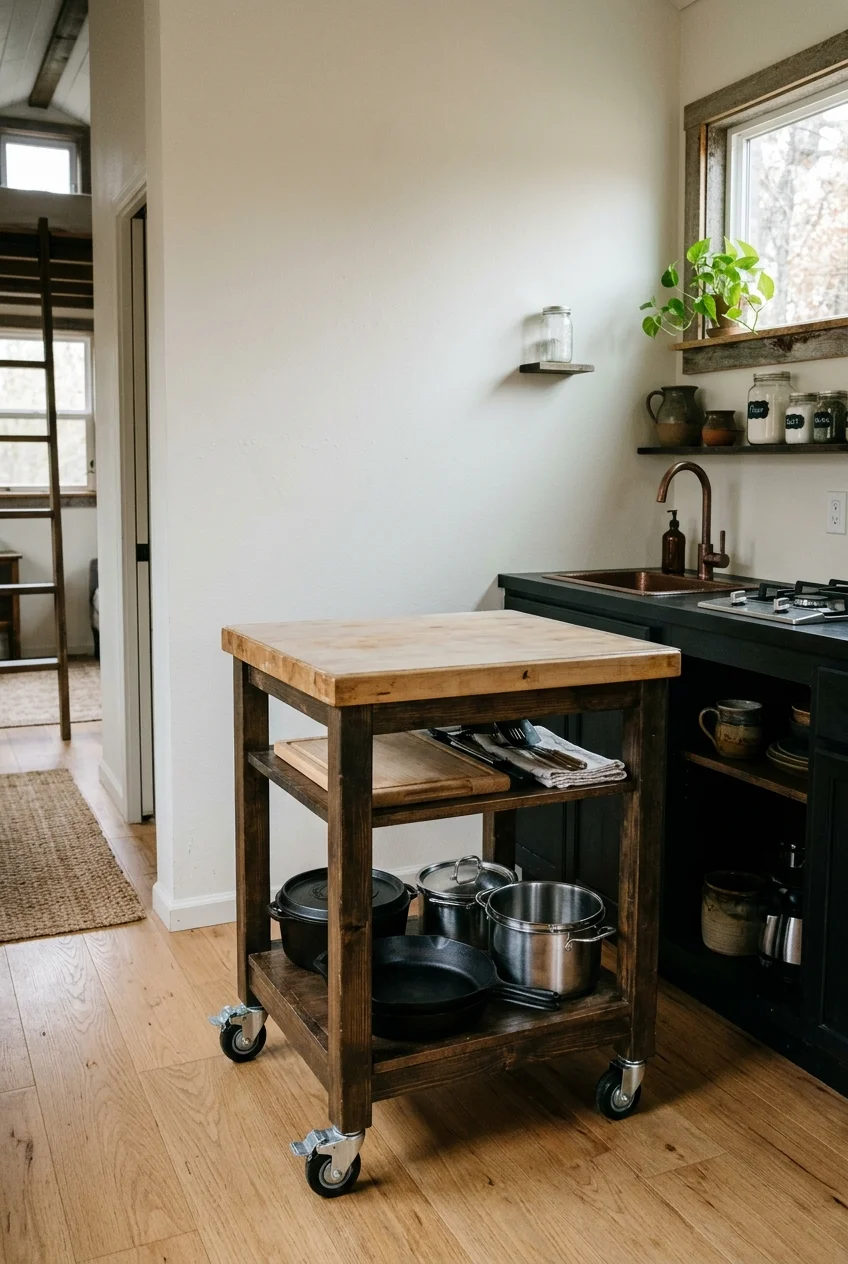
A small island on locking casters can work as a counter, serving station, or dining surface. Park it against a wall between active tasks.
Select a stable base with a wipeable top and place heavy items low. Wheels should lock firmly before chopping or setting down hot cookware.
- Parked position that leaves the aisle open
- Working position beside the main counter
- Serving position near the dining seats
Surfaces That Earn Their Space
Counter space feels larger when one surface can change jobs without complicated setup. Prioritize sturdy additions that disappear or store easily after use.
11. Bridge the Sink With a Removable Work Board
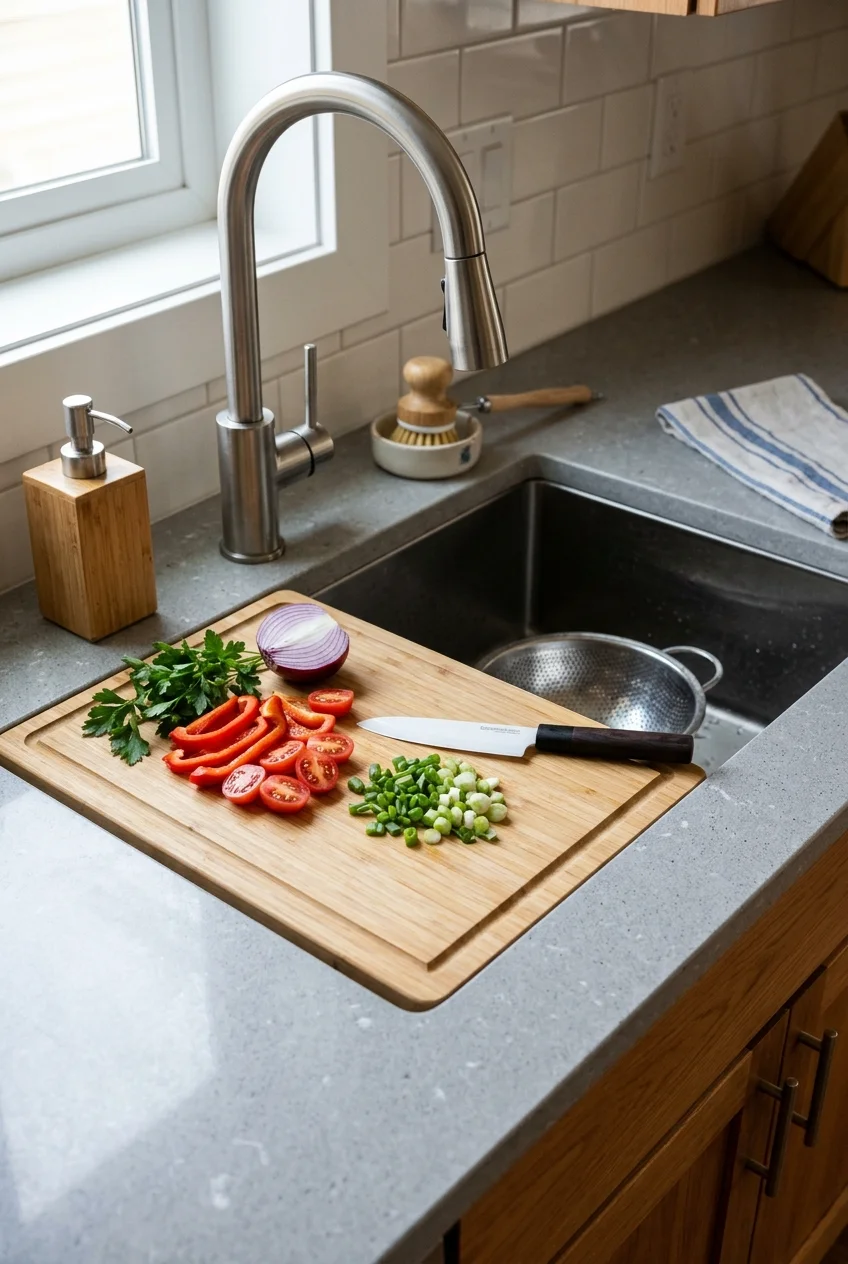
A fitted board can turn the sink into temporary chopping or plating space, then lift away when washing begins. It should rest securely without rocking.
One current option is an expandable bamboo over-sink cutting board; the connector lists a 24-to-33.9-inch range, but measure the sink and supporting ledges before choosing it.
Keep an additional heat-safe landing place available. A sink cover cannot serve prep and dishwashing at the same time during a busy meal.
12. Slide a Cutting Board Above a Drawer
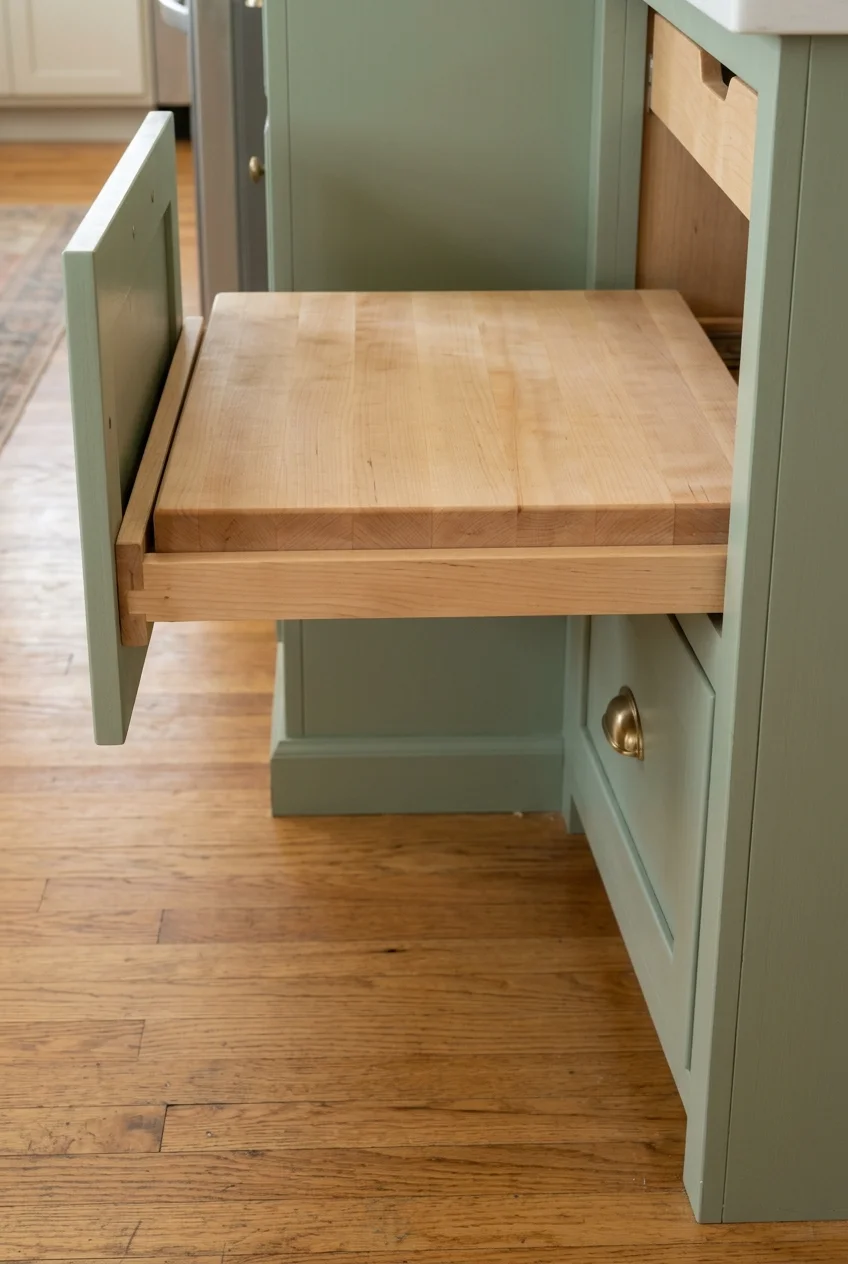
A pull-out board adds preparation space without changing the kitchen footprint. Position it where an open board will not trap someone inside the aisle.
Choose a removable food-safe surface that can be cleaned thoroughly. The supporting slides and cabinet construction must suit the intended load and use.
Watch for A board directly above the trash bin may simplify scraping, but it also needs a clean separation from waste and easy access for washing.
13. Mount a Drop-Leaf Counter on a Clear Wall
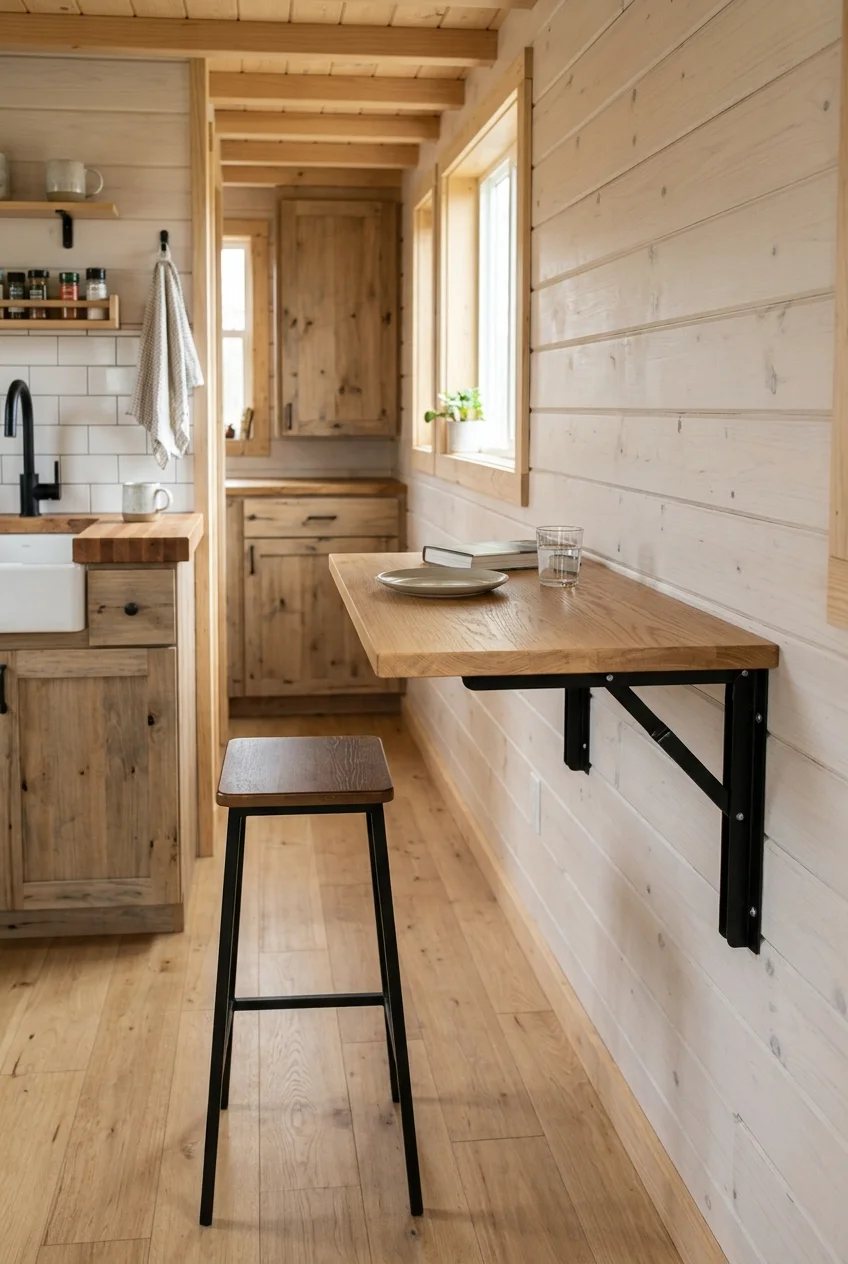
A wall-mounted leaf can become breakfast seating or pastry space, then fold nearly flat. It works best outside the main cabinet-door swing zone.
Secure the support system to an appropriate structure and follow its rated limits. A folding surface should not wobble when someone leans lightly while seated.
- Mark the open and folded footprints on the wall and floor.
- Test the route past both positions.
- Choose stools that store elsewhere or hang safely.
14. Use a Slim Cart as a Mobile Landing Zone
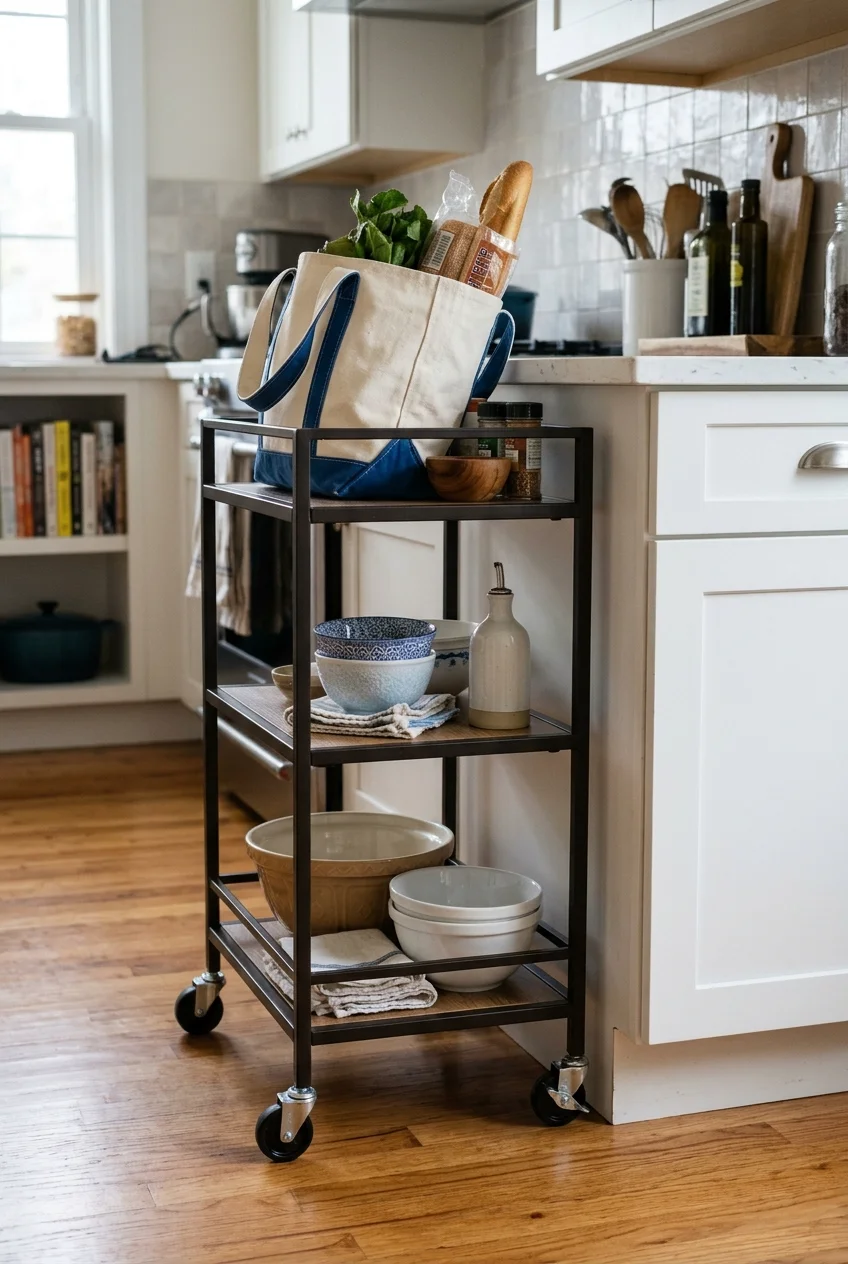
A narrow cart can receive groceries, hold mixing bowls, or move finished dishes toward the table. Give it one defined parking location.
Measure the cart with handles, towel bars, and wheels included. Published product widths often describe the body rather than every protruding part.
15. Add a Hinged Counter Extension at the Cabinet End
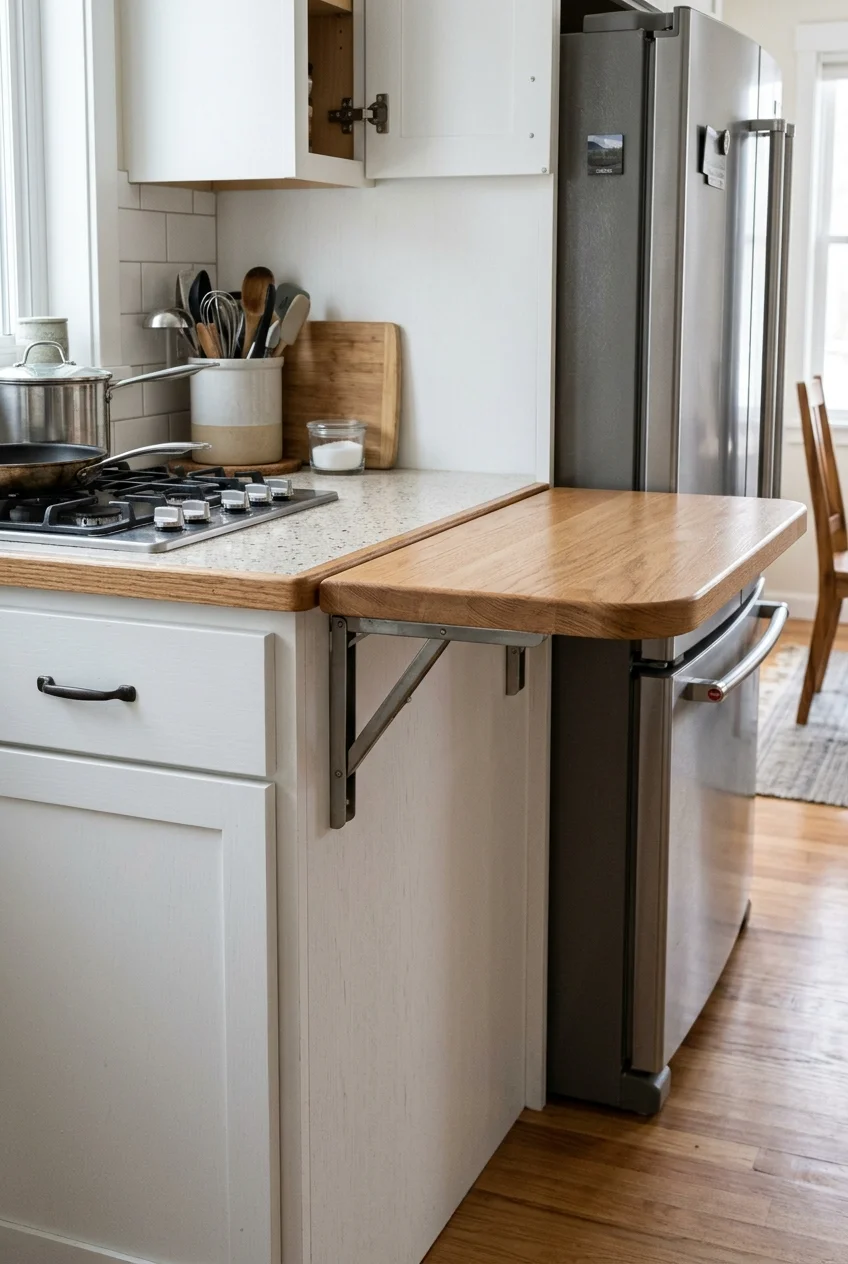
A small flip-up leaf adds a valuable landing place beside the range or refrigerator. Fold it down whenever the walkway needs its full width.
Keep the extension outside heat and door-clearance zones. Its bracket, cabinet side, and fasteners must support the planned use without stressing thin panels.
This is most useful for brief tasks, such as unloading groceries or setting down a mixing bowl, rather than permanent appliance storage.
16. Protect One Uninterrupted Preparation Stretch
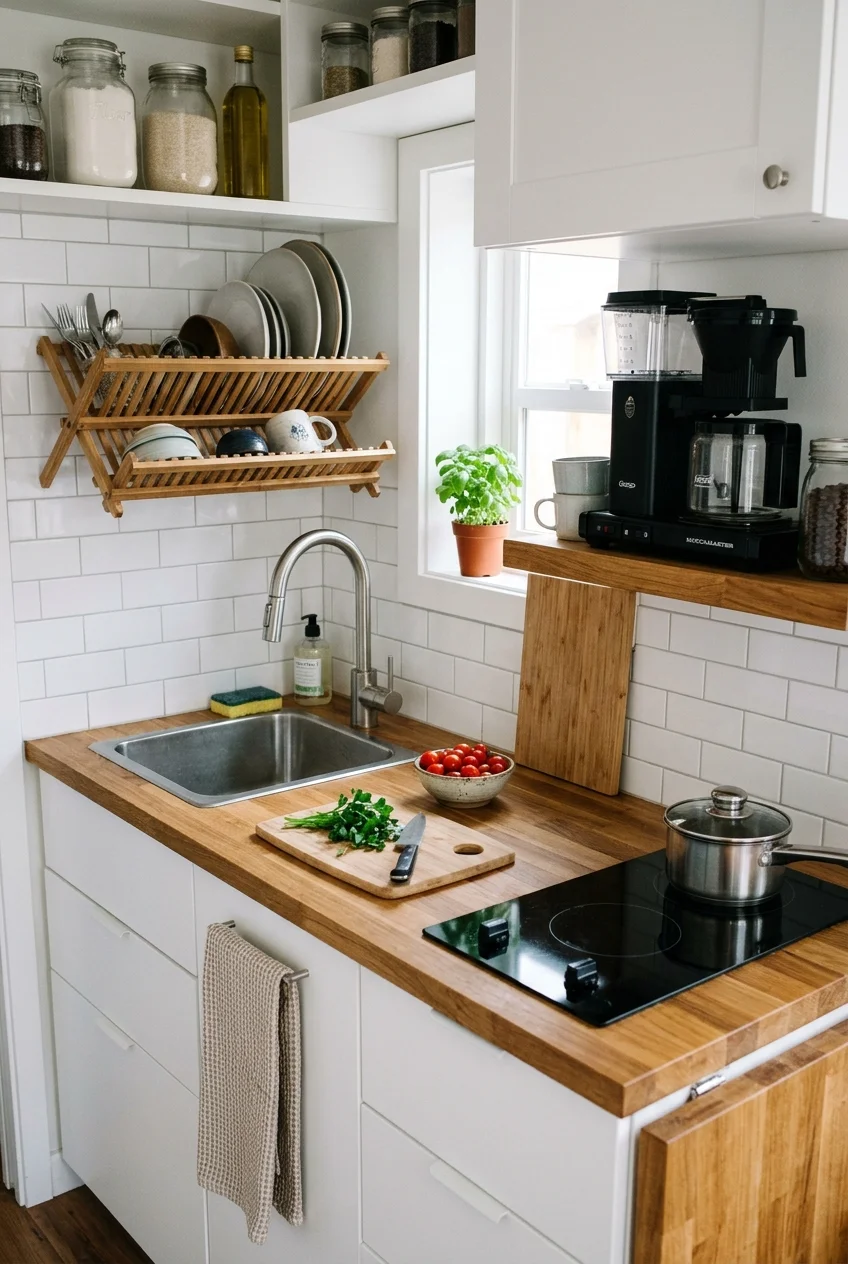
Several tiny counter fragments are less useful than one continuous work area. Group the sink and cooktop so at least one stretch remains clear.
Move the coffee maker, dish rack, and utensil crock elsewhere before expanding cabinetry. Better zoning may recover the surface you already own.
Practical tip Mark a no-storage rectangle with removable tape for one week. If objects repeatedly return, create a specific home for each one nearby.
17. Build a Shallow Ledge Into the Backsplash
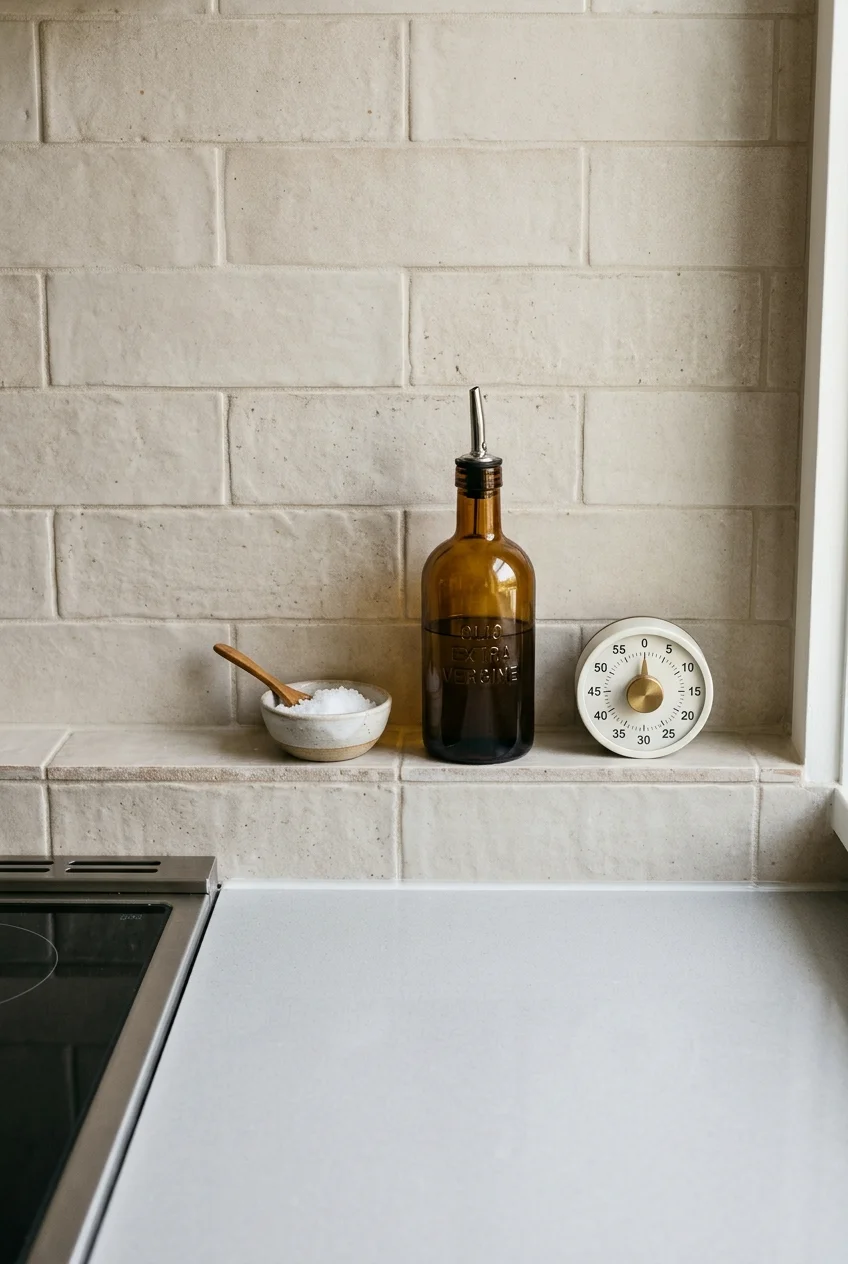
A narrow ledge can hold salt, oil, or a timer without consuming the main worktop. Keep it shallow enough to avoid head-level clutter.
Place everyday ingredients away from direct heat and splashes, using containers suited to their contents. The ledge should remain easy to wipe completely.
A continuous ledge also gives the backsplash a deliberate horizontal line, especially when upper cabinets are limited or deliberately omitted.
18. Let the Dining Table Handle Big Prep Jobs
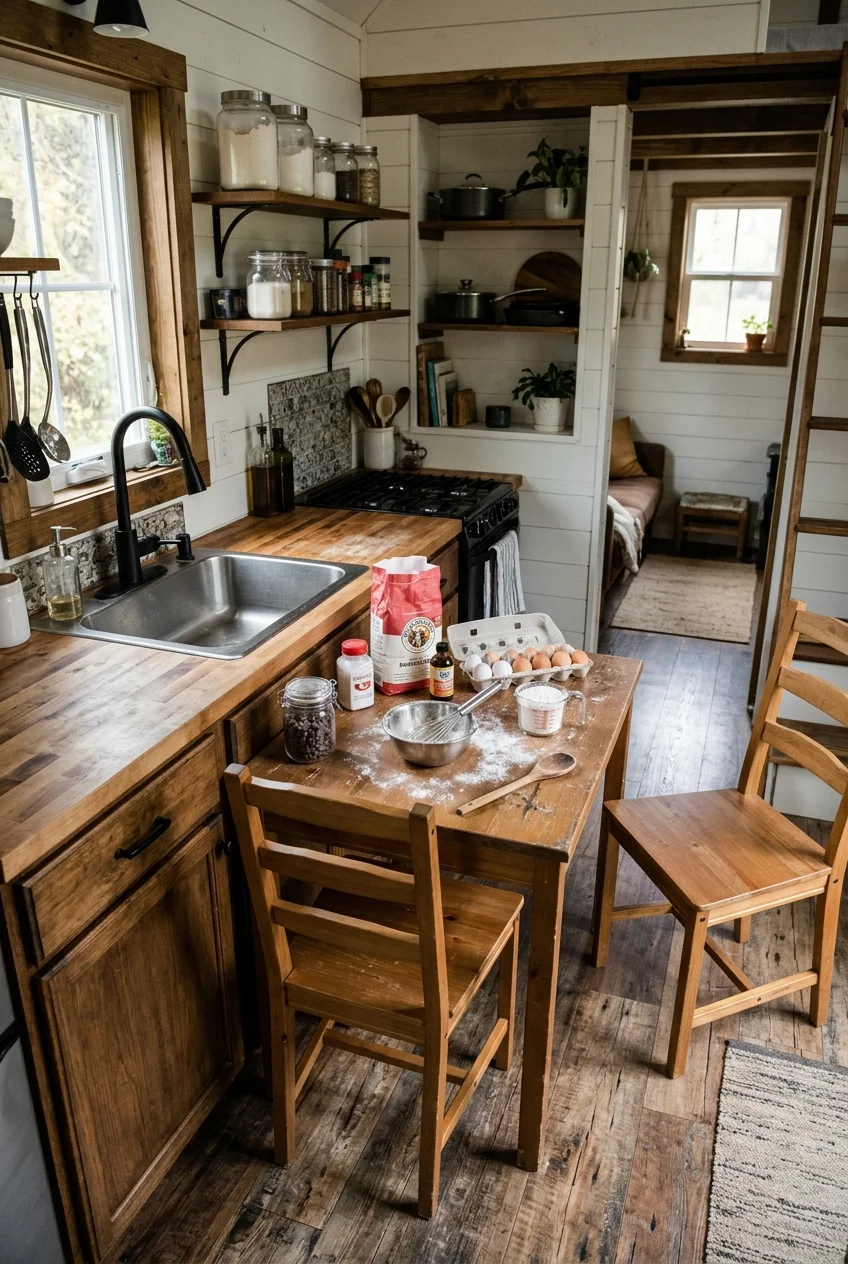
A nearby table can absorb rolling, sorting, or serving tasks that overwhelm the counter. Choose a washable surface and a comfortable working relationship.
Keep the route from sink to table short and unobstructed. Carrying wet ingredients across a sofa zone undermines the convenience of shared furniture.
- Daily dining with chairs in place
- Occasional prep with one chair moved
- Serving buffet with the cooking aisle still open
19. Create a Landing Shelf Beside the Refrigerator
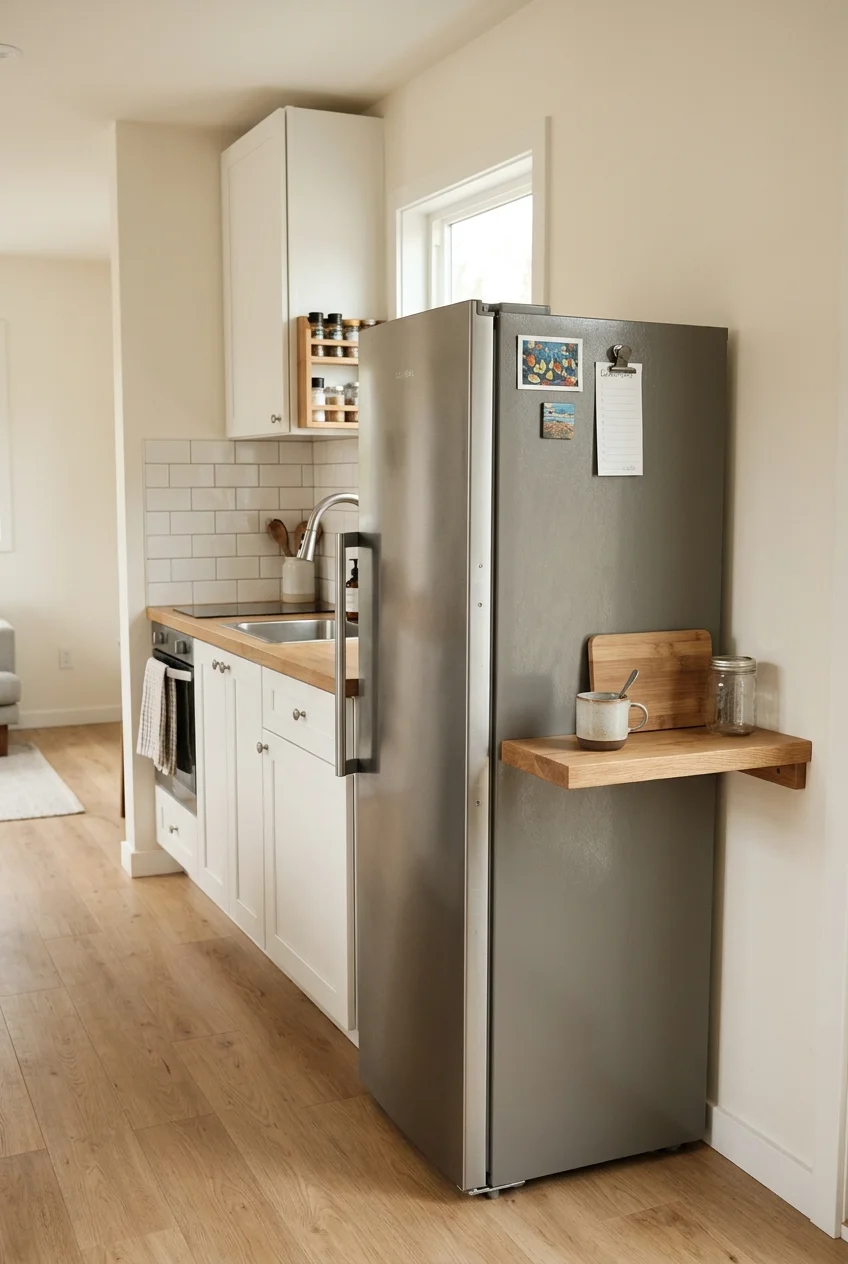
A small shelf beside the refrigerator gives groceries and containers somewhere to land. Without it, the nearest usable counter may sit across the room.
The shelf may be fixed, folding, or part of a pantry cabinet. Keep it outside the refrigerator door arc and the principal walking line.
20. Reserve a Corner Nook for One Daily Appliance
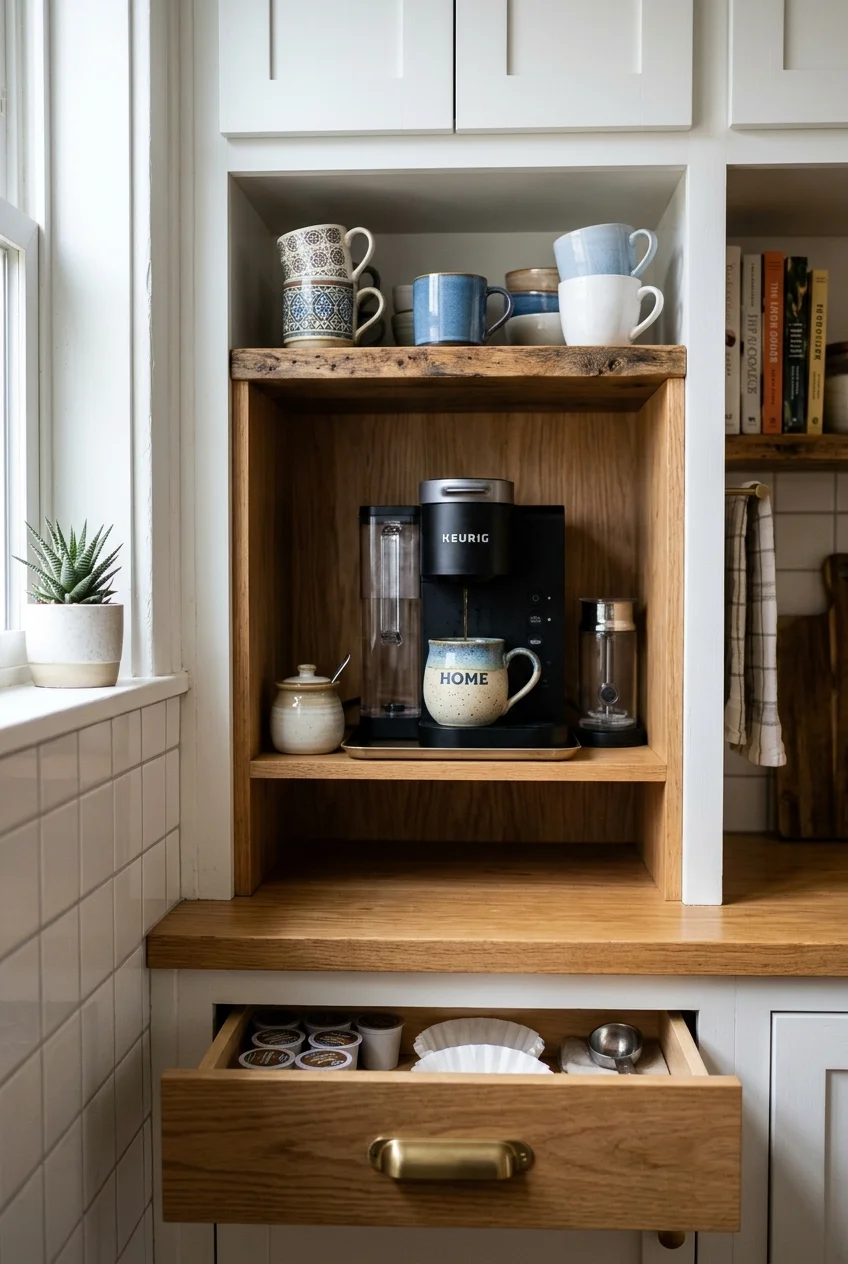
A counter corner can house one frequently used machine while leaving the main prep zone open. Choose the appliance based on routine, not aspiration.
Confirm ventilation, steam, heat, and operating clearances in its instructions. A decorative cabinet nook is not automatically safe for an appliance while running.
Store attachments immediately above or below the machine so the nook remains a complete station rather than a parking spot for unrelated clutter.
Cabinetry That Uses Every Layer
Good compact cabinetry reveals its contents without requiring a scavenger hunt. Use height, depth, corners, and door backs according to what they hold.
21. Choose Drawers for the Main Base Cabinets
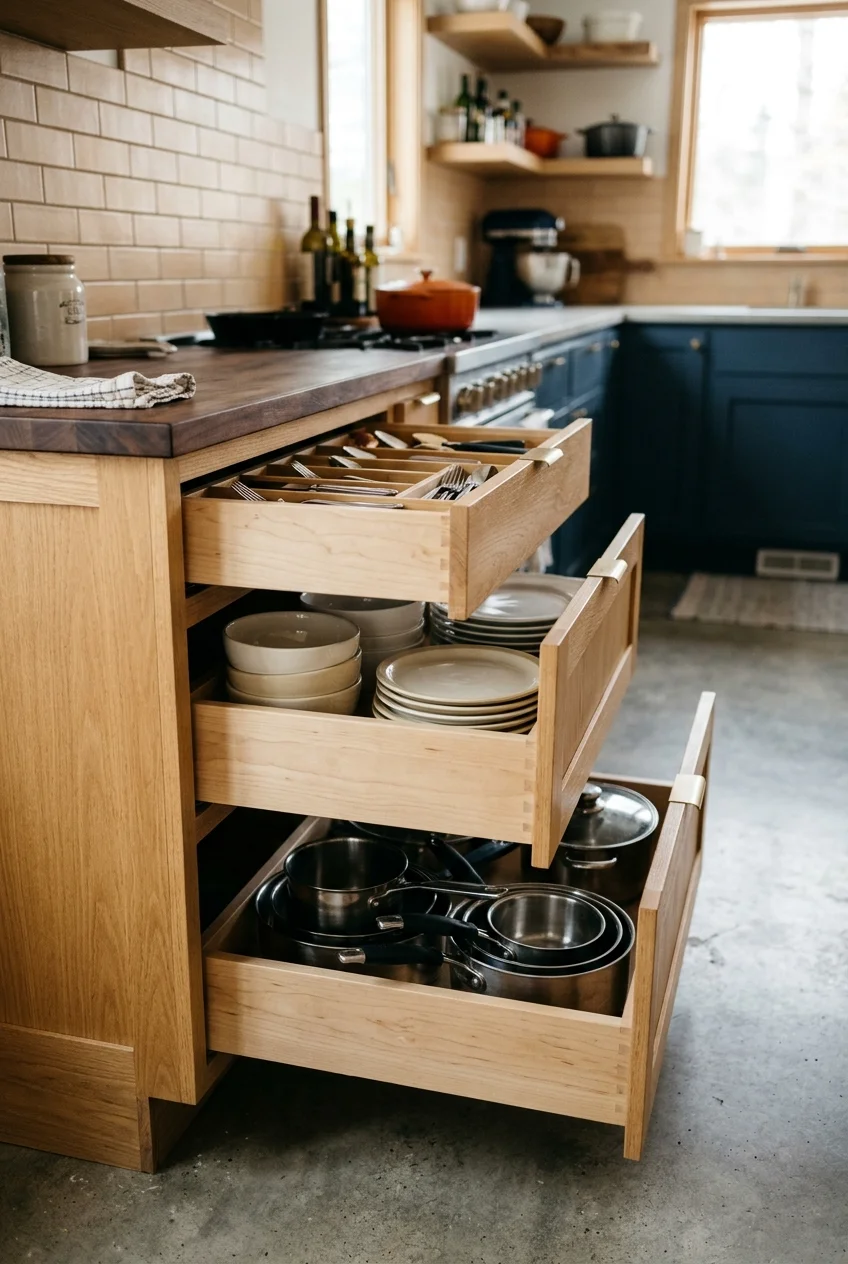
Wide drawers bring cookware and dishes forward, so nothing disappears behind a front row. They also reduce kneeling and reaching into dark cabinets.
Assign drawer depth before ordering: shallow for cutlery, medium for dishes, and deep for pots. Avoid paying for depth that small objects cannot use.
Check handles and drawer fronts against opposing cabinets. A well-organized drawer still fails if another open door blocks its full extension.
22. Hide Flat Items in a Sealed Toe-Kick Drawer
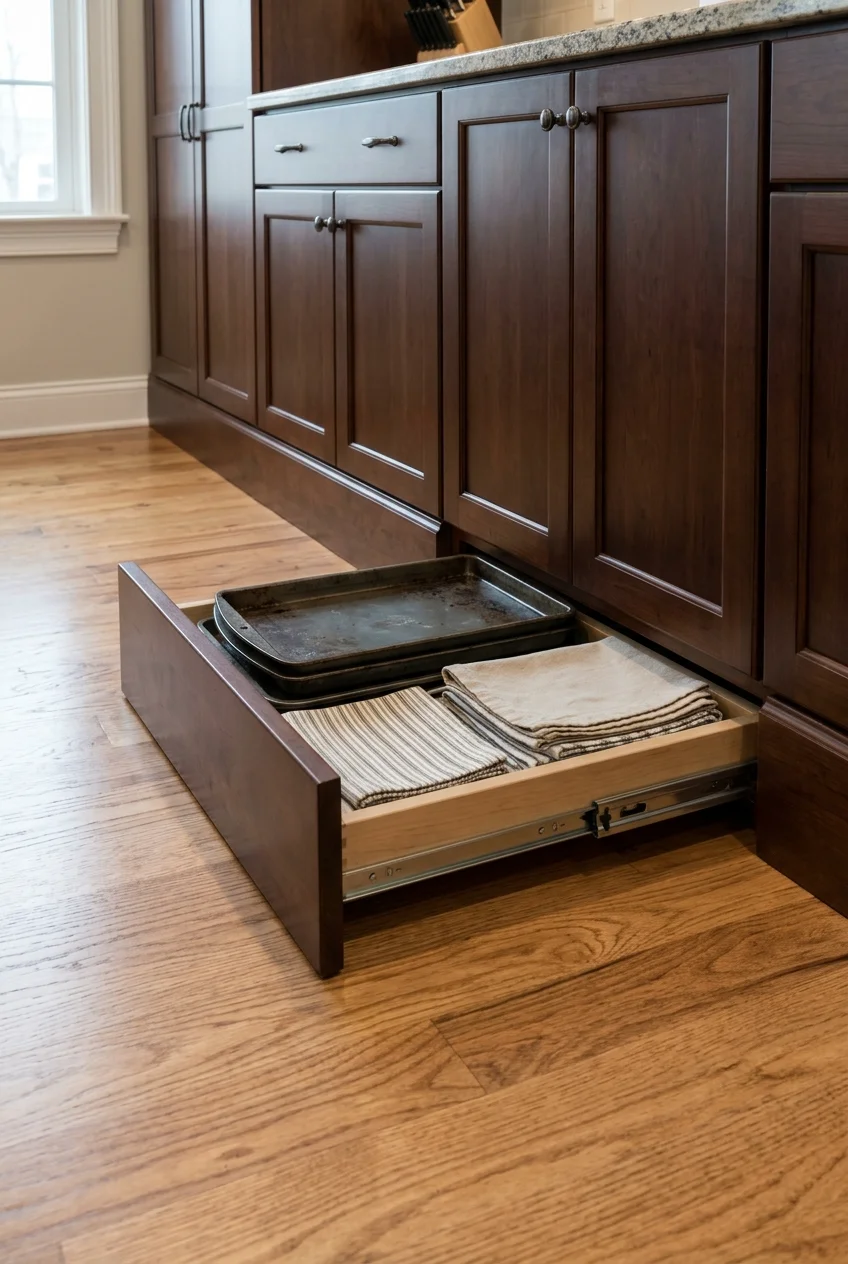
The recessed space beneath base cabinets can store trays, placemats, or seldom-used baking tools. A fitted drawer keeps those items away from floor dust.
For more ways to use overlooked cabinet layers, compare these kitchen storage ideas before deciding which retrofit deserves your limited budget.
Toe-kick work requires compatible cabinet construction and hardware. Keep the drawer shallow, easy to remove for cleaning, and clear of utilities.
23. Install a Narrow Pull-Out Pantry Between Tall Units
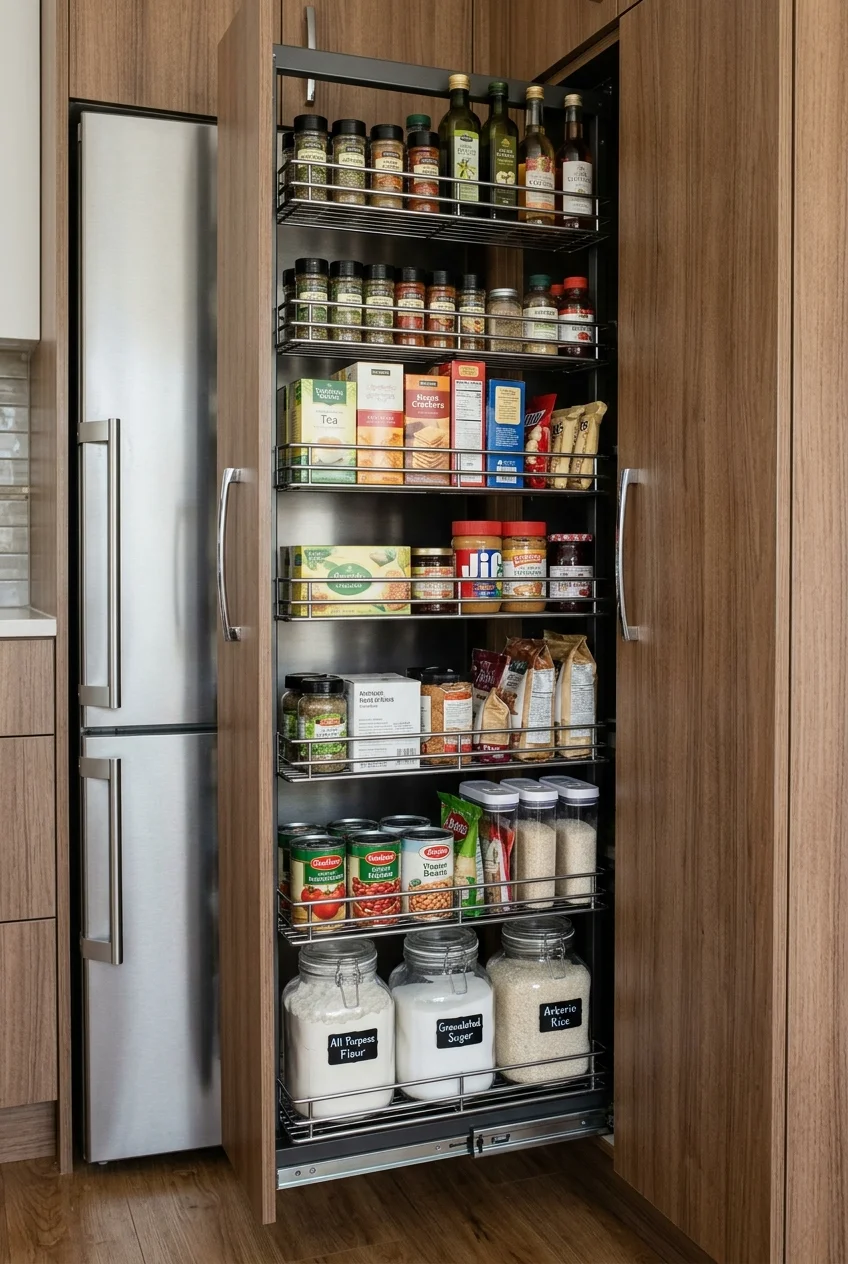
A slim pull-out pantry uses a narrow gap while exposing stored goods from both sides. Shallow shelves prevent cans and bottles from forming hidden rows.
Place heavier items low and fit rails that contain them during movement. In a mobile tiny house, storage also needs secure travel restraints.
Existing kitchens may need a simpler retrofit; these small kitchen storage solutions include alternatives that do not depend on custom tall cabinetry.
Reserve clear floor space for the pantry's full travel. A pull-out that collides with a cart or stool will remain frustratingly underused.
24. Box In the Refrigerator With Useful Upper Storage
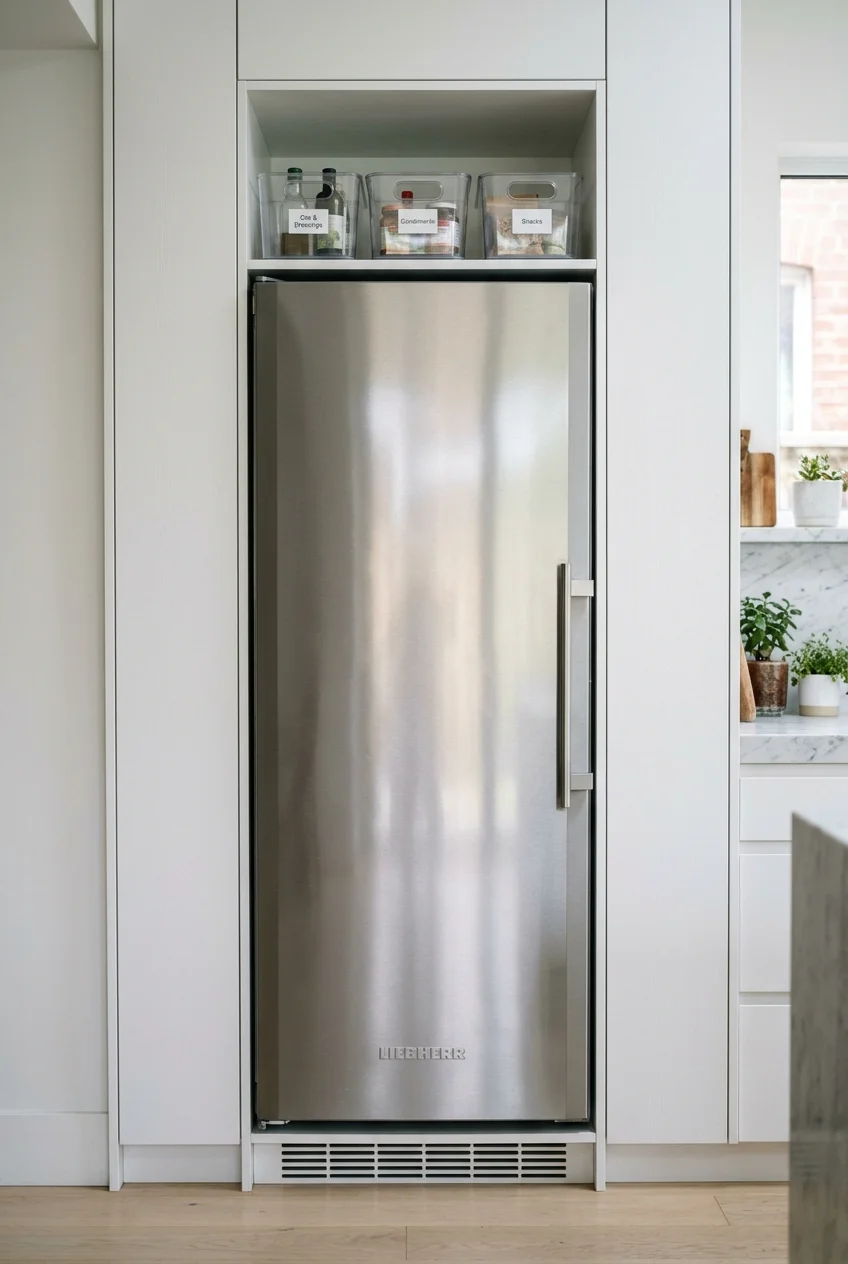
A cabinet above the refrigerator can hold light, infrequently used serving pieces while making the appliance wall feel finished. Depth should suit reachable storage.
Follow the refrigerator instructions for ventilation and surrounding clearances. Cabinet panels must not block required airflow or prevent service access.
Use a lift-up or paired door only when it can open comfortably below the ceiling. Store items in handled bins to simplify retrieval.
25. Take Upper Cabinets to the Ceiling
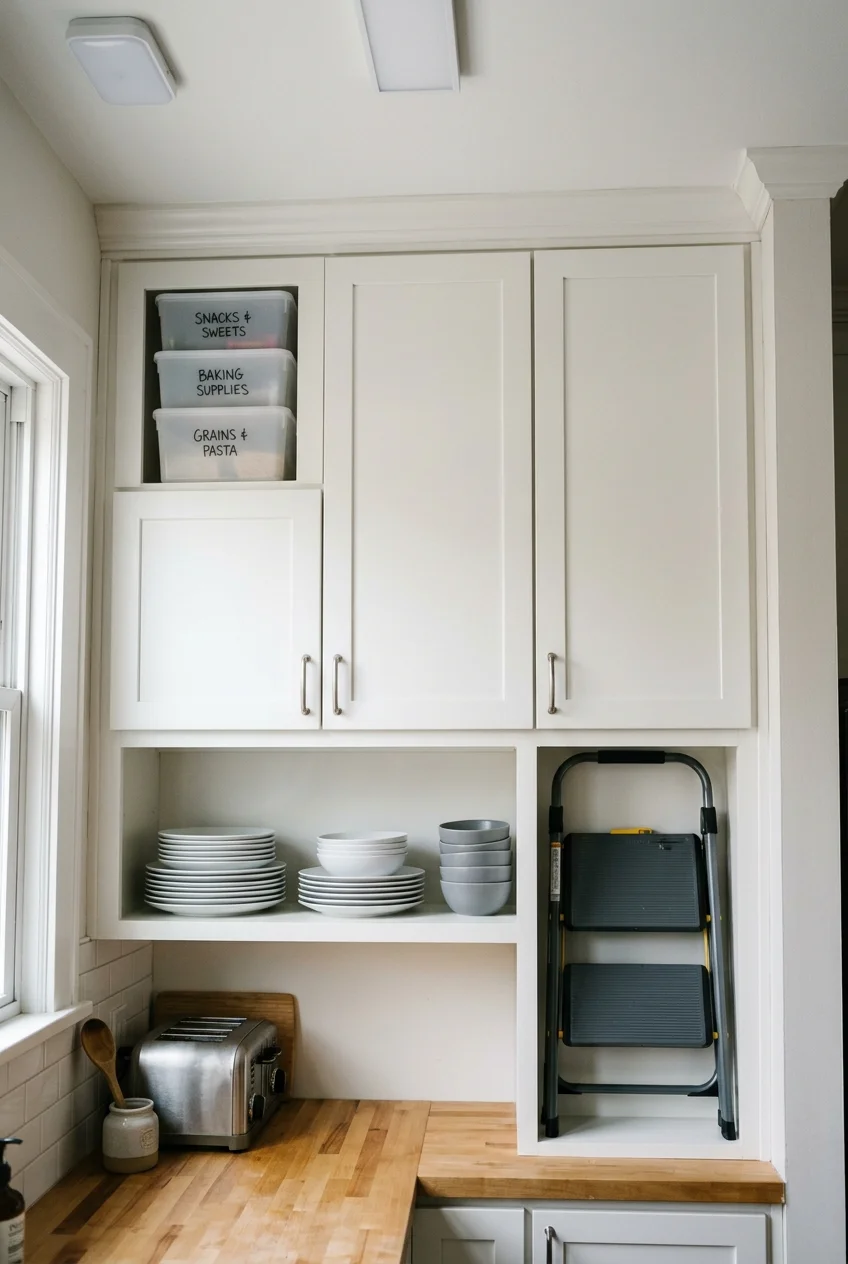
Ceiling-height cabinets eliminate the dusty ledge above standard uppers and add storage for lightweight, occasional items. Keep daily dishes on reachable shelves.
Use consistent fronts so the tall bank reads as one calm surface. Glass doors at the highest level usually reveal clutter without improving access.
Access note Plan a stable, stowable step stool and a safe place to open it. Never rely on counters or movable chairs for high storage.
26. Limit Open Shelves to Everyday Dishes
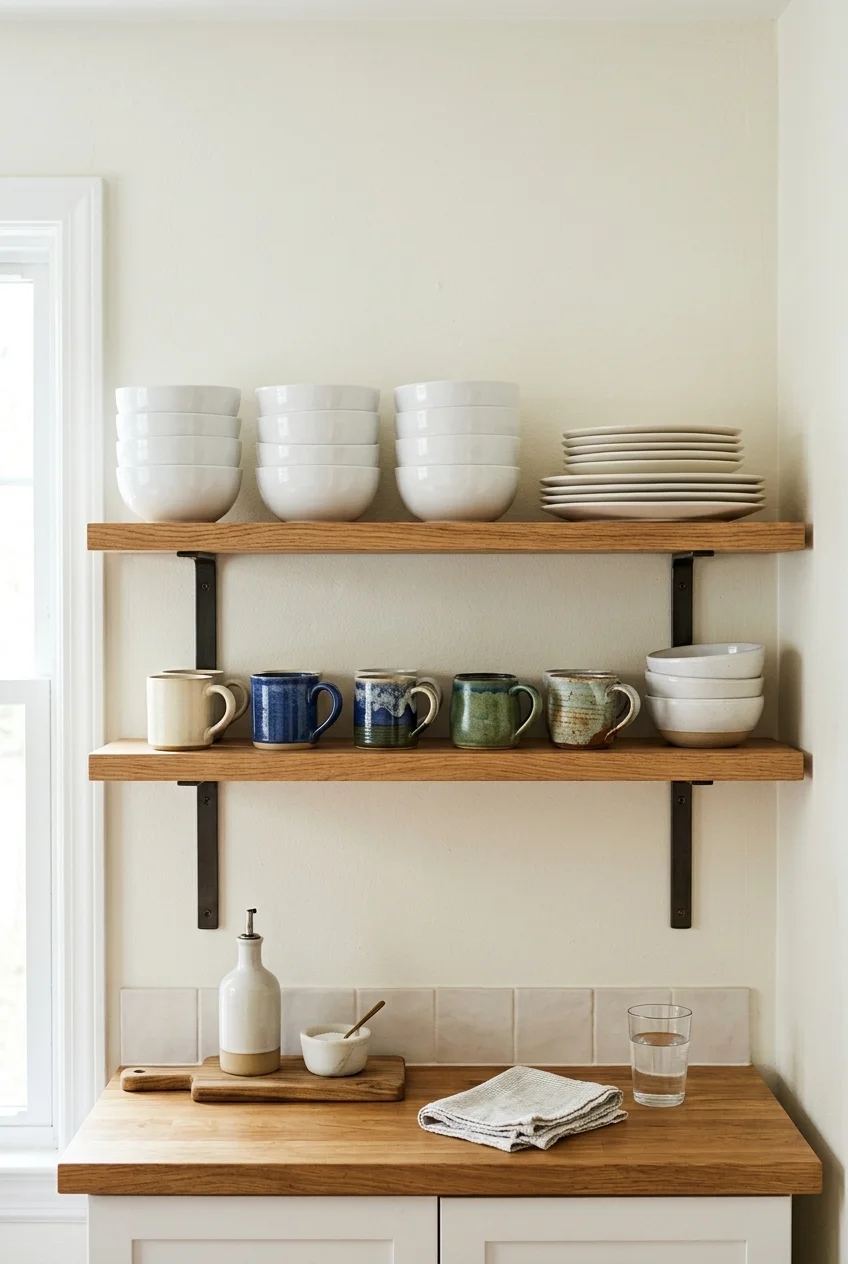
One or two open shelves can keep daily bowls and mugs close while making the wall feel less heavy. They are not free storage.
Place shelves away from cooking grease and size them for the actual stack. Leave enough clearance to lift the tallest item without tilting.
If dishes sit unused for weeks, move them behind doors. Open storage succeeds when frequent washing naturally controls ordinary dust.
27. Add a Shallow Dish Shelf Above the Sink
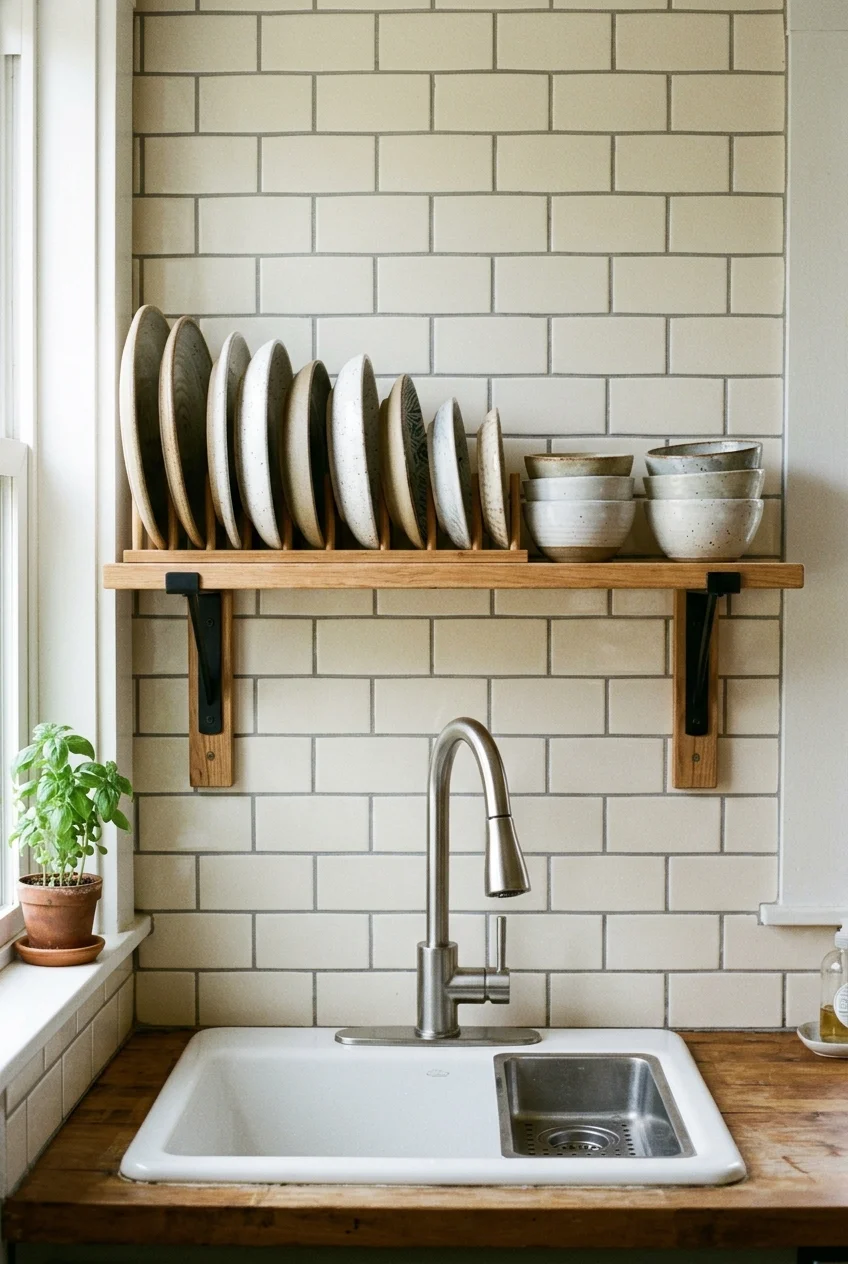
A compact dish shelf can store the plates used every day directly above the washing zone. Shallow depth keeps the work area from feeling enclosed.
Choose a design that handles moisture appropriately and does not drip onto vulnerable surfaces. Keep breakables secure, especially in a movable home.
The shelf can match the cabinets or become one contrasting line. Its dimensions should follow the dishes, not an arbitrary decorative proportion.
28. Make One Pegboard a Flexible Tool Wall
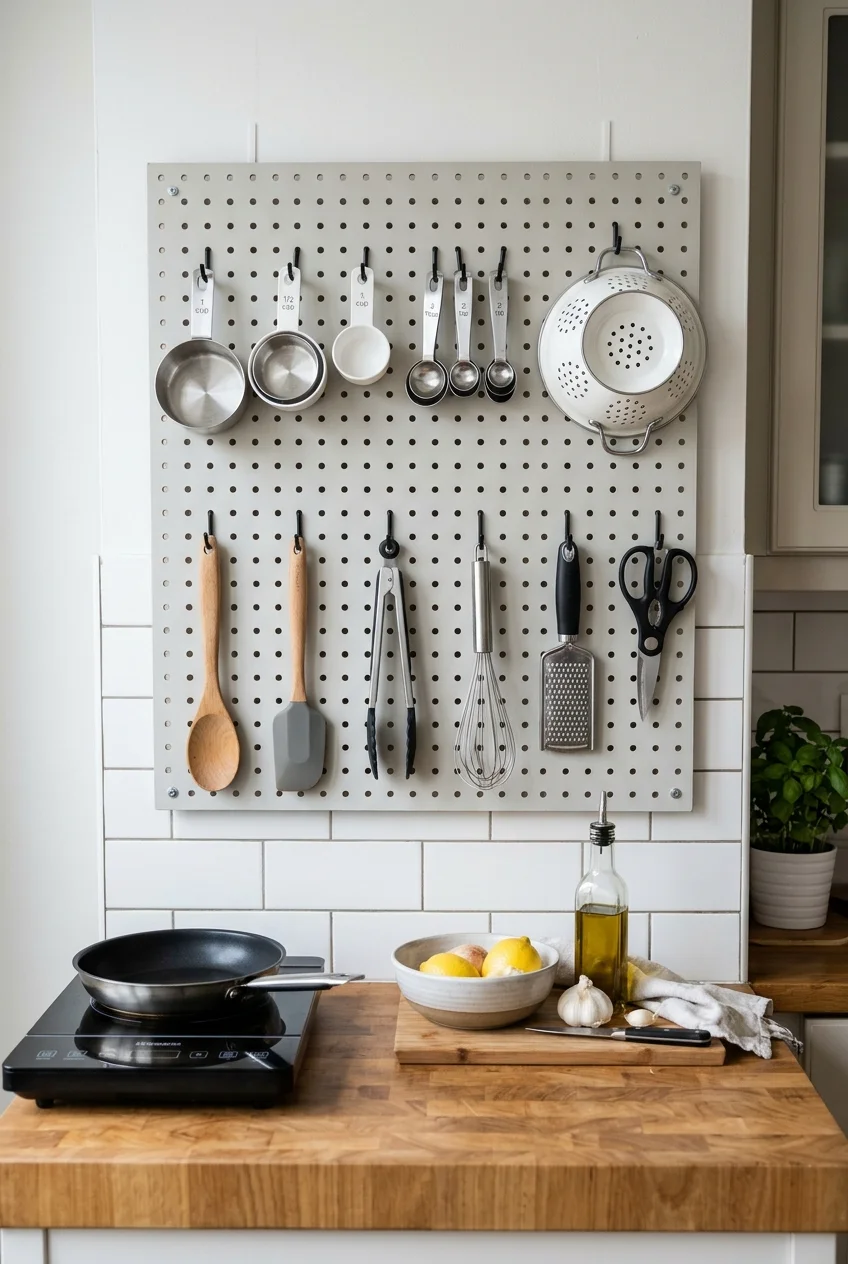
A properly spaced pegboard can hold measuring tools, a small colander, and lightweight pans. Hooks move when the utensil collection changes.
Mount it with the required gap behind the panel and support it for the planned load. Keep sharp tools away from exposed edges and children.
- Cooking tools closest to the range
- Measuring tools beside the prep surface
- Cleaning brush near the sink, but outside splash water
29. Run a Utensil Rail Along the Prep Zone
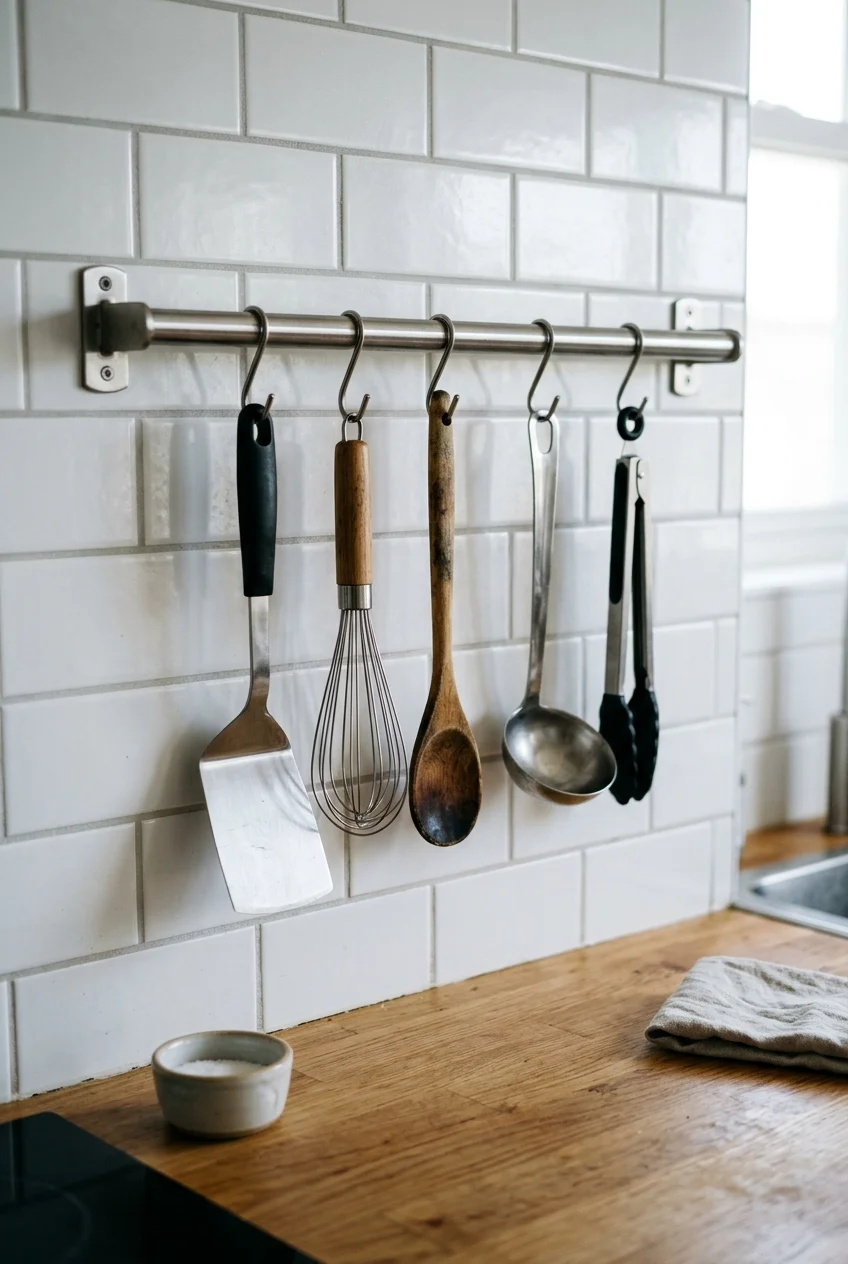
A short rail keeps frequently used tools visible without filling the counter. Install it where hanging utensils cannot swing over burners or the sink.
Limit the rail to tools used several times weekly. An overloaded row becomes visual noise and makes individual items harder to remove cleanly.
30. Move Knives From the Counter to a Secure Wall Strip
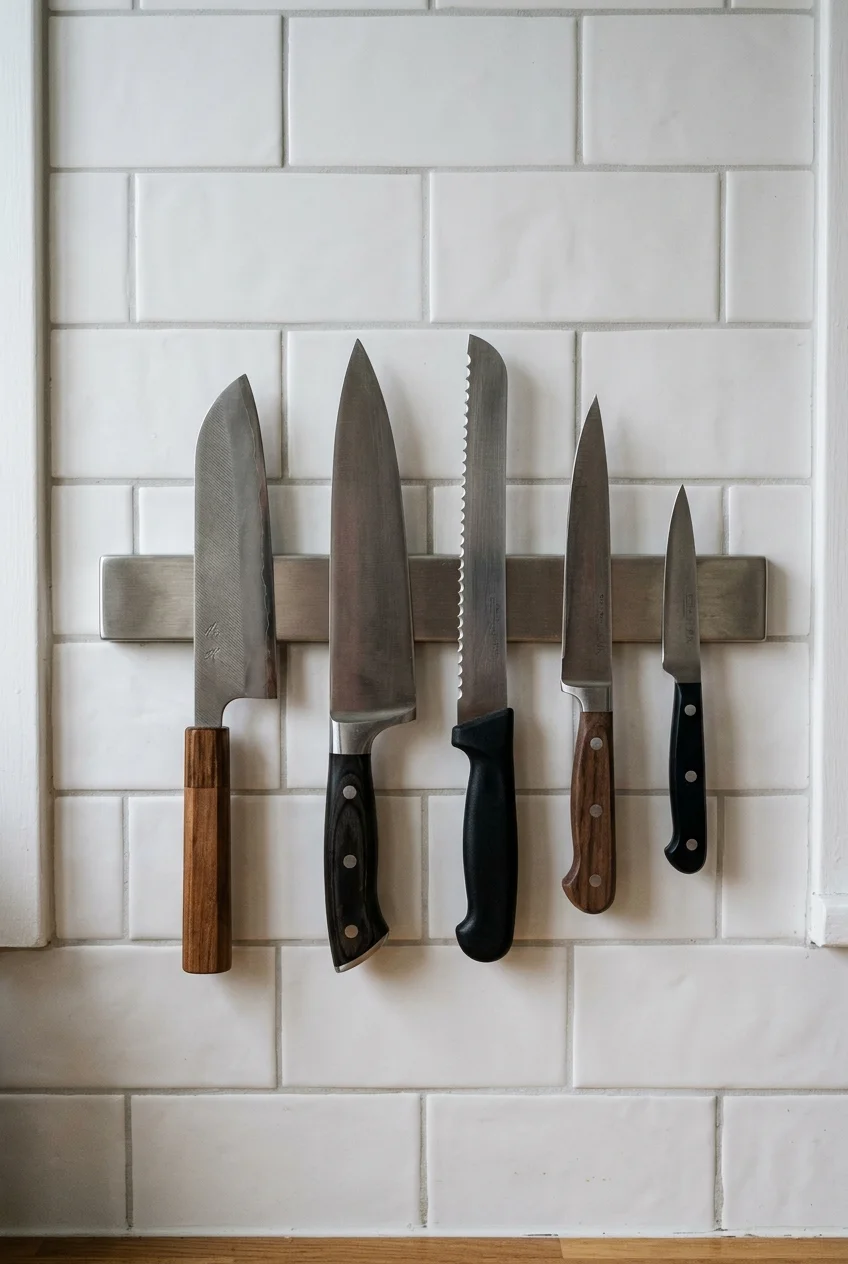
A magnetic strip can replace a bulky knife block while keeping blades visible. Position it beyond the reach of children and away from crowded passages.
The connector returned this 16-inch stainless magnetic knife strip with drilling and adhesive mounting options; confirm the chosen method suits your wall and knife weight.
Attach each clean, dry knife with the spine contacting first, then rotate the blade flat. Remove it with a controlled twist instead of pulling outward.
31. Store Boards and Trays in Vertical Dividers
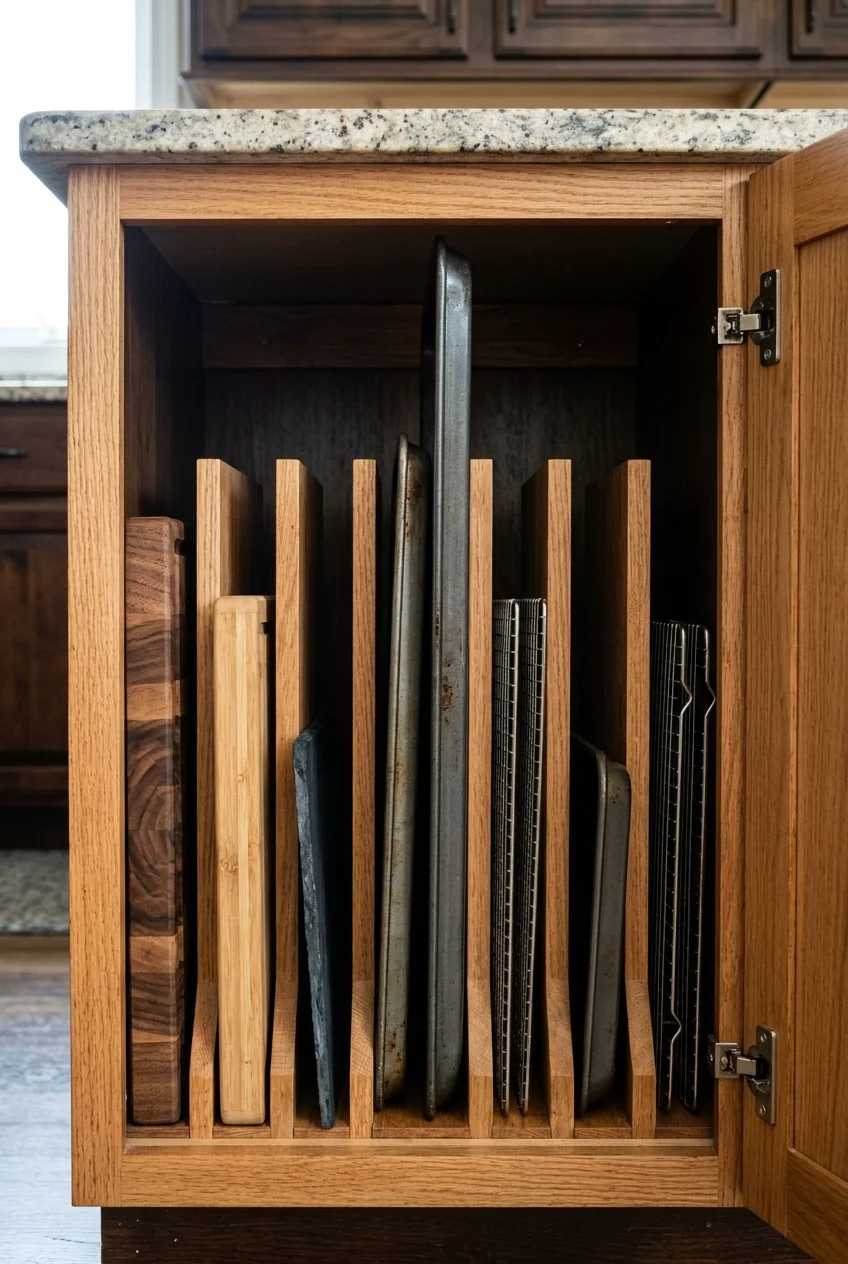
Vertical slots let you remove one cutting board or sheet pan without lifting a stack. Narrow compartments also discourage an oversized collection.
Fit dividers in a base cabinet near the preparation area or oven. Confirm the tallest tray clears the frame and nearby hardware.
Practical tip Sort by use before measuring compartments. A few wider slots handle cutting boards, while narrow slots keep sheet pans from leaning together.
32. Nest Cookware in a Deep Drawer
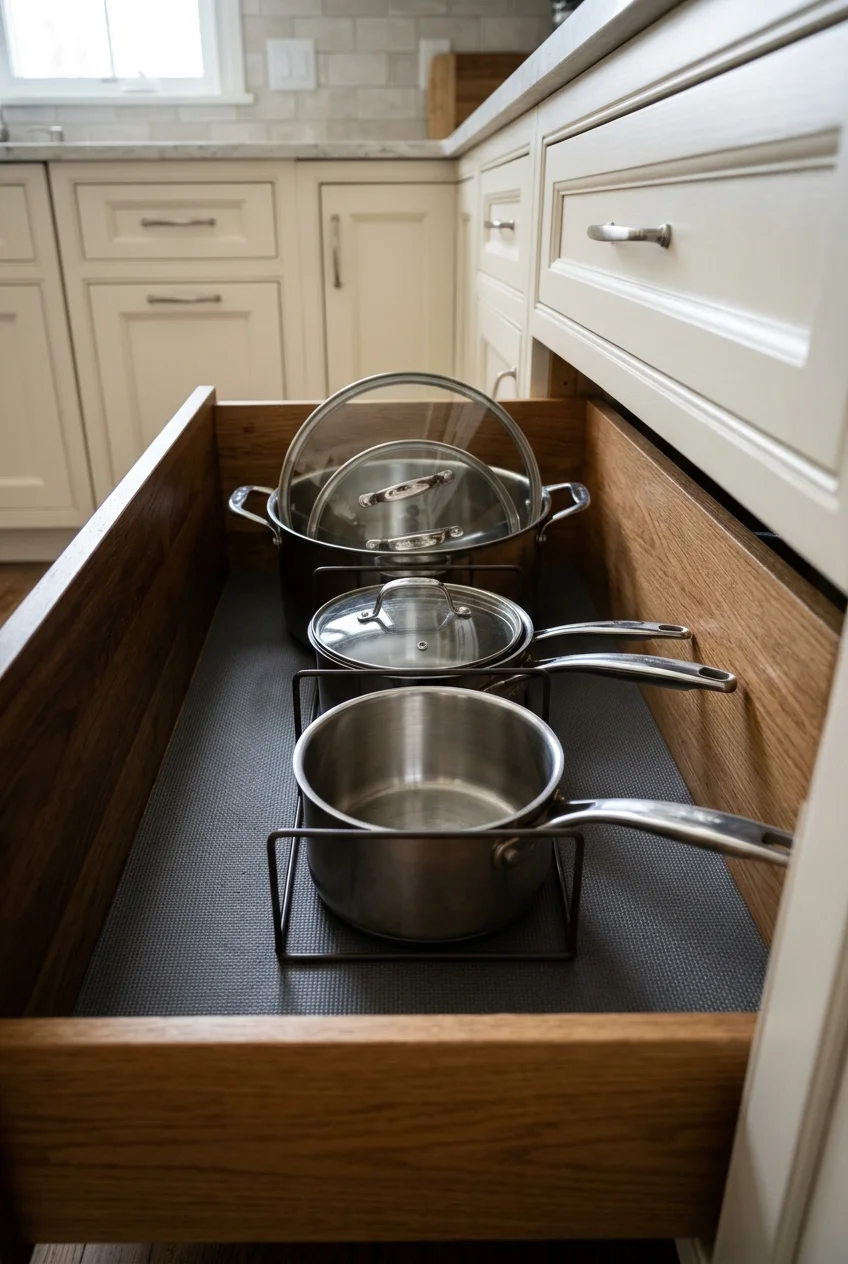
A deep drawer can hold a carefully edited set of pots, with lids standing separately. Nest only pieces that lift out without unpacking everything.
Use a nonslip liner and low dividers so cookware stays arranged when the drawer closes. Store the heaviest pot nearest the drawer front.
Tiny-house living rewards compatible diameters and shared lids. Keep the pieces that match actual cooking habits instead of a theoretical complete set.
33. Give the Blind Corner a Swing-Out Interior
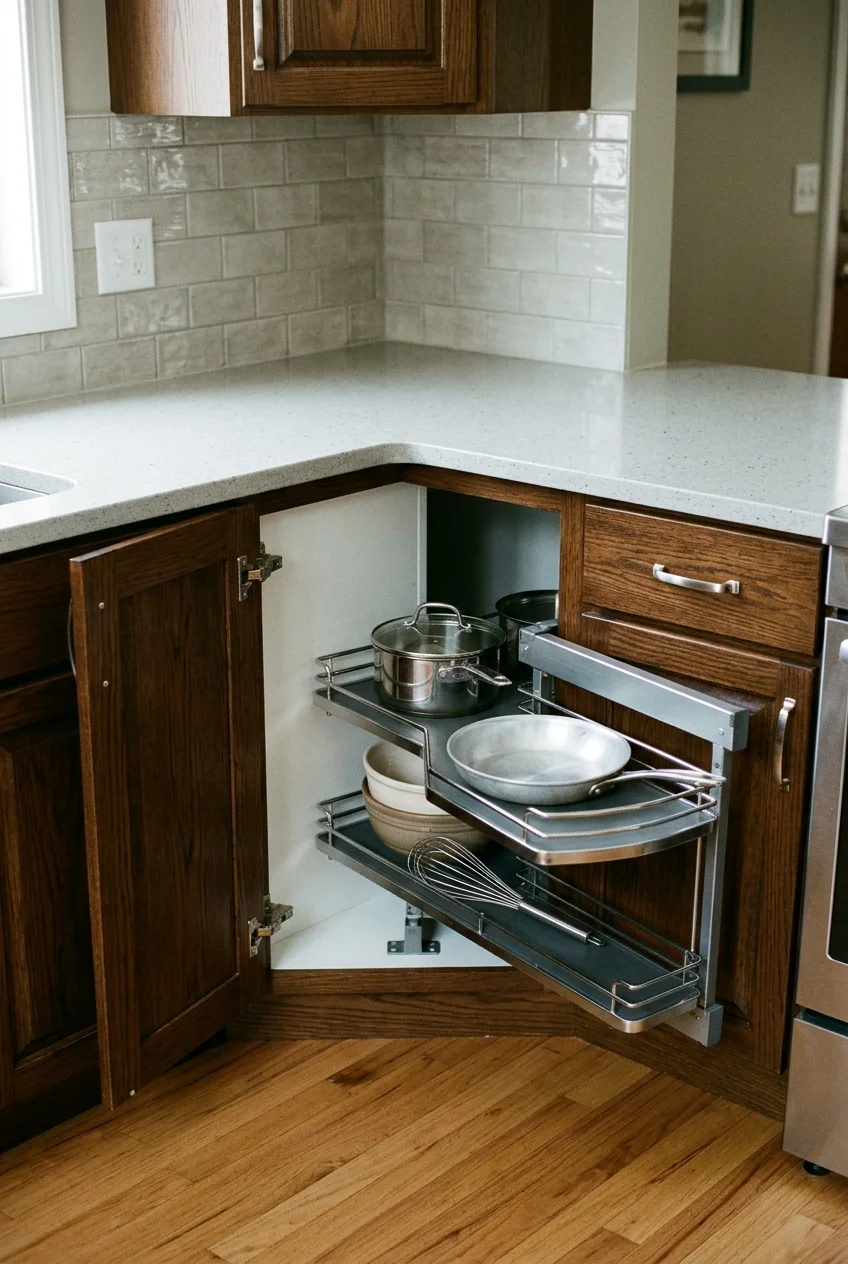
A corner pull-out can bring stored cookware into view, using space that a fixed shelf hides. Hardware must match the cabinet opening and handing.
Do not select the mechanism from the exterior cabinet width alone. Interior obstructions, hinges, frame thickness, and adjacent handles all affect fit.
For a lower-cost option, use the corner for seldom-needed pieces and keep daily cookware in drawers. Accessibility matters more than filling every inch.
34. Fit Under-Sink Storage Around the Plumbing
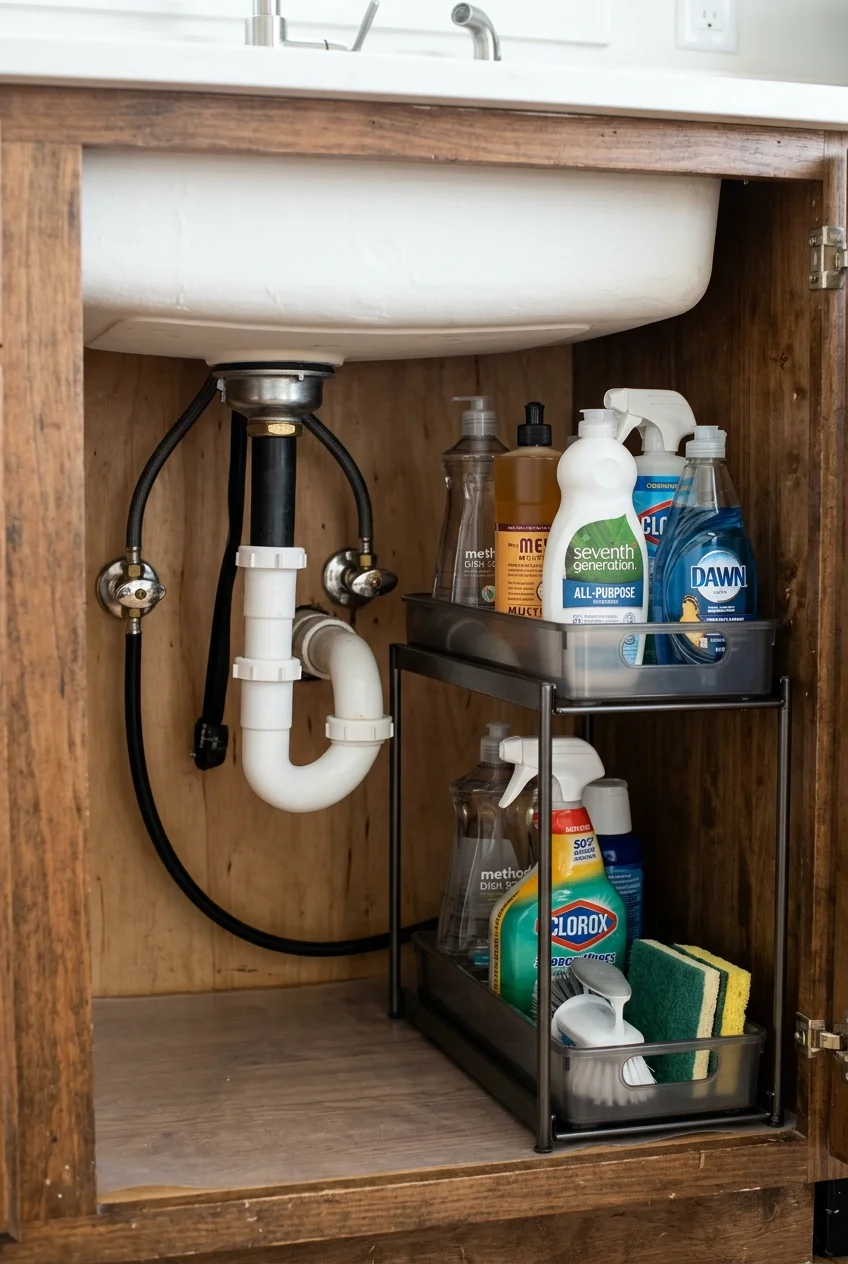
The drain, supply lines, and disposal space determine what fits beneath a sink. Measure each obstruction before choosing shelves or sliding trays.
A simple starting point is this two-tier under-sink tray with hooks; the connector lists 16 by 5.5 by 11.25 inches, so compare every pipe and cabinet clearance before buying.
Keep leak-sensitive supplies in a removable bin and leave shutoff valves reachable. Avoid packing the cabinet so tightly that moisture goes unnoticed.
Appliances and Fixtures Scaled to the Plan
Compact equipment saves space only when its capacity matches real routines. Select exact appliances early, then design cabinetry, ventilation, power, and access around them.
35. Choose a Two-Burner Cooktop for Simple Meals
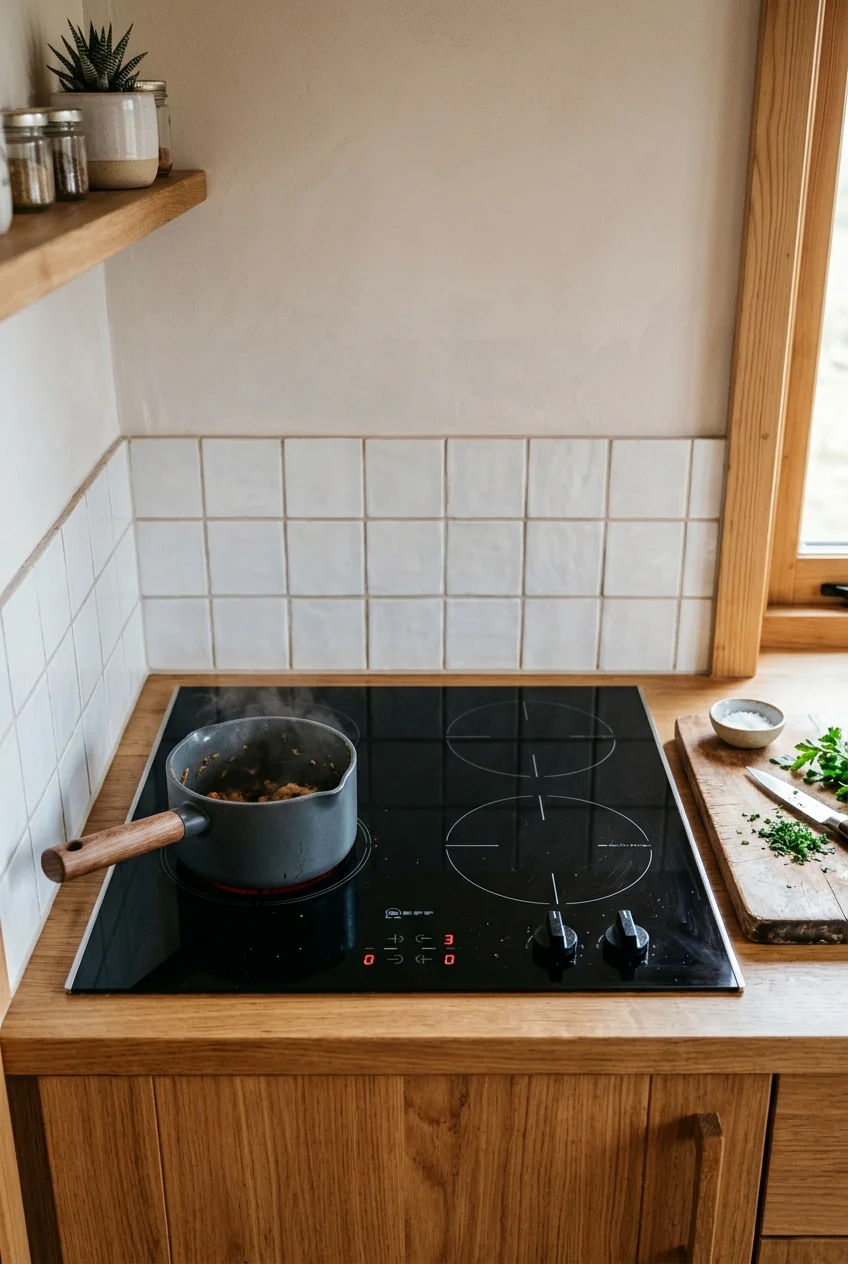
A two-burner cooktop can preserve counter space for households that rarely use several pans simultaneously. It may also allow useful drawers beneath.
Induction, radiant electric, and gas models have different electrical, ventilation, cookware, and clearance requirements. Choose the technology before cutting the countertop.
List the largest meals cooked during an ordinary month. If they regularly need three burners, a narrow range may be the better compromise.
Protect a landing area beside the cooktop rather than filling the saved width with permanent objects. Compact cooking still involves hot pans and ingredients.
36. Use a Narrow Range When an Oven Matters
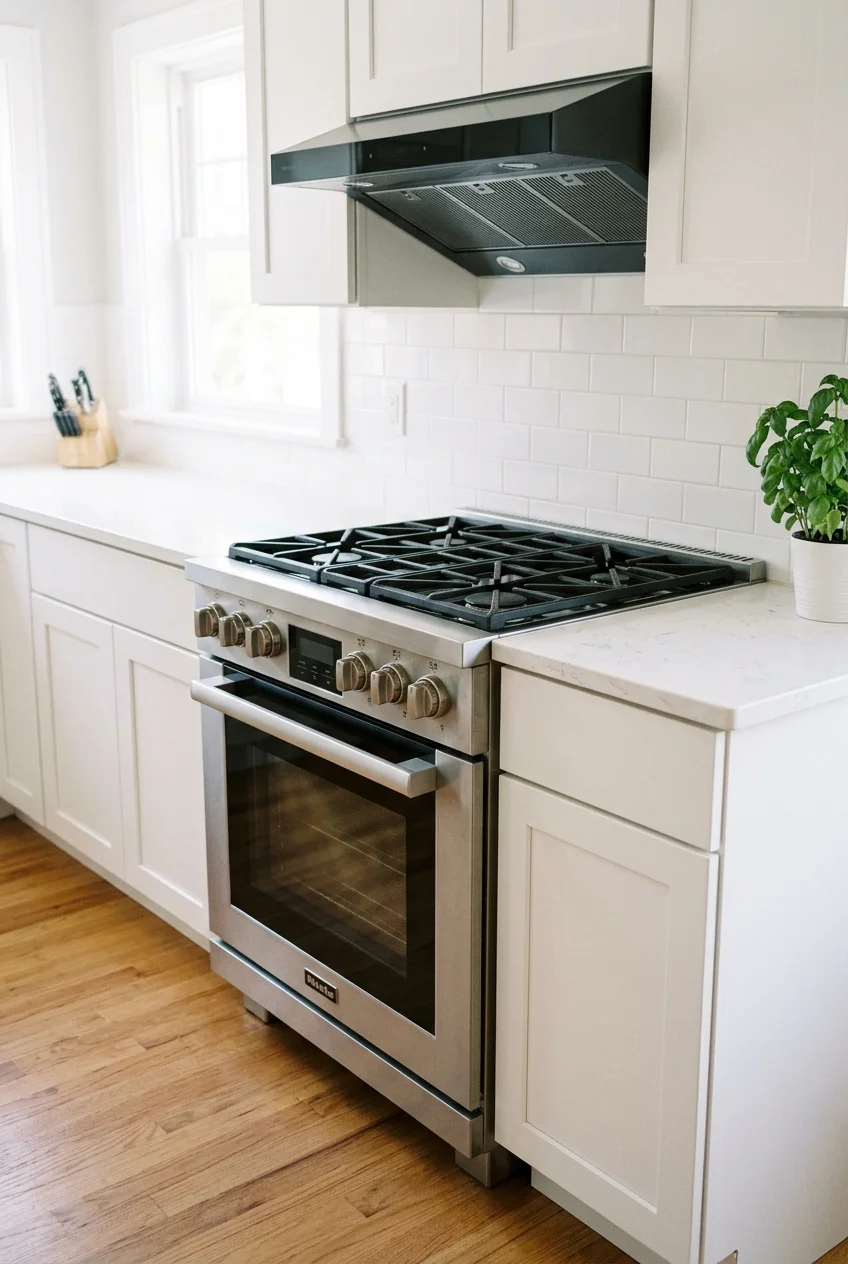
A compact freestanding range combines burners and an oven in one footprint. It suits cooks who bake often but cannot spare a separate wall oven.
Verify the model width, depth, anti-tip instructions, electrical or gas connection, ventilation, and surrounding clearances before finalizing all neighboring cabinets.
Keep a landing surface nearby for hot pans. A narrow appliance does not reduce the need for safe handling space during cooking.
Compare oven cavity dimensions with favorite pans, not only the exterior width. A roasting dish may be the item that determines whether compact works.
If baking is occasional, a cooktop and combination oven may preserve more storage. Choose the arrangement that removes redundancy from actual meals.
37. Tuck Refrigeration Beneath the Counter
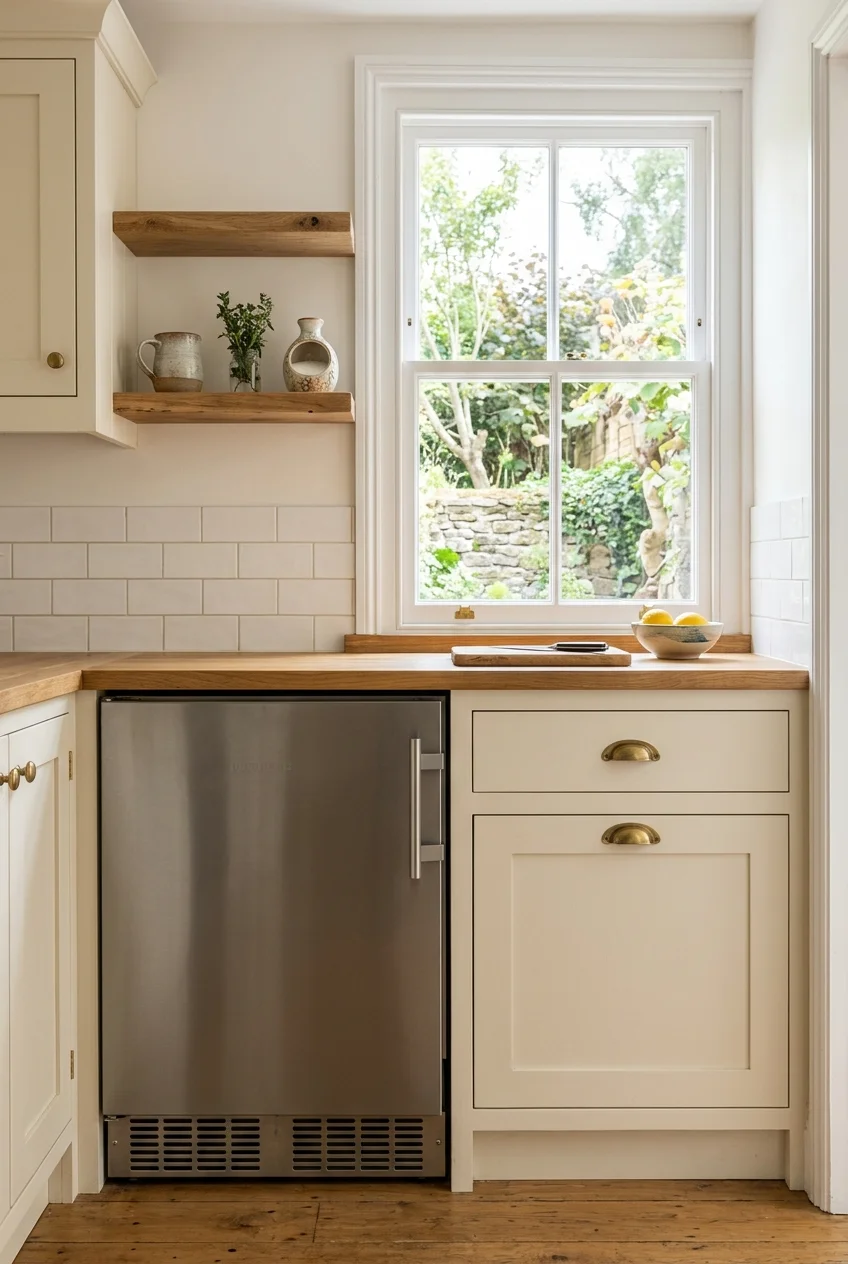
An under-counter refrigerator preserves the wall above for a window, shelves, or visual openness. Its limited capacity suits frequent shopping and edited ingredients.
Check whether the chosen unit is designed for built-in or freestanding use. Ventilation requirements determine whether surrounding cabinetry can enclose it.
Freezer needs often decide the issue. A small ice compartment is not equivalent to a separate freezer for long-term food storage.
38. Put a Tall Slim Refrigerator at the Run's Outer Edge
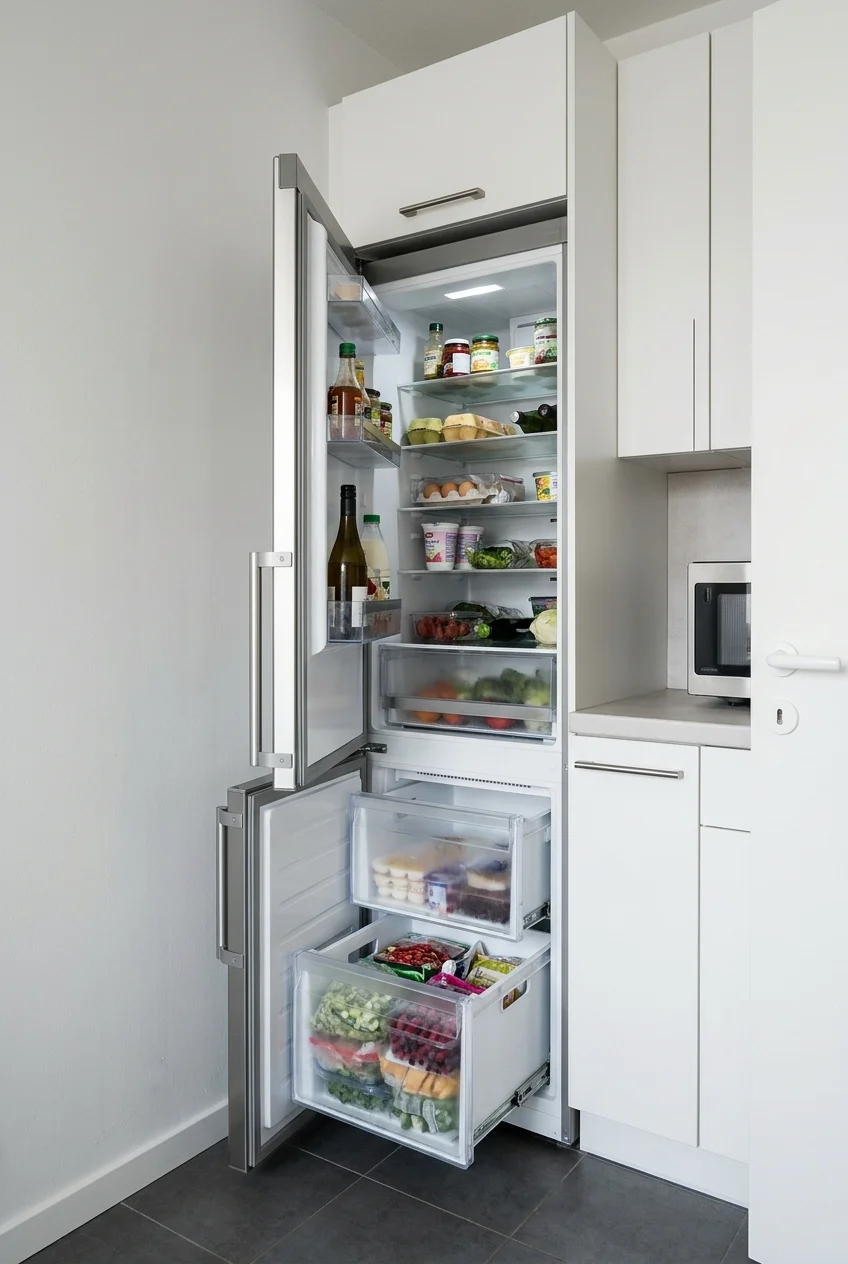
A narrow upright refrigerator offers easier eye-level access than an under-counter model. Place it at the cabinet run's edge to reduce visual bulk.
Confirm the door can open far enough for drawers and shelves to remove. Nearby walls, handles, and counter overhangs can restrict more than expected.
Layout check Choose the hinge side after mapping traffic. The open door should shield neither the preparation counter nor the main route through the home.
39. Consider a Dish Drawer Instead of a Full-Height Dishwasher
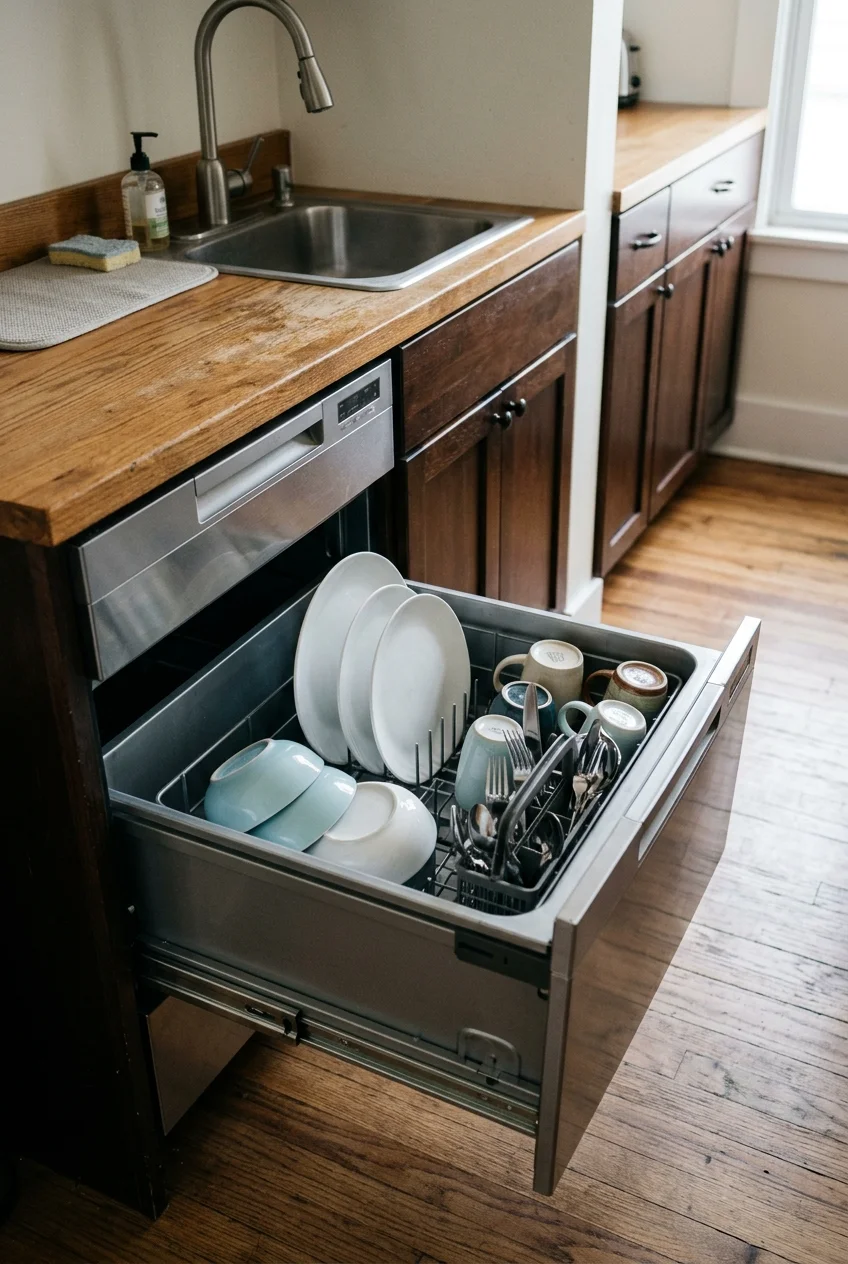
A single dish drawer may match a small household's daily load while preserving cabinet space. It also avoids a large door dropping into the aisle.
Compare place-setting capacity with actual dishes, including cutting boards and pans. A compact machine can require more frequent cycles after ambitious cooking.
Plumbing, power, ventilation, drainage, and cabinet support remain installation decisions. Confirm every requirement from the selected exact model before construction.
Load one representative meal's dishes before committing when a showroom permits it. Tall glasses and large plates reveal capacity better than place-setting numbers.
40. Use a Countertop Dishwasher Only With a Clear Home
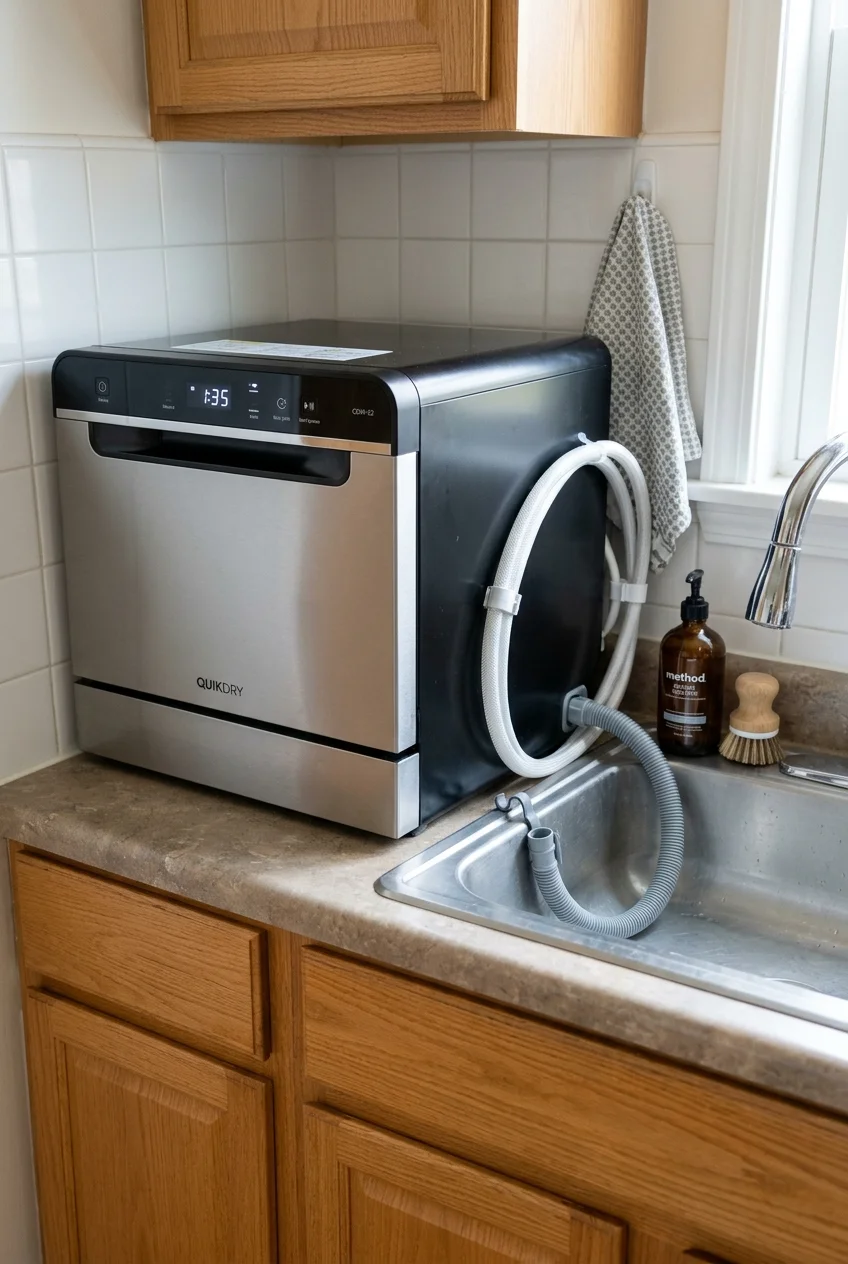
A countertop dishwasher can help where cabinetry cannot be altered, but it occupies valuable work surface and needs compatible water and drainage arrangements.
Plan where the machine operates, where hoses run, and where it stores if moved. Do not balance it over a sink or block a required outlet.
A filled countertop machine is awkward to relocate, so moving it daily may be unrealistic. Treat the operating position as a permanent layout decision.
Compare its daily capacity with hand-washing habits and available drying space. The appliance should remove a bottleneck rather than create another one.
- Enough counter depth for the full appliance
- A water connection supported by the selected model
- Drain routing that cannot slip or kink
- Ventilation and opening clearance from the manual
Compact Cooking, Cleanup, and Water
The smallest appliances and fixtures still need honest operating space. Combine functions selectively, and keep installation requirements visible during planning rather than after cabinetry arrives.
41. Combine Microwave and Convection Cooking
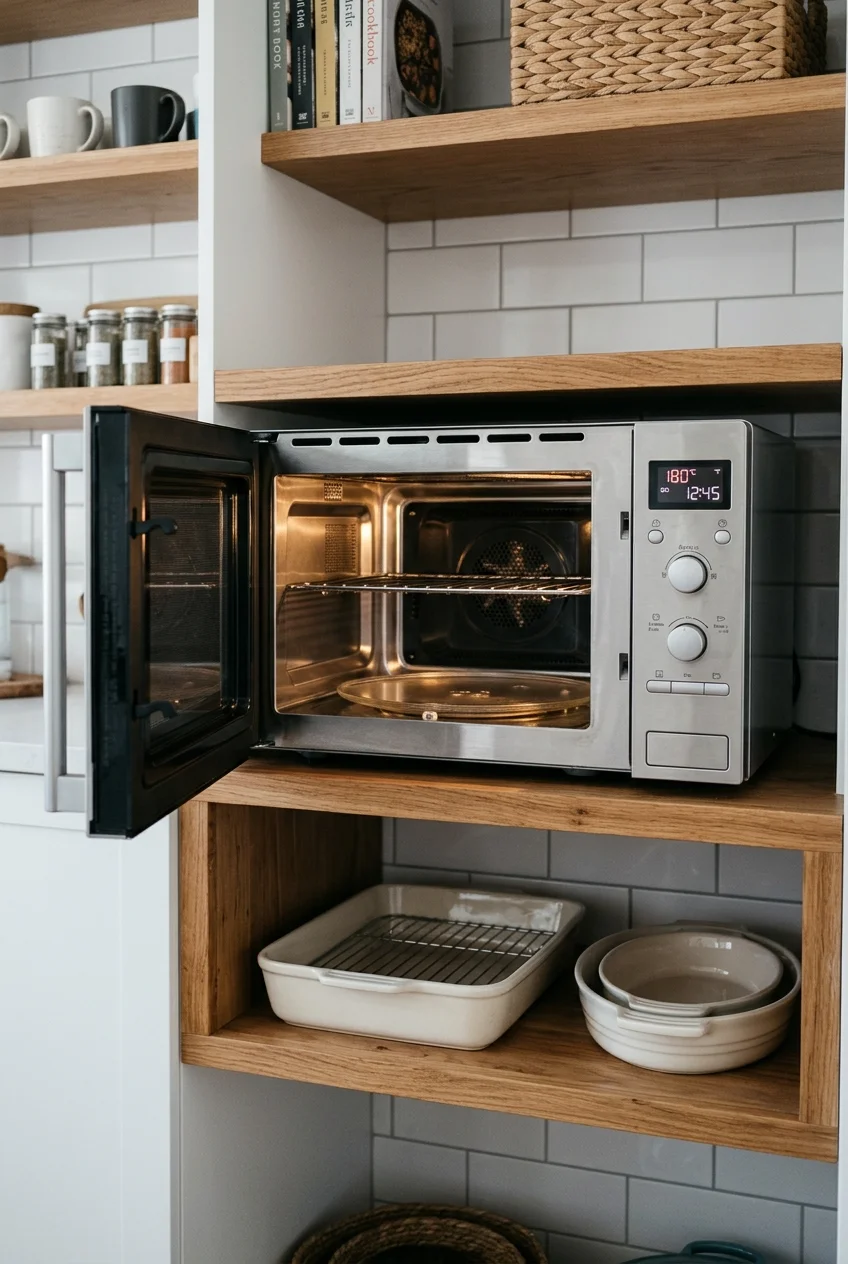
A combination appliance can cover reheating and some baking tasks without two separate boxes. Capacity, cookware compatibility, and cooking results vary by model.
Give the door room to open and follow ventilation instructions exactly. A shelf that fits the exterior dimensions may still restrict required airflow.
Before buying, write down the dishes prepared most often and their pan sizes. Confirm those vessels fit the usable interior, not merely the advertised capacity.
42. Vent the Cooktop With an Under-Cabinet Hood
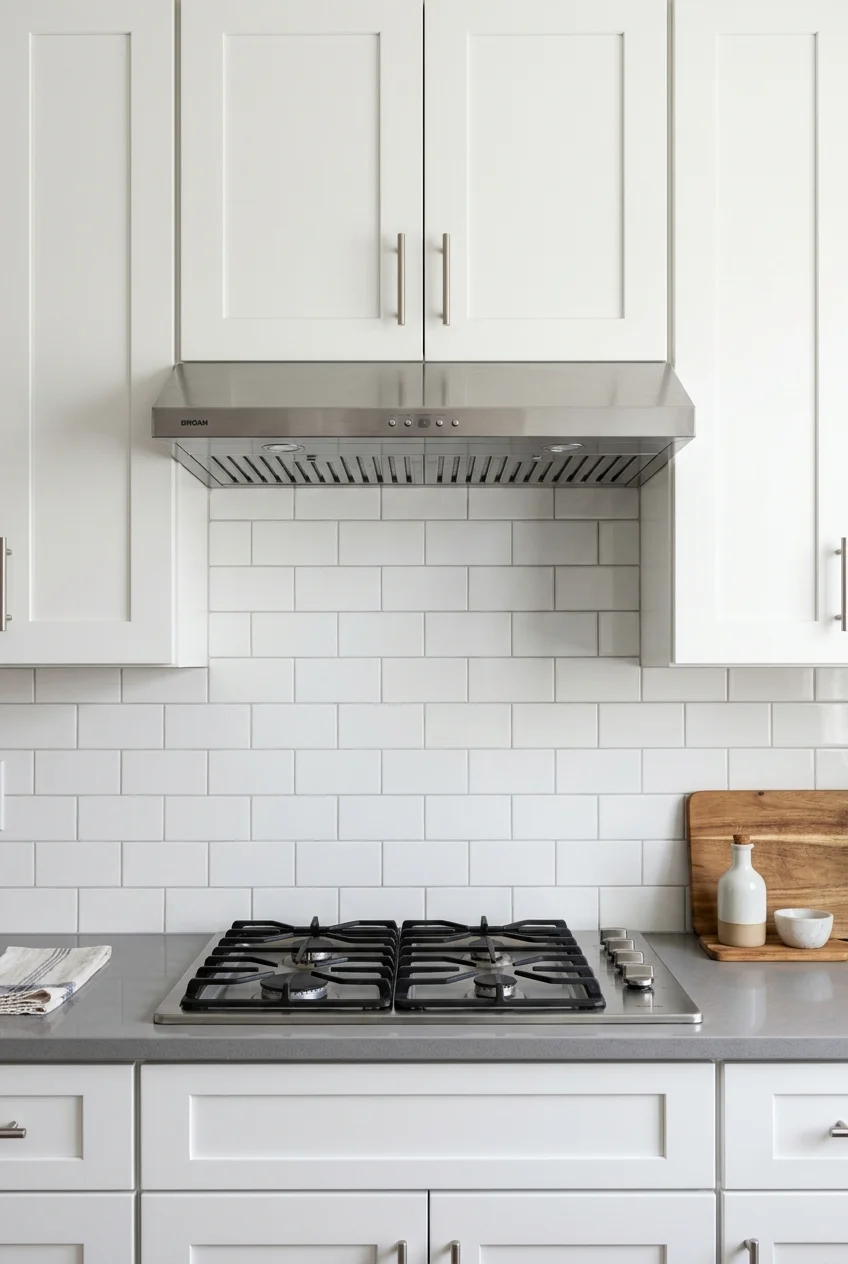
An under-cabinet hood uses the space above cooking while leaving nearby upper storage intact. Select it alongside the cooktop, not after cabinet installation.
Follow both manufacturers' requirements for width, height, ducting, electrical connection, and clearances. Recirculating and externally vented systems are not interchangeable solutions.
Keep the capture area unobstructed and clean filters on the schedule specified for the appliance. A decorative shelf should not interrupt airflow above burners.
A hood cannot compensate for a layout that crowds combustible or heat-sensitive materials around cooking. Coordinate the complete cooking zone before installation.
43. Choose One Useful Sink Bowl Instead of Two Tiny Ones
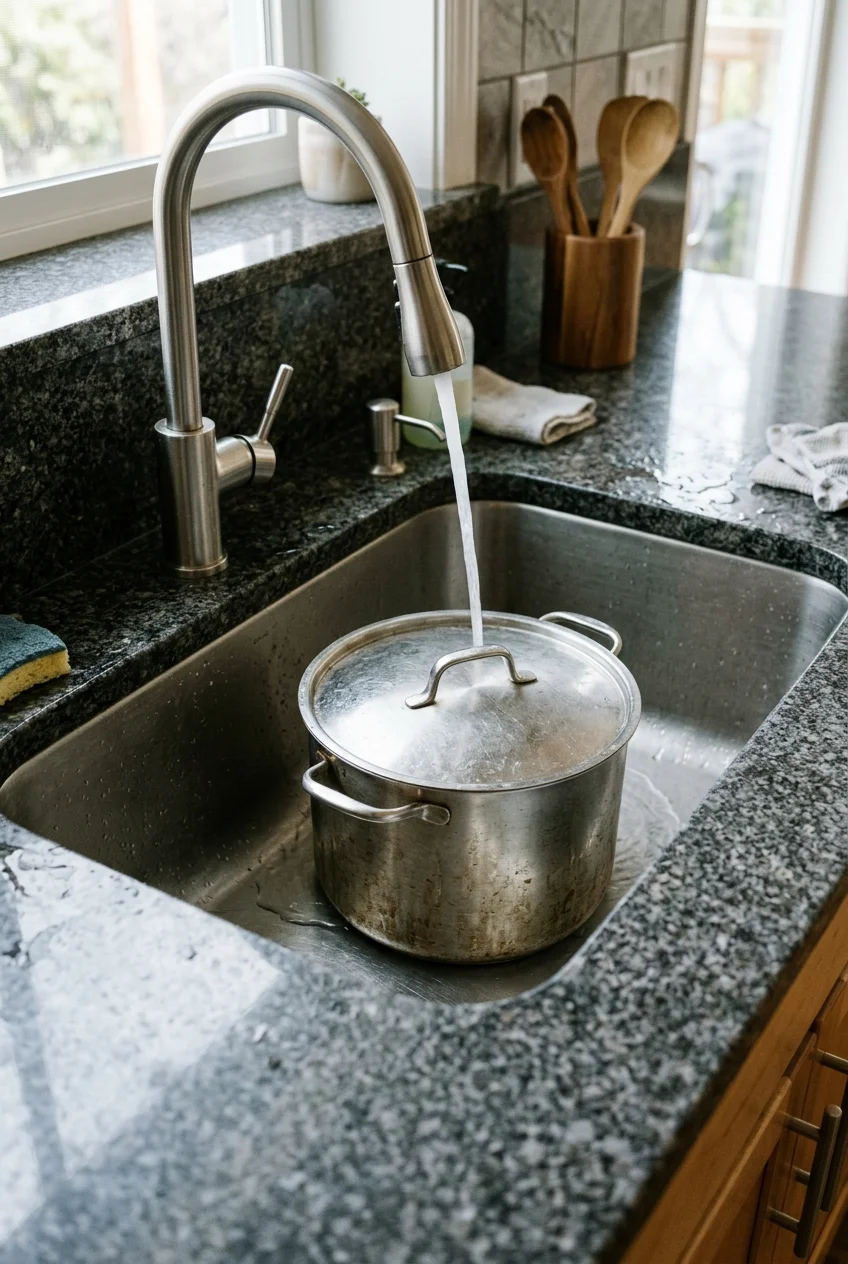
A single bowl can handle a stockpot or baking sheet better than two very small compartments. Its overall size should leave meaningful counter beside it.
Test the largest item routinely washed and consider bowl depth, faucet reach, drain position, and under-sink storage before selecting the fixture.
A compact sink still needs a secure countertop opening and proper support. The counter must stop cleanly at the bowl rather than crossing it.
44. Offset the Sink Drain to Recover Cabinet Space
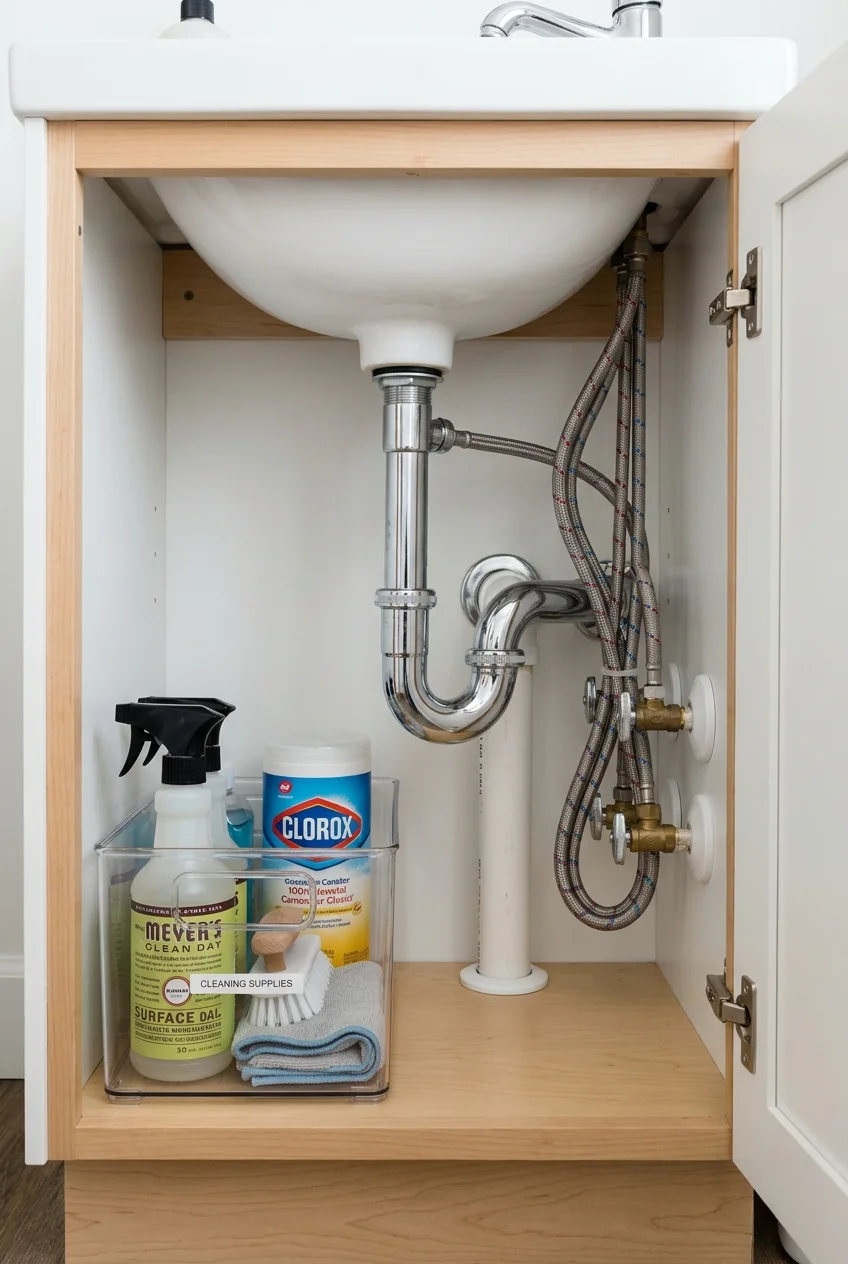
A rear or side drain can leave a larger uninterrupted area beneath the bowl for a waste bin or cleaning caddy. Plumbing still determines the result.
Coordinate the exact sink, trap, disposal choice, supply lines, and cabinet before promising storage. A shifted drain does not make those components disappear.
Choose the stored item before moving the drain. A waste bin, caddy, or water filter each needs a different clear shape beneath the bowl.
Keep valves and serviceable connections accessible after organizers are installed. Removable storage is usually more forgiving than shelves built tightly around plumbing.
Planning note Ask the plumber and cabinetmaker to review one dimensioned drawing. Separate assumptions about pipe routes often consume the storage the offset drain was meant to save.
45. Dry Dishes on a Rack That Spans the Sink
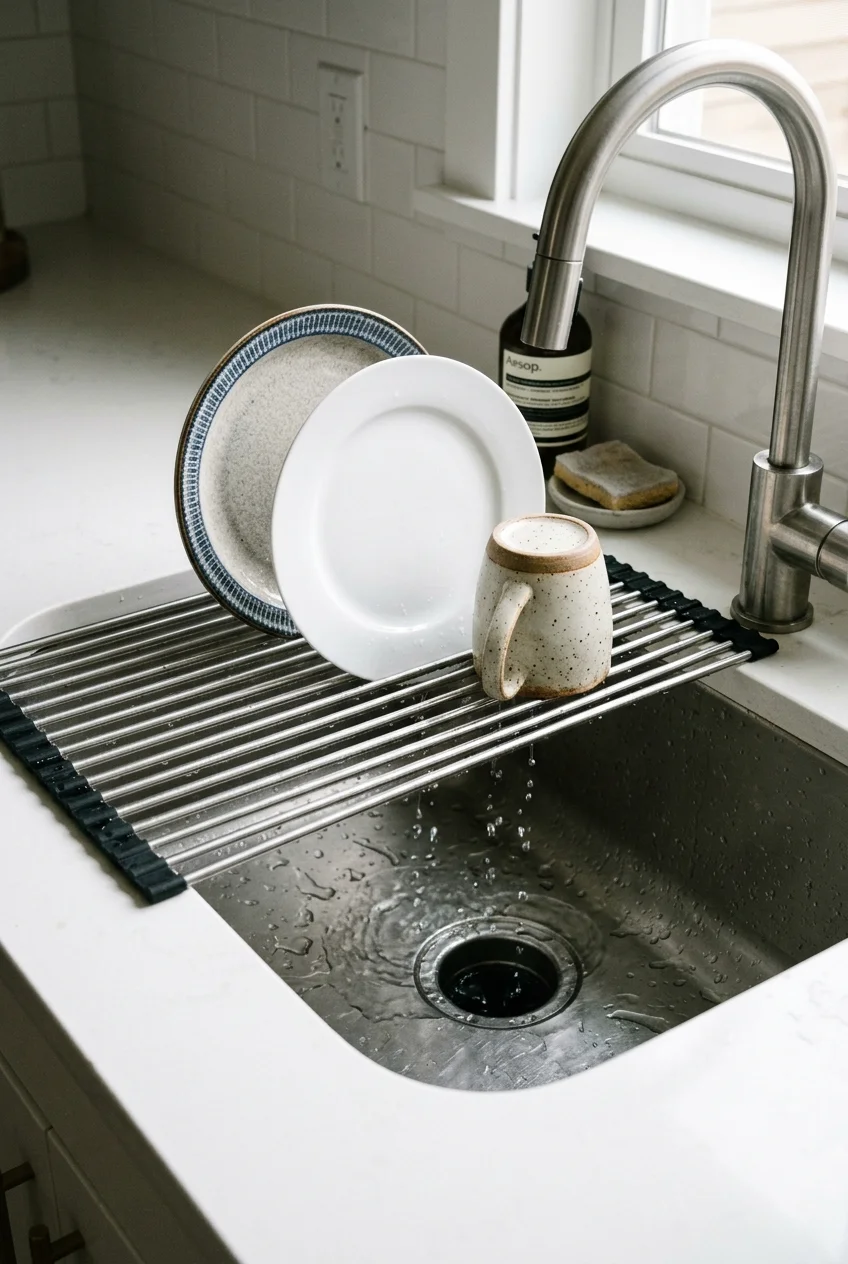
A roll-up or fitted rack can place wet dishes over the basin, keeping the neighboring counter available. It should sit securely on both sink ledges.
Choose a size that leaves the faucet usable and lets water fall entirely inside the bowl. Store the dry rack vertically after unloading.
This works best for small daily loads. Heavy cookware or a crowded rack may exceed its intended support and obstruct essential sink access.
46. Give Cabinet Doors Shallow Storage Jobs
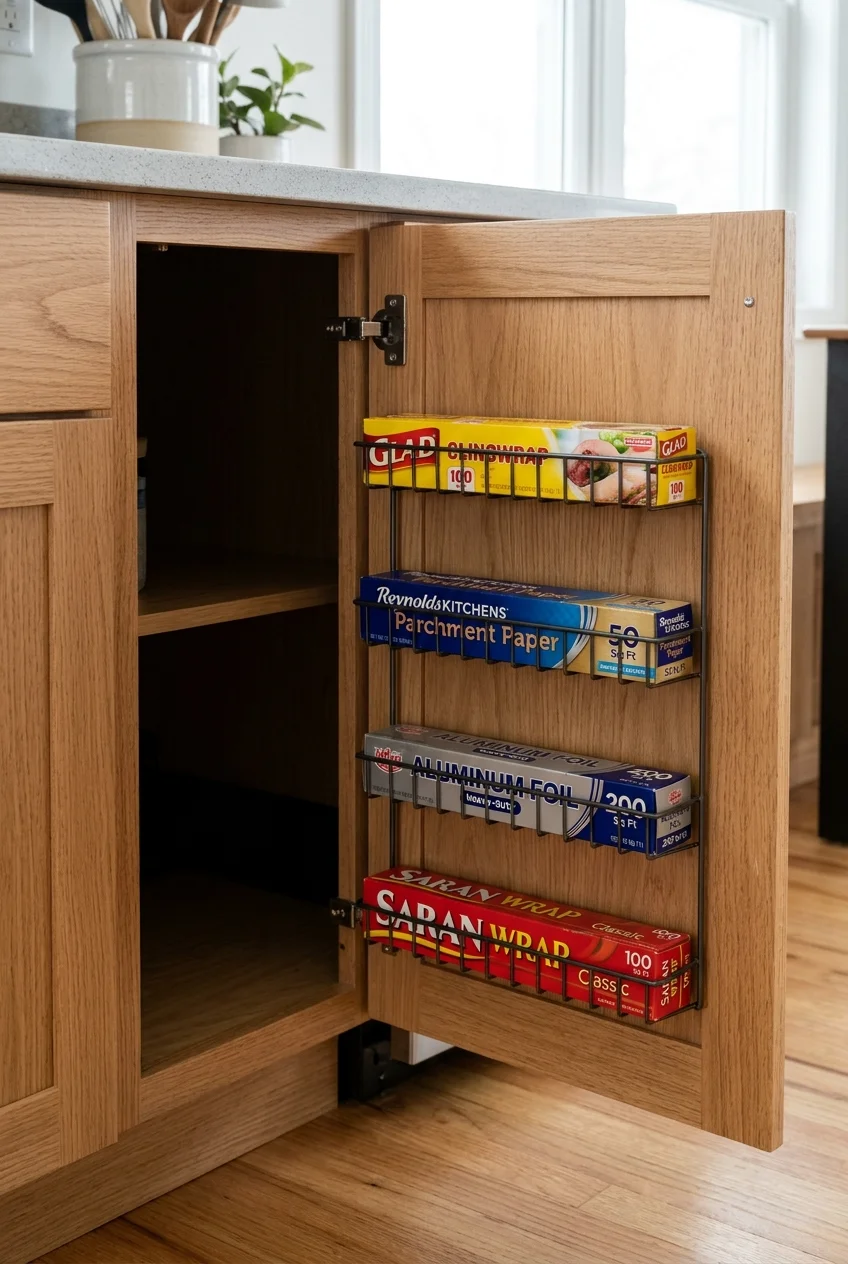
A narrow rack inside a door can hold wraps, lids, or cleaning cloths. Its contents must clear shelves, hinges, and items already inside.
Use lightweight objects and secure the rack for repeated movement. In a towable home, add retention so contents cannot bounce against the door.
- Wrap boxes inside a prep cabinet
- Flat lids inside a container cabinet
- Cloths inside the sink cabinet
- Small measuring tools inside a baking cabinet
Organization for Daily Cooking
Organization should shorten a real task, not create a display to maintain. Group tools by where they are used and leave enough space to return them easily.
47. Use Rectangular Containers Only Where They Improve Fit
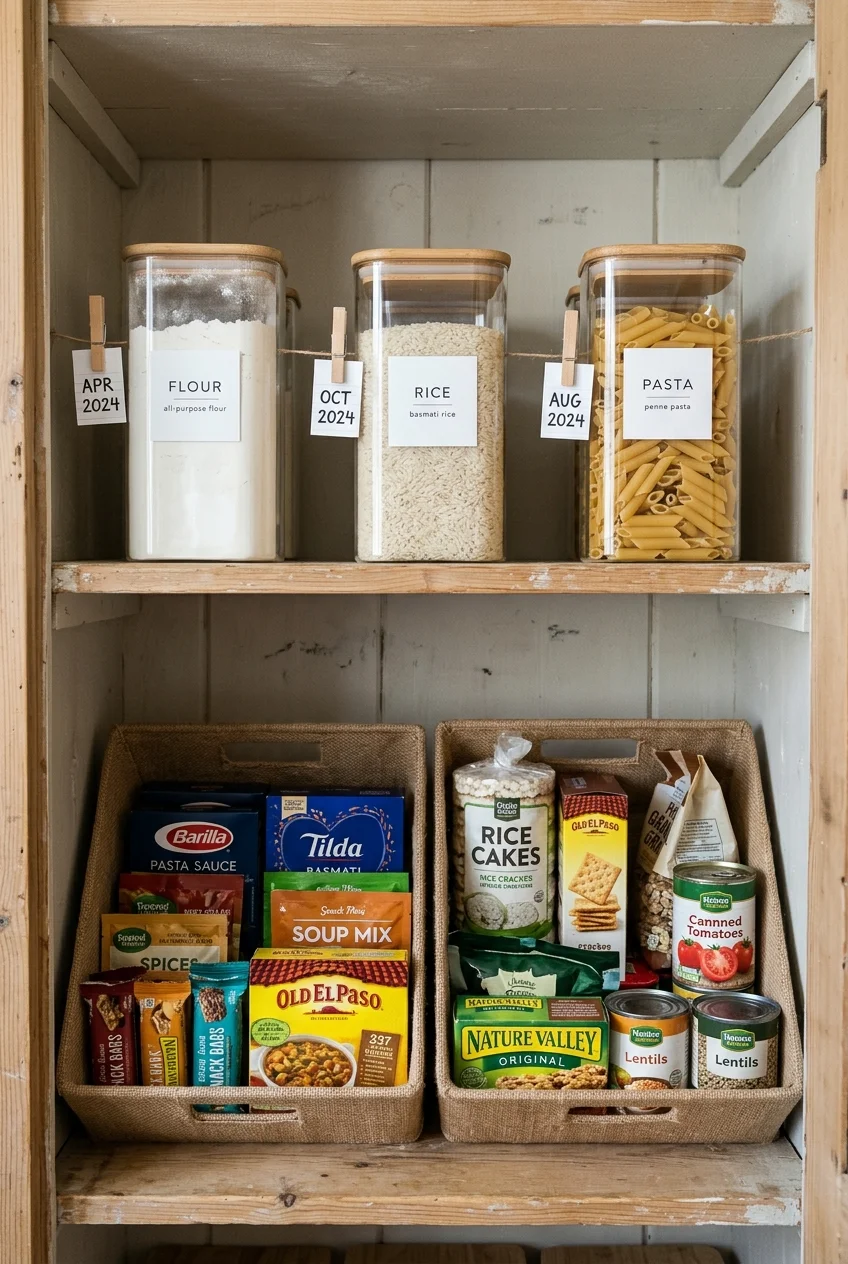
Square and rectangular containers can use shelf corners efficiently, but decanting every ingredient creates extra cleaning and tracking. Start with messy staple bags.
Choose stackable sizes that match shelf height, and retain cooking directions and date information. Never combine new food with old without cleaning the container.
For broader zoning and shelf strategies, use these pantry organization ideas selectively rather than purchasing a matching container set before measuring.
48. Lay Spices Flat in a Shallow Drawer
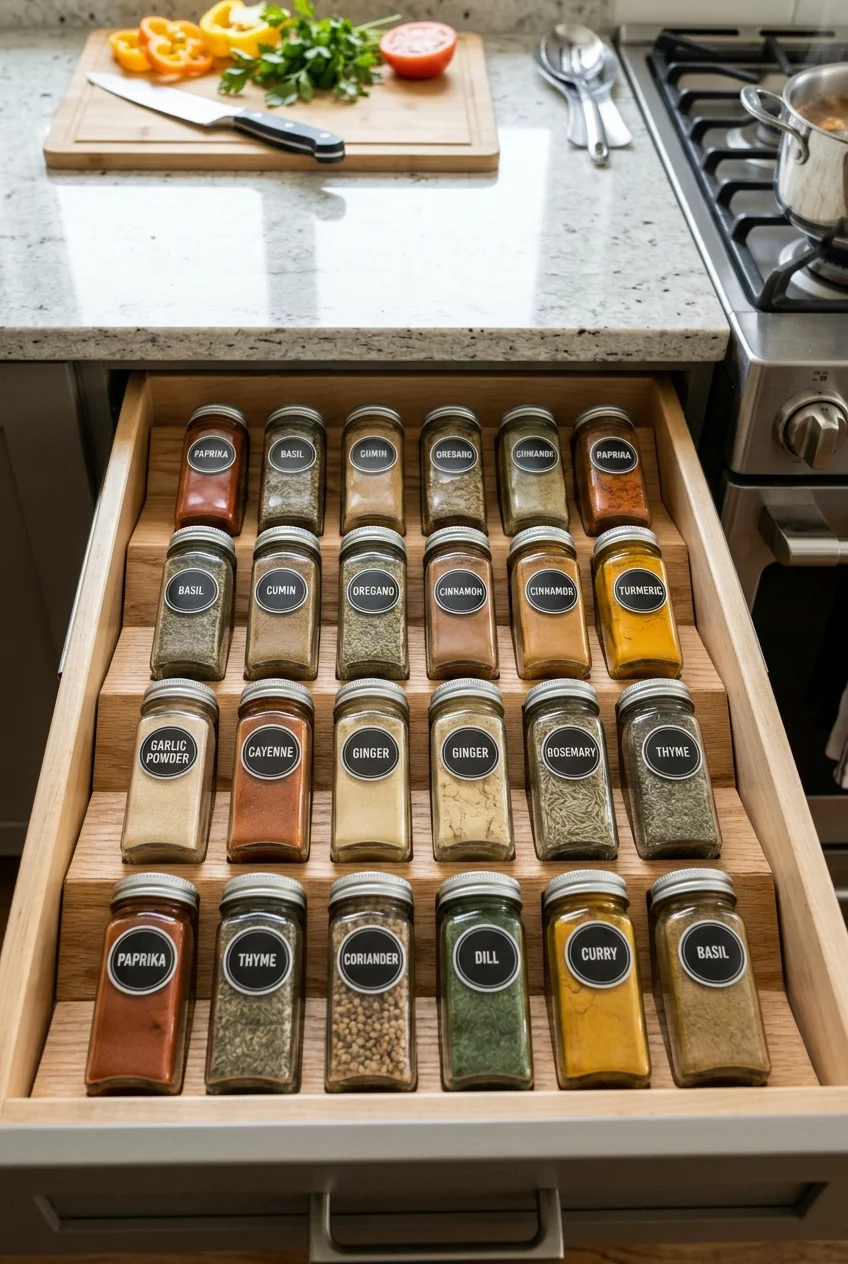
A shallow drawer with angled inserts makes spice labels visible at once. It frees an upper cabinet and keeps small jars from forming hidden rows.
Locate spices near preparation but away from excess heat and moisture. Measure jar height before selecting an insert or closing clearance may disappear.
Edit duplicates before organizing. A tiny drawer works when it holds the seasonings actually used, not every jar accumulated over several moves.
49. Put Trash and Recycling in One Pull-Out
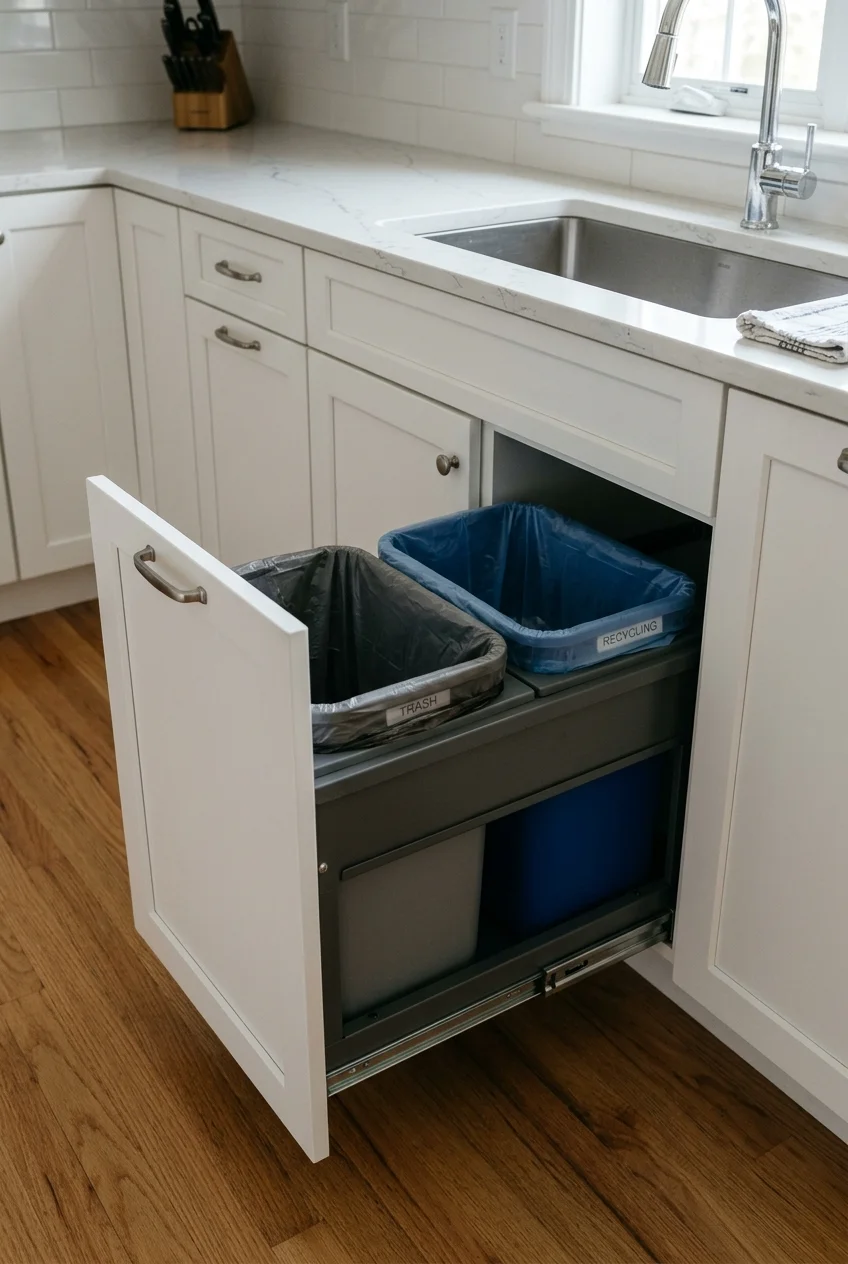
A dual-bin pull-out contains waste without using floor space. Position it near the sink or primary preparation area for easy scraping and sorting.
Measure bin height beneath the counter and verify that lids, handles, plumbing, and drawer hardware do not compete. The cabinet needs washable interior surfaces.
Two small bins require frequent emptying, which may be preferable to odor and overflow. Choose capacity according to local collection and household habits.
50. Build a Removable Cleaning Caddy
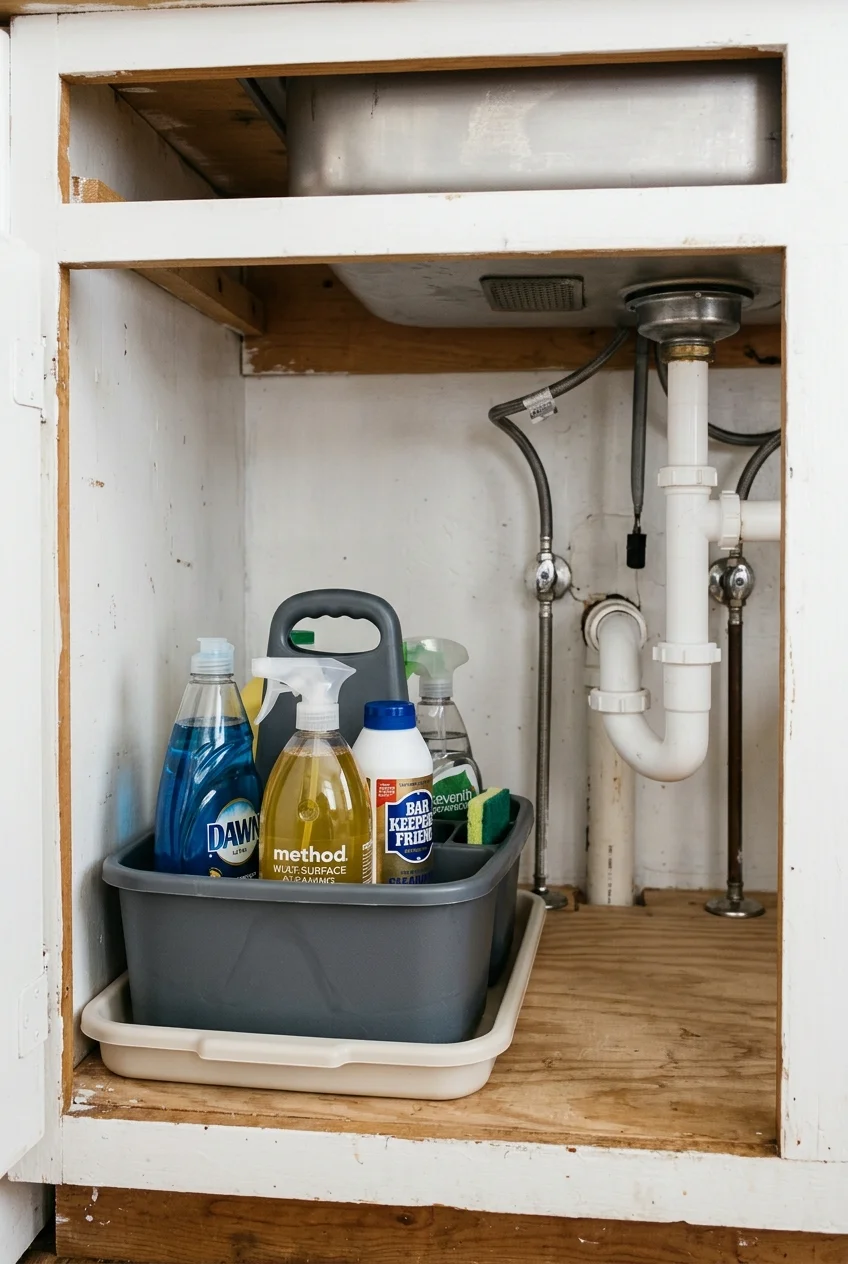
A handled caddy keeps the few kitchen cleaners together and lifts out for floor or bathroom tasks. It also exposes leaks faster than scattered bottles.
Store products according to their labels and keep incompatible chemicals separate. Do not place food, towels, or dishware in the same contained bin.
Practical tip Line the cabinet with a removable tray, not absorbent fabric. A pale tray makes drips visible and simplifies routine inspection around pipes.
51. Create a One-Shelf Breakfast Zone
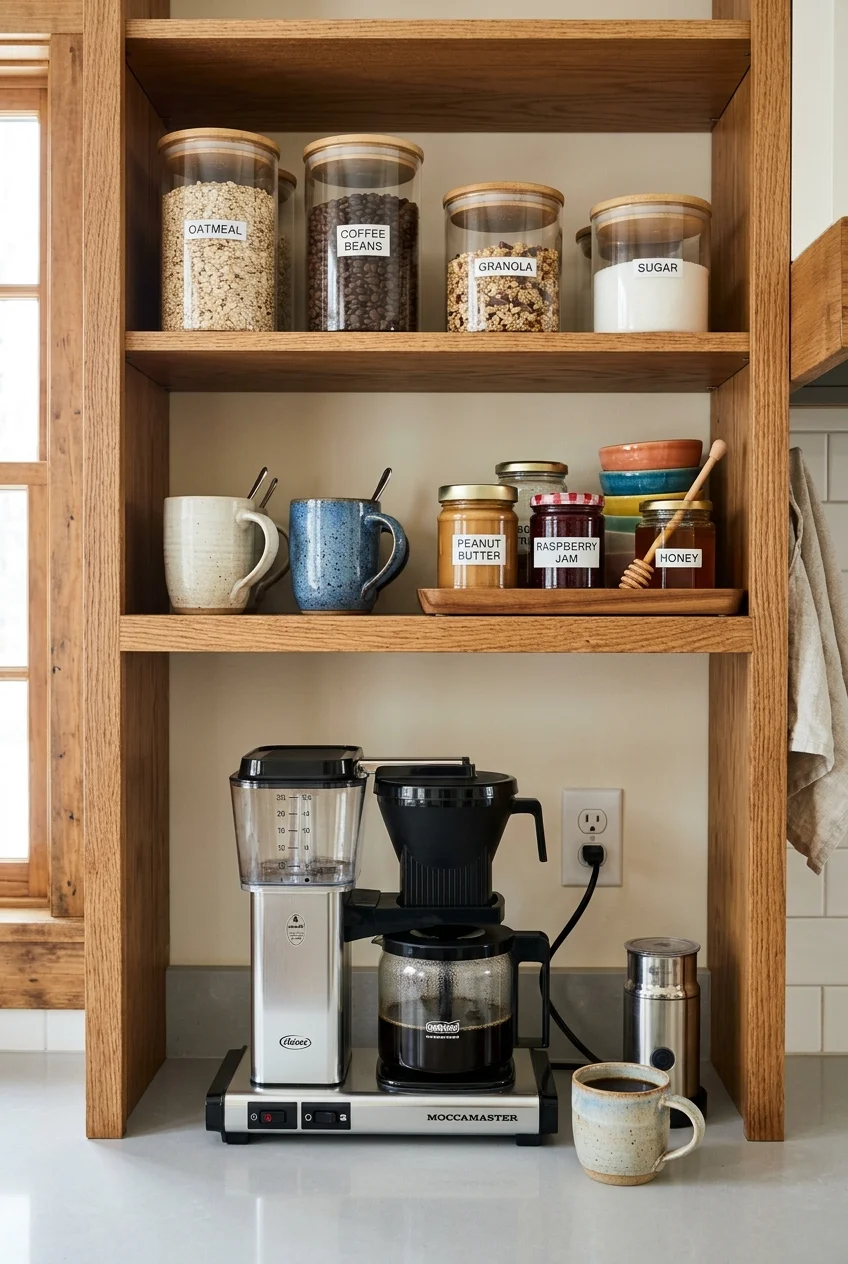
Group oatmeal, coffee, mugs, and spreads on one reachable shelf near breakfast appliances. Morning tasks then stay outside the main cooking and dish zones.
Keep only current supplies in the zone and store backstock elsewhere. A shallow tray can contain small packets without hiding larger jars behind them.
If a toaster or coffee maker operates nearby, respect its heat, steam, power, and ventilation requirements rather than treating the shelf as decoration.
52. Store Utensils by Task, Not Matching Sets
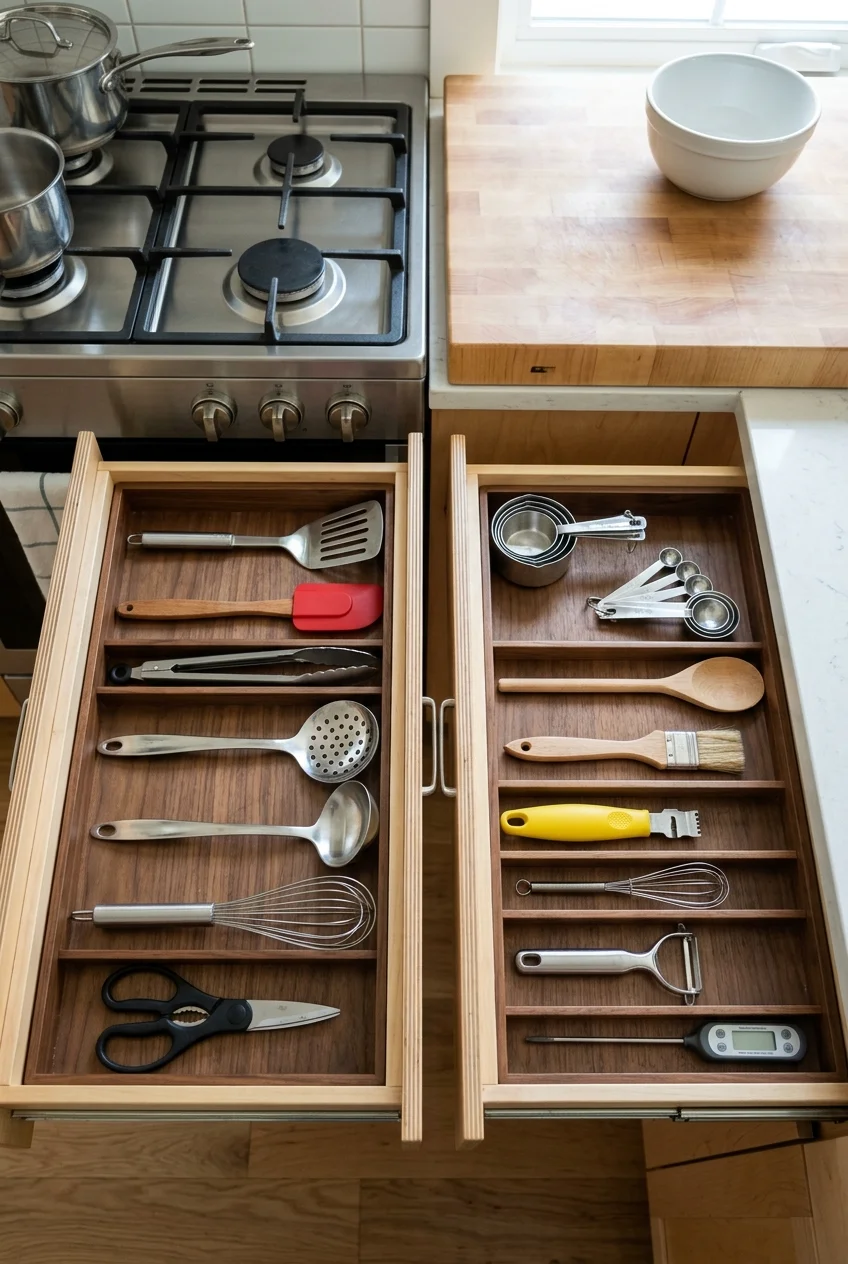
Keep everyday cooking tools beside the cooktop, baking tools near mixing space, and serving pieces near dining. Task grouping reduces movement in a narrow room.
Use short drawer dividers that fit actual tools, leaving room to grasp handles. Matching compartments matter less than a layout that returns easily.
- Heat-safe tools beside cooking
- Knives and peelers beside preparation
- Measuring tools with baking supplies
- Serving utensils near plates and table
53. Give Produce a Ventilated, Shaded Drawer
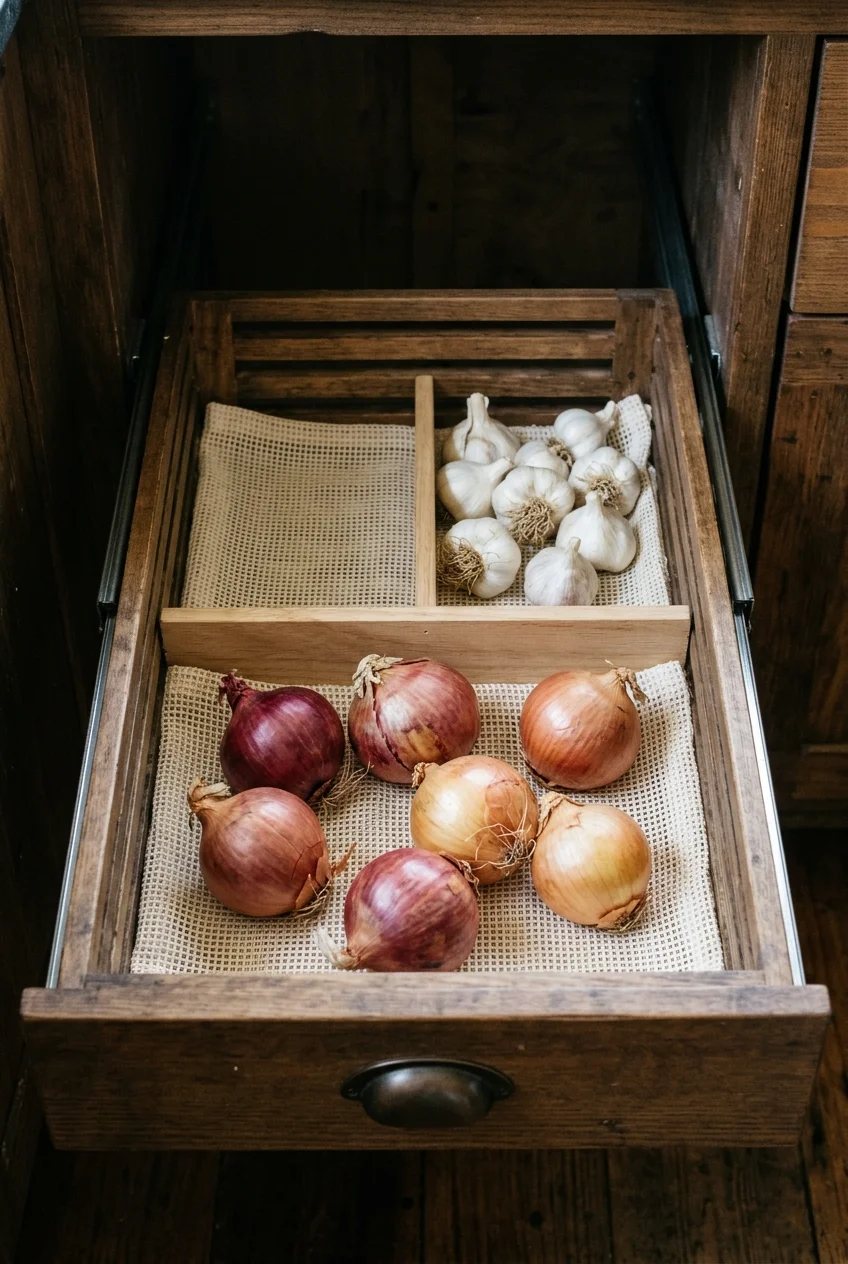
Some shelf-stable produce benefits from a cool, dry, ventilated place away from direct sunlight. A slatted drawer can clear counters without sealing moisture inside.
Store different produce according to reliable food-storage guidance, and inspect it regularly. A beautiful basket cannot correct incompatible temperatures or excess humidity.
Line the drawer with a washable, breathable base and avoid overfilling. Air needs room to move around the contents, not merely through the front.
Keep the drawer separate from household chemicals and inspect surrounding cabinetry for moisture. Remove spoiled pieces promptly before they affect neighboring produce.
54. Hang Mugs Beneath a Shelf Without Crowding the Counter
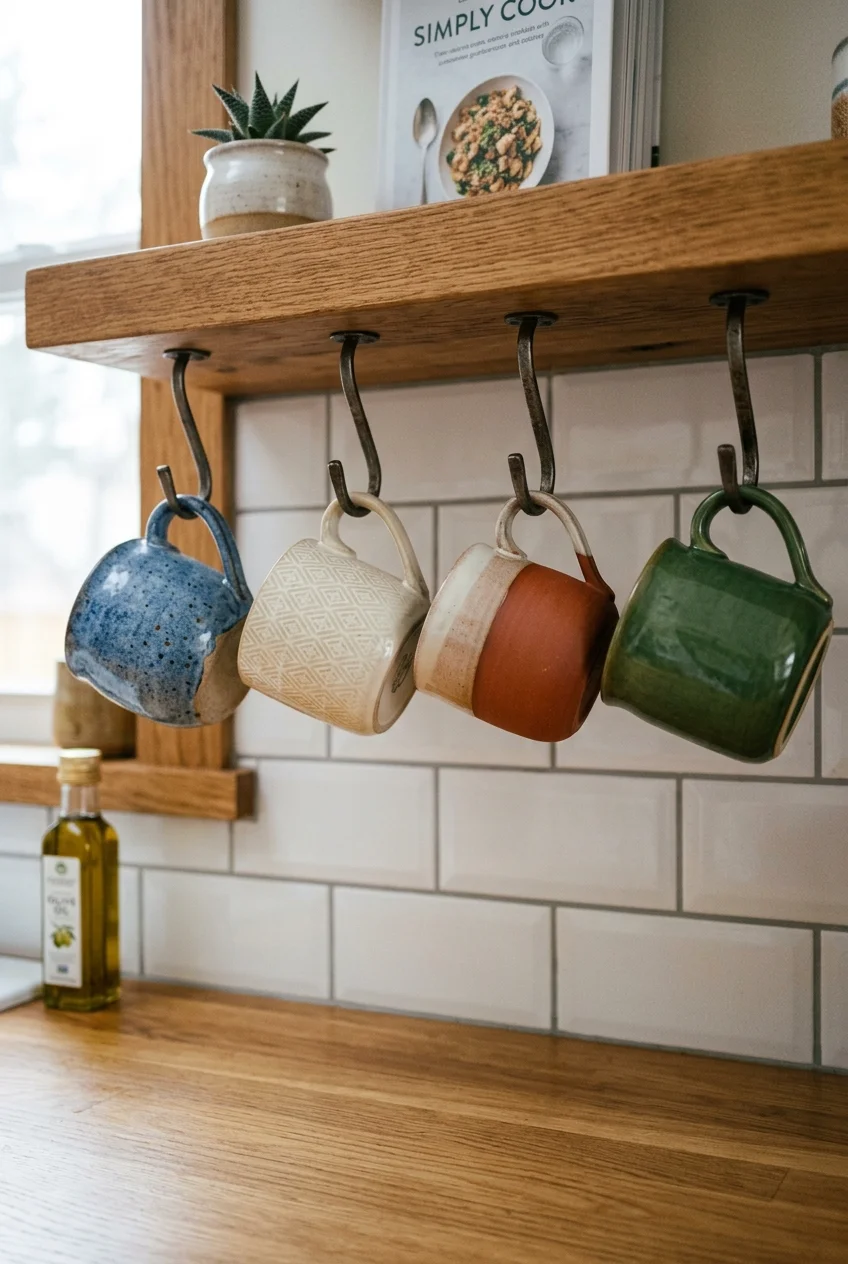
Under-shelf hooks can hold a small set of daily mugs while freeing cabinet space. Position handles so they do not collide when one mug moves.
Fasten hooks to material thick enough for the load and keep breakables away from busy walkways. Adhesive hardware needs a compatible surface and rating.
Limit the row to mugs that fit comfortably above the counter. A lower hanging edge should not interfere with appliances or preparation below.
Finishes That Make Small Kitchens Feel Intentional
Style can clarify a compact layout when color and material changes follow the architecture. Use a few deliberate relationships instead of many unrelated statement finishes.
55. Match Upper Cabinets to the Wall Color
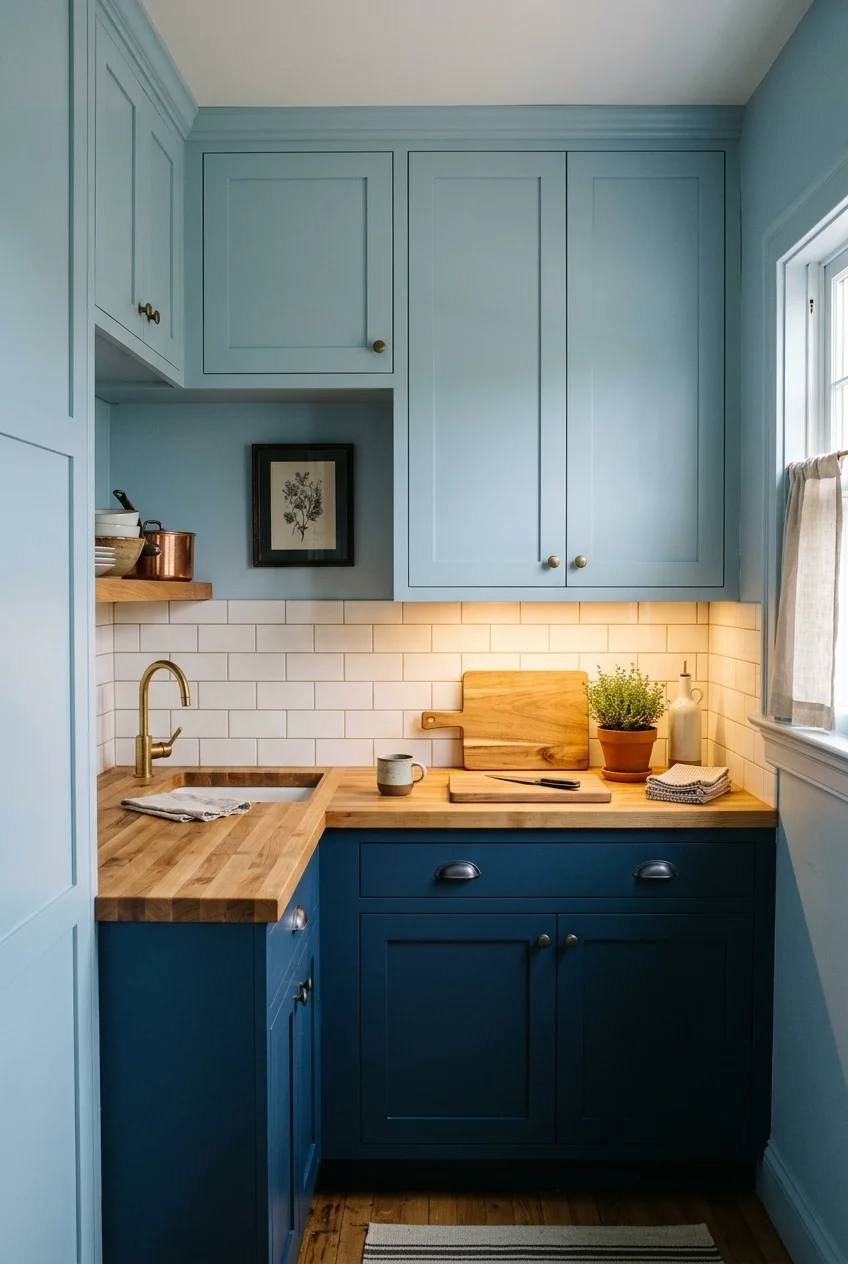
Painting upper cabinets close to the wall color reduces contrast at eye level, helping a dense storage wall read as one quieter plane.
Keep the base cabinets distinct if the room needs visual grounding. Compare painted samples under daytime, task, and evening light before committing.
Matching colors do not hide bulky proportions. Shallow uppers, consistent alignment, and restrained hardware still determine whether the wall feels calm.
56. Ground Pale Uppers With Darker Base Cabinets
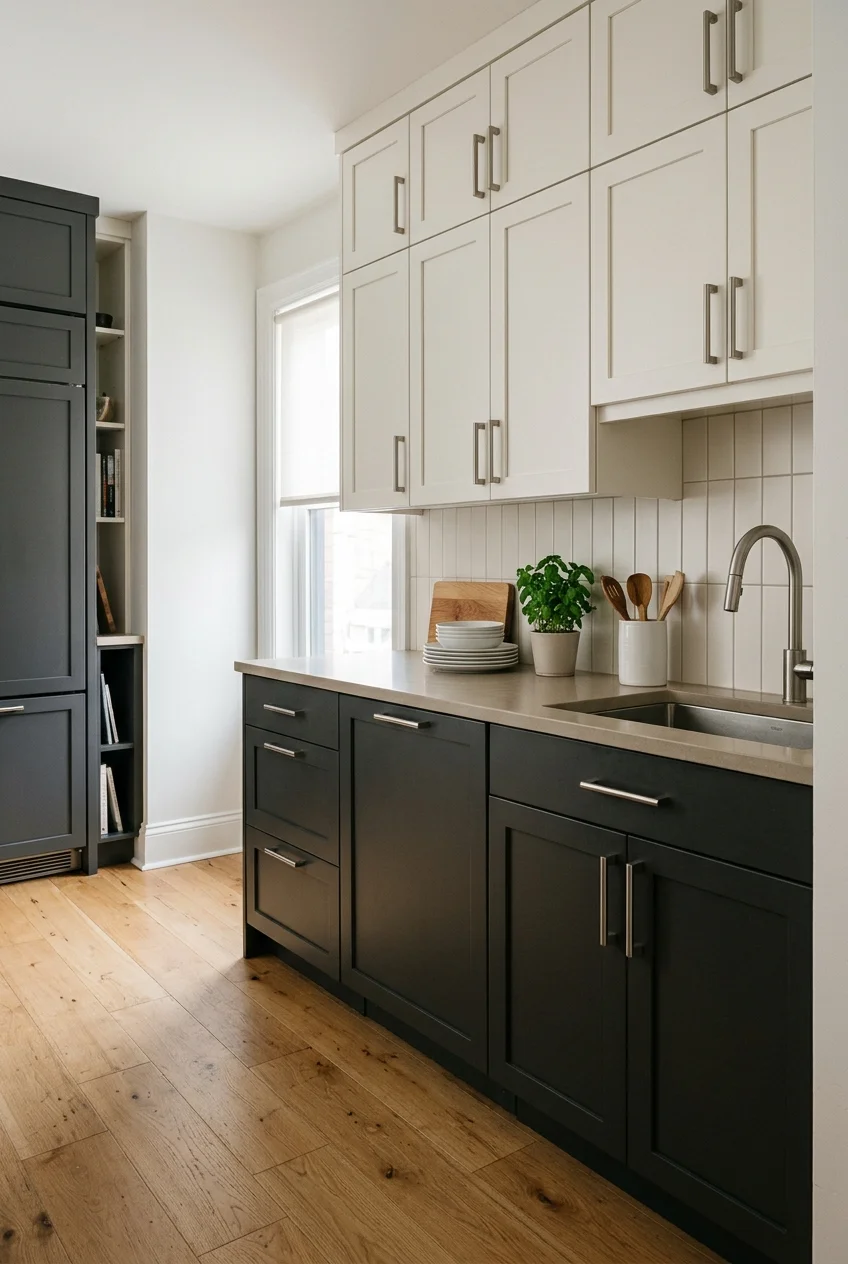
Darker base cabinets can visually anchor a tiny kitchen while lighter uppers keep the eye-level area open. The division also disguises everyday lower-cabinet scuffs.
Repeat one finish, such as hardware or counter color, across both halves. That connection prevents the two-tone scheme from looking like unrelated cabinet sets.
Sample first View large door samples beside the actual floor and counter. Small paint chips rarely reveal how undertones interact across an entire cabinet run.
57. Use One Saturated Cabinet Color Throughout
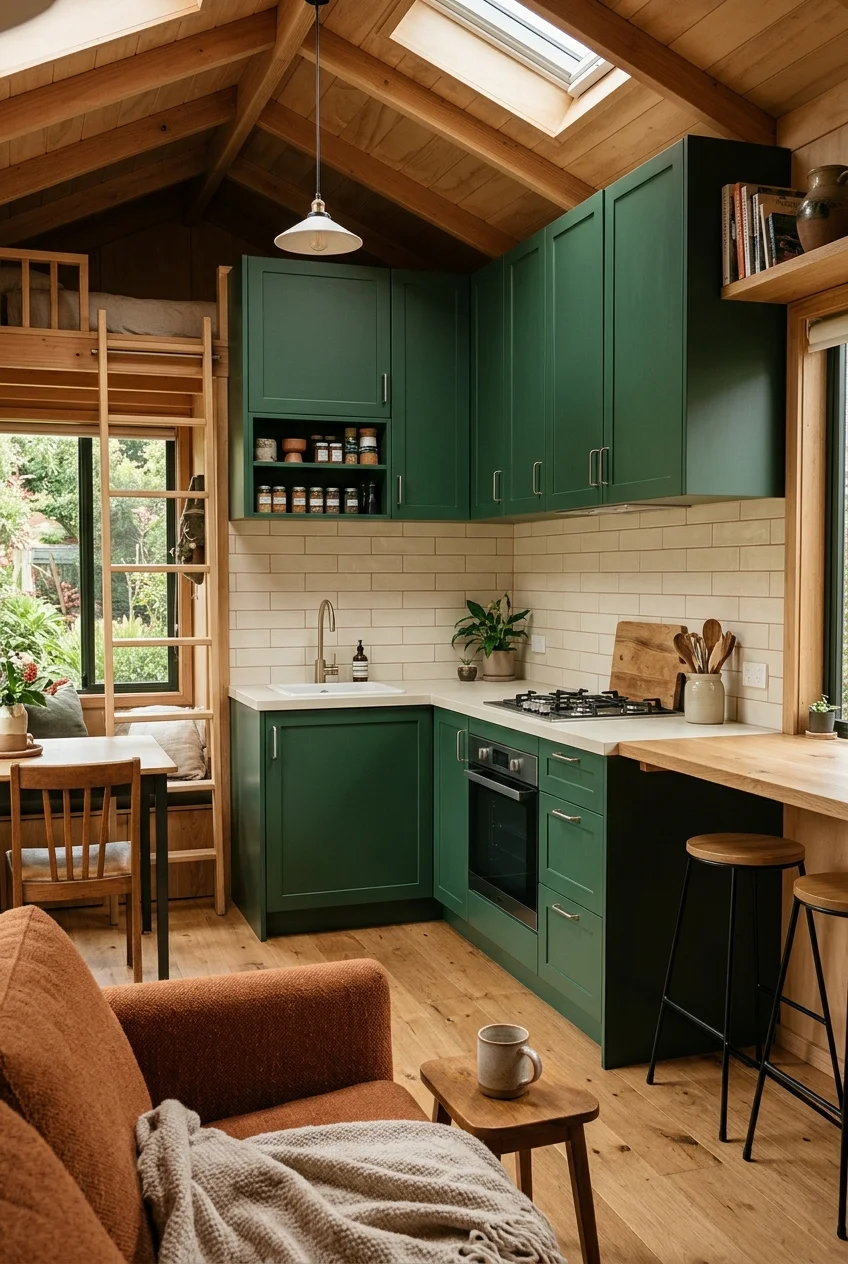
A compact kitchen can carry a confident cabinet color because the surface area is limited. One consistent hue also makes mismatched storage pieces feel related.
Balance the color with a restrained counter and backsplash rather than adding several competing patterns. Natural wood or simple metal hardware can provide contrast.
Test the color beside neighboring living-room finishes, since a tiny-house kitchen is usually visible from elsewhere. The scheme should belong to the whole interior.
58. Pair Wood Cabinet Fronts With a Matte Counter
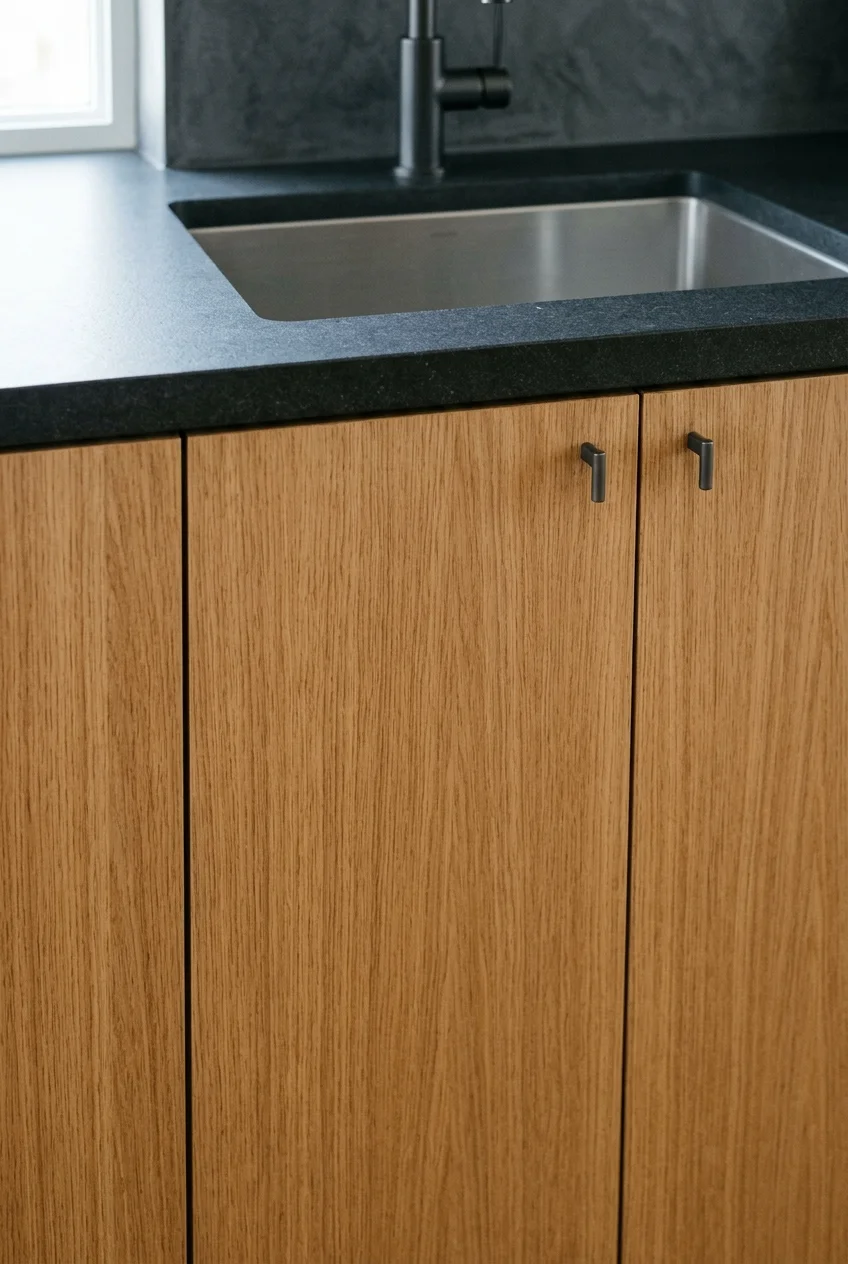
Wood fronts add grain and warmth without requiring decorative objects. A quiet matte counter lets that natural variation remain the main material feature.
Choose durable finishes appropriate to kitchen moisture and cleaning. Compare wood samples across several boards because grain and color variation are part of the result.
Run the grain consistently across adjacent fronts when a calm appearance matters. Random direction changes can make a short cabinet run look fragmented.
59. Carry the Backsplash to the Upper Boundary
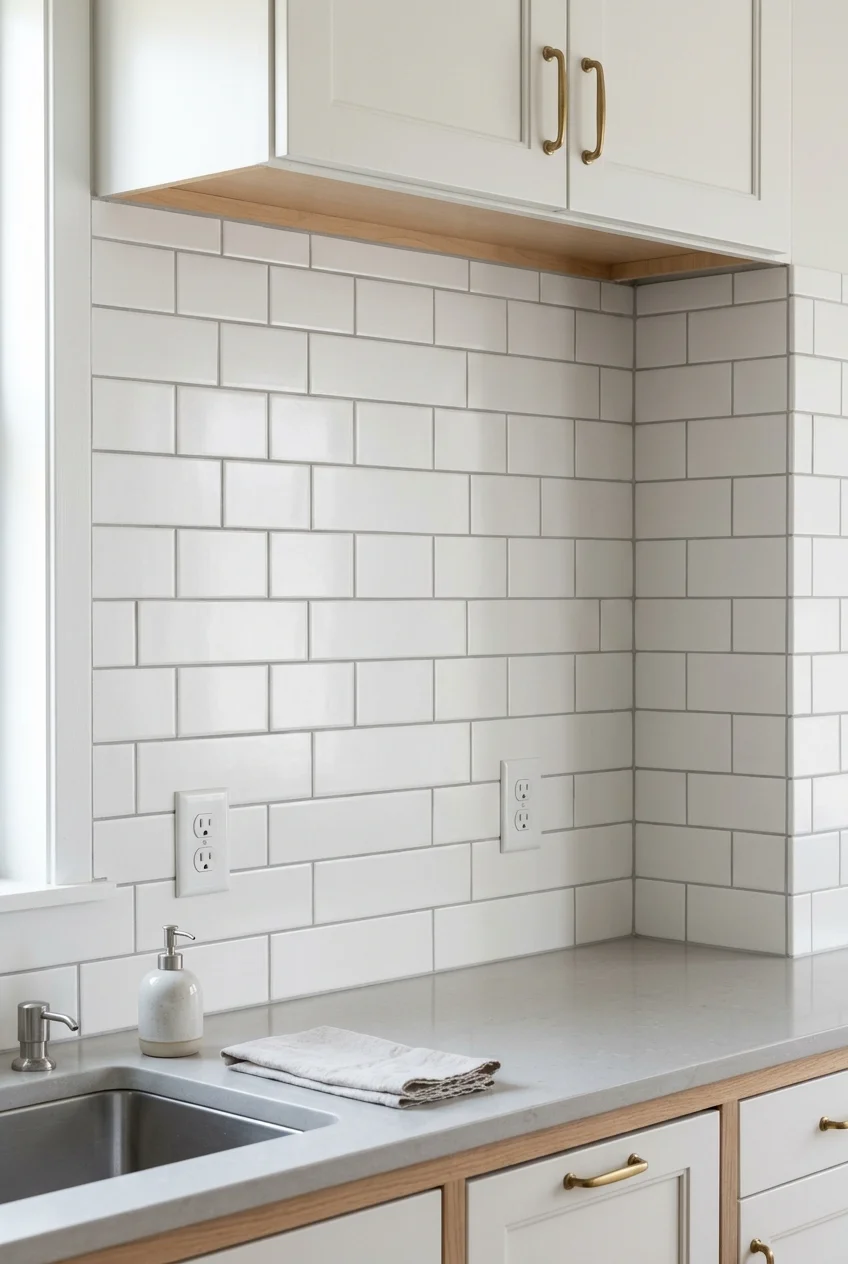
A continuous backsplash can unify the narrow space between counter and upper cabinets. Extending one material avoids several small visual bands and awkward stopping points.
Align tile courses, outlets, trim, and cabinet edges before installation. Corners should turn consistently, while tile stops cleanly at faceplates and adjoining surfaces.
Choose a finish that tolerates cleaning near cooking and water. Strong pattern can work, but fewer grout lines may be easier to maintain.
60. Mix Closed Storage With One Display Moment
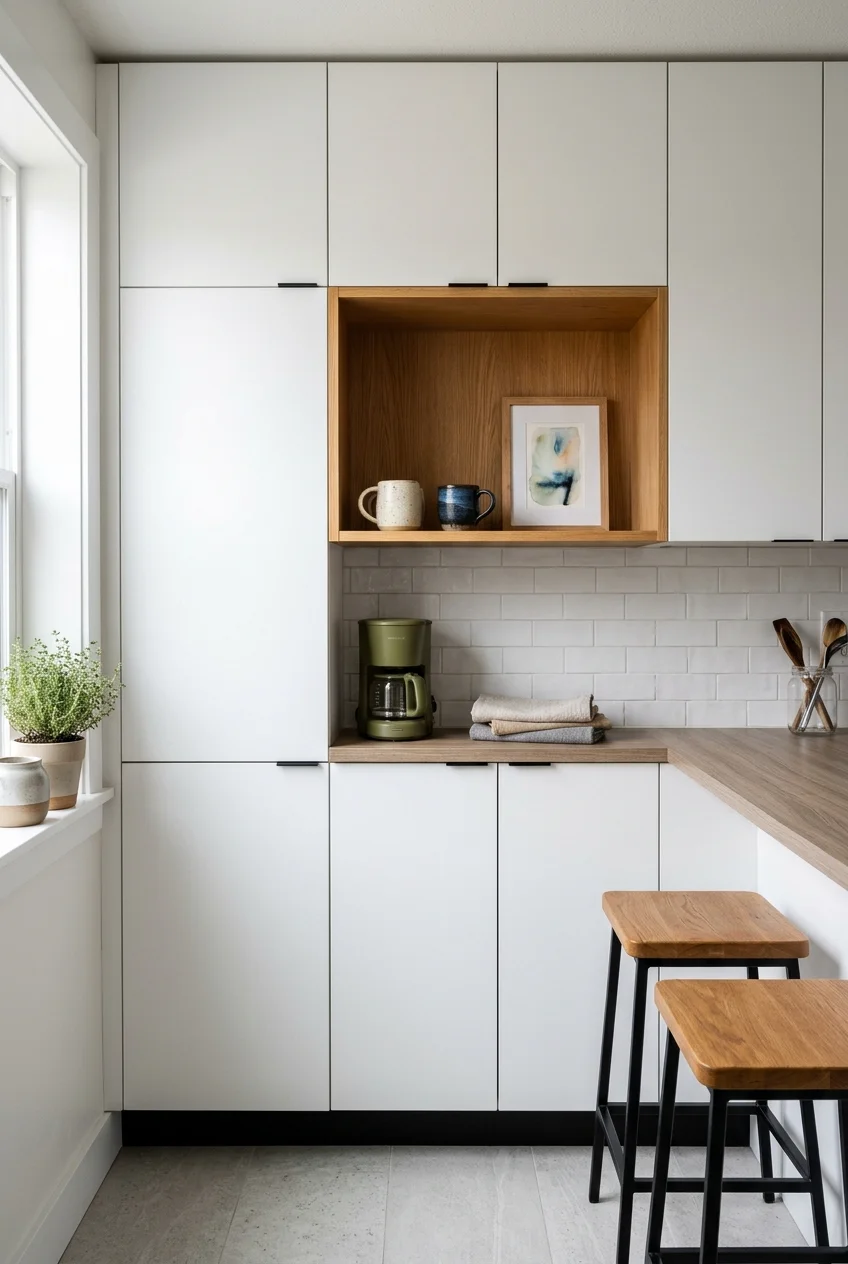
Mostly closed cabinetry keeps groceries and equipment visually quiet, while one open niche gives the kitchen personality. Place it where display will not steal work space.
Use the niche for a few daily objects, a small artwork, or attractive serving pieces. Avoid treating every open surface as another storage opportunity.
Repeat the niche material elsewhere in a small way, such as a shelf edge or stool seat. That echo makes the detail feel integrated.
Frequently Asked Questions
Which tiny house kitchen layout works best for one cook?
A single-wall, dead-end galley, or compact L shape can all work well. The best choice protects preparation space from through traffic and door conflicts.
Map the refrigerator, sink, cooktop, storage, and largest open doors before comparing styles. Your routines and house circulation matter more than a fashionable diagram.
Should a tiny house kitchen use full-size appliances?
Use the capacity your household regularly needs, not the smallest option automatically. Compact appliances save space only when their limits do not create constant workarounds.
Select exact models before final cabinetry. Width, depth, ventilation, power, plumbing, service access, and door swing can change the layout substantially.
How can a tiny kitchen gain prep space without remodeling?
Start by clearing one continuous counter stretch, then consider a sink board, roll-up drying rack, slim cart, or nearby table for temporary overflow.
Test every addition in both working and stored positions. It should not block doors, narrow the main route, or require inconvenient daily assembly.
What should be planned differently in a towable tiny house kitchen?
Movable homes need secure storage for doors, drawers, dishes, and pantry contents during travel. Added fixtures and appliances also affect weight and balance.
Work with the builder and relevant specialists on structure, utilities, road movement, and local requirements. Decorative inspiration cannot verify a travel-ready installation.