99 Christmas Village Display Ideas

This post may contain affiliate links: full affiliate disclosure.
Creating a miniature town requires more than just lining up houses on a flat table. Depth, height, and smart foundations make the difference between a cluttered shelf and a magical winter scene.
CHRISTMAS VILLAGE FOUNDATION AND LAYOUT IDEAS
1. Three-Level Christmas Village Setup
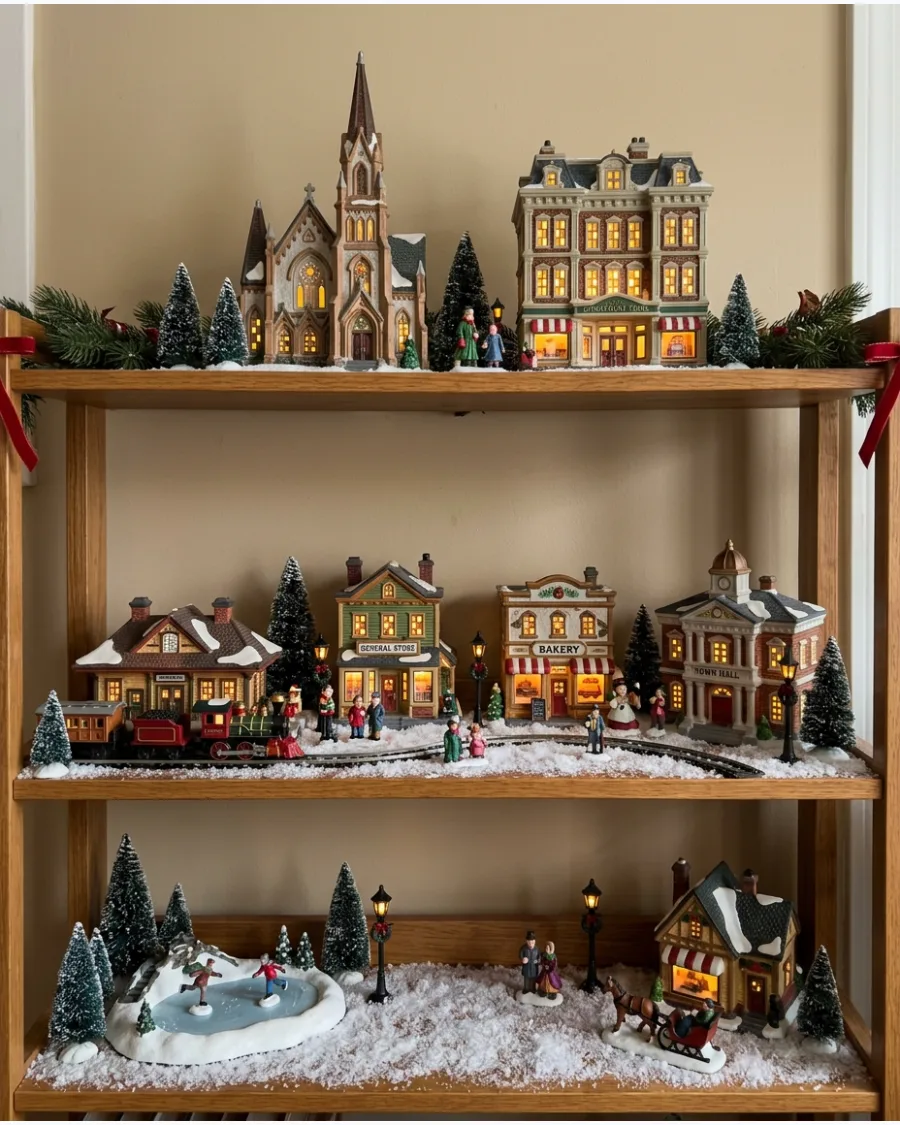
Building on different levels prevents the front row from hiding the back row. Arrange smaller accessories in the foreground and the tallest buildings in the back to draw the eye upward. This layering technique makes even a small collection feel like a sprawling town.
Flat displays look like a shelf of products, while levels look like a real community.
- $20-$50 for specialized risers or DIY materials.
- 30-minute setup for basic layering.
- Works on any wide console, sideboard, or deep mantel.
Use books of different thicknesses as instant foreground risers.
2. Hidden Box Riser Christmas Village
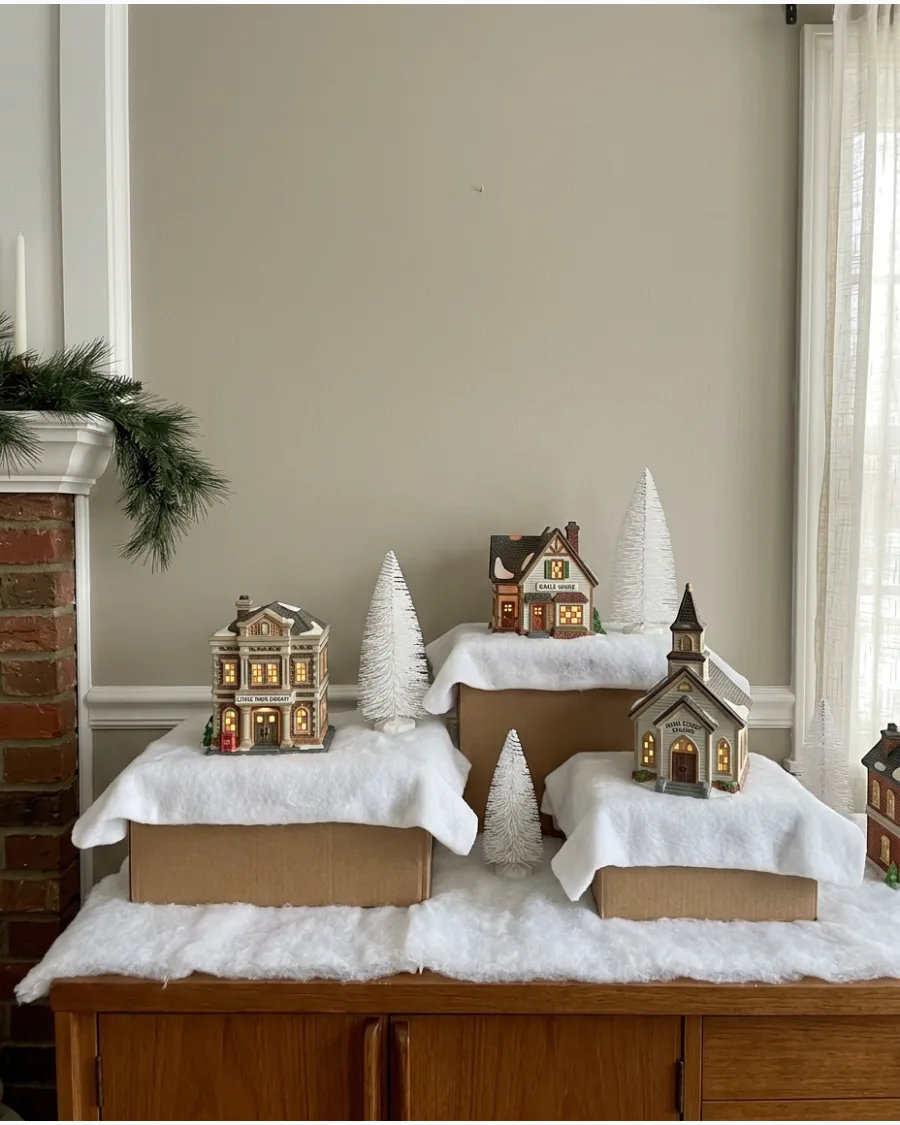
Use empty shipping boxes or plastic bins to create height without buying expensive professional platforms. Cover the boxes with a thick white fabric or batting to hide the cardboard and create a soft snowy terrain. This method is the best way to recycle household waste while giving your display professional dimension.
Fabric with a slight shimmer hides the box edges better than flat cotton.
- $0 using recycled household boxes.
- 15-minute setup to arrange and drape.
- Great for renters with limited seasonal storage.
Tape the boxes to the table so they do not slide under the weight of ceramic houses.
3. Sculpted Foam Christmas Village Platform
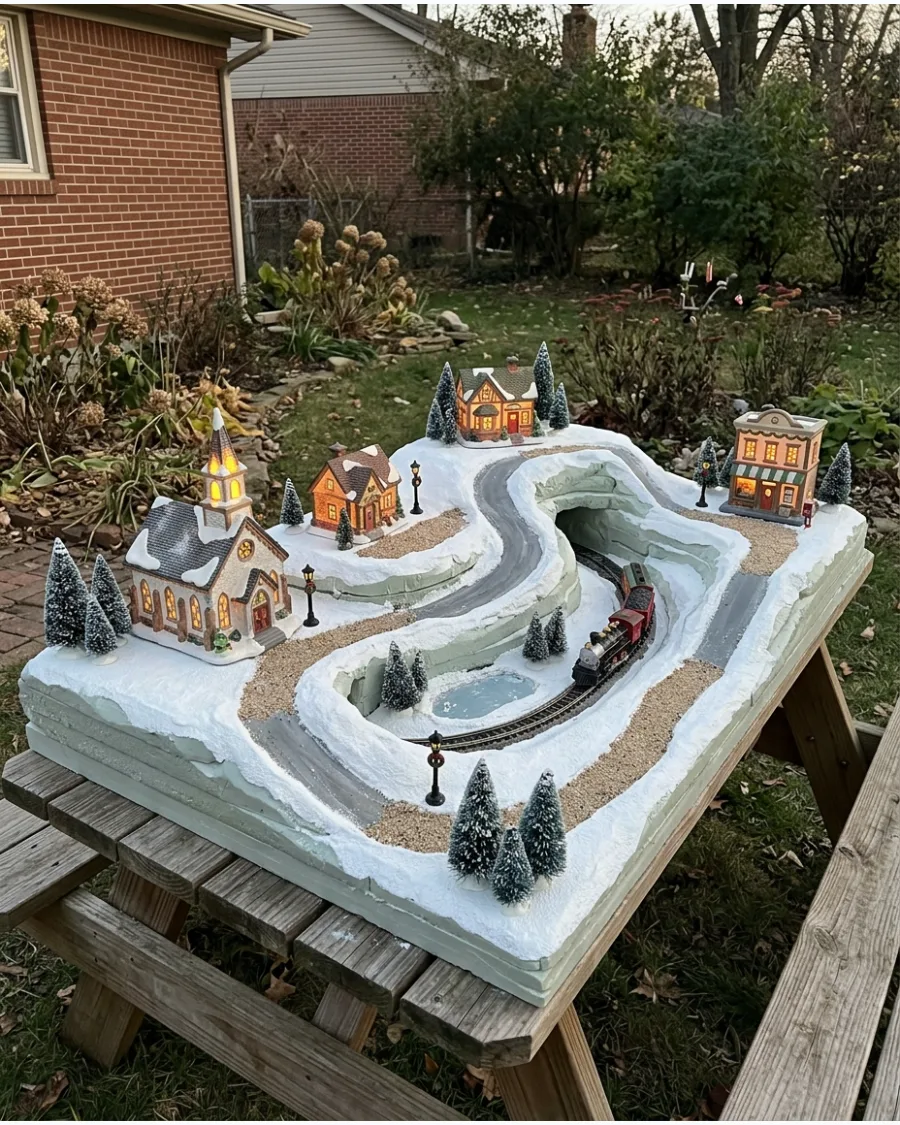
Rigid foam board allows for a custom landscape that lasts for years. Cut out specific spots for cords and carve gentle slopes into the foam for a more organic look. This provides the most stability for heavy porcelain pieces that might tilt on soft fabric.
Foam is the only way to get perfectly flat pads for houses on a hilly landscape.
- $15 for foam sheets at a hardware store.
- 2-hour project for carving and painting.
- Best for permanent, dedicated holiday displays.
Use a hot wire cutter to avoid the mess of crumbling foam bits.
4. Wooden Tiered Christmas Village Platform
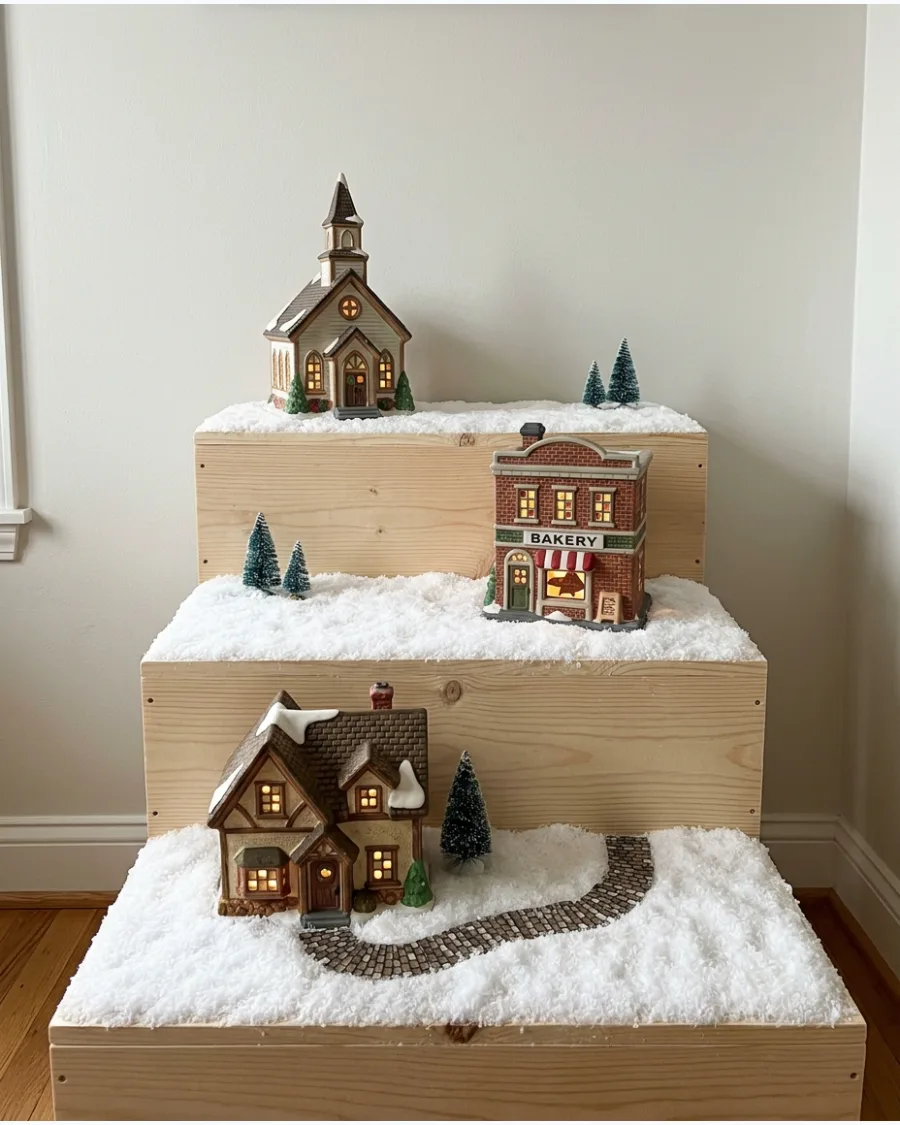
For those with heavy, high-end ceramic collections, a wooden frame offers the necessary strength. Build a simple set of stairs from plywood and paint it white or cover it with snow to create distinct neighborhoods. This structure prevents sagging over time and can be reused every season.
Wood is the safest choice if you have pets or kids who might bump the table.
- $30 for basic lumber and screws.
- 1-hour build time for a simple three-step design.
- Ideal for large, heavy ceramic collections.
Drill holes in the back of each tier to thread power cords through easily.
5. Cascading Hillside Village Setup
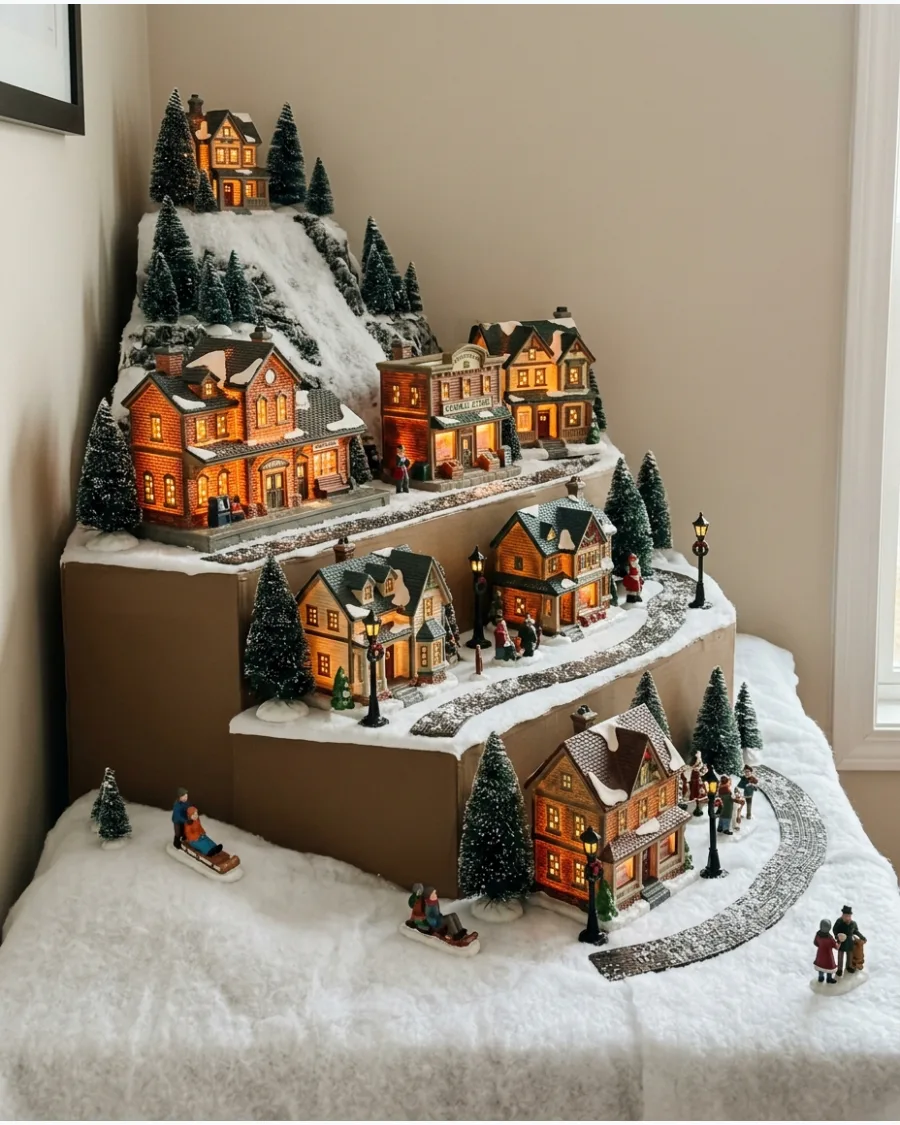
Mimic the look of a mountain town by placing the tallest elevation at one end of the table. Gradually step the buildings down toward the other side to create a natural flow for the eye. This works exceptionally well on long mantels where space is narrow but wide.
Asymmetry often looks more sophisticated than a perfectly centered peak.
- $10 for various height boxes or foam blocks.
- 20-minute setup for a cascading layout.
- Fits narrow spaces like mantels or window sills.
Place a ski lift or mountain-themed building at the highest point for logic.
6. U-Shaped Christmas Village Layout
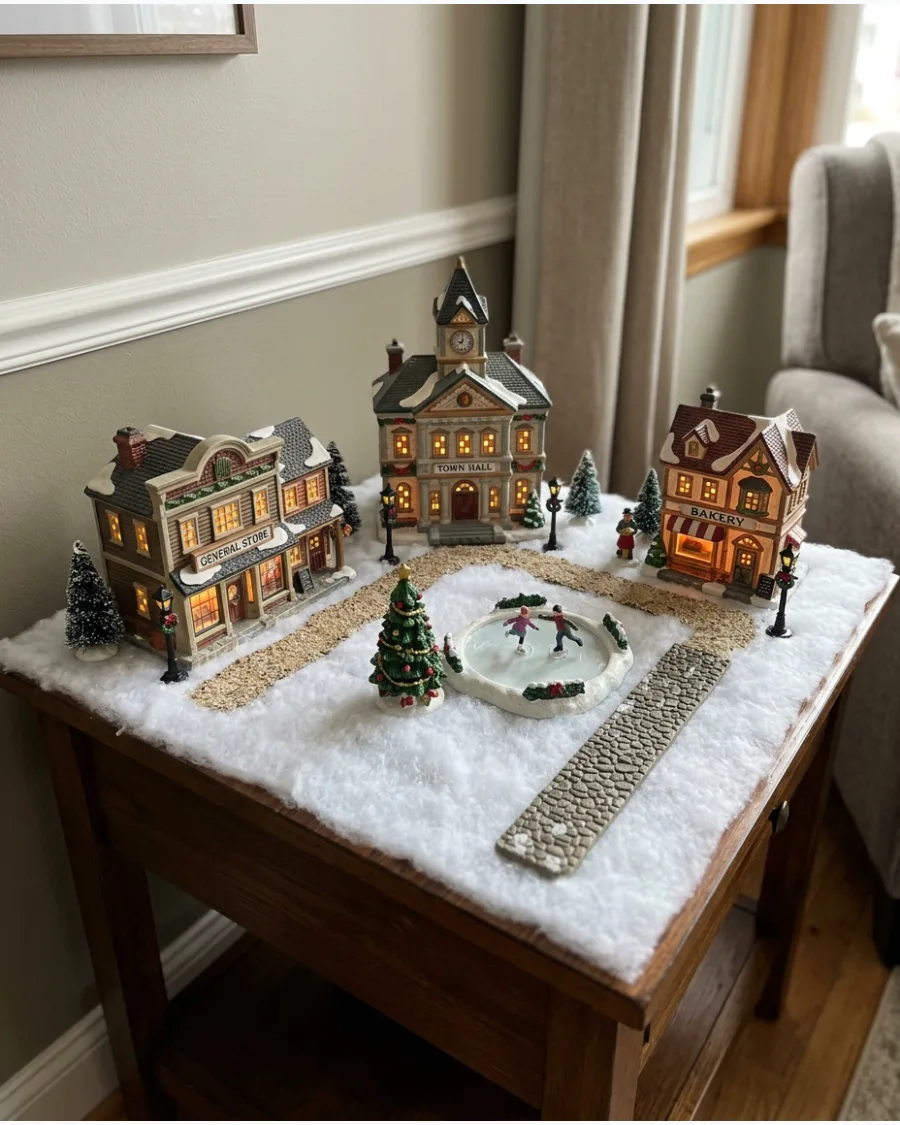
A U-shape creates a focal point in the middle of your display. Line the back and sides with buildings and leave the center open for a large feature like a skating rink or a town square. This layout invites people to look into the scene rather than just at it.
The central empty space actually makes the village look more populated and busy.
- $0 for layout adjustment.
- 30-minute setup to balance the three sides.
- Best for deep coffee tables or dining surfaces.
Use a mirror or a sheet of plexiglass in the center to mimic a frozen lake.
Holiday Decor
7. Tiered Corner Village Display
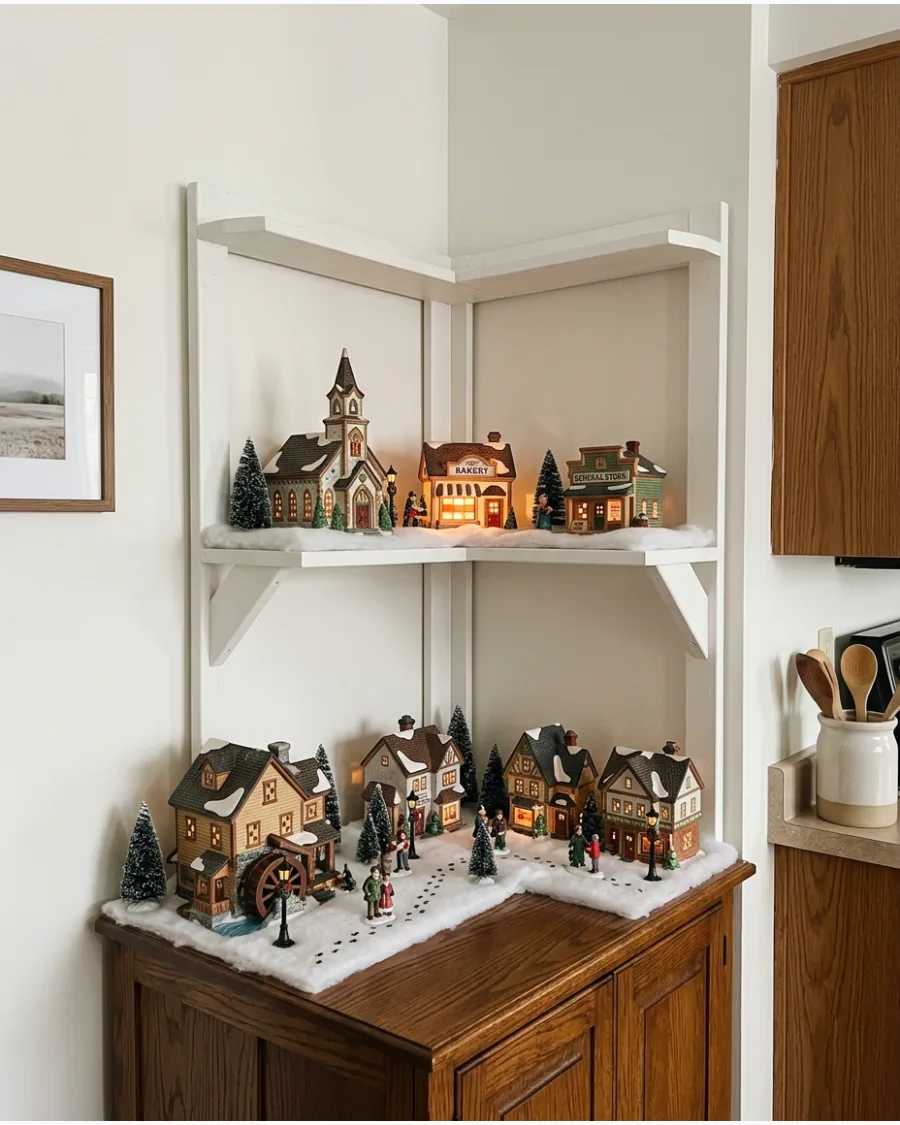
Small spaces benefit from an L-shaped layout that utilizes often-wasted corner depth on a sideboard or kitchen counter. Use foam insulation sheets cut into graduated steps to create height for back-row houses while keeping the front accessible for figurines. This tiered approach ensures every building is visible regardless of its size or placement.
For a polished look, a single strand of warm white LED lights should be tucked behind the risers rather than draped over them to avoid a cluttered appearance.
- Budget-friendly foam boards are available at hardware stores year-round for custom riser construction.
- Position the tallest structures in the innermost corner and scale down toward the edges for visual balance.
- Swap traditional cotton batting for a white felt runner to create a smoother, more modern landscape surface.
Most people skip this: Hiding power strips inside a hollow base riser keeps cords organized and invisible from every angle.
CHRISTMAS VILLAGE FOUNDATION AND LAYOUT IDEAS
8. Diagonal Christmas Village Layout
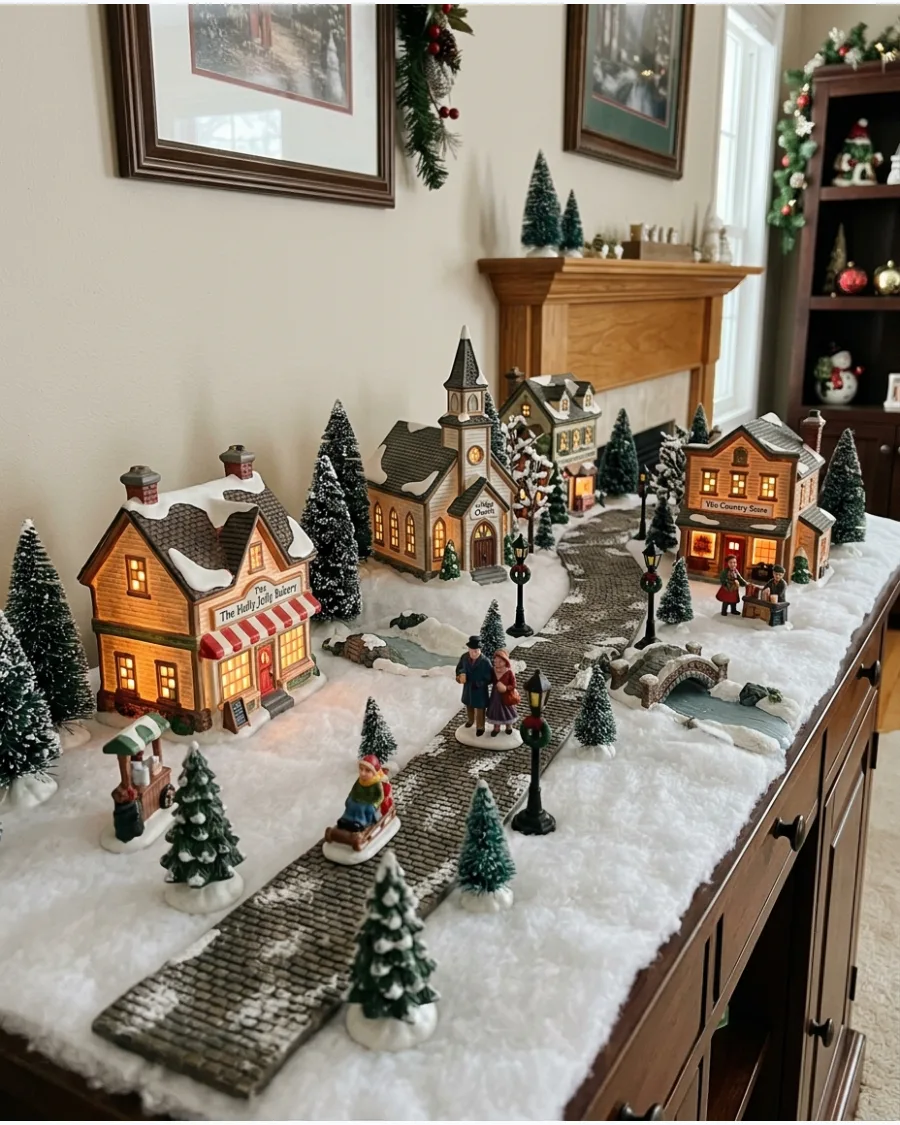
Placing your main street at an angle creates a sense of movement. Instead of parallel lines, run the road from the front left to the back right to trick the eye into seeing more depth. This breaks up the boxy feel of rectangular furniture.
Diagonal lines are the easiest way to make a small collection look much larger.
- $0 for layout adjustment.
- 15-minute setup for the diagonal line.
- Works best on square or rectangular tables.
Use a strip of grey felt to act as a diagonal road for the houses to follow.
9. Circular Christmas Village Setup
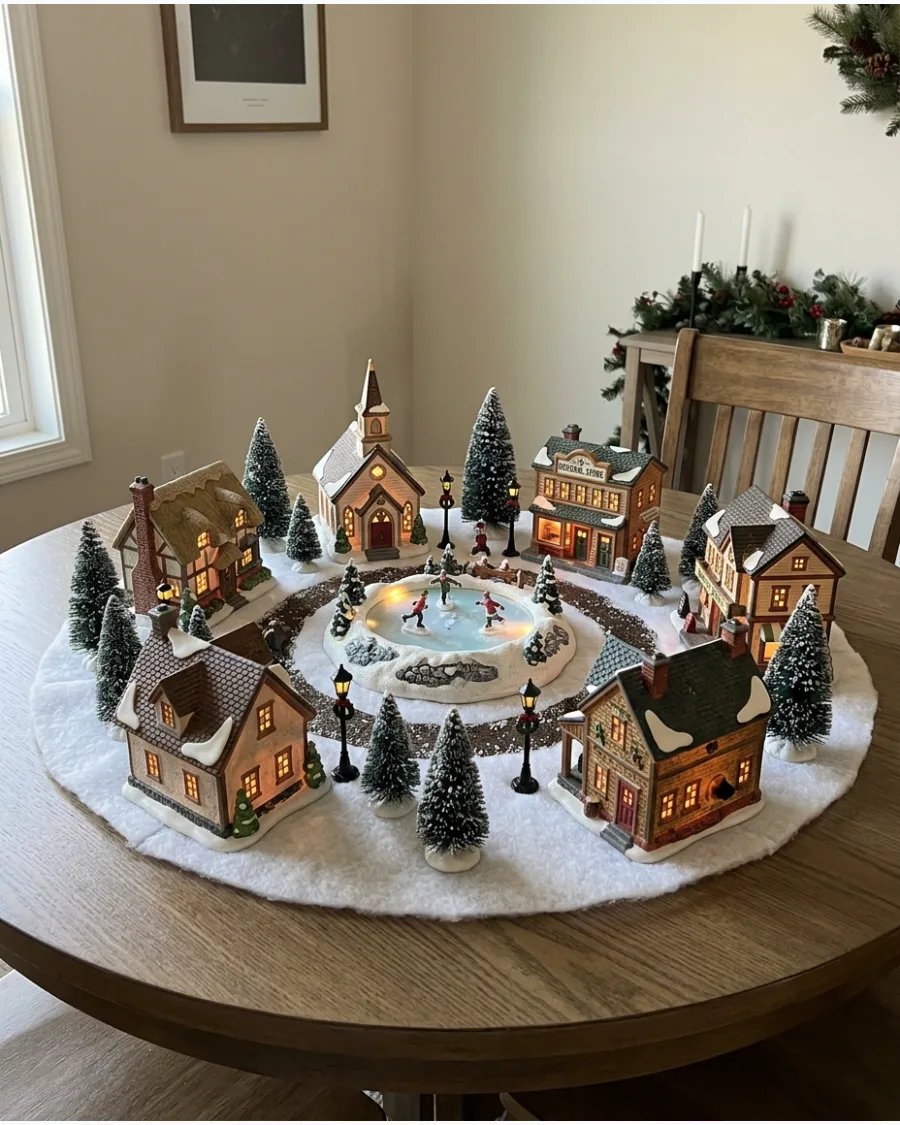
A circular layout is perfect for a display that needs to be viewed from all sides. Arrange the buildings in a ring around a central landmark like a large Christmas tree or a park fountain. This works best on round dining tables or in the center of an entryway.
This is the most social layout because it allows multiple people to view it at once.
- $0 for layout adjustment.
- 30-minute setup for 360-degree balance.
- Ideal for entryway tables or circular dining areas.
Hide all the power cords in the center under the main landmark.
10. Long Main Street Village Layout
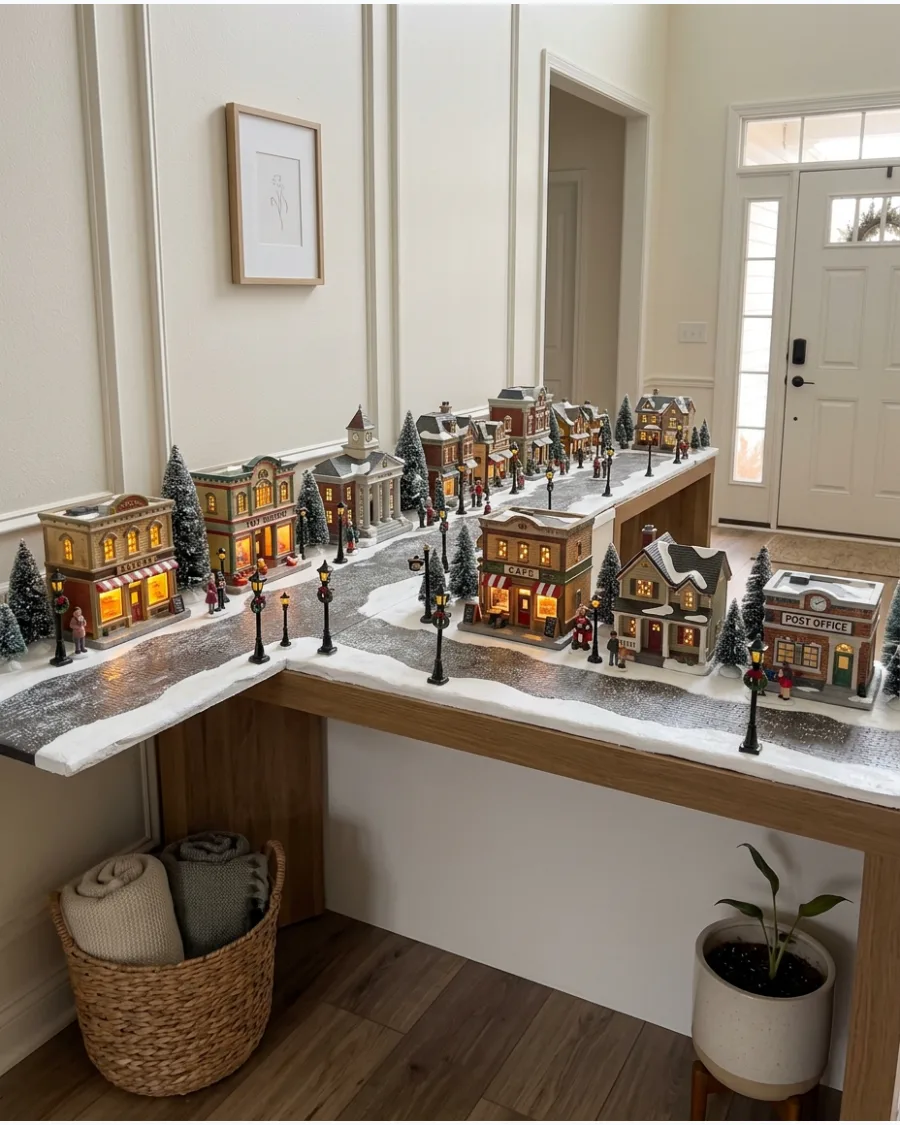
Focus on a single, bustling street to create a classic downtown feel. Line up shops and cafes along a straight path with streetlights and tiny pedestrians to simulate a busy shopping district. This traditional look is timeless and very easy to organize by building type.
Keeping the shops together and houses together makes the miniature world feel realistic.
- $5-$10 for extra pedestrians or streetlights.
- 20-minute setup for a linear street.
- Best for narrow hallways or console tables.
Space the streetlights evenly to reinforce the look of a planned city street.
11. Central Town Square Christmas Village
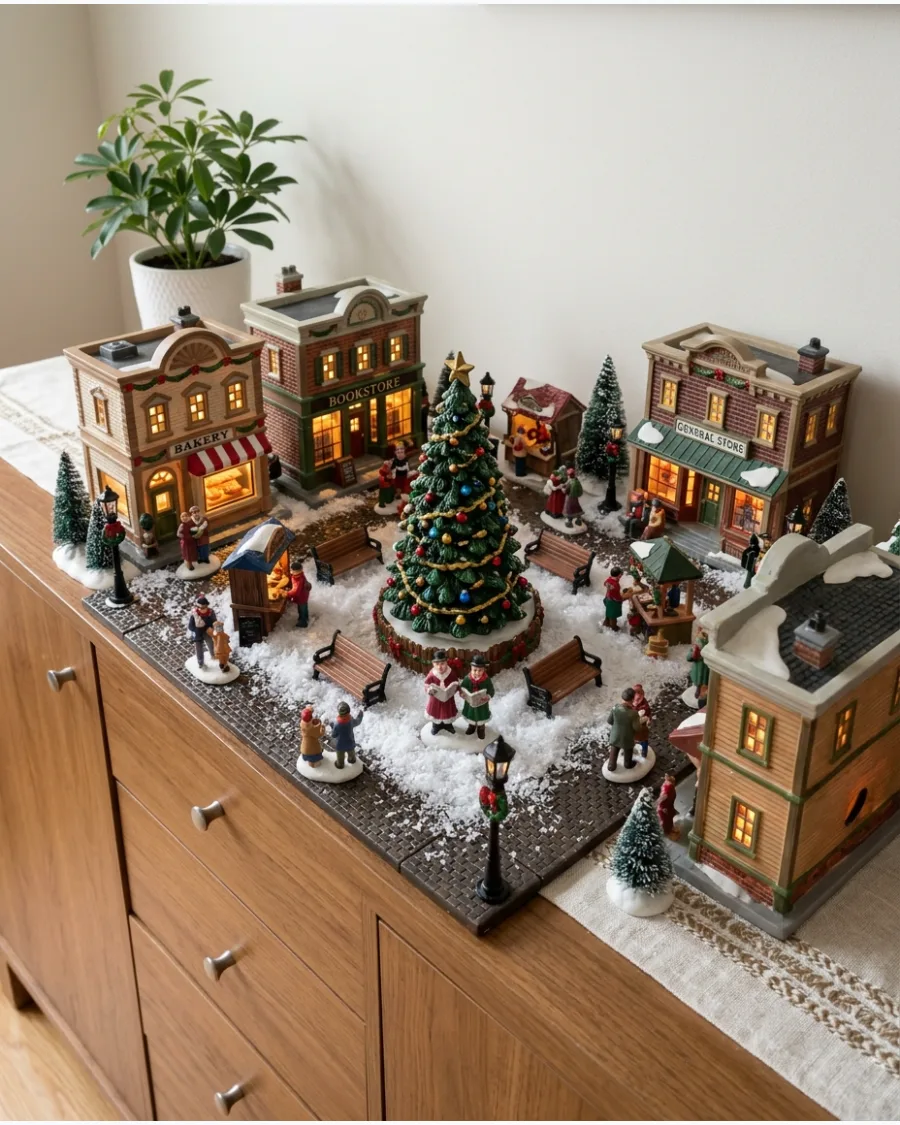
Design the entire setup around an open central plaza to create a realistic community feel.
This layout uses a large decorated tree, benches, and tiny vendors as the heart of the display. Place the tallest commercial buildings at the edges of the plaza to frame the central scene. Open spaces prevent the village from looking like a cluttered shelf and allow the details of the figures to stand out.
- Plan for a 12-inch diameter open space for the square.
- Set the central tree first, then arrange figures facing inward toward it.
- Works well on round dining tables or large square coffee tables.
Quick win: Use a small round mirror in the center of the square to mimic a frozen skating pond.
12. Church-on-the-Hill Village Layout
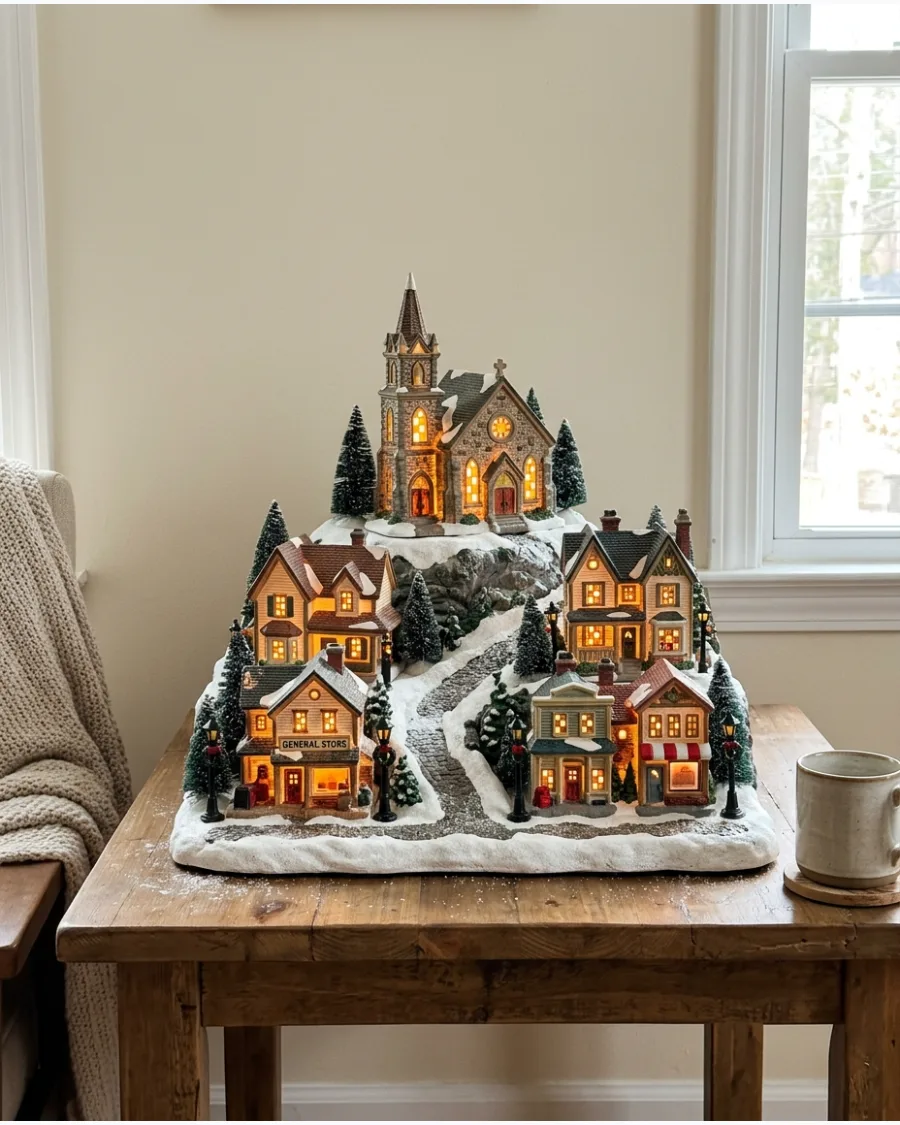
Place a church on the highest rear section of the display to create a classic silhouette. Build the residential and shopping areas on lower levels to mimic a real town nestled in a valley.
Use a sturdy box or foam block hidden under a snow blanket to give the church its height. Creating a clear focal point at the back draws the eye upward and adds instant drama to the display.
- Use a riser at least 4 inches taller than the main surface.
- Place the church in the back-center or a back corner for balance.
- Ideal for narrow mantels where vertical space is more available than depth.
Most people skip this: Angle the church slightly toward the center rather than facing it dead-front for a more natural look.
13. Residential Neighborhood Christmas Village
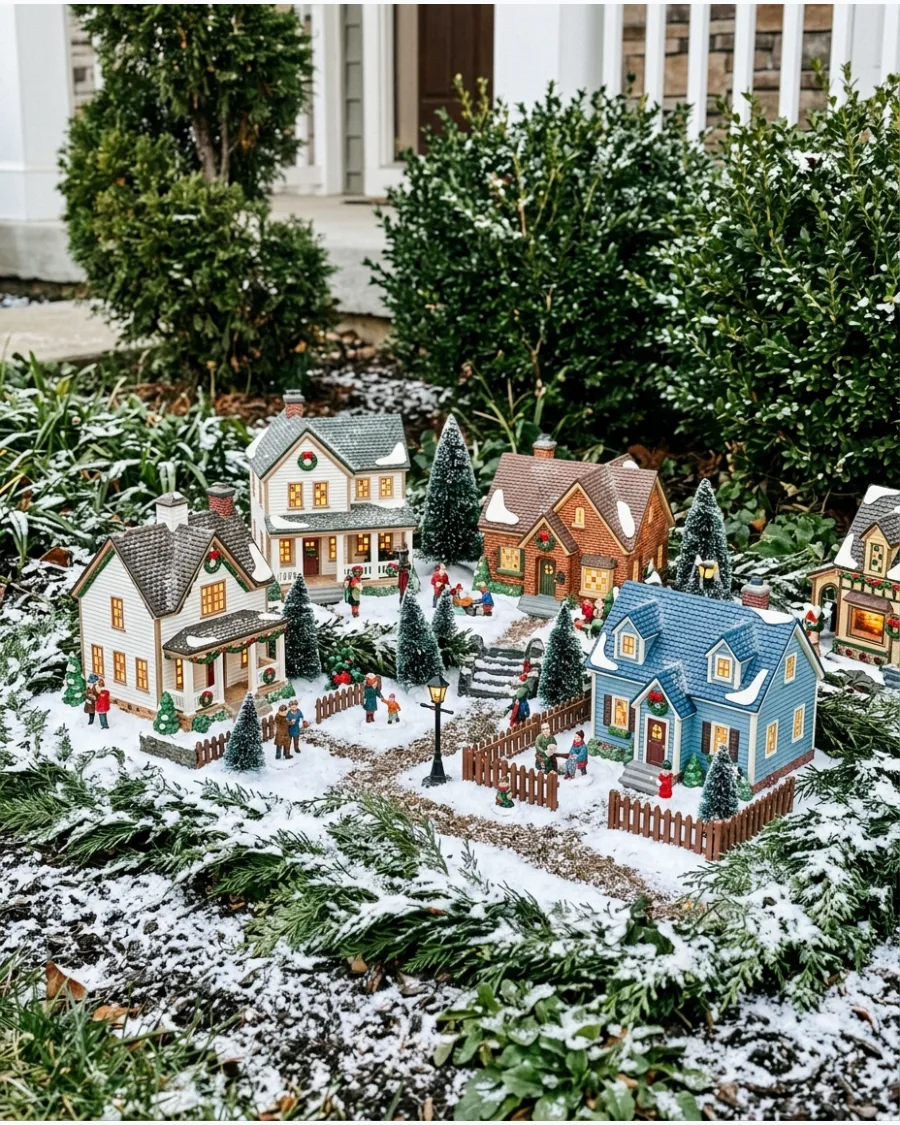
Group several miniature homes together to create a cozy residential zone. Add front yards, tiny sidewalks, and fences to separate the houses from the main road.
Line the front of the houses with small bottle brush trees to act as privacy hedges. Clustering similar buildings tells a clearer story than mixing shops and houses randomly throughout the scene.
- Budget-friendly using standard cardboard or ceramic houses.
- Space houses 3 to 5 inches apart to leave room for yard details.
- Adapt for small shelves by grouping just two houses with a shared fence.
Best shortcut: Use white felt strips to create clean, uniform sidewalks between the houses.
14. Separate Village District Setup
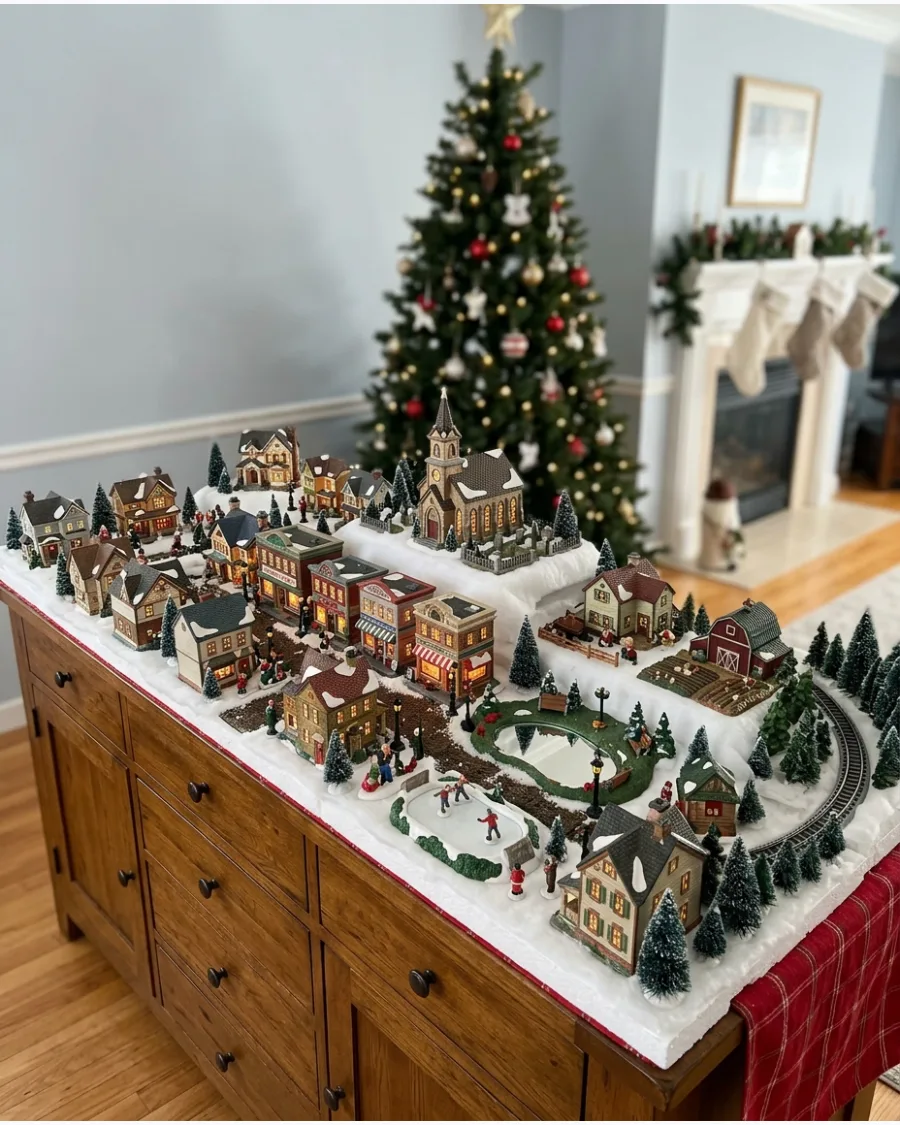
Divide a large Christmas village into specific zones like shopping, residential, and recreation. Use different textures like faux snow for the town and moss or pebbles for the countryside areas.
Leave a clear gap or a 'road' made of gray felt between the districts to define the boundaries. Defining zones makes a large collection feel organized and intentional rather than overwhelming.
- Best for collections with 10 or more buildings.
- Position the 'downtown' shopping district near the center of the room.
- Scales easily by adding or removing districts based on table size.
Quick win: Use a different style of miniature tree for each district to reinforce the visual separation.
15. Front-to-Back Layered Village
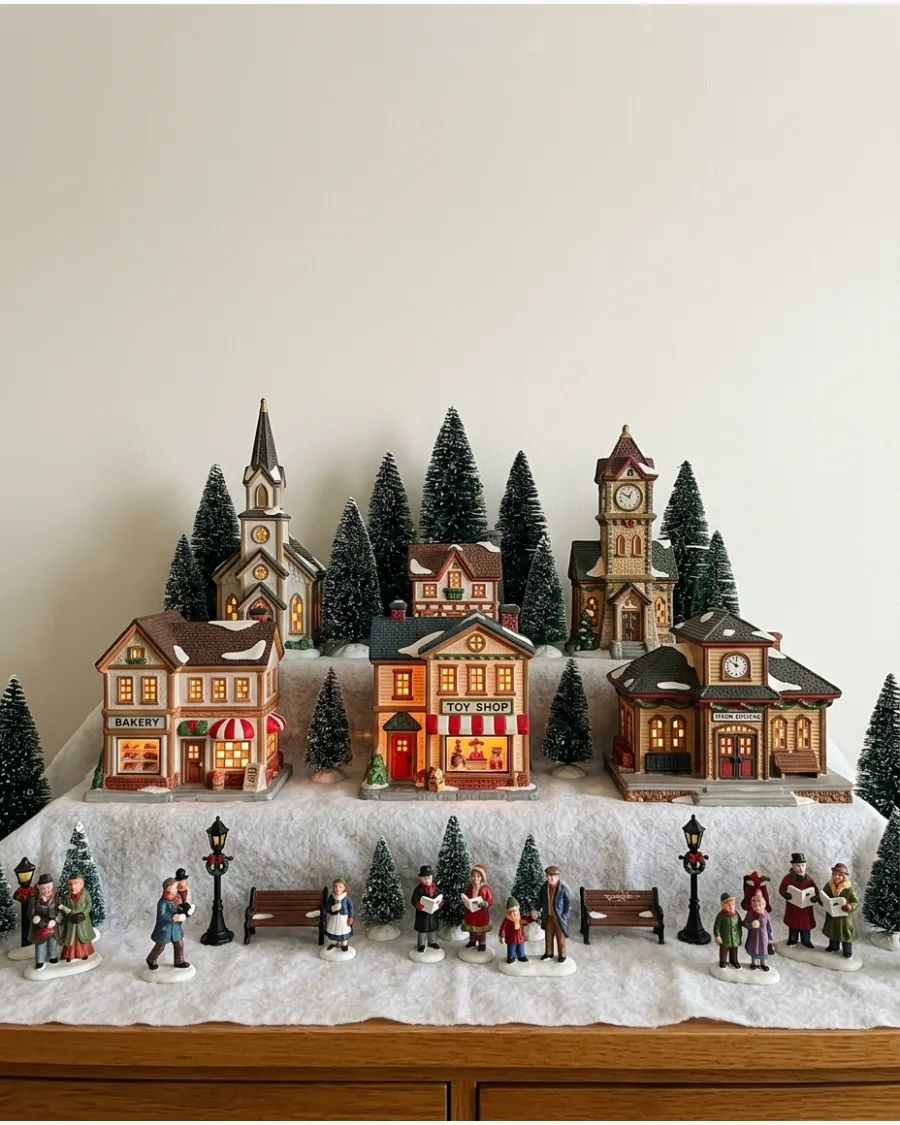
Create depth by positioning detailed figures and small accessories in the immediate foreground. Place medium buildings in the middle and the tallest structures or large trees at the very back.
Ensure no tall tree is directly in front of a building window to keep the internal lights visible. Layering by height ensures every piece is seen and makes the village feel much larger than it actually is.
- Takes about 30 minutes to layer correctly.
- Place figures on the 'street' level closest to the viewer.
- Works for any style, from rustic wood to polished porcelain.
Most people skip this: Crouch down to eye level while setting up to make sure small figures aren't hidden by buildings.
16. Modular Christmas Village Platform
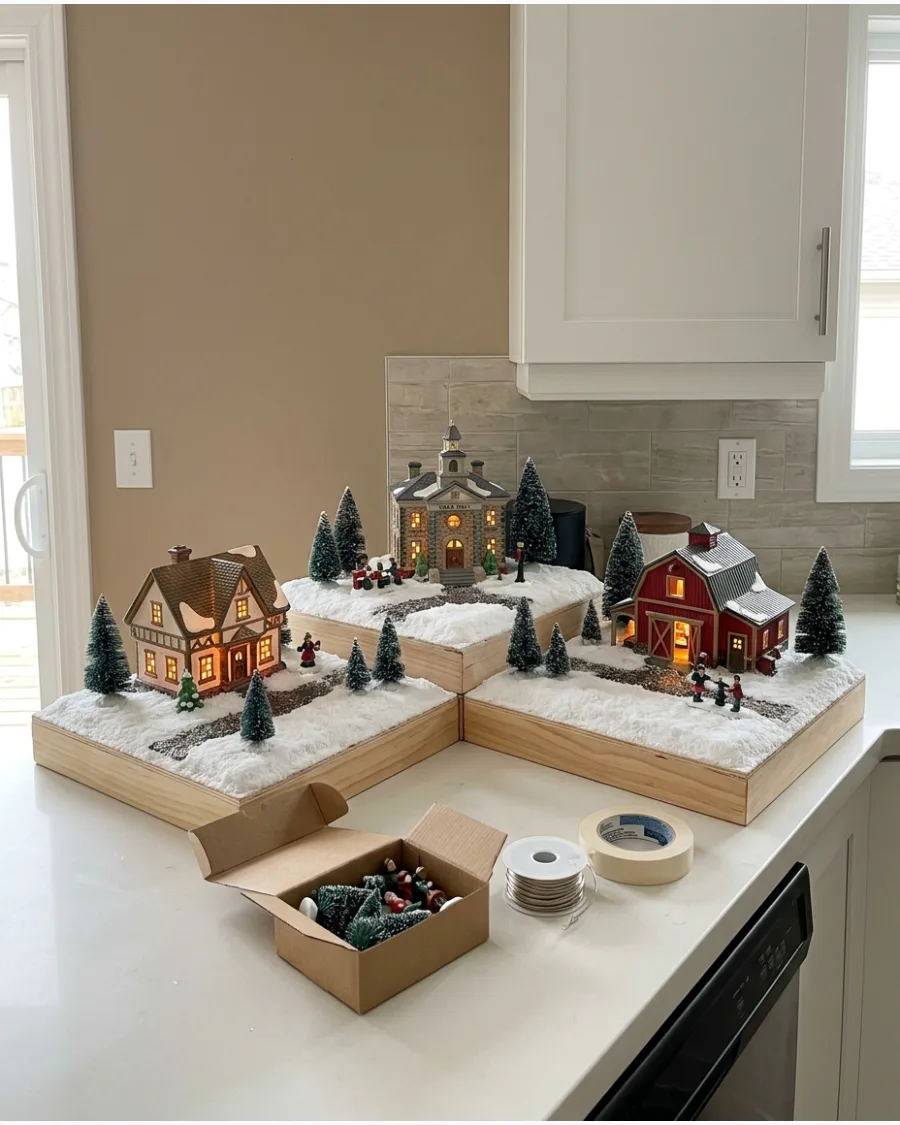
Create several separate platform sections using foam board that fit together like a puzzle. This makes it easy to build the village in segments on a kitchen counter before moving it to the final display spot.
Label the bottom of each platform section so you know exactly where they connect next year. Modular bases are the best way to handle large displays without the stress of moving one massive, heavy board.
- Requires foam insulation board and a craft knife.
- Build sections 12×12 inches for easy handling and storage.
- Great for renters who may need to fit the village into different spaces each year.
Best shortcut: Use Velcro strips on the edges of the platforms to keep them from sliding apart on the table.
17. Stable Building Pad Setup
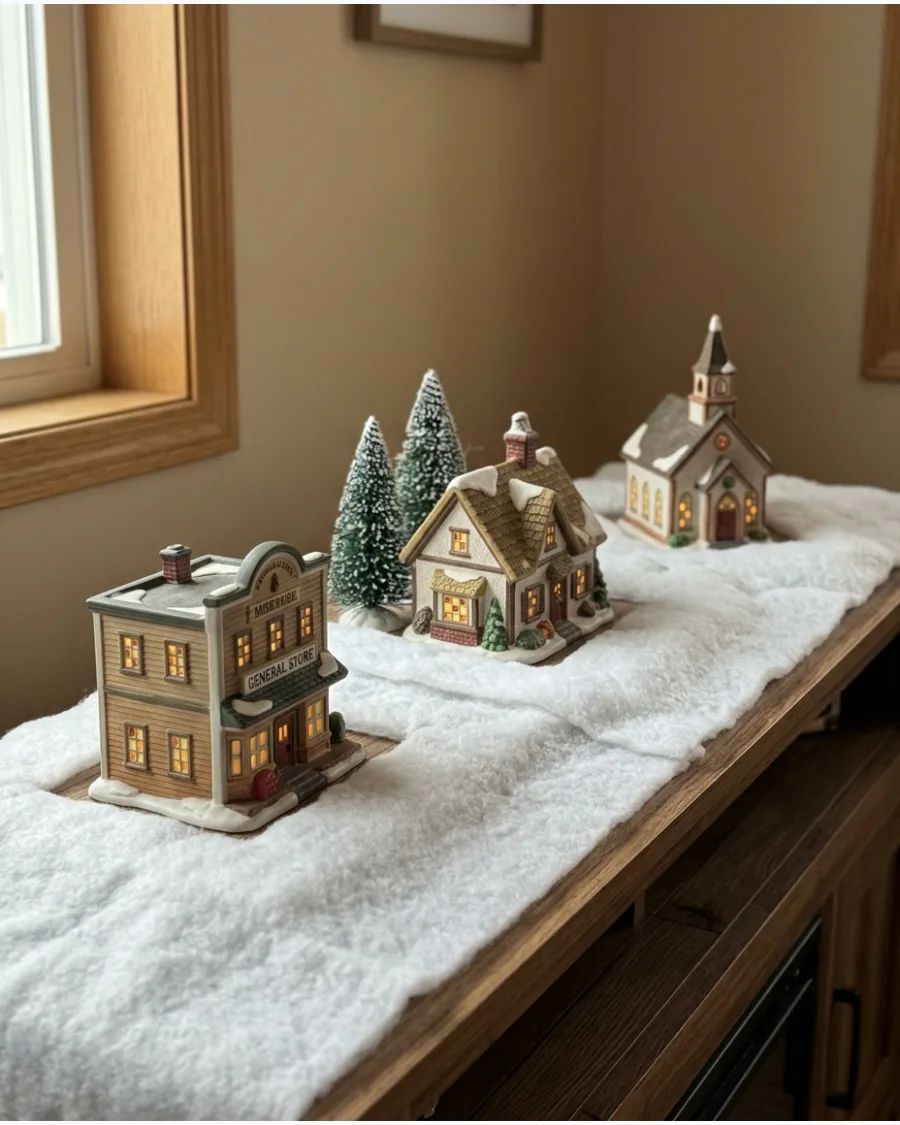
Create flat, recessed areas for each ceramic building within your snowy hills. This ensures the houses sit perfectly level and don't wobble on top of uneven batting or foam.
Trace the base of each house onto your platform and cut a shallow indent for it to sit in. Leveling the houses prevents that cheap, tilted look that ruins the realism of a miniature scene.
- Setup takes extra time during the initial build but saves time later.
- Use a hot wire cutter for the cleanest edges in foam pads.
- Keeps top-heavy ceramic buildings from tipping over and breaking.
Quick win: If you aren't using foam, place a small piece of cardboard under the snow blanket to create a flat 'foundation' for each house.
18. Hidden Cord Channel Village Platform
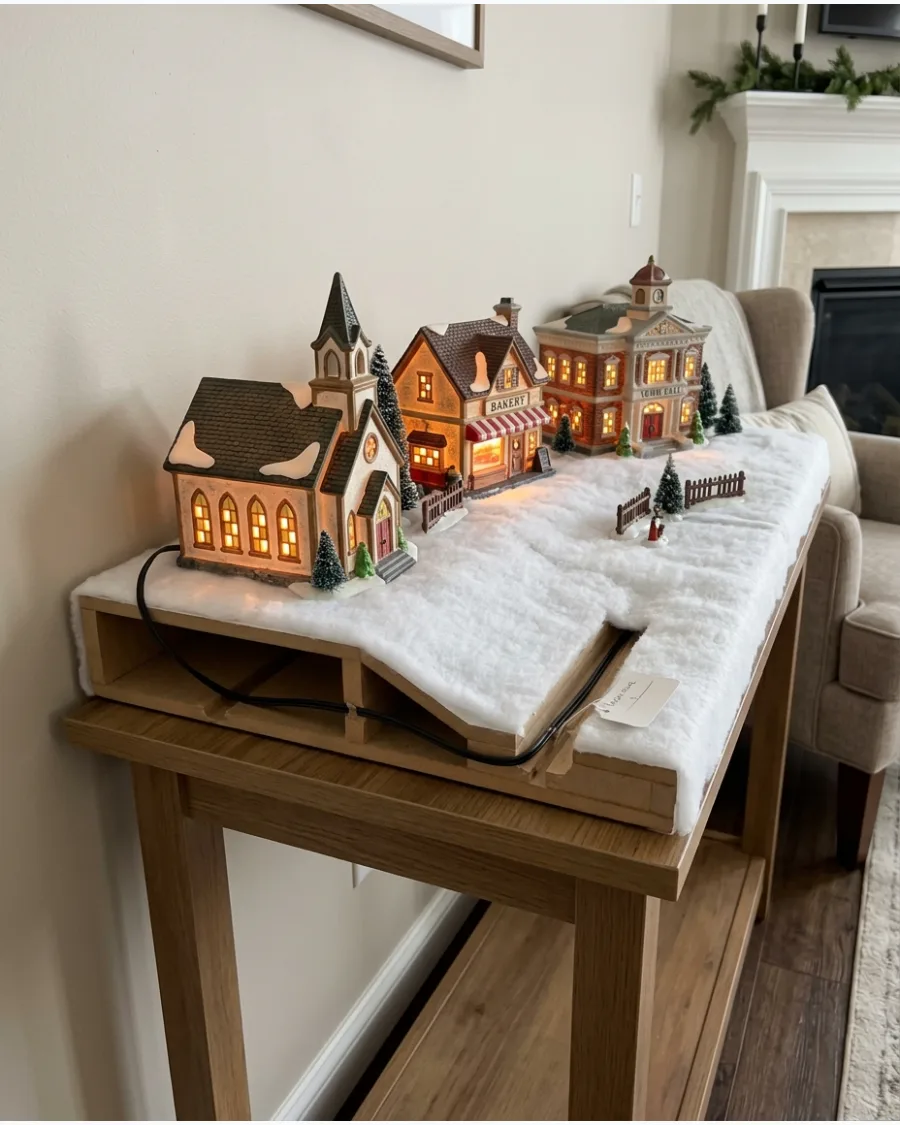
Cut narrow channels into your village base so electrical cords can travel invisibly between buildings. This removes the need to drape snow over bulky wires, which often creates unnatural lumps in the landscape.
Run all cords to a single power strip hidden behind the display or under the table. Visible power cords are the biggest distraction in a miniature display and should be hidden at all costs.
- Use 1-inch thick foam to allow enough depth for cord channels.
- Group 2-3 buildings to one power cord whenever possible.
- Essential for displays with more than five lighted buildings.
Best shortcut: Use white electrical tape to secure cords inside the channels before covering them with snow.
Home Decor
19. Narrow Depth Village Display
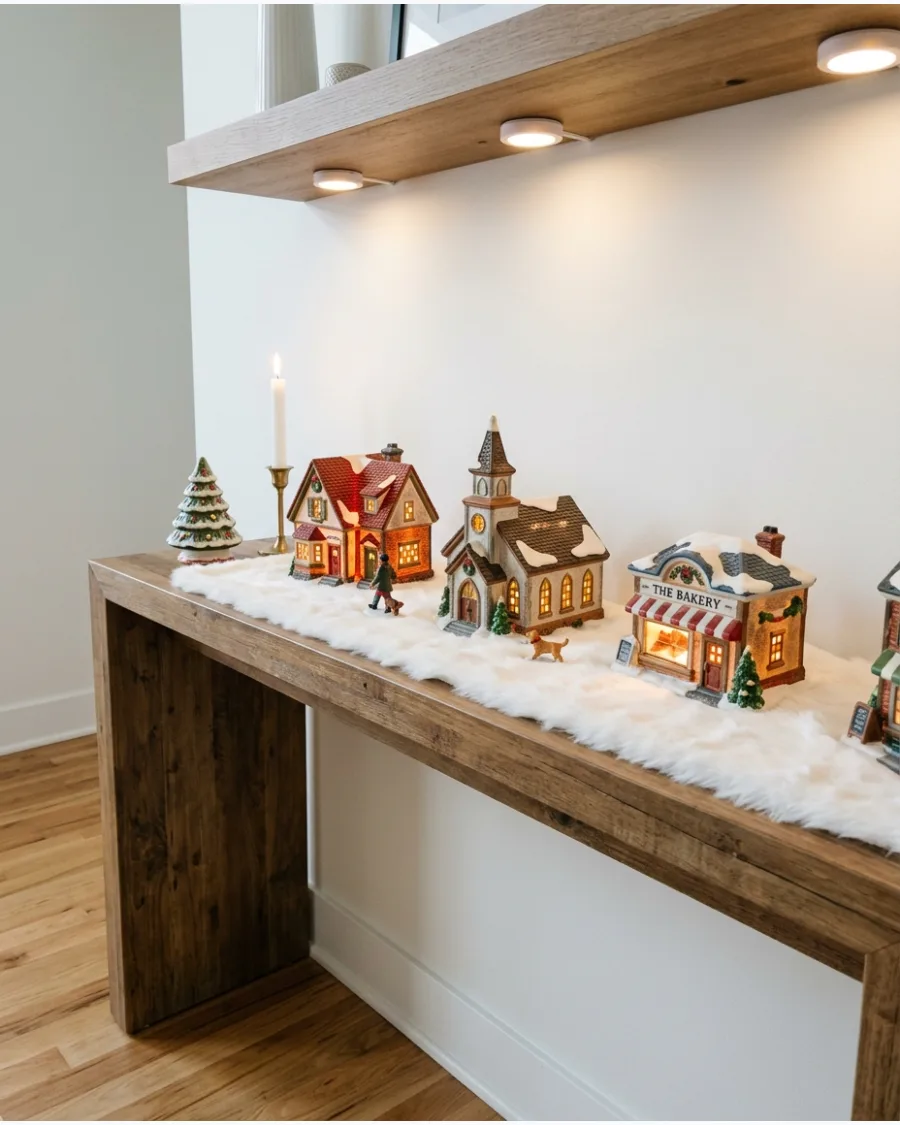
Utilizing narrow consoles or deep windowsills creates a festive focal point without sacrificing floor space. This linear arrangement keeps the collection organized while allowing the wall behind it to serve as a backdrop for faux-snow hills.
Mount battery-operated puck lights to the underside of shelves above the display to highlight the village rooftops. Villages often look best when clustered in odd numbers to create a more natural, organic flow.
- Shop for slim-profile buildings during post-holiday sales to fit narrow ledge spaces perfectly.
- Use adhesive cable clips along the back edge of the furniture to hide wiring for illuminated pieces.
- Swap the traditional white cotton base for a mirrored runner to double the light and add depth.
Quick win: Use varying heights of small wooden blocks hidden under the snow fabric to give the buildings a more dynamic, hilly appearance.
CHRISTMAS VILLAGE FOUNDATION AND LAYOUT IDEAS
20. Wraparound Christmas Village Display
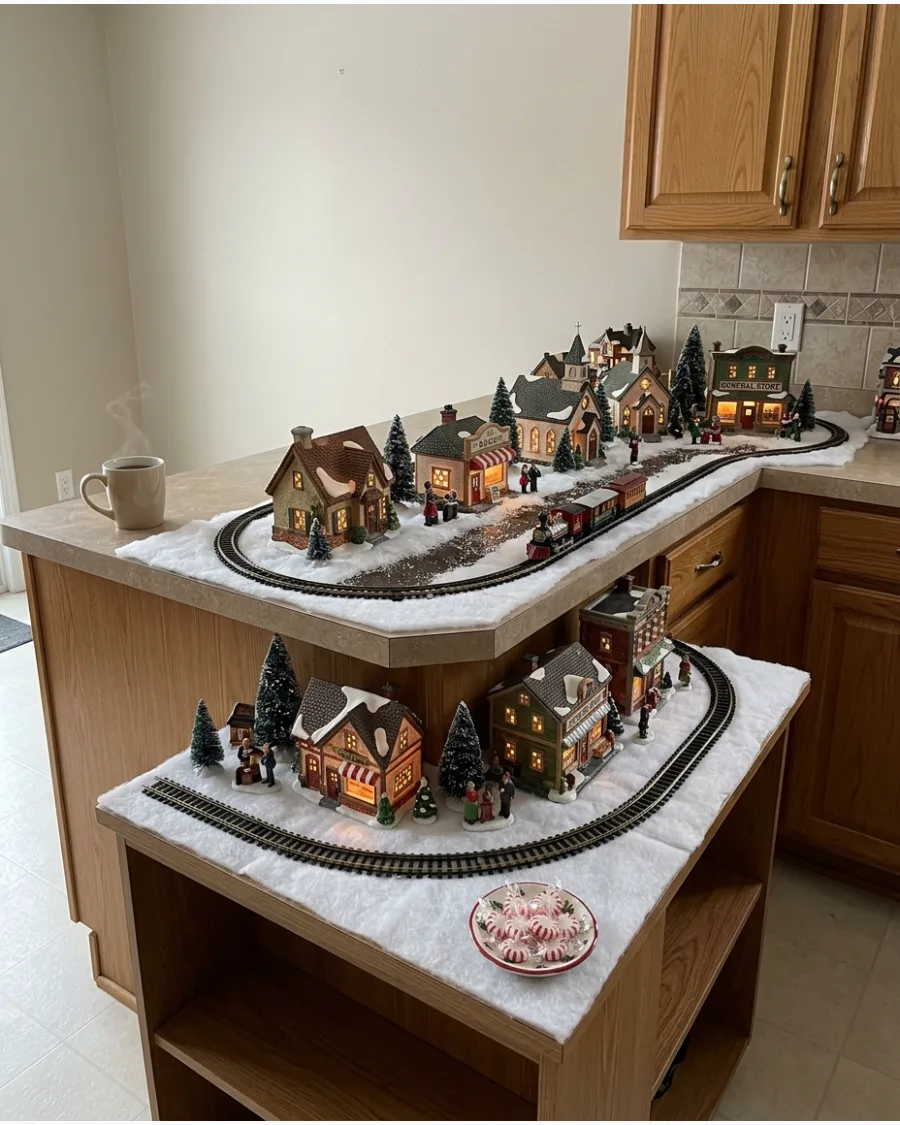
Extend the village around two or more connected surfaces, such as a corner desk or a sectional sofa table. This creates a continuous scene that leads the eye around the room.
Use a winding 'path' of snow to connect the two surfaces and make the transition look seamless. Using a corner makes the village feel like an immersive environment rather than just a flat decoration.
- Requires two tables of the same height or a corner counter.
- Place a major landmark, like a clock tower, right in the corner turn.
- Great for large families who want to view the village from different seating areas.
Quick win: Use extra-thick cotton batting at the junction where the two tables meet to hide the seam.
SNOWY LANDSCAPE CHRISTMAS VILLAGE IDEAS
21. Deep Snow Christmas Village
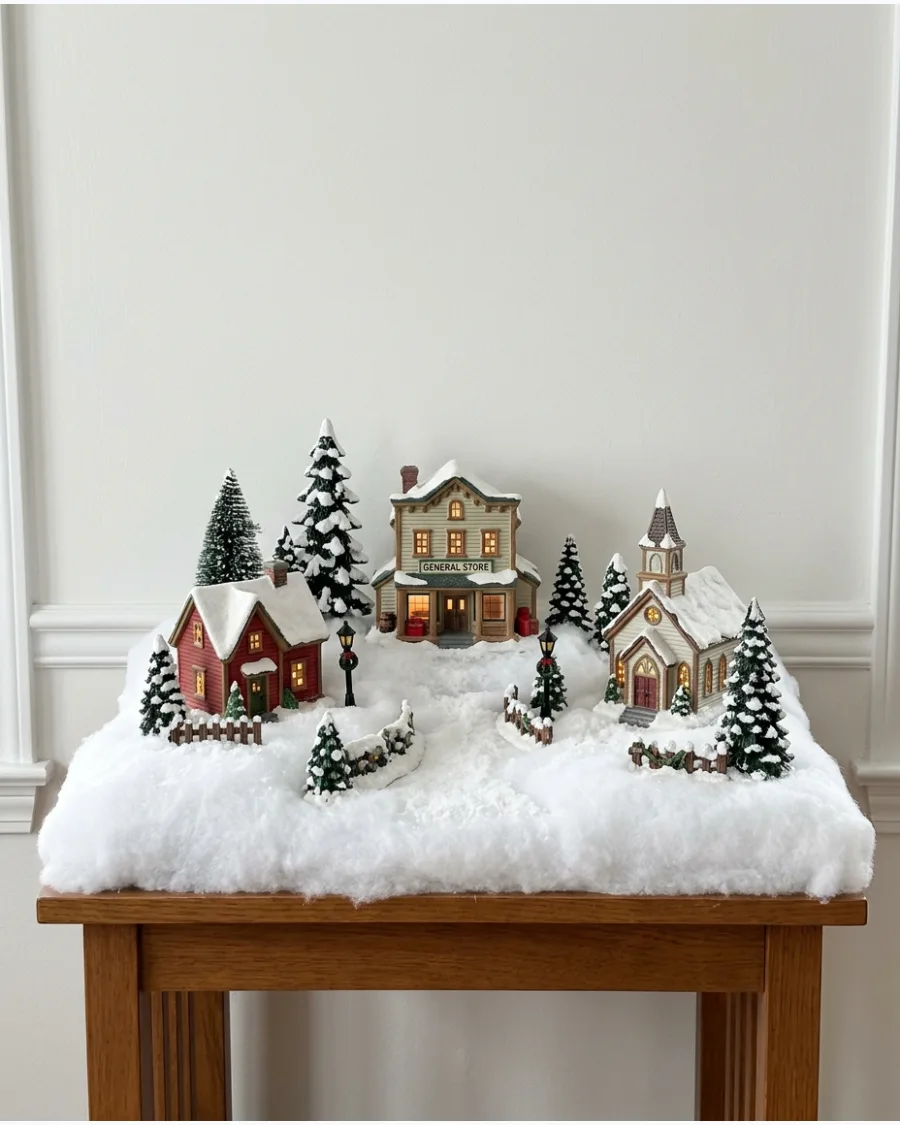
Using thick layers of loose artificial snow hides the plastic bases of trees and people for a more professional look. This technique makes the buildings look heavy and settled rather than just sitting on a flat table.
Spread extra snow around the corners of the buildings to mimic how drifts naturally form against walls. Using loose snow is messy, but it looks much better than flat cotton batting.
- Sourcing: Large bags of loose polyester or plastic snow flakes.
- Setup: Pour snow after all wiring is tested and buildings are in place.
- Adaptation: Use a tray with a lip to keep loose snow from falling onto the floor.
Quick win: Use a soft makeup brush to sweep stray snow off the roofs and windows for a tidy finish.
22. Realistic Snowbank Village Setup
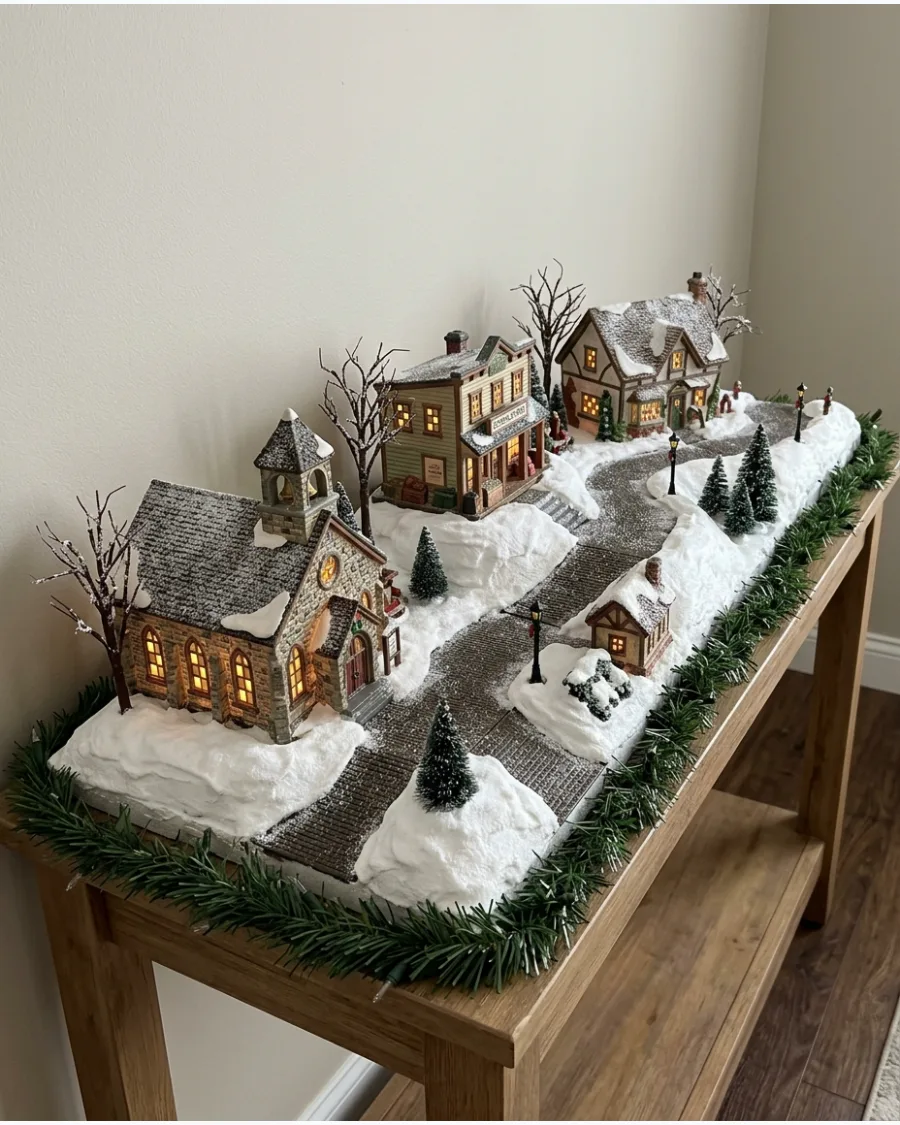
Flat snow looks artificial and lacks the character of a real winter scene. By building up mounds of snow along the edges of sidewalks and roads, you create a sense of scale and depth.
Use small pieces of white felt or foam under your loose snow to build up the height of these banks. Plowing the streets clear while leaving the banks high makes the village feel like a living town.
- Sourcing: White felt scraps or recycled packing foam.
- Setup: Place height-builders first then drape with snow blankets or loose flakes.
- Adaptation: Keep banks lower near the front of the display so they do not block the view of small accessories.
Most people skip this: Lightly spray the snowbanks with iridescent glitter to mimic the sparkle of frozen ice.
23. Snow-Covered Mountain Village
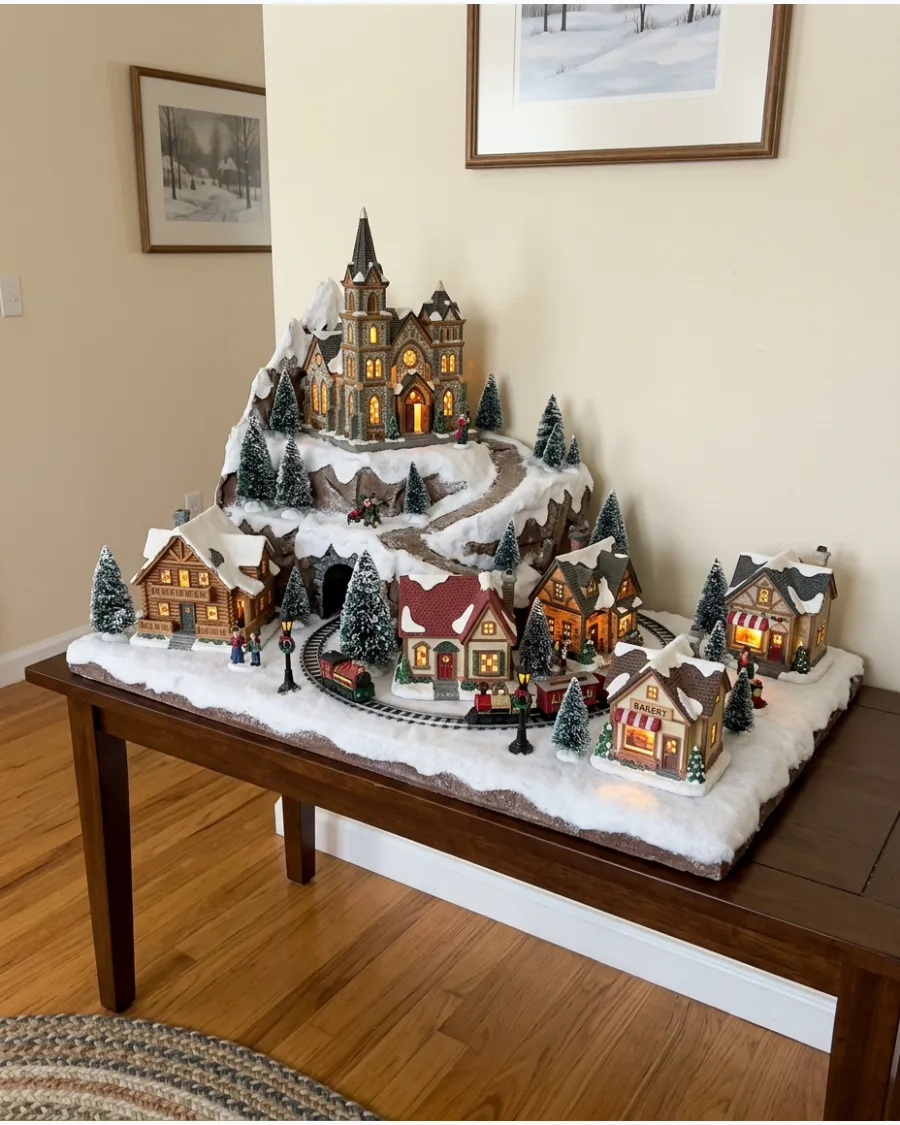
Adding height to the back of a display creates a dramatic backdrop that draws the eye upward. Placing cabins on different levels makes the landscape feel expansive and rugged.
Secure sturdy boxes or foam blocks of varying heights at the back of the surface to serve as the mountain foundation. Building vertically is the best way to fit more pieces into a narrow space like a mantel.
- Sourcing: Cardboard boxes or rigid insulation foam from a hardware store.
- Setup: Stack and tape boxes securely before covering with a white tablecloth or snow blanket.
- Adaptation: Use taller trees on the highest level to add even more vertical interest.
Best shortcut: Use a white bedsheet as a base layer over your mountains to save money on expensive snow blankets.
24. Pine Forest Christmas Village
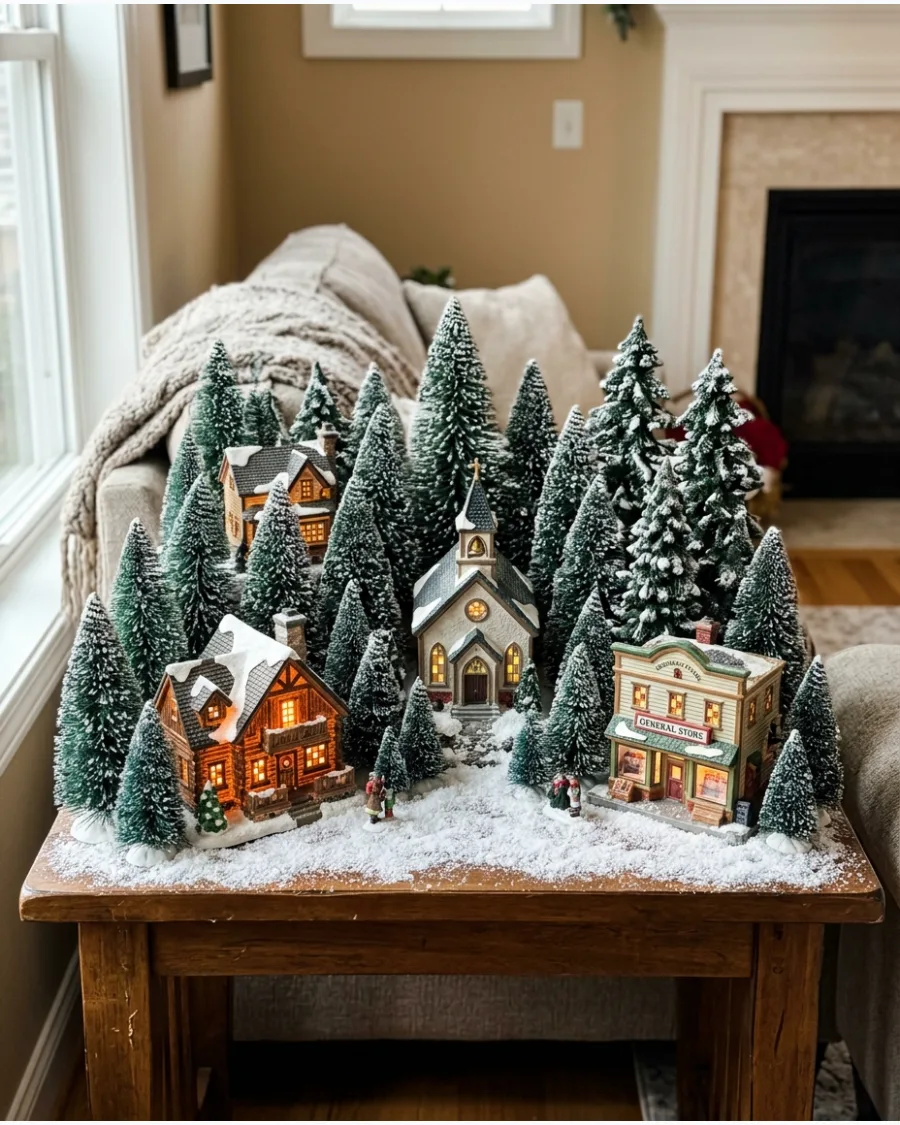
A village looks more realistic when it is surrounded by nature rather than just standing alone. Grouping trees of different heights and shades of green creates a dense, lush environment.
Tuck small clusters of three to five trees between every two houses to break up the architectural lines. A thick forest helps hide messy power cords and plugs at the back of the display.
- Sourcing: Multi-packs of bottle-brush or plastic evergreen trees.
- Setup: Mix frosted and non-frosted trees for a more natural, varied look.
- Adaptation: For small shelves, use just one or two tall trees to save space.
Quick win: Bend the wire trunks of bottle-brush trees slightly so they do not all look perfectly straight and stiff.
25. Winter Woodland Village
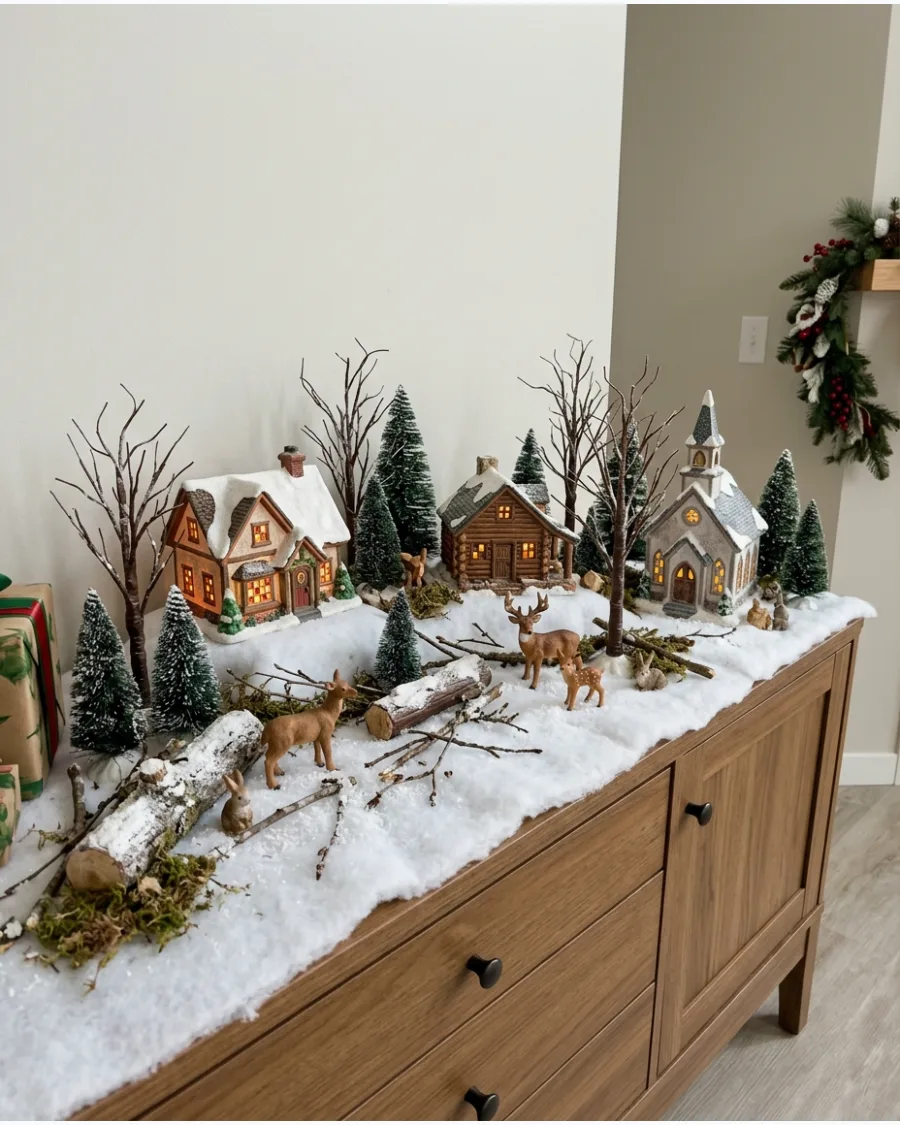
Mixing different types of trees and animals creates a story within your display. Bare branches and small woodland creatures like deer or rabbits add a touch of realism to a snowy scene.
Place tiny animal figures near the edges of the woods where they would naturally forage. A woodland theme feels more organic and less structured than a traditional town square.
- Sourcing: Miniature wildlife figures and twig-style trees.
- Setup: Scatter small twigs or bits of bark among the trees to ground the scene.
- Adaptation: Use this style on a windowsill where the natural light can hit the trees.
Most people skip this: Use real dried twigs from the yard to create realistic fallen logs in your woodland area.
26. Frozen Pond Christmas Village
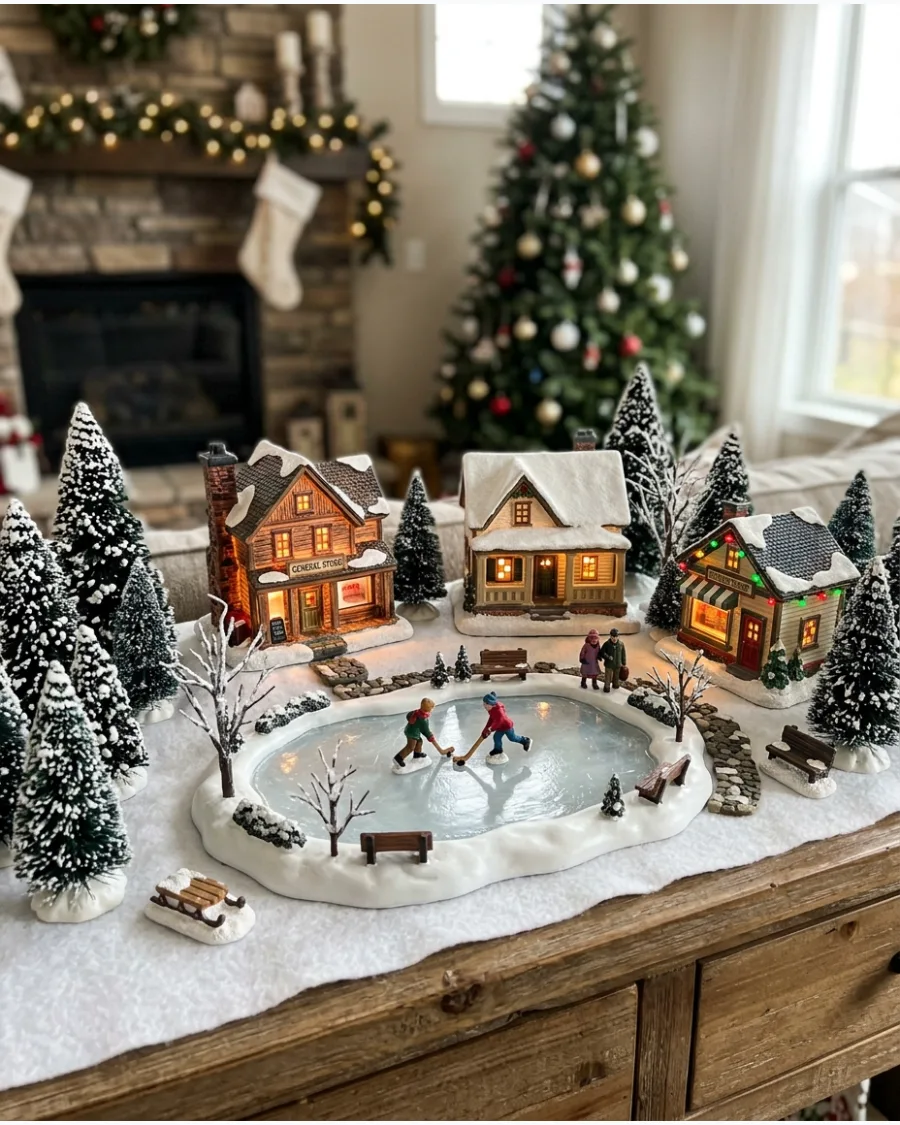
A water feature adds a focal point and a change in texture to the white snow. Using a reflective surface like a small mirror or blue plexiglass mimics the look of ice perfectly.
Ring the edge of the pond with loose snow to hide the sharp edges of the mirror. Placing a few benches or a tiny bridge nearby makes the pond feel like a part of the community.
- Sourcing: Small craft mirrors or blue acrylic sheets.
- Setup: Lay the mirror flat before adding snow to ensure it stays level.
- Adaptation: If you have small children, use blue felt instead of glass for a safer pond.
Best shortcut: A piece of aluminum foil crinkled and then flattened makes a surprisingly realistic frozen water surface.
27. Town Square Ice-Skating Rink
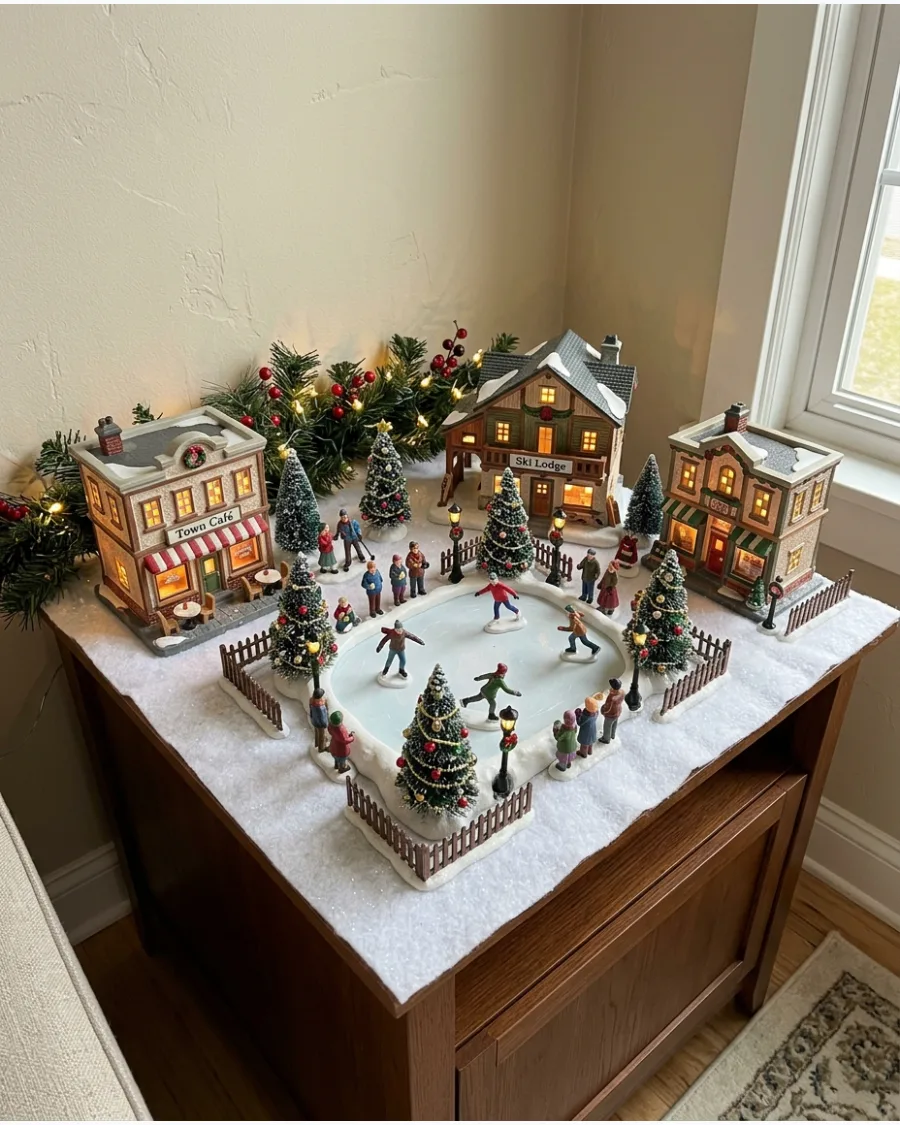
An ice rink brings a sense of motion and life to a village display. Surround the rink with benches, streetlights, and tiny people to create a bustling town center.
Position the rink in the widest part of your display so there is room for spectators to gather around it. This setup works best when it is the central point that all the shops face.
- Sourcing: Animated or static miniature skating rink sets.
- Setup: Ensure the rink is on a perfectly flat surface so the figures do not tip over.
- Adaptation: Use a simple white plate as a budget-friendly rink if you do not have a specific village piece.
Quick win: Place a few warm yellow streetlights around the rink to give it a cozy, evening glow.
28. Frozen River Through the Village
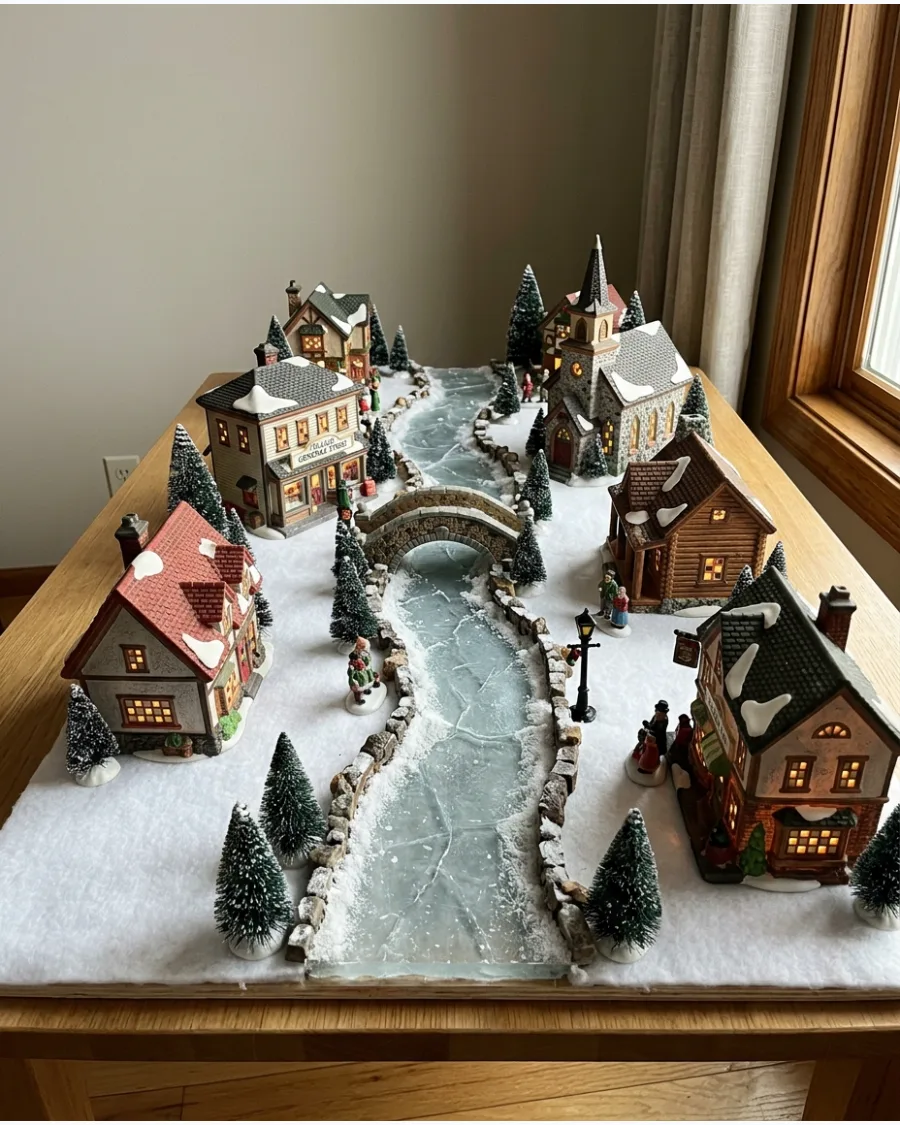
A river creates a natural path for the eye to follow through the entire display. It effectively divides different neighborhoods, like a shopping district and a residential area.
Create a winding path using blue ribbon or painted foam that starts at the back and curves toward the front. A curved river looks much more natural and interesting than a perfectly straight one.
- Sourcing: Blue satin ribbon or thin blue plastic sheets.
- Setup: Secure the river with double-sided tape so it does not shift when you add snow.
- Adaptation: For a very small display, a short stream in a corner is enough to add interest.
Most people skip this: Place small pebbles along the edges of the river to create a more realistic shoreline.
29. Stone Bridge Over a Frozen River
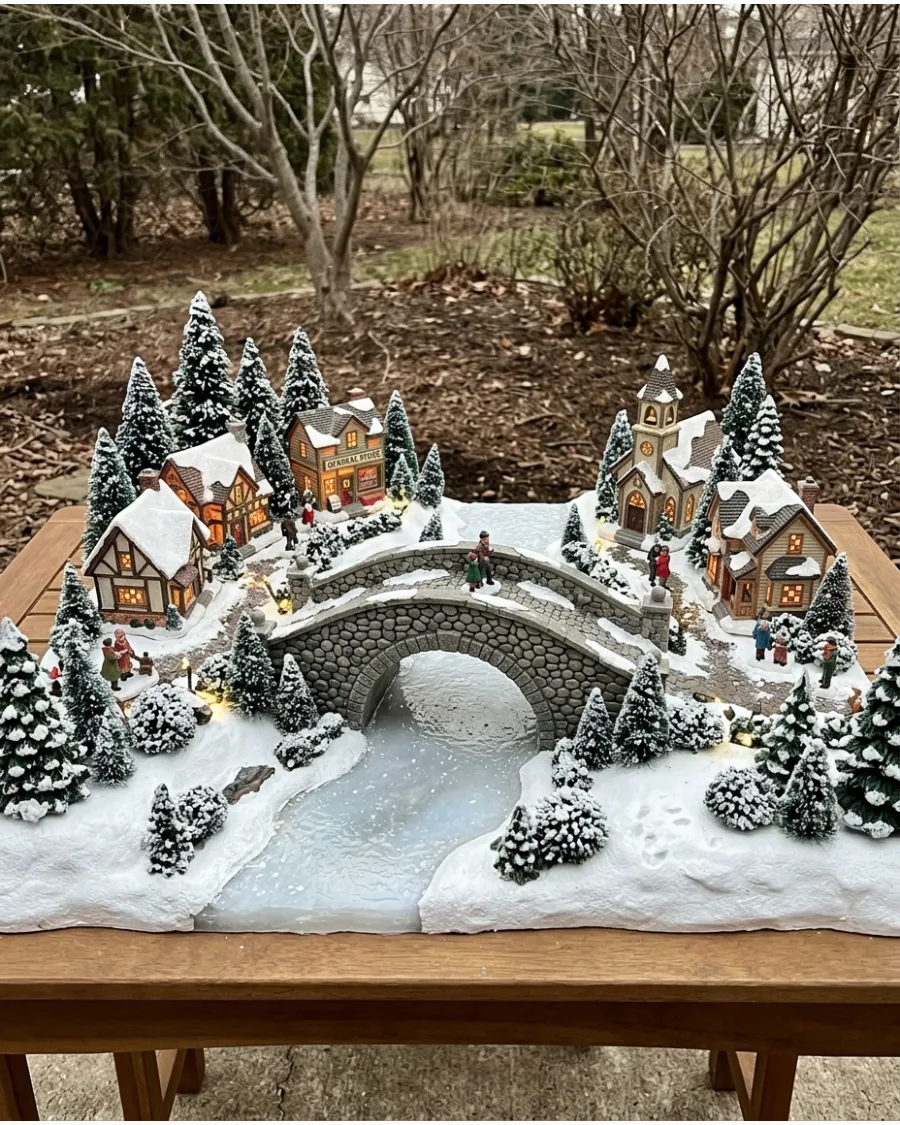
Bridges add physical height and a sense of connection between different parts of the village. Positioning a bridge over a river or a small ravine creates a classic, picturesque winter scene.
Tuck a few small evergreen trees near the base of the bridge to anchor it into the landscape. It serves as an excellent spot to place walking figures or a tiny horse-drawn carriage.
- Sourcing: Resin or ceramic miniature bridges.
- Setup: Make sure the bridge is stable and level so the figures on top do not fall.
- Adaptation: If you do not have a river, use the bridge to connect two different foam cliffs.
Best shortcut: Use a small piece of curved cardboard painted gray to make a custom bridge that fits your specific space.
30. Snowy Waterfall Village
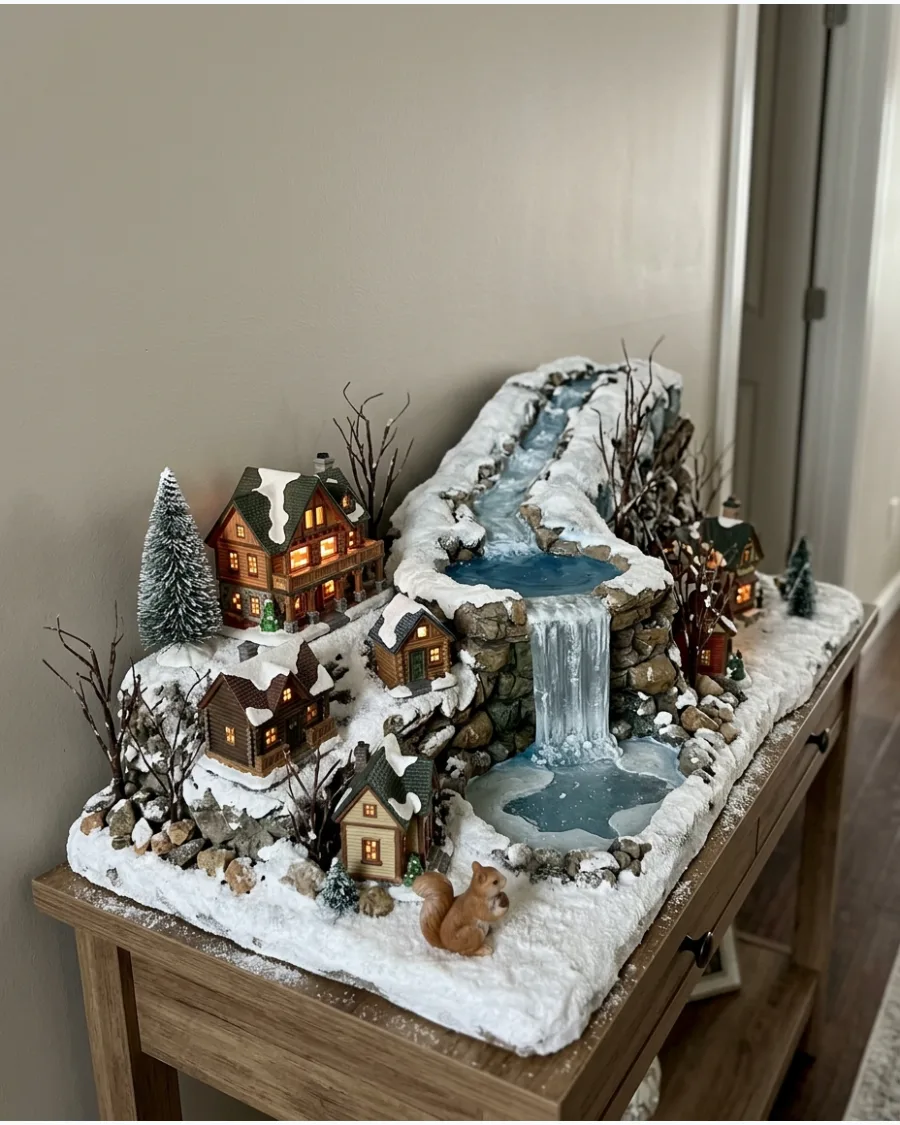
A waterfall is a dramatic feature that works perfectly with a multi-level mountain setup.
It provides a vertical element that connects a high-altitude cabin to a lower-level town. Use clear plastic wrap or icicle decorations to create the look of falling, frozen water. This feature works best at the very edge of a riser where the water would naturally drop.
- Sourcing: Clear cellophane, plastic wrap, or glass icicle ornaments.
- Setup: Tape the top of the waterfall to the upper level and let it drape naturally.
- Adaptation: Add a few tiny frozen rocks at the bottom to show where the water hits.
Quick win: Use a blue LED light behind the waterfall material to give the water a magical, glowing effect.
31. Snowy Park Christmas Village
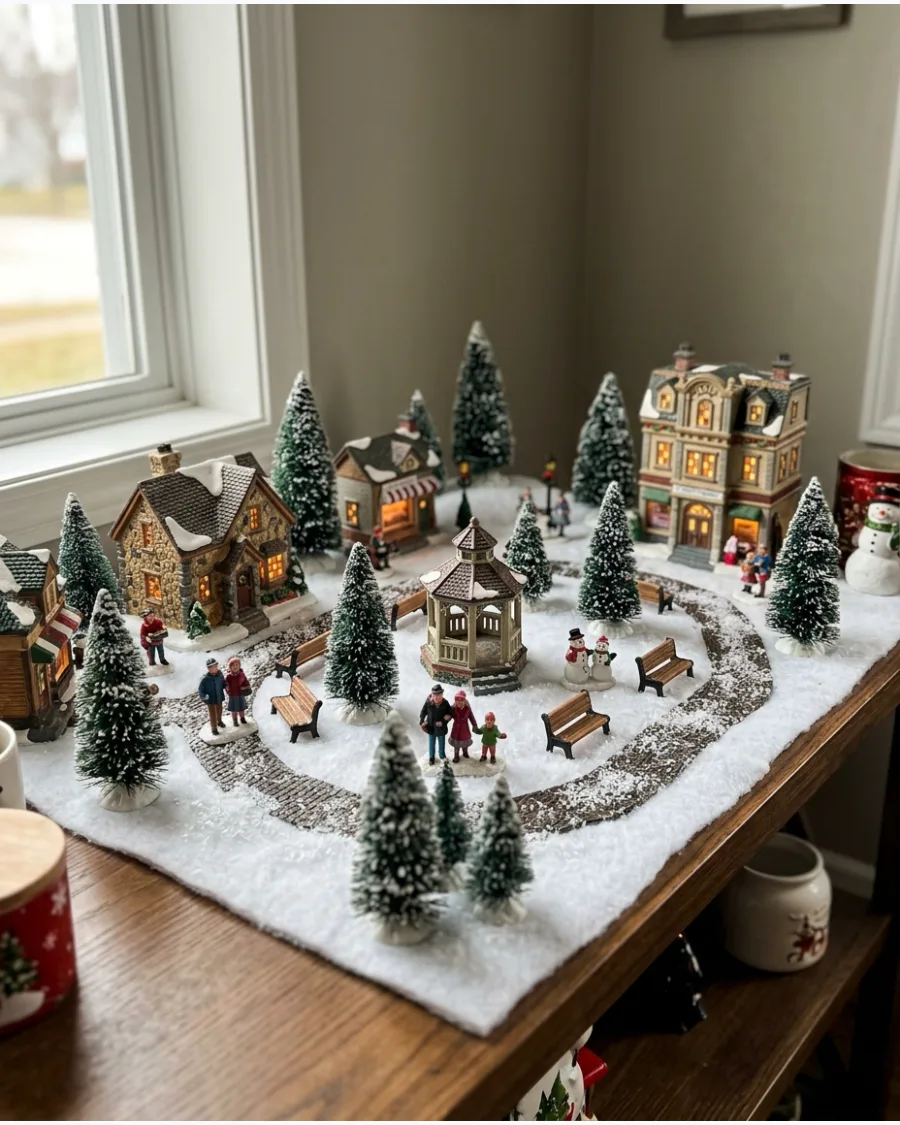
Build a central community hub by grouping park benches and a white gazebo in an open area. Surround the park with shops and houses to make the layout feel like a real town center. Use thin white batting to create soft, winding footpaths between the trees.
Small figurines like carolers or families add life to the empty spaces between larger buildings. A park provides a natural break in a dense village layout.
- Budget: $15-$40 for accessories
- Setup: 30 minutes
- Best for: Large flat surfaces like dining tables
Most people skip this: Use a dusting of baking soda over the paths to give the snow a fresh, sparkling texture.
32. Sledding Hill Christmas Village
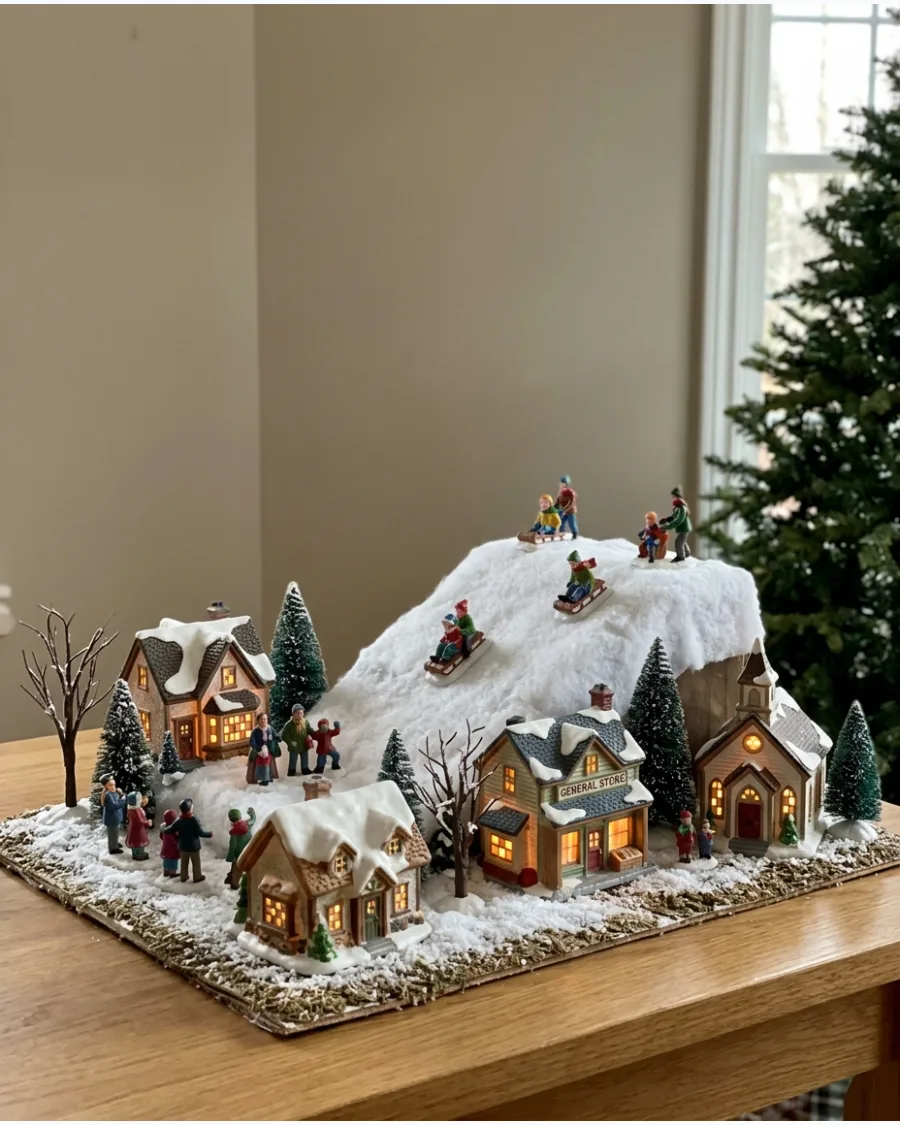
Use a sturdy foam block hidden under a white cloth to create an incline for a sledding scene. Place several sledding figurines at the top and bottom of the hill to suggest movement and action. Add a few spectators near the base to fill the scene.
This vertical element breaks up the flat look of a standard table display. It is one of the easiest ways to add height without buying expensive risers.
- Budget: $10 for foam
- Setup: 20 minutes
- Best for: Adding height to a display
Quick win: Tuck a few cotton balls under the snow blanket to create smaller, natural-looking bumps on the hill.
33. Ski Slope Christmas Village
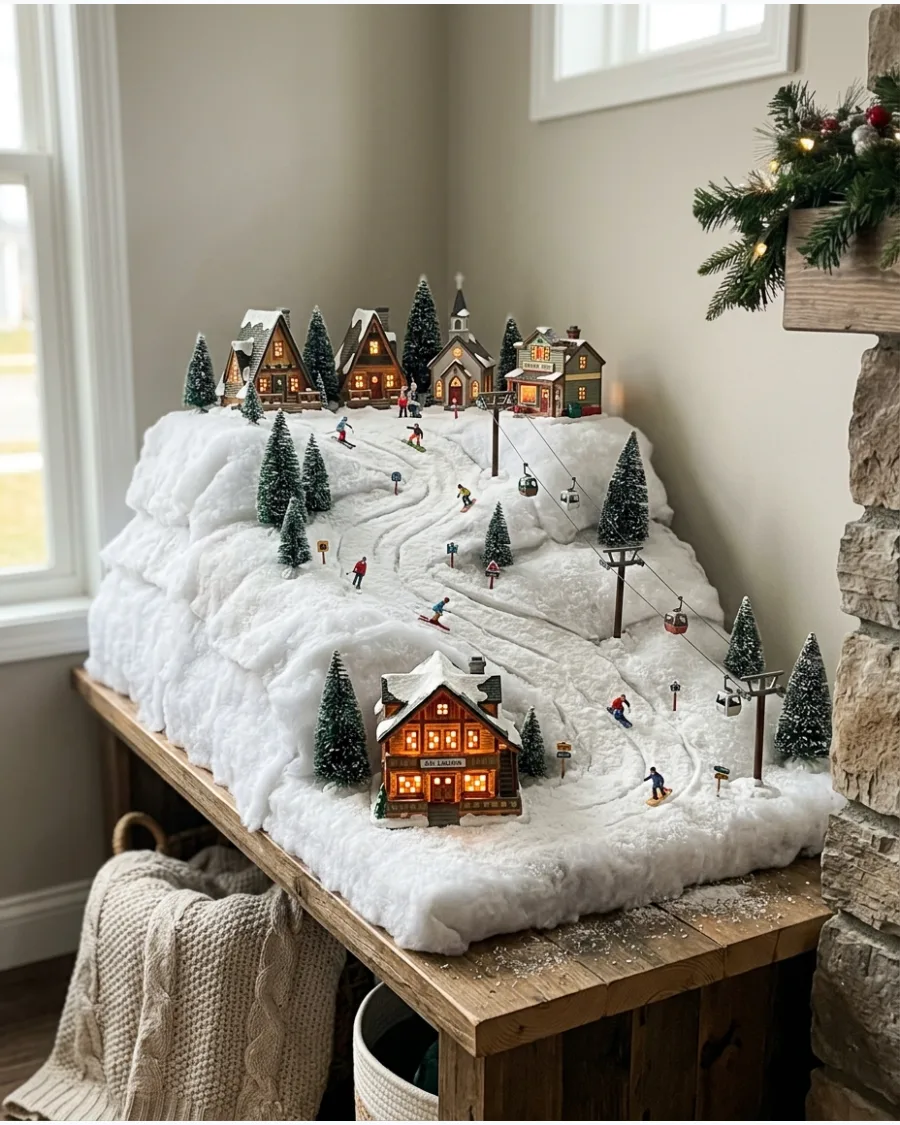
Design a mountain peak using stacked boxes covered in heavy white fleece for a realistic ski run. Install tiny trail signs and a row of pine trees along the edges to define the ski path. Position a ski lodge or cocoa stand at the bottom to give the skiers a destination.
High-contrast colors on the skiers' outfits make the white slope pop. A ski slope creates a clear focal point for any corner display.
- Budget: $25-$50
- Setup: 45 minutes
- Best for: Corner displays with vertical space
Best shortcut: Use a strip of blue ribbon under the snow at the base to mimic a frozen pond for skaters near the lodge.
34. Snowman Field Village Scene
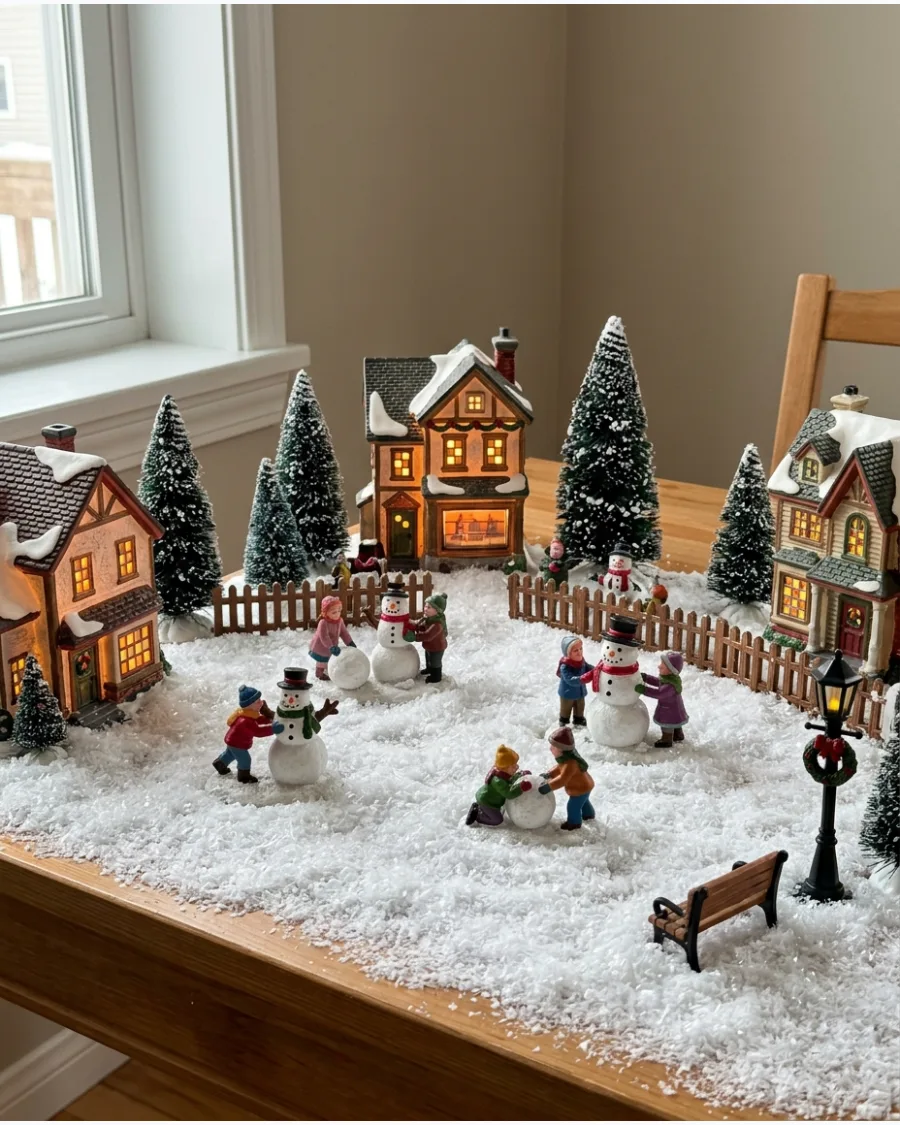
Dedicate a wide, flat area of the display to a playful field filled with various snowmen. Mix different sizes and styles of snowman figures to make the scene look like a community contest. Place a few child figurines with shovels or mittens nearby to tell a story.
This creates a cheerful focal point that doesn't require expensive buildings. It is a great way to use up extra space on a large table.
- Budget: $20
- Setup: 15 minutes
- Best for: Filling large gaps between buildings
Most people skip this: Place a tiny orange 'carrot' or bead on the ground near a snowman to look like a dropped nose.
35. Woodland Cabin Clearing
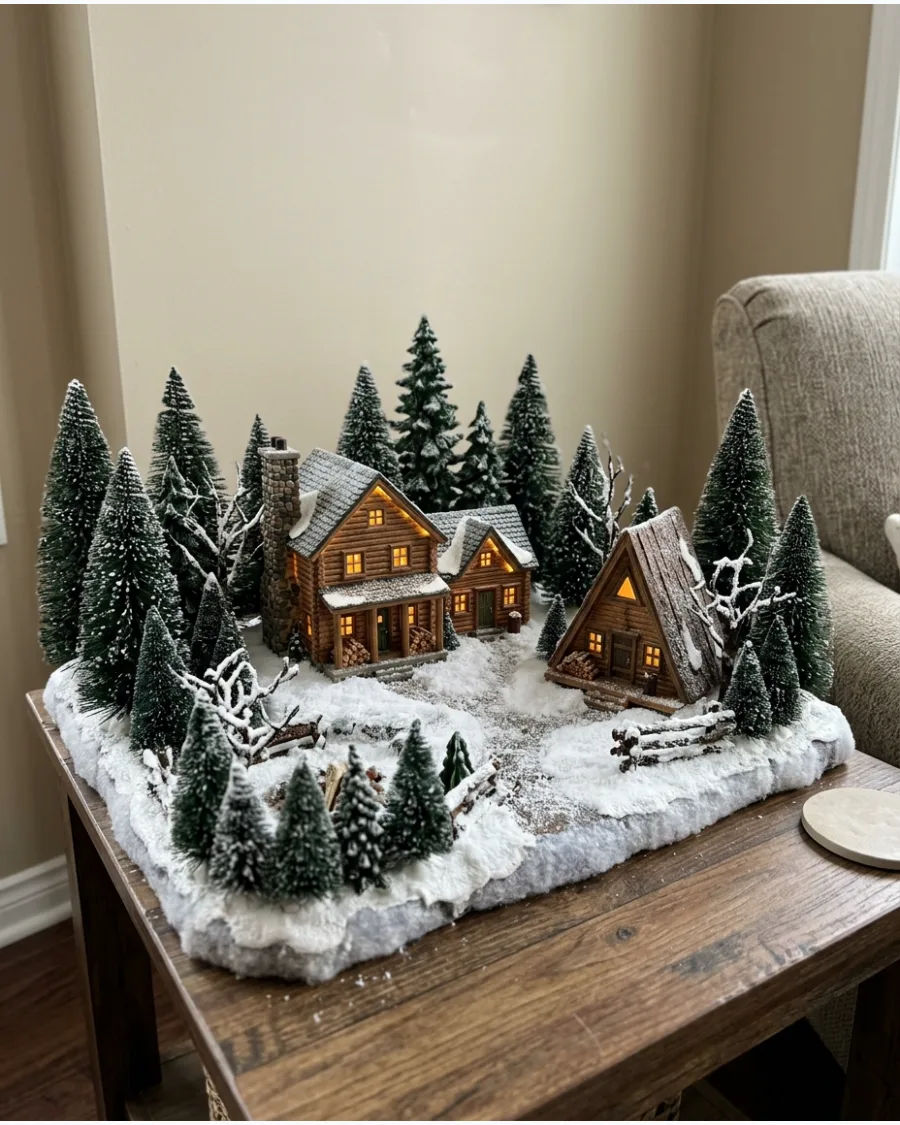
Group a few rustic-style cabins closely together in a circle to create a secluded neighborhood feel. Densely pack the area with miniature evergreen trees of different heights to frame the clearing. Use warm yellow bulb lighting inside the cabins to contrast with the cool white snow.
This setup works perfectly on a side table or mantel where space is limited.
The trees act as a natural backdrop for the small buildings.
- Budget: $60+
- Setup: 30 minutes
- Best for: Narrow mantels or shelves
Quick win: Sprinkle a small amount of dried moss near the cabin bases to suggest the ground peeking through the snow.
ROADS, PATHWAYS AND TRANSPORTATION IDEAS
36. Snowy Main Street Christmas Village
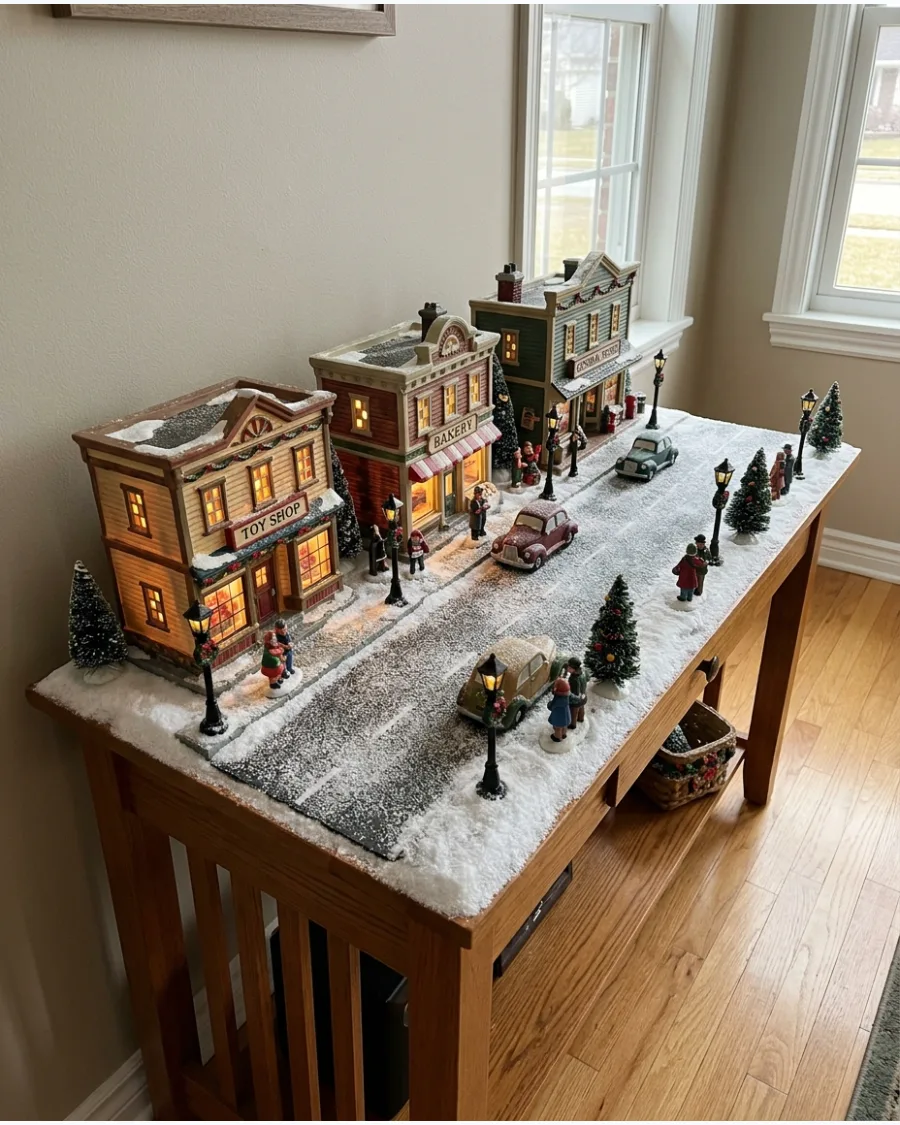
Lay a wide strip of gray felt or paper down the center of the display to serve as a bustling main road. Line the street with commercial buildings and add miniature vintage cars to the road. Place streetlights at regular intervals to illuminate the path and give the village a structured, urban feel.
This layout keeps the display organized and easy to view from the front. It works best on long, narrow surfaces like a buffet.
- Budget: $30 for road and cars
- Setup: 40 minutes
- Best for: Long, shallow surfaces
Best shortcut: Use black electrical tape to create realistic 'asphalt' lines if you want a more modern town look.
37. Cobblestone Christmas Village Street
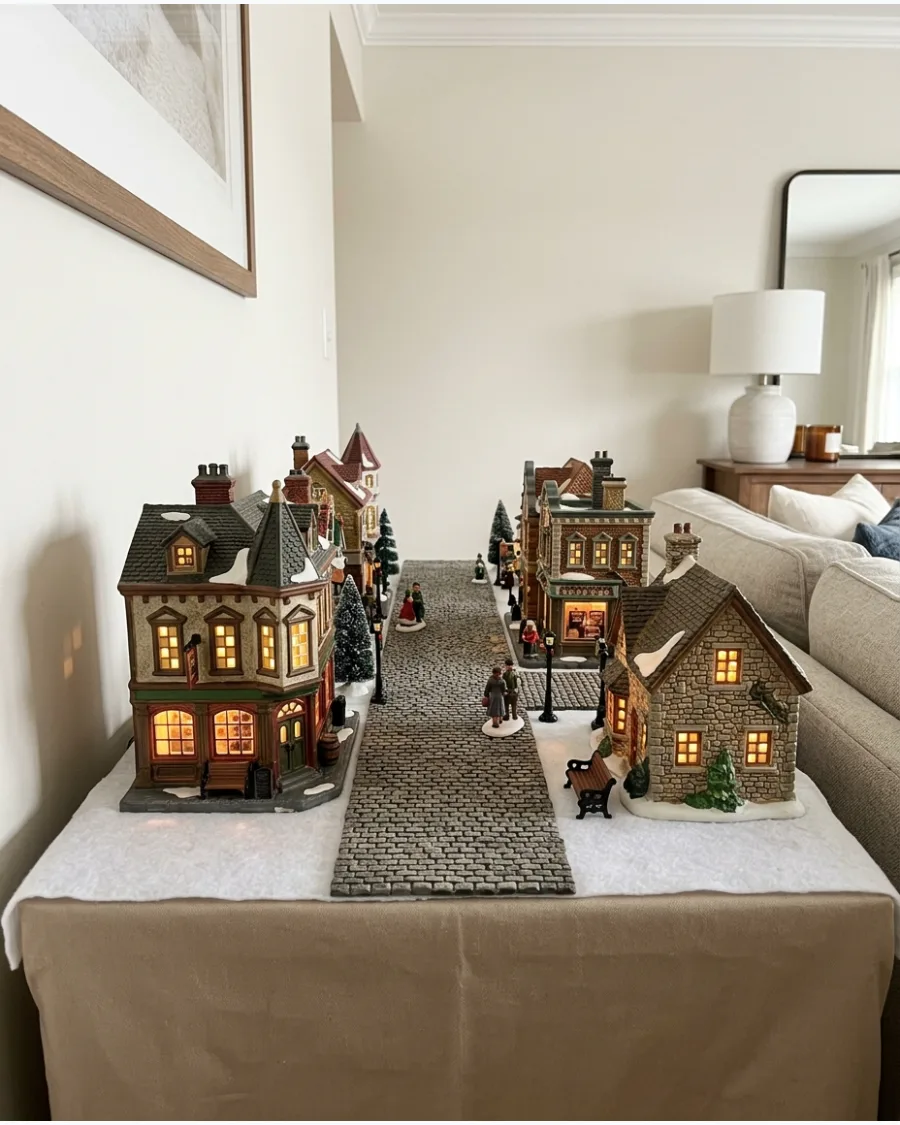
Enhance a traditional or Victorian village by using a textured cobblestone mat for the streets. Curve the road slightly around the buildings to create a more natural and interesting perspective. The texture of the stones adds a layer of detail that flat paper cannot provide.
This works best when paired with brick-style buildings and old-fashioned figures.
A curved road makes the village feel much larger than it actually is.
- Budget: $15 for mat
- Setup: 20 minutes
- Best for: Historical or Dickens-themed villages
Quick win: Lightly brush white acrylic paint over the cobblestones to make them look like they have frost in the cracks.
38. Winding Mountain Village Road
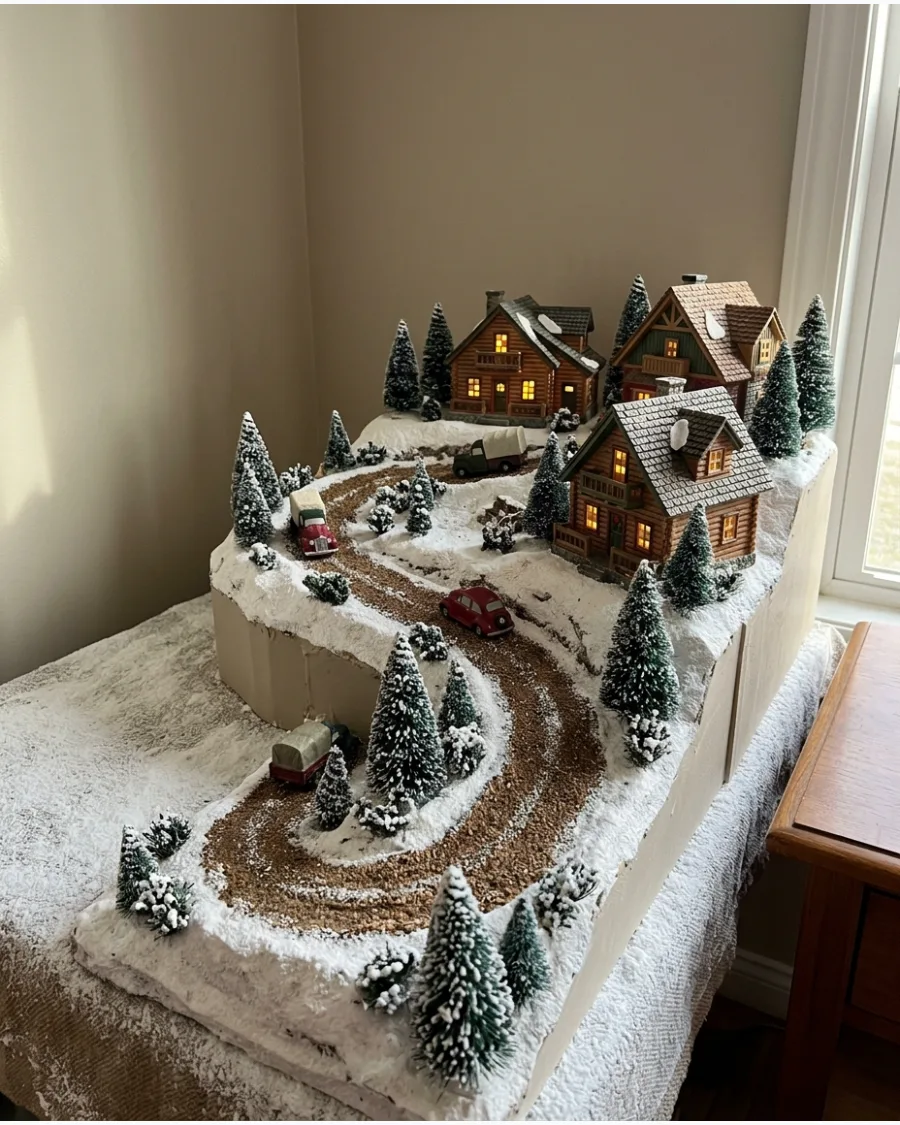
Create a narrow road that zig-zags up a multi-level display using cardboard ramps covered in snow. Place a small truck or SUV on the incline to emphasize the height and scale of the mountain. Use small stones or pebbles as a retaining wall along the edge of the road for extra realism.
This adds a sense of adventure and travel to the overall display. It is the best way to connect different levels of a village.
- Budget: $10
- Setup: 50 minutes
- Best for: Multi-level or tiered displays
Most people skip this: Angle the vehicles slightly toward the center of the road to make them look like they are actually driving.
39. Snow-Covered Sidewalk Village
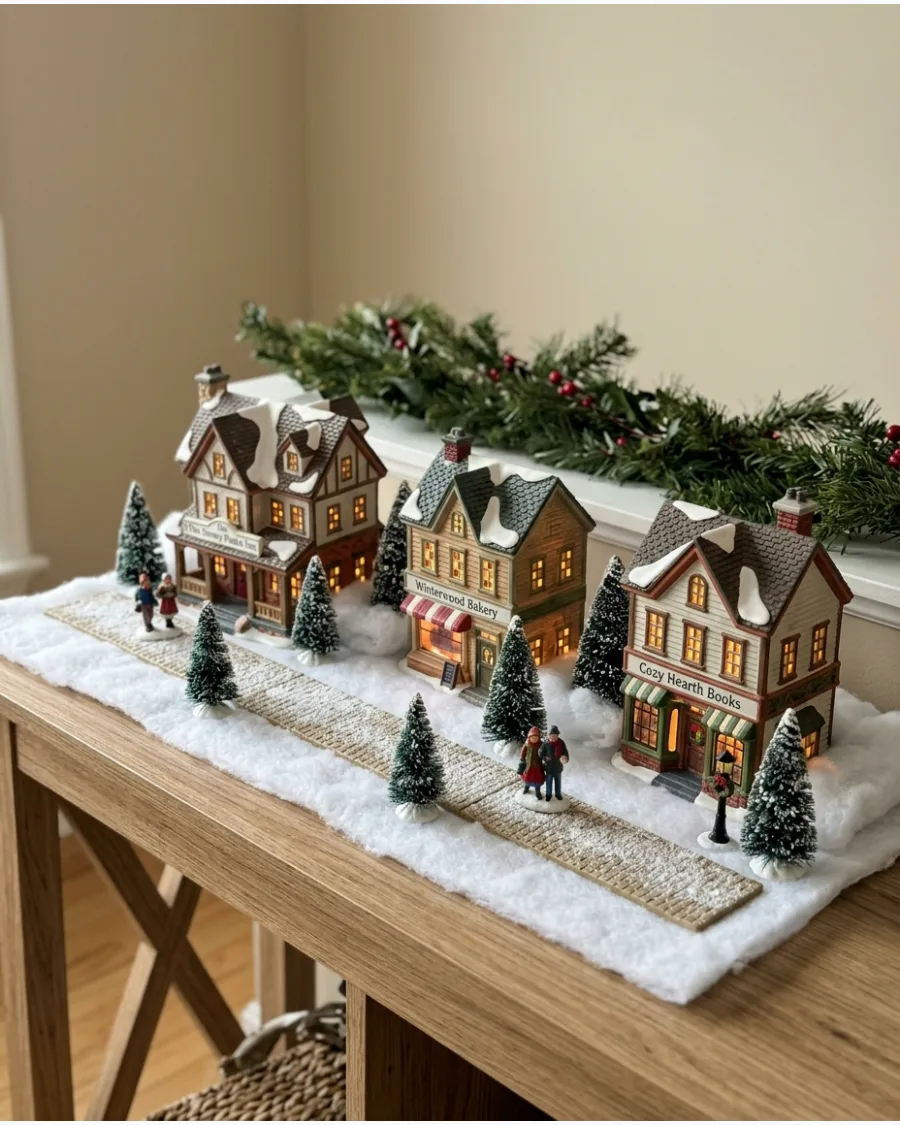
Add thin strips of white foam board in front of your houses to represent raised sidewalks. Glue a few pedestrians and pets to the sidewalks so they appear to be walking through the neighborhood. Leave a small gap between the sidewalk and the road to represent a curb.
This simple addition makes the transition from the buildings to the street look much more professional. Sidewalks help define the walking paths for your miniature people.
- Budget: $5 for foam board
- Setup: 25 minutes
- Best for: Creating clean lines in a layout
Best shortcut: Use white washi tape to mark out sidewalk boundaries on a dark surface if you don't want to use foam.
Home Decor
40. Realistic Miniature Village Landscaping
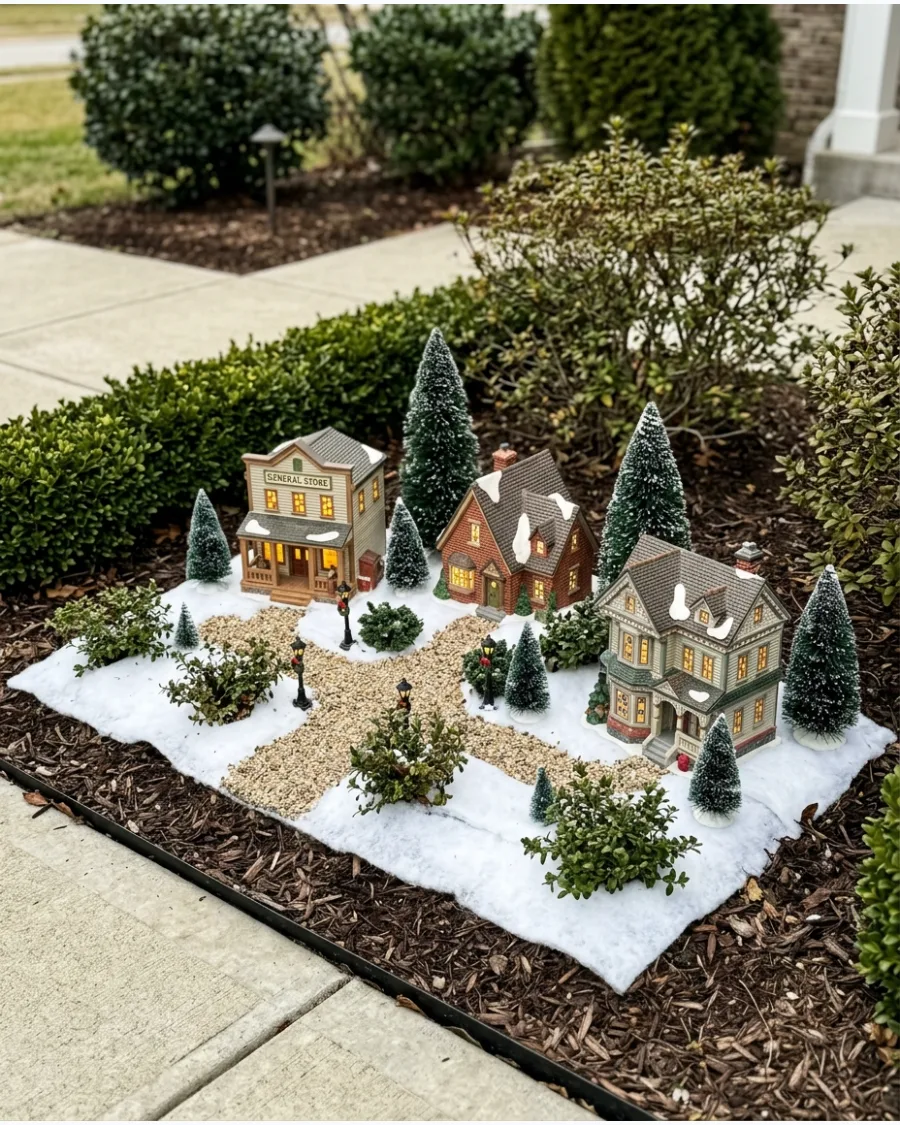
Miniature villages often feel incomplete without the transitional spaces between homes and streets. Layering fine-grain black sandpaper or textured grey felt creates the appearance of paved driveways and walkways. These small details ground the buildings and provide a sense of scale that plain cotton batting lacks.
High-quality landscaping elevates a basic set from a toy collection to a sophisticated holiday focal point.
- Purchase rolls of adhesive-backed sandpaper or felt in late autumn to ensure a variety of pavement colors are available.
- Cut the materials into rectangles or curved paths and place them directly onto the display base before adding snow layers.
- Incorporate tiny pebbles or brown flocking to differentiate between modern paved driveways and rustic dirt paths.
Quick win: Use a white paint pen to draw subtle parking lines or sidewalk cracks on the dark driveway material for added realism.
ROADS, PATHWAYS AND TRANSPORTATION IDEAS
41. Christmas Village Parking Lot
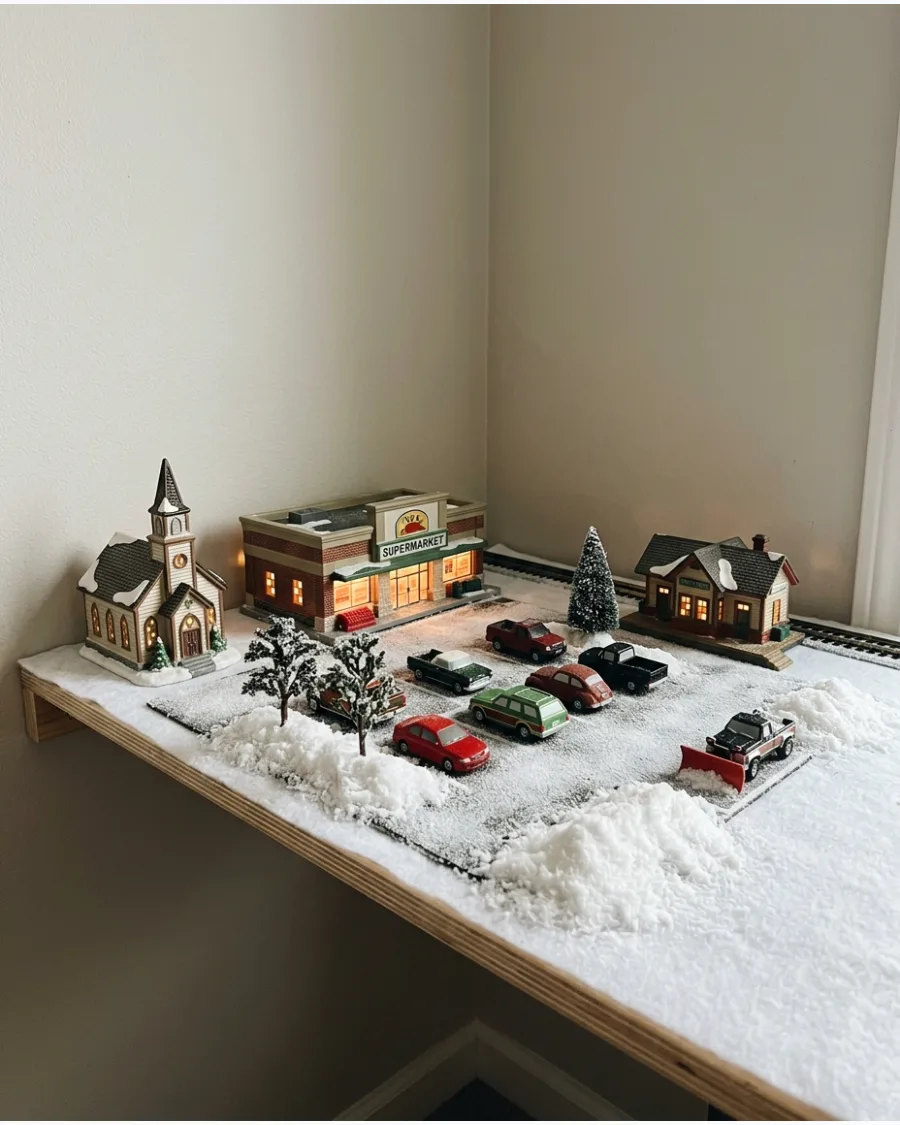
Every busy town center needs a place for visitors to park their vehicles. Arrange tiny cars in neat rows on a dark gray felt mat positioned next to your largest commercial building. This adds a layer of realism that makes the village feel like a functioning community rather than just a collection of houses.
A dedicated parking area also provides a visual break in the white snow, preventing the layout from looking too cluttered.
- Find miniature cars at hobby shops or toy aisles for under ten dollars.
- Secure the felt to the surface with double-sided tape to keep the vehicles from sliding.
- Adjust the size of the lot based on the number of commercial buildings in your town center.
Quick win: Use a white chalk marker to draw thin, straight lines on the gray felt to define the individual parking spaces.
42. Winding Pedestrian Path Village
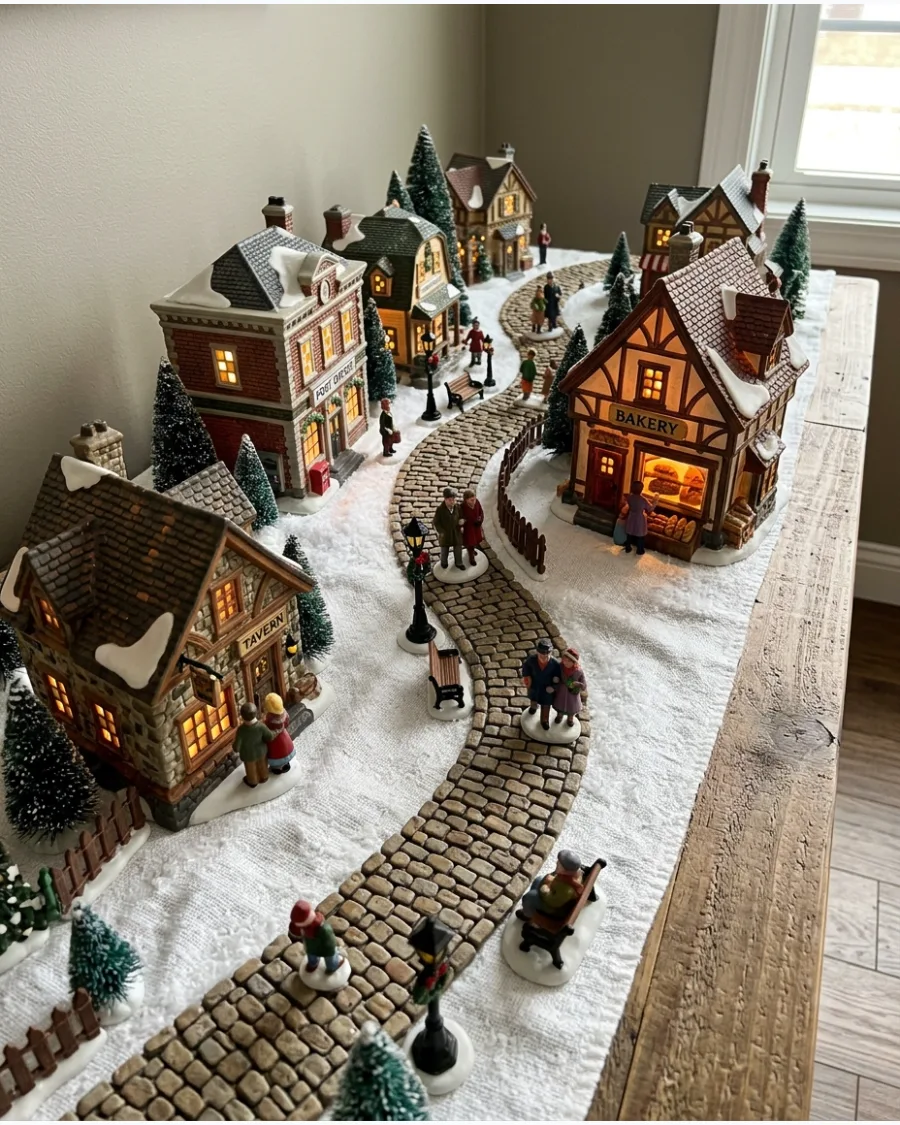
Give your miniature citizens a logical way to walk between their homes and the local shops. Sprinkle a thin layer of fine brown sand or dark glitter over the base snow to define narrow walking paths throughout the scene. This prevents figures from looking like they are floating aimlessly in a sea of white.
It guides the viewer's eye through the display and connects different zones together naturally.
- Buy fine-grain sand or decorative gravel from a craft store for a few dollars.
- Pour the sand through a small funnel to control the width and direction of the path.
- Add a few tiny benches or street lamps along the path to create a park-like atmosphere.
Best shortcut: Use a small, dry paintbrush to sweep away a thin line of faux snow before laying down the sand for a more permanent look.
43. Christmas Train Circling the Village
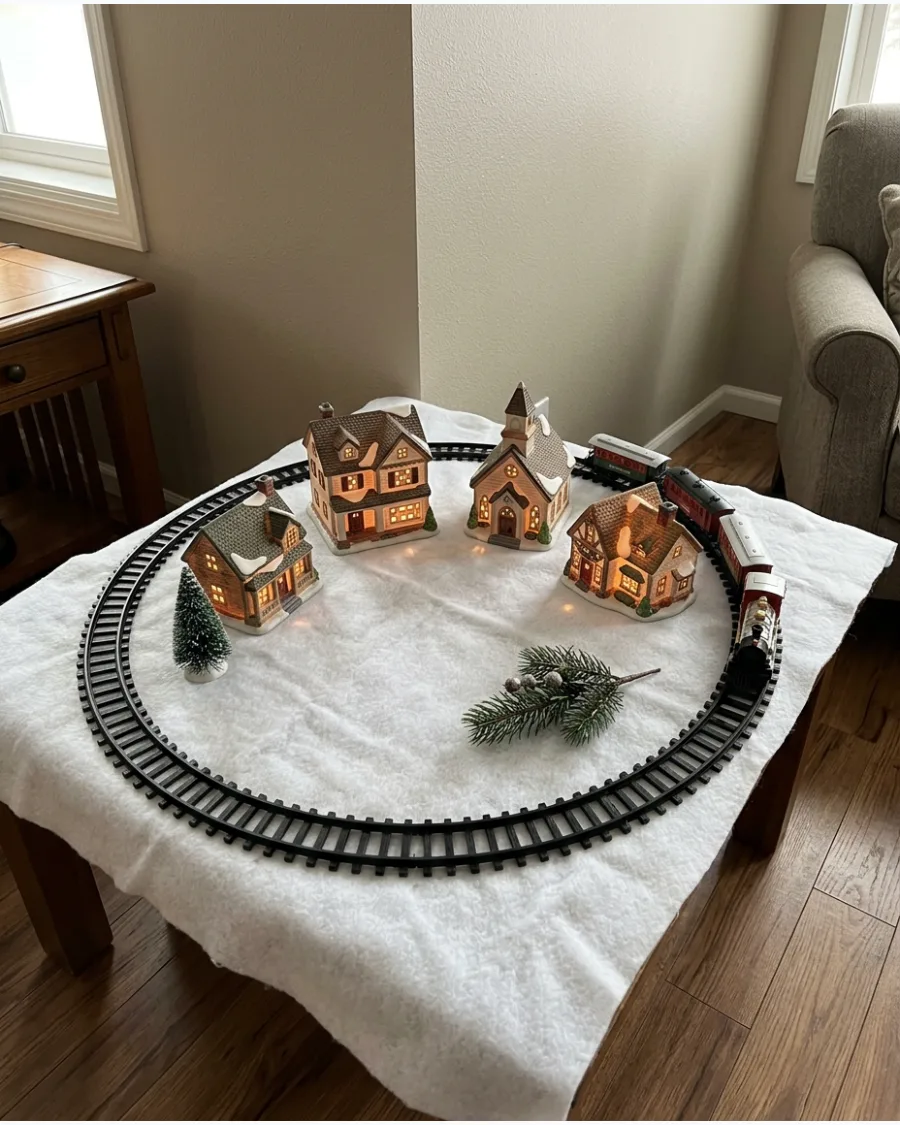
A train track provides a crisp, moving border for your entire holiday display. Set up the tracks first to establish the footprint of your village before you place any buildings or trees inside. This keeps the movement on the perimeter so it does not distract from the detailed interiors of the houses.
It is the most effective way to add motion to a large console table or floor display without crowding the center.
- Choose a battery-operated train set to avoid adding more power cords to your surface.
- Ensure the track is laid on a flat, hard surface or very tight fabric to prevent derailments.
- Scale the village buildings to match the size of the train for a cohesive look.
Most people skip this: Check that the track is perfectly level before adding the train, as even a small tilt can cause the engine to stall on curves.
44. Train Running Through the Village
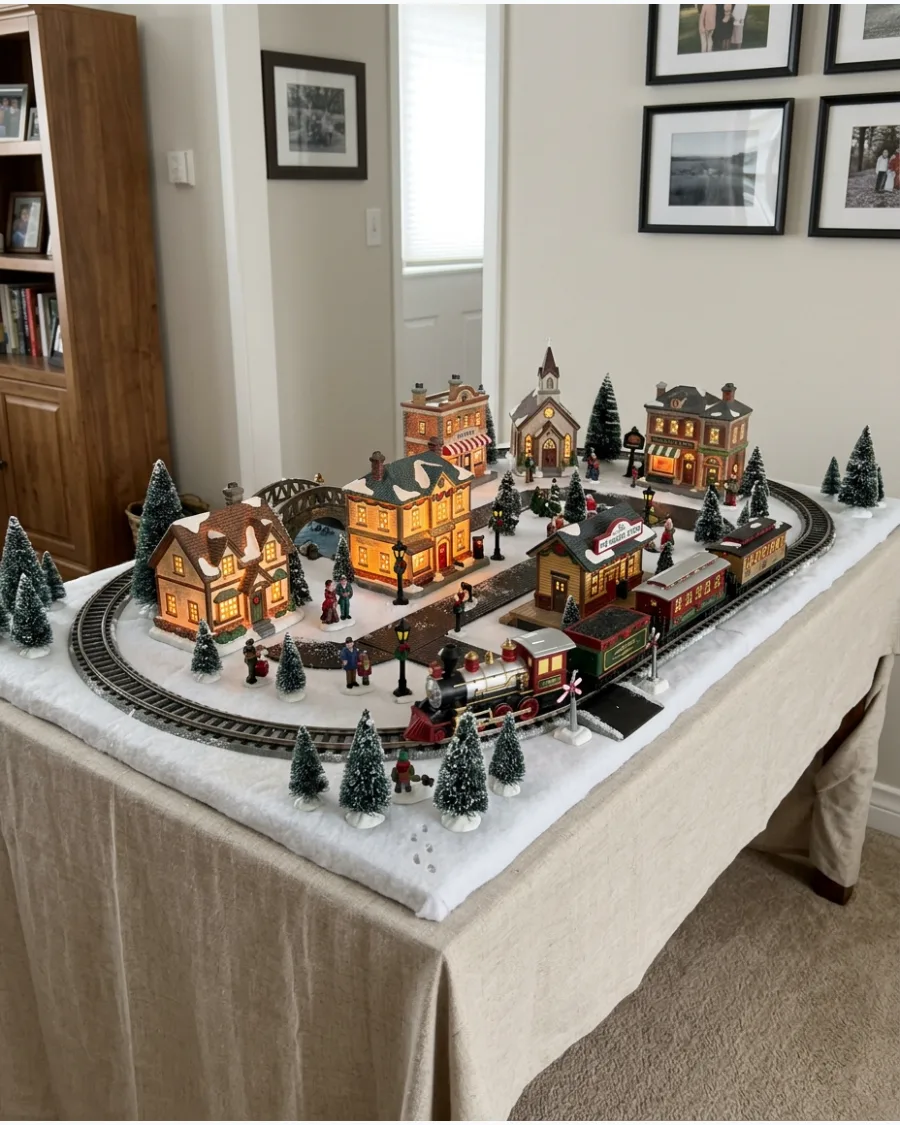
Bringing the tracks into the center of town adds a dynamic and busy energy to the layout. Position your tracks so they pass directly between a row of shops and a residential neighborhood. Using railroad crossing signs at the points where paths meet the tracks makes the intersection look intentional.
This layout works best on deeper surfaces where there is enough room for the track to curve behind taller buildings.
- Plan the track route before setting up buildings to ensure there is enough clearance for the train cars.
- Use flexible track pieces if your village has an irregular shape or tight corners.
- Space buildings at least two inches away from the track to prevent the train from clipping the corners.
Quick win: Place a few pine trees along the track edges to hide the plastic base of the rails and make them look integrated into the landscape.
45. Elevated Christmas Train Village
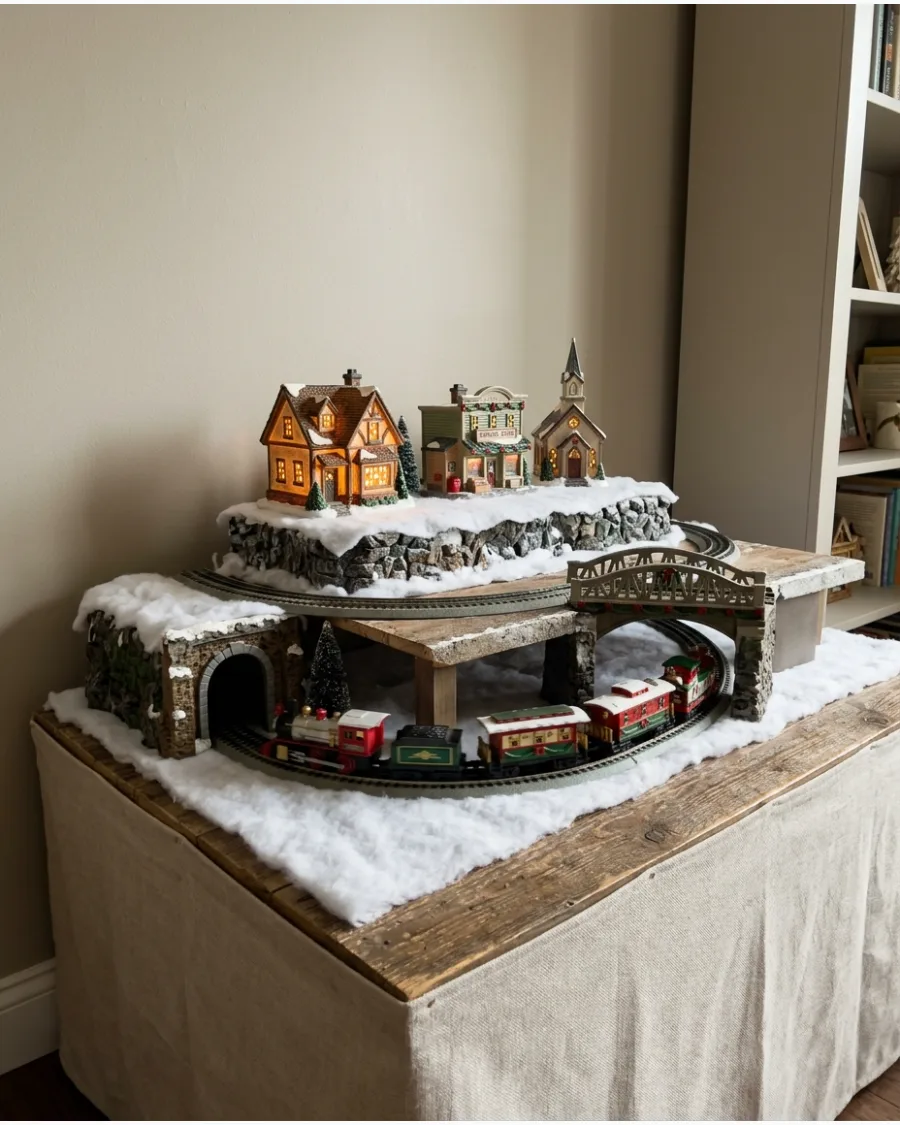
Elevation creates visual interest and provides a clever way to hide messy wiring. Place your houses on sturdy foam blocks and run the train tracks along the table surface directly below the town. This creates a two-story effect that makes the display look professionally designed and much larger than it actually is.
It allows the train to travel under the town, adding a sense of mystery to the movement.
- Use high-density foam blocks from a hardware store for the most stable elevated platforms.
- Drape white batting over the foam edges to create the look of heavy, overhanging snowdrifts.
- Ensure the train has at least five inches of vertical clearance to pass safely under the platforms.
Best shortcut: Paint the underside of your elevated platforms black to create a shadow effect that makes the train tunnel look deeper.
46. Christmas Village Train Station
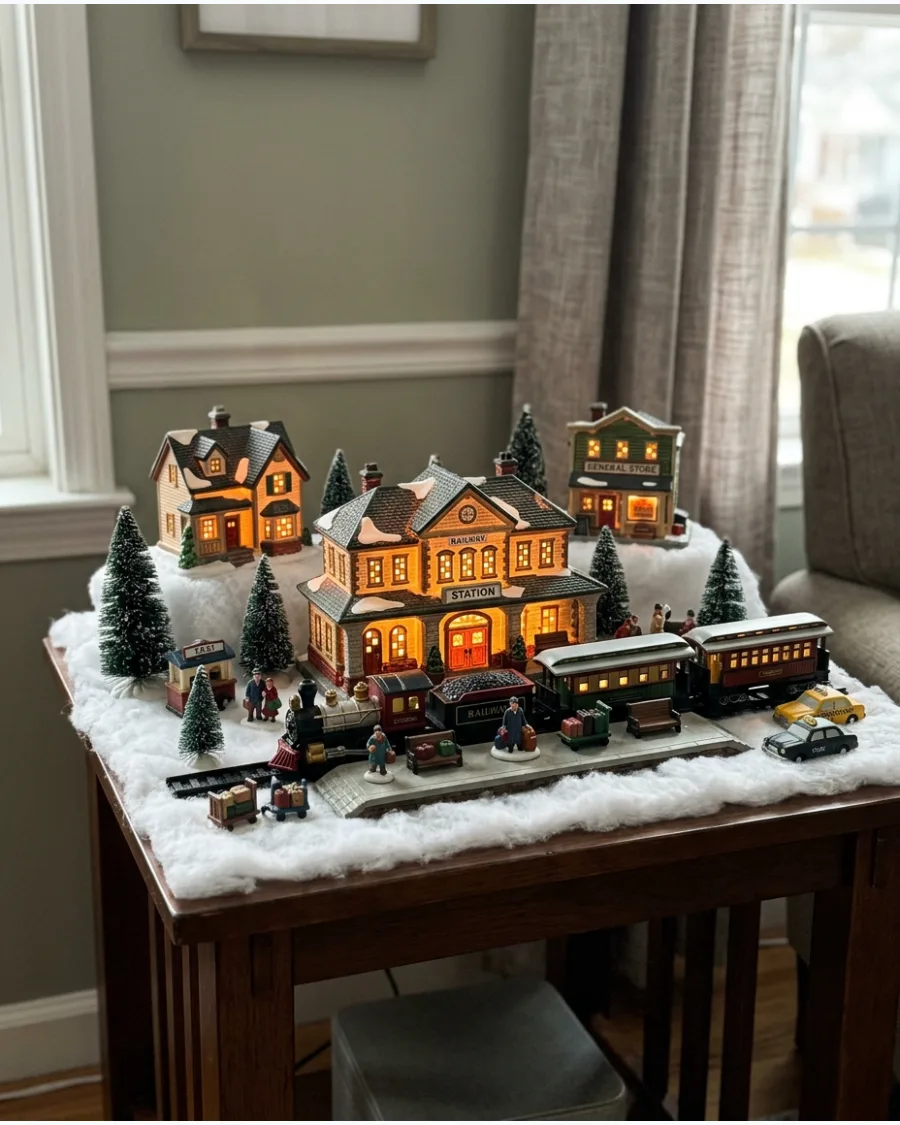
A dedicated station serves as a natural hub for activity and a primary focal point. Place your train station building on a slightly raised platform so the doors sit level with the train car steps. Adding accessories like benches, luggage piles, and a group of waiting travelers makes the scene feel active and alive.
It creates a clear destination for the train and provides a logical spot for the most detailed figures.
- Select a station building that includes internal lighting to draw attention to the platform at night.
- Cluster your most detailed traveler figures here to tell a small story within the larger village.
- Place the station at the front of the display so the fine details of the passengers are easy to see.
Most people skip this: Align the station platform exactly parallel to a straight section of track to make the boarding area look realistic.
47. Railway Bridge Christmas Village
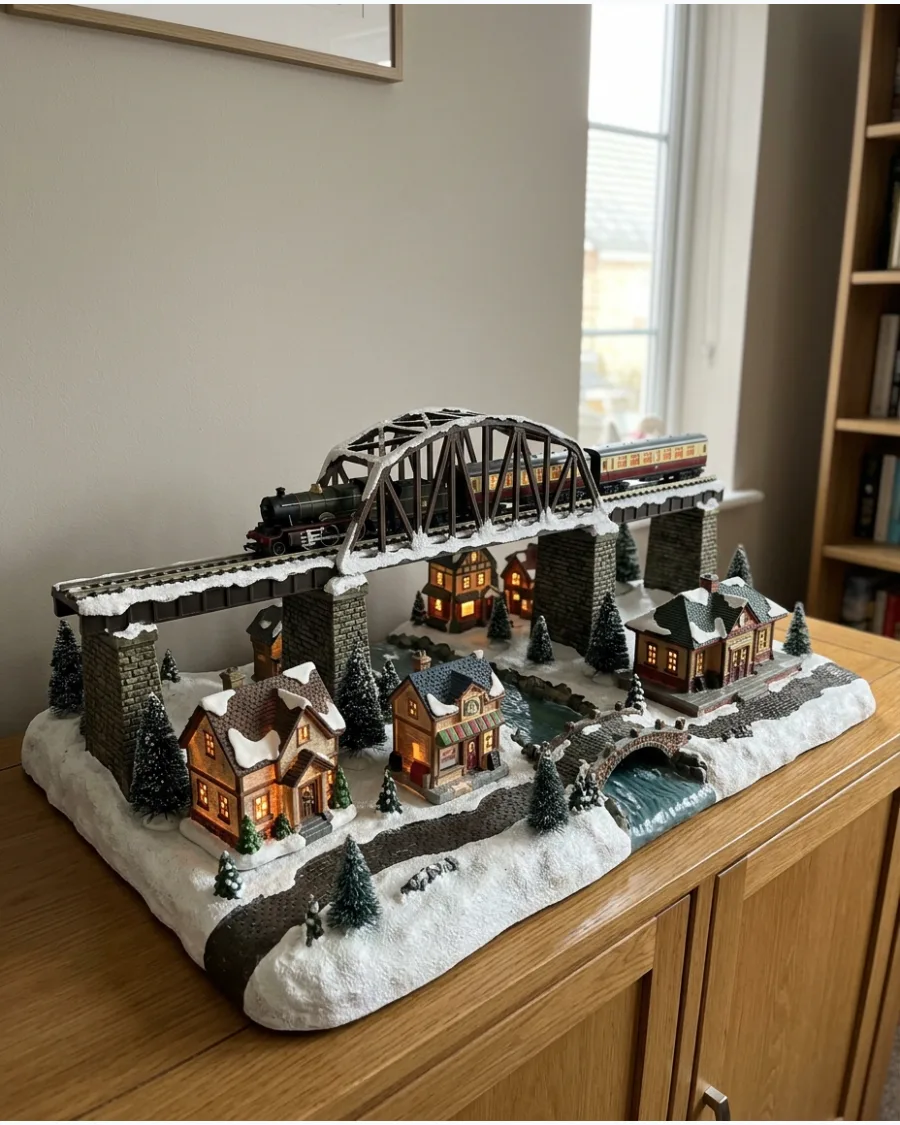
A bridge adds height and architectural detail that breaks up a flat display. Support a section of track with a miniature stone or steel-look bridge to cross over a lower path or a blue ribbon stream. This creates a strong visual moment by adding vertical layers to the transportation lines.
It is a great way to transition the train from a high mountain area down to a lower valley district.
- Check that the bridge is rated for the weight of your specific train model to avoid sagging.
- Secure the bridge footings with a small amount of museum wax to prevent shifting during operation.
- Place the bridge in the center of the display where it can act as a secondary focal point.
Quick win: Tuck a small sprig of greenery under the bridge arches to mimic the look of frozen river vegetation.
48. Mountain Train Tunnel Setup
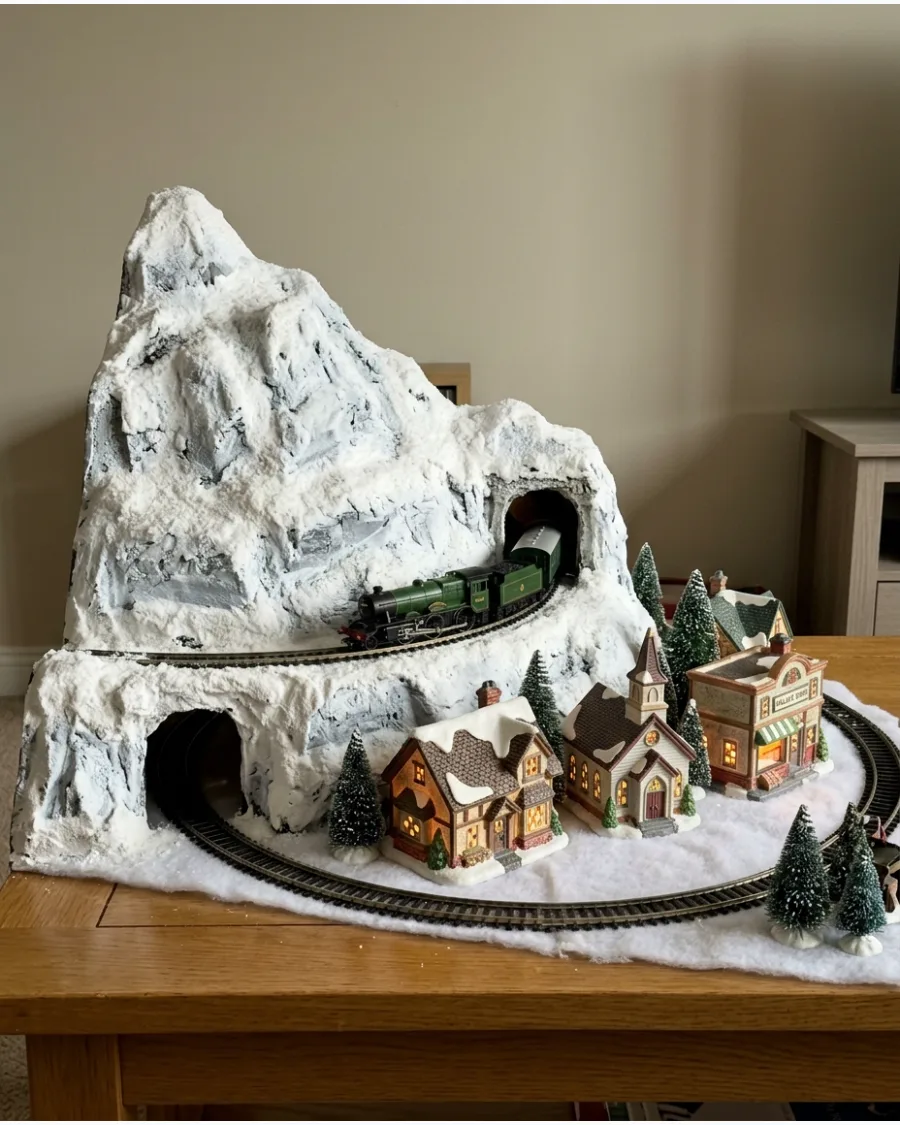
Tunnels add a sense of adventure and surprise to the railway movement. Use a pre-made mountain shell or build one from stacked foam to cover a curved section of the train track. Seeing the train enter one side of a snowy peak and emerge from the other is a classic holiday visual that children love.
The top of the tunnel also provides a perfect high-altitude spot to place a small cabin or a few pine trees.
- Ensure the tunnel interior is wide enough for the train to clear the curve without hitting the walls.
- Light the mountain with a small spotlight from the side to emphasize the texture of the snow.
- Use lightweight materials like paper-mâché or carved foam to keep the display from becoming too heavy.
Best shortcut: Paint the inside of the tunnel entrance flat black so the viewer sees a dark void rather than the unfinished material underneath.
49. Old-Fashioned Village Trolley
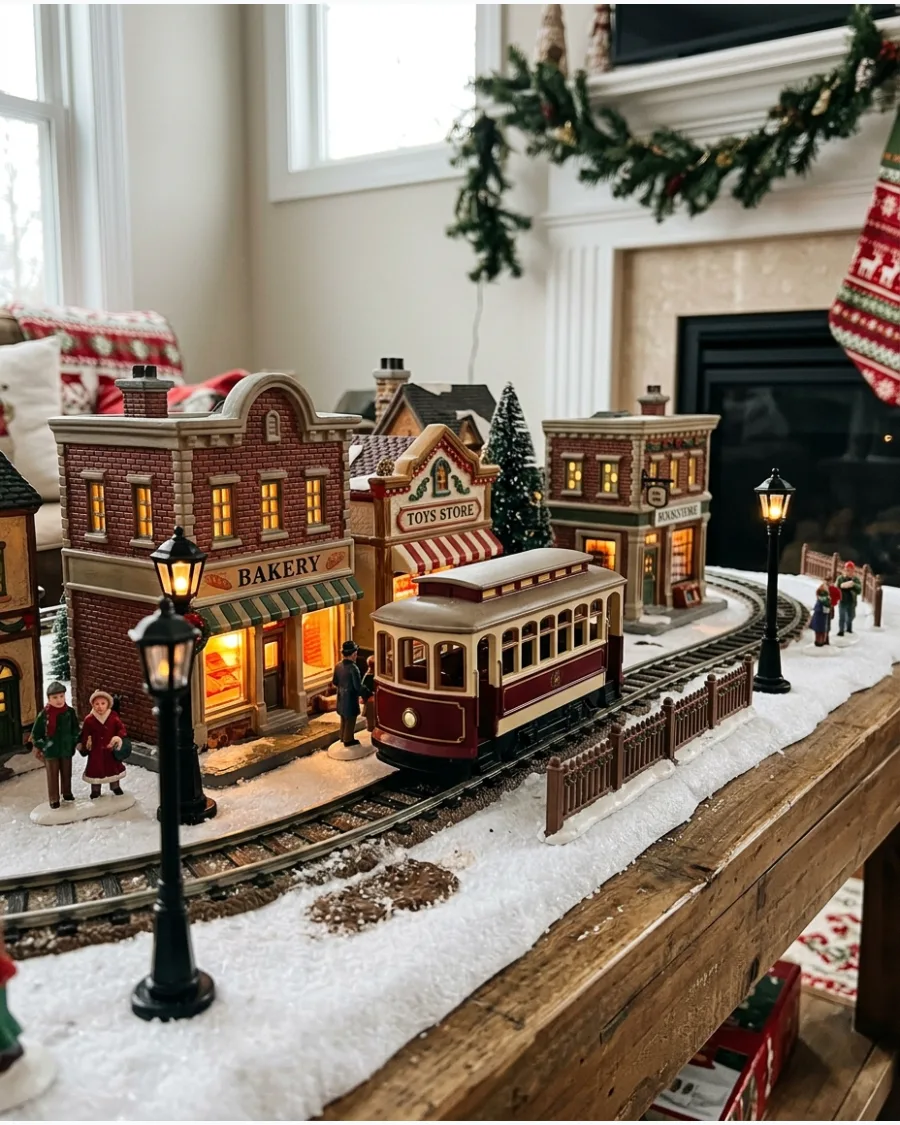
A trolley is a compact alternative to a full-sized train for smaller spaces. Run a single trolley car on a short, straight track down the center of your commercial shopping district. This fits perfectly on narrow mantels or bookshelves where a full circular track will not fit.
It adds movement and a nostalgic city feel without requiring a massive footprint or complicated setup.
- Look for auto-reverse trolley sets that travel back and forth on a single straight track.
- Place the tracks directly on the shelf surface and surround them with thin faux snow for a flush look.
- Position street lamps at both ends of the track to signal the trolley's stops.
Most people skip this: Place a few figures near the trolley doors to make it look like they are waiting for the next ride to arrive.
50. Horse-Drawn Carriage Village
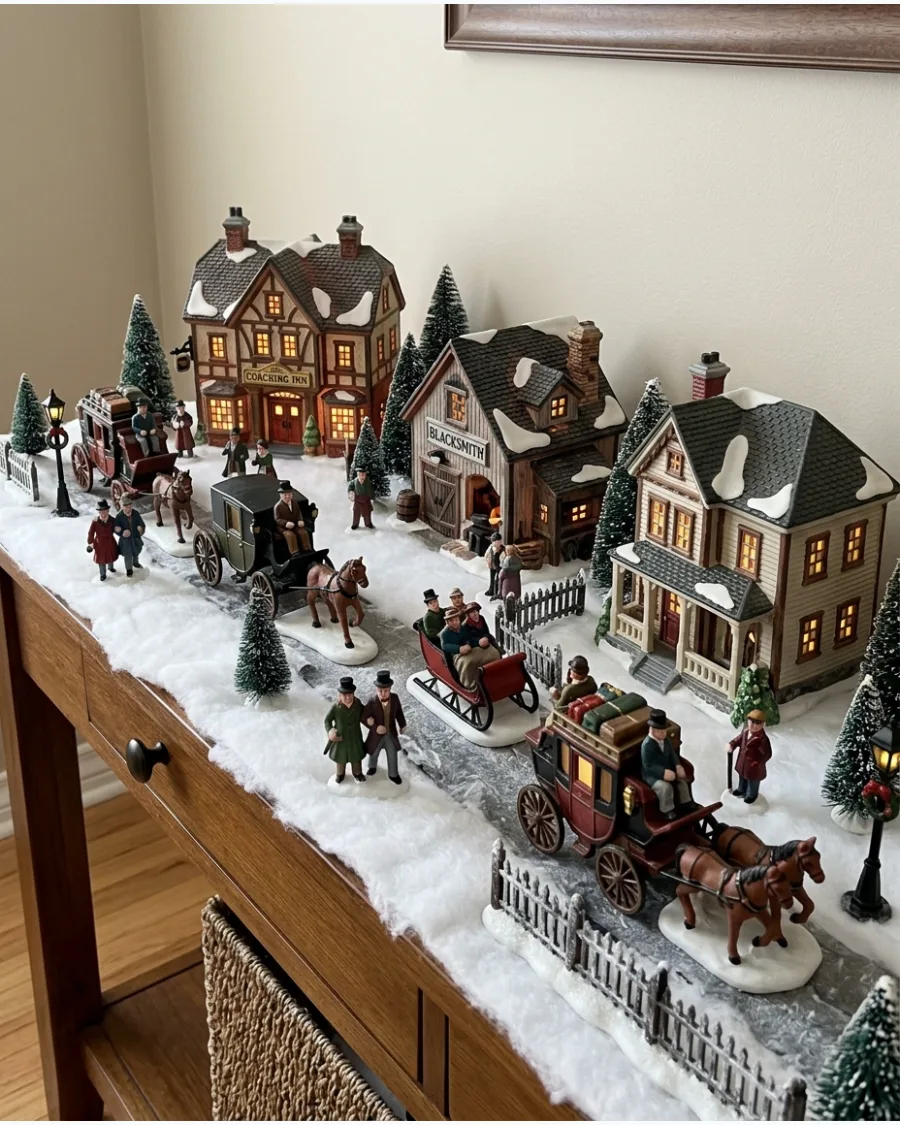
For a traditional or historic look, replace motorized vehicles with classic horse-drawn transport. Position a carriage and horses on a snowy street in front of a grand hotel or the village town hall. This immediately sets a Victorian or Dickens-era tone for the entire display.
The height of the horses and the carriage adds variety to the street scene compared to low-profile cars.
- Mix and match different carriage styles, such as open sleighs and closed coaches, for visual variety.
- Choose figures with period-accurate clothing to match the historic style of the transport.
- Place the carriage on a slight angle rather than perfectly straight to make the scene look more natural.
Quick win: Use the tip of a toothpick to press small hoof prints into the faux snow behind the carriage for a realistic, lived-in detail.
51. Vintage Car Christmas Village
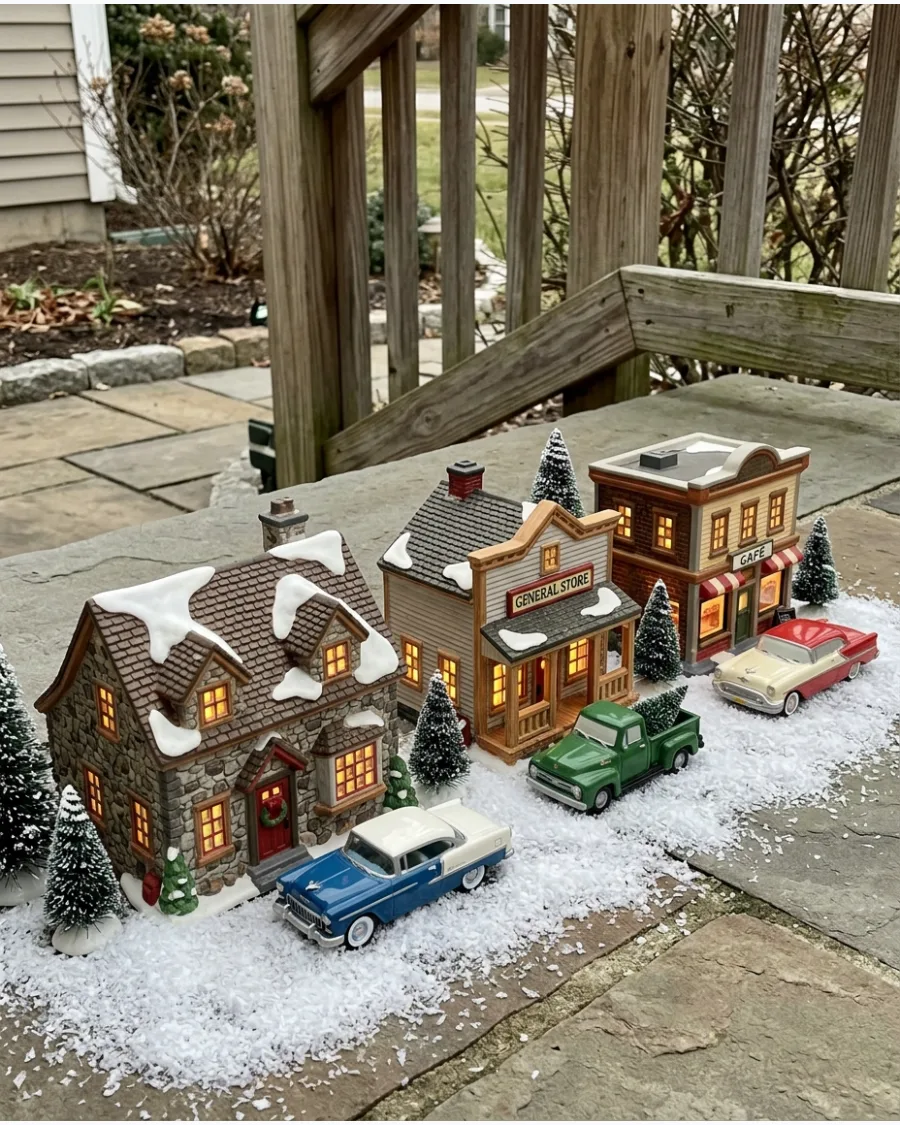
Adding small vintage cars parked outside houses and shops gives the scene a nostalgic mid-century feel. These tiny vehicles act as anchors that connect the buildings to the streets around them.
Place cars at slight angles in front of shops to make the village look like a snapshot of a busy holiday afternoon. Most people forget that a town needs a way for the residents to get around.
- Sourcing: Collect 1:43 or 1:50 scale die-cast cars for the best fit.
- Setup: Use blue tack to keep wheels from rolling on uneven snow surfaces.
- Adaptation: Swap shiny cars for matte or weathered versions to create a more rural or lived-in look.
Most people skip this: Angle the front wheels of the cars slightly so they look like they are turning, which adds a sense of motion.
52. Christmas Village Bus Stop
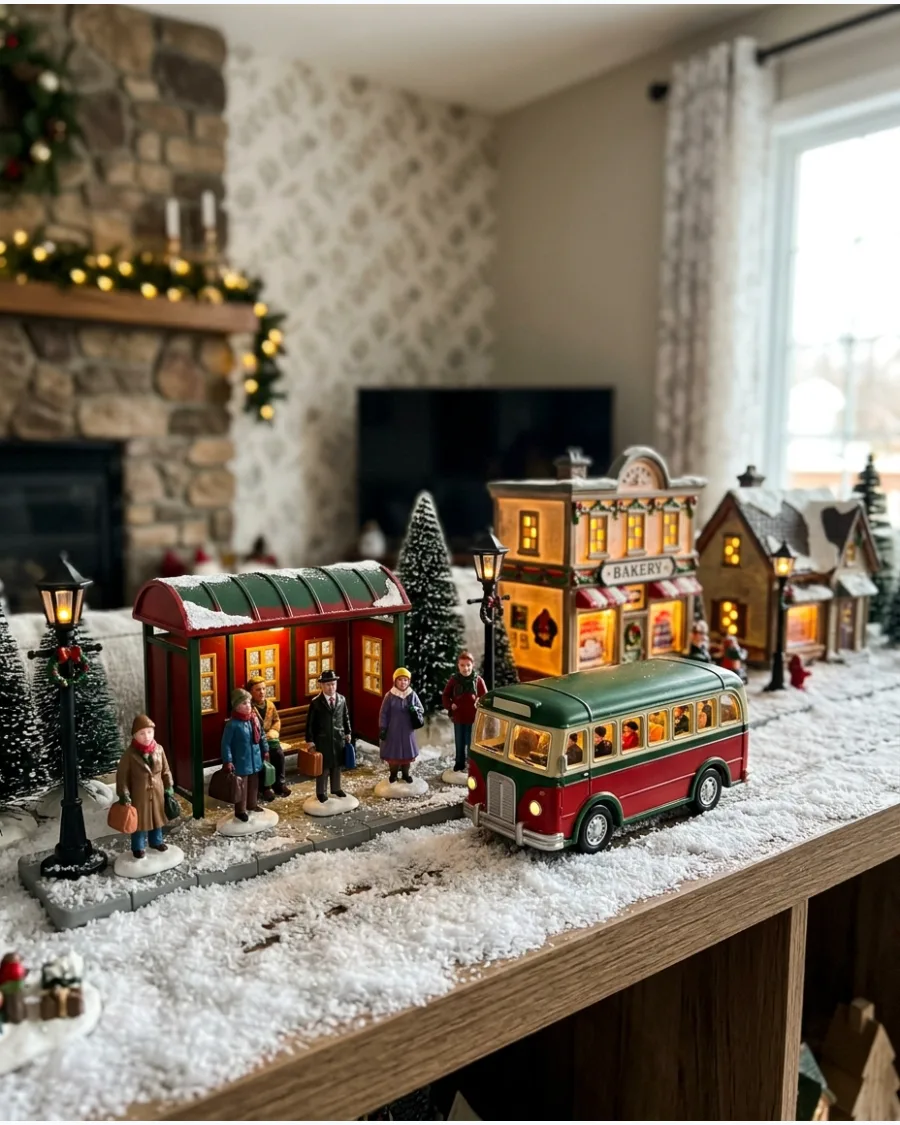
A roadside bus stop with a shelter and waiting passengers adds a touch of everyday realism to a miniature town. This detail works best near the edge of a display to suggest the world continues beyond the table.
Line up three or four figures in winter coats near the bus door to create a sense of community activity. Public transit scenes help break up the repetition of just having houses and stores.
- Sourcing: Find bus stop kits at hobby shops specializing in O-scale or HO-scale models.
- Setup: Tuck the bus power cord under a snow blanket to keep the lights visible but the mess hidden.
- Adaptation: For a smaller space, use a simple signpost instead of a full shelter.
Quick win: Place a tiny discarded newspaper or a bench inside the shelter to make the scene feel occupied.
53. Mountain Cable Car Village
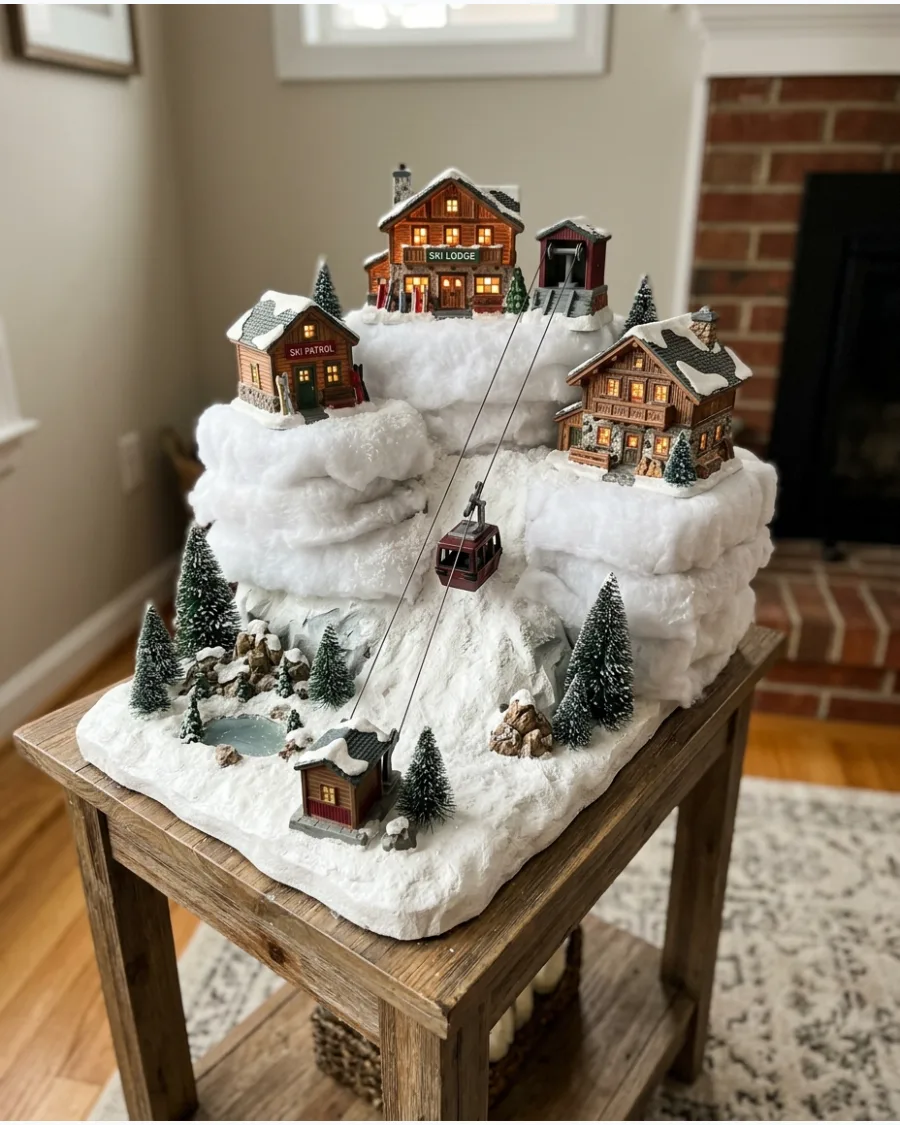
A miniature cable car traveling toward high chalets adds vertical interest that most flat displays lack. Stretching the cable between a high shelf and a main table creates a dramatic physical connection in the room.
Secure the cable line tightly to prevent the gondola from sagging into the mountain below. Elevated elements draw the eye upward and make the setup feel more professional.
- Sourcing: Motorized cable car sets are available from major village brands like Lemax.
- Setup: Ensure the wire path is clear of any tall trees or church steeples to avoid snags.
- Adaptation: If a motor is too loud, use a static cable car for the same visual effect without the noise.
Best shortcut: Use thin fishing line if the kit's cable is too bulky or visible against your wall color.
54. Mini Ski Lift Village
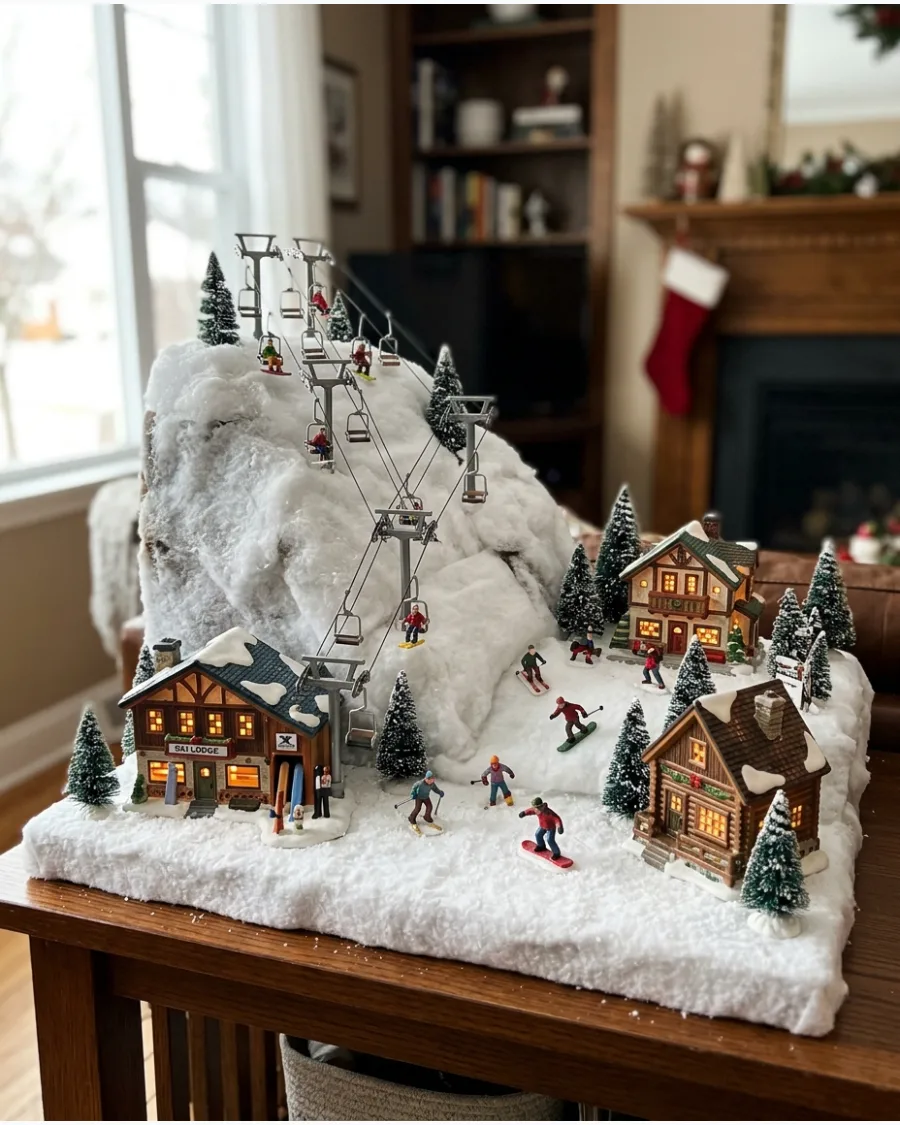
Turning a section of the village into a winter resort with a ski lift creates a high-energy focal point. The movement of chairlifts climbing a white foam hillside instantly catches the eye of anyone entering the room.
Scatter loose faux snow over the lift chairs to make the resort look like it just had a fresh powder dump. A dedicated recreation area balances the busy commercial zones of the town.
- Sourcing: Look for battery-operated ski lifts to avoid running long power cords across the mountain.
- Setup: Use carved insulation foam painted white to create the specific incline needed for the lift towers.
- Adaptation: Use a single stationary chairlift if you have a narrow shelf instead of a deep table.
Most people skip this: Place a few downed skiers or a tiny lodge at the bottom to add a bit of humor and storytelling.
CHRISTMAS VILLAGE THEME IDEAS
55. Victorian Christmas Village
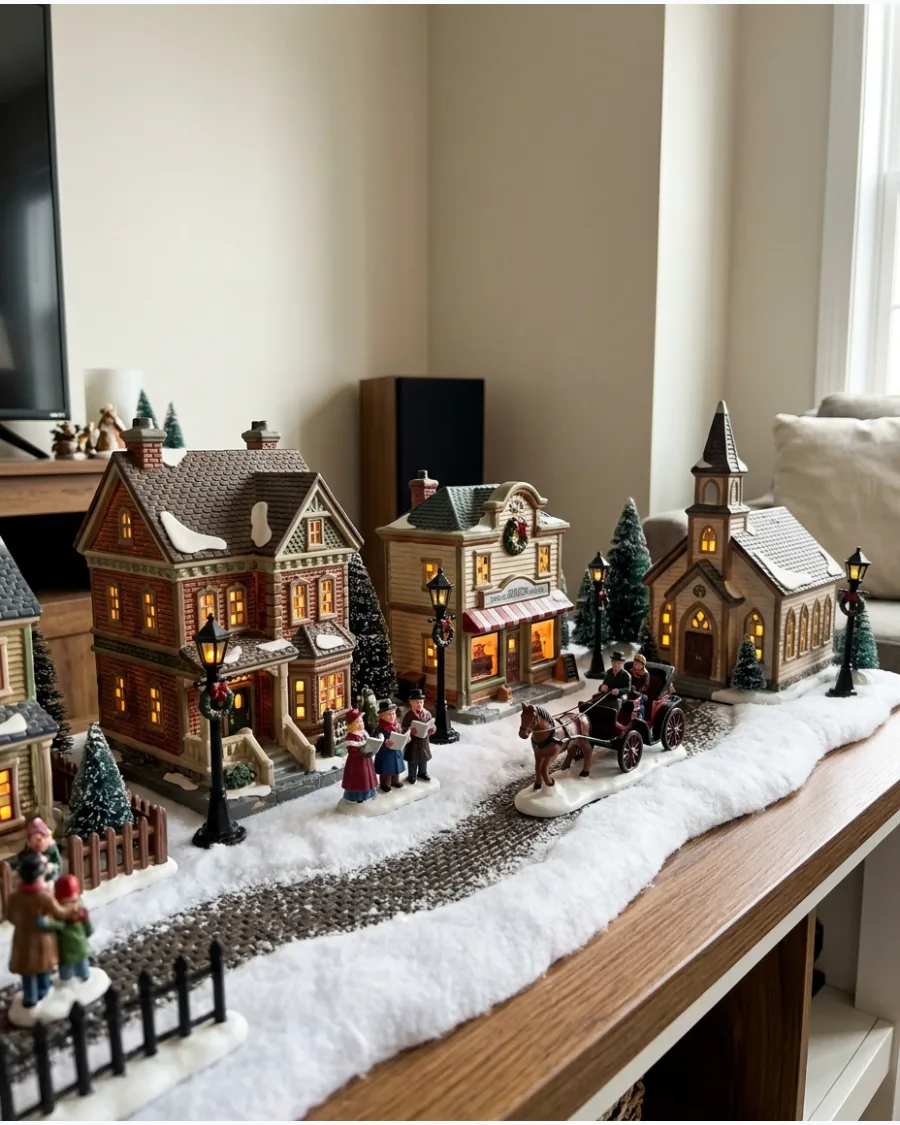
Victorian houses with steep gables and intricate trim create a classic, formal holiday atmosphere. This theme relies on warm streetlights and figures in formal period clothing like top hats and long coats.
Group three or four tall Victorian shops together to create a high-density downtown look on a mantel. The architectural detail of these pieces makes the village feel like a sophisticated heirloom.
- Sourcing: Victorian-style buildings are common and found at most big-box craft stores during the holidays.
- Setup: Use warm-toned LED bulbs instead of cool white to mimic the glow of old-fashioned gas lamps.
- Adaptation: Add a park area with a fountain to separate the residential homes from the main shops.
Quick win: Use a piece of dark velvet fabric under the snow to give the Victorian display a more luxurious base.
56. Dickens Christmas Village
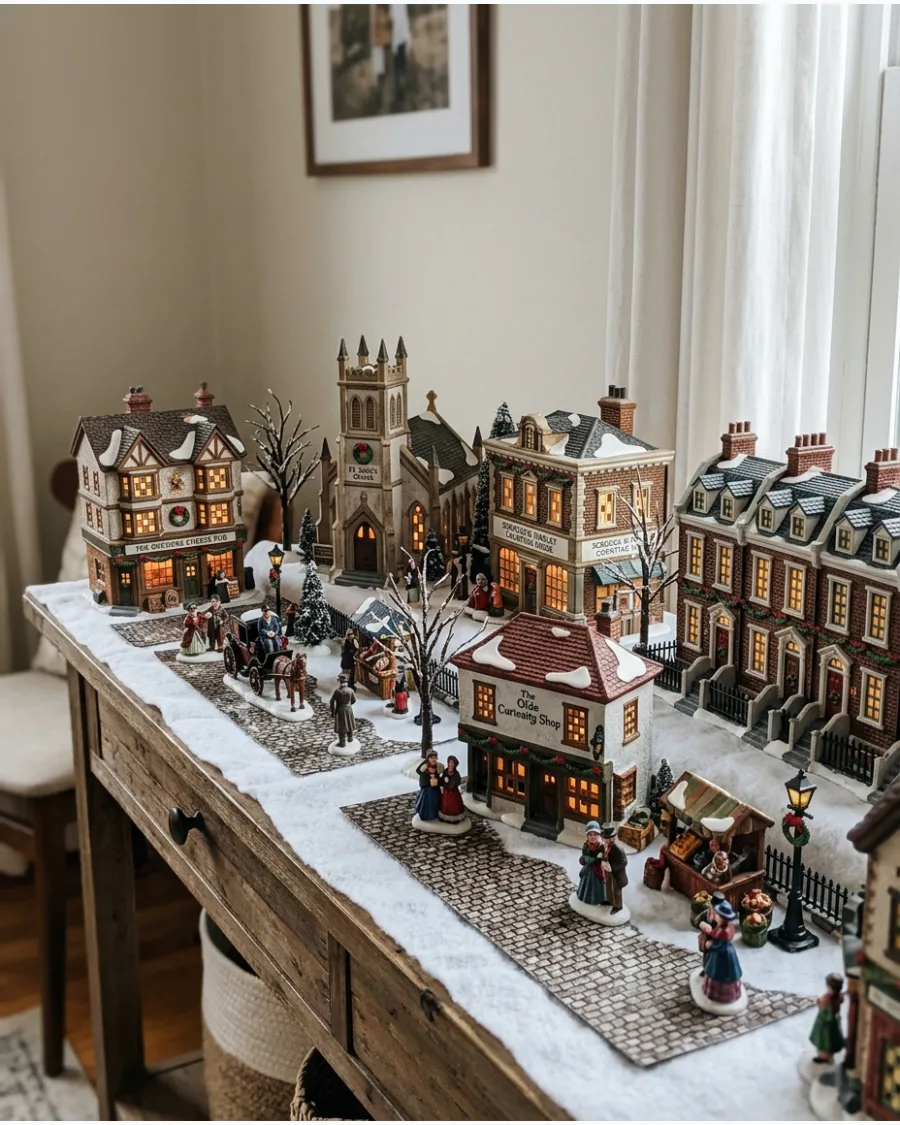
A Dickens-inspired display brings a storybook English feel with half-timbered buildings and narrow, winding streets. This style works best when the buildings are packed closely together to mimic an old city center.
Sprinkle gray gravel or use a cobblestone mat between the buildings to ground the historic aesthetic. Traditional details like market stalls and town criers help tell a specific historical story.
- Sourcing: Department 56 is the primary brand for the Dickens' Village series.
- Setup: Hide modern power strips behind the tallest buildings or inside a hollowed-out hill.
- Adaptation: For a renter-friendly version, use battery-operated tea lights inside the buildings to skip cords.
Best shortcut: Use a few drops of clove or cinnamon oil on the fabric base to add a subtle old-world scent to the display.
57. European Christmas Market Village
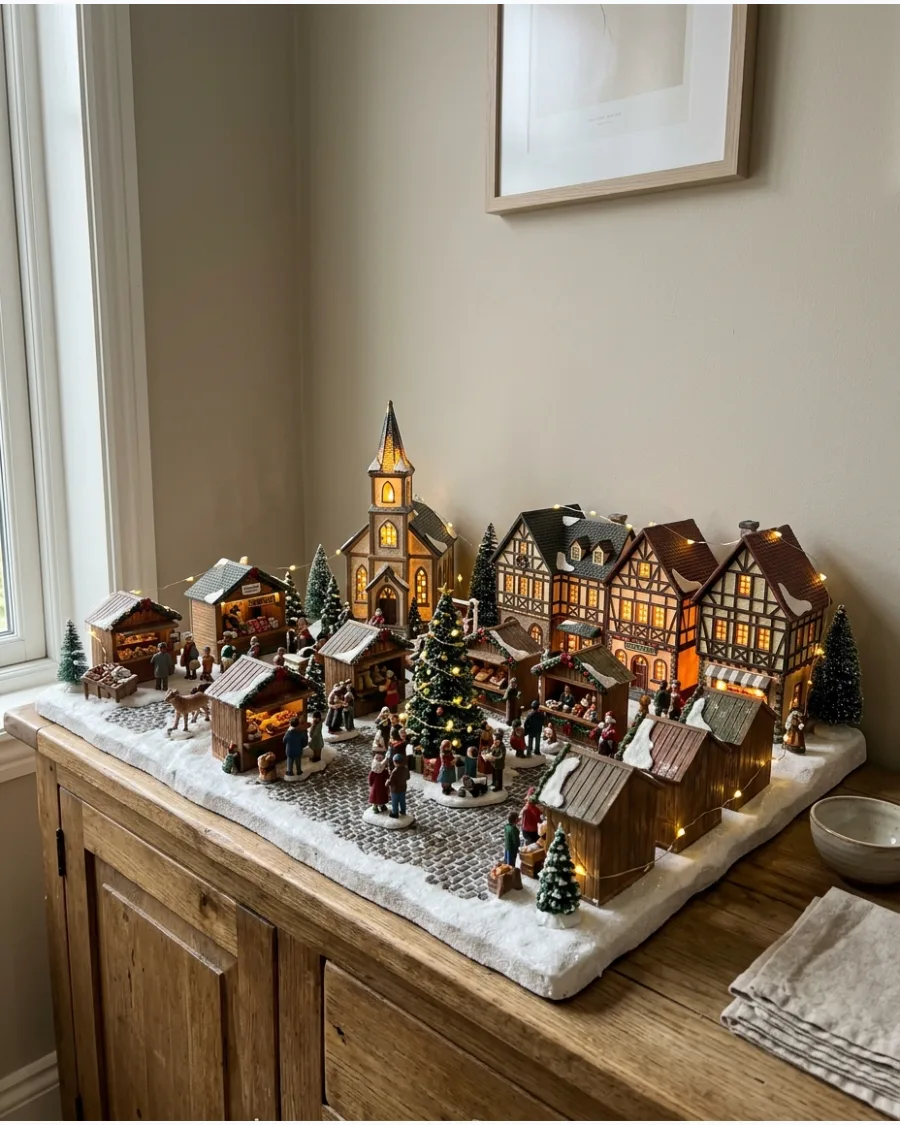
An open town square filled with wooden market stalls captures the festive spirit of a holiday fair. This layout prioritizes small accessories like food vendors and ornament booths over large residential buildings.
Arrange the stalls in a semi-circle around a central feature like a large tree or a fountain. The busy, cluttered look of a market adds a lot of life to a small space.
- Sourcing: Market stalls are often sold as individual accessory pieces rather than full buildings.
- Setup: Use a strand of micro-LED fairy lights draped between the stalls to mimic overhead market lighting.
- Adaptation: If space is tight, set the market on a tiered spice rack to save horizontal room.
Most people skip this: Place a few tiny dogs or pigeons near the food stalls to make the market feel lived-in.
58. German Christmas Market Village
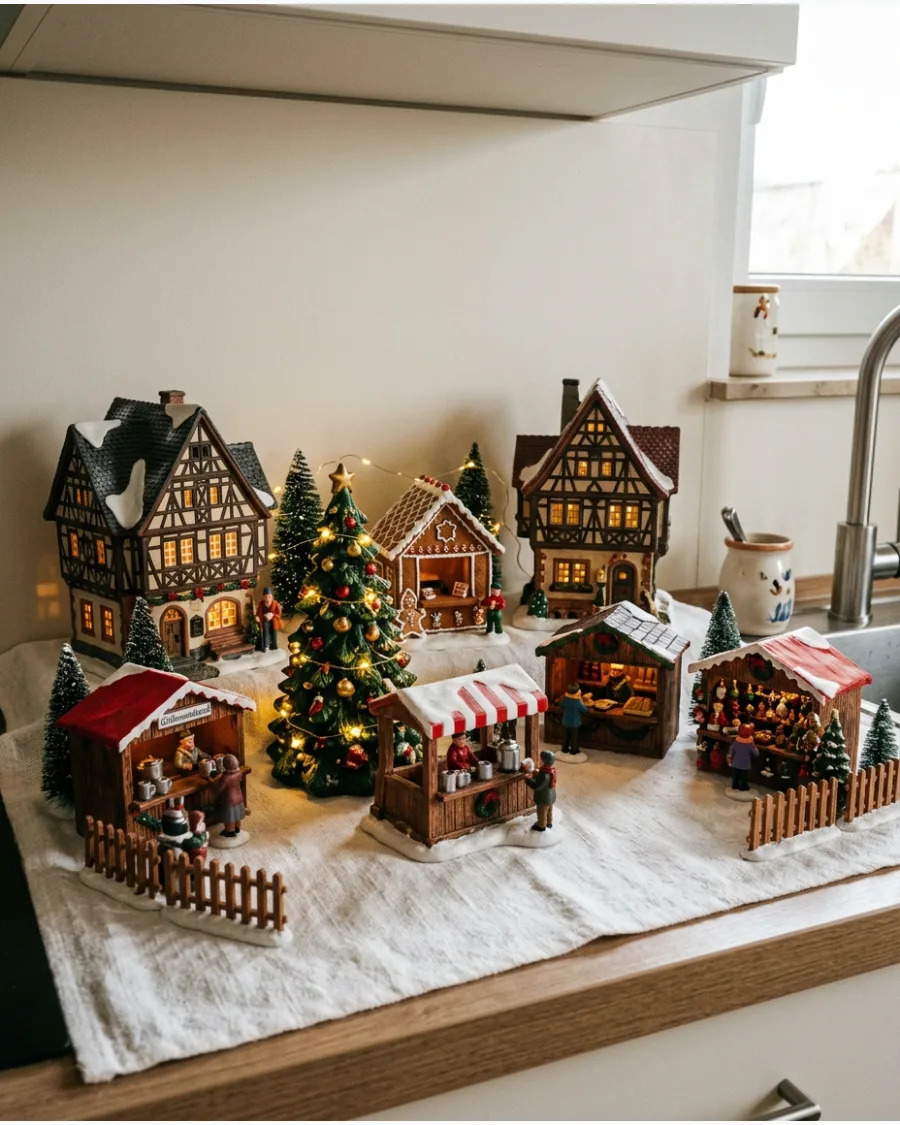
A German-style market focuses on timber-frame buildings and specific stalls like gingerbread and mulled wine. This theme creates a cozy, communal feeling that works well on a kitchen sideboard or dining room buffet.
Use a taller pine tree as the center of the market to act as a landmark for the tiny shoppers. The specific architecture of the Weihnachtsmarkt gives the display a clear and cohesive identity.
- Sourcing: Look for timber-frame or tudor style miniature buildings to get the German look.
- Setup: Place a small mirror at the back of the display to double the appearance of the market lights.
- Adaptation: Use real cinnamon sticks as logs near the stalls for a natural look and smell.
Quick win: Add a tiny Glühwein sign or a pretzel stand to make the theme instantly recognizable.
59. Alpine Chalet Christmas Village
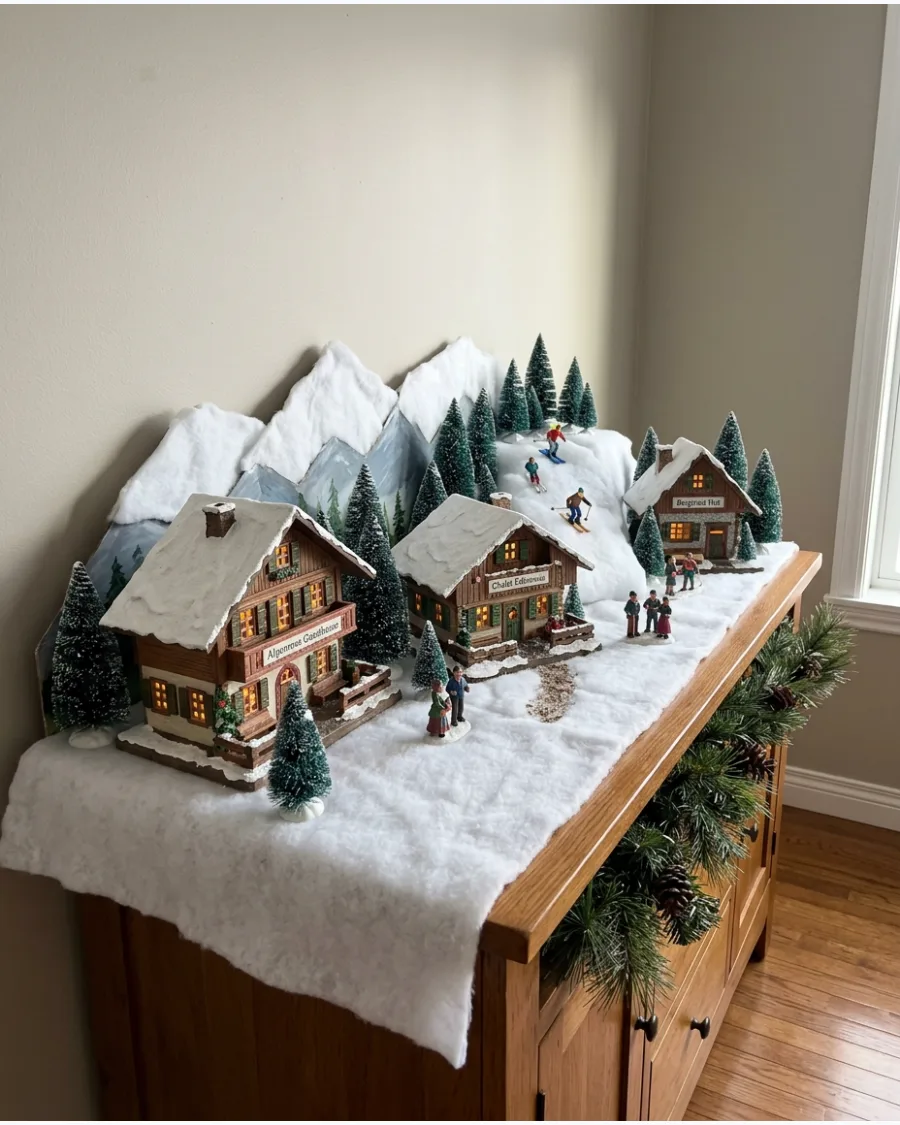
Alpine villages use wooden chalets with steep, snow-heavy roofs to create a mountain-resort vibe. This style needs plenty of pine trees and rocky terrain to look authentic.
Tuck small clumps of cotton batting around the base of the chalets to mimic deep, drifted snow. The warm light coming from the windows of a dark wood chalet creates a very cozy contrast.
- Sourcing: Alpine pieces are often sold as North Pole or Mountain series in major collections.
- Setup: Use pieces of slate or dark stone to create rugged paths between the elevated houses.
- Adaptation: If you lack height, place the chalets on stacked books covered with a white sheet.
Best shortcut: Spray a little bit of canned snow on the tips of your miniature pine trees for a fresh-frozen look.
60. Scandinavian Christmas Village
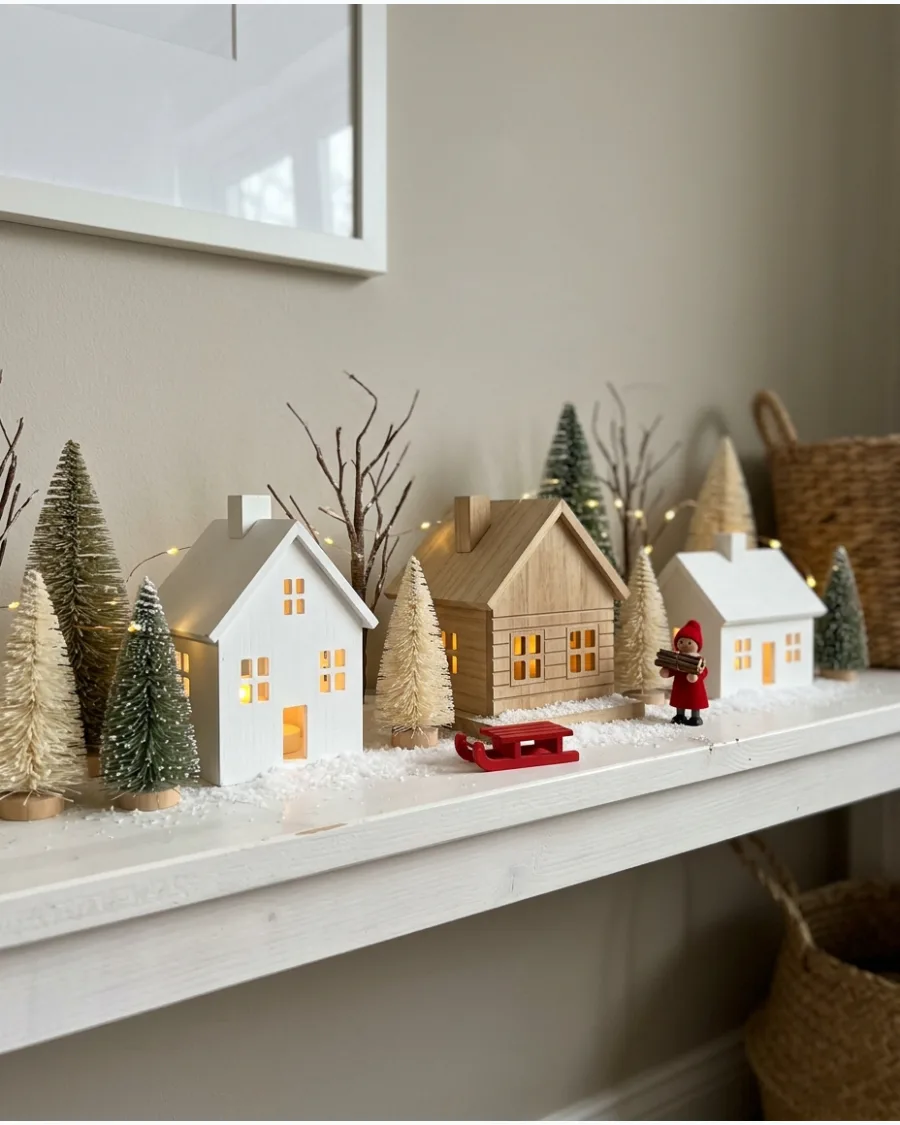
A Scandinavian village is all about simplicity, using white or light wood houses and minimal decorations. This clean look works perfectly in modern homes where a colorful, busy village might feel out of place.
Mix in a few natural elements like real pine clippings or bare twigs to keep the display grounded. Low-profile lighting and plenty of white space between houses are key to this aesthetic.
- Sourcing: Simple ceramic white houses are widely available at major home goods retailers.
- Setup: Use a plain linen runner instead of fluffy faux snow for a more sophisticated, flat texture.
- Adaptation: Use battery-operated candles behind the houses to create a soft silhouette effect.
Most people skip this: Limit your color palette to white, silver, and one shade of red for a true Nordic feel.
61. New England Christmas Village
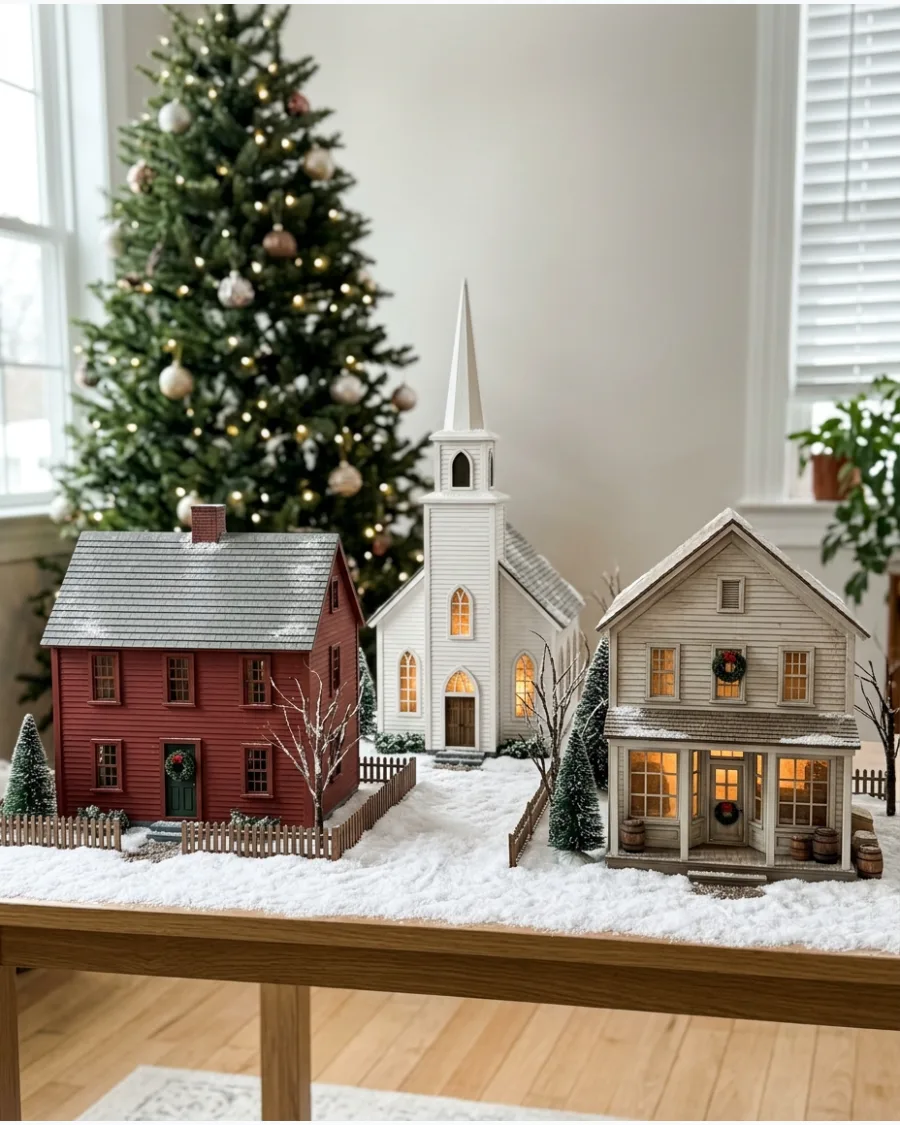
Create a charming American small town featuring colonial-style homes and a white steeple church. Elevate the church using a small hidden box under the snow fabric to make it the central focal point of the coastal town layout. A consistent architectural style across the buildings makes the miniature world feel like a real, grounded community.
- Collect pieces over several years from heritage brands to maintain a consistent colonial scale.
- Stagger buildings in a slight semi-circle to create depth on a narrow mantel surface.
- Add a few bare-branch miniature trees to mimic the look of a Northeast winter landscape.
Quick win: Use a piece of blue ribbon under the snow to create a frozen coastal inlet for your town.
62. Small-Town America Christmas Village
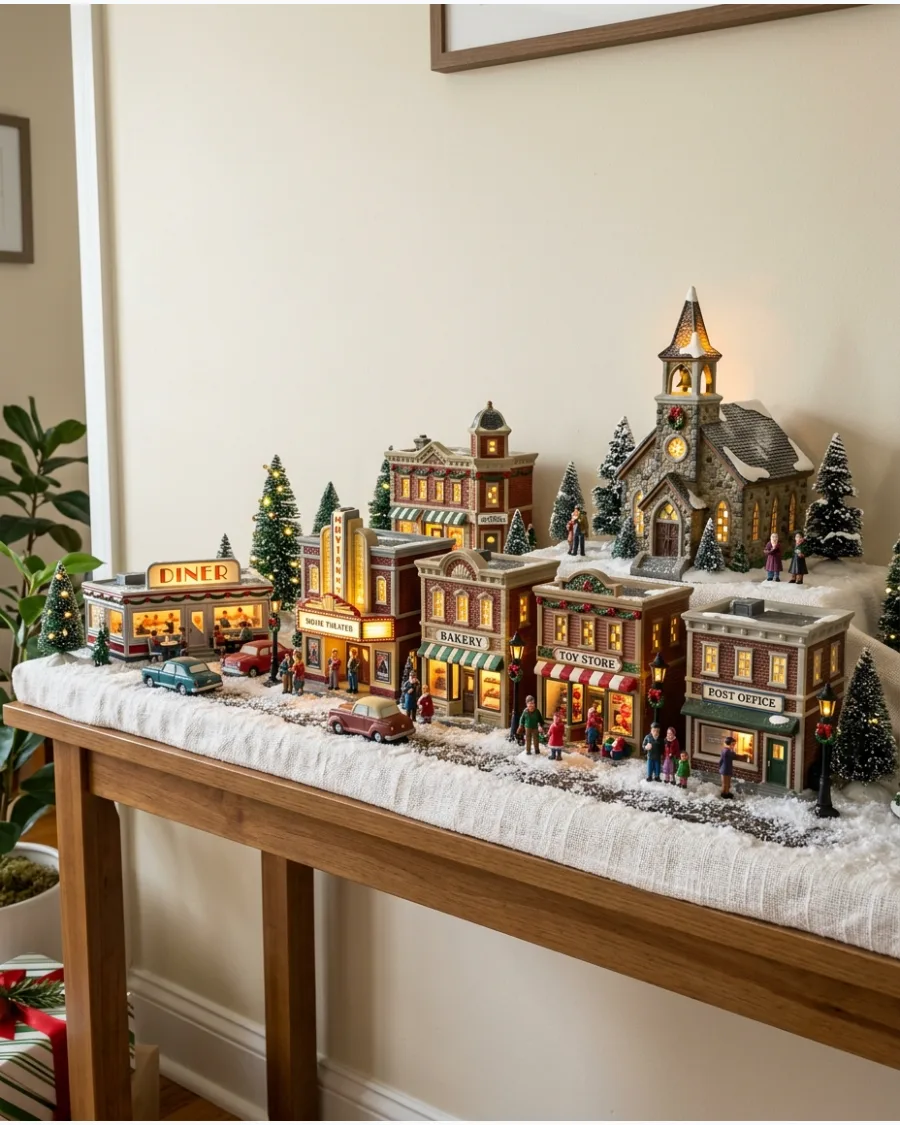
Build a nostalgic downtown area filled with a diner, a movie theater, and a post office. Group the commercial buildings closely together on a flat surface to form a walkable Main Street that draws the eye. Adding tiny figures carrying shopping bags brings the busy holiday scene to life.
- Look for mid-range ceramic sets at craft stores during the early November sales.
- Place streetlights every four inches to define the sidewalk and illuminate the storefronts.
- Use a gray felt mat as a base to represent paved streets without the mess of loose gravel.
Most people skip this: Place the tallest buildings in the center of the row to create a natural visual peak.
63. 1950s Retro Christmas Village
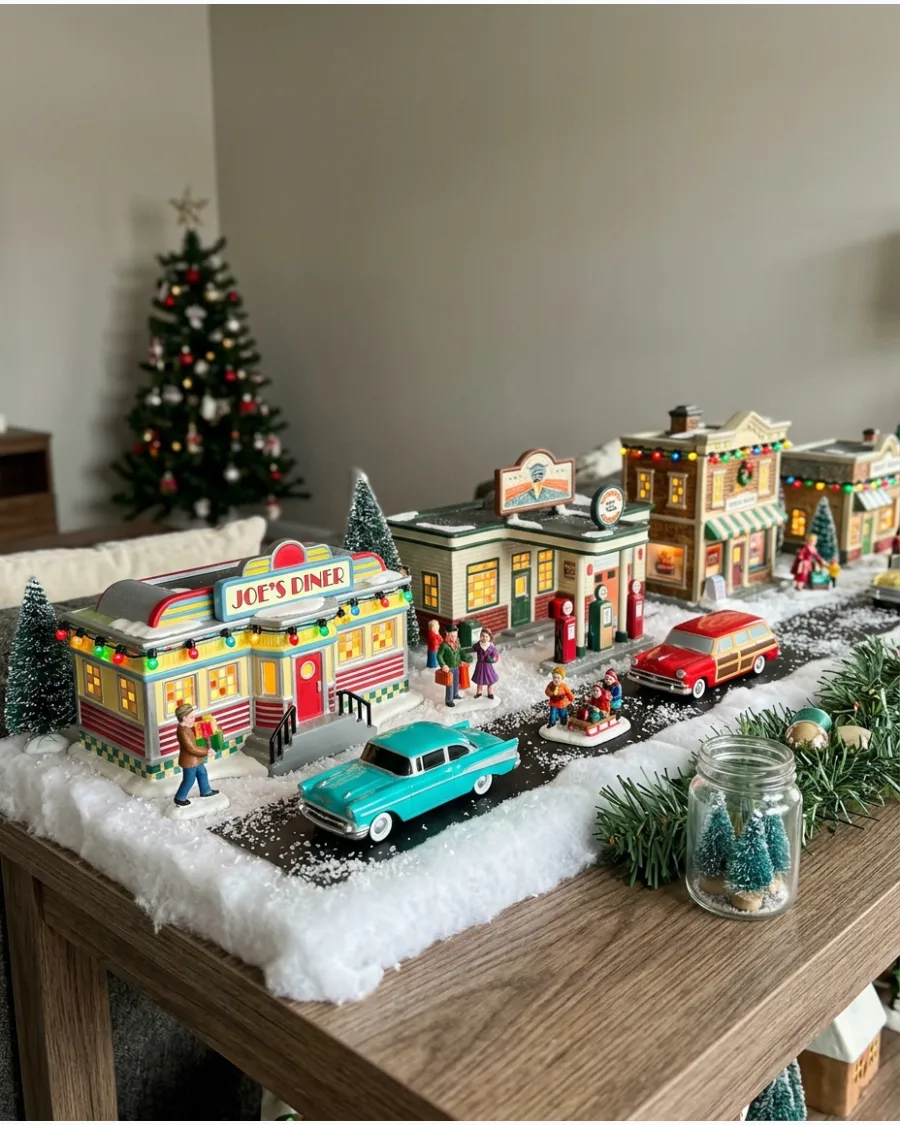
Use vintage cars, colorful storefronts, and classic diners to capture a mid-century holiday mood. Park tiny pastel-colored cars at various angles in front of the buildings to suggest a bustling town center. High-gloss finishes on the buildings help reflect the bright, optimistic energy of the era.
- Source 1:43 scale die-cast cars for the most realistic size match with standard village buildings.
- Tuck power strips behind the display and use cord clips to keep wires flat against the table.
- Add a few miniature people in coats and hats to emphasize the social atmosphere of the scene.
Best shortcut: Use a vintage-style tinsel garland as a border for the entire display to finish the retro look.
64. Colorful 1980s and 1990s Christmas Village
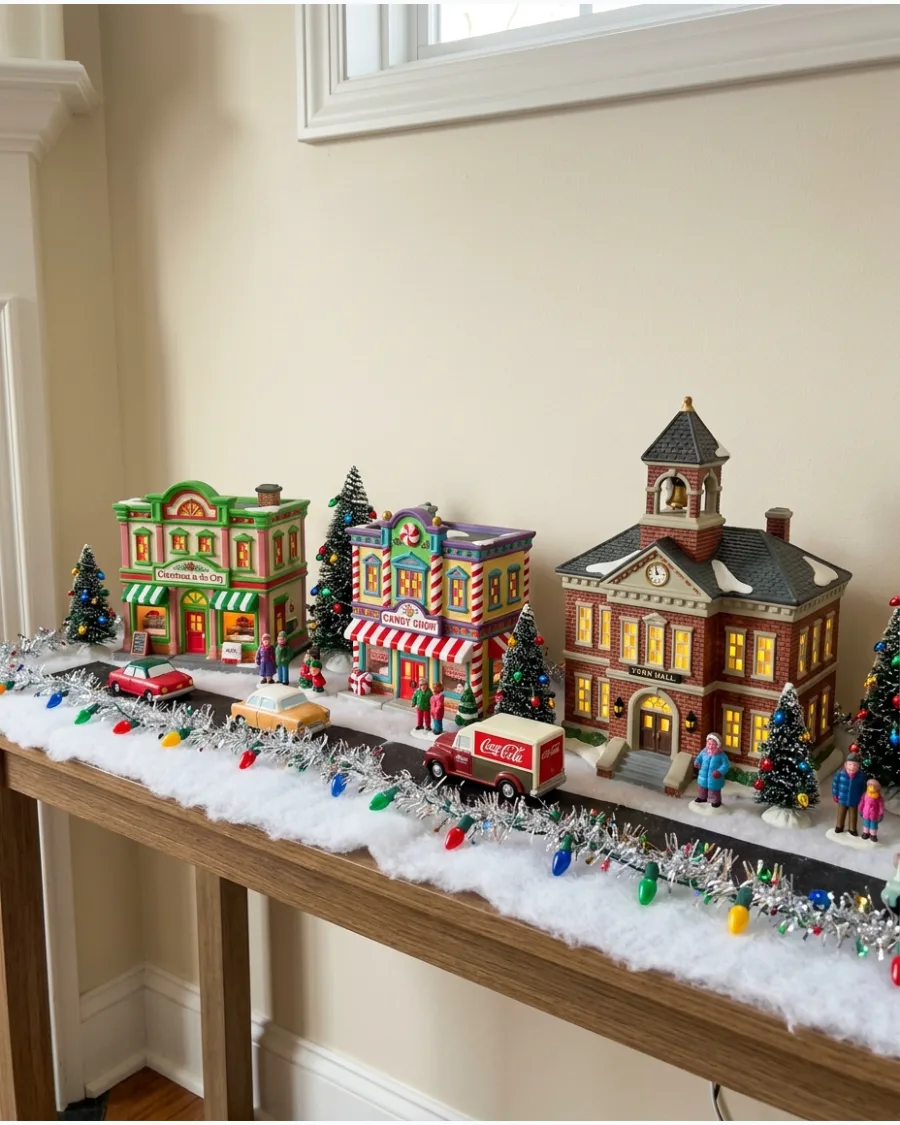
Mix bright lights and playful accessories for a lively retro holiday display that feels nostalgic. Drape thin silver tinsel around the rooflines of the shops to capture the over-the-top decorating style of the late 20th century. Bold, saturated colors on the buildings make this setup stand out in a brightly lit room.
- Search for vintage plastic village pieces at thrift stores for an authentic 90s texture.
- Use multicolored LED string lights rather than warm white to match the vibrant theme.
- Place this display on a white shelf to make the neon colors of the buildings pop.
Quick win: Add a tiny boombox or a miniature arcade machine accessory to nail the era's specific details.
65. White Ceramic Christmas Village
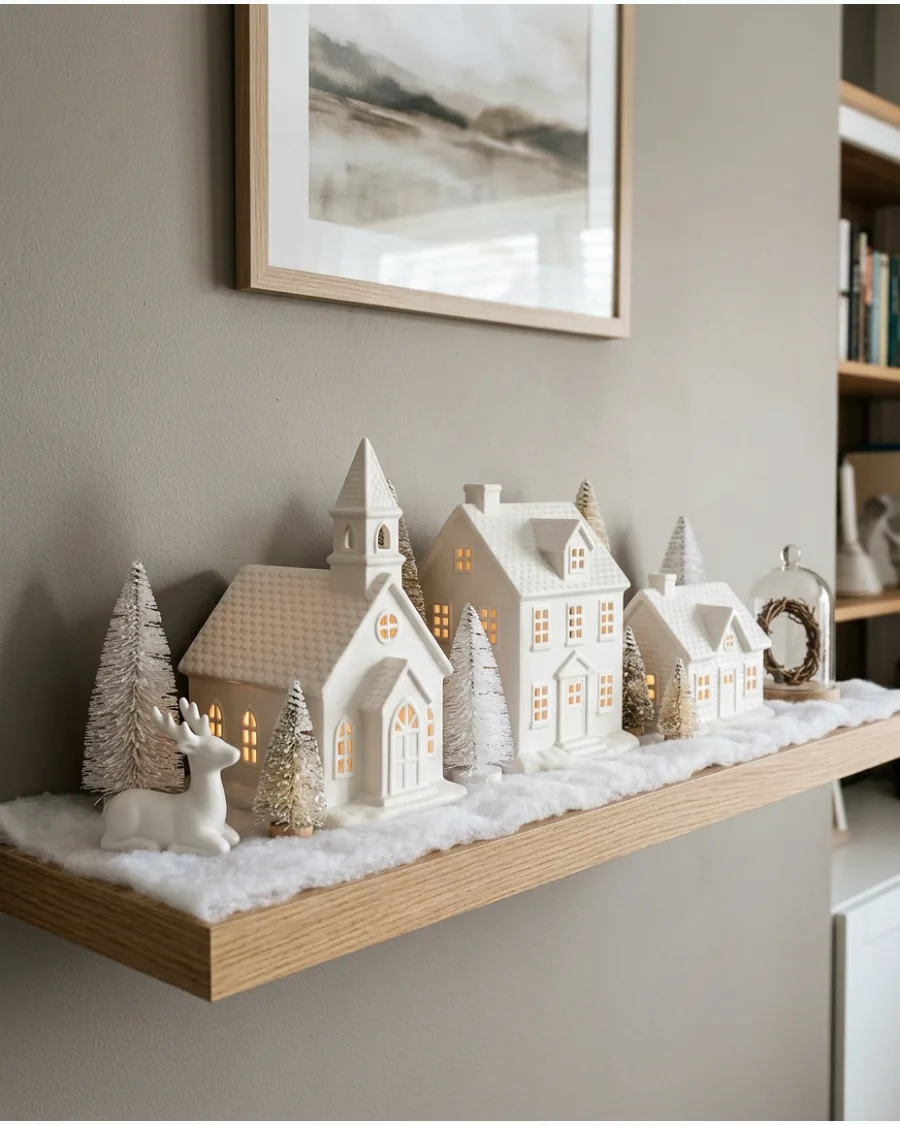
Use all-white houses and matching trees to create an elegant village where light provides the visual interest. Tuck warm-white fairy lights inside every building to create a soft, uniform glow that highlights the clean silhouettes. A monochromatic display keeps a room feeling calm and sophisticated during the busy holidays.
- Purchase a pre-packaged set of white ceramic houses to ensure the shades of white match perfectly.
- Line the windowsill with a thin layer of white quilt batting to hide any battery packs.
- Vary the heights of the houses by using small wooden blocks hidden under the fabric base.
Most people skip this: Use battery-operated tea lights with timers so the village glows automatically every evening.
66. Neutral Christmas Village
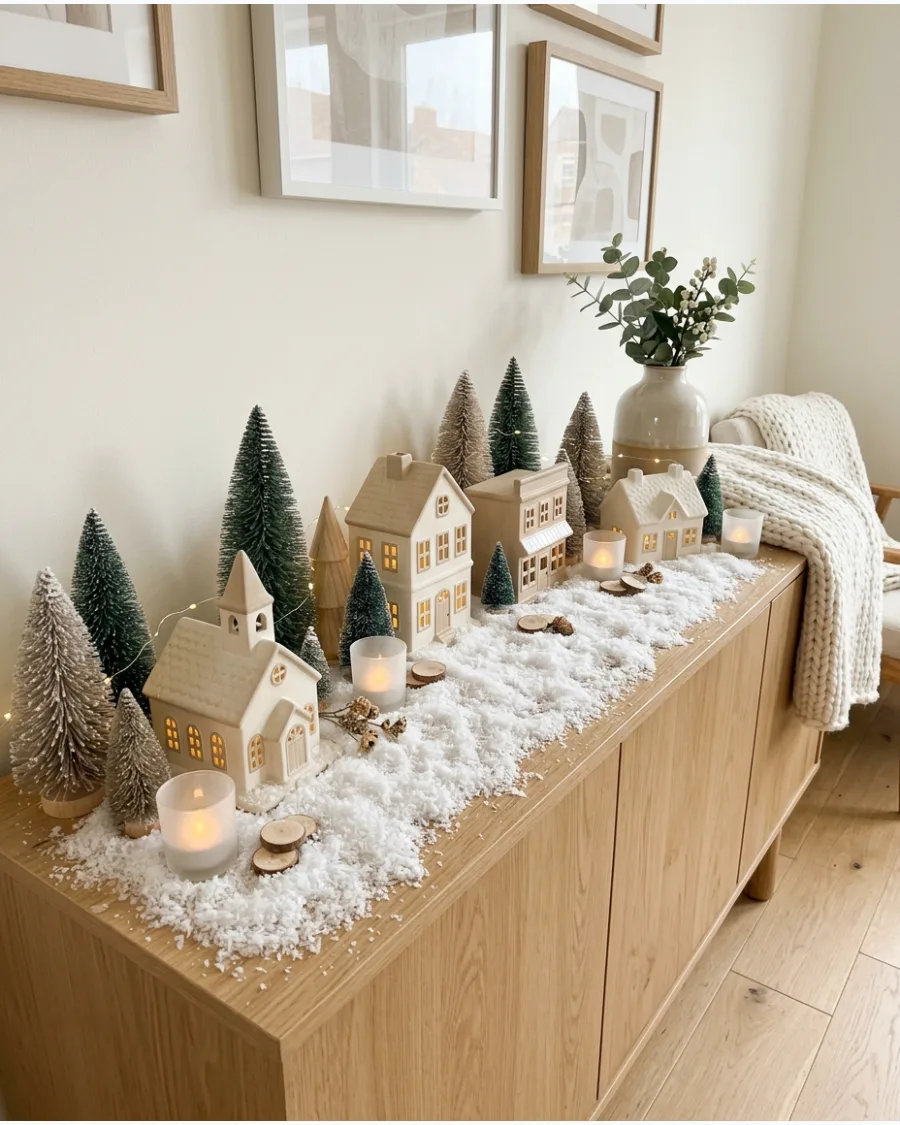
Combine cream, beige, and natural wood elements for a soft display that blends into modern interiors. Mix in natural wood trees and brown paper accents to ground the display in an organic, earthy palette. Muted colors allow the display to stay up longer into January without feeling like traditional holiday clutter.
- Budget for high-quality wooden trees that can be reused in non-holiday decor later.
- Place the buildings on a linen or burlap runner to add texture without using messy faux snow.
- Use warm-toned bulbs to keep the cream and beige tones from looking washed out.
Best shortcut: Use dried eucalyptus sprigs as 'greenery' to maintain the neutral, sophisticated color scheme.
67. Burgundy and Gold Christmas Village
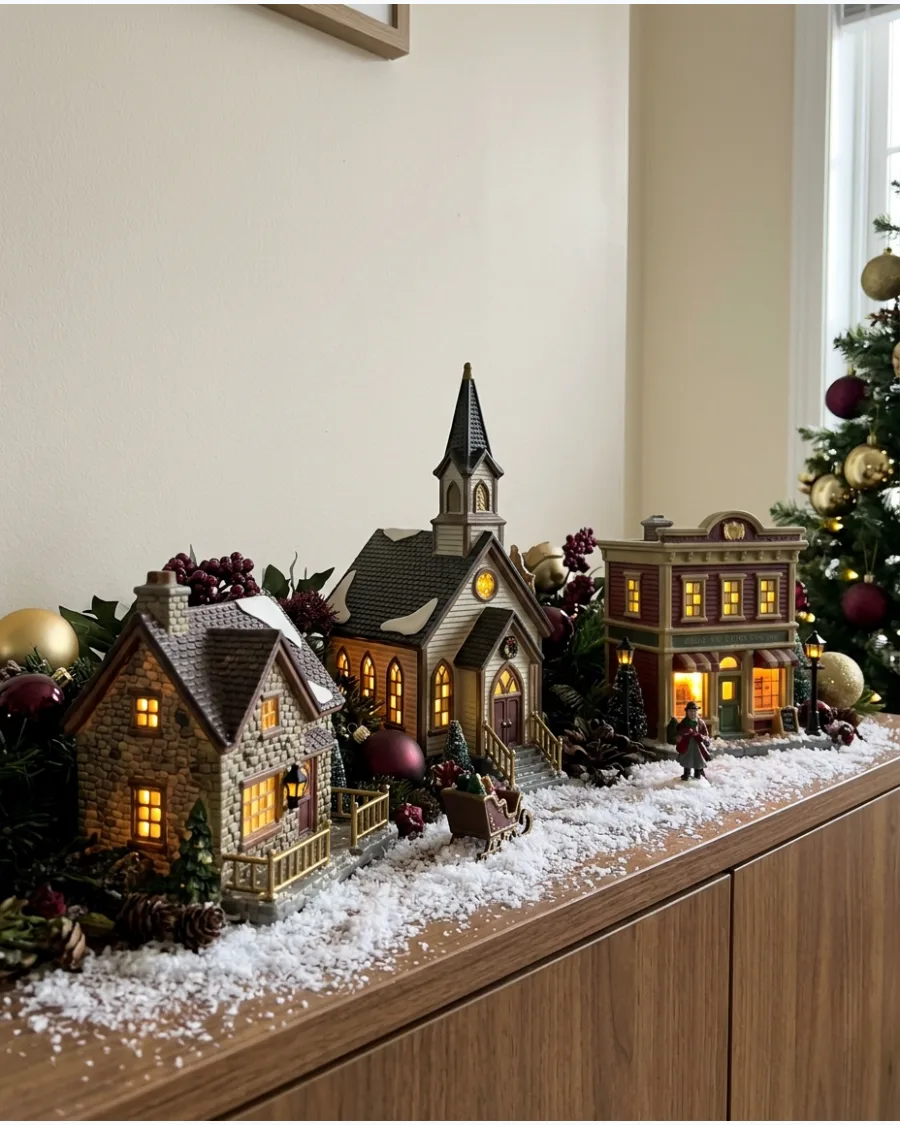
Introduce deep reds and brass details for a rich and traditional holiday palette. Incorporate brass miniature streetlights to add a metallic shimmer that complements the dark greenery of the village trees. Dark red accents make a traditional village feel more like a high-end decor piece and less like a toy.
- Paint standard green miniature wreaths with a dark burgundy acrylic paint for a custom look.
- Arrange the display on a dark wood surface like a sideboard to make the gold details stand out.
- Use gold-toned wire fairy lights to weave through the trees for extra warmth.
Quick win: Use a gold metallic paint pen to add small accents to the rooflines of plain buildings.
68. Jewel-Tone Christmas Village
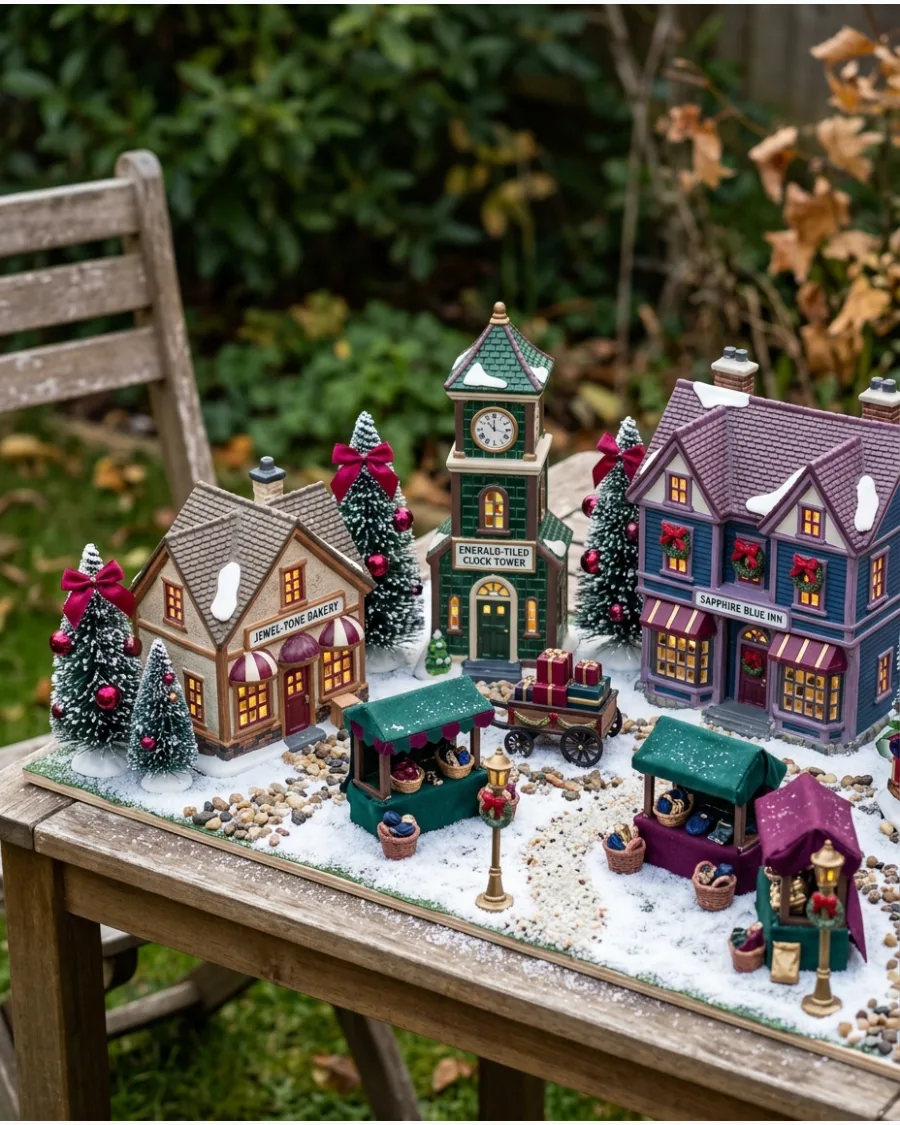
Add ruby, emerald, and plum accents to the accessories for a colorful but sophisticated look. Swap standard green trees for deep emerald or navy blue bottle brush trees to create a moody, rich landscape. Jewel tones work best when anchored on a dark furniture piece to let the colors glow.
- Buy bottle brush trees in bulk and dye them with fabric dye if you cannot find specific jewel tones.
- Space buildings at least three inches apart so the individual colors do not overwhelm each other.
- Use clear glass risers to add height without introducing new colors to the palette.
Most people skip this: Use velvet ribbon in plum or emerald as a border to frame the entire village display.
69. Gingerbread Christmas Village
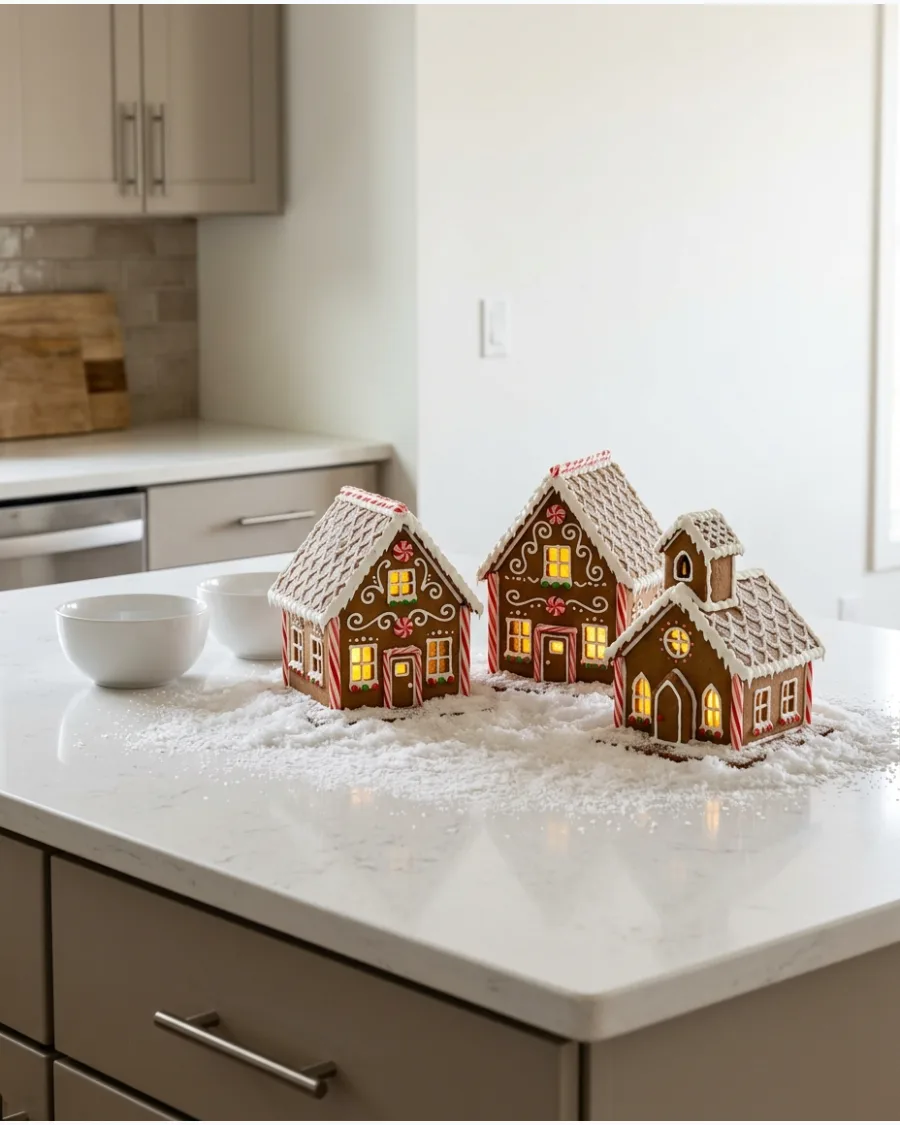
Build a whimsical town using gingerbread-style houses with icing roofs and candy decorations. Sprinkle coarse white glitter over the icing-covered roofs to mimic the look of real sugar crystals. This theme is the perfect choice for a kitchen counter where food-related holiday decor feels natural.
- Look for resin-based gingerbread houses for a durable display that lasts for many years.
- Place the houses on a large white cake stand to give the village a distinct 'dessert' presentation.
- Add small peppermint-shaped stepping stones to create a path between the houses.
Best shortcut: Use real candy canes as fence posts to add an authentic scent to the kitchen display.
70. North Pole Christmas Village
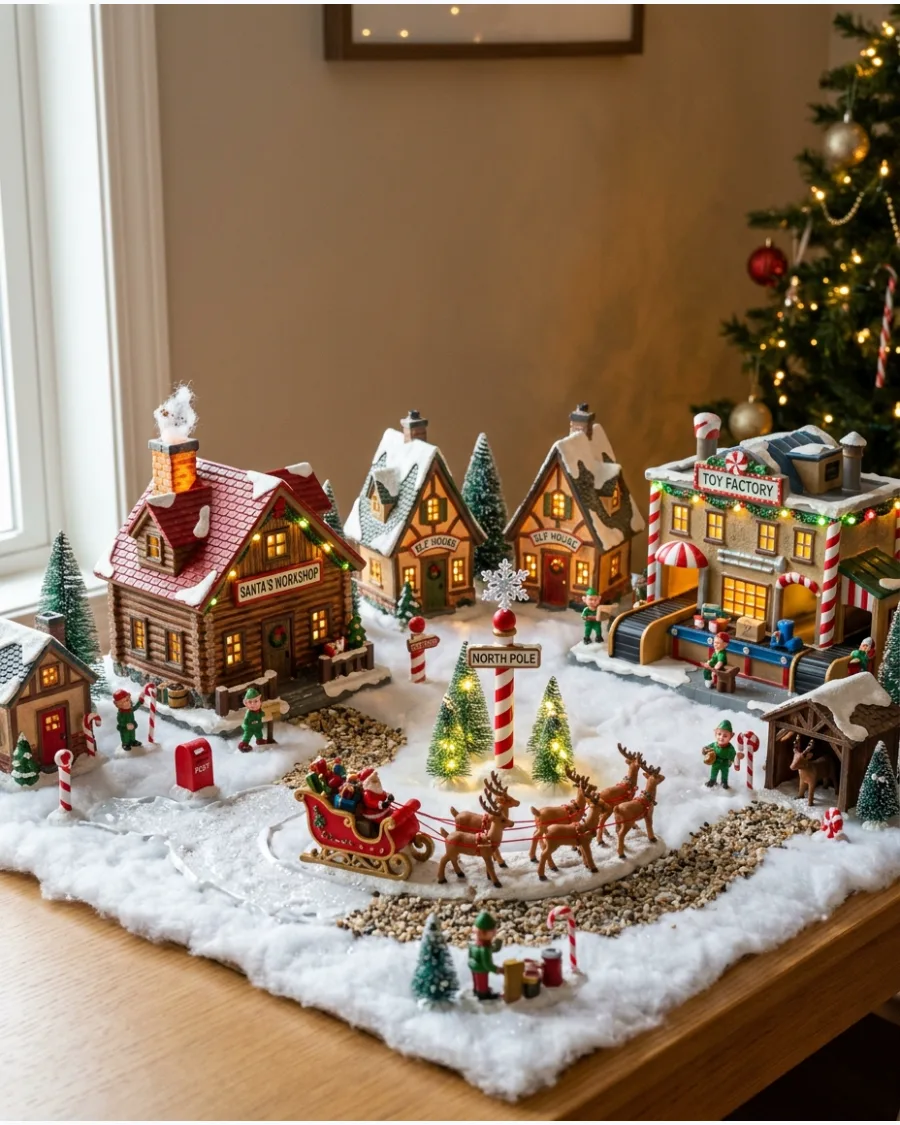
Create a fantasy village featuring Santa's workshop, reindeer areas, and bright candy-striped signs. Group the workshop and reindeer stables together at one end to designate a clear industrial zone for the North Pole. Bright primary colors like red and green keep this fantasy theme feeling classic.
- Incorporate a miniature sleigh and reindeer set as the primary focal point of the display.
- Use a very thick layer of fluffy polyester batting to mimic the deep snow of the Arctic.
- Add a 'North Pole' signpost at the entrance of the village to define the theme clearly.
Quick win: Use a blue-tinted light bulb inside the workshop to give it a magical, icy glow.
71. Candyland Christmas Village
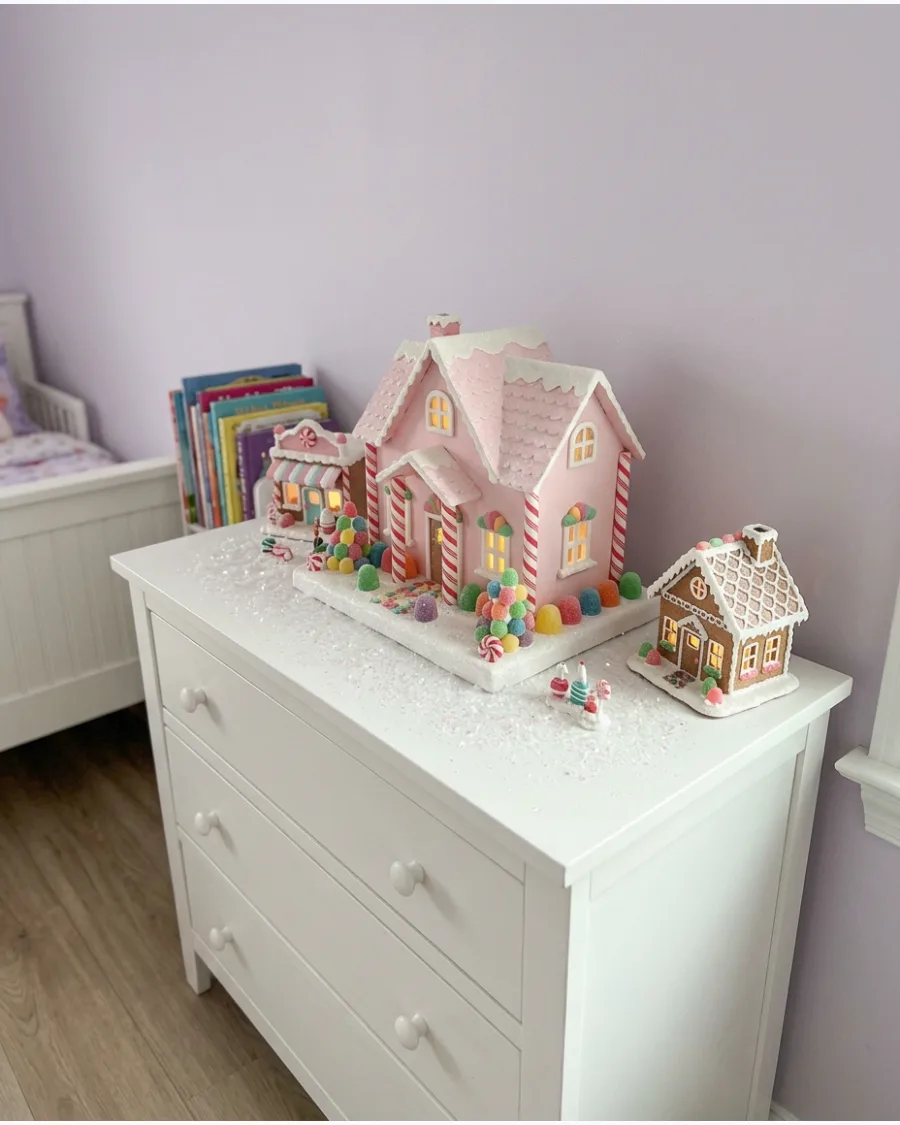
Use pastel-colored houses and candy-themed accessories to create a whimsical, sugar-coated town. Incorporate peppermint-striped streetlights and gumdrop bushes to maintain the theme throughout the layout.
Swap traditional white cotton snow for iridescent glitter or pink faux snow to lean into the fantasy look. This style works best in a child's bedroom or a playroom where bright colors feel natural.
- Sourcing: Look for sweet shop miniatures at craft stores in early October.
- Setup: Use a hot glue gun to attach small faux candies to the base of the houses.
- Adaptation: Scale it down by using a single large gingerbread house as a centerpiece on a kitchen counter.
Quick win: Use real wrapped peppermints as boulders for a low-cost, aromatic landscaping detail.
72. Woodland Christmas Village
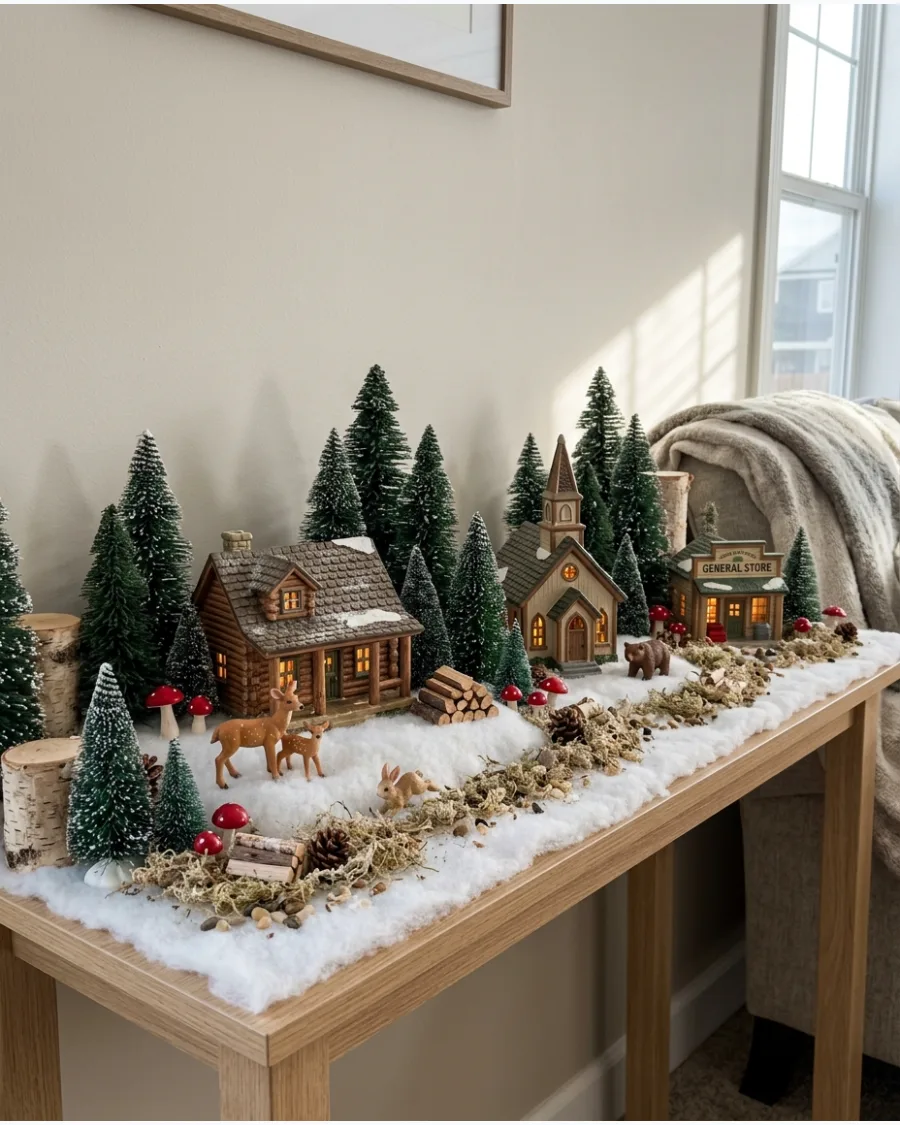
Focus on a natural aesthetic by grouping brown-toned cottages with dense clusters of miniature pine trees and forest animals. Add small piles of real twigs to mimic firewood stacks and use dried moss for a realistic ground cover.
Avoid shiny plastic accessories and stick to matte finishes to keep the forest vibe authentic. This setup brings a calm, earthy feel to a living room side table.
- Sourcing: Collect small acorns and twigs from the yard for free natural accents.
- Setup: Layer moss over a brown felt base to hide any gaps or wires.
- Adaptation: Use battery-operated tea lights inside the cabins to avoid trailing cords in a natural setting.
Most people skip this: Vary the tree heights significantly to mimic a real forest canopy instead of a flat row.
73. Rustic Farm Christmas Village
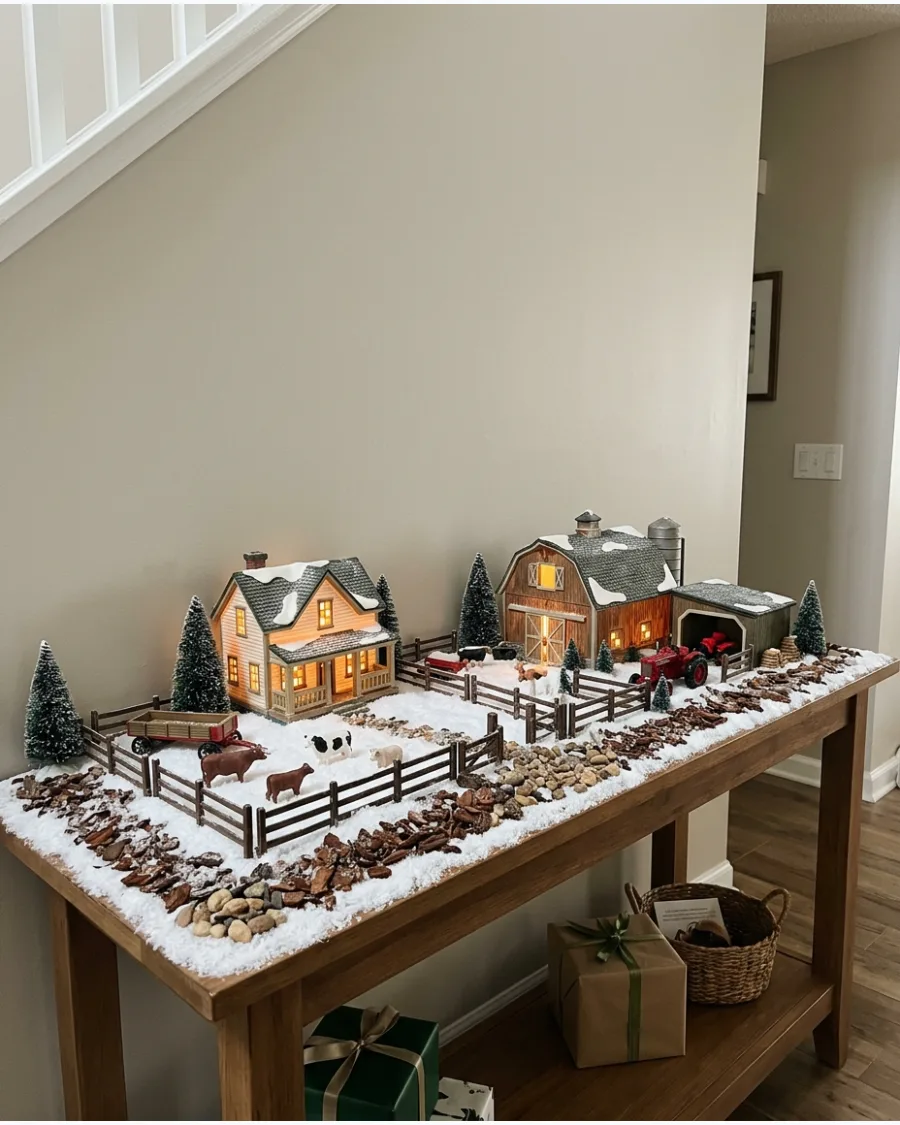
Build a countryside scene centered around a large red barn and a matching farmhouse. Use miniature split-rail fencing to define animal pens and place a small tractor in the yard for a working-farm feel.
Position the buildings at slight angles rather than a straight line to make the layout feel more organic. A console table in an entryway provides the perfect long surface for a sprawling rural landscape.
- Sourcing: Farm-themed miniatures are often found in model train sections of hobby shops.
- Setup: Use a white quilt as the base to simulate rolling, snow-covered hills.
- Adaptation: If space is tight, focus on a single barn and a small farmers market stall.
Best shortcut: Use a handful of dried oats or birdseed in a small tray to create a realistic feeding area for the animals.
74. Christmas Tree Farm Village
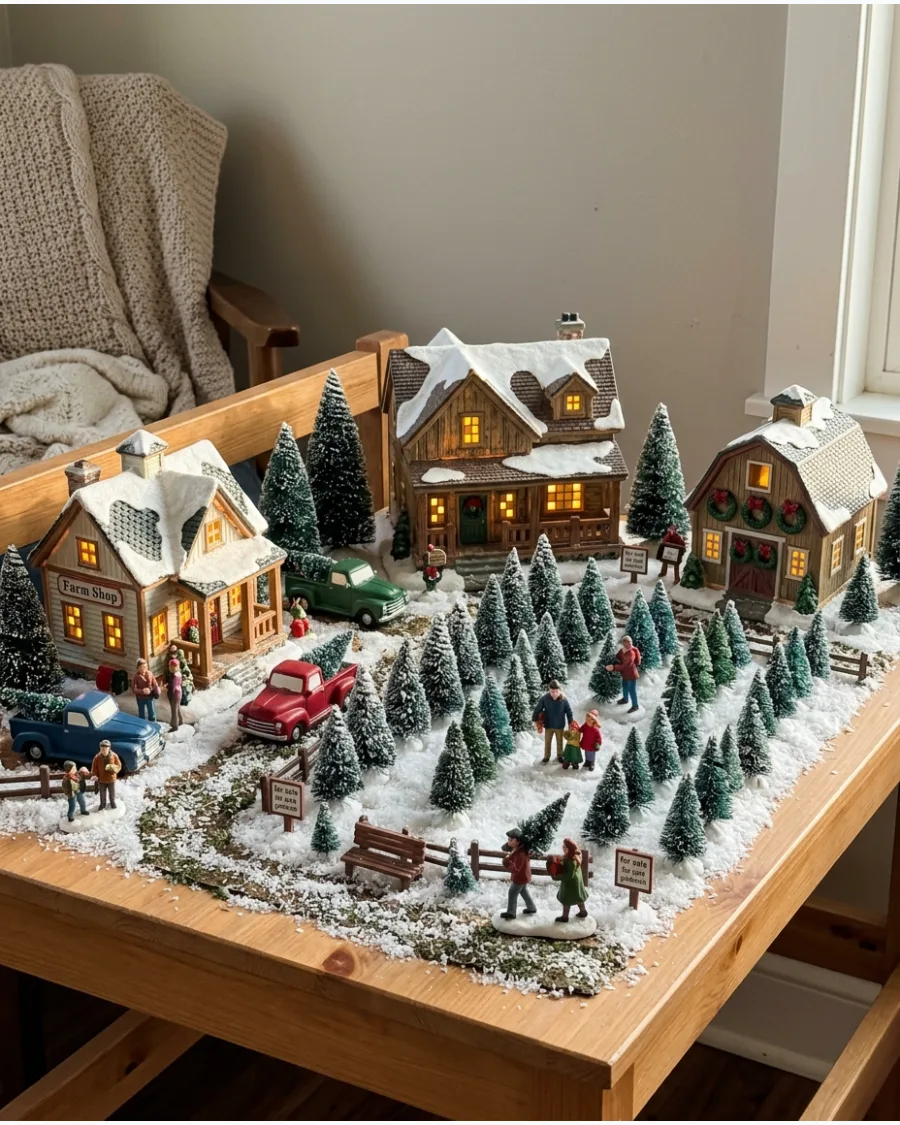
Create a dedicated tree farm scene by arranging rows of identical miniature evergreens next to a small sales shack. Include a vintage-style pickup truck with a tiny tree in the bed to tell a clear seasonal story.
Group the trees in tight, straight lines to clearly distinguish the farm area from the random forest trees. This theme is highly effective on a narrow mantel where a linear story is easy to follow.
- Sourcing: Buy bottle brush trees in bulk packs to ensure the farm rows look uniform.
- Setup: Use double-sided tape to keep the light trees from tipping over on the fabric base.
- Adaptation: Add a small hot cocoa stand miniature to expand the scene into a community event.
Quick win: Place a few wood discs as stumps in the rows to show where trees were recently cut.
75. Mountain Cabin Christmas Village
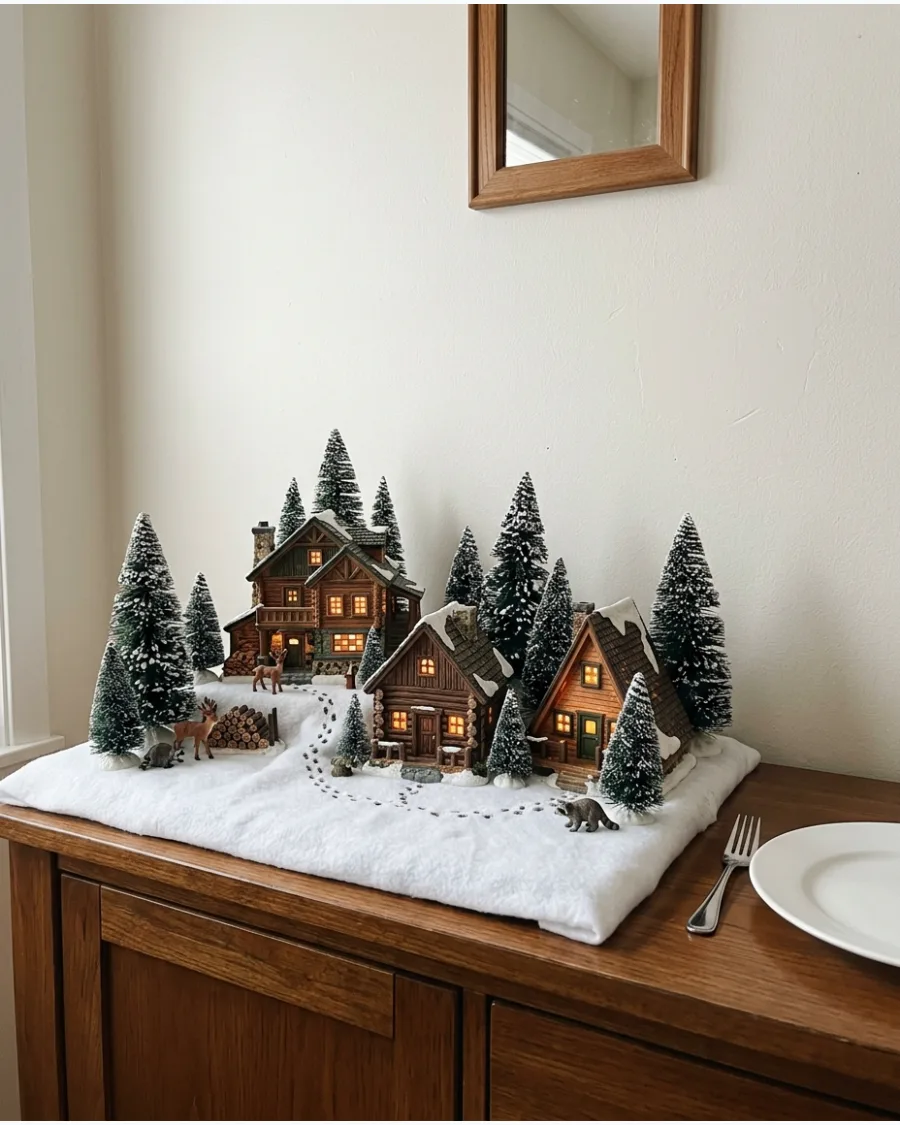
Emphasize a cozy, secluded feel by spacing out log cabins and using height to simulate a mountain range. Use boxes or foam blocks under a white cloth to create different elevations for each building.
Tuck small warm-white LED strings into the snow between cabins to mimic the glow of lanterns along a path. This works beautifully on a deep sideboard where the depth allows for multiple layers of elevation.
- Sourcing: Look for A-frame or log cabin specific miniatures for a consistent architectural style.
- Setup: Use crumpled brown paper under the white cloth to create rocky, uneven terrain.
- Adaptation: For a modern look, use only dark wood cabins and white lights without extra figurines.
Most people skip this: Dust the roofs of the cabins with extra faux snow to make them look buried in a mountain storm.
76. Ski Resort Christmas Village
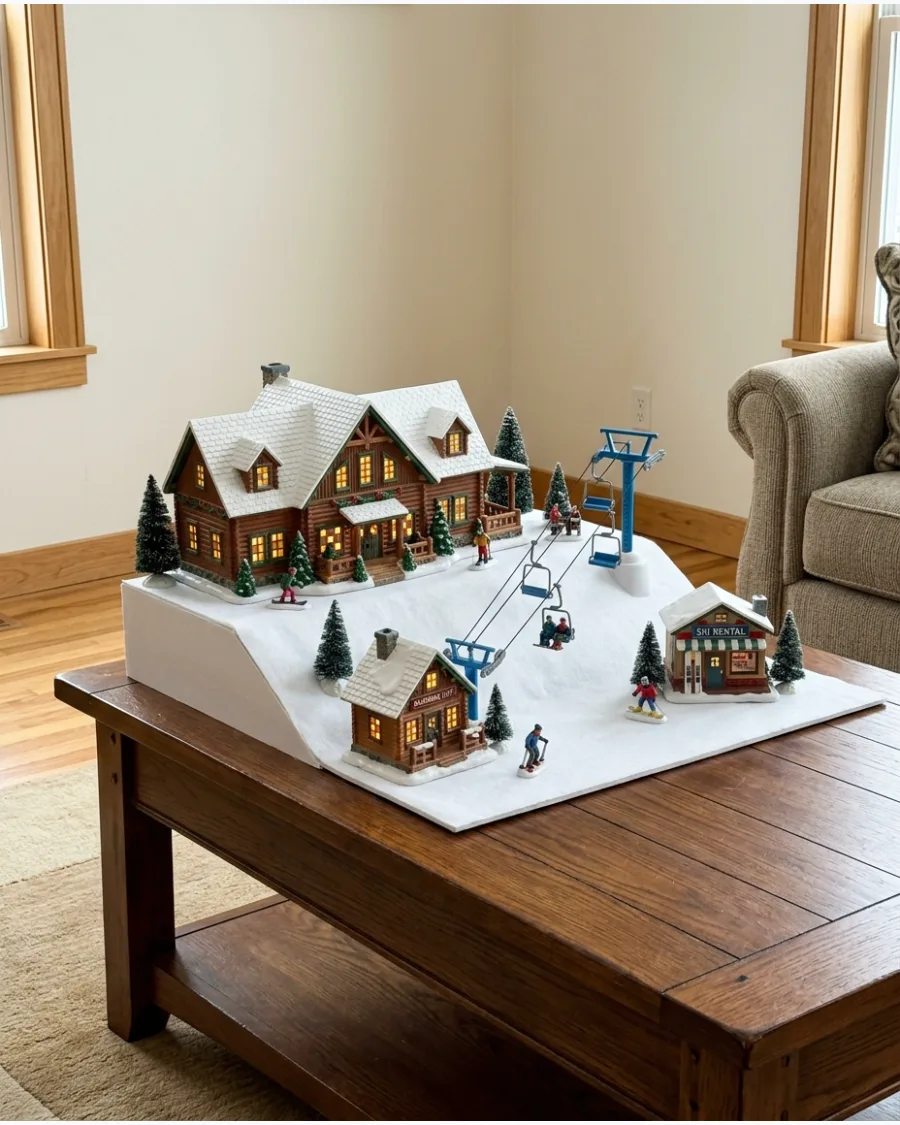
Turn a high-traffic area into a winter sports hub with a large lodge and a designated ski slope area. Use a smooth white material like felt or poster board to create a steep incline for miniature skiers to slide down.
Incorporate a motorized chairlift or a stationary cable car to add height and movement to the display. This theme is a great conversation starter on a large coffee table.
- Sourcing: Motion-based ski accessories are usually the hero pieces in major village brands.
- Setup: Secure the slope base firmly to the table to prevent the skiers from sliding off.
- Adaptation: Use blue mirrored glass or a small mirror to represent a frozen apres-ski pond at the base.
Best shortcut: Shred white paper in a blender to create powder snow that looks realistic on the steep slopes.
77. Christmas Carnival Village
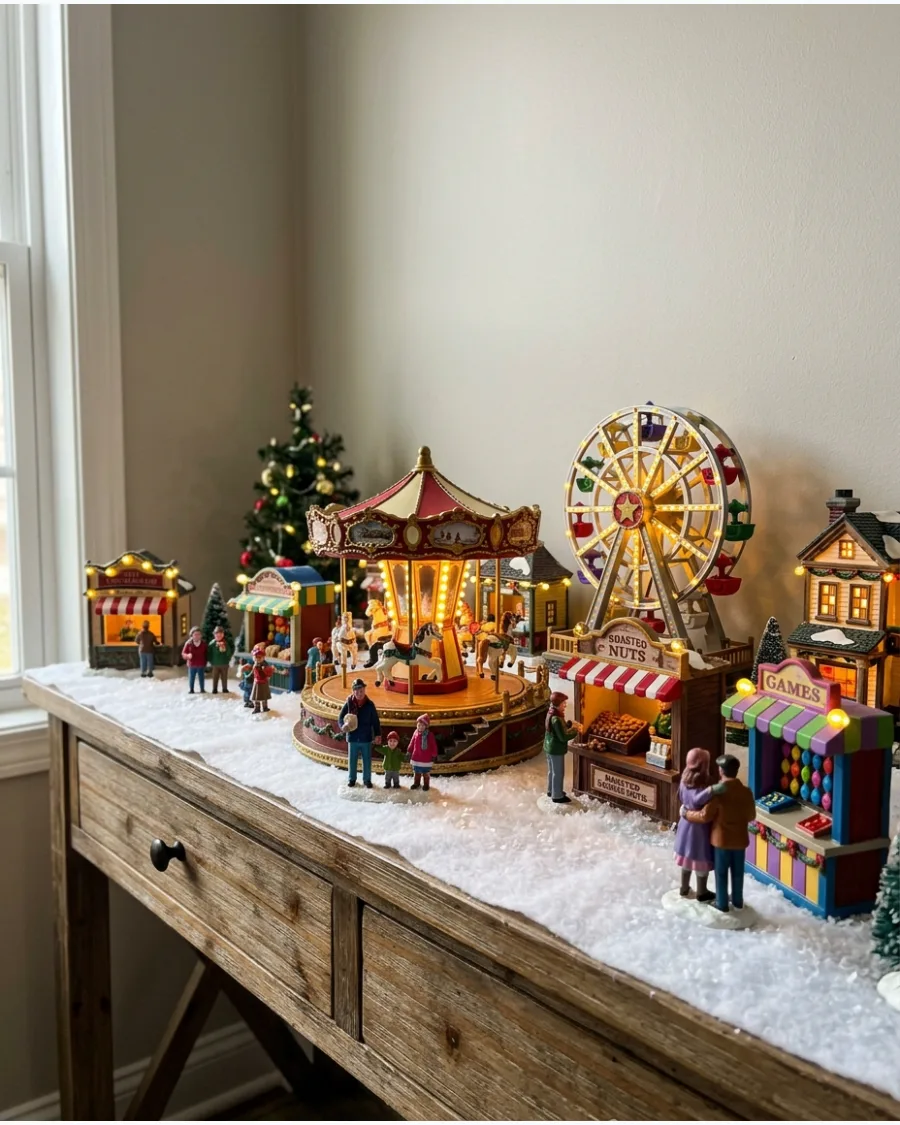
Bring energy to the room with a carnival theme featuring a Ferris wheel or carousel as the focal point. Use bright, multi-colored lights and small ticket booths to create a bustling fairground atmosphere.
Keep the buildings clustered together to mimic the tight layout of a real carnival. This high-energy setup is perfect for a media console where the lights won't compete with a TV screen.
- Sourcing: Target carnival or amusement park series from major collectible brands.
- Setup: Place all motorized pieces on a single power strip for easy one-switch operation.
- Adaptation: Use popcorn kernels as ground cover around the food stalls for an authentic fair look.
Quick win: Use a string of tiny bulb-style LEDs to string between the main attractions.
78. Christmas Bakery Street
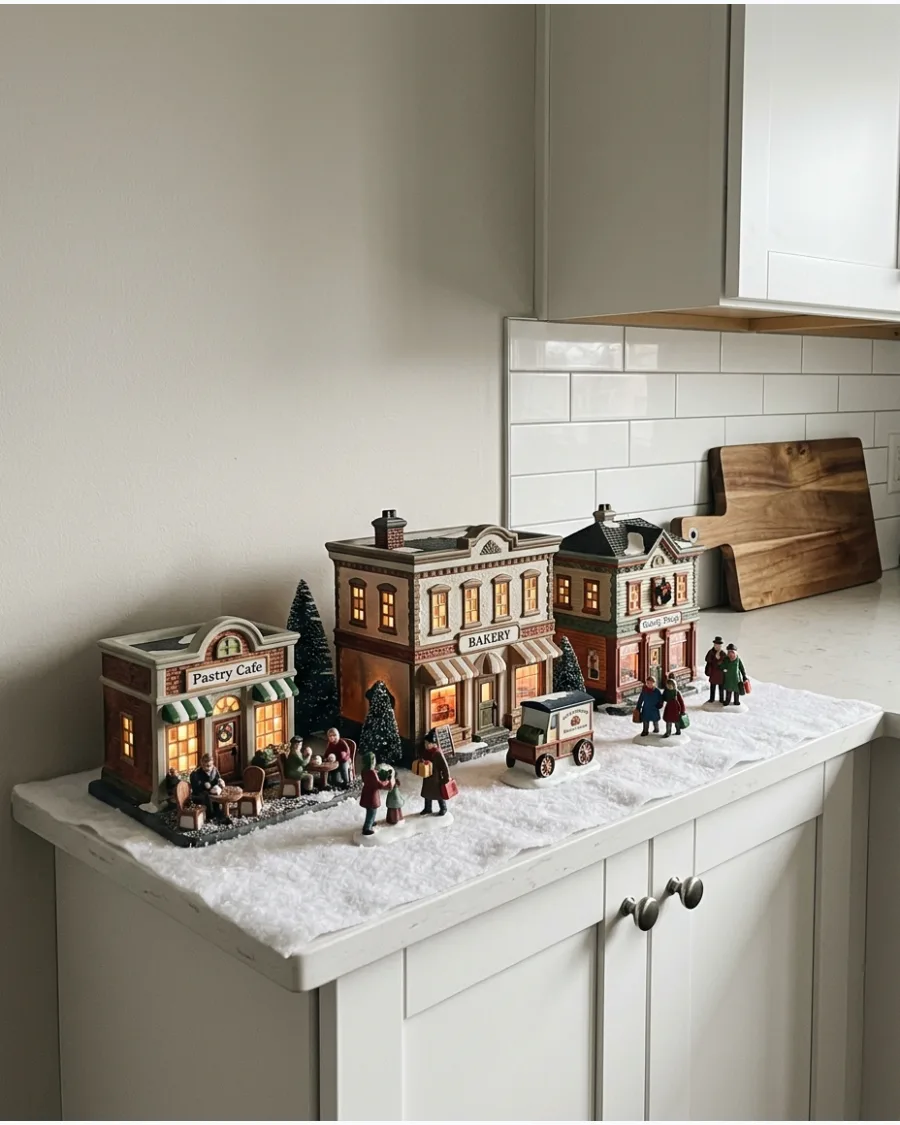
Focus on a main street of food-related shops like bakeries, chocolate stores, and cafes. Arrange small bistro tables and chairs outside the buildings to create a lived-in, European village feel.
Place a delivery truck or a bread cart in front of the main bakery to add a sense of action to the scene. This theme is ideal for a kitchen counter or a dining room buffet where food is already the focus.
- Sourcing: Bakery buildings often have the most detailed interior lighting—look for those with large windows.
- Setup: Use a brick patterned runner to define the street in front of the shops.
- Adaptation: Scent the area by tucking a few cinnamon sticks behind the buildings.
Most people skip this: Put tiny open signs in the windows using a fine-tip marker and cardstock for extra detail.
79. Toy Shop Christmas Village
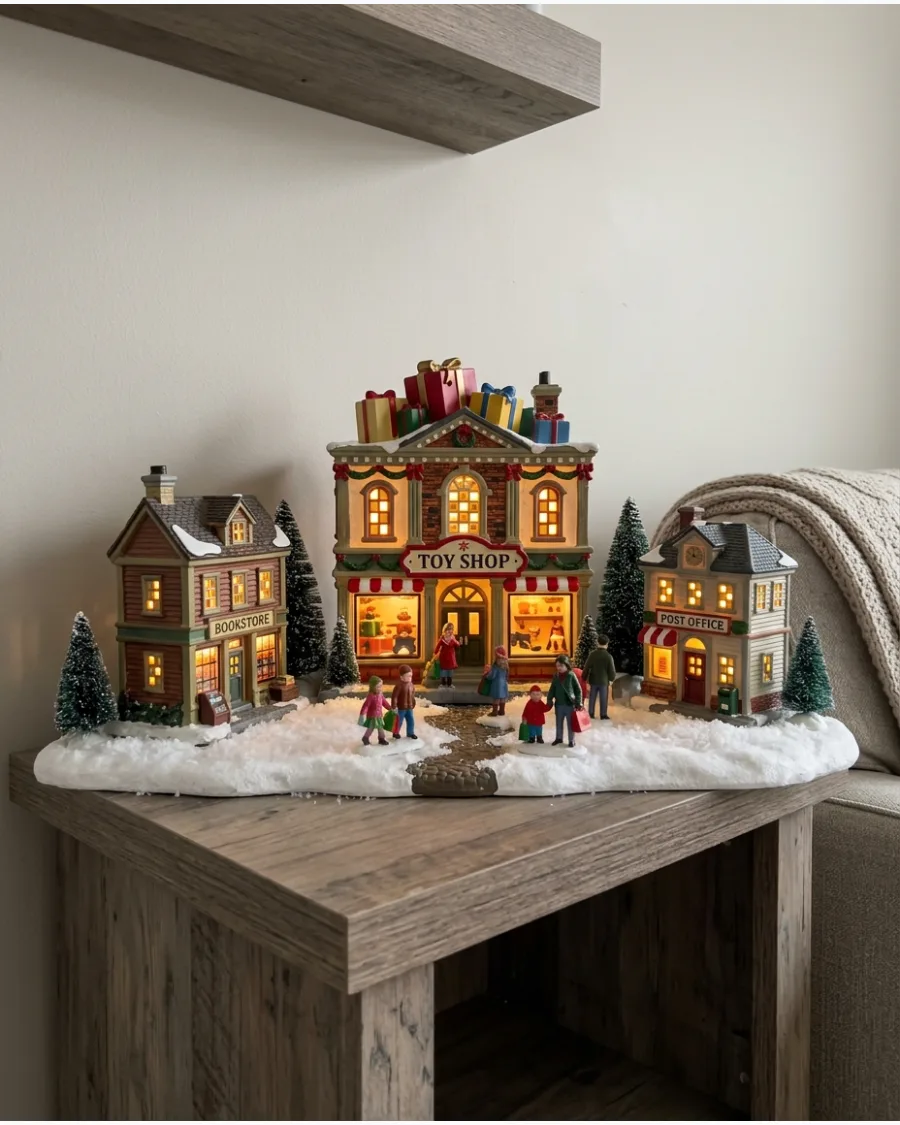
Design a commercial district that revolves around a grand toy store decorated for the holidays. Surround the shop with figurines of children looking in the windows and shoppers carrying tiny wrapped packages.
Use oversized props like a giant nutcracker or a large drum next to the toy shop to emphasize the theme. This colorful, nostalgic setup works well in a family room or near the Christmas tree.
- Sourcing: Look for toy shop or Santa's workshop buildings with animated window displays.
- Setup: Use small wooden blocks wrapped in festive paper as giant gift boxes around the store.
- Adaptation: Create a toy testing area in the town square with a few loose miniature blocks or balls.
Best shortcut: Use colorful buttons as toys in the shop windows if the building doesn't have a detailed interior.
80. Village Christmas Shopping District
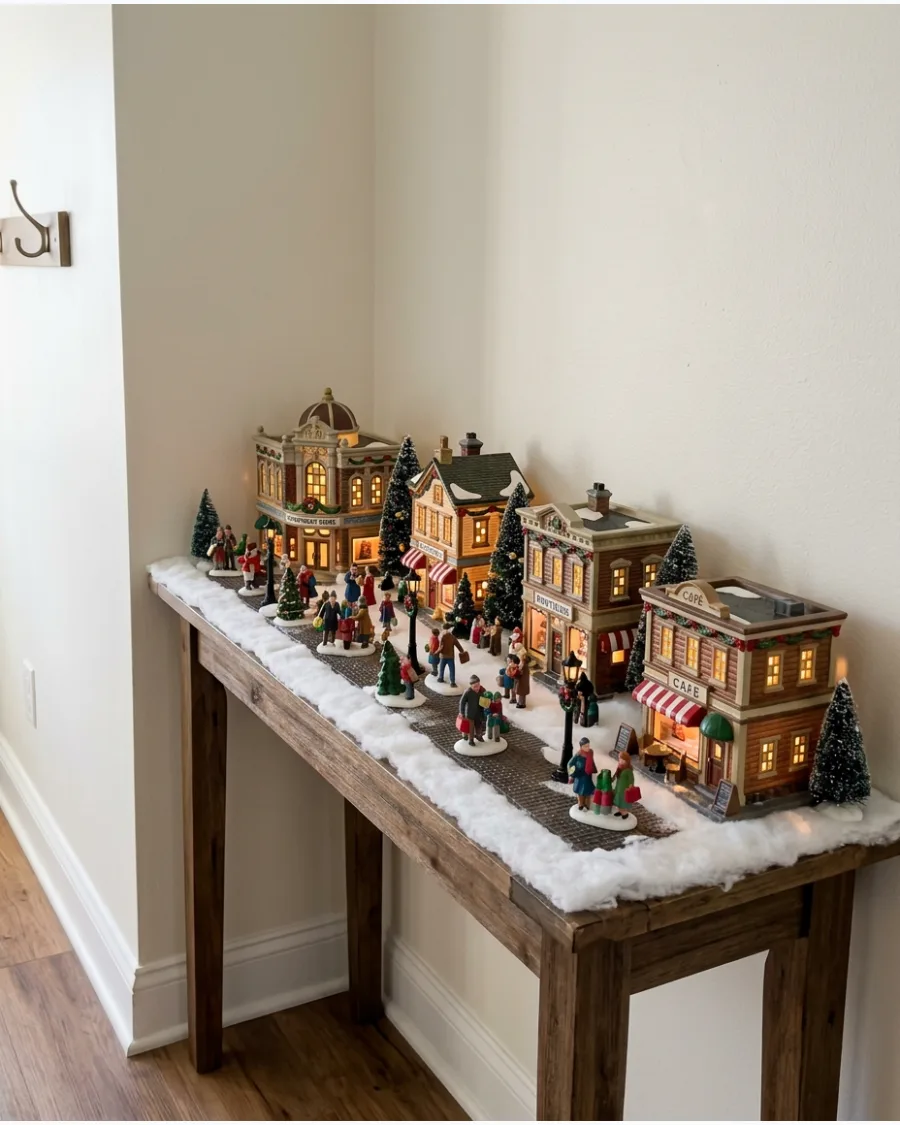
Recreate a high-end shopping street with department stores, boutiques, and decorated street lamps. Fill the sidewalks with shoppers and place small benches for a realistic urban feel.
Arrange the buildings in two rows facing each other to create a canyon effect that draws the eye down the street. A long hallway console or a wide window ledge provides the necessary length for a successful shopping district.
- Sourcing: Department store buildings are usually larger, so use them as anchors at the ends of the street.
- Setup: Use black electrical tape or dark gray felt to create a clean pavement look for the street.
- Adaptation: Add a town car or limousine miniature to give the district a luxury feel.
Quick win: Use tiny pieces of ribbon as scarves for the shopper figurines to make them look bundled up.
SMALL-SPACE CHRISTMAS VILLAGE SETUP IDEAS
81. Three-House Mini Christmas Village
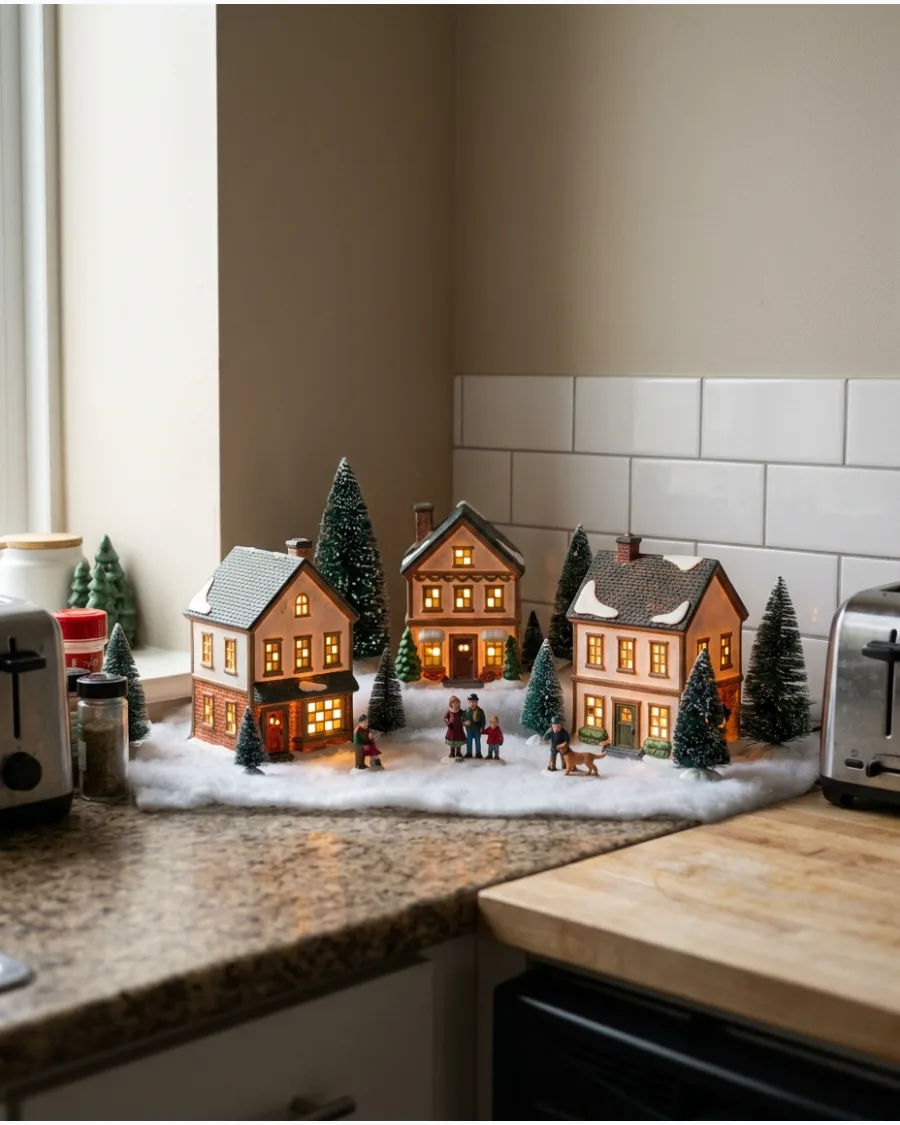
Using just three houses keeps the display focused and high-quality. Choose pieces with different heights to create a sense of scale.
Group the three buildings in a tight cluster on a bed of fluffy faux snow to make the small footprint feel intentional rather than empty. A few bottle brush trees and figures fill the gaps between the structures perfectly.
- Budget-friendly and quick to assemble for small apartments.
- Use a small piece of white felt as a base to protect surfaces from scratches.
- Swap the houses for different themes like a bakery or a chapel to change the mood.
Most people skip this: Angle the houses slightly toward each other to create a cozy town square feel.
82. Five-House Christmas Village
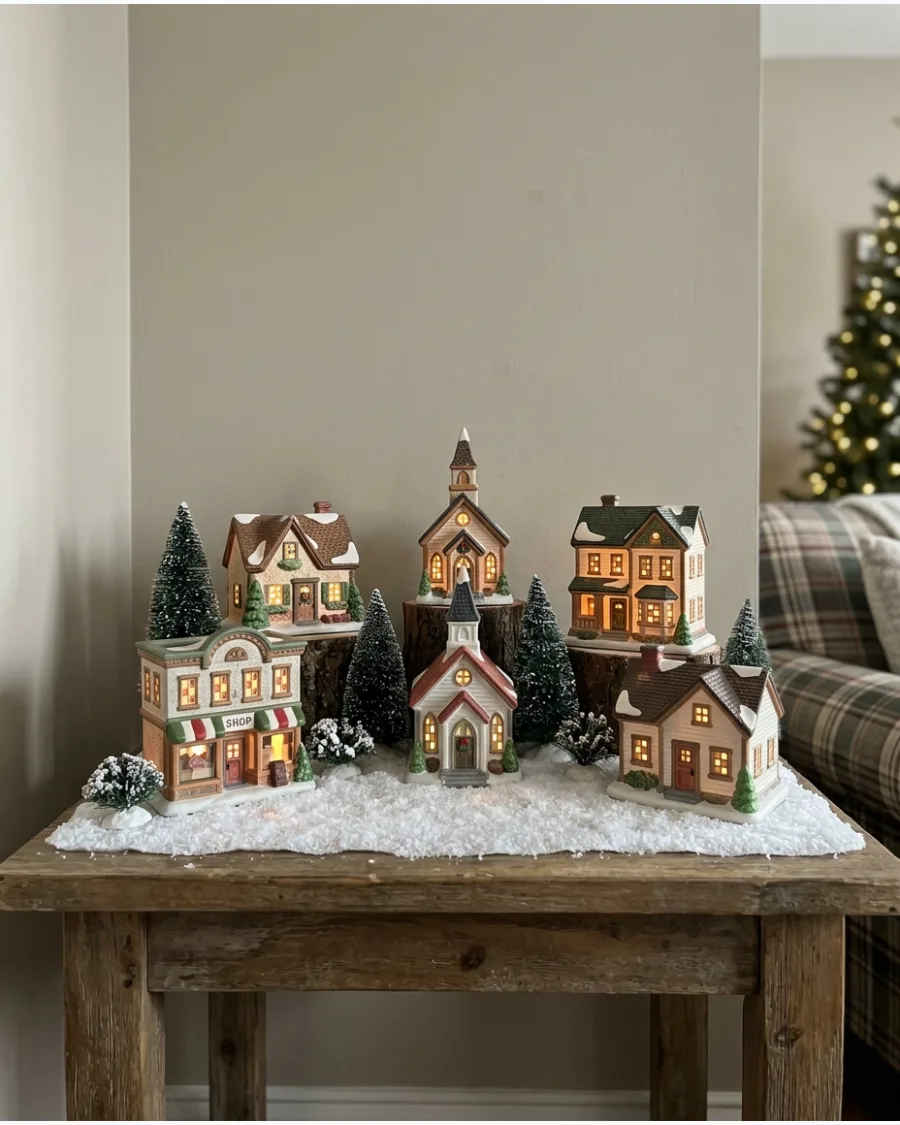
Five buildings provide enough variety to tell a story without needing a massive table. Elevate the back two houses using small boxes hidden under the snow fabric.
Stagger the buildings in a zig-zag pattern to give the eye a path to follow through the miniature town. This creates depth in a space that might otherwise look flat.
- Ideal for mid-range collections on standard furniture surfaces.
- Use wooden blocks or empty boxes as sturdy risers for height variety.
- Add a small mirror to the center to act as a frozen pond for figures.
Quick win: Place the tallest building in the back-center to act as a focal point for the entire display.
83. Narrow Console Christmas Village
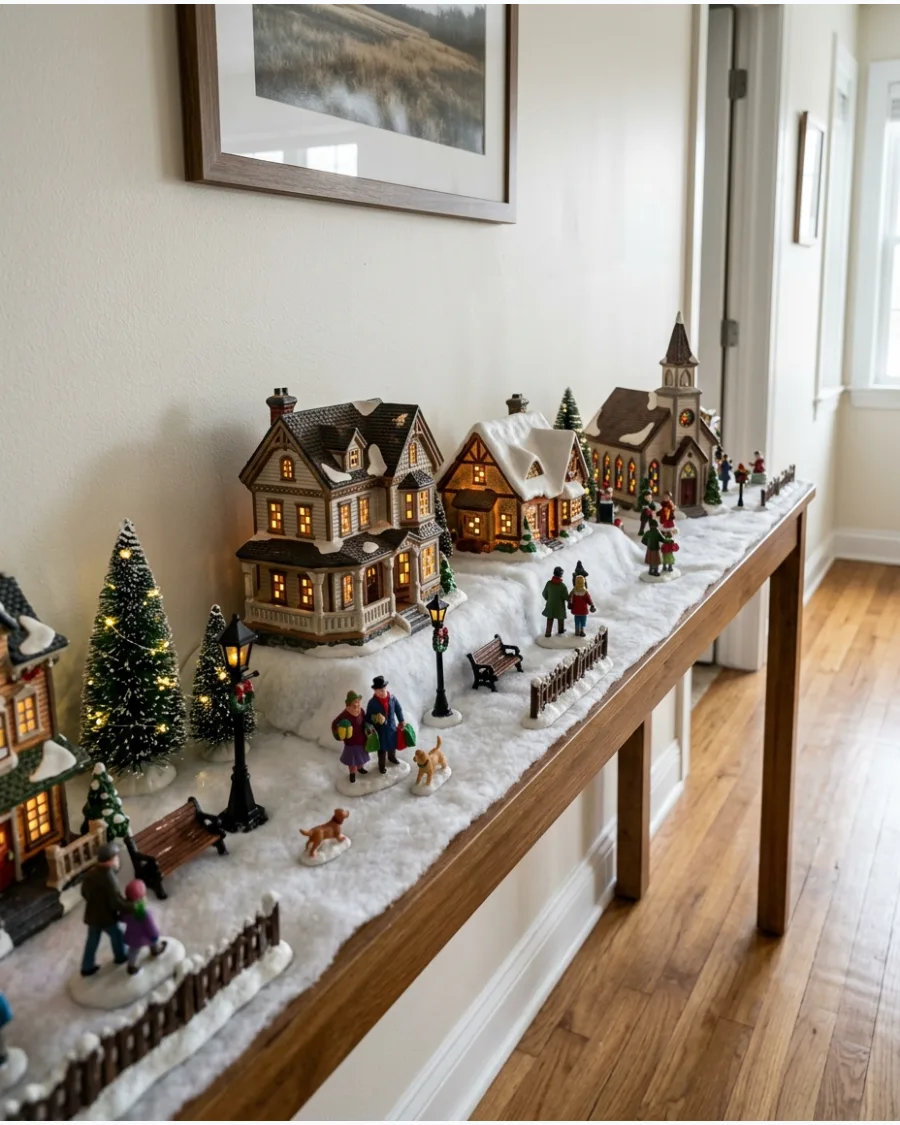
A long hallway console is the perfect stage for a linear street scene. Keep the buildings close to the wall to leave room for a detailed sidewalk in front.
Line the very front edge of the table with tiny street lamps and park benches to draw the viewer into the scene. This layout makes a narrow surface feel like a bustling downtown.
- Perfect for entryways or narrow hallways with high traffic.
- Run a power strip behind the table to hide cords out of sight.
- Use a long batting runner to mimic a snowy street across the length.
Best shortcut: Use battery-operated street lamps to avoid running wires across the front of the display.
84. Window Sill Christmas Village
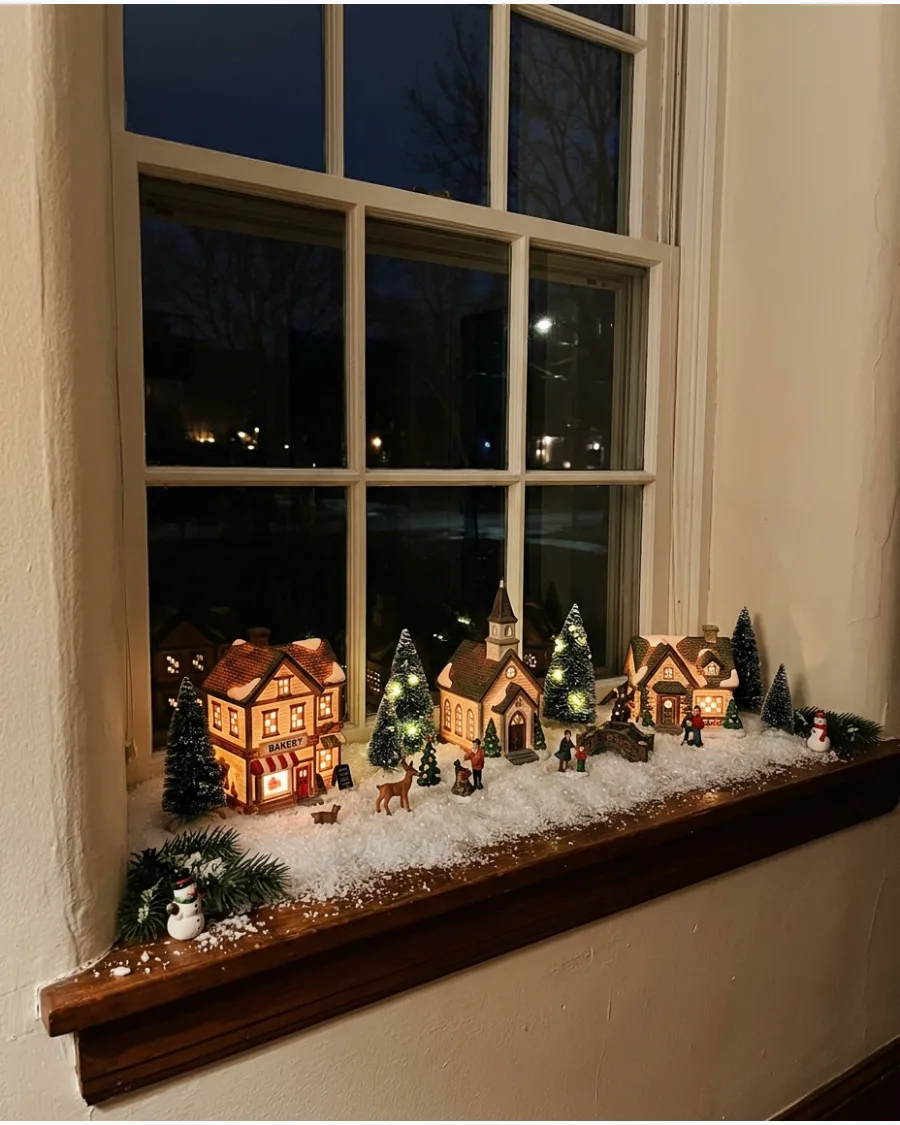
Deep window sills are underused real estate for holiday decor. The glass background reflects the internal lights of the houses for a doubled glow.
Measure the depth of the sill before choosing buildings to ensure they sit securely without overhanging the edge. It creates a beautiful silhouette from the outside of the home at night.
- Utilizes existing architecture for free display space.
- Use battery-powered tea lights inside unlit houses for a safe glow.
- Works best on sills at least five inches deep for stability.
Most people skip this: Clean the window glass thoroughly before setting up to prevent dust from showing in the light.
85. Floating Shelf Christmas Village
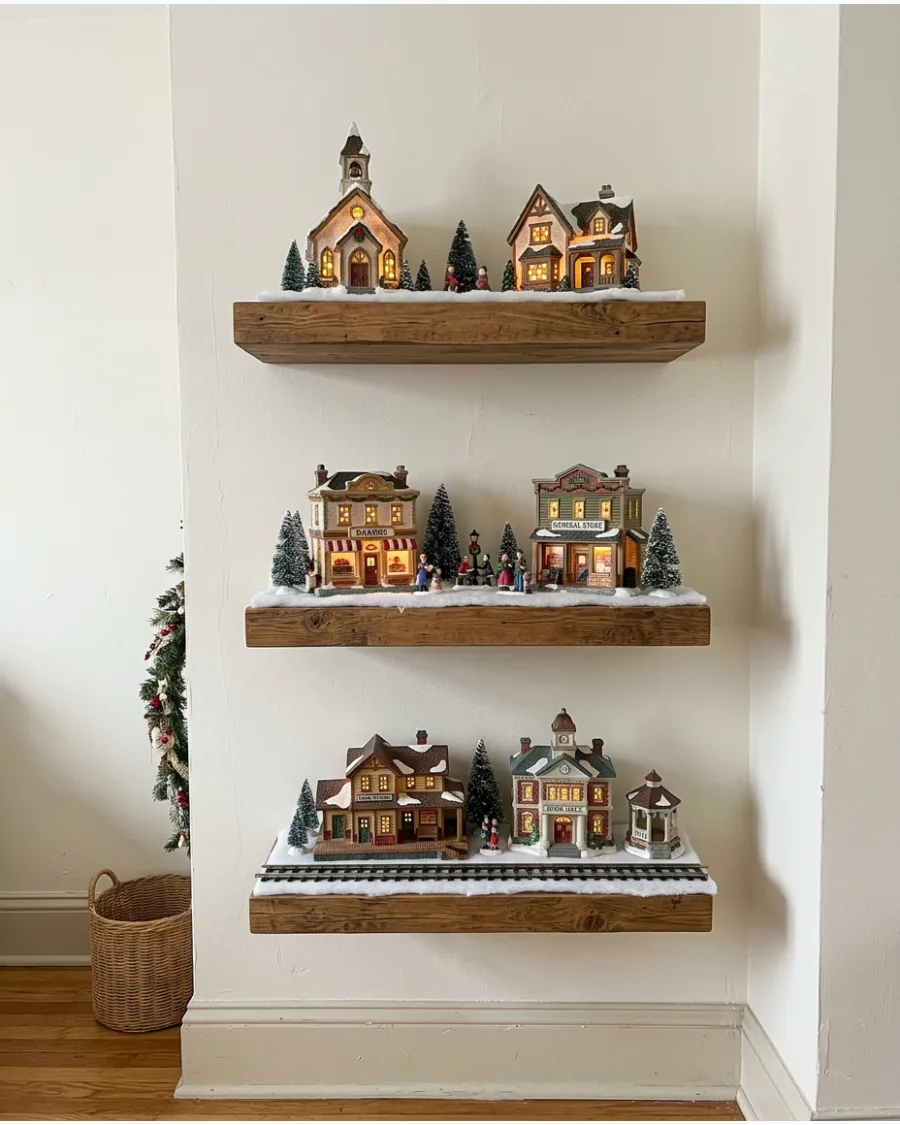
Vertical displays save valuable floor and table space in small rooms. Dedicate one shelf to a residential area and another to a commercial district.
Tuck the power cords behind the shelf brackets or use cord covers painted the same color as the wall. This keeps the focus on the miniatures rather than the mechanics of the setup.
- Saves floor space in apartments or small offices.
- Use Command hooks to secure light wires to the underside of shelves.
- Limit to two or three houses per shelf to avoid overloading the weight capacity.
Quick win: Add a few trailing ivy strands or garland bits to the shelf edges to soften the look.
86. Corner Shelf Christmas Village
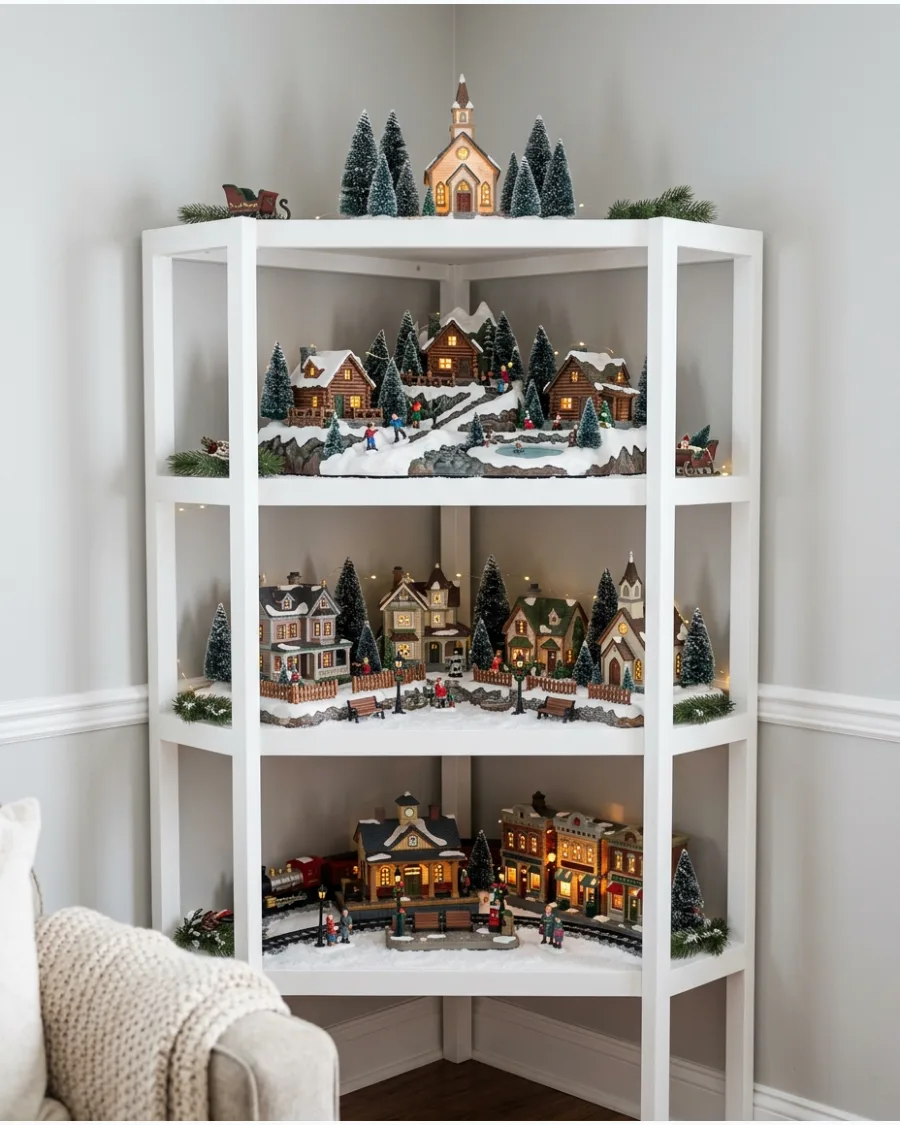
A corner unit offers a unique tiered perspective that mimics a hillside. Place mountain cabins at the top and a busy town square at the bottom.
Wrap the edges of each shelf in white batting to hide the shelf material and create a seamless snowy look. It turns a lonely corner into a festive focal point for the room.
- Maximizes unused corners in living rooms or dens.
- Group similar building styles on each level for visual cohesion.
- Use a single multi-plug extension cord at the base for all levels.
Best shortcut: Use a small handheld vacuum to clean up stray faux snow from the shelf corners.
87. Tiered Cake Stand Christmas Village
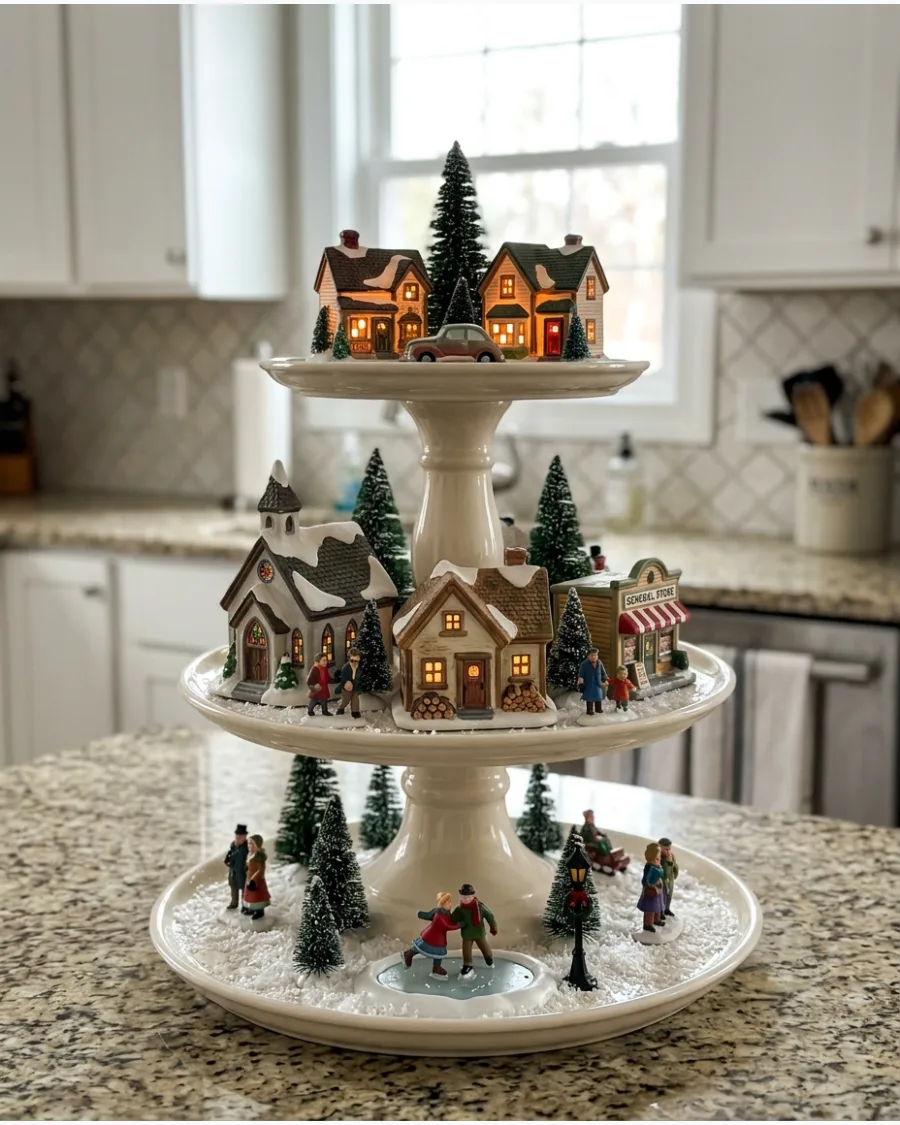
A three-tiered stand creates instant height and organization for very small pieces. This works best with micro-scale buildings or small porcelain ornaments.
Arrange the smallest items on the top tier and the larger buildings on the bottom for a balanced visual weight. It is a perfect centerpiece for a breakfast nook or kitchen island.
- Portable and compact for small tables or kitchen counters.
- Use sticky tack on the bottom of pieces to prevent them from sliding.
- Focus on one color theme for a clean and modern look.
Quick win: Fill the gaps between houses with loose artificial snow or small white pom-poms.
88. Portable Tray Christmas Village
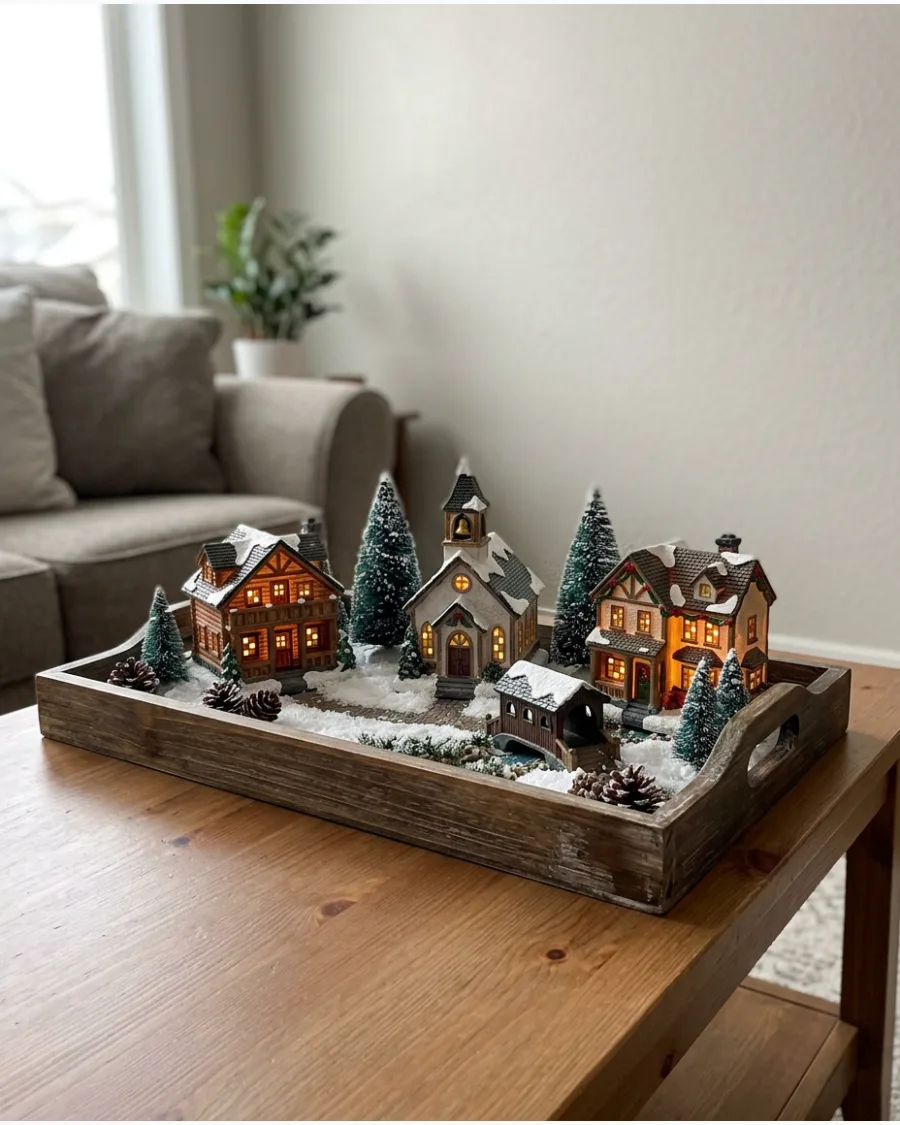
Building a village in a tray allows for easy movement when you need to use the table for dining. Choose a tray with high sides to keep the faux snow contained.
Secure the houses to the tray with removable adhesive putty so they stay in place during transport. This is the best solution for families who need flexible living spaces.
- Flexible for multi-use rooms like dining areas.
- Use a tray with handles for easier carrying between rooms.
- Line the tray with a thin sheet of foam for extra cushioning.
Most people skip this: Use a battery pack hidden inside one of the houses to power the whole tray without a trailing cord.
89. Glass Cloche Mini Village
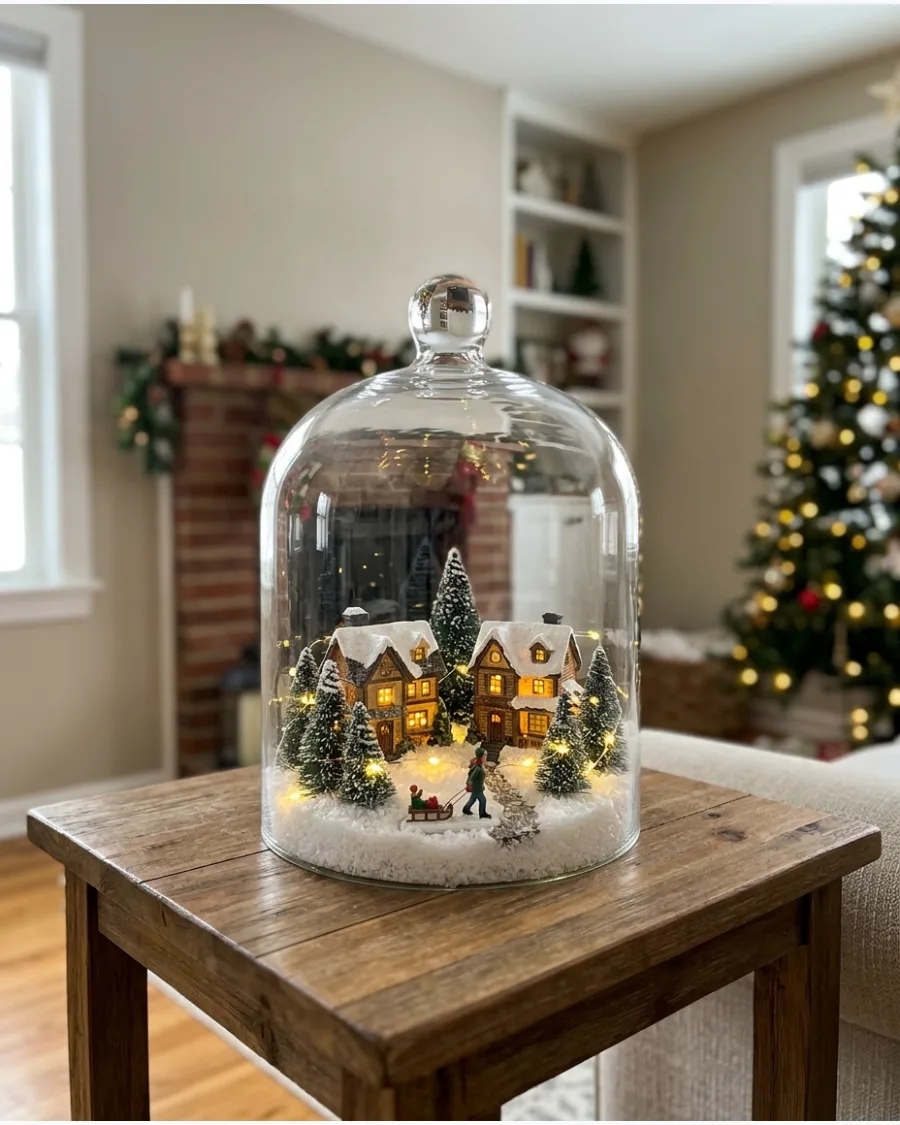
A glass cloche protects delicate miniatures from dust and curious pets. It creates a snow globe effect that feels very high-end and curated.
Coil a string of warm white fairy lights around the base of the house before lowering the glass dome. The glass amplifies the light for a stunning glow in a dim room.
- Dust-proof and pet-safe display for delicate collectibles.
- Use micro-LED fairy lights for a low-profile and elegant glow.
- Best for one or two high-quality statement pieces.
Best shortcut: Use a small piece of double-sided tape to keep the trees upright while placing the dome.
90. Christmas Village Bar Cart
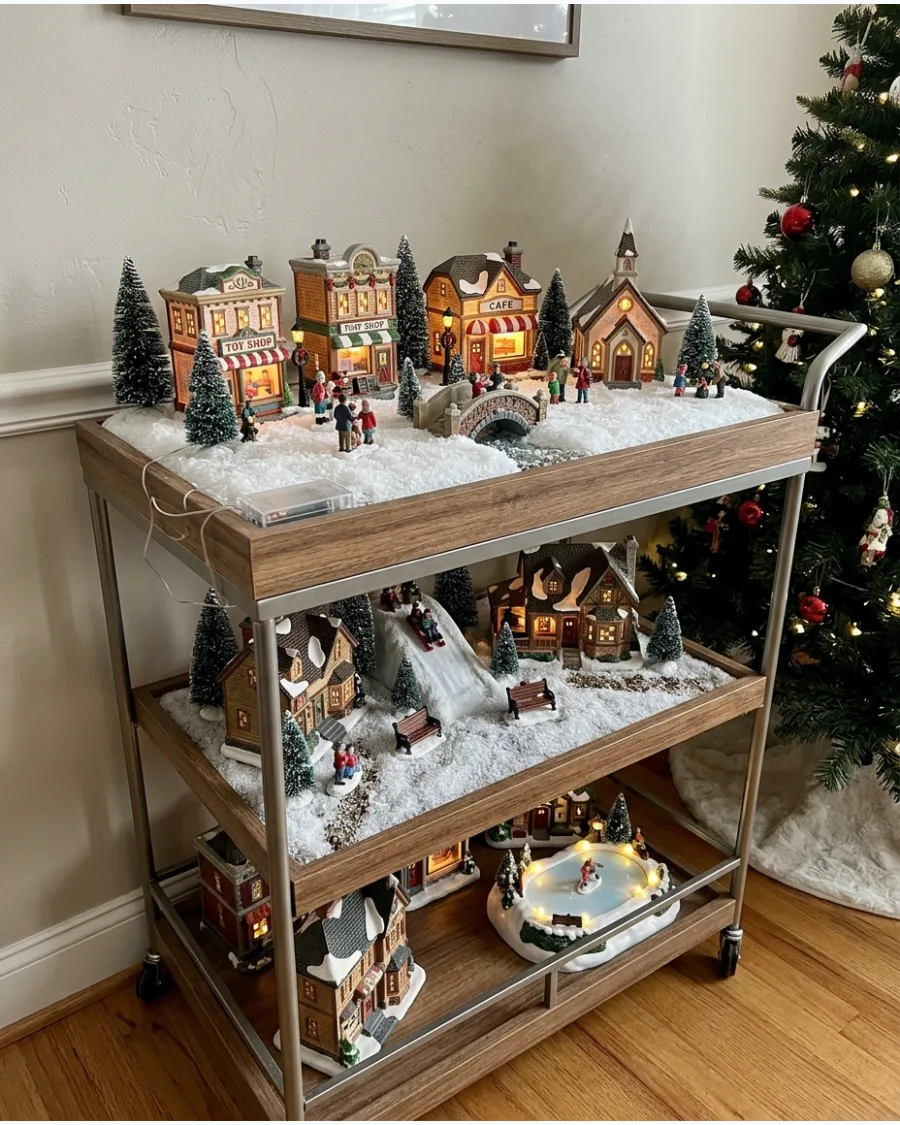
A bar cart provides two or three levels of display that can be wheeled into any room. Use the top for a main street and the bottom for a quiet park or forest scene.
Hang a small battery-operated wreath on the handle of the cart to tie the whole display together. It is an unexpected way to use functional furniture for seasonal decor.
- Mobile and stylish display option for entertaining.
- Use the bottom shelf for heavier accessories to keep it stable.
- Drape a small garland around the cart's frame for extra texture.
Quick win: Lock the wheels once the cart is in position to prevent the village from shifting.
91. Kitchen Counter Christmas Village
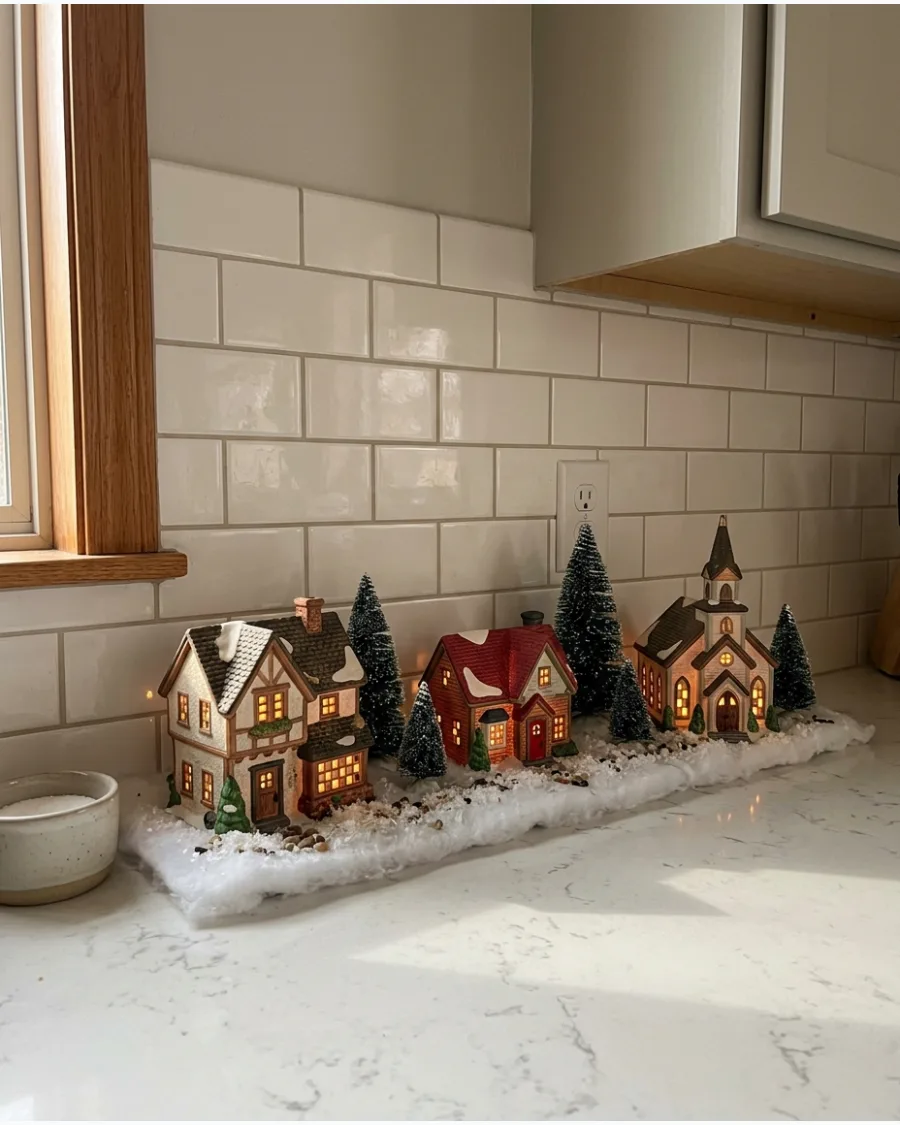
Use a corner or back edge of the counter to keep workspace clear. Choose moisture-resistant bases like ceramic trays to protect the surface from spills.
Keep the buildings in a single file line against the backsplash to maximize your prep space. Shallow displays prevent the village from feeling like a hurdle during meal prep.
- Sourcing: $20-$100 for a starter set.
- Setup: Place buildings on a non-slip silicone mat to prevent sliding.
- Adapt: Use battery-powered houses to avoid running cords near sinks.
Quick win: Use a narrow tray to move the village easily for cleaning.
92. Side Table Christmas Village
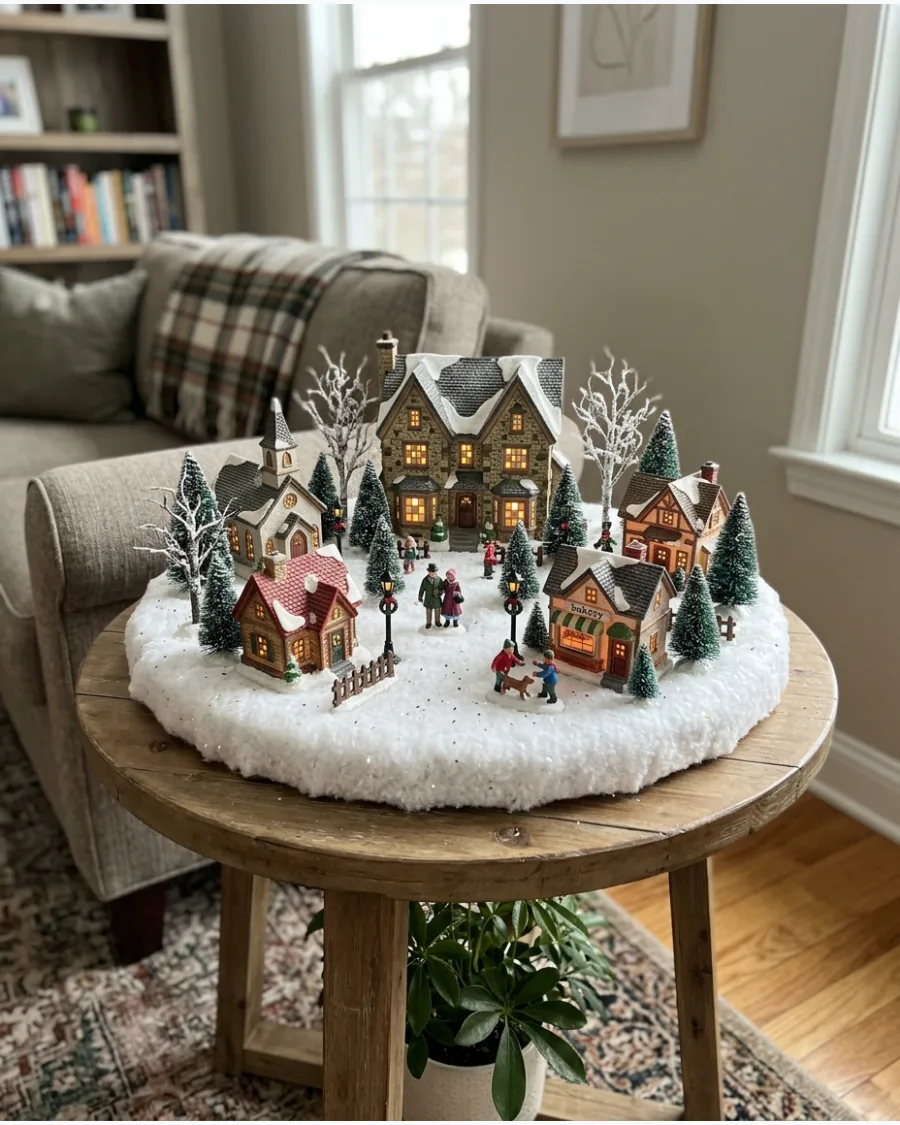
A round side table works well for a 360-degree view in a living room. Place the tallest building in the center and spiral smaller shops and figures around it toward the edges.
Arrange your figures facing inward to create a sense of community within the small circle. Circular layouts feel more organic and inviting than stiff, straight rows.
- Sourcing: $40-$150 depending on building detail.
- Setup: Use a round fabric tablecloth to hide the table surface.
- Adapt: Scale down to three buildings for small 18-inch tables.
Best shortcut: Use a lazy Susan under the snow to view the whole village with a simple turn.
LIGHTING AND STORYTELLING CHRISTMAS VILLAGE IDEAS
93. Warm Window Glow Christmas Village
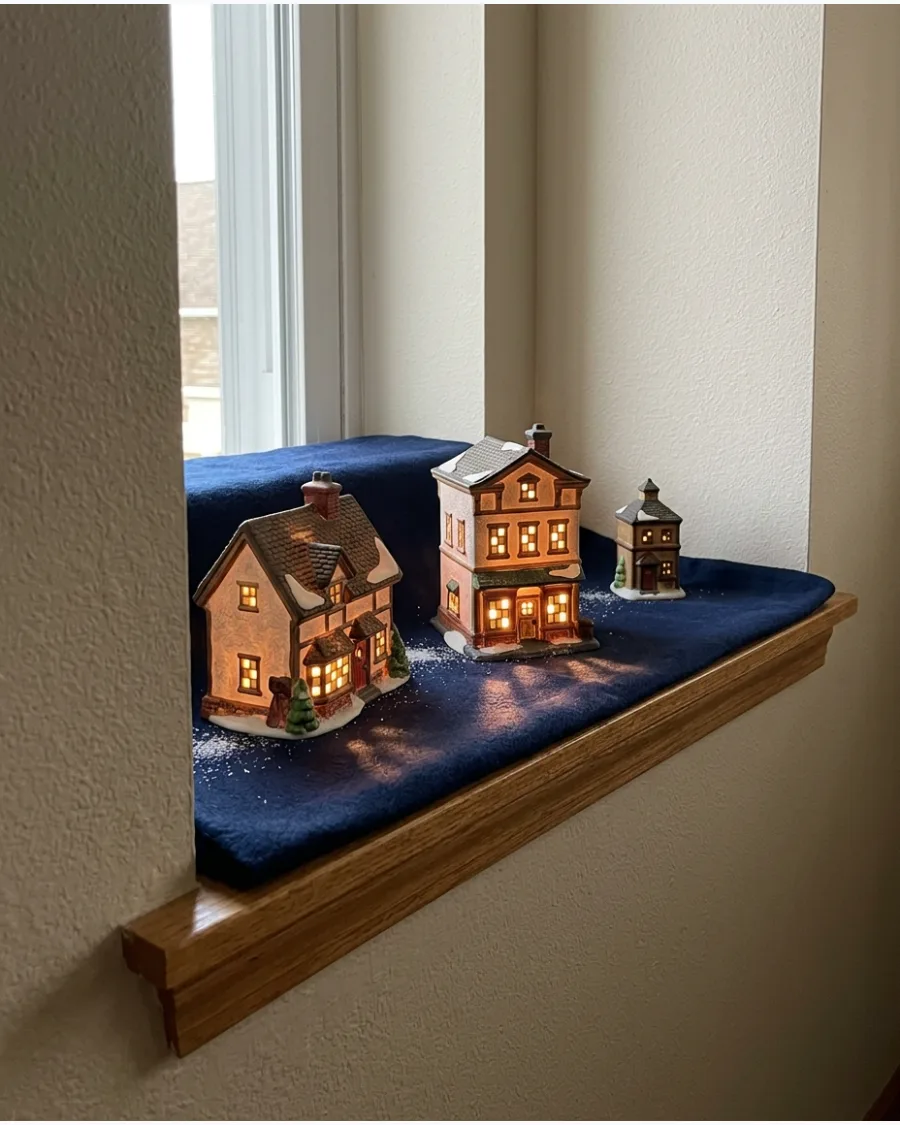
Focus on internal illumination to draw the eye toward the architecture. Use low-wattage warm bulbs or flickering LED candles inside each structure to create a cozy feel.
Turn off overhead room lights to let the golden glow from the miniature windows define the scene. Consistency in light temperature is the secret to a high-end, professional look.
- Sourcing: $10 for a pack of replacement bulbs.
- Setup: Ensure every building has a dedicated light source for even brightness.
- Adapt: Use yellow vellum paper inside windows to soften harsh white LEDs.
Most people skip this: Replace cool-toned LEDs with warm ones for a cozy, traditional feel.
94. Streetlight-Lined Christmas Village
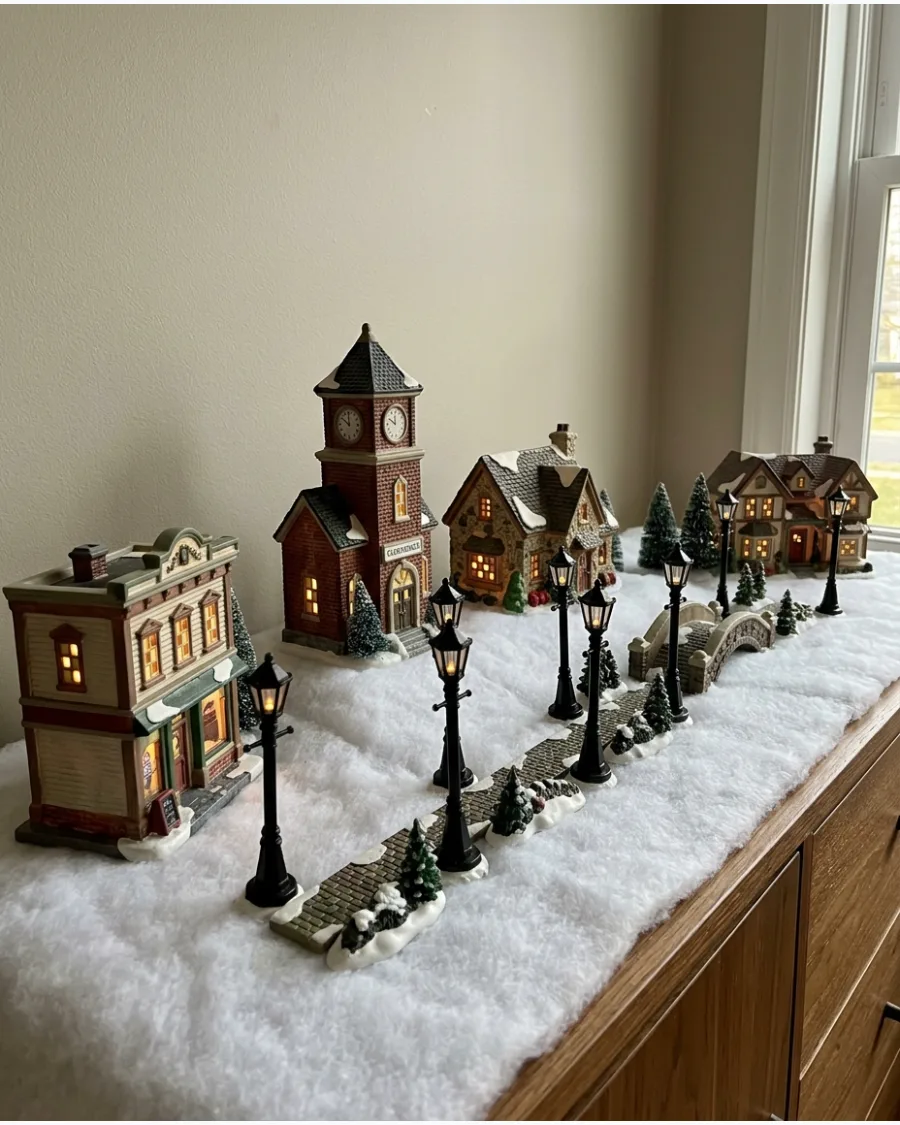
Miniature streetlights add height and architectural interest to the display. Place them at regular intervals along your village roads or near front doors.
Space the lamps about four inches apart to mimic the scale of a real neighborhood street. Streetlights are the best way to bridge the dark gaps between lit buildings.
- Sourcing: $15-$30 for a set of four to six lamps.
- Setup: Tape wires to the table surface before adding snow to hide them.
- Adapt: Use magnetic bases for stability on metal surfaces or trays.
Quick win: Use a tiny bit of poster tack to keep top-heavy streetlights upright.
95. Hidden Fairy Light Christmas Village
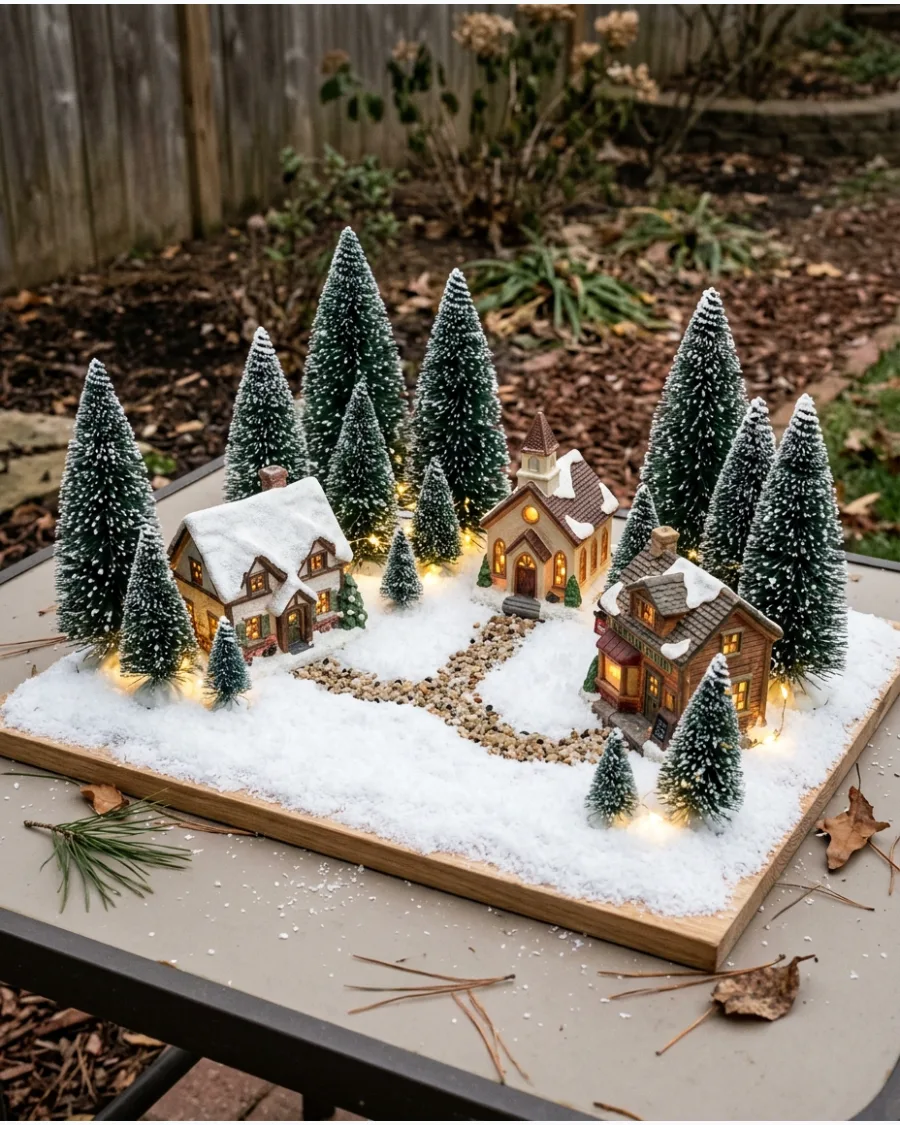
Tuck thin copper wire lights into the snow and behind trees. This creates a soft ambient glow that highlights the landscape textures without being distracting.
Bury the battery pack deep under a pile of faux snow or behind the largest building. Indirect lighting makes the entire display feel magical rather than just a collection of objects.
- Sourcing: $8-$15 for a multi-pack of fairy lights.
- Setup: Weave the lights through tree branches for a twinkling effect.
- Adapt: Choose warm white over cool white for a classic holiday feel.
Best shortcut: Thread lights through an empty toilet paper roll to create a glowing tunnel for a train.
96. Christmas Eve Village Scene
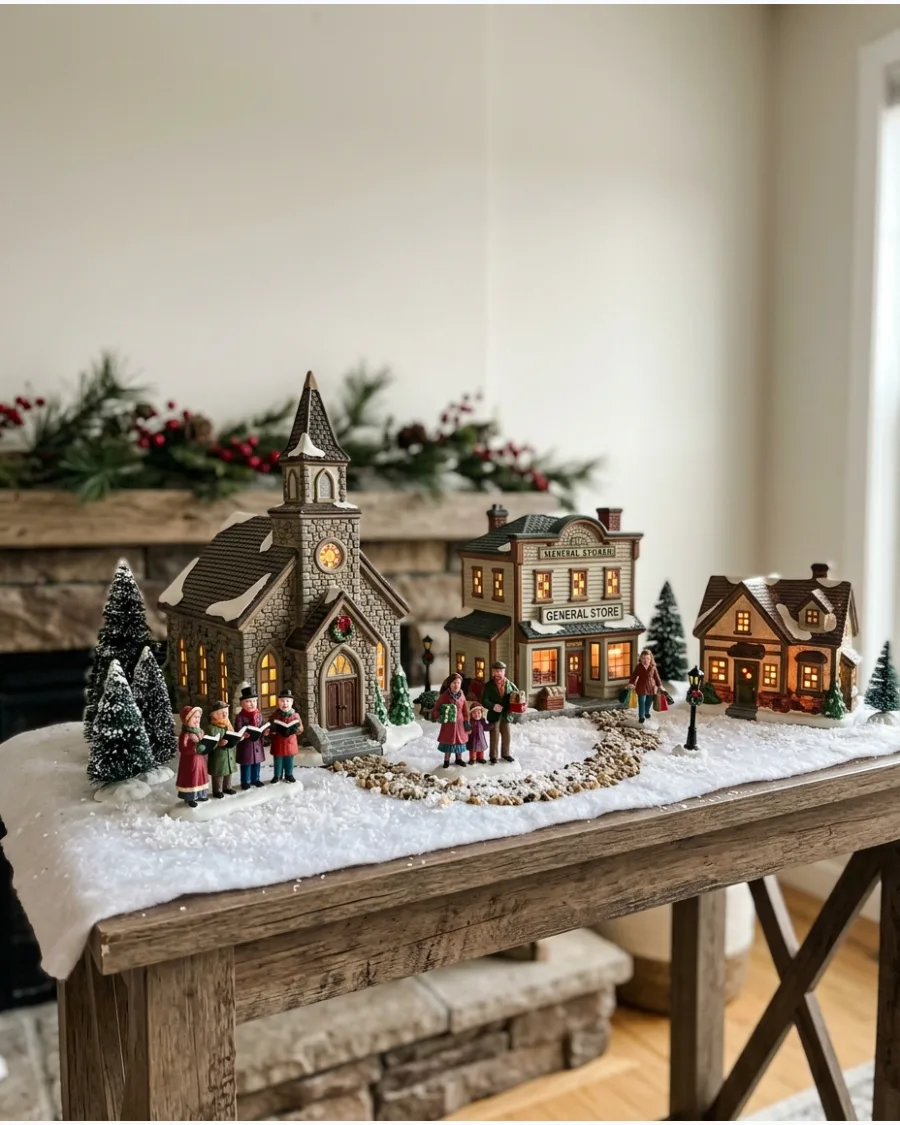
Set a quiet, expectant mood by choosing specific figures for the display. Place carolers under a streetlight and shoppers carrying tiny wrapped boxes near the stores.
Group your figures in small clusters of two or three to suggest they are walking together to a holiday service. Narrative details make the village feel like a living snapshot in time.
- Sourcing: $10-$20 for figure sets.
- Setup: Place a tiny closed sign on shop doors for realism.
- Adapt: Add a small sign near the church that says Midnight Mass.
Most people skip this: Face figures toward each other to imply conversation and community.
97. Christmas Morning Village Scene
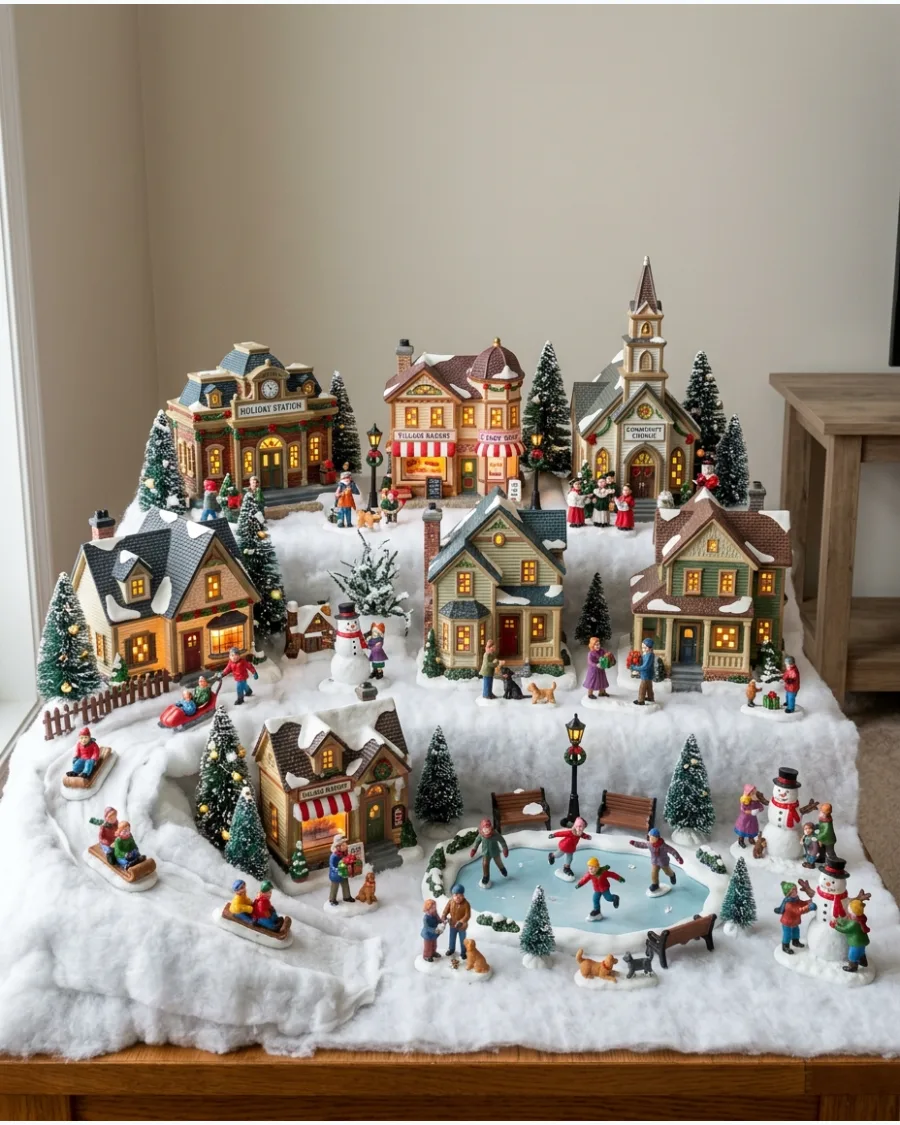
Shift the energy to high-activity accessories to represent the excitement of the holiday. Add children on sleds, people building snowmen, and pets playing in the yards.
Position sledding figures on a small mound of batting to create the illusion of movement down a hill. Active poses prevent the village from looking static and stiff.
- Sourcing: $15-$25 for active figure sets.
- Setup: Create a park area using a small green felt scrap under the snow.
- Adapt: Use bright, colorful figures to contrast with the white snow.
Quick win: Use a white hand towel under the snow to create natural hills and slopes.
98. Santa Flying Over the Christmas Village
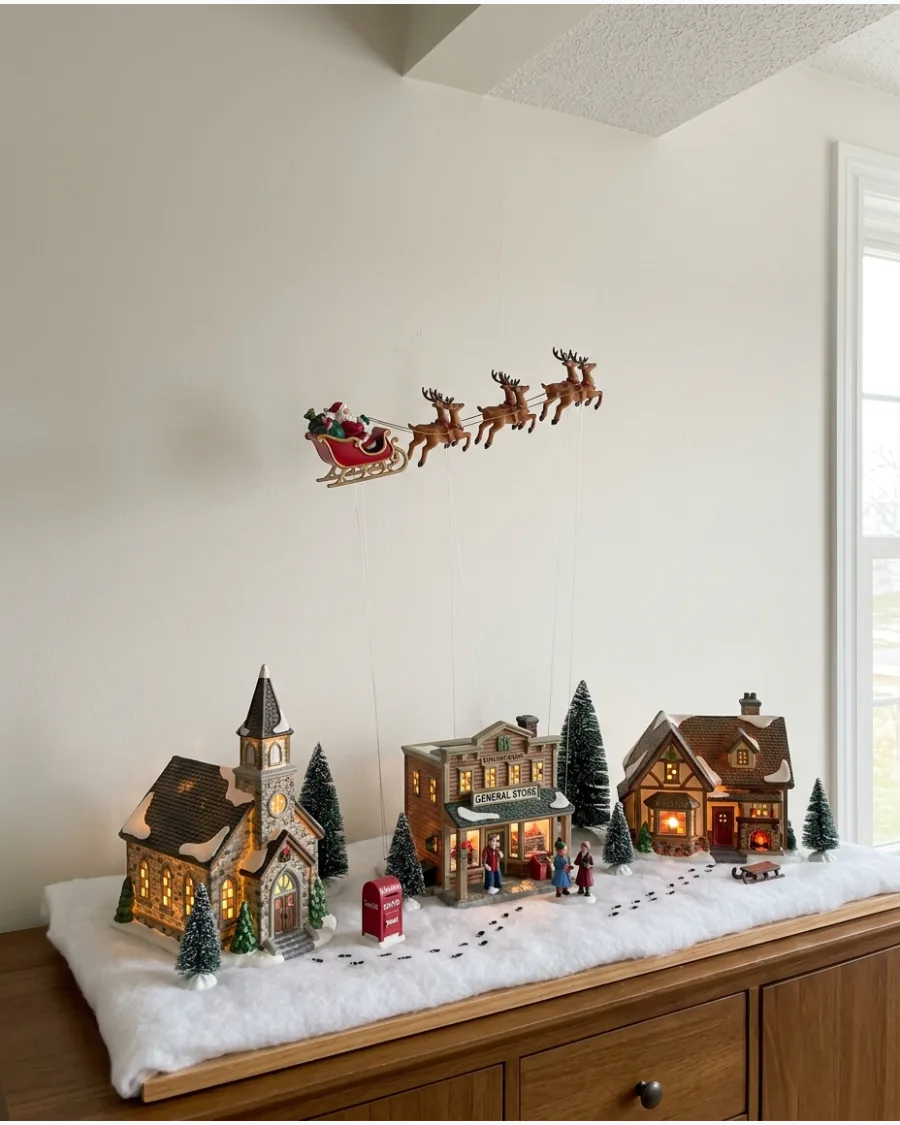
Bring the sky into your display by suspending a sleigh above the rooftops. Use clear fishing line to hang Santa and his reindeer from a shelf or ceiling.
Angle the sleigh slightly upward to suggest it is taking off from a nearby rooftop. Vertical elements break up the flat horizon of a tabletop display.
- Sourcing: $20-$40 for a hanging sleigh kit.
- Setup: Use clear adhesive hooks for damage-free ceiling hanging.
- Adapt: Mount the sleigh on a stiff wire if you cannot hang from the ceiling.
Best shortcut: Use clear fishing line for an invisible floating effect.
99. Collected Heirloom Christmas Village
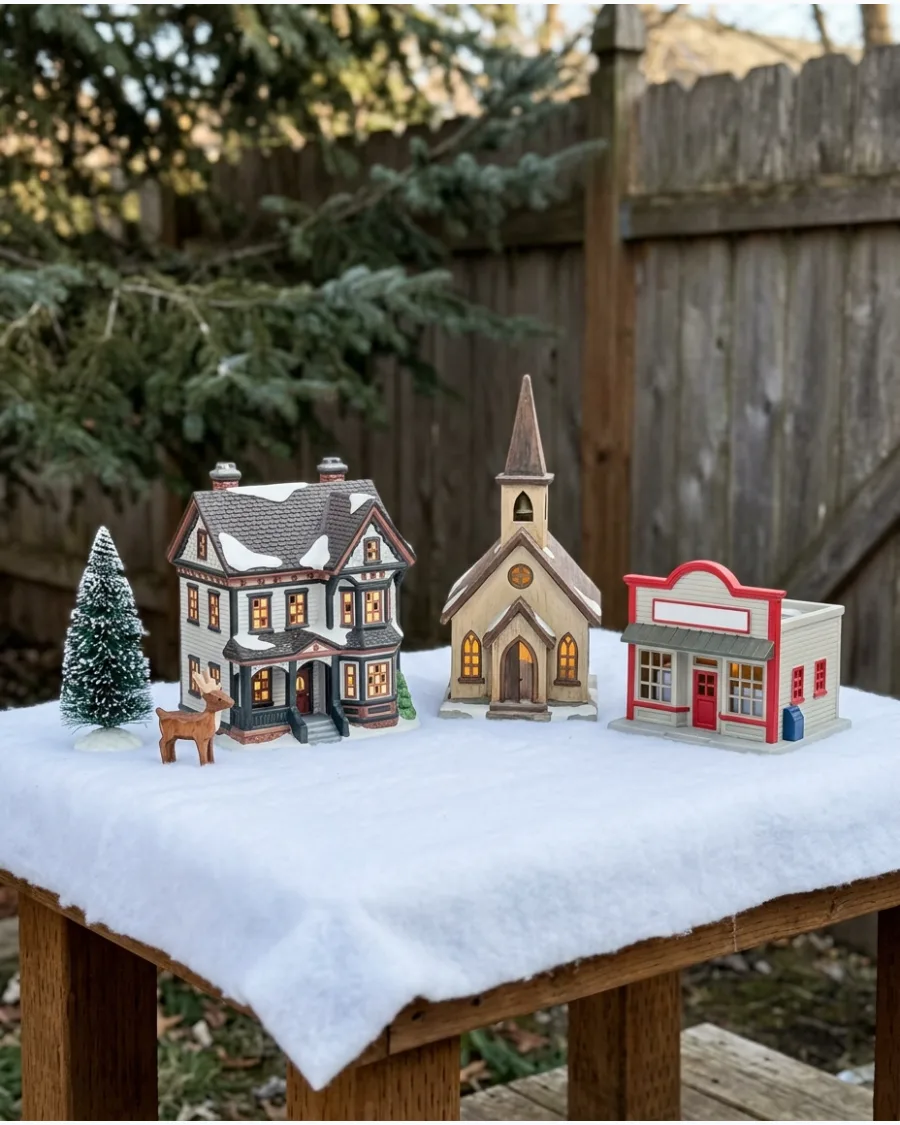
Unify a mismatched collection through consistent landscaping and snow. Use the same brand of faux snow and matching bottle brush trees across all pieces to tie them together.
Place the oldest or most sentimental building in the center to serve as the village anchor. Mixing styles adds character and tells a story of holiday traditions over time.
- Sourcing: $0 by using existing family items.
- Setup: Group by color or material to create visual flow.
- Adapt: Paint mismatched bases white to help them blend into the snow.
Most people skip this: Keep similar-scaled people together to maintain the illusion of a real town.
Frequently Asked Questions
How do I hide the messy power cords and battery packs?
You can easily conceal unsightly wires by tucking them beneath thick faux snow blankets or decorative moss. For a more permanent solution, try drilling small holes into your foam risers to route the cords directly underneath the display.
What can I use to create different heights and hills in my village?
Stack everyday household items like books, small boxes, or styrofoam blocks to build varied elevations for your buildings. Once you drape a white fabric snow layer over these items, they will look like natural, rolling hills in your winter landscape.
Where is the best place to set up a village if I don't have a mantel?
Entryway consoles, deep windowsills, and piano tops provide wonderful flat surfaces for a festive display. You can also arrange your village inside glass-front cabinets to keep the pieces protected while still serving as a beautiful holiday focal point.
How do I choose a cohesive 'look' if my houses don't match?
The secret is using a consistent base material, like all-white snow, to ground the entire scene. Incorporating uniform greenery, such as matching bottle brush trees throughout the display, will help tie different brands and styles together seamlessly.
What is the best way to light a village without an outlet nearby?
Battery-operated LED puck lights are perfect for illuminating the interiors of unlit porcelain buildings. You can also weave battery-powered fairy lights through the landscape to add a soft, magical glow without needing a nearby wall plug.