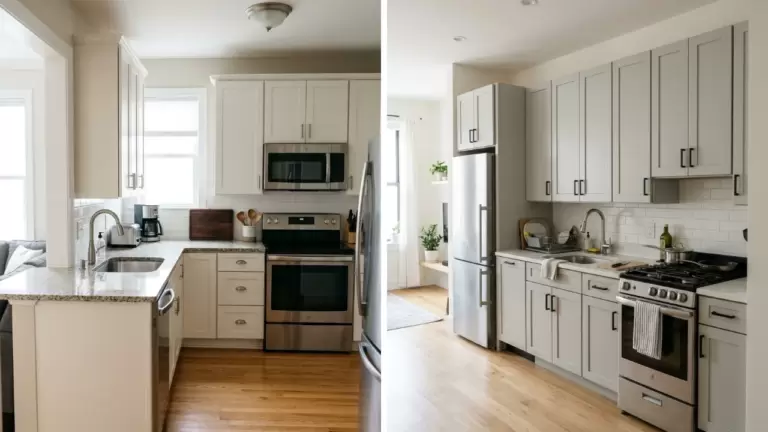
50 ADU Kitchen Ideas for Small Spaces

This post may contain affiliate links: full affiliate disclosure.
An accessory dwelling unit kitchen might share a wall with the sofa, sit inside a garage conversion, or have its own small room. Start with the space you have.
Save the layouts that match your floor plan, then look for details that fit the way you cook. A useful idea should make one daily task easier.
As an Amazon Associate I earn from qualifying purchases.
Layouts that make room to cook
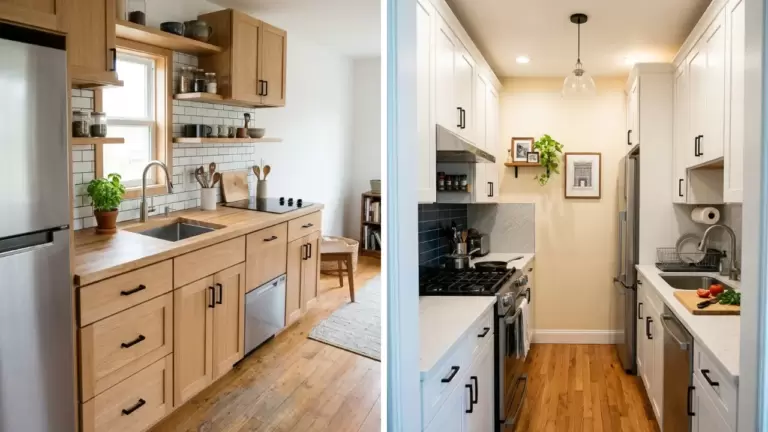
1. Keep the kitchen on one wall
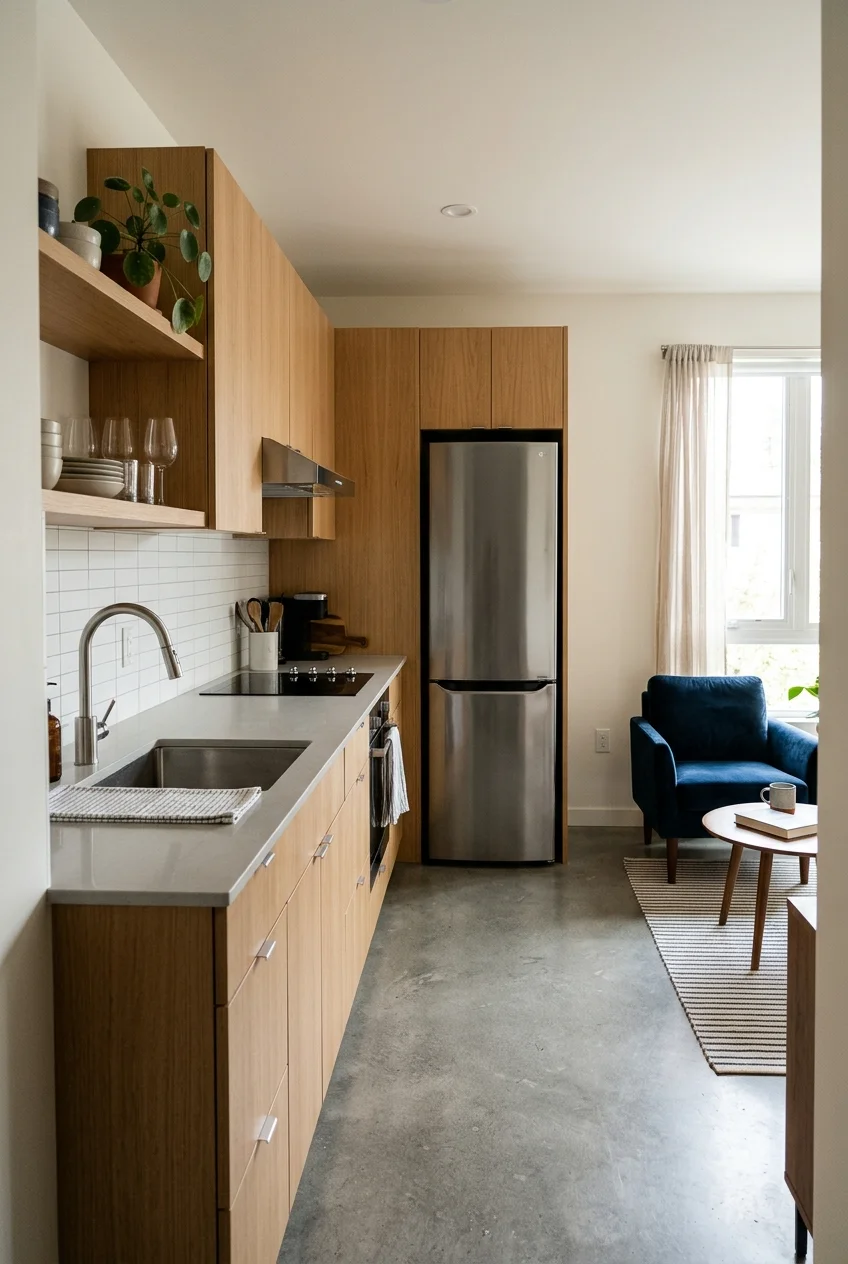
Putting the fridge at one end keeps a tall appliance from interrupting the worktop. Leave a continuous stretch between the sink and cooktop for chopping.
On a short wall, sketch the sink and cooking zone before counting cabinets. A small sink can buy usable counter space if it still holds your largest pan.
Leave room to set groceries down beside the fridge. If it's against a wall, check how far the door must open for interior drawers to slide out.
Check the plan with the dishwasher open, too. In a studio, its door can occupy the same strip of floor you use to reach the sofa.
2. Turn an unused corner into an L
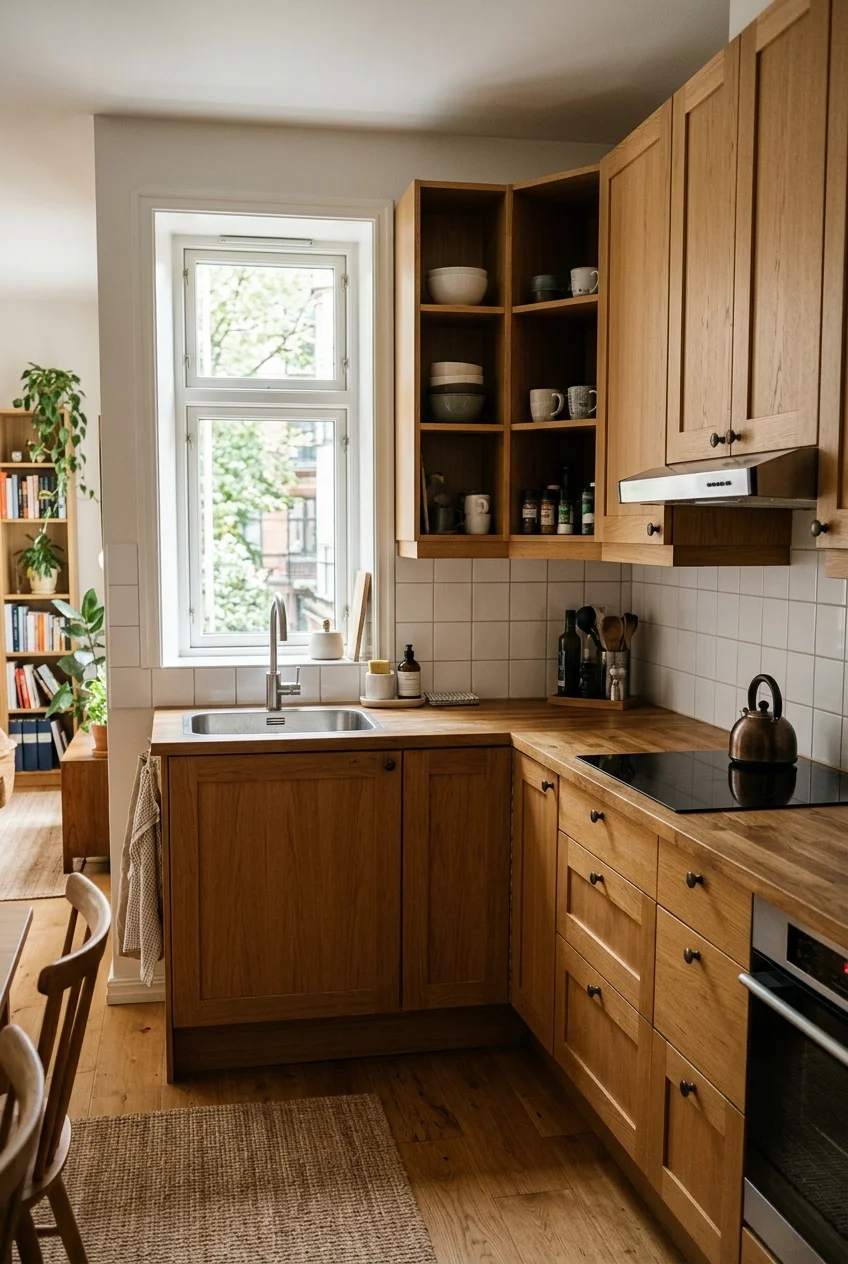
A short return can hold the sink under a side window while leaving the longer wall for pots, pans, cooking, and the main stretch of counter.
Plan the inside corner before filling both walls with drawers. Open the neighboring fronts on your drawing and leave space for pulls to pass each other.
If the return is very short, a simple corner cabinet with infrequently used gear may serve better than hardware that eats into both cabinet runs.
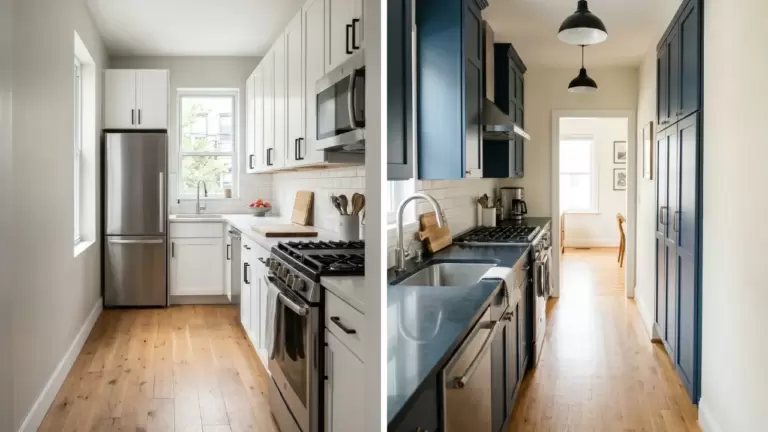
3. Pair full-depth cabinets with a shallow galley wall
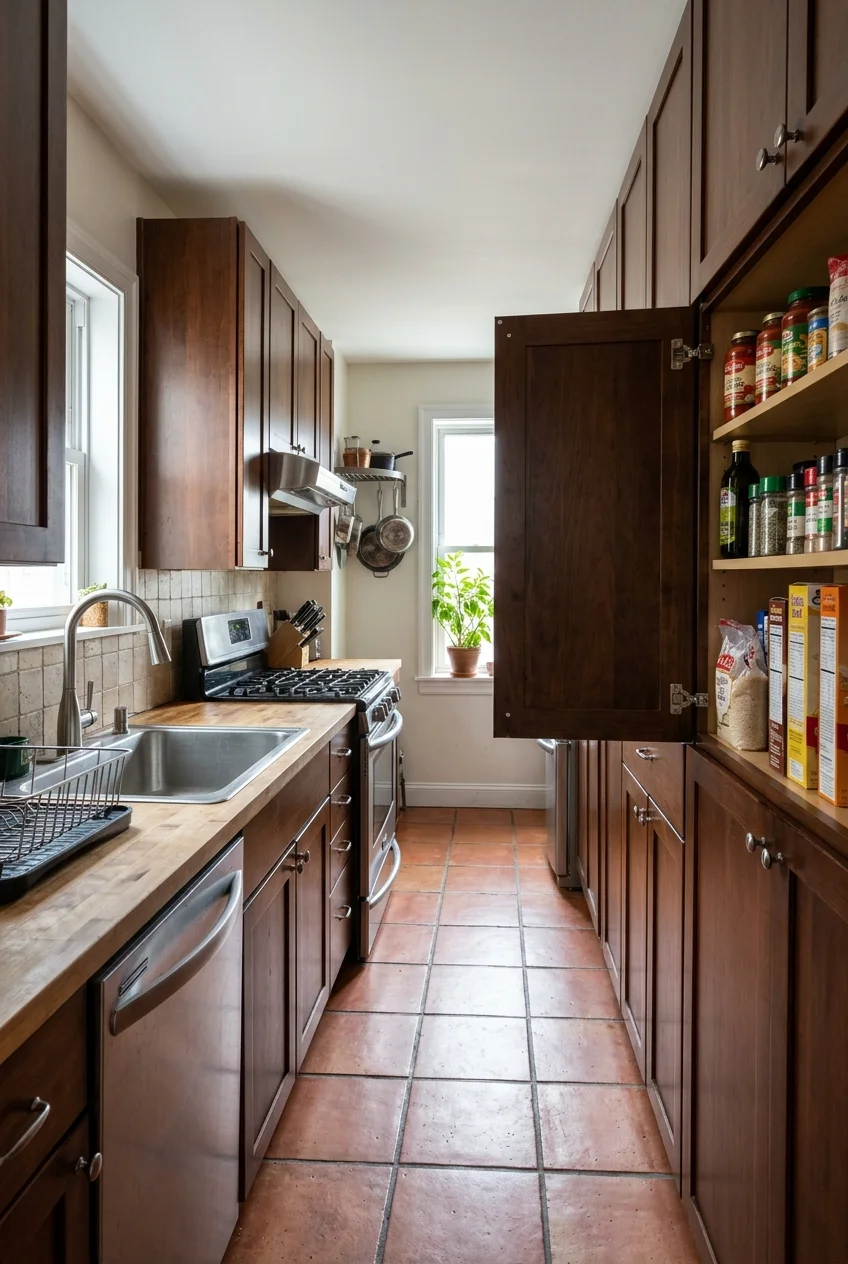
A shallow wall of shelves or cabinets can take dishes and cans while the deeper side holds the sink and cooking appliances. You gain storage without deepening both runs.
Choose the shallow side by what needs to fit inside it. Dinner plates, cereal boxes, and small appliances can demand more depth than the wall appears to need.
Tape both cabinet fronts on the floor and mark the appliance doors at full extension. Check the route to the far end while someone is unloading dishes.
Setup note Include handles and counter overhangs in the mock-up. Those projections can be easy to miss when the drawing shows only the dimensions of the cabinet boxes.
4. Give an open kitchen a short peninsula
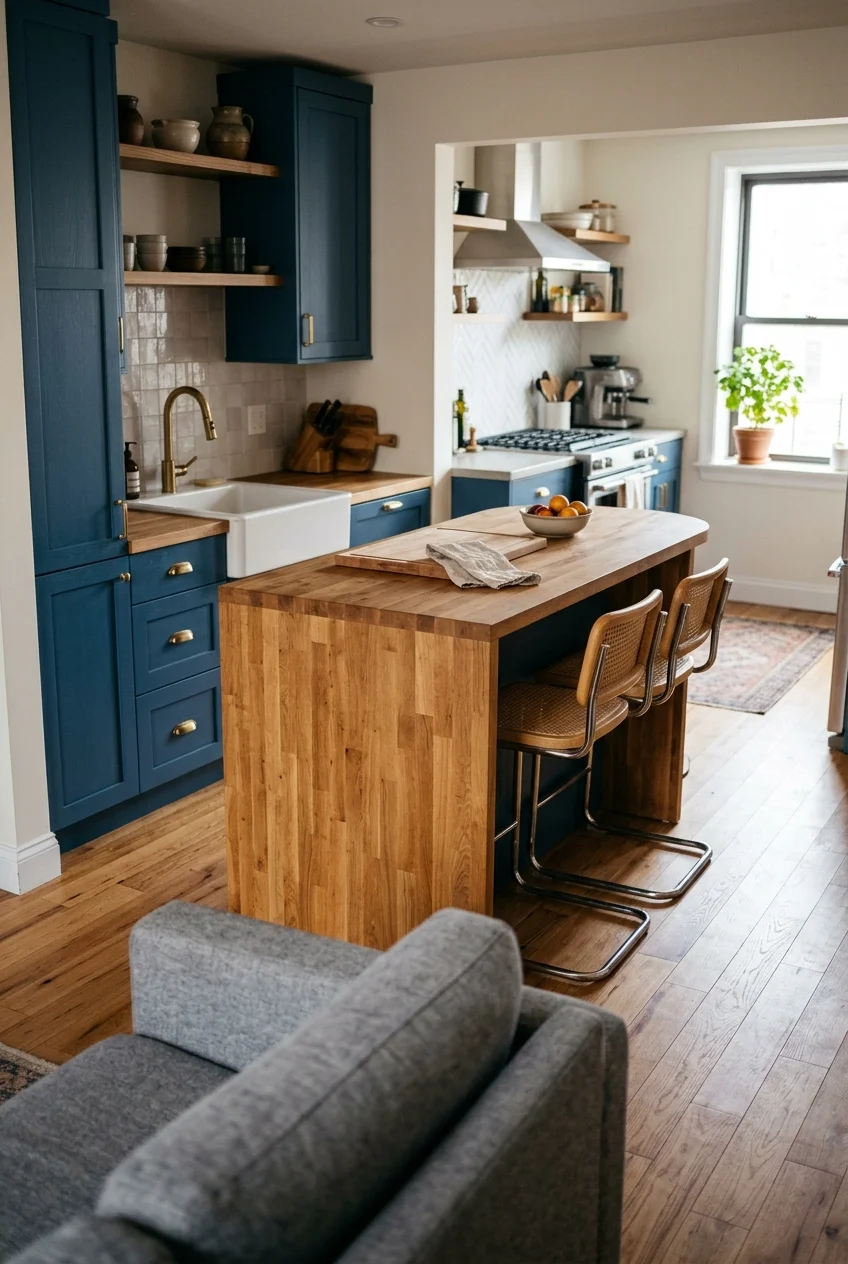
A peninsula attached at one end gives groceries and serving bowls a landing place while marking the edge of the kitchen from the living room.
Try a plain prep surface first. Putting a sink or cooktop in that return adds utility routing and leaves less room for the jobs that made the extension appealing.
A seating overhang needs properly designed support. If stools would sit in the main travel path even when tucked in, keep the outside face flush.
5. Set a movable island in a parking spot
Image pending: No image is attached to this draft for idea 5 (image-05).
A slim rolling worktable can come out on baking day and park beside the cabinets afterward. Give it a home before you shop for one.
Use a cart with locking casters and an easy-clean top. Open the fridge and oven in the proposed work position to check the clearance around them.
6. Tuck the kitchen into an alcove
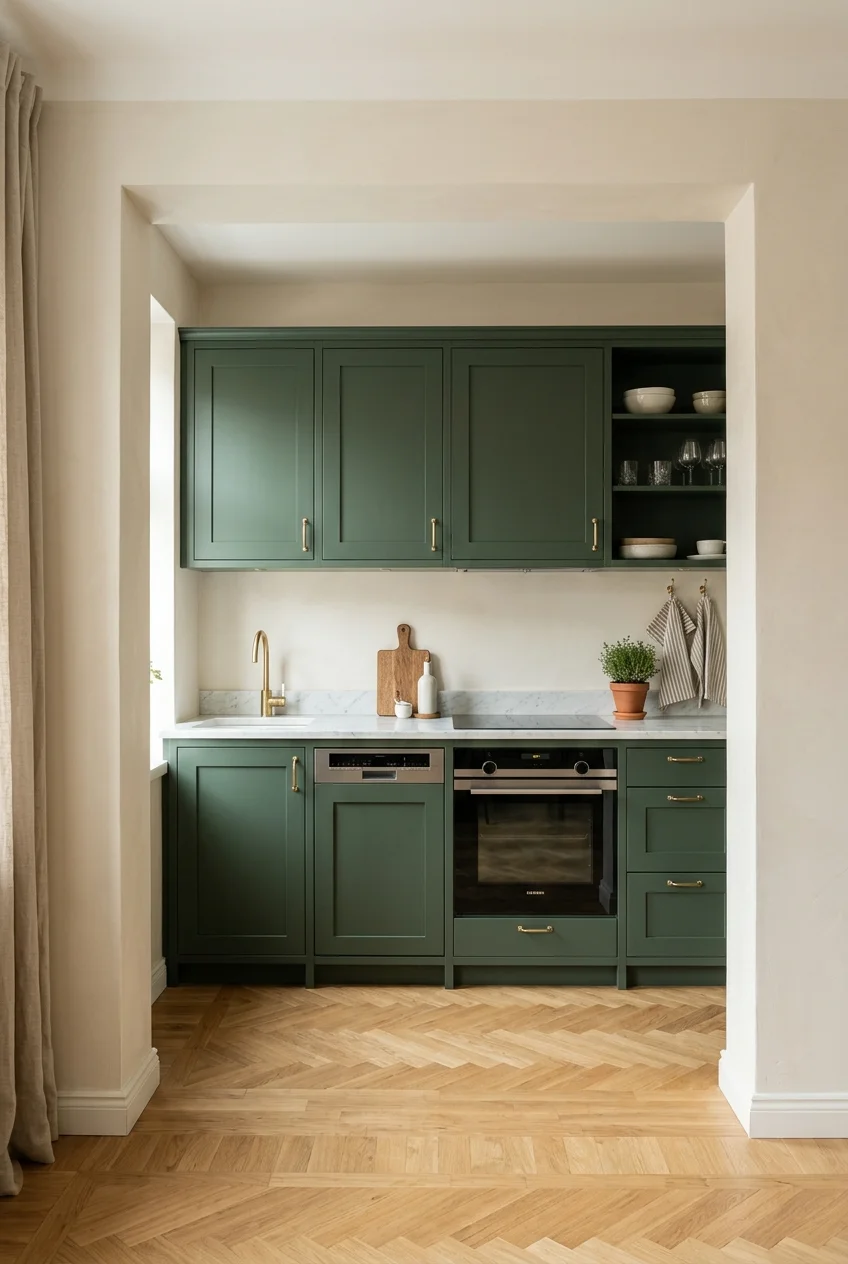
An existing recess can frame the fridge, sink, and cooking zone like a single piece of built-in furniture. Side walls give cabinet ends a natural stopping point.
Treat the cabinet fronts and finished wall surfaces as part of the opening. An appliance can fit on paper and still catch a handle on the jamb.
Reserve somewhere outside the recess for a person to pass or wait. That breathing room matters when the recess is only wide enough for one cook.
7. Make a pass-through from a separate kitchen
Image pending: No image is attached to this draft for idea 7 (image-07).
An opening above the counter lets the cook see into the living room and gives dishes a direct route to the table. It can preserve base storage below.
If you’re enlarging an existing opening, have the wall and any concealed utilities assessed first. Use the finished opening size to decide whether a ledge is worthwhile.
Keep the ledge out of the walking path on the living side. A shallow landing can hold two plates without committing the room to permanent bar seating.
8. Wrap a U around a dedicated cooking nook
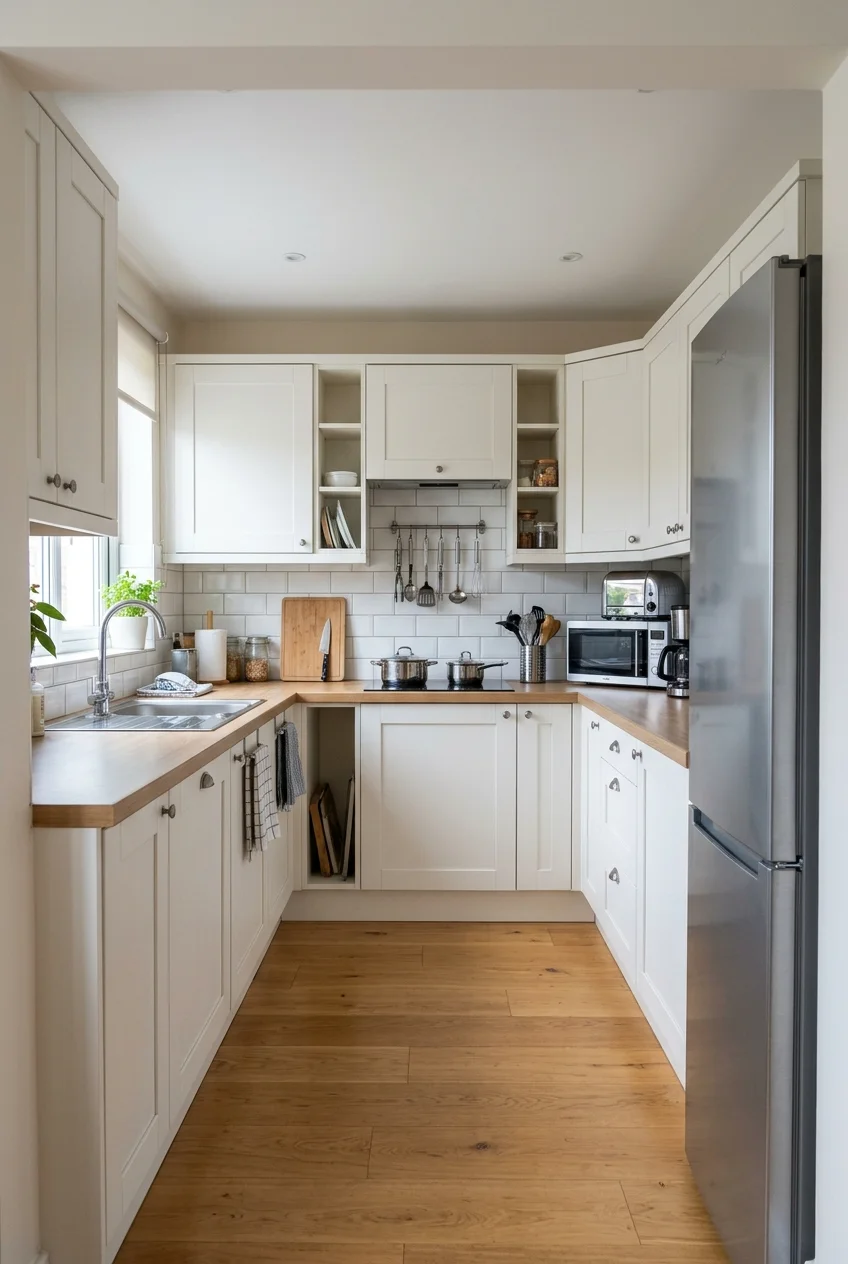
Three connected sides can separate cooking, prep, and cleanup in an ADU with a wide kitchen bay. Start by giving the sink and cooking surface distinct work areas.
The back corners are easy to overfill with hardware. Compare one accessible corner organizer with simpler storage for the roasting pan you only use at holidays.
Check whether two doors can open at once where their arcs meet. A dishwasher beside a corner can block a perpendicular drawer even when the center aisle feels generous.
Walk through dinner on the drawing, from washing produce to draining pasta. Put the clear counter where you can reach it without carrying a hot pot around a corner.
Leave the U open to the living area. If the fridge sits at that entrance, someone grabbing milk should be able to stay outside the cook's workspace.
Eating areas that fit beside the kitchen
9. Build a banquette into a dead corner
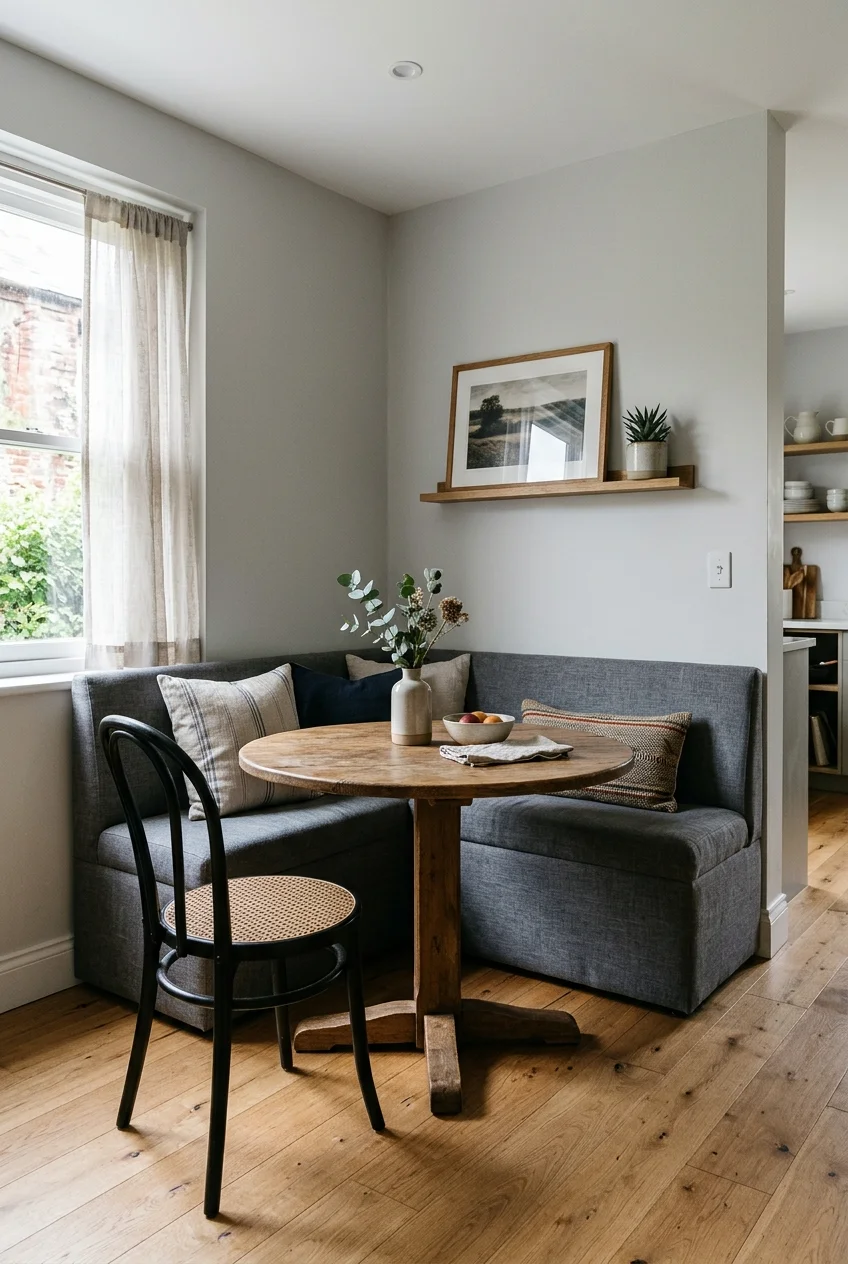
A fixed bench can bring a table closer to the wall because the wall-side seats need no pullback room. A pedestal gives knees space at the inside corner.
Mock up the bench front and table edge with boxes before ordering anything. Check how the person in the corner gets out when the other seats are occupied.
Choose front-access storage if the table would trap a lift-up seat. Reserve the bench compartment for things you can fetch without interrupting dinner.
10. Use a drop-leaf table that earns its floor space
Image pending: No image is attached to this draft for idea 10 (image-10).
Keep one leaf down for everyday meals and raise it when company comes. A freestanding gateleg table can shift position as the kitchen's traffic changes.
Measure the table in both configurations with chairs occupied. The expanded top earns its keep when guests can still reach the fridge without moving someone.
11. Hang a two-seat shelf under the window
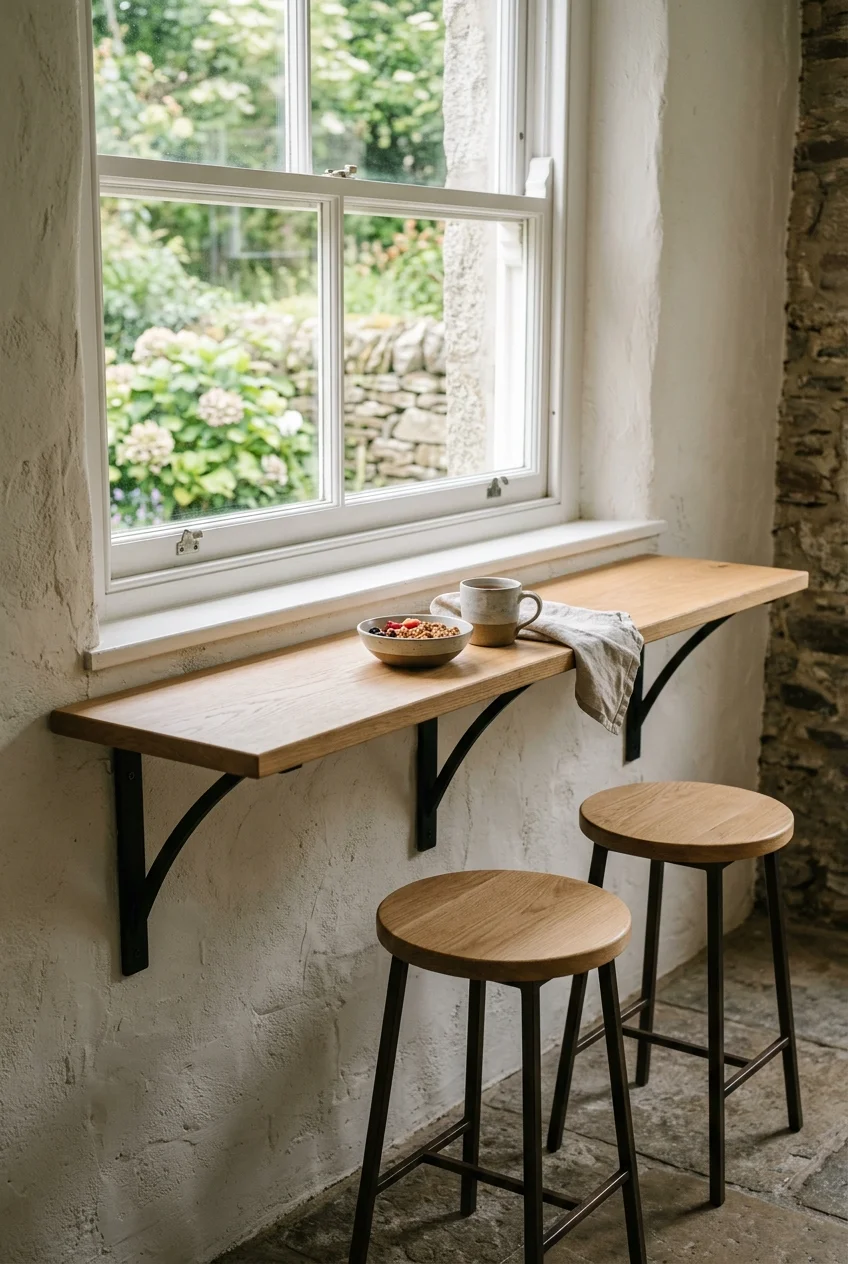
A wall-mounted eating shelf puts two seats along the window and leaves the center of the room open. Pick a depth that holds a dinner plate comfortably.
Check where the brackets will meet knees before choosing the span. Have the supports and fastening matched to the wall construction and expected loads.
An inward-opening window needs room to swing above the shelf. Check the shade controls and window handle from a seated position before setting the height.
12. Choose a round table for a diagonal route
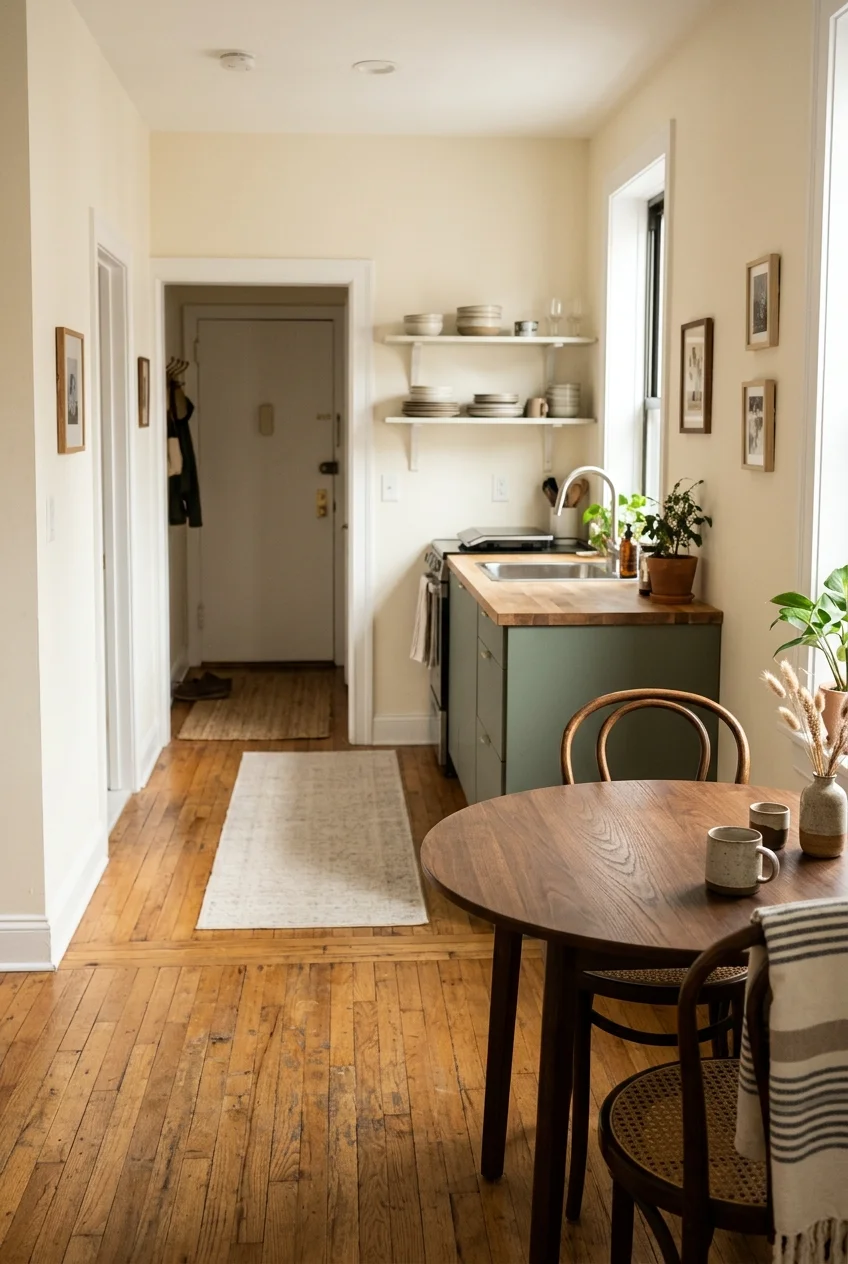
A round top works well where the route from the entry to the kitchen brushes a dining corner. There’s no projecting corner at the tightest turn.
Measure with the chairs pulled out and the door open. An armless chair that tucks close to the table can save more floor space than a smaller tabletop.
13. Use the sofa back to place a dining console
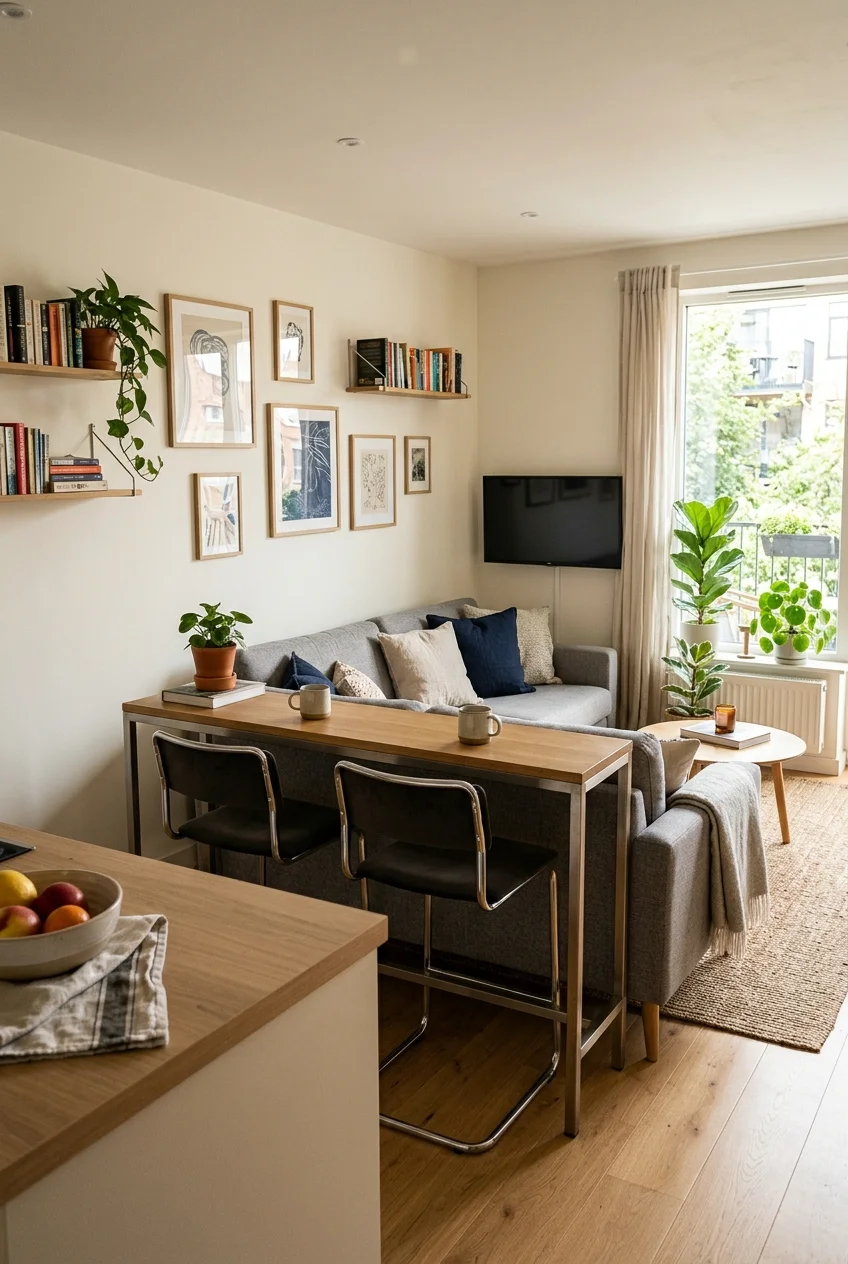
In an open studio, a narrow counter behind the sofa can seat someone facing the living area while taking up less depth than a separate dining set.
Look for a freestanding console designed for seating, with clear knee space and a stable base. Mark the chair footprint so it stays out of the kitchen aisle.
14. Start the coffee station beyond the cook's route
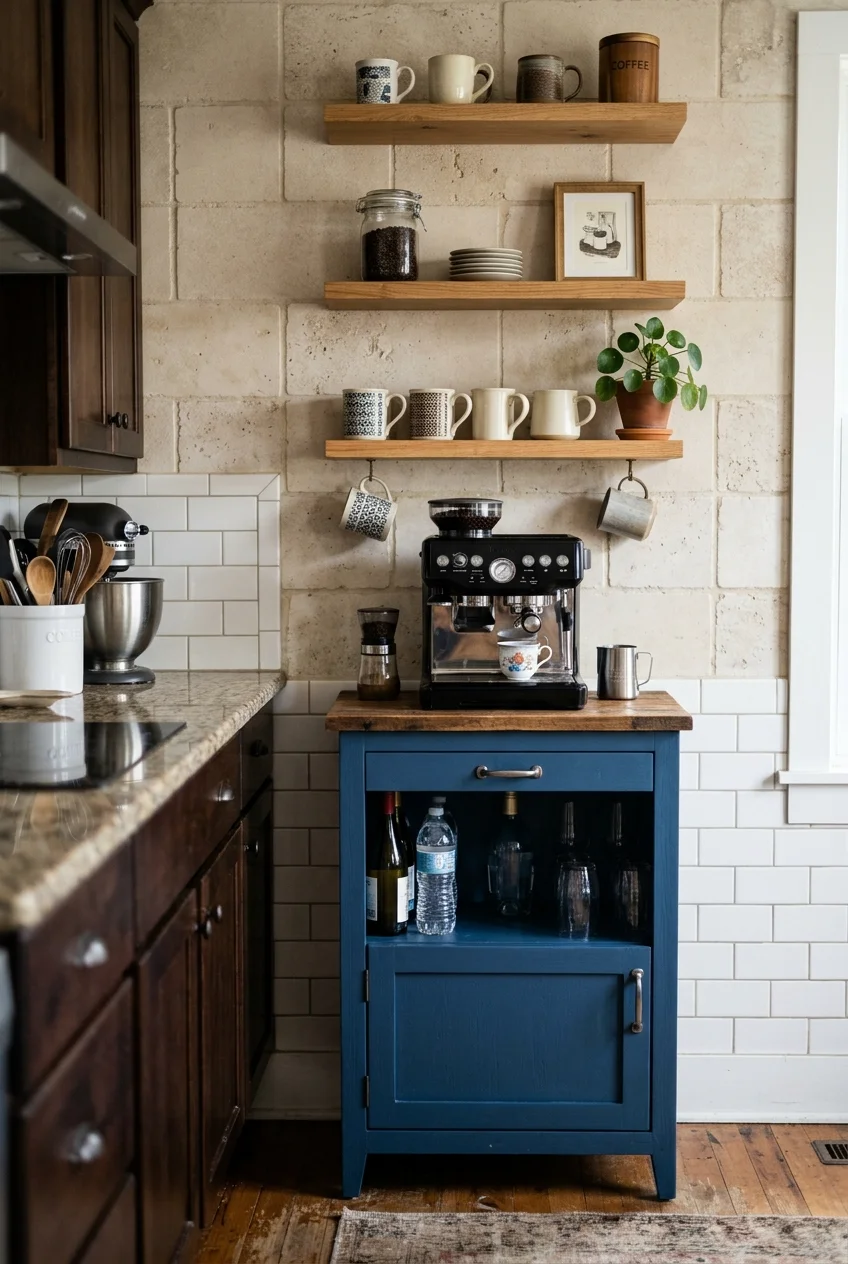
A small beverage station on a side wall lets someone make coffee while the main counter stays available for breakfast prep. Put mugs within reach of the machine.
Pick a spot where the water tank is easy to remove and there’s room above the machine for steam and access. Use the appliance instructions to check placement.
Appliances that leave room for a worktop
15. Trade fridge width for height
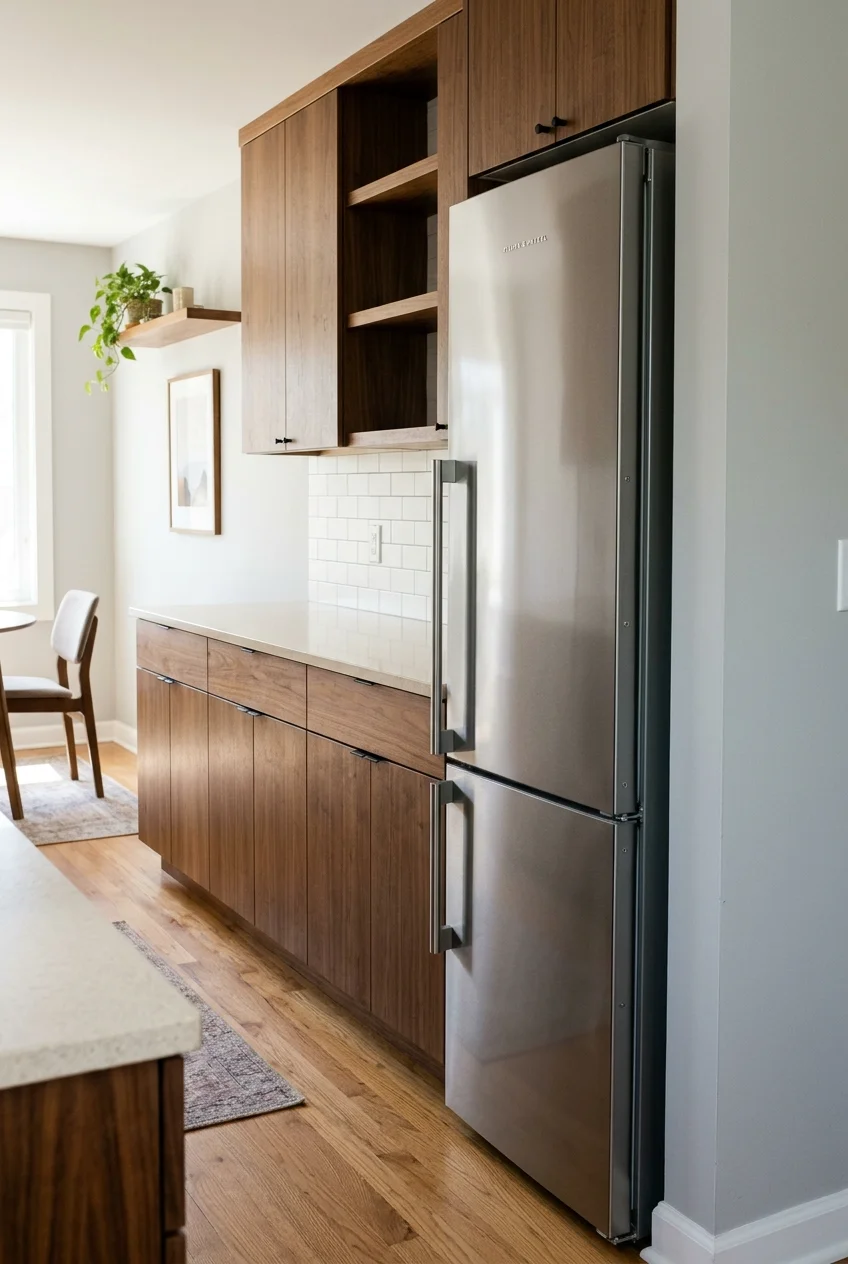
A slim upright fridge frees cabinet frontage while keeping frozen food available for everyday cooking. Compare the actual shelf layout with what you bring home each week.
A tall appliance can cast a shadow over the counter next to it. Place it at a run's end and keep your best daylight near the prep zone.
Watch for Check the manufacturer’s door swing and ventilation diagrams before finalizing cabinet widths. A narrow fridge can still need extra room to open fully beside a wall.
- Check shelf depth against your tallest pitcher and largest leftovers container.
- Look for freezer drawers you can remove with the door at its actual opening angle.
- Include the handle when comparing appliance depth with adjacent cabinet fronts.
16. Keep the counter continuous over a built-in fridge
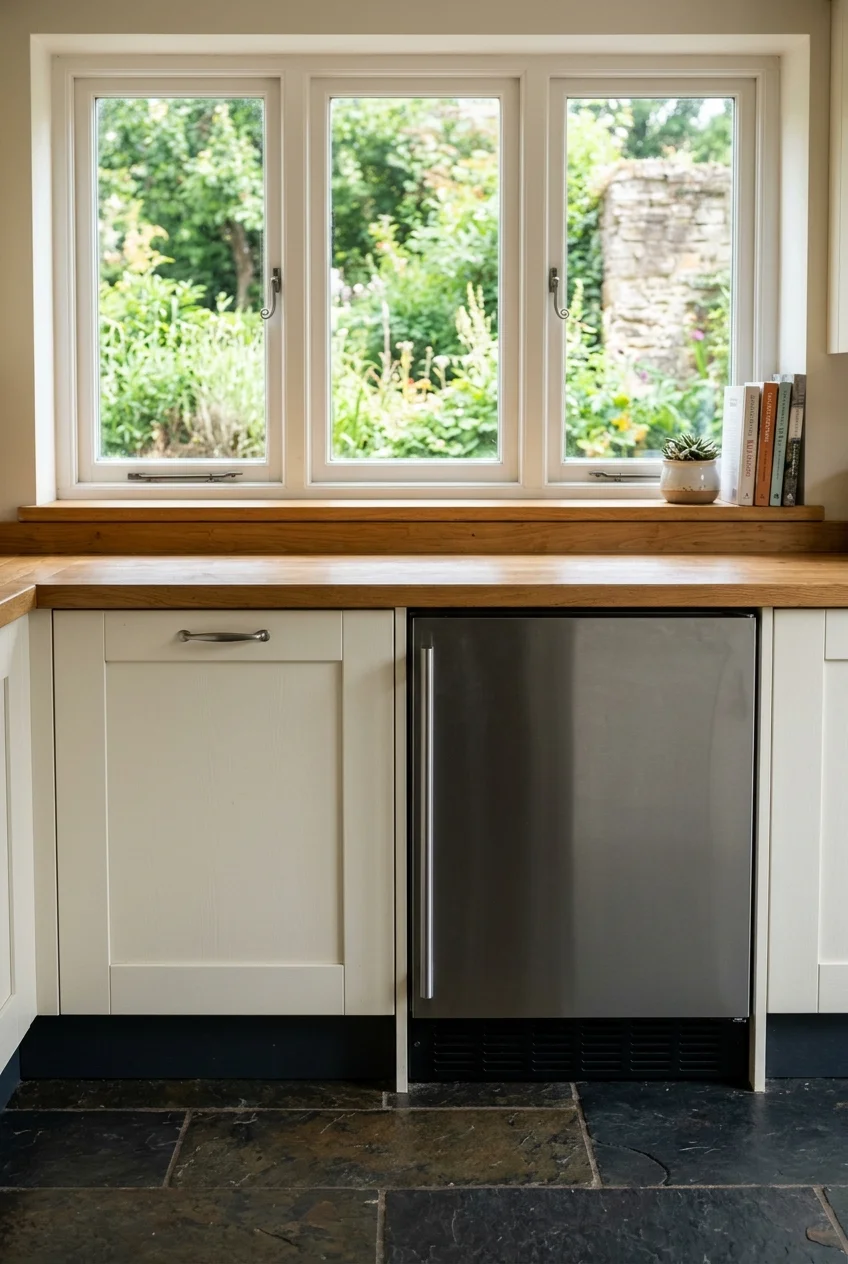
An undercounter refrigerator makes sense when keeping a window low or gaining uninterrupted worktop matters more than storing large containers and a week's worth of leftovers.
Choose a model approved for built-in use and design the opening around its ventilation instructions. Check freezer capacity separately if you depend on batch cooking.
Put the unit at the outer end of the cabinet run so a person opening it can stay clear of the sink. Try reaching the lowest shelf before buying.
17. Fit a narrower range for everyday baking
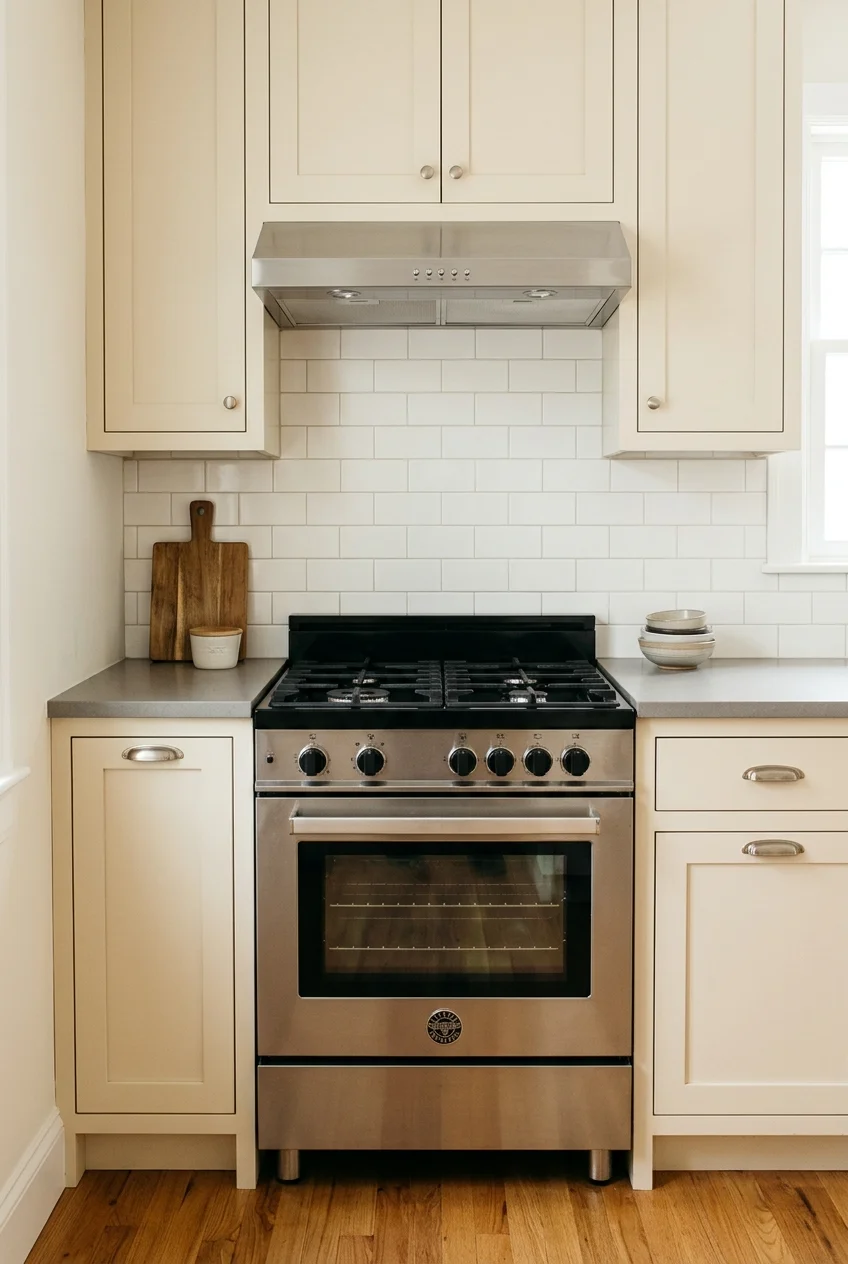
A compact range preserves the familiar oven and cooktop arrangement in a shorter run. Start with the largest sheet pan or baking dish you routinely use.
Compare the oven's usable rack width and depth with that cookware. On top, check whether your two largest pans can sit on neighboring burners without crowding.
Leave a heat-safe landing surface beside the range and check the model's clearance and utility requirements. A few inches reclaimed on paper can disappear once installation is considered.
18. Make a two-zone cooktop part of a prep counter
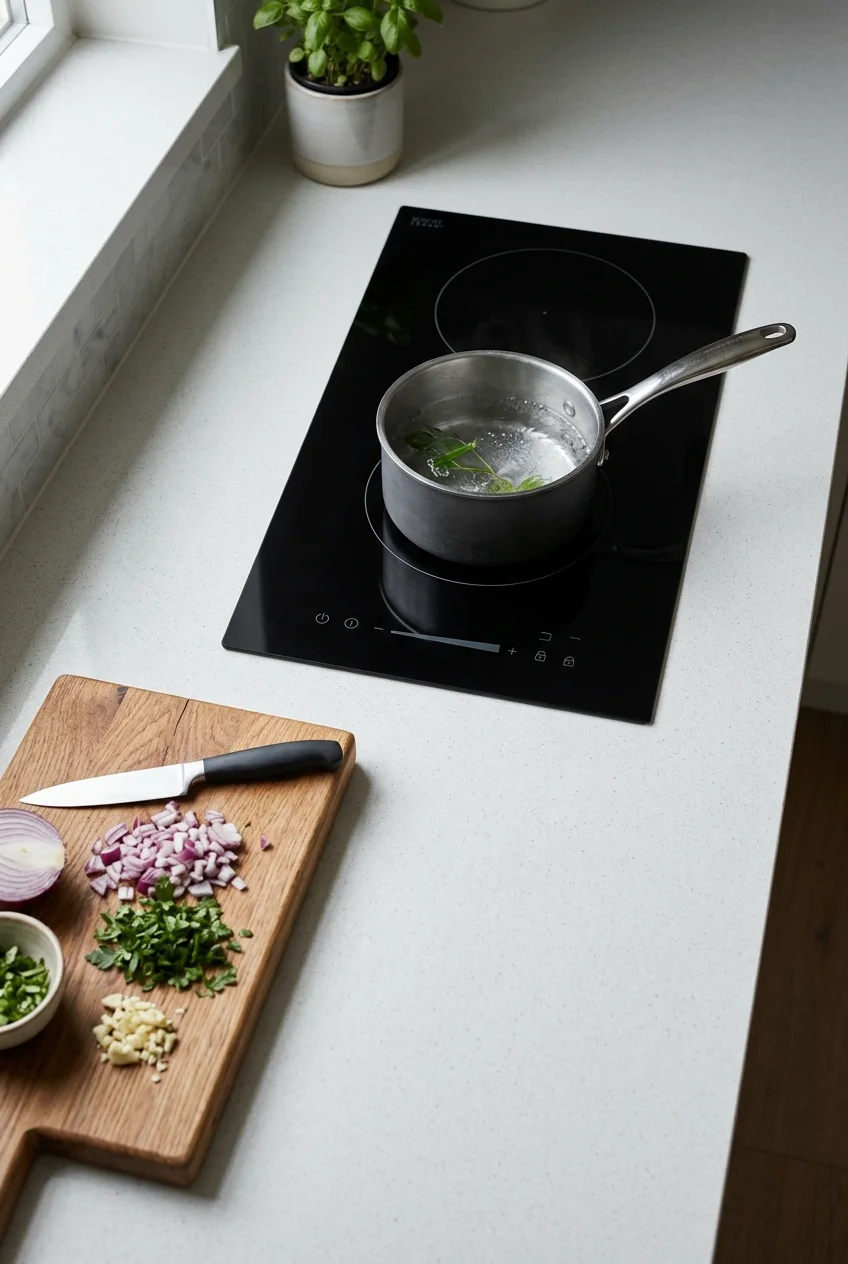
A two-zone cooktop can preserve a broad cutting area for someone who usually cooks with a saucepan and a skillet. Pan sizes matter as much as burner count.
An induction model needs compatible cookware, and a built-in model has its own cutout, electrical, and ventilation requirements. Select it before the counter and cabinet are made.
Check the supported pan diameters for both zones. A small espresso maker and a wide skillet can each pose fit problems, even with induction-compatible bases.
If you bake regularly, budget space for a separate oven as you plan the run. Confirm which permanent cooking facilities your local building department requires.
19. Recess the microwave in a fitted cabinet bay
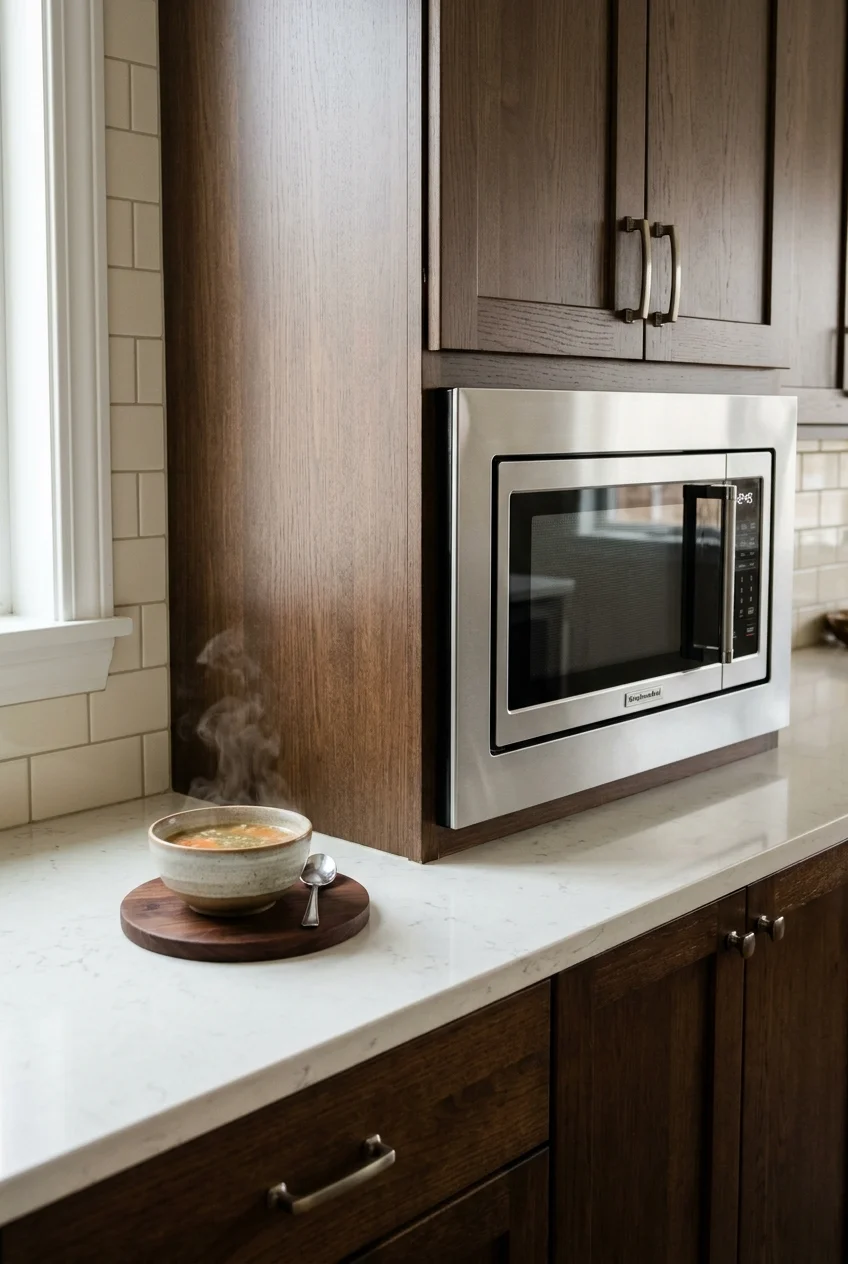
A shelf with a nearby landing spot can reclaim the corner where a microwave would otherwise sit. Choose a height that allows easy handling of hot bowls.
Select a microwave suitable for the proposed installation and follow its instructions for airflow, support, and any required trim kit. Size the shelf or niche around that model.
Open the door in the proposed spot before committing. A low shelf can work well if the door clears nearby drawers and the controls are easy to see.
20. Put a slim dishwasher beside the dish drawer
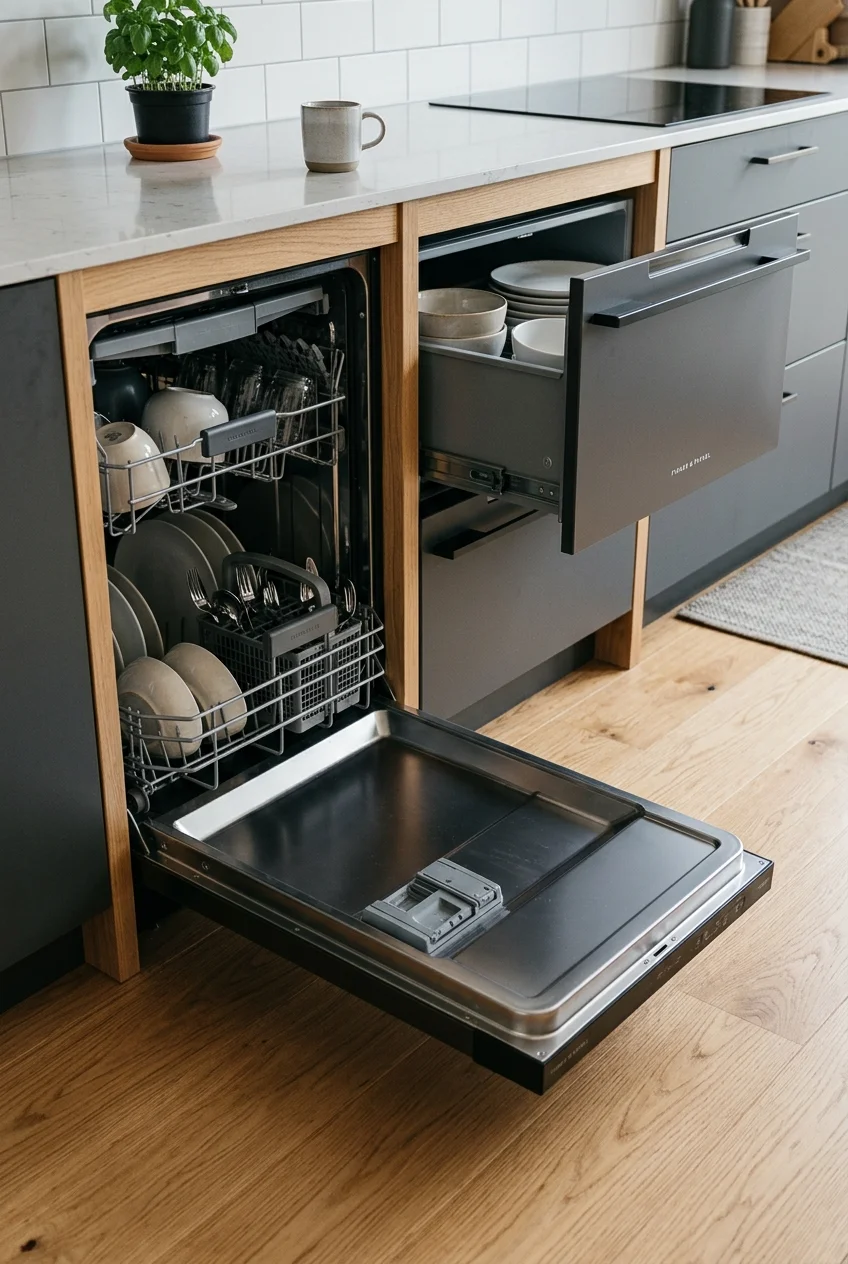
A narrow dishwasher can preserve one more useful cabinet bay. Place everyday dishes within a step of it so unloading takes fewer trips through a tight kitchen.
Bring the actual plate and bowl sizes to a showroom if possible. Rack shape, tines, and space for oversized utensils can matter more than the machine's width.
Setup note Mark the fully open door on your floor plan. If it blocks the only route through the kitchen, move the machine away from that pinch point.
21. Give the hood a straightforward route outdoors
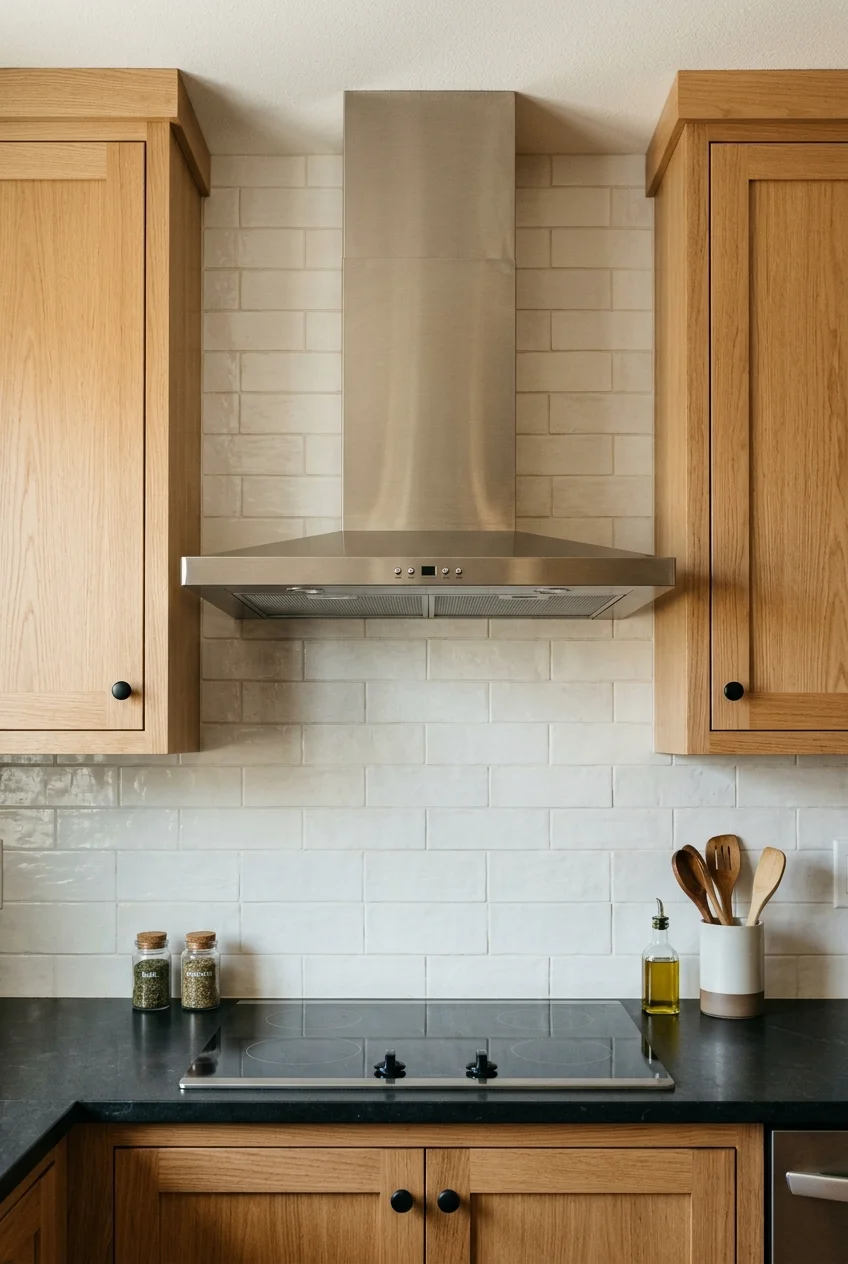
A shallow wall hood can look at home over a compact cooktop. Plan the route for outdoor exhaust while the layout and the cabinet openings are still flexible.
Have your installer check duct sizing, routing, clearances, and any local makeup-air requirements. The exterior wall location can influence which cabinet run makes sense for cooking.
Choose nearby uppers after the hood is selected so the sides and height work with its instructions. Keep the task light aimed at the cooking surface.
22. Put stacked laundry at the edge of the kitchen
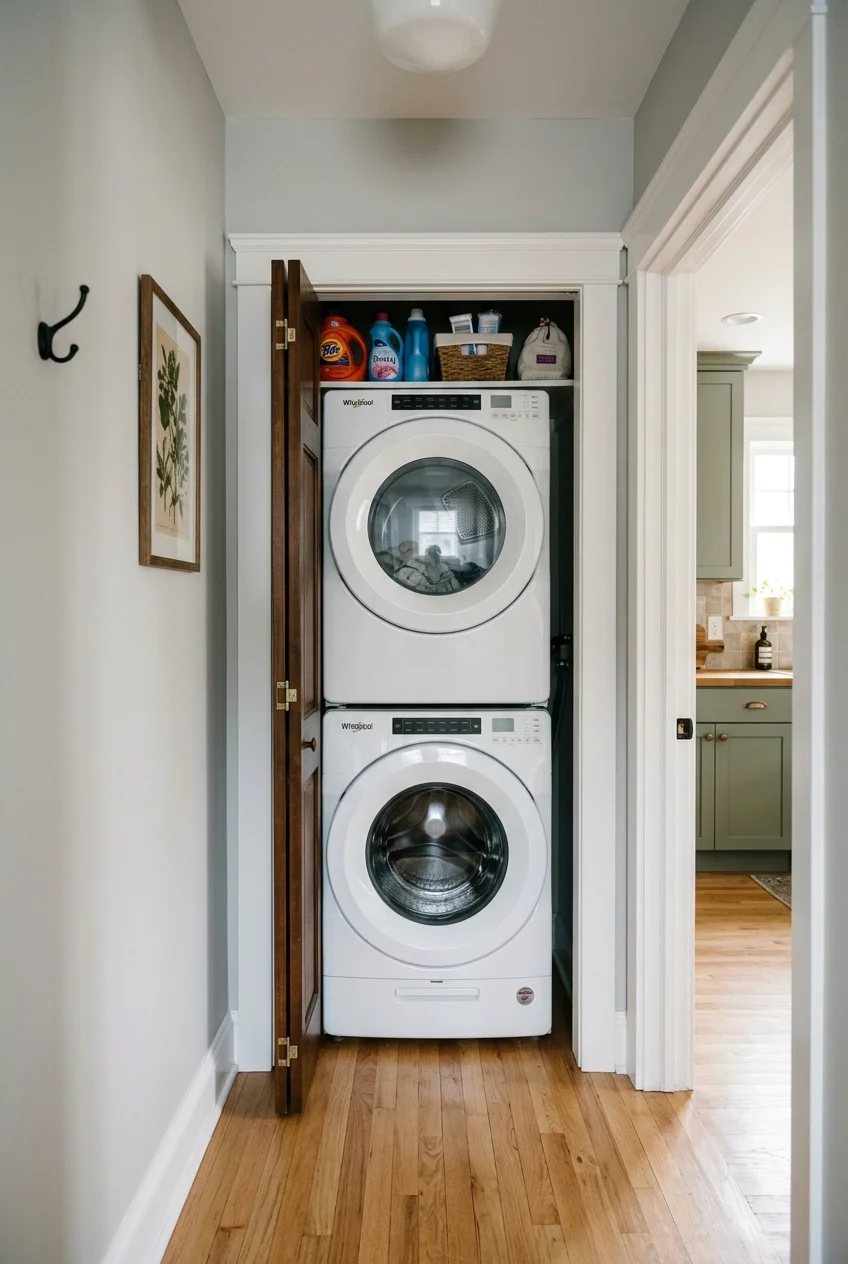
A laundry closet near the kitchen can share part of the unit's service area while leaving washing baskets out of the food prep zone. Give it its own opening.
Select a manufacturer-approved stacking pair and kit. Confirm the enclosure, utility, and venting requirements before specifying doors, shelves, or the finished dimensions of the closet.
Sketch a place for a basket with the washer door open. A closet that opens toward a clear hall can be easier to use than one facing the oven.
Cabinet storage that uses the whole footprint
23. Give heavy pans a deep drawer
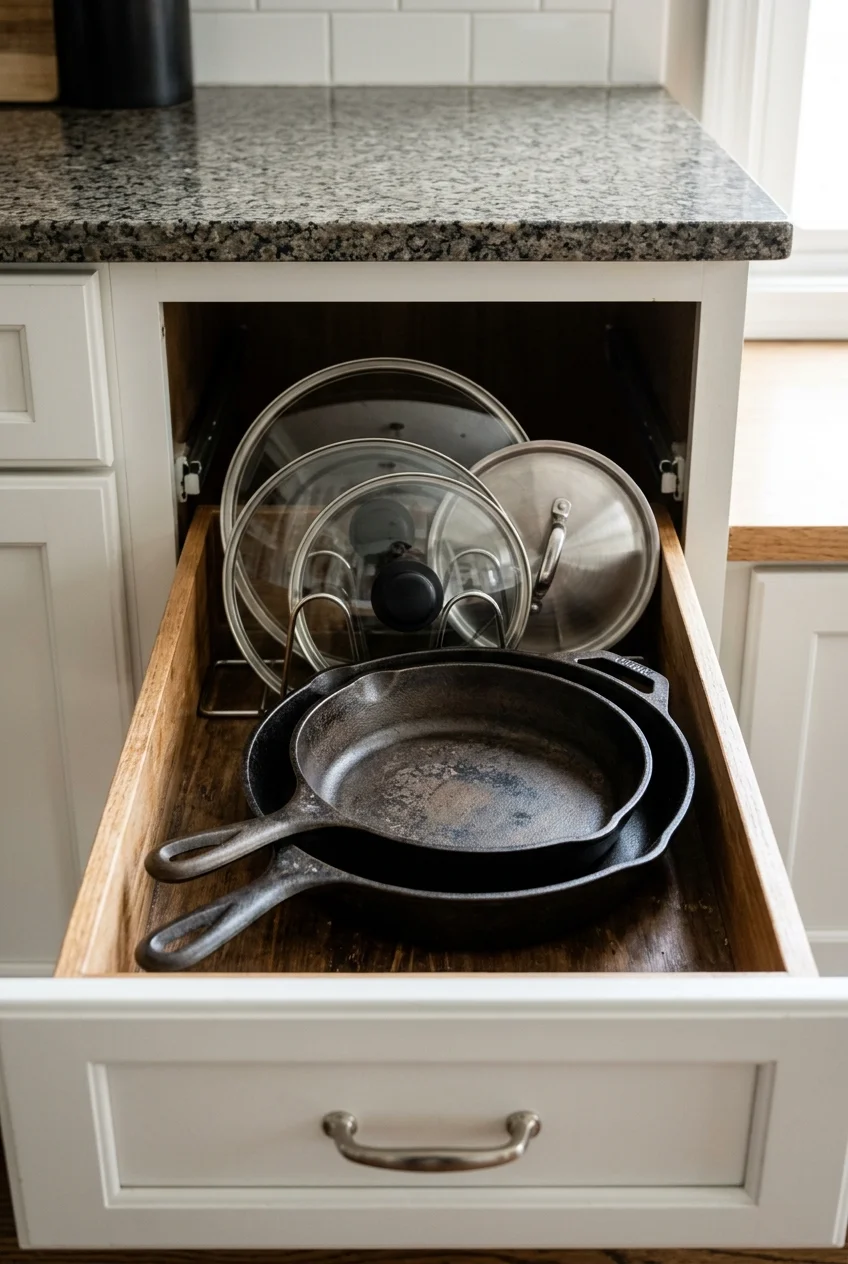
A wide drawer lets you lift a favorite skillet without shifting a stack from the front of a cupboard. Put it close enough to the range for an easy reach.
Check the drawer's usable depth and the hardware's load rating against the weight of the cookware. Reserve a separate slot or divider for loose lids.
24. Use a shallow pantry that shows the back row
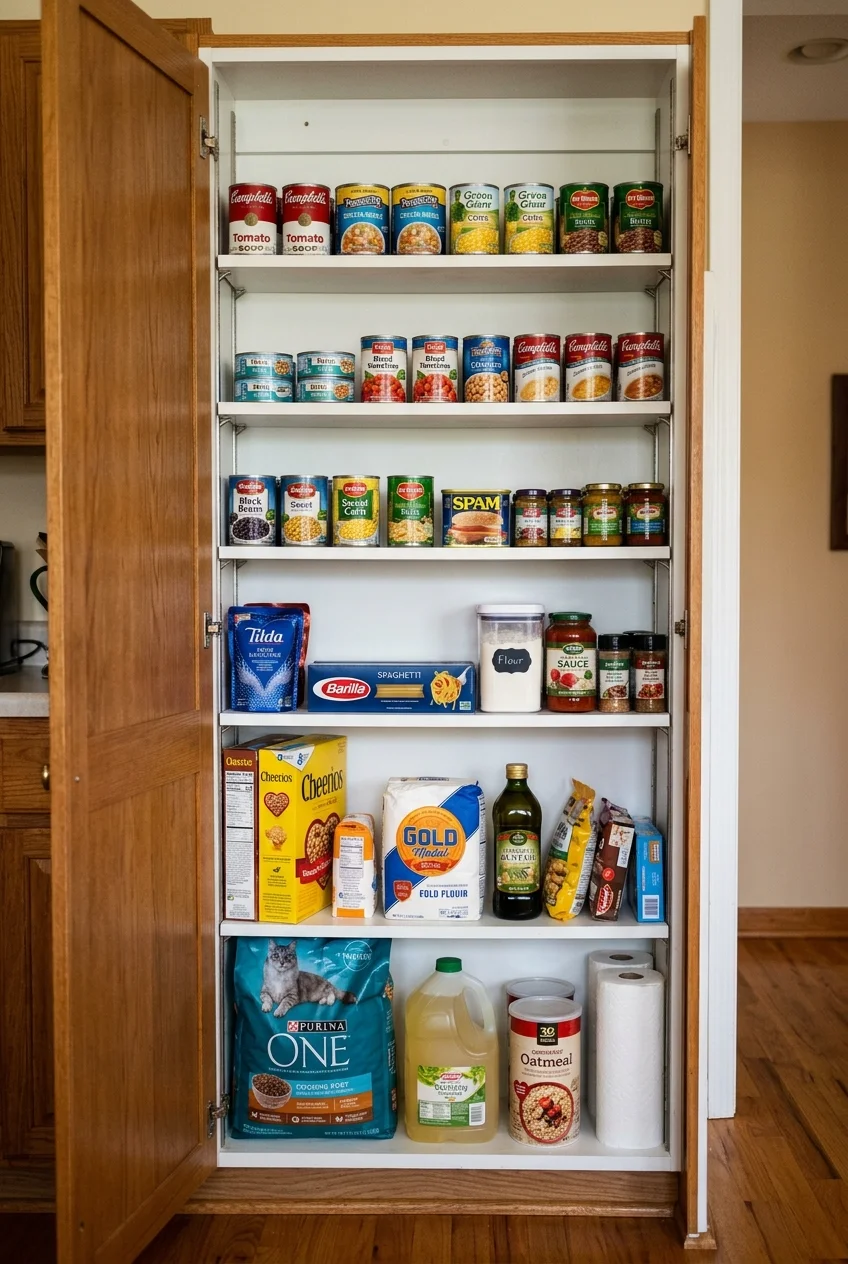
A tall cabinet with shallow shelves makes it easier to scan ingredients. Start with the packages you buy most often and build shelf spacing around them.
Put cans and small jars at eye level, with taller cereal boxes and oil bottles on shelves spaced for them. Keep the heaviest staples lower.
For more ways to arrange a shallow shelf, borrow the first-in, first-out approach from these pantry organization ideas so older cans stay easy to reach.
25. Fill a narrow gap with a pullout for bottles
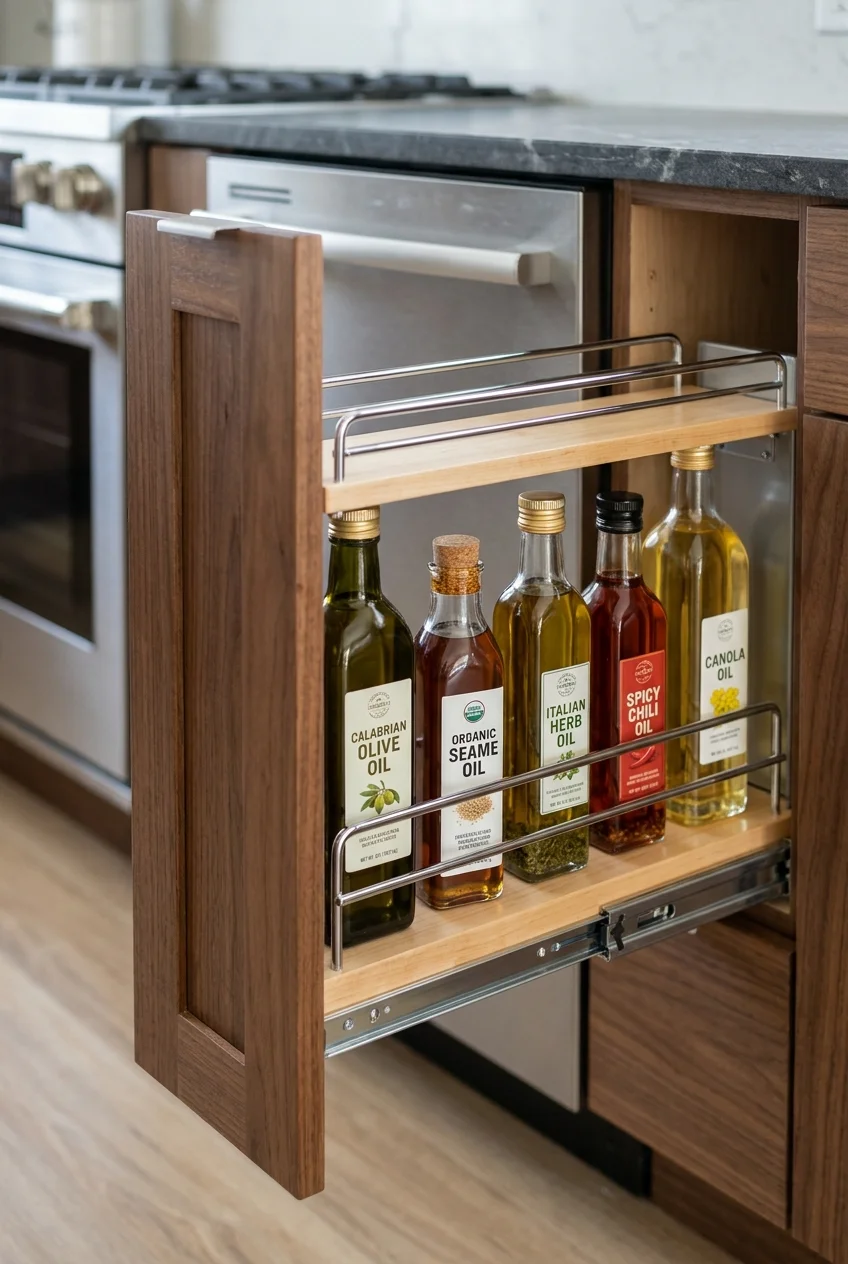
A slim pullout can use a gap between two base cabinets for bottles that are awkward to see on a deep shelf. Keep it near the prep counter.
Measure the inside of the organizer, including rails, and compare both width and height with your actual bottles. A nominal cabinet width describes the box, not its contents.
Choose edge rails high enough to steady tall bottles when the pullout moves. Check that the handle clears nearby hardware from the fully closed position through full extension.
26. Store trays upright near the oven
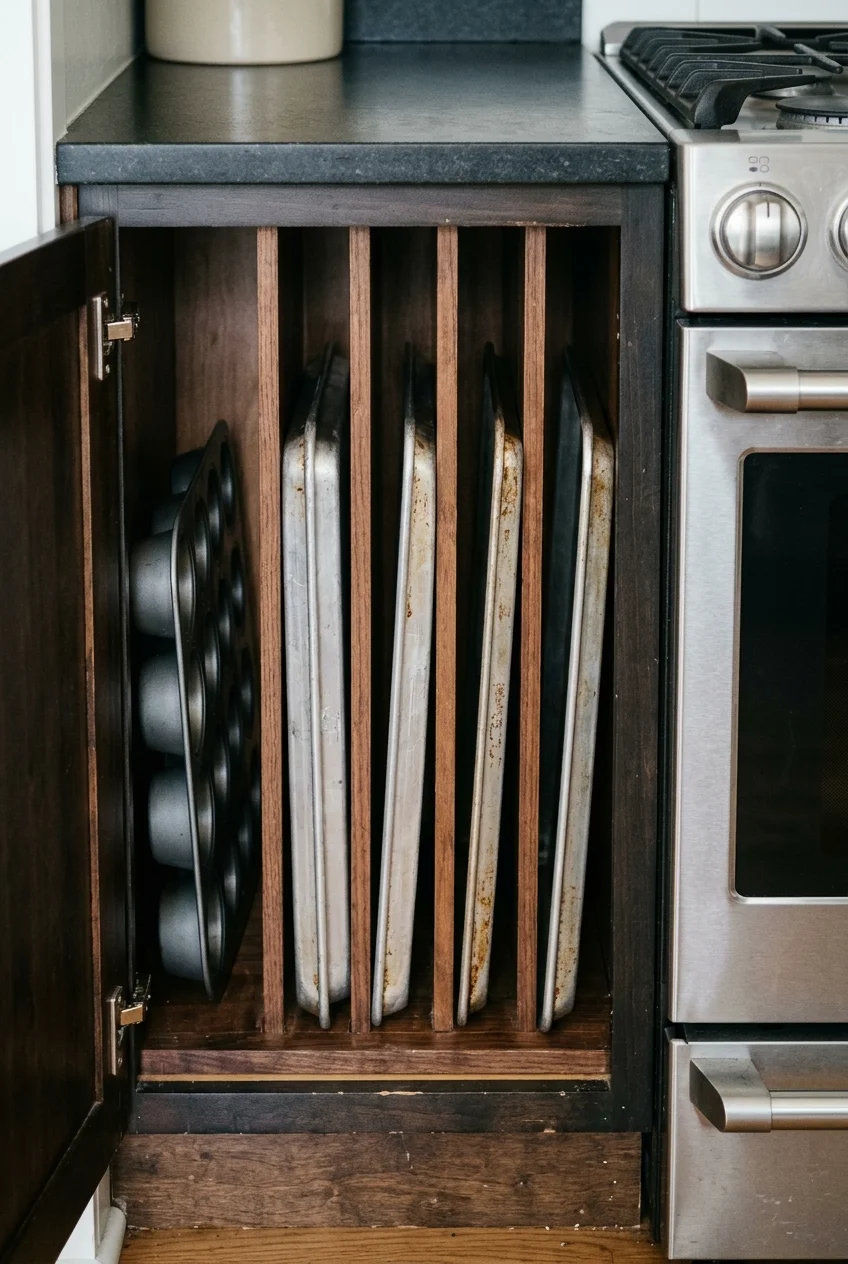
Adjustable dividers let spatulas and tongs share a long lane while shorter tools stay near the front. Keep the drawer within reach of the main worktop.
Check the tallest item in the position you'll actually store it. Put the divider where the door can open far enough for trays to slide straight out.
27. Fit a toe-kick drawer for flat items
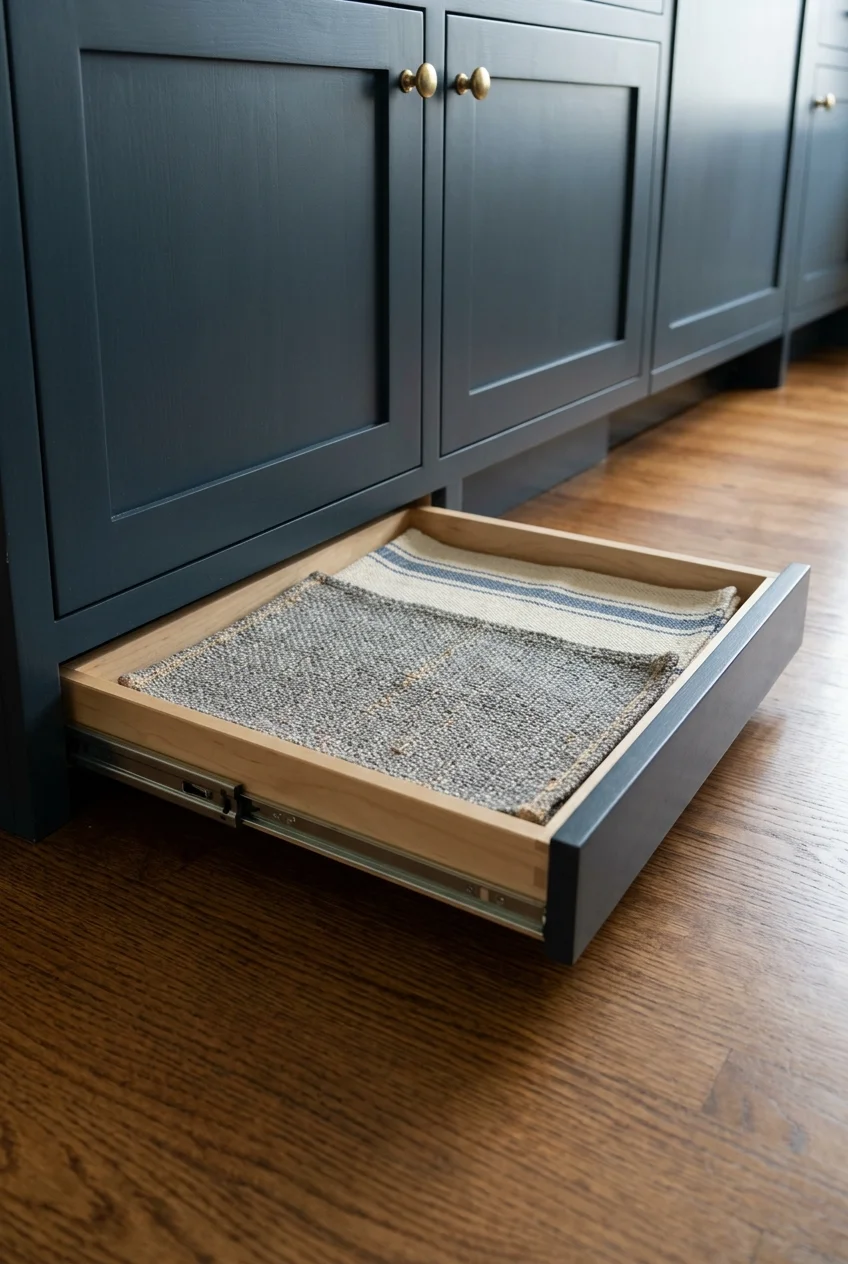
The plinth under some cabinet systems can accommodate a low drawer for extra placemats or serving trays. It makes sense where ordinary drawers are already working hard.
Ask the cabinet supplier whether the base has room for an approved drawer assembly. Legs, vents, heating outlets, and floor variation can limit what fits.
Try the opening motion before choosing the hardware. A low drawer suits things you only need occasionally, especially if bending to floor level is uncomfortable.
28. Divide a top drawer by the way you cook
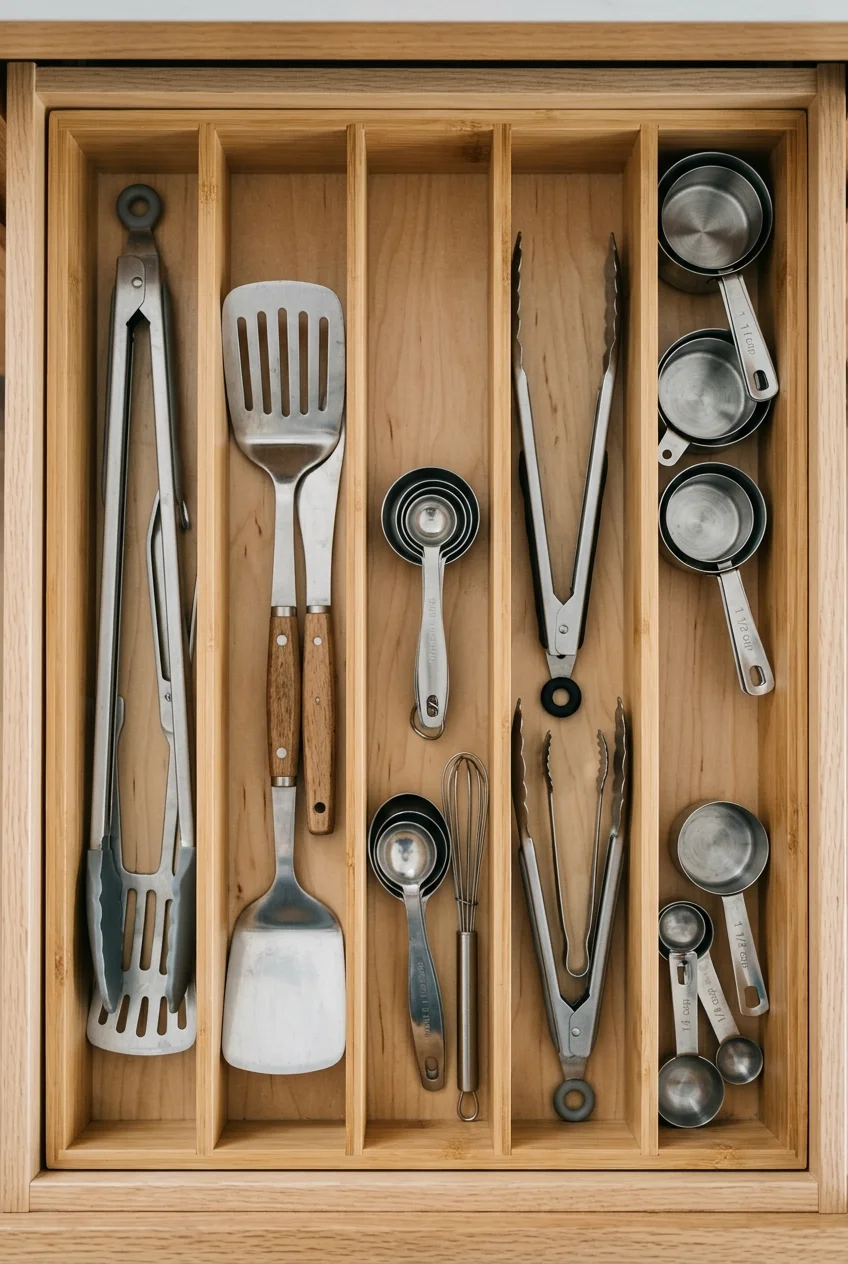
Keep spatulas and tongs in a long lane, with short tools closer to the front. Dividers let one shallow drawer replace a countertop utensil crock.
The Fyvva spring-loaded bamboo dividers (paid link) fit a stated span of 16.9–22.2 inches. Measure between the inside walls and check that 2.3 inches of height clears the cabinet opening.
29. Bring the trash and recycling below the prep zone
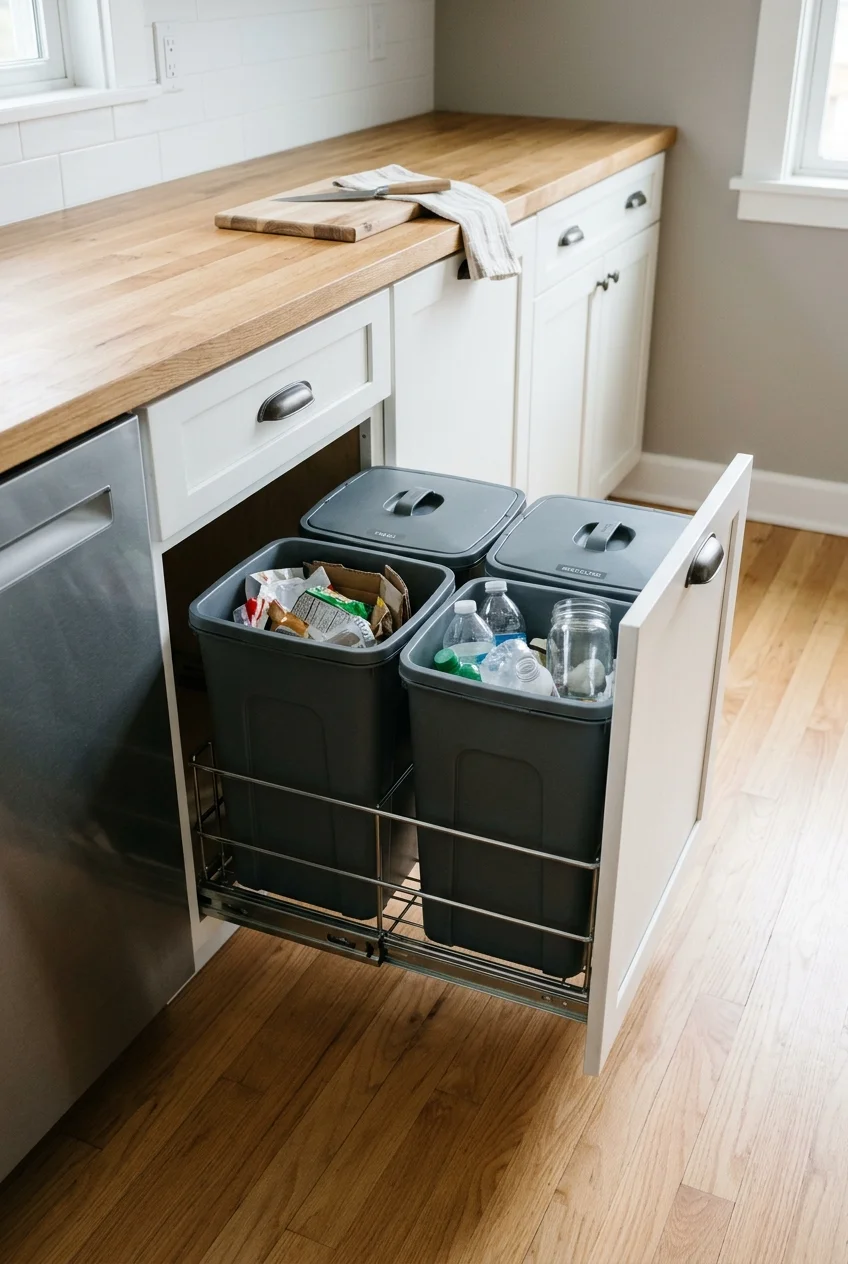
A pullout under the worktop lets you sweep scraps into a bin without crossing the kitchen. Put the handle where you can approach it from the cutting area.
Choose bin sizes based on what accumulates fastest and how often you take it outside. Two equal compartments can waste volume when one fills much sooner.
Check that full bins lift out and that the floor stays clear when the pullout is open. Keep cleaning products in a separate spot from the food prep area.
30. Store daily dishes in a lower drawer
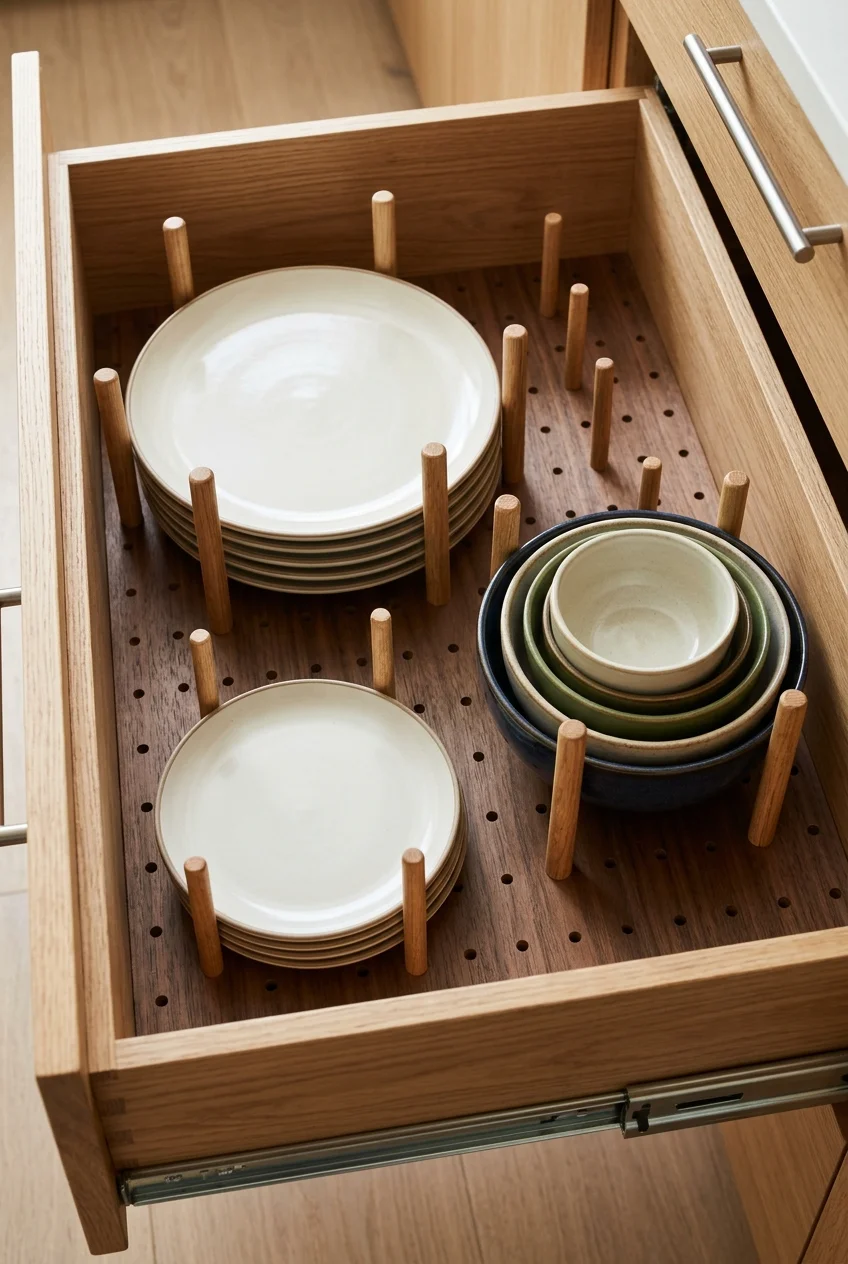
If wall cabinets are awkward to reach, use a base drawer for plates and bowls. A peg insert keeps stacks from drifting as the drawer moves.
Place the drawer near the dishwasher or sink and choose stack heights that are comfortable to lift. Check the weight rating for the drawer and its hardware.
31. Put a fitted swing-out tray in the blind corner
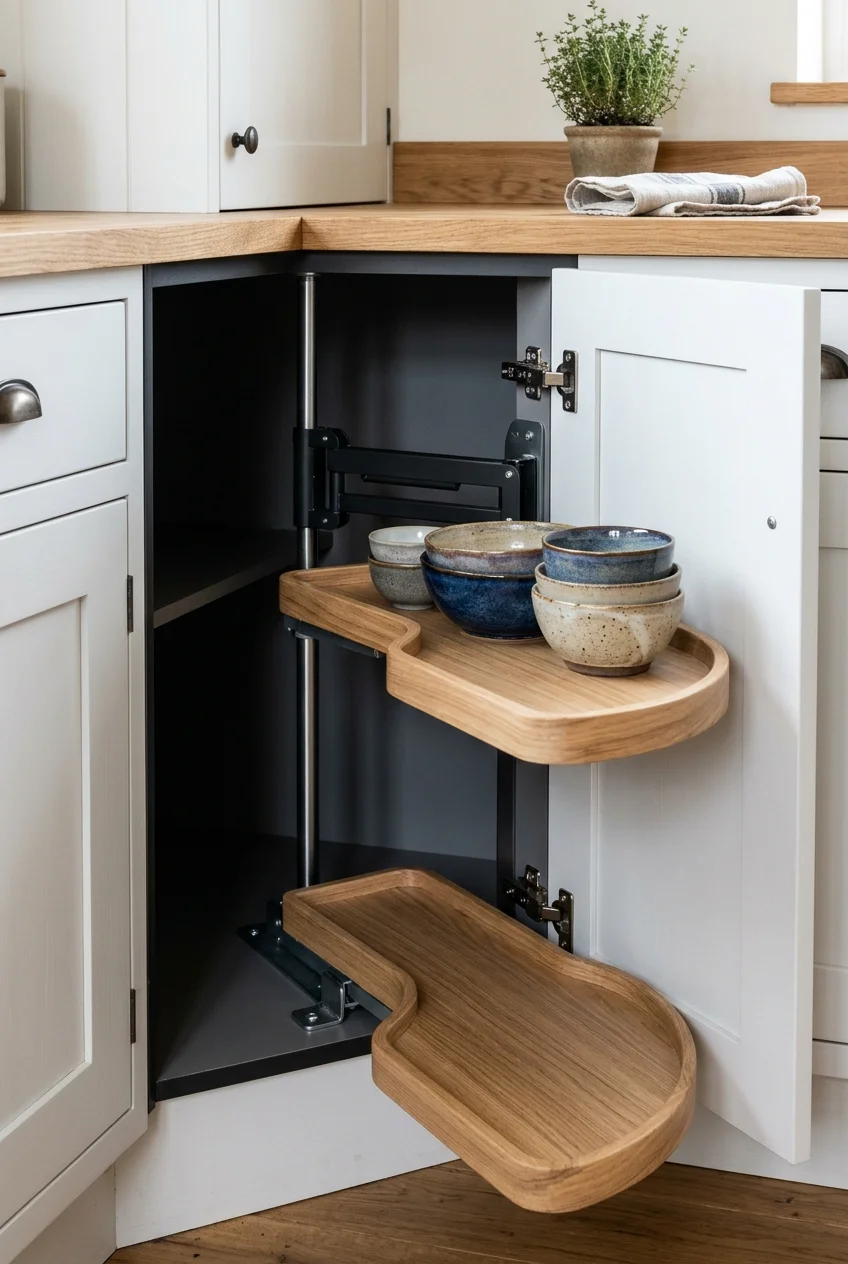
A blind corner can hold the salad spinner or mixing bowls you use enough to want nearby. A swing-out tray brings them toward the cabinet opening.
Choose hardware after measuring the actual opening, hinge locations, cabinet depth, and corner orientation. An organizer's overall dimensions tell you little about the path it takes.
- Check clearance at the door and opposite cabinets with the tray fully extended.
- Match the manufacturer’s load limit to what will sit on each tier.
- Make sure you can lift the tallest stored piece off the tray.
Keep the shelves light enough to move comfortably. If the opening is already generous, try a simple shelf with a handled bin before buying special hardware.
32. Turn a finished cabinet end into a cookbook shelf
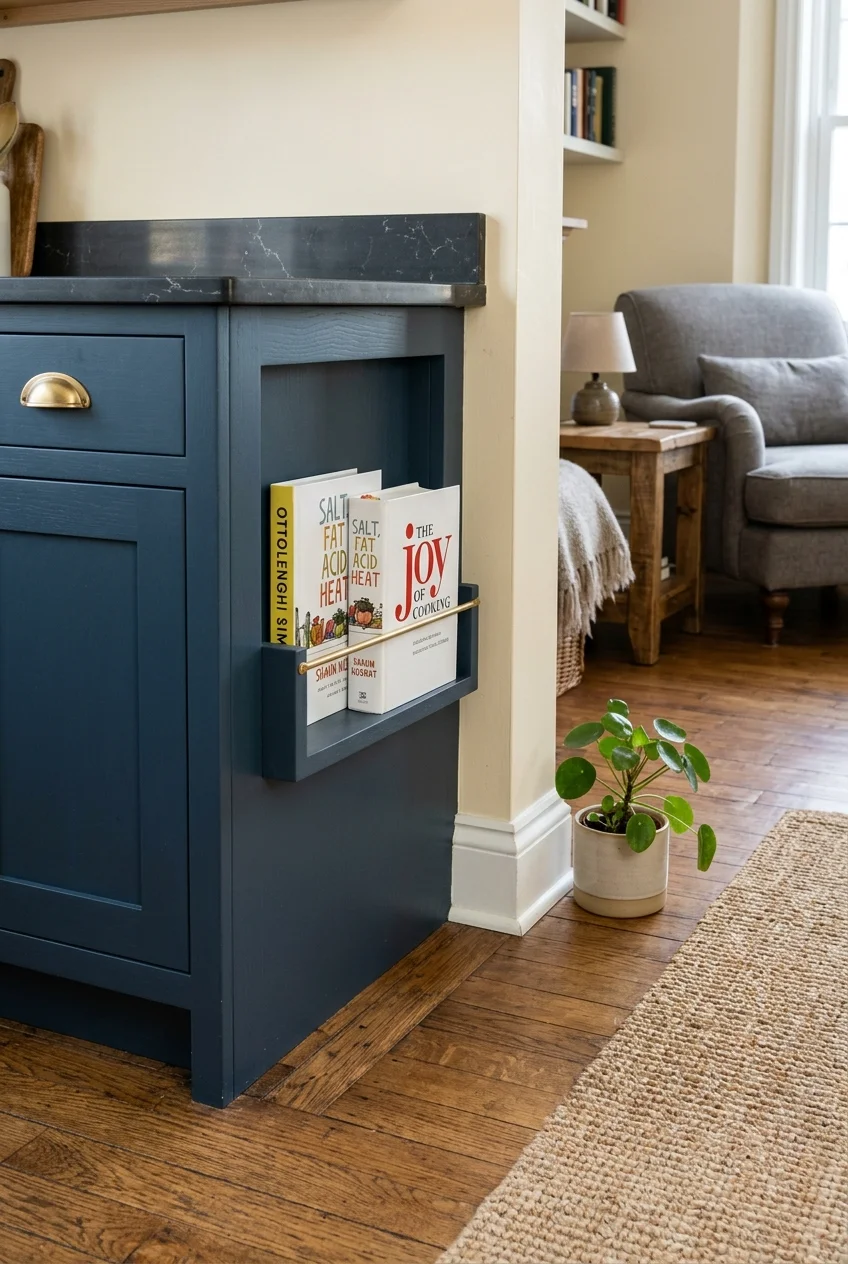
The exposed cabinet end facing the living area can hold the books you reach for midweek. Face slim covers outward where a deep bookcase would project too far.
Give the books a low retaining edge and keep the shelf within the cabinet's footprint where possible. A narrow entry is a poor place for projecting corners.
33. Take seasonal storage to the ceiling
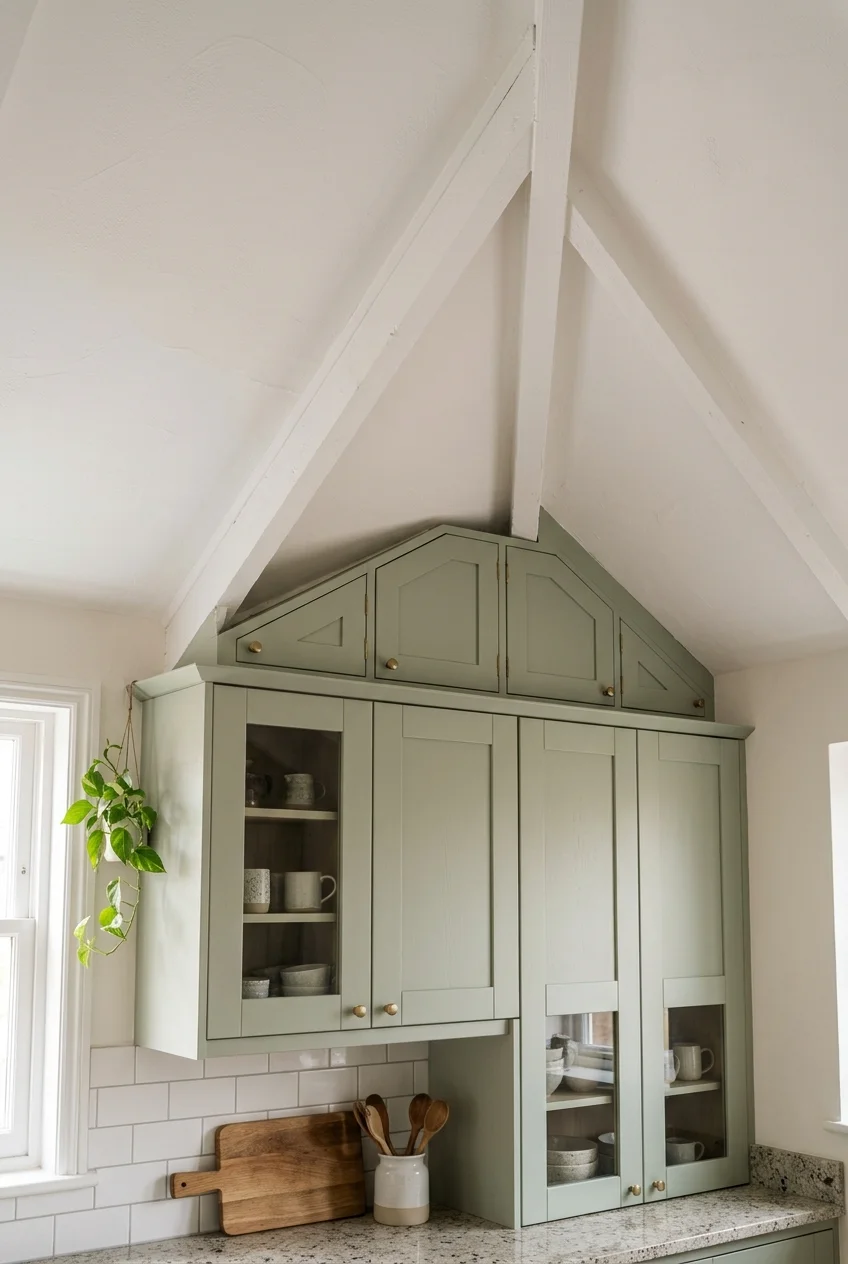
Make a high row of closed cabinets part of the kitchen elevation. It’s a place for lightweight seasonal serveware when the lower shelves are already spoken for.
At a sloped ceiling, use a fitted panel or a stepped cabinet line. Give each door room to open clear of the ceiling, light fixtures, and trim.
34. Give the broom a slim utility cabinet
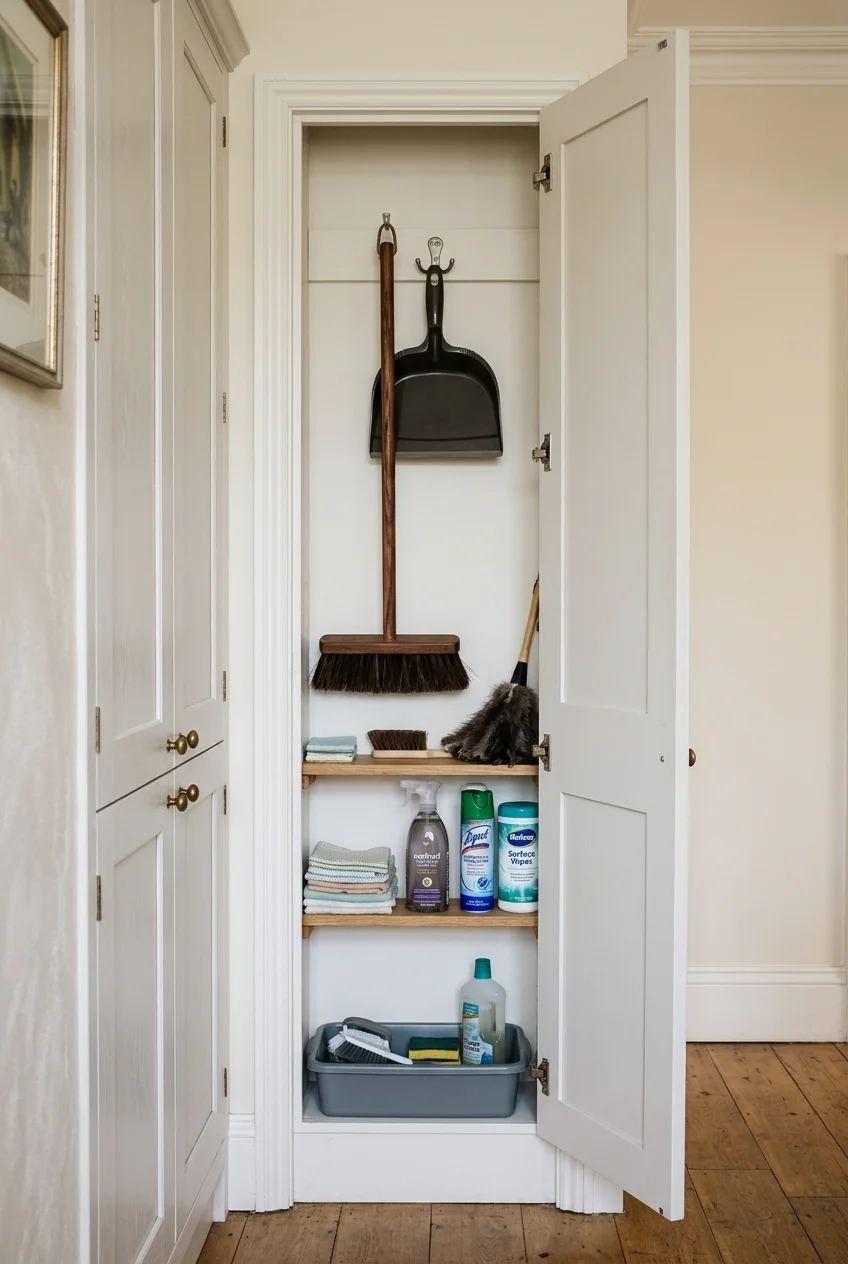
A narrow tall cupboard at the edge of a kitchen can hold a broom and dustpan upright. Close it and the living area sees a single finished panel.
Hang long handles above the base so the bottom can hold a washable tray. Check the inside height with the broom hanging from its actual hook.
Sink and prep details that reclaim counter space
35. Size a single-bowl sink around the largest pan
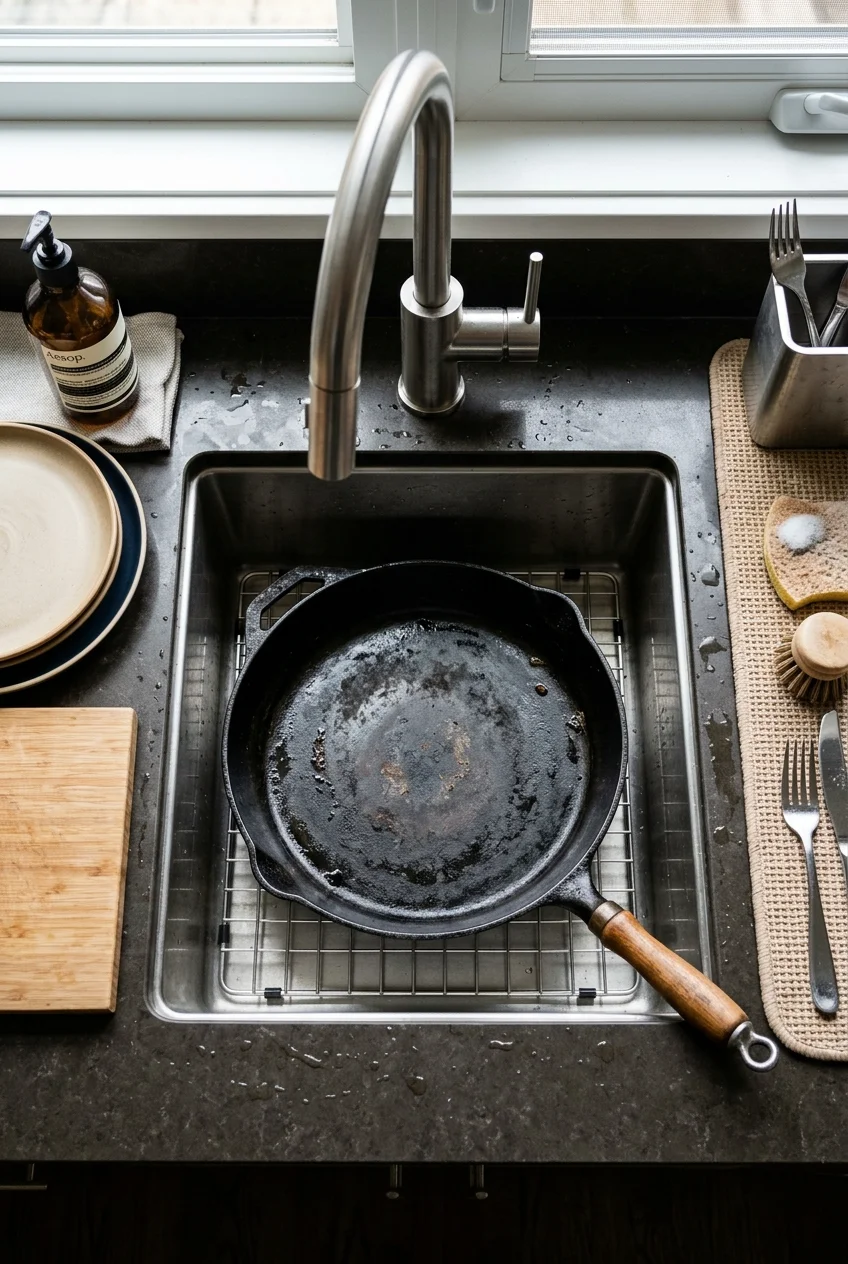
A compact single bowl gives one pan the whole basin. Bring your biggest skillet measurements when shopping, including the handle if you want to soak it flat.
Compare bowl dimensions, corner shape, and depth, then verify the cabinet and cutout requirements. A deeper sink can feel awkward if you already lean to reach the drain.
36. Add a removable board on sink ledges
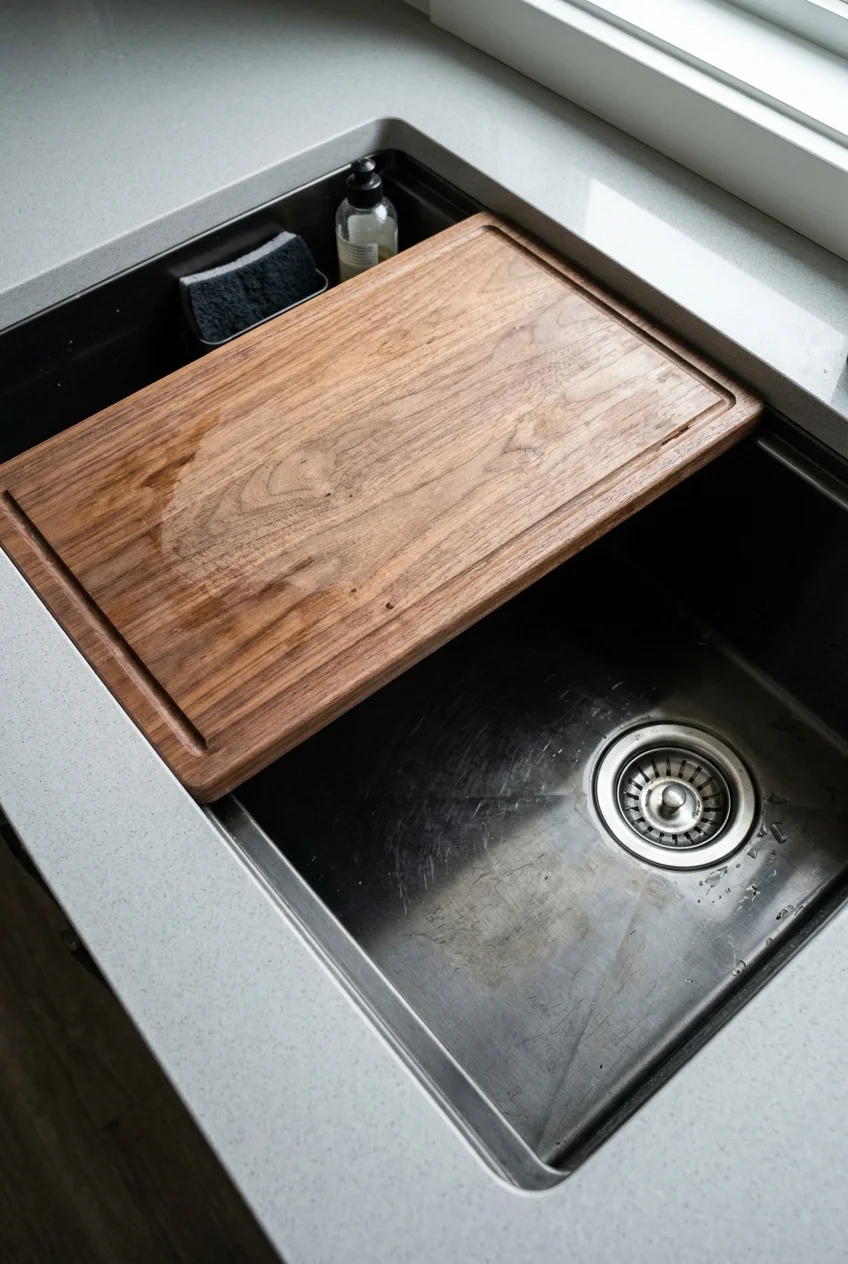
A fitted cutting board can bridge one part of a workstation sink while leaving the rest of the bowl open. Slide it away when you need full access.
Choose a board built for the sink ledges so it sits securely. An ordinary board propped on the rim can shift as you press down.
Consider where the board dries after washing. If it has nowhere to go, you may end up covering the sink even when you need the entire basin.
37. Dry dishes above part of the basin
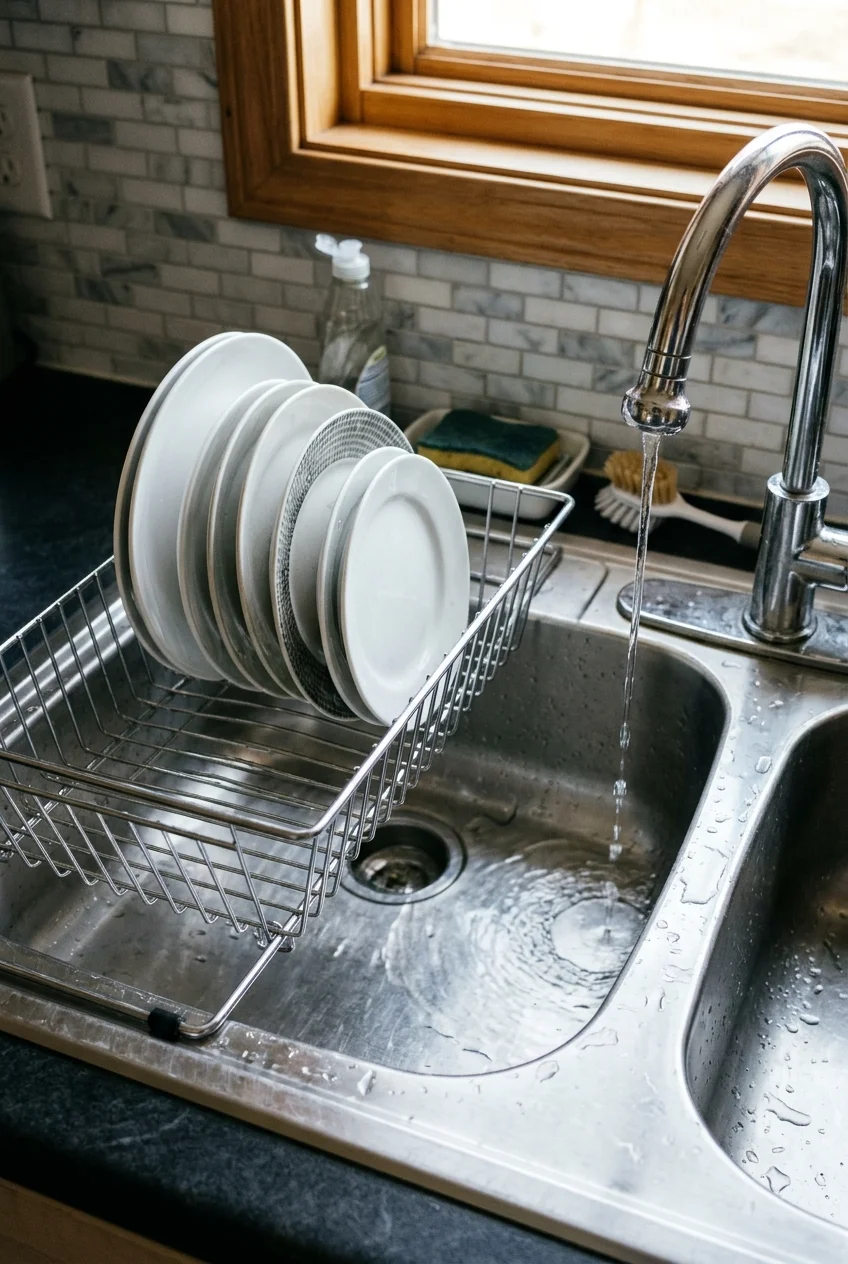
A rack that bridges part of the sink makes sense when the only clear worktop is also your chopping station. Water can fall straight into the basin.
The OXO extendable sink rack (paid link) uses adjustable arms. Check your sink’s usable span and rim support, and make sure the faucet still reaches the uncovered basin.
If you wash large pots daily, pick a rack you can lift out and stow easily. An open basin is more useful than permanent drying space.
38. Fit a retractable prep board below the counter
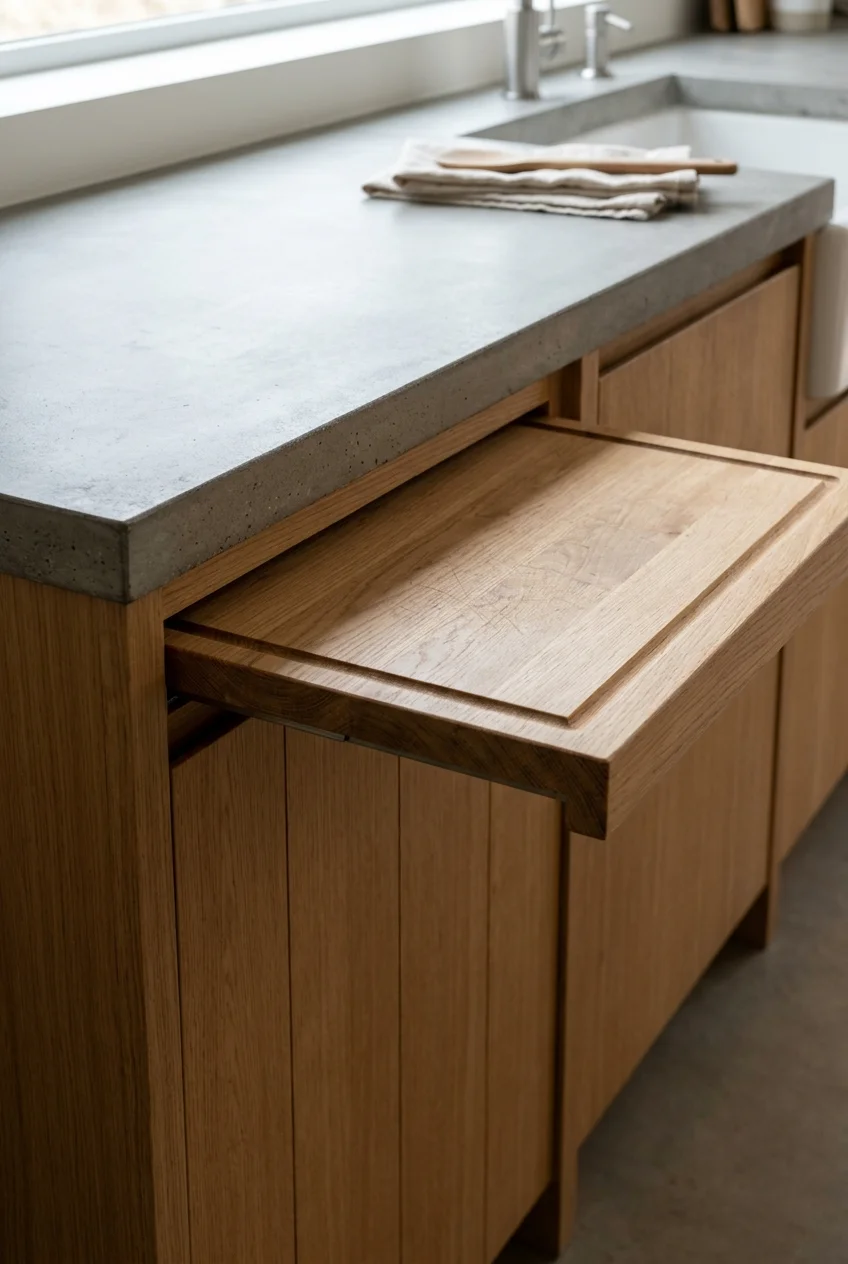
A built-in pullout board adds a temporary surface for prep when the main counter is busy. Place it where you can use it without opening an appliance behind you.
Check the assembly's rated load and unsupported extension. Ask how the board comes out for cleaning and whether the cabinet design allows enough clearance to remove it.
If its extended position blocks the path out of the room, put the board on an end cabinet or choose a movable worktable with a better parking spot.
39. Use a rail for tools you reach for daily
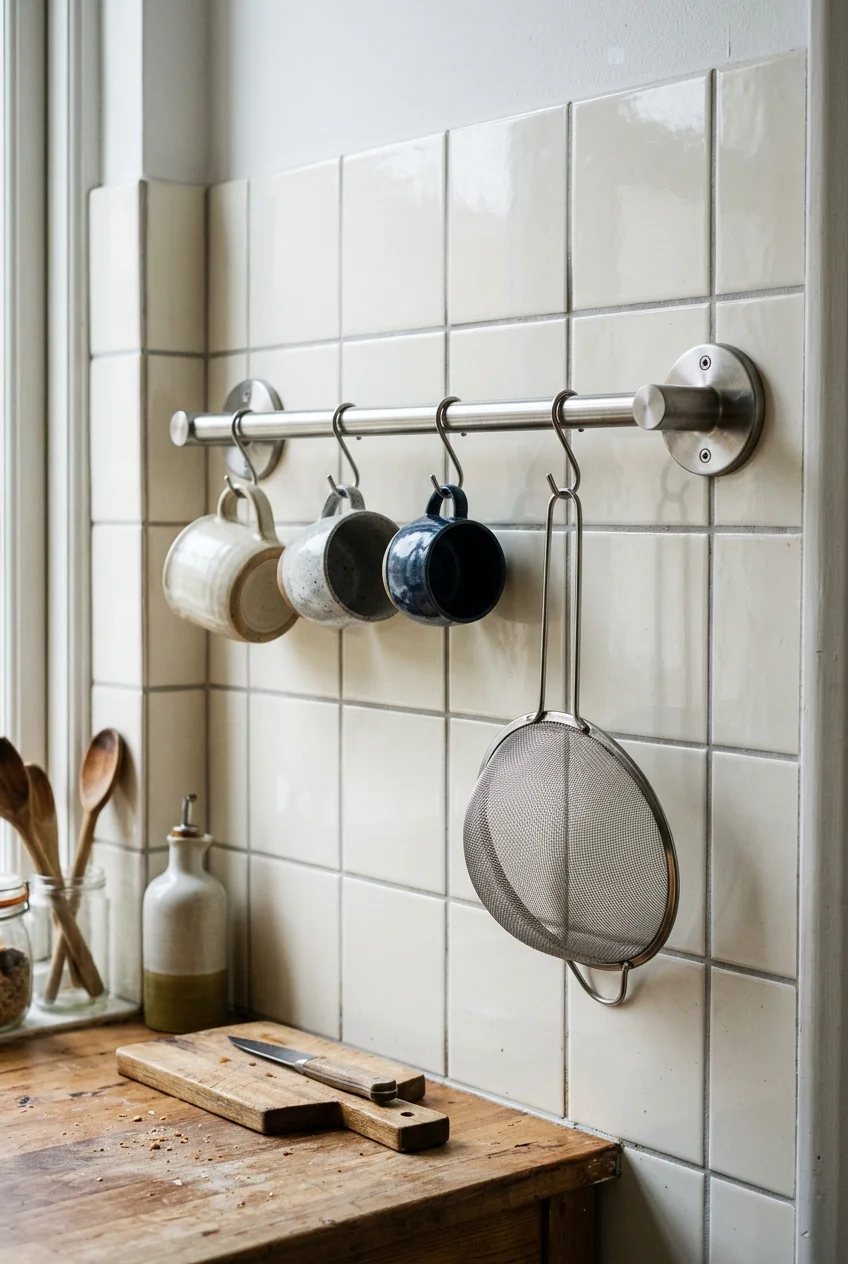
A short rail beside the main work area can hold measuring cups and a small strainer without taking up drawer space. Give the pieces room to hang freely.
Choose fasteners for the backing and check what is behind the wall before drilling. Stay clear of the cooking surface and leave enough space to wipe the backsplash.
40. Keep handwashing supplies inside the sink
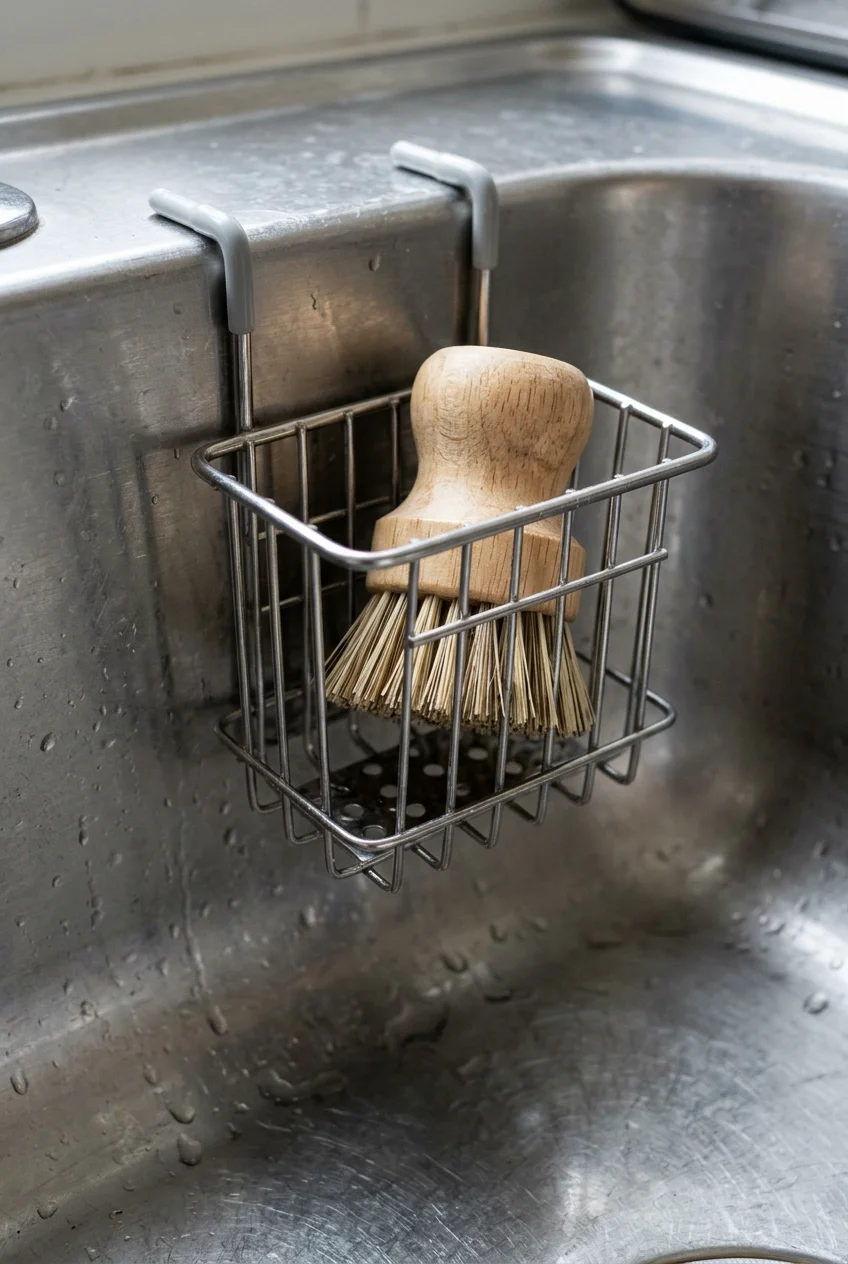
A removable caddy holds the brush and sponge at the wet edge, freeing the counter and containing drips after cleanup. Pick one you can lift out quickly.
Give the caddy drainage and room to dry. Test its placement with your largest pot in the sink so you can still set the pot down flat.
41. Give groceries a drop zone at the entry
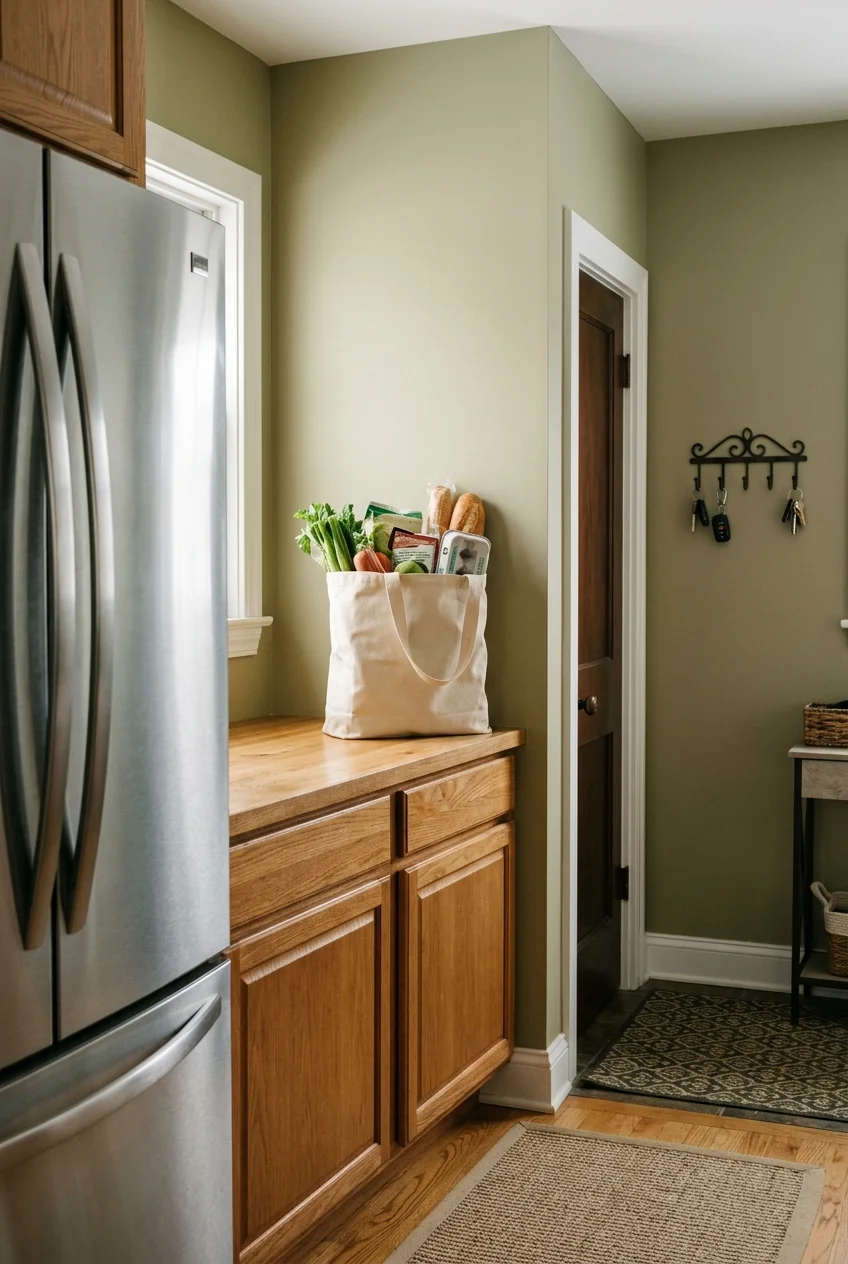
Where the entry opens into the kitchen, reserve a clear counter corner for grocery bags so you can unload before moving farther into the room.
Keep the landing out of the door swing and away from hot cookware. Give keys and mail their own small spot so they stay off the food counter.
42. Make space for two cooks with a second prep surface
Image pending: No image is attached to this draft for idea 42 (image-42).
When two people cook together, reserve a second stretch of counter for cold assembly. It can sit beyond the sink or at a right angle to the primary work area.
Store a cutting board and bowls near that second spot. Think through where each person reaches for ingredients and where hot pans will travel before placing the zones.
Try making breakfast together using the taped layout. The repeated trip to the trash or fridge often tells you more than how far apart the two worktops are.
Finishes and lighting that work in a small footprint
43. Use open shelves for the dishes in rotation
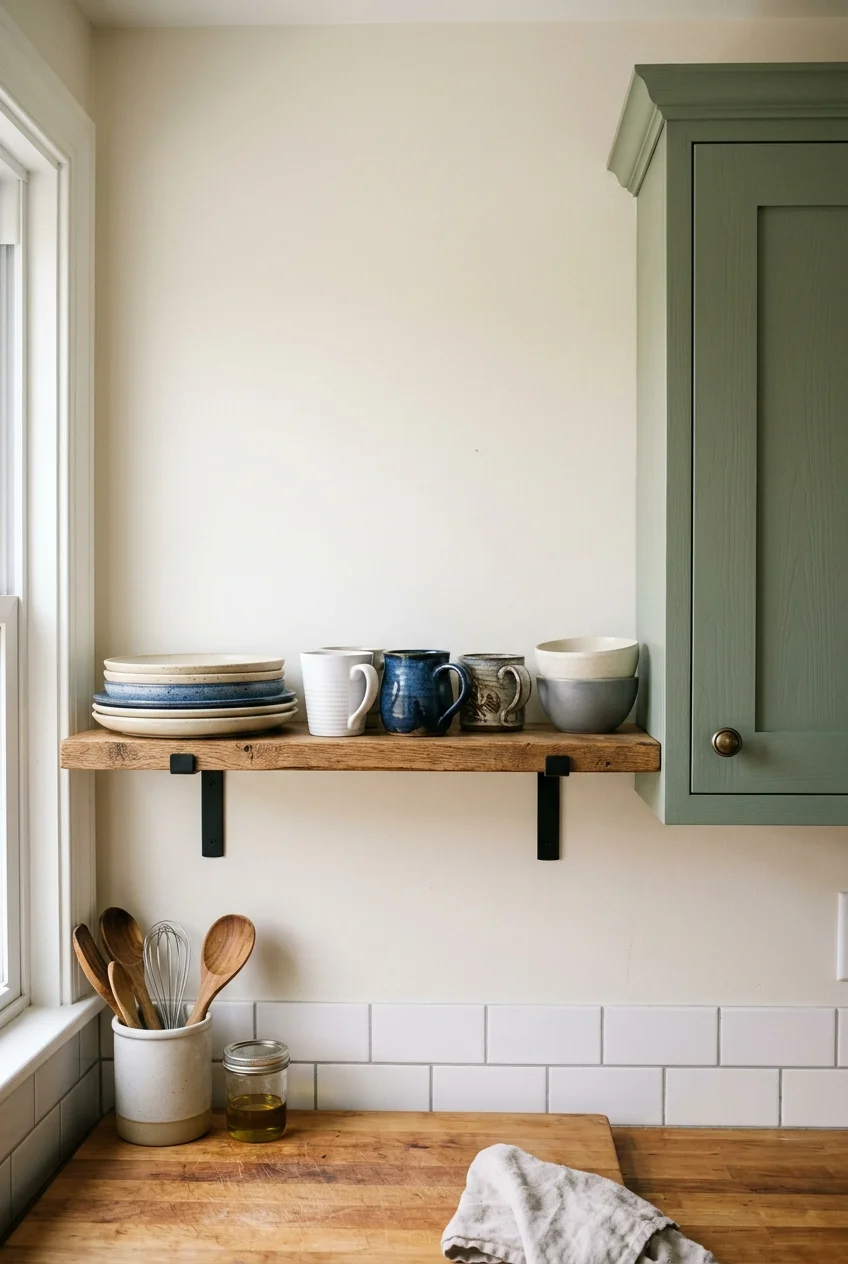
One short open shelf can hold the bowls and glasses you wash every day. Keep spare mugs and food packages behind doors so they have a home.
Match shelf depth to your widest dish and leave space to lift it clear. Use mounting hardware rated for the shelf, wall construction, and loaded weight.
44. Use reeded glass on a single dish cupboard
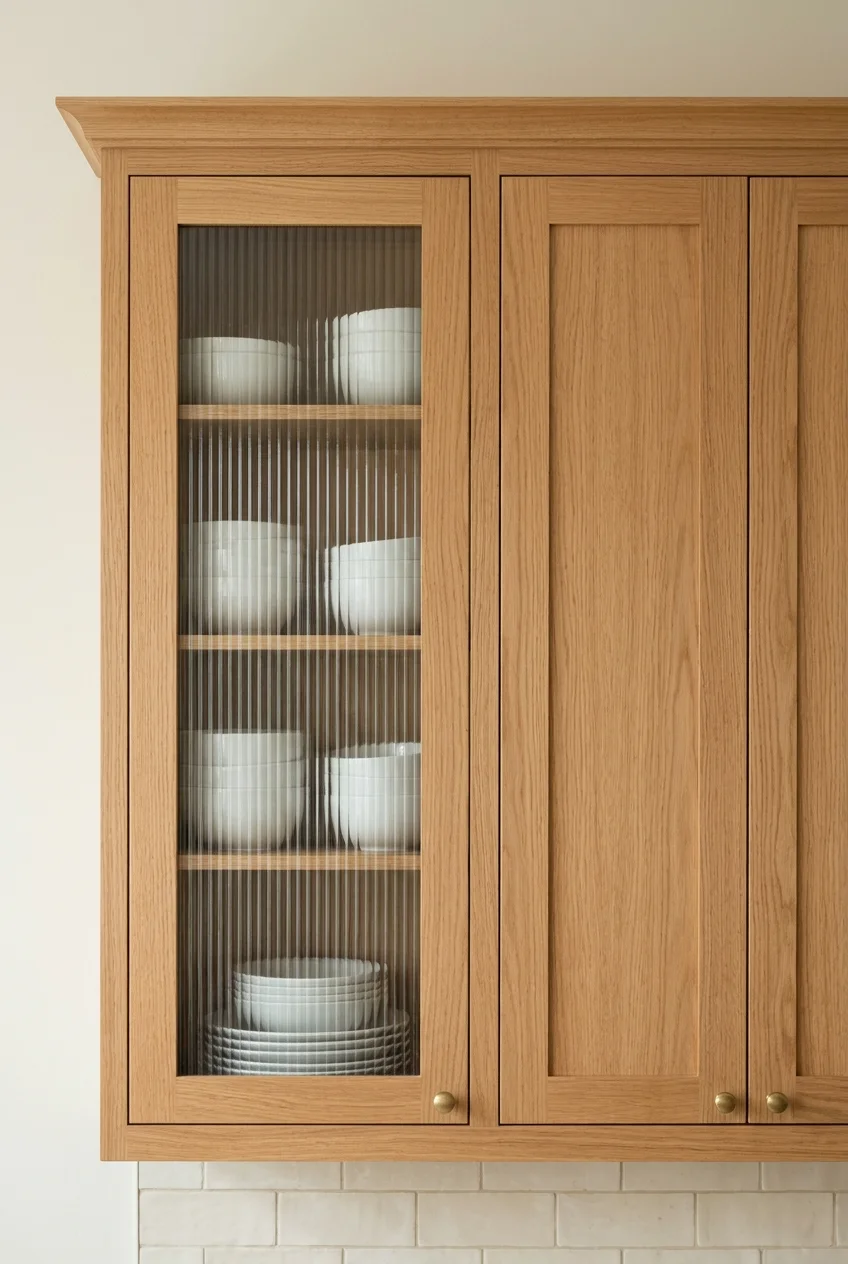
Fluted glass softens the outline of stacked dishes while preserving some depth at the top of the cabinet run. Use it where the contents tend to stay simple.
Before changing existing doors, compare these kitchen cabinet makeover ideas for ways to add texture and check whether your door frames can accept new panels.
45. Use a stainless backsplash just at the cooking zone
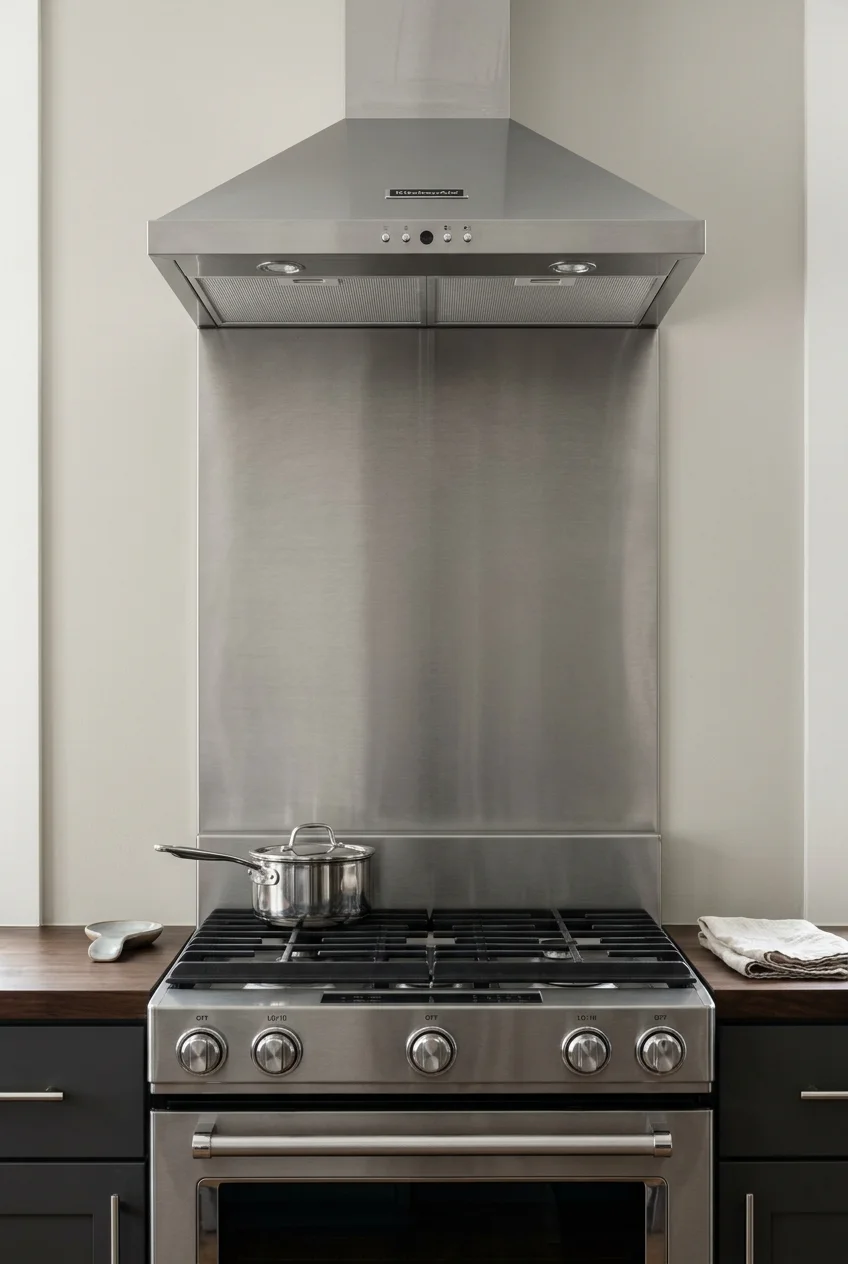
A sheet of brushed stainless can define the part of the wall that sees splashes from the stove. Let it stop at a cabinet edge or trim line.
Have the installer confirm the backing and finished edges suit the appliance and wall. Check the sample under task lighting so the sheen works in the room.
46. Run glazed tile from the counter to the ceiling
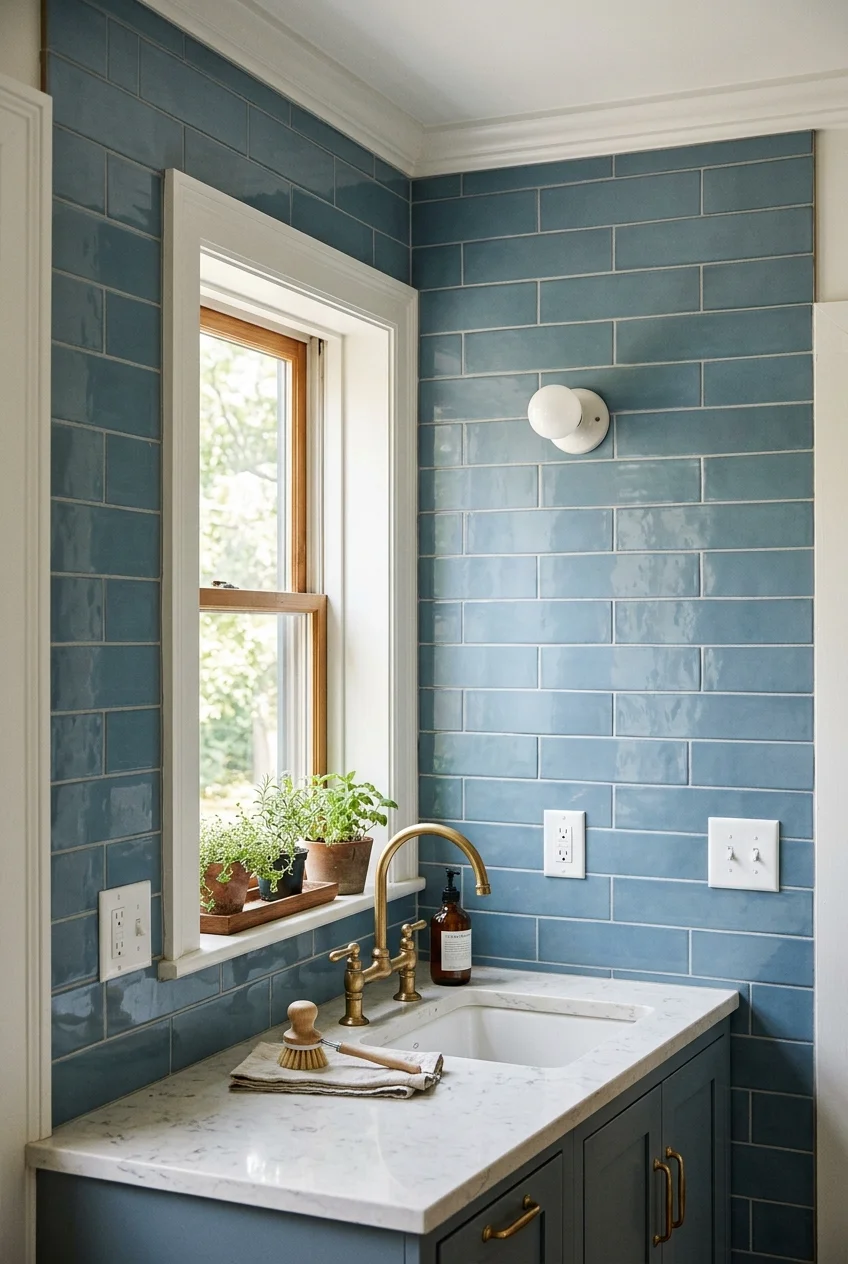
A continuous tiled wall can give a single-wall kitchen a clear boundary in an open studio. Use an exposed wall edge or built-in trim as the stopping point.
Test the tile layout around the window and outlets before setting the first course. Shift the pattern if it leaves a sliver beside the casing.
Choose a grout color close to the tile for a quiet backdrop. A more visible joint makes sense if you want the tile grid to read from across the room.
47. Use a rounded counter end at a busy corner
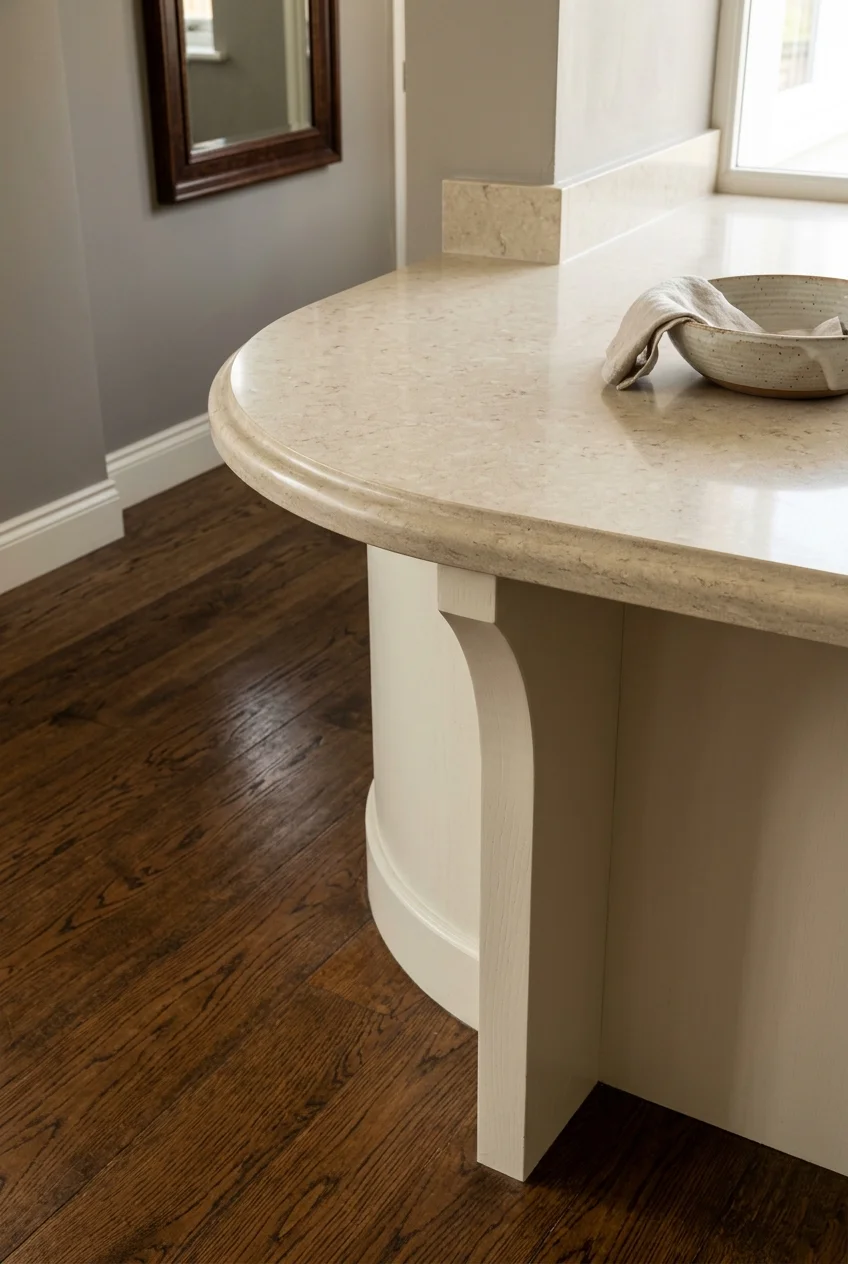
Where the worktop ends beside an entrance, easing the exposed corner can make the turn feel less abrupt. The profile is easiest to plan before the counter is cut.
Ask the fabricator to coordinate the radius with the cabinet below. If a sharp cabinet or pull sticks out beneath the curve, it still defines the pinch point.
48. Light the front half of the worktop
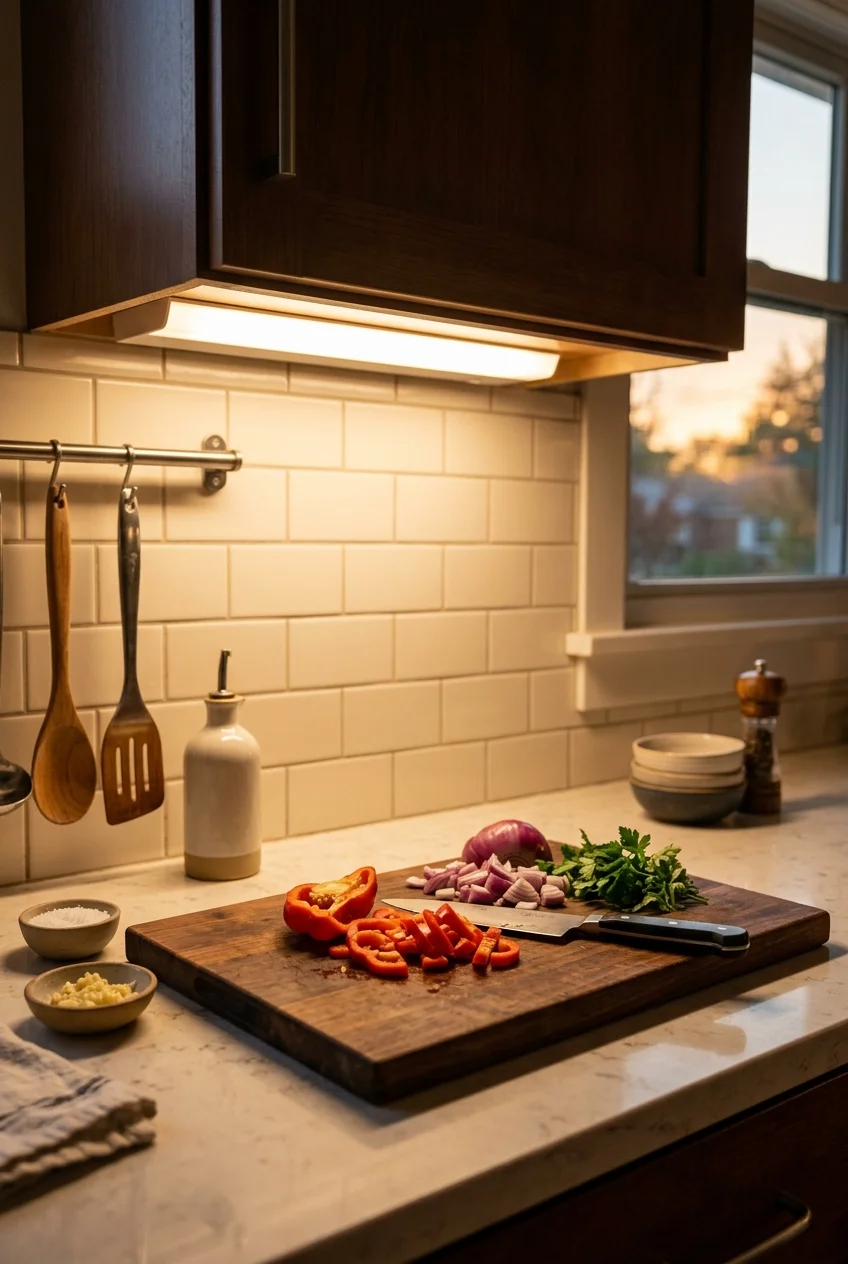
An undercabinet light near the front edge helps illuminate the spot where you actually stand and chop. A fixture at the back may mainly brighten the wall.
Test placement with the upper doors closed and from the sofa's sightline. A diffuser or small cabinet lip can soften the view of individual LED points.
Choose a fixture rated for the location and coordinate the driver and controls with the installer. Keep the switch or dimmer easy to reach from the prep area.
49. Use a shaded pendant to mark the dining zone
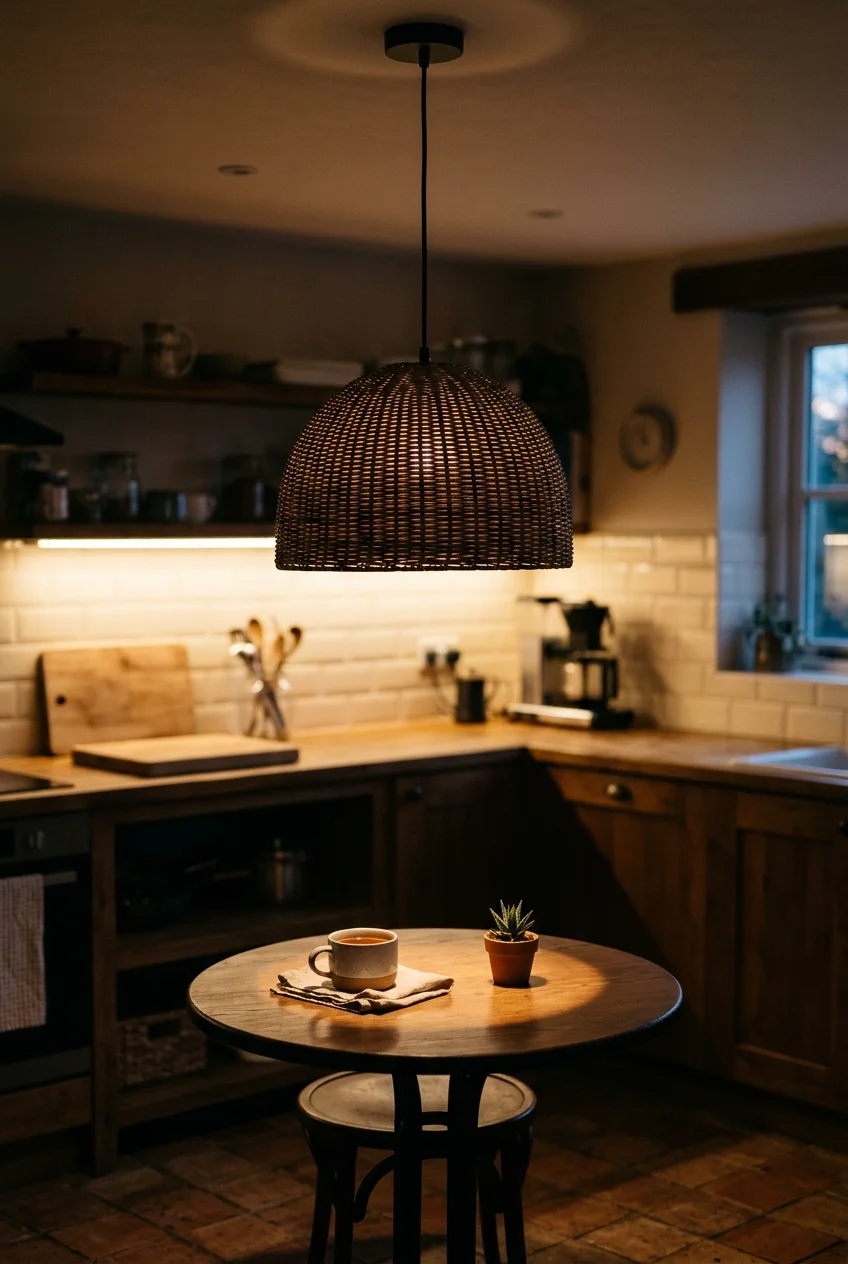
A single shaded pendant can put the visual center over the table in a studio where the kitchen shares lighting with the rest of the room.
Check the shade from a seated position before settling on its height. If the table regularly moves aside, choose a location that clears the main walking route.
50. Continue the same floor through the kitchen and living area
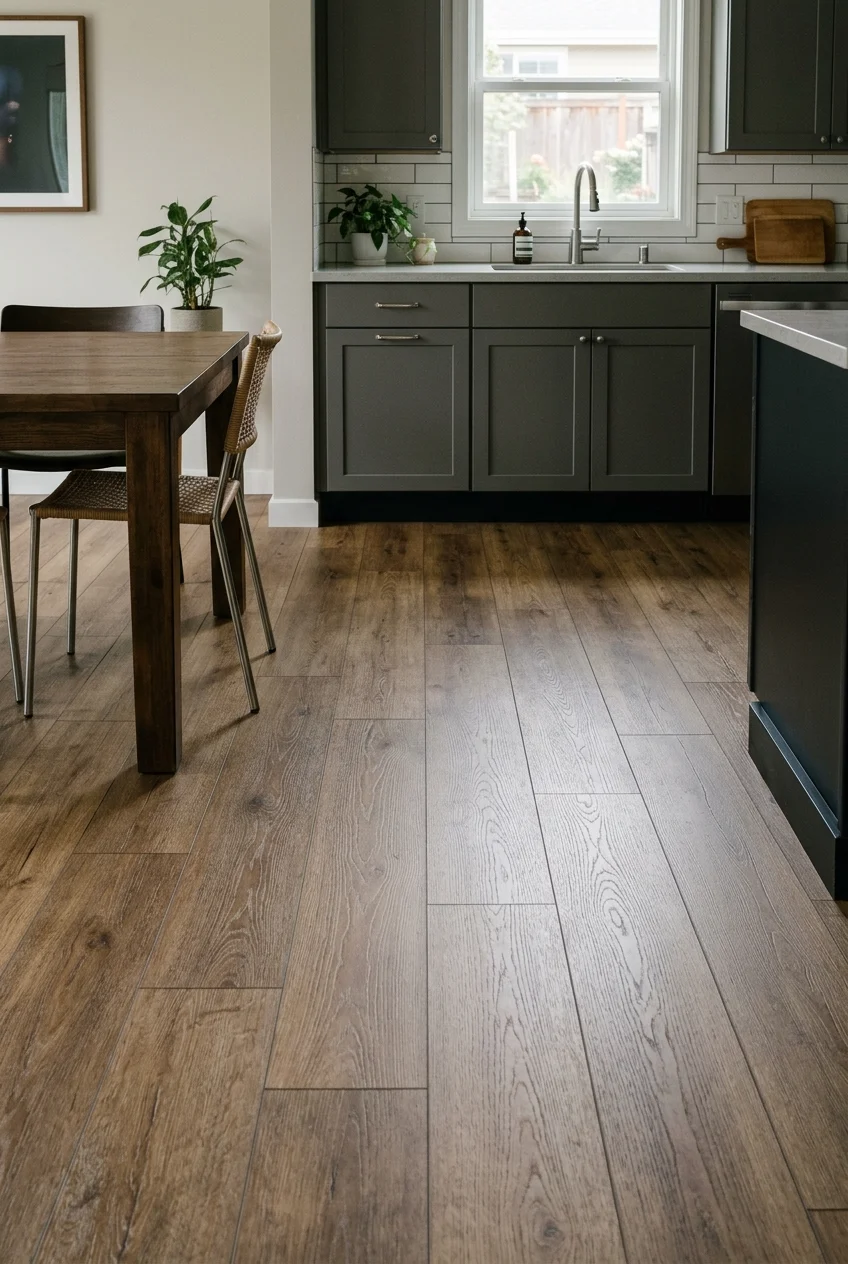
One run of flooring can tie a compact kitchen to the sitting area and avoid a visual break across the middle of an already short room.
Choose a product approved for kitchens and have the installer check substrate conditions and required transitions. Carry the pattern through only where the product allows.
If a floor change is necessary, put it at a natural boundary such as a doorway. In an open room, agree on the exact seam location before installation.
Frequently Asked Questions
Can an ADU kitchen use just a microwave and a mini fridge?
Ask your local building department which permanent cooking facilities your unit needs before buying appliances. The requirements for a legal dwelling depend on the jurisdiction.
Bring an appliance list and a simple floor plan when you ask. You can then compare the smallest options that satisfy the requirements and suit your meals.
Where should I start when converting a garage into an ADU kitchen?
Mark the existing doors, slab changes, and other fixed features first. Ask your design team where plumbing and outdoor kitchen exhaust can reasonably reach the proposed kitchen.
Compare your favorite layout with a version that puts the sink closer to a feasible drain. Seeing both can clarify how much the layout change buys you.