50 Tiny Galley Kitchen Ideas

This post may contain affiliate links: full affiliate disclosure.
A tiny galley kitchen asks every surface to work hard, yet the best changes begin with movement, sightlines, and the tasks you repeat daily.
Use these ideas to compare layouts, storage details, colors, and flexible upgrades before buying anything. Measure doors, drawers, appliances, and the clear aisle first.
Choose a few changes that solve your biggest friction points instead of stacking every space-saving trick into one already busy, narrow room.
As an Amazon Associate I earn from qualifying purchases.
Shape the Layout and Sightlines
Start with the corridor itself. These ideas preserve movement, reduce visual bottlenecks, and make the long view feel purposeful rather than cramped.
1. Stagger the Sink and Range Instead of Facing Them
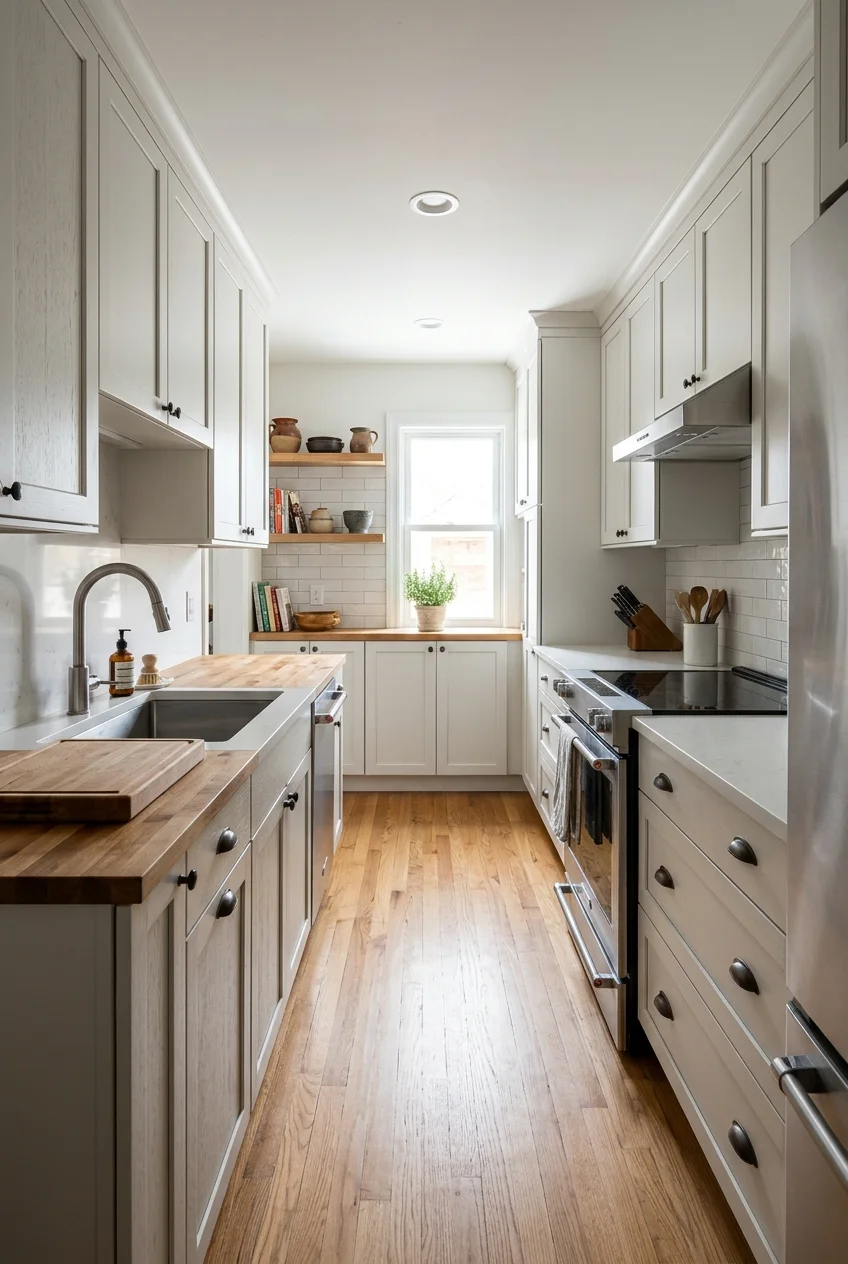
Offset the sink and range so two people are less likely to stand back-to-back at the busiest points. Keep uninterrupted prep space beside each fixture.
Map open oven, dishwasher, and refrigerator doors before finalizing cabinetry. A balanced elevation matters less than a passage that still works during cleanup.
- Keep the dishwasher close to the sink.
- Leave a landing surface beside the refrigerator.
- Avoid placing two deep appliance handles directly opposite.
Planning check Mark appliance doors on the floor with painter’s tape, then rehearse cooking and cleanup movements before approving the final layout.
2. Keep the Center Completely Island-Free
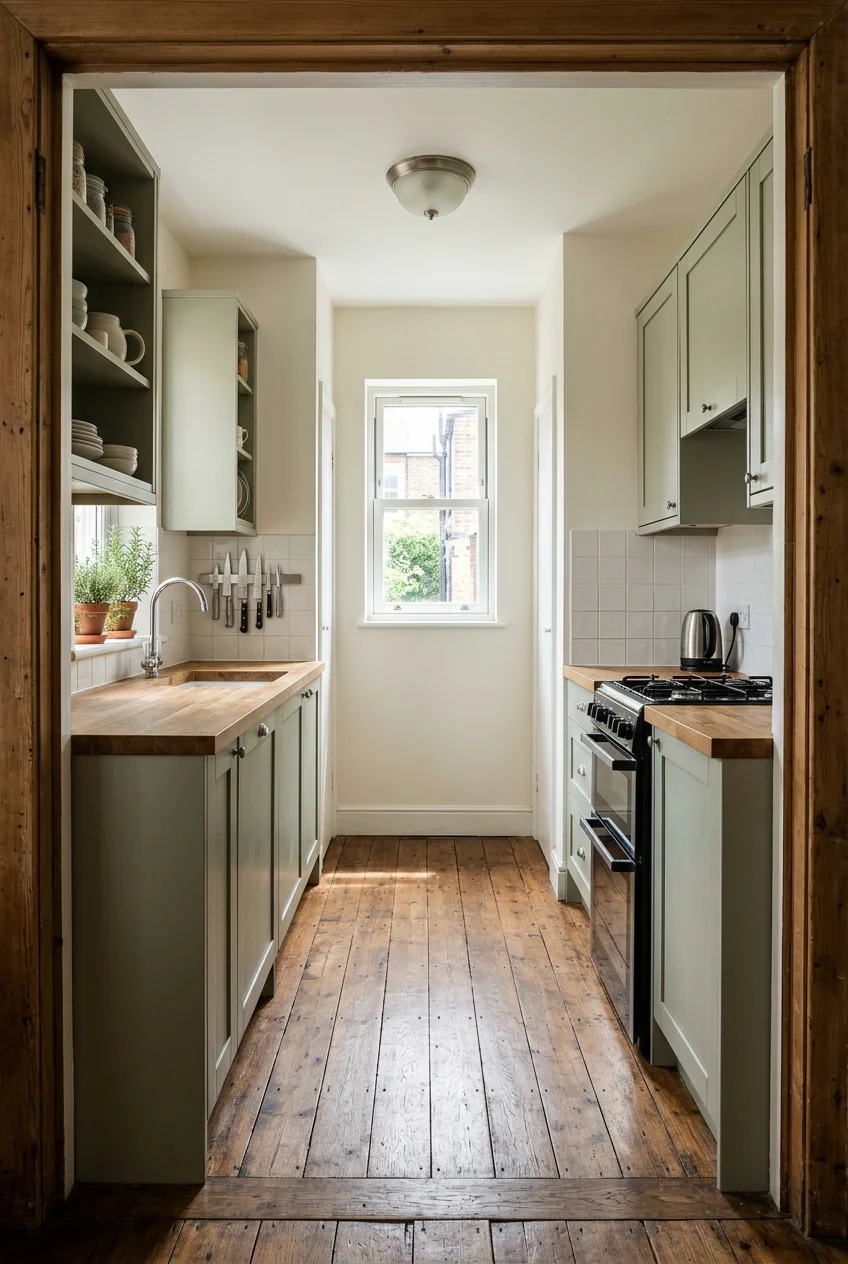
In a true double-run galley, an island often consumes the only circulation space. Let the empty center remain the room’s most useful feature.
If your room is unusually wide, compare carefully measured narrow kitchen island ideas before adding furniture that could block appliance doors.
A small prep cart can wait outside the kitchen and roll in temporarily, giving occasional surface area without making every trip through the room awkward.
3. Finish the Long View with a Window Seat
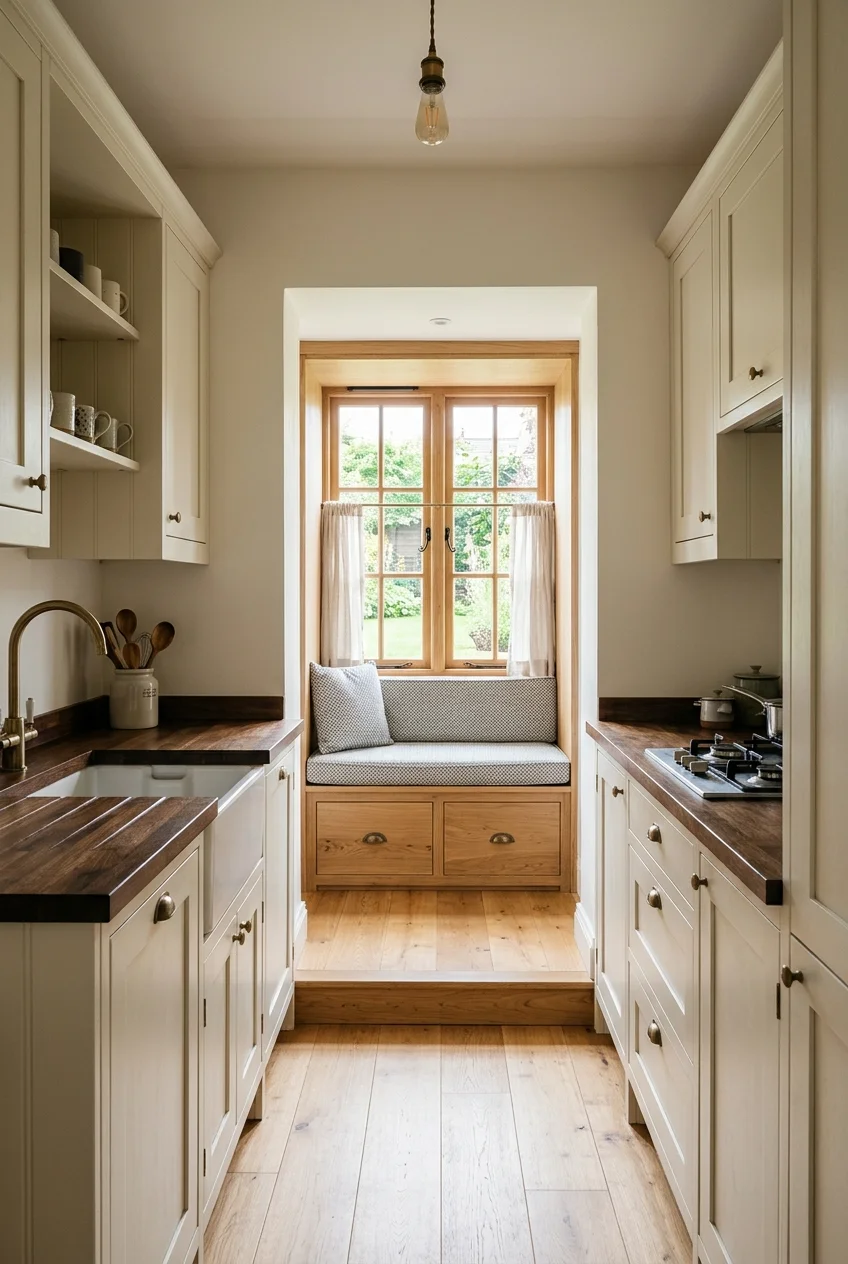
A shallow window seat at the closed end turns the strongest sightline into a destination. Drawers below can hold linens or occasional serving pieces.
Keep the seat beyond the active work zone, with enough floor space for knees and passing. Washable cushions suit a spot near cooking and cleanup.
4. Use a Pocket Door to Recover Swing Space
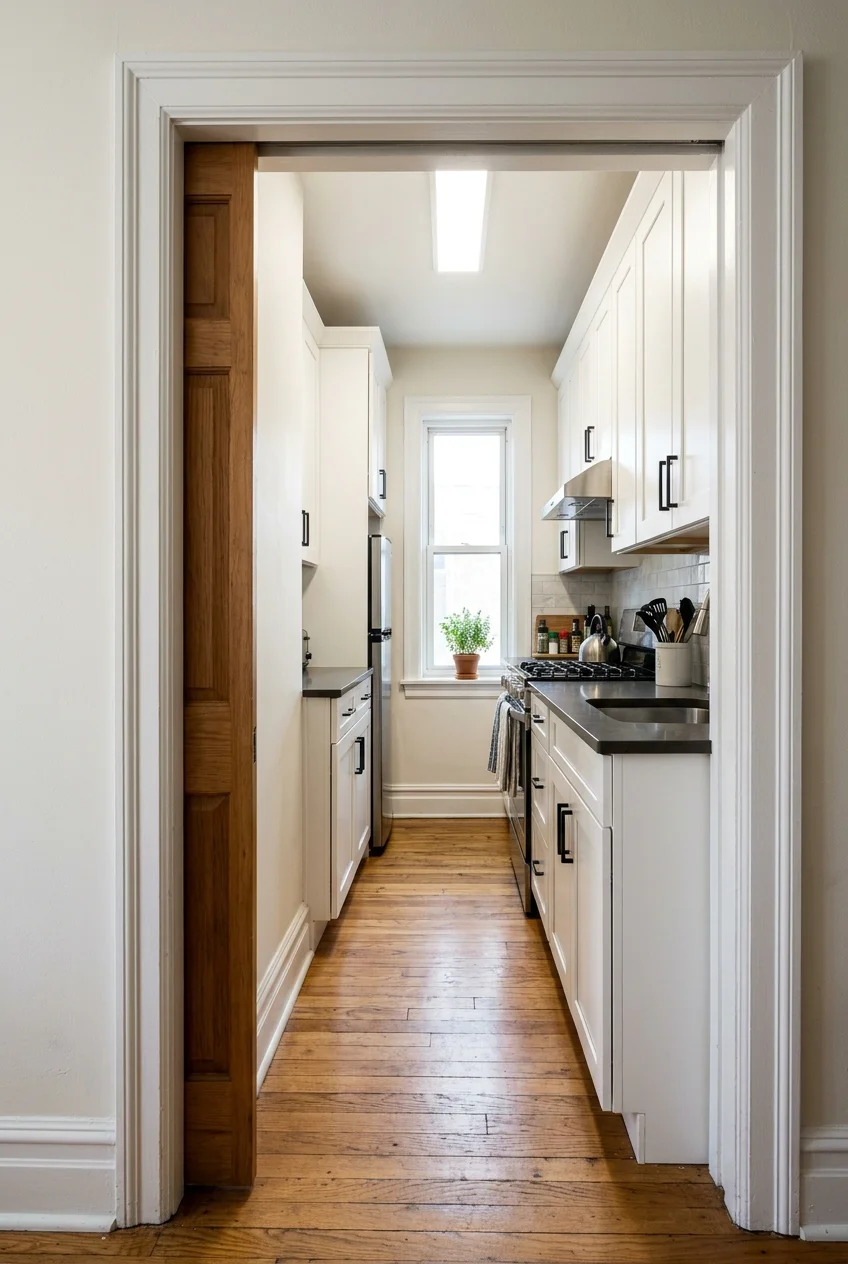
A hinged kitchen door can collide with cabinets or trap someone beside an appliance. A pocket door clears that floor area when the wall permits.
Wall cavities may contain wiring, plumbing, or structural framing, so this is not automatically a simple retrofit. Have the wall evaluated before ordering hardware.
- Confirm the wall can accept a pocket door.
- Check the required fire or ventilation separation locally.
- Choose durable hardware with an accessible pull.
Select a door width that preserves the useful opening, then choose a pull that remains reachable when the panel is fully inside its pocket.
Plan baseboards, casing, and the floor transition together. Misaligned trim can catch the door or make an otherwise clean conversion look improvised.
If the wall cannot be altered, an outward-swinging door or a properly placed surface slider may solve the conflict without entering the cavity.
5. Open a Pass-Through Above One Counter
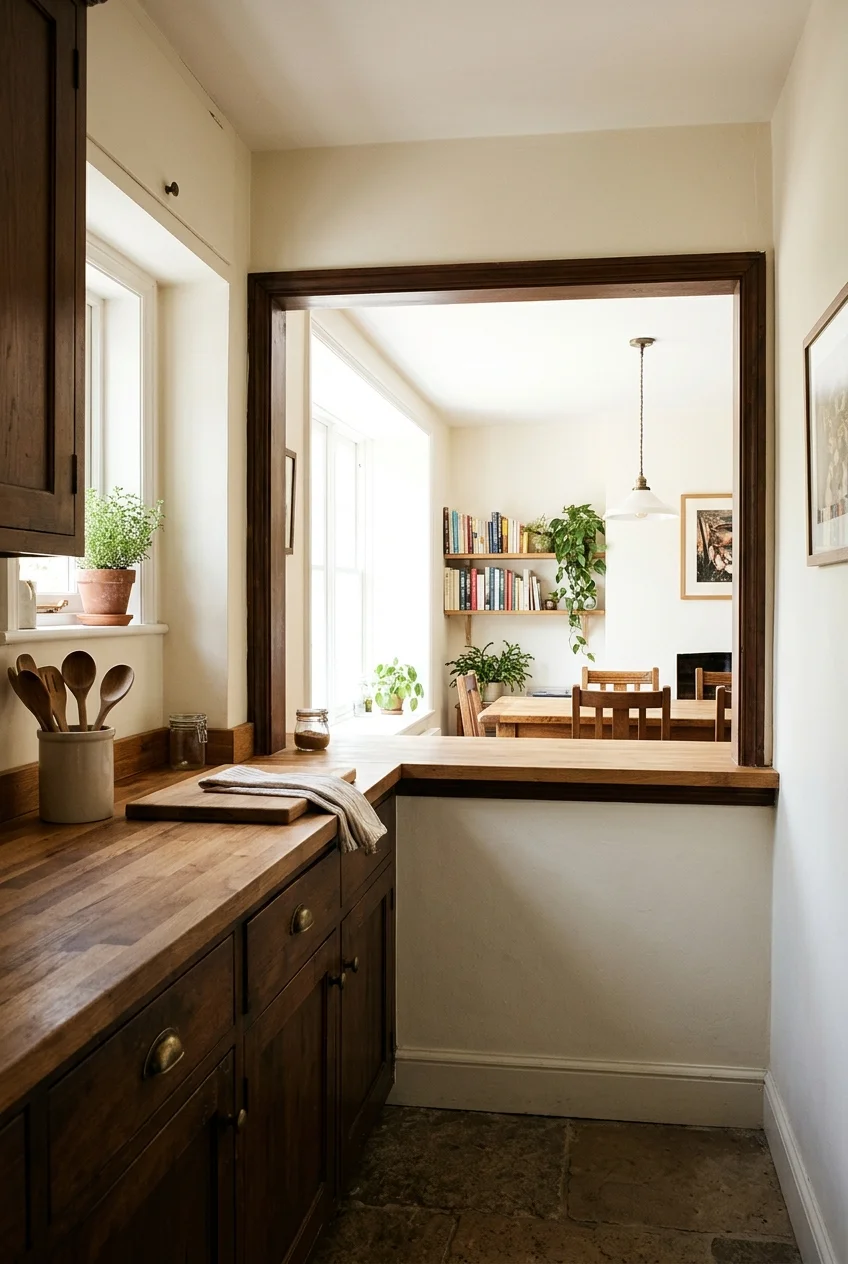
A pass-through can borrow daylight and conversation from the next room while preserving the lower cabinets. Keep the ledge shallow enough for the aisle.
Explore verified kitchen pass-through ideas for ledge, trim, and storage options, then have any wall opening evaluated before demolition begins in your room.
Center the opening on a useful view rather than automatically matching the cabinet run. A framed opening can feel deliberate even when structural posts remain.
Watch for Do not assume a wall is nonstructural because it sounds hollow; utilities and load paths require qualified inspection before cutting.
6. Replace a Solid Divider with Interior Glass
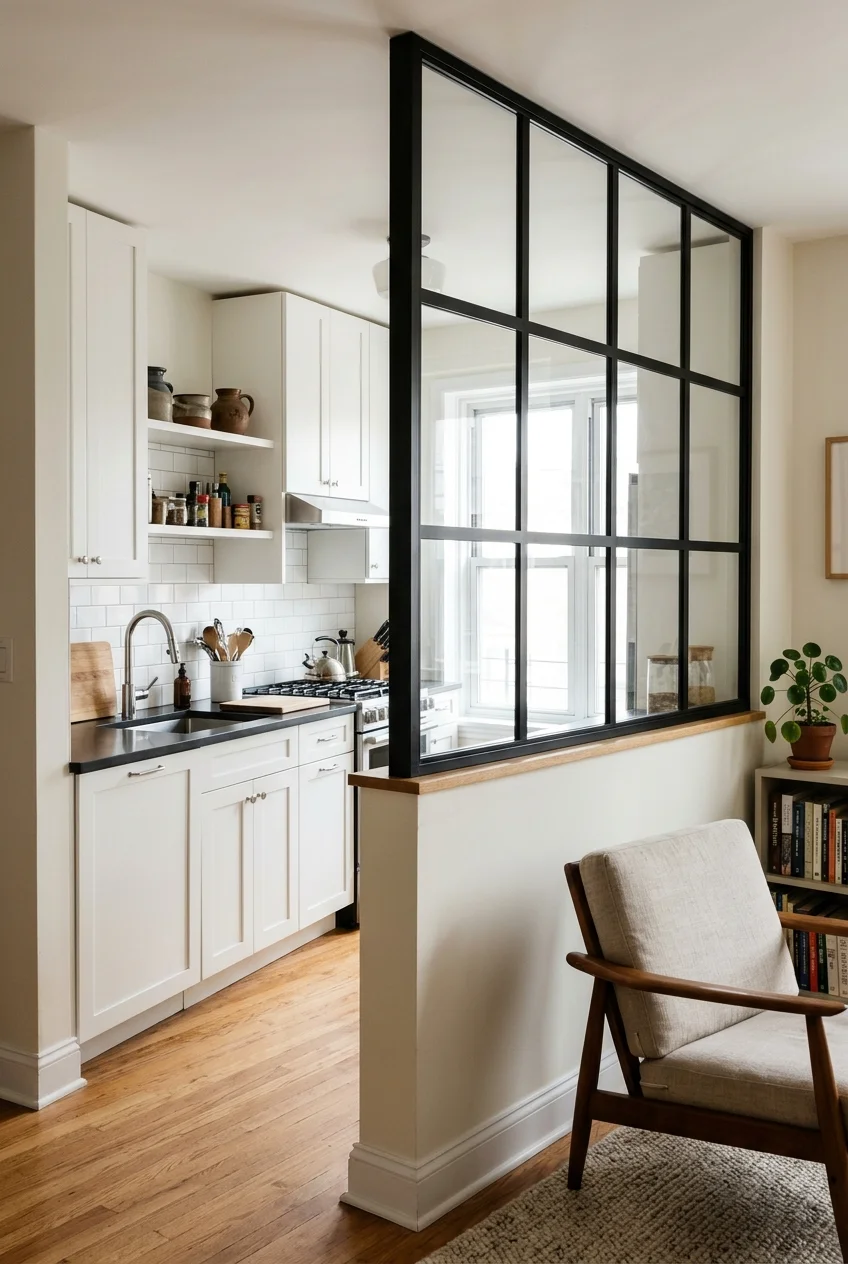
A fixed interior window shares light without exposing the kitchen to foot traffic. Slim dark frames can give the opening clear architectural structure.
Use safety glazing where required, and keep the glass away from direct heat. The surrounding wall and trim still need appropriate kitchen finishes.
Reeded glass softens the view of dishes, while clear glass preserves the longest sightline. Choose based on privacy needs, not only appearance.
7. Group the Refrigerator and Pantry at One End
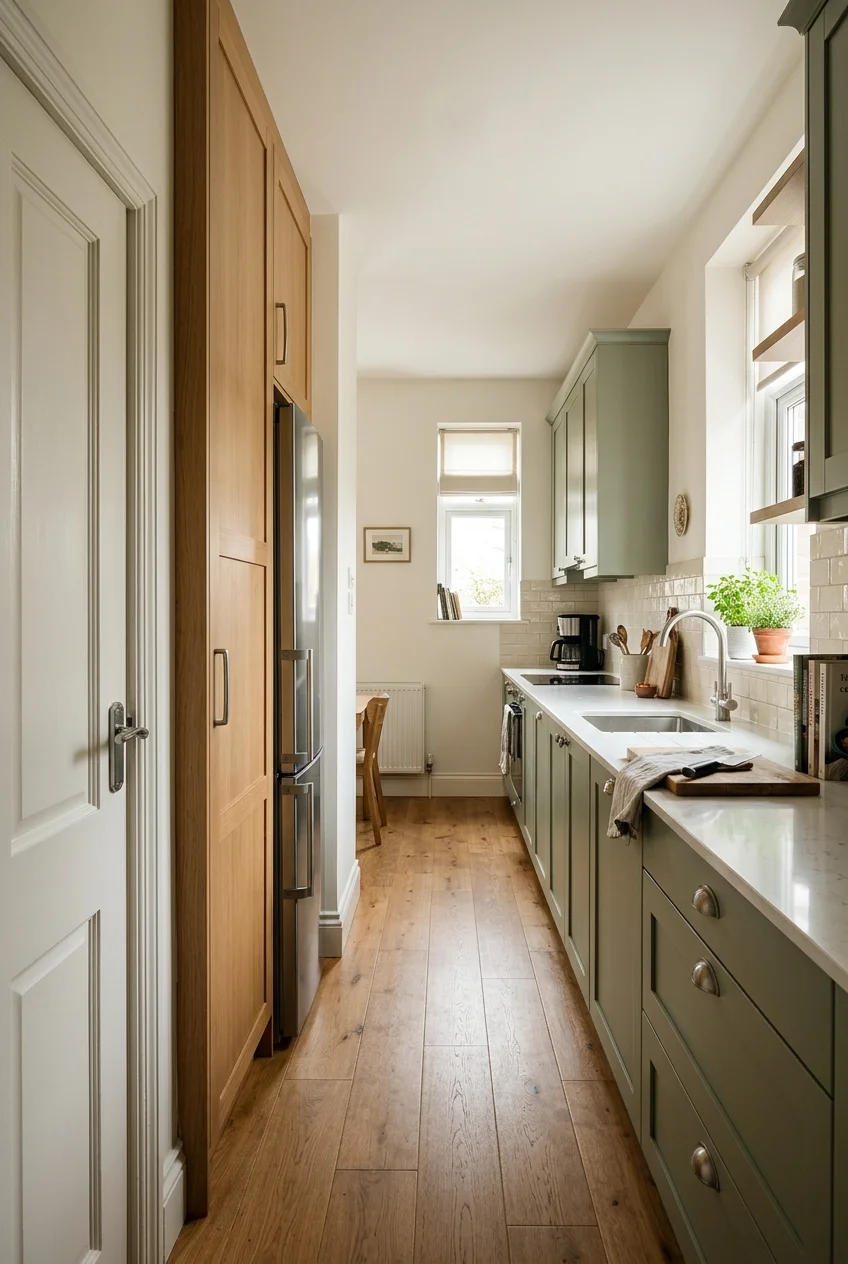
Consolidating tall units creates one storage block instead of several visual interruptions. Place it near the entrance so grocery unloading stays outside the cooking zone.
Check refrigerator ventilation, hinge clearance, and handle projection before surrounding it with cabinetry. The adjacent pantry door must open without striking the appliance.
- Refrigerator door opens toward the landing counter.
- Pantry shelves match the packages you buy.
- Upper cabinet remains reachable or stores occasional items.
Use a matching panel or repeated color to calm the tall elevation, but do not conceal required grilles or reduce the manufacturer’s clearances.
8. Leave a Landing Counter Beside the Refrigerator
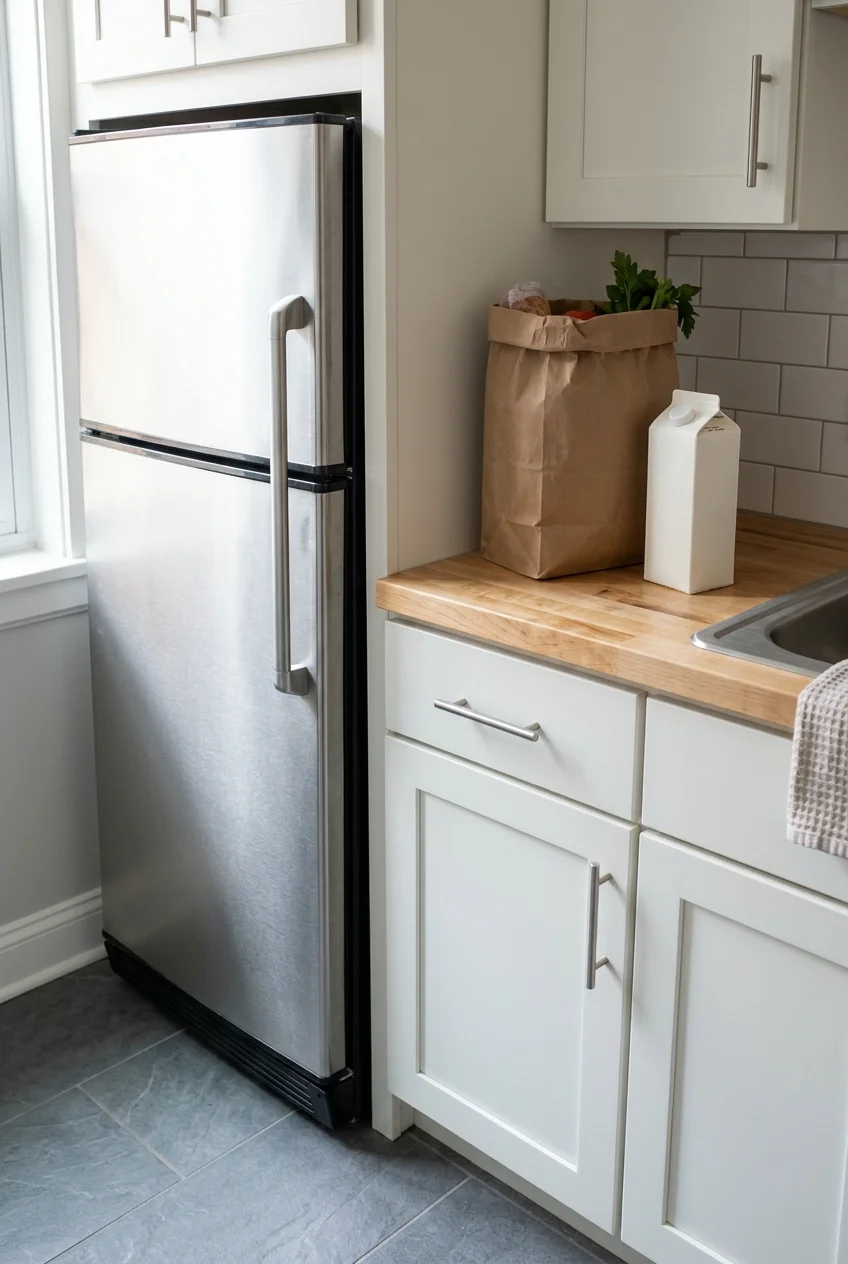
Even a short counter beside the refrigerator gives groceries, pitchers, and containers somewhere to land. It prevents the opposite counter from becoming the default drop zone.
Keep that surface genuinely available by storing mail and small appliances elsewhere. A shallow drawer below can hold wraps, clips, and reusable bags.
9. Protect the Aisle from Every Door Swing
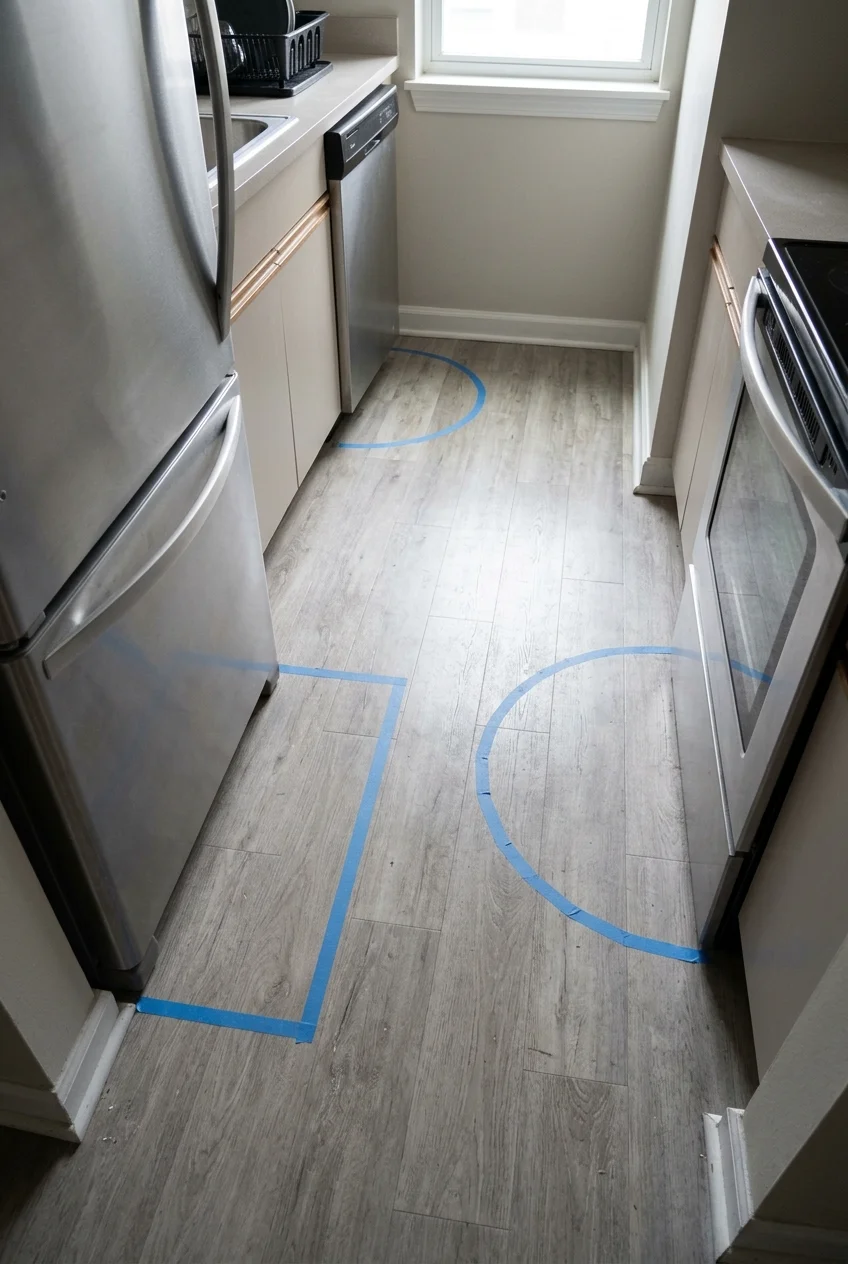
Open every cabinet and appliance on paper, not just the room door. Opposing dishwasher and oven doors can make a workable aisle unusable.
Where conflicts cannot move, choose routines and hardware that reduce simultaneous opening. A refrigerator with narrower doors may help, but confirm actual specifications.
Setup note Tape each open-door footprint on the floor and test it with another person carrying a tray through the kitchen without stepping sideways.
10. Create One Unbroken Prep Stretch
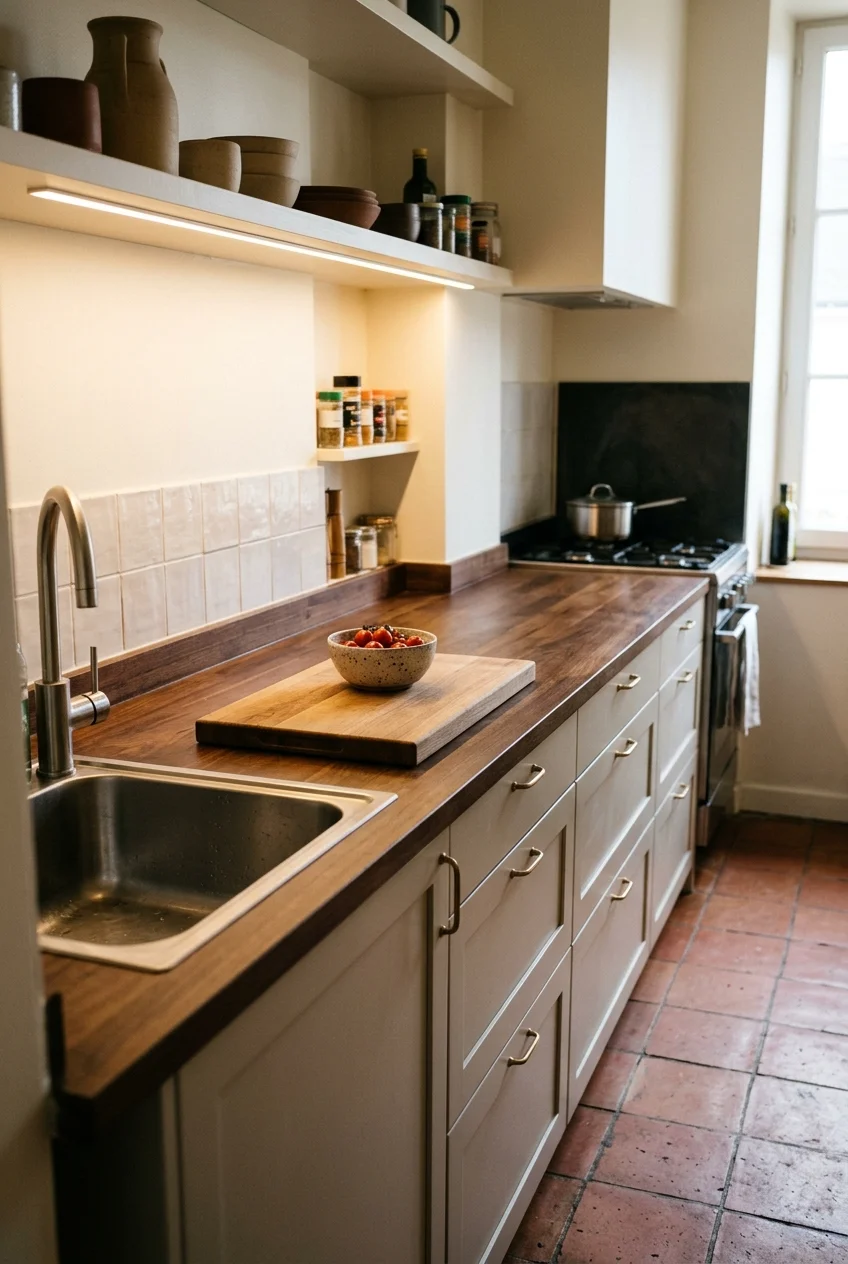
Protect one continuous counter section for chopping, mixing, and plating. Move decorative objects and countertop appliances away from this primary work surface.
A prep zone works best between water and heat without crossing a doorway. Store knives, boards, bowls, and trash within one or two steps.
If outlets or plumbing interrupt the ideal spot, choose the safest clear section available rather than forcing a textbook arrangement into the room.
Build Storage Without Closing In the Room
Storage earns its place when it improves access. Mix dense cabinets with visual breathing room, and fit organizers to real objects rather than imagined categories.
11. Run One Cabinet Wall to the Ceiling
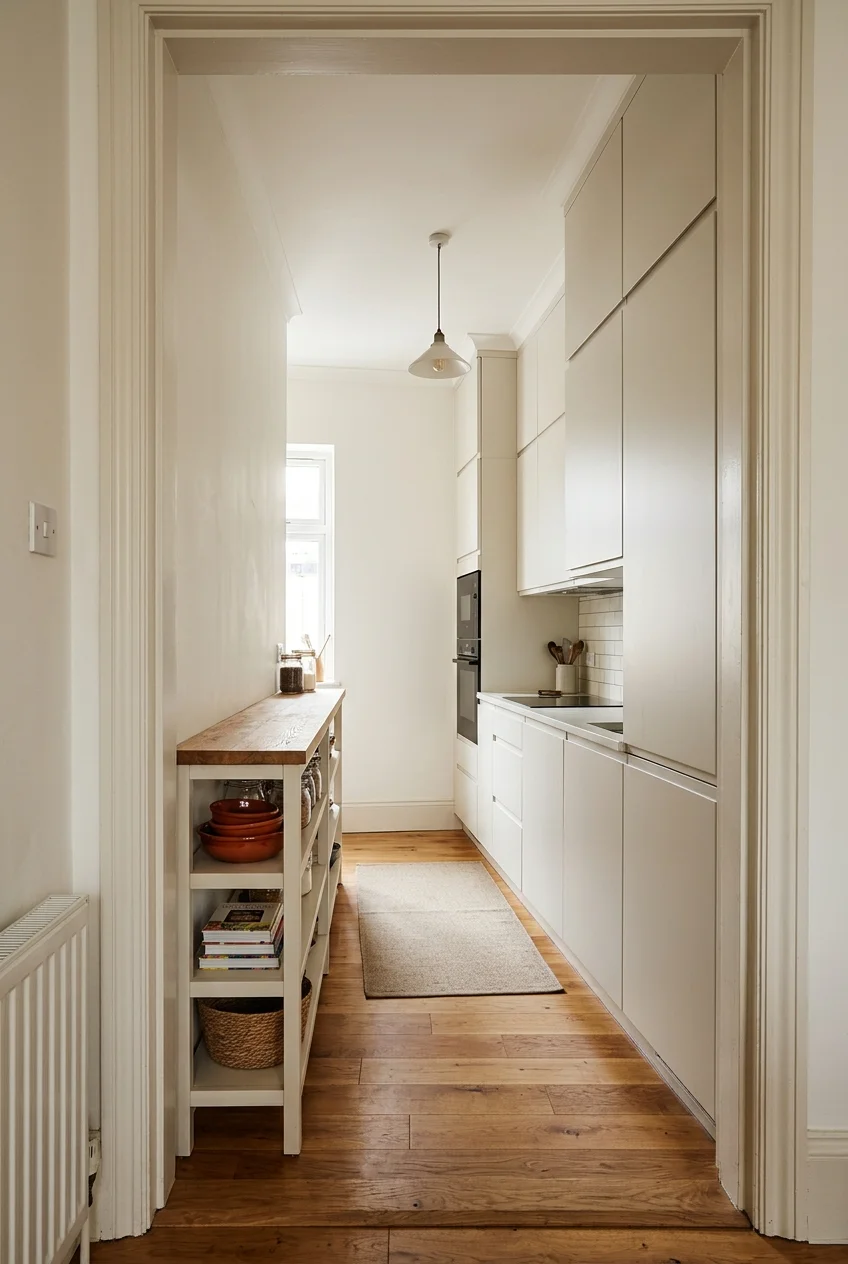
Ceiling-height cabinets add capacity without increasing the footprint. Concentrating them on one wall lets the opposite side stay lighter and easier to scan.
Reserve the highest shelves for lightweight, occasional items. Daily dishes belong lower, where reaching them does not require moving a stool into the aisle.
A simple crown or flat filler closes the dust-catching gap. Confirm the ceiling variation before fabrication so the top line does not visibly wander.
12. Remove Uppers from Only the Window Side
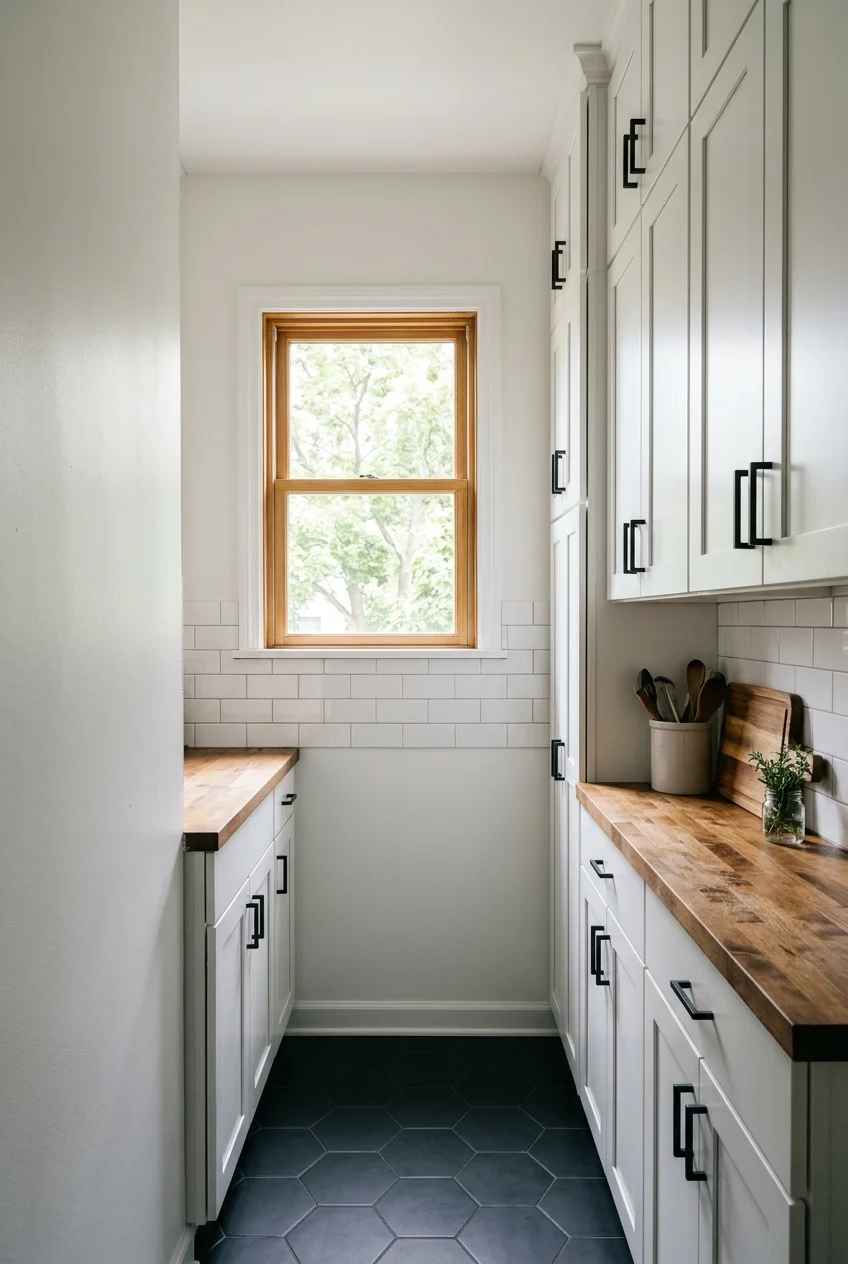
Keeping the window wall free of upper cabinets allows daylight to spread across the aisle. Storage remains concentrated on the opposite elevation.
Use the open wall for a washable backsplash and one useful rail, not a collection of small decorations. The clear plane becomes part of the design.
Before removing cabinets, relocate their contents on paper. If everything migrates to the counter, the room will feel smaller despite the improved light.
13. Use One Short Open Shelf Near the Sink
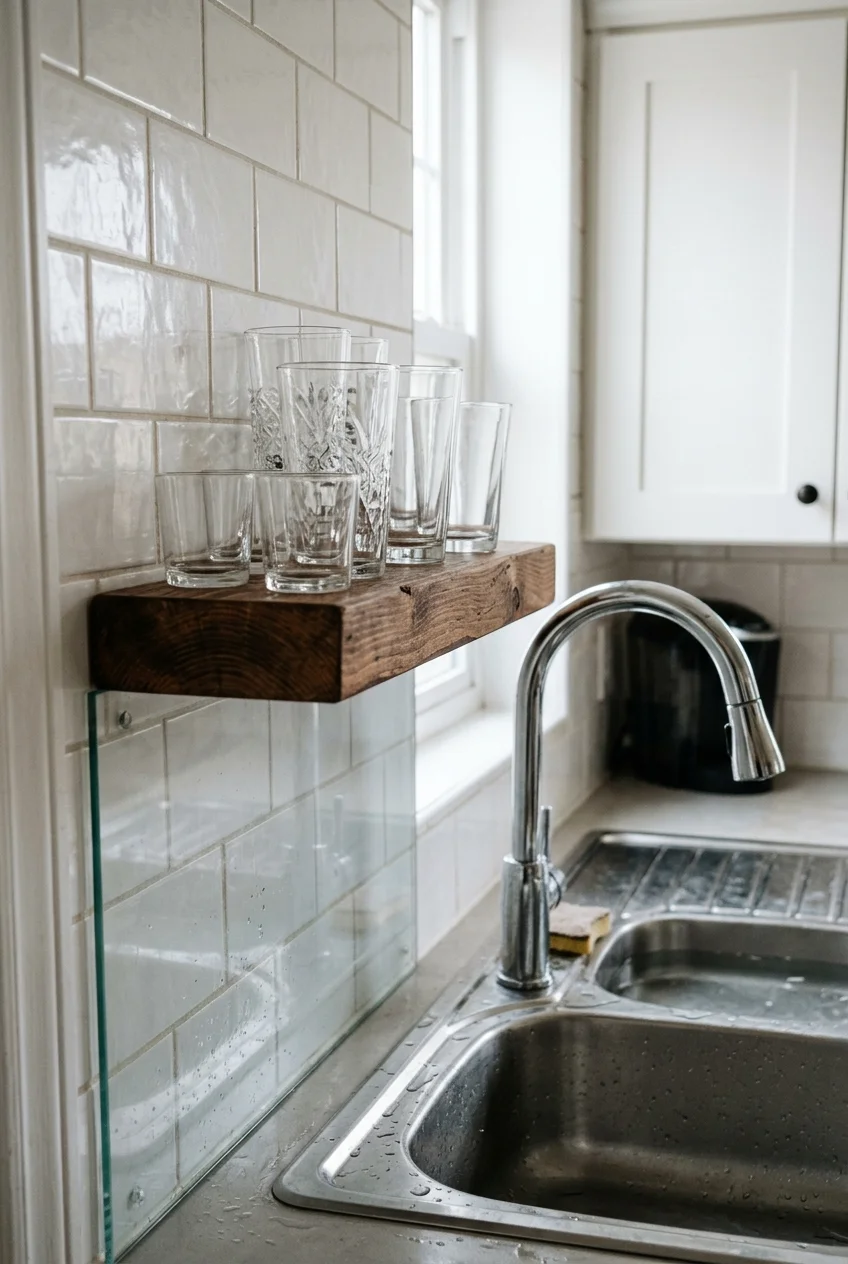
A single shallow shelf can hold daily glasses or mugs without creating another heavy cabinet box. Keep it within comfortable reach beside the sink.
Choose brackets or concealed supports rated for the shelf and contents. Leave clearance below for the faucet, appliances, and comfortable cleaning.
Open storage works only when the items are used often enough to stay clean. Move occasional serving pieces behind doors instead.
14. Choose Reeded Glass for One Upper Cabinet
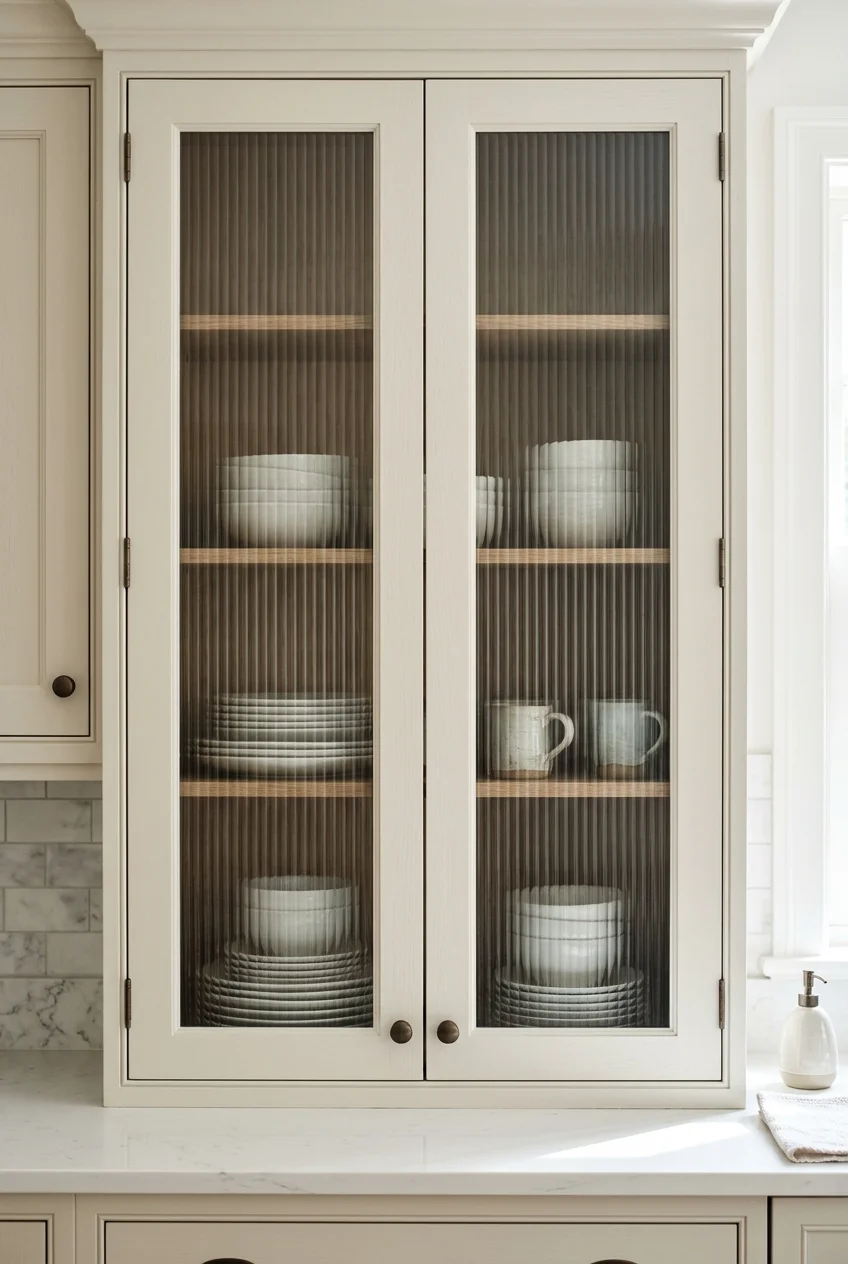
Reeded glass breaks up a long run of solid doors while blurring mismatched dishes. Limit it to one cabinet so the texture stays legible.
Use it for attractive, frequently reached items rather than pantry packages. Internal lighting is optional and requires proper fixtures, wiring, and heat management.
15. Convert Lower Cabinets to Deep Drawers
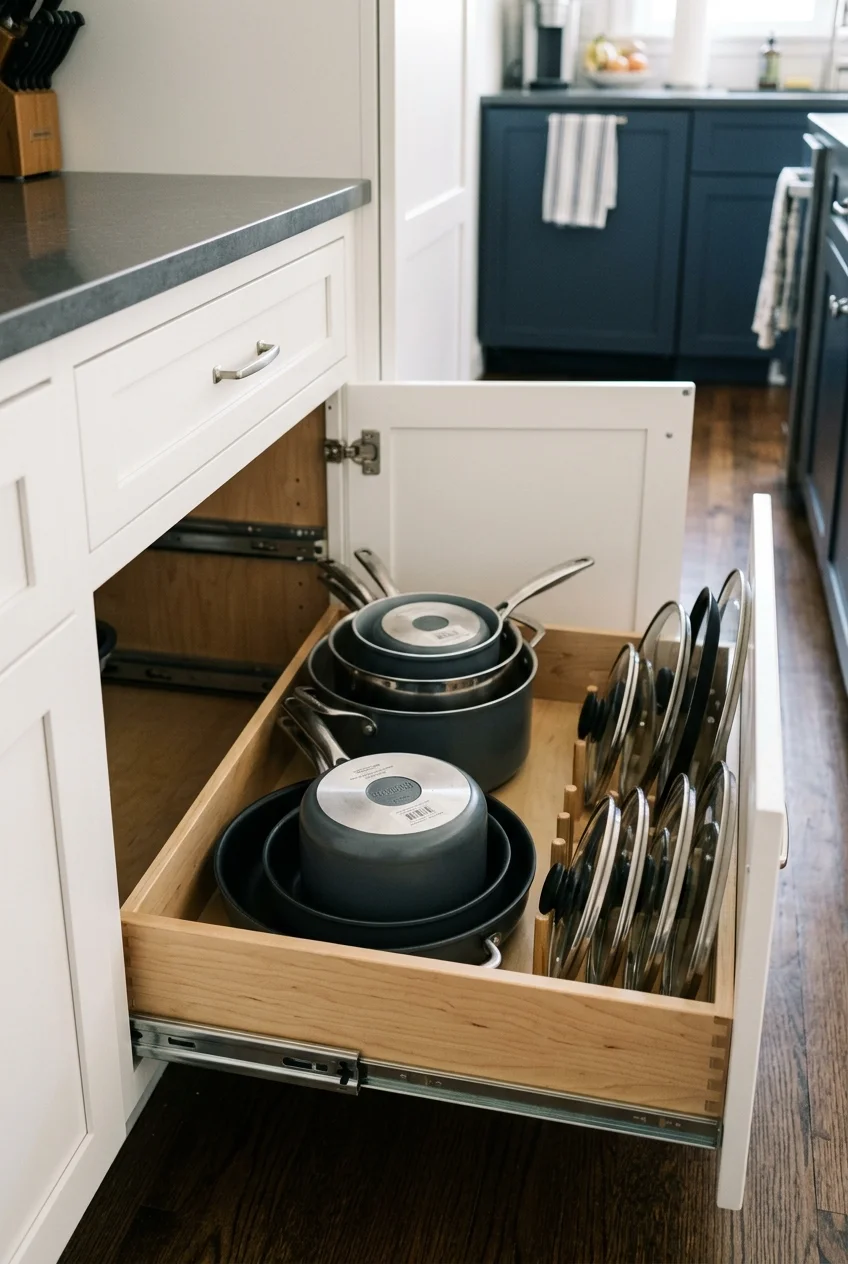
Deep drawers bring cookware forward, avoiding the kneeling and unloading required by shelves behind doors. Use shallower drawers above for utensils and wraps.
Plan drawer heights around your tallest pots, then divide lids and pans so they do not topple. Full extension and load ratings depend on chosen hardware.
- Measure pot and lid heights together.
- Keep heavy cookware in the lowest drawer.
- Position pulls where they will not catch clothing.
Internal dividers should lift out for cleaning and adjustment. Fixed pegs look orderly, but flexible zones adapt better when cookware changes over time.
Shallow top drawers can hold utensils, trivets, and wraps near prep, keeping small tools from disappearing beneath cookware in the deeper level.
Retrofitting existing face frames can reduce usable width, so compare conversion hardware with new drawer boxes before assuming every cabinet is a candidate.
16. Fit a Pull-Out into a Narrow Cabinet Gap
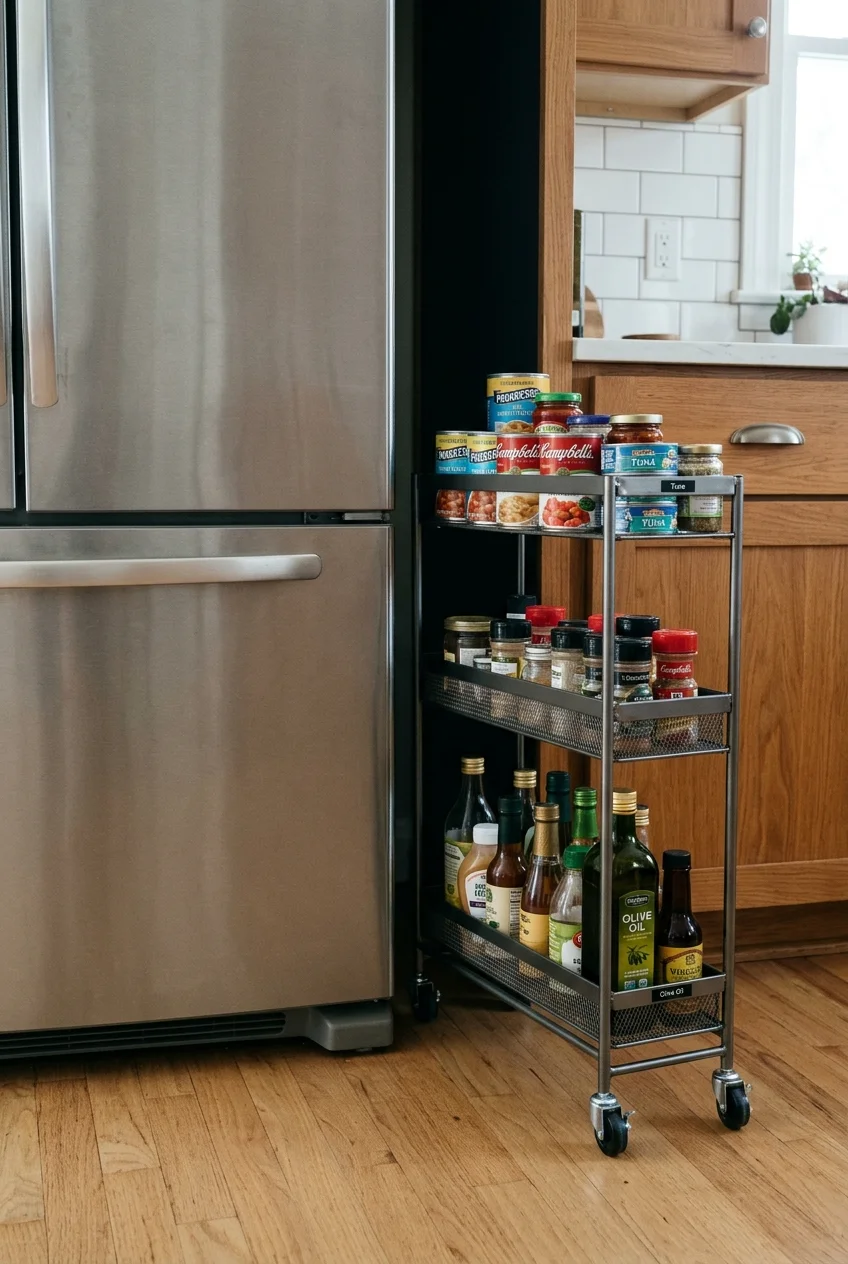
A narrow pull-out can store oils, cans, or baking supplies in a space too slim for a standard cabinet. Keep contents matched to its construction.
Built-in pull-outs need secure cabinetry and hardware rated for their loaded weight. Position cooking oils away from excessive heat and direct sunlight.
A freestanding alternative can use the gap without remodeling, provided it rolls smoothly and does not become a hidden catchall.
This slim rolling kitchen cart (paid link) has mesh shelves and casters; measure the full gap, handle, baseboards, and retrieval path first.
17. Add Vertical Dividers for Trays and Boards
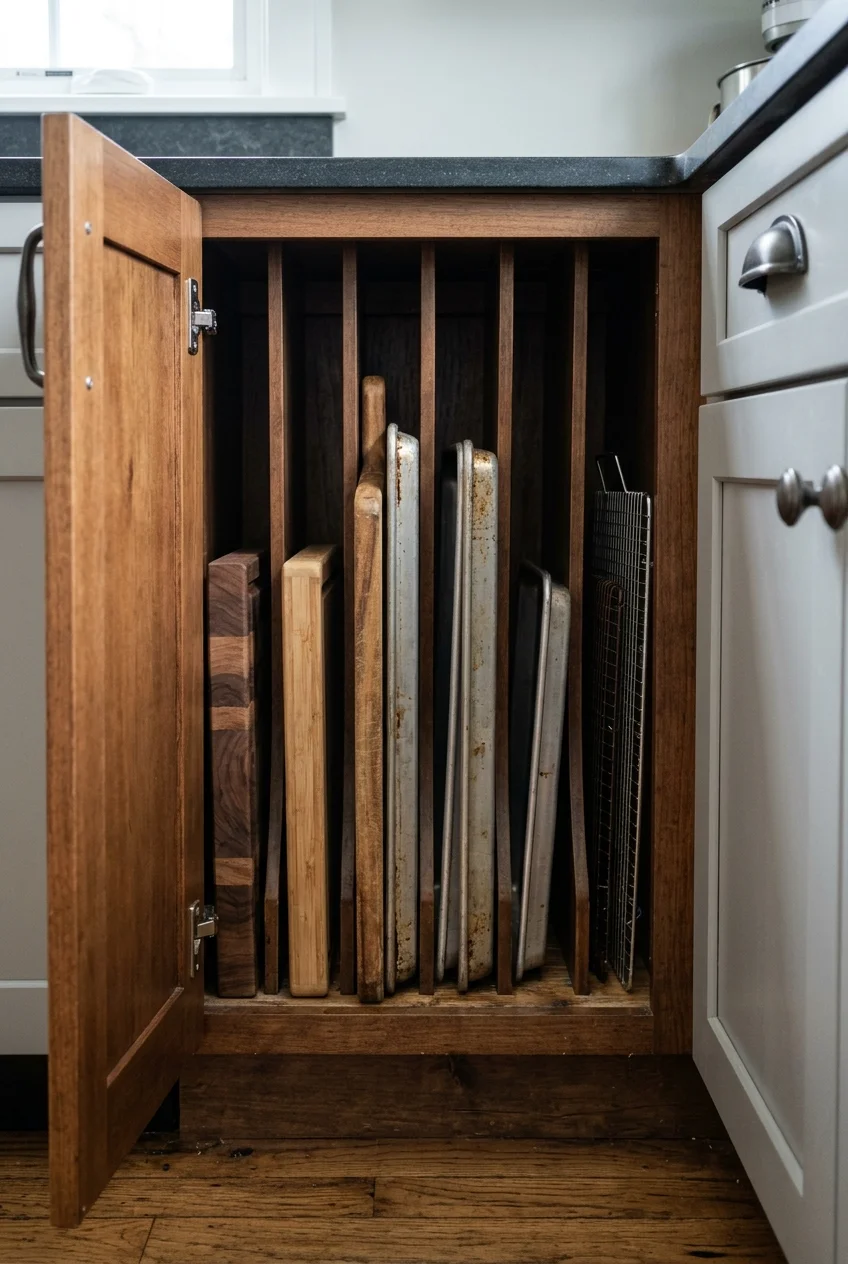
Vertical slots make sheet pans, cooling racks, and cutting boards visible without lifting a heavy stack. A base cabinet near the prep zone works well.
Set divider spacing from the widest pieces you own, including handles and rims. Leave one larger bay for roasting pans or serving trays.
Practical tip Test the layout with removable tension dividers before installing permanent partitions, and confirm every tray remains easy to lift without scraping.
18. Use Toe-Kick Drawers for Flat, Occasional Items
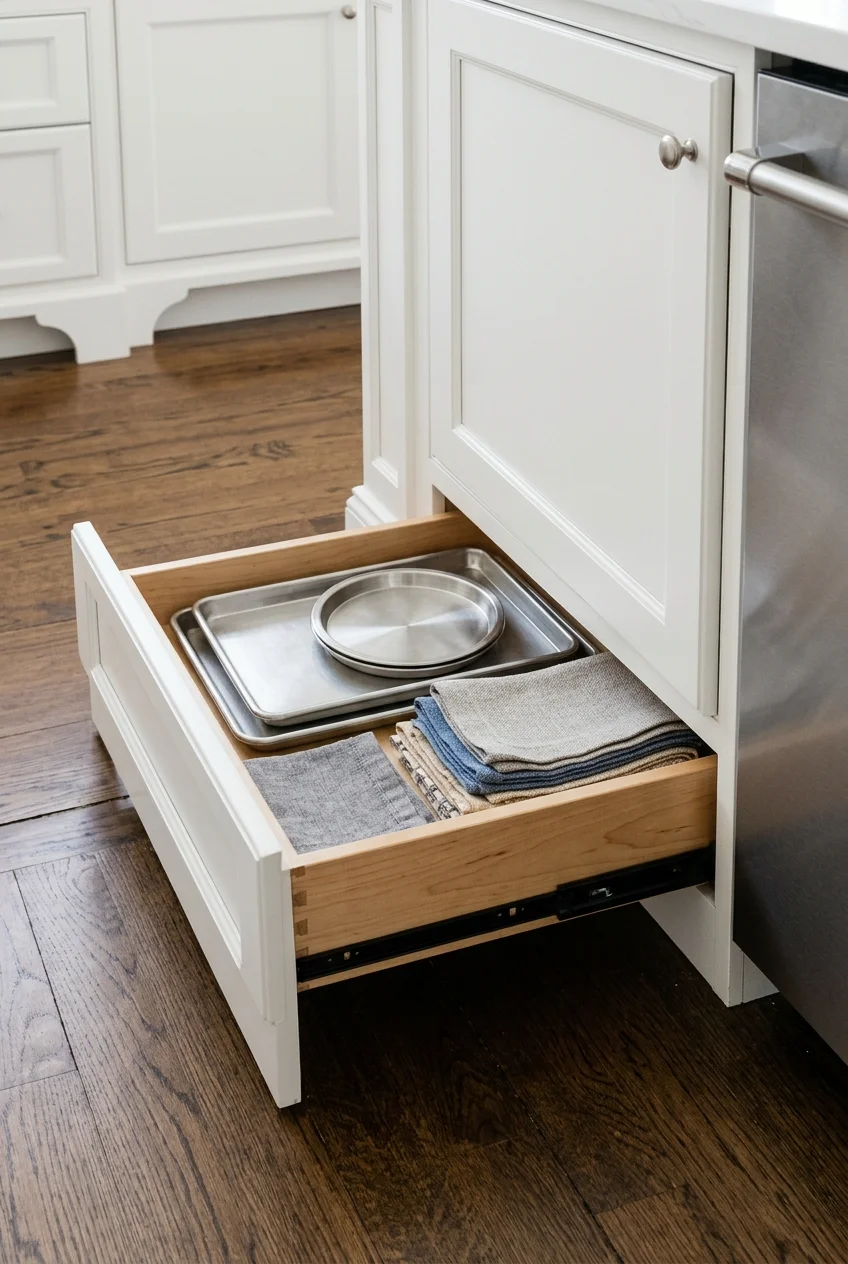
A toe-kick drawer can hold flat trays, linens, or spare placemats without taking normal cabinet space. It is unsuitable for food or damp items.
This retrofit requires compatible cabinet construction and careful clearance from flooring, vents, and appliance panels. A cabinetmaker should assess the existing base.
Use a recessed pull or touch latch so hardware does not project into feet. Label contents inside rather than adding visible text near the floor.
19. Organize the Under-Sink Cabinet Around Plumbing
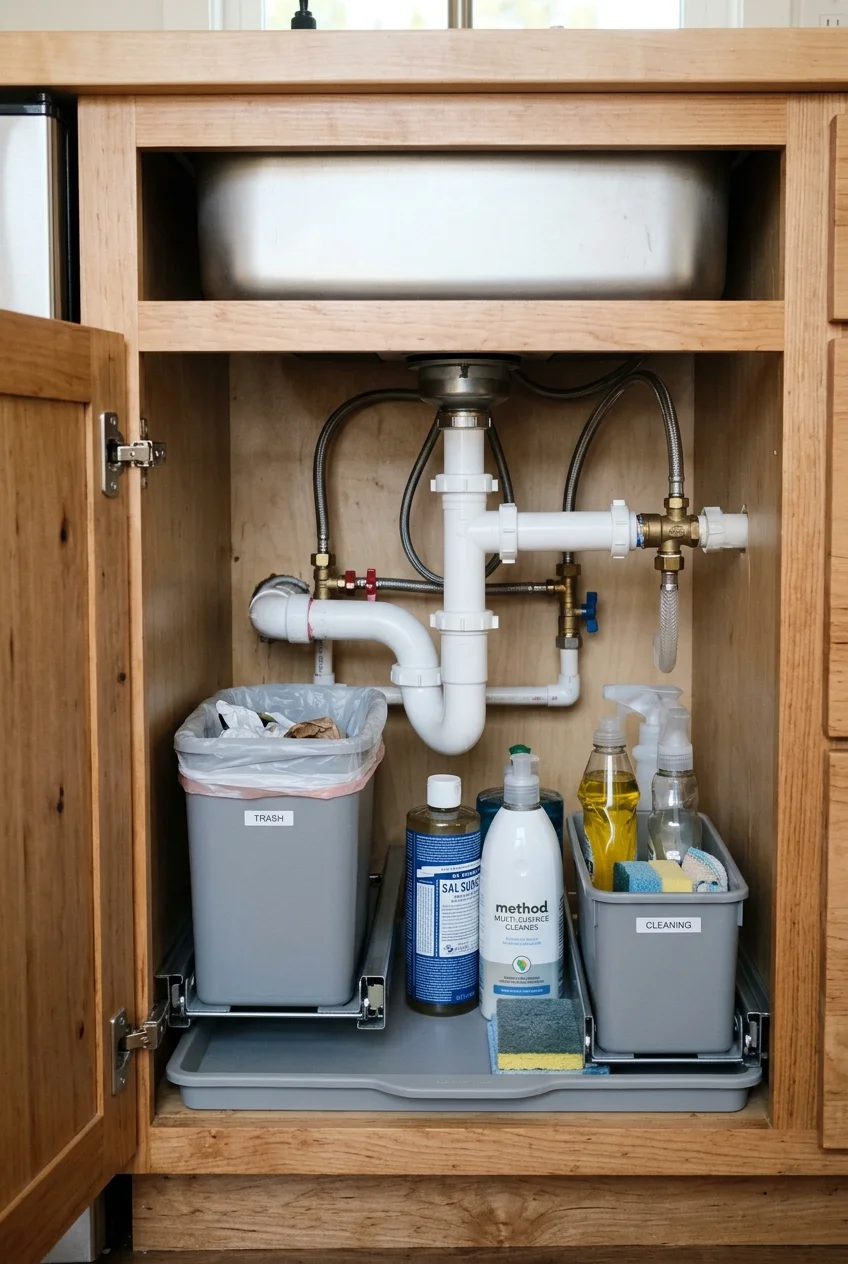
Measure around the trap, supply lines, disposal, and cabinet hinges before buying organizers. Two smaller units often fit better than one wide shelf.
Keep leak-sensitive paper goods elsewhere, and make shutoff valves reachable. A removable tray beneath cleaning bottles helps contain minor drips.
Group supplies by task instead of container color: dishwashing, surface cleaning, and spare bags. Each bin should slide out without catching the pipes.
Mount nothing through the cabinet wall until you know what lies beyond it. Plumbing, electrical runs, and neighboring drawers can occupy that space.
A compact two-level pull-out organizer (paid link) can separate bottles from small tools; verify pipe clearance and bin removal space first.
Do not pack the cabinet so tightly that a slow leak stays hidden. Leave enough visibility to inspect connections during regular cleaning.
20. Refresh Sound Cabinets Instead of Replacing Them
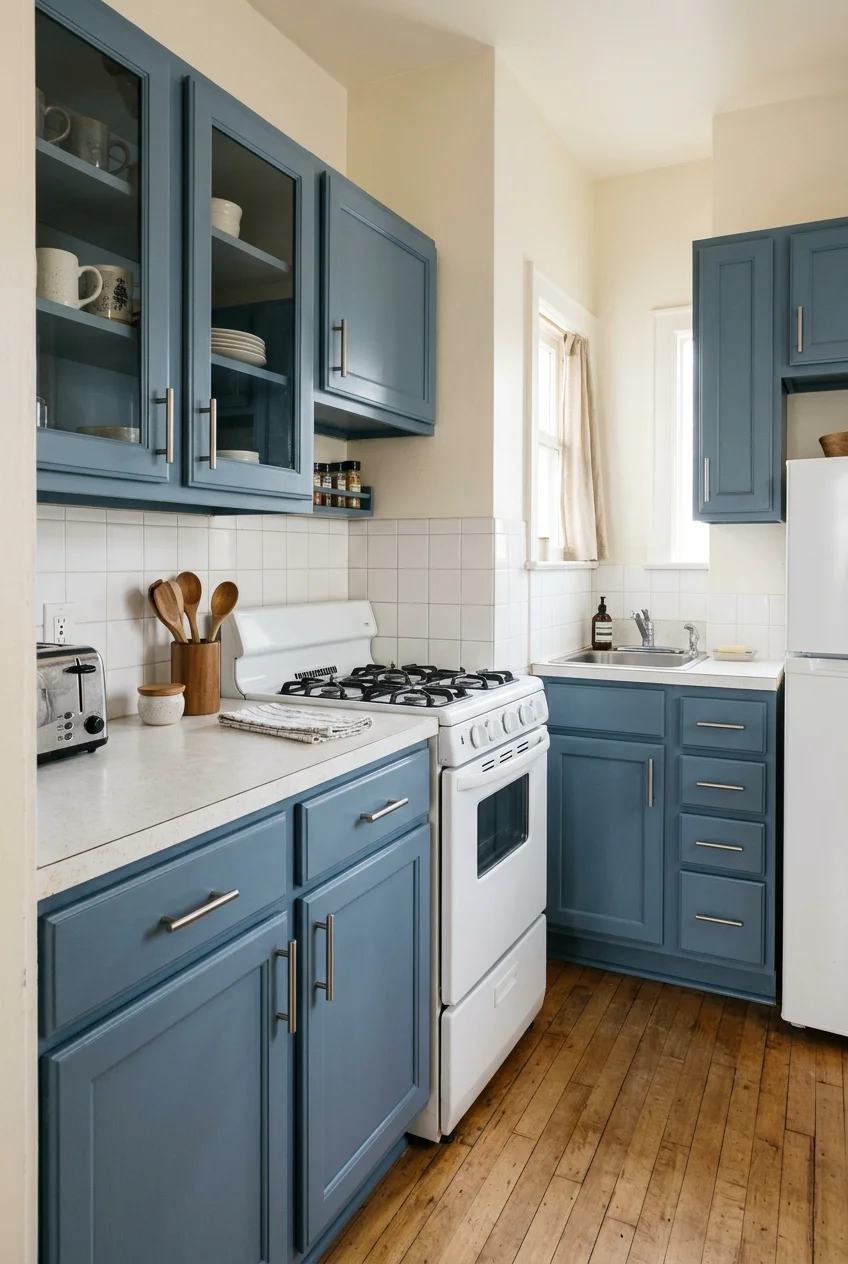
When boxes and doors are sound, paint, new pulls, or selective glass can change the room without altering its proven footprint.
Compare options in these verified kitchen cabinet makeover ideas before deciding whether the finish, door style, or storage interior is the real problem.
Painting still requires degreasing, surface preparation, compatible primer, and full cure time. Test adhesion in an inconspicuous spot and follow the coating system.
Older painted surfaces may contain lead. Avoid uncontrolled sanding, and follow current federal and local guidance for testing, containment, and cleanup.
Clear Counters and Improve Daily Work Zones
Counter space feels larger when tools live where they are used, vertical surfaces carry light loads, and temporary equipment disappears after the task.
21. Dry Dishes Over the Sink
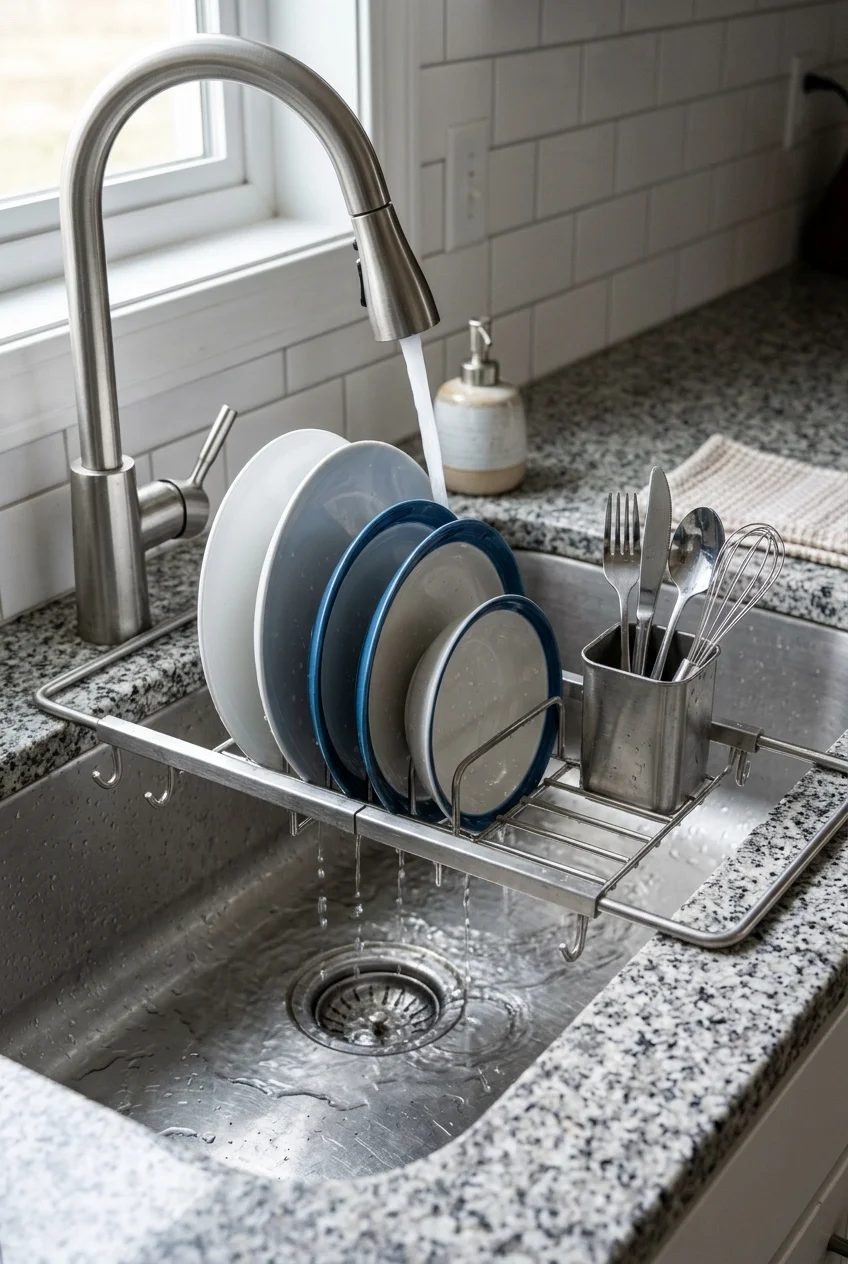
An over-sink rack returns the adjacent counter to food preparation. It works best for a small daily load, not an overflowing household backlog.
This expandable over-sink dish rack (paid link) drains into the basin; compare its support span with your sink width and faucet position.
Make sure the rack sits securely on solid edges and can be removed for sink cleaning. Do not let dishes obstruct faucet controls.
22. Mount a Rail for the Tools You Use Daily
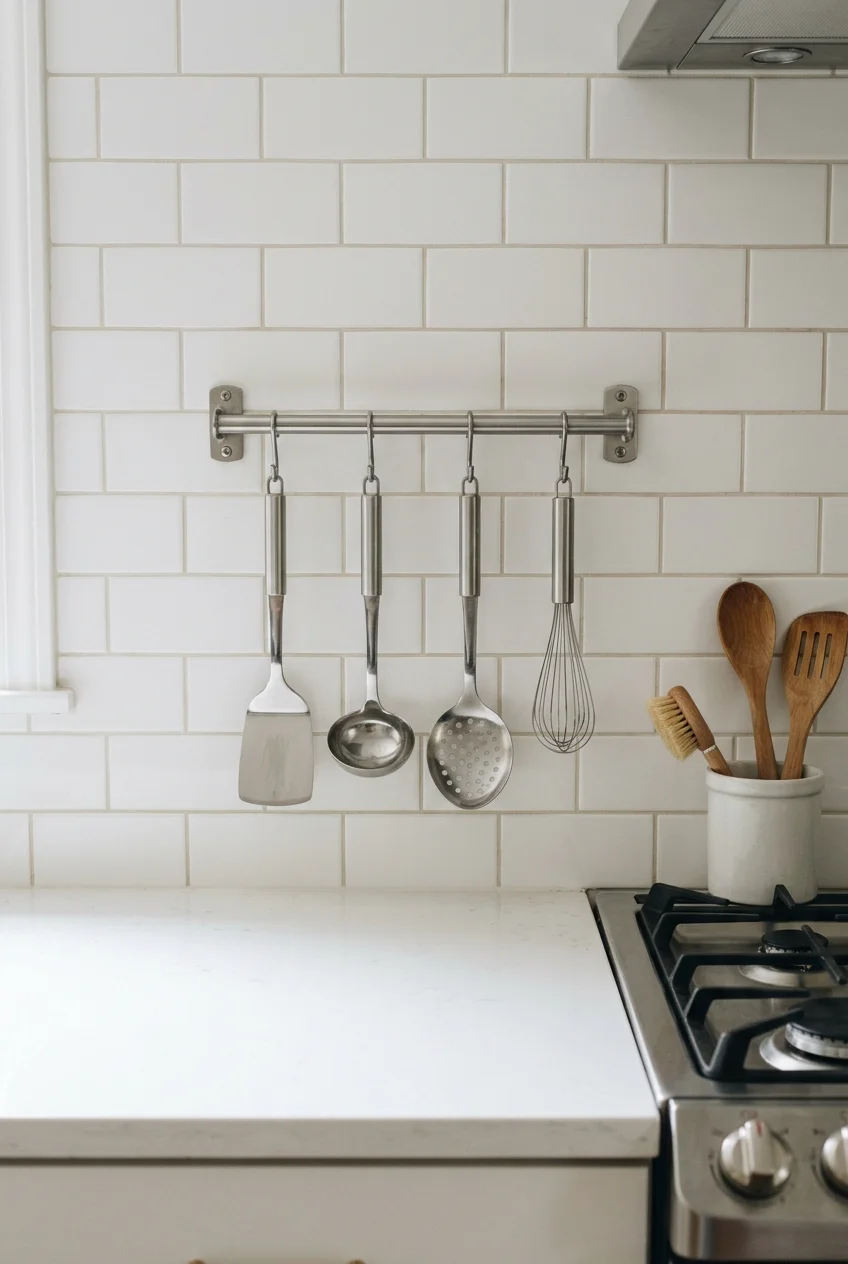
A short wall rail can hold ladles, measuring spoons, or one small utensil cup while freeing a drawer. Keep it outside the range’s heat zone.
Anchor the rail for its intended load and choose hooks that cannot slide off easily. Leave enough counter clearance for appliances and cleaning.
- Hang only frequently washed tools.
- Keep sharp blades in safer dedicated storage.
- Avoid mounting above active burners or the sink basin.
23. Store Spices on the Refrigerator Side
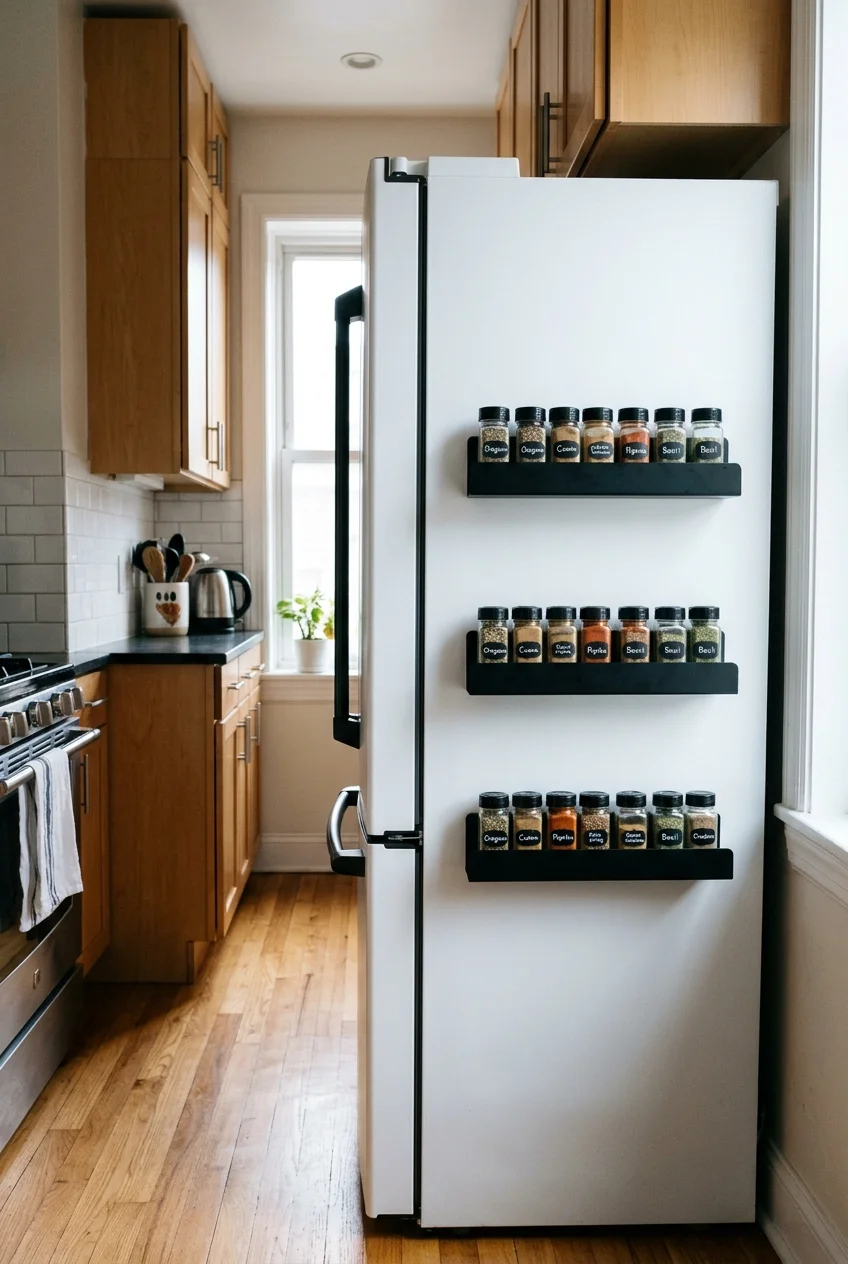
An exposed refrigerator side can carry lightweight spice storage without using counter space. Keep frequently used jars visible and return extras to a cabinet.
These magnetic refrigerator spice shelves (paid link) are movable; first confirm your refrigerator panel attracts magnets and the door clears them.
Place the shelves away from direct stove heat and where shoulders will not brush them. Heavier bottles belong in stable cabinetry.
24. Tuck Paper Towels Under an Upper Cabinet
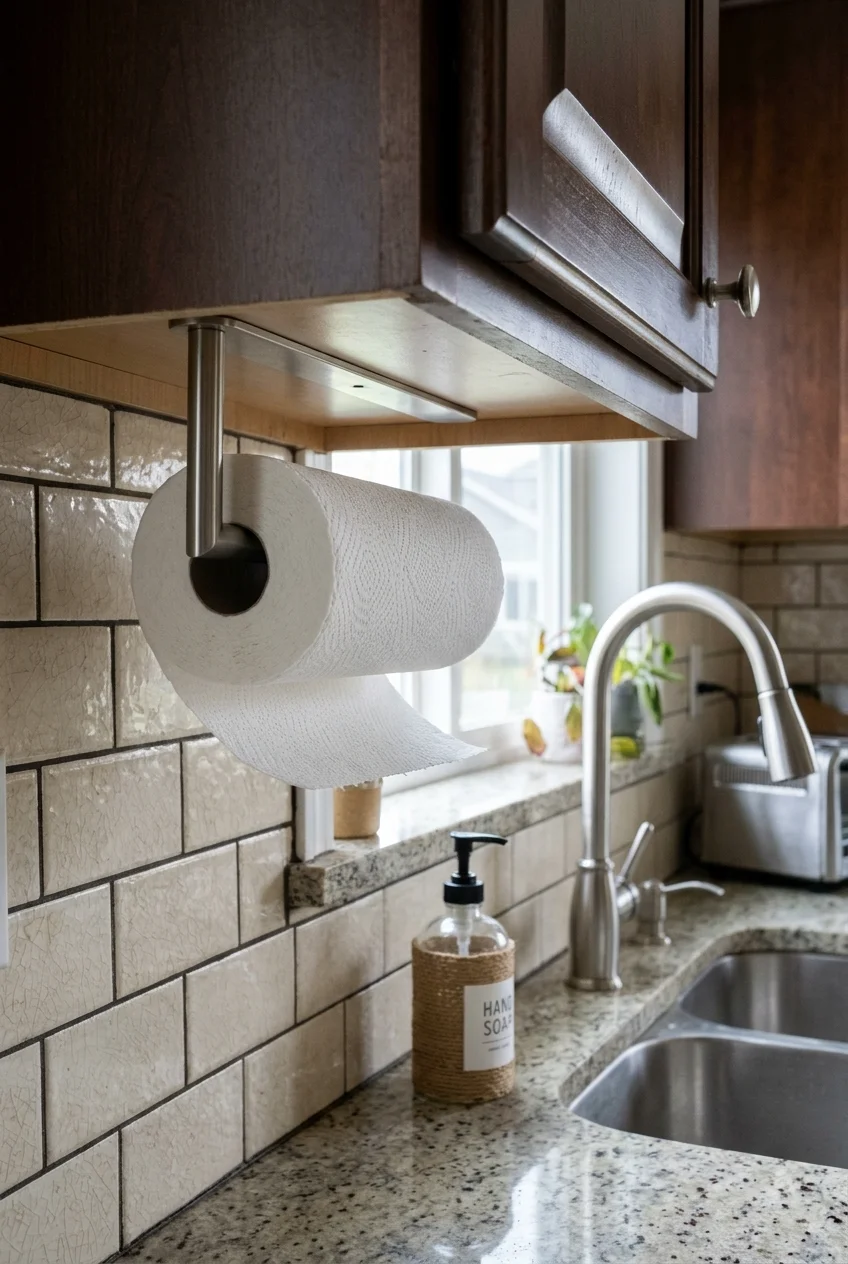
An under-cabinet holder removes a bulky roll from the worktop. Mount it near cleanup, but far enough from the sink to avoid constant splashes.
Check door clearance and the cabinet bottom before drilling. Renters can choose a removable holder only if its adhesive suits the surface and load.
25. Give the Coffee Maker a Dedicated Niche
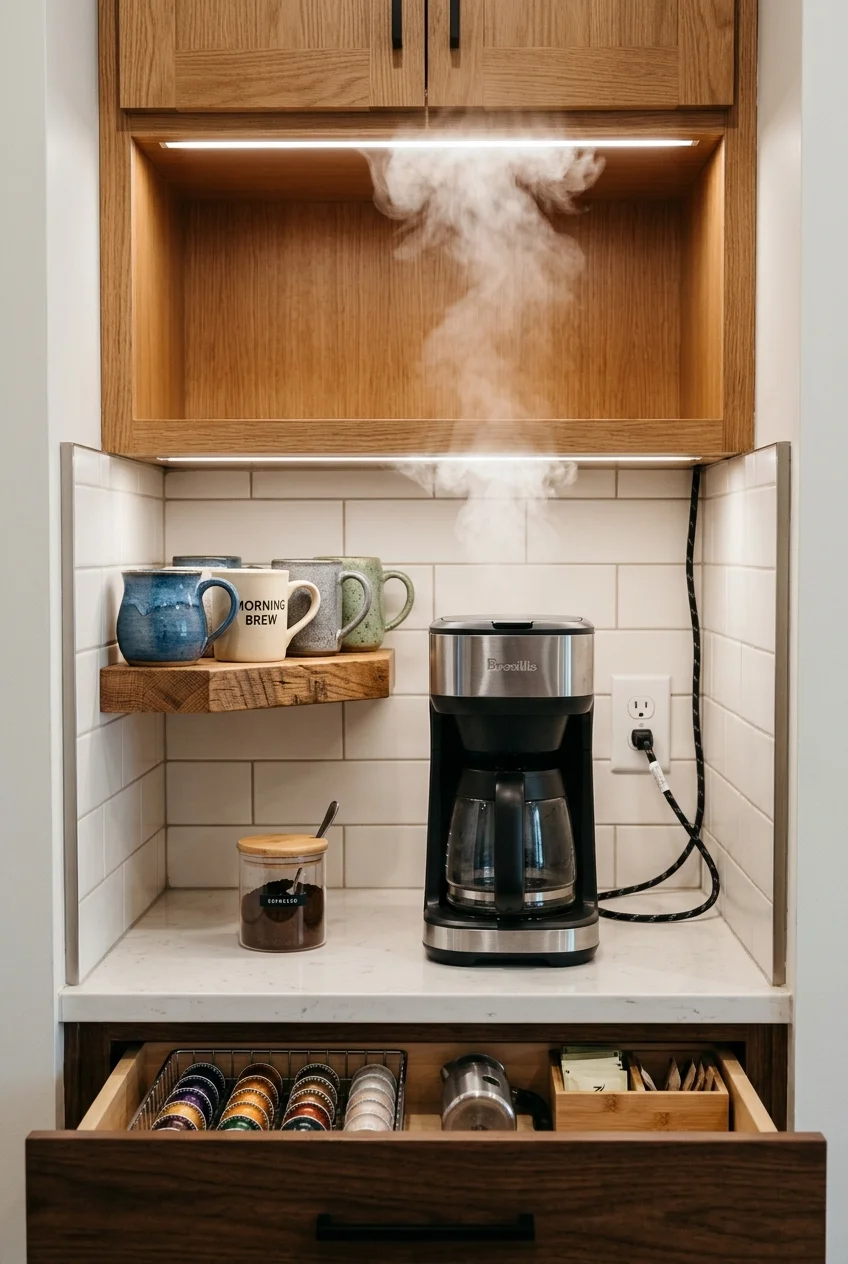
A compact coffee zone prevents mugs, beans, and filters from spreading across the prep counter. Choose a short counter section away from the range.
Keep the machine where steam and heat will not damage cabinetry, following its manual. Store only the week’s supplies nearby to limit clutter.
A pull-out shelf can help with refilling, but it must support the machine and keep the cord safely routed without pinching.
26. Hide Small Appliances Behind Retracting Doors
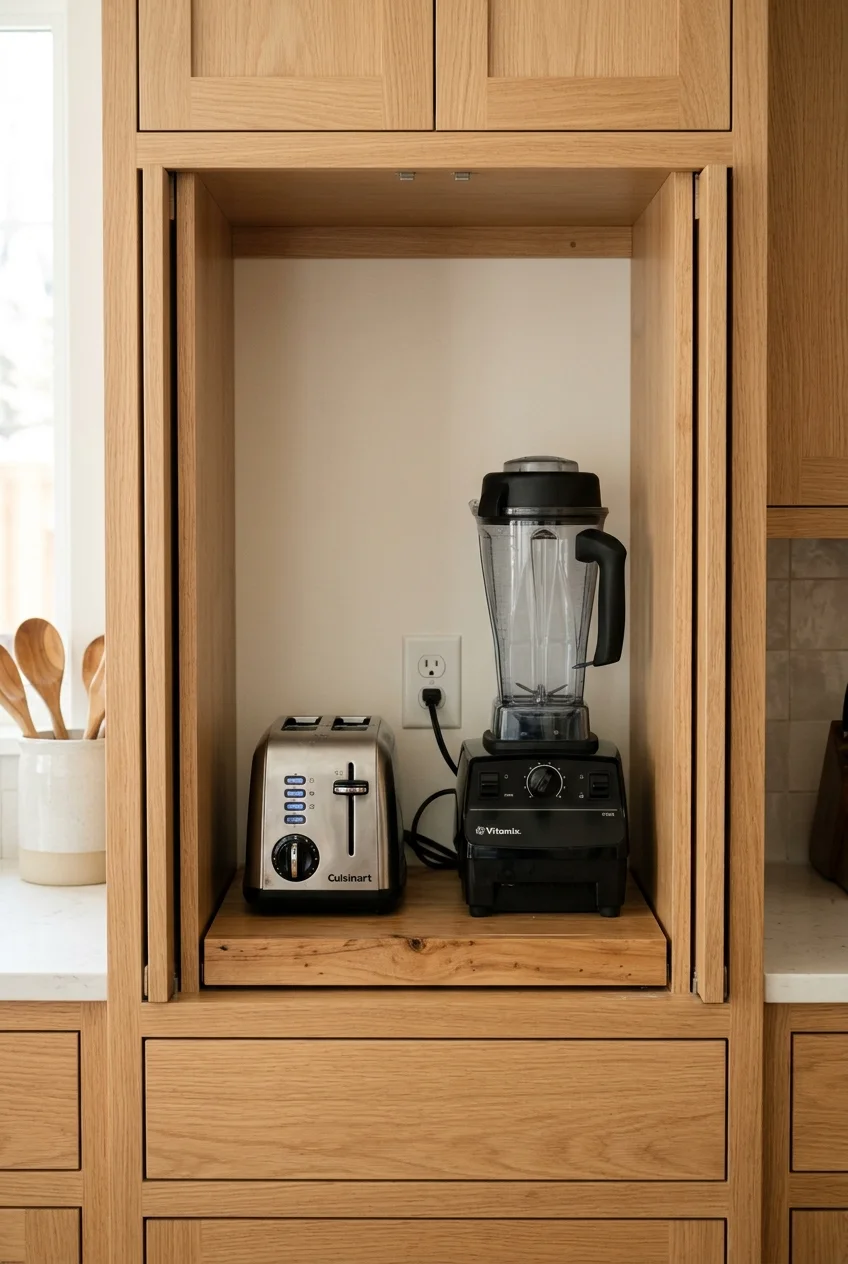
An appliance cabinet can conceal a toaster or blender while keeping it near an outlet. Retracting doors avoid projecting into the narrow aisle.
The cabinet must suit the appliance’s heat, steam, ventilation, and electrical requirements. Many appliances should operate only with doors fully open.
- List each appliance and operating clearance.
- Plan a heat-safe, accessible outlet.
- Confirm doors retract without blocking adjacent cabinets.
- Provide a removable surface for crumb cleanup.
Give the appliance a stable work surface at a comfortable height. Sliding shelves need stops and hardware appropriate for both static and operating loads.
Plan where hot accessories, cords, and loose attachments will rest after use. Crowding them beside the machine defeats the cabinet’s clean-counter purpose.
If custom cabinetry is unrealistic, store the least-used appliance in a low drawer and keep only one everyday machine on the counter.
27. Add a Removable Sink Cover for Prep
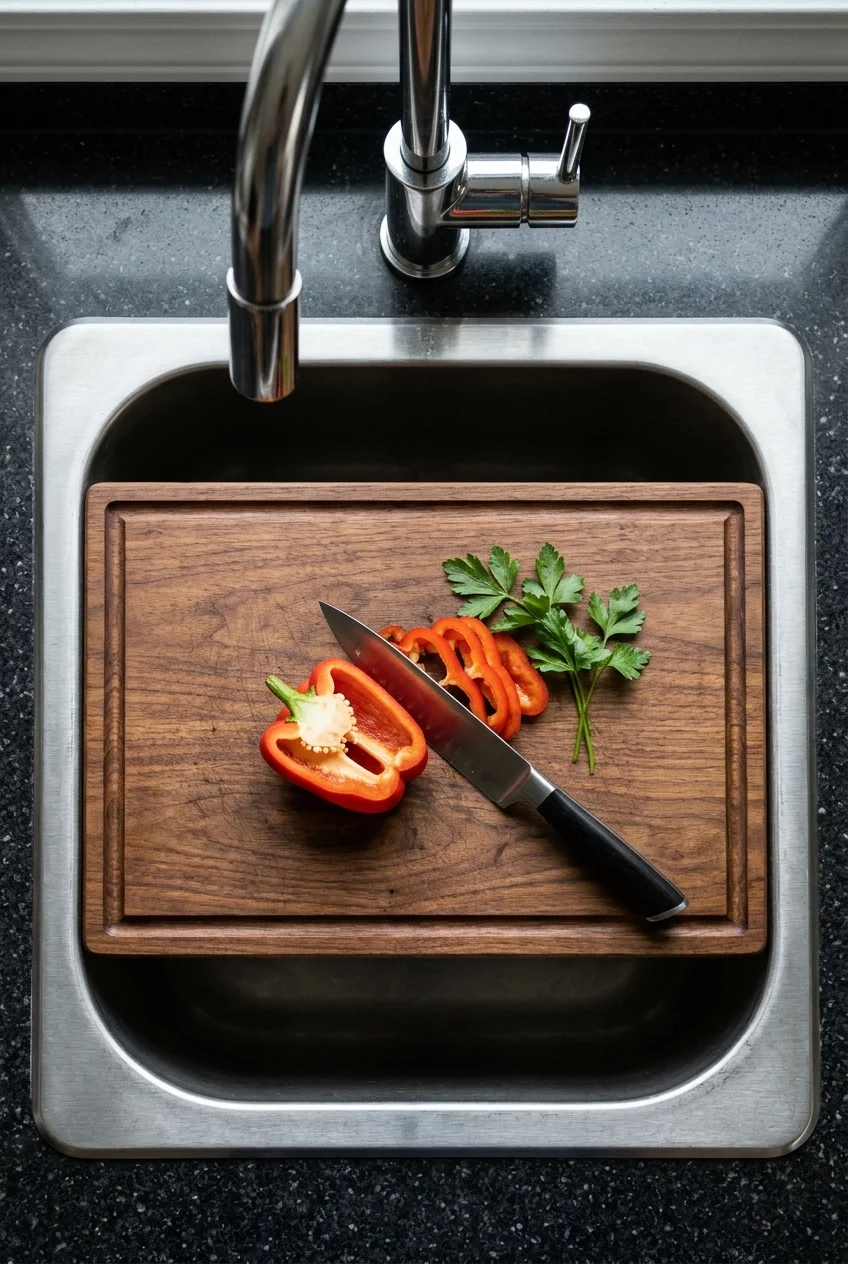
A fitted sink cover creates temporary workspace when the basin is empty. Choose a stable board designed for the sink rather than balancing scrap material.
Remove it before using water, and never conceal dirty dishes beneath it. Store the board vertically where both sides can dry completely.
28. Install a Fold-Down Ledge Outside the Work Aisle
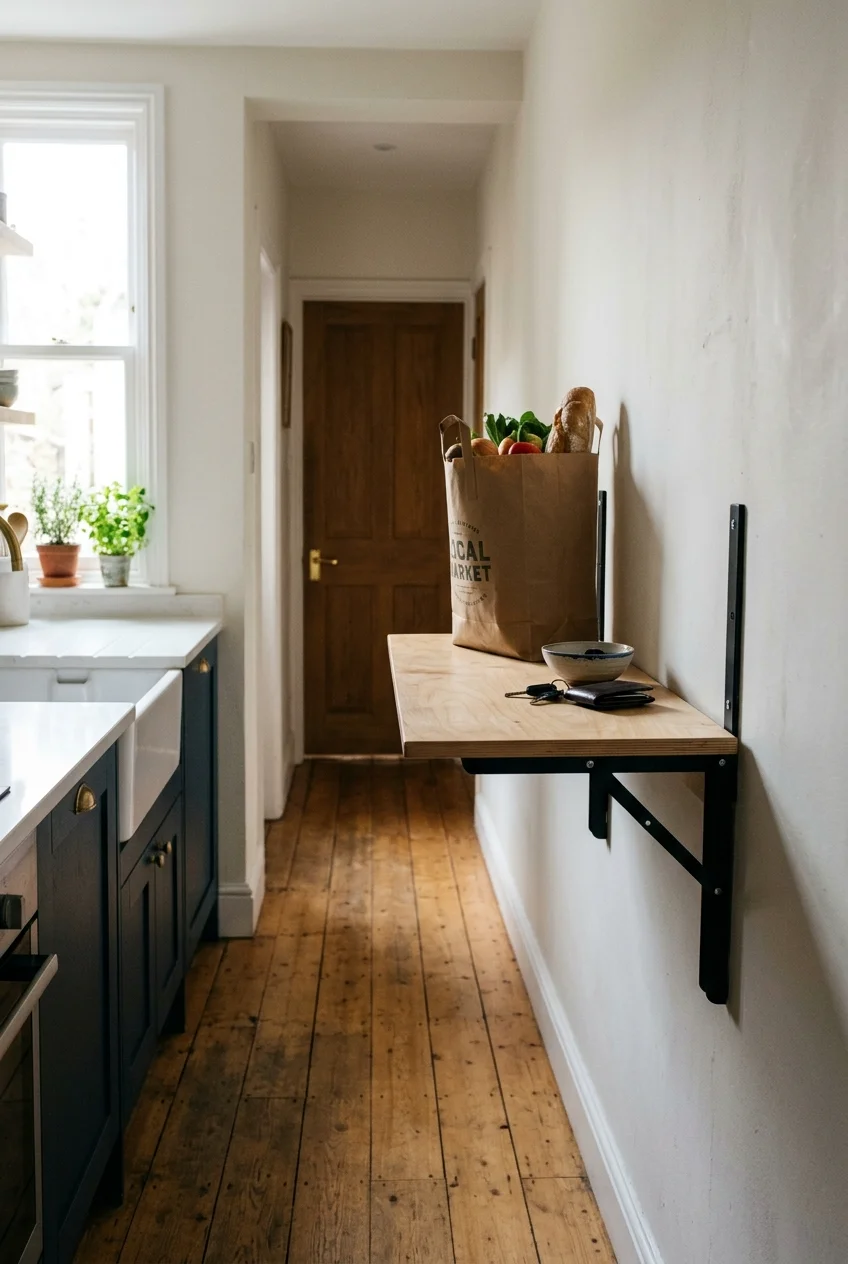
A wall-mounted ledge can hold groceries or a laptop, then fold flat after use. Put it beyond the active galley rather than opposite hot appliances.
The wall, brackets, and fasteners must support the intended load. Confirm the folded panel does not cover an outlet, vent, or doorway trim.
A shallow ledge is more useful than a deep table that narrows circulation. Pair it with a stool that stores somewhere else when unused.
29. Corral Cooking Bottles on One Washable Tray
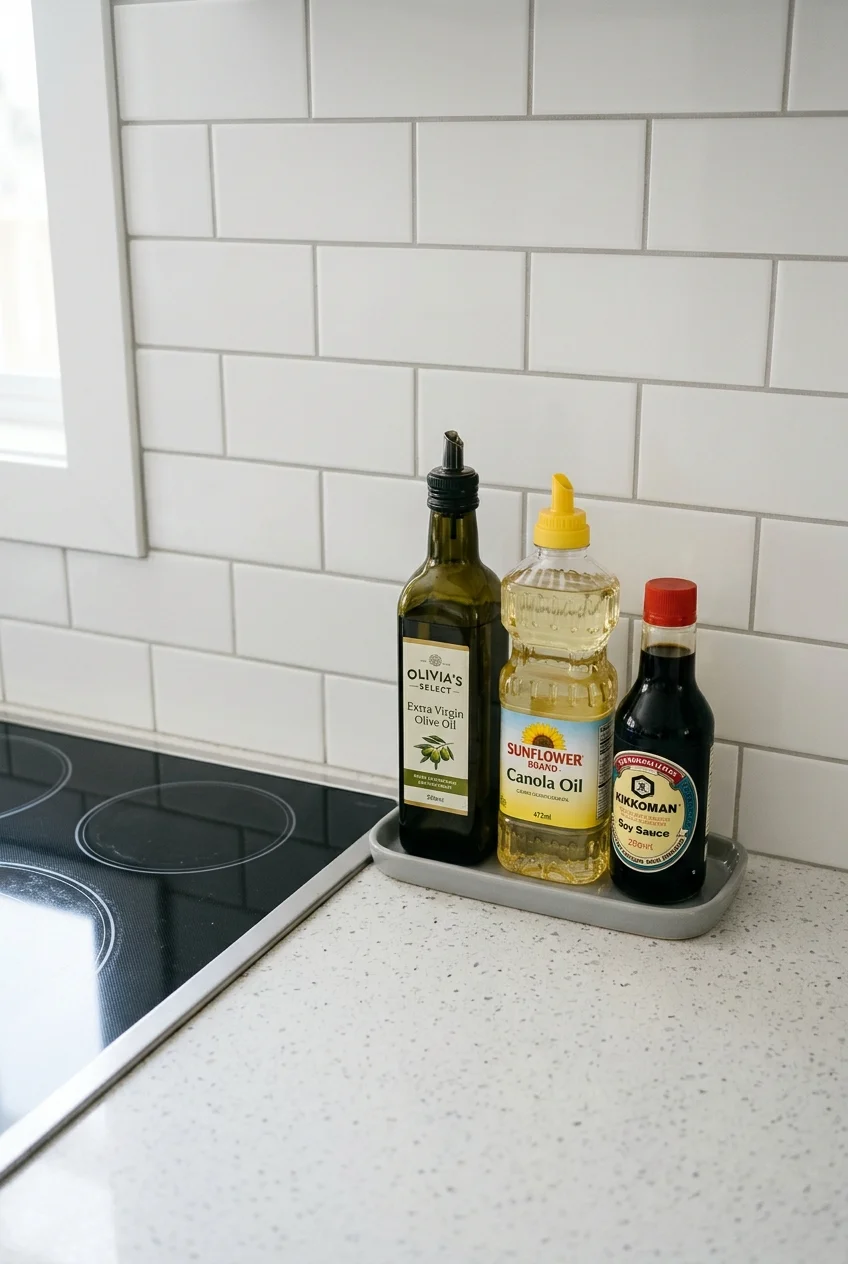
Group the few oils and seasonings used daily on a washable tray. Containment makes the counter easier to wipe and prevents bottles from drifting.
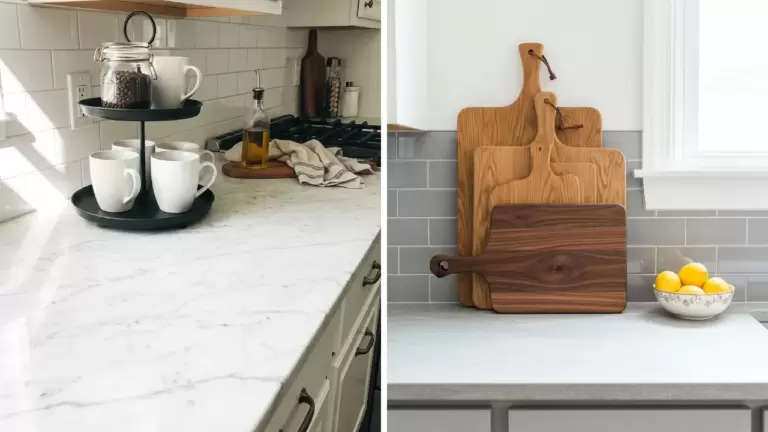
For more edited arrangements, browse these kitchen countertop styling ideas and favor useful groupings over decorative layers in a tiny room.
Keep the tray beside, not behind, the cooktop so bottles avoid direct heat. Store backups and rarely used flavors in a cabinet.
30. Set Up Trash and Recycling Beside Prep
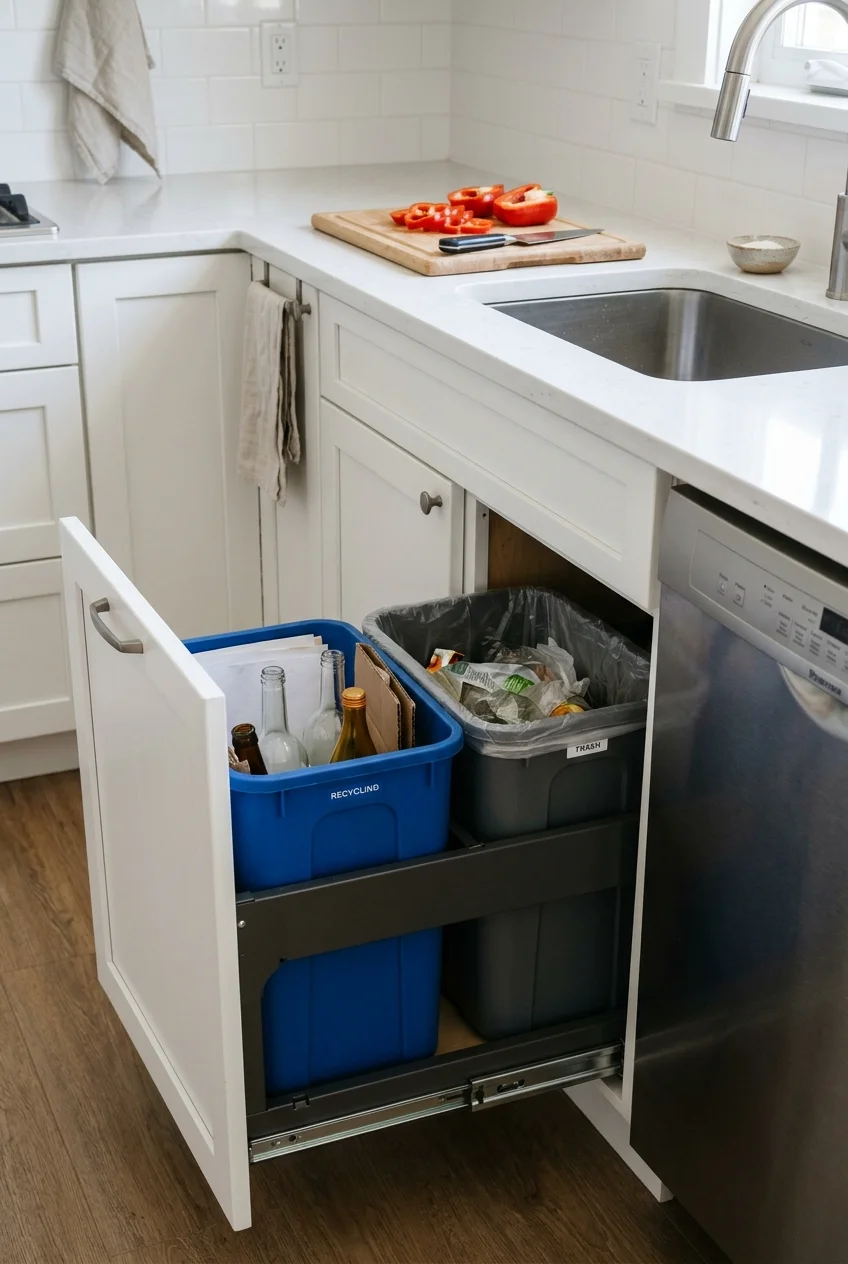
A pull-out waste cabinet near the prep surface shortens cleanup and keeps freestanding bins out of the aisle. Separate containers according to local collection rules.
The cabinet needs washable interiors and enough clearance to remove each bin. Avoid placing the pull-out where an open dishwasher blocks access.
If cabinetry cannot change, use slim lidded bins at the room’s end rather than squeezing them between opposing work centers.
Use Color, Light, and Finish Deliberately
A tiny kitchen does not require an all-white palette. Control contrast, reflection, pattern scale, and lighting so one visual choice leads the room.
31. Pair Dark Base Cabinets with Pale Uppers
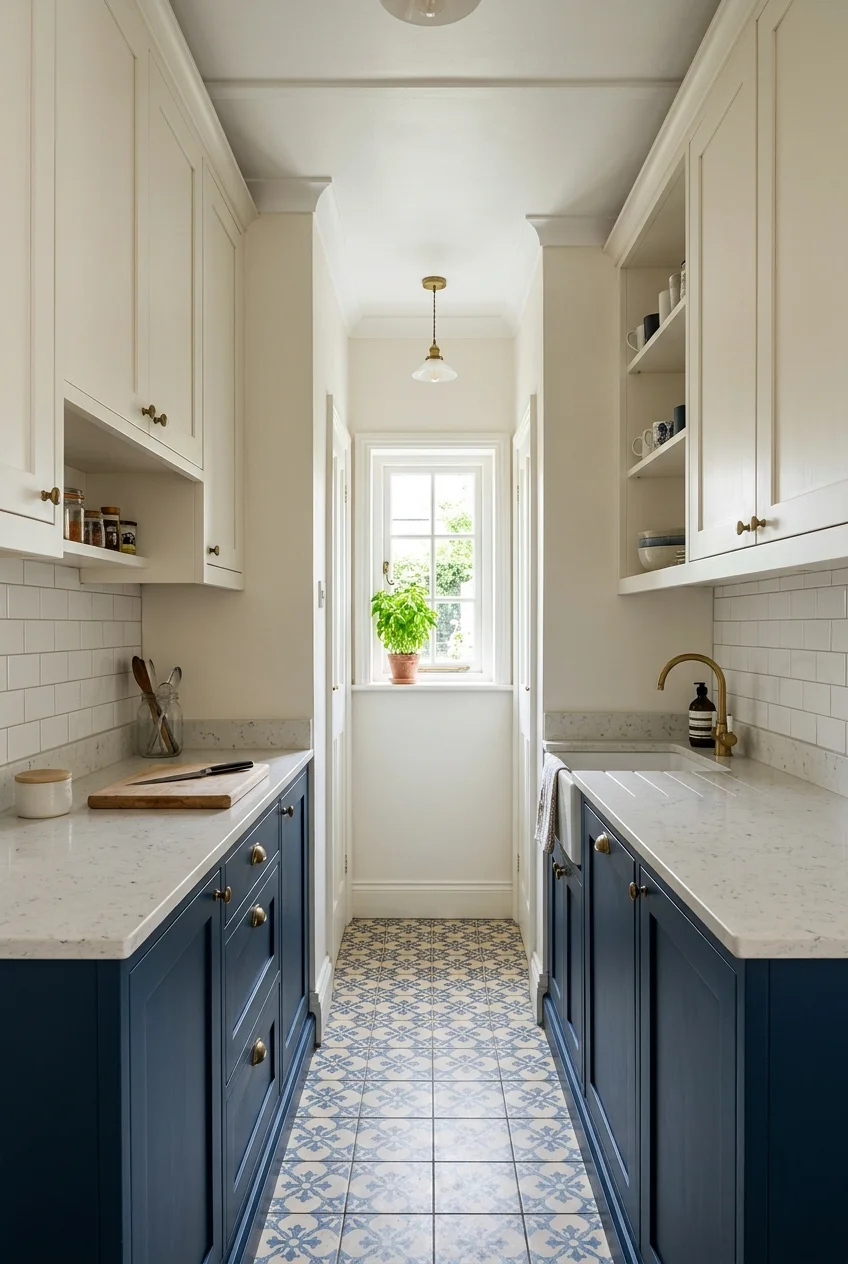
A deeper color below grounds the long cabinet runs, while pale uppers reduce visual weight at eye level. Repeat both tones in small details.
Sample the dark color beside the floor and countertop, not on a white wall. Undertones become more obvious across two close parallel surfaces.
32. Color-Drench Cabinets and Walls
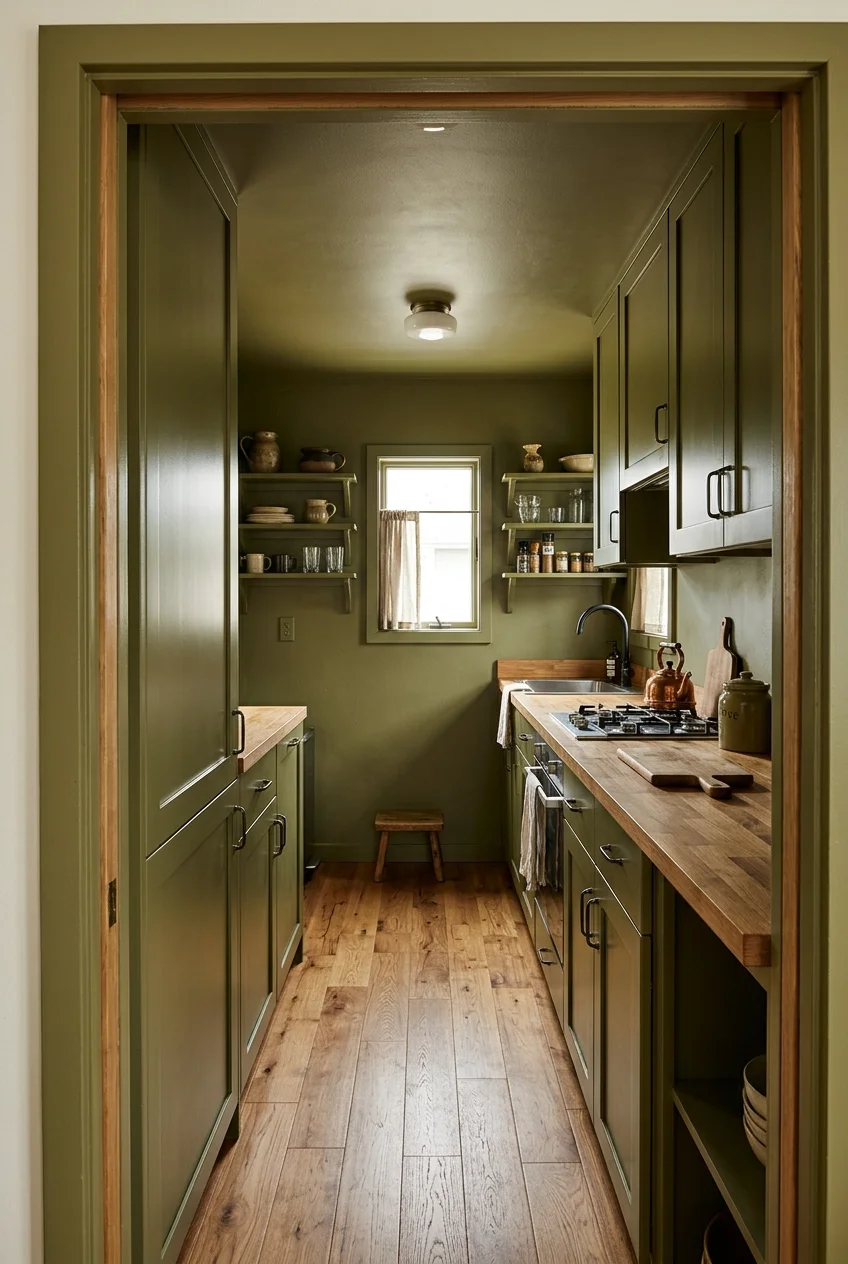
Using one muted color across walls and cabinets reduces visual chopping, especially when doors have simple profiles. Vary sheen for durability and definition.
Test large samples on both sides of the aisle because the same color changes with shadow. Keep counters and flooring distinct enough for orientation.
This approach can feel enveloping rather than airy, which may be the point. Choose it because you like saturation, not as a guaranteed enlarging trick.
33. Choose a Glossy Backsplash to Bounce Light
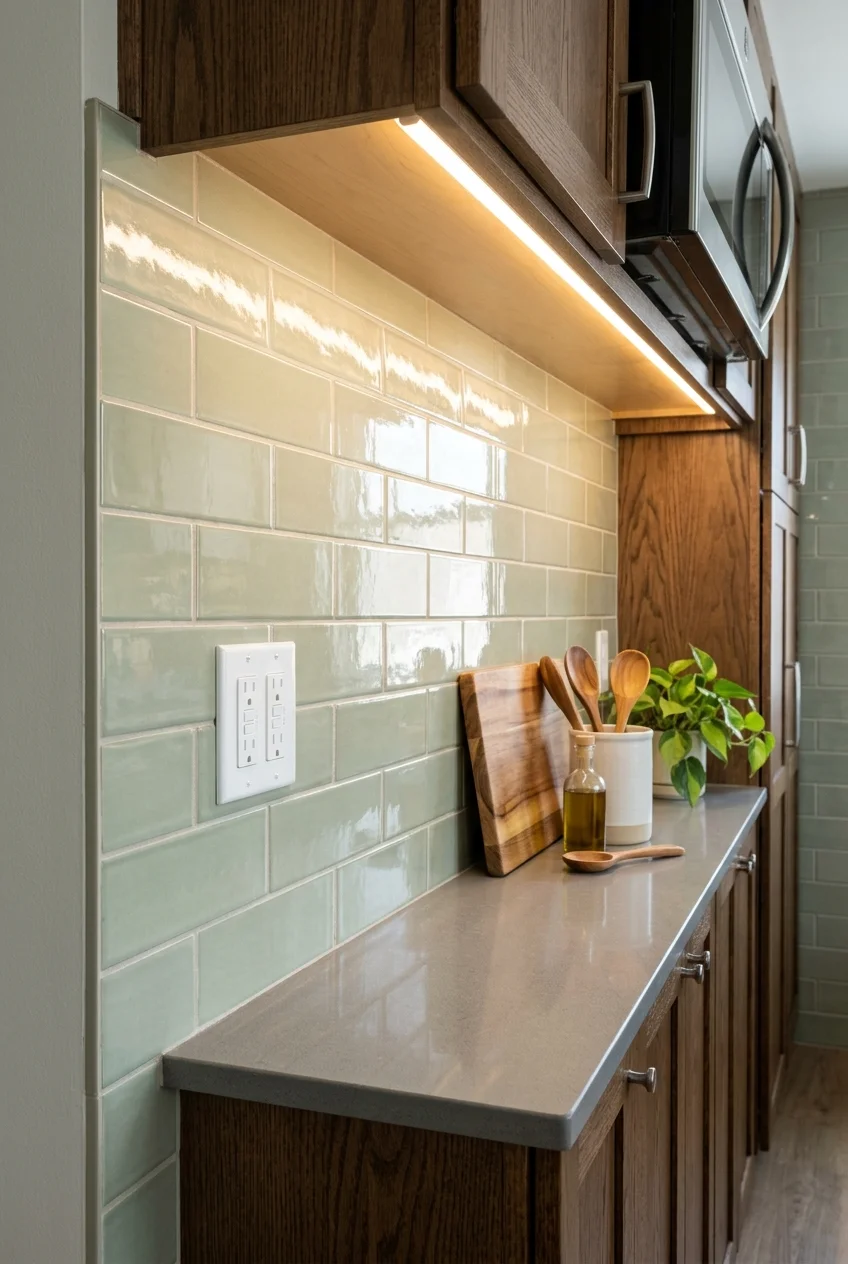
Glazed tile reflects small highlights across a narrow room without requiring mirrored walls. A restrained pattern keeps grout lines from dominating the long elevation.
If your cabinets are white, compare these verified backsplash ideas before selecting color, scale, and finish for the actual room.
Bring tile samples home and inspect them under task lighting. Highly irregular surfaces can cast busy shadows, while very reflective finishes reveal splashes quickly.
34. Use a Mirror Only on a Quiet Wall Section
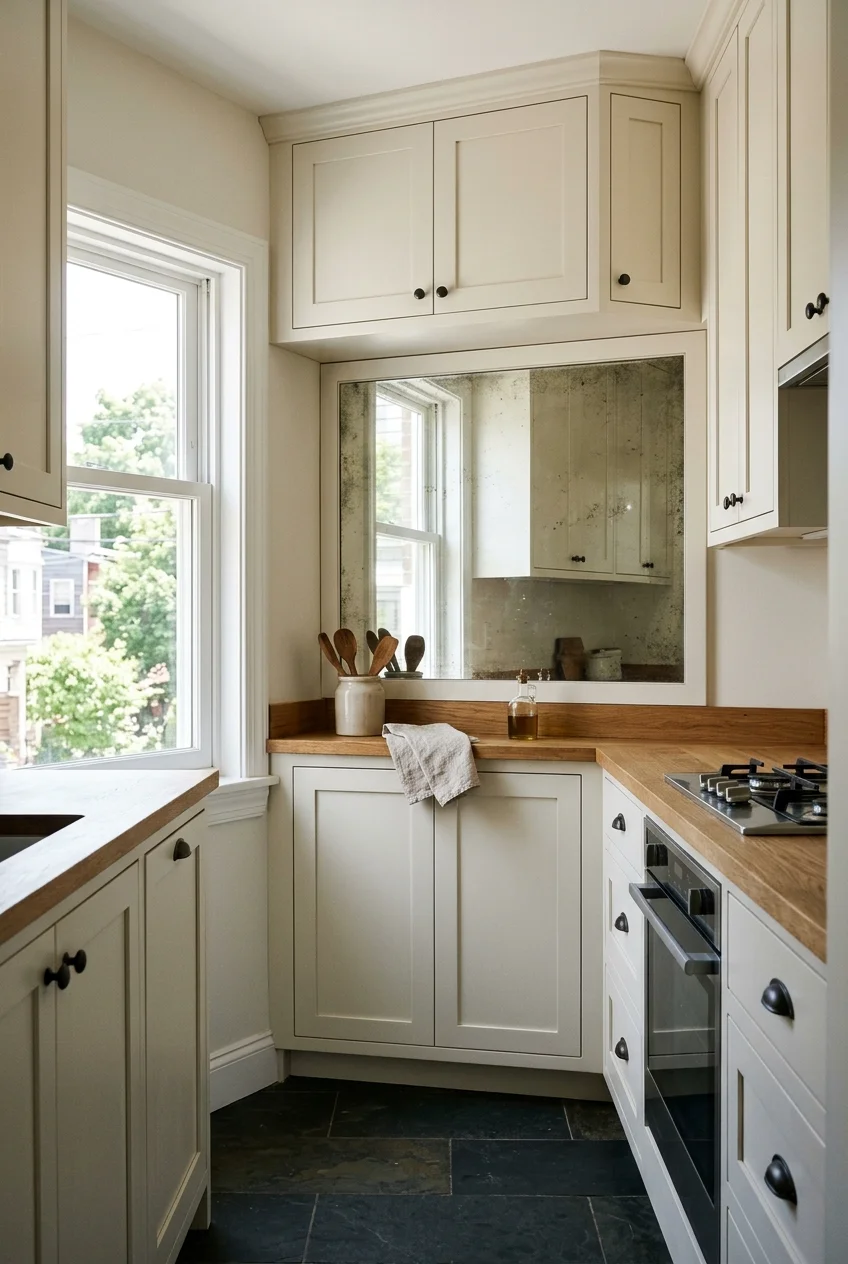
A mirror can extend a sightline when it reflects a window or calm dining area. Avoid placing it where burners, splashes, or clutter dominate.
Antiqued or lightly smoked glass softens reflections, while clear mirror provides more brightness. Both require careful templating around outlets and edges.
Cleaning note Use kitchen-appropriate installation materials and keep mirror edges properly finished so routine wiping does not expose a vulnerable backing during regular cleaning.
35. Run a Small Floor Pattern Across the Width
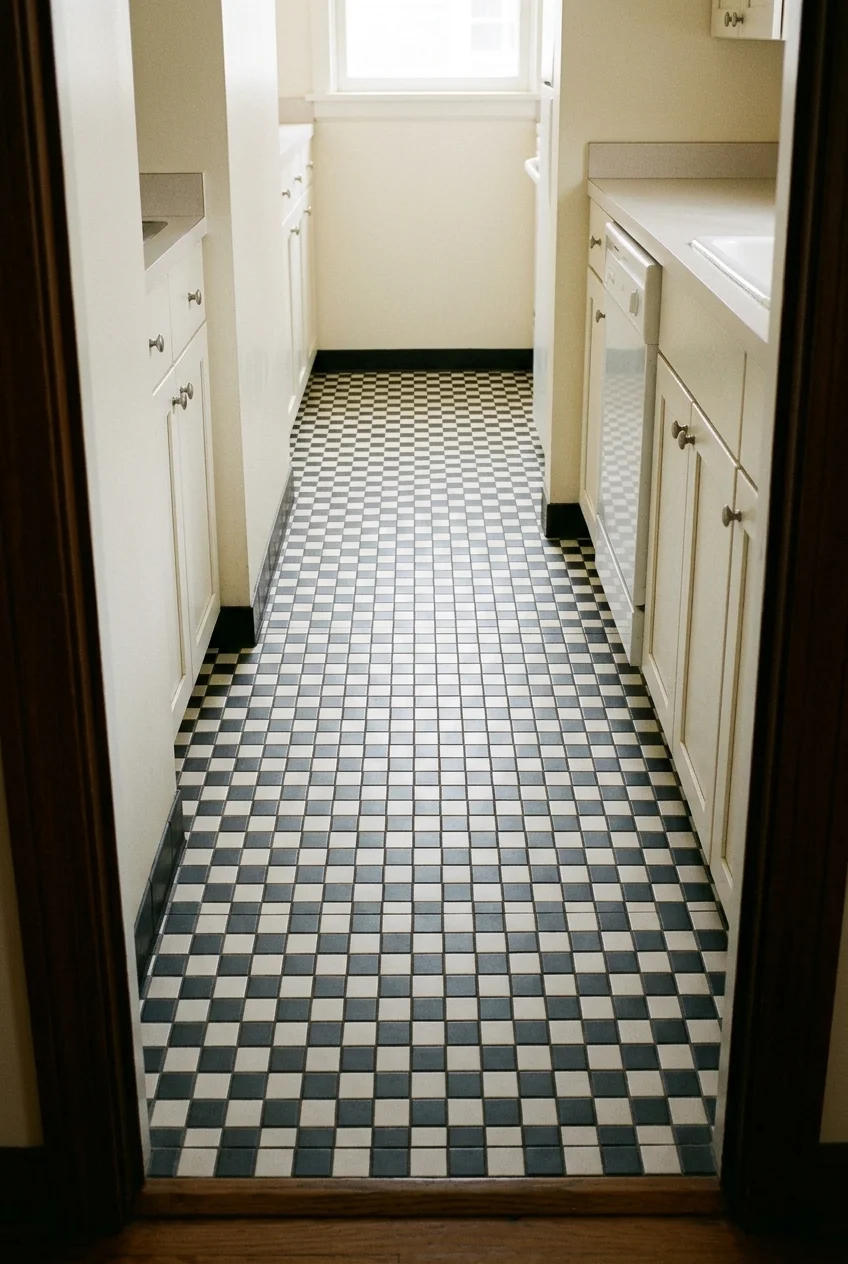
A compact checker or short herringbone layout can emphasize width instead of the corridor’s length. Scale the repeat to remain readable between cabinets.
Lay out full tiles or a paper template before installation to avoid skinny edge cuts. Slip resistance, cleanability, and subfloor suitability matter more than direction.
If replacing flooring is unrealistic, a flat-woven runner can introduce a crosswise motif without committing to demolition, permanent materials, or installation costs.
36. Lead the Eye with a Washable Runner
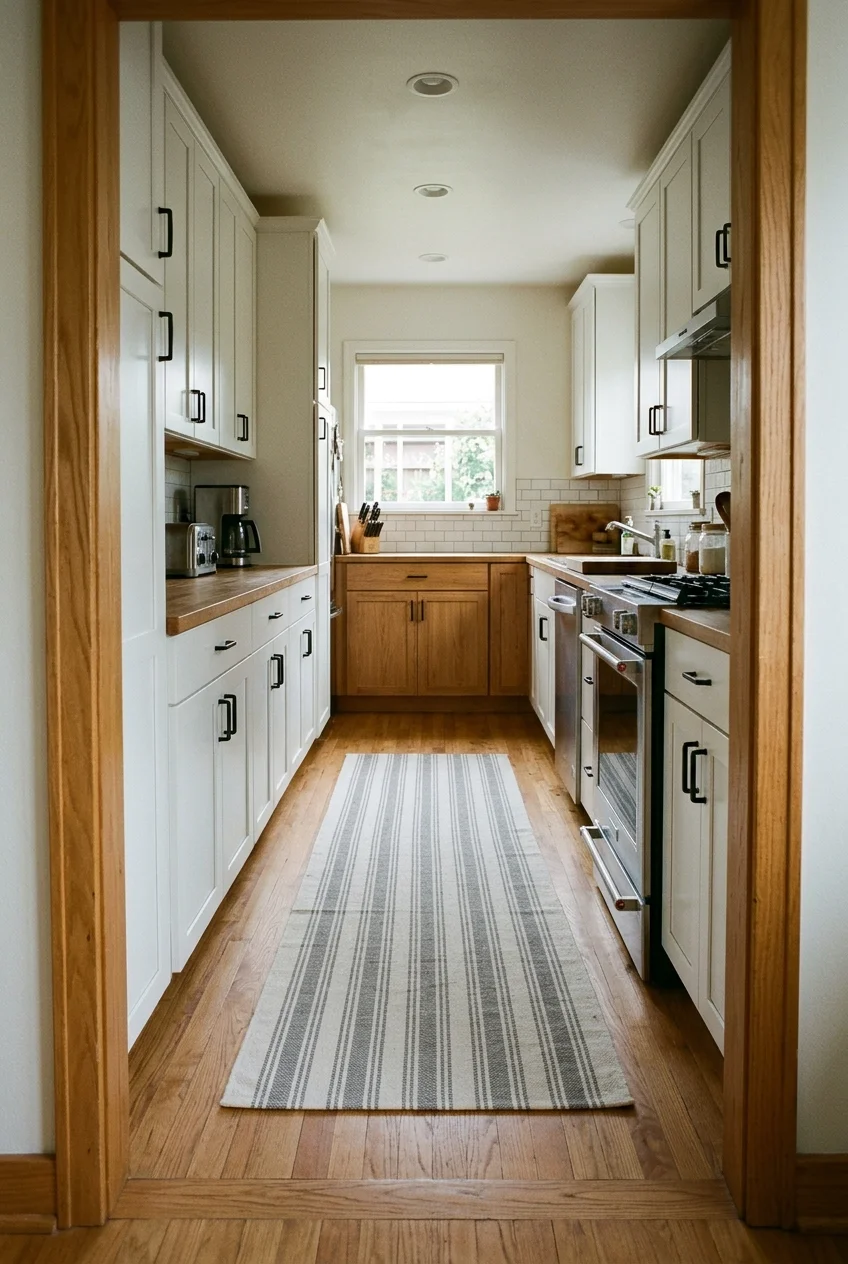
A narrow runner introduces color and softens sound without taking counter space. Choose a low profile that will not catch doors or become a trip edge.
Use a suitable nonslip pad, and keep rug edges away from the range and dishwasher. Washability matters more than an elaborate pale pattern.
Stop the runner before thresholds so it does not bunch beneath doors. A shorter rug can define the prep zone without covering every inch.
37. Paint the Ceiling a Controlled Accent Color
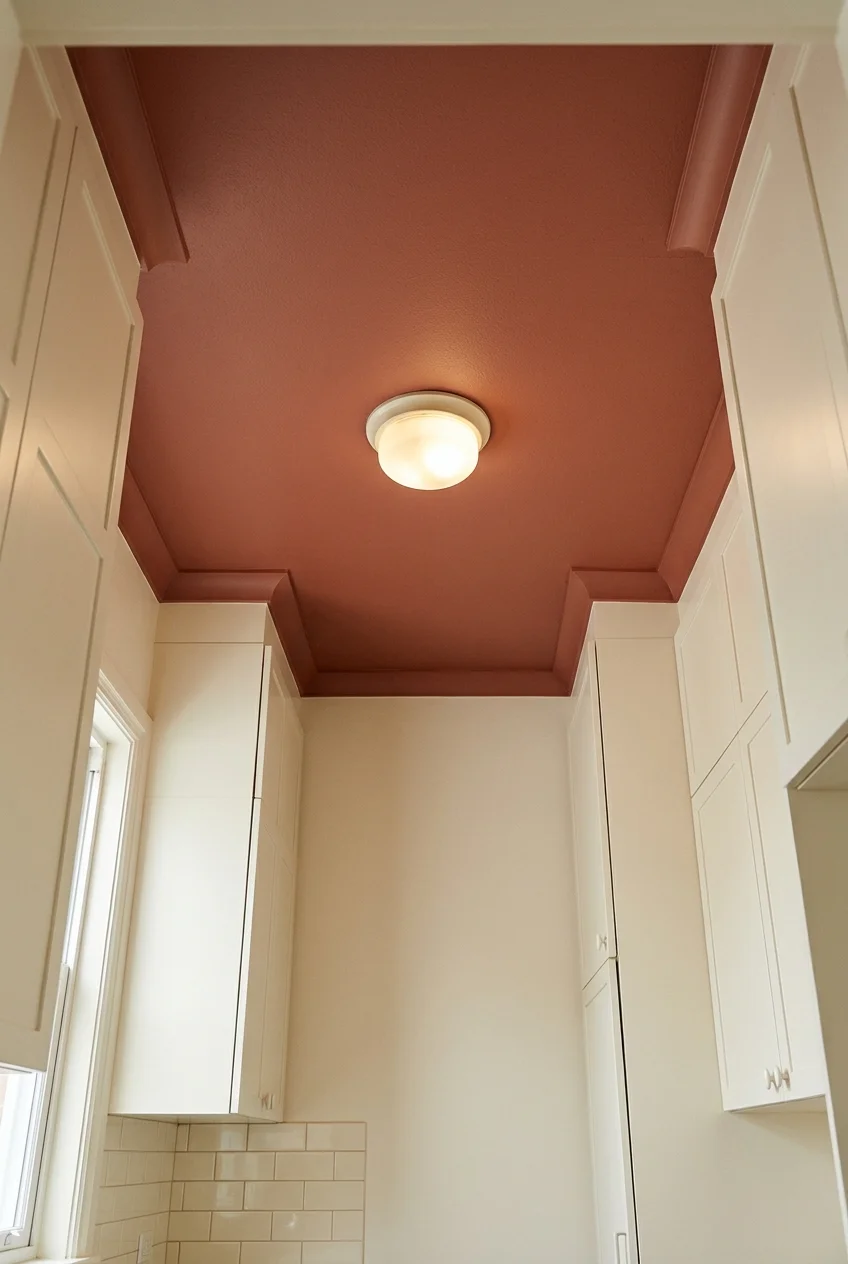
A soft ceiling color gives the long room a finished top plane without consuming storage. It works best when wall and cabinet colors stay restrained.
Sample the color beside existing lighting because upward-facing illumination can exaggerate undertones. Use a finish appropriate for kitchen moisture and cleaning.
38. Layer Under-Cabinet and Ceiling Light
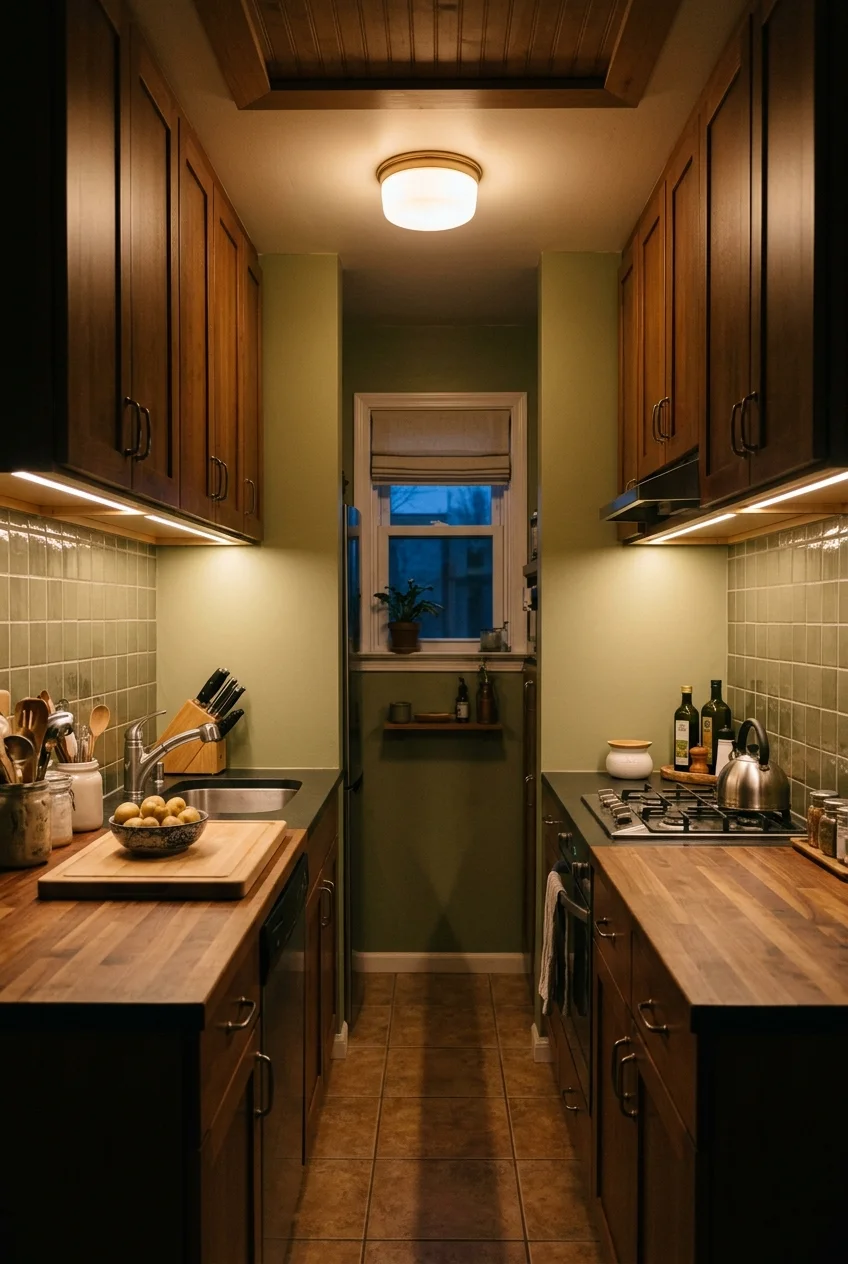
Ceiling light supports circulation, while under-cabinet fixtures illuminate chopping and washing. Separate controls let the small room adapt from cooking to evening cleanup.
Choose fixtures intended for their location, and have permanent wiring completed properly. Avoid visible diodes reflecting harshly from glossy counters or backsplashes.
- Continuous task light over the main prep counter.
- Compact ceiling fixture clear of cabinet doors.
- Optional low-level night light outside the cooking controls.
Match color quality closely across layers so food and finishes do not shift noticeably when both sources are switched on together during evening use.
39. Add One Articulating Wall Light at the End
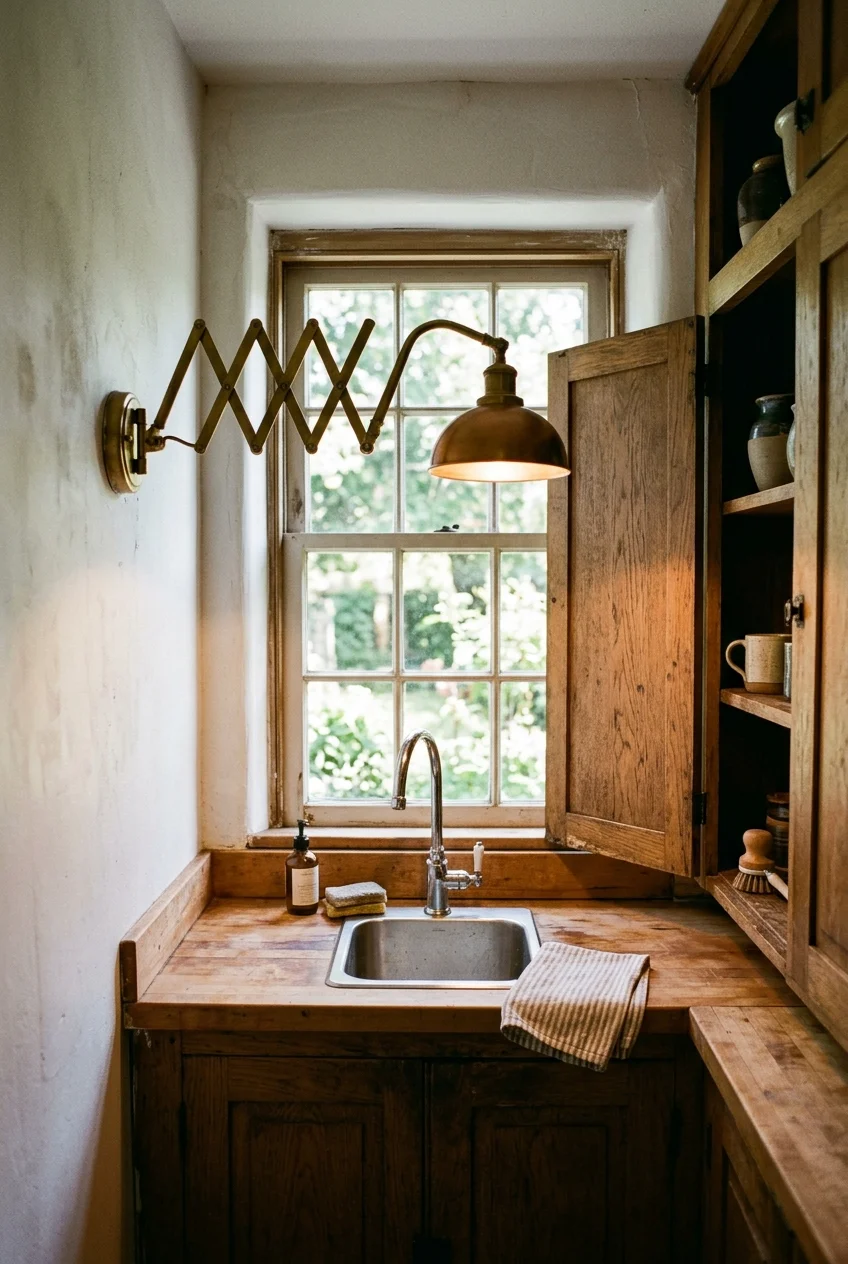
A small articulating sconce can brighten a sink or end counter while creating a focal point. Keep its arm outside door swings and head clearance.
Use a fixture rated for the location and install it on a suitable electrical box. Plug-in versions still need safe cord routing away from water and heat.
Placement check Mock up the extended arm with cardboard before installation so it does not collide with upper doors, heads, or the faucet.
40. Make the End Wall the Only Patterned Surface
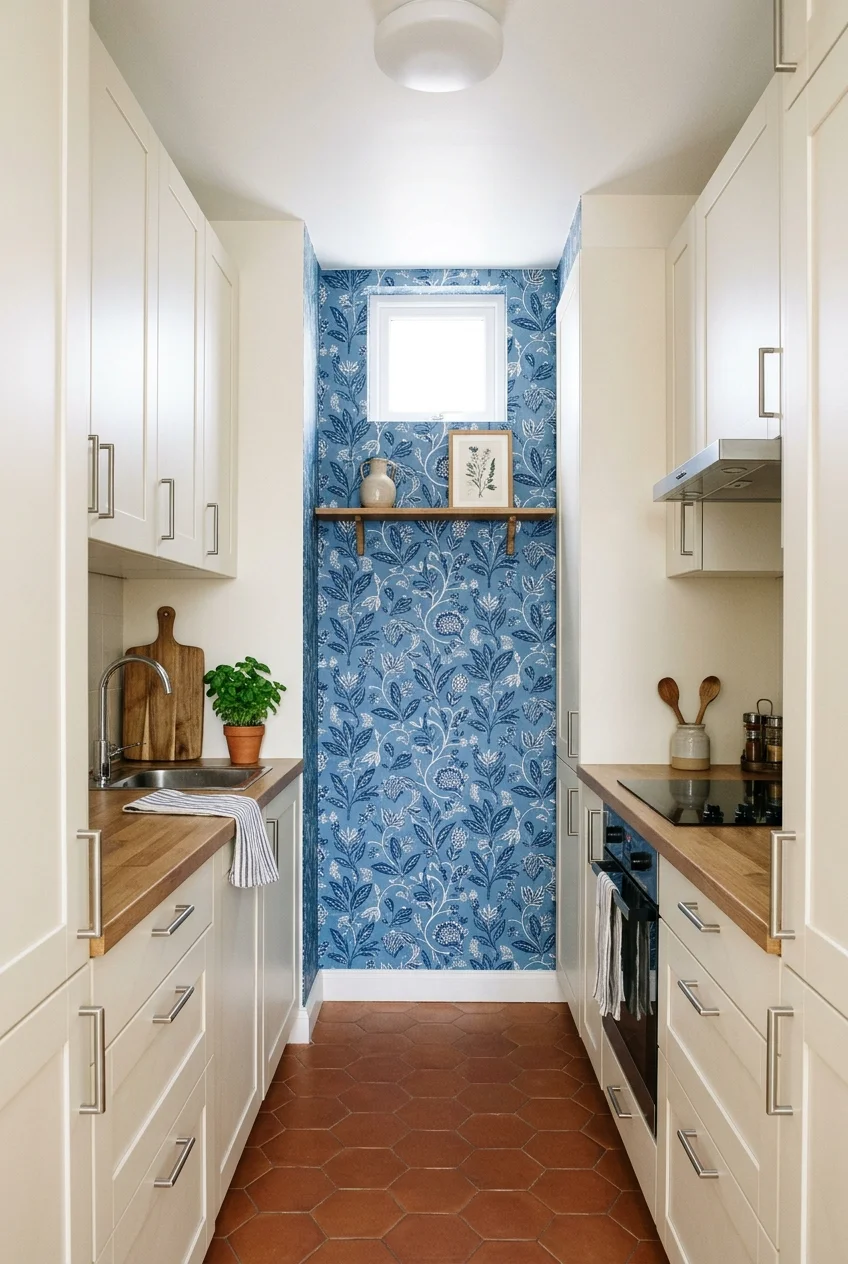
Wallpaper or patterned tile on the short end wall can stop the tunnel effect. Keep the long side walls quieter so the pattern has room.
Choose a washable, kitchen-suitable material and keep paper away from direct splash and heat. A framed panel can deliver color with easier replacement.
Repeat one pattern color in cabinet hardware, a runner, or a small appliance. Multiple exact matches will feel more staged than connected.
Choose Flexible Upgrades for Real Homes
The last group mixes renter-friendly changes with renovation decisions. Each idea solves a distinct constraint, so choose according to access, ownership, and budget.
41. Swap Bulky Pulls for Low-Profile Hardware
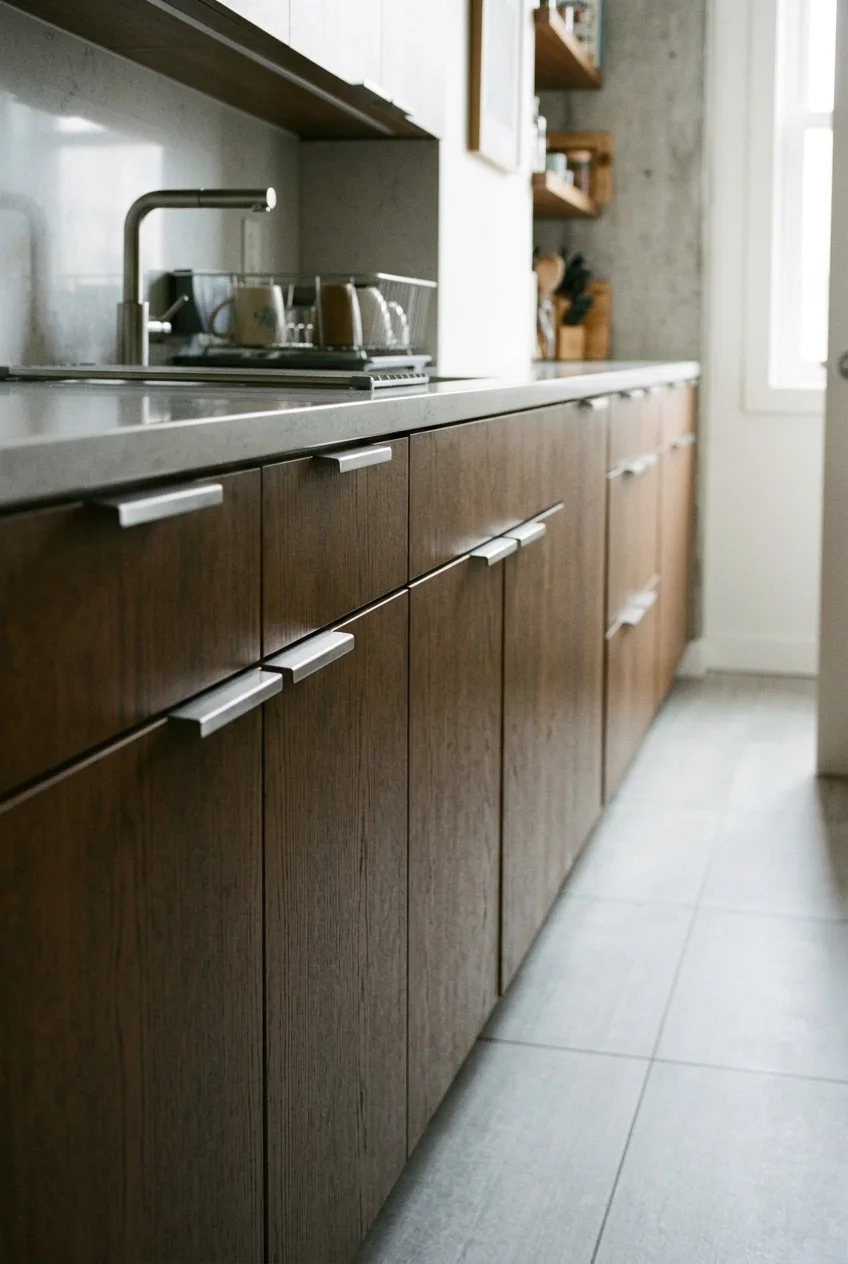
Long projecting handles can catch pockets in a narrow aisle. Low-profile pulls or well-placed knobs reduce snags while preserving an easy grip.
Measure existing hole spacing before shopping, and test one sample with wet hands. Edge pulls need compatible door construction and careful alignment.
Do not reduce accessibility for a cleaner line. The best hardware feels secure to the people using it and clears neighboring doors.
42. Use Removable Wallpaper on the End Panel
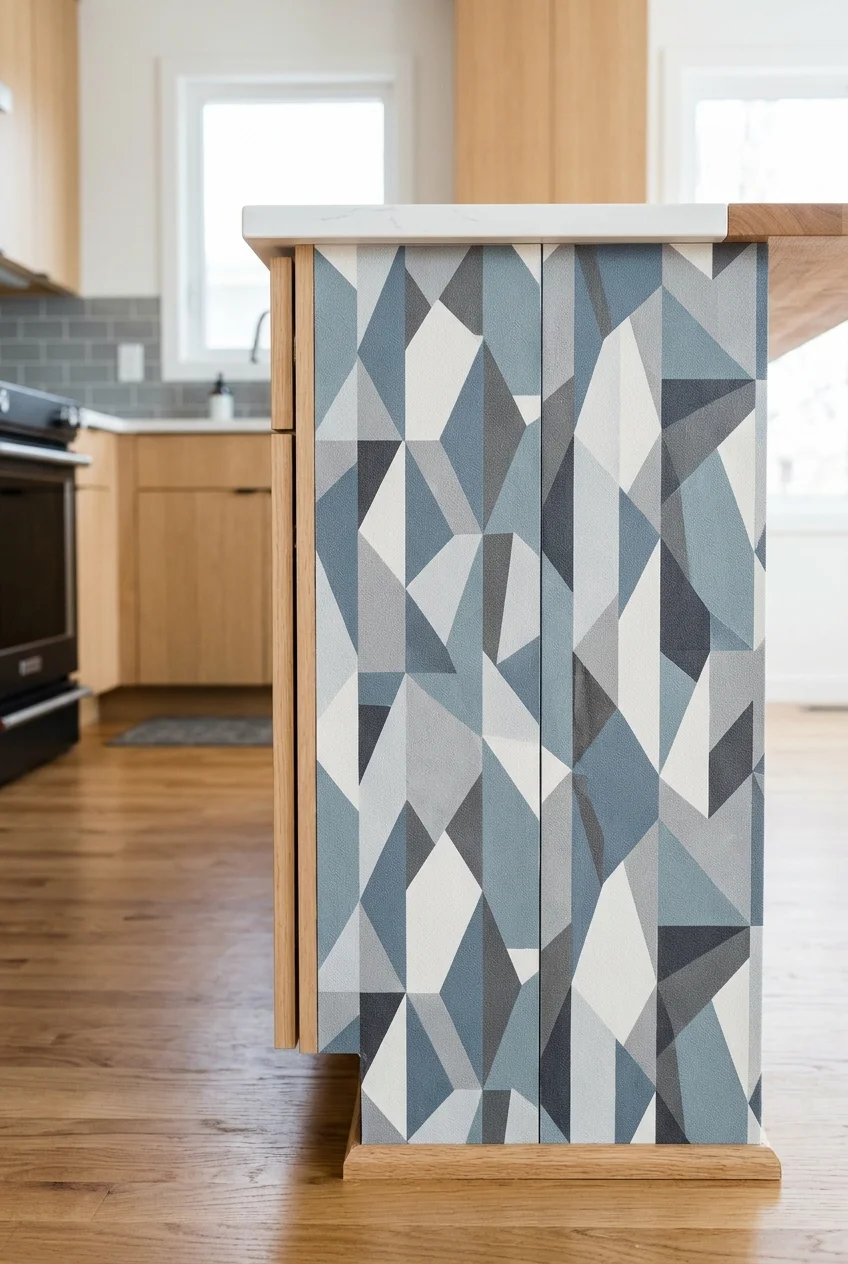
A cabinet end panel offers enough surface for a renter-friendly pattern without covering the entire kitchen. Choose a design scaled to the small rectangle.
Confirm the material suits the finish, heat, and moisture exposure, then test removal in a hidden spot. Keep seams away from frequent splashes.
Rental note Save the product instructions and a small offcut so you can check removal guidance and patch the pattern after minor damage.
43. Build a Freestanding Pantry at the Dead End
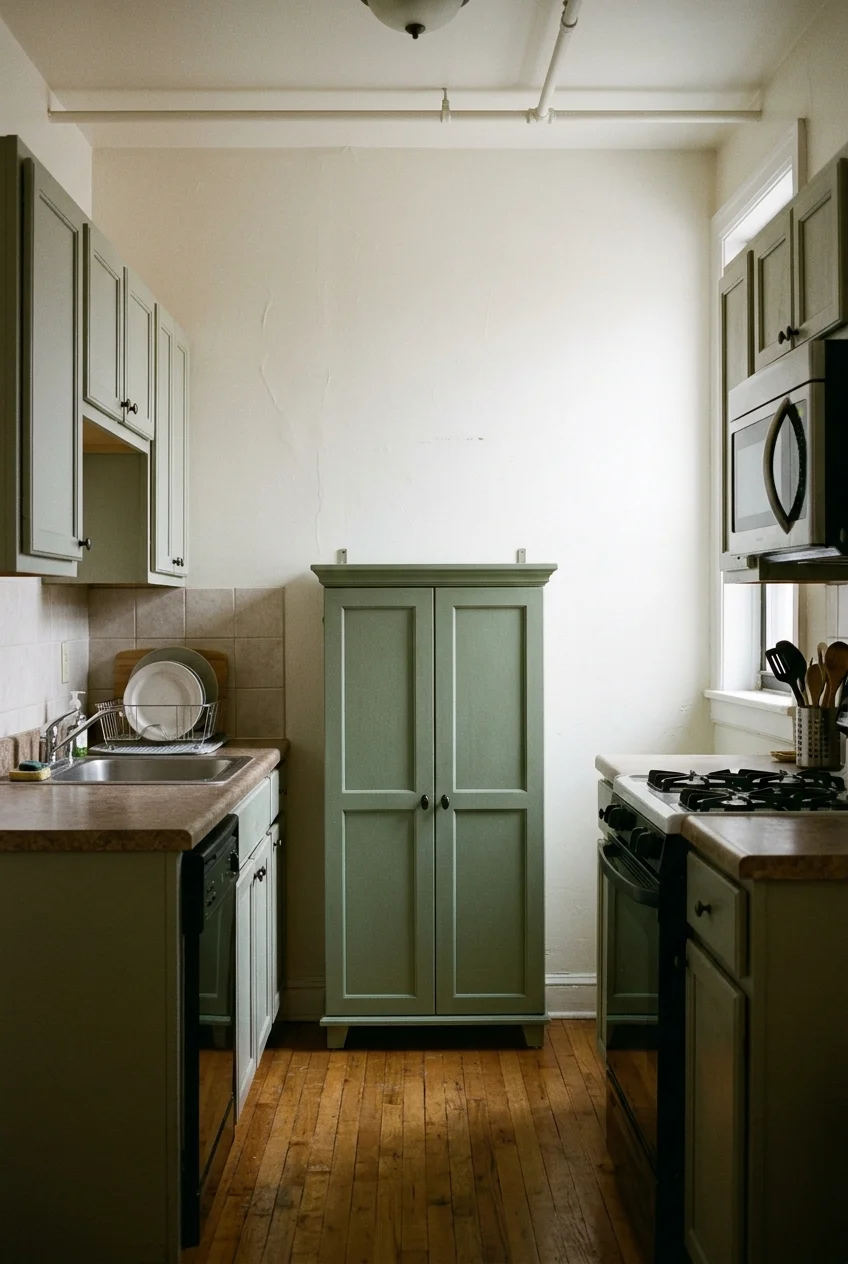
A shallow freestanding pantry can use a blank end wall without changing rental cabinetry. Closed doors keep package colors from dominating the sightline.
Anchor tall furniture as required, and confirm it does not cover vents, outlets, or access panels. Door depth must stay clear of the aisle.
Adjust shelves to food packaging you actually buy, leaving one tall zone for bottles. Avoid storing heavy appliances above shoulder level.
44. Choose a Compact Dishwasher for a Small Household
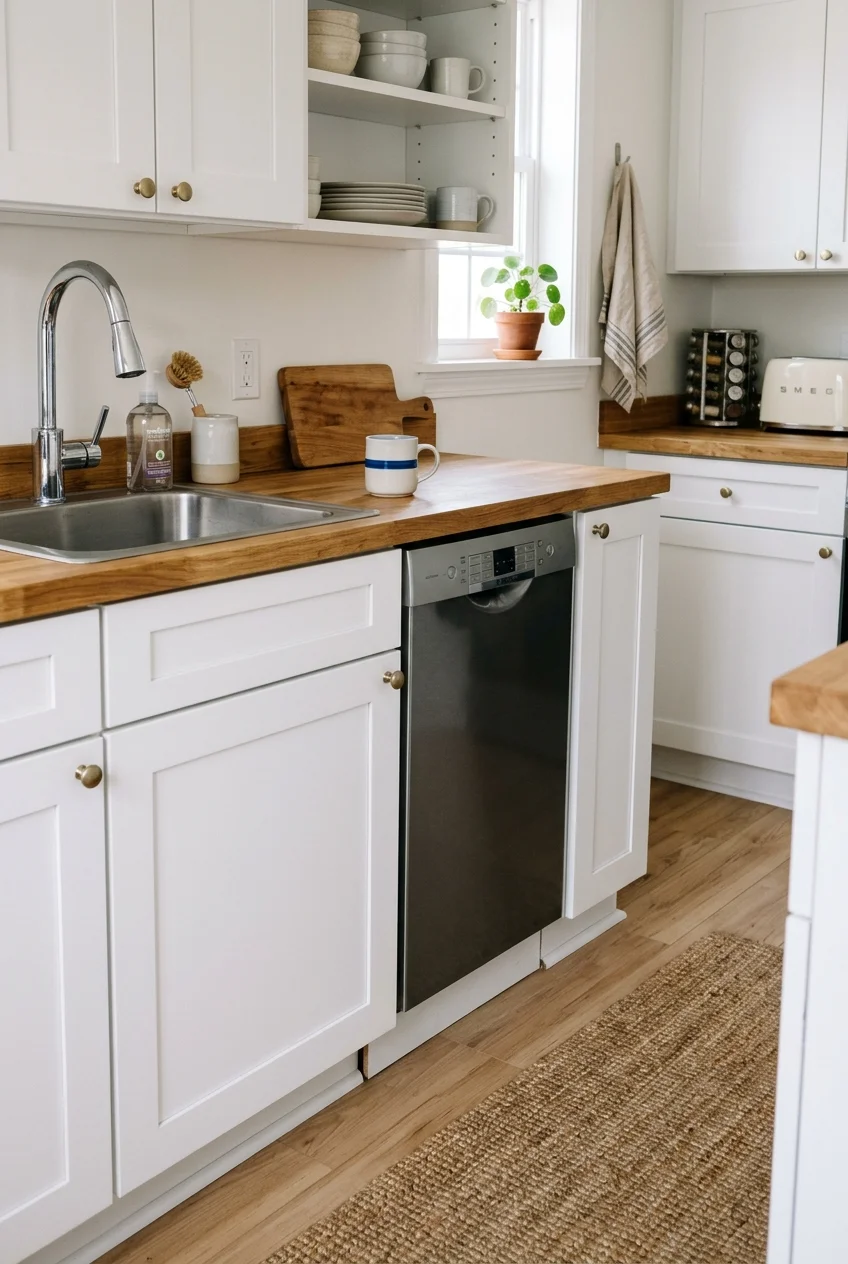
A narrower dishwasher can free cabinet width for drawers or trash storage, but capacity and cycle habits must suit the household.
Compare exact exterior dimensions, required openings, hookups, sound ratings, and place settings. The door still needs clear standing space when fully open.
Keep the dishwasher near the sink and follow the manufacturer’s installation requirements. Custom filler panels can prevent awkward gaps beside existing cabinets.
- Daily dish volume and largest pan size.
- Cabinet opening and finished-floor height.
- Water, drain, power, and service access.
- Open-door clearance across the aisle.
A smaller tub may require more frequent cycles or hand-washing large cookware. Compare that routine honestly with the cabinet space you would regain.
If replacing a wider machine, plan the recovered width as finished cabinetry rather than leaving a narrow filler that cannot store anything useful.
45. Select a Counter-Depth Refrigerator with a Practical Door
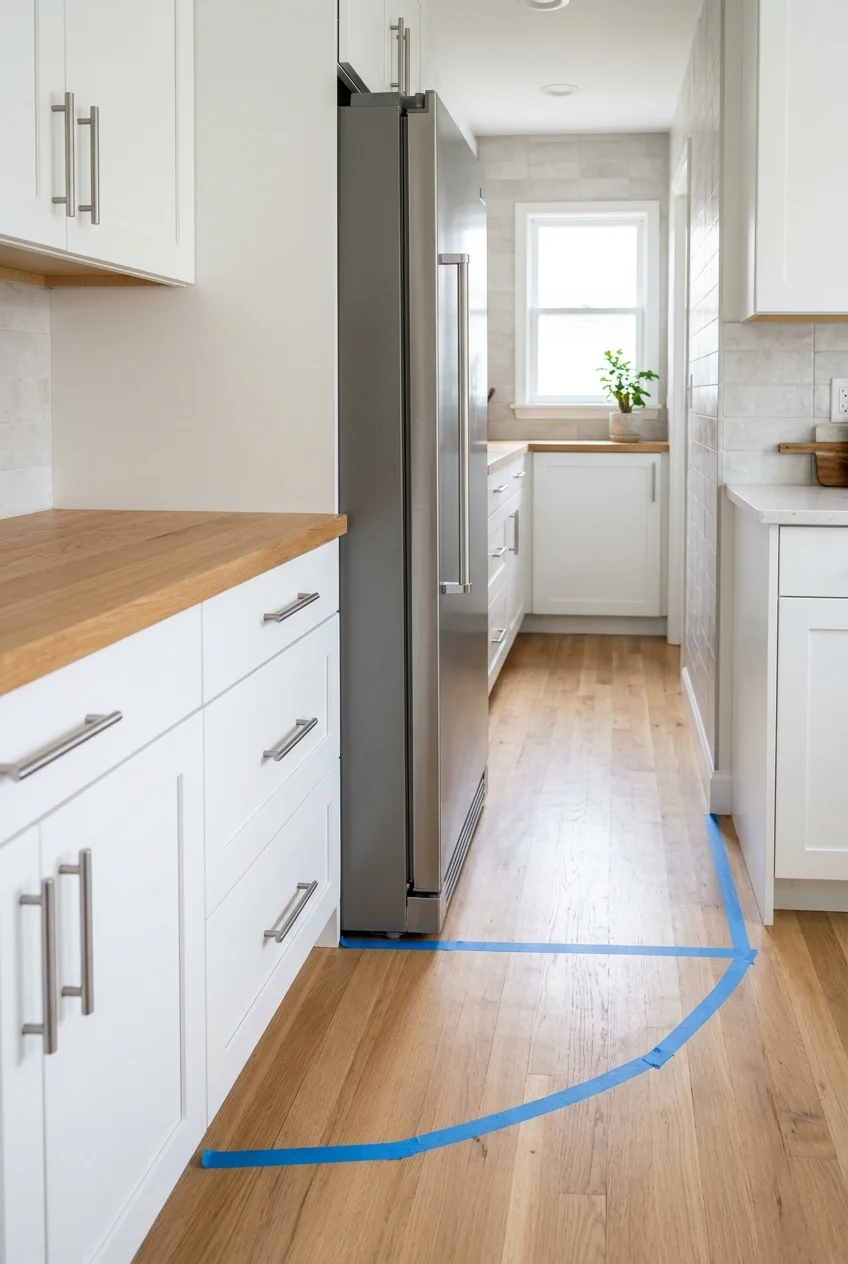
Reducing refrigerator projection can improve a narrow passage, but the label “counter-depth” does not guarantee flush installation. Handles and ventilation still add depth.
Compare cabinet cutout, door swing, hinge behavior, and drawer access. Some doors must open beyond ninety degrees before interior bins can be removed.
Tape the full body and open-door footprint on the floor. Capacity, service access, and food habits should decide whether the tradeoff is worthwhile.
46. Panel One Appliance to Calm the Long Elevation
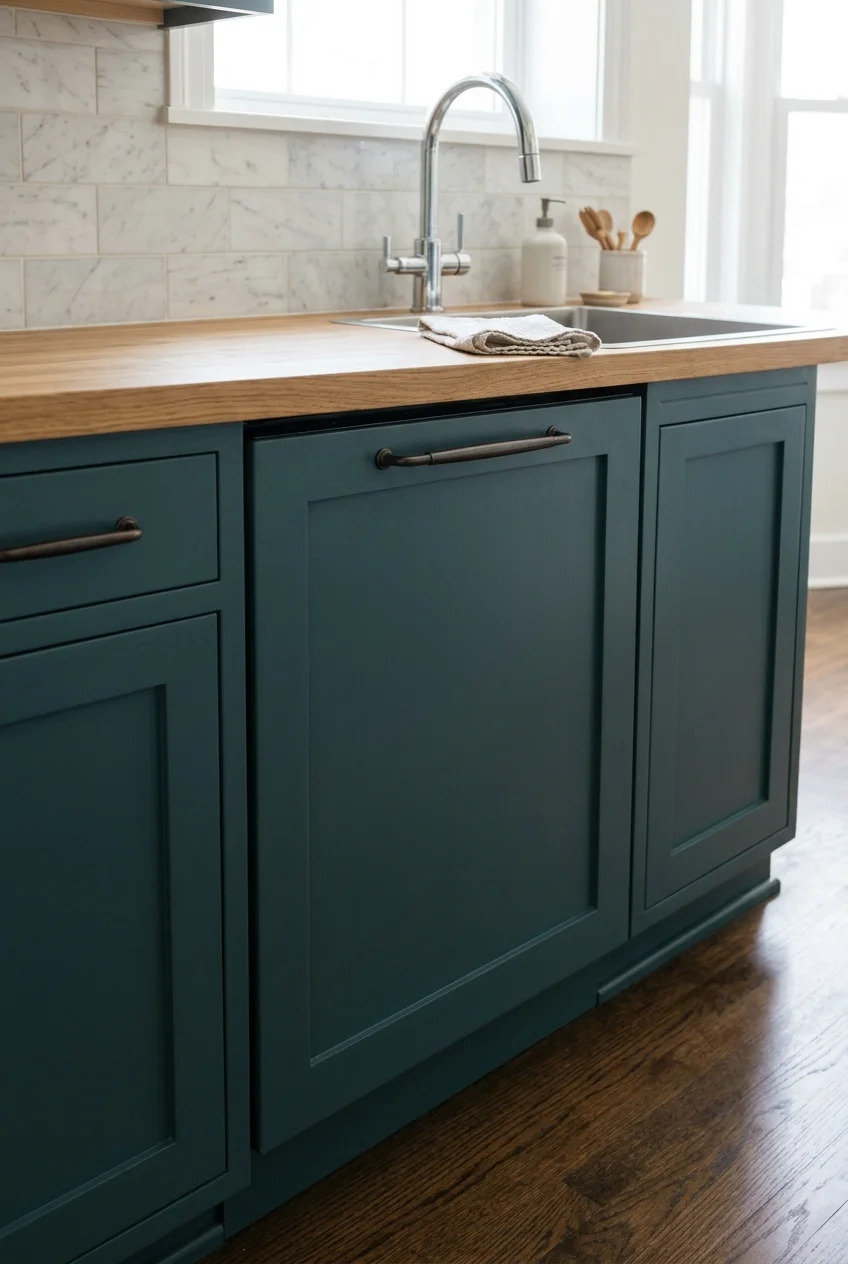
A dishwasher panel matching the base cabinets removes one visual break without requiring every appliance to disappear. It suits the most continuous cabinet run.
Only panel-ready models accept integrated fronts, and panel weight, ventilation, controls, and handle placement must follow the appliance specifications for safe operation.
Use the same toe-kick line and door spacing as neighboring cabinets. A mismatched reveal can be more noticeable than a standard appliance front.
47. Create a Small Breakfast Perch Beyond the Kitchen
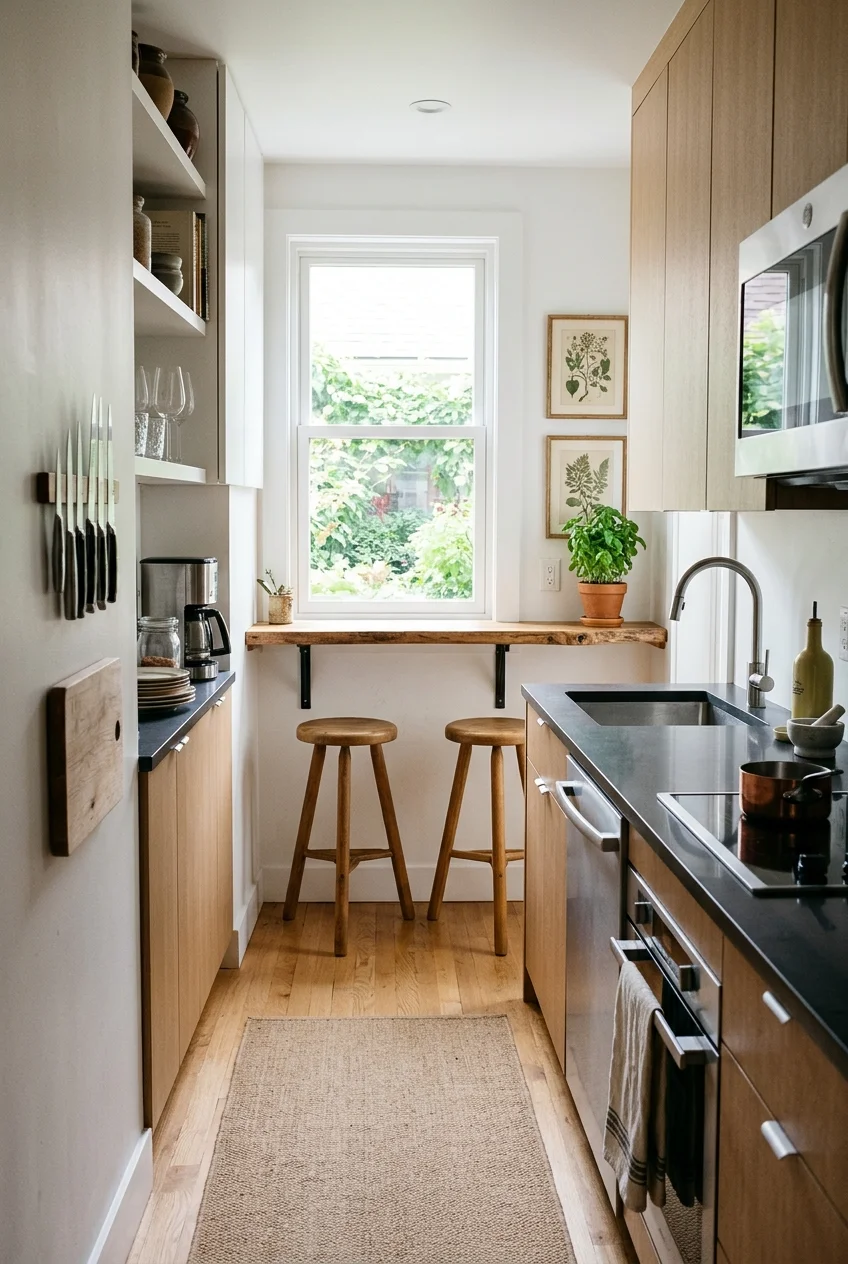
Two shallow stools at a counter extension can work when seating begins beyond the active aisle. Keep diners away from the range and dishwasher.
Plan knee space, support, and walking clearance from actual stool dimensions. Backless stools tuck farther under, but they may not suit everyone.
If pulled-out seats block the only route, choose a wall ledge in the adjacent room instead. Daily circulation matters more than squeezing in seating.
48. Turn the Window Sill into a Herb Ledge
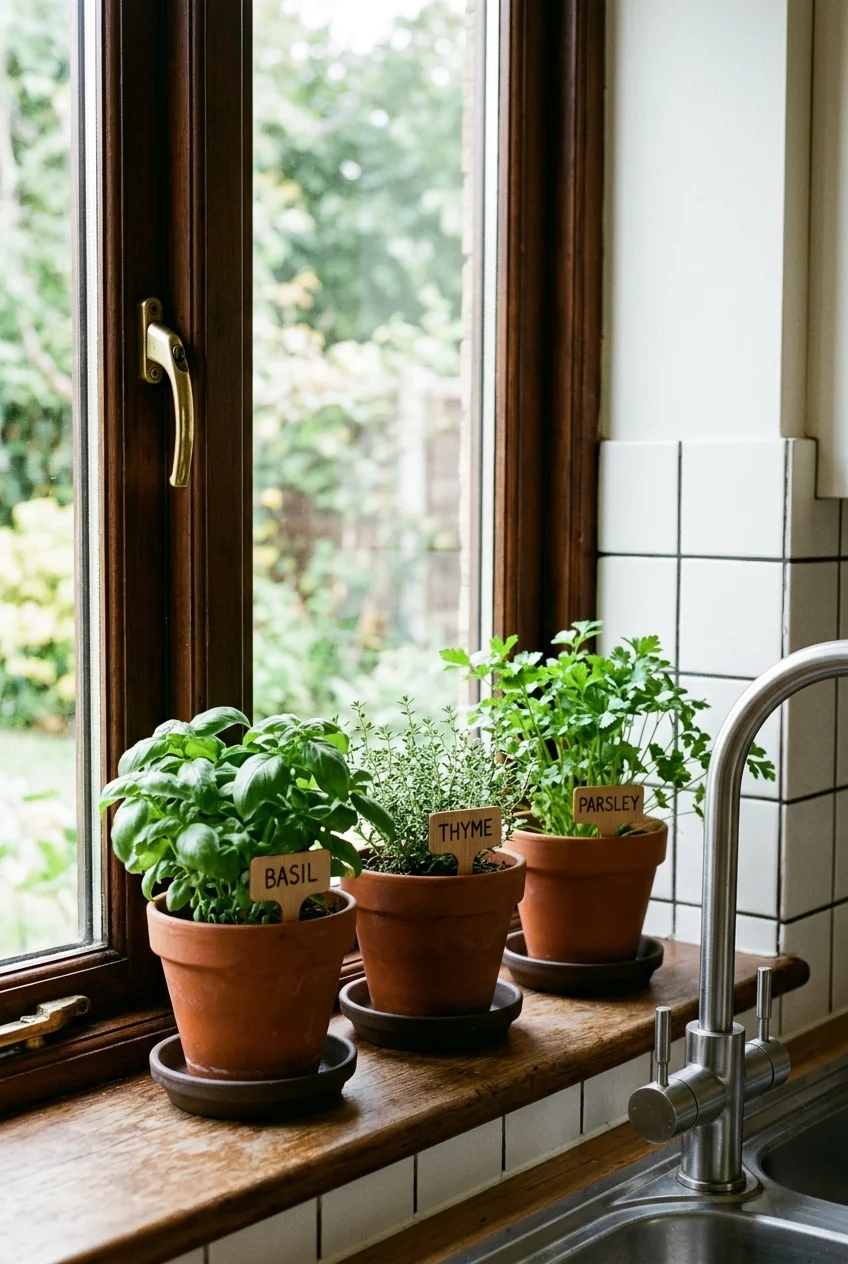
A deep window sill can hold two or three small herbs without occupying prep space. Use trays to protect paint and contain watering spills.
Select plants for the window’s actual light, and keep leaves clear of cooking heat. Move pots before opening or cleaning the window.
If the sill is too shallow, a securely supported shelf can extend it slightly, provided it does not interfere with the faucet or window hardware.
49. Give One Corner to a Vertical Plate Rack
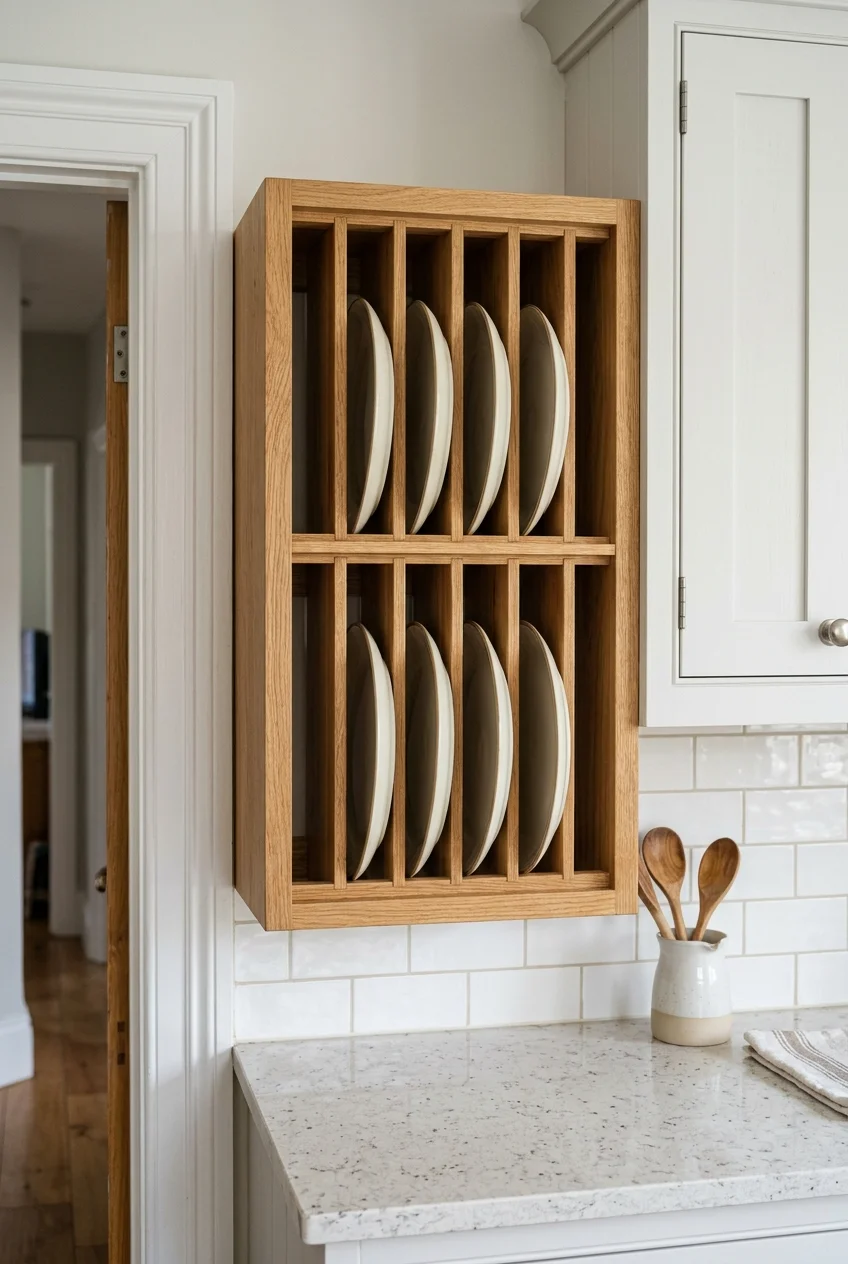
A narrow vertical plate rack can use an end corner that is too shallow for ordinary cabinetry. Everyday plates stay visible and easy to reach.
Size slots to the actual plate diameter and rim thickness. The rack needs secure support and enough front clearance to remove dishes safely.
Limit the display to one coordinated stack rather than every dish. Bowls and heavy serving pieces remain safer on conventional shelves.
50. Finish with One Clear-Counter Reset Zone
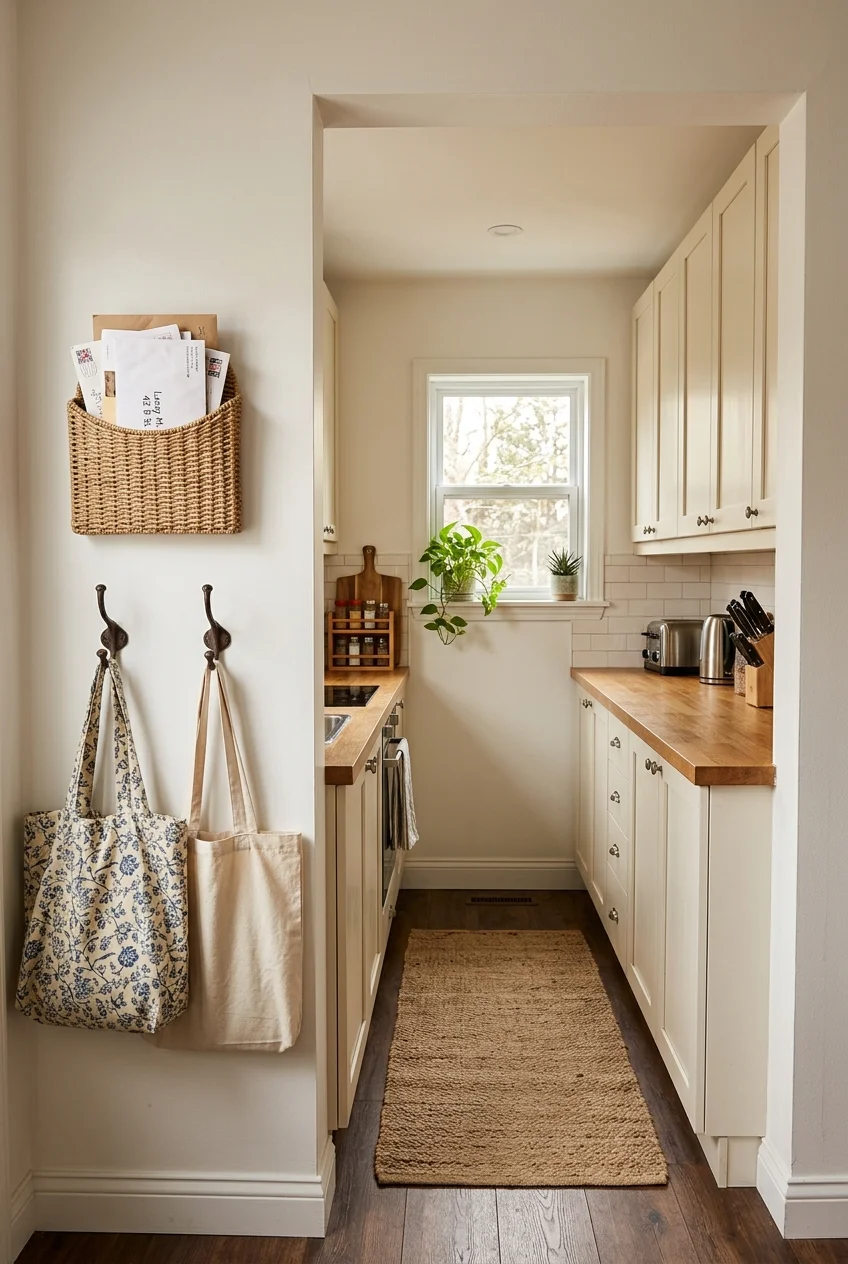
Choose one small section near the entrance as the daily reset point for keys, mail, and reusable bags, keeping those items outside food preparation.
A shallow wall pocket and two hooks can contain arrivals without taking the counter. Empty the pocket weekly before it becomes permanent storage.
Keep hooks away from heat, water, and cabinet swings. If the entrance is already tight, move the reset zone into the adjoining hallway.
Frequently Asked Questions
How wide should the aisle be in a tiny galley kitchen?
Treat published planning dimensions as starting points, then verify current guidance, local requirements, appliance openings, and the needs of everyone using the kitchen.
Measure between finished counter or appliance fronts, not cabinet boxes alone. Test the proposed aisle with open doors and another person moving through.
Should every tiny galley kitchen use light colors?
No. Light finishes can reflect more light, but dark cabinets, saturated walls, or patterned floors can work when contrast and illumination are deliberately controlled.
Sample colors on both sides of the aisle and observe them throughout the day. A pleasing, coherent palette matters more than a universal rule.
What should I change first on a small budget?
Begin with the daily obstacle: a blocked counter, poor task light, inaccessible cabinet, or colliding door. Fixing friction usually improves the room more than decoration.
Then edit countertop items, adjust shelves, and test removable organizers. Paint, new hardware, or construction should follow measurements and a clear functional goal.
Can a tiny galley kitchen have seating?
Yes, when seating sits beyond the active work aisle or folds away completely. Pulled-out stools must not block appliances, exits, or the primary path.
Mock up the table, overhang, and occupied stool footprint before buying. If circulation fails, place the dining perch in the adjacent room instead.