60 Narrow Kitchen Remodel Ideas

This post may contain affiliate links: full affiliate disclosure.
A narrow kitchen can have plenty of cabinets and still give you nowhere to chop when the dishwasher is open. Start with the pinch point you notice every day.
Compare layouts first, then pick cabinet, appliance, or lighting changes that solve that pinch point. Use the fit checks before ordering anything that opens into the aisle.
As an Amazon Associate I earn from qualifying purchases. This article contains affiliate links for two optional storage products you can compare for your space.
Layouts That Give You Room to Move
Start with the narrowest part of the kitchen. It might be the refrigerator handle, an open dishwasher door, or the spot where someone passes behind the cook.
1. Put Everything on One Wall
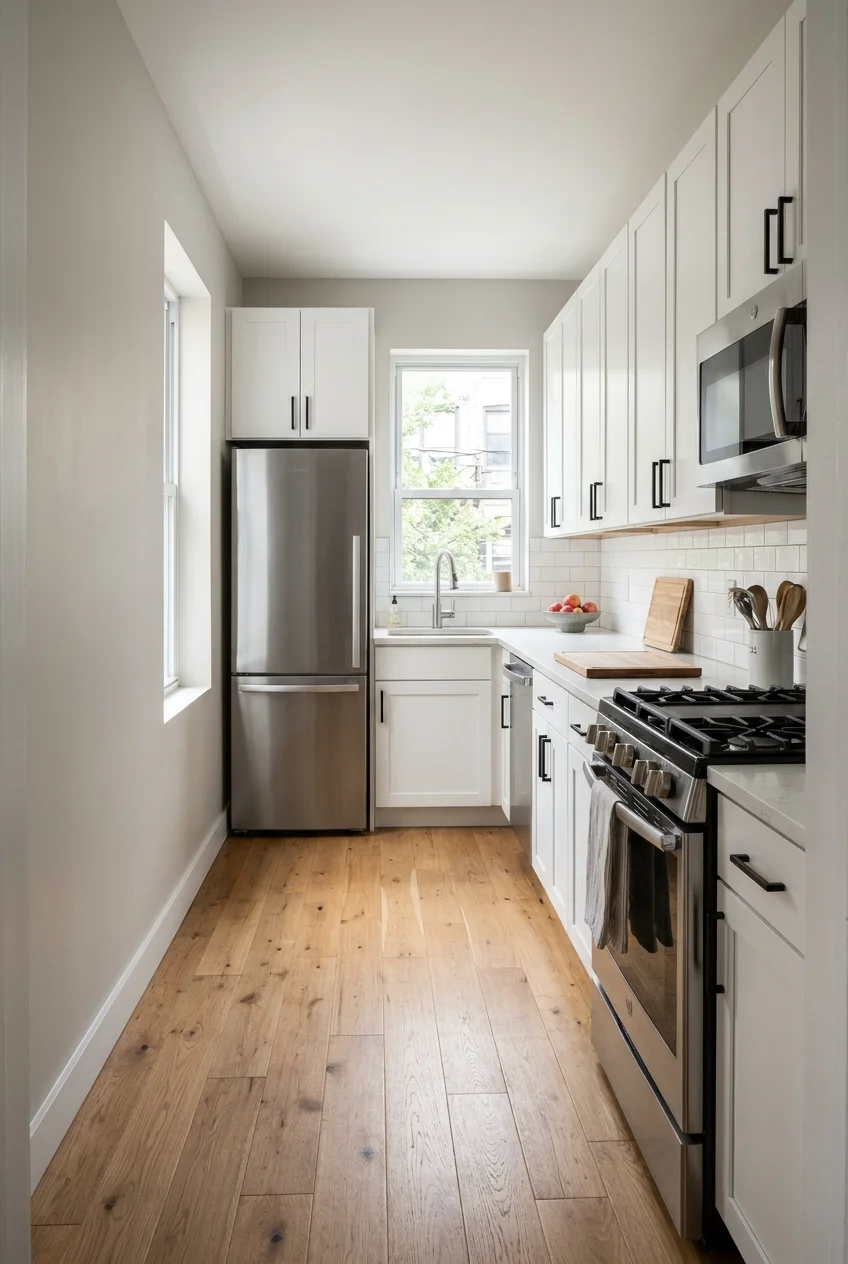
Put the refrigerator, sink, and range in a single run when two rows of cabinets would squeeze the aisle. Leave the opposite wall clear for passing.
Keep a continuous prep counter between the sink and the range where you can rinse, chop, and transfer ingredients. Give the refrigerator a landing spot nearby.
Wall length matters because every tall cabinet takes a bite out of the counter. If the drawing leaves only scraps of worktop, cut back on tall storage first.
Plan outlets around the actual work zone. Mark where the toaster, coffee maker, and mixer normally sit before asking your electrician to finalize their locations.
Open the refrigerator and oven on your floor plan and measure clear space beyond the doors. Include the route diners take when walking past the kitchen.
Practical tip Measure wall length above the baseboard and again at counter height. If the walls taper, give the cabinet supplier both numbers before the order.
2. Pair a Full-Depth Work Wall With Shallow Storage
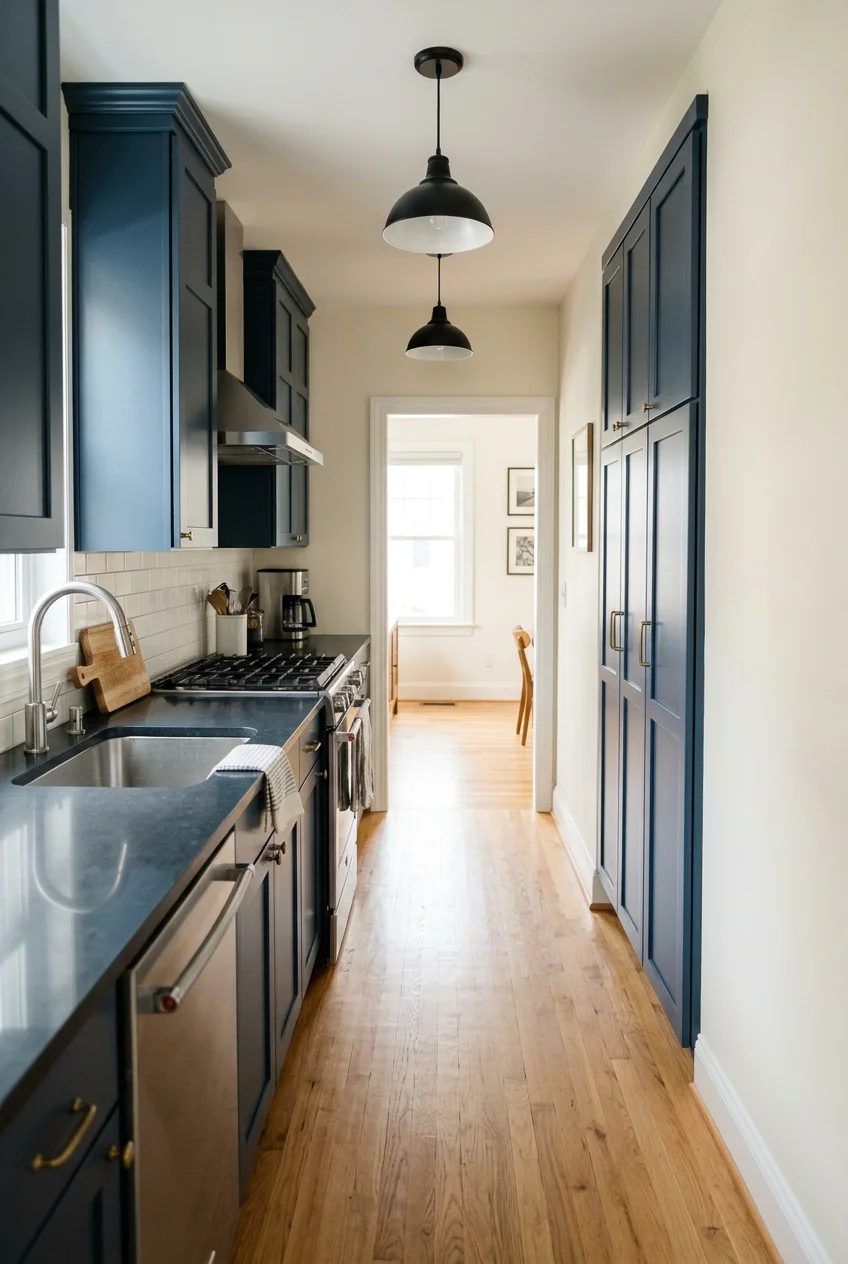
Give the sink and range a full-depth run and put shallower pantry cabinets across from them. Store canned goods, mugs, and glasses along the shallow wall.
The shallow side earns its keep without forcing you to give up the prep area. Measure the cabinet you plan to buy with its front and pulls attached.
Test shelf depth with items you actually own. A cereal box may work sideways, while a dinner plate could need more room than the cabinet offers.
End the shallow run before a shared doorway if the final cabinet would crowd it. A finished end panel makes the shorter run look intentional.
3. Give Each Side of a Two-Wall Galley a Job
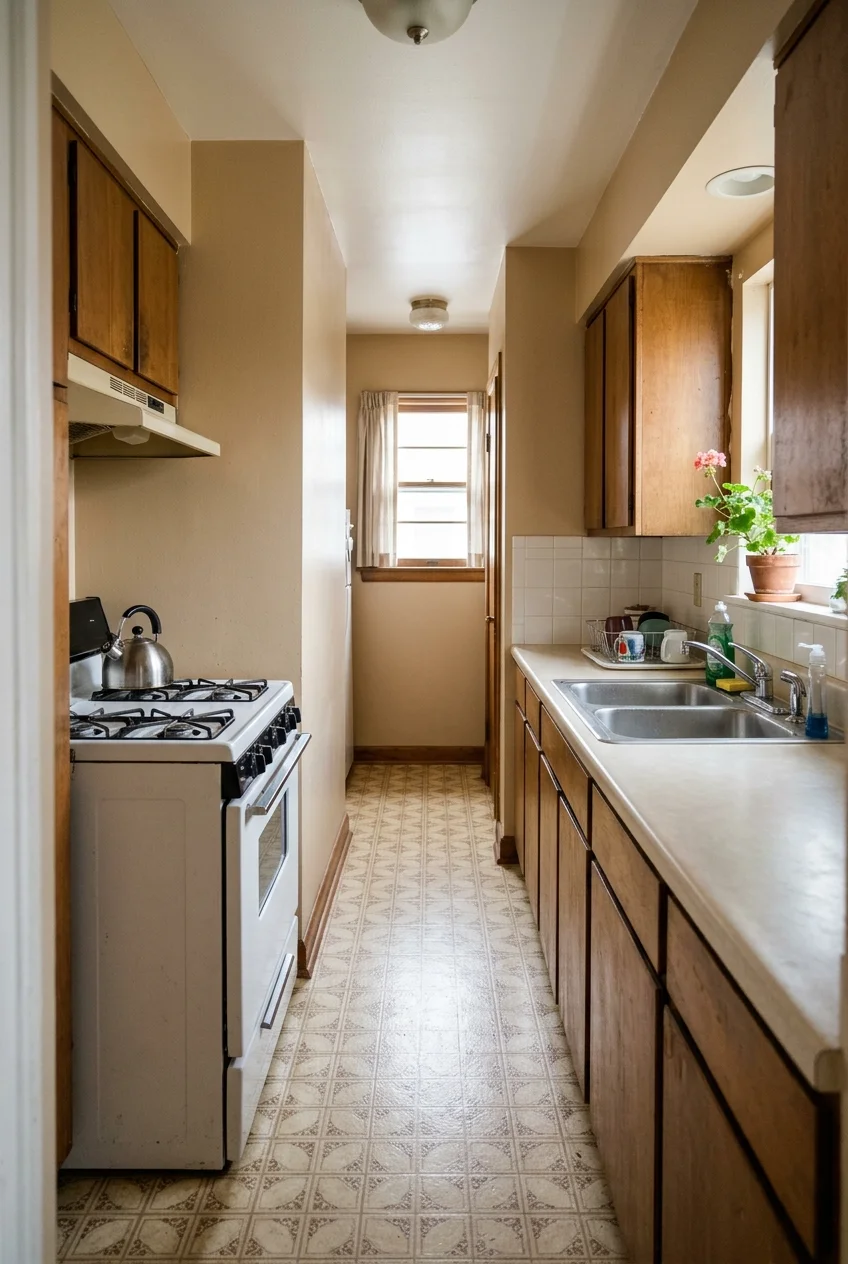
Dedicate one wall to washing and prep and the other to cooking. Place the work counter near the sink and reserve counter space beside the range.
Offset the sink and range so two people can work without standing back to back. Try the arrangement with the dishwasher open before choosing appliance positions.
The National Kitchen & Bath Association suggests a 42-inch work aisle for one cook and 48 inches for multiple cooks. Check the room and applicable requirements.
- Measure between finished counter edges, tall cabinet fronts, or appliances at the tightest point.
- Record projecting handles and open-door footprints separately.
- For two cooks, mark likely standing spots and test where their work overlaps.
See these tiny galley kitchen layouts for more ways to arrange opposing runs. Use the photographs to compare where tall appliances interrupt the view down the room.
4. Turn the Last Few Feet Into an L
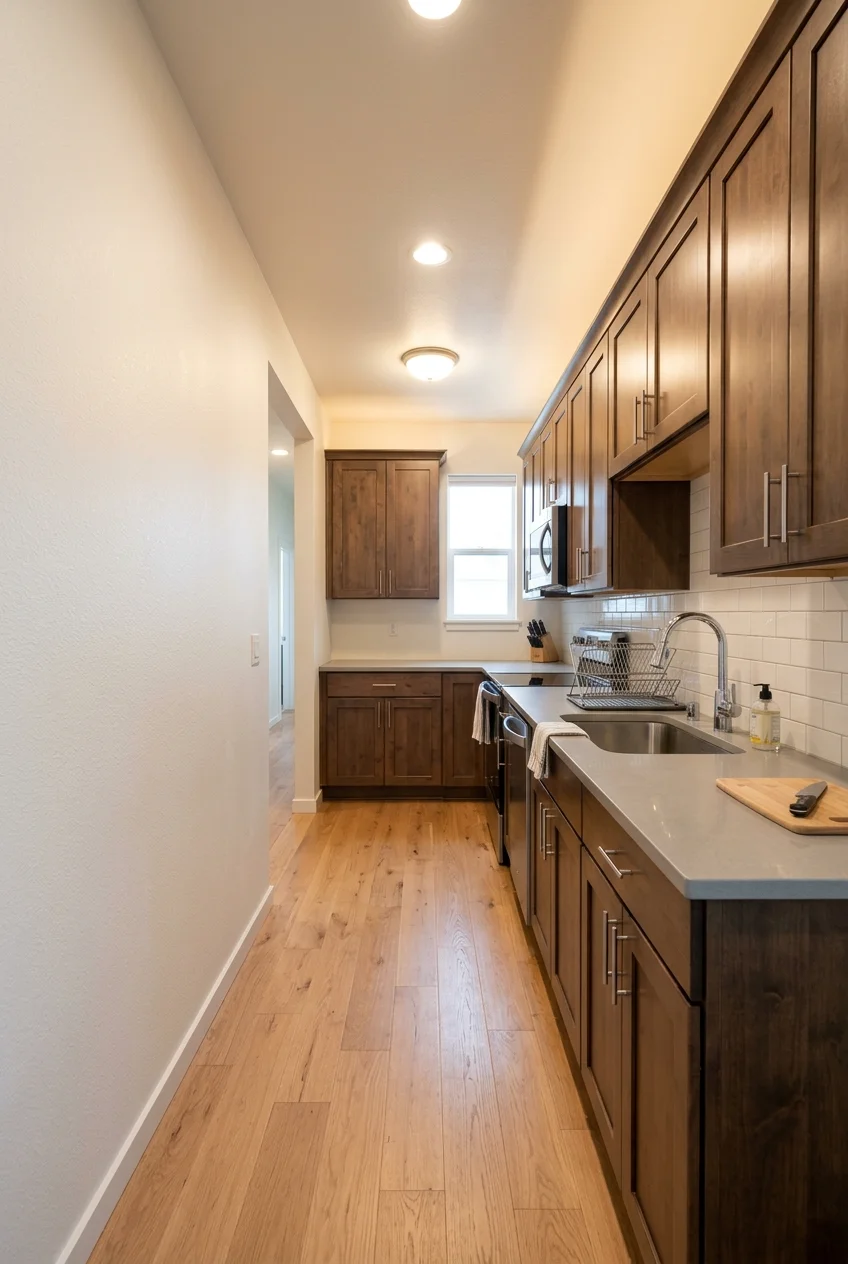
Wrap the main run around a solid end wall when an L would provide a second work surface while preserving room to move along the open side.
Keep the corner clear enough to set down mixing bowls or baking sheets. A toaster tucked permanently into that spot can make both adjoining counters harder to use.
At the inside corner, have the cabinet installer check drawer faces and handles on both arms. A planned filler may be necessary for them to pass.
Use the return wall for the job that fits its length. If a sink would crowd the corner, reserve the return for clean dishes or baking prep.
5. Keep the Sink and Range Connections in Place
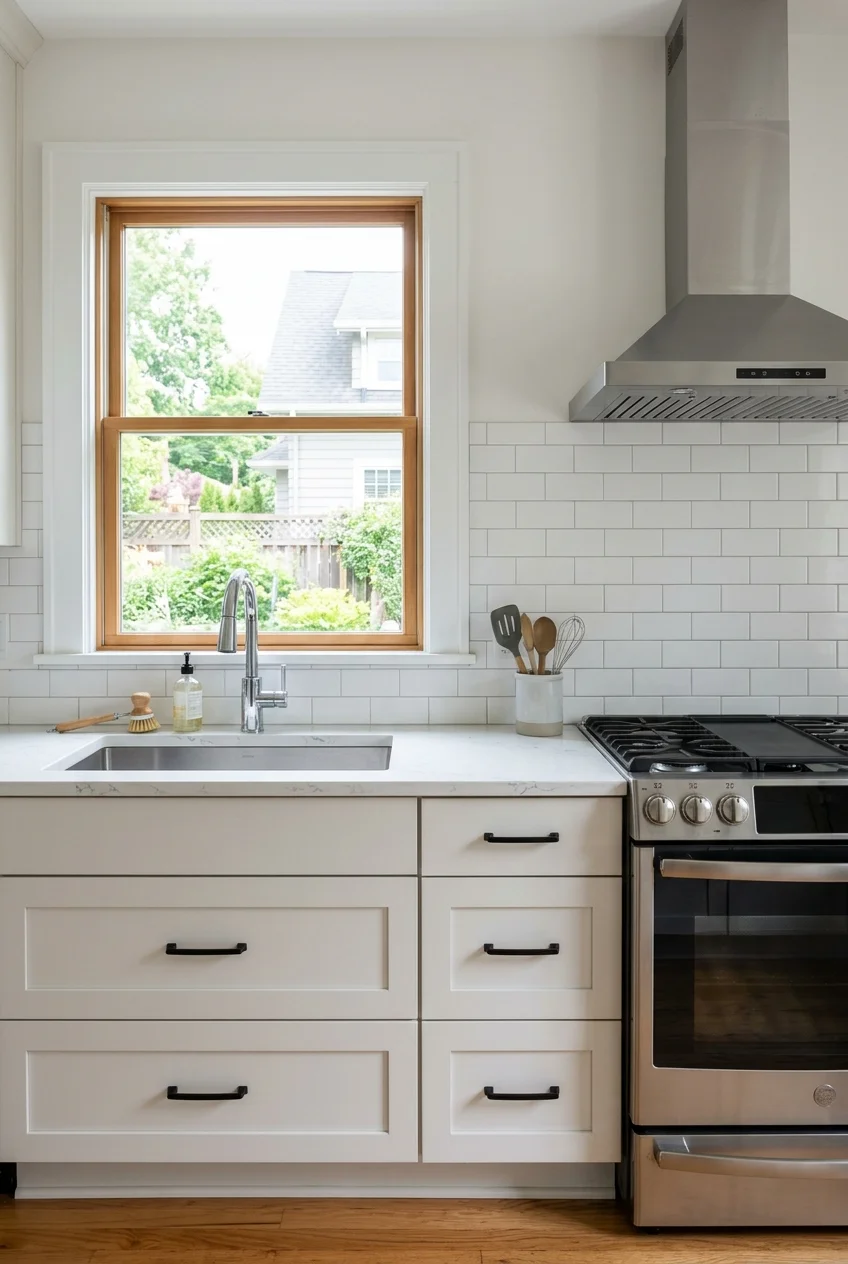
Keep the sink, range, and hood near their existing hookups when their positions already work. Rebuild the storage and prep space around those locations first.
Ask for a quote that shows which cabinet, counter, and electrical changes the project needs. Compare it with a separate quote for any major appliance move.
An existing sink position can still work with a waste pullout, a better dish landing spot, or a dishwasher that opens away from the busiest standing area.
Before ordering cabinets, have the contractor confirm the existing connections are usable. Older shutoffs, wiring, or duct routes can change the scope once inspected.
6. Put Tall Units at the Low-Traffic End
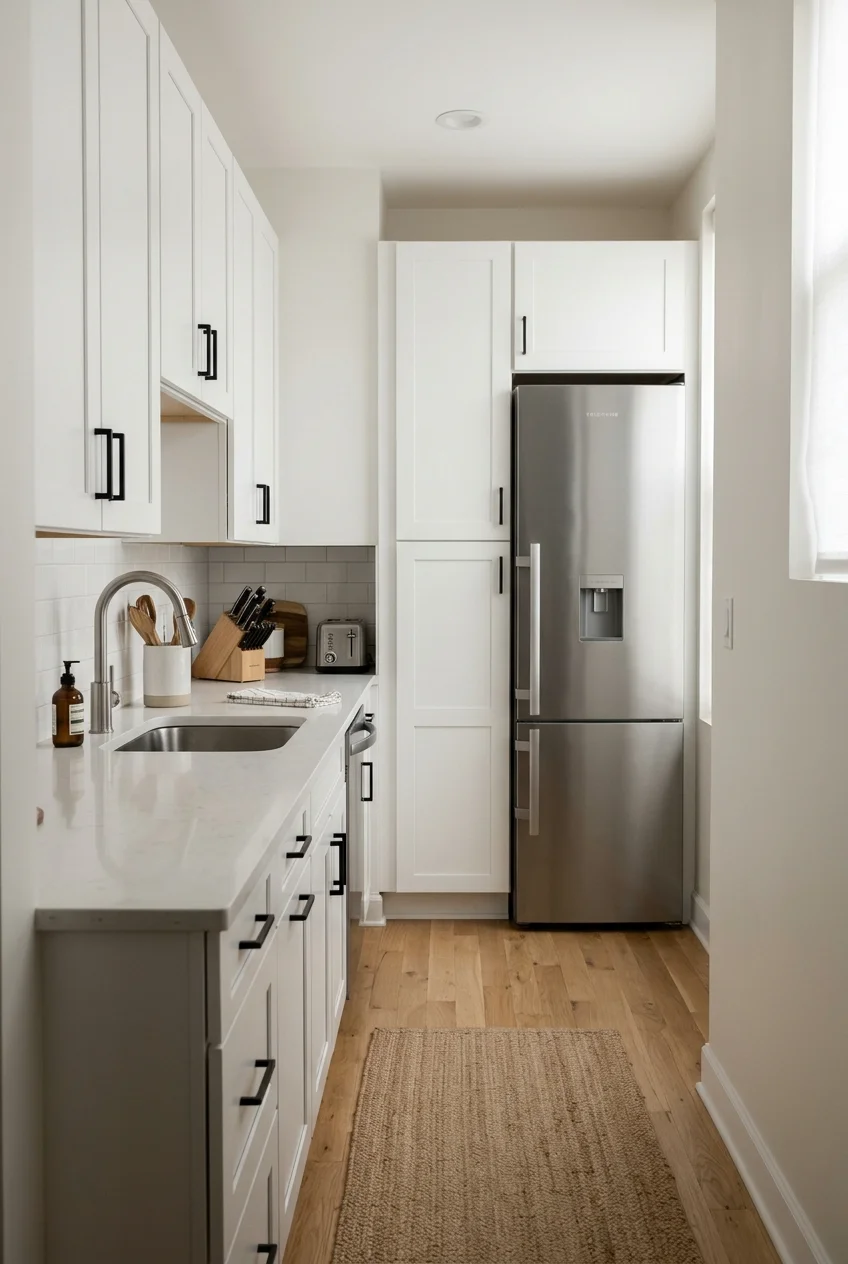
Group the refrigerator and a tall pantry at the end where an open door causes the least disruption. Keep the central work surface continuous at standing height.
In a pass-through kitchen, check both entrances before choosing the end. Start at the grocery drop-off point and follow the route people actually use.
Give the tall doors room to swing and leave a nearby landing counter. A model that looks slim closed can need extra wall clearance for bins.
Order matching or coordinated end panels if the side of the group faces the next room. Keep the refrigerator clearances specified in its installation guide.
7. Protect One Full Prep Stretch
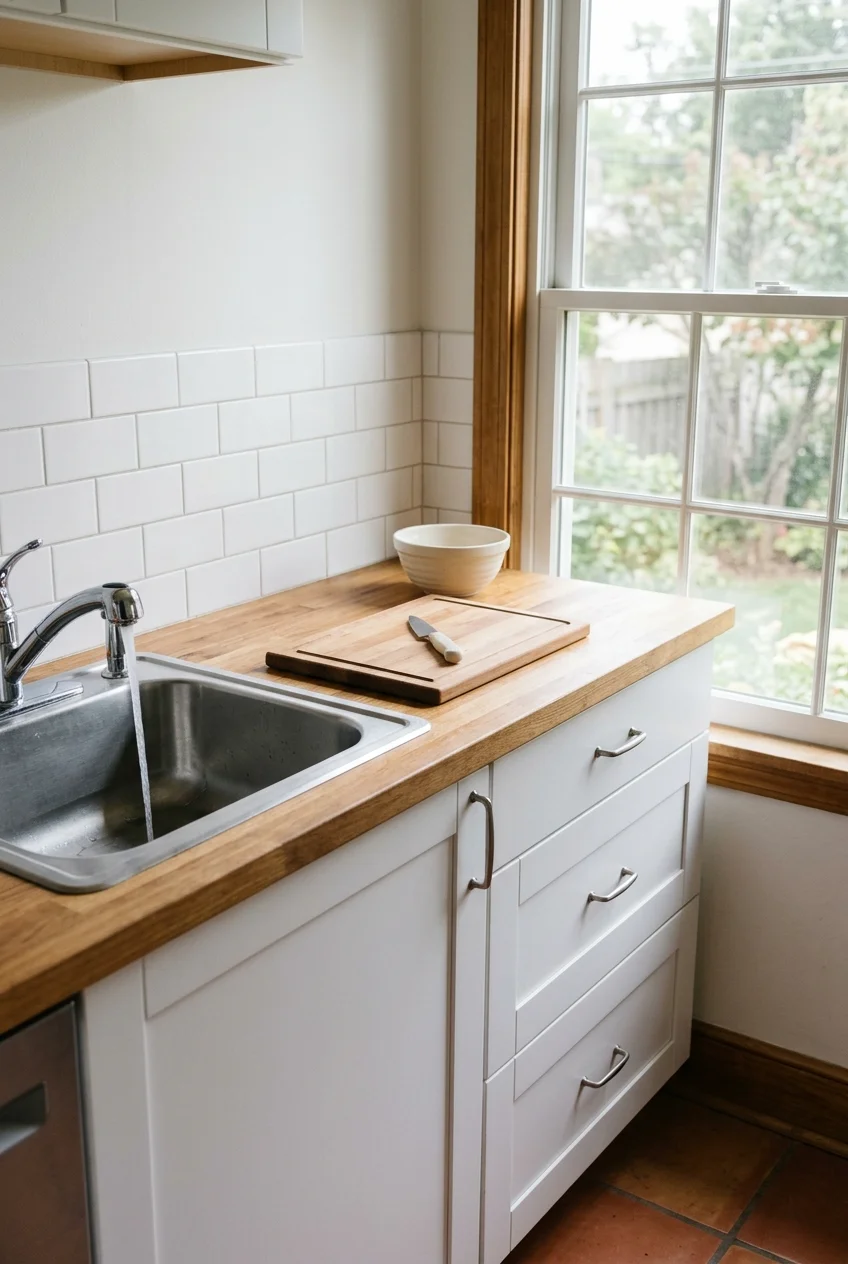
Claim the widest counter stretch beside the sink for your main prep station. Measure it with your cutting board, a mixing bowl, and space for scraps.
Choose a spot that leaves you a landing area at the range. Keep frequently used prep tools in the drawer below so they stay within reach.
If the counter only looks long because it includes a drying rack and a toaster, give those items another home before pricing a larger countertop.
8. Build a Cleanup Zone Around the Sink
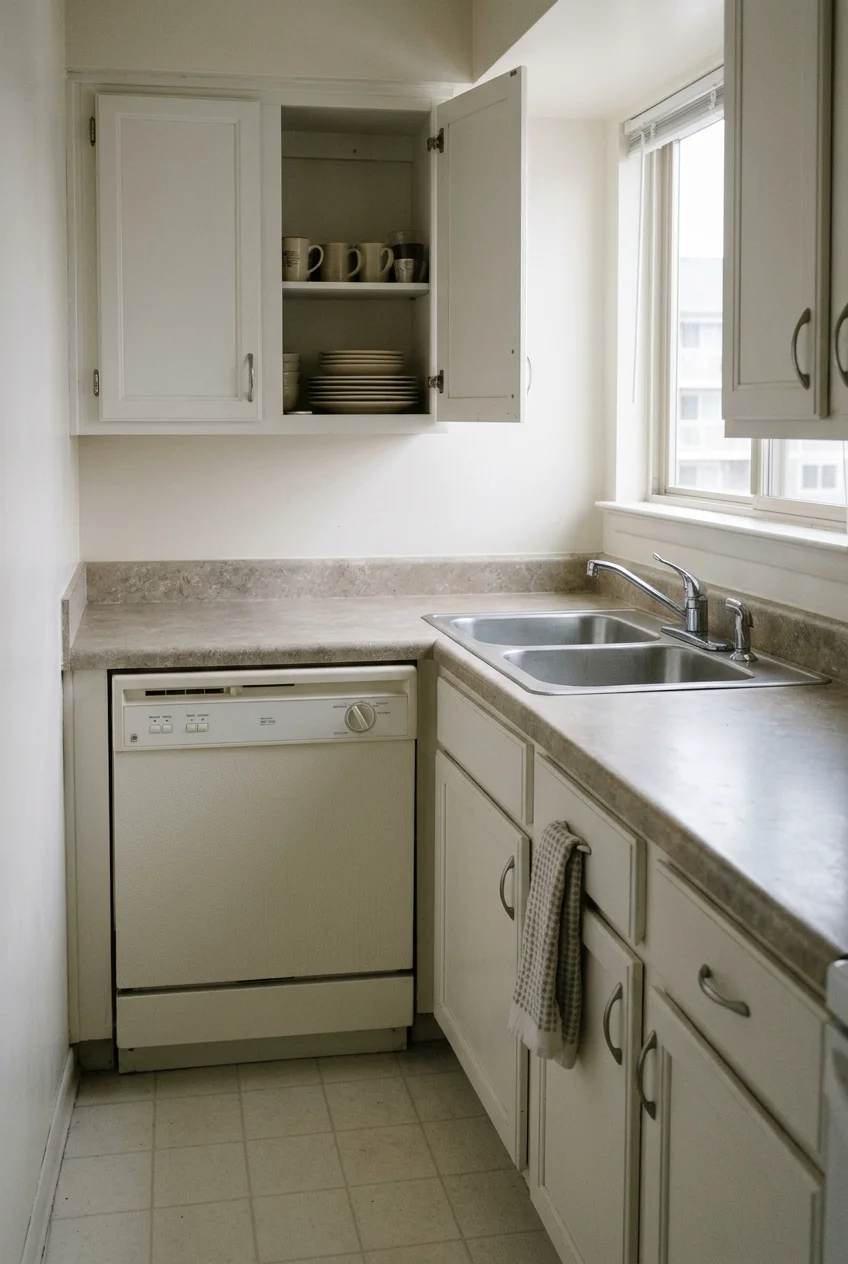
Put the sink, dishwasher, and dish storage within a few steps of each other. Arrange them so unloading stays out of the main food prep spot.
Stand at the sink while a helper holds a cardboard template at the dishwasher door position. Check where feet, cabinets, and the opened panel compete for space.
Keep frequently used dishes on the cleanup side if reaching the original cupboard would mean stepping around the open dishwasher every time you put a plate away.
Leave a dry landing spot for a pot or a dish rack. In a short run, it can share the counter you use for light prep.
9. Open a Nonessential Partition
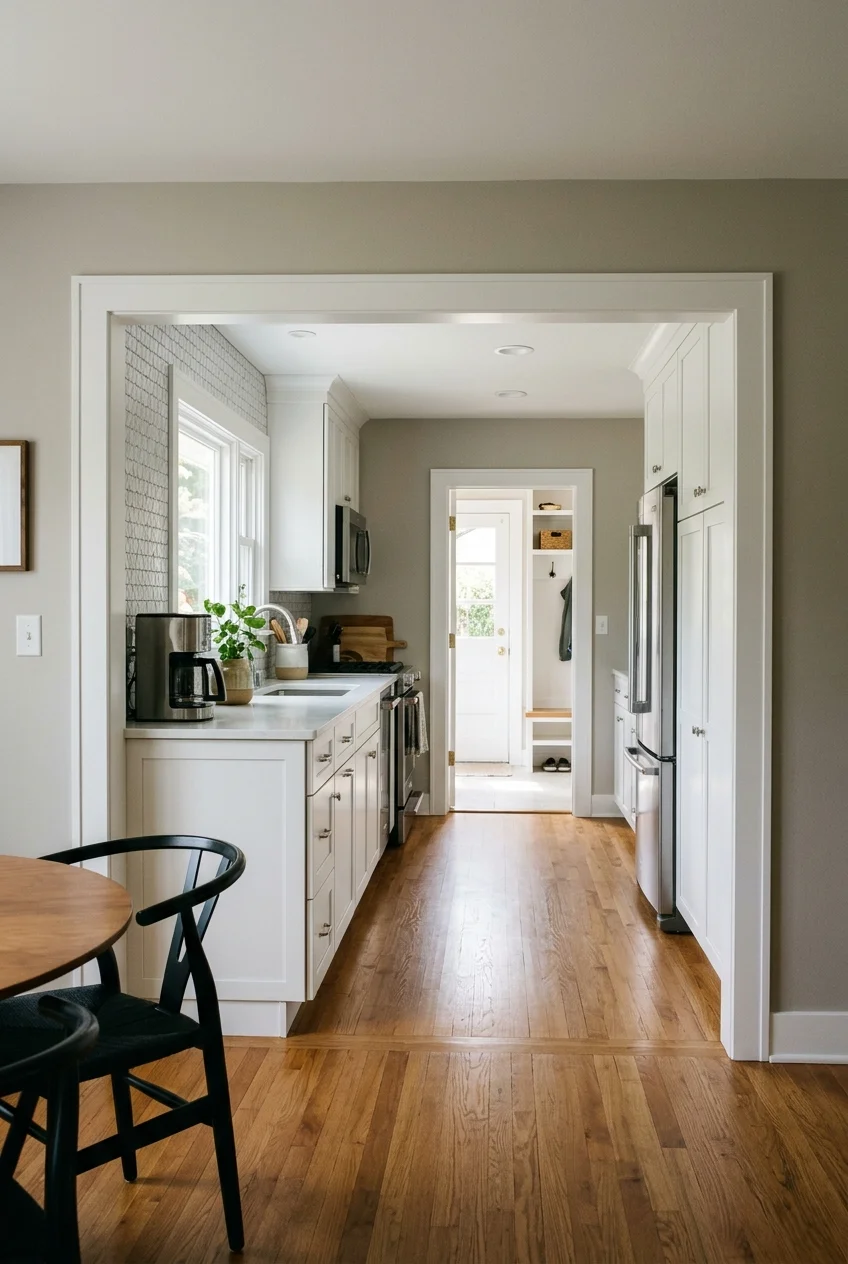
Consider opening a side partition when a narrow kitchen feels cut off from the dining room. Keep the main work run and recover a longer view across both rooms.
Before demolition, have a qualified professional check whether the wall carries loads or contains utilities. Ask the local building department about permits before work starts.
Mark exactly where the new opening would end. Decide where outlets, switches, and any displaced upper cabinets will go while the wall is still on paper.
List what the wall currently hides from dinner guests, such as dishes drying or the trash bin. Decide which of those items needs a new spot.
A framed opening can keep a short wall for useful storage. Match floor transitions and finished wall edges so the two spaces read as one project.
Compare the quote with a lighter update using the existing opening. Paying for structural work makes more sense when the new connection improves how you use both rooms.
10. Make the Kitchen Entrance a Clear Landing Zone
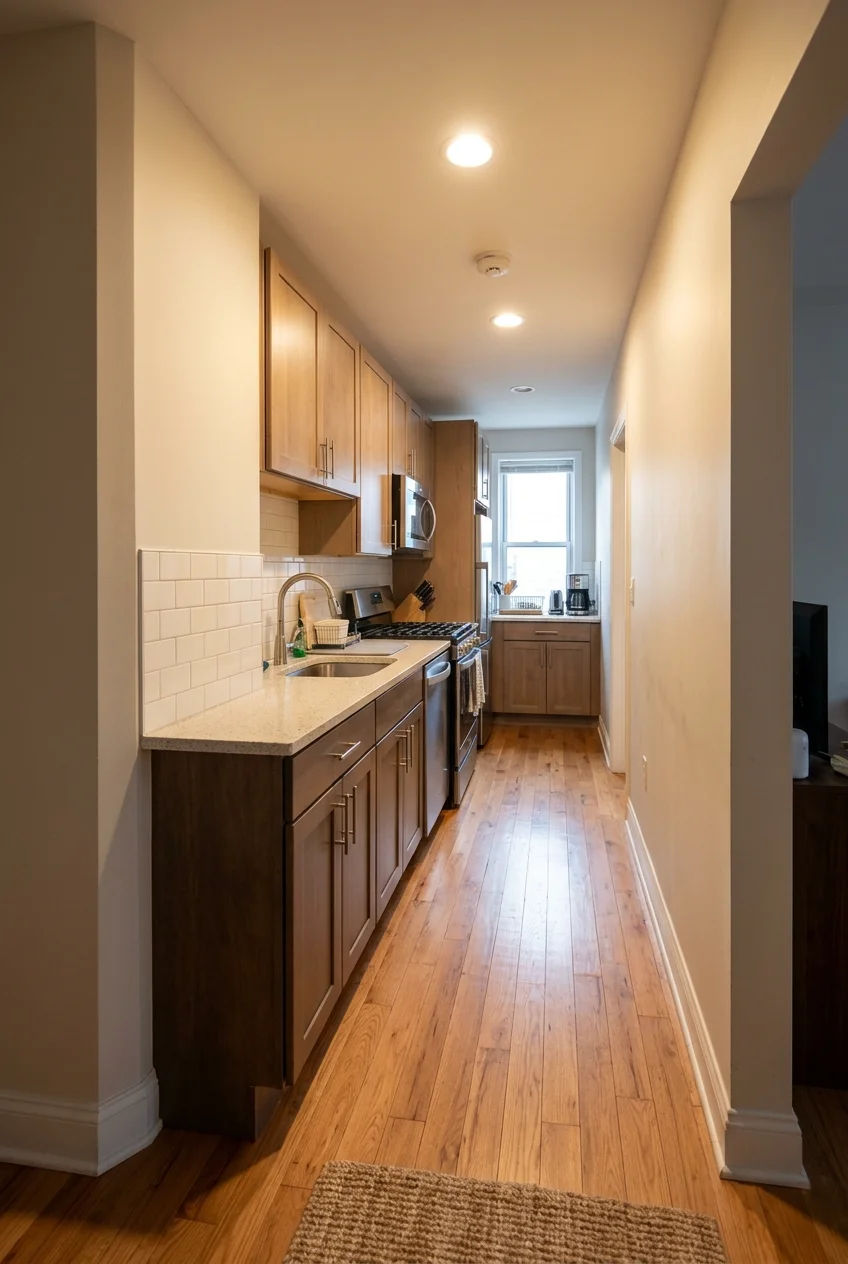
End the cabinet run before the entry turn if its corner catches grocery bags or makes two people stop. Carry the floor through the opening for an unobstructed approach.
Keep a counter close enough to set down a tote without carrying it to the sink. A finished cabinet end keeps the first thing you see tidy.
Tape the planned cabinet end onto the floor and walk in carrying laundry or groceries. Try the turn from both directions before setting the cabinet length.
Cabinet Changes That Make Storage Easier to Reach
Start with the things you reach for every day. A new cabinet earns its footprint when it makes those items easier to put away and take out.
11. Replace Lower Shelves With Deep Drawers
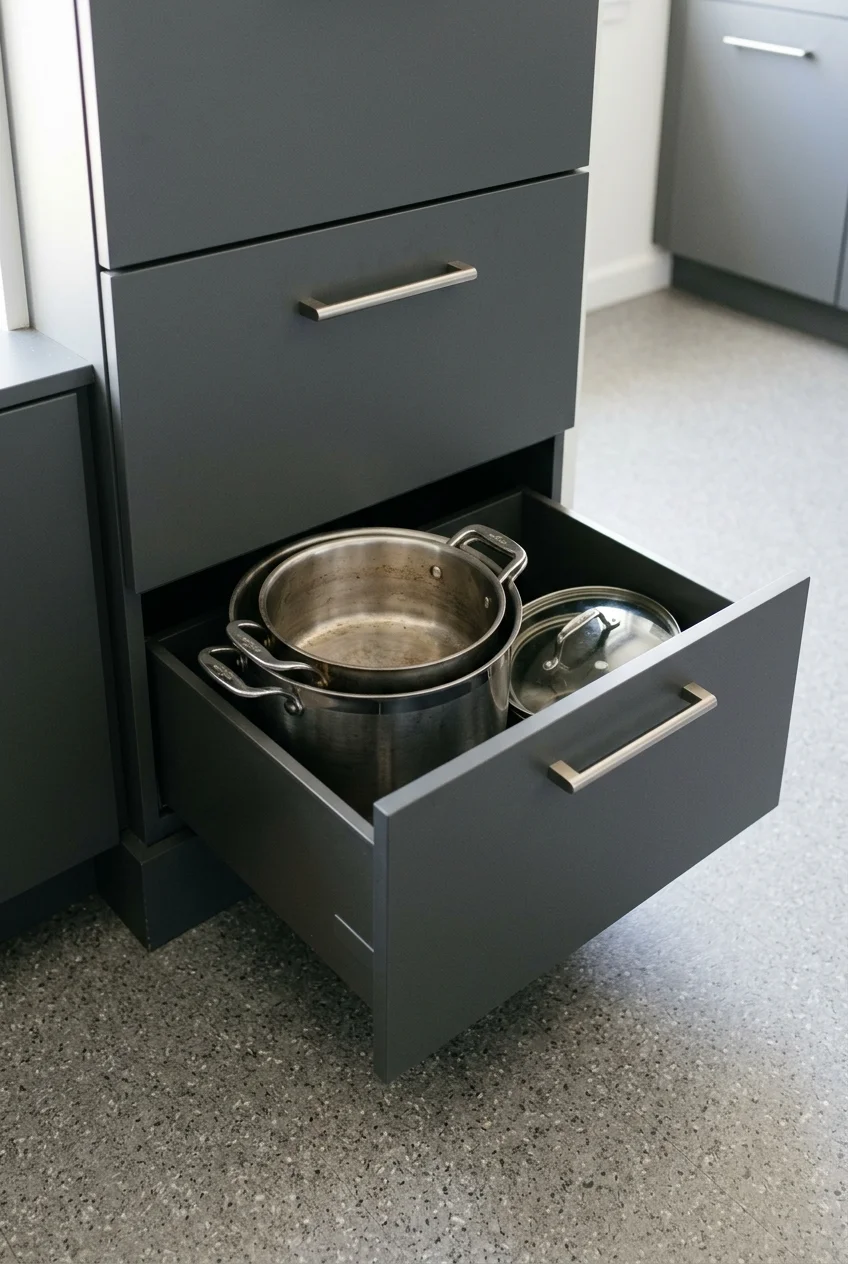
Use deep lower drawers for cookware so you can see the whole stack when you pull it out. Keep a shallower drawer above for cooking tools.
Set your tallest pot and its lid together on the floor to see how much height the drawer needs. Compare that number with usable interior height.
Check how far the drawer opens into the aisle and where your feet go. If the run faces a wall, leave enough room to stand back.
Keep heavy cookware in a drawer rated for the load. If you're reusing the cabinet box, price a retrofit shelf on slides before replacing the whole unit.
12. Add Cabinet Storage Up to the Ceiling
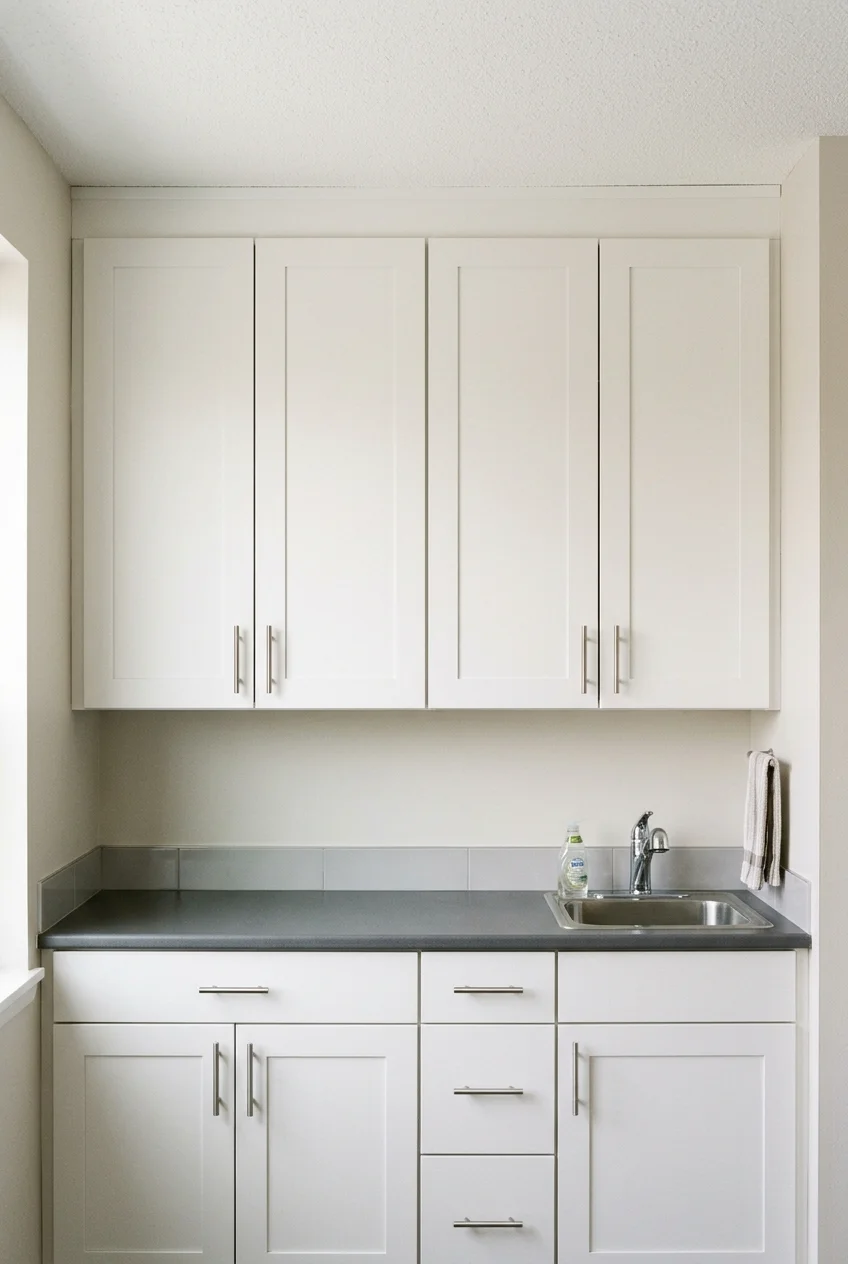
Extend upper cabinets to the ceiling if you need a place for holiday platters and spare serving bowls. Keep daily dishes within a comfortable reach.
Choose stacked cabinets if you want separate access to seasonal storage. Ask the installer to measure ceiling variation and plan a tidy filler at the top.
Limit ceiling-height cabinets to the wall that needs them most if a second tall row would make the kitchen feel hemmed in at eye level.
13. Trade a Short Upper Cabinet for One Shelf
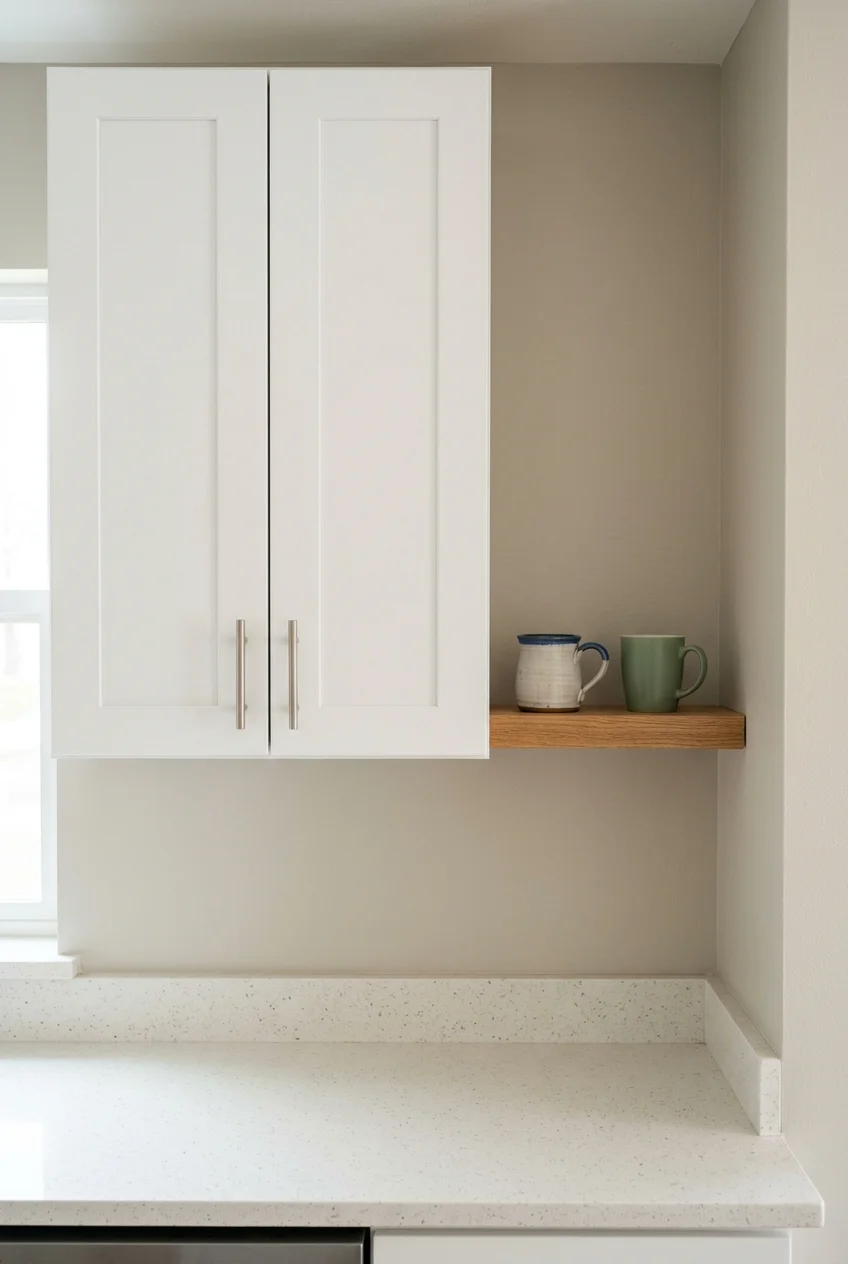
Replace one short upper cabinet with a shelf that holds everyday pieces. A single open section gives you elbow room near a sink or prep corner.
Keep the shelf shallower than the counter and size it around what will sit there. Check the bracket rating and the mounting instructions for your wall.
If you need the cabinet's full capacity, put the shelf where replacing a cabinet makes sense, such as a small end bay that mainly holds mugs.
14. Use a Pullout for a Narrow Cabinet Bay
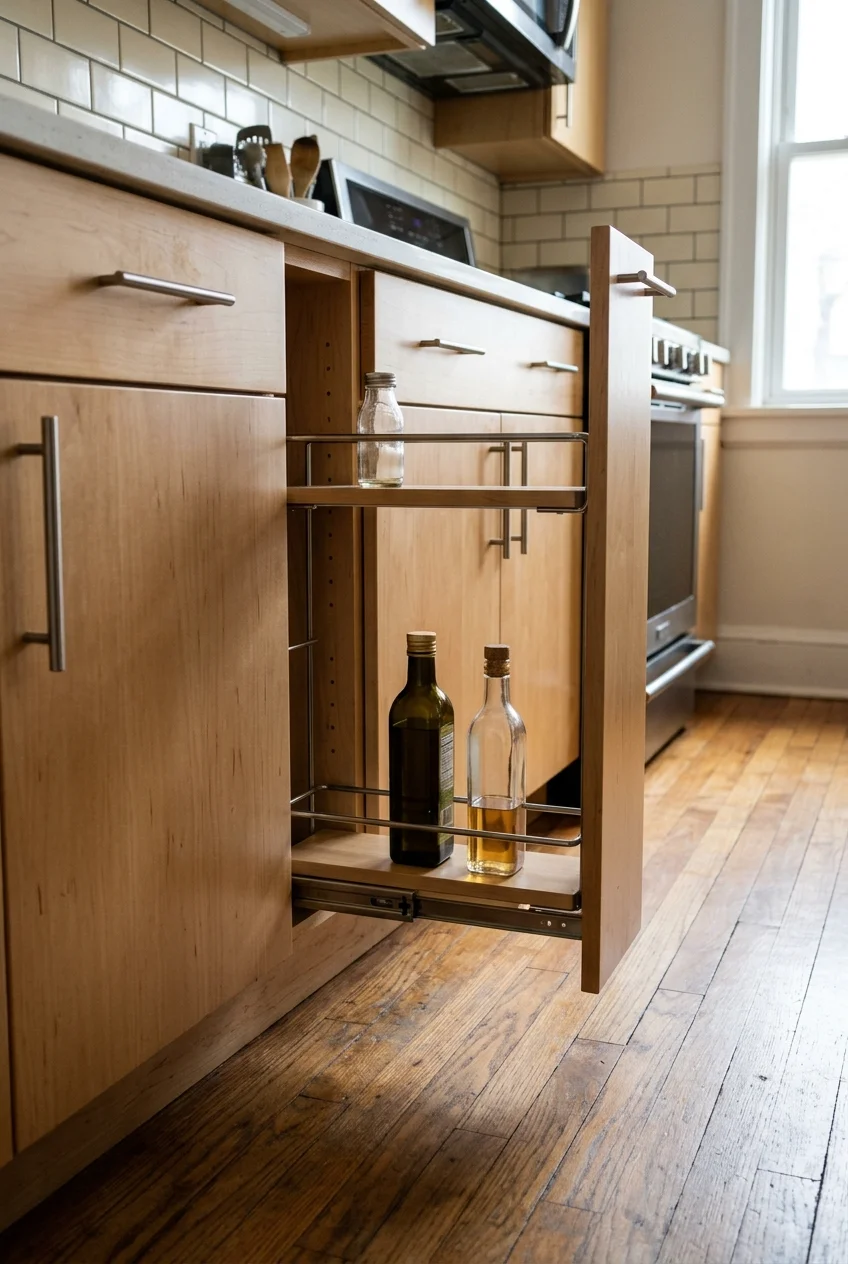
Turn a narrow base cabinet bay into a pullout for cooking oils or tall bottles. Position it near prep with the bottles away from the range's heat.
Measure the finished opening and bring the tallest bottle to the cabinet showroom. A pullout that fits the opening can still have too little vertical space.
Leave enough room to pull the unit all the way out and lift bottles from the upper tier. Check for a neighboring handle before placing the order.
15. Put Trash and Recycling in One Base Pullout
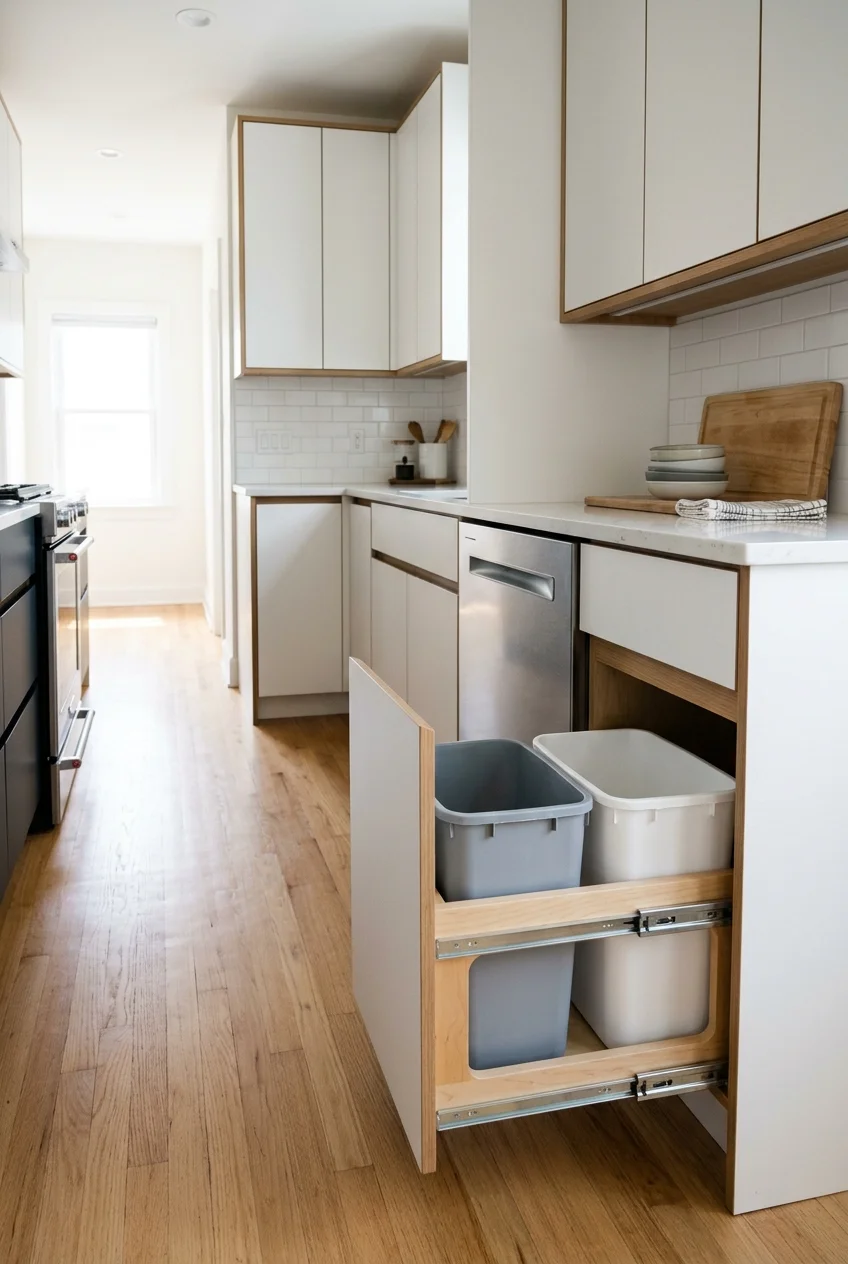
Put both bins in a single pullout close to where you chop. It frees the spot where a freestanding trash can narrows the walking lane.
Check the actual bin volume and fit with the bags you buy. Two little bins can work for a small household that empties them frequently.
Open the dishwasher and simulate pulling out the bins during cleanup. If the two fronts overlap, shift the pullout to the other side of the sink.
A covered bin may suit households that collect food scraps. Check how the lid opens inside the cabinet before assuming a taller bin will fit.
16. Store Trays Upright in a Divided Bay
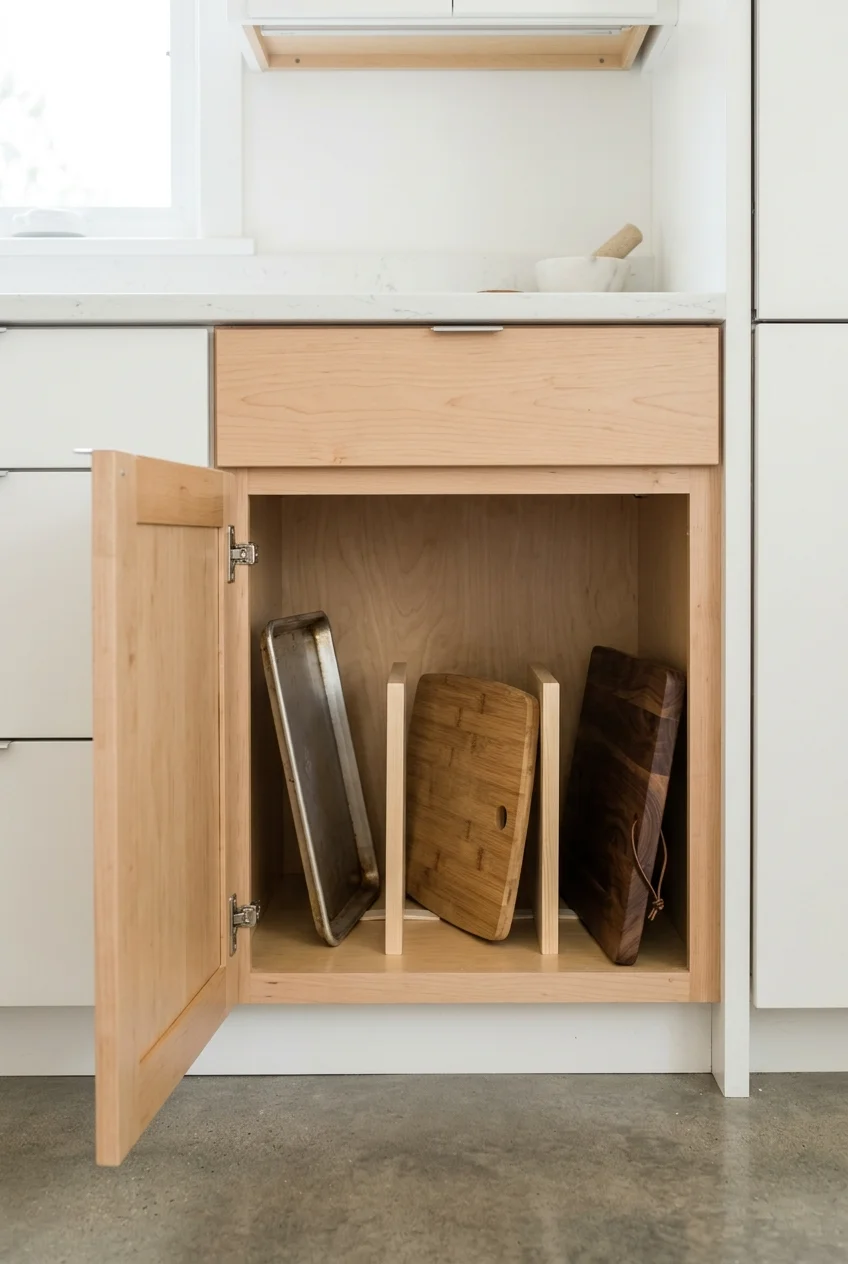
Add vertical dividers to a cabinet near the oven for sheet pans and cutting boards. Leave the most frequently used pan in the easiest slot.
Measure your widest tray standing on edge, including its rim. Check both the top clearance and how far forward the tray has to come before it tilts.
17. Add Rollout Shelves to Sound Base Cabinets
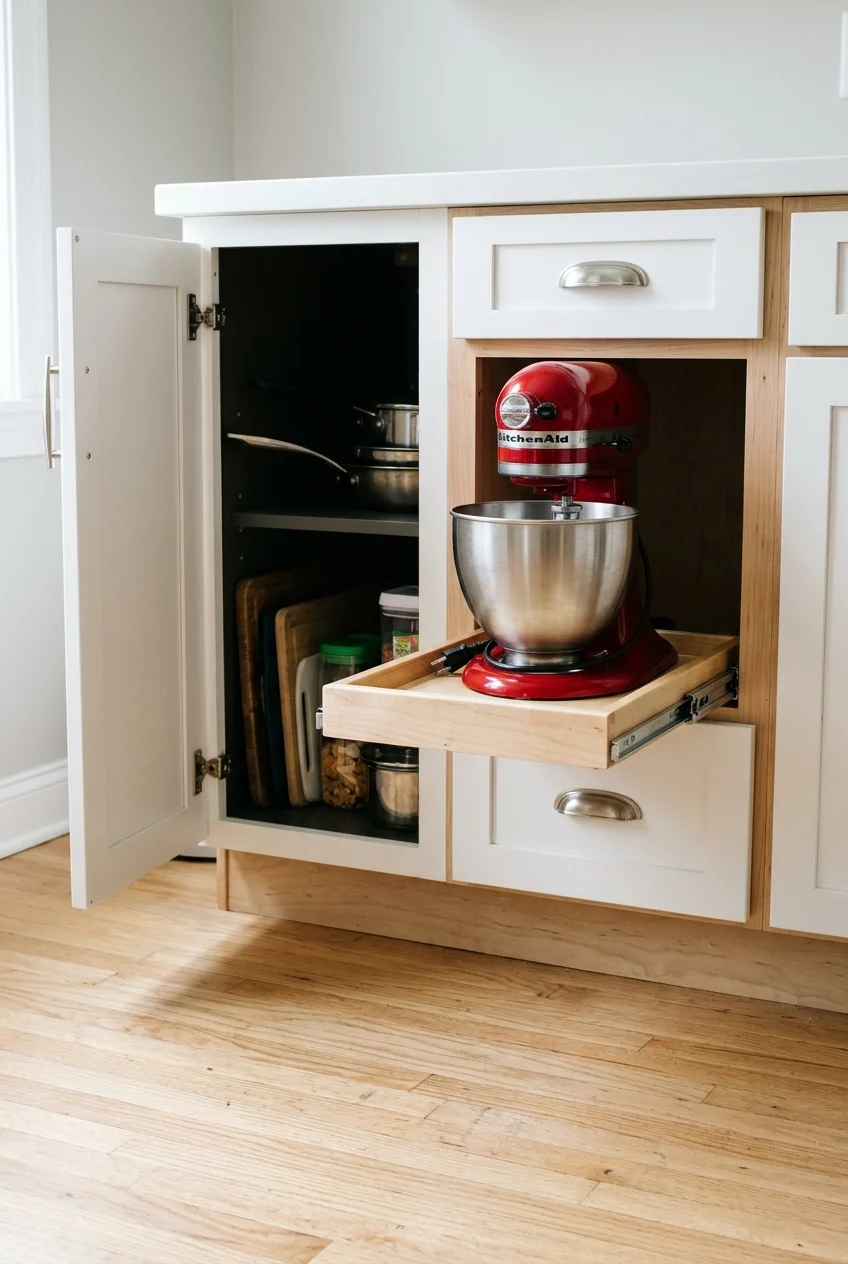
Retrofit a sound base cabinet with a rollout shelf for small appliances that are hard to lift out from the back. Measure the narrowest finished opening.
Account for the door and hinge projecting into that opening. Check the shelf's required depth and weight rating with the heaviest appliance you plan to store.
Open the shelf fully and check where it puts you in the aisle. In the tightest spot, a fixed shelf for lightweight items may be easier.
18. Make the Inside Corner Reachable
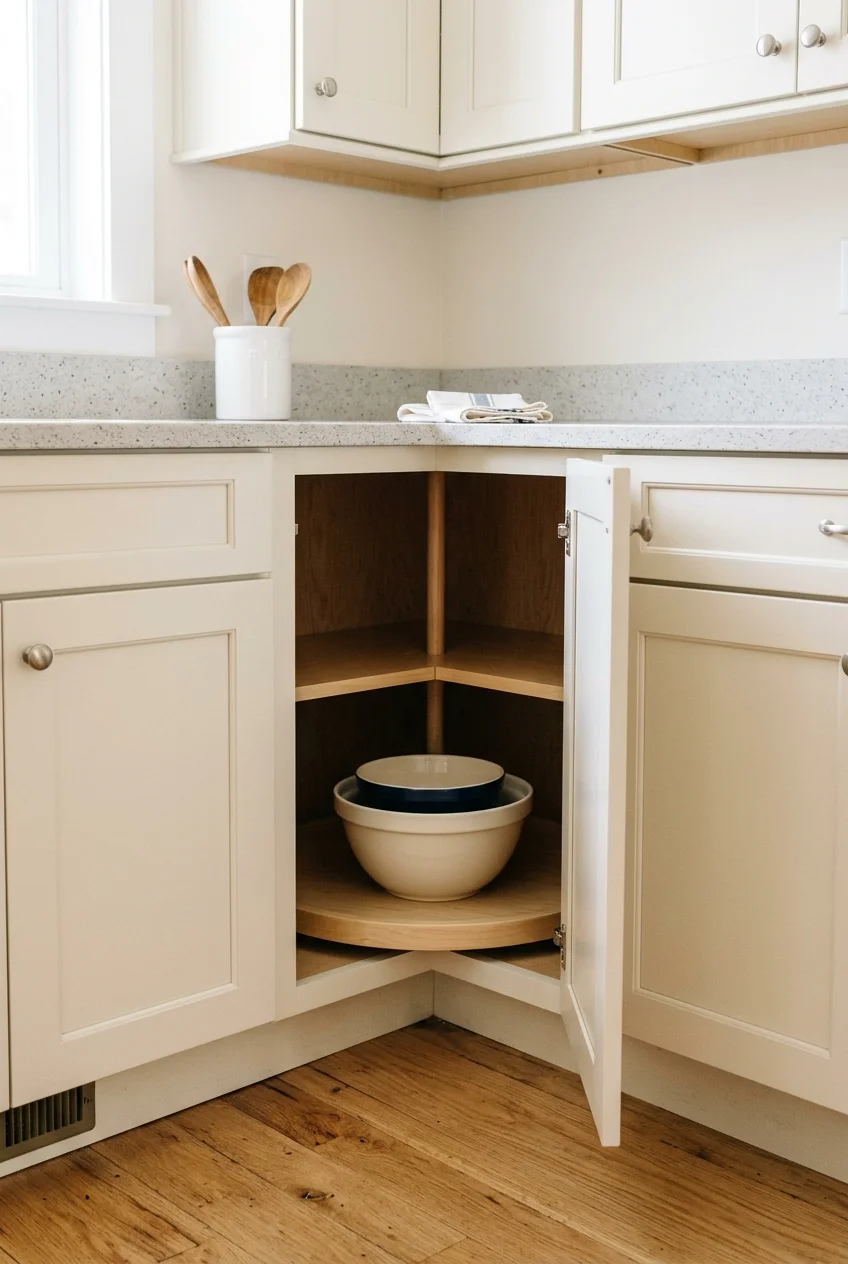
Use a corner mechanism when an L-shaped run leaves a hard-to-reach base cabinet. Compare a rotating shelf in a diagonal cabinet with a blind-corner pullout.
Open a showroom sample and compare how much of each shelf comes into reach. A mechanism that suits big mixing bowls may waste space around small cans.
Measure the door opening, adjacent handles, and swing path before buying. An installer can check which hardware fits the actual box and clears a nearby appliance.
See these corner cabinet storage ideas if you need to compare access styles. Check what your corner actually holds before paying for a larger mechanism.
19. Make a Shallow Drawer Work Harder
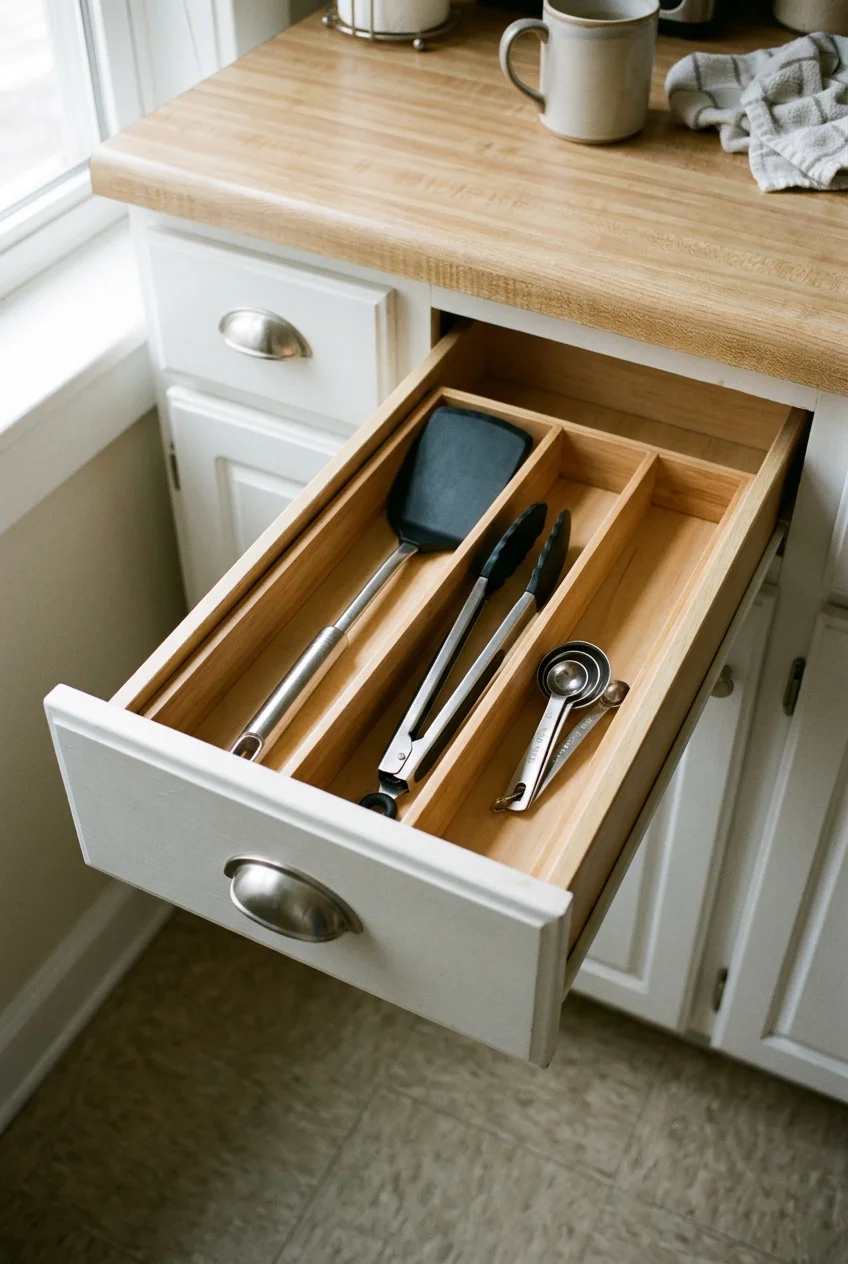
Divide one shallow drawer into lanes for spatulas, tongs, and measuring spoons. Keeping long tools flat frees the counter space usually taken by a utensil crock.
An OXO expandable kitchen tool organizer adjusts across the drawer. Check the drawer's inside width, front-to-back depth, and closing height with your longest tools in place.
Try putting the tools in the drawer before buying an insert. A separate narrow lane is useful when a bulky whisk tends to catch above the tray.
20. Replace Deep Wall Cabinets With Shallower Uppers
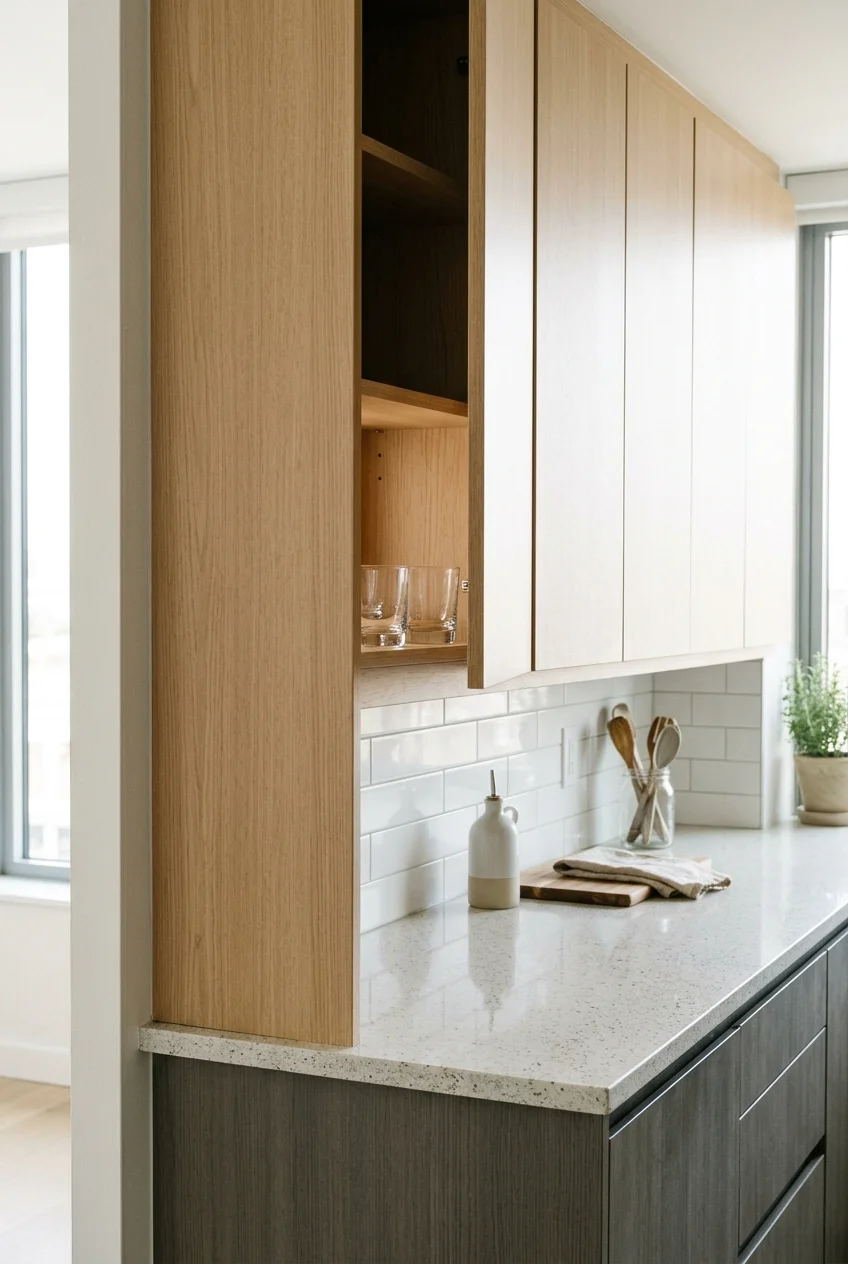
Use shallower wall cabinets where a deep upper makes you duck or lean back while working. Keep everyday mugs and short glassware in that section.
Measure each stack of plates before reassigning storage. If the dishes are too wide, keep them in a deeper cabinet near the dishwasher or in a drawer.
Check how the cabinet aligns with the hood or a neighboring deeper unit. End the shallow run at a natural break such as a wall or open shelf.
Appliances and Fixtures That Fit a Tight Kitchen
Shop from actual installation drawings. The appliance width on a price tag tells you less than the dimensions with handles, doors, connections, and required installation space.
21. Shop for a Counter-Depth Refrigerator
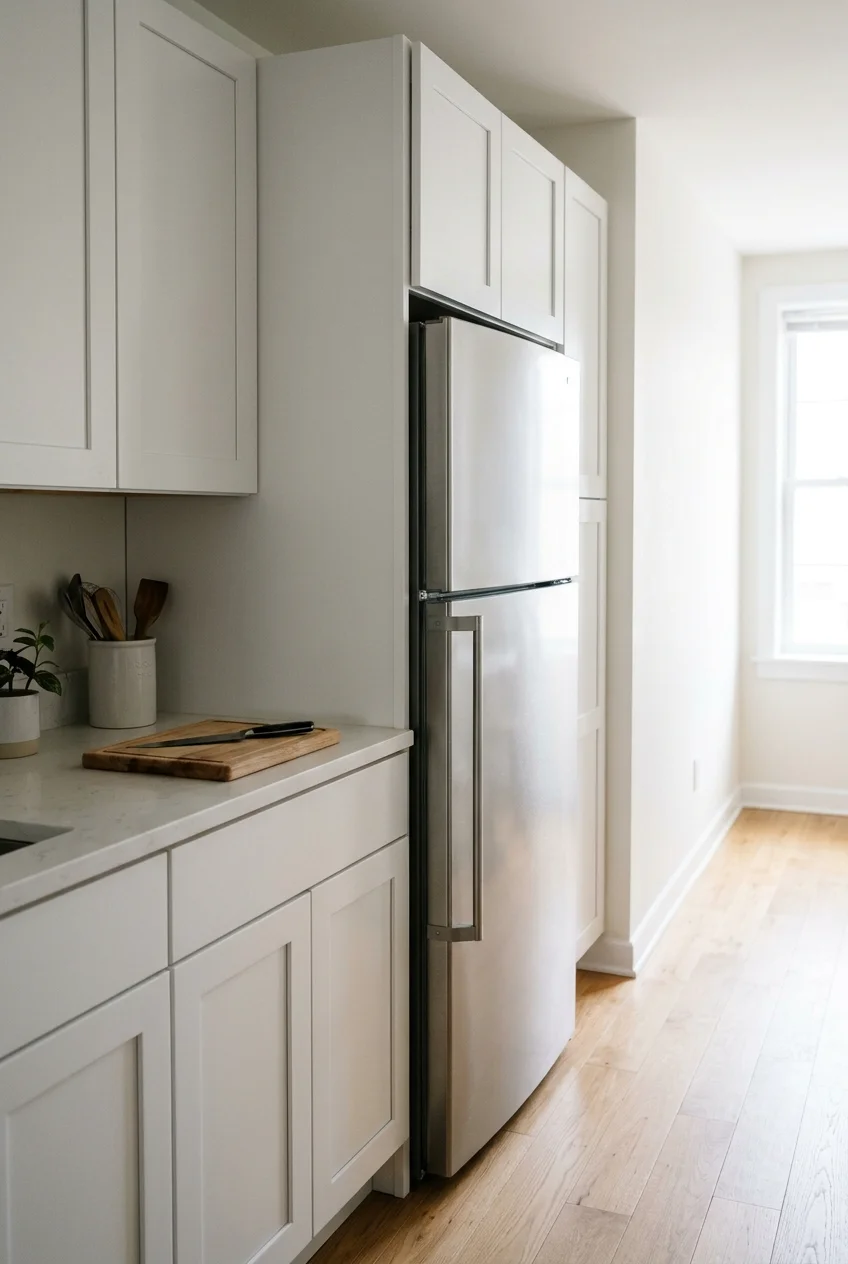
Choose a counter-depth model when the refrigerator body is the pinch point. Read the published depth with the handles and compare it with the finished counter.
Check whether the doors need to project beyond an adjacent cabinet to swing freely. Open the model far enough to slide out both produce drawers.
Include room for the rear connection and the ventilation clearances in the installation guide. The usable aisle starts at whichever finished part sticks out farthest.
A shallower refrigerator can have less usable capacity. Take a look at shelf width and freezer layout if you regularly store pizza boxes or batch-cooked meals.
Measure the delivery route too. A tight turn at the front door can rule out a refrigerator even when it fits the opening in the kitchen.
22. Position the Fridge Hinge for Easy Unloading
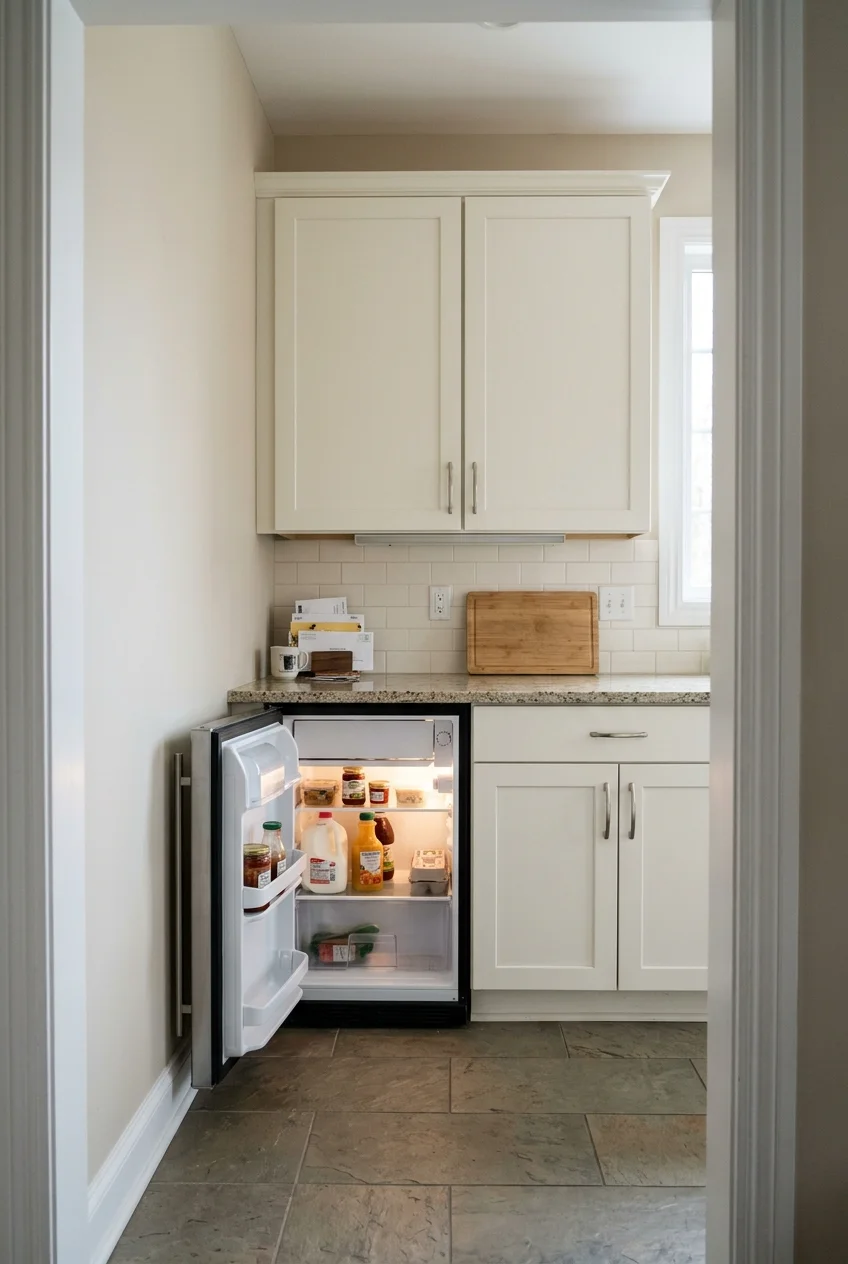
Pick a refrigerator with a door configuration that allows you to unload directly onto a landing counter. Make sure an adjacent wall leaves room for the swing.
Check the model's hinge options before buying. If you need to reverse the opening, confirm the manufacturer allows it and ask who can do the work.
If a single wide door blocks the lane during dinner prep, compare a split-door model. Test drawer removal with one door open and with both open.
23. Choose an 18-Inch Dishwasher When Dishes Fit
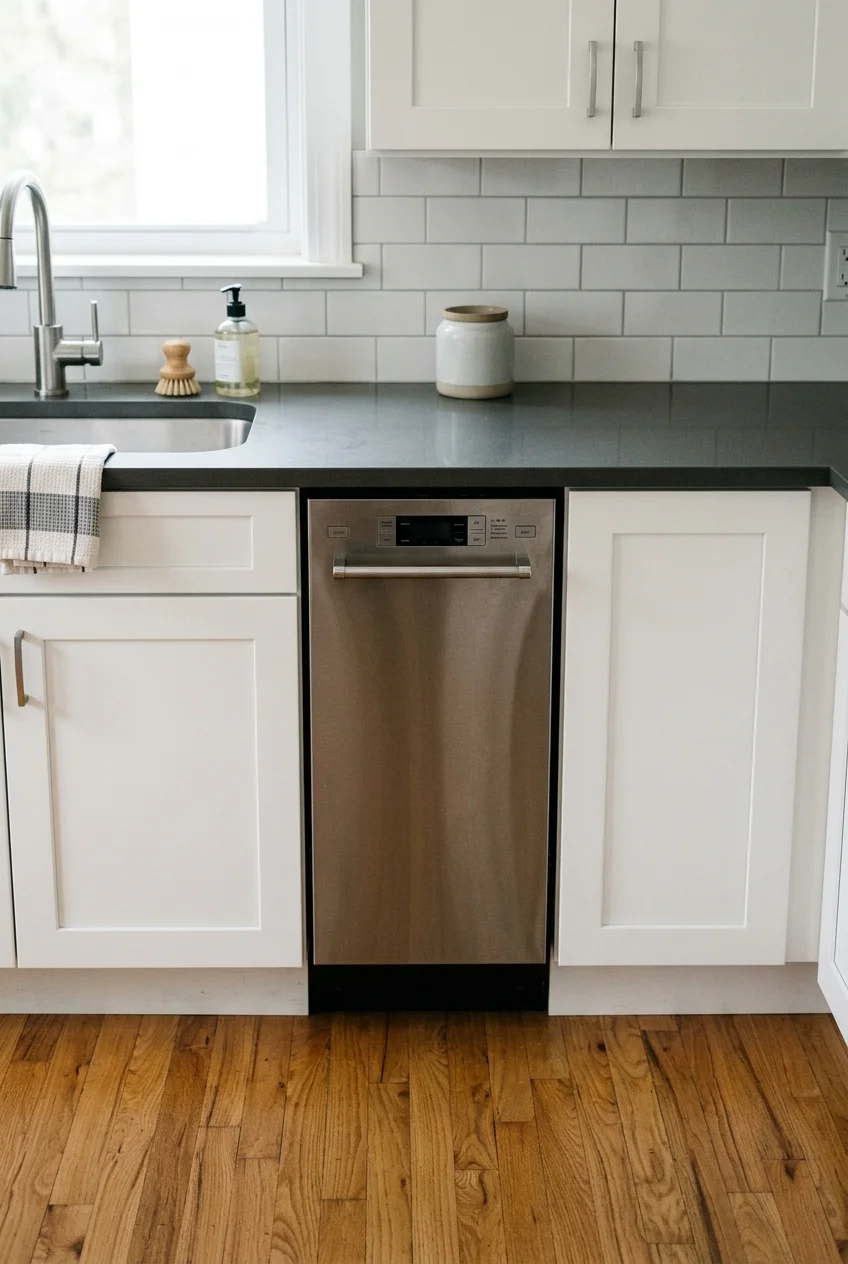
An 18-inch dishwasher can free width for cabinets in a narrow run. Take your largest dinner plate and a typical load list to compare rack layouts.
Use the manufacturer's opening dimensions, including height and depth. A nominal 18-inch width by itself tells you little about the fit under an existing counter.
Measure the door when it's open, then compare the projection with the walkway. A slimmer machine still extends into the aisle when you drop the door.
Keep the new space together if you can. The width is more valuable next to a usable cabinet bay than split into tiny fillers around the machine.
24. Compare a 24-Inch Range With Your Cookware
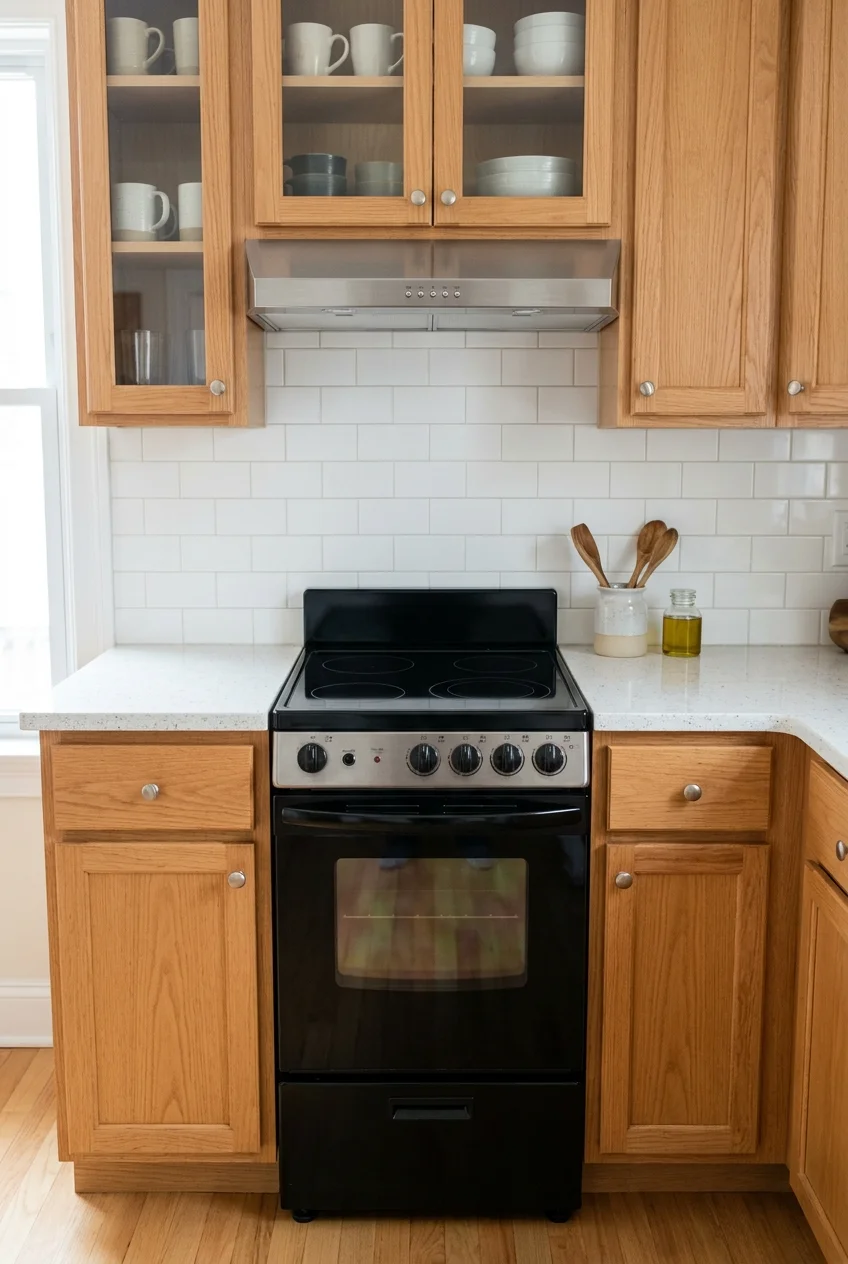
Where the range consumes most of the wall, compare a 24-inch model. Use the recovered space to make one useful counter or drawer bay beside it.
Check burner spacing with the two pans you use together most often. Pull the oven rack out and compare its usable dimensions with your sheet pans.
Confirm the circuit or fuel supply, hood fit, and appliance clearances with your installer. Ask them to include the manufacturer's anti-tip requirements in the installation plan.
A smaller oven makes sense only if it handles your everyday meals. Keep the existing range size if giving it up would disrupt the way you cook.
25. Choose a Single-Bowl Sink for Full-Size Pans
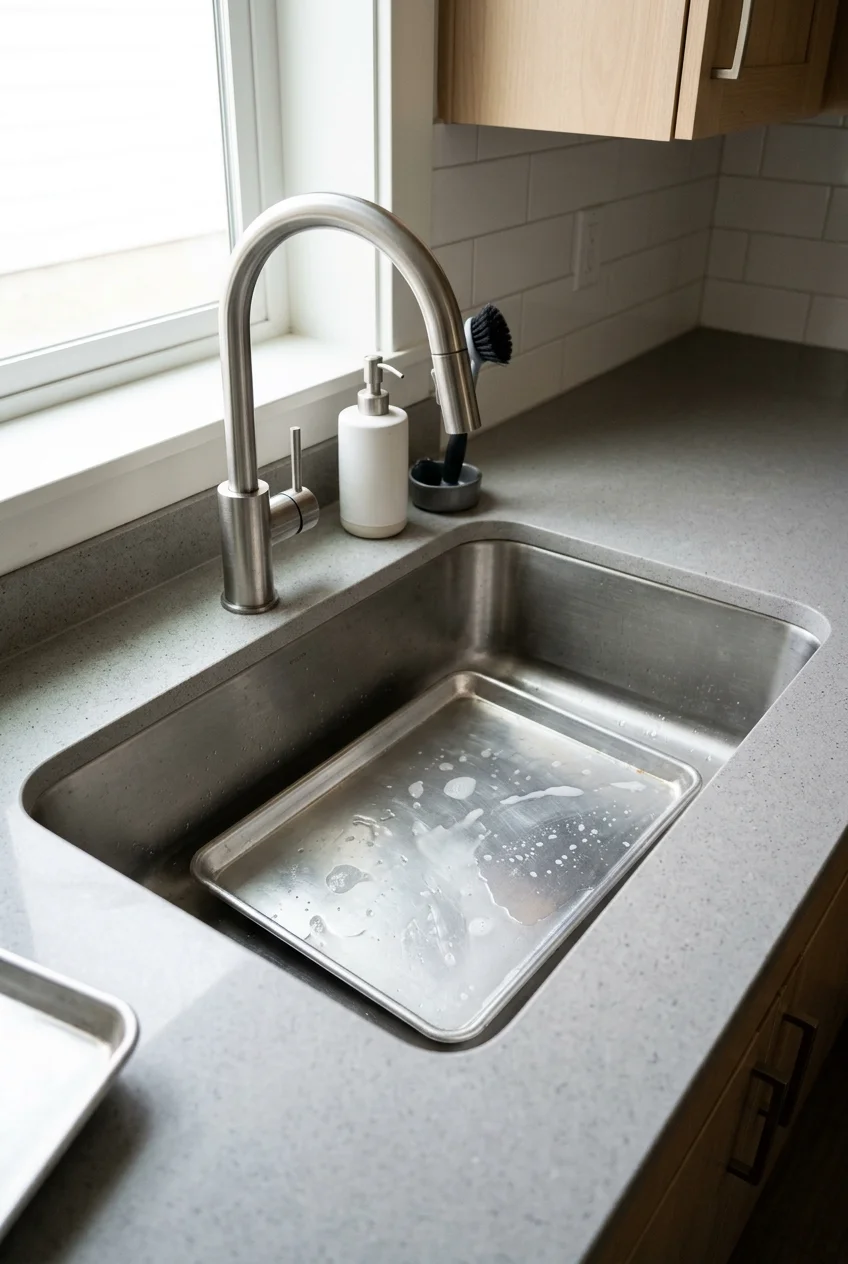
Look for a single-bowl sink when two small basins make sheet pans awkward to wash. Compare interior bowl width with the pan you wash most often.
Check the required cabinet size and the counter cutout, especially when you're keeping the old counter. Leave clearance for the faucet at the wall or window trim.
The deepest bowl can be tiring if you bend to reach its bottom. Test a sample at counter height and leave some open counter beside it.
26. Size the Faucet for the Sink and Wall
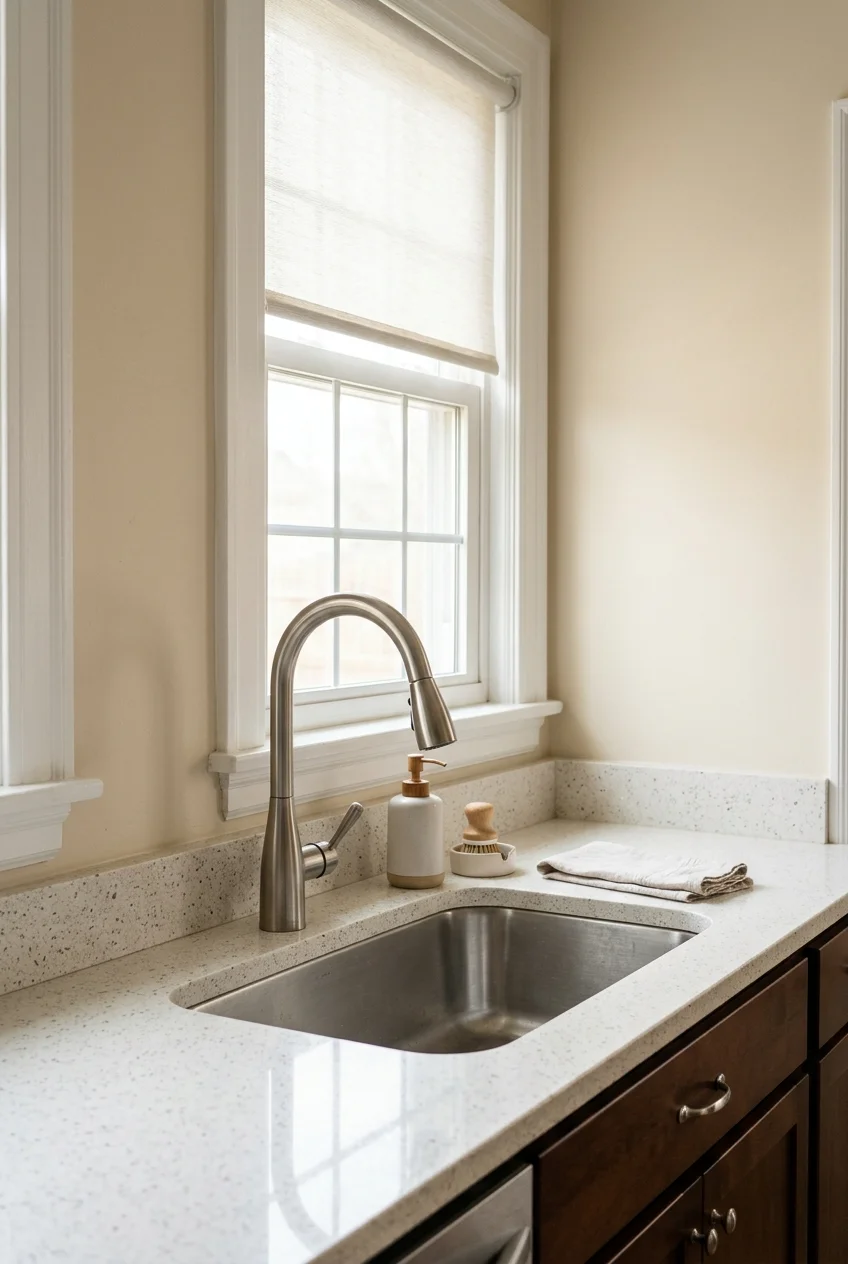
Pick a faucet with a reach that sets the water comfortably inside the basin. Check the space behind the faucet for the handle to move fully.
Put a tall pot in the sink at the showroom if you can. In a window-side setup, compare the faucet's height with the sash and blinds.
A pull-down head can help rinse a broad bowl. Check the cabinet space below so the hose has room to move around bins and stored supplies.
27. Use a Workstation Ledge for Occasional Prep
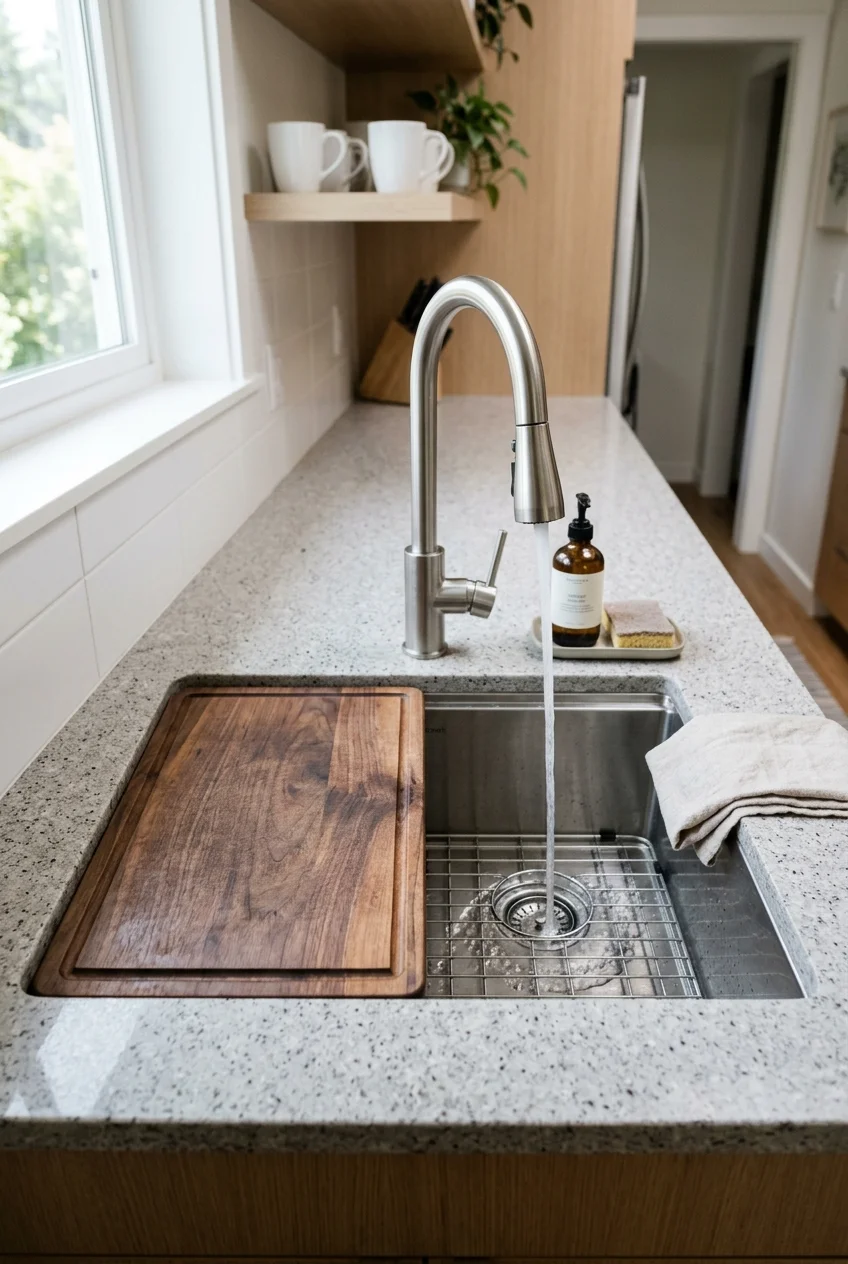
Choose a sink with an integrated ledge if you need a temporary spot for chopping or draining. Match every accessory to the basin model before buying.
Slide the board to one end and check that enough basin remains free for rinsing. If the board covers the entire bowl, the two jobs compete.
Allow a place to wash, dry, and store the accessories. Keep a regular cutting board nearby if you often need the sink and your full prep surface simultaneously.
28. Put the Microwave in a Dedicated Shelf Bay
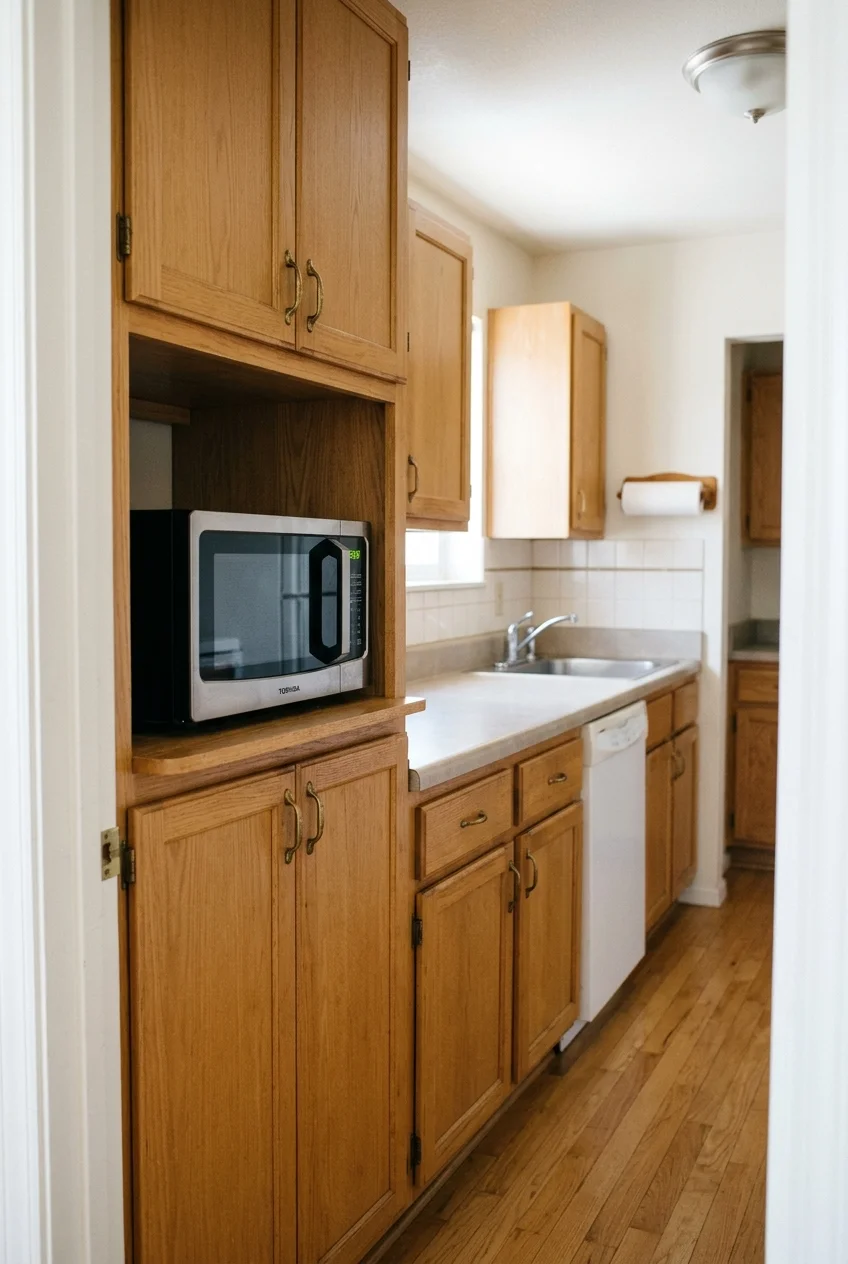
Give a compatible microwave a dedicated shelf at a comfortable height to move it off the worktop. Leave an adjacent landing surface for a hot plate.
Check whether the manual permits your proposed setup. A countertop unit may require open space around it, while a built-in installation may require a model-specific kit.
Open the microwave door and check where its edge crosses the walkway. Try lifting a bowl with both hands from the shelf to the landing surface.
Plan the outlet with an electrician so the cord reaches without interfering with ventilation. Measure interior shelf depth and the plug projection before ordering the cabinet.
29. Plan a Slim Hood With a Route Outdoors
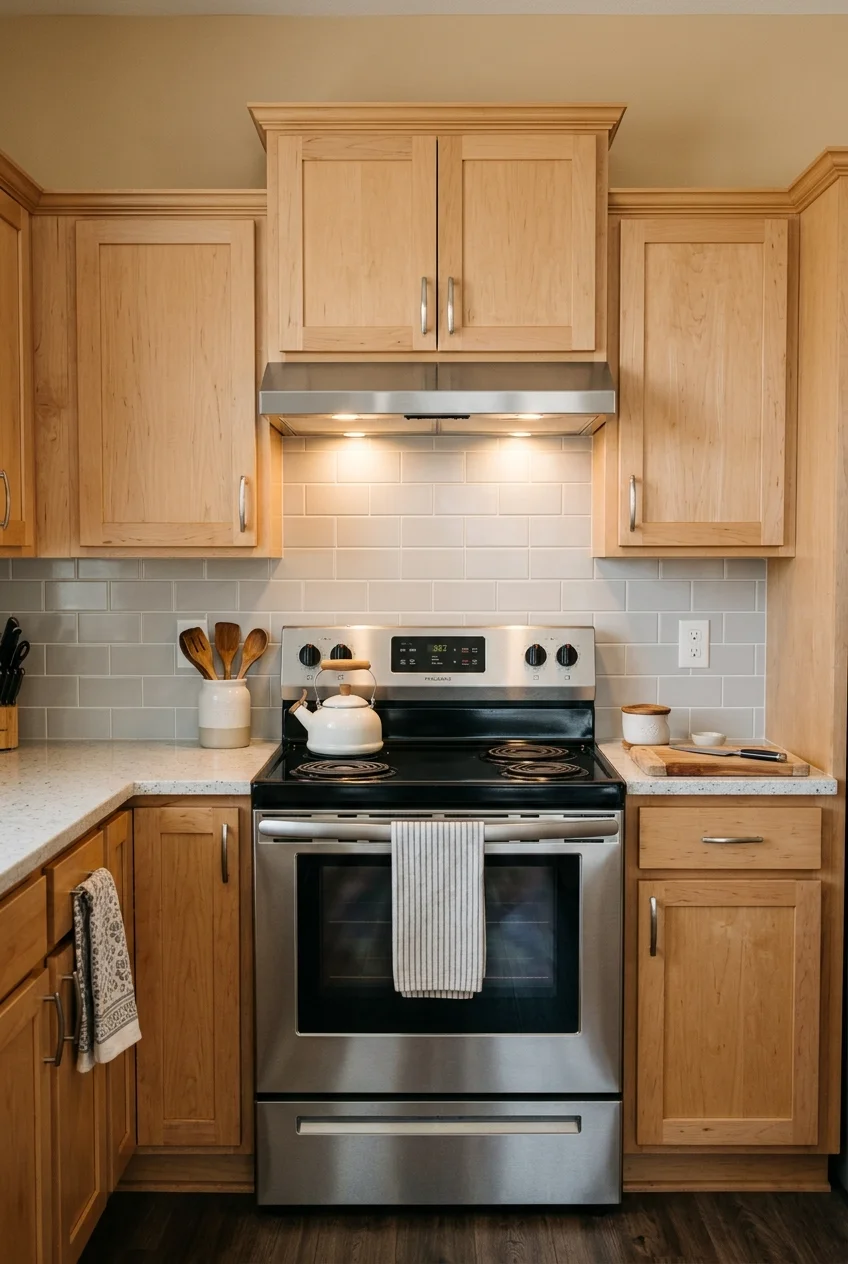
Choose a hood that suits the range and can exhaust outdoors when the building allows. A simple under-cabinet shape keeps the cooking wall visually compact.
Ask the installer to confirm the duct route and allowable length in the product instructions. Exterior penetrations and shared building walls may require separate approval.
Verify the hood's mounting height against both appliance manuals. Check how the front edge feels when you stand at the range and reach the back burner.
The EPA recommends using a hood that exhausts outdoors when available. If your building restricts ducting, ask which ventilation options are allowed before ordering cabinets.
Ask the contractor about local requirements, including any air replacement provisions for the proposed equipment. Include the venting work in your estimate before comparing hood prices.
Cabinet and Surface Updates That Make a Difference
Keep the parts that are sound and work well. In a narrow kitchen, a better cabinet front or a cleaner floor transition can solve a daily annoyance.
30. Reface Sound Cabinets With Simpler Doors
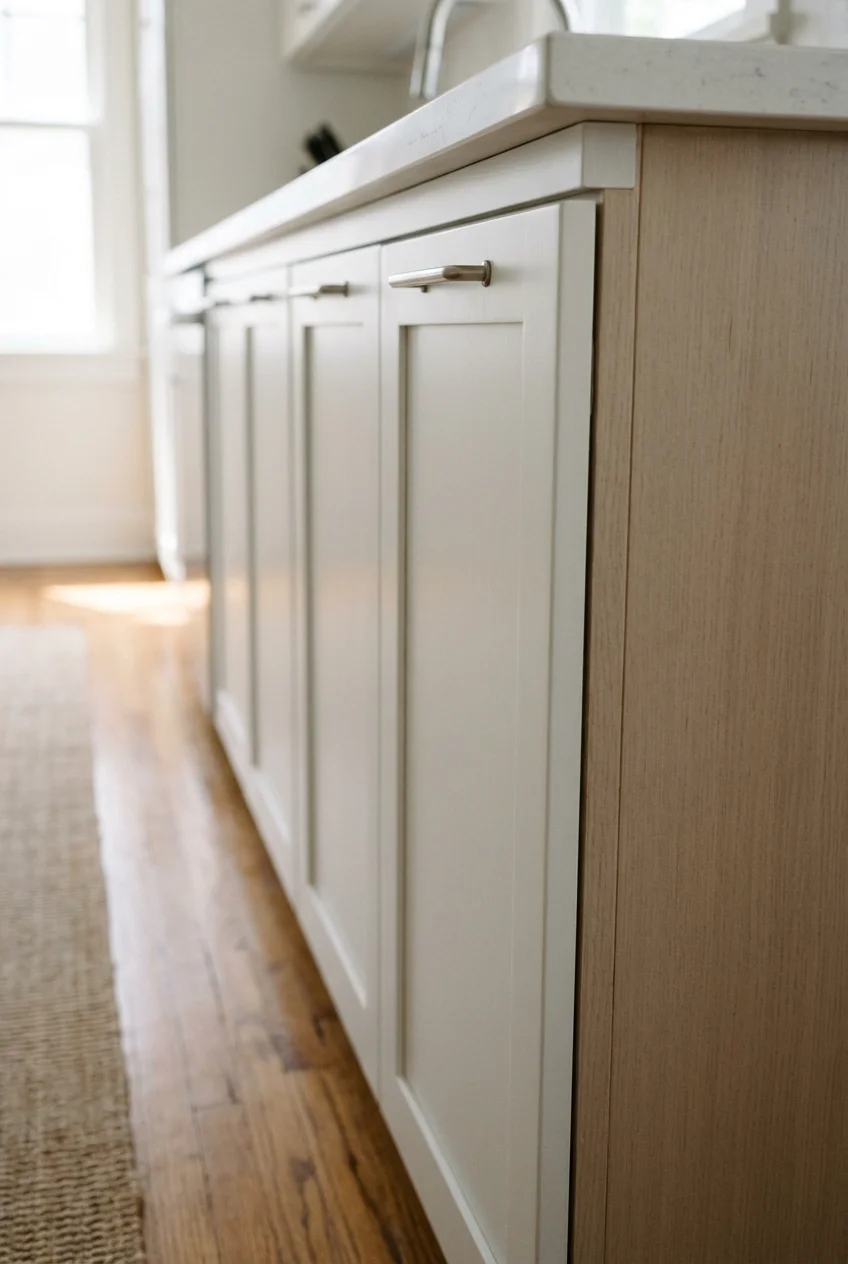
Reface sound cabinet boxes when the layout works and the doors are the main problem. Choose a plain profile that is easy to wipe in passing.
Ask what the quote includes for drawer fronts, end panels, hinges, and exposed edges. Stand at both entrances to see which side panels will remain visible.
Inspect the boxes for water damage, loose joints, and poor anchoring before spending money on new fronts. Put the budget toward repairs where the boxes are failing.
If you want to compare door treatments, browse these kitchen cabinet makeover ideas and pay attention to how side panels and exposed edges meet the new fronts.
31. Repaint the Cabinets You Can Keep
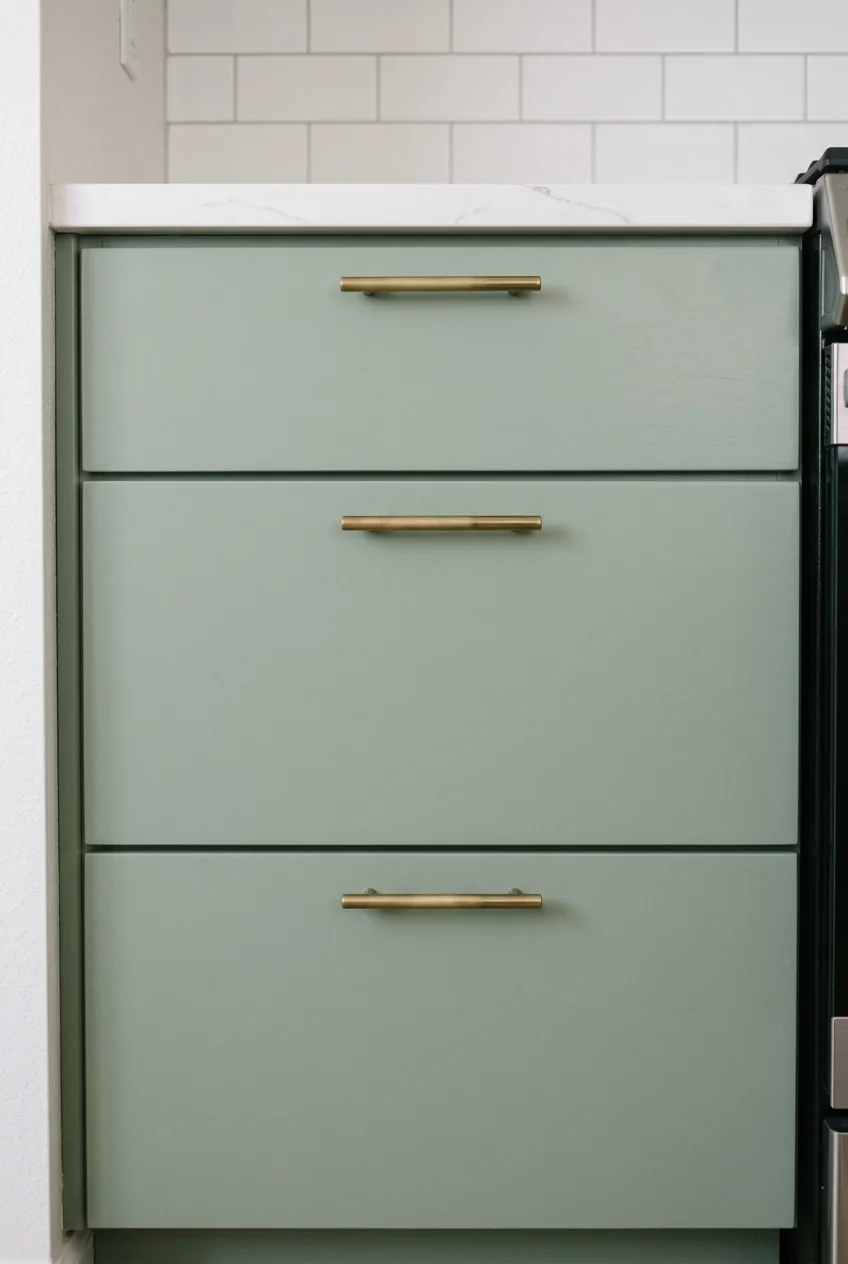
Paint serviceable doors when their finish is the part you dislike. Choose a cabinet coating and follow its preparation and cure instructions for the existing surface.
Test adhesion on a sample area as directed by the coating manufacturer. Photograph door positions and keep the hardware for each cabinet together before taking it apart.
If the home predates 1978 and the work will disturb painted surfaces, ask a lead-safe certified renovator about the prep plan before sanding or scraping anything.
Schedule around curing time, particularly if this is your only kitchen. Keep the surfaces where you prepare food and wash dishes available during the rest of the project.
32. Swap Projecting Pulls for Low-Profile Hardware
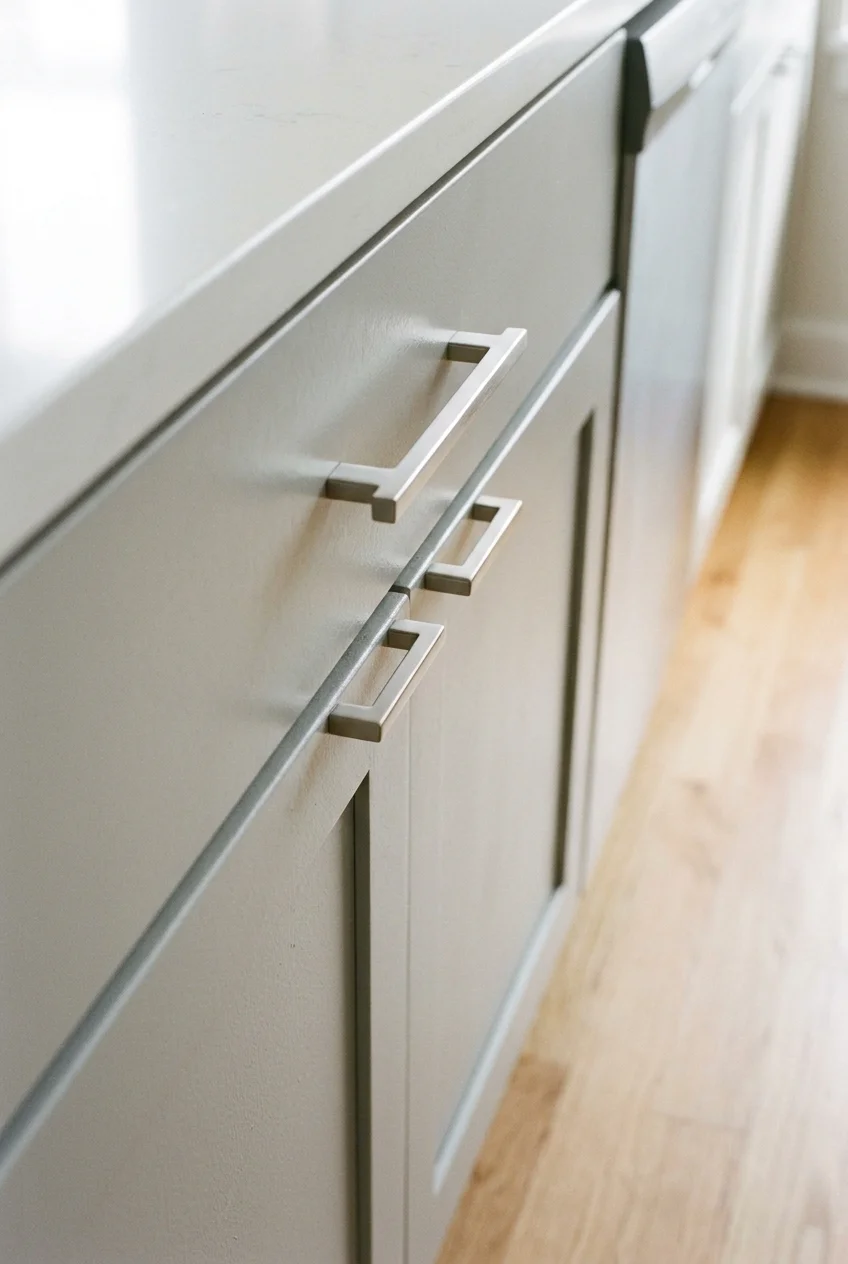
Replace protruding pulls where pockets or tote straps catch on them. Pick a handle you can grip comfortably with wet hands and test it on one door.
Measure the center-to-center distance between existing screw holes before ordering. At an inside corner, open both fronts with the sample installed to see what clears.
33. Replace a Tired Counter With Stock Laminate
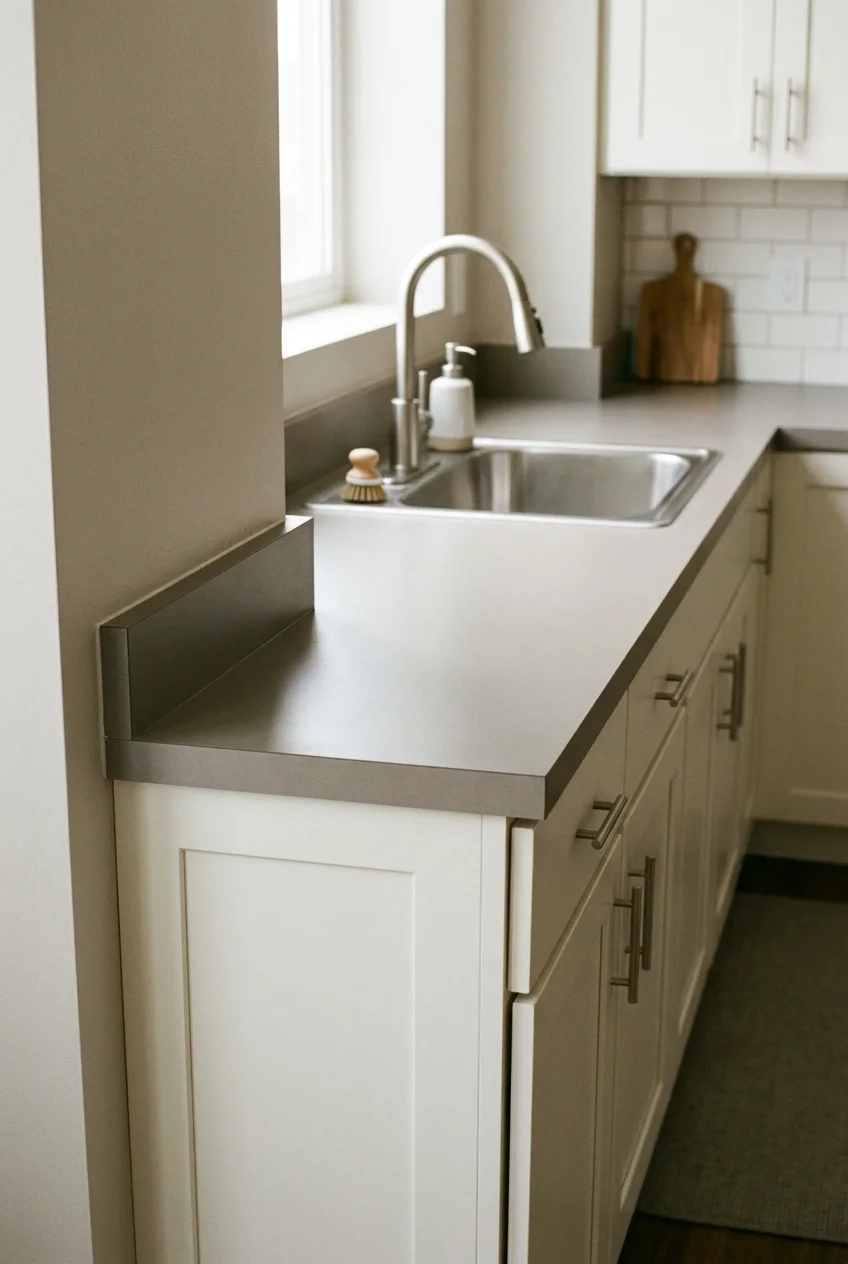
Price stock laminate when a short, straight run can use a readily available countertop. Compare the finished edge and end-cap options where the counter faces the room.
Verify the wall angle and the actual depth of the cabinet run. An out-of-square wall or an awkward turn may make a custom piece easier.
Check the manufacturer's rules for sink installation and care near heat or water. If the cooktop lands close to a joint, show that location to the supplier.
For more budget kitchen remodel ideas, start with the changes that replace a failing surface or improve prep. Compare quotes using the same scope and finish details.
34. Add a Pullout Work Surface to a Base Cabinet
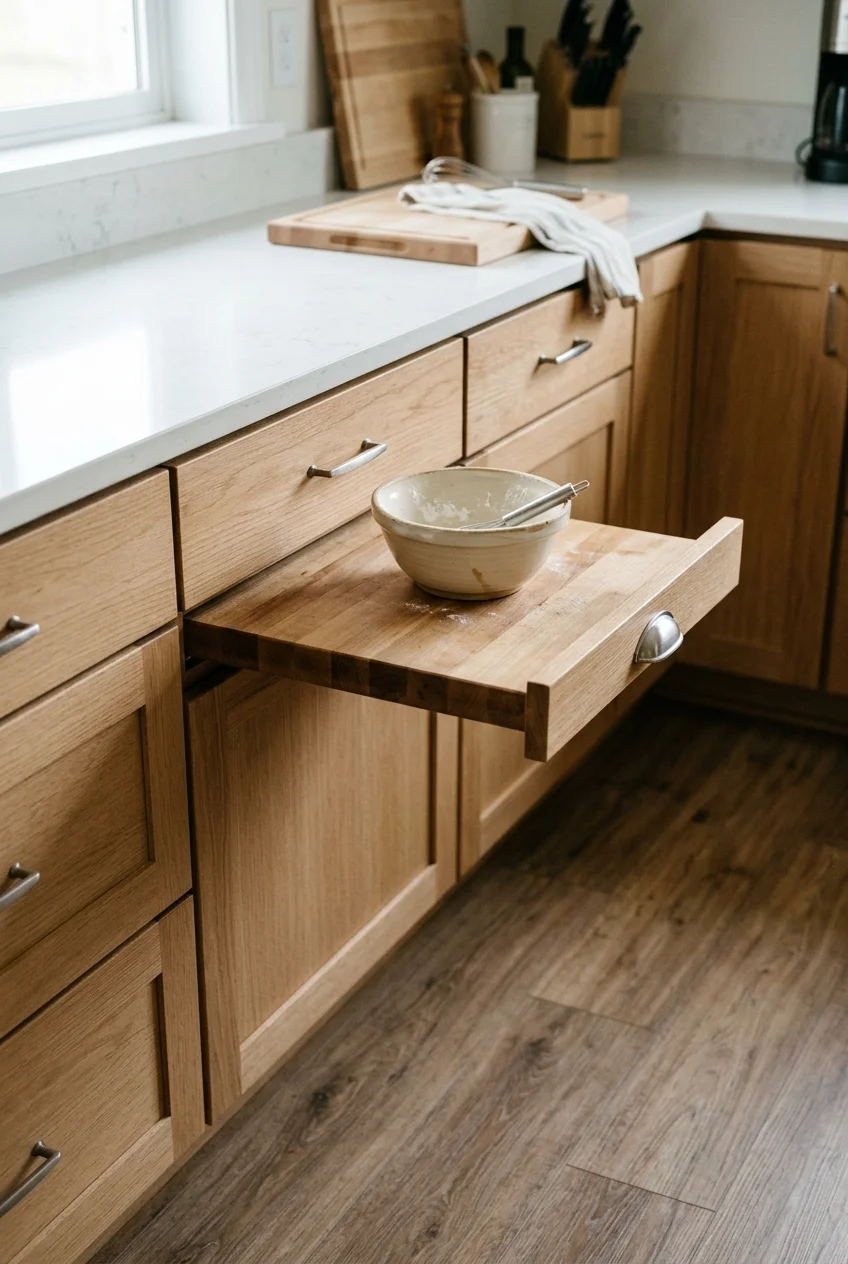
Fit a purpose-built pullout work surface below the counter if you need temporary room for sandwich prep or mixing. Choose a bay away from main traffic.
Check how far the surface extends, where you stand, and how much weight the hardware supports. Test the opening with a nearby cabinet door in use.
Ask the installer to confirm support for the selected system. Leave part of the permanent counter free for heavier prep, since a pullout has its own limits.
Choose a food-prep surface you can clean and dry before it slides away. Set aside a permanent storage spot for the tools you use with it.
35. Install a Single Backsplash Panel Behind Prep
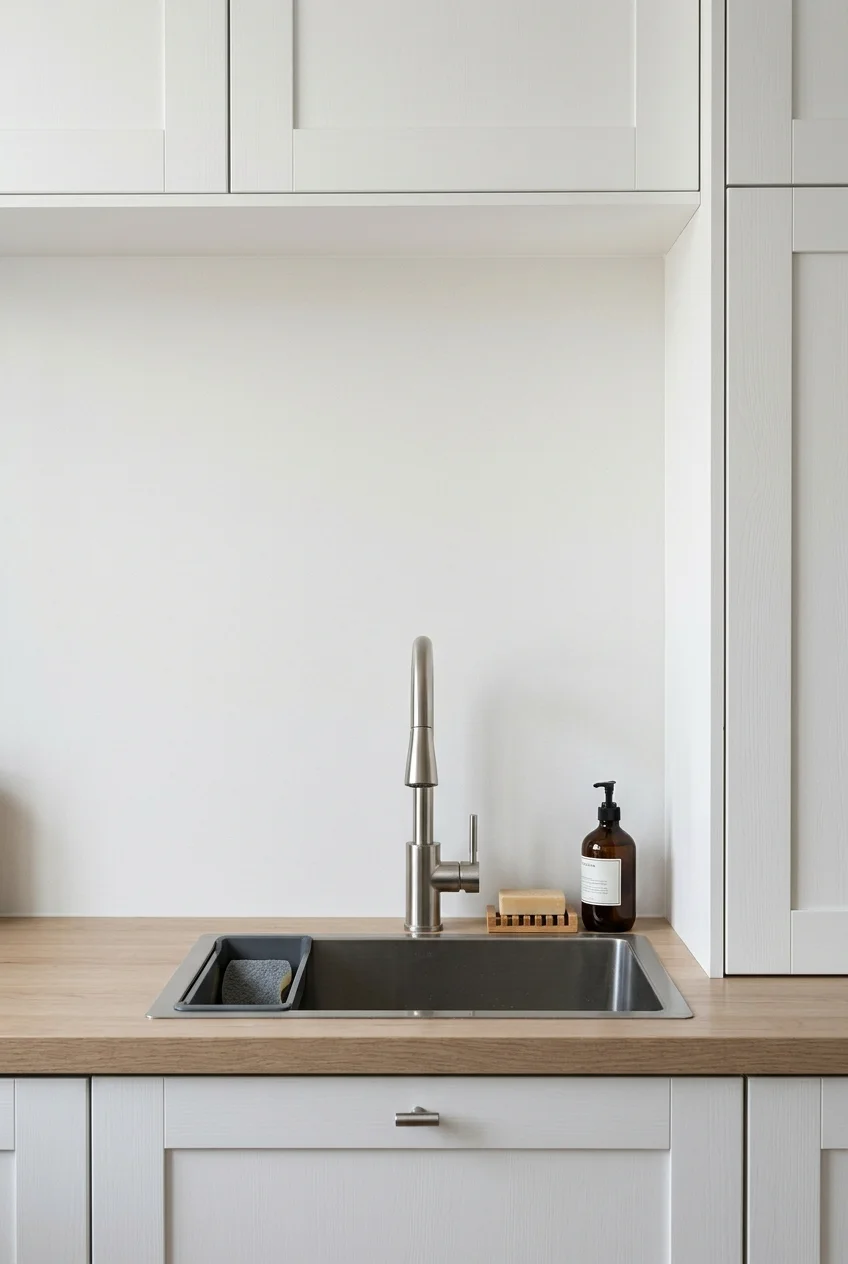
Use one wipeable backsplash panel through the sink and prep area if spatters are a daily chore. Align its finished end with the cabinet edge.
Mock up the end and outlet locations with paper before ordering. Ask the installer how exposed edges will finish and how changes of plane will be sealed.
At the cooking wall, match the finish and installation to the range's clearance instructions. A product that suits the sink wall may have limitations near a burner.
36. Continue the Adjacent Flooring Through the Galley
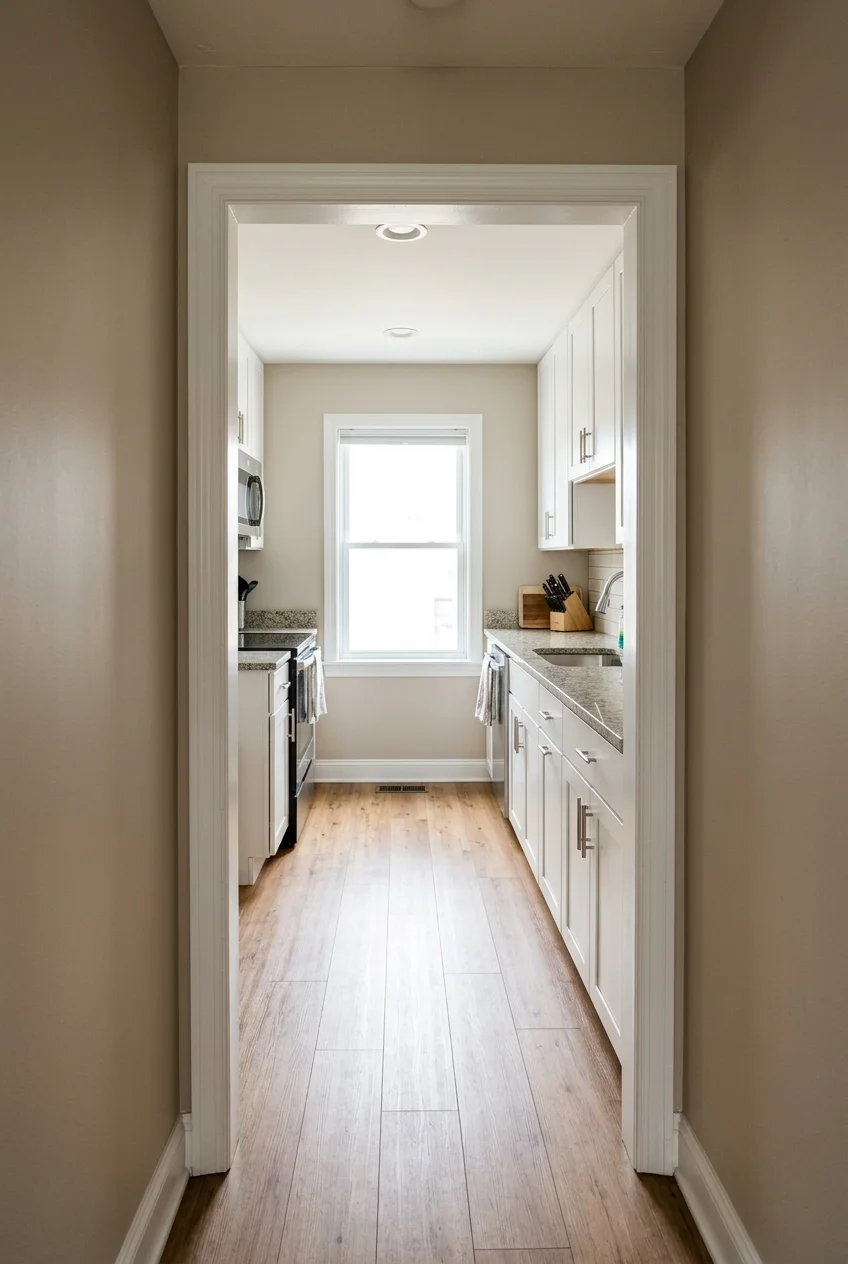
Use the same suitable flooring through the kitchen and nearby hall when they're being redone together. A single surface keeps the narrow entry visually connected to both spaces.
Check height at doorways, transitions, and under the dishwasher. Ask the flooring and cabinet installers to agree on what goes under the cabinets before work begins.
Where you must keep a transition, choose the profile and placement early. Check that an appliance can clear it when it needs to slide out for service.
37. Use Sheet Flooring to Minimize Seams in a Short Room
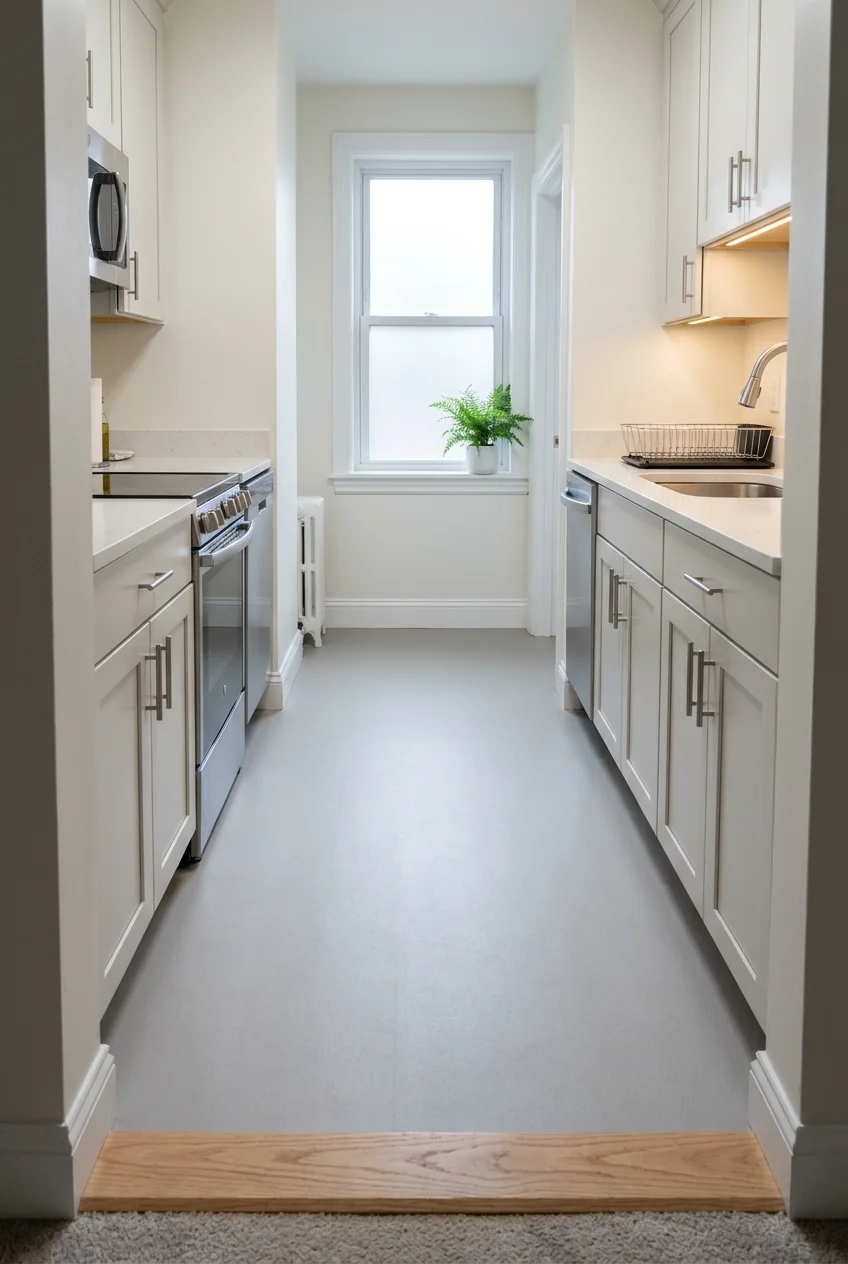
Compare sheet flooring when the narrow room can be covered with few or no seams. Ask the installer how the product handles your doorway, subfloor, and sink area.
Check manufacturer instructions for moisture management and where the flooring ends at cabinets or appliances. Ask for subfloor preparation to be itemized in the quote.
Bring home a sample and view it between the cabinet runs. A quiet repeat usually reads better in a narrow room than a pattern with many breaks.
38. Ease the Counter Corner at a Tight Turn
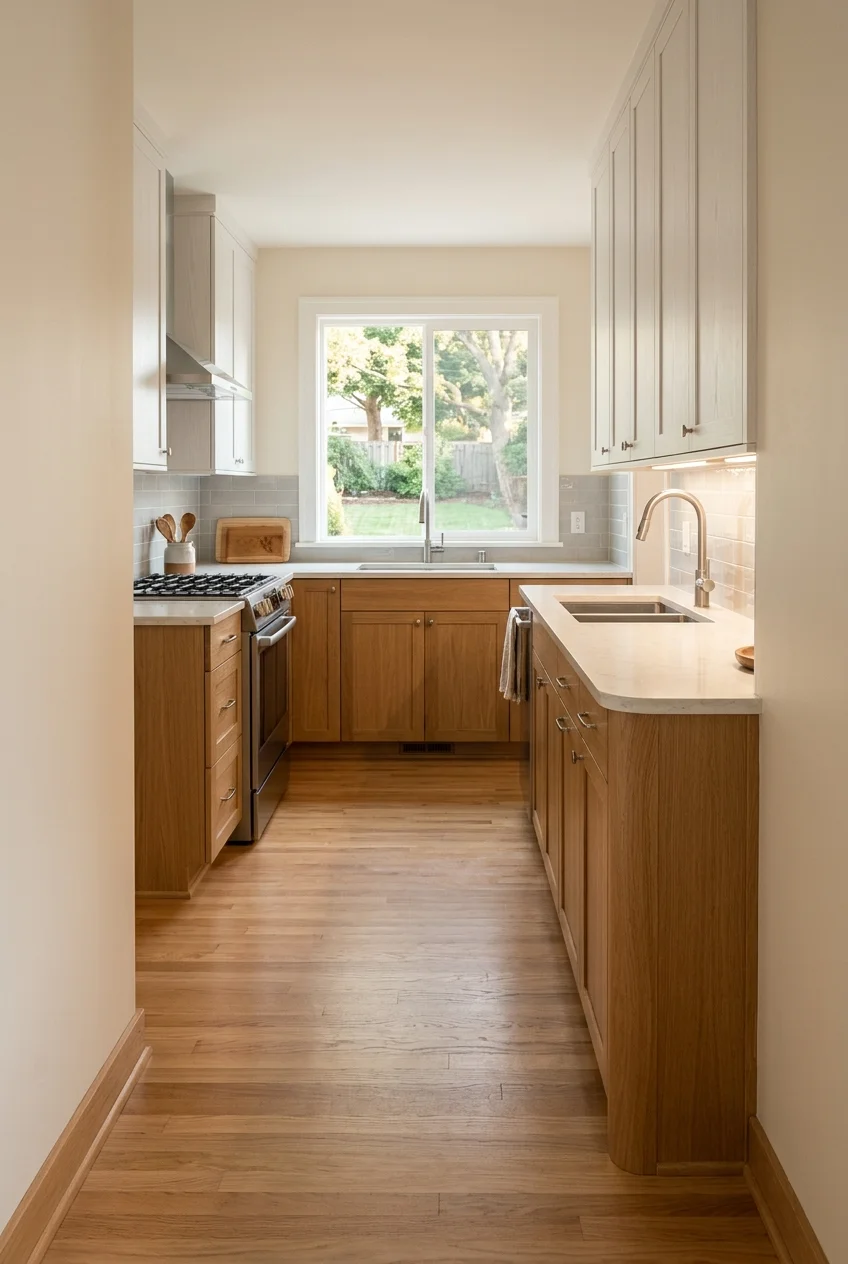
Specify a gently eased or rounded outside corner where the counter meets a tight turn. It can make the corner less abrupt when you carry groceries past it.
Mark the desired shape on the template with the fabricator. Check the finished cabinet side, overhang, and any countertop product limits before committing to the edge.
If the cabinet itself steals walking space, shorten the run. The shape of the edge only helps where the cabinet footprint already fits the turn.
Lighting and Daylight for a Narrow Room
Walk through the kitchen before breakfast and after dark. Note where your shoulders cast shadows across the cutting board and which parts of the room stay dim.
39. Run Task Lighting Under the Upper Cabinets
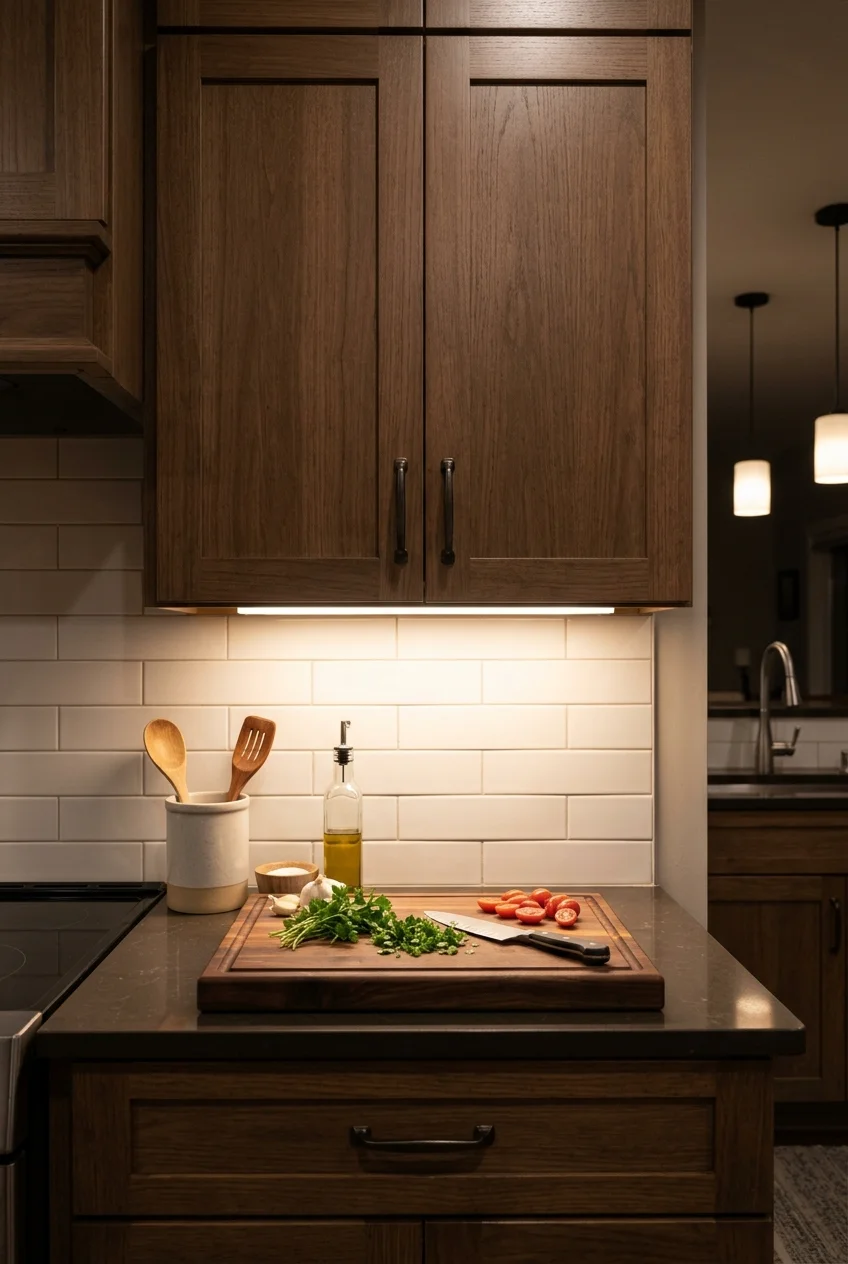
Add a continuous strip or linkable bars beneath the uppers where you chop and measure. Place the light to illuminate the work surface in front of you.
Hold a sample at different points beneath the cabinet before mounting. Check the light on the counter and the view from the doorway at seated height.
A diffuser can help soften visible dots. Use a fixture suited to the location and ask your electrician how permanently wired models will be switched and serviced.
Browse these kitchen lighting ideas for examples of task and room lighting used together. Decide which counter sections actually need extra light before buying fixtures.
40. Use Two Low-Profile Ceiling Fixtures in a Long Galley
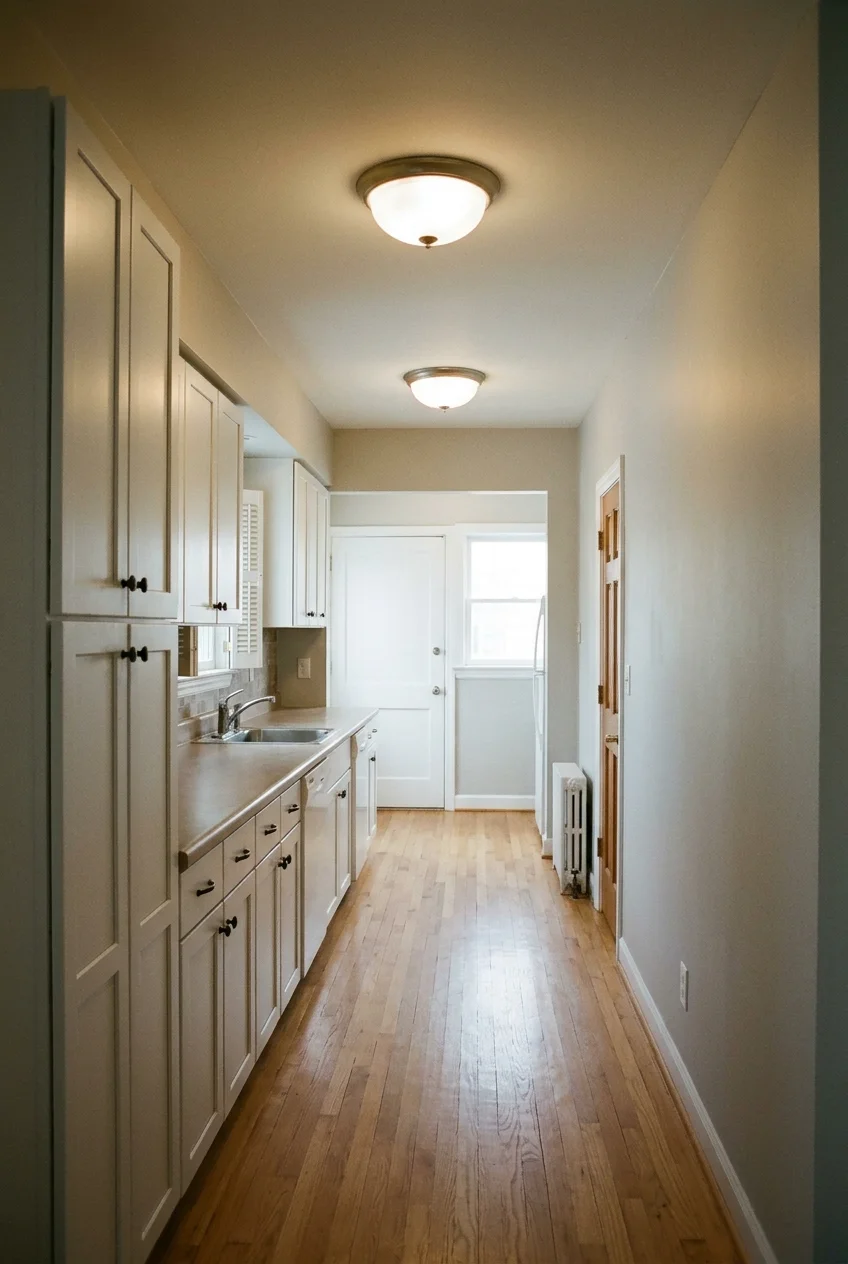
Spread room light along the length of the galley with two low-profile fixtures. Position them around the portions of the room that your current fixture leaves dark.
Mark both positions before the electrician moves a ceiling box. Check the view from both ends and confirm that doors or tall cabinet fronts clear the fixtures.
Use a diffuser if direct light feels harsh from the hallway. Keep dedicated counter lighting in the work zones where you still cast a shadow.
41. Use Aimable Track Heads From One Ceiling Feed
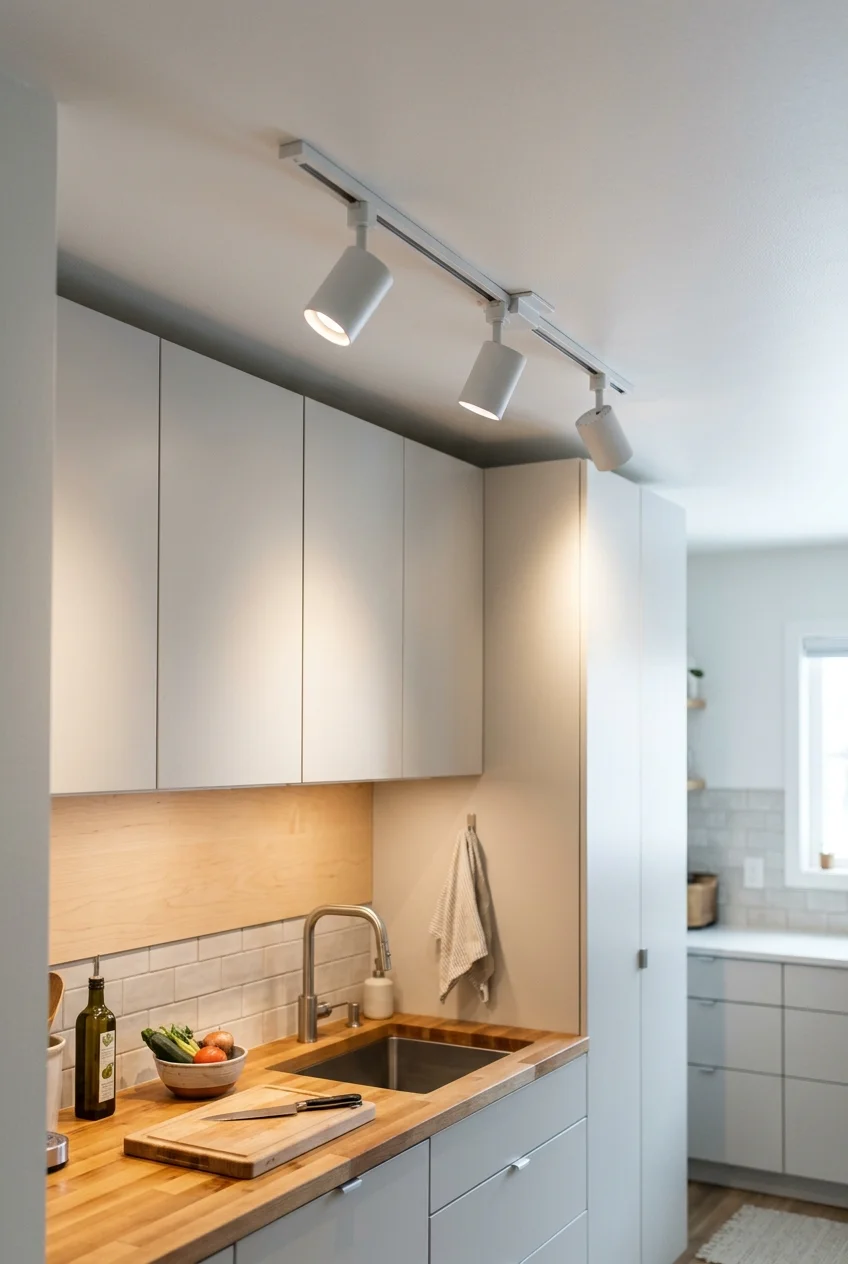
Consider a short track when one ceiling feed needs to light several tasks. Aim individual heads at prep and storage instead of pointing all of them straight down.
Have an electrician check the existing box and the fixture's mounting requirements. Draw where you would aim each head before choosing the track's length and position.
Try the angles at night with someone standing at the worktop. Re-aim any head that creates glare in a sightline from the adjacent room or hits a wall.
42. Add Low Light Along the Toe Kick for Night Trips
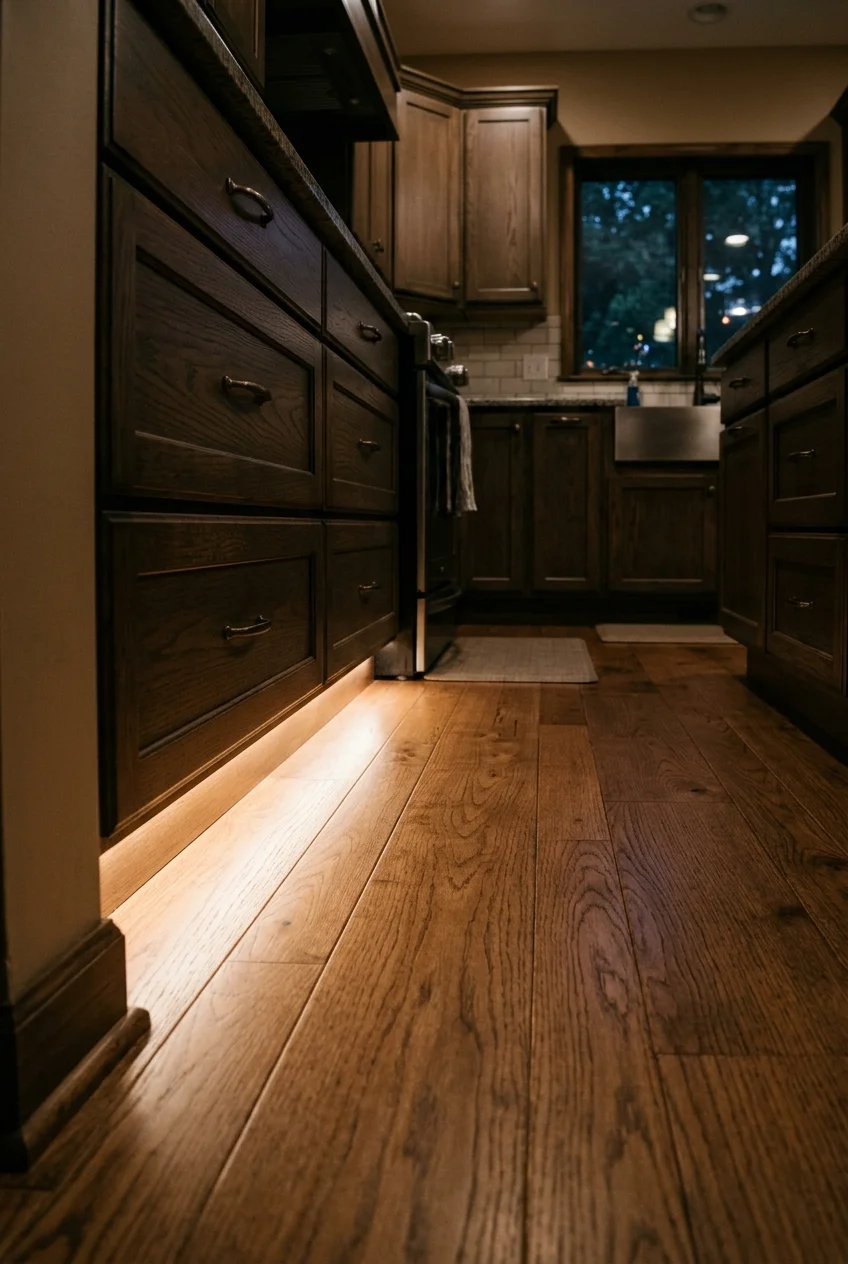
Add a toe-kick light if people cross the kitchen for water at night. Put it on a separate control so it can run by itself after dinner.
Choose a fixture suitable for the location and keep its wiring clear of routine cleaning. Have the installer plan access to any replaceable parts or drivers.
View a sample from the adjacent room before installing it. A gentle glow along the floor is easier to live with than a bright visible row of dots.
43. Use a Low-Bulk Shade at the End Window
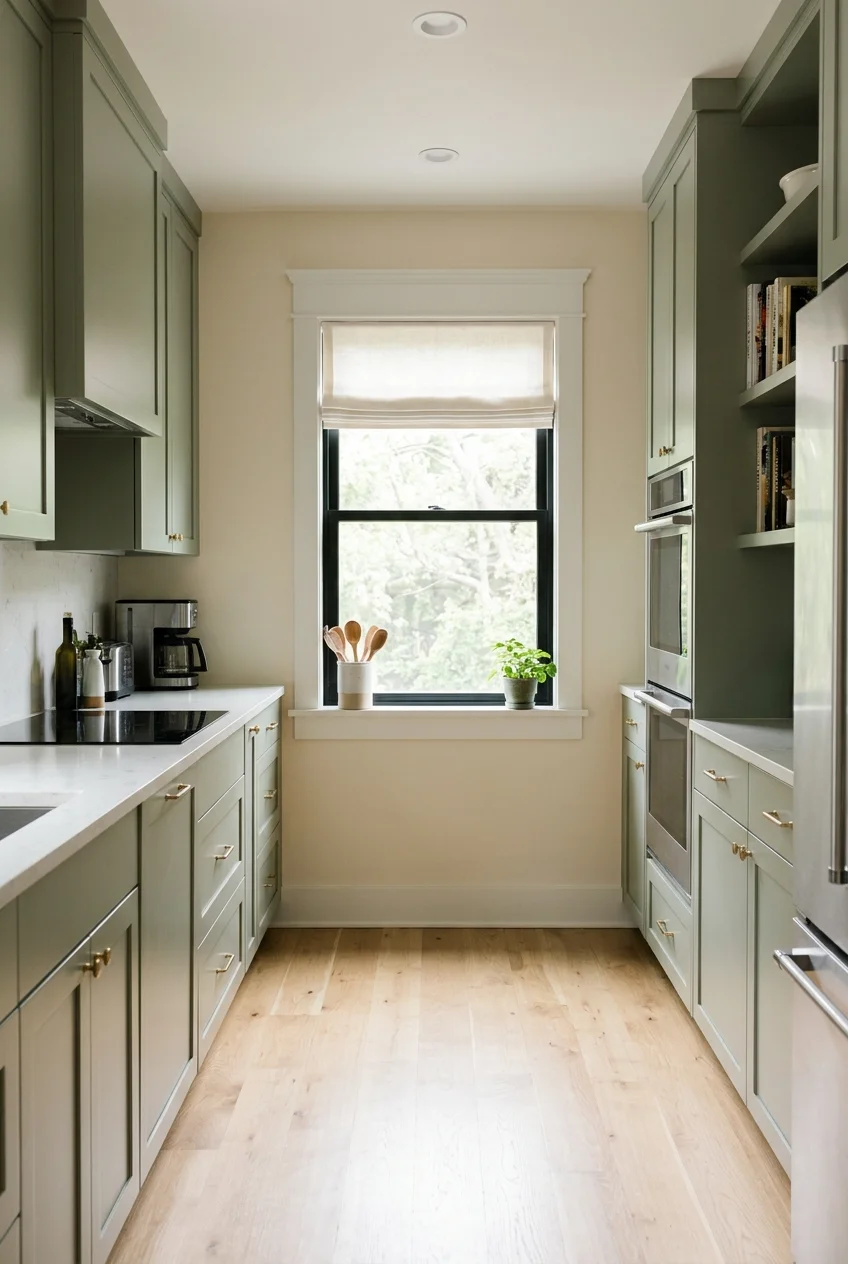
Choose a simple shade that stacks neatly above the glass so the end window can light the full aisle. Measure both the opening and the stack height.
Check how the shade operates with a faucet, window crank, or cabinet beside it. Keep the controls reachable without leaning far across a sink or prep counter.
Test the fabric with the kitchen lights on after dark if privacy matters. A sample held to a daytime window tells you only part of the story.
44. Borrow Light Through an Interior Transom
Image pending: No image is attached to this draft for idea 44 (image-44).
Add an interior transom above a doorway if the kitchen borrows light from a brighter room. The opening works best where light reaches the other side regularly.
Ask a professional to check framing and requirements before changing the opening. In a condo, see whether building rules limit structural or wall modifications before planning it.
Choose glazing for the privacy you need. A fixed translucent panel can pass diffuse light while softening the view into the next room after dark.
Review the opening from both rooms. Align its finished trim with the doorway below, and check whether the new glass would sit behind a cabinet or light fixture.
45. Choose Low-Glare Finishes for the Prep Area
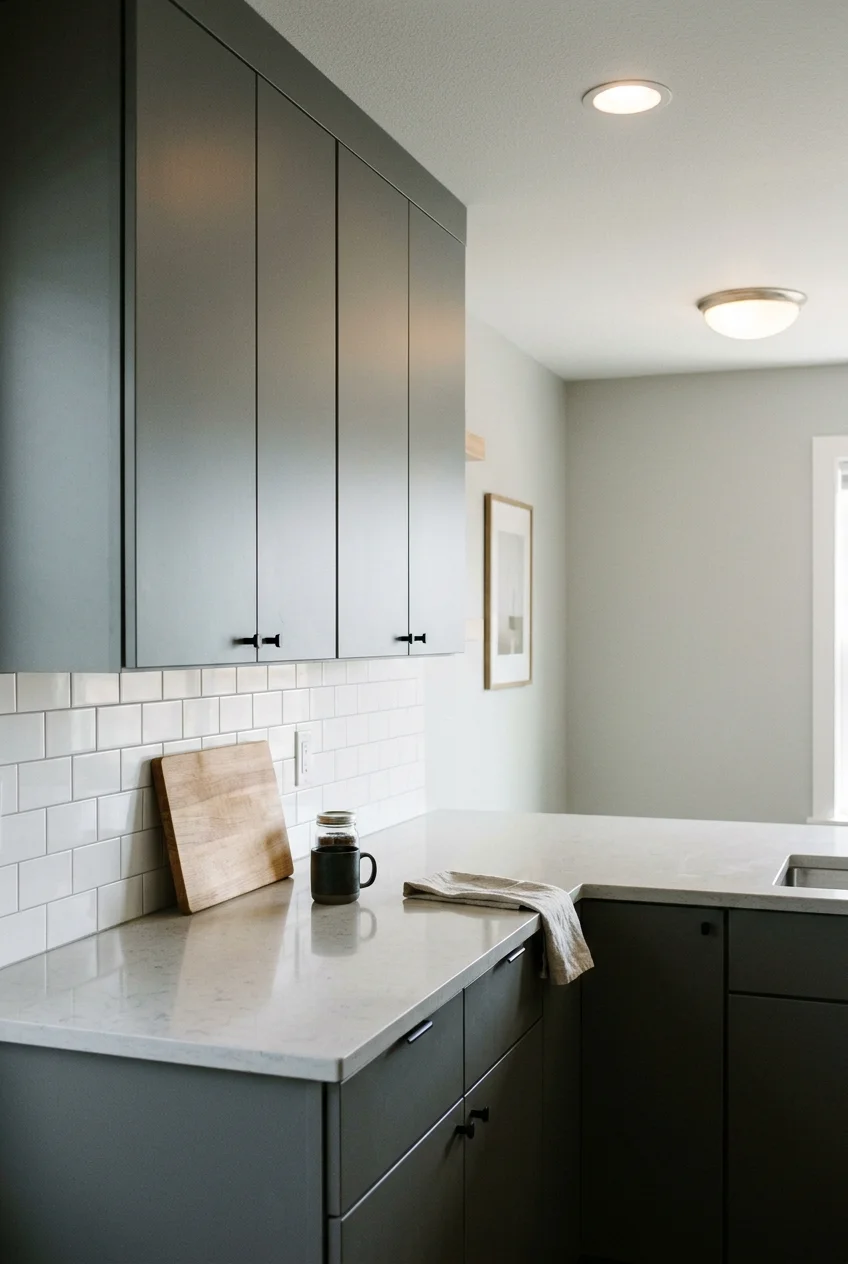
Choose a low-glare worktop if the overhead fixture reflects into your eyes while you chop. Compare counter and cabinet samples together across the galley before ordering.
Tape a large sample vertically where the doors will go, then set the counter sample flat beneath it. Check each at midday and under your evening lights.
Look at reflections from the standing position where you prep. If glare makes the surface hard to see, compare a less reflective finish under the same fixture.
46. Give Prep Lights Their Own Control
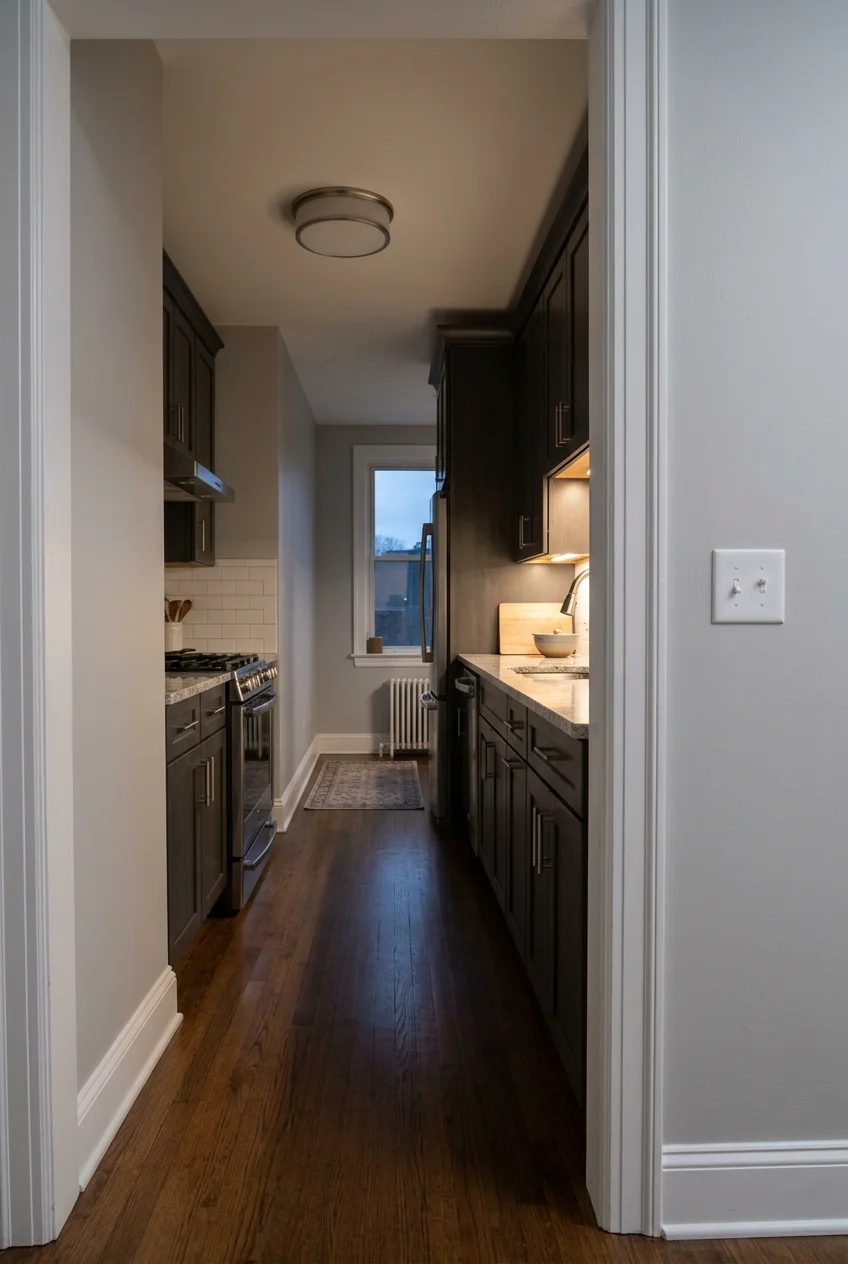
Put room lights and counter lights on separate controls when the kitchen serves both cooking and late-night trips. Ask the electrician to confirm fixture and dimmer compatibility.
Locate controls where you can reach them at the entrance you use after dark. For two entrances, ask how you can control room lighting from either end.
Walk the project with the electrician before the walls close. Point out which fixtures should operate together and decide what you want lit when carrying dishes out.
Seating and Doorways That Leave the Aisle Clear
Mark the occupied footprint of any seat before committing. A stool that tucks away neatly can still close off the kitchen while someone is sitting on it.
47. Fold a Wall Table Away Between Meals
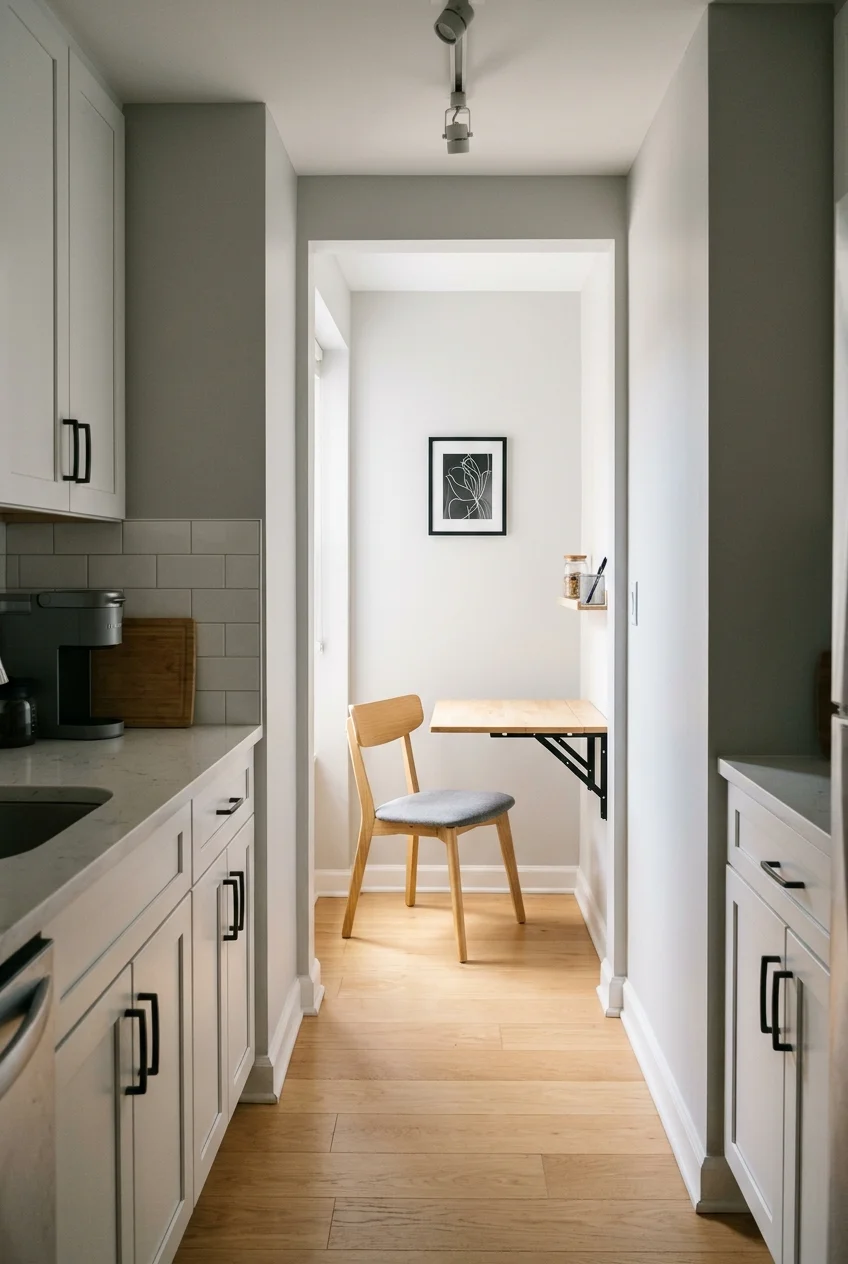
Put a folding wall table on an end wall or in a recess that leaves the passage clear when the table is open and in use.
Tape the open dimensions onto the floor and pull up a chair. Include the chair's position when someone sits down or pushes away from the table.
Use a top with hardware and a wall attachment suited to its load. Ask the property's owner before drilling if you want this option in a rental.
48. Add a Breakfast Ledge at the Quiet End
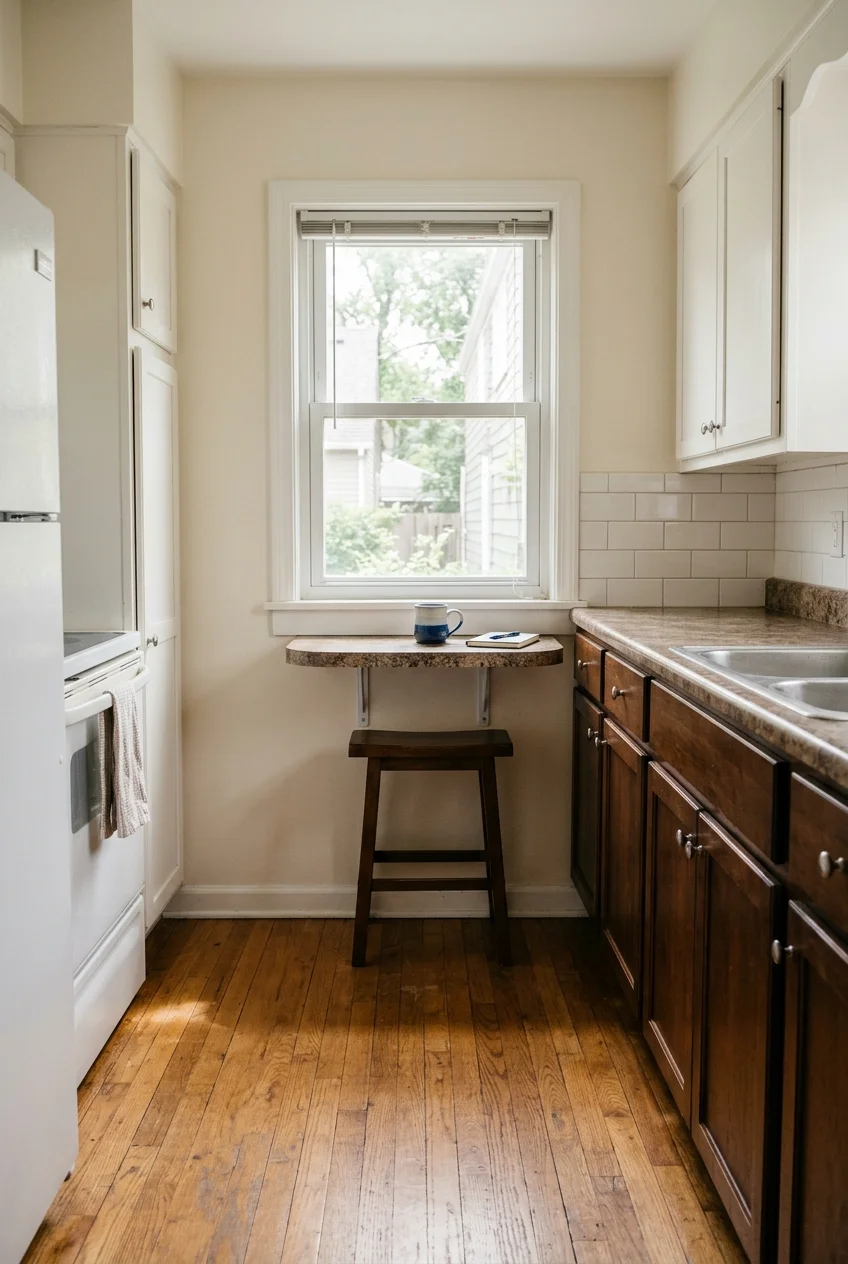
Set a shallow breakfast ledge along an end wall with standing room behind the stool. Try it where the seated position stays out of the main aisle.
Put your cereal bowl and coffee mug on a cardboard mockup first. Check knee space and whether the ledge projects too far near a door swing.
Choose a stool that fits fully below when you're done. If you rely on a chair with a back, check how much farther it sits out.
49. Use a Bench in a Nook Outside the Work Aisle
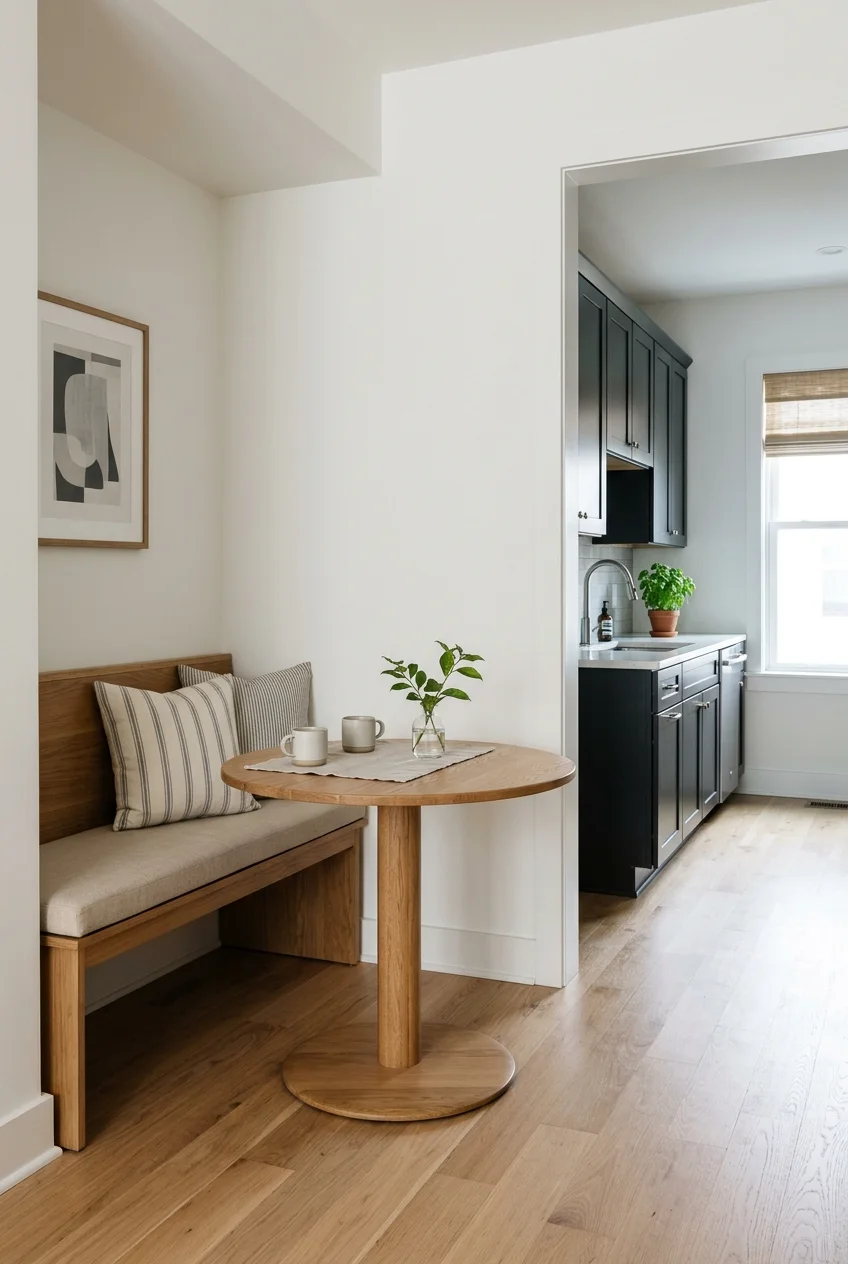
Put a compact bench along the wall of an adjoining dining nook. Test the table position so nobody has to back into the kitchen to stand up.
Leave enough table overhang for knees and check how people slide onto the bench. A pedestal base may free up space where legs would get in the way.
Compare corner dining nook layouts if the room opens at an angle. Start with the seat direction and the path around the table when people are seated.
50. Replace an Intrusive Swing Door With a Pocket Door
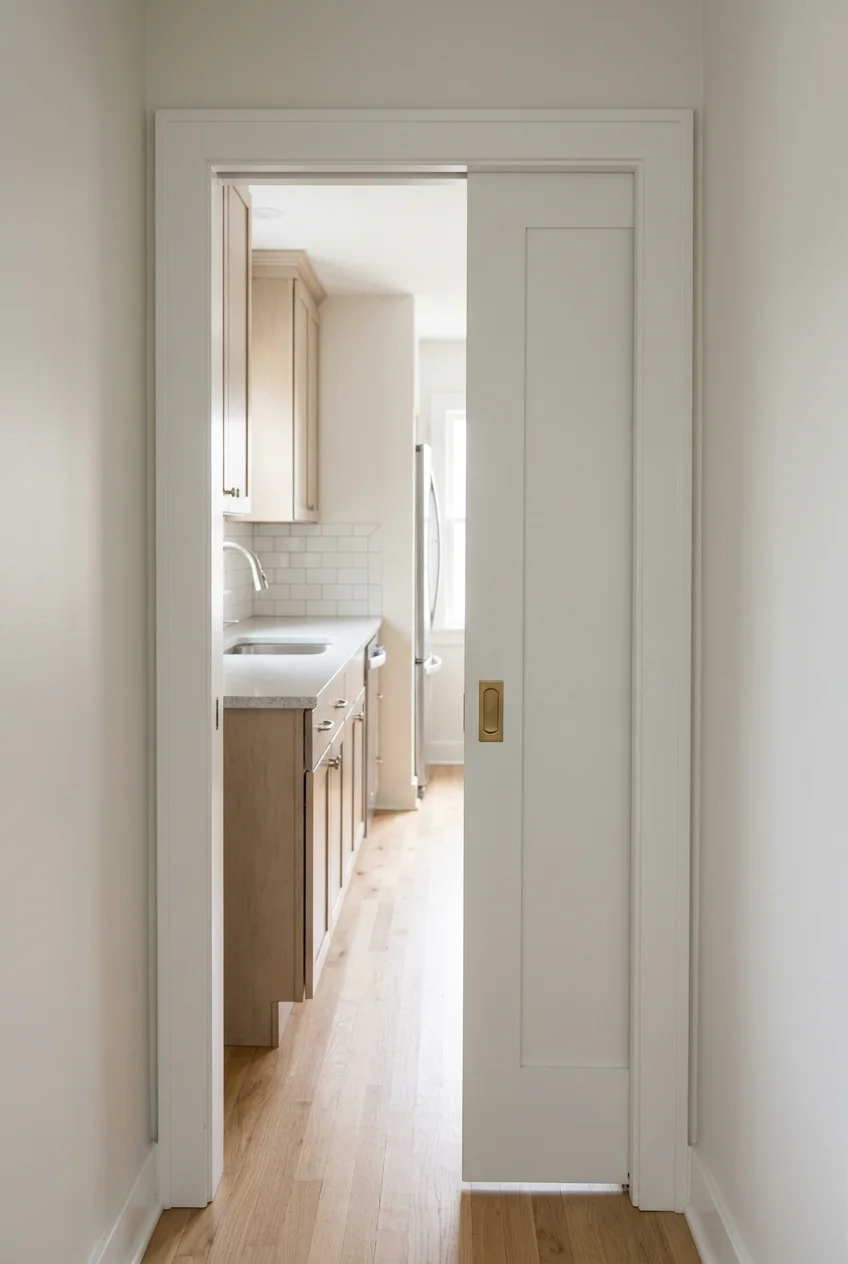
Consider a pocket door when the kitchen door blocks a cabinet or appliance. Its panel slides into the wall and frees the floor occupied by the swing.
Have a contractor confirm that the pocket can fit in the proposed wall. Plumbing, switches, ductwork, and structural framing can make a different opening more practical.
Try the pull on a showroom door to see whether you can grip it comfortably. Check how much the panel projects when the door is fully open.
Ask how the track can be serviced and where the wall will need refinishing. Confirm who handles any electrical relocation before you compare contractor quotes.
Sketch the kitchen in use with the new opening. Include the oven and dishwasher doors so the project solves the blockage you notice most often.
51. Put a Short Peninsula at the Mouth of the Kitchen
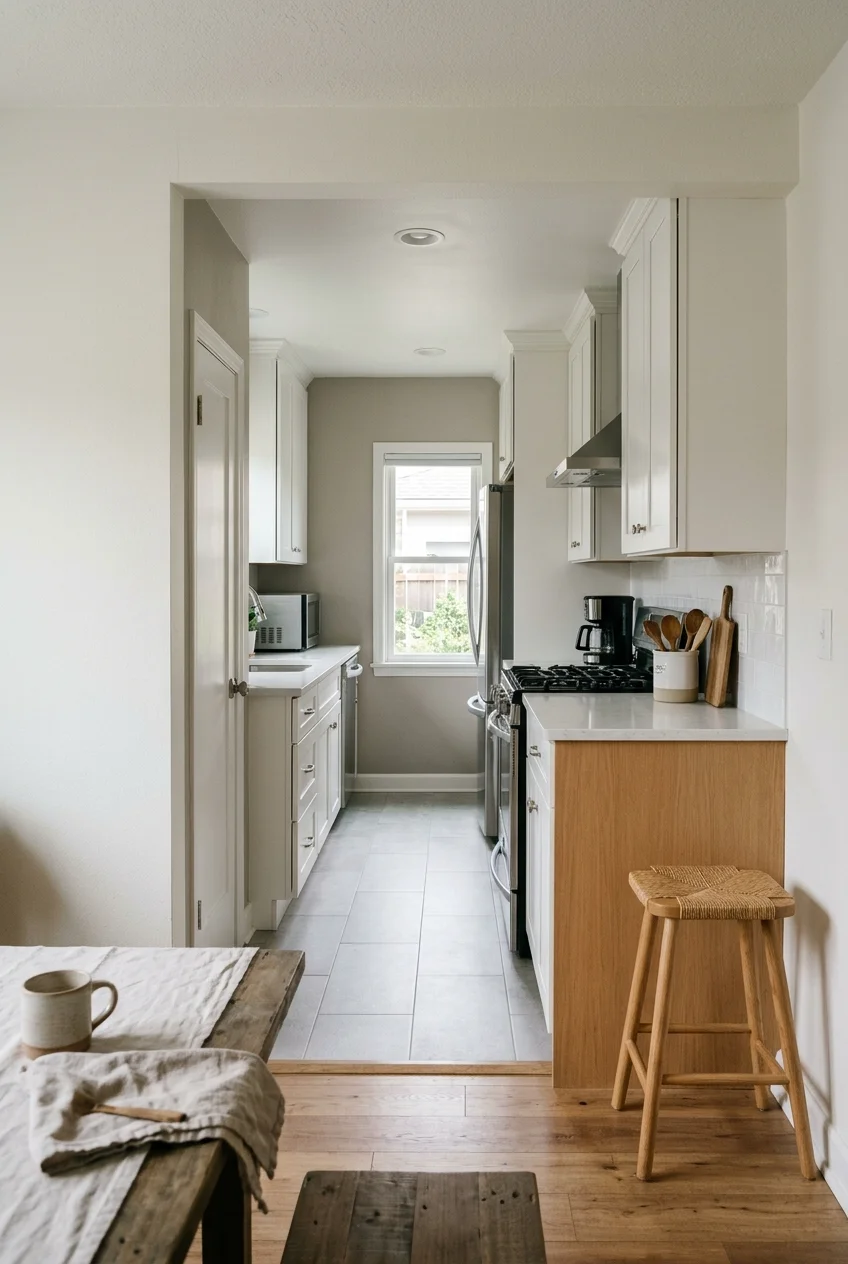
Try a short peninsula at the room's open end if it can add prep space without making the opening hard to cross. Approach it from both rooms.
Keep any stool on the dining side. Measure the aisle with someone sitting and opening the nearest cabinet before you settle on the peninsula's length.
Mark the cabinet footprint and counter overhang separately. Include the end panel and any hardware in the mockup, since those become the edges people walk past.
Have the installer confirm counter support and discuss electrical requirements early. If the mockup feels cramped, keep the floor open and use a table beyond the entrance.
52. Move Coffee Making to a Side Niche
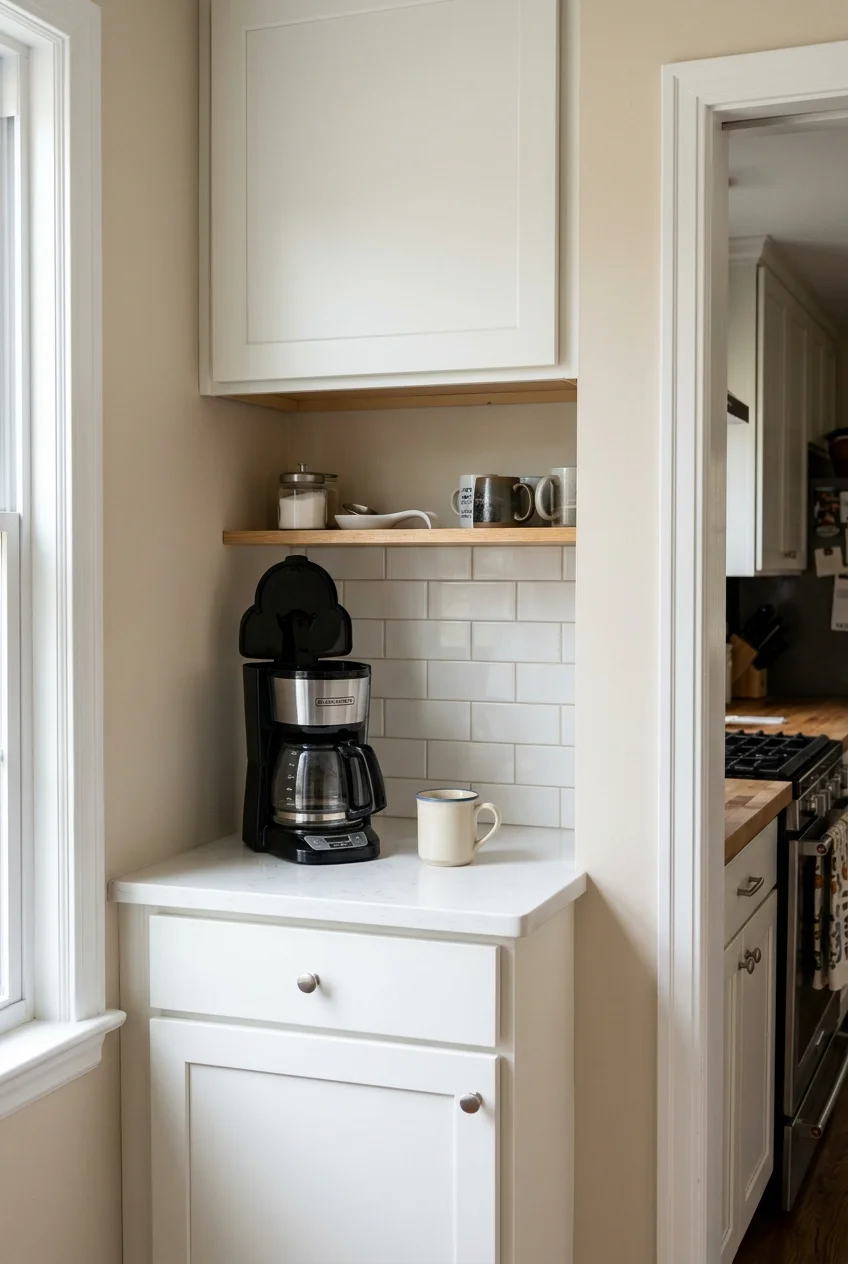
Use a shallow niche just beyond the aisle for the coffee setup. Choose a recess near a suitable outlet with room to fill and clean the machine.
Check the machine's depth with its plug, and its height with the water lid open. Follow the manual's requirements for the surfaces and ventilation around it.
Leave enough space to set down a mug or pull out the water reservoir. If serving blocks a doorway, shift the station farther into the adjoining room.
53. Put Bulk Pantry Storage Across the Threshold
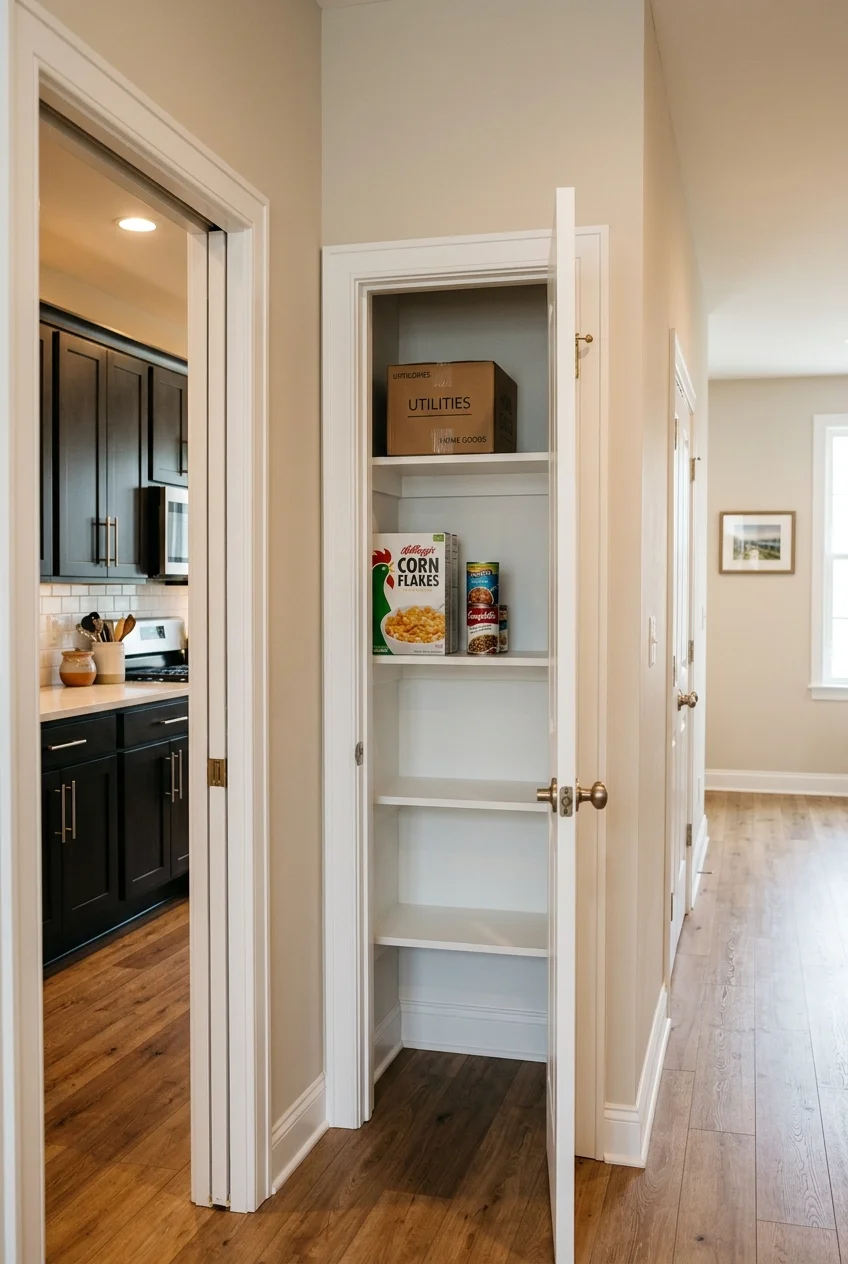
Store paper goods and spare pantry items in a closet just outside the kitchen. That can free a full cabinet bay for tools you reach for daily.
Assign a reachable shelf to groceries you restock weekly. Group bulky extras separately so the kitchen's working supply can fit into one nearby cabinet or drawer.
Leave the hall passage clear while the closet is open. Check shelving depth with your largest packages and confirm that the space is suitable for storing food.
54. Rehang a Door When the Swing Is the Problem
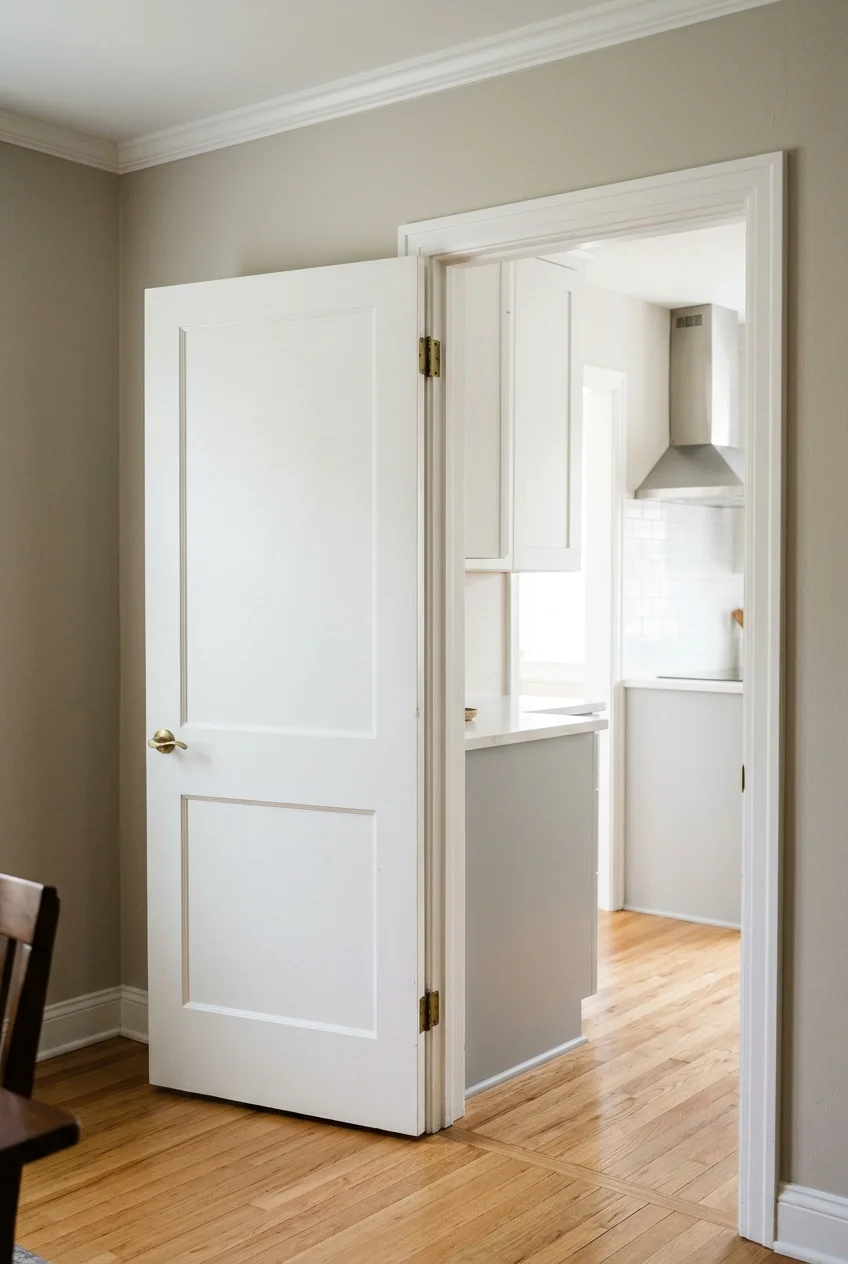
Ask a carpenter whether reversing a kitchen door's swing can clear a nearby cabinet. Map the new arc so it leaves the adjoining route safe and usable.
Check switch access and adjacent doors on both sides of the wall. Confirm any rules that apply to that opening, especially in a rental or shared building.
If reversing the swing would block the other room, consider a different door design. The useful test is how people pass through during a busy meal.
Smaller Changes for Renters and Light Remodels
Try changes you can undo when the kitchen layout belongs to your landlord. Measure the space first and ask before attaching anything to cabinets or walls.
55. Give a Prep Cart Its Own Parking Spot
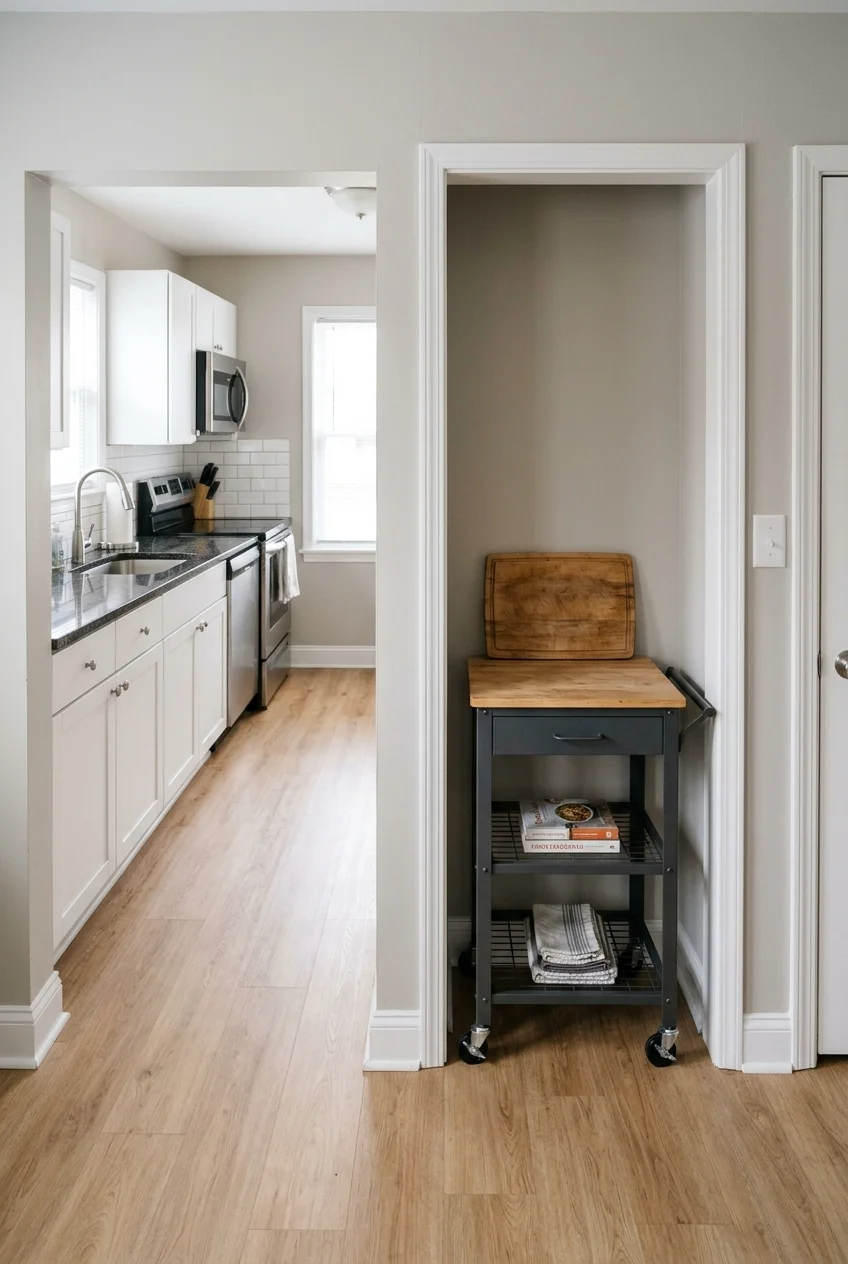
Bring out a small prep cart when you need another surface and park it in a recess outside the aisle afterward. Measure the parked footprint first.
Compare the handle and the caster positions with the width of the recess. Choose a cart that feels stable in use, and follow its instructions on locking wheels.
Plan a clear route for moving it. If you're constantly steering around an appliance door, choose a different parking spot and keep the main prep area fixed.
56. Move Dish Drying Over the Sink
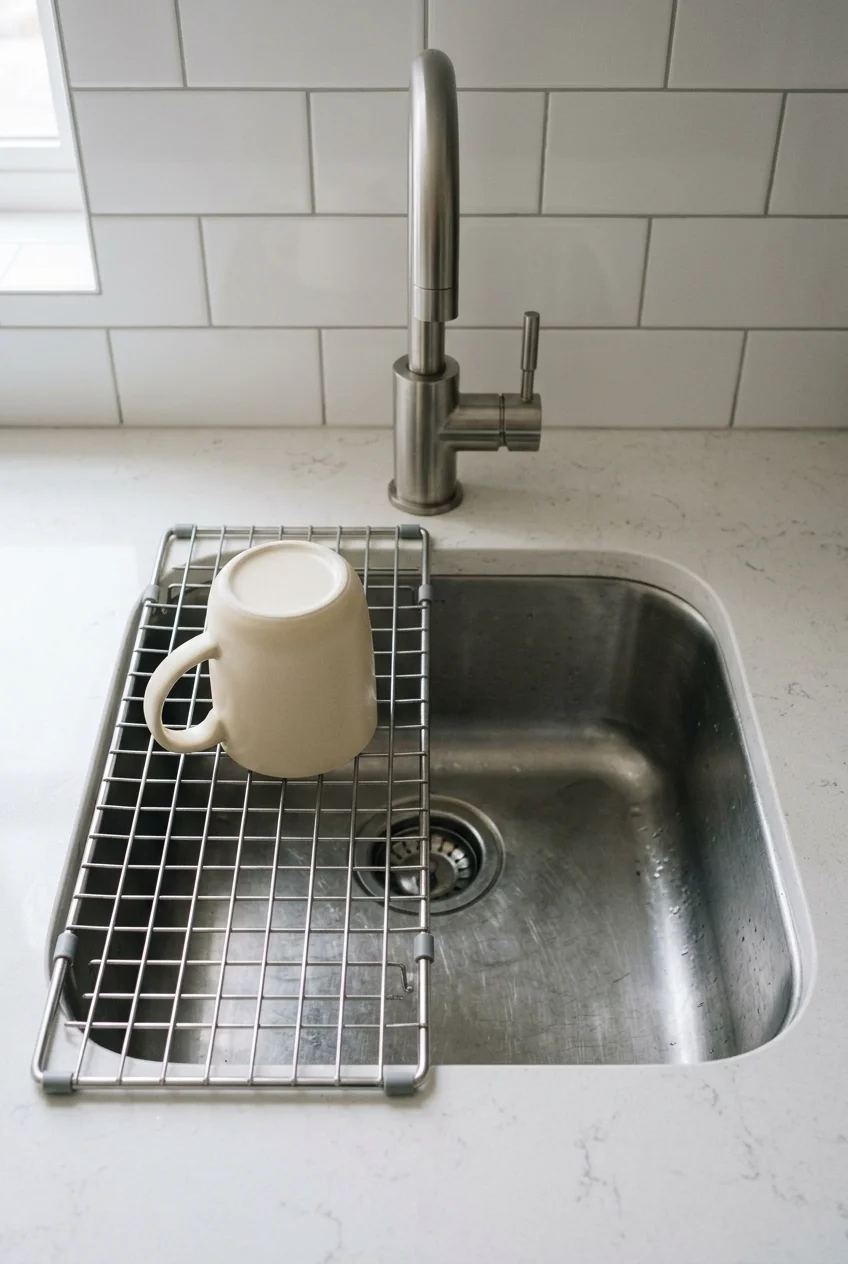
Use a roll-up drying rack over part of the sink if the counter rack consumes your prep space. Choose one that sits securely on both edges.
Compare its supported span and rated load with the model instructions. Leave room for the faucet, and move heavy cookware to a stable surface for drying.
Roll it up after unloading if you need the full sink. Choose a storage spot where the rack can dry fully before it goes into a drawer.
57. Hang Paper Towels Below an Upper Cabinet
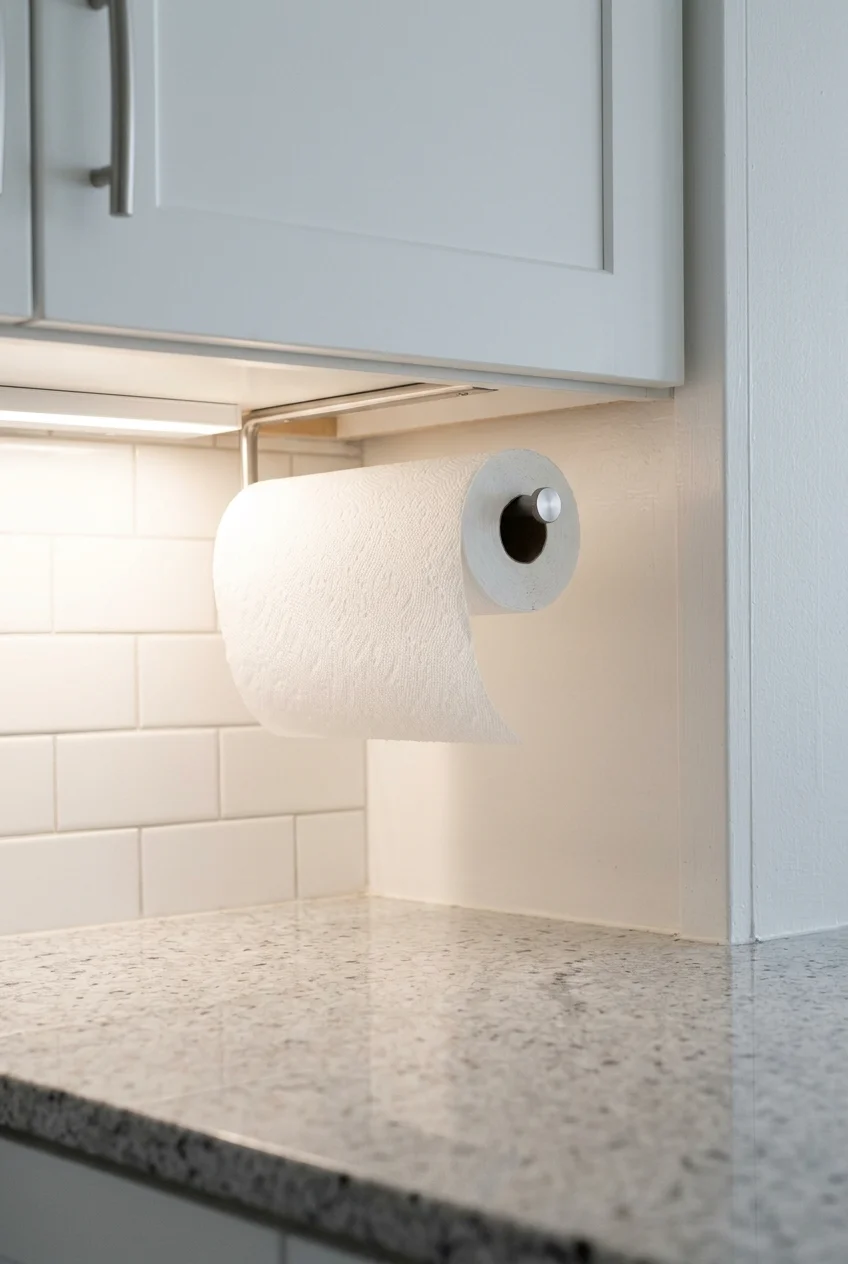
Put a paper towel roll beneath an upper cabinet to free a little counter space. Choose a spot where an overhanging roll won't catch your shoulder.
A simplehuman wall-mount paper towel holder can go beneath a cabinet. Allow room to slide on a fresh roll and match the mounting hardware to the surface.
58. Stack Dishes on a Freestanding Shelf Riser
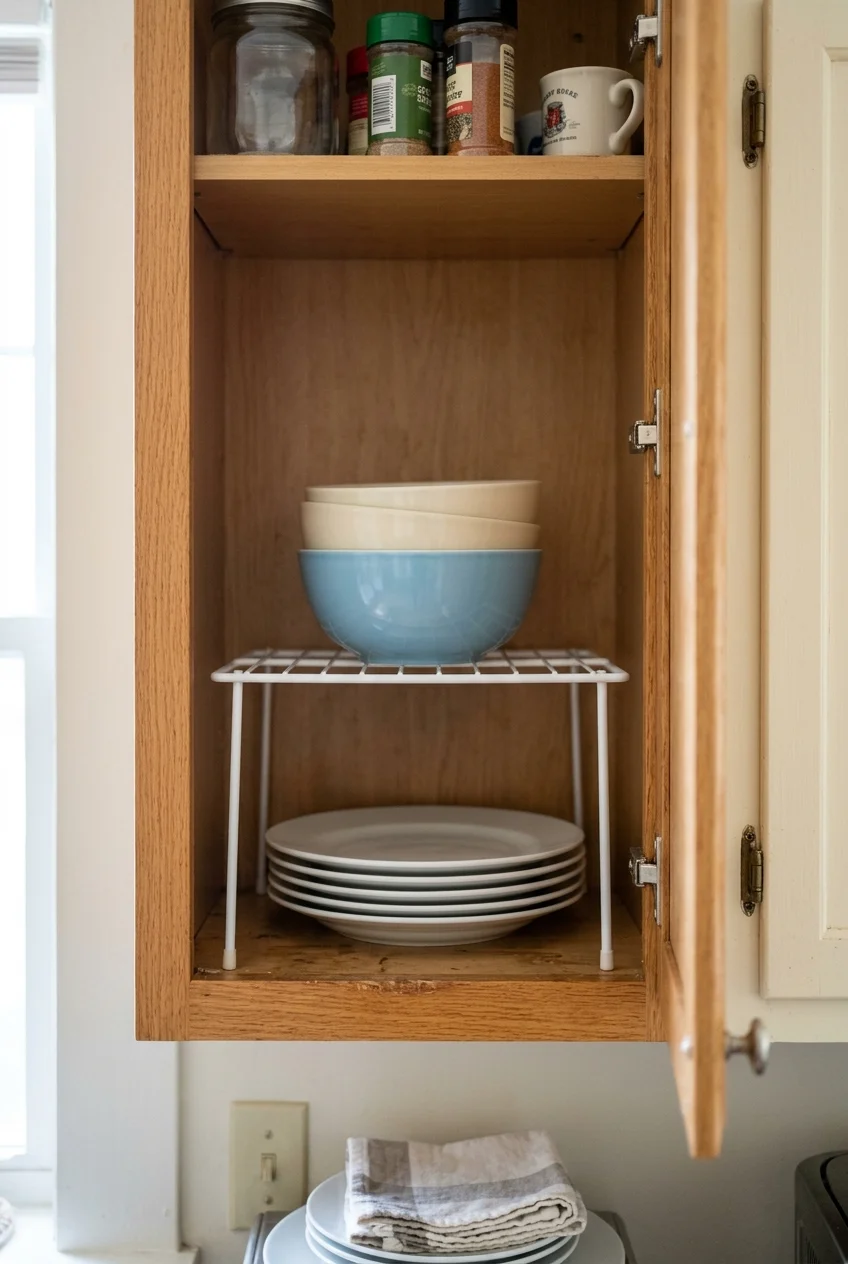
Add a freestanding riser to one tall cupboard shelf so everyday bowls and plates can share it without sitting on top of each other. Measure both stacks.
Check the riser's depth and height against the door and shelf pins. Keep heavier dishes low, and use a riser rated for what you put on it.
59. Fit Removable Caddies Around the Sink Cabinet
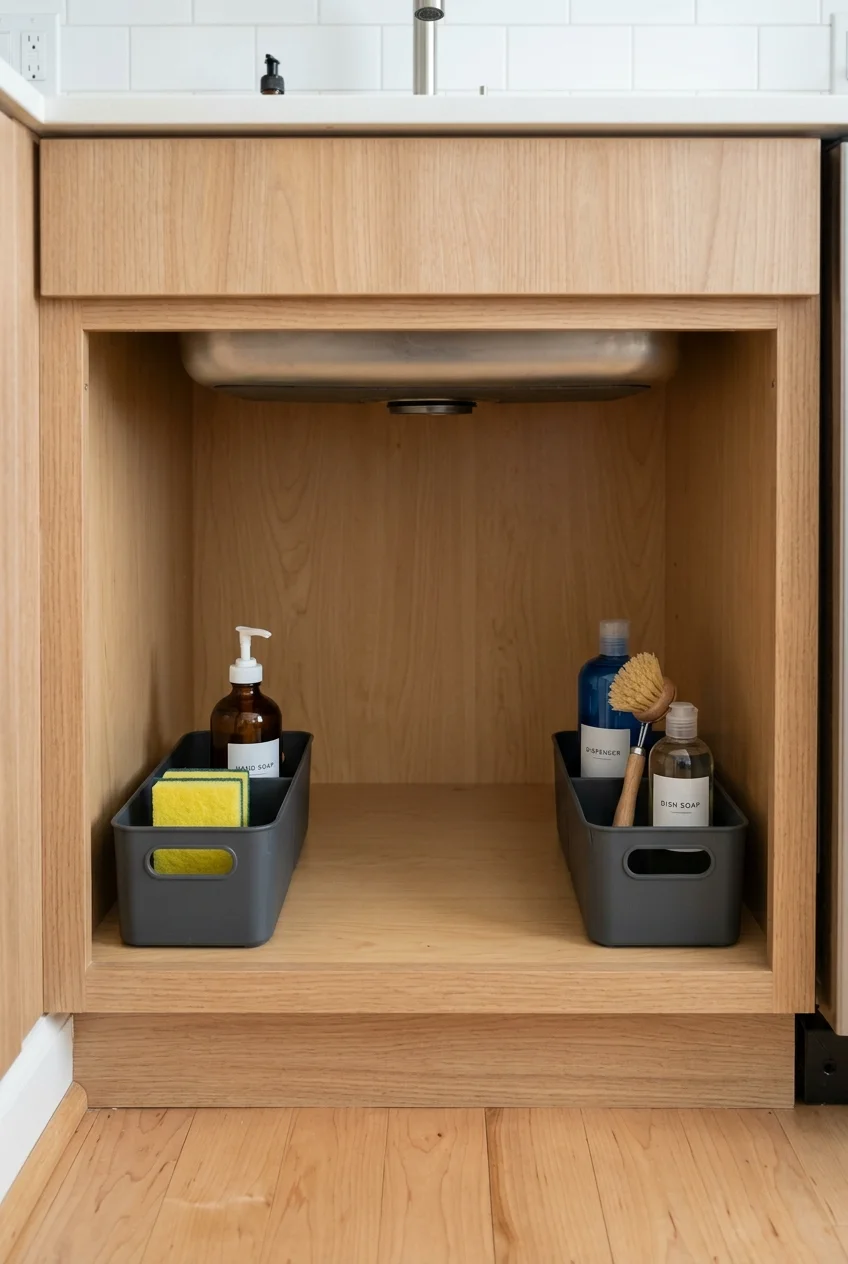
Use two removable caddies sized for the spaces on either side of the drain. Slide the cleaning supplies you reach for most often into the front caddy.
Measure the narrowest space with the cabinet doors open. Keep shutoffs accessible and avoid crowding the faucet hose, disposal, or filter if your sink has one.
Choose washable trays you can lift out to wipe the cabinet. Compare their loaded height with any low point inside the opening, including the hinge arms.
60. Cover a Small Backsplash Area With a Removable Finish
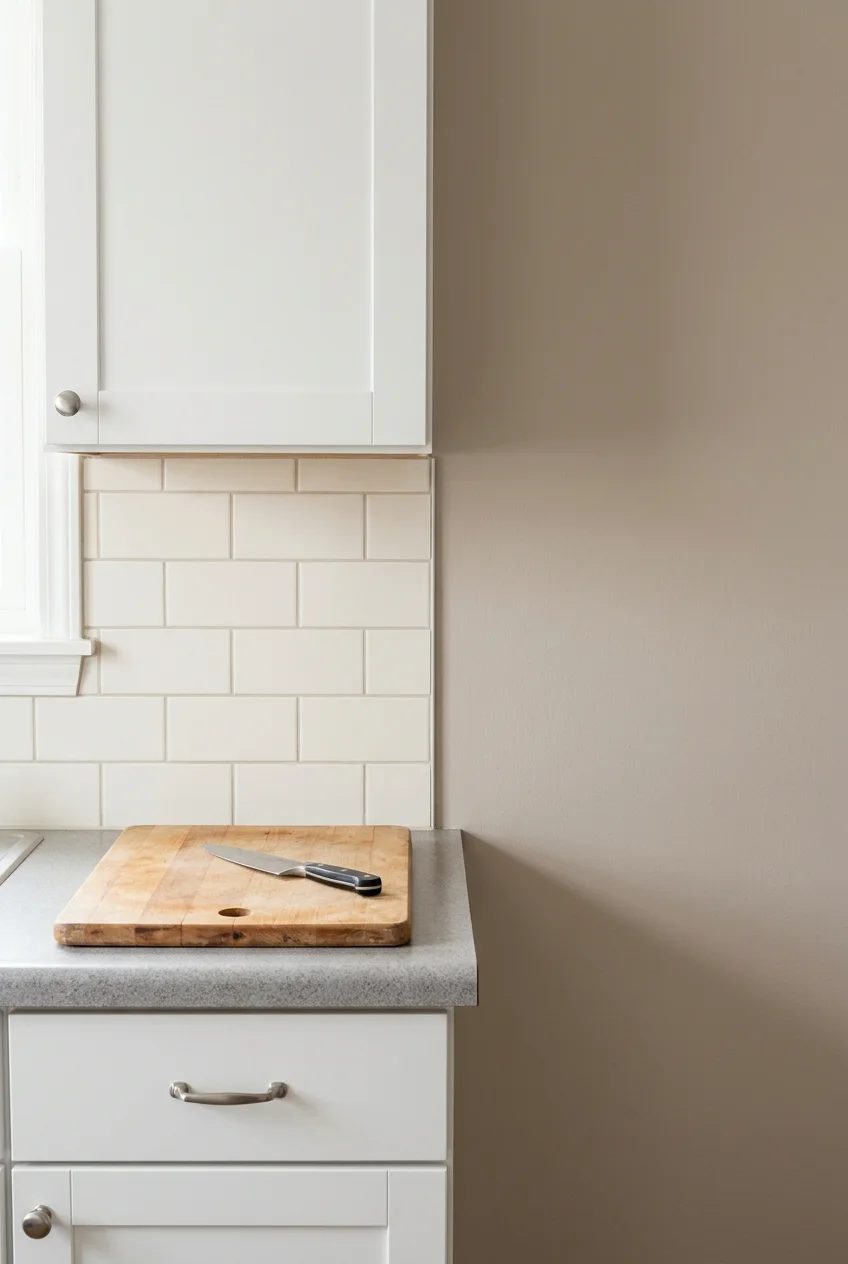
Try a removable surface behind the prep counter only if the manufacturer approves it for that wall and the landlord agrees. Start with a small test patch.
Choose a product intended for the surface and nearby moisture. Keep it away from the range unless the manufacturer explicitly allows that installation and its clearances fit.
Follow the product's removal instructions at the end of the lease. Painted surfaces vary, so check the test area after taking the sample off before covering more.
Frequently Asked Questions
How wide should the work aisle be in a narrow kitchen?
The National Kitchen & Bath Association recommends at least 42 inches for one cook and 48 inches for multiple cooks, measured between opposing counter fronts, tall cabinets, or appliances.
Treat those figures as planning guidance. Check any local code or accessibility requirements for your project, then measure how open drawers and appliance doors affect the aisle.
Can I put an island in a narrow galley?
Only consider one if the remaining work aisles and any walking route still function with people cooking, cabinets open, and seating occupied. Tape the footprint before deciding.
A short peninsula at the open end or a cart that parks outside the aisle can add space where a permanent island would make cooking harder.
What should I measure before ordering cabinets?
Record wall lengths, finished floor height, trim, window positions, and the depth of the tightest aisle. Mark all plumbing, electrical, and ventilation locations on the same drawing.
Then compare the cabinet drawings with appliance installation guides. Include handles, fillers, open doors, service clearances, and the route the installer will use to bring units inside.
What is worth changing first on a limited budget?
Start with the issue that stops you using the kitchen comfortably. That might be a poorly lit prep area, a blocked doorway, or a damaged worktop.
If the original layout works, keeping cabinets or appliance connections can give you more flexibility in the budget. Compare written quotes based on the same scope.