50 Kitchen Lighting Ideas

This post may contain affiliate links: full affiliate disclosure.
Good kitchen lighting helps you see a cutting board clearly, softens the room after dinner, and gives cabinets, tile, and hardware their proper color.
As an Amazon Associate I earn from qualifying purchases.
Start by noticing where shadows fall and which surfaces glare. Then combine the ideas below according to your room, rather than copying one photograph.
The strongest schemes use several modest sources with separate controls. Decorative fixtures can lead visually, while quieter task lights handle the work underneath.
Plan the Layers Before Choosing Fixtures
A simple lighting map prevents beautiful fixtures from leaving worktops dark. Begin with activities, sightlines, and controls before settling on a decorative style.
1. Map Light Around Real Kitchen Tasks
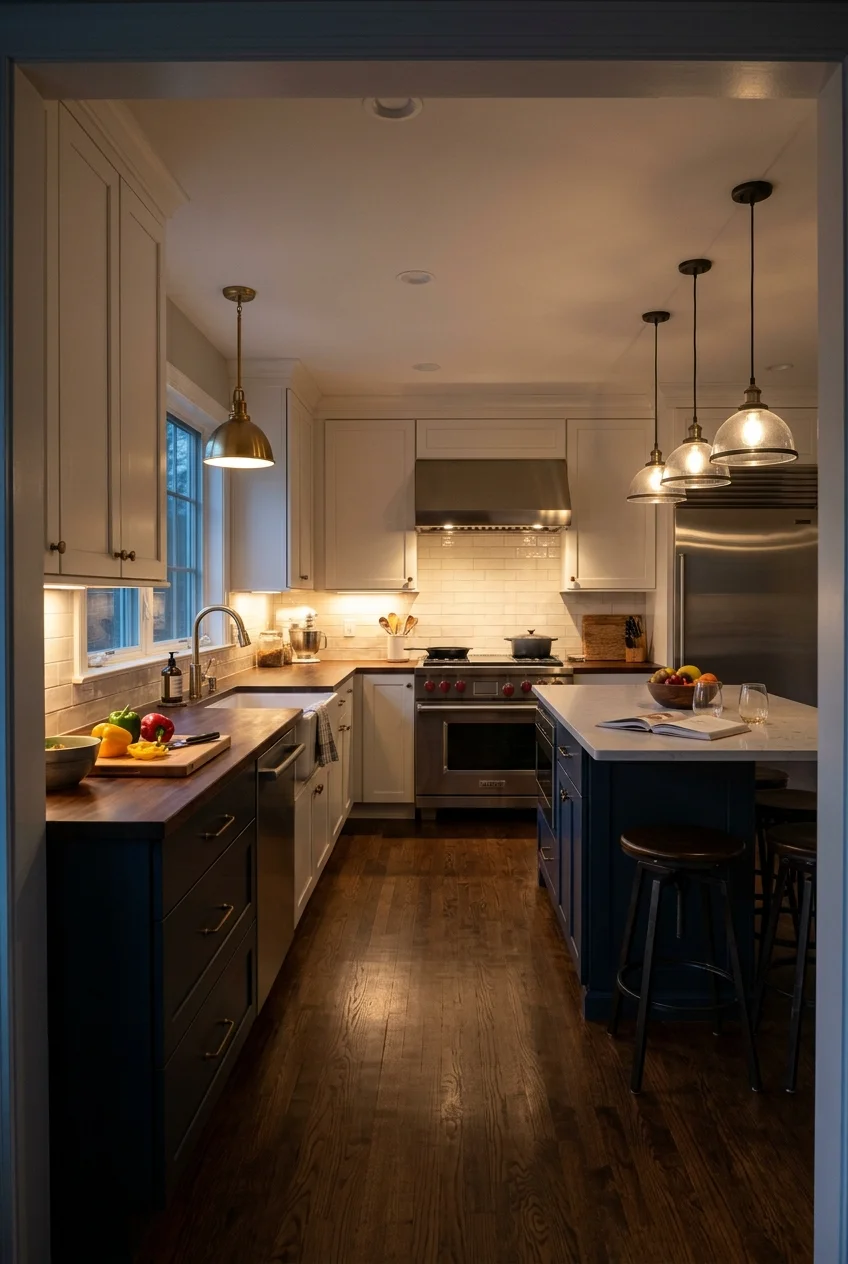
Mark the sink, range, main chopping space, island seats, pantry entrance, and cleanup route. Each location needs light aimed at what actually happens there.
Stand in each working position after sunset and note where your body blocks the ceiling light. Those shadows reveal the most valuable task-lighting upgrades.
Repeat the check with cabinet doors and appliances open. A fixture can cover the counter beautifully yet disappear behind an upper door or refrigerator door.
- Prep and chopping surface
- Sink and cleanup area
- Range and cooking controls
- Island seating or homework zone
- Pantry and nighttime route
2. Build an Ambient, Task, and Accent Mix
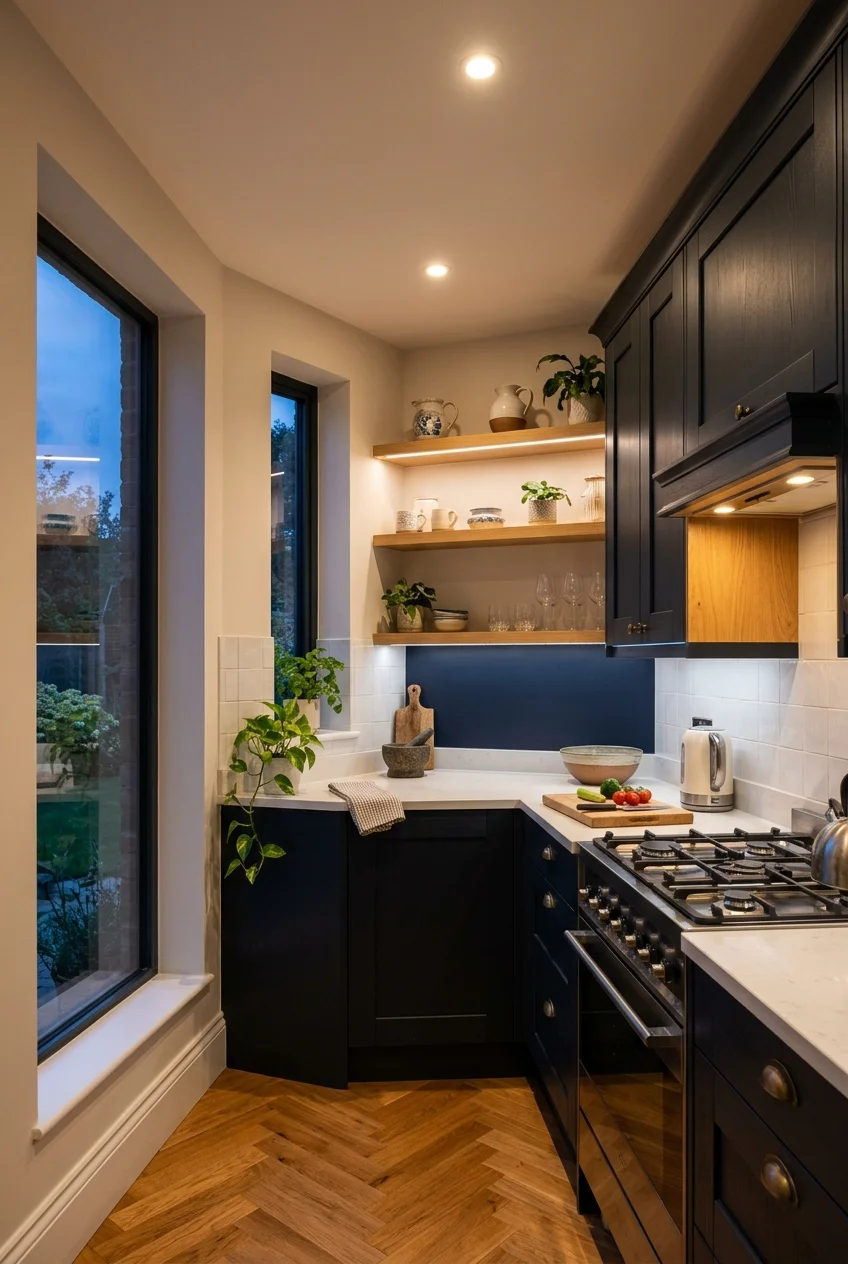
Ambient light lets you move safely, task light clarifies work surfaces, and accent light adds depth. Using all three prevents one ceiling fixture from overworking.
Keep the layers visually related through repeated shapes, finishes, or color temperature. They need not match, but they should look intentional when illuminated together.
Decide which layer deserves visual attention. In a quiet ceiling plan, pendants can lead; in an architectural room, decorative fixtures may need to remain secondary.
Practical tip Switch off each layer separately during planning. If the countertop disappears without decorative pendants, the room still needs dedicated task light.
3. Give Each Lighting Layer Its Own Control
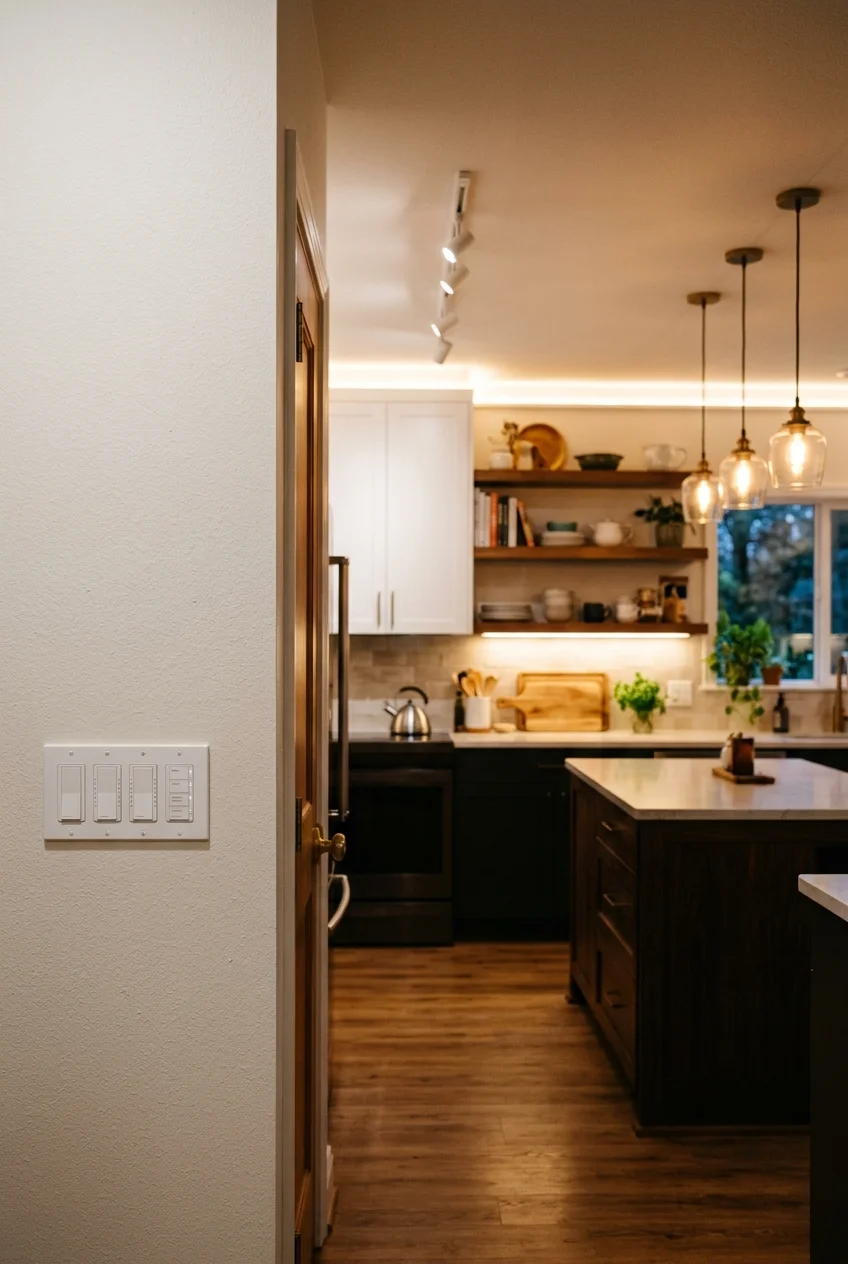
Separate controls let bright preparation lighting stay independent from evening pendants or shelf lights. That flexibility matters more than installing every possible fixture type.
Label unfamiliar switches discreetly inside the switch plate area or create a simple scene guide. Guests should not need five guesses to light the island.
- General ceiling lights
- Counter task lights
- Island or table fixtures
- Cabinet and shelf accents
4. Choose a Consistent White-Light Family
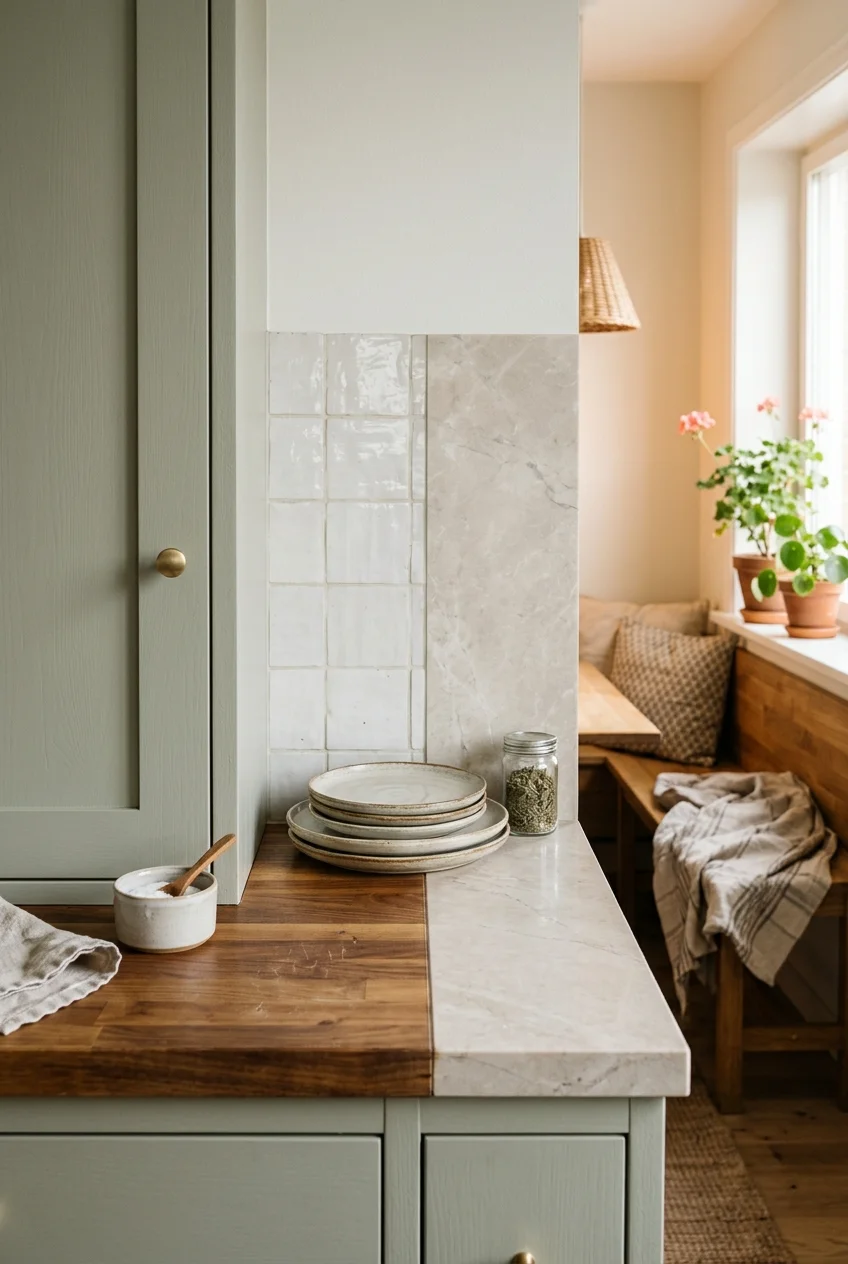
Nearby lights with noticeably different color temperatures can make one counter look yellow and another blue. Choose a coordinated family for fixtures seen together.
A slightly warmer dining nook can still work when the shift feels deliberate. Test samples against cabinet paint, wood, stone, and backsplash tile after dark.
Setup note Compare lamps at full brightness and dimmed. Some LEDs change character as they dim, while others retain nearly the same white appearance.
5. Shield Bright Sources From Direct View
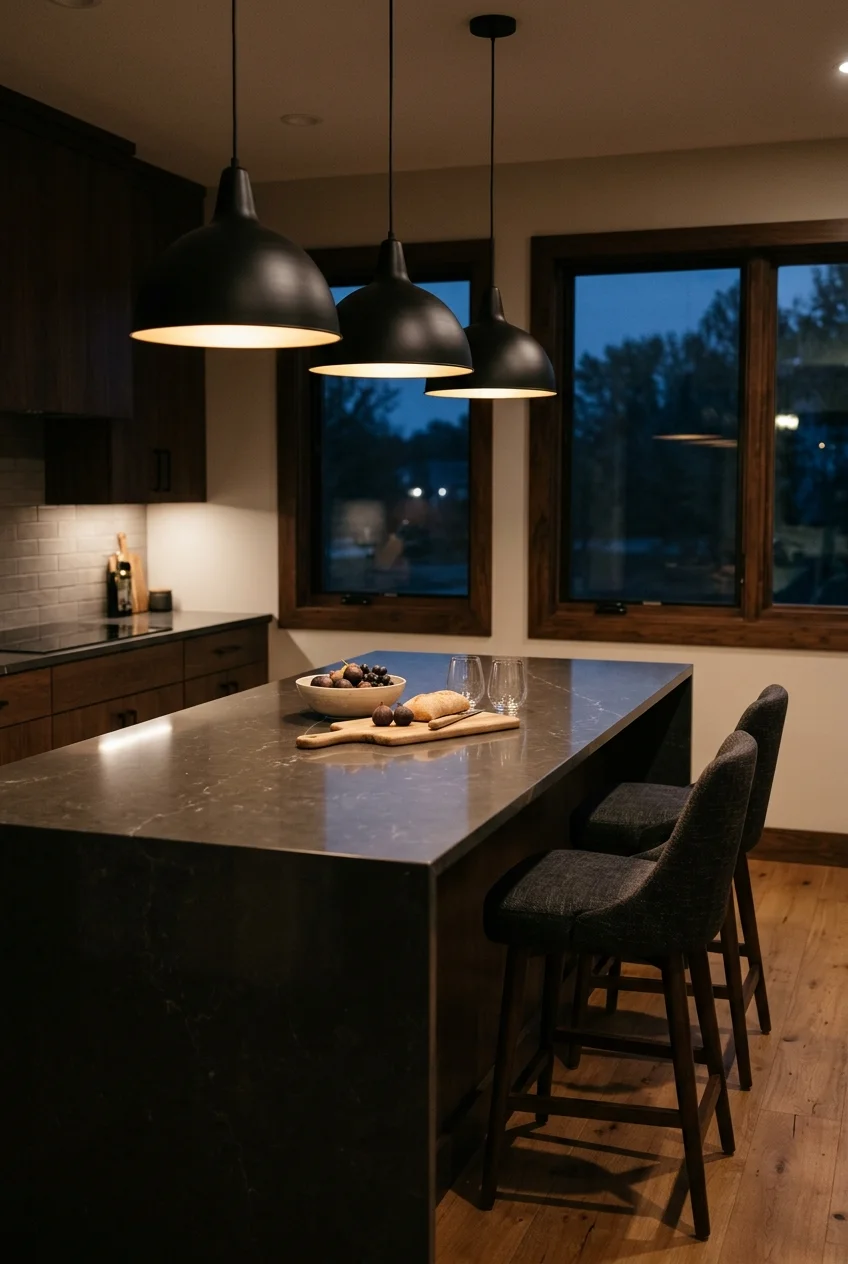
Bare bright points create glare on glossy counters and appliance doors. Shades, diffusers, lenses, and careful aiming make illumination comfortable without simply lowering brightness.
Check the fixture from seated and standing positions. A pendant that hides its lamp from the cook may expose it directly to someone at the island.
- View from the main doorway
- Sit at every island stool
- Look across polished counters
- Check reflections in dark windows
6. Mock Up Pendant Size and Beam Spread
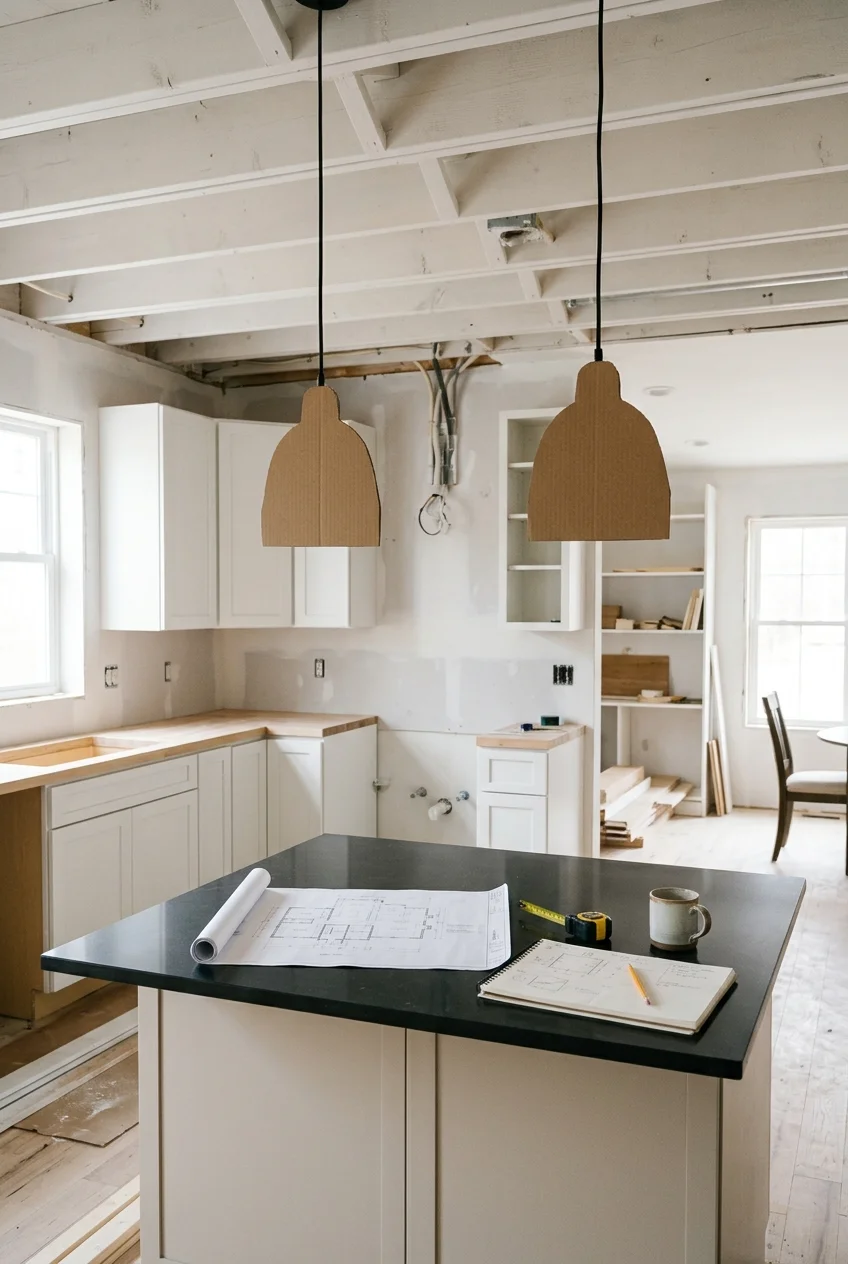
Tape paper circles or hang lightweight cardboard shapes where fixtures might go. The mock-up reveals scale and sightline problems before holes or purchases become permanent.
At night, test a temporary lamp near the proposed location and observe where its light lands. Decorative size and useful beam coverage are separate decisions.
Watch for A broad shade may look balanced yet trap light in a narrow pool. Review the manufacturer’s distribution information before choosing the final lamp.
7. Pair LEDs With a Compatible Dimmer
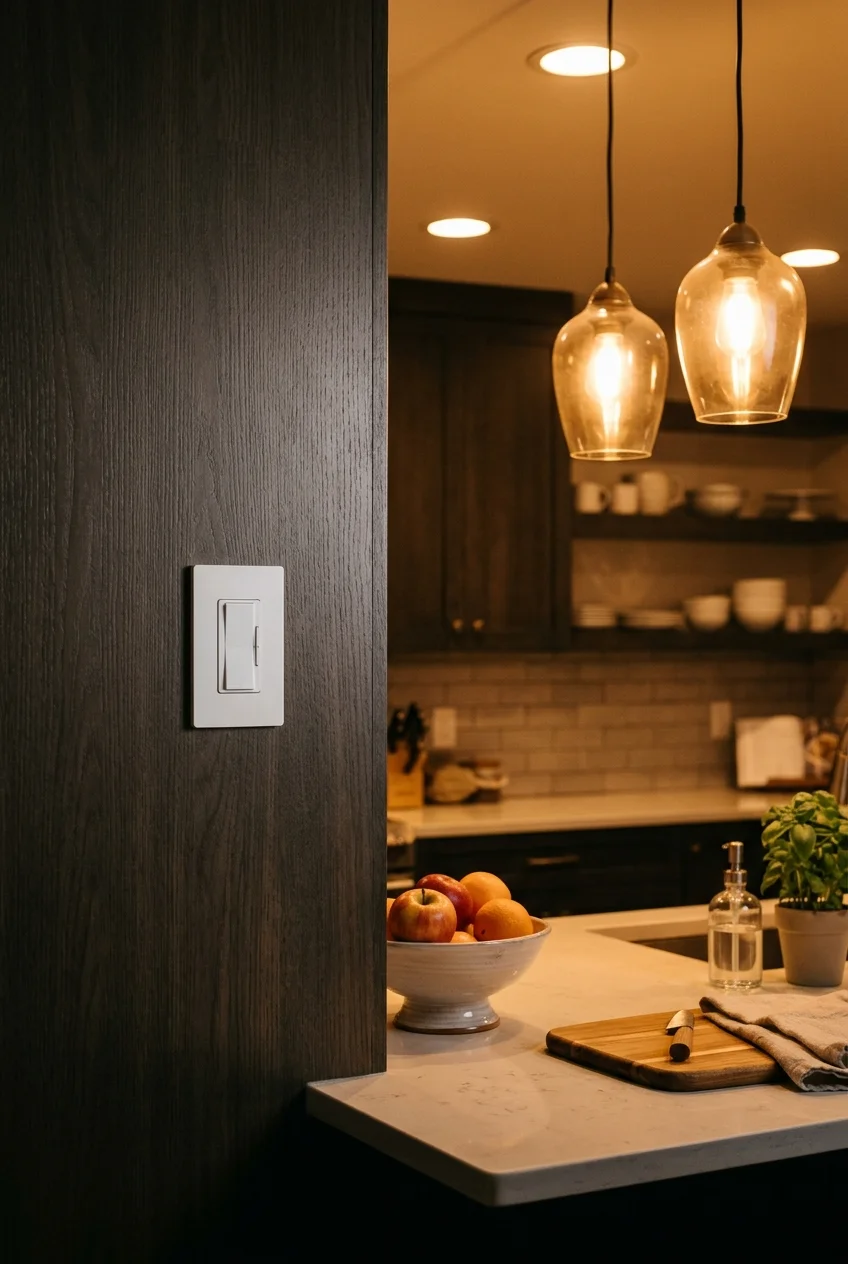
Not every LED and dimmer combination behaves well. Confirm compatibility through the lamp or fixture maker before buying, especially when avoiding flicker matters.
Test the lowest useful setting after installation. A dimmer that works at full output may still shimmer, buzz, or drop out near the bottom.
Add the total connected load and fixture type to the planning notes. Compatibility depends on the whole controlled group, not one sample lamp alone.
Safety note Fixed-wiring changes belong with a qualified electrician where required. Product instructions and local electrical rules take priority over decorative plans.
Create Useful Ceiling Coverage
Ceiling lights should cover circulation and open work surfaces without flattening the room. Their spacing should follow counters and aisles, not an empty ceiling grid.
8. Place Recessed Lights Over Counter Edges
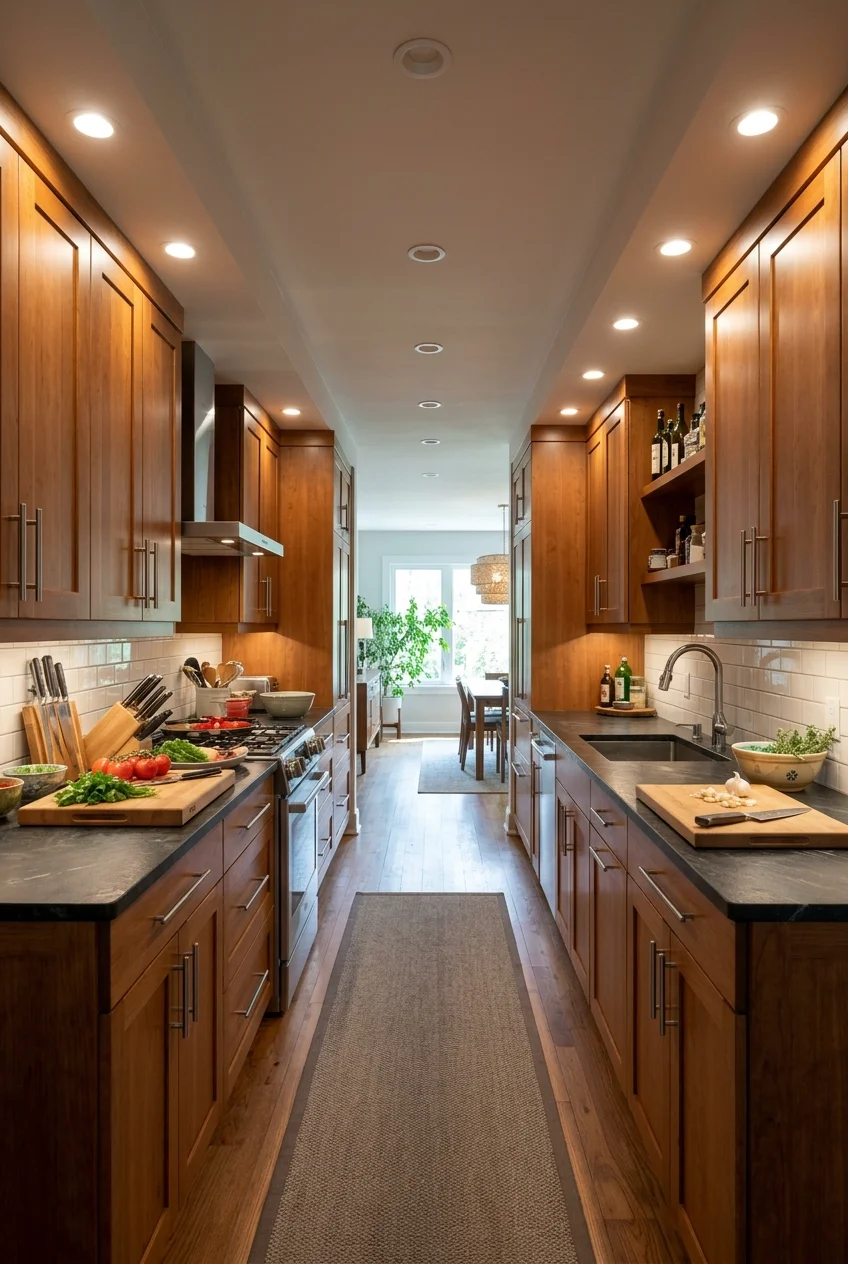
Downlights centered in the walking aisle often put the cook’s shadow directly on the worktop. Shift coverage toward counter edges so light reaches the task.
Use the fixture’s beam information and ceiling height when spacing. More holes do not guarantee smoother light, especially with narrow beams and reflective stone.
If insulation will touch a recessed fixture, choose an appropriate rated model. Below unconditioned space, airtight construction may also matter for the assembly.
9. Use a Broad Flush Mount on a Low Ceiling
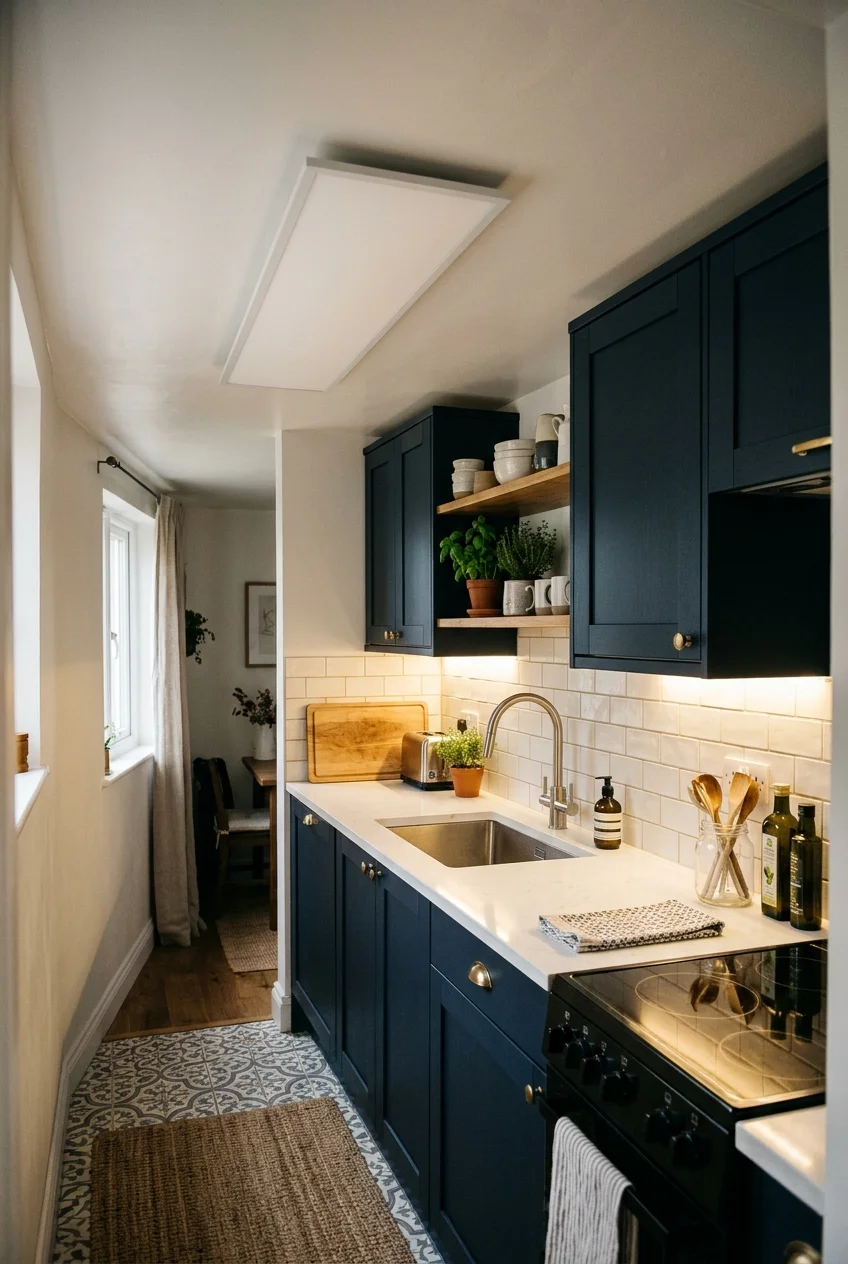
A shallow flush mount preserves headroom and gives a compact kitchen a clear visual center. Choose a broad diffuser instead of a tiny harsh dome.
Pair it with counter lighting so the fixture handles general brightness rather than every detailed task. A quiet ceiling can make bolder cabinet hardware feel stronger.
10. Aim a Track Along Changing Work Zones
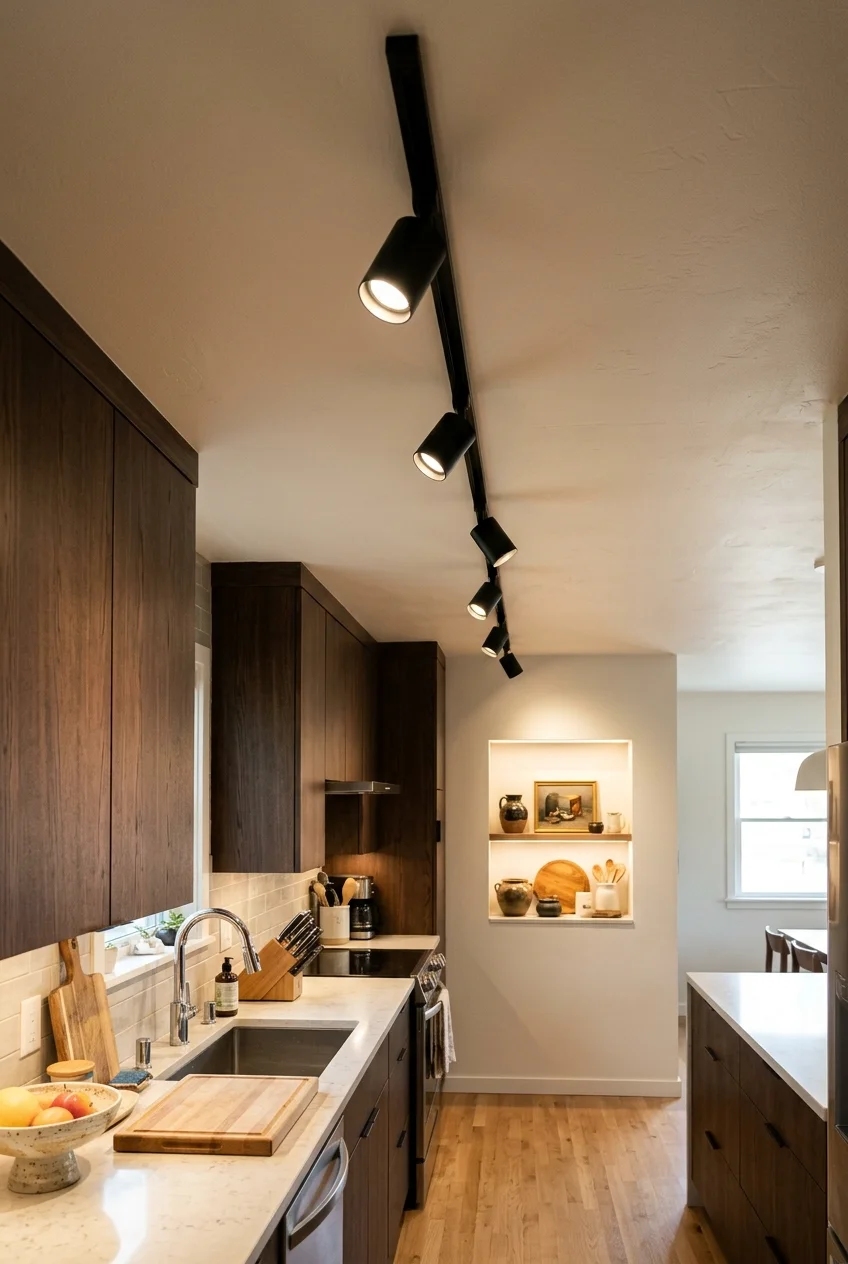
Track lighting can redirect when a table moves or artwork changes. Aim separate heads toward prep surfaces, a cabinet face, and the room’s darker end.
Keep the track line related to cabinetry or ceiling architecture. A random diagonal may solve coverage while making an otherwise orderly kitchen feel unsettled.
Select beam spreads according to distance and target size. A narrow head suits an object, while a broader beam covers a working counter more evenly.
- One head for the primary prep counter
- One head for the sink wall
- One head for a display or dark corner
11. Wash Tall Cabinet Faces With Soft Light
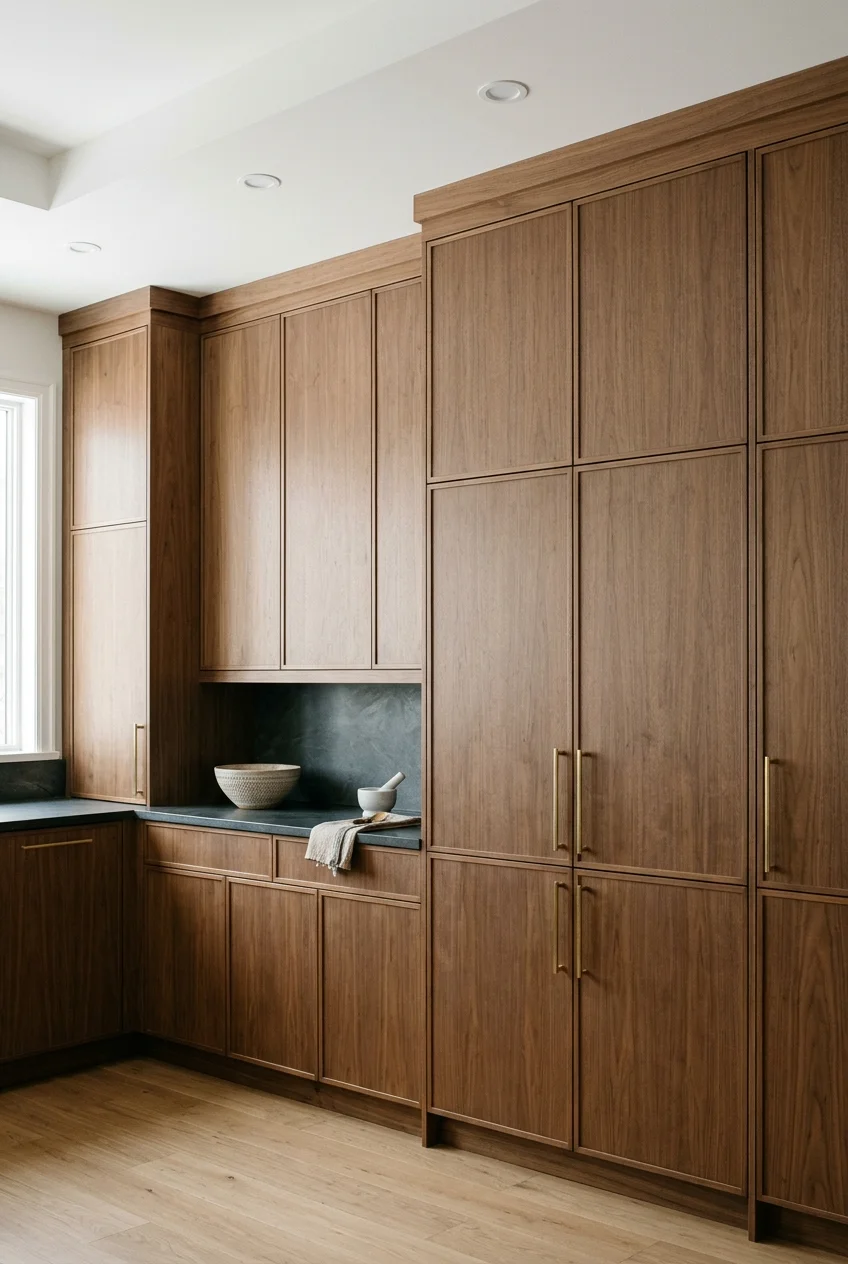
Light grazing down tall pantry or cabinet faces reveals color and wood grain while reducing the dark-wall effect. Keep the beams broad and restrained.
If cabinetry itself needs updating, compare the finish under evening light before choosing from these kitchen cabinet makeover ideas. Lighting can amplify undertones that daylight hides.
Practical tip Aim for an even wash rather than bright scallops. Closely spaced hotspots can make flat doors look uneven even when the finish is sound.
12. Hide Uplight in a Ceiling Cove
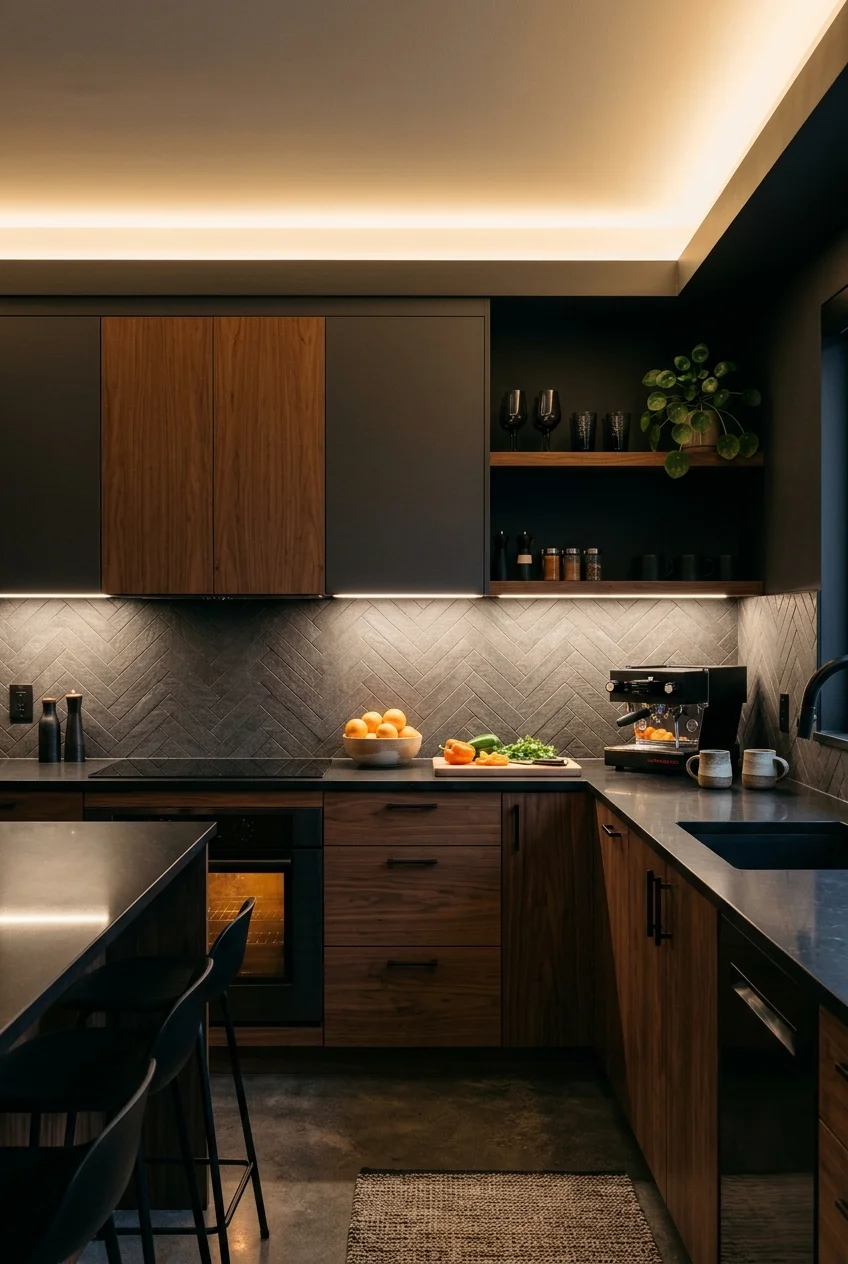
A shallow cove can bounce light off the ceiling and soften a kitchen with many hard surfaces. It works best as atmosphere, not primary task lighting.
Keep the source fully concealed from normal viewpoints and provide accessible maintenance. Dusty exposed tape or visible bright dots quickly weaken the intended effect.
13. Layer Long Drops Into a Vaulted Ceiling
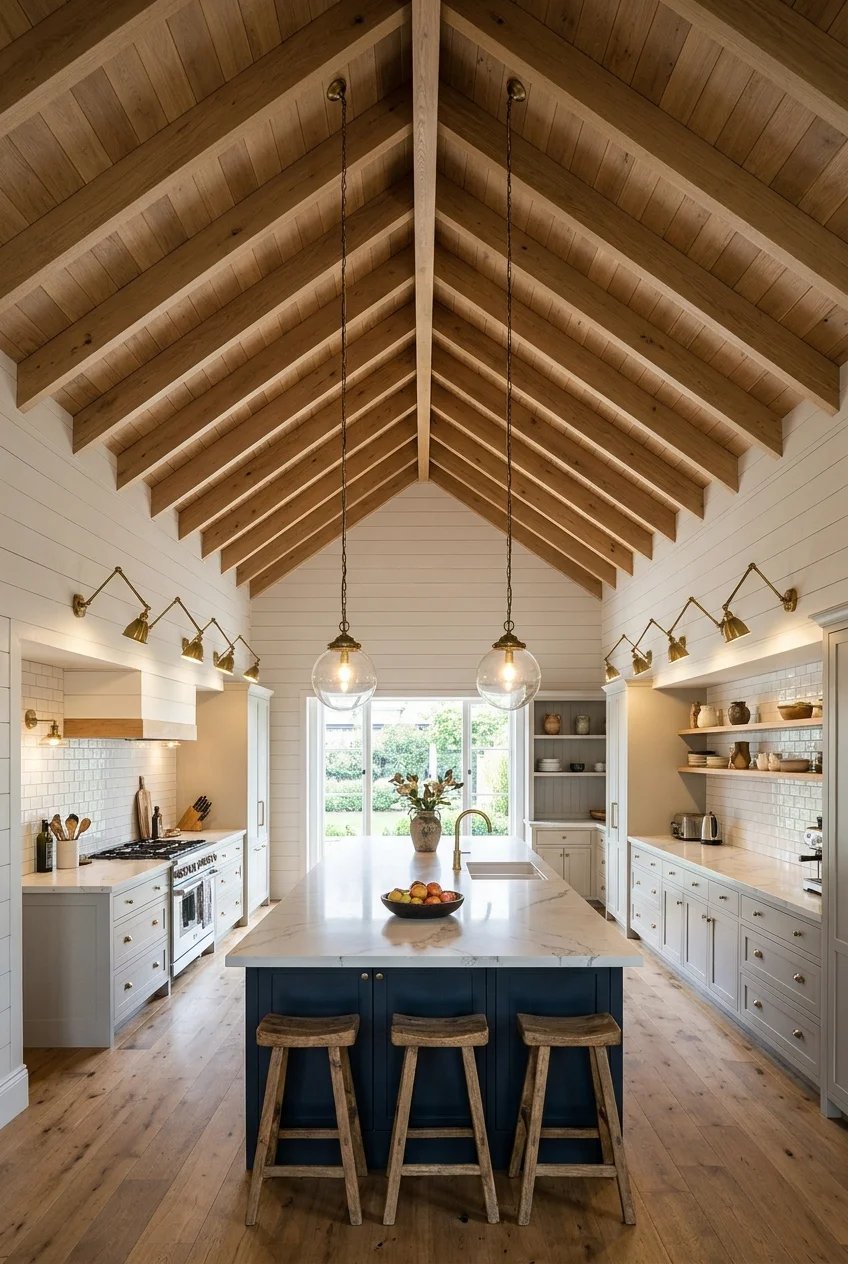
Vaulted ceilings need fixtures that reach the occupied zone instead of illuminating empty volume. Long pendants can connect the high plane to an island.
Use adjustable ceiling lights for baseline coverage, then let the pendants establish rhythm below. Coordinate suspension lengths with slopes, beams, and clear sightlines.
Maintenance becomes part of the design at this height. Confirm how lamps, shades, and drivers can be reached before selecting a delicate statement fixture.
If the ceiling slope complicates mounting, use hardware designed for that condition. Improvised adapters can leave fixtures tilted or place stress on unsupported connections.
14. Plan Electric Light Around Daylight
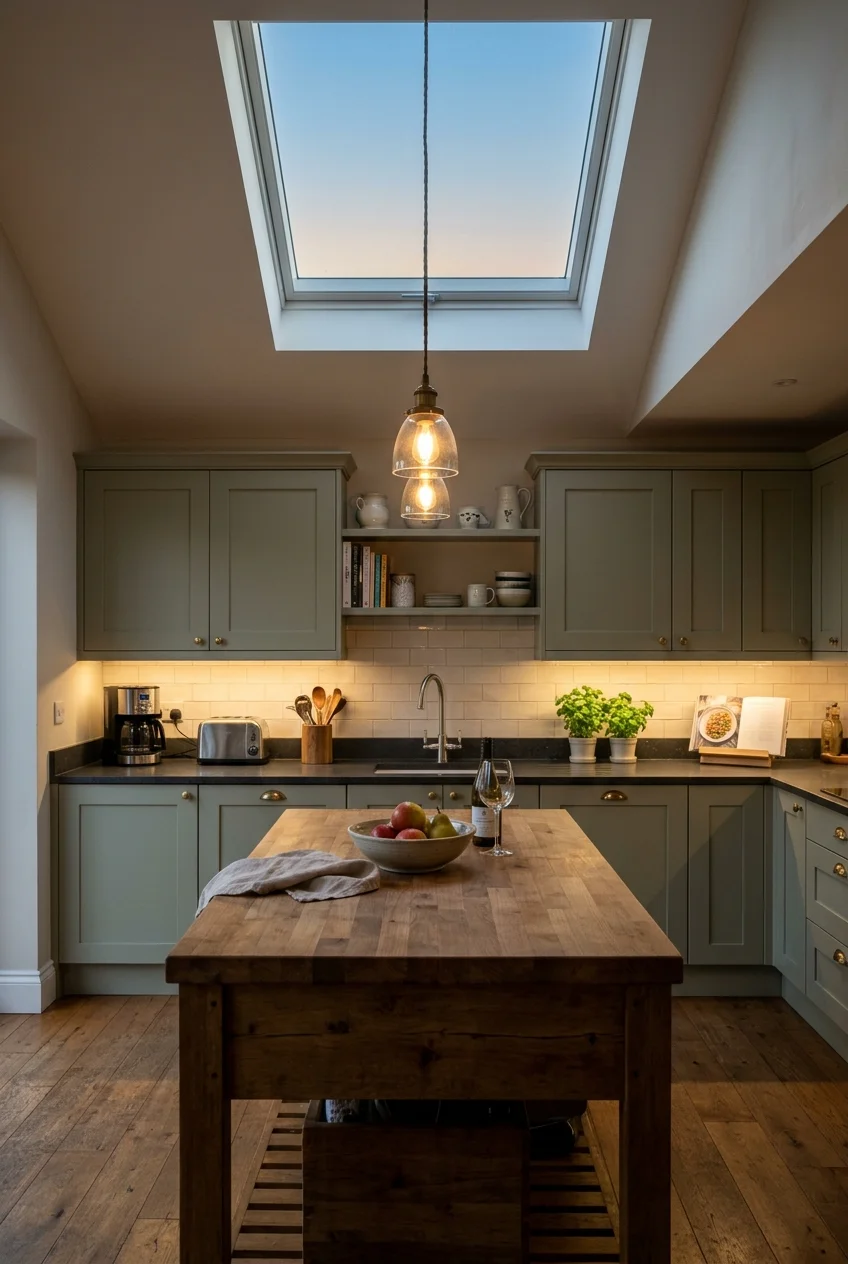
A skylight or large window can carry daytime brightness but leave strong contrast after sunset. Electric layers should support the same surfaces when daylight disappears.
Place controls where evening changes are easy, and avoid aiming intense downlights into glossy surfaces beside windows. Reflections become more noticeable after dark.
Setup note Photograph the room at morning, afternoon, and night. The sequence reveals where changing daylight creates glare, shadows, or an unexpectedly dim corner.
Choose Island and Peninsula Lighting
Island fixtures shape the room’s identity, but scale, glare, and sightlines still govern the choice. Select a composition that fits the island’s actual length.
15. Center One Oversized Pendant on a Short Island
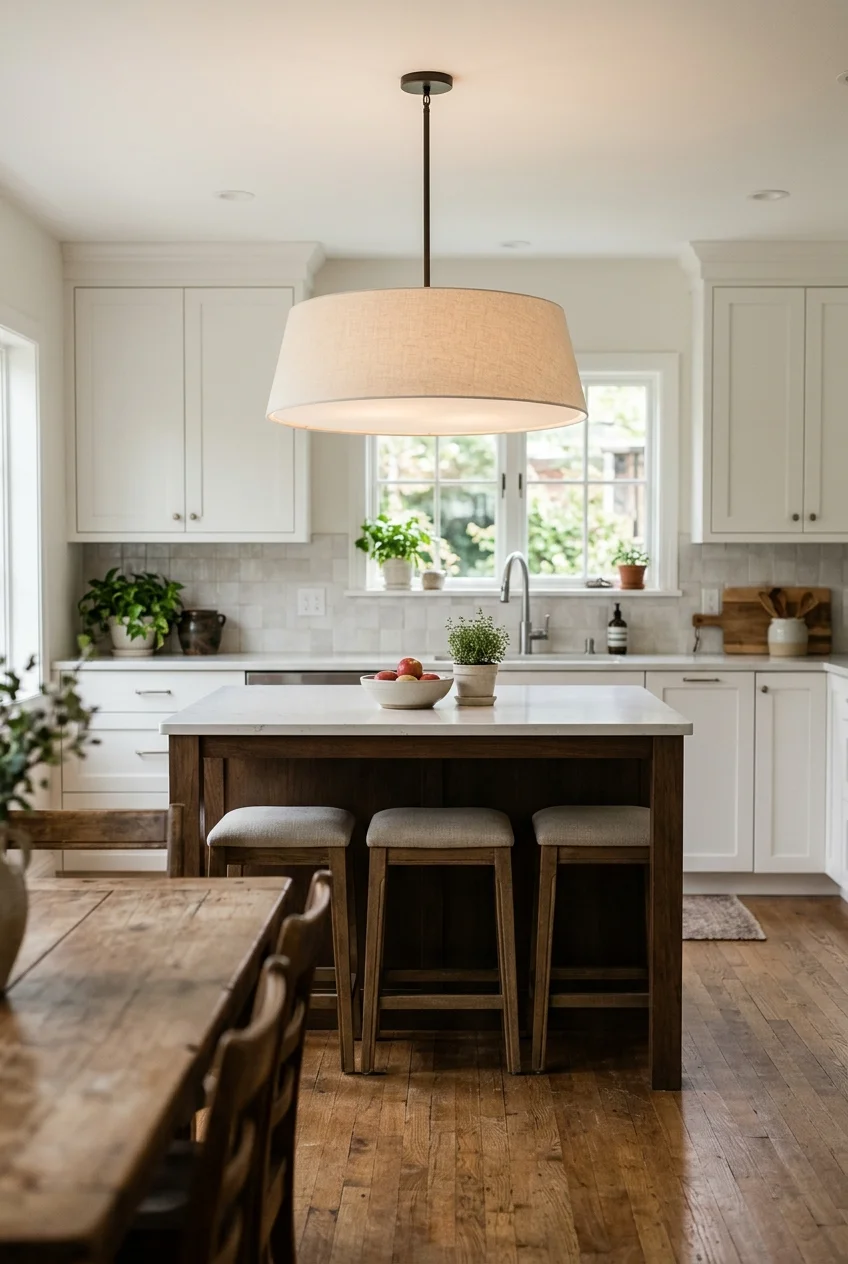
One generous pendant can calm a short island that would feel crowded by several small fixtures. Choose a shade wide enough to look intentional.
The lower edge should preserve views across the room and keep the lamp outside direct sight. Mock up the diameter before committing to the scale.
16. Use a Pair of Domes Over a Long Island
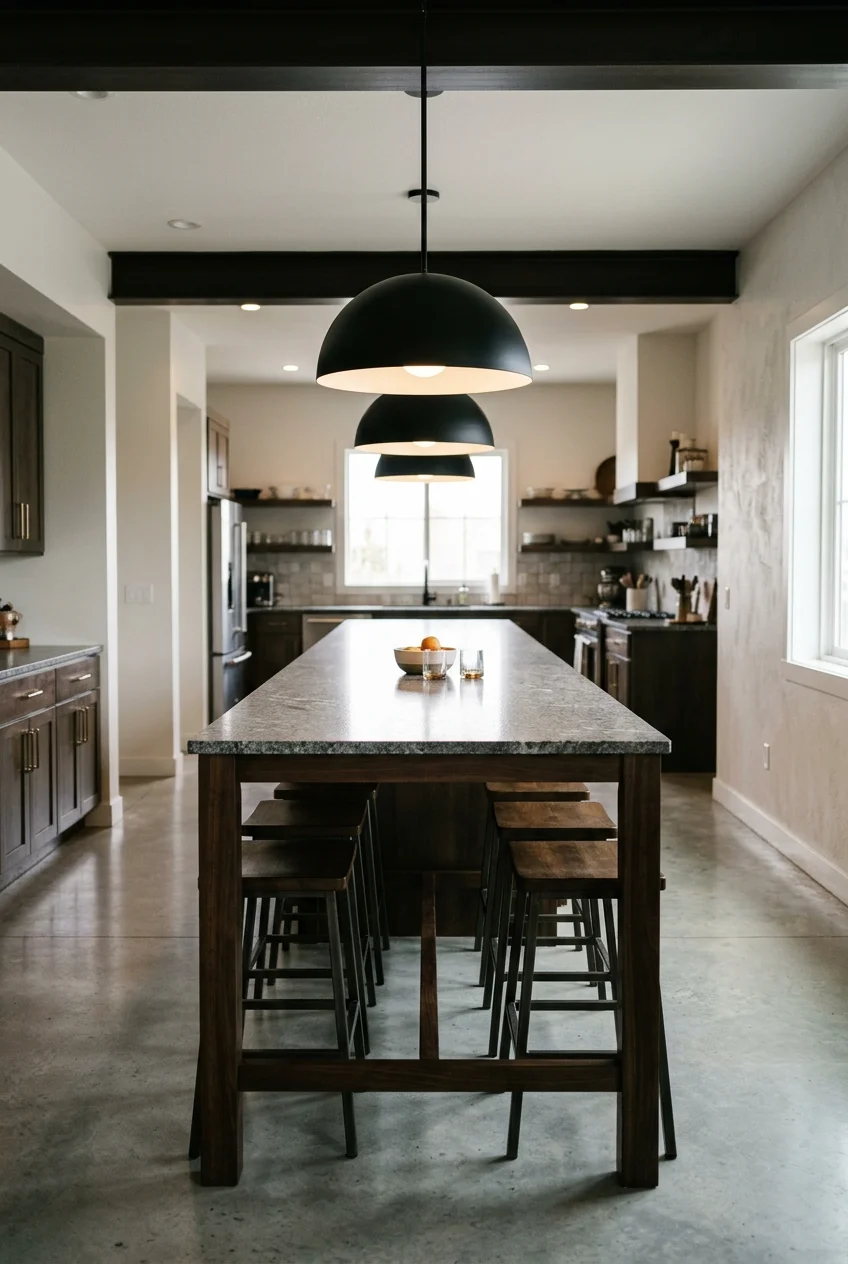
Two broad domes create a slower, calmer rhythm than three small pendants. Their downward light suits islands used for prep, serving, and casual meals.
For tight rooms, settle the island footprint before spacing fixtures. These narrow kitchen island ideas help distinguish workable prep islands from oversized plans that pinch circulation.
Center the pair over the useful surface, then check cabinet and appliance relationships. Perfect room symmetry matters less than a balanced island composition and open route.
- Measure the island, not the whole room
- Keep both shades clear of open cabinet doors
- Check the view from nearby seating
17. Repeat Three Small Pendants for Rhythm
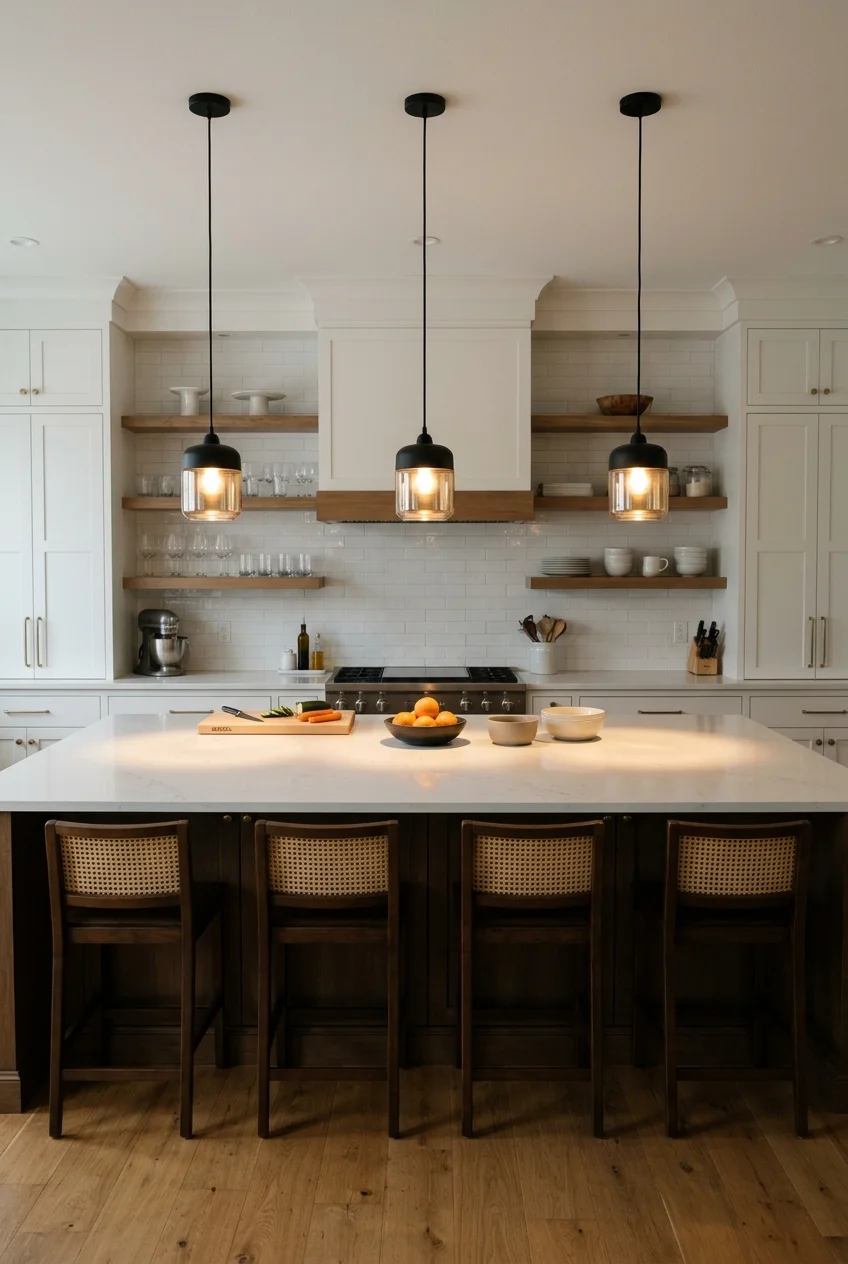
Three compact pendants suit a long island when their repetition reinforces its length. Small shades keep the ceiling active without creating a heavy overhead block.
Space them by the useful counter area rather than the island’s decorative end panels. Equal gaps look best when the island itself is visually symmetrical.
18. Stretch a Linear Fixture Over the Worktop
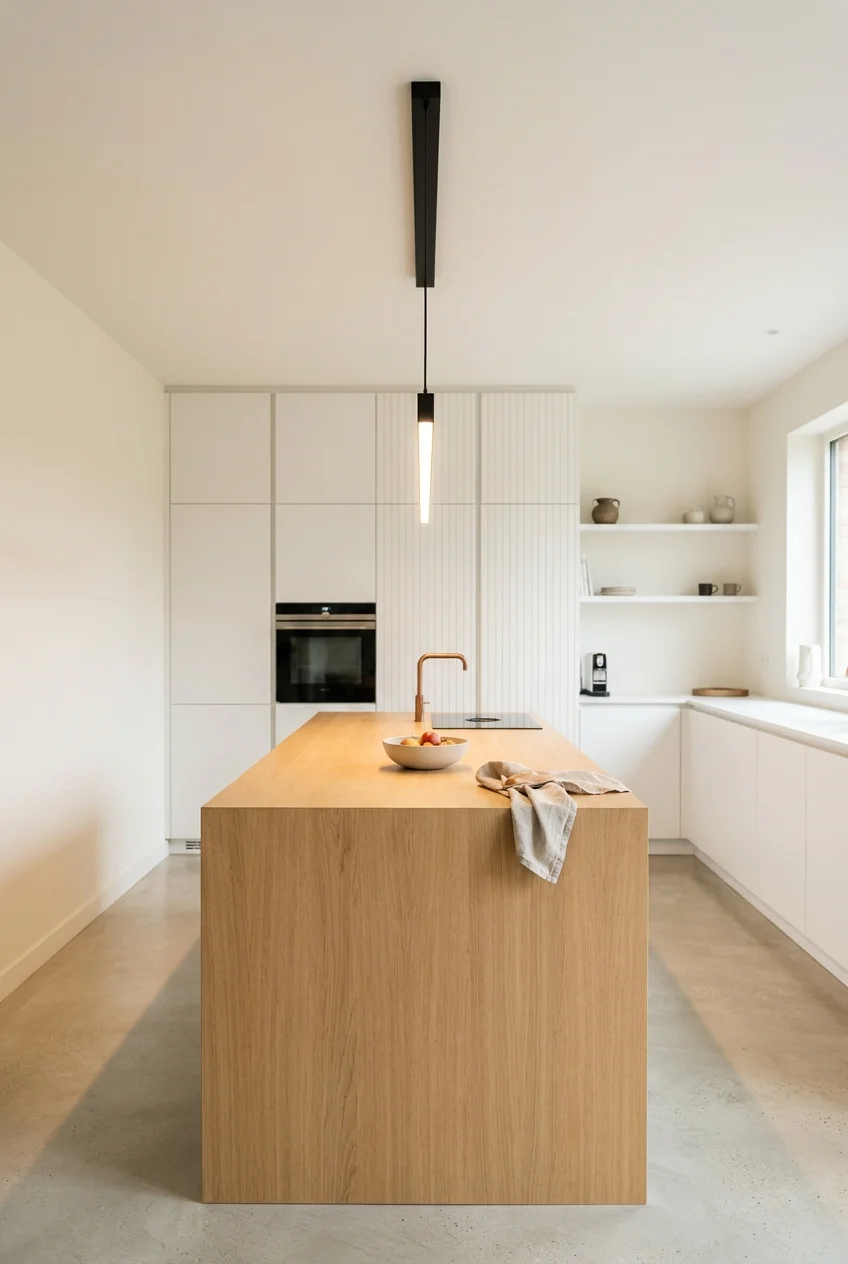
A slim linear pendant gives one continuous gesture above a rectangular island. It can distribute light evenly without the visual busyness of separate cords.
Choose a length that leaves breathing room at both ends. The fixture should relate to the worktop, not extend over empty floor or nearby seats.
19. Keep Sightlines Open With Clear Glass
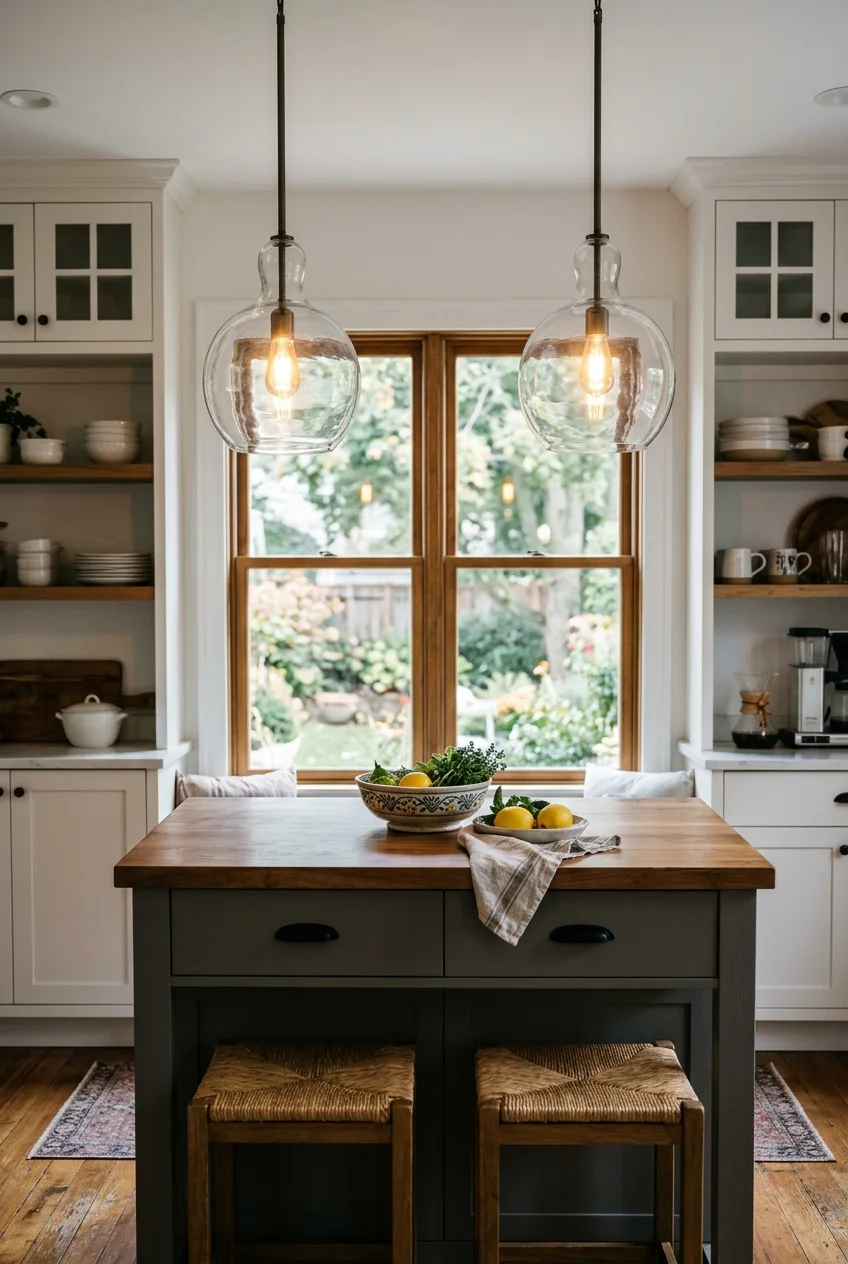
Clear glass pendants add shape without hiding cabinets or a window beyond the island. Their openness works especially well in compact or visually busy kitchens.
Because clear glass exposes the lamp, choose brightness and bulb shape carefully. Frequent cleaning also matters where cooking film and fingerprints become obvious.
20. Soften a Hard Kitchen With Opal Globes
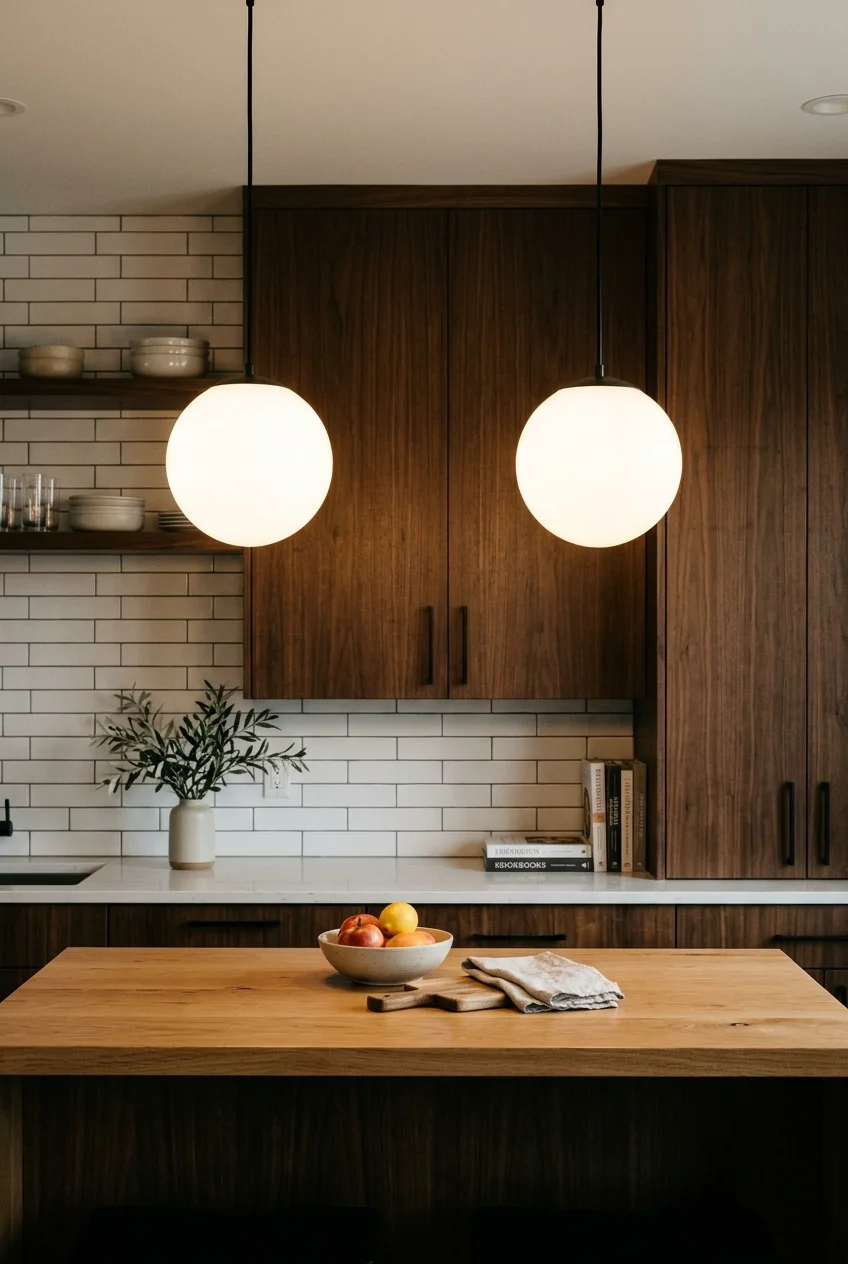
Opal globes spread light and introduce curved forms among straight cabinets, tile joints, and counter edges. The diffused surface also hides the bare lamp.
Repeat the globe shape in two or three places rather than filling the ceiling. A restrained cluster keeps the effect graphic instead of drifting toward novelty.
21. Direct Light Downward With Metal Domes
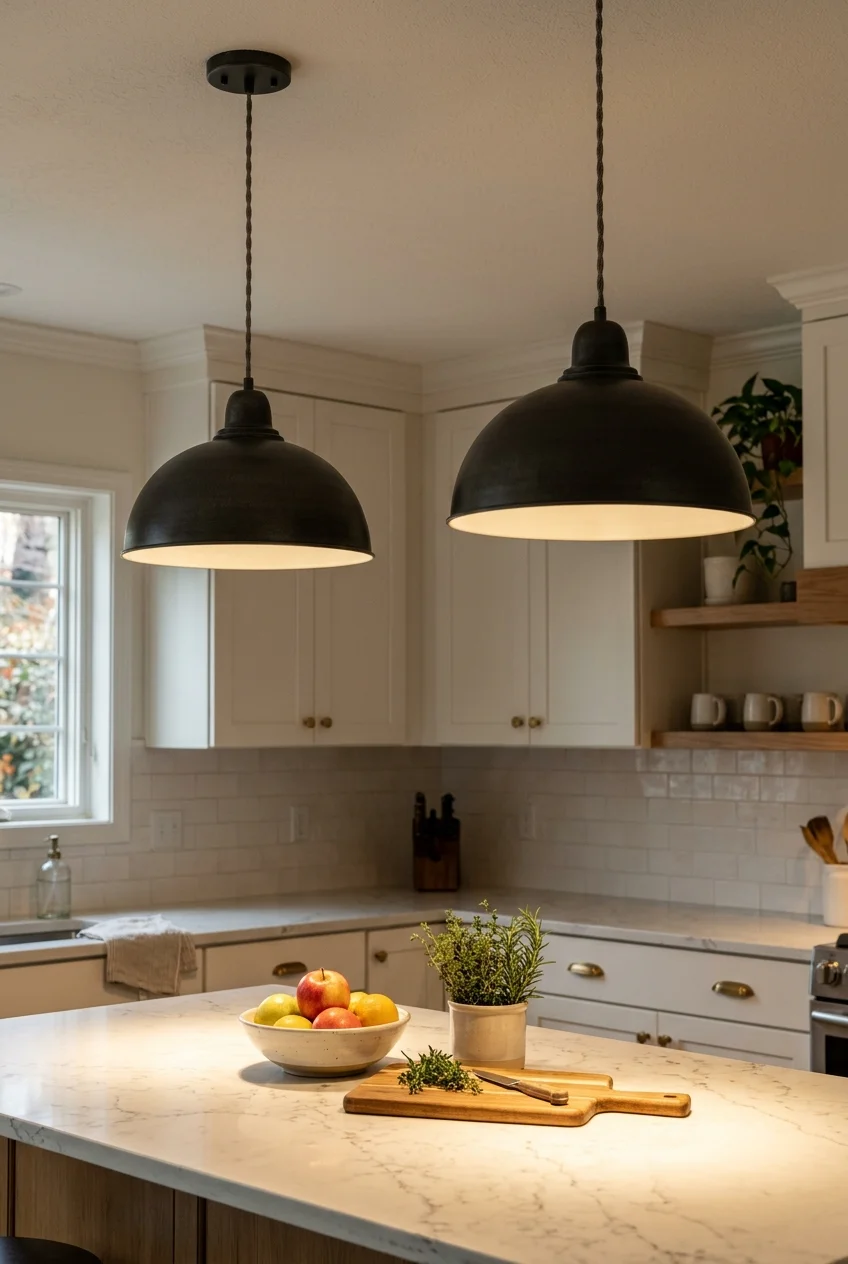
Opaque metal shades focus attention on the counter and keep the ceiling visually quieter. They are useful where the island needs task emphasis without ambient glare.
The interior finish affects the character of reflected light, while the exterior color carries the style. Sample both beside the countertop before ordering multiples.
22. Add Texture With a Woven Shade
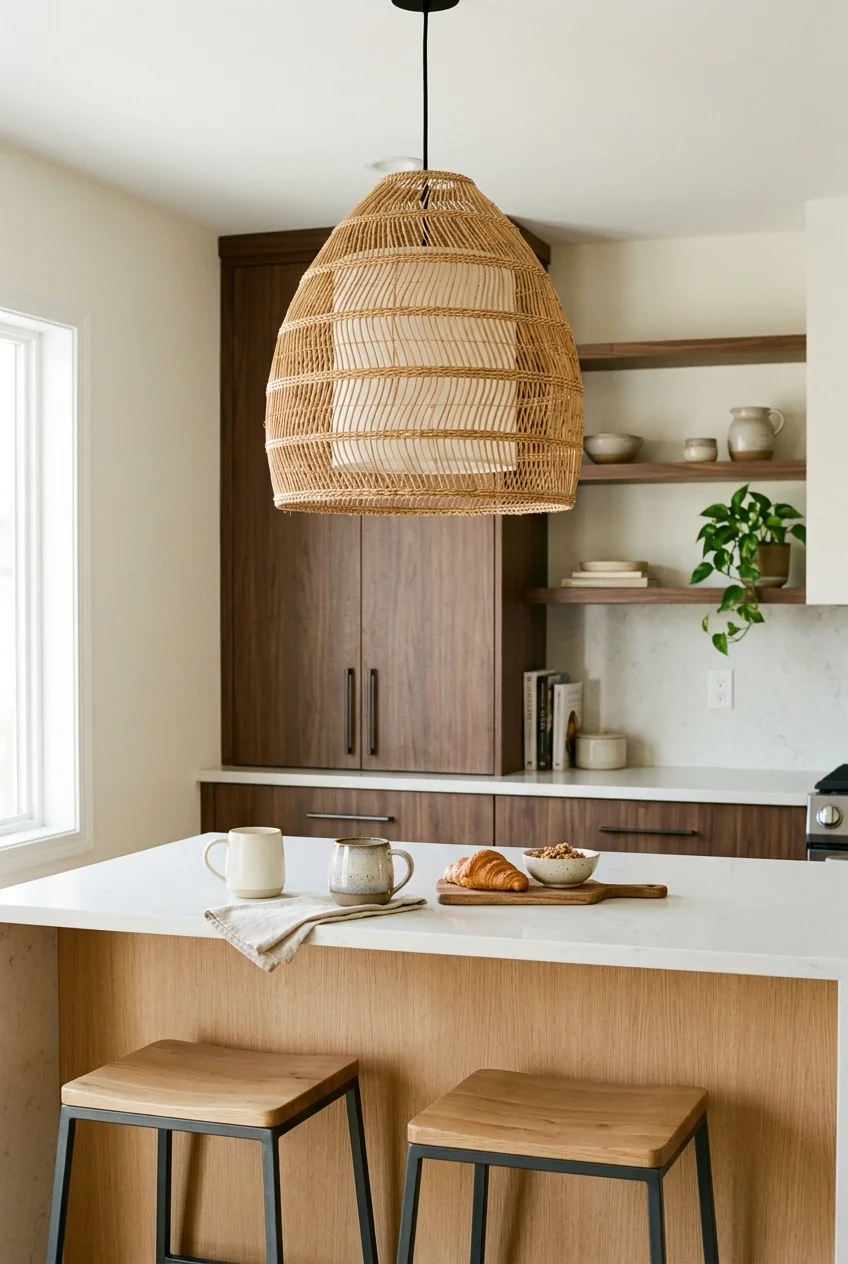
A woven pendant can warm a kitchen dominated by painted panels, glass, and stone. Keep its texture concentrated so the room does not become themed.
Look through the weave while illuminated, since open patterns can cast busy shadows. A lined or denser shade gives a quieter pool over eating areas.
23. Use Milk Glass for a Familiar Soft Glow
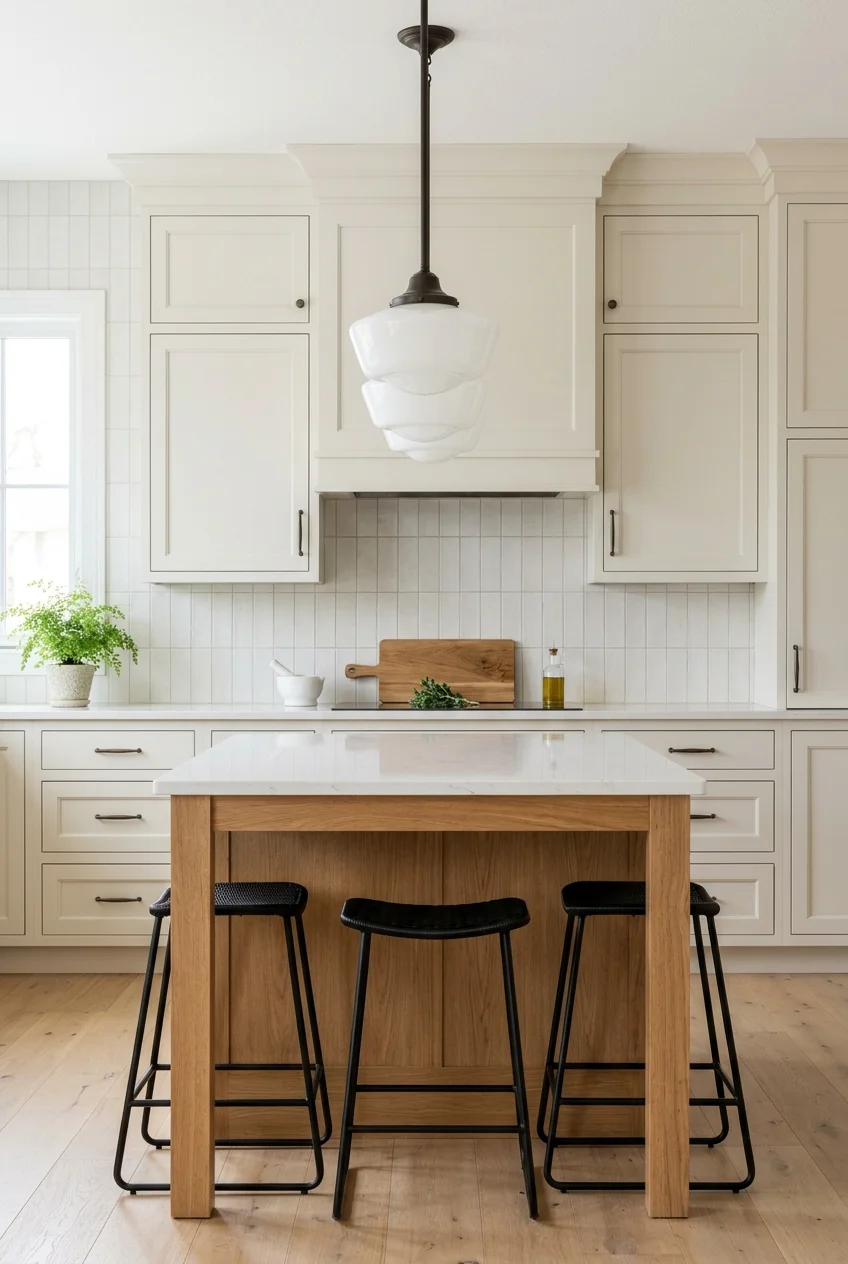
Milk-glass pendants suit cottage, traditional, and transitional kitchens without requiring antique fixtures everywhere. Their opaque bowls soften light and conceal modern lamps.
Pair the nostalgic shape with simple hardware and uncluttered counters. Too many period details can turn a useful reference into a costume-like theme.
24. Balance an Asymmetrical Sculptural Cluster
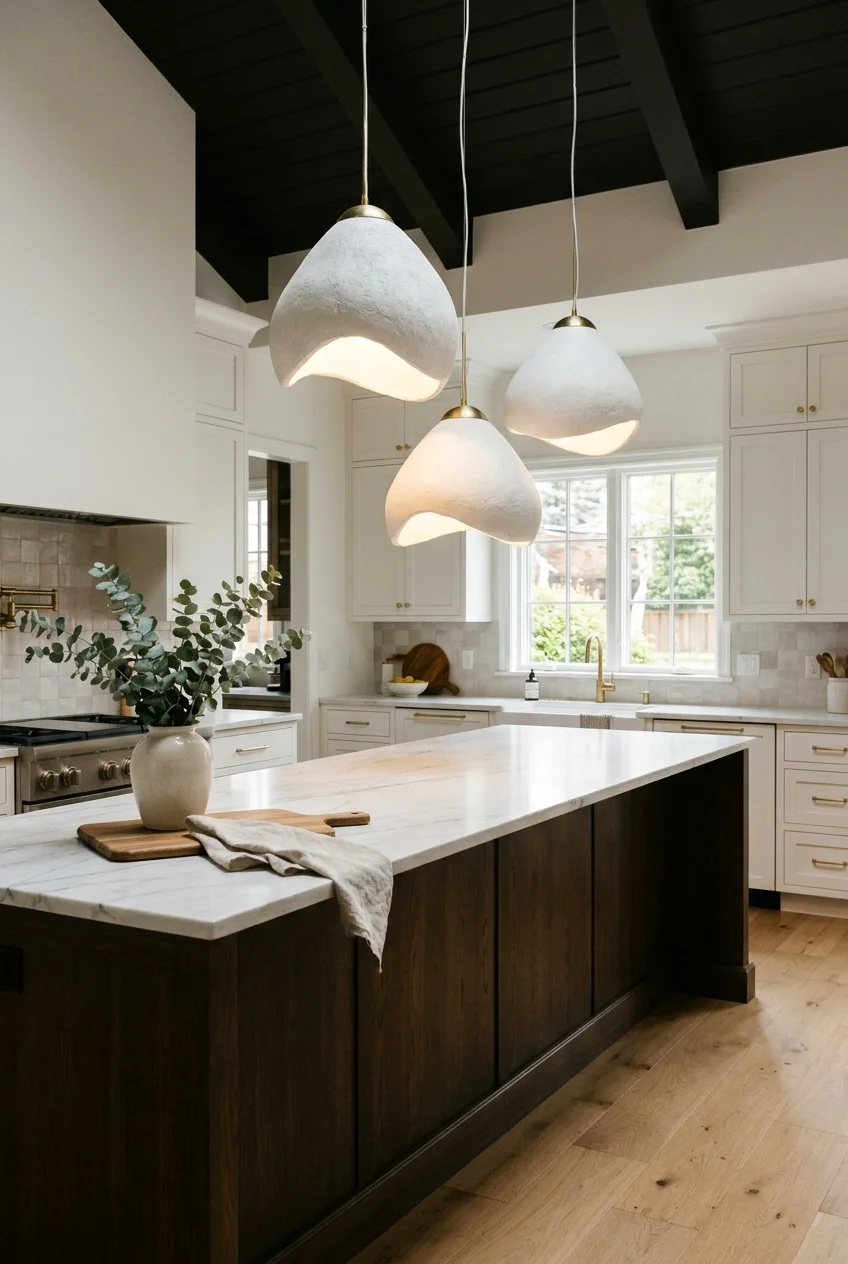
A cluster of related pendants can animate an island without following a strict row. Keep one shared material or shape so the composition reads as one fixture.
Stagger heights outside normal head space and protect sightlines toward the range or windows. Asymmetry should follow the room, not appear randomly tangled.
Illuminate Counters, Sink, and Cooking Zones
Task lighting works best close to the surface, where your body cannot block it. Conceal the source when possible and let the illuminated counter remain prominent.
25. Run LED Tape Near the Cabinet Front Edge
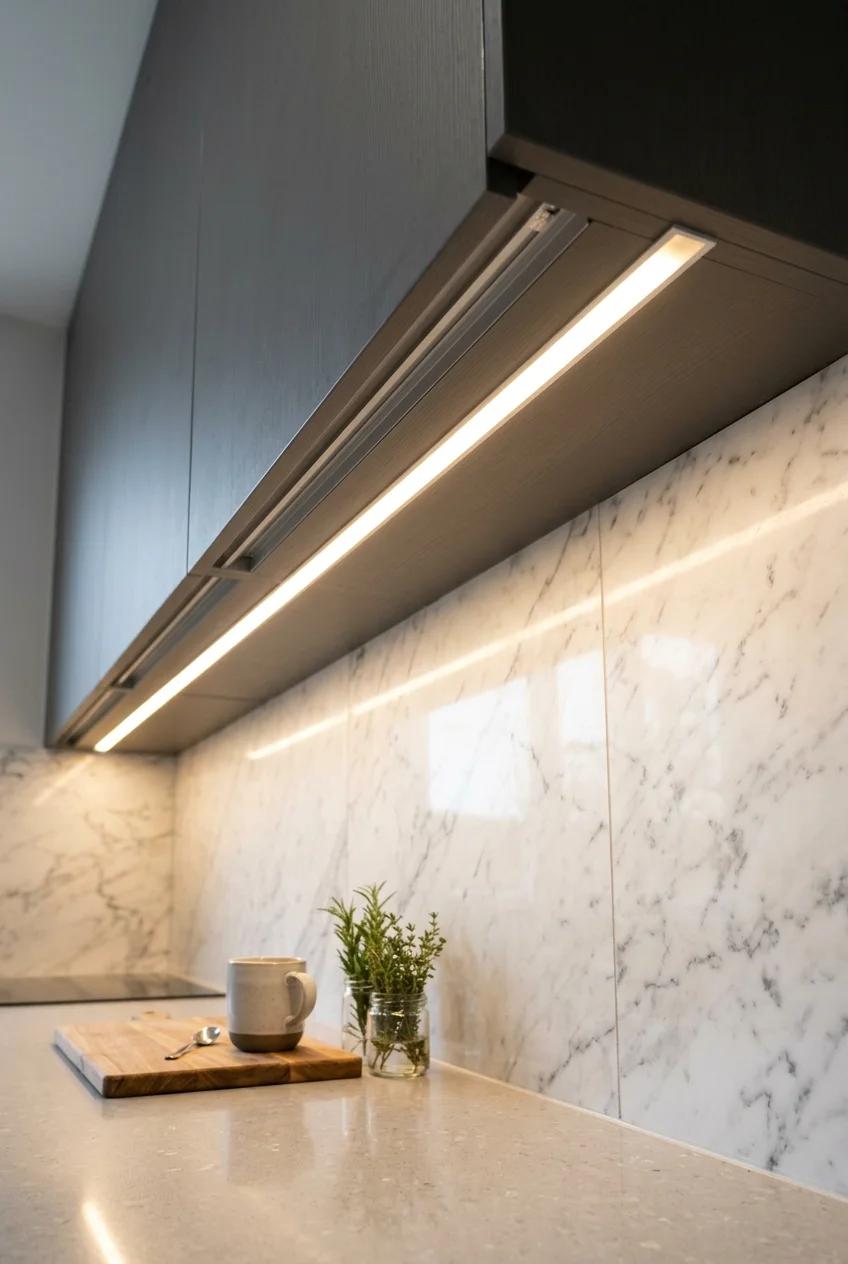
Tape placed near the wall can leave the front half of a counter dim. Moving it toward the cabinet face spreads light across the active work area.
Use a channel and diffuser for a continuous line instead of visible dots. Conceal cables, drivers, and connectors without making future maintenance impossible.
This upgrade pairs naturally with other practical cabinet makeover ideas, especially when dark upper cabinets make the countertop feel shadowed after sunset.
26. Use Linkable Bars for a Plug-In Upgrade
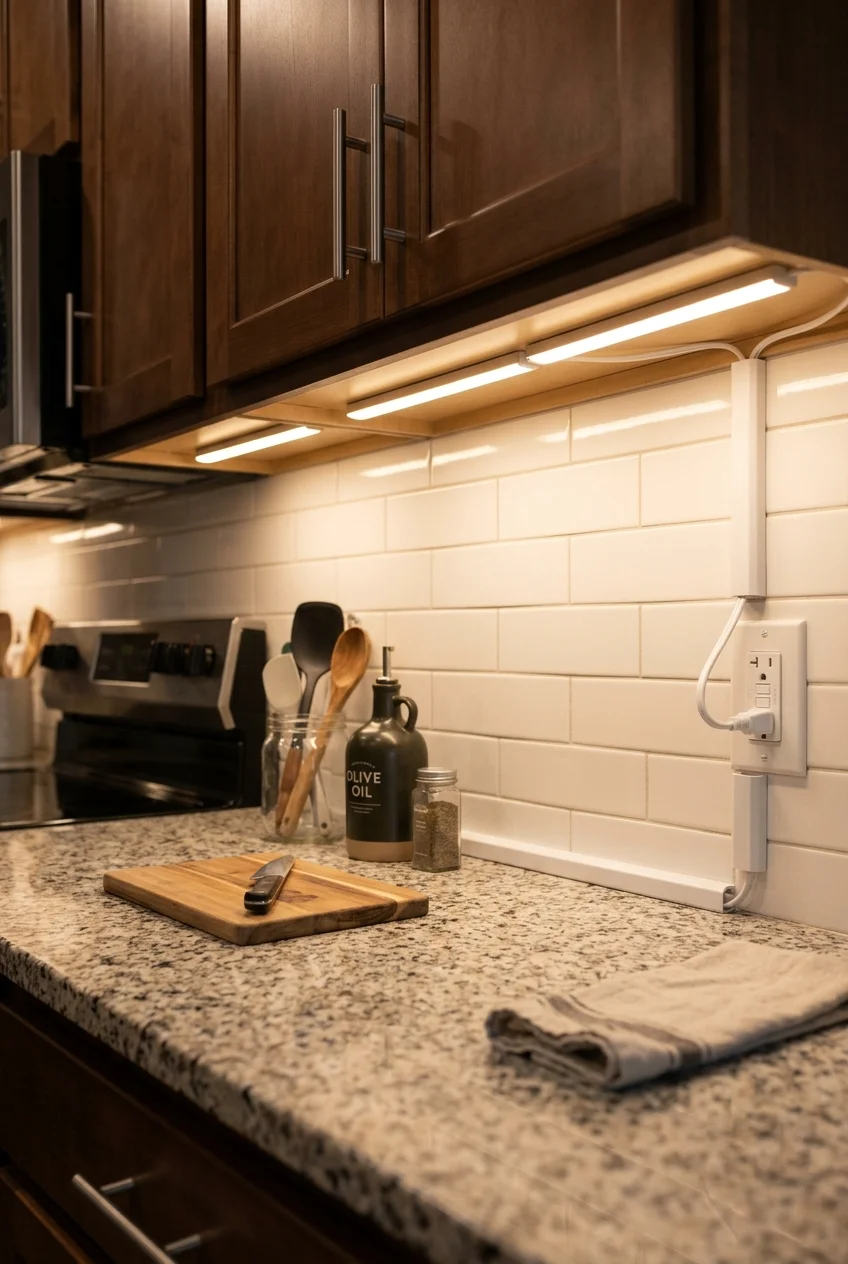
Linkable bars can brighten a long counter without opening the wall. Measure each cabinet run, outlet location, cord path, and switch access before ordering.
One current option is this six-bar 3000K plug-in lighting kit (paid link). Its included dimmer controls the kit; the listing says it is not compatible with existing AC wall dimmers.
Hide cords with approved clips and follow the supplied layout instructions. A clean route matters visually and keeps loose cable away from heat and wet areas.
Because the kit contains six bars, sketch where every bar and connector will go. Extra hardware should not tempt you to overcrowd a short cabinet run.
27. Use Puck Lights for Deliberate Pools
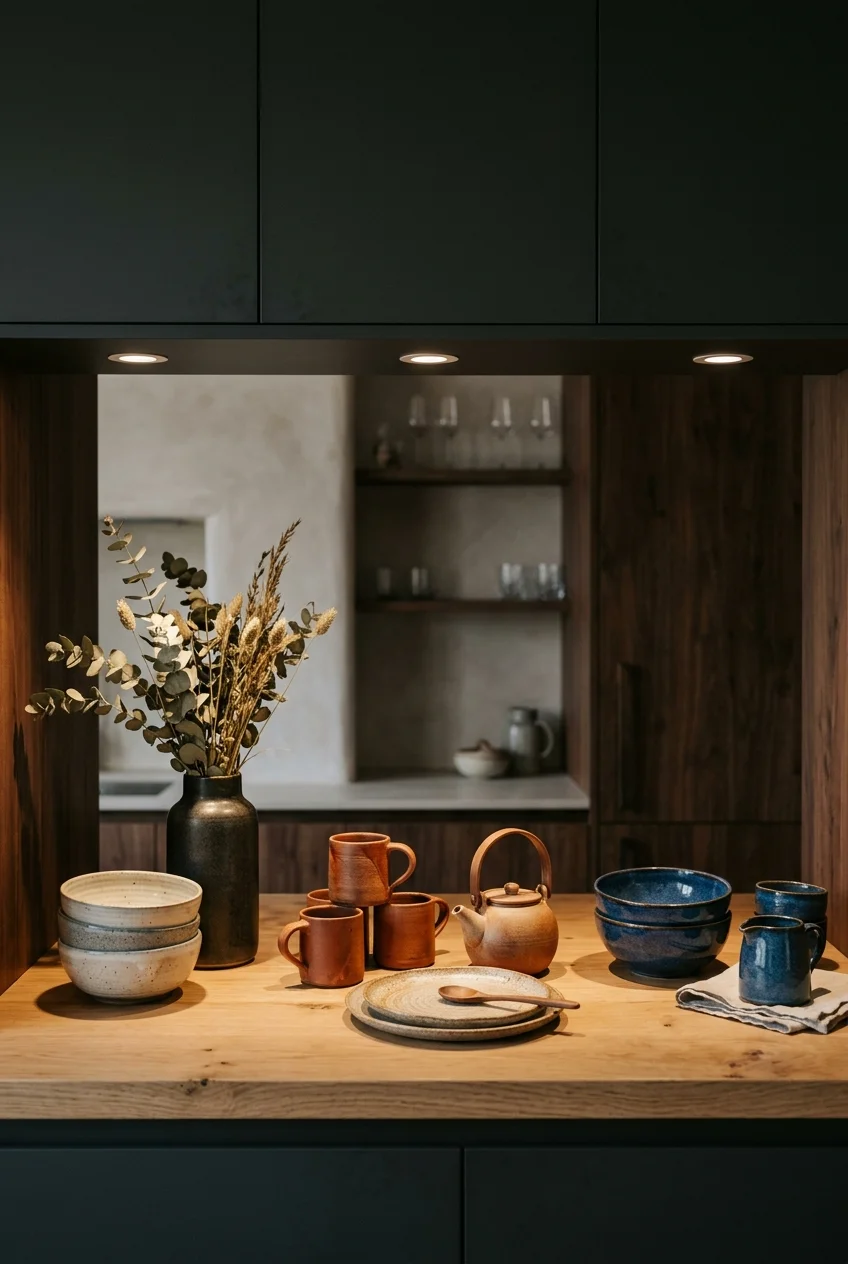
Puck lights create distinct circles rather than one continuous wash. Use that rhythm for display shelves or short cabinet bays where pools feel intentional.
They are less convincing across a primary chopping counter, where gaps can read as uneven coverage. Test the spacing before attaching every puck permanently.
28. Frame the Sink With Two Compact Sconces
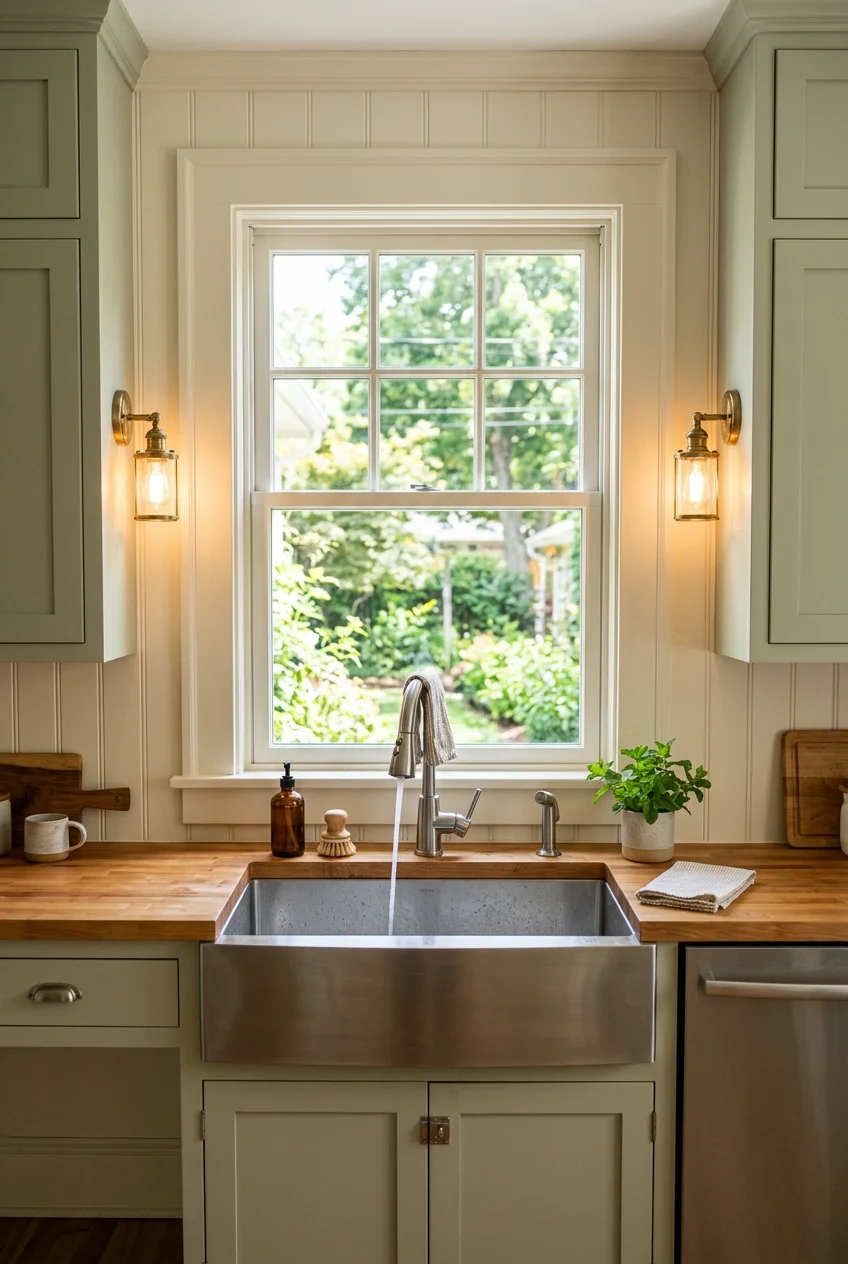
Paired sconces can make a sink wall feel architectural while adding useful side light. Keep them clear of cabinet doors, window trim, and splashing water.
Use fixtures suitable for their exact location and follow required installation rules. The arrangement should support sink work without turning the window into a stage.
Check reflections after dark if the sink faces glass. Moving sconces slightly outward can reduce doubled bright points without weakening the useful side illumination.
29. Hang One Small Pendant Over the Sink
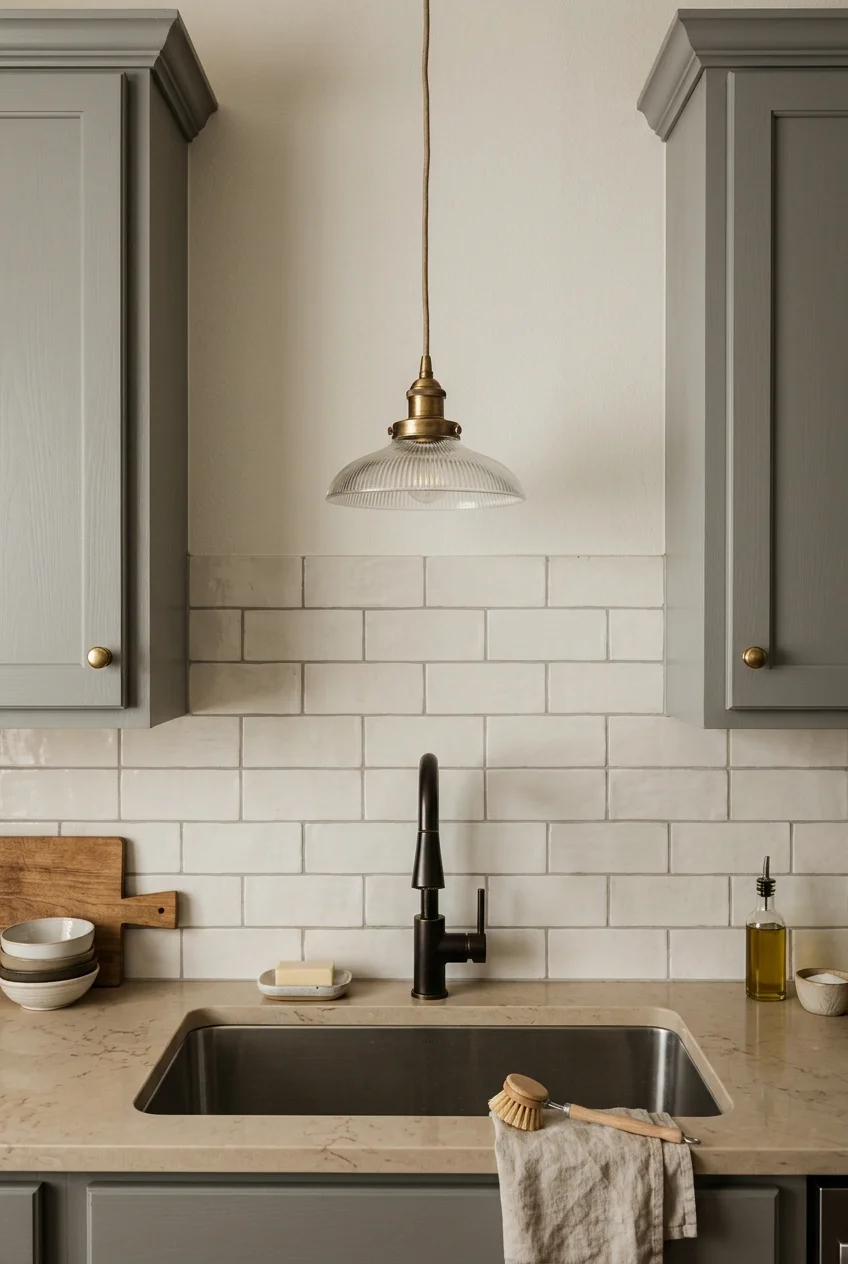
A petite pendant gives a windowless sink its own focal point and brings light closer to the basin. Keep the shade narrow enough for nearby doors.
Center it on the sink, not automatically on the cabinet run. Confirm that the drop clears heads, faucets, and any upper door swing.
30. Use the Range-Hood Light as a Real Layer
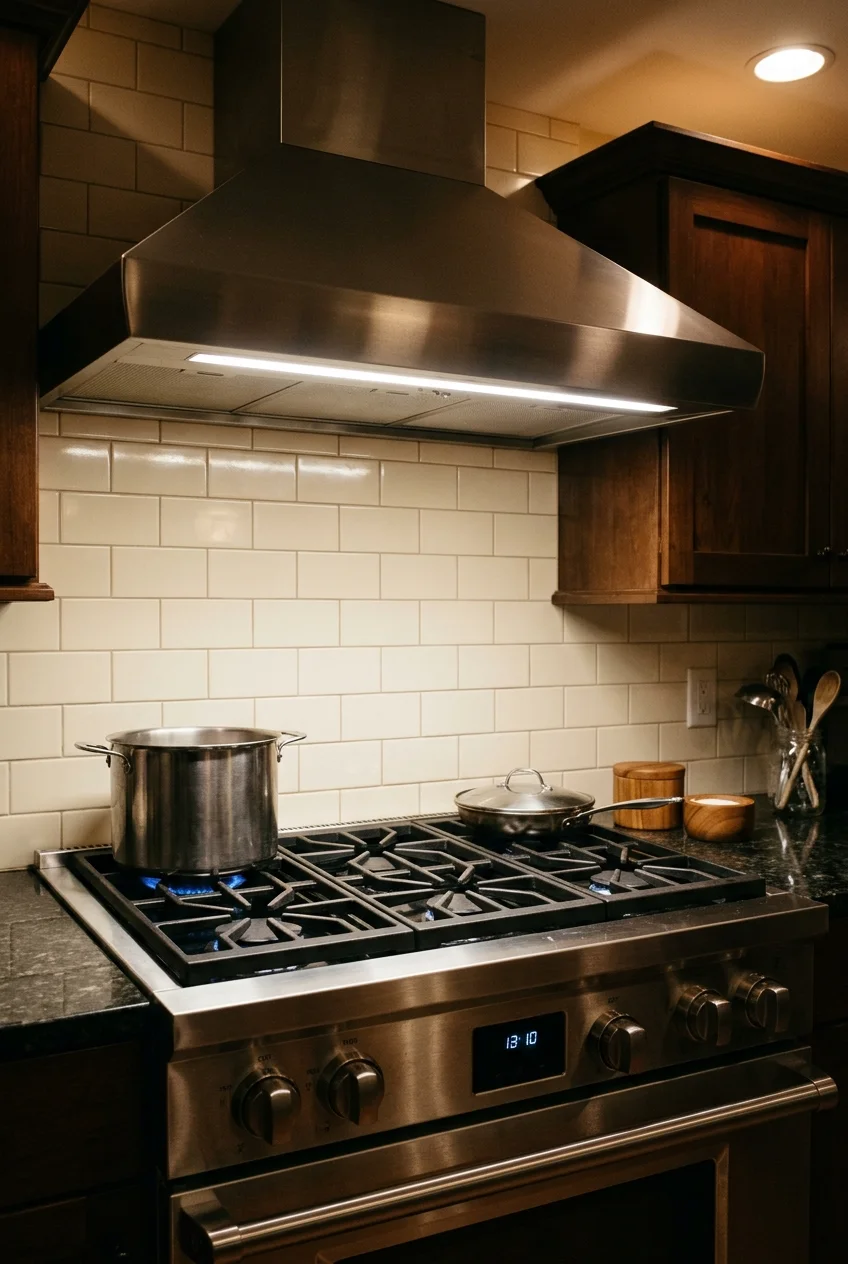
A range-hood lamp should reveal controls and the cooking surface without relying on distant ceiling lights. Check its coverage when comparing hood models.
Keep this light independently usable from general lighting. Follow the appliance instructions for replacement lamps and never improvise near heat, grease, or ventilation components.
31. Carry Continuous Light Through a Counter Corner
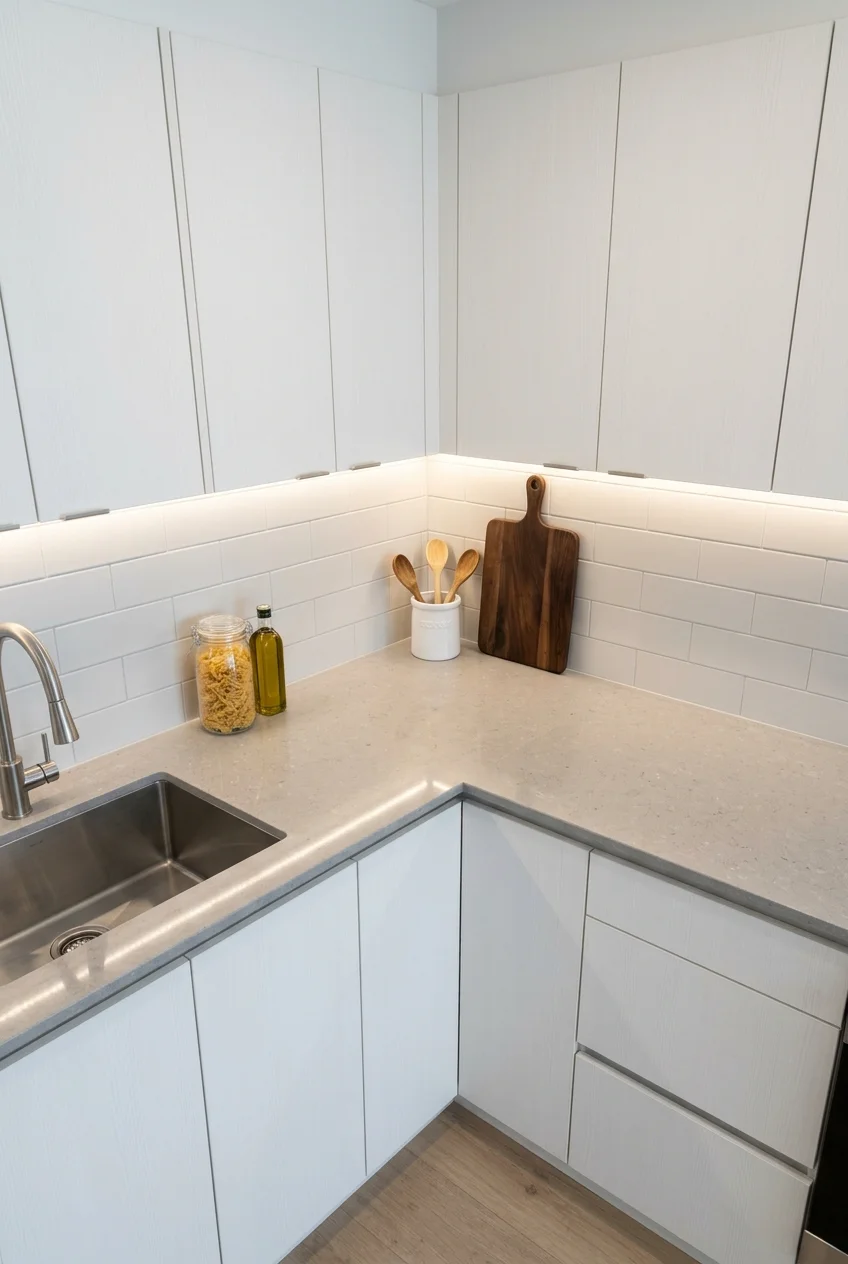
An L-shaped counter feels coherent when task light continues around the turn. Plan connector locations so the corner does not become dark or visibly tangled.
Maintain one apparent brightness across both legs, even when cabinet lengths differ. A smooth turn is more useful than adding a brighter fixture at the corner.
32. Aim a Swing-Arm Light at a Coffee Station
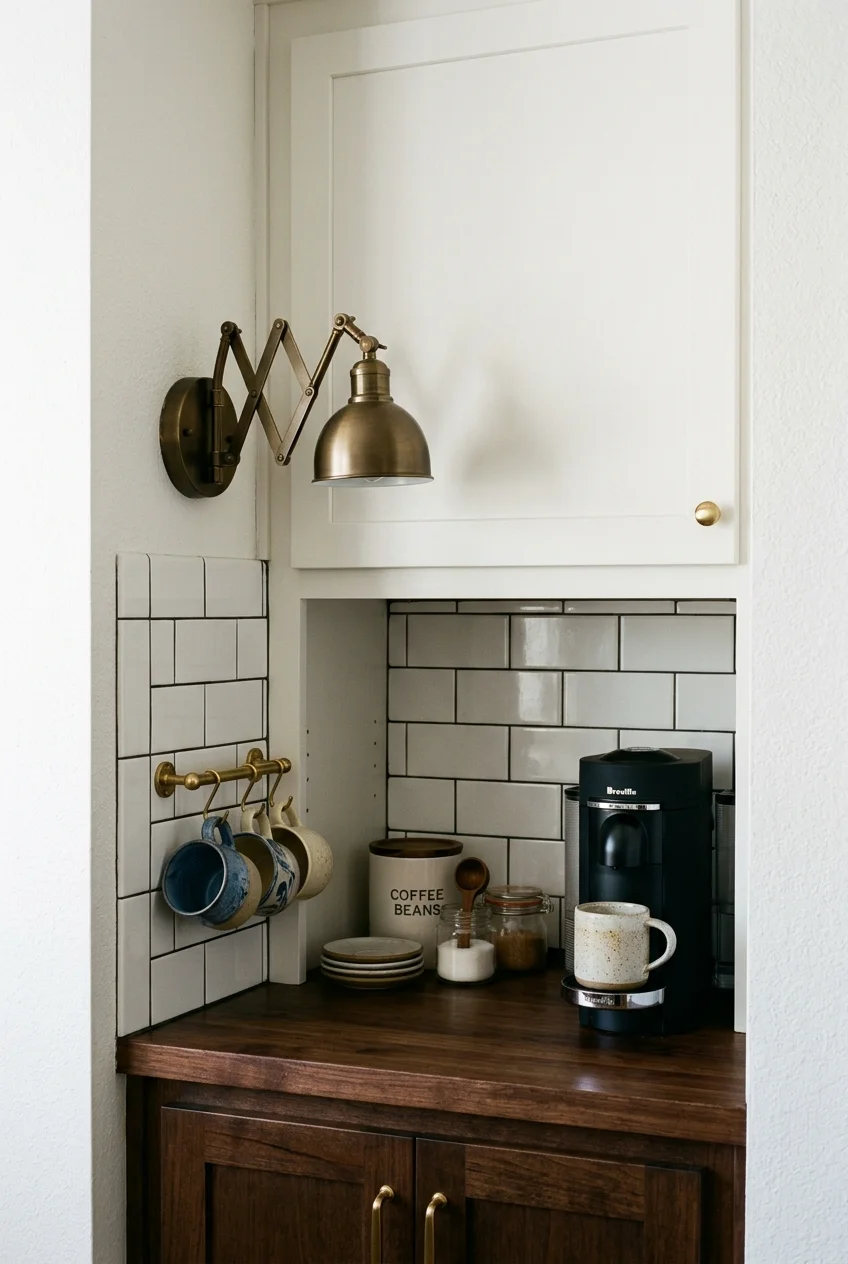
A wall-mounted swing arm can focus light on a coffee station, recipe stand, or baking corner. Fold it back when the counter needs more clearance.
Mount it where the arm cannot collide with cabinet doors or steam-producing appliances. The moving joint should remain reachable without leaning across hot equipment.
Choose a shade that directs light below eye level. An exposed lamp becomes uncomfortable when the arm swings outward toward someone standing at the counter.
Practical tip Use a paper template to trace the arm’s full sweep on the wall. That simple check catches interference before any mounting holes are drilled.
Add Depth With Cabinet and Accent Lighting
Accent lighting should reveal useful objects or architecture instead of outlining every surface. A few restrained highlights create more depth than a room full of glowing edges.
33. Light Glass-Front Cabinets From Within
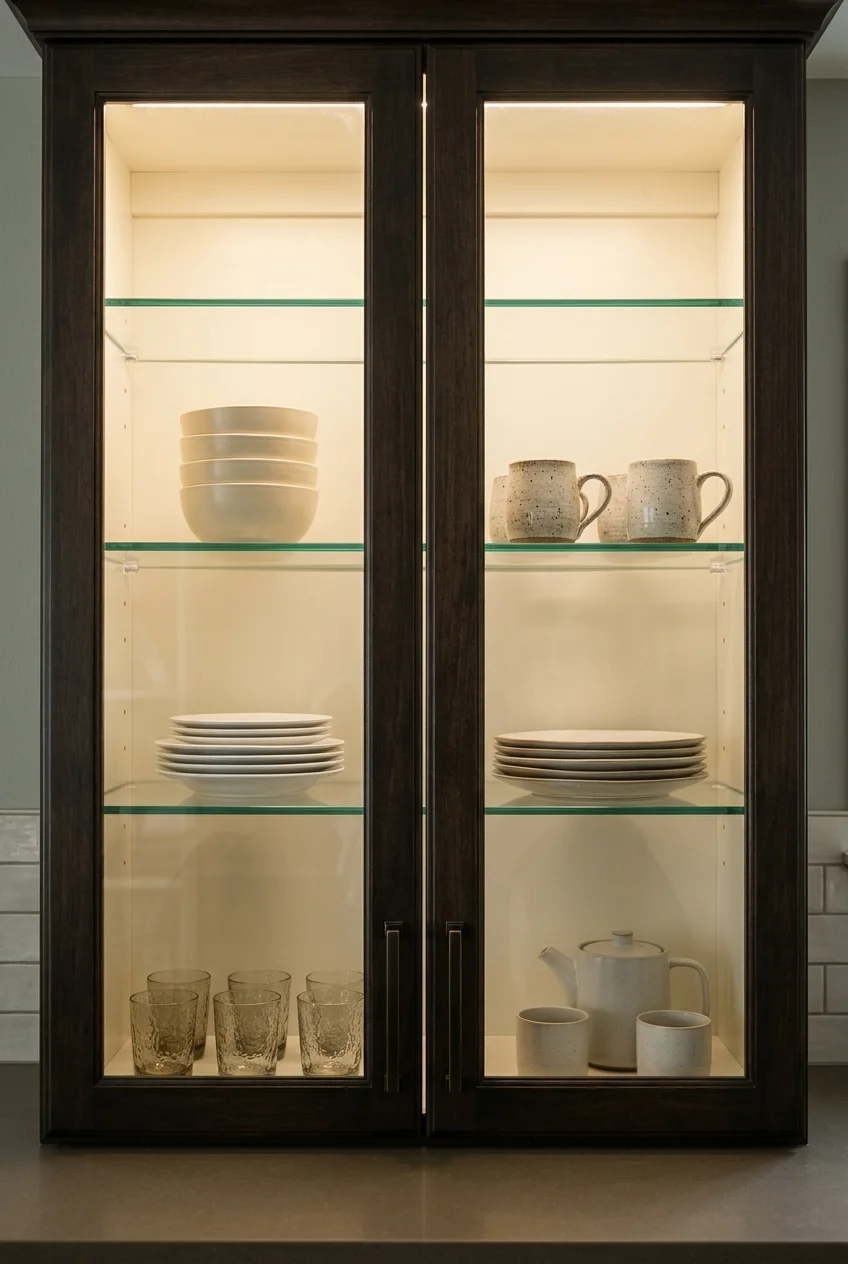
Interior cabinet light turns glassware and dishes into a quiet display while breaking up a solid cabinet wall. Keep shelves edited so every object has space.
Light also exaggerates reflections and backsplash color. If white cabinetry surrounds the display, compare these backsplash ideas for white cabinets before choosing the final lamp tone.
Route wiring so shelves remain usable and doors close freely. Opaque cabinet interiors may need a dedicated automatic-off control under some local energy rules.
34. Tuck Light Beneath an Open Shelf
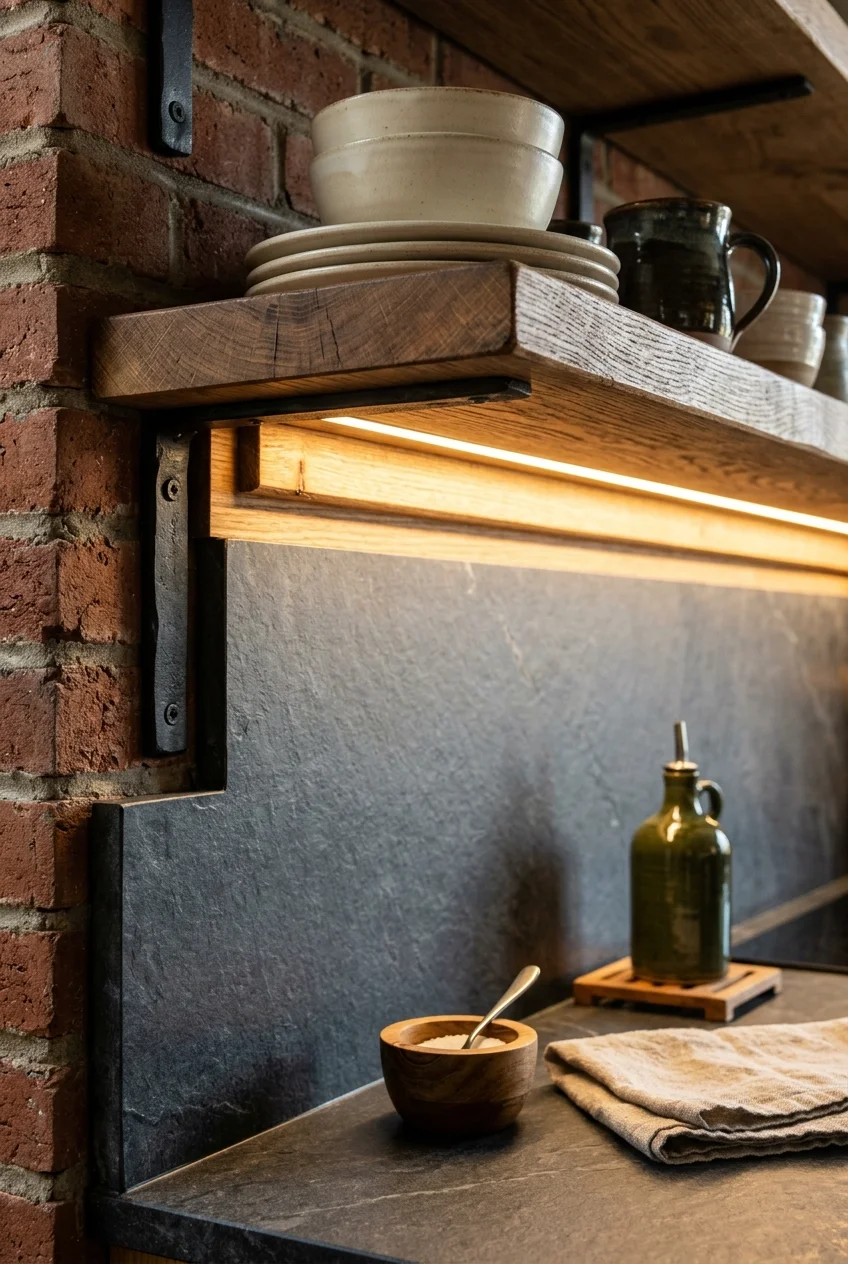
A slim source beneath an open shelf can illuminate the counter and make the shelf appear lighter. Hide it behind the front edge or a shallow lip.
Keep the shelf depth and brackets physically believable, and avoid flooding decorative objects from below. The main purpose remains the work surface beneath.
35. Add Automatic Light Inside the Pantry
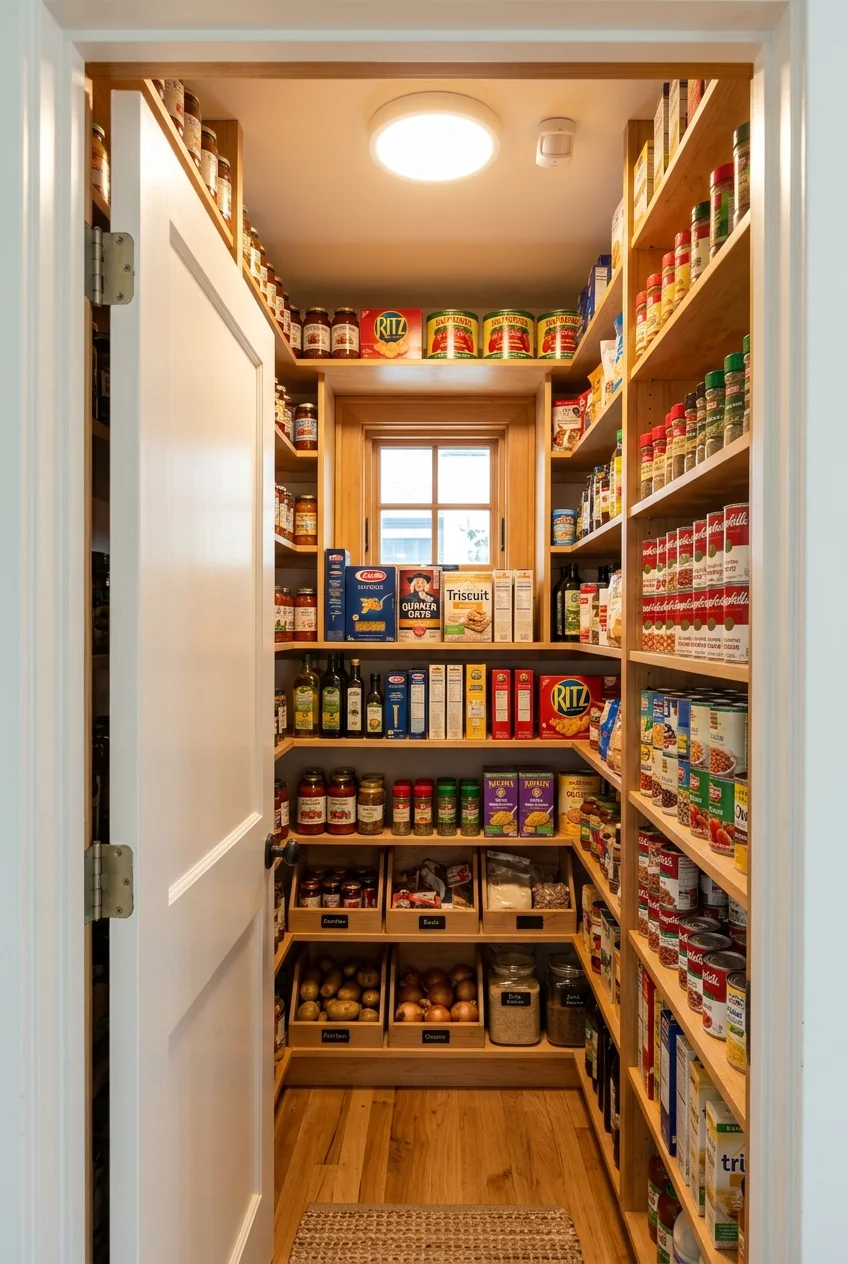
A door or occupancy-triggered pantry light makes labels readable without leaving the fixture on. Place the source where open doors and shelves will not block it.
Good lighting cannot fix overcrowded shelves, so pair it with these pantry organization ideas if packages still hide behind one another after illumination improves.
In deep pantries, one ceiling light may brighten the floor while shelf fronts remain dim. A vertical or front-positioned source can reveal contents more evenly.
- Light the shelf fronts, not only the ceiling
- Keep sensors clear of stored packages
- Use automatic-off behavior where required
36. Use Door-Triggered Light in Deep Cabinets
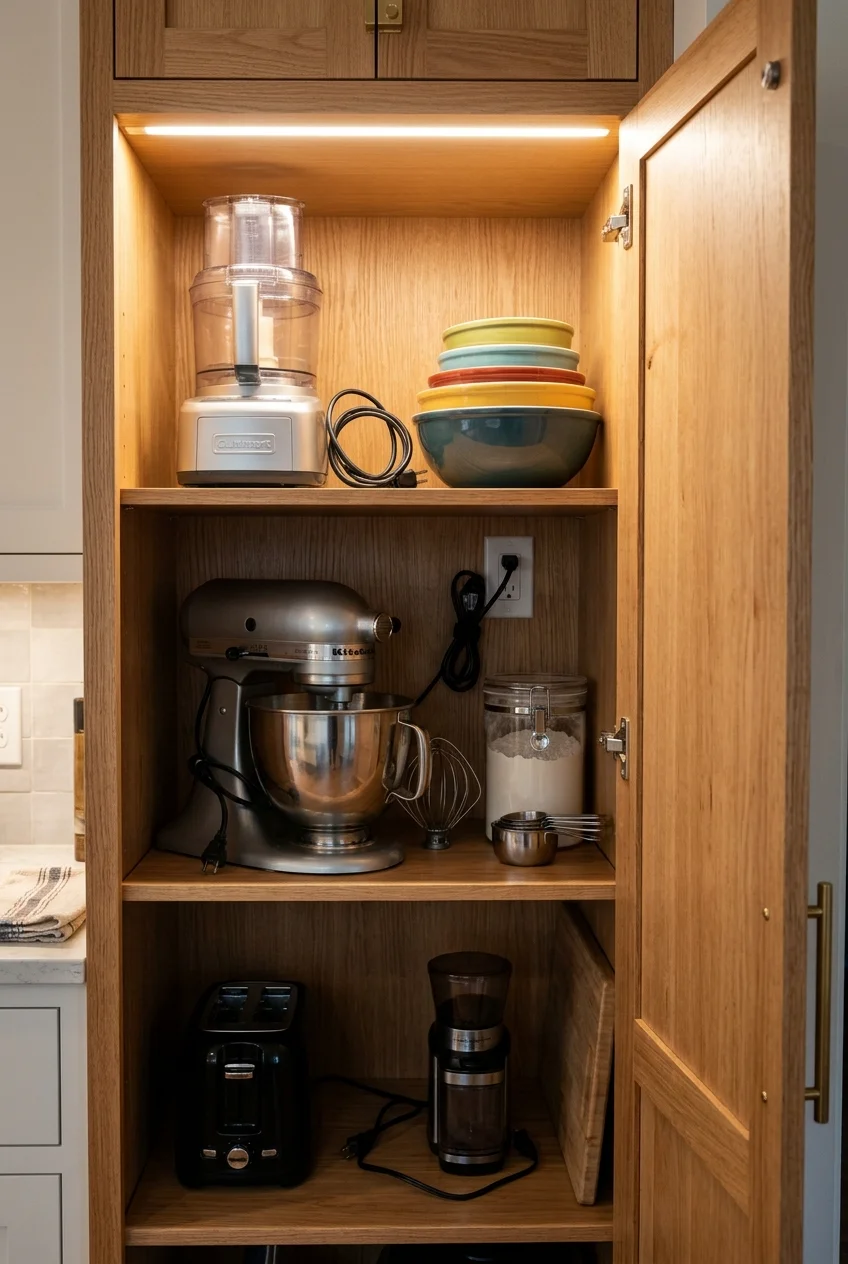
A deep appliance cabinet becomes easier to use when opening the door activates a small internal light. Position it above the contents, not behind them.
Choose a system intended for enclosed cabinetry and follow its heat, wiring, and shutoff requirements. The light should turn off reliably when the door closes.
37. Guide Nighttime Steps With Toe-Kick Light
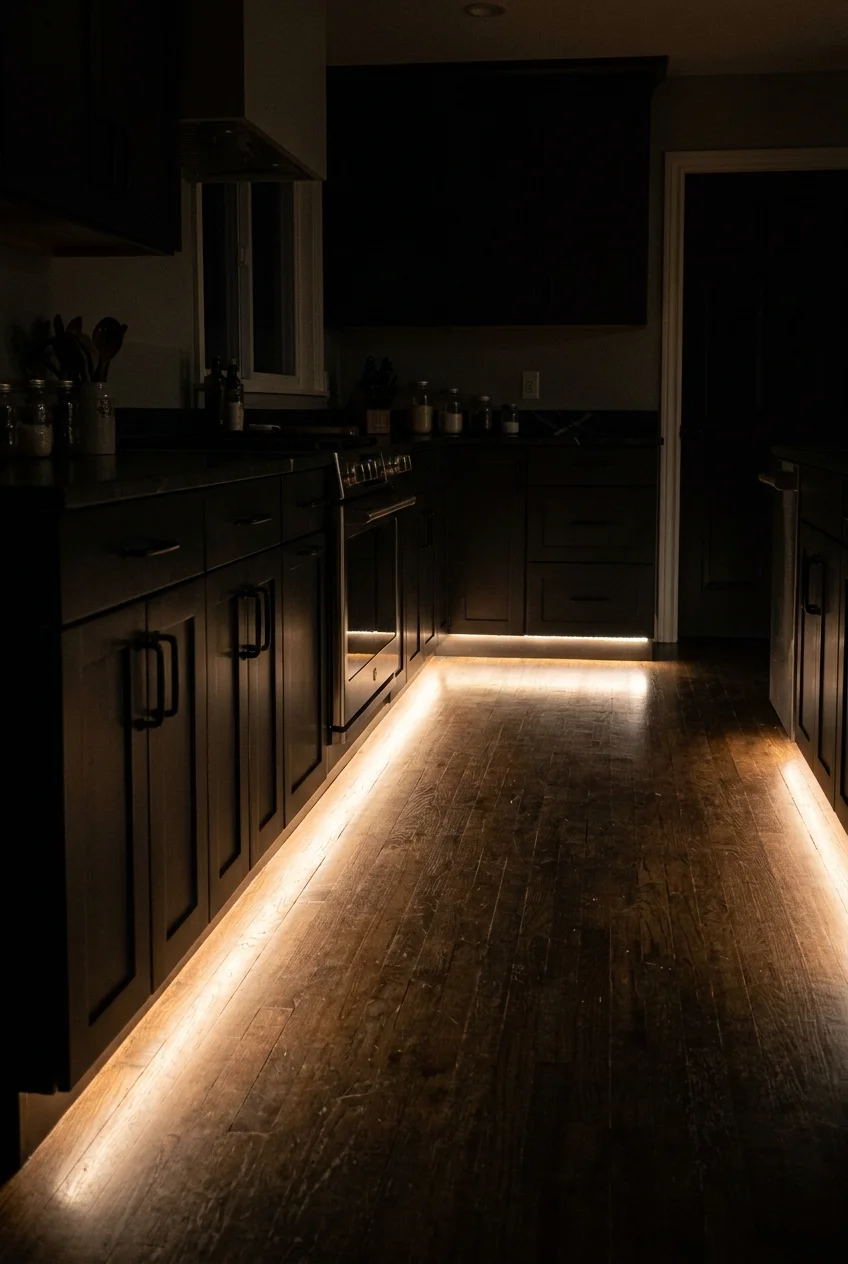
Low toe-kick lighting can mark the floor path without waking the whole kitchen. Use a gentle, continuous glow rather than bright exposed points.
Reserve it for navigation and keep it separate from task lighting. Reflections on polished floors can make a low strip appear much brighter than expected.
38. Bounce Light Above Upper Cabinets
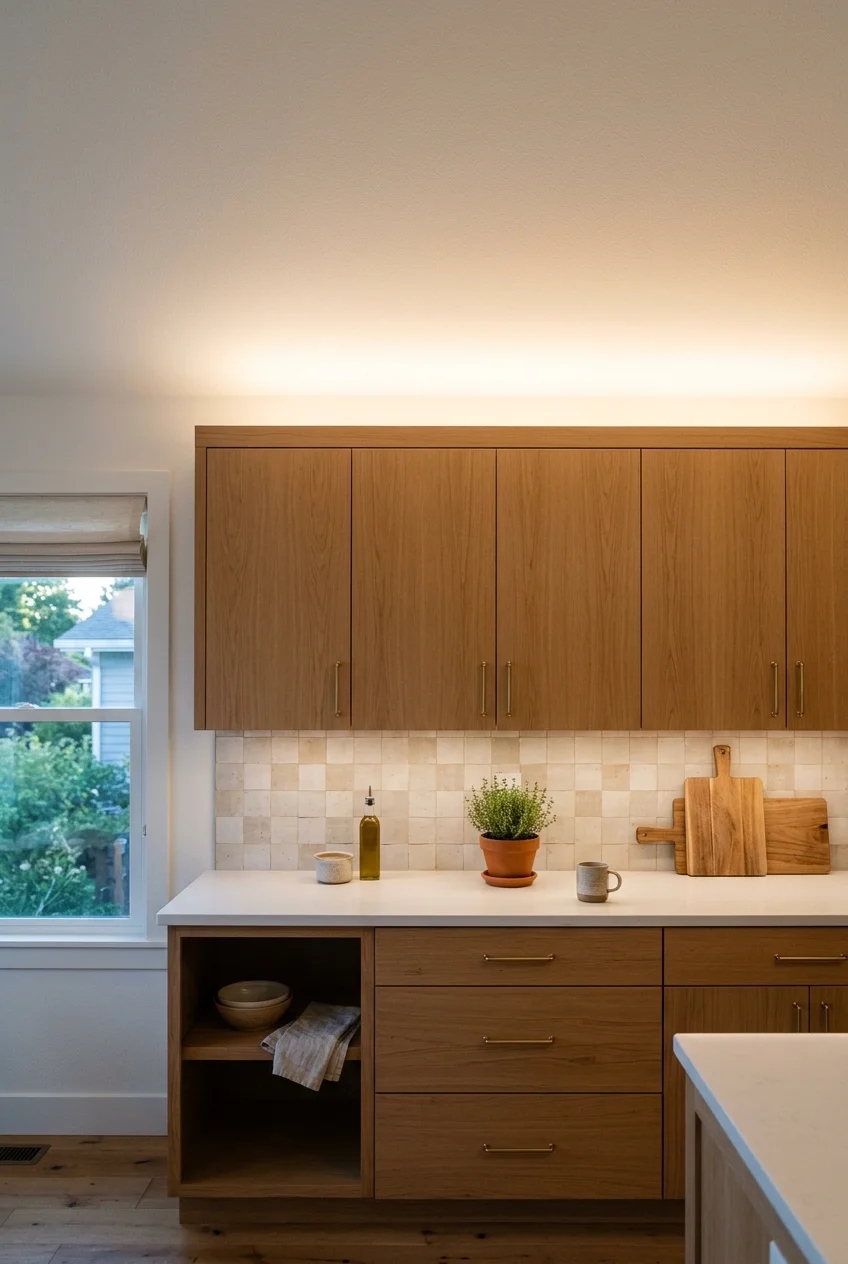
Where cabinets stop below the ceiling, concealed uplight can soften the gap and lift a shadowy room. It works best on a reasonably clean ceiling plane.
Keep the source far enough back that it disappears from normal view. Uneven cabinet heights or visible wiring can make this treatment look accidental.
39. Float the Island With a Recessed Base Glow
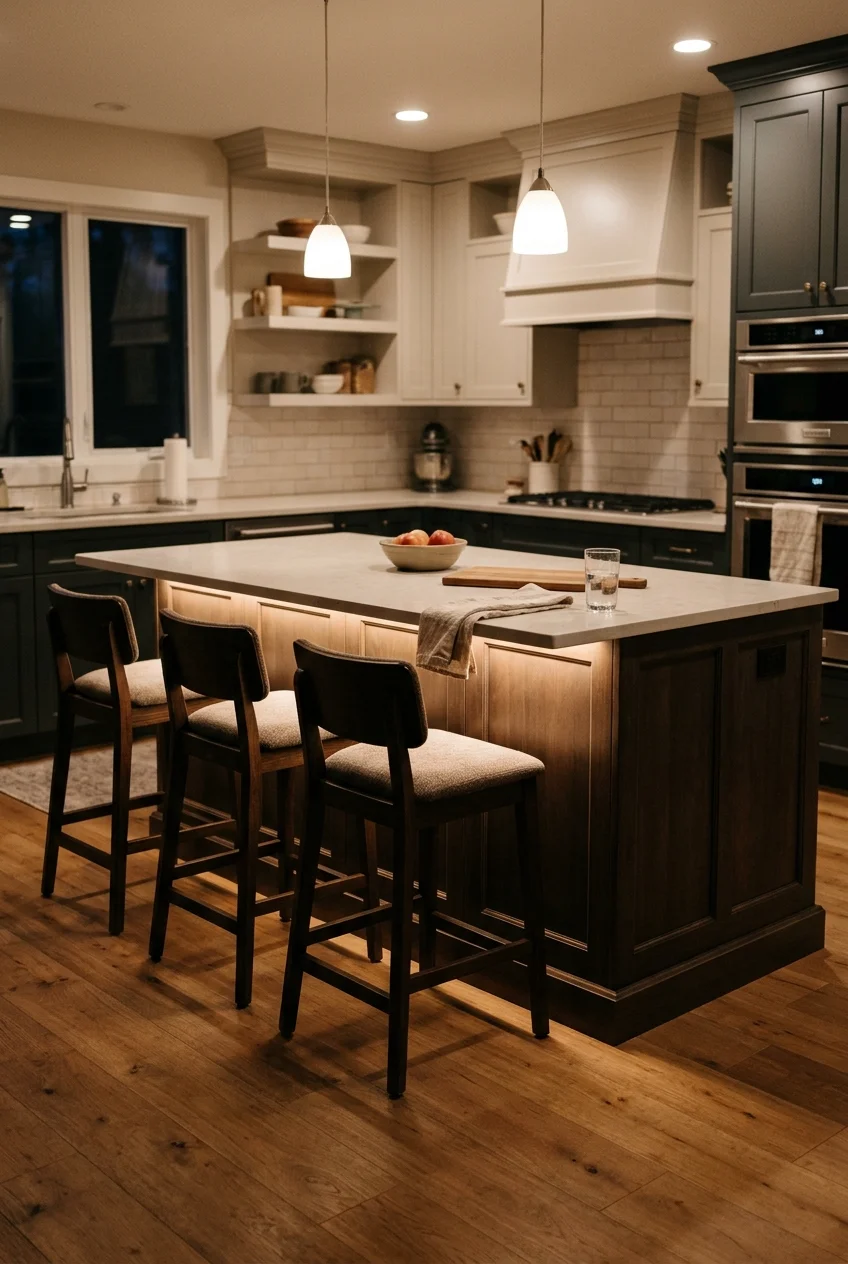
A narrow light recessed beneath an island overhang can lighten a heavy base and add evening atmosphere. Keep the visible effect subtle and continuous.
Protect the source from shoes, cleaning tools, and direct sight. Avoid placing bright light where it exaggerates crumbs or creates distracting floor reflections.
40. Highlight One Artwork or Display Niche
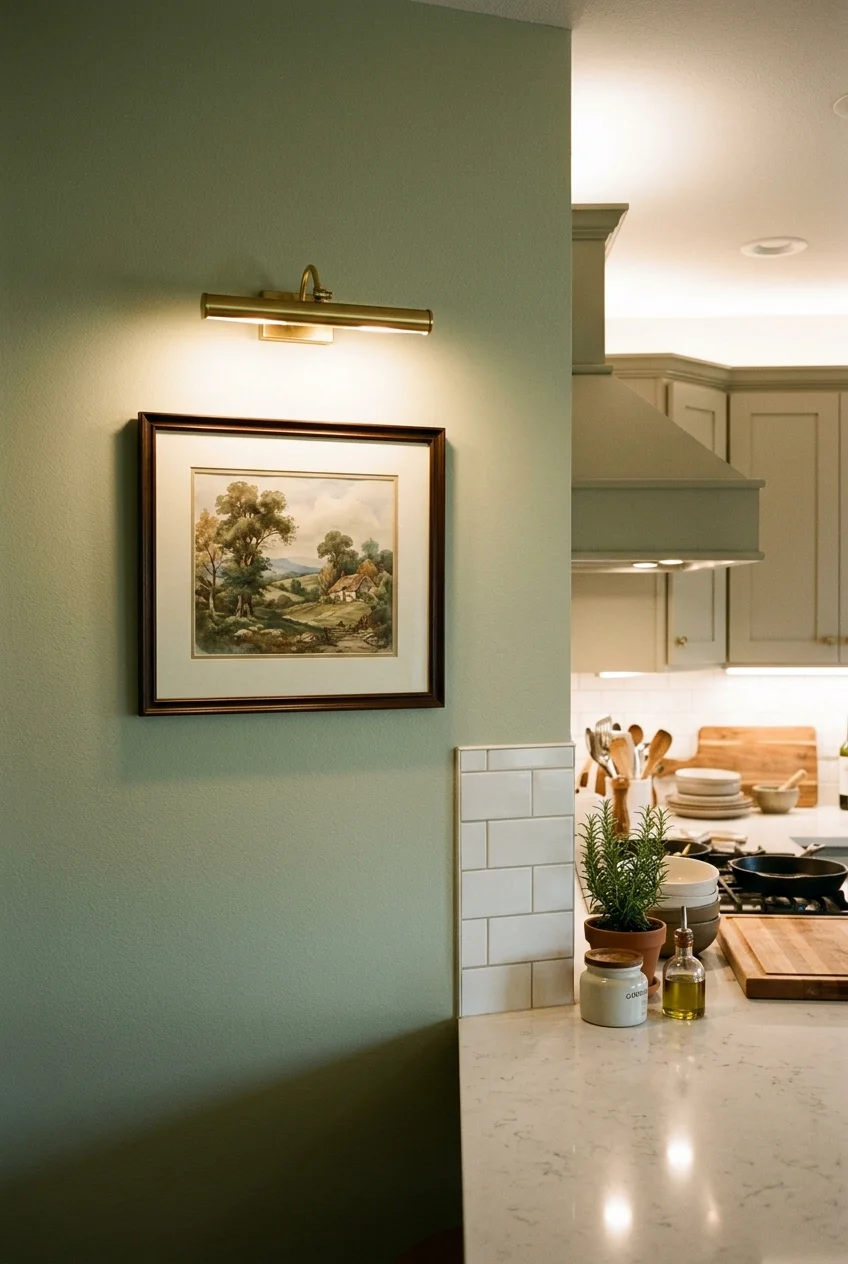
A small picture light or aimed spot can give a kitchen wall a finished focal point. Choose artwork that tolerates the room’s heat and moisture conditions.
Keep the accent dimmer than working surfaces so it supports the room instead of competing. One deliberate highlight often looks stronger than several tiny spots.
Adapt Lighting to Small, Narrow, and Rental Kitchens
Limited space makes glare, cord routes, and fixture depth more noticeable. Favor broad coverage, reversible upgrades, and pieces that do not steal working clearance.
41. Create One Continuous Line in a Galley
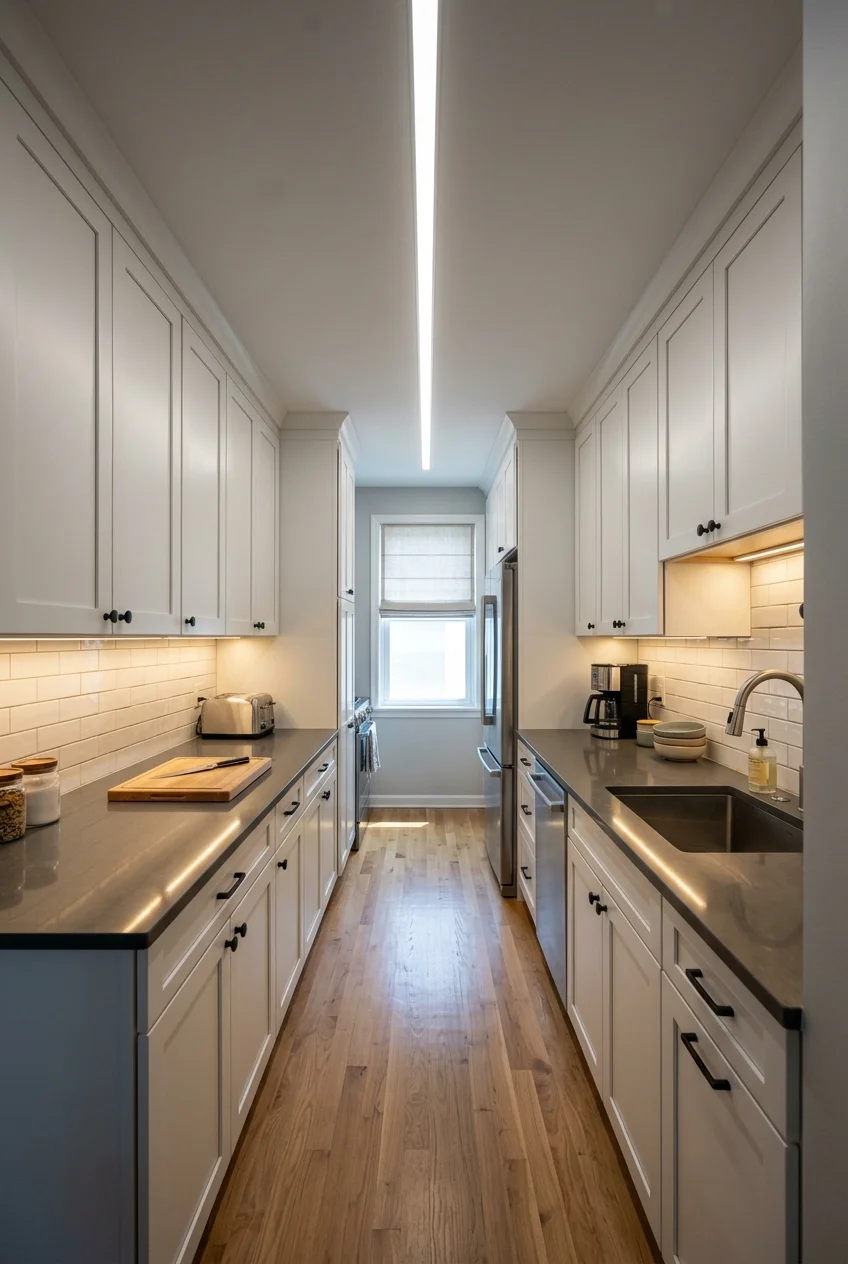
A galley looks calmer when ceiling or track lighting follows its long axis. Add counter light on both sides so your body does not create alternating shadows.
If crowded counters are also blocking light, these kitchen storage ideas offer ways to move useful items upward or inside cabinets without narrowing the aisle.
Keep decorative fixtures shallow in a true galley. Hanging shades can interrupt the main sightline and make a narrow ceiling feel busier than necessary.
42. Use an Adjustable Ceiling Rail in a One-Wall Kitchen
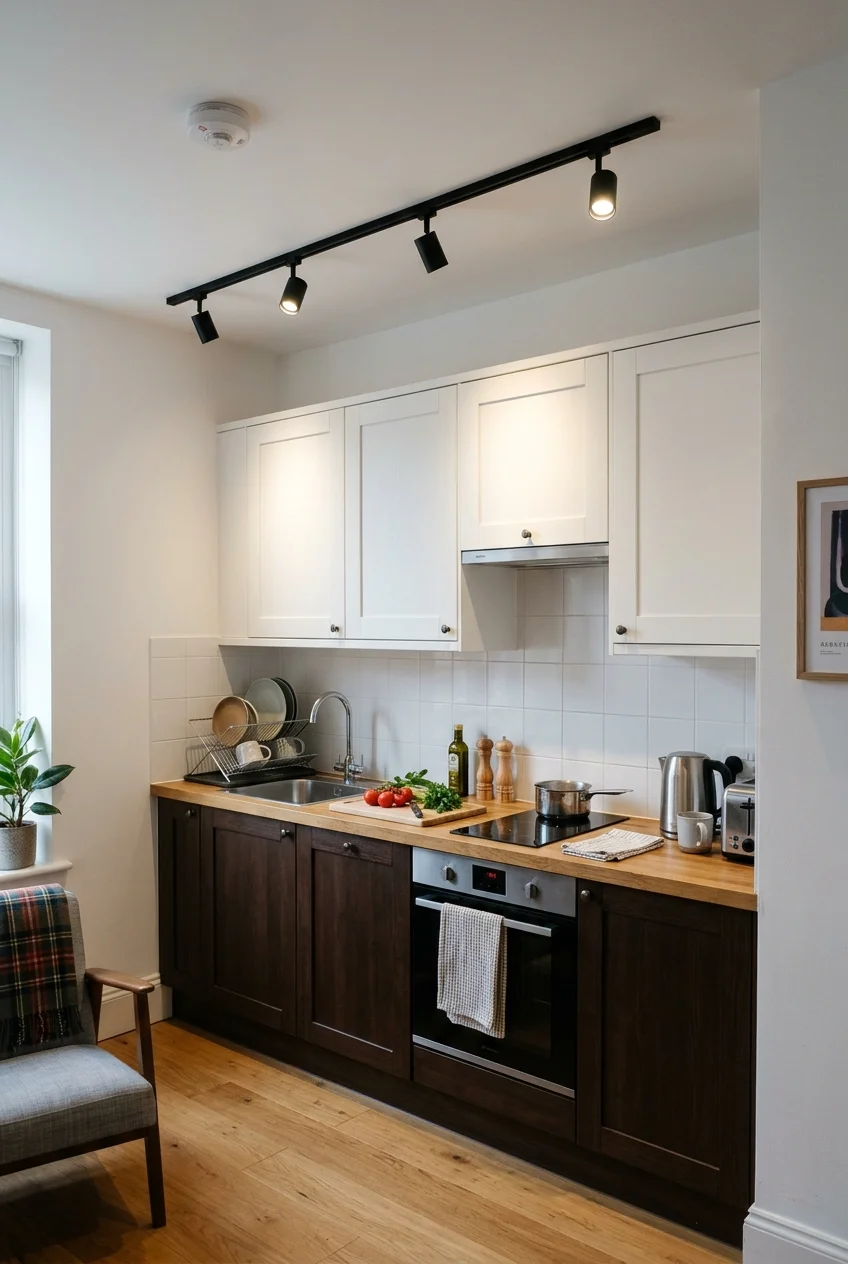
One straight rail can aim light at the sink, prep counter, and open shelf without filling a small ceiling with separate fixtures.
Align the rail with the cabinet run and select compact heads. The orderly line makes a studio kitchen read as one intentional zone from the living area.
43. Pair a Flush Mount With Under-Cabinet Light
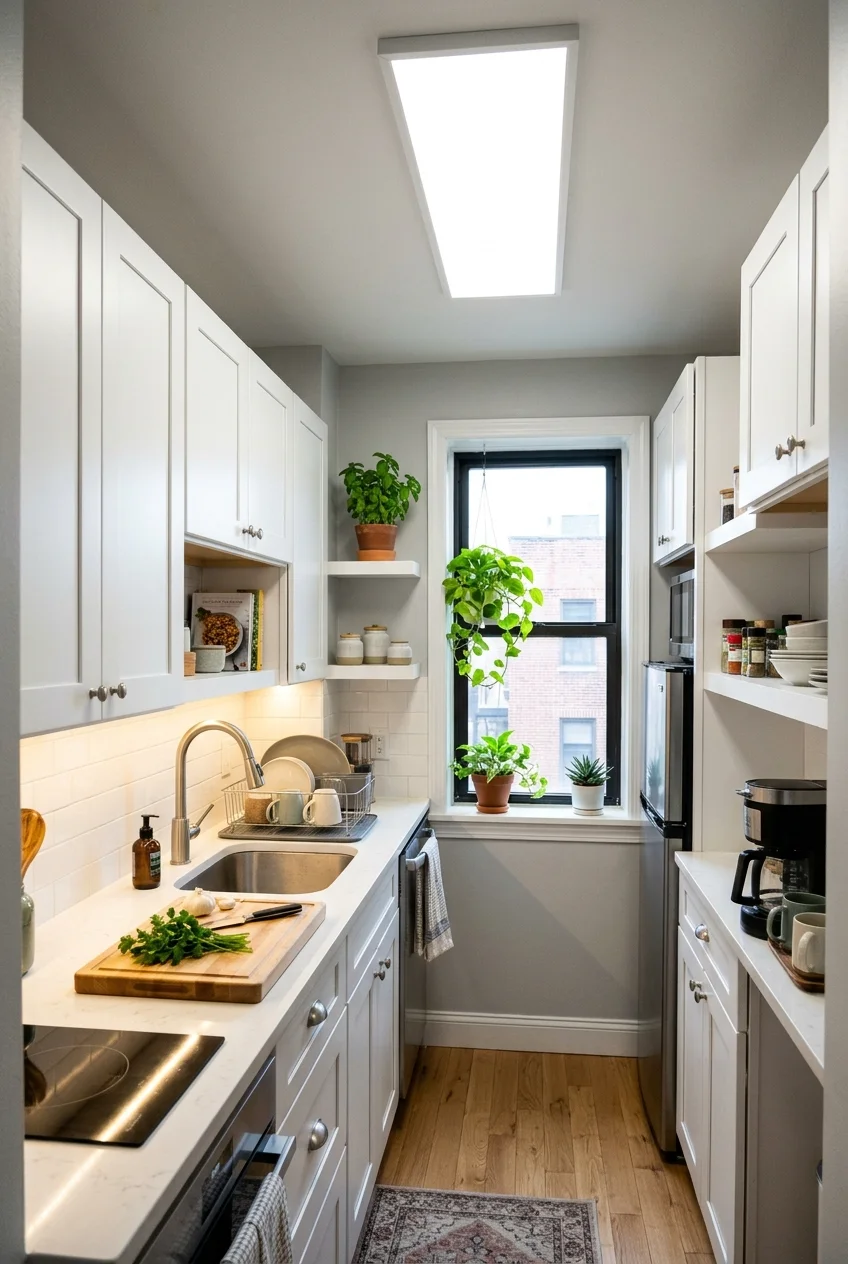
In a tiny kitchen, one broad flush mount plus targeted counter lighting may outperform a crowded ceiling. The combination preserves height and covers work.
Choose the ceiling fixture for comfortable ambient spread, then size the lower layer to the active counter. This keeps the plan simple without accepting shadows.
44. Hang a Plug-In Pendant Without Rewiring
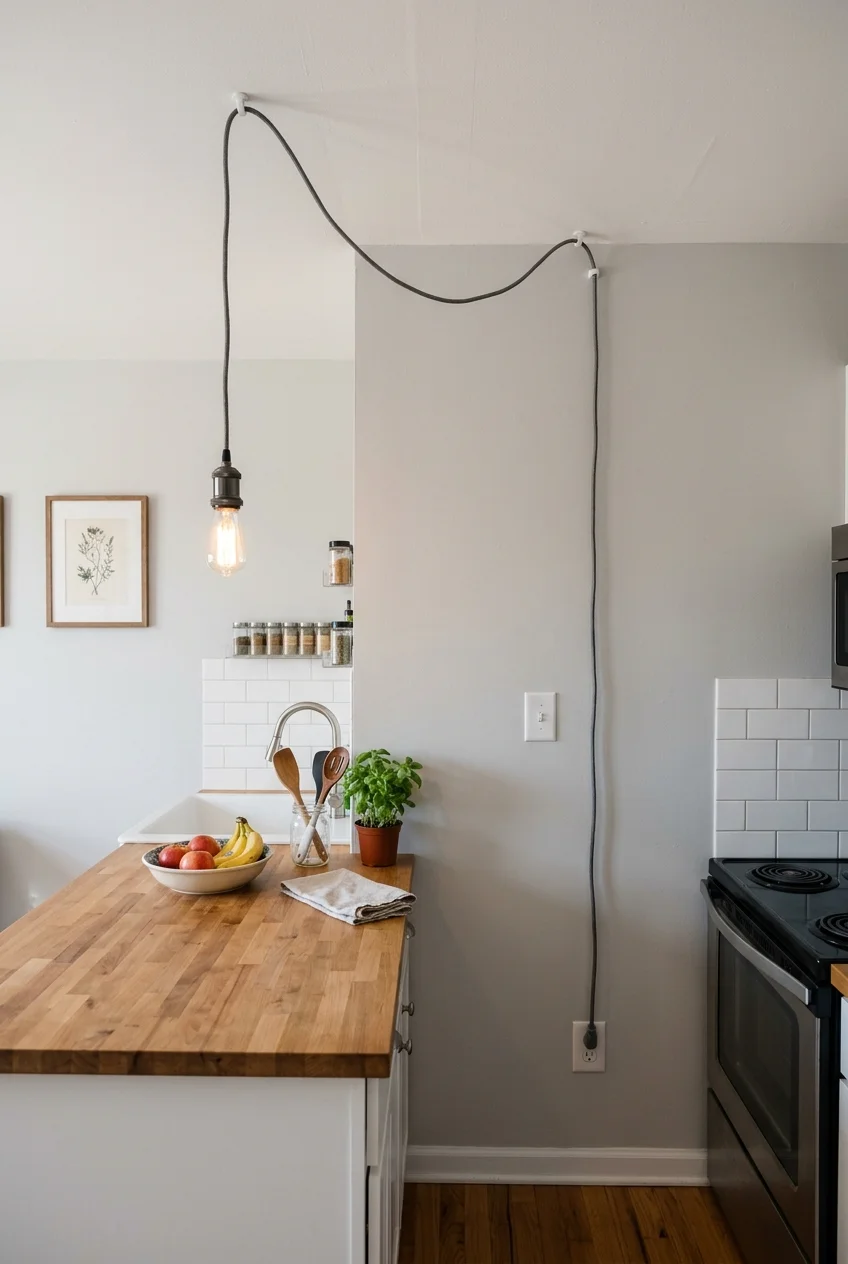
A swagged plug-in pendant can define a rental table or peninsula when permanent ceiling work is unavailable. Route the cord deliberately instead of hiding it badly.
Use hardware rated for the fixture, keep the cord away from heat and water, and confirm lease rules before mounting any ceiling hooks.
Choose a plug location that does not cross a doorway or active counter. An attractive shade cannot compensate for a cord stretched through daily circulation.
Setup note Mock up the entire cord path with painter’s tape. A neat vertical drop and controlled ceiling run look more intentional than a loose diagonal cable.
45. Place a Cordless Lamp in the Breakfast Nook
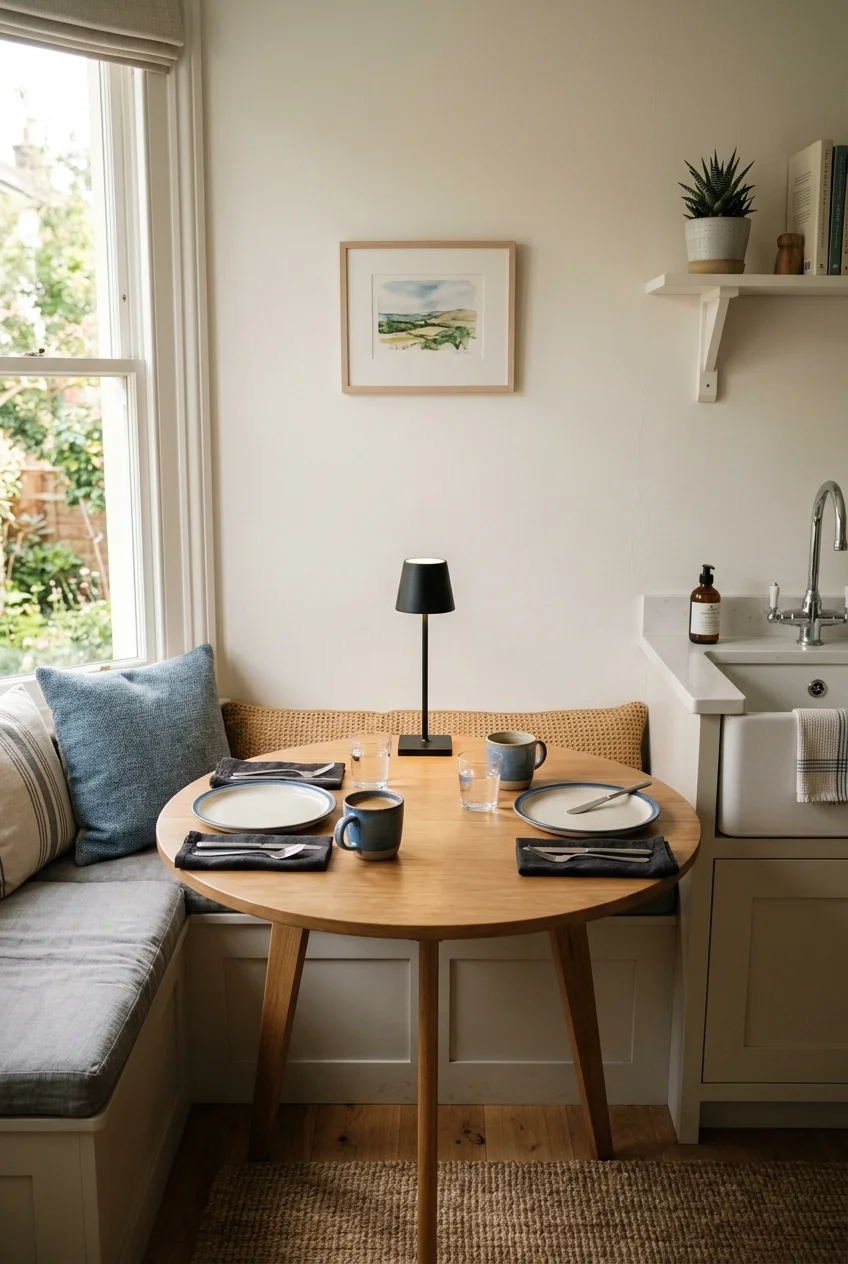
A rechargeable table lamp gives a breakfast nook softer evening light without adding wiring. Keep it away from the main prep surface and potential spills.
This two-pack cordless touch lamp set (paid link) offers three selectable color settings and stepless dimming, according to the current Amazon listing. Check the base size before buying.
Choose one lamp scale that leaves room for plates and elbows. Recharge it away from wet areas, and follow the supplied battery and charging instructions.
Fine-Tune Color, Scenes, and Dining Light
Controls and lamp quality determine whether attractive fixtures remain pleasant every day. Finish with choices that support cooking, cleanup, conversation, and late-night use.
46. Use Dim-to-Warm Light for Evening Transitions
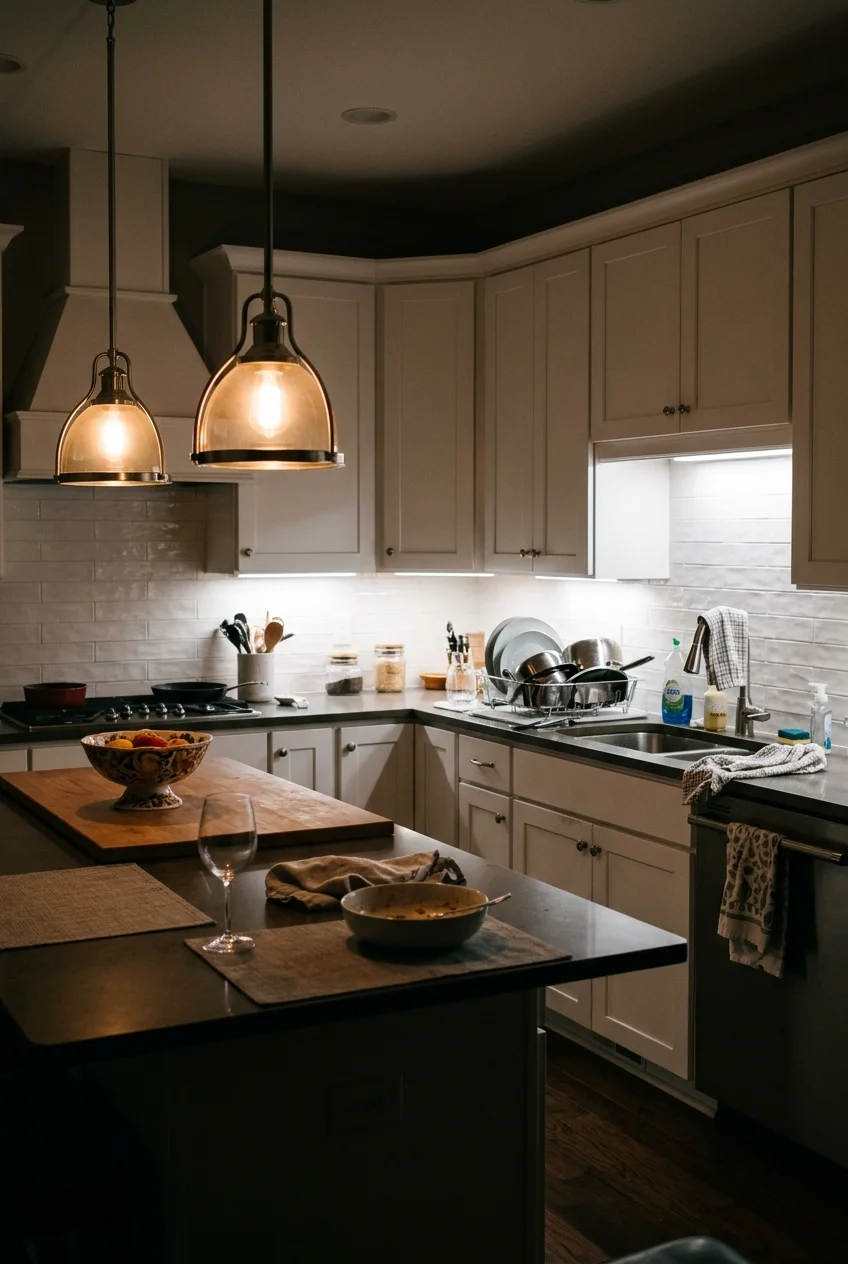
Dim-to-warm sources shift toward a warmer appearance as brightness falls, creating a gentler evening setting without changing every fixture in the room.
Use the effect where relaxation matters, such as pendants or dining lights. Keep dependable task illumination available separately for cleanup and food preparation.
47. Try Tunable White for Changing Tasks
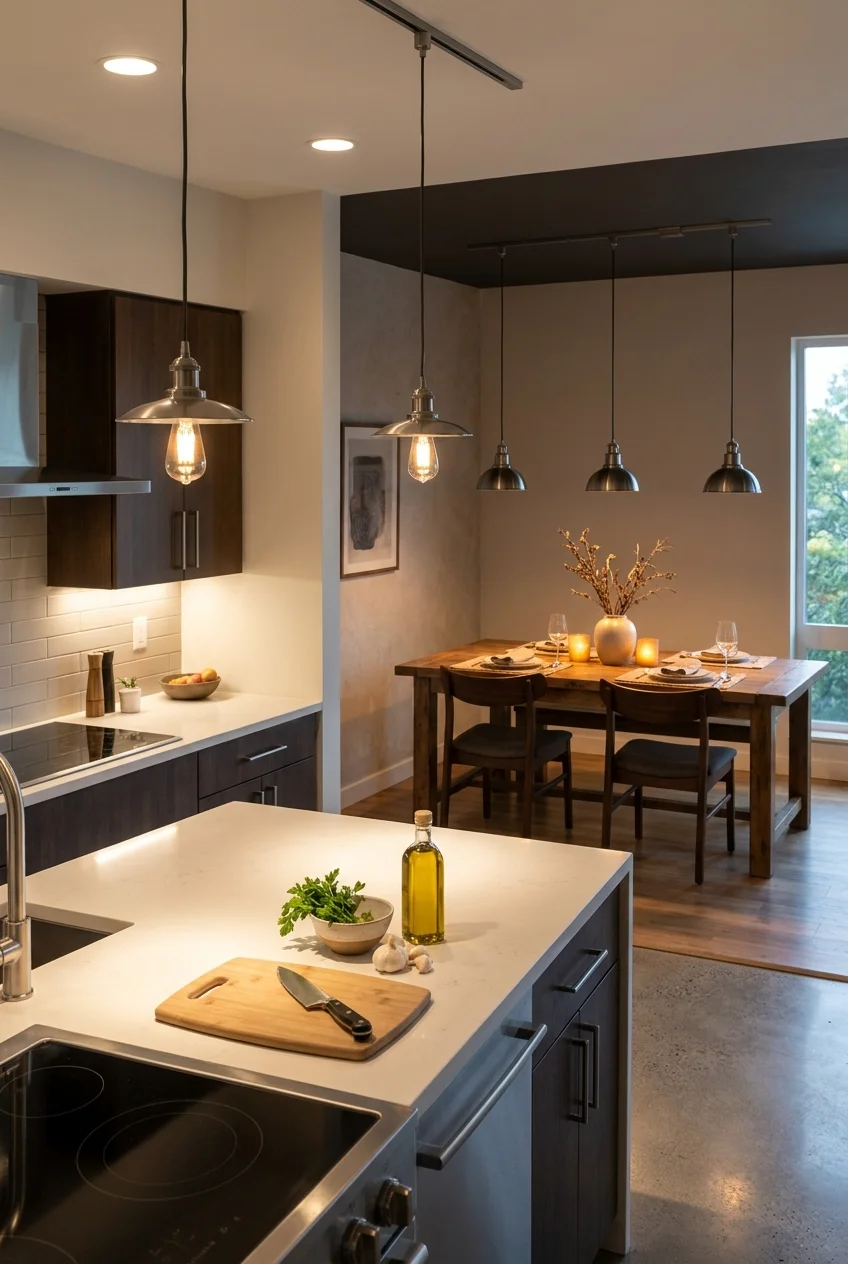
Tunable-white fixtures can provide clearer light for detailed work and warmer light for meals. Use the range intentionally instead of constantly chasing novelty.
Save a few practical settings so the household can repeat them easily. A complicated control system is less useful than one everyone understands.
48. Prioritize Color Rendering Where Food Is Prepared
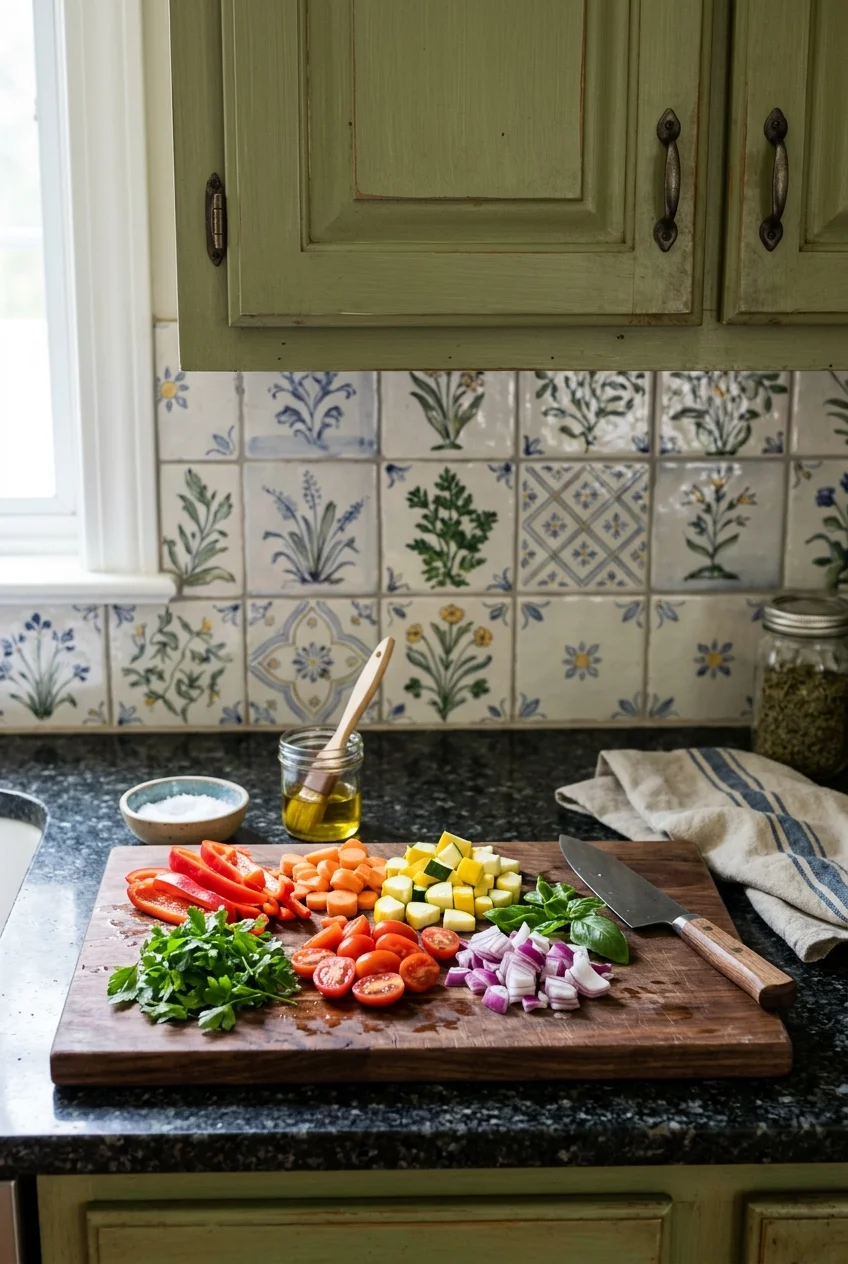
Light that renders color well helps ingredients, cabinet paint, wood, and tile appear more natural. Compare samples over the actual countertop before standardizing lamps.
Do not rely on color temperature alone, because two lamps with the same stated appearance can render saturated colors differently. Manufacturer specifications offer better guidance.
49. Save Simple Smart-Lighting Scenes
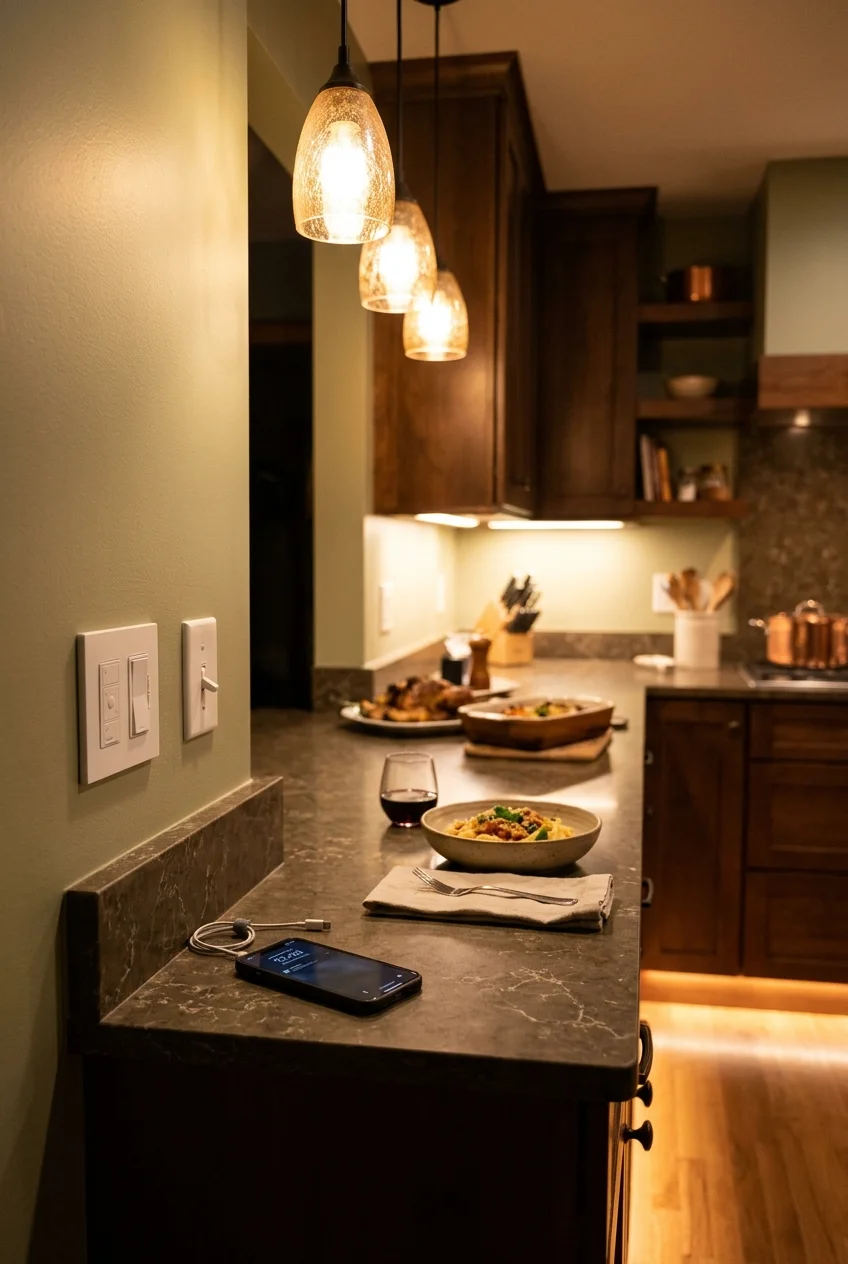
Useful scenes combine layers for repeatable moments: bright preparation, cleanup, dinner, and nighttime navigation. Keep manual wall control available for ordinary use.
Name scenes by activity rather than mood and limit the list. Reliable everyday access matters more than dozens of subtle variations nobody remembers.
Test each scene with everyone who regularly uses the kitchen. A setting that looks calm may still leave the sink or medication drawer too dim.
- Prep: counters and ceiling bright
- Dinner: pendants and nook softened
- Cleanup: sink, range, and counters active
- Night: low navigation layer only
50. Give the Kitchen Table Its Own Fixture
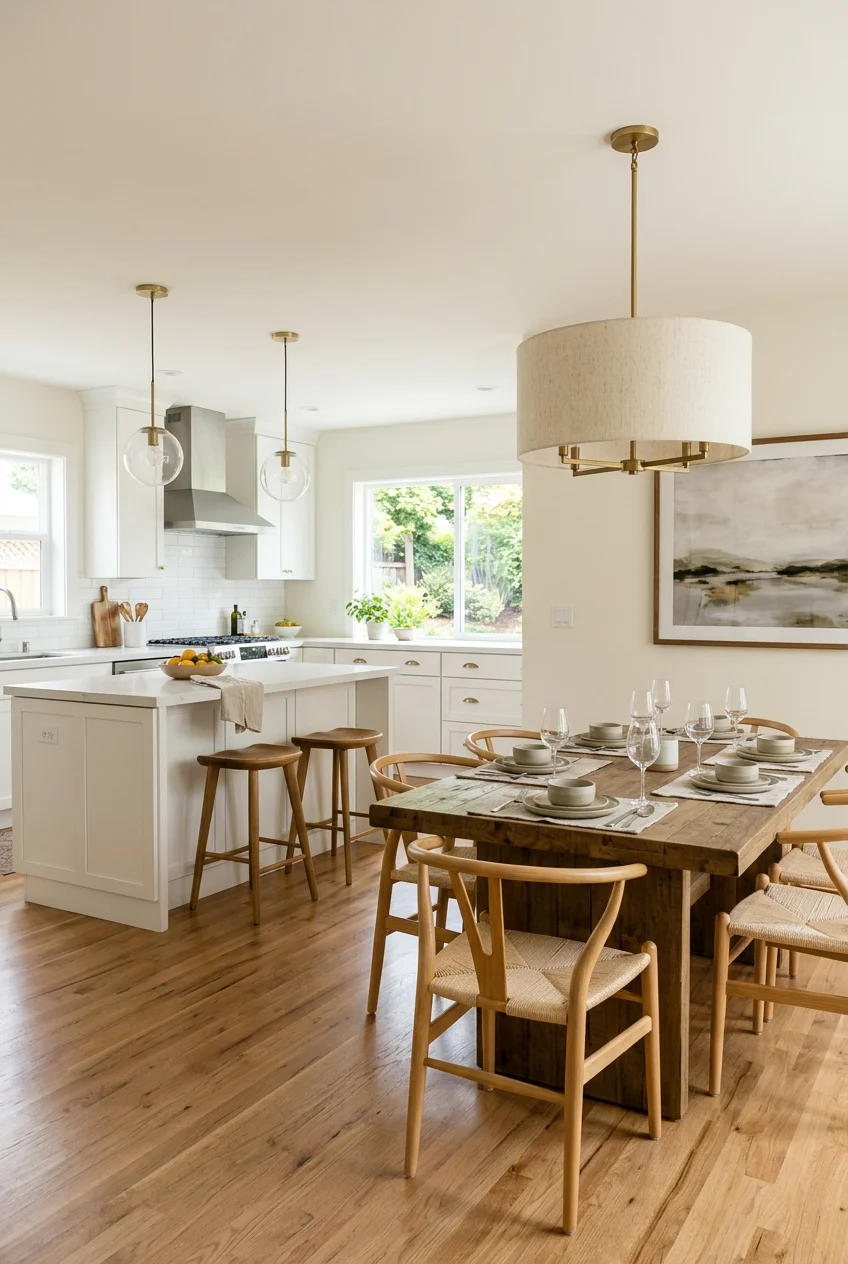
A chandelier or pendant over the kitchen table creates a second center of gravity beside the island. It tells dining and preparation zones apart.
Choose a shade that lights faces and the tabletop without exposing a harsh lamp. Center it on the table, then confirm the chair positions and walking route.
When both island and table fixtures are visible together, let one lead and the other support. Shared finish, shape, or material can connect them without matching.
Frequently Asked Questions
What lighting layers does a kitchen usually need?
Most kitchens benefit from ambient coverage, focused task light at work surfaces, and selective accent light. Separate controls let each layer serve its purpose.
Should kitchen pendants be centered on the island or the room?
Usually, align pendants with the usable island surface and its activities. Room-centered placement can look wrong when the island sits intentionally off the ceiling centerline.
What color temperature works best in a kitchen?
There is no universal number. Choose a coordinated white-light family that flatters your finishes, supports tasks, and remains comfortable beside adjacent rooms after dark.
Can renters improve kitchen lighting without permanent wiring?
Yes. Plug-in under-cabinet bars, swag pendants, rechargeable lamps, and replaceable lamps can help, provided cords stay safe and mounting follows lease and product requirements.