50 Corner Dining Nook Ideas

This post may contain affiliate links: full affiliate disclosure.
Turning an empty corner into a dining spot maximizes every square inch of the home.
These setups create a dedicated place for meals without crowding the kitchen floor or blocking traffic.
1. Built-In Corner Banquette
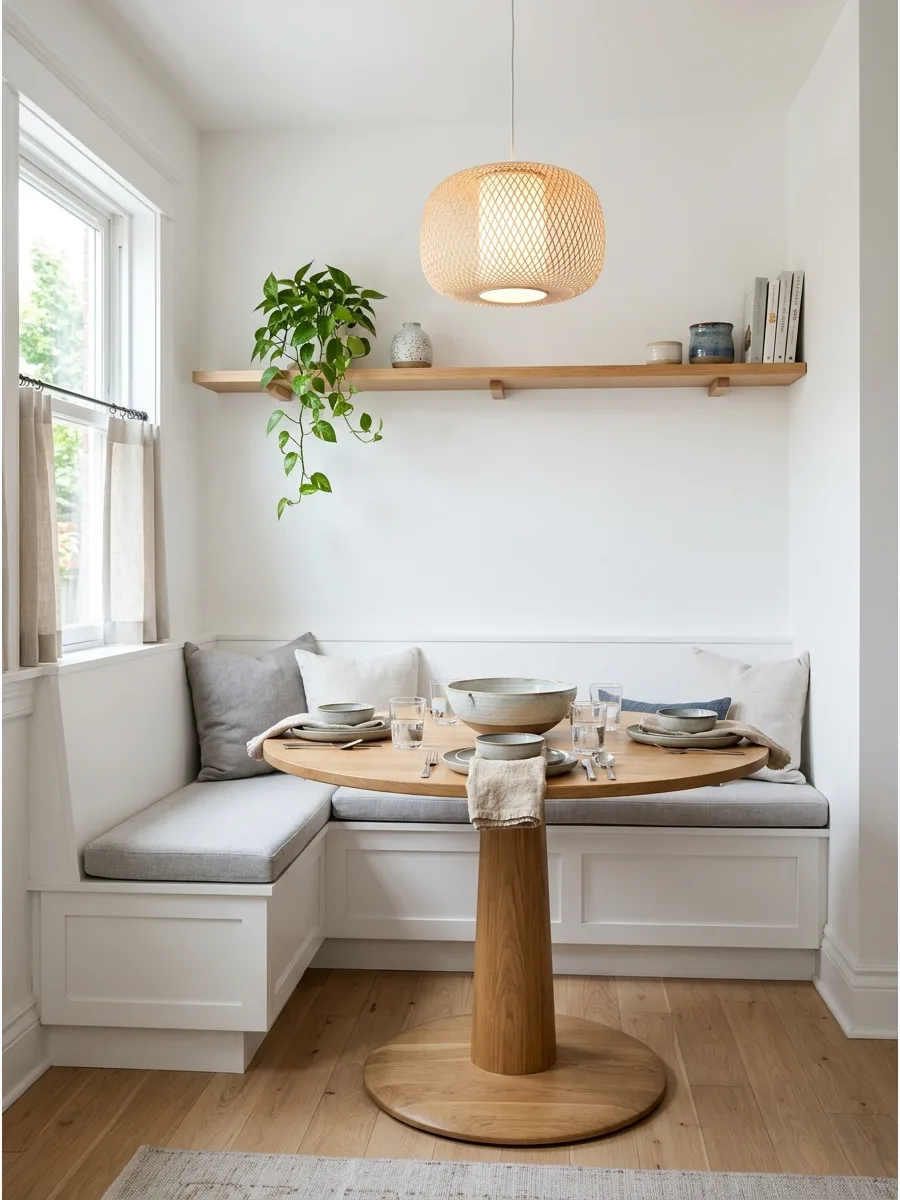
A custom bench makes the corner feel permanent and high-end while saving significant floor space. It sits flush against the drywall, eliminating the need for the clearance space regular chairs require.
Measure the wall length carefully to ensure the bench doesn’t block any electrical outlets or heat vents. A built-in design often works better than loose chairs because it creates a clean, architectural look that defines the dining zone.
- Budget $500-$1,500 for a custom-built solution.
- Mount the frame directly to wall studs for maximum weight support.
- Use 3-inch thick high-density foam for the most comfortable seating.
Quick win: Paint the bench the same color as the baseboards for a seamless, professional look.
2. L-Shaped Dining Nook
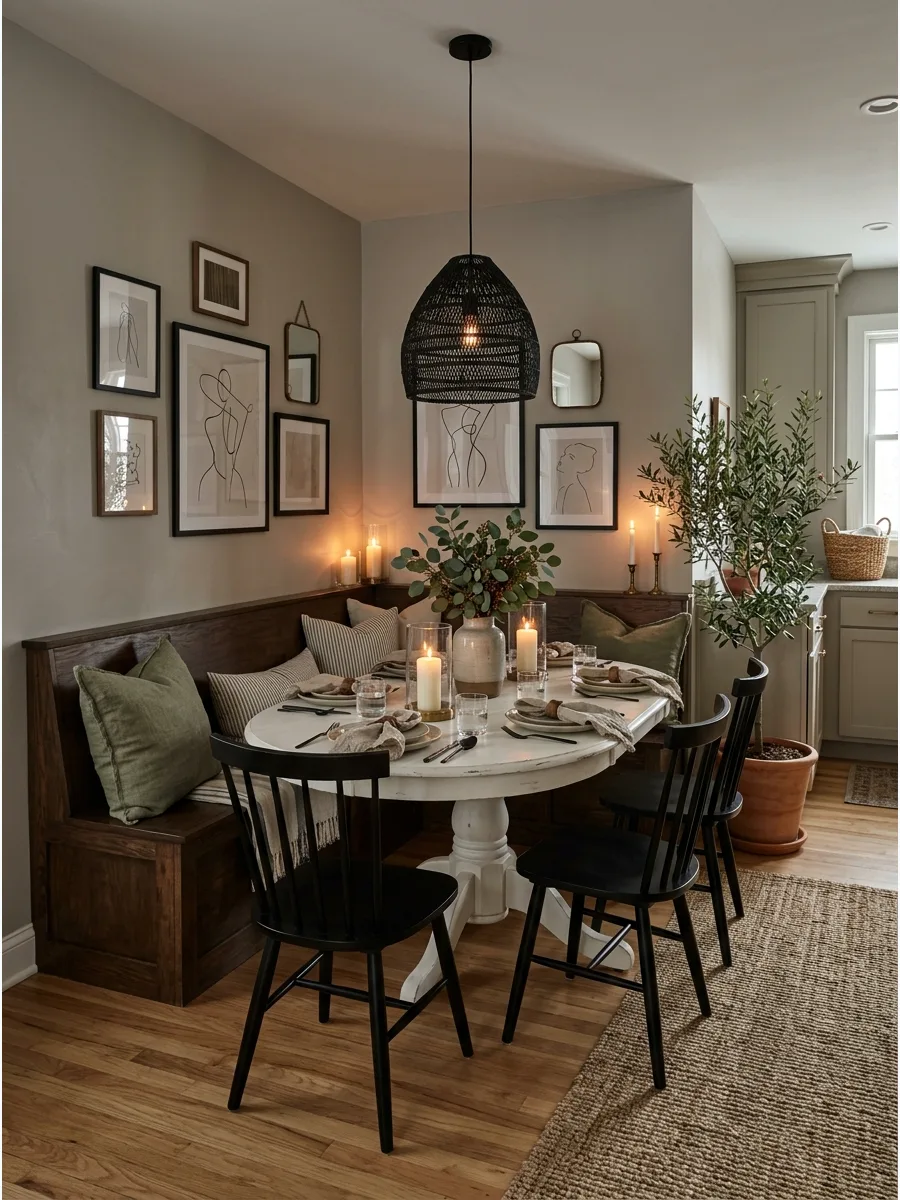
This classic layout uses a corner bench to wrap around a central table, creating a natural conversation circle. It feels more intimate than a standard rectangular table and fits more people in a smaller footprint.
Pair an L-shaped bench with a round or oval table to make it easier for people to slide into the middle seats. Pedestal bases are the best choice here so no one bangs their knees on table legs.
- Budget $300-$800 for pre-made freestanding sets.
- Center the table at the exact vertex of the corner for balance.
- Swap one chair for a backless stool to keep the walkway open.
Most people skip this: Leave exactly 18 inches of space between the table edge and the bench back for comfortable seating.
3. Corner Bench With Storage
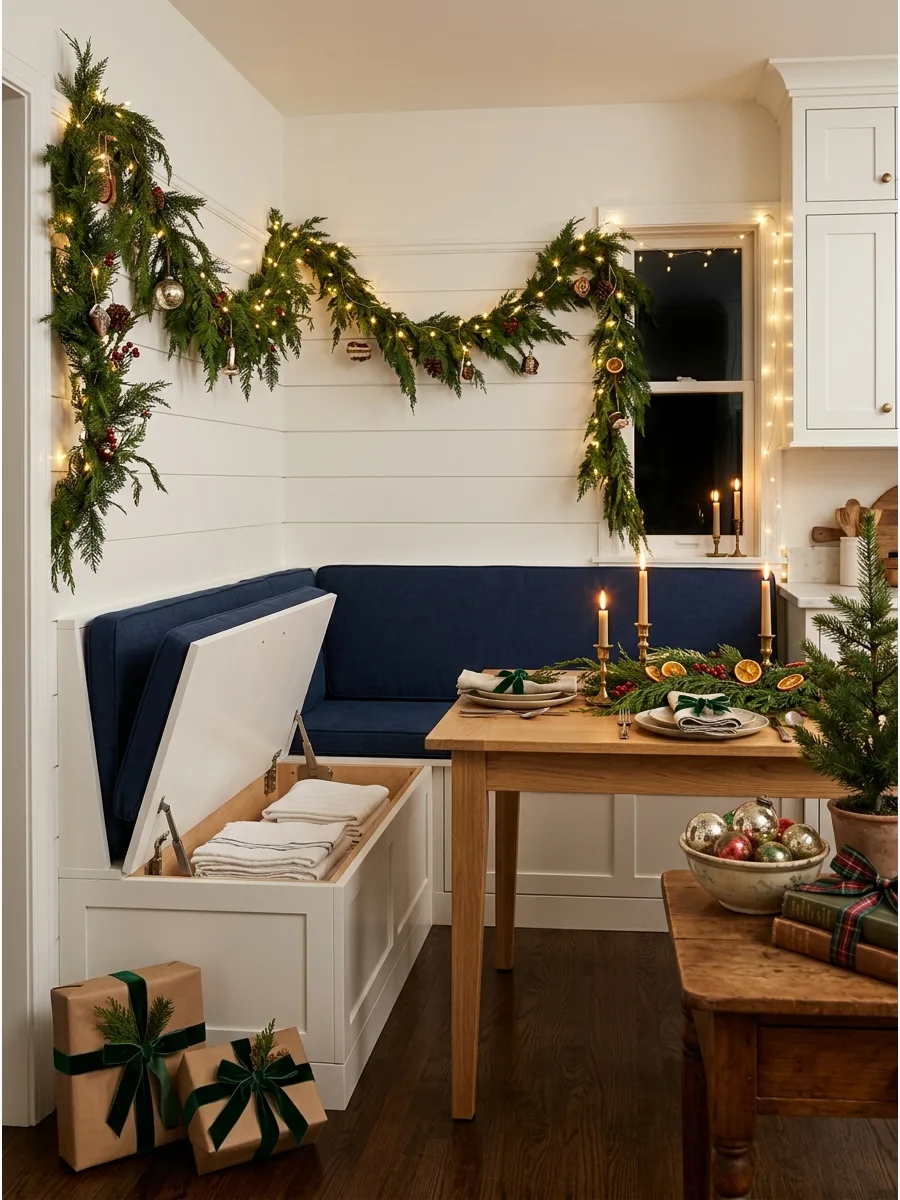
Small homes benefit from furniture that does double duty, and a bench is the perfect place to hide bulky items. Using the hollow space inside for holiday platters or extra linens keeps the kitchen organized.
Install a piano hinge on the top seat so the lid opens easily for quick access to seasonal kitchen gear. It effectively turns a simple seat into a secondary pantry area.
- Budget $50-$100 for heavy-duty lid hinge hardware.
- Seal the interior wood to prevent fabric snags on stored linens.
- Add a small finger-pull hole to avoid heavy lids slamming on fingers.
Best shortcut: Use clear plastic bins inside the bench to keep stored items organized and dust-free.
4. Dining Nook With Drawers
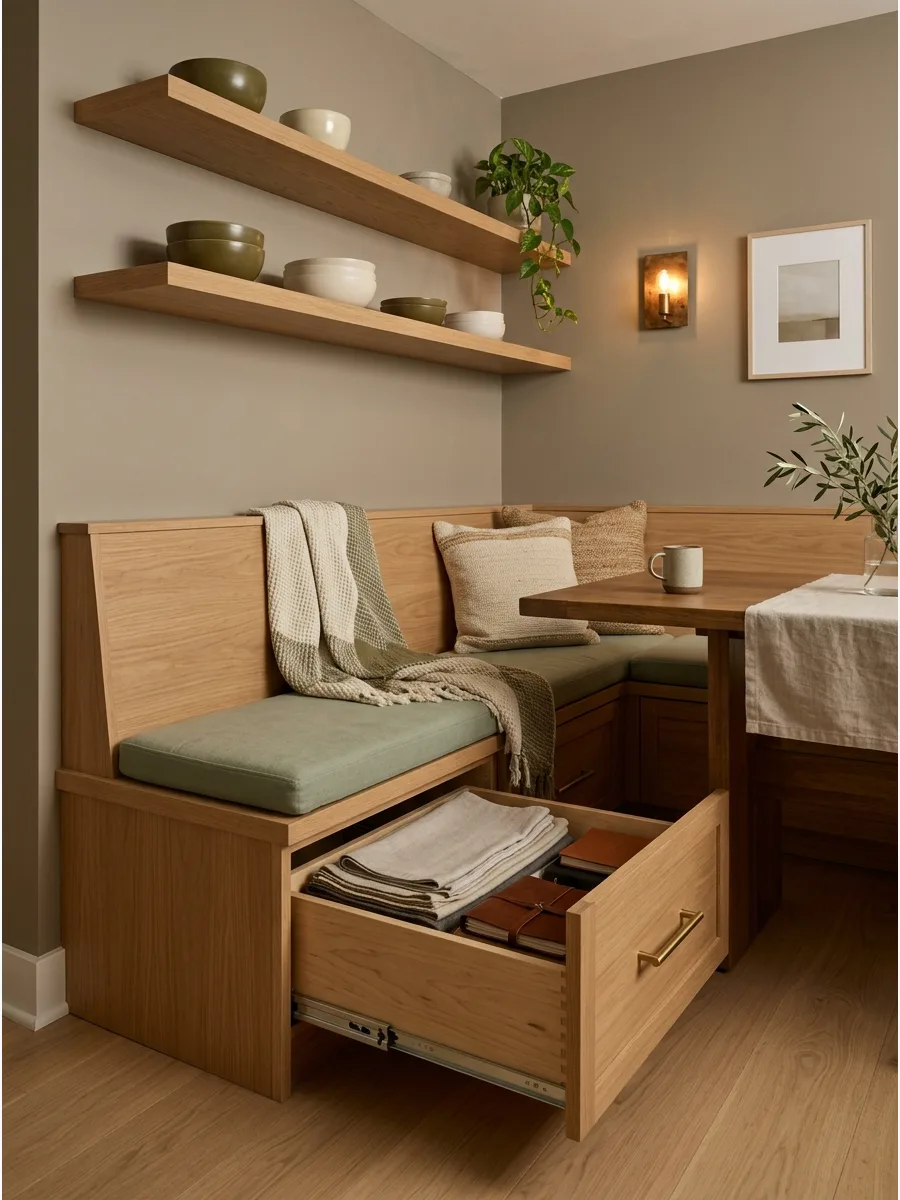
Lift-top benches can be inconvenient if you have to move cushions every time you need an item. Pull-out drawers on the ends of the bench offer much faster access for daily supplies like placemats or homework kits.
Choose heavy-duty drawer slides that can handle the weight of heavy cookware or stacks of books. This setup feels more like high-quality cabinetry than a simple DIY project.
- Budget $200 for high-quality drawer slide kits.
- Use soft-close hardware to prevent noise in a quiet kitchen.
- Match the drawer fronts to your existing kitchen cabinet style.
Quick win: Label the inside of the drawers so family members know exactly where to put craft supplies.
5. Window Corner Dining Nook
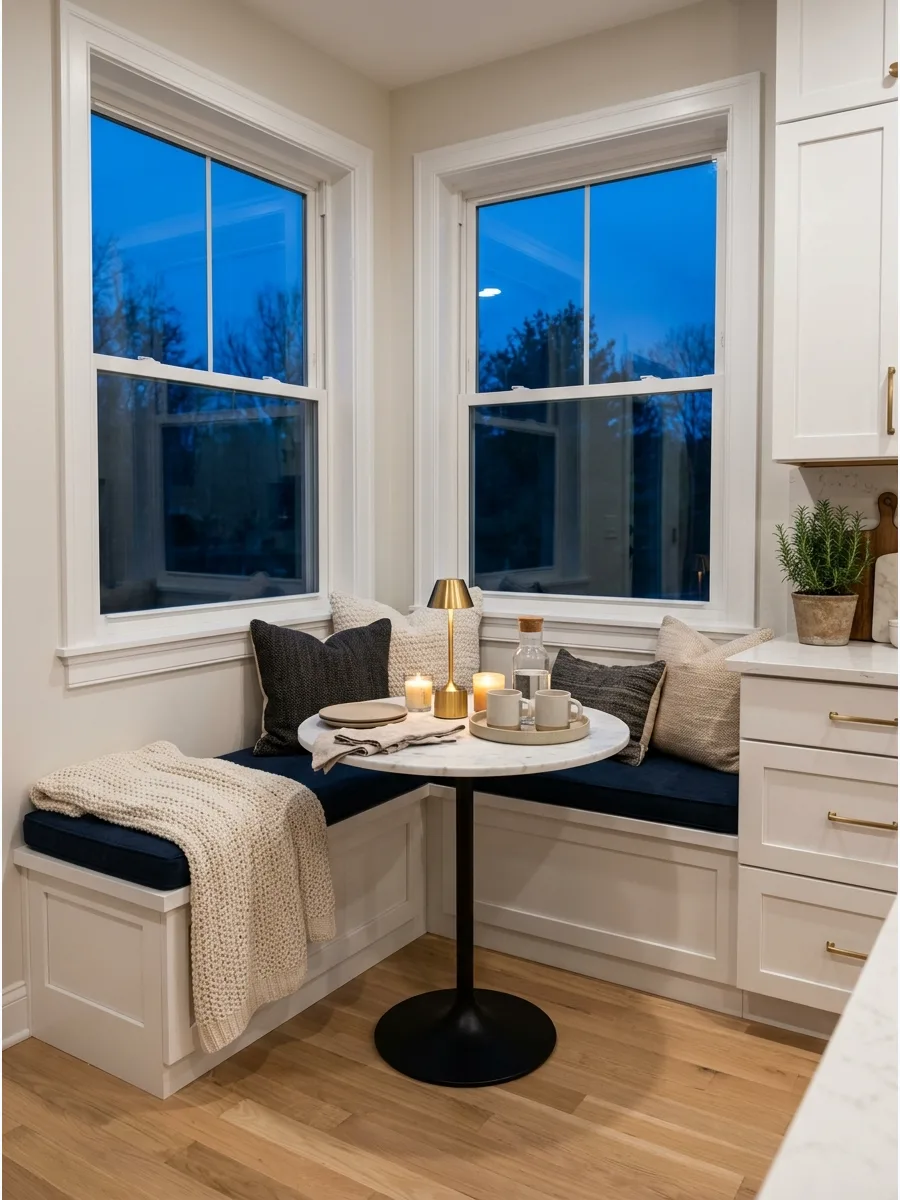
Placing a table near windows makes a small kitchen feel much larger and more open. The view outside provides a sense of space that a solid wall simply cannot provide.
Keep the table height slightly below the window sill to avoid blocking the glass and the natural light. It is the most effective way to create a bright morning coffee ritual spot.
- Position the bench 2 inches away from the wall to allow for airflow.
- Use UV-resistant fabric for cushions to prevent sun fading over time.
- Match the table finish to the window trim for a coordinated look.
Most people skip this: Check for drafts near the window before finalizing the seating to ensure comfort in winter.
6. Bay Window Corner Nook
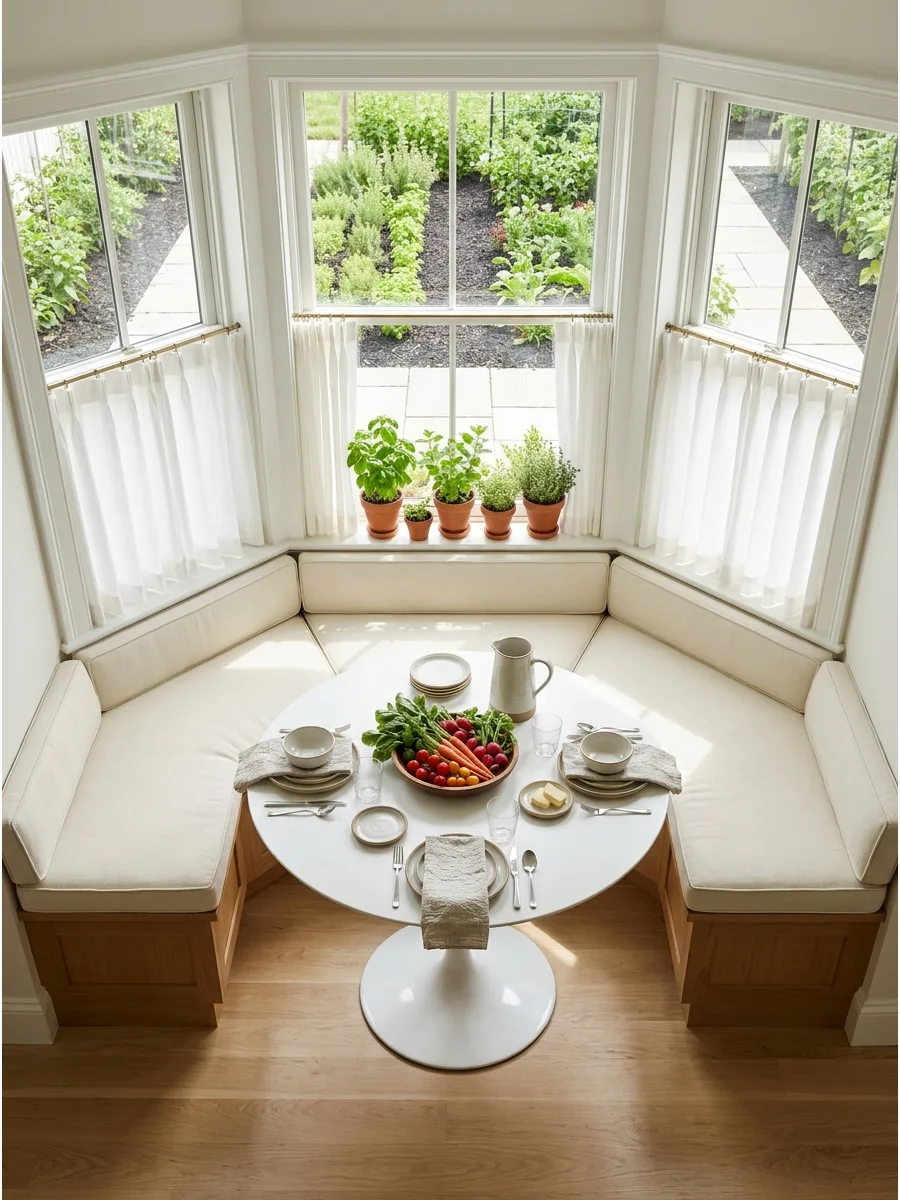
A bay window provides a natural architectural hug for a dining table and seating. Custom-cut cushions turn this awkward bump-out into the most popular seat in the entire house.
Follow the angles of the window frame when building the bench base to maximize the floor area. This layout works beautifully with café curtains for a touch of classic privacy.
- Budget $400 for custom-cut upholstery foam and fabric.
- Use a cardboard template to get the bench shape exactly right.
- Install floor-length curtains on the outer sides only to frame the view.
Best shortcut: Buy a curved outdoor sectional piece if you want the look without building a custom indoor bench.
7. Wall-to-Wall Bench Nook
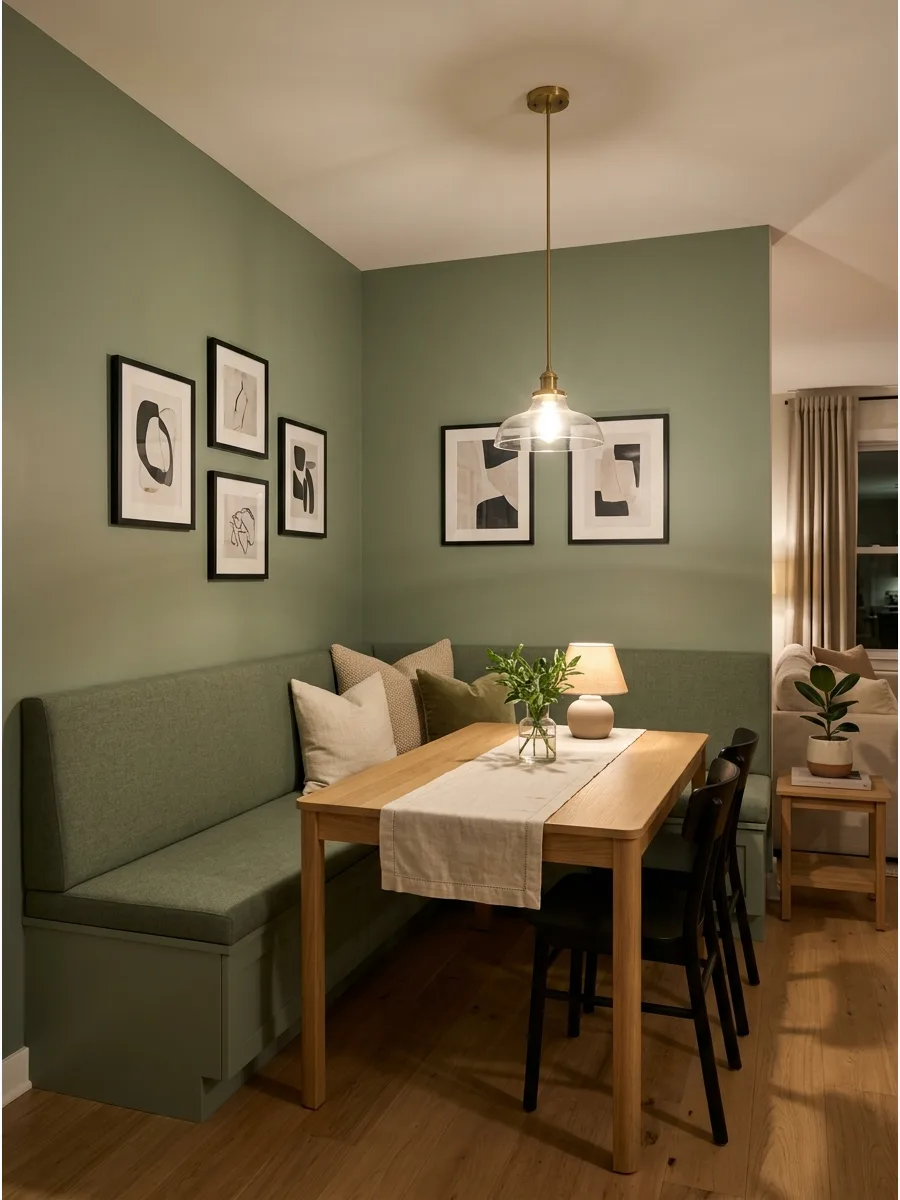
Running a bench all the way from one corner to the next creates a clean, architectural line that feels intentional. This look minimizes visual clutter because there are no gaps or awkward dead spaces between furniture.
Paint the wall and the bench the same color to create a sophisticated, high-end look that feels like part of the room. It offers the most seating possible for larger families in a small footprint.
- Budget $600 for lumber, trim, and high-quality paint.
- Use a level to ensure the bench is perfectly straight across long spans.
- Add middle supports every 3 feet to ensure the seat is stable.
Quick win: Use a color-drenching technique by painting the bench, wall, and trim the exact same shade.
Home Decor
8. Floating Corner Bench Nook
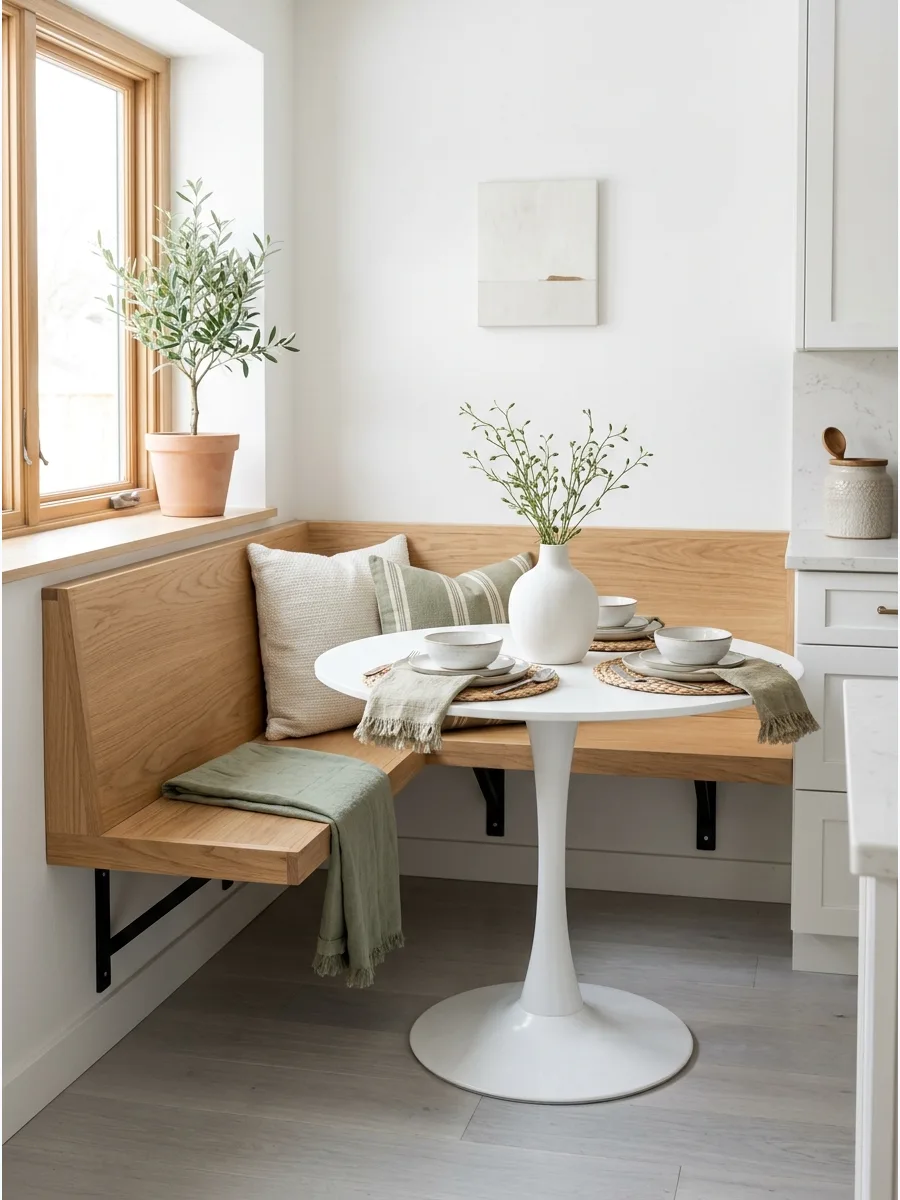
A wall-mounted bench transforms a tight corner into a streamlined dining zone without the visual clutter of traditional chair legs. By securing the frame directly to wall studs, the floor remains completely clear for easy cleaning and a more spacious feel.
Mount the bench at a standard 18-inch height to ensure ergonomic comfort when paired with a typical dining table. Heavy-duty steel brackets provide the necessary support for a minimalist wood or upholstered top. Natural wood finishes generally offer more longevity than fabric in high-traffic kitchen areas.
- Sourcing: Budget $200-$500 for lumber and heavy-duty L-brackets from a local hardware store.
- Setup: Use a stud finder to locate support beams and pre-drill holes to prevent wood splitting.
- Adaptation: Add custom-cut foam cushions with outdoor-rated fabric for a softer seat that resists spills.
Most people skip this: Leave a two-inch gap between the back of the bench and the wall to allow for easy crumb cleanup and better airflow.
9. Tiny Corner Dining Nook
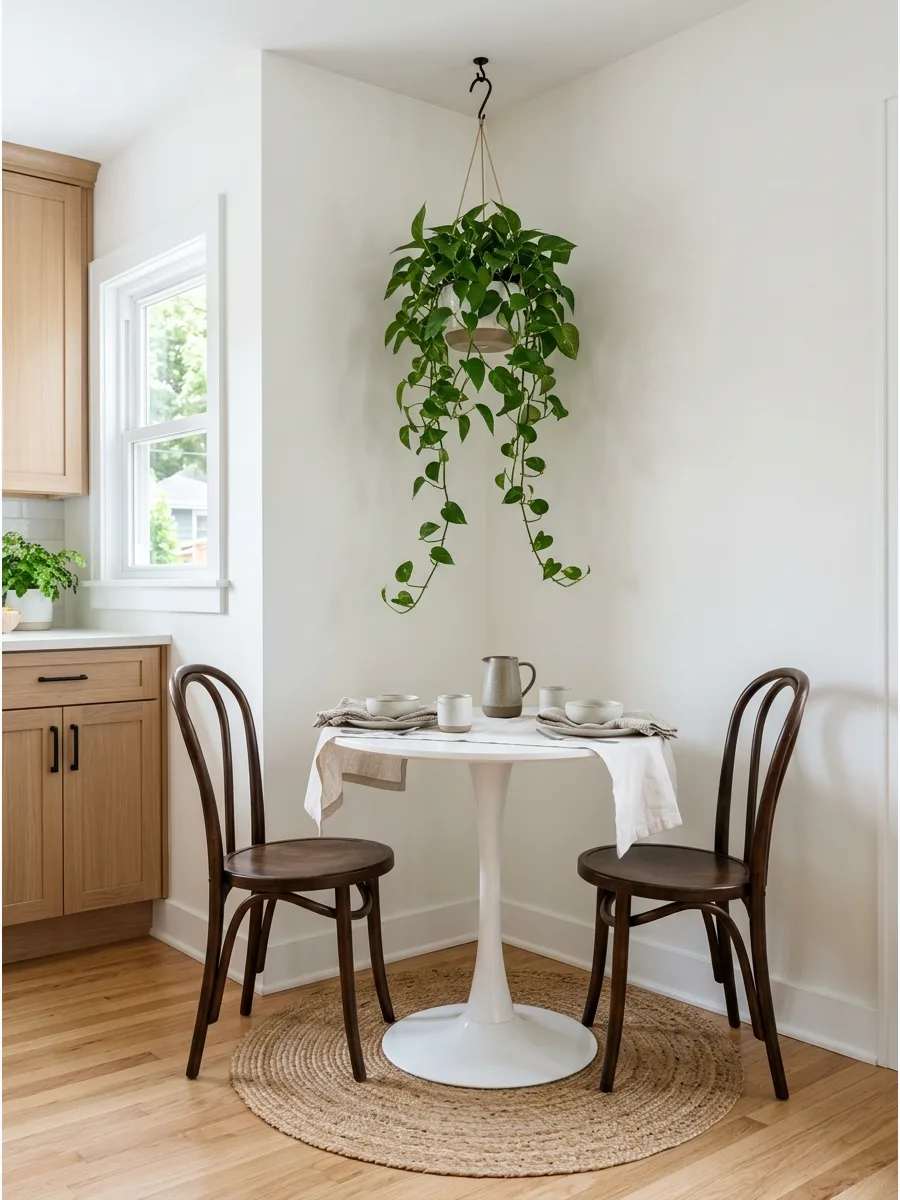
Even the smallest kitchen corner can host a meal if you choose the right furniture scale. A 30-inch round table and two slim chairs occupy very little square footage while remaining functional.
Select a pedestal table rather than one with four legs to allow for more legroom in a tight space. This setup keeps the kitchen usable without sacrificing a place to sit down.
- Budget $200 for a small, durable bistro furniture set.
- Place the table 2 feet away from the wall for easy movement.
- Use clear acrylic chairs to make the corner feel visually open.
Best shortcut: Use a wall-mounted fold-down table if the corner is located in a high-traffic walkway.
10. Apartment Corner Dining Nook
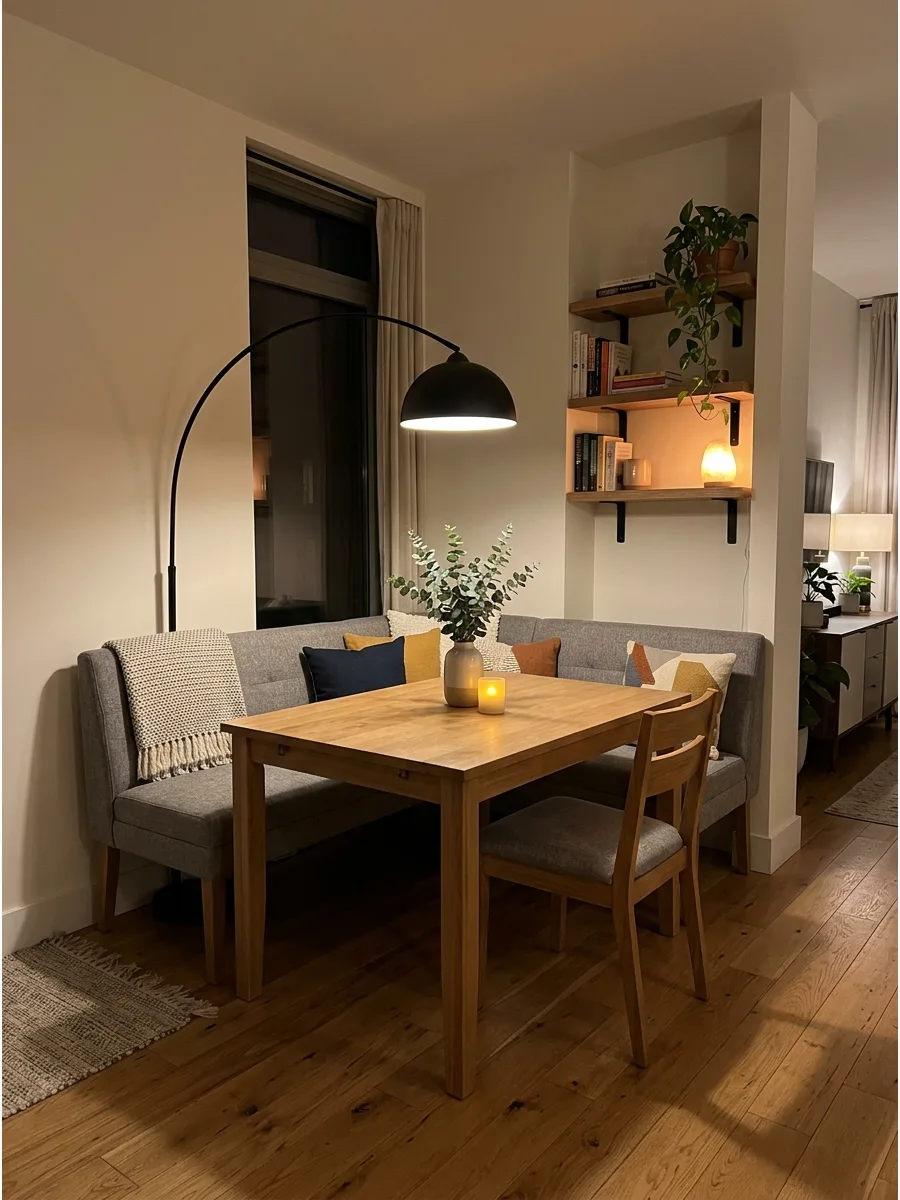
Renters can create a cozy nook without drilling into walls or building permanent structures. A freestanding L-shaped bench set provides the look of a built-in without the long-term commitment.
Look for a set with finished backs so you can move it around if the room layout changes. It instantly defines a dining zone in an open-concept apartment space.
- Budget $400-$900 for a complete freestanding furniture set.
- Place felt pads under the legs to protect rental floor surfaces.
- Use a large area rug to anchor the furniture and define the zone.
Quick win: Use Command strips to hang a lightweight gallery wall above the bench for a personal touch.
11. Two-Person Corner Nook
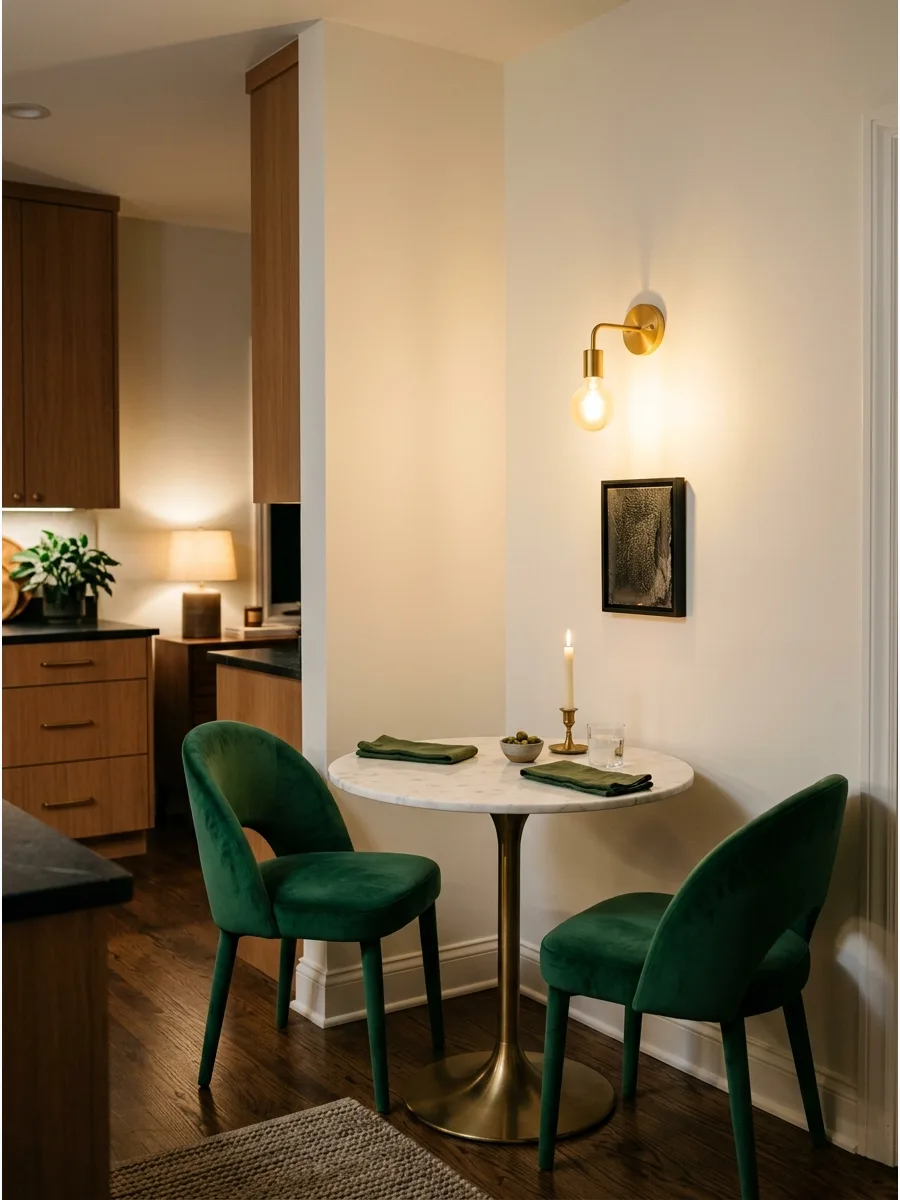
A bistro-style setup is ideal for couples who want a dedicated morning spot without using a full dining room.
Two upholstered chairs tucked into a corner feel much more intentional than eating at a kitchen island. Choose chairs with low backs so they don’t visually overwhelm a small corner. This creates a cozy café vibe right in your own kitchen.
- Budget $300 for a high-quality table and two chairs.
- Use a table with a 24-inch diameter for a true bistro feel.
- Position chairs at a 45-degree angle to the corner for better flow.
Most people skip this: A small round rug under a two-person set makes the corner feel like its own separate room.
12. Narrow Kitchen Corner Nook
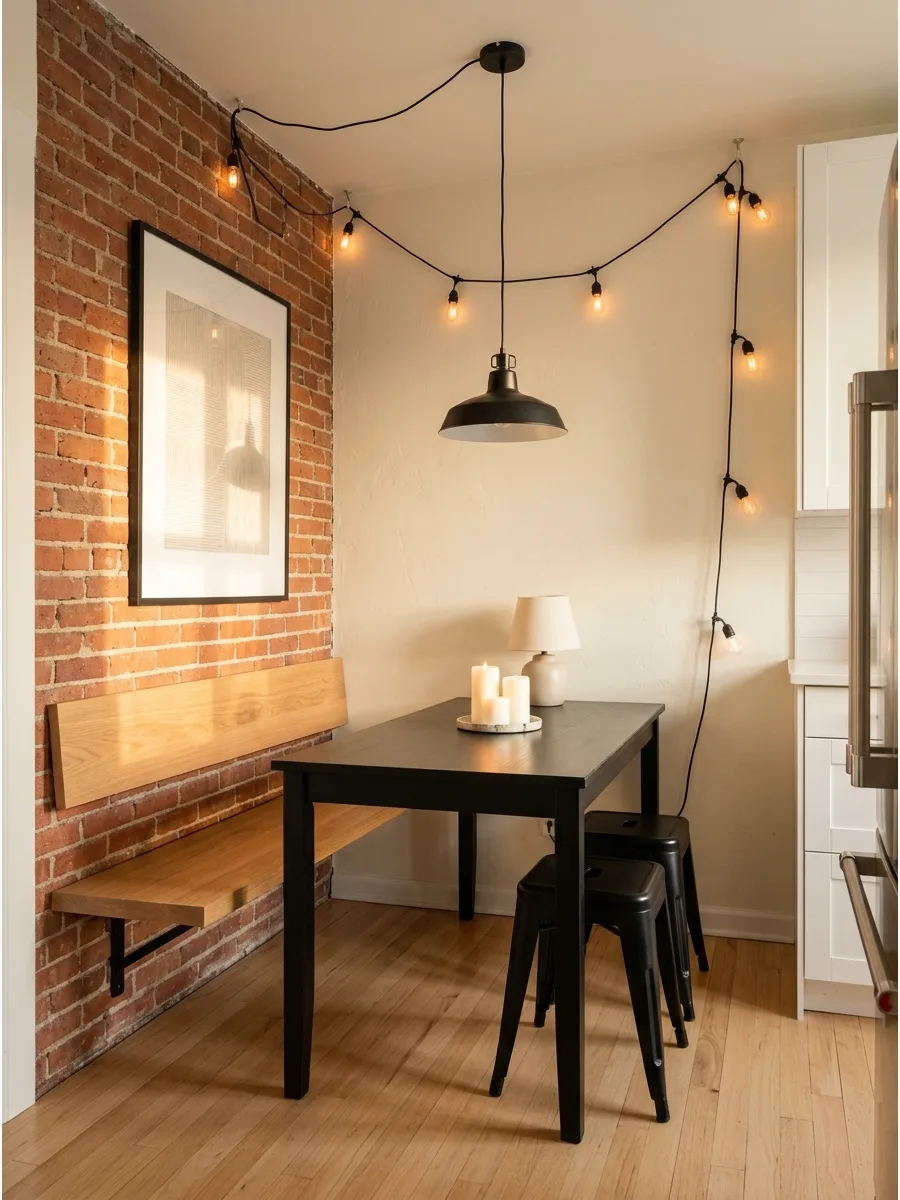
Long, skinny kitchens often have one unused corner that can be turned into functional seating. A slim rectangular table paired with a wall bench keeps the main walkway clear for the cook.
Ensure the table is narrow enough that chairs can still be pulled out without hitting the opposite wall or cabinets. This maximizes seating in a galley-style layout without adding clutter.
- Budget $250 for a narrow console-style dining table.
- Keep the table width under 24 inches for the best fit.
- Use a bench with a slim backrest to save extra inches of space.
Best shortcut: Use a counter-height table and stools to make the narrow space feel like a modern breakfast bar.
13. Drop-Leaf Table Corner Nook
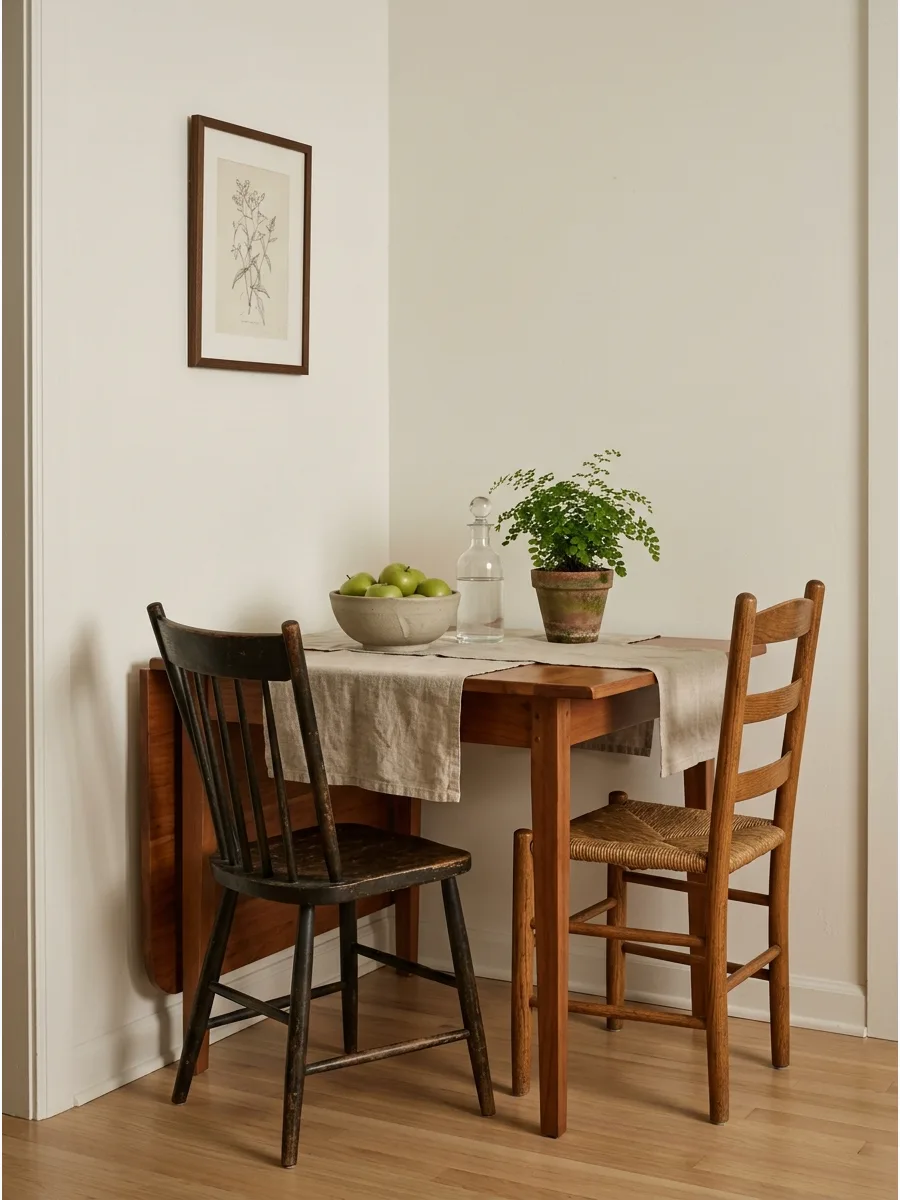
Flexibility is key in multi-use spaces where you might occasionally host guests for dinner. A drop-leaf table can stay small for daily use and expand quickly when you need extra surface area.
Keep the table pushed against the wall with one leaf down to save floor space during the day. It provides the best of both worlds for small-scale living and entertaining.
- Budget $150-$300 for a vintage or new drop-leaf table.
- Check the hinge stability before buying to ensure it is sturdy.
- Place the table near a wall outlet for easy laptop charging.
Quick win: Use the folded-down side as a temporary desk for paying bills or working from home.
14. Corner Nook With Stools
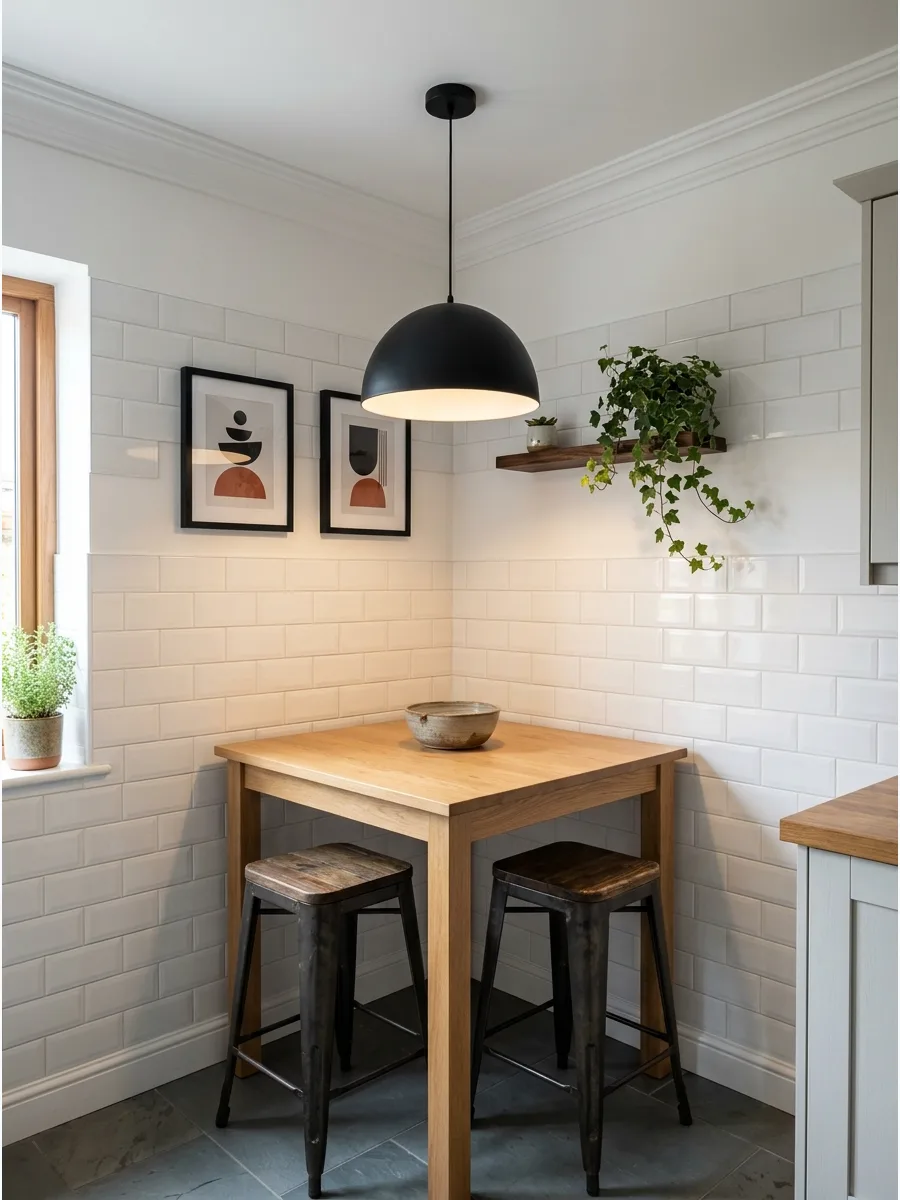
Backless stools are a secret weapon for tiny dining areas because they slide completely under the table. This keeps the floor clear when the nook isn’t being used for a meal or homework.
Select stools with a footrest to make sitting for longer periods more comfortable. It is a smart choice for high-traffic kitchens where every inch of floor space counts for movement.
- Budget $80 per stool for durable, high-quality materials.
- Measure the table height to ensure 10 inches of leg clearance.
- Choose stackable stools for even more flexibility in small rooms.
Most people skip this: Upholstered stools add a pop of color and softness to an otherwise hard-surfaced kitchen.
15. Breakfast Corner Dining Nook
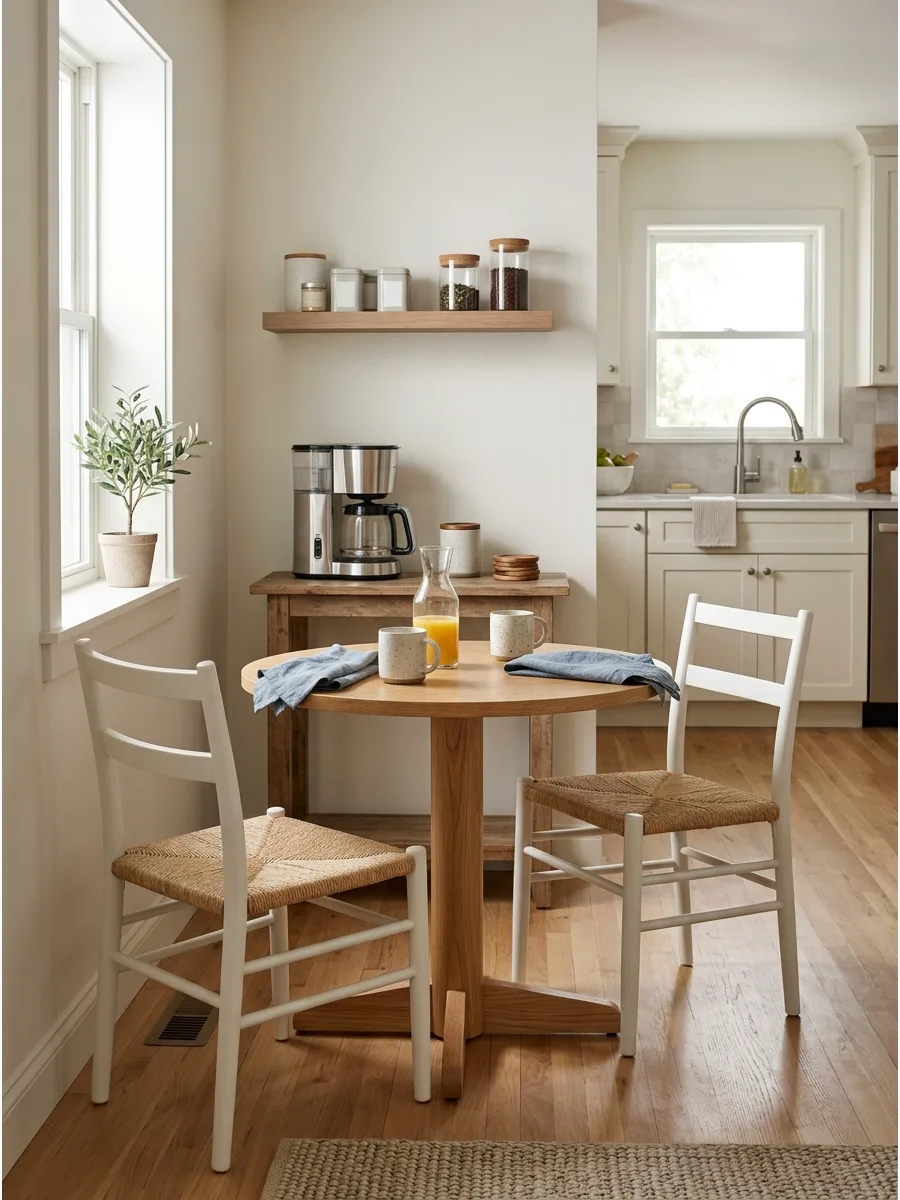
A dedicated breakfast spot makes the morning rush feel much more organized and calm. This nook doesn’t need to be huge; it just needs enough space for a toaster, coffee mugs, and two people.
Install a small shelf nearby to hold coffee pods or tea tins to keep the table surface clear. It acts as a secondary station away from the main cooking zone.
- Budget $100 for a simple table and two basic chairs.
- Use wipeable placemats for easy morning cleanup.
- Place the table near the most natural light source in the room.
Best shortcut: Use a rolling cart next to the nook to hold all your breakfast supplies and extra mugs.
16. Small Open-Plan Dining Corner
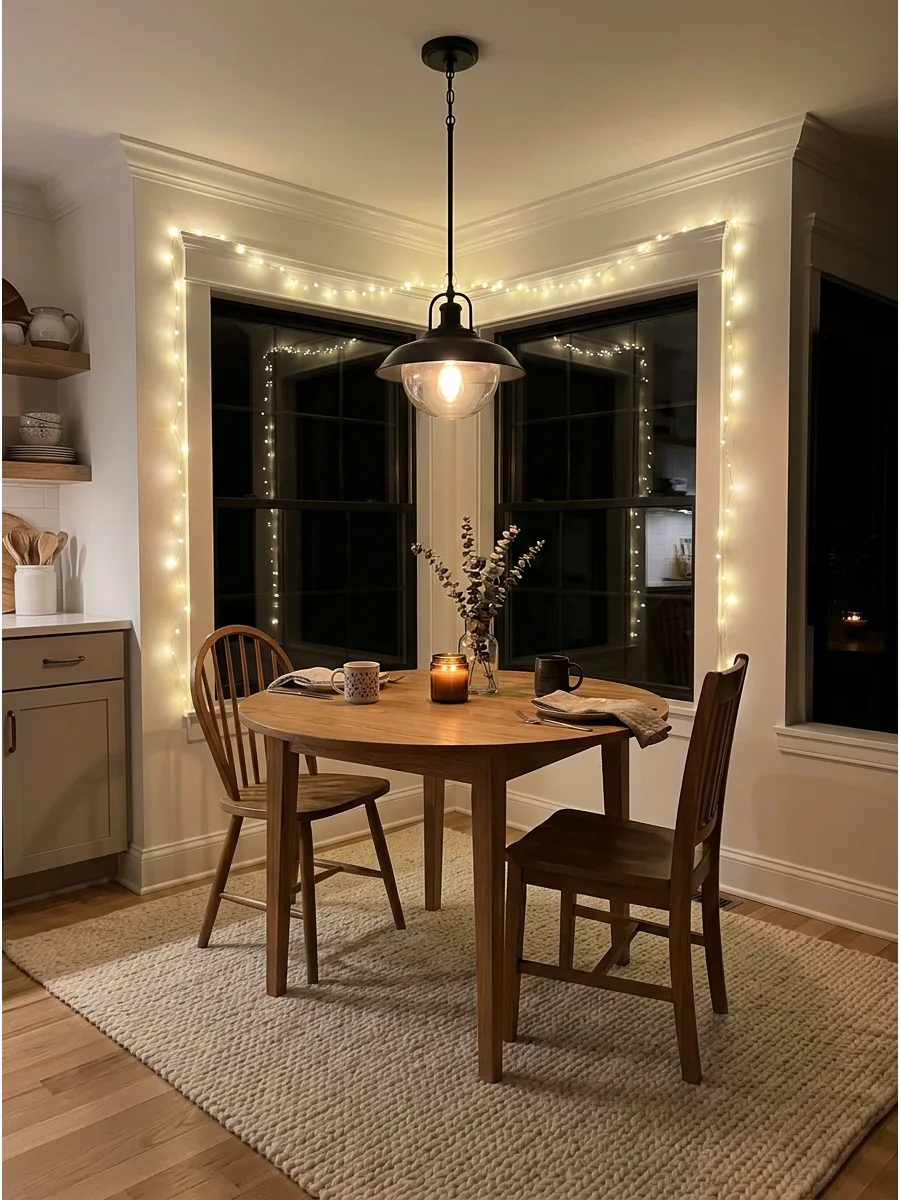
Define the dining nook in an open kitchen or living area by using a rug and a statement light. This keeps the furniture from feeling like it is floating aimlessly in the room.
Anchor the table with a low-hanging pendant light to create an invisible boundary between the eating area and the rest of the floor. Rugs should extend at least 24 inches past the table edge so chairs do not catch on the border.
- Budget $150-$400 for a quality rug and light fixture.
- Center the light fixture directly over the middle of the table.
- Choose a washable rug to handle high-traffic kitchen spills.
Quick win: Use a rug with a subtle pattern to hide crumbs between vacuuming sessions.
17. Warm Minimalist Corner Nook
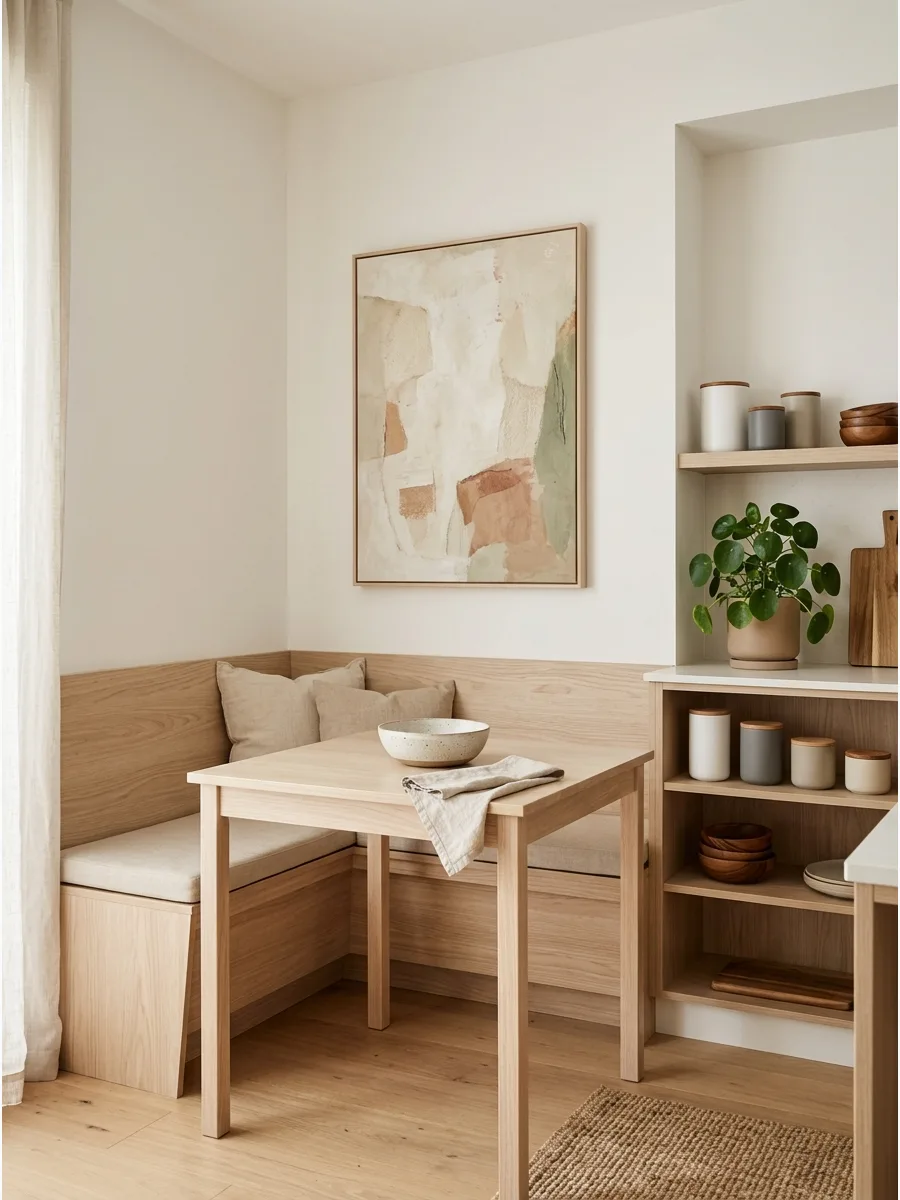
Combine cream walls and light wood with clean lines for a calm, modern look. This style focuses on quality over quantity to prevent a small corner from looking cluttered.
Stick to a monochromatic palette with different textures like linen and smooth wood to add depth without adding noise. One oversized piece of art on the wall provides enough visual interest without needing extra decor on the table.
- Choose FSC-certified light woods like ash or maple.
- Mount the art so the center is at eye level when you are seated.
- Use a high-density foam for the bench cushion to ensure it keeps its shape.
Most people skip this: Add a small felt pad under the bench legs to protect your floors from scratches.
18. Organic Modern Dining Nook
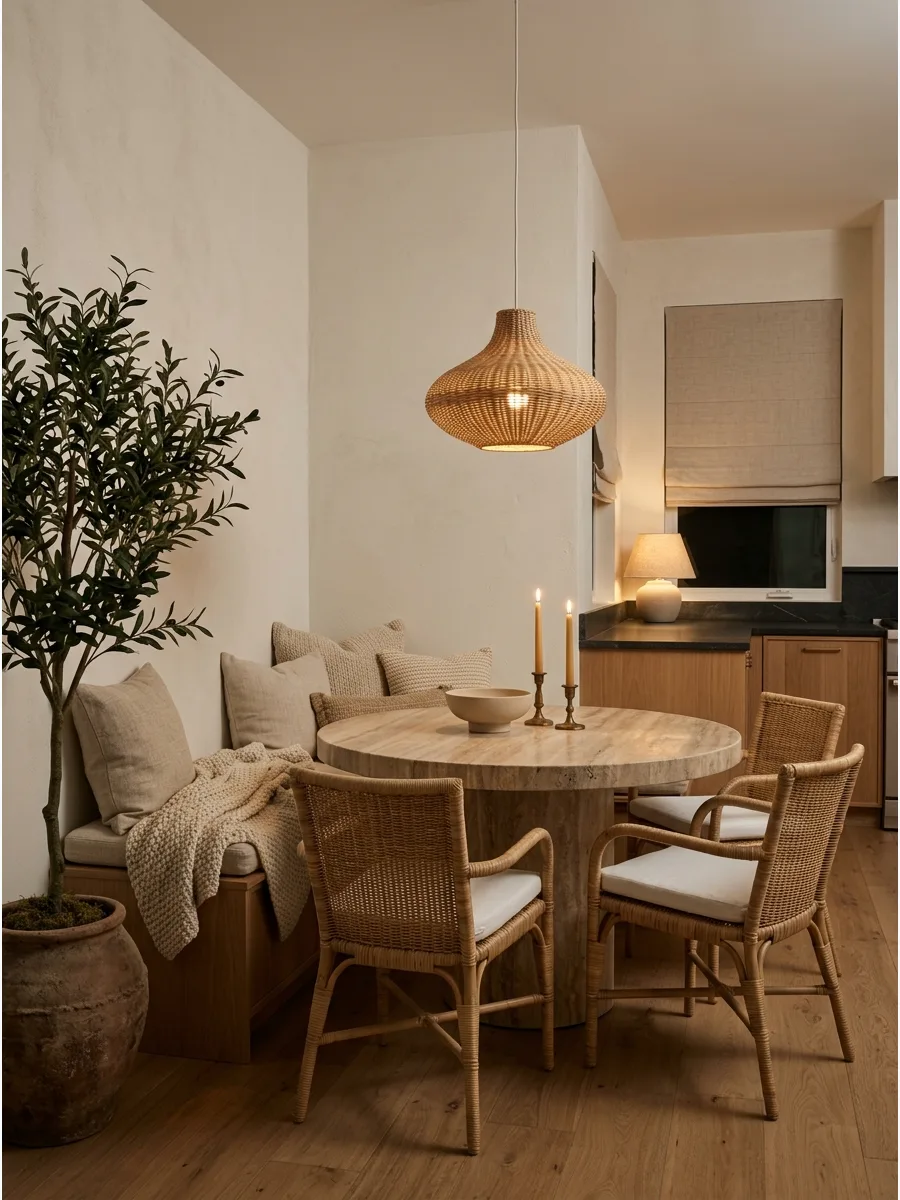
Mix natural wood, stone, and woven textures for a kitchen corner that feels grounded. This look brings the outdoors in while keeping the furniture lines sharp and intentional.
Pair a heavy stone-topped table with woven rattan chairs to balance weight and texture. Using mismatched natural materials makes the space feel curated rather than like a pre-matched set.
- Select a table with a pedestal base to make it easier to sit down.
- Ensure the stone top is sealed to prevent stains from acidic foods.
- Add a floor plant to the corner to soften the transition between walls.
Best shortcut: Use a faux olive tree if your corner does not get enough natural sunlight.
19. Curved Corner Banquette
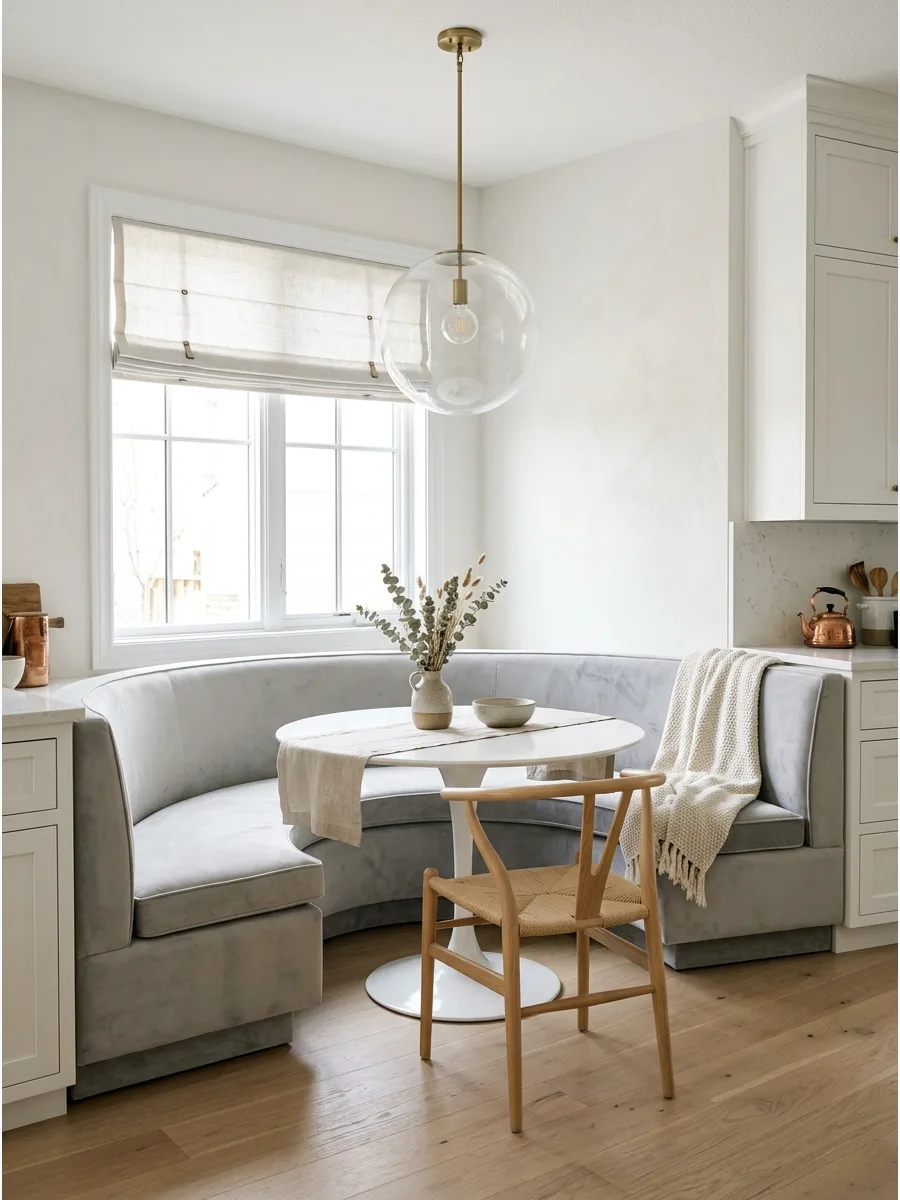
Use a curved bench to soften the corner and make the nook feel more relaxed. Sharp 90-degree angles can feel rigid, but a curve invites people to slide in and stay for a while.
Order a custom curved cushion that extends slightly past the bench edges for a high-end, tailored appearance. Curved seating often makes it easier to fit one extra guest during a crowded dinner.
- Plan for a 3-week lead time if ordering custom upholstery.
- Match the table diameter to the inner curve of the bench.
- Use performance velvet to make the fabric easy to clean.
Quick win: A round tulip table is the best partner for curved seating because it has no sharp corners.
20. Round Table Corner Nook
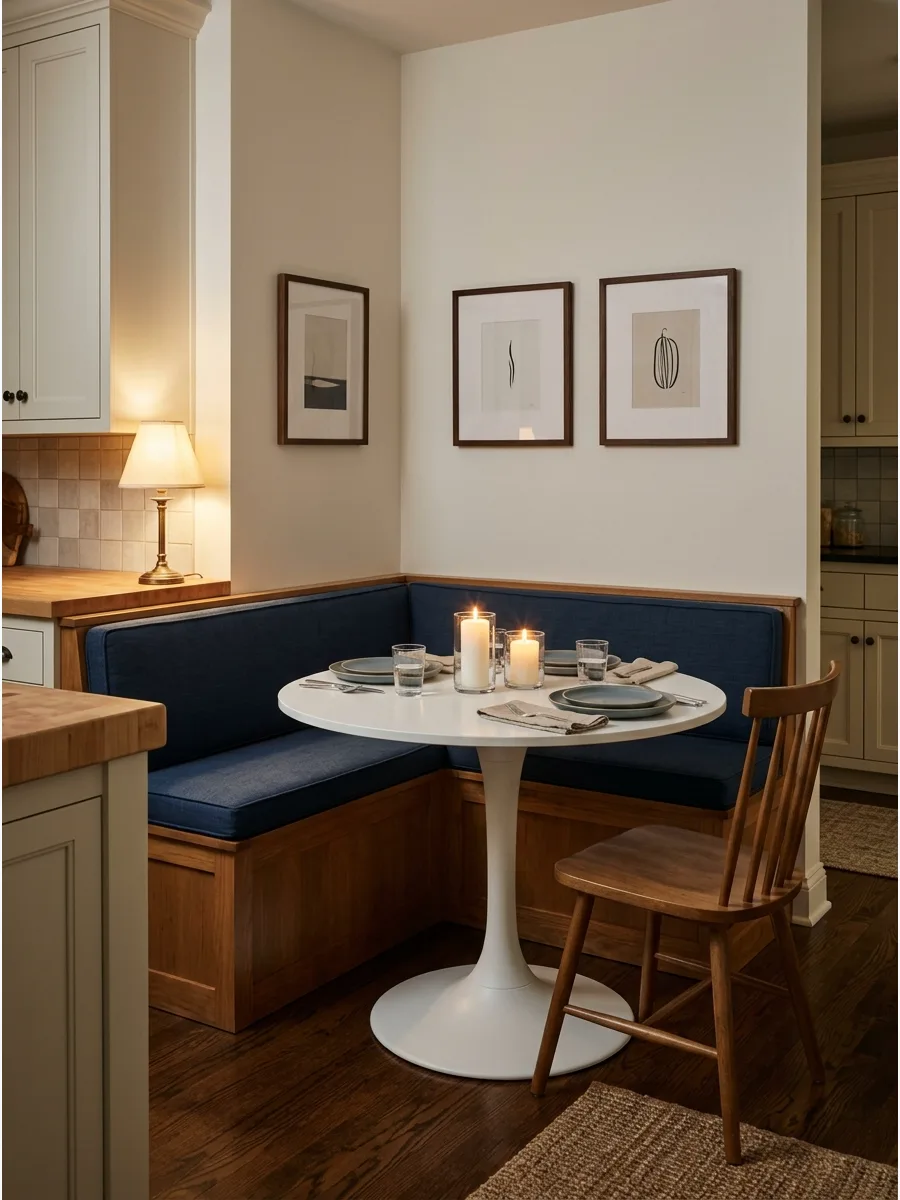
Pair a round pedestal table with corner seating to make movement around the nook easier. Pedestal bases are superior to four legs because they do not trap knees when people are sliding onto a bench.
Measure the table diameter to ensure there is at least 30 inches of clearance for walking paths. A round shape breaks up the boxy lines of a kitchen and helps the room flow better.
- Budget $300-$700 for a sturdy pedestal table.
- Place the table so it overlaps the bench by 2 to 4 inches.
- Add one matching chair on the open side for extra seating.
Most people skip this: Check the weight capacity of the pedestal to ensure the table does not tip when someone leans on the edge.
21. Oval Table Dining Nook
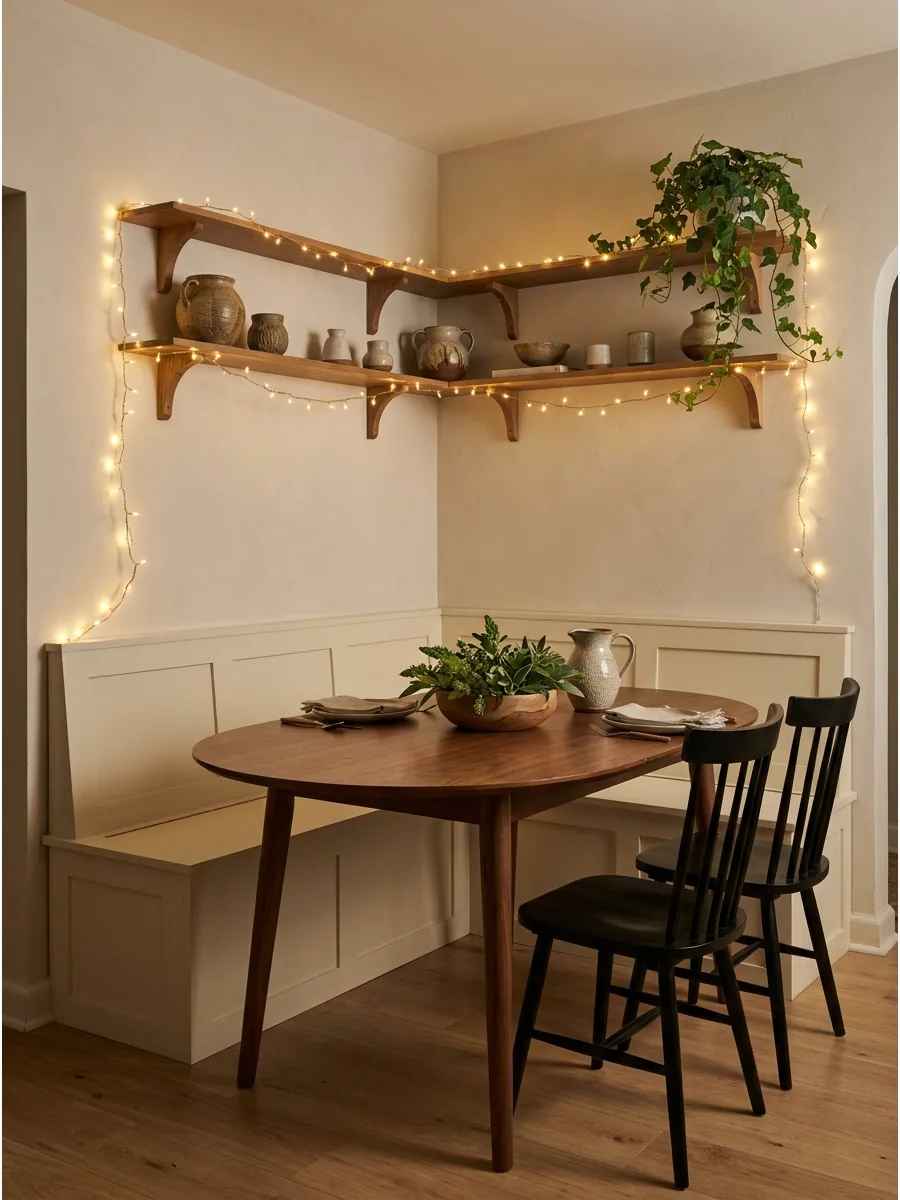
Use an oval table when you want softness but need more surface space than a round table.
This shape provides the length of a rectangle without the sharp corners that can cause bruises in tight quarters. Position the long side of the oval against the longest bench wall to maximize seating capacity. Oval tables are the best choice for narrow nooks that still need to seat four or five people.
- Measure the total length of the bench before buying the table.
- Leave 18 inches of space between the table and any opposite cabinets.
- Use slim-profile chairs to keep the walkway clear.
Best shortcut: If you cannot find an oval table, use an oval tablecloth over a rectangular one to test the flow.
22. Black Accent Corner Nook
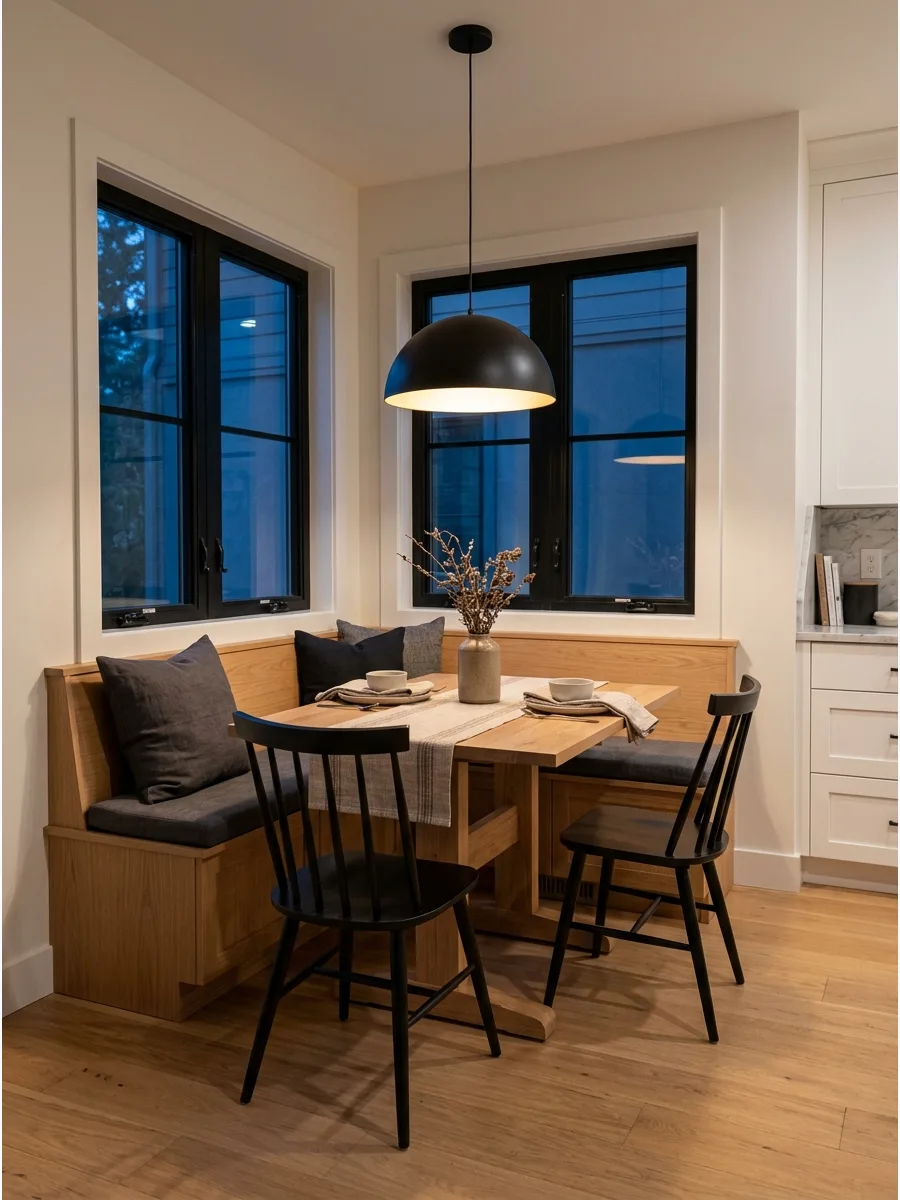
Add black chairs or a black pendant light to create modern contrast in a neutral room. High contrast makes a small corner pop against standard kitchen cabinets.
Use matte black finishes to hide fingerprints and maintain a sophisticated look. Grounding the corner with dark accents prevents the dining area from disappearing into the background of a white room.
- Incorporate black through hardware, lighting, or chair frames.
- Wipe down matte black surfaces with a damp microfiber cloth.
- Balance the black with plenty of natural wood to keep it from feeling cold.
Quick win: Swap out your existing cabinet pulls for black ones to match the new dining nook accents.
23. Two-Tone Built-In Nook
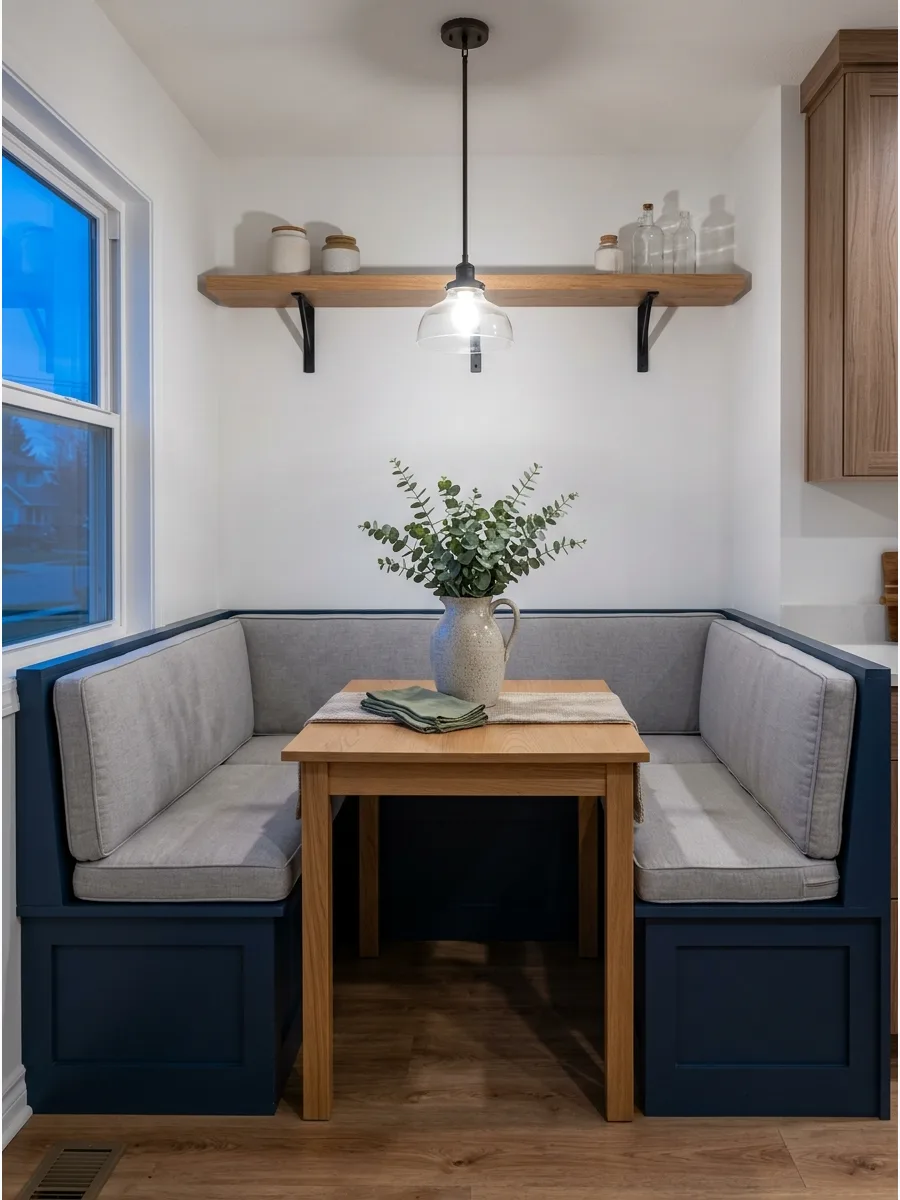
Paint the bench base one color and use a different cushion or wall color for a layered look. This technique makes the furniture look like a custom architectural feature rather than an afterthought.
Match the bench base color to your lower kitchen cabinets for a seamless, designer-grade transition. Contrast between the seat and the base helps the eye distinguish the different levels of the nook.
- Use a semi-gloss paint on the bench base for easy cleaning.
- Coordinate the cushion fabric with your kitchen backsplash colors.
- Allow paint to cure for 48 hours before installing the cushions.
Most people skip this: Paint the inside of storage benches a lighter color so it is easier to see what is inside.
24. Minimal White Corner Nook
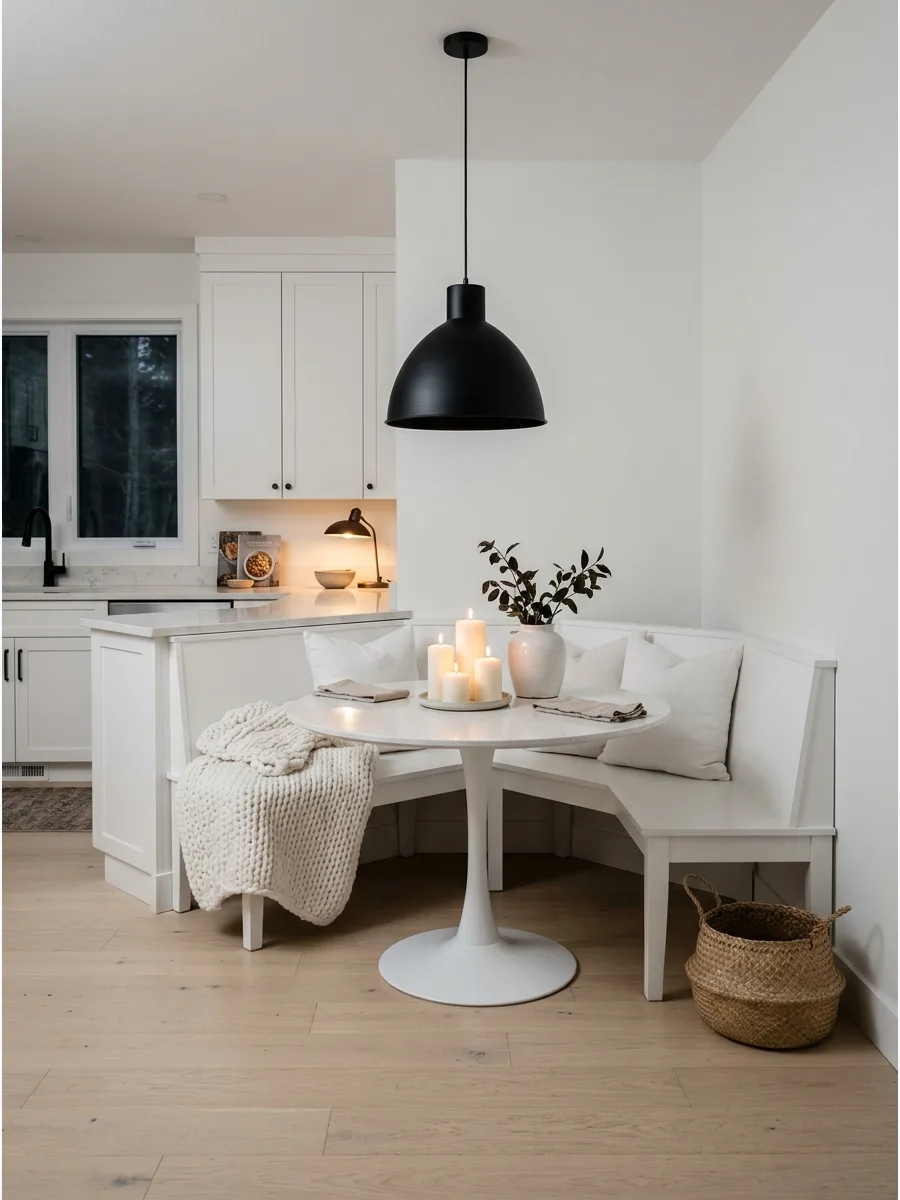
Keep the nook bright with white walls, pale wood, and linen cushions. This is the best way to make a tiny, dark kitchen feel significantly larger and airier.
Choose a white table with a durable laminate or quartz top to make cleaning spills effortless. All-white spaces need varied textures like a chunky knit throw or a woven basket to avoid looking like a hospital room.
- Use ‘warm white’ light bulbs to prevent the space from looking blue.
- Choose removable cushion covers that can go in the washing machine.
- Add a small wooden tray to the table to introduce a warm accent.
Best shortcut: Use a magic eraser to quickly remove scuff marks from white table legs.
Dining Room
25. Airy Slatted Wood Nook
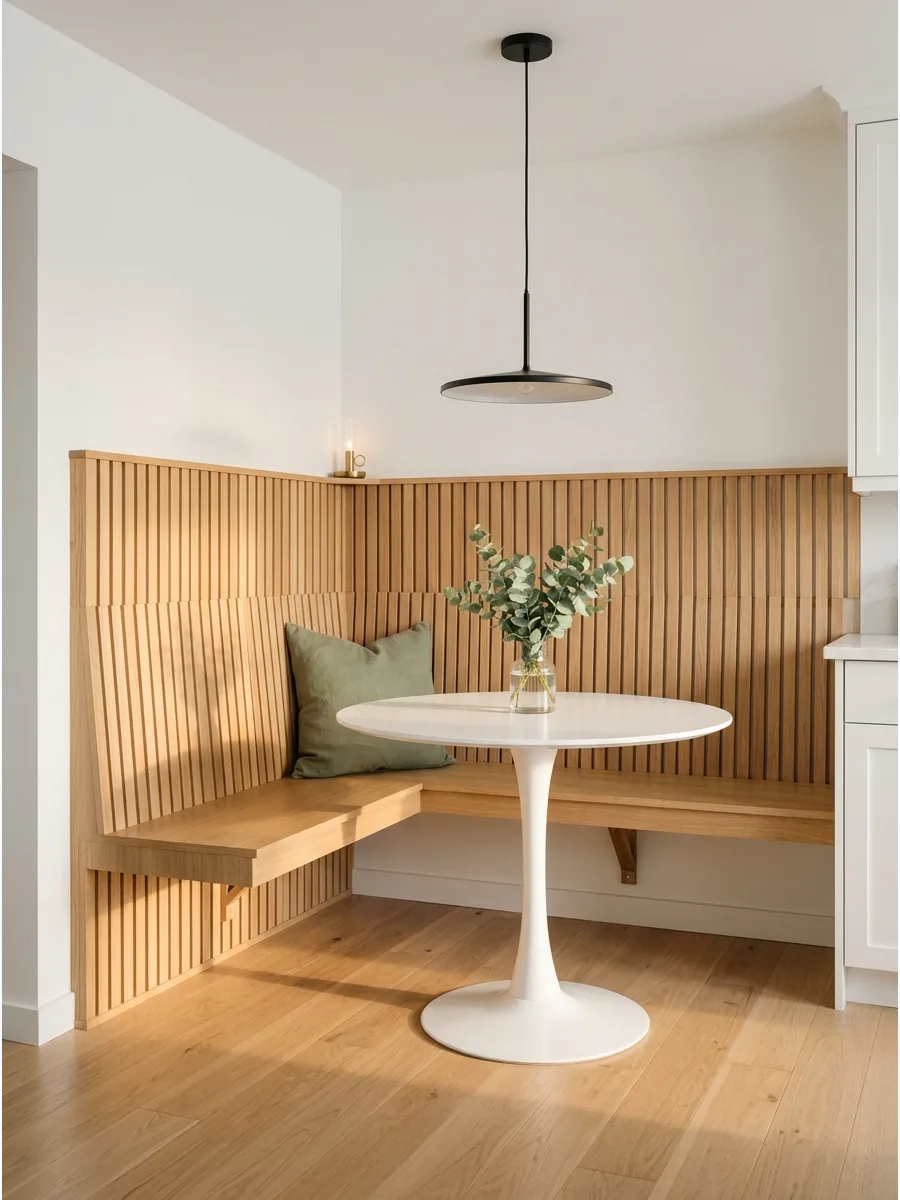
A cottage-style dining nook utilizes vertical wall space with light-toned wood slats to define the eating area without closing it off. This setup maximizes floor space in small kitchens by tucking a L-shaped bench directly into an underused corner.
Install a wall-mounted pedestal table to eliminate bulky legs and allow for easier legroom when sliding into the bench. Using a round table top prevents sharp edges in tight high-traffic zones. Many homeowners choose benches that are too deep, but a shallow 18-inch seat depth maintains comfort while saving valuable floor space.
- Budget for a pre-made pine bench set starting at $300 or build a custom frame over a weekend for less.
- Secure the bench to wall studs to prevent tipping and ensure the table height is exactly 12 inches above the seat.
- Swap the wood bench for upholstered storage cubes if hidden pantry space is more important than the cottage aesthetic.
Quick win: Add a washable linen seat cushion with non-slip backing to prevent the fabric from sliding every time someone sits down.
26. English Cottage Dining Nook
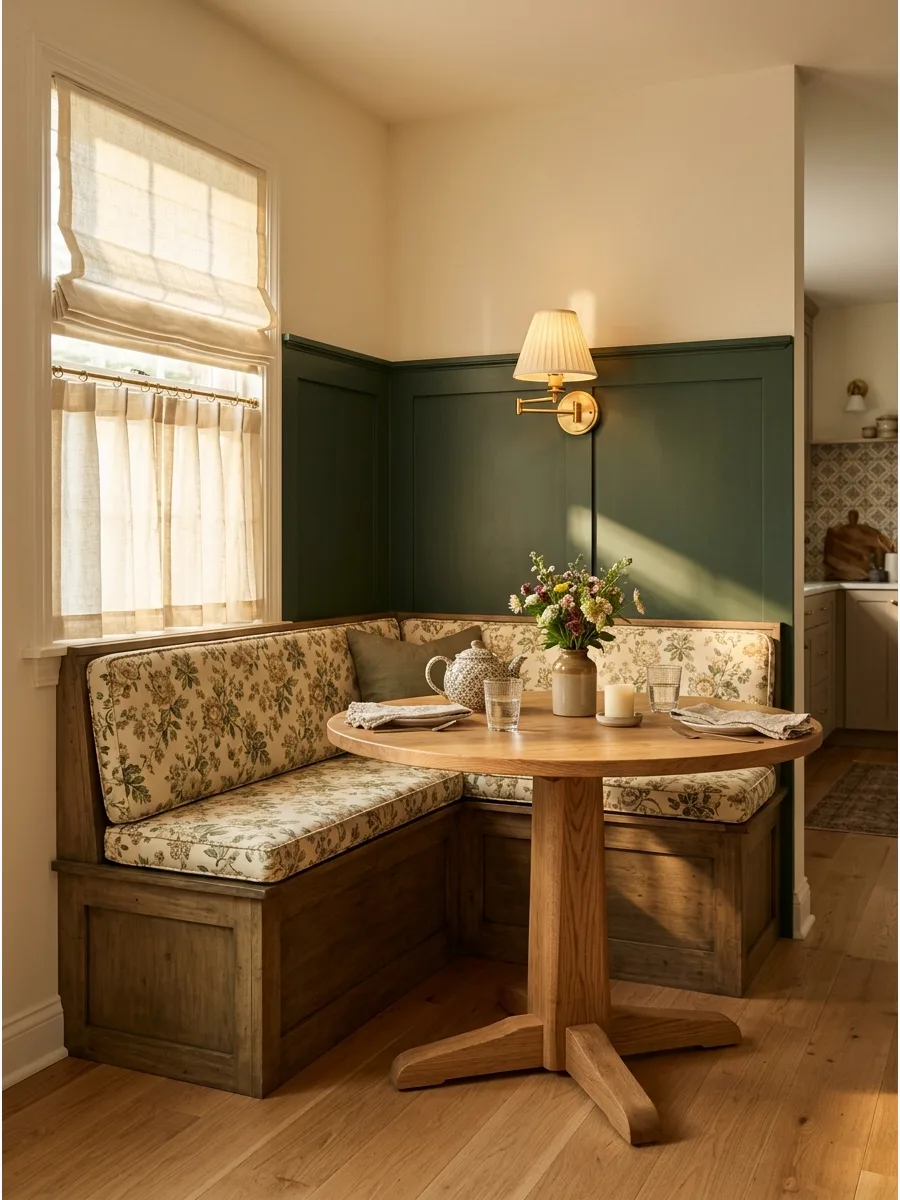
Add floral fabric and warm lighting to create a classic, traditional English style. This look is more formal than a standard cottage but remains very approachable and cozy.
Incorporate a pleated fabric lamp shade on a wall sconce to add a traditional English touch. Deep greens and rich creams create a warm atmosphere that encourages family conversation.
- Use traditional wainscoting or beadboard on the lower half of the wall.
- Choose floral fabrics with a cream or tea-stained background.
- Install a plug-in wall sconce if you do not want to hire an electrician.
Most people skip this: Use a dimmable bulb in your wall sconce to set the mood for evening meals.
27. Vintage Corner Dining Nook
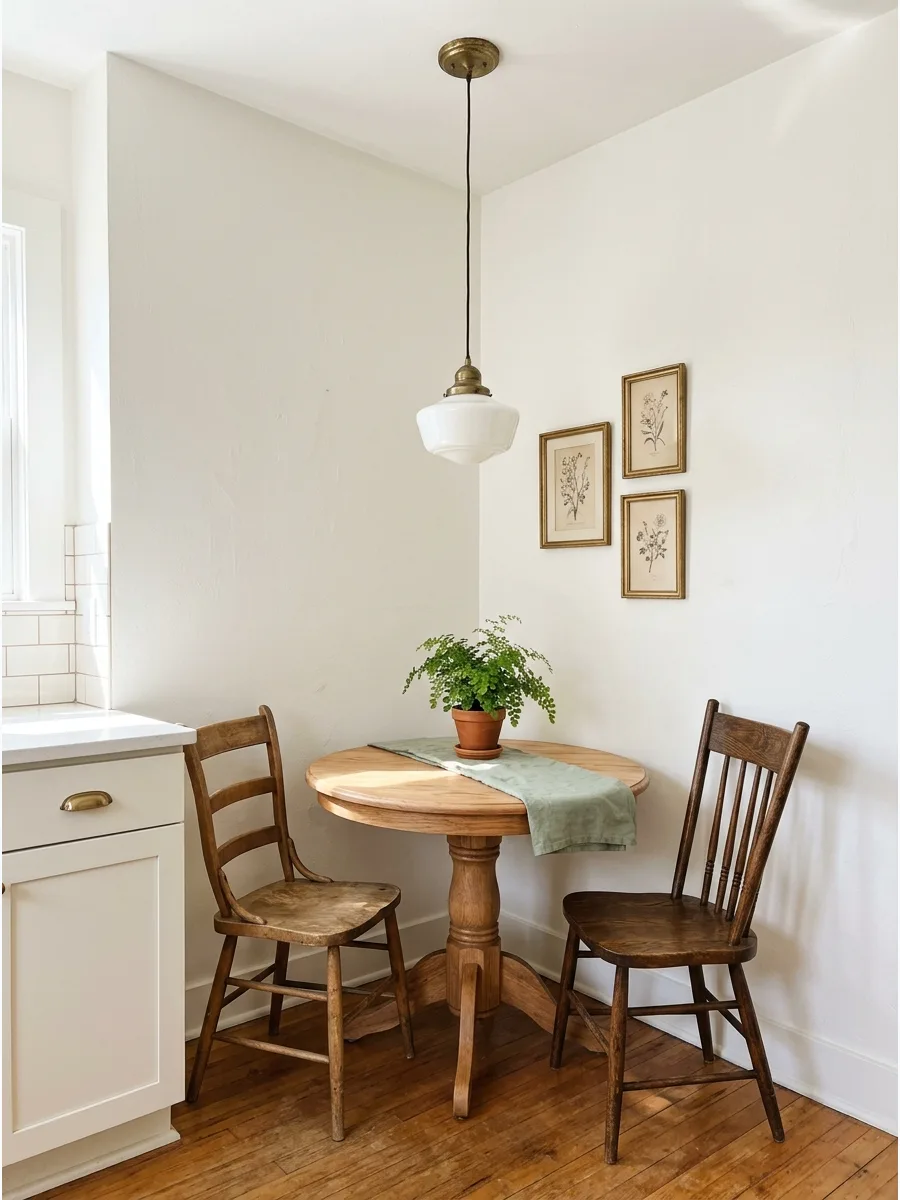
Use antique chairs and a secondhand table to give the kitchen unique character. Mixing old pieces creates a space that cannot be bought in a big-box store.
Sand down a thrifted table and apply a clear matte sealer to show off the natural grain and history of the wood. Older furniture is often scaled smaller, which makes it perfect for tight corners.
- Check local estate sales for solid wood tables under $100.
- Ensure all chair legs are sturdy and do not wobble before buying.
- Group small pieces of art together to create a focal point.
Best shortcut: Rub a walnut over small scratches in old wood furniture to hide them instantly.
28. Dark Wood Dining Nook
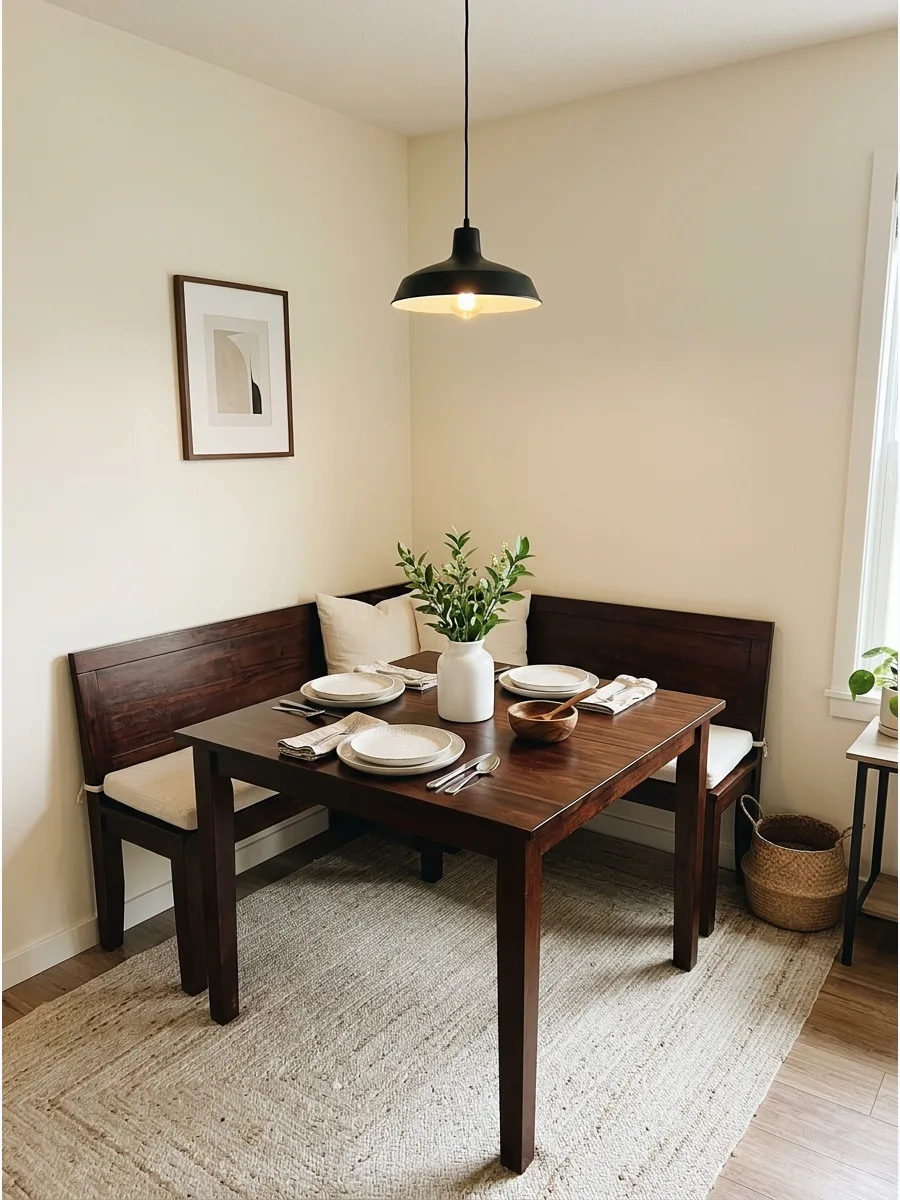
Choose a dark wood table or bench to add warmth and character to the corner. Deep brown tones are becoming popular again because they make interiors feel more personal and grounded.
Balance dark wood with lighter wall colors or a bright rug to keep the corner from feeling heavy. The depth of dark wood provides a sturdy feeling that light wood sometimes lacks.
- Match the wood stain to other dark elements in your home for consistency.
- Use a high-quality wood polish once a month to maintain the shine.
- Pair with white or cream ceramics to provide a sharp contrast.
Quick win: Add a white linen runner to a dark wood table to brighten the surface for photos.
29. Mixed Chair Dining Nook
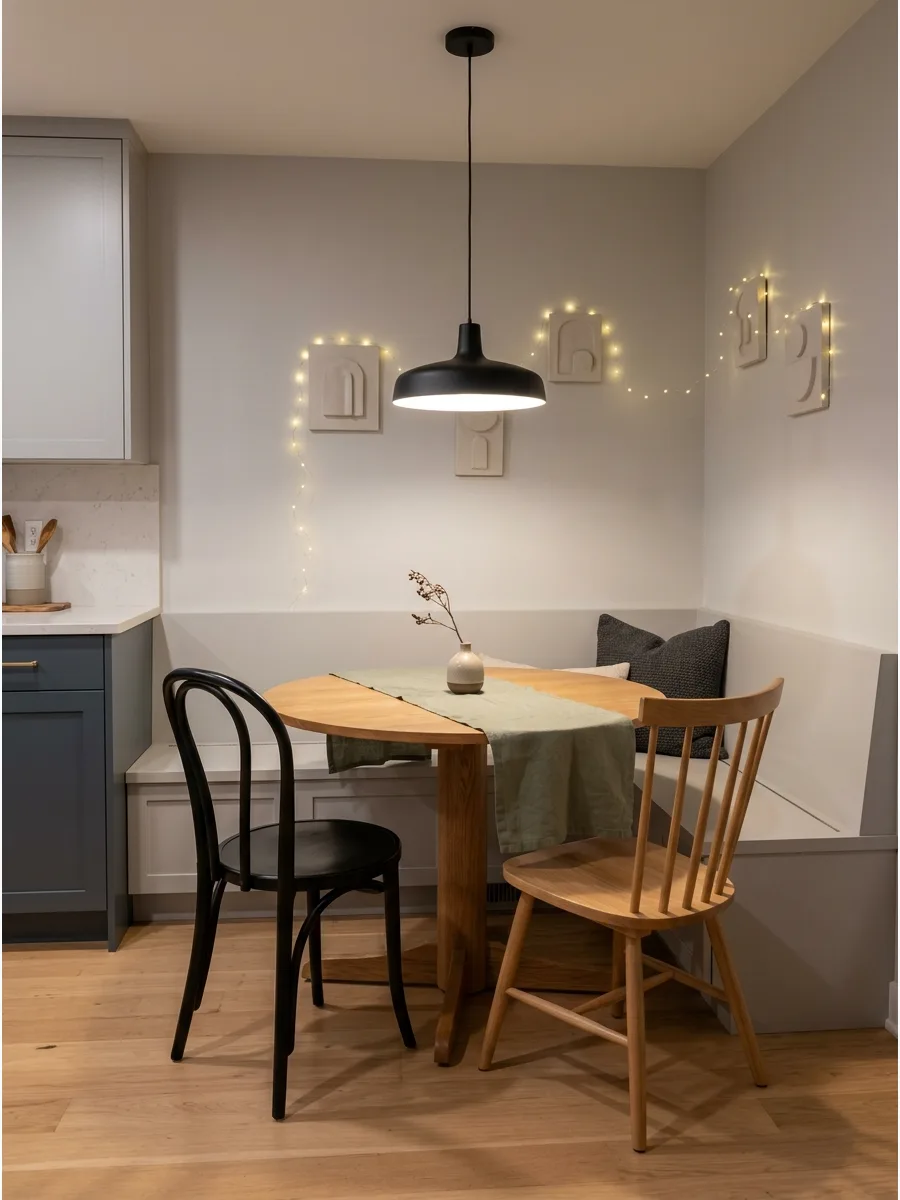
Pair a corner bench with two different chairs for a relaxed, collected look. This prevents the dining set from looking too rigid and allows you to use chairs you already own.
Keep the chairs in the same color family or material to ensure the mix looks intentional rather than messy. Mixing styles is a great way to transition between a modern kitchen and a traditional living area.
- Look for chairs with similar seat heights to keep everyone level.
- Mix a modern chair with a vintage one for a designer-style contrast.
- Use the same style of seat pad on both chairs to tie them together.
Most people skip this: Ensure the tallest chair back does not block the view of the table from the rest of the room.
30. Corner Nook With Pillows
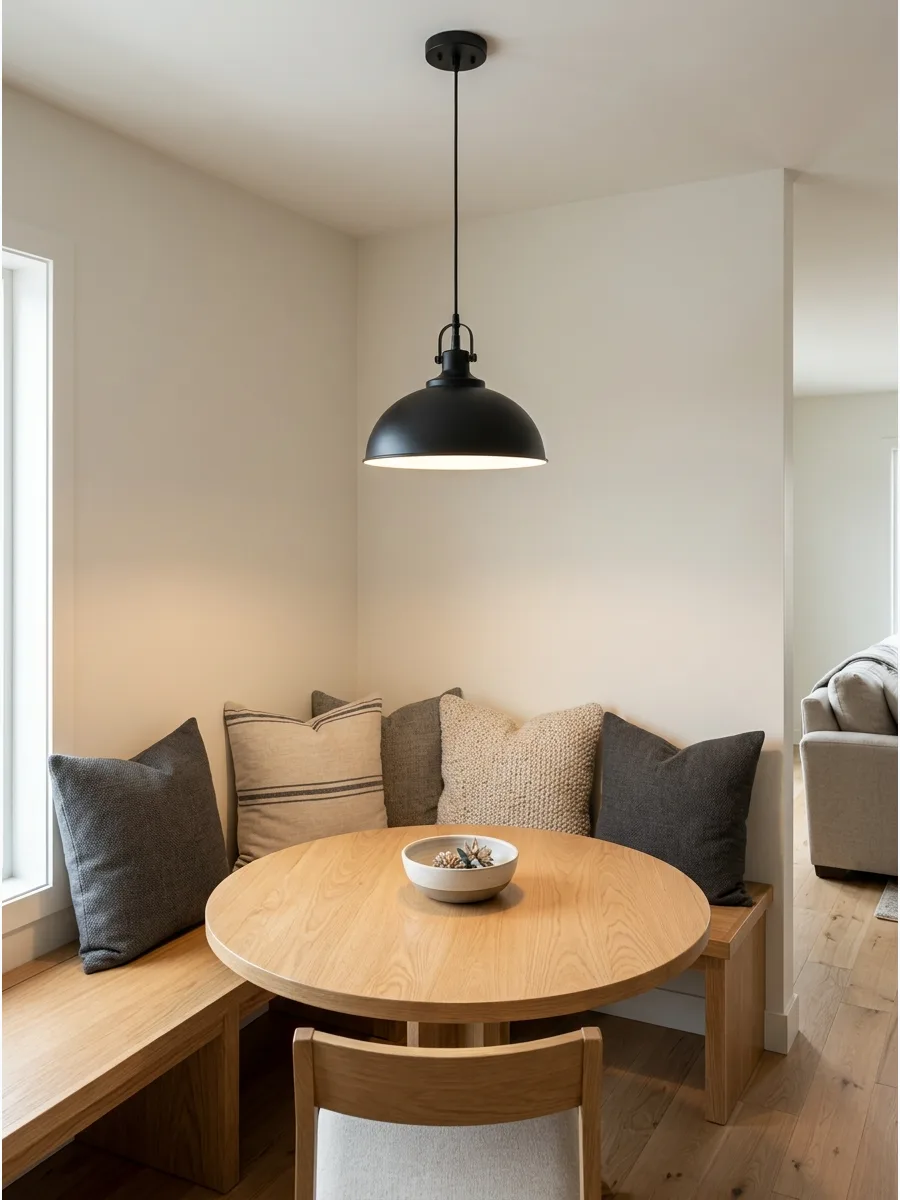
Add throw pillows to the bench so the dining corner feels softer and more comfortable. Most wooden benches are too hard for long dinners or work sessions.
Use outdoor-rated fabrics for the pillows so they can be easily wiped down after messy meals. Layering different sizes of pillows creates a lounge-like vibe that encourages guests to linger.
- Budget $20-$40 per pillow for high-quality inserts and covers.
- Choose a mix of solid colors and small-scale patterns.
- Ensure the pillows are not so thick that they push people off the bench.
Best shortcut: Use ‘feather-alternative’ inserts so the pillows look full but are easy to fluff back into shape.
31. Cozy Café Corner Nook
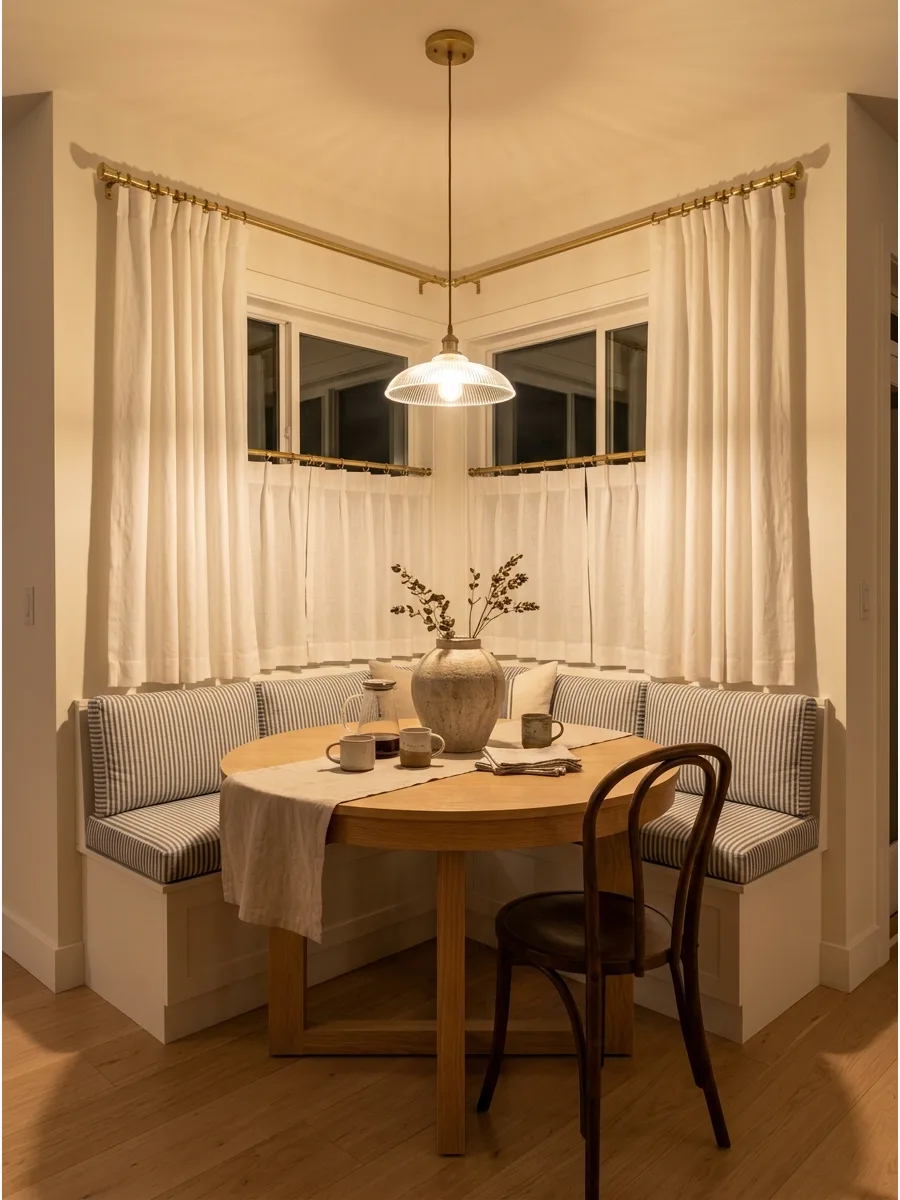
Use a small round table, bentwood-style chairs, café curtains, and warm lighting for a coffee-shop feel. This setup works perfectly for morning espresso or a quick lunch without taking up too much floor space.
Hang a simple brass rod with café curtains to add privacy and a soft, finished look to the windows. Café seating feels much more intentional than just shoving a spare chair into a corner.
- Budget-friendly update for under $200.
- Mount the curtain rod at the halfway point of the window frame.
- Works best in small kitchens or studio apartments.
Quick win: Use a battery-operated puck light inside a pendant fixture if you do not have a ceiling outlet.
32. Family-Friendly Corner Nook
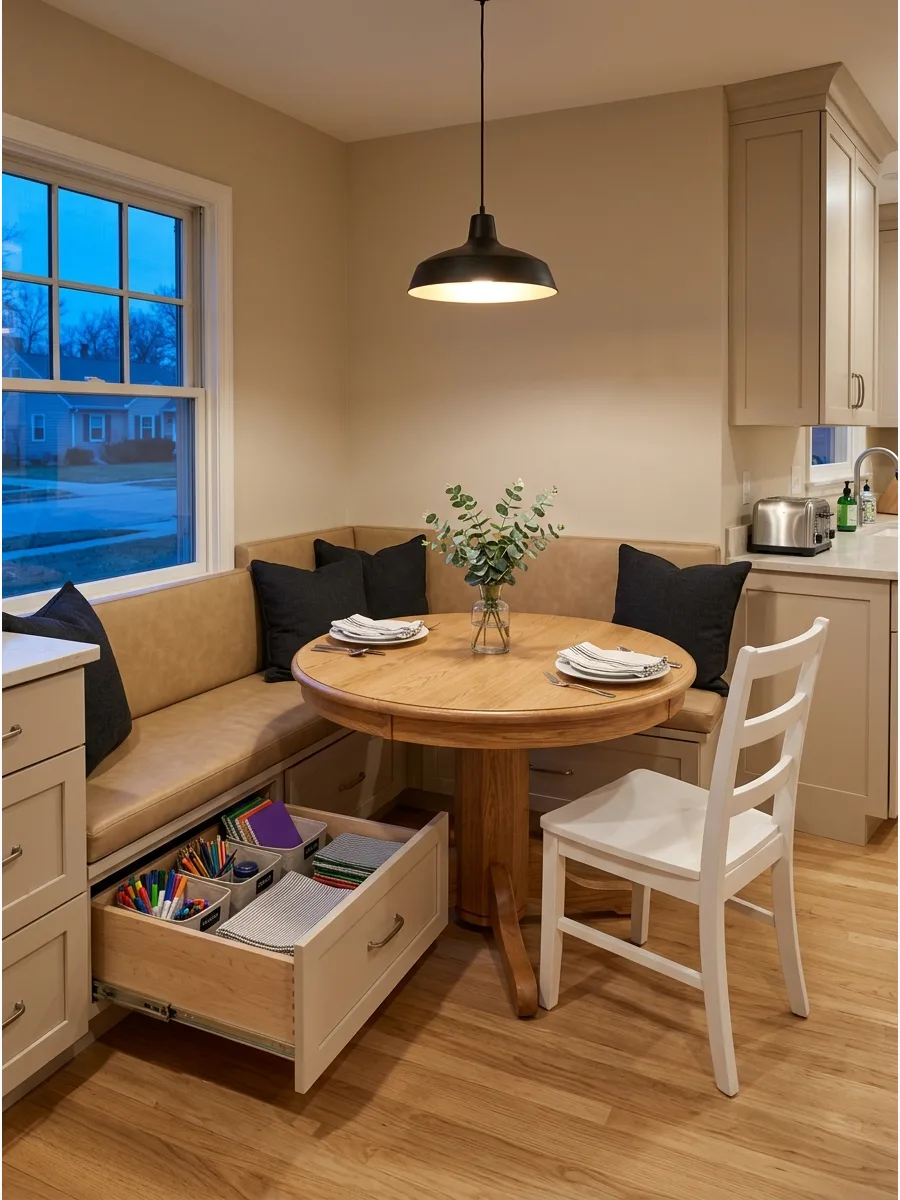
Use wipeable cushions, rounded table edges, and hidden storage for a practical everyday dining space. A busy kitchen needs materials that can handle spills and heavy use every day.
Opt for a table with rounded corners to keep the space safe for kids moving through the room. Hidden storage under the bench is a lifesaver for stashing art supplies or placemats.
- Saves time on cleanup with performance fabrics.
- Position the bench base 3 inches back from the table edge for leg room.
- Choose a pedestal table base to avoid bumping knees on table legs.
Most people skip this: Apply a fabric protector spray to non-leather cushions before the first use.
33. Wallpaper Corner Dining Nook
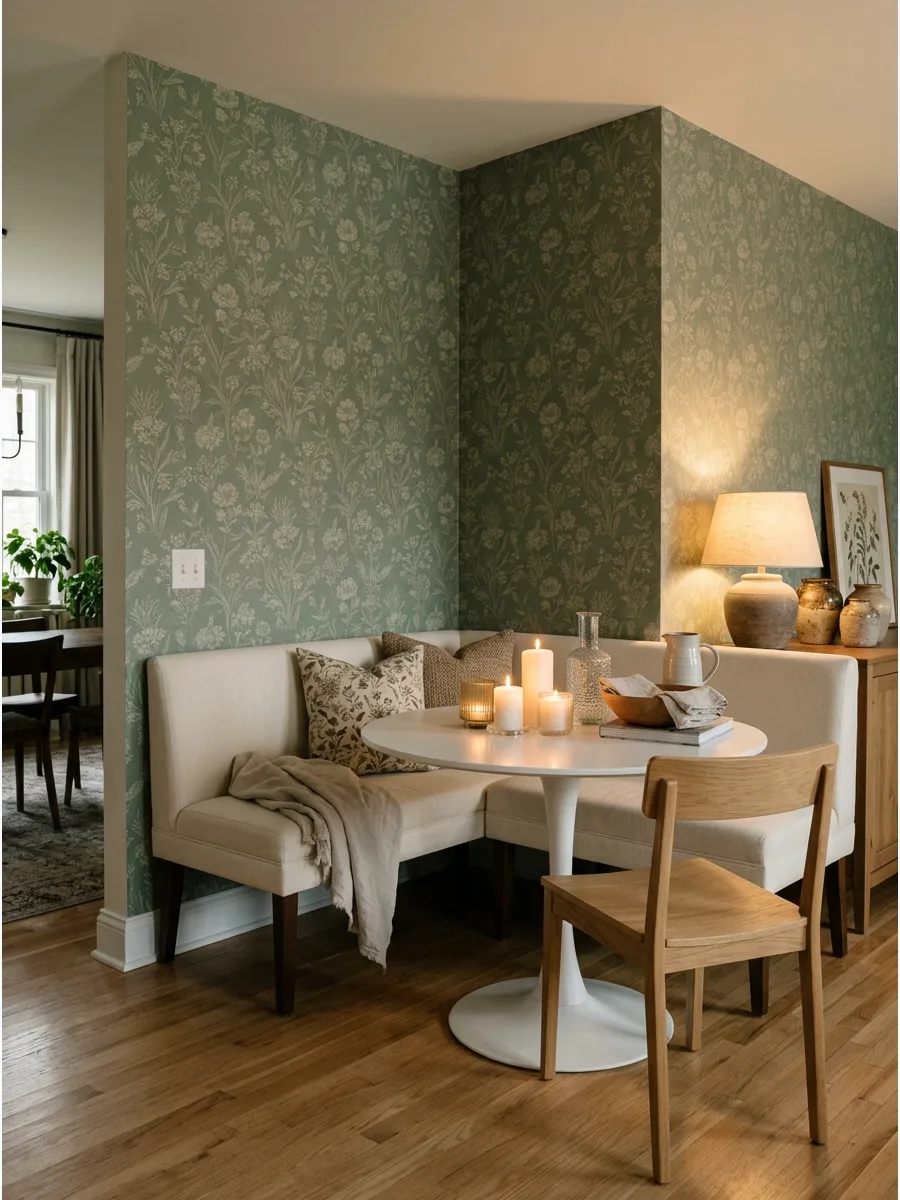
Add wallpaper behind the bench to make the nook feel like its own little room. This is the easiest way to define a dining zone in an open-concept floor plan without building walls.
Apply a clear matte sealer over the wallpaper near the table height to protect it from splashes and scuffs. This creates a high-end designer look that anchors the furniture beautifully.
- Peel-and-stick options are perfect for renters.
- Align the pattern carefully at the corner seam for a seamless look.
- Choose a small-scale print to make a tight corner feel larger.
Best shortcut: Use a plumb line to ensure your first panel of wallpaper is perfectly straight.
34. Beadboard Corner Nook
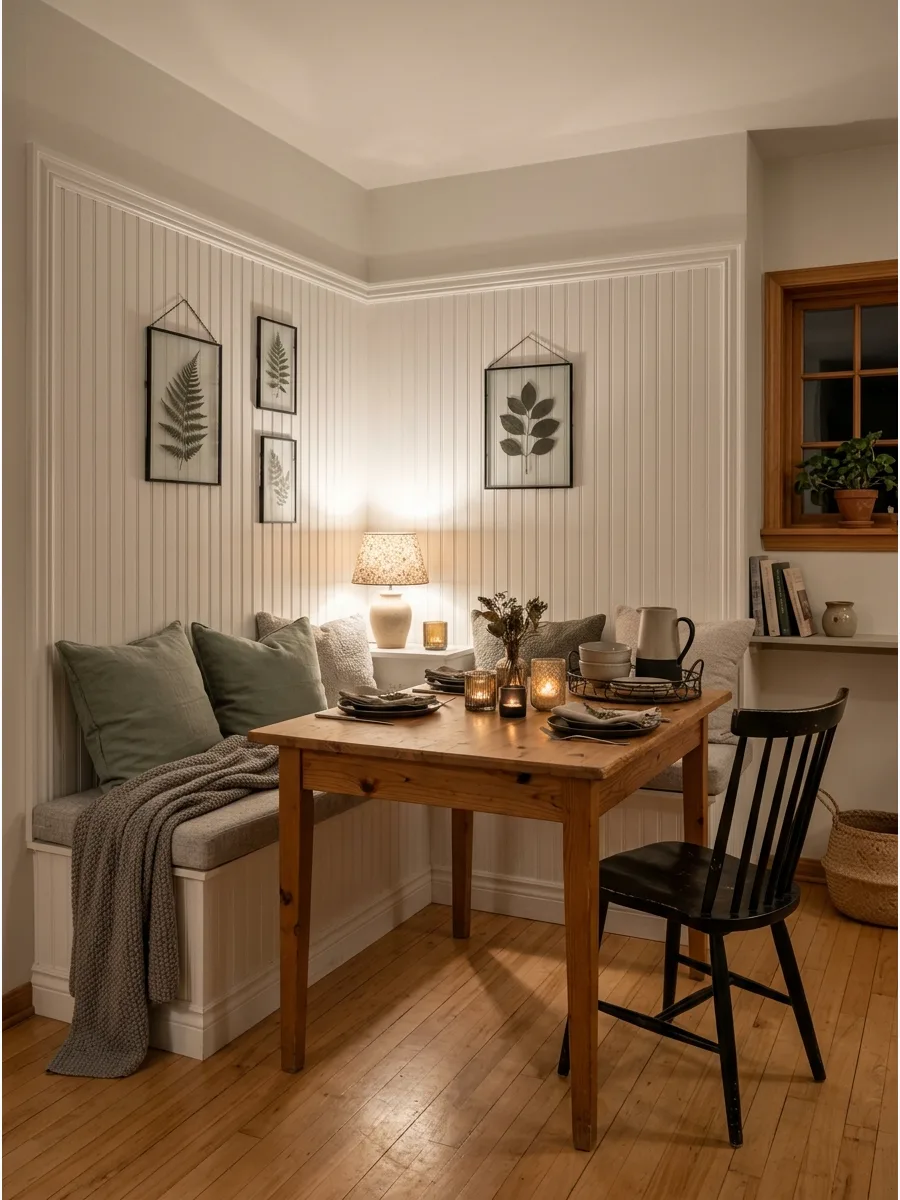
Install beadboard behind the bench for a classic cottage-style dining corner. This material adds instant architectural interest and protects your walls from the constant movement of chairs and guests.
Paint the beadboard a soft neutral like mushroom or warm gray to help white dishes and wood tables pop. It provides a durable surface that handles the bumps and kicks of daily seating better than plain drywall.
- Installation takes one weekend with a nail gun.
- Finish the top edge with a small decorative cap rail.
- Use moisture-resistant panels if the nook is near a sink or stove.
Quick win: Paint the beadboard before installing it to avoid messy corners and gaps.
35. Vertical Paneling Dining Nook
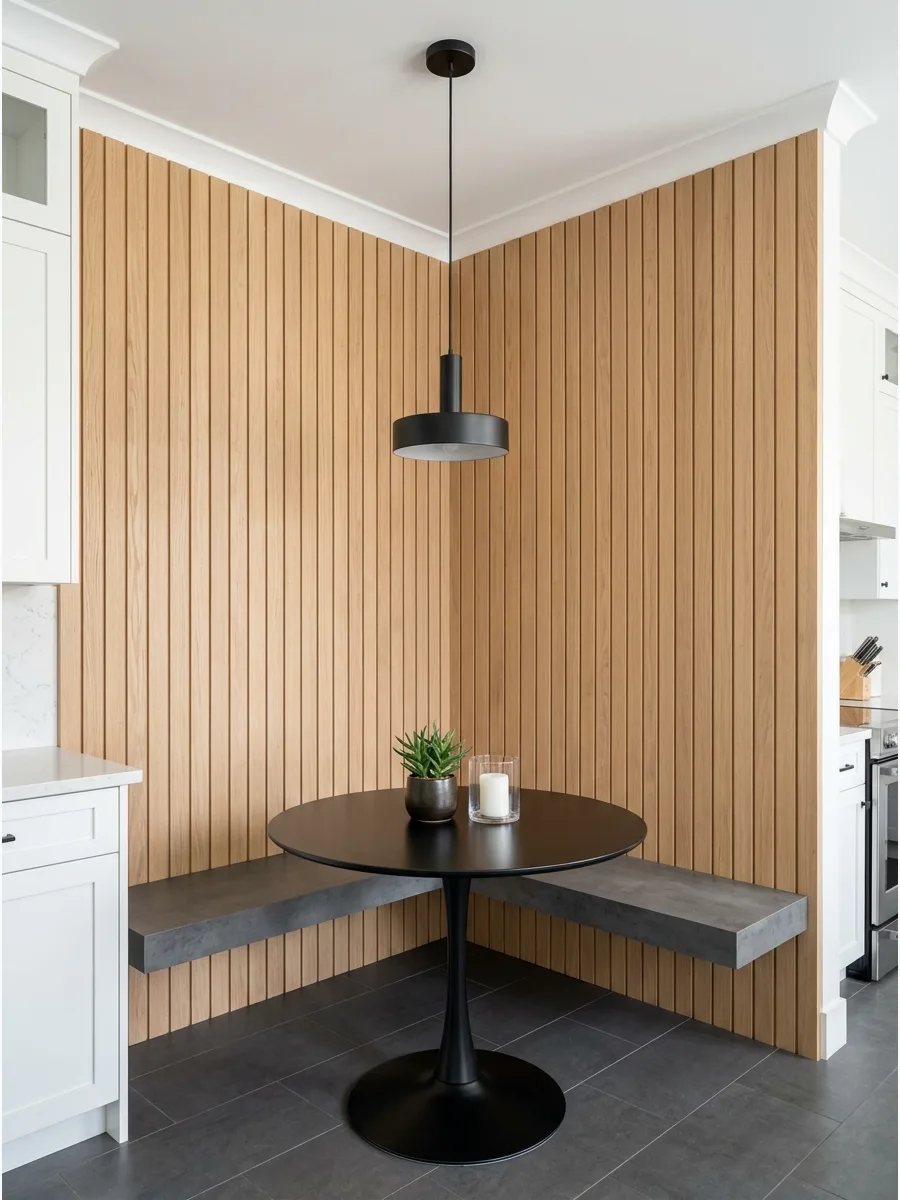
Use vertical paneling to make the corner feel taller and more custom. This texture draws the eye upward and makes the ceiling height seem much more impressive in a small kitchen.
Run the paneling from the floor to the ceiling to create a seamless backdrop for a sleek floating bench. It is a simple project that adds significant value and modern style to an open-concept area.
- Increases the perceived height of the room.
- Use construction adhesive and finish nails for a secure hold.
- Space the slats 1/2 inch apart for a balanced, modern look.
Most people skip this: Paint the wall behind the slats black or dark gray to add depth to the paneling.
36. Painted Accent Wall Nook
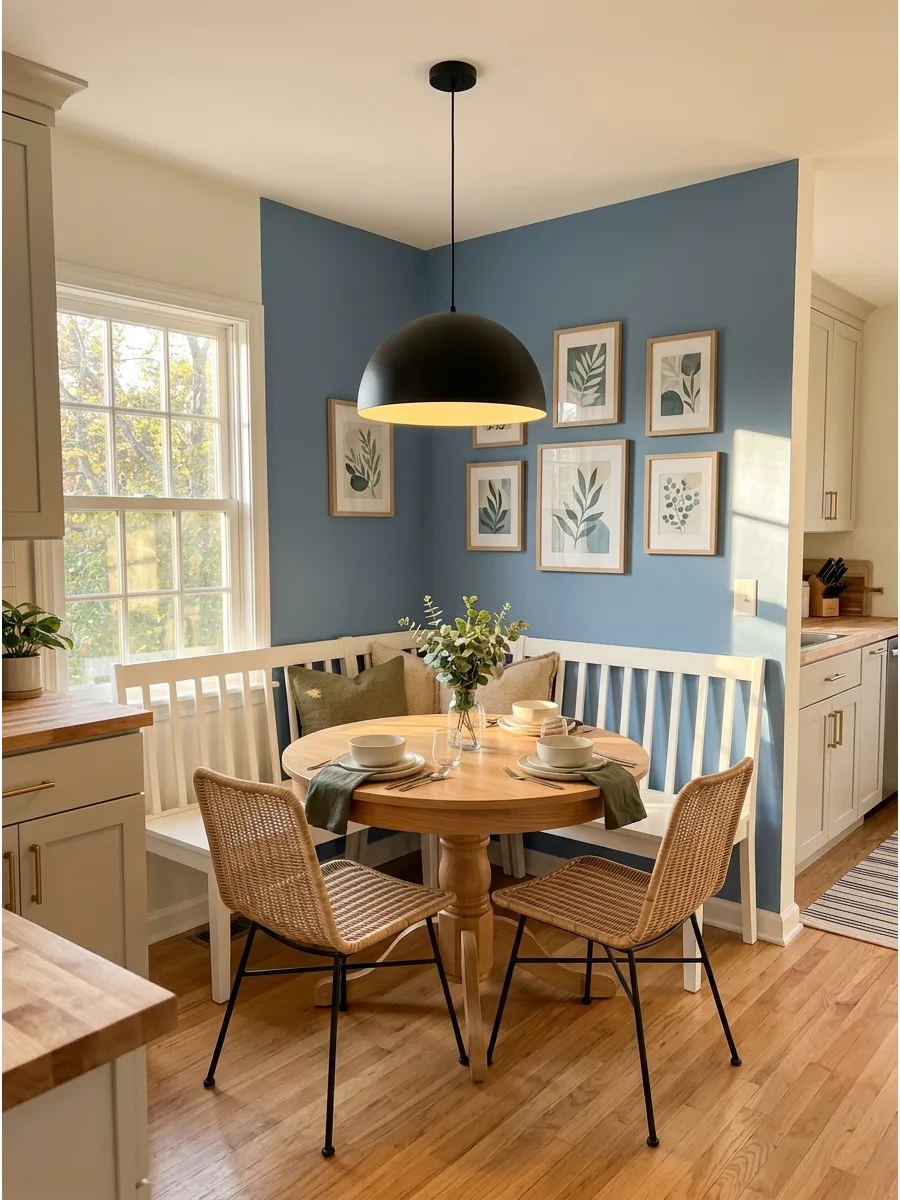
Paint the dining corner sage green, dusty blue, beige, taupe, or warm brown to define the space. A fresh coat of paint is the most affordable way to create a cozy boundary for the table without adding bulk.
Paint only the two walls that form the corner to visually anchor the furniture in the room. This trick makes the nook feel intentional rather than just a table pushed against a wall.
- Costs less than $50 for a gallon of paint.
- Use a satin finish for easy wiping and durability.
- Coordinate the wall color with your existing kitchen cabinet tones.
Best shortcut: Use high-quality painter’s tape to get perfectly crisp lines where the accent color meets the ceiling.
37. Color-Drenched Corner Nook
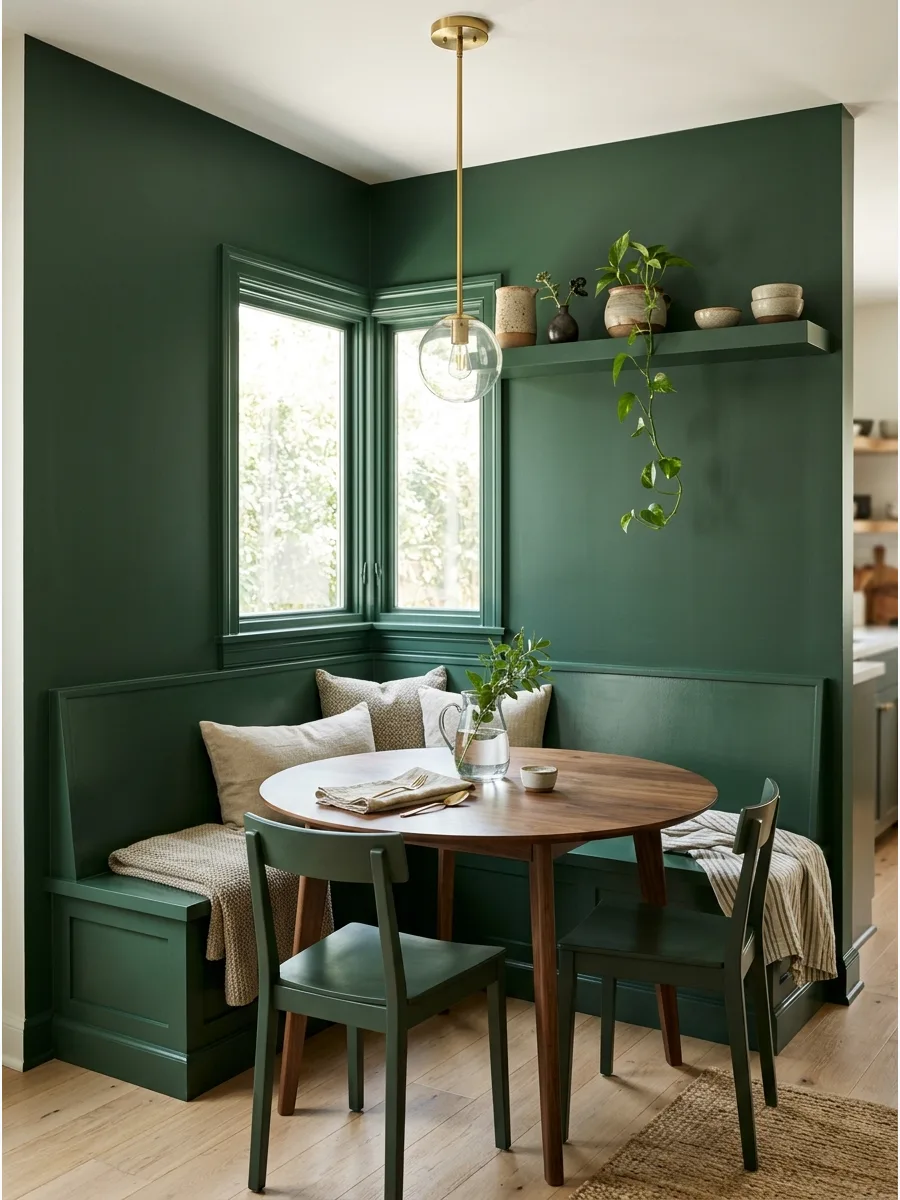
Paint the walls, trim, and built-in bench the same color for a bold designer look. This technique hides the lines of the furniture and makes a small corner feel much larger and more cohesive.
Use a semi-gloss finish on the bench and trim for durability while keeping the walls in a matte or eggshell finish. It creates a seamless, high-end feel that works beautifully with moody jewel tones or warm neutrals.
- Creates a high-end, custom-built appearance.
- Hides shadows and awkward corners in small rooms.
- Works best with mid-tone colors like terracotta or olive green.
Quick win: Match your outlet covers to the wall color so they disappear into the drench.
38. Arched Wall Dining Nook
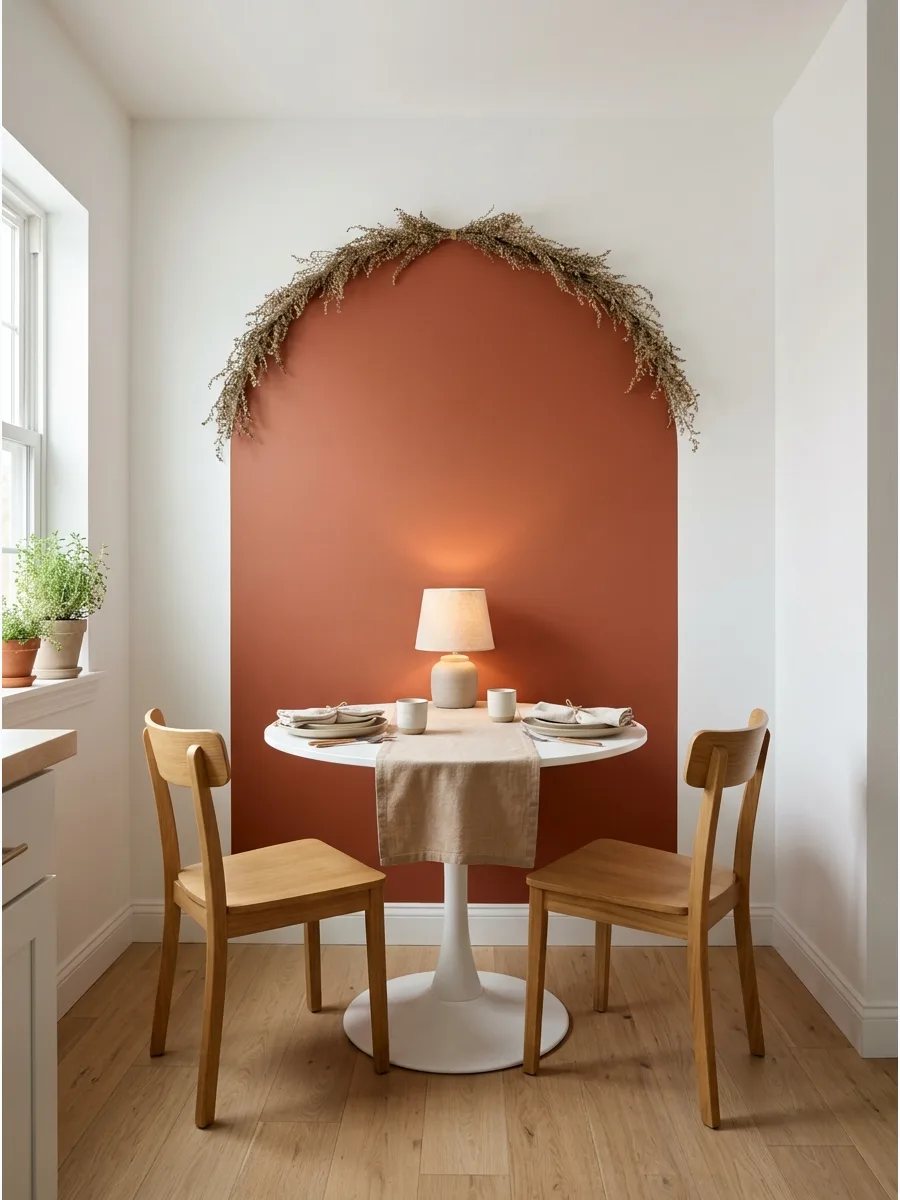
Paint or frame an arch behind the bench to create a soft focal point. An arch adds a soft, organic shape to a room full of hard angles and straight lines typical of most kitchens.
Center the table within the arch to create a perfect focal point that draws guests into the space. It is a clever way to add architectural character to a standard builder-grade home without a major renovation.
- Can be achieved with paint or a large wall decal.
- Softens the look of square tables and rectangular benches.
- Great for defining a nook in a long, narrow hallway.
Best shortcut: Use a string and a pencil to draw a perfect curve for your painted arch.
Home Decor
39. Wrap-Around Dining Gallery Wall
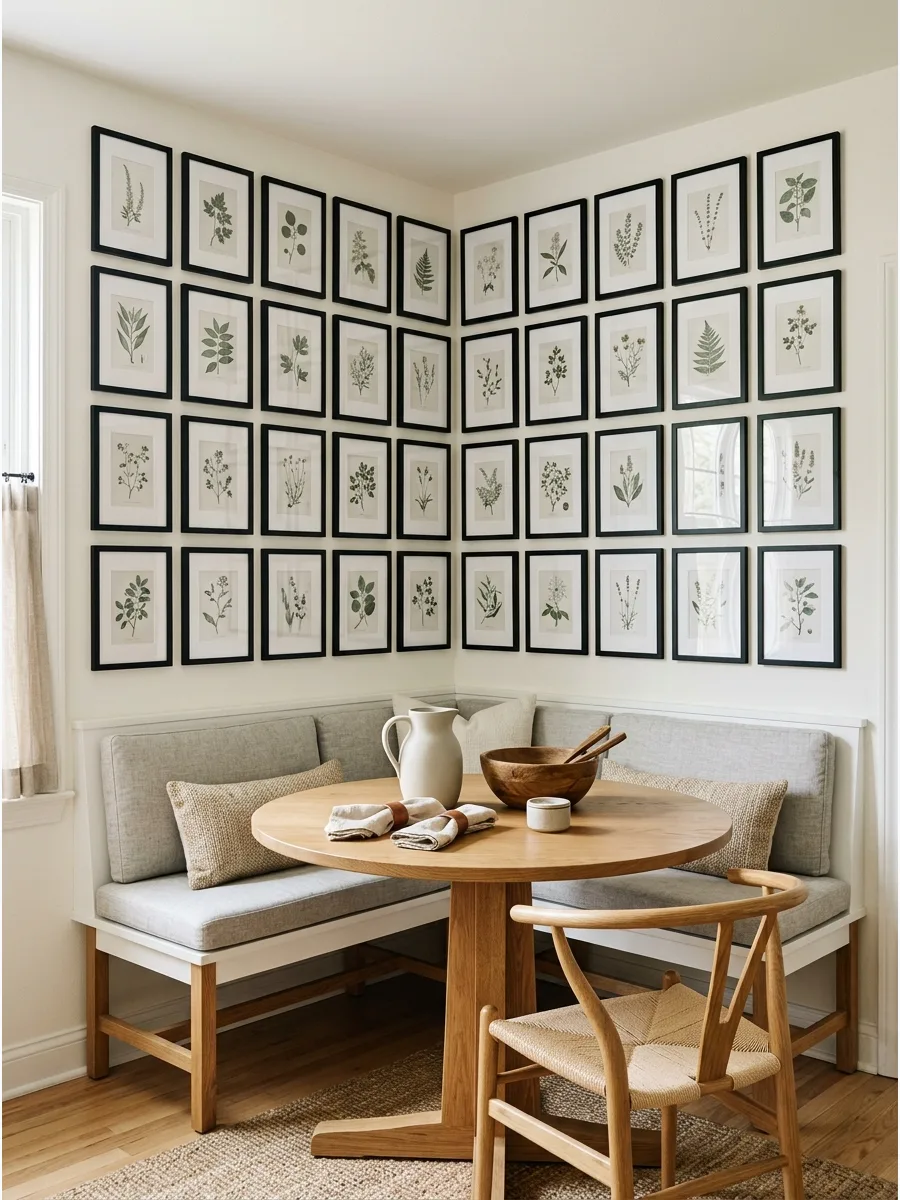
A corner dining nook often feels disconnected from the rest of the room without visual grounding. Using a wrap-around gallery wall creates an intentional boundary that defines the eating area as a distinct zone.
Hang frames at eye level when seated to ensure the artwork feels intimate rather than towering over the table. Most people find that using identical frames for different art styles provides the perfect balance of cohesion and personality.
- Sourcing: Look for digital art sets online to print at home for a budget-friendly way to fill large wall spans.
- Setup: Use painter’s tape to map out the frame placement on both walls before driving any nails.
- Adaptation: Swap out two or three frames for slim floating shelves to hold small succulents or spice jars.
Most people skip this: Leave exactly two inches of space between every frame to maintain a professional, curated look without the wall feeling cluttered.
40. Picture Ledge Dining Nook
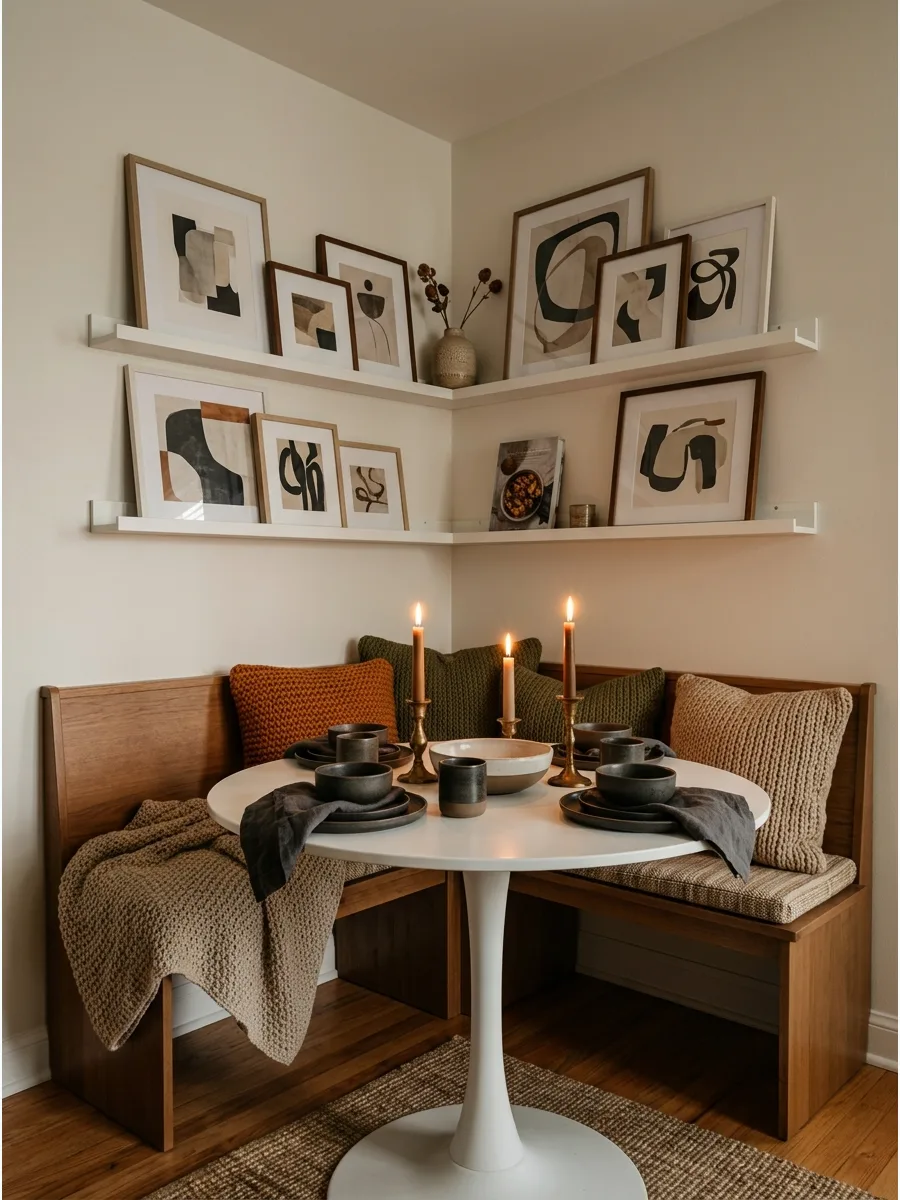
Use picture ledges above the nook so the wall art can be changed easily. Ledges allow you to swap out art, small ceramics, or cookbooks whenever the mood strikes without making new holes.
Overlap different frame sizes on the ledge to create depth and a professional, layered look. This keeps the wall decor flexible and keeps the table surface clear for meals.
- Ideal for rotating seasonal decor or kids’ artwork.
- Install the ledge at eye level when seated.
- Choose a ledge with a front lip to prevent items from sliding off.
Quick win: Place a small piece of museum putty under light items to keep them stable on the ledge.
41. Pendant Light Corner Nook
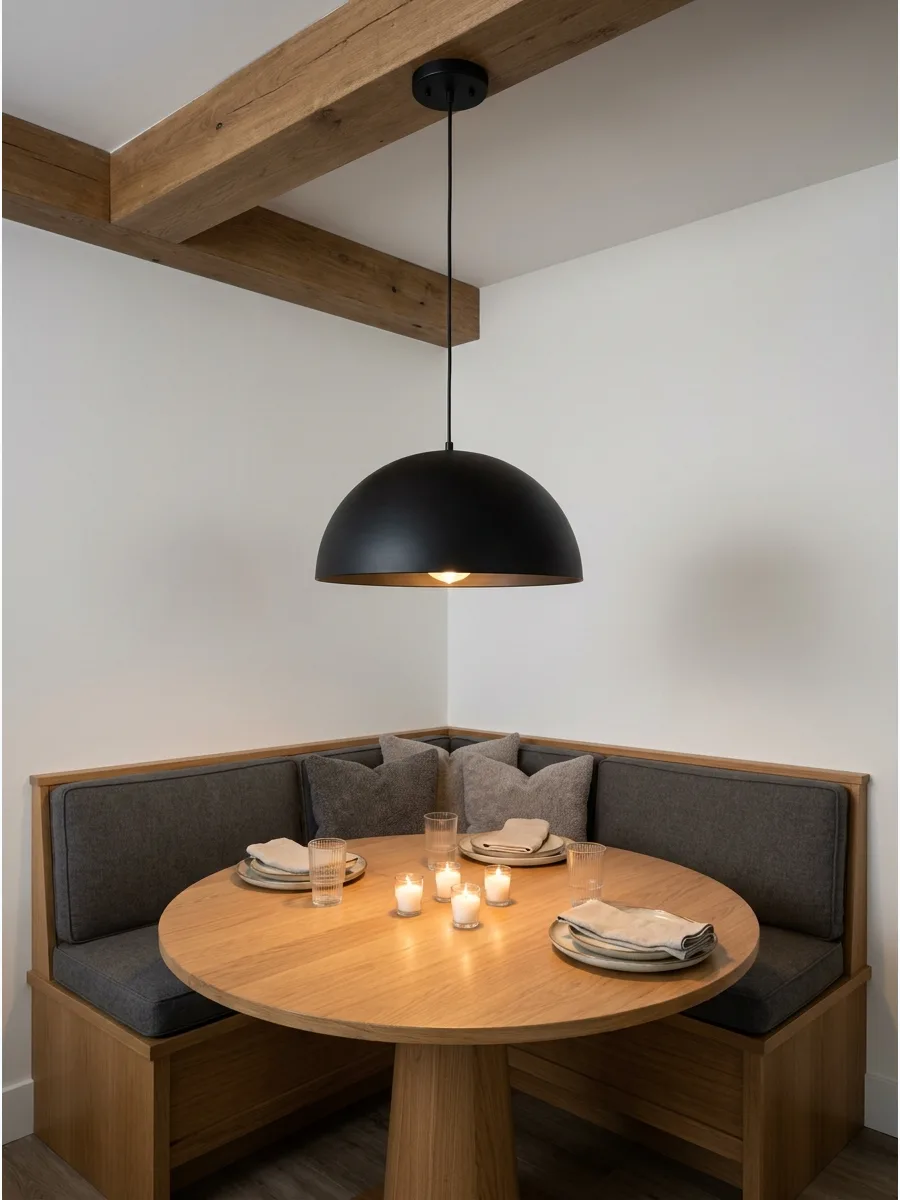
Hang one statement pendant above the table to make the nook feel finished. Lighting is the anchor of the room and defines the center of your dining area.
Choose a fixture with a dimmable bulb to easily transition from bright homework light to soft dinner lighting. A single light hanging low over the table creates an intimate atmosphere for evening meals.
- Hang the bottom of the light 30 to 36 inches above the tabletop.
- Center the light over the table, not the floor space.
- Use a warm white bulb (2700K) for a cozy, inviting glow.
Most people skip this: Swag the cord with a ceiling hook if your junction box isn’t centered over the table.
42. Wall Sconce Dining Nook
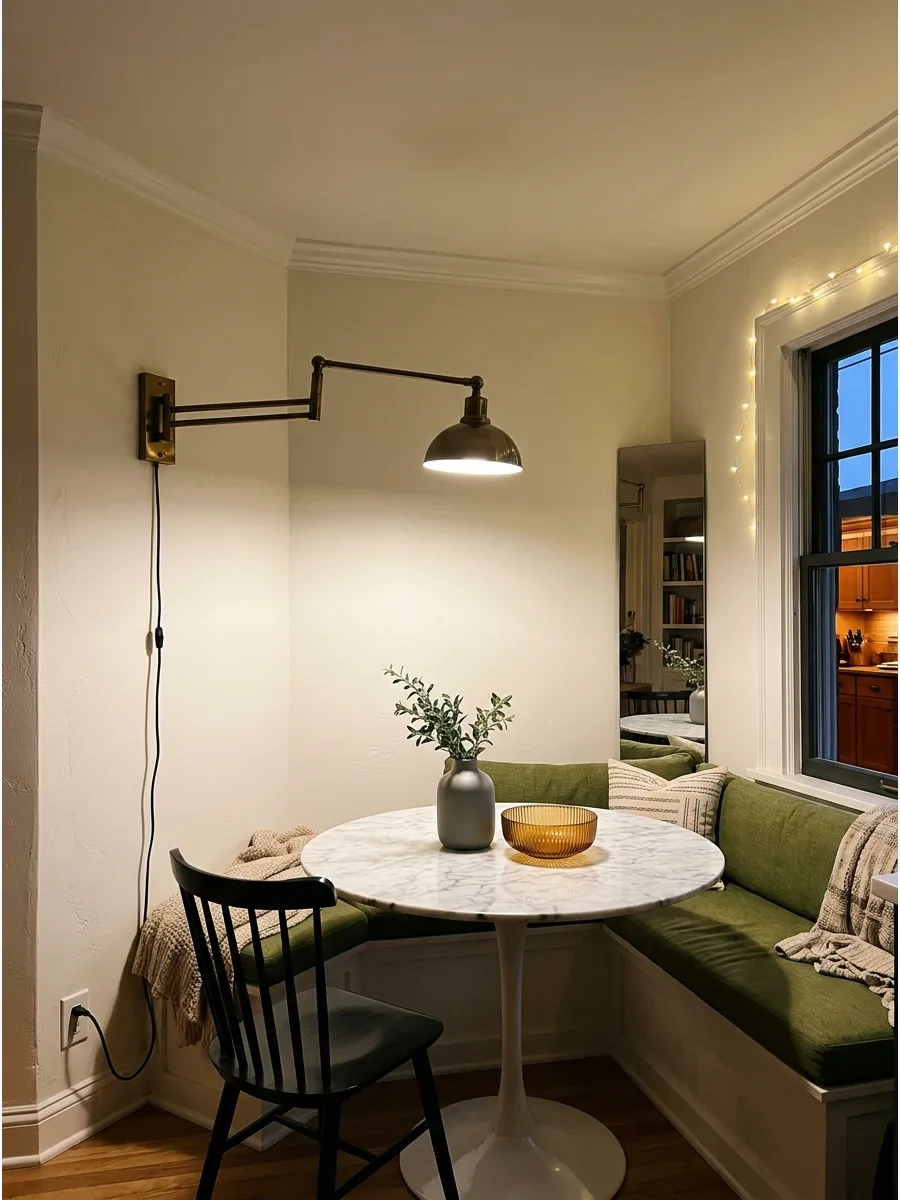
Add wall sconces above the bench for cozy evening lighting. If you cannot hardwire a ceiling light, plug-in sconces are a brilliant way to add warmth without electrical work.
Install a swing-arm sconce so you can move the light directly over the table when needed. This provides soft, eye-level light that feels much more inviting than harsh overhead cans.
- Saves ceiling space in rooms with low clearance.
- Provides targeted task lighting for reading or laptop work.
- Cord covers can be painted to match the wall for a hidden look.
Best shortcut: Use a puck light with a remote to turn a hardwired sconce into a wireless one.
43. Woven Light Fixture Nook
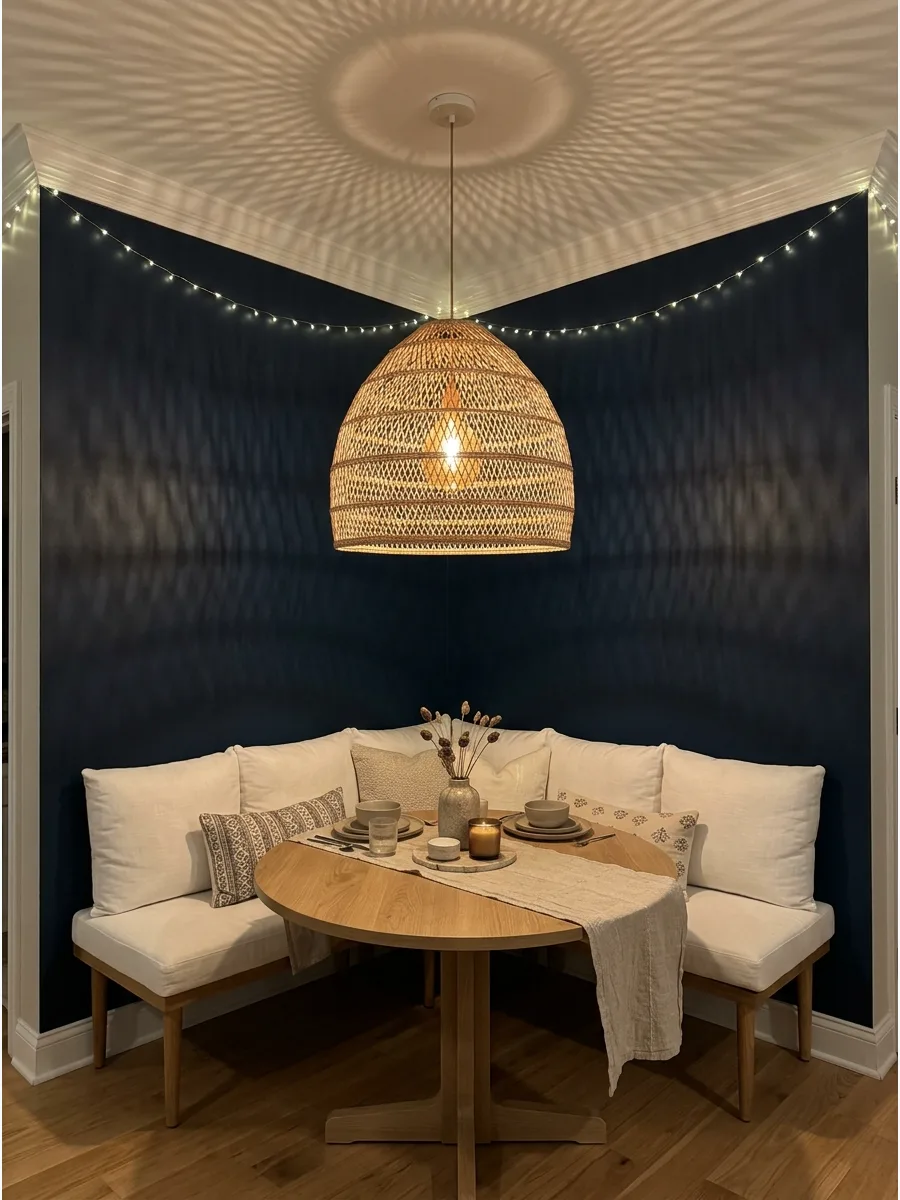
Use a rattan or woven pendant to bring texture and warmth to the corner. The gaps in the weave cast beautiful shadows on the walls, making the nook feel extra cozy at night.
Pair a woven light with wood furniture and linen cushions to create a cohesive, natural look. This is an easy way to soften a modern kitchen filled with hard surfaces like stone and tile.
- Adds organic texture to a minimalist or modern space.
- Lightweight and easy to install on most ceiling boxes.
- Works well with bohemian, coastal, or organic modern styles.
Quick win: Use a clear Edison bulb to emphasize the patterns created by the woven shade.
44. Corner Nook Café Curtains
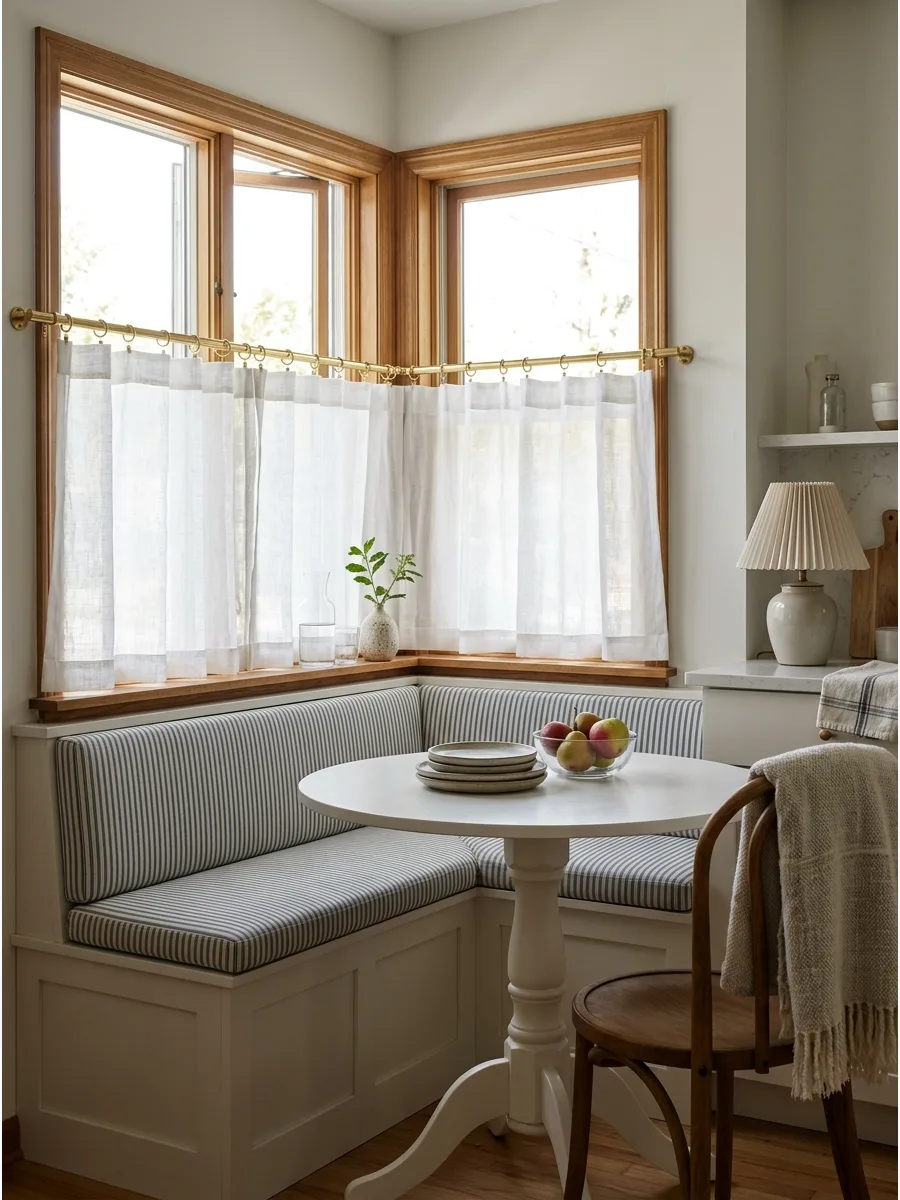
Add café curtains to nearby windows for privacy, softness, and a charming kitchen look. They cover only the bottom half of the window, leaving the top open for sunshine and views of the sky.
Use a lightweight linen or cotton fabric to keep the space feeling airy and casual. This classic detail adds a layer of softness that makes the dining corner feel finished and intentional.
- Provides privacy while seated without blocking all natural light.
- Easy to remove and wash when they get dusty.
- Adds a pop of pattern or color at eye level.
Most people skip this: Use clip-on rings for the curtain rod to make sliding the fabric open and closed much smoother.
45. Corner Dining Nook Rug
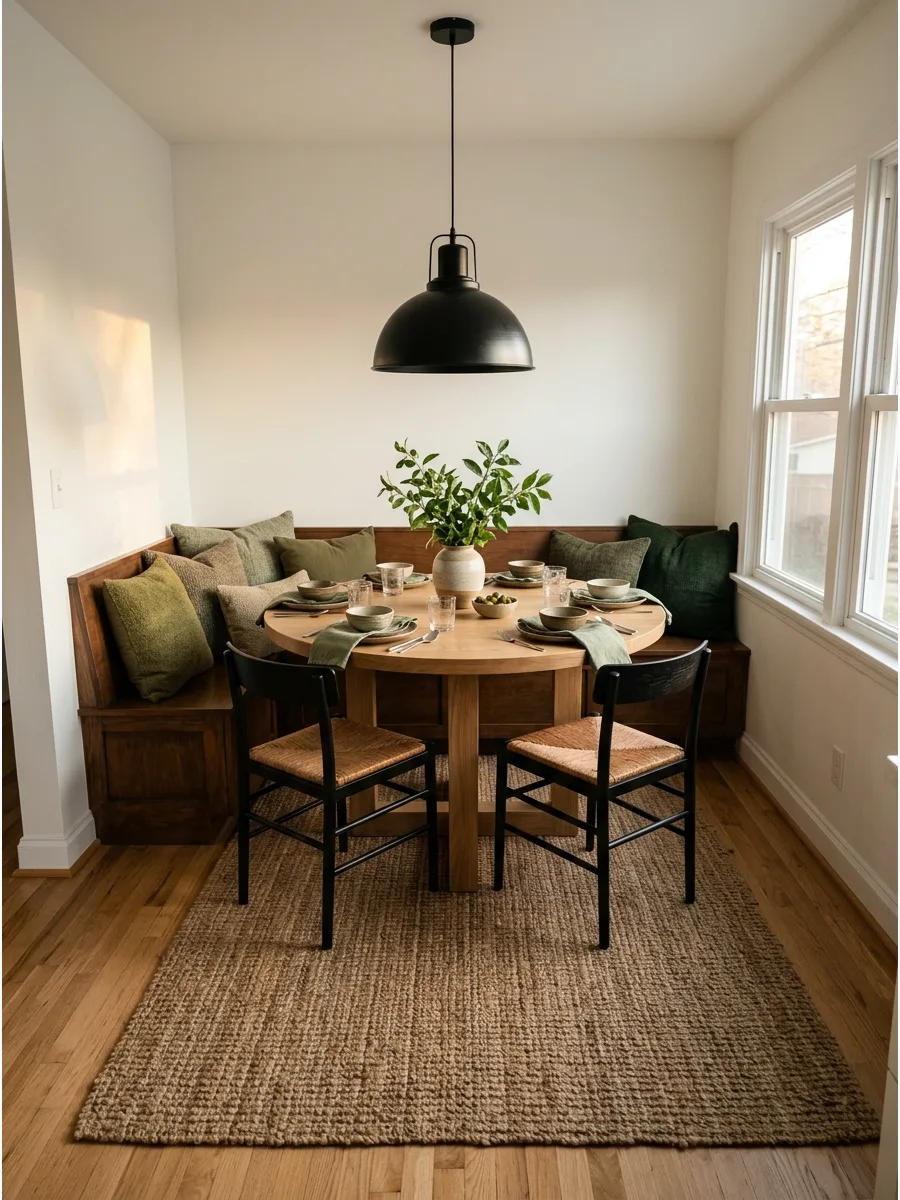
Use a washable rug under the table to define the dining zone. A rug is the most effective way to “zone” an area in an open-concept floor plan while muffling the sound of chairs.
Select a washable rug or an indoor-outdoor material to make cleaning up crumbs and spills stress-free. Ensure the rug is large enough so the chairs stay on the surface even when they are pulled out.
- Protects hardwood or tile floors from chair scratches.
- Choose a low-pile rug so chairs slide easily without catching.
- A rug adds a layer of comfort and warmth underfoot.
Best shortcut: Use a high-quality rug pad to prevent the rug from bunching up under the table legs.
46. Checkerboard Detail Nook
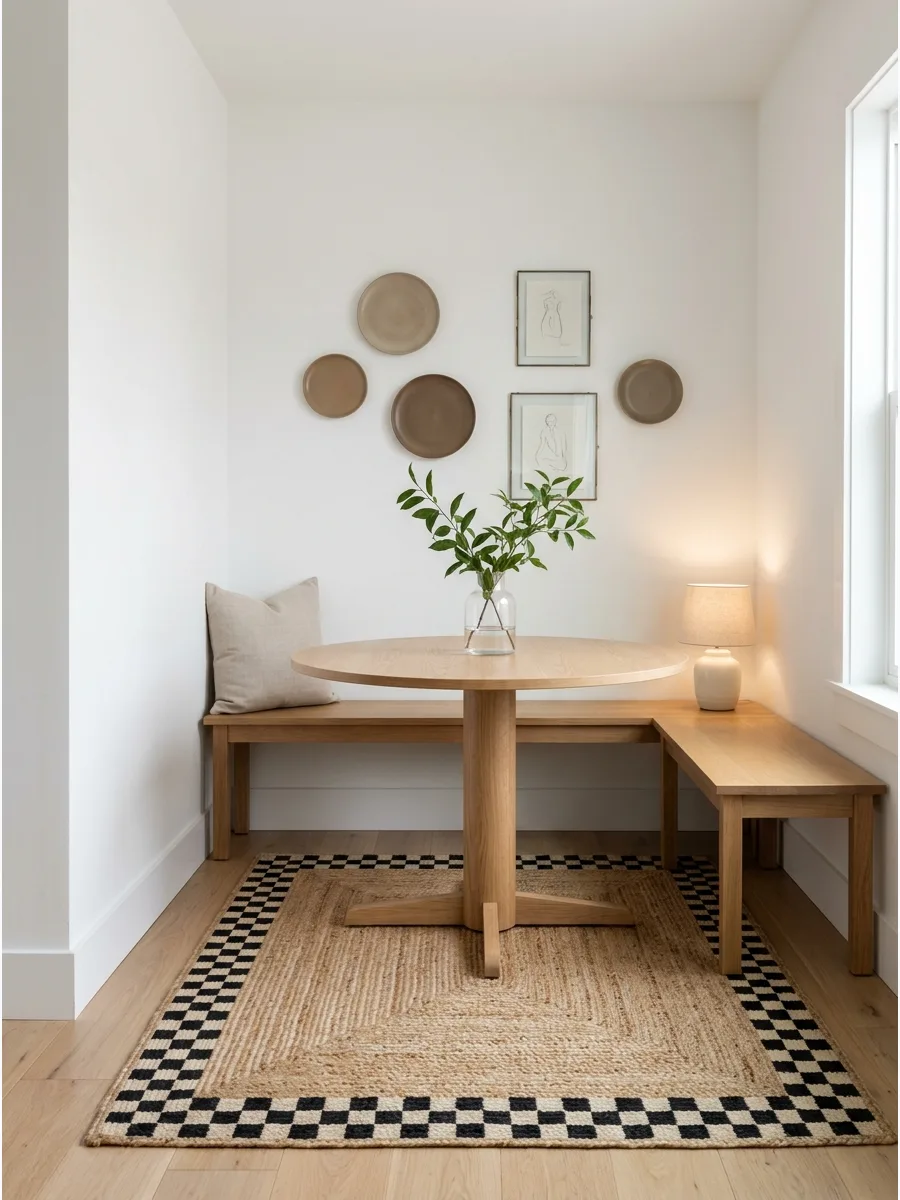
A checkerboard pattern adds a playful, modern energy to a quiet kitchen corner. Use a rug or patterned cushions to bring in this classic look without the commitment of tile.
Layer a low-pile checkerboard rug under the table to instantly define the dining zone. This pattern hides small spills better than solid colors.
- Search for washable rugs to make cleaning up food spills much easier.
- Center the table over the rug so all chair legs stay on a level surface.
- Use checkerboard napkins or a table runner for a low-cost style update.
Quick win: Stick to a two-tone neutral palette like tan and white to keep the pattern from feeling overwhelming in a small space.
47. Plant-Filled Corner Dining Nook
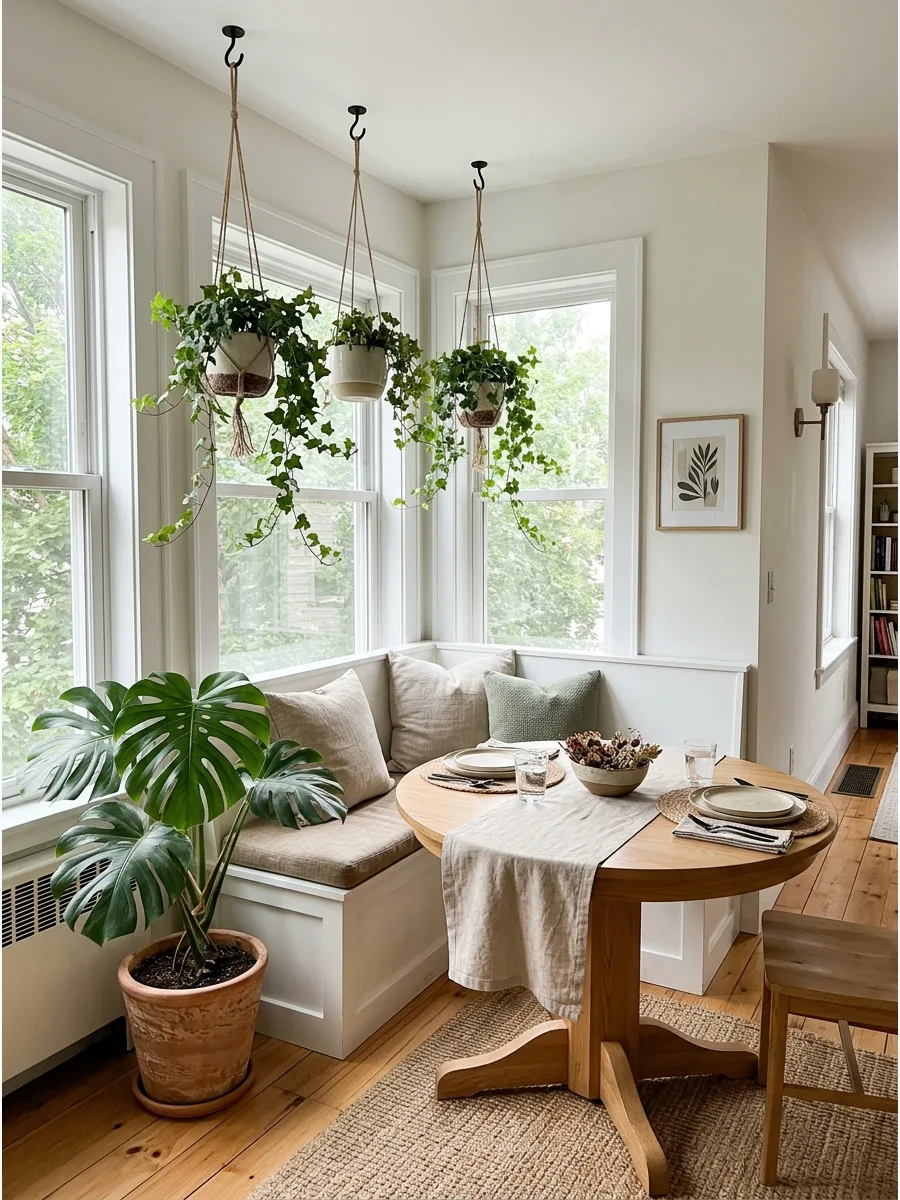
Bringing greenery into a dining corner makes the space feel fresh and intentional. Hang trailing plants from the ceiling or place a large floor plant in the gap between the bench and the wall.
Group three plants of varying heights in the corner to create a lush, natural backdrop. Live plants also help soften the hard lines of a built-in bench.
- Choose low-light plants like pothos if the corner is positioned away from windows.
- Use saucers under every pot to protect the bench and floor from water damage.
- Swap real plants for high-quality faux silk versions if the area has no natural light.
Most people skip this: Check the ceiling height before hanging plants to ensure they do not hit guests in the head when they sit down.
48. Coffee Station Beside Nook
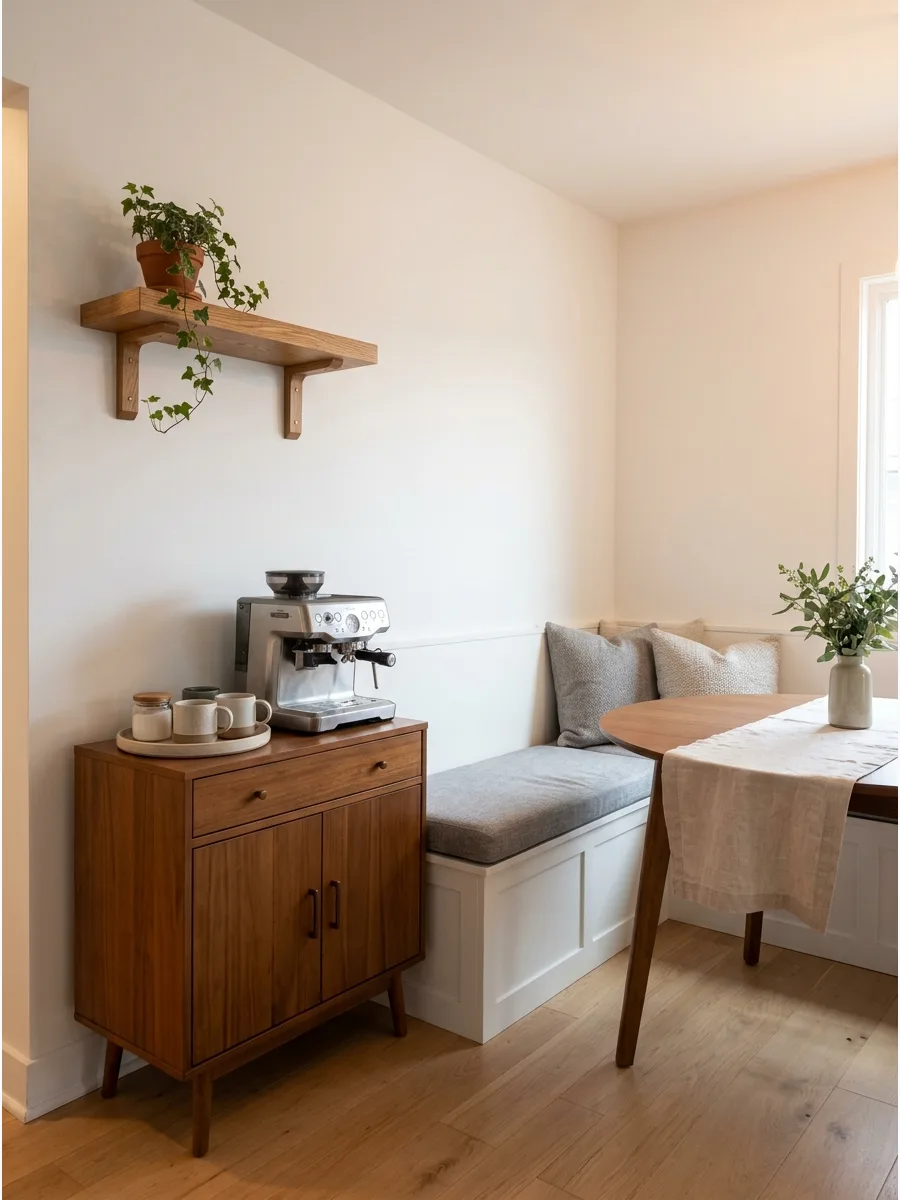
Placing a dedicated coffee bar next to the seating area streamlines the morning routine. A small sideboard or a floating shelf can hold the brewer, mugs, and sugar jars within arm’s reach.
Install a sturdy floating shelf above the coffee bar to keep mugs organized and off the main table. This setup keeps the dining table clear for actual plates and laptops.
- Measure the cabinet height to ensure it matches the table or bench for a seamless look.
- Position the station near an outlet to avoid visible cords stretching across the walkway.
- Use a rolling cart if the dining area needs to be reconfigured for larger parties.
Best shortcut: Use a decorative tray to corral sugar bowls and spoons so the station stays tidy and easy to wipe down.
49. Bookshelf Corner Dining Nook
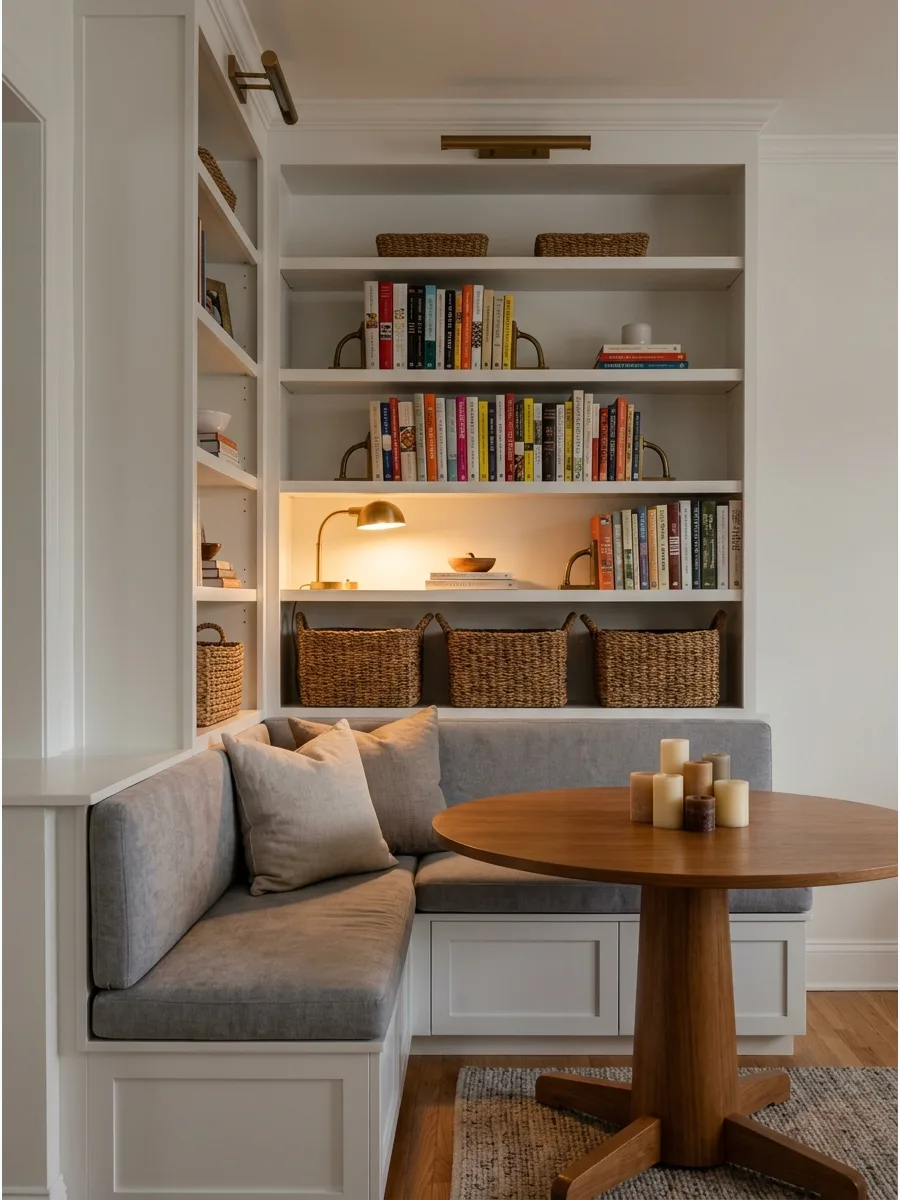
Surrounding a dining nook with books turns it into a cozy library for coffee breaks or study sessions. Install tall bookshelves on one side of the bench to maximize vertical storage.
Mix cookbooks with decorative baskets on the lower shelves to hide extra linens or chargers. This makes the corner feel like a built-in feature rather than an afterthought.
- Buy adjustable shelves to accommodate tall bottles or oversized coffee table books.
- Secure tall shelves to the wall studs for safety in high-traffic dining areas.
- Use floating ledges instead of a bookcase if floor space is extremely limited.
Most people skip this: Leave the shelves at eye level slightly less crowded so the dining area does not feel cluttered or claustrophobic.
50. Multi-Use Corner Dining Nook
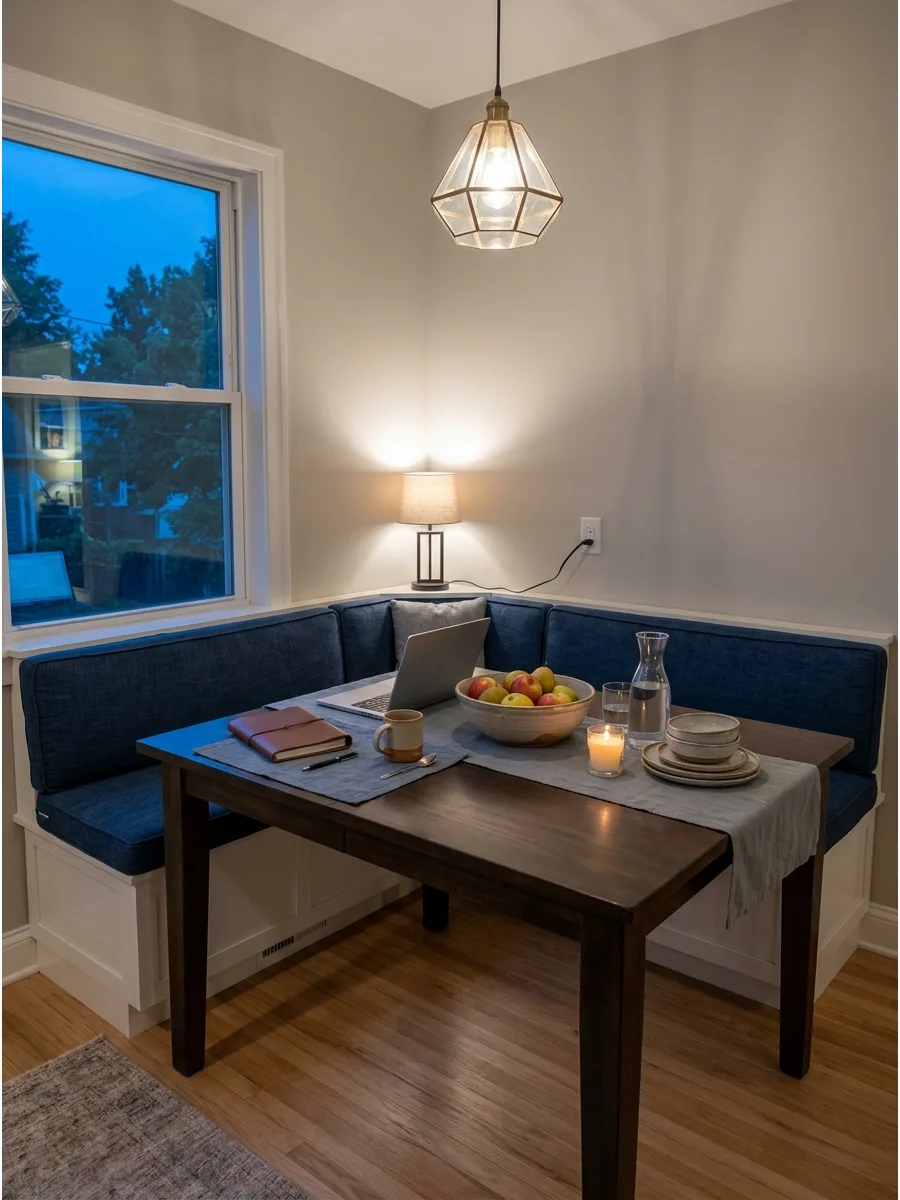
A well-designed nook should work for more than just dinner. Choose a table with a durable surface that can handle laptop work, homework, and crafts.
Incorporate a bench with a deep seat and high-quality foam cushions to ensure comfort during long work sessions. Adding a nearby outlet or a charging hub makes the space truly functional for the whole family.
- Look for performance fabrics that resist stains from both food and office supplies.
- Place the table 18 inches away from the bench to allow enough legroom for adults.
- Use a pedestal table instead of one with four legs to make it easier to slide into the bench.
Quick win: Add a small table lamp to the corner for task lighting that feels warmer than overhead kitchen lights.
Frequently Asked Questions
How much space do I need for a corner dining nook?
You should aim for a minimum footprint of about 5 by 5 feet to comfortably fit a small table and bench seating. Ensure you leave at least 24 inches of clearance between the table and any nearby obstacles so guests can slide in and out without feeling cramped.
Should I choose a round or rectangular table for a corner?
Rectangular tables are excellent for maximizing seating capacity against walls and work seamlessly with L-shaped benches. Round tables are often better for high-traffic areas, as their lack of sharp corners improves flow and prevents accidental bumps in tight spaces.
Is a built-in banquette better than freestanding chairs?
Built-in banquettes are fantastic for saving space and often provide valuable hidden storage under the seats. On the other hand, freestanding chairs offer more versatility, allowing you to easily rearrange your layout or move furniture when cleaning.
How do I choose the right rug size for a corner nook?
Choose a rug that extends at least 24 to 30 inches beyond the table edges to ensure chair legs remain on the rug when pulled out. This prevents tripping hazards and helps visually define the dining area as its own cozy zone within the room.
Where should the lighting be placed in a corner dining area?
Always center your pendant or chandelier directly over the table’s surface rather than the center of the room to create a balanced look. If you cannot move the ceiling junction box, a stylish swing-arm wall sconce is a practical way to provide focused light in an off-center corner.