50 Bathroom Lighting Ideas for Vanities, Ceilings, Showers, and Nighttime

This post may contain affiliate links: full affiliate disclosure.
Bathroom lighting has to illuminate faces, floors, storage, and wet areas without turning every routine into the same bright overhead scene.
These ideas compare mirror arrangements, ceiling fixtures, shower lighting, decorative accents, night lights, and controls so each layer has a clear purpose.
Save the looks that fit your room, then verify fixture listings, placement, wiring, dimmer compatibility, adopted codes, and installation requirements with qualified professionals.
Mirror and Vanity Lighting That Helps You See Clearly
Vanity lighting works best when it reaches the face from useful angles without harsh glare. Coordinate fixtures with mirror size, sink positions, and reflected views.
1. Flank One Mirror With Matching Sconces
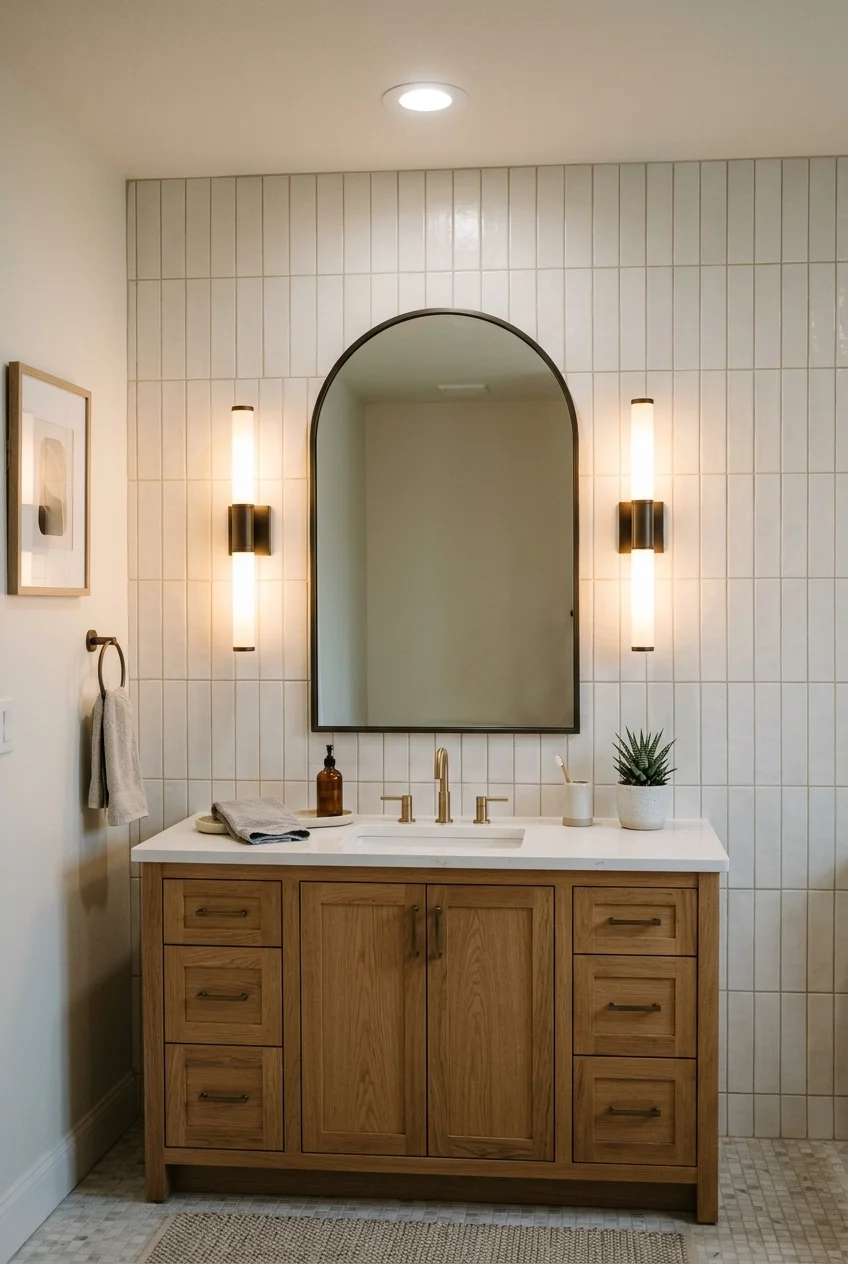
A sconce on each side of one mirror sends light toward both sides of the face, reducing the deep shadows created by ceiling-only illumination.
Choose fixtures narrow enough to preserve mirror width and door clearance. Their glowing portions should relate to standing face height, not merely wall symmetry.
Use a ceiling fixture for general light as well. Side sconces can serve the mirror beautifully without carrying every corner of the room.
2. Use Vertical Light Bars for Even Face Lighting
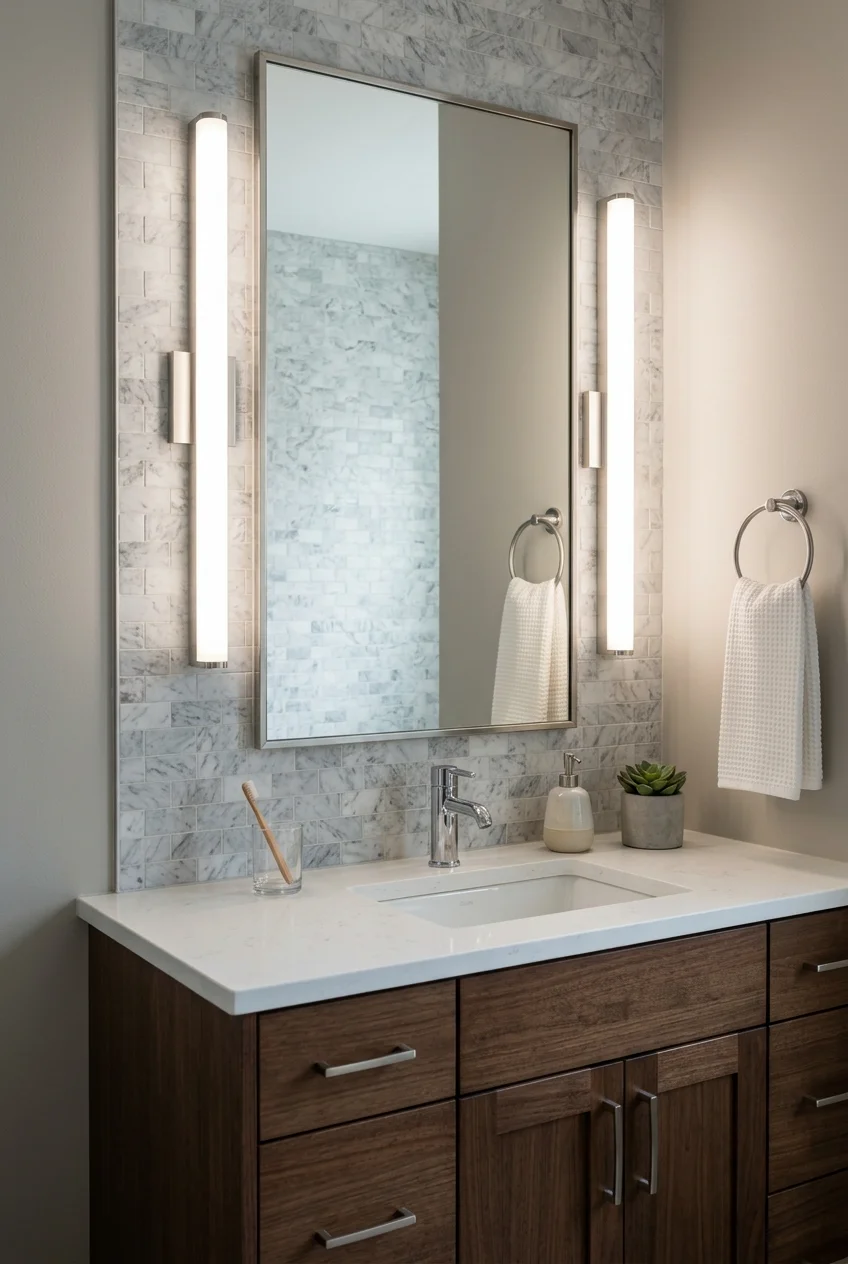
Long vertical light bars spread illumination across more of the face than tiny point sources, making them useful beside tall rectangular mirrors.
Keep both bars aligned with the mirror and clear of cabinet doors, towel hardware, and side walls. Confirm the fixtures carry the required location rating.
- Compare bar length with mirror height.
- Check glare from the normal standing position.
- Leave room to clean mirror edges.
- Coordinate boxes before tile installation.
A diffused lens hides individual LEDs and softens reflections. View an operating sample when possible because product photographs rarely reveal actual glare.
3. Place Three Sconces Across a Double Vanity
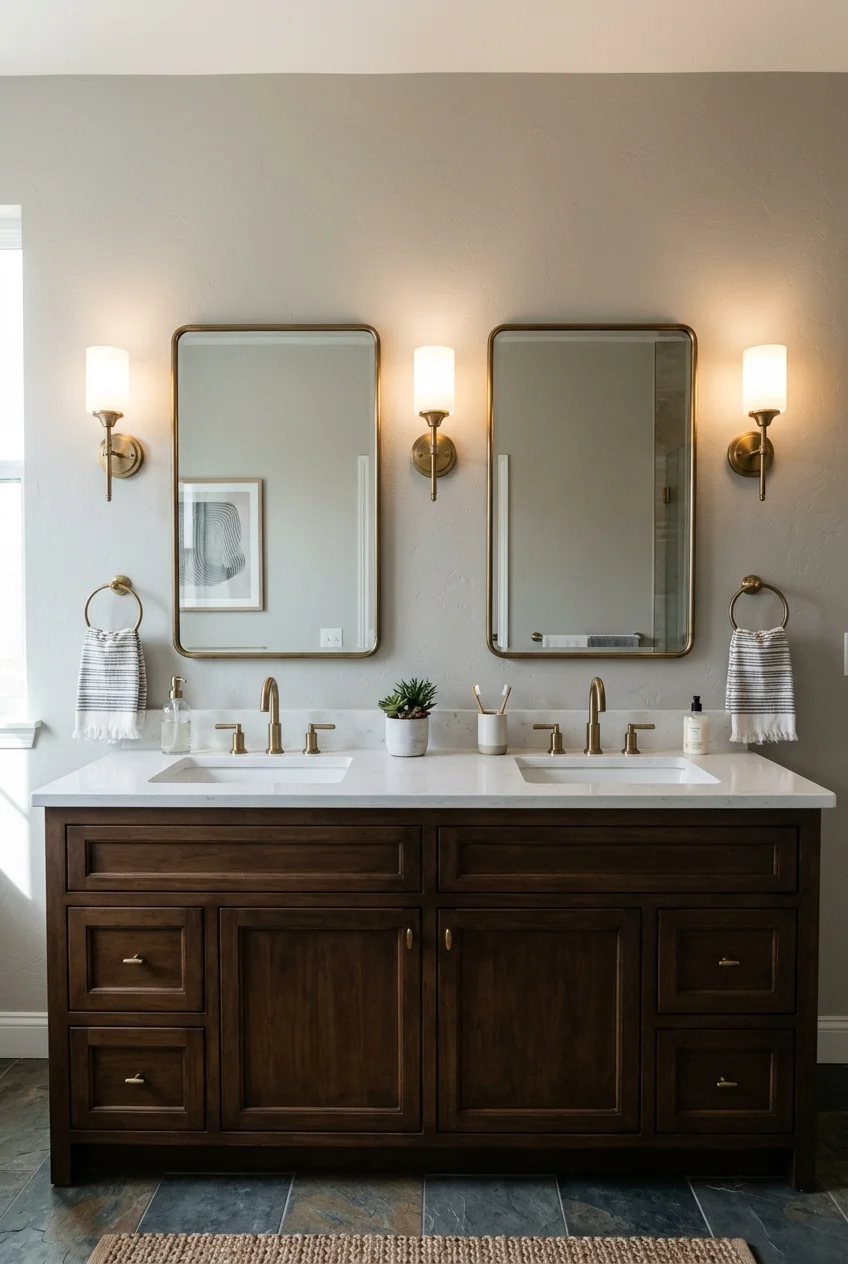
Three sconces can frame two mirrors by placing one at each outer edge and one between them, creating a balanced rhythm across a wide vanity.
The center fixture needs enough wall width to avoid crowding mirror frames. Align all three glowing elements rather than only their mounting plates.
Put both sinks and mirrors into the elevation before choosing fixture width. Small spacing errors become conspicuous across a long repeated arrangement.
4. Center a Diffused Light Bar Above the Mirror
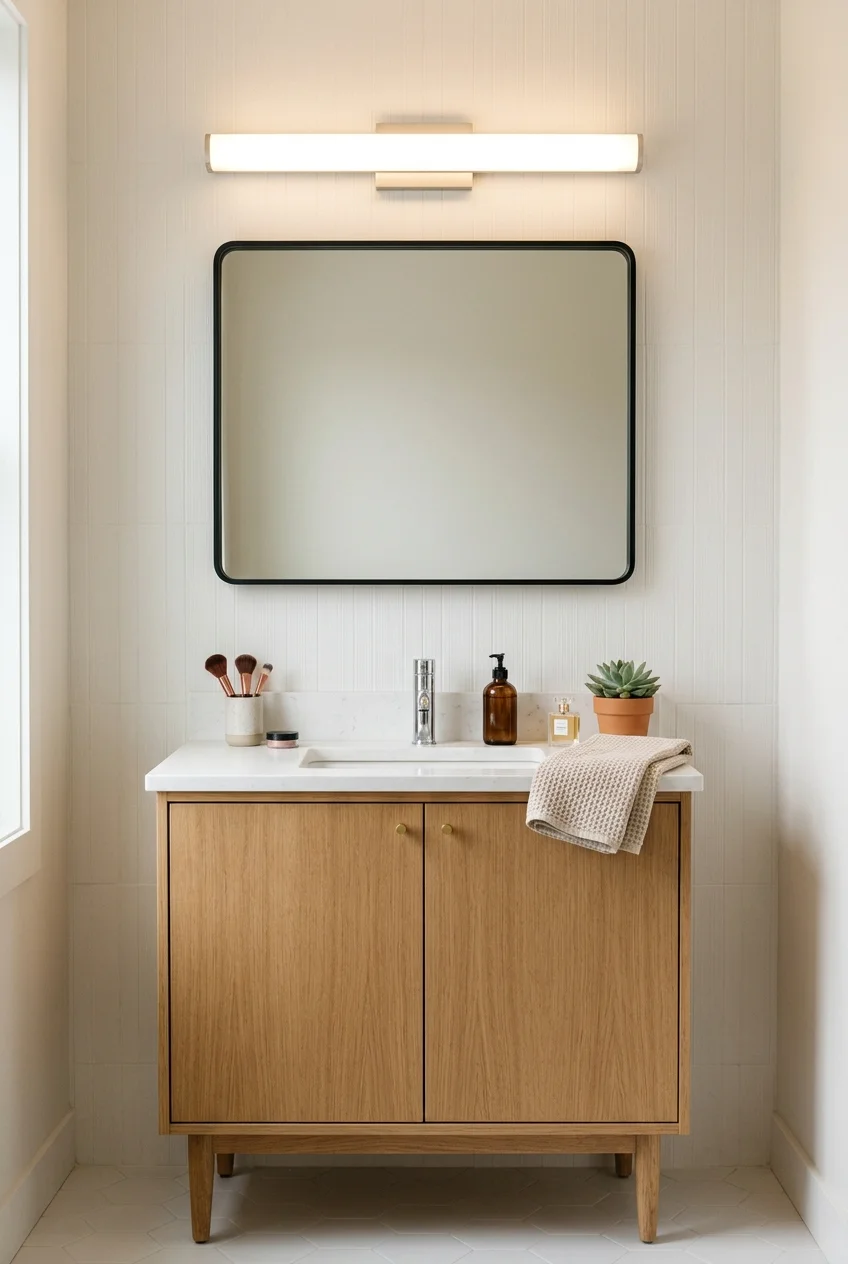
An over-mirror bar fits walls without side clearance and can illuminate a broad vanity when its lens spreads light forward rather than straight downward.
As an Amazon Associate, we earn from qualifying purchases.
This dimmable damp-rated LED vanity bar offers selectable white-light settings. Confirm its width, electrical requirements, compatible dimmer, and location rating before choosing it.
Center the glowing section on the sink or mirror composition, not automatically on the entire wall. A nearby linen cabinet can shift the visual balance.
Watch for A fixture above the mirror can still cast eye-socket shadows. Add side light when precise grooming matters and the wall provides enough space.
5. Choose a Front-Lit Mirror for a Clean Wall
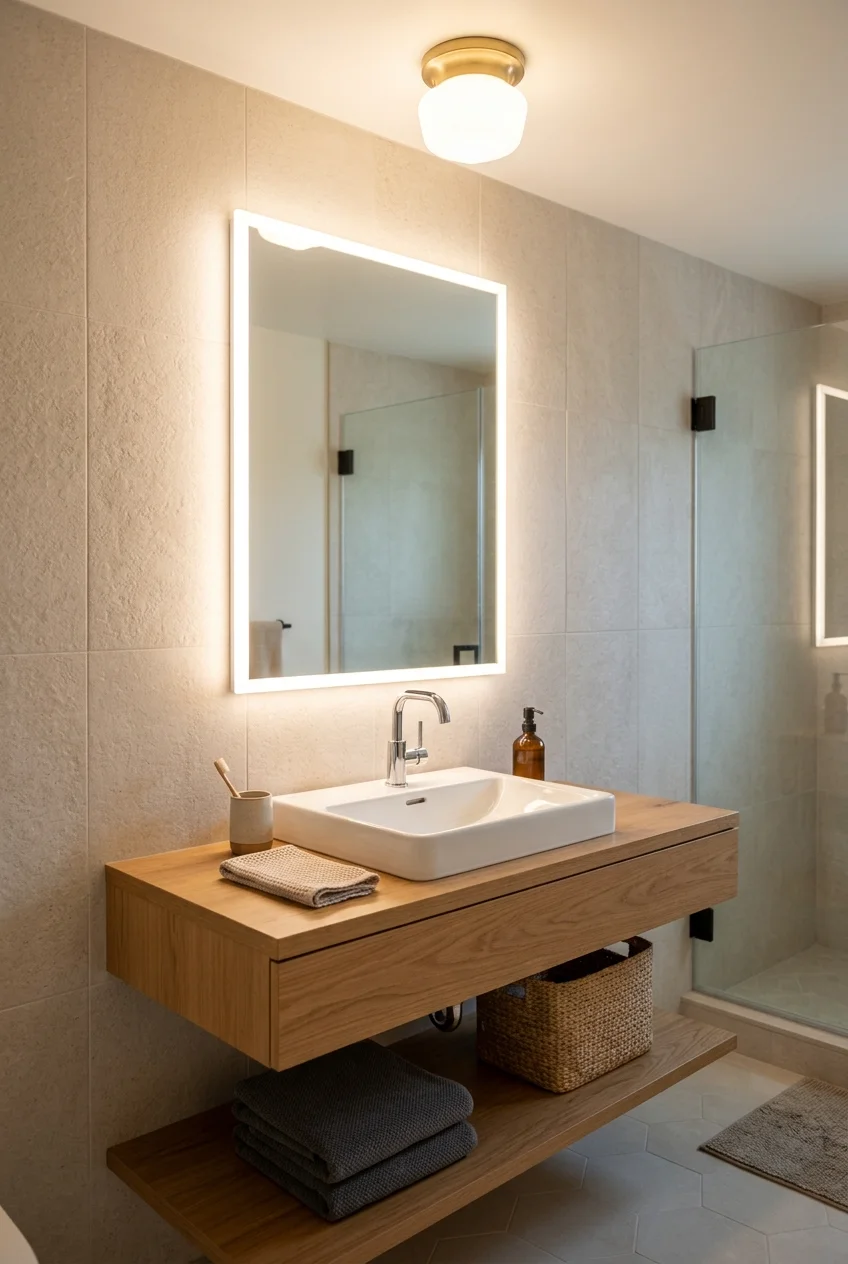
A front-lit mirror integrates task light along its face, removing separate sconces and keeping a narrow vanity wall visually simple.
A dimmable front-lit and backlit bathroom mirror can combine mirror lighting with adjustable appearance. Verify dimensions, controls, wiring method, listing, and defogger operation.
Integrated light does not automatically illuminate the whole room. Add a separate ambient source so floors, storage, and the shower remain visible.
- Check illuminated area against face position.
- Confirm switch and touch-control behavior.
- Plan wiring before closing the wall.
- Leave service access required by the product.
Confirm how defogging, memory, and lighting functions behave independently. Features sharing one touch control may not match the household’s preferred routine.
Compare the mirror at its brightest and dimmest settings. A glowing border may look strong in photographs yet provide limited forward task light.
6. Add a Backlit Halo Behind a Framed Mirror
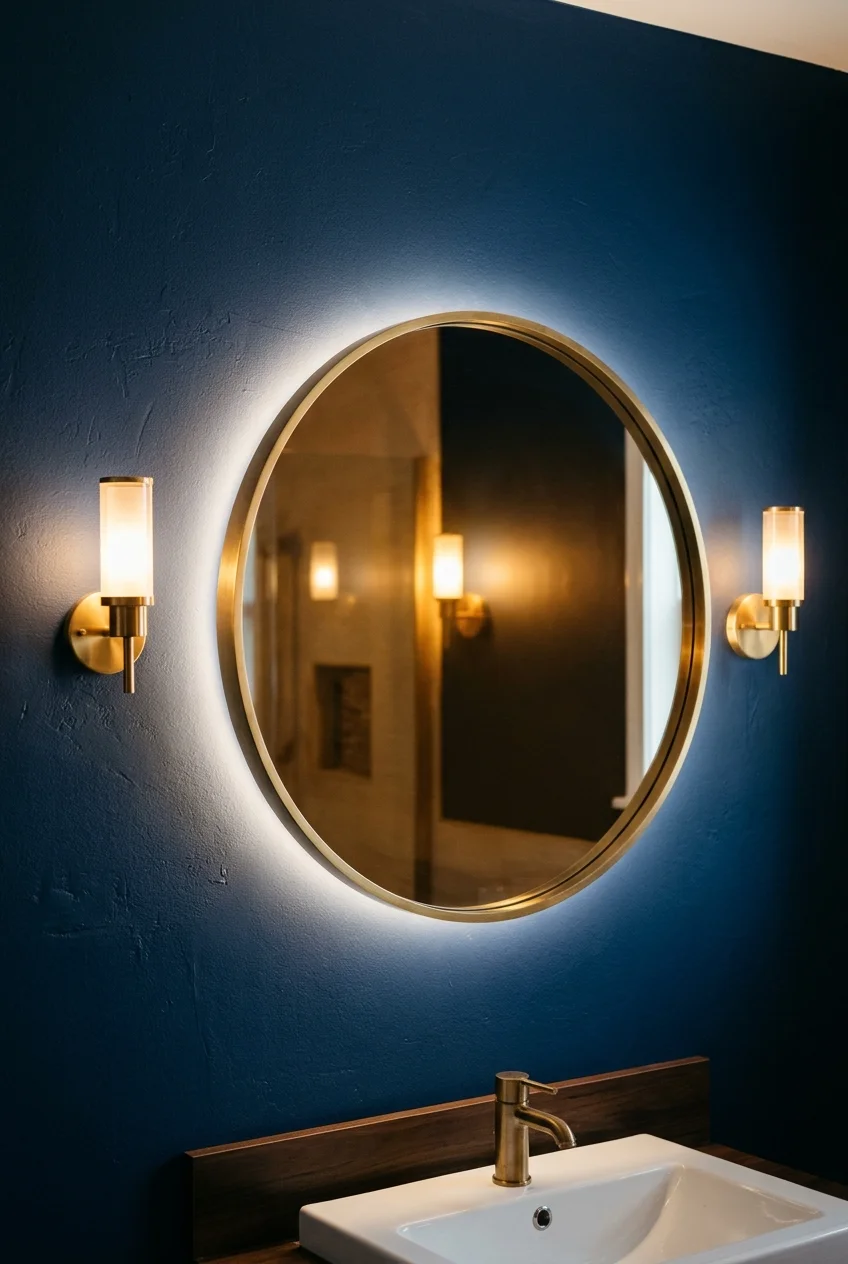
Backlighting creates a soft halo on the wall and visually separates the mirror from tile, plaster, or a saturated paint color.
Treat the halo as accent light unless the product also directs light forward, and keep its wall gap even to prevent distracting bright patches.
7. Install Lighted Medicine Cabinets Over Two Sinks
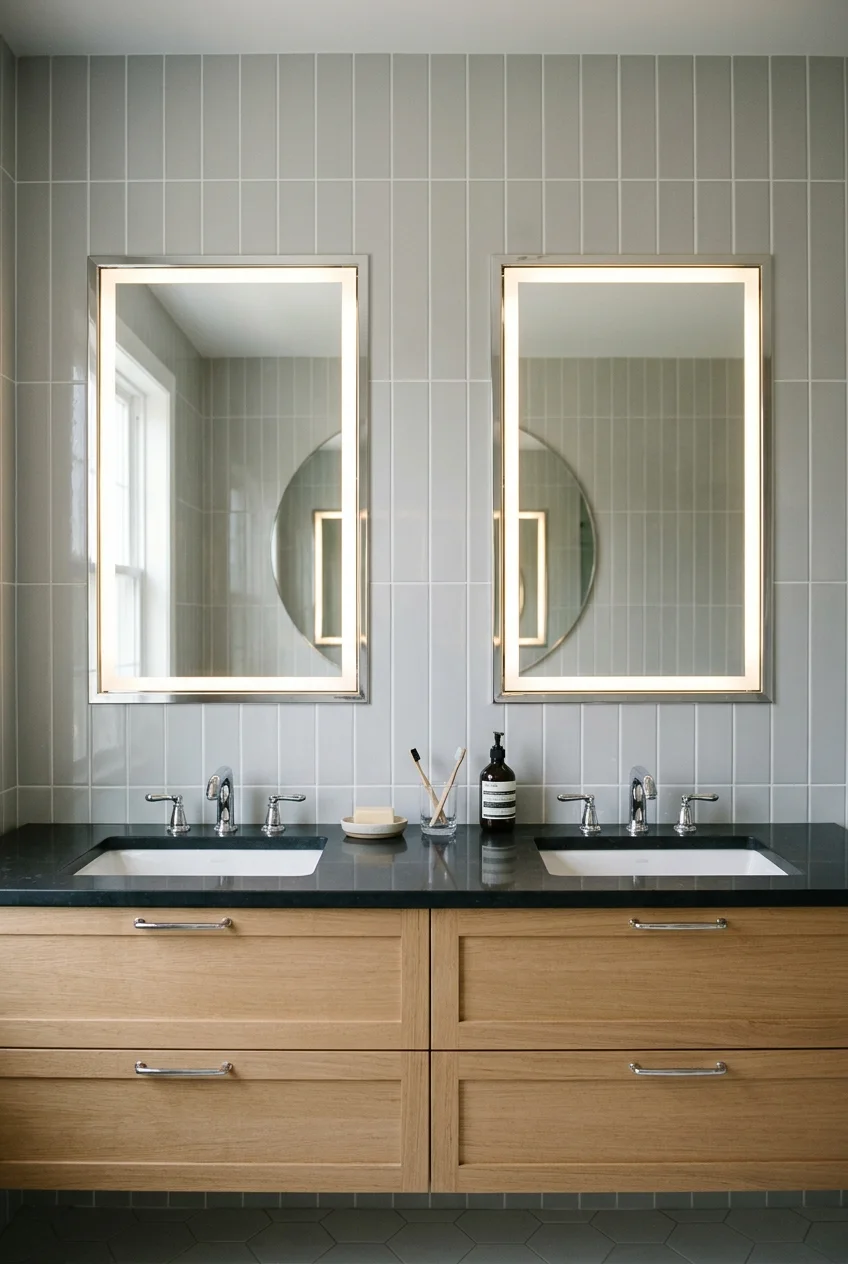
Two lighted medicine cabinets combine shallow storage, mirrors, and task lighting while giving each person a defined zone across a shared vanity.
Coordinate stud locations, recess depth, wiring, door swing, faucet centers, and internal shelves before framing. Nearby sconces must not block either door.
- Set sink and faucet centers.
- Choose cabinet sizes and hinge directions.
- Map framing, wiring, and service access.
- Test fully opened doors against adjacent fixtures.
Check whether internal outlets, defogging, or night lights require additional circuits or controls. Do not assume two cabinets can simply share every connection.
Recessed boxes must preserve the wall assembly and avoid hidden utilities. Surface-mounted versions may be preferable when framing or depth prevents safe recessing.
Match the cabinets’ color settings and dimming behavior so one side does not render skin or finishes differently from the other.
8. Hang Pendants Beside a Round Mirror
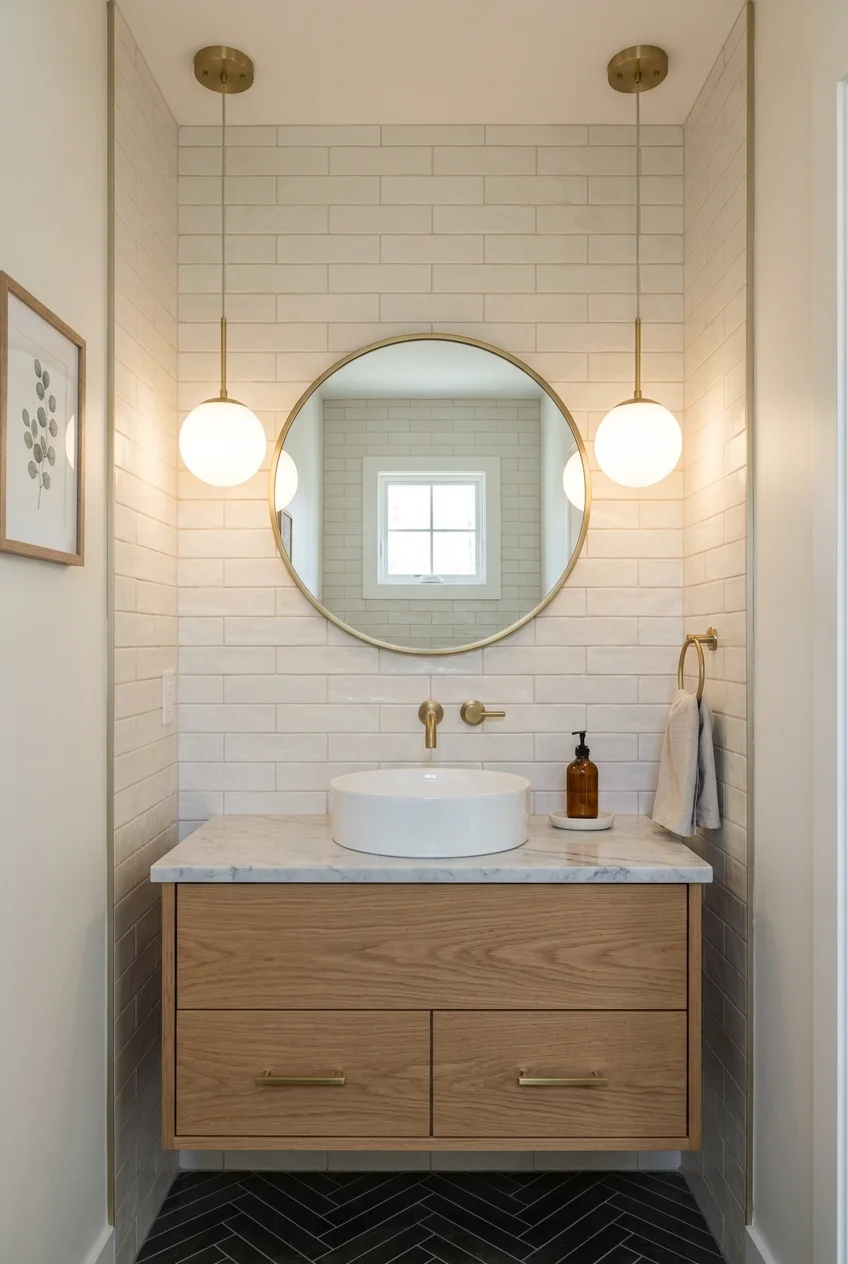
A pair of slim pendants can frame a round mirror while leaving the wall surface open, especially when tile makes additional wall boxes visually awkward.
Pendant length, swing, ceiling support, and proximity to water all require careful planning. A qualified electrician should verify local restrictions and product suitability.
Use compact shades that direct soft light toward the face without hanging into the sink approach. Test the reflected lamp brightness from normal eye level.
Setup note Finalize pendant locations only after the mirror and vanity are centered. Ceiling boxes are less forgiving than adjustable wall-mounted fixture plates.
9. Drop One Pendant Between Separate Mirrors
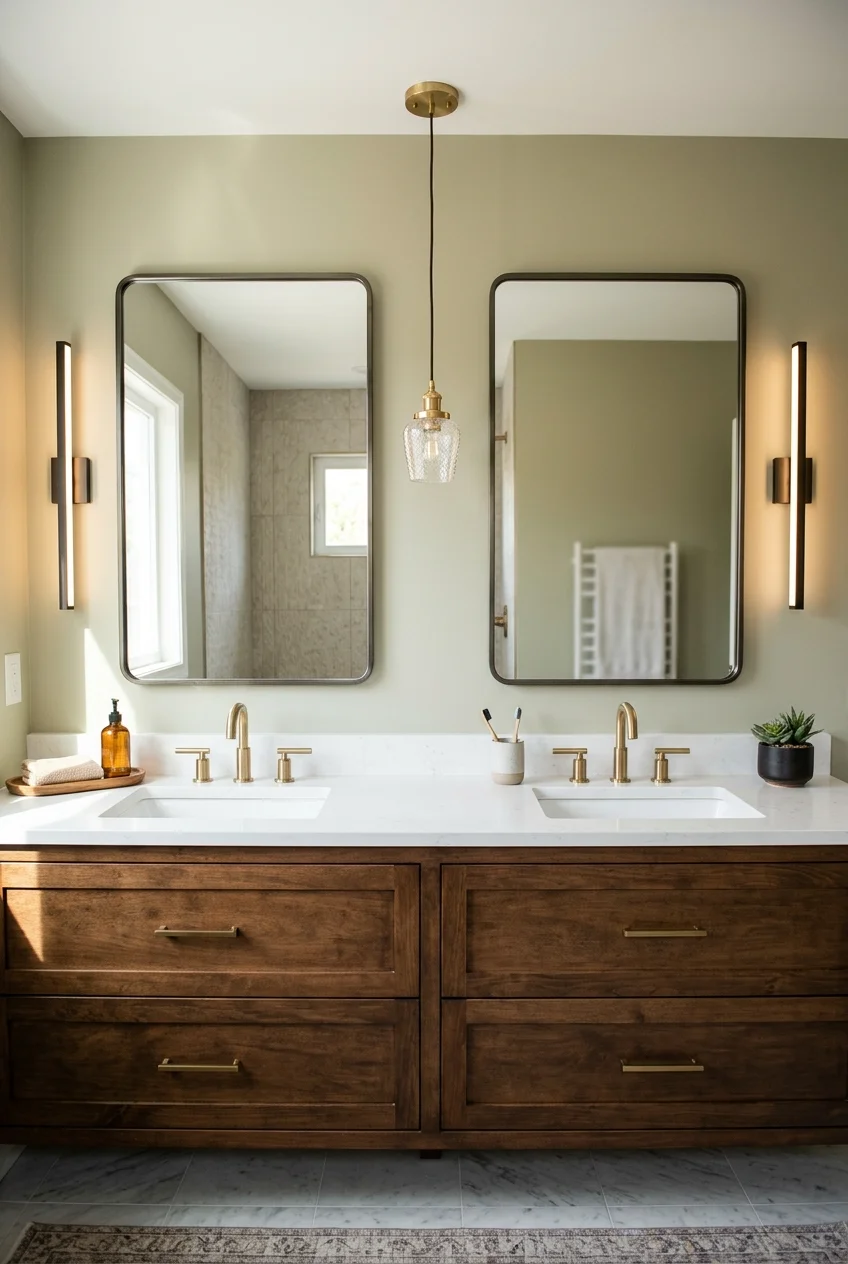
One decorative pendant in the center gap can connect two mirrors without repeating a third wall sconce, giving a double vanity a clear focal point.
Support it with useful face lighting, then check both mirror reflections so the pendant does not overlap faces or repeat against a distracting tile joint.
10. Use Picture Lights Above Small Vanity Mirrors
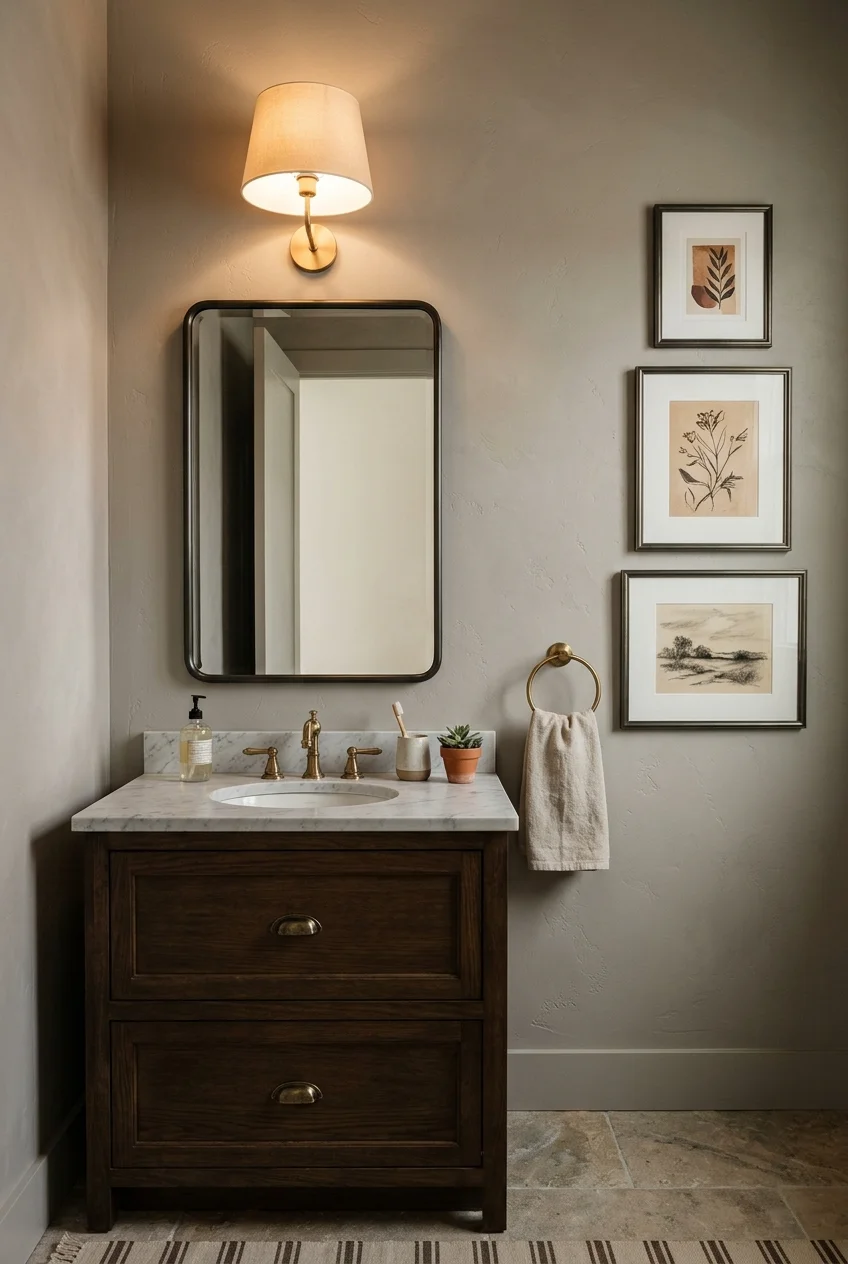
A compact picture-light shape gives a powder-room mirror a tailored, furniture-like finish and works well above framed artwork elsewhere in the room.
Choose a diffused fixture intended for bathroom use rather than adapting a dry-location art light. Confirm forward spread and glare before relying on it.
For a larger visual refresh around the fixture, these powder room ideas show how mirrors, wall finishes, and compact vanities can share one focal wall.
11. Pair Opal Globe Sconces With an Arched Mirror
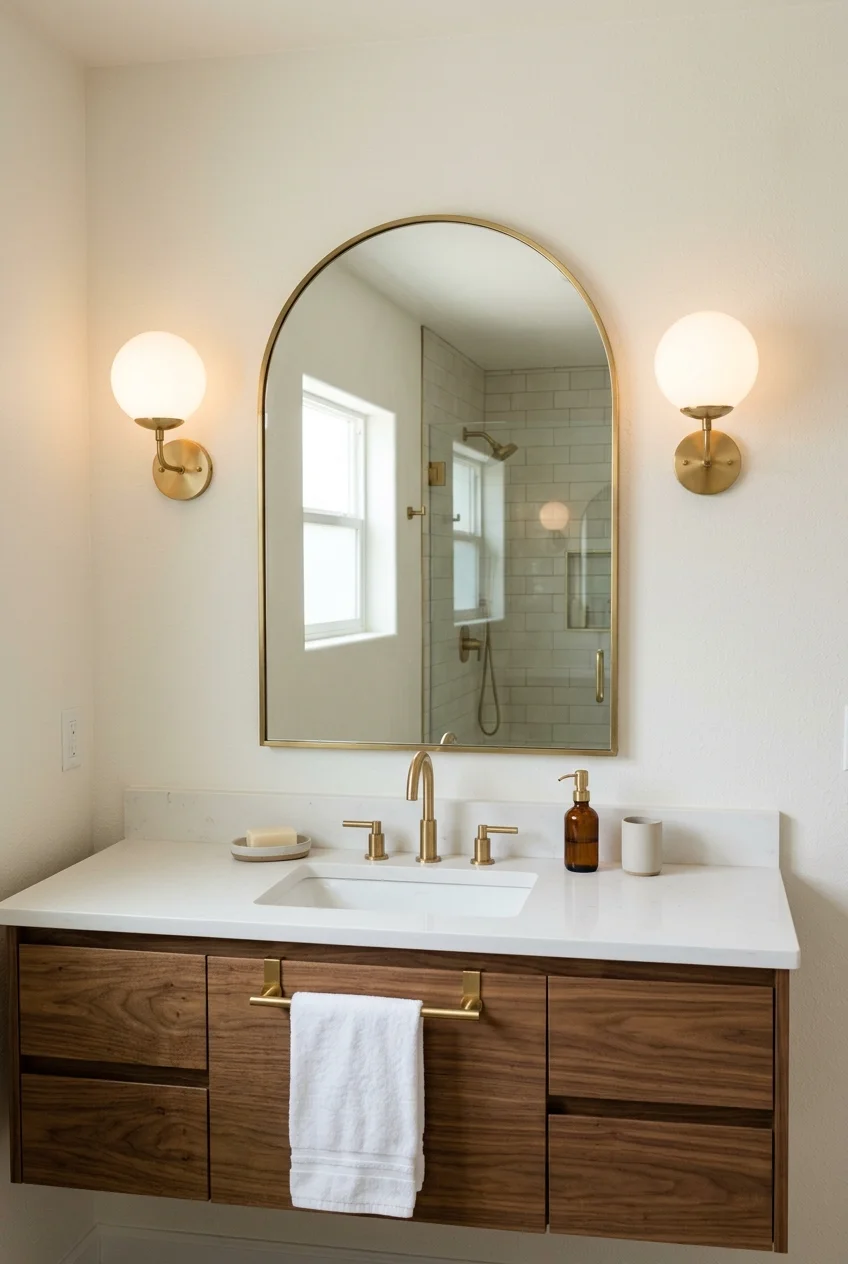
Opal globes soften the visible lamp and introduce round shapes beside an arched mirror, balancing the straight lines of a vanity and backsplash.
Select globe size from the wall elevation, then place mounting arms clear of the frame so reflected shapes remain balanced rather than crowded.
12. Use Fabric-Shaded Sconces in a Dry Powder Room
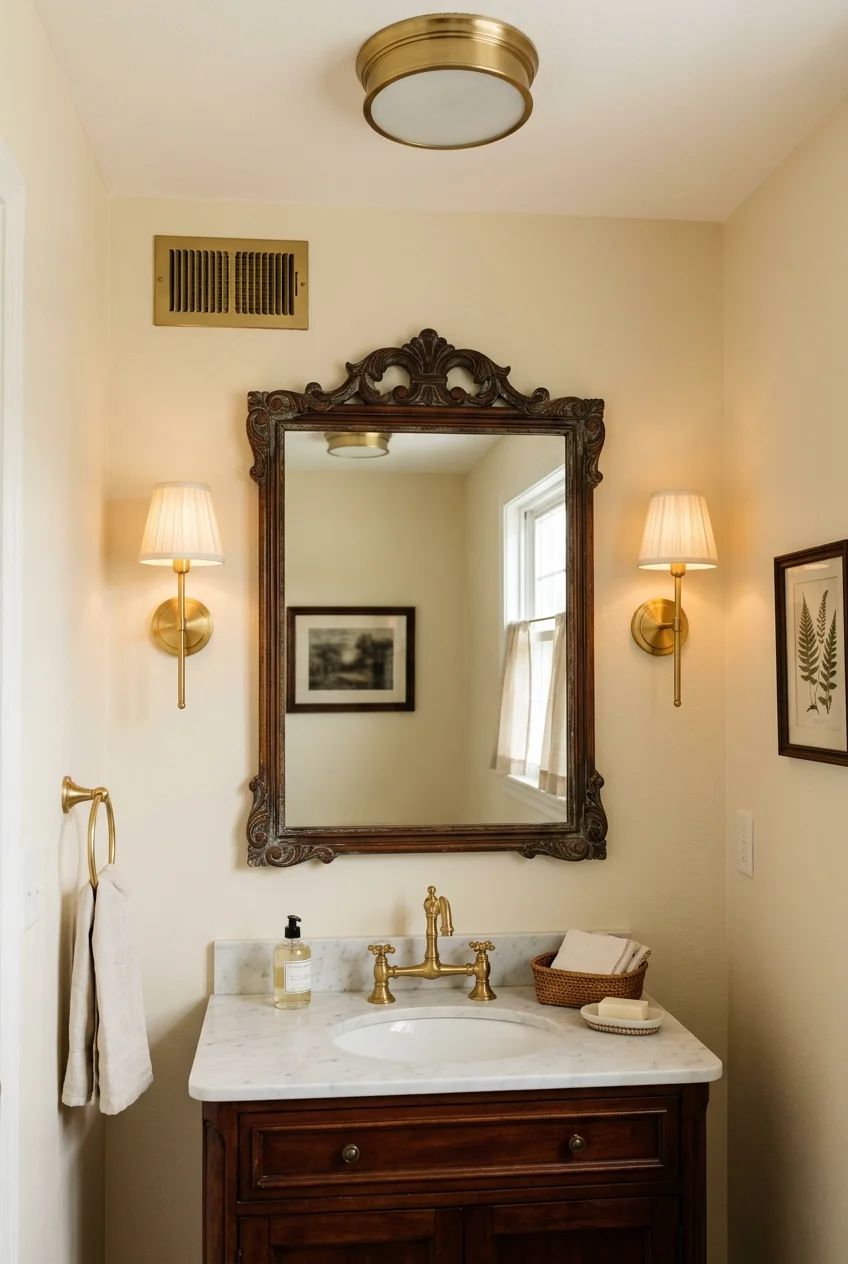
Small fabric shades can soften light and make a powder room feel furnished rather than purely utilitarian, especially beside a traditional mirror.
Use only fixtures and shades approved for their installed bathroom location. Fabric near steam or splashes may discolor and demand more upkeep.
Keep the vanity task modest and support the sconces with a ceiling source. Opaque shades may send more light upward and downward than forward.
13. Run One Linear Fixture Across a Wide Mirror
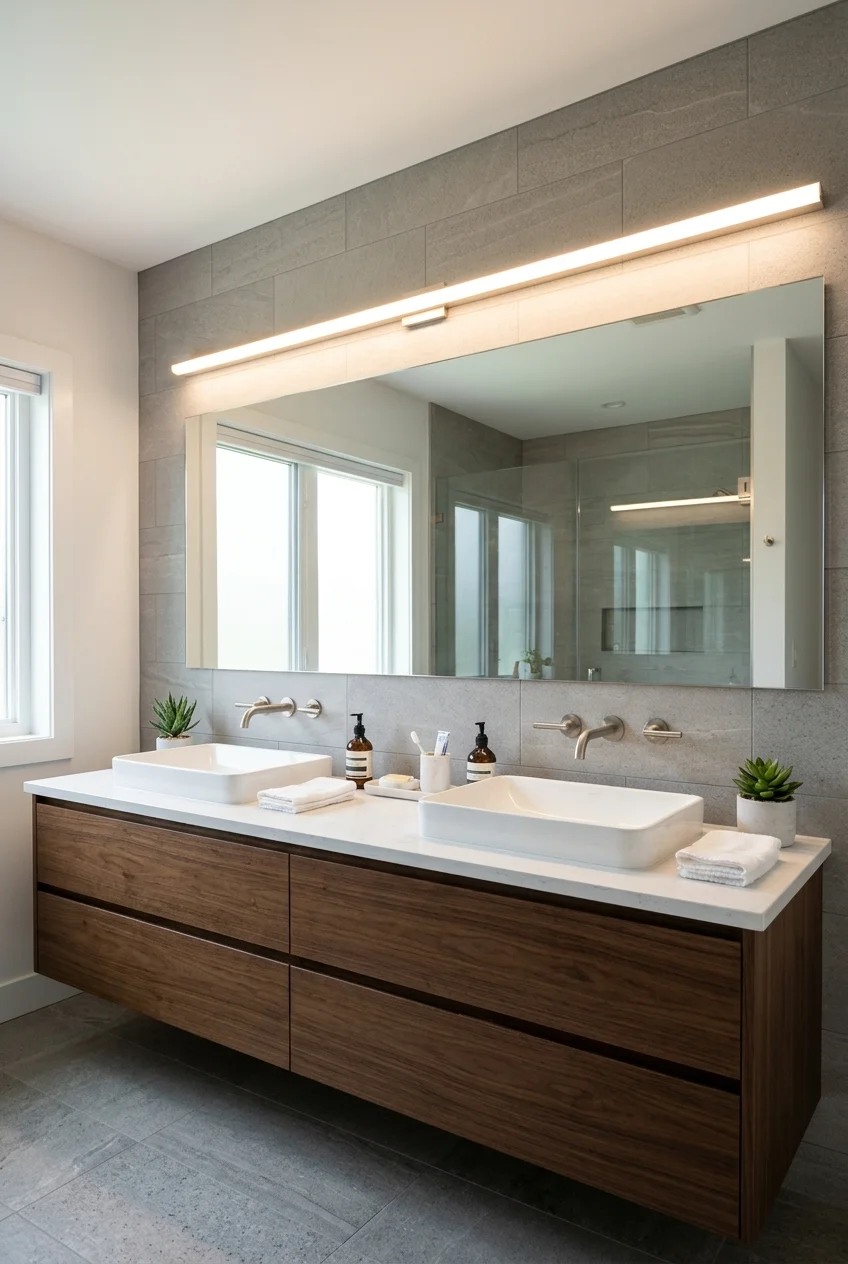
A continuous linear fixture can unify one long mirror above a double vanity, avoiding several small decorative fittings across a busy wall.
Its lit length should relate to the mirror and both sinks. A short bar floating over one side makes the shared composition feel unfinished.
Confirm the lens distributes light across both faces and does not produce a bright stripe in the mirror. Diffusion matters more than a minimal profile.
14. Give a Seated Makeup Area Its Own Task Light
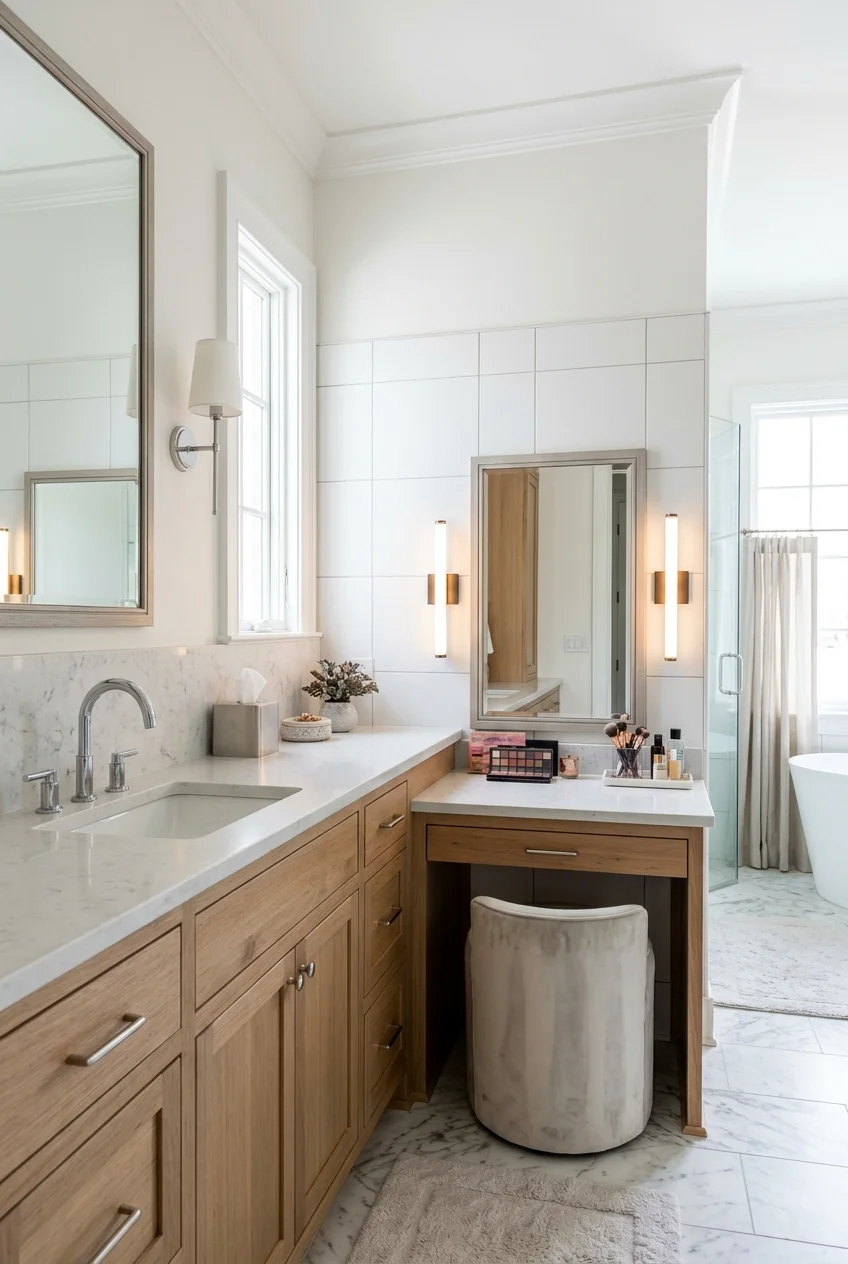
A lower seated makeup counter needs task light centered on that user, rather than borrowing illumination from a sink several feet away.
Coordinate mirror height, chair position, outlets, drawer swing, and fixture glare from the seated viewpoint. Standing-height assumptions will misplace the useful light.
These bathroom vanity ideas can help connect a dedicated grooming station to the larger cabinet, mirror, storage, and countertop composition.
Put the makeup light on its own control so the station can run brightly without forcing every ambient and shower fixture to full output.
Ambient and Ceiling Lighting That Defines the Room
Ambient light makes floors, storage, and circulation readable. Choose a ceiling strategy that suits room shape, height, daylight, and the more focused fixtures below.
15. Use a Broad Flush Mount in a Small Bathroom
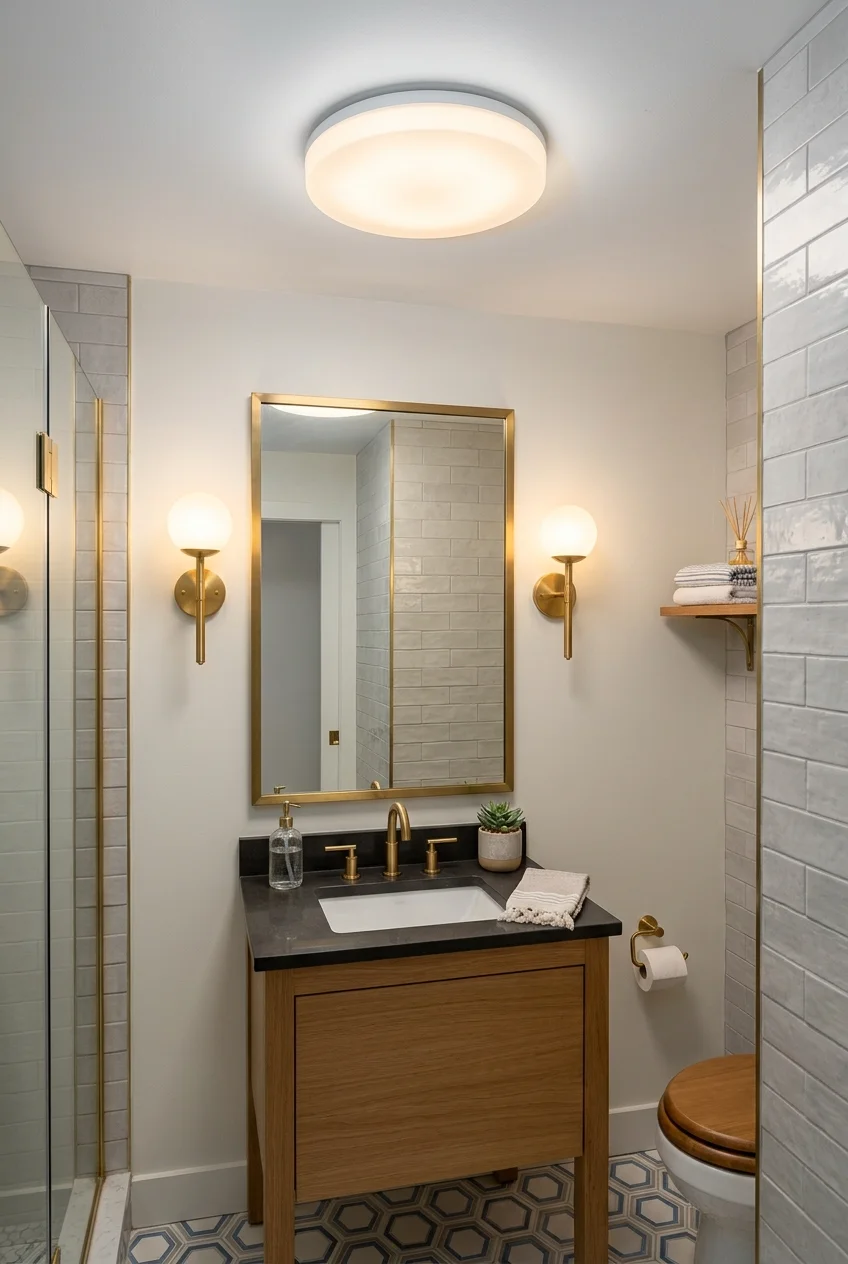
A broad flush mount can provide useful general light without lowering the ceiling visually, making it a straightforward anchor for a compact bathroom.
Choose a diffused lens and enough spread to reach the doorway, toilet, and floor. Vanity lighting should still handle face-level tasks separately.
16. Choose a Semi-Flush Fixture for More Ceiling Presence
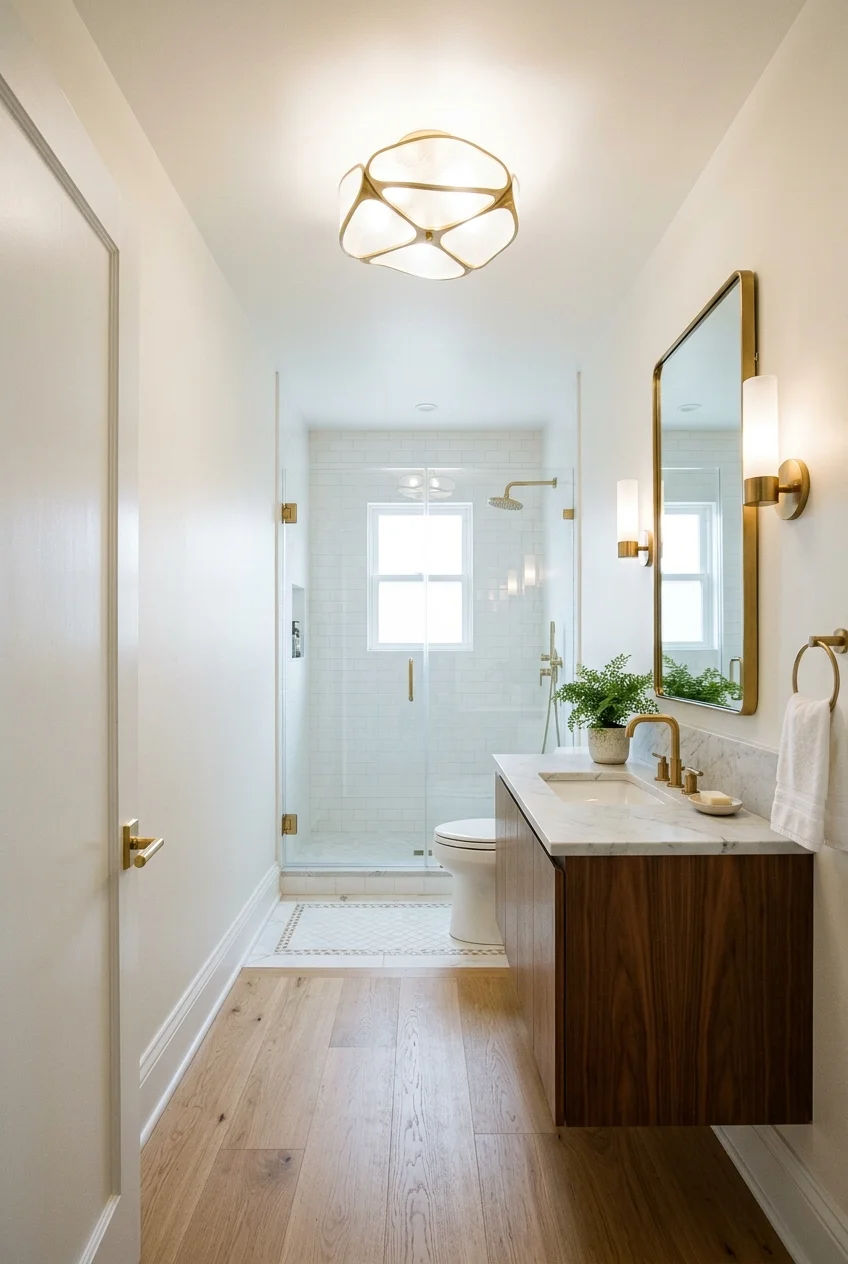
A semi-flush fixture introduces visible shape and shadow while staying closer to the ceiling than a pendant, useful in bathrooms with moderate height.
Check door swing, sightlines, and tallest-user clearance, then choose a translucent shade that distributes useful ambient light without competing with the mirror.
17. Space Recessed Downlights Along the Walking Route
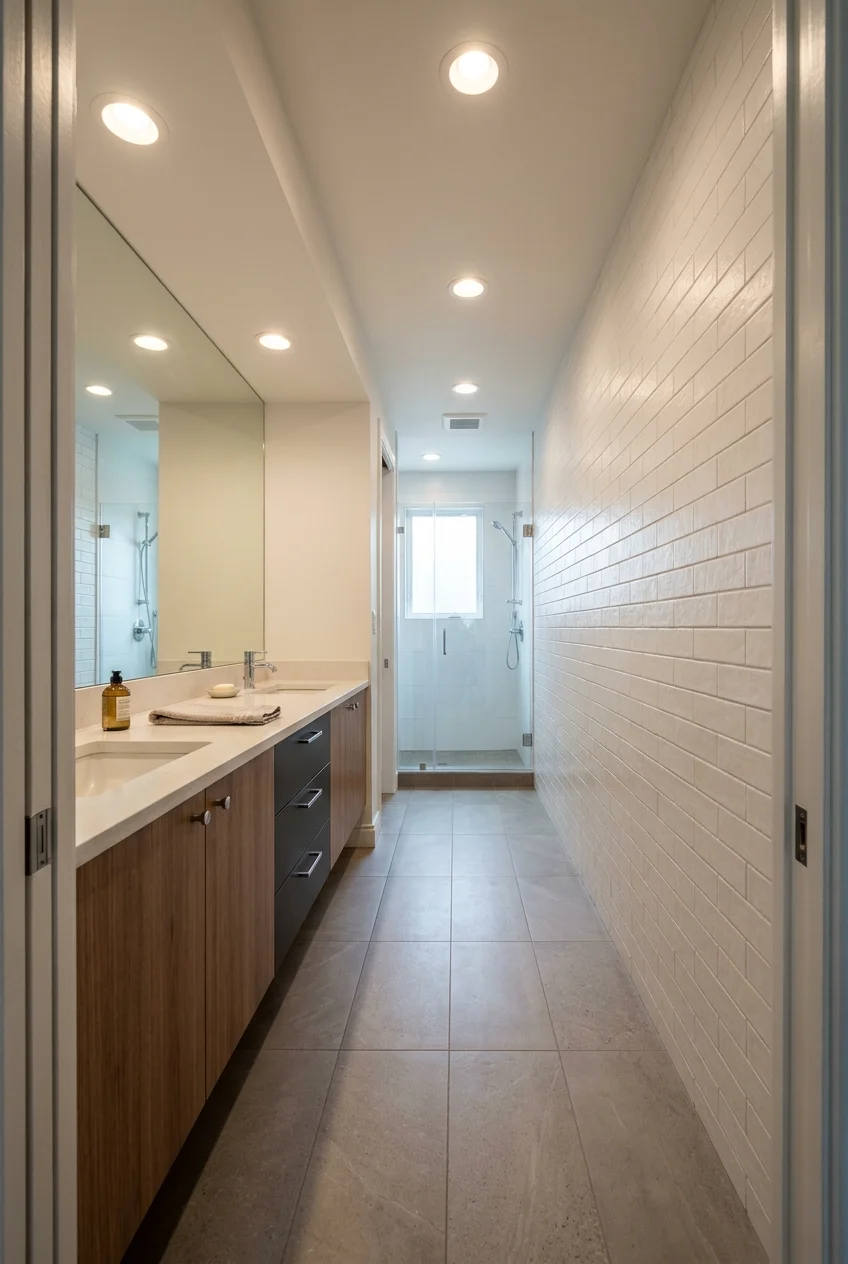
A few recessed downlights can illuminate circulation, storage, and floor transitions when they follow the room’s usable path rather than a generic ceiling grid.
Avoid placing one directly above the mirror user, where it can deepen facial shadows. Let dedicated vanity fixtures handle that vertical task.
- Mark the walkway and cabinet fronts.
- Keep beams away from direct mirror glare.
- Coordinate ceiling structure and insulation conditions.
- Choose approved trims for each location.
Open doors and drawers on the plan before fixing centers. A downlight directly above a tall door can throw moving shadows across the room.
Coordinate beam spread with the ceiling height and room width. Narrow beams create isolated circles, while overly broad beams may flatten useful emphasis.
Beam spread, ceiling height, and surface reflectance affect spacing. Have the lighting plan checked rather than copying another room’s fixture count.
18. Wash One Wall Instead of Spotlighting the Floor
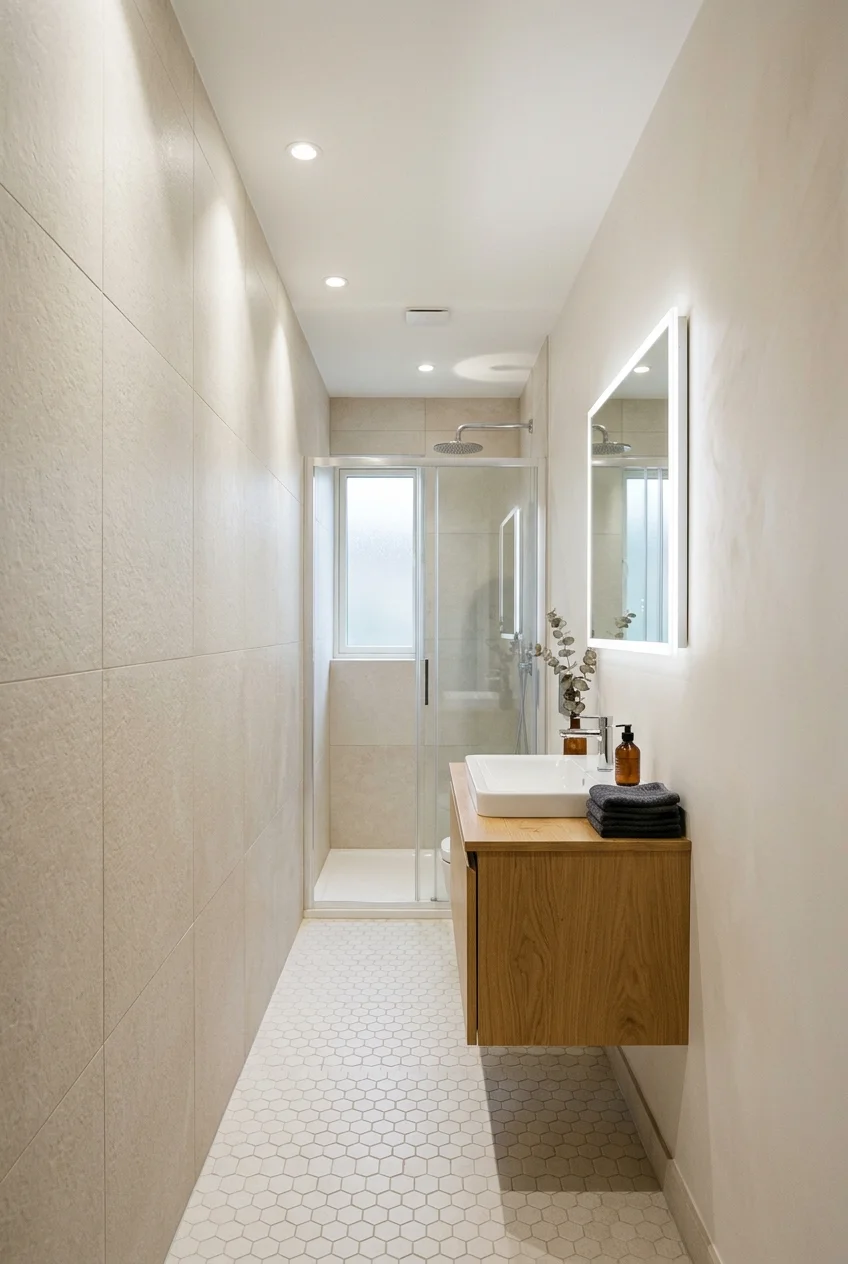
Ceiling-mounted wall-wash light can brighten a tiled or painted vertical plane, making a narrow bathroom feel less like a corridor of overhead pools.
Aim for even distribution without sharp scallops, test textured tile carefully, and retain separate ambient, vanity, and shower light for practical visibility.
19. Make a Dry Powder Room Memorable With a Lantern
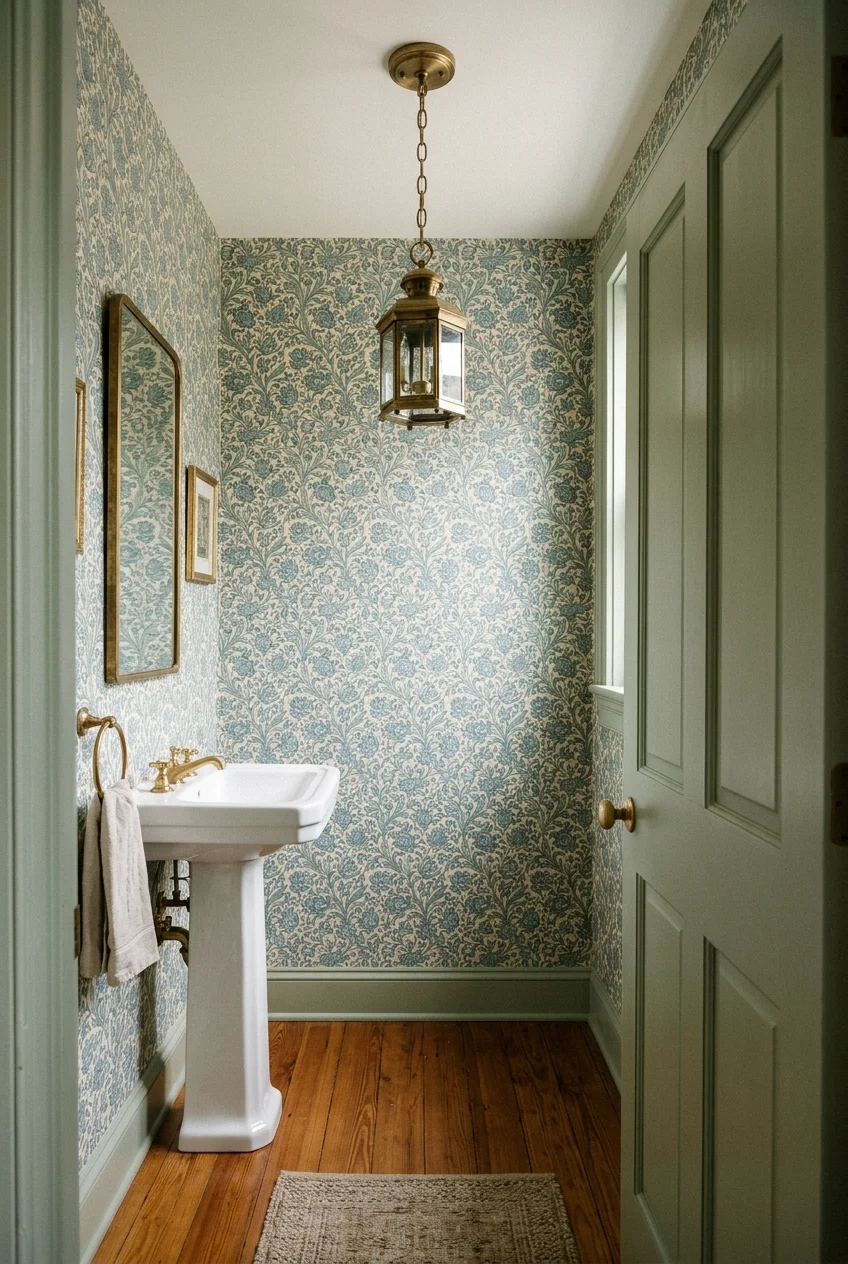
A compact lantern can become the central decorative object in a powder room, where the ceiling fixture remains visible from the doorway.
Choose a scale that clears the door and does not crowd the mirror reflection. A diffused or shaded lamp prevents the fixture from becoming a glare source.
Coordinate the lantern with these powder room ideas so the ceiling, wallpaper, mirror, and vanity read as one deliberate composition.
20. Use a Chandelier Only in a Verified Dry Location
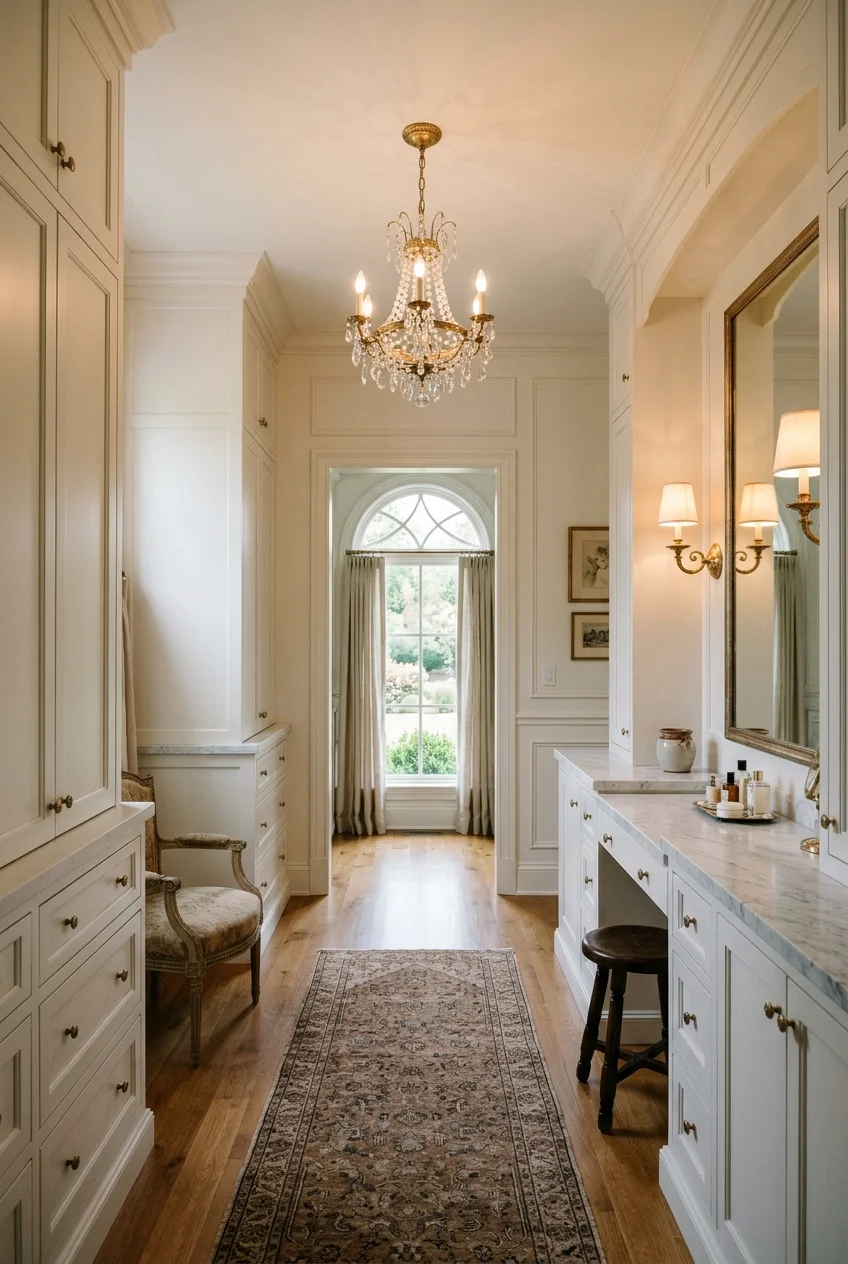
A small chandelier can soften a large bathroom and mark an open dressing zone, but visual drama never overrides restrictions around tubs and showers.
Have a qualified electrician confirm the adopted code, prohibited zones, ceiling support, fixture listing, and exact placement before purchasing or roughing in wiring.
- Draw the tub and shower boundaries.
- Confirm the restricted volume with the electrician.
- Verify ceiling support and fixture listing.
- Check door, head, and reflected clearances.
Watch for A photograph showing a chandelier above a bathtub is inspiration, not evidence that the placement is legal or safe in your bathroom.
Review the fixture at the bathroom entrance and in mirror reflections. A large decorative form may dominate several views more strongly than expected.
Plan cleaning and lamp access without moving across wet surfaces or standing on the tub. Maintenance difficulty is a real part of fixture placement.
Keep task lighting independent at the mirrors. Decorative sparkle across the room does not guarantee useful illumination for shaving, makeup, or medication labels.
21. Let a Skylight Carry Daytime Ambient Light
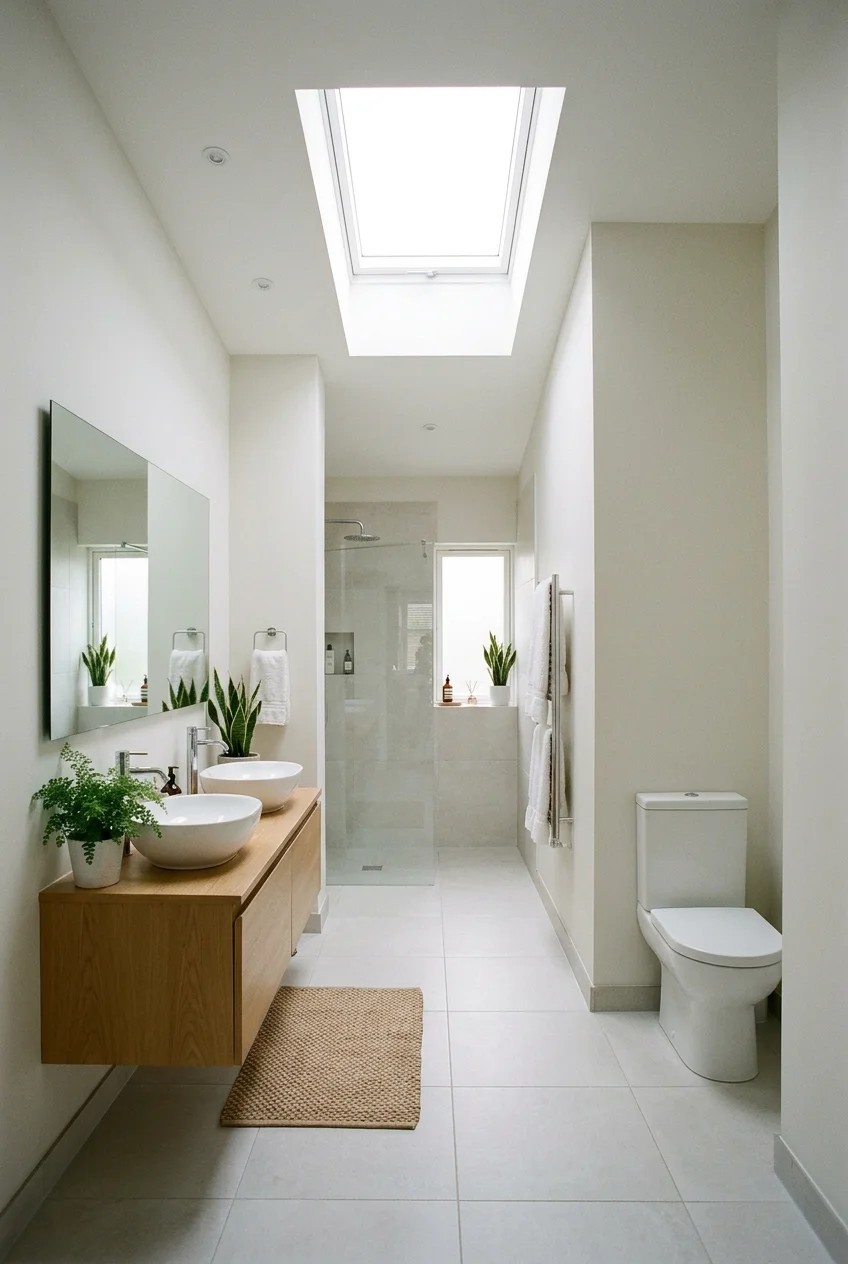
A skylight can bring daylight deep into a bathroom while preserving wall privacy, especially where exterior windows face neighbors or a narrow side yard.
Its location affects glare, heat, waterproofing, roof framing, and the nighttime ceiling plan. Treat it as building work, not simply another light source.
Place electric ambient lighting nearby but not directly in the opening. The room still needs reliable illumination after sunset and during dark weather.
22. Add a High Clerestory Window Above the Vanity
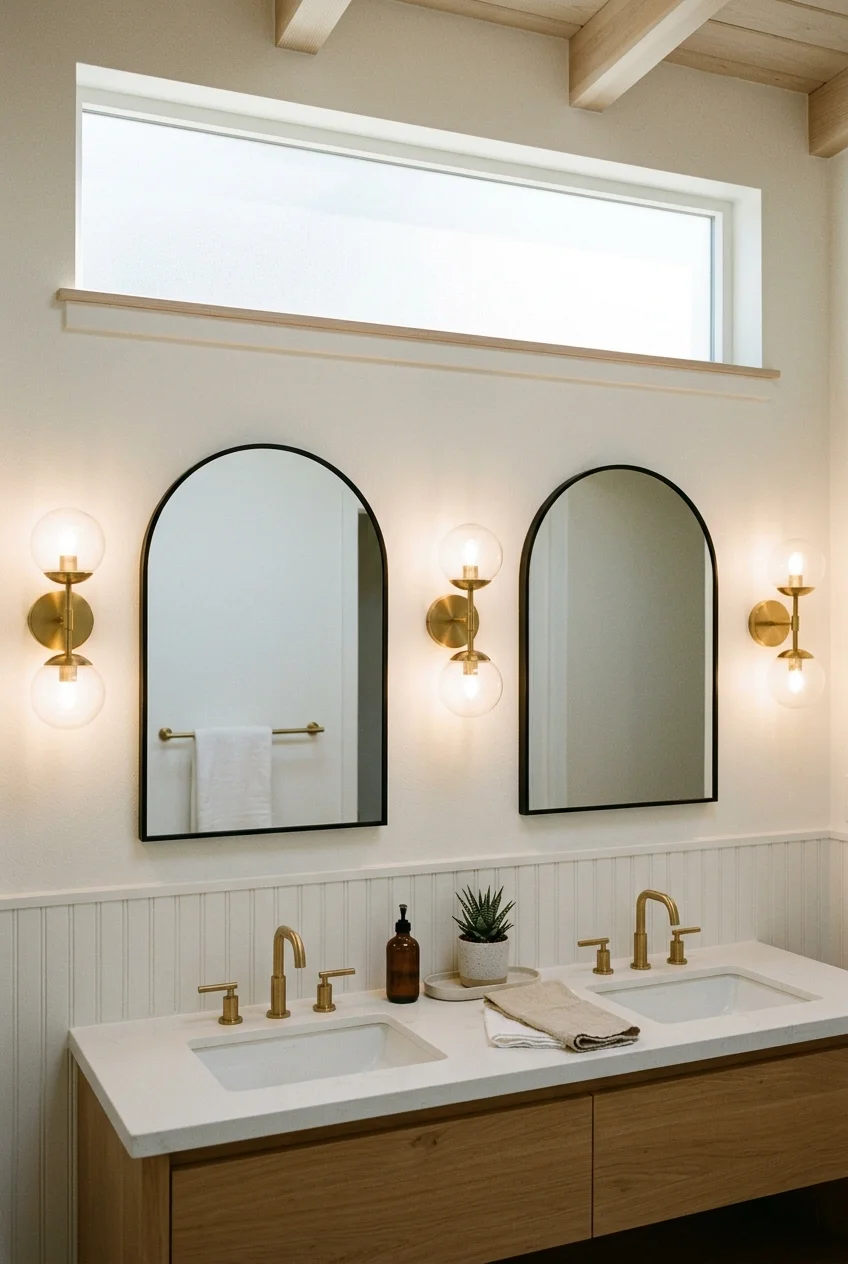
A clerestory window can brighten the vanity wall from above while maintaining privacy and leaving lower wall area available for mirrors and storage.
Coordinate sun direction, glazing, exterior views, waterproof detailing, and mirror glare. Daylight changes throughout the day, so dedicated task lighting remains necessary.
Use the window’s horizontal line to organize the room. Align mirror tops or wall tile thoughtfully instead of leaving an accidental strip between elements.
23. Hide Indirect Light in a Ceiling Cove
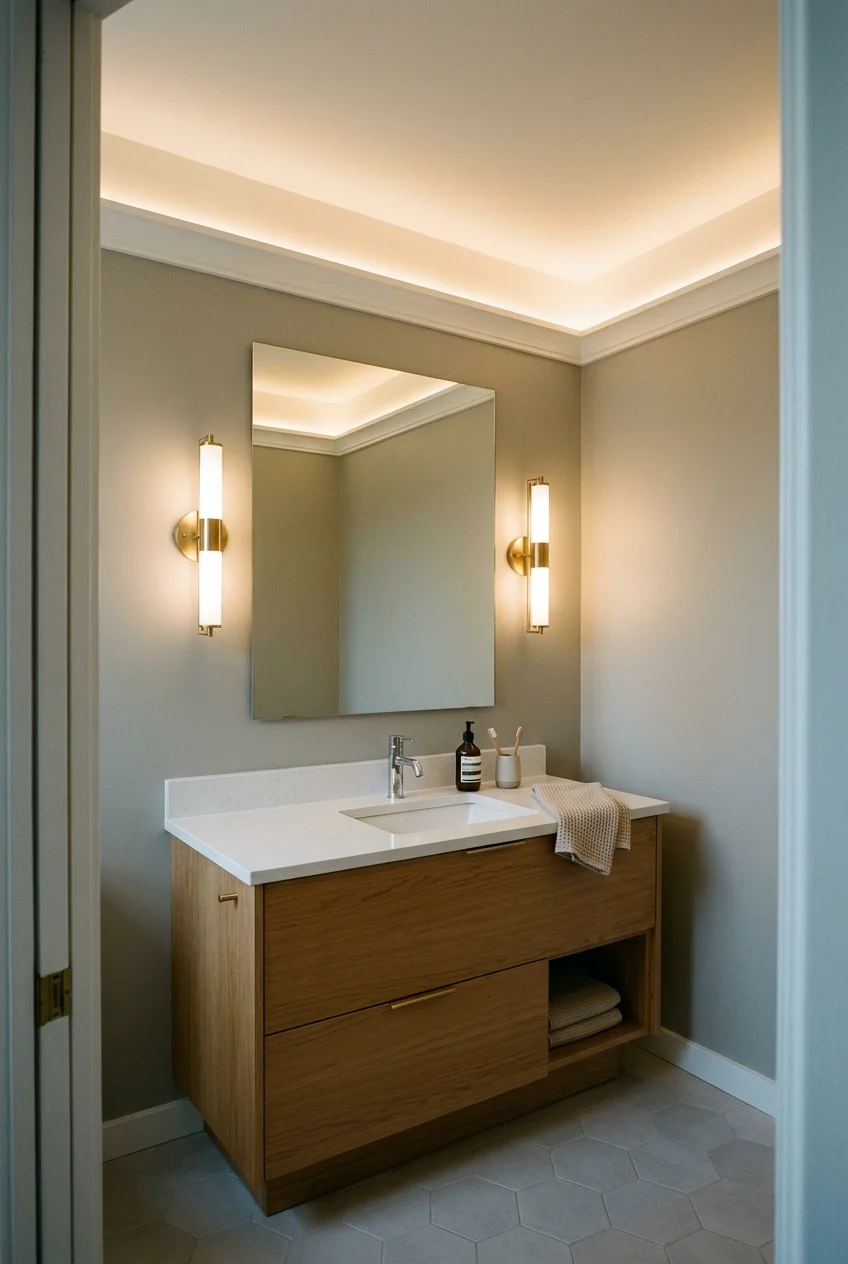
Concealed linear light in a ceiling cove can lift the room visually by illuminating the ceiling plane instead of exposing a bright lamp.
The cove must hide the source from normal viewpoints while allowing ventilation, installation, and service. Uneven setback creates visible bright and dark bands.
- Mock up the cove profile.
- Check the source from doorway and mirror.
- Specify a compatible dimmable system.
- Provide required driver access.
Paint sheen and ceiling texture affect the reflected result. A rough or glossy plane can reveal unexpected hotspots that a smooth matte sample hides.
Continuous runs may need multiple feeds or drivers, depending on the specified system. Coordinate divisions so brightness does not change visibly at joints.
Use cove light as ambient support, then add face and shower lighting where tasks occur. Reflected light alone may leave vertical surfaces too dim.
24. Combine General Light With the Exhaust Fan
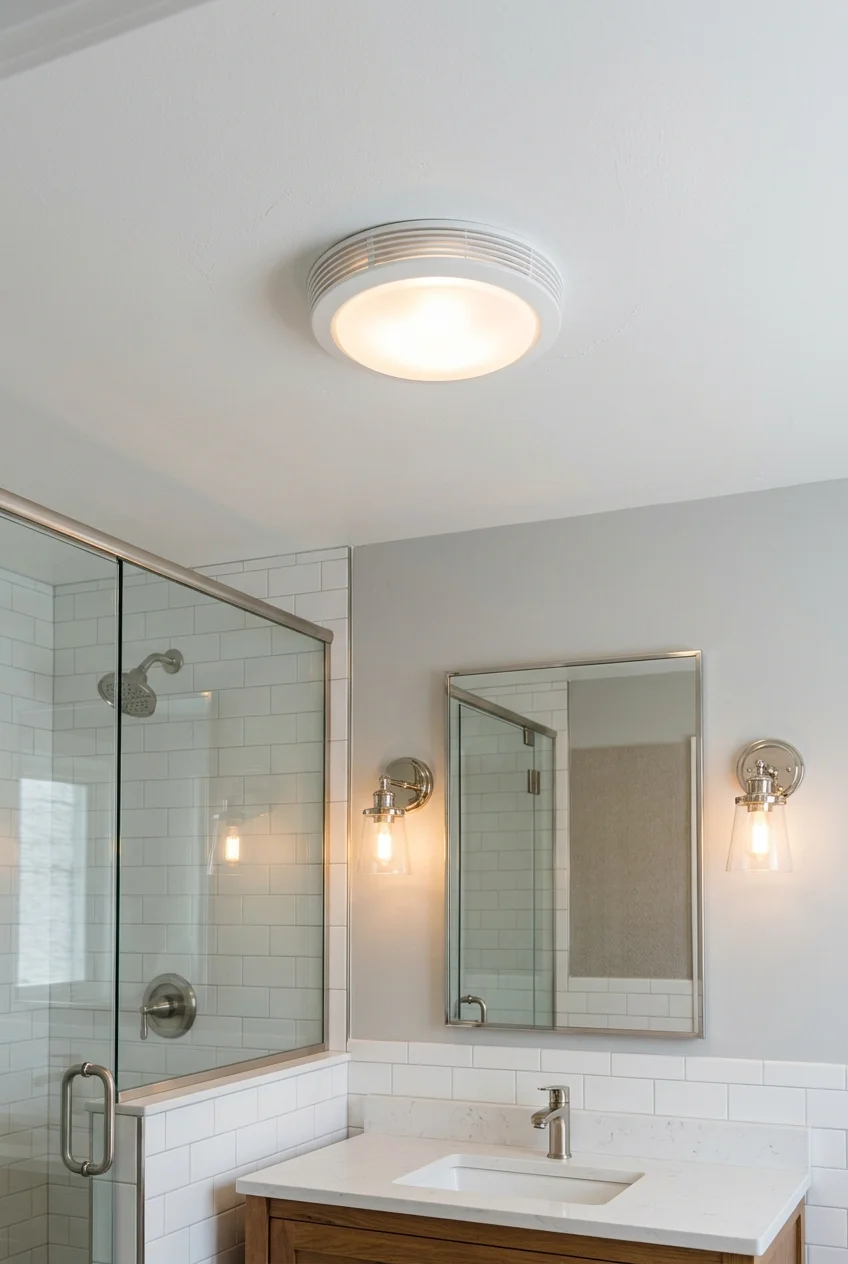
A fan-light unit can place general illumination and ventilation at one ceiling location, useful where a compact bathroom has little room for separate devices.
Select the fan for ventilation needs and the light for distribution rather than treating either as a bonus feature. Controls should remain understandable.
Coordinate ducting, ceiling depth, electrical requirements, sound expectations, airflow needs, and damp-location suitability with the product instructions and qualified installers.
25. Follow a Sloped Ceiling With Surface-Mounted Lights
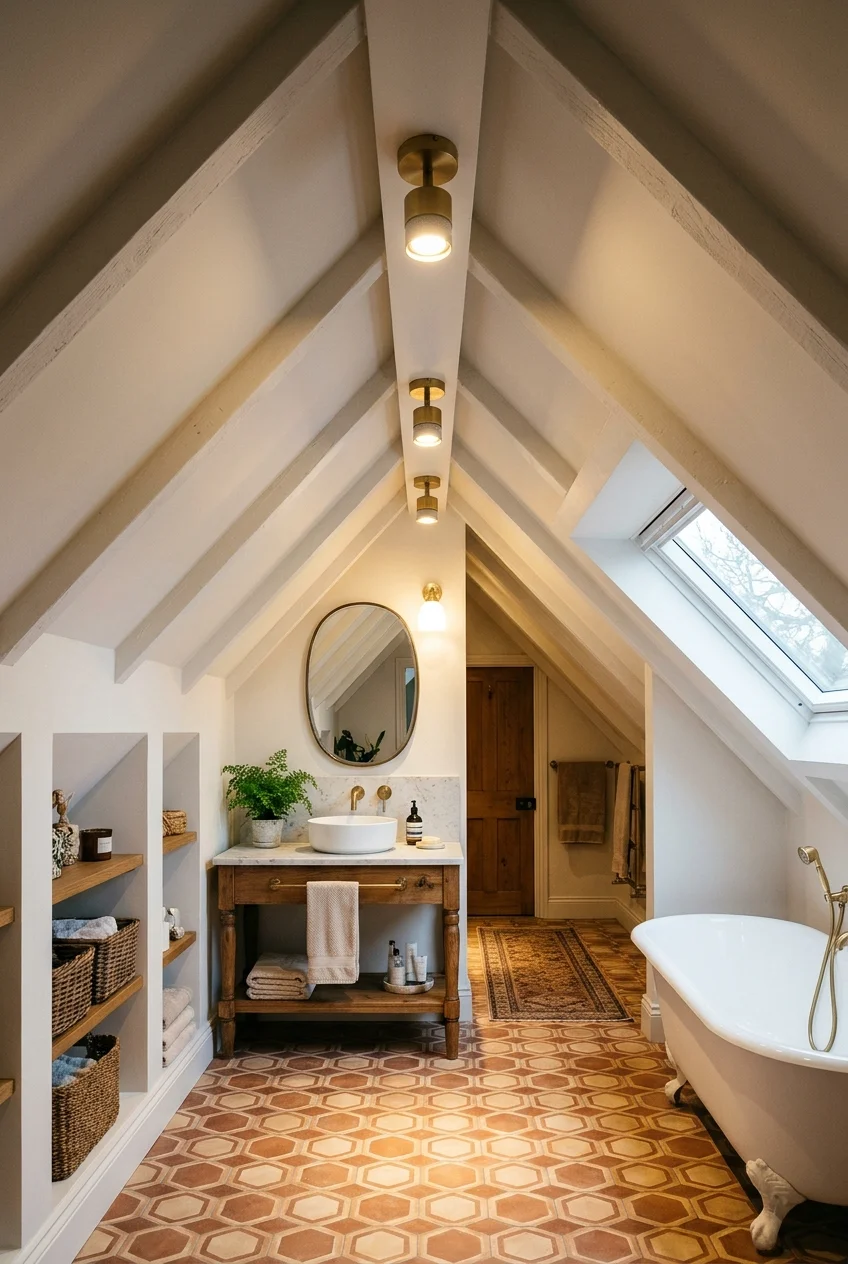
Small surface-mounted fixtures can follow a sloped ceiling without filling every rafter bay with recessed housings, preserving a cleaner roof assembly.
Aim or distribute light toward the vanity, floor, and high wall rather than emphasizing the slope alone. Keep bright sources outside mirror sightlines.
For more ways to work with roof angles, review these attic bathroom ideas before finalizing mirrors, storage, ventilation, and the lighting layout.
Have the ceiling construction, insulation, air sealing, boxes, and fixture ratings checked before installation. Thin roof cavities leave little room for casual changes.
Shower, Tub, and Night Lighting With Clear Safety Boundaries
Wet-zone lighting needs appropriate listing and coordinated installation. Use these concepts as planning directions, then verify every fixture, location, and protection requirement locally.
26. Place a Wet-Location Downlight Over the Shower
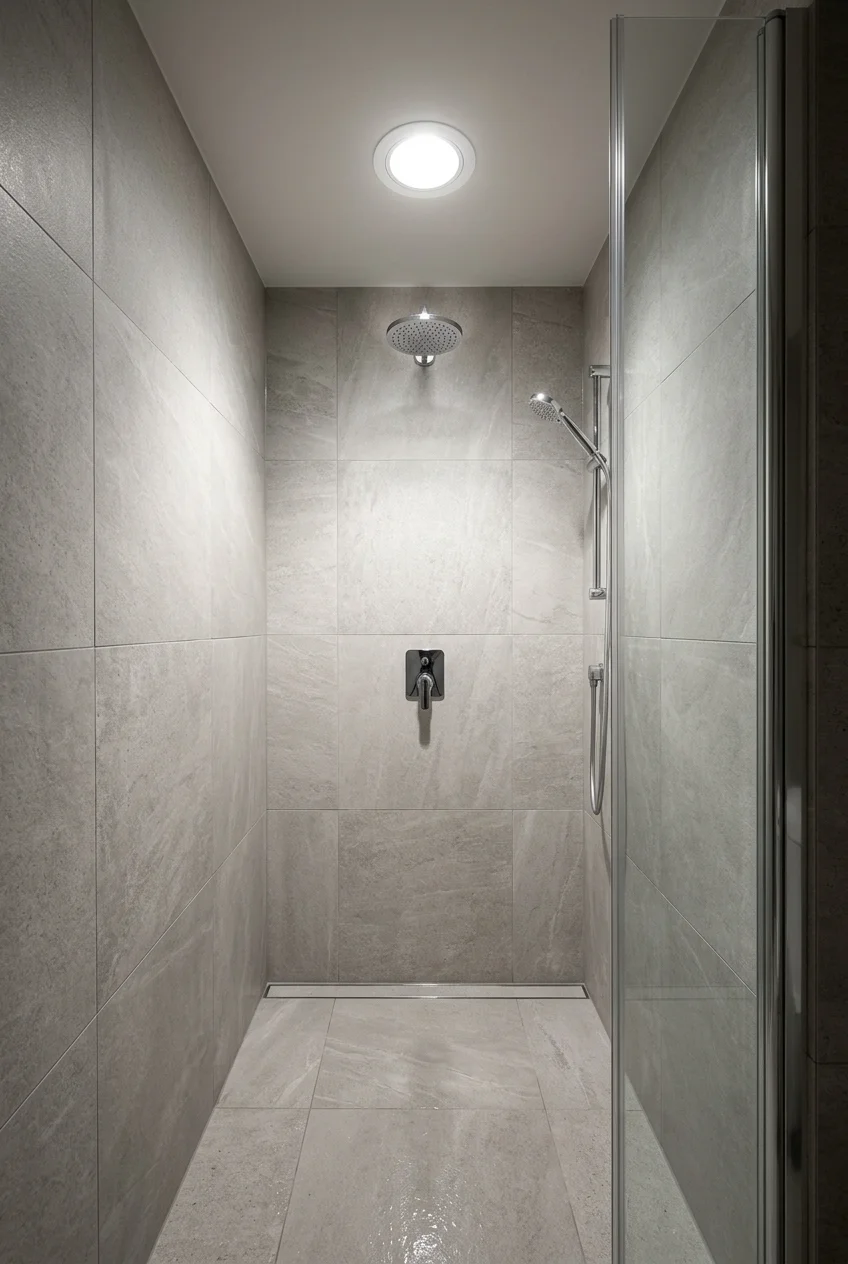
A dedicated shower downlight prevents an enclosure or partition wall from turning the bathing area into a dim recess behind the brighter vanity.
Use a fixture listed for the installed wet location and follow its instructions for trim, sealing, ceiling construction, controls, and required protection.
Position the beam for the standing area rather than directly over a reflective drain. Pale tile may need less output than dark matte surfaces.
- Confirm the exact wet-zone boundary.
- Choose the listed fixture and trim together.
- Coordinate waterproof ceiling details.
- Keep the control accessible from a dry approach.
Watch for Damp-rated and wet-location-listed are not interchangeable descriptions. Match the product marking carefully to the actual exposure, installation, and adopted requirements.
Check the beam with the shower door or curtain closed. Glass reflections and dark curtains can change how much useful light reaches the standing area.
Keep the fixture accessible according to its instructions. A sealed appearance should not require damaging waterproof finishes for routine driver or lamp service.
27. Integrate Linear Light Into a Shower Niche
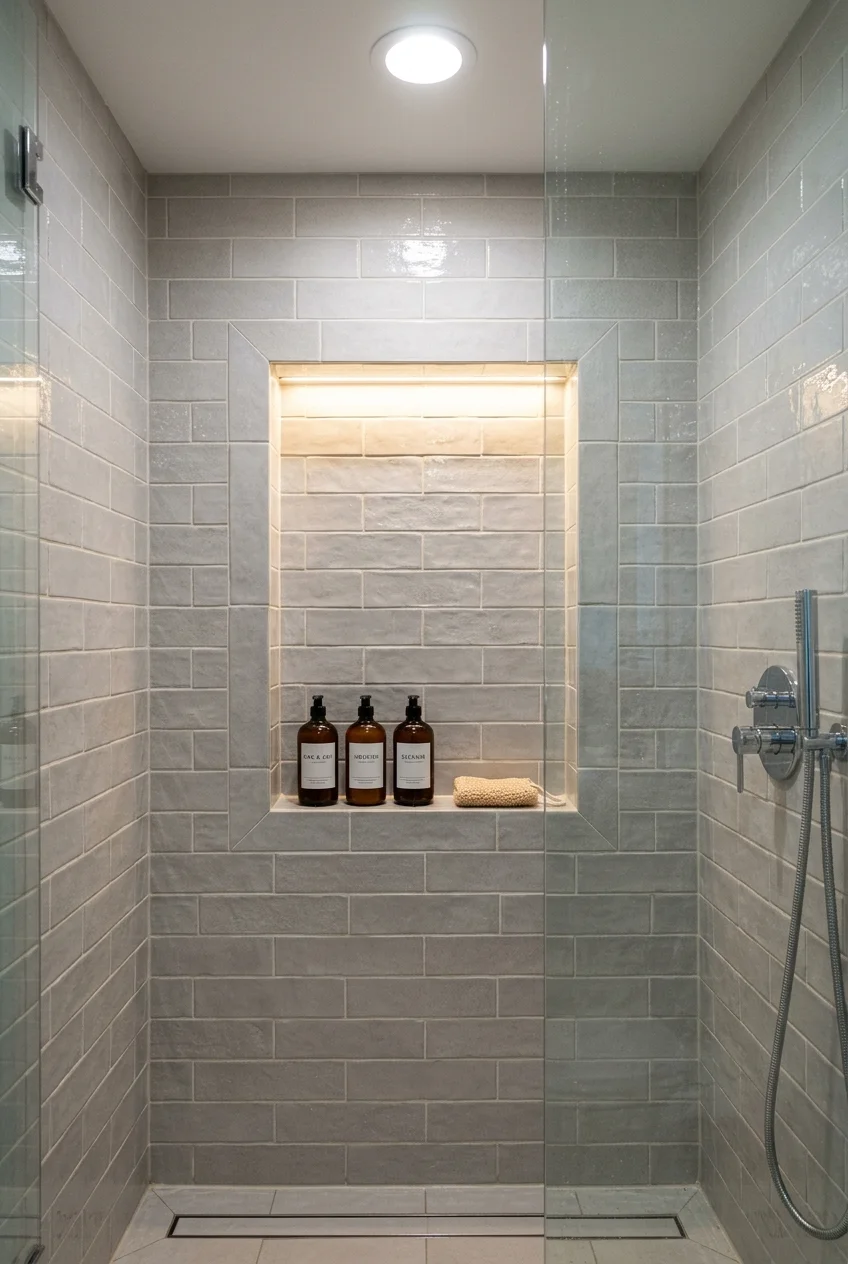
A lit niche can make bottles and controls easier to see while turning the recess into a deliberate horizontal detail within the tile field.
This is not a place for ordinary adhesive tape light. Specify a listed wet-location system coordinated with waterproofing, drainage, heat, wiring, and service access.
- Size the niche and shelf arrangement.
- Select the complete listed lighting system.
- Coordinate waterproofing and cable penetrations.
- Test the assembly before final tile closes access.
Conceal the source behind a designed lip so users see an even wash rather than individual points reflected in glossy tile or glass.
Slope the niche surfaces and preserve drainage without allowing the lighting recess to collect water. Waterproofing details must remain continuous around every penetration.
Keep a separate overhead shower light when the niche glow does not illuminate the standing area. Accent and functional layers solve different problems.
28. Graze Textured Shower Tile From Above
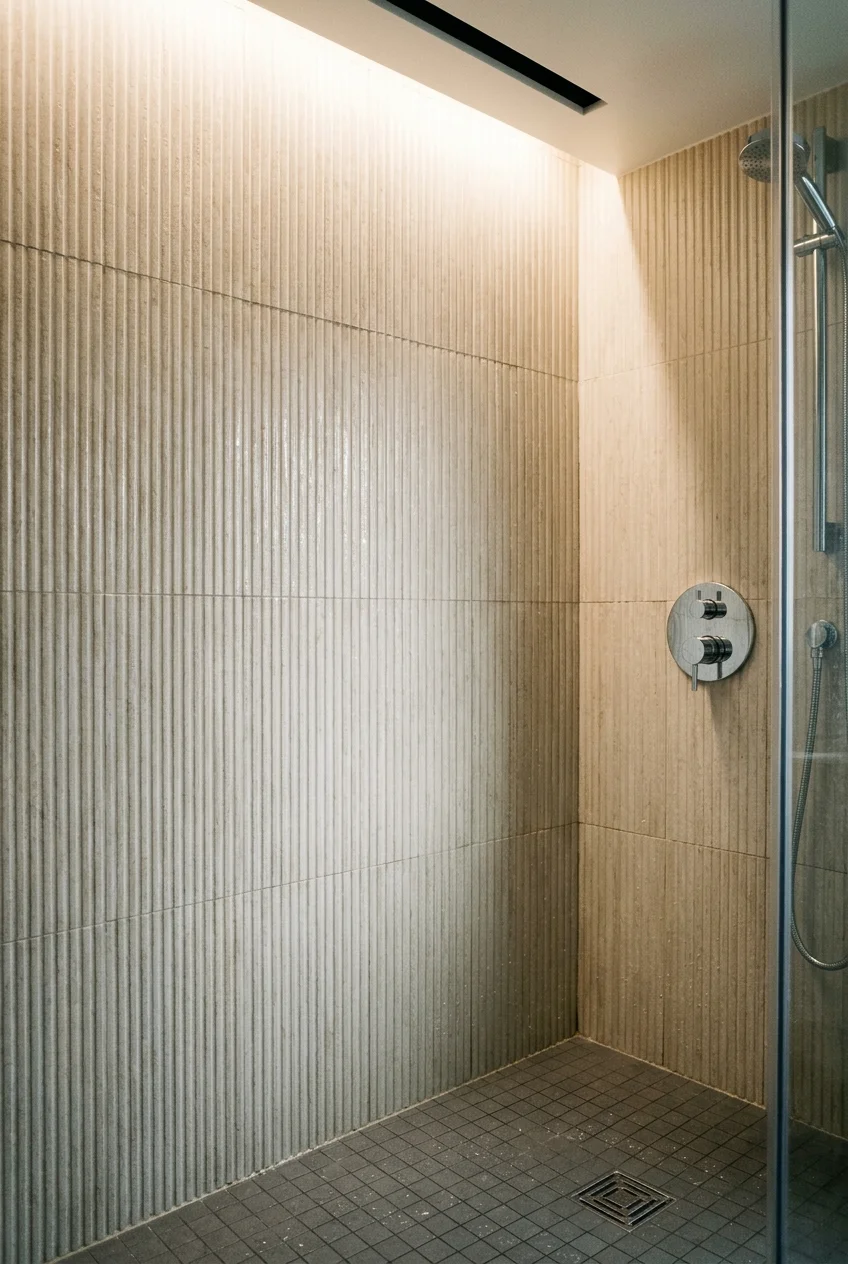
A narrow beam near a textured shower wall can reveal relief and shadow, making a restrained tile selection more visually active after dark.
Grazing also magnifies lippage, uneven joints, and surface variation. Review a lit sample before committing to a technique that exposes every installation detail.
Use properly listed equipment for the location and maintain broader shower illumination. Texture lighting should not leave controls, thresholds, or the floor unclear.
29. Light a Doorless Shower Beyond Its Privacy Wall
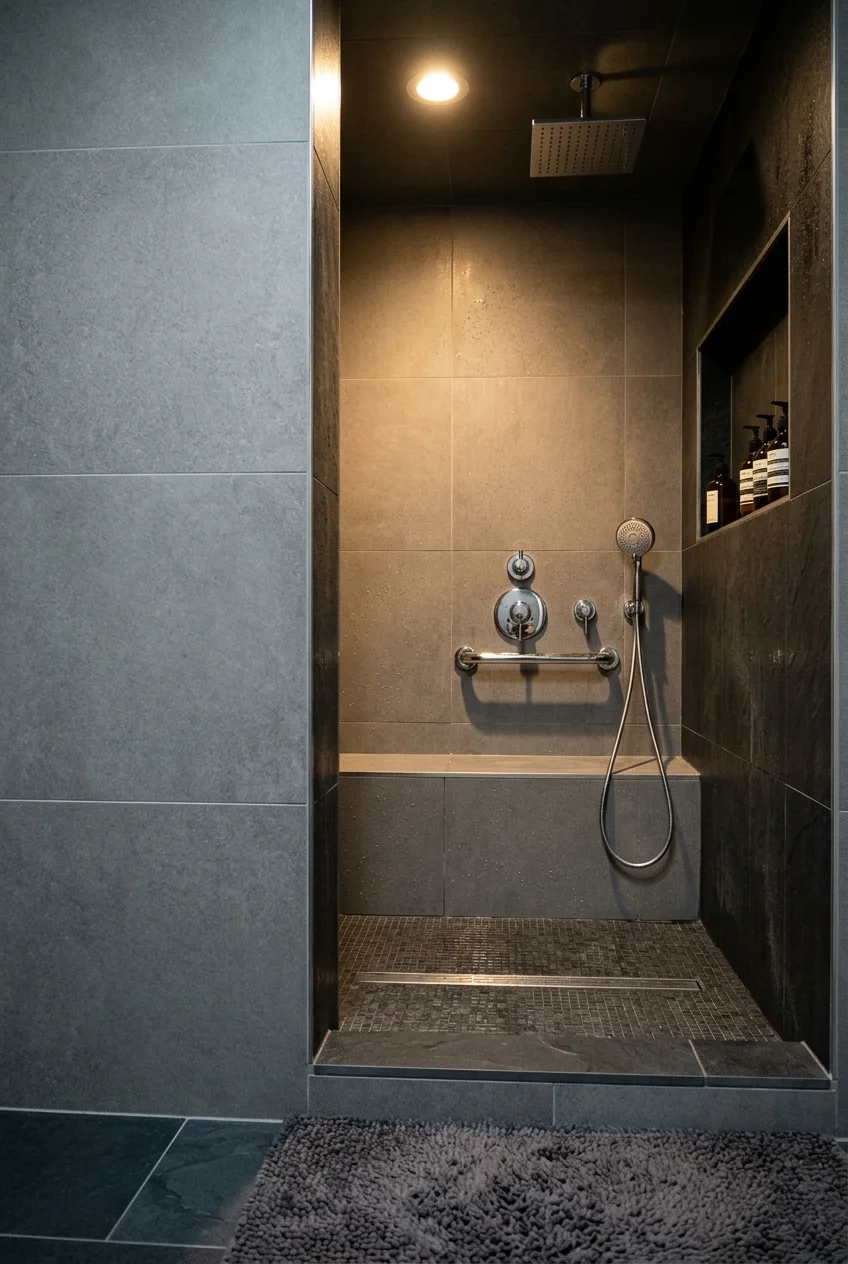
A full or partial privacy wall can block room light, so place dedicated illumination inside the shower zone rather than expecting light to bend around it.
Coordinate beam location with the showerhead, glass, bench, and entry. The light should reveal the threshold and controls without shining into the room.
These doorless walk-in shower ideas can help you judge how partition height, openings, and circulation affect both daylight and electric light.
Use a wet-location-listed fixture where exposure requires it, installed under the adopted rules. The privacy wall does not make the ceiling electrically dry.
30. Place Tub Sconces Outside the Restricted Zone
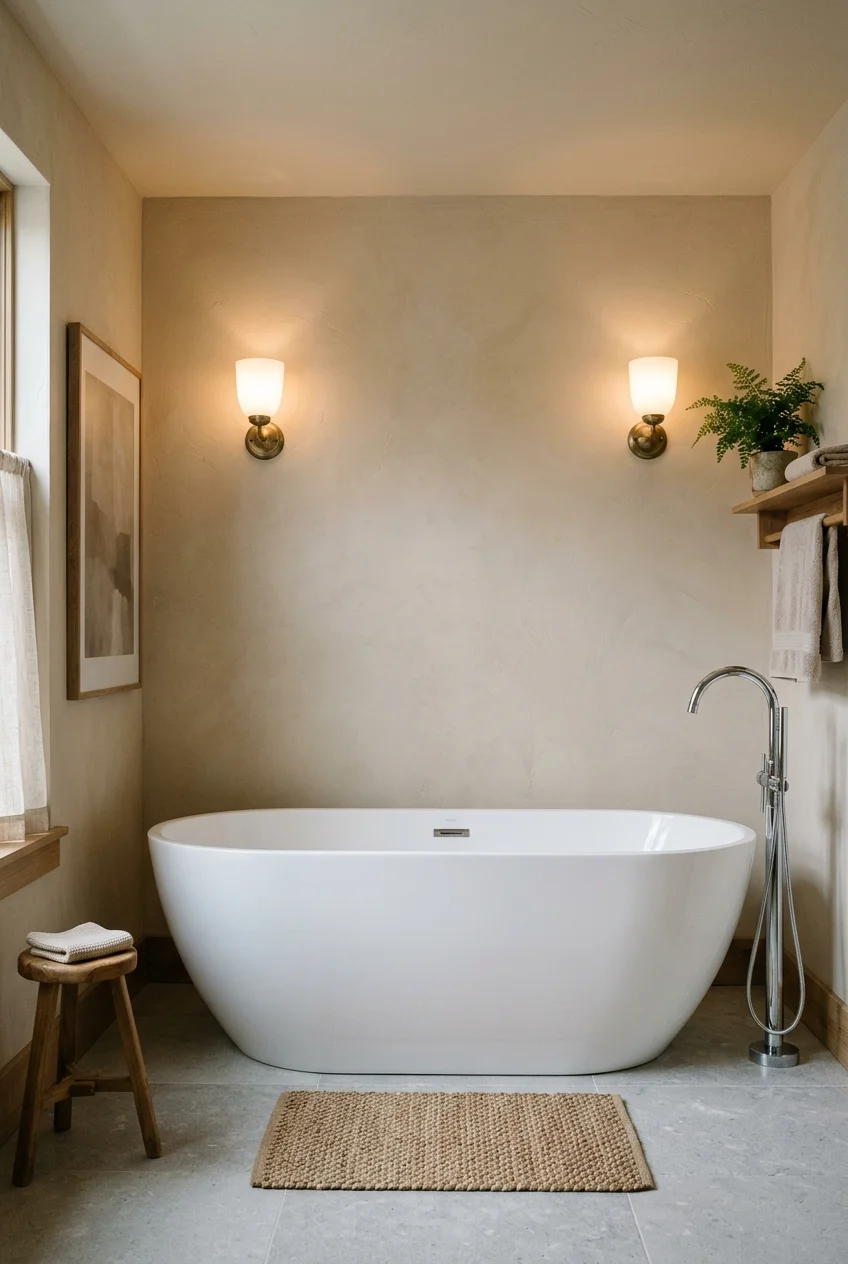
Wall sconces can frame a freestanding tub from a distance and create a calm evening layer without hanging a fixture directly above the water.
A qualified electrician must confirm the adopted code’s restricted zone, fixture listing, mounting surface, switches, and exact relationship to the tub.
Aim for reflected or diffused light rather than exposed lamps at reclining eye level. Keep the path and tub edge visible when the sconces are dimmed.
31. Float a Night Glow Beneath the Vanity
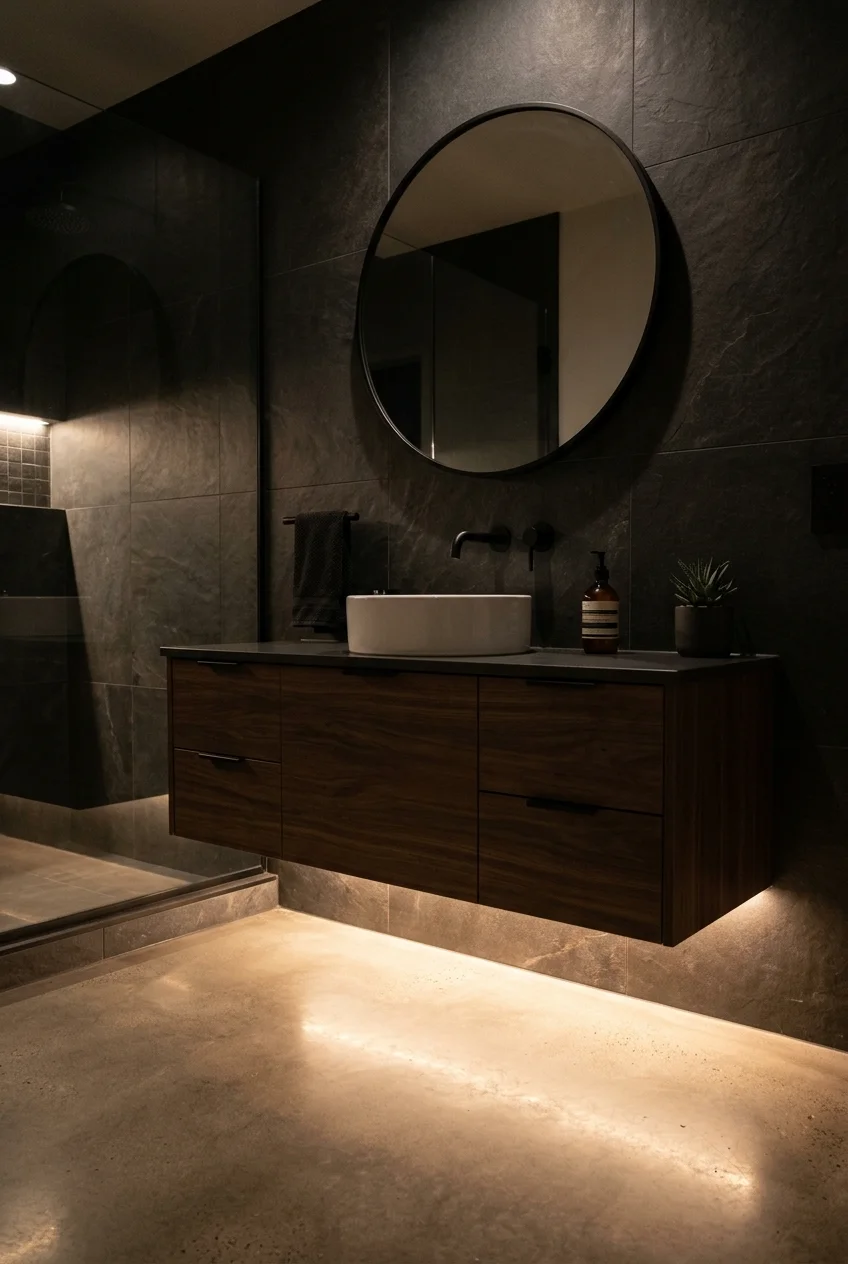
Concealed light beneath a wall-hung vanity can reveal the floor for nighttime wayfinding without turning on bright ceiling or mirror fixtures.
Hide the source from standing and doorway views, and keep wiring, drivers, moisture suitability, and service access within a complete approved installation.
Use low output and a warm appearance so the glow guides rather than dominates. A reflective floor may require extra shielding to avoid visible dots.
32. Add a Low Wall Light Near the Bathroom Entry
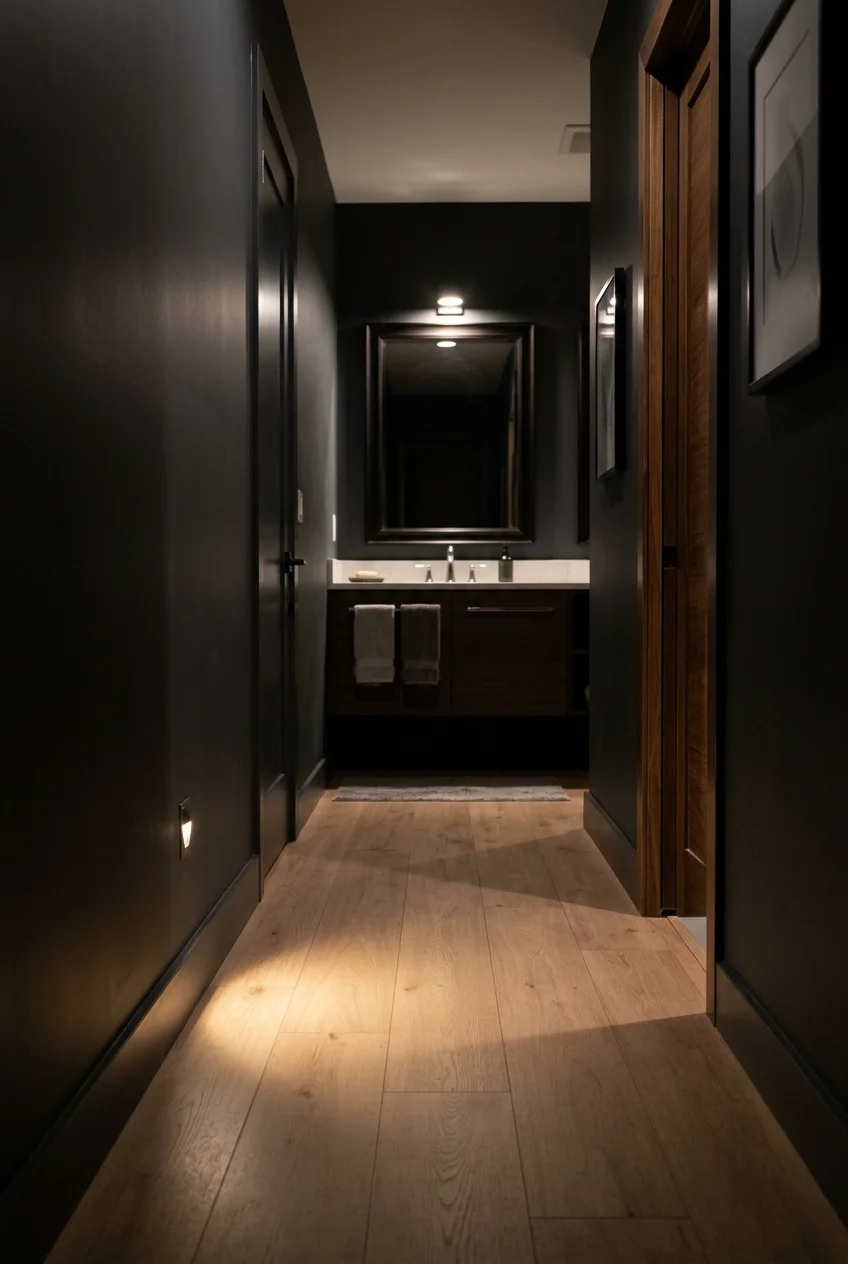
A recessed low wall light can mark the route from doorway to toilet or vanity while keeping illumination below sleepy eye level.
Choose a shielded fixture suitable for the bathroom location and coordinate its box with wall framing, waterproof finishes, base trim, and cleaning access.
Place it where an open door, towel, or wastebasket will not cover the beam. One useful marker is better than several decorative points.
33. Give the Water Closet Its Own Ceiling Light
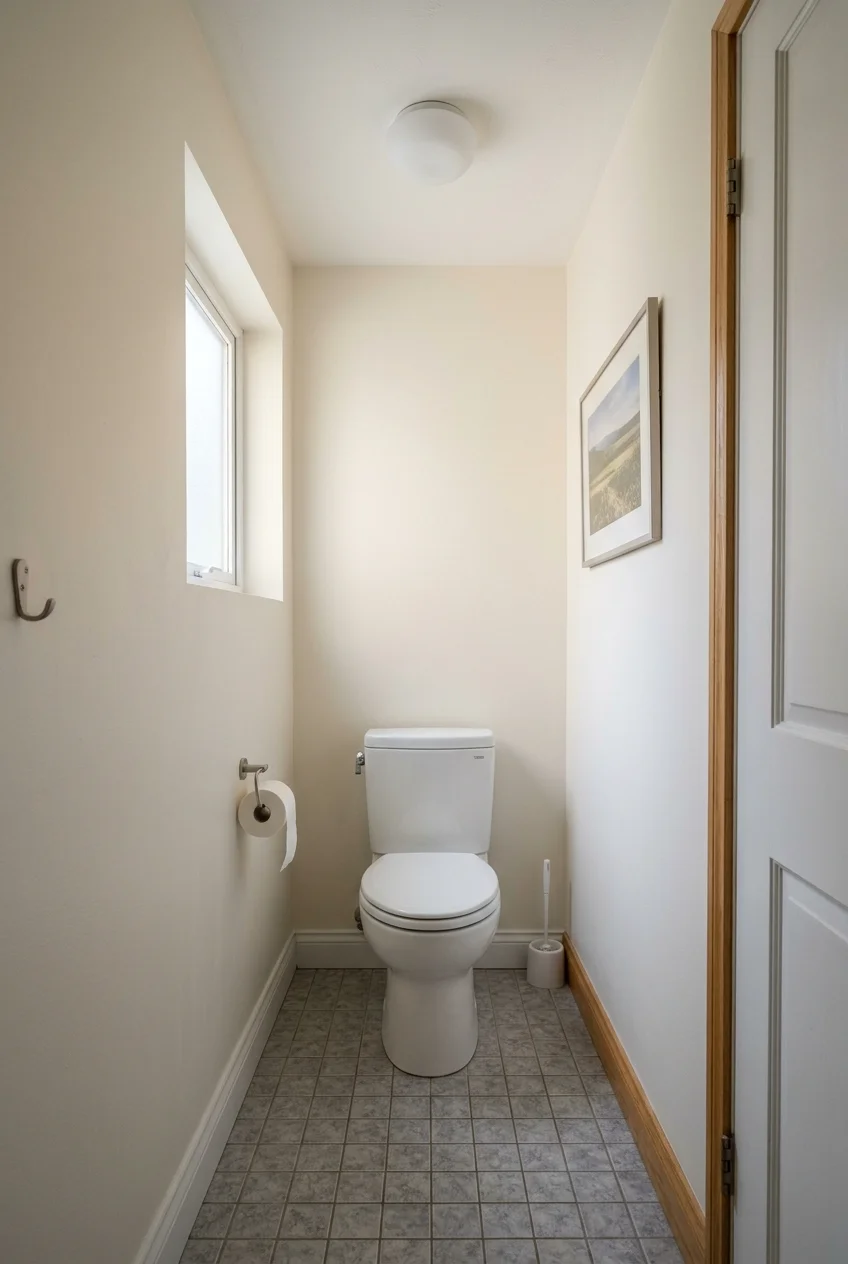
An enclosed toilet compartment needs its own ambient source because the main bathroom light may be blocked by a door or full-height partition.
Use a compact diffused fixture that lights the floor and surrounding walls without harsh glare. Coordinate ventilation and lighting controls for straightforward use.
For layout and storage decisions inside the compartment, these water closet ideas can help keep the small zone clear and functional.
34. Use a Motion Night-Light Outside the Splash Zone
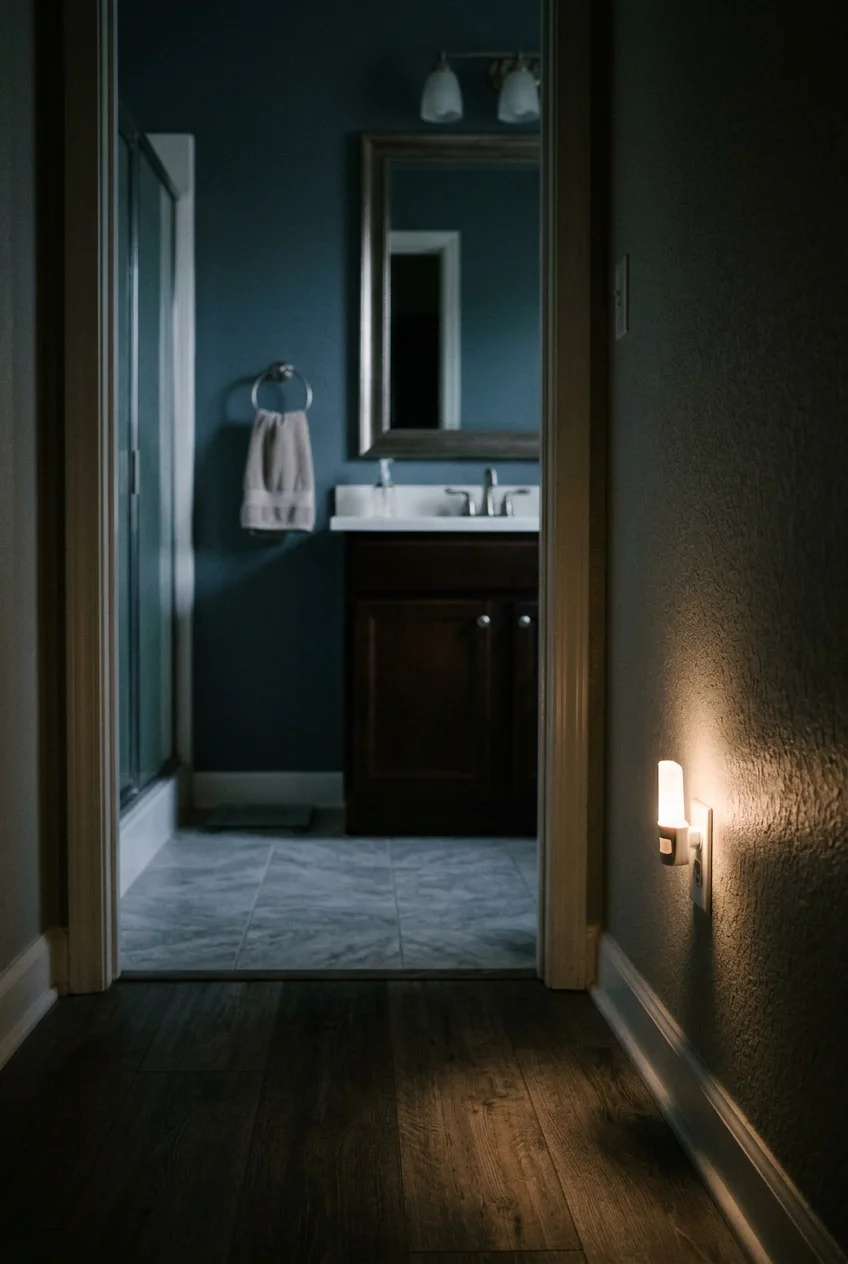
A motion night-light can provide temporary low-level wayfinding without changing the hardwired plan, useful near the bathroom entrance or along an adjacent hallway.
This adjustable motion-sensor plug-in night-light offers automatic and manual modes. Confirm outlet position, brightness, clearance, and suitability for the intended dry location.
Watch for Do not use a plug-in night-light where it can be splashed, obstruct a required receptacle, or tempt someone to handle it with wet hands.
Set the sensor so an opening door or approaching person activates it before the first step into darkness, not after reaching the toilet.
Fixture Styles and Accent Lighting With a Clear Visual Role
Decorative lighting works when its shape, finish, and glow reinforce the room without hiding essential tasks. Let one feature lead while quieter layers provide support.
35. Warm the Vanity With Ribbed Glass Sconces
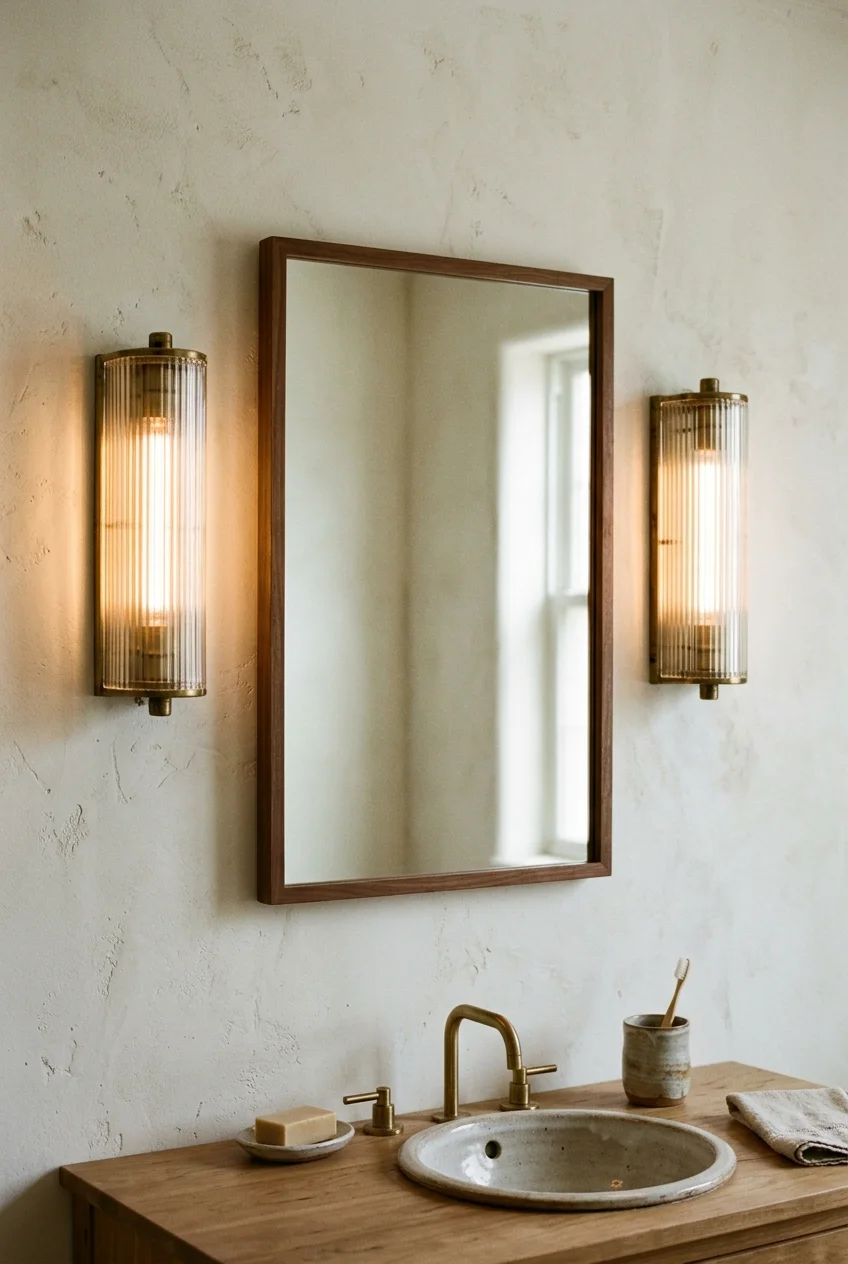
Ribbed glass breaks the lamp image into softer highlights and adds vertical texture beside a simple mirror, particularly against plain plaster or large tile.
Inspect the fixture illuminated because clear or ribbed glass can still expose a glaring bulb. Diffused lamps and thoughtful output preserve the decorative texture.
36. Repeat Opal Globes Across a Long Vanity
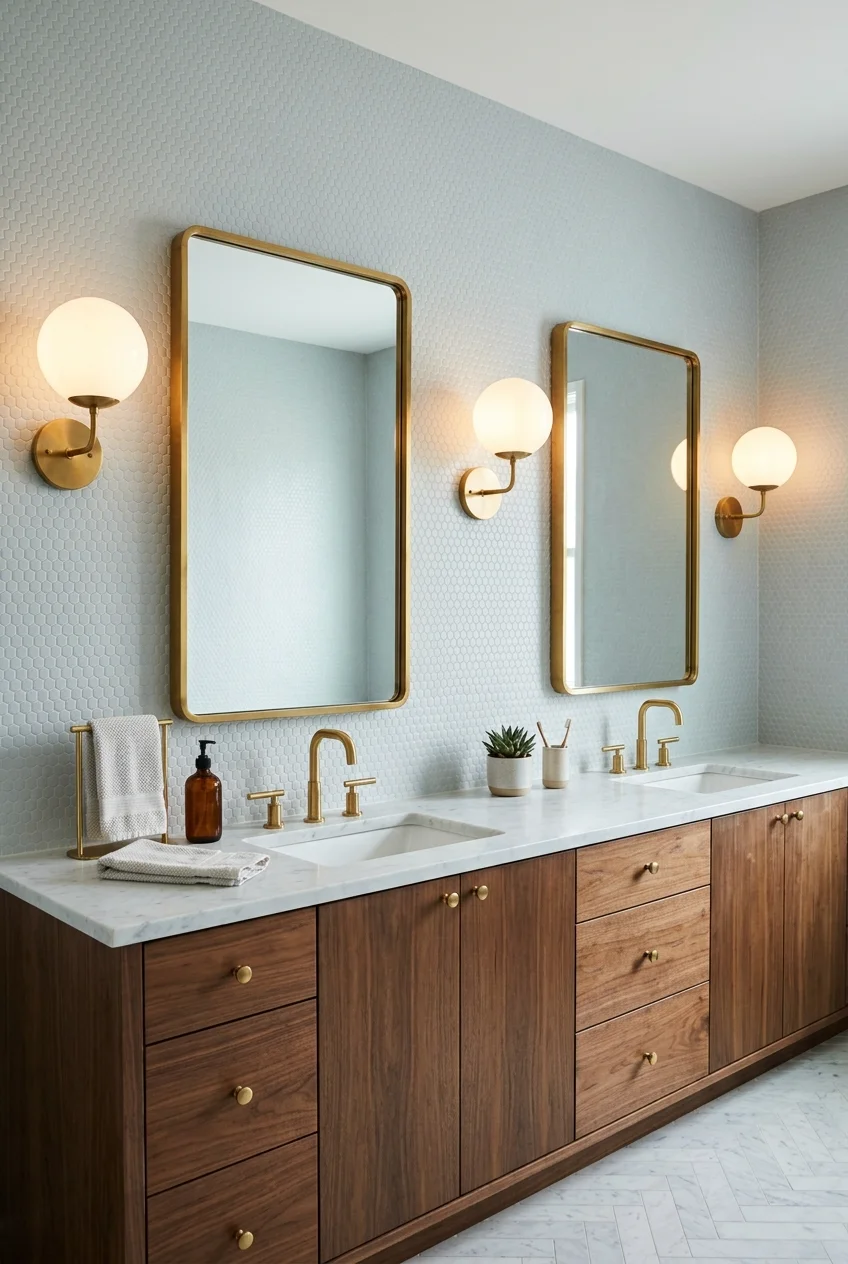
A row of opal globes can create a playful rhythm across a long vanity while keeping each light source visually soft and easy to repeat.
Space one consistent globe size from mirror divisions and sink centers, not equal wall fractions alone, so the repeated circles clarify the composition.
37. Outline Pale Tile With Matte Black Fixtures
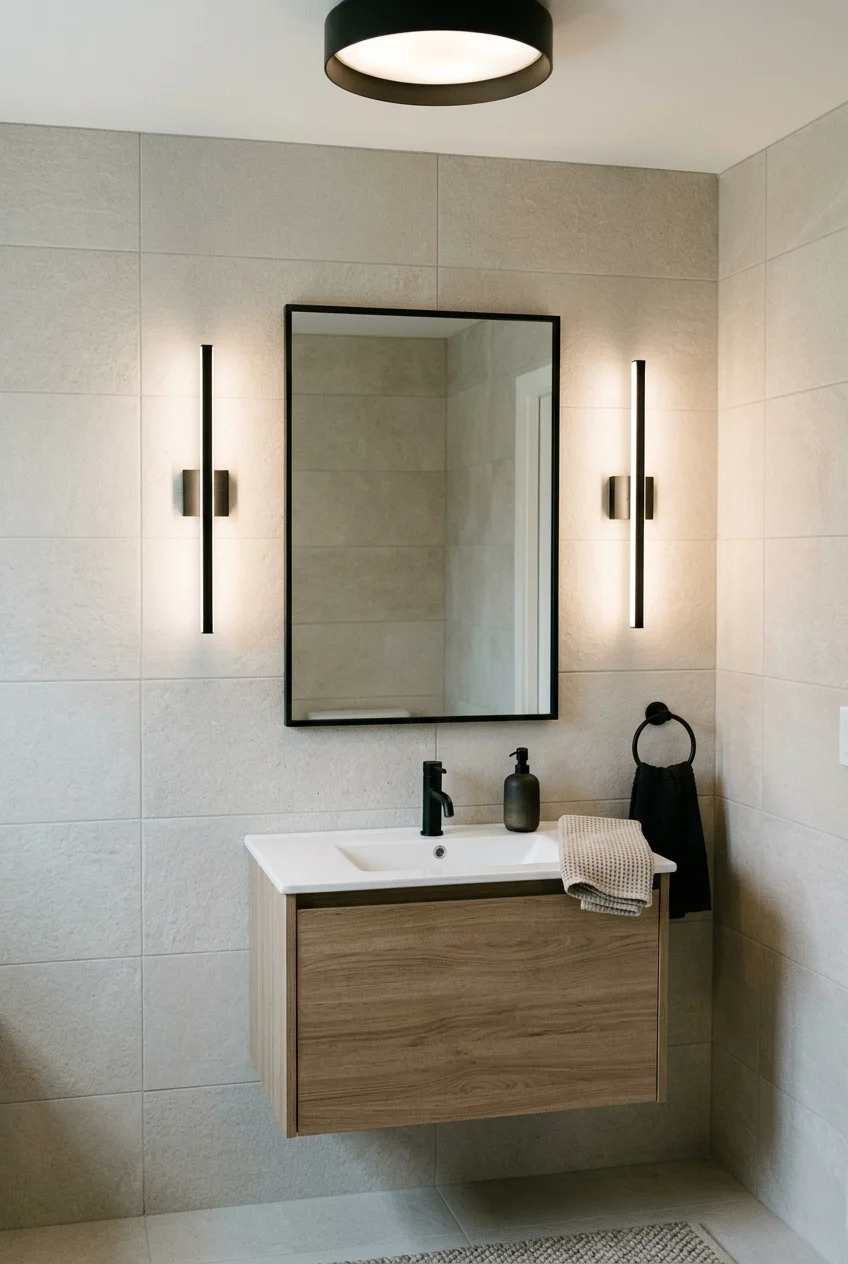
Matte black fixtures create readable silhouettes against pale tile, helping slim sconces and a ceiling light hold their shape in a bright bathroom.
Repeat black selectively in the mirror frame or faucet. Filling every accessory with the same finish can turn useful contrast into a rigid theme.
38. Pair Aged Brass With Veined Stone
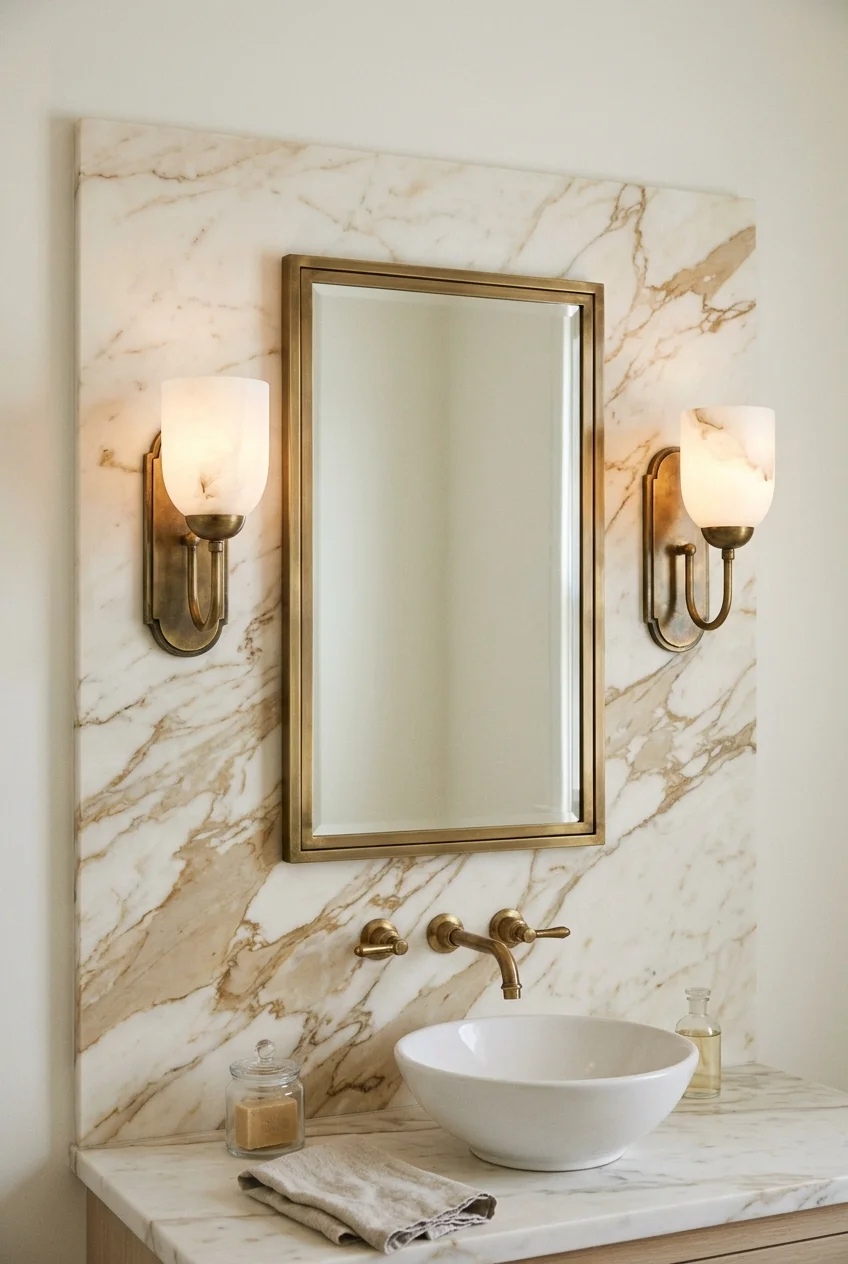
Aged brass lighting can pick up warm mineral tones in veined stone, connecting the vanity wall without requiring the faucet and every handle to match.
Compare the finish beside the actual slab and use diffused shades, keeping warm metal as an accent without glare obscuring the stone pattern.
39. Color-Match the Fixture to a Saturated Wall
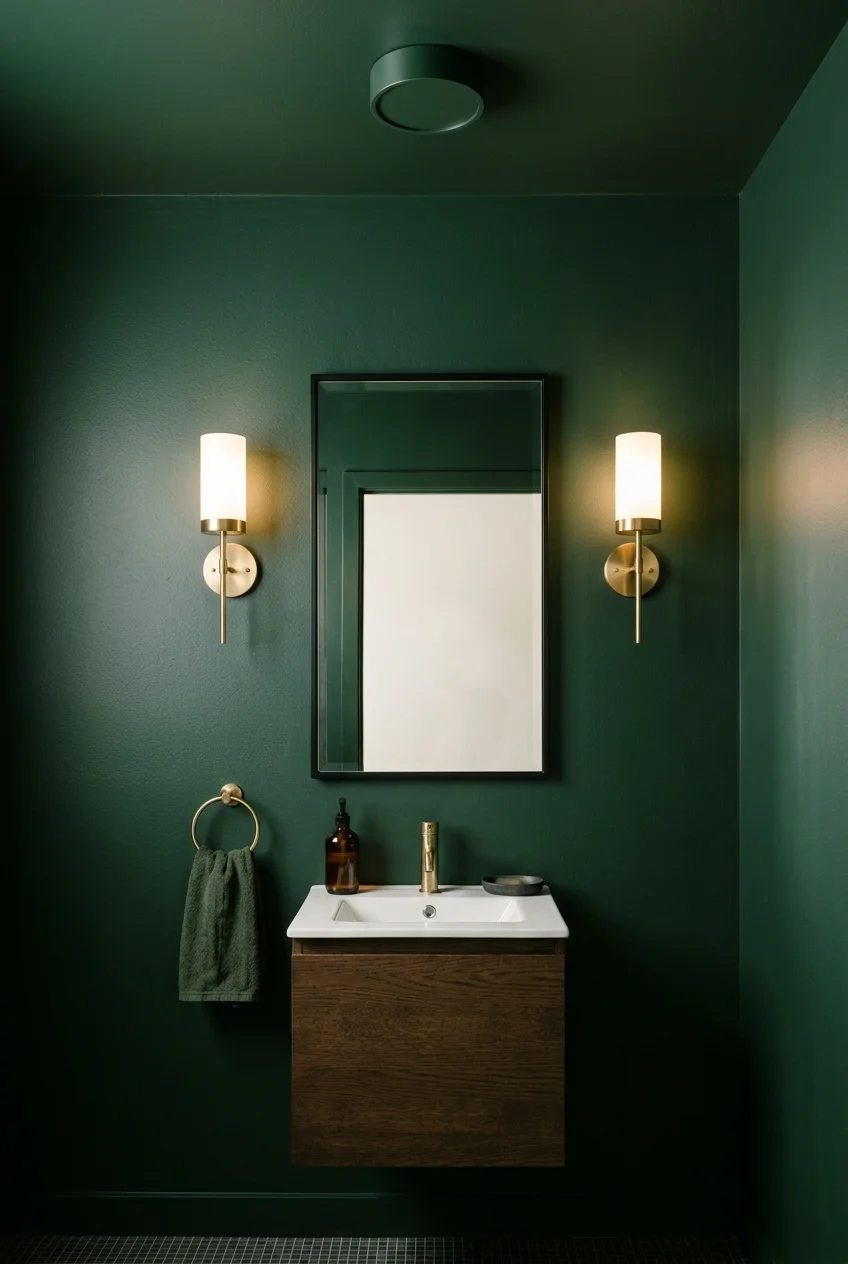
Painting or selecting a fixture close to the wall color can make its silhouette quieter while preserving the pool of light as the main event.
Use a manufacturer-finished fixture or an approved refinishing method rather than painting electrical components casually. Keep labels, vents, sockets, and grounding points untouched.
Choose this approach for one dry decorative fixture, then keep task lights visually simple. The room still needs enough contrast to locate controls safely.
40. Hang a Sculptural Pendant in a Dry Powder Room
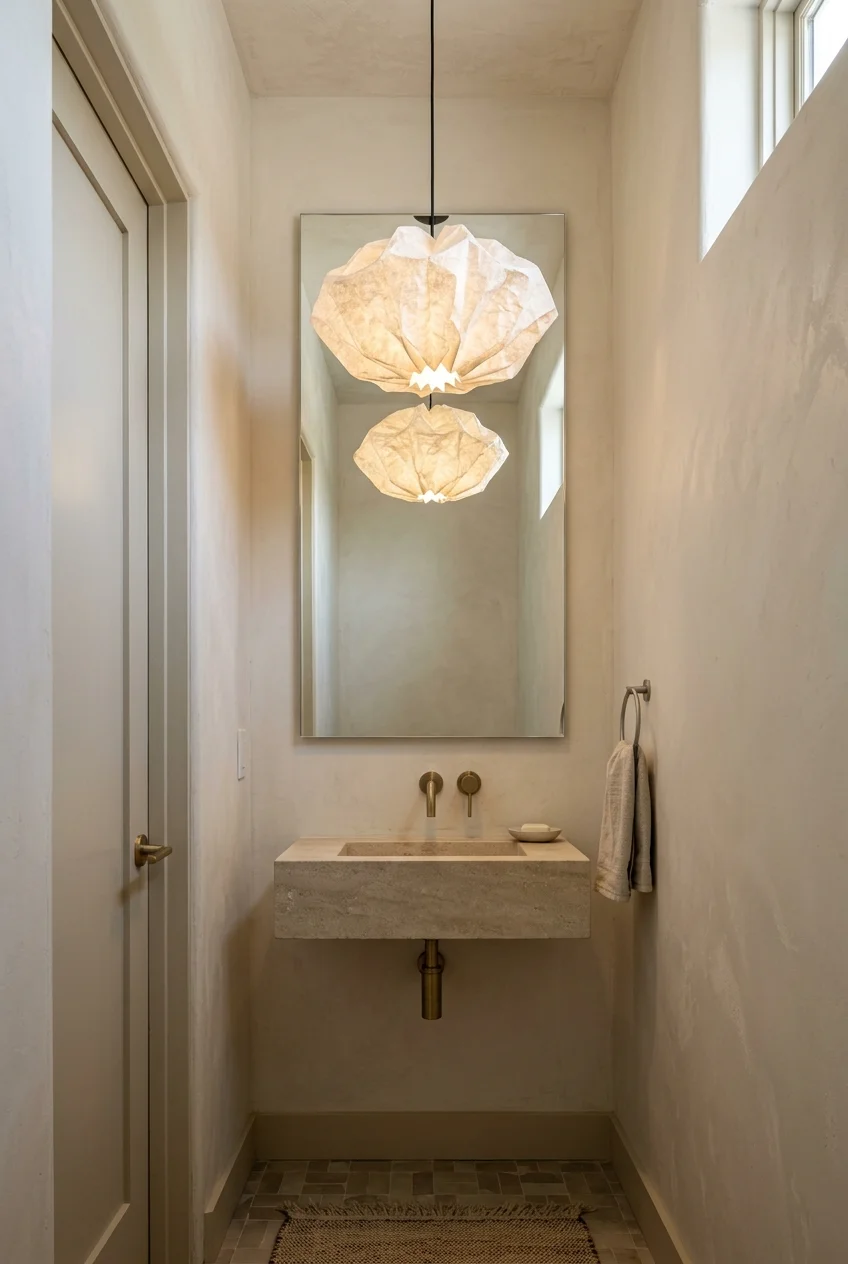
A sculptural pendant can occupy the vertical center of a powder room, giving a tiny space one memorable form without adding countertop decor.
Keep it clear of the door, mirror, and standing headroom, and verify the fixture’s listing and location with a qualified electrician.
A pendant with a shaded or diffused source prevents direct glare in the mirror. Add discreet vanity light if the decorative fixture leaves faces shadowed.
41. Use a Schoolhouse Fixture for Vintage Character
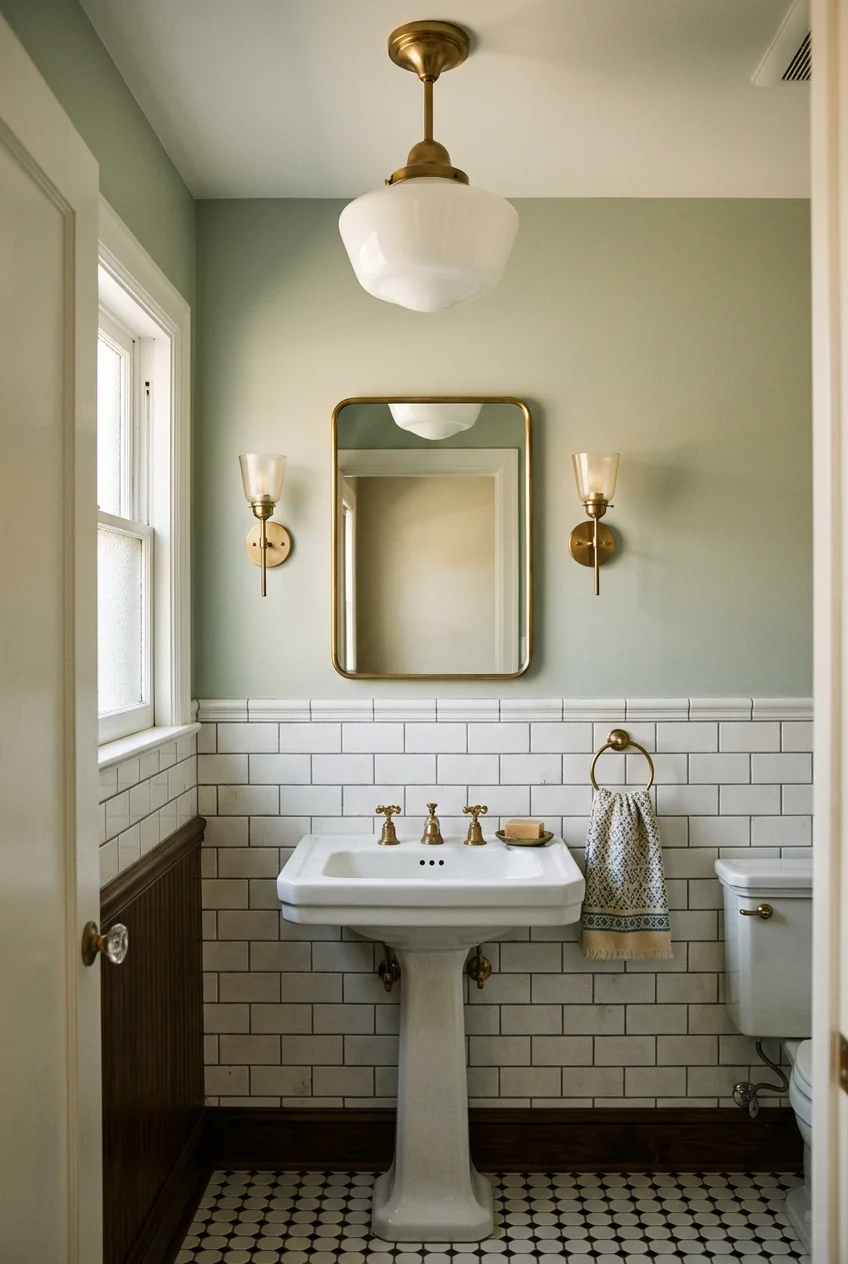
A schoolhouse globe brings a recognizable vintage shape to the ceiling while its opaque glass can distribute light more gently than a clear exposed lamp.
Pair it with simpler vanity lights and confirm bathroom suitability; antique originals may need professional assessment before installation in a damp setting.
42. Choose Plaster-Look Sconces for Soft Wall Light
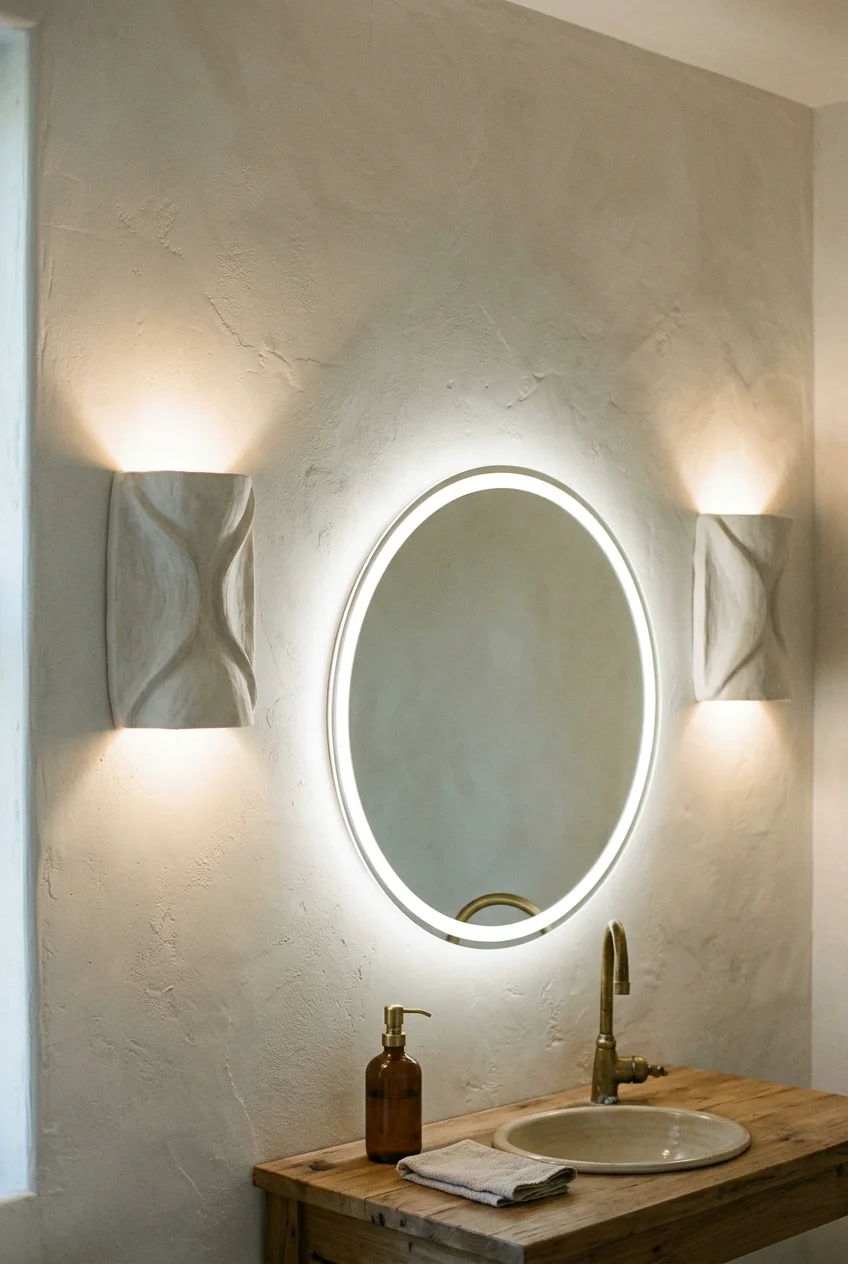
Plaster-look sconces can blend with a pale wall while sending reflected light upward or downward, creating a quieter effect than exposed decorative lamps.
Opaque shades may contribute little forward light at the mirror, so use them as accent or ambient support rather than the only grooming source.
Place them where their beams remain uninterrupted by medicine cabinets and shelves. A close obstruction can create an awkward bright patch or hard shadow.
43. Backlight a Translucent Stone Vanity Panel
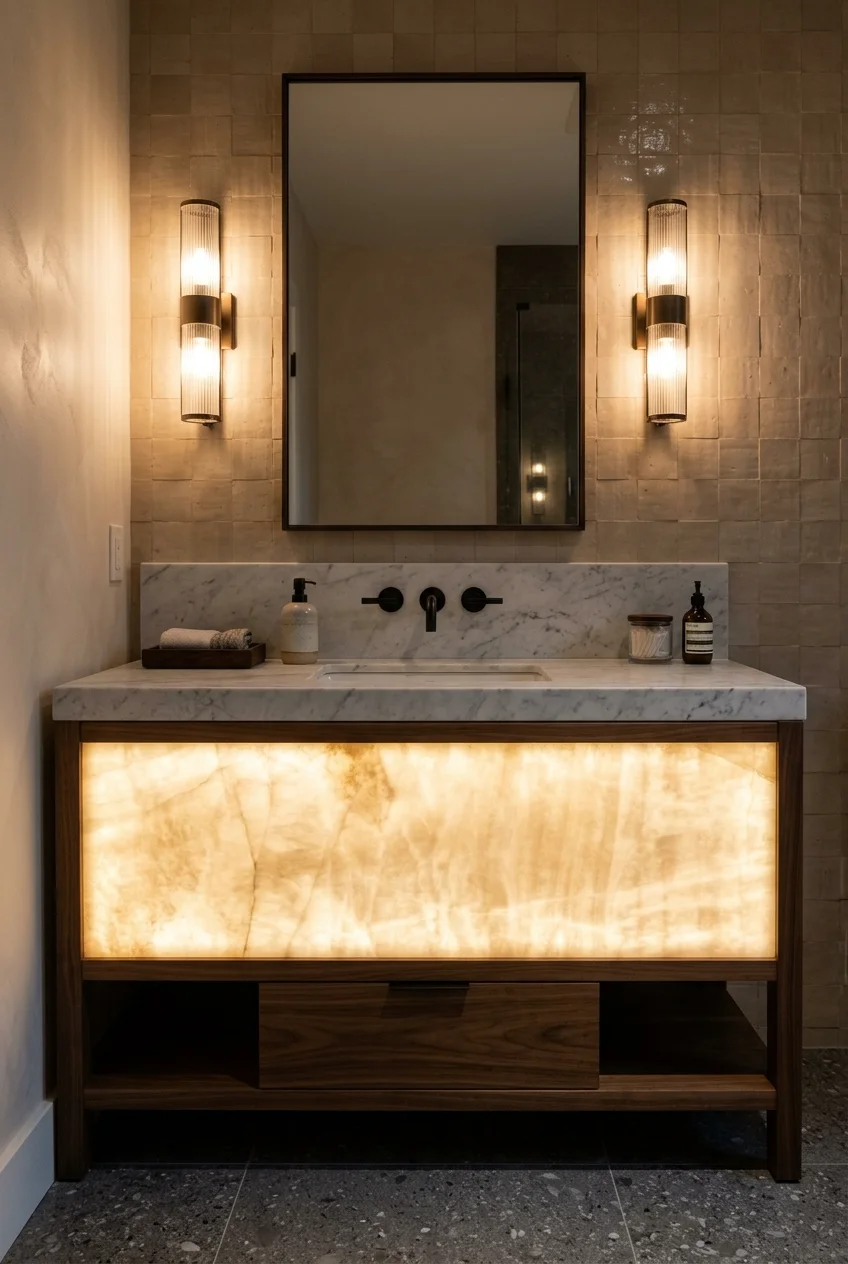
A translucent stone panel can become a luminous vanity feature when the light source, slab thickness, support, and pattern are designed as one assembly.
Uneven diode spacing, inaccessible drivers, heat, and visible framing can spoil the effect. Require shop drawings, samples, dimming tests, and service planning.
- Select the translucent material and approved thickness.
- Mock up diffusion and source spacing.
- Design support without blocking the glow.
- Provide ventilation, controls, and driver access.
Watch for A photograph cannot prove an illuminated stone assembly is safe, serviceable, or evenly lit. Treat it as a specialized fabricated feature.
Veins and inclusions transmit light differently across one slab. Approve the exact material under the proposed source rather than relying on an unlit sample.
Design a removable access path that does not expose live parts during ordinary cleaning. Future driver replacement should not require dismantling the entire vanity.
Keep surrounding lighting restrained so the panel remains legible, but retain sufficient face and floor illumination when the feature is dimmed or off.
Controls, Color Quality, and Layered Lighting Plans
A useful lighting plan changes with the task. Separate layers, compatible controls, thoughtful color quality, and a reliable low setting make attractive fixtures easier to live with.
44. Put Ambient, Vanity, and Shower Lights on Separate Controls
Image pending: No image is attached to this draft for idea 44 (image-44).
Separate controls let the vanity run brightly for grooming, the shower operate independently, and the ambient layer soften without leaving the whole room dark.
Group switches by function and label unfamiliar controls discreetly. A complicated row of identical buttons defeats the flexibility it was meant to provide.
- Ambient: room and floor visibility
- Vanity: forward face lighting
- Shower: dedicated wet-zone illumination
- Night: low-level route lighting
Locate controls where users can reach the needed layer before entering a dark or wet area, following the adopted electrical rules and product instructions.
45. Use Compatible Dimmers for the Main Layers
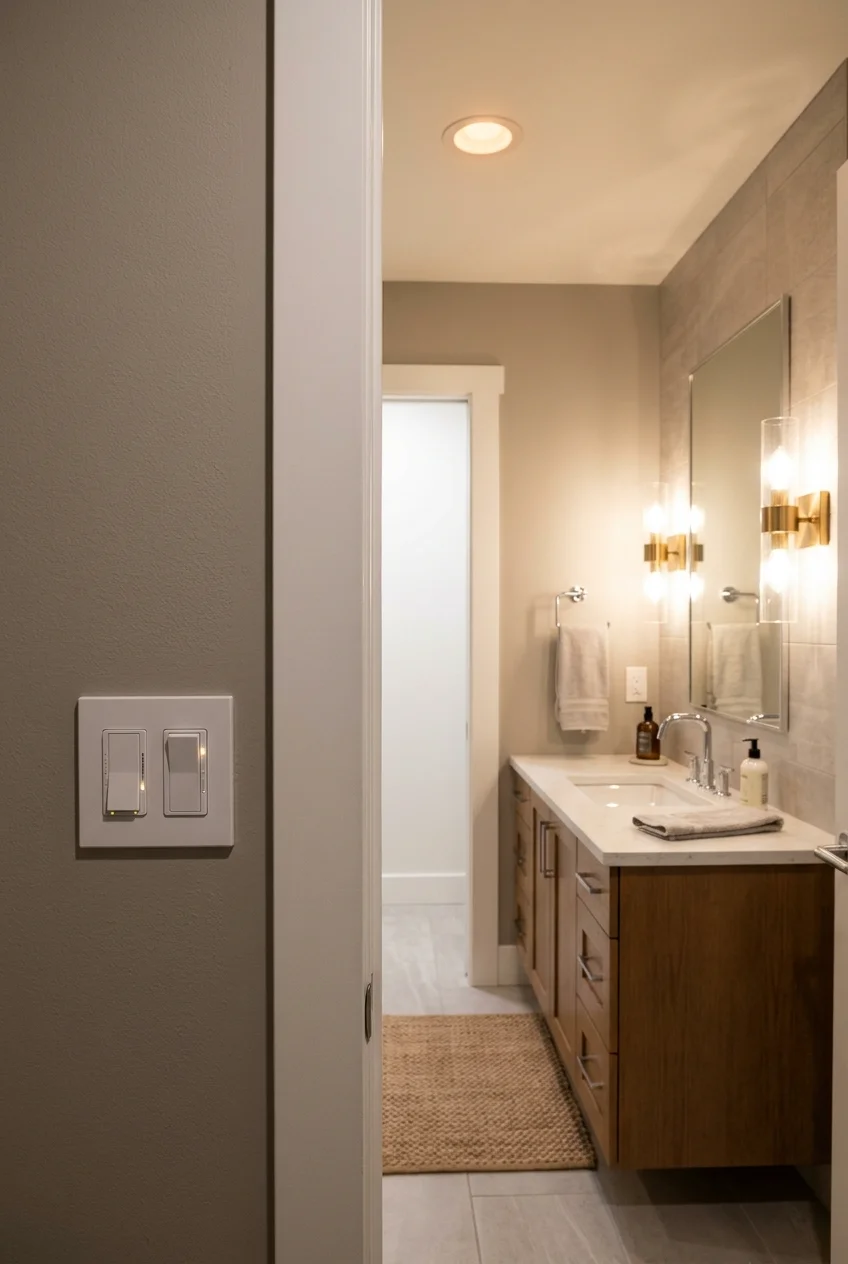
Dimmers allow one fixture to support bright cleaning, ordinary routines, and softer evening use, but the lamp, driver, and control must work together.
Check the fixture manufacturer’s dimmer guidance and test low-end stability. Flicker, buzzing, delayed starts, or failure to turn off indicate poor compatibility.
- Choose the fixture and light source.
- Review the supported control type.
- Select a compatible dimmer and wiring method.
- Test full range before final acceptance.
Practical tip Set a useful minimum level rather than chasing darkness. The lowest setting should still reveal the floor, counter edge, and doorway safely.
A control that works with one fixture may not suit another driver on the same circuit. Mixed loads deserve explicit compatibility review before installation.
Verify behavior after power loss and at the lowest setting. Some systems return at full brightness or flash briefly, which matters during nighttime use.
Dim vanity and ambient layers separately when possible. A calm bath setting may still need enough mirror light for medication, contact lenses, or cleanup.
46. Use Tunable White Light for Morning and Evening
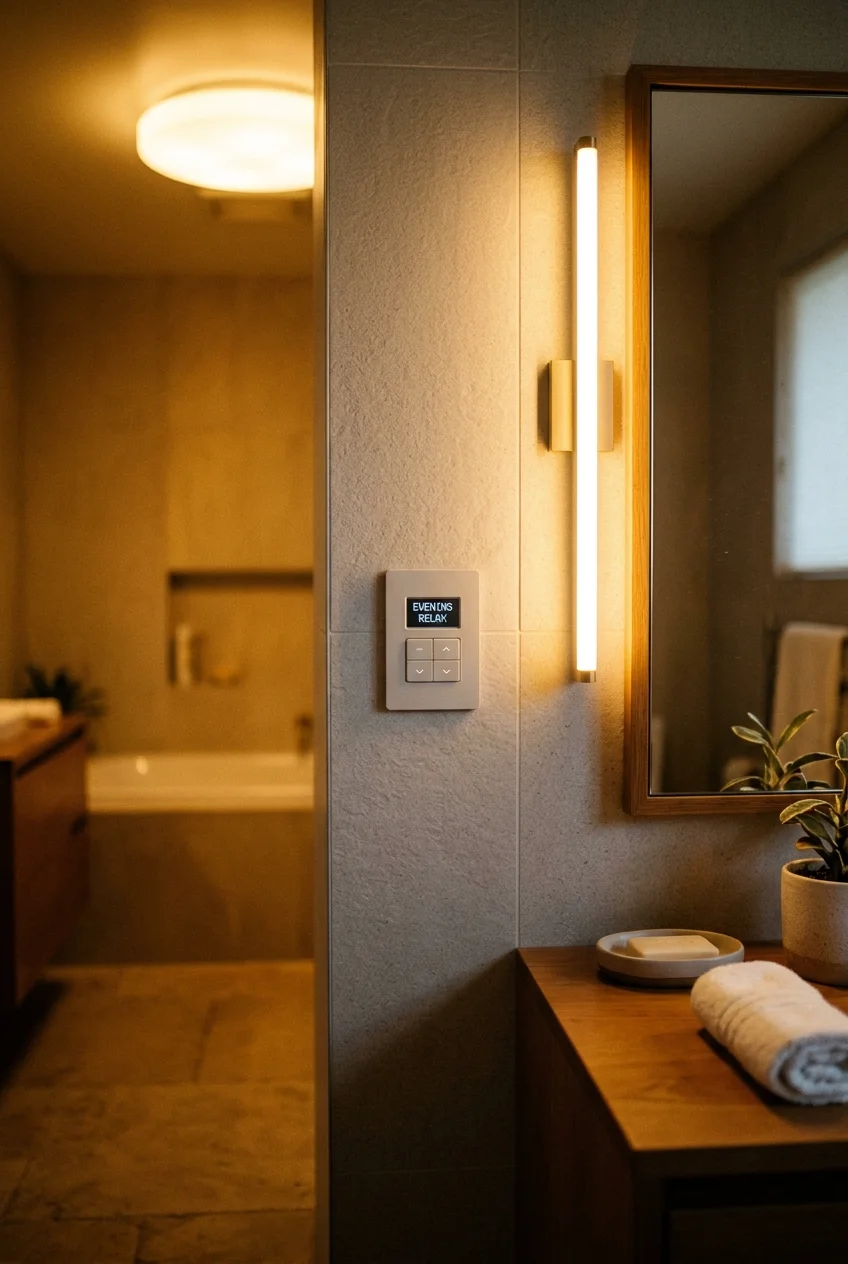
Tunable white lighting can provide a cooler, brighter appearance for morning routines and a warmer appearance when the room should settle at night.
Keep settings simple and consistent across fixtures. Mixed color appearances can make mirrors, tile, and skin look disconnected within one small room.
Verify how the system returns after a power interruption and whether wall controls work without an app. Everyday reliability matters more than many presets.
47. Choose Light That Renders Skin and Finishes Naturally
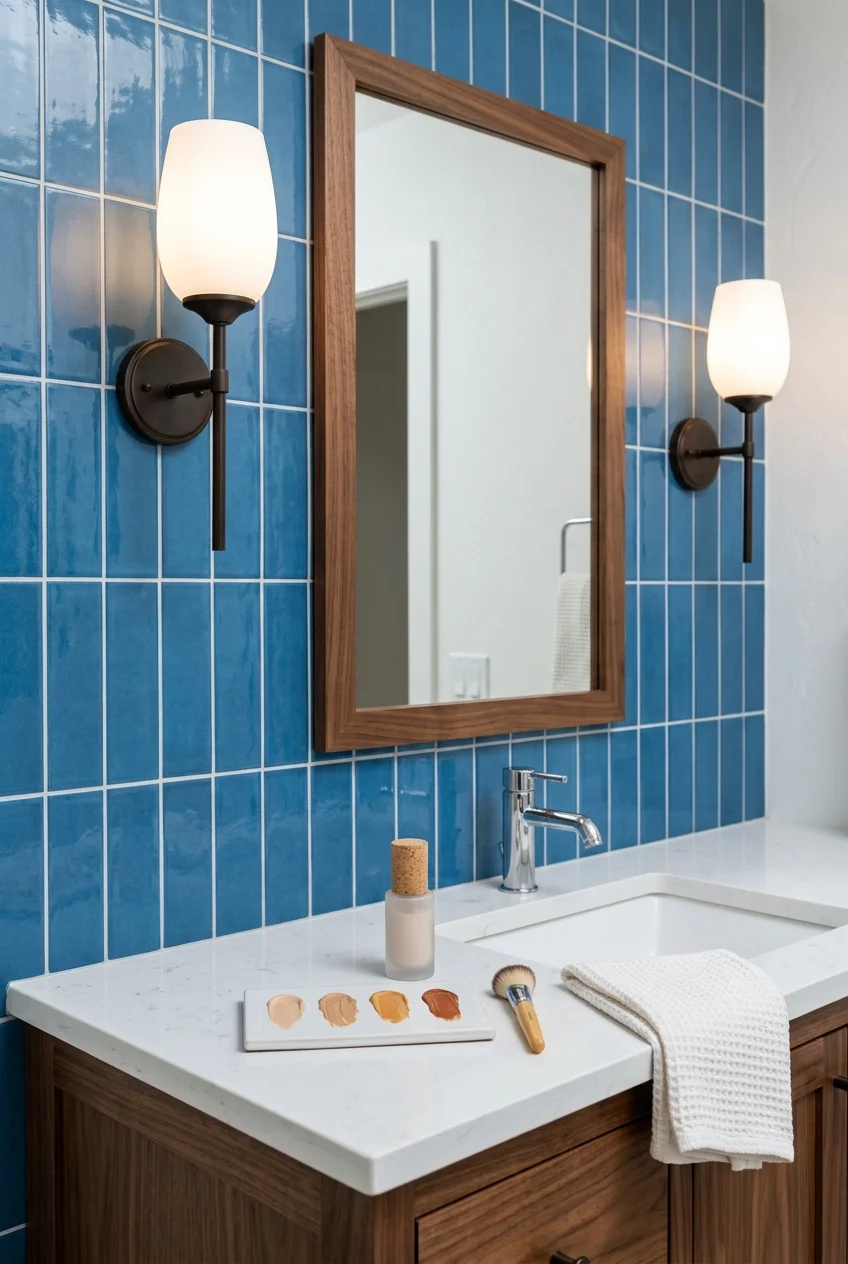
Color rendering affects how skin, makeup, paint, wood, and tile appear, so compare more than color temperature when selecting vanity lamps or integrated LEDs.
Review manufacturer color-quality information and inspect samples with actual bathroom finishes. Two products labeled the same white appearance can render saturated colors differently.
Use the same compatible source family across paired sconces. Slight differences become obvious when two lamps illuminate one face or mirror simultaneously.
48. Save a Few Activity-Based Smart Scenes
Image pending: No image is attached to this draft for idea 48 (image-48).
Smart scenes can recall several layers together, making useful combinations repeatable without adjusting every dimmer separately during busy mornings or nighttime visits.
Name scenes by activity and keep manual wall control available. Guests should not need a phone, account, or voice command to use the bathroom.
- Morning: vanity and ambient bright
- Bath: ambient and accent softened
- Cleaning: all practical layers bright
- Night: route light only
Test scenes with everyone who uses the room. A visually calm setting may leave the shower threshold or medicine cabinet too dim for someone else.
49. Coordinate Lighting With Mirror Reflections
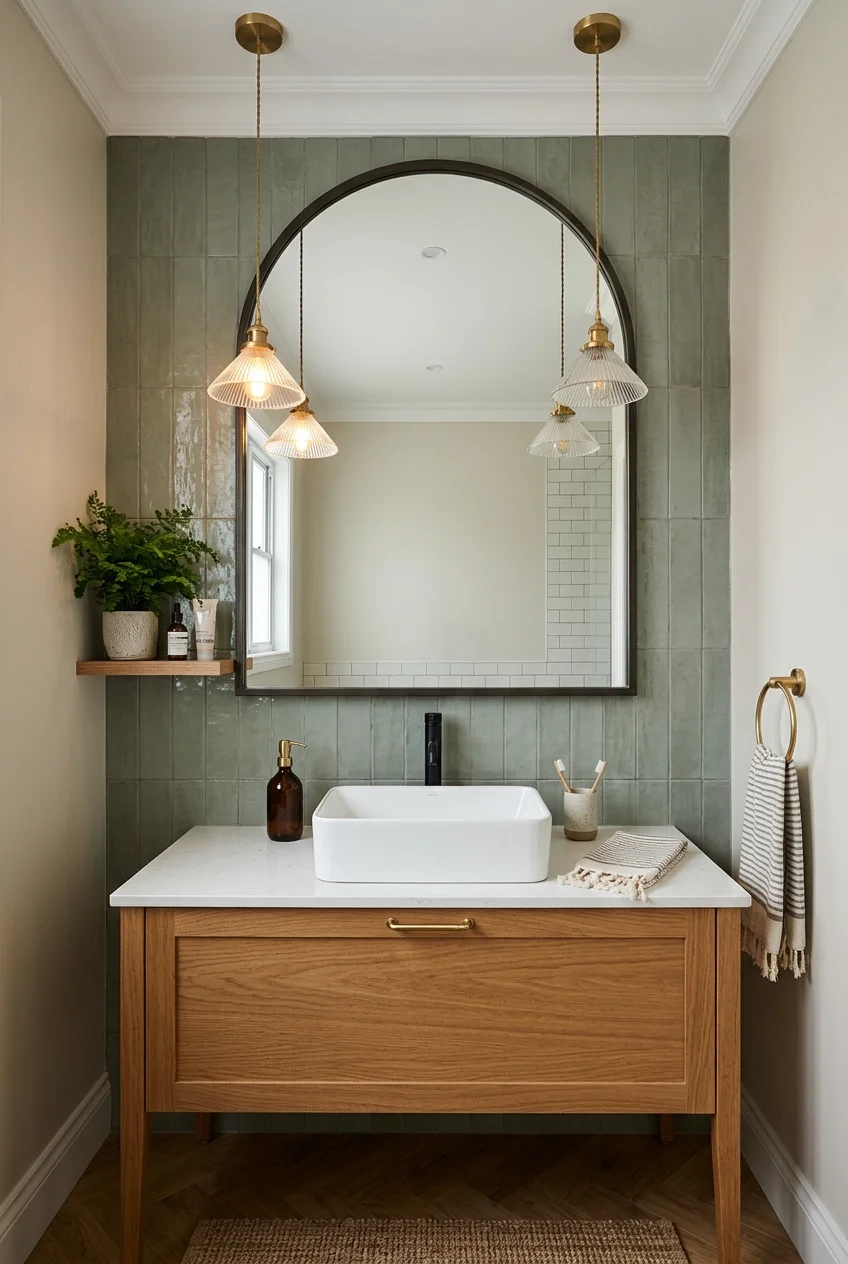
Every visible fixture may appear again in the mirror, so review the reflected composition before rough-in rather than evaluating only the wall elevation.
A pendant behind the viewer can land at the center of a face in reflection, while recessed lights may form a distracting row overhead.
Photograph or model the view from ordinary standing positions. Small location changes can clean the reflection without altering the broader lighting strategy.
50. Build One Complete Four-Layer Bathroom Plan
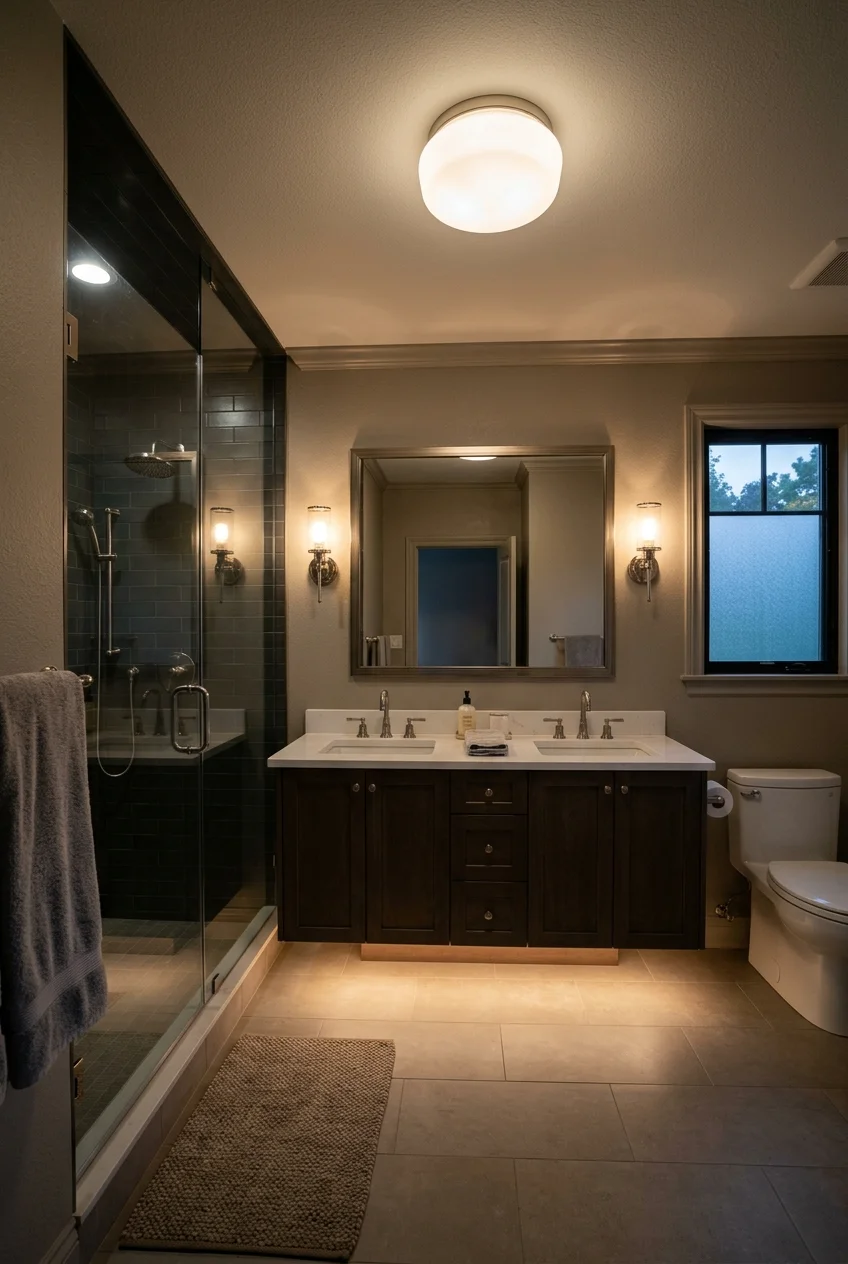
A resilient bathroom plan combines forward vanity light, general ambient light, dedicated wet-zone illumination, and one low nighttime route layer.
Start from activities and room geometry, then select decorative fixtures. This prevents a beautiful ceiling piece from consuming the budget while essential zones remain dim.
- Map sinks, shower, tub, toilet, doors, and storage.
- Assign task, ambient, wet-zone, and night layers.
- Choose listed fixtures and compatible controls.
- Review glare, reflections, and service access.
- Confirm the plan with qualified installers and local requirements.
If the lighting accompanies a broader renovation, use these builder-grade bathroom makeover ideas to coordinate repairs, mirrors, surfaces, ventilation, and installation sequence.
Commission every scene after installation. Check the mirror, shower threshold, cabinet interiors, floor route, and switch behavior before considering the lighting complete.
Keep product records and control instructions with the home file. Future lamp, driver, or dimmer replacement depends on knowing what was designed to work together.
Frequently Asked Questions
Is one ceiling light enough for a bathroom?
One ceiling light may illuminate the floor, but mirrors and enclosed showers often need separate task lighting because overhead light creates shadows and partitions block beams.
Should bathroom sconces face up or down?
Direction matters less than useful distribution, diffusion, and glare. Choose the orientation that lights faces and nearby surfaces without exposing a harsh lamp in the mirror.
Can any light fixture be installed above a shower?
No. The exact fixture and installation must suit the wet location and adopted electrical requirements, including listing, trim, sealing, protection, and manufacturer instructions.
What makes bathroom lighting comfortable at night?
A shielded low-level source near the route provides orientation without flooding the eyes. Keep it warm, dim, and separate from bright vanity or ceiling layers.