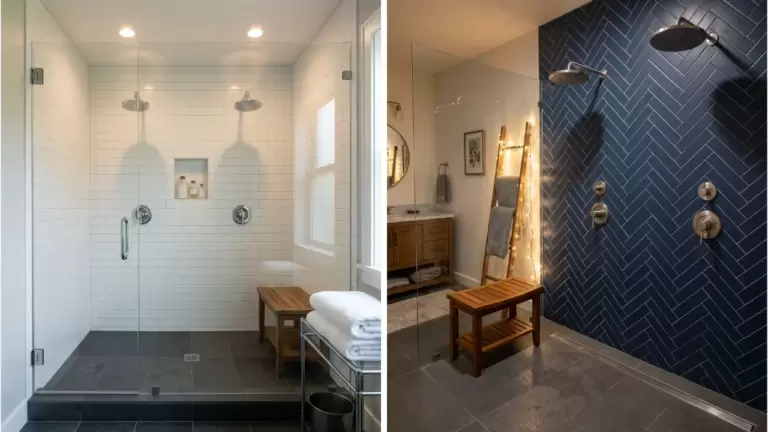
32 Walk-In Shower With Wall No Door Ideas

This post may contain affiliate links: full affiliate disclosure.
Skip the glass and the constant cleaning by using a permanent wall to define your shower space.
These doorless layouts use clever placement and partition walls to keep water where it belongs while opening up the room.
1. Half Wall Walk-In Shower
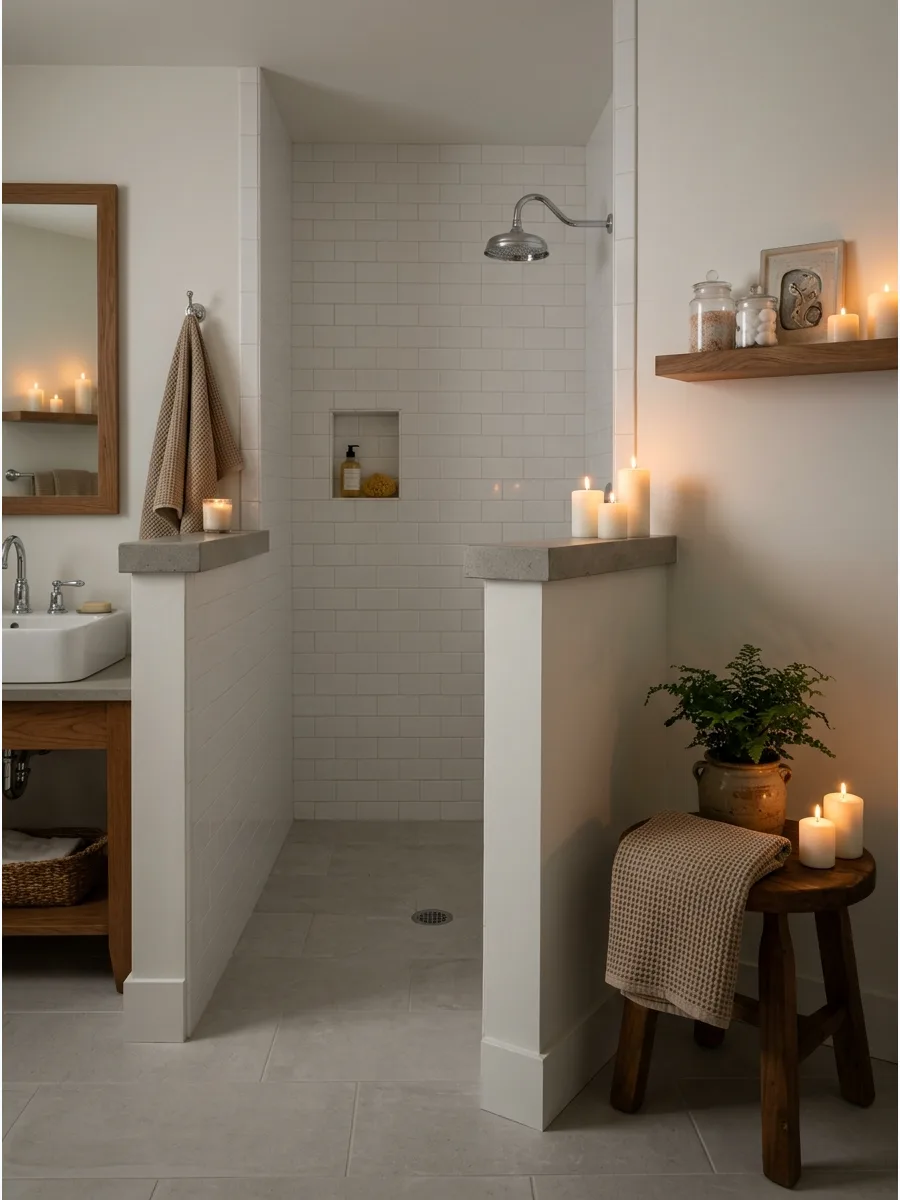
Use a half wall beside the shower to block water while keeping the bathroom open and bright. This setup creates a clear boundary without the visual weight of a full-height divider.
Cap the wall with a solid stone slab to prevent water from seeping into the grout lines on top. It’s a smart choice for bathrooms that lack natural light.
- Budget: $400 – $800 for framing and basic tile
- Placement: Position beside the toilet or vanity to define zones
- Adaptation: Use waterproof paint on the outside for a budget-friendly finish
Quick win: Angle the top of the wall slightly toward the shower so water naturally drains back inside.
2. Pony Wall Shower No Door
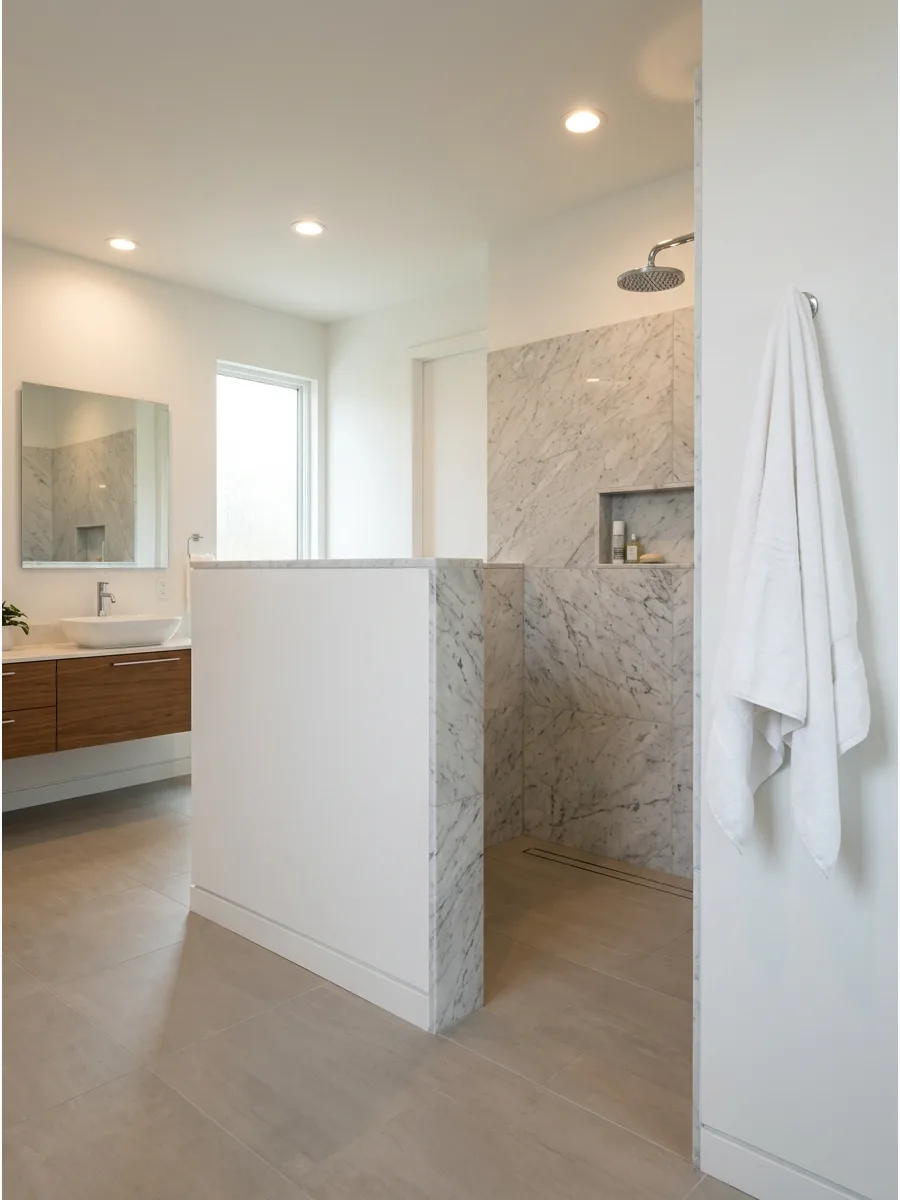
A pony wall gives privacy without closing off the shower like a full glass enclosure. It hides the messy floor area of the shower while letting the upper half of the room breathe.
Build the wall at least 42 inches high to effectively hide plumbing and provide a sense of enclosure. This layout works perfectly in master suites where a sense of flow is needed.
- Sourcing: Standard 2×4 lumber and cement backer board
- Setup: Frame the wall securely to the floor and existing wall studs
- Style: Match the wall height to the vanity for a clean horizontal line
Most people skip this: Reinforce the top plate of the pony wall to prevent it from wobbling over time.
3. Tile Half Wall Walk-In
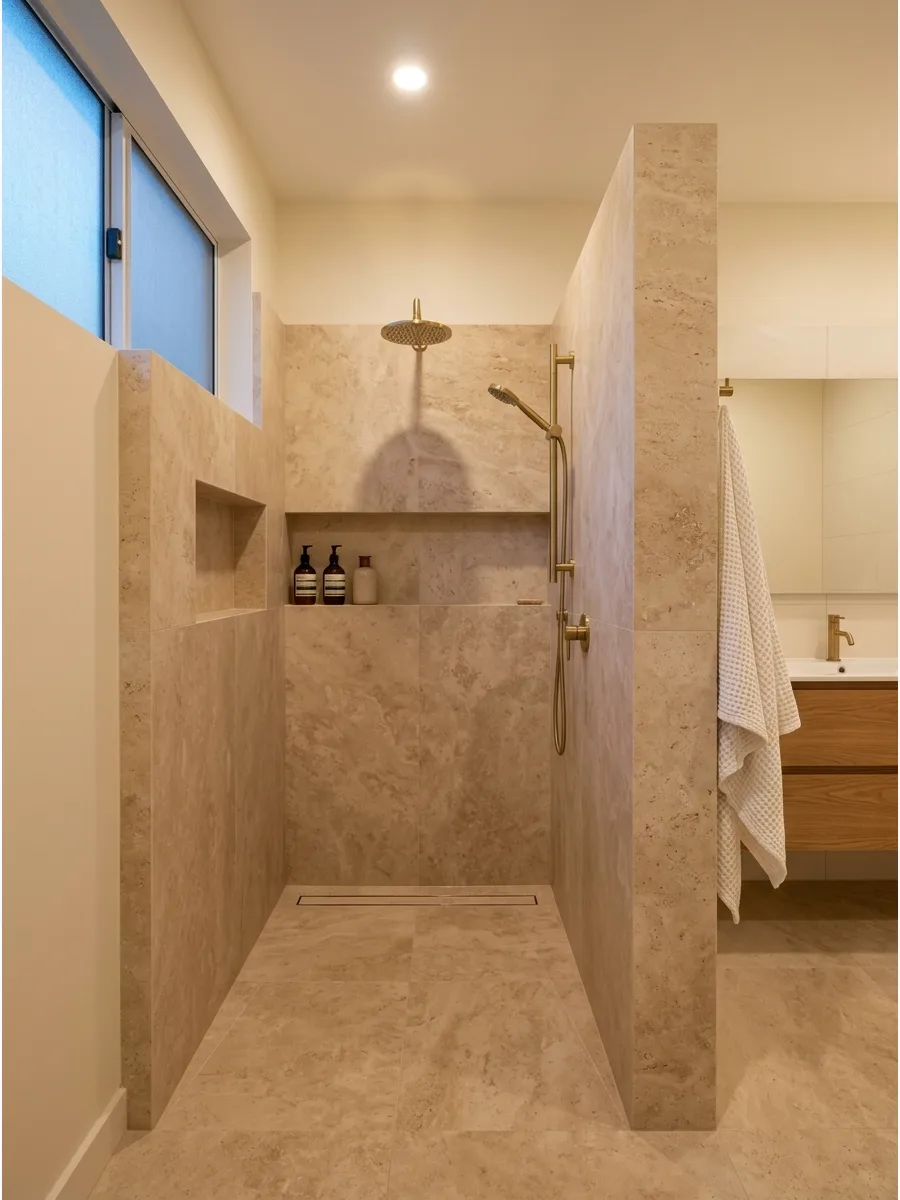
Tile the half wall in the same material as the shower for a clean built-in look. This creates a cohesive wet zone that feels like a custom architectural feature rather than an afterthought.
Use a mitered edge on the tile corners for a high-end finish that eliminates the need for plastic trim. It makes the shower feel like a solid, permanent part of the room structure.
- Budget: $600 – $1,200 depending on tile choice
- Logistics: Order 15% extra tile to account for mitered corner cuts
- Adaptation: Contrast the wall tile with the floor for a modern look
Best shortcut: Use a solid quartz or marble remnant for the wall cap to avoid grout maintenance on top.
4. Half Wall With Glass Top
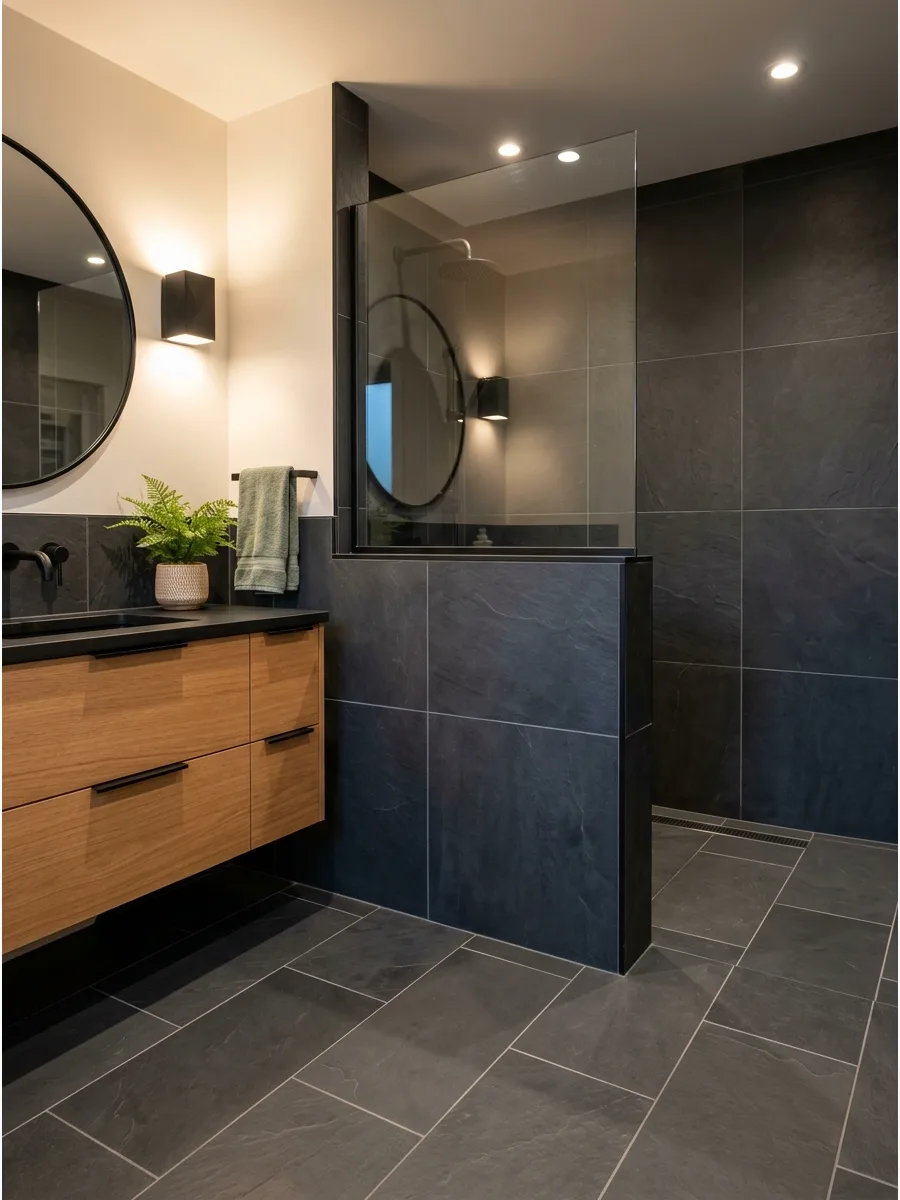
Add a short glass panel above the half wall to control splashing while keeping the doorless style. This hybrid approach offers the best of both worlds by providing a splash guard without a heavy door.
Secure the glass with a low-profile U-channel to keep the hardware nearly invisible. It’s the most effective way to keep the rest of the bathroom floor bone-dry.
- Timing: 1-2 weeks for custom glass fabrication
- Placement: Install on the side closest to the vanity or towel rack
- Adaptation: Use fluted glass for extra privacy and texture
Quick win: Choose 3/8-inch tempered glass for the best balance of weight and durability.
5. Curbless Shower Half Wall
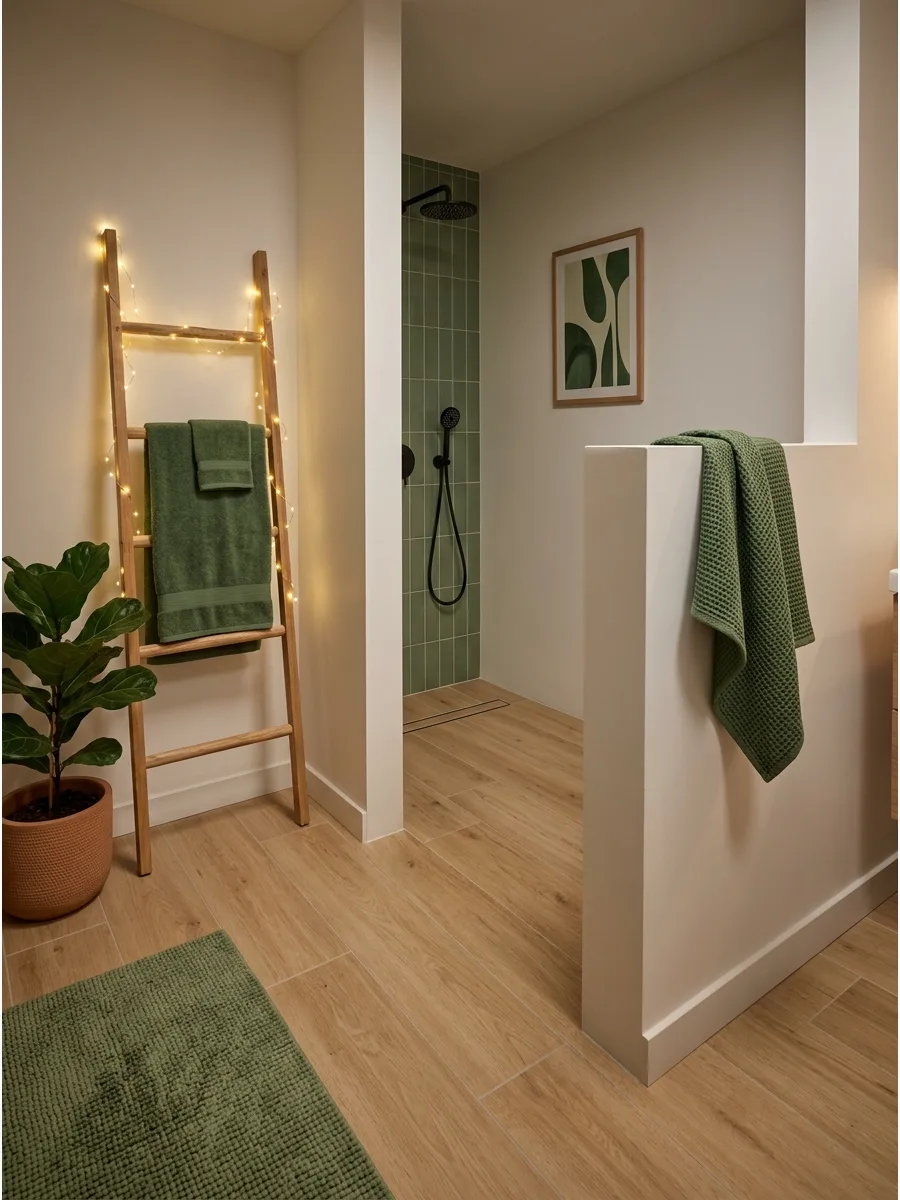
Use a flush floor and half wall for a modern spa-style bathroom that feels open and easy to enter. Removing the curb creates a seamless path that makes the bathroom feel twice as large.
Ensure the floor slopes exactly a quarter-inch per foot toward the drain to keep water from traveling into the dry zone. It’s the ultimate choice for a clean, accessible design.
- Budget: $1,500 – $3,000 for professional floor sloping
- Setup: Requires lowering the subfloor or using a curbless shower tray
- Adaptation: Ideal for aging-in-place and wheelchair accessibility
Most people skip this: Test the floor slope with a level before laying any tile to ensure perfect drainage.
6. Small Bathroom Half Wall
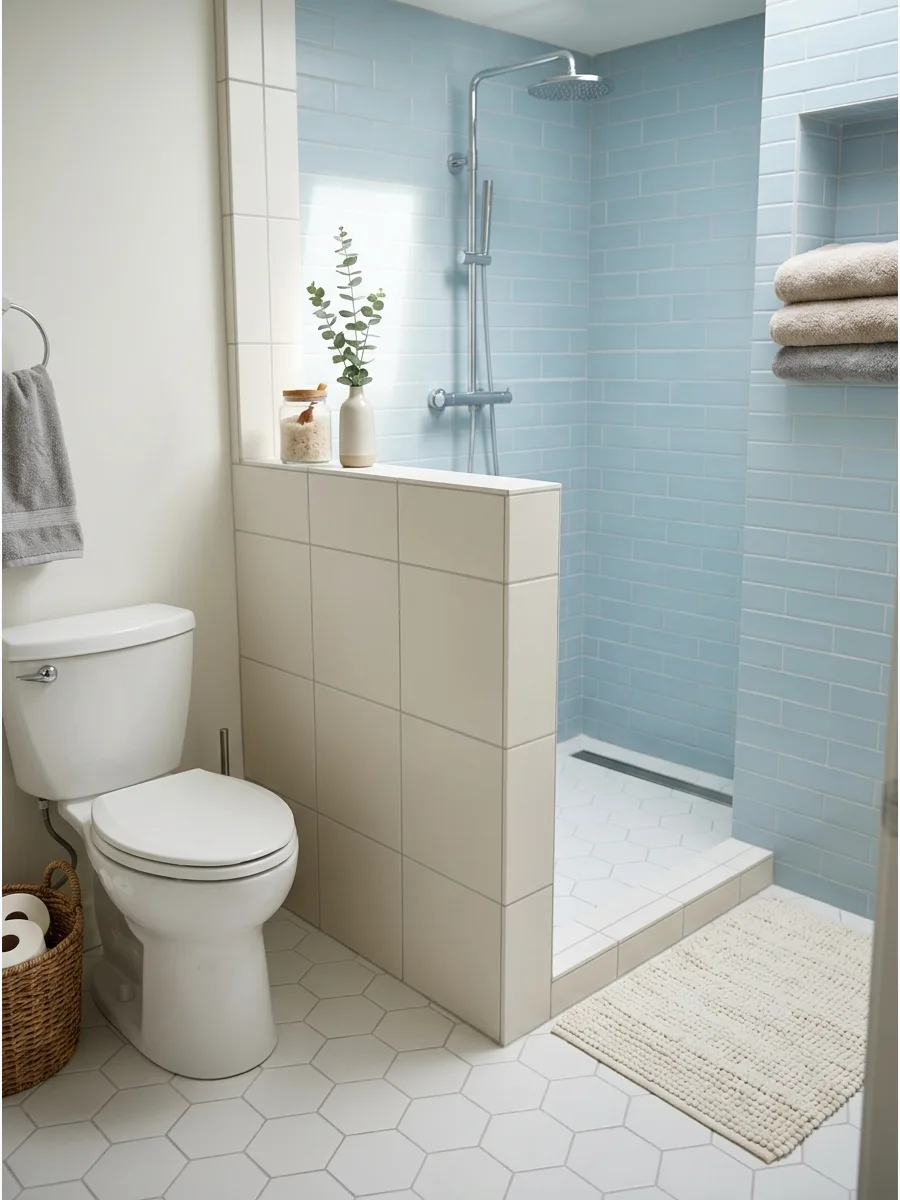
In a small bathroom, a half wall can separate the shower from the toilet without making the room feel tight. It provides a necessary barrier for hygiene and splash control in cramped quarters.
Keep the wall thin by using two-by-three framing instead of two-by-fours to save every possible inch of floor space. This layout prevents the boxed-in feeling common in tiny bathrooms.
- Timing: 2-3 days for framing and tiling
- Placement: Align the wall with the edge of the toilet tank
- Size: Keep the wall length under 36 inches to maintain a clear walkway
Best shortcut: Use large-format tiles on the half wall to make the small space feel larger.
7. Half Wall Beside Vanity
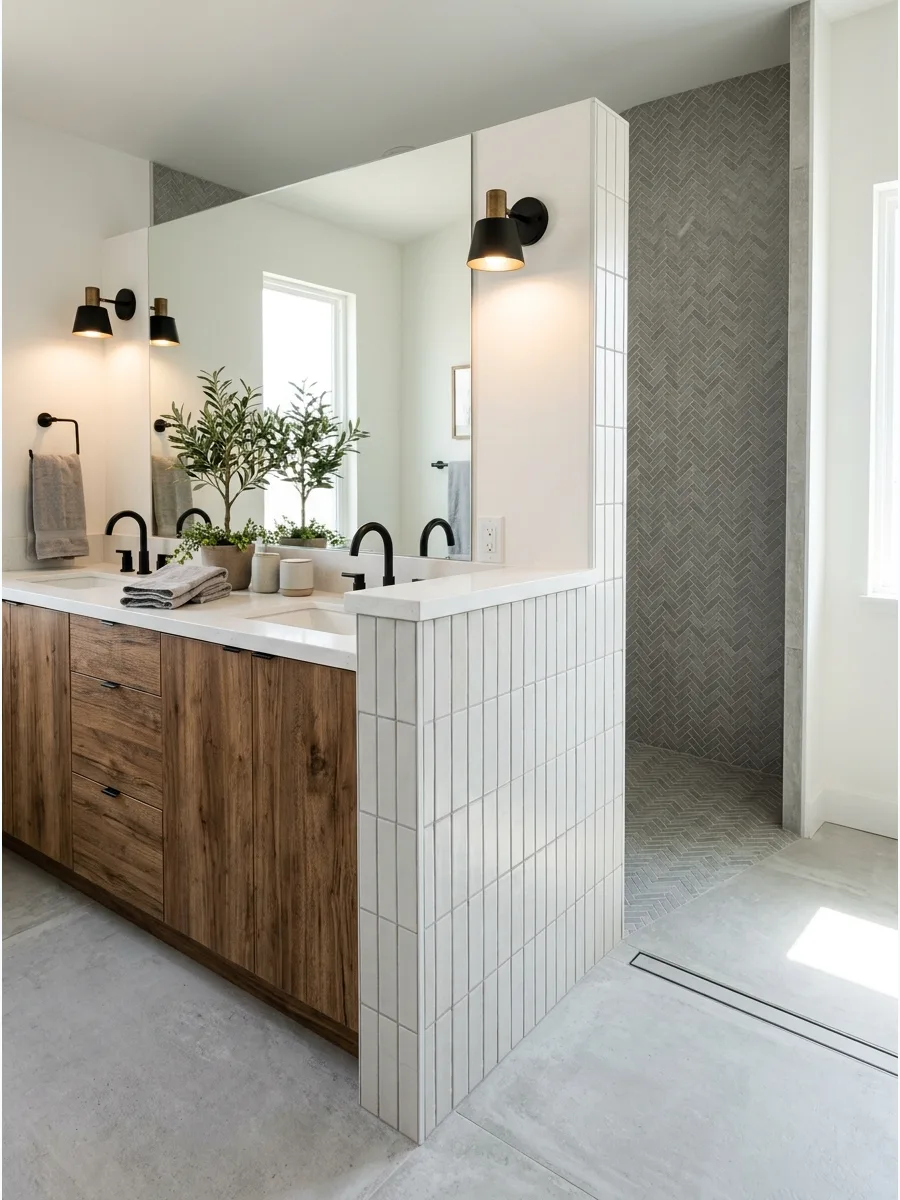
Place the half wall between the shower and vanity to protect the vanity area from water. This prevents the side of wood cabinets from rotting or warping due to constant moisture.
Extend the wall just two inches past the vanity depth to ensure full coverage from overspray. It creates a neat, organized look where every zone has its own place.
- Sourcing: Match the wall cap to your vanity countertop material
- Logistics: Ensure there is enough room to clean between the wall and vanity
- Adaptation: Tile the vanity side of the wall for extra water protection
Quick win: Leave a 1-inch gap between the vanity and the wall to allow for air circulation.
Home Decor
8. Glass-Free Pony Wall Niche
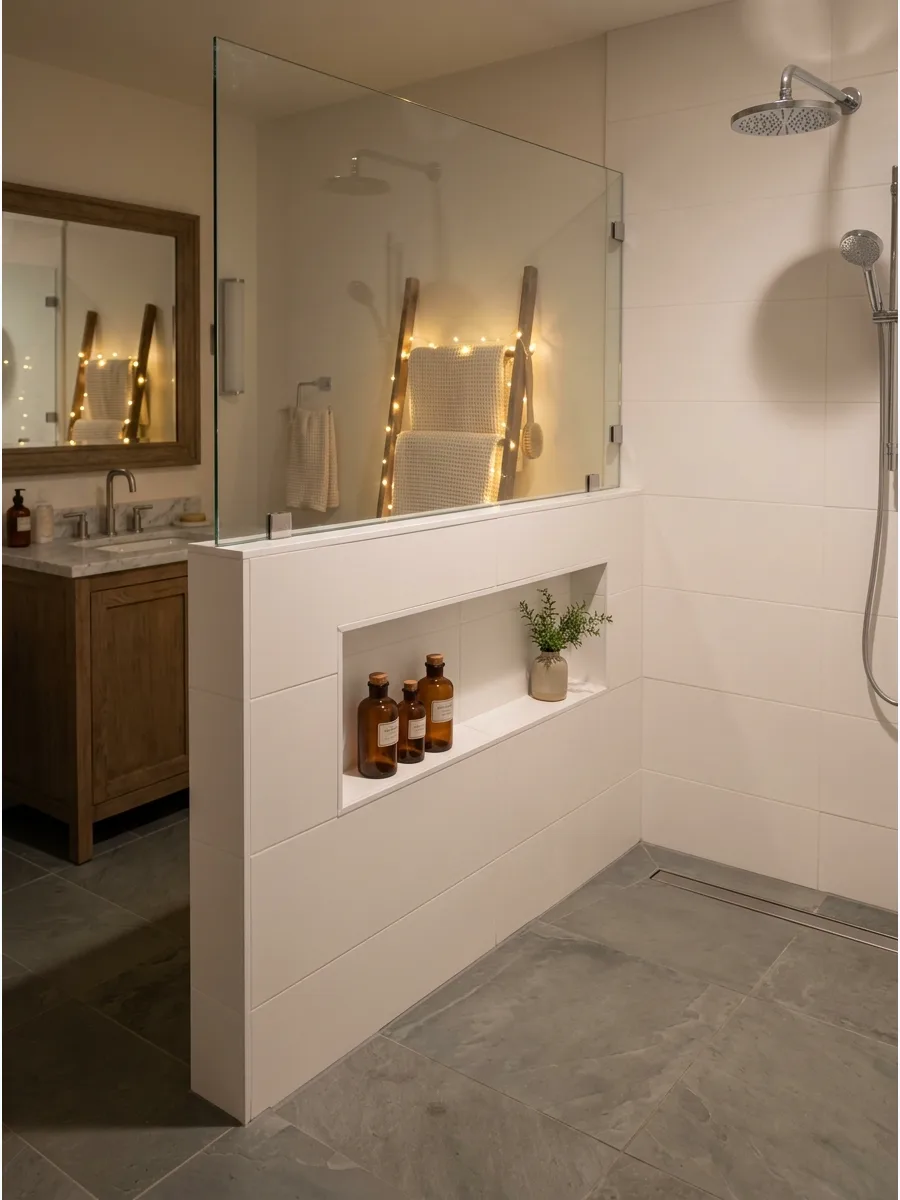
A half-height wall creates a partition for a walk-in shower while keeping the space airy and open. Incorporate a horizontal niche into the interior face of the wall to keep soap and bottles hidden from the rest of the bathroom. This design eliminates the need for swinging doors and minimizes water splashes.
A sloped sill on the niche prevents water from pooling and causing mildew.
- Plan for a 36-42 inch wall height during the framing phase of a bathroom remodel.
- Ensure the niche is framed between studs and waterproofed with a pre-formed insert.
- Swap standard subway tile for oversized marble slabs inside the niche for a high-end focal point.
Most people skip this: Angle the bottom ledge of the niche slightly toward the shower floor to ensure every drop of water drains away instantly.
9. Shower Behind Full Wall
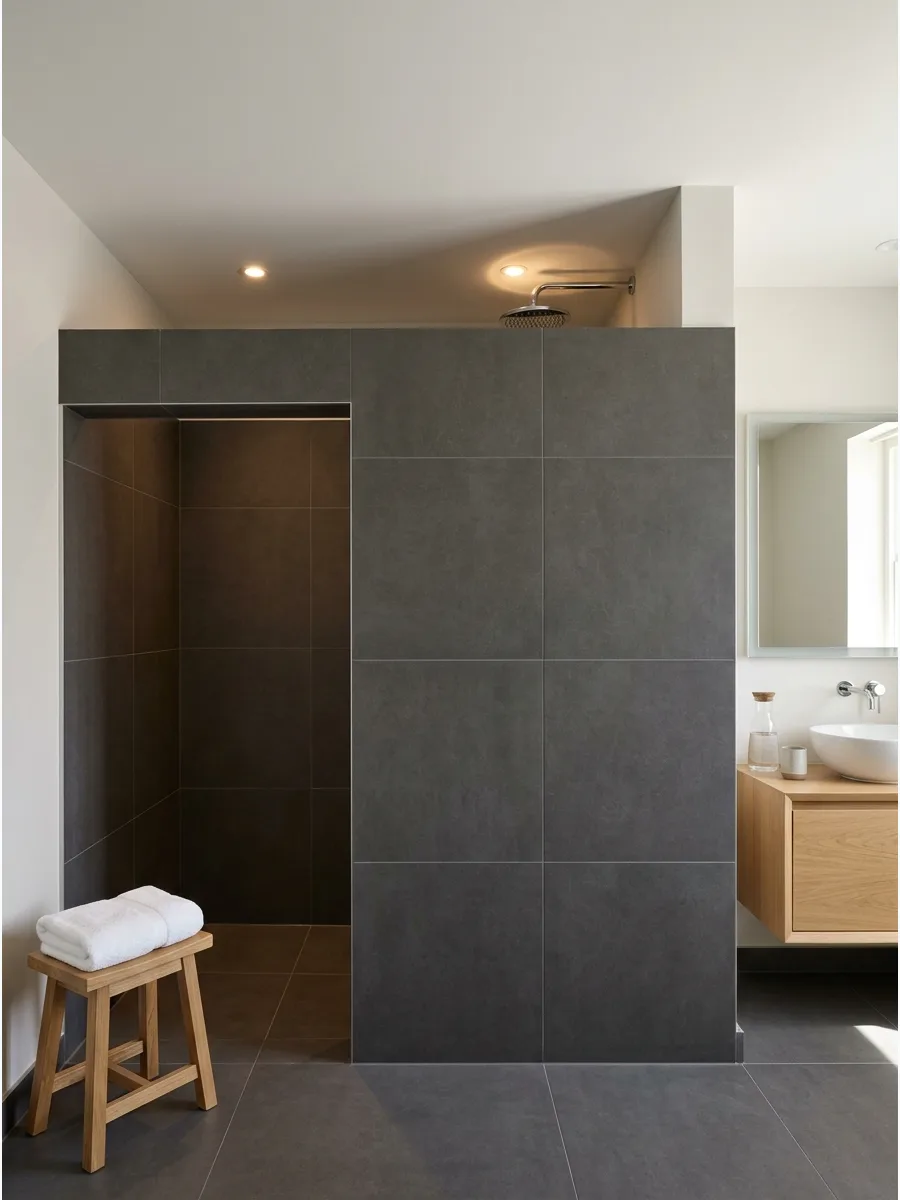
Build a full-height wall to hide the shower entrance and create a private doorless shower zone. This walk-around style feels like a luxury retreat and offers maximum privacy.
Leave at least a 30-inch wide opening to ensure the entry feels comfortable and not cramped. It works best in large bathrooms where the shower can be its own dedicated room.
- Budget: $1,000 – $2,500 for framing, drywall, and tile
- Logistics: Plan for overhead lighting since the wall will block natural light
- Style: Use a floor-to-ceiling wall to create a high-end hotel vibe
Best shortcut: Add a dedicated vent fan inside the shower area to handle the enclosed steam.
10. Side Wall Walk-In
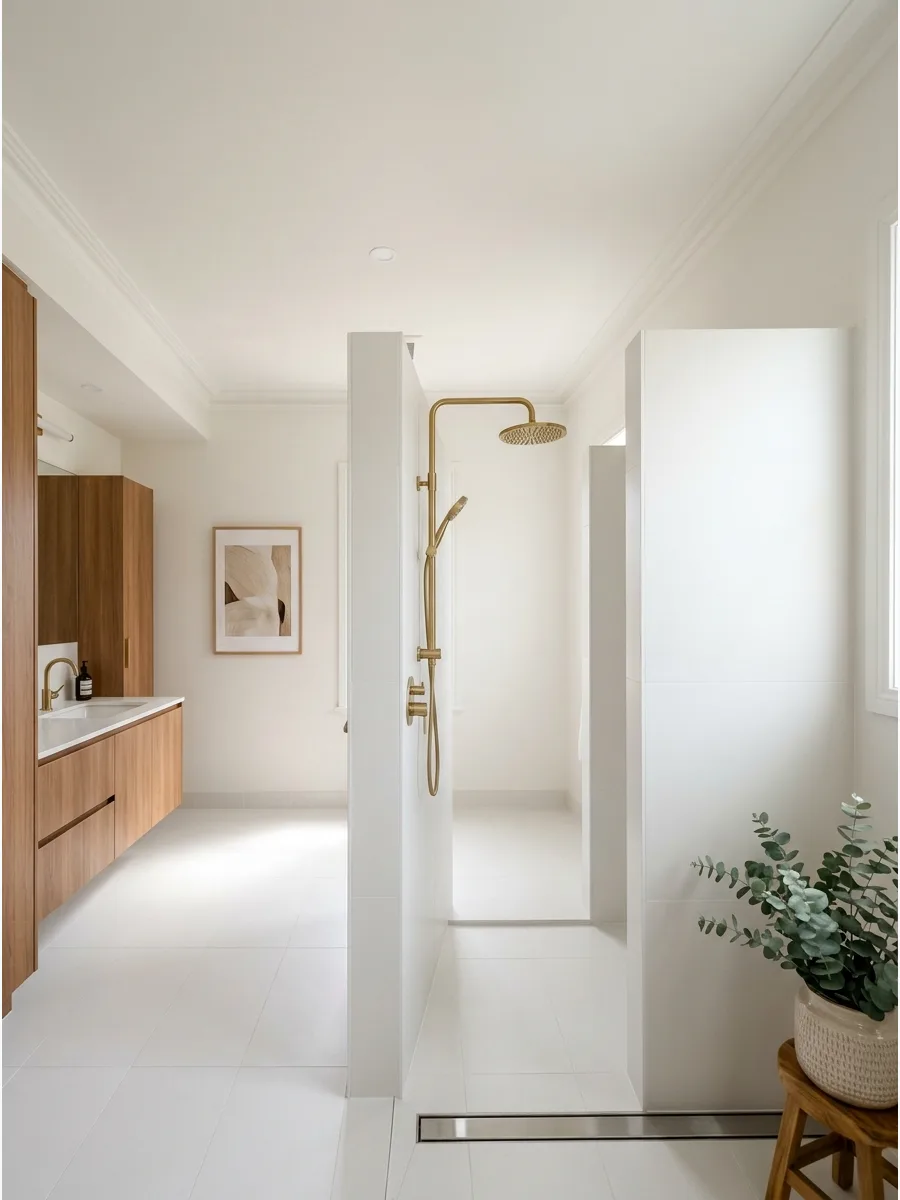
Use one solid side wall to guide water back into the shower and create a simple open entry. This design relies on the wall’s length to contain the spray from the shower head.
Mount the shower head on the same wall as the opening, facing away from the entrance, to minimize splash. It’s a minimalist solution that looks incredibly sharp in modern homes.
- Timing: 4-6 days for full wall construction and waterproofing
- Placement: Best for rectangular rooms with a long footprint
- Adaptation: Use a textured tile on the side wall to add visual depth
Quick win: Use a handheld shower wand on a slide bar to keep water directed downward.
11. Shower Wall Behind Vanity
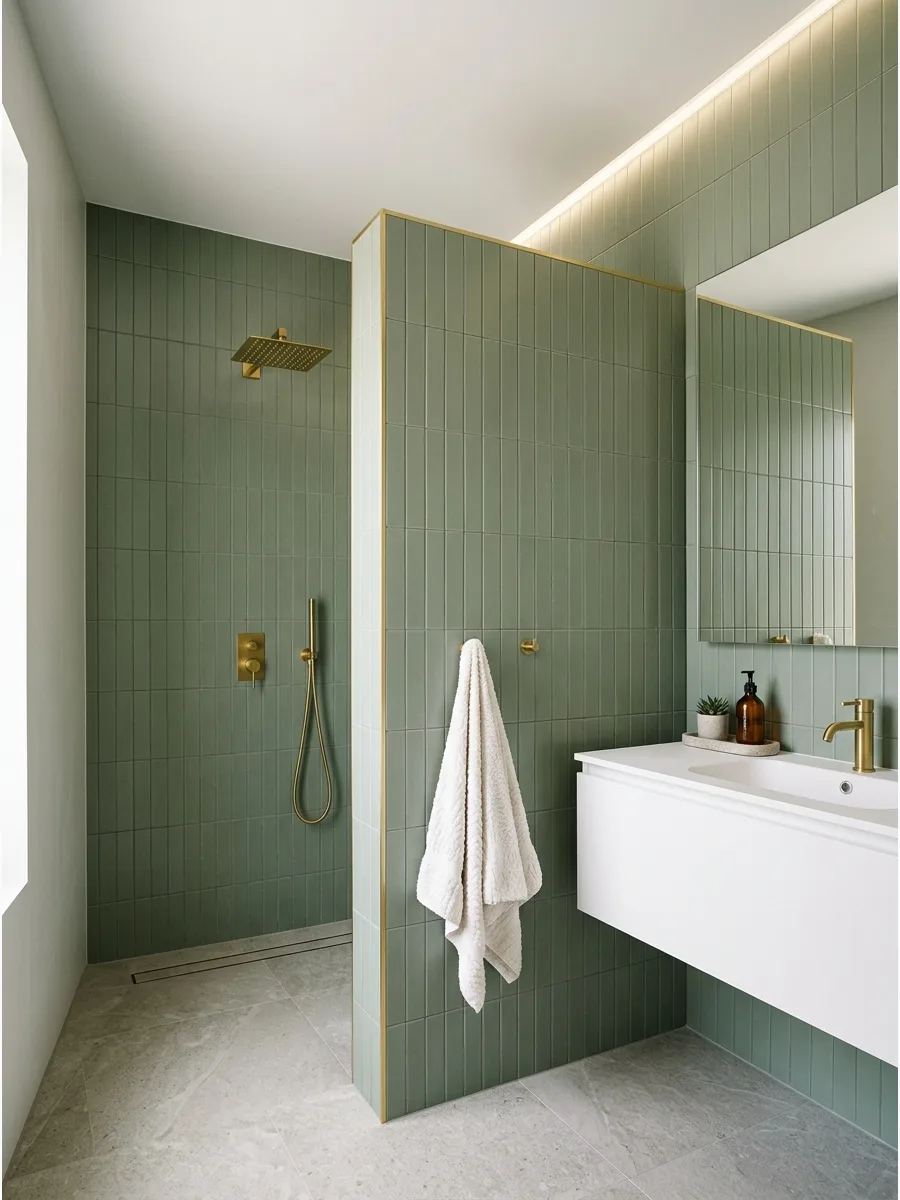
Place the shower behind a dividing wall near the vanity for a modern hotel-style bathroom layout. This uses the vanity wall as a dual-purpose structure, saving space while adding architectural interest.
Run the wall tile all the way to the ceiling to make the room feel taller and more expansive. It’s a clever way to hide the plumbing for both the sink and the shower in one wall.
- Budget: $1,200 – $2,800 for plumbing and double-sided wall finishing
- Setup: Frame the wall with 2×6 studs to accommodate plumbing for both sides
- Logistics: Ensure the entry point is at least 32 inches wide for easy access
Most people skip this: Soundproof the wall interior to reduce noise between the shower and the rest of the bathroom.
12. Walk-In Shower Return Wall
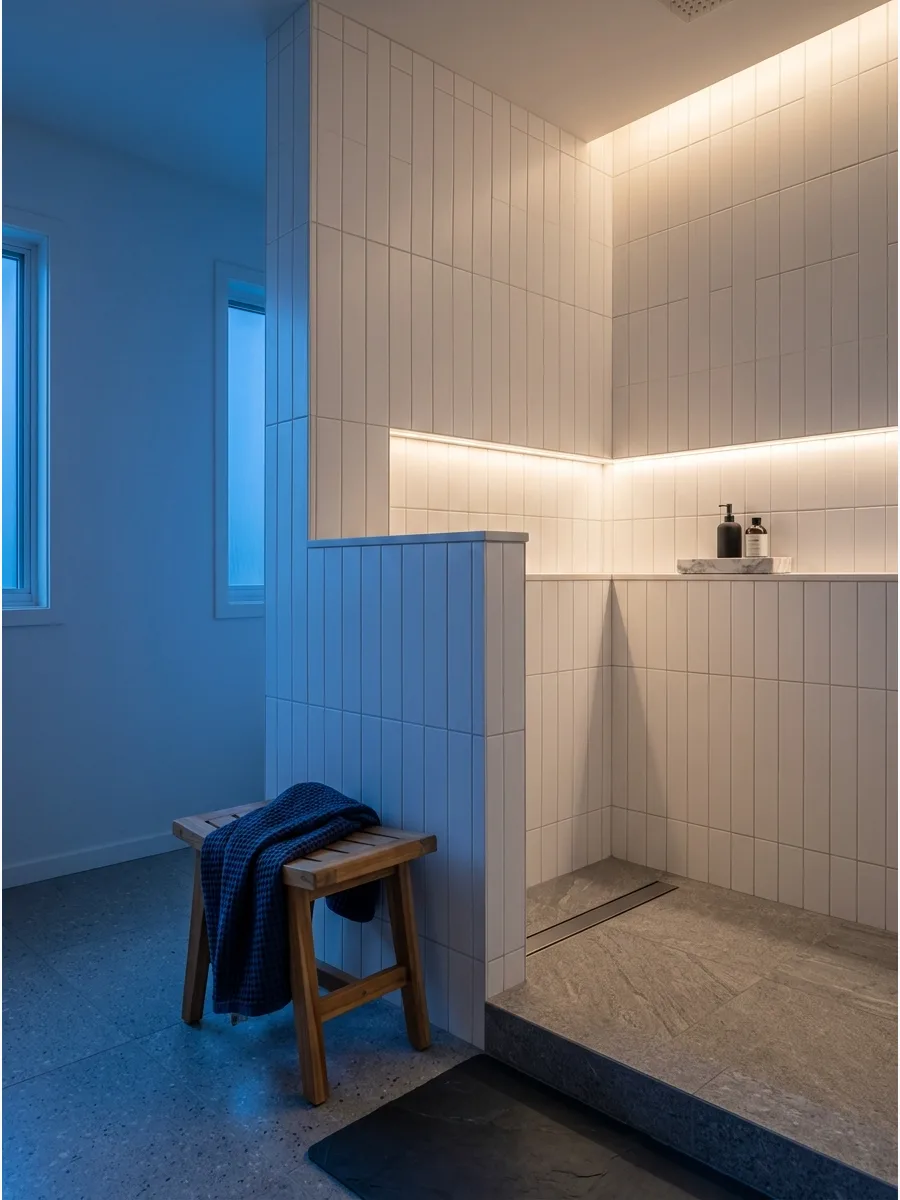
A return wall near the entrance helps reduce splash while keeping the shower door-free. This small L-shape at the end of the partition wall acts as a hook to catch stray droplets.
Make the return wall at least six to 12 inches long to effectively block water without blocking the path. It’s a simple structural tweak that makes a big difference in floor maintenance.
- Sourcing: Standard framing materials and tile
- Placement: At the very end of the main partition wall
- Size: Keep the return wall short enough to allow for a 30-inch entry
Best shortcut: Tile the return wall in a contrasting color to highlight the architectural shape.
13. Doorless Shower Privacy Wall
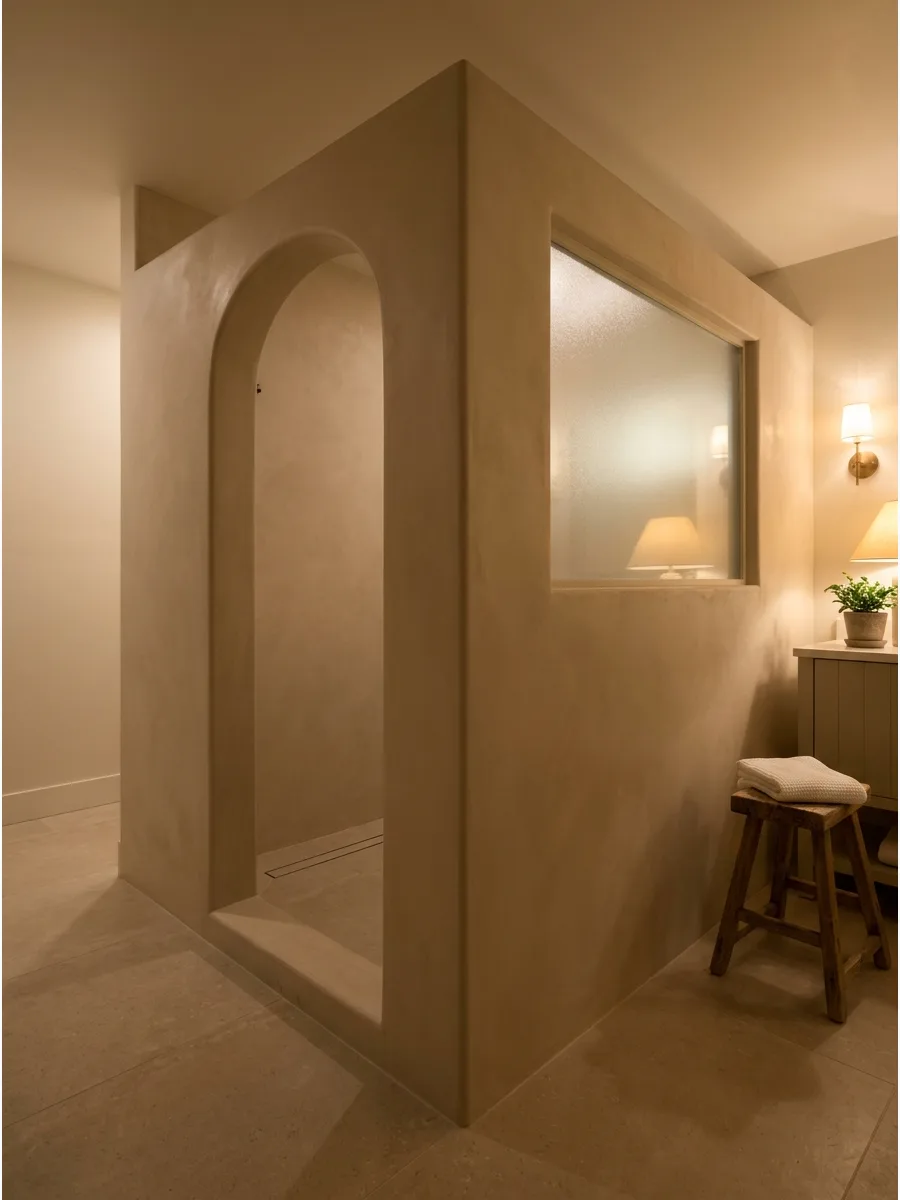
Use a privacy wall instead of glass for a calmer, more enclosed feeling.
This creates a cozy nook for showering that feels much more private than a transparent glass box. Incorporate a frosted glass window at the top of the wall to let in light while maintaining total privacy. It’s perfect for those who want a spa-like atmosphere without feeling exposed.
- Timing: 5-7 days for framing, drywall, and specialty finishes
- Setup: Create an arched entry for a softer, more custom look
- Style: Use plaster or microcement for a seamless, grout-free appearance
Quick win: Install a dimmable LED light inside the shower nook to control the mood.
14. Long Wall Walk-In
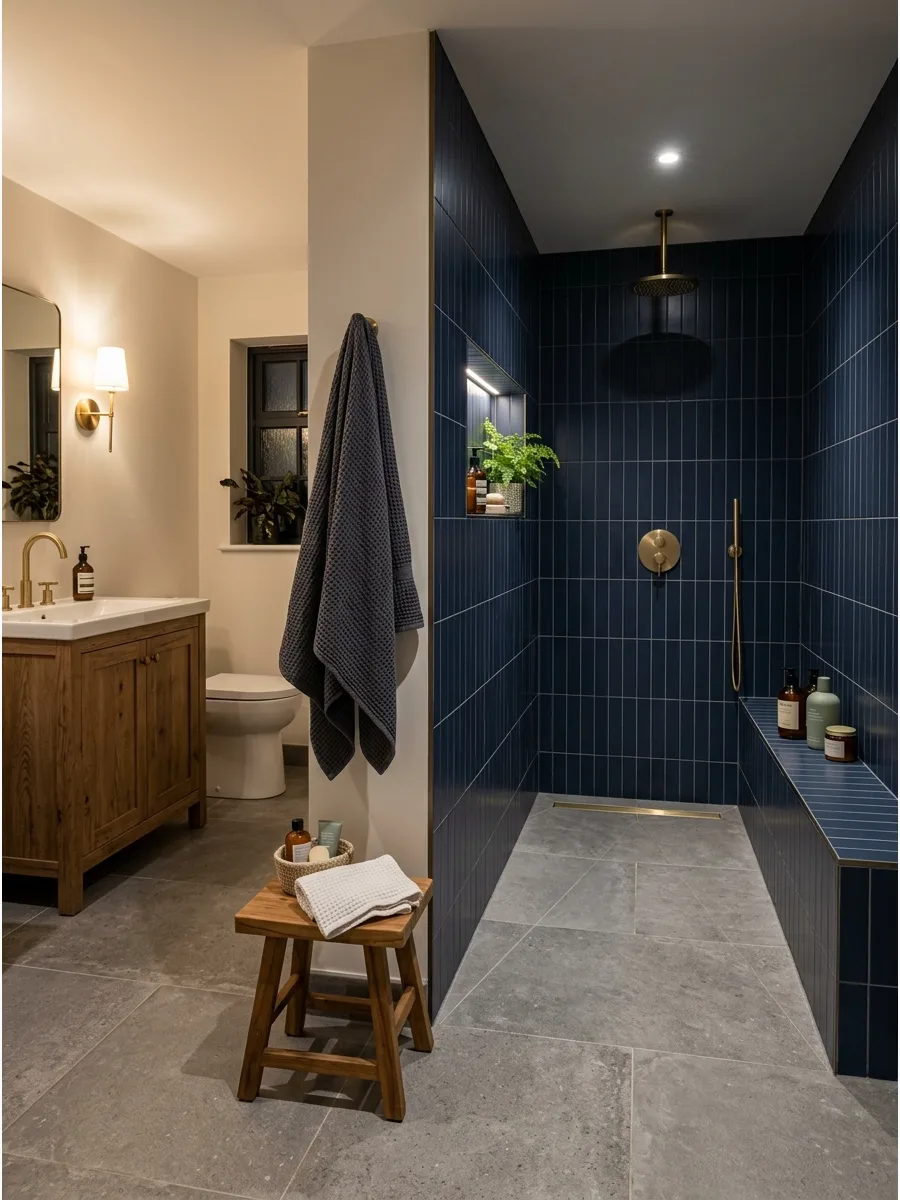
Design a long shower wall with the shower head at the far end to keep water away from the opening. The sheer distance between the water source and the exit keeps the bathroom floor dry.
Aim for a shower length of at least six feet to ensure the dry zone near the entry stays safe. This layout is ideal for rectangular bathrooms with plenty of wall space.
- Budget: $1,500 – $3,500 for extensive tiling and waterproofing
- Placement: Run the wall along the longest dimension of the bathroom
- Adaptation: Add a built-in bench along the wall for extra comfort
Most people skip this: Use two different floor tiles to visually separate the wet and dry zones of the long shower.
15. Open Shower Partition Wall
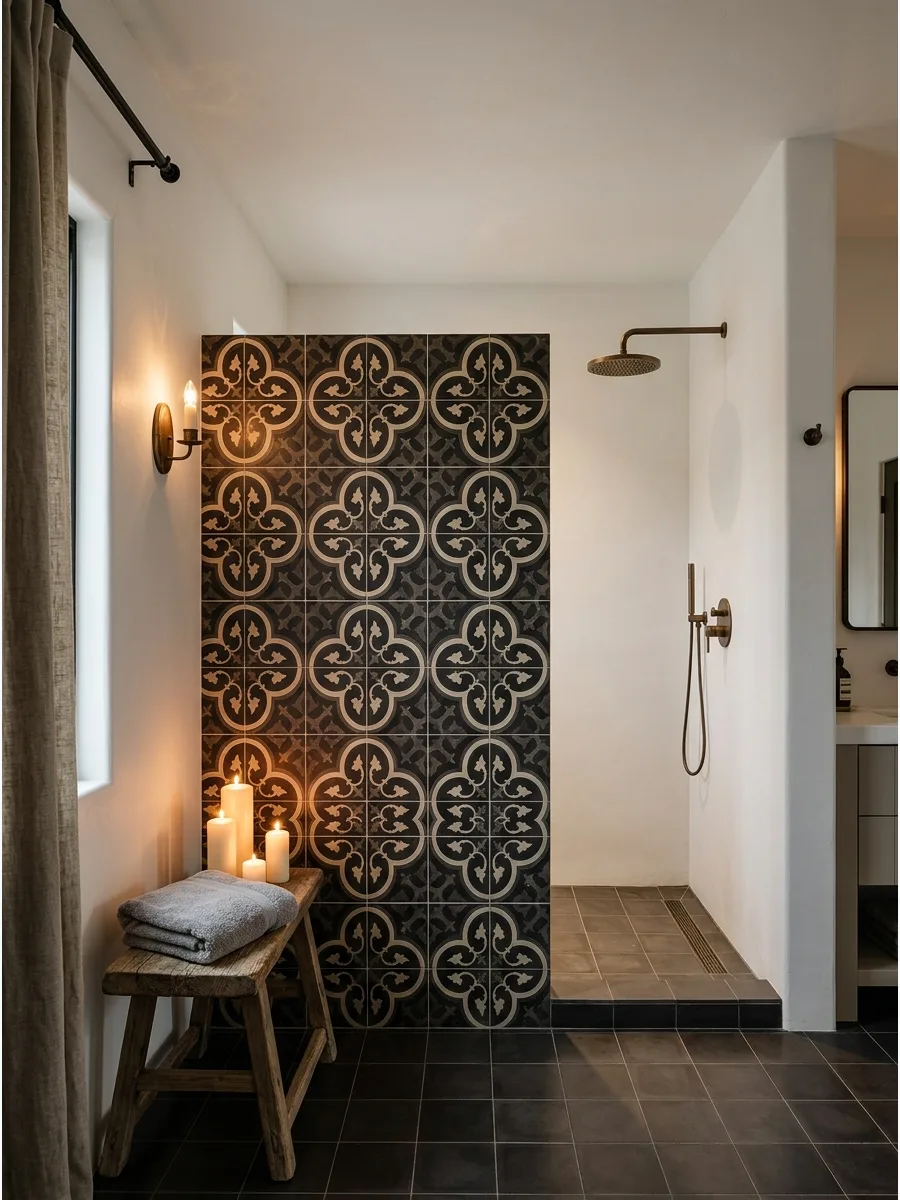
A partition wall creates separation without needing a shower curtain or glass door. It acts as a permanent piece of the room’s architecture that never needs cleaning with a squeegee.
Choose a bold tile for the partition wall to turn it into a focal point for the entire bathroom. It provides a solid, grounded feel that glass simply cannot match.
- Timing: 3-5 days for framing and tiling
- Logistics: Ensure the wall is anchored to both the floor and ceiling for stability
- Style: Match the tile on the partition wall to the bathroom floor for continuity
Best shortcut: Use a pre-built shower wall panel system to save time on framing and waterproofing.
16. Low Half Wall Shower
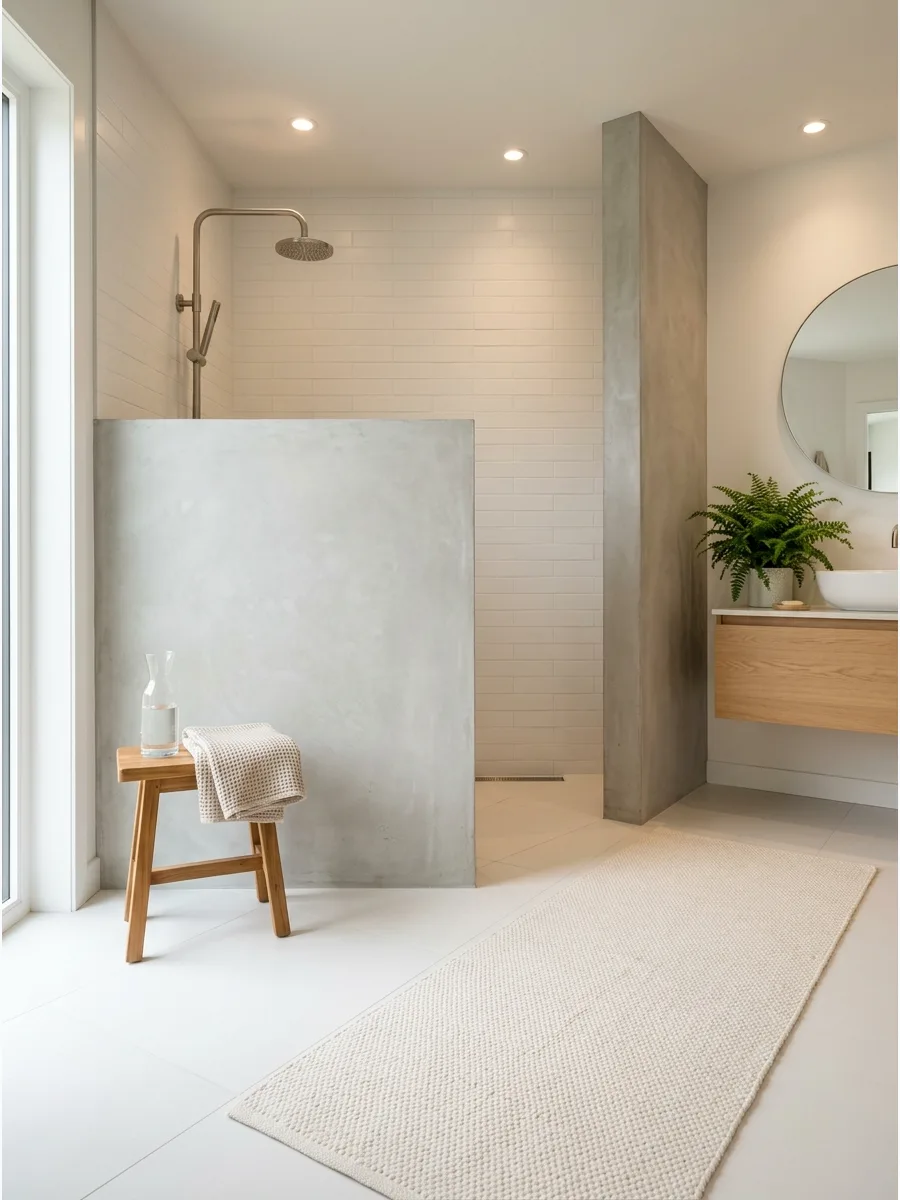
A low wall defines the shower area without cutting off the room’s visual flow. It keeps water contained while allowing the bathroom to feel open and bright.
Build the wall at least 42 inches high to effectively block water spray from a standard shower head. This setup is the gold standard for making a medium-sized bathroom feel twice as big.
- A basic stud-and-tile half wall adds about $400 to $800 to a standard renovation budget.
- Anchor the wall into the floor joists and wall studs to ensure it doesn’t wobble over time.
- For a more open look in a master suite, cap the wall with a piece of matching countertop stone instead of tile.
Quick win: Cap the top of the wall with a solid piece of quartz or stone to prevent water from seeping into grout lines.
17. Doorless Pony Wall Entry
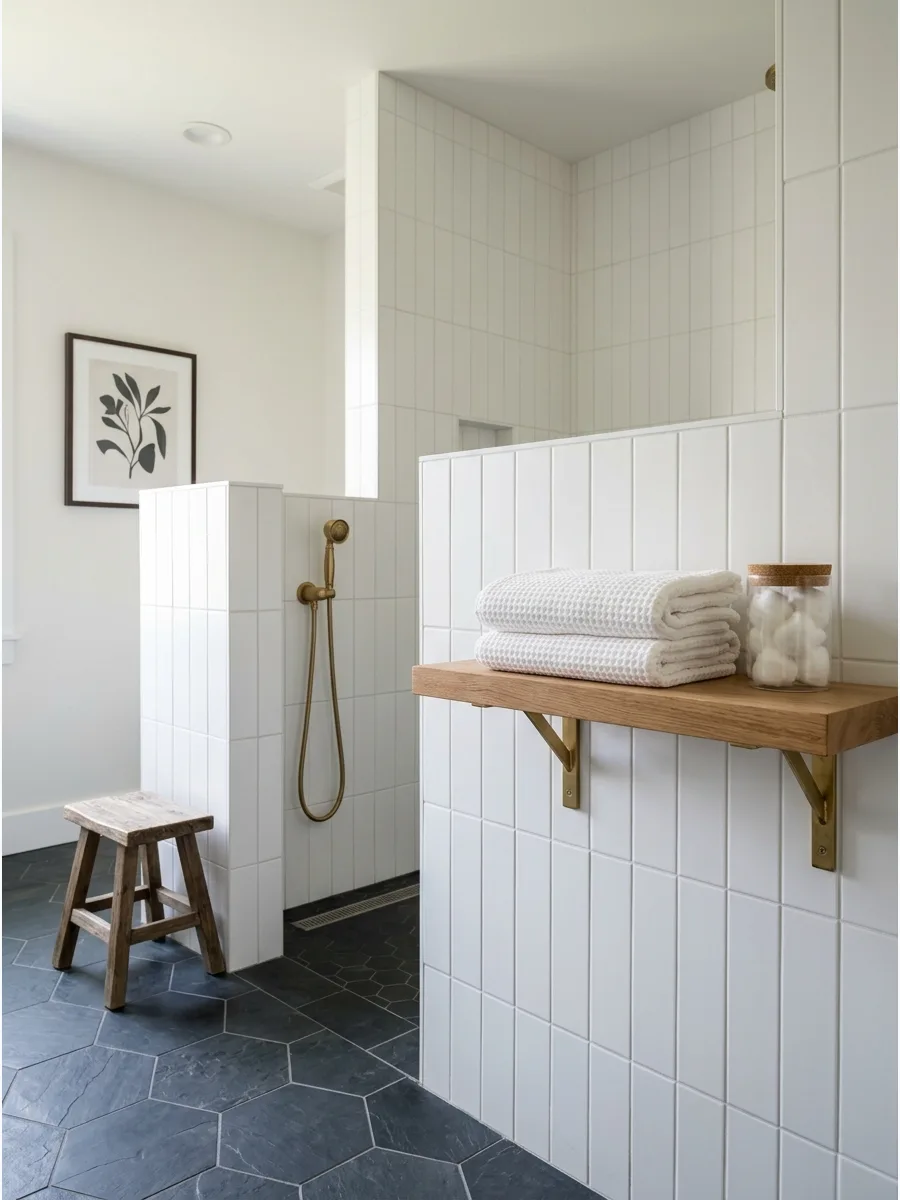
A pony wall gives privacy without closing off the shower like a full glass enclosure. It creates a solid boundary that feels more permanent and architectural than a curtain.
Place the pony wall directly opposite the shower head to catch the most significant water bounce. It provides a sturdy spot to install grab bars or a built-in bench.
- Expect to spend one weekend framing and one weekend tiling for a DIY pony wall project.
- Use pressure-treated lumber for the bottom plate of the wall to prevent wood rot from floor moisture.
- In a large room, extend the pony wall to five feet in length to create a true walk-behind entrance.
Best shortcut: Ensure the wall is framed with pressure-treated lumber to resist any moisture that might penetrate the tile.
18. Tiled Half Wall Design
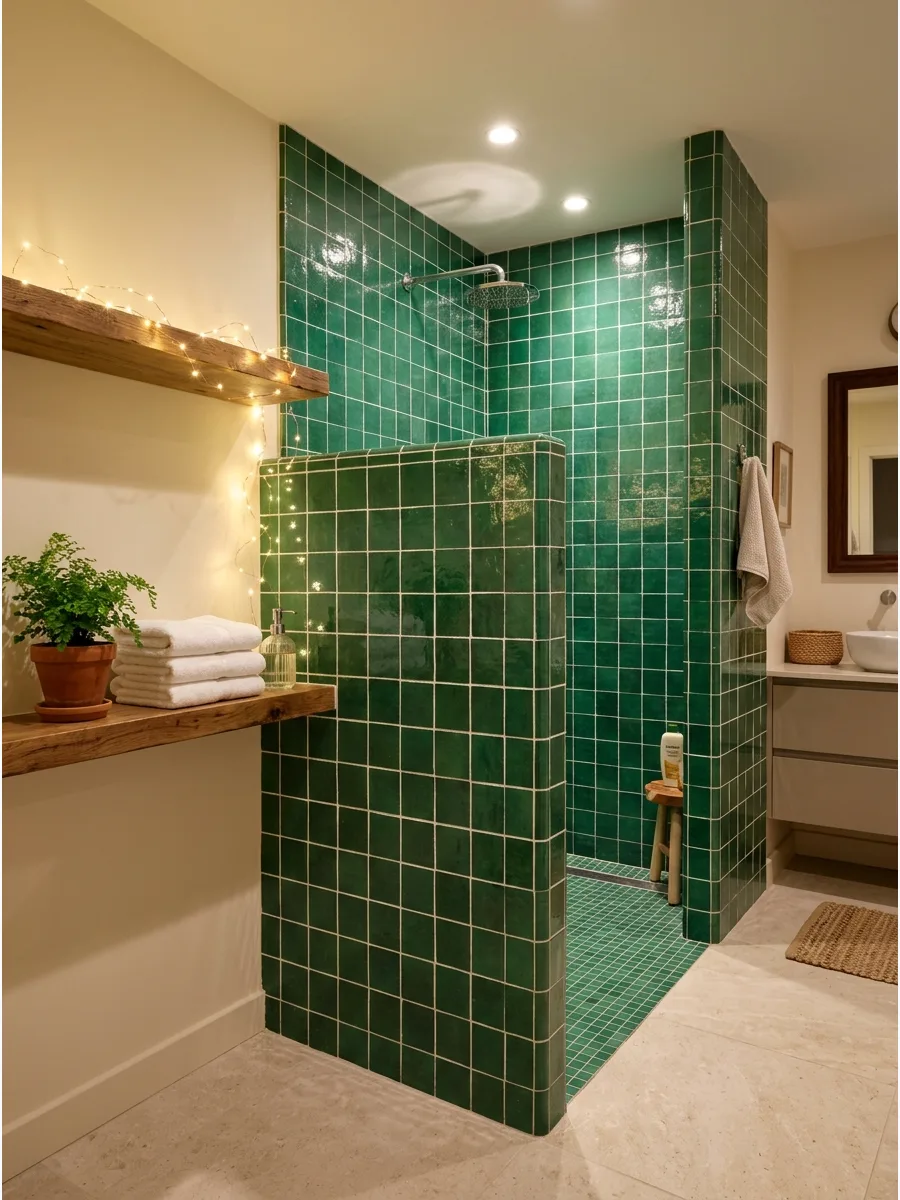
Matching the half wall tile to the shower interior creates a seamless, built-in look that feels intentional. This design trick hides the wet zone and makes the bathroom appear more organized.
Use a contrasting grout color if the goal is to highlight the architectural lines of the partition. It is a durable alternative to glass that requires zero squeegeeing.
- High-quality ceramic or porcelain tile costs between $5 and $15 per square foot.
- Apply tile to both sides of the wall and the top edge to create a fully waterproof barrier.
- Mix different tile shapes, like hex on the floor and subway on the wall, to add visual interest.
Most people skip this: Apply a high-quality sealer to the grout on the top edge of the wall where water sits the longest.
19. Glass Topped Shower Wall
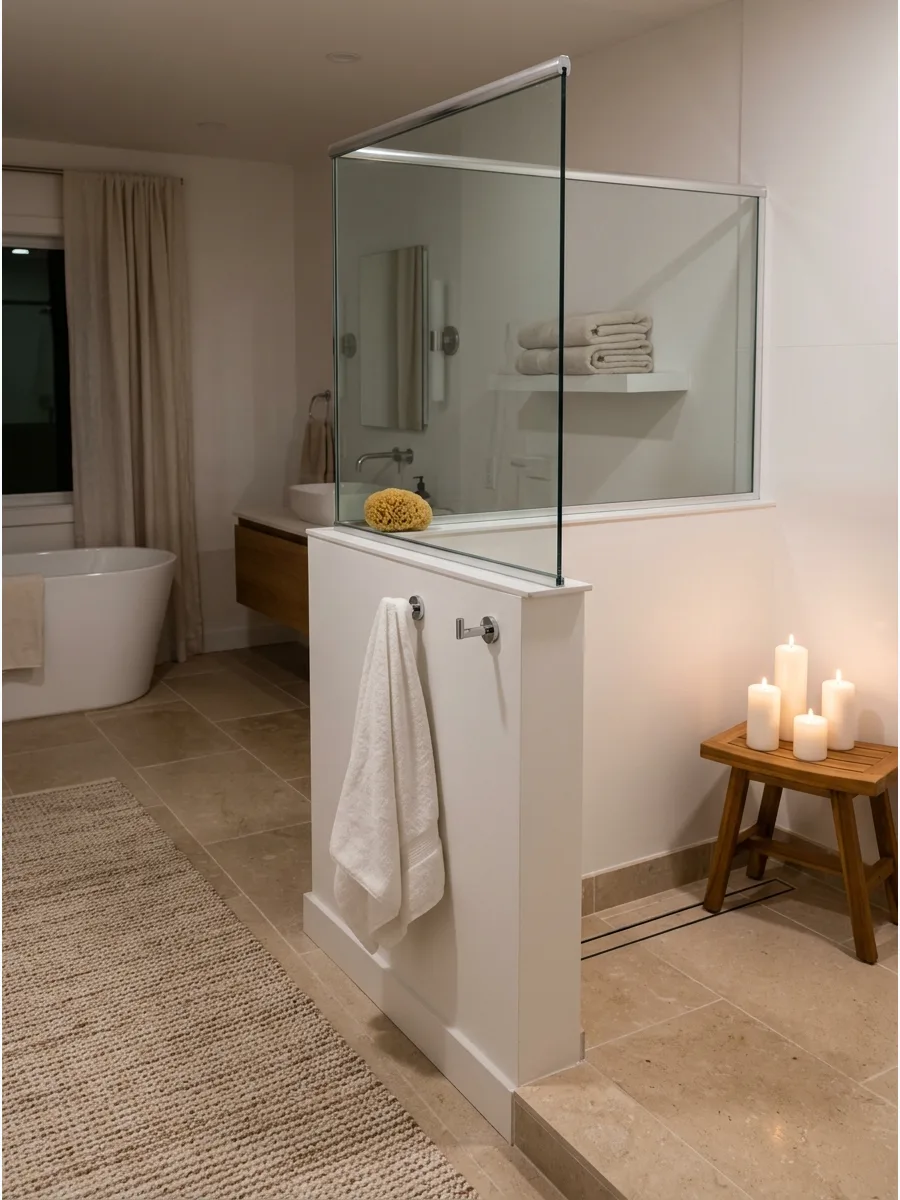
Adding a short glass panel above a solid wall gives the best of both worlds: privacy and splash control. It lets natural light reach the shower floor while keeping the rest of the bathroom dry.
Order a custom-cut tempered glass panel that sits securely in a U-channel along the top of the pony wall. This hybrid approach prevents the closed-in feeling of a full glass door.
- A custom glass panel typically takes two to three weeks to be fabricated and delivered.
- Use 3/8-inch or 1/2-inch thick tempered glass to ensure the panel is sturdy and safe.
- Choose frosted glass for the top section if the shower is visible from the main bathroom door.
Quick win: Use fluted or frosted glass for the top section to add texture and hide water spots between cleanings.
20. Zero Entry Half Wall
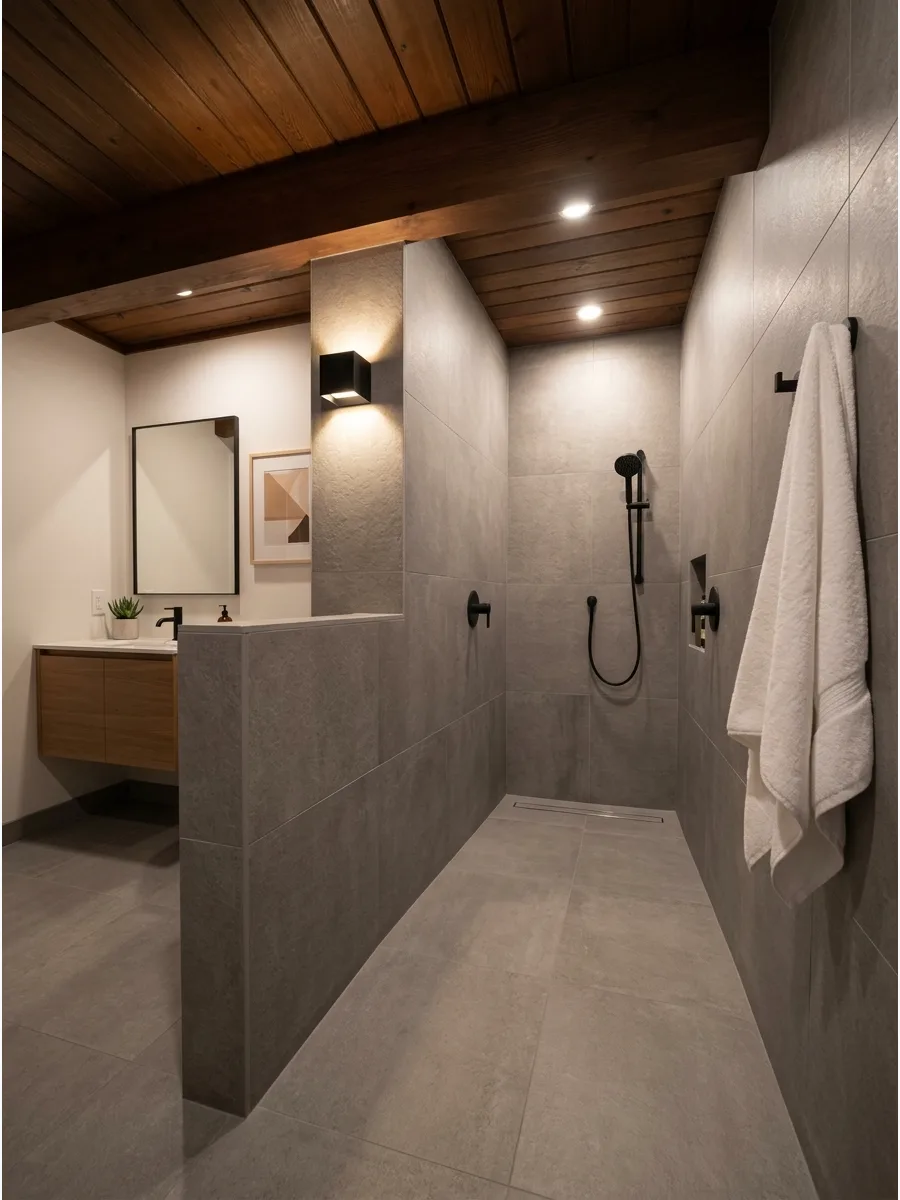
A curbless entry removes the trip hazard and creates a high-end spa aesthetic. The half wall acts as a splash guard while keeping the floor transition completely flat.
Slope the shower floor toward the back wall at a rate of one-quarter inch per foot to ensure proper drainage. This layout is the smartest choice for long-term accessibility and modern style.
- Curbless conversions usually require a professional plumber to recess the drain into the subfloor.
- Install a linear drain at the entrance or back wall to handle water volume without a curb.
- Use small-format tiles or mosaic sheets on the floor to provide extra grip in the wet zone.
Best shortcut: Use a pre-sloped shower pan kit designed for curbless installs to save hours of manual floor leveling.
21. Compact Half Wall Layout
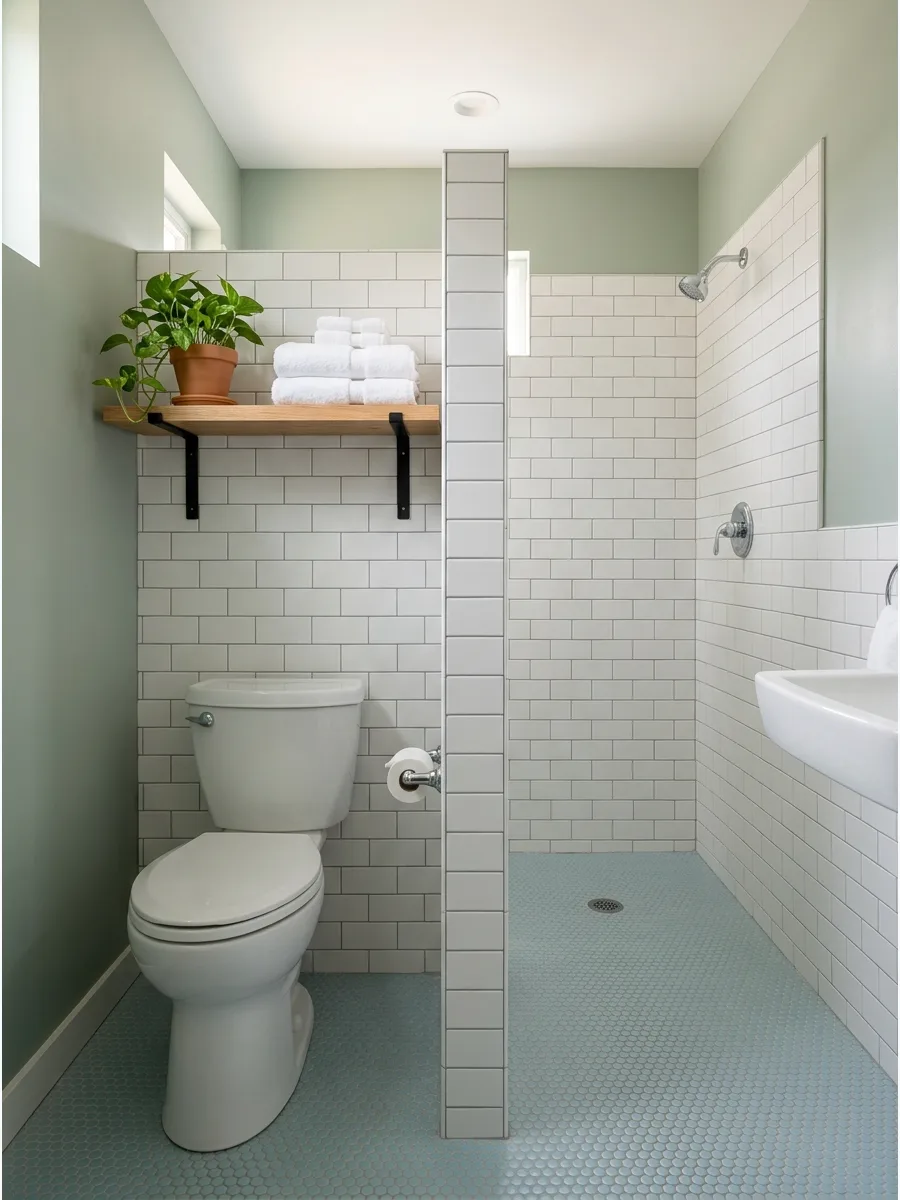
In tight spaces, a half wall separates the shower from the toilet without the bulk of a full wall. It provides a mounting surface for toilet paper holders or towel bars on the dry side.
Keep the wall thickness to a minimum by using 2×4 framing to save every inch of floor space. This layout prevents the cramped hallway feel common in narrow bathrooms.
- Standard 2×4 framing and half-inch cement board create a wall about 4.5 inches thick.
- Position the wall so there is at least 15 inches of clearance from the center of the toilet.
- Paint the partition the same color as the main walls to keep the small room feeling unified.
Quick win: Paint the dry side of the wall the same color as the bathroom walls to make the partition disappear visually.
22. Vanity Side Partition Wall
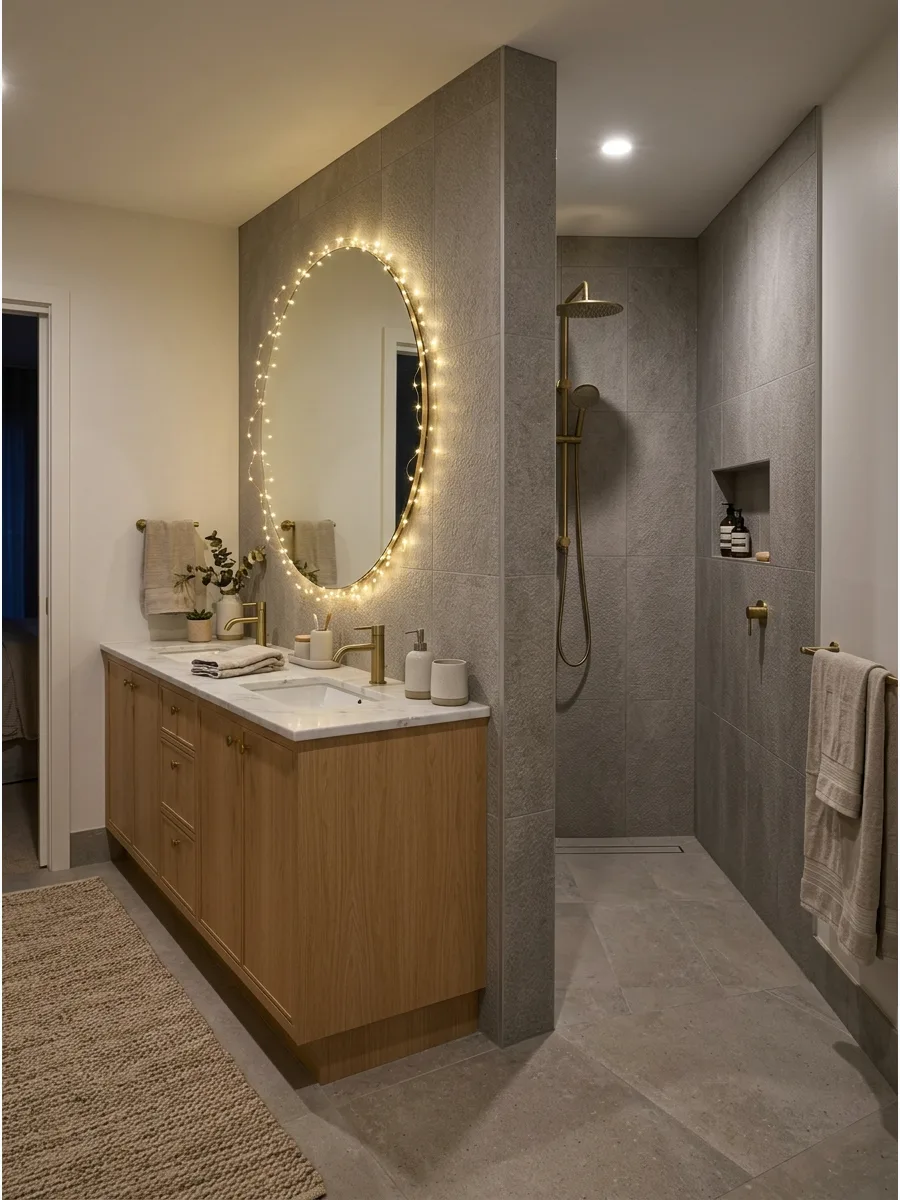
Placing a partition wall between the vanity and the shower protects wood cabinets from water damage. It creates a dedicated grooming zone that feels separate from the wet area.
Extend the half wall exactly two inches past the depth of the vanity to ensure full splash protection. This is the most practical way to layout a bathroom where the sink and shower share a wall.
- Seal the joint between the vanity and the partition wall with silicone caulk to prevent leaks.
- Match the wall cap to the vanity countertop material for a high-end designer look.
- Add a waterproof outlet to the vanity side of the wall for convenient hair tool use.
Most people skip this: Leave a small gap between the vanity and the wall for easy cleaning and to prevent moisture traps.
23. Niche Integrated Half Wall
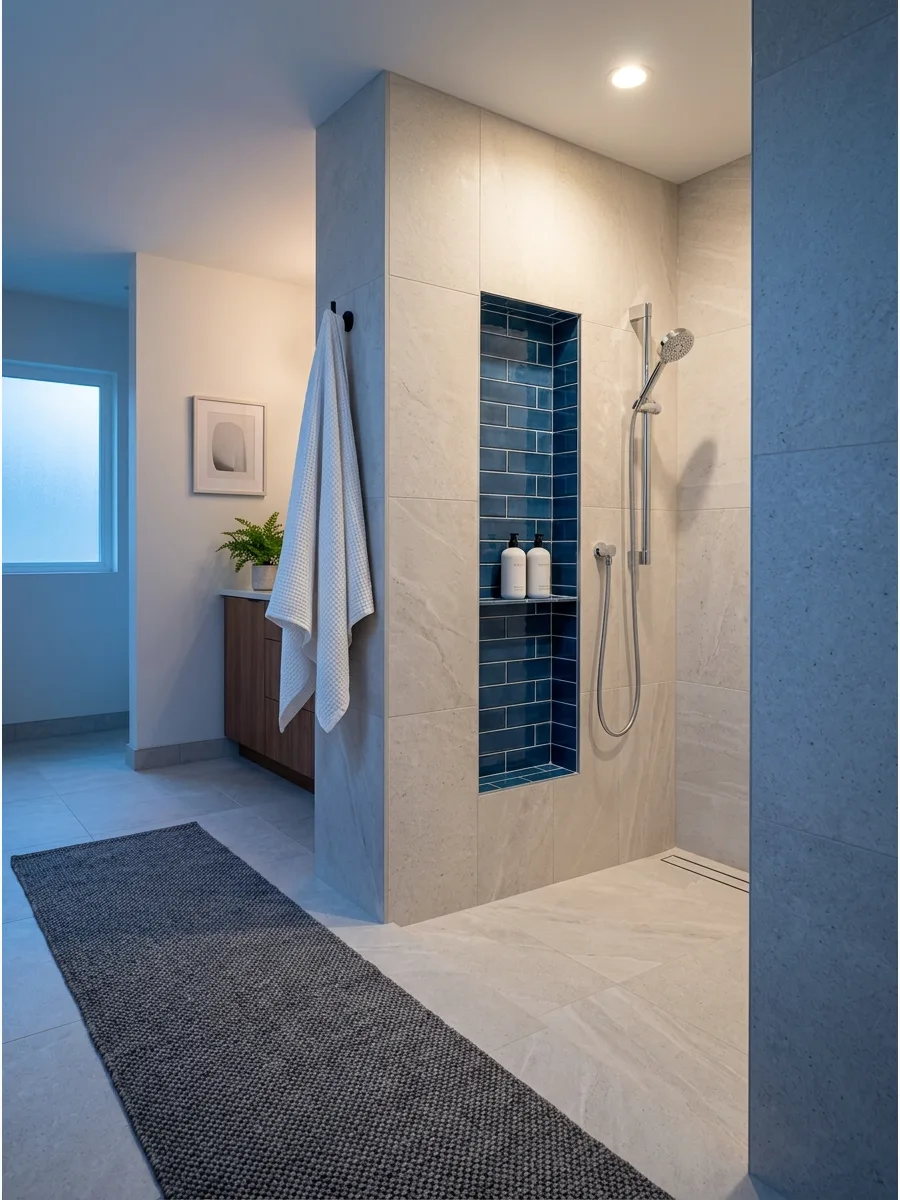
The interior side of a half wall is the perfect spot for a hidden storage niche. It keeps shampoo bottles and soap out of sight from the rest of the bathroom.
Frame the niche between the wall studs during the initial construction phase for a flush finish. This detail turns a basic partition into a high-functioning storage feature.
- Purchase a pre-fabricated niche insert for $40 to $100 to ensure a 100% waterproof seal.
- Size the niche to fit your tallest shampoo bottles, usually at least 12 inches high.
- Slope the bottom shelf of the niche slightly toward the shower to prevent standing water.
Best shortcut: Buy a pre-fabricated waterproof niche insert to guarantee the shelf is perfectly sloped and leak-proof.
24. Full Height Shower Wall
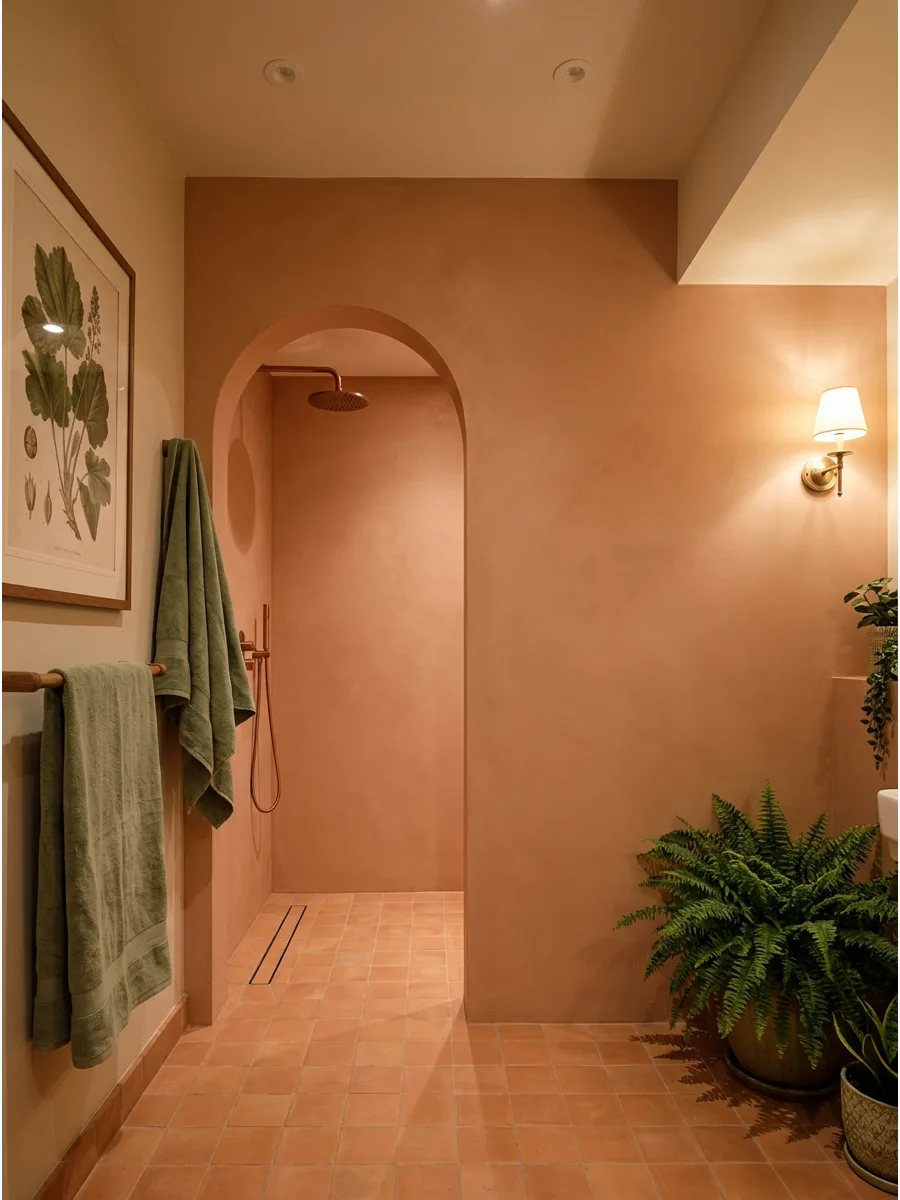
A full-height wall offers maximum privacy and creates a secluded wet room feel. It completely hides the plumbing and gives the bathroom a clean, architectural look.
Leave an opening at least 30 inches wide to ensure a comfortable entry without the need for a door. This is the best option for large master suites where the shower is a focal point.
- Full walls require standard framing and drywall or cement board from floor to ceiling.
- Install a dedicated exhaust fan inside the shower area to manage steam and humidity.
- Add an arched top to the entry for a softer, more custom architectural appearance.
Quick win: Install an exhaust fan directly inside the shower zone to prevent steam from lingering behind the full wall.
25. Single Side Wall Entry
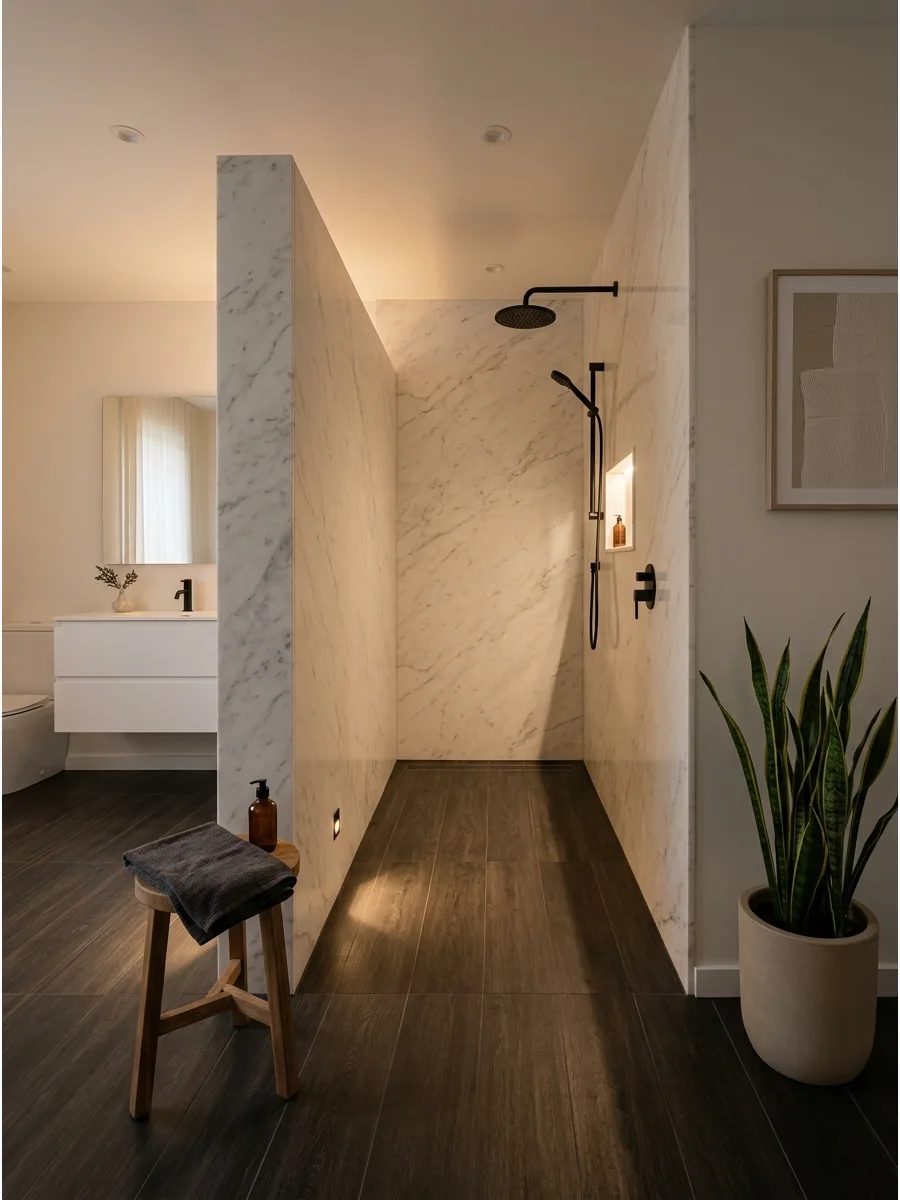
A single side wall is often enough to contain water if the shower head is positioned correctly. This minimalist approach keeps the bathroom layout simple and unobstructed.
Angle the shower head toward the back corner of the side wall to minimize splashing into the main room. It works exceptionally well in long, narrow bathroom layouts.
- Ensure the side wall is at least 60 inches long to catch the natural arc of water spray.
- Use large-format tiles on the side wall to minimize grout lines and simplify cleaning.
- Mount the shower controls on the outside edge of the wall to turn on the water without getting wet.
Most people skip this: Ensure the side wall is at least 60 inches long to catch the natural arc of water spray.
26. Vanity Back Wall Shower
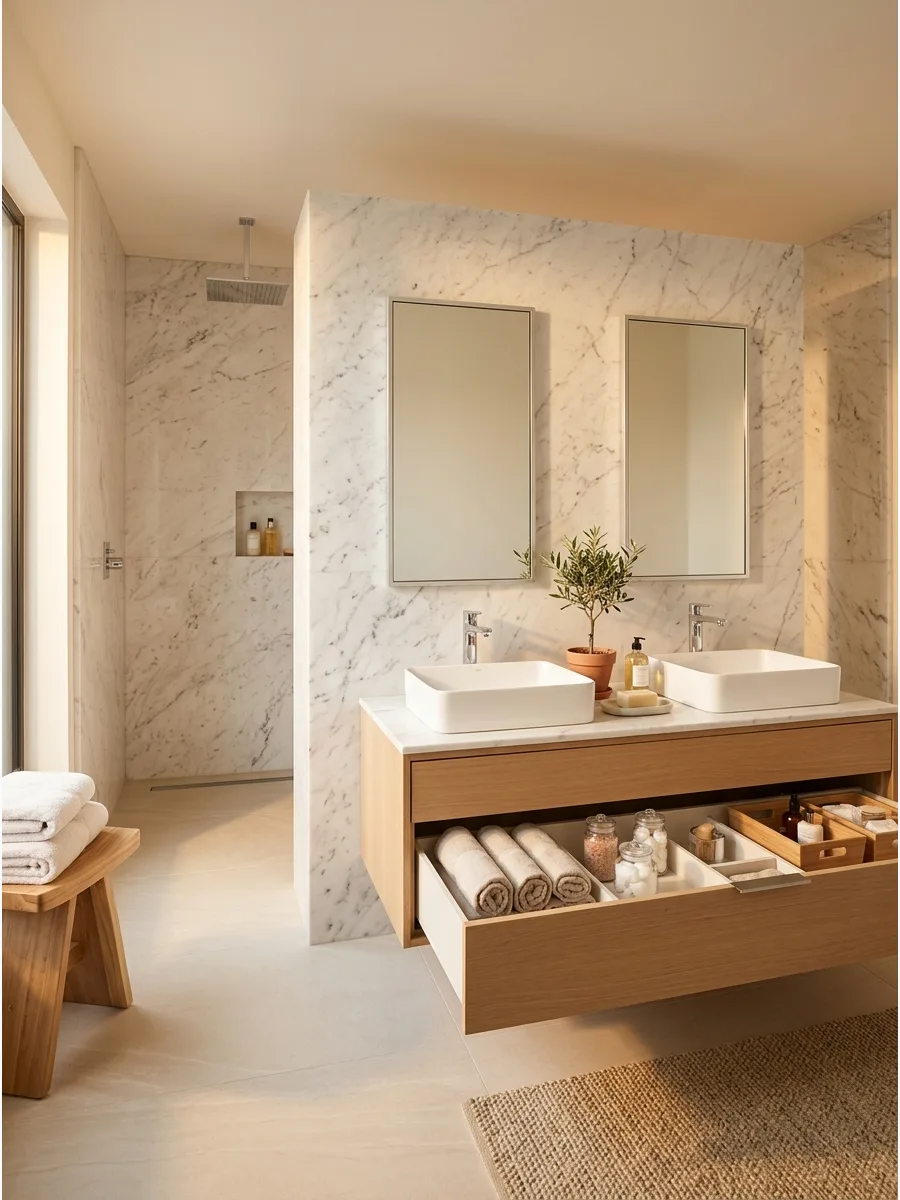
Placing the shower behind a floating vanity wall creates a high-end hotel vibe. This layout uses the wall for dual purposes: mounting sinks on one side and the shower head on the other.
Run the plumbing through the center of the wall to keep both sides functional and clean. It is a sophisticated way to divide a large open-concept bathroom.
- This layout requires a larger bathroom footprint, typically at least 10 feet by 12 feet.
- Use a wall-hung vanity to keep the floor continuous and make the room feel larger.
- Install waterproof LED strips behind the vanity mirror for indirect shower lighting.
Best shortcut: Use a wall-hung vanity to keep the floor continuous and make the whole room feel larger.
27. Splash Guard Return Wall
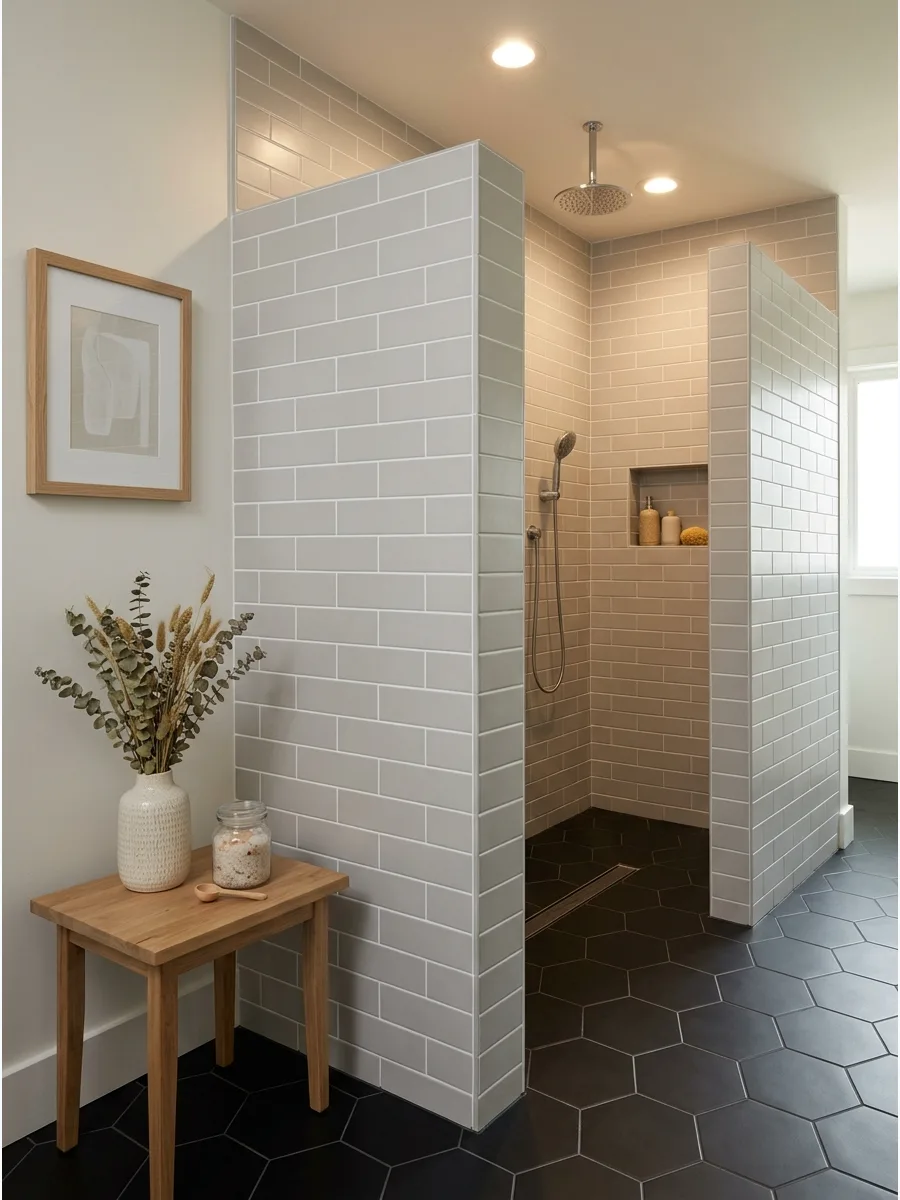
A short return wall at the end of the shower entrance acts as a final barrier for stray droplets. It creates a labyrinth style entry that provides privacy without a door.
Keep the return wall between 12 and 18 inches long to block water without making the entry feel cramped. This is a smart fix for doorless showers that tend to splash onto the vanity or rug.
- A return wall can be added to an existing shower by framing a small extension and re-tiling.
- Mount a robe hook on the exterior of the return wall to keep your towel dry and nearby.
- Use a different tile pattern on the return wall to create a subtle design feature.
Quick win: Add a robe hook to the outside of the return wall to keep towels dry but within easy reach.
28. Secluded Entry Privacy Wall
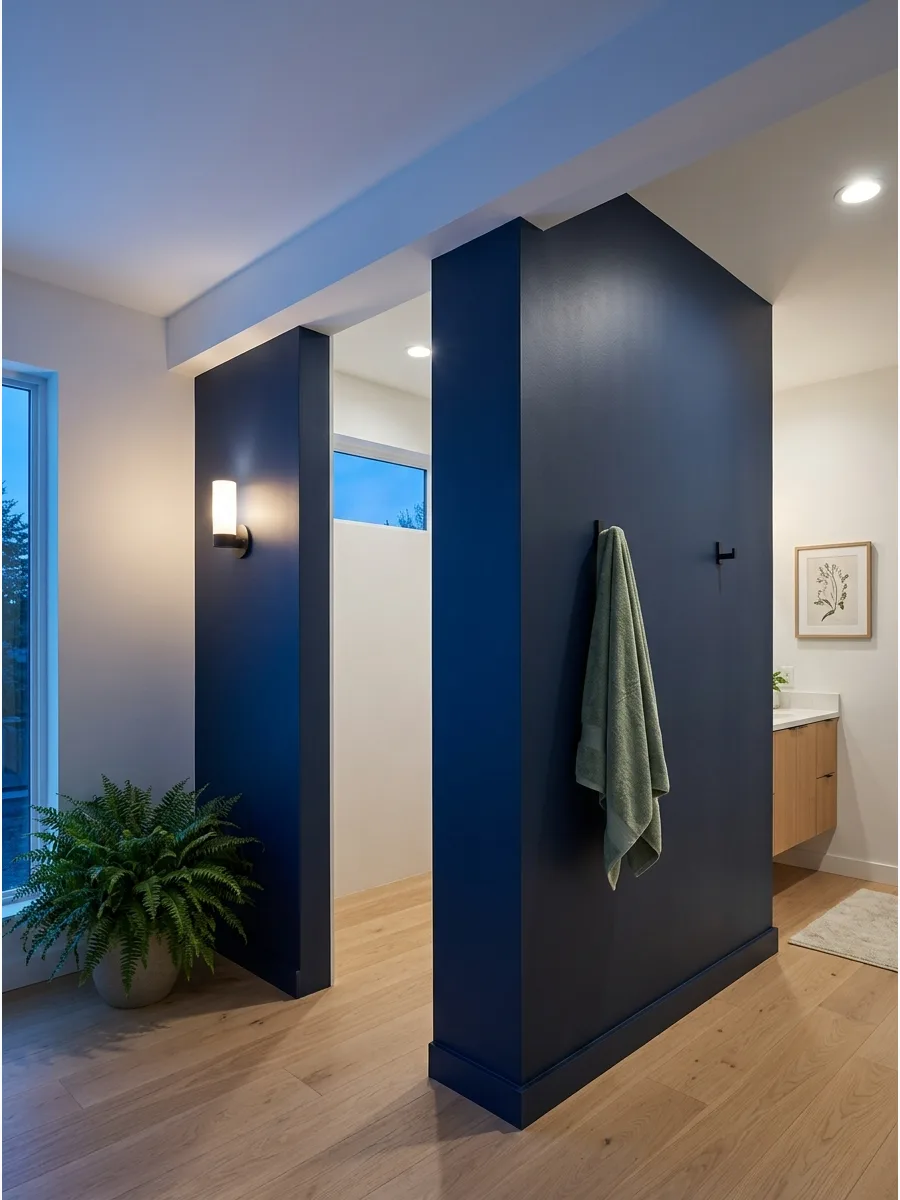
A dedicated privacy wall keeps the shower hidden from the bathroom door or vanity area. It allows for a completely open entrance while maintaining a sense of modesty.
Build the wall to ceiling height for a permanent, structural look that feels like part of the room. This design is ideal for shared bathrooms where multiple people might be getting ready at once.
- Frame the wall with standard 2x4s and use moisture-resistant drywall on the dry side.
- Position the opening so it does not face the main bathroom mirror or doorway.
- Install a recessed, waterproof light inside the shower area since the wall blocks natural light.
Most people skip this: Install a recessed light inside the shower area, as the privacy wall will block most of the room’s ambient light.
29. Seamless Tiled Privacy Wall Shower
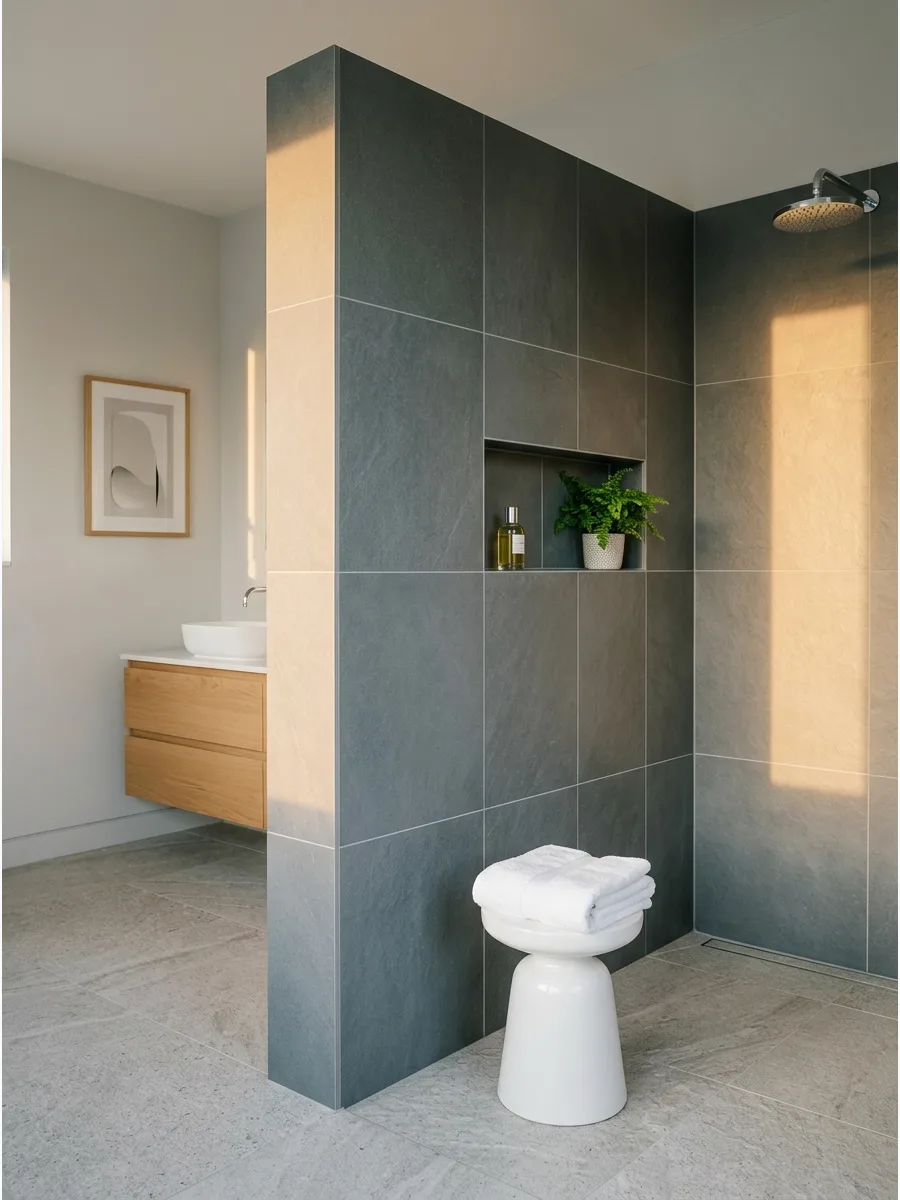
A walk-in shower with an extended solid wall eliminates the maintenance of glass while providing a high-end architectural look. This layout uses a longer partition to create a natural splash barrier that keeps the rest of the bathroom dry.
Plan for a wall length of at least 48 inches to ensure water containment without needing a door. A solid wall also allows for built-in niches on the interior side for hidden storage. Most people underestimate how much warmer a solid-walled shower feels compared to glass, as it traps steam more effectively.
- Custom wall framing and tiling typically add $800 to $1,500 to a standard renovation budget.
- Ensure the floor slope is precisely angled toward a linear drain at the far end of the enclosure.
- Swap standard tile for large-format slabs to minimize grout lines and create a monolithic appearance.
Most people skip this: Install a small ventilation fan specifically inside the shower zone to prevent moisture buildup behind the extended wall.
30. Freestanding Partition Shower Wall
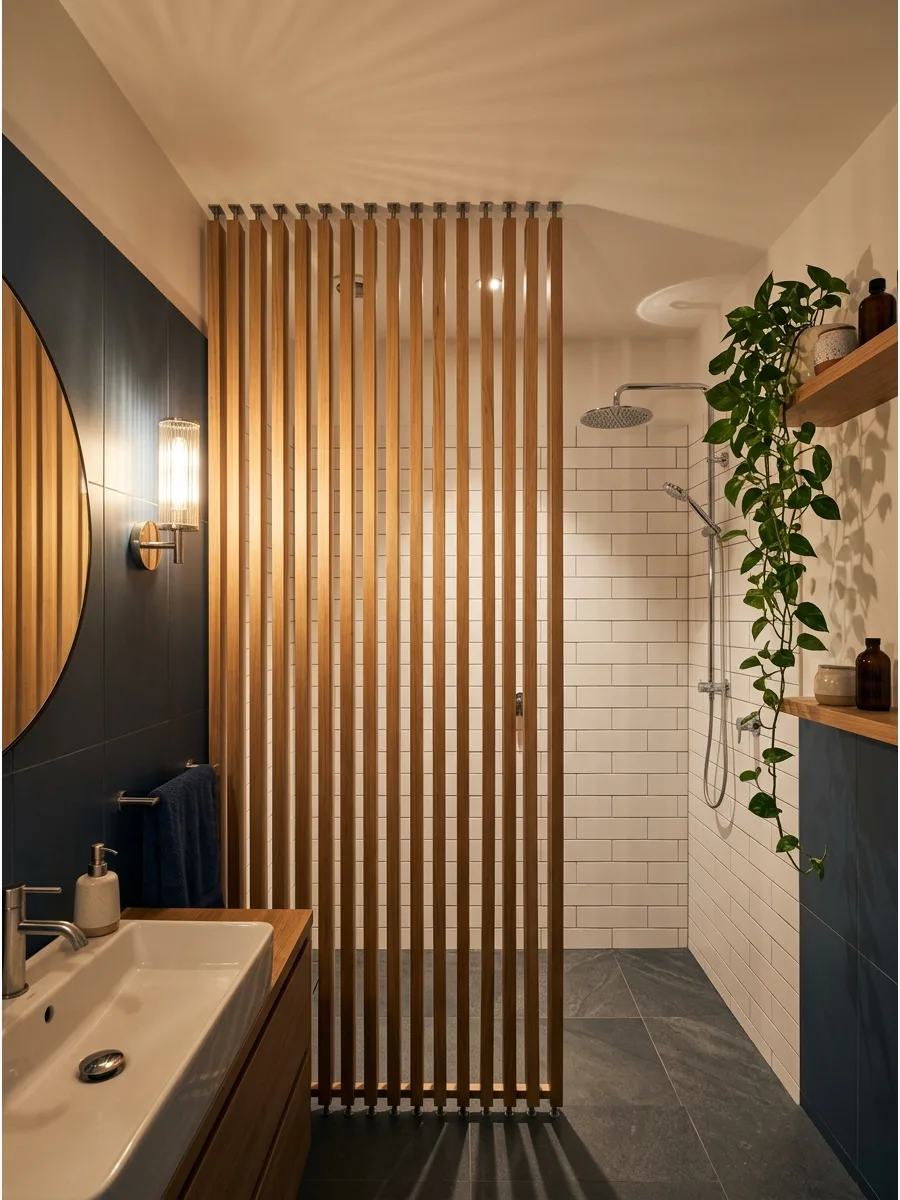
A simple partition wall can be used to carve out a shower zone in an unconventional room layout. It doesn’t need to reach the ceiling to be effective at defining the space.
Use a glass-to-wall connector for extra stability if the partition is narrow or freestanding. This is a flexible solution for modernizing an old bathroom without a full gut renovation.
- Freestanding walls must be bolted securely to the floor and at least one side wall.
- Finish the partition in a waterproof material like tile, stone, or marine-grade wood.
- Leave at least 36 inches of clearance around the partition for comfortable walking paths.
Quick win: Choose a textured or reeded glass partition to add a designer element that masks water spots.
31. Full Wall No-Door Shower
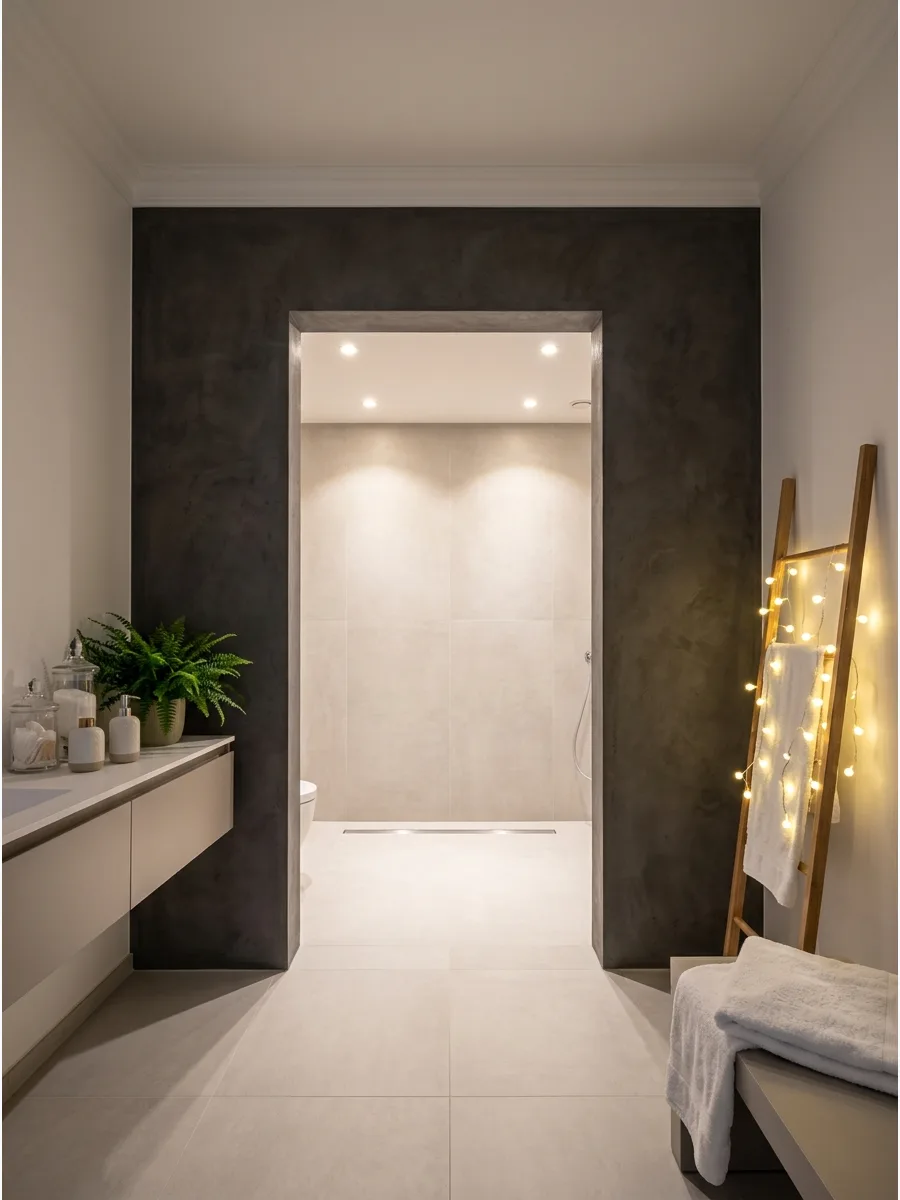
A full-height wall creates a complete sense of enclosure and privacy without the need for a glass door. This design is perfect for large bathrooms where you want to hide the shower area from the main entrance.
Paint or tile the wall in a bold color to make it a central design feature of the room. It eliminates the need to squeegee glass every day, which is a huge time saver. A solid wall also holds in steam better than an open-concept glass layout.
- Framing a full wall is a standard construction task that takes 1 day.
- Ensure there is a vent fan inside the shower area to handle steam buildup behind the wall.
- Install a light fixture inside the shower since the full wall will block natural light.
Most people skip this: Add an extra-wide opening (at least 30 inches) to make the shower feel accessible and grand.
Bathroom Remodeling
32. Seamless Glass Wall Shower
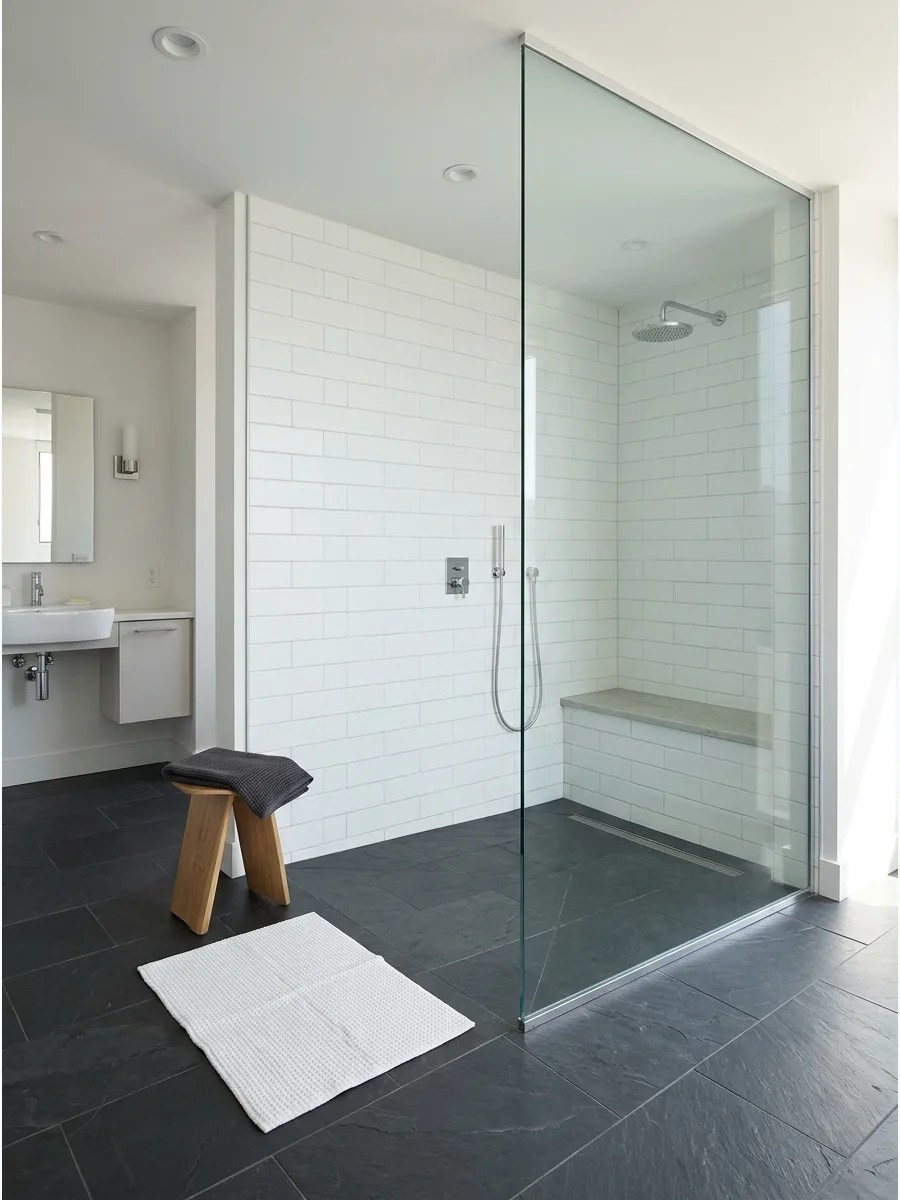
A long, doorless walk-in shower utilizes a single fixed glass or tiled partition to create a sleek, open-concept wet room. This design eliminates the need for heavy swinging doors and makes a small bathroom feel significantly larger.
Install the shower head at the furthest point from the opening to ensure water stays contained within the drainage zone. While glass panels offer a modern look, a tiled pony wall provides more privacy and requires less frequent cleaning than transparent surfaces.
- Budget for high-quality tempered glass or custom masonry depending on the desired privacy level.
- Ensure the floor has a 2% slope toward the drain to prevent pooling in the dry area.
- Swap clear glass for frosted or fluted textures to hide water spots and add visual interest.
Quick win: Position a heated towel rack just outside the splash zone for a warm transition out of the shower.
Frequently Asked Questions
How do I stop water from splashing out of a doorless shower?
To effectively contain water, ensure your partition wall is at least 36 to 48 inches long to create a sufficient splash zone. Angling the showerhead away from the opening and using a rain-style fixture will also help keep the rest of your bathroom dry.
Does a walk-in shower with no door feel cold?
Because these showers allow more airflow, they can feel cooler than fully enclosed units. To stay cozy, many homeowners install radiant floor heating or overhead heat lamps to help trap warmth and maintain a comfortable steam level.
What is the minimum size for a walk-in shower without a door?
For proper water containment and user comfort, a minimum footprint of 4×5 feet is generally recommended. This size provides enough space for a splash zone while ensuring you have plenty of room to move around freely.
Do I need a special drain for a doorless shower?
A linear drain is often the best choice for doorless showers because it allows for a single-slope floor pitch toward the wall. This design ensures water flows efficiently away from the entrance and prevents pooling in the main bathroom area.
How do I maintain privacy in a doorless shower layout?
You can easily maintain privacy by incorporating frosted glass partitions, pony walls, or an ‘L-shaped’ entryway that blocks the direct line of sight. These architectural choices create a secluded feel while still preserving the open, modern aesthetic of the design.