50 Bathroom Shower Wall Ideas With Better Materials, Patterns, and Details

This post may contain affiliate links: full affiliate disclosure.
Shower walls occupy a large visual field, so material, tile scale, grout rhythm, storage openings, and edge details shape the entire bathroom.
Use these ideas to compare achievable looks, then confirm every finish, substrate, waterproofing component, adhesive, sealant, and accessory with its manufacturer and installer.
This article contains affiliate links. We may earn a commission from qualifying purchases at no additional cost to you.
Choose the Shower Wall Material
Start with surfaces made or approved for the intended shower application. Appearance matters, but joint count, care, fabrication, and system compatibility narrow the choices.
1. Use Porcelain Slabs for Broad, Quiet Walls
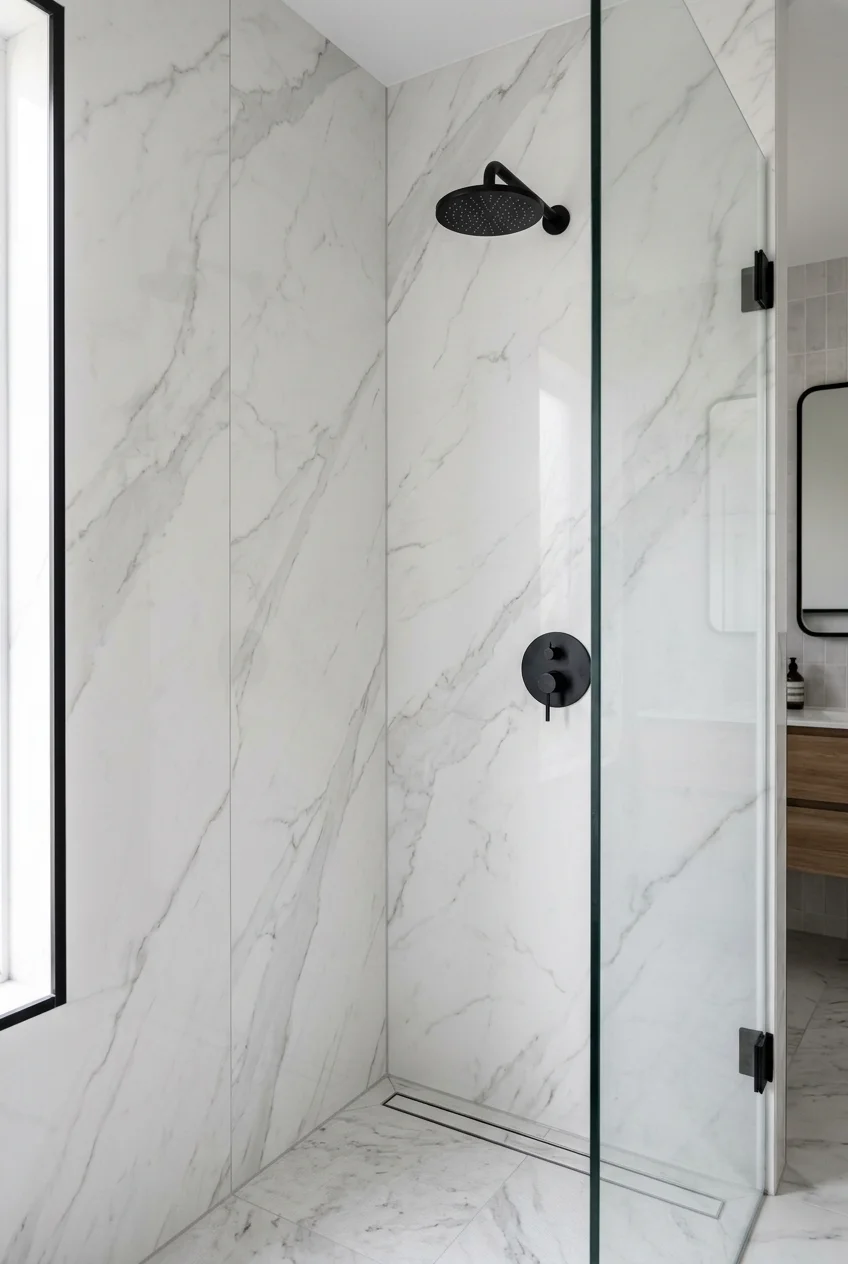
Large porcelain slabs create broad fields of color or veining with very few visible joints, making fixtures and niches read against a calmer background.
Select a surface specifically approved for shower walls, then study full-sheet images because a small sample cannot show the complete printed or through-body pattern.
Fabrication, transport, wall flatness, penetrations, and handling require experienced planning. A beautiful slab should not be forced around mislocated plumbing or uneven framing.
Layout tip Approve a scaled elevation showing every slab seam, vein direction, valve opening, niche, corner, and exposed edge before material is cut or delivered.
2. Choose 24-by-48-Inch Tile for a Large-Scale Grid
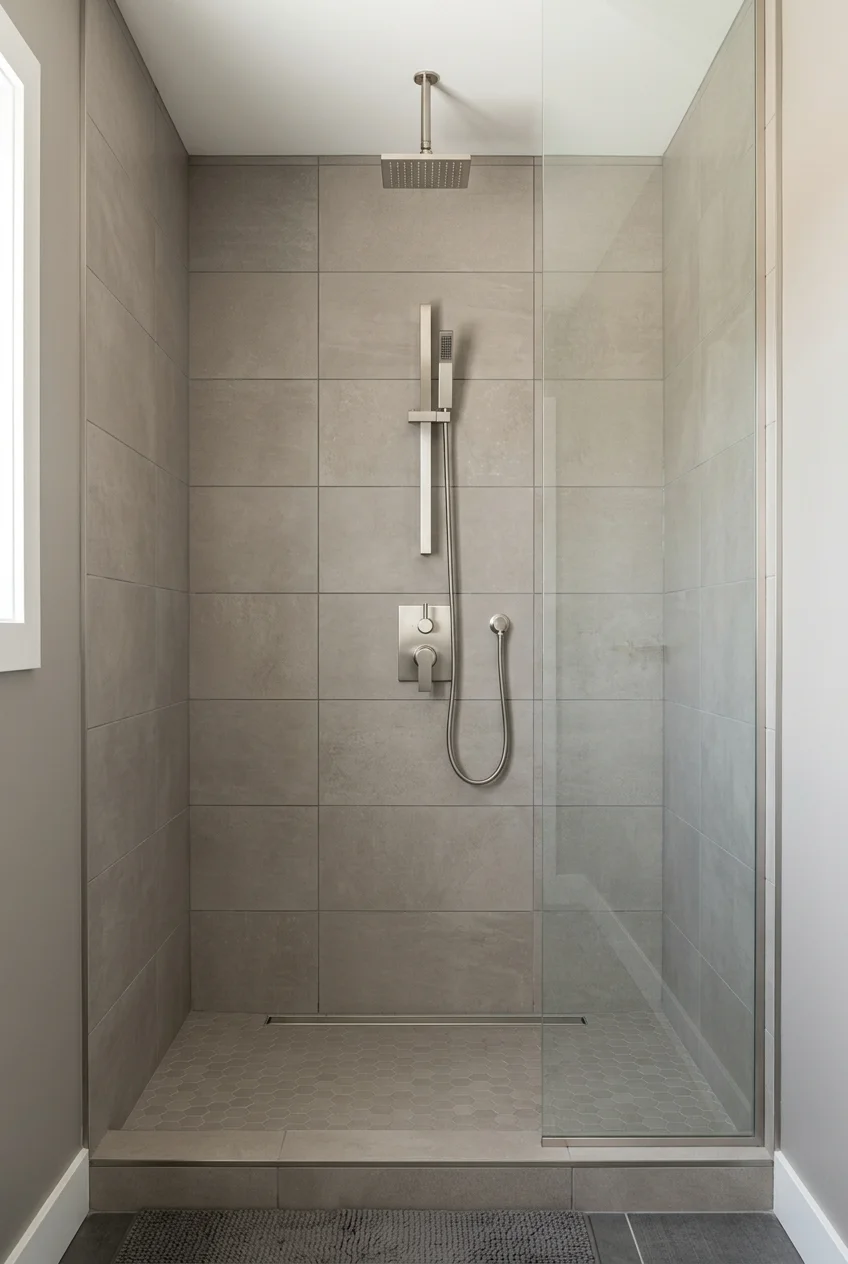
Twenty-four-by-forty-eight-inch porcelain tile gives a shower a broad, architectural grid while retaining repeatable pieces that can be arranged around corners and openings.
Map full tiles from the main sightline and balance perimeter cuts. Large pieces make narrow slivers and drifting joints more obvious, not less noticeable.
Confirm wall flatness, tile variation, mortar coverage, movement joints, and handling requirements with the tile and setting-material manufacturers before installation begins.
3. Use 12-by-24-Inch Porcelain as a Flexible Middle Scale
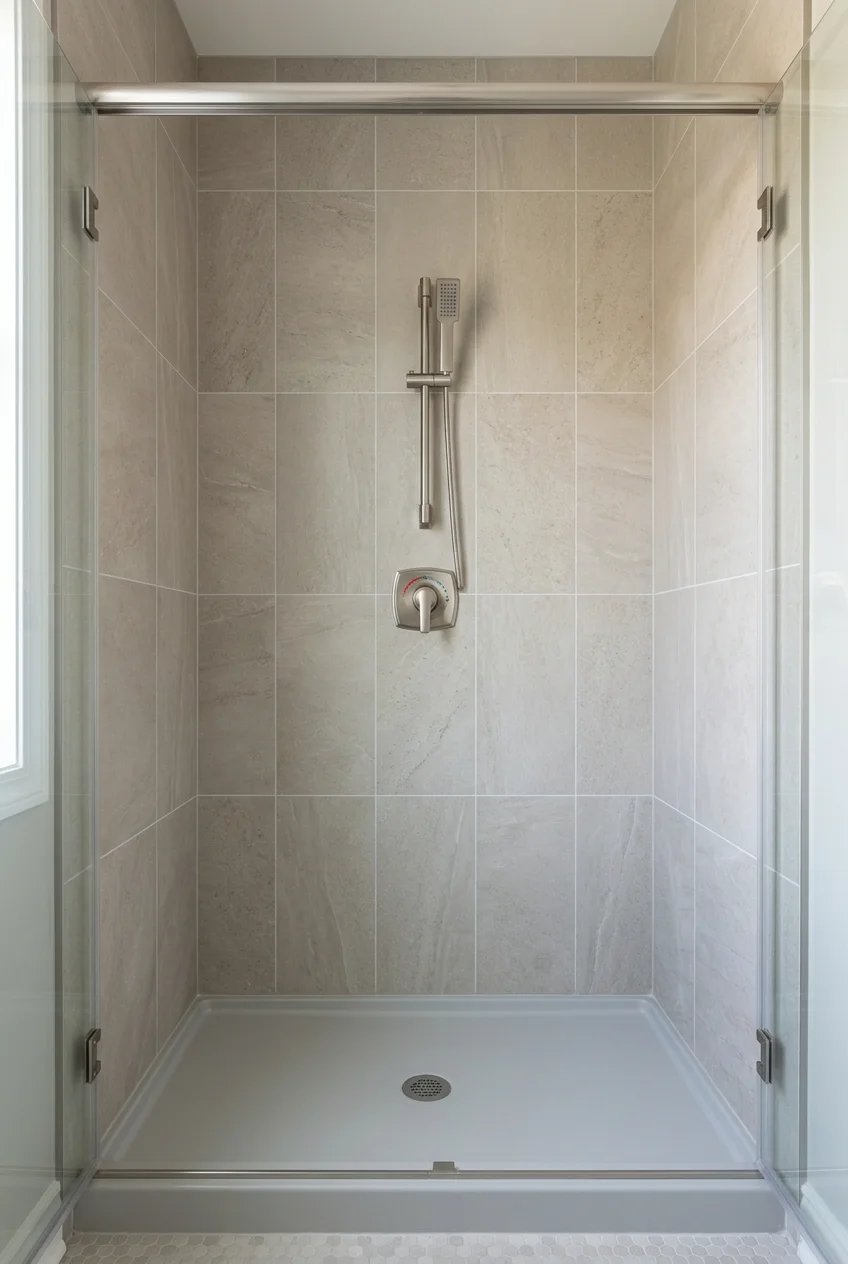
Twelve-by-twenty-four-inch tile offers fewer joints than small tile without demanding slab-scale handling, making it adaptable to alcoves, corners, and ordinary ceiling heights.
Stack it for a crisp grid or use the offset permitted by the manufacturer. Center the layout where the shower is seen most often.
4. Pick a Grout-Free Solid-Surface Panel System
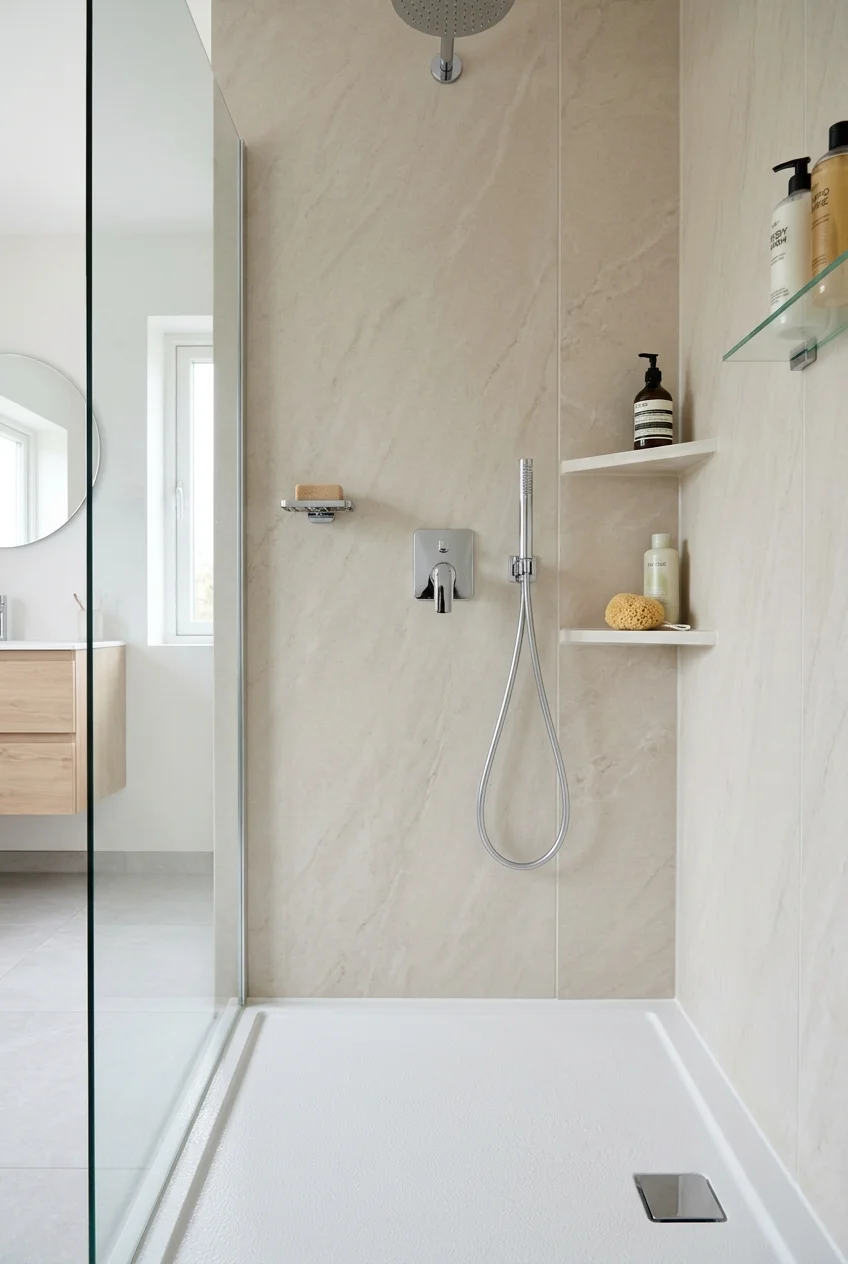
Solid-surface or composite wall panels reduce grout lines and can reproduce quiet solids, stone patterns, or subtle textures across a fitted shower enclosure.
Panel material alone does not define the assembly. Corners, seams, substrate preparation, adhesive, sealant, penetrations, and accessory support remain system-specific decisions.
- Verify the approved substrate and adhesive.
- Dry-fit panels before cutting plumbing openings.
- Use the specified sealant at seams and edges.
- Provide structural backing for supported accessories.
Compare the wall system with broader shower remodel ideas before deciding how the enclosure, base, storage, and fixtures should work together.
Ask to see a completed corner and seam sample. Printed stone can look convincing from a distance while poorly placed joints still interrupt the effect.
Do not use new panels to conceal a damaged enclosure. Investigate movement, moisture, weak substrate, and failed plumbing before the replacement surface closes the wall.
5. Refresh an Alcove With an Acrylic Surround
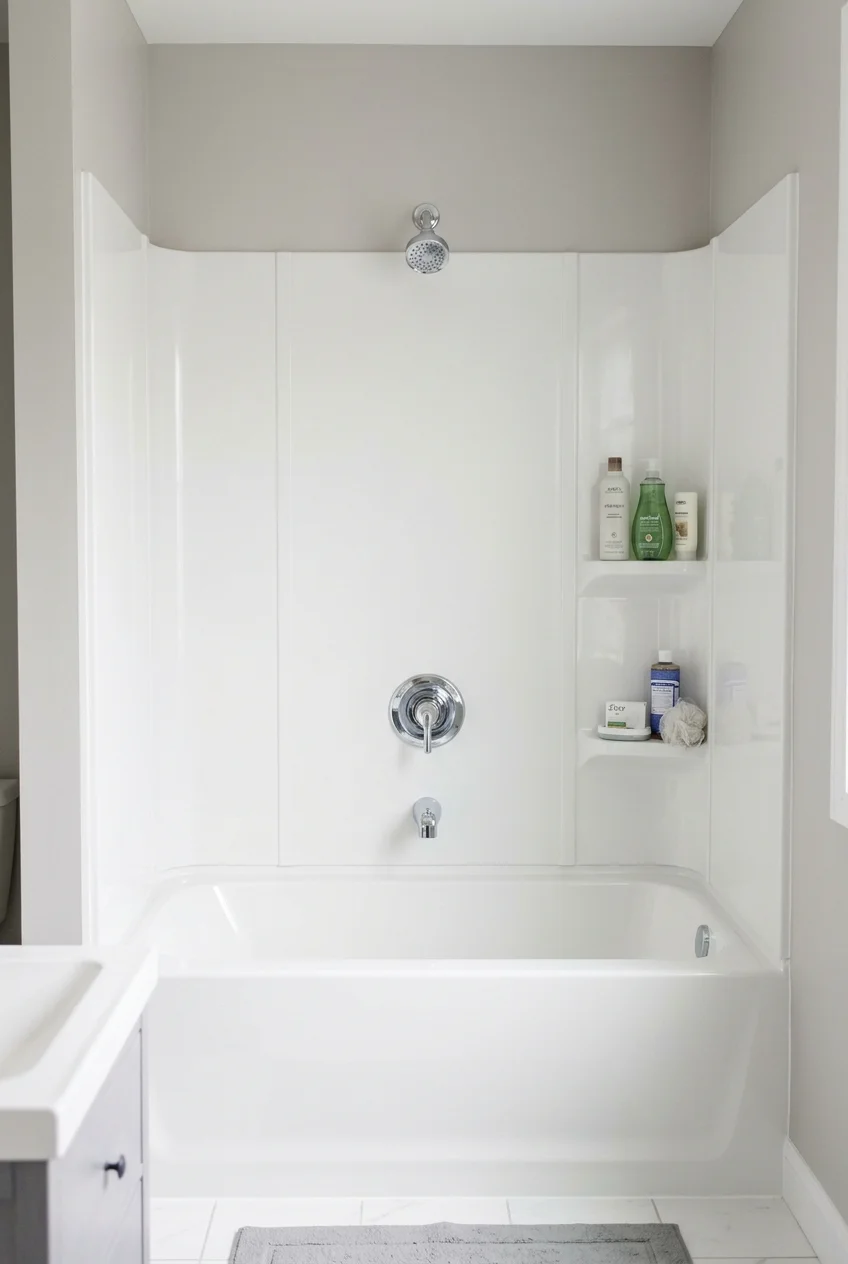
A molded acrylic surround can give a tub-shower alcove a clean, continuous appearance with few joints and integrated ledges in some product designs.
Choose the exact configuration for the tub or shower base, wall dimensions, plumbing wall, and remodeling condition rather than trimming a generic surround indiscriminately.
Inspect shelf depth and corner curves with real bottles. Shallow molded details may appear useful in photographs yet hold little during everyday bathing.
6. Use Cultured Marble Panels for a Soft Stone Look
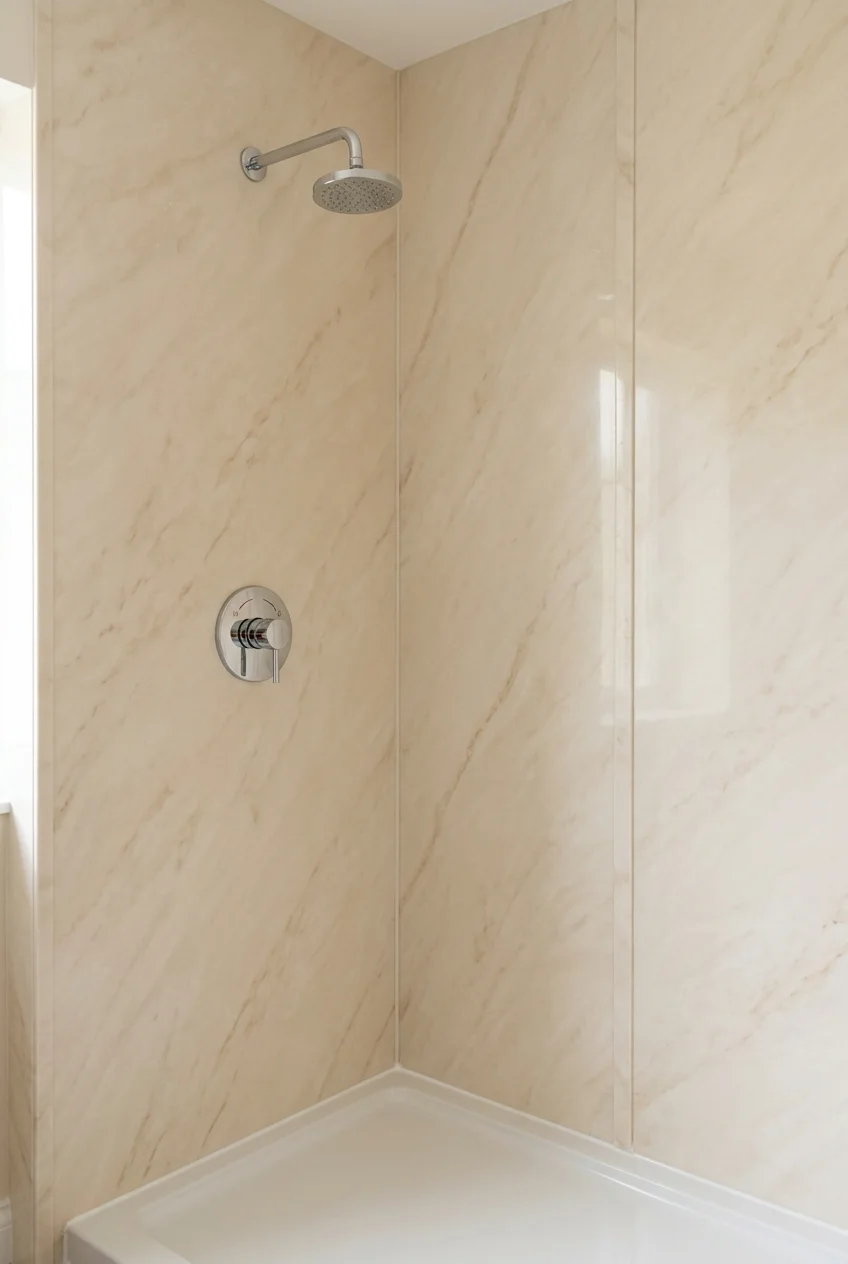
Cultured marble panels offer a continuous stone-like surface with fewer joints than tile, fitting bathrooms that need gentle pattern without a busy grout grid.
Review the manufacturer’s sample at full scale because veining, gloss, edge profiles, seam color, and corner treatment determine how convincing the finished surround appears.
Coordinate wall measurements and plumbing openings before fabrication. Field changes around valves or windows can be difficult once a fitted panel arrives.
7. Choose Natural Stone With Its Care in Mind
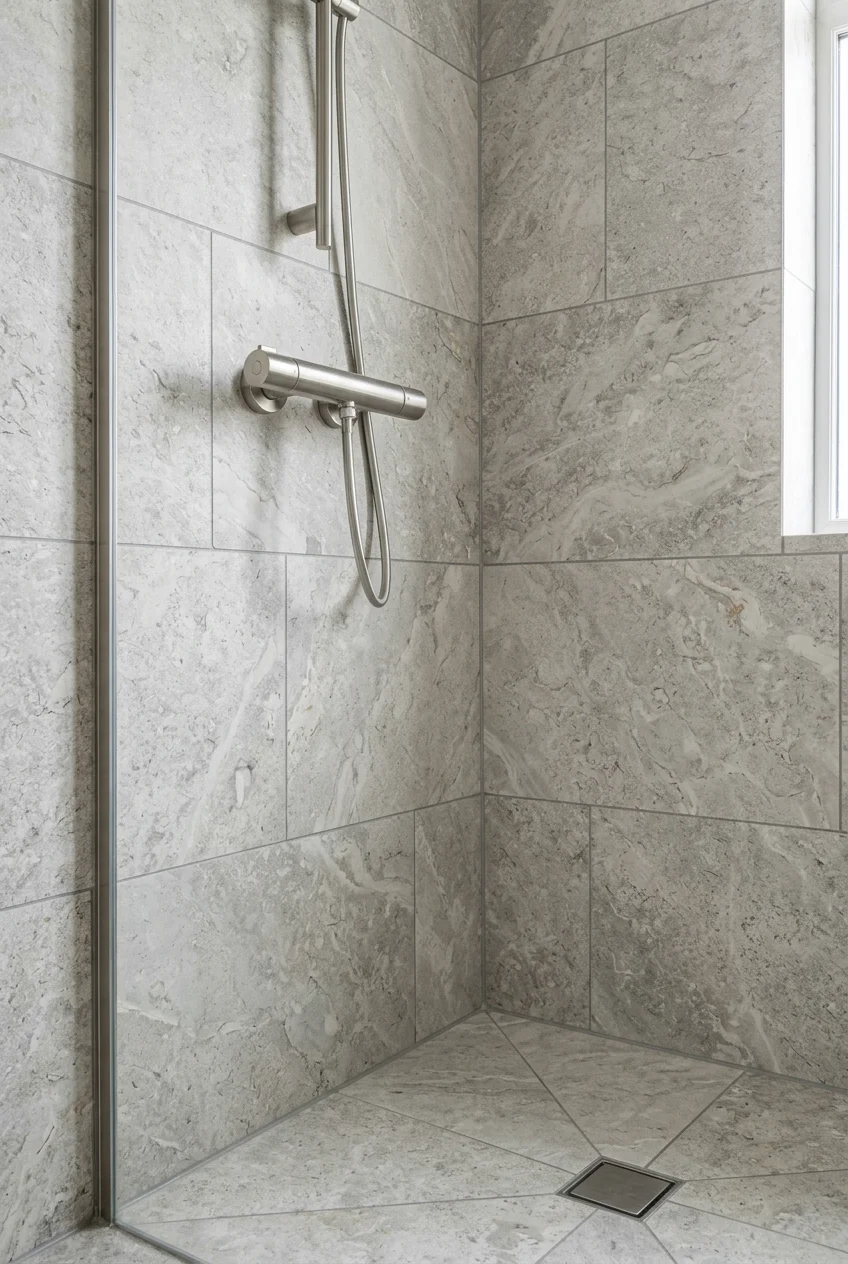
Natural stone gives every shower wall genuine variation, but mineral composition affects sensitivity, cleaning choices, sealing expectations, and how the surface changes with use.
Ask the stone supplier whether the selected material is appropriate for the specific wet application, finish, piece size, setting system, and local water conditions.
Use a neutral cleaner approved for that stone and avoid assuming a sealer makes the wall stain-proof. Some calcareous stones remain vulnerable to acidic products.
Care note Drying wet-area stone with a squeegee can reduce soap-scum buildup, but the blade and hanging method still need to suit the installed surface.
8. Keep Glazed Subway Tile Classic and Practical
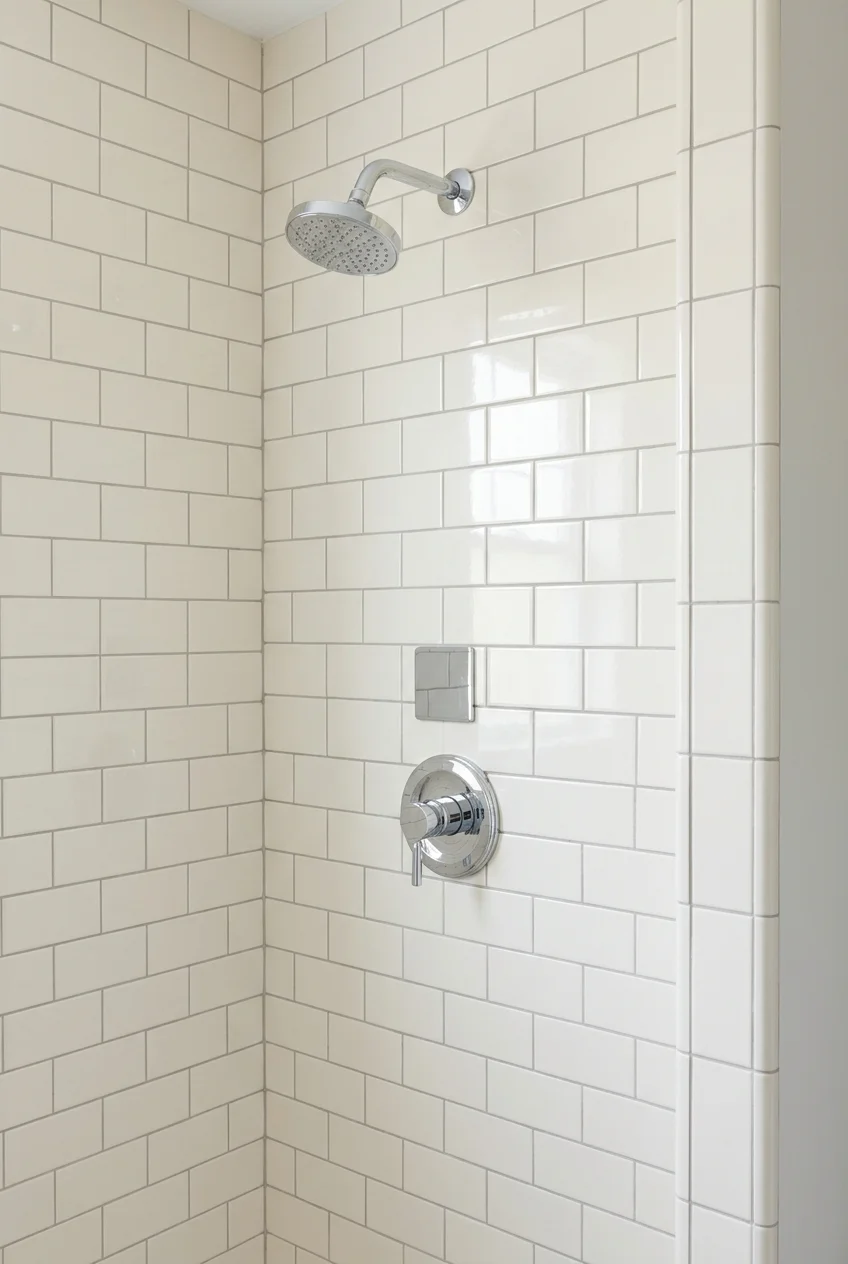
Glazed subway tile creates an easy-to-read rhythm, works around common shower dimensions, and offers enough joints to absorb modest walls without oversized cuts.
Choose trim and outside-corner details with the tile order. A familiar field tile can still look unfinished when exposed edges receive improvised treatment.
9. Let Handmade-Look Tile Show Gentle Variation
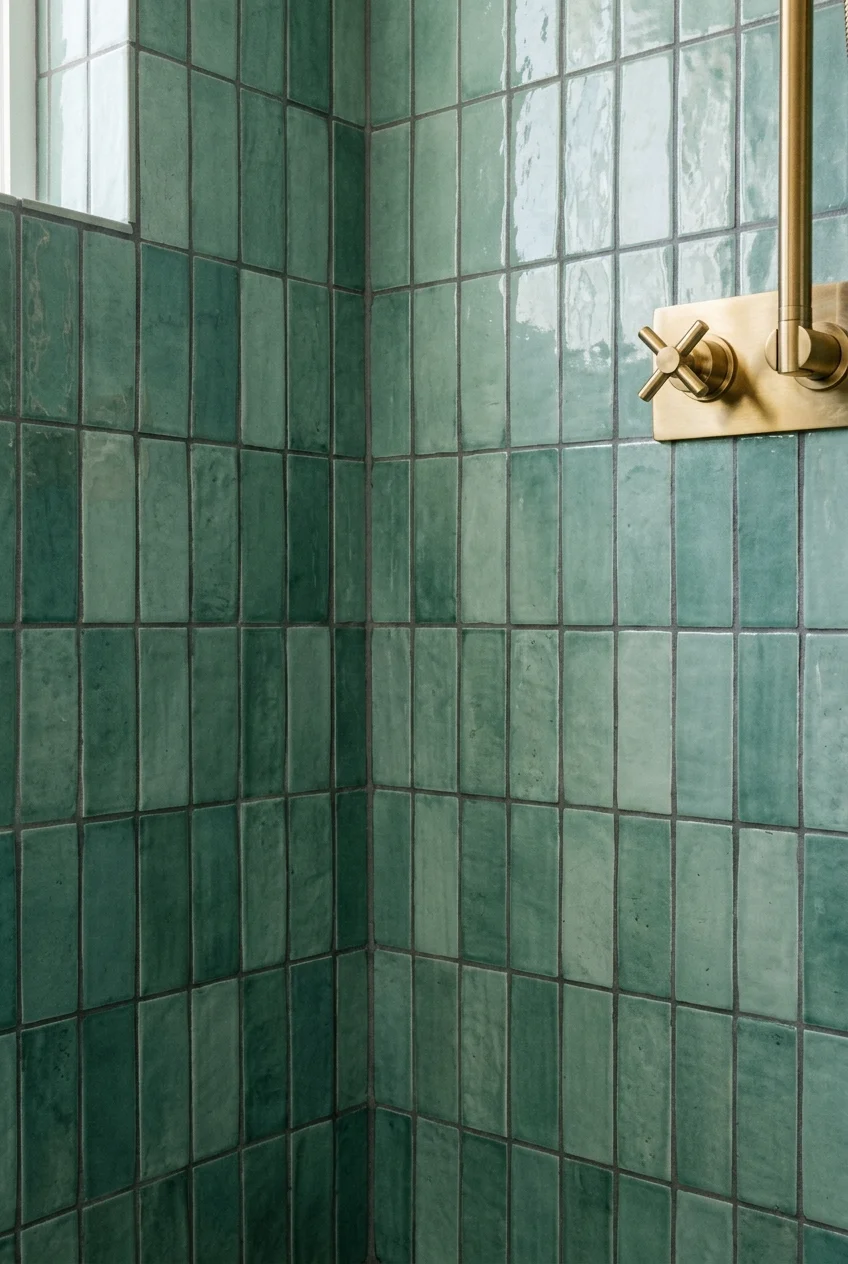
Handmade or handmade-look glazed tile brings softly irregular edges and color shifts, giving a simple shower wall movement without a printed motif or border.
Open several boxes and blend pieces across the wall. Installing one carton at a time can create unintended blocks of tone or surface character.
Sample check View a multi-piece sample under wet and dry conditions because glossy undulation can look dramatically different beneath direct shower lighting.
10. Use Glass Mosaic for Luminous Depth
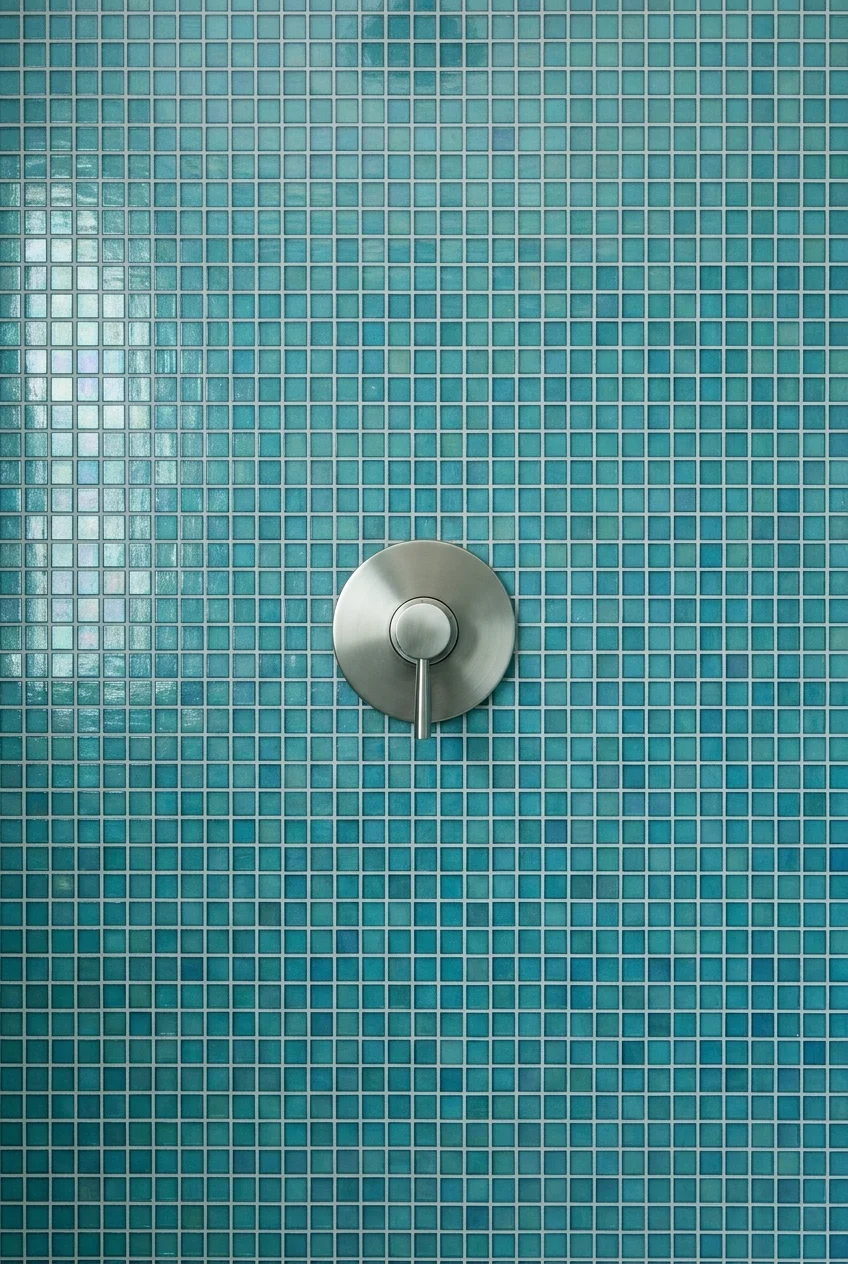
Glass mosaic can give a shower wall luminous depth, especially when small pieces shift gently in tone rather than forming a high-contrast picture.
Confirm the exact mosaic, backing, adhesive, grout, and installation method are approved together. Translucent pieces can reveal inconsistent coverage or sheet boundaries.
Inspect several installed sheets from normal viewing distance before the material sets. Visible grids are easier to correct during layout than after grouting.
Set the Tile Pattern and Scale
The same tile changes character when rotated, staggered, enlarged, or grouped. Plan the pattern across corners, niches, fixtures, and ceiling cuts before installation begins.
11. Stack Rectangles Vertically to Emphasize Height
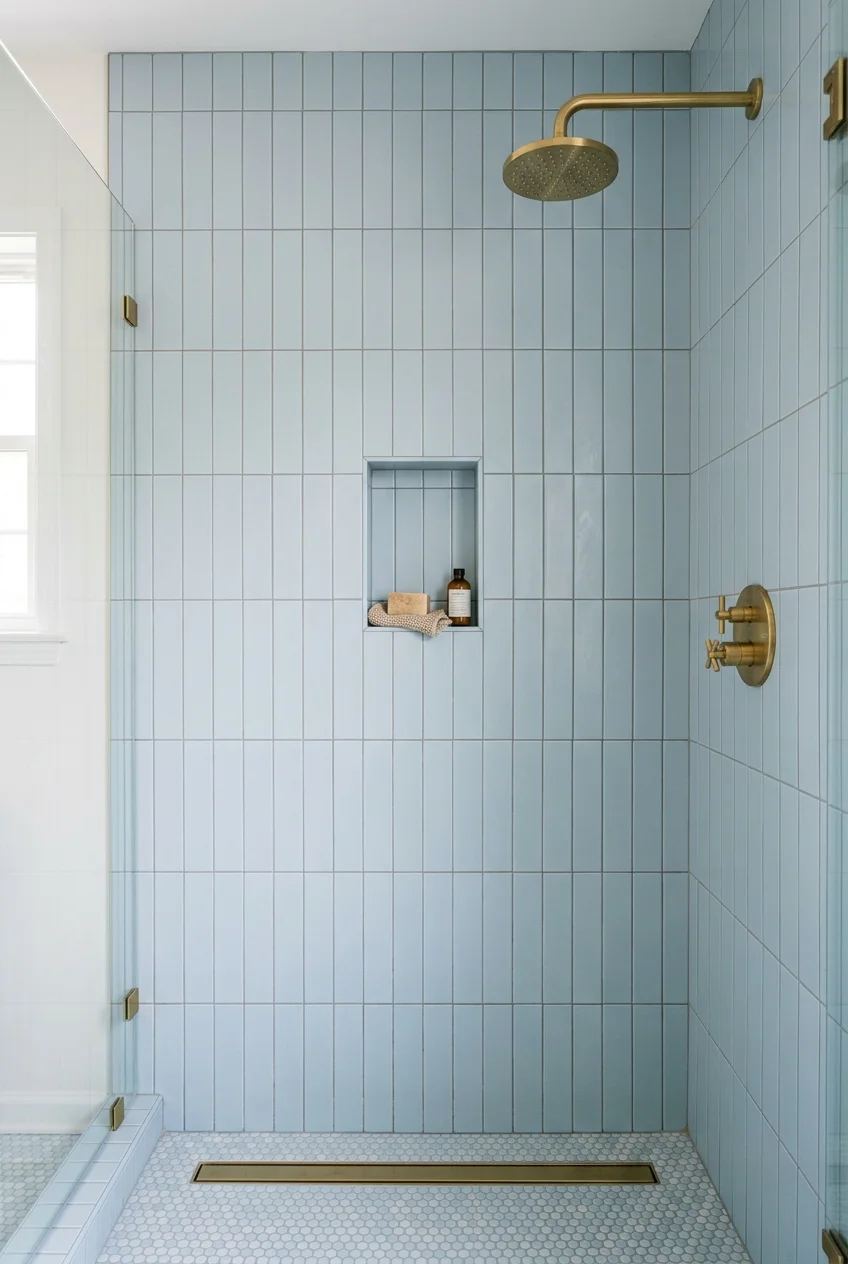
Vertical stacked rectangles pull the eye upward and give ordinary tile a cleaner, more architectural rhythm than a familiar horizontal running bond.
Center the columns on the primary wall and plan ceiling cuts carefully. Long vertical joints make small alignment errors visible from across the bathroom.
12. Run Long Tile Horizontally to Widen the Back Wall
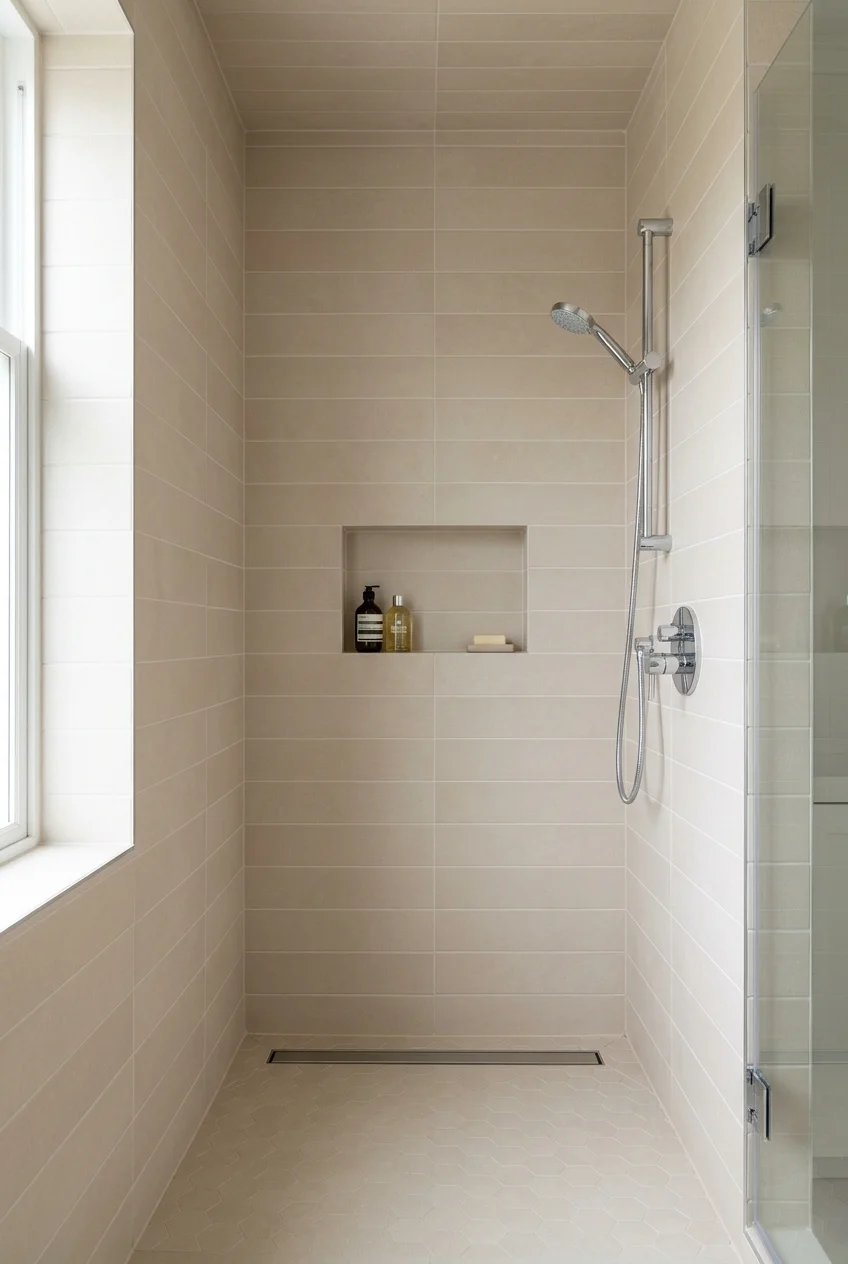
Long horizontal rows visually stretch a narrow back wall and can connect two side walls when joints wrap through the inside corners with discipline.
Establish the most visible course first, then account for the shower base, ceiling, niche, and valve heights before committing to the starting row.
Layout tip Draw every horizontal joint on an elevation so the niche shelf and fixture plates do not create near-misses that look accidental.
13. Use a Running Bond for Familiar Movement
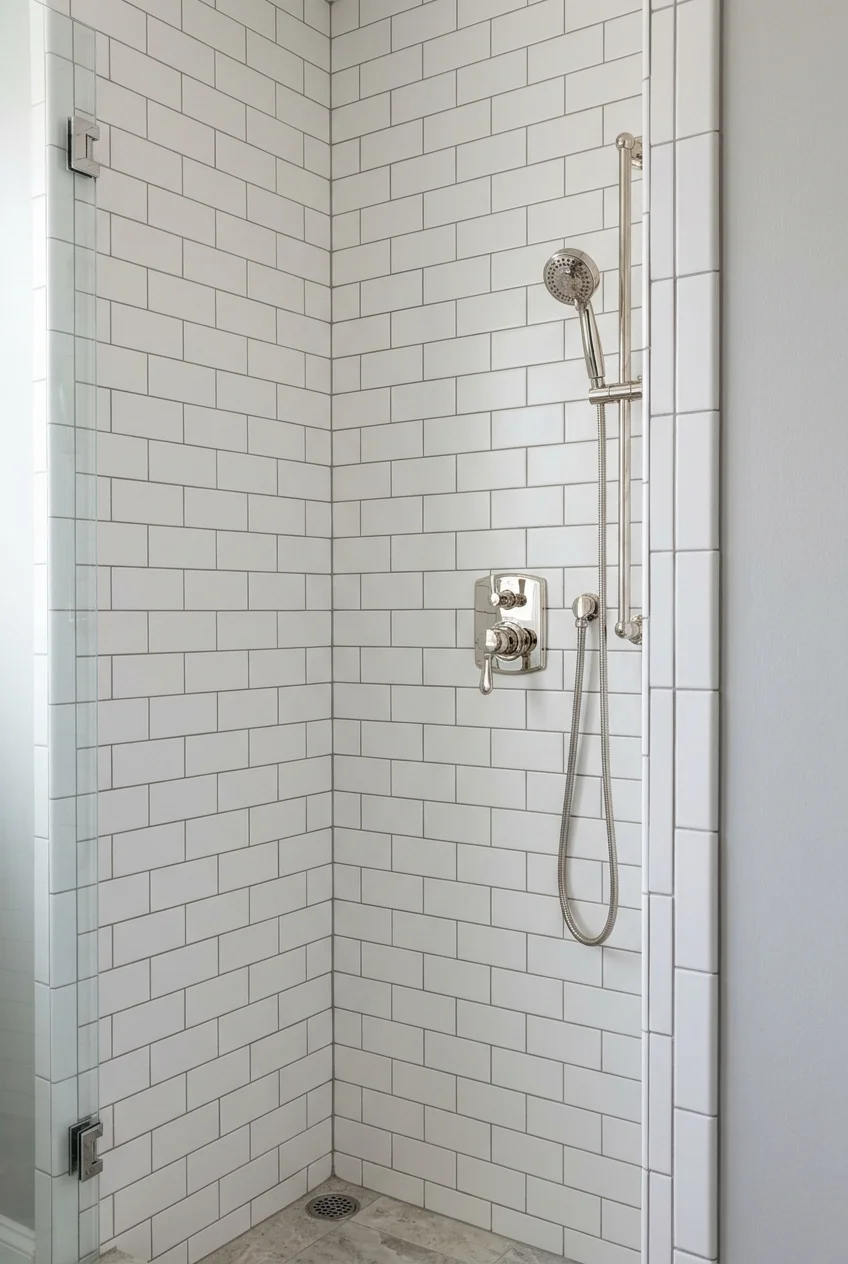
A running-bond layout gives rectangular tile gentle movement and softens strict wall geometry, making it useful in traditional, transitional, or simple modern bathrooms.
Follow the tile manufacturer’s offset recommendation, particularly with longer pieces. The familiar half-offset appearance is not appropriate for every product or variation.
14. Make One Wall a Herringbone Focal Point
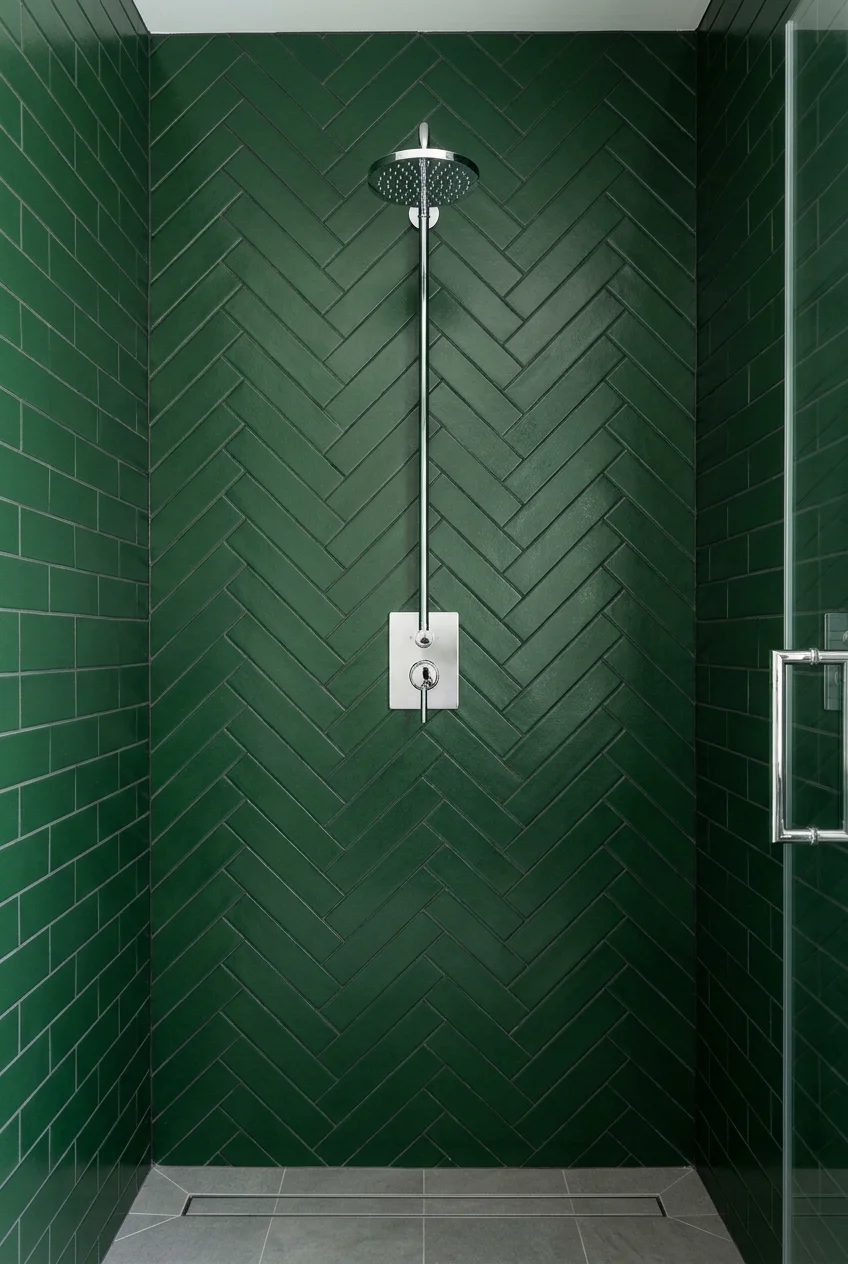
Herringbone adds diagonal energy to a shower, so confining it to the back wall keeps the pattern legible without surrounding the user in constant movement.
Center the pattern on a deliberate axis, then calculate triangular perimeter cuts and fixture interruptions. A narrow wall can expose every small layout compromise.
- Choose the centerline before setting the first piece.
- Dry-lay the repeat at full width.
- Keep side walls quieter in color and pattern.
- Order enough material for diagonal cuts.
15. Choose Chevron Tile for a Continuous Zigzag
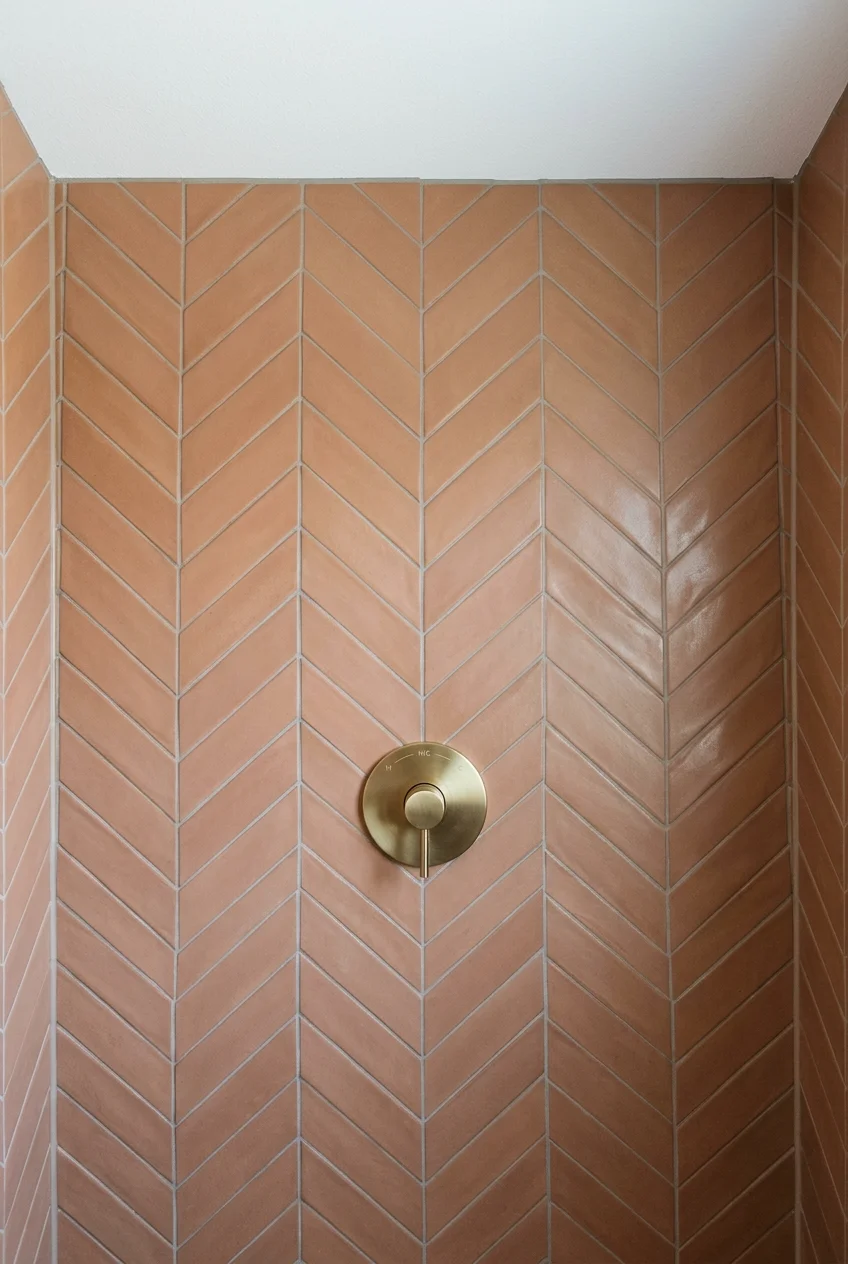
Pre-shaped chevron tile creates a clean repeating zigzag with points that meet directly, producing a sharper graphic than rectangular tile arranged as herringbone.
Check how the pattern terminates at both corners and the ceiling. Partial points can look unfinished when the wall width ignores the tile module.
16. Return to a Simple Six-Inch Square Grid
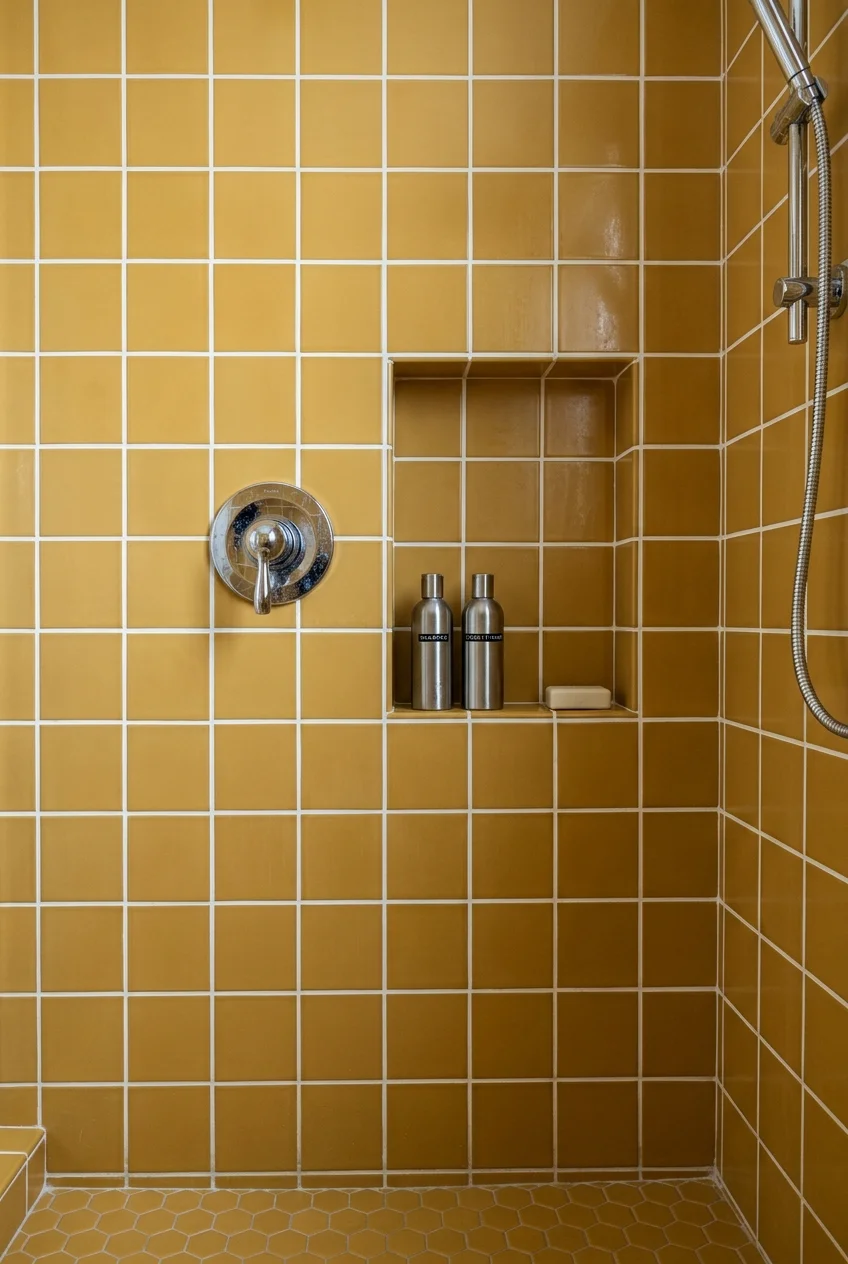
Six-inch square tile creates an orderly grid with enough grout rhythm to feel intentional, especially in saturated color or a softly varied handmade finish.
Use the square module to organize fixture heights and niche dimensions. Random interruptions weaken the calm geometry more than a carefully centered partial row.
17. Build an Oversized Checkerboard Feature Wall
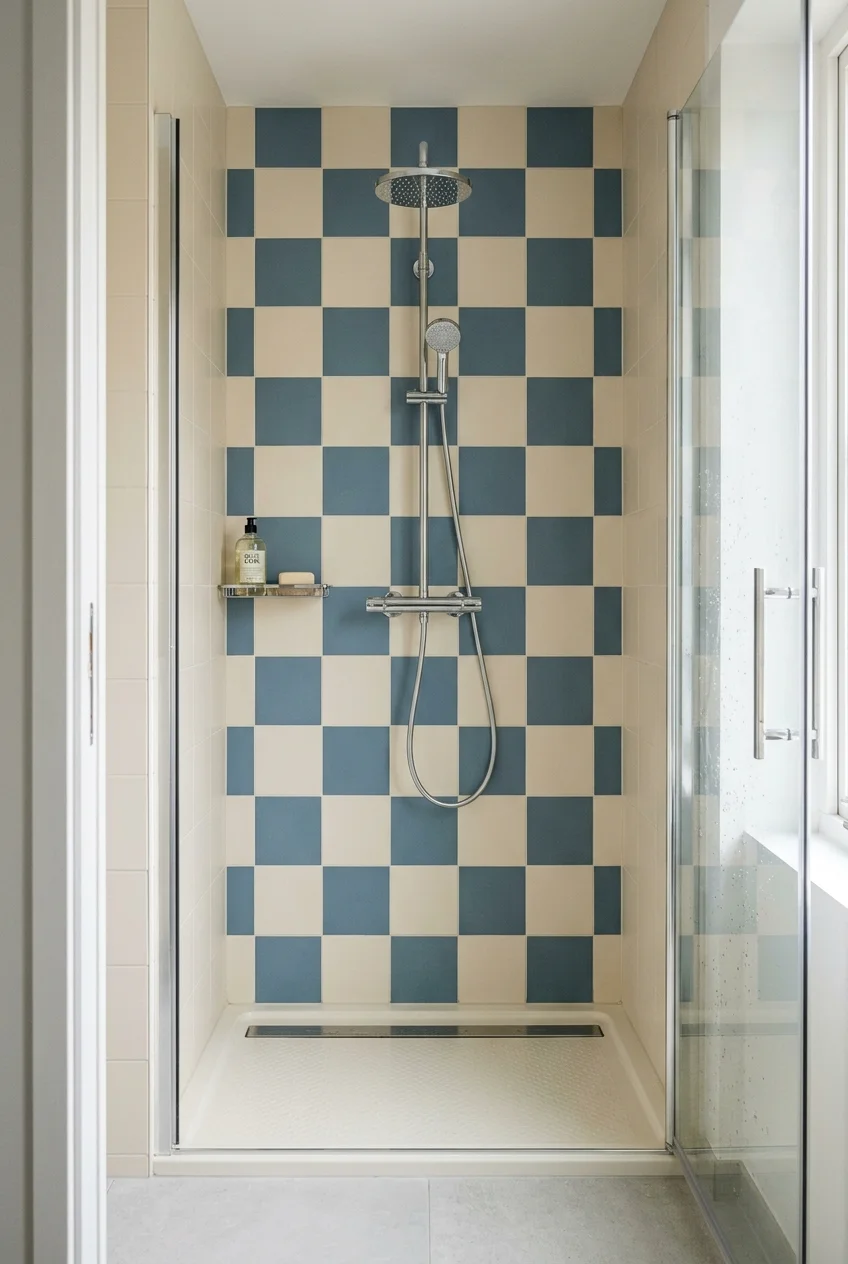
An oversized checkerboard turns the shower wall into a clear graphic statement using two durable tile colors rather than a delicate printed pattern.
Choose related values for a softer effect or strong contrast for drama. Keep fixtures simple and center the repeat on the principal wall.
Visual check Photograph a full-scale paper mockup from the bathroom doorway, because a repeat that looks balanced nearby may feel cropped from the entrance.
18. Cover a Wall With Medium Hexagon Tile
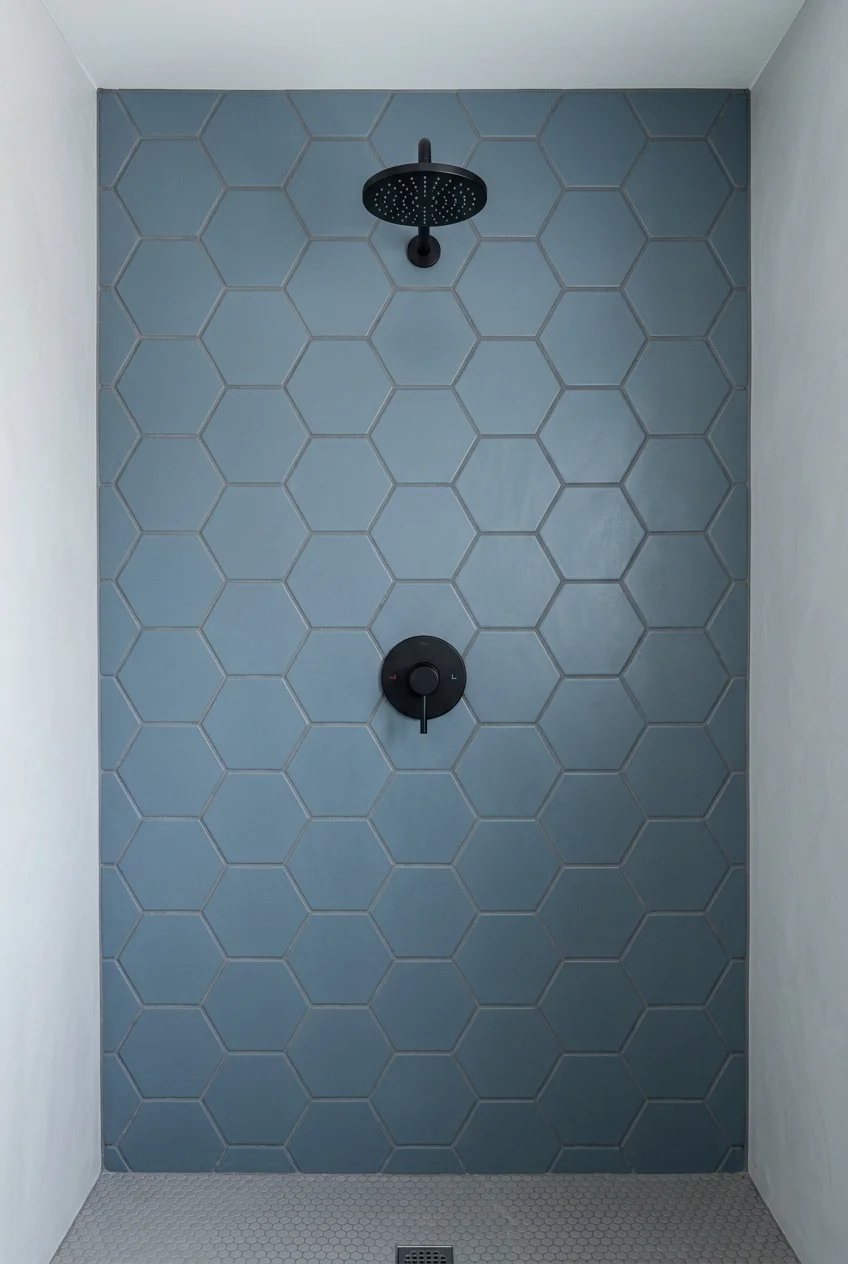
Medium hexagons introduce clear geometry without the dense grout field of tiny mosaics, creating a wall that feels patterned even in one solid color.
Plan the top, bottom, and corner terminations together. Half-hexagon cuts can look deliberate when repeated consistently rather than improvised at each boundary.
19. Use Penny Rounds for a Fine-Grained Wall Texture
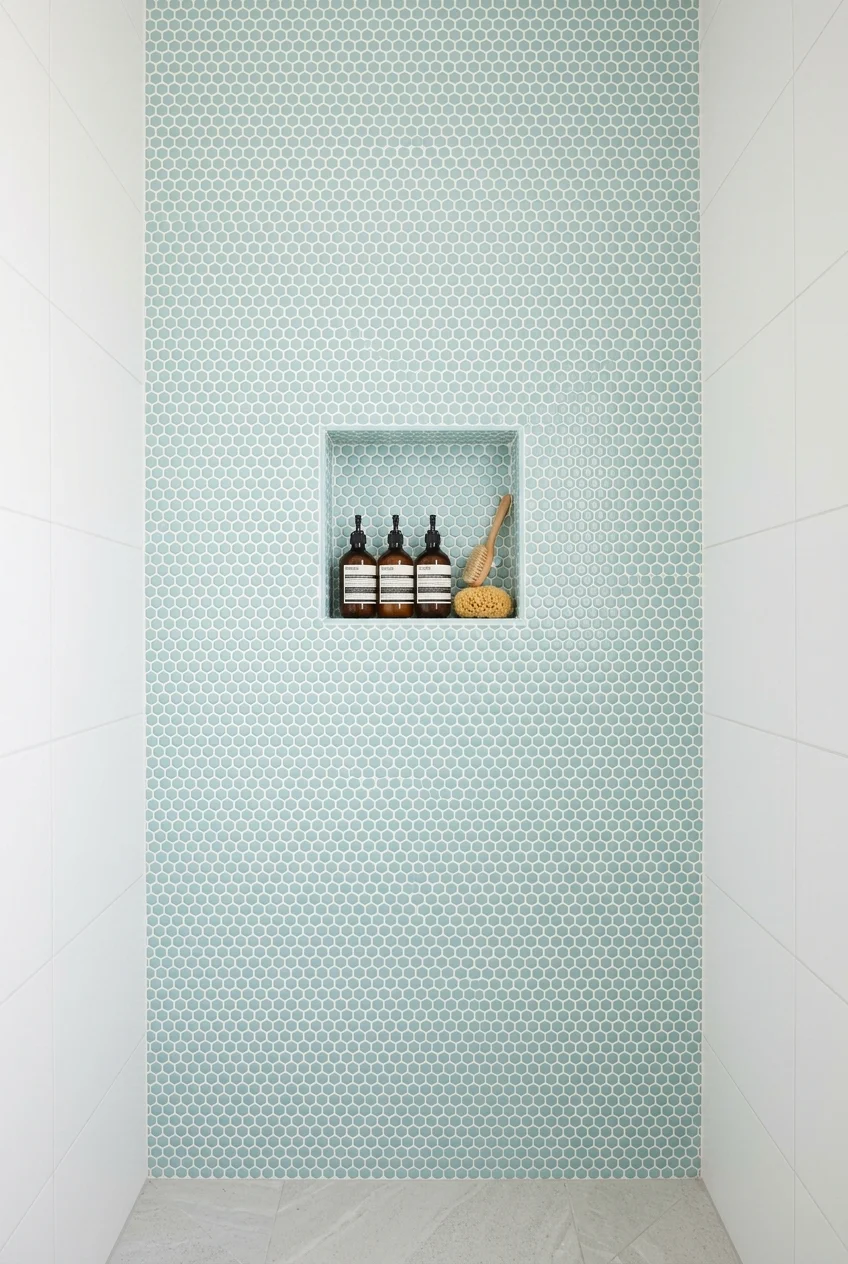
Penny rounds create a dense, lively texture that reads almost like fabric from across the room and reveals individual circles at close range.
Sheet alignment and grout consistency matter enormously. Inspect the wall under side lighting before grout, when visible seams between sheets remain easier to adjust.
Limit the mosaic to one wall or niche when cleaning many joints would be unwelcome. The same texture can remain effective at a smaller scale.
20. Create Fine Vertical Rhythm With Finger Mosaic
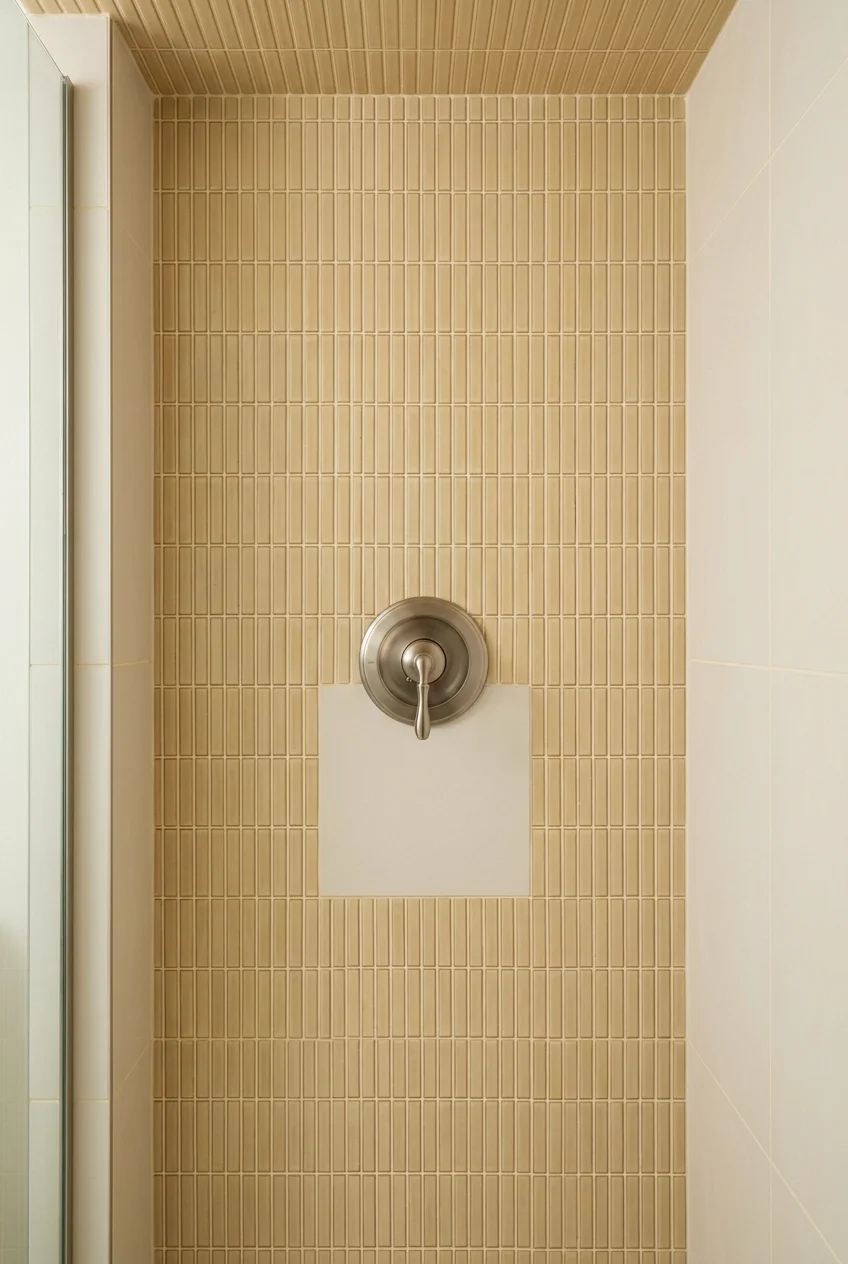
Narrow finger or kit-kat mosaic makes a refined vertical texture, giving a small wall strong rhythm without relying on dramatic color or large veining.
Use it where straight sheet alignment can be checked carefully. Fixtures with broad plates may cover several narrow joints and need a flat seating area.
21. Use Scallop Tile as a Controlled Decorative Layer
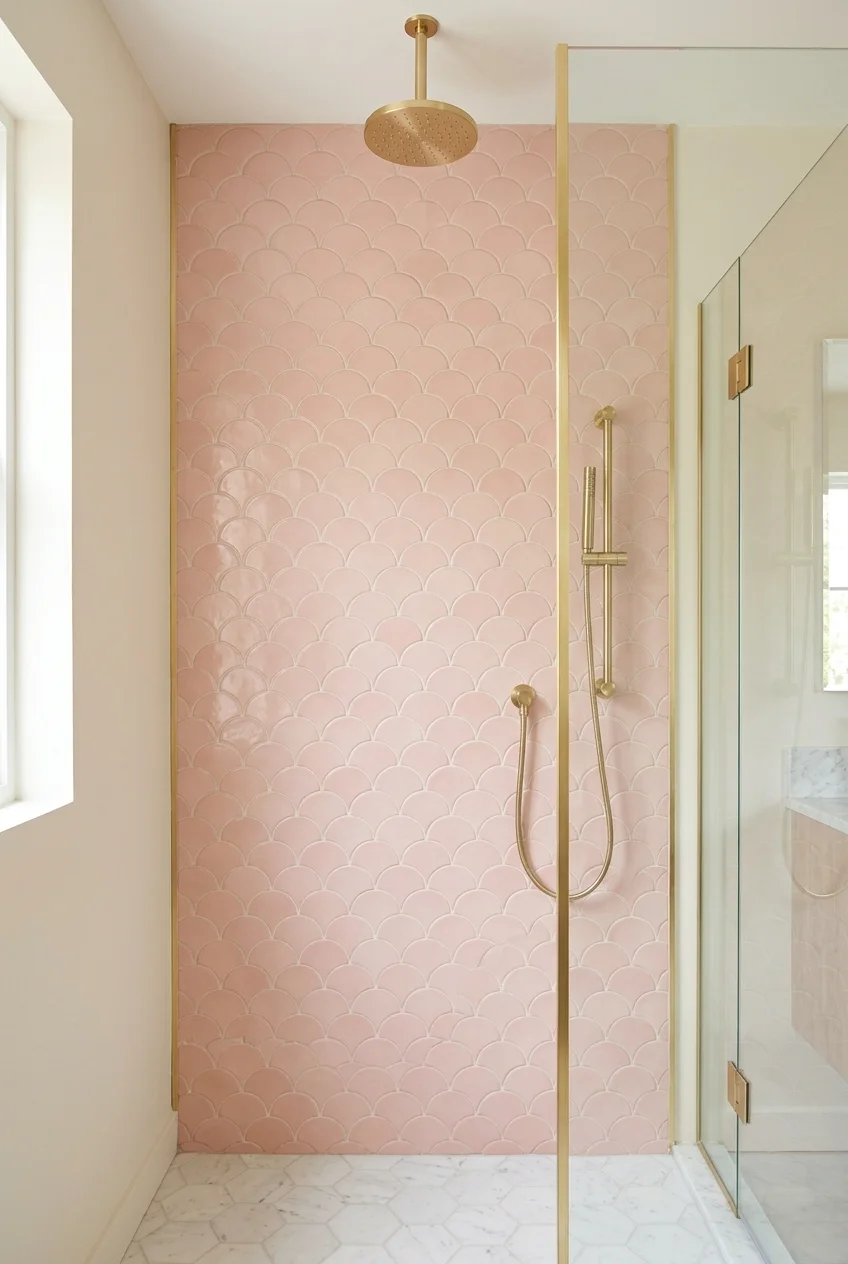
Scallop or fan tile brings a recognizable curved repeat to shower walls, softening straight glass, square niches, and rectangular room geometry.
Keep the color restrained and study the orientation before ordering. Turning the same shape upward or downward changes the wall’s movement considerably.
Edge note Confirm a practical termination detail before installation, because curved modules rarely create a naturally straight exposed edge at the shower opening.
22. Color-Block the Walls With Two Broad Fields
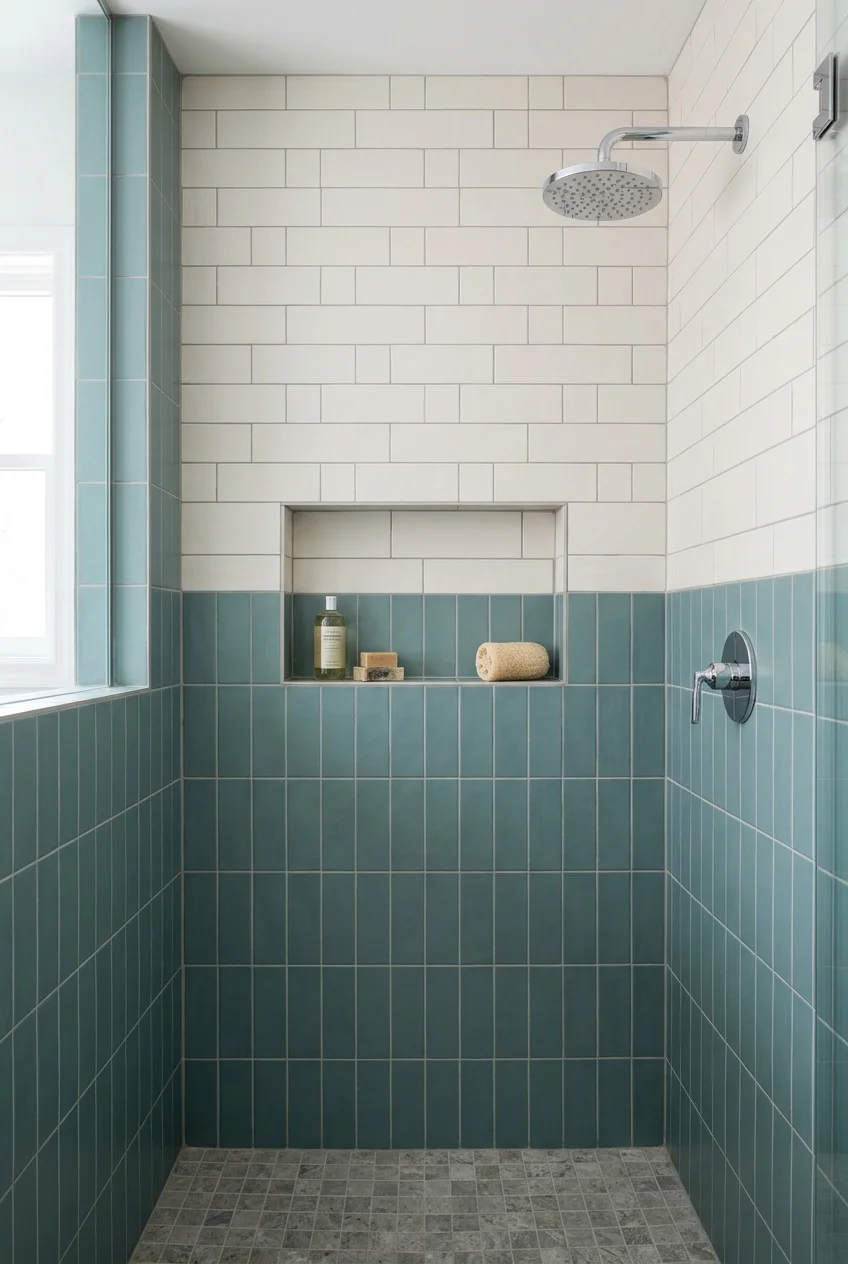
Two broad tile colors create a strong composition without a small repeating motif, especially when the transition aligns with a niche, ledge, or fixture line.
Choose one transition height and carry it through adjoining walls. Arbitrary stops behind controls or shelves make the color division feel unresolved.
Use Color and Finish Deliberately
Color establishes the wall’s visual weight, while surface finish changes reflected light and cleaning visibility. Samples should be viewed wet and under bathroom lighting.
23. Use Glossy White Tile to Catch Available Light
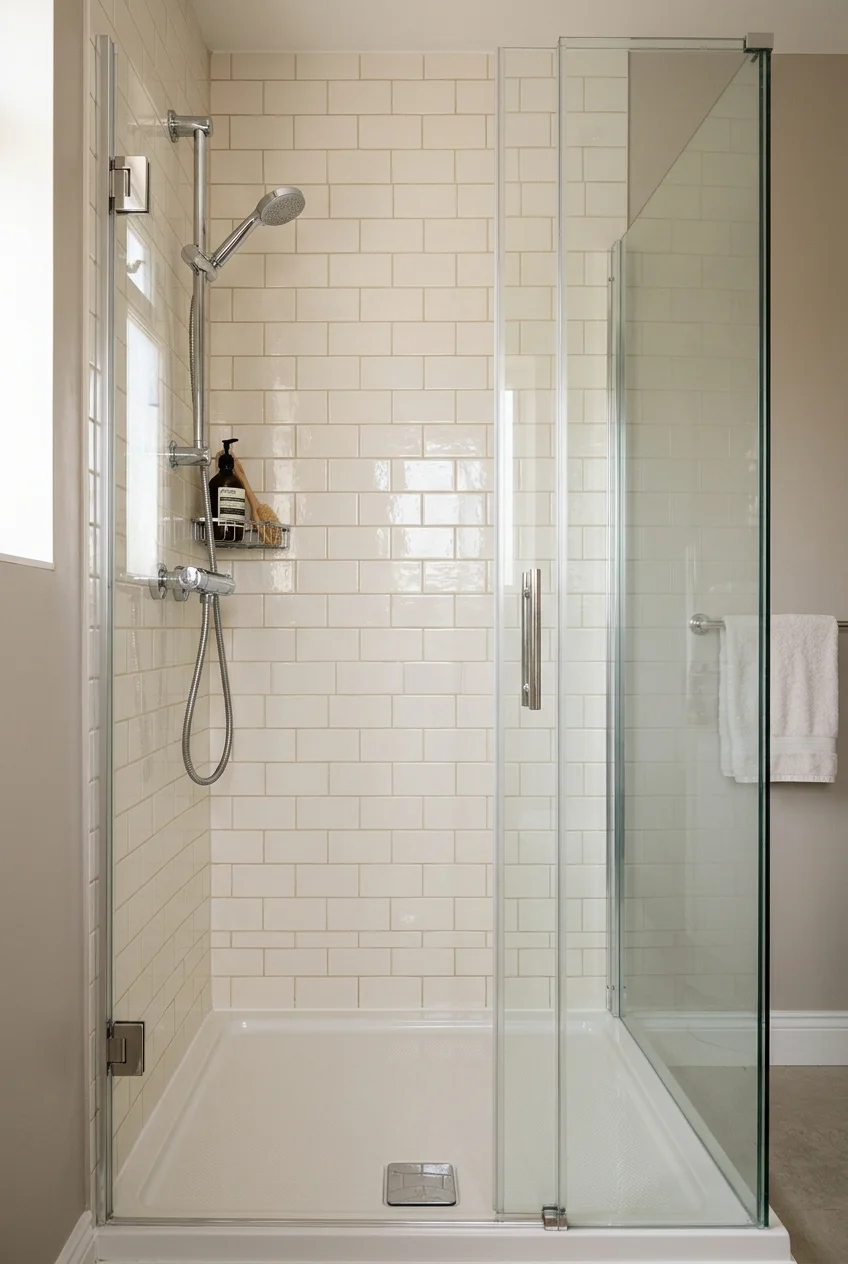
Glossy white wall tile reflects fixtures, glass, and available light, helping a compact shower remain visually open without requiring a complicated pattern.
Compare several whites beside the shower base and surrounding paint. Cool, warm, and gray undertones become more obvious when large surfaces meet.
24. Wrap One Shower in Matte Charcoal
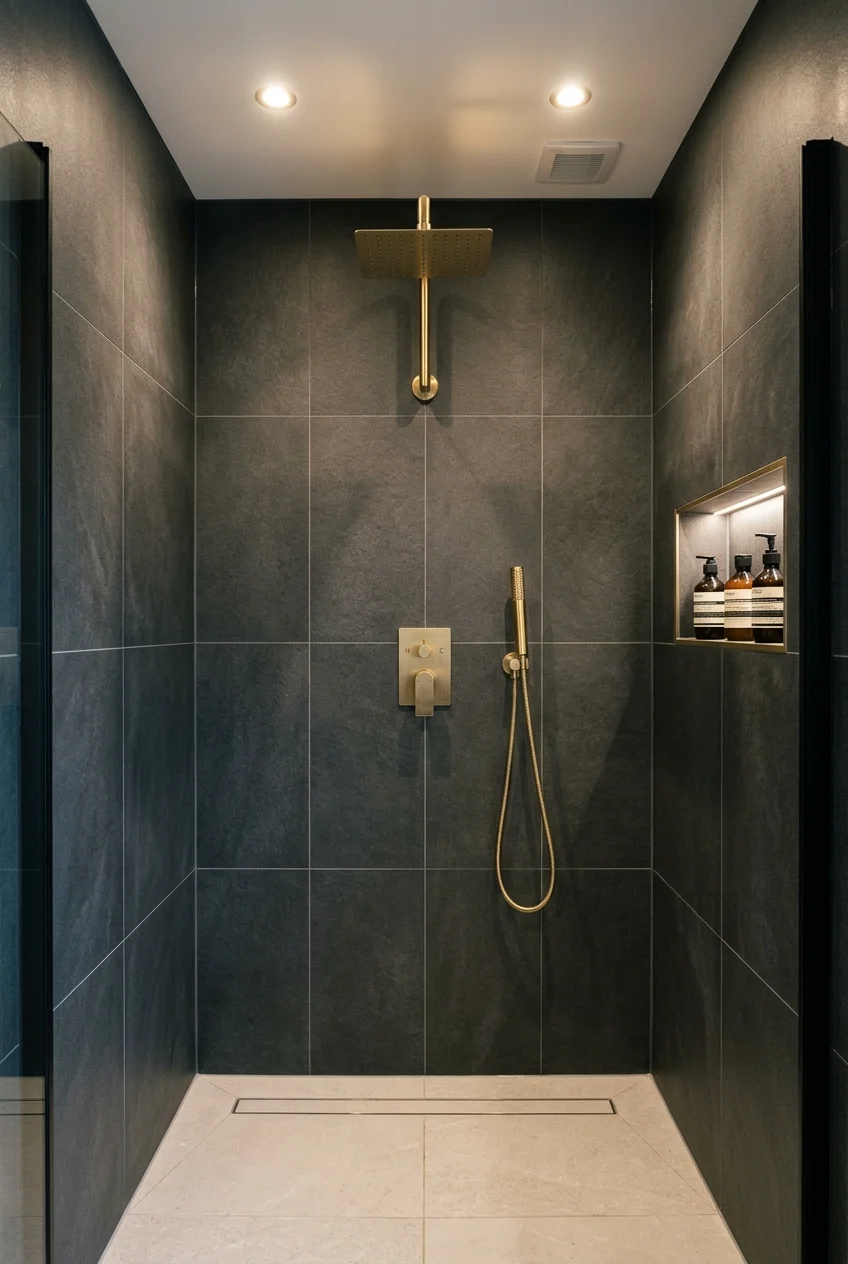
Matte charcoal walls give the shower visual depth and make pale stone, warm metal, or a white base stand out with clear contrast.
Provide enough layered lighting to read corners and surfaces. Dark material can be dramatic without making controls, ledges, or floor changes difficult to see.
Sample check Wet the sample and let it dry naturally; mineral spotting and soap film may appear very different on a dark matte finish.
25. Build Depth With Deep Green Glaze
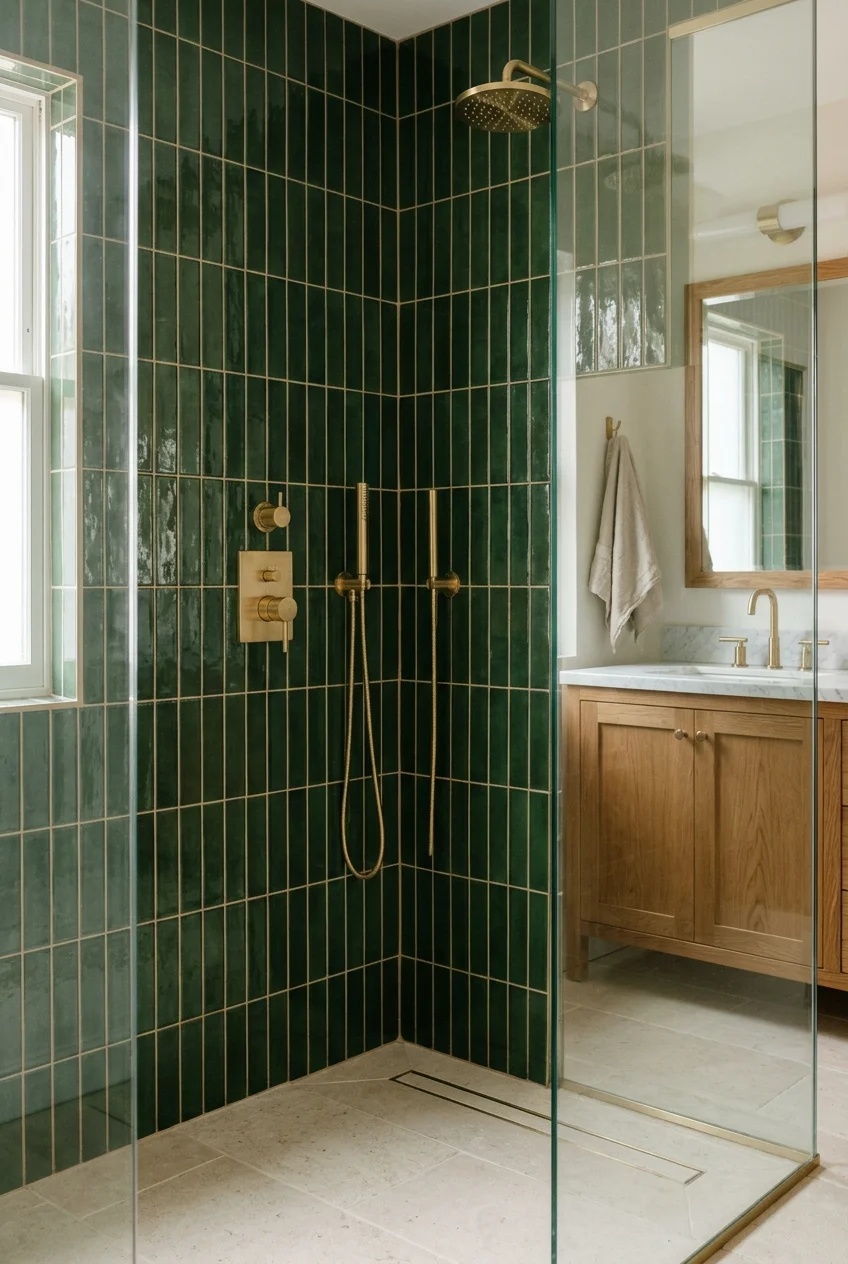
Deep green glazed tile creates depth through reflected highlights and tonal variation, bringing color to the shower while remaining connected to natural stone or wood.
Use a simple layout so the glaze remains the feature. Warm grout softens the grid, while strong contrast makes every individual piece more graphic.
26. Make Saturated Blue the Main Wall Color
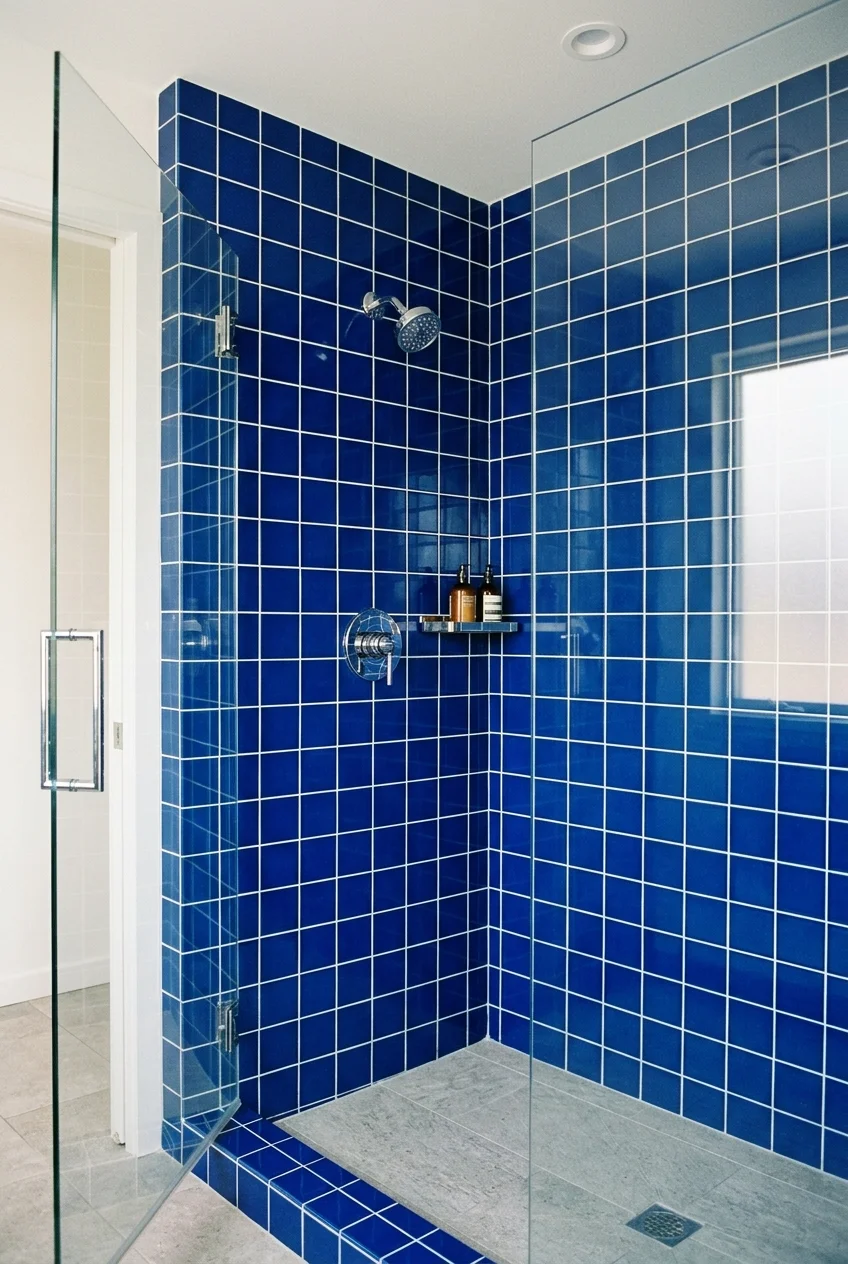
Saturated blue wall tile can carry the bathroom’s color story alone, allowing the floor, vanity, and fixtures to remain quieter and easier to coordinate.
Order enough tile from the intended production lot and blend pieces before setting. Strong colors can reveal lot variation more clearly across adjacent walls.
27. Warm the Shower With Terracotta-Look Porcelain
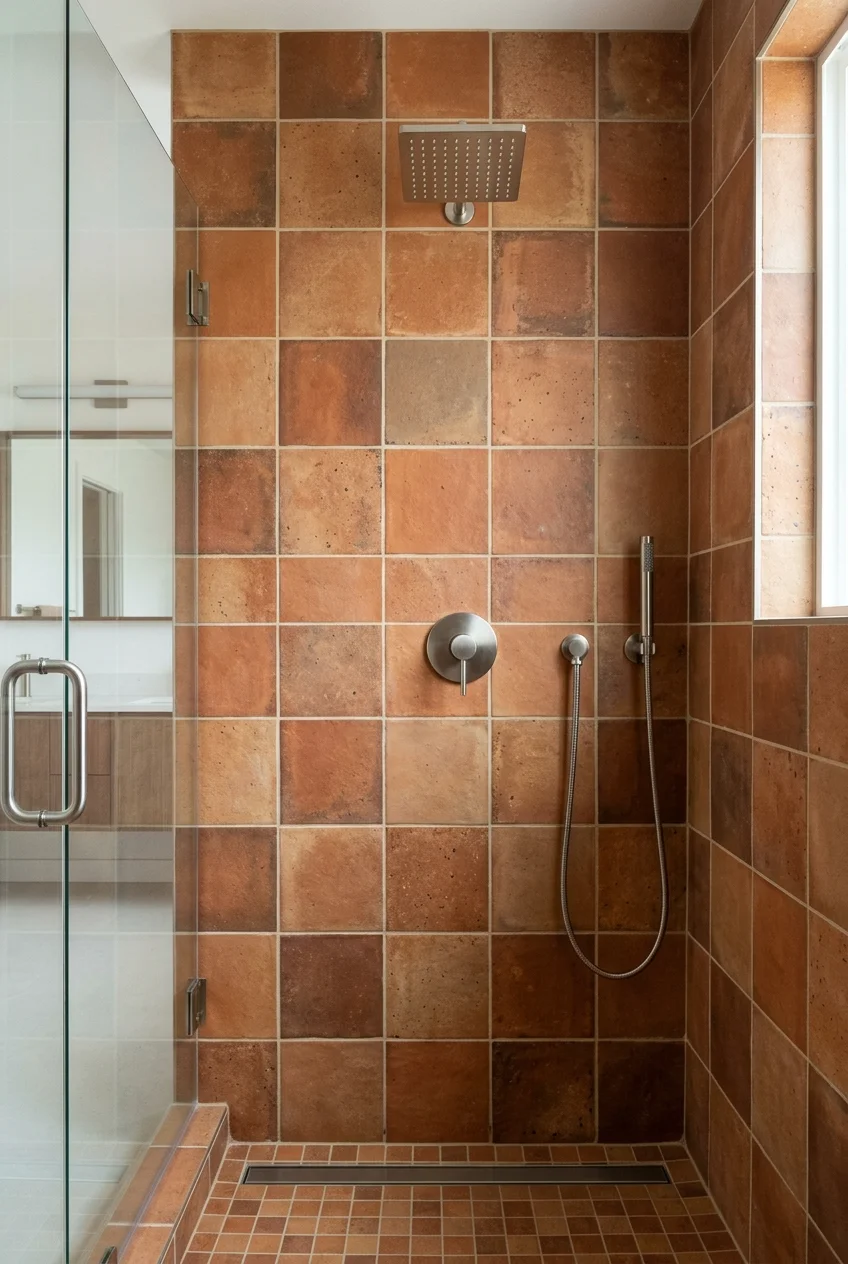
Terracotta-look porcelain brings earthy red and clay tones into the shower while offering a manufactured surface whose approved applications and care can be checked directly.
Pair the warm walls with restrained cream grout and simple metalwork. Heavy rustic props are unnecessary for the color to feel grounded.
Review several pieces for print repetition and tonal range. Random rotation may help, but only when the manufacturer’s pattern and directional markings permit it.
28. Run Wood-Look Porcelain Planks Up the Wall
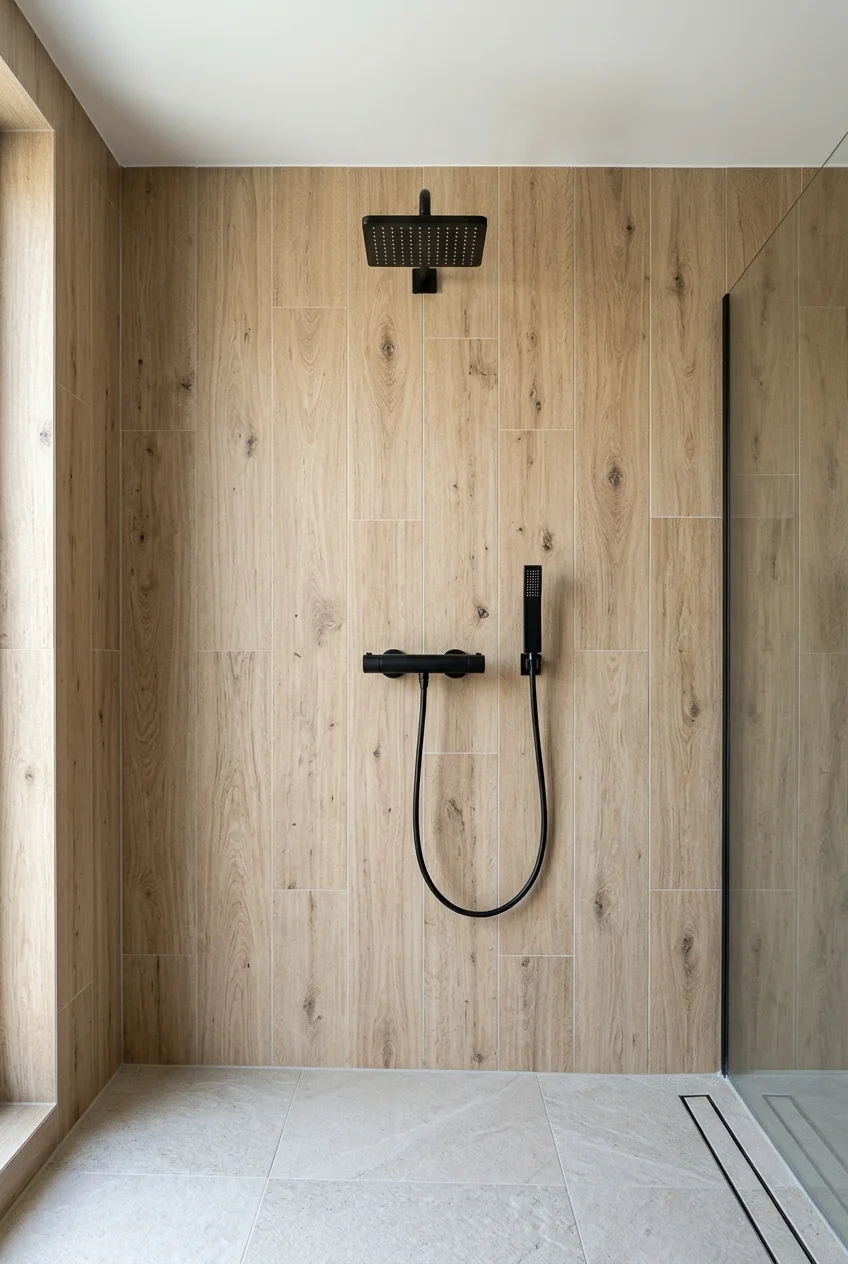
Wood-look porcelain adds grain and warmth without placing ordinary wood boards inside the wet enclosure, provided the selected tile is approved for shower walls.
Mix plank faces before setting and avoid a repeating stair-step layout. Realistic variation matters more on a full-height wall than on a small sample.
Choose grout close to the dominant wood tone so joints support the plank direction instead of turning the wall into a high-contrast grid.
29. Choose Terrazzo-Look Porcelain for Scattered Color
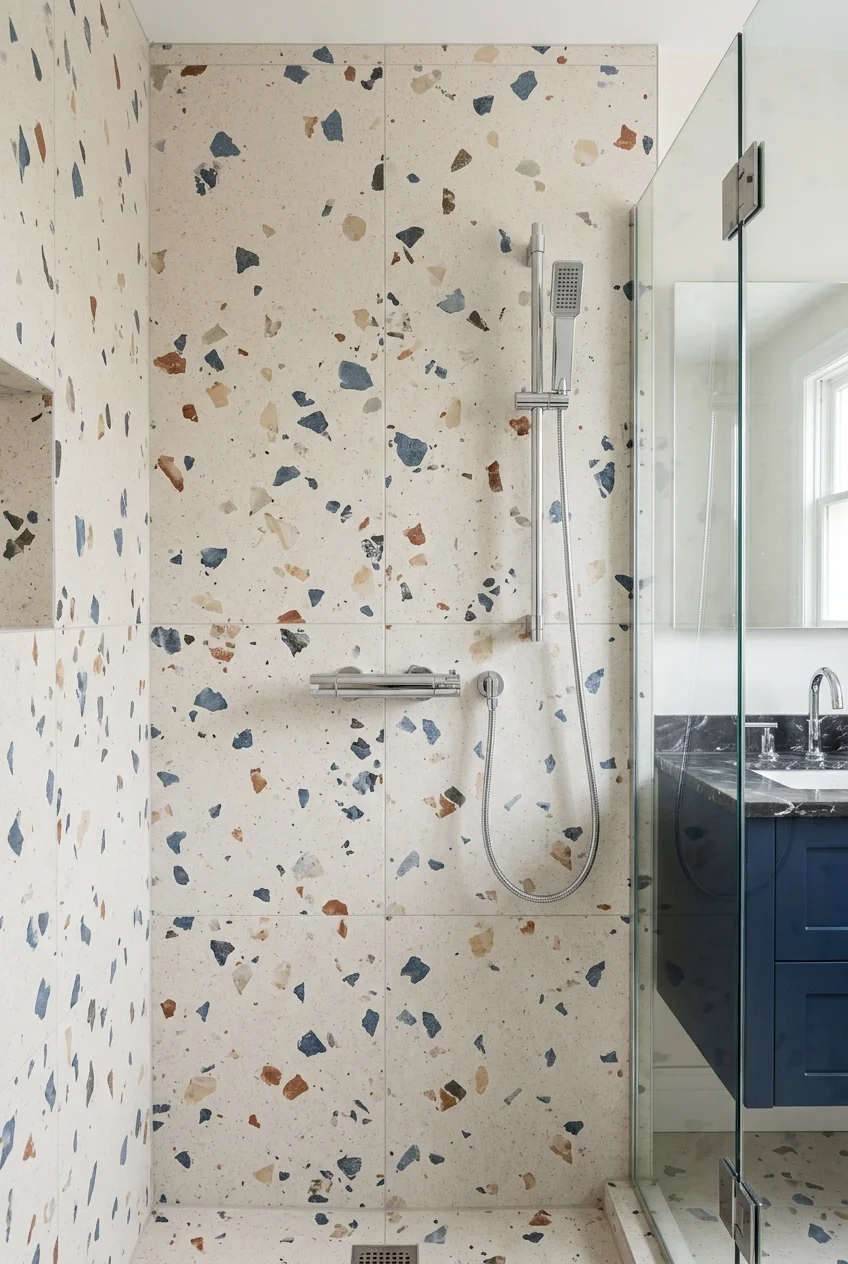
Terrazzo-look porcelain introduces small chips of several colors at once, creating a lively wall that can connect the vanity, floor, and metal finishes.
Pull only one or two chip colors into the rest of the bathroom. Repeating every shade can turn a useful palette into unnecessary matching.
Pattern check Review multiple tile faces together, because a convincing terrazzo effect depends on varied chip placement and minimal repetition across the installed wall.
30. Layer Several White Textures Instead of One Flat White
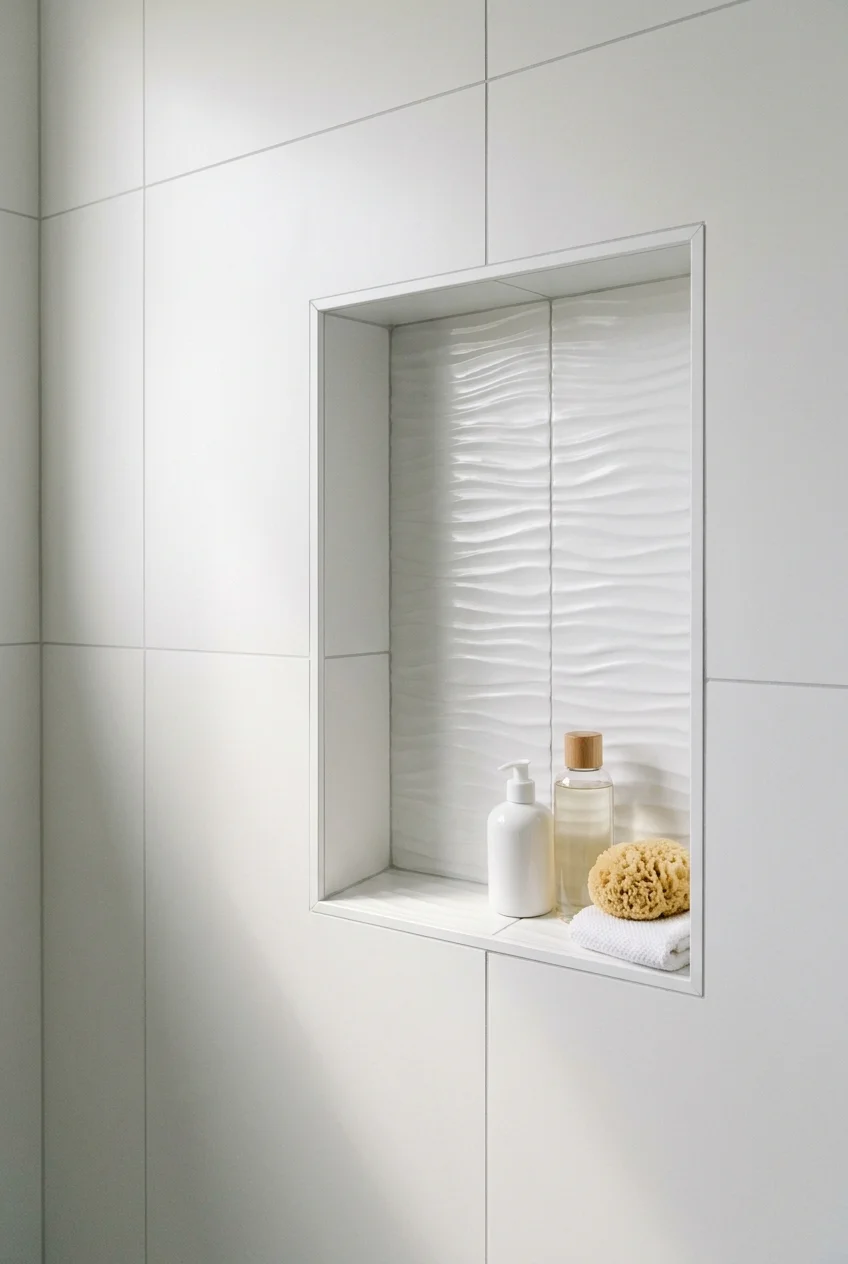
Combining smooth, softly rippled, and small-format white surfaces can give an all-white shower depth without introducing another color or prominent printed pattern.
Assign each texture a clear zone, such as smooth field walls and a rippled niche. Scattering finishes randomly makes maintenance and visual rhythm harder.
31. Mix Matte and Gloss in One Color Family
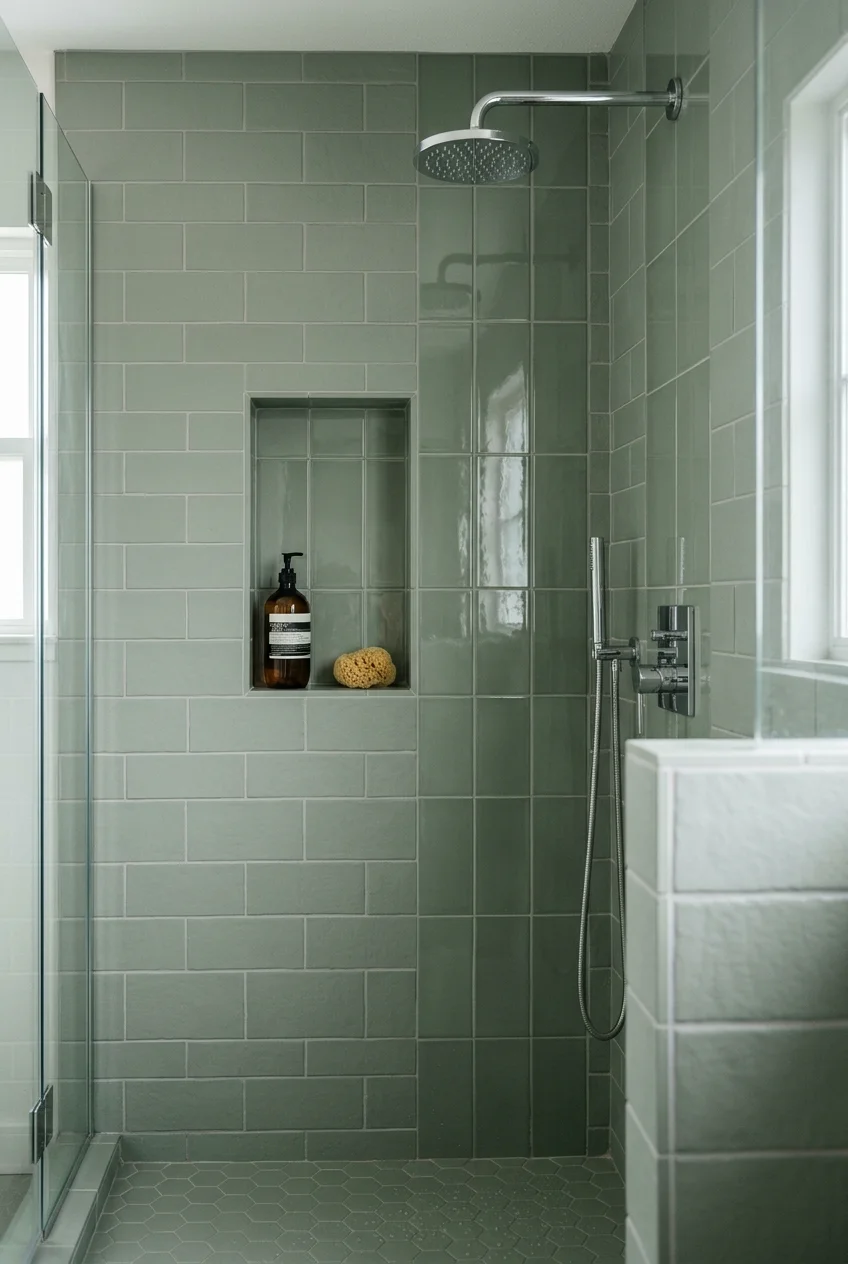
Using matte and gloss versions of one color creates depth through changing reflection, keeping the palette calm while light reveals different wall zones.
Compare more bathroom tile combination ideas before assigning each finish to shower walls, floors, niches, surrounding bathroom surfaces, and compatible edge details.
Order both finishes from a coordinated range when possible. Products sharing a color name can still differ in undertone, thickness, edge, and actual dimensions.
32. Use Brick-Look Porcelain for Warm, Linear Texture
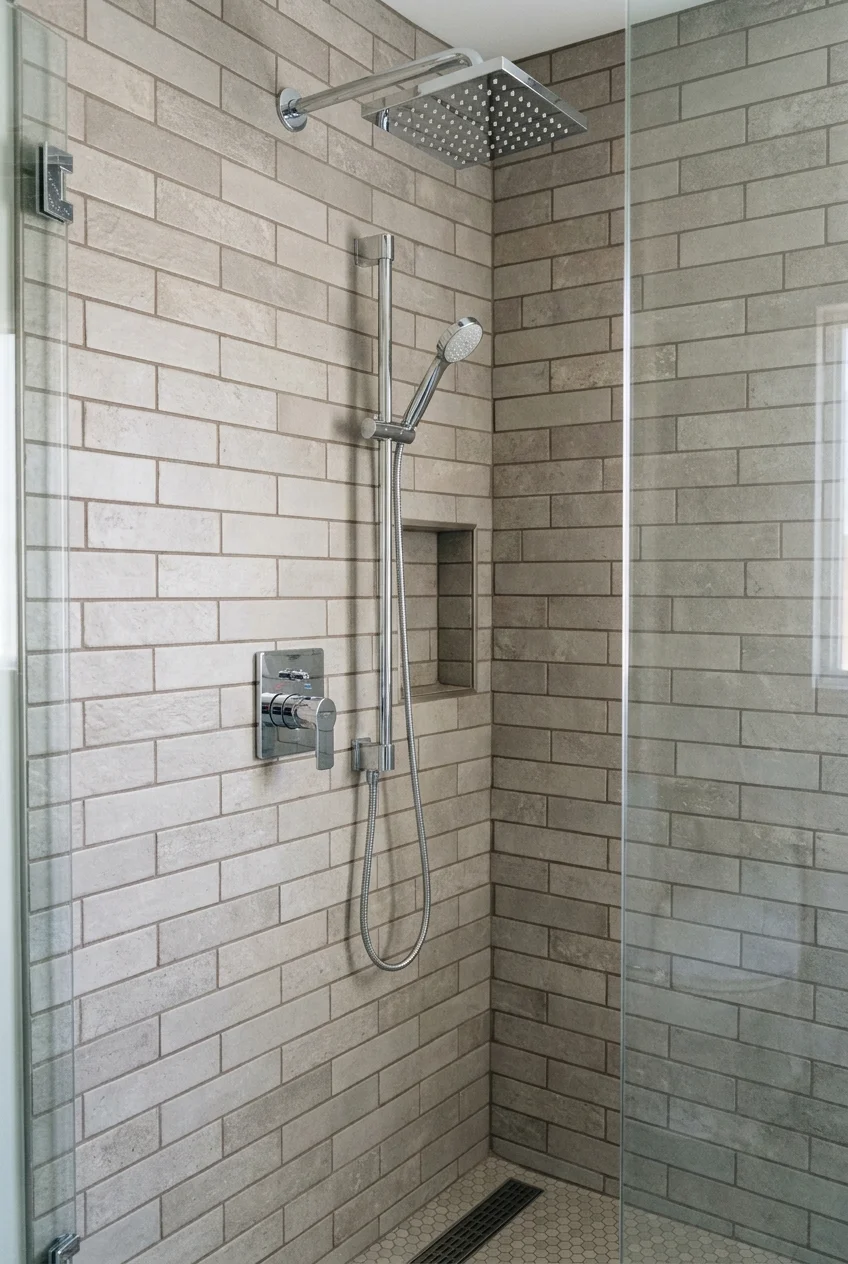
Brick-look porcelain creates warm linear texture without using ordinary masonry units, provided the chosen product is listed for the intended shower-wall application.
Keep mortar-colored grout moderate and the layout precise. Overly deep joints or artificial distress can make a finished shower look damaged rather than textured.
Build Focal Points and Storage Into the Walls
A niche, ledge, bench, or feature wall can organize the shower visually and physically when its structure, slope, waterproofing, and tile layout are coordinated.
33. Bookmatch Veining on the Main Shower Wall
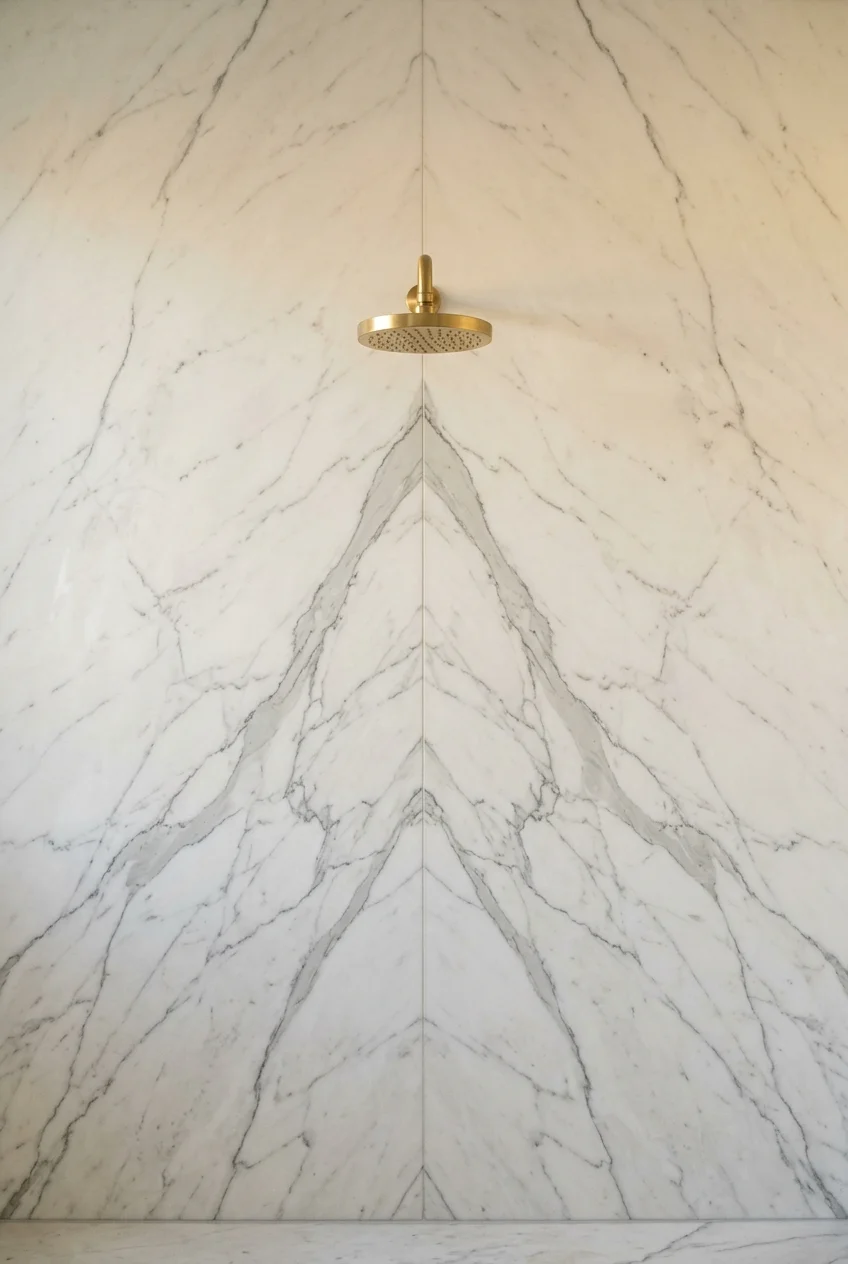
Bookmatched slabs mirror adjacent vein patterns, turning the back wall into one large composition rather than a collection of unrelated stone-look pieces.
Choose the center seam and focal axis before cutting. Plumbing, niches, benches, and glass hardware should support the composition instead of interrupting its strongest movement.
Approve photographs or digital layouts of the actual selected slabs. Small samples cannot predict how two large faces will meet across the wall.
34. Confine Patterned Tile to One Focal Wall
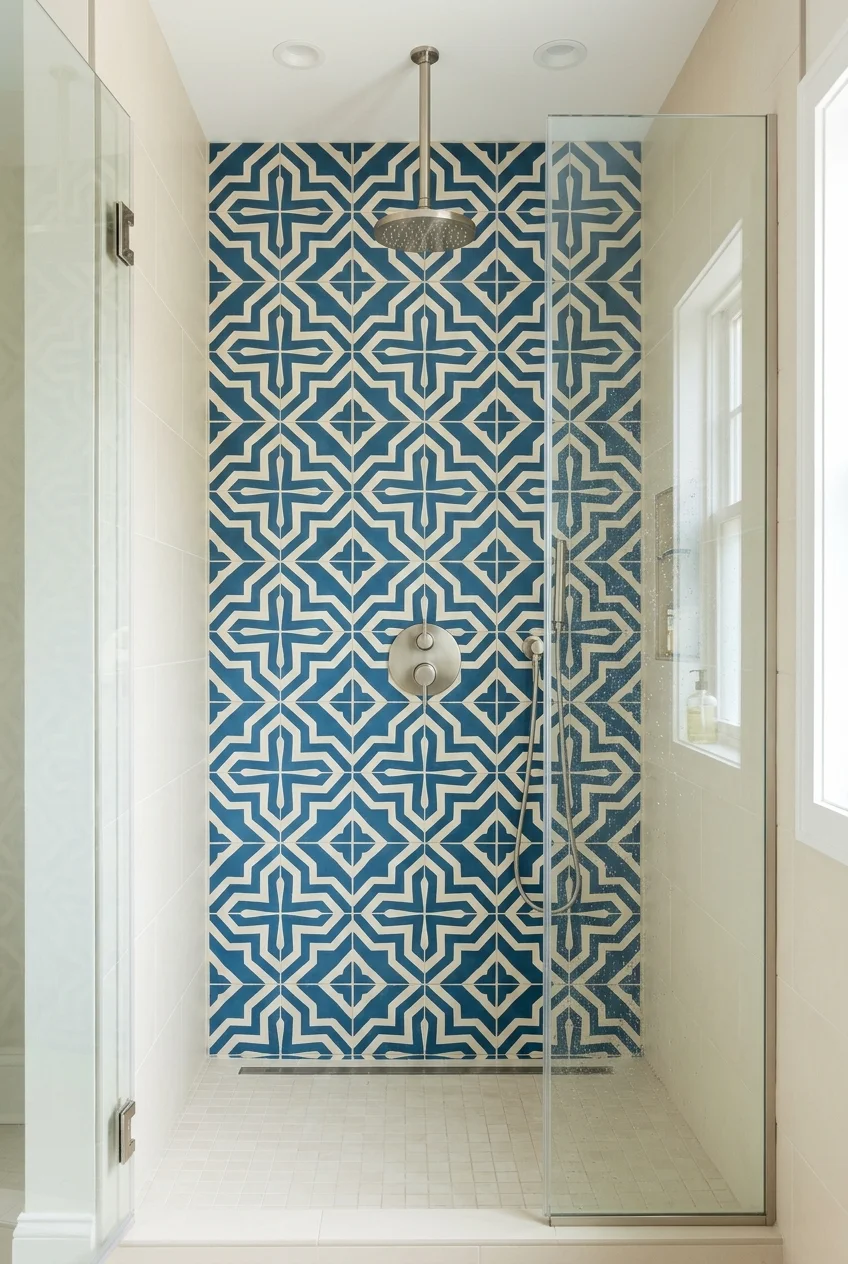
A patterned back wall gives the shower a clear focal point while plain side walls preserve breathing room and simplify cuts around glass or openings.
Dry-lay the repeat across the full width and center the most recognizable motif. Random edge fragments can weaken an otherwise orderly printed design.
35. Blend the Niche Into the Field Tile
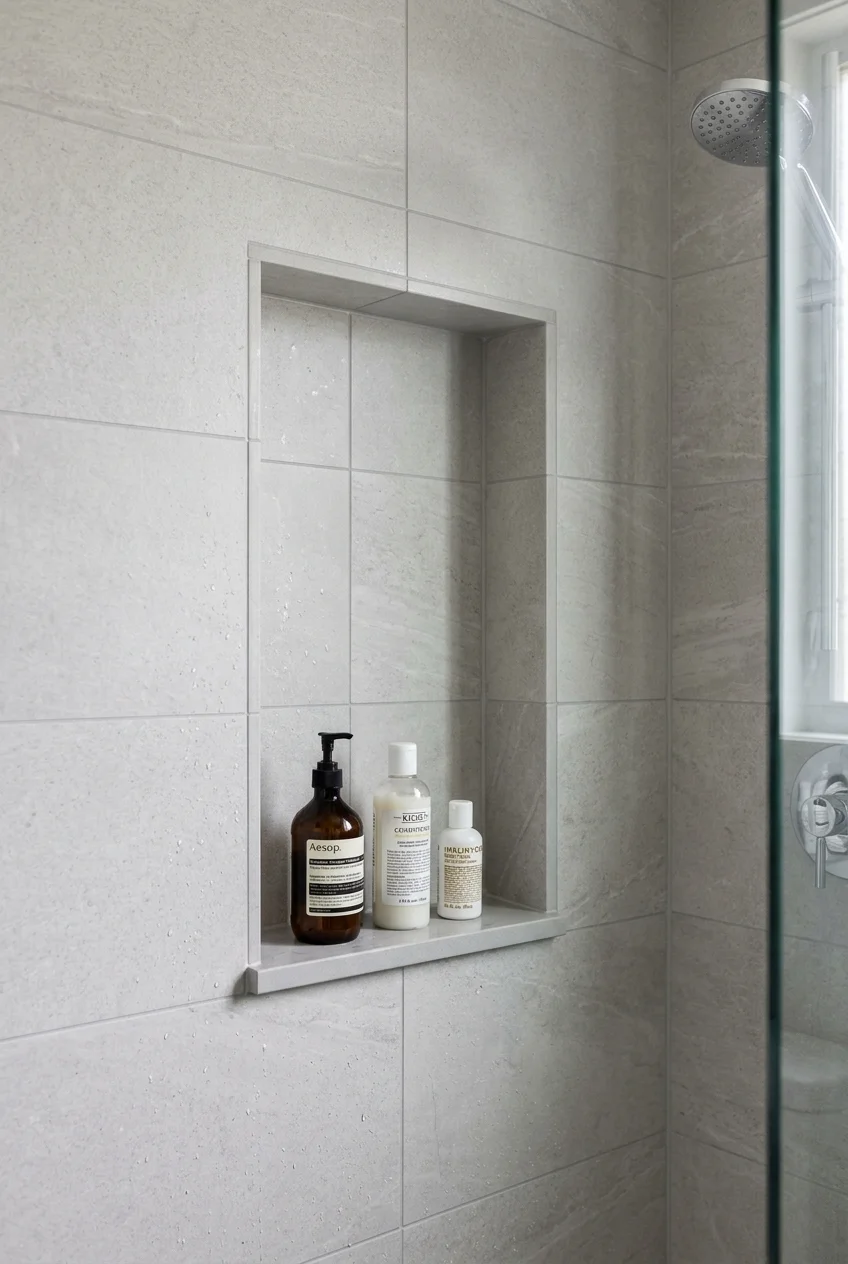
Continuing the field tile through a niche lets storage recede, which suits a shower where material, veining, or fixtures already provide enough visual interest.
Align surrounding grout joints through the opening and use solid, appropriately sloped shelf pieces where practical. Thin tile strips on horizontal surfaces look fragile.
Review these shower niche ideas for proportion and placement, then let framing, plumbing, storage needs, and waterproofing determine the final opening.
Setup note Measure the bottles actually used before framing, including pump height, while keeping the niche away from structural conflicts and vulnerable exterior-wall insulation.
36. Line the Niche With a Contrasting Mosaic
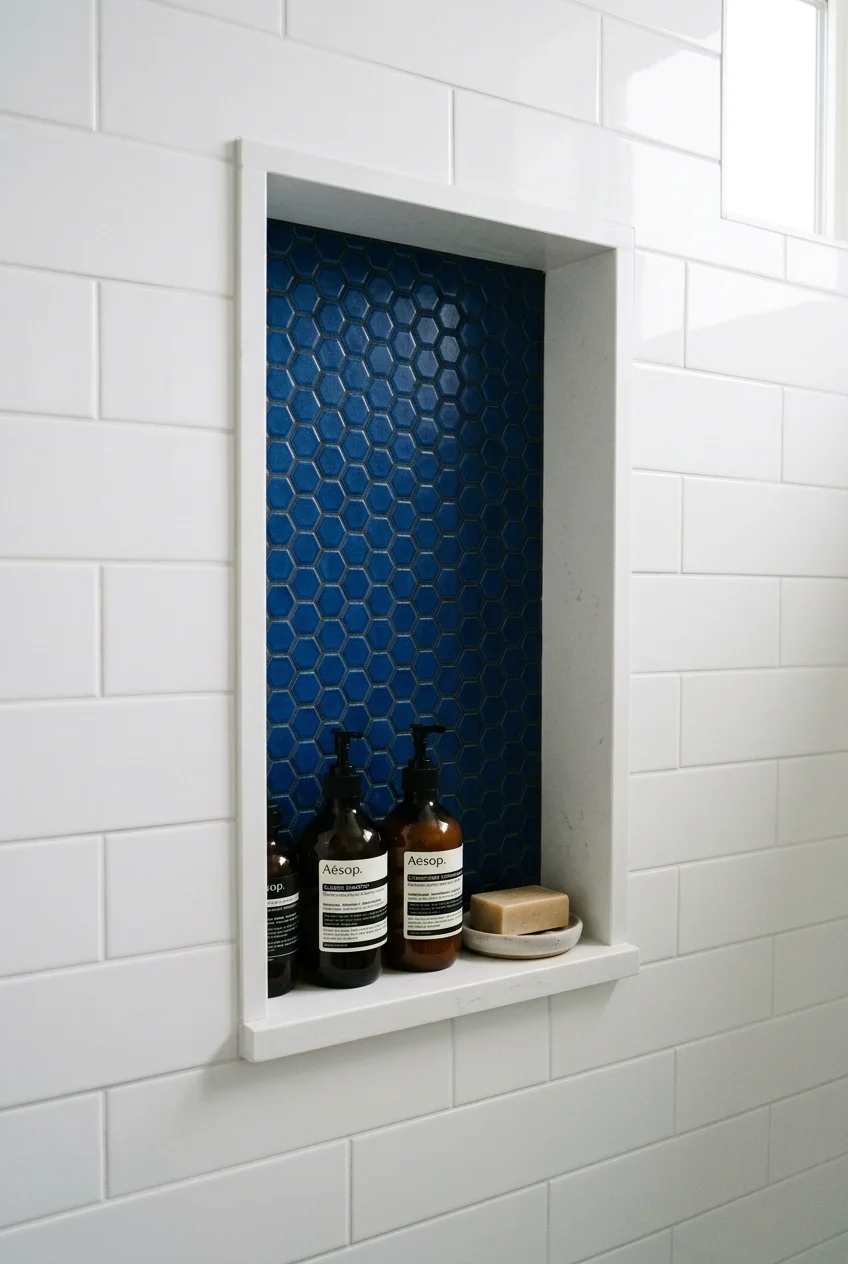
A contrasting mosaic turns a small niche into a contained accent, providing pattern and color without adding installation complexity across the entire shower wall.
Use the field tile or a solid stone piece at the sill and frame. This creates cleaner edges than wrapping tiny mosaic pieces around every surface.
Coordinate the mosaic thickness with adjacent finishes so the transition stays flush. A decorative backing should not leave shelves or trim visibly misaligned.
37. Build a Long Ledge Instead of a Deep Niche
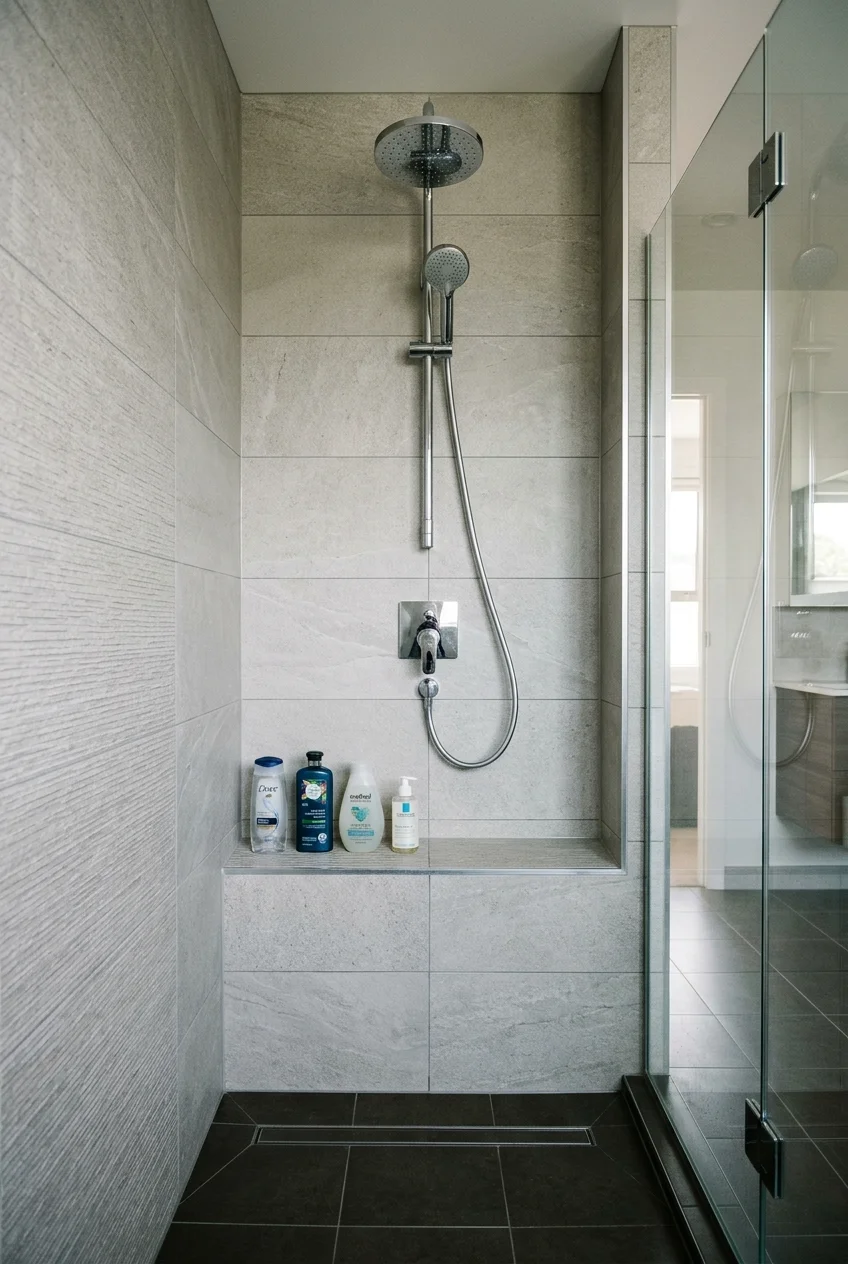
A shallow ledge can span the shower wall and hold several bottles without requiring a deep recess inside a plumbing wall or insulated exterior wall.
Treat its top, corners, and wall connections as part of the waterproof assembly. The finished horizontal surface must direct water back toward the shower.
Compare additional shower storage ideas when a built-in ledge would conflict with framing, fixtures, or the available standing area inside the finished enclosure.
- Size the ledge for real containers.
- Keep it clear of control operation.
- Use a solid top with a deliberate edge.
- Preserve comfortable shoulder and elbow space.
38. Use a Solid Corner Shelf as a Small Intervention
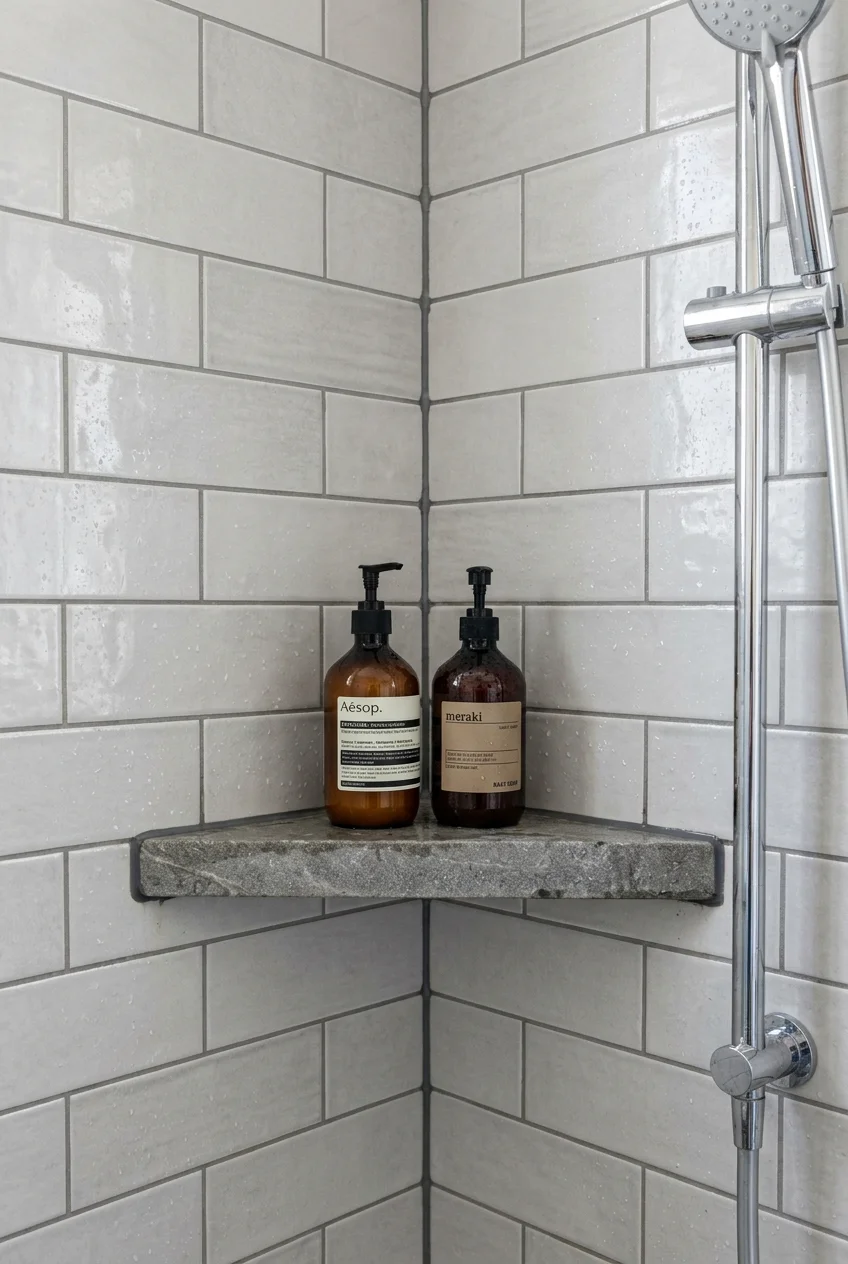
A solid corner shelf adds compact storage without interrupting the main wall with a large recess, making it useful in an existing or narrow shower.
Choose a shelf and support method intended for the assembly. It should be firmly supported, sloped to drain, and positioned away from body movement.
Placement check Mock up the shelf with cardboard and full bottles so elbows, shoulders, door glass, and the shower spray remain comfortably clear.
39. Clad the Bench to Continue the Wall Pattern
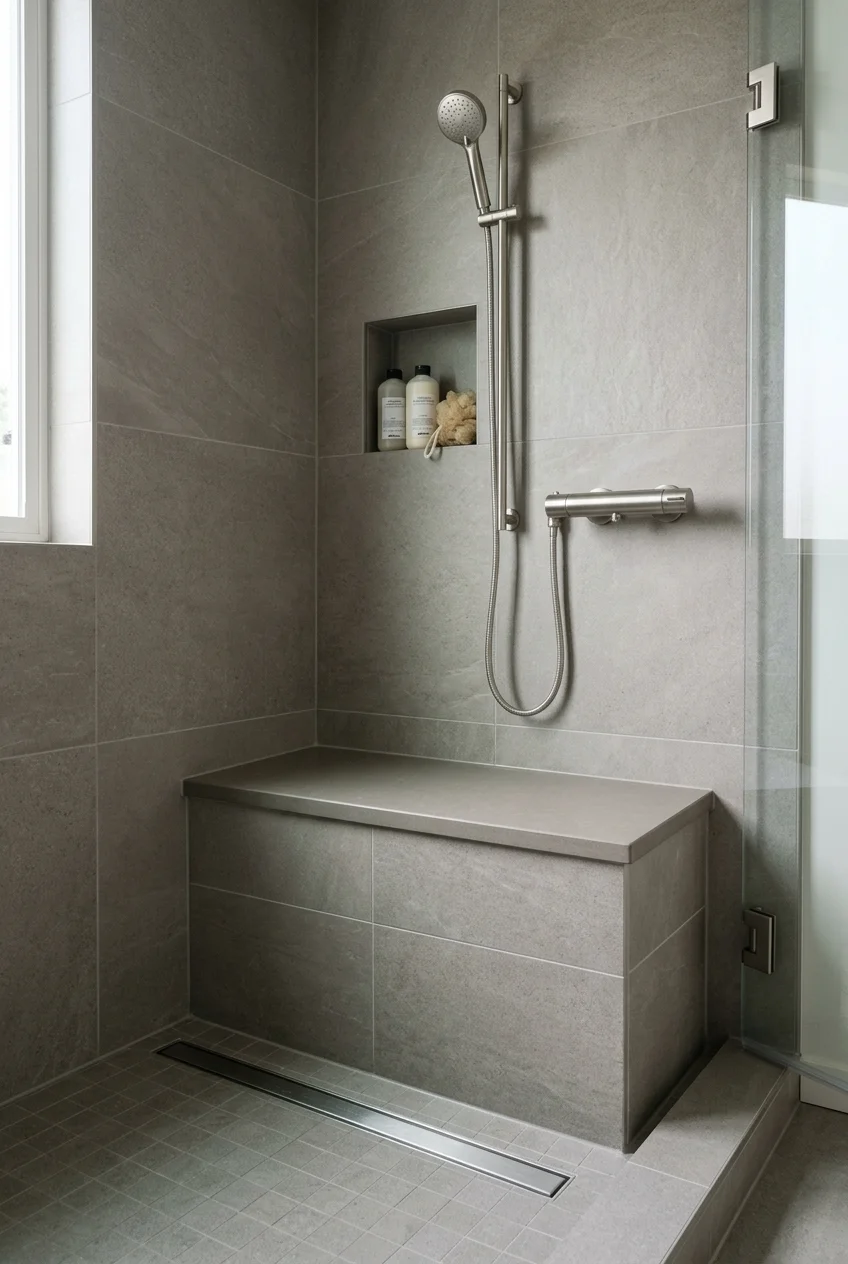
Continuing the wall material across a built-in bench makes the seat feel architectural, especially when grout joints or slab veining align through the vertical face.
Use a solid seat top where appropriate and slope it toward the shower. A flat horizontal surface encourages standing water around joints and corners.
Frame, support, and waterproof the bench as part of the approved shower assembly. Surface tile alone cannot make an improvised box safe or durable.
40. Wrap a Pony Wall in the Same Shower Finish
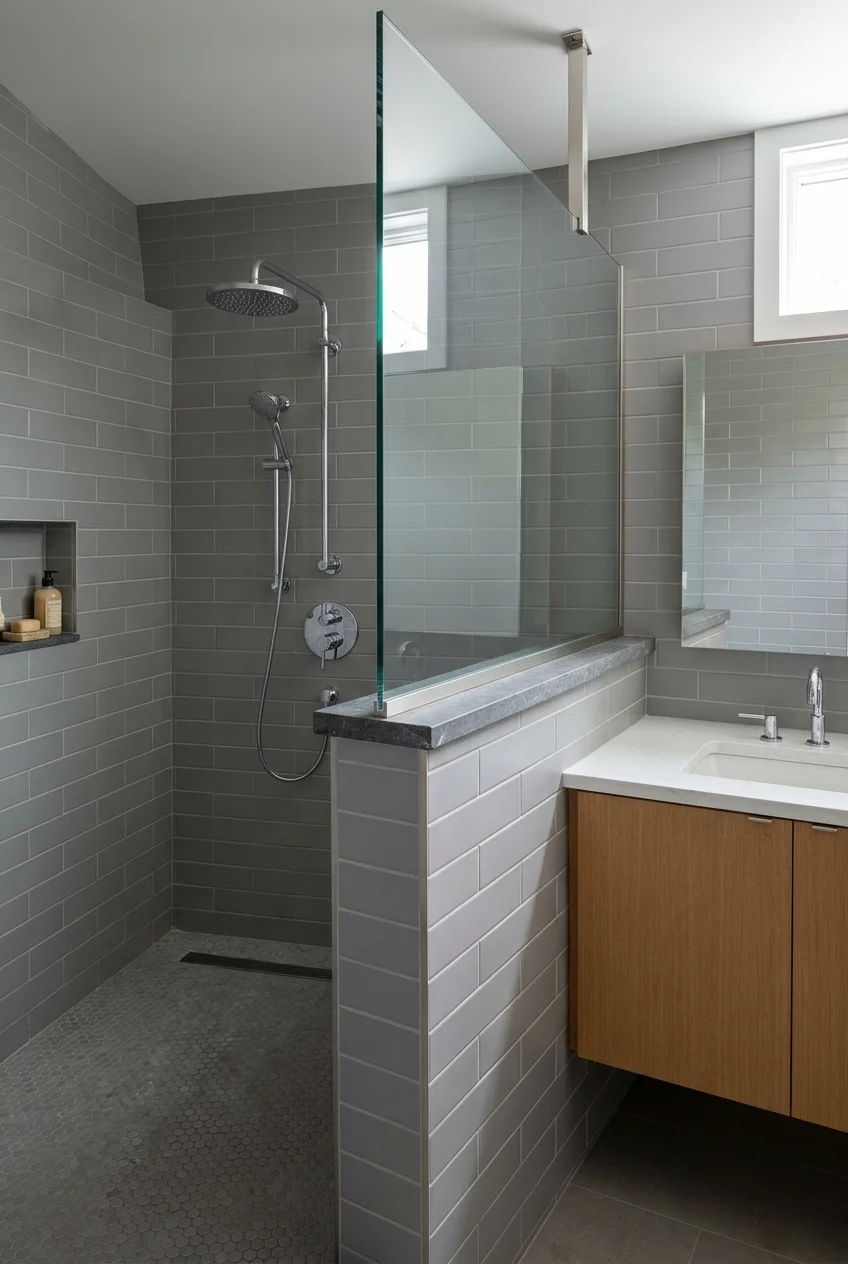
Cladding a pony wall with the shower material makes it belong to the enclosure while providing privacy, glass support, or separation from a nearby vanity.
Use a solid, sloped cap and coordinate glass attachment before finishing. The top should not become a collection of vulnerable penetrations and tiny tile strips.
Align vertical joints between the main wall and pony-wall face when sightlines allow. Consistent coursing helps the lower partition feel intentionally integrated.
41. Continue Tile Across the Shower Ceiling
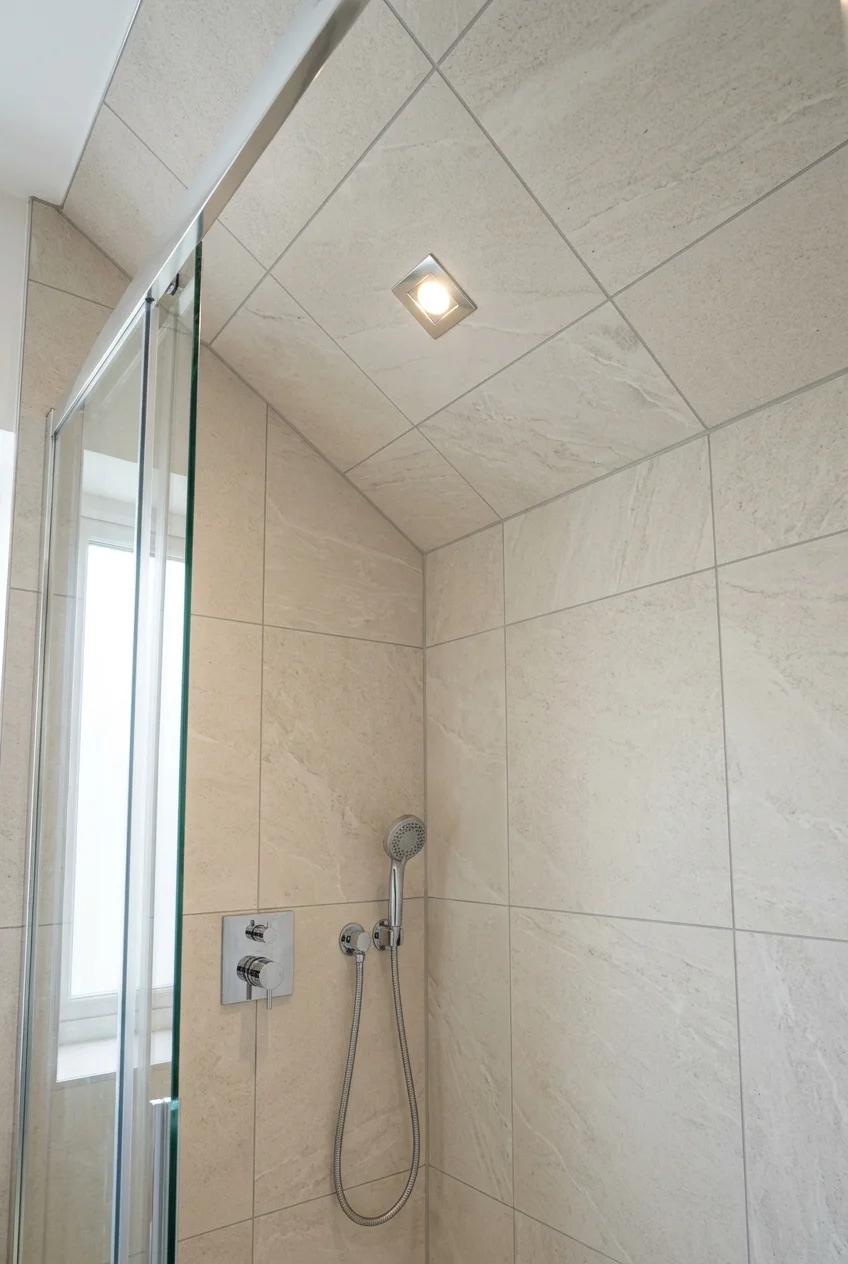
Carrying the wall finish onto the ceiling can make a compact enclosure feel complete, particularly beneath a low soffit or inside an enclosed shower.
Confirm the substrate, waterproofing or vapor requirements, bonding materials, tile weight, fixture locations, and movement details for the exact ceiling condition.
Choose a layout that meets wall joints cleanly at the perimeter. Random ceiling cuts are especially visible when viewed upward from the shower entry.
Lighting note Place approved shower lighting before final layout so housings land deliberately within tile fields rather than clipping narrow corners or decorative repeats.
42. Carry the Shower Finish Beyond the Glass Edge
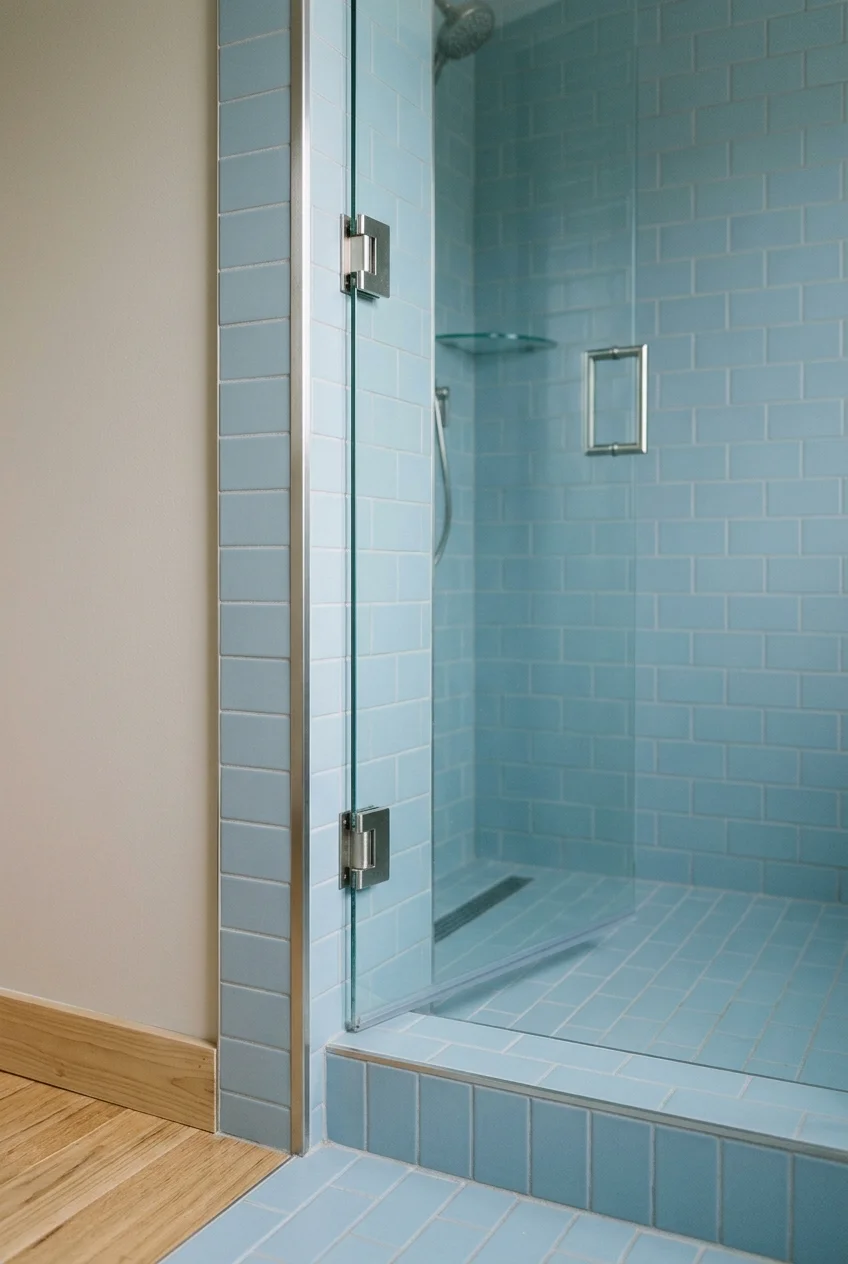
Extending tile slightly beyond the glass or opening gives the shower a deliberate frame and protects the transition where occasional splash reaches painted wall.
Set the stopping line from the enclosure plan, not guesswork. Door hardware, base width, floor slope, and splash behavior affect the useful boundary.
Finish the exposed edge with coordinated trim, a factory edge, or a planned return. The extra tile should not end in visible raw material.
Finish Edges, Fixtures, and Maintenance Thoughtfully
Small decisions at penetrations, exposed edges, joints, and supports determine whether a striking wall still looks resolved after fixtures and daily routines arrive.
43. Align Fixtures With the Tile Grid
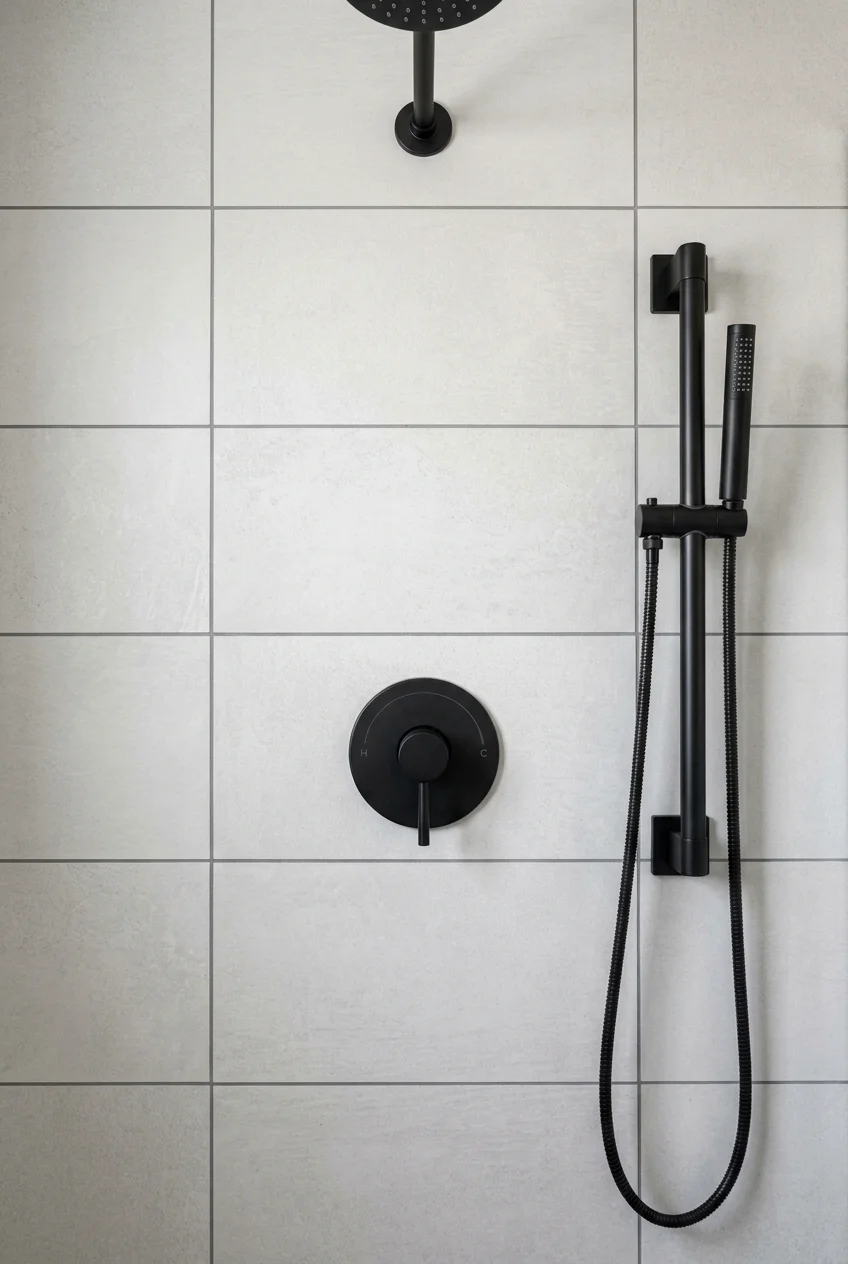
Centering shower controls, body sprays, or a rail within tile fields prevents plates from clipping grout joints and makes the wall composition appear intentional.
Coordinate plumbing rough-in with the final tile elevation before walls close. Moving a valve later is far harder than adjusting a paper layout early.
- Draw the finished tile grid at full scale.
- Mark valve, head, rail, and outlet centerlines.
- Check trim-plate dimensions and movement.
- Confirm the layout with plumbing and tile installers.
44. Finish Exposed Tile Edges With One Clean Line
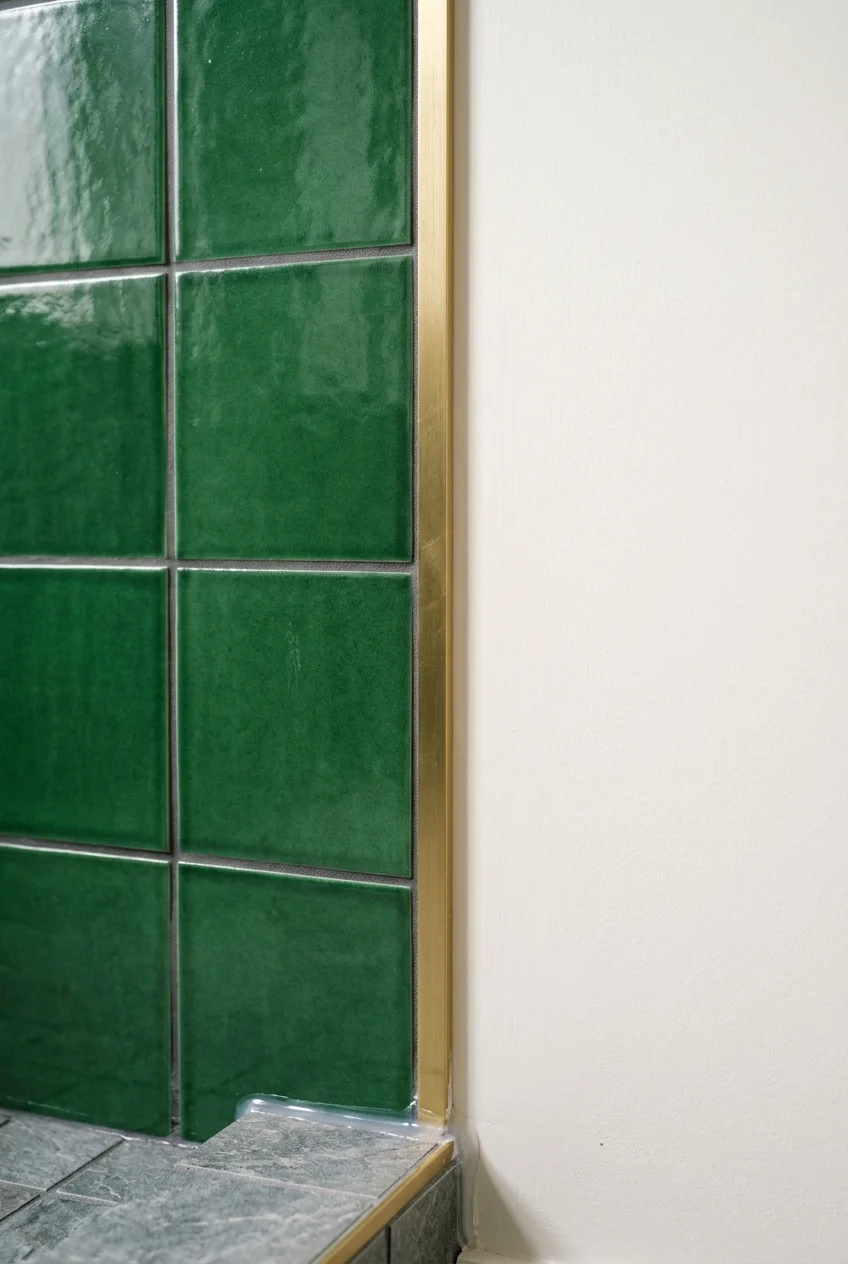
An exposed shower edge needs a deliberate finish, whether that is a factory edge, coordinating trim tile, metal profile, or returned wall material.
Select the edge detail with the tile because thickness, glaze coverage, corner geometry, and adjacent paint all affect which solution looks complete.
Ordering note Include outside corners, niche frames, pony-wall tops, and transitions in the trim count; field tile quantities alone do not complete the installation.
45. Match the Grout to Quiet the Wall
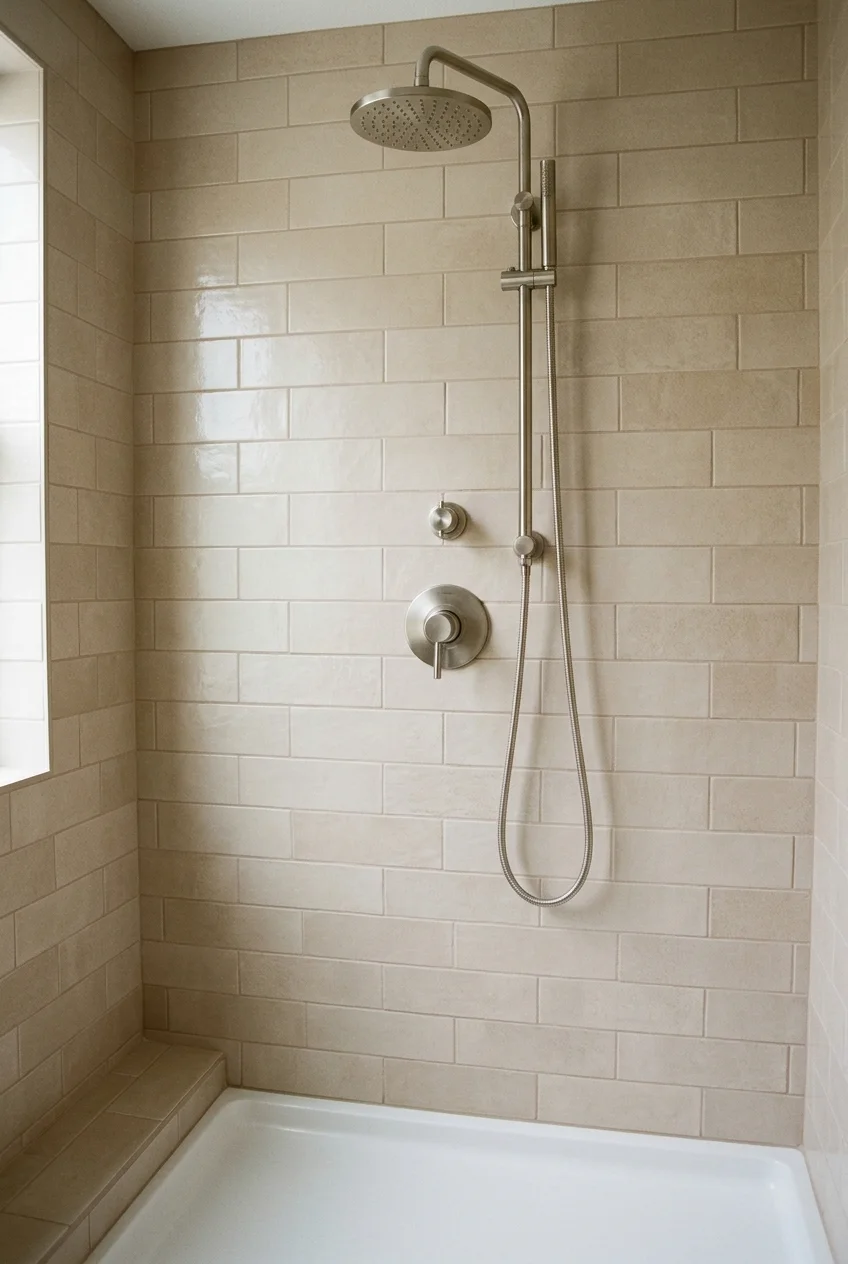
Grout close to the tile color softens the grid and lets shape, glaze, or veining lead, which is useful across broad walls or small mosaics.
Test cured samples rather than relying on a printed chart. Joint width, tile edge, lighting, and water can change the apparent grout color.
46. Use Contrasting Grout to Draw the Pattern Clearly
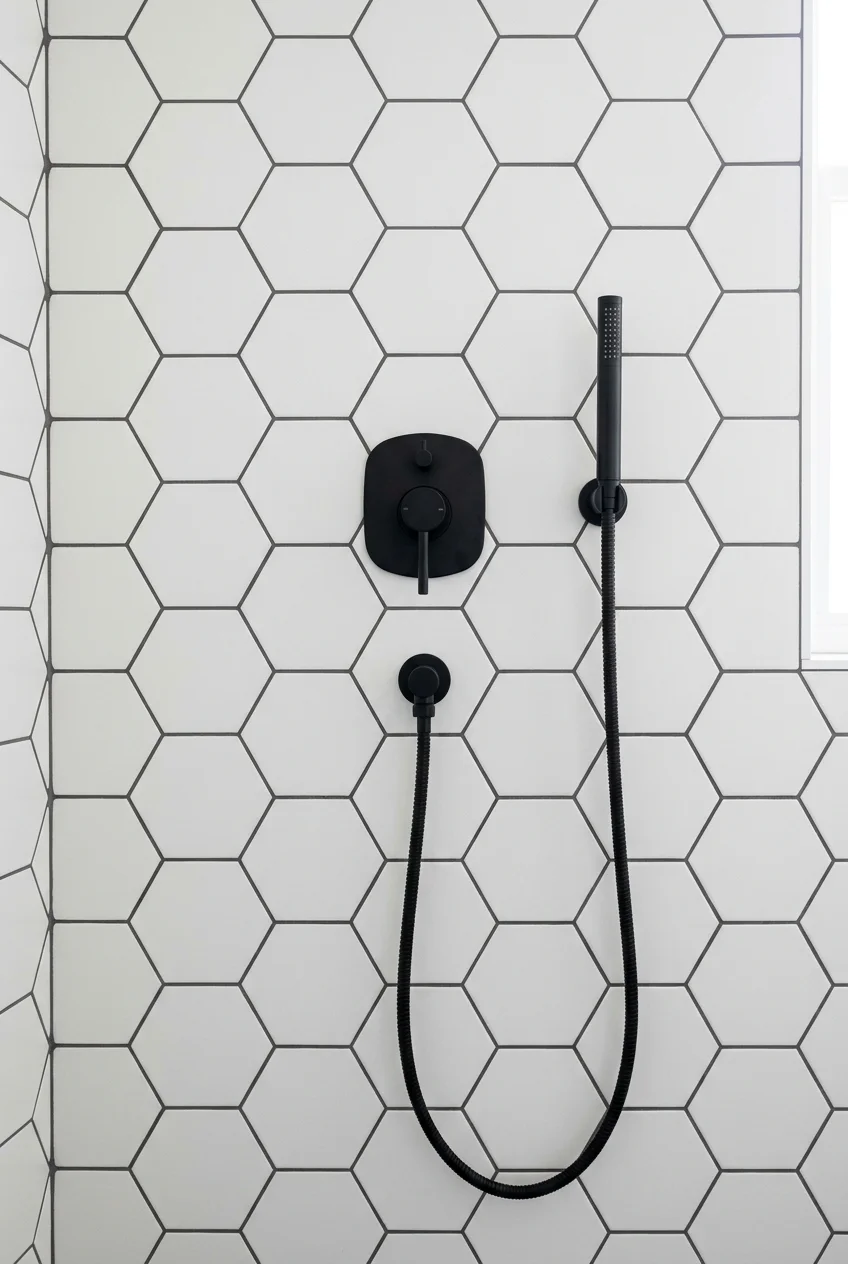
Contrasting grout turns each tile edge into part of the design, making simple subway, square, or hexagon layouts appear stronger and more graphic.
The contrast also exposes spacing, cuts, and alignment. Use it when the layout is worth emphasizing, not as a distraction from uneven workmanship.
Check whether the grout or pigment can affect the selected tile surface, and follow testing, sealing, cleanup, and curing instructions for that combination.
47. Plan Structural Backing for Grab Bars Before Tile
Image pending: No image is attached to this draft for idea 47 (image-47).
Structural backing behind the finished wall preserves options for securely mounted grab bars, seats, rails, and accessories without relying on decorative tile for support.
Discuss likely bar locations, user reach, framing, waterproof penetrations, and the mounting requirements of selected hardware before substrate and membrane installation begins.
Photograph and measure the concealed backing before walls close. Future installers need reliable locations rather than guesses made through finished tile.
Planning note Backing preserves flexibility, but it does not determine an accessible layout by itself; involve intended users and qualified guidance for final placement.
48. Treat Waterproofing as the Hidden Wall Design
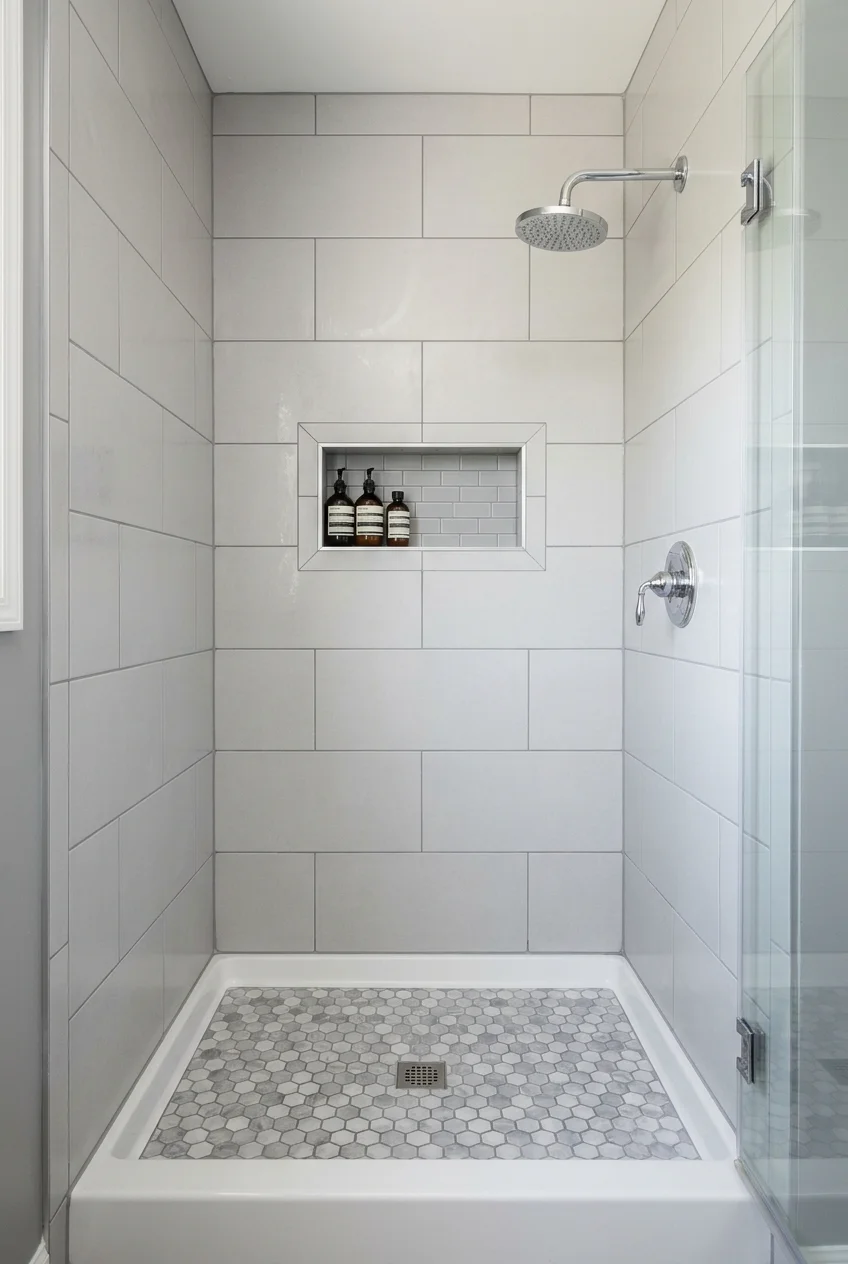
Tile, stone, and grout form the visible layer, but they do not replace a documented waterproofing assembly behind the shower walls and transitions.
Choose the substrate, membrane or panel, seams, corners, penetrations, drain connection, and setting materials as compatible parts rather than unrelated purchases.
Follow the selected system’s current instructions for coverage, overlaps, cure time, testing, and steam conditions. Requirements differ between ordinary, enclosed, and steam showers.
Remember that a water-durable backer is not necessarily waterproof. Protect moisture-sensitive construction with the assembly specified for the chosen substrate and shower condition.
- Document the complete approved assembly.
- Seal every required seam and penetration.
- Coordinate niches, benches, and curbs early.
- Perform any specified test before covering the system.
A finished photograph cannot prove hidden waterproofing quality. Keep installation records, product information, and progress photos with the household’s renovation documents.
49. Balance Large Wall Tile With a Smaller Shower Floor
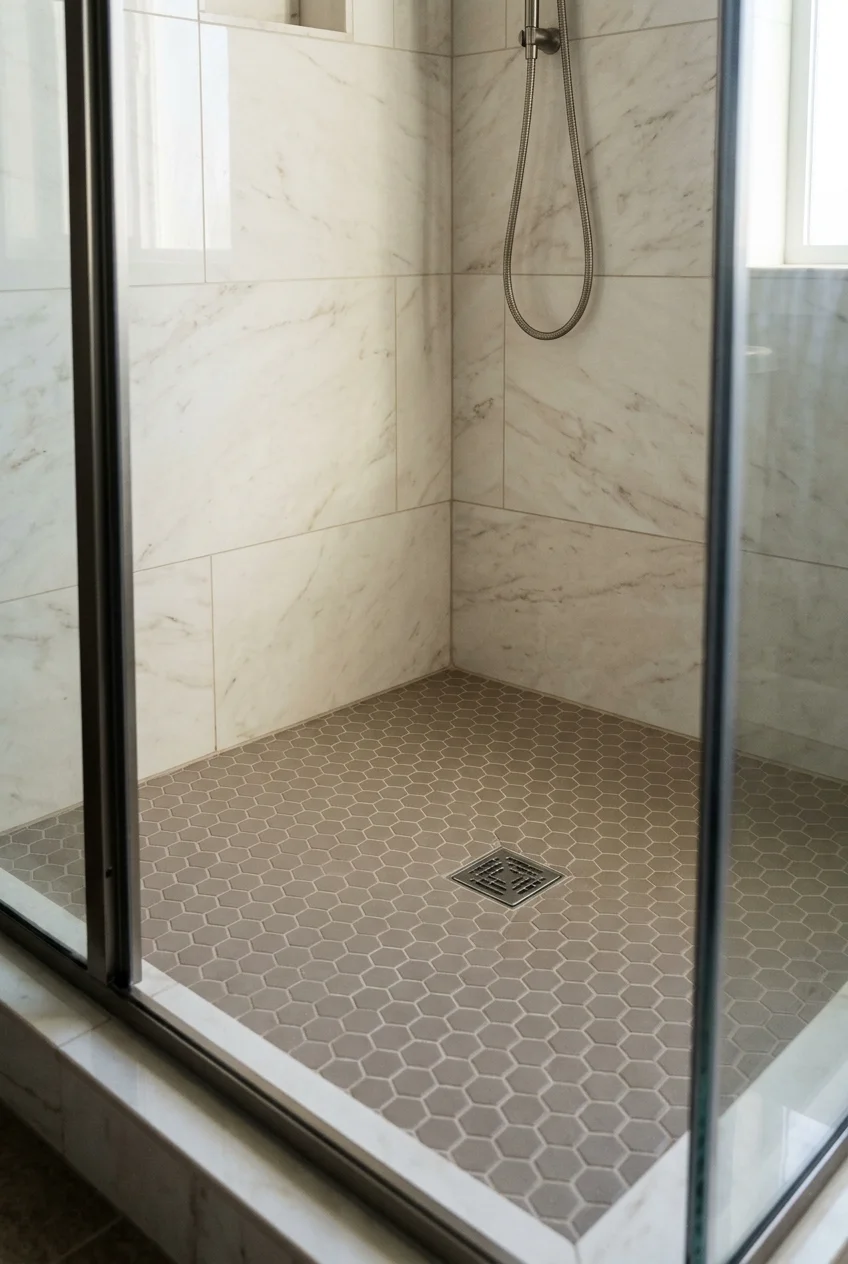
Large wall tile paired with a smaller floor mosaic creates a useful shift in scale and lets the floor follow slopes around a point drain.
Connect the two surfaces through color, veining, or grout rather than an exact pattern match. The wall should remain calm while the floor handles geometry.
Confirm every floor tile is rated for the wet application and planned installation. A product approved for walls is not automatically suitable underfoot.
50. Choose a Wall You Can Maintain After Every Shower
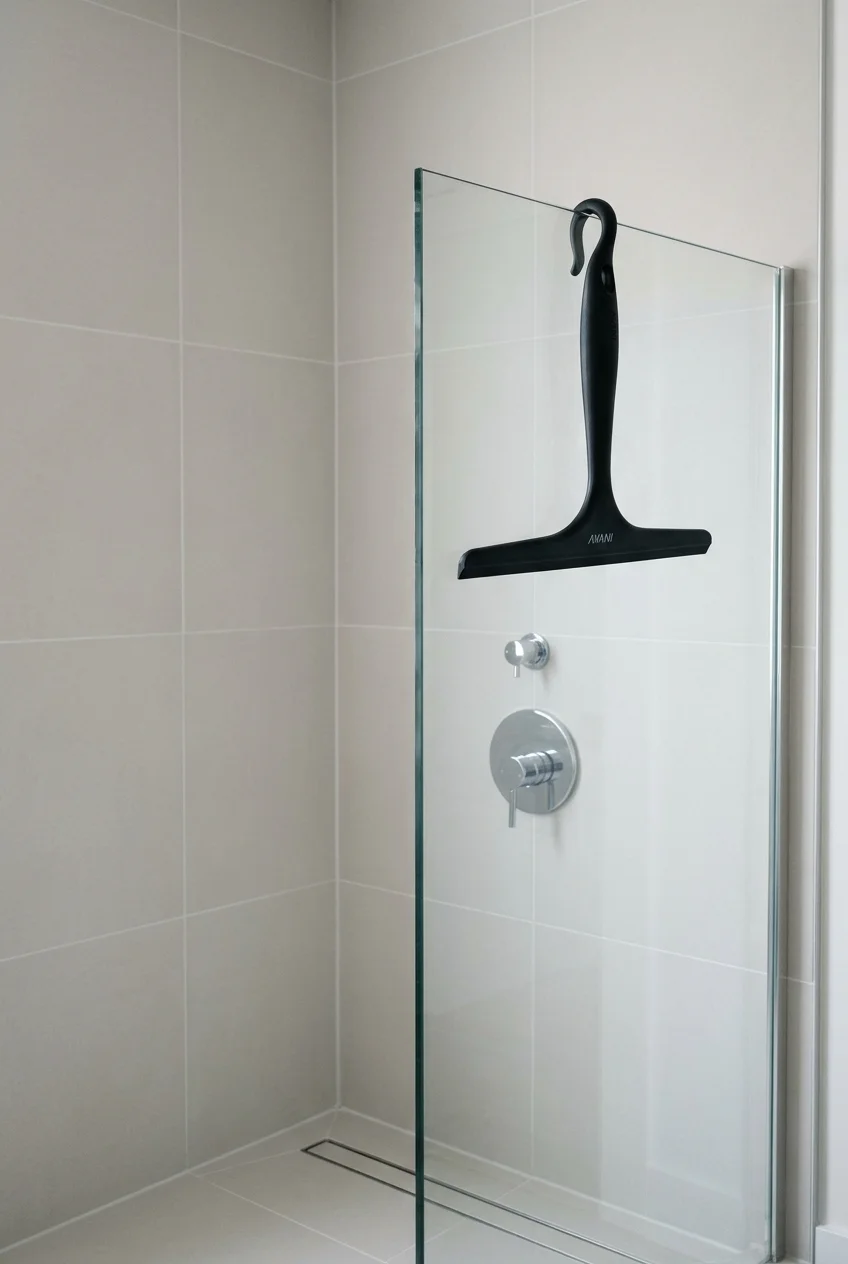
Before ordering, compare joint count, texture, approved cleaners, water spotting, replacement options, and how comfortably the highest wall areas can be reached.
For routine drying, this one-piece silicone shower squeegee has a built-in hook and is listed for tile, glass, mirrors, and other smooth surfaces.
Check the blade against the installed finish and choose a hanging position that does not obstruct controls, chip edges, or penetrate waterproofed walls.
Practical tip Keep the manufacturer’s care sheet with the renovation records so future cleaners are chosen for the actual wall, grout, panel, or stone system.
Frequently Asked Questions
Is shower tile itself waterproof?
Tile is the visible finish, not the complete moisture-management system. A shower still needs an approved substrate, waterproofing approach, sealed transitions, and compatible setting materials.
Follow one documented assembly instead of mixing convenient pieces from unrelated systems. Seams, corners, penetrations, niches, benches, and wall-to-floor connections require particular attention.
Which shower wall is easiest to keep clean?
Grout-free panels and large surfaces reduce joint cleaning, but no finish is maintenance-free. Texture, water chemistry, soap, ventilation, and approved cleaners affect upkeep.
Compare real samples and manufacturer care instructions before buying. A highly textured wall may hide spotting visually while taking longer to wipe thoroughly.
Can shower wall panels be installed over existing tile?
Some panel systems permit installation over specific prepared surfaces, while others require removal. The existing tile must not conceal damage, movement, moisture, or an unsuitable substrate.
Use the selected manufacturer’s current installation guide and warranty conditions. Do not treat a generic adhesive claim as approval for every panel and wall condition.
How high should shower-wall waterproofing extend?
Required coverage depends on the approved shower system, enclosure type, steam exposure, local requirements, and manufacturer instructions rather than a decorative tile stopping point.
For example, Schluter instructs KERDI to reach showerhead height at minimum in ordinary showers, with different ceiling requirements for enclosed or steam applications.