50 ’70s Bathroom Remodel Ideas

This post may contain affiliate links: full affiliate disclosure.
An avocado tub, a long vanity mirror or a floor of little squares can give a 70s bathroom remodel its direction before you pick anything new.
Start with the feature you’d miss most. Compare small updates, like a graphic curtain, with bigger changes that recover floor space or make an awkward tub easier to reach.
As an Amazon Associate I earn from qualifying purchases.
Keep the features that give the room its character
1. Keep the avocado tub and give it a cream surround
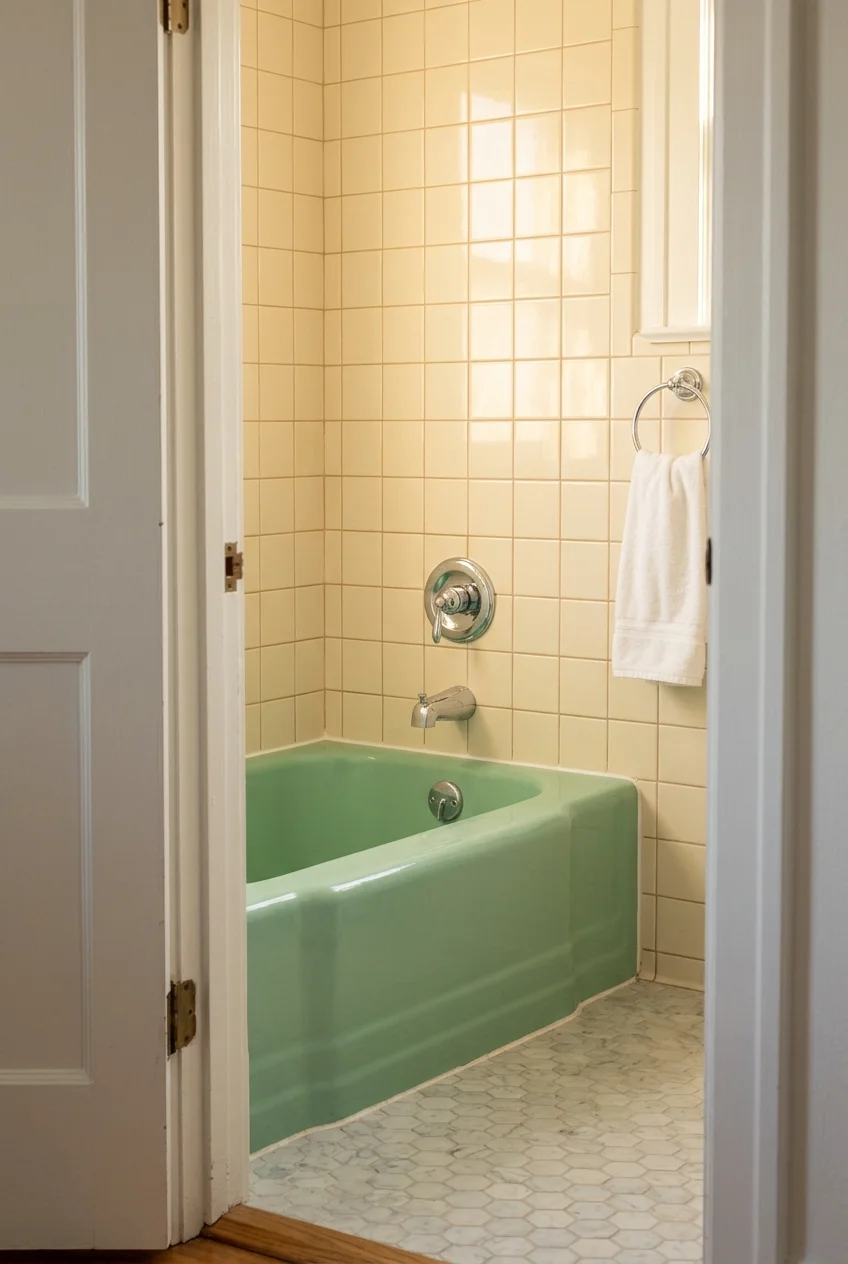
An avocado tub can carry the whole palette. Surround it with warm ivory tile and use a green sample from the tub edge to judge the undertone.
Hold the tile and grout samples upright beside the apron. Creams that looked neutral in the shop can pull pink or yellow under your bathroom lights.
Before committing to the surround, have a plumber check the drain and overflow. A sound finish is worth preserving when the parts behind it can be serviced.
2. Build around a harvest-gold sink
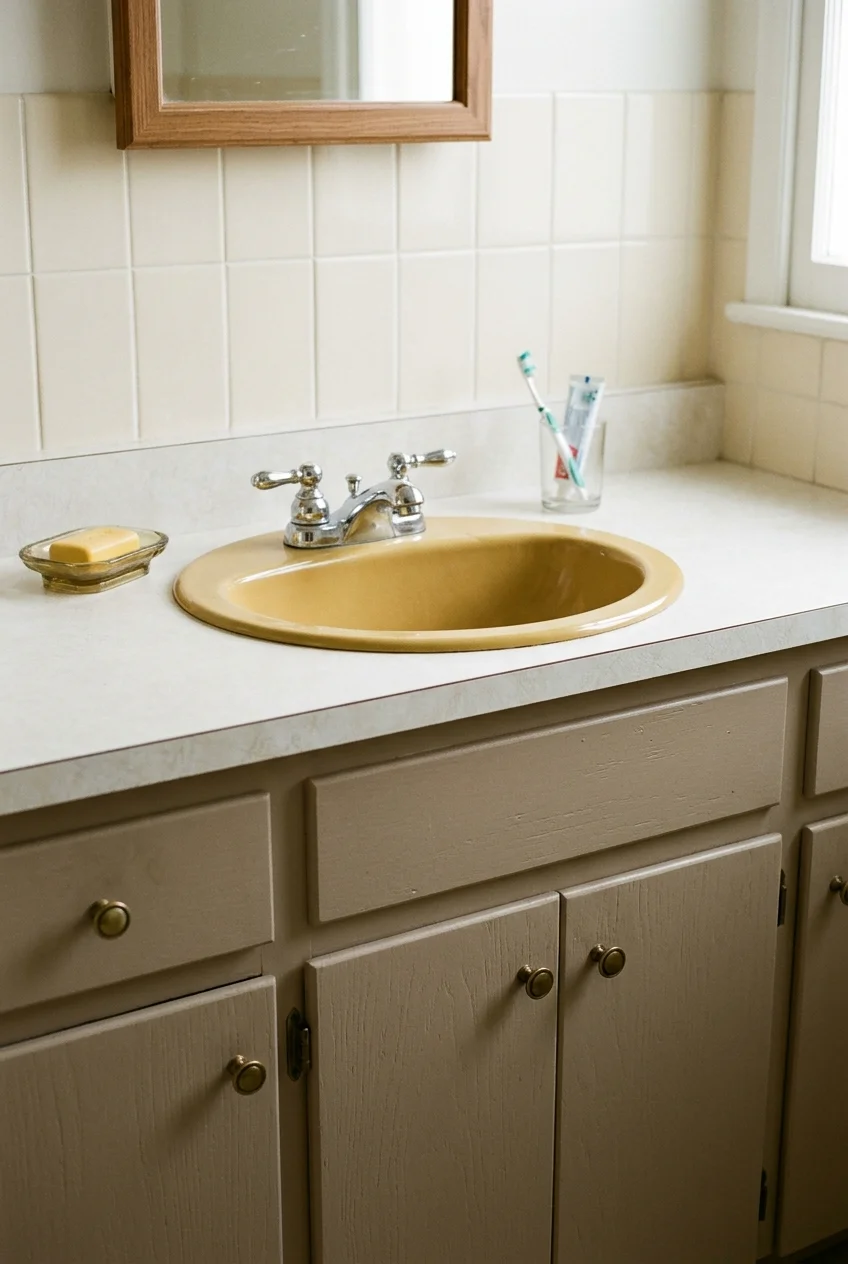
A harvest-gold drop-in sink looks deliberate on a quiet counter. Try a solid warm white with a soft brown edge detail borrowed from the cabinet below.
If you replace the countertop, have the fabricator template the existing sink. The cutout, rim overlap and faucet configuration dictate which countertop setups will work.
For a gold basin with a grayish cast, try mushroom cabinet paint. A yellow-brown stain makes more sense when the ceramic leans closer to amber.
3. Preserve original tile as a half wall
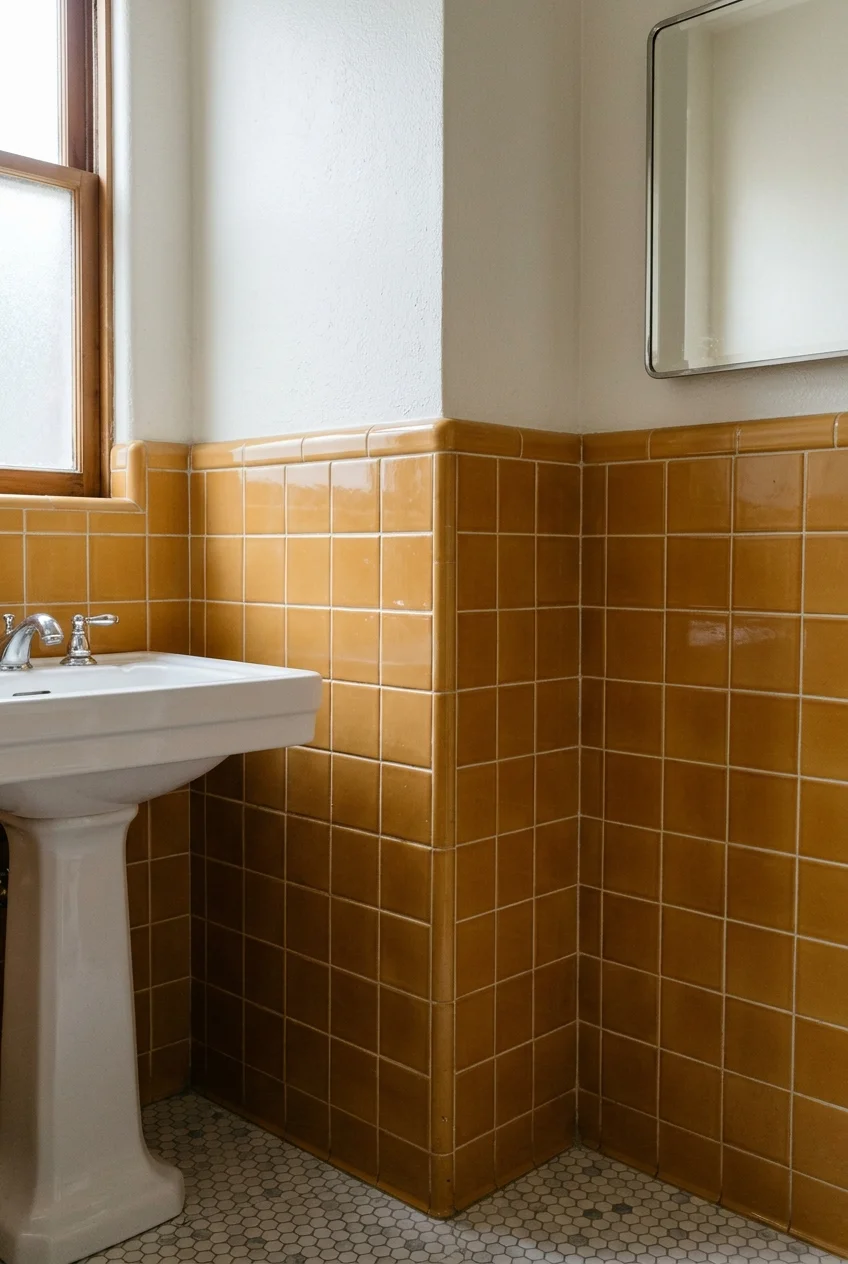
Use the top edge of intact tile as an architectural line. An upper wall in warm off-white gives a band of olive or ocher tile a clear finish.
Keep the original rounded cap if it's sound. When an exposed edge is damaged, ask a tile setter to find trim that fits its thickness and profile.
A tile wainscot can end differently in the shower, where wall protection has its own requirements. Plan the painted area for the dry side of the room.
4. Make a single replacement tile patch look intentional
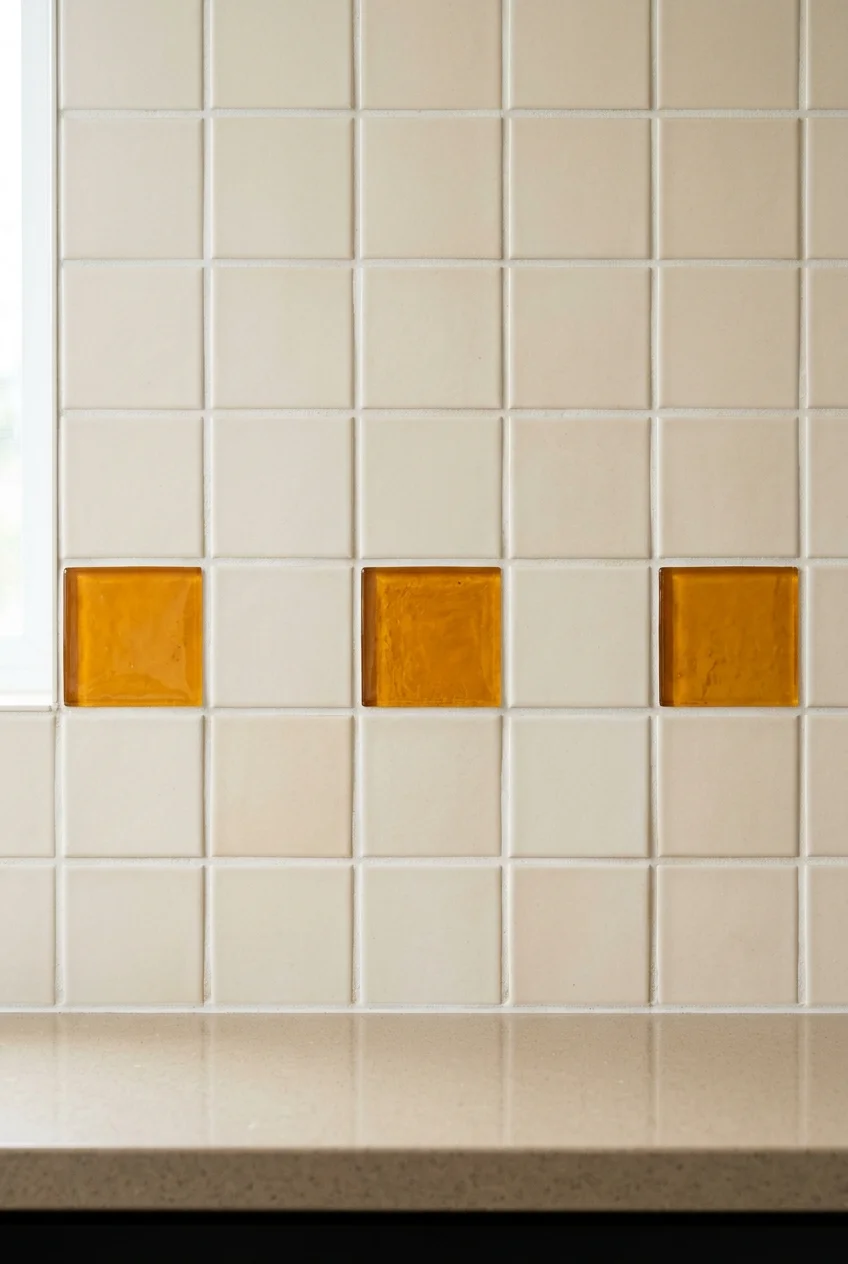
A short row of repeated inserts gives a repair a pattern the eye can follow. This works best when several damaged tiles cluster around a vanity.
Bring an intact spare or measurements to the tile supplier. Ask about actual face size, edge shape and thickness so the patch can finish level with its neighbors.
Have loose tiles or recurring cracks checked before replacing the faces. A decorative insert works for localized cosmetic damage once you know the backing is sound.
5. Save a tiled vanity top with a finished edge
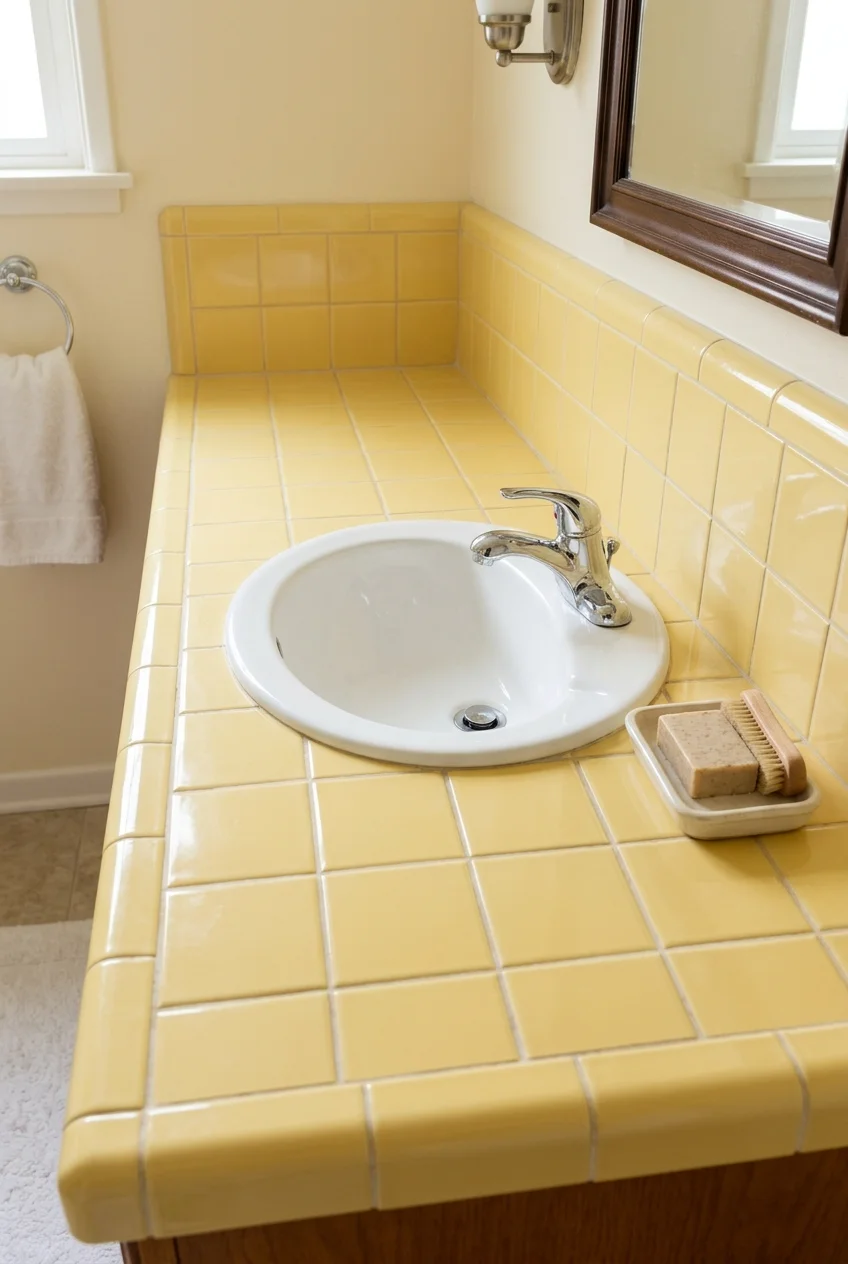
A tiled vanity top can be the strongest surviving detail, especially when its bullnose matches the backsplash. Let cabinet fronts below it support that uninterrupted grid.
Inspect the sink rim, grout and the seam where the backsplash meets the counter. Swelling or movement at the edge calls for a closer look before cosmetic work.
When the assembly is sound, use a small tray for toiletries. It lifts bottles together for cleaning and leaves the pattern visible across most of the counter.
6. Keep an original brick wall
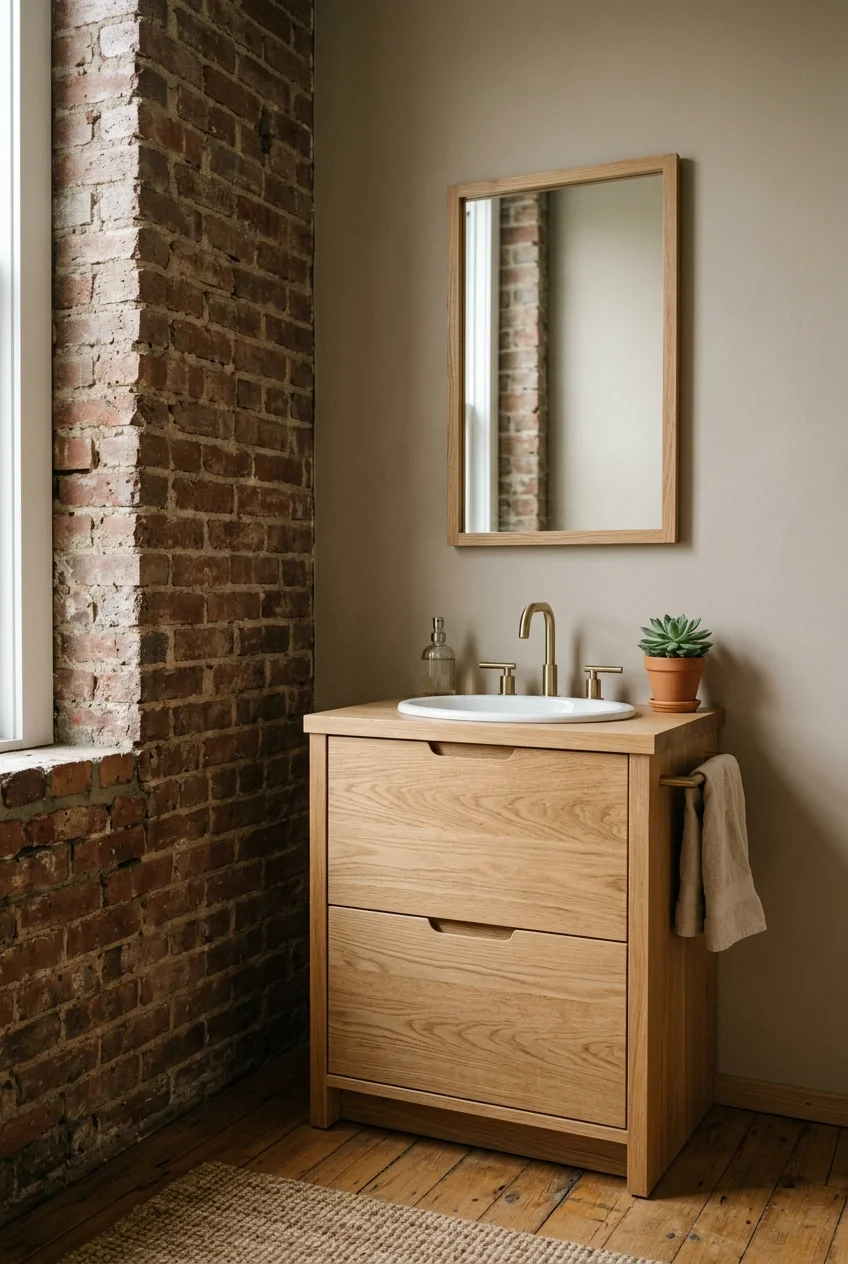
An exposed brick wall can set the palette for the entire bath. Pull a clay or mortar tone into nearby porcelain and let the brick keep its irregular texture.
Plan this treatment on a dry wall. For a brick surface inside a shower, ask a tile professional to assess the existing construction and recommend a suitable assembly.
7. Give a speckled cultured-marble counter room to breathe
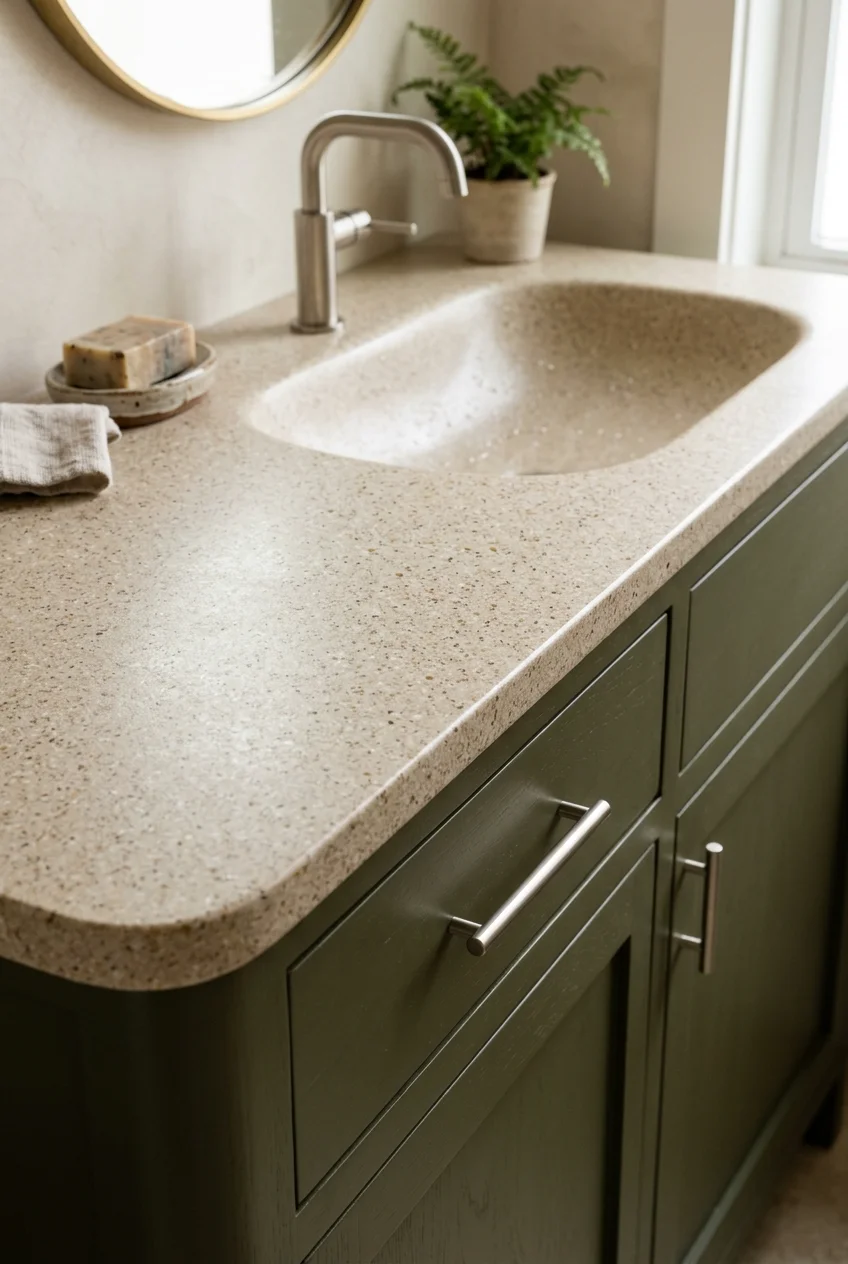
A beige speckled top with an integral basin works with deep olive cabinet paint. The larger block of solid color makes the small flecks easier to appreciate.
Ask the manufacturer or a refinisher about care if the surface is dull or scratched. Polishing guidance depends on the material and its existing protective finish.
8. Keep a long wall mirror and frame its perimeter
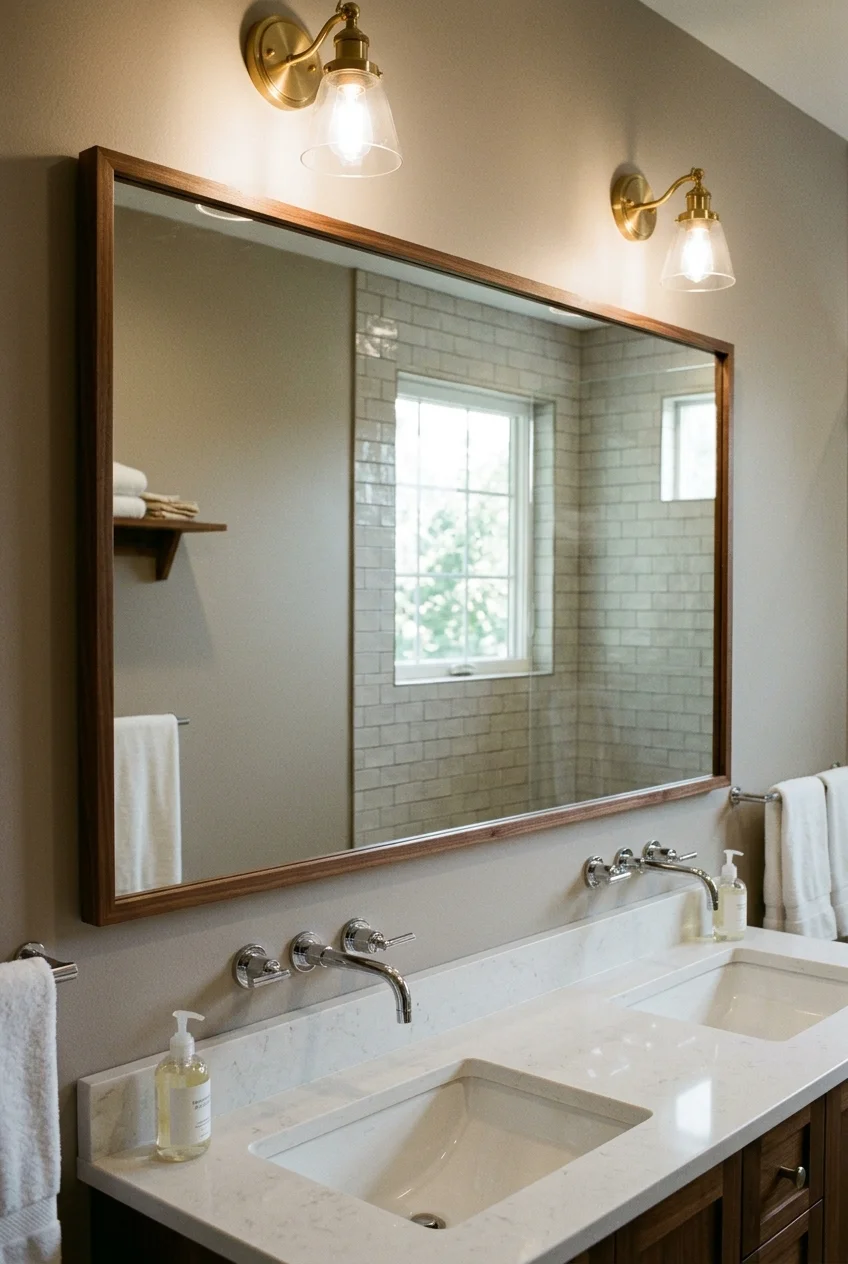
A broad existing mirror can make a cramped double vanity easier to share. A slim walnut surround gives the uninterrupted glass a shape that relates to the cabinetry.
Check how the mirror is supported and where clips or receptacles sit. Choose a trim system that accommodates the existing fixings and leaves wall plates accessible.
If the original edges are backed by dark marks, a frame may cover them. A mirror that's loose or failing needs evaluation before you hang trim around it.
Color palettes that work with retro shapes
9. Pair burnt orange with warm white
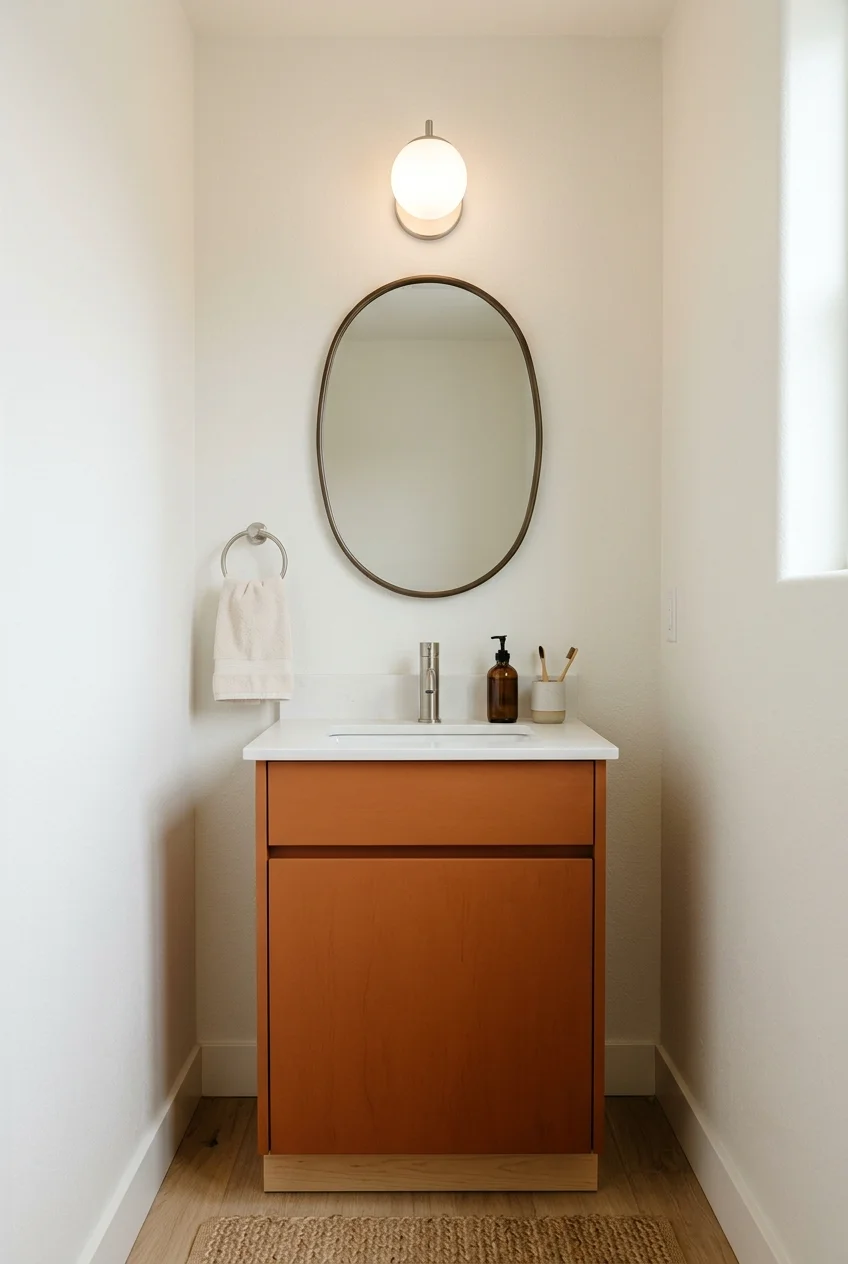
Put burnt orange on a vanity with flat fronts. Warm white walls and a simple pale counter give the orange enough surrounding space to read clearly.
Compare a redder orange and a more muted clay paint against the same white. The softer option is especially useful when the countertop already has yellow undertones.
10. Use tobacco brown and honey for a tonal room
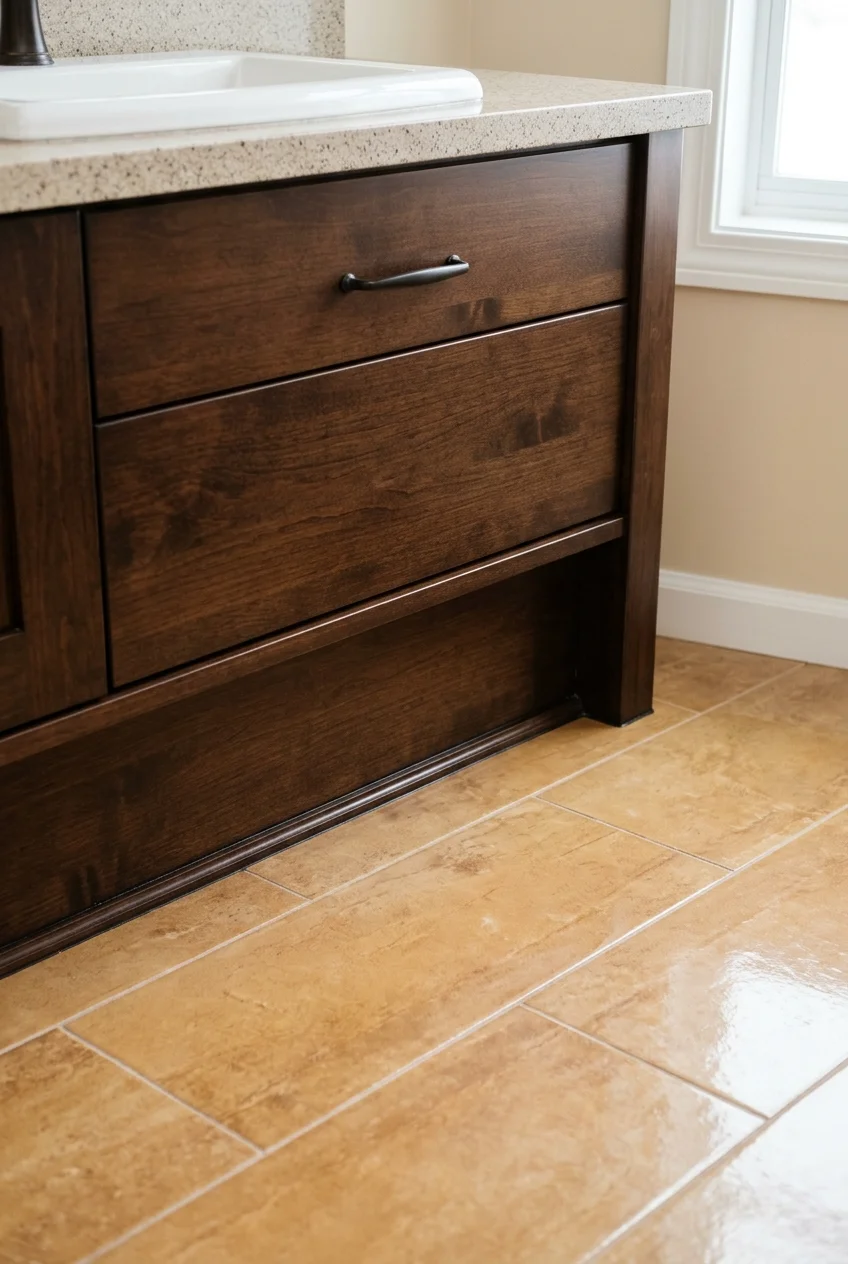
A tobacco-brown vanity with a honey-colored floor gives you the depth of a brown bathroom without relying on a dark ceiling or walls over the sink.
Look for a honey tone with enough contrast to show the cabinet's toe kick. Put both samples beside the wall color and check them after dark.
11. Soften mauve tile with plum cabinetry
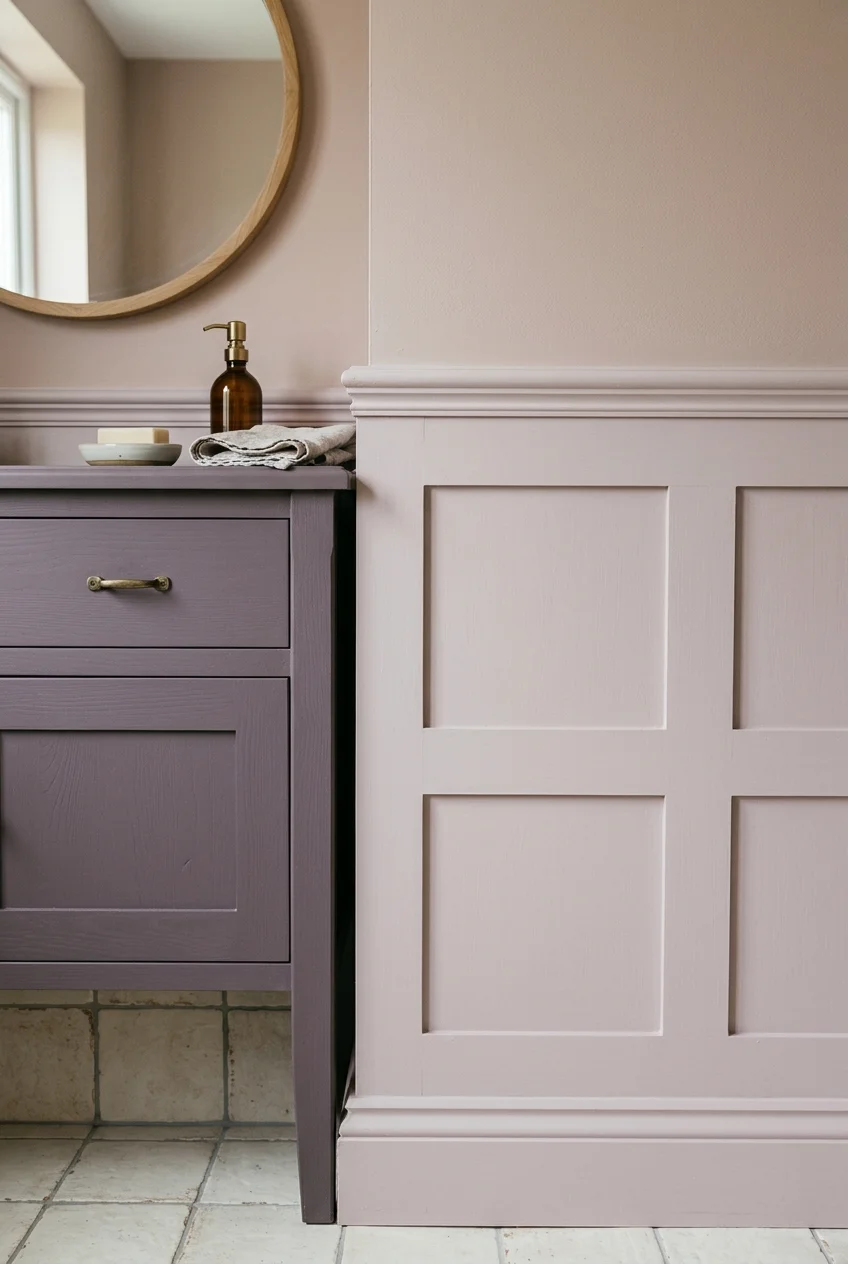
A muted plum cabinet can pick up the blue side of old mauve tile. Look for a sample that stays distinct from the tile when both darken in shade.
Use the lightest tile undertone to choose the paint above it. A chalky pink-beige works with many mauves and feels more connected than a stark white.
12. Try denim blue with rust accents
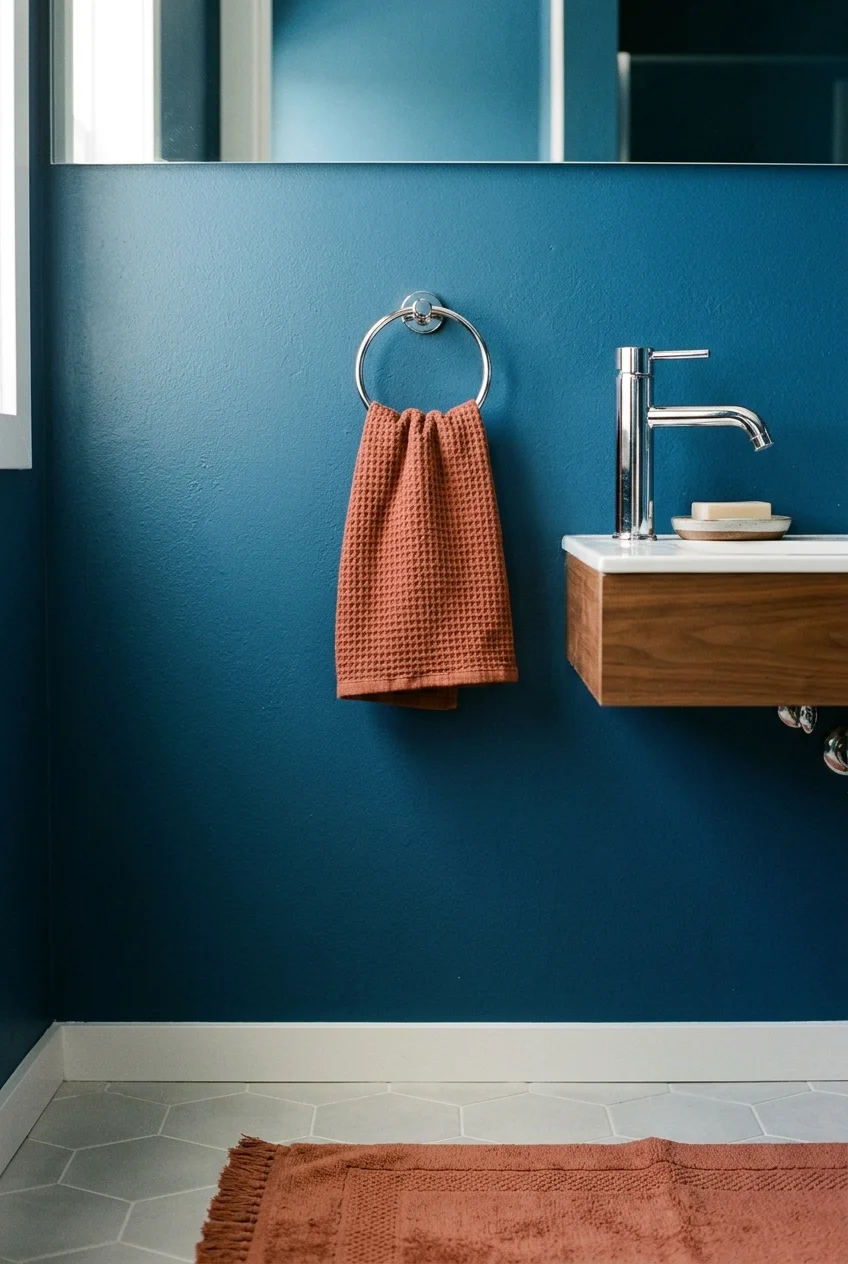
Medium denim blue makes a useful backdrop for orange-brown textiles. Use the rust on a visible hand towel and a small mat in the dry area.
A soft gray-blue works with existing polished chrome. When selecting the towels, bring them into the room so you can judge how much orange the light reveals.
13. Bring dusty pink and red together in a powder room
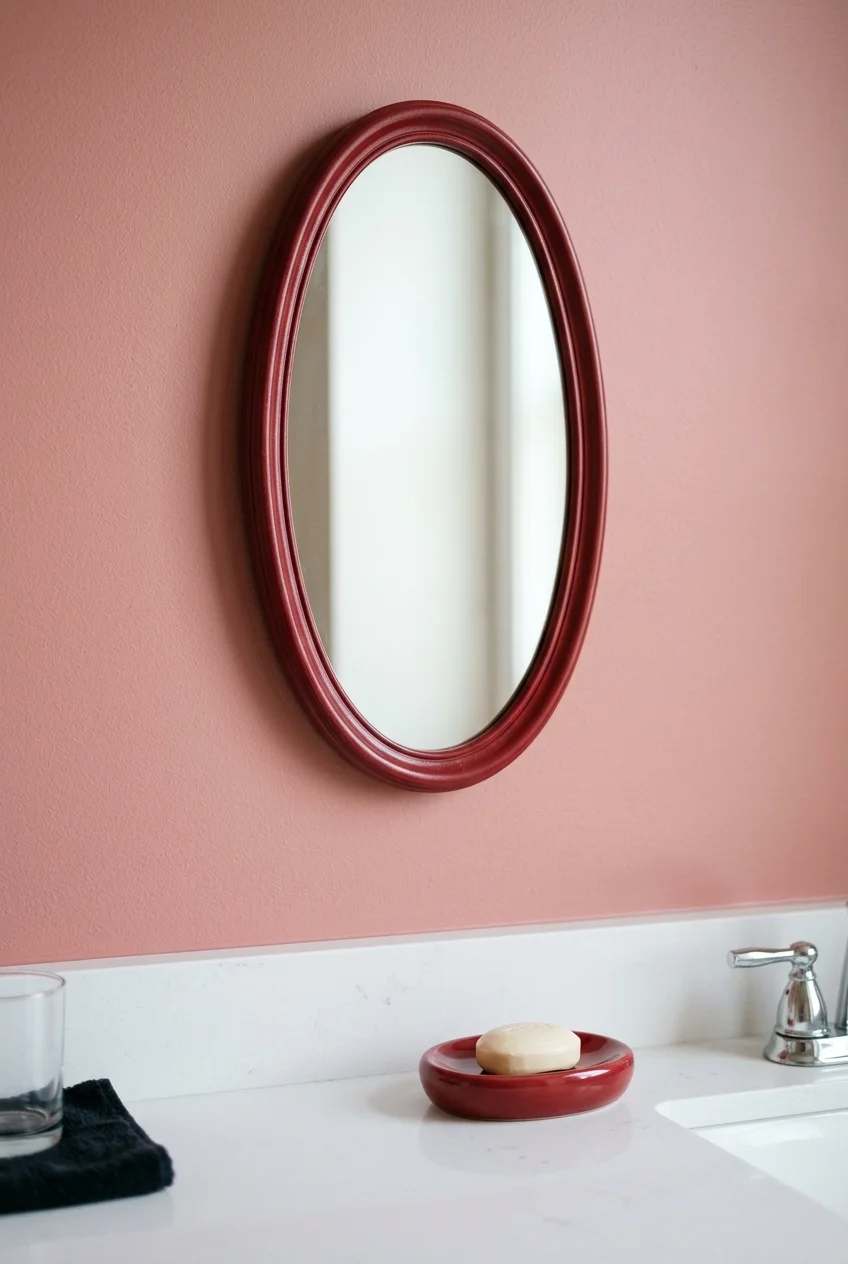
A narrow red mirror frame over dusty pink walls gives the sink area focus. Repeating the same red in one small object keeps the palette easy to follow.
Use a frame sample against the wall paint. A warm tomato red suits peachy pink, while a cooler cherry red works better with a pink that leans lilac.
14. Pair olive walls with pale oak
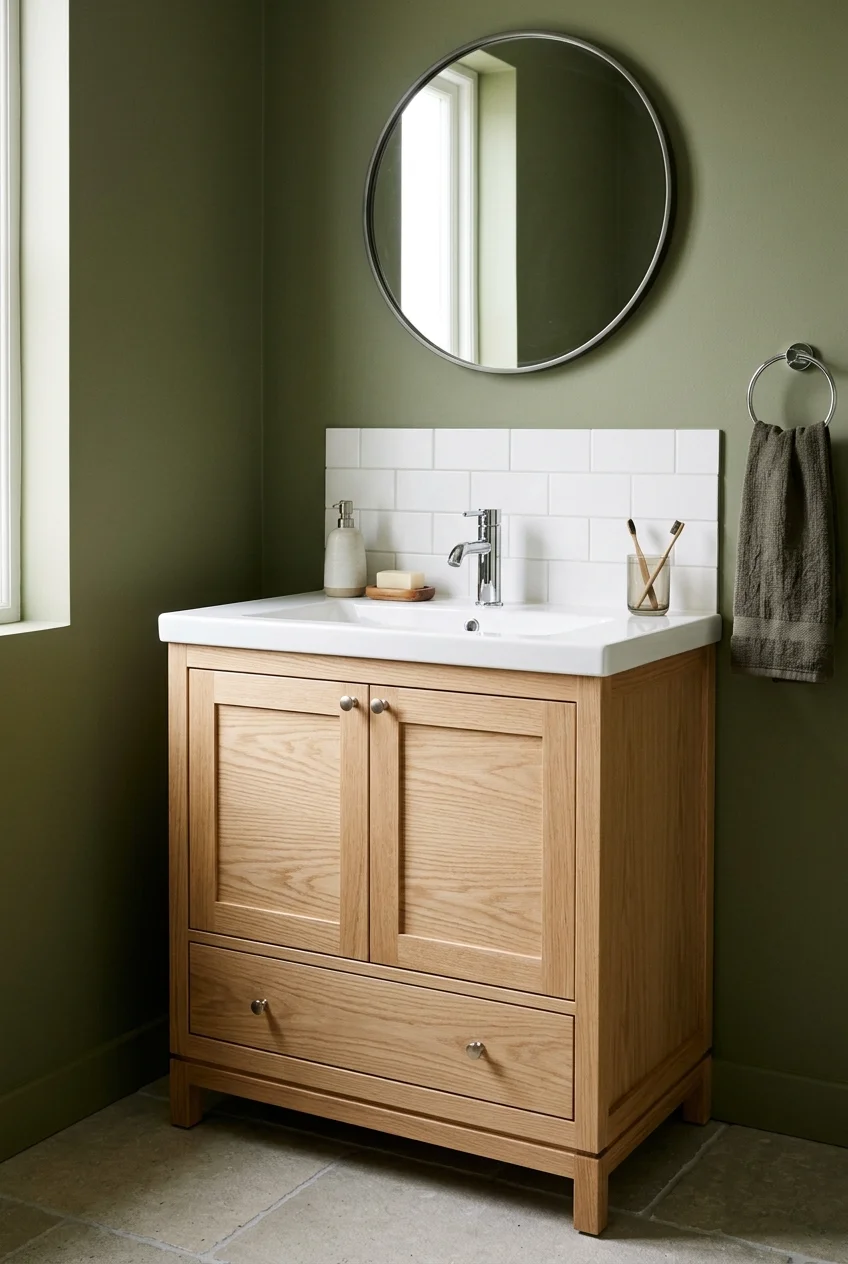
Pale oak can bring out the grassy side of a muted olive. Give the wood a simple silhouette so its grain shows against the broad area of paint.
Choose a cabinet finish suitable for bathroom use and compare actual samples. A strongly amber finish can shift the pairing toward yellow under warm vanity lighting.
15. Use aubergine with warm brass and putty
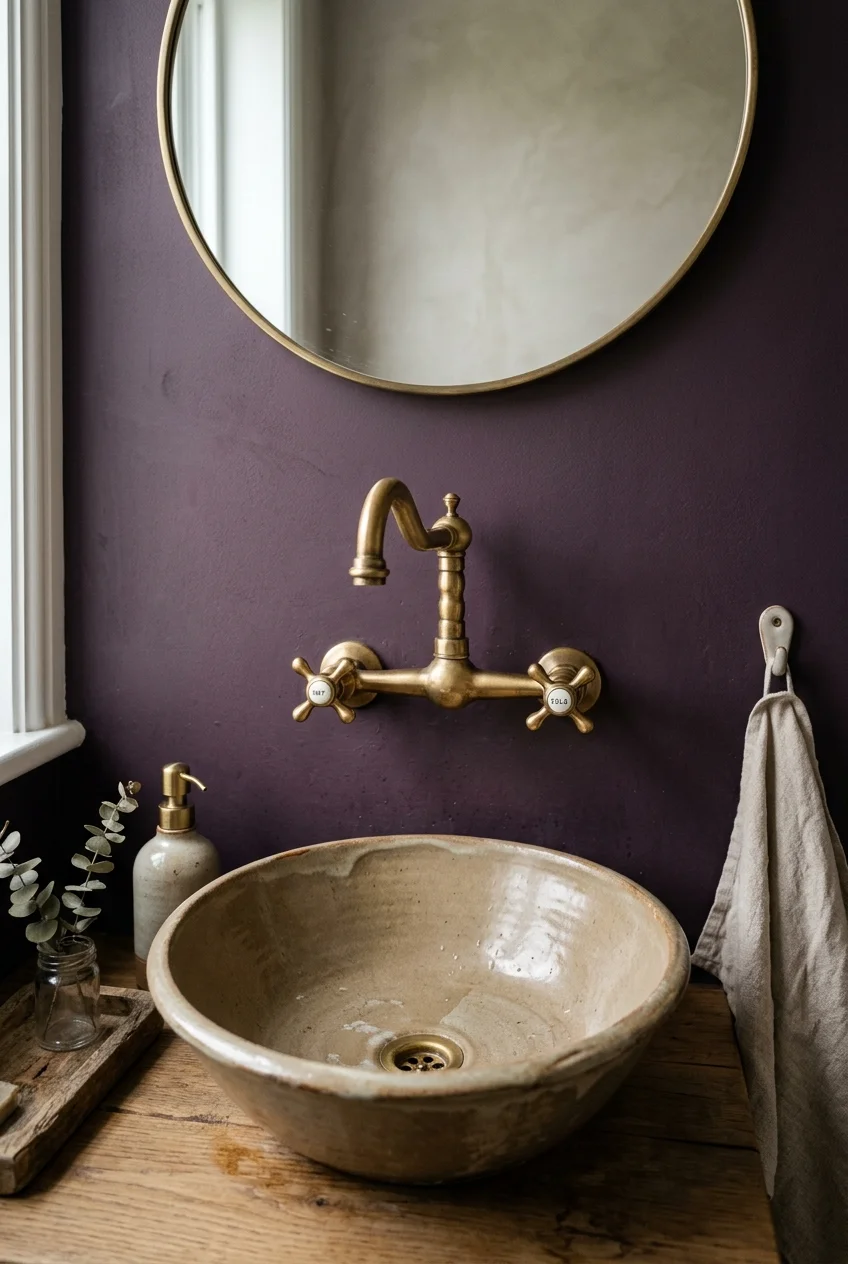
In a powder room, deep aubergine works on a narrow sink wall where brass catches the light. A putty-colored counter introduces some distance between the two finishes.
Try the purple under the light you intend to use. If the sample turns almost black at night, a slightly lighter shade will show more color.
Square tile, graphic floors and textured finishes
16. Wrap a tub in one color of square tile
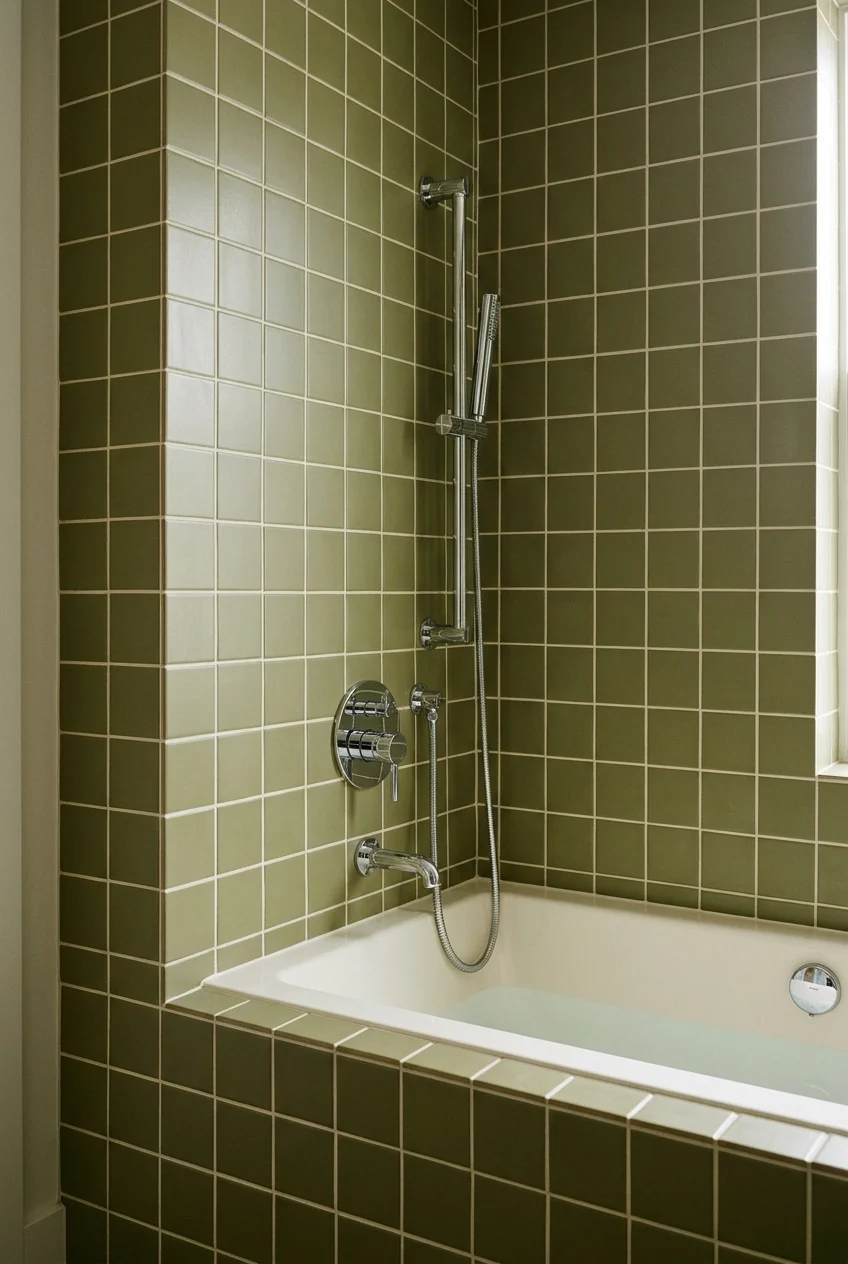
Small square wall tiles give an ordinary tub alcove a stronger outline. Choose one glaze, then use a close grout color to soften the grid.
Lay out a full course against the tub dimensions before ordering. A balanced cut at both corners often looks calmer than a nearly full tile beside a sliver.
If a niche or window interrupts the pattern, ask for an elevation that shows the cuts. Decide where the eye should land when the curtain is open.
The tile is the visible finish. Ask your installer how the waterproofing system meets the tub and how it's detailed around the valve and spout openings.
17. Lay a two-color checkerboard floor
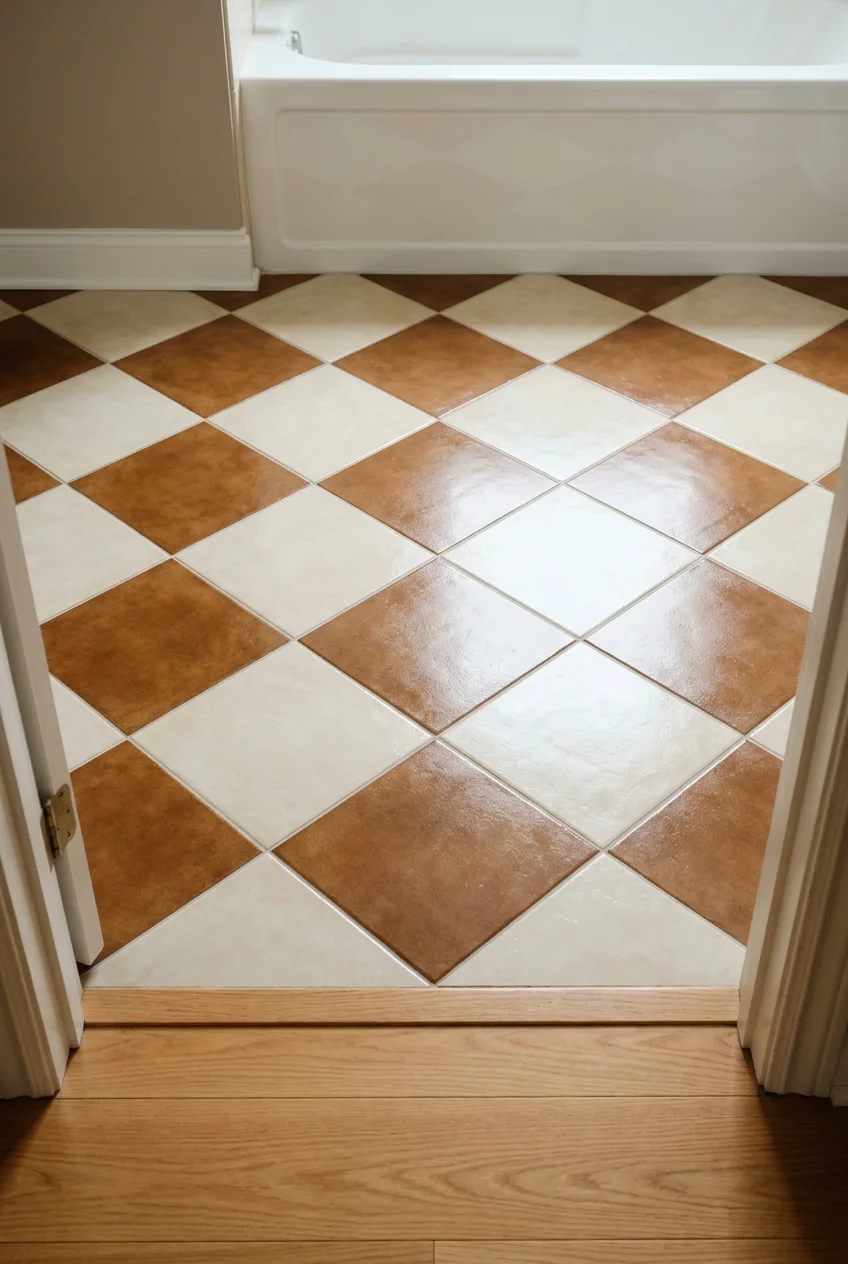
A cream-and-caramel checkerboard gives a plain bath a clear pattern at floor level. Larger squares show the alternating colors quickly, even from the open doorway.
Start with a dry layout that accounts for the threshold and exposed edges. An offset can balance the outer cuts where the floor meets the tub apron.
Pick tiles intended for a bathroom floor and ask about suitability for wet barefoot use where needed. A matching shower floor may call for a different tile.
If you're choosing a quieter wall, compare the checkerboard and simple wall pairings in these bathroom tile combinations before committing to another competing pattern.
18. Add a single stripe inside the shower
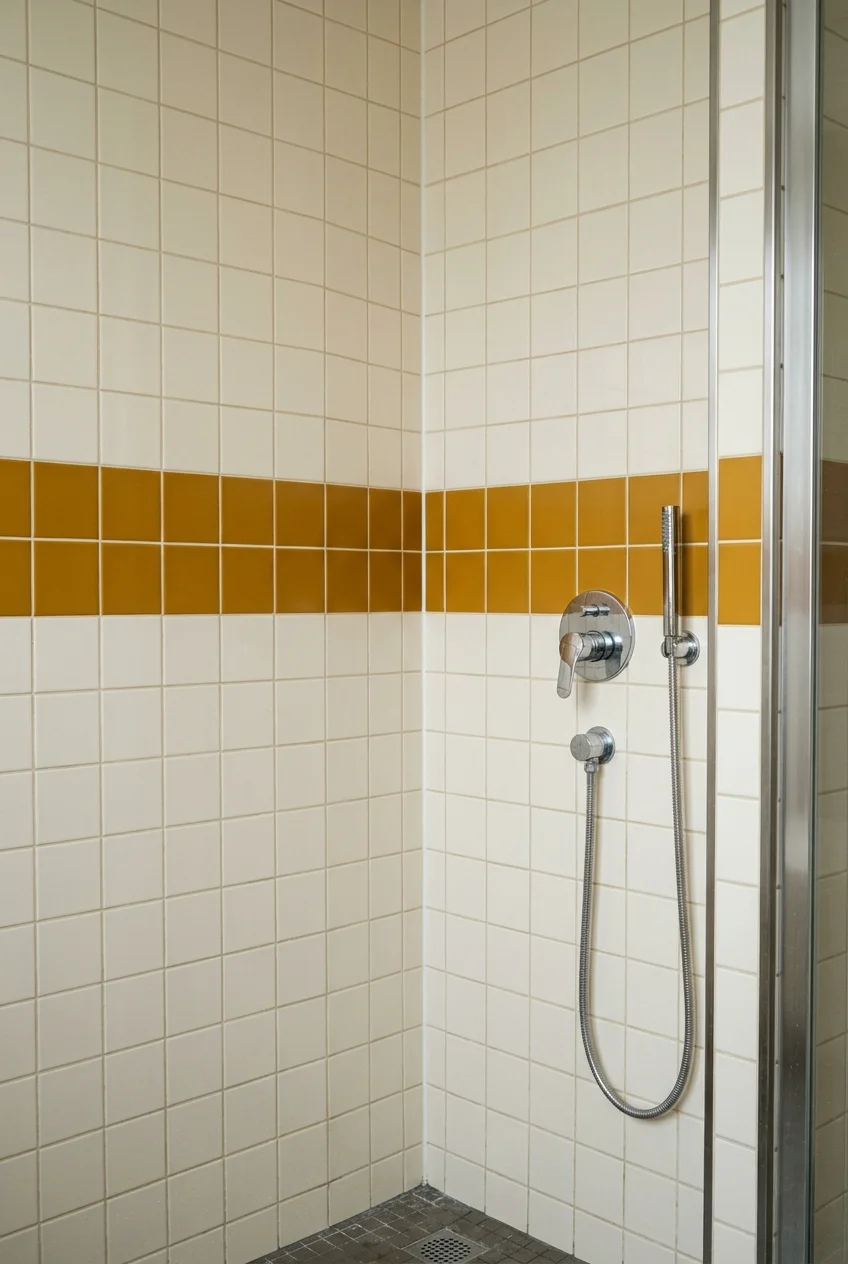
Run one ocher course across a cream shower wall and around the corner. Let the stripe follow the tile grid so it reads as part of the surface.
Work from actual sample dimensions because similarly named tiles can vary. An installer can check whether the two colors share a module and compatible thickness.
Locate the stripe using the shower controls and the niche as reference points. A full stripe just above or below them often gives the cleanest result.
19. Use terrazzo to bring several colors together
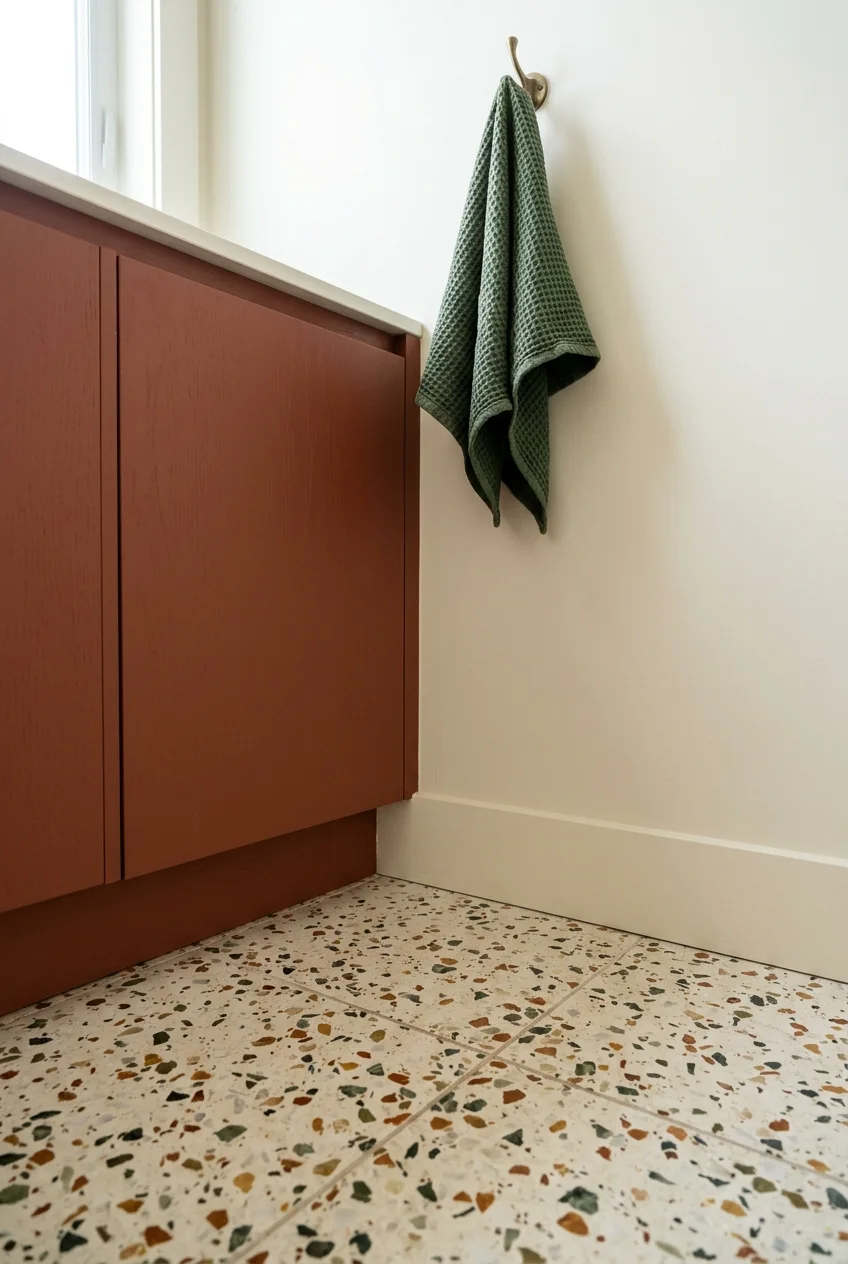
Terrazzo can connect a rusty vanity, cream walls and a green towel through its aggregate. Start with one sample that contains two colors you already plan to use.
Large chips make a stronger statement across a small floor. Finer chips work when you want the vanity or tub to be the first thing you notice.
Ask whether the terrazzo is cement-based, resin-based or a porcelain lookalike. Installation, sealing and cleaning depend on the product, so use the supplier's instructions for that surface.
20. Lay penny mosaics in a border
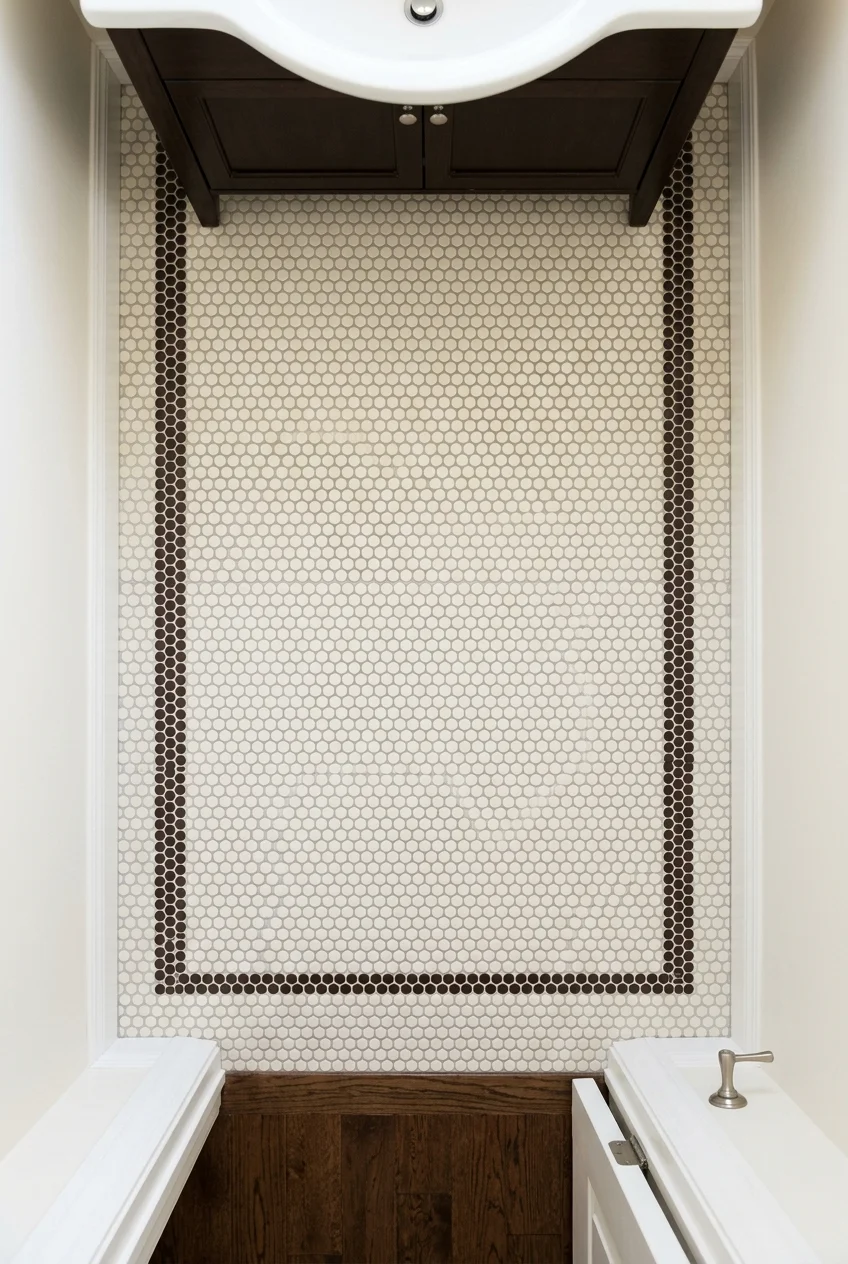
A thin dark border can frame a pale penny-round floor like a rug. Keep it inside the visible walking area so the vanity and toilet conceal fewer transitions.
Draw the border on a floor plan first. Have the installer account for sheet seams and trace the inside corners so the turn looks consistent on all sides.
21. Run a stack of skinny rectangles vertically
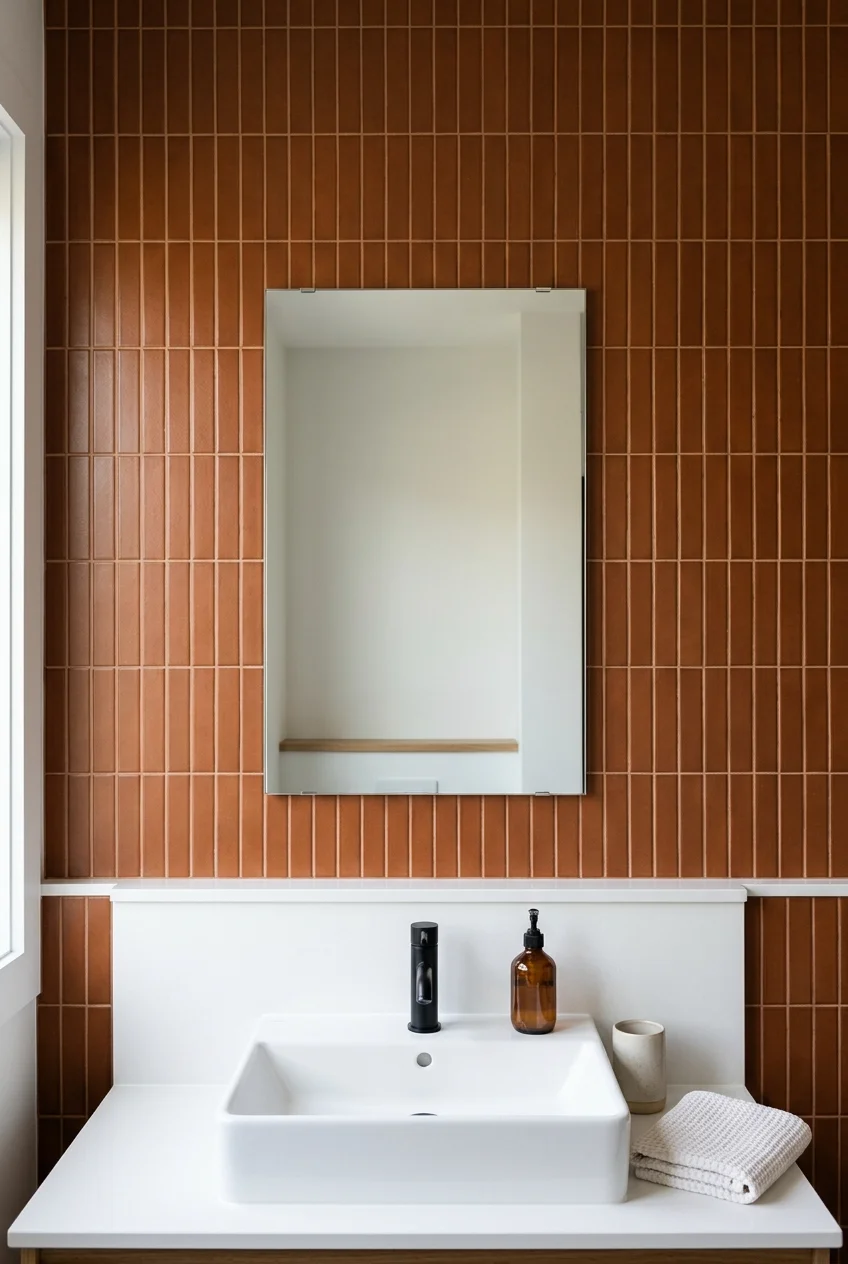
Vertical rows of narrow tiles draw attention upward behind a vanity. Pick a satin cinnamon or ocher finish if you want the grid to stay legible under lights.
Center a joint or a full tile on the sink before finalizing the layout. Use the mirror and wall outlets to check where the vertical lines will land.
22. Tile the front of the tub
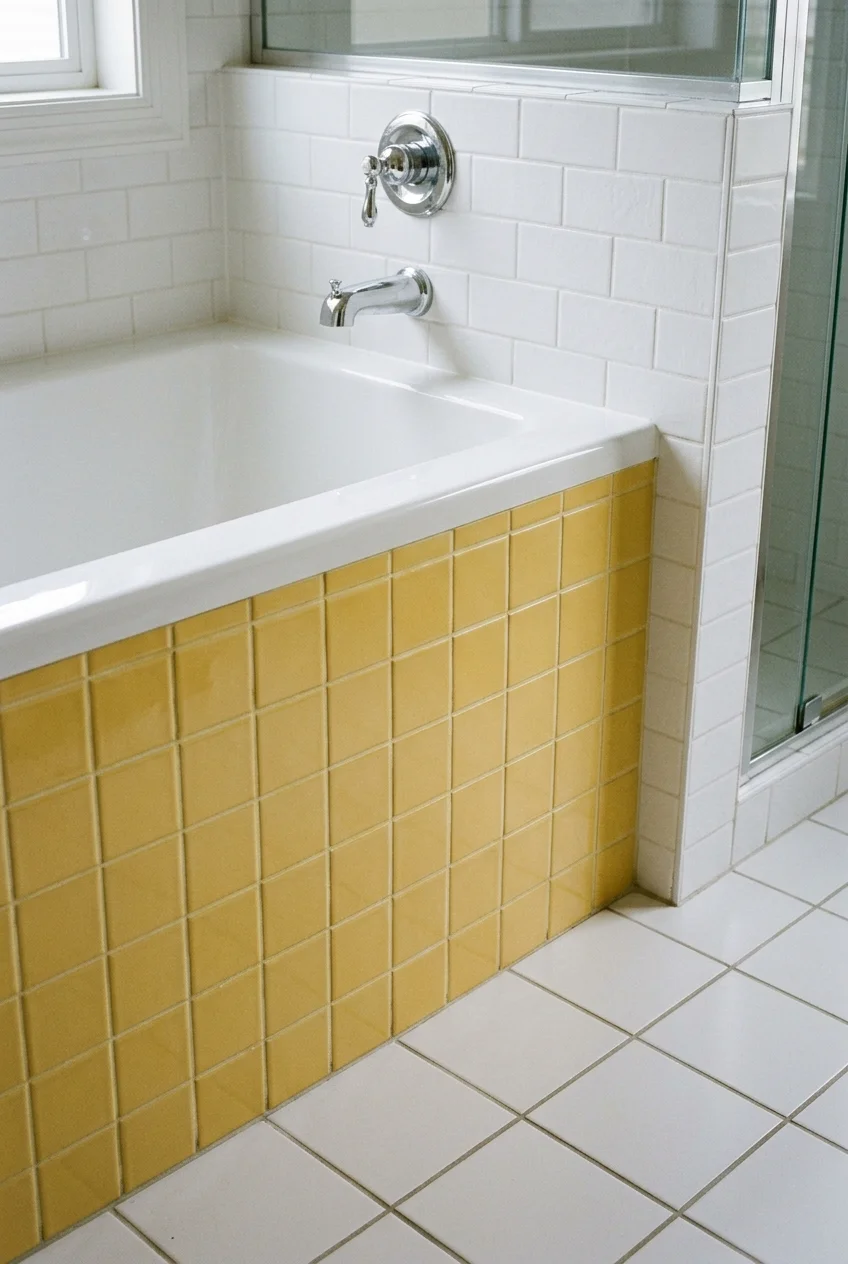
A bath apron in butter-yellow squares gives the tub its own block of color. Carry the grid across the front, then finish it cleanly at the adjoining wall.
Choose an alcove or drop-in tub meant for that construction. Ask the installer how the apron meets the rim and how required service points stay accessible.
Plan the top cut and wall junction before the first tile goes in. The strongest version reads as a continuous face with an intentional edge at each end.
23. Swap old carpet for a speckled resilient floor
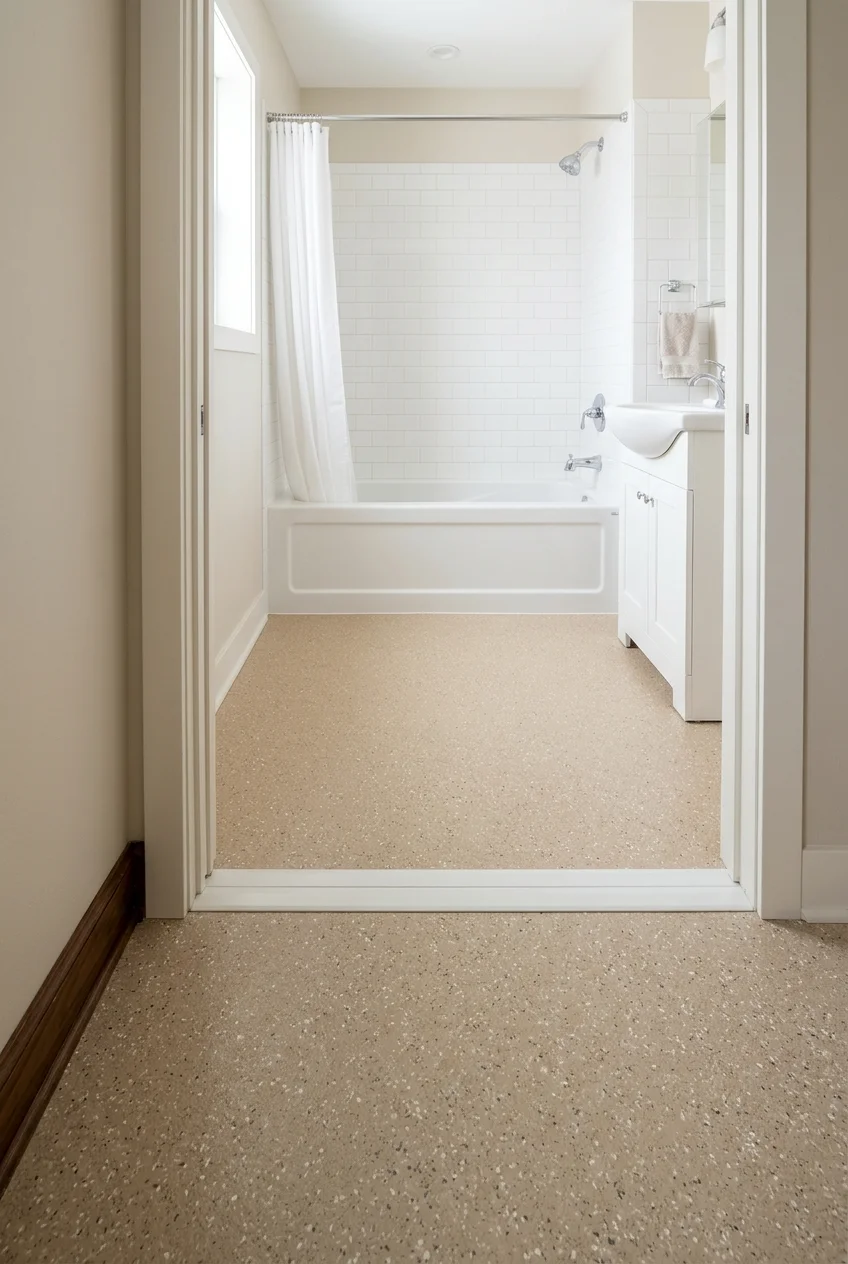
A low-contrast speckled floor can keep the visual softness of an old carpeted room. Look at bathroom-rated sheet flooring in warm sand or muted clay.
Check what lies under the carpet before disturbing older flooring or adhesive. If you suspect asbestos, have an accredited professional assess the material before removal or prep.
Confirm the flooring manufacturer's requirements for the subfloor, seams and bathroom use. Sample over the actual layout so the finish works with the adjoining hall and threshold.
24. Use a half-circle tile pattern on the dry floor
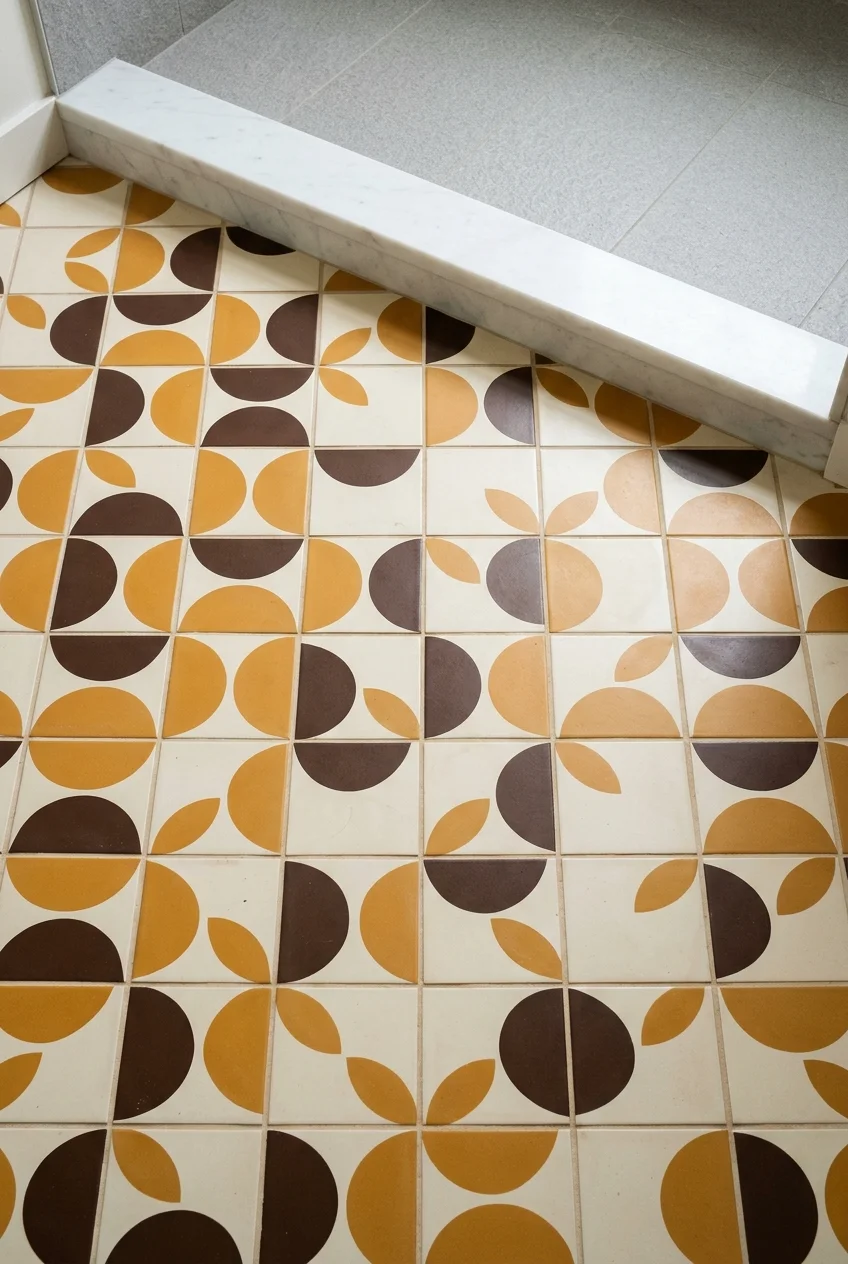
Repeating arcs can give a floor the rhythm of a 1970s textile. Limit your palette to ocher, chocolate and cream so the geometry stays easy to read.
Arrange several sample tiles together. One attractive tile tells you little about how the arcs meet and whether the intended motif survives cuts along the perimeter.
If the pattern reaches a separate shower, pick a compatible solid shower-floor tile with product guidance for that use. Repeat one color along the transition for continuity.
25. Use a ribbed border above plain tile
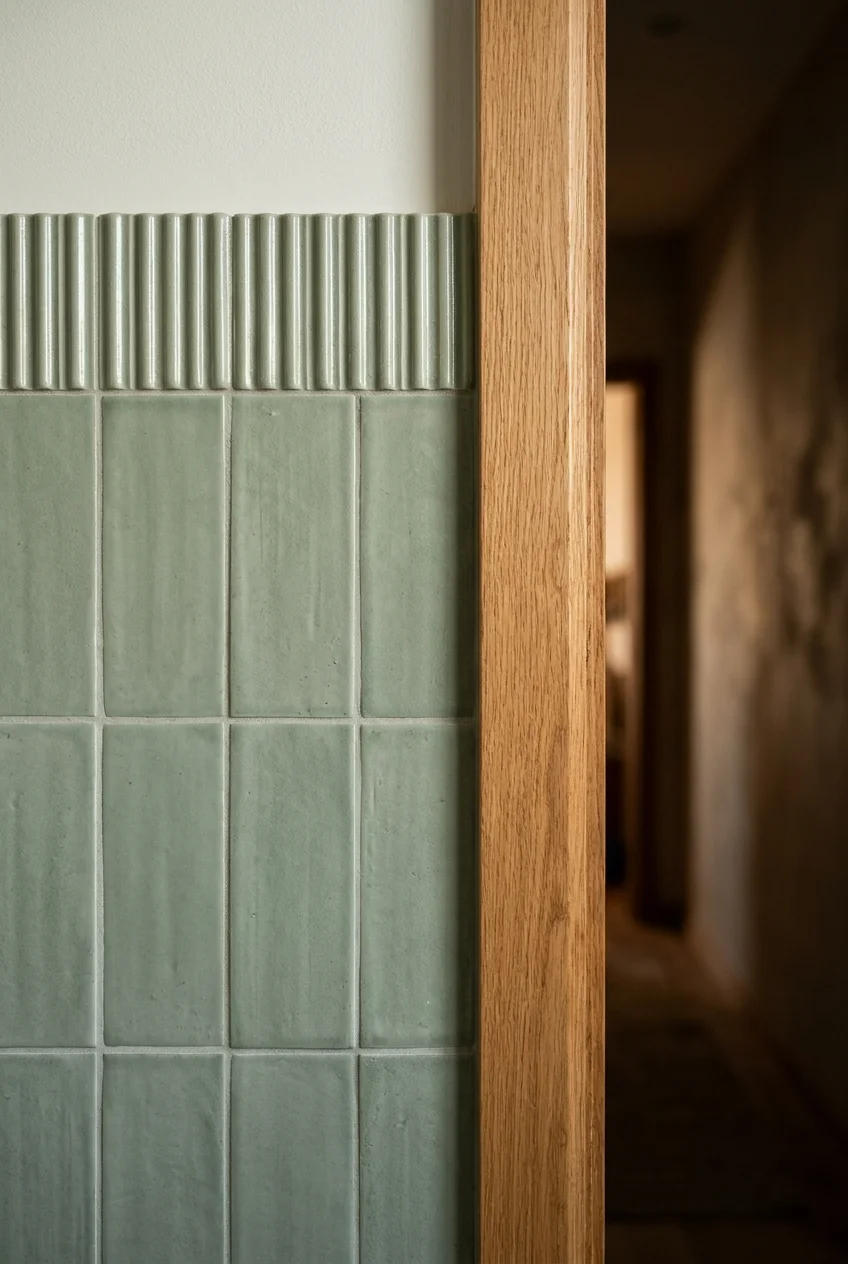
A narrow fluted band catches a little shadow where the main tile field ends. Stick to one glaze across both shapes if you want a quiet effect.
Check the thickness difference where the relief tile meets the plain tile. Ask about a compatible edge piece, particularly where the stripe terminates at a doorway.
Vanities, storage and fixtures with a 70s silhouette
26. Reface sound cabinets with walnut slab doors
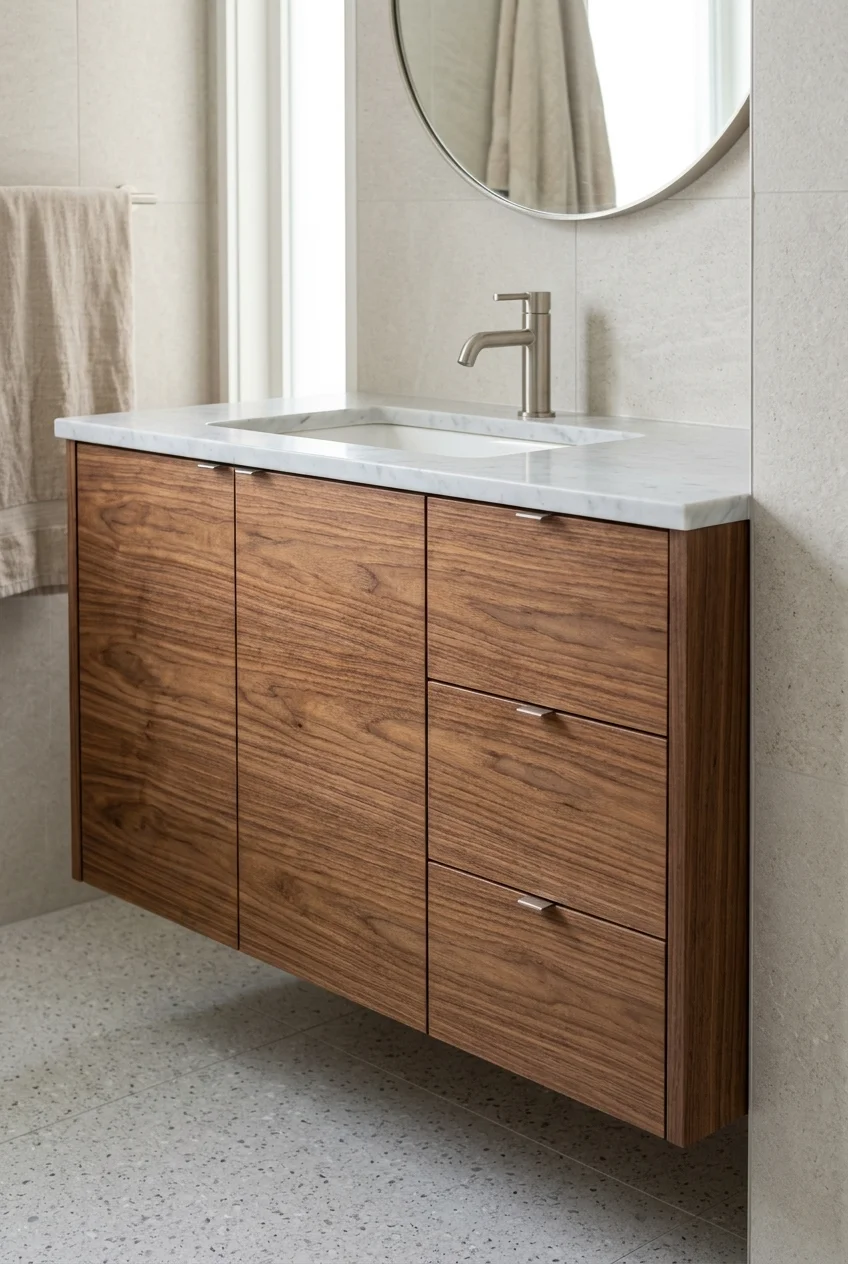
Flat walnut fronts can bring back the look of a 1970s vanity while keeping useful compartments. Inspect the cabinet box and sink area before ordering fronts.
Ask the supplier to measure each opening and identify the overlay and hinge type. Adjacent doors need enough space to open without striking each other or the wall.
Plan the grain across the entire run. Vertical grain emphasizes taller doors, while matched horizontal grain makes a low, wide cabinet feel like one piece.
Bring one finished sample into the bath. Check the finish at bottom edges and around pulls, where moisture and regular wiping can be harder on the veneer.
Ordering tip Mark the back of each sample front with its intended position if the cabinet has nearly identical openings with subtly different measurements.
27. Convert a low credenza into a vanity
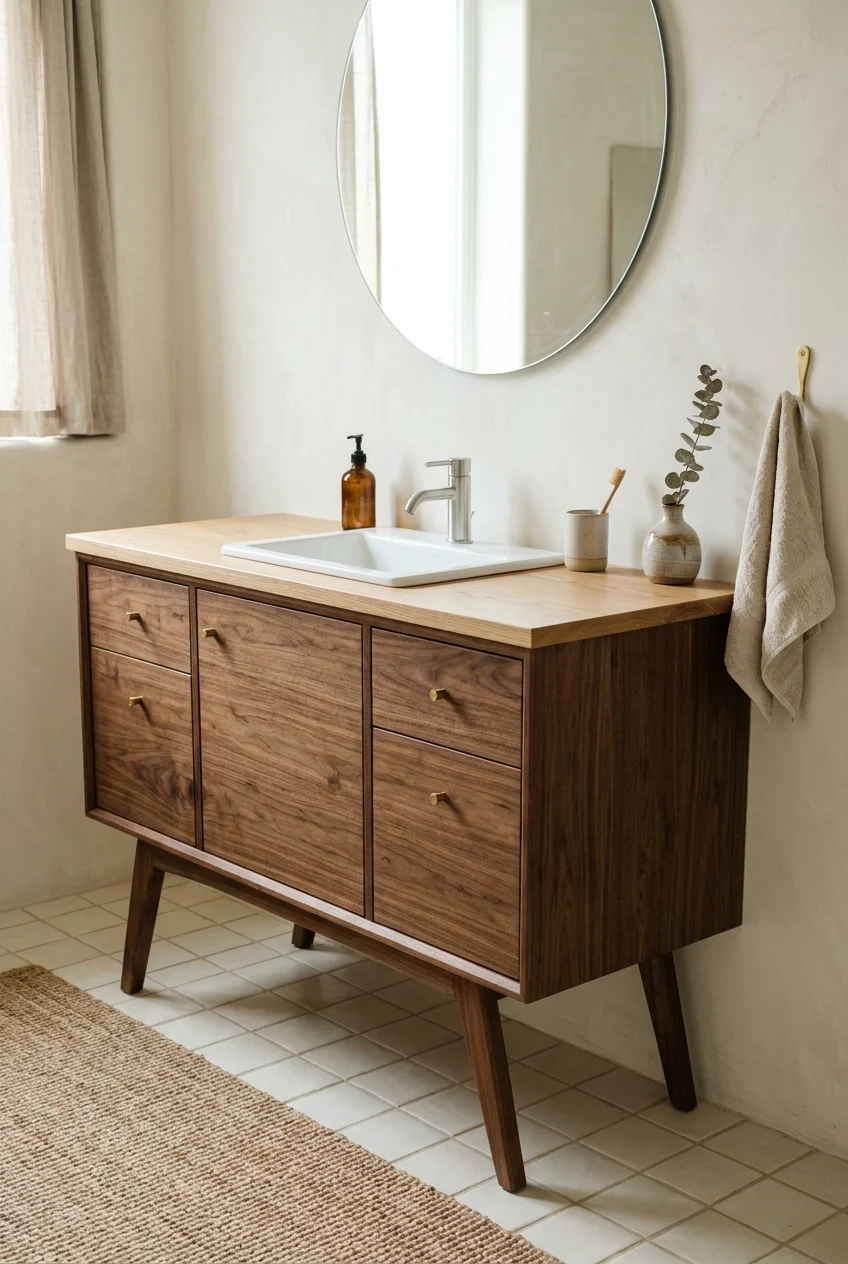
A walnut credenza with tapered legs gives a retro bath the lighter profile of furniture. Choose the cabinet after checking where the drain and supplies enter.
A shallow basin can leave room for a modified drawer. Have the fabricator and plumber agree on the sink position and trap route before anyone cuts wood.
Keep working storage on either side of the basin where possible. A false front may be the cleanest choice directly under the sink in a shallow cabinet.
Have the cabinet assessed for countertop loads, stability and attachment. Protect the finished wood and cut edges according to the materials used, especially around the basin.
Run a hand under the original apron before choosing the piece. Thick rails may be exactly where the sink hardware or a faucet shank needs to sit.
28. Choose a tambour-front linen cabinet
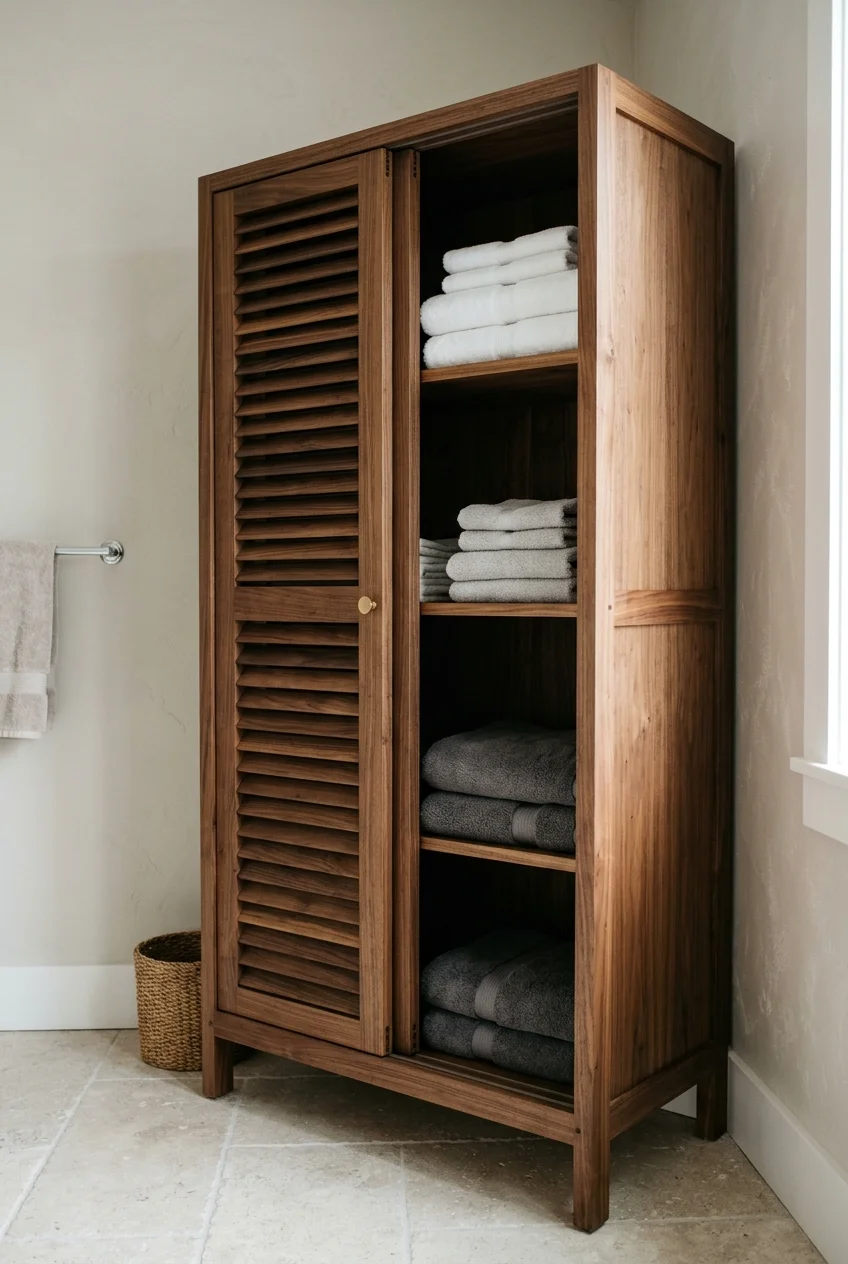
Curved tambour slats give a tall cabinet texture from floor to shoulder height. A sliding front can help where a swinging door would narrow the passage.
Test the sliding door or review its track details before buying. The moving panel takes up interior space where it curves or slides behind the cabinet edge.
Measure for folded towels on the shelves after accounting for that track. Anchor tall cabinetry using its instructions and protect it from direct shower spray.
29. Install a wall-hung vanity to reveal more floor
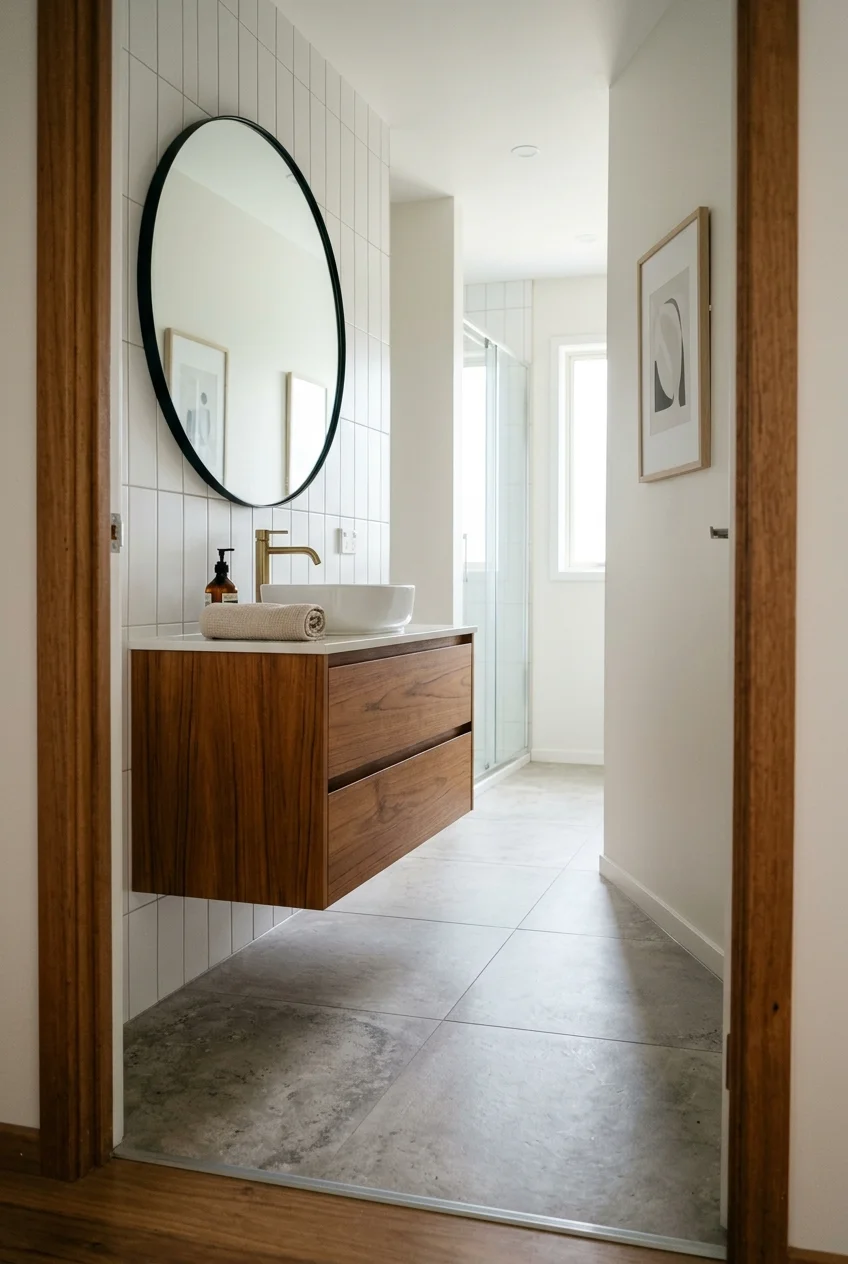
Keeping the floor visible below the sink makes a narrow bath easier to read at the door. Try a shallow wood cabinet with a clean slab face.
Measure counter depth and passage space with the drawers open. The shallower profile is only useful if the basin, faucet and storage still work for daily use.
Confirm the manufacturer's support requirements and where the wall drain will land before the wall closes. Exposed pipes below the cabinet can interrupt the intended open space.
30. Fit a compact corner sink for a crowded powder room
Image pending: No image is attached to this draft for idea 30 (image-30).
A corner basin puts the wash station into an unused angle and leaves more of the main path clear. A mustard glaze makes the small fixture count.
Mock up the basin projection and faucet reach before ordering. A compact shape still needs room for hands and space to approach without hitting a door.
Ask a plumber and installer to confirm mounting support and drain routing. A side-mounted faucet can work if the basin has a suitable deck and landing area.
31. Add a recessed medicine cabinet with a smoked-mirror frame
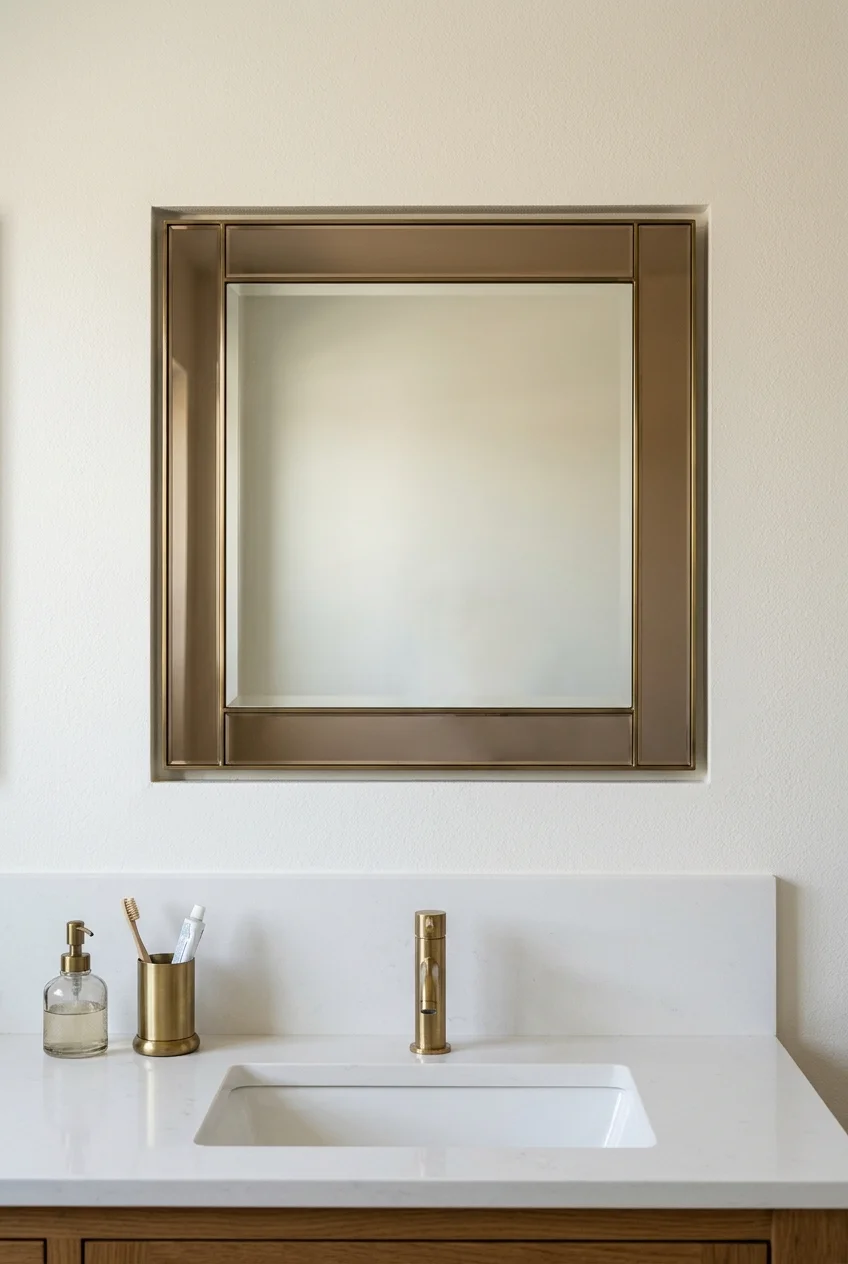
Smoked mirror around a clear central door gives the sink wall a darker outline. Keep the main reflection clear for shaving, makeup and checking small details.
Before choosing a recessed case, check the cavity for pipes, wiring and framing. A shallow surface-mounted version can give you the same visual line when the wall is crowded.
Check the swing with any wall lights and the faucet in place. Open the cabinet far enough to confirm that shelves can be adjusted and removed.
32. Put a ceramic vessel bowl on a lower vanity
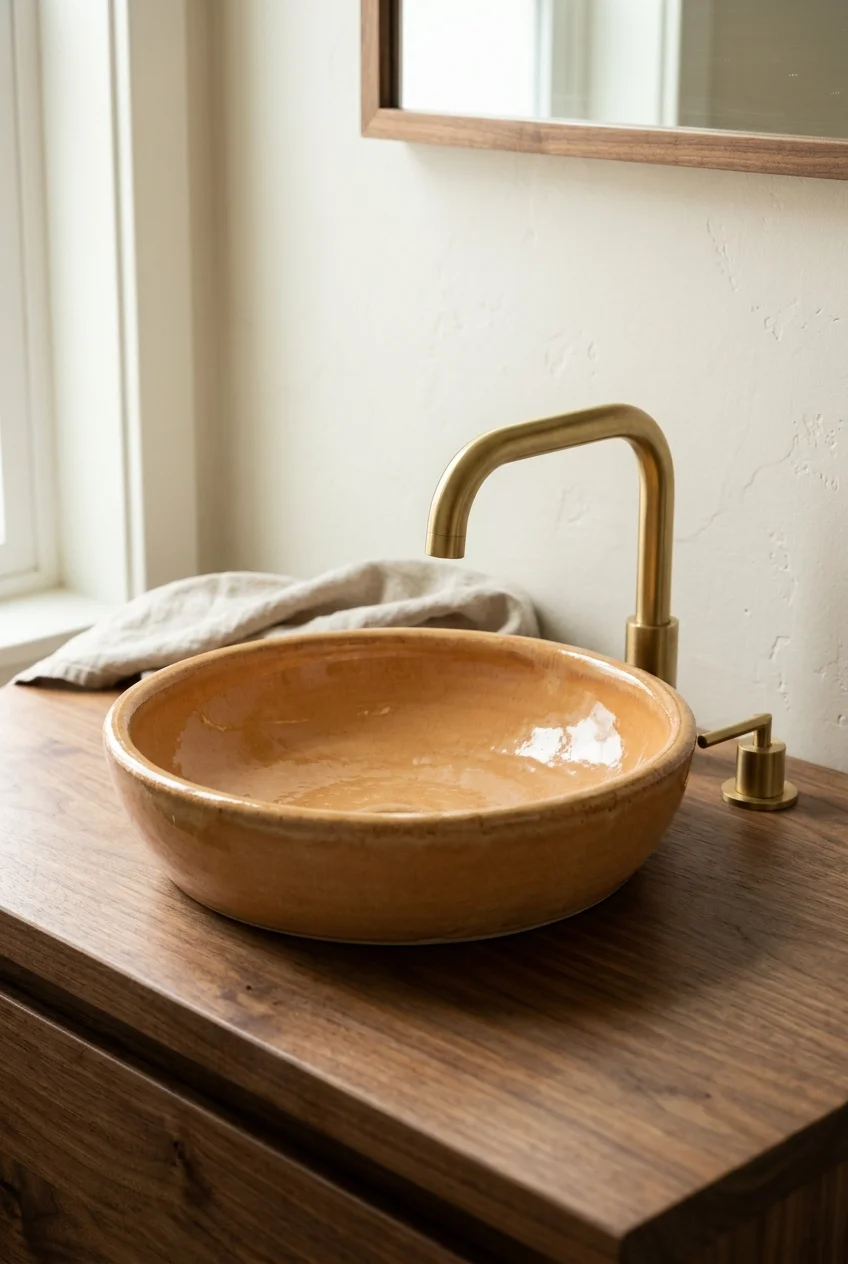
A shallow apricot vessel bowl brings the color up where you can see its profile. Pair it with a simple walnut or warm white vanity top.
Work backward from a comfortable finished rim height before choosing the cabinet. A vessel bowl on an already tall top can make washing and cleaning awkward.
Match the faucet's reach and height to the bowl. Have the installer verify how the water lands and whether the drain needs an overflow-compatible assembly.
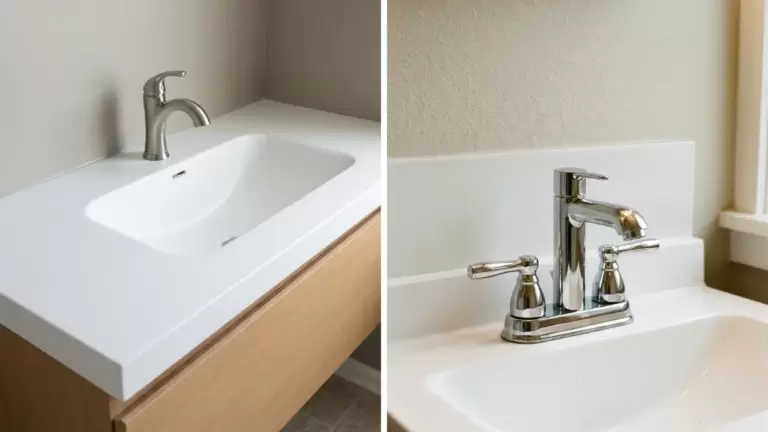
33. Use a wall-mounted faucet to clear the countertop
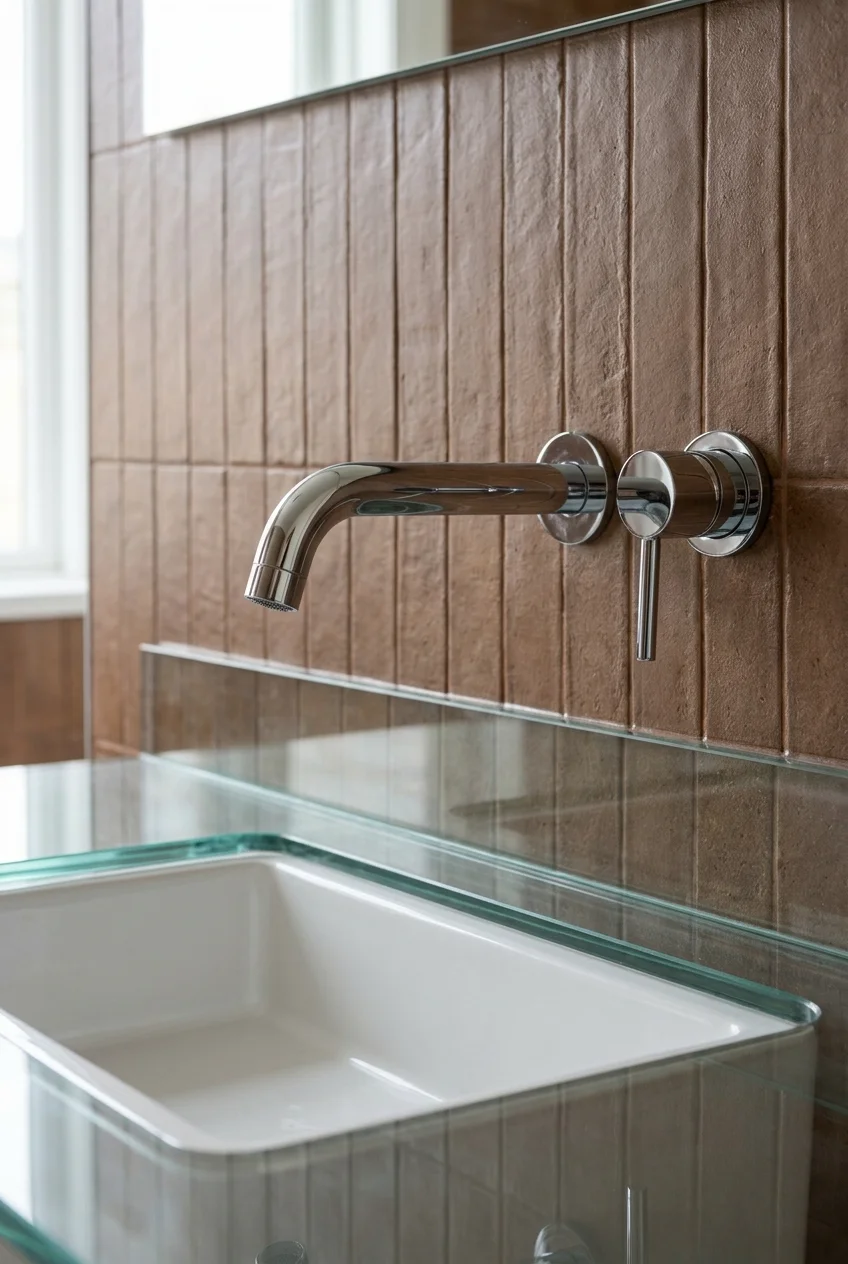
A wall-mounted faucet leaves the deck around the sink easier to wipe. A simple chrome spout looks right with a wide, shallow rectangular bowl and brown tile.
Set faucet and bowl positions together at the planning stage. The rough-in depth, spout reach and finished wall thickness affect where the water lands in the basin.
Allow for the correct valve body and manufacturer-specified access. In an otherwise intact bathroom, a deck-mounted faucet delivers a similar finish with a smaller job.
34. Use a shower niche as a color block
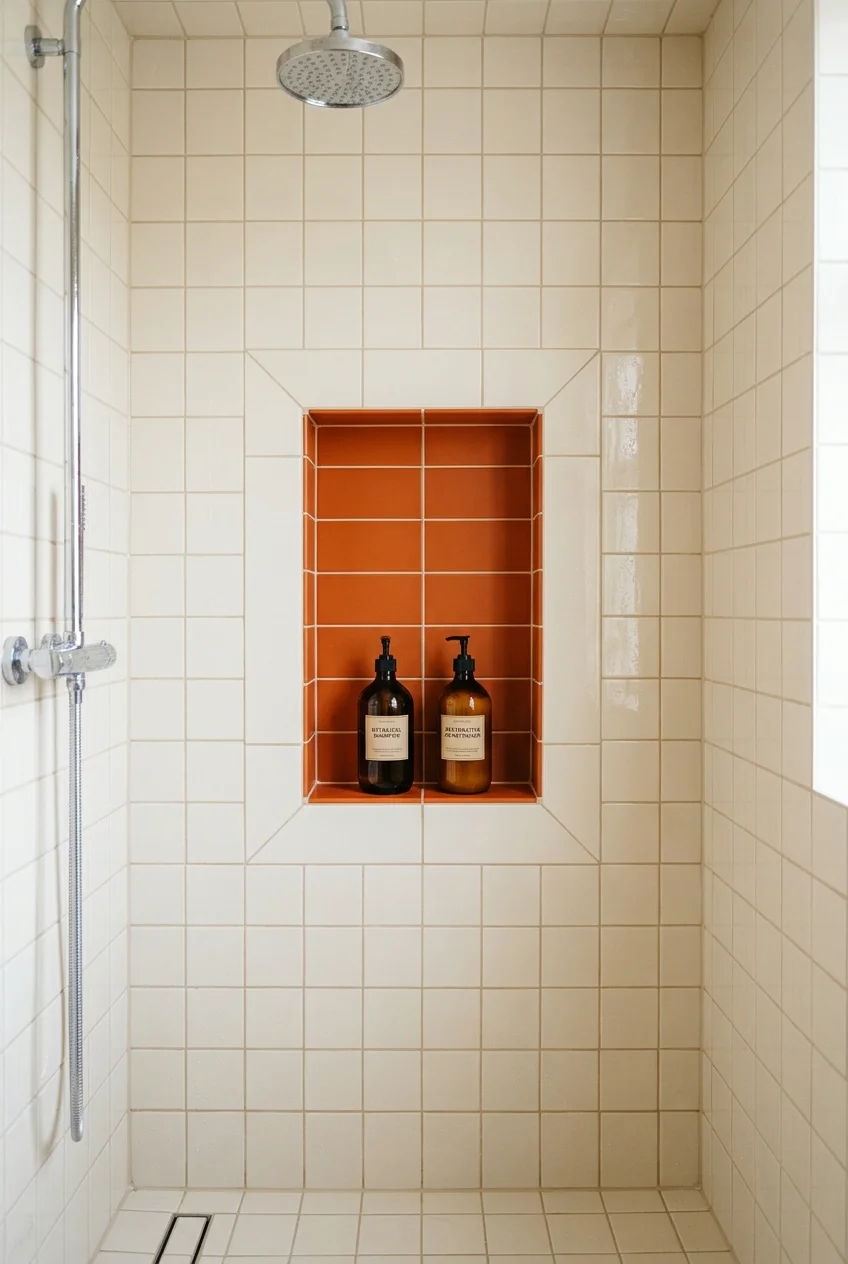
A deep orange niche set in pale field tile draws the eye to one useful recess. Keep bottles together inside it so the wall around it stays clear.
Set the shelf height using your tallest daily bottle and the tile module. Check stud locations and plumbing before making a recessed storage plan around one tidy drawing.
Specify the niche as part of the shower's waterproof assembly. Ask the installer how they will detail corners and provide drainage at the shelf before setting tile.
Setup note If the desired wall is crowded with pipes, a compatible corner shelf can keep toiletries reachable without building a recess there.
Pattern, lighting and finishing details
35. Hang a big geometric shower curtain
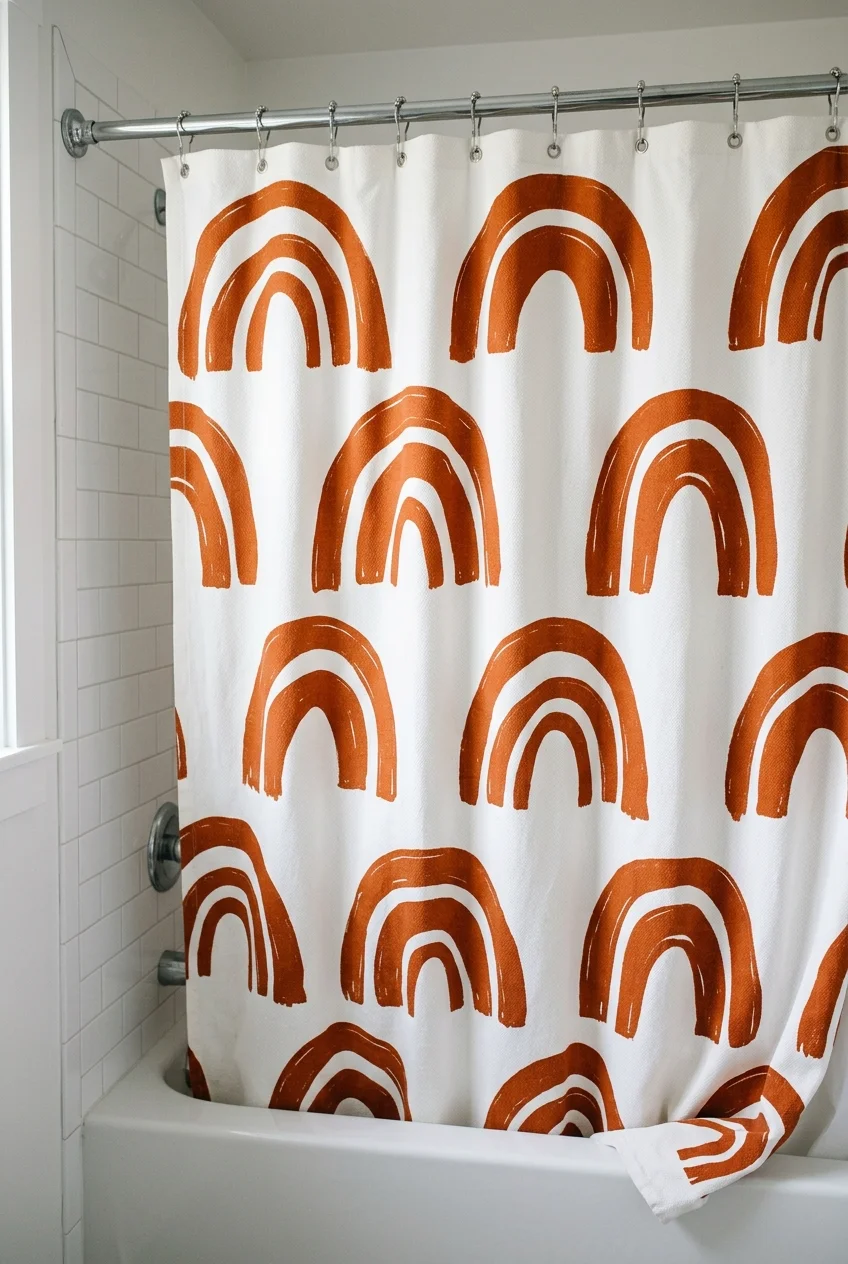
A curtain with oversized orange curves gives a plain tub a 70s focal point. It's an easy place to start when your tile and fixtures are staying.
A orange geometric shower curtain is one option if its listed 72-by-72-inch size fits your rod. Measure the span and drop with your rings in place.
See the small bathroom shower curtain ideas for lower-contrast patterns if your bathroom already has patterned tile and you want the two surfaces to sit comfortably together.
36. Put oversized botanical wallpaper in the powder room
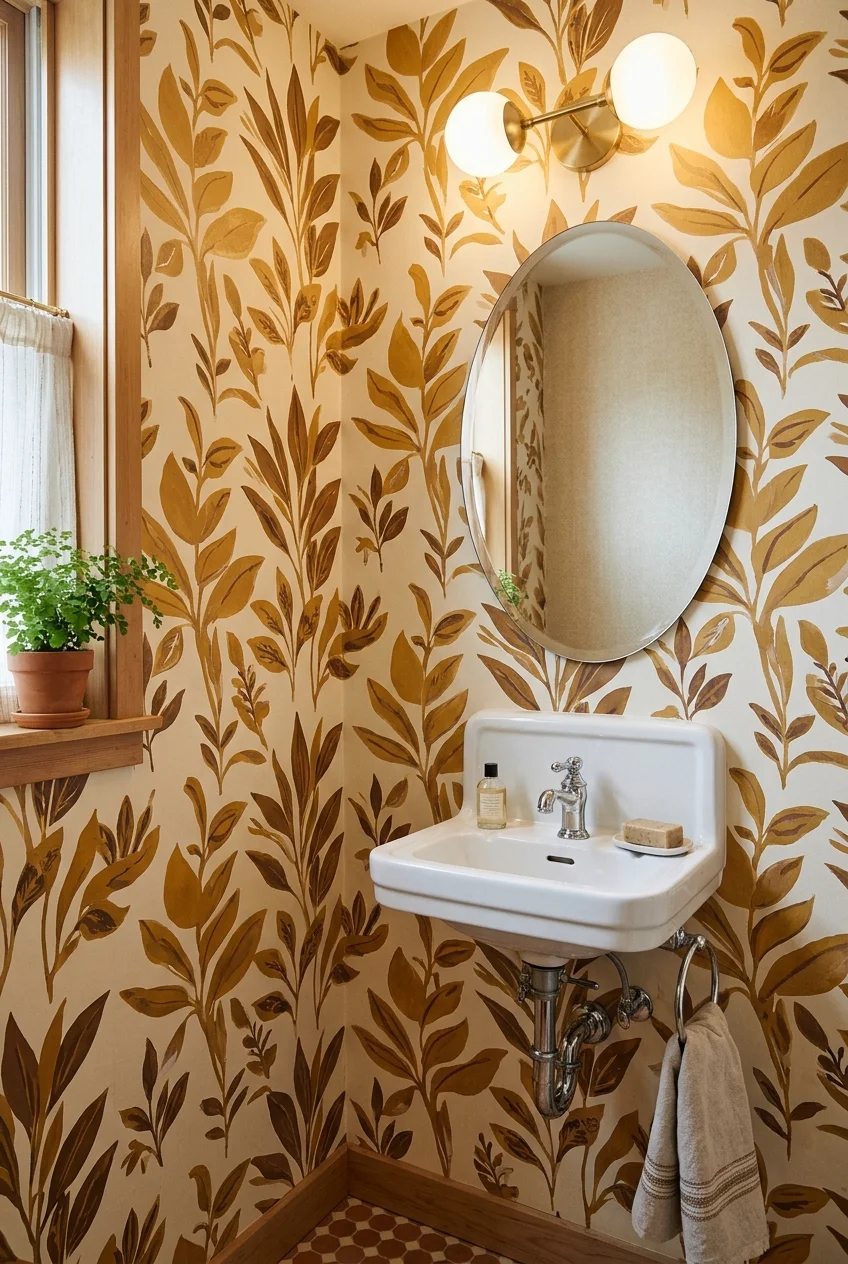
Large illustrated leaves in brown and gold can fill the view behind a compact sink. Start with a sample big enough to show the full repeat.
Look at the pattern behind the mirror before setting the layout. An off-center repeat can let a whole leaf show above the frame and avoid awkward tangents.
For a frequently steamy full bath, check the wallpaper manufacturer's guidance and keep it away from direct splash. A dry powder room offers more material options.
37. Frame one graphic print beside the mirror
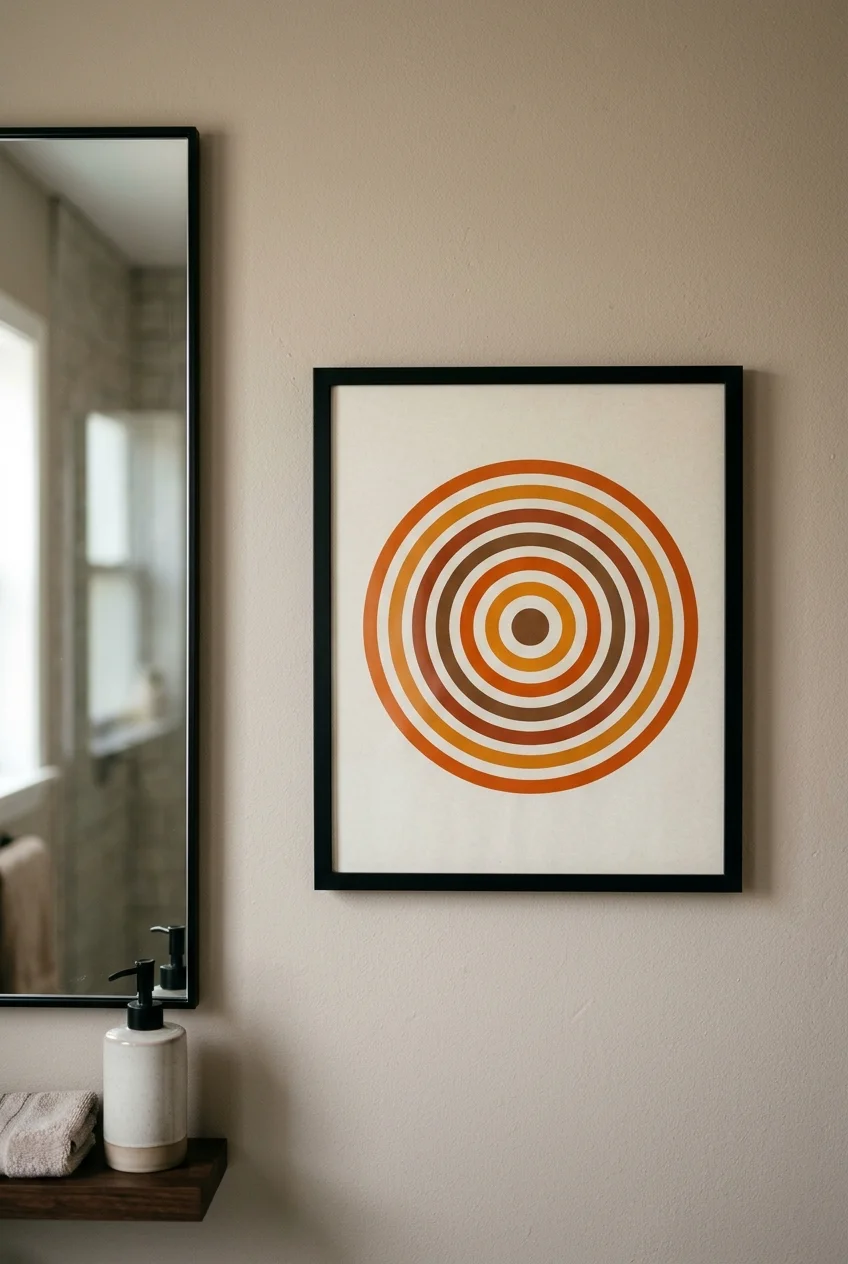
A single poster with concentric rings can introduce the decade without changing the finishes. Hang it on the dry wall beside the mirror to balance the vanity.
Pick one poster color that already appears in the room. If the bath gets steamy, use a reproduction you can replace and keep it away from splash.
38. Make a woven shade the natural texture
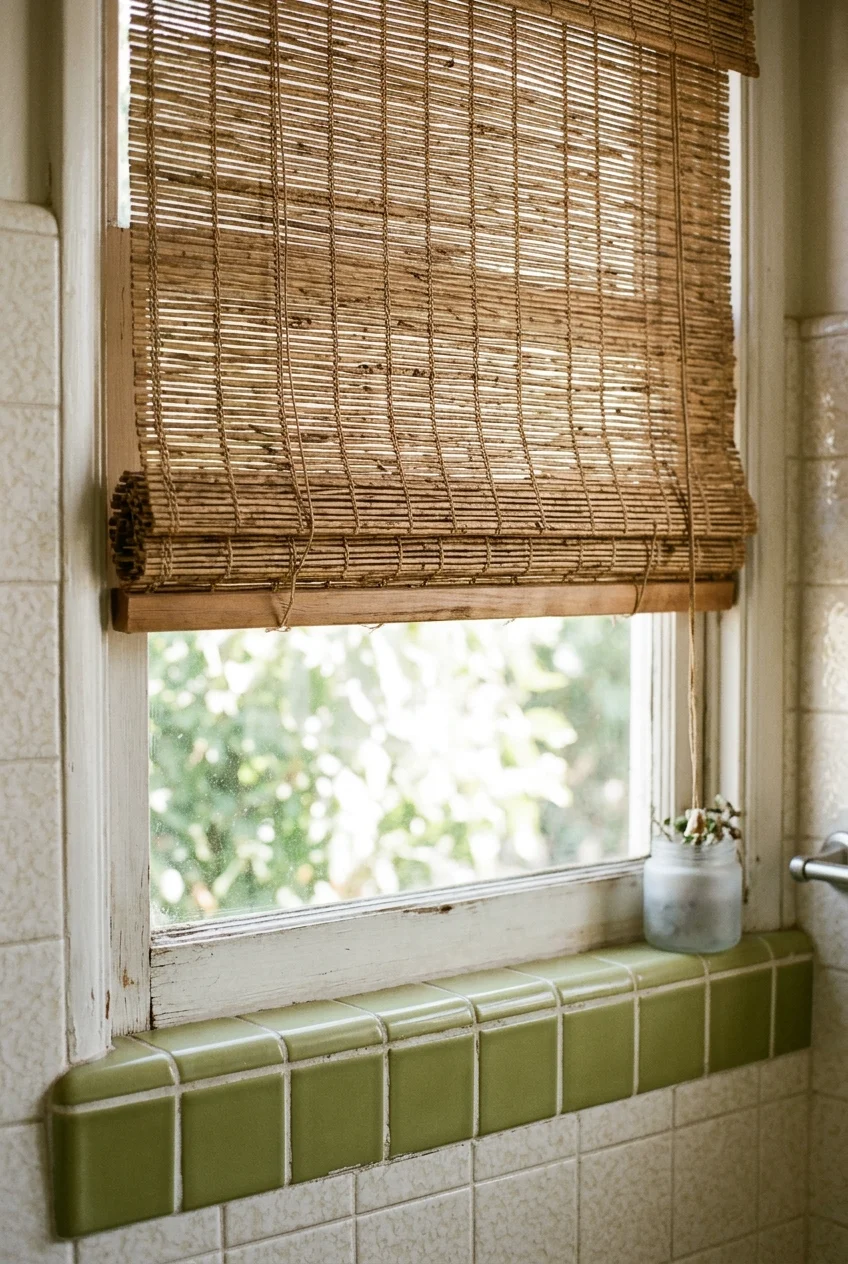
A woven reed shade warms up a cream and avocado bathroom without using counter space. Look for a lined version if the window faces another home.
Check how the shade will handle humidity and compare privacy with the room lit after dark. For direct splash, choose window treatment materials suited to that exposure.
These bathroom window treatments include wipeable roller options worth comparing if your window sits near the tub and needs frequent cleaning or more privacy.
39. Put an amber glass light above a powder-room mirror
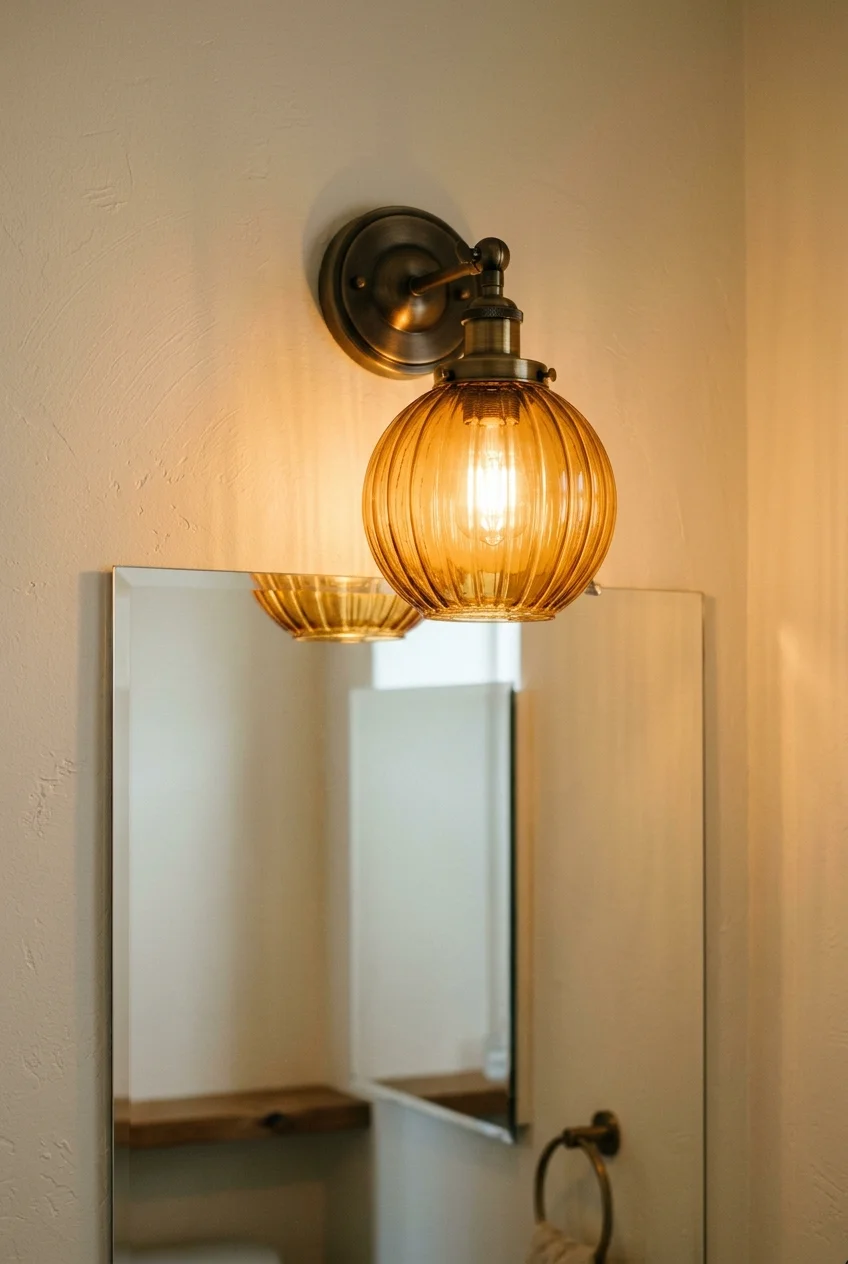
A single amber globe against cream paint gives a small powder room the glow of period glass. Pair it with a clear mirror and a quiet basin.
Colored glass can change how skin tones look. If this is the main grooming mirror, compare a clear or opal option or add separate neutral task lighting.
Confirm the fixture is rated for its intended location and have the mounting and wiring checked. Pick the shade style after confirming room for bulb changes.
40. Flank the mirror with opal globes
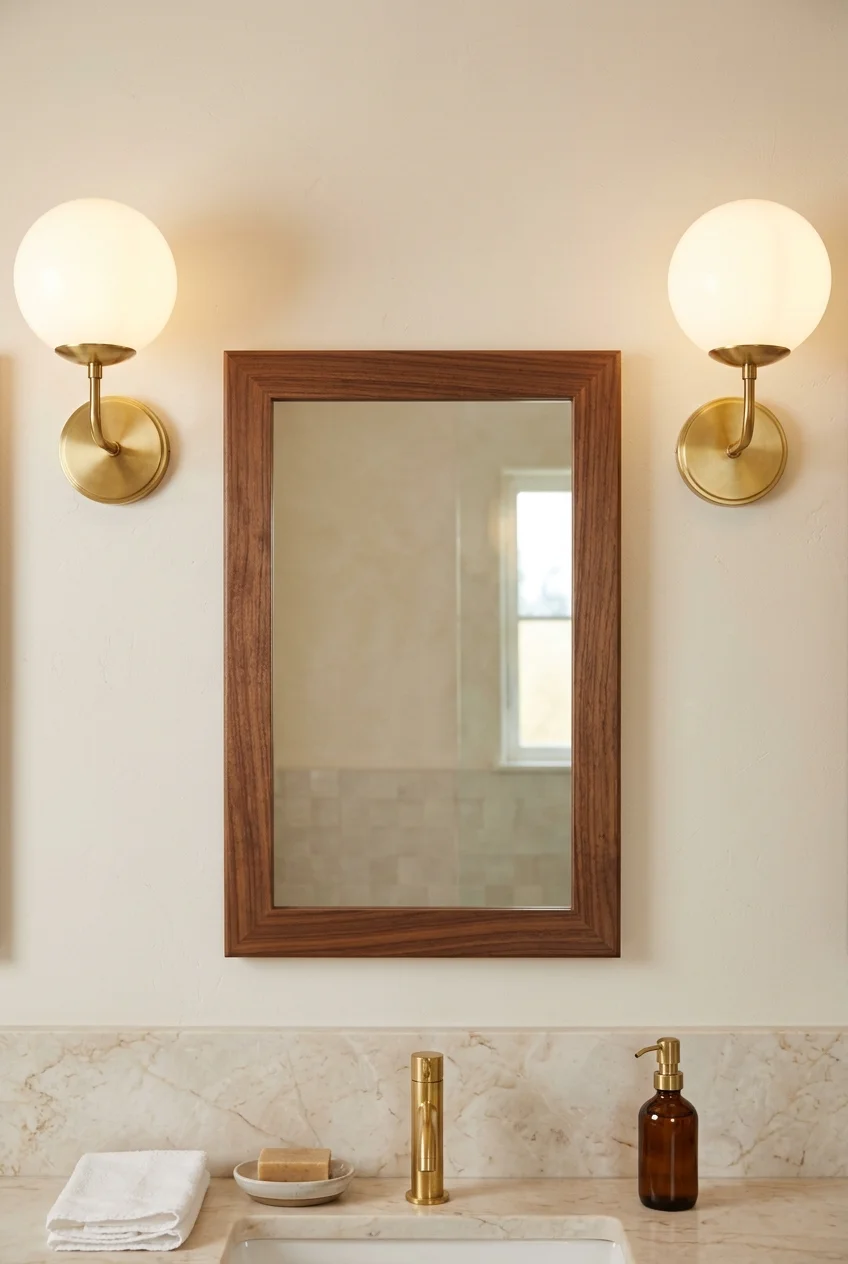
Round opal sconces give a plain mirror a recognizable 1970s outline. Put one on each side where the light can reach both sides of your face.
Tape up paper templates of the mirror and backplates first. Leave space for the cabinet door to open and for your hand to reach the switch comfortably.
Have an electrician check fixture location and rating, especially if the tub is close. Match bulb appearance across both globes to avoid a noticeable color difference.
41. Add a squat ribbed ceramic stool
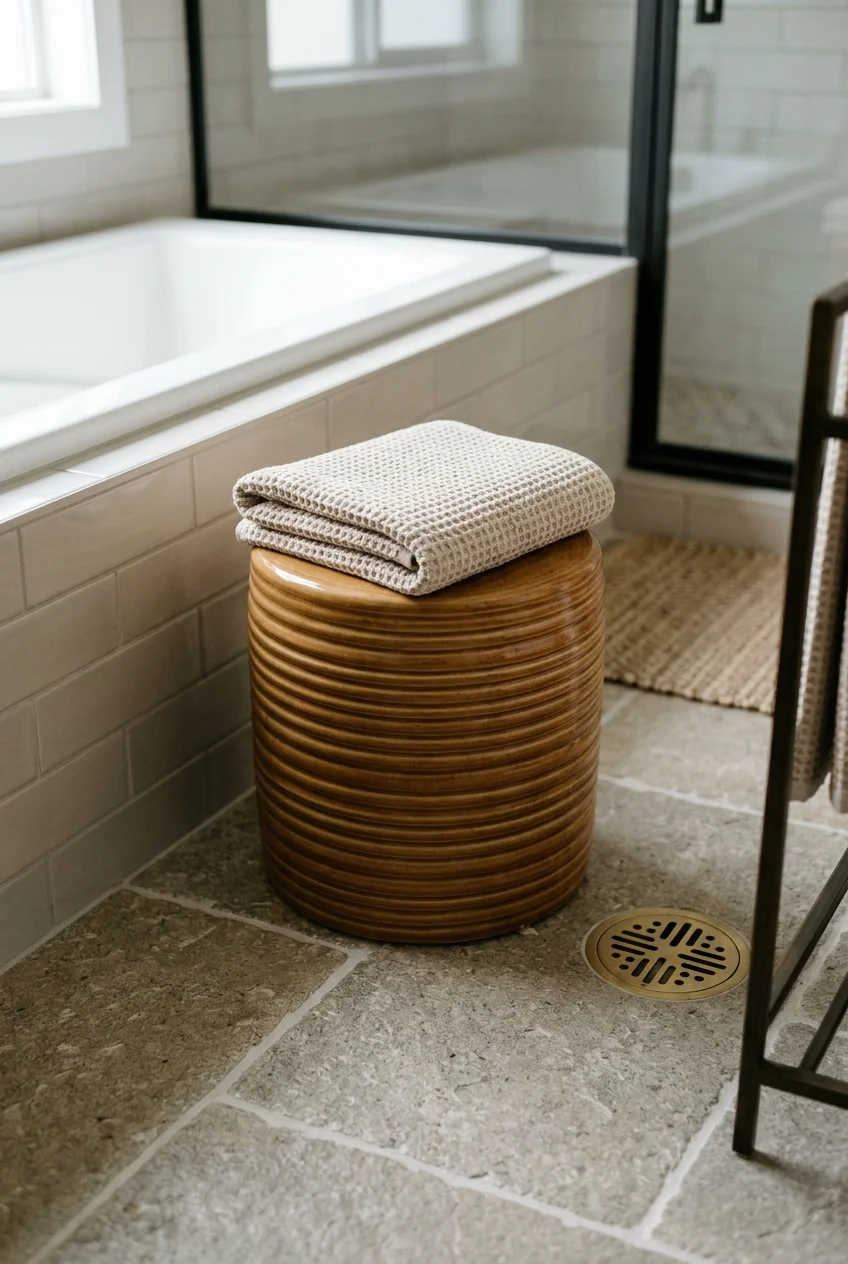
A glazed ceramic stool borrows the rounded volume of 1970s decor. Place it beside the tub outside the main path so a towel stays easy to reach.
Check that all feet sit steadily on the actual floor. Use it for towels unless the manufacturer specifies that the piece is suitable for seating or stepping.
42. Bring in a smoked-glass shelf over the sink
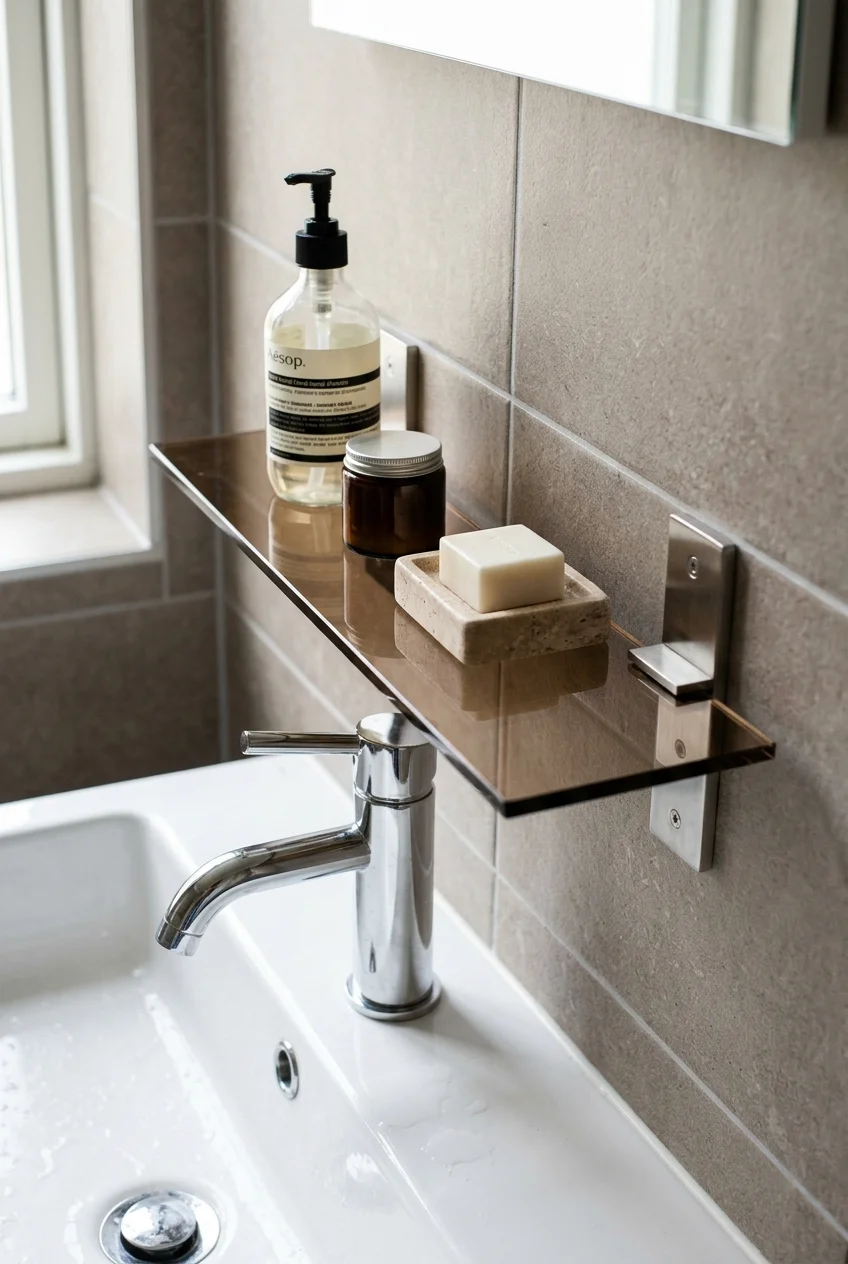
Bronze-tinted glass brings a darker horizontal line to a pale vanity wall. Use a shallow shelf so the edge stays back from the basin's working area.
Choose a shelf system with suitable safety glass and supported hardware. Check the mounting instructions, the wall substrate and clear space for operating the faucet before buying.
43. Swap plain knobs for oversized round pulls
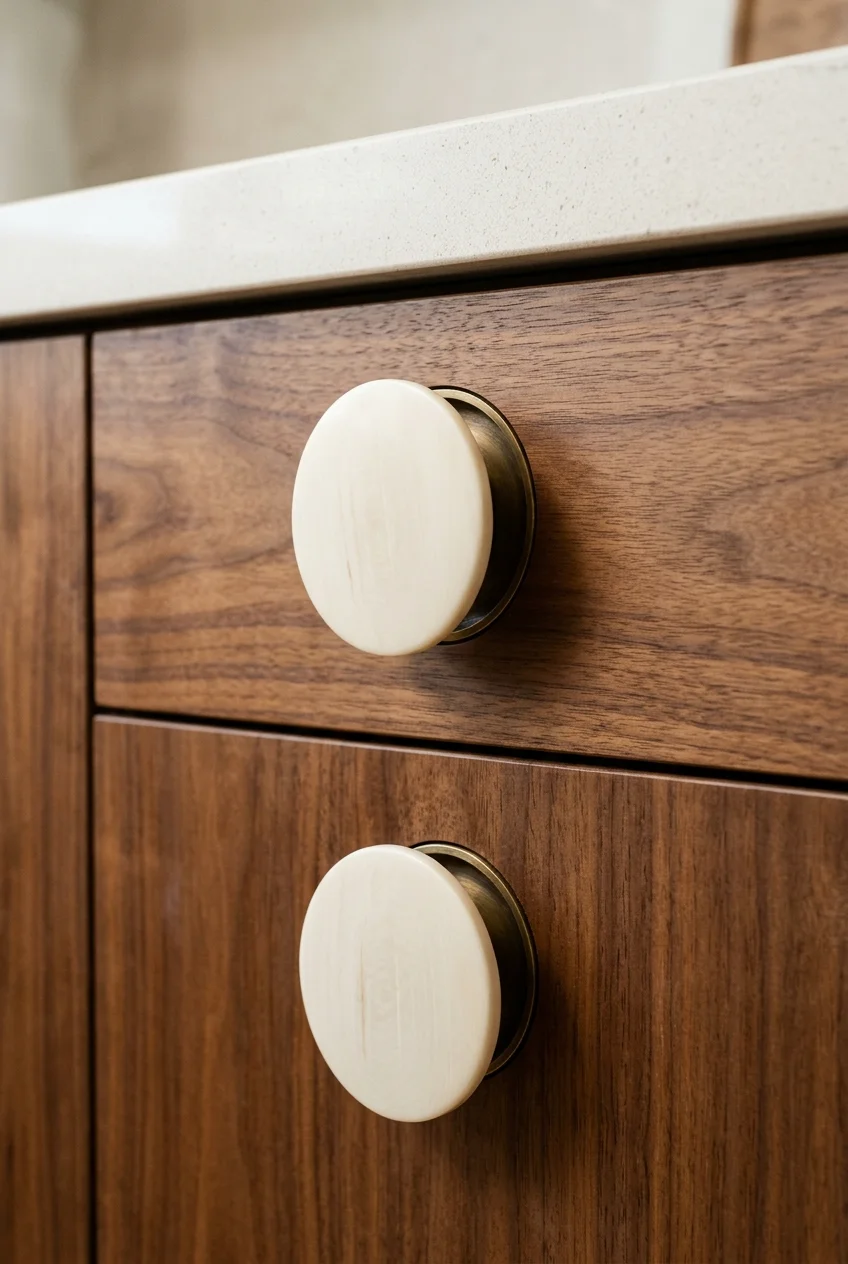
Disc-shaped knobs add visible geometry to flat vanity fronts. Try matte ivory against wood or brushed nickel on a dark painted cabinet to let the circles show.
Check the existing hole spacing before ordering replacements. Hold a sample on the door and reach behind it to confirm there's space to grip it with wet hands.
Layout changes that make an old bath easier to use
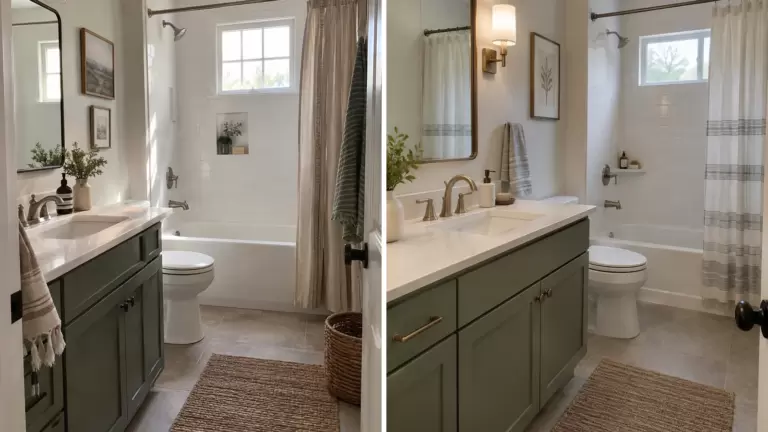
44. Replace a low sunken tub with an alcove tub
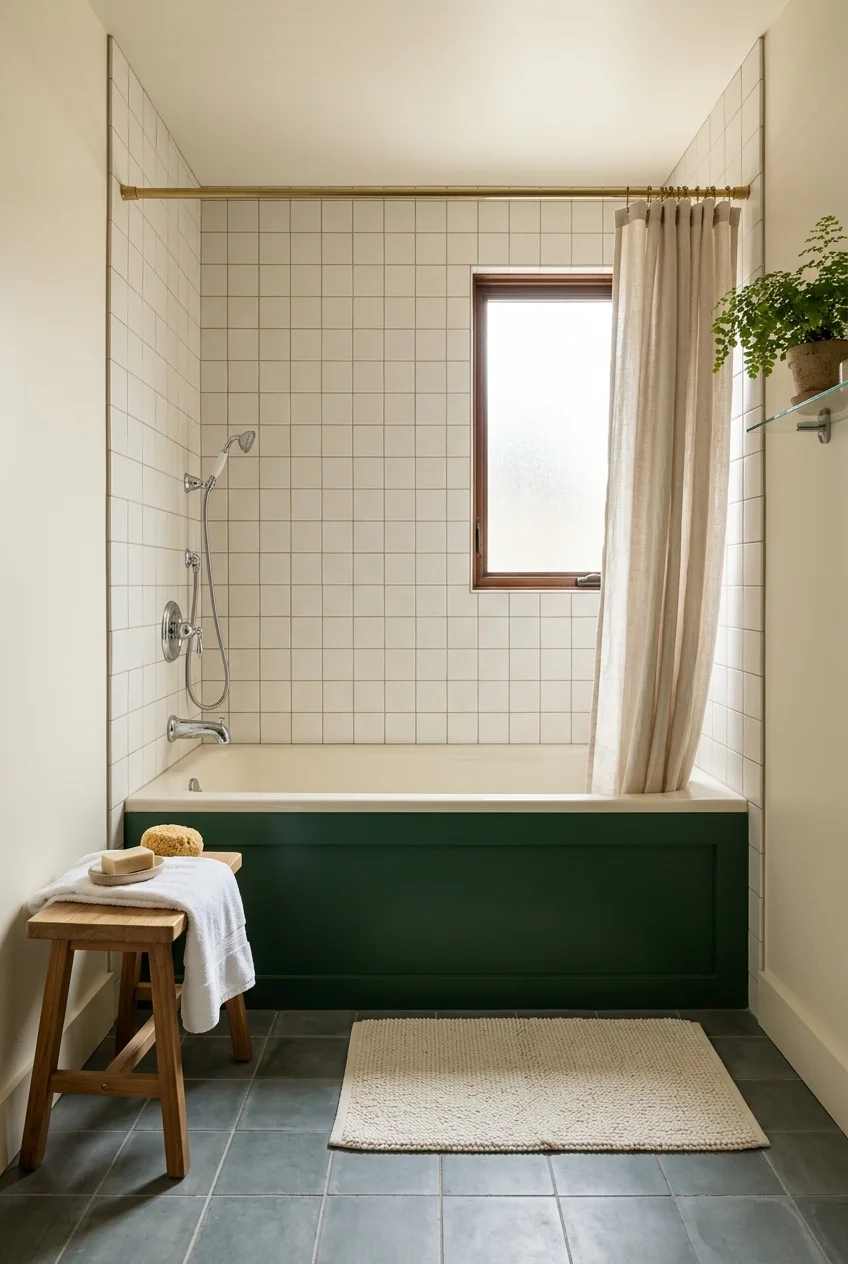
A standard-height alcove tub can simplify entry when the old design requires a step down. Cream square tile and a deep green apron retain the period character.
Have a remodeler investigate the existing recess, joists and plumbing before choosing the new tub. Filling or modifying a sunken area depends on how it was built.
Lay out the rim and controls before setting the surround. If the tub doubles as a shower, allow room for the curtain or enclosure and plan the waterproofing.
- Compare rim height and interior depth on actual specification drawings.
- Ask how the existing floor will be made level at the former recess.
- Verify drain access, tub support and the transition into the room.
45. Trade a tub for a shower in the same end of the room
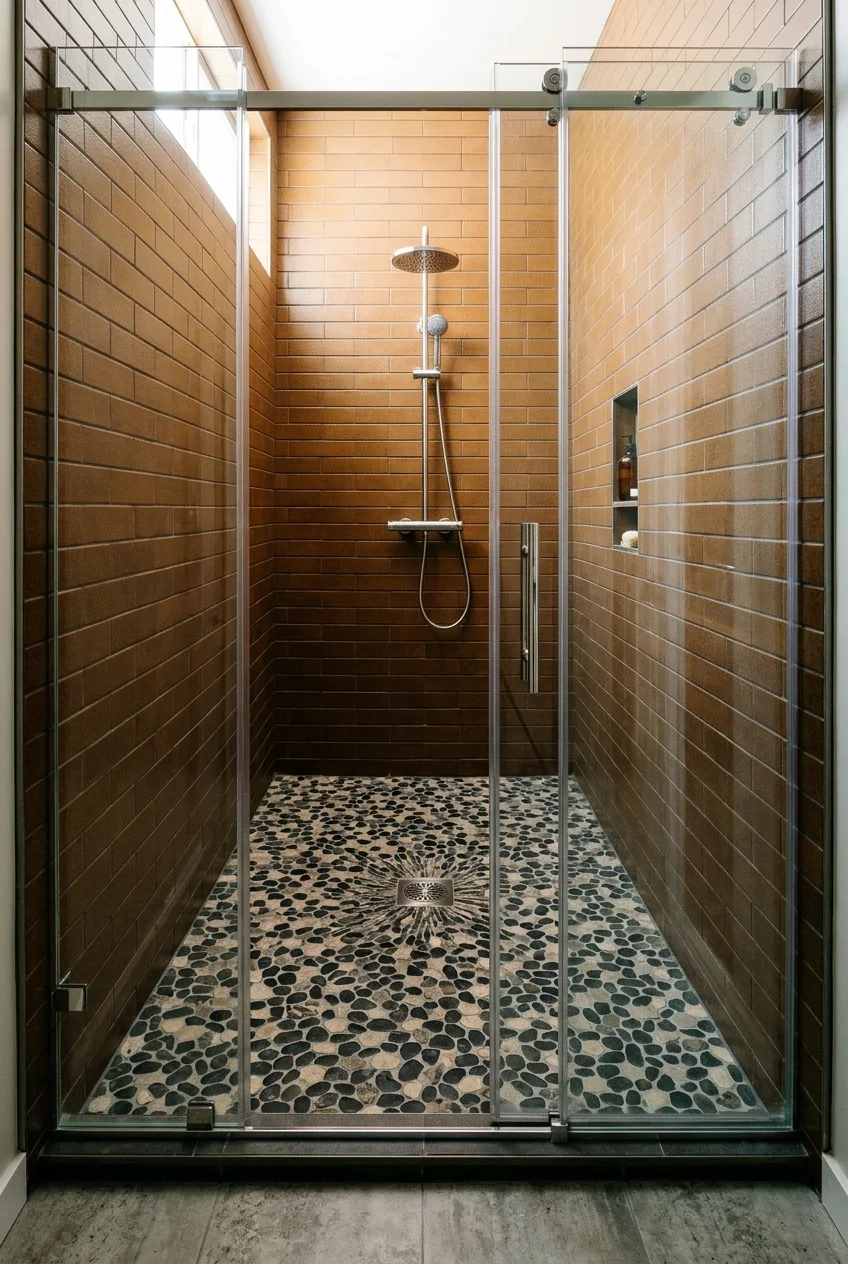
A shower can keep the old tub's end-wall location and give the room a longer view. Warm brown wall tiles keep the new enclosure from feeling generic.
Ask the plumber to confirm the drain size and location for the intended shower. Reusing the general footprint can still require substantial work below the old tub.
Plan the door or opening from the dry side of the room. Check its relationship to the vanity, toilet and towel hook before selecting an enclosure.
Measure the entry route for a prefabricated base as well as the alcove. Tight stairs or a narrow bathroom door can change which assemblies are practical.
Use a shower-floor finish specified for that application. The installer should design the slope, drain and waterproofing together before the new finish goes in.
Practical tip If this is your only tub, consider how you handle bathing children or pets before choosing a shower in its place.
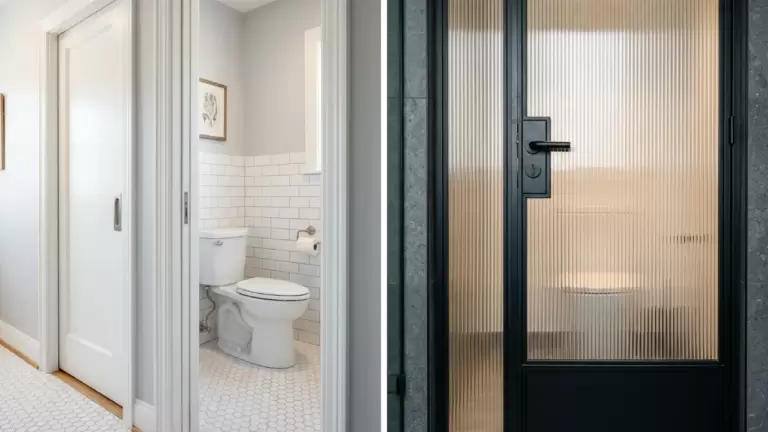
46. Screen the toilet with a tiled half wall
Image pending: No image is attached to this draft for idea 46 (image-46).
A half wall can add privacy without cutting the room into two dark compartments. Face its vanity side in small ocher tile and cap it in a solid material.
Make a cardboard mock-up to check views from the entrance and actual space around the toilet. Check both the approach and how you would clean behind it.
Have your installer plan secure attachment and confirm local fixture clearances. A shorter wall may provide enough screening while keeping more of the floor available.
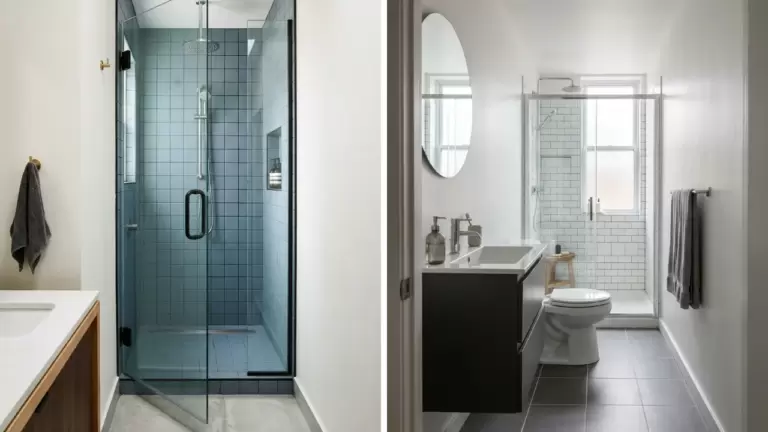
47. Swap cloudy sliders for clear glass on a tiled shower
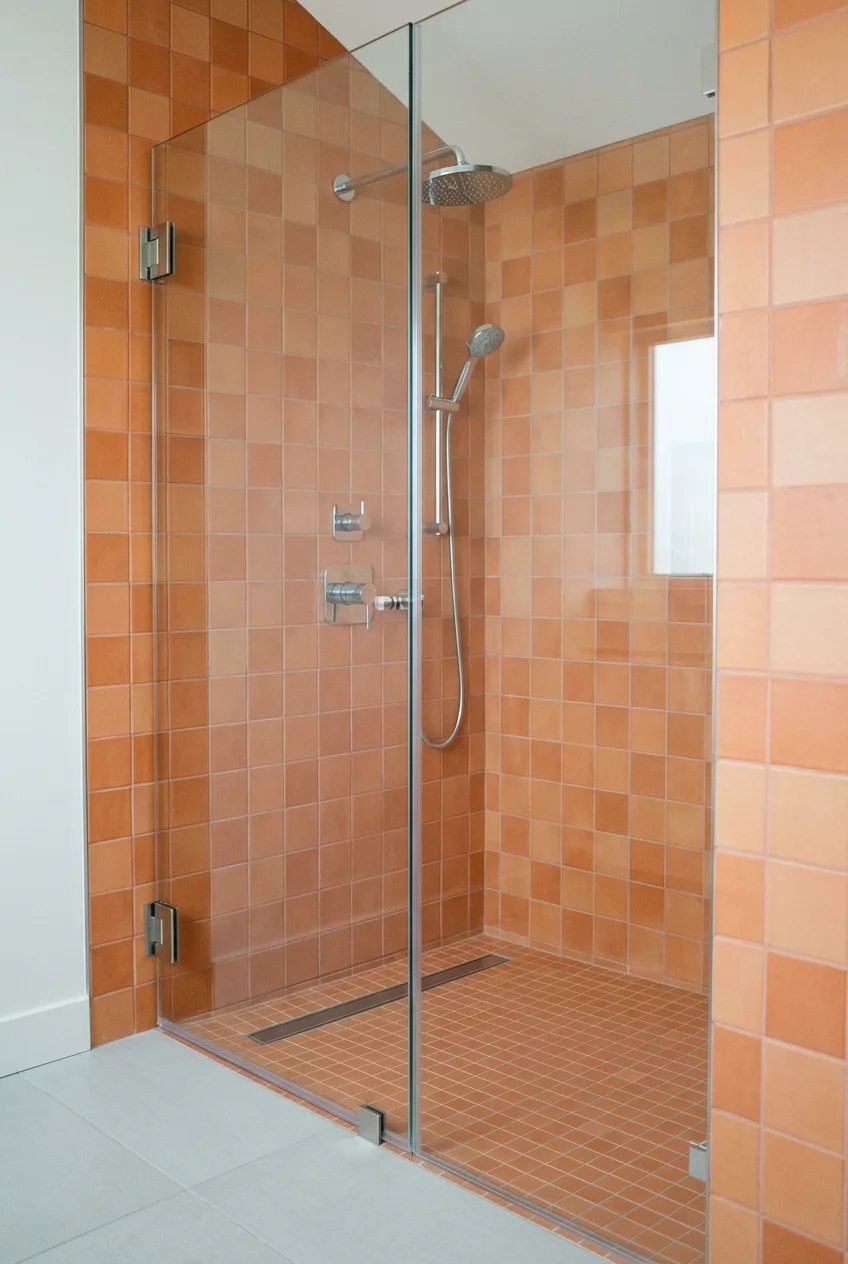
Clear glass lets you see the finished shower wall from the doorway. Choose this when the pattern deserves a clear view and you can keep the glass clean.
Measure the finished opening and check the support needed at the hinge or track. Sliding glass preserves aisle space, while a swinging panel needs a clear arc.
A foldaway shower squeegee offers a compact way to clear water from smooth glass. Its supplied suction hanger needs a surface where it can grip.
48. Borrow daylight with a high reeded-glass window
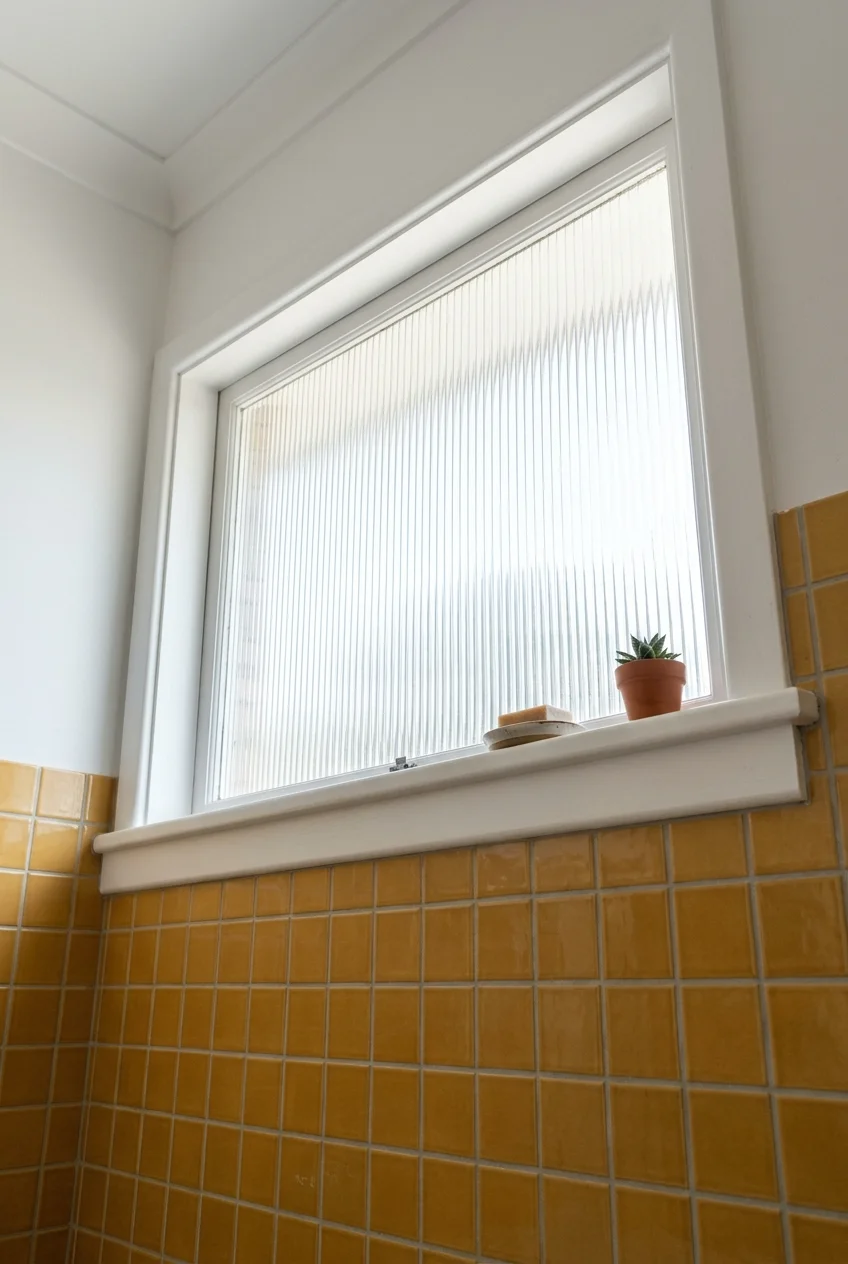
A high reeded-glass window can illuminate a dark bath while breaking up the view. The vertical texture fits an otherwise simple wall of ocher squares.
Check privacy at night with the bathroom lit. Obscure glazing can still show outlines, so use the sightline from neighboring windows to decide if a shade is useful.
Have the window supplier confirm the appropriate glazing and frame for its location, especially near a tub or shower. Include any wet-area sill details early in planning.
49. Turn an empty end wall into a vanity and tall storage run
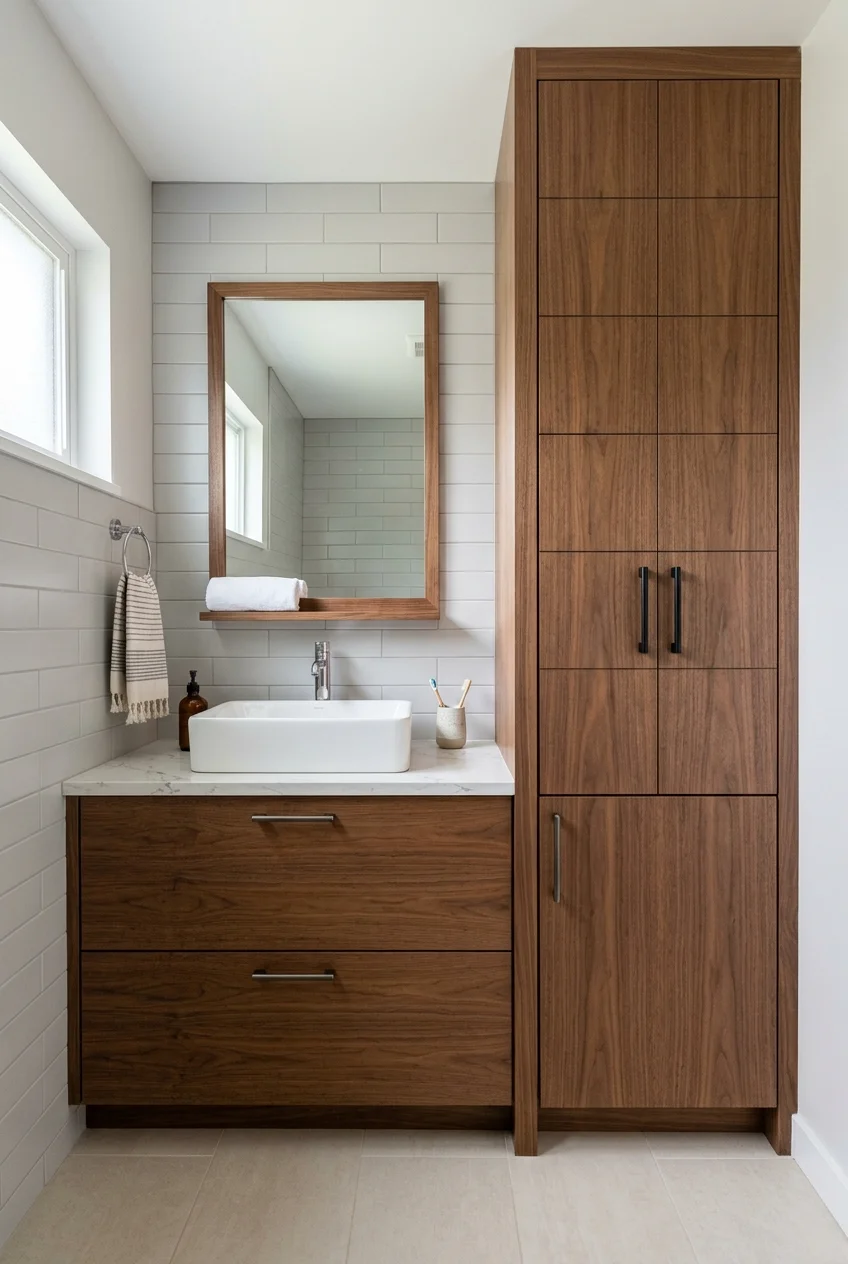
A vanity and full-height linen tower can use a single end wall efficiently. Matching walnut fronts make the tall and low pieces read as one fitted arrangement.
Start from the sink centerline and work outward. Allow room for the linen door to open past the counter overhang and for the vanity drawers to clear pulls.
Set wet and dry storage inside the same run. Keep clean towels in the tower and make the plumbing cabinet easy to empty when valves need service.
Check where the counter ends against the tower and specify a finished joint. The tall cabinet needs appropriate anchoring and a finish suited to the bathroom.
50. Use glass block above a shower partition
Image pending: No image is attached to this draft for idea 50 (image-50).
A short row of translucent glass block on a tiled partition lets light reach a shower tucked behind the wall. The grid echoes the square ceramic tile below.
Think about privacy from the doorway before picking the block texture and partition height. Check where the opening falls so spray stays mostly inside the shower area.
Have the installer design the glass block support and the adjoining wet-area assembly. These are separate construction details that need to meet cleanly at the tile cap.
Frequently Asked Questions
What should I check before removing original flooring or painted trim?
Old flooring, backing and adhesives can contain asbestos. If you suspect it, consult a trained, accredited asbestos professional before cutting, lifting or sanding the material.
For painted surfaces in a pre-1978 home, review the EPA guidance on lead at home and ask about lead-safe work before disturbing any old finish.
The EPA guidance on asbestos explains when to leave sound material in place and when a trained professional should assess planned work that might disturb it.
Can I keep a colored tub and replace the rest of the suite with white?
Yes. Choose the white in the same room as the tub, then carry a small note of the tub color into a nearby patterned or solid finish.
If the original fixtures all have different undertones, keeping one makes it easier to choose new finishes. Start with the piece in the best condition.
How can I make an original 70s bathroom feel more current?
Pick one original feature to stay visible, then simplify the surfaces around it. A sculptural mirror and plain walls can change how a busy tile floor reads.
If the fixtures need replacing, put the period detail into a tile shape or a walnut cabinet. That way you can choose straightforward replacements for everyday plumbing.