50 Halloween Witch Door Decor Ideas

This post may contain affiliate links: full affiliate disclosure.
Transforming a front entrance into a magical portal requires more than just a few plastic props. Success lies in balancing height, texture, and a clear focal point to keep the look cohesive.
These witch-inspired designs offer a sophisticated way to celebrate the season with style.
Witch Wreath Ideas
1. Oversized Witch Hat Wreath
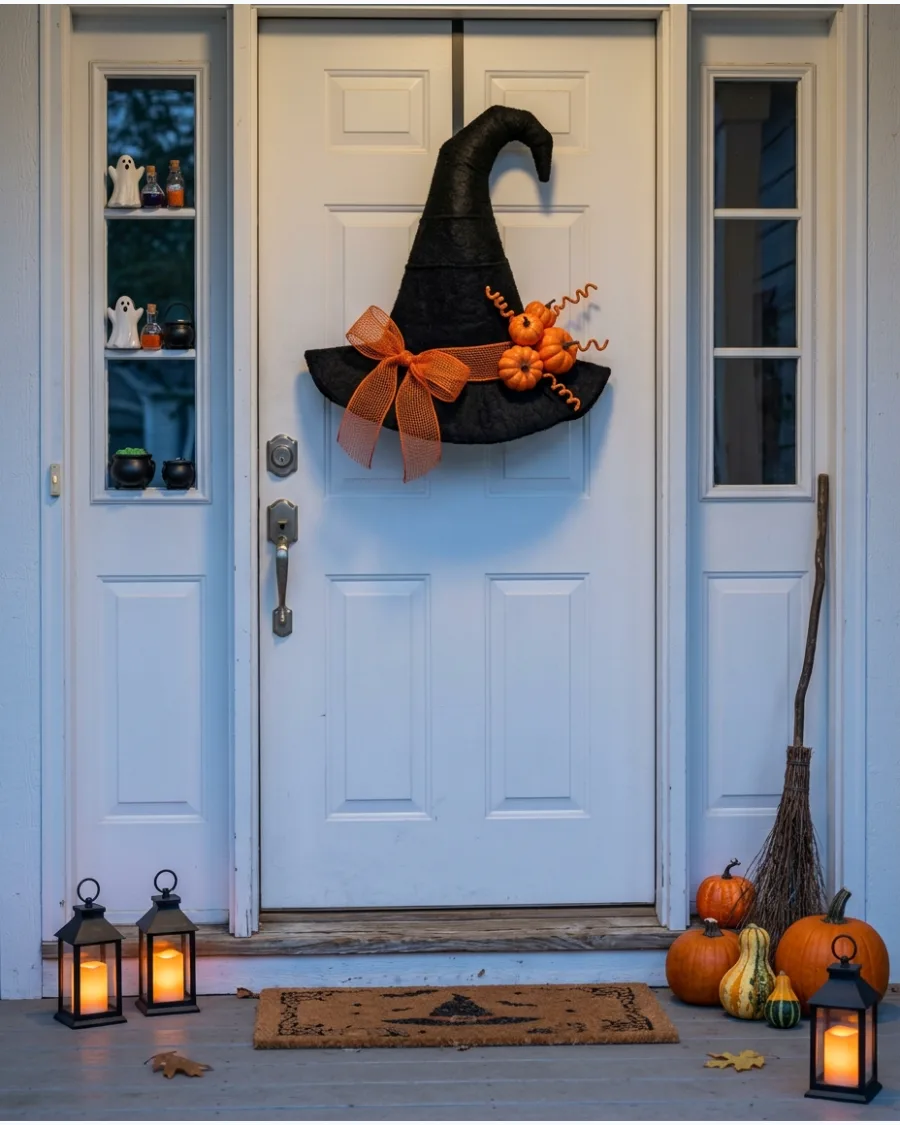
Use a large black felt or straw witch hat as the base for a unique door hanger. Wire the decorations directly through the material of the hat to keep them from sliding off when the door moves. Plastic hats are often too slippery for glue, so fabric bases provide a better grip for ribbons and pumpkins.
- Buy a hat with a stiff wire brim to hold its shape.
- Use 22-gauge floral wire to secure heavy items like faux spiders.
- Swap out the ribbon colors to match your existing porch furniture.
Most people skip this: Spray the hat with a fabric protector to prevent the black felt from fading in the sun.
Witch Door Decoration Ideas for Halloween
2. Horizontal Witch Broom Door Swag
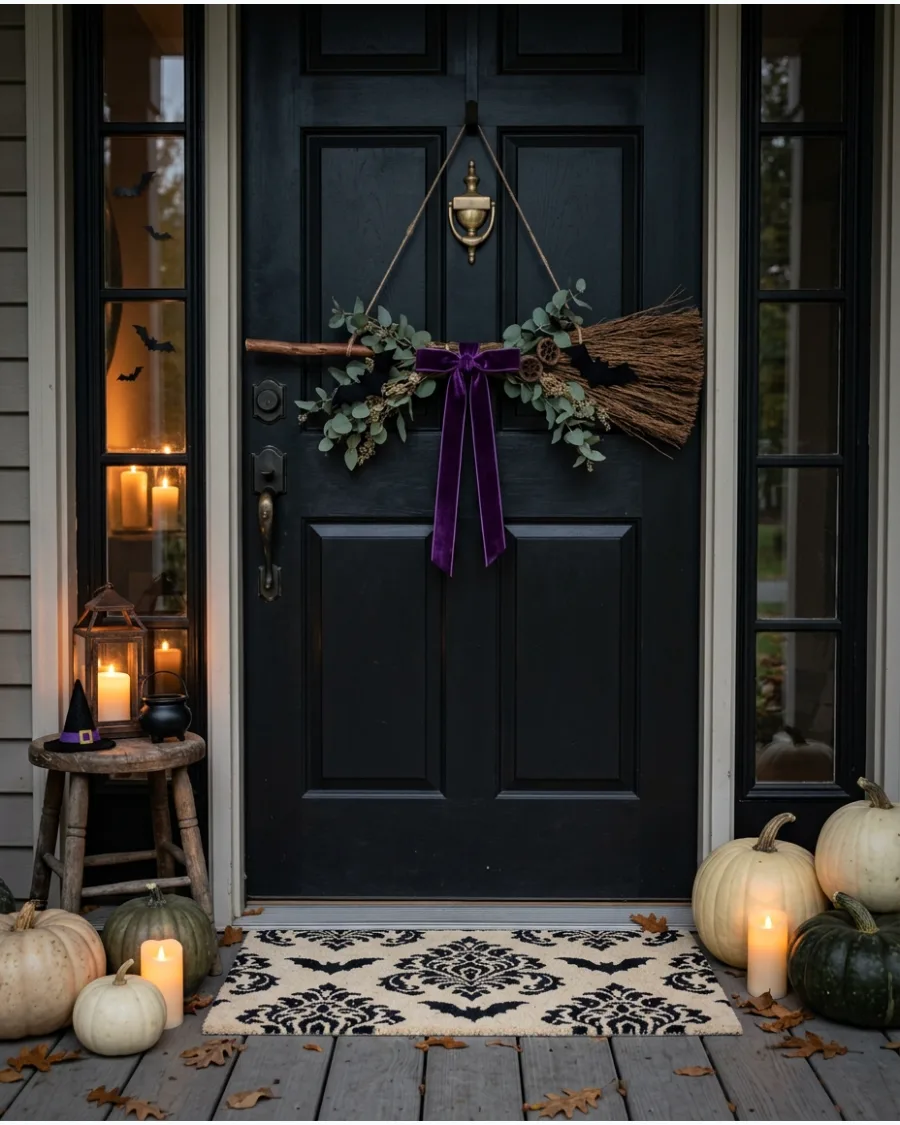
This horizontal arrangement replaces the traditional round wreath with a rustic cinnamon broom base. Wire dried eucalyptus and purple ribbon onto the handle to create a textured, asymmetrical focal point. It works because the horizontal line breaks up the vertical panels of a standard front door.
While many prefer a centered look, placing the broom at a slight diagonal adds a sense of movement that feels more whimsical.
- Source a scented cinnamon broom from a local grocery store for under $10 in early October.
- Secure the broom using two clear adhesive hooks placed horizontally to prevent tilting or sliding.
- Swap the ribbon for orange burlap or black lace to match different porch color schemes.
Quick win: Spritz the broom bristles with water every few days to reactivate the cinnamon scent for guests.
Witch Wreath Ideas
3. Crossed Witch Broom Door Hanger
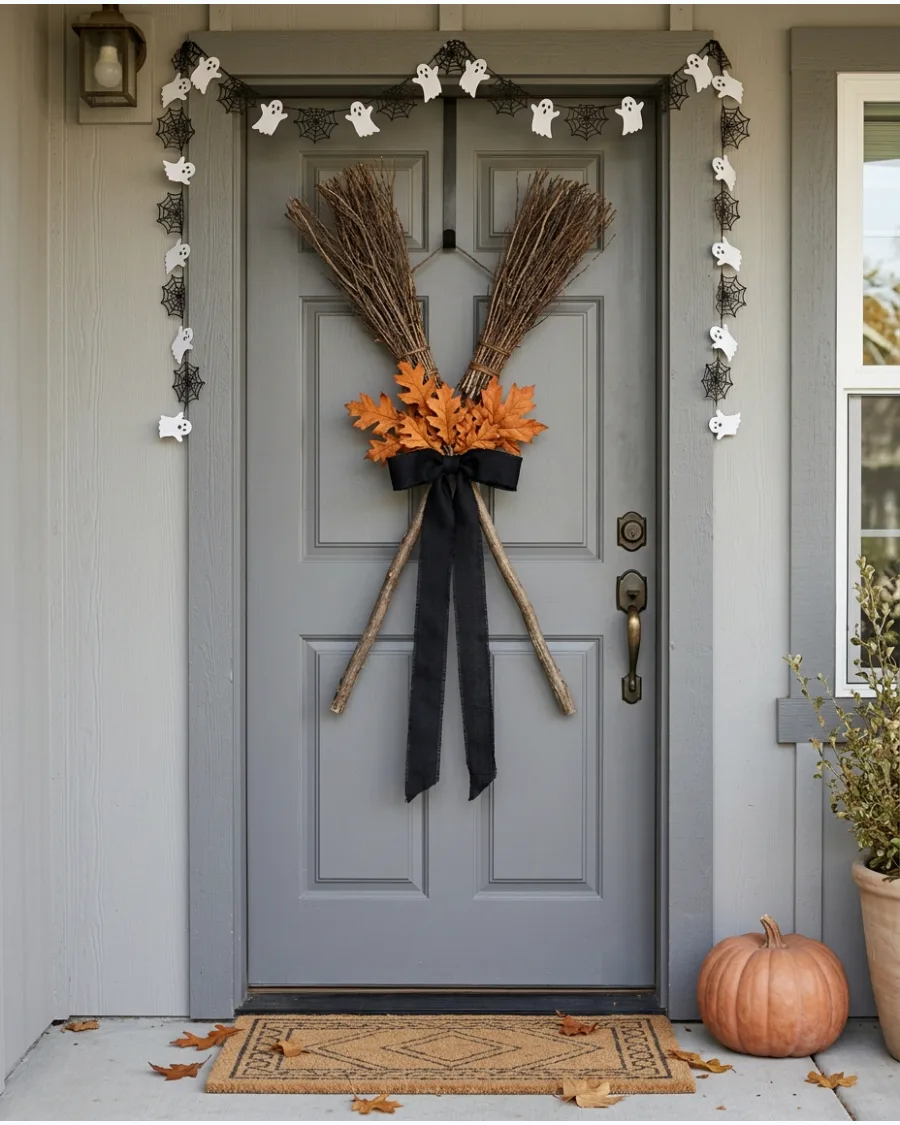
Create a simple but striking X shape using two full-sized rustic brooms. Tie the intersection tightly with jute twine before adding decorative ribbons to hide the hardware. This vertical design is a great alternative for narrow doors where a wide round wreath might hit the frame.
- Look for brooms with natural twig bristles for a vintage look.
- Hang the display using a sturdy over-the-door hook.
- Attach a 'Witches Welcome' sign where the broom handles meet.
Best shortcut: Use a zip tie to secure the brooms together first, then wrap the twine over it for a polished look.
4. Black Feather Witch Wreath
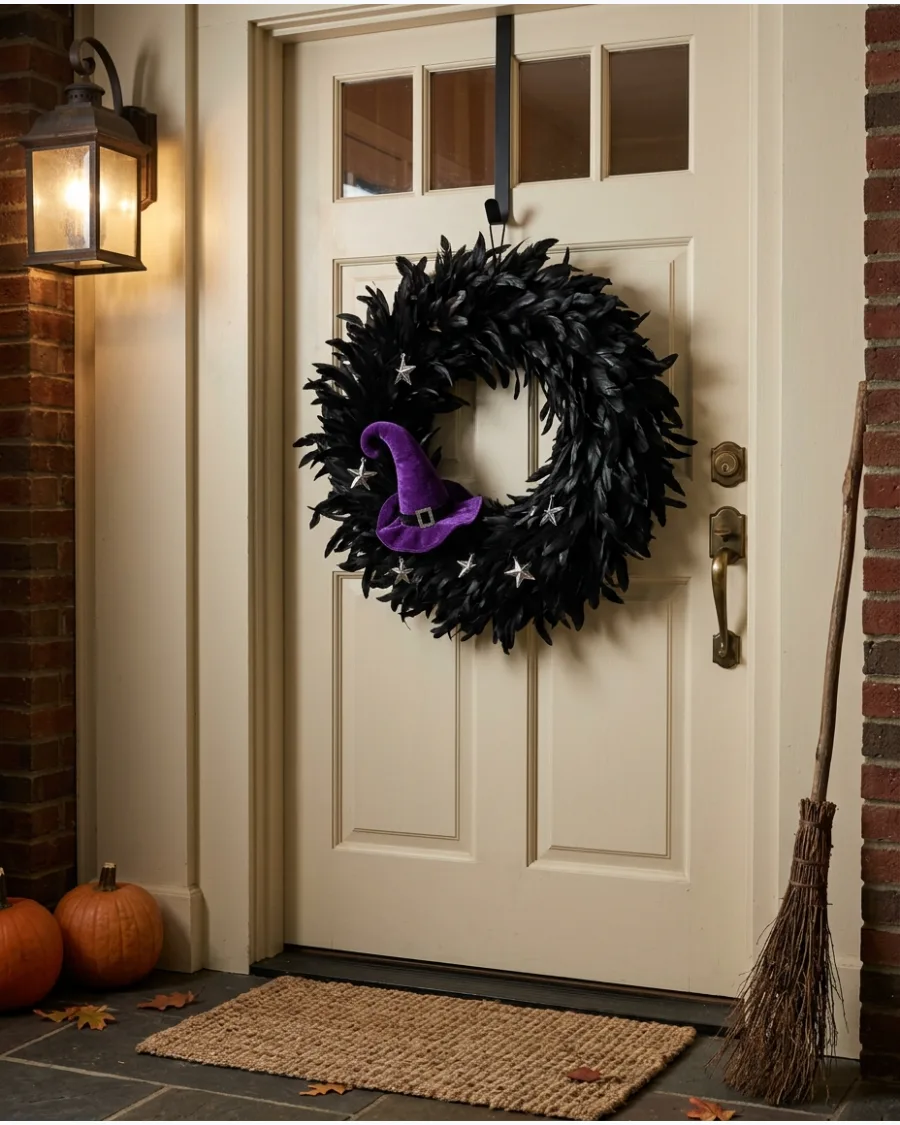
Cover a foam wreath form with black feather boas or individual goose feathers for a gothic feel. Spray the finished wreath with a light coat of hairspray to prevent individual feathers from shedding in the wind. High-contrast colors like silver or purple stand out beautifully against the dark texture.
- Use two feather boas for a full, high-end appearance.
- Attach a small velvet witch hat with hot glue on the side.
- Choose a light-colored door for the best visual impact.
Most people skip this: Shake the feather boa outside before crafting to remove loose debris and dust.
5. Purple and Black Witch Wreath
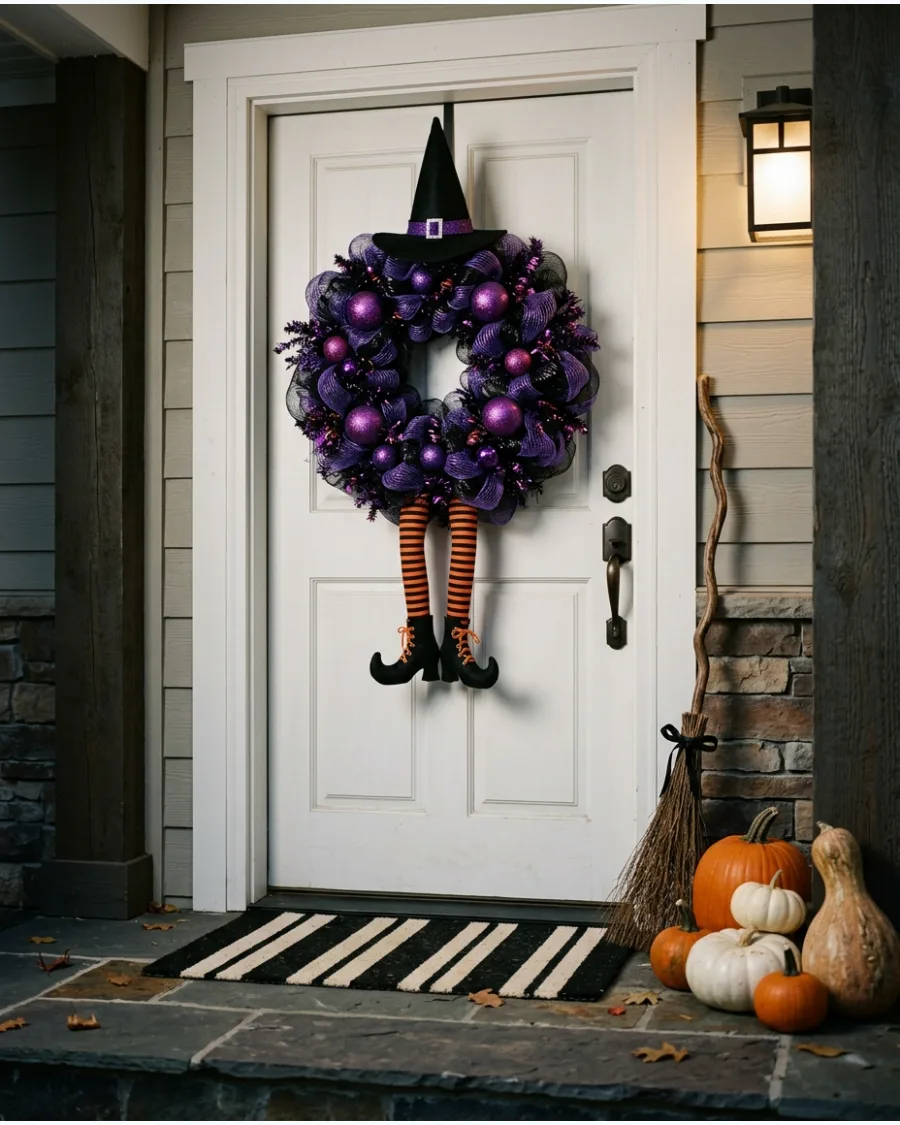
Mix black deco mesh with deep purple ribbons and glittery ornaments for a bold statement. Tuck the wire ends of the witch legs deep into the wreath form so the boots hang at a natural angle. This playful color palette works well for families who want a festive rather than scary entrance.
- Layer 10-inch mesh loops for maximum volume.
- Use wired ribbon so you can shape the bows easily.
- Add striped witch legs to the bottom for a whimsical touch.
Quick win: Use pipe cleaners in a matching color to attach ornaments so they don't fall off when the door slams.
6. Mossy Forest Witch Wreath
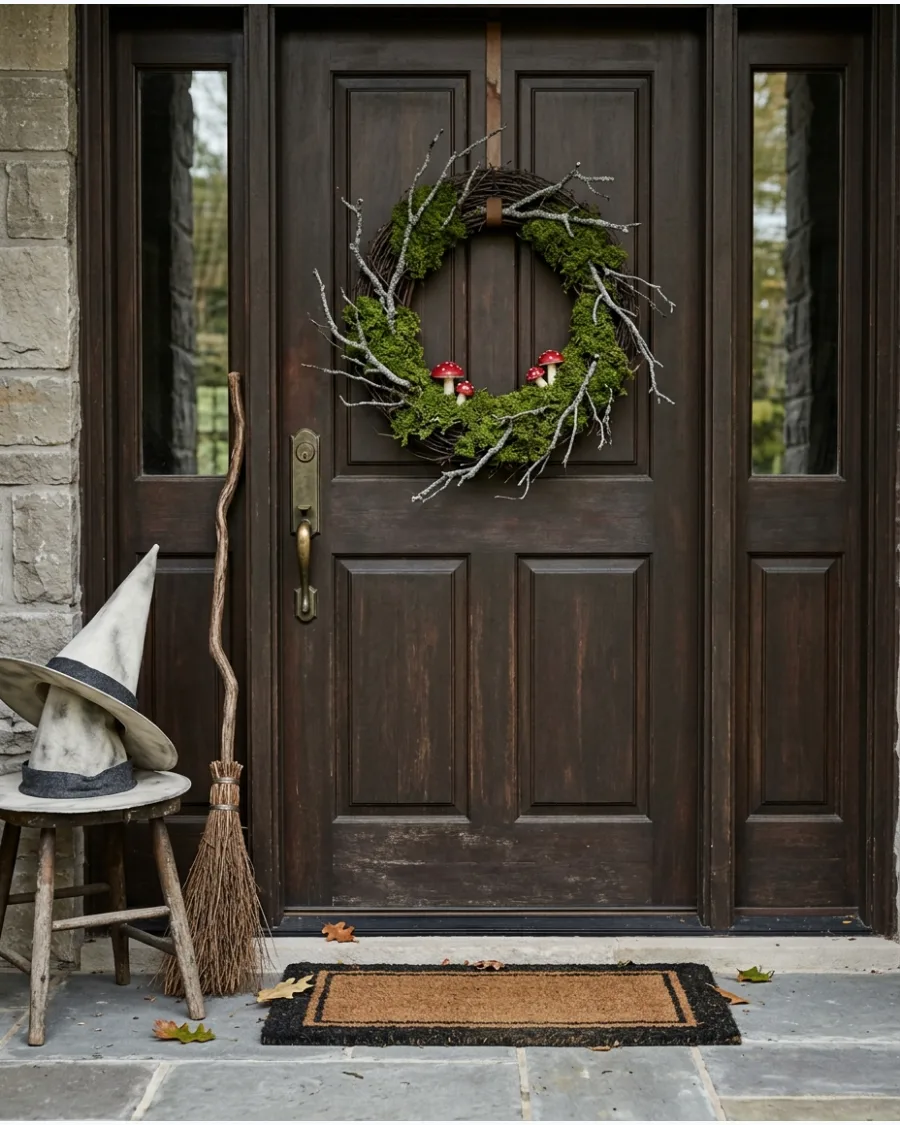
Combine faux moss, twisted branches, and dark greenery on a grapevine base for an organic look. Hot glue small plastic mushrooms and faux ferns into the crevices of the vines for a layered, three-dimensional effect. Synthetic moss stays vibrant longer than real moss, which can turn brown and brittle outdoors.
- Start with a grapevine base for a natural, woody texture.
- Incorporate a small crescent moon charm or miniature broom.
- Use various shades of green moss to add depth to the design.
Best shortcut: Apply moss in small clumps rather than large sheets to make the wreath look more like a natural growth.
7. Potion Bottle Wreath
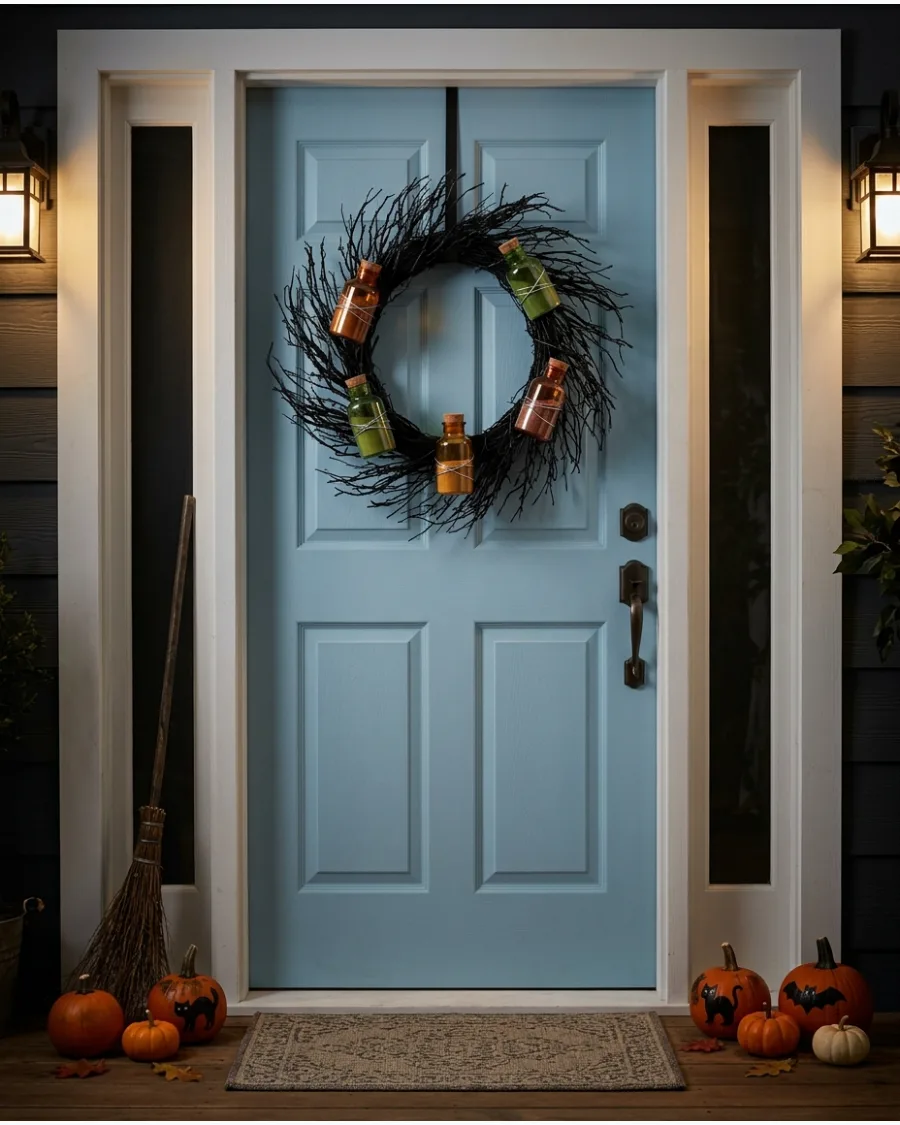
Decorate a dark twig wreath with several small, labeled potion bottles. Empty plastic bottles are much safer than glass on a swinging door to prevent breakage and keep the weight manageable. Varying the heights and colors of the bottles creates the look of an old apothecary shelf.
- Attach bottles using thin silver or black florist wire.
- Print vintage-style labels on tea-stained paper for authenticity.
- Use amber, green, and clear bottles for a diverse color mix.
Most people skip this: Seal the labels with a clear matte spray to protect them from humidity and moisture.
8. Crescent Moon Witch Wreath
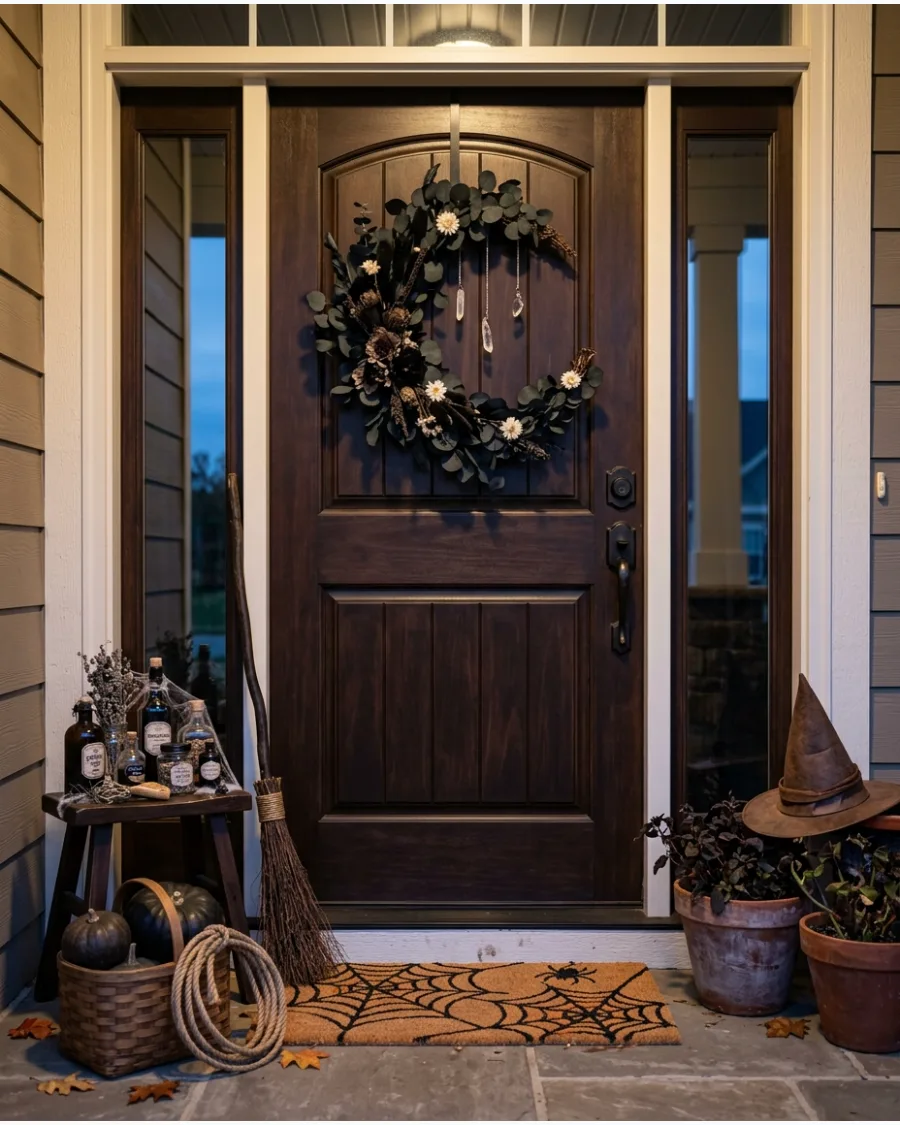
Shape dark greenery and dried flowers into a celestial crescent moon. Focus the heaviest decorations at the bottom curve of the moon to keep the wreath hanging straight on the hook. This sophisticated shape offers a subtle witchy vibe that transitions perfectly from September through October.
- Use a pre-made wire moon frame for the easiest assembly.
- Add hanging crystals or stars for a magical, celestial feel.
- Stick to a monochrome palette like all black or all white for elegance.
Quick win: Balance the crescent by adding a small weight to the inner tip if it starts to tilt on the door.
9. Witch Cauldron Wreath
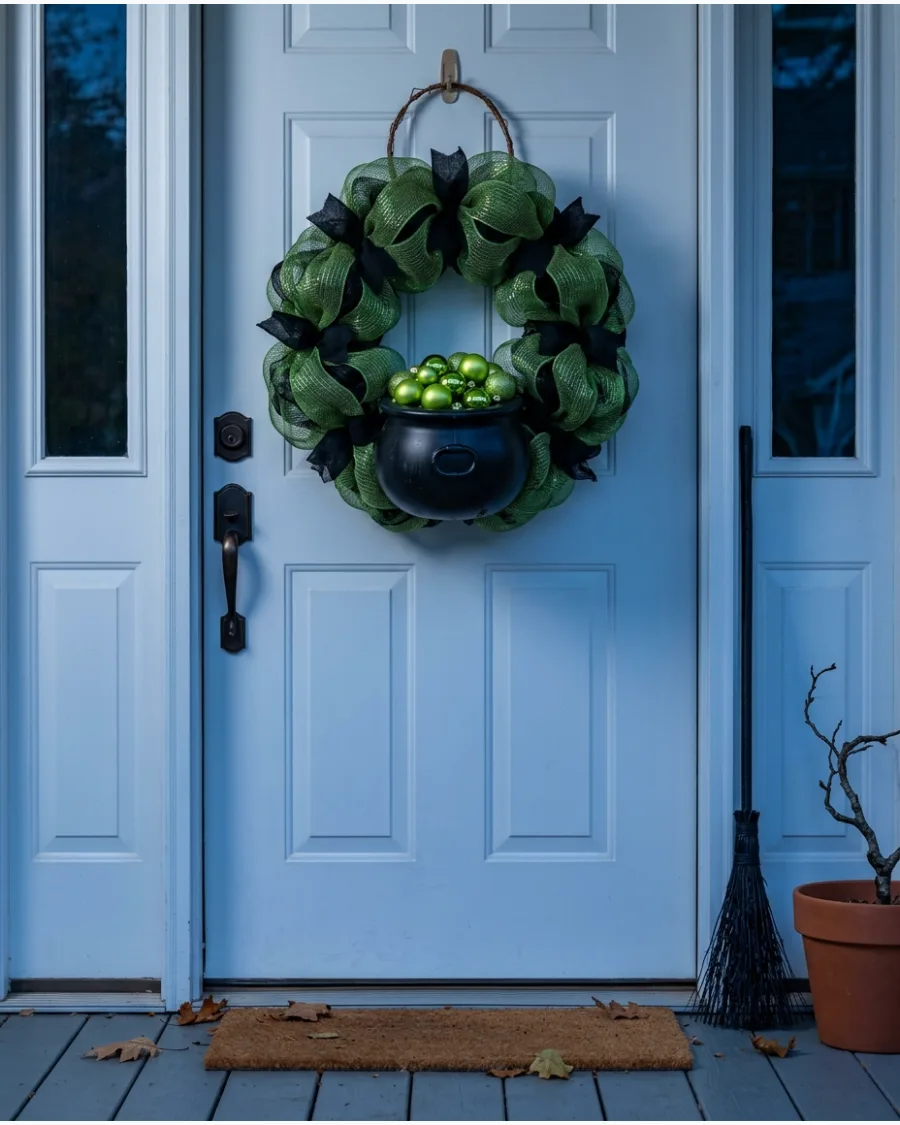
Place a miniature plastic cauldron at the base of a mesh or grapevine wreath. Fill the cauldron with lightweight iridescent Christmas ornaments to mimic glowing bubbles without adding unnecessary bulk. Wispy green mesh can be pulled upward from the pot to represent magical smoke.
- Secure the cauldron with heavy zip ties to the wreath frame.
- Use iridescent ornaments in different sizes for a bubble effect.
- Add battery-operated fairy lights inside the pot for a night glow.
Best shortcut: Use a handful of poly-fill stuffing under the 'bubbles' to fill space so you need fewer ornaments.
10. Witch Boots Wreath
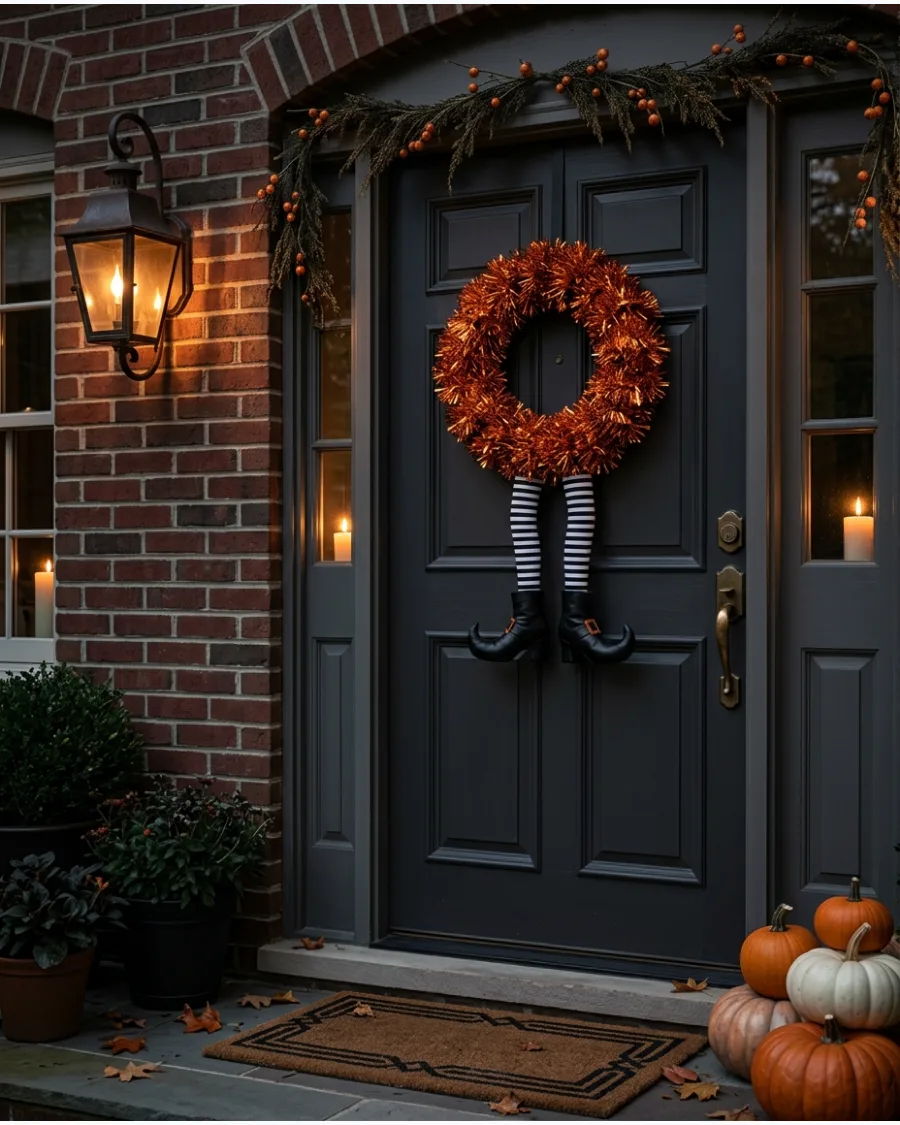
Add a pair of stuffed striped legs and pointed boots to the bottom of a bright wreath. Secure the legs at two different points on the frame to prevent them from flapping and hitting the glass. This design creates the humorous illusion of a witch who has crashed directly into your front door.
- Choose boots with curly toes for a classic witch silhouette.
- Use a tinsel or mesh wreath base for high-energy color.
- Match the leg patterns to your doormat for a cohesive look.
Most people skip this: Stuff the legs with extra batting or plastic bags if they arrive flat to give them a 3D look.
Witch Hat Door Decorations
11. Giant Witch Hat Door Topper
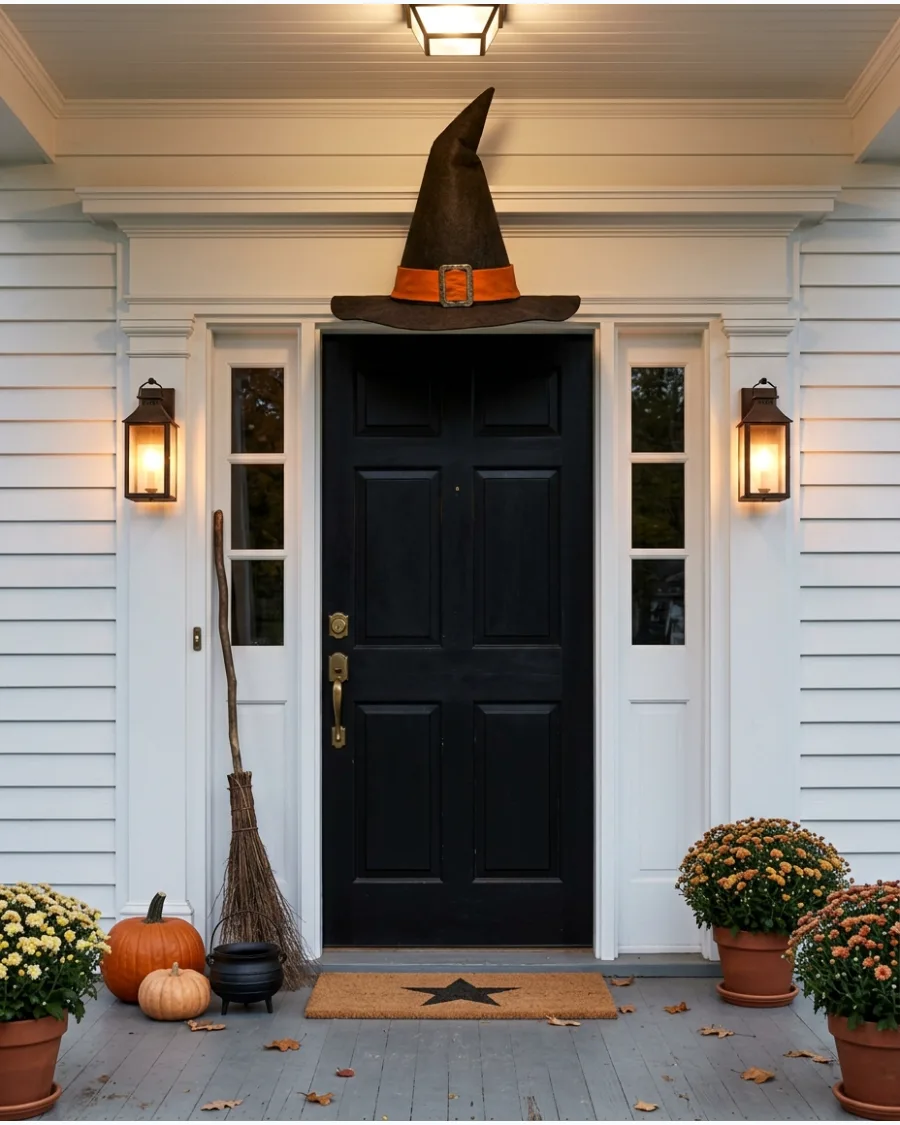
Anchor a large, stiff fabric witch hat directly above the top molding of the door. This adds height to the entrance and makes the house feel like a character.
Secure the hat with heavy-duty command hooks or a small finishing nail to keep it from tipping in the wind. It works best on doors with a flat lintel or a small porch roof for protection.
- Buy an extra-large hat with a wire rim to hold its shape.
- Use exterior-grade adhesive hooks on the wall above the door.
- Remove the hat if heavy storms or high winds are predicted.
Best shortcut: Use a pool noodle inside the hat to help it keep its tall, pointed shape without adding weight.
12. Floating Witch Hats Around the Door
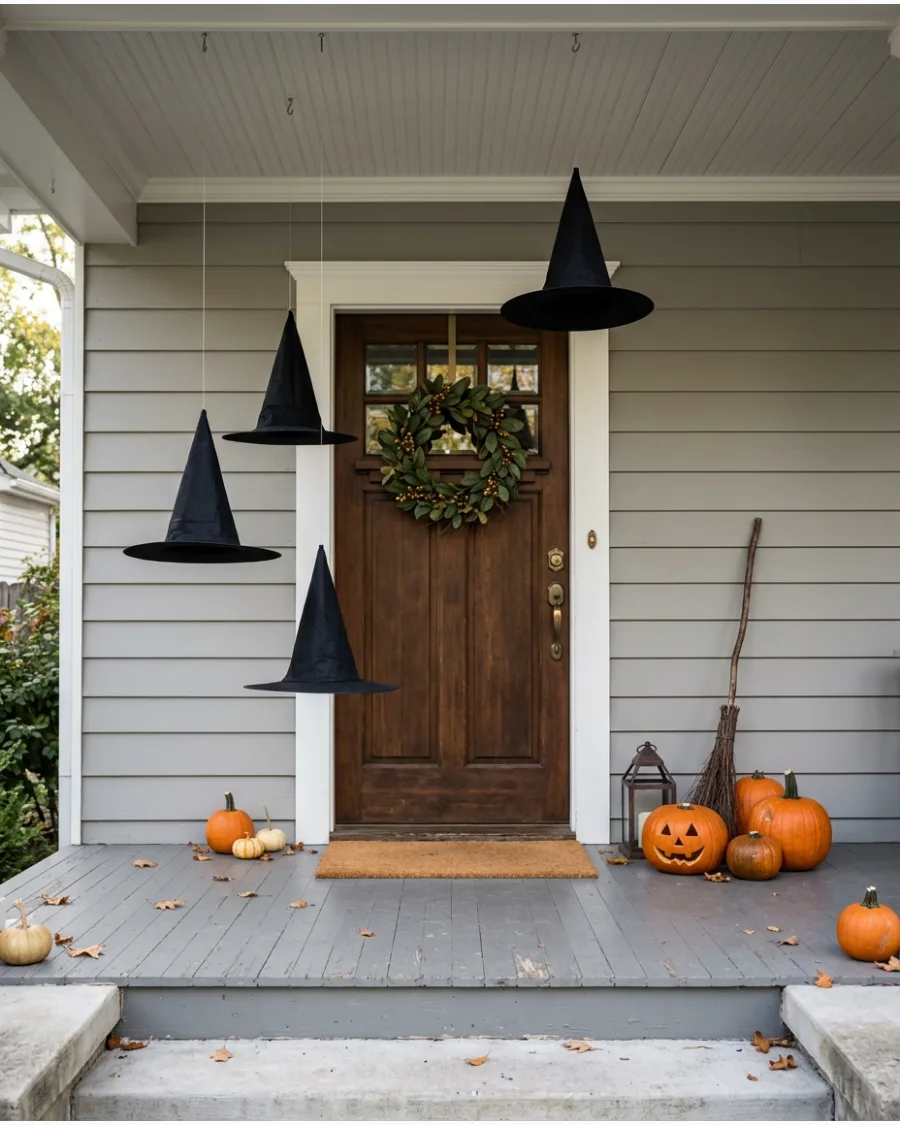
Use clear line to hang multiple hats from the porch ceiling at varying heights. The movement in the breeze creates a magical, haunted atmosphere without cluttering the doorway.
Tie the fishing line to the top point of each hat and space them at least twelve inches apart to prevent tangling. This setup keeps the walking path clear while filling the vertical space.
- Budget-friendly hats from dollar stores work well since they are lightweight.
- Group hats in odd numbers like three or five for a better visual balance.
- Use small screw-in hooks or magnetic hooks on metal porch ceilings.
Quick win: Insert battery-operated LED tea lights inside the hats to make them glow from within at night.
13. Witch Hat Door Garland
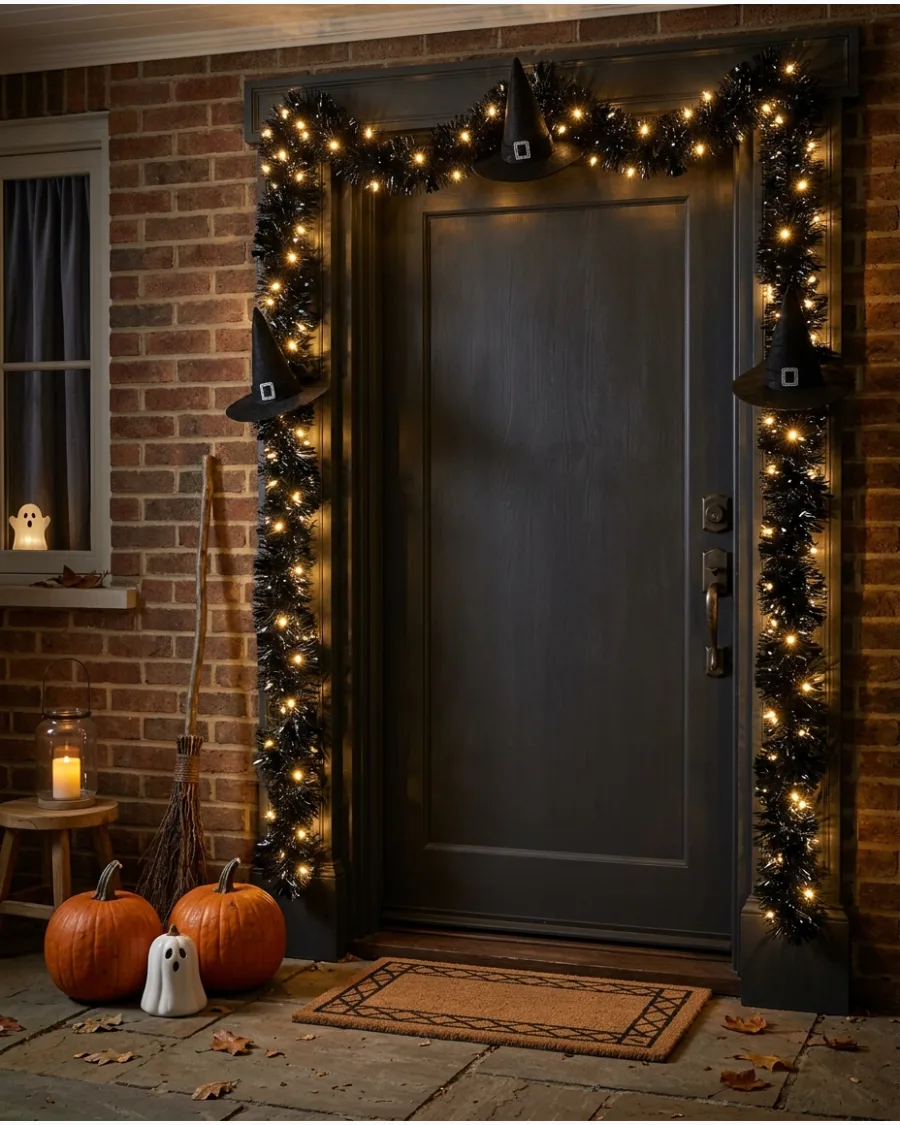
Drape a thick black evergreen or tinsel garland around the doorframe and attach small hats along the length. Intersperse the hats with silver stars or glowing lights to add depth and interest.
Use zip ties to fasten the hats to the garland so they stay facing forward even when the door opens. It creates a cohesive frame that highlights the entrance.
- Purchase a pre-lit garland to save time on wiring.
- Alternate hat sizes to create a more organic and less repetitive look.
- Renters can use over-the-door garland hangers to avoid drilling into the trim.
Most people skip this: Wrap the garland around a tension rod inside the doorframe for a no-drill installation.
14. Floral Witch Hat Door Hanger
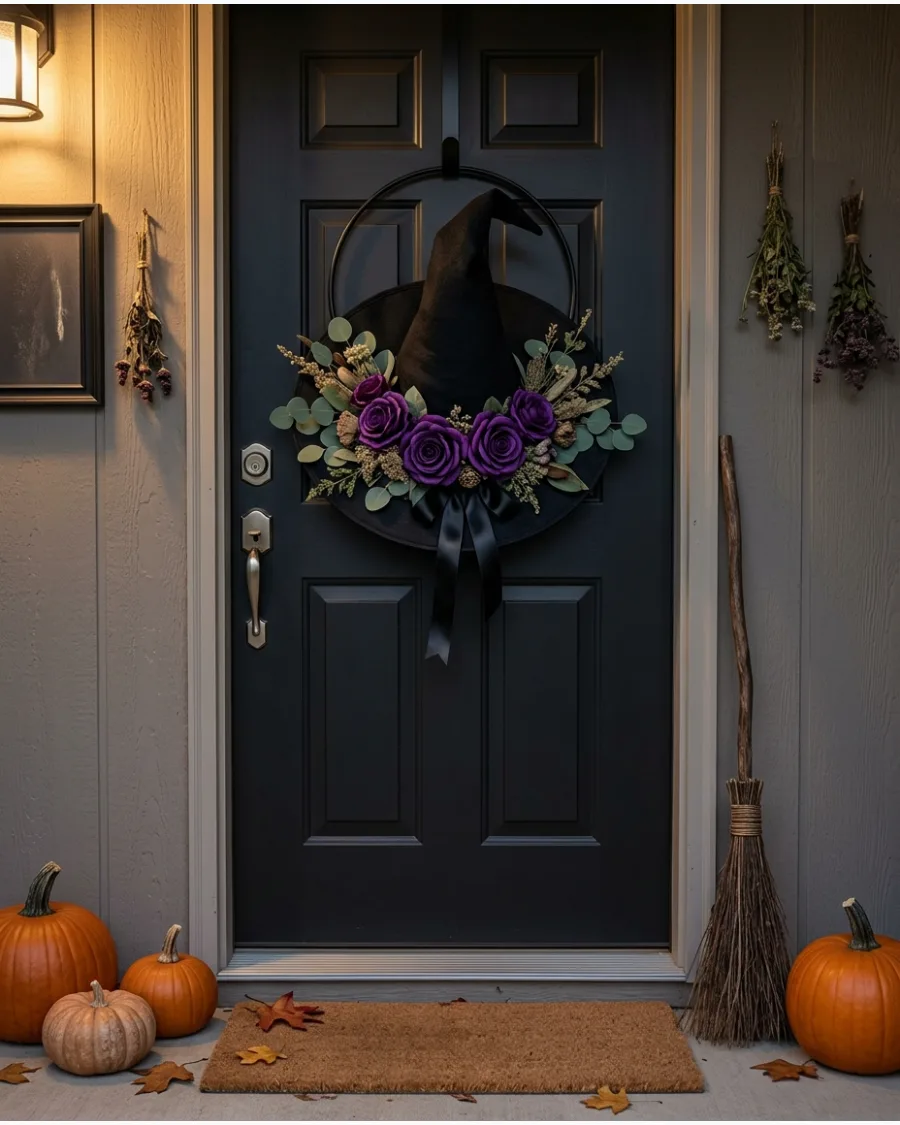
Turn a standard hat into a high-end floral arrangement by filling the brim with seasonal blooms. Dark roses, purple ranunculus, and silver-dollar eucalyptus create a sophisticated look.
Hot glue the stems directly onto the fabric brim or tuck them into a foam ring hidden under the hat's band. This serves as a unique focal point that replaces a traditional circular wreath.
- Use high-quality silk flowers to ensure the decoration lasts through rain or humidity.
- Mix in trailing ivy or ribbons to add vertical length to the bottom of the hat.
- Choose a hat with a wide brim to provide more surface area for the flowers.
Quick win: Spray the silk flowers with a UV-protectant spray to prevent the colors from fading in direct sunlight.
15. Whimsical Striped Witch Hat
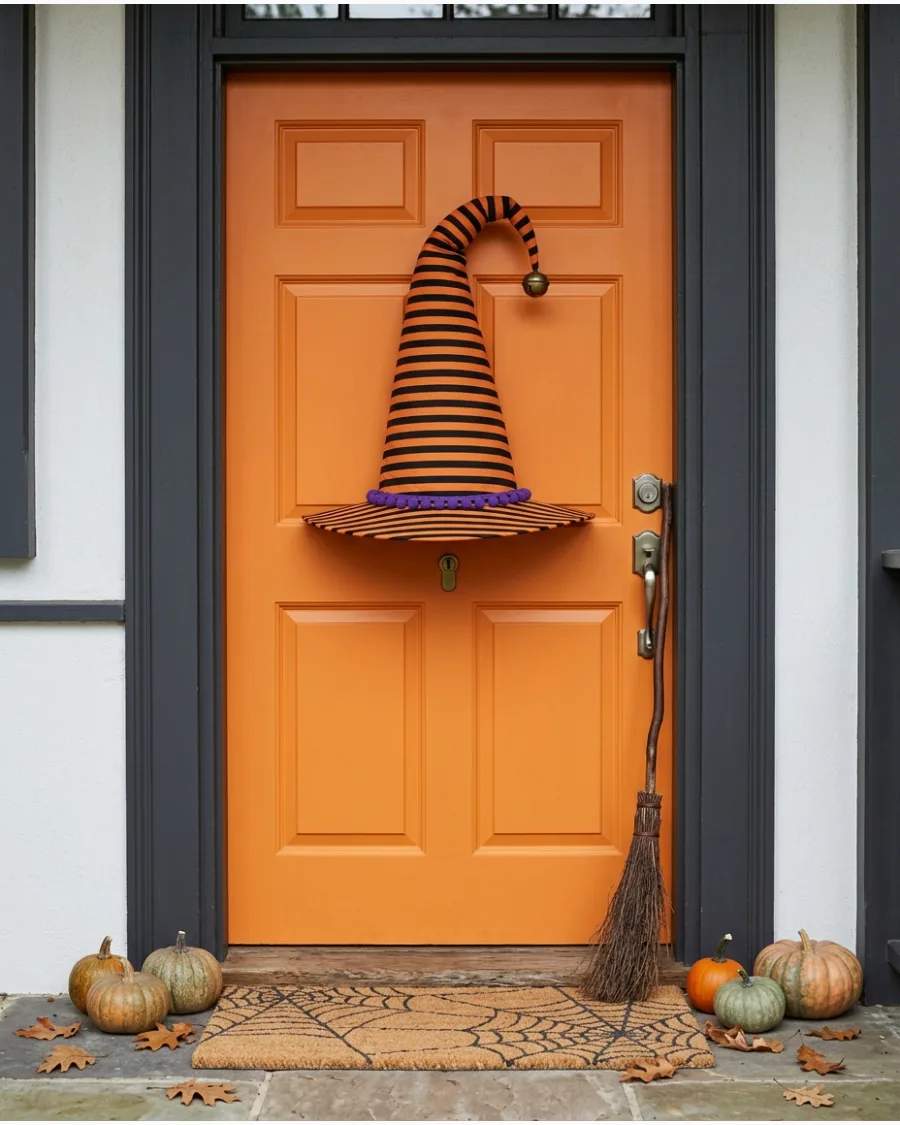
Choose a hat with bold patterns and a curved crooked top for a playful, storybook vibe. Adding bells or pom-poms to the tip provides movement and a cheerful sound when the door is used.
Select a hat with a built-in wire so you can bend the tip into a dramatic spiral or zig-zag. This style is perfect for homes with young children or a colorful Halloween palette.
- Look for hats made of felt or thick polyester to withstand outdoor elements.
- Attach the hat to the door using a wide suction cup hook for glass doors.
- Coordinate the hat colors with your doormat for a matched look.
Most people skip this: Stuff the tip of the hat with tissue paper or plastic bags to keep it from flopping over completely.
16. Elegant Black Velvet Witch Hat
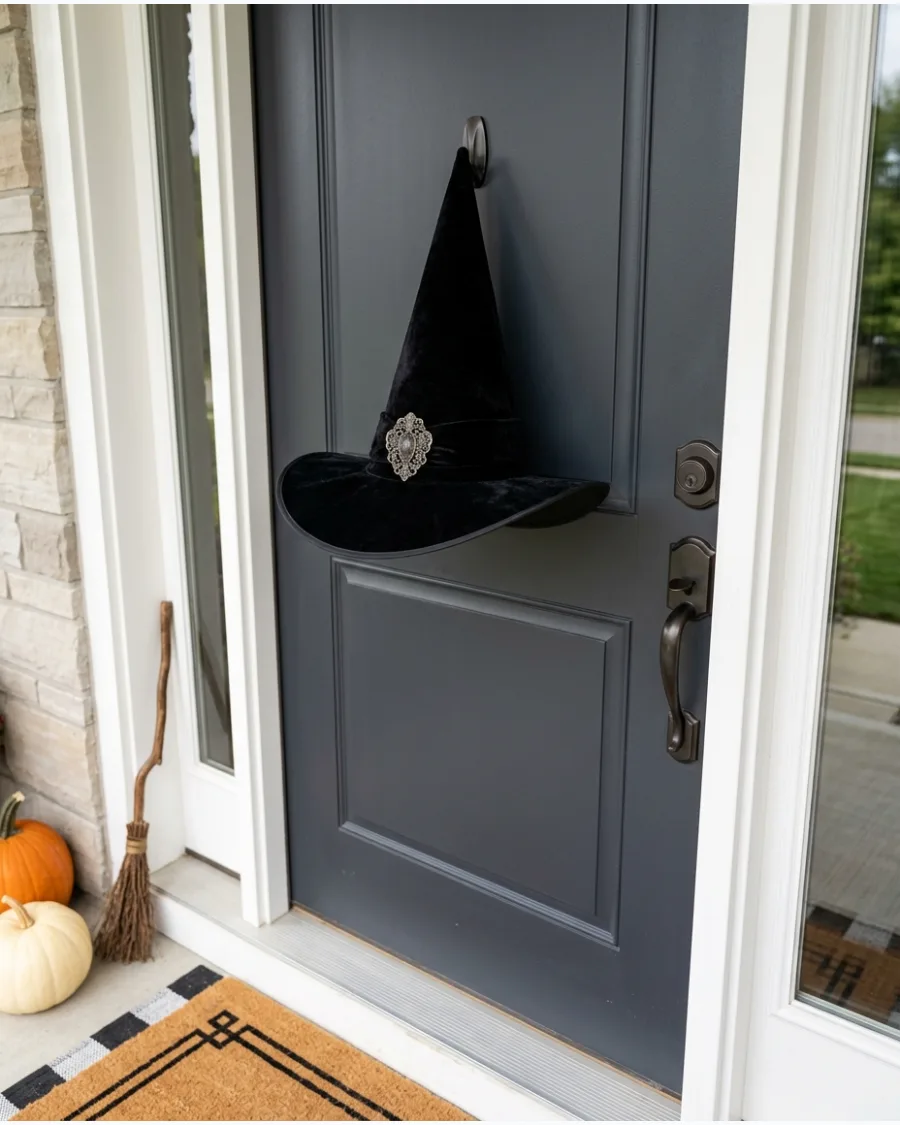
A single, high-quality velvet hat offers a minimalist and sophisticated approach to Halloween decor. Focus on the texture of the fabric and a few well-placed details like an antique brooch or a silk ribbon.
Hang the hat slightly off-center on the door to create a more modern and curated appearance. This look works beautifully on dark-colored doors for a subtle, tone-on-tone effect.
- Search vintage shops for unique brooches or pins to personalize the hat.
- Use a velvet hat with a structured crown so it doesn't lose its shape over time.
- Pair with white pumpkins on the porch to maintain a clean, monochromatic palette.
Best shortcut: Use a lint roller on the velvet before hanging to ensure it looks crisp and professional.
17. Pink Glam Witch Hat
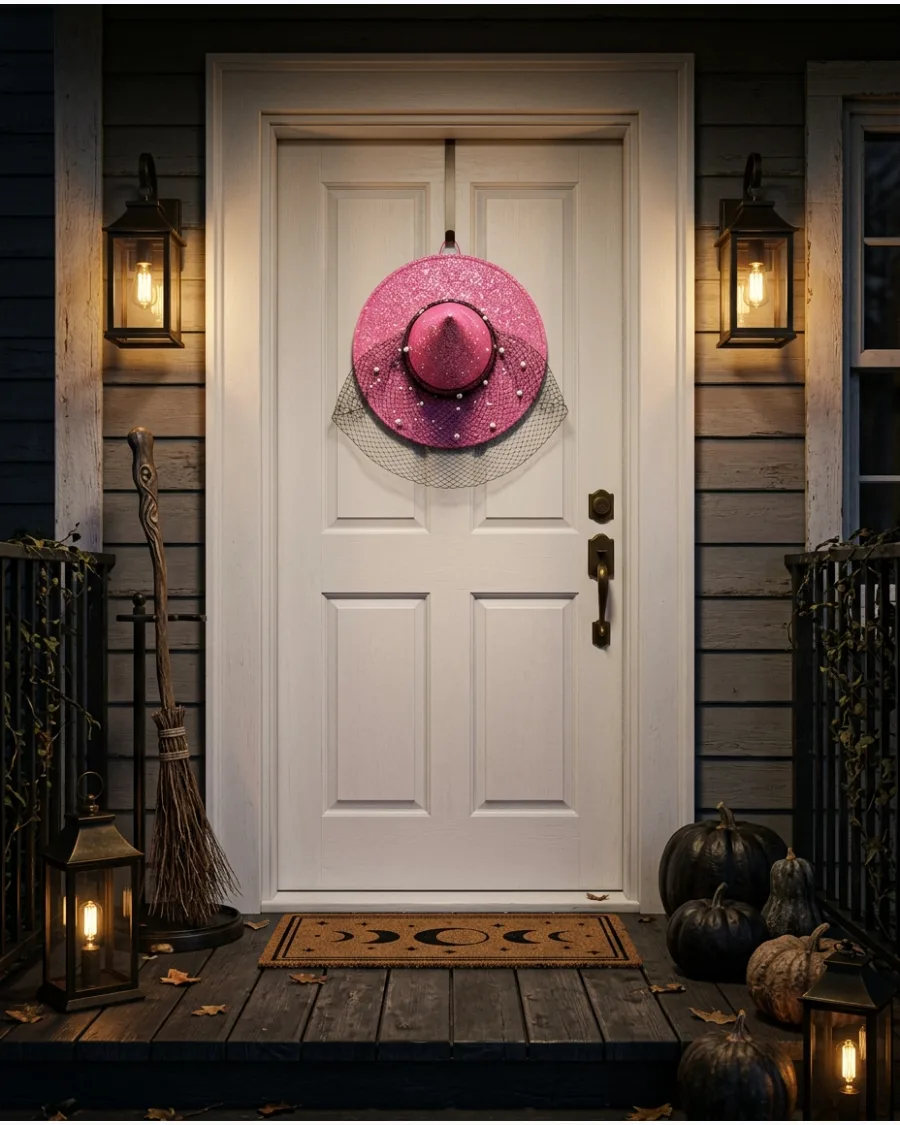
Break away from traditional colors by using a bright pink or pastel hat accented with glitter and pearls. This glam style is a popular trend that brings a fresh, modern energy to the front porch.
Incorporate black accents like a mesh veil or dark roses to keep the witch theme recognizable. It pairs perfectly with white or painted pumpkins for a chic entrance.
- Use a spray glitter sealer if the hat is shedding too much sparkle.
- Mix in metallic gold or silver ribbons for extra shine.
- This style works best on light-colored doors to make the pink pop.
Quick win: Add a few pink LED lights around the doorframe to enhance the color theme at night.
18. Patchwork Witch Hat Door Hanger
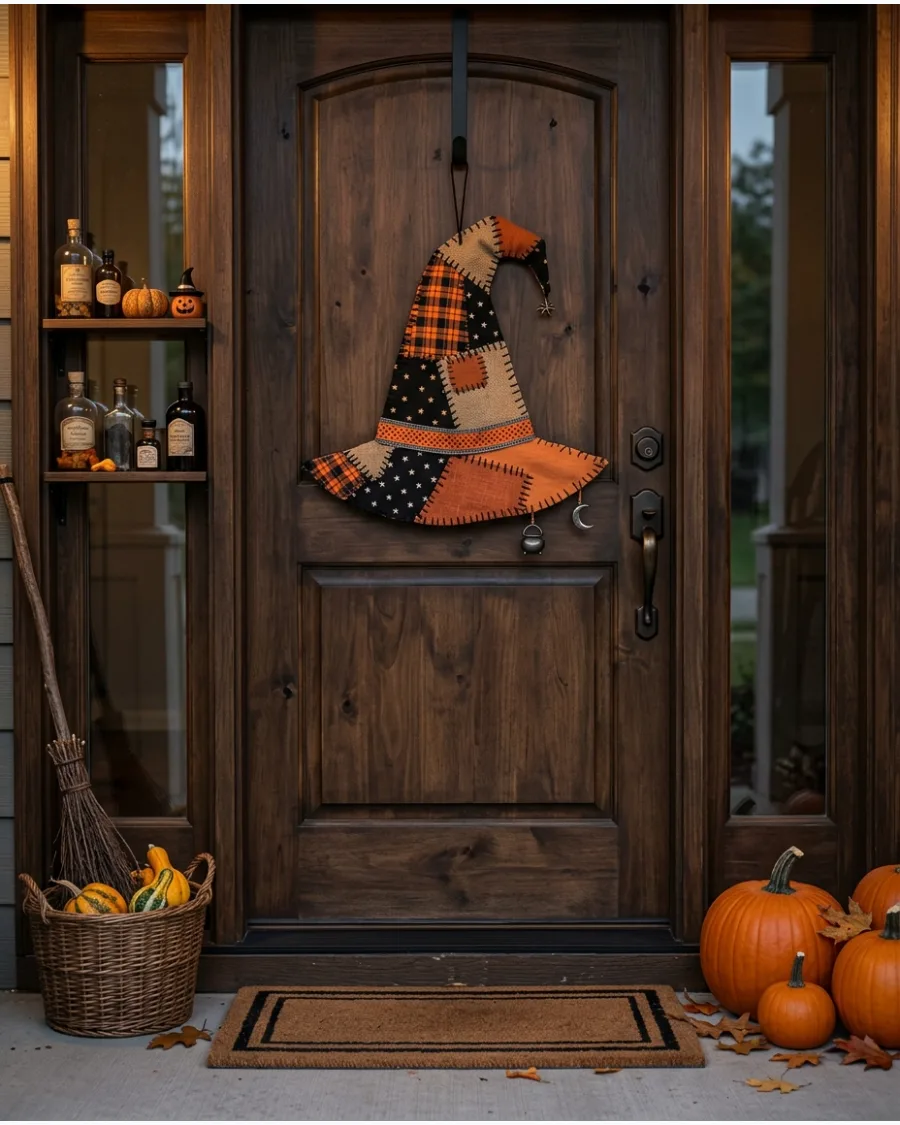
Create a rustic, handmade feel by covering a hat form in different fabric scraps like plaid, stars, and stripes. The variety of patterns adds visual interest and a cozy, cottagecore aesthetic to the door.
Secure the fabric edges with a bead of hot glue or decorative stitching to prevent fraying in the wind. This is an excellent way to use up leftover Halloween fabric from other projects.
- Use a stiff cardboard or plastic hat base to provide a solid surface for the fabric.
- Choose fabrics with varying scales, like a large check paired with a tiny star print.
- Spray the finished hat with a fabric sealer to protect it from moisture.
Most people skip this: Use pinking shears to cut the fabric patches for a decorative, zigzag edge that also prevents raveling.
Witch Broom Door Decorations
19. Witch Broom Parking Station
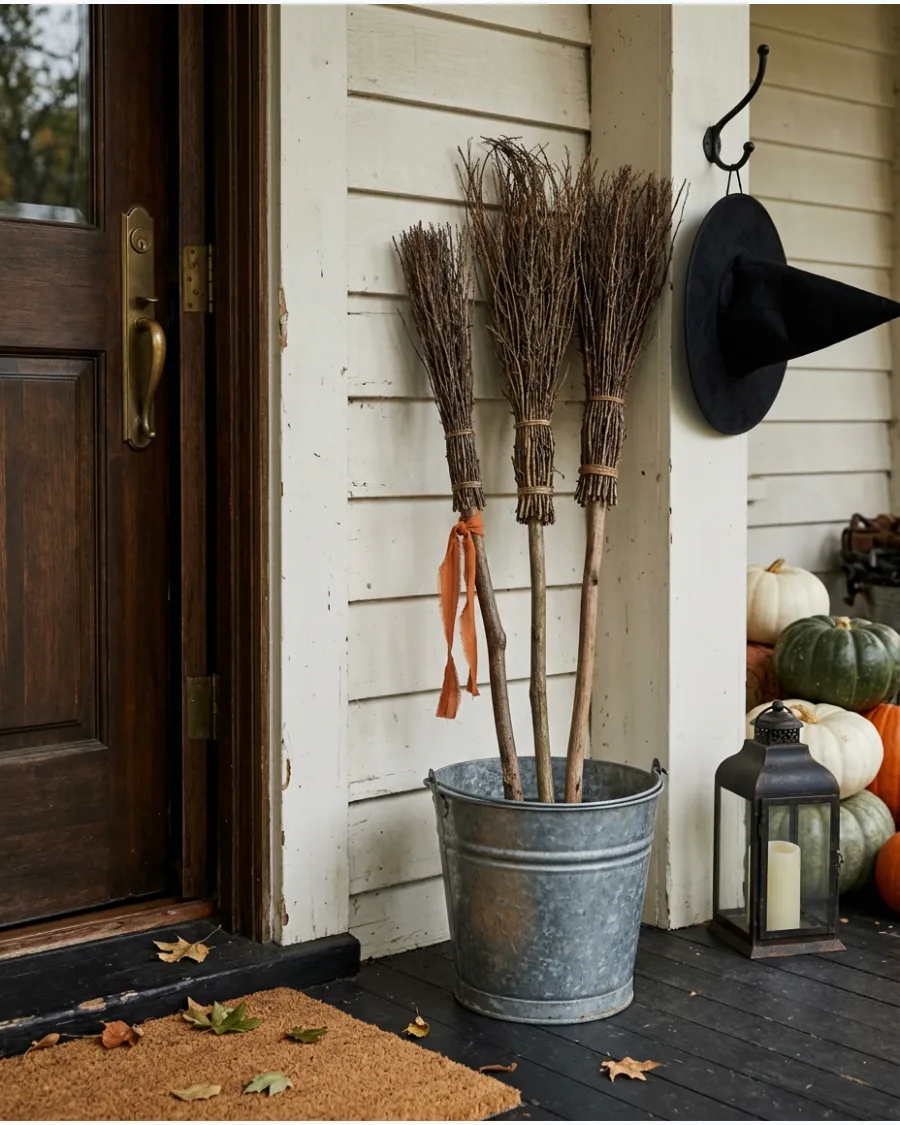
Group several brooms of different heights in a galvanized bucket or a wooden crate next to the door. Adding a small sign or a bow to the handles makes the display look intentional rather than like forgotten tools.
Weight the bottom of the container with bricks or heavy stones to keep the brooms from blowing over. This keeps the entrance clear while adding a charming narrative to the porch.
- Use a mix of traditional straw brooms and gnarled wizard style brooms for variety.
- Position the bucket at least 18 inches away from the door swing to avoid tripping.
- Add a few faux crows or a plastic spider to the broom bristles for extra detail.
Best shortcut: Buy cinnamon brooms from the grocery store to add a pleasant fall scent to your entryway.
20. Broom-Lined Doorframe
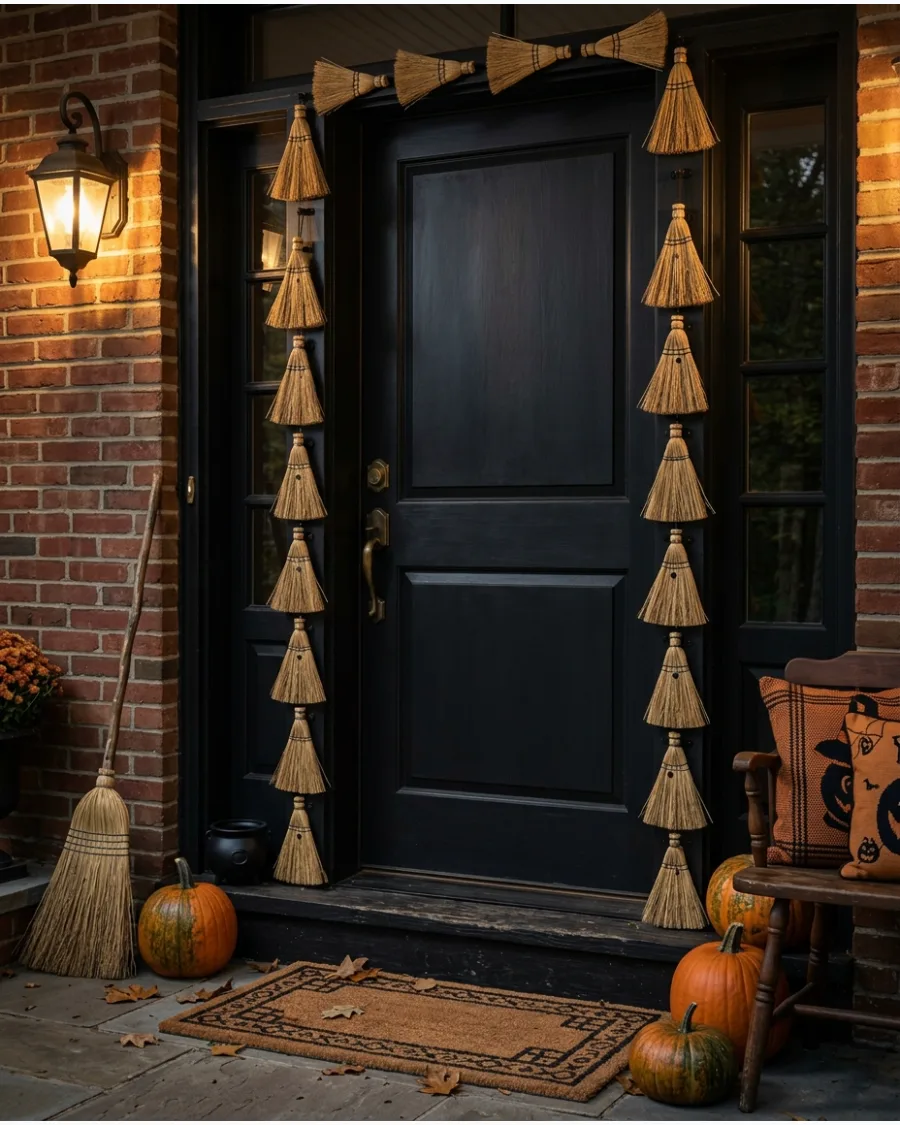
Mount small, lightweight broom heads around the perimeter of the door to create a unique textural border. The natural straw or raffia material adds a rustic element that contrasts well with painted trim.
Space the brooms evenly and point the bristles outward to create a sunburst effect around the frame. This approach uses repetition to make a big visual impact without needing large props.
- Use small command strips or floral wire to attach the brooms to the molding.
- Choose brooms of the same size for a clean, symmetrical look.
- This decoration is best for covered porches to protect the natural fibers from rain.
Quick win: Lightly singe the ends of the straw with a lighter to give the brooms an aged, used look.
21. Single Rustic Broom Door Hanger
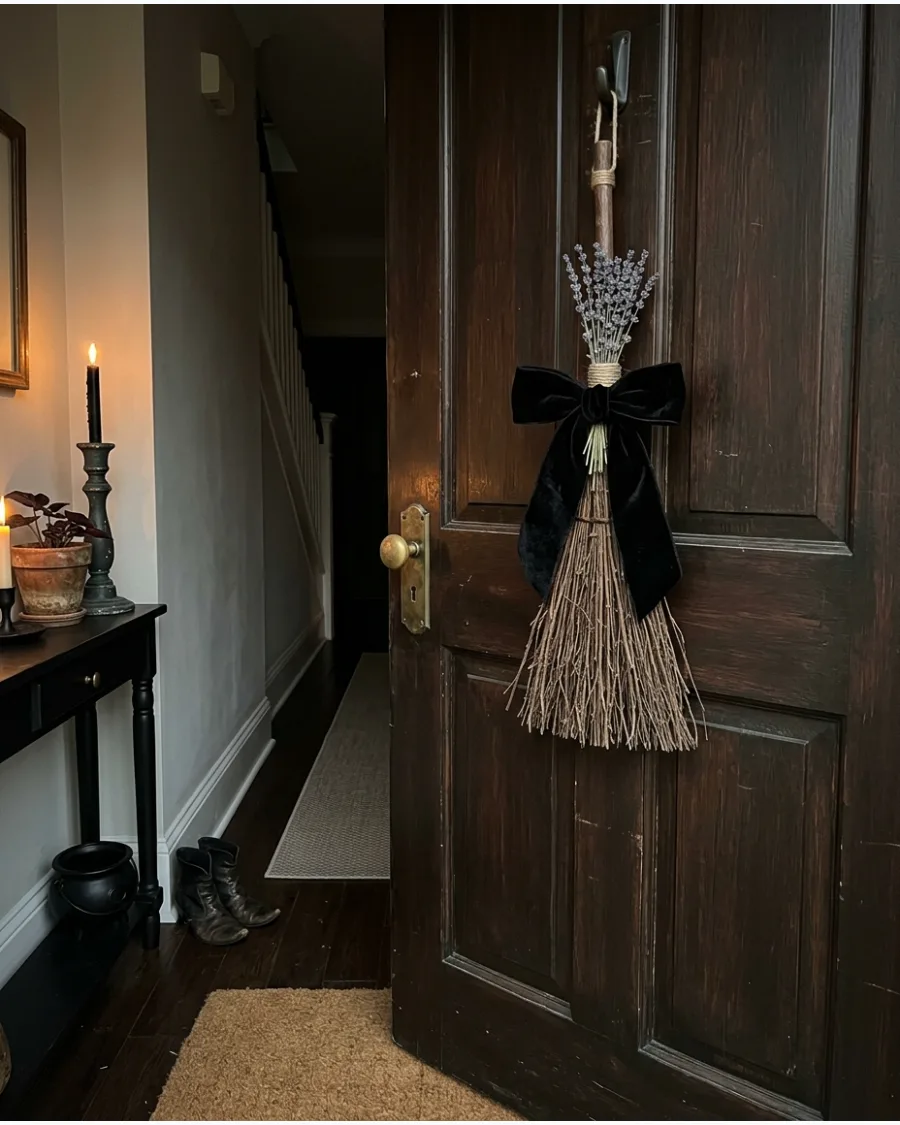
A handmade twig broom makes a striking vertical statement when hung directly on the front door. Tie a bunch of dried lavender or sage to the handle to add texture and a natural scent to the entryway.
Secure the broom handle with a heavy-duty over-the-door hook to prevent it from sliding or banging when the door opens. This simple setup brings a primitive, earthy vibe to the home without requiring expensive materials.
Twig brooms are light enough that they won't damage the door finish over time.
- Source natural twig brooms from craft stores or local garden centers.
- Use a 2-inch wide velvet ribbon to hide the hanging wire or hook.
- Swap the purple ribbon for orange or black to match other porch accents.
Quick win: Use a small piece of florist wire to attach the herbs so they stay secure even in windy weather.
Home Decor
22. Leaning Broom and Lantern Entry
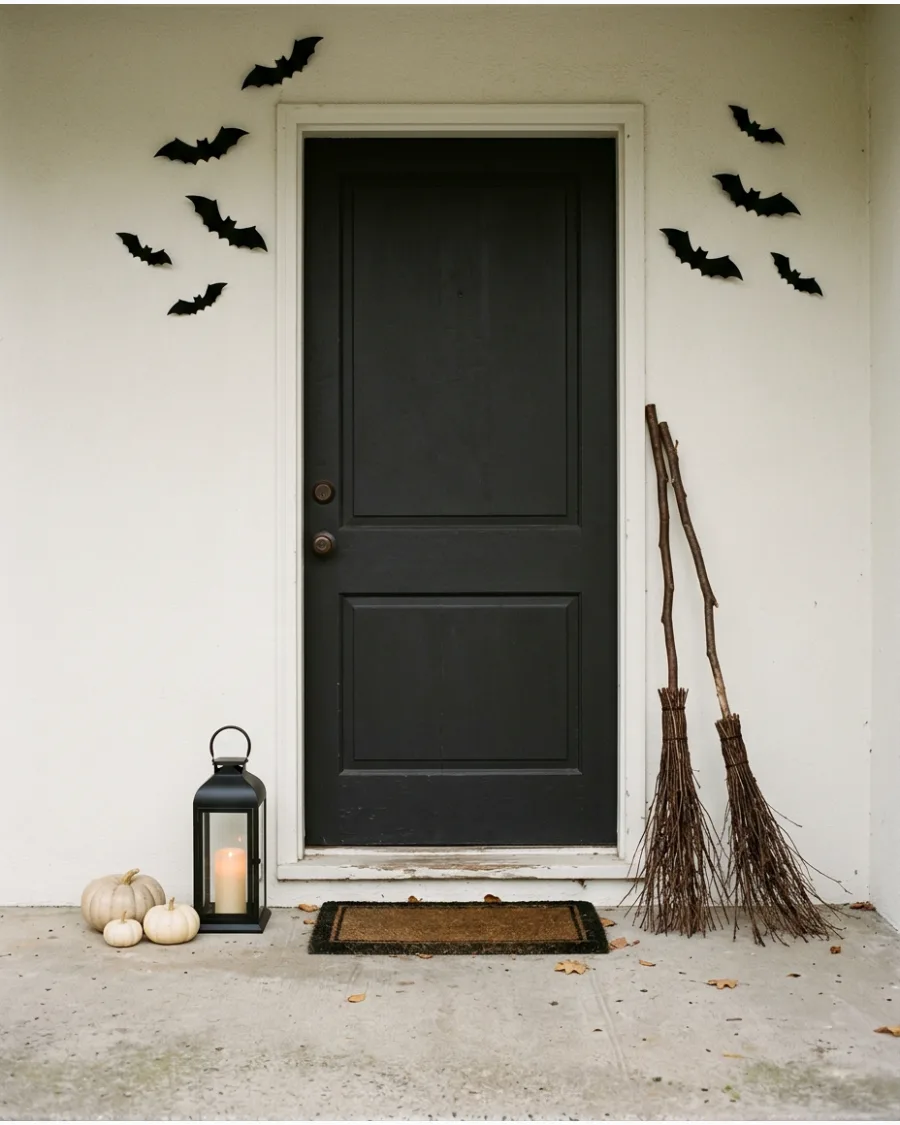
A cluster of textured brooms and glowing lanterns creates an inviting, mystical entryway without needing complex wall mounts. Lean two cinnamon-scented brooms at varying angles against the door frame to establish height and natural fragrance. This setup works because it transitions the porch from daylight charm to evening ambiance instantly.
Natural twig brooms offer better visual weight than plastic versions, grounding the display in a more organic aesthetic.
- Sourcing: Purchase handmade cinnamon brooms from local craft stores or grocery floral departments in late September.
- Setup: Secure the broom handles with a small loop of clear fishing line tied to a hidden hook for stability against wind.
- Adaptation: Swap the lanterns for carved pumpkins or oversized cauldrons to shift the theme toward a more playful look.
Quick win: Wrap a strand of battery-operated orange fairy lights around the broom bristles to make the display pop after sunset.
Witch Broom Door Decorations
23. Colorful Ribbon Witch Brooms
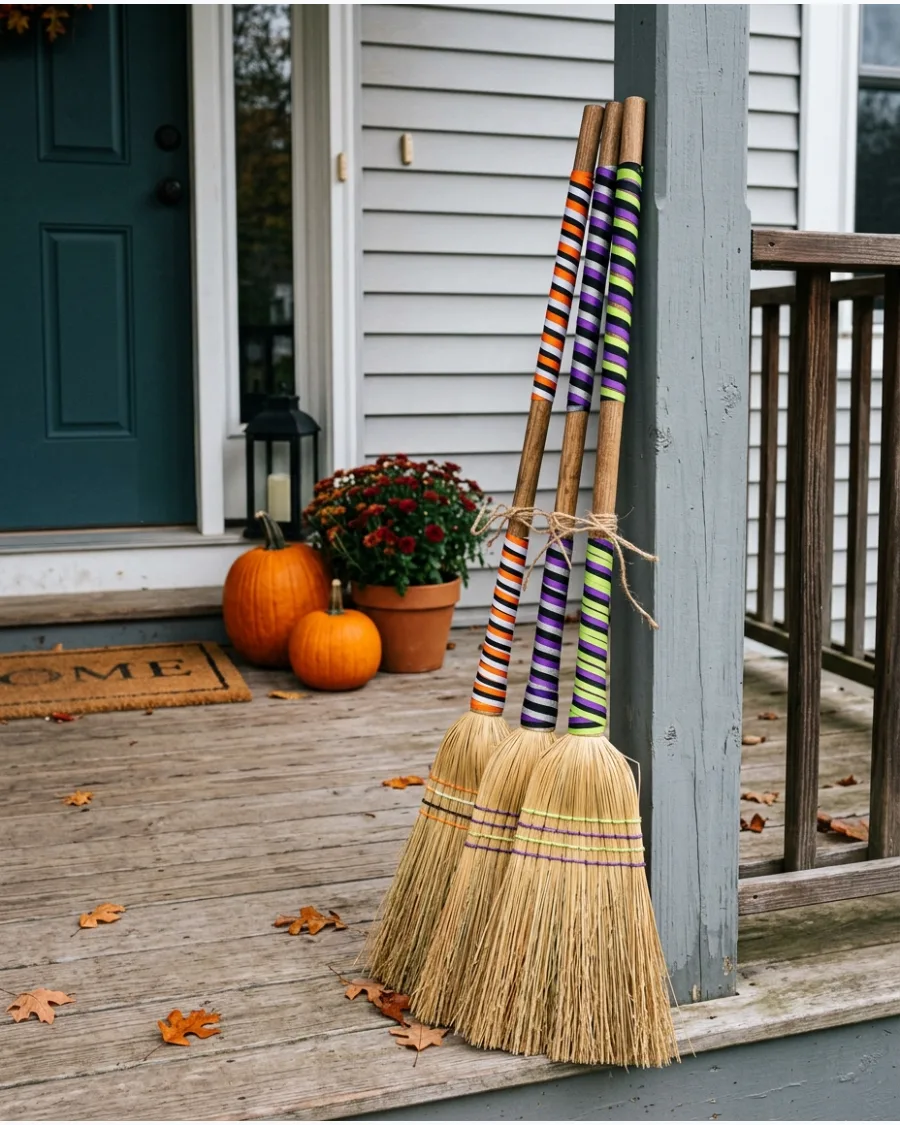
Standard straw brooms get a playful makeover when the handles are wrapped in vibrant, seasonal colors. Choose ribbons in lime green, bright purple, or orange to contrast against a neutral house exterior.
Use double-sided tape at the top and bottom of the handle to keep the ribbon from slipping down over time. This is a great way to incorporate a specific color palette into the Halloween theme. Displaying three brooms together creates a more intentional look than a single one.
- Pick wired ribbon for the bows so they hold their shape outdoors.
- Lean the brooms at slightly different angles to create a fan-like shape.
- Choose ribbons with varying patterns like polka dots and stripes for more visual interest.
Best shortcut: Use self-adhesive athletic wrap in neon colors for a fast, non-slip handle covering.
24. Mini Broom Swag
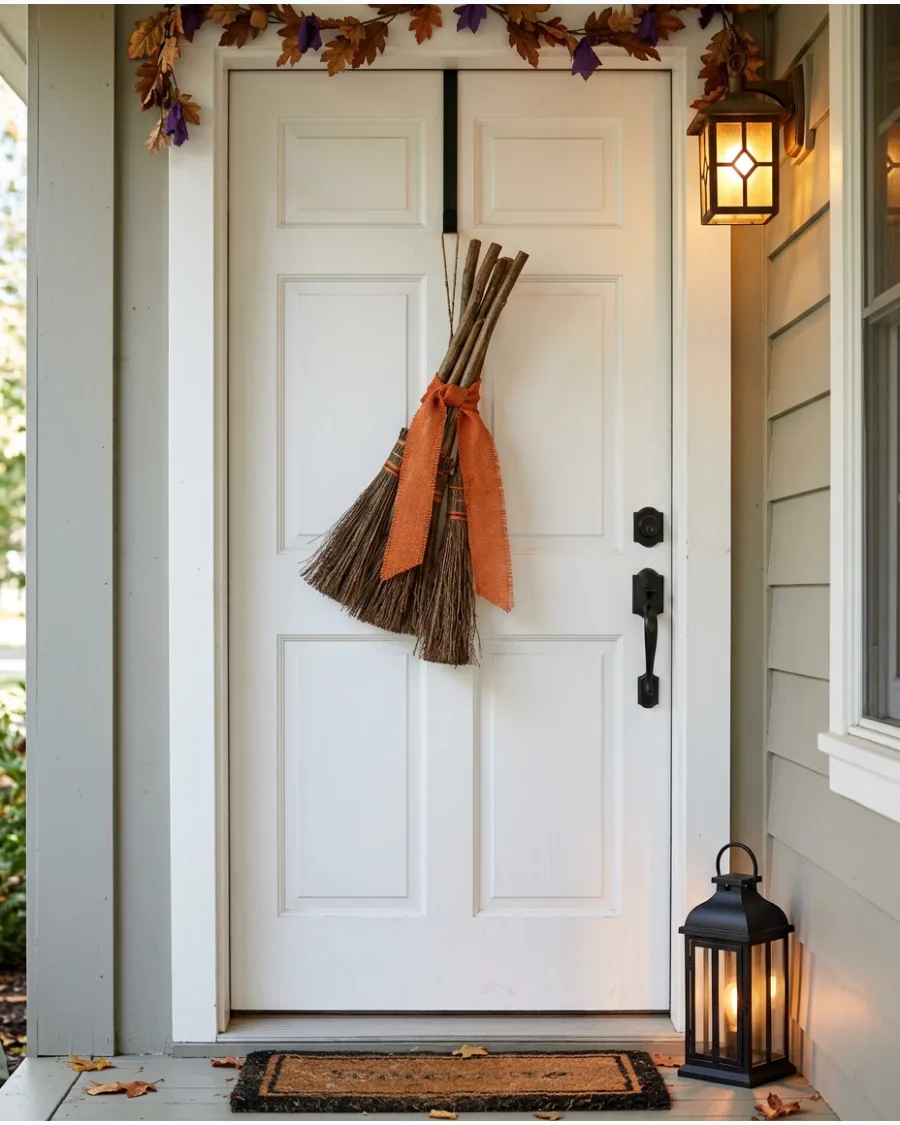
Miniature cinnamon brooms can be bundled together to create a fragrant and charming door swag. Tie five or six mini brooms at the handles with a wide burlap or satin ribbon.
Arrange the brooms at different angles before tying the central knot to give the swag more visual volume. This decoration is a smart alternative to a traditional round wreath. It fits perfectly on narrow doors or side entrances.
- Buy cinnamon-scented brooms to give guests a warm autumn welcome.
- Tuck in a few sprigs of faux autumn leaves for a pop of color.
- Hang the swag at eye level for the best visual impact.
Quick win: If the cinnamon scent is too strong, leave the brooms in the garage for two days before hanging them on the door.
Witch Door Signs
25. Witches Welcome Door Sign
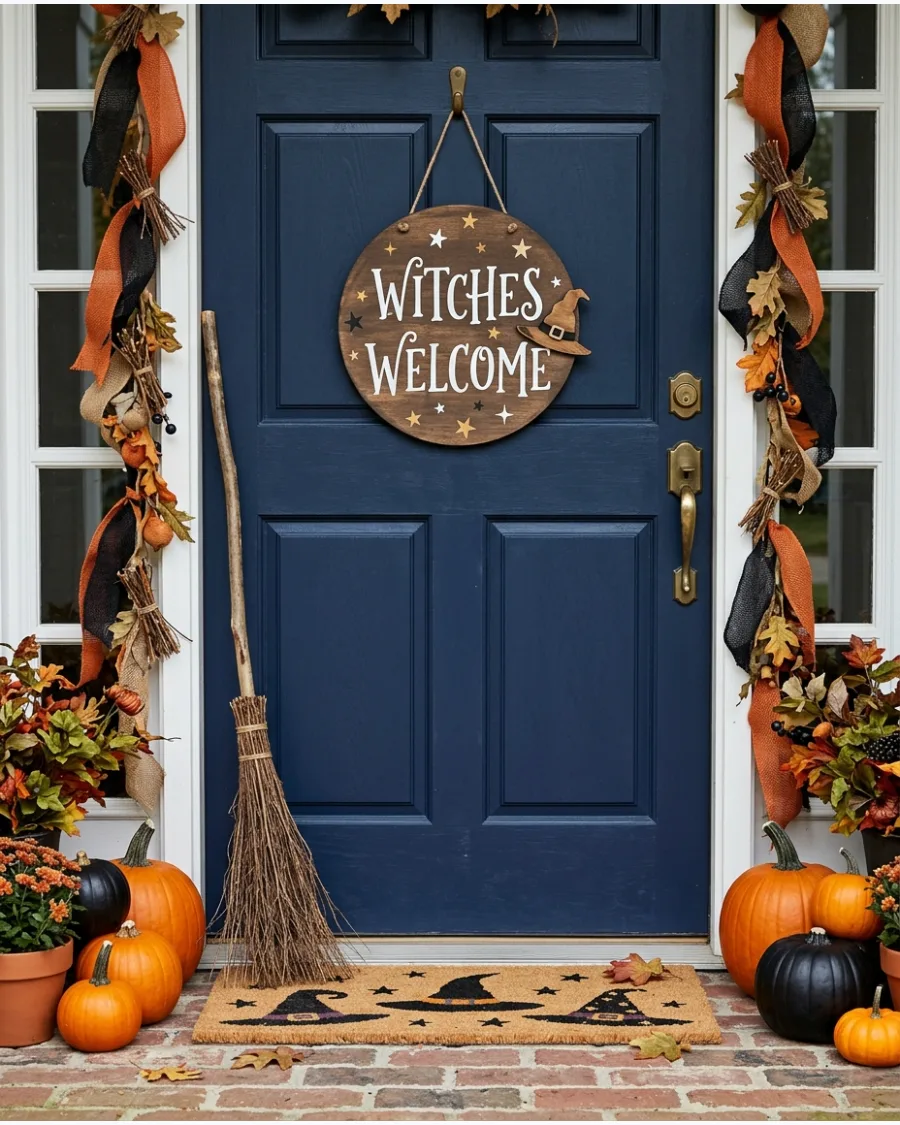
A wooden sign with a friendly greeting sets a whimsical tone for trick-or-treaters. Look for a circular or rectangular plaque that features classic witch motifs like stars or a pointed hat.
Choose a sign with a flat back so it stays flush against the door and doesn't bang when people enter. This keeps the decoration quiet and prevents scratches on the door paint. A sign with white or gold lettering is easiest to read from the street.
- Select a sign made of treated wood or metal to withstand outdoor humidity.
- Hang the sign using a command hook for a damage-free installation on metal doors.
- Add a small battery-operated fairy light string around the edge for night visibility.
Most people skip this: Apply a quick coat of clear spray sealant to the sign to prevent the paint from fading in the sun.
Witch Door Decoration Ideas
26. Layered Wood Witch Sign
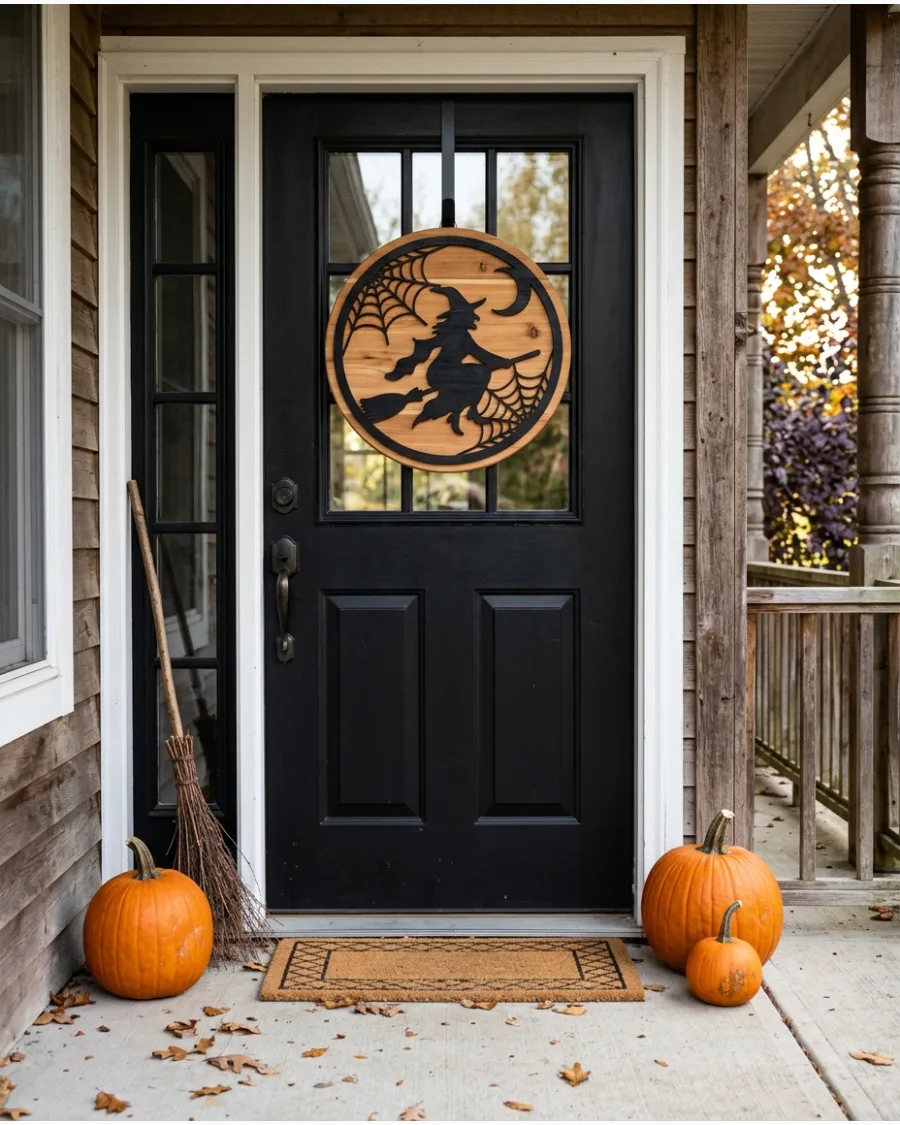
A dimensional wood sign with the 'The Witch Is In' script offers a more sophisticated look than flat plastic decals. The raised lettering adds texture and shadow, making the message pop against a dark-painted door.
Mount the sign using a heavy-duty magnetic hook to avoid drilling holes into metal entry doors. It is often better to choose a sign with a natural wood backing to keep the holiday aesthetic feeling grounded rather than kitschy.
- Sourcing: Look for handmade options on artisan marketplaces or local craft fairs in early September for the best selection under $40.
- Setup: Use a command strip or a wreath hanger if the door is made of wood or fiberglass to ensure a damage-free removal after Halloween.
- Adaptation: Tie a bundle of dried eucalyptus or cinnamon sticks to the hanging twine for a subtle, seasonal scent every time the door opens.
Quick win: Rub a bit of dark furniture wax into the carved letters of the sign to increase legibility for guests viewing it from the sidewalk.
Witch Door Signs
27. Witch Way to the Candy Sign
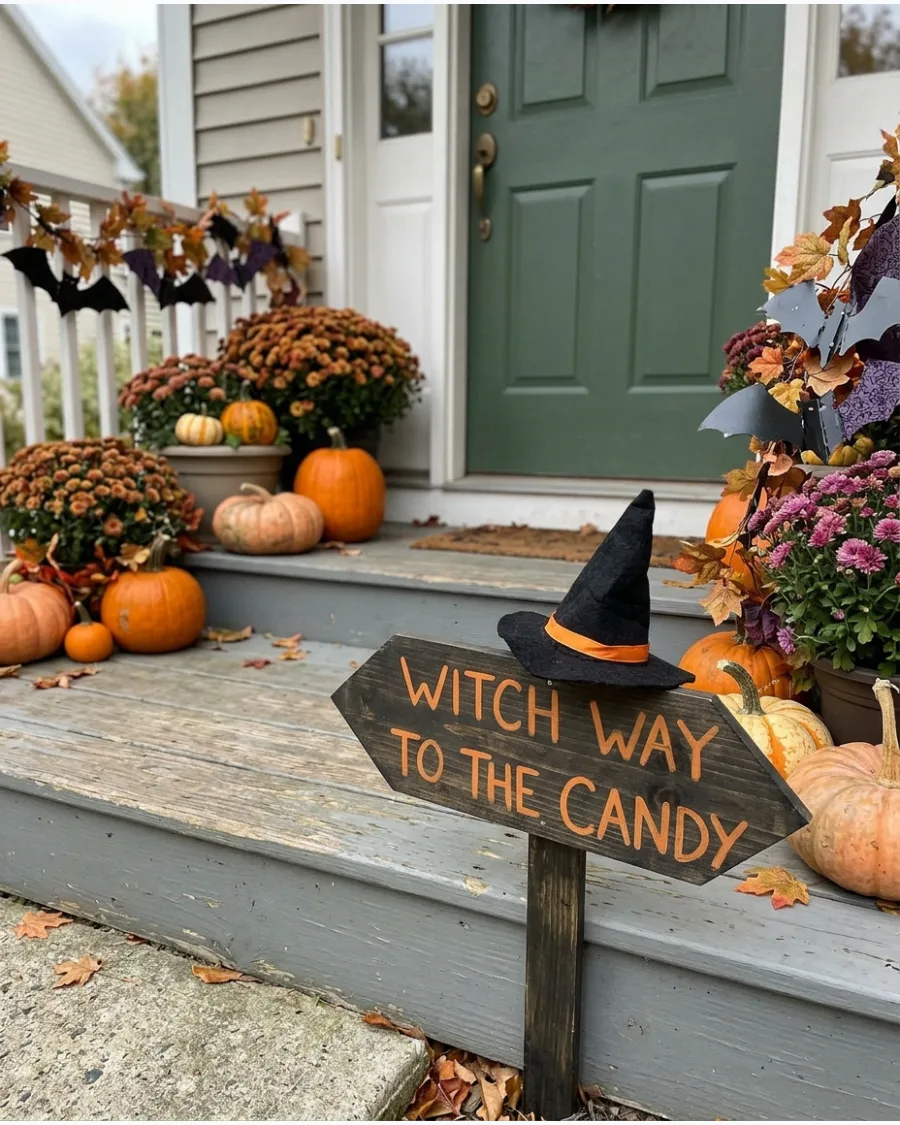
Directional signs are both decorative and functional for guiding guests toward the treats. An arrow-shaped sign can be mounted to the door or placed on a stake in a nearby planter.
Mount the arrow on a garden stake near the porch steps if you have limited space on the door itself. This keeps the walkway clear while still adding to the theme. It is a playful nod to the tradition of trick-or-treating.
- Choose a sign with a pointed arrow that clearly indicates the direction of the bowl.
- Match the font style to other Halloween decorations for a cohesive look.
- Place the stake in a heavy pot filled with sand to keep it upright.
Quick win: Use reflective paint for the lettering so the sign catches the light from flashlights and streetlamps.
28. Broom Parking Sign
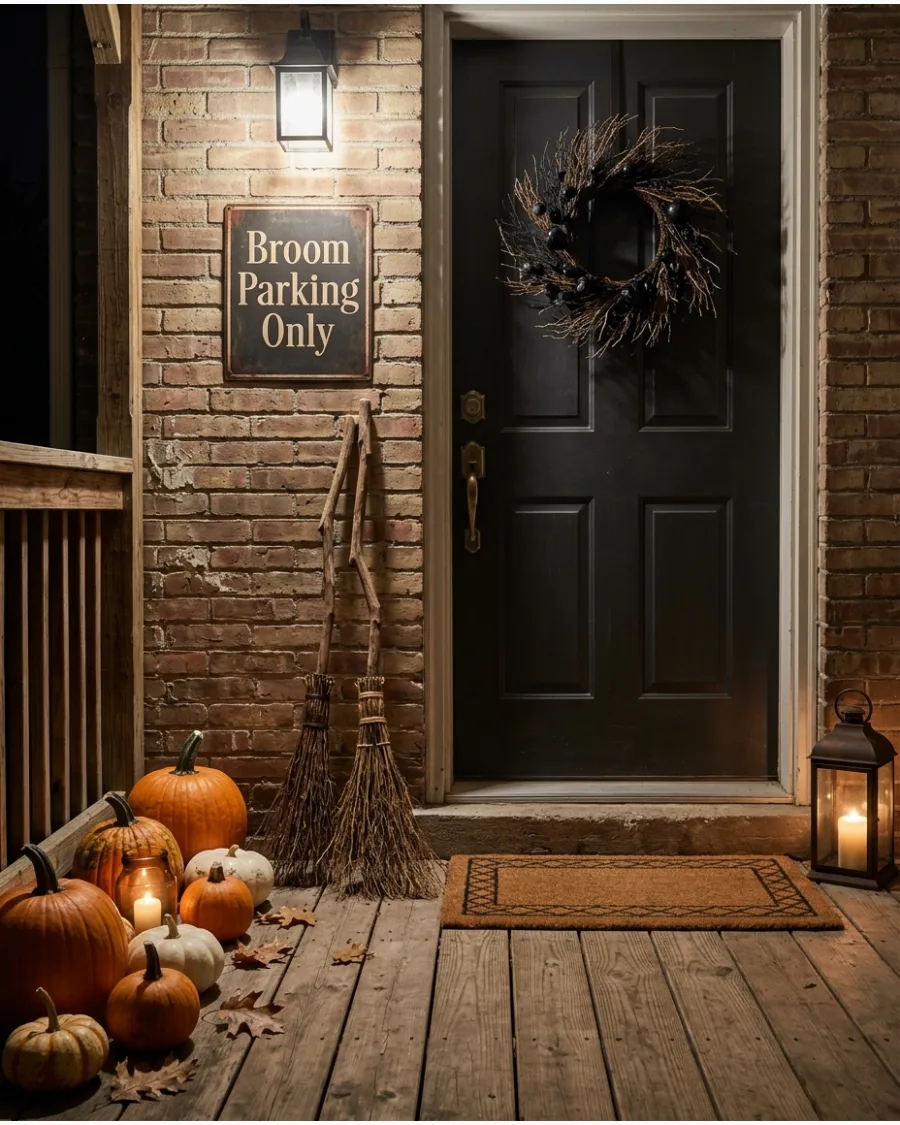
A "Broom Parking Only" sign is a clever way to organize a collection of decorative brooms. This sign defines a specific area of the porch, making the decor feel like a planned scene.
Place this sign at eye level above your broom collection to clearly define the theme for guests. It works especially well in tight spaces like apartment hallways or narrow entries. The sign adds a touch of humor to the spooky season.
- Look for a vintage metal sign for a more authentic, aged appearance.
- Mount the sign using outdoor-rated adhesive strips for a clean look.
- Space the brooms evenly underneath the sign to create an organized display.
Most people skip this: Lean the brooms with the bristles pointing up to prevent the straw from bending and to follow the tradition of 'parking' them.
Halloween Front Door Decor
29. Weathered Wood Potion Shop Sign
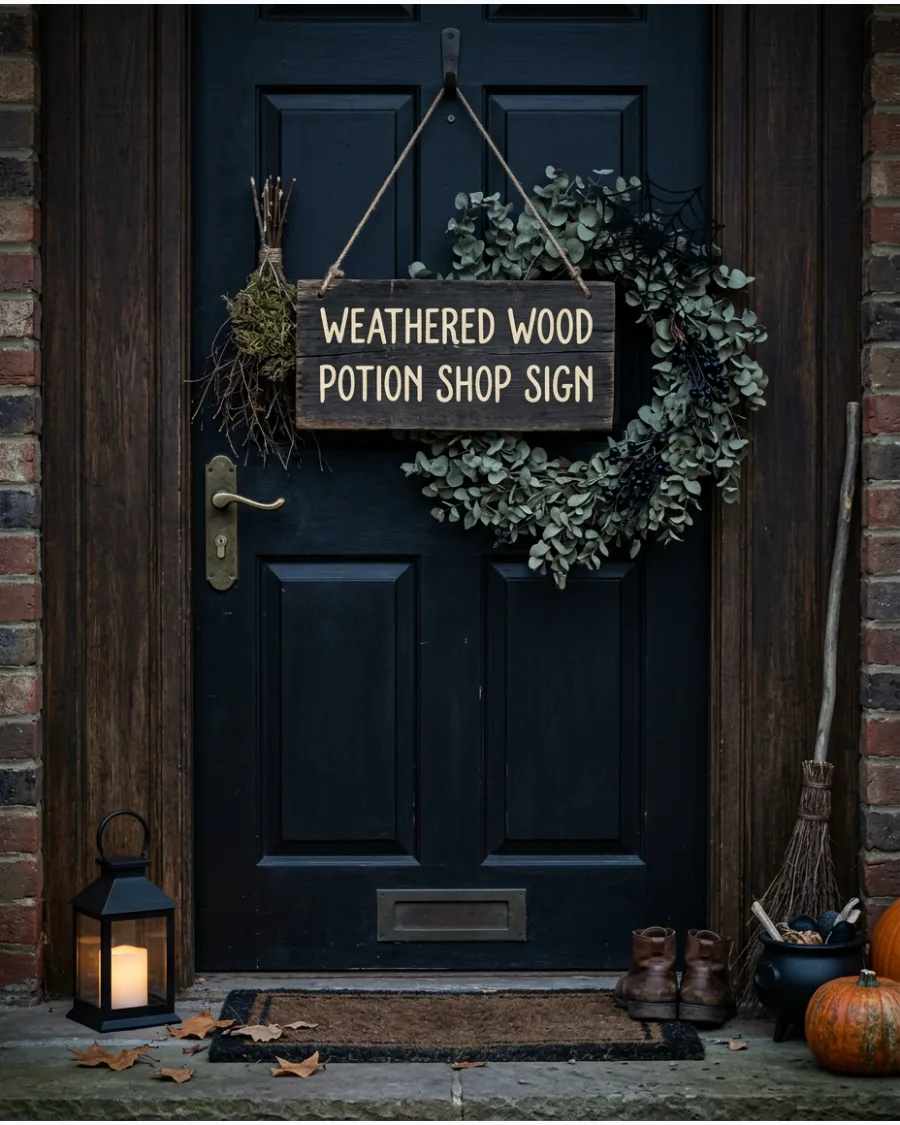
A hand-painted wooden sign creates an immediate sense of story before guests even enter the home. This approach favors a village witch aesthetic over bright plastic colors, using muted tones and natural textures to feel authentic.
Sand the edges of a pine board and apply a dark walnut stain to mimic centuries of wear. Distressed lettering in a creamy off-white is much more legible from the street than stark white.
- Source a 12-inch pine plaque from a local craft store for under ten dollars.
- Attach a sturdy jute twine loop to the back using heavy-duty staples for a rustic hanging method.
- Switch the text from Potions to Herbalist or Coven Meeting to adjust the level of spookiness.
Quick win: Rub a bit of gray craft paint into the corners of the sign with a dry cloth to simulate years of accumulated dust and age.
Witch Door Signs
30. Potion Shop Entrance Sign
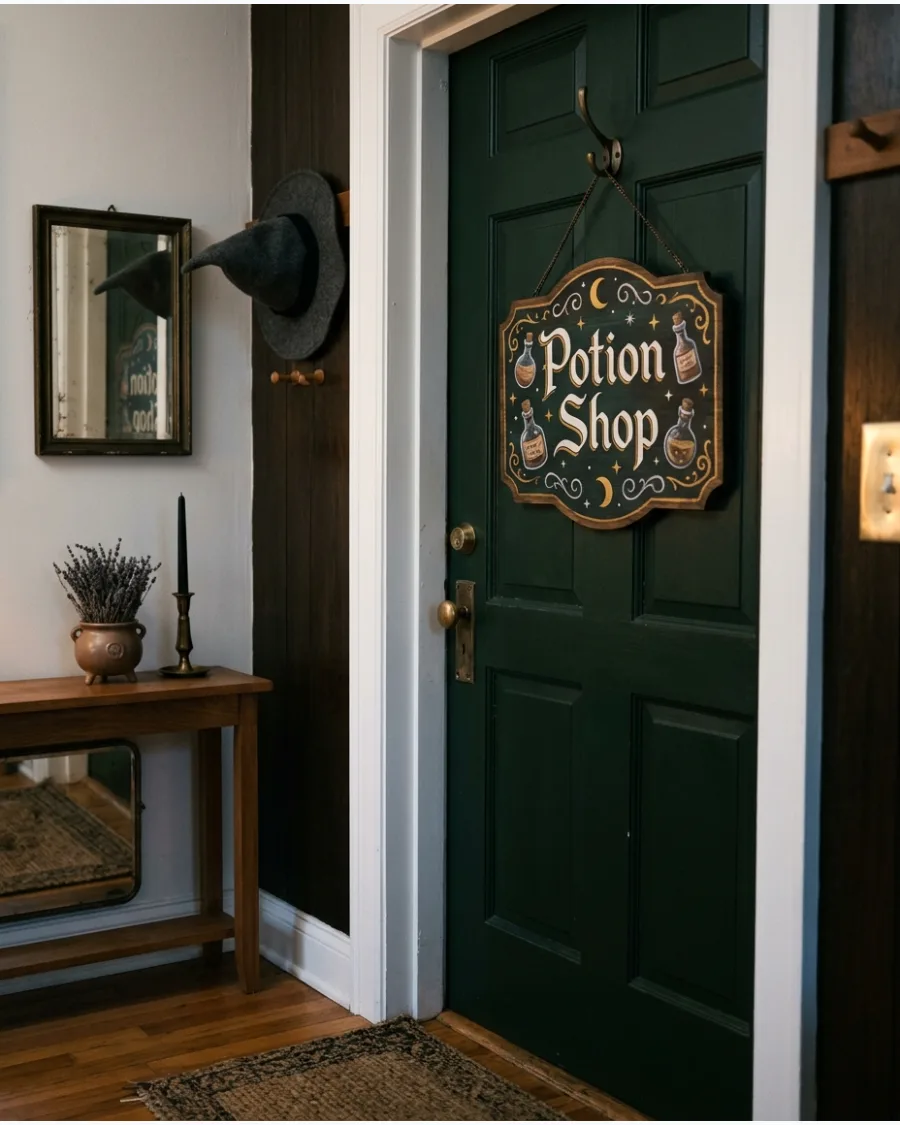
A potion shop sign offers a more detailed and mysterious take on witch decor. Featuring illustrations of bottles and moons, this sign suggests there is more to see inside.
Use a sign with metallic gold or silver lettering to make the mysterious theme feel more high-end and intentional. This approach moves away from cartoonish Halloween tropes and toward a curated aesthetic. It looks best when paired with dark-colored doors.
- Select a sign with a Victorian or Gothic font for a more dramatic effect.
- Coordinate the sign's colors with nearby pumpkins or floral arrangements.
- Hang a small cluster of empty glass vials nearby to reinforce the theme.
Quick win: Hang the sign from an ornate brass hook instead of a standard nail to elevate the overall look of the door.
Home Decor
31. Spell Ingredients Delivery Sign
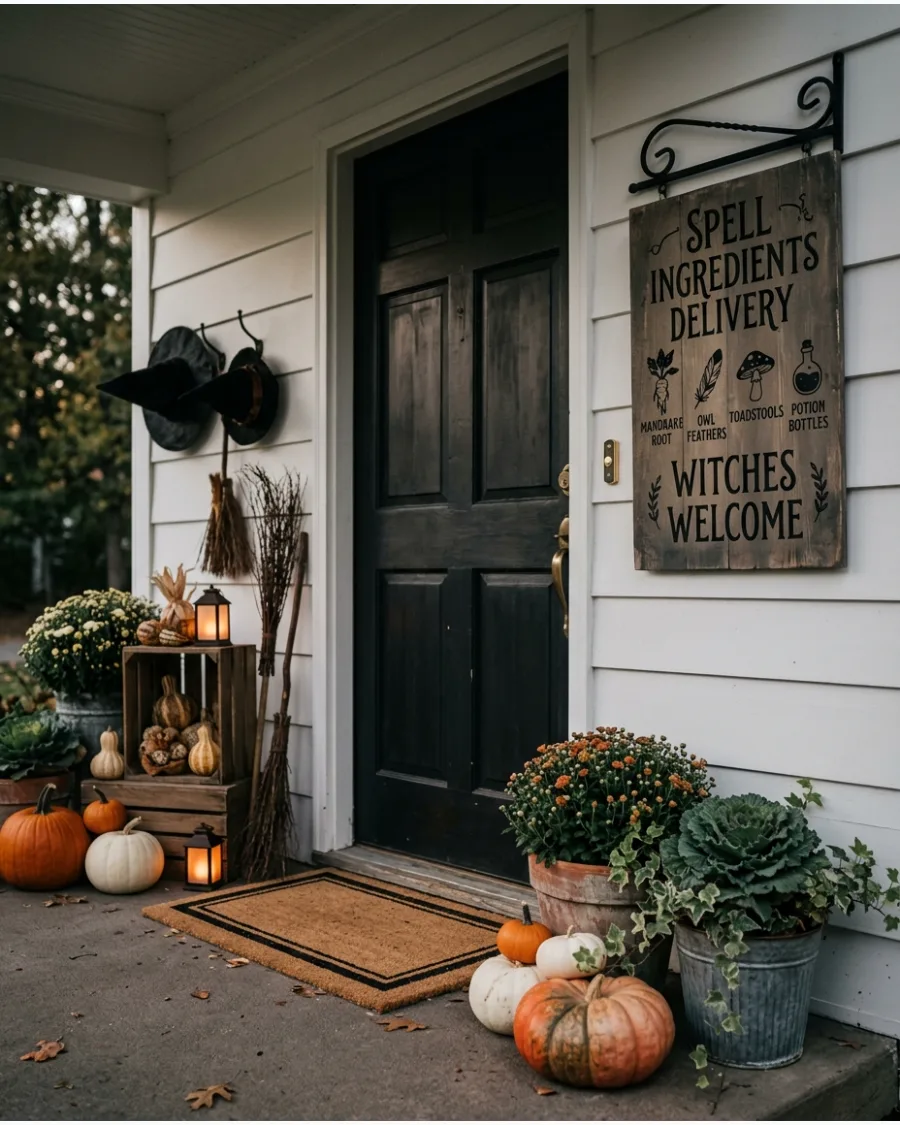
A dedicated delivery sign creates a whimsical narrative for the front porch that goes beyond standard spooky wreaths. Mount a rustic wooden plaque near the doorbell or mailbox using weather-resistant adhesive strips. This detail suggests a busy witch lives inside, making the home feel like a lived-in part of a magical world.
It is much more effective to use aged parchment textures rather than bright, modern fonts to maintain the illusion of an ancient apothecary.
- Sourcing: Under $15 for a DIY wood plaque or a downloadable printable from an online marketplace.
- Setup: Use a command hook or twine to hang the sign at eye level so delivery drivers and guests notice the joke immediately.
- Adaptation: Swap the text to 'Apothecary Deliveries Only' or 'Toadstool Drop-Off' to fit different magical themes.
Quick win: Rub a damp tea bag over white paper to create an 'antique parchment' look before framing it in a dark wood frame.
Witch Door Signs
32. Coven Meeting Door Sign
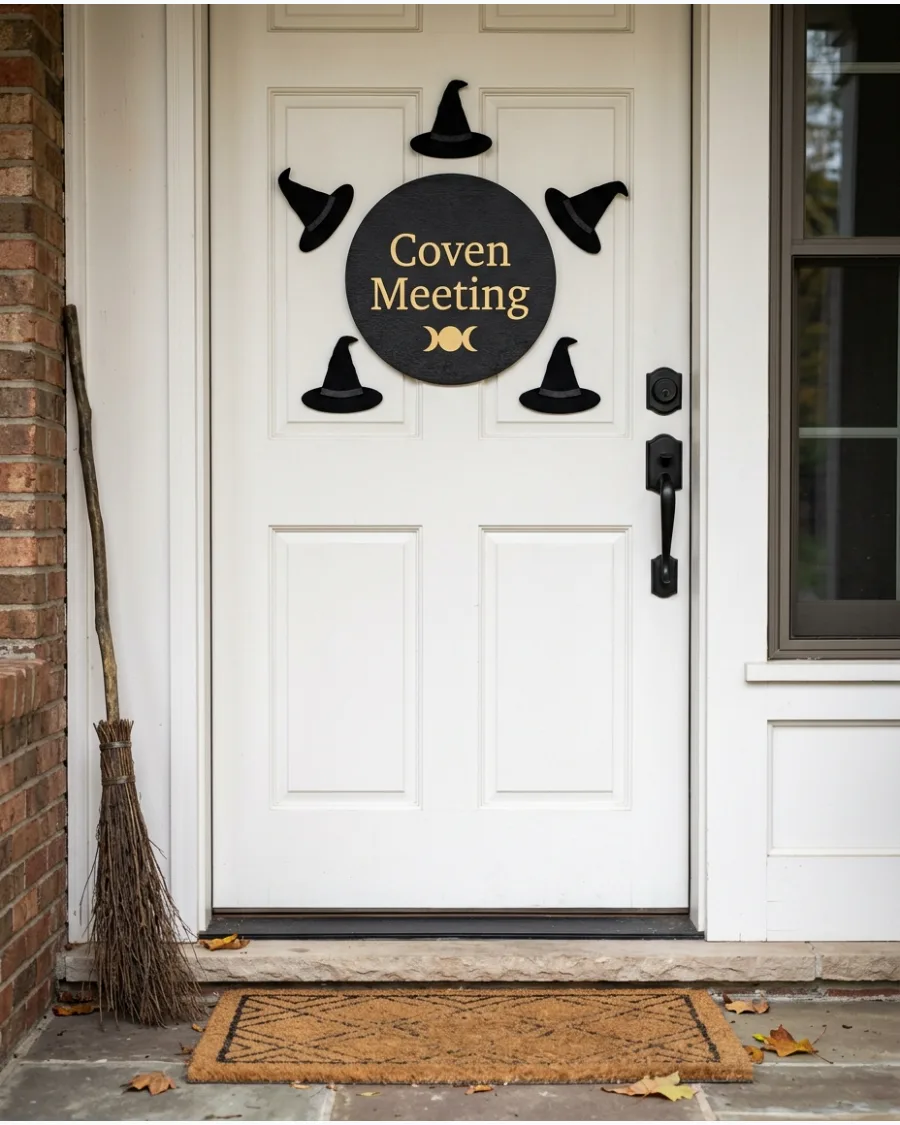
A sign announcing a coven meeting is a perfect way to set a theme for a seasonal party. Attach several mini felt witch hats around the sign using removable adhesive to give the display a three-dimensional look. This simple addition makes a flat sign feel more like a custom art piece.
- Look for lightweight wood or foam signs to prevent them from falling.
- Use Command strips to secure the sign without damaging the paint.
- Swap mini hats for paper bats if you want a spookier vibe.
Quick win: Angle the mini hats at different heights to make them look like they are floating or dancing around the text.
Full Witch Door Makeovers
33. Giant Witch Face Door
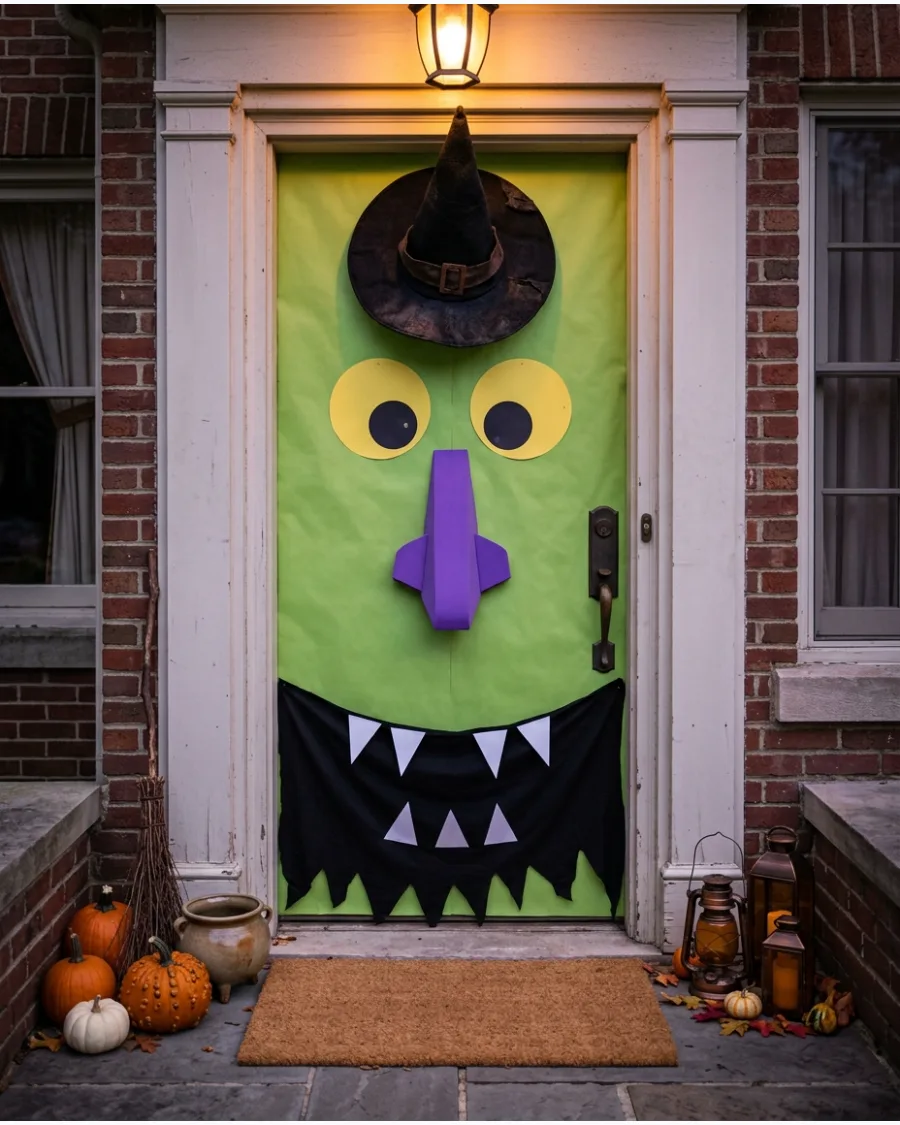
Turning the entire door into a character is a high-impact way to decorate for trick-or-treaters. Place a large, sturdy witch hat on the top of the door frame to act as the character's headpiece and add height to the display. It works best on light-colored doors that make the green skin tone pop.
- Use weather-resistant craft foam or plastic tablecloths for the face.
- Tape the edges of the paper on the inside of the door for a clean look.
- Use removable mounting putty for the eyes and nose to protect the finish.
Most people skip this: Reinforce the paper around the door handle with clear packing tape so it does not rip after a few uses.
34. Flying Witch Silhouette
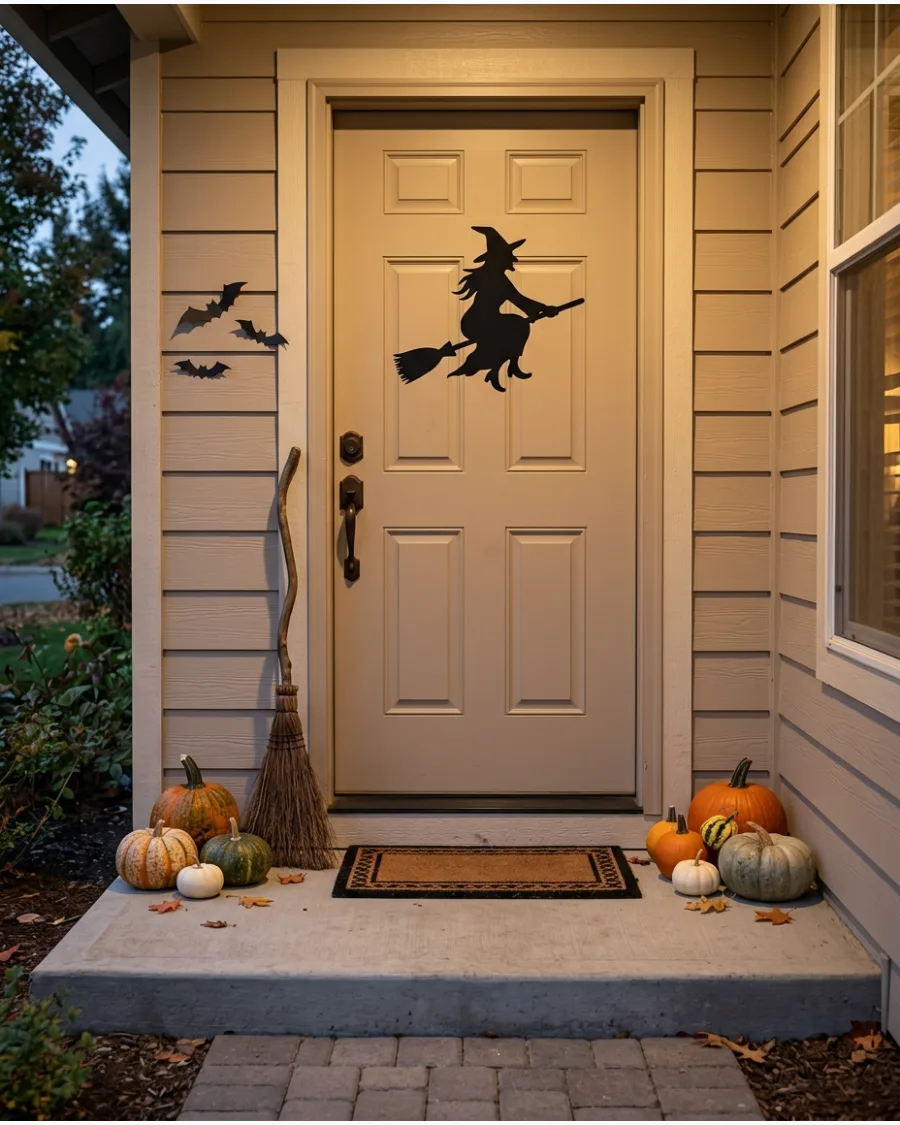
A large black silhouette creates a clean and modern look that is visible from the street. Position the witch at a slight upward angle to make it look like she is actively flying across the door. You can extend the scene by adding a few small bats to the wall next to the entrance.
- Vinyl decals are the easiest way to apply and remove the silhouette.
- Ensure the door surface is dry and clean before sticking the vinyl.
- Matte black poster board works well for a low-cost DIY version.
Best shortcut: Shine a spotlight from the ground at night to cast a larger-than-life shadow of the silhouette onto the house.
35. Witch Legs Under the Door
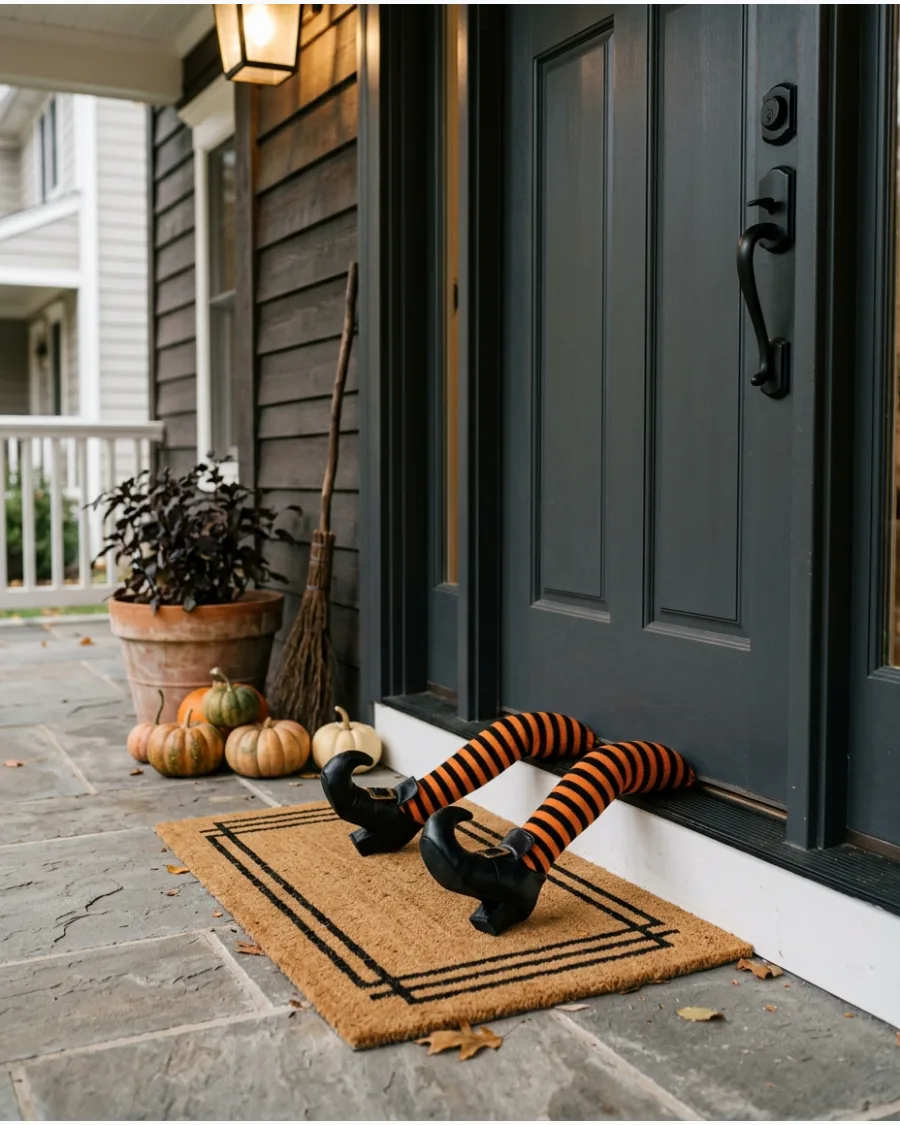
Stuffed legs appearing to be crushed under the door is a classic and funny Halloween trope. Secure the top of the legs to the bottom edge of the door with heavy-duty tape so they stay in place when the door opens and closes. It is a low-effort way to add a lot of personality to a small space.
- Buy pre-stuffed legs or use old tights filled with cotton batting.
- Secure the shoes to the legs with hot glue so they do not fall off.
- Choose bright colors like lime green or orange to ensure they are visible.
Quick win: Stuff a wire coat hanger into the legs so you can bend the knees or toes for a more realistic appearance.
Halloween Decor
36. Crashing Witch Door Display
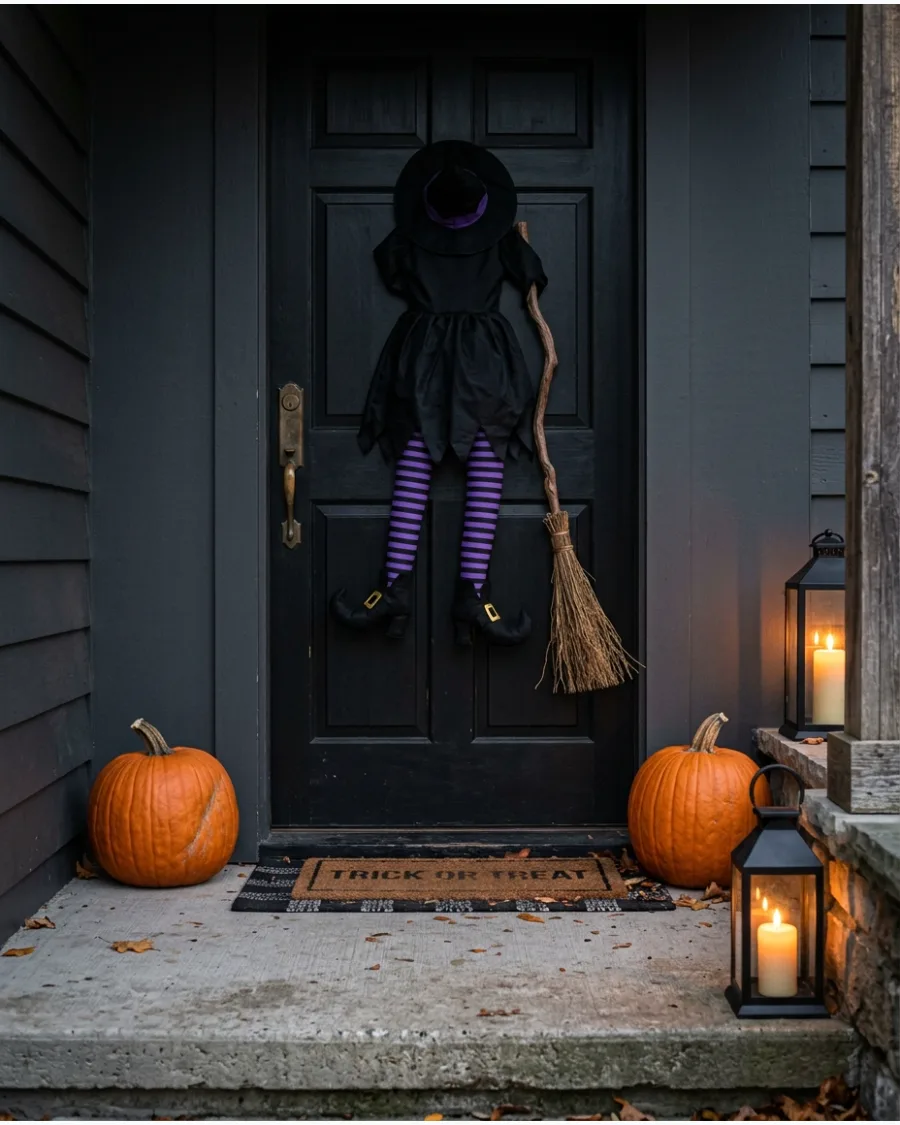
A crashing witch display adds a playful, comedic element to the front entrance by making it look like a broomstick flight went slightly off-course. This decoration typically consists of stuffed legs, a cape, and a hat secured directly to the door's surface to create a 3D effect.
Position the broomstick at a 45-degree angle to enhance the sense of motion and impact. Using a door with a dark paint color helps the vibrant striped stockings pop against the background. While store-bought kits are convenient, stuffing the legs with extra bubble wrap ensures they maintain a realistic shape against heavy winds.
- Inexpensive kits are available online starting in early September, or use old stockings and a real yard broom for a DIY version.
- Secure the limbs using heavy-duty suction cups for glass doors or command hooks for wood to avoid permanent damage.
- Switch the traditional purple and orange colors for a monochromatic black-and-white theme to match a modern minimalist exterior.
Most people skip this: Light the display from below with a small ground spotlight to create dramatic shadows on the door at night.
Full Witch Door Makeovers
37. Witch’s Cottage Entrance
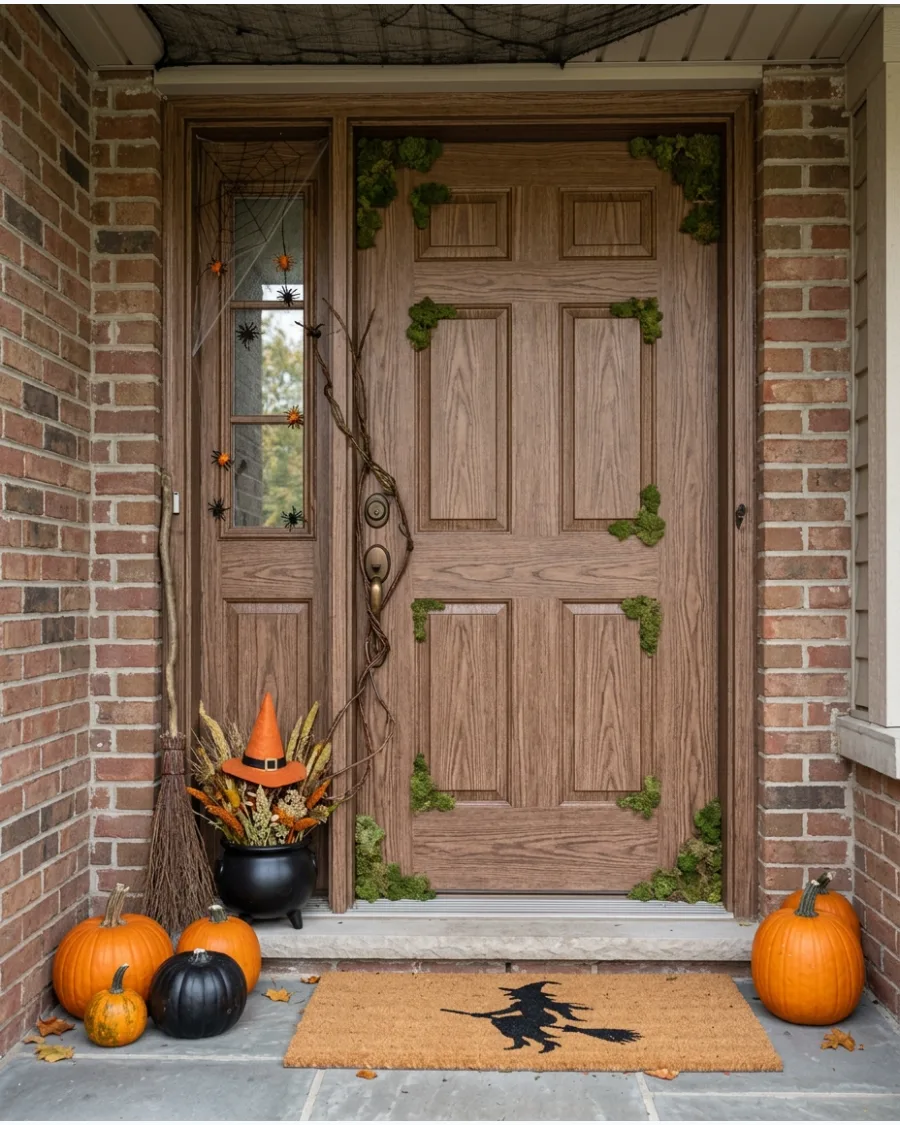
Transforming a standard door into a rustic cottage entrance creates an immersive atmosphere for visitors. Glue clumps of preserved green moss into the corners of the door frame to make the house look ancient and overgrown. This texture makes the fake wood panels look much more realistic and high-end.
- Use wood-grain contact paper for a temporary and realistic wood look.
- Drape real grapevine or plastic ivy over the frame for added texture.
- Add a few plastic potion bottles on the porch floor near the door.
Quick win: Use a dark brown marker to draw knots and cracks onto the paper to make the fake wood look more authentic from a distance.
38. Magical Spellbook Door
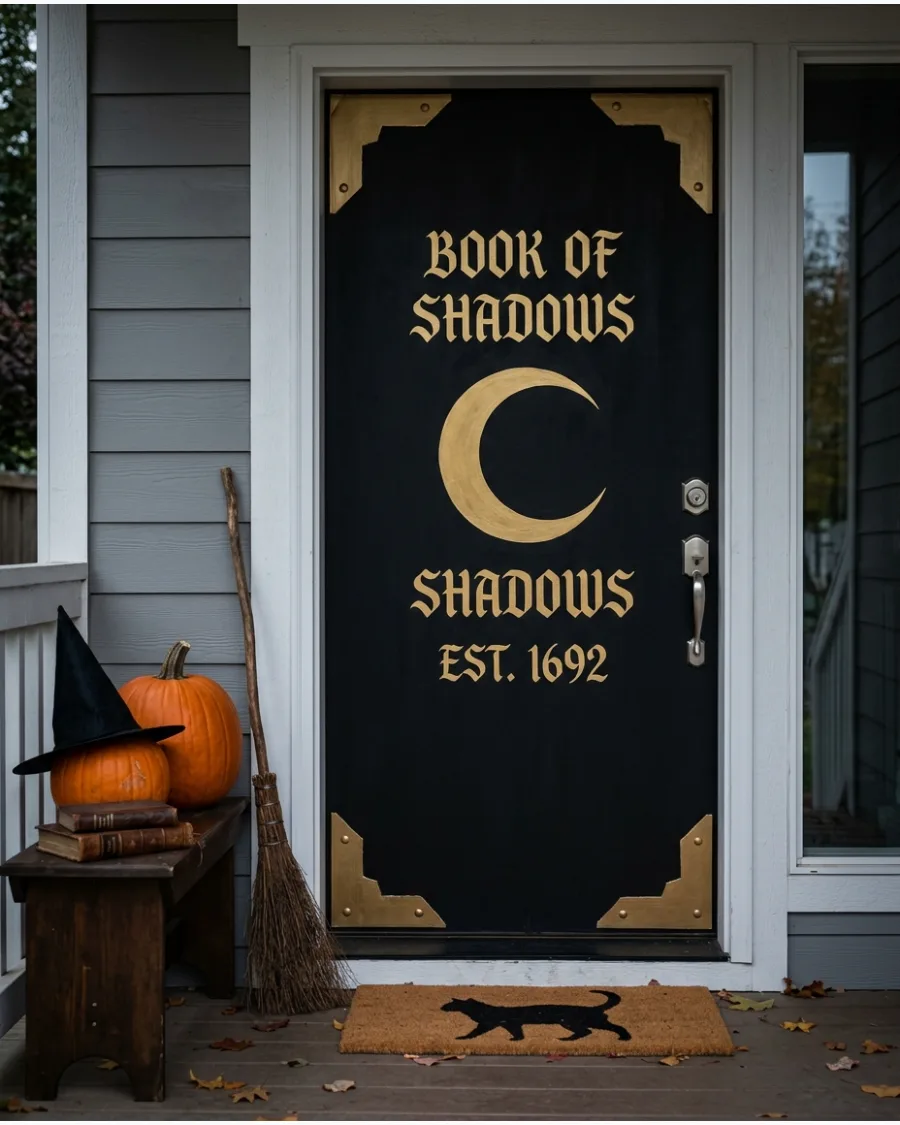
A spellbook door uses simple shapes and metallic accents to create a mystical look. Add oversized gold corner protectors made from painted cardboard to give the door the appearance of a heavy, leather-bound book. This design is sophisticated and works well for homes with a darker aesthetic.
- Matte black wrapping paper makes a great base for a leather look.
- Use foam board for raised 3D elements like symbols or titles.
- Stick to a two-color palette like black and gold for a cohesive look.
Best shortcut: Use a projector to trace the letters onto the paper before cutting to ensure the title is perfectly centered.
39. Green Witch Door Cover
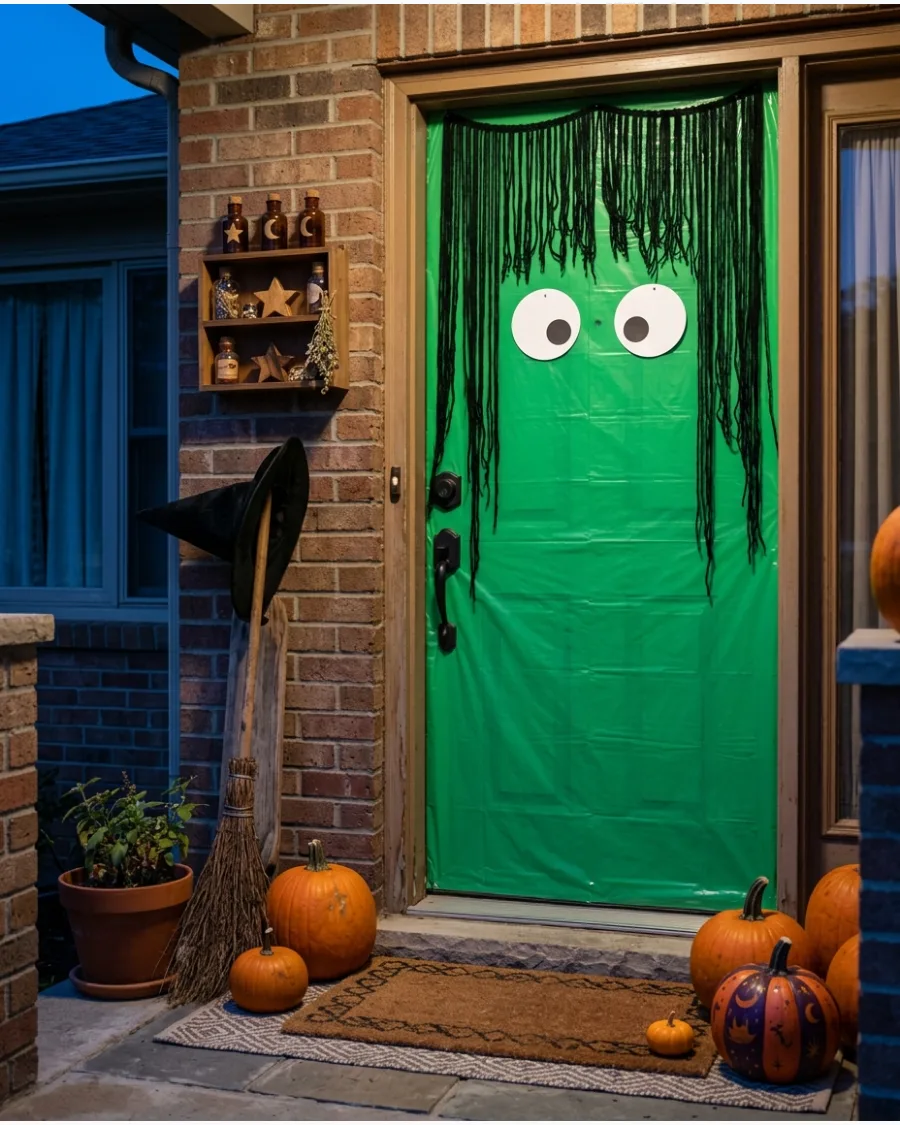
A bright green door cover makes your home stand out and serves as the perfect base for a witch face. Hang long strands of black yarn from the top of the door to create the look of wild, messy hair. This is a budget-friendly project that uses simple materials like plastic and string.
- Plastic tablecloths from a party store are the cheapest way to cover the door.
- Use double-sided tape for the yarn hair to keep it from tangling.
- Add a purple paper lip cutout at the bottom for more character.
Most people skip this: Cut a small slit for the door handle so the plastic does not bunch up or rip when people enter the house.
40. Celestial Witch Door
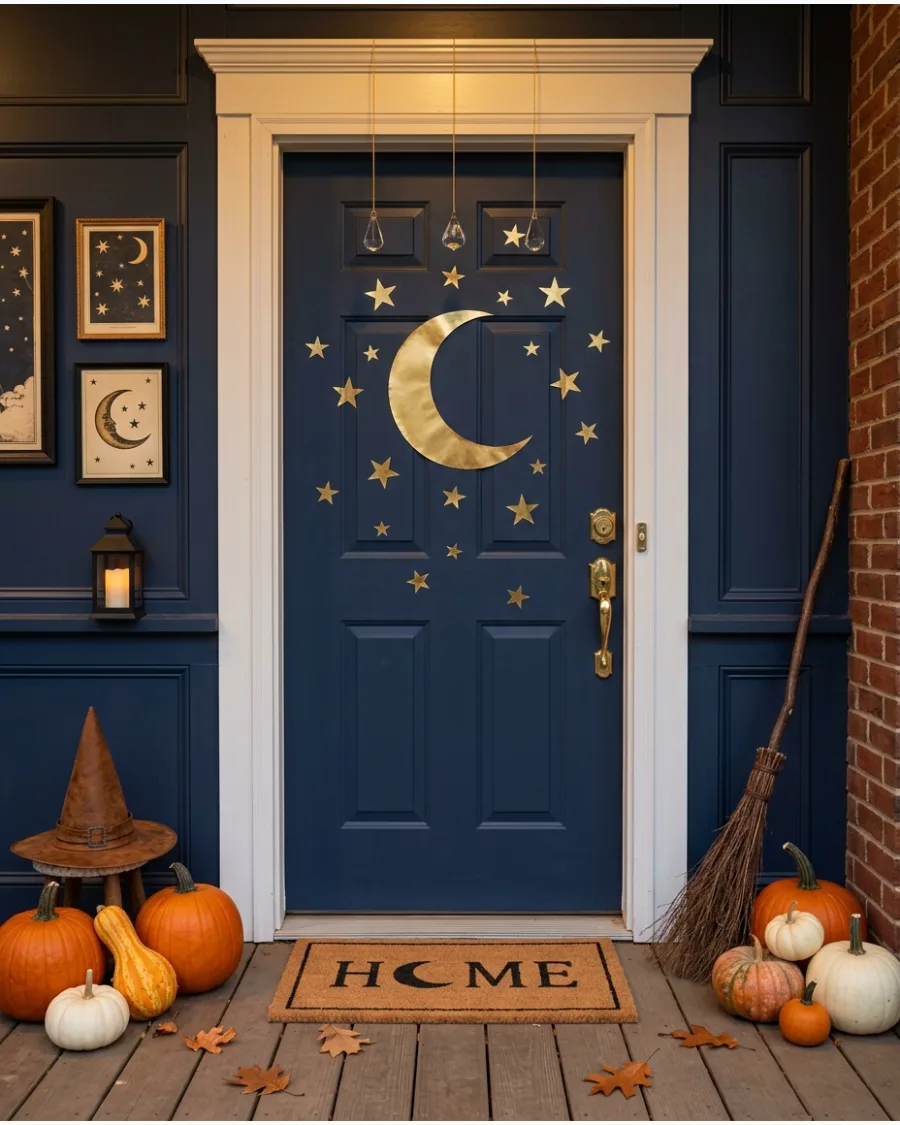
A celestial theme uses stars and moons to create a magical and elegant entrance. Apply gold foil stars in a random pattern across a dark door to mimic a clear night sky. This look is festive enough for Halloween but stylish enough to last through the entire month.
- Metallic vinyl stickers are the fastest way to add stars to the door.
- Use a dark blue or black door background for the best contrast.
- Add a simple black broom leaning nearby to tie in the witch theme.
Quick win: Use glow-in-the-dark star stickers so the celestial pattern remains visible even after the porch lights are turned off.
Witchy Doorframe and Porch Ideas
41. Bubbling Cauldron Entrance
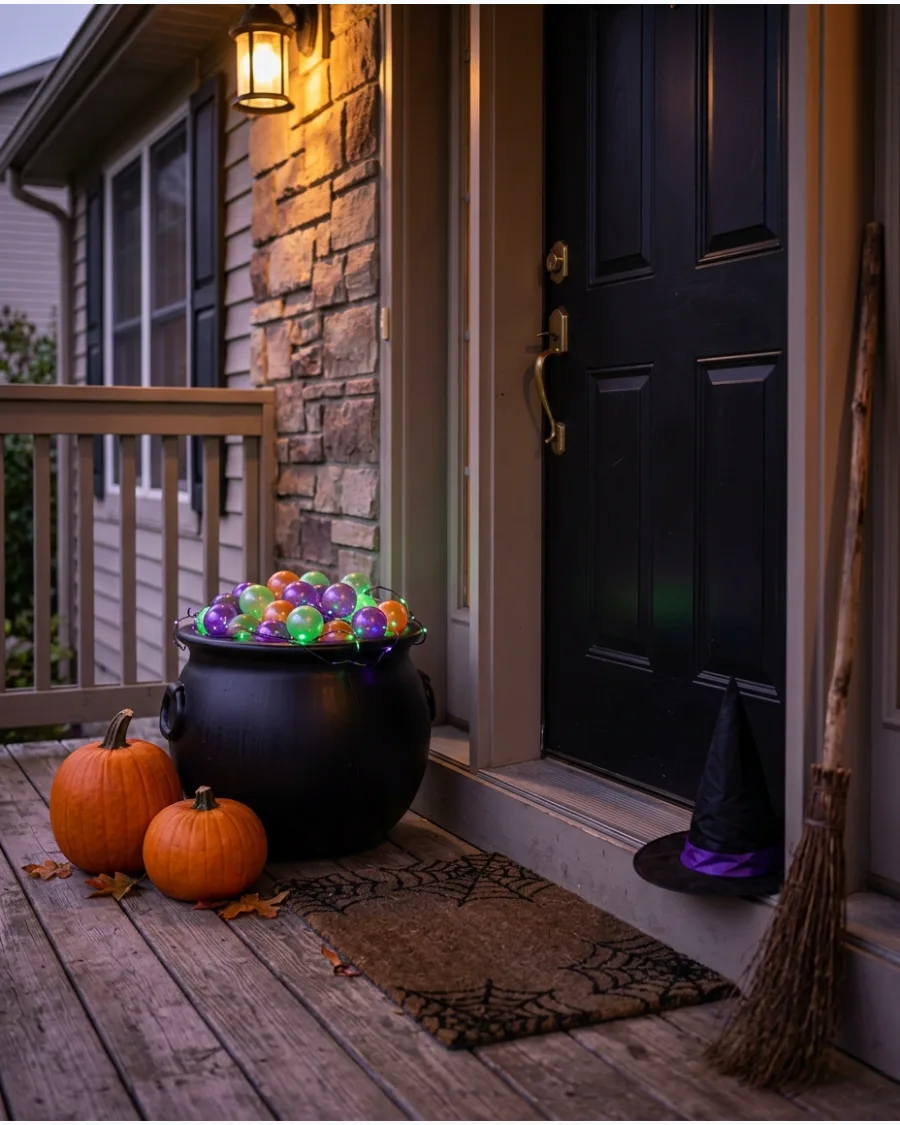
Set a large black cauldron on the porch floor next to the door. Fill the pot with clear iridescent ornaments and green fairy lights to mimic a glowing brew.
Tuck a handful of dry ice into a bowl of water hidden inside for a real mist effect. Large props like this create a focal point that draws the eye without cluttering the walkway.
- Buy a plastic cauldron from a party store and battery-powered LED strings.
- Place the cauldron two feet away from the door swing to keep the path clear.
- Swap the green lights for purple or orange to change the mood of the potion.
Quick win: Use a small ultrasonic mister inside the cauldron for a consistent fog without the hassle of dry ice.
42. Cauldron Planter
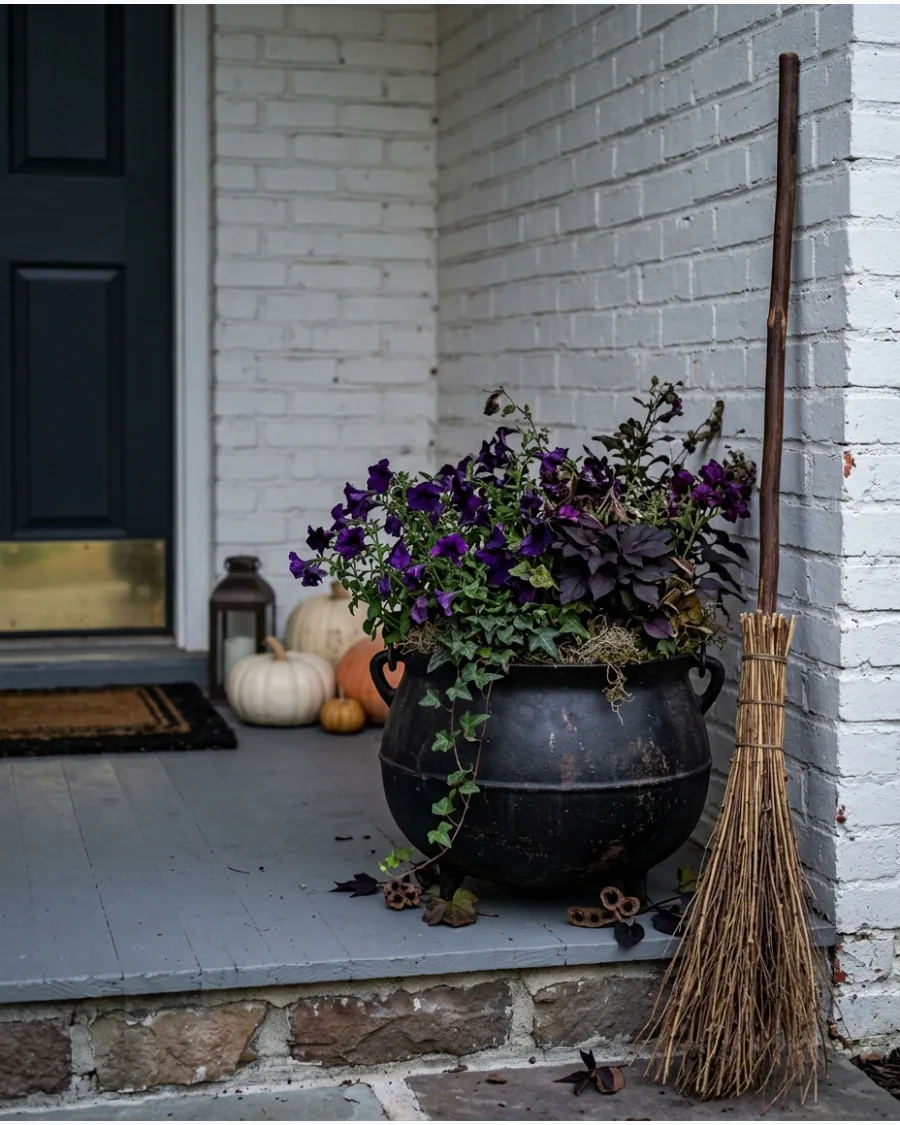
Transform a heavy-duty cauldron into a seasonal planter for the entryway. Pack it with deep purple pansies or black mondo grass for a moody, living display.
Drill small drainage holes in the bottom if you plan to keep real plants in it all season. Living plants add a texture that plastic decorations cannot replicate.
- Look for lightweight resin cauldrons at garden centers for easier moving.
- Elevate the planter on a small stool to give it more presence next to the door.
- Use faux silk flowers if the porch does not get enough sunlight for real plants.
Best shortcut: Place a smaller plastic nursery pot inside the cauldron so you do not have to fill the entire thing with heavy soil.
43. Witch Boot Planters
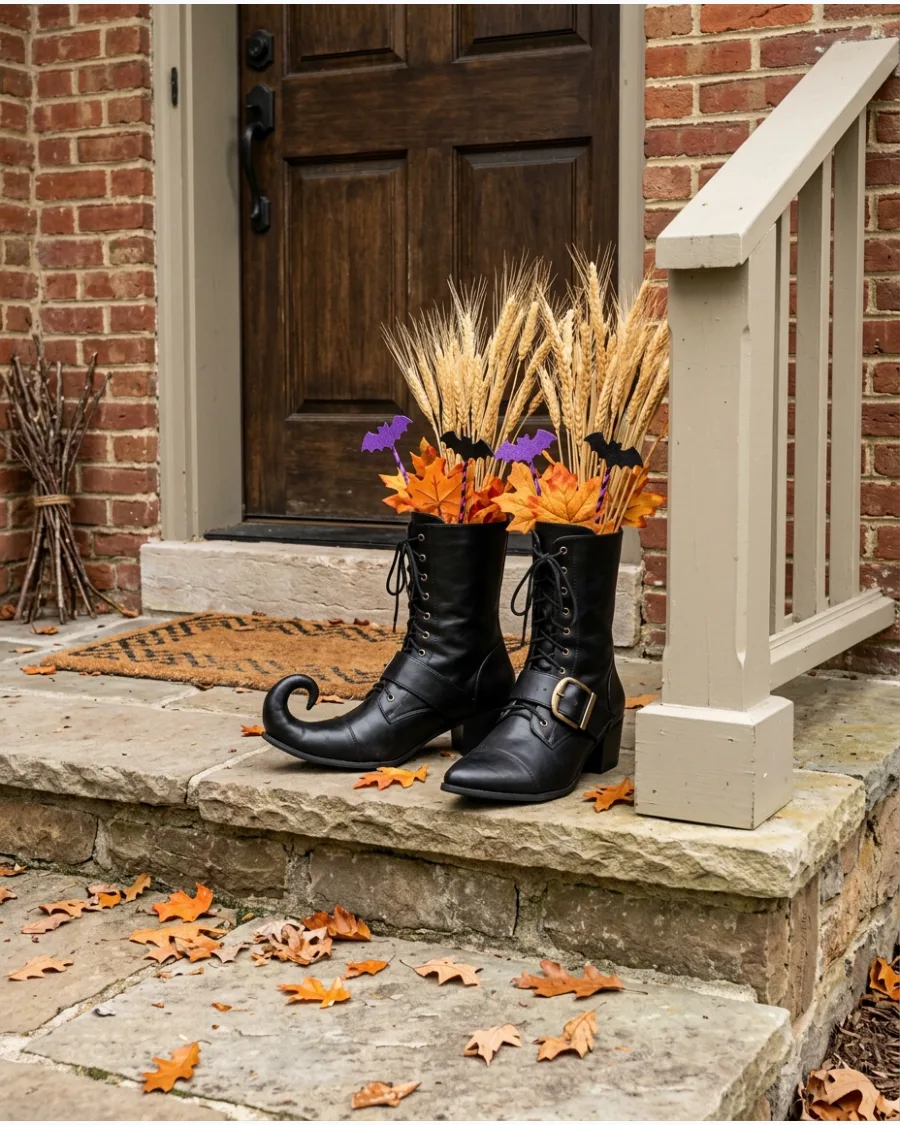
Position a pair of upright witch boots on the porch steps to act as whimsical vases. Stuff the legs with floral foam to hold bundles of dried wheat or faux autumn leaves.
Weight the bottom of the boots with small stones so they do not tip over in the wind. Symmetry works best here, so placing one on each side of the threshold feels intentional and polished.
- Check thrift stores for old leather boots and spray paint them matte black.
- Use floral foam blocks to keep the stems standing straight and secure.
- Wrap the tops of the boots in burlap for a rustic farmhouse look.
Most people skip this: Stuff the toes of the boots with newspaper or plastic bags first to help them maintain their iconic curled shape.
Halloween Decor
44. Floating Apothecary Bottle Doorway Arch
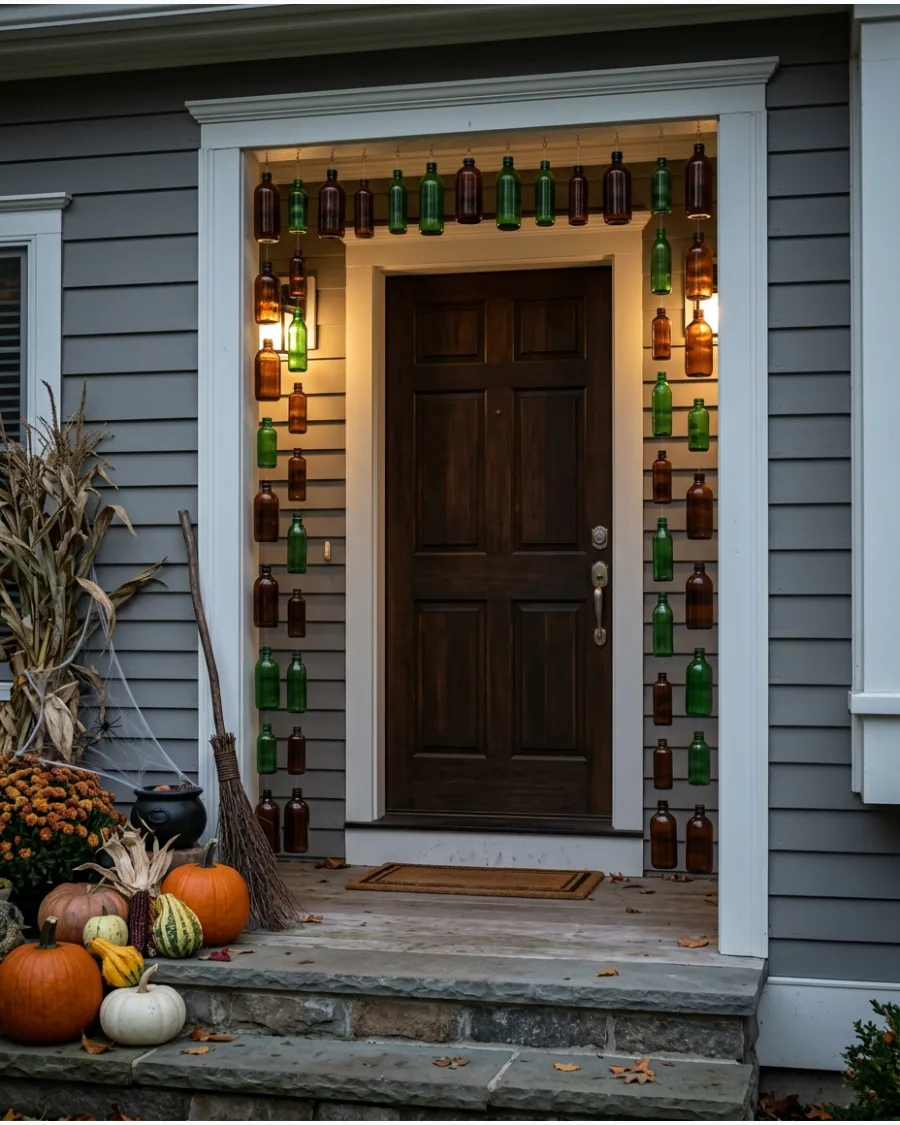
This installation uses lightweight plastic apothecary bottles suspended at varying heights to frame the front entrance. Secure clear monofilament to the porch ceiling or door frame to create the illusion of a gravity-defying potion collection. It adds a sophisticated potion master aesthetic without the clutter of traditional floor-standing props.
Using plastic instead of glass is the only safe way to ensure the arch remains durable and safe during high autumn winds.
- Source multi-packs of vintage-style plastic bottles and 20lb test fishing line for under forty dollars.
- Tie bottles at staggered lengths and attach them to a tension rod or small screw hooks placed along the door trim.
- Fill a few select bottles with battery-operated fairy lights or tinted water to add depth and nighttime visibility.
Quick win: Use a tiny drop of hot glue on the knot at the bottle neck to prevent the slick fishing line from sliding off during a breeze.
Witchy Doorframe and Porch Ideas
45. Black Rose Witch Garland
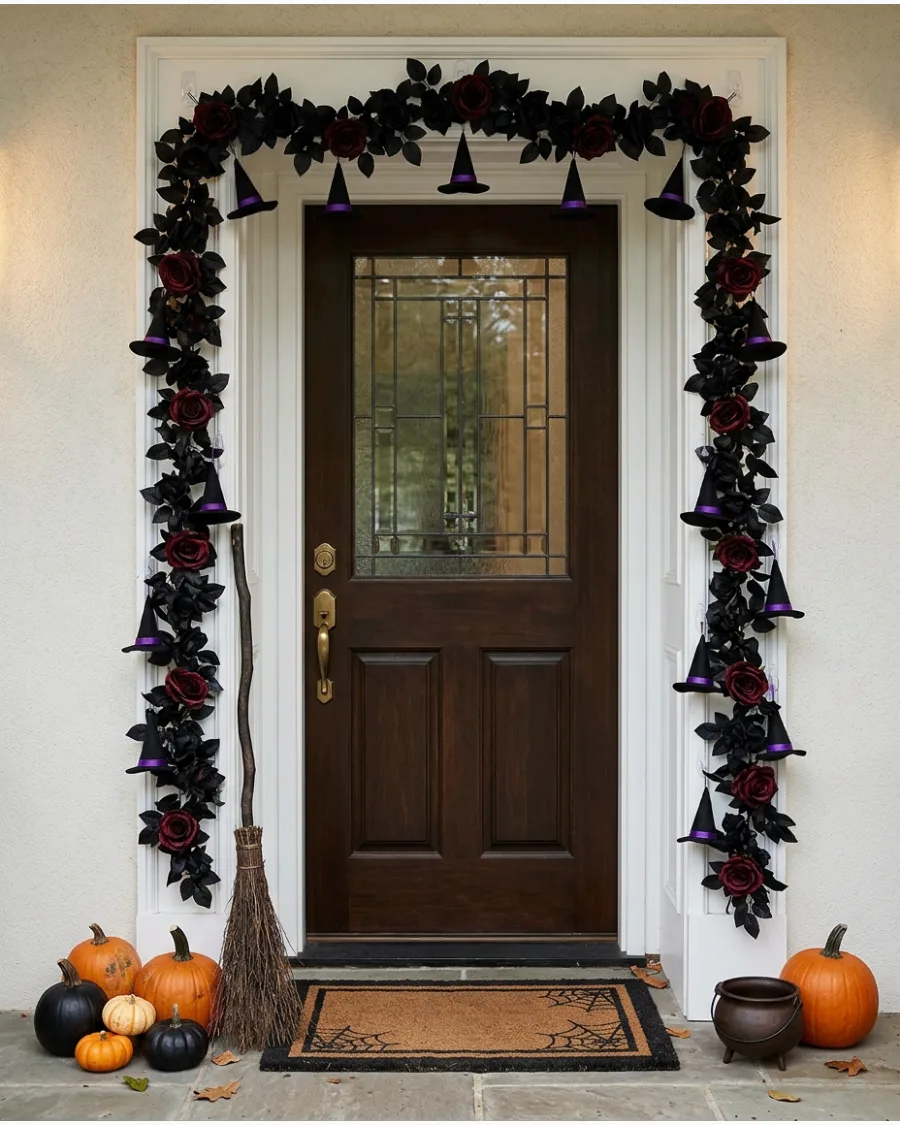
Frame the entire door with a thick garland of dark foliage and artificial roses. Weave in small silver charms or tiny witch hats to tie the theme together.
Secure the garland with adhesive hooks every twelve inches to prevent it from sagging over the handle. Darker colors look sophisticated against a light-colored house and provide a subtle spooky vibe.
- Buy a basic green garland and spray paint it black for a custom look.
- Use zip ties to attach extra floral picks or ornaments to the main vine.
- Drape the garland only across the top if the entryway is very narrow.
Best shortcut: Buy pre-lit black garlands to save time on wiring lights through the branches.
46. Enchanted Forest Witch Entrance
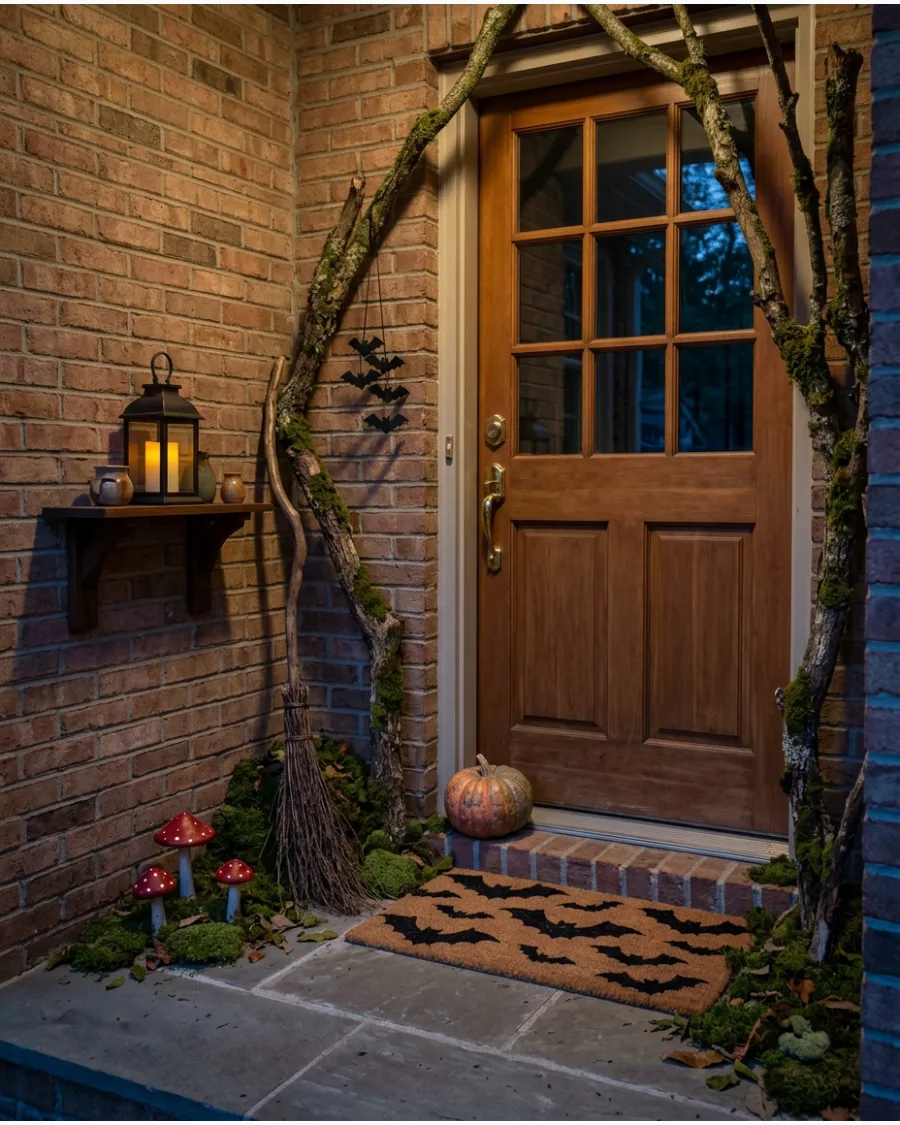
Lean gnarled branches against the porch walls to create an overgrown, mystical look. Scatter faux moss and small mushroom figurines around the base of the door.
Use fishing line to hang a few plastic crows from the porch ceiling so they appear to be hovering. Natural textures like wood and moss ground the theme and make it feel more realistic.
- Gather fallen branches from the yard for a budget-friendly structural element.
- Use outdoor-rated battery lights to weave through the branches for a soft glow.
- Swap the mushrooms for pinecones to transition this look into late autumn.
Most people skip this: Spray the branches with a clear matte sealant to prevent them from rotting if they sit on a damp porch.
47. Gothic Witch Doorway
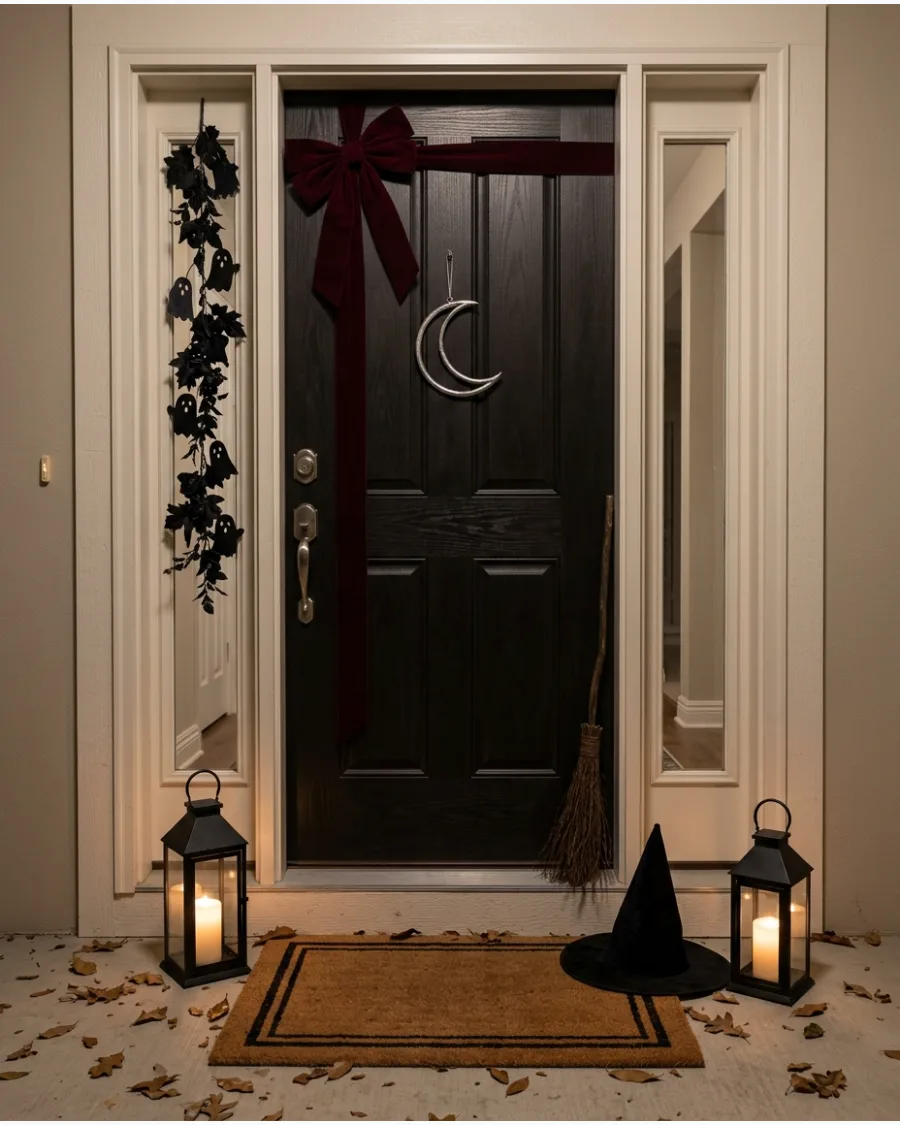
Decorate the entrance with deep burgundy ribbons and aged metal lanterns for a Victorian feel. Place a small, ornate cauldron on a pedestal to serve as a sophisticated centerpiece.
Hang a heavy black wreath with a single silver crescent moon for a focal point on the door. Mixing metallic finishes like pewter or tarnished gold adds a layer of richness to the dark palette.
- Look for lanterns at home goods stores and add LED pillar candles.
- Use wire-edged ribbon for the bows so they hold their shape in the wind.
- Incorporate dried eucalyptus for a muted, dusty look that fits the gothic theme.
Quick win: Place a few drops of lavender or patchouli oil on the wreath to give guests a sensory experience.
48. Whimsigoth Witch Entrance
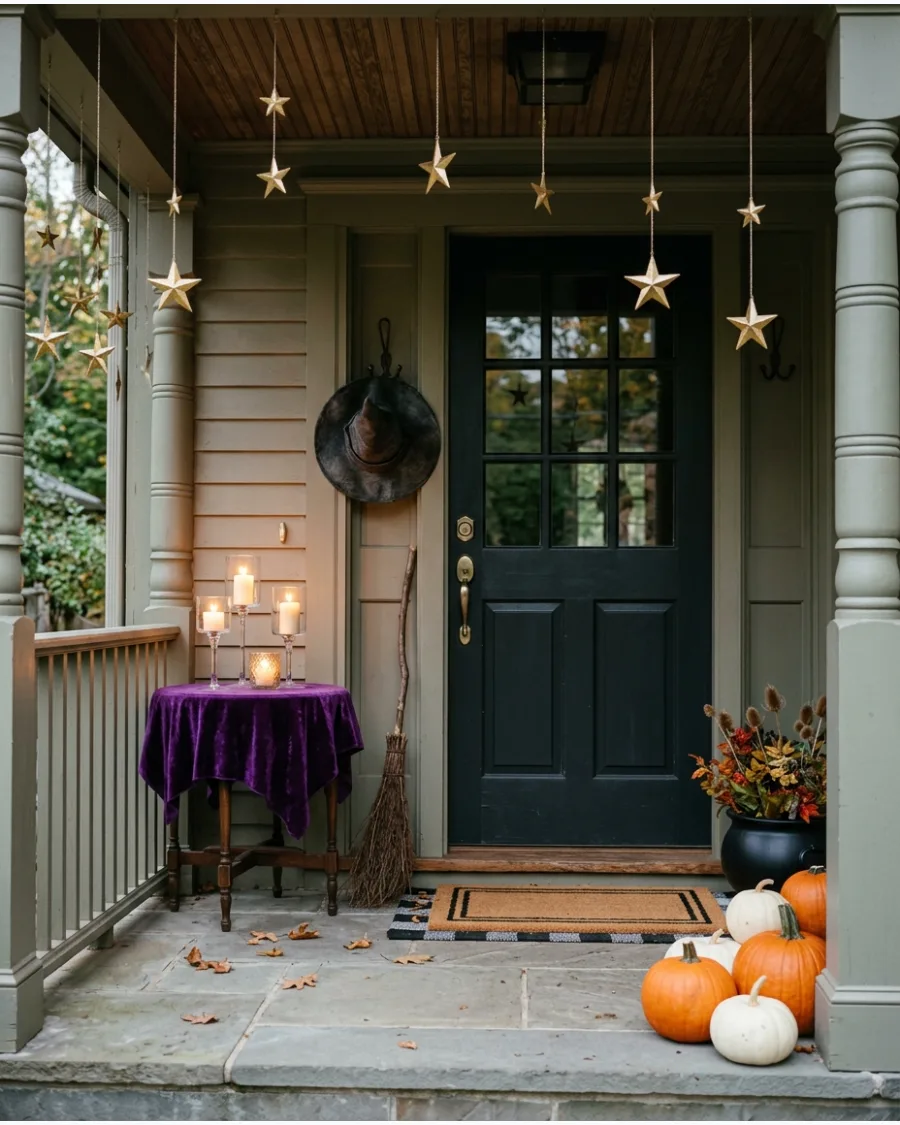
Layer jewel-toned fabrics and celestial symbols around the door for a mystical atmosphere. Hang gold stars from the porch eaves at varying heights using clear thread.
Drape a velvet runner over a side table to hold candles and crystal-shaped ornaments. This style is all about mixing textures, so combine velvet, silk, and wood for the best result.
- Mix purple, emerald, and gold for a palette that feels magical rather than scary.
- Use suction cups to hang stars on the glass of a storm door.
- Repurpose old Christmas ornaments that fit the celestial or jewel-tone theme.
Best shortcut: Use fairy lights with star-shaped bulbs to get the celestial look and the lighting in one step.
49. Neutral Farmhouse Witch Door
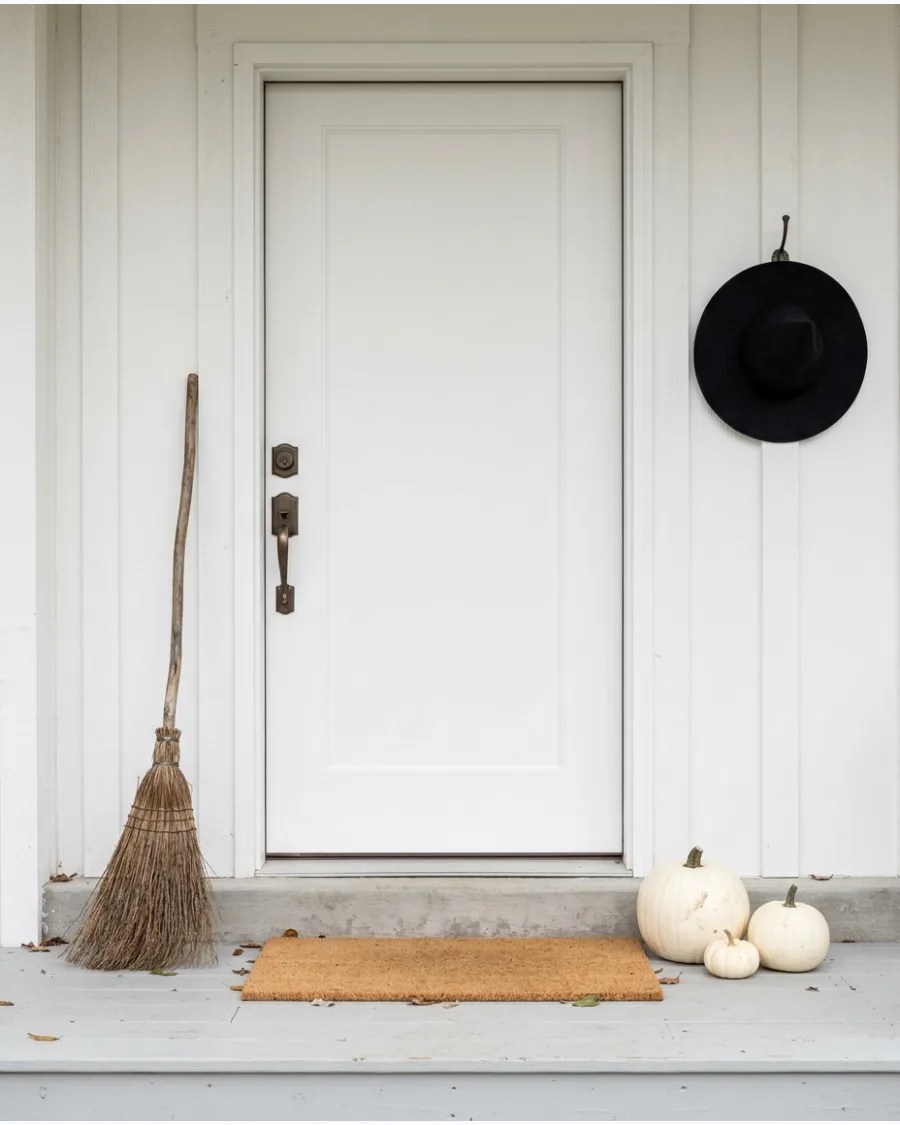
Keep the colors soft with cream pumpkins and natural straw brooms. Hang a simple black witch hat from a single hook for a minimalist nod to the season.
Wrap the broom handle in twine or a neutral linen ribbon for a textured finish. A muted palette allows the witchy elements to feel like part of your everyday fall decor.
- Use real pumpkins and gourds for a natural look that lasts until Thanksgiving.
- Opt for a broom made of real twigs rather than plastic for better texture.
- Keep the door clear of clutter by focusing the decor on the wall space next to it.
Most people skip this: Use a wall hook painted the same color as the siding to make the hanging hat look like it is floating.
50. Interactive Candy Cauldron Door
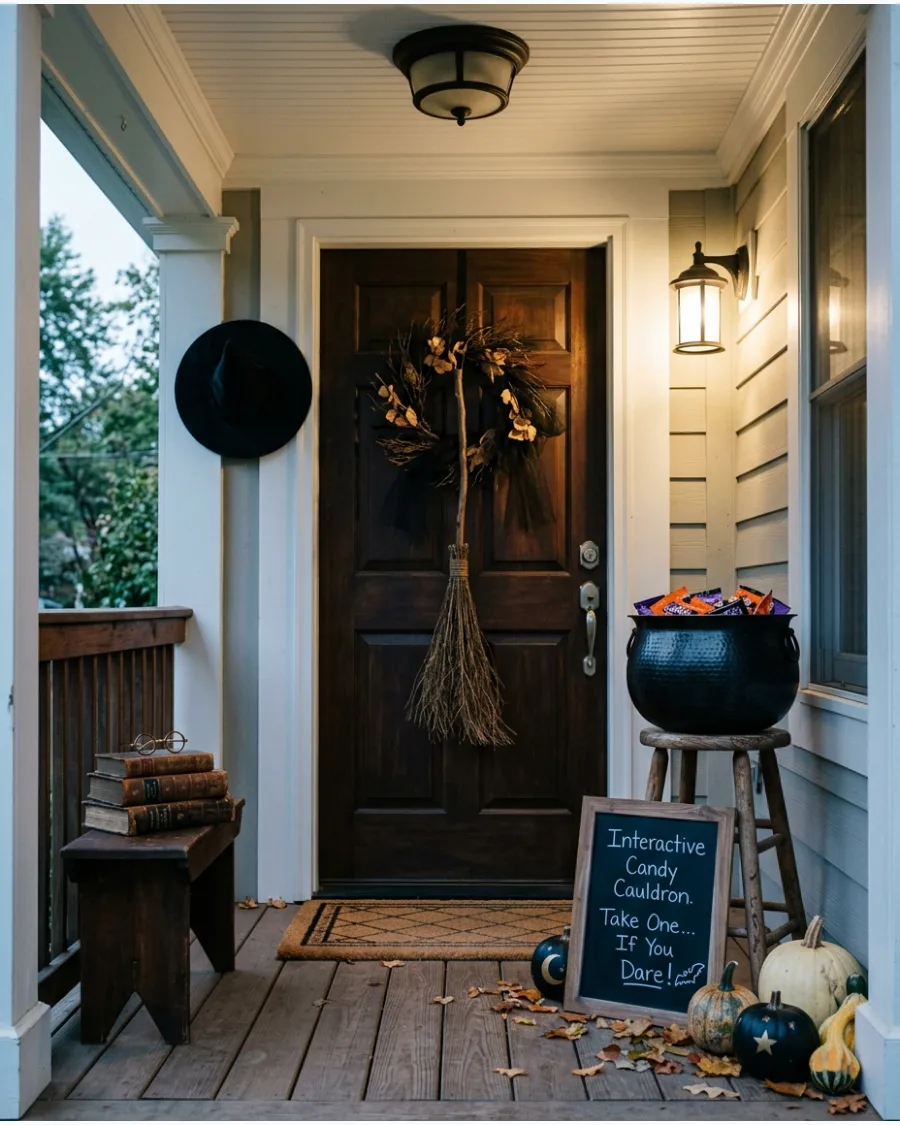
Set up a potion station where trick-or-treaters can grab their sweets. Place a cauldron on a sturdy stool and surround it with old books and a themed sign.
Fill the cauldron with a mix of treats and small non-food prizes like spider rings. Making the candy bowl part of the scene turns a simple chore into an immersive experience for the neighborhood.
- Use a heavy stool or table so the cauldron does not get knocked over by excited kids.
- Place the station three feet away from the door to manage the flow of traffic.
- Add a battery-operated lantern inside the candy to help kids see the treats at night.
Quick win: Use a grabber tool styled like a skeleton hand or a wand to hand out candy from a safe distance.
Frequently Asked Questions
How do I make witch hats look like they are floating on my porch?
To achieve a magical floating effect, thread clear fishing line through the tip of each hat and secure it to your porch ceiling with transparent Command hooks. This creates a seamless, spooky look that makes the hats appear as if they are hovering mid-air.
What is the best way to secure a witch's broom to a front door?
Use heavy-duty suction hooks or discrete floral wire to anchor the broom firmly against the door's surface. This prevents the broom from sliding or rattling whenever the door is opened, keeping your display secure all season long.
How can I do a witch theme if I have a very small entryway?
Focus on your vertical space by hanging a witch-themed wreath and leaning a single broom in the corner. You can also stack a few pumpkins near the door to add festive charm without taking up valuable walking space.
What lighting works best for a witch-themed door at night?
Flickering LED candles placed inside lanterns offer a safe and eerie glow for your entryway. For more drama, use purple or green floodlights to cast spooky shadows and highlight your witchy decorations after dark.
How do I keep my witch porch decor from looking cluttered?
Maintain a sophisticated look by sticking to a consistent color palette like black, gold, and deep green. Grouping your decorative items in odd numbers also helps create a balanced, professional display that feels intentional rather than crowded.