50 DIY Outdoor Witch Decoration Ideas

This post may contain affiliate links: full affiliate disclosure.
Transforming a yard into a haunted landscape is easy with handmade witch figures that stand up to the weather.
These budget-friendly projects use simple materials like tomato cages and fabric to create a professional look. Focusing on scale and lighting ensures the display remains visible and impressive from the street.
DIY Outdoor Witch Figures
1. Tomato Cage Witch
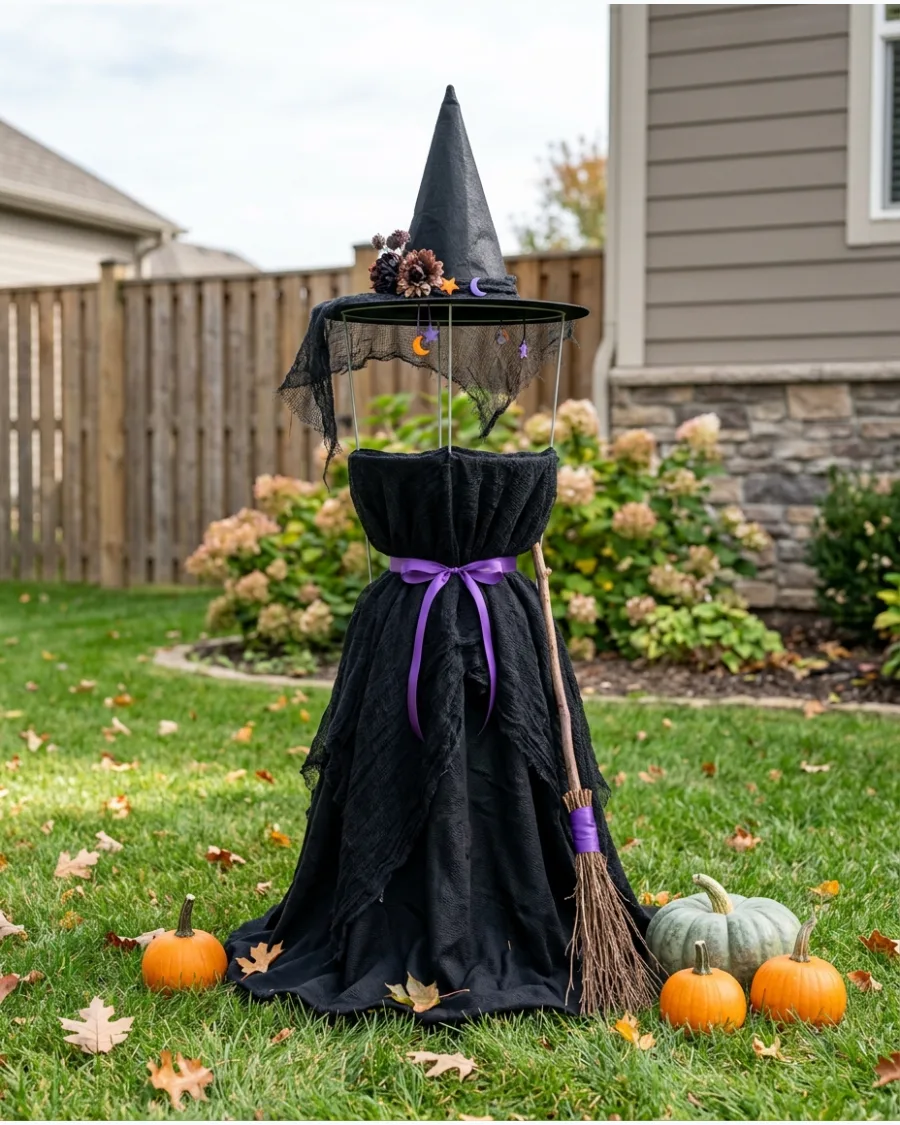
An upside-down tomato cage provides a sturdy, conical base for a life-size figure without the need for heavy wood. Drape the frame in heavy black landscape fabric or outdoor polyester to ensure it holds up against rain.
Zip-tie a foam ball or plastic pumpkin to the top spike to create a stable neck for the witch's hat. This method is incredibly stable in wind if the cage stakes are driven deep into the turf.
- Under $20 and 30 minutes to assemble.
- Drive the cage spikes 6 inches into the soil for stability.
- Use a gray wig for a weathered, realistic look.
Most people skip this: Spray the fabric with a UV-protectant coating to prevent the black color from fading to gray in the sun.
2. Glowing Tomato Cage Witch
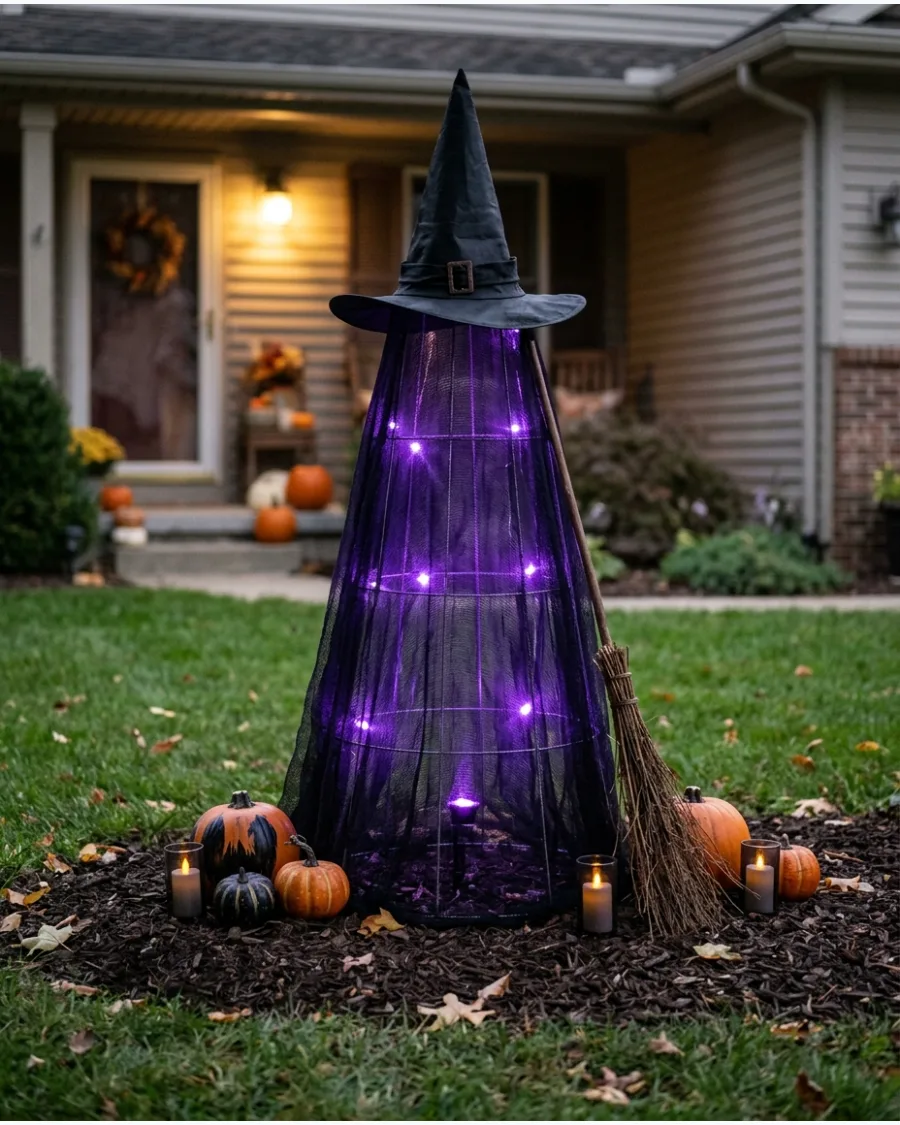
Adding lights inside the frame transforms a simple figure into a centerpiece for nighttime viewing. Use battery-operated or solar LED strings to avoid running long extension cords across the lawn.
Wrap the lights loosely around the metal wire before pulling the sheer fabric over the top. A translucent purple or green fabric allows the light to diffuse beautifully without revealing the cage structure inside.
- Approximate $25 budget with solar lights.
- Secure battery packs inside a plastic bag to keep them dry.
- Swap purple for orange for a classic Halloween palette.
Quick win: Use cool-white LEDs to make purple fabric pop, or warm-white LEDs to give green fabric a swampy, organic glow.
3. Life-Size Stick Witch

Using natural materials like branches helps the decoration blend into a garden or wooded area. Build a tripod or T-frame using fallen limbs and secure the joints with heavy-duty twine or wire.
Drape old black clothing over the wooden frame and stuff the sleeves with dry leaves to create realistic arm shapes. Real wood adds weight, which prevents the figure from tipping over during autumn gusts.
- Free if using yard debris and old clothing.
- Lash joints with garden wire for maximum strength.
- Add a burlap hood for a rustic, folk-horror style.
Best shortcut: Use a PVC pipe cross-joint at the shoulders if you cannot find two branches that sit flush against each other.
4. Witch Holding a Lantern

A focal point like a lantern draws the eye and provides functional pathway lighting for trick-or-treaters. Extend a stiff wire or a thin PVC pipe from the shoulder to act as a reaching arm.
Hook the handle of an outdoor-rated LED lantern onto the hand and secure it with a small dab of hot glue or wire. Placing this figure near the start of a walkway makes the entrance feel intentional and welcoming.
- Around $30 including the LED lantern.
- Place on a flat surface to prevent the figure from swaying.
- Use a flickering flame bulb for a realistic fire effect.
Most people skip this: Weight the bottom of the cloak with small stones so the fabric doesn't blow into the lantern and obscure the light.
5. Witch Stirring a Cauldron

This classic scene adds a sense of motion and storytelling to a front yard display. Position a large plastic cauldron or a black-painted planter directly in front of a standing witch figure.
Secure a long wooden dowel or a real tree branch between the witch’s hands and lean it into the pot at an angle. A heavy pot filled with rocks or water acts as a perfect anchor to keep the entire display from moving.
- Costs about $15 for the pot and dowel.
- Fill the cauldron with sand or water for stability.
- Add a fog machine inside for a professional, eerie touch.
Quick win: Fill the cauldron with green plastic ornaments or 'bubbles' to make the potion look like it is boiling over in the daylight.
6. Three Witches Around a Cauldron
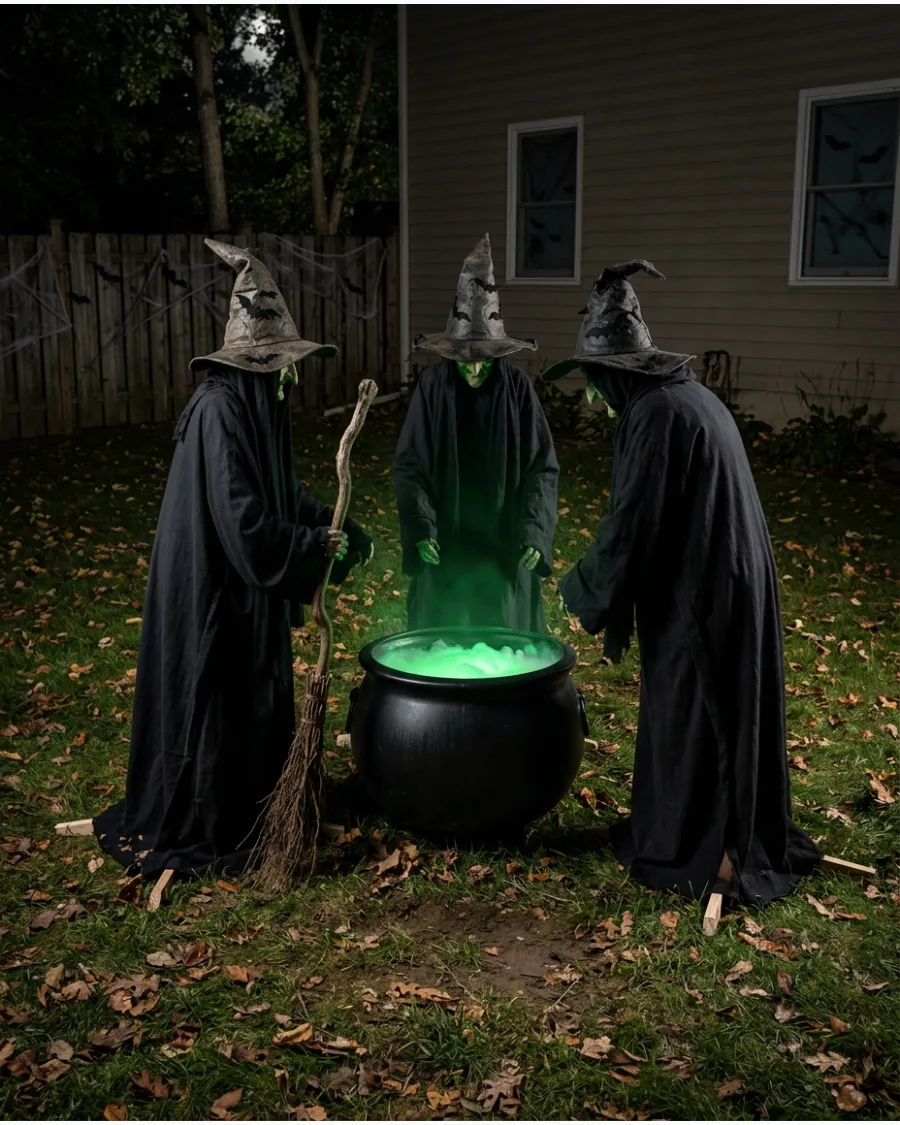
Grouping figures creates a high-impact scene that fills a large empty space in the yard. Set three tomato-cage or stake-based witches in a tight circle, angling their heads inward toward a central pot.
Tie the hands of the figures together using fishing line to create the illusion that they are holding hands in a ritual. Varying the height of each witch makes the trio look more natural and visually interesting.
- Budget $60 for the full set of three.
- Space figures 2 feet apart for maximum visibility.
- Use different colored wigs to distinguish the characters.
Best shortcut: Use a single green floodlight on the ground inside the circle to illuminate all three faces from below simultaneously.
7. Sitting Porch Witch
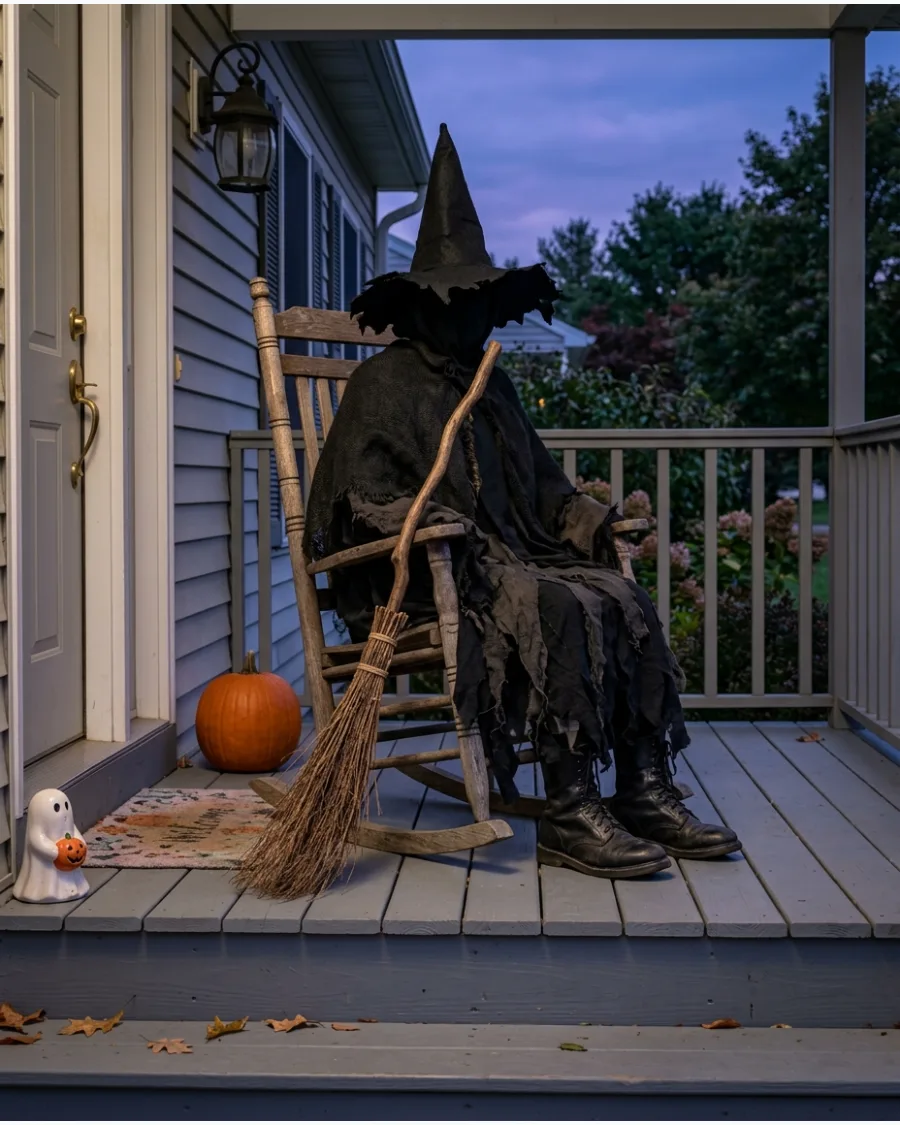
A seated figure feels more approachable and works perfectly for smaller spaces like a front porch or balcony. Use a pair of old boots and black leggings stuffed with plastic bags to form the legs.
Prop the torso against the back of a sturdy chair and let the arms rest naturally on the armrests or a broomstick. This setup keeps the decoration off the wet ground and protects the fabric from mud.
- Under $10 using recycled clothes and bags.
- Use safety pins to keep the hat attached in the wind.
- Position near the doorbell for a gentle jump-scare effect.
Most people skip this: Stuff the torso with bubble wrap instead of paper so the figure doesn't become heavy and soggy if the humidity is high.
8. Faceless Cloaked Witch
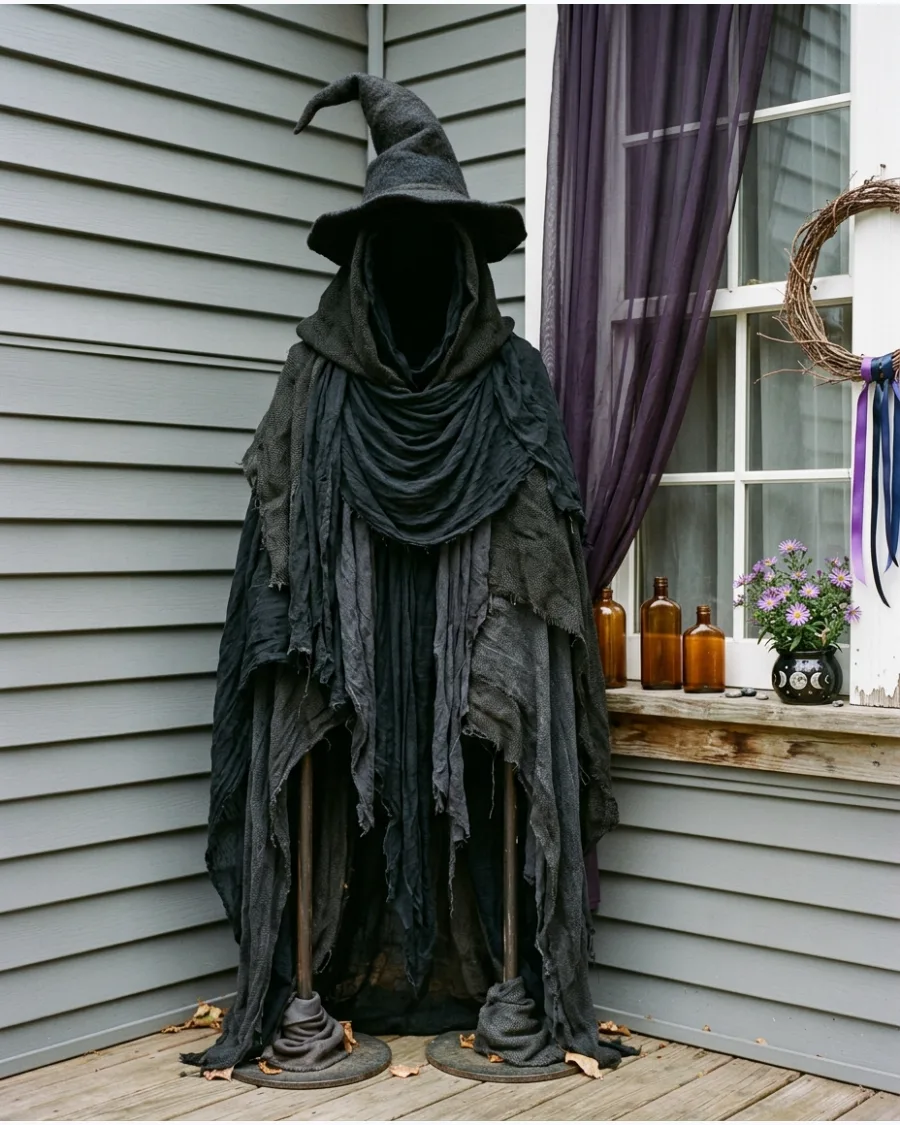
A faceless design relies on silhouette and shadow to create a creepy, sophisticated look. Use a tall garden stake or a fence post as the main support and drape it with several layers of black cheesecloth or mesh.
Pull the hood of the cloak forward so it creates a deep, dark void where the face should be. This minimalist approach is very effective because the viewer’s imagination fills in the scary details.
- Under $15 for fabric and garden stakes.
- Shred the bottom edges of the fabric for a ghostly look.
- Use a matte black fabric to absorb light and create depth.
Quick win: Place a small piece of black cardboard inside the hood to keep the shape open and prevent the fabric from collapsing flat.
9. Whimsical Green Witch

Bright colors and exaggerated features offer a fun, family-friendly alternative to scary decorations. Paint a large foam ball with bright lime green outdoor acrylic paint and use a smaller ball for a protruding nose.
Dress the figure in striped stockings and a purple dress to create a vibrant contrast against the green grass. A whimsical style is great for homes with young children who might find realistic witches too frightening.
- Approximate $25 for paint and accessories.
- Use yarn for thick, colorful braids or wild hair.
- Secure the hat with a chin strap to keep it on in the wind.
Best shortcut: Use a green plastic Halloween mask over a foam head to save time on sculpting and painting facial features.
10. Moss-Covered Forest Witch

This organic design makes the witch look like a permanent fixture of the landscape. Apply patches of sheet moss and dried vines to a burlap or brown fabric cloak using outdoor construction adhesive.
Tuck real twigs and dried ferns into the folds of the clothing to help the figure blend into the surrounding shrubbery. This earthy texture looks high-end and artisanal compared to standard plastic store-bought props.
- About $30 for moss and adhesive.
- Place near a large tree trunk for a cohesive look.
- Use brown or tan fabric as the base layer for an earthy feel.
Most people skip this: Mist the moss with water occasionally if using real preserved moss to keep the color from turning brittle and brown.
DIY Witch Cauldron Decorations
11. Glowing Bubble Cauldron
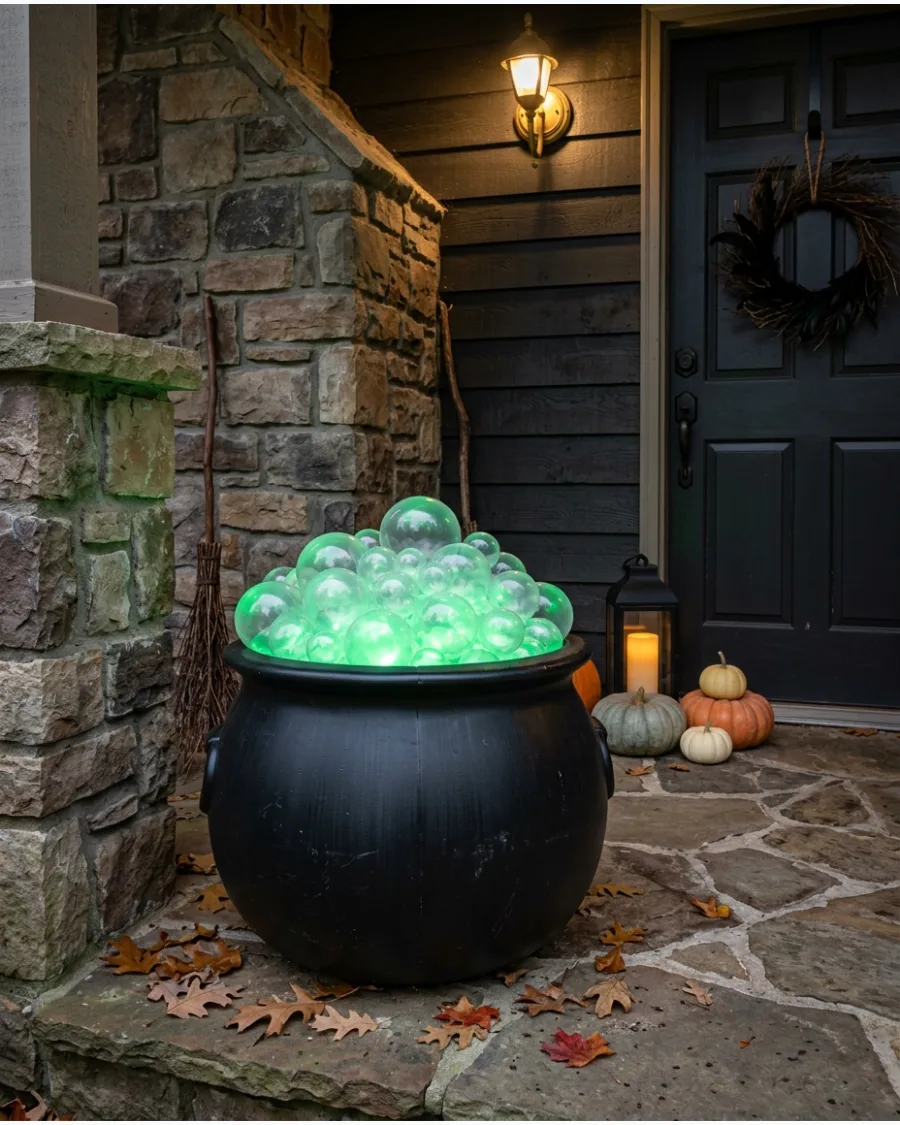
Fill a large black pot with clear plastic ornaments to create the look of a boiling potion. Place a green or purple outdoor-rated LED puck light at the very bottom so the glow filters up through the spheres.
Secure the top layer of ornaments with a small bead of clear silicone to keep them from rolling away during a storm. Most people skip the light color, but a vibrant green provides the most classic magical look.
- $20 – $30 / 30 minutes.
- Place the light on a timer to preserve battery life throughout the month.
- Mix iridescent and clear ornaments to add more depth to the light reflection.
Quick win: Use ornaments of varying sizes to make the bubbles look more organic and less uniform.
12. Pool Noodle Cauldron Bubbles
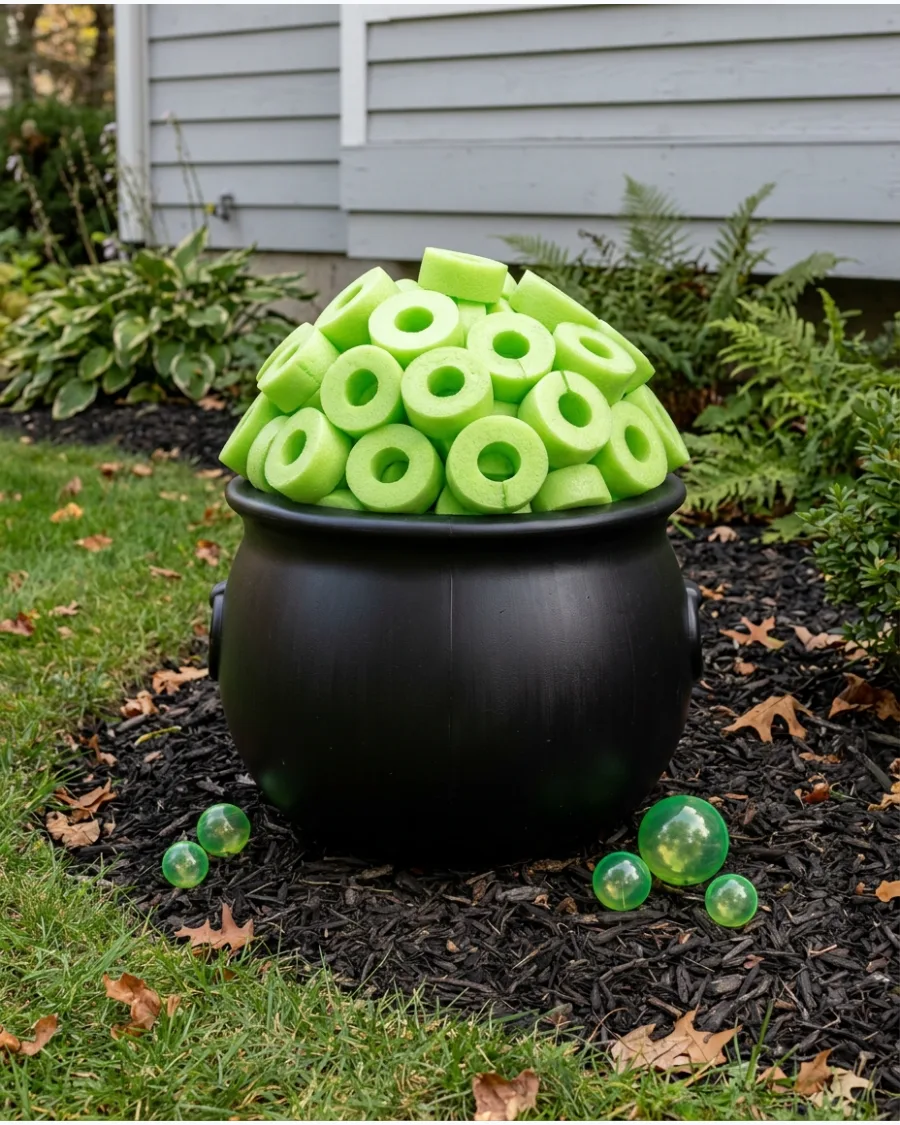
Slice green pool noodles into rings of different thicknesses to act as thick, frothy bubbles. Paint the foam with outdoor spray paint and stack them high above the rim of a plastic pot.
Apply a strong construction adhesive between the rings to build a stable pyramid that can withstand high winds. Foam is a smart choice because it is lightweight and won't shatter if the cauldron tips over.
- $10 / 45 minutes.
- Use a low-temperature glue gun to prevent the foam from melting during assembly.
- Spray the finished stack with a UV-resistant clear coat to prevent the paint from peeling.
Most people skip this: Sand the surface of the pool noodles lightly before painting to help the color stick better.
13. Ornament Bubble Cauldron

Attach a mix of shiny and matte purple and green ornaments to a wire mesh frame inside the pot. This creates a high-end look without needing hundreds of ornaments to fill the entire space.
Tuck thin strands of battery-operated fairy lights between the ornaments to give the display a professional shimmer. This method makes the cauldron easy to move since the center remains mostly hollow.
- $25 / 40 minutes.
- Use plastic shatterproof ornaments to prevent breakage on hard driveway surfaces.
- Secure the wire frame to the inner rim of the pot with small zip ties.
Best shortcut: Use a half-circle of floral foam inside the pot to quickly pin the ornaments in place.
14. Witch Legs in a Cauldron
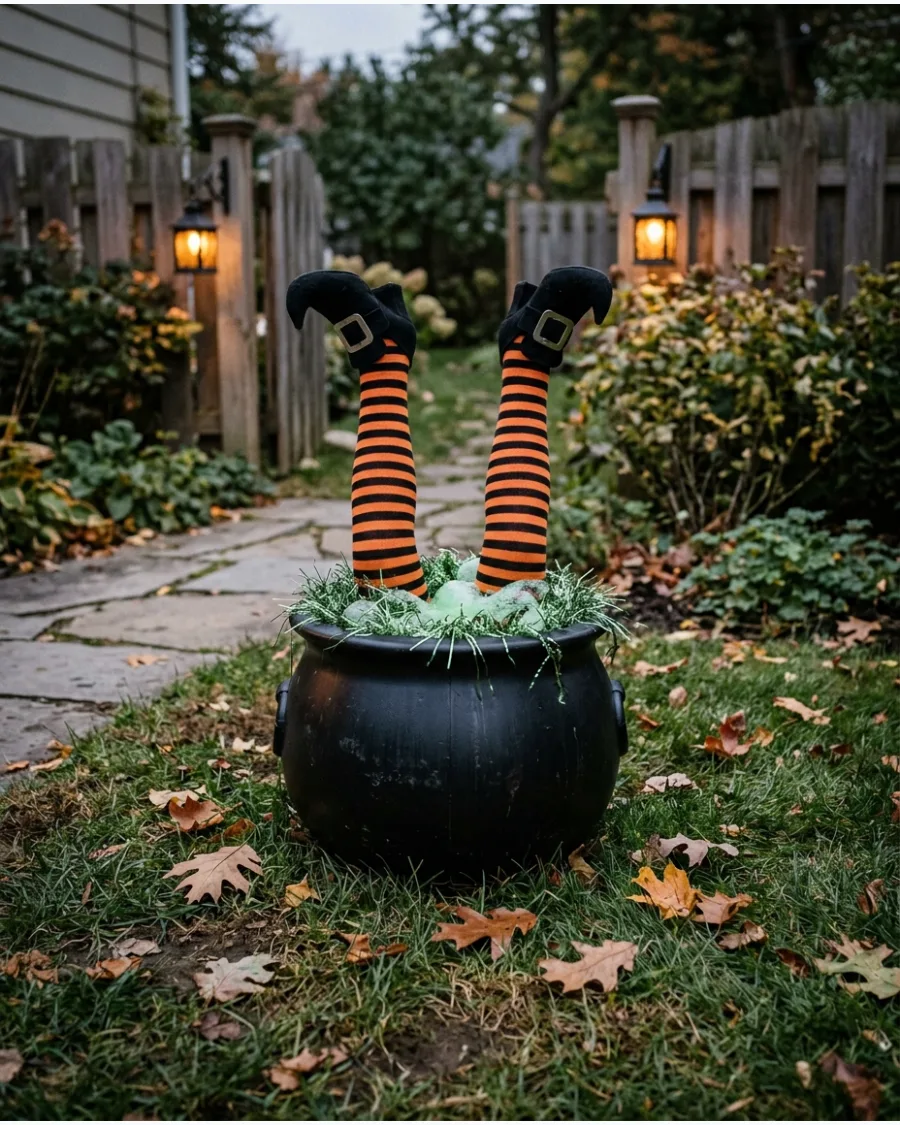
Stuff a pair of bright striped tights with plastic bags to create a pair of legs that won't get heavy when it rains. Add pointed black boots and position the legs upside down so it looks like a witch fell into her brew.
Place a heavy brick inside the bottom of the cauldron to keep the legs from leaning or blowing over. This adds a playful, humorous touch to a front yard display.
- $15 / 20 minutes.
- Insert a thin PVC pipe or dowel into the legs to keep them perfectly straight.
- Spray the boots with a water-repellent coating to protect the fabric or faux leather.
Quick win: Use pool noodles inside the tights for perfectly smooth legs that never look lumpy.
15. Cauldron Candy Station
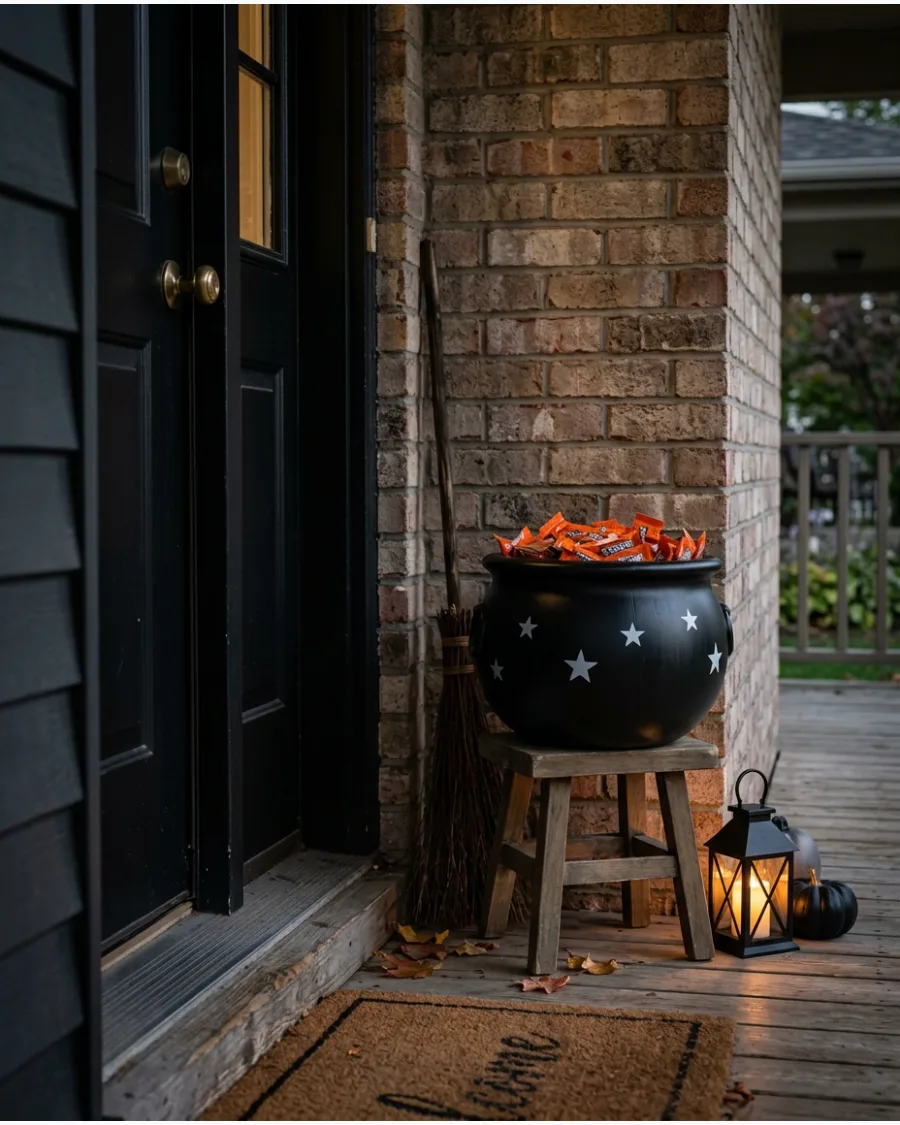
Turn a large plastic cauldron into a functional treat holder for trick-or-treaters. Use white paint pens to draw stars or mystical symbols on the side of the pot to make it look authentic.
Set the cauldron on a sturdy stool or small side table so children do not have to bend down to reach the candy. It is a practical way to keep the porch organized while staying on theme.
- $15 / 15 minutes.
- Add a small 'Take One' sign using a wooden stake tucked into the side.
- Line the bottom with a clean towel to raise the candy height if the pot is very deep.
Most people skip this: Place a heavy stone in the bottom of the pot to prevent it from being knocked over by excited guests.
16. Cauldron Planter

A black cauldron works perfectly as a seasonal home for autumn plants. Fill it with dark-colored foliage like black pansies, purple mums, or ornamental kale for a sophisticated look.
Drill three or four small holes in the bottom of the plastic pot to ensure proper water drainage for the plants. This project blends your existing garden style with holiday spirit.
- $30 / 25 minutes.
- Use a layer of gravel at the base to improve drainage and add weight.
- Swap real plants for high-quality faux evergreens if you want a zero-maintenance option.
Best shortcut: Keep the plants in their original nursery pots and just drop them into the cauldron for a five-minute setup.
17. Bubbling Cauldron Fountain Illusion
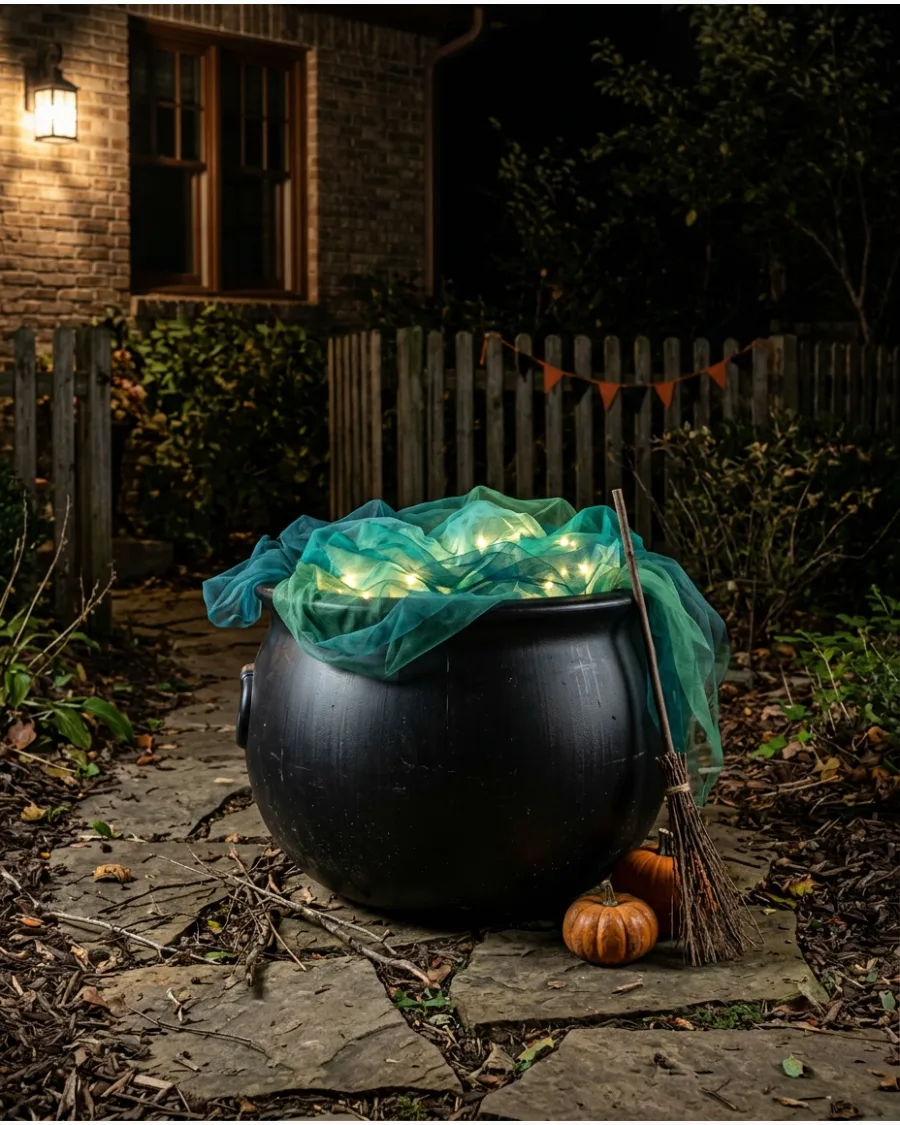
Layer sheer teal or green fabric over a mound of batting to create the appearance of moving liquid. Place a small battery-powered fan nearby or rely on the breeze to give the fabric a flowing motion.
Pin small clear glass beads to the surface of the fabric to catch the light and look like popping bubbles. It offers a high-impact visual without the hassle of using real water pumps.
- $20 / 45 minutes.
- Use outdoor-rated sheer fabric to prevent the material from sagging when damp.
- Secure the fabric to the inside rim with waterproof tape or heavy-duty staples.
Quick win: Place a cool-mist humidifier inside for a few hours on Halloween night to create real 'steam' rising from the pot.
18. Cauldron With Glowing Eyes
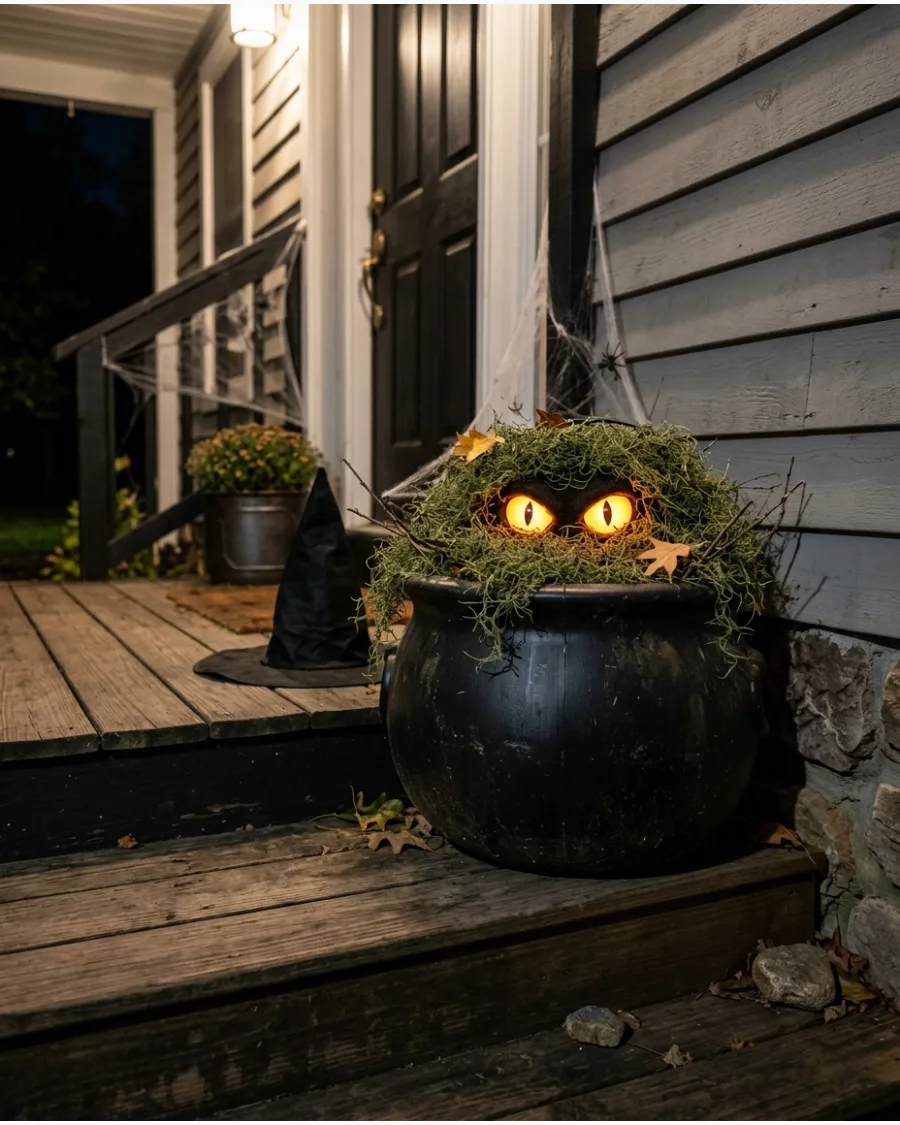
Hide a set of large, glowing monster eyes inside a cauldron filled with faux moss or green ornaments. The eyes should peek out from the 'bubbles' to give the impression that something is living inside the potion.
Angle the eyes toward the front gate so they appear to watch visitors as they walk up the path. It adds an unexpected layer of mystery that is more eerie than scary.
- $15 / 30 minutes.
- Use battery-powered LED eyes so you do not have to run extension cords across the porch.
- Choose yellow or red lights to make the eyes stand out against green moss.
Most people skip this: Use a piece of black cardboard to create 'eyelids' over the lights to make the stare look more menacing.
19. Mini Cauldron Walkway
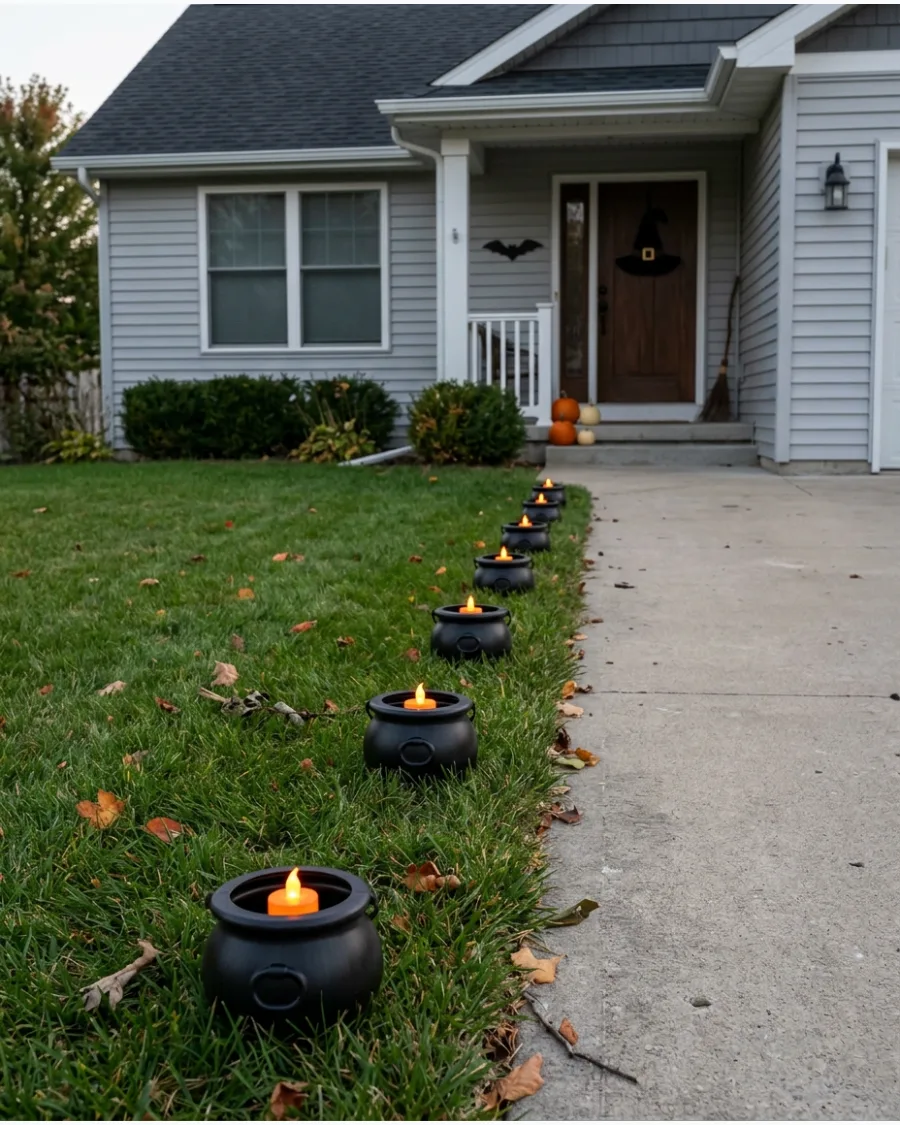
Lining a walkway with several small cauldrons creates a repetitive, professional look for your front yard. Fill each mini pot with a battery-operated candle or a small pumpkin to provide a safe light source for the path.
Space the pots exactly two feet apart to create a clean and organized visual line to your front door. This is a budget-friendly way to decorate a large area quickly.
- $25 / 20 minutes.
- Fill the bottom of each mini cauldron with sand to keep them from shifting on the grass.
- Use waterproof tea lights to ensure they stay lit during foggy or damp evenings.
Best shortcut: Buy a multi-pack of plastic party cauldrons to get the best price for a long walkway.
20. Rustic Branch Cauldron Stand
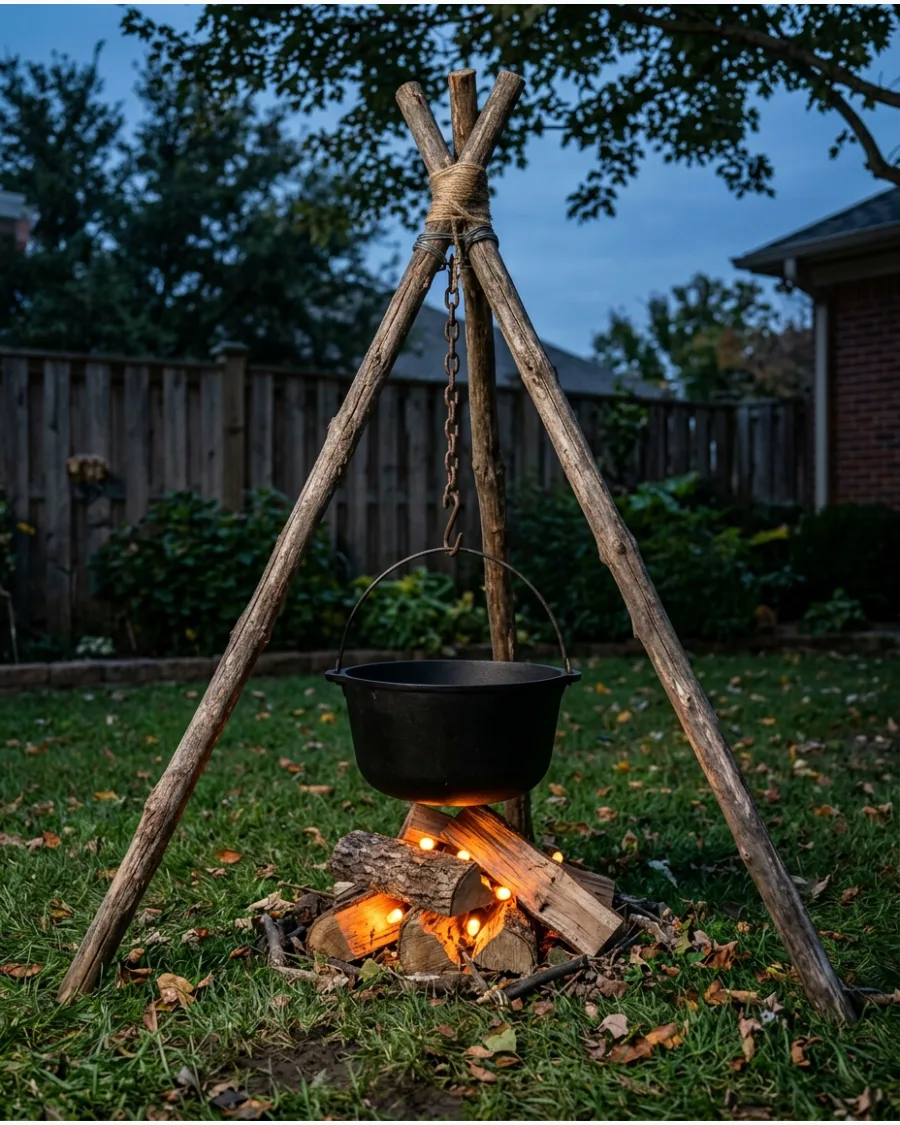
Build a simple tripod by tying three sturdy branches together at the top with thick twine. Suspend a lightweight cauldron from the center using a metal chain to create a traditional forest-witch scene.
Place a cluster of orange string lights and real wood logs at the base to mimic a flickering campfire. This adds height to your outdoor display and makes the cauldron a true focal point.
- $5 – $10 / 50 minutes.
- Sharpen the bottom of the branches to stake them into the soil for extra stability.
- Use a plastic chain painted black to keep the weight of the hanging pot low.
Quick win: Wrap a few strands of yellow and orange lights around the logs to make the 'fire' look more realistic from the street.
DIY Witch Broom Decorations
21. Witch Broom Parking Station
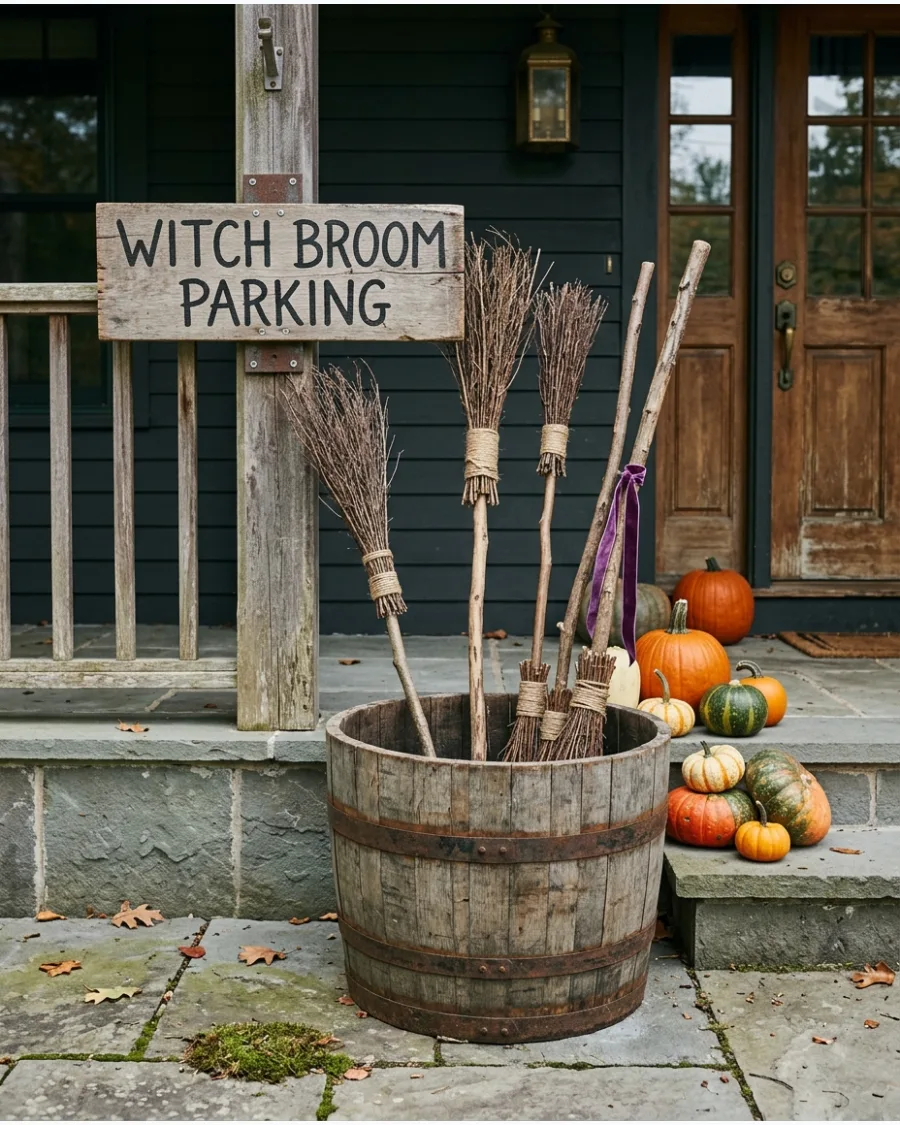
Use a galvanized bucket or a wooden barrel to corral a collection of handmade brooms. A simple hand-painted sign leaning against the container lets guests know exactly where to park their ride.
Weighted containers like heavy barrels prevent the brooms from toppling over during autumn wind gusts. A mix of different broom heights creates a more layered and interesting visual.
- $10-25 for a barrel and scrap wood
- 20 minutes for assembly
- Use heavy stones at the bottom of the bucket to keep it stable.
Quick win: Use a stencil for the sign lettering to get a professional look without needing perfect handwriting.
22. Rustic Twig Broom
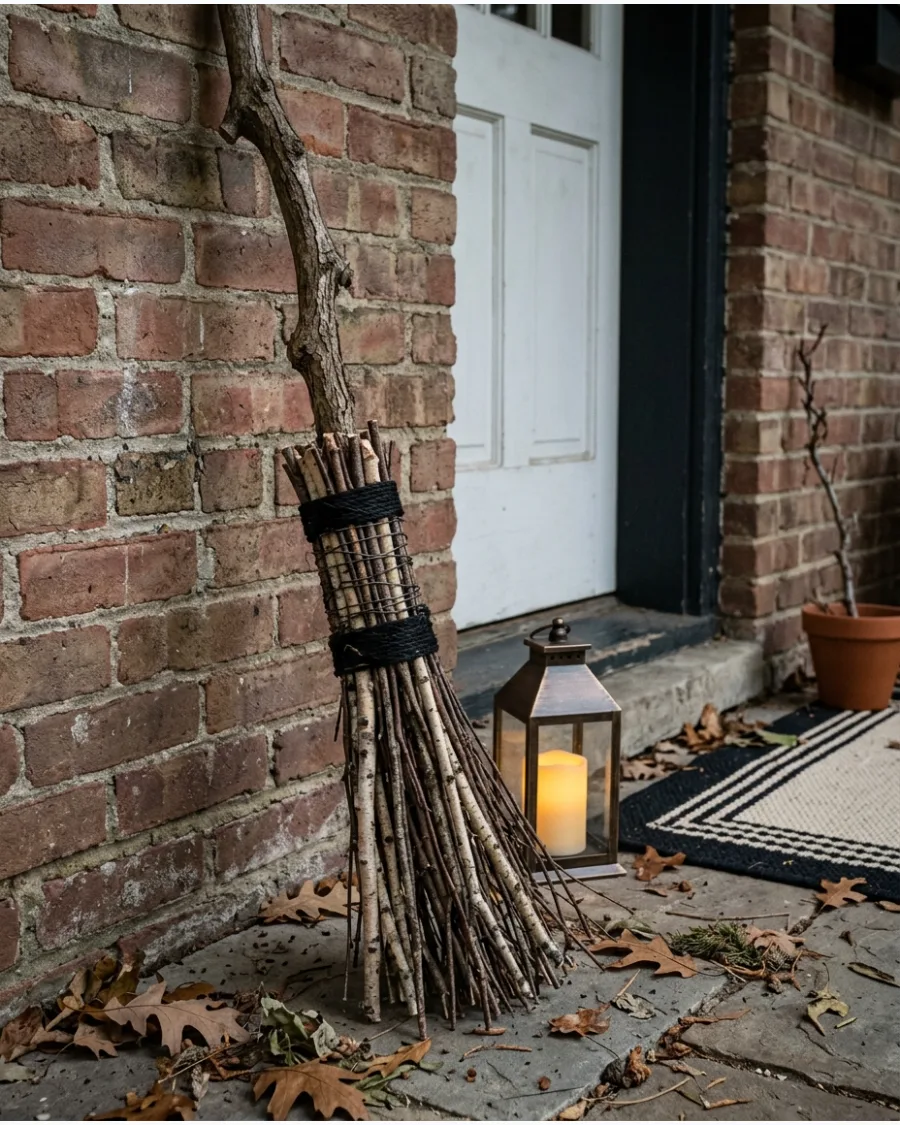
Natural materials like fallen branches and dried tall grass make the most authentic-looking witch brooms. Secure the bundle to a sturdy stick using heavy-duty wire or thick twine for a secure hold.
Wrapping the wire with a layer of black ribbon or leather cord hides the mechanics while adding a finished touch. These look best when the bristles are left slightly uneven for a wild, forest-found appearance.
- Free if foraging or $5 for twine
- 30 minutes per broom
- Choose a branch that is at least one inch thick for the handle.
Best shortcut: Soak the twigs in water for an hour before bundling to make them flexible and prevent snapping.
23. Colorful Witch Brooms

Brighten up a dark porch by wrapping broom handles in vibrant ribbons like lime green, deep purple, or classic orange. Mixing patterns like polka dots and stripes adds a whimsical energy to the traditional witch aesthetic.
Secure the ribbon ends with a dab of hot glue at the top and bottom to ensure they stay tight against the wood. This is a great way to coordinate your outdoor decor with specific house colors.
- $5-15 for ribbon
- 15 minutes per broom
- Use outdoor-rated ribbon to prevent colors from bleeding in the rain.
Quick win: Add a small bow or a plastic spider at the top of the handle for an extra pop of detail.
24. Lighted Witch Broom
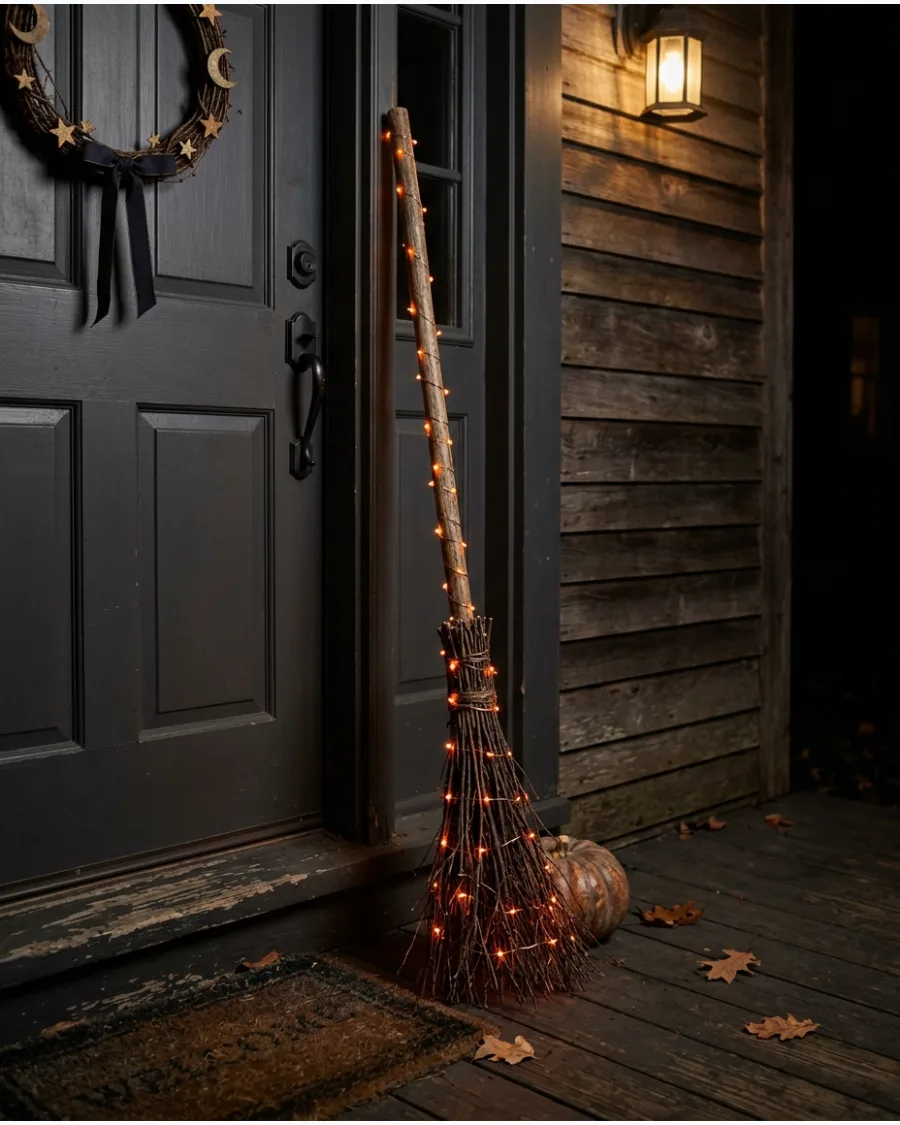
Adding lights to a broom makes it a focal point for nighttime displays and ensures it doesn't disappear after dark. Wind a string of battery-operated fairy lights from the top of the handle all the way down into the bristles.
Tuck the battery pack into the bristle bundle or behind the handle using black duct tape to keep it hidden. Warm white lights give off a classic glow, while purple or green lights feel more magical.
- $10 for lights
- 10 minutes setup
- Use lights with a built-in timer to save battery life.
Most people skip this: Wrap the lights loosely so the wire doesn't snap if the broom is moved or bumped.
25. Broom Directional Sign
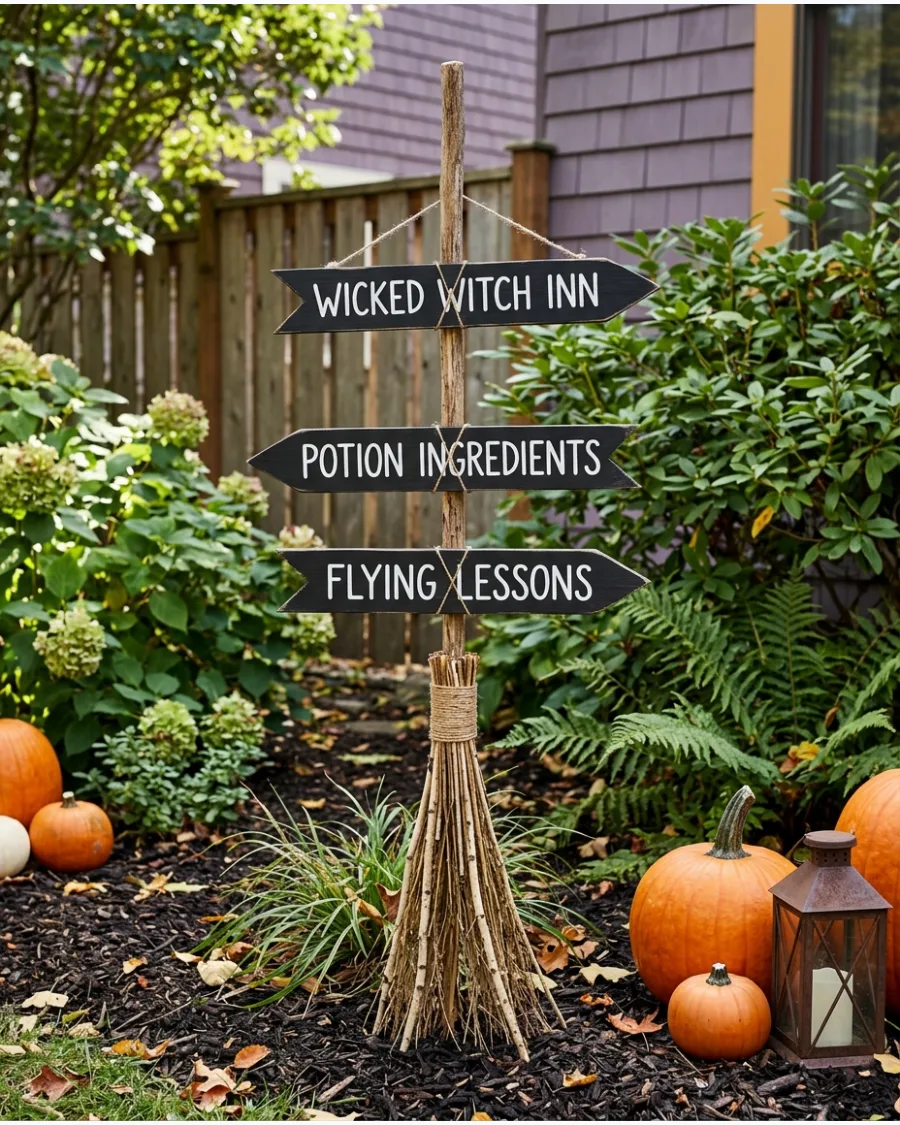
Turn a long-handled broom into a vertical signpost by attaching wooden arrows pointing in different directions. Paint the arrows with spooky destinations like the Potion Shop or Cackle Creek using high-contrast white paint.
Screw the arrows directly into the wooden handle to prevent them from sliding down over time. This tall decoration fills vertical space on a porch or near a walkway perfectly.
- $15 for wood arrows and paint
- 45 minutes assembly
- Use a garden stake behind the broom handle to keep it standing straight in the dirt.
Best shortcut: Use pre-cut wooden craft arrows from a hobby store to save time on sawing.
26. Flying Broom Fence Decoration
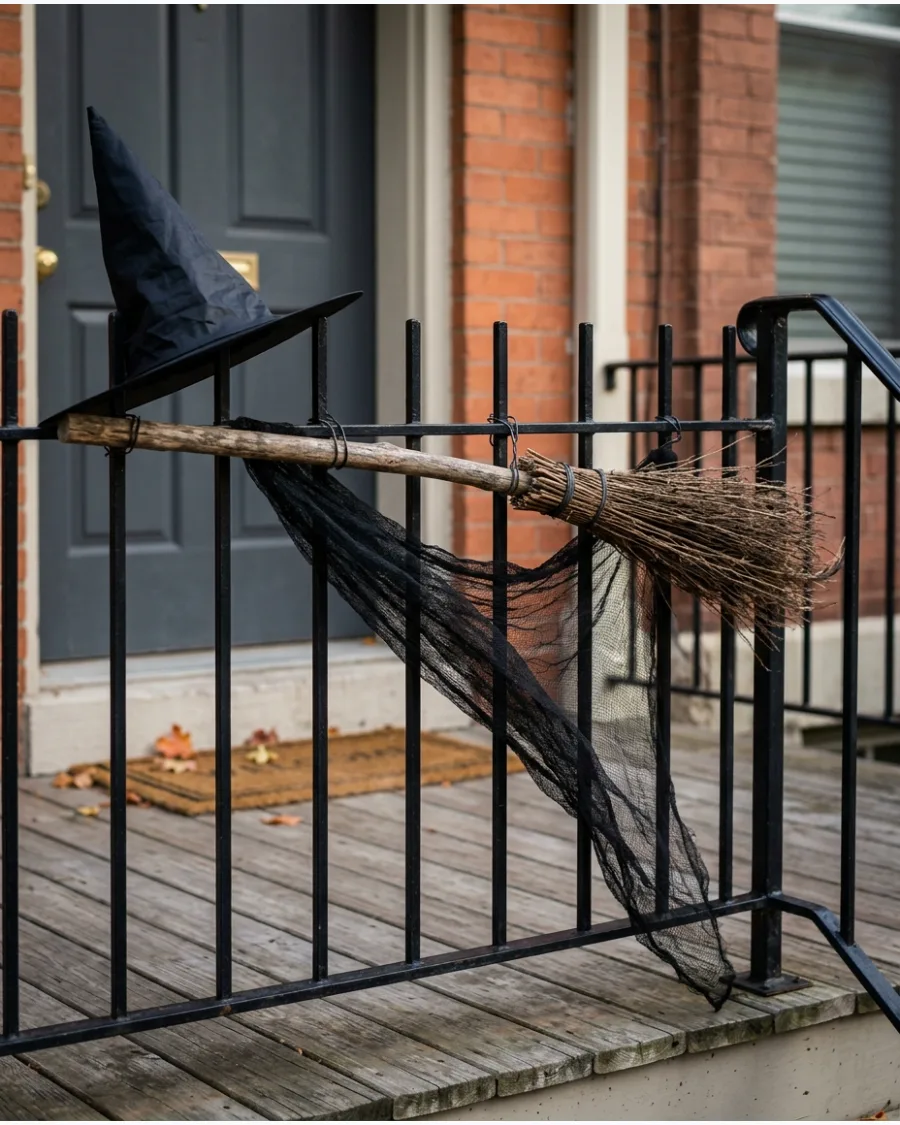
Create the illusion of a witch in mid-flight by mounting a broom horizontally across a fence or porch railing. Attach a classic black witch hat to the handle and let long strips of black tulle or fabric trail behind it.
Use black zip ties to secure the broom to the railing so the fasteners are invisible from a distance. This adds a sense of motion to your yard without requiring any moving parts.
- $10 for fabric and hat
- 20 minutes setup
- Ensure the fabric is short enough that it doesn't get caught in fence latches.
Quick win: Stuff the witch hat with plastic grocery bags so it keeps its shape in the wind.
27. Mini Broom Garland
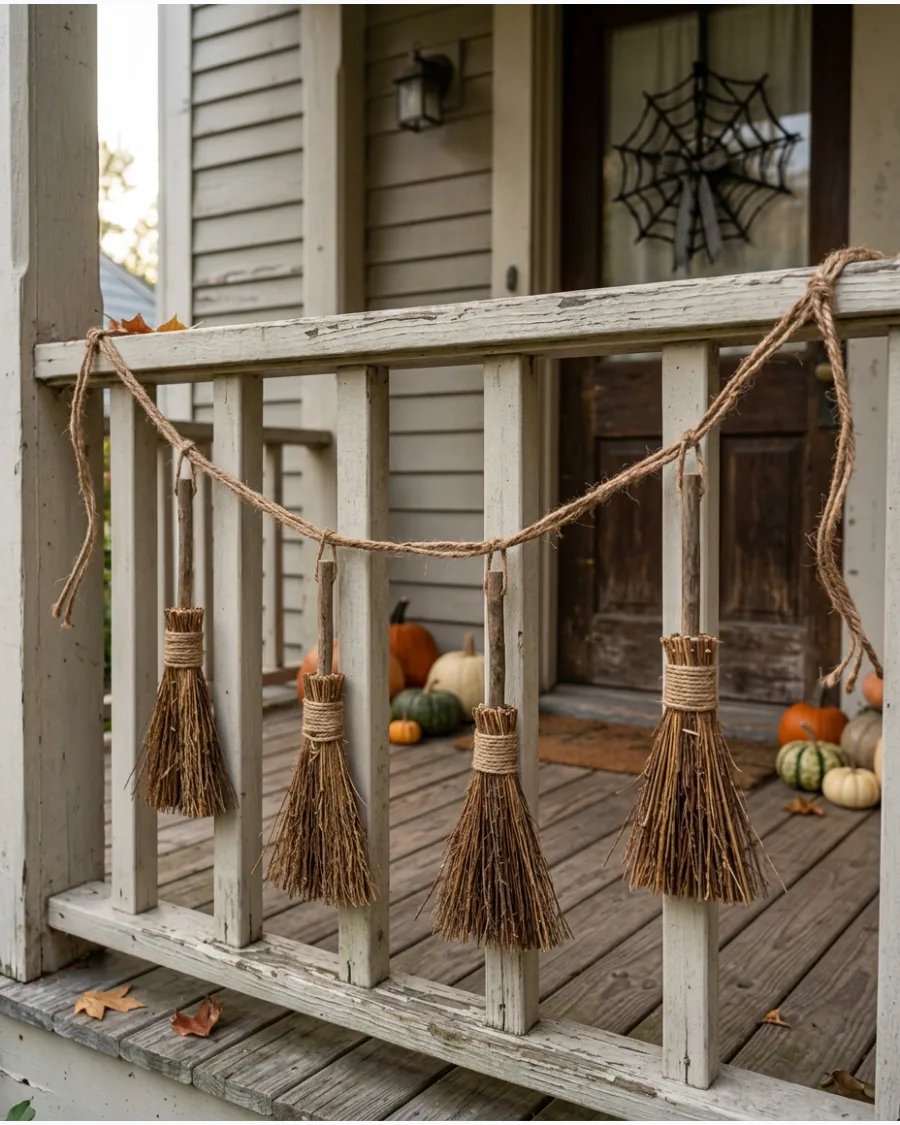
Small-scale decorations can make a big impact when repeated in a long garland. Craft several six-inch brooms using small twigs and raffia, then tie them onto a long piece of thick twine.
Space the mini brooms about eight inches apart to ensure the garland doesn't look cluttered or heavy. Drape this over a doorway or across a porch railing for a subtle but detailed witchy touch.
- $5 for raffia and twine
- 1 hour crafting time
- Use a drop of glue where each broom meets the twine to keep them from sliding.
Most people skip this: Vary the types of twigs used for the mini brooms to give the garland more texture.
28. Brooms Lining the Walkway

Guide visitors to your front door by placing a row of matching brooms along the edge of the path. Sticking the handles directly into the ground or using small garden stakes keeps them upright and uniform.
Alternating the brooms with small pumpkins or lanterns creates a rhythmic pattern that leads the eye toward the house. This works best when the brooms are all the same height for a clean, intentional look.
- $30-50 for multiple brooms
- 15 minutes setup
- Sharpen the ends of the broom handles with a sander to make them easier to push into soil.
Best shortcut: If your ground is too hard, use heavy flower pots filled with sand to hold the brooms in place.
29. Witch Broom Wreath
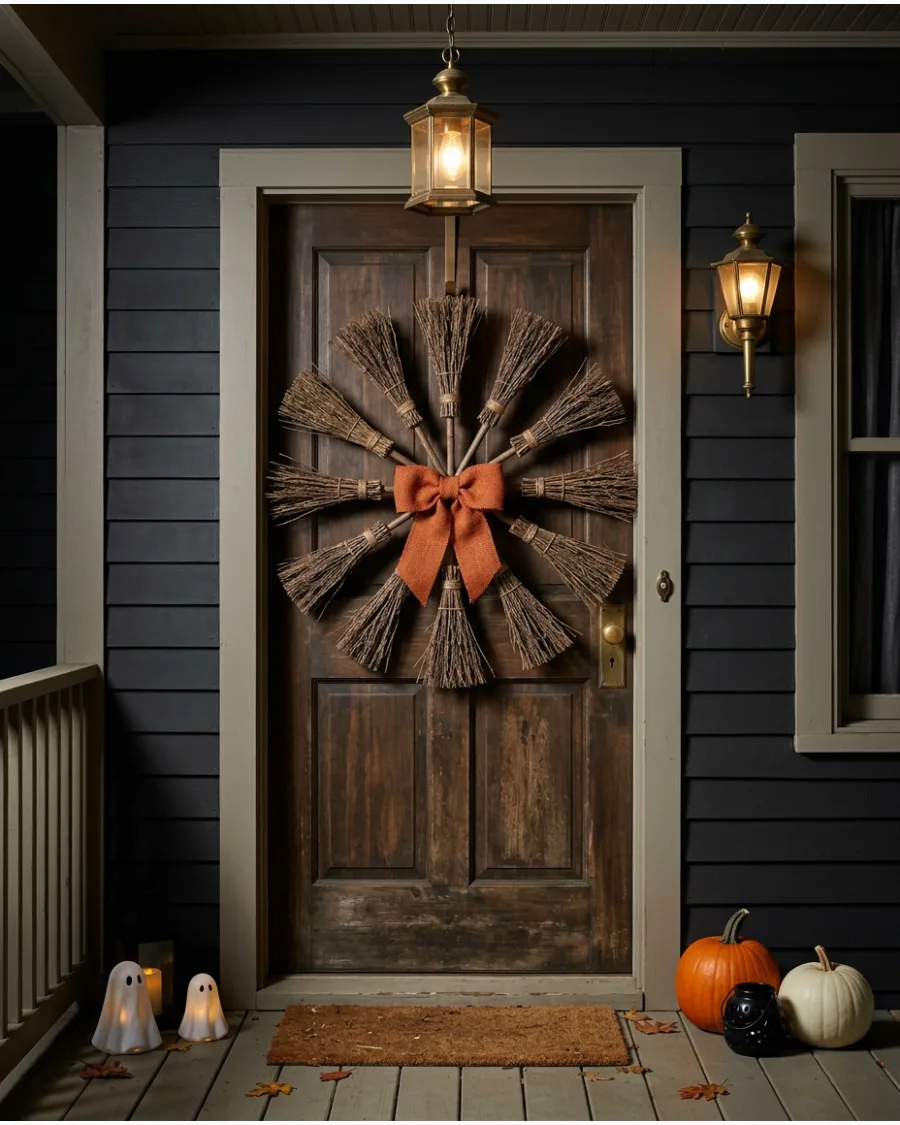
A wreath made of small brooms is a clever alternative to the standard berry or leaf design. Secure several twig brooms to a circular wire frame so the bristles all point outward in a starburst pattern.
Add a large bow or a small wooden sign to the center to cover the wire and create a focal point. This flat decoration is perfect for front doors where space between the door and a storm door is tight.
- $20 for brooms and frame
- 40 minutes assembly
- Use a wire wreath form for the most stable base.
Quick win: Use cinnamon-scented brooms to give your entryway a pleasant autumn fragrance.
30. Crashed Witch Broom
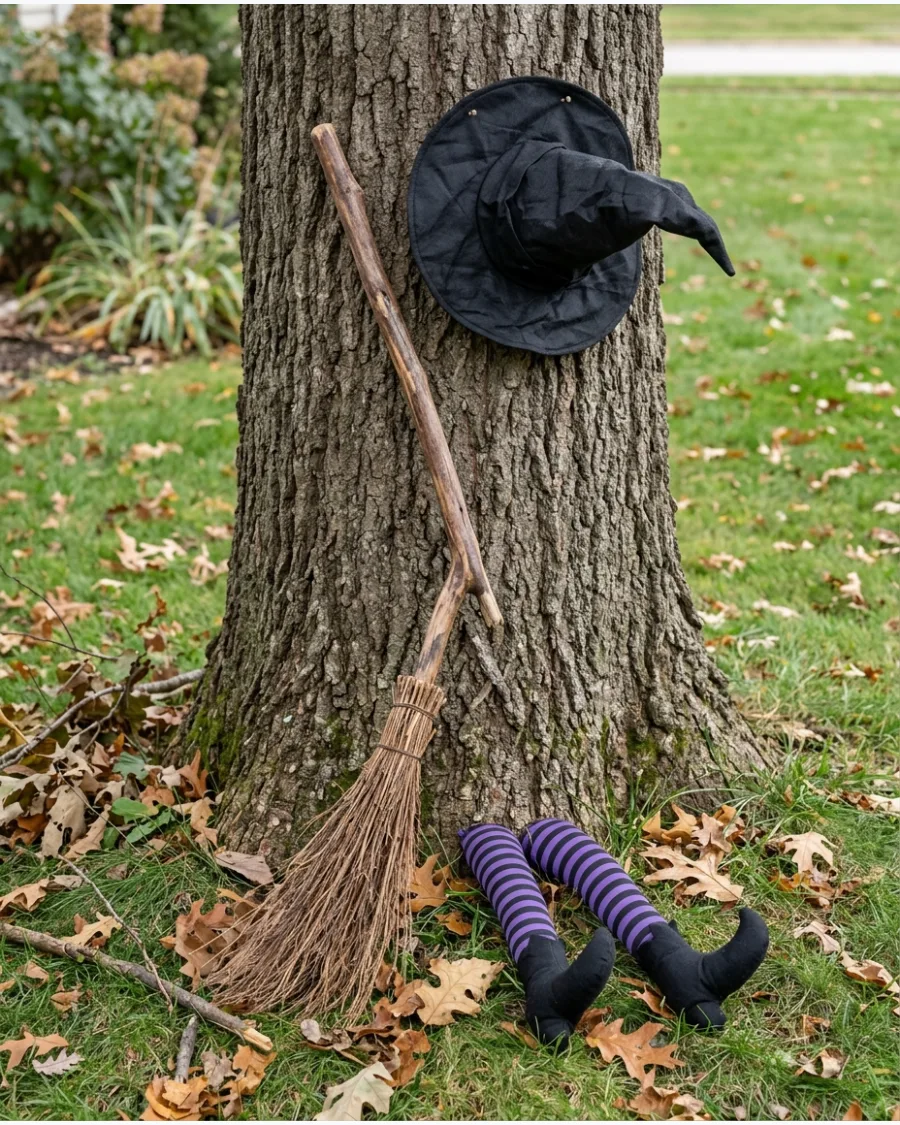
This humorous display suggests a witch had a bit of a flight accident against a tree or wall. Prop a broom vertically against a trunk and place a bent witch hat at the top, along with a pair of stuffed striped leggings sticking out from the base.
Angle the broom slightly to one side to make the crash look more dynamic and accidental. It is a playful project that always gets a laugh from neighbors and trick-or-treaters.
- $15 for hat and leggings
- 10 minutes setup
- Use clear fishing line to secure the hat to the tree bark so it does not blow away.
Most people skip this: Stuff the leggings with pool noodles or poly-fill to give them a realistic, 3D shape.
DIY Witch Hat Decorations
31. Floating Witch Hats
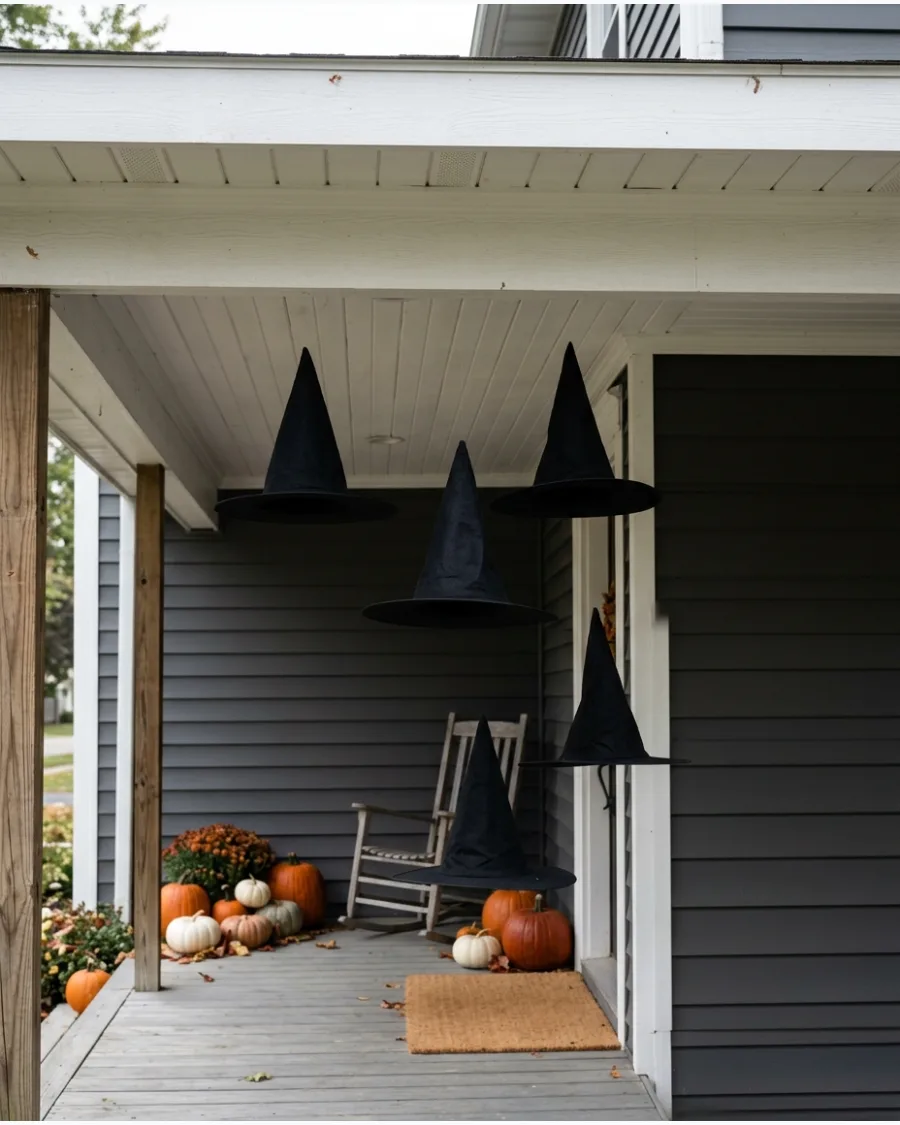
Suspend lightweight witch hats from a covered porch ceiling using clear fishing line to create a ghostly movement when the wind blows. Knot the fishing line through the very tip of the hat and secure it to a screw hook for the best stability. These hats look most impressive when grouped in odd numbers like five or seven to create a natural, clustered appearance.
- $10 budget for a set of five basic hats.
- Mount hooks to the porch ceiling and tie line to the tip of each hat.
- Use black hats for a classic look or orange for higher visibility against dark siding.
Best shortcut: Use a large needle to thread the fishing line through the fabric so the hat hangs perfectly straight without tilting.
32. Lighted Floating Witch Hats
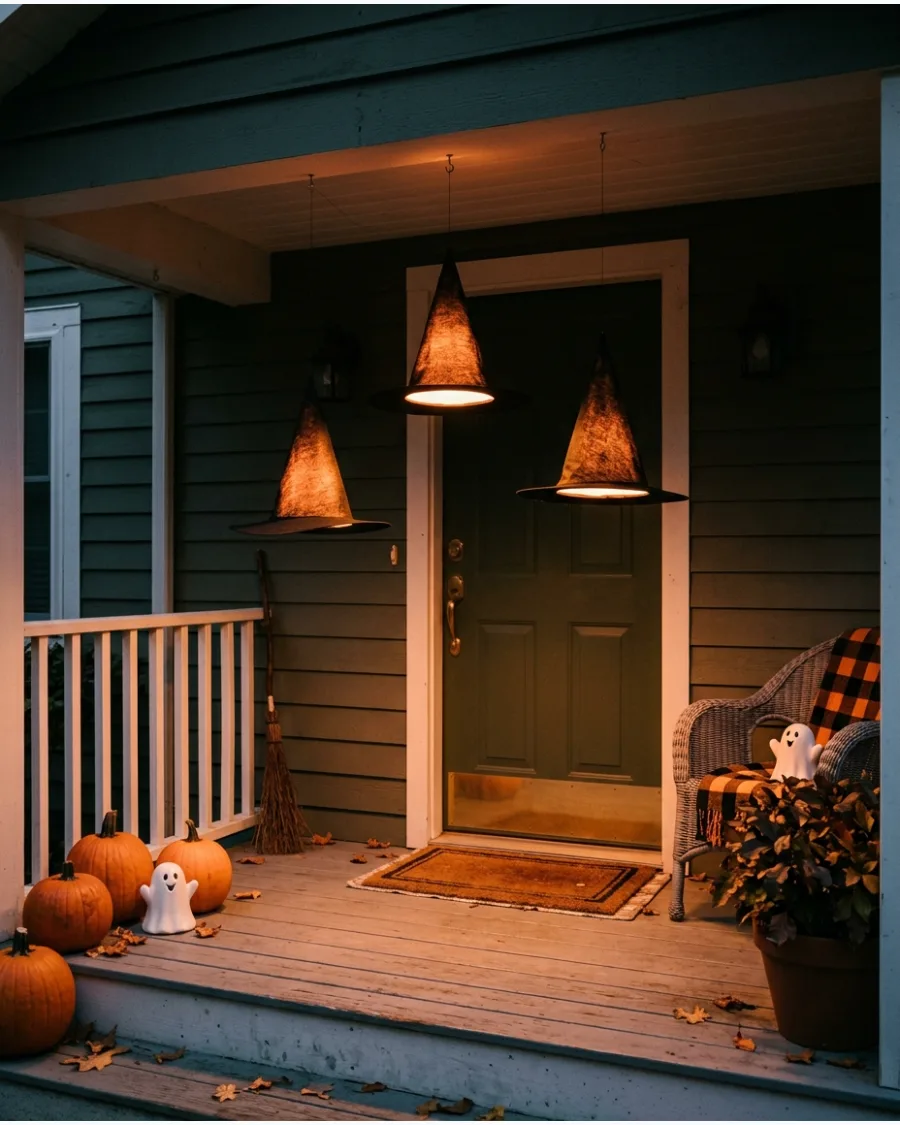
Place battery-powered LED puck lights or glow sticks inside lightweight hats before hanging them for a striking nighttime effect. Secure the light source to the inside of the hat with a small piece of duct tape to prevent it from falling out. This adds depth to the display and makes the hats visible even from the street in complete darkness.
- $20 for a pack of remote-controlled LED lights and hats.
- Insert the lights and test the weight before hanging the hats with clear line.
- Choose warm white or orange LEDs to create a classic, eerie Halloween glow.
Quick win: Use remote-controlled LED puck lights so you can turn the entire display on from inside the house without a ladder.
33. Witch Hat Yard Stakes
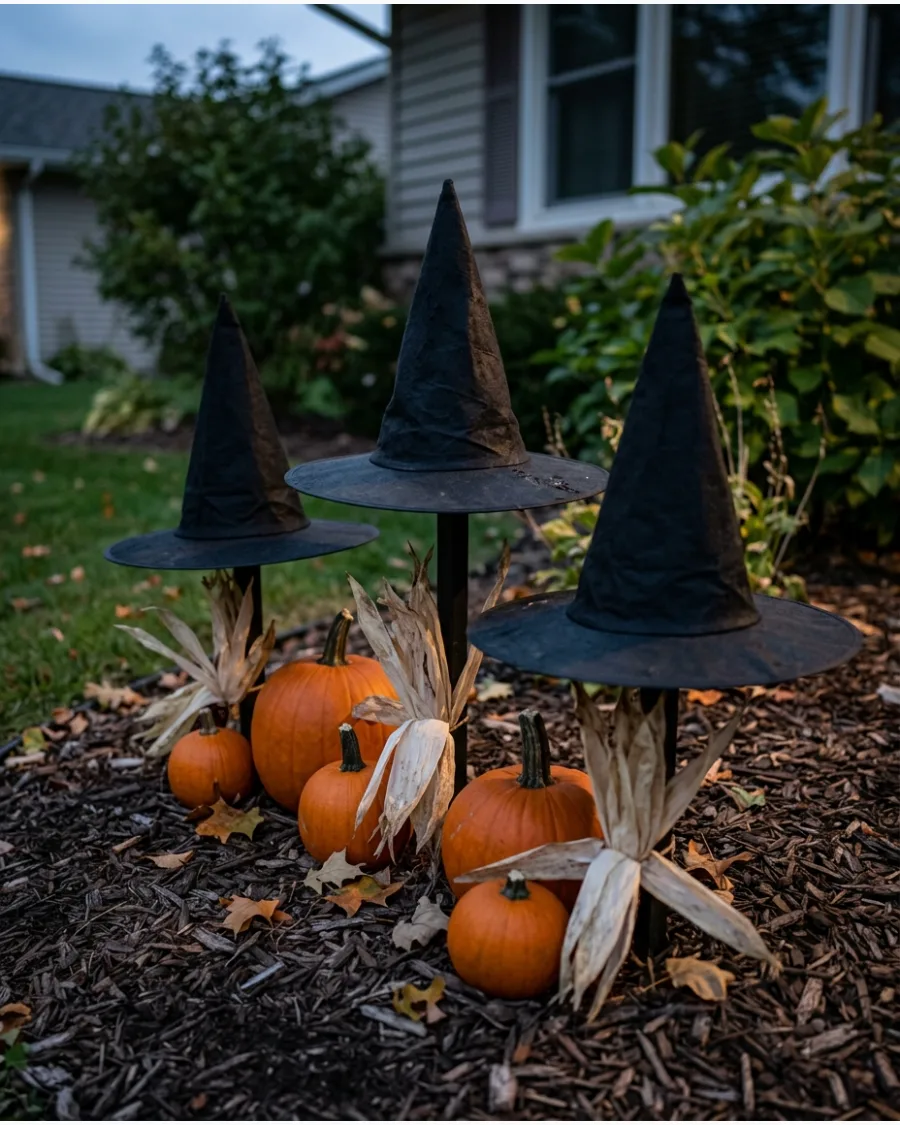
Attach inexpensive witch hats to wooden garden stakes to populate flower beds or lawns. Drive the stake deep into the soil first, then slip the hat over the top and pin the brim to the ground with U-shaped garden staples. This prevents the hats from blowing away during autumn storms and keeps the display looking tidy.
- $2 per stake plus the cost of hats.
- Space hats at least 2 feet apart to ensure each one is visible from the sidewalk.
- Use heavy-duty plastic or felt hats that can withstand rain without drooping.
Most people skip this: Stuff the inside of the hat with plastic grocery bags to keep the point from flopping over when it gets wet.
34. Witch Hat Planters
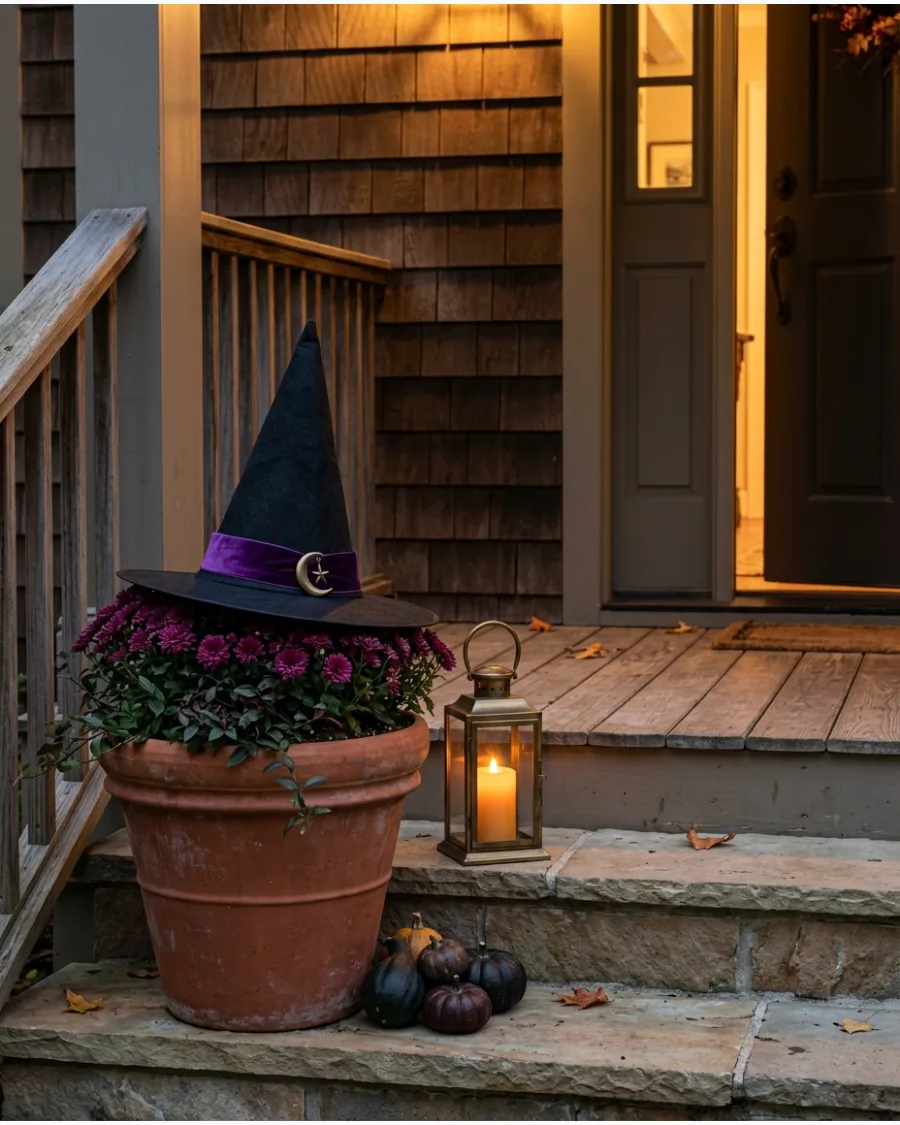
Place pointed hat forms over outdoor planters, leaving flowers or grasses visible around the brim to act as decorative trim. Choose hats with wide brims that can rest securely on the edges of your ceramic or plastic pots. Black, purple, or striped hats work best to coordinate with the rest of your porch color scheme.
- 10 minutes setup using existing porch planters.
- Select hats that are at least two inches wider than the pot opening.
- Renter-friendly option that requires no permanent installation or ceiling hooks.
Quick win: If the hat is too small for the pot, use a few dabs of hot glue to attach the brim to the rim of the planter temporarily.
DIY Witch Decorations for Outdoors
35. Giant Fabric Witch Hat Topper
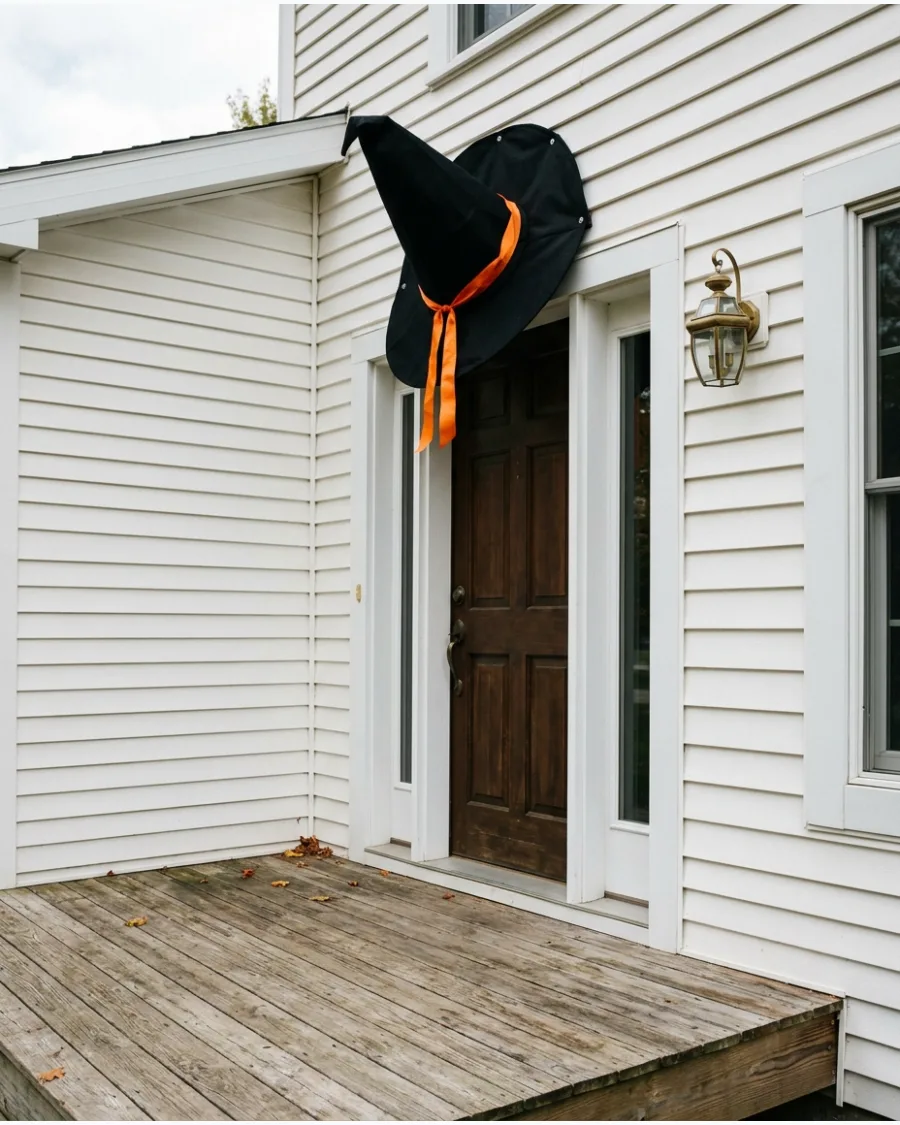
A massive witch hat perched atop the front door frame creates an instant focal point for the spooky season. Using weather-resistant black felt or outdoor fabric ensures the structure holds its shape against the wind.
Secure the brim to the top molding using removable adhesive hooks or thin floral wire for a floating effect. This oversized silhouette works better than many small decorations because it commands attention from the sidewalk. High-contrast colors like lime green or purple ribbon around the base add much-needed visibility against dark house siding.
- Source thick, heavy-duty felt or outdoor canvas from a craft store for a budget-friendly DIY project.
- Construct a lightweight wire frame inside the cone to prevent drooping during autumn rain or wind.
- Swap the ribbon color to match existing porch planters or seasonal wreaths for a cohesive look.
Most people skip this: stuffing the top of the hat with plastic grocery bags keeps the point upright without adding heavy weight that could pull on the door frame.
DIY Witch Hat Decorations
36. Witch Hat Garland
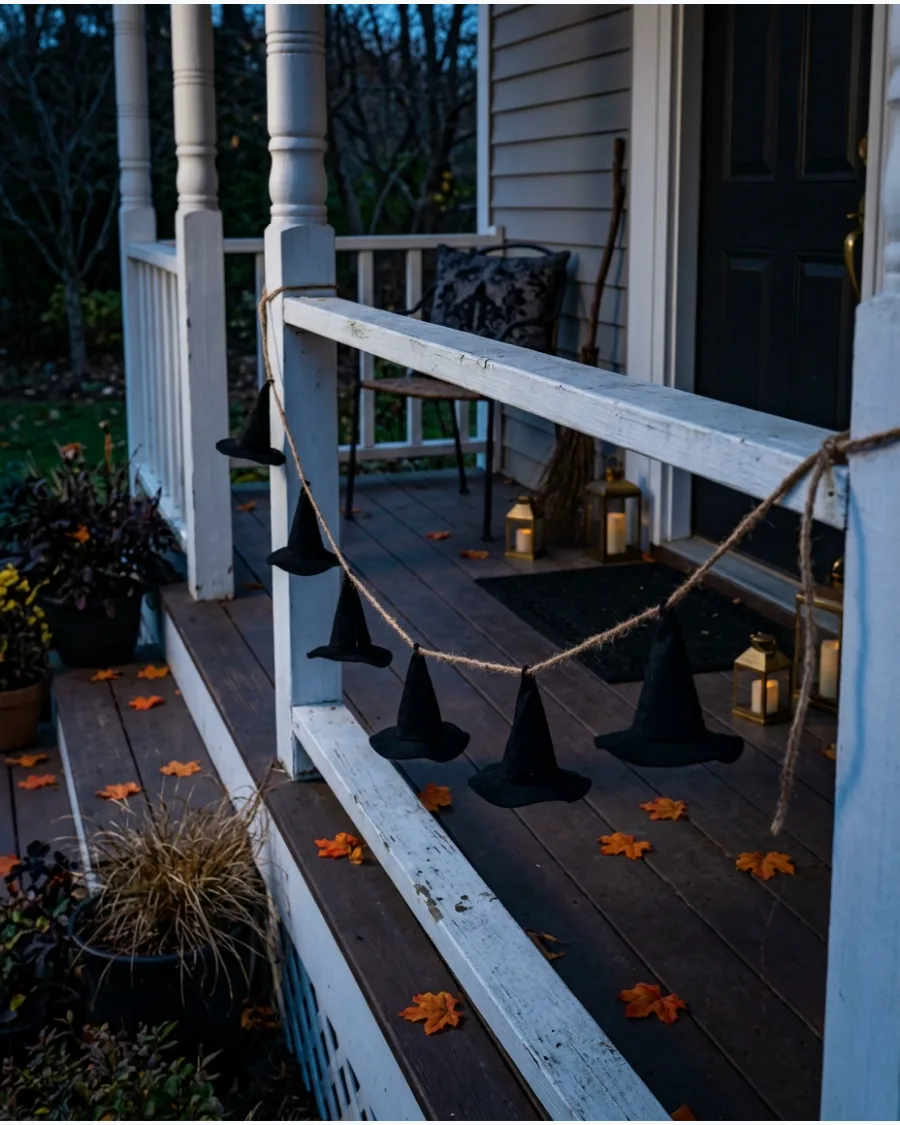
Connect several miniature hats with strong twine or ribbon to create a festive strand for railings or door frames. Space the hats evenly and tie a small knot in the twine on both sides of each hat to keep them from sliding toward the center. This is a great way to add visual detail to long stretches of porch railing.
- Under $20 for a 10-foot garland.
- Use 6-inch mini hats and hang them with zip ties for a secure outdoor hold.
- Drape the garland in swags rather than a straight line for a more professional look.
Most people skip this: Use hats of different textures, like felt and burlap, to add visual interest and depth to the garland.
37. Colorful Patchwork Witch Hats

Cover simple hat forms with outdoor fabric in gingham, stripes, or floral patterns for a unique, cottage-style look. Apply a coat of outdoor fabric sealant to the patterns to prevent the colors from fading in the sun. These bright colors offer a refreshing change from the traditional all-black palette and stand out against green lawns.
- $5 to $10 per hat depending on fabric choice.
- Use spray adhesive to attach fabric and trim excess with sharp fabric scissors.
- Coordinate fabric patterns with your existing outdoor pillows or cushions.
Quick win: Use old outdoor tablecloths or cushions as a source for weather-resistant fabric scraps to save money.
38. Mossy Forest Witch Hats

Decorate black hats with faux moss, mushrooms, and small branches to give them an organic, weathered look. Hot glue clumps of preserved reindeer moss around the base of the hat to hide the seam where the cone meets the brim. This style blends perfectly with natural landscaping and wooded yards for an enchanted-forest theme.
- $15 for craft moss and small decorative mushrooms.
- Use waterproof glue to ensure the moss stays attached through rain.
- Pair these with real branches found in the yard for an authentic look.
Best shortcut: Spray the finished hat with a clear matte sealer to keep the moss from shedding or blowing away in the wind.
DIY Witch Porch and Door Decorations
39. Witch’s Cottage Entrance
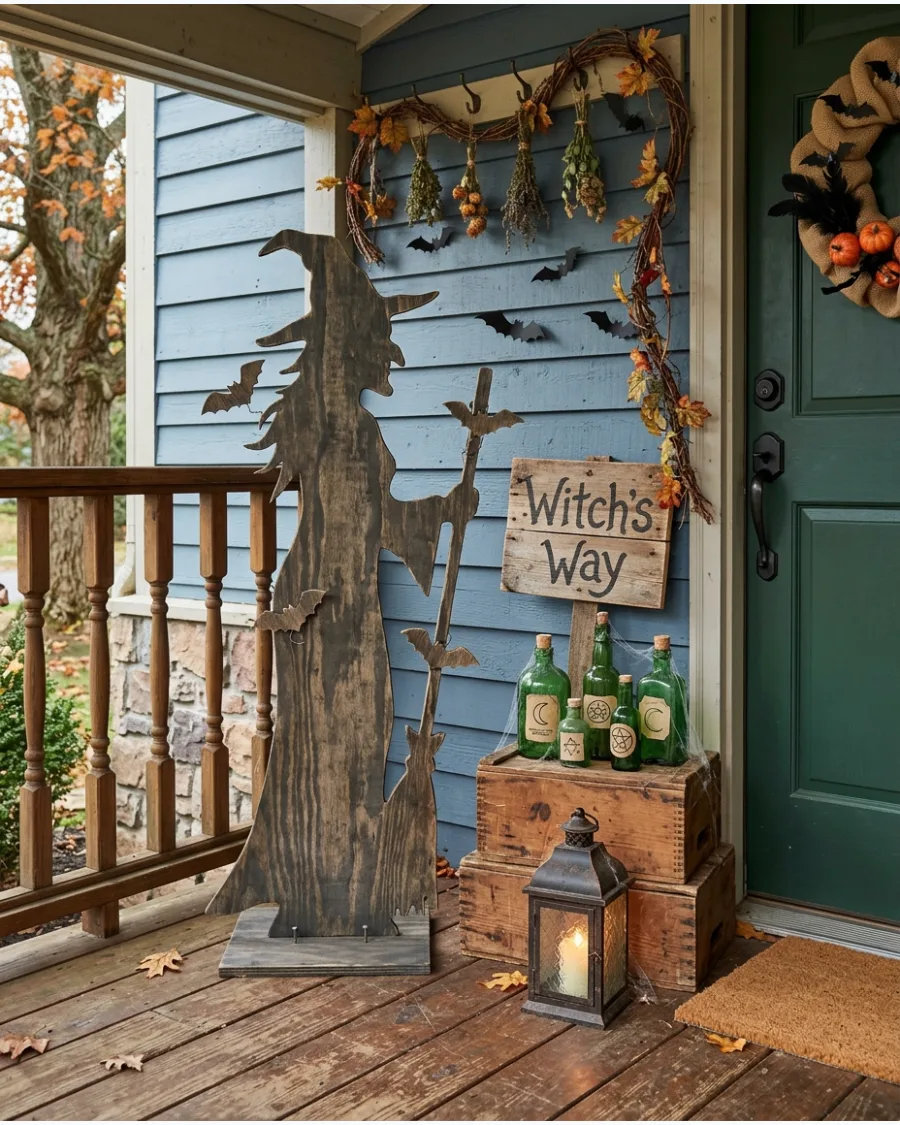
Decorate the porch with crooked wooden signs, brooms, and old lanterns to transform the entrance into a storybook scene. Lean several handmade twig brooms against the wall at different angles to create a lived-in, cluttered look. This immersive approach makes the porch feel like a functional part of a witch's home rather than just a display.
- Zero cost if using found branches and old household lanterns.
- Focus the decor around the door handle and eye-level zones for impact.
- Add clumps of moss to the door frame to suggest an aged, rustic cottage.
Most people skip this: Replace your standard porch light with a flickering flame bulb to instantly change the atmosphere of the cottage at night.
40. Outdoor Potion Shop
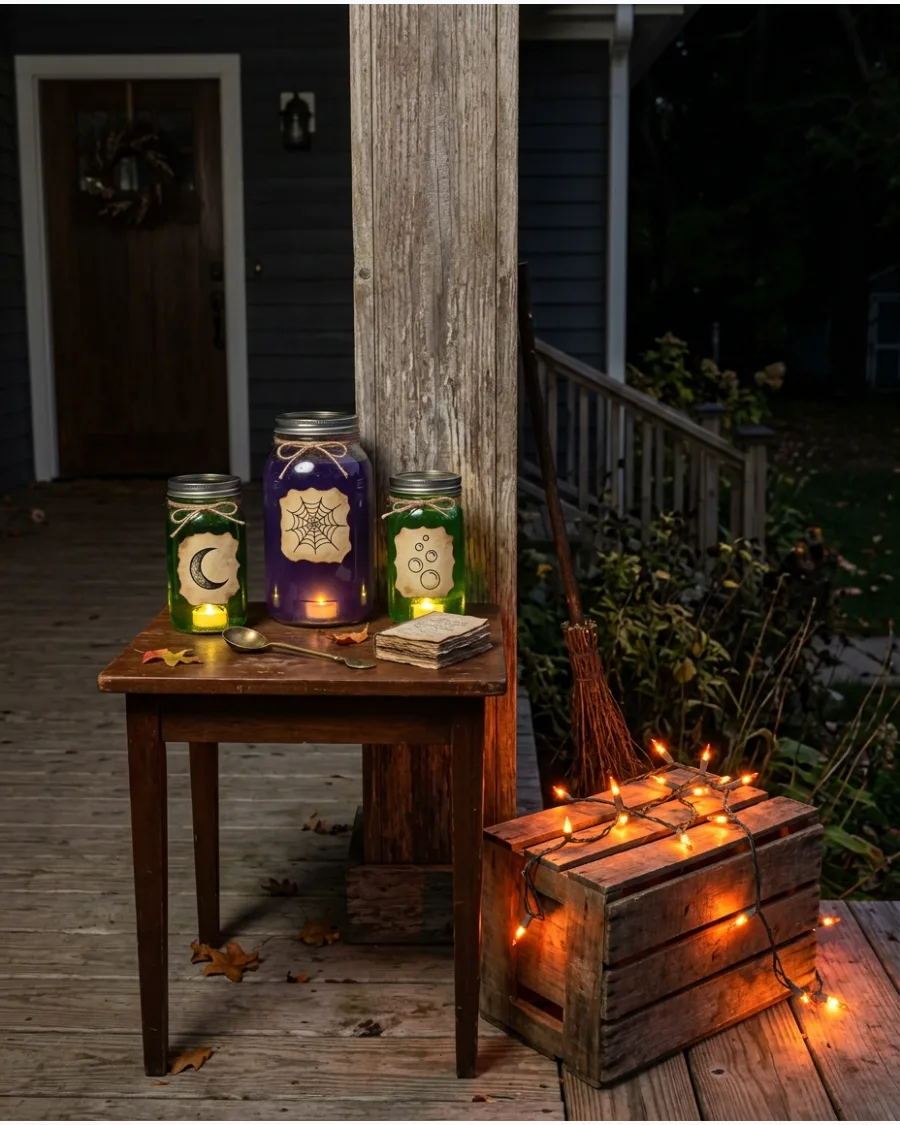
Arrange colored plastic bottles, jars, and small crates on a porch table to mimic a market stall. Fill clear jars with water and a few drops of food coloring, then drop in a battery-operated submersible light for a magical glow. This setup provides a great secondary focal point away from the main door for larger porches.
- $10 to $20 for jars and labels.
- Use plastic containers instead of glass for safety in high-traffic outdoor areas.
- Place the display on a stable, flat surface to prevent spills or breakage.
Quick win: Use tonic water in the jars and shine a blacklight on them to make the liquid glow bright blue through the night.
41. Witches Welcome Door Sign
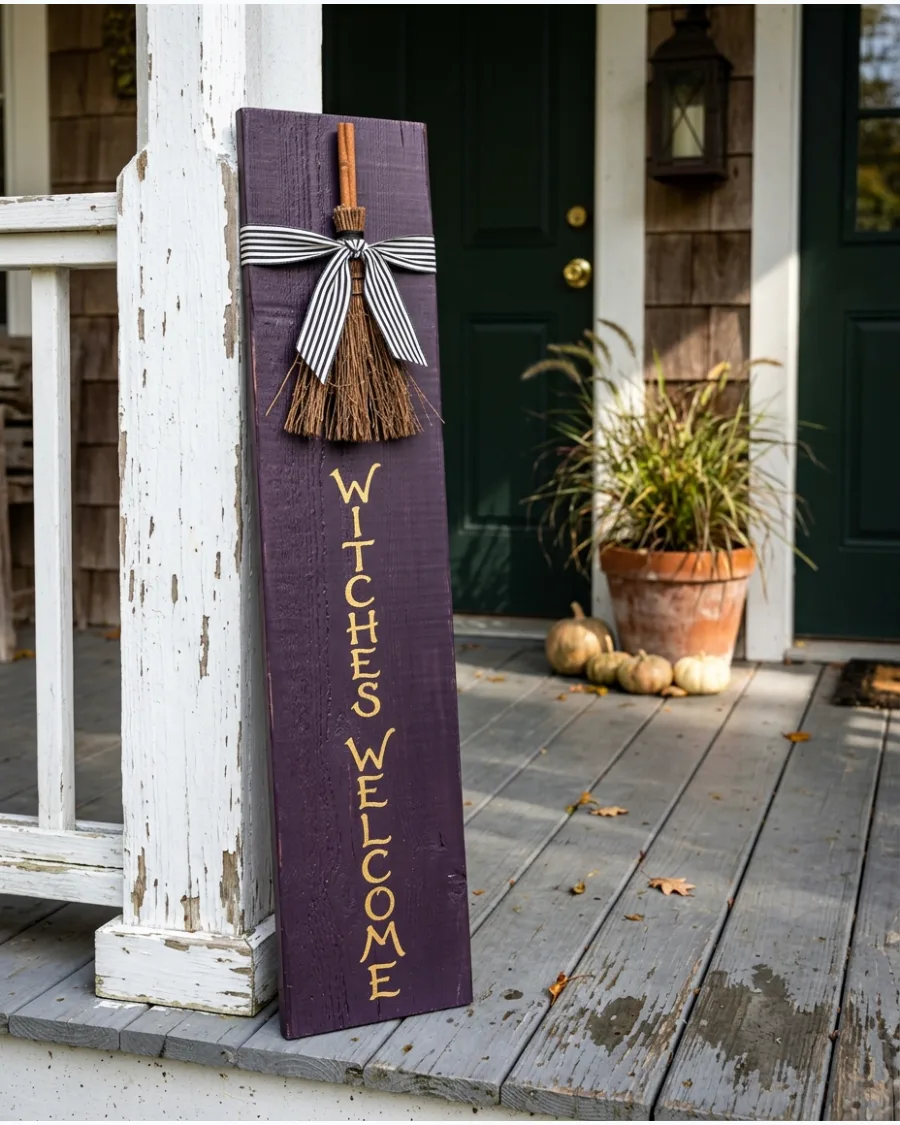
Paint a wooden board with a dark background to make the lettering stand out from the street. Decorate the sign with a small broom or a crescent moon to add texture.
Seal the wood with a clear exterior spray to prevent the paint from peeling in the rain. A deep purple background makes gold or white lettering pop much better than standard black.
- $15 – $25 / 1 hour
- Use a stencil for the lettering if hand-painting feels intimidating
- Attach a sawtooth hanger or heavy twine for versatile mounting options
Quick win: Sand the edges of the wood before painting to give it a slightly worn, vintage look.
42. The Witch Is In Sign
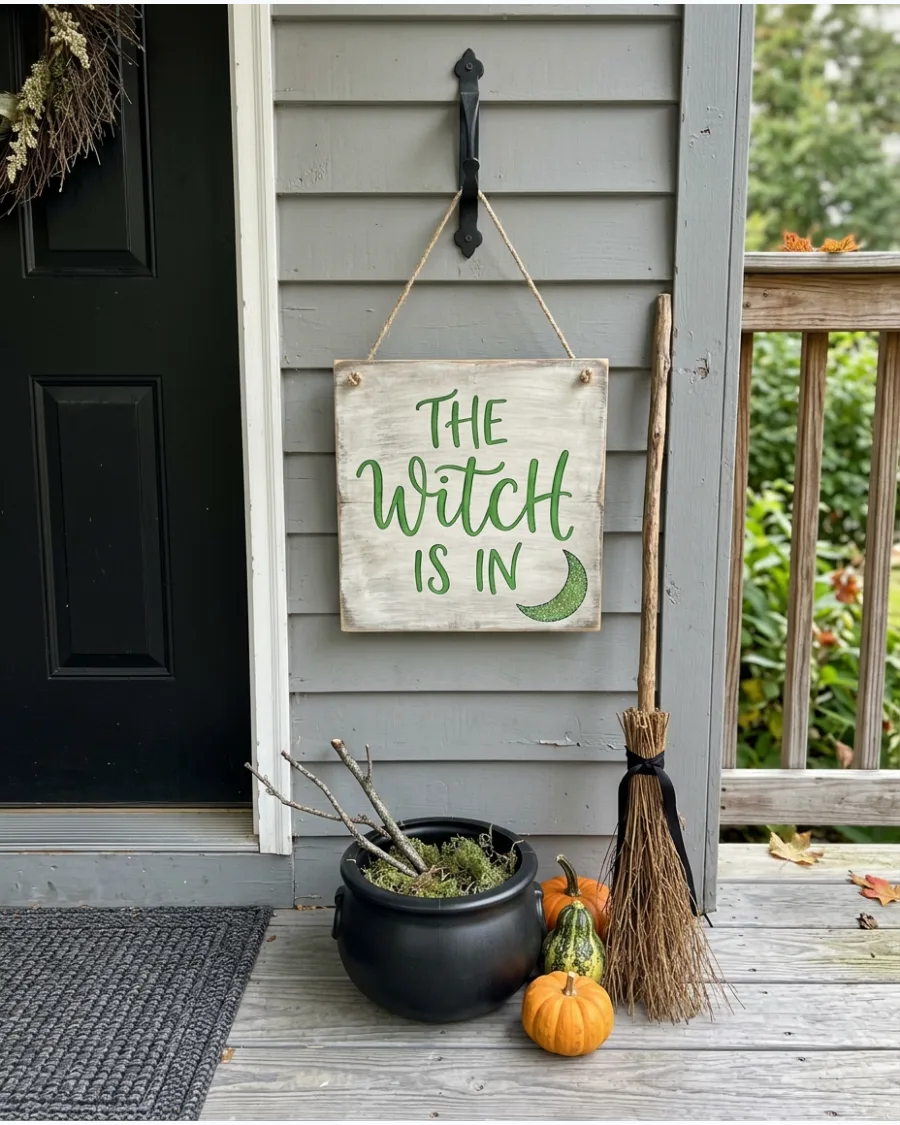
Create a reversible sign that adds a bit of humor to the front entry. Hang it from a door or a porch post using a sturdy ribbon that won't fray in the wind.
Use a thick, weather-resistant ribbon to ensure the sign stays level when the wind picks up. Reversible signs are great for adding a bit of personality that neighbors will actually stop to read.
- $10 – $20 / 45 minutes
- Paint both sides with a base coat before adding any text or details
- Swap the ribbon for a decorative metal chain for a more industrial look
Best shortcut: Use vinyl letter stickers if you want a professional look without the steady hand required for paint.
43. Witch Boots Beside the Door

Stuff striped tights and attach handmade pointed shoes for a playful look. Position the legs behind a planter or beneath a bench so only the boots remain visible.
Fill the tights with plastic grocery bags instead of cotton batting so they do not soak up water and get heavy. Tucking the legs into a heavy ceramic pot keeps them from blowing away during an October storm.
- Under $15 / 30 minutes
- Secure the shoes to the tights with hot glue or safety pins
- Use wire inside the legs if you want to pose them at a specific angle
Most people skip this: Spray the shoes with a water-repellent coating to keep the fabric or faux leather from cracking.
44. Witch Boot Planters

Turn old rain boots into oversized witch containers for your porch steps. Fill them with dark flowers or faux vines to create a moody botanical display.
Spray paint old rubber rain boots matte black and add a layer of duct tape around the top to create a flared cuff look. Dark purple pansies or black mondo grass create a perfect moody vibe for these containers.
- $20 – $40 / 1 hour
- Drill drainage holes in the bottom of the boots to keep the plants healthy
- Weight the toes with small rocks so the boots do not tip over
Quick win: Use a silver metallic paint pen to draw stitching details around the edges of the boots.
45. Witch’s Laundry Line
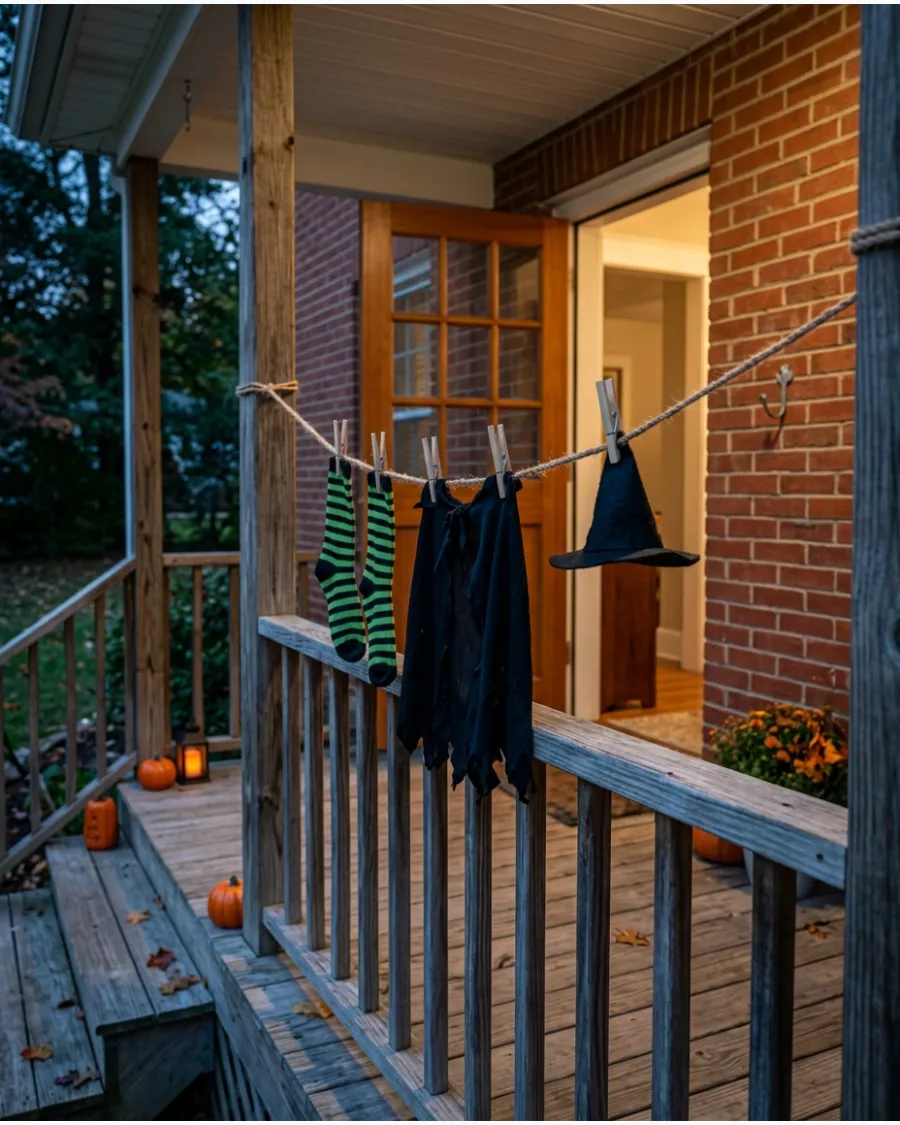
Stretch a laundry line across a covered porch or between two garden posts. Hang striped stockings, black capes, and small hats to make it look like a witch just finished her chores.
Use heavy-duty clothespins and a thick jute rope to make sure the laundry does not slide into a pile in the middle. This display fills a large empty space quickly and gives the porch a lived-in, whimsical feel.
- $15 – $30 / 1 hour
- Thrift stores are the best place to find cheap black fabric for capes or skirts
- Hang the items slightly crooked to make it look like they were tossed up in a hurry
Best shortcut: If you do not have a porch, run the line between two shepherd’s hooks in a garden bed.
46. Spellbook Porch Display
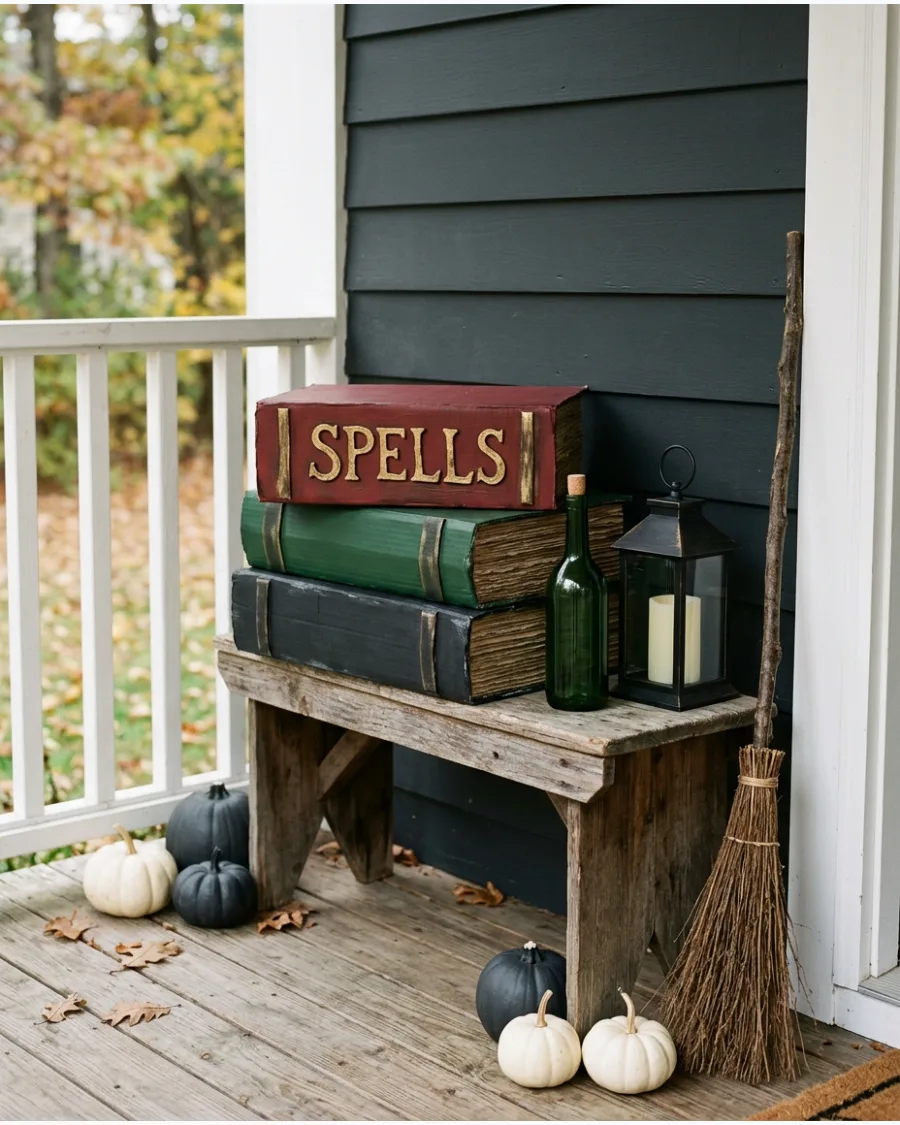
Turn old cardboard boxes into oversized spellbooks using paint and raised foam details. Stack them beside the door with potion bottles and an LED lantern for a scholarly witch vibe.
Coat the finished cardboard books in a matte exterior varnish to protect the paper from humidity. Stacking the books at different angles creates a more natural, cluttered look than a perfectly straight pile.
- $5 – $15 / 2 hours
- Use a hot glue gun to create raised designs on the spine before painting
- Old wine bottles with labels removed make excellent potion containers for the display
Most people skip this: Glue a piece of heavy scrap wood inside the bottom box so the stack stays put in the wind.
Enchanted Witch Yard Displays
47. Witch Silhouette Stakes
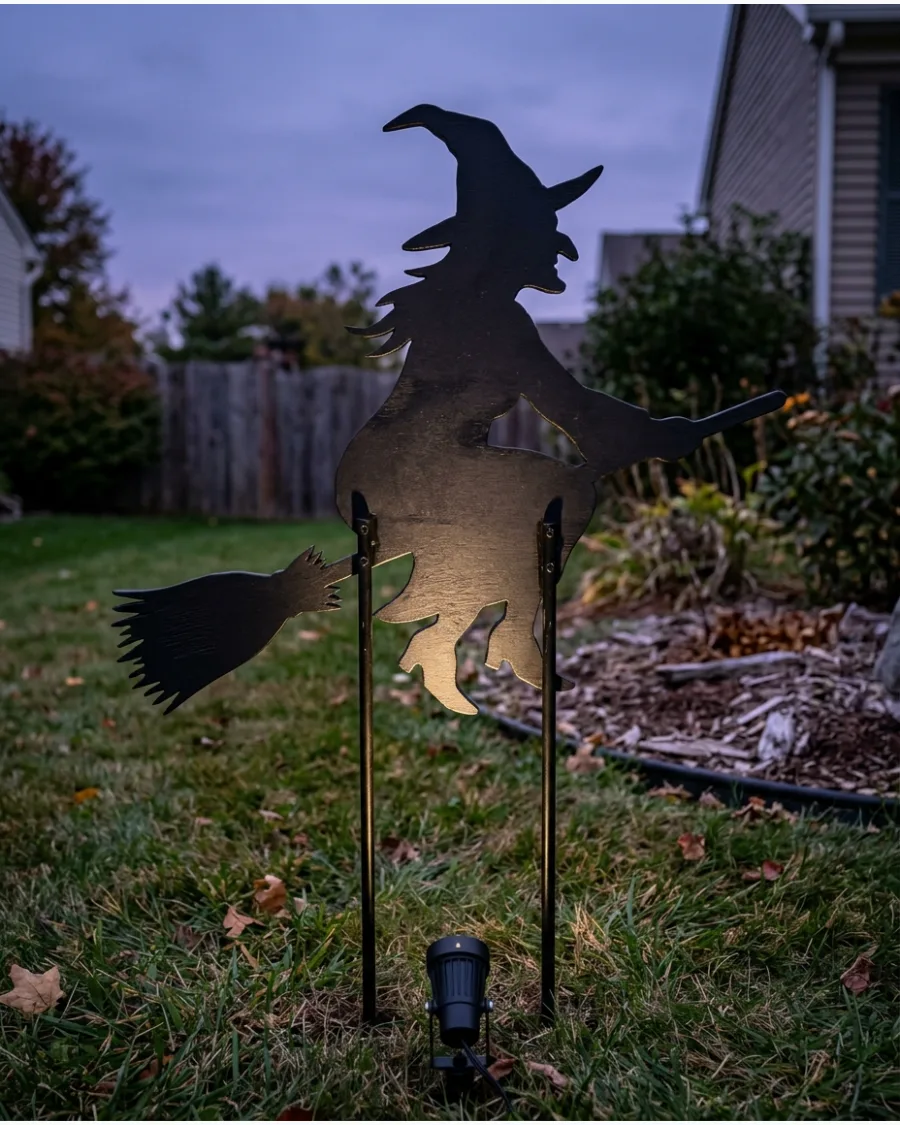
Cut witch shapes from thin plywood or sturdy foam board and paint them solid black. Attach them to secure garden stakes for a dramatic outline against your house or fence.
Position a spotlight at the base of the silhouette to cast a giant, spooky shadow against the side of the house. Black silhouettes look much more professional and high-end than colorful, cartoonish yard stakes.
- $25 – $50 / 3 hours
- Use a jigsaw for plywood or a sharp utility knife for corrugated plastic
- Paint both sides black so the display looks good from every angle
Quick win: Trace a projection of a witch onto your material to get perfect proportions without drawing skills.
48. Witch Circle Around a Tree
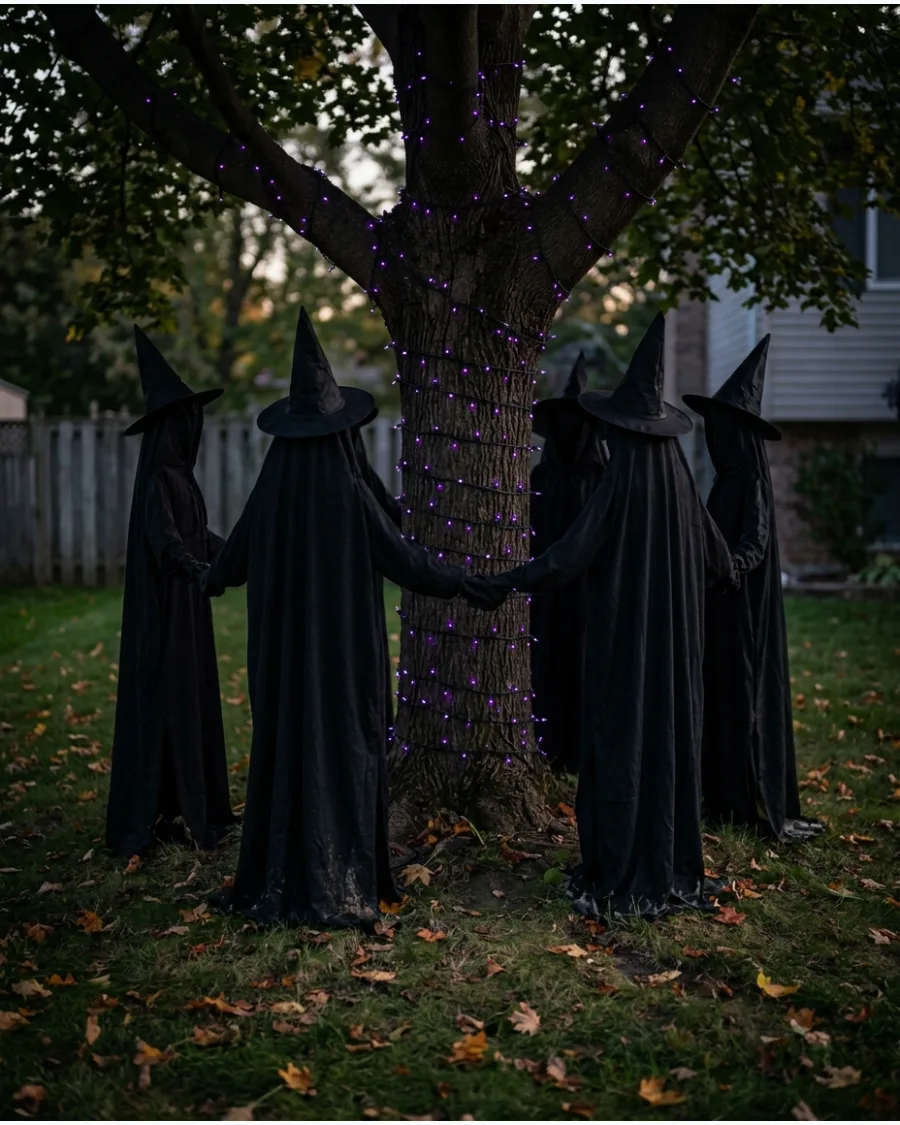
Arrange simple cloaked figures in a circle around a large tree in your yard. Point their arms toward the center and add colorful lights around the trunk for a gathering effect.
Tie the hands of the witches together with fishing line so they stay in a perfect circle even if the ground is uneven. Using simple black fabric for the cloaks allows the glowing lights on the tree trunk to be the star of the show.
- $40 – $80 / 2 hours
- Use PVC pipe or tall garden stakes as the skeletons for the figures
- Secure the cloaks at the neck with zip ties so they do not slip down
Best shortcut: Use inexpensive black plastic tablecloths for the cloaks if you are on a tight budget and want something waterproof.
49. Enchanted Witch Garden
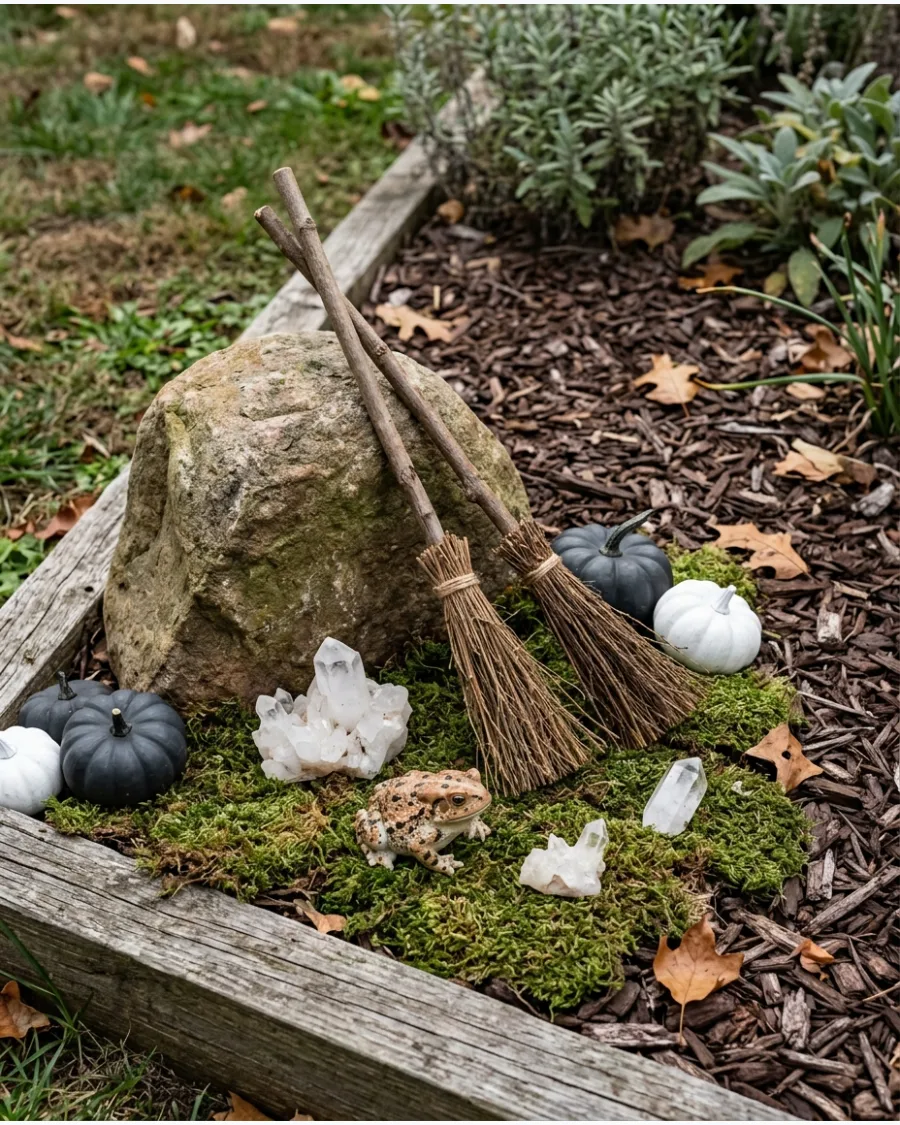
Decorate a flower bed with moss, crystals, and miniature brooms to create a magical landscape. Add a small witch figure to make the area look like a tiny workstation.
Nestle small LED tea lights inside the moss to give the garden a magical, flickering glow at night. Mixing natural elements like real stones and moss with DIY miniatures makes the scene feel grounded and realistic.
- $20 – $40 / 1 hour
- Use weather-resistant glue for any small pieces that need to stay attached to rocks
- Group items in odd numbers like three or five for a more pleasing arrangement
Most people skip this: Clear a small path in the mulch using flat pebbles to give the miniature garden a sense of scale.
50. Complete Witch Coven Yard Scene
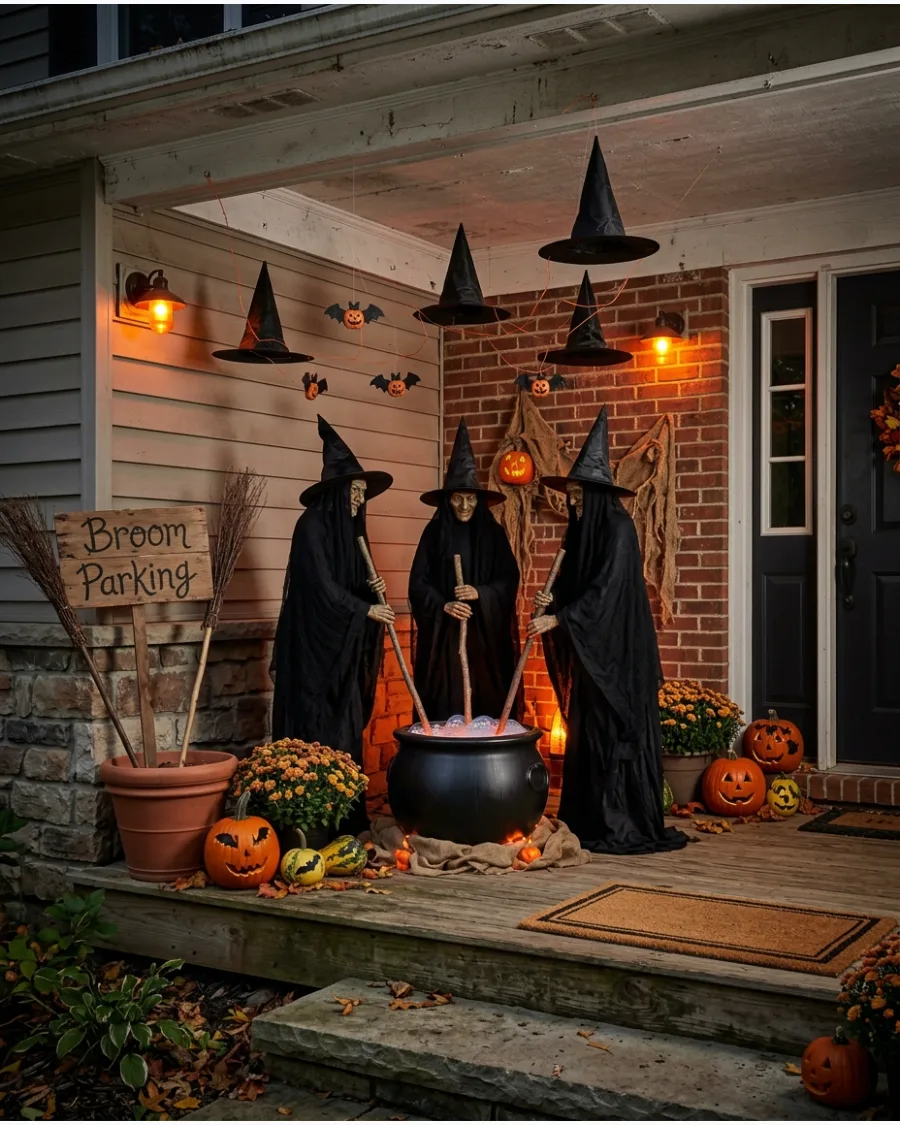
Combine multiple DIY projects like standing witches, a cauldron, and a broom station into one cohesive scene.
Repeat the same materials and lighting colors throughout the yard to tie everything together. Repeat a single accent color, like lime green or bright orange, across all the different elements to make the display feel intentional. A large-scale scene works best when there is a clear path for the eye to follow from the yard to the front door.
- $100+ / 5+ hours
- Start with the largest items first and fill in the gaps with smaller details like pumpkins
- Use heavy-duty extension cords and a timer to manage all the lighting effortlessly
Quick win: Take a photo of the yard from the street during the setup to see where the dead spots are in your lighting.
Frequently Asked Questions
How do I keep my outdoor witch decorations from blowing away?
To keep your yard props secure, drive a piece of rebar or a sturdy tent stake into the ground and zip-tie it to the decoration's frame. For flat surfaces, hide small sandbags inside the base or under the witch's robes to provide enough weight to withstand heavy gusts.
What are the best weather-resistant materials for DIY witch hats?
Instead of standard felt which absorbs water, use outdoor-grade fabrics like polyester or nylon that naturally shed moisture. You can also craft hats from black plastic sheeting or spray-paint foam cones to ensure they maintain their shape and won't sag during autumn rain.
How can I make a DIY cauldron look like it's actually bubbling outdoors?
Create a bubbling effect by filling your cauldron with iridescent Christmas ornaments and tucking waterproof LED puck lights underneath for a glowing brew. For a more dramatic look, place a small fog machine or a mist maker inside a bowl of water to produce a continuous, eerie vapor.
How do I hang 'floating' witch hats from a porch ceiling?
Use heavy-duty clear fishing line and a needle to thread through the tip of each hat, securing it with a knot on the inside. Attach the other end of the line to outdoor Command hooks or small screw-eyes on your porch ceiling for a magical, invisible hold.
Can I use real branches for a DIY witch broom display?
Real branches like birch or fallen oak make excellent handles, but ensure the wood is dry and sturdy before assembly. To prevent shedding, tightly bundle smaller twigs or straw around the base with wire rather than twine, ensuring the bristles stay intact even in high winds.