50 Retro Halloween Decorating Ideas

This post may contain affiliate links: full affiliate disclosure.
Authentic vintage decor brings a warm, cozy feeling to the home that modern plastic simply cannot match. Focus on paper textures, classic color palettes, and friendly faces to create a space that feels like a curated collection.
These retro pieces offer a nostalgic charm that turns any room into a festive throwback celebration.
Classic Vintage Halloween Decorations
1. Vintage Black Cat Die-Cut Wall Decorations
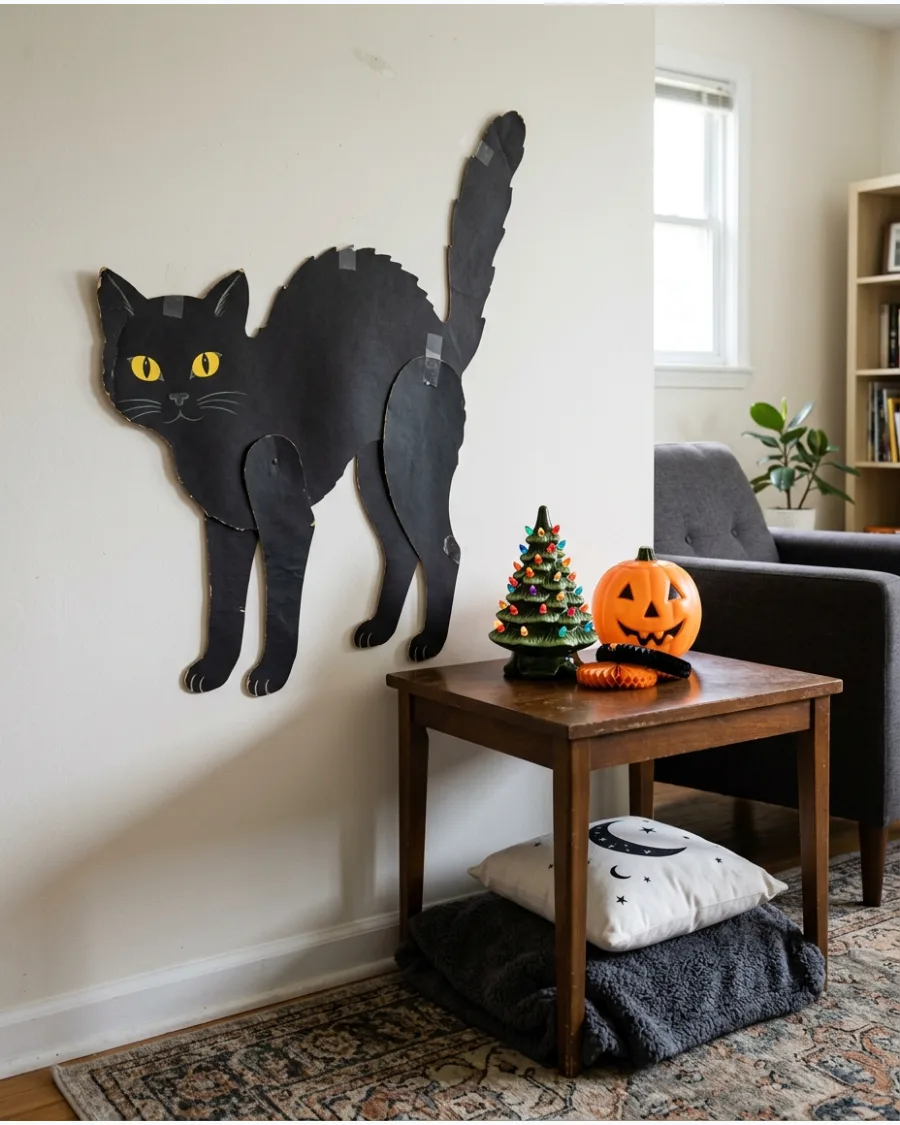
Decorate the walls with oversized black cats featuring arched backs, bright yellow eyes, and playful expressions. Choose reproductions with slightly faded orange, black, cream, and yellow coloring for an authentic vintage appearance.
Mount these at eye level on a gallery wall to create a focal point that feels curated rather than cluttered.
- Look for Beistle-style reproductions at specialty party shops or online marketplaces for a budget-friendly start.
- Use small pieces of painter's tape or removable putty on the back to prevent tearing the paper during setup.
- Group several cats of different sizes together on a large wall for a more dramatic impact in open-concept rooms.
Quick win: Use a black marker to touch up any white edges on reproduction cutouts for a more seamless, high-end look.
2. Smiling Jack-o’-Lantern Paper Cutouts
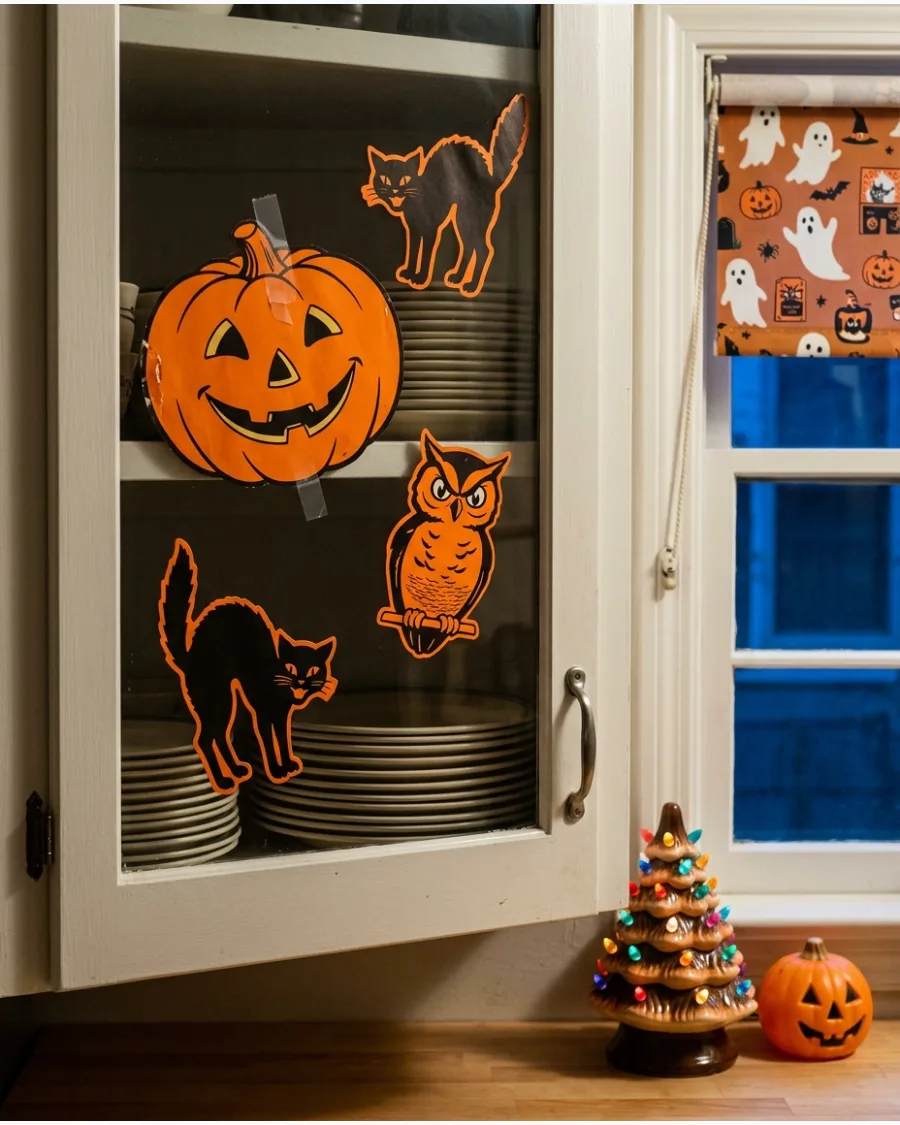
Hang cheerful pumpkin-face cutouts across doors, windows, and kitchen cabinets. Cartoonish expressions feel more nostalgic than realistic or frightening pumpkin designs.
Stick these to the inside of glass cabinet doors for a surprise pop of color whenever the kitchen lights are on.
- Choose cardstock versions which are more durable and easier to store for next year than thin paper.
- Secure the cutouts using clear adhesive tabs to keep the focus on the artwork rather than the tape.
- Mix and match different facial expressions to give each cabinet or window its own unique personality.
Most people skip this: Backing thin paper cutouts with a piece of black cardstock makes them sturdy enough to reuse for multiple seasons.
3. Retro Honeycomb Paper Pumpkins
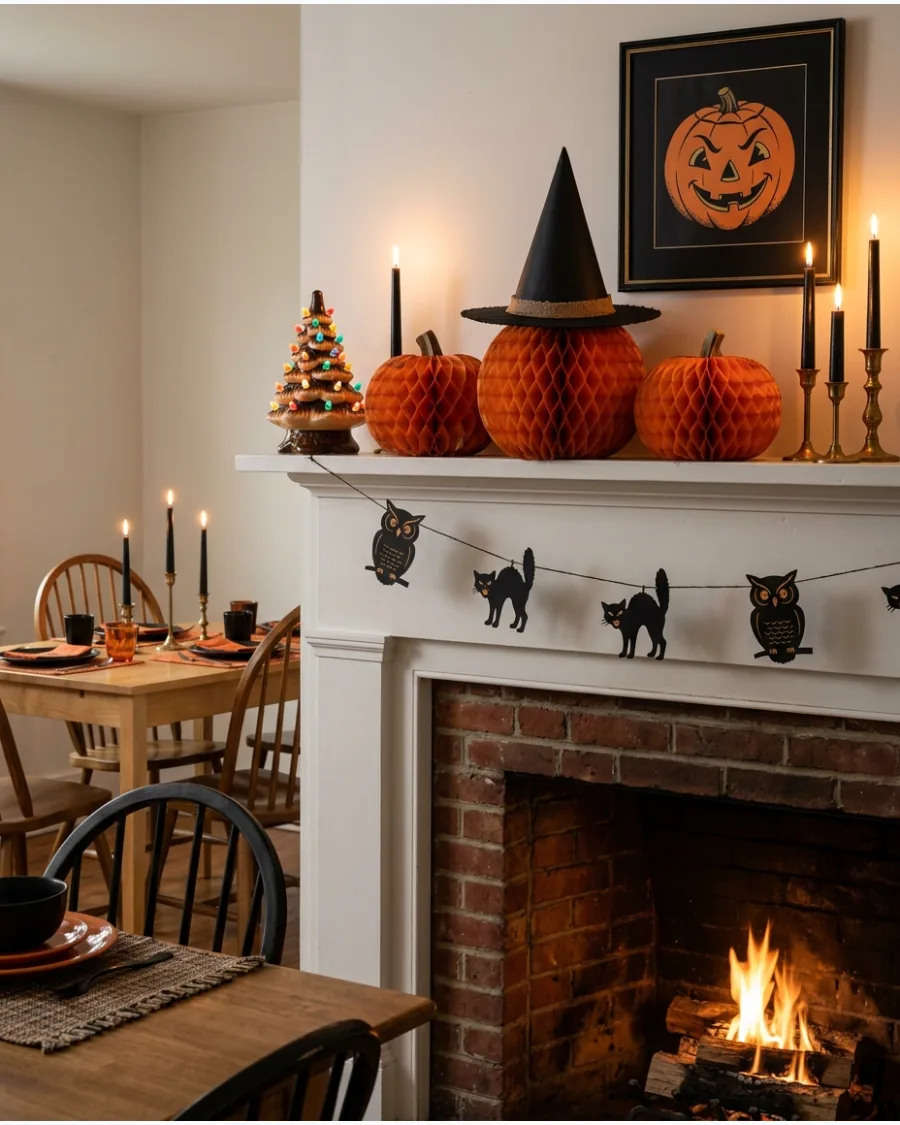
Display orange honeycomb pumpkins on mantels, shelves, and party tables. Add black paper faces, witch hats, or pleated collars to give each pumpkin its own vintage personality.
Cluster three pumpkins of different heights to create a balanced centerpiece that does not block sightlines across a dining table.
- Purchase multipacks of various sizes to quickly fill empty spaces on a budget.
- Open the honeycomb 180 degrees and use the included clips instead of glue so they can be folded flat for storage.
- Place these on high shelves or mantels to keep the delicate paper away from pets or small children.
Best shortcut: Use a hairdryer on a low, cool setting to gently blow dust off honeycomb paper without crushing the delicate folds.
4. Accordion-Fold Paper Witches
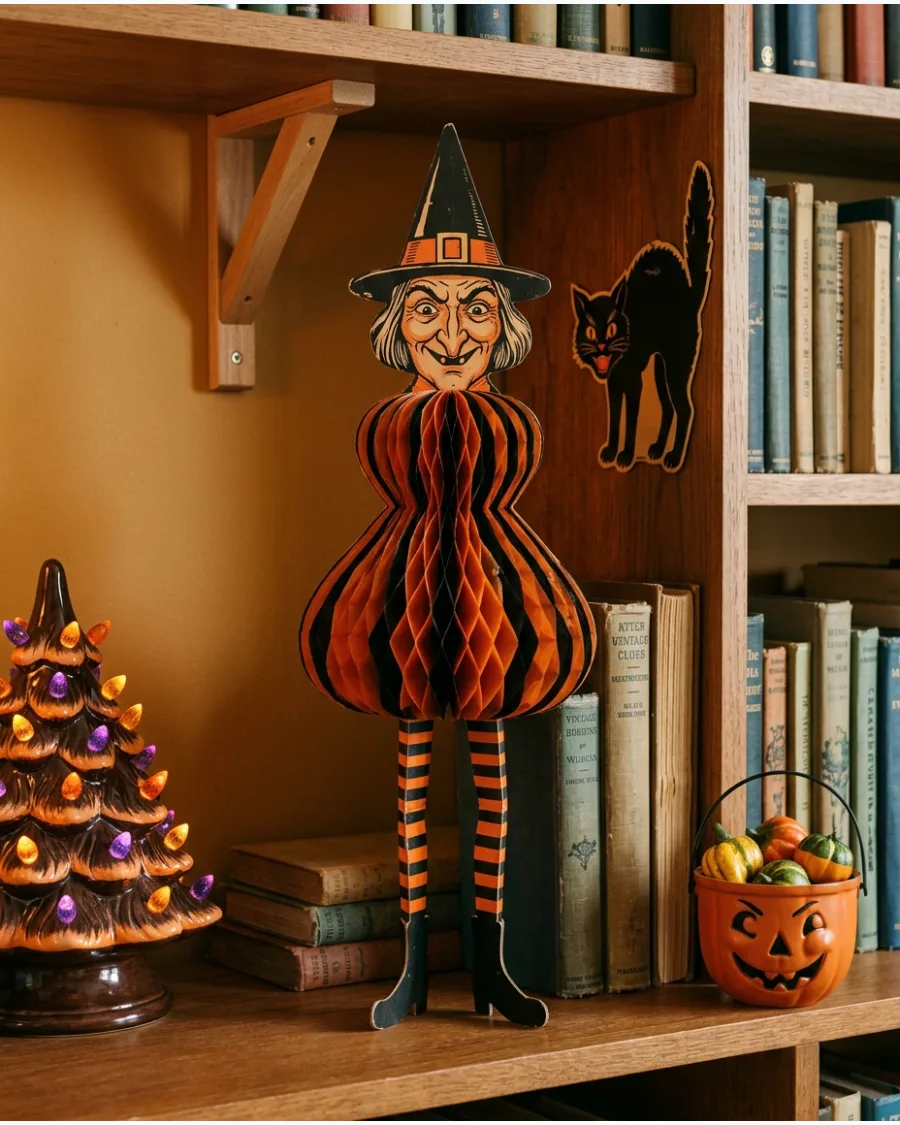
Create standing witches using accordion-folded black and orange paper. Pointed hats, striped stockings, and funny facial expressions make them look like decorations from an old Halloween party catalog.
Place these figures between books or near a table lamp to highlight their colorful patterns and vintage charm.
- Check vintage-style reproduction brands for witches with authentic mid-century illustrations.
- Ensure the base is fully expanded on a flat surface to prevent the tall hats from making the figures top-heavy.
- Add a small piece of double-sided tape to the bottom of the feet to keep them secure on smooth shelving.
Quick win: Place a heavy coin inside the base of paper standees to keep them from tipping over in drafty rooms or near entryways.
5. Vintage Halloween Postcard Gallery
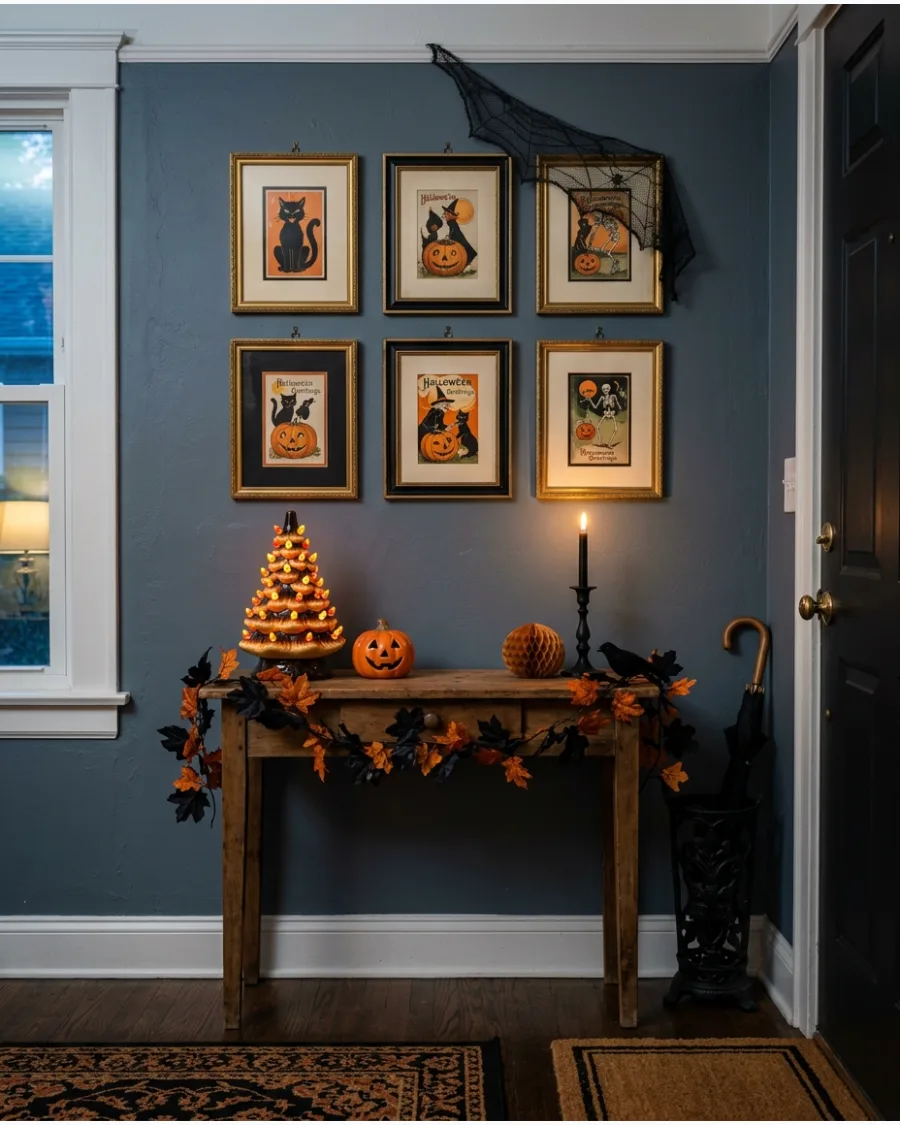
Frame reproductions of early Halloween postcards featuring witches, moonlit pumpkins, and black cats. Arrange them in mismatched antique-style frames for a collected-over-time display.
Hang the frames in a tight grid pattern to make a small collection of cards feel like a significant art installation.
- Search for 'vintage Halloween postcard sets' online to get a variety of cohesive designs at once.
- Use frames with built-in mats to give the small postcards more visual weight on a large wall.
- Swap out your regular year-round photos for these cards to save space and avoid making new holes in the wall.
Most people skip this: Use acid-free mounting corners instead of tape to keep vintage postcards in pristine condition inside their frames.
6. Retro Halloween Paper Garland
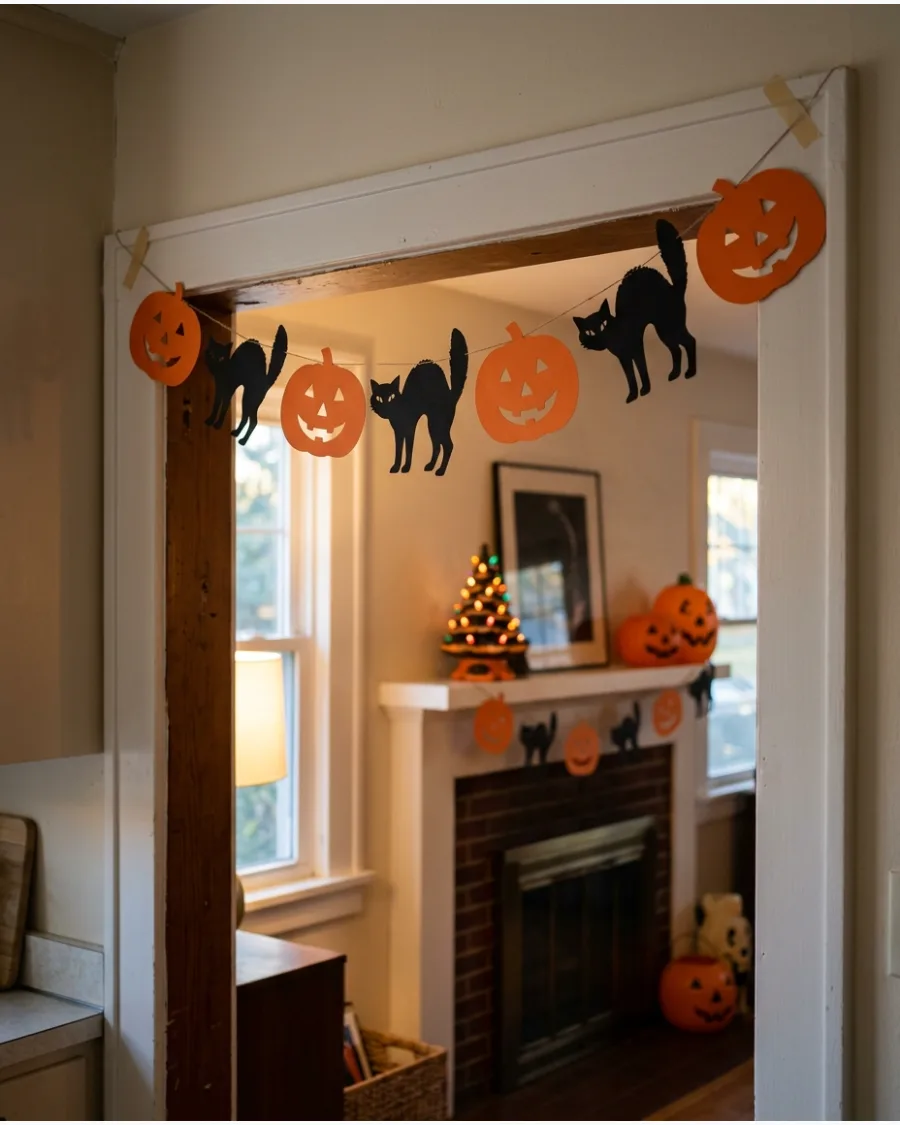
String together paper pumpkins, cats, ghosts, moons, and owls to create an old-fashioned garland. Hang it across a mantel, doorway, staircase, or kitchen window.
Loop the garland over a large mirror or doorway to frame the room without using heavy or permanent hardware.
- Choose garlands with long strings on the ends to make tying them to railings or curtain rods much easier.
- Space the characters evenly along the string so the garland looks balanced when draped in a swag shape.
- Layer two different garlands together for a fuller look that mixes different characters and colors.
Best shortcut: Drape the garland over the top of a curtain rod to add seasonal flair without the need for drilling or nails.
7. Crepe Paper Halloween Streamers
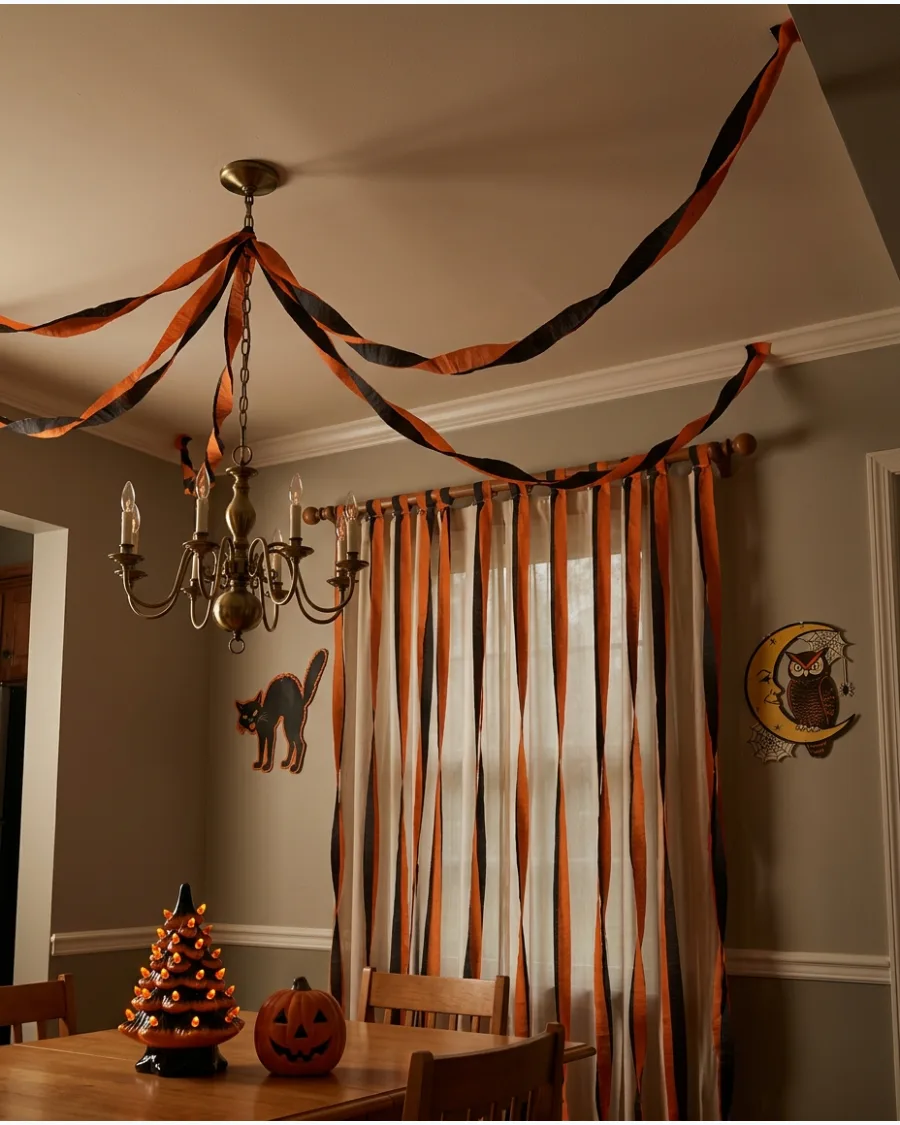
Twist orange and black crepe paper streamers together and drape them across the ceiling. The simple material instantly recreates the cheerful atmosphere of a mid-century Halloween party.
Secure the ends with a small twist to keep the spiral shape tight and prevent the paper from sagging over time.
- Buy jumbo rolls of flame-resistant crepe paper for safety and to cover larger ceiling areas efficiently.
- Use low-tack painter's tape to attach streamers to the ceiling to avoid peeling off any paint when the season ends.
- Drape them from a central light fixture out to the corners of the room for a classic 'big top' party effect.
Quick win: Twist streamers in opposite directions from both ends to get a more uniform, professional spiral before taping them down.
8. Vintage Owl Decorations
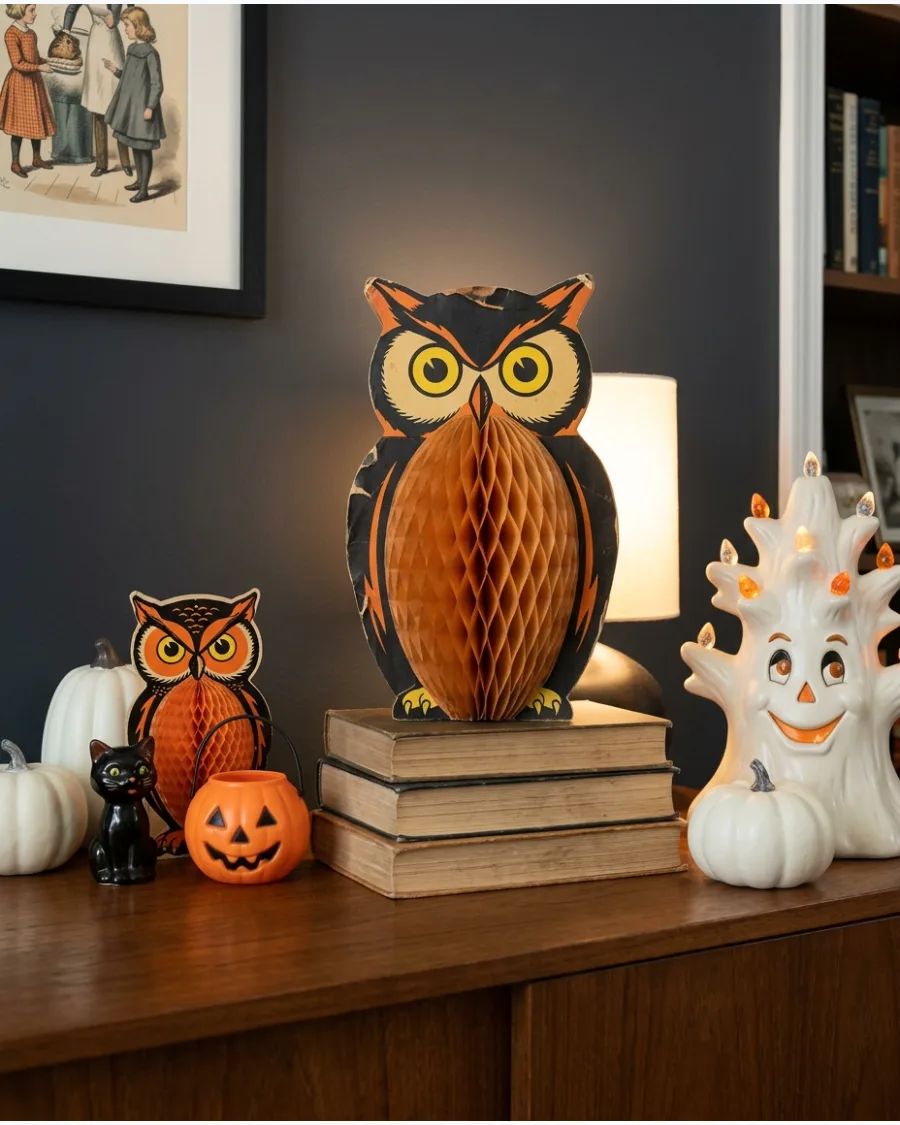
Add wide-eyed paper owls to bookshelves, walls, and tabletop displays. Choose owls with exaggerated expressions and warm orange, brown, black, and yellow details.
Face the owls toward the center of the room to draw the eye toward your main display areas.
- Look for owls with jointed wings that can be posed for a more custom and interactive look.
- Incorporate these into a display of real or faux autumn leaves to ground the paper decor in a natural setting.
- Select designs with 'honeycomb' bellies to add three-dimensional texture to flat shelf arrangements.
Most people skip this: Layering different textures like paper owls and velvet pumpkins makes a retro display feel more modern and high-end.
9. Papier-Mâché Pumpkin Buckets
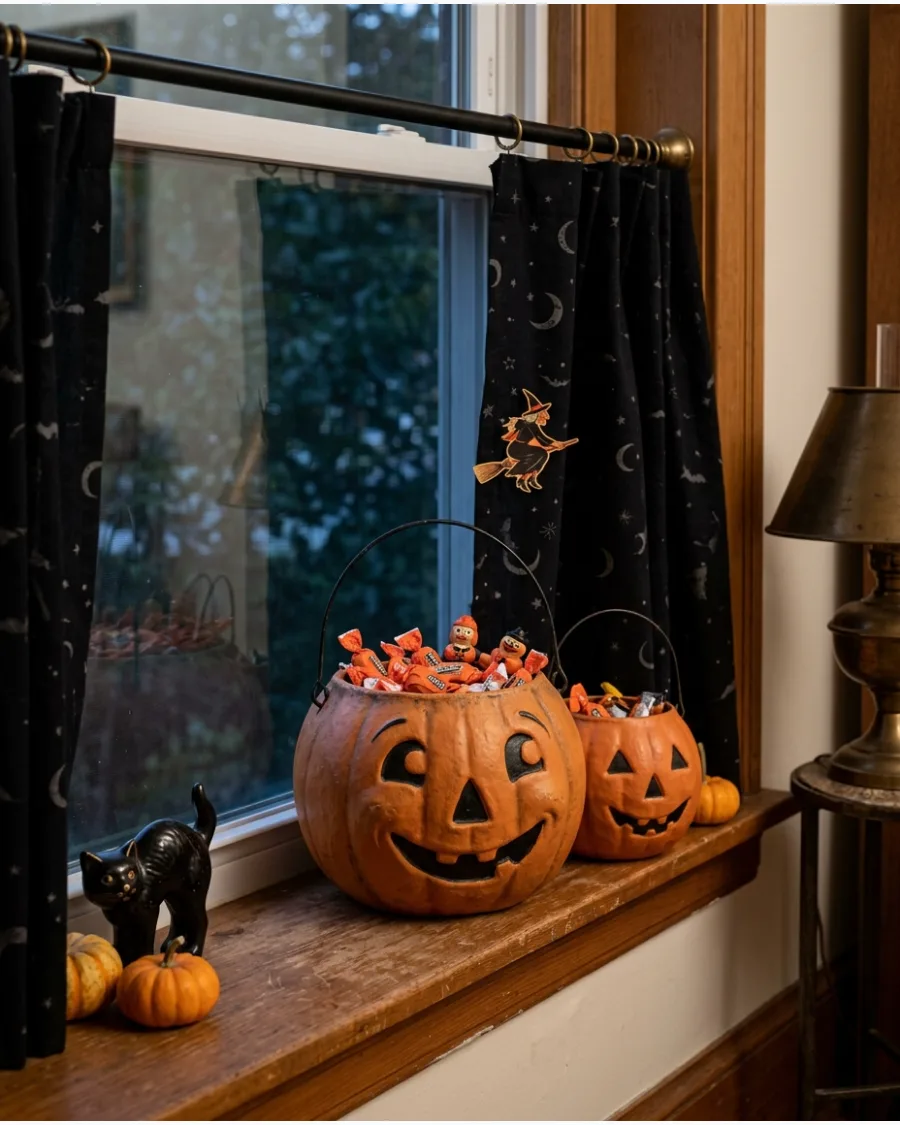
Display reproduction papier-mâché jack-o’-lantern buckets with wire handles. Fill them with wrapped candy, dried flowers, or battery-operated candles.
Line the bottom with a bit of tissue paper so smaller items sit near the top for a fuller, more abundant look.
- Opt for hand-painted reproductions to get the matte, textured finish that looks like an authentic antique.
- Keep these away from moisture or high humidity, as papier-mâché can soften and lose its shape over time.
- Use them as a unique centerpiece by grouping three buckets of different sizes on a decorative tray.
Quick win: Use battery-operated tea lights instead of real candles to prevent heat damage or fire risks to the papier-mâché material.
10. Retro Moon-Face Decorations
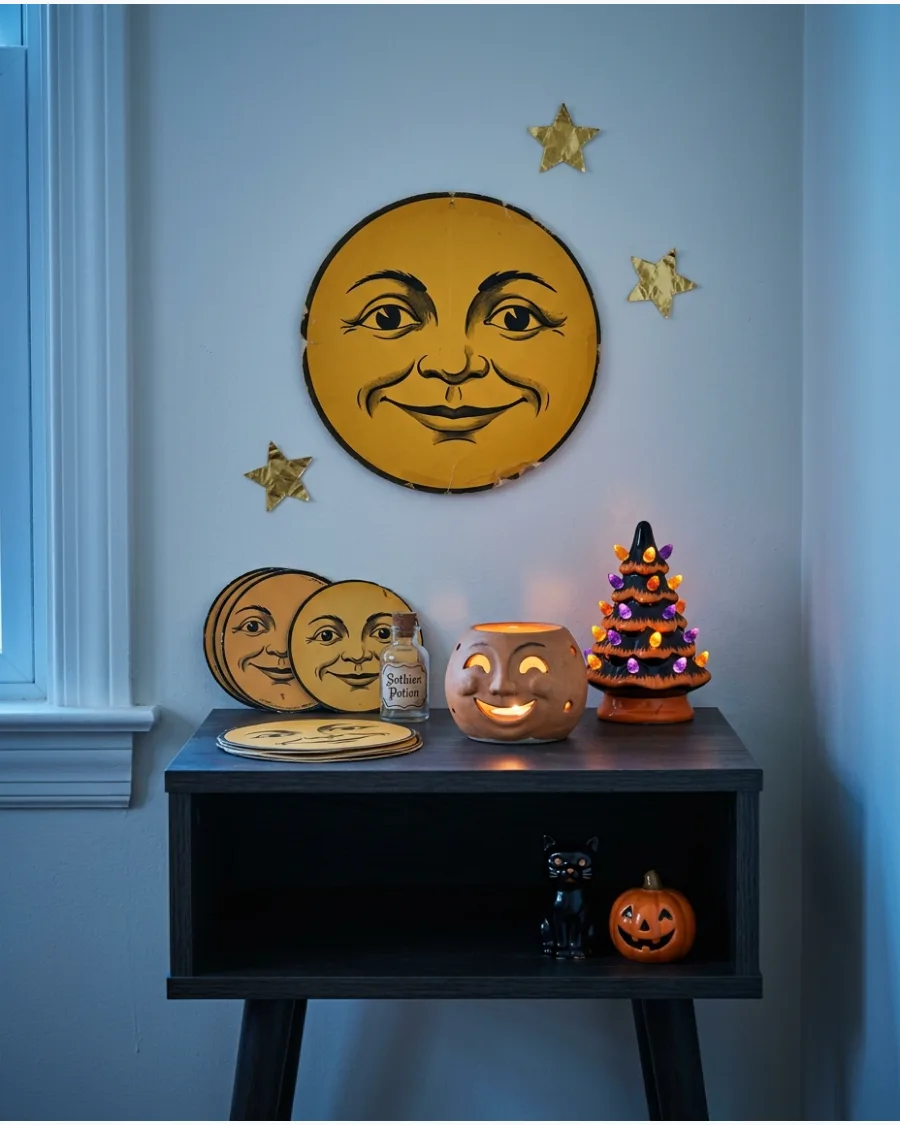
Use smiling crescent moons and full-moon faces throughout your Halloween decor. Pair them with flying witches, black cats, and scattered gold stars for a whimsical night-sky theme.
Hang a large moon face slightly higher than other decorations to act as a visual anchor for your Halloween display.
- Mix pale yellow moons with dark black silhouettes to create a high-contrast look that pops against neutral walls.
- Stick small foil stars around the moon using removable adhesive to expand the theme across a larger wall space.
- Choose double-sided moons if hanging them in a window so the decoration looks great from both inside and outside.
Best shortcut: Use clear fishing line to hang moon faces from the ceiling to make them look like they are floating magically in the room.
Retro Halloween Mantel Ideas
11. Orange-and-Black Mantel Village
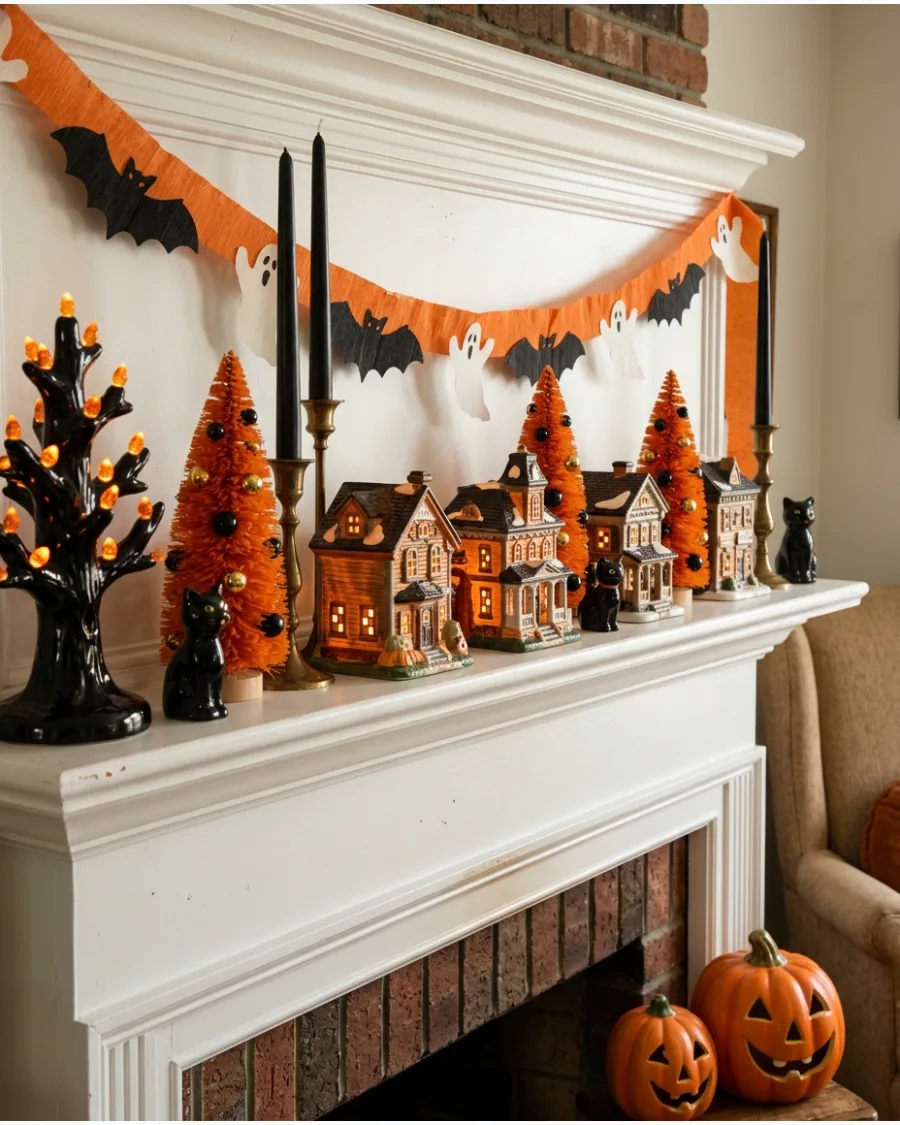
Set up a miniature town using ceramic houses and bottle-brush trees in classic seasonal colors. Hand-painted details on tiny buildings add a layer of authenticity that modern plastic sets often lack.
Arrange the tallest houses in the center of the mantel to create a clear focal point for the display. Muted tones keep the scene feeling like a treasured collection from decades ago.
- Sourcing: Look for Department 56 or similar collectible ceramic brands at thrift stores.
- Setup: Use small blocks of wood under the back houses to create different height levels.
- Adaptation: Swap ceramic houses for folded cardstock versions if decorating a narrow shelf.
Quick win: Place a string of warm white fairy lights behind the houses to make the windows glow without using messy candles.
12. Vintage Halloween Ceramic Tree
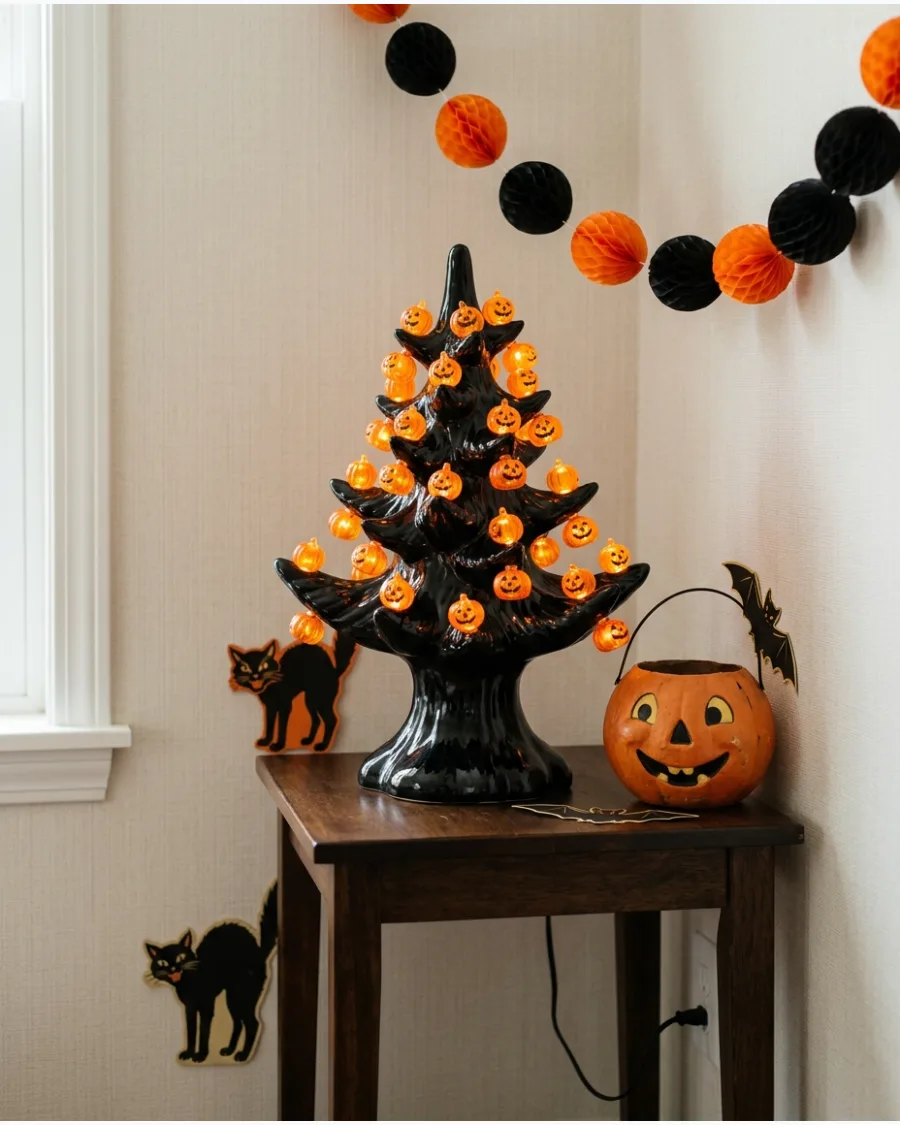
A ceramic tree with orange or black glaze brings a specific mid-century holiday charm into the room. These pieces usually feature small plastic bulbs shaped like pumpkins or ghosts that glow when plugged in.
Place the tree on a sturdy side table near a wall outlet to keep cords tucked out of sight. It serves as a perfect glowing centerpiece that bridges the gap between Halloween and traditional holiday decor.
- Sourcing: Modern reproductions are widely available if authentic 1970s versions are too pricey.
- Logistics: Check the bulb sockets for heat; older models may need low-heat LED bulbs.
- Placement: Keep on a flat, stable surface away from high-traffic edges to prevent tipping.
Best shortcut: If a bulb goes missing, use a drop of clear craft glue to secure a replacement plastic peg permanently.
13. Antique Clock Halloween Display
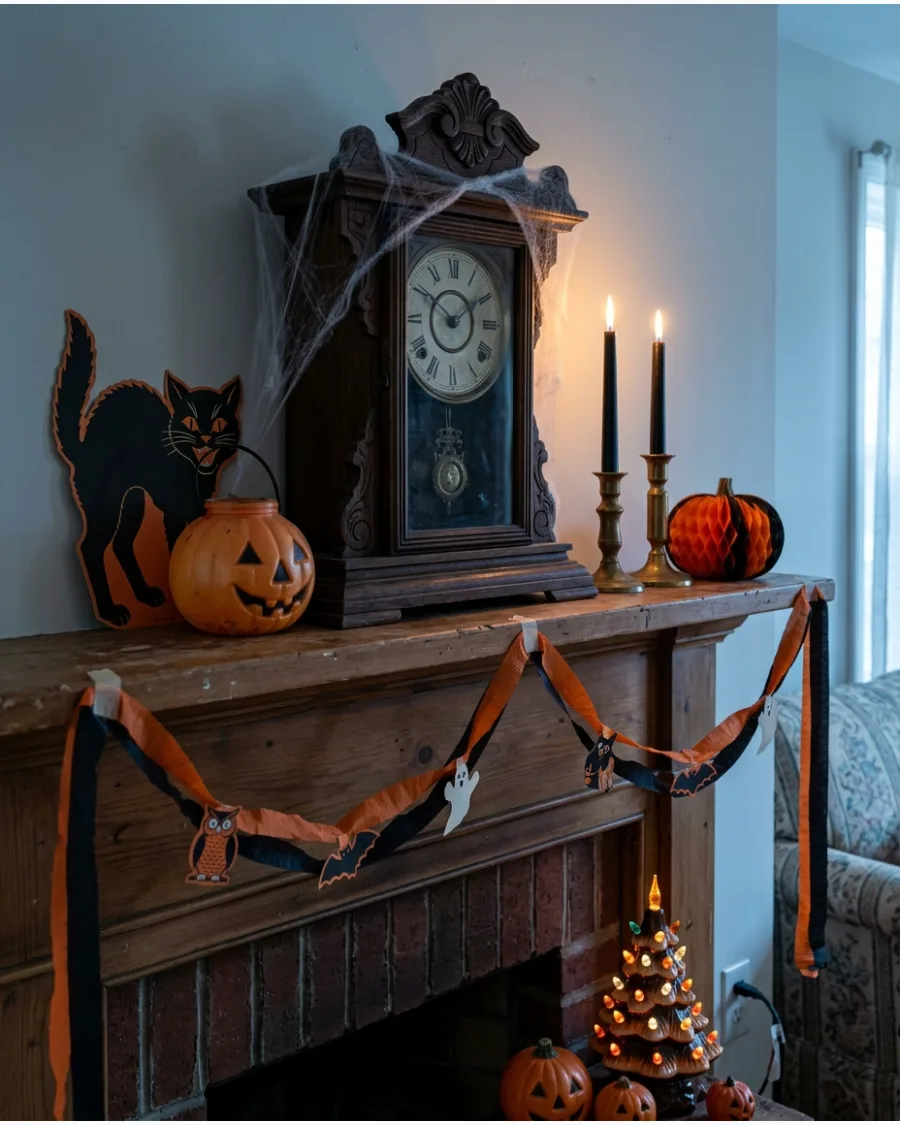
Use an old mechanical mantel clock to anchor a spooky but sophisticated arrangement.
Draping thin faux cobwebs over the wood casing makes the piece look like it was pulled from a dusty attic. Set the clock hands to 11:59 to suggest a mysterious midnight event is about to happen. Pairing the clock with tall black taper candles creates a dramatic height difference on the shelf.
- Sourcing: Search for non-working vintage clocks at estate sales for a lower price point.
- Assembly: Use a small paintbrush to stretch cobwebs thinly so they look realistic rather than clumpy.
- Style: Choose brass or silver candle holders to add a metallic vintage touch.
Most people skip this: Use battery-operated taper candles to prevent wax from dripping onto the delicate wood of an antique clock.
14. Retro Blow-Mold Pumpkin Collection
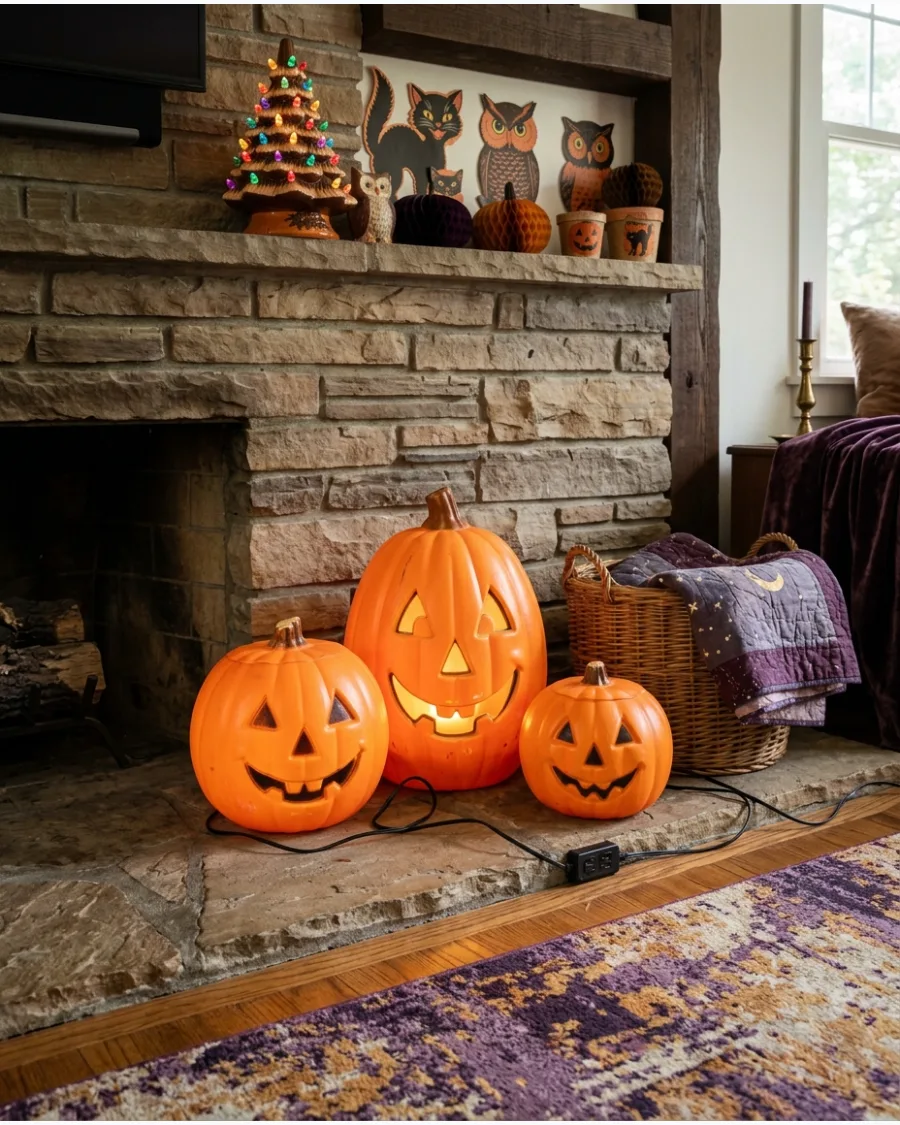
Plastic blow-mold pumpkins offer a bright, nostalgic glow that evokes memories of neighborhood trick-or-treating. Grouping several sizes together creates a high-impact visual that works well in corners or on wide hearths.
Mix different facial expressions to give the group a playful and curated personality. These durable pieces are easy to clean and store, making them a practical choice for annual decorating.
- Sourcing: Look for the 'Empire' or 'General Foam' stamps on the bottom for authentic mid-century pieces.
- Storage: These are bulky, so store them in large plastic bins to prevent the paint from scuffing.
- Budget: New reproductions offer the same look for half the price of rare vintage molds.
Quick win: Use a multi-plug outlet strip with a timer so the whole collection turns on automatically at sunset.
15. Vintage Books and Pumpkin Display
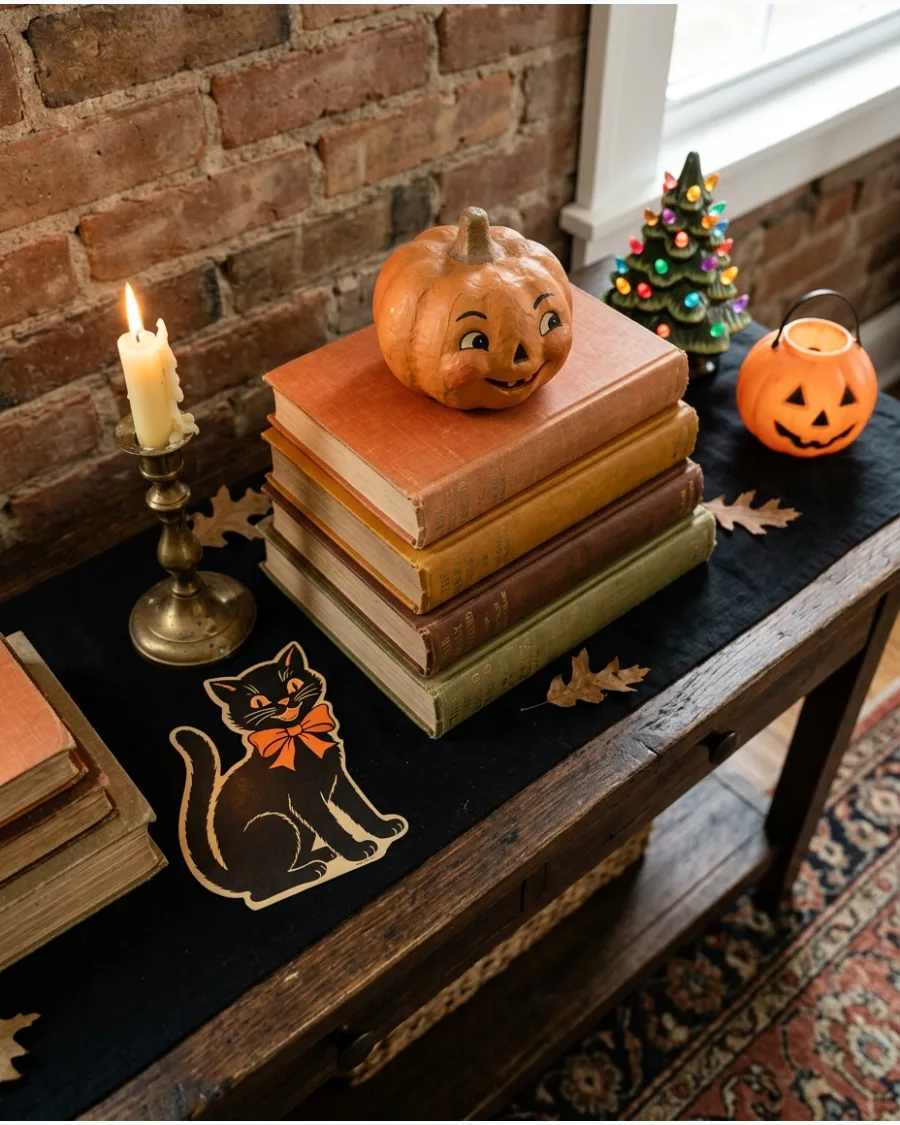
Stacking old hardback books in autumn colors provides a stable base for smaller decorative items. Look for covers in deep orange, mustard yellow, or faded black to match the retro theme.
Turn some book spines inward to show off the aged, yellowed pages for extra texture. Topping the stack with a brass candlestick or a small cat figurine completes the scholarly, old-world look.
- Sourcing: Visit local library sales or used bookstores for cheap linen-bound hardbacks.
- Setup: Stack books from largest on the bottom to smallest on top for a pyramid effect.
- Adaptation: Use brown paper bags to wrap modern books if you cannot find the right vintage colors.
Best shortcut: Look for books with 'spooky' titles like classic mystery novels to add a hidden layer of detail to the display.
16. Halloween Silhouette Mantel
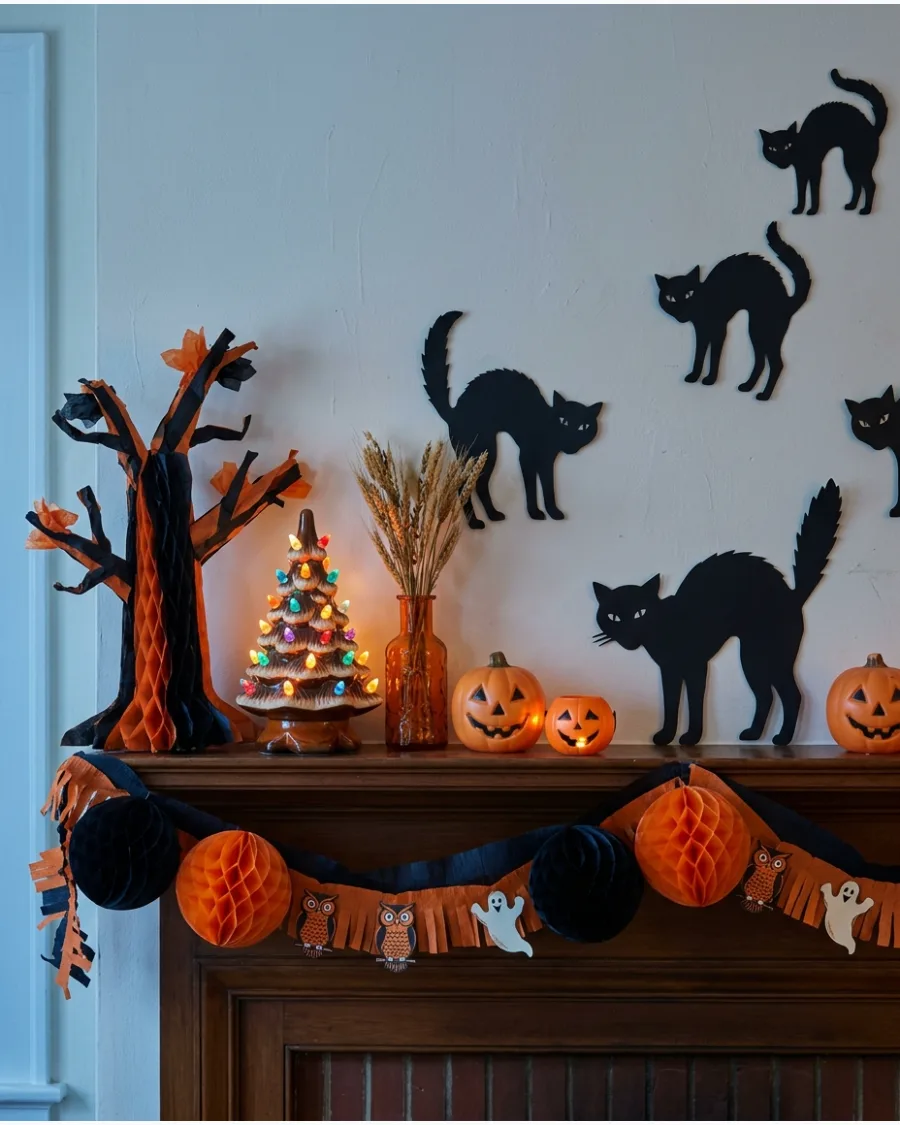
Black cardstock silhouettes are a classic way to add graphic interest without spending much money. Cutting out shapes like arched-back cats or crooked trees creates a sharp contrast against light-colored walls.
Use small pieces of removable adhesive putty to stick the silhouettes directly to the wall above the mantel. This technique allows for a large-scale display that stays flat and does not clutter the actual shelf surface.
- Timing: This is a quick one-hour project if you have a pair of sharp scissors and black paper.
- Placement: Space the shapes unevenly to make the scene look more natural and dynamic.
- Renter Limits: Adhesive putty is safe for most painted walls and leaves no oily residue.
Most people skip this: Light the mantel from below using a small spotlight to cast giant, spooky shadows of the silhouettes onto the ceiling.
17. Mercury Glass Pumpkin Display
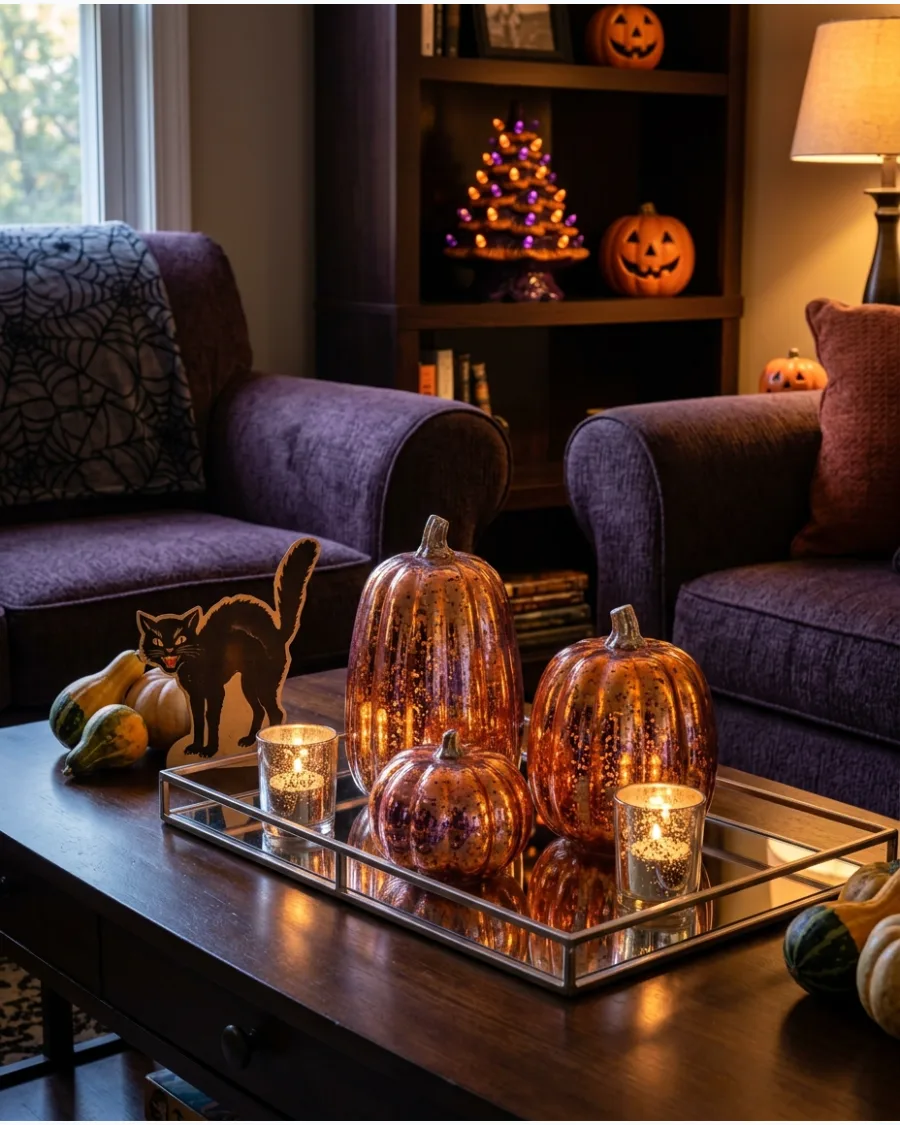
Mercury glass pumpkins provide a shimmering, metallic finish that feels more elegant than standard plastic decor. The mottled silver and orange surfaces reflect candlelight beautifully during evening hours.
Cluster three pumpkins of varying heights together to create a balanced rule-of-three arrangement. This style works perfectly for those who want a nostalgic vibe that still feels polished and grown-up.
- Sourcing: These are common in home decor stores during September and October.
- Setup: Place them on a mirrored tray to double the reflective glow and protect your furniture.
- Style: Mix in a few silver-toned mercury glass items to break up the solid orange palette.
Quick win: Wipe the glass with a soft microfiber cloth before displaying to remove fingerprints that dull the metallic shine.
18. Old Radio Halloween Vignette
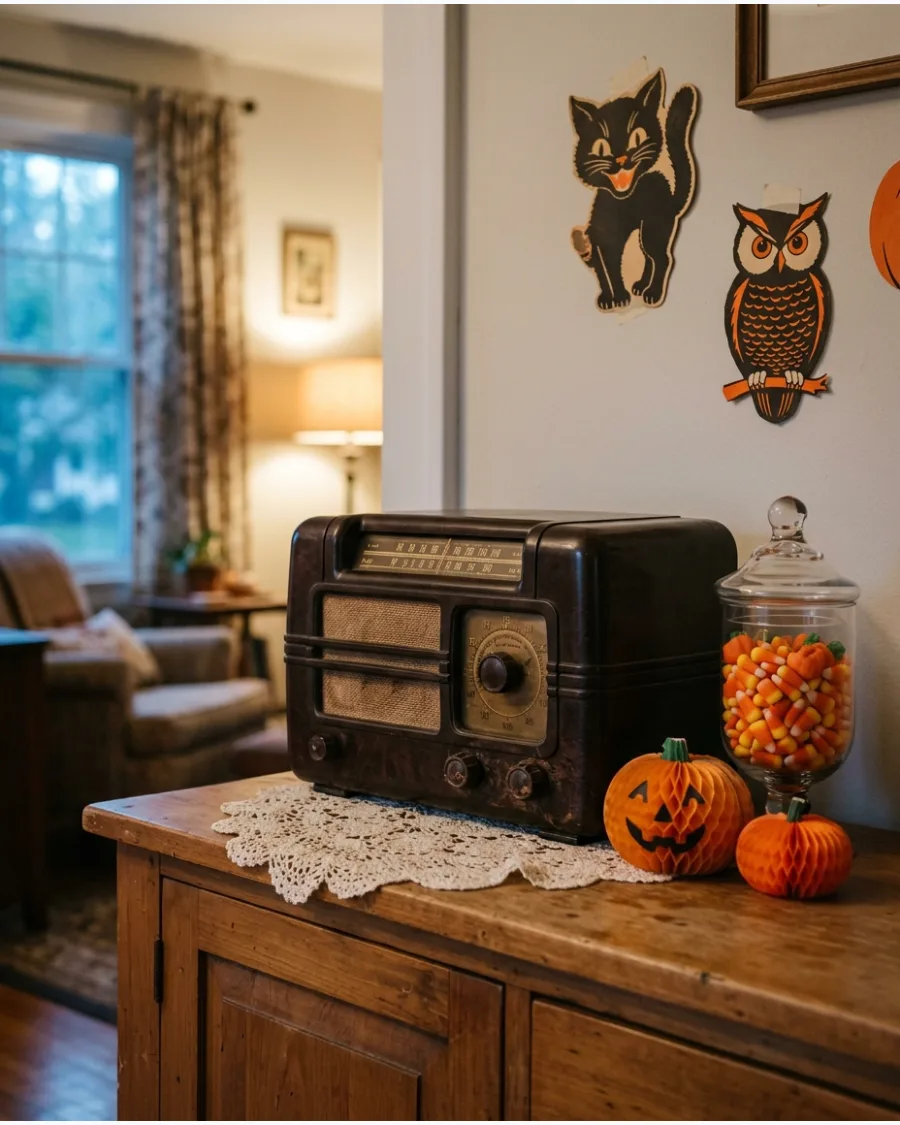
A vintage tabletop radio serves as a unique anchor for a retro-themed corner. Surrounding the radio with paper pumpkins and candy jars makes it feel like part of a lived-in 1950s home.
Tuck a small battery-operated light inside a nearby glass jar of candy to add a soft glow to the scene. Even if the radio no longer works, its wooden or Bakelite shell adds instant historical character.
- Sourcing: Search eBay or local antique malls for 'Bakelite' or 'tube' radios.
- Placement: Use a lace doily or a linen runner under the radio to protect the tabletop from scratches.
- Adaptation: Hide a modern Bluetooth speaker behind the vintage radio to play old-timey radio broadcasts.
Best shortcut: Search online for '1940s Halloween radio broadcasts' to play through your hidden speaker for an immersive experience.
19. Black Feather Halloween Tree
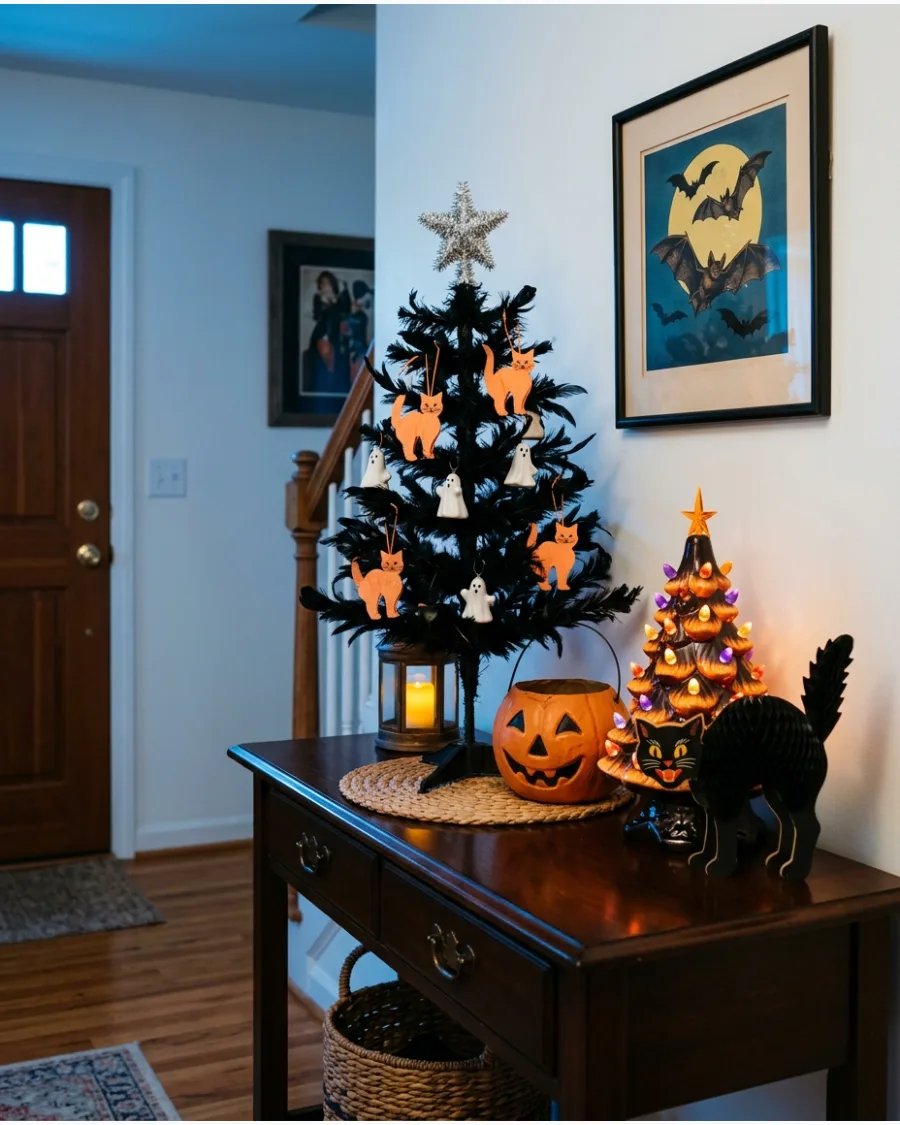
Feather trees were originally a German tradition, but a black version fits the Victorian-gothic side of retro Halloween perfectly.
These trees have wide-spaced branches that are ideal for showing off delicate vintage ornaments or candy containers. Hang lightweight paper ornaments near the tips of the branches to prevent the wire from sagging. A large star or a witch-hat topper gives the tree a finished, festive appearance.
- Sourcing: Specialty holiday boutiques often carry high-quality reproduction feather trees.
- Assembly: Gently bend the wire branches outward to create a symmetrical shape after unpacking.
- Storage: Store upright in a tall box to keep the delicate feathers from being crushed.
Most people skip this: Use vintage-style 'S' hooks made of wire instead of modern plastic hangers for a more authentic antique look.
20. Retro Halloween Banner
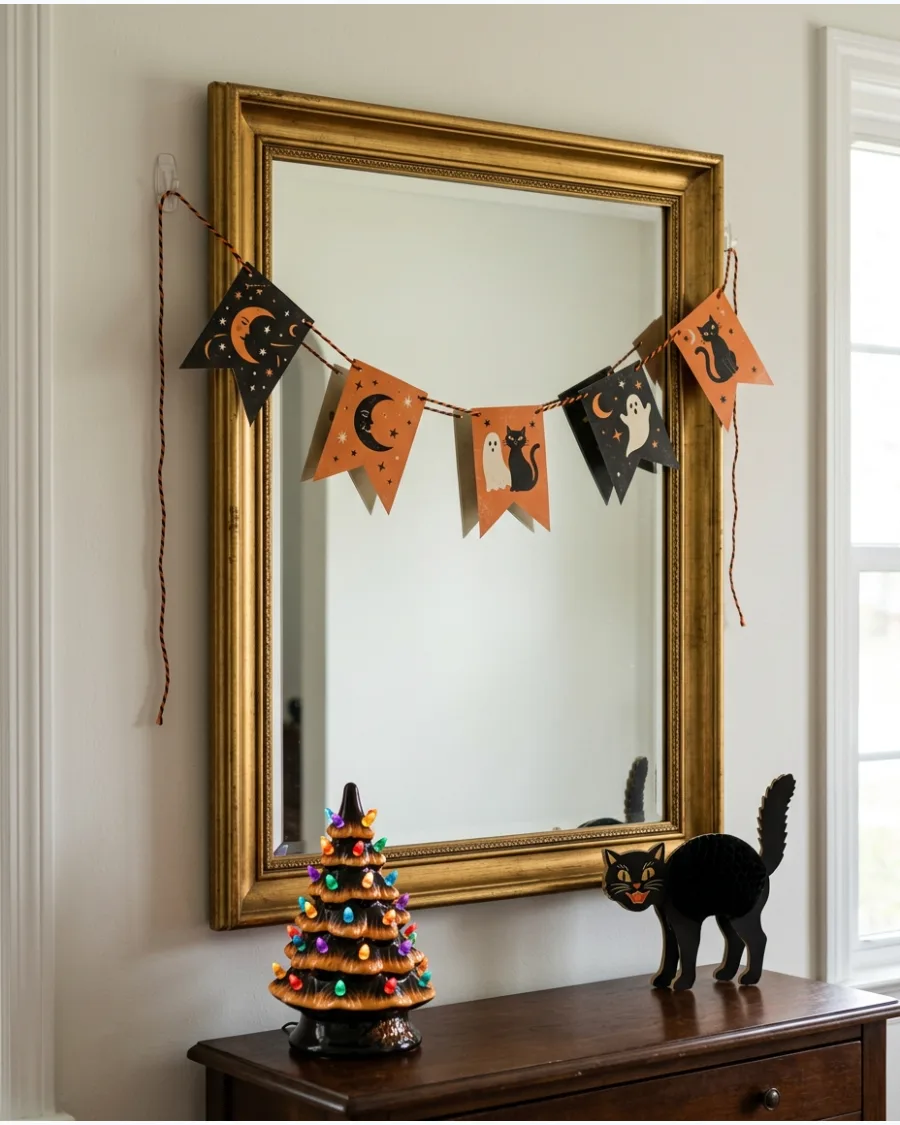
A simple pennant banner with blocky lettering instantly defines the theme of a room. Choosing a design with tea-stained edges or faded ink helps a modern reproduction look like an authentic find.
Drape the banner in a soft arc across a mirror or a large window frame to draw the eye upward. The classic orange-and-black color scheme ensures it coordinates with almost any other vintage decor pieces.
- Sourcing: Look for banners made of thick cardstock or felt for a more durable, retro feel.
- Setup: Use clear suction cups to hang banners across glass surfaces without leaving marks.
- Adaptation: If the banner is too long, split it into two rows and hang them one above the other.
Quick win: If the banner looks too new, lightly sponge the edges with diluted brown acrylic paint to mimic decades of age.
Vintage Halloween Porch Decorations
21. Glowing Pumpkin Blow-Mold Steps
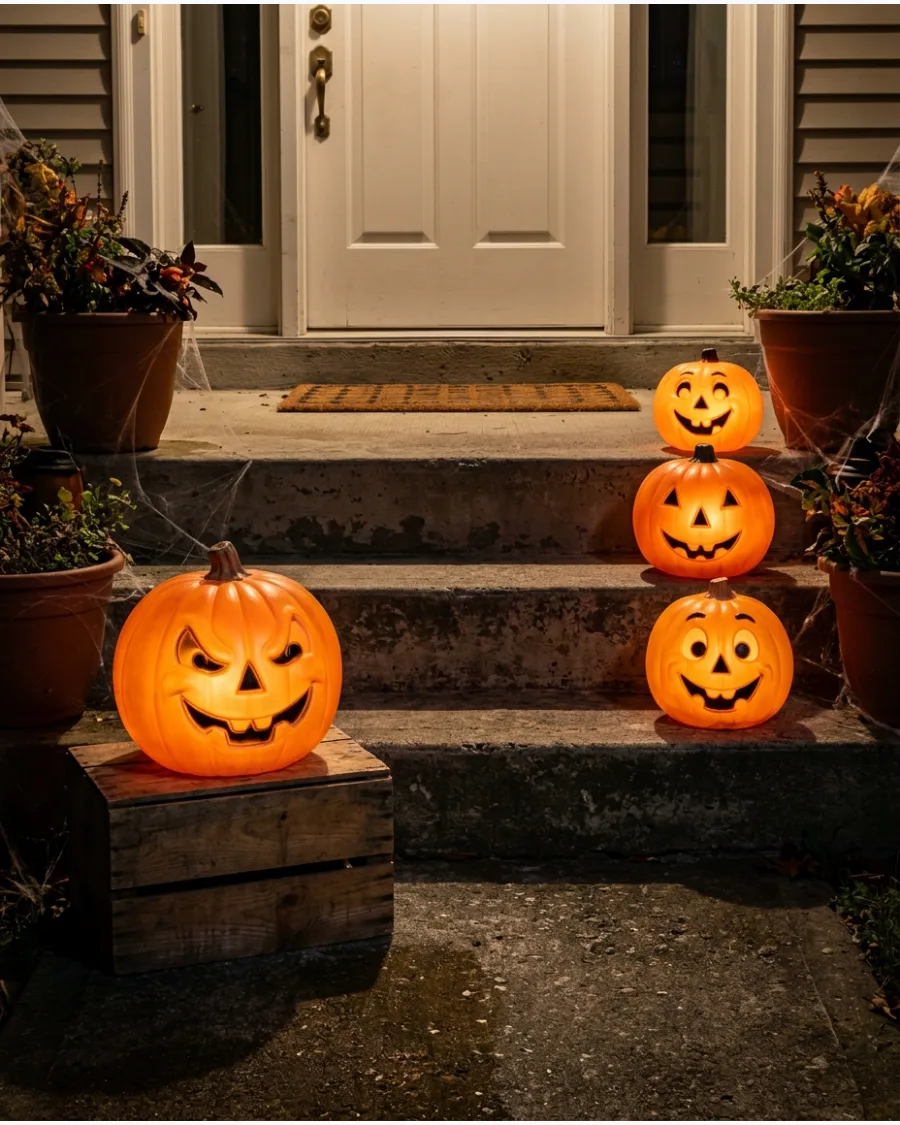
Line the porch steps with illuminated plastic pumpkin blow molds. Mix different faces and sizes instead of using identical decorations for a more authentic collected look.
Stagger the heights by placing some on small wooden crates to create a more dynamic visual flow. Mixing expressions gives the display a playful, hand-curated character that mimics mid-century neighborhood displays.
- Check flea markets or online auctions for original 1960s molds.
- Ensure all electrical cords are rated for outdoor use and secured with gaffer tape.
- Use LED bulbs to prevent the plastic from overheating during long nights.
Quick win: Use a multi-plug outdoor extension cord to keep all pumpkins on a single timer.
22. Retro Black Cat Porch Sign
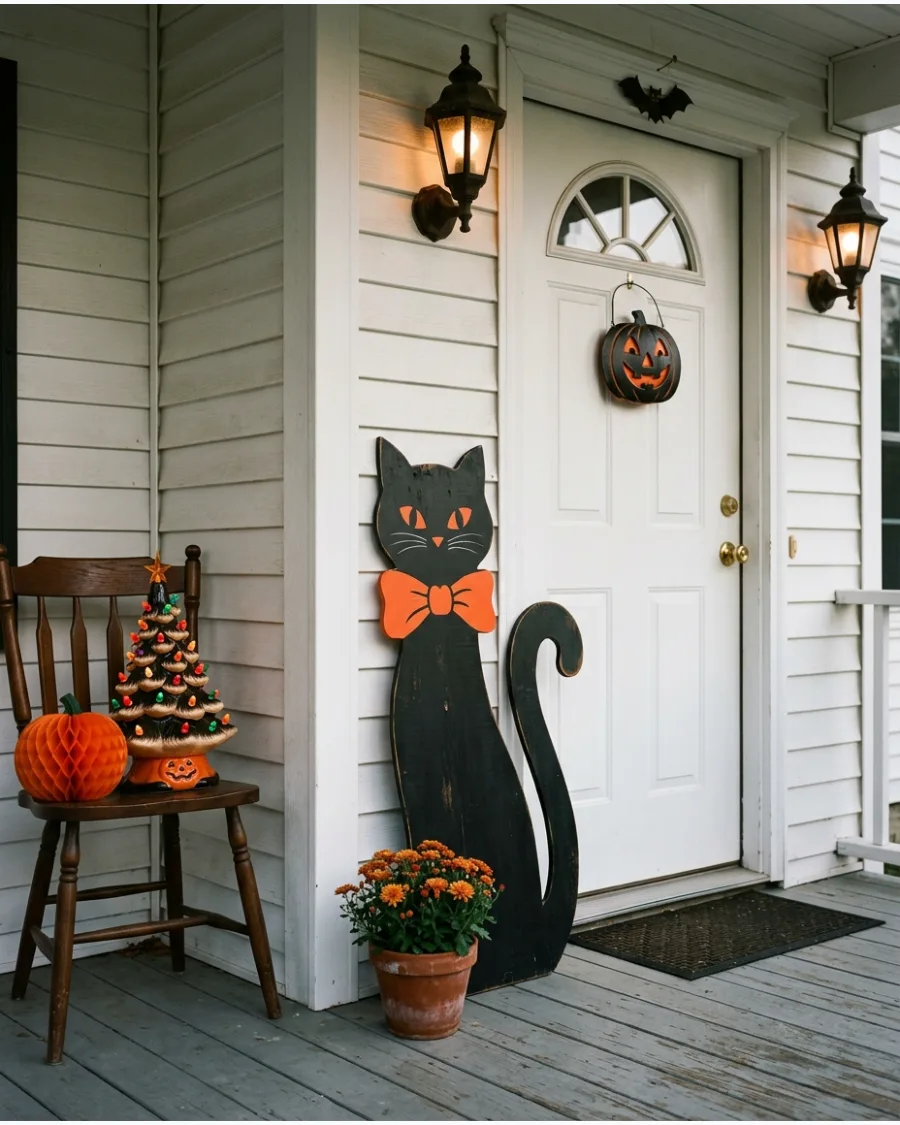
Place a tall black cat sign beside the front door. Look for a design featuring a curved tail, bow tie, surprised eyes, or a pumpkin tucked beneath its paws.
Position the sign at a slight angle against the house siding to ensure it stays visible from the sidewalk. A flat silhouette style mimics the mid-century plywood cutouts that were popular in suburban yards.
- Look for weather-resistant plywood or metal versions for longevity.
- Secure the base with a heavy brick or sandbag hidden behind the sign.
- Choose a matte finish to prevent glare from streetlights or flashlights.
Most people skip this: Spray the back of wooden signs with a clear sealant to prevent moisture from warping the board.
23. Vintage Halloween Mask Wreath
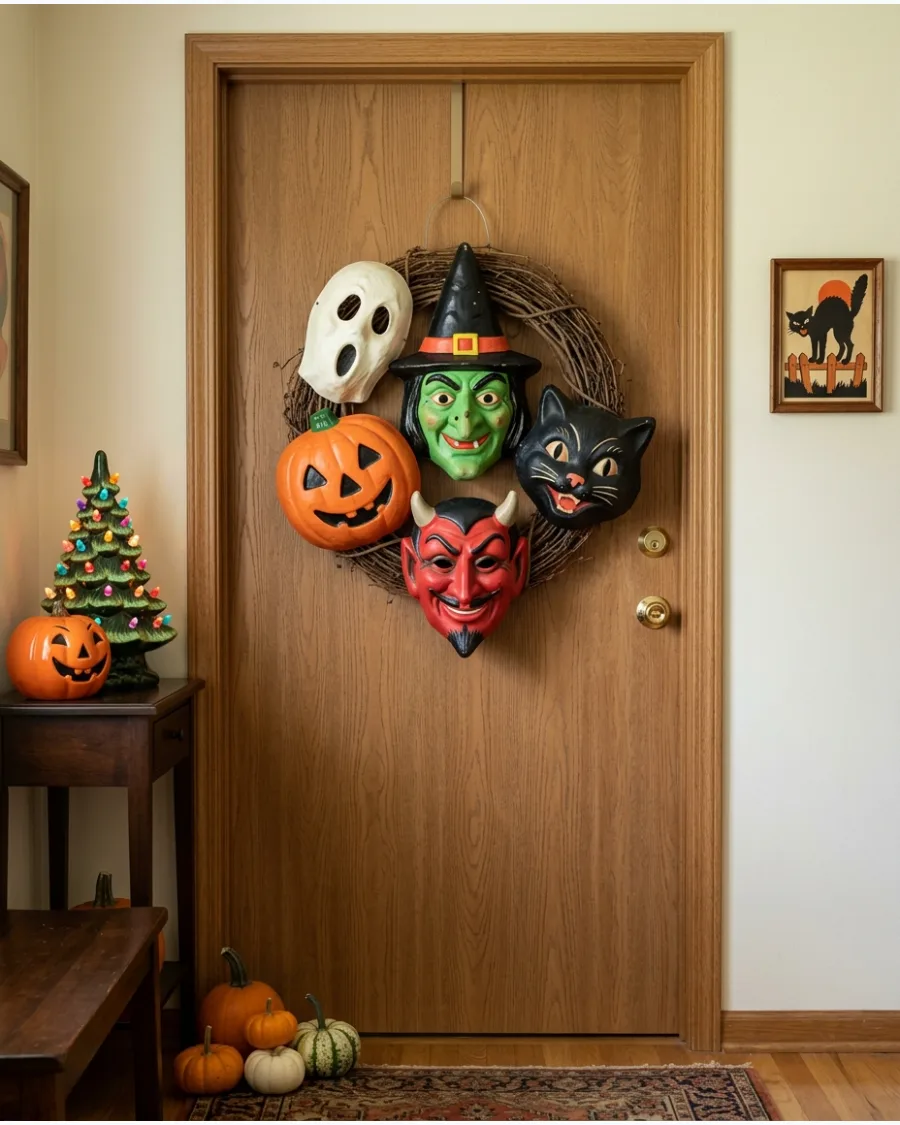
Cover a wreath form with colorful reproductions of old paper Halloween masks. Use pumpkins, cats, devils, witches, owls, and friendly monsters to create a playful statement piece.
Secure the masks using thin floral wire through the eye holes so they do not blow away in the wind. This look celebrates the neon colors and quirky expressions of classic 1950s costumes.
- Buy reproduction masks to save money and preserve original collectibles.
- Use a grapevine or straw wreath base for a sturdy attachment surface.
- Add a large orange burlap bow at the top for a finished look.
Best shortcut: Use hot glue for a permanent display if you are not planning to reuse the masks for costumes later.
24. Paper Witch Door Decoration
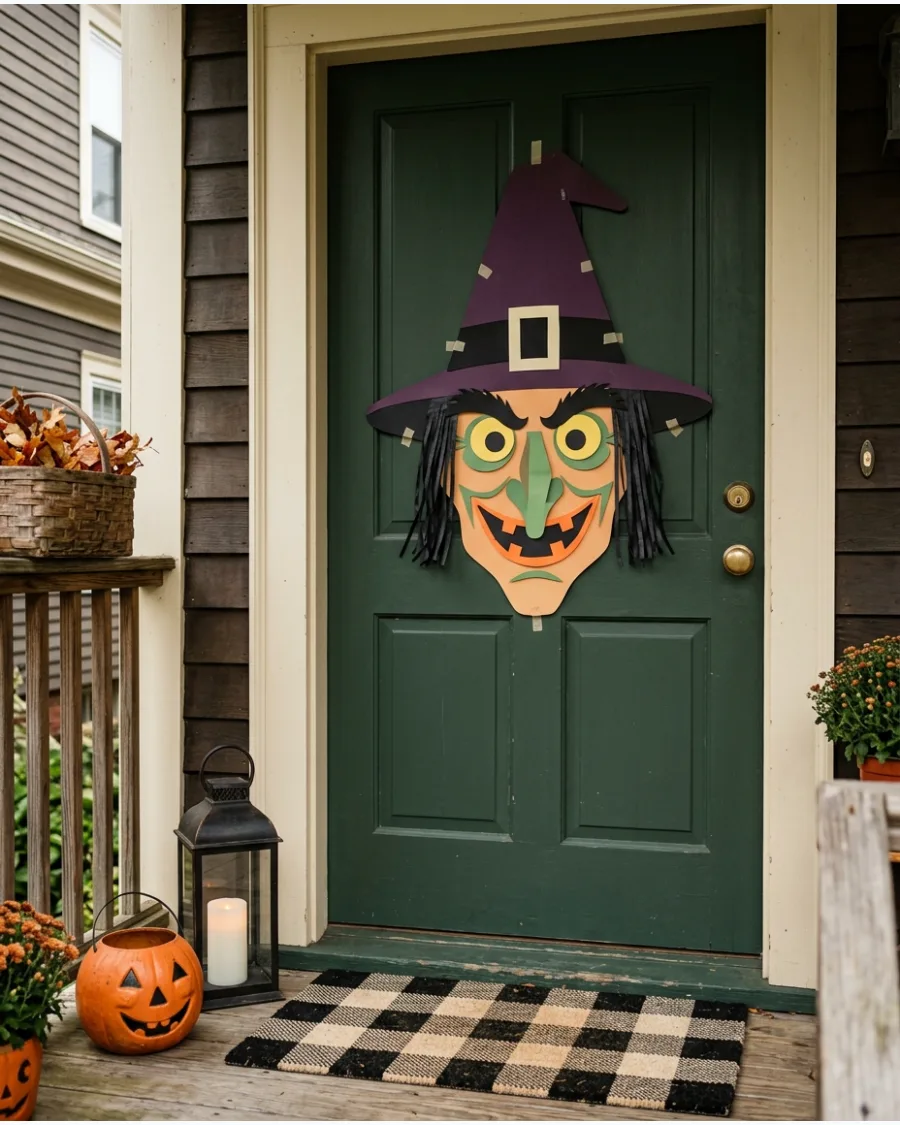
Turn the front door into a giant retro witch face using removable paper shapes. Add a crooked hat, bright eyes, a long nose, and an exaggerated smile.
Apply the shapes with heavy-duty mounting putty to ensure they stick to the door texture without damaging the paint. This large-scale decor mimics the classic Beistle style and creates a bold focal point for the whole house.
- Cut shapes from thick cardstock or weather-resistant vinyl sheets.
- Laminate the paper pieces if the porch is not fully covered from rain.
- Trace patterns from vintage postcards for authentic mid-century proportions.
Quick win: Use bright green paper for the face skin to make the features pop against a dark-colored door.
25. Old-Fashioned Trick-or-Treat Station
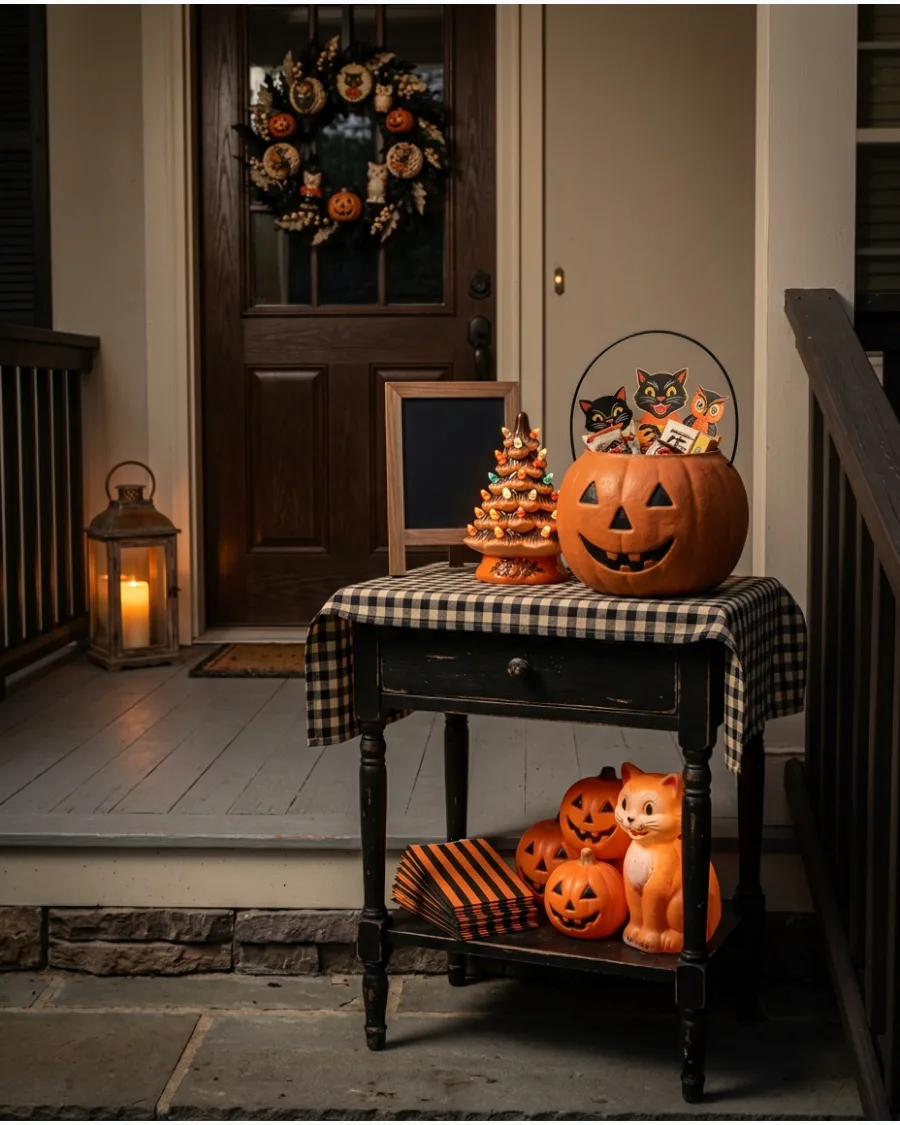
Set up a small porch table with a papier-mâché pumpkin bucket, striped paper candy bags, and a handmade “Trick or Treat” sign. Add an orange gingham tablecloth for extra nostalgia.
Place the table against a wall away from the door swing to keep the walkway clear for visitors. This setup feels like a community-focused neighborhood from the 1940s.
- Search for reproduction pulp buckets that look like original 1930s designs.
- Use a heavy tablecloth weight to keep the fabric from shifting in the wind.
- Fill the bags with classic sweets like popcorn balls or wax lips.
Most people skip this: Use a battery-operated candle inside the bucket to highlight the candy bags after sunset.
26. Vintage Halloween Porch Lanterns
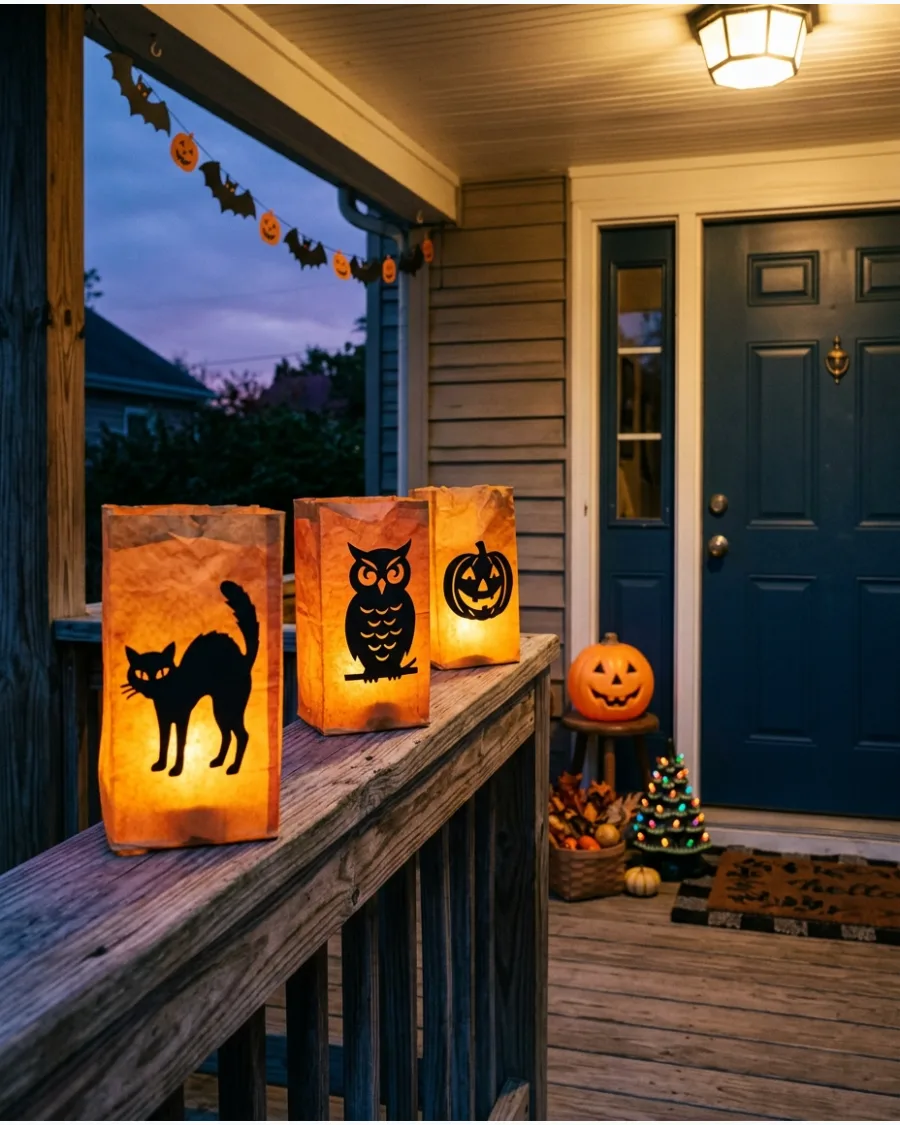
Place reproduction pulp-paper or papier-mâché lanterns along the porch. Use battery-operated lights rather than open flames inside paper decorations.
Set the lanterns on a sturdy porch railing or a wide window ledge to keep them at eye level. The soft glow through the paper cutouts creates a spooky but friendly atmosphere that plastic lights cannot match.
- Look for lanterns with wire handles for easy hanging or table placement.
- Ensure the lanterns are under a roof to protect the paper from dampness.
- Buy LED tea lights with a flicker effect for a realistic flame look.
Best shortcut: Group three lanterns of different heights in a corner to create a high-impact lighting zone.
27. Retro Ghost Yard Stakes
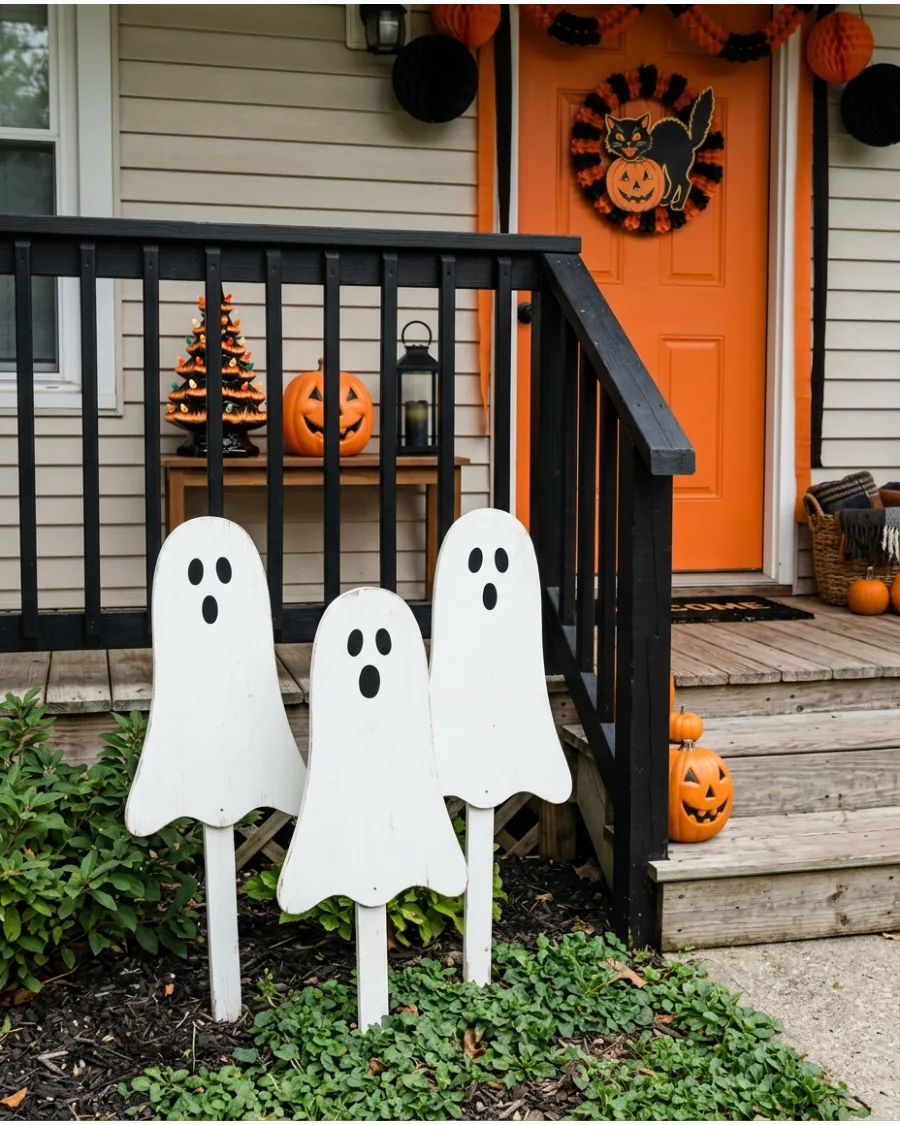
Add friendly white ghosts with simple black faces to flower beds and walkways. Choose flat wooden or metal silhouettes rather than realistic figures for a more vintage look.
Space the ghosts about three feet apart along the garden path to create a sense of movement. These simple shapes reflect the minimalist lawn decor common in mid-century neighborhoods.
- Paint 1/4-inch plywood white and use black outdoor acrylic for the faces.
- Attach 12-inch garden stakes to the back of the ghosts with wood screws.
- Angle the ghosts slightly toward the street for better visibility from cars.
Quick win: Use reflective black paint for the eyes so they glow when car headlights hit them.
28. Classic Pumpkin and Cornstalk Porch
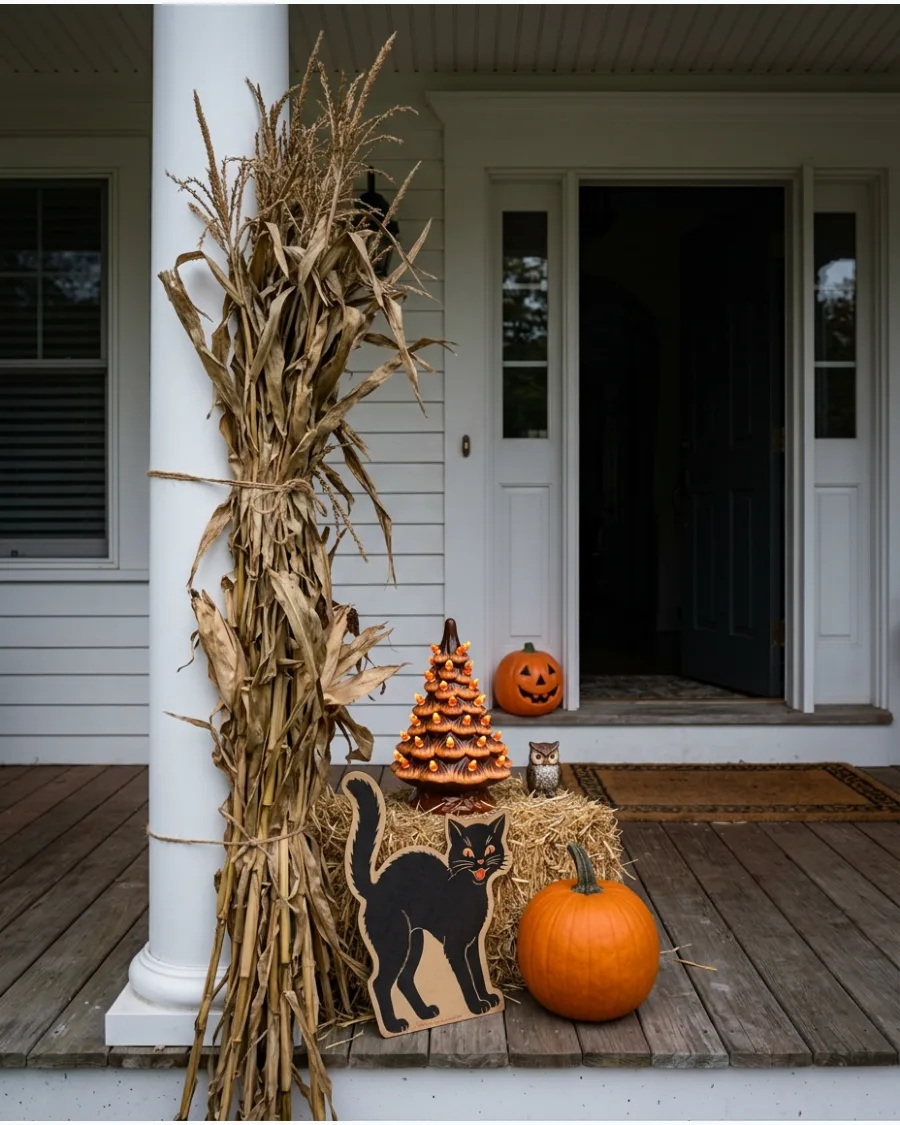
Combine carved pumpkins with cornstalks, hay bales, mums, and an old wooden chair. Add one vintage black cat or witch decoration to turn the traditional fall setup into a Halloween display.
Tie the cornstalks to a porch pillar using thick twine to prevent them from tipping over in the wind. This layered look provides a rich, harvest-themed backdrop that feels timeless and cozy.
- Buy cornstalks from local farms or garden centers in late September.
- Use a mix of heirloom pumpkins and traditional orange gourds for texture.
- Swap the pumpkins for fresh ones if they start to soften in the heat.
Most people skip this: Tuck a small string of orange lights inside the cornstalks for a subtle evening glow.
29. Orange String-Light Porch
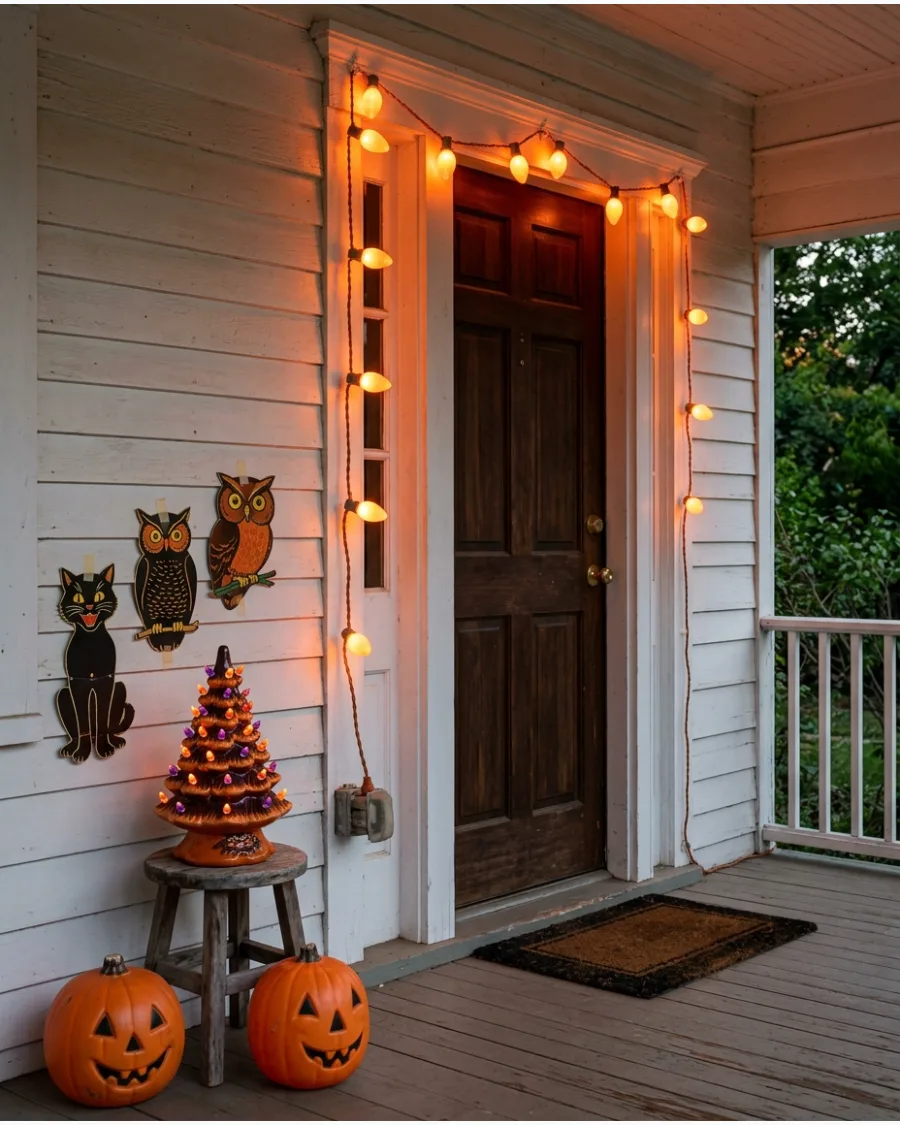
Outline the porch railing or doorway with large orange globe lights. Their warm glow looks especially nostalgic when paired with paper decorations and plastic pumpkins.
Wrap the lights tightly around the railing to hide the green wire and keep the focus on the bulbs. Large C7 or C9 bulbs give off a much more retro vibe than modern tiny LED strings.
- Choose ceramic-coated bulbs for a matte, vintage appearance.
- Use plastic gutter clips or command hooks for a clean installation.
- Connect no more than three strands to a single outlet to avoid blown fuses.
Best shortcut: Use a light sensor plug so the porch automatically glows as soon as the sun goes down.
30. Mid-Century Halloween Doormat
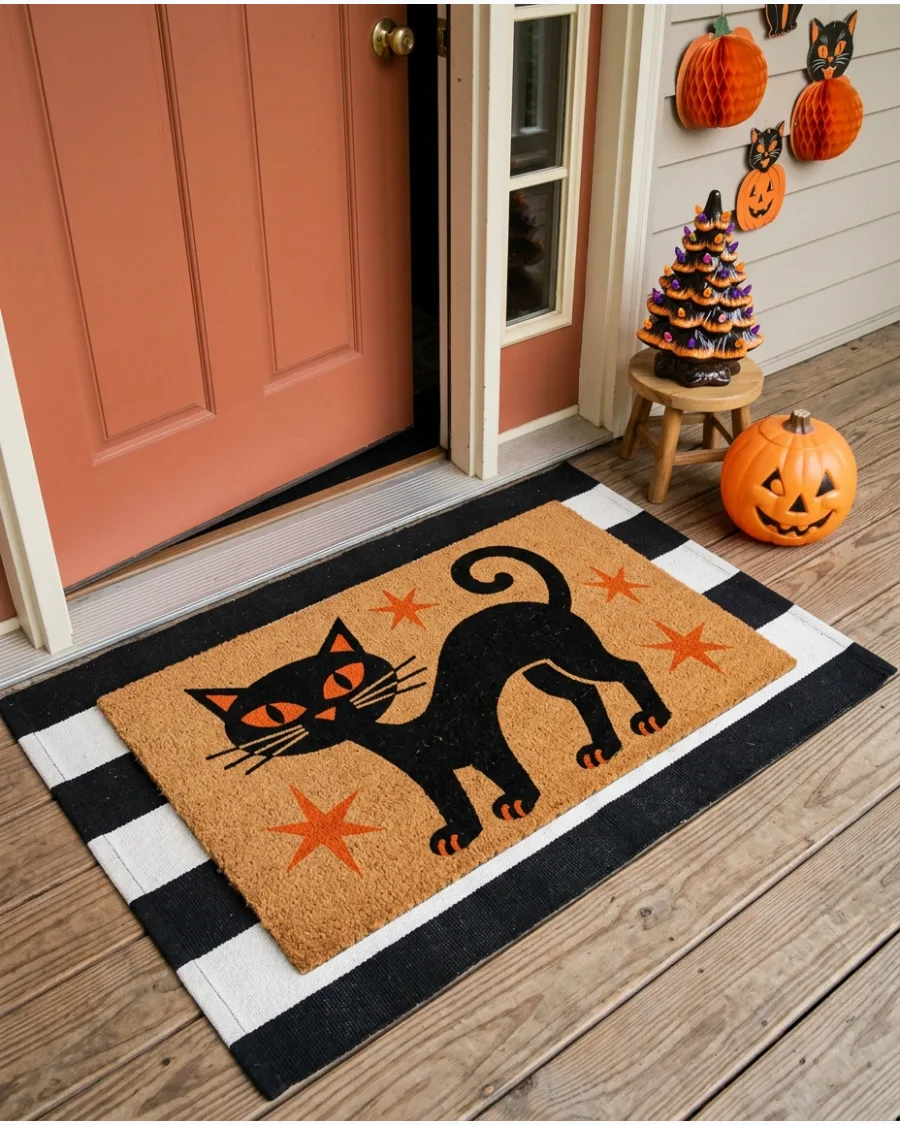
Choose a doormat featuring a smiling pumpkin, black cat, boomerang shapes, or starburst patterns. Keep the design limited to orange, black, cream, and muted yellow.
Layer the themed mat over a slightly larger striped or solid black rug to give the entry more visual weight. A low-profile coir mat works best for catching dirt while keeping the vintage graphic clear.
- Select a coir material for durability and a natural, old-fashioned texture.
- Look for screen-printed designs that will not fade quickly in the sun.
- Shake the mat out weekly to keep the colors looking sharp.
Quick win: Spray the mat with a UV-protectant clear coat to keep the orange and black ink from fading.
Retro Halloween Table Decorations
31. Vintage Halloween Party Tablescape
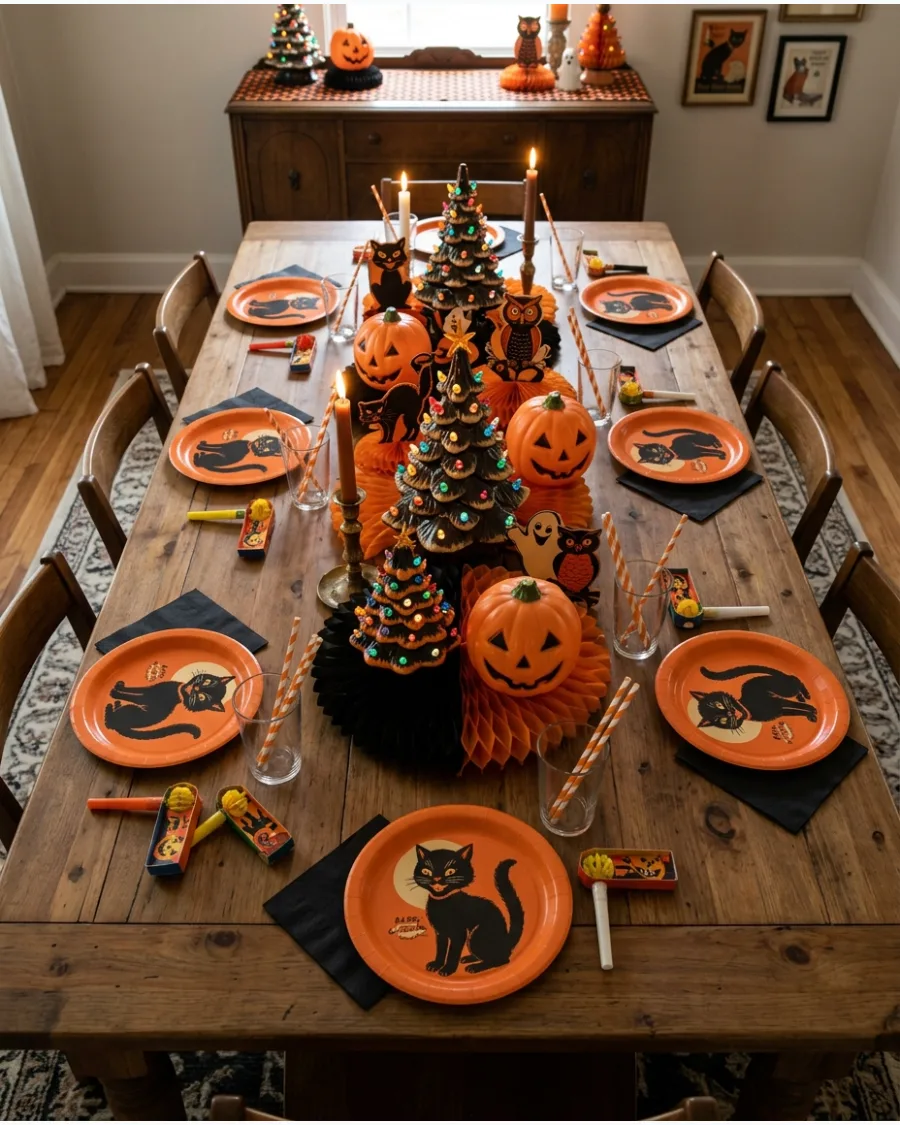
Recreate a mid-century children's party by layering orange paper plates over black scalloped mats. Add striped paper straws and illustrated cups featuring grinning pumpkins.
Mix in paper noisemakers and cone-shaped hats to give the table an authentic celebratory feel. These paper goods are often more durable than modern versions and provide an instant color palette. High-quality paper plates with scalloped edges feel more substantial than cheap grocery store versions.
- Look for reproduction kits online to save money on genuine antiques.
- Arrange a noisemaker at every setting for a balanced look.
- Paper goods are great for easy cleanup after a gathering.
Quick win: Use black cardstock under orange plates to create a custom border that makes cheap paper goods look high-end.
32. Black Cat Candleholders
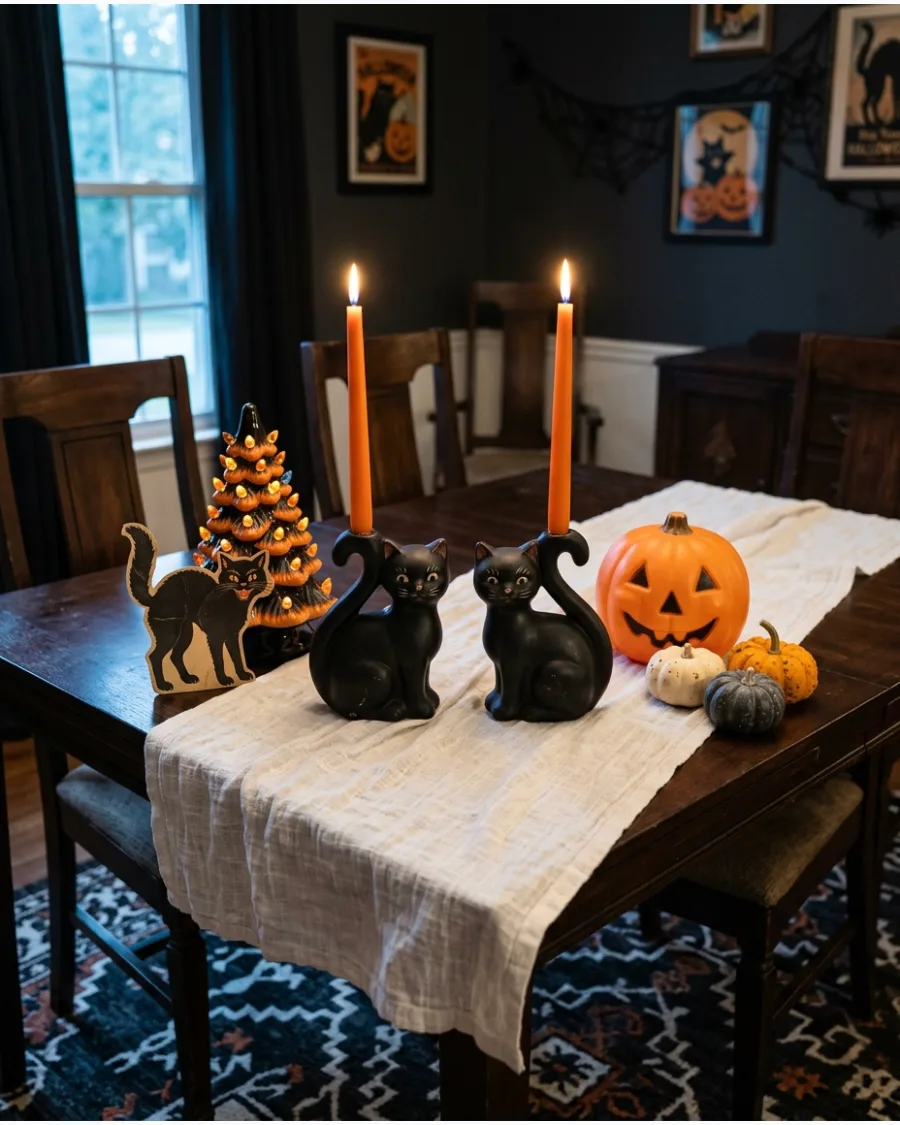
Use ceramic cat figurines with arched backs and wide, glowing eyes to hold taper candles. These pieces often feature whimsical expressions that feel more friendly than scary.
Choose orange or cream-colored beeswax candles to contrast against the black ceramic finish. This setup provides a soft, warm glow that highlights the glossy texture of the vintage figurines.
Ceramic cats with painted yellow eyes add a pop of color even when the candles aren't lit.
- Source these from antique malls or specialty retro decor shops.
- Place them on a heat-resistant runner to protect your table surface.
- Try mixing different heights of cats to create a more dynamic display.
Best shortcut: Use museum wax on the bottom of taper candles to keep them perfectly straight in vintage holders.
33. Retro Candy Bowl Display
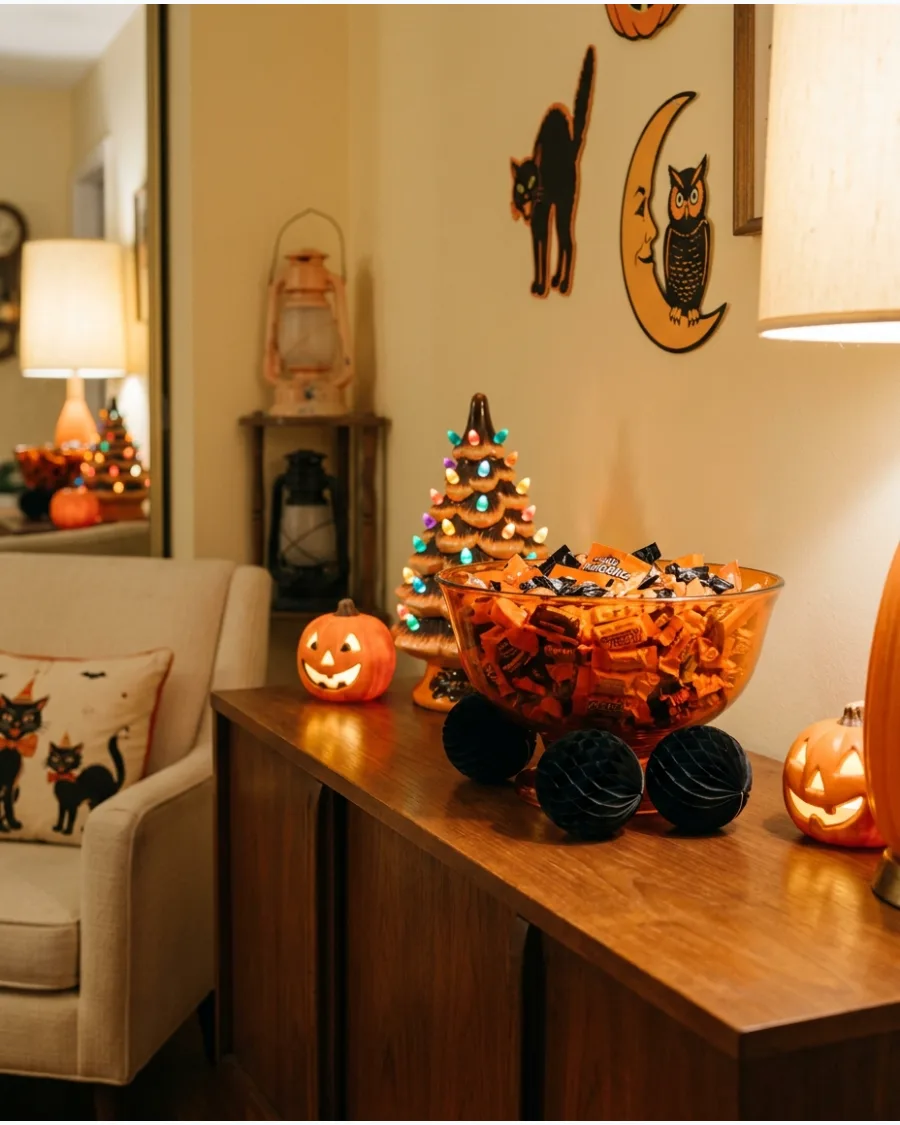
A bright orange or black glass bowl makes a perfect vessel for classic wrapped sweets. Surround the base with small honeycomb paper balls and tiny character picks for extra height.
Tuck a few vintage-style paper pumpkins around the bowl to anchor the display on your sideboard. This creates a festive focal point that is both functional and decorative. Colored glass bowls catch the light beautifully and feel much more permanent than plastic buckets.
- Use a mix of wrapped candies like taffy or caramels for a nostalgic look.
- Place this on an entryway console or a dining room buffet.
- Swap the candy for paper confetti if you want a non-food version.
Most people skip this: Clean vintage glass with a mix of vinegar and water to restore the original shine before displaying.
Home Decor
34. Mid-Century Halloween Party Crackers
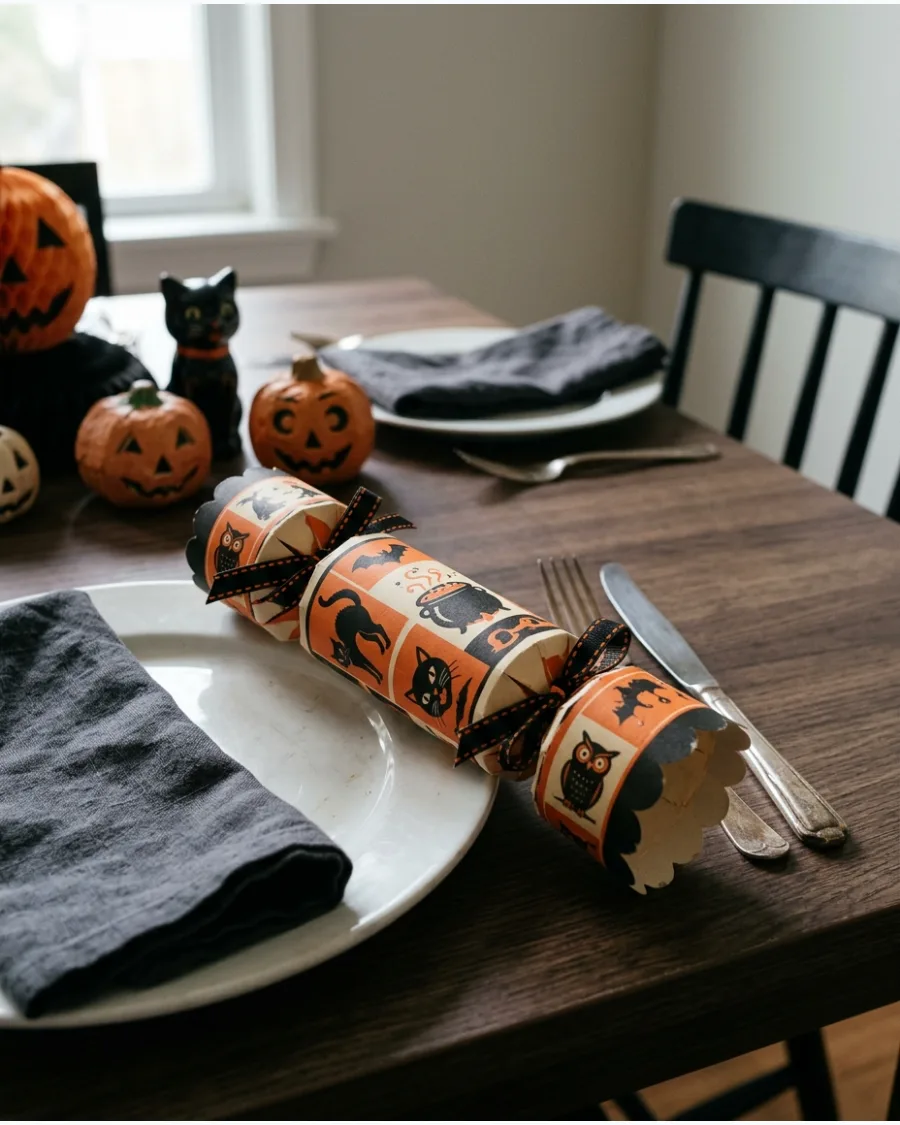
These paper-wrapped favors bring a nostalgic interactive element to the dining table using vintage orange and black motifs. Wrap sturdy cardboard tubes in crepe paper and tie the ends with black velvet ribbon for a high-end feel. The snap of the cracker adds a sense of occasion that standard party favors lack.
While traditional crackers often contain plastic trinkets, filling them with small wooden dice or retro candies keeps the aesthetic authentic.
- Purchase pre-cut cracker kits or use recycled tubes and vintage-style wrapping paper to keep costs under fifteen dollars.
- Place one cracker horizontally across each guest's dinner plate or group them in a glass bowl as a centerpiece.
- Switch out the paper patterns to match a 1920s spooky theme or a 1950s kitsch color palette.
Quick win: Include a small printed card with a vintage riddle or fortune inside each cracker to spark conversation.
Retro Halloween Table Decorations
35. Vintage Halloween Place Cards
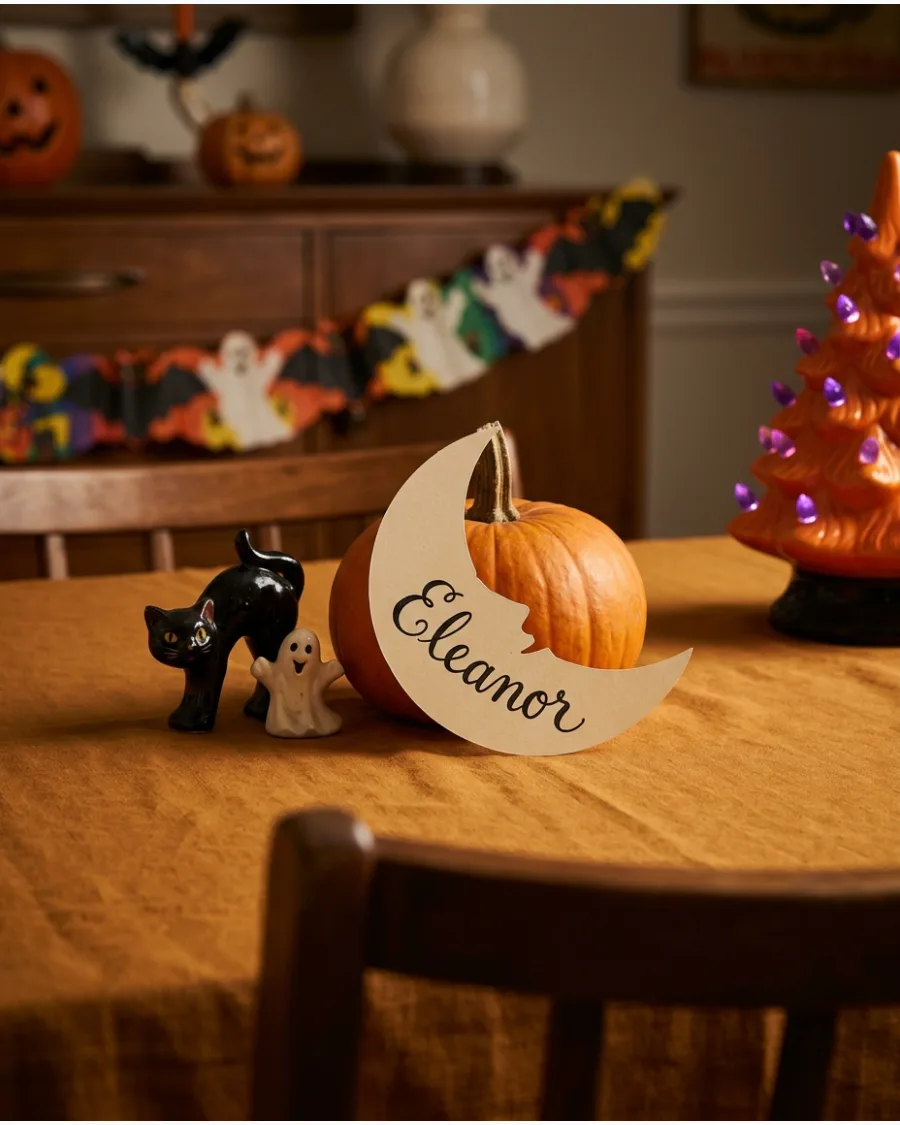
Use thick cream cardstock to cut out simple shapes like crescent moons or witch hats. Hand-letter the names with a fountain pen or a fine-tip black marker for an old-fashioned feel.
Propping these against a small pumpkin or a sprig of dried wheat keeps them upright and visible. This small detail makes a holiday meal feel more intentional and curated. Hand-lettering with slight imperfections actually adds to the retro, homemade charm.
- Look for aged paper or tea-stain your own cardstock for a weathered look.
- Use a stencil if you want a uniform look for the shapes.
- These can be stored flat and reused for several years.
Best shortcut: Use a gold paint pen for the lettering to give the cards a slightly more formal, mid-century look.
36. Jadeite and Orange Tableware
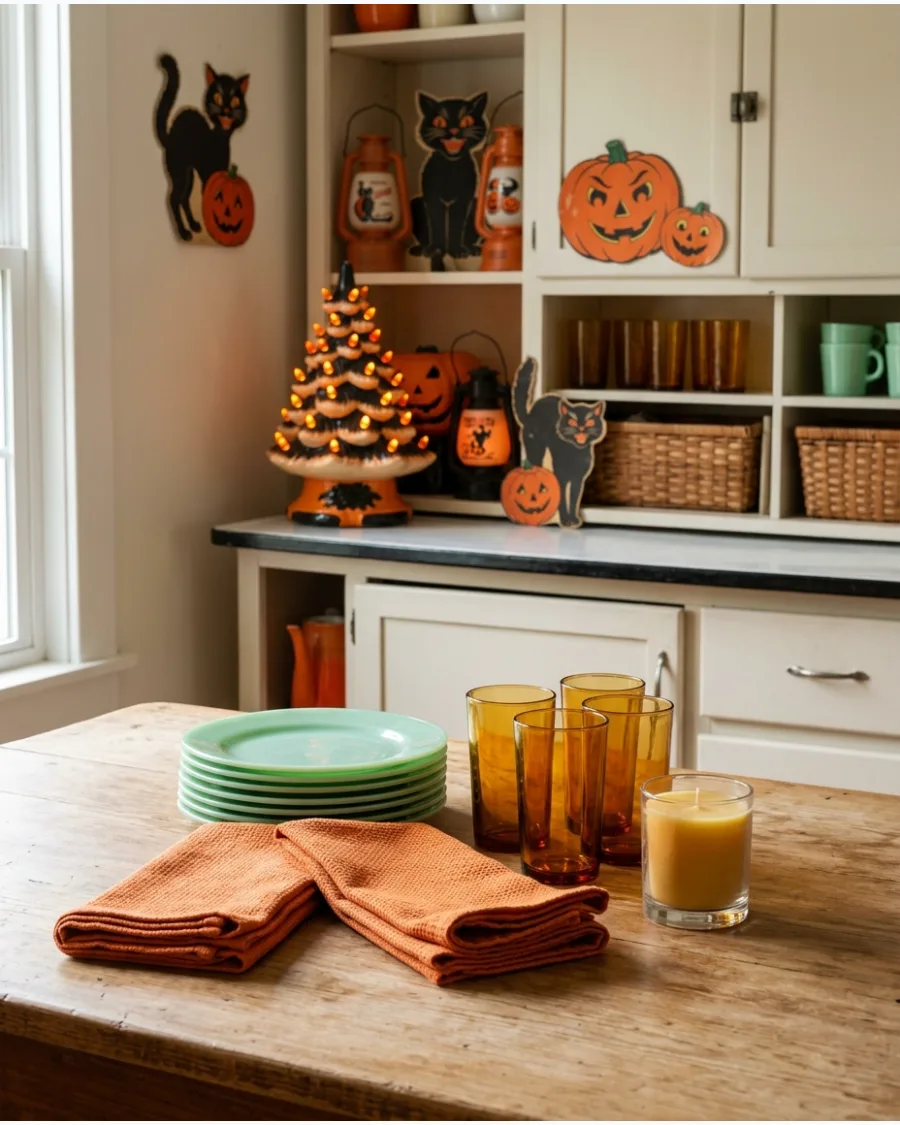
The milky green color of Jadeite dishes provides a stunning backdrop for classic Halloween orange. Layer orange cloth napkins between green plates to break up the color.
Add a few black taper candles in glass holders to ground the bright color palette. This combination feels fresh while nodding to 1940s and 50s kitchen styles. Jadeite is heavy and durable, making it a practical choice for a busy holiday table.
- Find reproduction Jadeite at modern home stores if you can't find vintage pieces.
- Use amber glassware to bridge the gap between the green and orange.
- This look works perfectly for a festive breakfast or brunch.
Most people skip this: Check the bottom of vintage dishes for lead warnings before using them for actual food service.
37. Retro Pumpkin Centerpiece
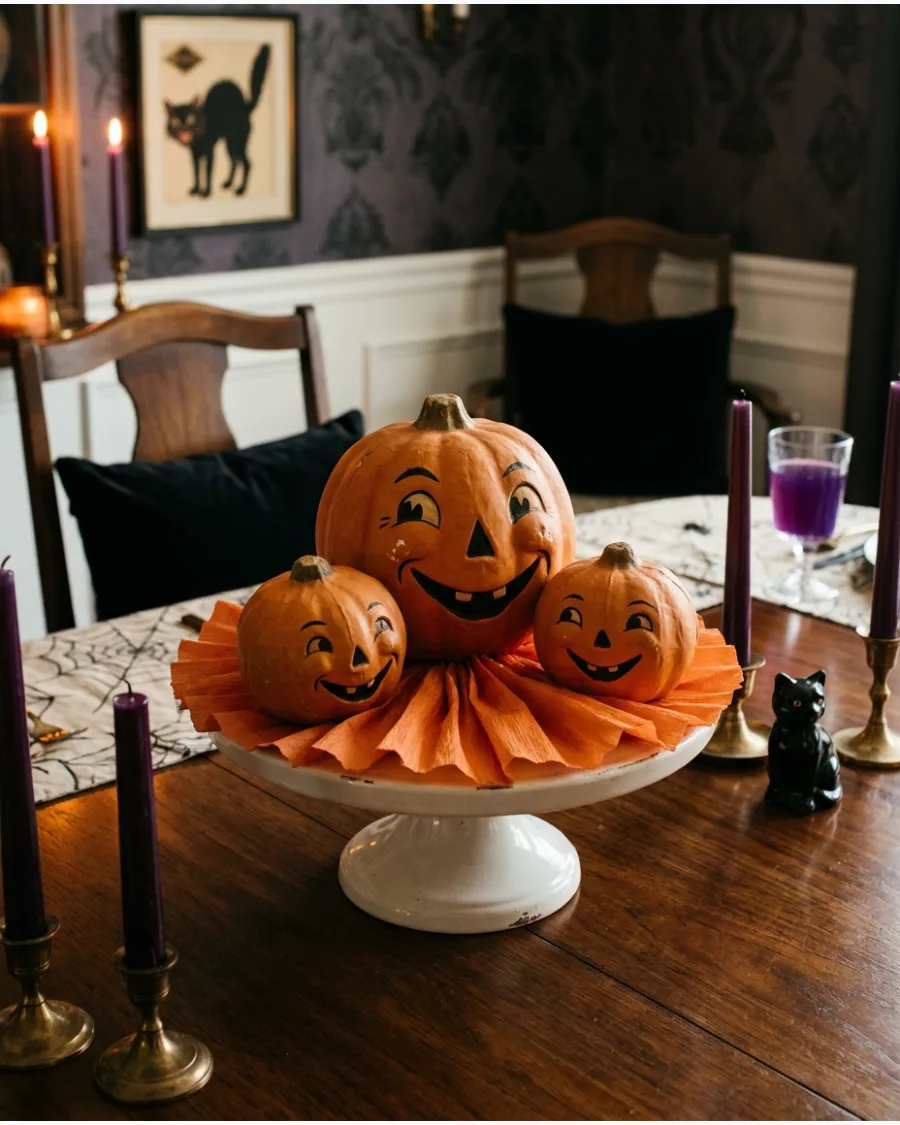
Elevate a group of smiling papier-mache pumpkins by placing them on a tiered cake stand. Wrap the base of the stand with black-and-orange striped ribbon or a ruffle of orange crepe paper.
Scatter a few black cardstock stars around the pumpkins to fill in any empty gaps. This vertical arrangement saves space on the table while creating a clear centerpiece. Papier-mache has a matte, textured finish that looks much better under dining lights than shiny plastic.
- Secure the pumpkins with a tiny bit of museum wax to prevent them from rolling.
- Use different sizes of pumpkins to create visual interest.
- This display looks best when placed in the exact center of the table.
Quick win: Use a black marker to darken the eyes and mouths of older pumpkins if the paint has faded.
38. Old-Fashioned Candy Jar Collection
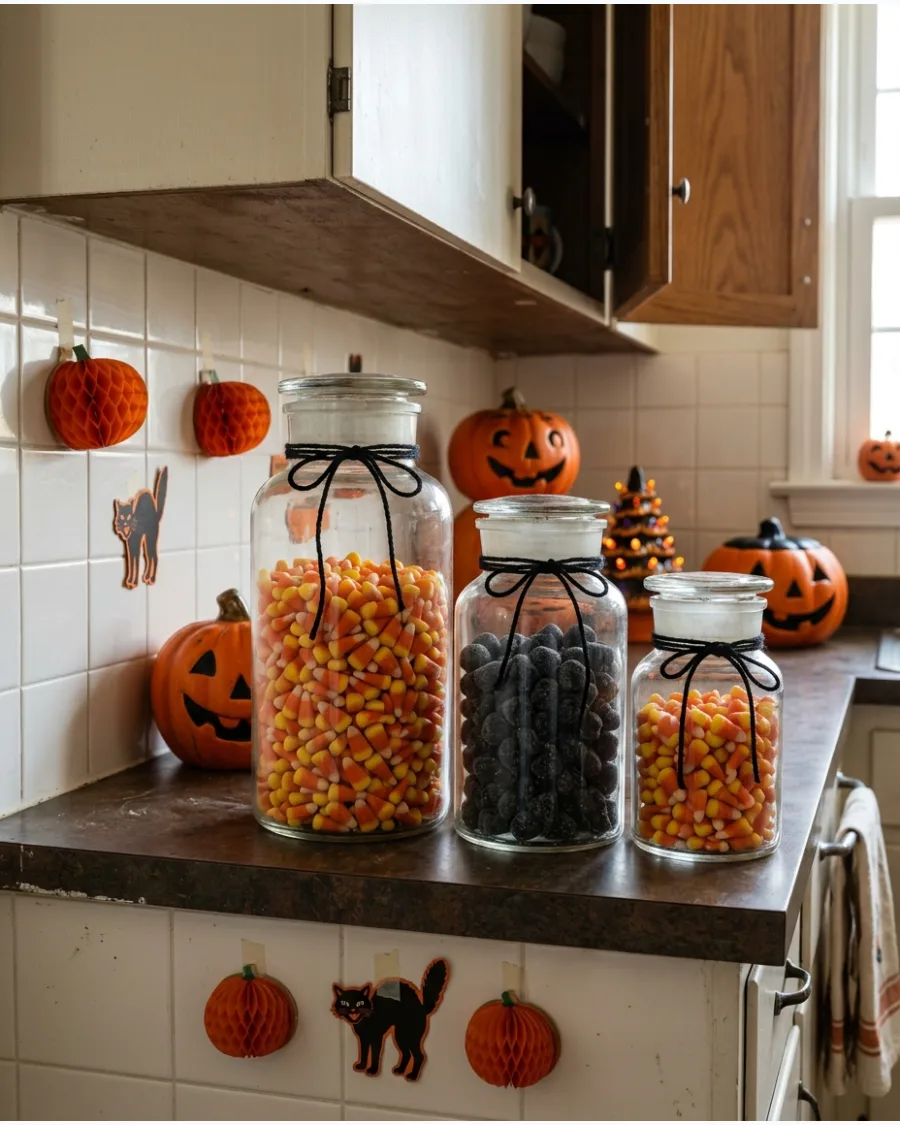
Group clear glass apothecary jars of different heights and fill them with seasonal sweets. Stick to a specific color theme, like candy corn or black licorice, to keep the look organized.
Tie a piece of black twine around the neck of each jar with a simple handwritten label. This mimics the look of an old general store candy counter. Glass jars allow the vibrant colors of the candy to act as the primary decoration.
- Use jars with lids to keep the candy fresh throughout the month.
- Arrange them in a cluster of three for the most balanced look.
- This idea works well on a kitchen counter or a deep windowsill.
Best shortcut: Place a smaller glass inside the jar and fill the gap with candy to use less sugar while still looking full.
39. Halloween Paper Hat Centerpieces
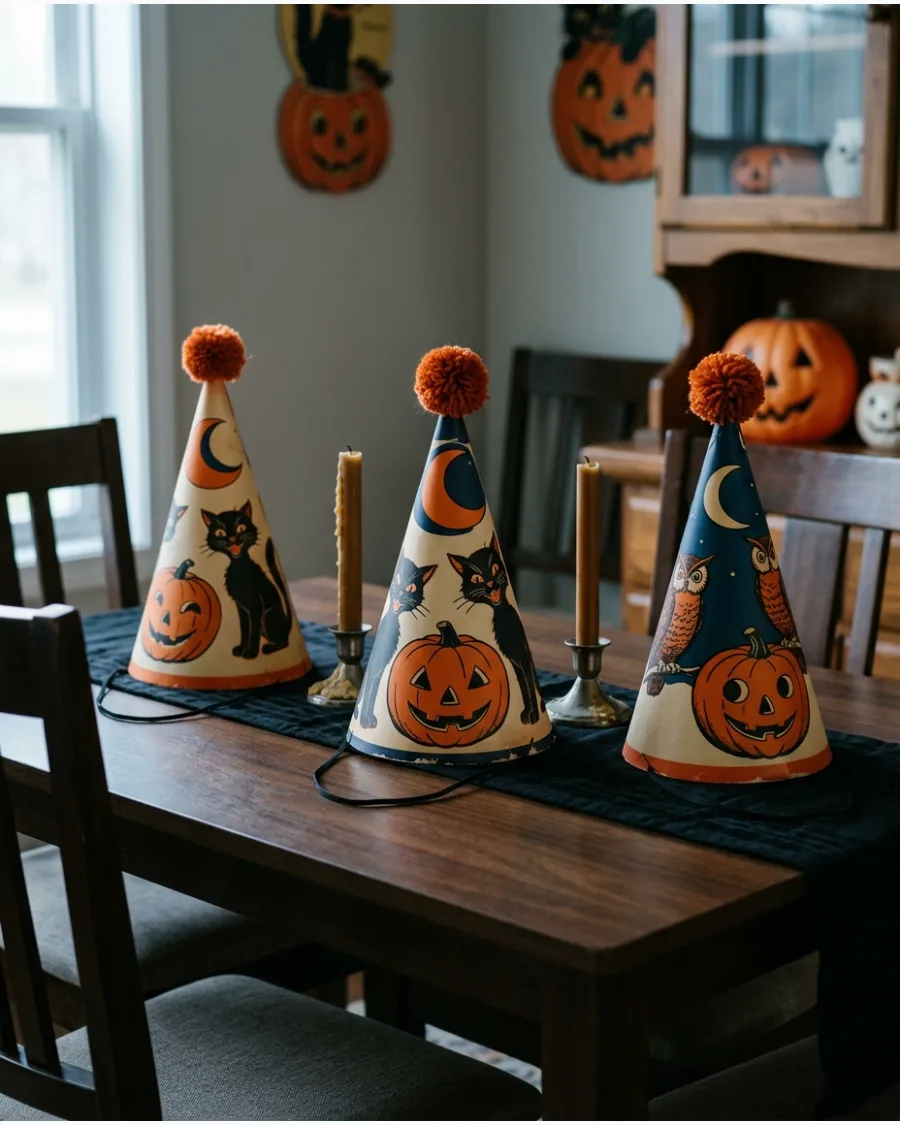
Vintage-style cone hats are not just for wearing; they make excellent tabletop decor. Group three or five hats of varying patterns in the center of the table on a black runner.
Tuck some orange tinsel or metallic fringe around the bottom of the hats to add a bit of sparkle. The tall, pointed shapes provide height without blocking the view across the table. Using hats as decor is a clever way to add height without spending money on large vases.
- Look for hats with pom-poms or crepe paper fringe at the top.
- If the hats are light, weigh them down with a small piece of hidden clay.
- These are easy to collapse and store in a flat box after the holiday.
Most people skip this: Iron your table runner before placing the hats to ensure the thin paper sits perfectly flat.
40. Black-and-Orange Gingham Table
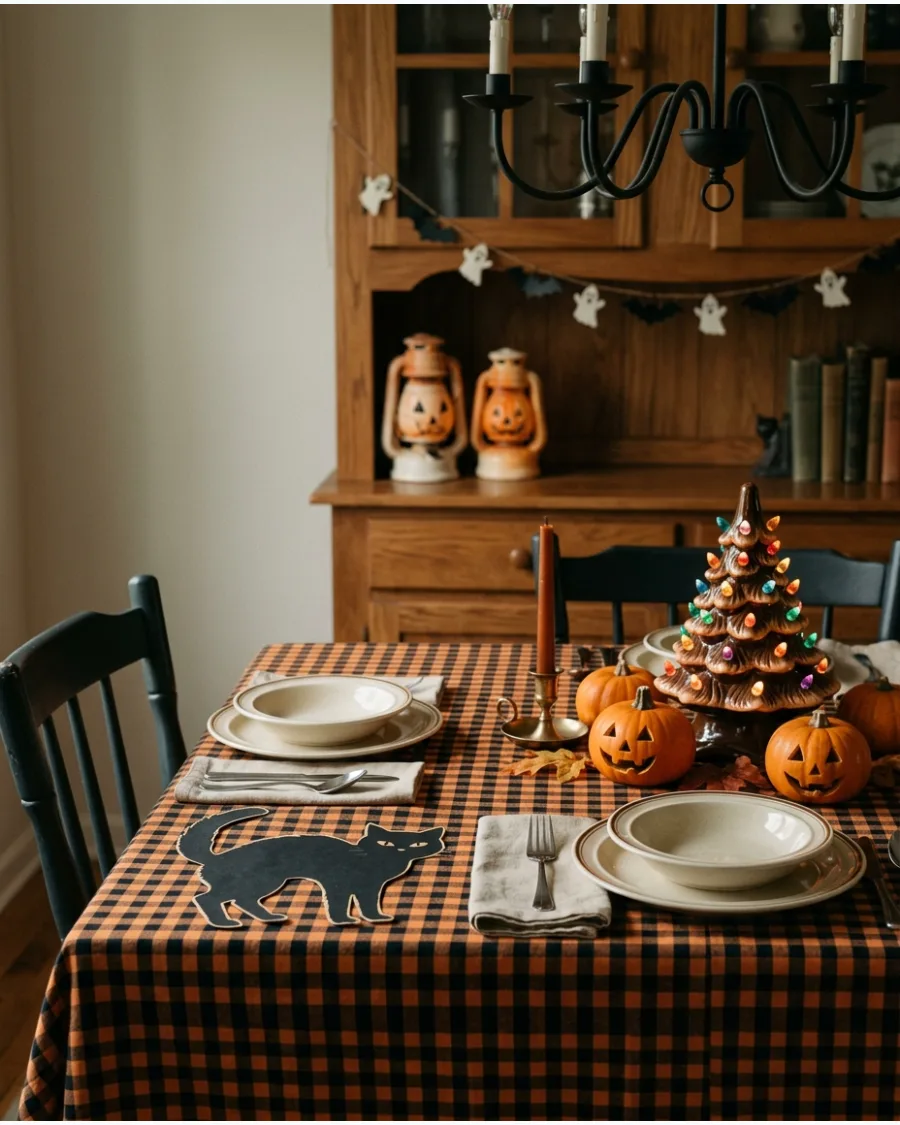
A gingham tablecloth provides a classic, country-inspired base for your retro collection. Layer it with plain cream dishes and simple silverware to let the pattern stand out.
Intersperse small orange pumpkins and black paper cat cutouts along the length of the table. This look is cheerful and nostalgic without feeling overly cluttered. Gingham is a timeless pattern that bridges the gap between summer and fall perfectly.
- Choose a large-scale check for a bold look or a small micro-check for something more subtle.
- Cotton or linen gingham is easy to wash and reuse every year.
- This pattern also pairs well with solid black or orange accessories.
Quick win: Use a gingham runner instead of a full cloth if you want to show off a beautiful wood dining table.
1970s, 1980s and 1990s Halloween Decorations
41. Groovy Disco Ghost Display
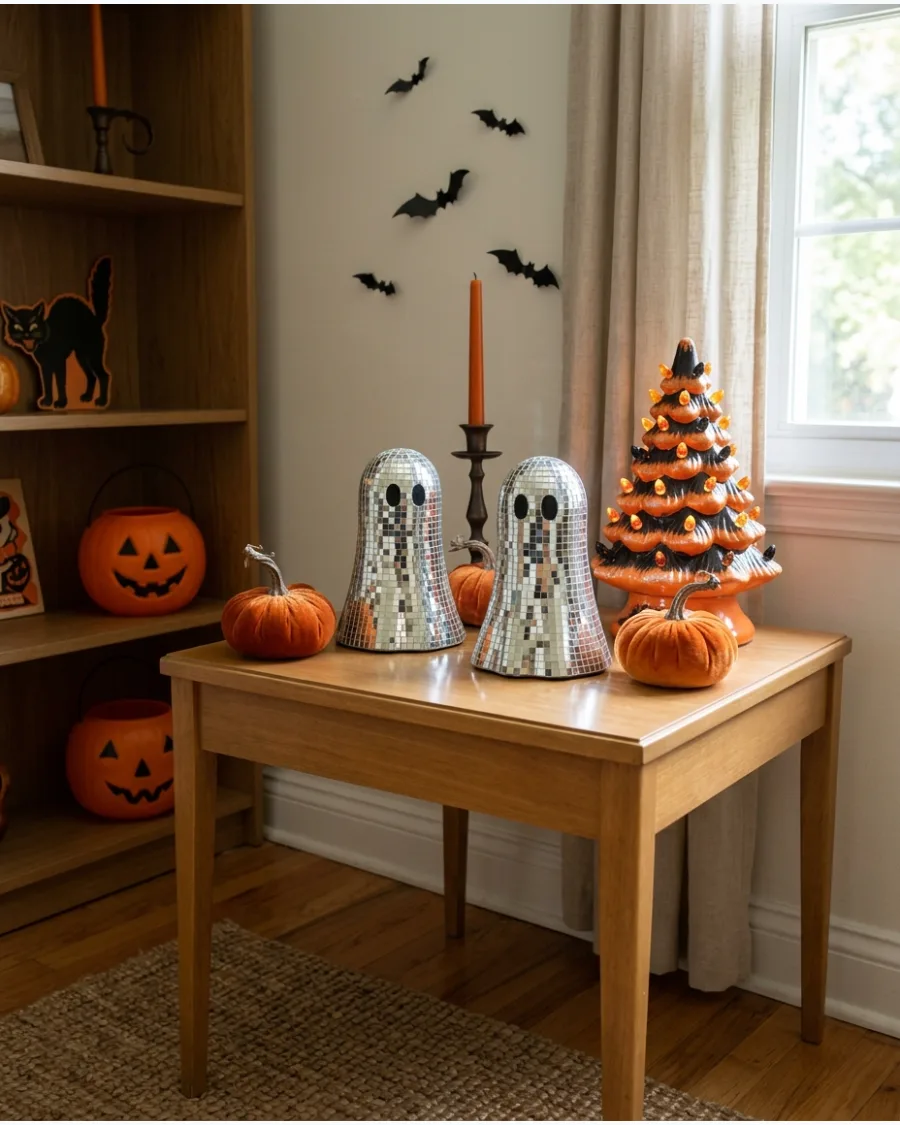
Apply tiny mirrored tiles to foam ghost shapes to catch and scatter light around the room. Surround these reflective figures with orange and yellow velvet pumpkins to introduce soft 1970s textures.
Set these ghosts near a window or lamp to maximize the reflective sparkles across the living room.
- Buy adhesive mirror tiles online for a mess-free application.
- Place the display near a direct light source to create dancing light patterns.
- Use silver craft paper as an alternative if glass tiles feel too heavy for the ghosts.
Quick win: Use a battery-operated spotlight to keep the ghosts shimmering even after the sun goes down.
42. Roller-Rink Halloween Corner
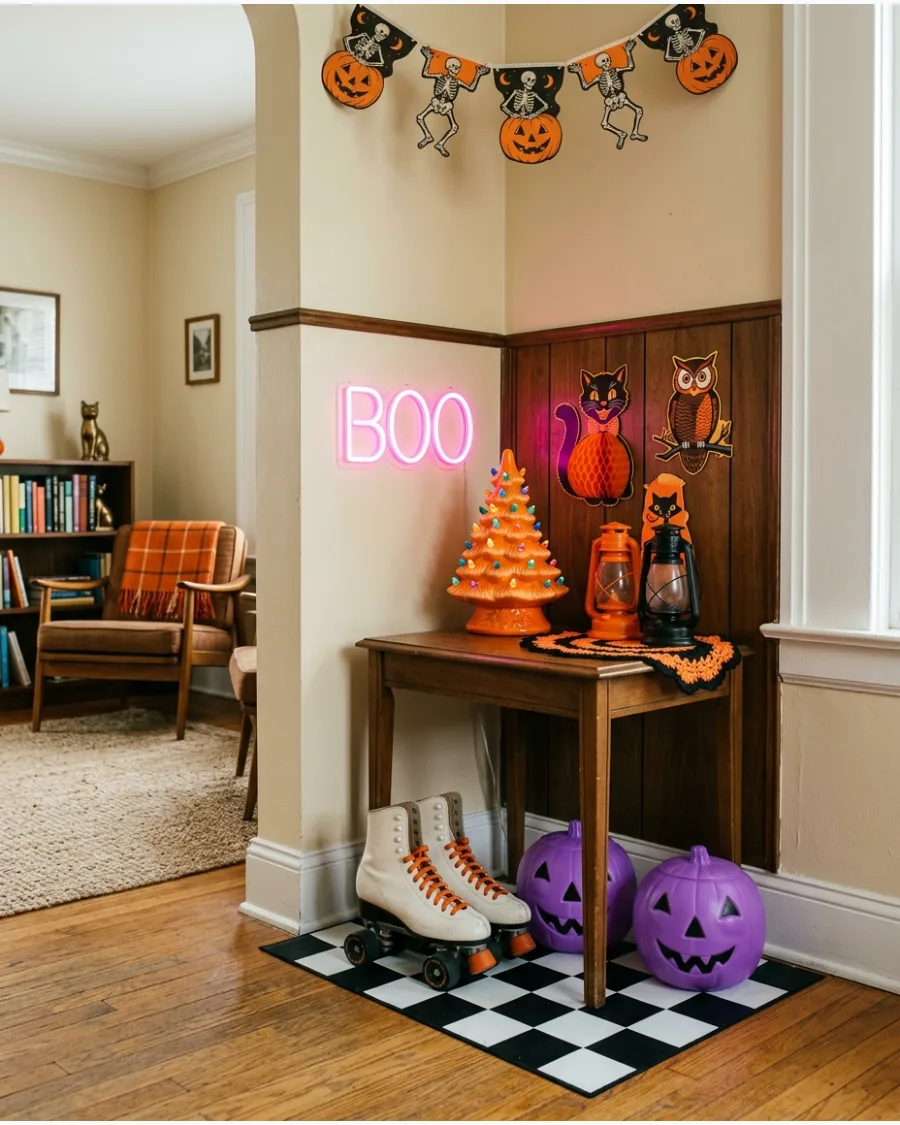
Mix neon-style signs with checkerboard floor mats to ground the space in a retro-party vibe. Add pastel-colored ghosts and pumpkins to break up the traditional orange and black palette.
Hang a small disco ball from a ceiling hook to cast moving light patterns over the entire display.
- Look for battery-powered neon-style LED signs for easy placement without cords.
- Use actual vintage roller skates for an authentic prop feel.
- Stick to a five-color neon palette like pink, aqua, orange, purple, and black.
Best shortcut: Drape a checkerboard scarf over a shelf if you do not want to commit to a full floor mat.
43. Vintage Plastic Pumpkin Pails
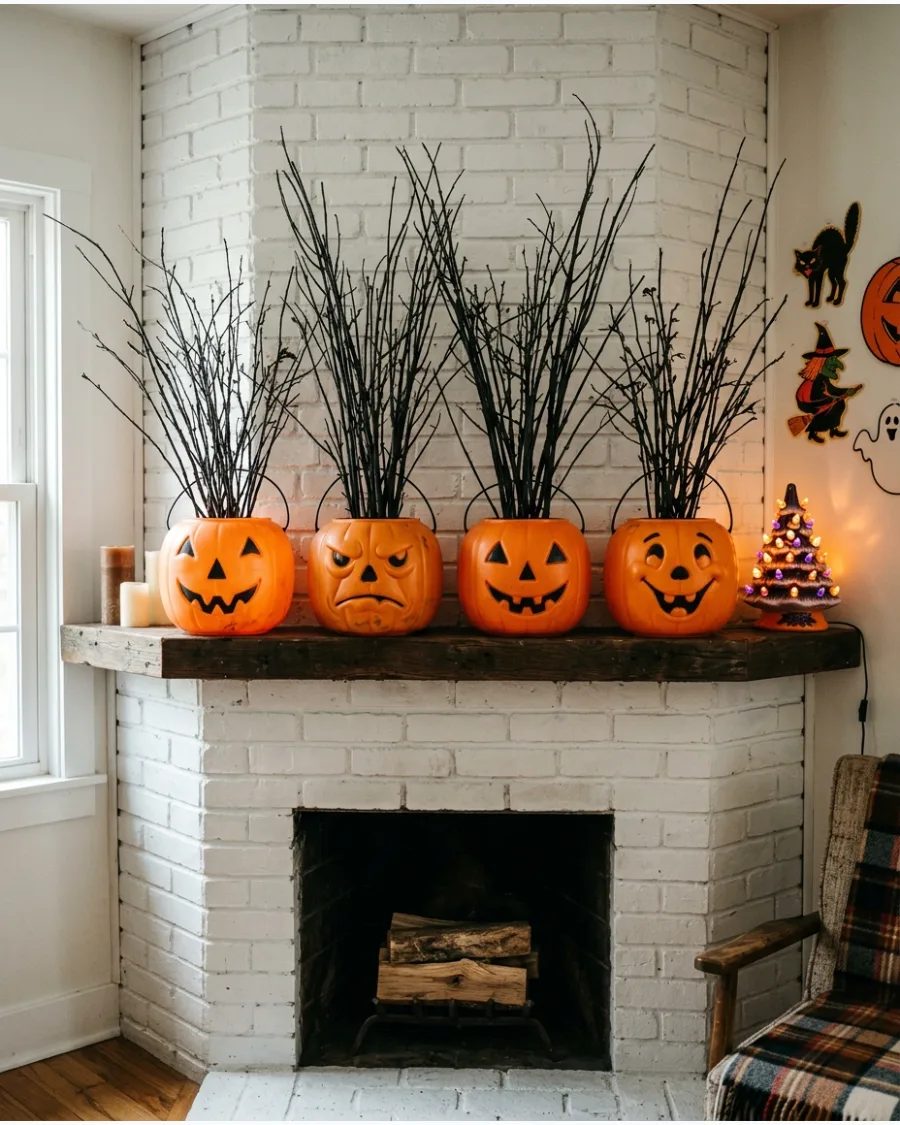
Line up classic blow-mold pails on a fireplace mantel or open shelving for a nostalgic focal point. Fill them with dried wheat stalks or black glitter branches to add height and texture.
Group pails of different heights together to create a visual focal point that feels intentional rather than cluttered.
- Source original pails at thrift stores or flea markets for an authentic look.
- Stuff the bottom of the pails with newspaper to hold heavy branches upright.
- Clean plastic with mild soap and water to avoid stripping any original paint.
Most people skip this: Place a battery-operated tea light inside each pail to make the faces glow at night.
44. Handmade Sheet Ghosts
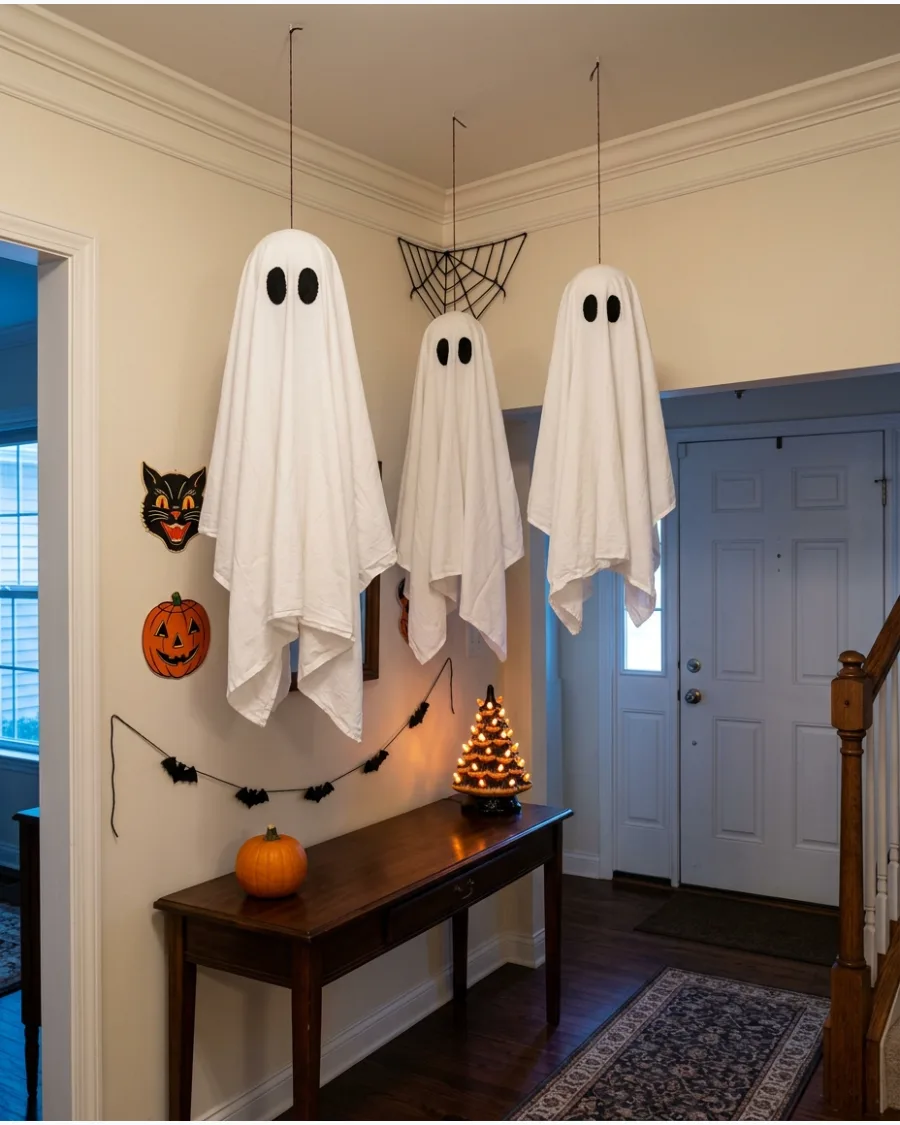
Drape white cotton fabric over balloons or foam heads to create classic floating figures. Use black felt for the eyes and mouth to capture the specific hand-cut look common in the 1990s.
Hang these from the ceiling at varying heights using clear fishing line for a ghostly floating effect.
- Use old white bedsheets for a matte finish that looks more traditional than shiny synthetics.
- Stiffen the fabric with spray starch to help the ghosts hold their shape in a breeze.
- Secure the fishing line to a small ceiling hook for a damage-free installation.
Quick win: Use pinking shears on the bottom edge of the fabric to prevent fraying and add a zig-zag retro detail.
45. Retro Halloween Window Silhouettes
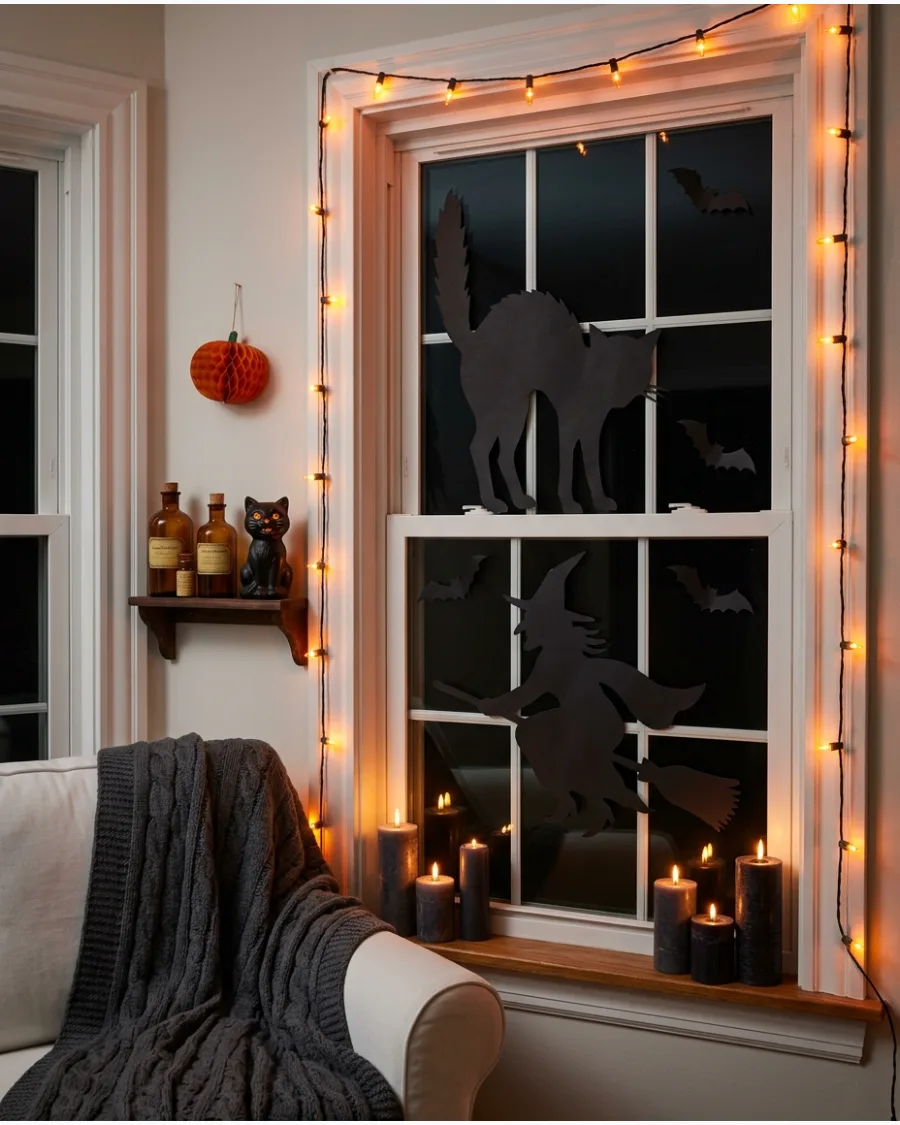
Cut large shapes out of heavy black cardstock to fit perfectly within your window panes. Secure them with clear tape so they appear as solid shadows to anyone passing by outside.
Place a purple or orange floodlight on the floor aimed at the window to make the silhouettes pop after dark.
- Measure each window pane carefully before cutting the paper shapes.
- Use removable double-sided tape to protect the glass and keep the paper flat.
- Choose simple, bold shapes like bats or witches for better visibility from a distance.
Best shortcut: Use black contact paper for a peel-and-stick version that stays perfectly flat against the glass surface.
Home Decor
46. Vintage Multi-Color Bulb Display
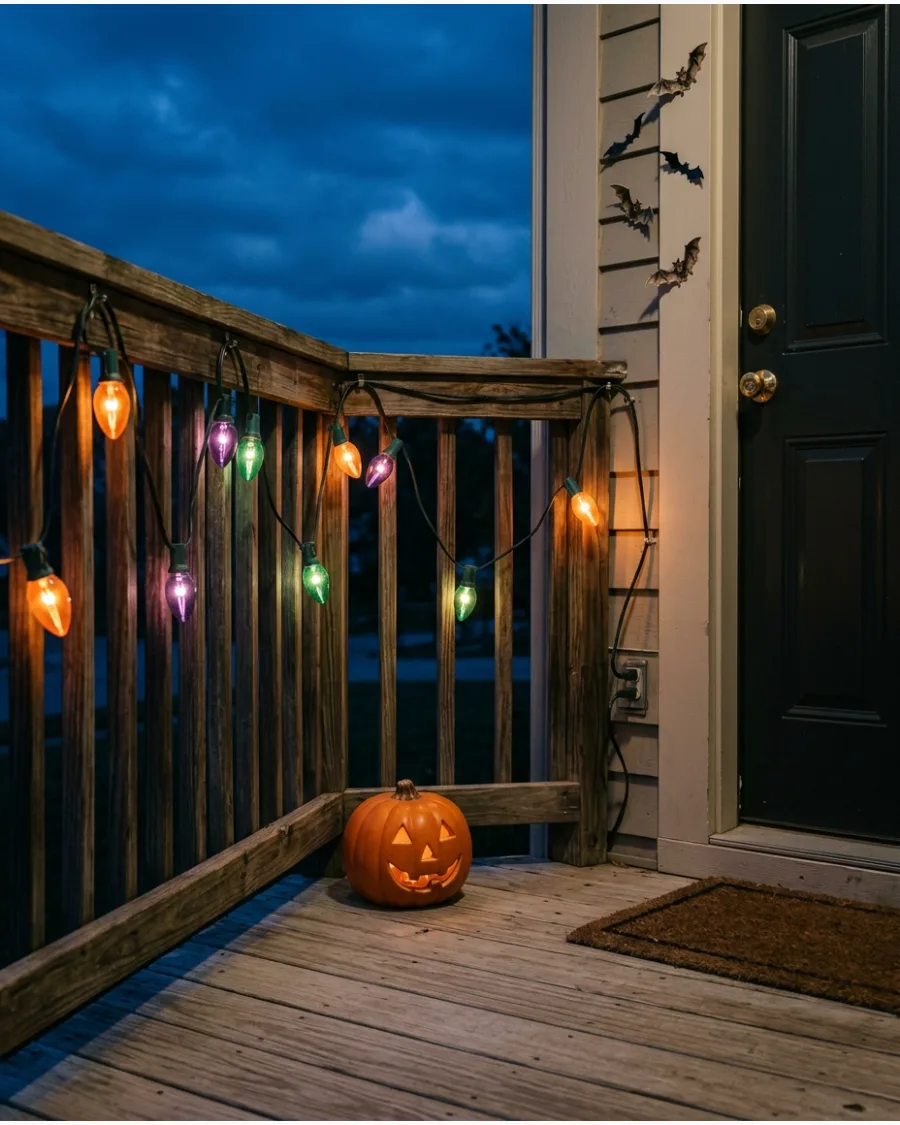
Large C7 or C9 ceramic bulbs in orange, purple, and green offer a nostalgic alternative to modern purple-only LEDs. Layer these oversized strands along a fireplace mantle or porch railing to mimic mid-century holiday displays. The opaque coating on retro-style bulbs diffuses light softly, preventing the harsh glare often associated with clear glass.
Opaque bulbs provide a more substantial, high-quality look during the daylight hours compared to thin wire fairy lights.
- Look for ceramic-coated LED versions in late August to ensure the best color variety before specialty sets sell out.
- Use insulated plastic clips rather than metal staples to secure the thick wires without damaging the vintage-style casing.
- Swap standard clear bulbs in existing strands for a custom mix of amber and violet to achieve a specific 1960s palette.
Most people skip this: Check the start-to-end connectivity limits on older-style incandescent strands to avoid blowing a fuse when linking multiple sets.
1970s, 1980s and 1990s Halloween Decorations
47. Halloween Cassette and Record Display
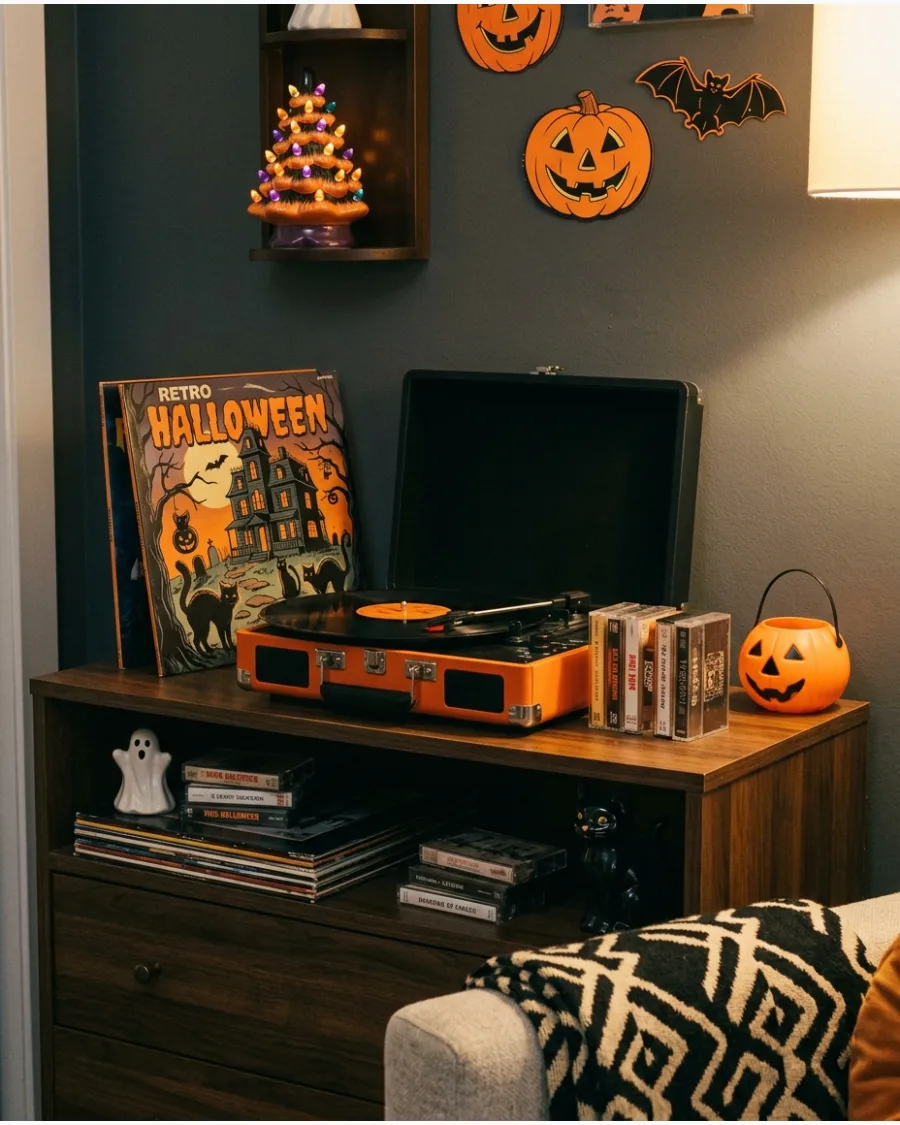
Showcase old media like vinyl records or cassette tapes alongside your seasonal pumpkins and lights. A handmade sign advertising a monster party adds a personal touch that feels like a nostalgic school invite.
Lean a vintage-style record sleeve against a stack of books to serve as a backdrop for smaller pumpkins.
- Print out fake scary album covers if you do not have real vintage records.
- Use a plate stand or wire easel to hold record sleeves upright on a flat surface.
- Add a small dish of candy corn to the display to complete the party vignette.
Quick win: Use a black permanent marker to write Halloween Mix 94 on a blank cassette tape for an instant prop.
48. Retro Halloween TV Setup
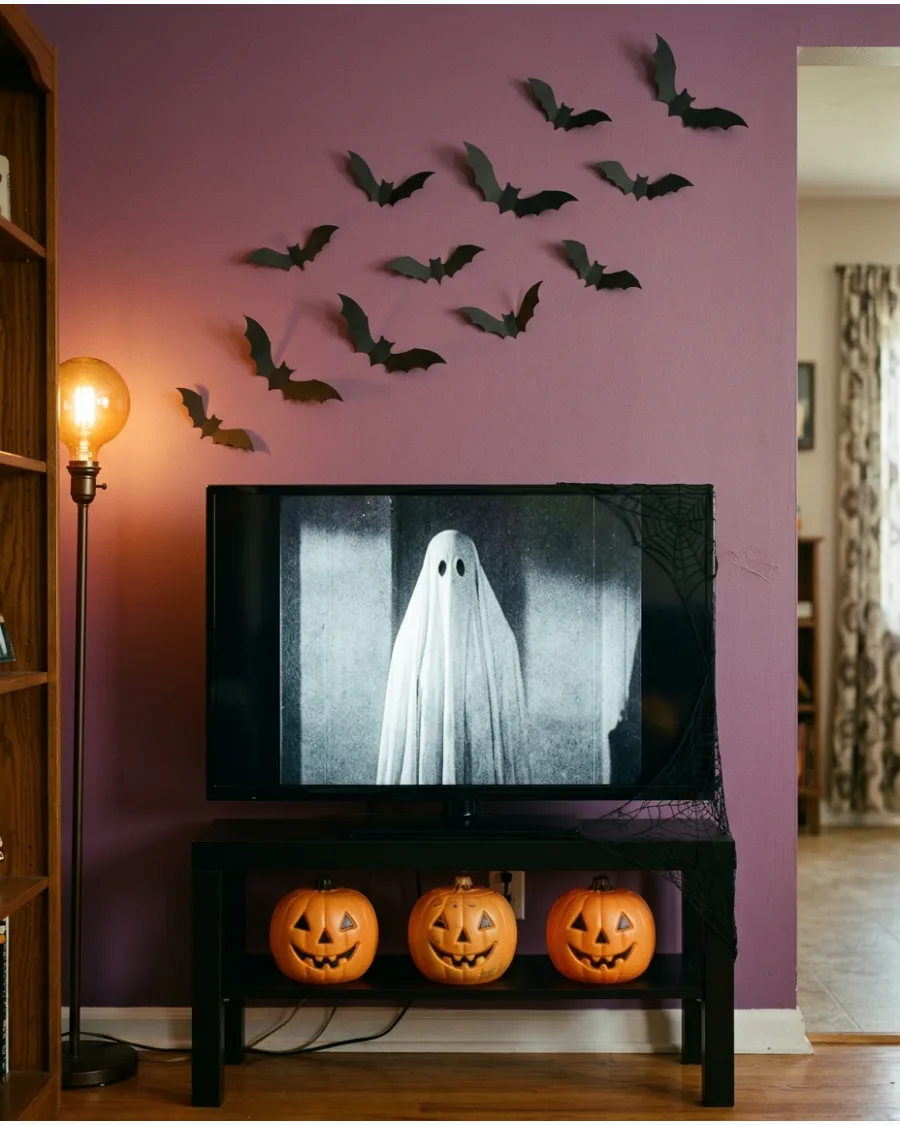
Use a television as a digital art piece by playing loops of grainy black-and-white Halloween imagery. Surround the screen with physical items like paper bats or plastic pumpkins to blend the technology with the room.
Set the screen brightness to a lower level so the glow doesn't overpower the rest of the room's lighting.
- Find vintage halloween loop videos on popular streaming sites for a background vibe.
- Keep the volume on mute to maintain a subtle atmosphere during gatherings.
- Clear any clutter from the TV stand to let the screen remain the visual focus.
Best shortcut: Use a scary static video loop if you want a subtle, creepy vibe without specific characters.
49. ’90s Homemade Halloween Wall
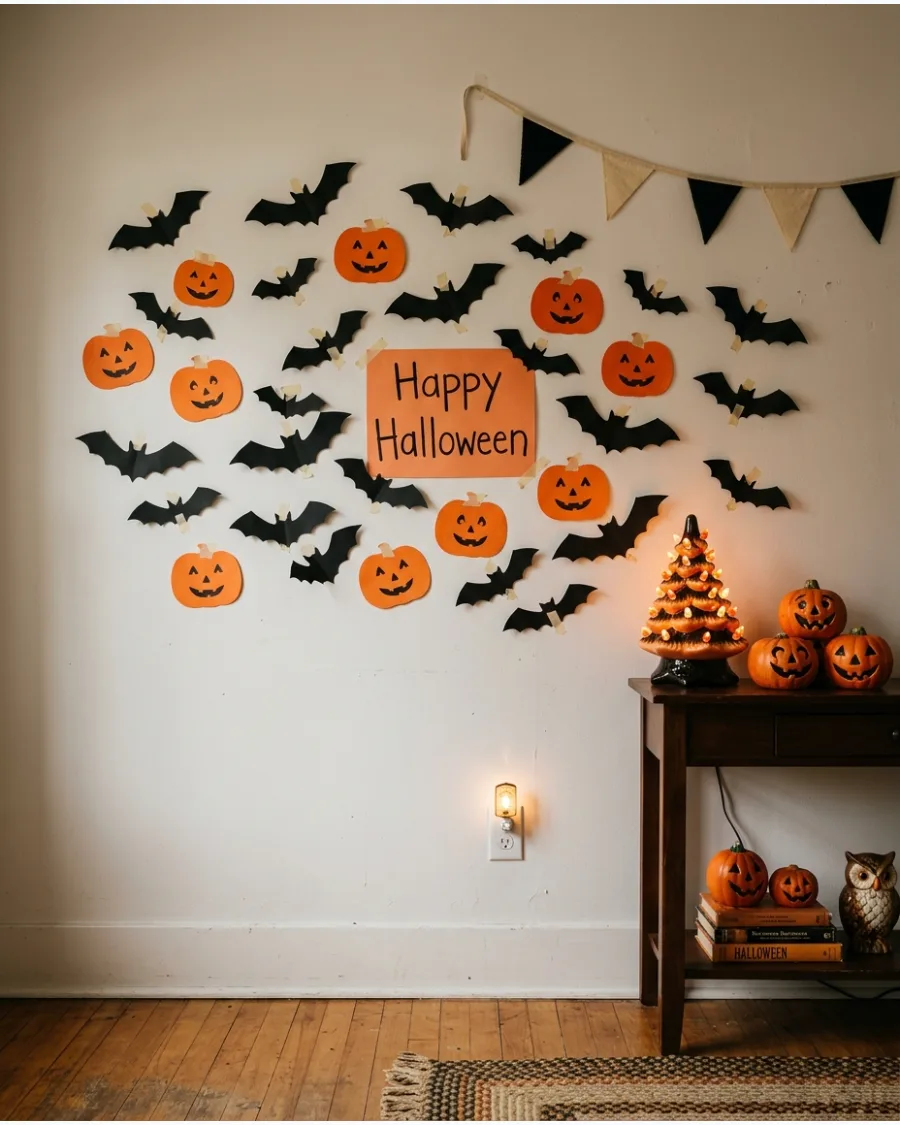
Recreate the look of a school classroom party using construction paper cutouts and hand-drawn signs. Tape bats and pumpkins in a random pattern across a large wall to make the space feel energetic.
Use rolled pieces of painter's tape on the back of the paper to protect your wall paint while keeping the decorations secure.
- Use a mix of matte and glossy paper to add texture to the flat wall display.
- Involve others in cutting out imperfect shapes to capture a genuine handmade look.
- Space the items about three inches apart for the best visual impact across the wall.
Most people skip this: Use a hair dryer on a low setting to warm the tape before peeling it off at the end of the season.
50. Mixed-Decade Retro Halloween Collection
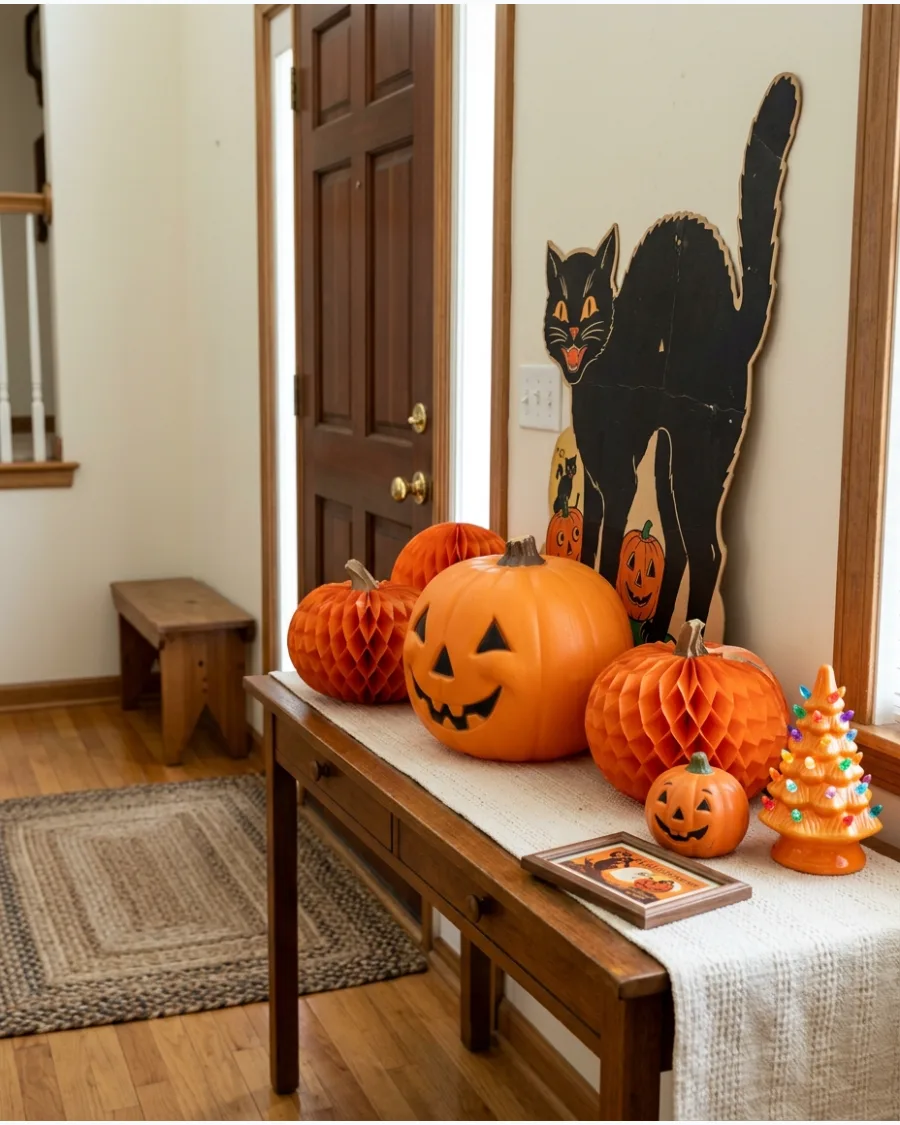
Blend items from different eras by sticking to a strict color palette of orange, black, and cream. A mid-century honeycomb pumpkin can sit comfortably next to a 1980s plastic pail if the colors are coordinated.
Place the largest items at the back of the display and layer smaller pieces in the front to create depth.
- Limit the display to three main colors to keep the collection looking curated.
- Use small wooden blocks to lift shorter items in the back for better visibility.
- Dust vintage paper items with a dry microfiber cloth to avoid moisture damage.
Quick win: Add a few new items with an aged finish to fill gaps in your collection without spending a fortune on antiques.
Frequently Asked Questions
What are the most iconic retro Halloween brands to look for?
Keep an eye out for Beistle and Luhrs if you love classic paper cutouts, as they defined the mid-century aesthetic. For those iconic glowing lawn figures, Union Products is the gold standard for vintage blow molds.
How do I display vintage paper decorations without damaging them?
To protect delicate paper, use acid-free adhesive putty or archival-safe tape that won't leave residue. For your rarest pieces, consider placing them in a simple frame to prevent tearing and keep them dust-free.
What is the difference between 1950s and 1970s Halloween decor?
The 1950s focused on charming, illustrative paper designs with detailed graphics and classic spooky characters. By the 1970s, the style shifted toward bolder colors and a heavy use of plastic and kitschy blow molds.
How can I mix retro Halloween with my existing modern furniture?
Create a dedicated vintage zone by using a specific "anchor piece" like a bar cart or a fireplace mantel to showcase your collection. This allows your retro items to stand out as a curated display without clashing with your overall modern interior.
Where can I find high-quality retro-reproduction Halloween decor?
Many modern retailers like Bethany Lowe Designs and Beistle themselves offer high-quality reproductions that capture the vintage look perfectly. You can also check specialty boutique sites that focus on mid-century holiday aesthetics for authentic-looking new pieces.