50 Kids Bathroom Remodel Ideas

This post may contain affiliate links: full affiliate disclosure.
A kids bathroom remodel has to balance two jobs: creating a room children enjoy now and building durable routines that still work later.
Use these ideas to compare layouts, surfaces, storage, fixtures, and playful details, then adapt the strongest combination to your room and household.
As an Amazon Associate I earn from qualifying purchases.
Layouts That Make Shared Routines Easier
Start with movement, reach, and storage before choosing a theme. A cheerful room still frustrates children when doors collide or towels lack homes.
1. Give Siblings Separate Sink Zones
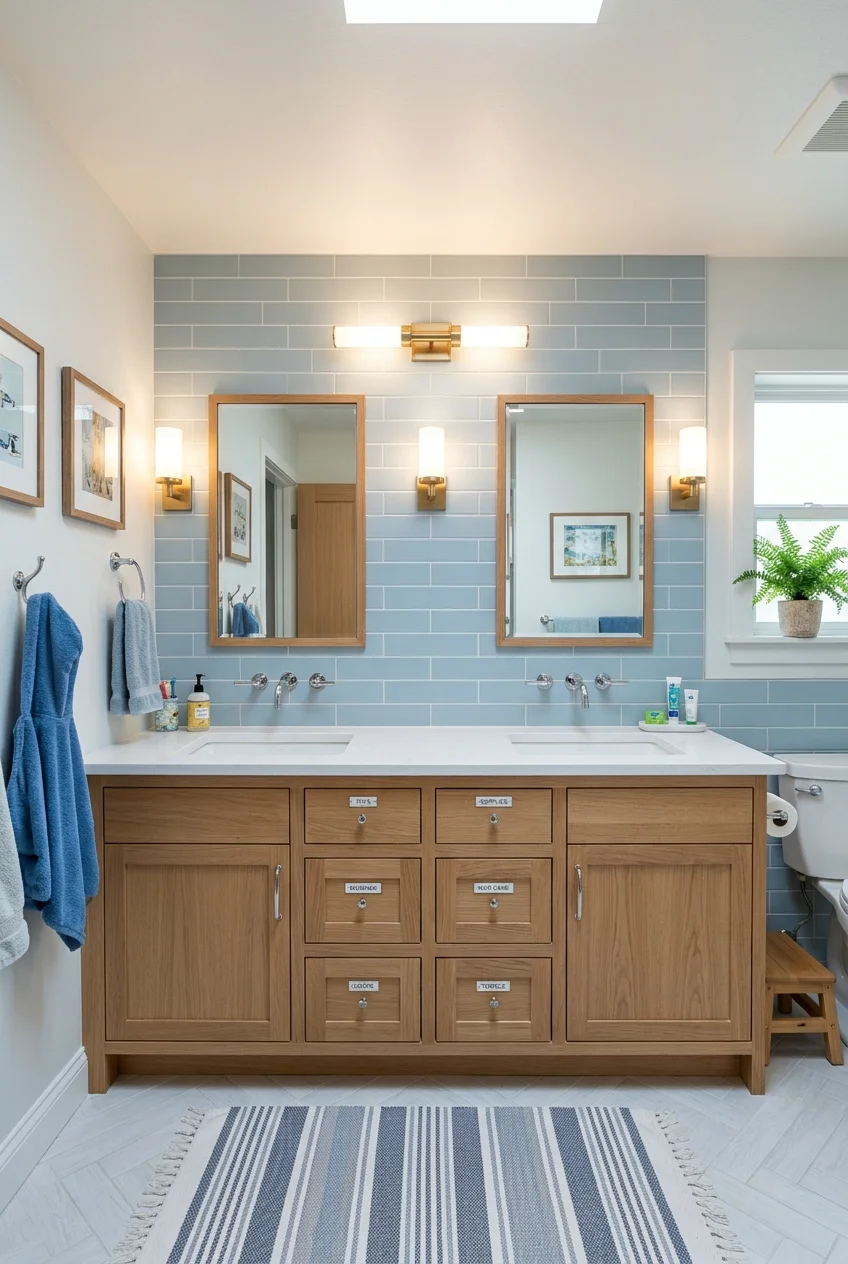
A double vanity creates two clear grooming stations, reducing morning crowding while keeping each child responsible for one drawer, cup, and towel hook.
Choose one continuous counter for easy wiping, then center a mirror and task light over each basin so both sides feel equally usable.
If plumbing must move, compare that cost with a long single-sink vanity; two basins help only when simultaneous access matters to the household.
- Confirm both drawers can open together.
- Leave standing room at each faucet.
- Keep shared supplies in the center.
2. Stretch One Vanity Into Two Grooming Stations
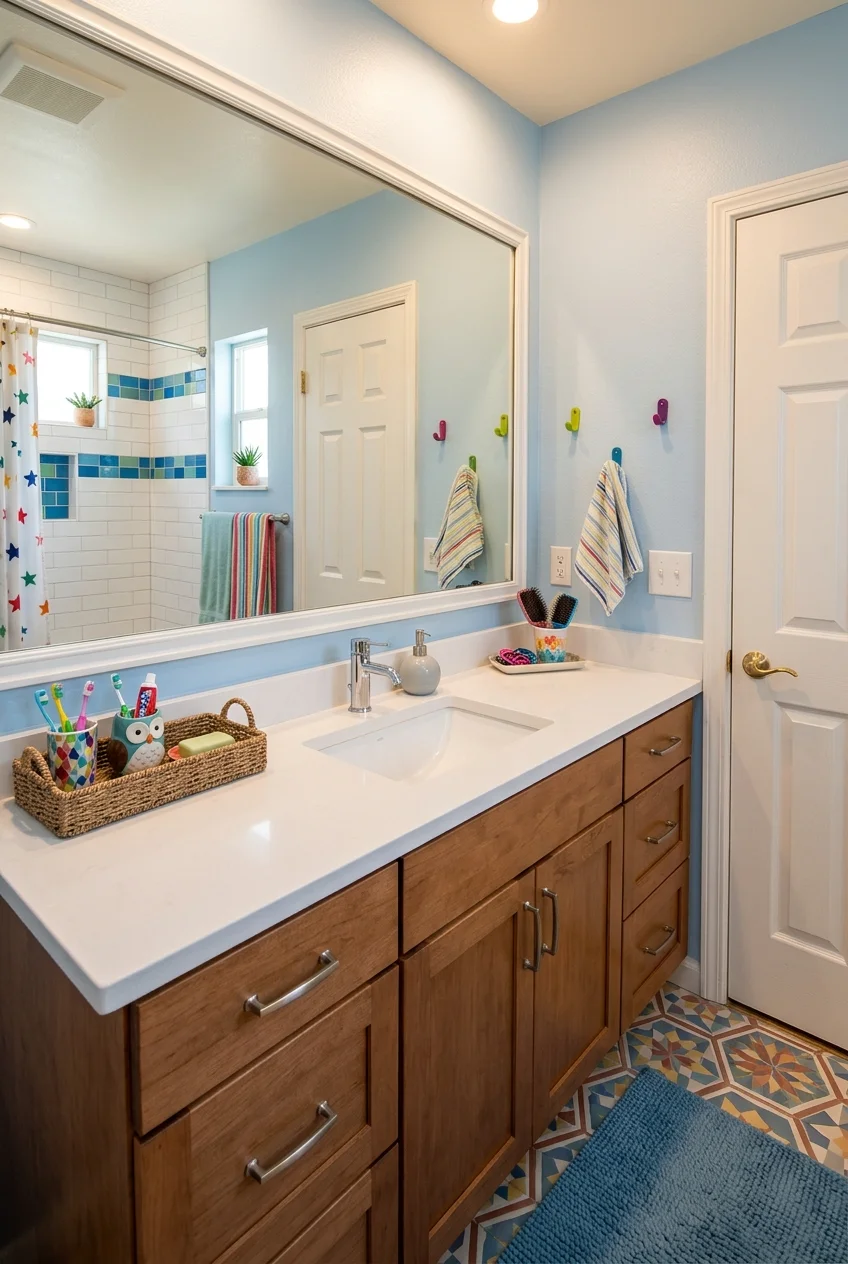
When two sinks will not fit, use a long single-basin vanity with generous counter space and two designated grooming zones on opposite sides.
This layout preserves drawer width and reduces plumbing changes. Give each child a shallow tray so toothbrushes and hair tools return to predictable places.
Setup note Keep the basin slightly off-center only when the remaining counter genuinely serves the second station; otherwise the arrangement feels awkward and cramped.
3. Build In a Pullout Step Below the Vanity
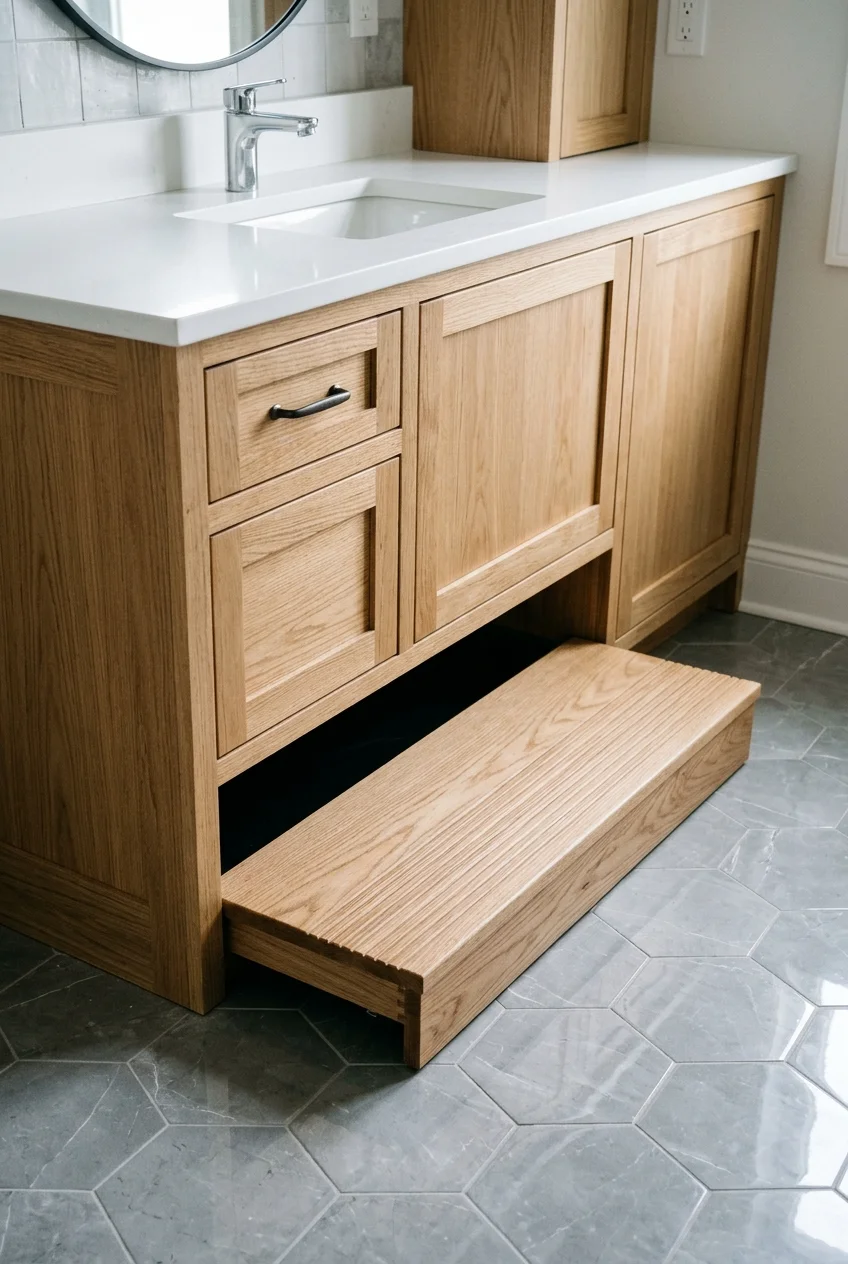
A pullout platform disappears beneath the toe kick, keeping the walkway clear while giving a smaller child stable access to the sink.
Treat this as cabinetry, not a loose drawer. The platform needs a broad standing surface, secure stops, and a design appropriate for expected use.
Ask the cabinetmaker how the step will lock open, support weight, resist moisture, and remain serviceable as the child grows taller.
Store the platform fully inside its opening when unused, and keep nearby doors or drawers from opening into a child standing on it.
For a movable alternative, consider a folding child step stool (paid link), then confirm its height, stability, and storage spot before ordering.
4. Keep the Tub When Bathing Still Matters
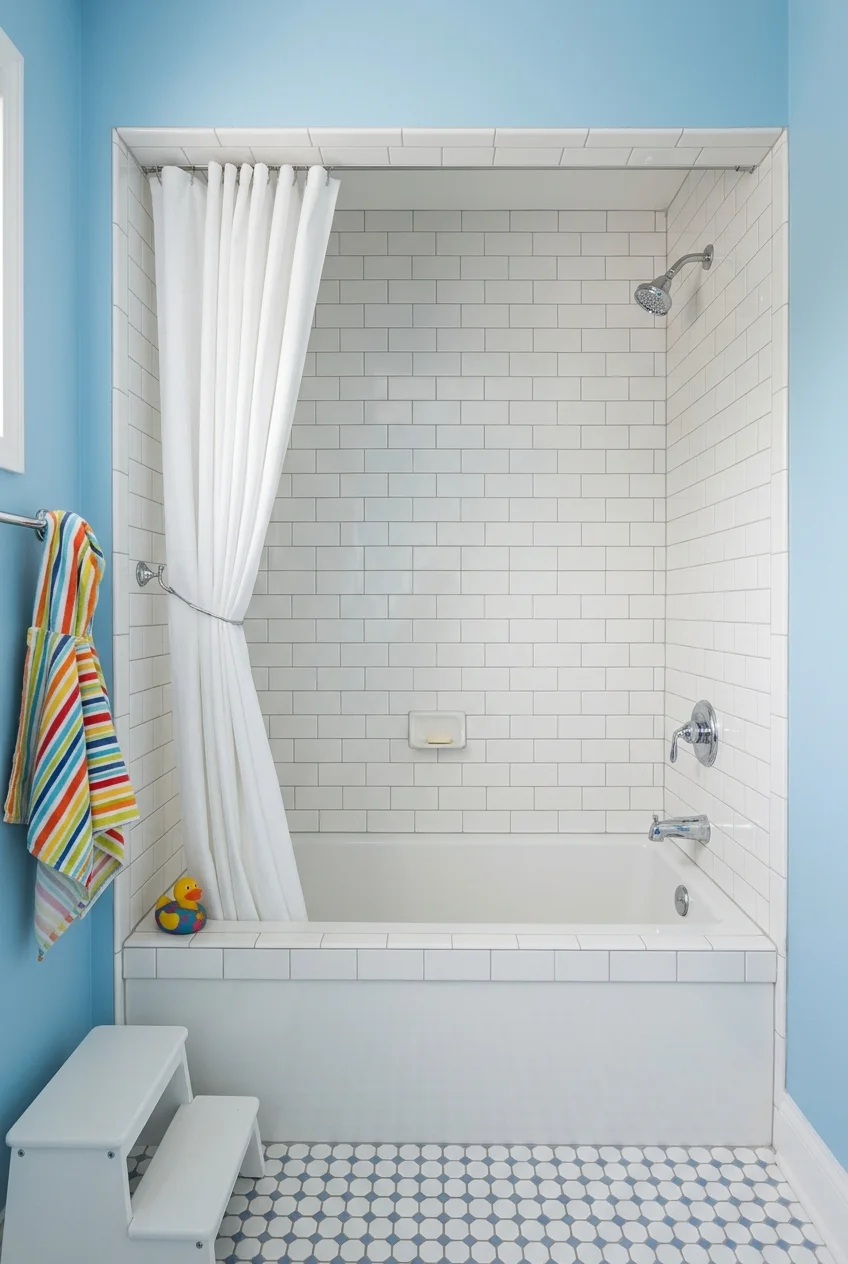
A three-wall alcove tub supports bathing younger children and usually uses less floor area than combining a separate tub with a shower.
Use a simple surround, reachable controls, and a curtain or door that allows an adult to supervise without leaning around fixed panels.
If the household is moving beyond baths, compare that value against a roomy shower rather than preserving a tub that will become unused.
5. Use a Tub-Shower Screen That Still Allows Reach
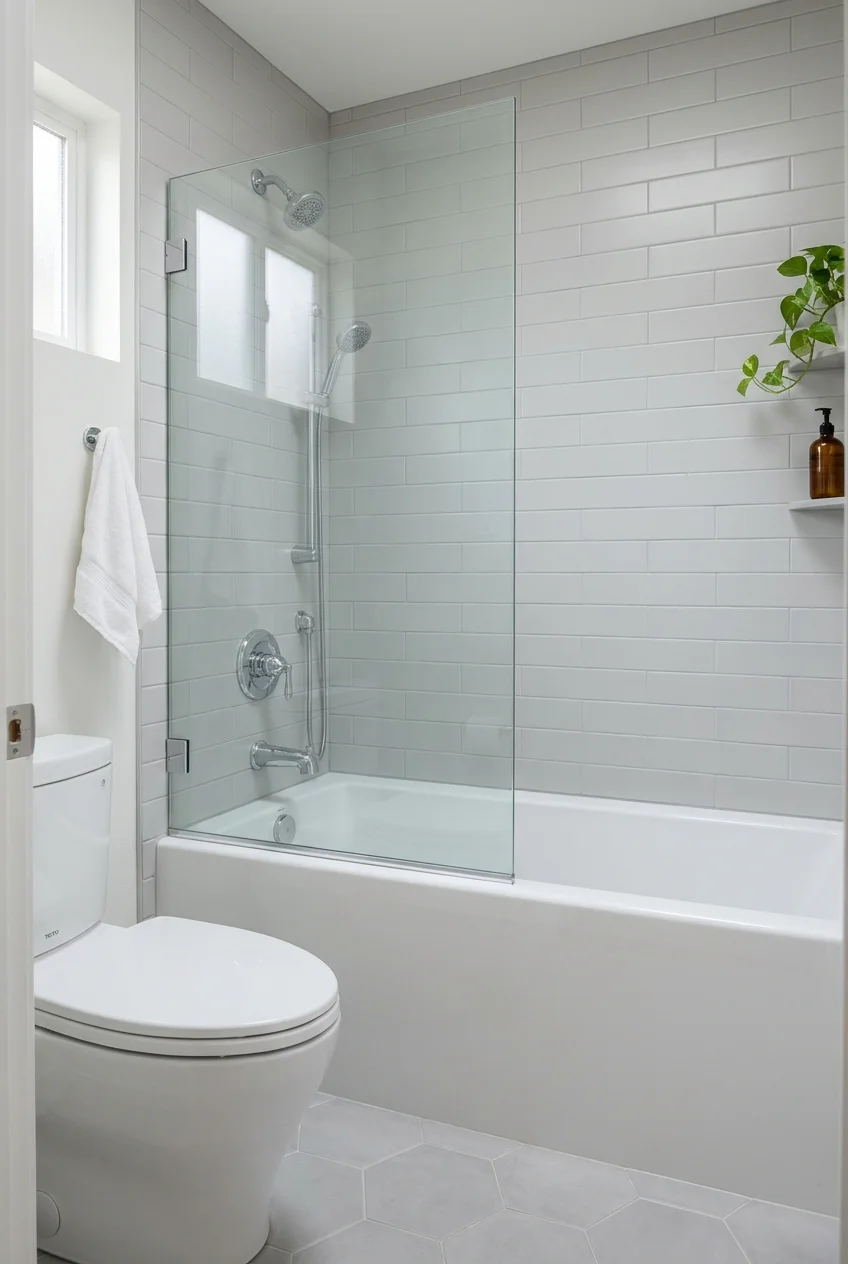
A partial glass screen can contain spray without blocking an adult from helping at the tub. Its width and swing must suit the room.
Place controls where someone can start the water without standing beneath the showerhead, and keep the screen edge away from the toilet.
Also consider cleaning reach, towel placement, and the direction water travels when the handheld shower is used near the open portion.
Watch for A beautiful fixed panel can make bathing assistance difficult. Mock up its footprint with cardboard before ordering custom glass or relocating fixtures.
6. Separate the Toilet From the Main Vanity Traffic
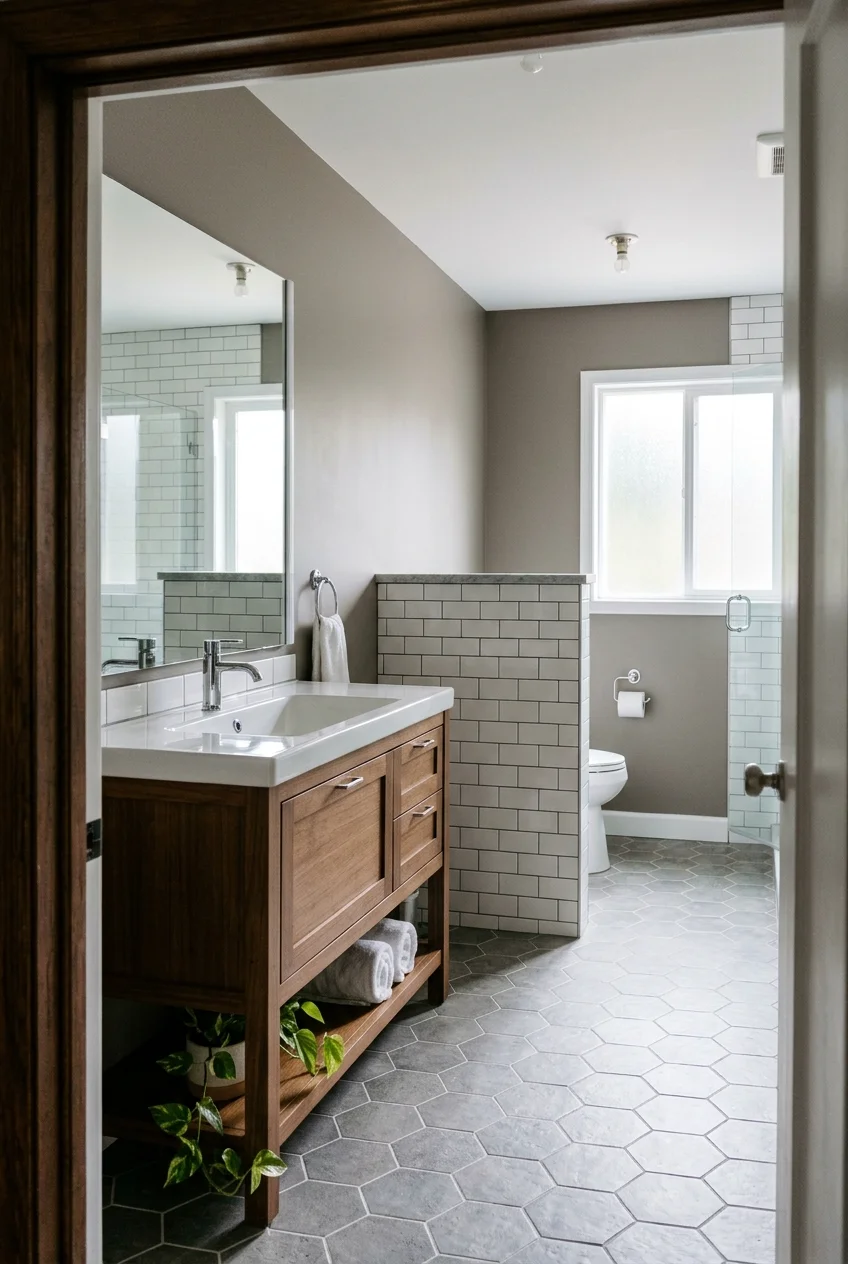
A short privacy wall or thoughtful fixture placement keeps the toilet out of the vanity sightline while preserving supervision and easy cleaning.
Avoid squeezing it behind a door or beside drawers that cannot open. Check required clearances locally before framing any new partition.
In a narrow room, a simple visual offset often works better than a full enclosure that steals light and makes the bathroom feel cramped.
7. Swap a Swing Door for a Pocket Door Where Framing Allows
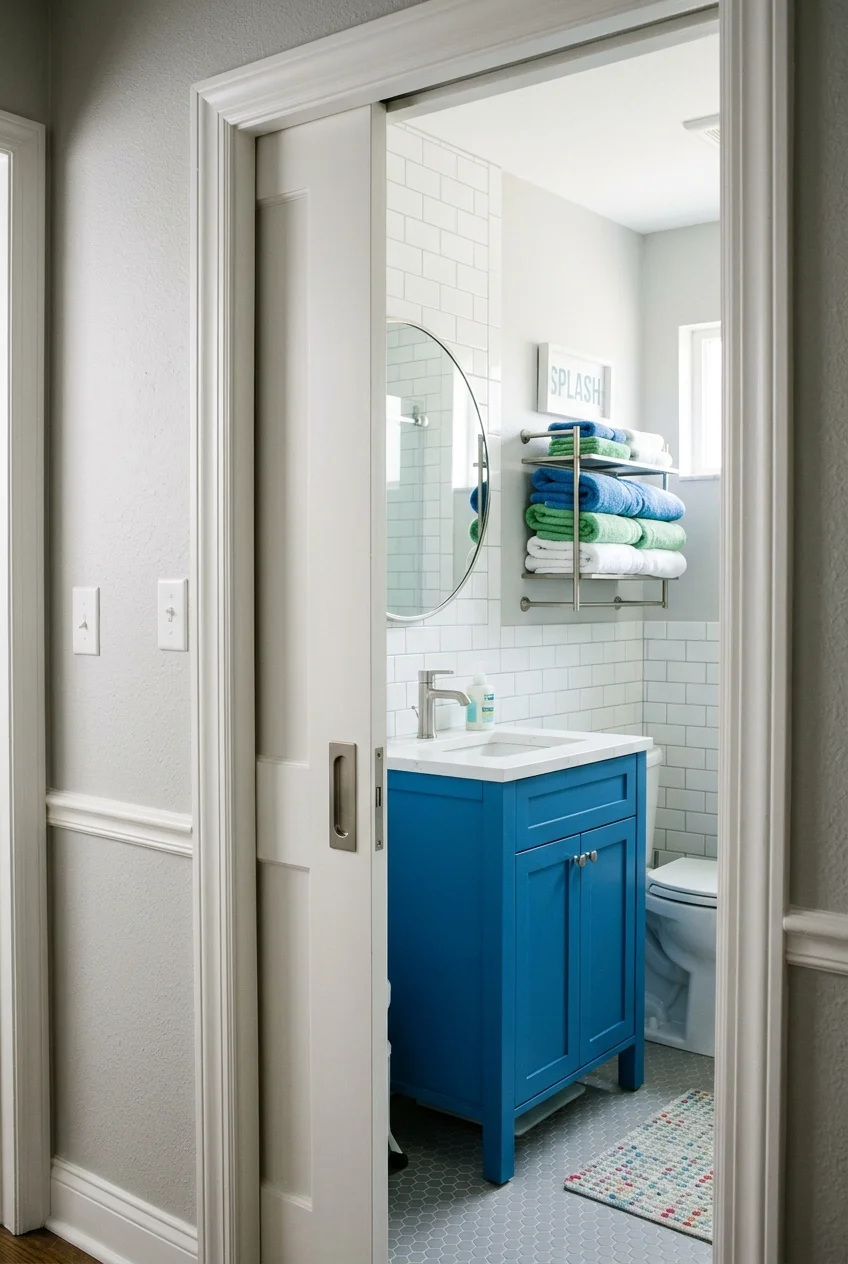
A pocket door can release valuable floor and wall space in a small bathroom, especially when the existing door collides with towel storage.
The wall cavity must remain free of plumbing, electrical runs, and structural conflicts. A contractor should verify feasibility before demolition begins.
Choose easy-grip hardware and confirm the door can still provide privacy without becoming difficult for smaller hands to operate independently.
Pocket doors also seal sound differently from hinged doors, so discuss privacy expectations and soft-close hardware before selecting the final assembly.
8. Create a Dry Getting-Ready Zone Outside the Splash Path
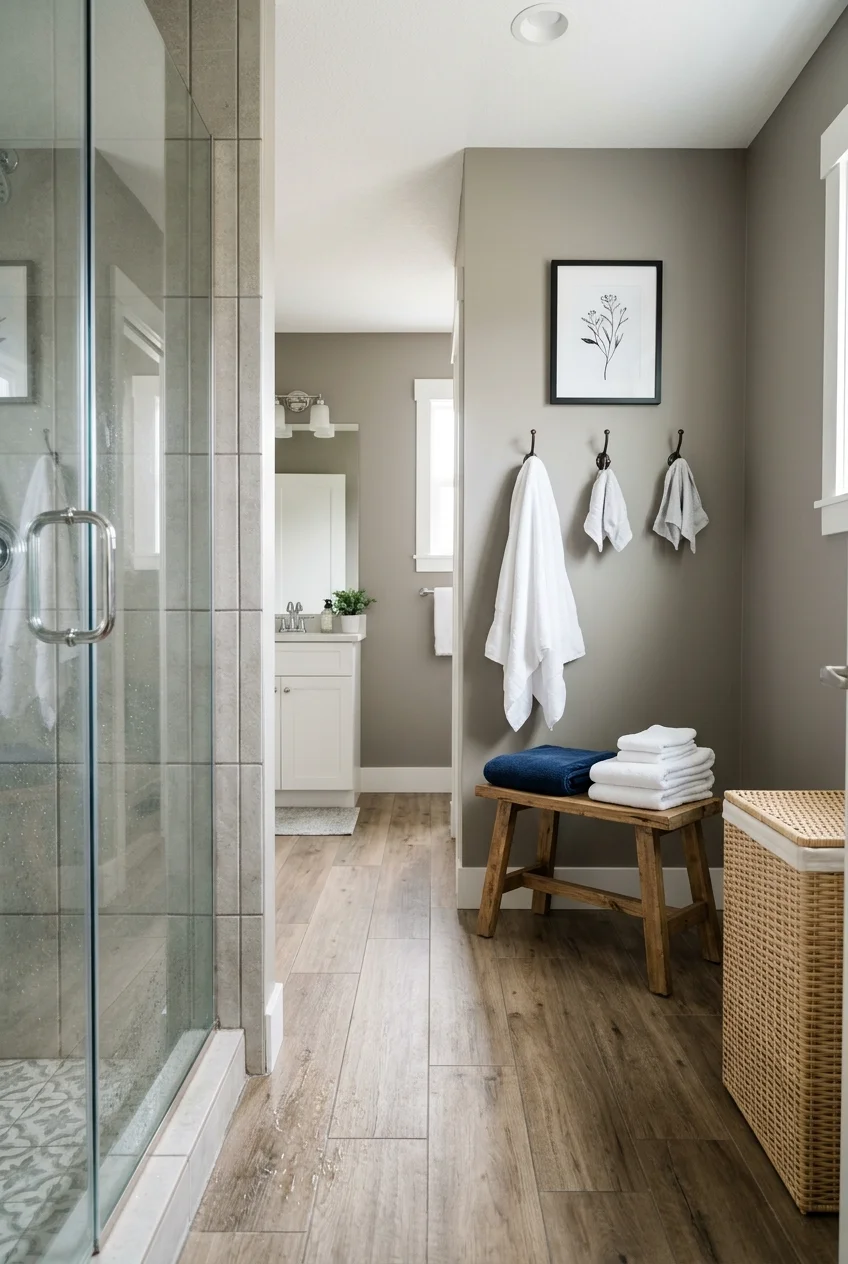
Place towel hooks, hamper access, and a small dressing surface beyond the tub or shower spray zone so dry clothes stay dry.
A change in wall color or floor pattern can mark the zone visually without adding a partition that narrows the room.
- Keep hooks reachable from the exit.
- Leave the floor path unobstructed.
- Store clean clothes above splash height.
Color, Tile, and Character Without Visual Clutter
Use one memorable surface as the lead, then let quieter finishes support it. Children get personality while the room remains easy to update.
9. Color-Block the Shower With Two Tile Tones
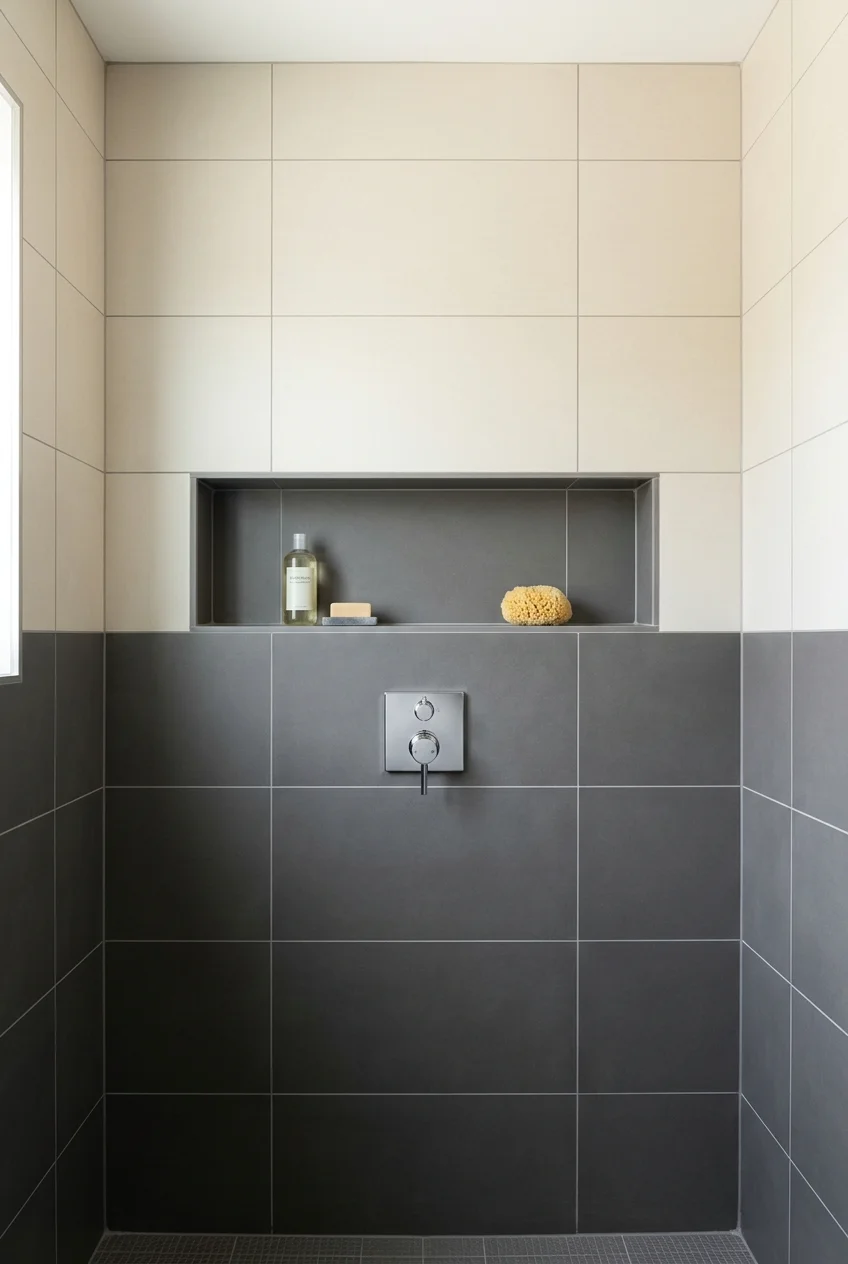
Divide the shower wall into two broad color fields instead of scattering many accent tiles. The result reads playful while grout lines stay orderly.
Align the color break with a niche, window ledge, or fixture line so it appears intentional rather than stopping at an arbitrary height.
Compare scales and finishes in these bathroom tile combination ideas, then order samples to view under the room's actual lighting before committing.
10. Let a Speckled Terrazzo-Look Floor Carry the Playfulness
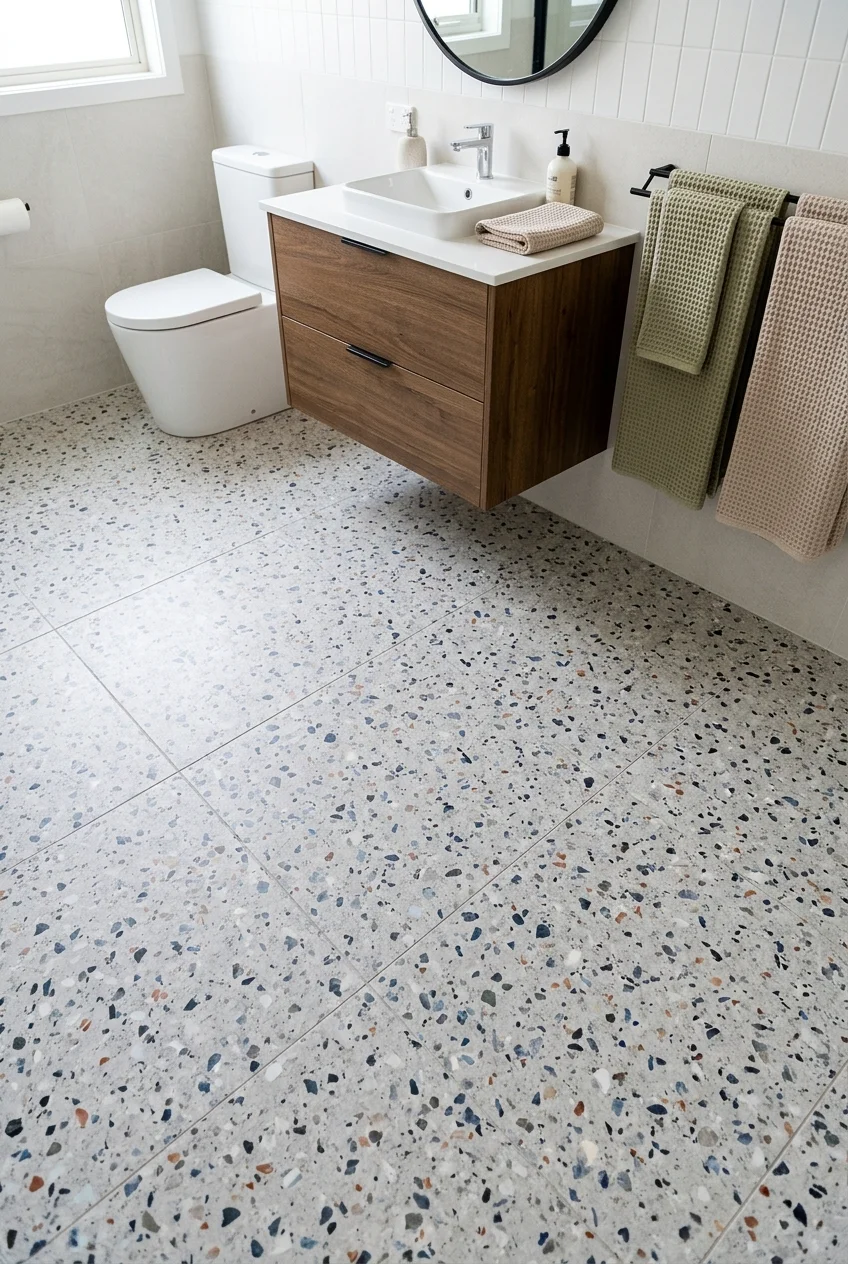
A multicolor terrazzo-look floor introduces several accent colors at once, allowing walls and cabinetry to stay calm and easier to refresh later.
Choose a floor product declared suitable for the intended wet interior use, then pull only one or two chip colors into towels and paint.
Large visual chips feel lively from standing height, while an overly tiny, high-contrast pattern can read as constant dirt in a busy bathroom.
11. Pair a Graphic Floor With Quiet White Shower Walls
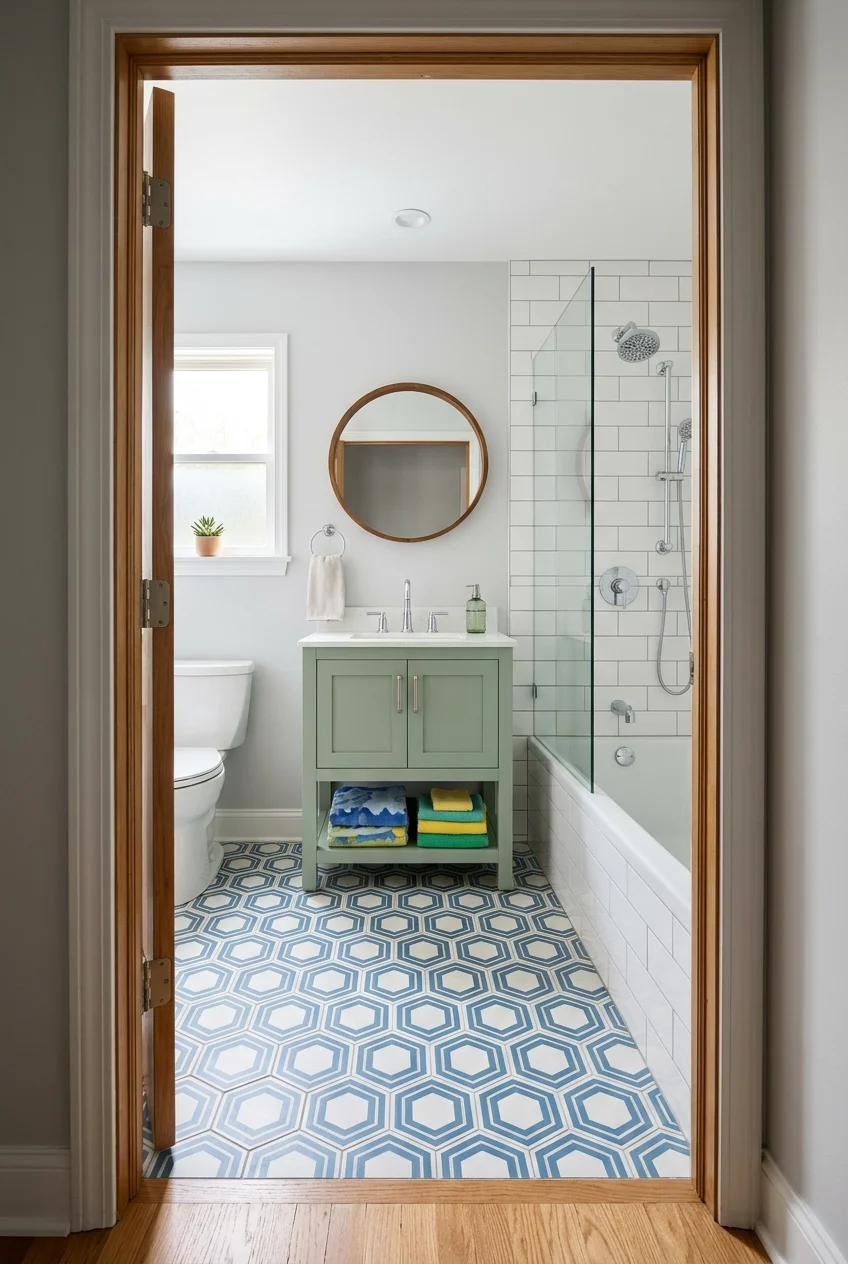
A geometric floor becomes the main design moment when the shower uses plain, light wall tile with restrained grout contrast.
Dry-lay patterned tiles before installation begins so repeats, borders, and awkward cuts are visible while changes are still possible later.
- Center the pattern on the main sightline.
- Avoid tiny slivers at the doorway.
- Keep the vanity finish visually simple.
12. Run Vertical Tile to Emphasize Height
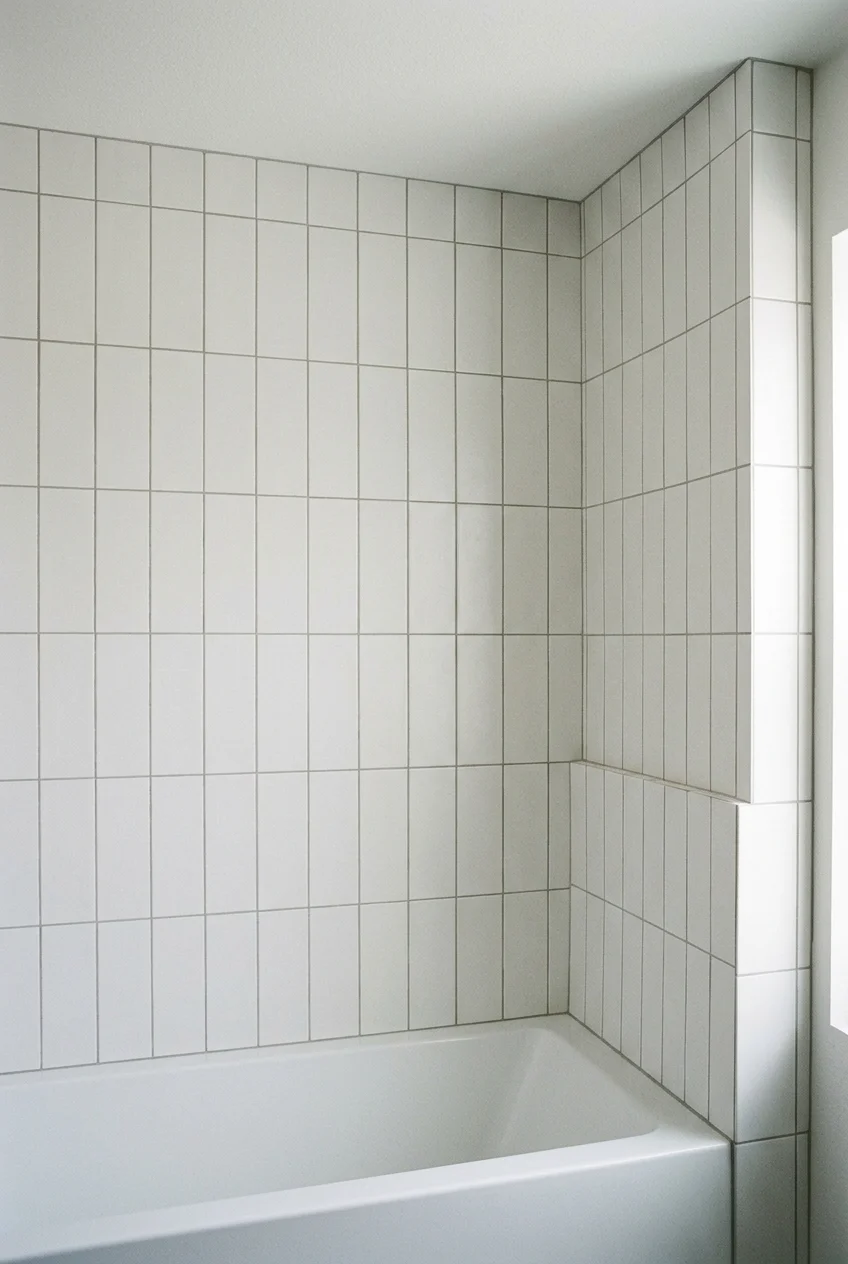
Vertically stacked rectangular tile draws attention upward and gives a low-ceiling bathroom a stronger architectural rhythm without relying on a busy motif.
Keep the layout centered on the tub or vanity, because uneven edge cuts become especially noticeable when every grout line forms a column.
Setup note Ask the installer to map the first and last columns before setting tile; balanced cuts matter more than beginning with a full piece.
13. Use Waterproof Wallpaper on One Dry Wall
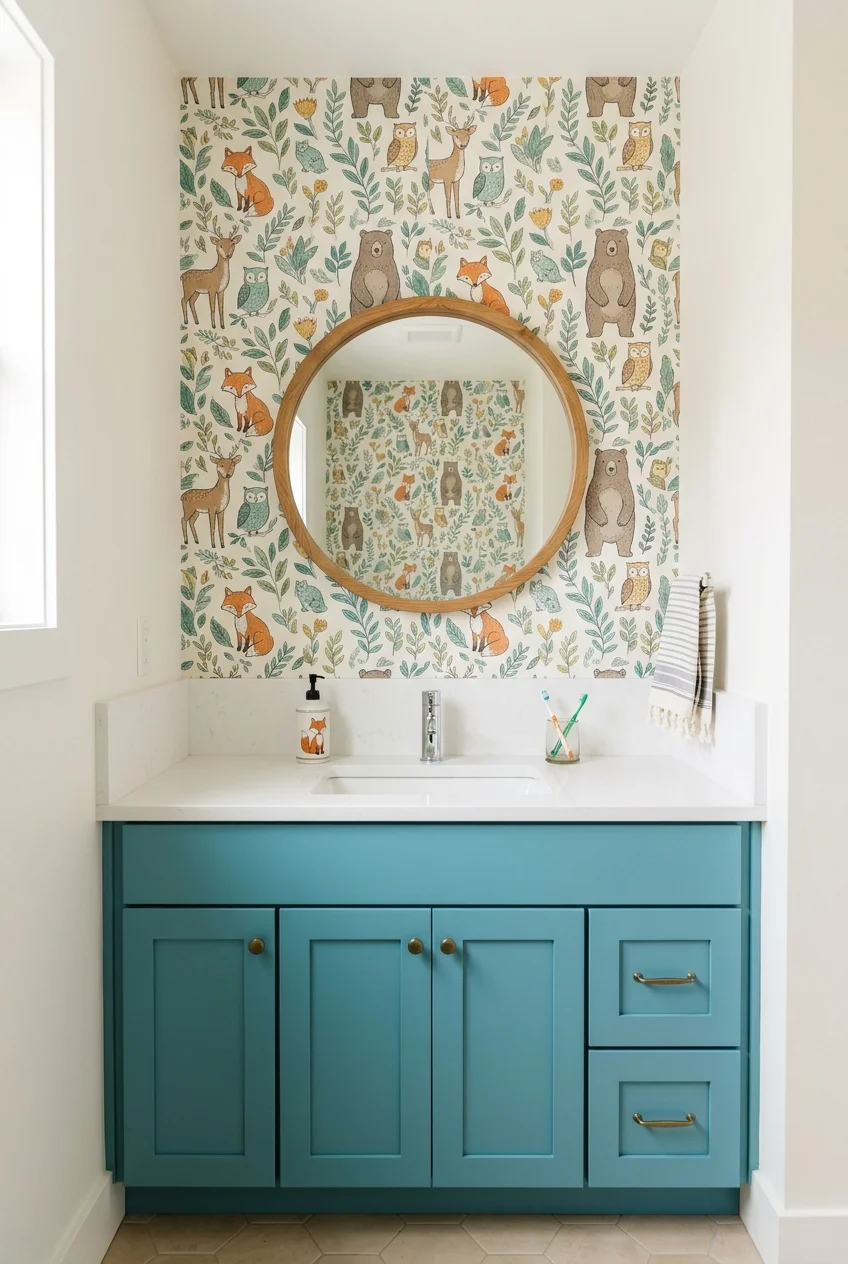
A wallpapered vanity wall delivers animals, stars, botanicals, or abstract color without committing every permanent surface to a childhood theme.
Keep paper outside direct splash zones and select a product whose manufacturer permits bathroom use. Ventilation still matters because steam reaches dry walls.
Repeat one wallpaper color on the vanity or towels, then stop. Too many matching motifs make the room feel like a themed retail display.
14. Paint a Durable Half-Wall Above a Tiled Base
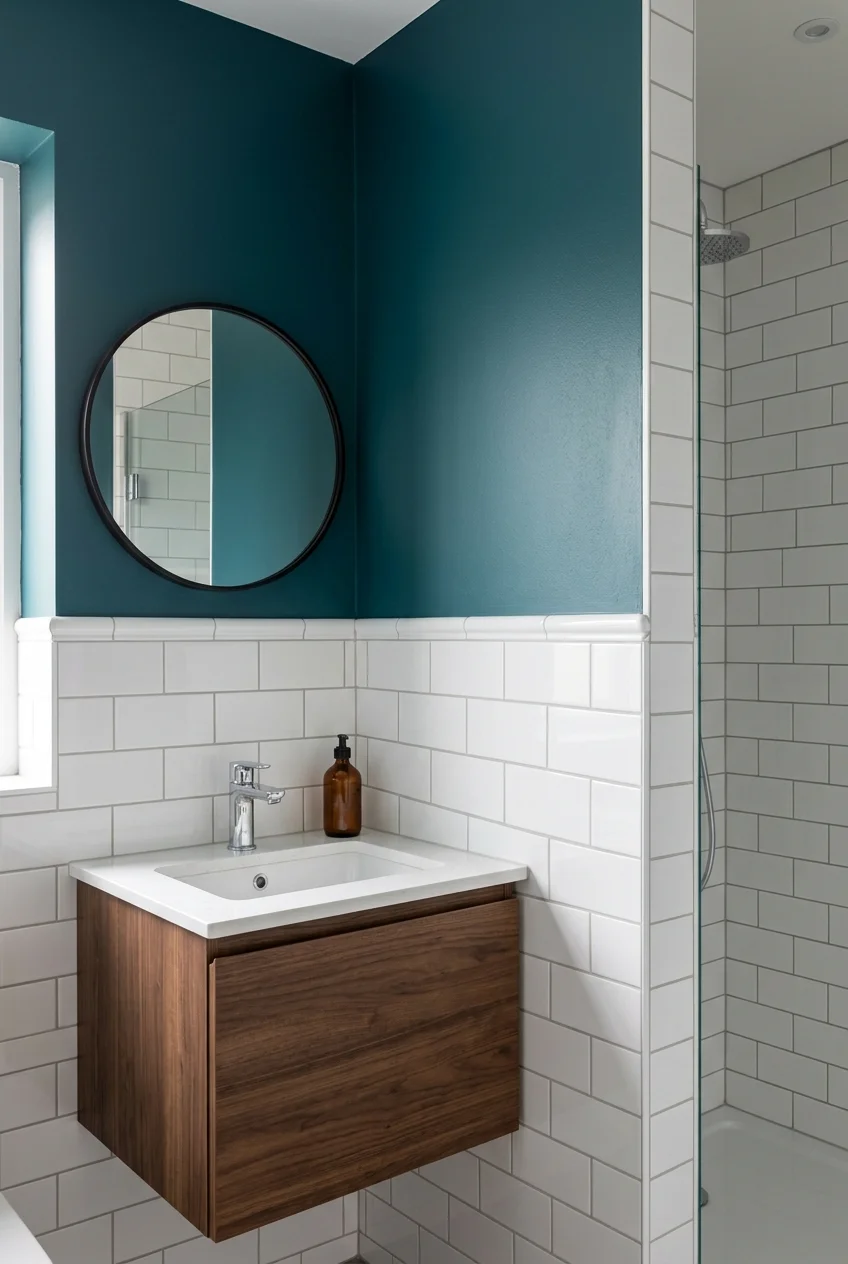
A tiled lower wall handles splashes and scuffs, while washable paint above keeps color changes affordable as children's tastes evolve.
Set the transition at a deliberate architectural line, such as the vanity backsplash or window sill, and finish the exposed tile edge cleanly.
Use bathroom-rated paint and confirm compatible sealants at joints. Paint alone should never substitute for the required waterproof assembly inside wet areas.
15. Make the Ceiling the Unexpected Color Moment
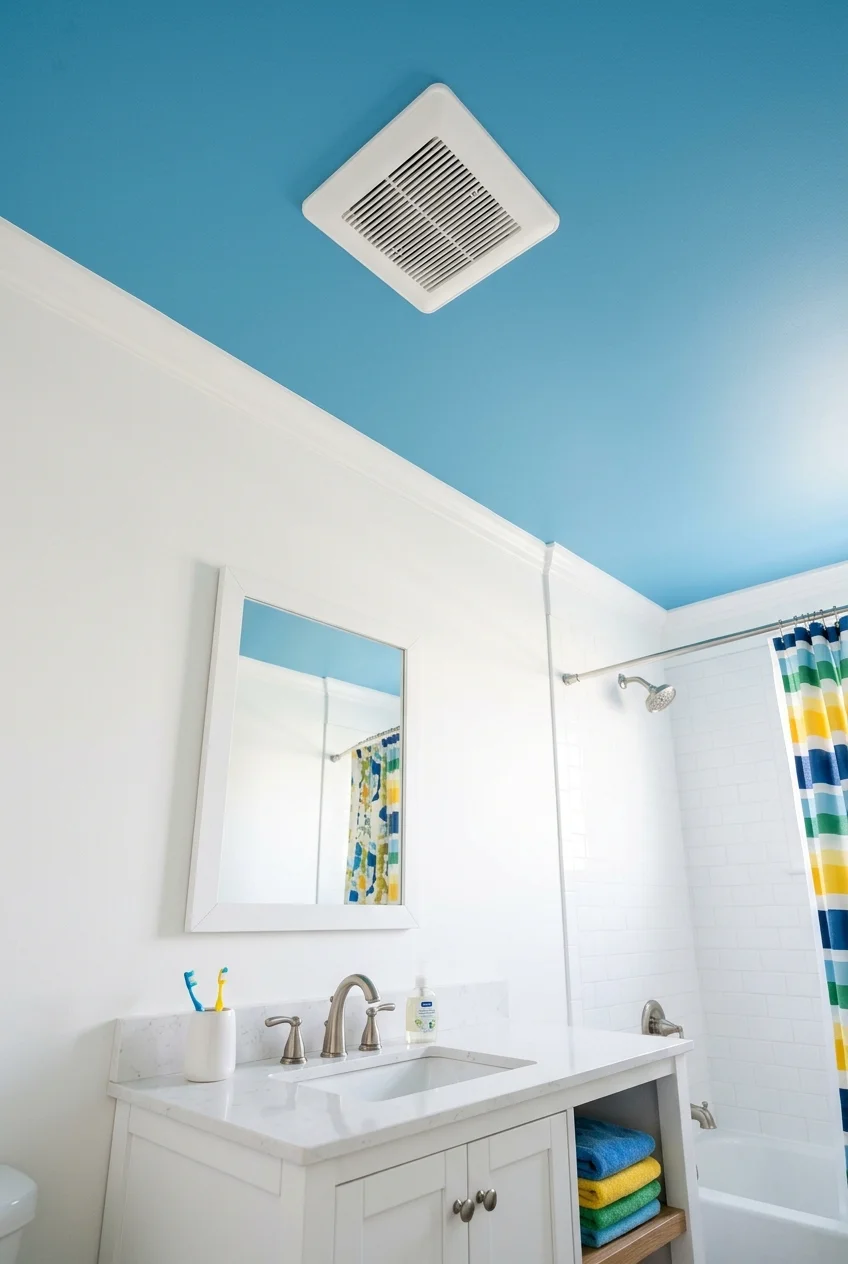
A colored ceiling adds personality without crowding eye-level surfaces, especially when walls, tile, and cabinetry already need to remain practical and bright.
This works best with a simple room shape and adequate light. Continue the ceiling color only onto trim when the edge detail supports it.
Prepare peeling or stained areas before painting, and use a coating intended for humid interiors rather than hiding an unresolved moisture problem.
Focused Finishes That Are Easy to Live With
A smaller design move can carry the room when it has a clear boundary. Concentrate pattern where it will stay visible and maintainable.
16. Line the Shower Niche With One Accent Mosaic
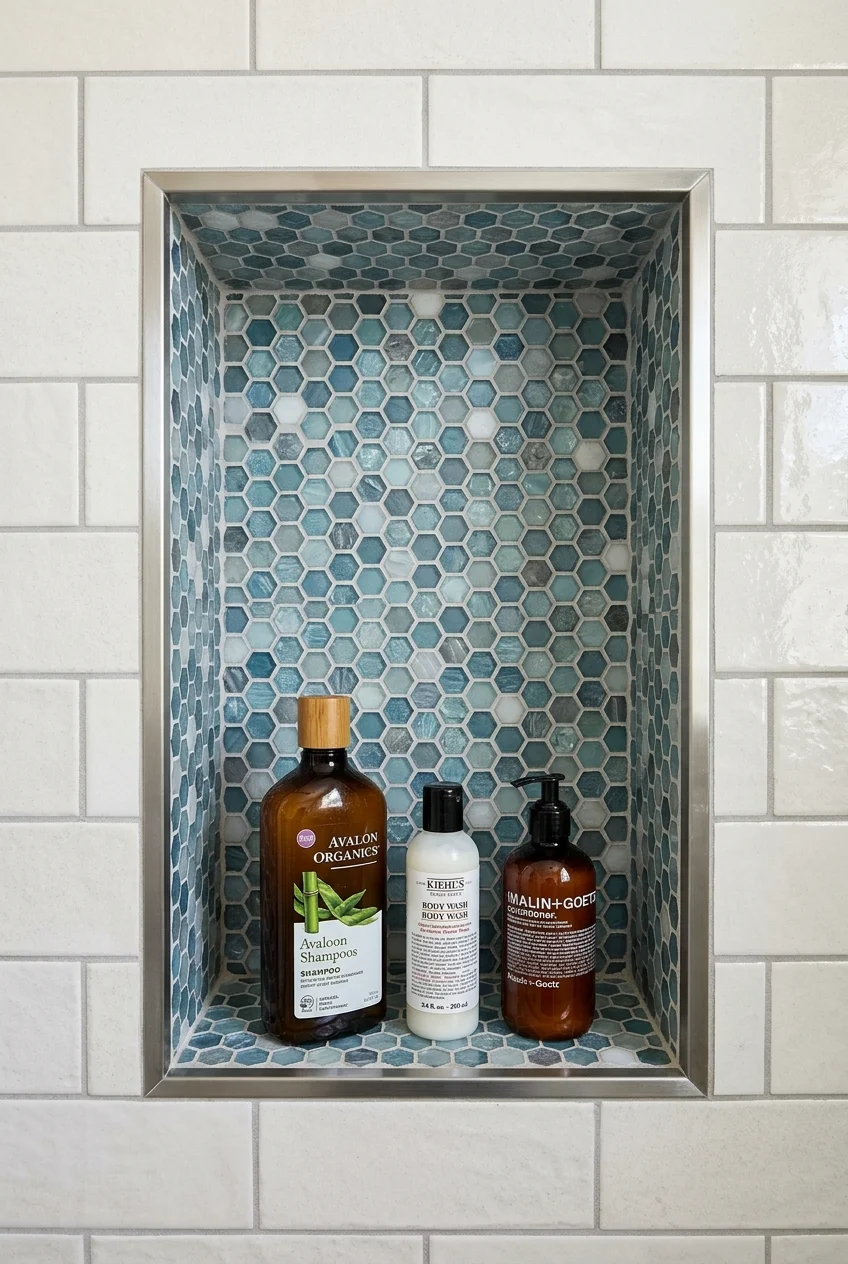
A contrasting mosaic inside the niche creates a contained focal point and repeats color without covering an entire shower in a demanding pattern.
Choose pieces compatible with the niche dimensions so edges finish neatly. Waterproofing and slope belong beneath the tile, not in decorative grout choices.
Keep bottles below the niche top and confirm shelves are deep enough for actual containers without projecting into the shower path.
17. Scale a Checkerboard Floor to the Room
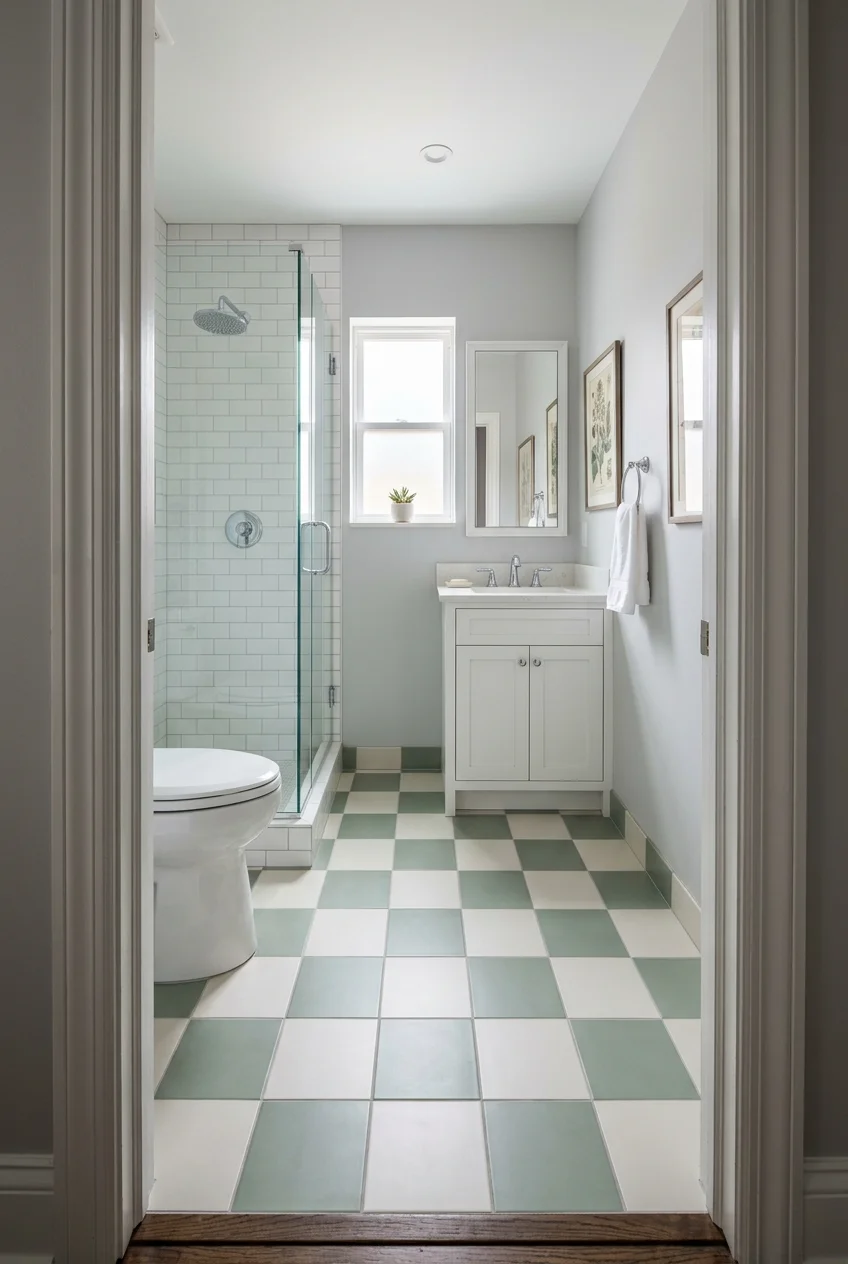
A checkerboard floor feels playful and structured, but tile size determines whether the pattern reads clearly or breaks into awkward fragments.
Lay out full rows across the doorway and vanity sightline before ordering. Softer color contrast keeps a compact room lively without feeling visually crowded.
Practical tip Photograph the dry layout from the doorway; the camera quickly reveals off-center rows and tiny perimeter cuts that are easy to miss nearby.
18. Let a Painted Vanity Supply the Main Color
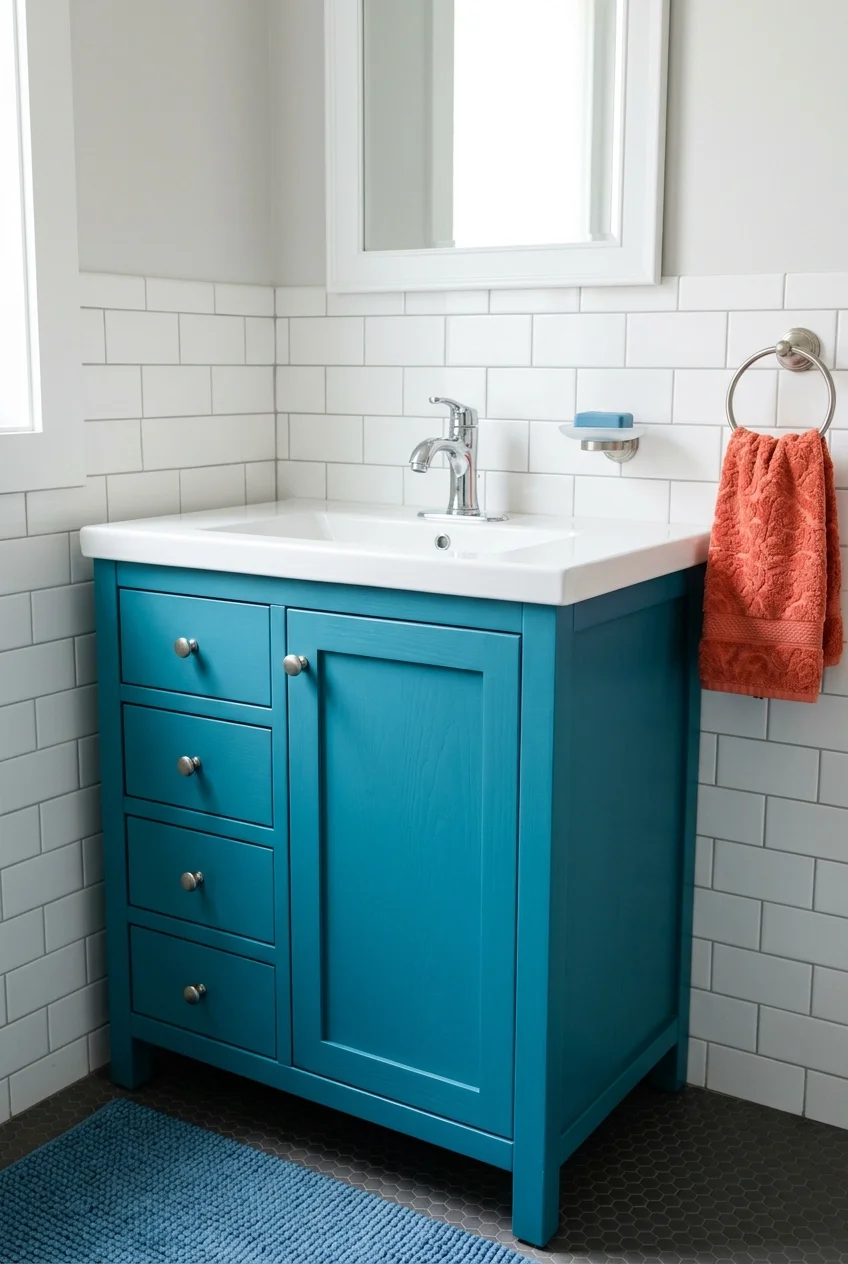
A saturated vanity brings substantial color at eye level while leaving tile, plumbing fixtures, and counters flexible enough to survive changing preferences.
Choose a cabinet finish intended for humid rooms, then repeat the color sparingly in one towel stripe or framed print.
Test the paint beside the counter sample because cool white, cream, and stone undertones can shift the cabinet color unexpectedly.
19. Use a Simple Mural Above the Splash Zone
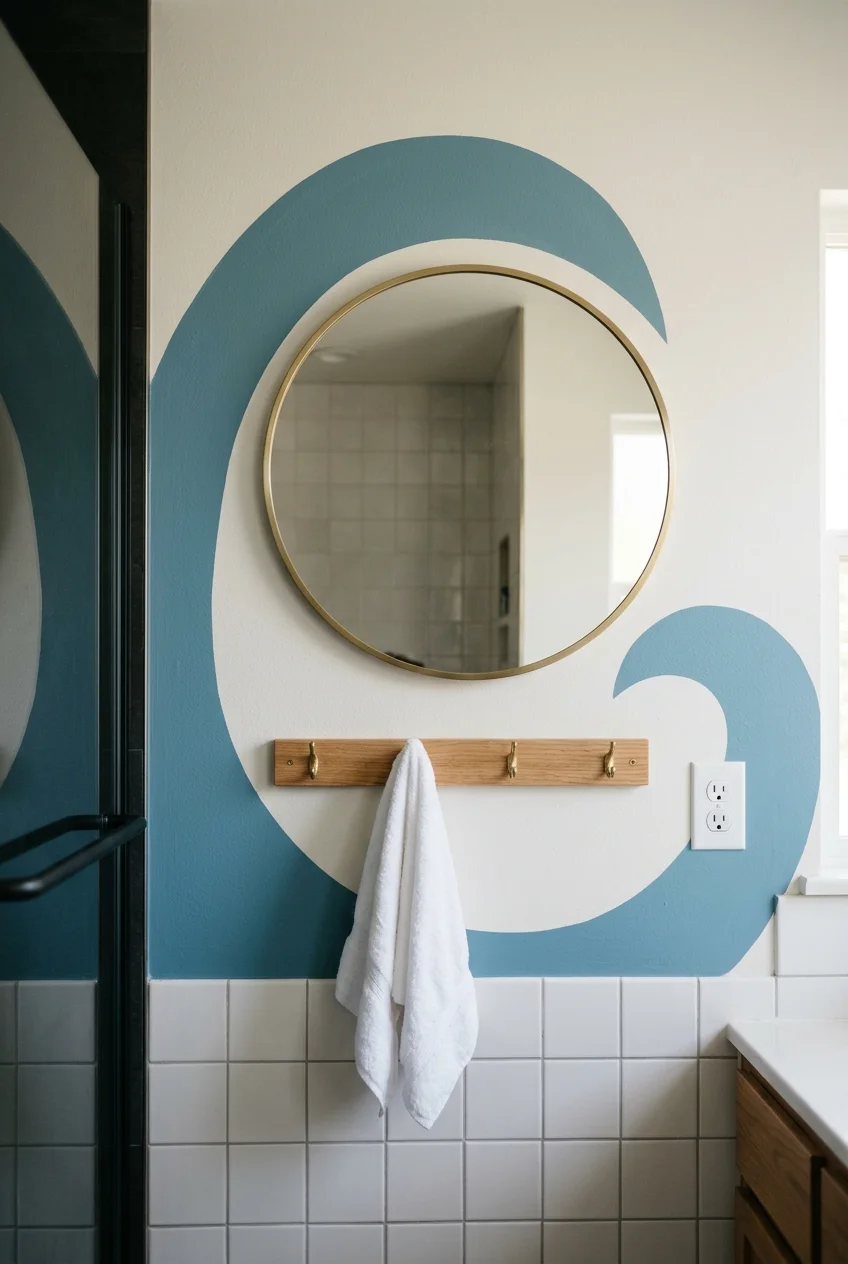
A painted arch, oversized wave, or loose geometric mural can personalize a dry wall without adding grout, seams, or costly custom tile.
Keep the shape clear of direct water and frame it around a mirror, hook rail, or shelf so the composition has a practical anchor.
- Use washable bathroom paint.
- Keep outlets and switches unobscured.
- Trace the design before painting.
20. Choose a Replaceable Shower Curtain as the Theme Layer
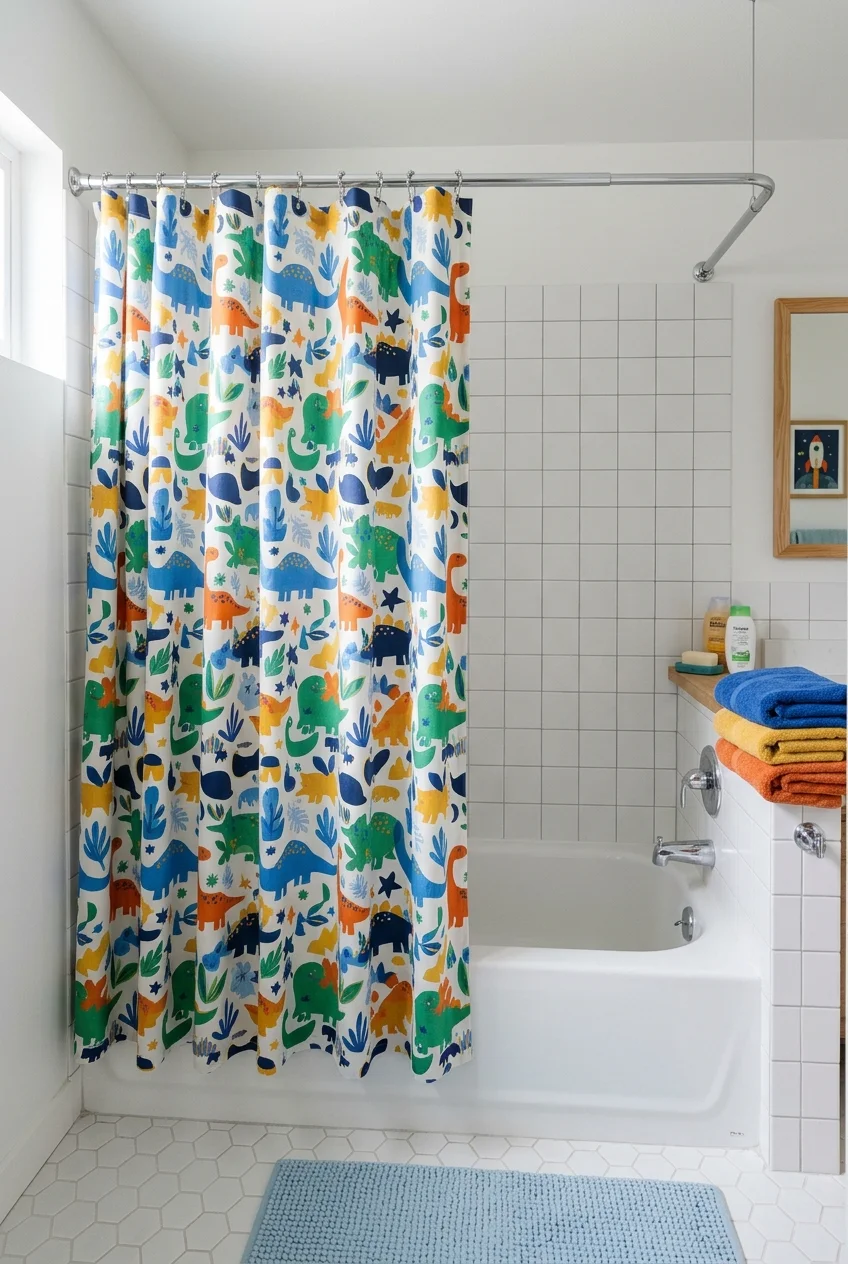
A shower curtain can carry animals, stripes, or bold color while permanent tile stays neutral enough for the bathroom to grow with its users.
Mount the rod high enough to lengthen the room visually, but keep the curtain hem above the floor so it can dry and clean easily.
Browse these small bathroom shower curtain ideas for pattern scale, then choose a washable curtain and a separate water-resistant liner.
Storage Children Can Reach and Adults Can Manage
Divide storage by frequency and safety: daily items belong within easy reach, backups sit higher, and medicines or cleaners remain secured away.
21. Add a Narrow Linen Tower Between Sink Zones
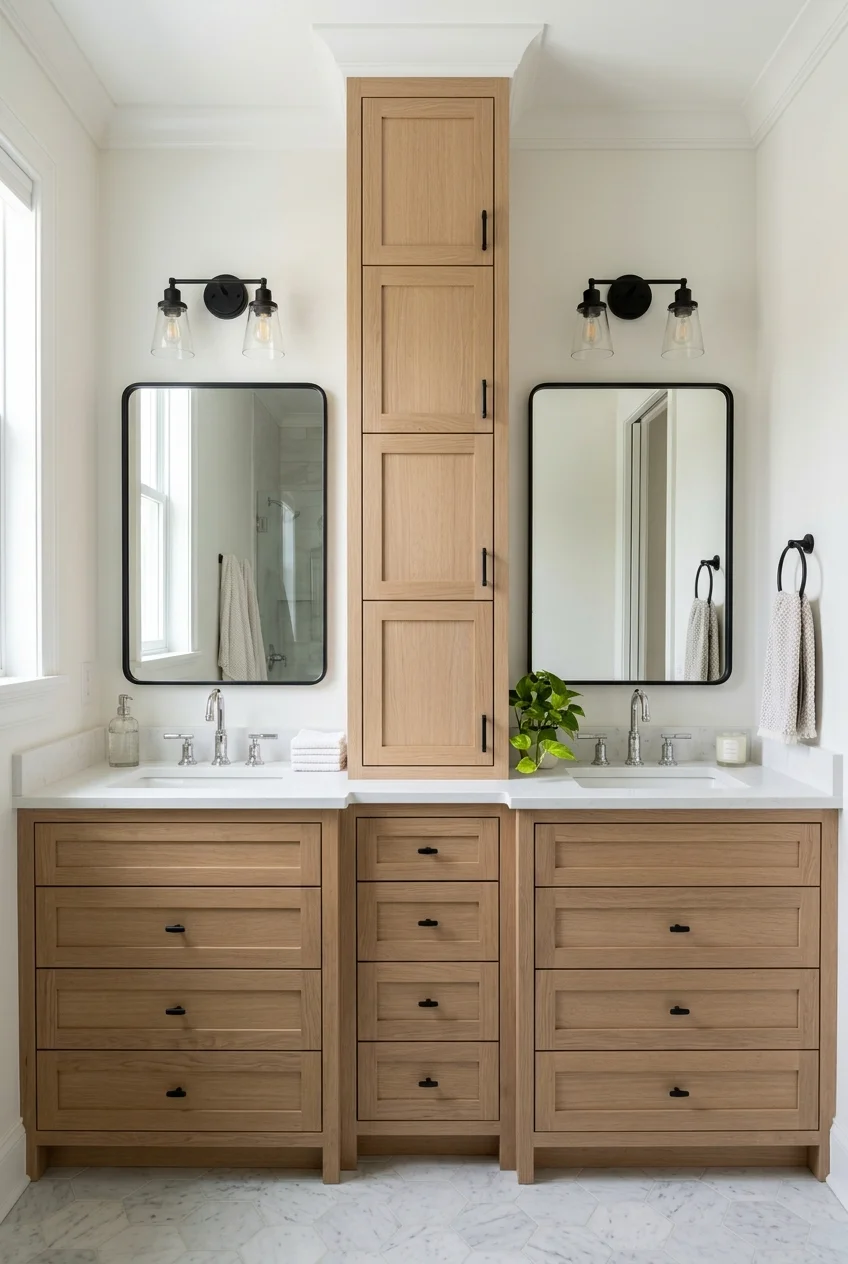
A slim center tower separates sibling stations while keeping washcloths, spare soap, and grooming supplies close to the point of use.
Use drawers below for daily items and a closed upper cabinet for backups. Confirm the tower does not crowd mirrors or task lighting.
Shallow shelves prevent supplies from disappearing behind one another, which matters more than maximizing the cabinet's total cubic volume alone.
22. Use Wide Drawers Instead of Deep Door Cabinets
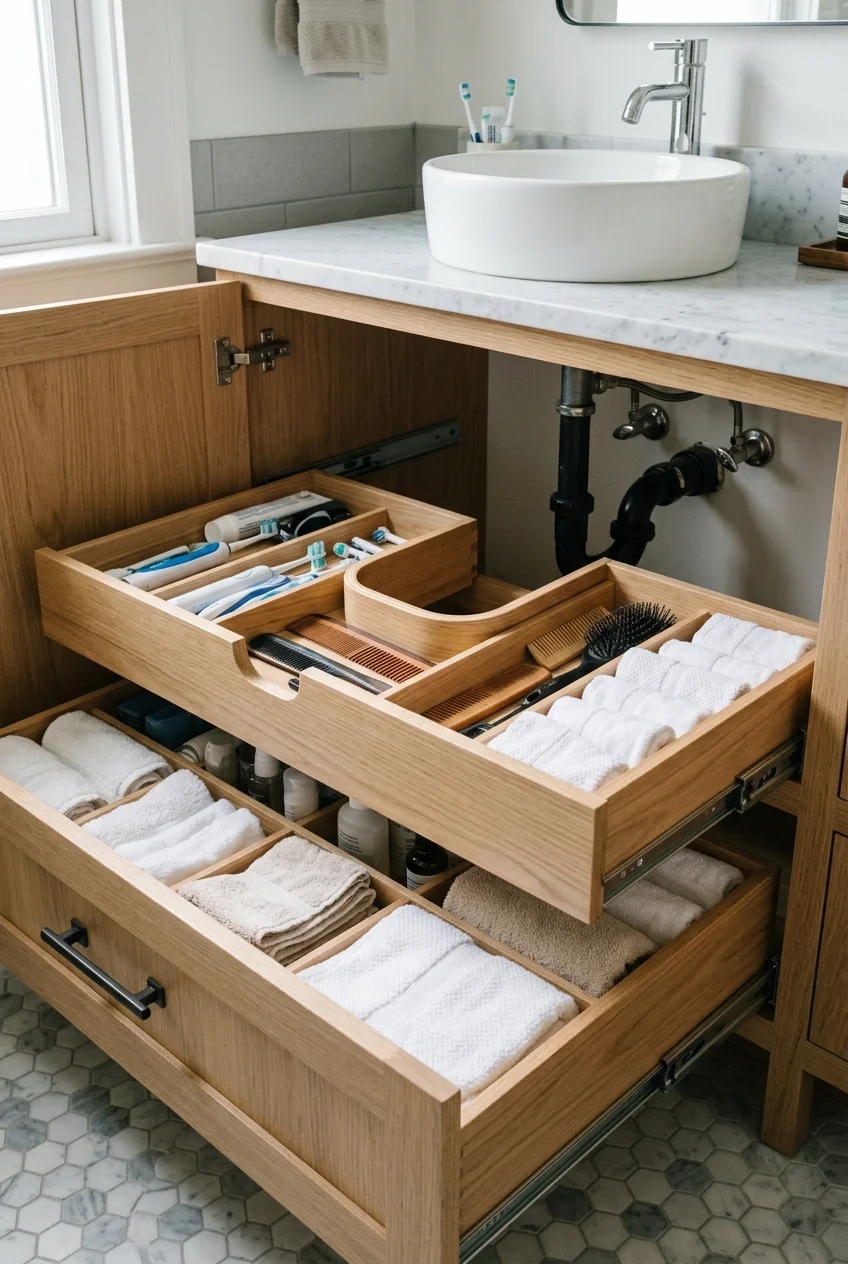
Wide drawers bring toothbrushes, hair accessories, and washcloths into view without requiring children to kneel and search behind plumbing by themselves.
Plan drawer depths around actual items, reserving the deepest drawer for towels or a hair dryer that adults supervise during routines.
- Use wipeable removable dividers.
- Leave clearance around the sink trap.
- Assign one drawer per child.
Ask the cabinet supplier to show the internal drawer shape, because a full-width front may conceal a narrow U-shaped box around the drain.
Select full-extension hardware so items at the back remain visible, and verify that opened drawers do not collide with the bathroom door.
23. Install Shallow Pullouts Beside the Plumbing
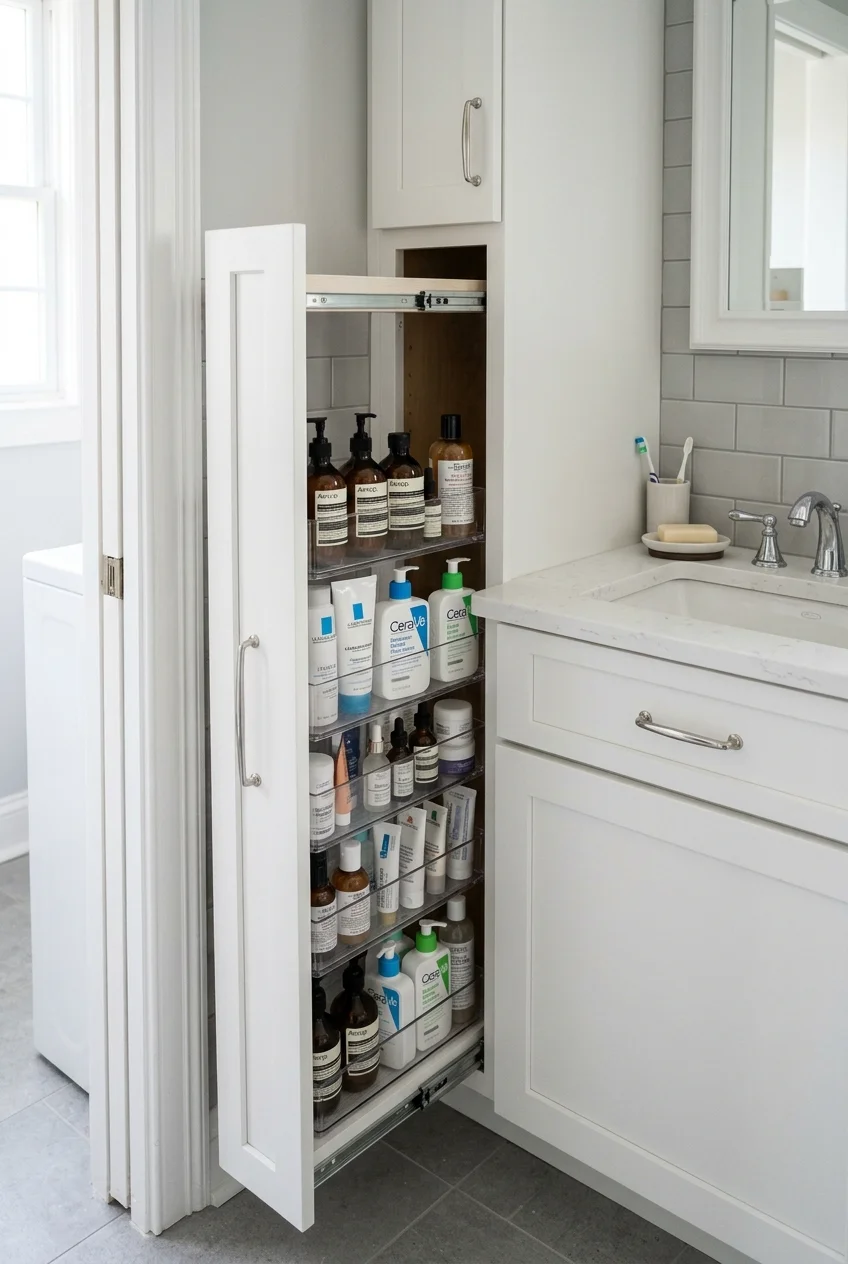
Narrow vertical pullouts can use the dead space beside a sink base for bottles, spare tissue, or supervised styling tools.
Specify removable, washable bins and confirm the pullout clears hinges, supply lines, and the open bathroom door throughout its travel.
Keep heavier bottles low so the unit feels stable, and avoid storing medicines or cleaners in a child-accessible pullout at all.
24. Give Bath Toys a Draining Home
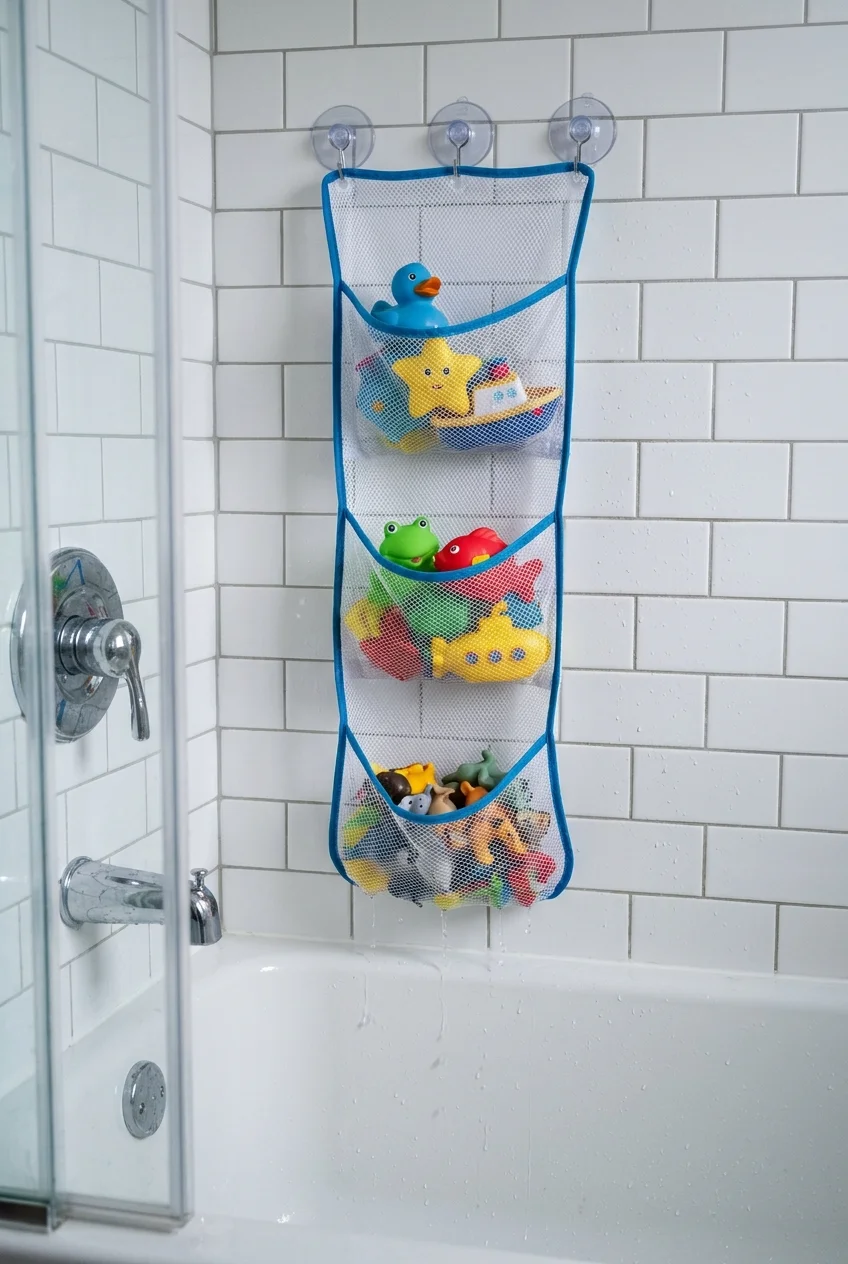
Store bath toys where water can drain and air can circulate, rather than leaving damp pieces piled on the tub floor or rim.
Mount the organizer away from the standing area and inspect attachments regularly. Empty and clean it often enough to catch trapped residue.
A three-compartment mesh bath organizer (paid link) can separate toys, but confirm the mounting surface and placement suit your tub before purchasing.
25. Recess Medicine Cabinets Between Wall Studs
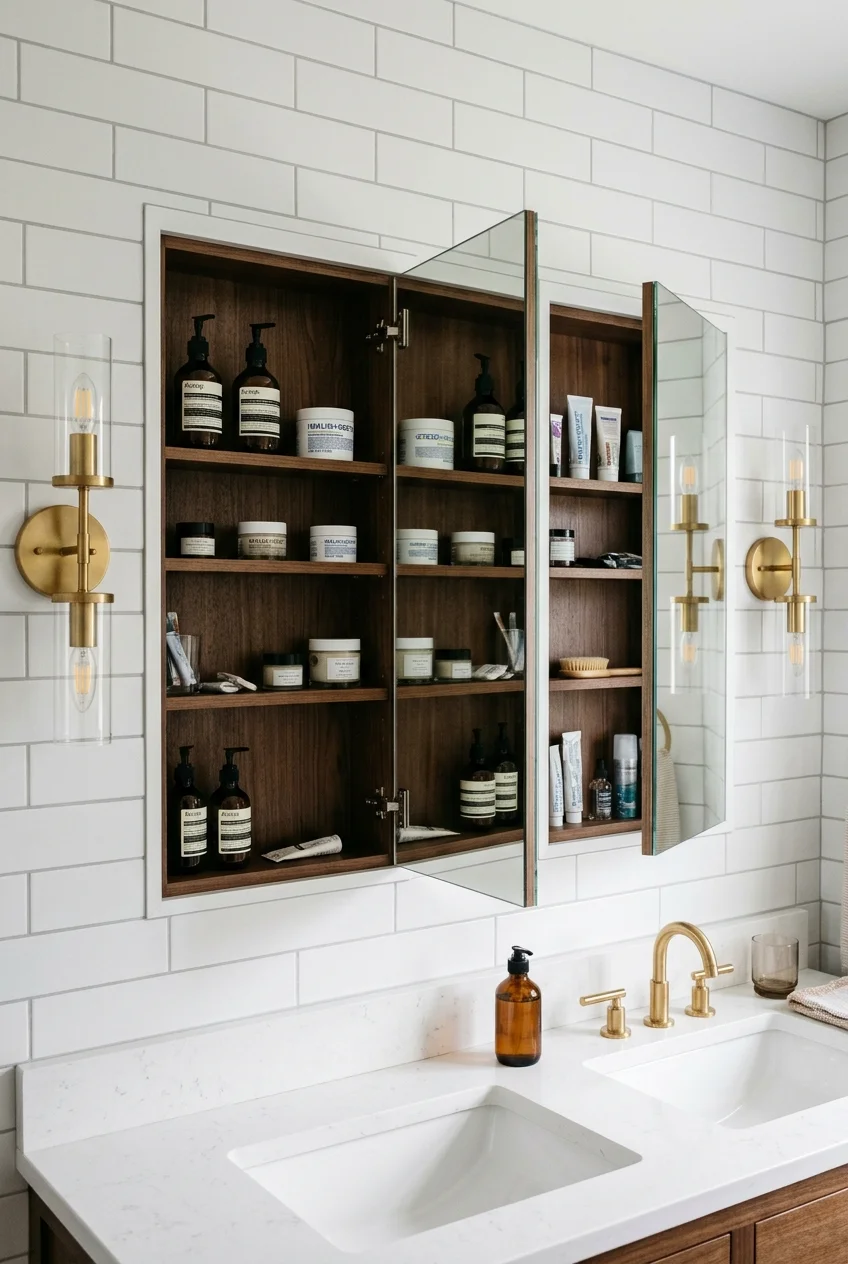
Recessed medicine cabinets add shallow storage at eye level without projecting far over the sink, making small vanity areas feel less crowded.
Use lower shelves for supervised daily items and secure medication elsewhere. Wall framing, wiring, vents, and plumbing determine whether recessing is possible.
A mirrored door should open without striking a side wall or light fixture, so test the hinge direction before installation.
26. Mix Open Cubes With Closed Drawers
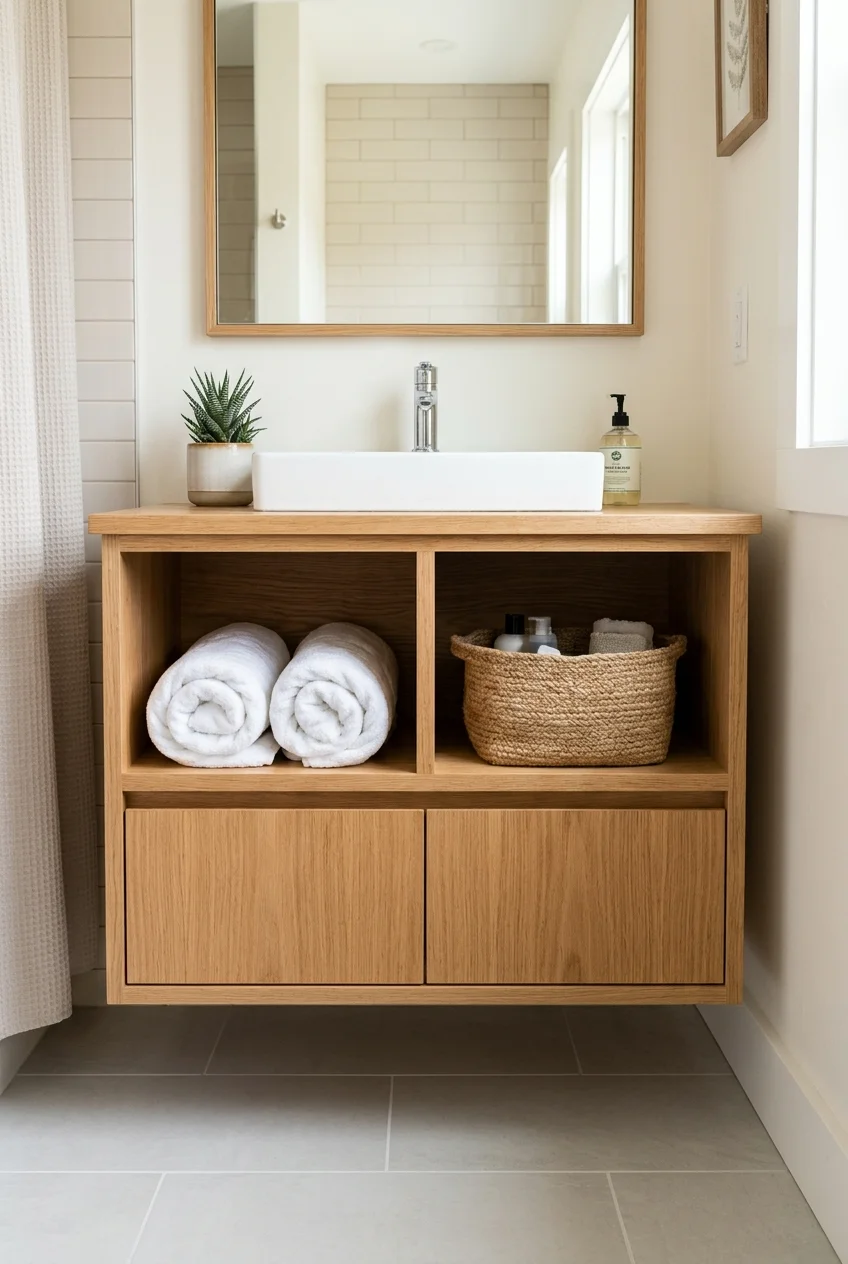
Open cubes make rolled towels easy to grab, while closed drawers hide small grooming items that would otherwise make the room look constantly cluttered.
Limit open storage to a few durable categories and size each cube for the baskets or towel stacks you will actually use.
Keep the lowest opening clear of toilet spray and wet shoes, especially when the vanity sits beside the bathroom entrance.
27. Build a Ventilated Hamper Into the Vanity End
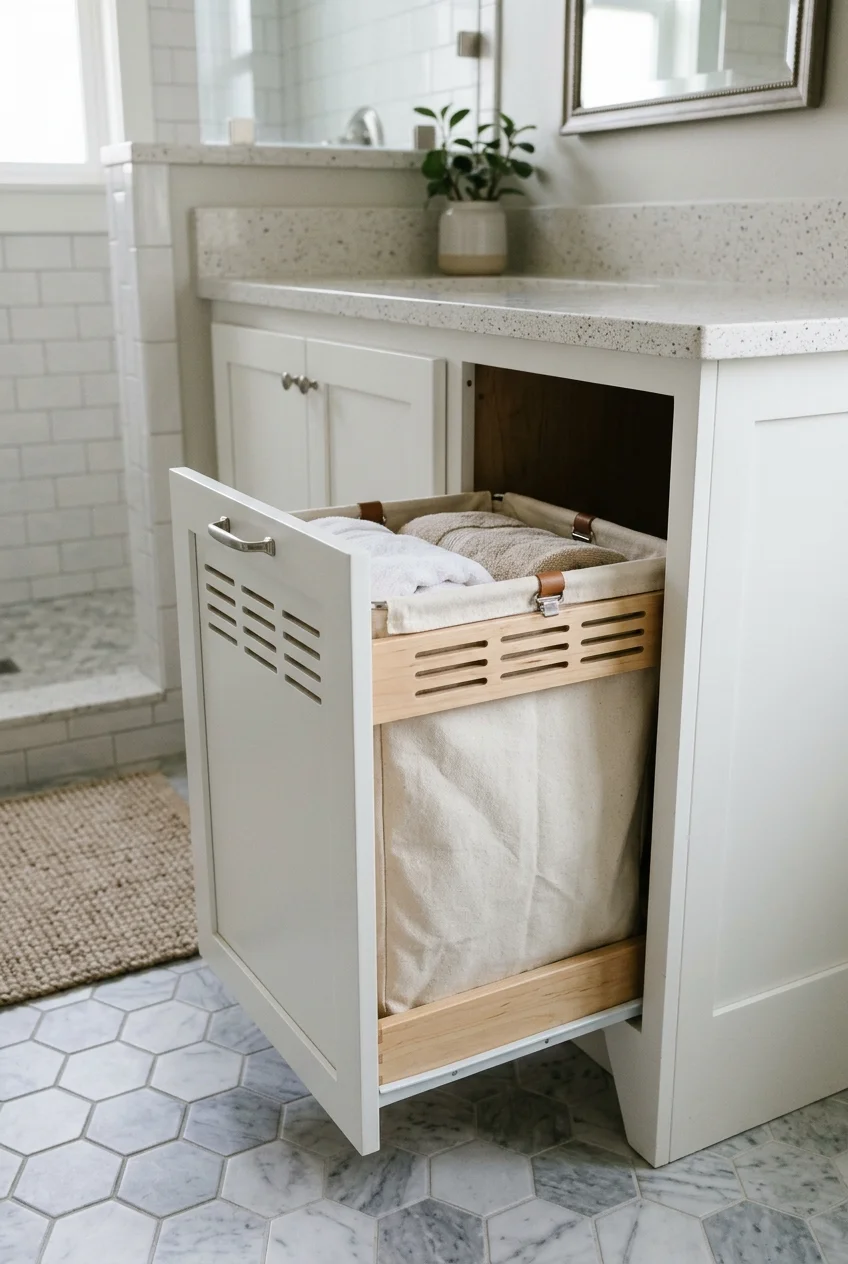
A tilt-out or pullout hamper at the vanity end catches damp towels before they reach the floor, while preserving the main sink storage.
Choose a removable liner and provide ventilation so moisture does not remain trapped inside cabinetry. The compartment needs regular emptying, not hidden accumulation.
Watch for Check the open hamper against the bathroom door and walkway; a convenient bin becomes frustrating when it blocks the only exit path.
28. Reserve a High Lockable Cabinet for Hazardous Items
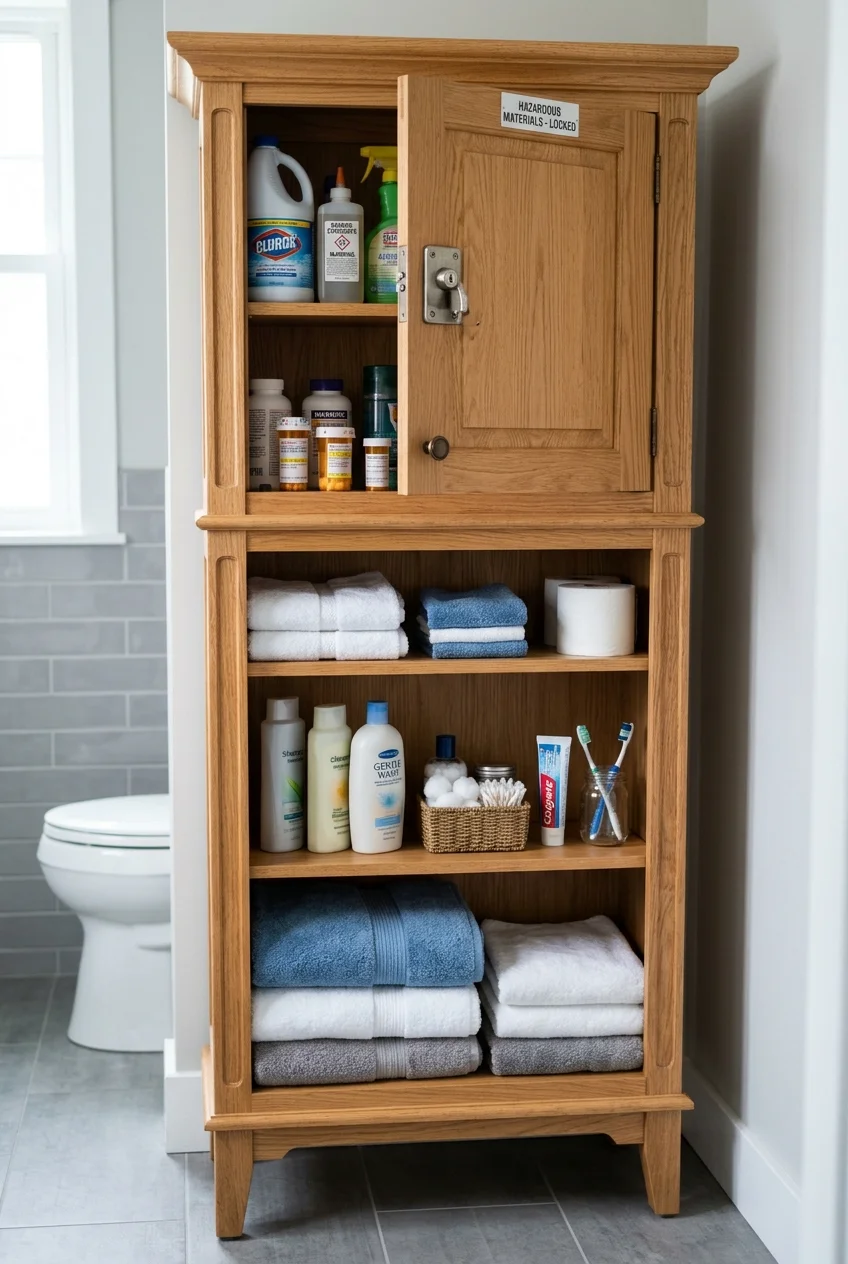
Medicines, cleaners, sharp tools, and concentrated toiletries need a secured location beyond a child's reach, not merely an attractive matching basket.
A high cabinet with an adult-operated lock keeps hazardous products separate from everyday towels and toothbrushes. Reengage the lock after every use.
CPSC guidance also recommends safety latches and locks for bathroom cabinets, while noting that no device makes a home completely childproof.
29. Use the Toilet Wall for a Shallow Closed Cabinet
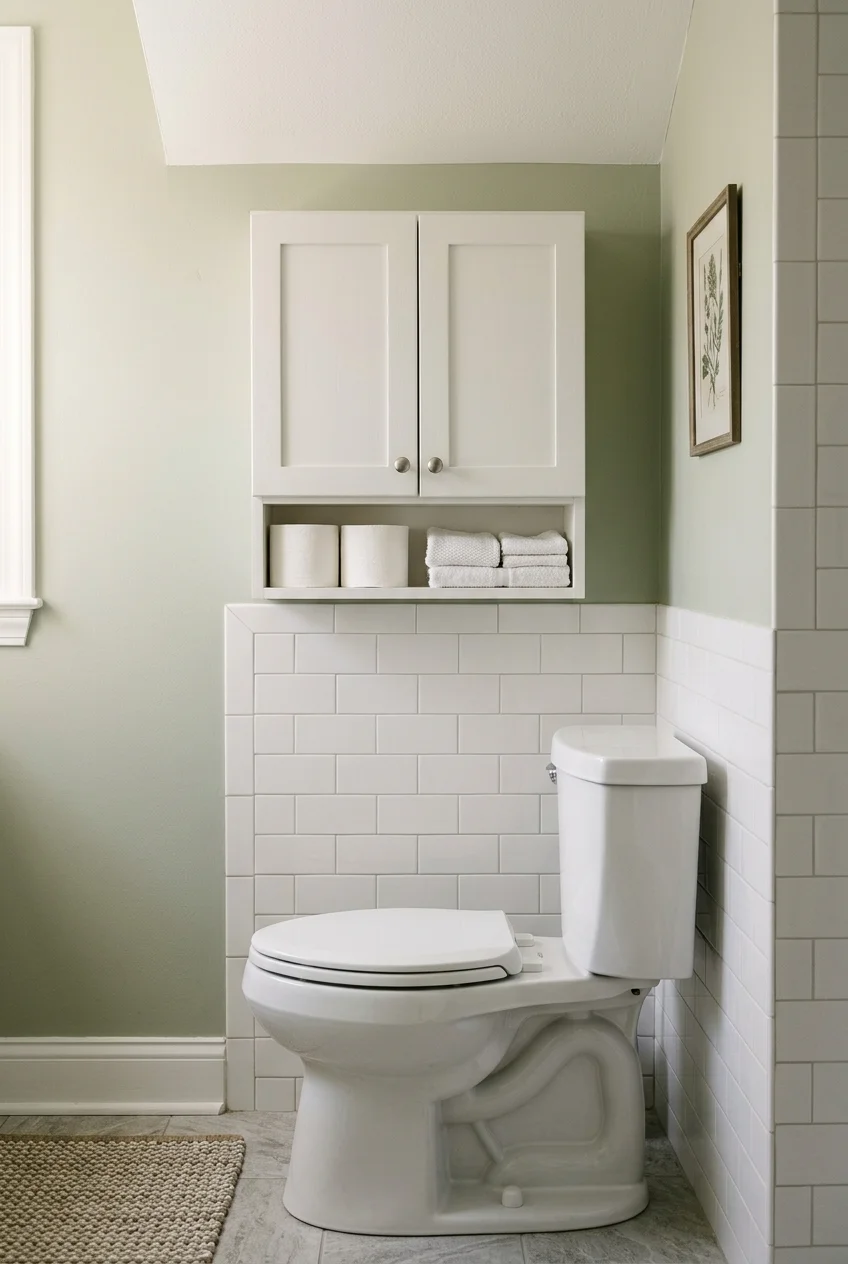
A shallow wall cabinet above the toilet can hold spare paper and washcloths without consuming floor area or creating a deep overhead obstacle.
Keep the cabinet depth modest, anchor it into suitable structure, and position doors so an adult can reach supplies without leaning dangerously.
Closed fronts reduce visual clutter and protect linens better than open shelves directly above a flushing toilet during daily use.
30. Install a Long Rail of Individual Towel Hooks
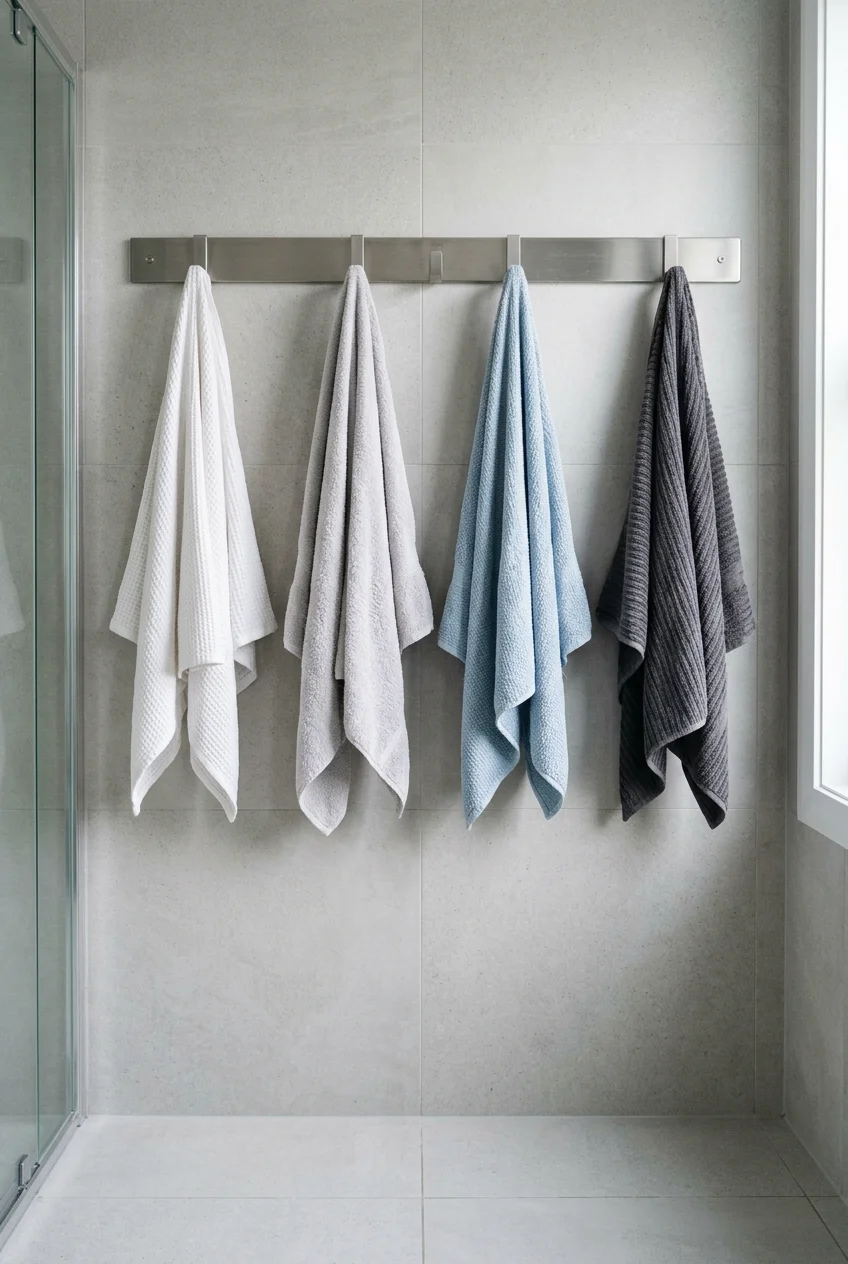
Individual hooks are easier for children than folding towels over bars, and a long rail keeps several damp towels from piling together.
Space hooks far enough apart for airflow, mount the rail into reliable backing, and place it outside direct shower spray.
- Assign one hook per child.
- Add one hook for a bath mat.
- Keep clean robes on a separate rail.
Fixtures That Support Independent Routines
Choose fixtures children can understand now without permanently shrinking the bathroom. Reach aids and flexible controls adapt better than miniature plumbing installations.
31. Choose Easy-Grip Lever Faucet Handles
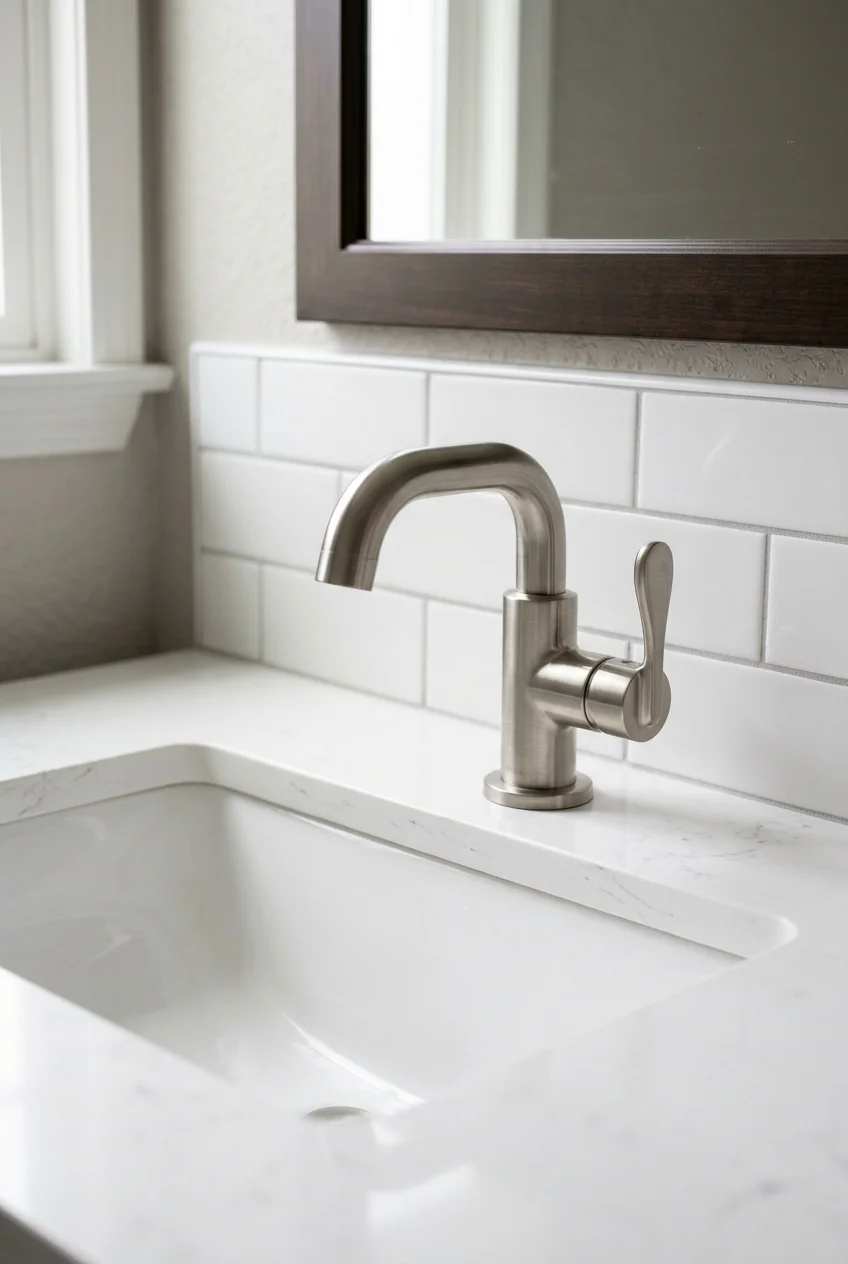
Lever handles are easier to operate with wet or soapy hands than small round knobs, helping children control flow without excessive twisting.
A single lever simplifies operation, while two levers make hot and cold visually distinct. Choose the format your household can use consistently.
Confirm the faucet fits the sink's hole pattern and projects over the basin, preventing water from striking the back deck or front rim.
Before ordering, compare handle travel with the backsplash and mirror edge so the lever can move fully without striking another surface.
32. Lower the Mirror Edge, Not the Entire Vanity
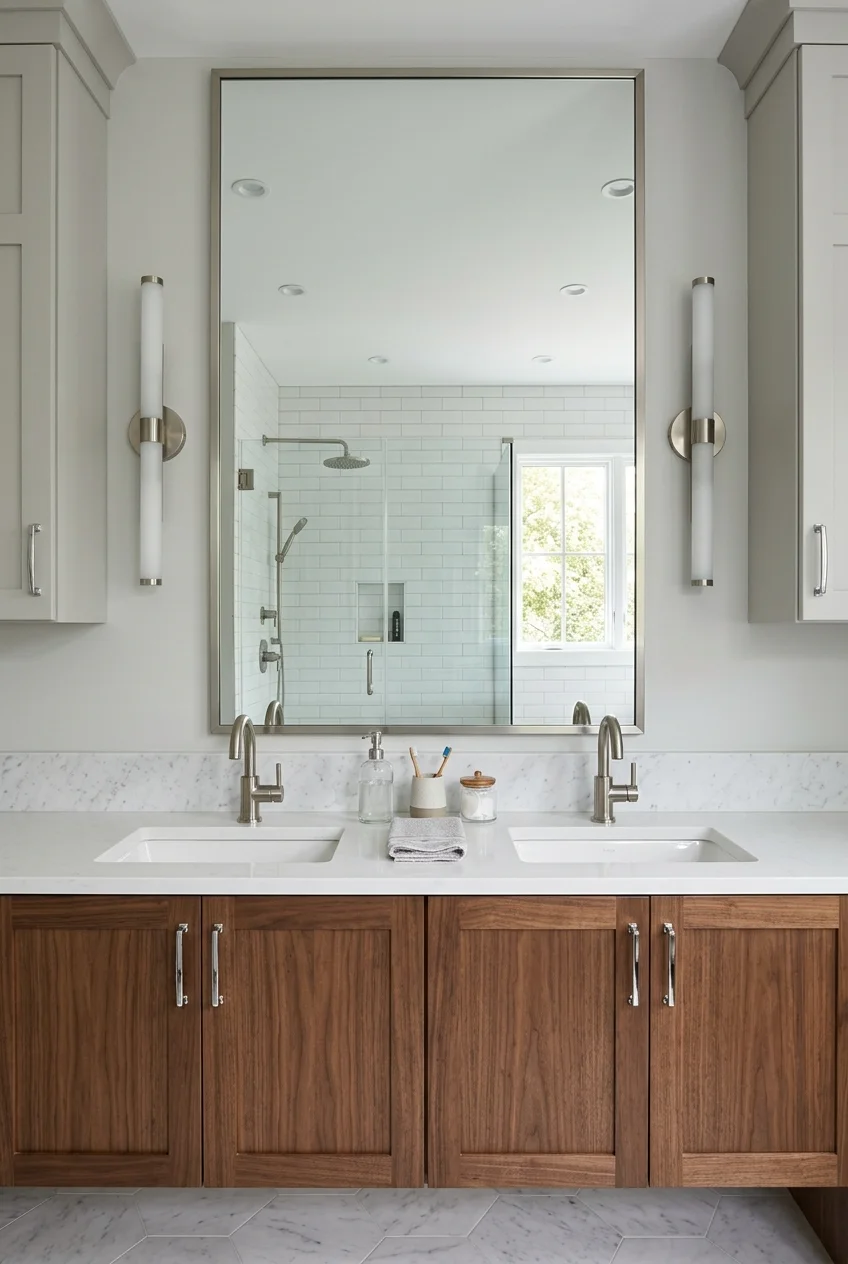
A tall mirror with a low bottom edge lets shorter children see themselves while preserving an adult-height vanity that remains useful through adolescence.
Use a backsplash or sealed gap below the mirror so repeated splashes do not attack its backing or the wall finish.
If one large mirror serves two sinks, align lighting to both faces rather than placing a single bright fixture only in the center.
33. Add a Handheld Shower on an Adjustable Slide Bar
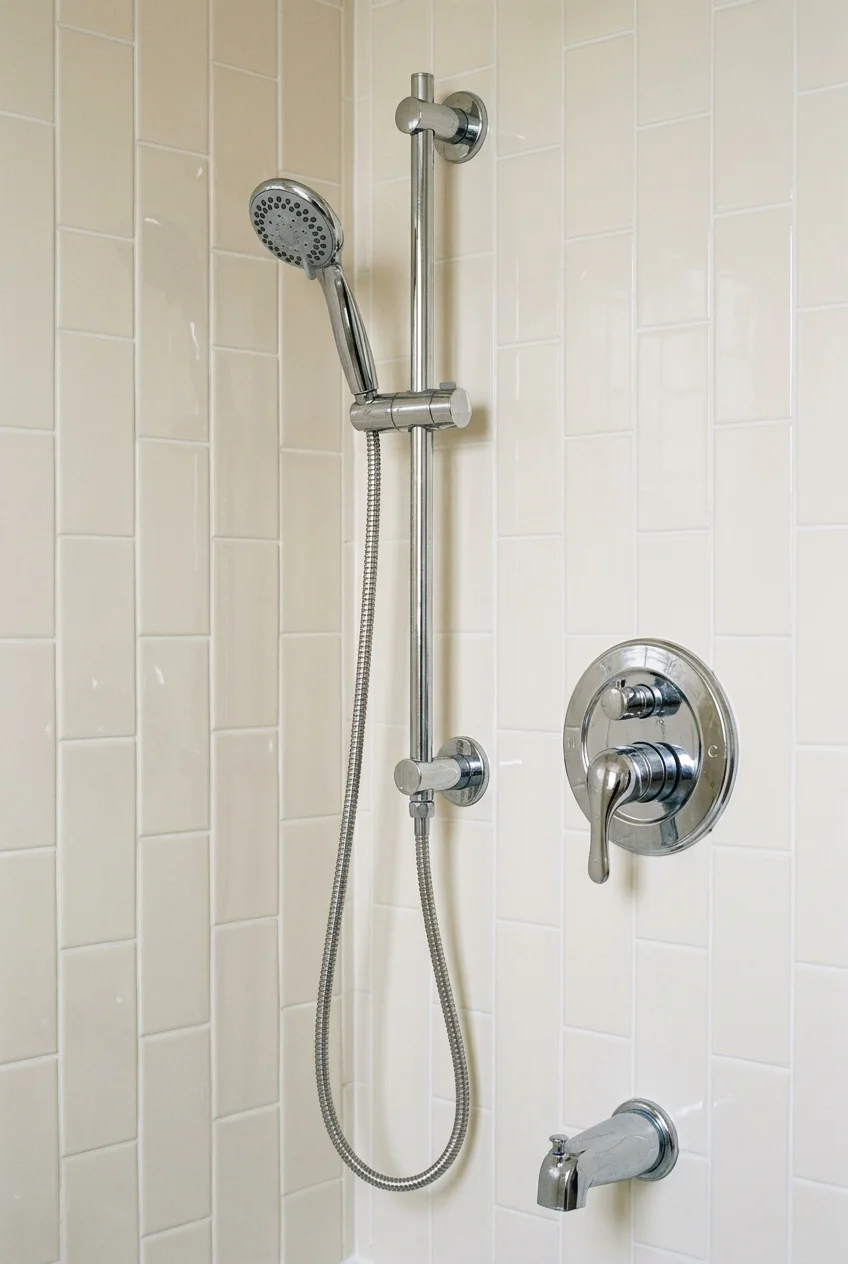
A handheld shower supports assisted bathing, rinsing shampoo, cleaning the tub, and adjusting spray height as children grow over time.
The slide bar must be installed as its manufacturer specifies and should not be treated as a grab bar unless explicitly rated for that purpose.
Place the hose where it hangs freely without looping across controls, the tub spout, or the main standing area during use.
34. Select WaterSense-Labeled Plumbing Fixtures
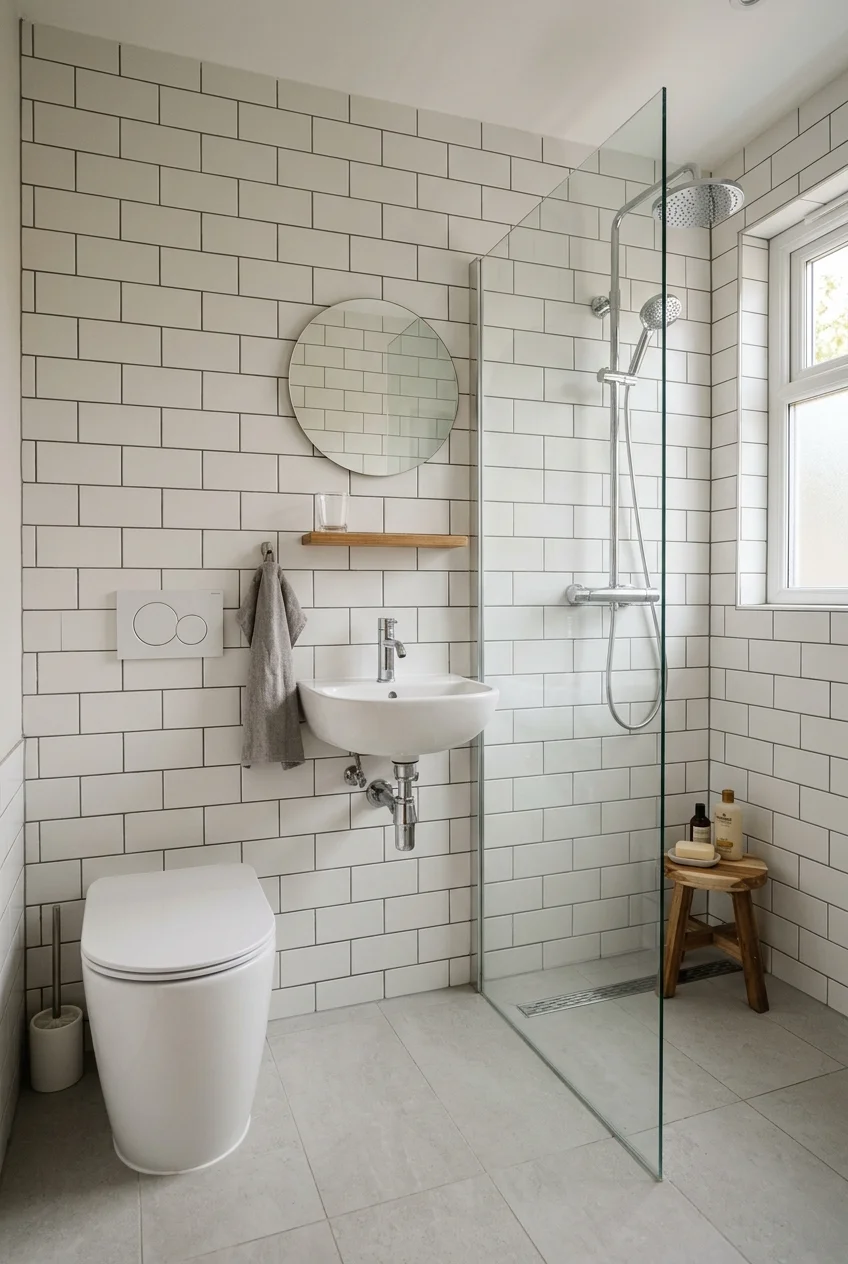
WaterSense-labeled toilets, bathroom faucets, and showerheads are independently certified for water efficiency and performance, making the label a useful comparison tool.
Match the fixture to the room first: verify toilet rough-in, faucet configuration, shower connection, and local requirements before choosing a style.
- Check the WaterSense product listing.
- Confirm dimensions against the plan.
- Keep model numbers with project records.
Keep replacement parts and routine maintenance in mind, because a fixture that is easy to service may remain useful much longer.
35. Layer Ceiling Light With Face-Level Vanity Light
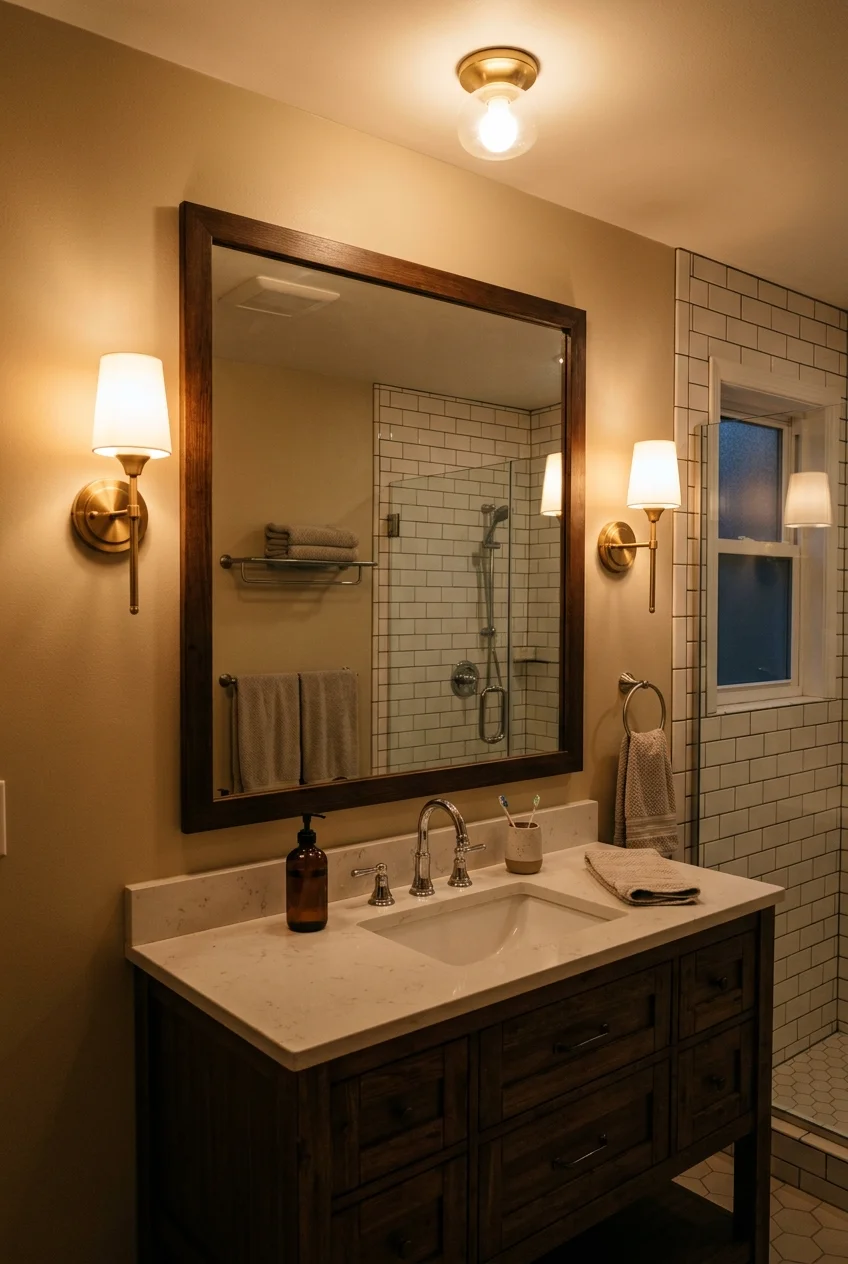
General ceiling light makes the room navigable, while face-level light reduces shadows during toothbrushing, hair care, and later grooming routines.
Use enclosed fixtures rated for their locations and select color quality that keeps skin, paint, and tile from looking strangely tinted.
Switching the layers separately gives children a simple bright option for mornings and a quieter setting for evening routines every day.
36. Add Low-Level Night Lighting for the Route
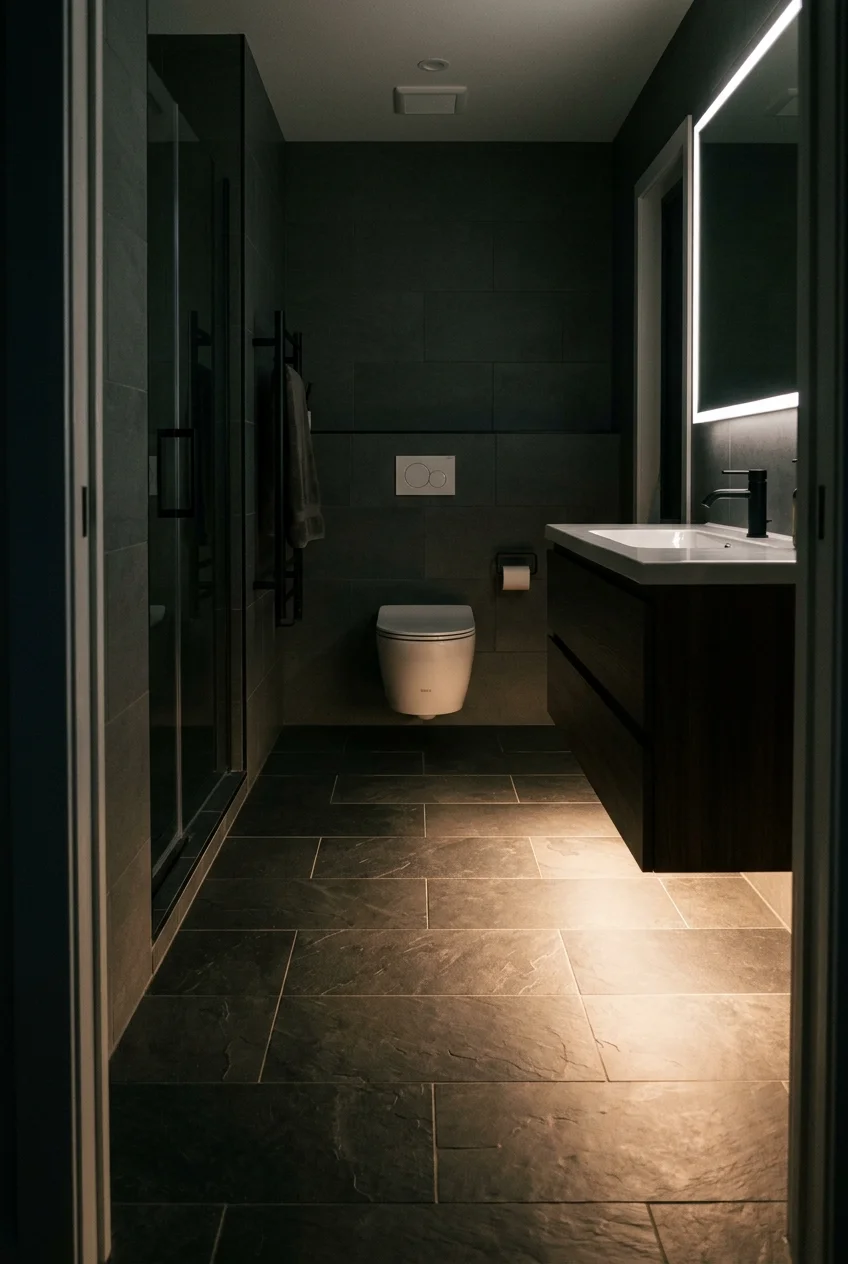
A low, soft light can mark the path to the toilet without flooding the room with glare during nighttime visits.
Integrate it beneath a floating vanity or in an approved wall fixture, keeping all electrical work appropriate for a damp bathroom environment.
Setup note Choose a control that is predictable and easy to override; an unreliable motion sensor can be more startling than a simple dim setting.
37. Plan GFCI-Protected Outlets Before the Walls Close
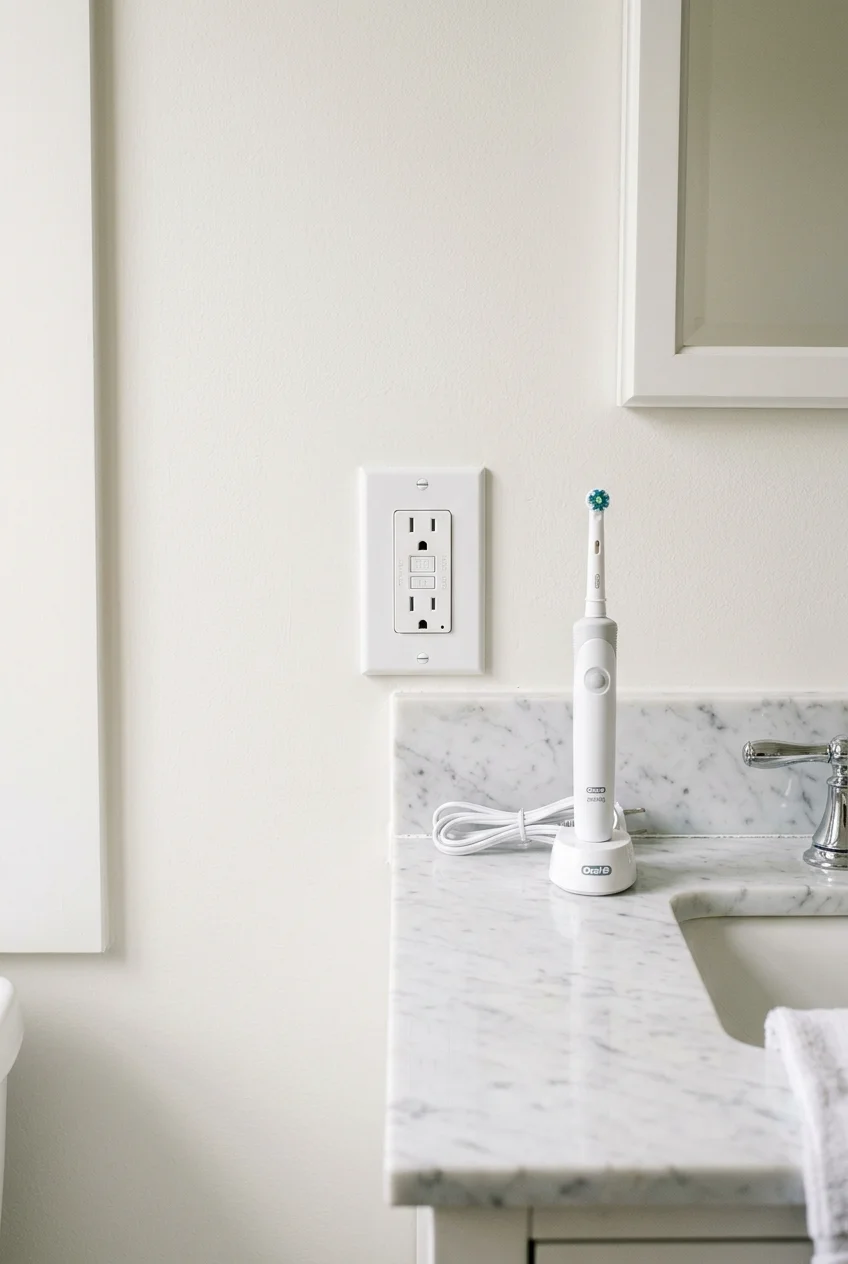
Bathroom receptacles need GFCI protection, and their locations should support real grooming routines without cords crossing sinks, wet counters, or walkways.
Map future toothbrush chargers, hair tools, and cleaning equipment, then let a qualified electrician apply current local electrical requirements for the household.
A shallow device drawer may hide chargers only when the electrical components and cabinetry are designed and installed for that specific use.
Place permanent outlets where plugs remain visible and reachable, rather than forcing cords behind mirrors, across basins, or through improvised cabinet holes.
If chargers live near the vanity, provide a dry landing spot that keeps devices from sitting against wet toothbrushes or a splashed counter edge.
Watch for Do not improvise an extension cord inside a drawer. Heat-producing tools need safe cooling, clear storage, and adult supervision after use.
38. Include Anti-Scald Protection at Faucets and Showers
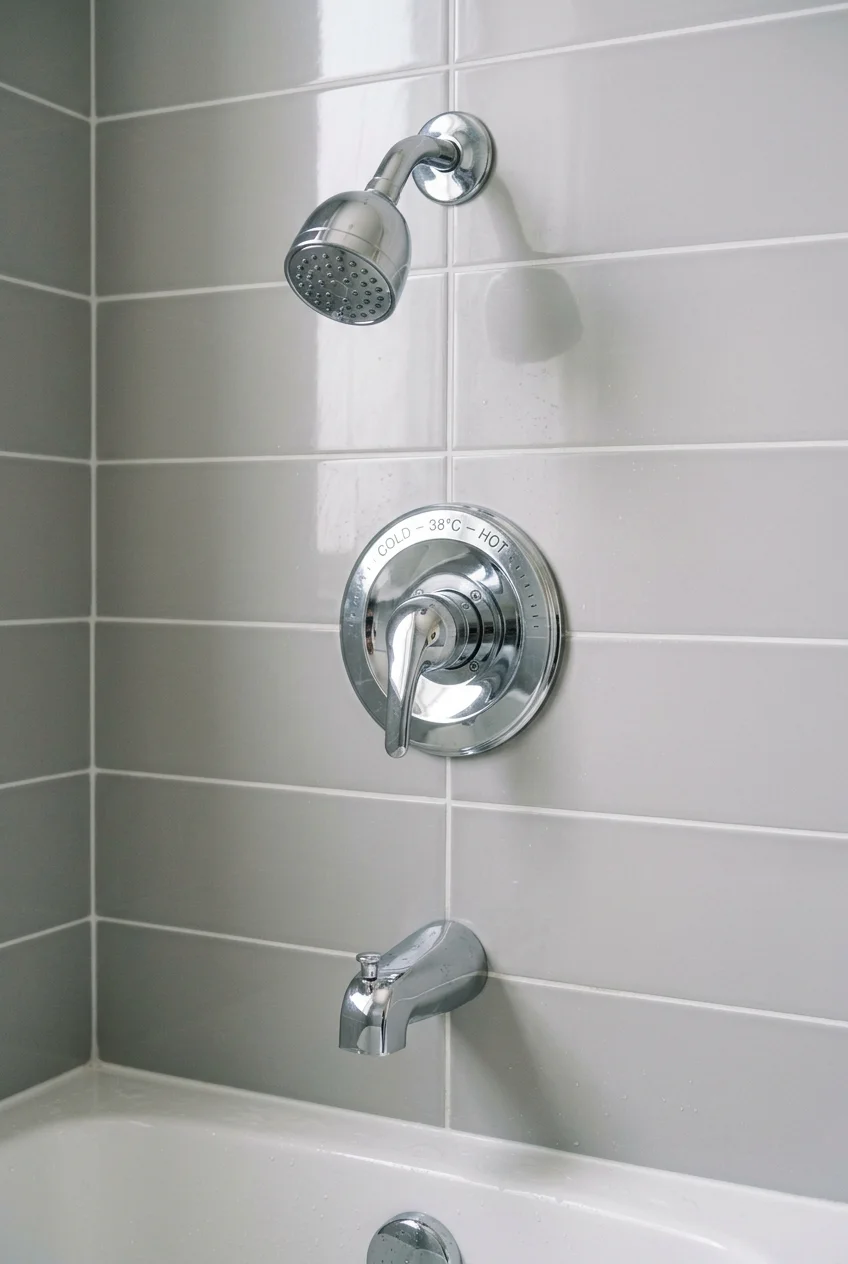
Children can be burned quickly by overly hot water, so temperature control belongs in the remodel plan rather than as an afterthought.
CPSC recommends setting the water heater to 120 degrees Fahrenheit or lower and using anti-scald devices for faucets and showerheads.
Have a qualified professional verify the system, valve compatibility, and local code. A decorative handle does not prove temperature protection exists.
Pressure-balancing and thermostatic systems manage temperature differently, so select the appropriate device with a plumber who understands the existing supply.
After installation, adults should test operation, teach children the control positions, and continue supervising younger bathers around water during every bath.
39. Specify Flooring for the Actual Wet Use
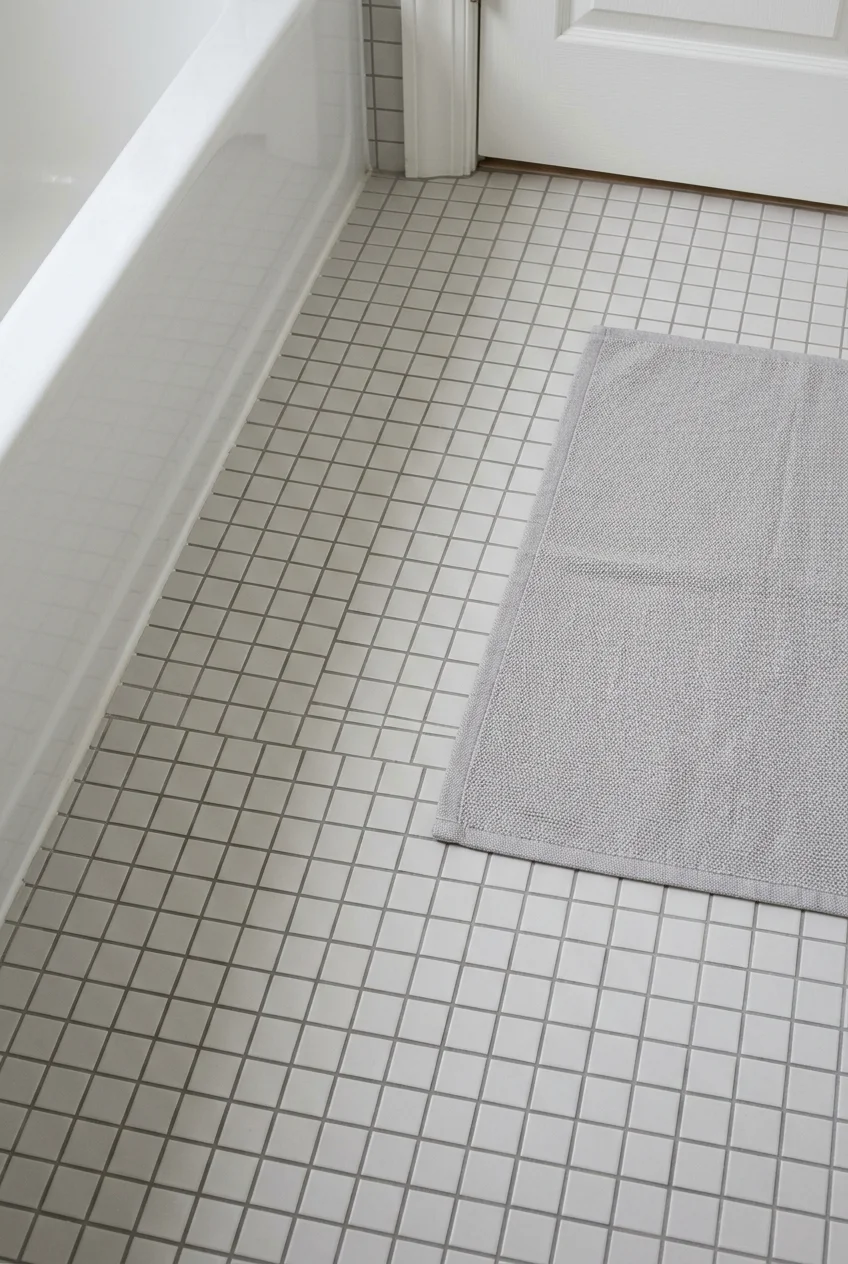
Bathroom flooring should be evaluated for its intended wet interior location, surface texture, drainage, cleaning method, and household use together.
DCOF is useful for comparing hard surfaces, but the Tile Council notes that it does not alone predict whether someone will slip.
- Request the manufacturer use classification.
- Review samples when wet and dry.
- Avoid raised edges that catch toes.
Small-format tile adds grout joints and follows shower slopes more easily, while larger tile reduces joints but demands careful surface planning.
Transitions at the doorway should remain smooth and firmly finished, because a raised strip can create a trip point in the busiest path.
Keep absorbent mats flat and out of door swings, then replace them when backing curls or loses its grip during regular cleaning.
40. Soften Exposed Counter and Cabinet Corners
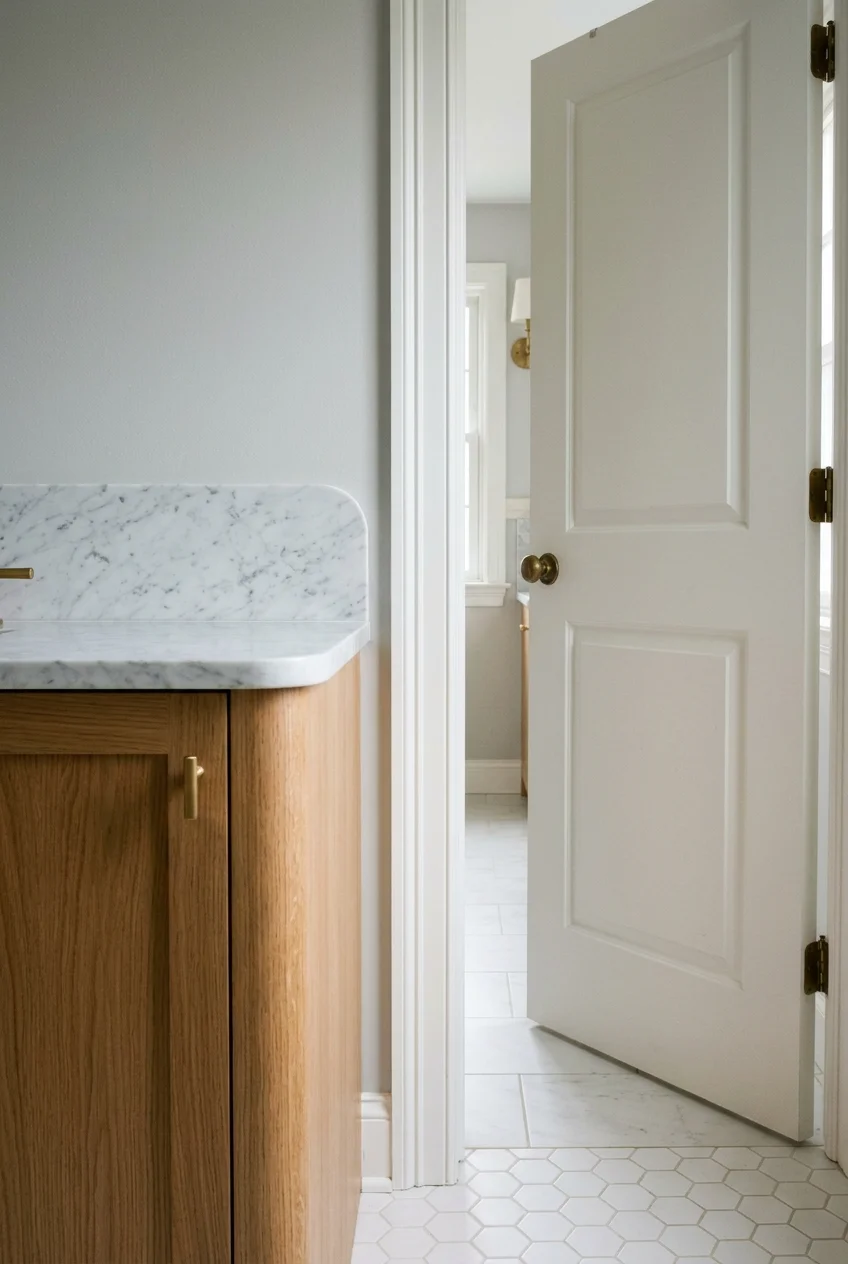
Rounded counter corners and eased cabinet edges reduce sharp projections along busy paths without making the bathroom look like a temporary nursery.
Prioritize corners beside doorways, tub exits, and narrow aisles. Corners against a wall do not need the same visual treatment.
Ask how the chosen countertop material can be fabricated, because edge options differ among laminate, solid surface, quartz, and natural stone.
Durability Behind the Pretty Parts
The most valuable remodel details often disappear behind tile or above the ceiling. Plan moisture control and structural support before selecting finishing accessories.
41. Size the Exhaust Fan for the Room
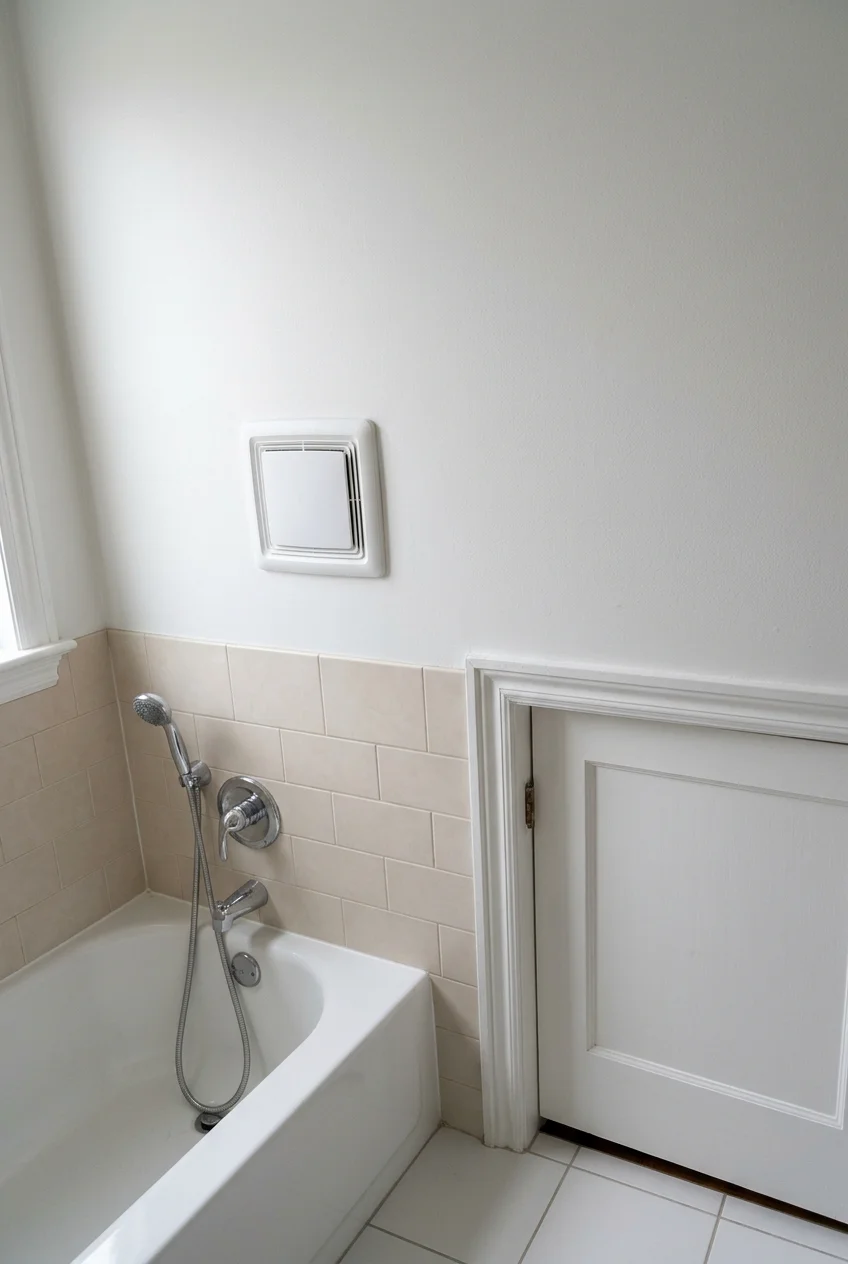
A properly sized exhaust fan removes moisture that would otherwise linger on mirrors, paint, grout, and cabinetry after baths and showers.
Home Ventilating Institute guidance recommends at least 50 CFM for bathrooms under fifty square feet and roughly one CFM per square foot above that.
Duct layout and exterior termination affect real performance, so compare HVI-certified ratings and let a knowledgeable installer evaluate the complete path.
Fan capacity on the box does not overcome a pinched, excessively long, or poorly terminated duct that restricts actual airflow.
Provide makeup air through an appropriate door undercut or other planned path so exhausted air can be replaced from adjacent space.
Practical tip A timer or humidity control helps the fan continue after bathing, when children may otherwise switch it off as they leave.
42. Treat Tile as a Finish, Not the Waterproofing
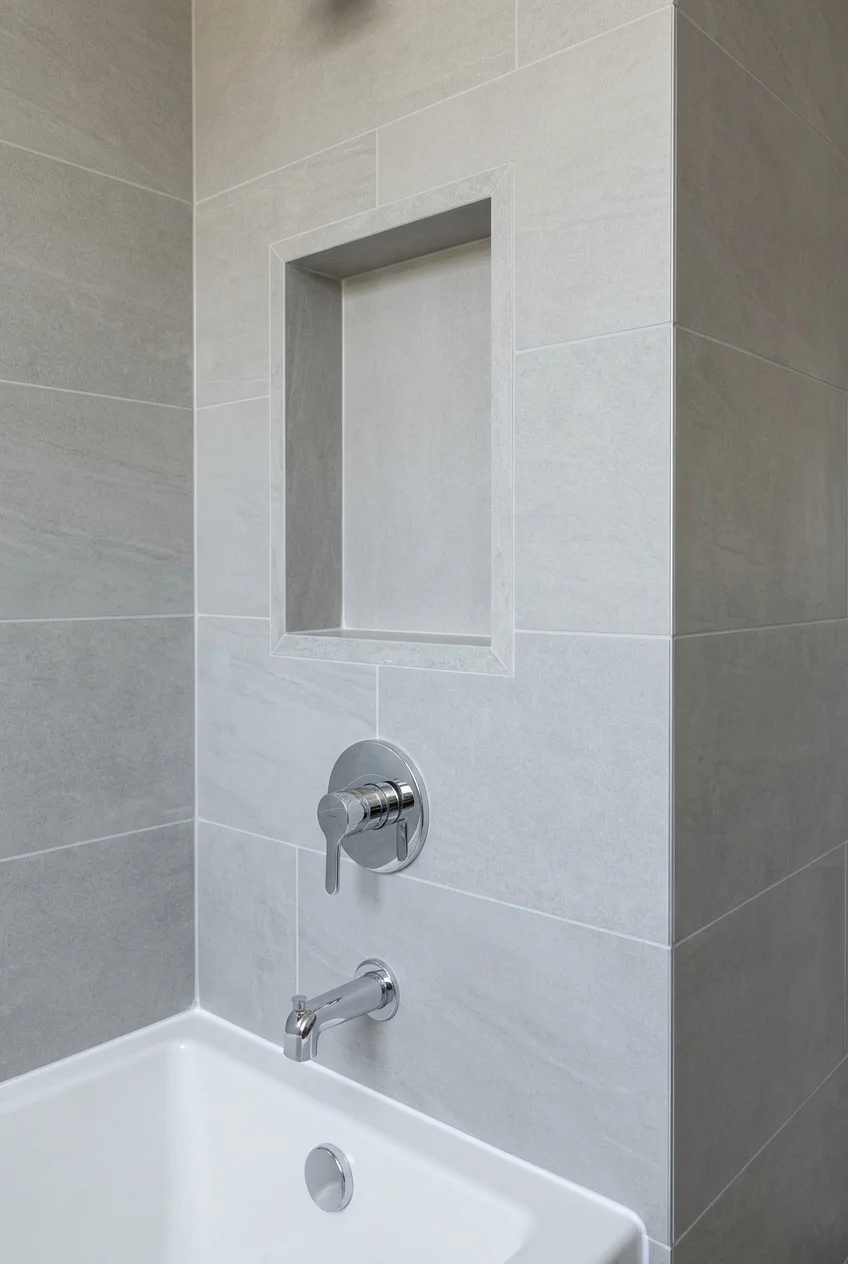
Tile and grout are visible finishes; the shower still needs a continuous waterproof assembly with sealed seams, corners, penetrations, and transitions.
Select one compatible system and follow its current installation instructions rather than mixing leftover membranes, drains, and sealants from unrelated manufacturers.
Plan niches, benches, and curbs before waterproofing so every change is included in the assembly instead of cut into finished protection later.
Before finish tile begins, complete the manufacturer-directed water test and any inspection required by the local authority for the project.
Every fastener and pipe penetration needs the system's specified treatment; surface caulk cannot repair a discontinuous hidden membrane after tile installation.
- Complete the waterproof layer.
- Seal penetrations and transitions.
- Perform any required water test.
- Install the finish tile.
43. Add Wall Backing for Future Hardware
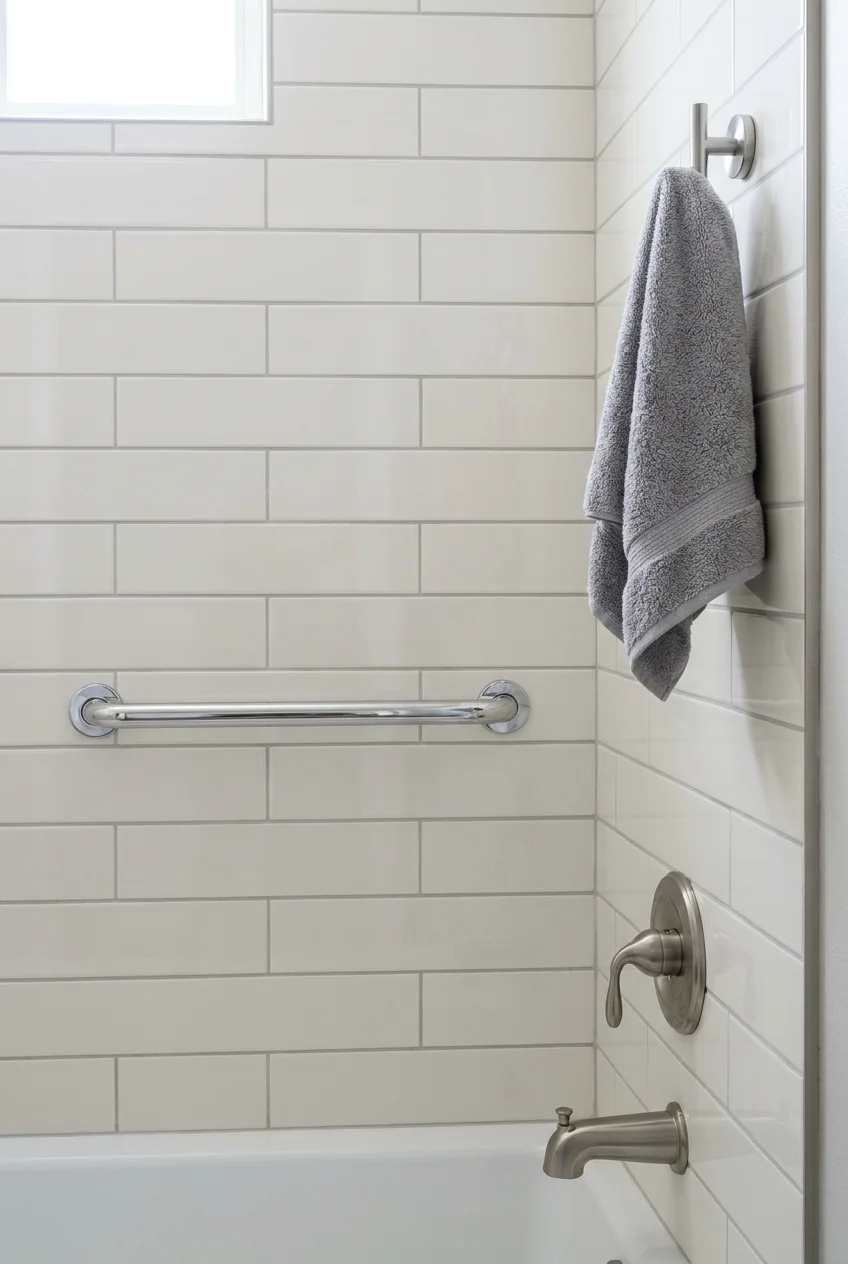
Blocking inside open walls creates secure attachment points for future grab bars, heavier hooks, adjustable shelves, or a fold-down seat.
Record measured locations with photographs before drywall and tile cover them. Future installers should still verify structure and product requirements.
Include backing across a useful horizontal range rather than one tiny spot, because future hardware lengths and mounting holes may differ.
This small planning step preserves options as children grow, grandparents visit, or household mobility needs change unexpectedly in the future.
Details That Can Grow With the Kids
Keep expensive choices durable and flexible, then place childhood personality in layers that are easy to swap without reopening walls or replacing plumbing.
44. Frame Playful Art in a Changeable Grid
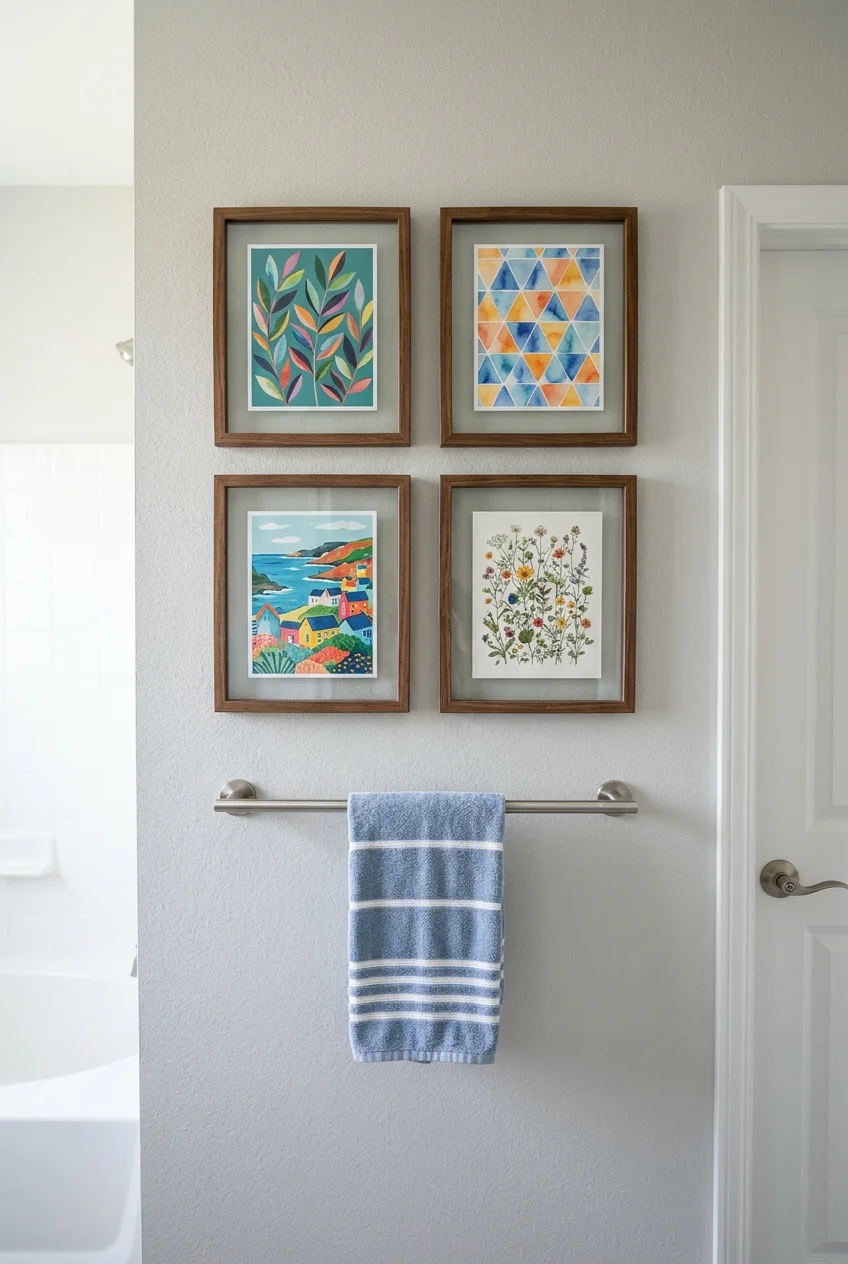
A small grid of framed prints brings color and humor to a dry wall while letting children update the subjects without repainting the room.
Use moisture-tolerant frames with secure hanging hardware, and keep glass away from tight areas where doors or elbows could strike it.
Match frame sizes rather than artwork themes, giving the wall visual order even when each child chooses a different image.
45. Use Removable Decals on a Dry Painted Surface
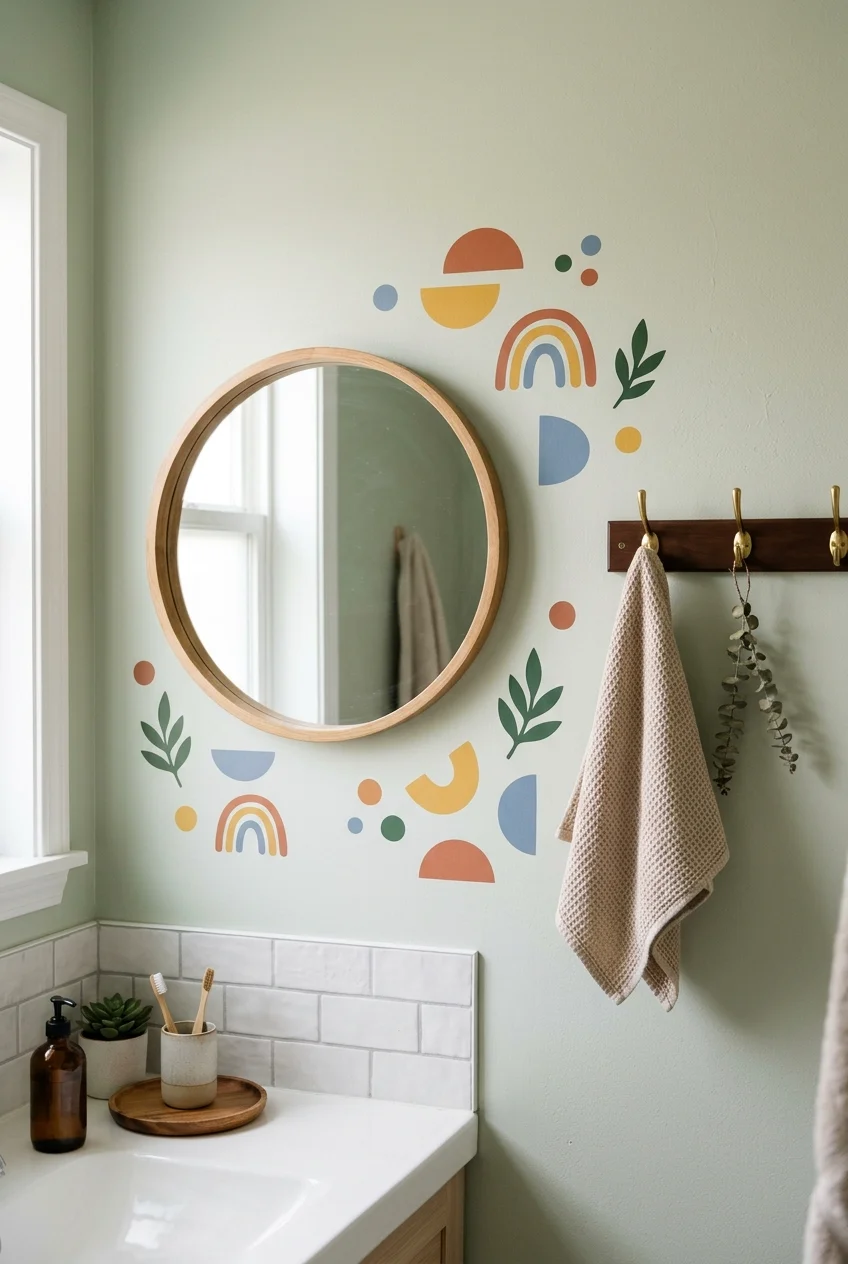
Removable decals create stars, sea life, letters, or abstract shapes without committing tile or cabinetry to one childhood interest during the remodel.
Apply them only to a clean, cured, manufacturer-approved painted surface outside splash zones, then test one hidden corner before covering the wall.
A sparse cluster around a mirror or hook rail looks intentional and remains easier to replace than an edge-to-edge scene.
46. Put the Theme in One Sophisticated Pattern
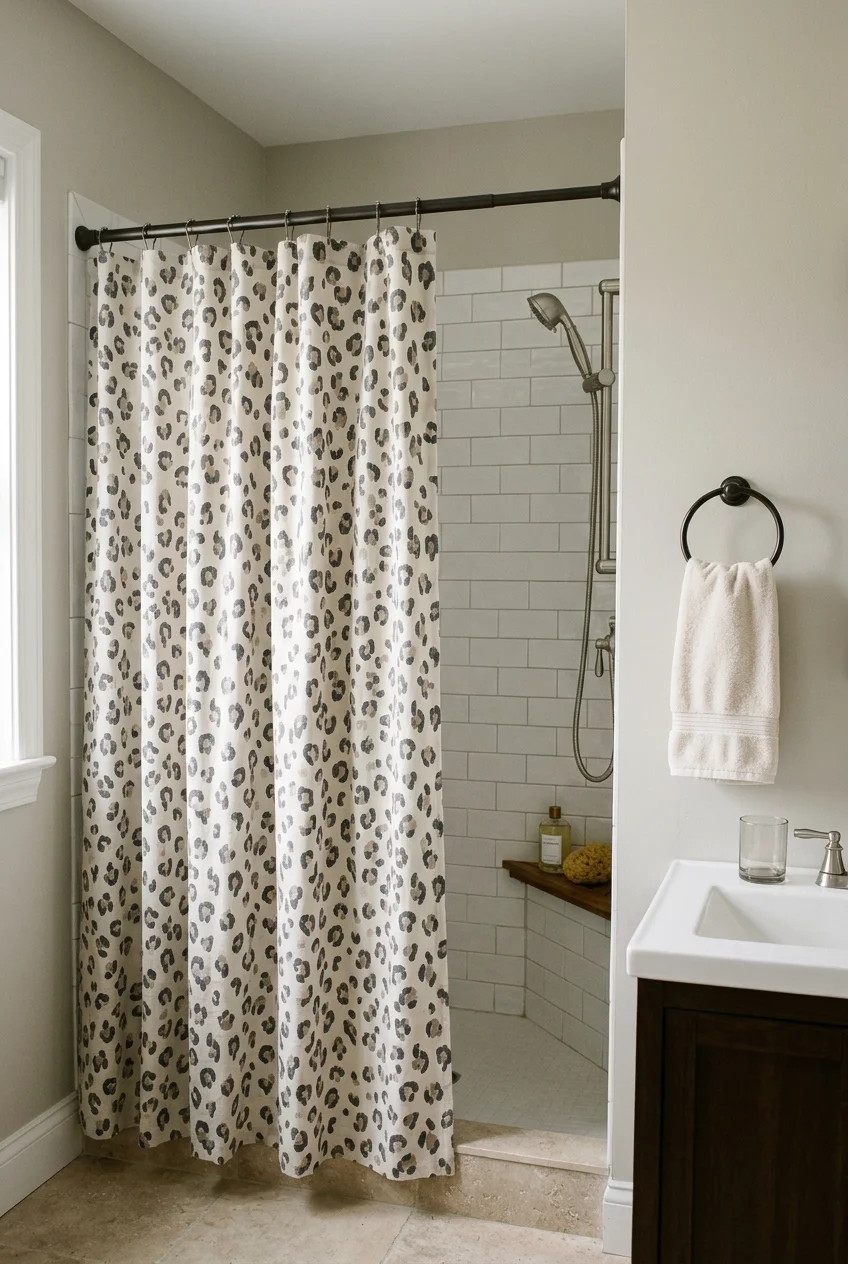
A single animal, botanical, space, or ocean pattern can feel playful without turning every towel, knob, and tile into matching merchandise.
Choose one application, such as wallpaper, curtain, or art, then support it with solids drawn from the pattern's quieter colors.
This restraint makes later updates straightforward: replace the patterned layer while leaving the main finishes and storage plan intact for future users.
47. Assign Each Child One Accent Color
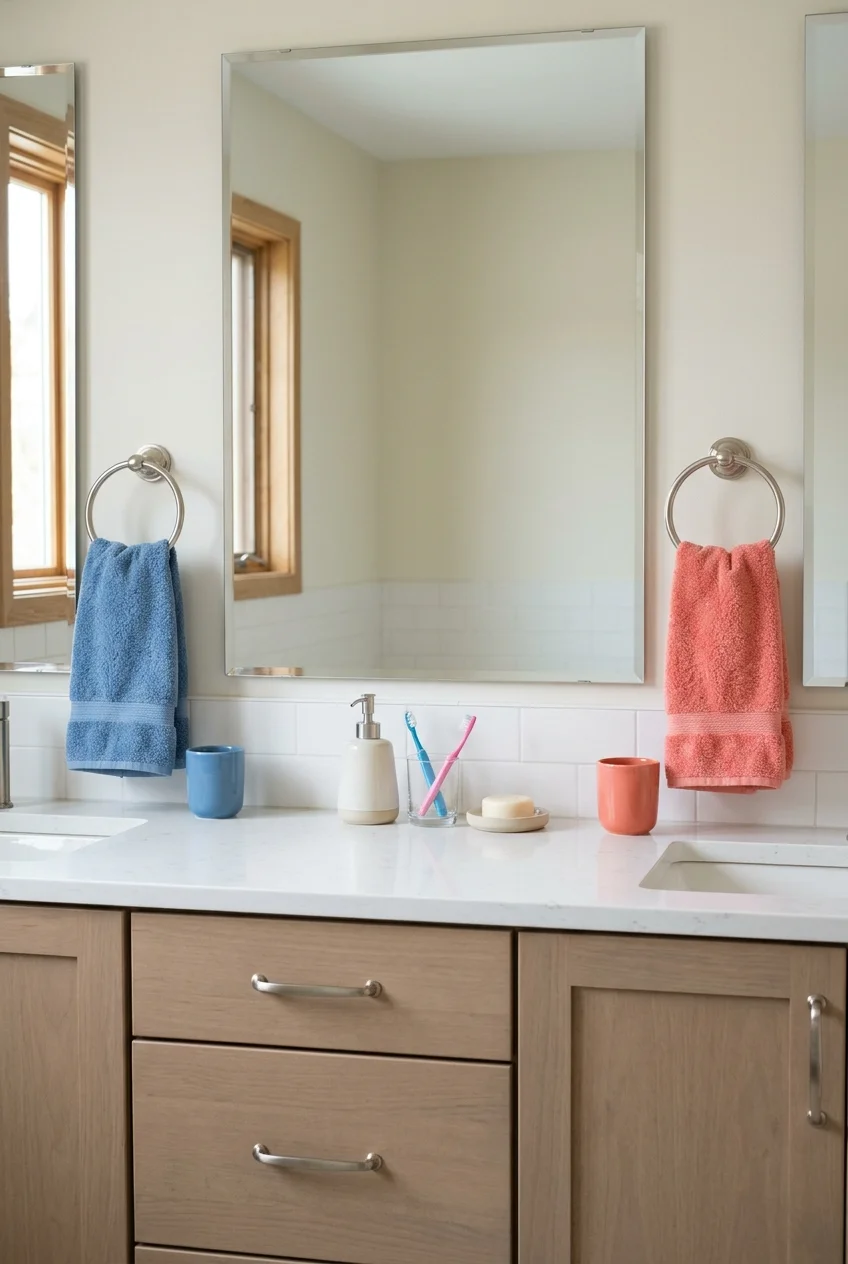
Color coding can distinguish towels, toothbrush cups, and drawer organizers without adding names or labels that children outgrow as they get older.
Choose accents that remain easy to replace and keep permanent surfaces shared. The system works only when each color appears on genuinely useful items.
- One towel color per child.
- Matching cup or tray.
- Neutral shared soap and storage.
48. Use Adjustable Shelves Inside the Linen Cabinet
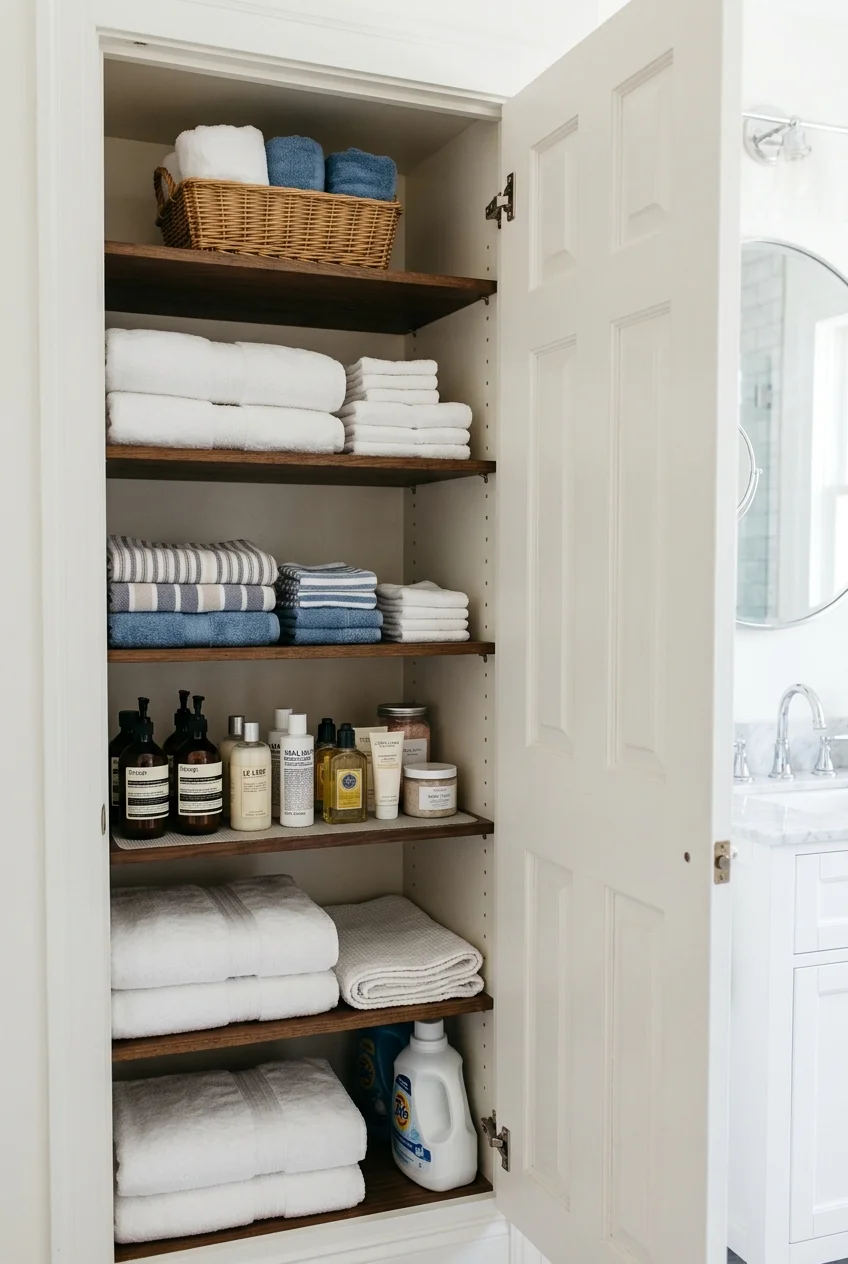
Adjustable shelves accommodate small washcloth stacks now, taller bottles later, and changing quantities of towels without requiring new cabinetry over several years.
Use closely spaced support holes and sturdy shelf pins, then keep heavy supplies below shoulder height for safer lifting during routine use.
Leave enough clearance to remove each shelf for cleaning, especially when the cabinet sits near humid bathing areas after regular use.
49. Keep Permanent Fixtures Adult-Sized and Add Reach Aids
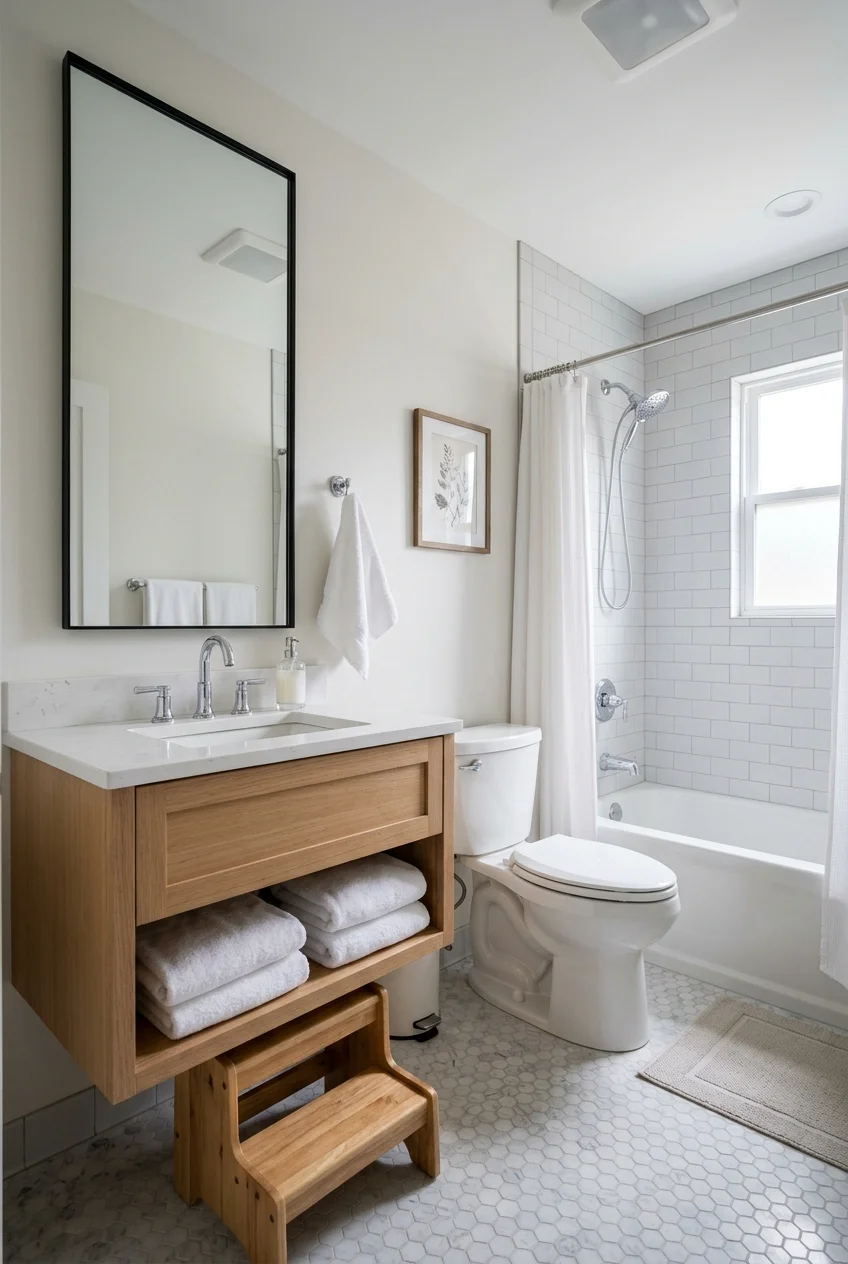
Standard-height fixtures usually serve a longer lifespan than miniature sinks or toilets that children quickly outgrow and future buyers may not want.
Use a stable step, low mirror edge, reachable hook, and easy-grip controls to bridge current height without rebuilding the room later.
Remove reach aids when they become unnecessary, restoring floor space while leaving the vanity, plumbing, and storage fully functional in daily use.
50. Plan a Teen-Ready Grooming Drawer From the Start
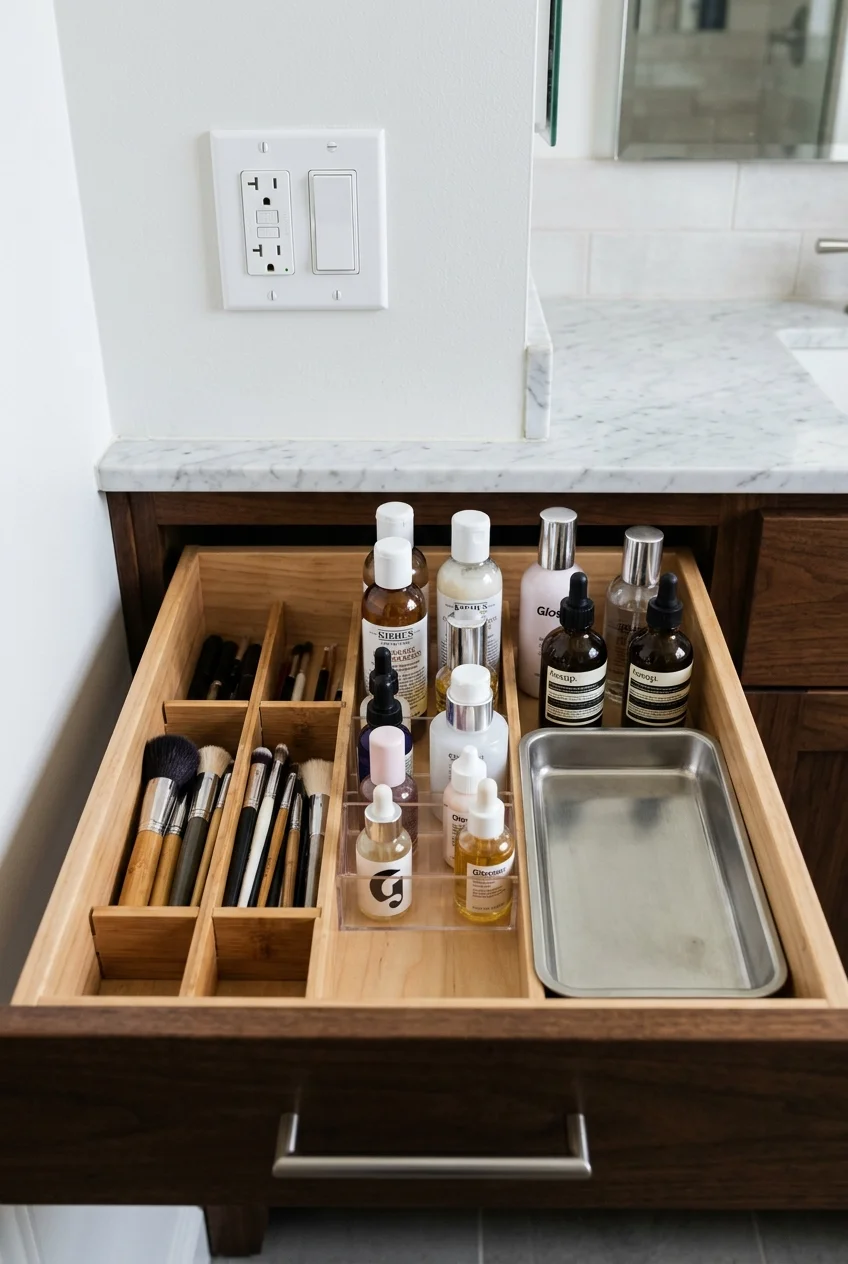
Reserve one deep drawer for brushes, skin-care bottles, and supervised hair tools so the counter can stay usable as routines become more complex.
Use adjustable dividers and a removable heat-resistant tray only as its manufacturer directs; never close away a hot tool or tangled live cord.
Locate adult-supervised power nearby through a qualified electrical plan, while keeping cords and appliances away from water and the main walkway.
Choose a drawer bottom and organizer inserts that lift out for cleaning, since powders, lotions, and hair products eventually leave residue.
Setup note A drawer with flexible dividers adapts better than many tiny custom compartments, which often fit today's products and fail after one packaging change.
Frequently Asked Questions
How can a kids bathroom remodel grow with the children?
Keep tile, plumbing, counters, and cabinetry durable and broadly useful, then express childhood interests through curtains, towels, art, decals, and paint.
Standard-height fixtures paired with removable steps, low mirror edges, adjustable shelves, and reachable hooks adapt more easily than permanently miniature installations.
Is a tub or shower better for a kids bathroom?
A tub often serves younger children and assisted bathing, while a roomy shower may suit older children and households that no longer take baths.
Base the decision on present routines, supervision needs, available footprint, water containment, and likely resale expectations rather than a universal rule.
Does a shared kids bathroom need two sinks?
Two sinks help simultaneous routines when the room has enough counter, storage, and standing space, but they also add plumbing and reduce drawer width.
A long single-sink vanity can work well when children use the room at different times or need more storage than simultaneous faucet access.
Where should the remodel budget go first?
Prioritize sound plumbing, waterproofing, ventilation, electrical safety, durable wet-use finishes, and storage that fits daily routines before spending heavily on decorative details.
Paint, towels, curtains, art, and hardware can add personality later, while repairing hidden moisture or moving poorly planned fixtures costs far more.