50 Kitchen Sink Ideas

This post may contain affiliate links: full affiliate disclosure.
A kitchen sink shapes prep, cleanup, and the view across your counter. The right choice starts with what you wash and how you move.
These 50 ideas compare visible styles with practical tradeoffs, helping you save favorites while noticing the cabinet, counter, and maintenance details each requires.
As an Amazon Associate I earn from qualifying purchases.
Sink Shapes and Silhouettes to Compare First
Start with the shape you want to see every day, then check whether its bowl, rim, and cabinet requirements suit your actual kitchen.
1. Use a Wide Single Bowl for Oversized Cookware
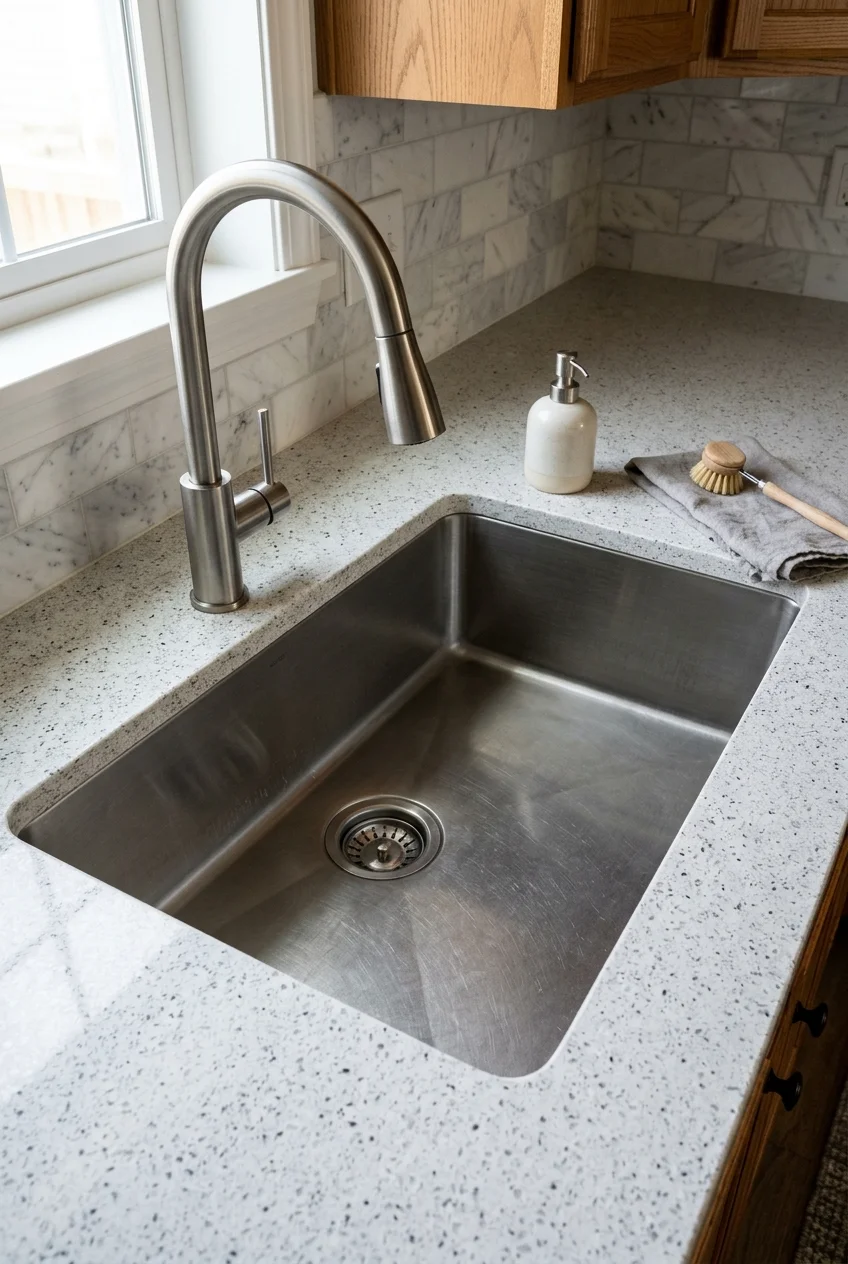
A broad, uninterrupted basin gives baking sheets, stockpots, and roasting pans room to sit flat. It also avoids collisions with a center divider.
Before choosing the largest model, measure the sink cabinet interior and the counter cutout. Leave workable space for the faucet, disposal, and plumbing.
Balance width with comfortable reach. An extra-deep, extra-wide bowl can hide dishes well, yet it may require more bending and counter space.
2. Divide Washing and Rinsing with Equal Double Bowls
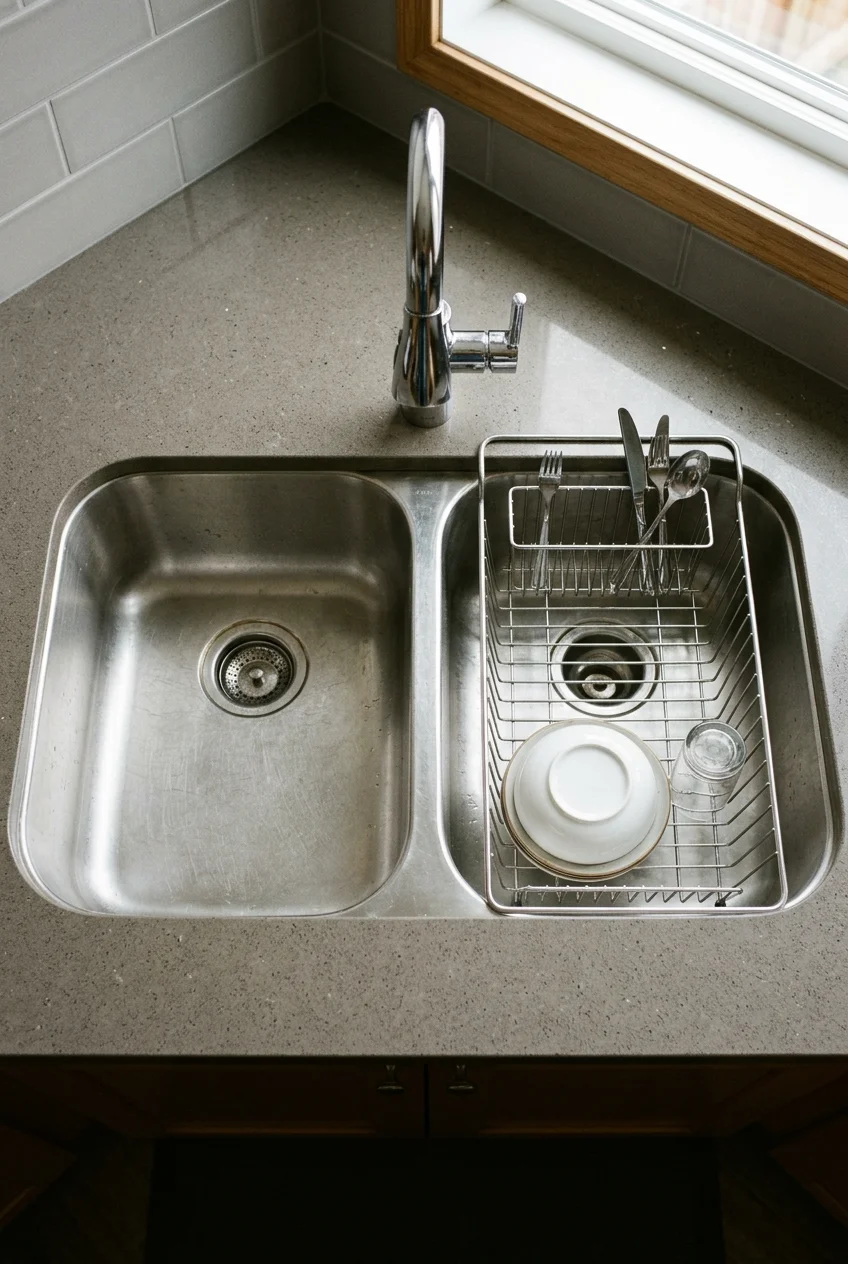
Equal bowls make two matching work zones, useful when one side holds soapy water while the other remains available for rinsing or draining.
The divider reduces the width available for large pans, so compare your biggest cookware with each bowl rather than relying on total sink width.
- Wash on one side and rinse on the other.
- Keep a drying rack in one bowl.
- Separate food preparation from cleanup.
3. Choose an Offset Double Bowl for Flexible Cleanup
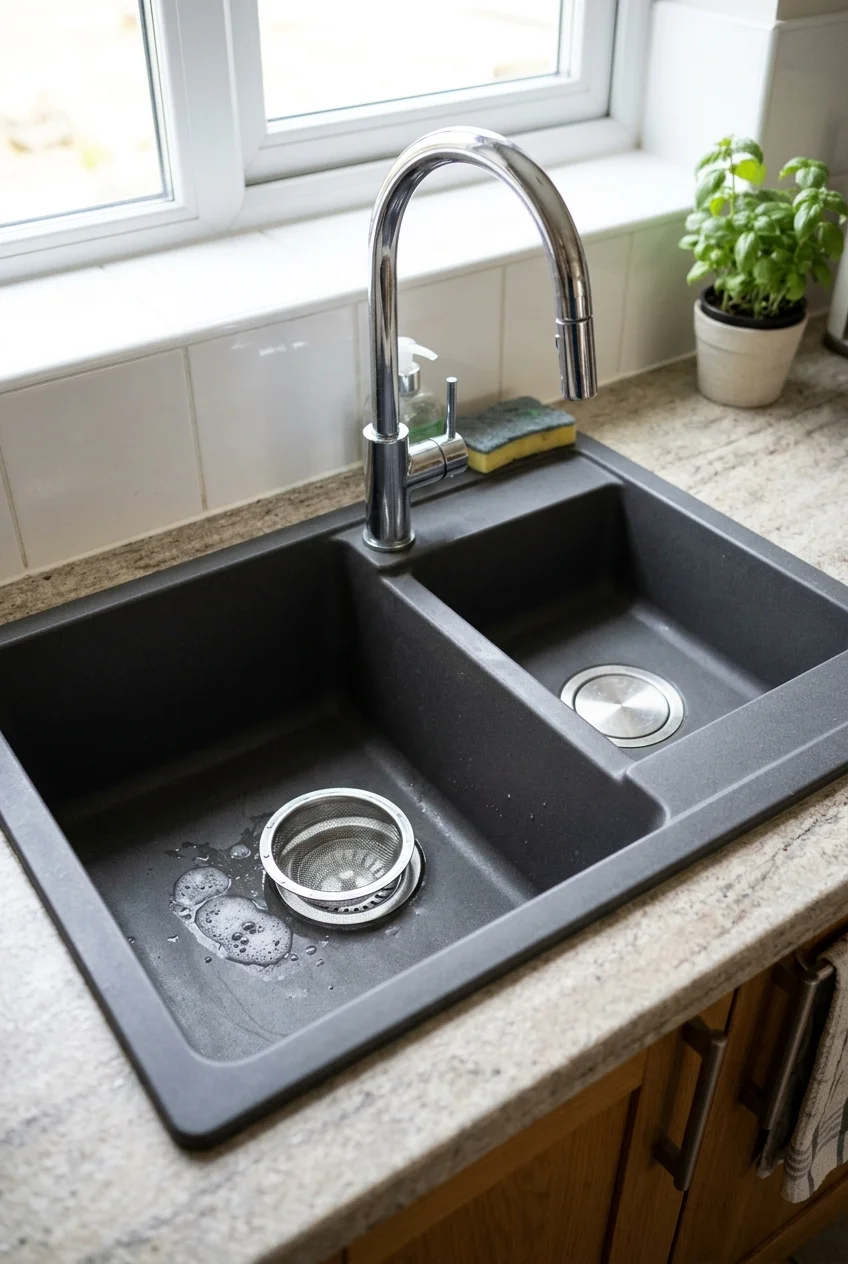
An offset double sink pairs one generous basin with a smaller companion bowl. The larger side accepts cookware while the smaller side handles rinsing.
Decide which side should be larger by tracing your dishwasher, disposal, and dominant-hand workflow. Reversing the layout later usually requires more than styling changes.
Compare divider height as well as bowl width. A tall divide contains separate water levels, while a lower divide accommodates handles spanning both sides.
4. Lower the Divider for a Hybrid Two-Bowl Sink
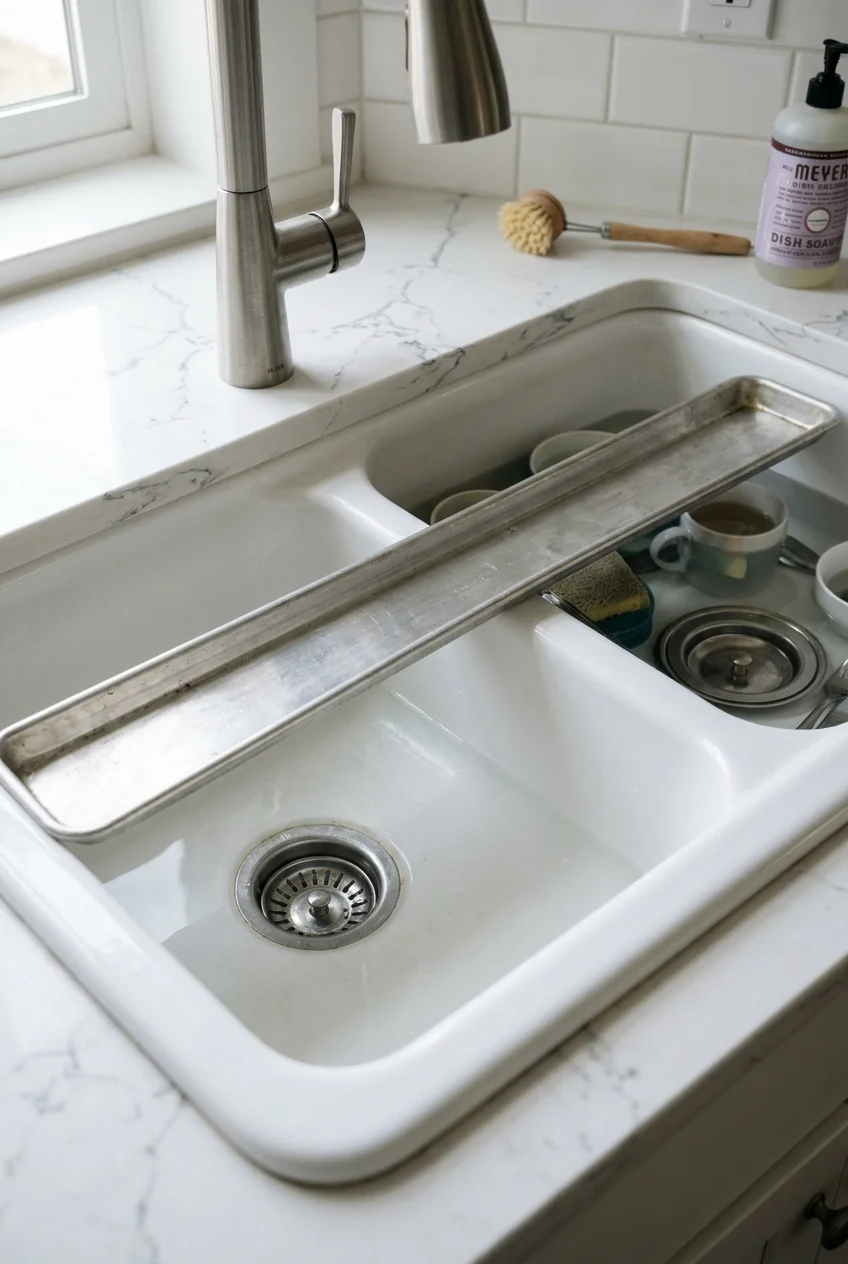
A low-divider sink keeps two drains and separate zones while allowing long pan handles to cross the center. Water can also spill between bowls sooner.
This format suits cooks who want separation without the full barrier of equal bowls. Check divider height in person because product photos can conceal it.
5. Bring the Basin Forward with an Apron Front
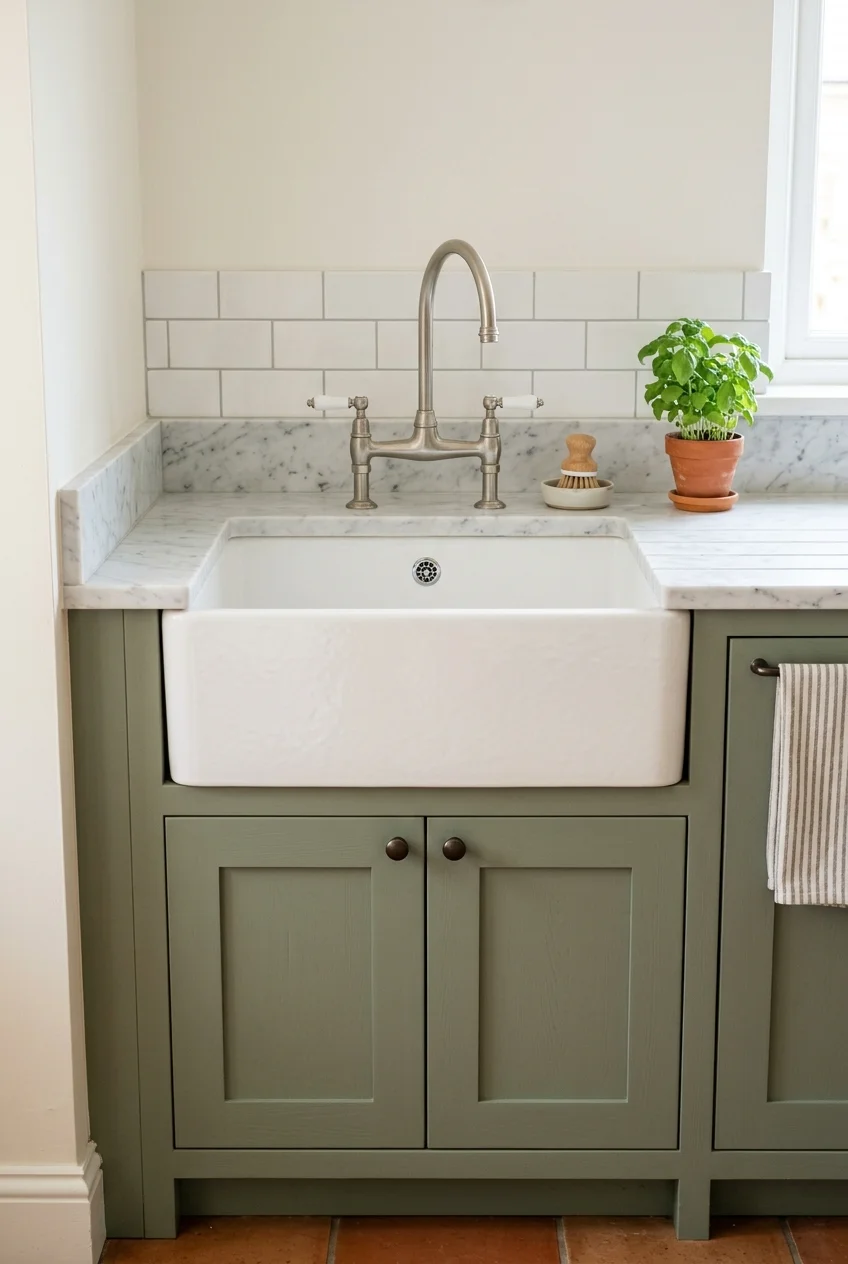
An apron-front sink exposes the basin face instead of hiding it behind a false drawer. That strong horizontal panel becomes part of the cabinetry design.
Tall aprons can require a purpose-built or modified base cabinet plus substantial support. Confirm the sink template, cabinet construction, and finished counter height together.
Choose the apron after viewing it beside the door profile. A thick rounded front reads traditional, while thin square edges feel more tailored.
Setup note A short-apron retrofit may preserve more of an existing cabinet face, but only when the manufacturer explicitly approves that installation method.
6. Make a Stainless Apron Feel Contemporary
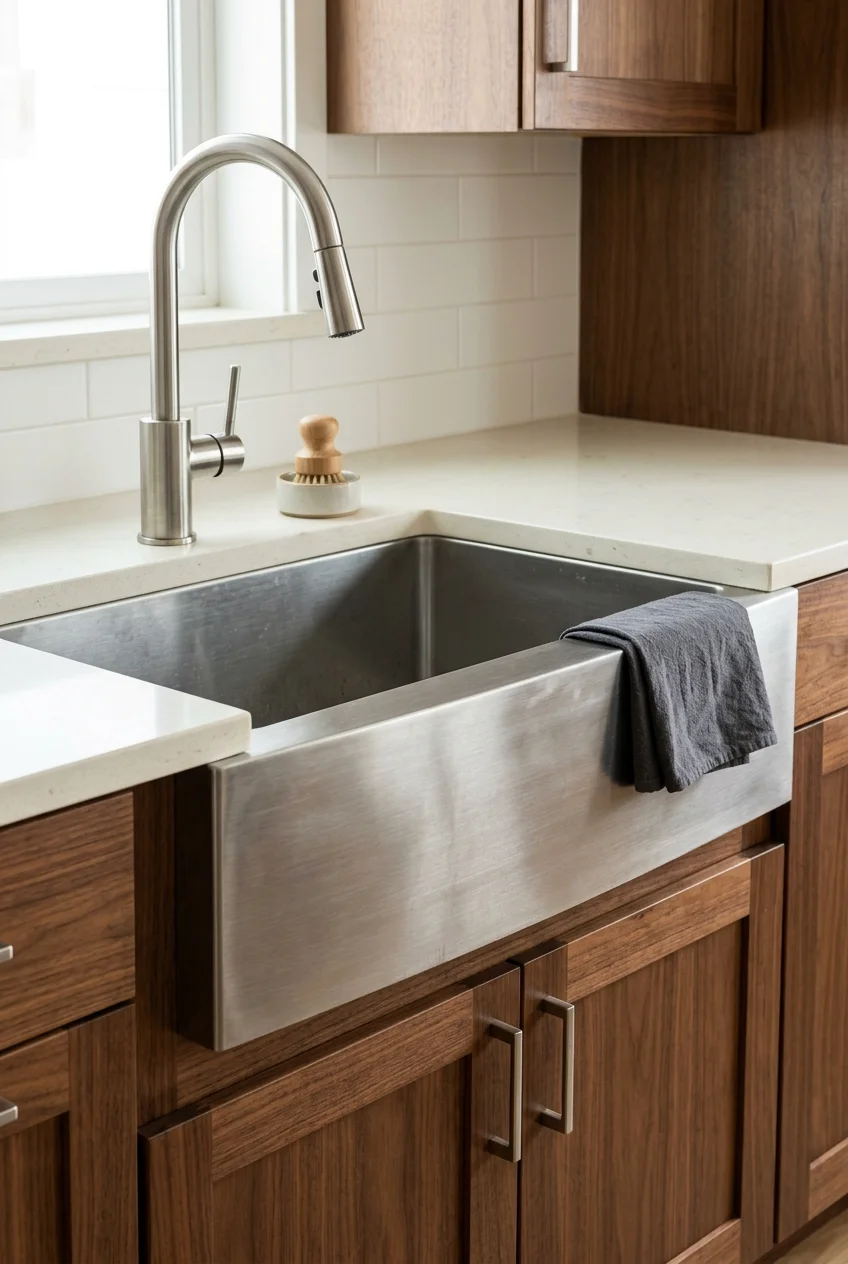
A stainless apron-front sink keeps the strong farmhouse silhouette but removes the traditional ceramic association. It relates naturally to steel appliances and restrained hardware.
Brushed surfaces usually disguise daily marks better than mirror finishes. Compare the sink steel beside nearby appliances, because different grain directions can look mismatched.
7. Use a Rounded Apron for a Softer Profile
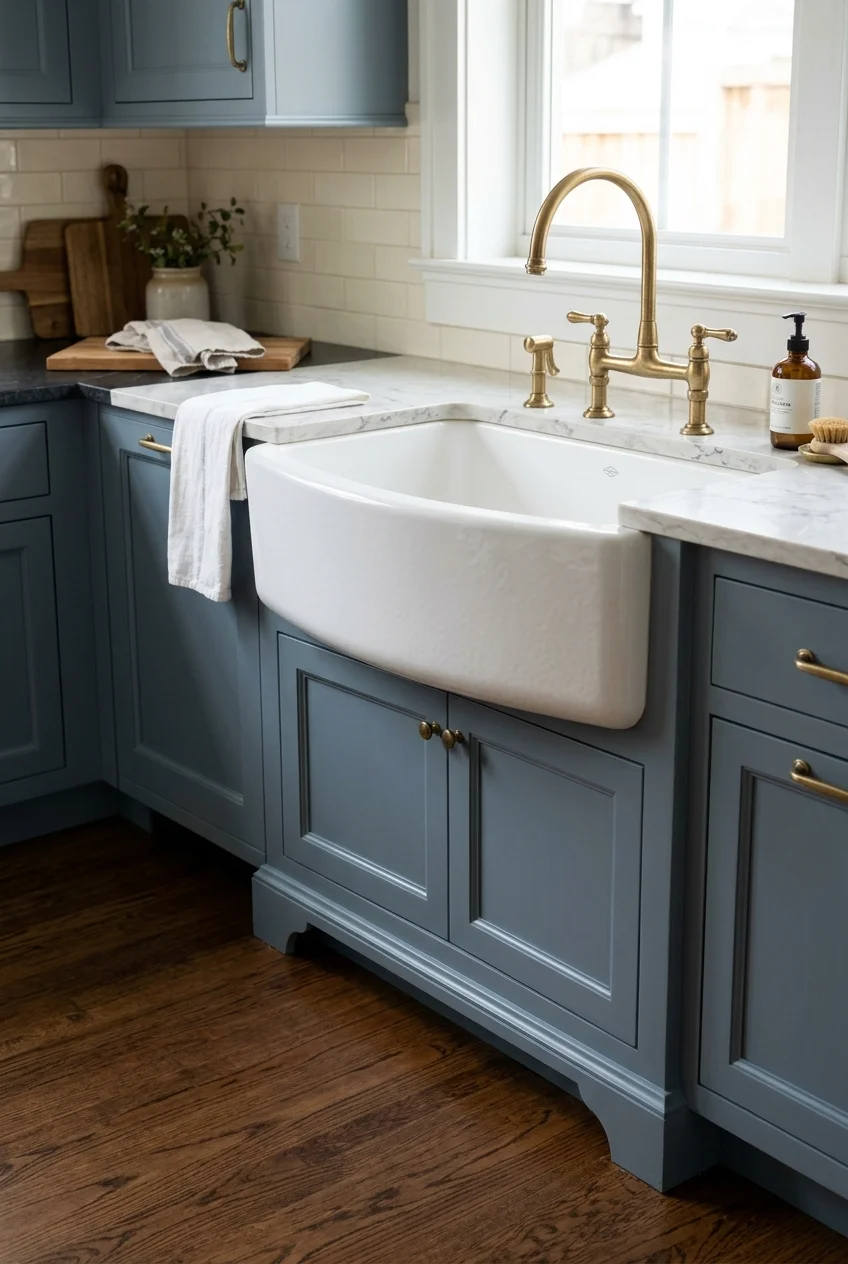
A gently bowed apron interrupts rigid cabinet lines and suits kitchens with curved stools, arched details, or traditional door profiles. Keep surrounding shapes restrained.
The curve can project beyond the cabinet face, so check aisle clearance and adjacent door swing using the manufacturer drawing rather than a front photograph.
8. Try a Compact Round Sink at a Prep Station
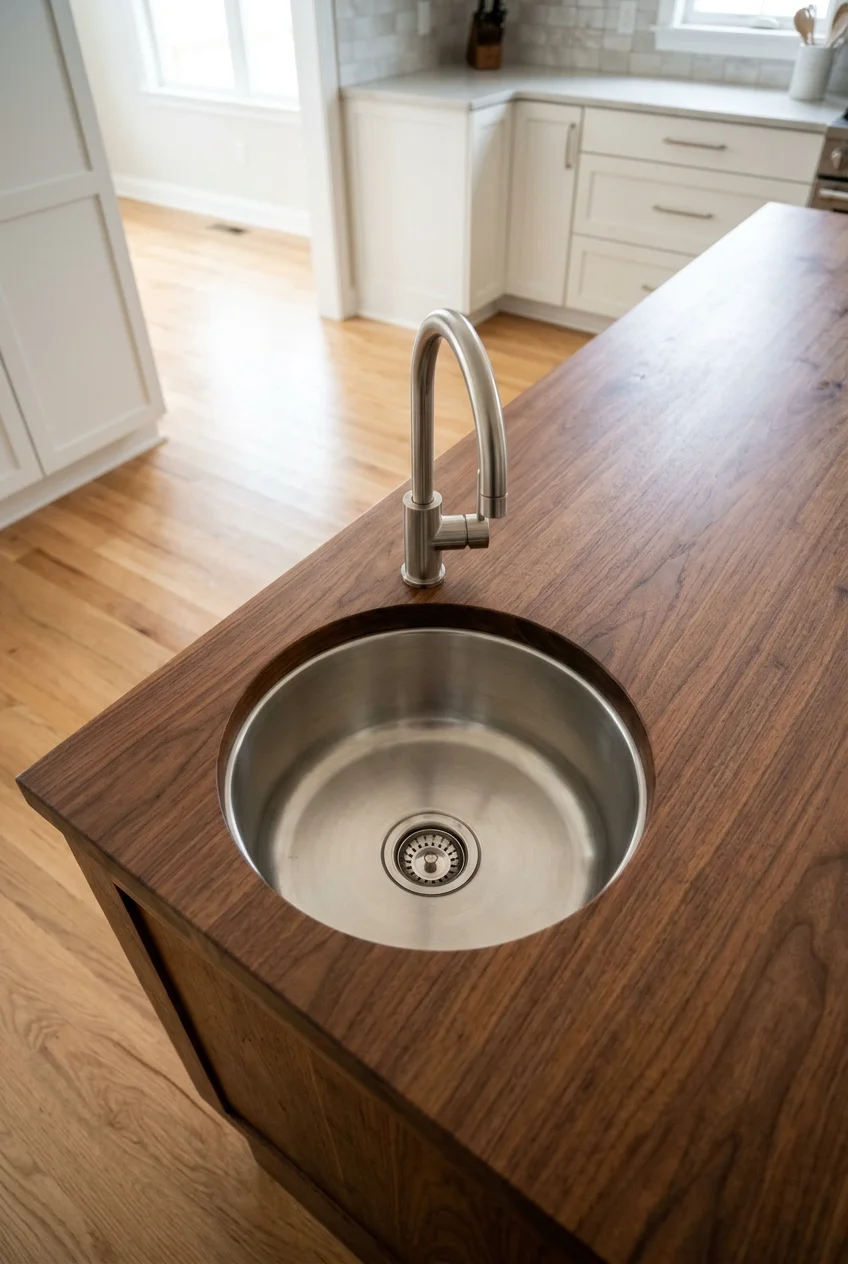
A small round basin creates a useful rinsing point on an island or beverage counter without claiming the footprint of a second full cleanup sink.
Plan its purpose before adding plumbing. A prep sink needs nearby landing space, a reachable faucet, and a location that does not divide the main aisle.
Include the plumbing route, venting, and cabinet loss in the decision. The small visible bowl can require significant work and storage below.
9. Fit a Corner Sink Where Two Runs Meet
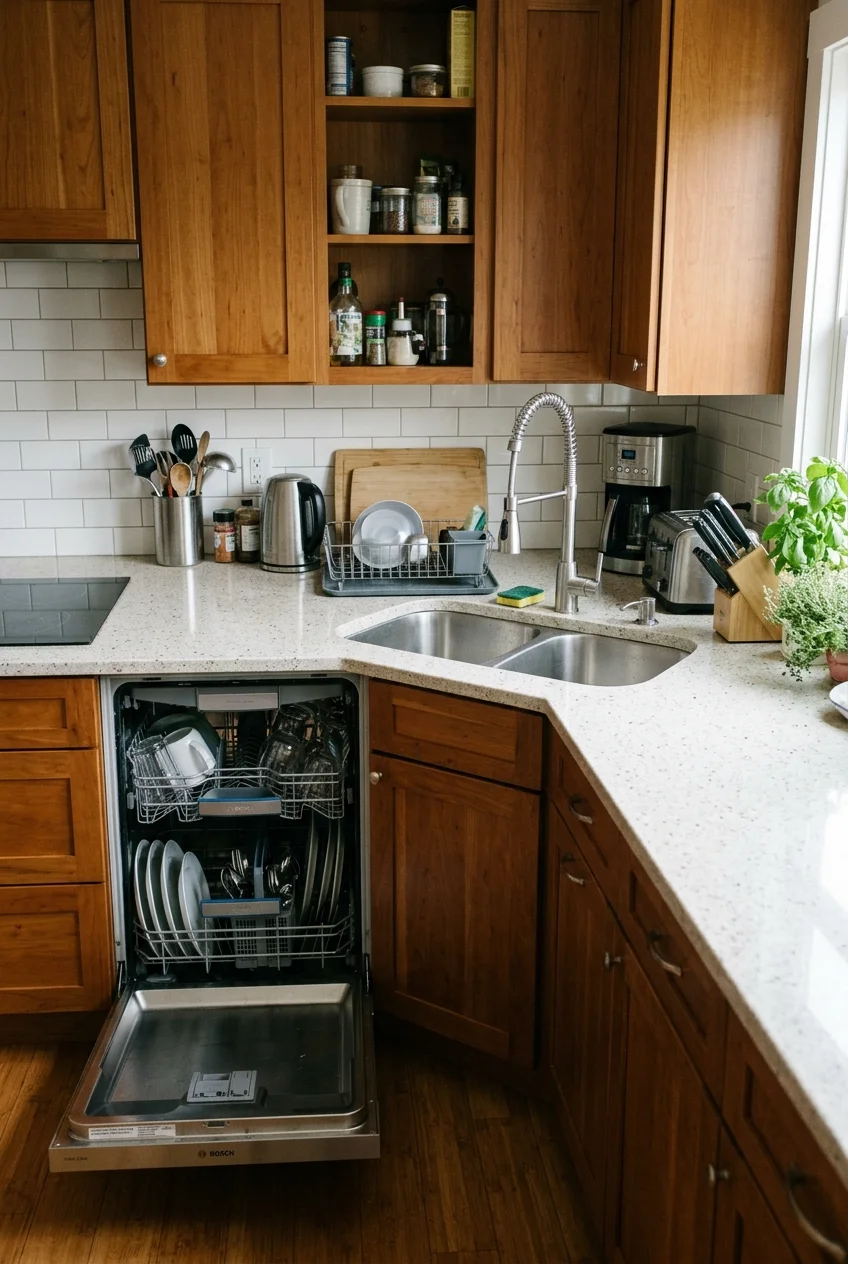
A corner sink can use an otherwise awkward junction and open longer counter stretches on both sides. It also places the user facing into the room.
Test the plan with both cabinet doors, dishwasher, and faucet movement shown. Deep corner space behind the basin can become difficult to clean or reach.
- Check dishwasher clearance beside the corner.
- Keep faucet controls within comfortable reach.
- Plan access to shutoffs and the drain.
10. Let a Fluted Apron Add Quiet Texture
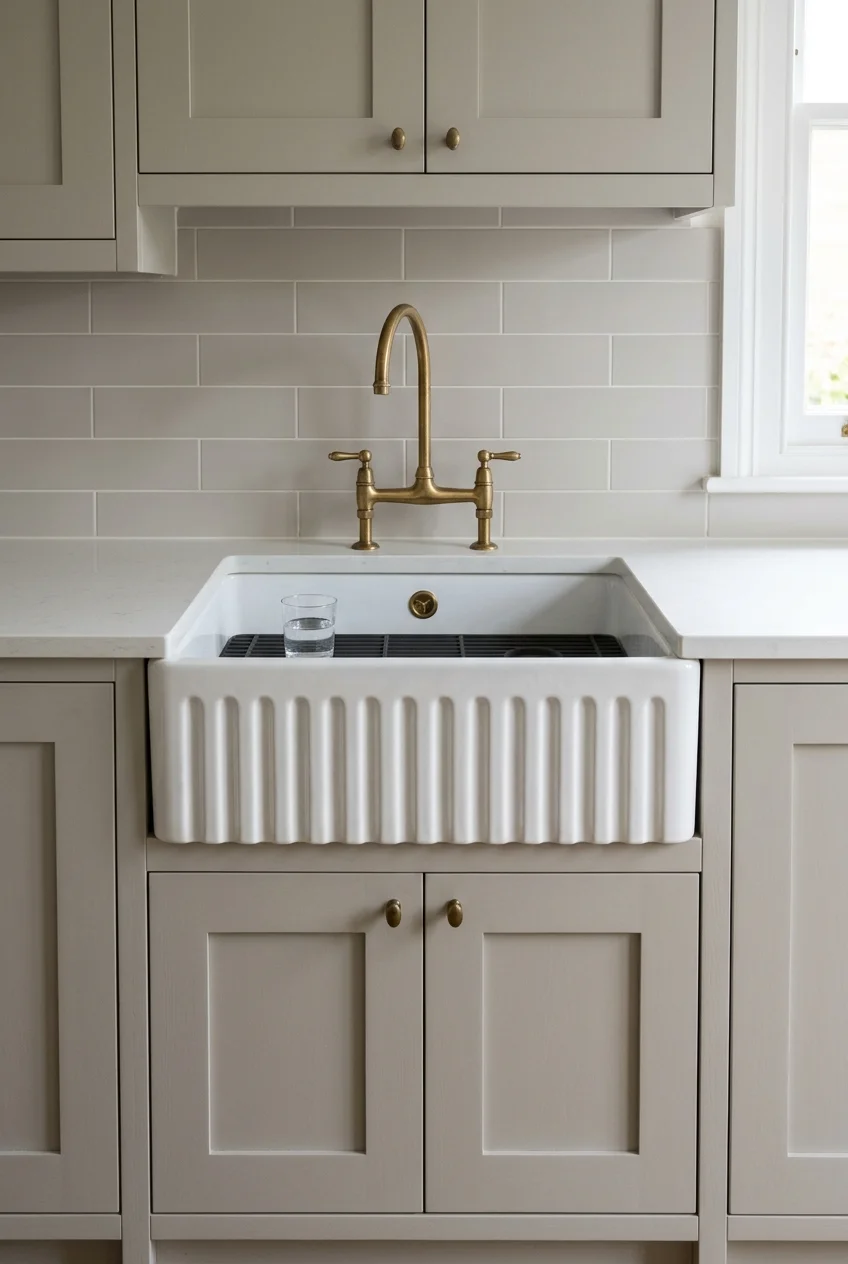
Vertical fluting gives an apron sink depth without relying on color. The detail works best when nearby cabinet fronts and backsplash patterns remain comparatively simple.
Grooves collect more residue than a flat face, so inspect their depth and finish. Shallow, smoothly glazed channels are easier to wipe regularly.
Materials, Colors, and Finishes That Change the Look
Material affects more than appearance: weight, care, sound, edge details, and repair options all matter once the sink enters daily service.
11. Keep the Classic Look of Brushed Stainless Steel
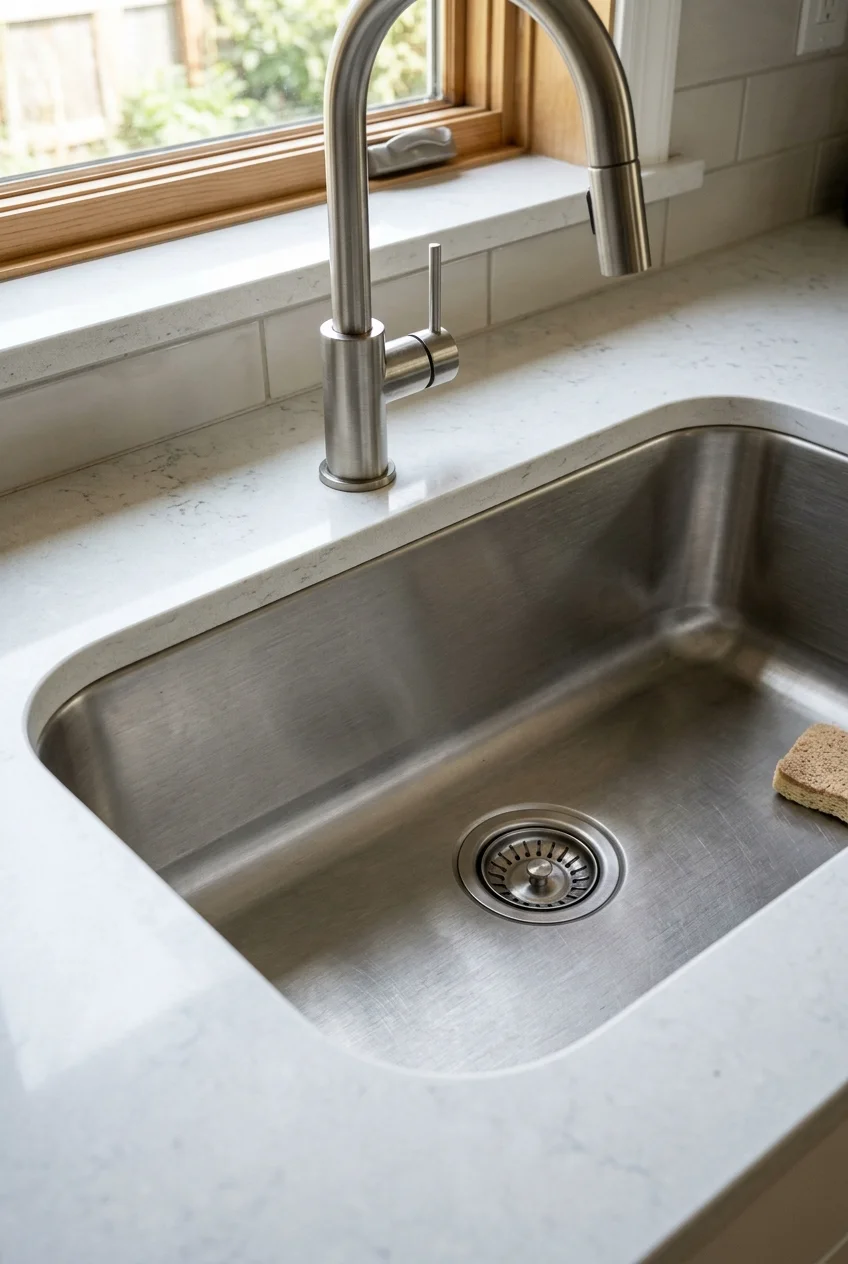
Brushed stainless steel works across contemporary and traditional kitchens because its fine grain reads as neutral. It also echoes many appliances without demanding exact color matching.
Compare steel gauge, underside sound treatment, corner radius, and drain position rather than judging appearance alone. Tighter corners look crisp but require more careful cleaning.
Wipe with the grain and follow the maker’s cleaner guidance. Everyday scratching may blend into a soft patina rather than remaining invisible.
12. Use a Dark Composite Sink for Graphic Contrast
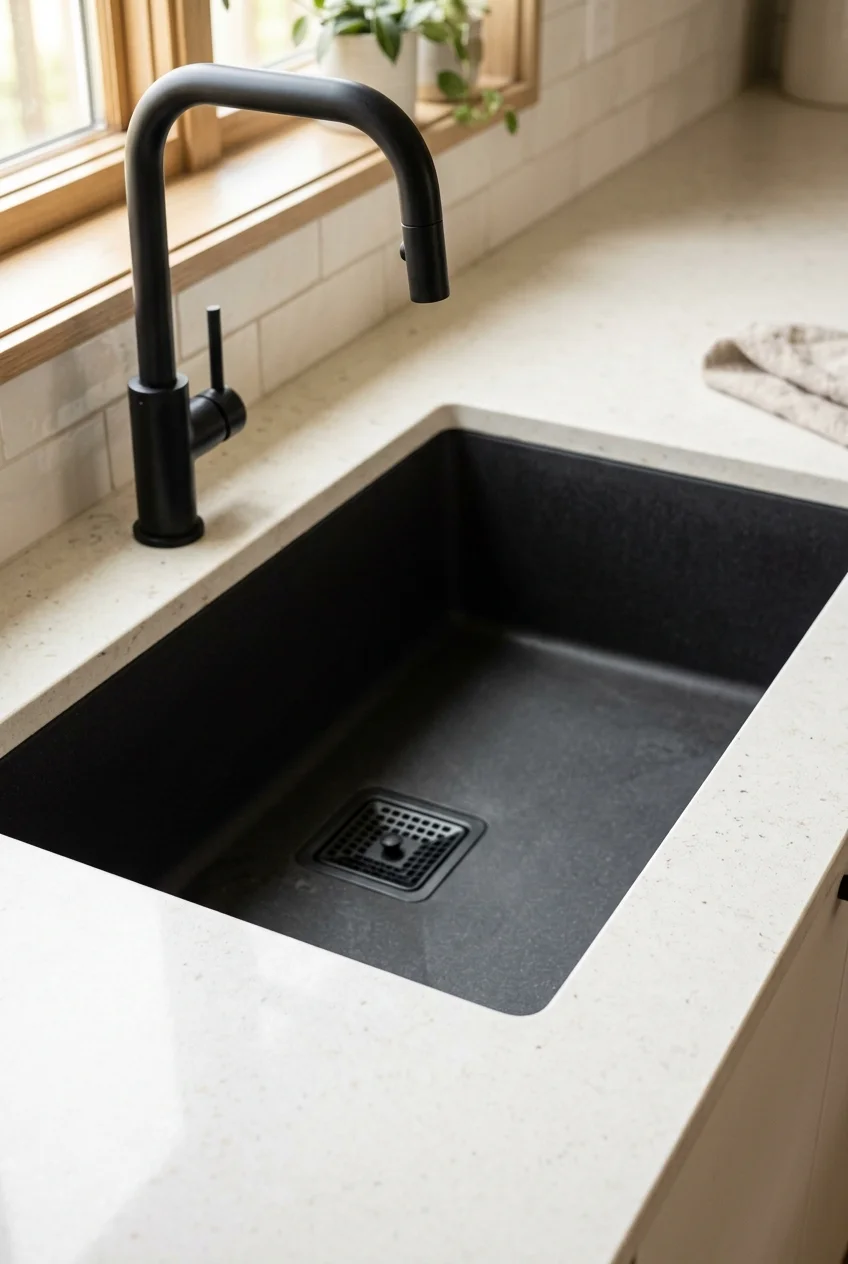
A charcoal or black composite basin creates a defined shape against a pale counter. Repeating the dark tone once in hardware keeps the contrast deliberate.
Hard-water residue is more visible on some dark finishes. Ask for the manufacturer care guide and view a physical sample wet and dry before committing.
13. Blend a Warm Gray Sink into Stone Counters
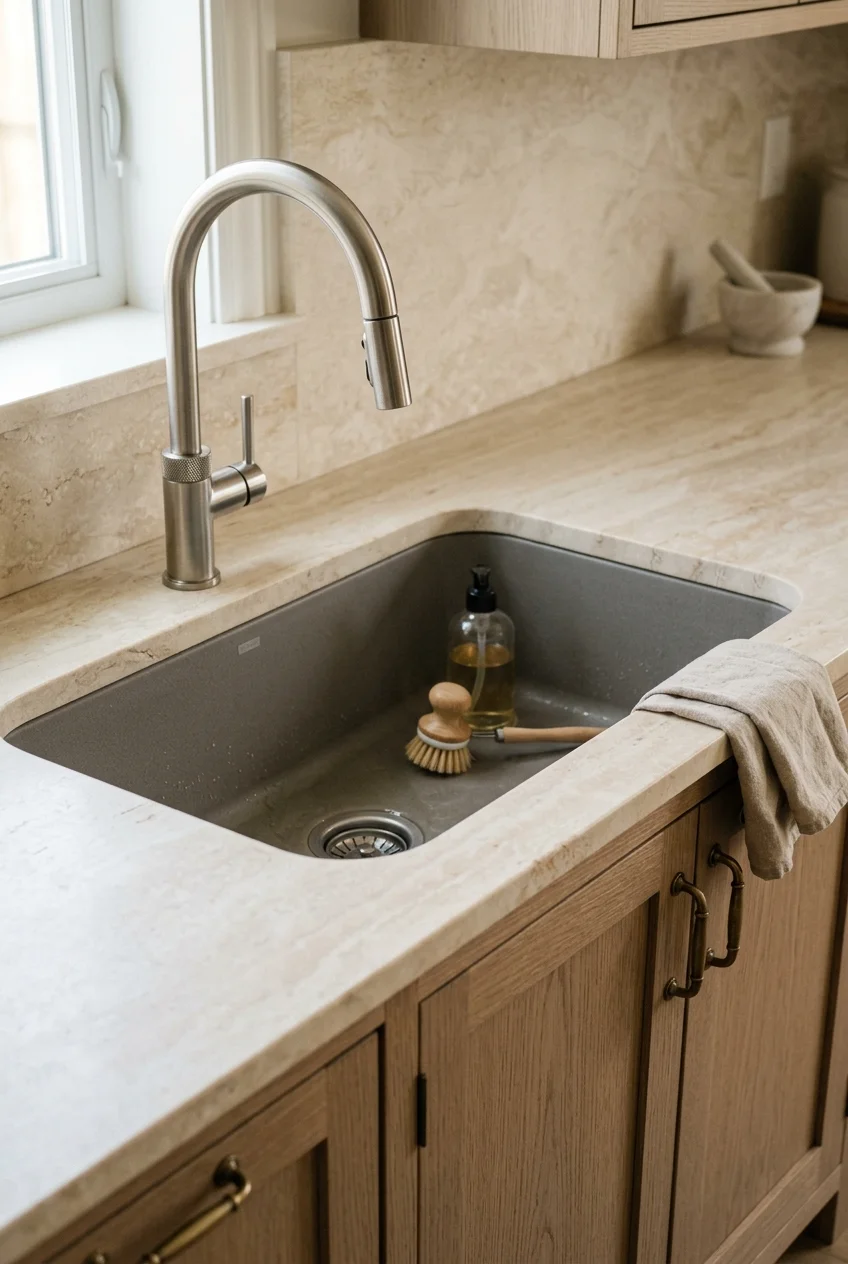
Warm gray softens the jump between a pale countertop and darker cabinetry. It is quieter than black while still defining the sink as a separate object.
Match undertones rather than names. Place the sink sample against the actual counter slab, because gray can shift green, blue, or brown under different lighting.
14. Choose Soft White Instead of Bright White
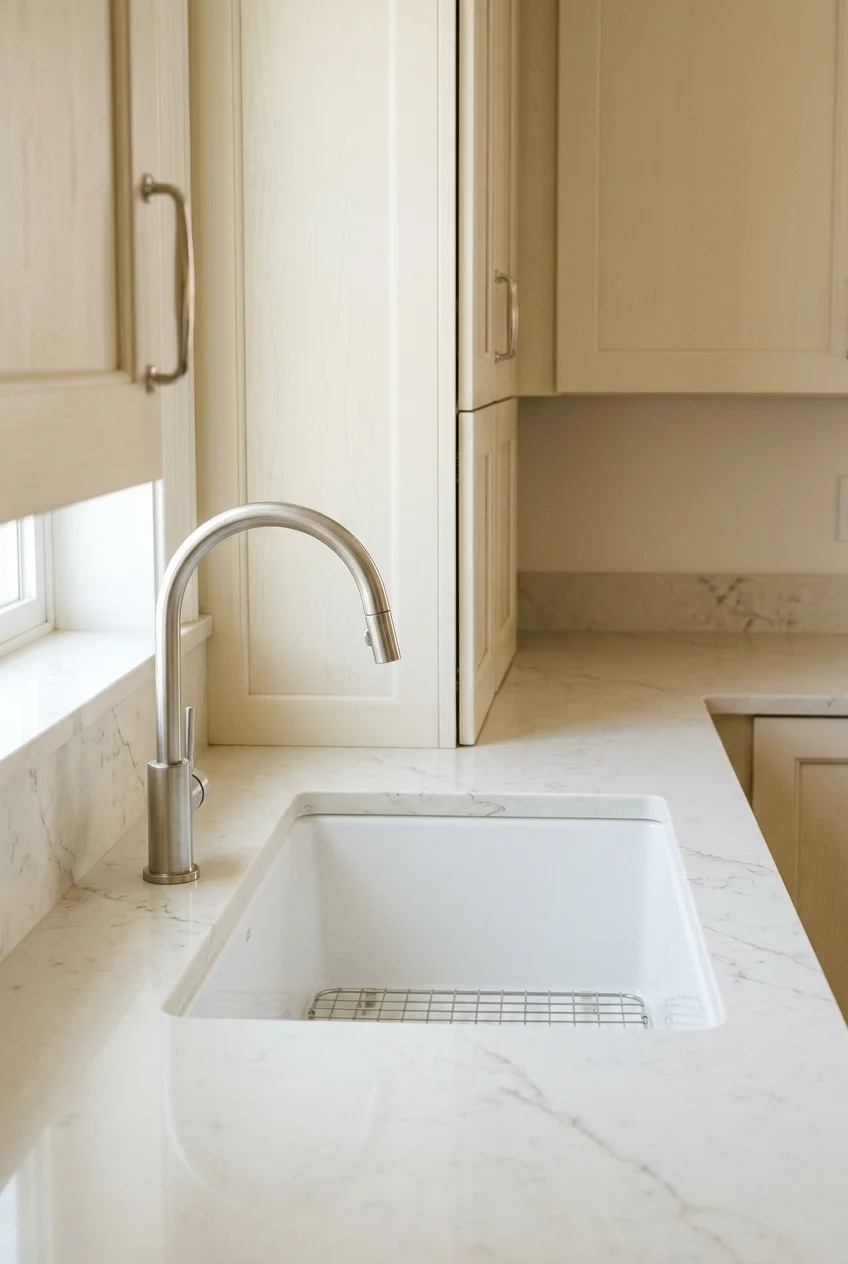
A soft-white sink can bridge cream cabinets and a pale veined counter without introducing a stark blue cast. The result feels layered rather than perfectly matched.
Bring cabinet, counter, and sink samples together before ordering. Three almost-whites can clash more visibly than a purposeful contrast when their undertones disagree.
15. Anchor the Counter with a Deep Blue Sink
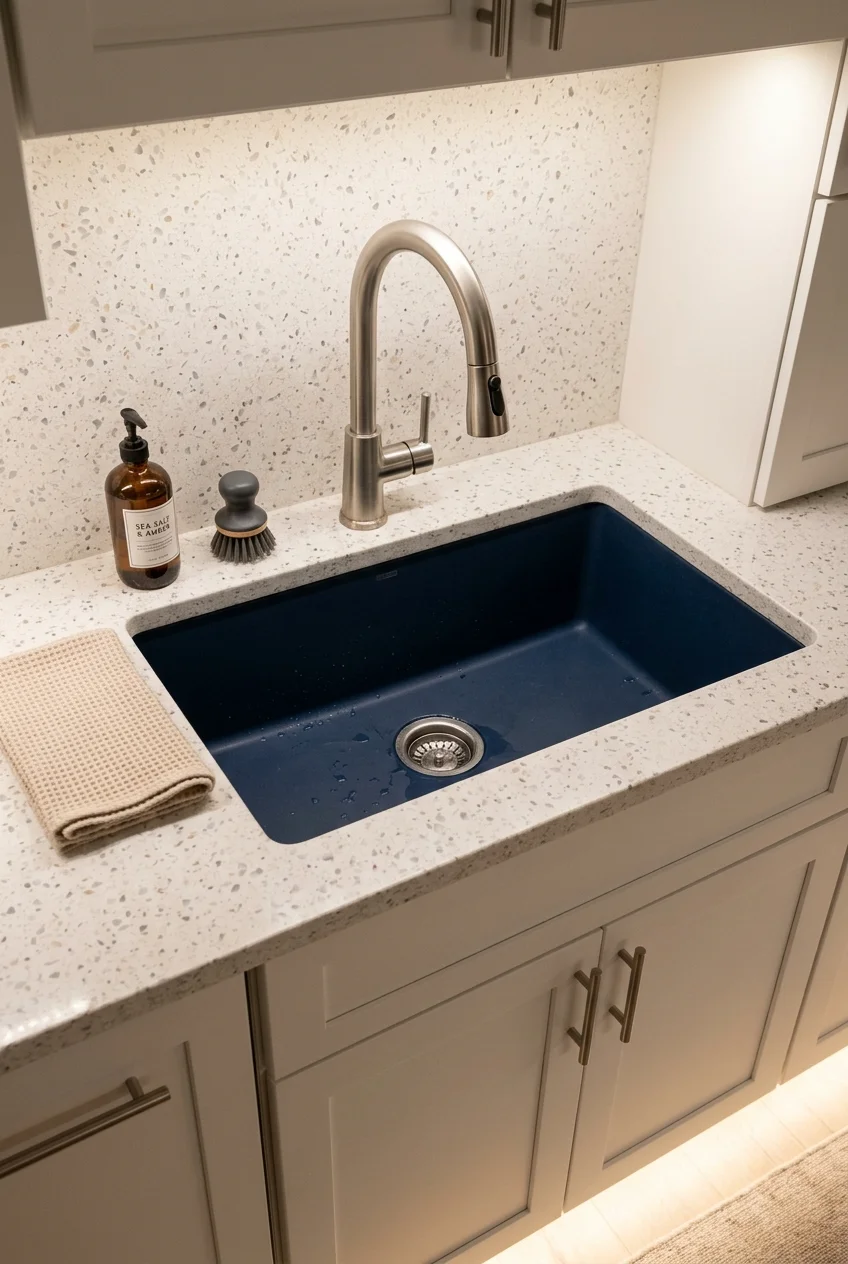
A deep blue basin adds color at the work surface without repainting an entire cabinet run. It reads most clearly against restrained counters and backsplashes.
Treat the color as a long-term fixture, not a removable accessory. Confirm replacement options, finish care, and how the hue looks under evening task lighting.
16. Add Character with an Enameled Cast-Iron Sink
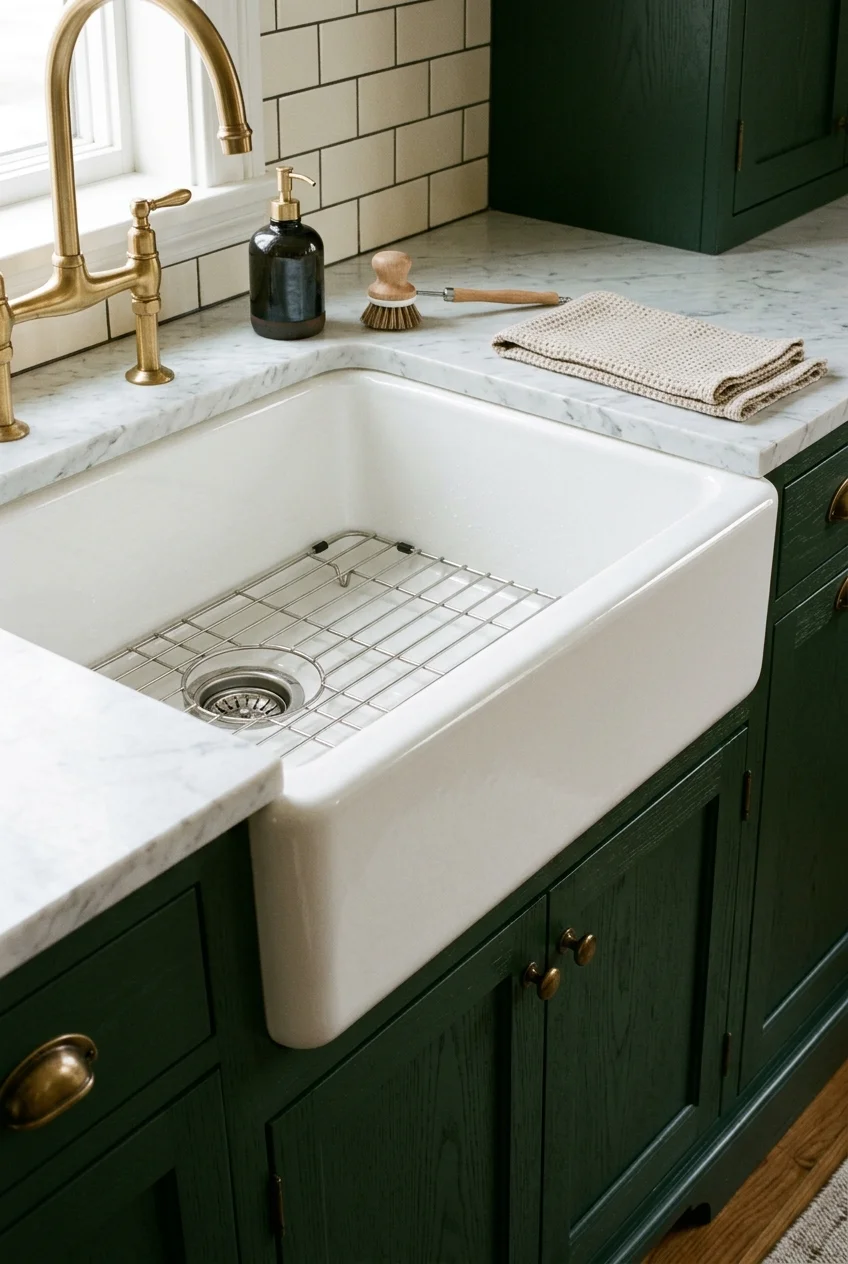
Enameled cast iron brings a glossy, substantial surface and can support traditional or tailored kitchens. Its weight becomes an installation consideration, not just a material detail.
Confirm cabinet support and handling requirements before demolition. Protect the enamel with the recommended rack and cleaning methods rather than assuming every abrasive is suitable.
Color choices can be long-lived, so compare the enamel with counters under actual room lighting. Small samples rarely show the basin’s full reflective effect.
Watch for Cast-iron dimensions and weight vary by model, so the installer should follow the current template and support instructions for the exact sink.
17. Use Fireclay for a Crisp Traditional Basin
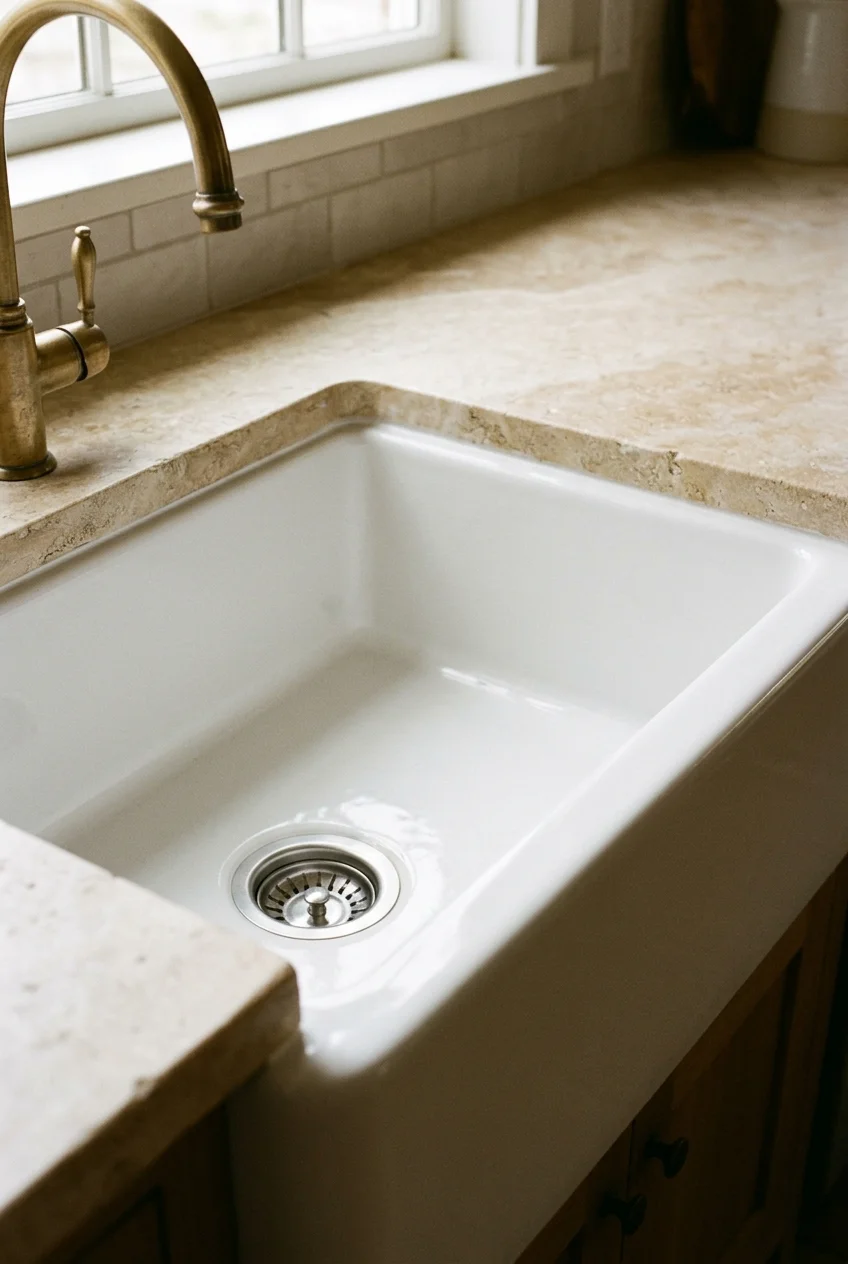
Fireclay gives apron and undermount sinks a smooth ceramic presence with softly dimensional edges. Slight manufacturing variation can be part of the material.
Cabinetmakers and countertop fabricators need the actual sink before final cutting. A nominal specification cannot replace fitting the template and basin to one another.
Choose a compatible drain and bottom protection before installation. Metal cookware can leave marks even when the underlying glazed surface remains intact.
18. Make Copper the Deliberate Focal Material
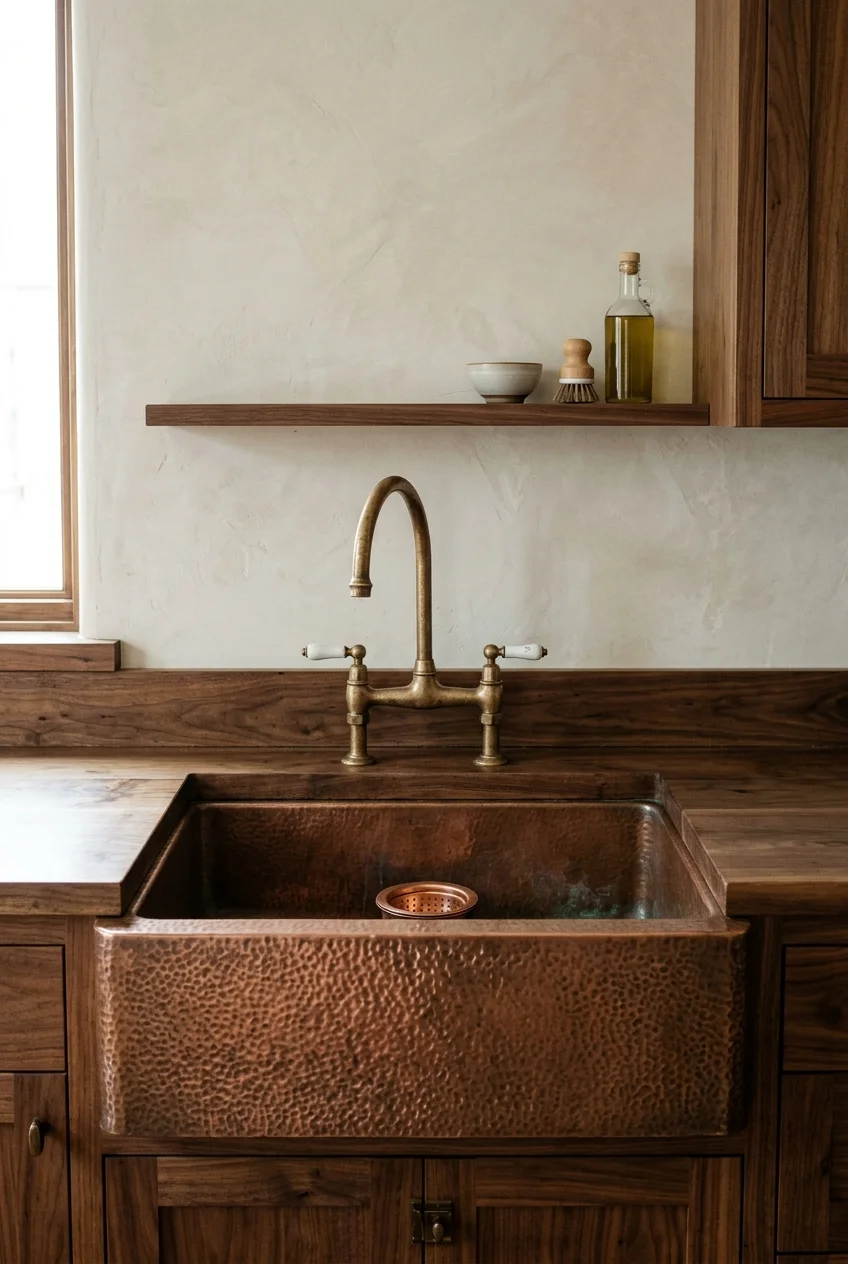
A hammered copper basin contributes warmth, texture, and visible surface change. Pair it with simpler counters so the sink remains the intentional focal material.
Copper develops patina and reacts differently to cleaners than stainless steel. Read the maker care instructions before deciding whether evolving color will suit you.
19. Let Integrated Solid Surface Nearly Disappear
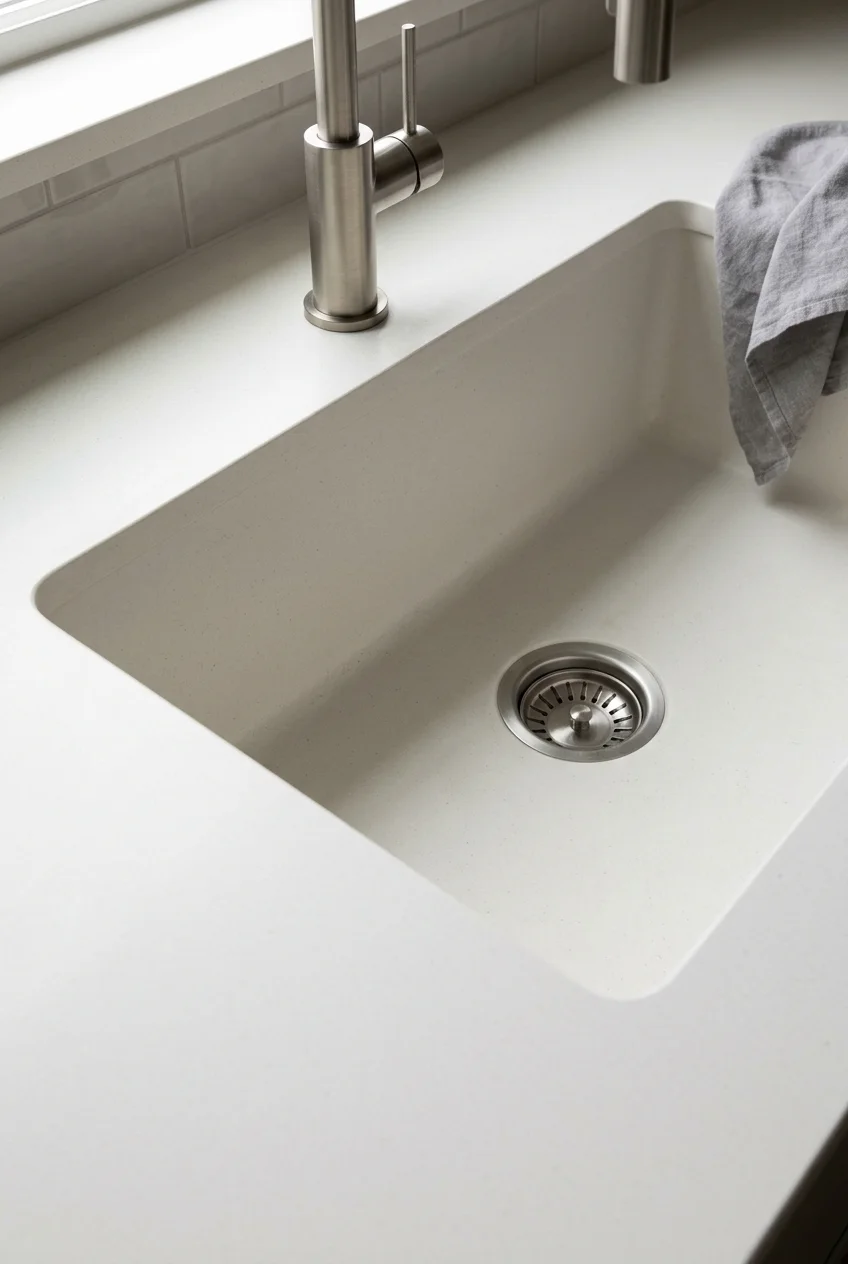
A solid-surface counter can flow into a matching basin with visually quiet seams. The continuous color is useful when cabinetry or backsplash should lead.
Ask how the fabricator handles corners, drainage slope, repair, and future replacement. Seamless-looking does not mean every integrated basin uses identical construction or maintenance.
Keep a sample of the material and written care instructions. Repair possibilities depend on the specific product, damage, thickness, and fabricator experience.
20. Continue Natural Stone into a Statement Basin
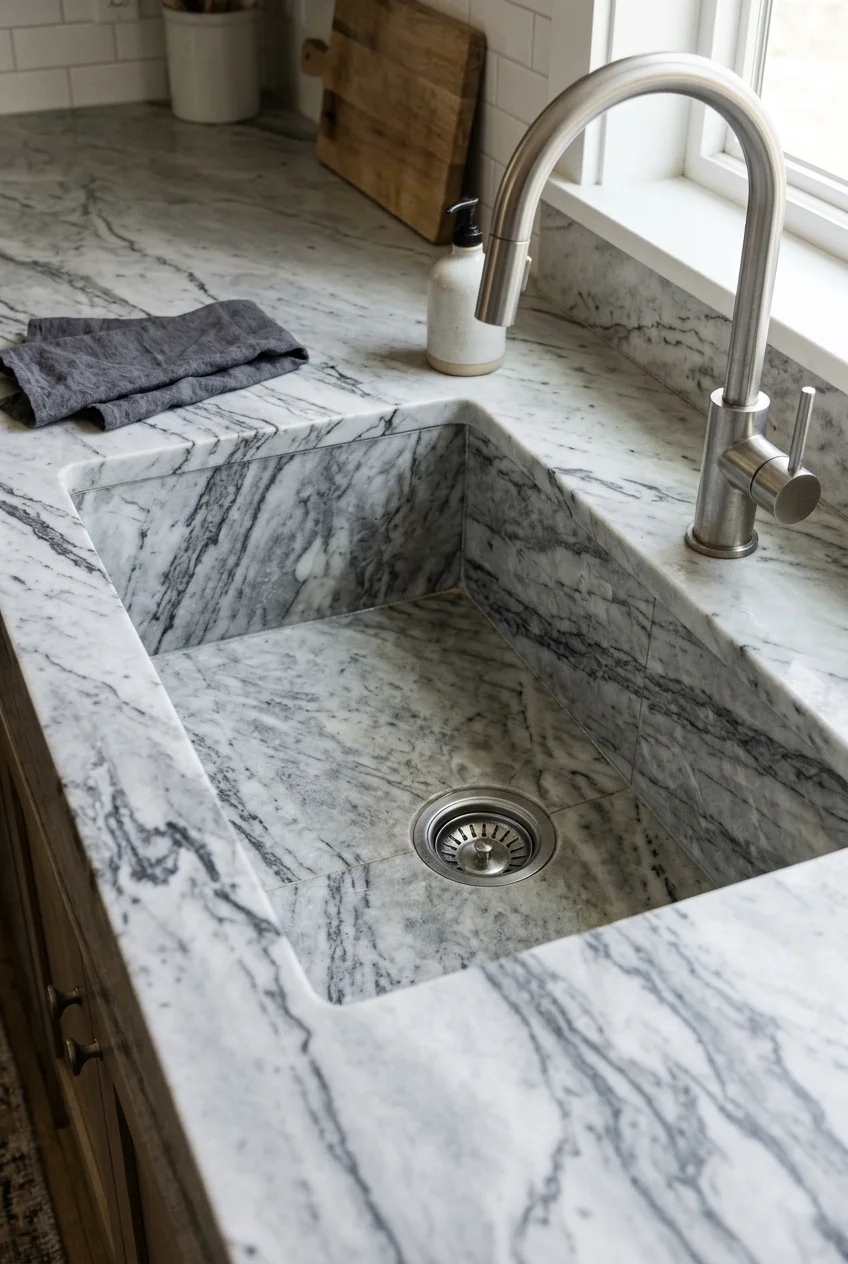
A stone basin can repeat the counter veining and create a sculptural centerpiece. It belongs in a plan built around fabrication, sealing, weight, and drainage.
Request shop drawings, maintenance guidance, and a clear repair strategy. Natural variation is attractive, but edges, joints, and water exposure still need competent detailing.
A smaller stone sink or lined basin can preserve the visual idea with less material exposure. Compare alternatives before committing the entire washing surface.
- Review the exact slab layout.
- Confirm support and finished weight.
- Approve drain and internal corner details.
- Ask how joints will be maintained.
Mounting and Counter Details That Define the Edge
The same basin can look entirely different depending on how its rim meets the counter, making installation type a design decision with practical consequences.
21. Sweep Crumbs Easily into an Undermount Sink
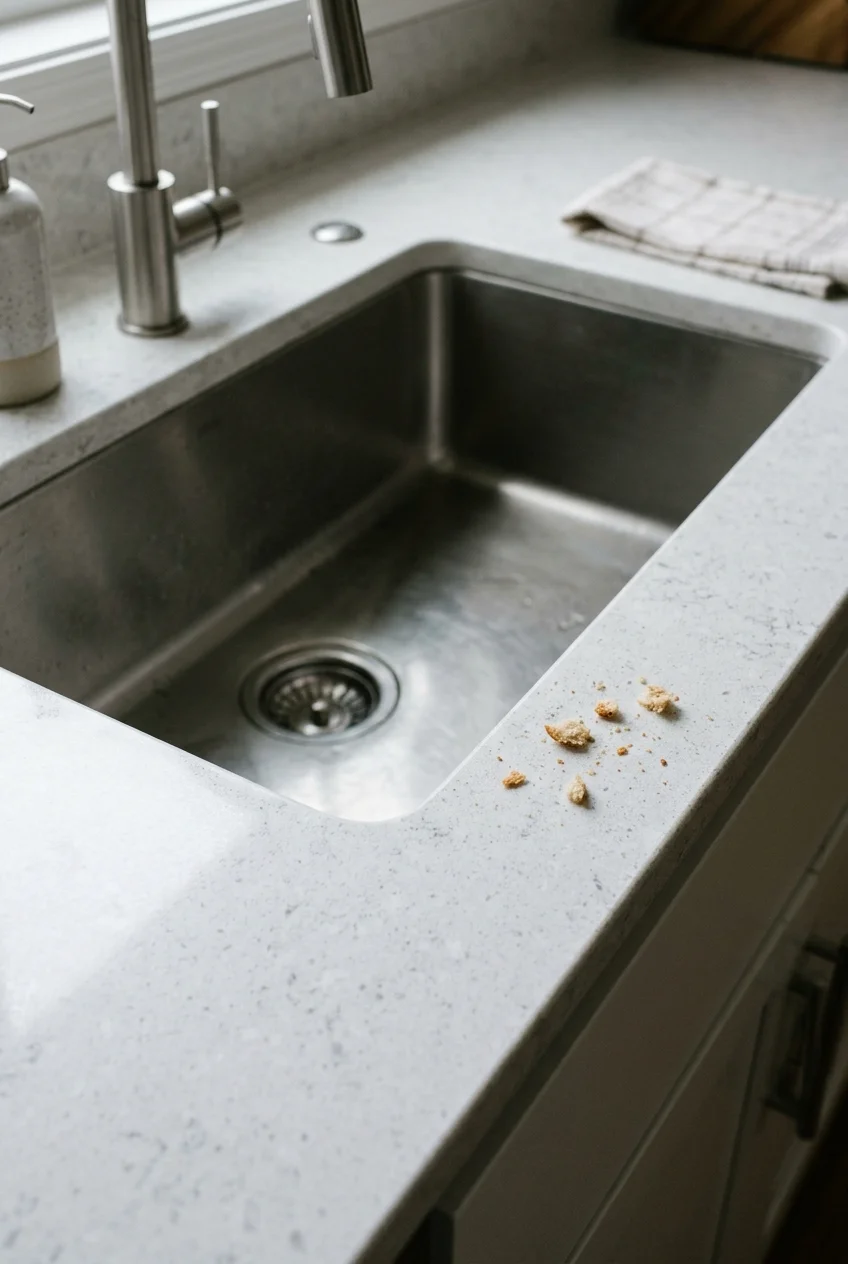
An undermount sink keeps the counter surface visually continuous and lets crumbs move directly into the bowl. The exposed counter edge becomes an important detail.
This installation needs a compatible, water-resistant counter and reliable support below. Agree on positive, negative, or flush reveal before fabrication begins.
Inspect the seal line during routine cleaning and address gaps promptly. Water should not linger where the sink flange meets the underside of the counter.
22. Use a Drop-In Sink for a Defined Rim
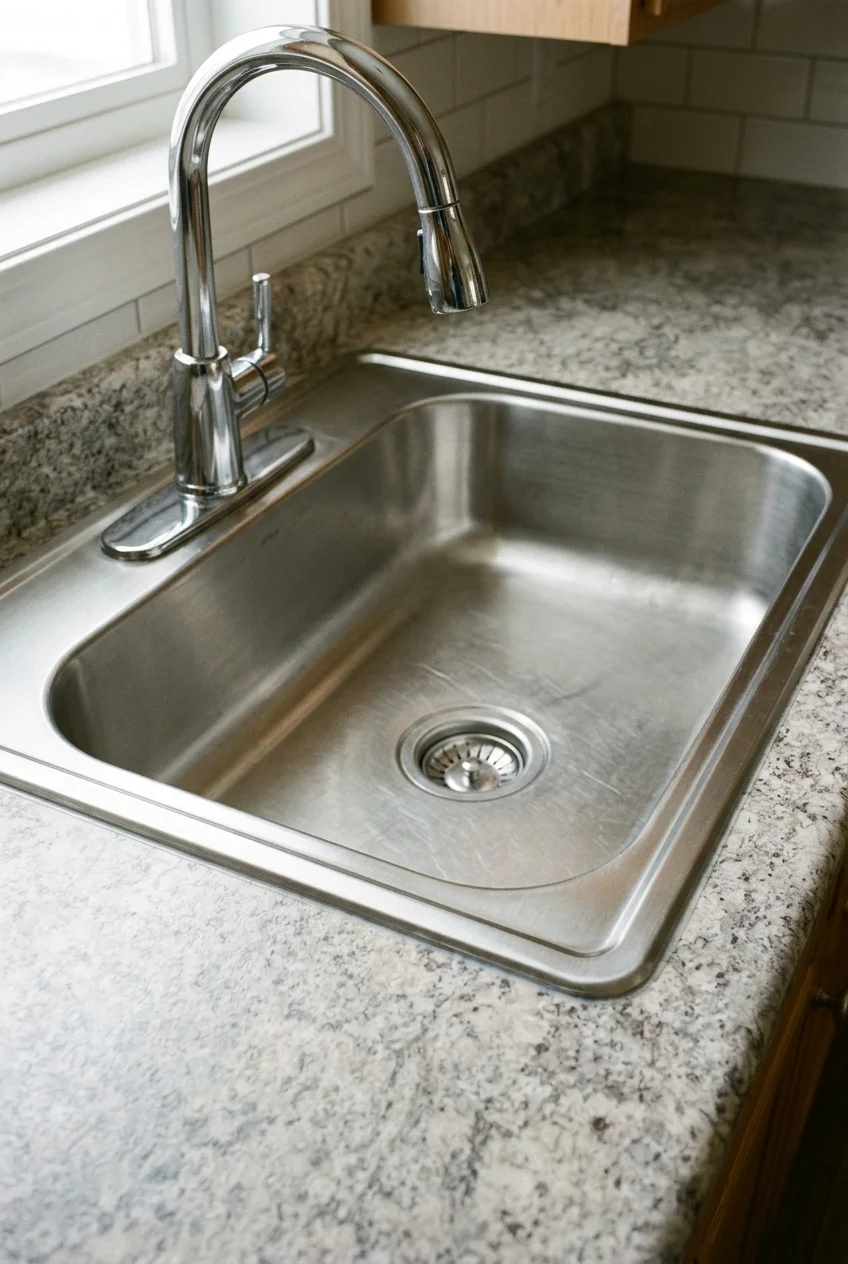
A drop-in sink places a visible rim above the counter, creating a clear outline and allowing installation in many existing countertop materials, including laminate.
Keep the rim narrow enough for easy wiping and follow the sealing instructions closely. The edge should sit fully supported, without gaps or rocking.
23. Set the Sink Flush with the Counter
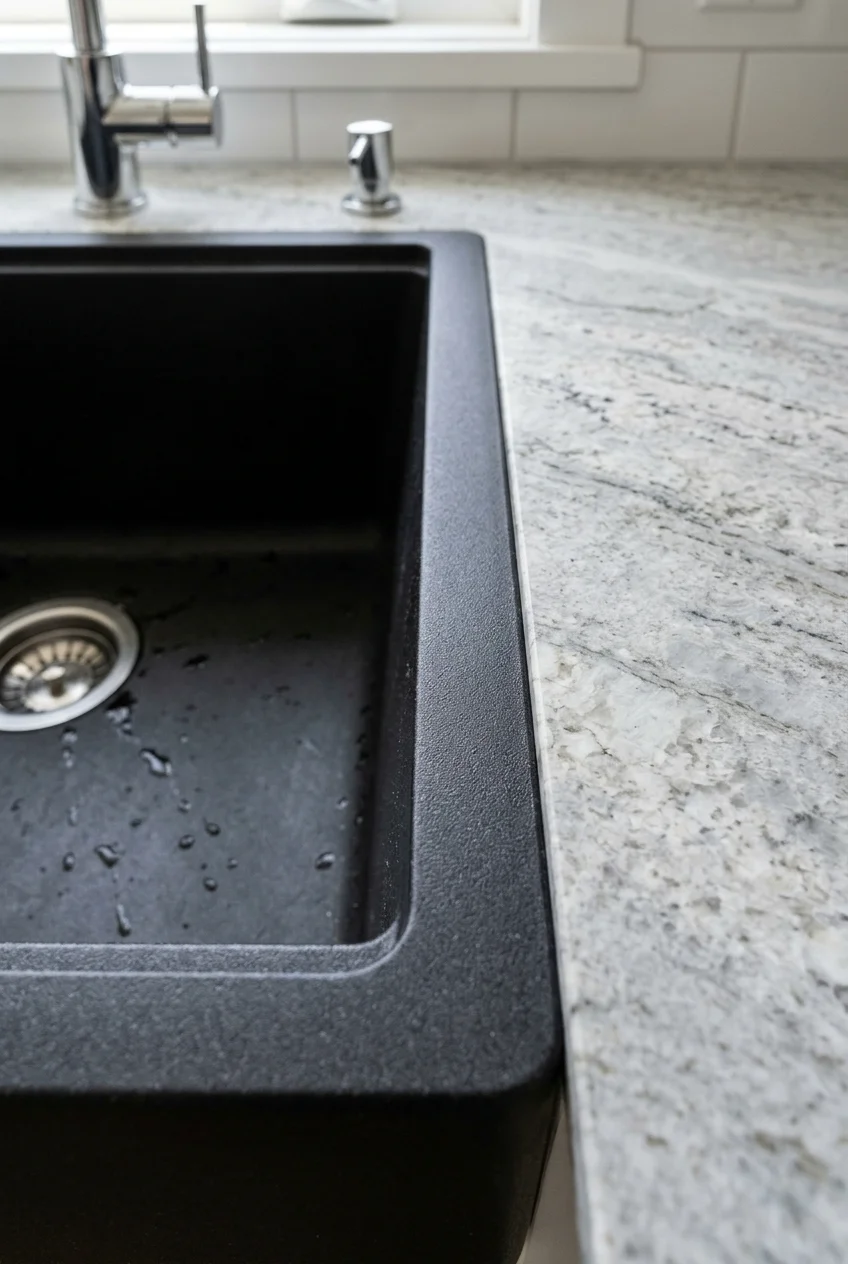
A flush-mounted sink aligns its rim with the worktop, reducing the visual step while keeping a distinct material boundary around the basin.
The result depends on precise fabrication and compatible products. Ask who is responsible for the recess, sealing, and tolerance between sink and counter.
A nearly level joint can still collect residue if the transition is uneven. Review a finished sample or detailed edge drawing before approving fabrication.
24. Expose a Slightly Raised Ceramic Edge
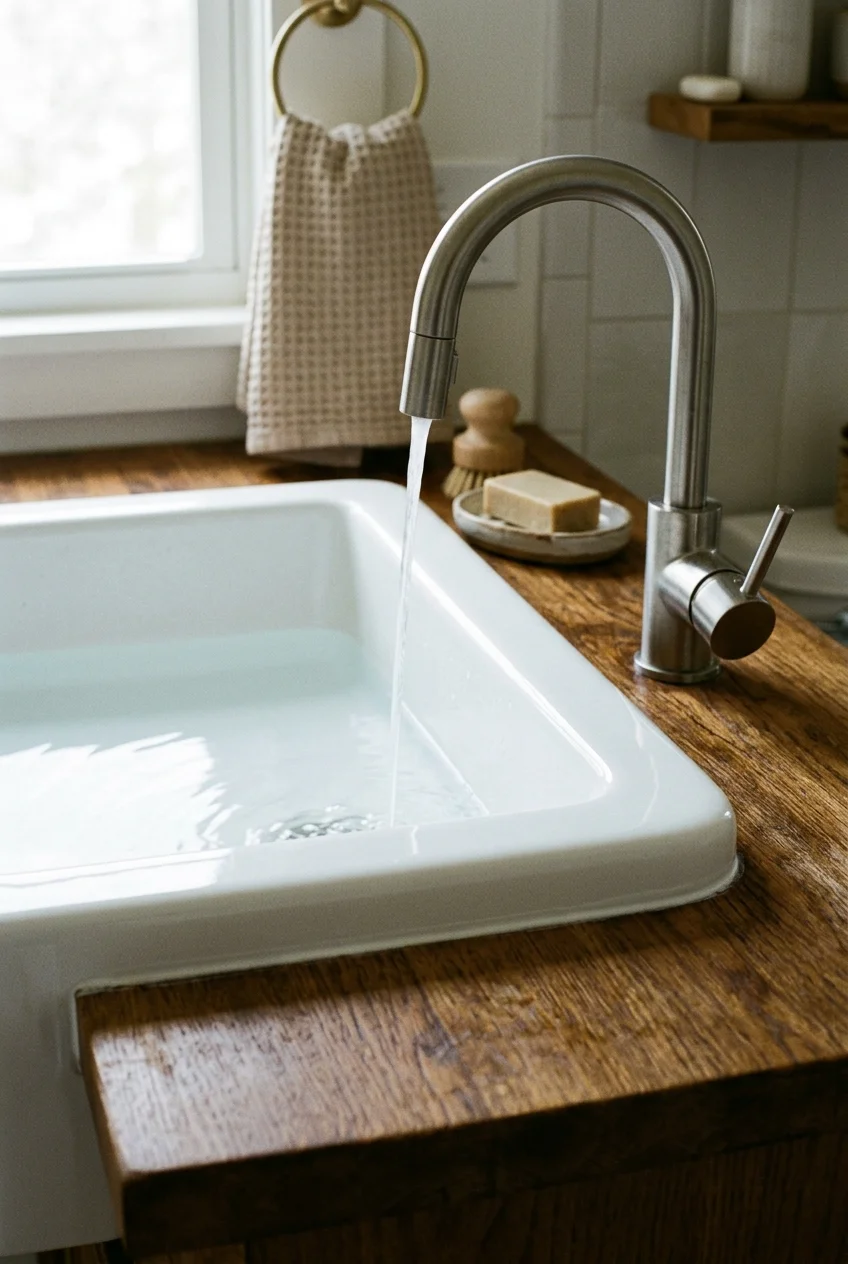
A gently protruding ceramic sink celebrates its thickness instead of hiding it. The raised edge adds a crafted look beside wood or stone counters.
Check how far the lip projects and how water returns to the bowl. A decorative edge should not create an awkward cleaning channel behind it.
25. Pair a Tile-In Sink with a Tiled Counter
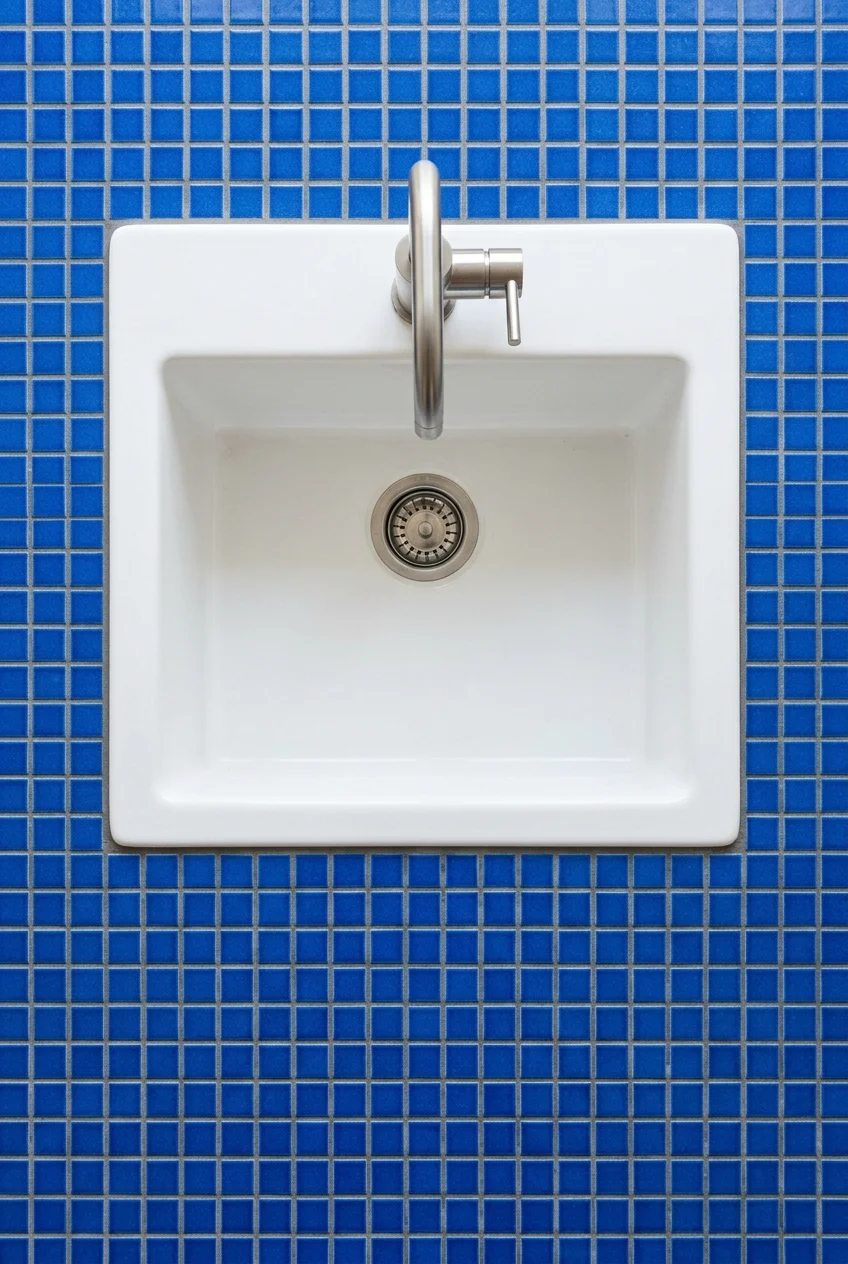
A tile-in sink has a flat edge designed to meet surrounding tile, creating a purposeful transition in vintage-inspired or colorful countertop schemes.
Plan full tile courses, grout joints, waterproofing, and edge movement together. Random slivers around the basin make the installation look improvised and complicate maintenance.
Use grout and sealants suited to repeated water exposure, then follow their maintenance schedules. The sink edge should remain readable, clean, and fully supported.
26. Choose a Short Apron for an Existing Cabinet
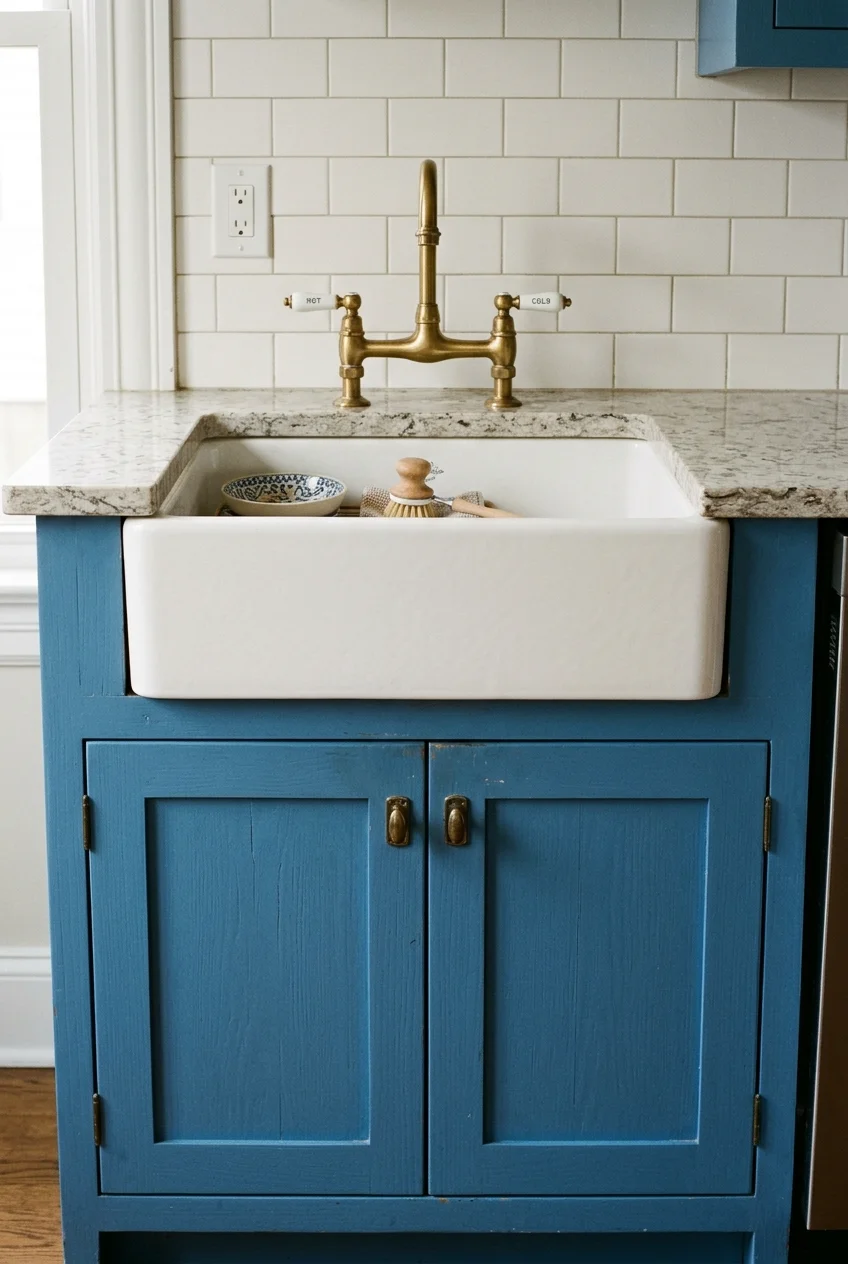
A short-apron sink can deliver the exposed-front look while retaining more of the cabinet face below. Some models are designed specifically for retrofit situations.
Do not assume every short apron fits every base. Compare the exact cutout template with door rails, drawer fronts, supports, and counter thickness.
27. Mount a Utility-Style Sink to the Wall
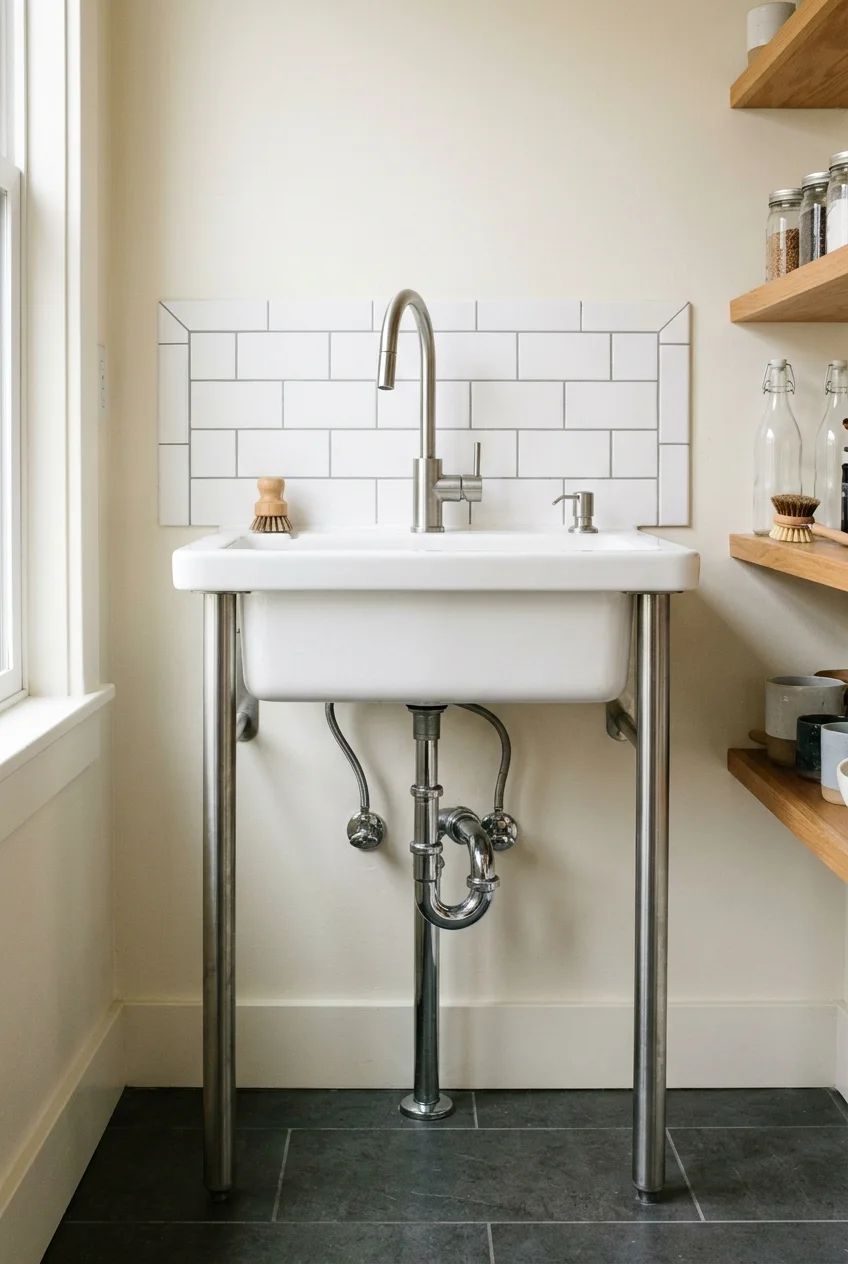
A wall-mounted kitchen sink creates an open, furniture-like profile and can suit a pantry, studio kitchen, or historically influenced room without standard base cabinetry.
The wall structure, brackets, supply lines, drain, and exposed surfaces all need deliberate planning. This is a fixture installation, not a floating styling trick.
Open space below can feel lighter, but it removes concealed storage and exposes cleaning details. Decide whether baskets or shelving would obstruct necessary access.
Setup note When pipes remain visible, choose a finished plumbing arrangement that can be cleaned and protected rather than treating utility connections as incidental clutter.
28. Place the Drain Off Center for More Usable Space
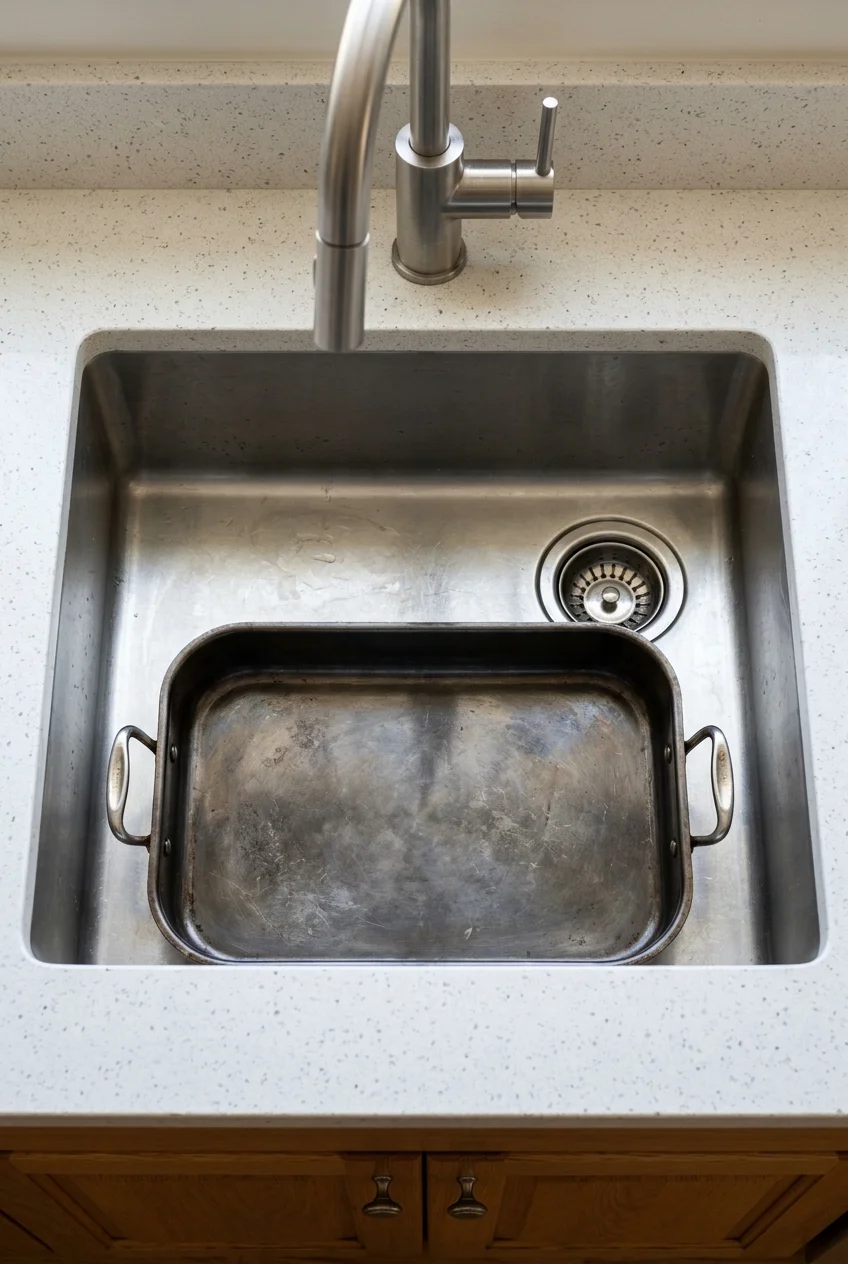
An offset drain leaves a longer uninterrupted basin floor for pans and may shift plumbing away from the middle of the sink cabinet.
That shift can improve under-sink storage, but only after accounting for the disposal, trap, supply lines, and dishwasher connection in the real cabinet.
29. Use a Rear Drain to Open the Cabinet Front
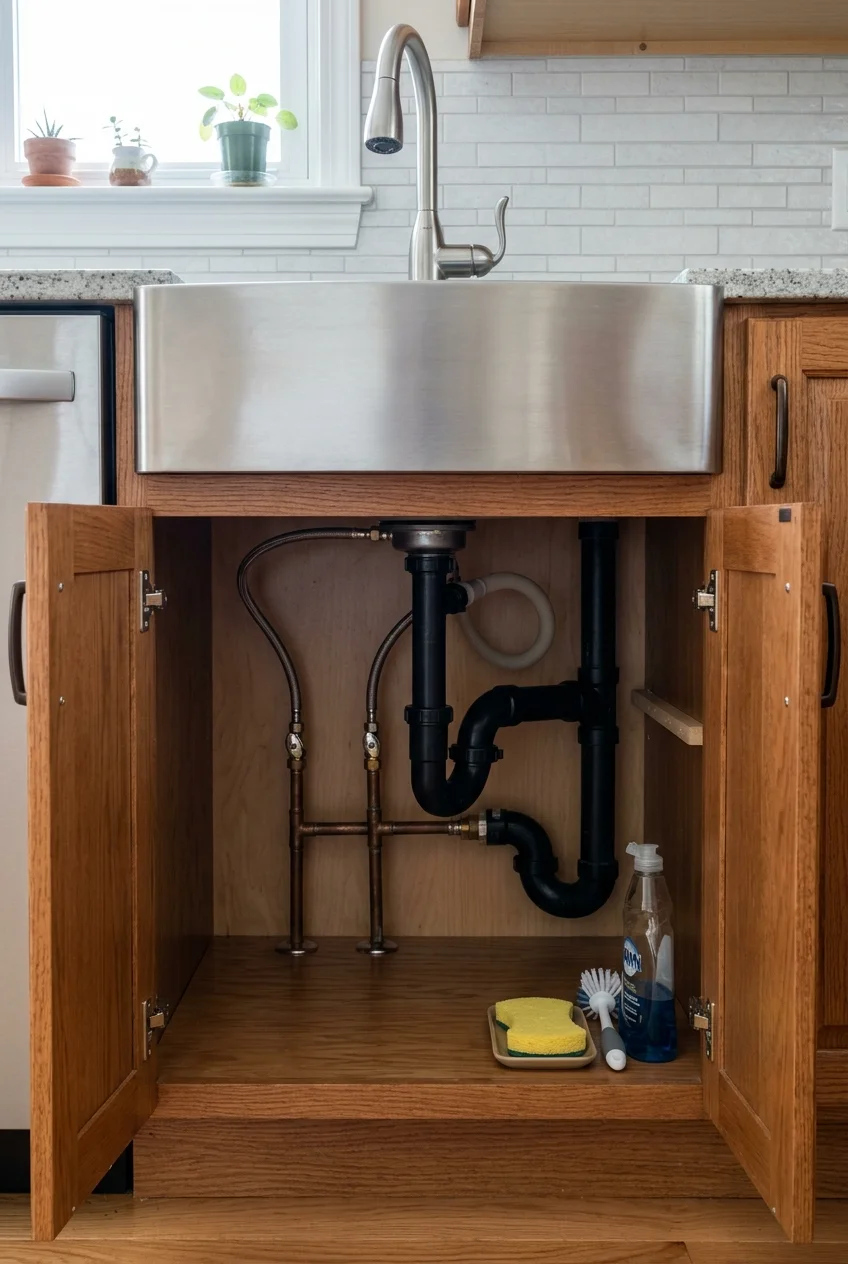
A rear-set drain moves much of the plumbing toward the cabinet back, potentially leaving the front portion easier to organize and reach.
The benefit depends on actual plumbing geometry and disposal depth. Review a cabinet elevation before buying organizers or promising a completely open base.
30. Protect the Counter with an Integrated Drainboard
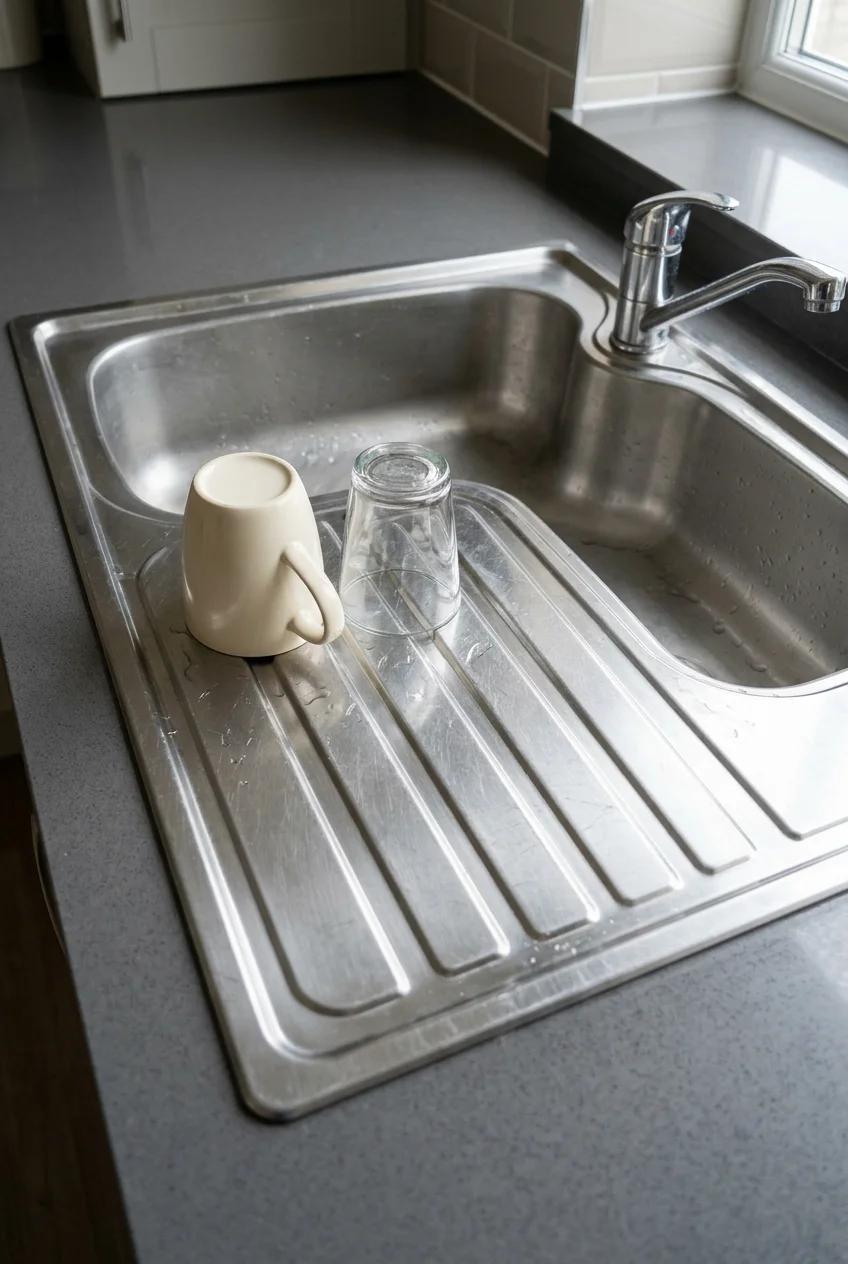
An integrated drainboard gives wet dishes a sloped landing area beside the bowl. It keeps drying activity defined instead of spreading across the counter.
Choose the drainboard side according to your dishwasher and dominant-hand workflow. Grooves should return water toward the sink without creating hard-to-clean dead ends.
Workstation Features for Prep, Washing, and Drying
Functional accessories earn their place when they fit the sink, support a real task, and store without turning the entire counter into equipment.
31. Add a Ledge for Sliding Workstation Accessories
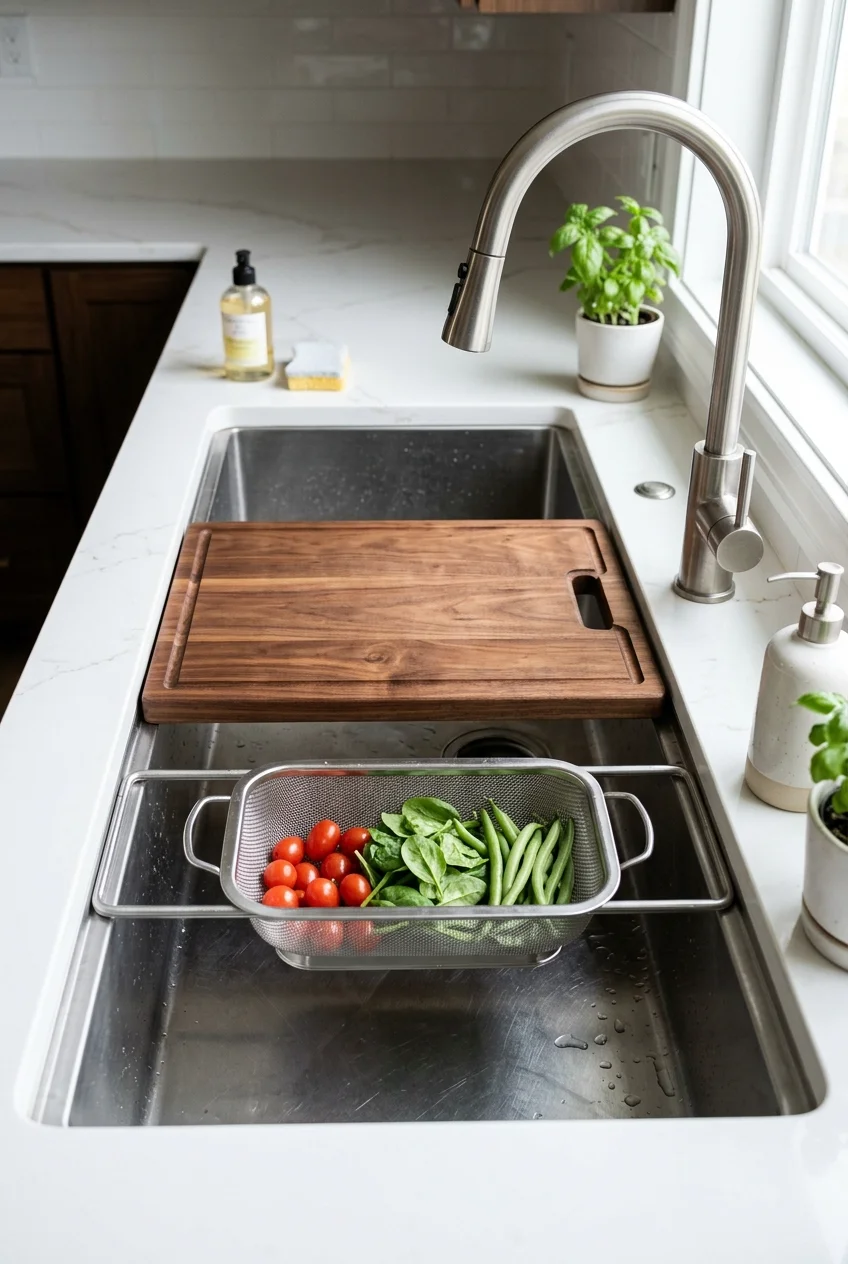
A workstation sink uses internal ledges to support fitted boards, colanders, racks, or trays. Tasks can happen above the basin instead of consuming counter space.
Compare included accessories, replacement availability, ledge levels, and storage needs. A generous bundle is not helpful when most pieces live awkwardly in another cabinet.
Leave part of the bowl open during messy prep so scraps and water can reach the drain. Accessories should move without scraping the faucet or backsplash.
- Board for trimming and transferring food
- Colander for rinsing above the drain
- Rack for drying glasses or cookware
- Tray for containing wet utensils
32. Use Two Accessory Levels for Parallel Tasks
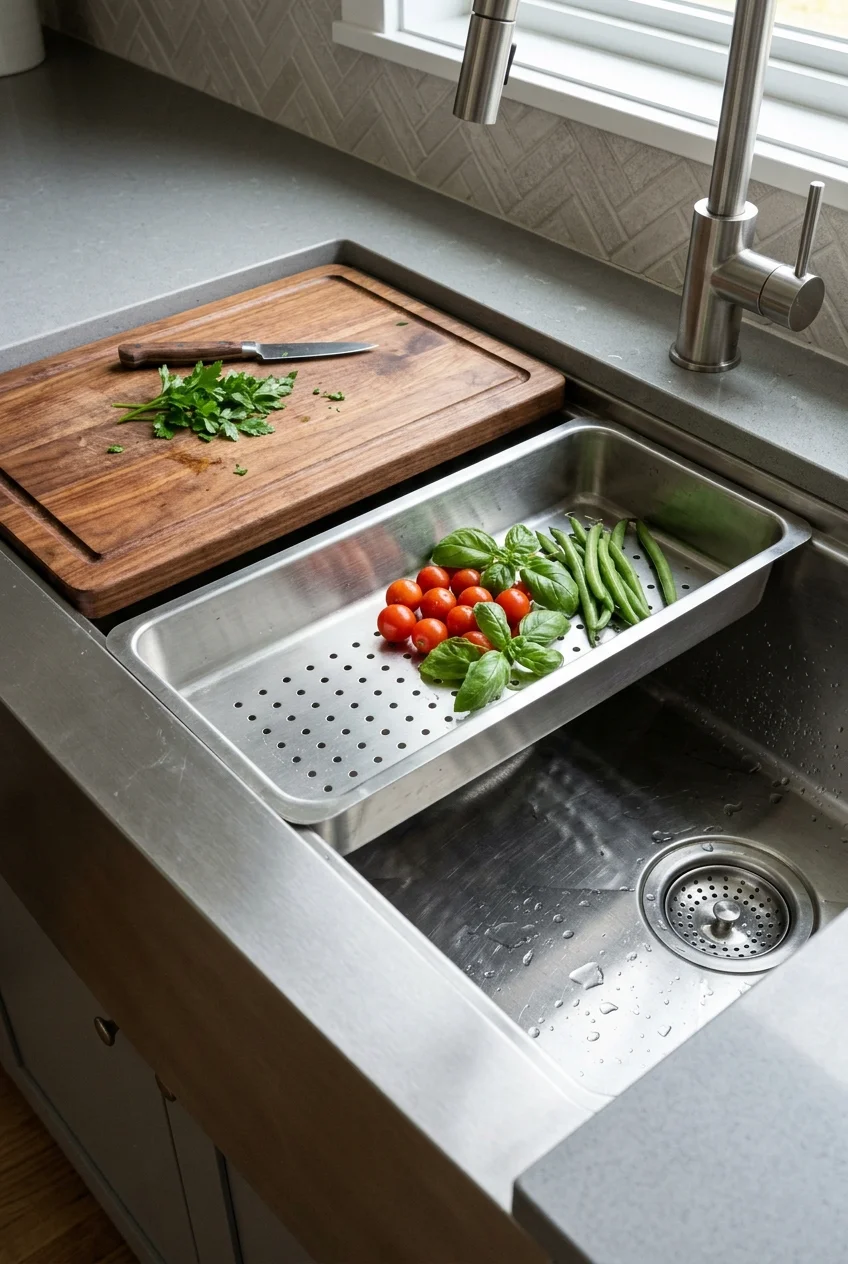
Dual-level ledges let one accessory slide above another, separating chopping, rinsing, and drying within the same footprint. The depth also affects comfortable reach.
Try the arrangement with your body position in mind. A lower tray that looks clever online may be inconvenient if it is difficult to lift when loaded.
33. Roll a Drying Rack Across Part of the Bowl
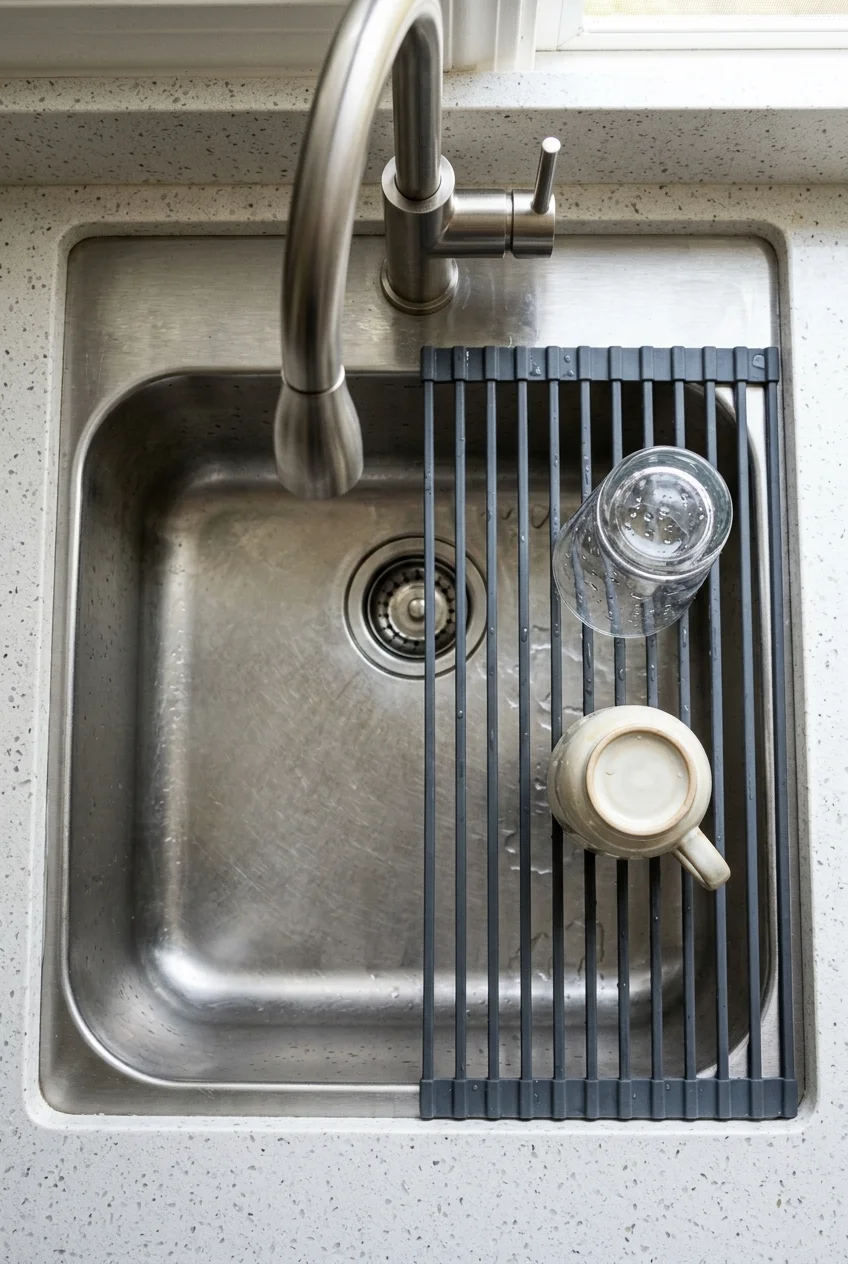
A roll-up rack creates temporary drying space across a sink, then stores in a narrow roll. It works best when some basin area remains open.
A 20.5-by-13-inch roll-up drying rack (paid link) is one current option. Measure the front-to-back span and supported edge before selecting its size.
Practical tip Leave enough exposed bowl for pouring and rinsing, and roll the rack dry before storing it inside a cabinet or drawer.
34. Suspend a Colander Above the Drain
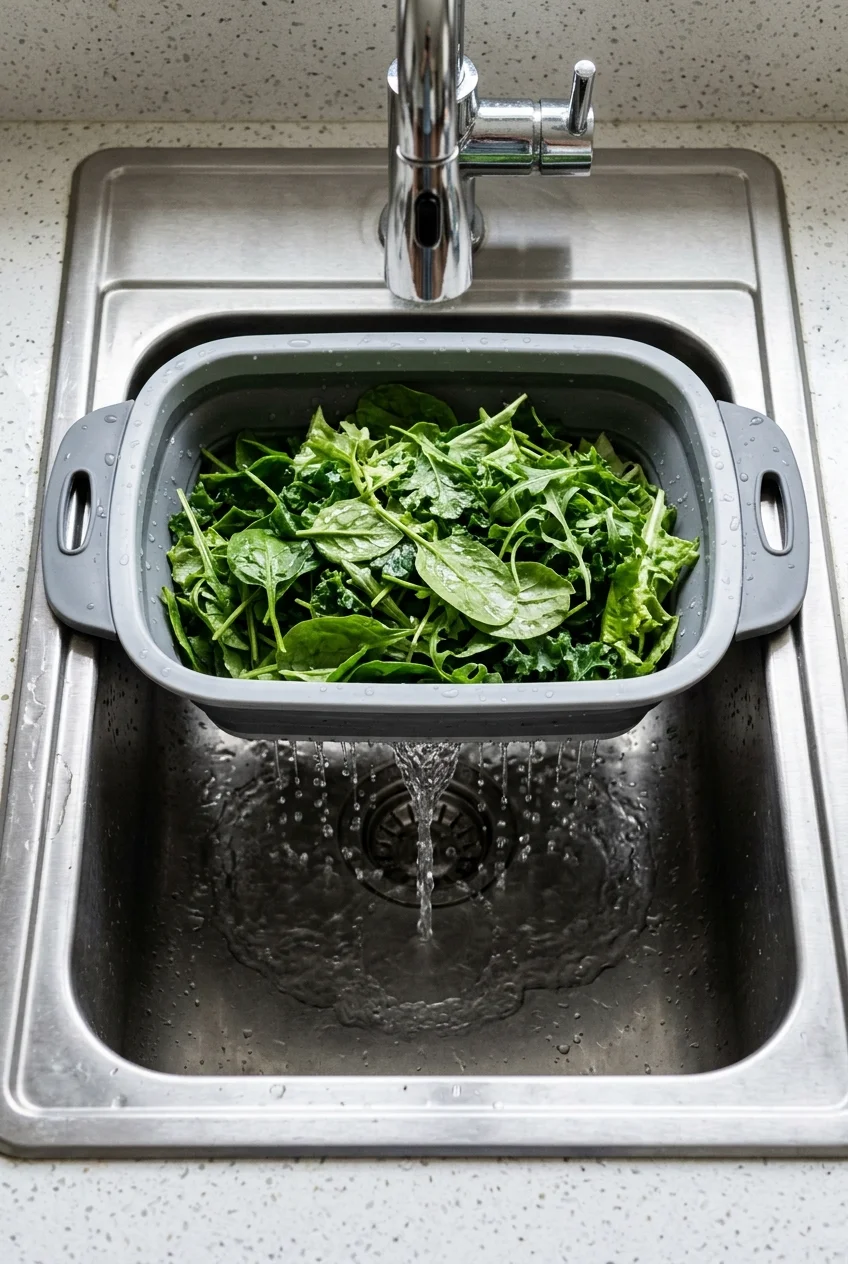
An over-sink colander keeps produce above the basin floor while water runs directly to the drain. Stable handles matter more than decorative color.
An expandable collapsible colander (paid link) adjusts from 15 to 19.8 inches according to the current listing. Confirm it rests securely across your sink.
35. Fit a Bottom Grid to Protect the Basin Floor
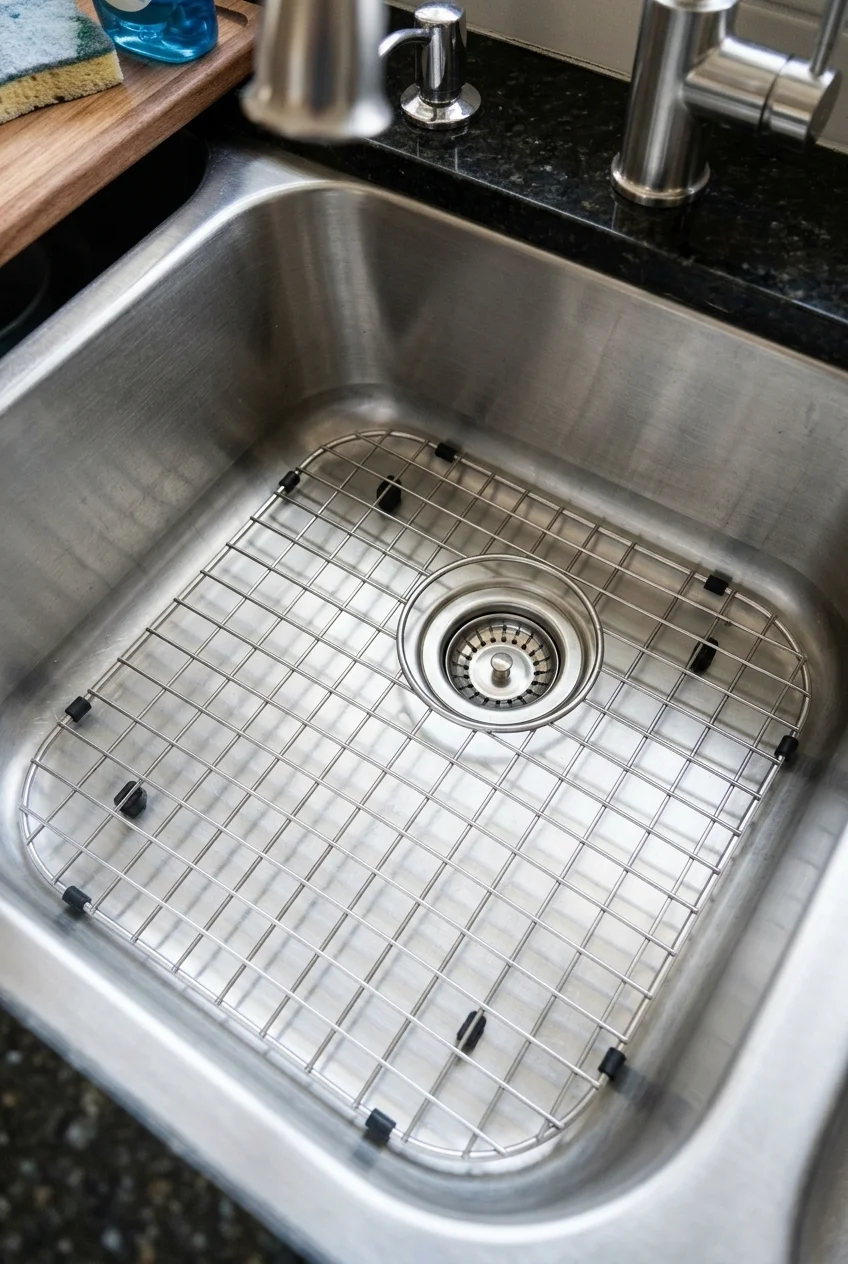
A fitted grid lifts cookware above the sink floor and lets water reach the drain. Its feet, outline, and drain opening must match the bowl.
Choose the sink manufacturer’s specified grid when possible, or measure every critical dimension. Remove and clean beneath it regularly so residue does not hide below.
Check replacement feet and bumpers periodically. Bare metal contact can mark the sink, while missing feet may leave the grid rocking under cookware.
Sink Placement Ideas That Improve the Kitchen Workflow
Placement controls the view, landing space, dishwasher relationship, and traffic around the sink, so test the whole work zone rather than centering one fixture.
36. Center the Main Sink Under a Window
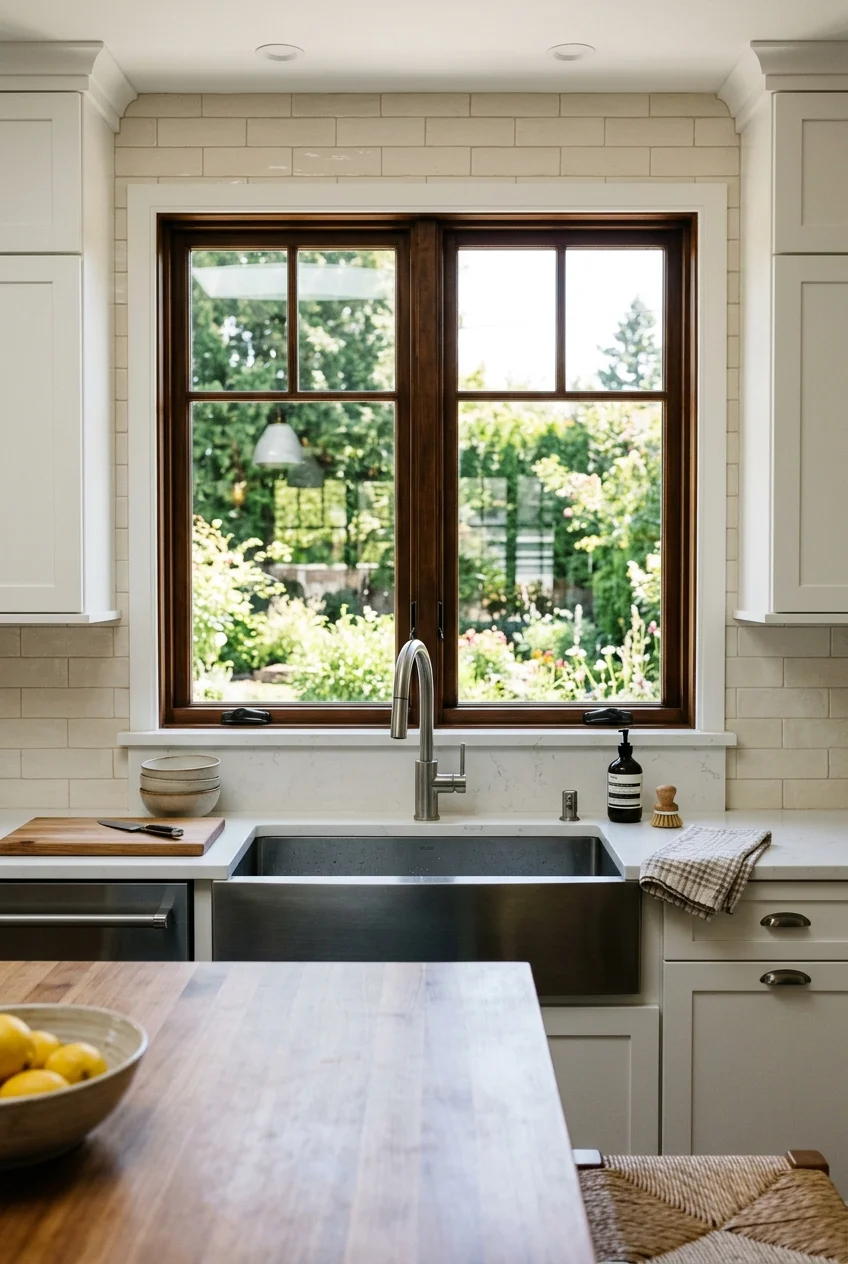
A window gives the cleanup zone a long view and daylight, while naturally organizing the cabinet run. The faucet must still clear the sash.
Measure handle movement, screen removal, sill depth, and any inward-opening window. Water-resistant trim and a wipeable sill make the arrangement easier to maintain.
37. Turn the Sink Toward the Room on an Island
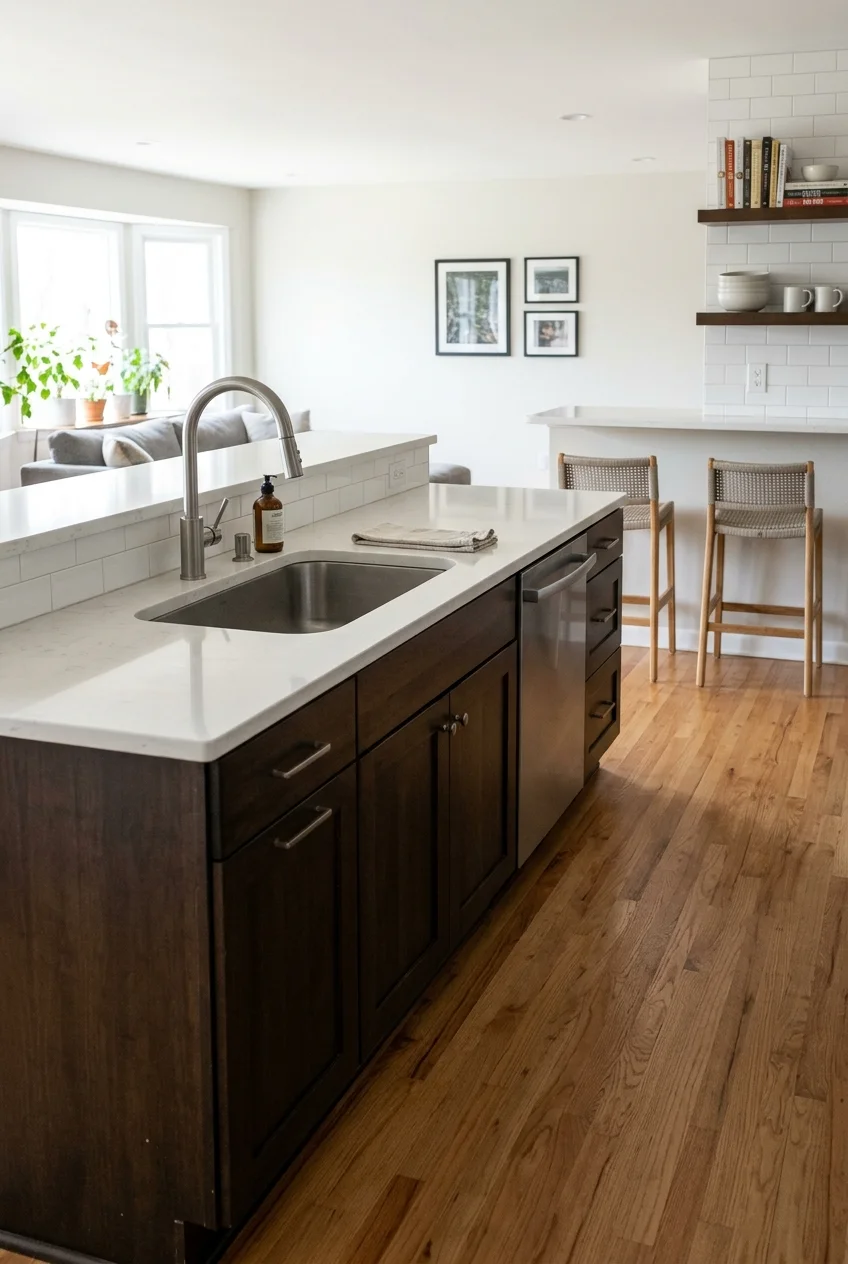
An island sink lets the cook face the room during preparation or cleanup. It also makes plumbing, splash control, and counter interruption highly visible.
Check the surrounding work aisle and appliance swings using these narrow kitchen island ideas before enlarging the island or adding seating behind the sink.
Keep dirty dishes away from seated guests by preserving a raised edge, generous counter depth, or a separate cleanup zone when the room allows.
38. Use a Prep Sink at the Island End
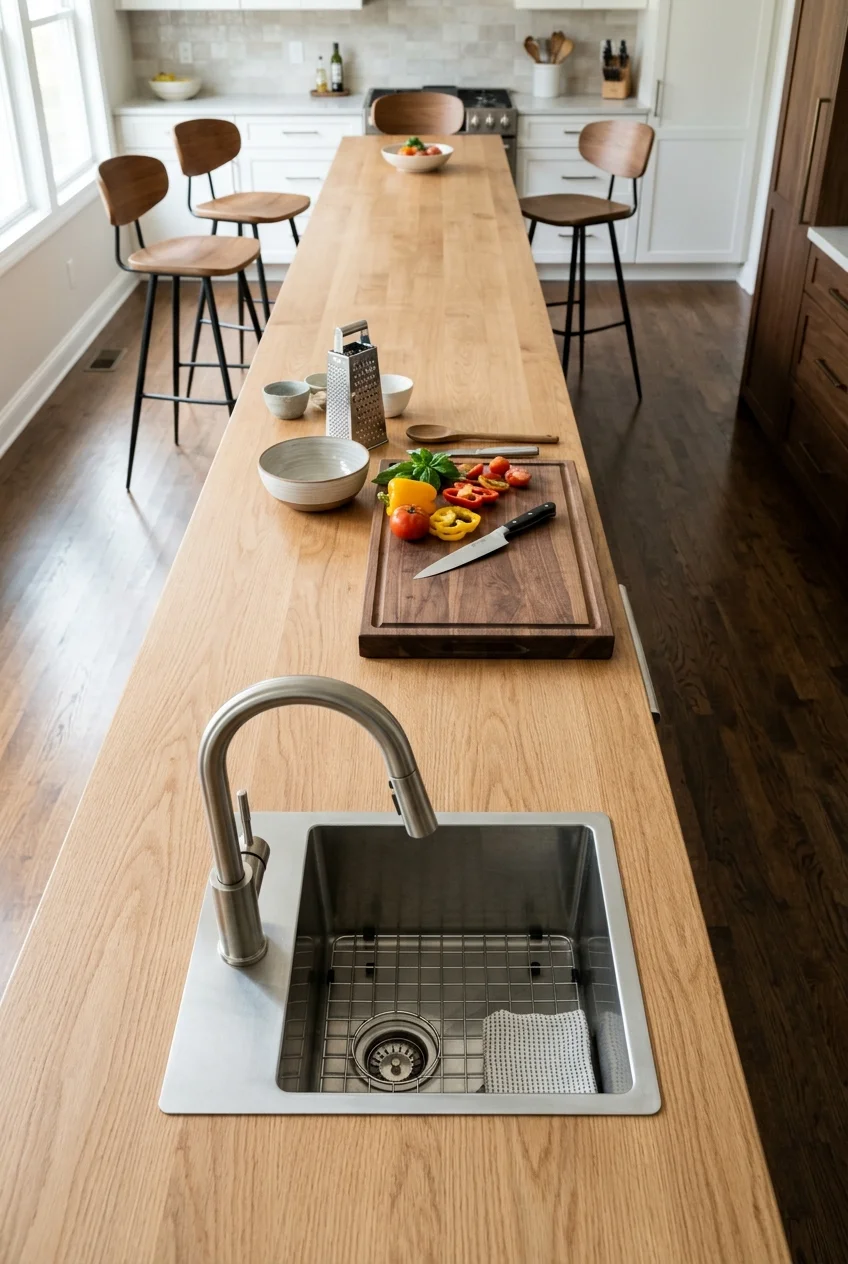
Placing a small prep sink near the island end keeps water available without splitting the longest central work surface. It also avoids the seating zone.
Leave usable landing space beside the bowl and protect the aisle from an open dishwasher or refrigerator door. A secondary sink should shorten steps, not create them.
39. Move Cleanup into a Butler’s Pantry
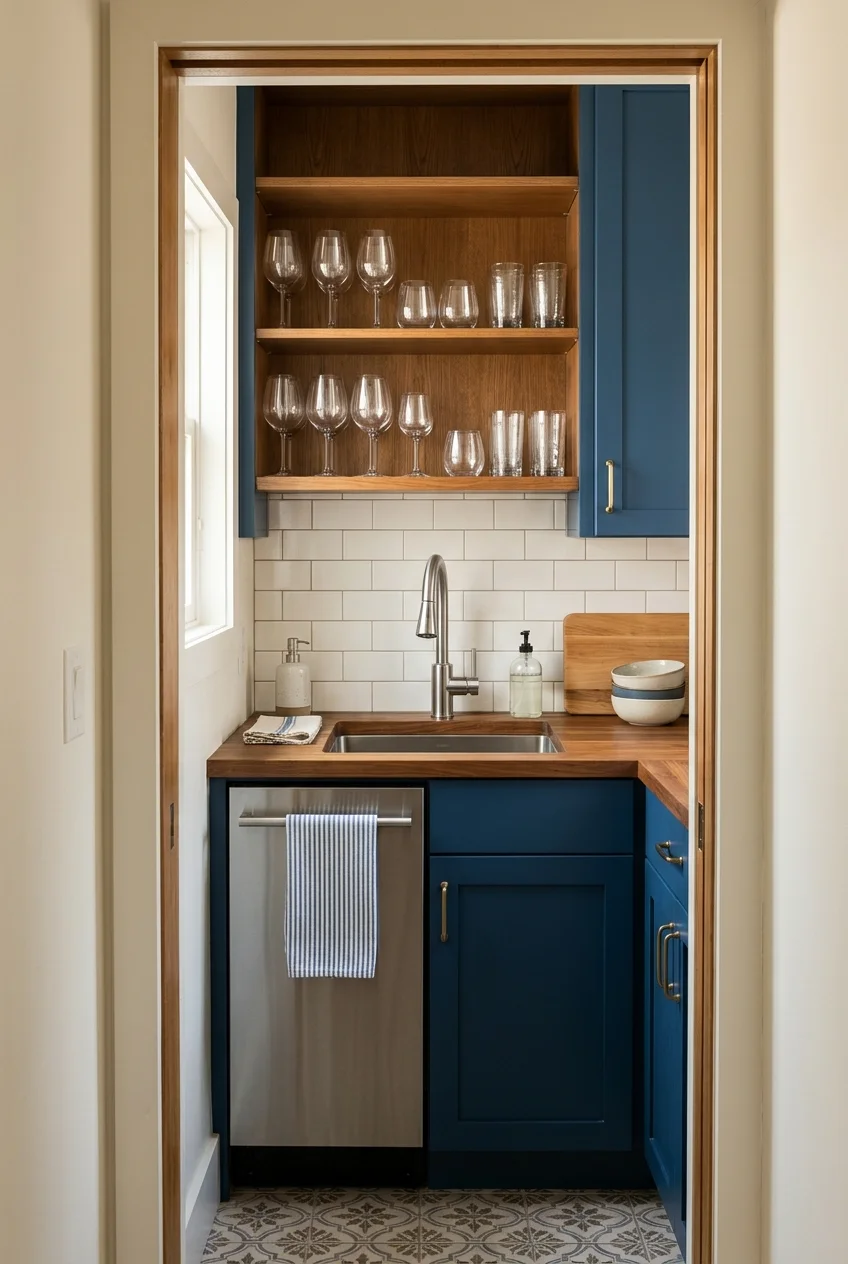
A secondary cleanup sink in a butler’s pantry can keep glassware, serving pieces, and entertaining mess away from the main cooking zone.
Give it real counter landing space, lighting, ventilation, and storage rather than squeezing plumbing into a decorative nook that cannot support cleanup tasks.
40. Place the Sink Near the Dishwasher, Not Across the Aisle
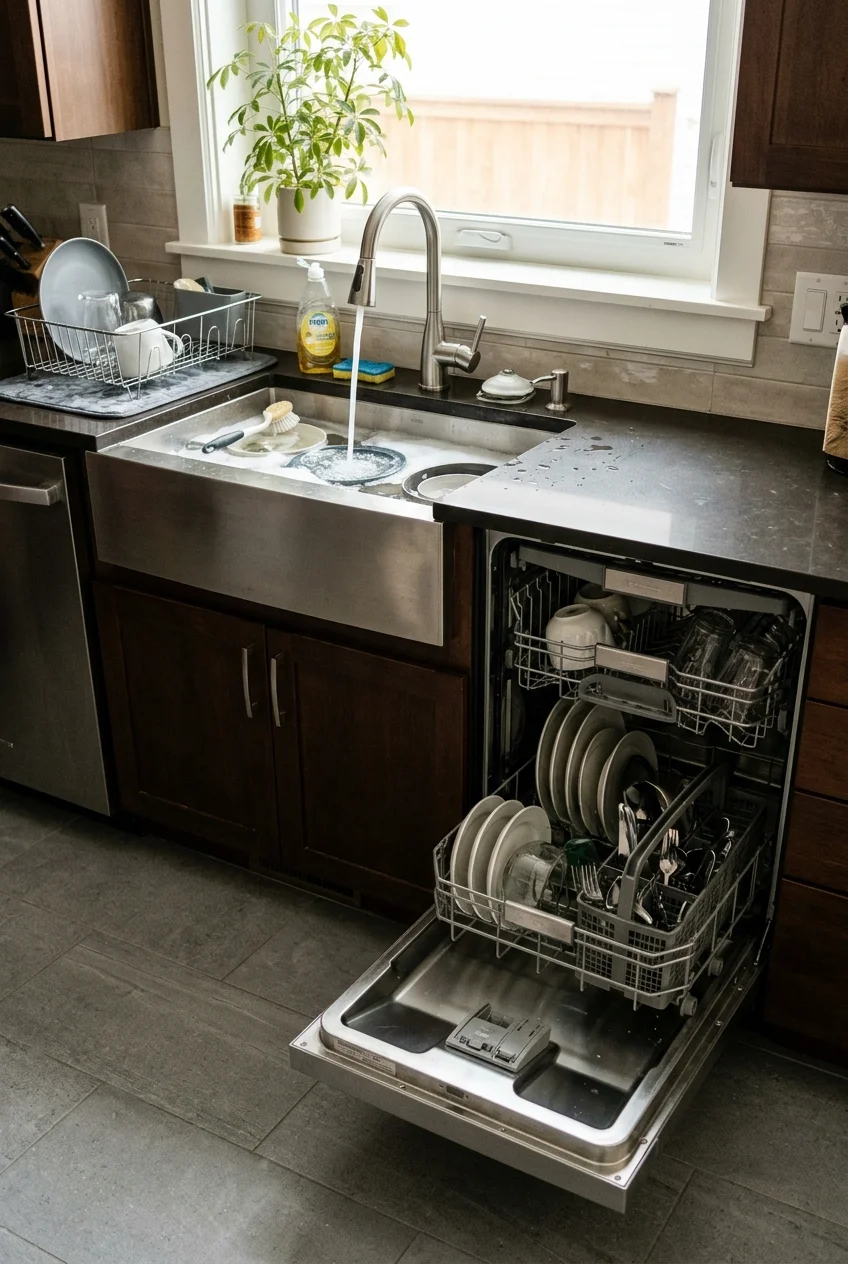
Keeping the dishwasher beside the cleanup sink lets wet dishes move a short distance without crossing a traffic path. Handedness determines the most comfortable side.
Open the dishwasher in the plan and check access to the sink, trash, and nearby drawers. A door that blocks standing space will frustrate daily loading.
41. Preserve Landing Space on Both Sides
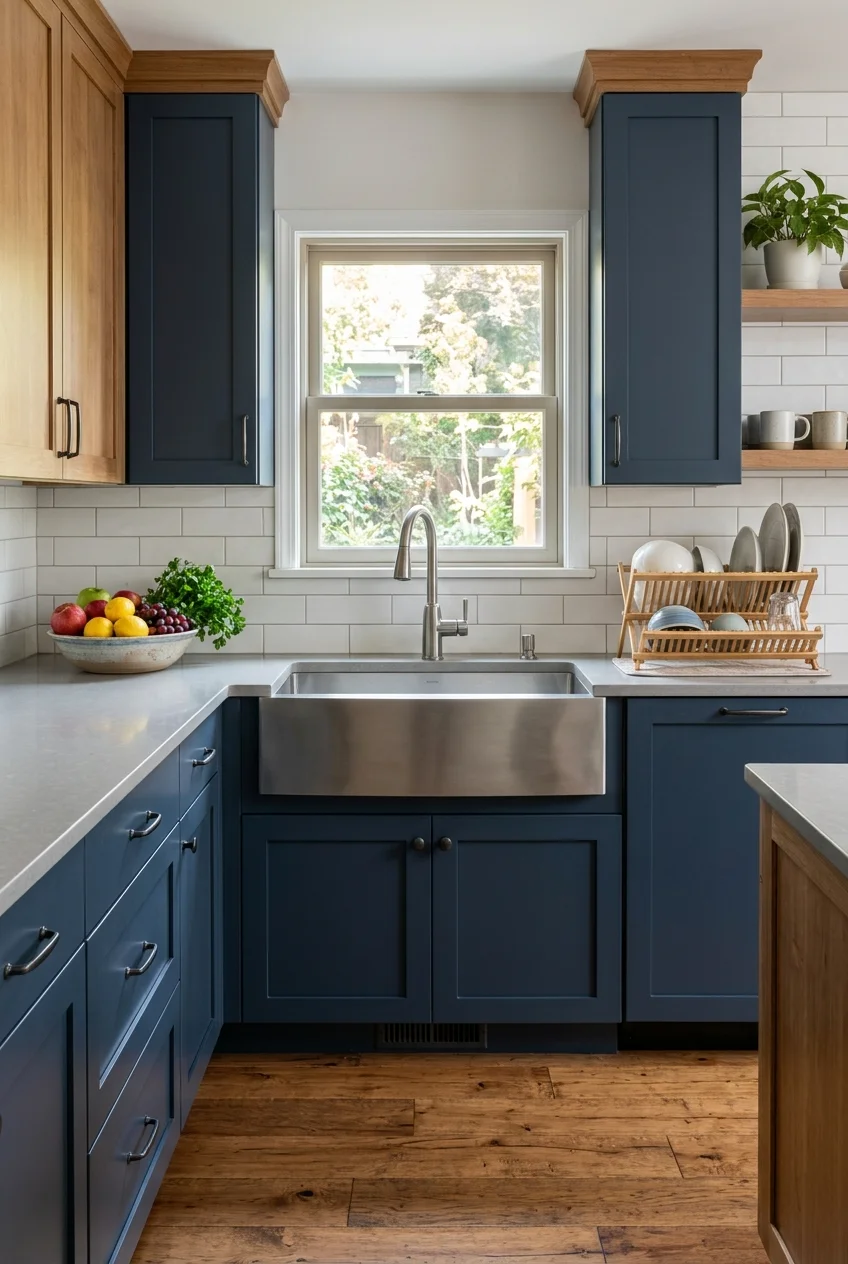
Counter beside the sink supports dirty dishes, washed produce, and hot cookware. A beautiful basin becomes awkward when cabinetry crowds both edges.
Current NKBA guidance recommends at least 24 inches on one side and 18 inches on the other, though local requirements and room conditions vary.
Planning note Measure usable counter frontage, not empty wall length, and account for tall cabinets, appliance panels, and corners that interrupt the landing area.
42. Plan a Shallower Basin for Easier Reach
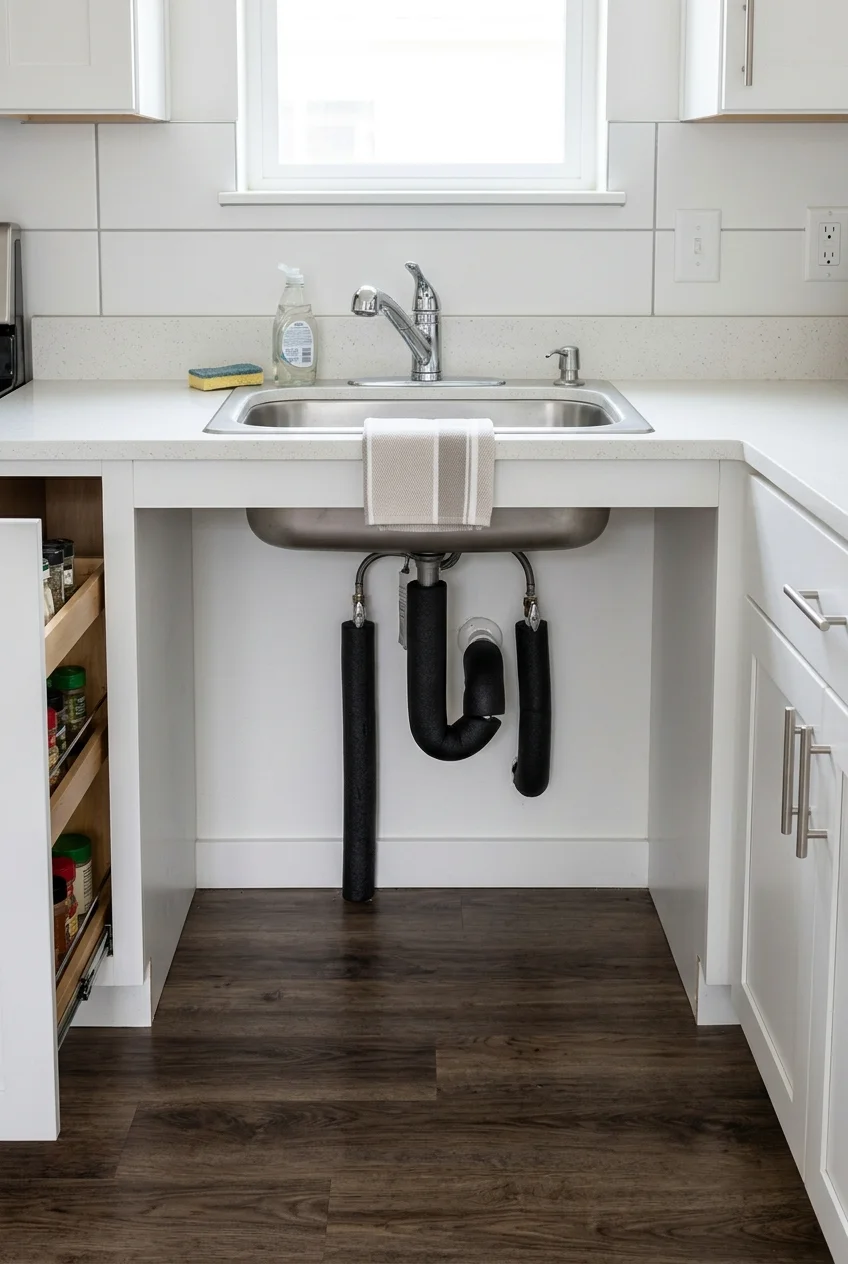
A shallower bowl reduces the distance to dishes at the bottom and preserves more cabinet space below. It can benefit shorter users or seated tasks.
Depth alone does not create an accessible sink. Counter height, knee and toe clearance, protected pipes, controls, floor space, and reach all work together.
Elkay notes different maximum bowl depths for certain ADA-compliant installations, while federal accessibility rules apply to covered spaces rather than every private kitchen.
Use current standards, local requirements, and the needs of the actual user. A qualified kitchen professional can coordinate cabinetry, plumbing, and clearances.
- Test comfortable reach to the bowl bottom.
- Protect exposed hot-water and drain pipes.
- Keep faucet controls within easy reach.
- Preserve clear floor and knee space.
43. Use a Small Sink in a Narrow Kitchen Run
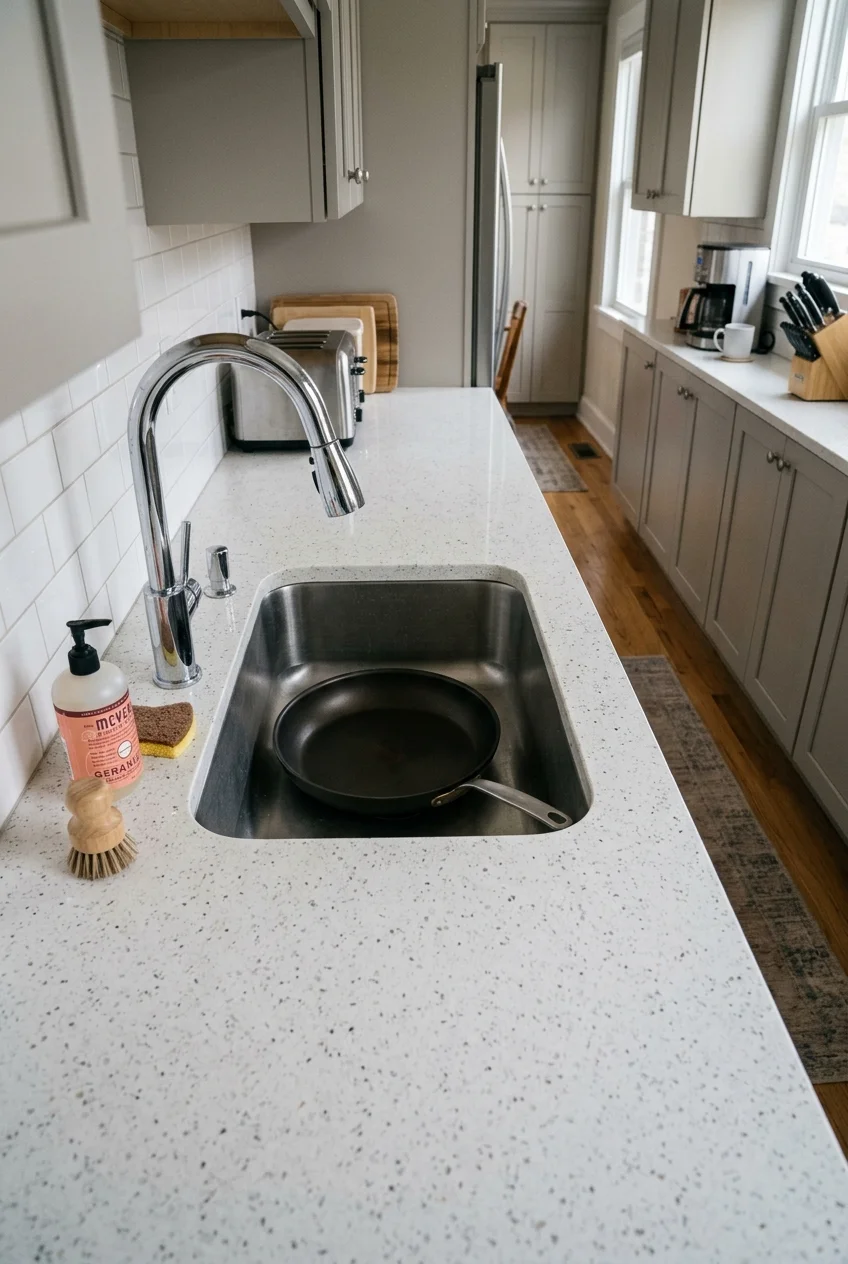
A compact single bowl preserves counter space in a narrow kitchen while still handling daily dishes. Prioritize usable bowl shape over decorative width.
If storage pressure is driving the layout, review these small kitchen storage solutions before sacrificing the landing area or choosing an oversized sink cabinet.
Mock up the opening with painter’s tape and place your largest pan inside. That quick test reveals whether compact still feels workable.
44. Set the Sink Against a Full-Height Slab Backsplash
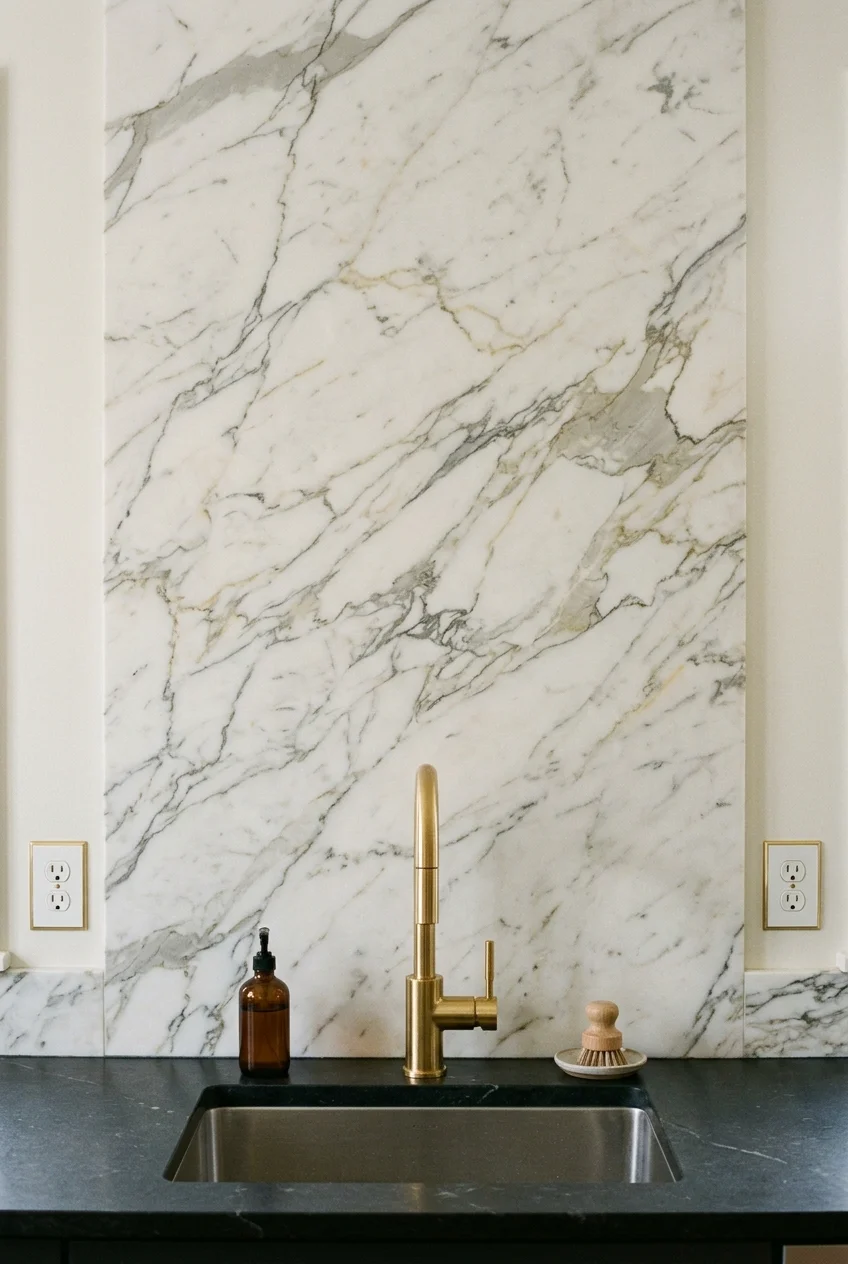
A full-height slab behind the sink creates a calm, wipeable field with few visual joints. Veining can frame the faucet and windowless wall.
For alternatives with more pattern and grout detail, compare these kitchen backsplash ideas for your sink wall before choosing a continuous slab.
Coordinate faucet holes, outlets, shelves, and slab seams before fabrication. Random cuts through strong veining can distract from an otherwise quiet installation.
45. Frame the Sink with Contrasting Base Cabinets
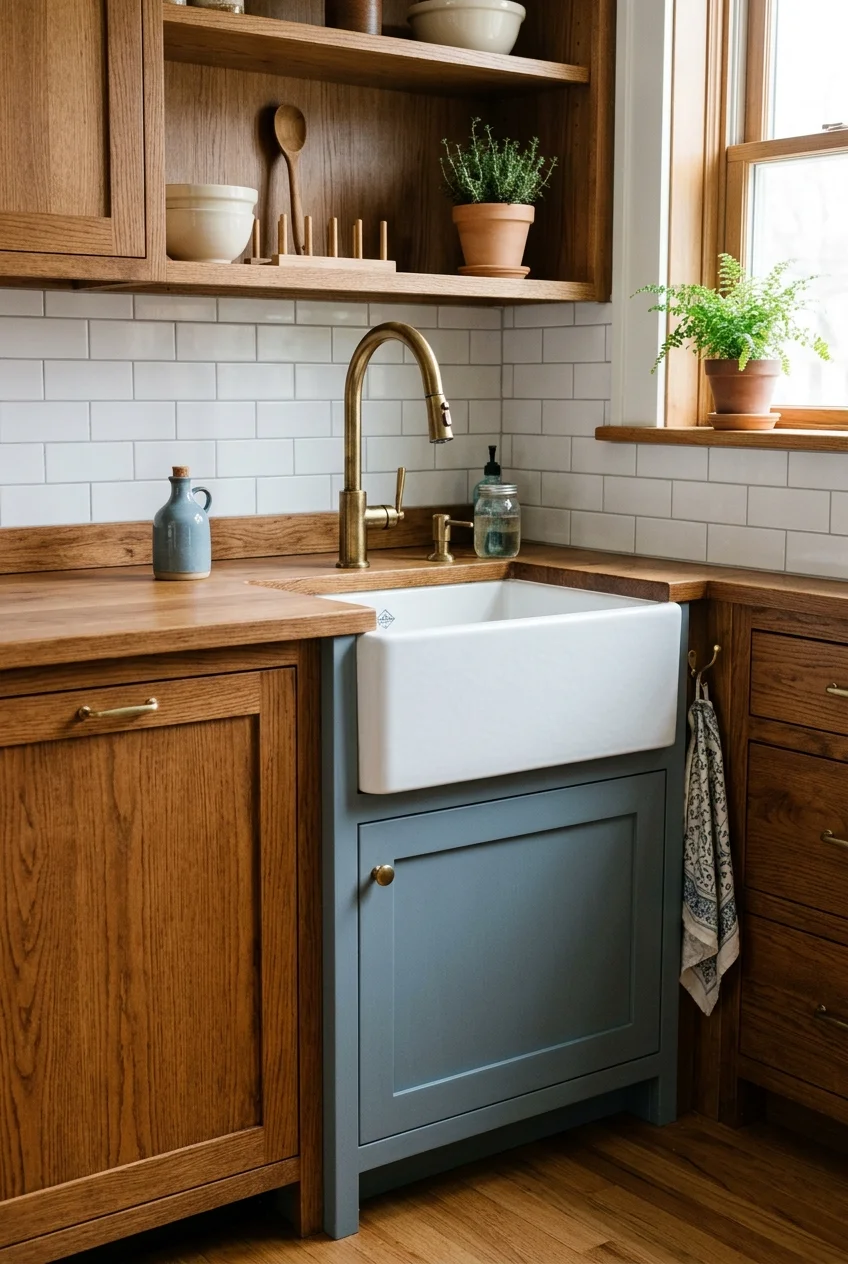
A different cabinet color under the sink can identify the cleanup zone without changing every door. It works especially well with an apron front.
Keep the contrast connected to the wider room by borrowing an approach from these kitchen cabinet makeover ideas rather than adding an isolated accent.
Faucets, Accessories, and Finishing Details
The basin may set the footprint, but smaller choices around it determine reach, splashing, cleaning, and whether the whole sink station looks resolved.
46. Scale the Faucet to the Bowl
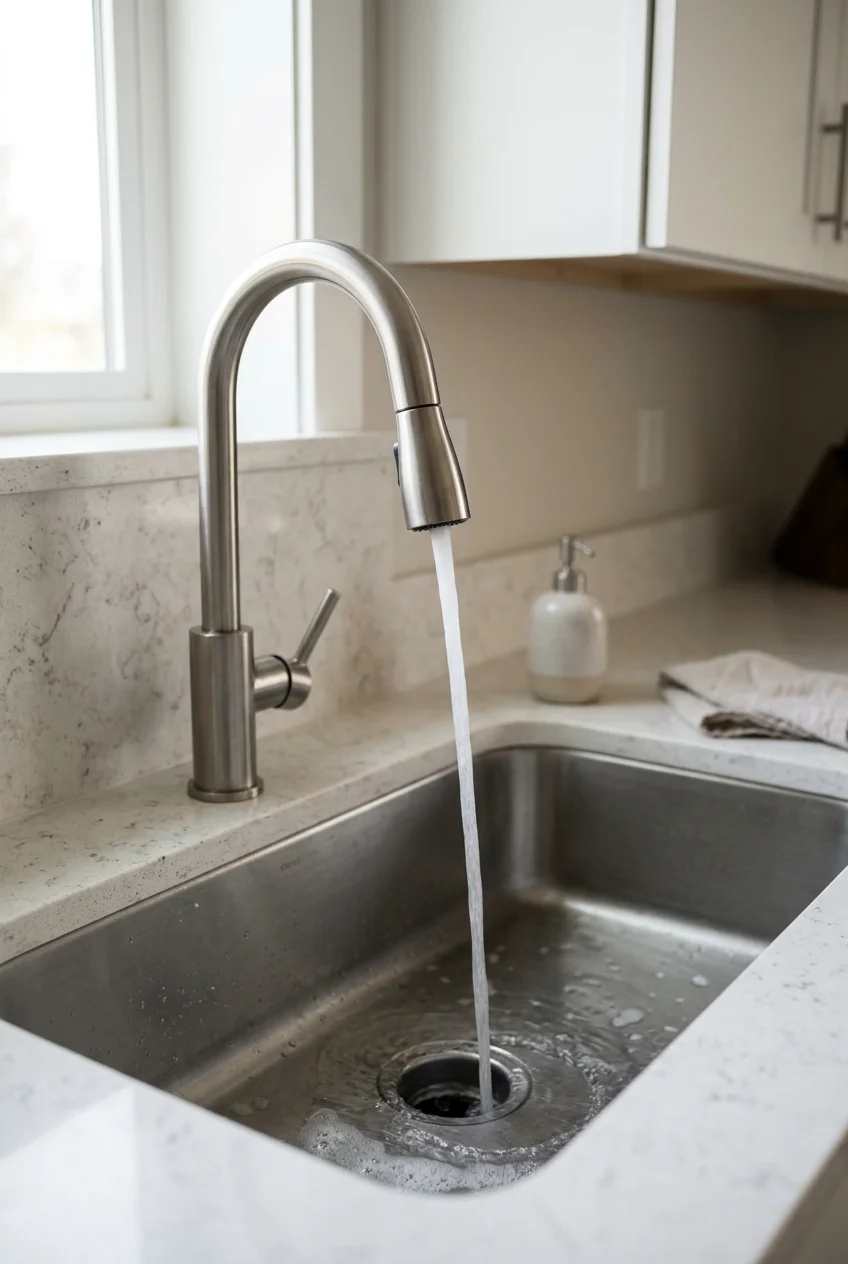
A high arc gives tall pots clearance, but its outlet should land well inside the basin. Excess height can amplify splashing in shallow sinks.
Check spout reach, rotation, handle clearance, and spray-hose path against the exact sink. A proportional faucet works better than the tallest available model.
47. Free the Counter with a Wall-Mounted Faucet
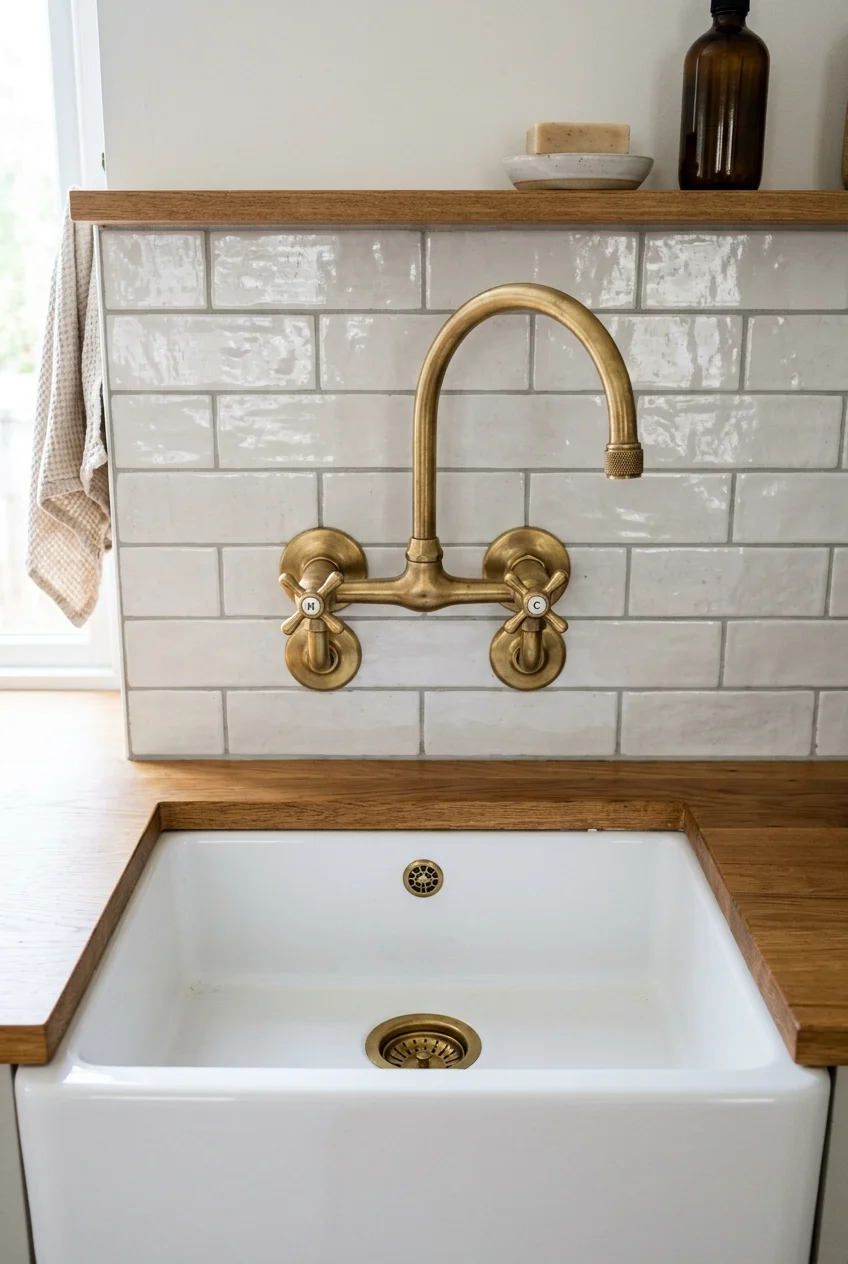
A wall-mounted faucet leaves the sink deck open and creates a strong traditional or utilitarian detail. Its height and reach must be established before plumbing closes.
Coordinate the finished wall thickness, valve access, backsplash material, and sink centerline. Moving a wall faucet later is considerably harder than changing a deck-mounted model.
48. Use a Bridge Faucet to Emphasize Traditional Lines
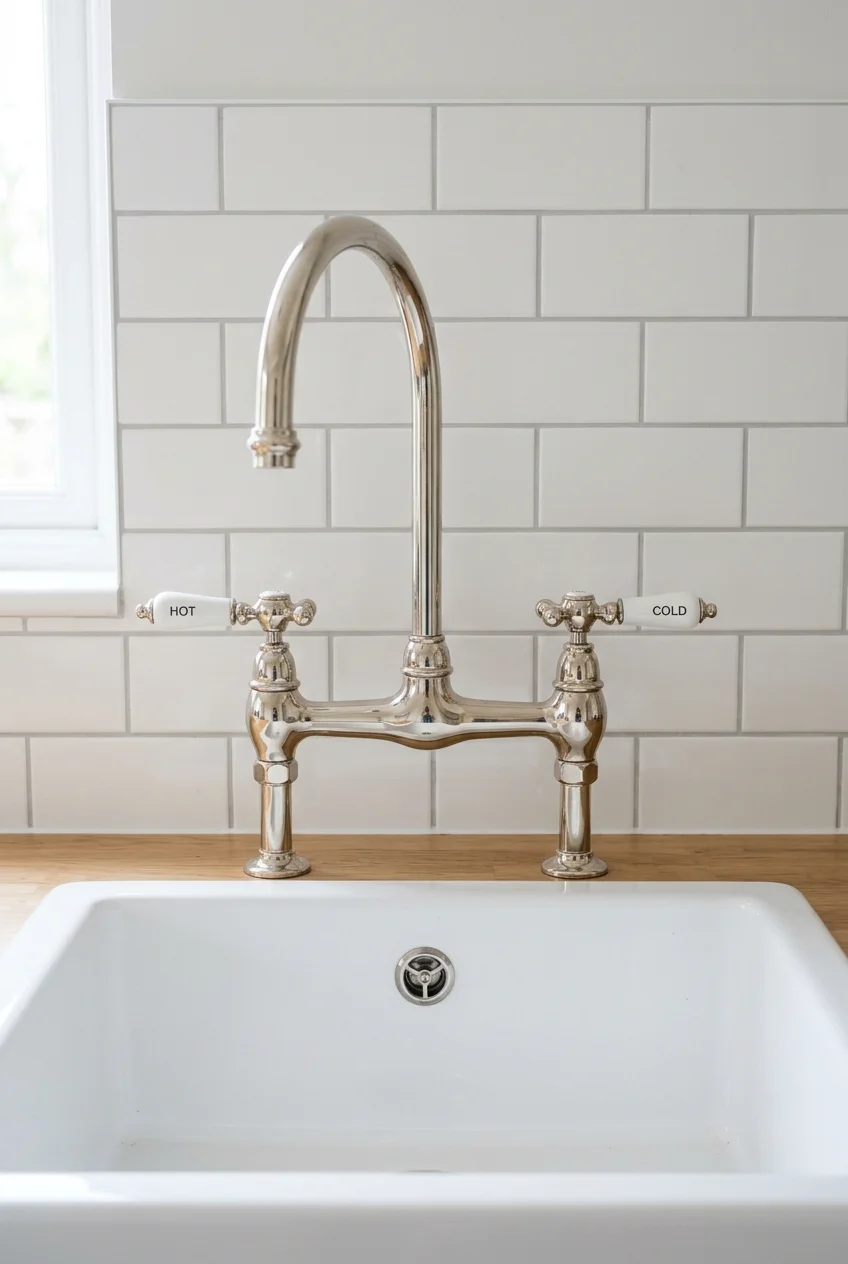
A bridge faucet exposes the connection between hot and cold controls, giving the sink wall a clear architectural shape. It pairs naturally with apron basins.
The wider arrangement needs enough deck or wall space and suitable hole spacing. Choose lever handles that remain operable when hands are wet or limited.
49. Give Sponges a Draining Home Beside the Sink
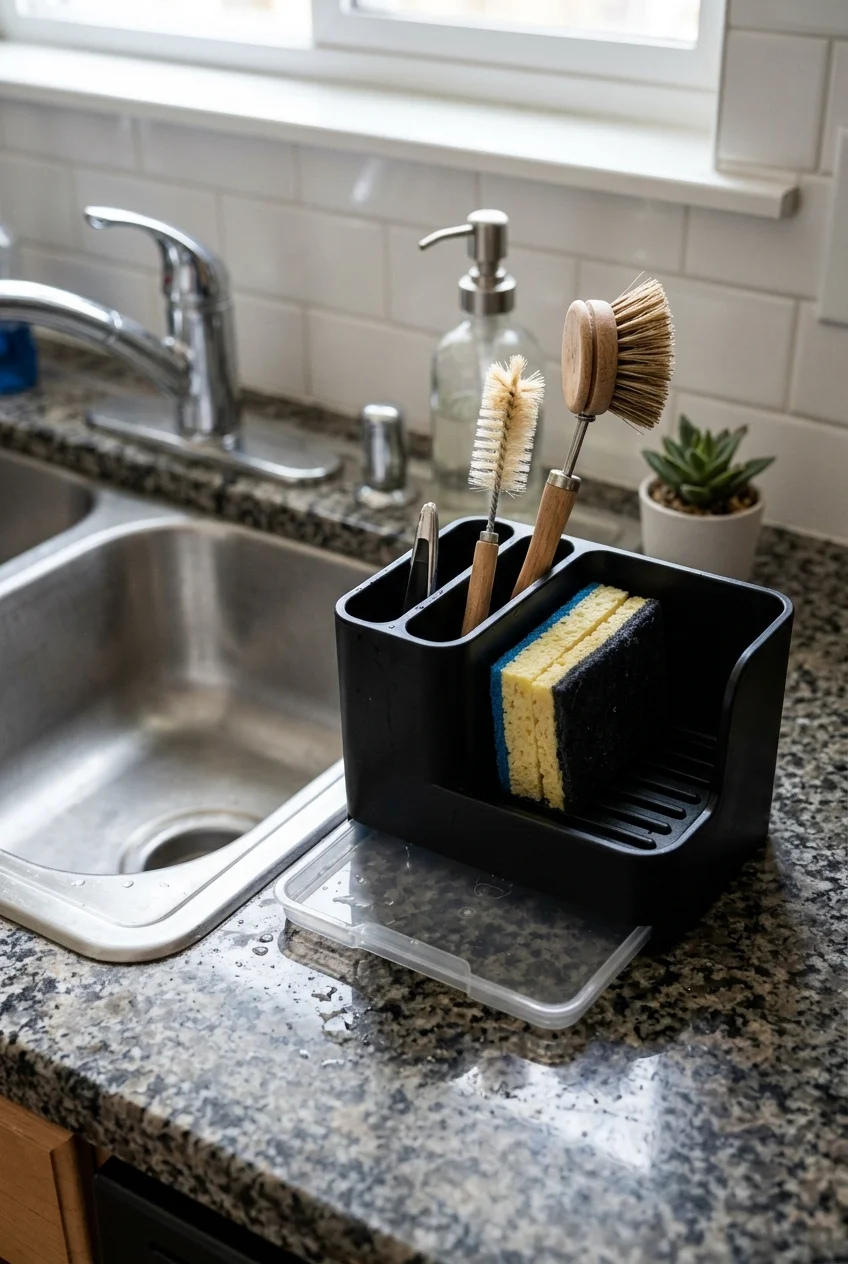
A small counter caddy keeps wet tools together without hanging hardware inside the basin. A removable tray prevents runoff from spreading across the counter.
This three-compartment sink caddy (paid link) includes separate brush slots and a drain tray. Confirm its footprint leaves your faucet handle and counter edge clear.
Empty and wash the tray regularly. Compact organization only helps when collected water and soap residue are not allowed to remain underneath.
50. Cover the Sink Only with a Fitted Work Surface
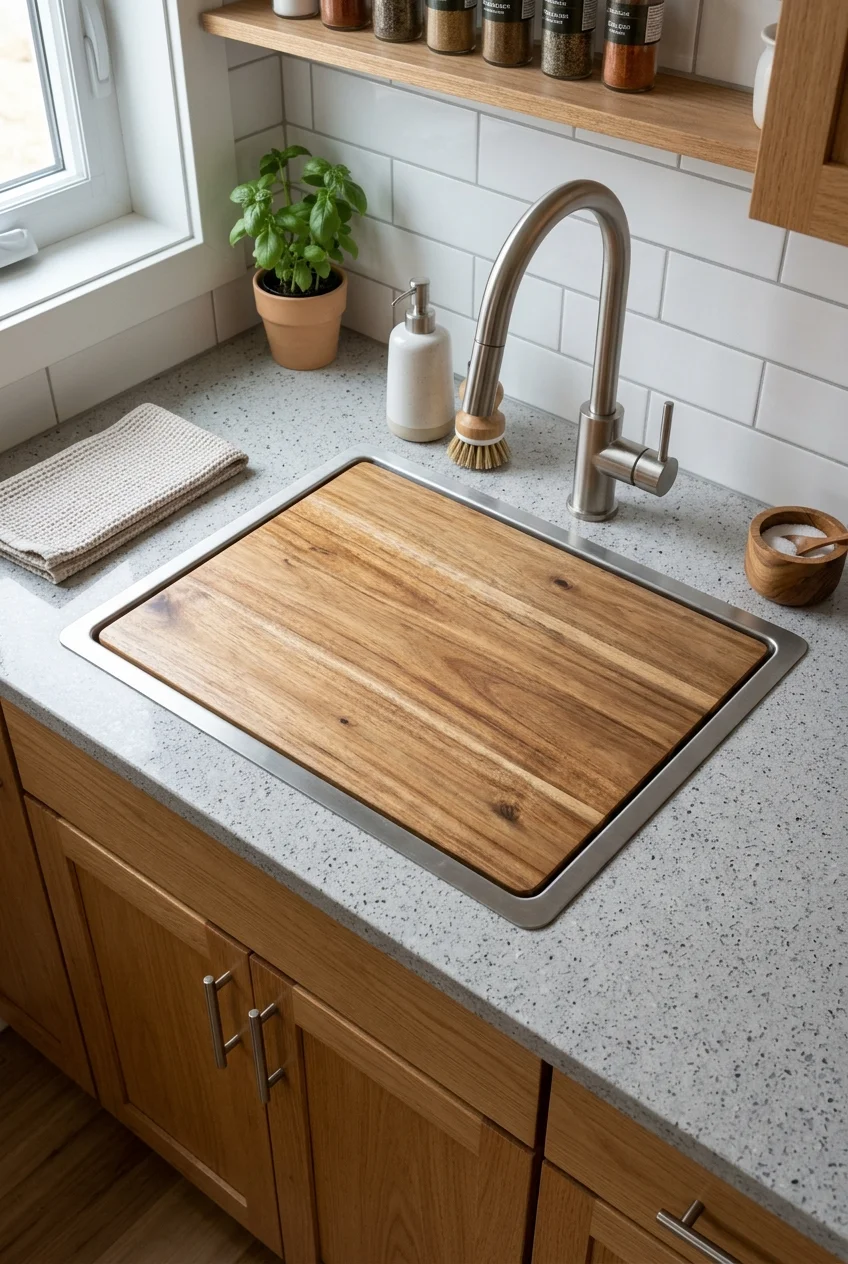
A fitted sink cover can add temporary prep area in an RV, studio, or occasional-use kitchen. It must rest on designed supports, not plumbing fixtures.
Never cover a wet basin and forget it. Dry the sink first, store the panel safely, and keep the faucet area unobstructed during placement.
Use a manufacturer-approved accessory or a professionally fitted board that cannot slide into the bowl. Improvised covers can damage edges or create an unstable work surface.
Practical tip Treat the cover as temporary counter space for light preparation, not as a surface for hot cookware, heavy appliances, or unattended loads.
Frequently Asked Questions
Should I choose a single-bowl or double-bowl kitchen sink?
Choose a single bowl for wide cookware and uninterrupted washing space. Choose double bowls when separating washing, rinsing, draining, or food preparation matters more.
Measure the items you wash most often, then compare them with each individual bowl. Total exterior width can hide surprisingly narrow working space.
What kitchen sink depth is comfortable?
Deeper bowls contain tall cookware and splashes, while shallower bowls reduce bending and preserve cabinet space. Comfort depends on counter height and user reach.
Test comparable display sinks if possible, and include any bottom grid in the effective depth. Accessibility requirements need a coordinated design, not depth alone.
Can an undermount sink be installed with any countertop?
Undermount sinks need a countertop edge and substrate that tolerate water exposure and support the chosen installation. Many standard laminate counters are unsuitable.
Confirm compatibility with the sink maker, countertop fabricator, and installer before cutting. Their template, support method, reveal, and sealing details must agree.
How do I keep a kitchen sink area from looking cluttered?
Keep only frequently used tools at the sink, give wet items a draining place, and store backup soap or scrubbers inside a reachable cabinet.
Choose one contained caddy or fitted rack instead of several small holders. Clear faucet movement, open landing space, and regular cleaning matter most.