60 Basement Kitchenette Remodel Ideas

This post may contain affiliate links: full affiliate disclosure.
A basement kitchenette can keep drinks and snacks close to the couch or give overnight guests a place to put together breakfast. Start with how people will use it.
A dry counter may cover movie nights. A sink changes the plumbing plan, and adding a cooktop or oven brings new ventilation, power, and permit questions.
These 60 ideas help you pick a footprint, check what the basement can support, and plan the counter, appliances, storage, and lighting around real routines.
Pick a Layout That Suits the Basement
Decide who will use the kitchenette and what they will do there. Then mark its footprint, appliance openings, and main walking route on the existing floor.
1. Start With a Dry Snack Station
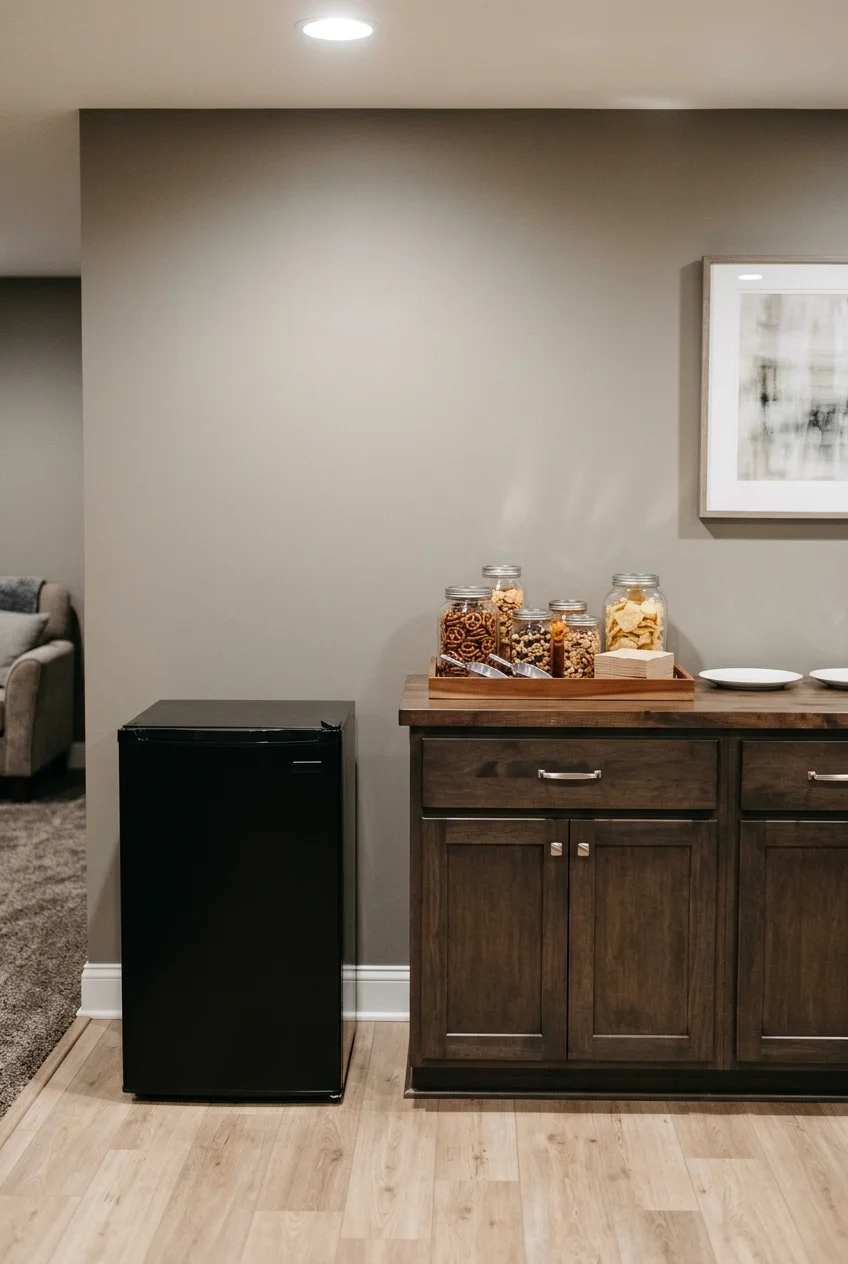
A dry snack station works for a basement where people mostly grab a drink or eat something prepared upstairs. Start with a counter and an approved fridge location.
Put packaged snacks in one drawer and cups above or beside the counter. Leave an uninterrupted landing for drinks, lunch bags, and plates coming from upstairs.
Use a washable tray for spills and decide where used dishes will go. A dry station works best when carrying them upstairs feels easy in practice.
In a rental, a freestanding cabinet and a fridge placed according to its manual can give you the same routine. Ask before anchoring or altering finishes.
2. Put a Wet Bar on One Straight Wall
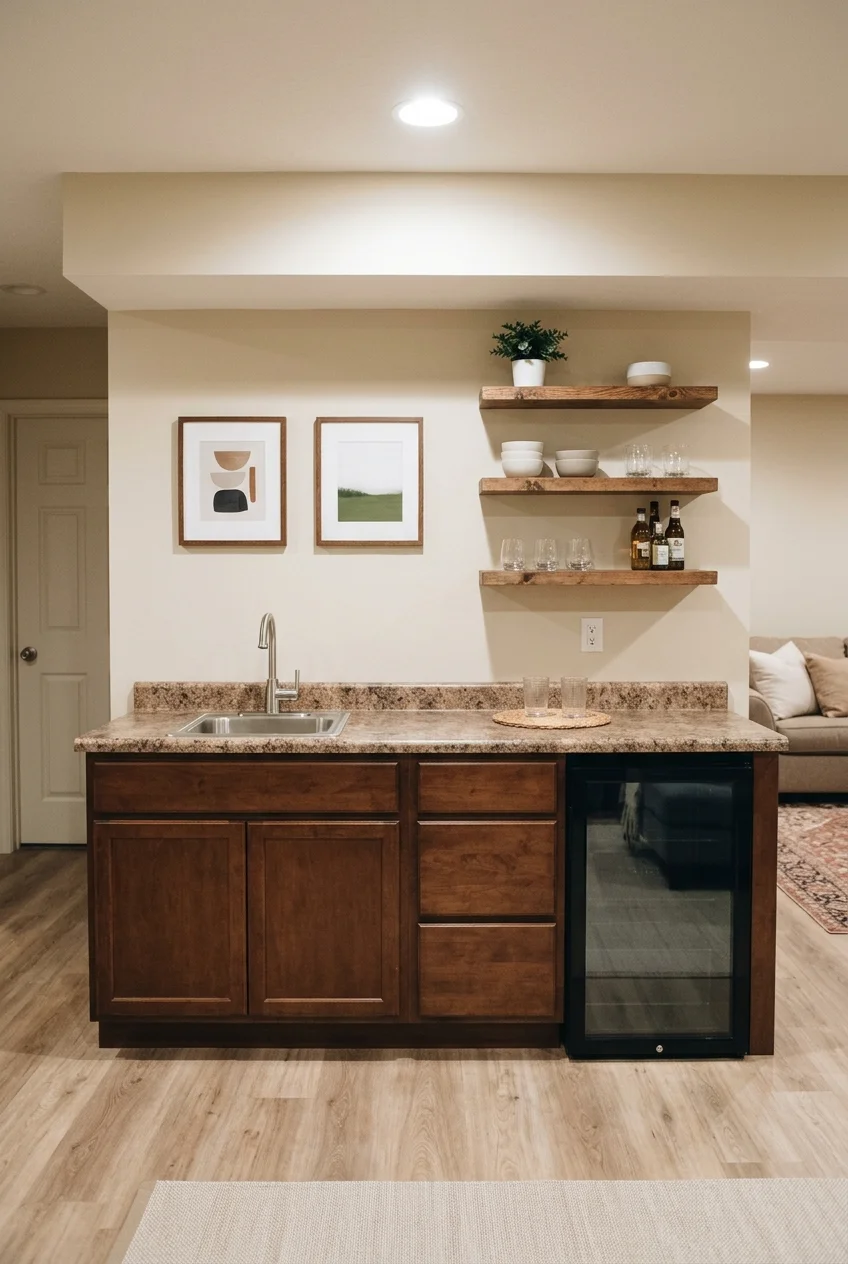
A straight run with a compact sink, prep counter, and fridge gives a family room a place to serve drinks without taking over the seating area.
Mark the sink, fridge opening, and one useful stretch of counter on the same wall. Allow for finished end panels and any filler needed near corners.
Choose a bowl that fits what you wash there most often. A small drink station needs a useful rinse area more than it needs a second sink.
Before choosing cabinets, have a plumber check the proposed drain and supply route. A nearby water line does little to solve a difficult drain elevation.
3. Fit the Kitchenette Into an Existing Alcove
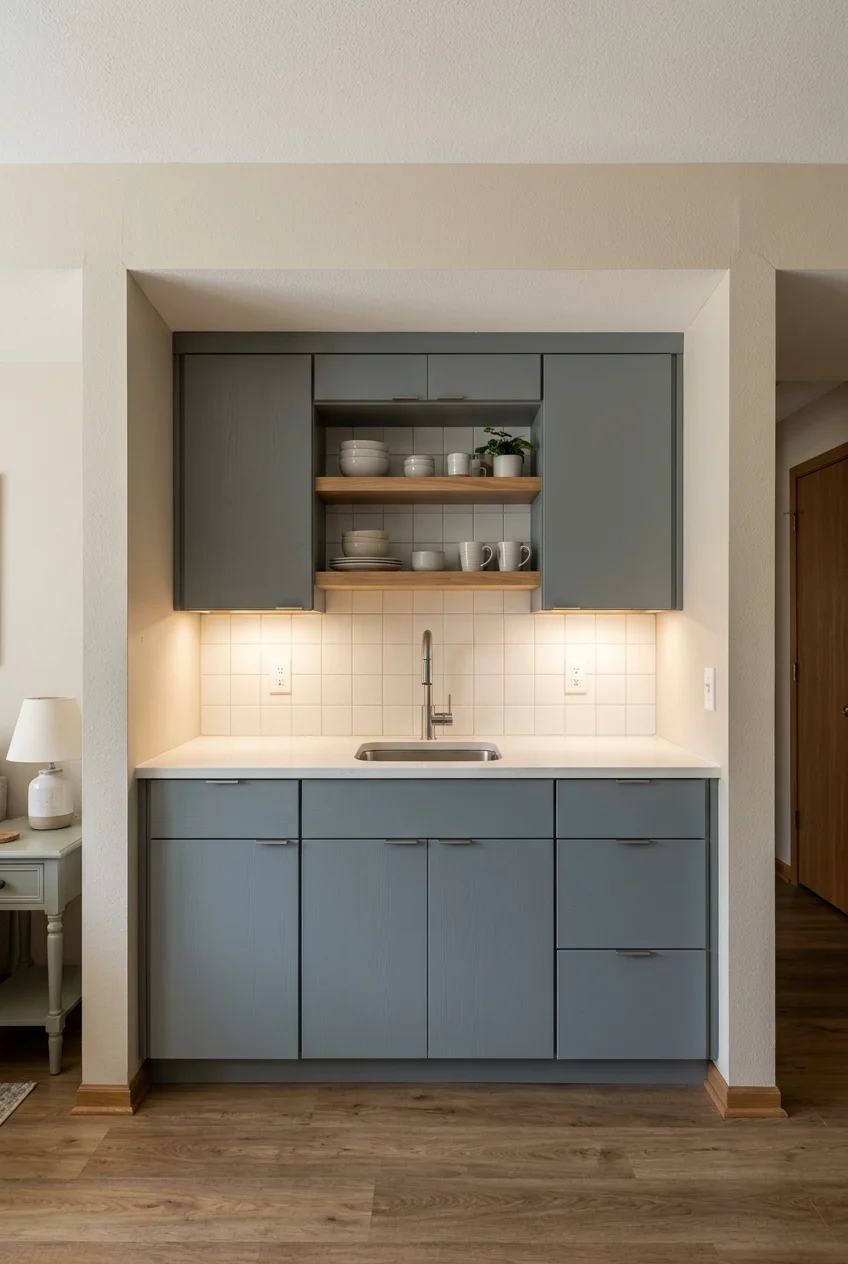
Use a finished recess when you want the kitchenette out of the main circulation path. Measure its width at the floor, counter line, and cabinet tops.
Check depth on both sides of the recess. Allow for appliance ventilation and cabinet doors that may need filler space to swing beside a wall return.
Plan a termination detail where the counter meets the side walls. If neither side is square, a templated counter may fit better than a stock top.
Add a task light inside the recess if the ceiling light stays out in the larger room. Test the work surface with upper cabinets in place.
4. Wrap the Counter Around a Short Corner
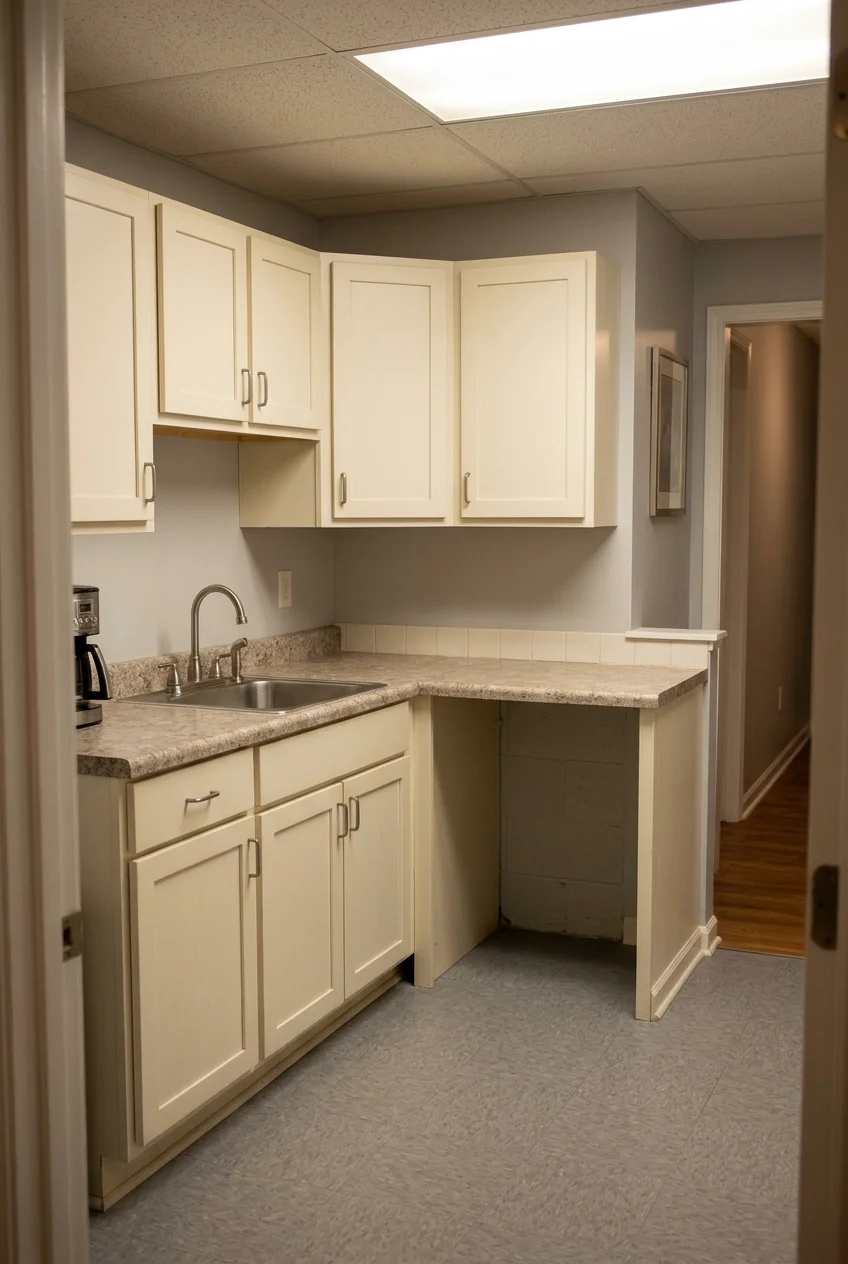
A short L layout puts the sink on one wall and gives serving or prep its own return. Try it when a straight run leaves too little counter.
Reserve the corner for an uninterrupted surface or a cabinet designed for the corner opening. Avoid a fridge hinge or dishwasher door immediately beside the return.
Mock up the return length and open nearby room doors. Think about where people will stand when they wait for a drink during a movie or game.
Confirm the new counter shape through the delivery route. Ask the fabricator where a seam would land if the full top cannot be brought downstairs in one piece.
5. Keep a Narrow Galley Open at Both Ends
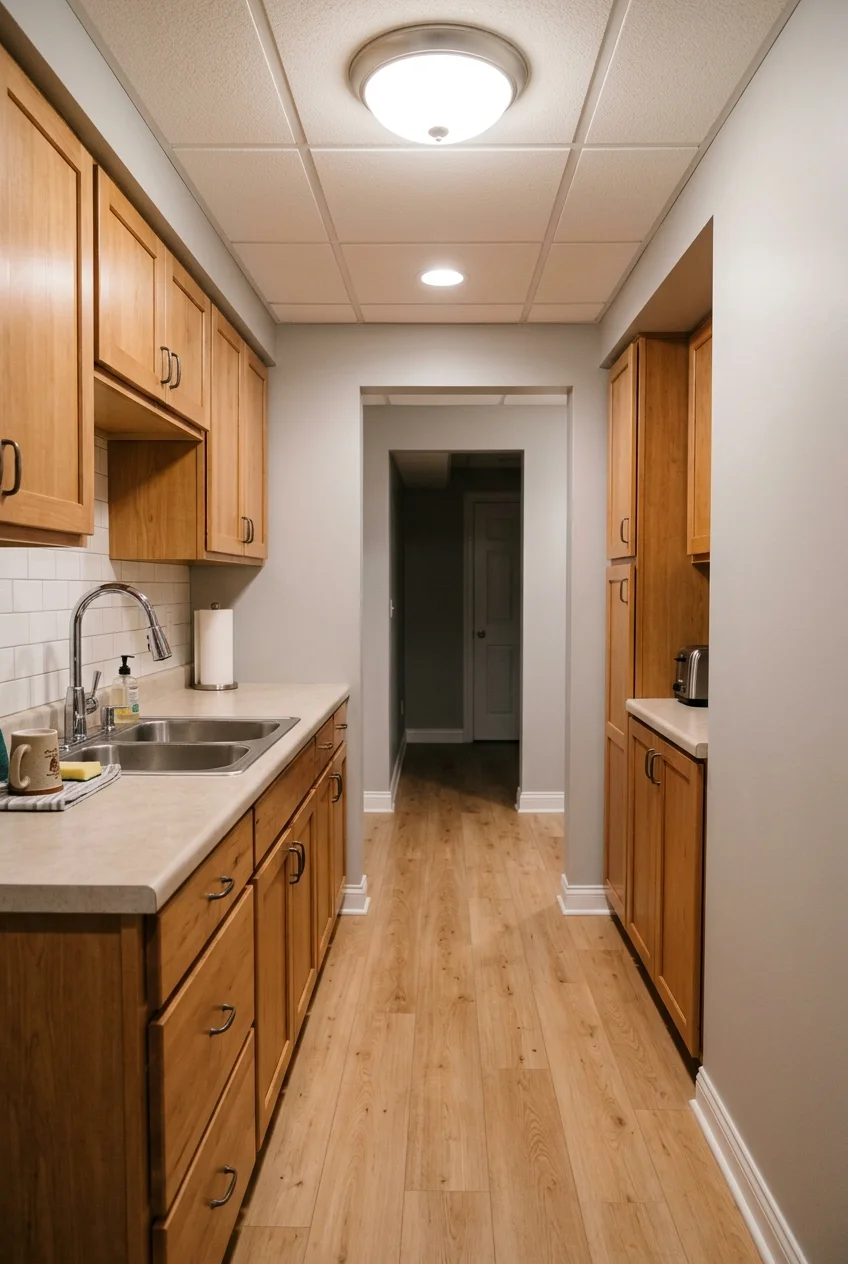
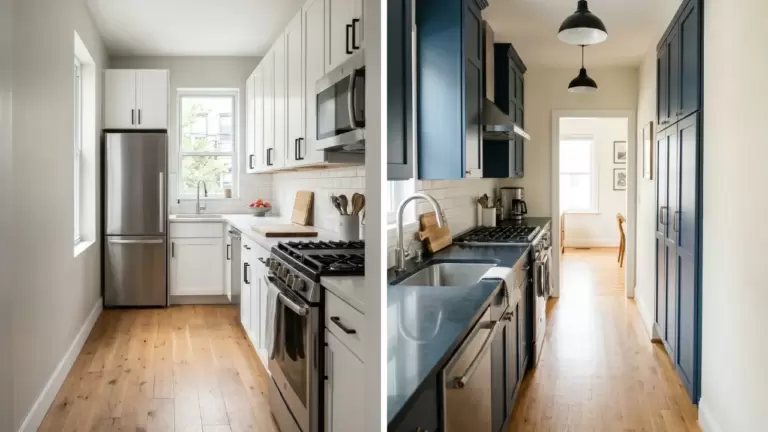
A two-sided galley can work when its ends remain open and the basement has room for people to pass. Put shallow storage opposite the main work counter.
Tape both rows at their finished depth, including pulls and countertop edges. Check the remaining aisle with the fridge pulled open and any serving drawers extended.
Keep the heaviest appliance tasks on the wider side. A shallow opposite run can hold plates or packaged food while protecting the passage between basement rooms.
Count the main paths together, especially if one end is close to a stair landing. A one-wall layout may be easier when the same aisle carries everyone.
Compare these tiny galley kitchen ideas for shallow storage, door swing planning, and ways to keep the walking route clear between two runs of cabinets.
6. Use a Short Peninsula as a Serving Counter
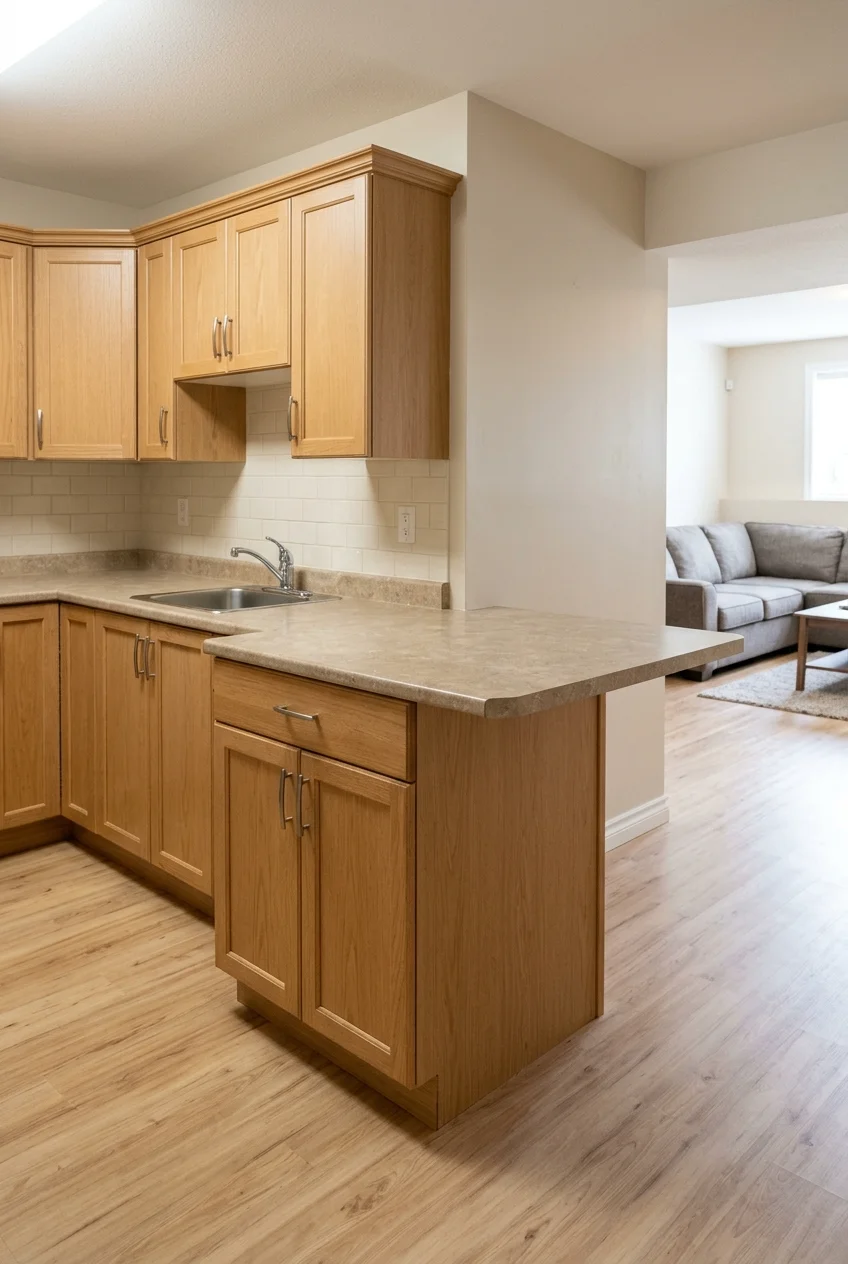
A short peninsula can mark the edge of a kitchenette and give guests a serving side. Attach it where the return stays clear of the main basement route.
Lay out the finished counter projection before choosing supports. If you plan to use stools, mark their occupied space as well as where they tuck away.
Leave the sink and fridge on the wall run so the serving surface stays useful. Check that people can reach the fridge while someone stands at the peninsula.
Compare these kitchen peninsula layouts if you need ideas for supporting an overhang, locating stools, or deciding when a short return makes the passage feel tight.
7. Use a Basement Window as the End of the Run
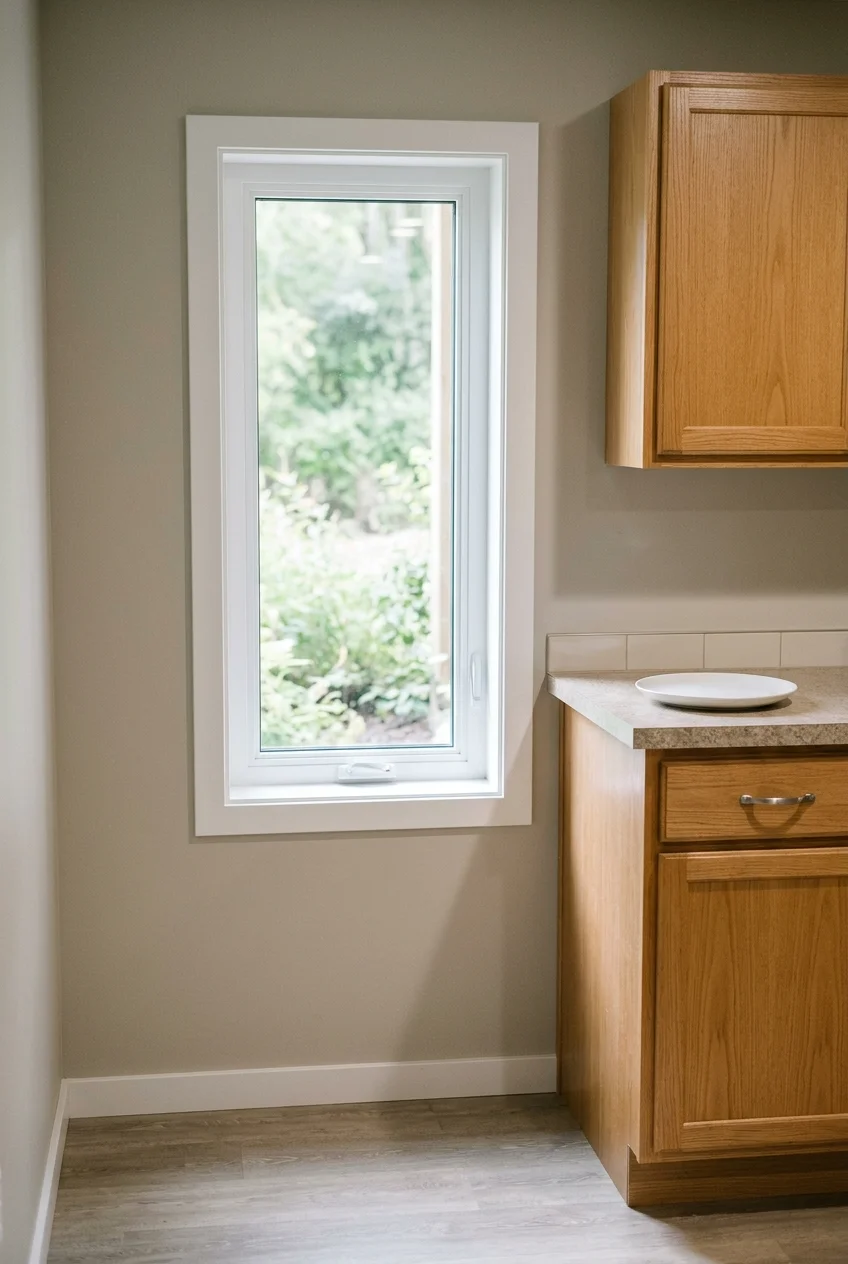
Leave an operable basement window clear and set the last stretch of cabinet beside it. The light can reach the worktop while the window remains easy to use.
Check the full sash movement and avoid putting a tall appliance in front. Confirm with your building office whether the opening serves an emergency escape function.
Use the nearby counter for a daylight task such as sorting snacks or packing trays. Keep the work surface below or beside the sill line as appropriate.
8. Separate a Kitchenette From the Laundry Work Area
Image pending: No image is attached to this draft for idea 8 (image-08).
A short finished divider can keep a shared basement wall useful for both laundry and food prep. Give each area its own work surface and clear approach.
Set the food side away from detergent and hamper traffic. Check that washer doors and any pullout shelves open without entering the sink or serving zone.
Price the actual plumbing, electrical, and vent routes for each use. Shared proximity can help planning, but the installer still needs to verify capacity and access.
Leave room to disconnect or replace laundry equipment without removing the kitchenette counter. Test the delivery route with the divider marked before you build it.
9. Give Overnight Guests a Self-Contained Breakfast Nook
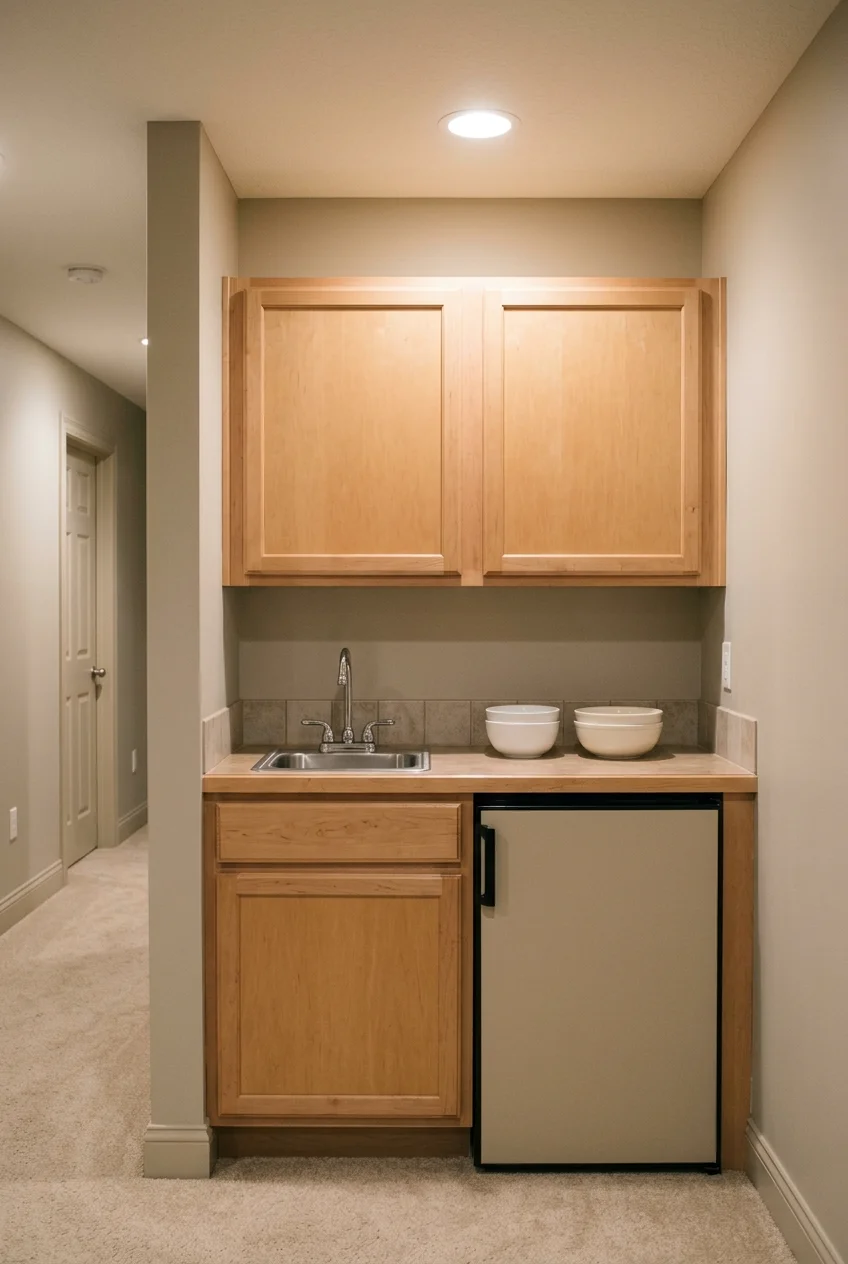
Set up one breakfast nook for overnight guests with cold food storage, a place to rinse a cup, and room to prepare something simple in the morning.
Choose a counter that holds two bowls without blocking the sink. A clear shelf or one reachable drawer can show guests where everyday dishes belong.
If you want permanent cooking or a separate dwelling, ask the local building office how it classifies your actual plan. Get that answer before ordering appliances.
Check delivery dimensions, nighttime light, and noise near sleeping areas. Guests should be able to use the nook without repeatedly walking through the rest of the basement.
Solve Basement Installation Constraints Early
Walk the space with the people who will install the plumbing, ventilation, and electrical work. Use the finished layout to preserve access to existing services.
10. Place the Sink Where Gravity Drainage Works
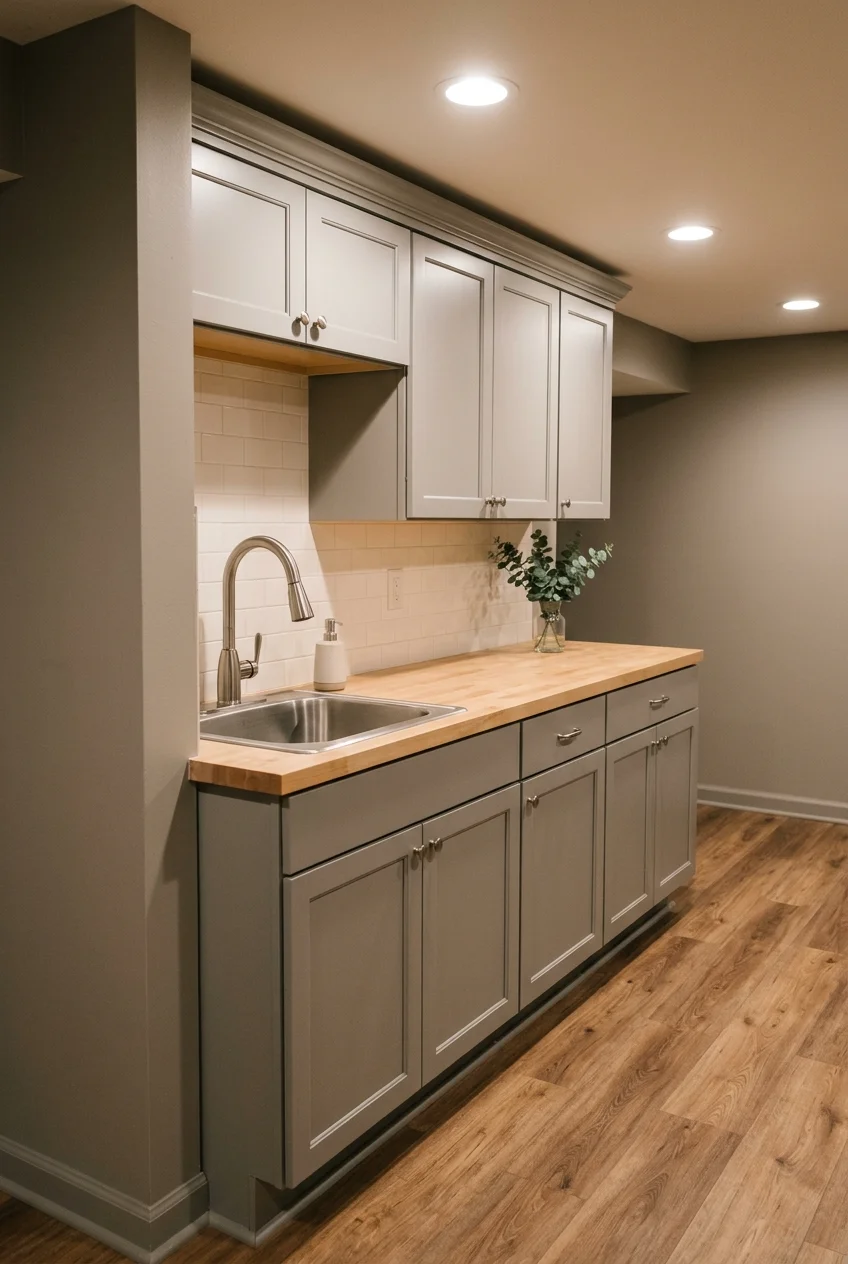
Locate the sink where a plumber can verify an approved gravity drainage route. The best spot depends on the waste line elevation, vent route, and available slope.
Show the plumber where you want the sink and a second location you could live with. Ask which floor or wall finishes each route would disturb.
Have the location checked against the finished cabinet size and basin depth. A deeper basin can reduce the working room for the trap and other connections.
Set the cabinet order after the rough plumbing plan. Confirm where the shutoffs will stay accessible and where any required inspections fit the cabinet installation schedule.
A less invasive route can matter more than centering the sink on a wall. Move the counter break or the upper storage to balance the finished run.
Ask what adjacent flooring would need patching if the slab is opened. Price the patch with the plumbing so you can compare the options fairly.
11. Reserve Real Service Space for a Lifted Drain
Image pending: No image is attached to this draft for idea 11 (image-11).
A basement sink below the available gravity outlet may need an approved pumped drainage system. Have a licensed plumber choose the arrangement for the actual fixture and elevation.
Ask what remains accessible for inspection and replacement, and how the system will be vented. Keep service dimensions in the drawings before you choose nearby cabinets.
A groundwater sump serves a different purpose from a sanitary drainage system. Have the plumber identify the proper connection and confirm the local inspector’s requirements up front.
Compare the pump plan with relocating the sink or keeping the station dry. Include access, noise placement, and future service in the price comparison you request.
Ask the installer to identify the service area on the finished plan and leave operating information with the house records. Avoid using that space for pantry overflow.
Ask whether a high-water alarm or other failure indicator is appropriate for the system. Decide where an alert could be heard from the rooms people use.
12. Leave a Clear Route to the Utility Room
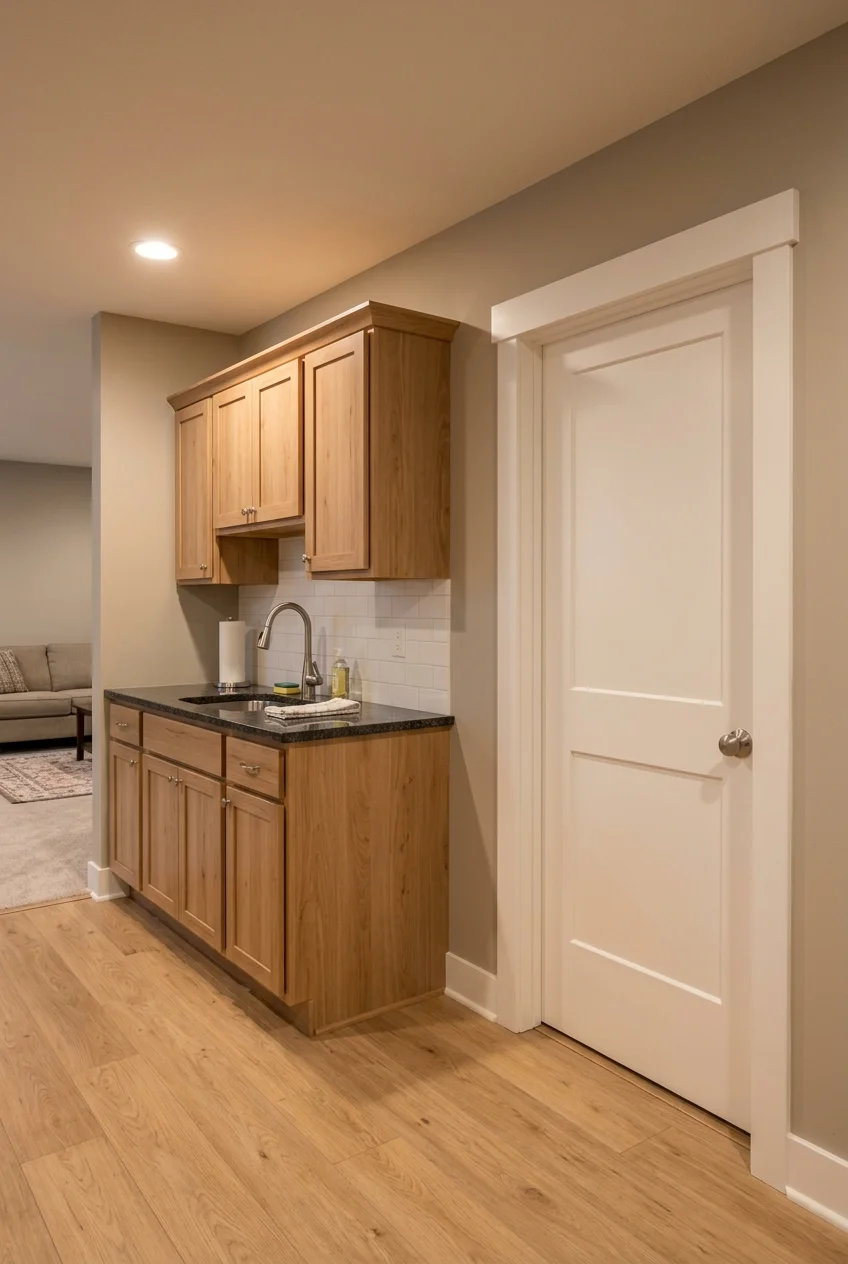
A clear route to the utility room can determine where the kitchenette should end. Mark the existing door, service surfaces, and the path large equipment would need.
Ask your contractor to confirm working clearances for the equipment and any electrical panel. Keep seating, countertops, and storage outside the spaces that have to remain available.
If you dislike the view from the seating area, turn the counter toward another wall. A change in orientation can preserve access while moving the focal point.
13. Fit Low Cabinets Beneath an Existing Soffit
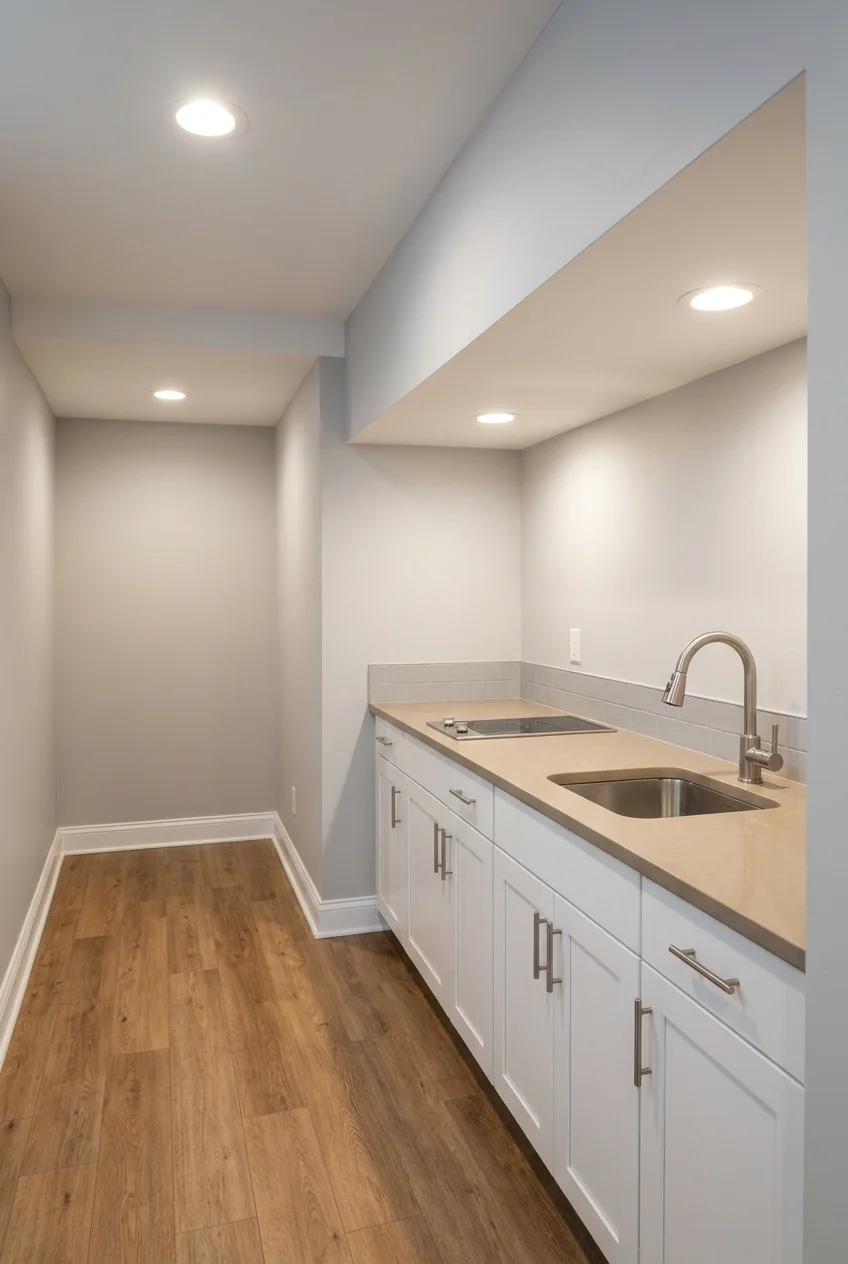
A low run can use the wall beneath a finished soffit while leaving ducts or pipes in place. Start with the actual height from the finished floor.
Use base cabinets or shallow upper storage only where heads, doors, and appliance ventilation have enough room. Keep the standing work position outside any low overhang.
Ask about existing access openings and changes to required headroom before closing surfaces. If the overhead area feels tight, reserve that spot for cold storage or serving.
14. Plan an Outdoor Hood Route Before Adding a Cooktop
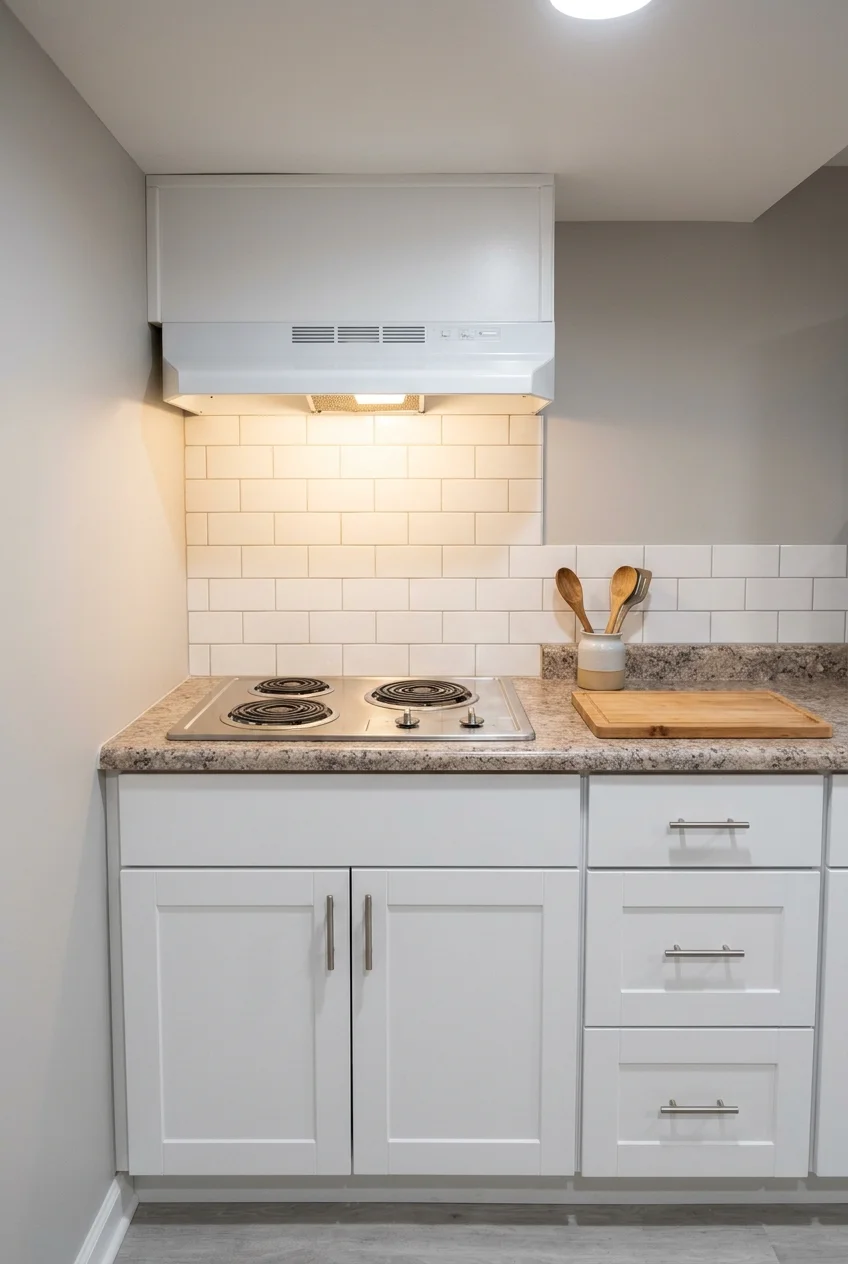
A cooktop layout starts with a workable exhaust route. Ask a qualified installer to match the hood and duct to the appliance, basement structure, and local requirements.
Discuss where the duct exits, the bends it needs, and whether makeup air applies. Check overhead space alongside any existing ducts and joists before the ceiling is finished.
An electric cooktop still creates cooking particles and moisture. A hood that vents outside addresses a different job from recirculation, so compare those options with the installer.
Mark the sink, prep area, and pan landing on the same plan. Keep facing shelves and cabinet ends clear according to the appliance and hood installation instructions.
If exterior venting is difficult, revisit what people need to cook downstairs. A beverage and reheating station can have a smaller footprint and a simpler appliance list.
Agree on what ceiling or wall finishes the exhaust work will disturb. Order the hood after the installer confirms the route and resulting cabinet height.
15. Keep Sink Shutoffs Reachable Behind Cabinet Doors
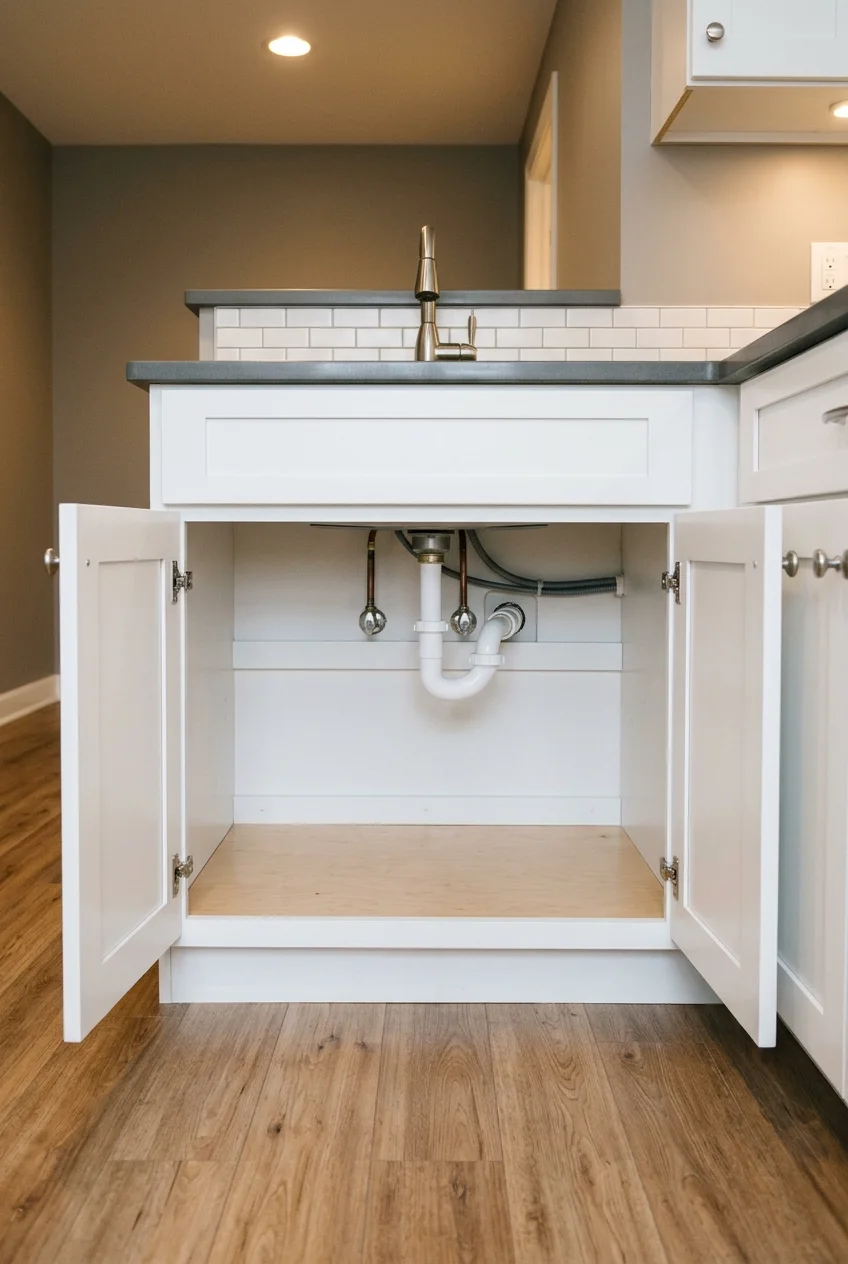
Put sink shutoffs where an adult can reach them quickly through a cabinet opening. Choose the location before committing to pullouts or a crowded under-sink organizer.
Ask the plumber to show you the valves when the work is finished. Leave the area clear of stored bottles that would need to be removed first.
If multiple appliances share the water area, have the installer identify which valve serves each connection. Keep that information with the appliance manuals or in the cabinet.
16. Carry Appliances Down Before Locking the Cabinet Plan
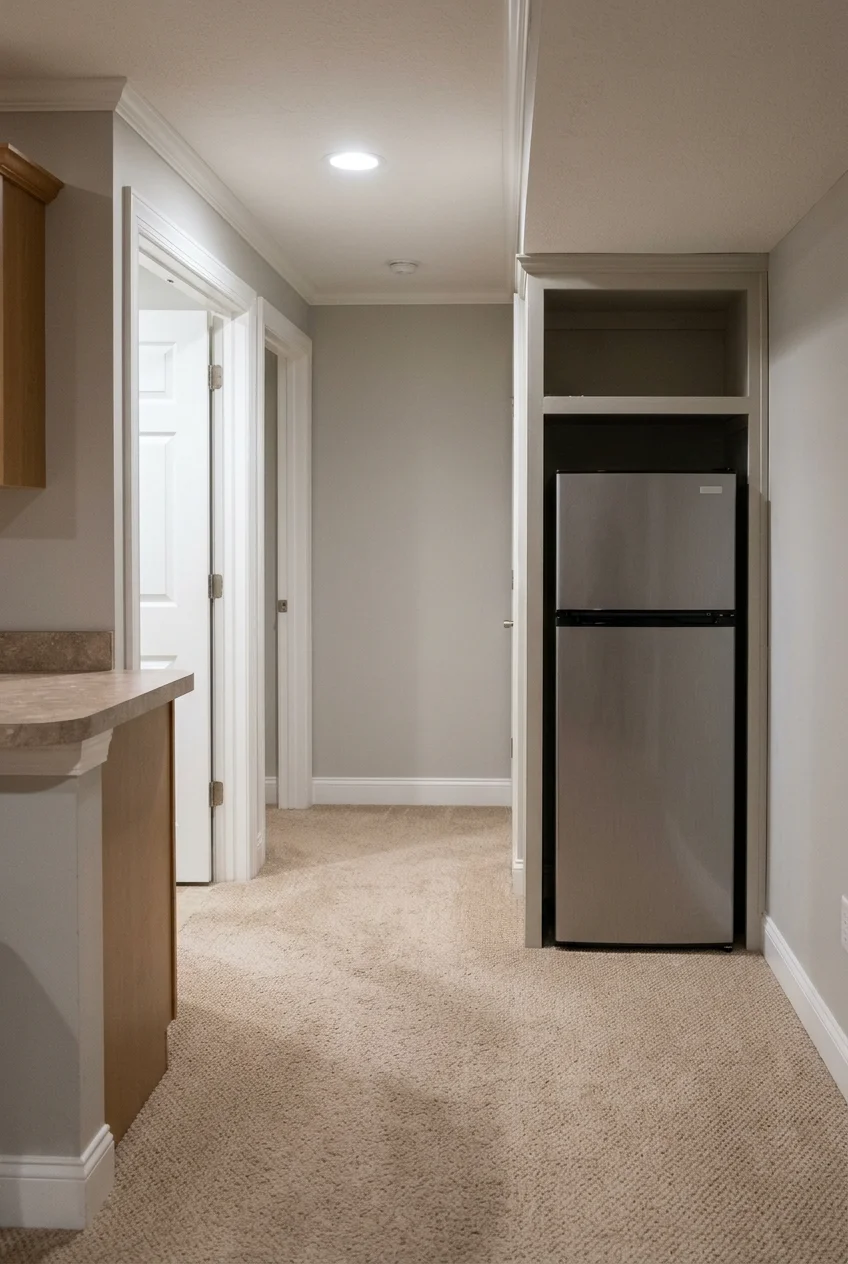
Pick appliance sizes after measuring every part of the basement delivery route. Include the actual clear stair width, door opening, turn, and low overhead point.
Use the packaged and unpackaged dimensions listed by the manufacturer. Ask the delivery team how they handle tight turns and which parts can be removed for delivery.
Set cabinet breaks so the biggest later replacement can also get down the stairs. Confirm room to pull appliances forward without removing a fixed return or island.
- Measure the narrowest finished door and the tightest landing or turn.
- Compare packaging and approved unpackaged dimensions with the delivery team.
- Check the removal path from the installed appliance back to the stairs.
17. Agree on Sink and Appliance Power Before Walls Close
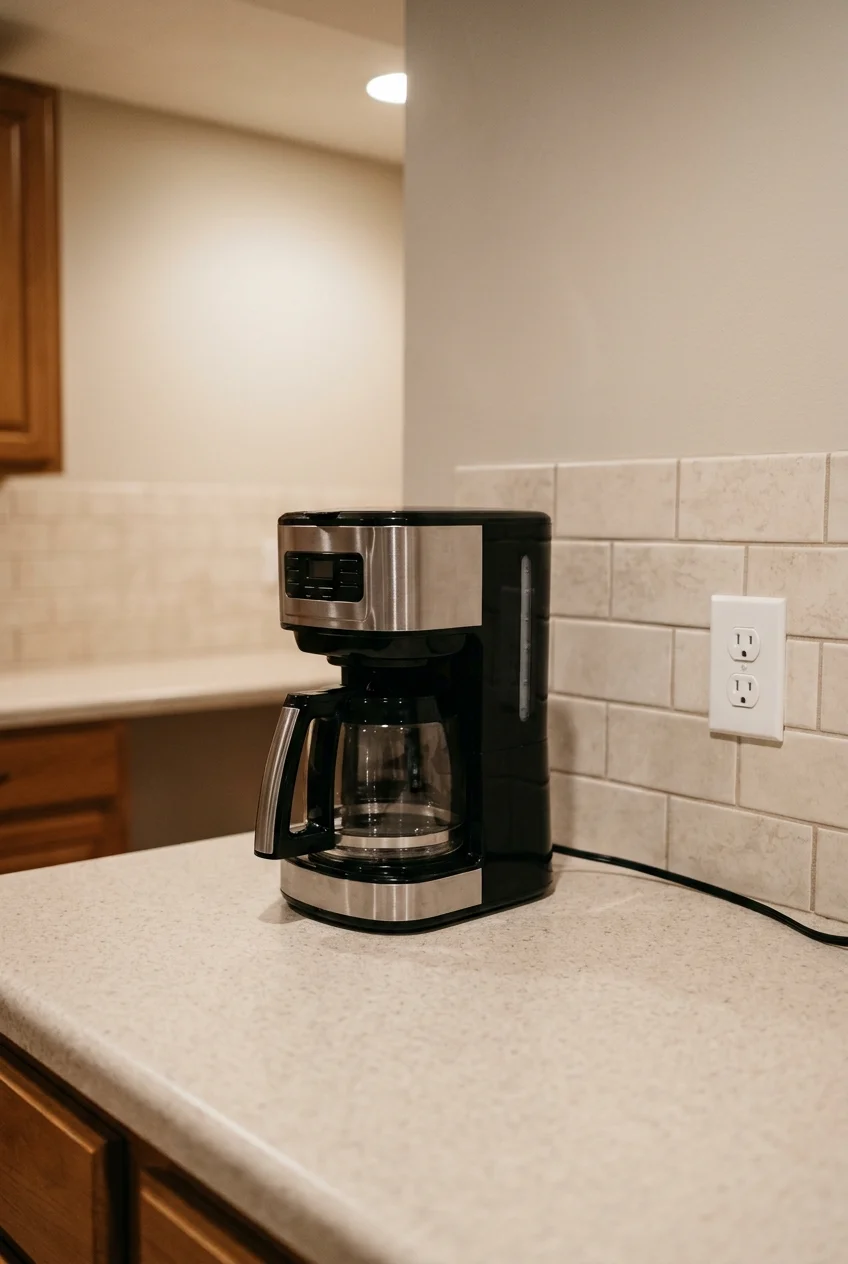
Make an appliance list before deciding where outlets, switches, and lighting belong. A small microwave, fridge, dishwasher, and kettle can have very different electrical and installation needs.
Have an electrician review load, circuit needs, required protection, and approved receptacle locations for the products you intend to use. Show them the proposed cabinet interiors.
Pick a place for the appliance cord that keeps it off hot surfaces and out of the sink area. Keep controls and wall plates reachable after installation.
Ask the installer to confirm where any future appliance can be swapped and serviced. Keep drawings and model instructions together so replacement starts with the correct details.
Choose Appliances That Fit the Work
Start with the jobs people will do downstairs. Check the specified opening, power, ventilation, and service clearance for the exact model before the cabinetry is ordered.
18. Fit a Built-In Beverage Fridge Under the Counter
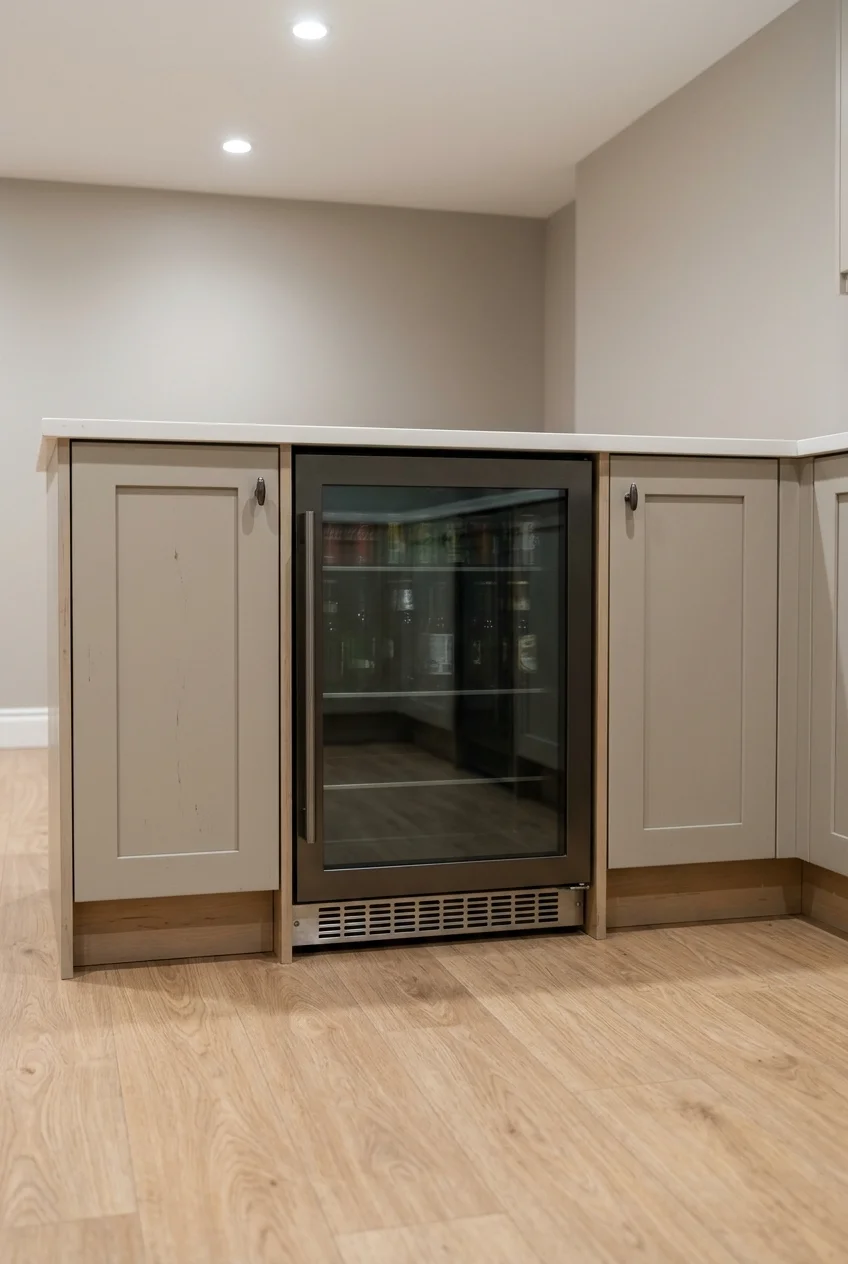
A built-in beverage fridge can hold cans and bottles while leaving the counter available for serving. Choose a unit approved for the enclosure you are building.
Check its ventilation openings, required gaps, and the door hinge’s sweep. Keep toe kicks or nearby handles clear of the air path and the door edges.
Think about what you intend to chill. If you need to store leftovers or other perishables, confirm that the appliance is designed for safe food refrigeration.
19. Leave a Freestanding Fridge and Freezer Open to the Room
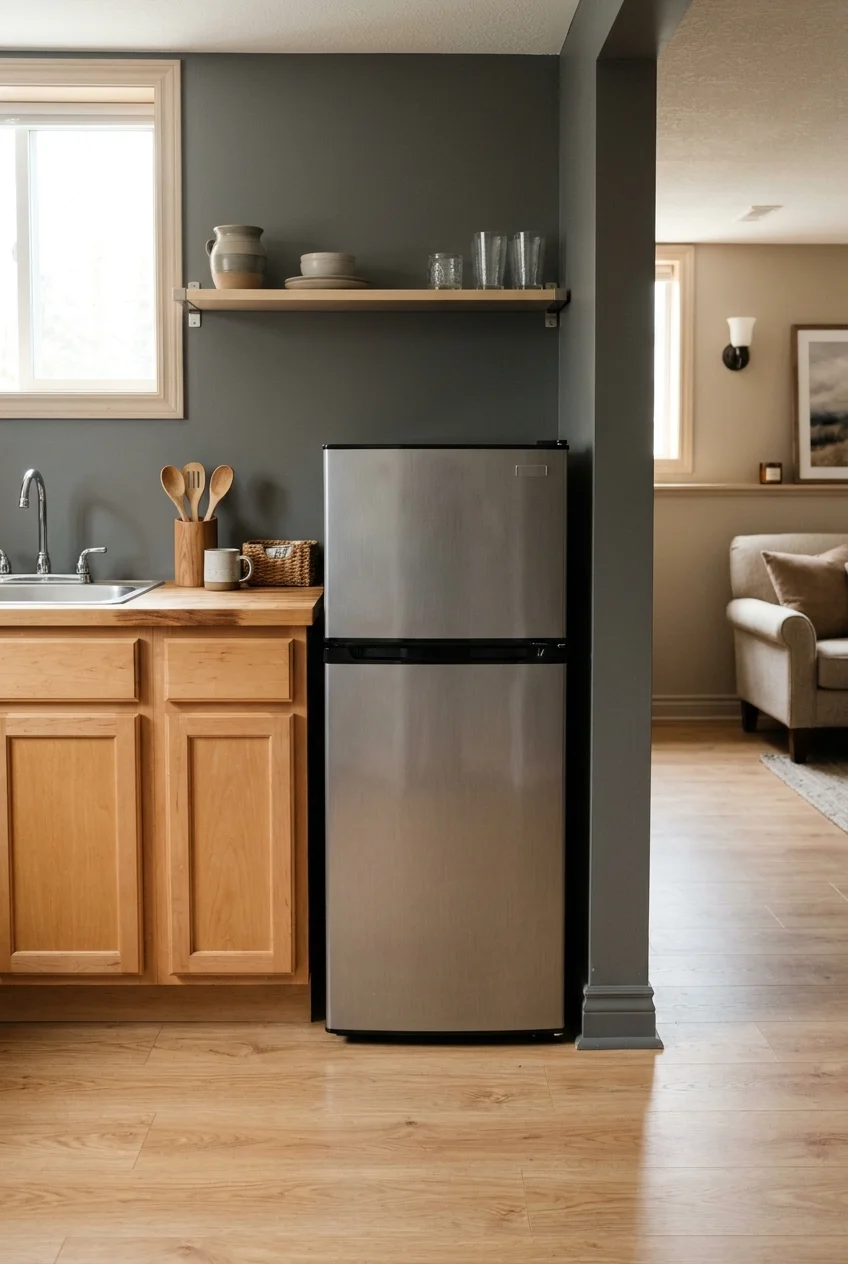
A compact freestanding refrigerator with a separate freezer compartment suits a kitchenette used for overnight food storage. Place it where the required air gaps can remain open.
Check operating temperature limits for the model if the basement gets cold. Check all surrounding clearances and confirm how far the door must open to remove bins.
Keep a counter landing within reach while leaving the fridge independent of the cabinets. That makes it easier to replace the unit when its dimensions change.
20. Get the Microwave Off the Prep Counter With an Approved Built-In
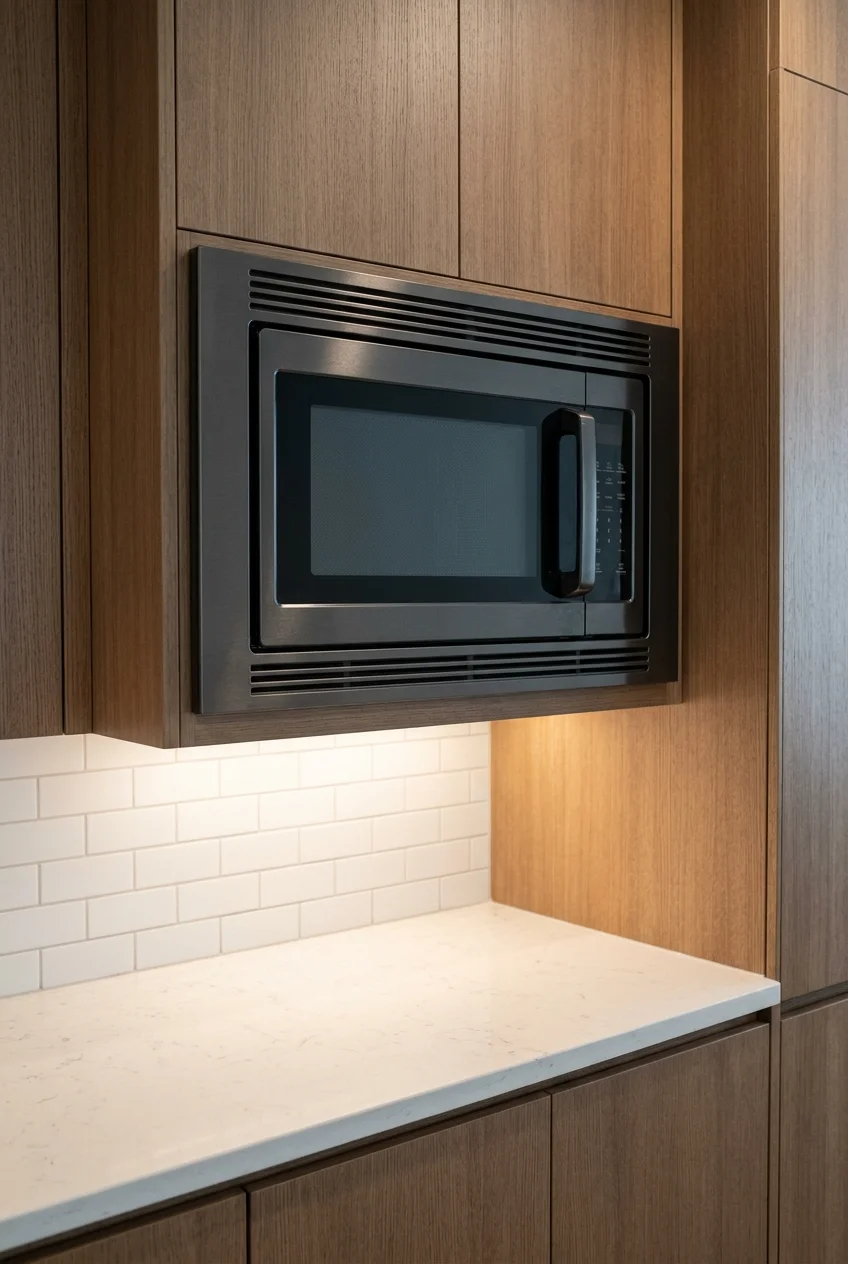
A microwave approved for built-in installation can clear a valuable prep surface. Check that the exact model, trim kit, opening, and clearances are listed to work together.
Choose a height where everyday users can see into the oven and lift out a warm bowl comfortably. Keep an open landing beside or directly beneath it.
Verify door travel and service access with the cabinet maker. A freestanding countertop model needs the clearances in its own manual and may require an open counter.
21. Fit an 18-Inch Dishwasher Beside the Sink
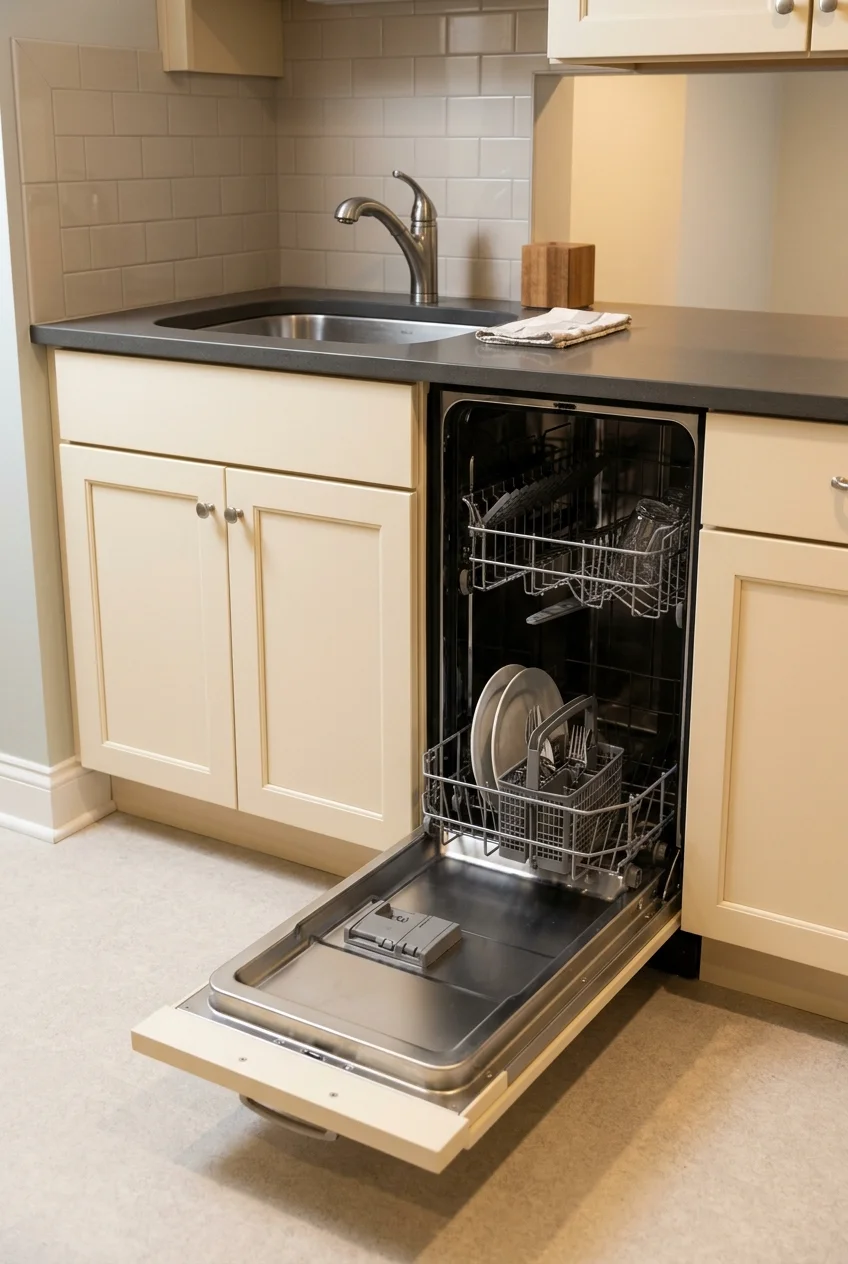
An 18-inch built-in dishwasher can suit a downstairs sink that sees frequent snack plates or breakfast dishes. Confirm the opening and rack capacity for the specific model.
Open the dishwasher outline against the taped layout. Check the space left to pass, and confirm that adjacent drawers will clear the door while you unload.
Ask the installer about the drain connection and service access. Put everyday dishes in a nearby drawer so unloading takes one step in a narrow room.
22. Size a Single-Bowl Sink for the Dishes You Actually Use
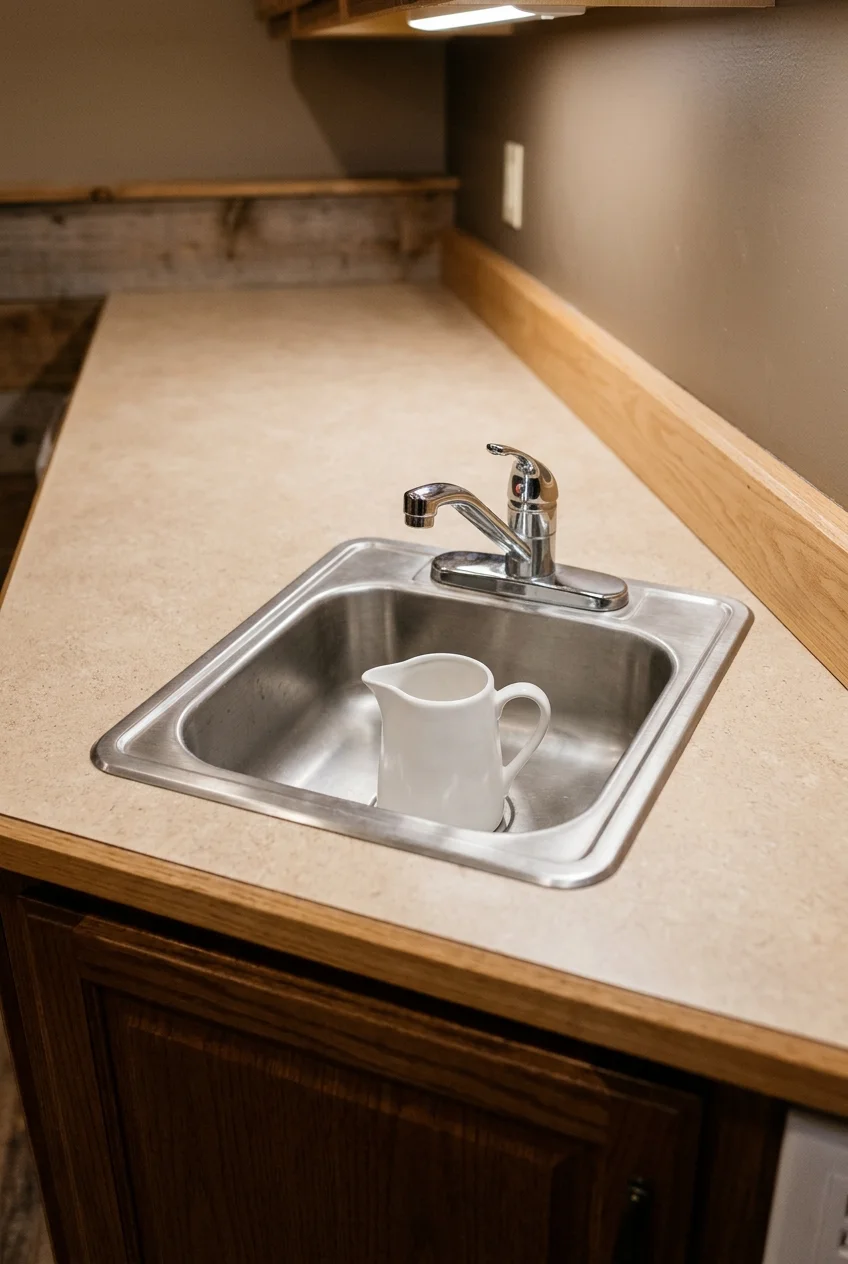
Choose a compact single-bowl sink based on the largest item it needs to rinse. A useful interior shape can matter more than the sink’s advertised outside width.
Compare the actual bowl measurements, base cabinet requirement, and mounting cutout. Place the faucet where its water lands well inside the bowl and handles move freely.
If you use the sink mainly for cups, a smaller bowl can leave more landing. If glasses and platters pile up, prioritize a better-fitting basin instead.
23. Choose a Sink With a Built-In Drainboard
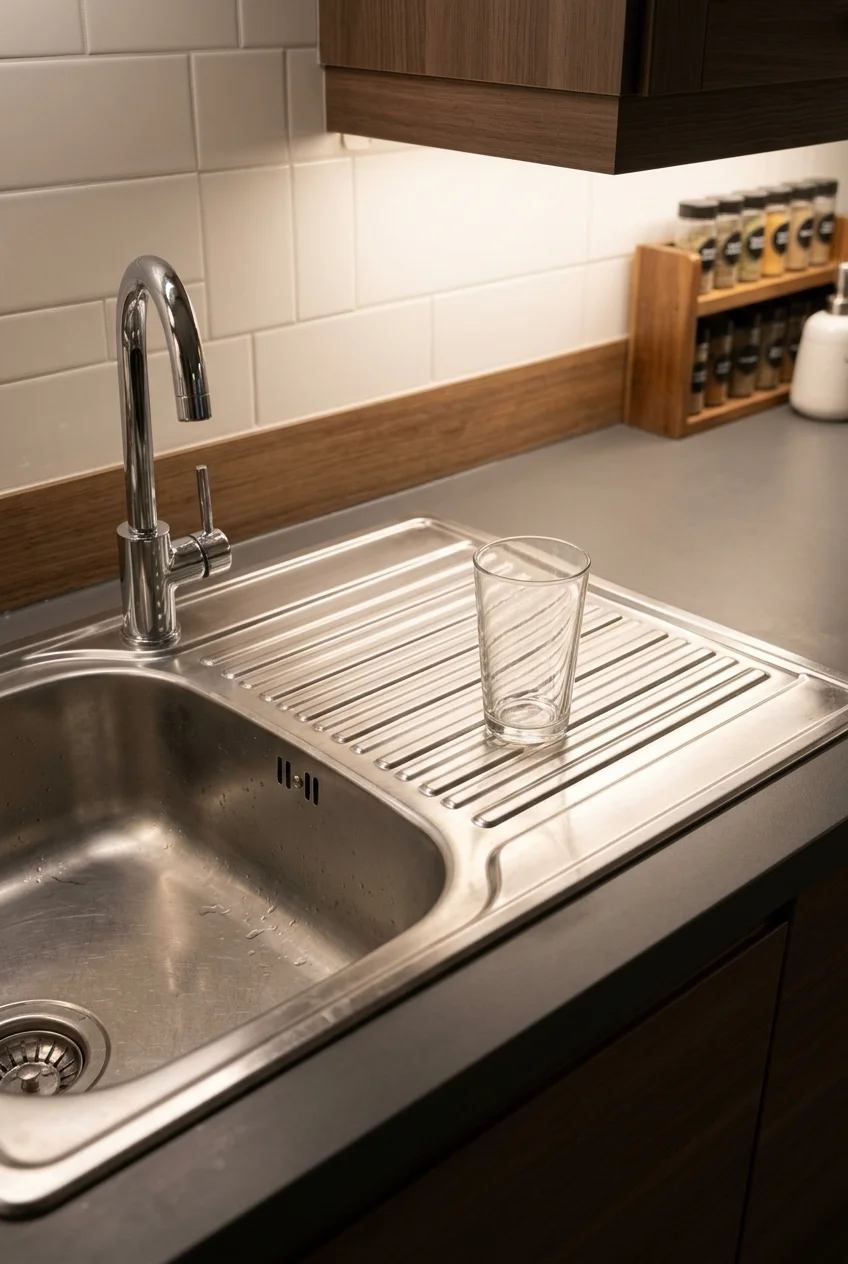
An integral drainboard keeps drips next to the sink when handwashing is the main cleanup routine. Choose its side based on how you move wet dishes.
Measure the full fixture width with the drainboard included. On a short run, compare the fixed drying area with the remaining counter needed for serving and prep.
Check the manufacturer’s installation details and where runoff is directed. An integrated drainboard works best when clean dishes can air-dry without competing with the coffee setup.
24. Add Filtered Drinking Water at the Sink
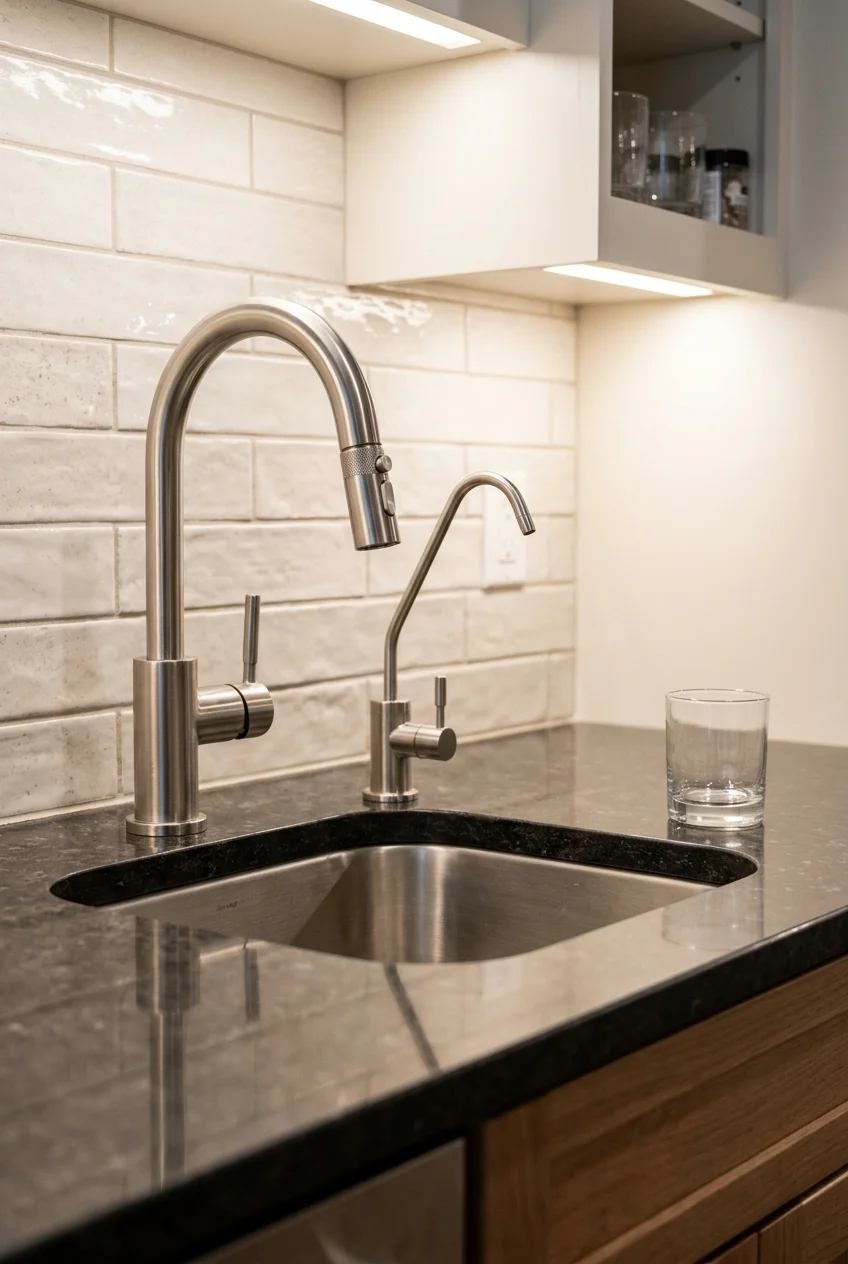
A separate filtered-water tap can save trips upstairs if the basement hosts overnight guests or sees daily use. Choose a system suited to your actual water concerns.
Confirm whether the sink deck has a compatible opening for the tap. Keep cartridges reachable and leave enough cabinet space to follow the specified replacement procedure.
Check how the connection affects the existing faucet and shutoffs. Ask the installer where to record the cartridge model and replacement schedule so it is easy to find.
25. Put an Undercounter Ice Maker Near the Serving Side
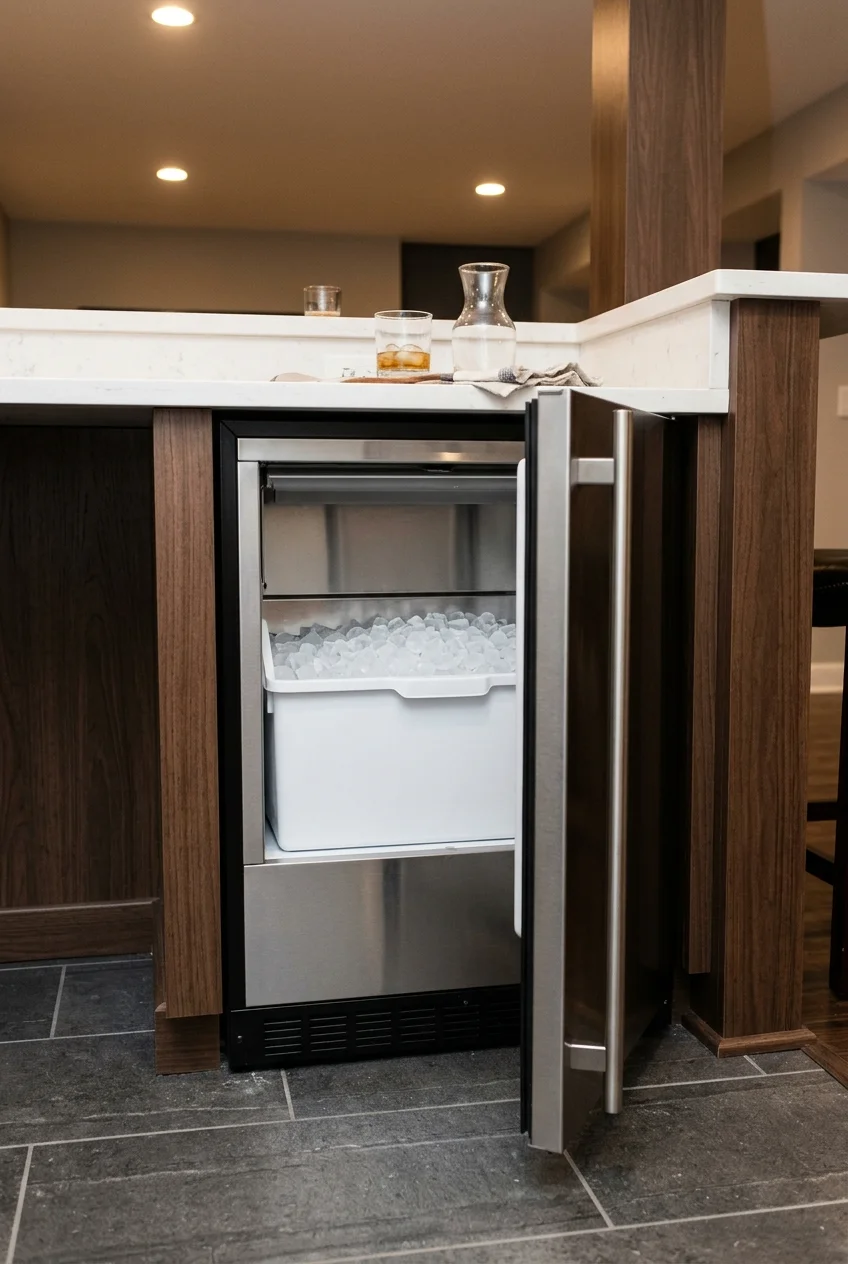
Choose a dedicated ice maker when the basement regularly serves enough drinks to justify the space. Compare that with keeping a refillable ice bin in an existing freezer.
Check whether the model requires a drain, what drainage arrangement it allows, and where its water connection will be serviced. Verify ventilation and the required opening.
Place it near the serving side so people can scoop ice without standing at the sink. Reserve nearby counter space to set down a glass safely.
Include the cleaning and maintenance instructions in the decision. Ask about noise and service access if bedrooms or a seating area share the wall with the machine.
26. Keep Coffee Supplies Together on One Dry Counter
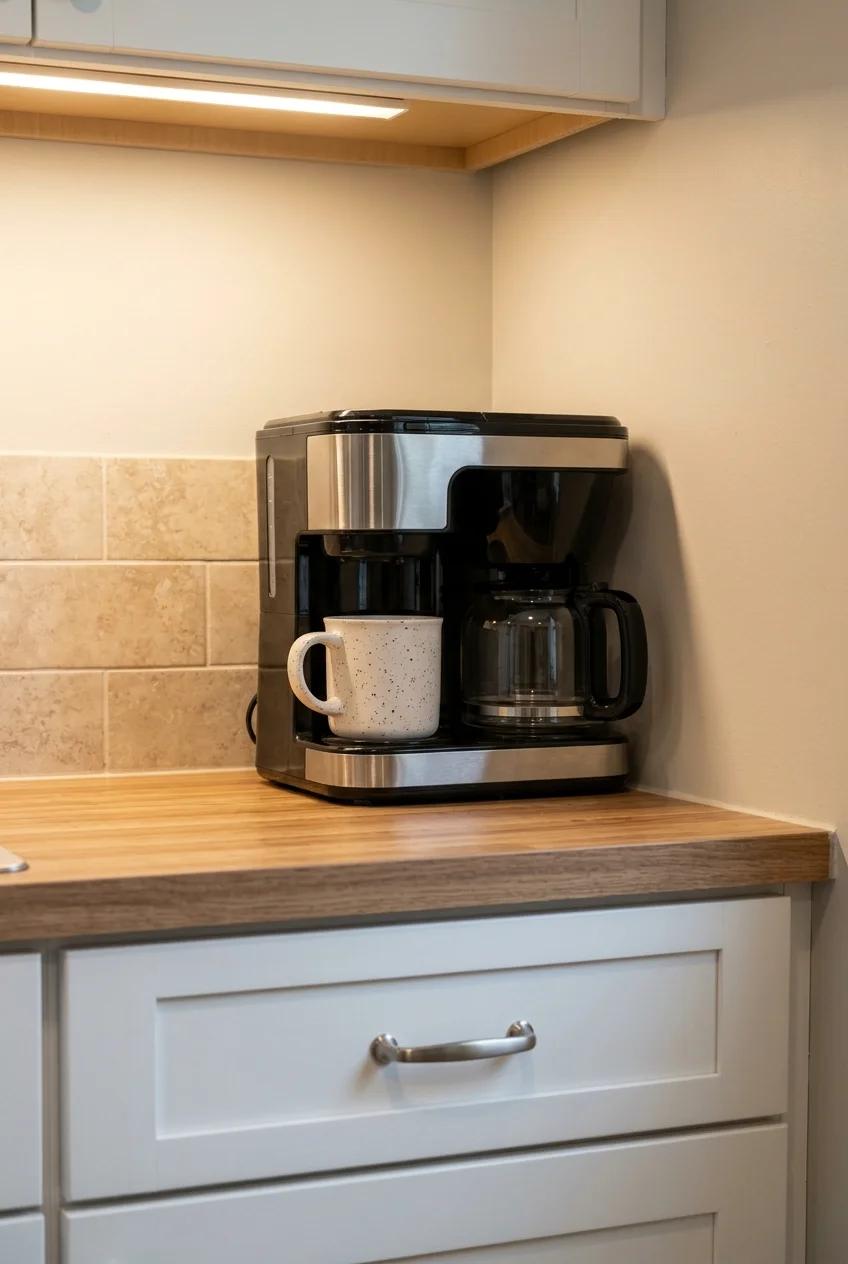
A coffee station works best when the machine sits beside cups, filters, and a place to set down a full mug. Give it its own dry landing.
Check how the water reservoir fills and how the lid opens under cabinets. Set the machine where you can reach both without dragging it to the counter edge.
Use the closest drawer for supplies so guests need few instructions. Keep a small washable surface beside the machine for the damp scoop or used spoon.
27. Use a Compact Range Only if the Basement Needs an Oven
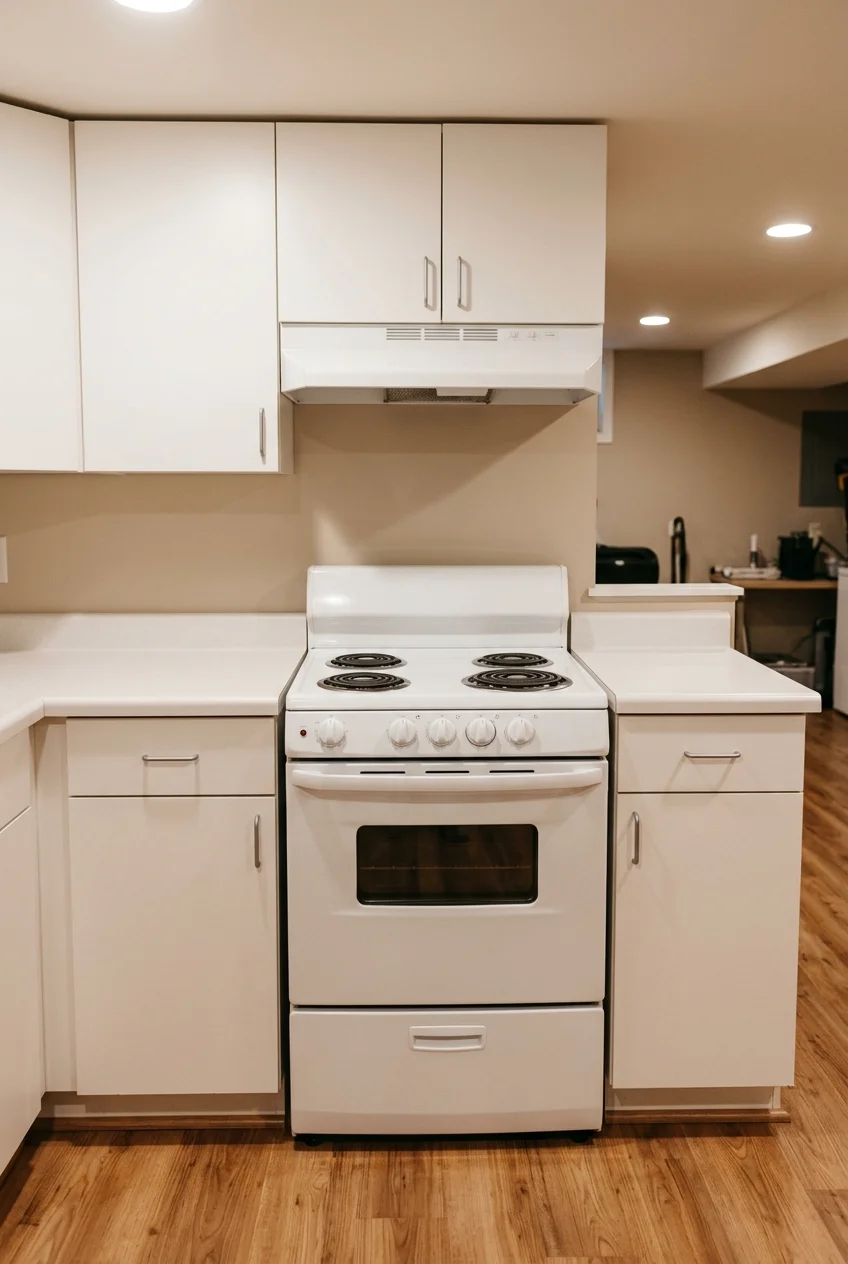
A compact range earns its floor space when people regularly bake or cook meals downstairs. Confirm what the local building office allows for the room’s use first.
Compare oven capacity with your usual pans and check the installation drawing before setting cabinet openings. Include the full door projection and the delivery route in your measurements.
Coordinate the electrical connection, ventilation, and specified anti-tip installation with qualified installers. Give hot pans a landing on the counter closest to the oven door.
Check that someone carrying a tray can stand clear of the open door. If the room only serves snacks, the space can stay available for a simpler appliance.
28. Give a Countertop Oven Its Own Open Landing
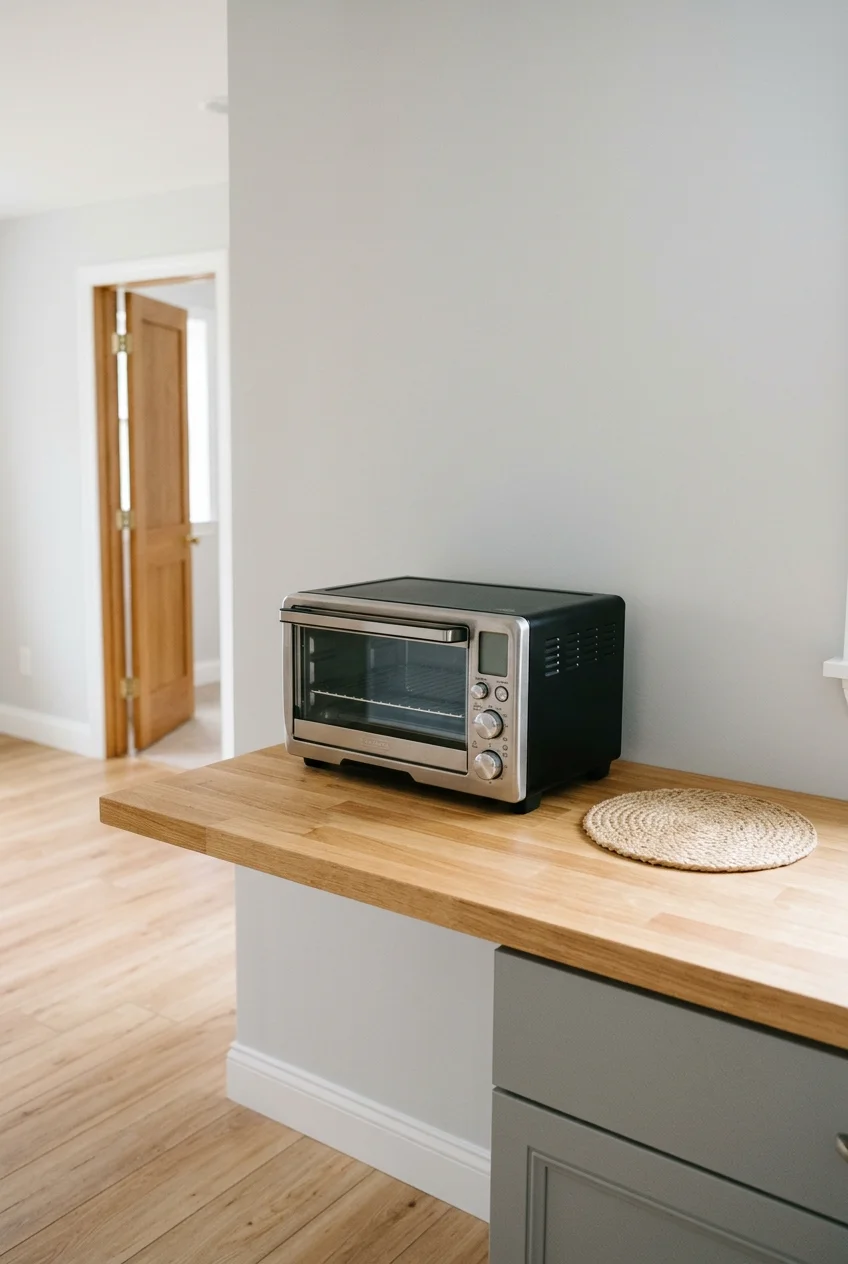
A countertop oven can serve occasional toast or small batches when the room can accommodate the model’s required clearances. Give it a permanent position approved by its manual.
Use an open counter with the specified heat-resistant surface and surrounding space. Keep upper shelves, walls, other appliances, and nearby finishes outside the manufacturer’s required envelope.
Check the door and tray path from a standing position. Leave an adjacent landing for a hot tray, and ask the electrician about the appliance load.
29. Reverse the Fridge Hinge to Clear the Counter
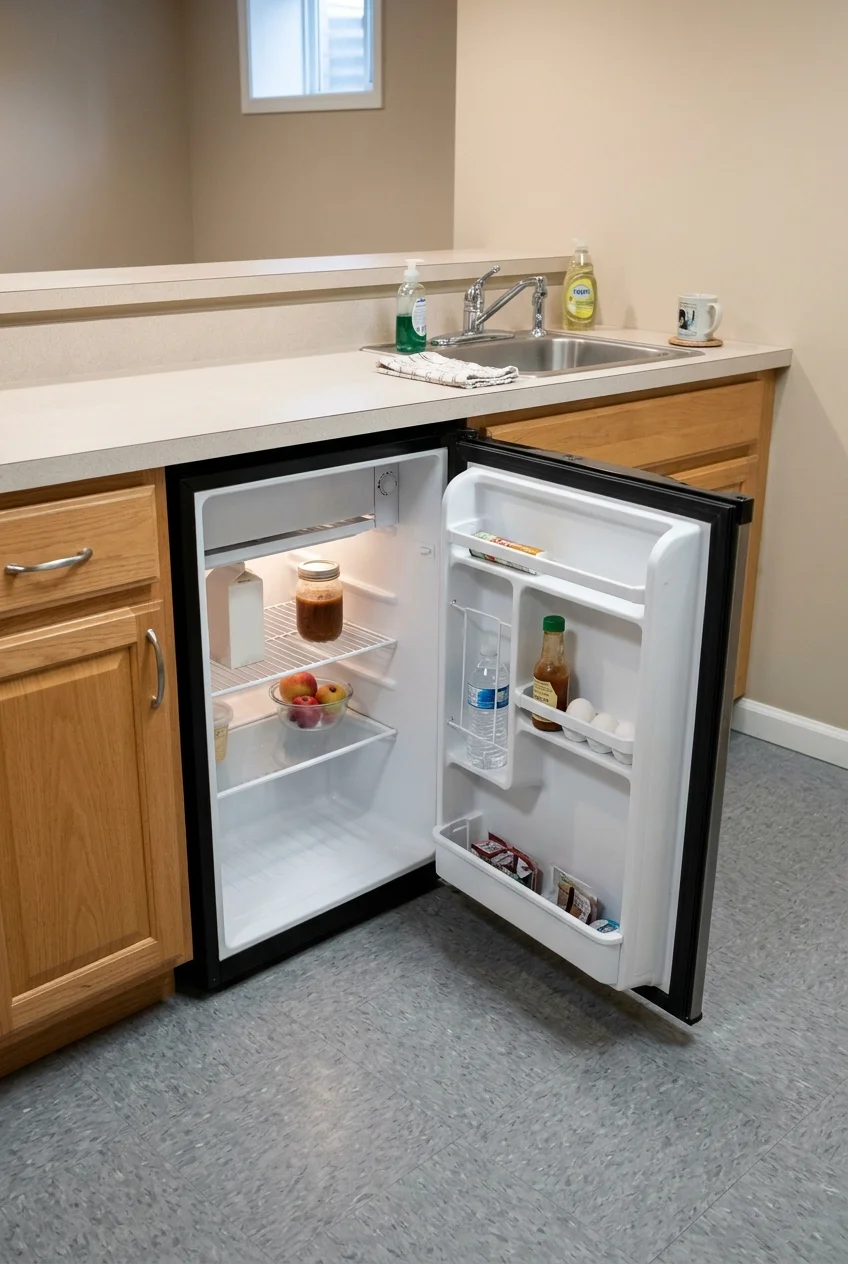
A reversible fridge door can make unloading easier when the hinge is currently on the serving side. Choose the swing that leaves a clear path to the counter.
Check the exact model’s reversal instructions and confirm the final hinge clears the wall. Verify the opening angle needed to pull drawers out for normal use.
30. Choose a Faucet That Clears the Shelf Above
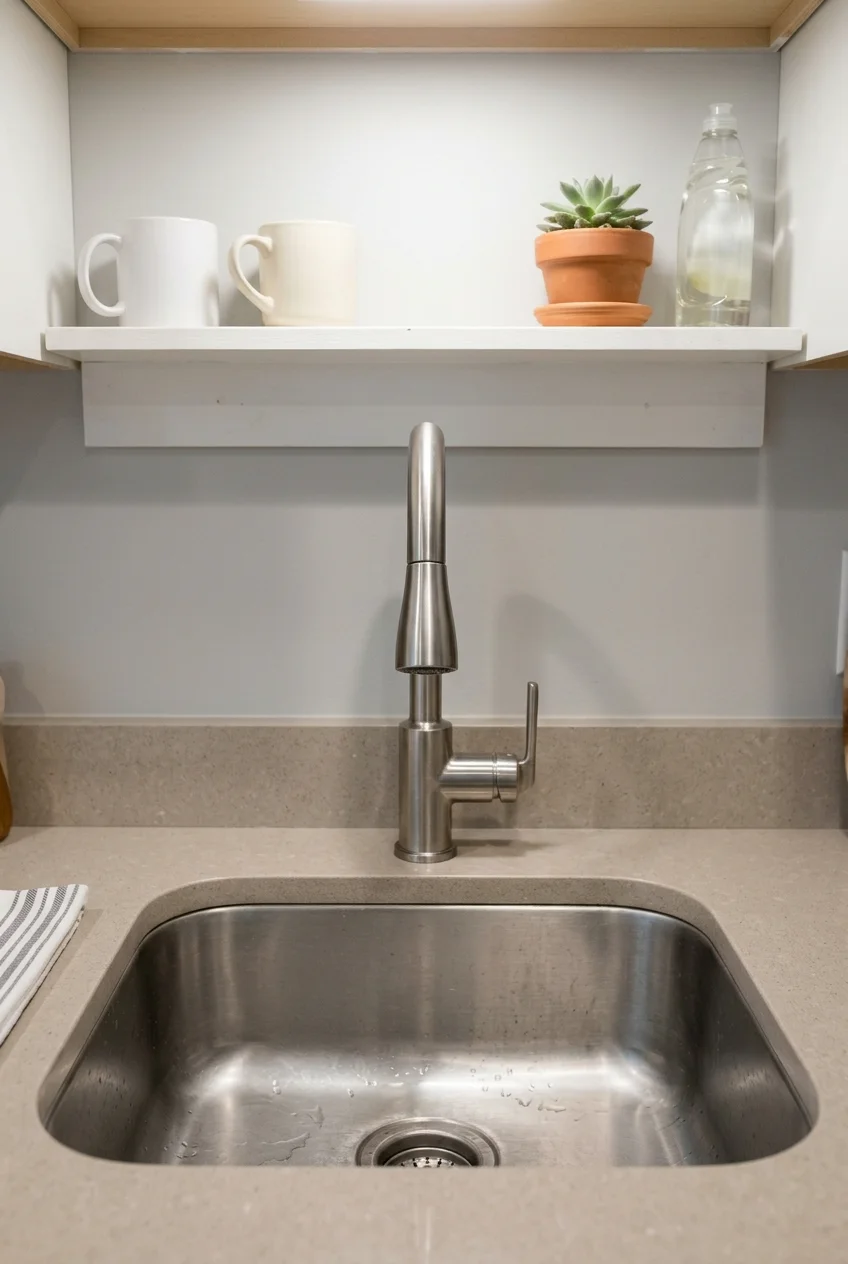
A lower pull-out faucet can fit beneath an existing shelf or basement window trim. Compare the full faucet height and its handle movement with the available space.
Check the spout reach against the basin and make sure the spray hose has an unobstructed path below. Ask the installer to keep the hose clear of stored supplies.
Fit Storage to a Short Cabinet Run
Give every cabinet a job based on what you carry downstairs. Measure the things people actually use before you buy inserts or commit to deep shelves.
As an Amazon Associate I earn from qualifying purchases. Measure the storage opening or available counter before buying any linked item for your basement kitchenette.
31. Put Everyday Plates and Bowls in One Deep Drawer
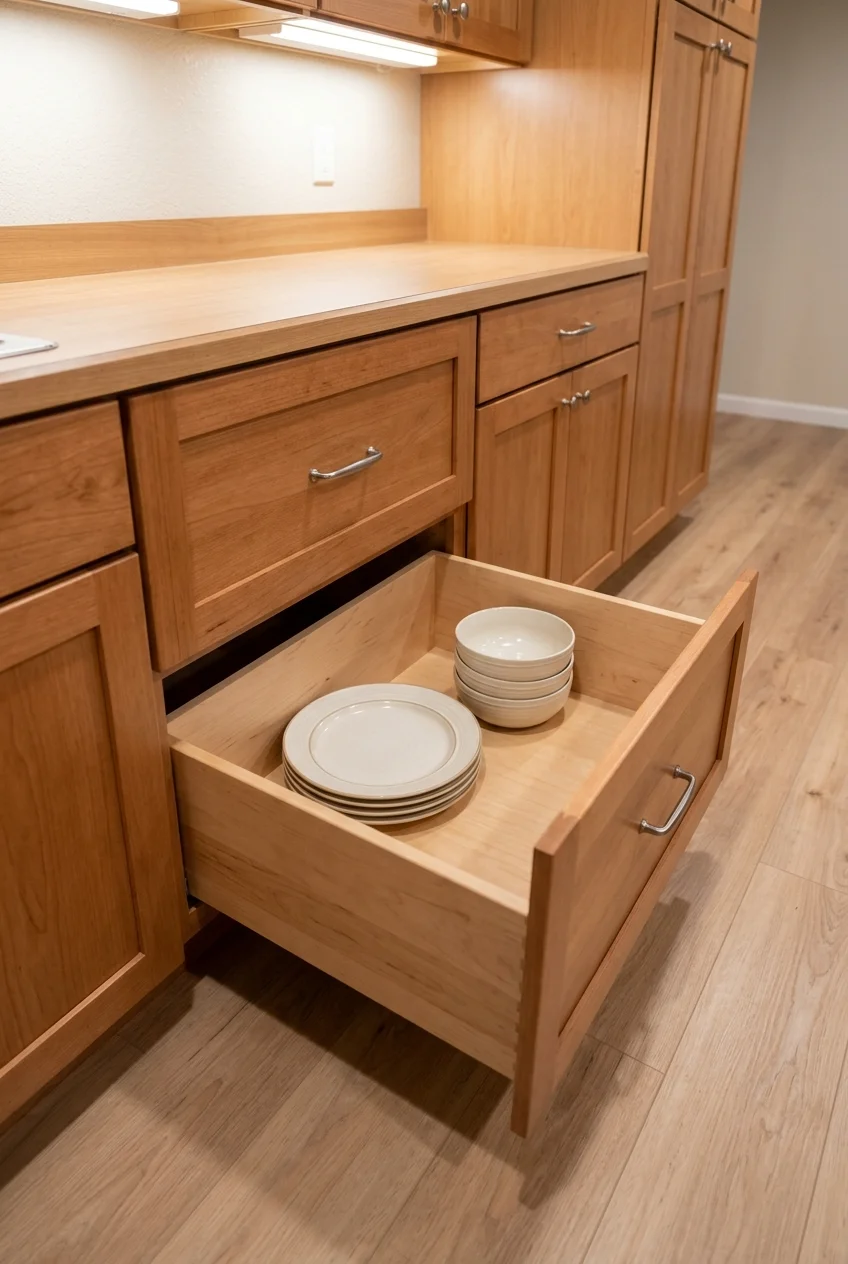
A deep drawer beneath the prep surface puts everyday dishes below eye level and close to where you serve. Check its usable height with plates stacked.
Review slide capacity and drawer dimensions with the cabinet supplier. Keep stacks low enough to lift easily, and use dividers if dishes shift when the drawer opens.
32. Keep Upper Cabinets Shallow Along a Narrow Aisle
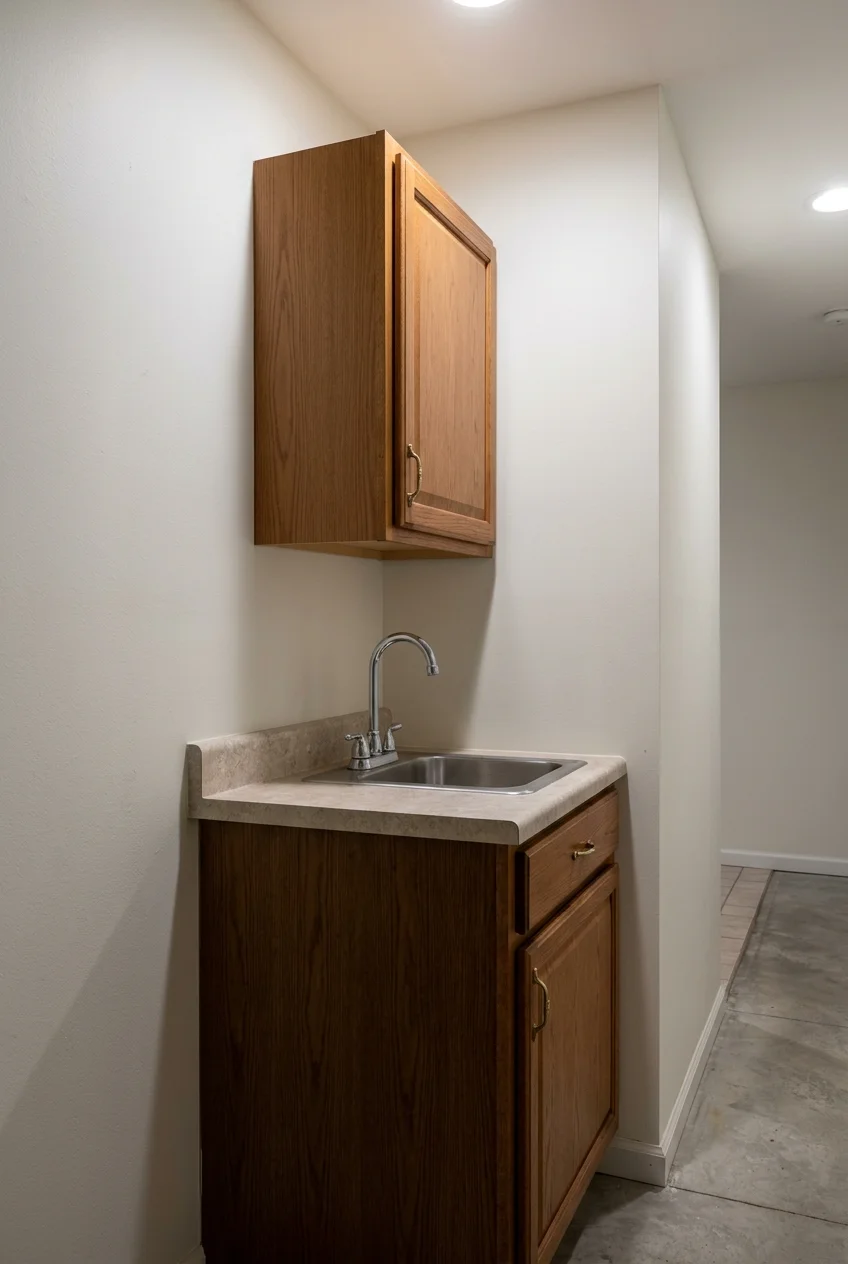
Shallow uppers work for mugs and glasses when standard cabinets feel too close to the prep edge. Measure the dishes and compare their depth with usable shelf space.
Check cabinet door travel and the available height over the counter. A modest projection can leave better visibility at the sink while keeping everyday items within reach.
33. Hang One Open Shelf Where Guests Can Find Cups
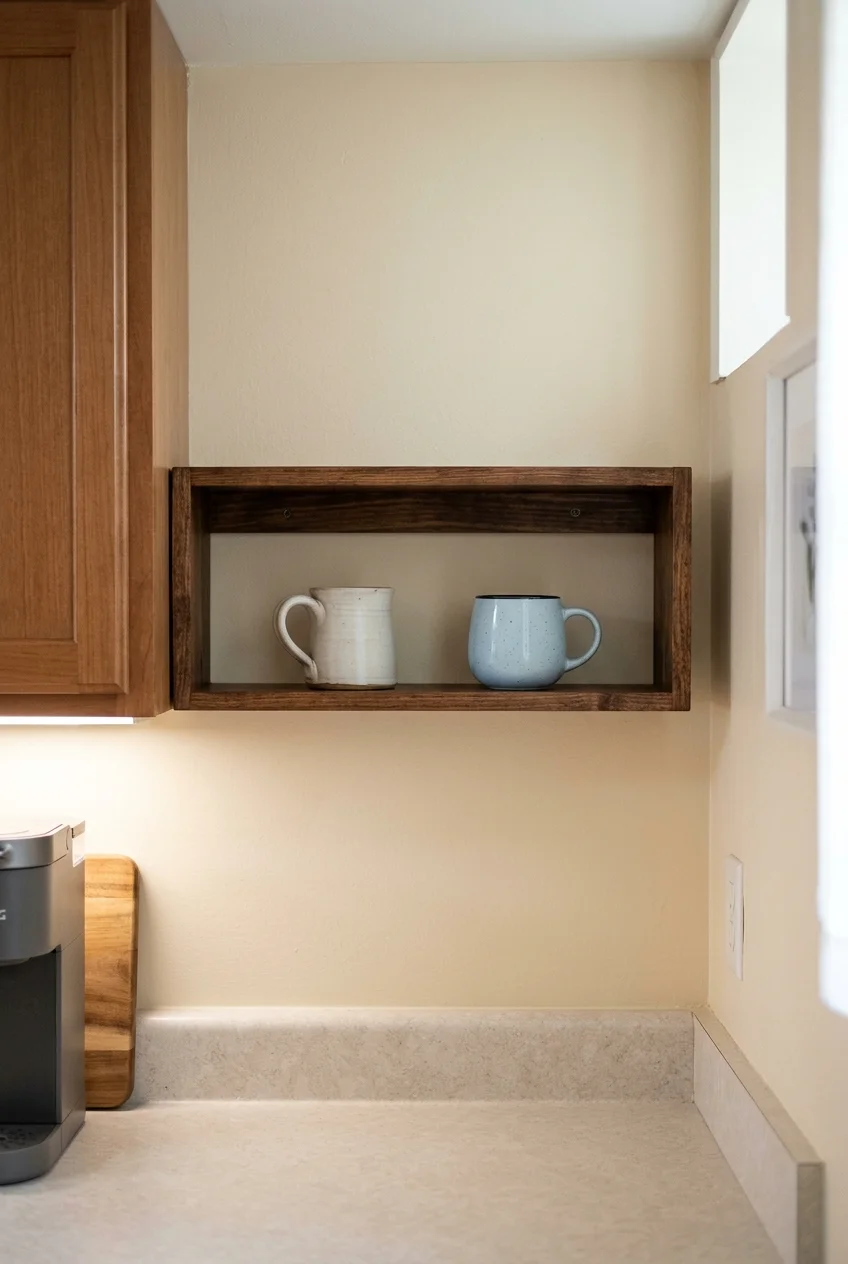
One open shelf tells guests where to find cups without asking them to open cabinets. Use it for a small number of pieces you wash often.
Place the shelf away from the cooking zone and choose a depth that fits the cup handles. Check the mounting system’s wall requirements and expected load.
34. Fit a Tall Pullout Pantry at the End of the Counter
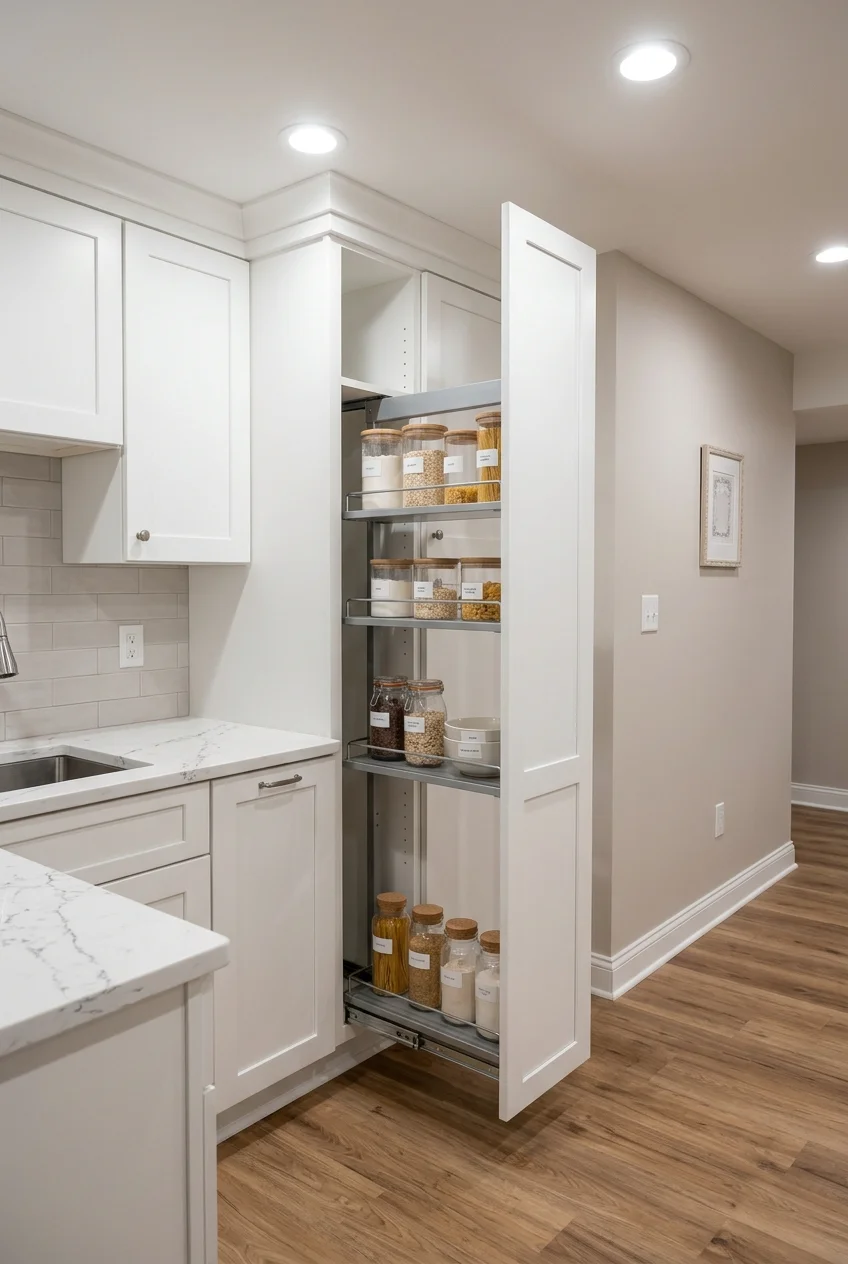
A tall pantry pullout can bring packaged food into view when a deep cabinet would hide it. Put it on a finished end with clear opening space.
Choose shelf heights around the tallest items and confirm the hardware rating. Check the fully extended depth from the cabinet face and test the neighboring door swings.
Use it for modest supply quantities. Reserving one shelf for refills keeps family-room snacks easy to sort without turning the kitchenette into the main household pantry.
35. Park a Slim Cart in a Finished End Gap
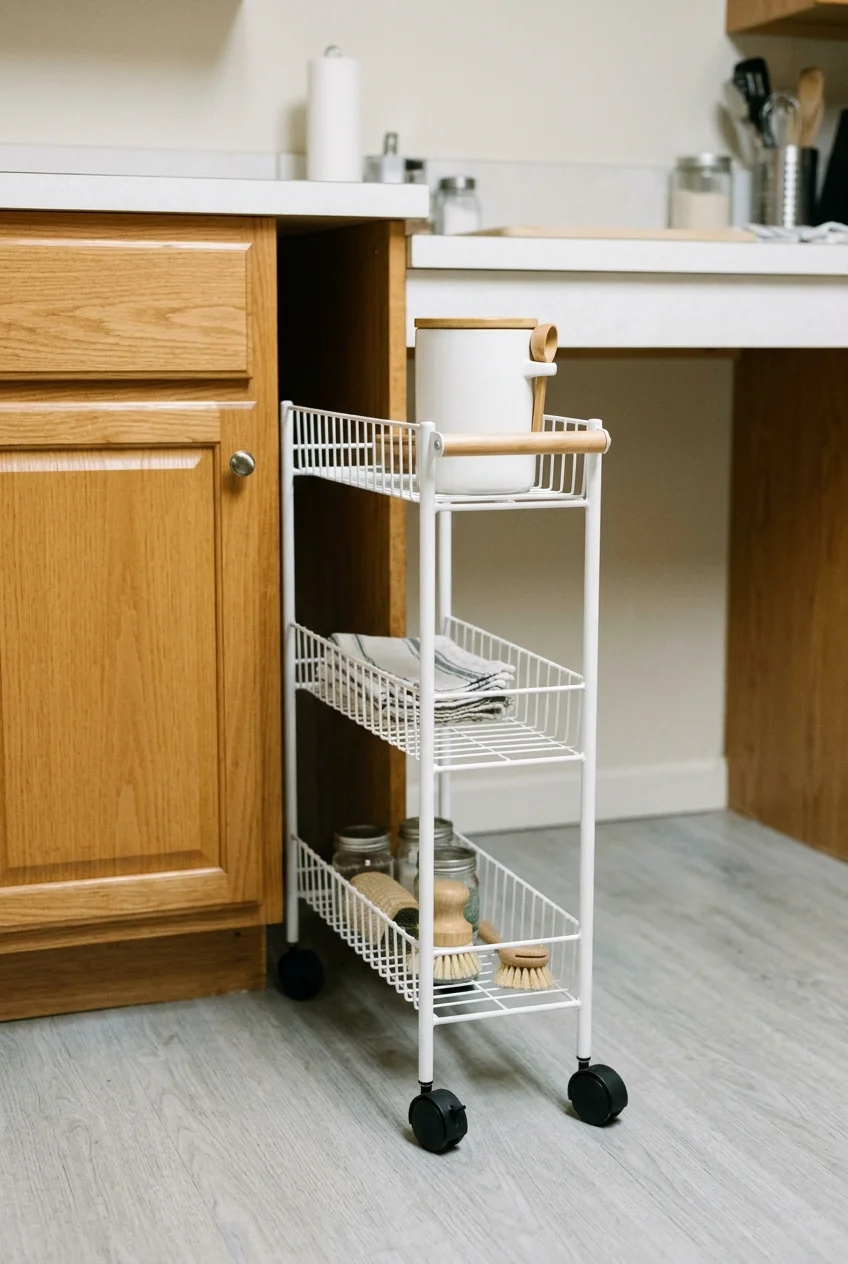
A slim cart makes an awkward dry gap useful for light, frequently used items. Leave clear floor in front so you can roll it out without twisting.
The Yamazaki slim rolling cart is about five inches wide. Check the full depth, baseboard projection, floor level, and handle clearance before choosing its parking spot.
Keep the cart away from ventilation openings and places that need service access. A gap beside a base cabinet is usually easier to evaluate than an appliance gap.
36. Stand Serving Boards Upright in a Divided Slot
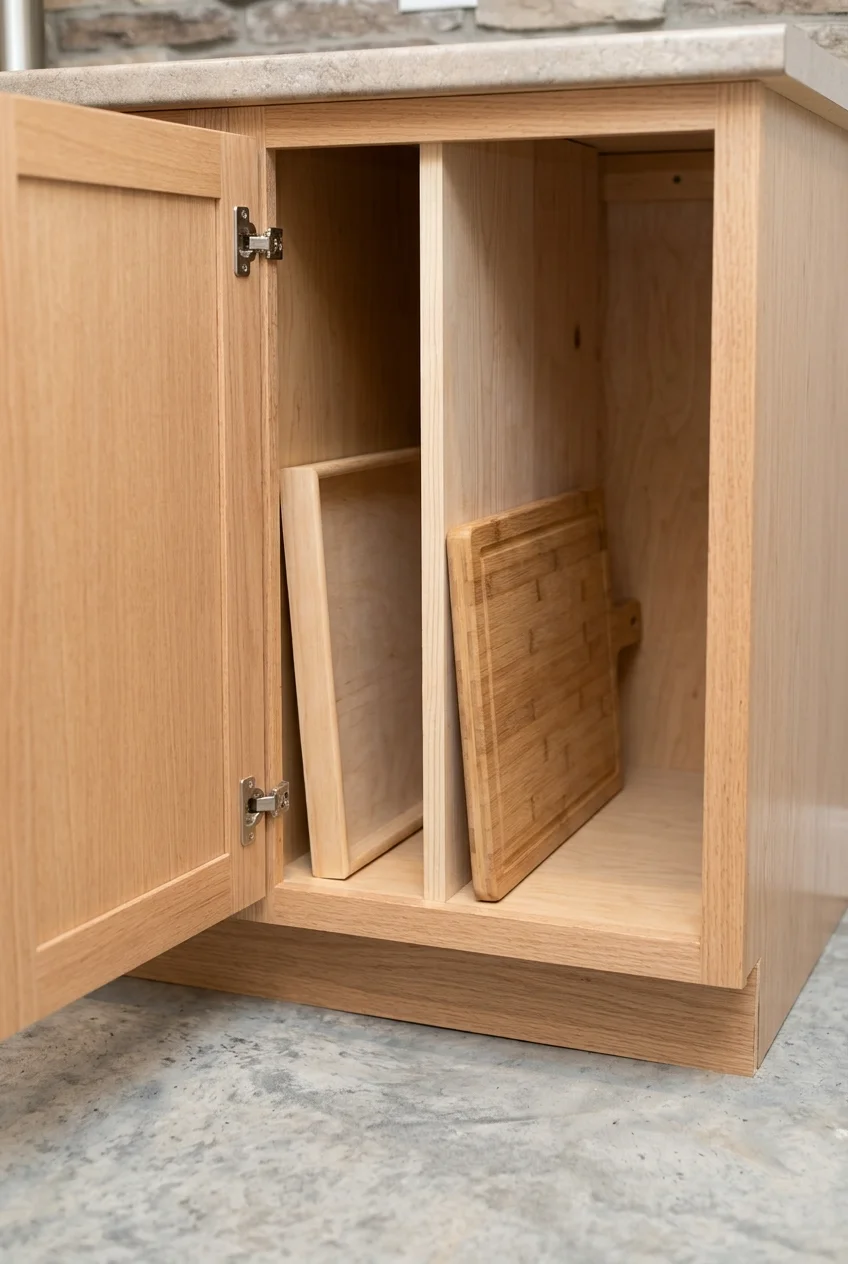
A narrow bank of vertical dividers makes trays and boards easy to remove one at a time. Measure your largest piece, including any handles or corners.
Put the slot near the serving counter and away from damp dishes. Compare adjustable dividers if your tray sizes vary, and leave finger room above the items.
37. Give Trash and Recycling a Pullout Near the Exit
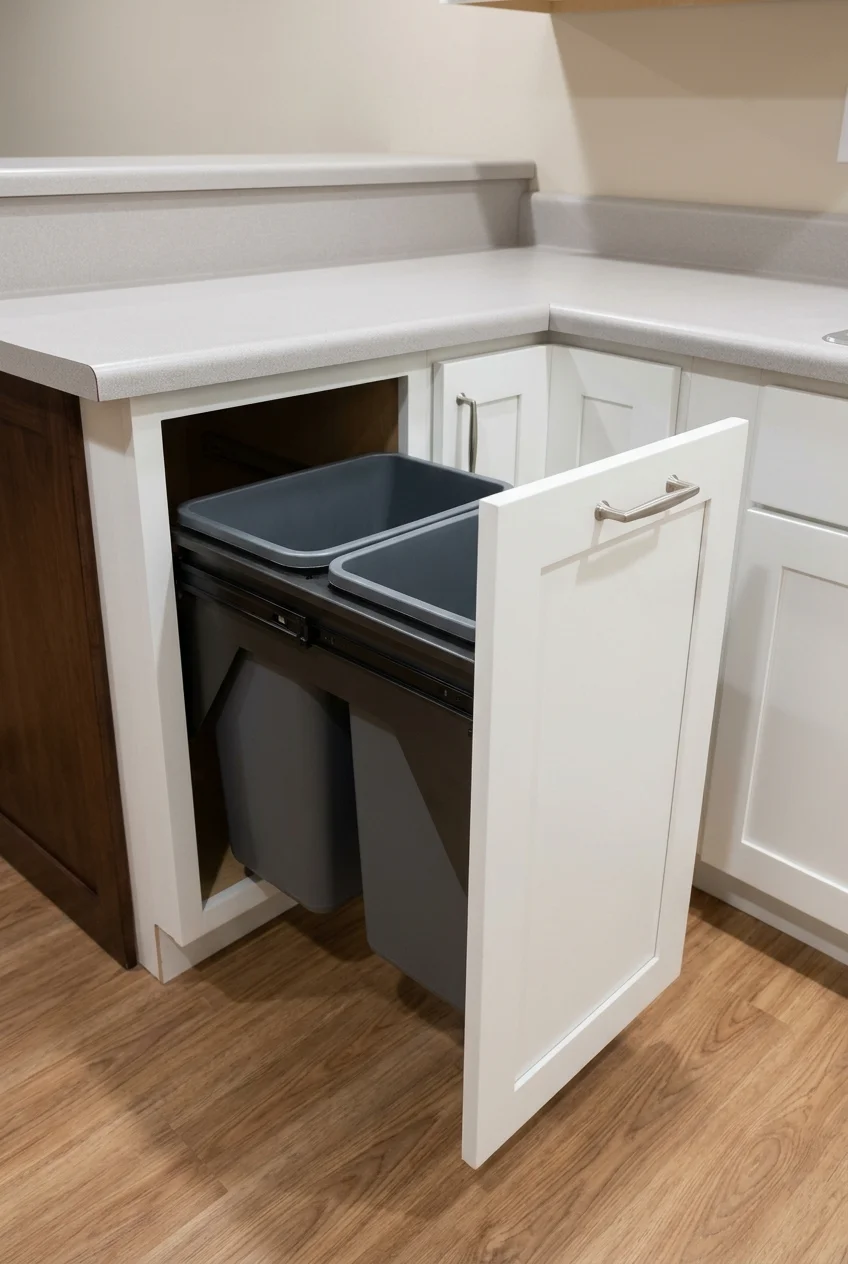
A two-bin pullout can keep waste service off the floor near a busy serving area. Put it where people can use it while someone stands at the sink.
Measure the space with the pullout fully extended. Select bins you can lift out below the counter and check how their lids and liners fit the opening.
38. Group Packaged Snacks in Lift-Out Bins
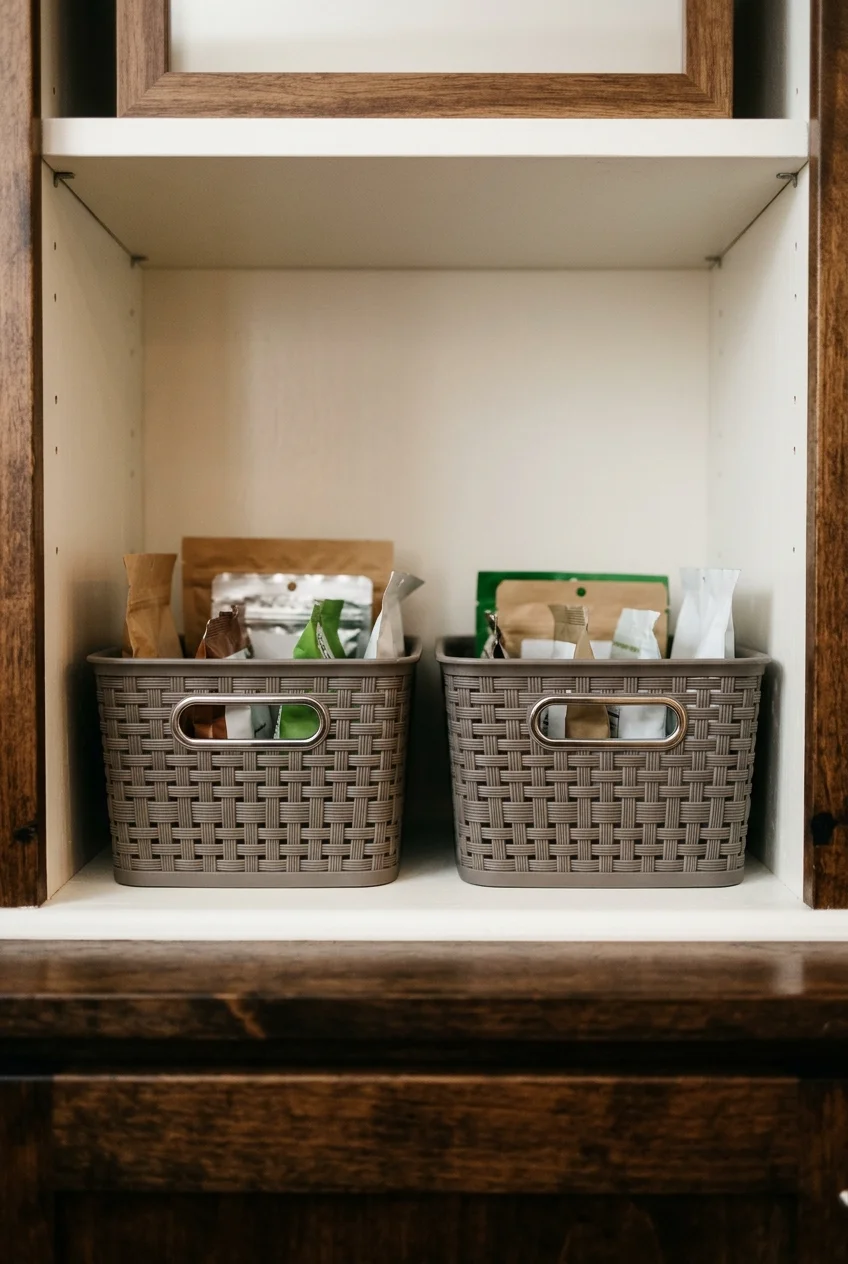
Lift-out bins give a shared kitchenette an easy restocking routine. Put frequently eaten snacks in one reachable bin and keep unopened extras elsewhere to avoid overfilling it.
Check shelf height with a hand on the full bin. Choose smooth, washable sides and store food in closed packaging if the basement has a pest history.
39. Use a Lift-Up Upper Door in a Tight End Bay
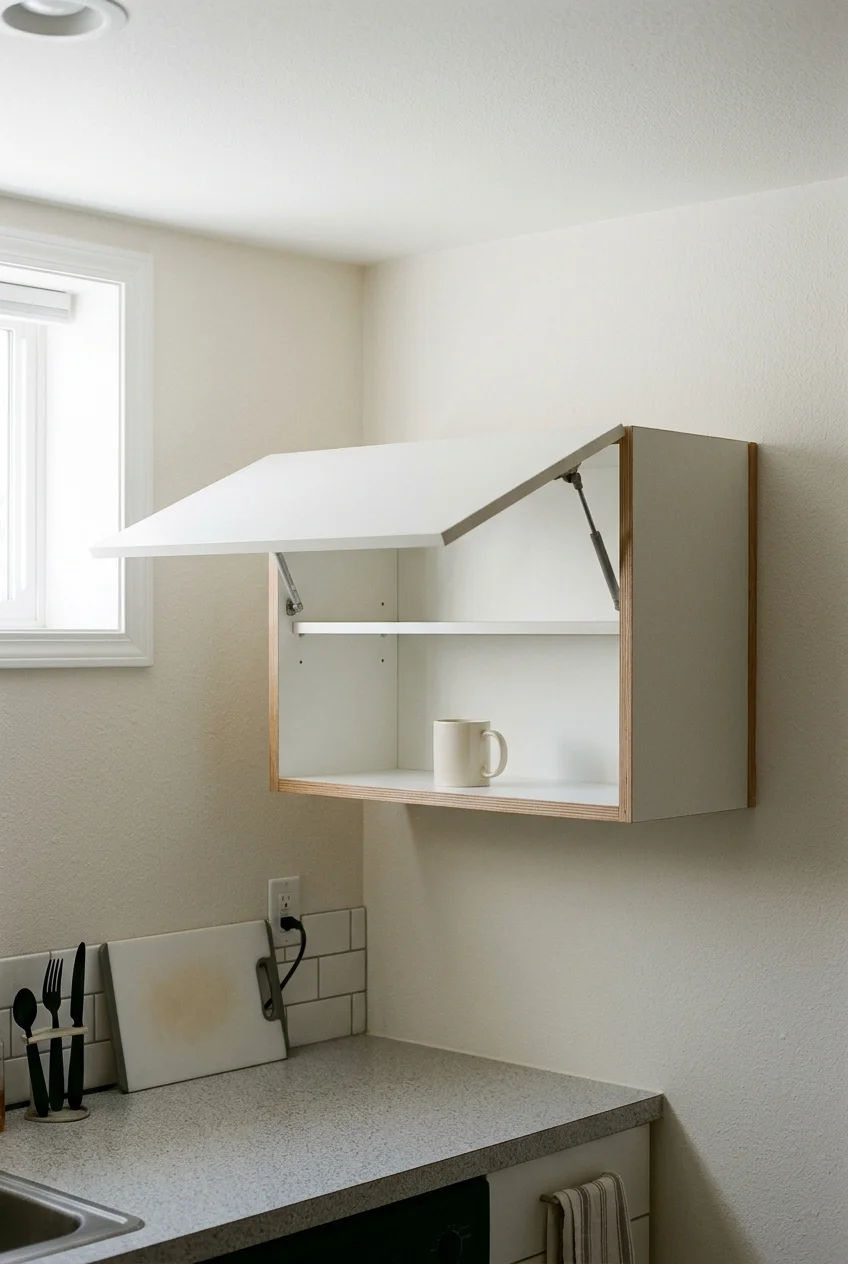
A lift-up upper door can keep a sideways cabinet swing out of a tight end bay. Check the opening arc wherever the ceiling or soffit steps down.
Try a sample mechanism at a comfortable height. Confirm the door remains easy to close and specify hardware matched to the front dimensions and weight.
40. Open a Corner Cabinet From the Rec Room Side
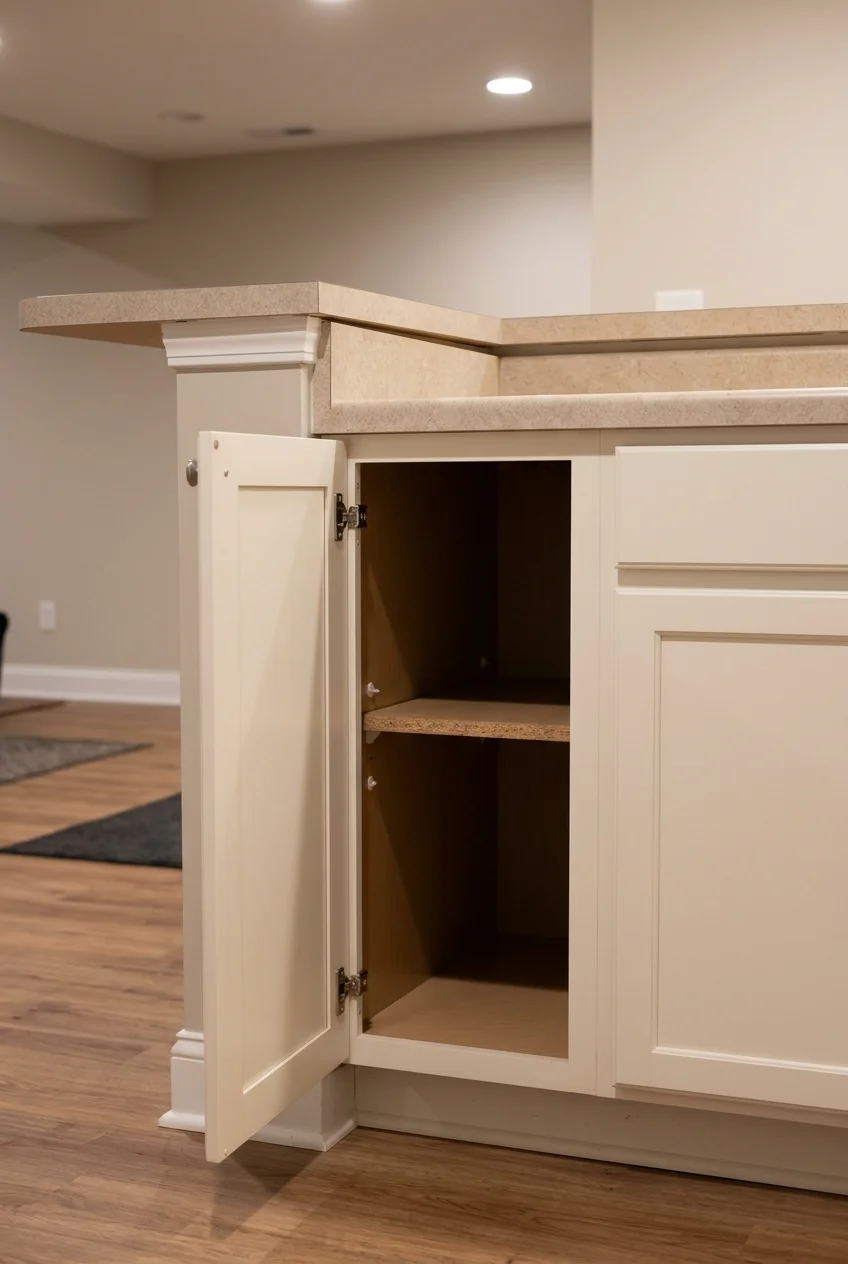
Use the back of a short return to reach storage that would be awkward from inside the kitchenette. Give the room-facing cabinet a simple finished door.
Check the corner structure and countertop support with the cabinet supplier. Leave room to open the door without bumping a stool or extending it into the main route.
Use that cabinet for items people take straight to the rec room, like serving trays or reusable cups. Keep cleaning products on the kitchenette side.
Finish the Counter, Floor, and Lighting
Basement finishes face splashes and limited light. Plan the floor build-up, finish edges, and work lights before ordering cabinets for an existing ceiling or slab.
41. Install Slab-Approved Flooring After Checking Moisture
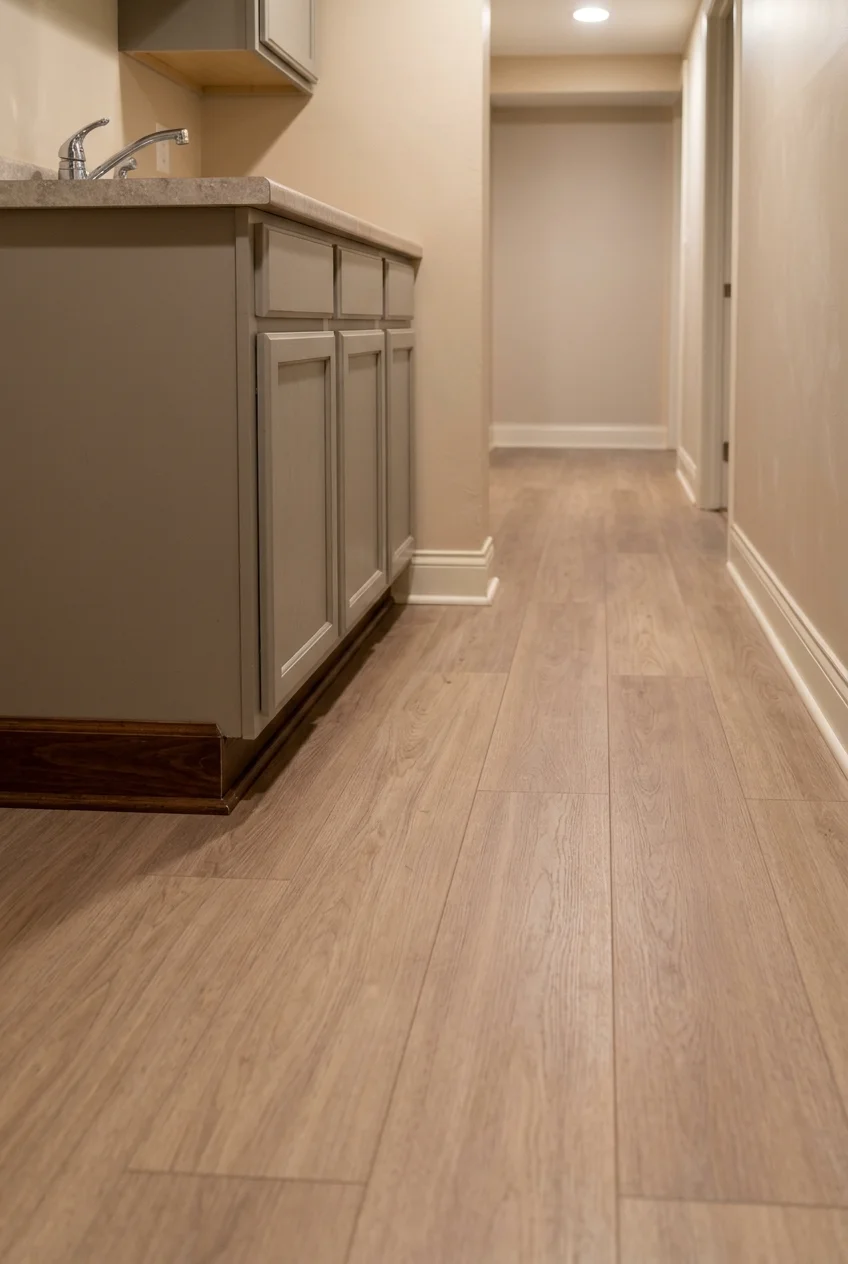
Use a flooring system specifically approved for the basement slab and the conditions there. Check the product’s moisture testing and preparation requirements before choosing the finish.
Have recurring seepage or dampness assessed and addressed before covering the slab. A surface that tolerates spills does not solve moisture coming from underneath or through walls.
Ask the installer how the required underlayment and flooring thickness change appliance openings, toe kicks, and the transition to the adjoining room. Verify where fixed cabinets can sit.
Discuss repair access if a leak occurs later. Save the exact product information and spare pieces if your selected system can be repaired in individual sections.
These kitchen renovation ideas offer more ways to coordinate cabinet installation, floor transitions, and appliance openings before buying materials for a short basement run.
Practical tip If the basement will become occupied space, test it for radon before finishing the floor and walls. Address any elevated result as part of the remodel.
42. Add a Short Backsplash Where the Sink Gets Wet
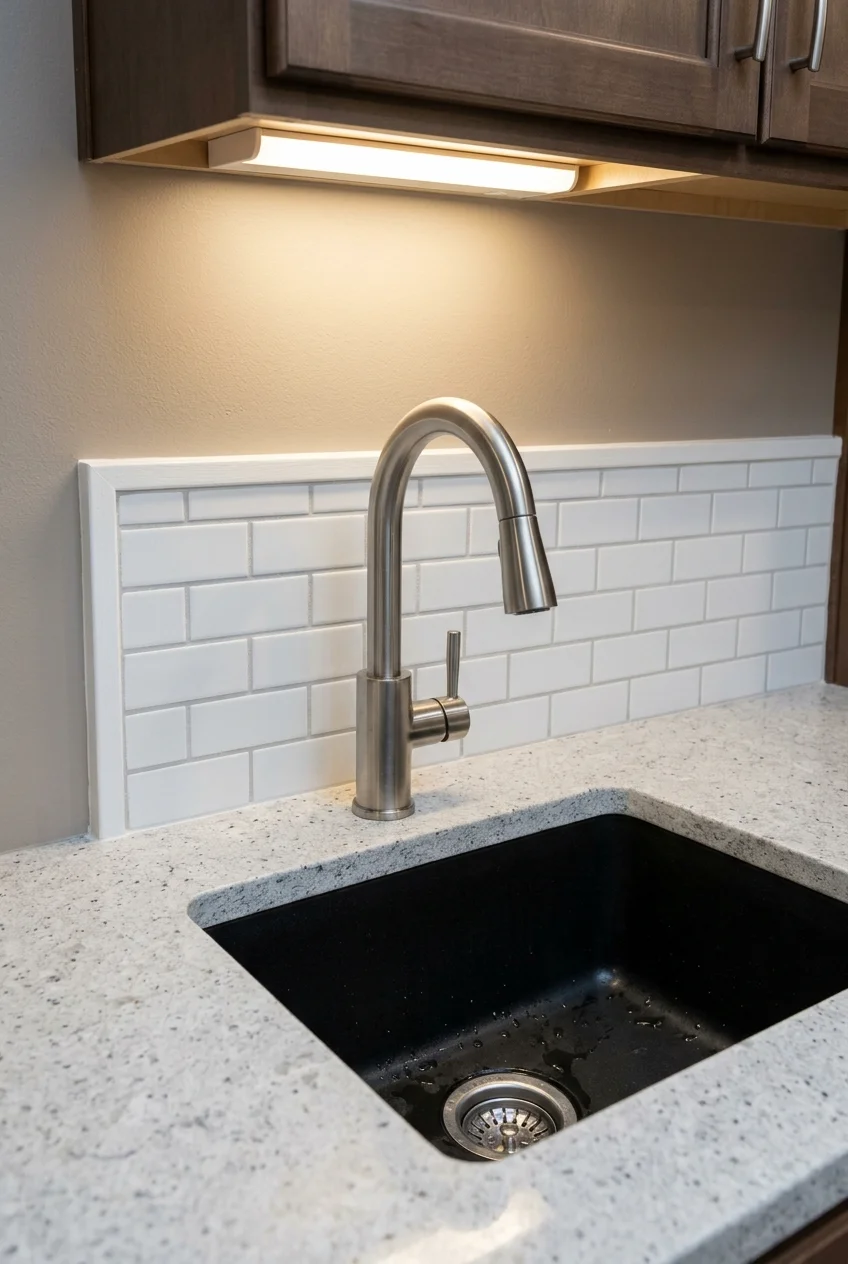
A compact backsplash can protect the wall behind a wet-bar sink without finishing the entire wall. Decide where its top edge and side edges should stop.
Check the faucet’s handle travel after the splash surface is added. Choose an edge detail and counter joint that the installer can finish neatly and you can clean.
If an adjoining sidewall regularly catches water, include that return in the plan. A faucet that reaches well into the bowl may also help limit splashing.
43. Choose a Laminate Worktop for a Mostly Dry Station
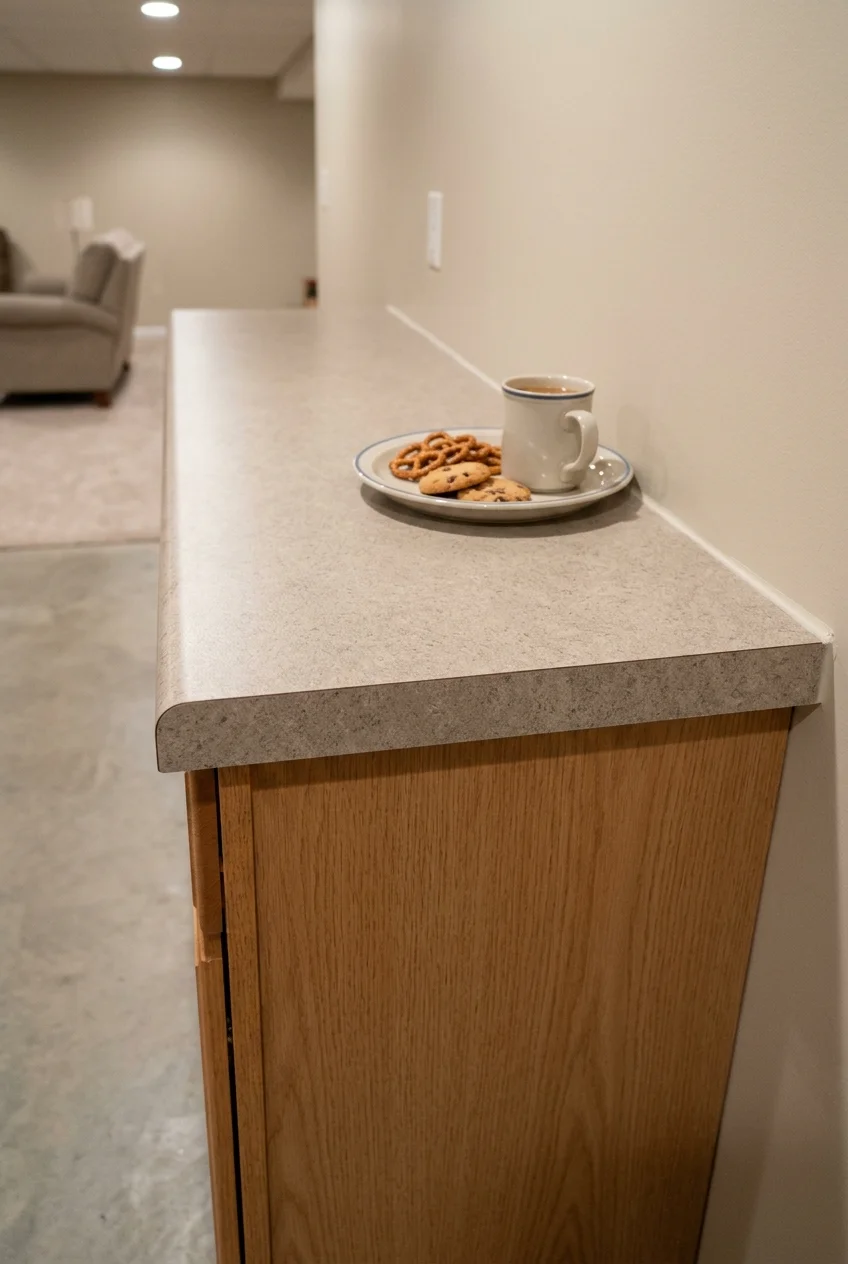
Laminate can give a dry snack counter a straightforward finished top. Compare available stock lengths and check the installed projection over drawer pulls and nearby doors.
Plan the end finish where the counter is visible from the rec room. Follow the product’s instructions for keeping joints dry and using protection under hot appliances.
If you add a sink, confirm that its mounting method and the counter are compatible. Ask how the installation will protect the cutout and exposed seams.
44. Reuse Sound Base Cabinets With New Fronts
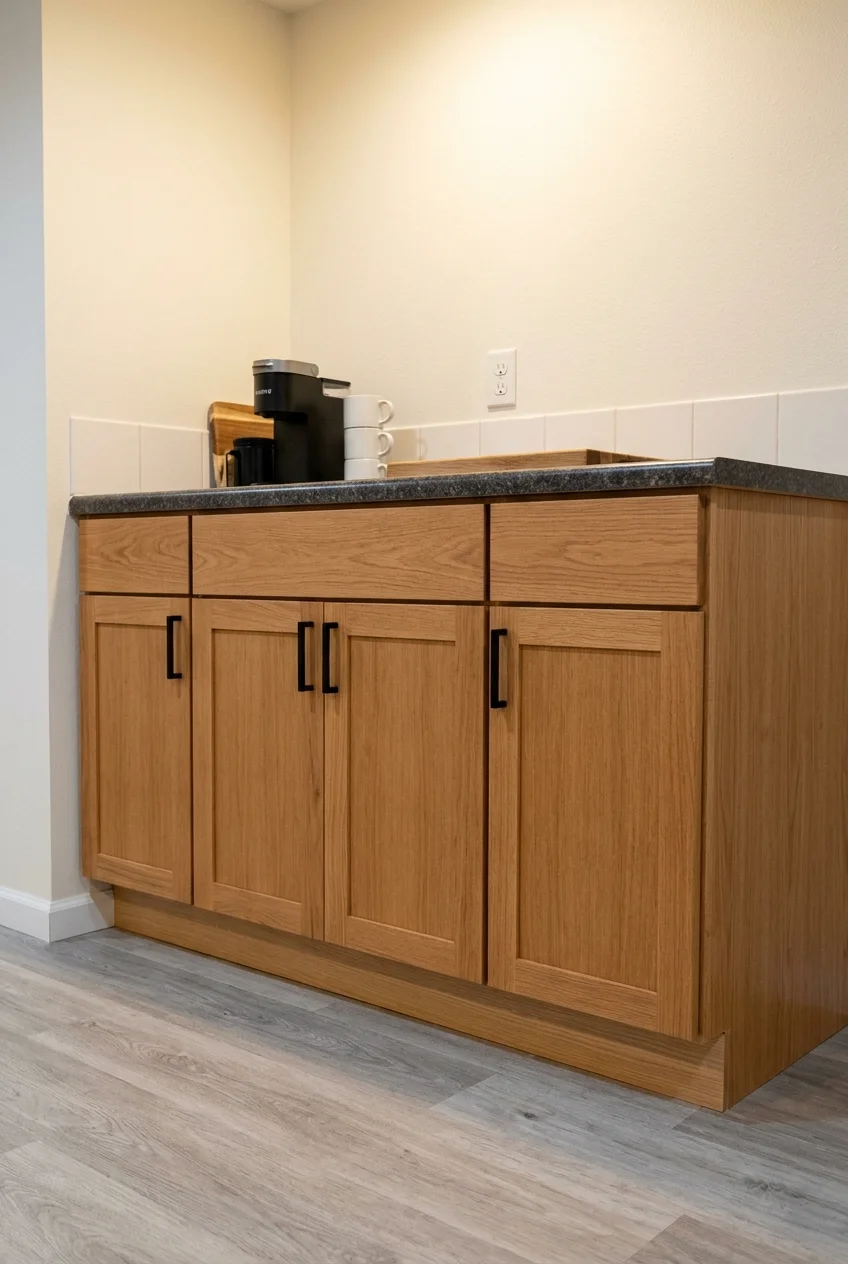
New doors can refresh an existing kitchenette when the cabinet boxes fit the room and are still square and dry. Check the sink base and floor edges first.
Confirm door overlay, hinge locations, and clearances with the supplier. Include finished ends if an old box remains visible from the main basement seating area.
Keep the layout if it already works for prep and traffic. If you want to move the sink or add appliances, check the cabinet sizes before refacing.
45. Use a Replaceable Toe Kick Along the Wet Side
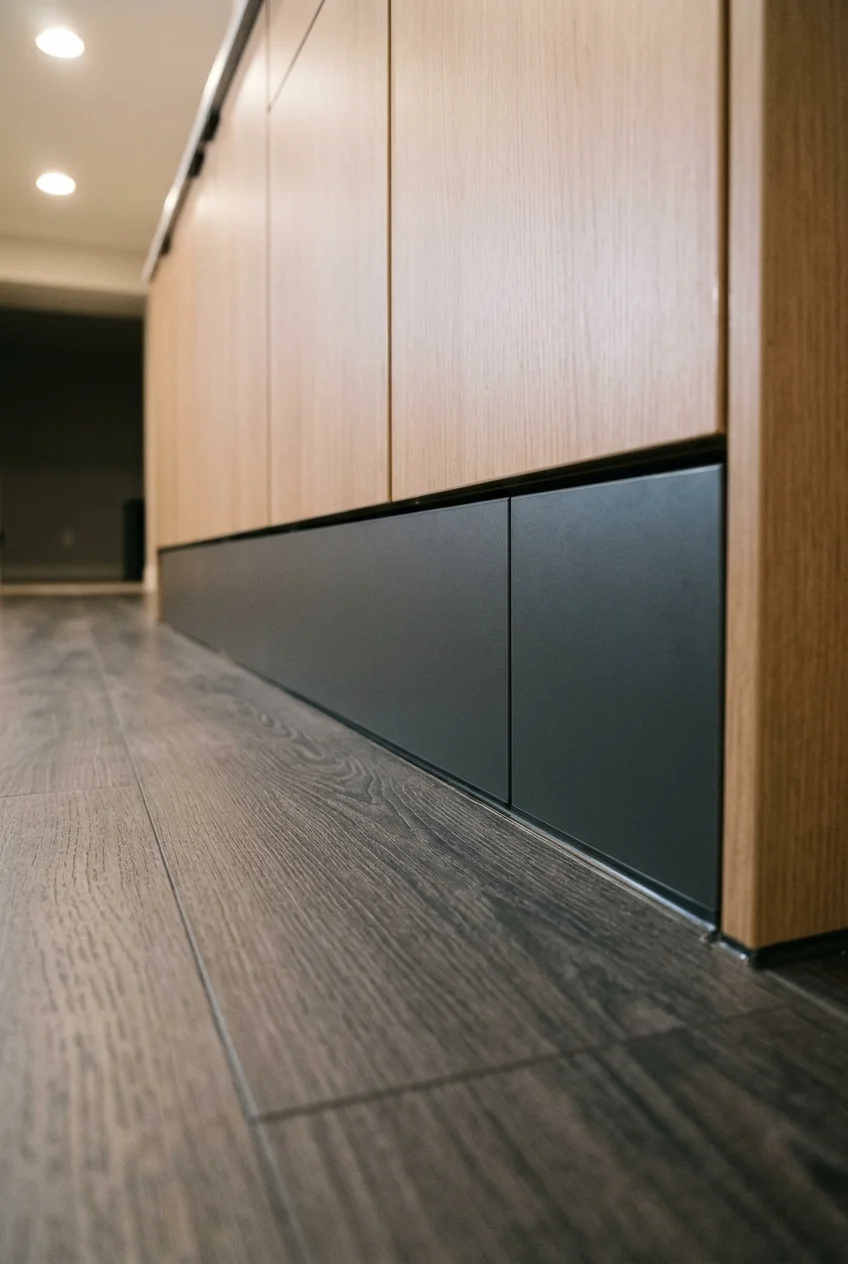
A replaceable toe-kick panel gives the sink run a clean finish and can simplify repair after ordinary wear. Ask what the cabinet system supports before choosing a material.
Keep any appliance grilles open as specified. Leave removable sections where the cabinet or appliance maker requires access, and address leaks promptly if they occur.
46. Put Task Light Directly Over the Worktop
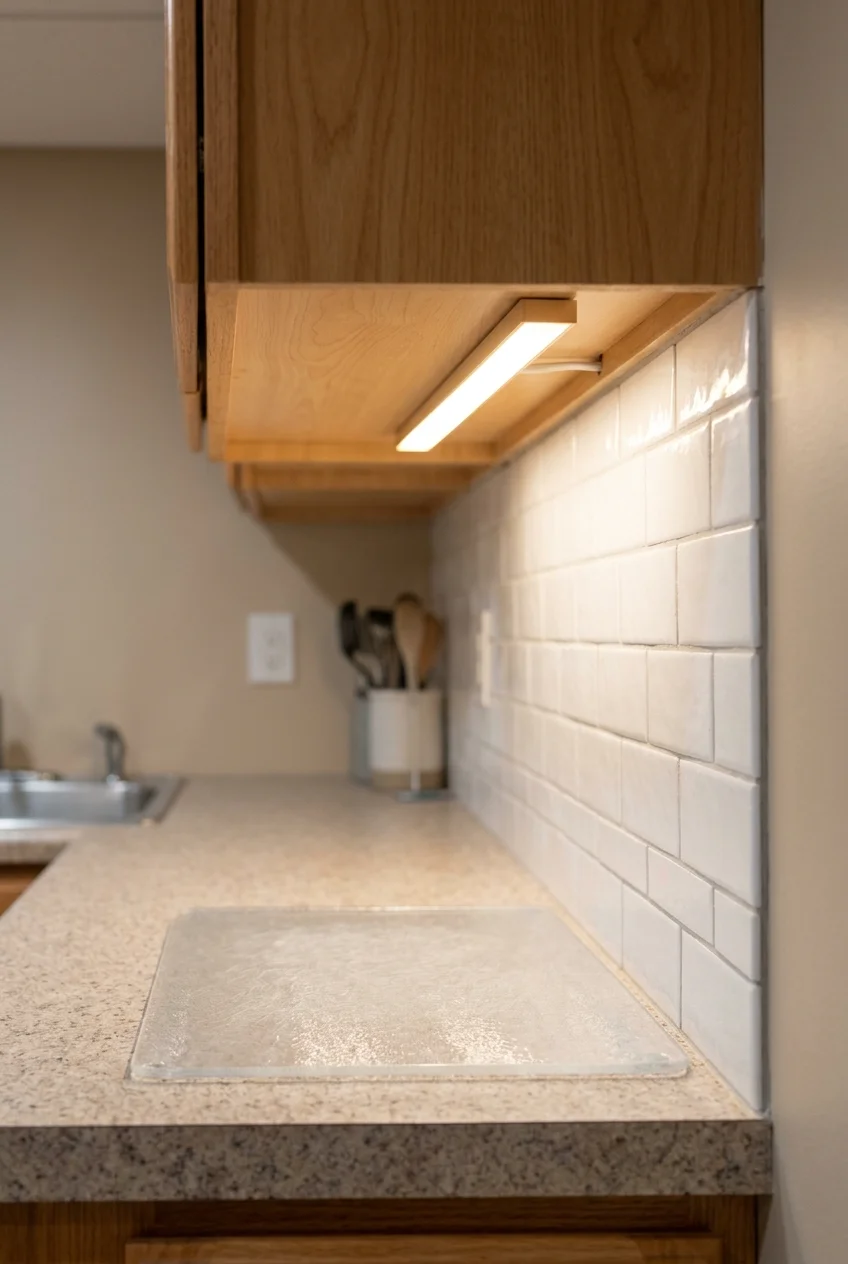
An undercabinet fixture can light food prep without throwing your own shadow over the counter. Test its position on the cabinet underside before settling on a mounting line.
Have the installer check the visible glare from seated positions in the rec room. A diffuser or front edge detail can soften a distracting view of the light source.
Leave the switching convenient to the work surface. Try the circuit by itself and with the room lights on to see how the counter will look at night.
47. Use Low-Profile Ceiling Fixtures Where Headroom Is Tight
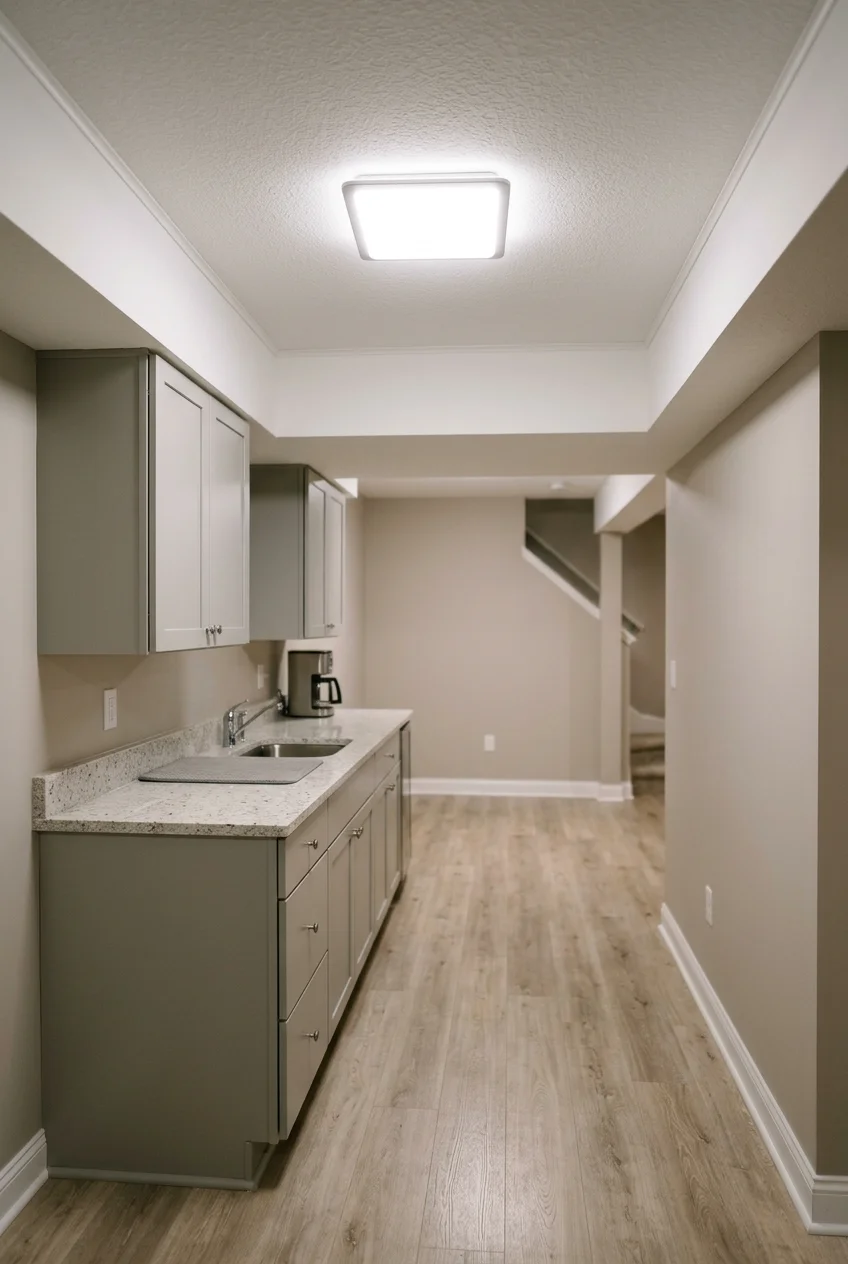
A low-profile ceiling fixture can spread light in a basement without occupying headroom like a hanging pendant. Locate it over the path and main work zone.
Look at the fixture from the basement seating area before deciding on brightness. A diffused lens can make the light more comfortable at an ordinary viewing angle.
Have an electrician verify the ceiling installation and fixture suitability. Coordinate its position with joists, ductwork, and existing access points while changes are still easy to make.
48. Light the Cabinet Base for Late-Night Trips
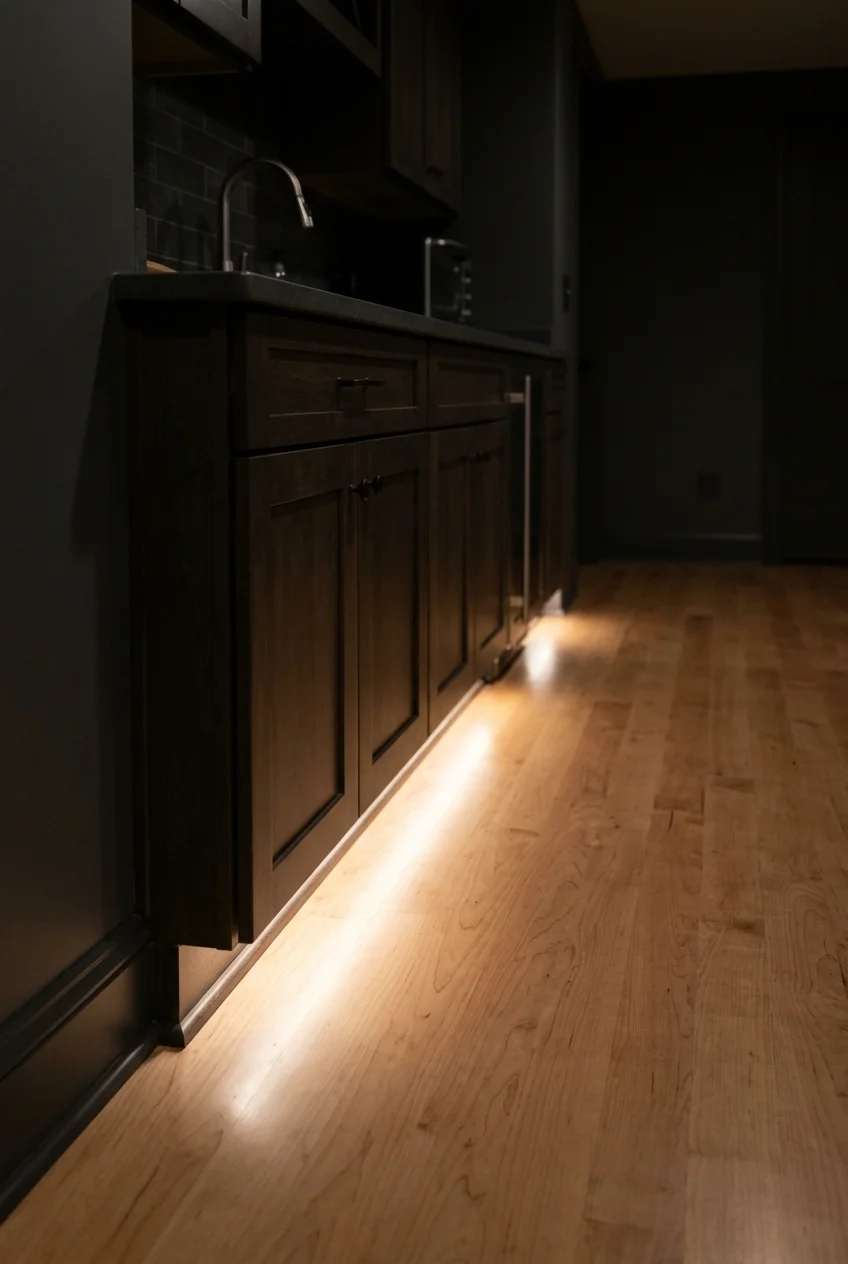
Low lighting at the cabinet base can make the route to the counter easier to see at night. Keep it separate from the brighter prep lighting.
Choose a protected fixture suited to the mounting location and check for glare at floor level. Have the installer include a simple way to switch it off.
49. Give the Kitchenette Its Own Lighting Control Beside the Media Room
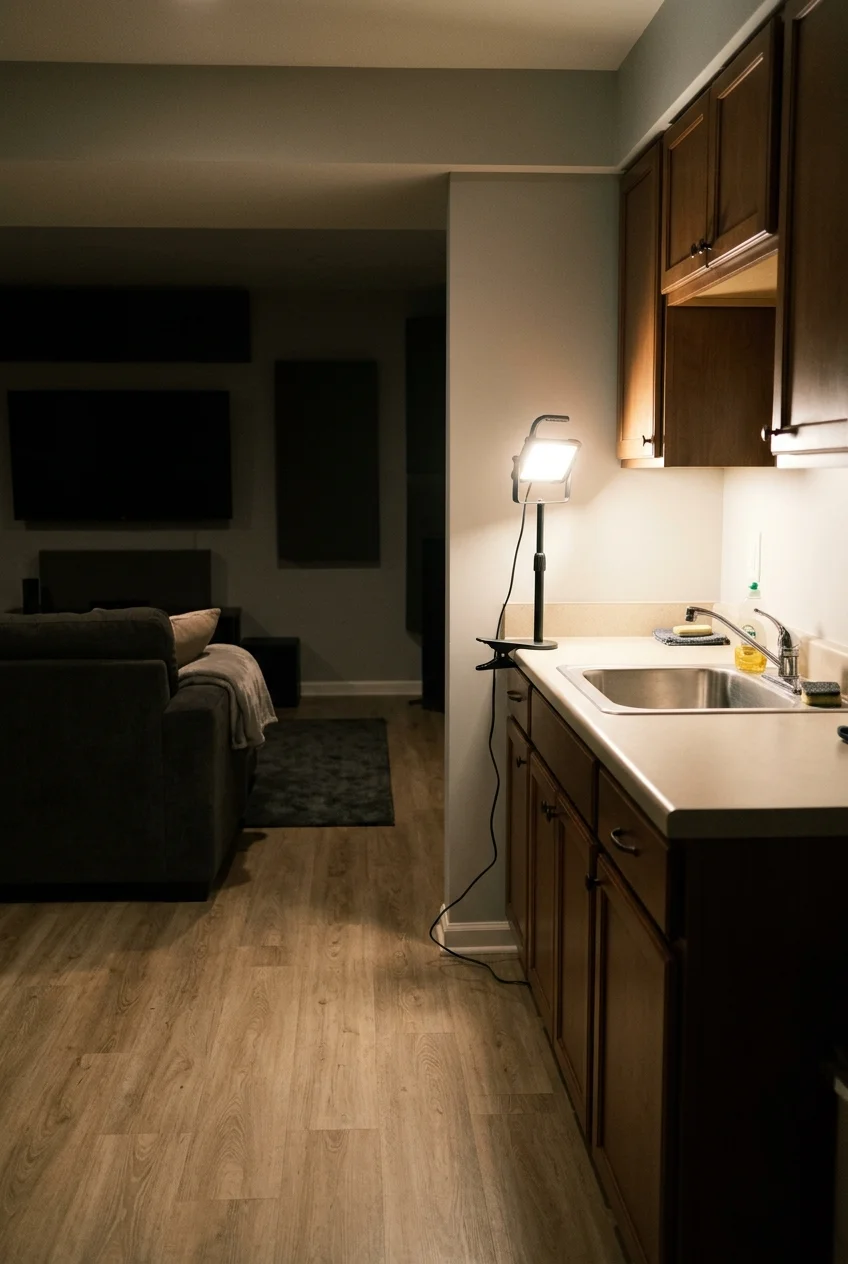
Put the kitchenette on a separate lighting control when it shares a basement with a movie area. People can serve drinks while the seating zone stays dim.
Choose controllable fixtures that direct most light toward the work surface. Test the glare from the couch and check dimmer compatibility with the electrician if you use one.
50. Make the Flooring Transition at the Kitchenette Easy to Cross
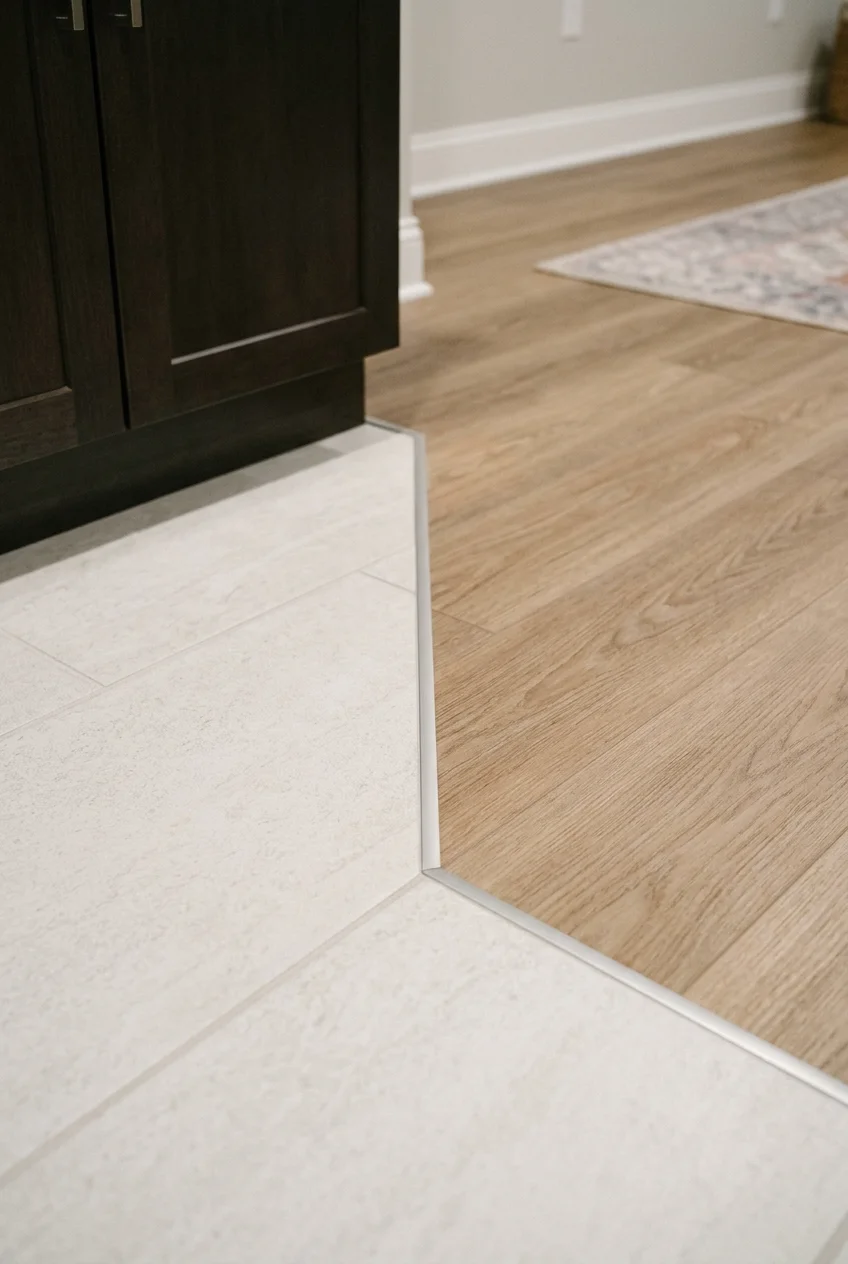
Plan a smooth flooring transition when the kitchenette meets a different basement finish. Compare the actual material thicknesses so the installer can handle the change at the edge.
Set the boundary away from the sink approach if the layout allows. Use a compatible finished transition and check where carts, stools, and appliance doors will travel.
Set Up the Kitchenette for Serving and Cleanup
Walk through a busy evening or an overnight visit from start to finish. Give food, drinks, and used dishes their own workable places in the room.
51. Fold Down a Serving Shelf for Larger Gatherings
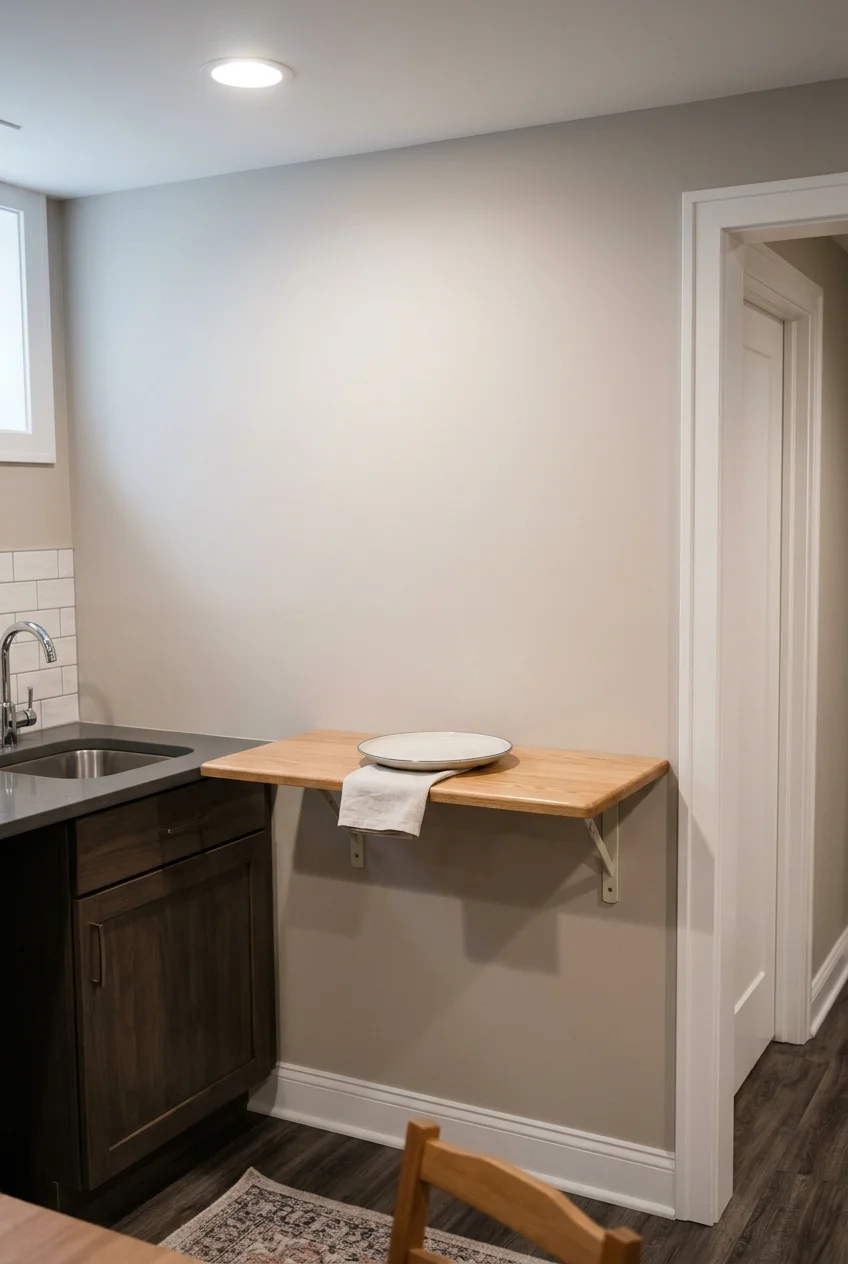
A wall-mounted fold-down shelf gives you a temporary serving surface when the main counter fills up. Choose a dry wall away from the stairs and primary aisle.
Mark the shelf when open and closed, including the supports. Check the mounting requirements and weight rating, then decide what you will actually put on it.
Keep hot appliances on their approved permanent surfaces. A plain fold-down shelf works well for plates and serving dishes that guests can lift without leaning.
52. Use a Rolling Serve Cart With a Real Parking Spot
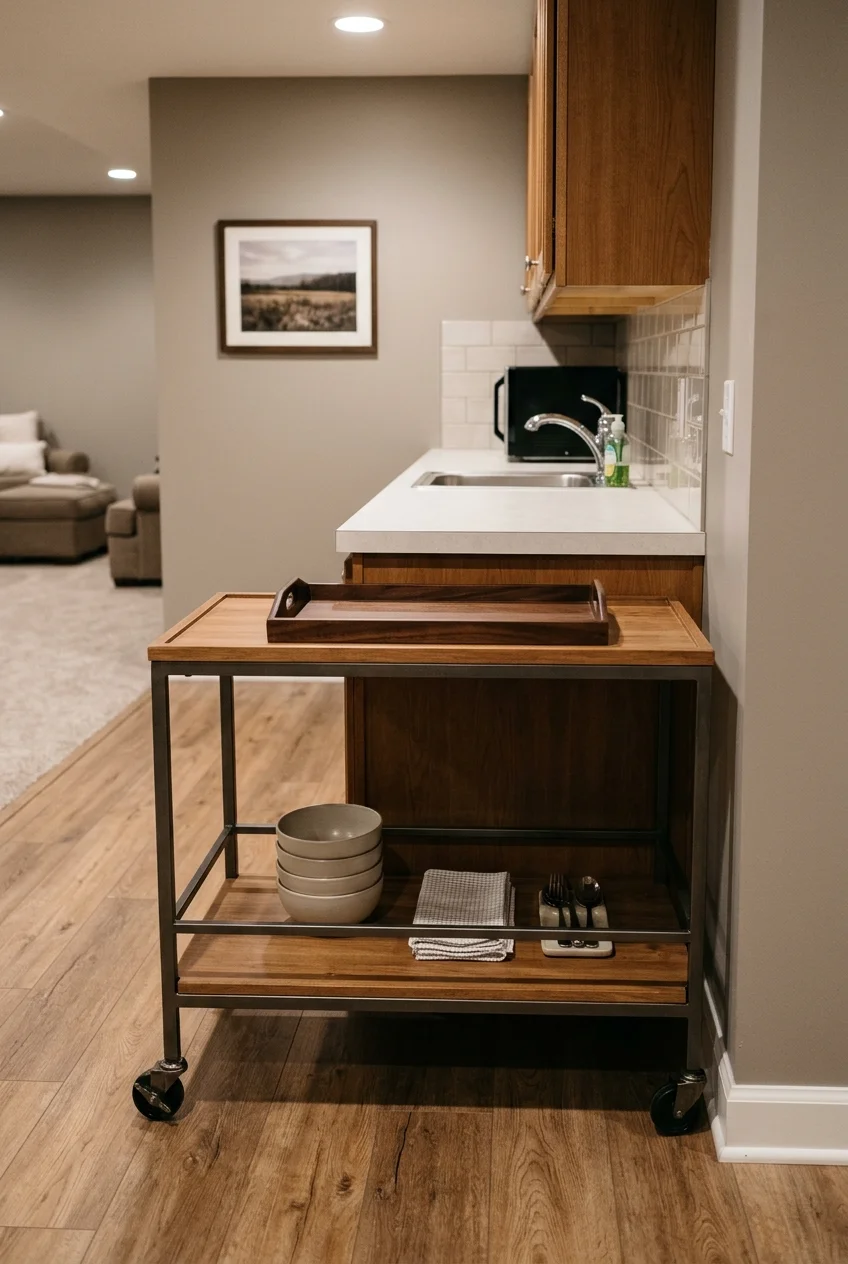
A serving cart can carry food from the kitchenette to the seating area in one trip. Choose one with a flat top and a grip you can reach.
Measure the turning route and plan where the cart will live afterward. Use the specified wheel locks when parked and keep its route away from basement steps.
53. Build One Seated-Height Prep Spot
Image pending: No image is attached to this draft for idea 53 (image-53).
A seated-height counter gives guests another way to make a snack or sort plates. Leave usable space for knees and feet under the part you intend to use.
Ask the intended users to try a temporary surface at the proposed height. Mark the reach to commonly used items and leave room to approach the counter.
Have the cabinet installer plan support without filling the knee area. Keep this section for cool prep and serving unless a qualified designer addresses the specific appliance layout.
54. Tuck Two Stools Under an Existing Counter Overhang
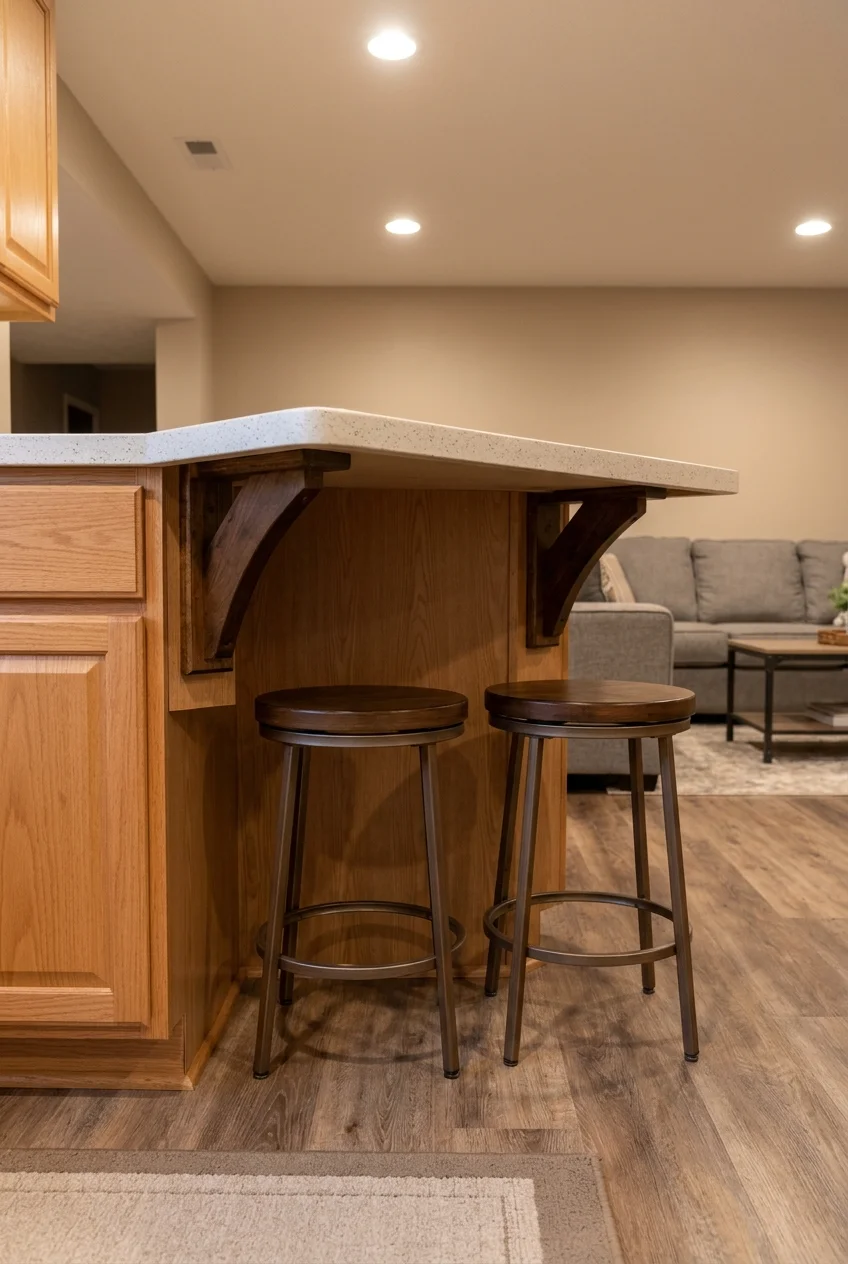
Two backless stools can work at a supported counter when they fit fully out of the walking route. Check the usable opening beneath the top before shopping.
Measure seat height against the underside of the counter, including brackets or trim. Test knee space and ensure a seated guest can get up without blocking the aisle.
If the aisle is tight even with stools tucked in, use the counter for serving. Put seats where the rec room already has room to approach them.
55. Keep a Roll-Up Drying Mat Next to a Small Sink
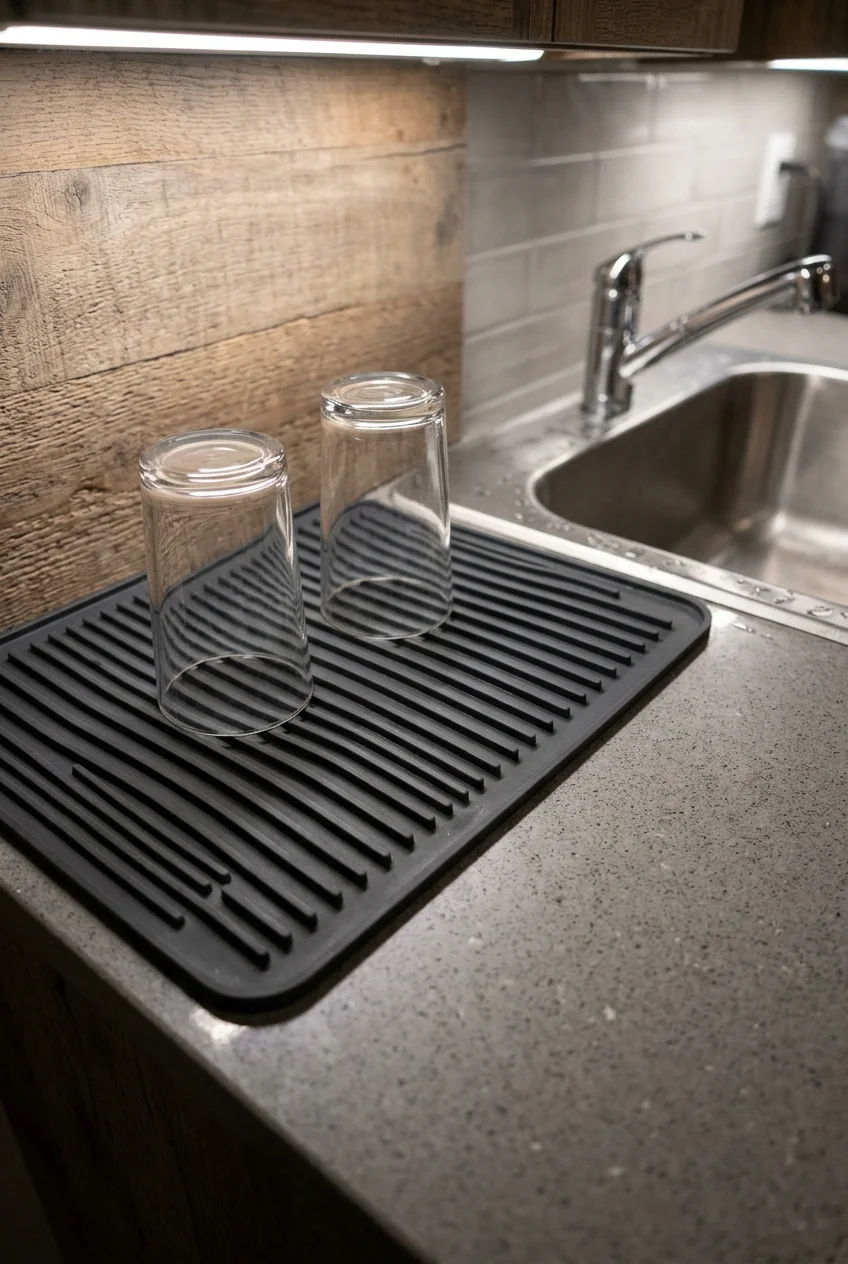
Use a roll-up drying mat when occasional handwashing needs a landing but you still want the counter clear for serving. Store it dry between uses.
The OXO large silicone drying mat rolls up for storage. Measure the flat counter beside the sink, including the space you need to keep available for prep.
56. Give Used Dishes a Washable Carry Bin
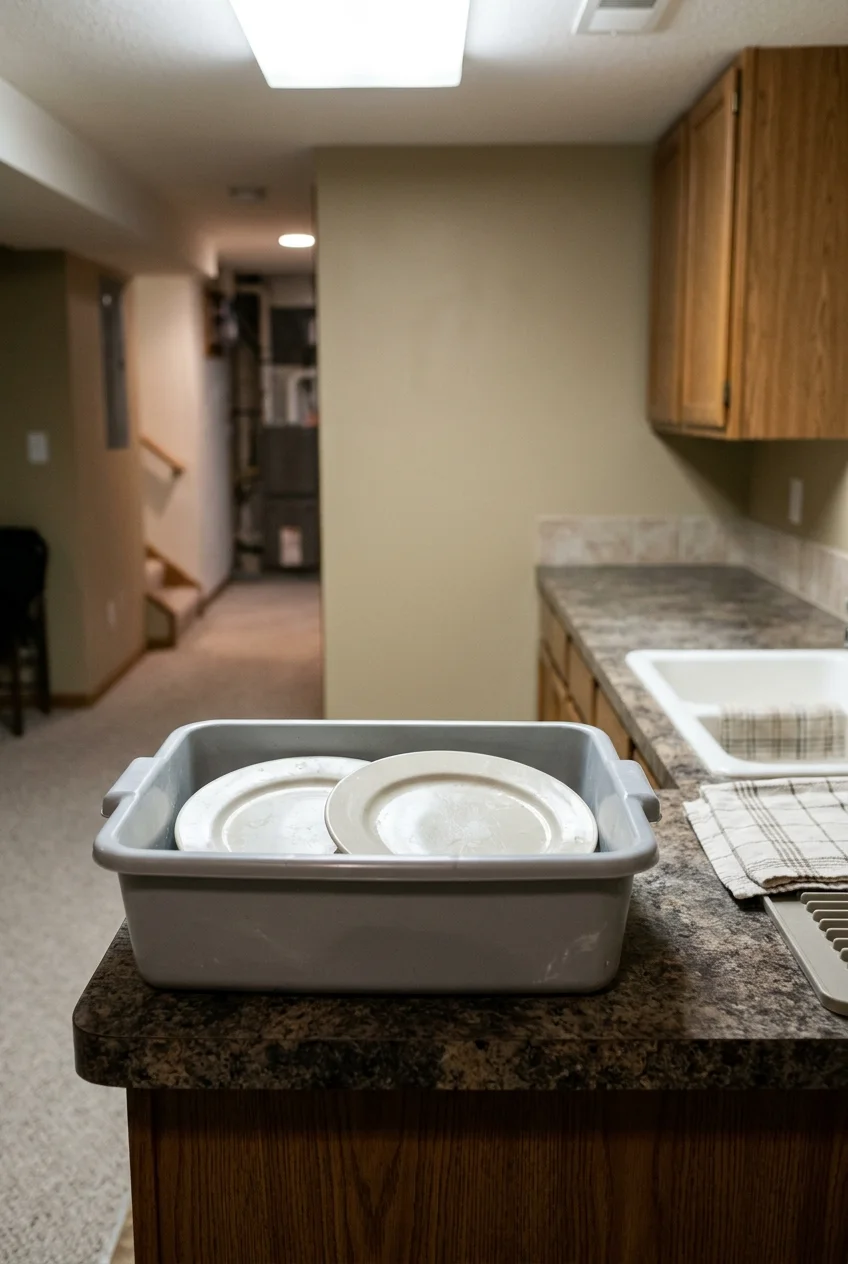
A shallow handled bin can collect dishes for an upstairs sink when the basement has no place to wash them. Park it on a stable counter end.
Choose a bin you can lift safely when loaded. Carry smaller loads if the route includes stairs, and avoid letting sharp utensils disappear beneath plates or mugs.
57. Put a Refillable Drink Dispenser at the Guest End
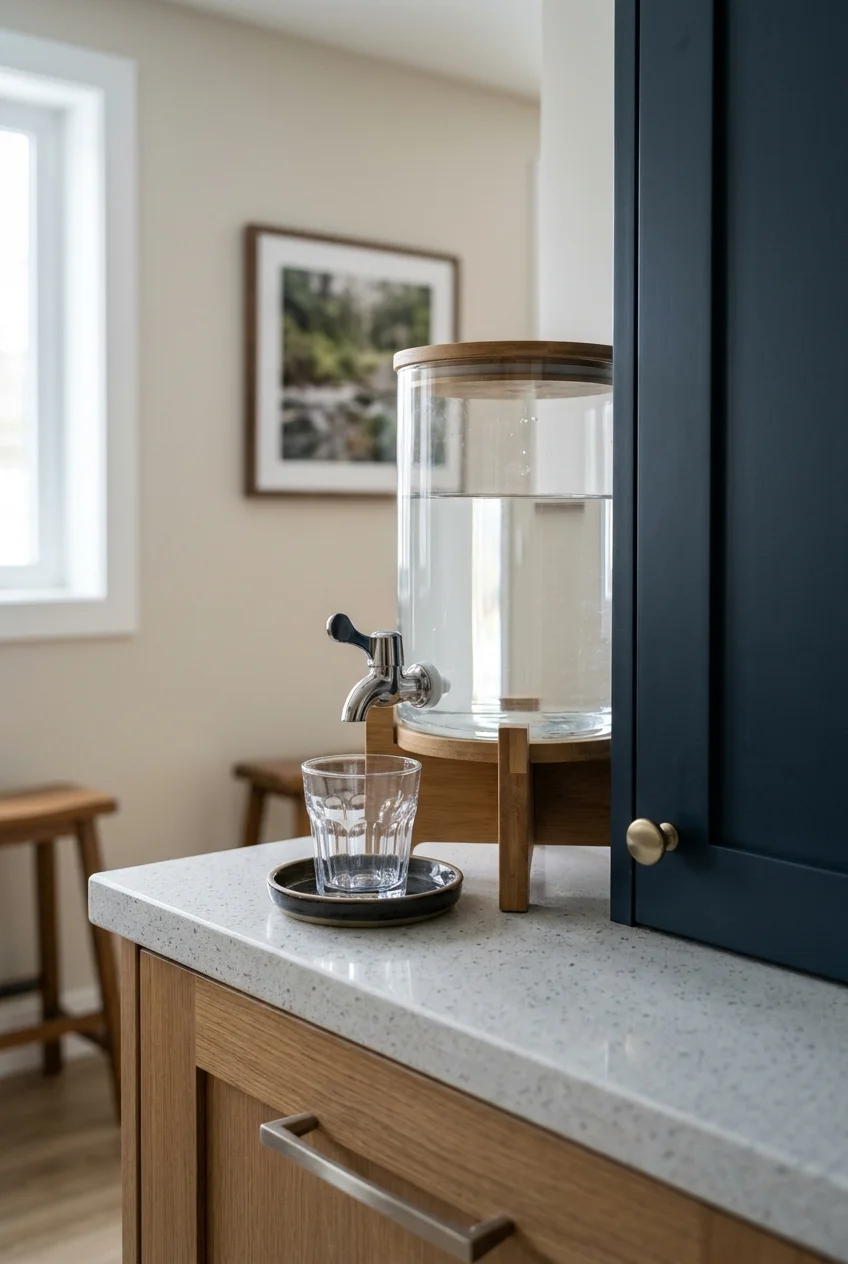
A refillable drink dispenser can move water pickup away from the sink during a gathering. Keep it on a stable, dry counter end with room for a cup.
Choose a size you can refill without carrying a heavy full vessel. Check where the spigot lands and keep the base fully supported behind the counter edge.
Use a low drip tray and follow the cleaning directions between gatherings. Set the dispenser where guests can reach it without passing behind someone who is prepping.
58. Lock Cleaning Supplies Away From Snacks
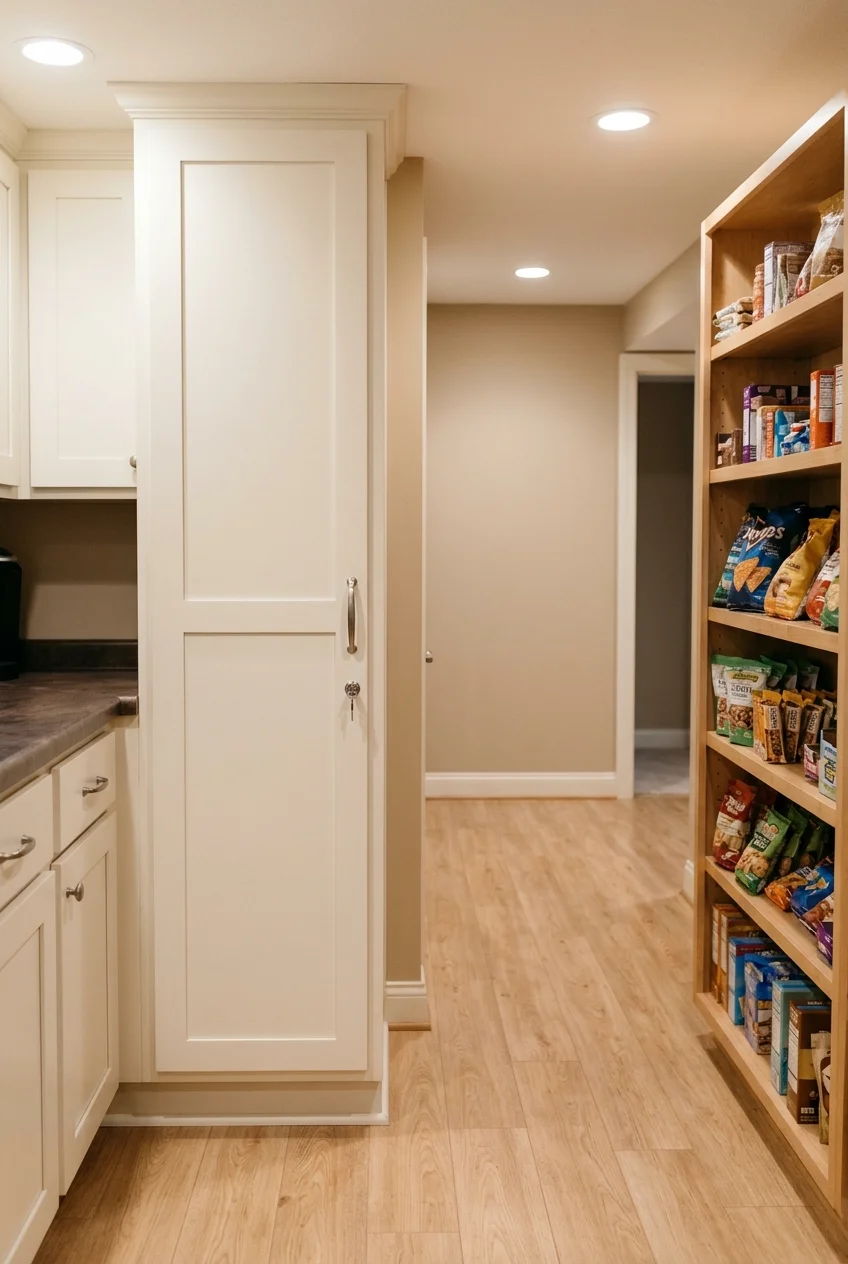
A lockable base cabinet gives cleaning supplies a dedicated home in a kitchenette used by children. Keep cleaners in their original containers and separate from food.
Choose a cabinet away from the snack area and kitchen linens. Check that the latch engages reliably and stores its key out of children’s reach if needed.
59. Open a Pass-Through to the Basement Rec Room
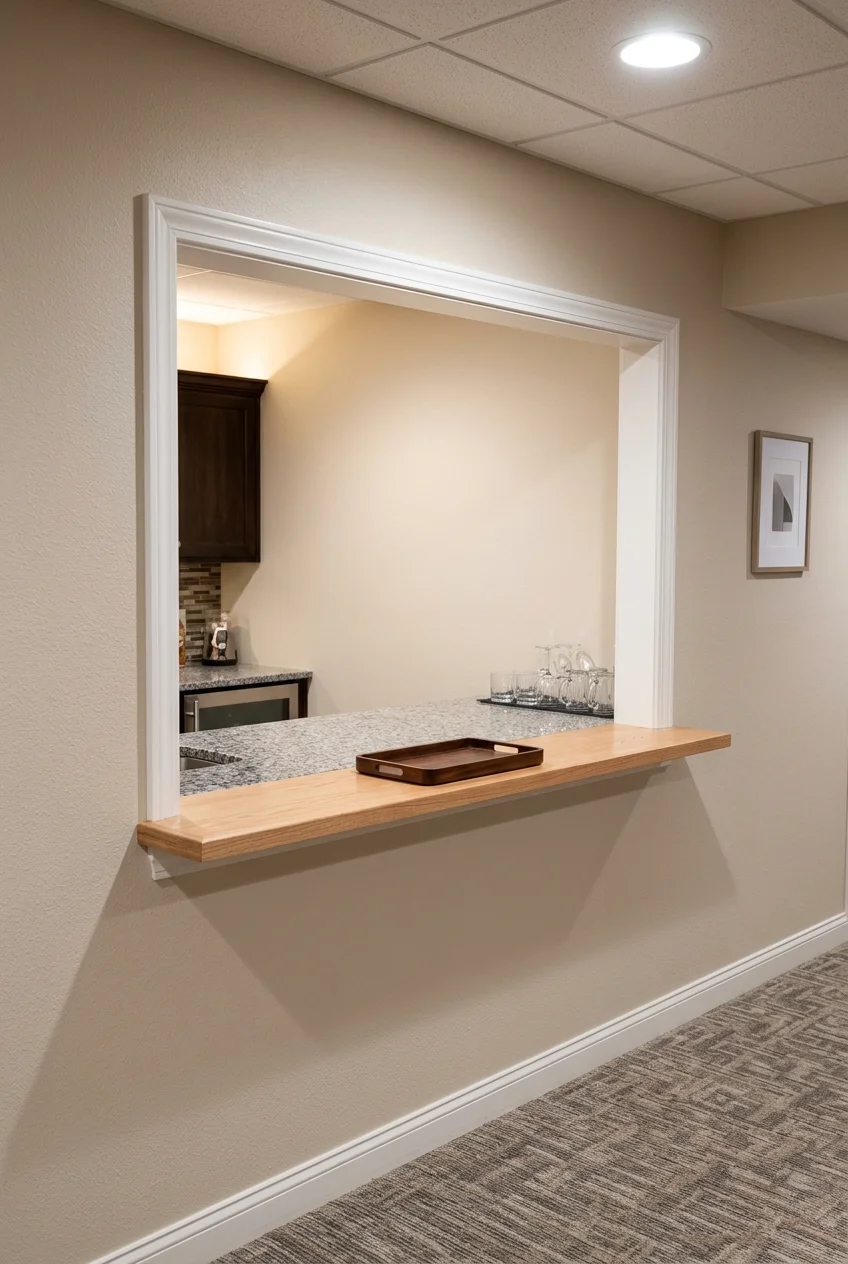
A pass-through can give the serving counter an opening onto the rec room while keeping most prep inside a separate kitchenette. First confirm what the wall contains.
Ask a contractor to look for structure, ducts, water lines, and wiring. Have them check whether a wall opening is allowed and whether any approvals are required.
Set the opening height and sill depth based on the trays you carry. Keep enough counter inside the kitchen to land a platter before handing it across.
Decide how both faces of the opening will finish. Check light direction from the sofa and plan support for any projection before ordering the finished serving ledge.
Mark where guests stand on the rec-room side. Keep that spot clear of the main circulation route so a line for drinks can form without blocking the stairs.
If the opening faces a television, check the view with the counter lights on. A lower-glare fixture can make the ledge easier to use during movies.
60. Screen a Separate Kitchenette With a Pocket Door
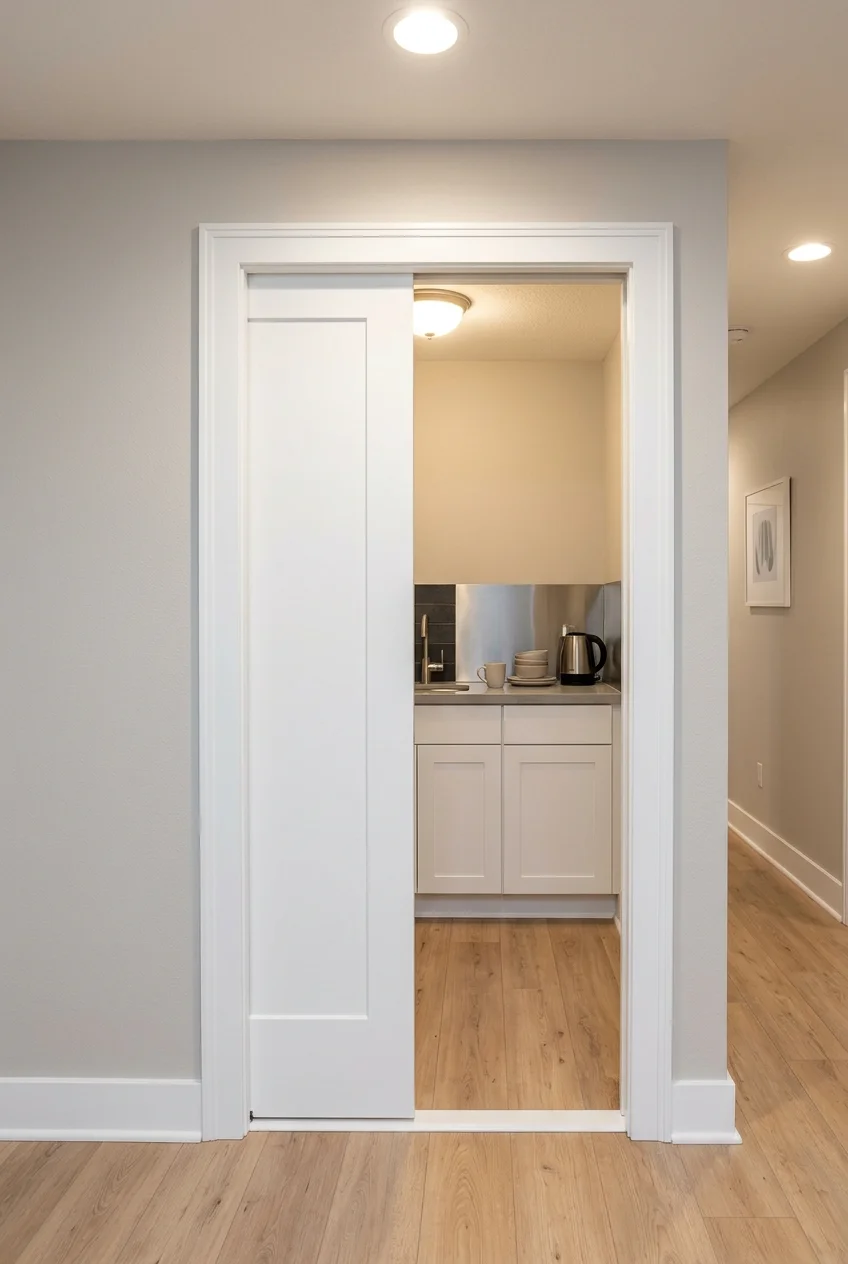
A pocket door can close off an adjoining kitchenette when you want to screen cleanup from the rec room. Use it at a real doorway with usable clearance.
Have a contractor verify the pocket wall and anything that would need to move, including plumbing or wiring. Confirm how the door affects required ventilation and access.
Check the finished opening against appliance removal and the usual route for serving trays. Use a comfortable pull you can grip, with a clear landing on both sides.
Ask the designer to account for the door in the ventilation plan. Keep switches and controls reachable so you can enter and use the room easily.
Plan hardware access with the installer before closing the pocket wall. Ask how a worn roller would be adjusted or replaced after the painted casing goes on.
Frequently Asked Questions
Does a basement kitchenette need a sink?
A sink helps when people regularly rinse cups, wash dishes, or prep food. For occasional snacks, a dry counter with a dish bin may cover the routine.
Ask a plumber to check the drain elevation before you plan the sink cabinet. Then compare installation and service costs with carrying dishes to the main kitchen.
Can I put a regular compact fridge under the counter?
Check the installation manual for the exact fridge. A freestanding model can need air space that tightly fitted cabinetry removes, even when the unit fits the opening.
Choose a model approved for the enclosure. If it will store perishable food, use a fridge thermometer to verify it holds food at 40°F or below.
When should I ask the building office about permits?
Ask before buying fixtures or starting demolition if you plan new plumbing, electrical work, ventilation, or cooking equipment. Bring a floor plan and your proposed appliance list.
Describe how the basement will be used, especially if it could become a separate dwelling. Ask which approvals and inspections apply to that exact plan.