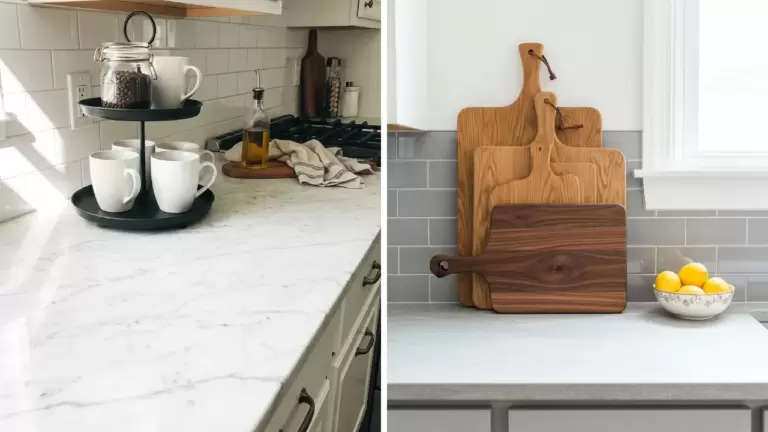
53 Kitchen Renovation Ideas

This post may contain affiliate links: full affiliate disclosure.
Kitchen renovation ideas are useful only when they solve the room you have. Start with measured workflow, appliance clearances, storage inventory, plumbing, wiring, ventilation, and a budget reserve before choosing finishes.
Research produced 82 credible candidates across layout, storage, accessibility, appliances, surfaces, lighting, building systems, small spaces, household routines, and sequencing. The final 53 solve meaningfully different renovation problems; weaker finish swaps and overlapping mechanisms were removed.
How to Plan a Kitchen Renovation
Use this list to build a scope, then verify dimensions and code requirements with the appropriate local professionals. Hidden work deserves priority because it is expensive to revisit after cabinets, counters, and tile are installed.
Layout and Workflow Renovation Ideas
Begin with how groceries, dishes, people, and hot pans move through the room. A measured plan can improve the kitchen more than an expensive finish applied to the same bottlenecks.
1. Set the Island Around a Real Work Aisle
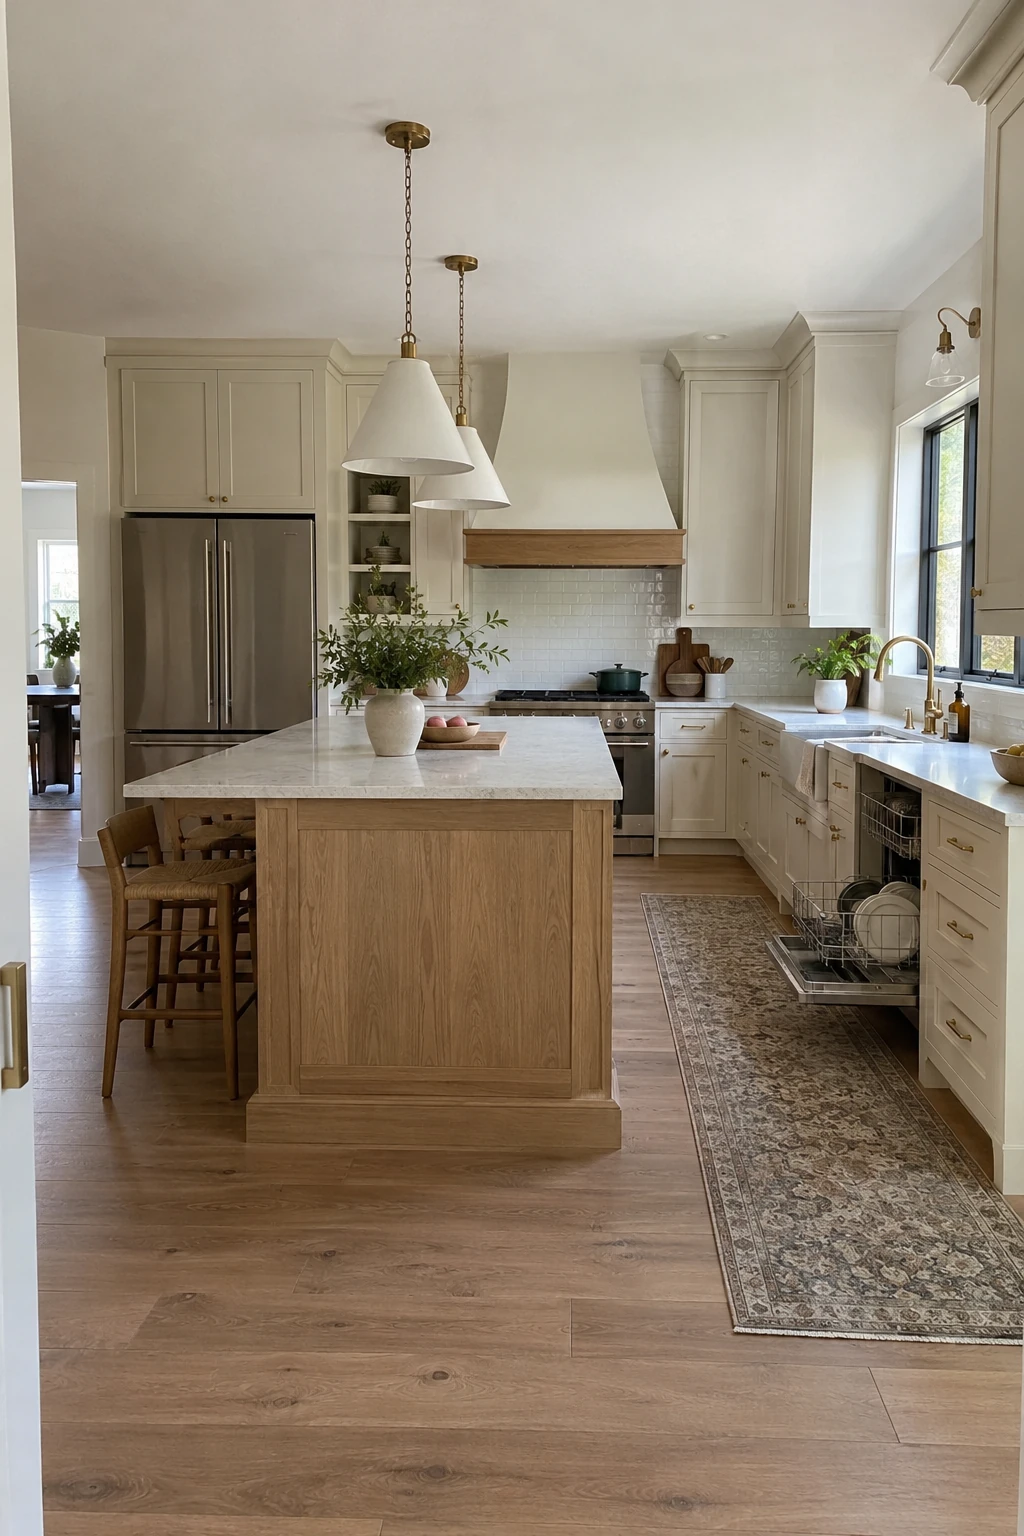
Size the island after marking cabinet and appliance depths on the floor. A useful island leaves room for open doors, a cook at the counter, and someone passing without turning sideways.
NKBA guidance commonly starts around 42 inches for one cook and 48 inches for multiple cooks, but handles and appliance doors change the usable gap. Measure from finished fronts, not the wall behind them.
Planning check: Pause after the measured mockup and verify clearances before fabrication.
If the room cannot support those clearances, shorten the island or use a narrow worktable. More floor area often improves prep and cleanup more than one extra cabinet.
Finalize seating only after the work side functions. Stools should tuck in fully and remain outside the main refrigerator-to-sink path.
Shop the Bosch laser measure on Amazon
2. Move the Refrigerator to the Traffic Edge
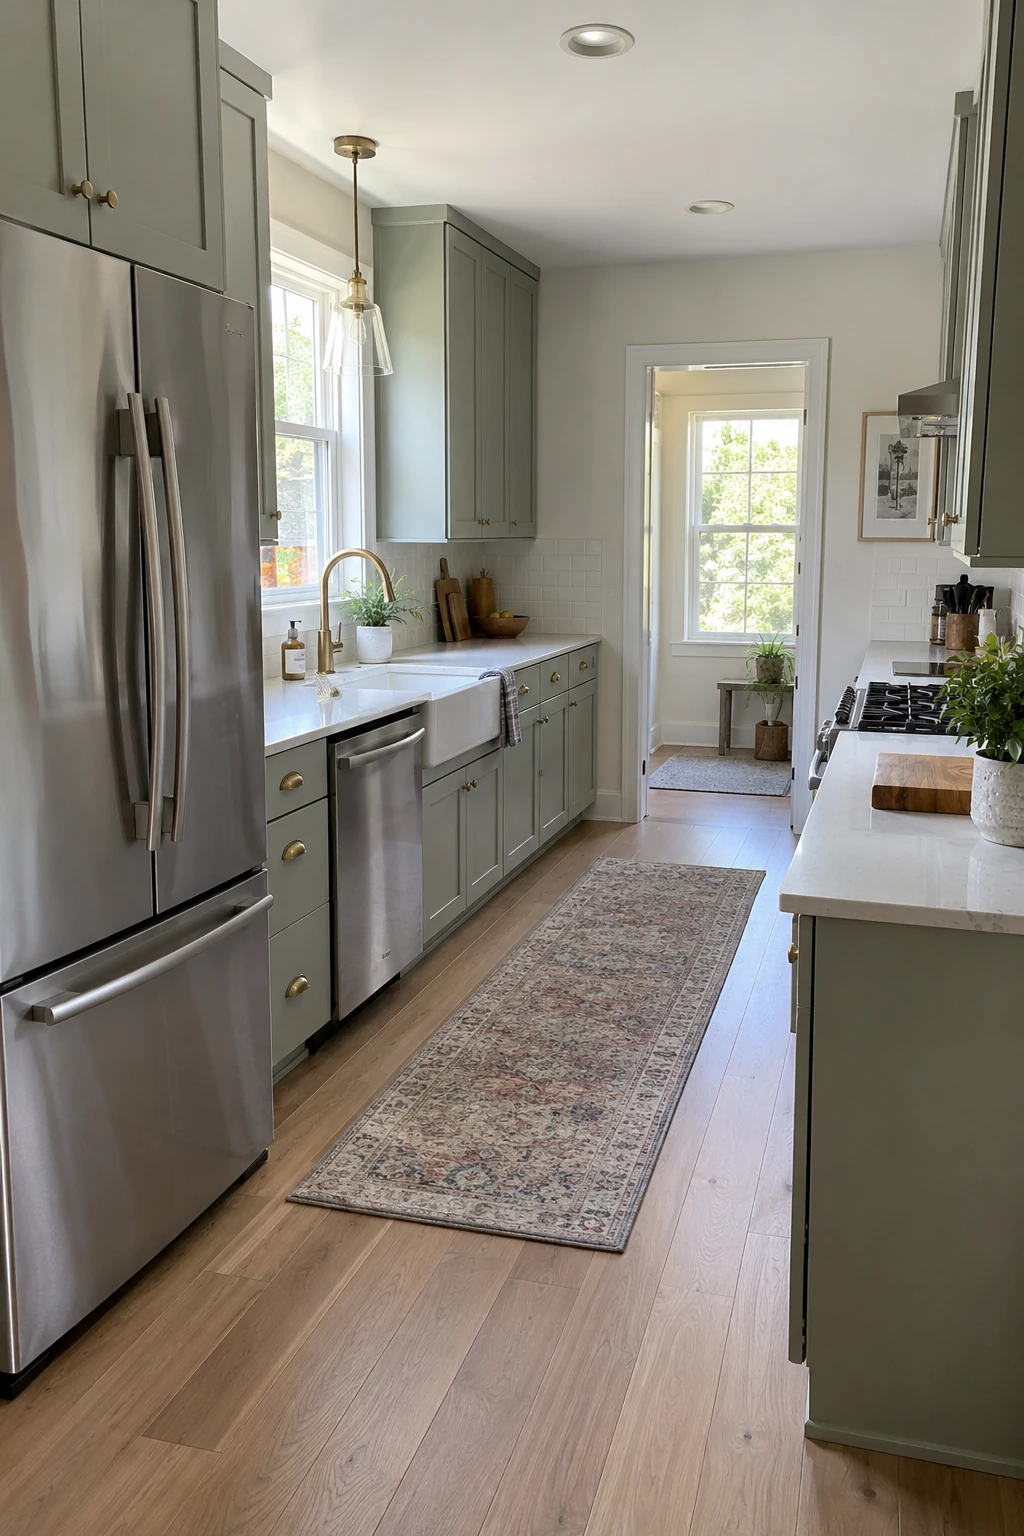
Place the refrigerator where family members can reach drinks and snacks without crossing the main prep zone. The end of a cabinet run often works better than the center of the work triangle.
Provide landing counter near the latch side and confirm the door can open past 90 degrees for drawer removal. A counter-depth model reduces projection but still needs ventilation clearances from its manual.
Check the delivery route before committing to panel depths. Doorways, turns, and island spacing can block a large appliance long after the cabinetry is fixed.
3. Build a Prep Zone Beside the Sink
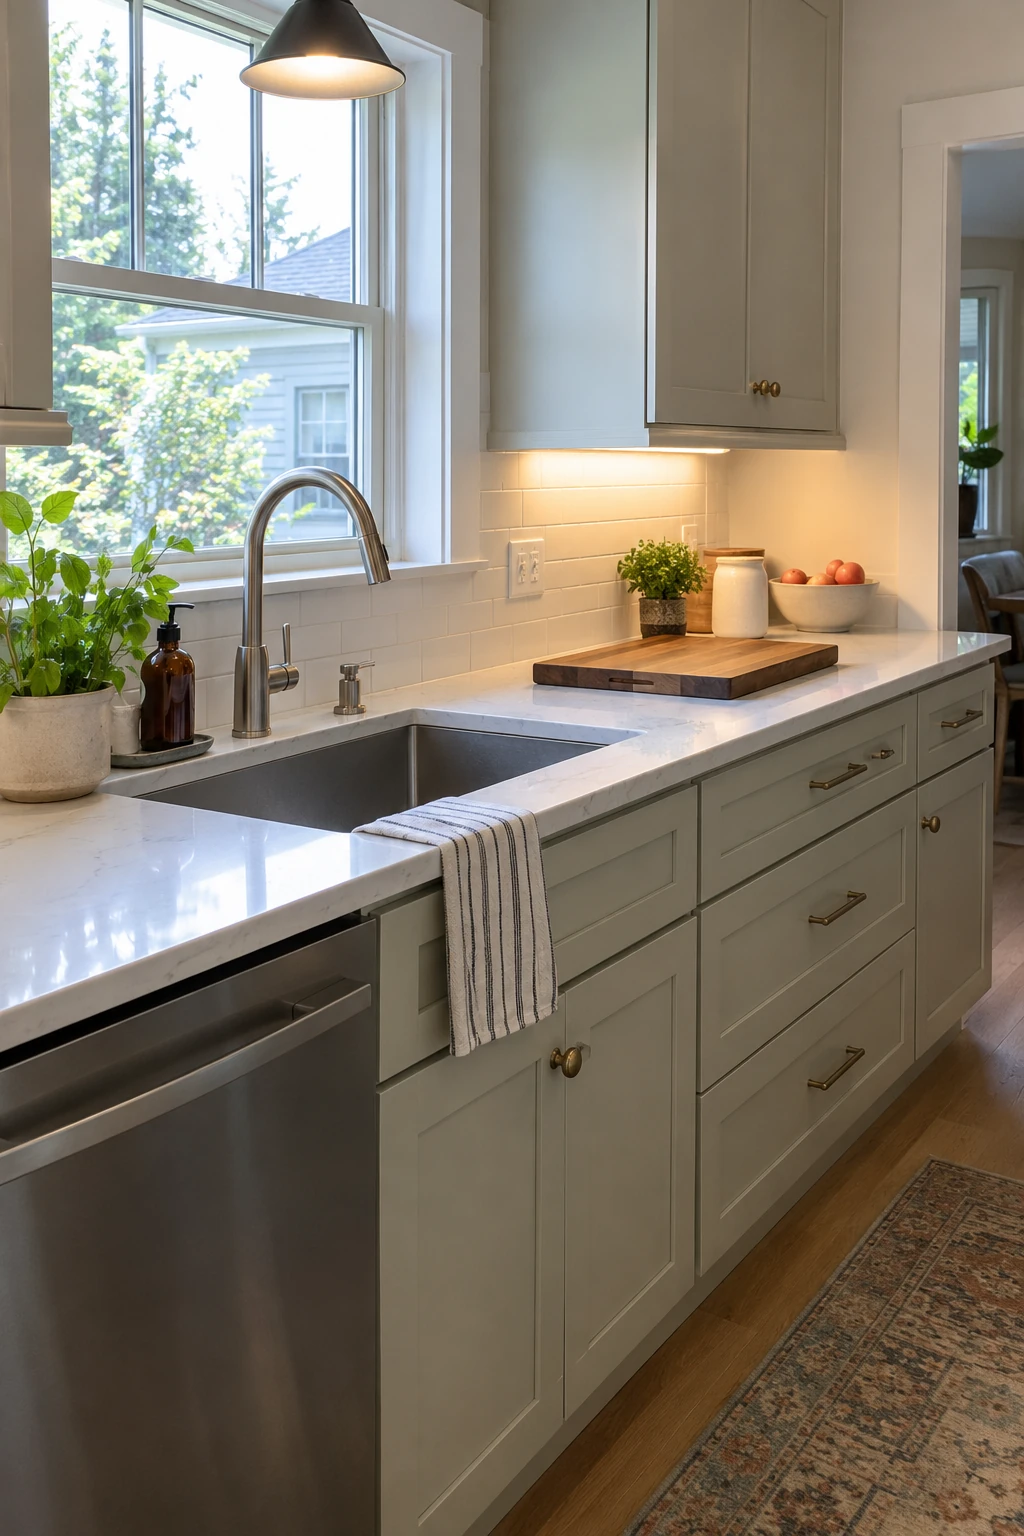
Reserve the longest uninterrupted counter beside the sink for chopping and mixing. Keep the trash pullout, knives, bowls, and everyday utensils below this zone so cleanup takes fewer steps.
Avoid dropping a tall appliance or pantry cabinet into the middle of the run. Even a beautiful layout feels cramped when the main work surface is split into several narrow pieces.
Coordinate sink size with usable counter rather than choosing the largest basin that fits the cabinet. A compact workstation sink can recover surface in a small kitchen when its accessories are genuinely useful.
4. Replace a Blocking Peninsula With an Island
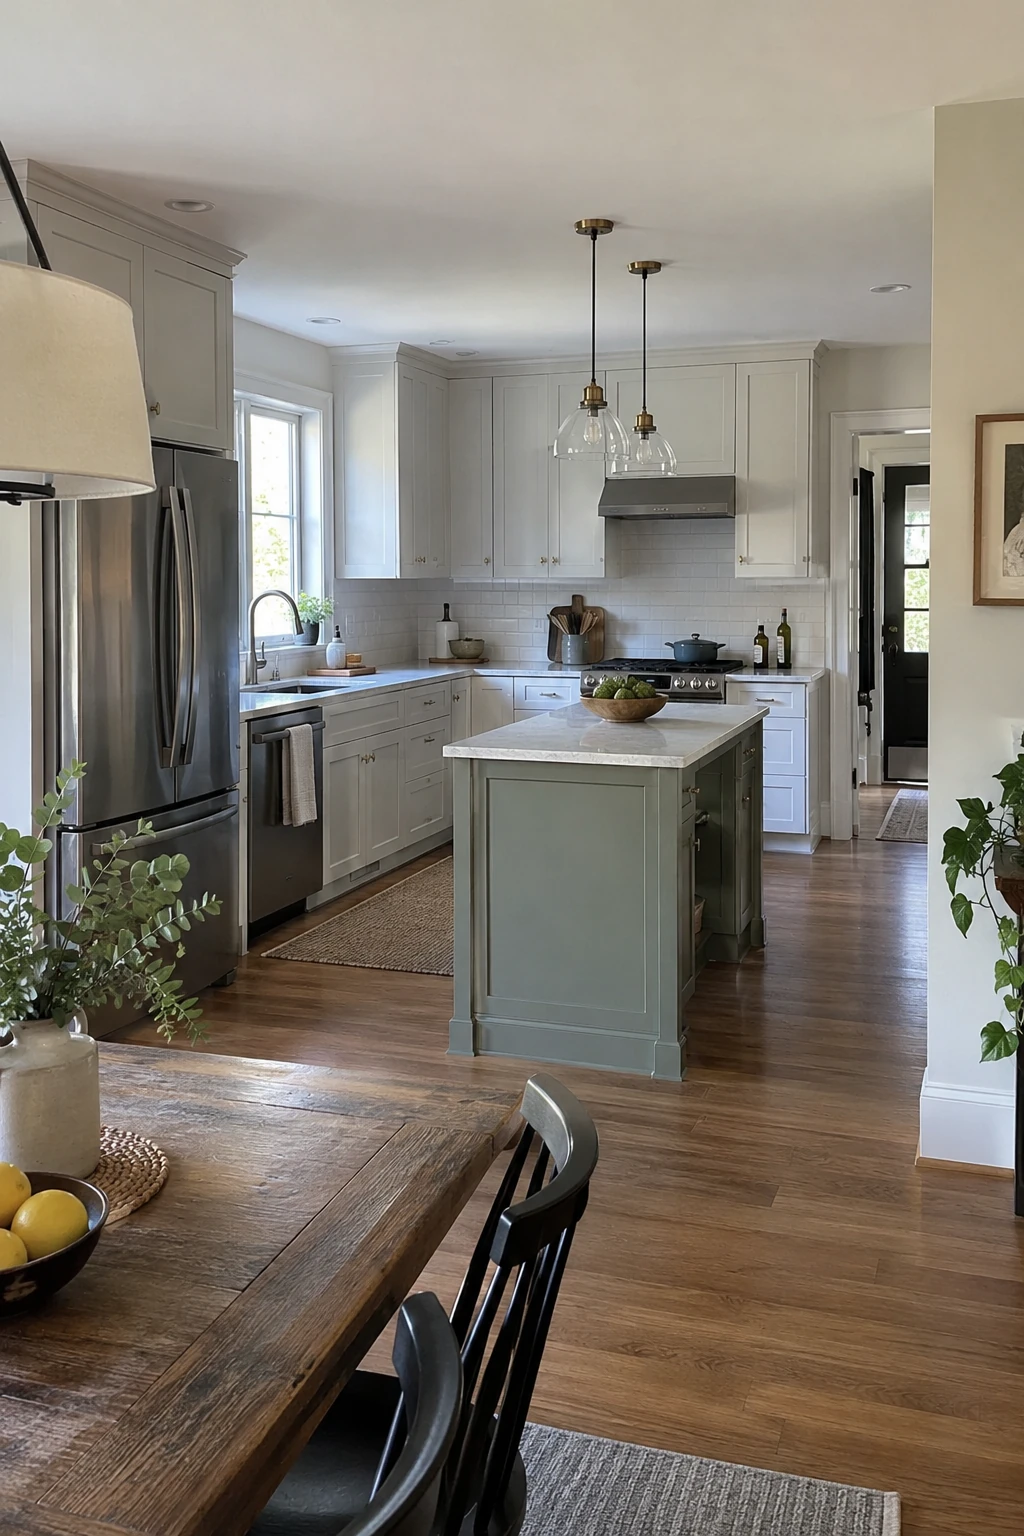
A peninsula can trap traffic in a U-shaped plan. Replacing it with a shorter island may open a second route and connect the kitchen to the dining area.
Before demolition, identify plumbing, wiring, floor patches, and structural posts inside the peninsula. Moving a sink or range from it can turn a simple cabinet change into a major systems project.
Cabinet and Pantry Upgrades
Cabinet storage works best when openings match the objects inside. Inventory cookware, food, appliances, recycling, and cleaning supplies before selecting door and drawer combinations.
5. Keep the Sink on the Existing Plumbing Wall
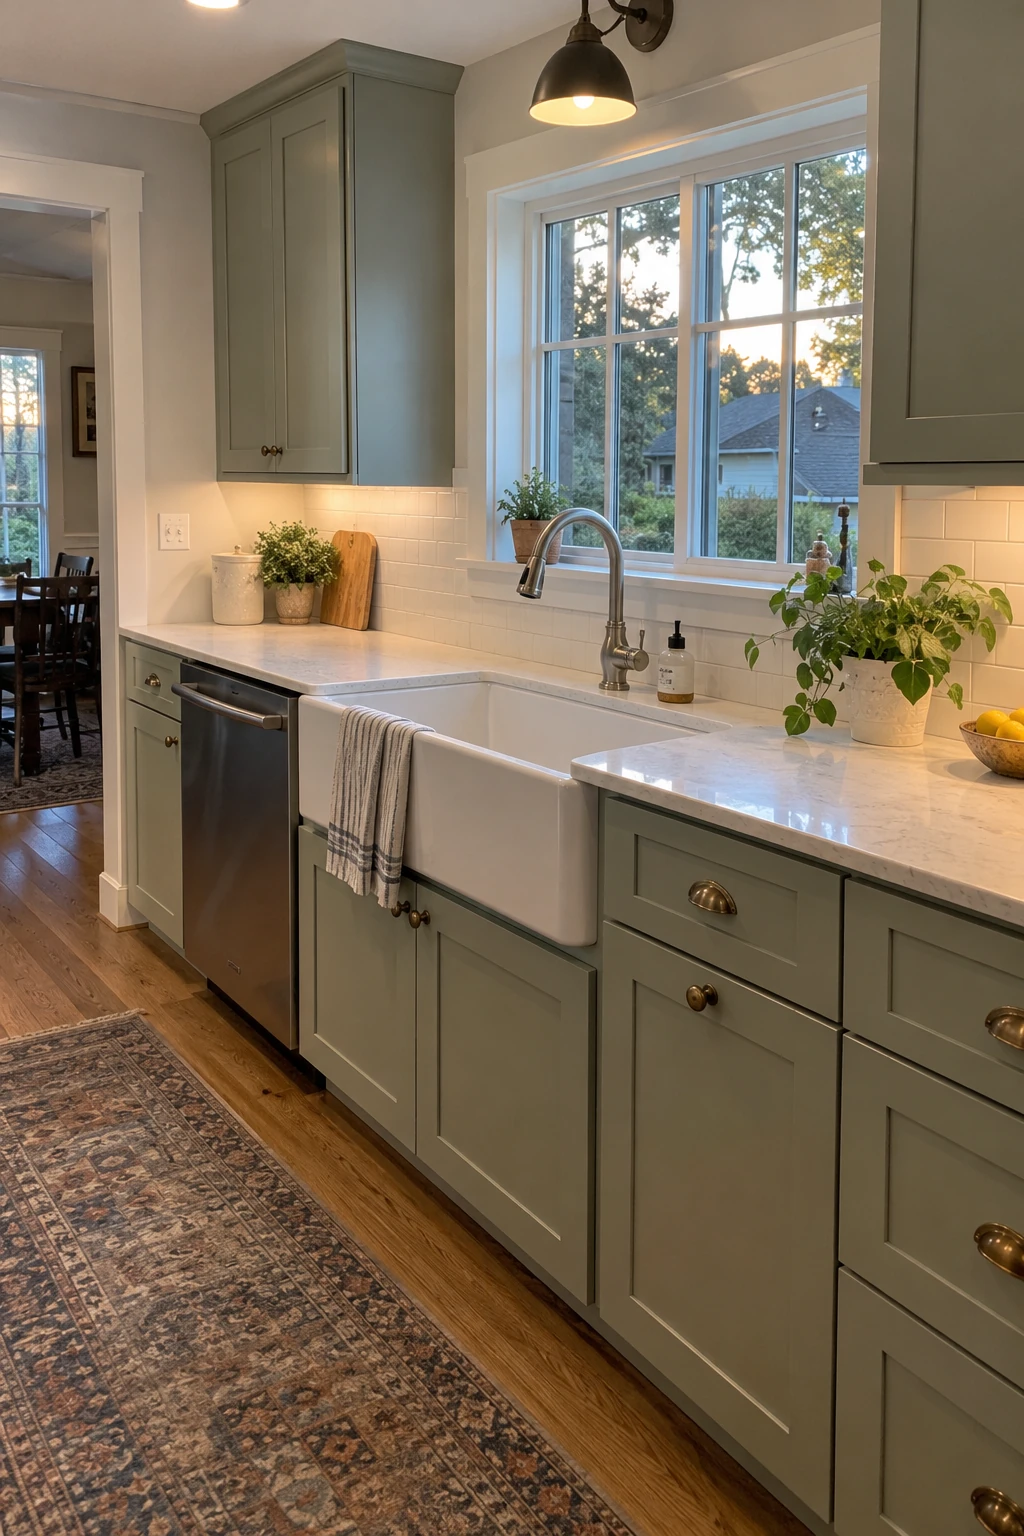
Retaining the sink and dishwasher near existing supply, drain, and vent lines can protect the budget for cabinetry, counters, or lighting. It also reduces the number of hidden conditions opened under the floor.
Have the plumber inspect old shutoffs, drain condition, venting, and dishwasher connection while the base cabinets are out. Easy access is the right moment to replace weak parts rather than bury them behind new work.
6. Run Upper Cabinets to the Ceiling
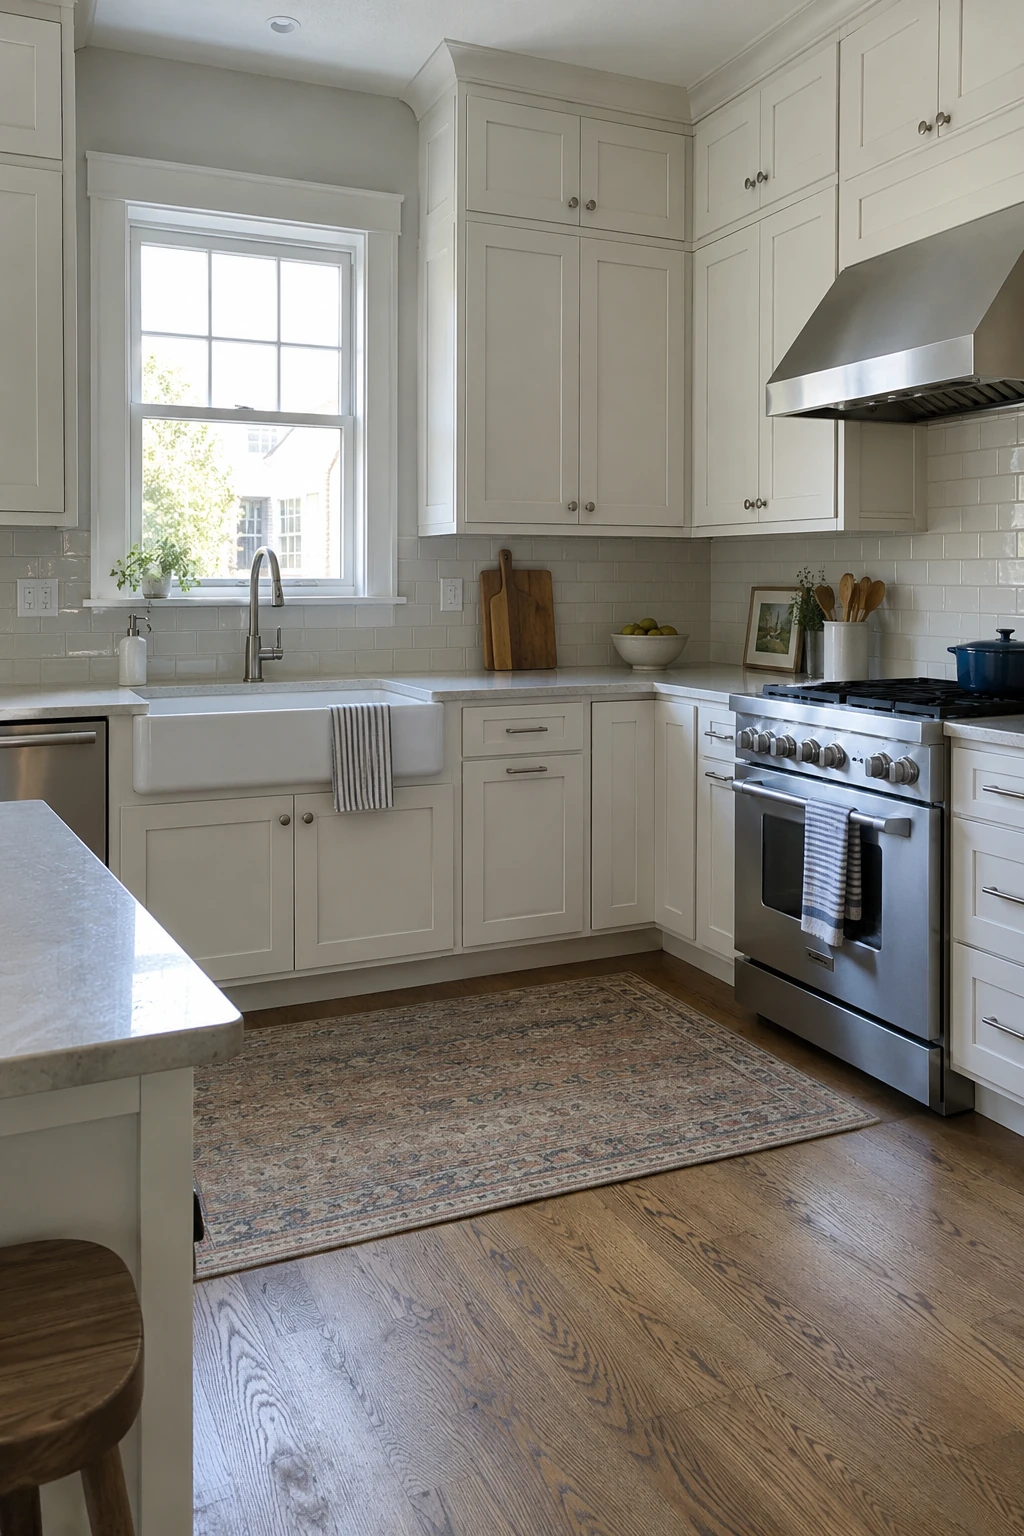
Ceiling-height cabinetry removes the dusty ledge above standard uppers and stores seasonal pieces out of the daily zone. Use the highest section for lightweight items that are safe to lift from a step stool.
Measure the ceiling at several points because floors and framing are rarely level. A planned filler, scribe, or two-part crown lets the installer absorb variation without crooked door lines.
Break a very tall run with one glass cabinet, hood, or window. Continuous doors can feel heavy in a narrow kitchen even when the added storage is useful.
7. Use Wide Drawers Below the Counter
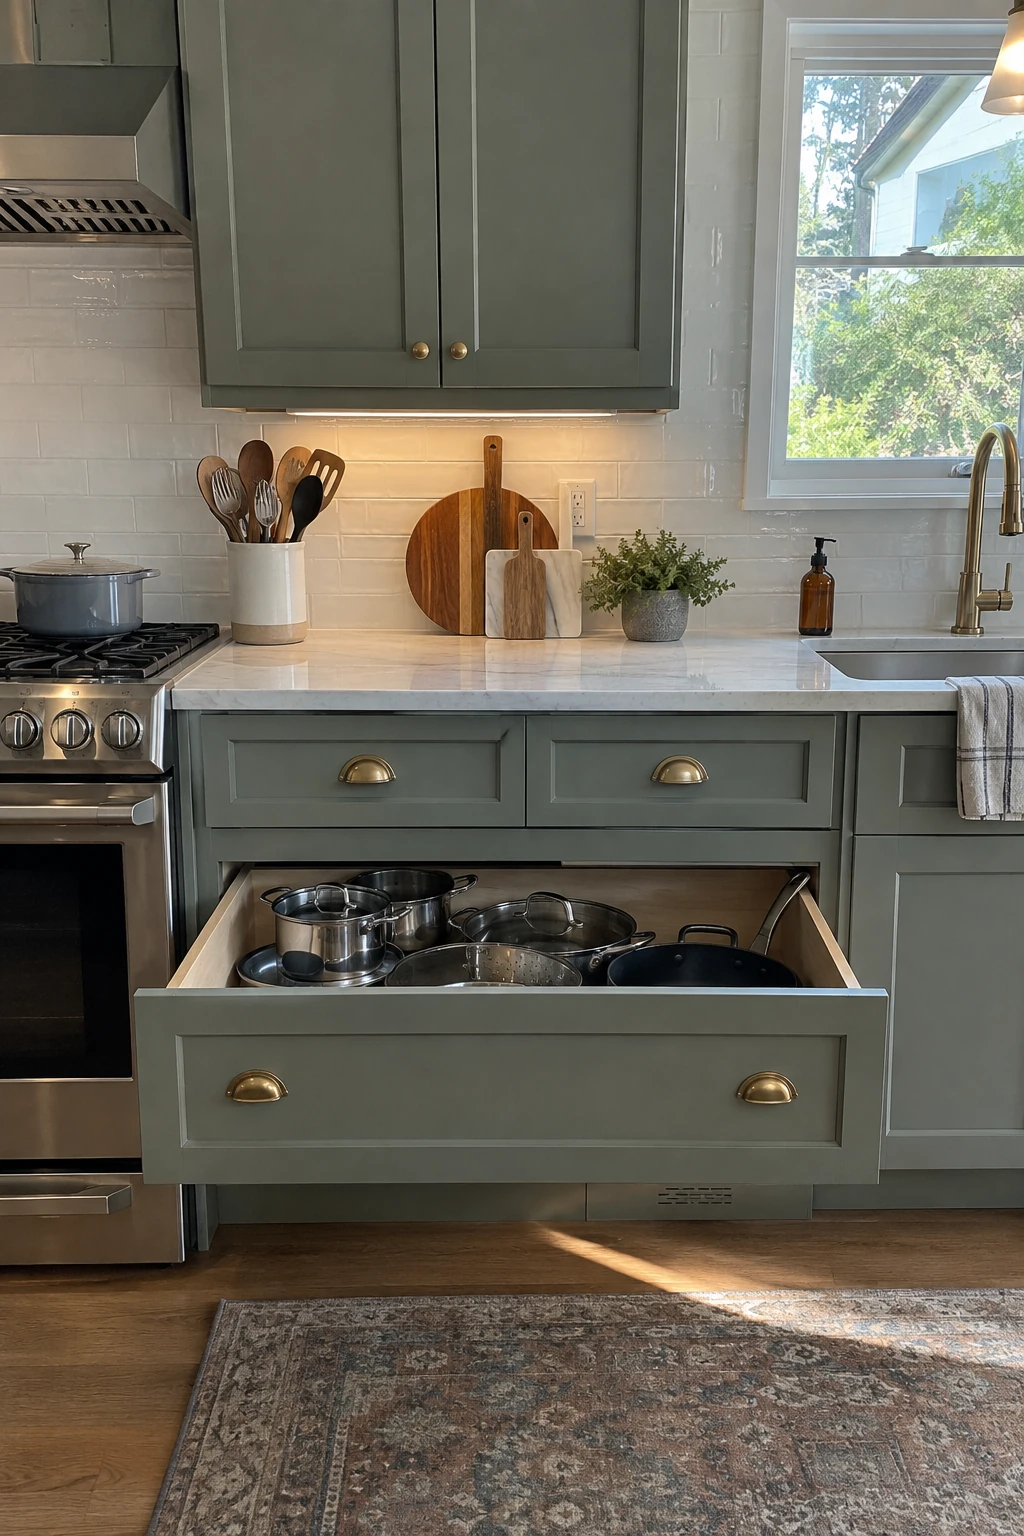
Deep drawers bring pots and mixing bowls into view without kneeling and unloading a front row. Divide a wide base into shallow utensil storage above and deeper cookware drawers below.
Specify full-extension hardware and load ratings for heavy dishes or cast iron. A broad drawer that sags or racks under weight is less useful than two properly supported banks.
Planning check: Pause after the measured mockup and verify clearances before fabrication.
Keep drawer widths aligned with the countertop work zones above. Repeated vertical lines help a long cabinet run look calmer.
Place frequently used cookware between the range and sink. Baking pans and specialty appliances can live farther from the primary prep area.
8. Add a Narrow Full-Height Pantry Pullout
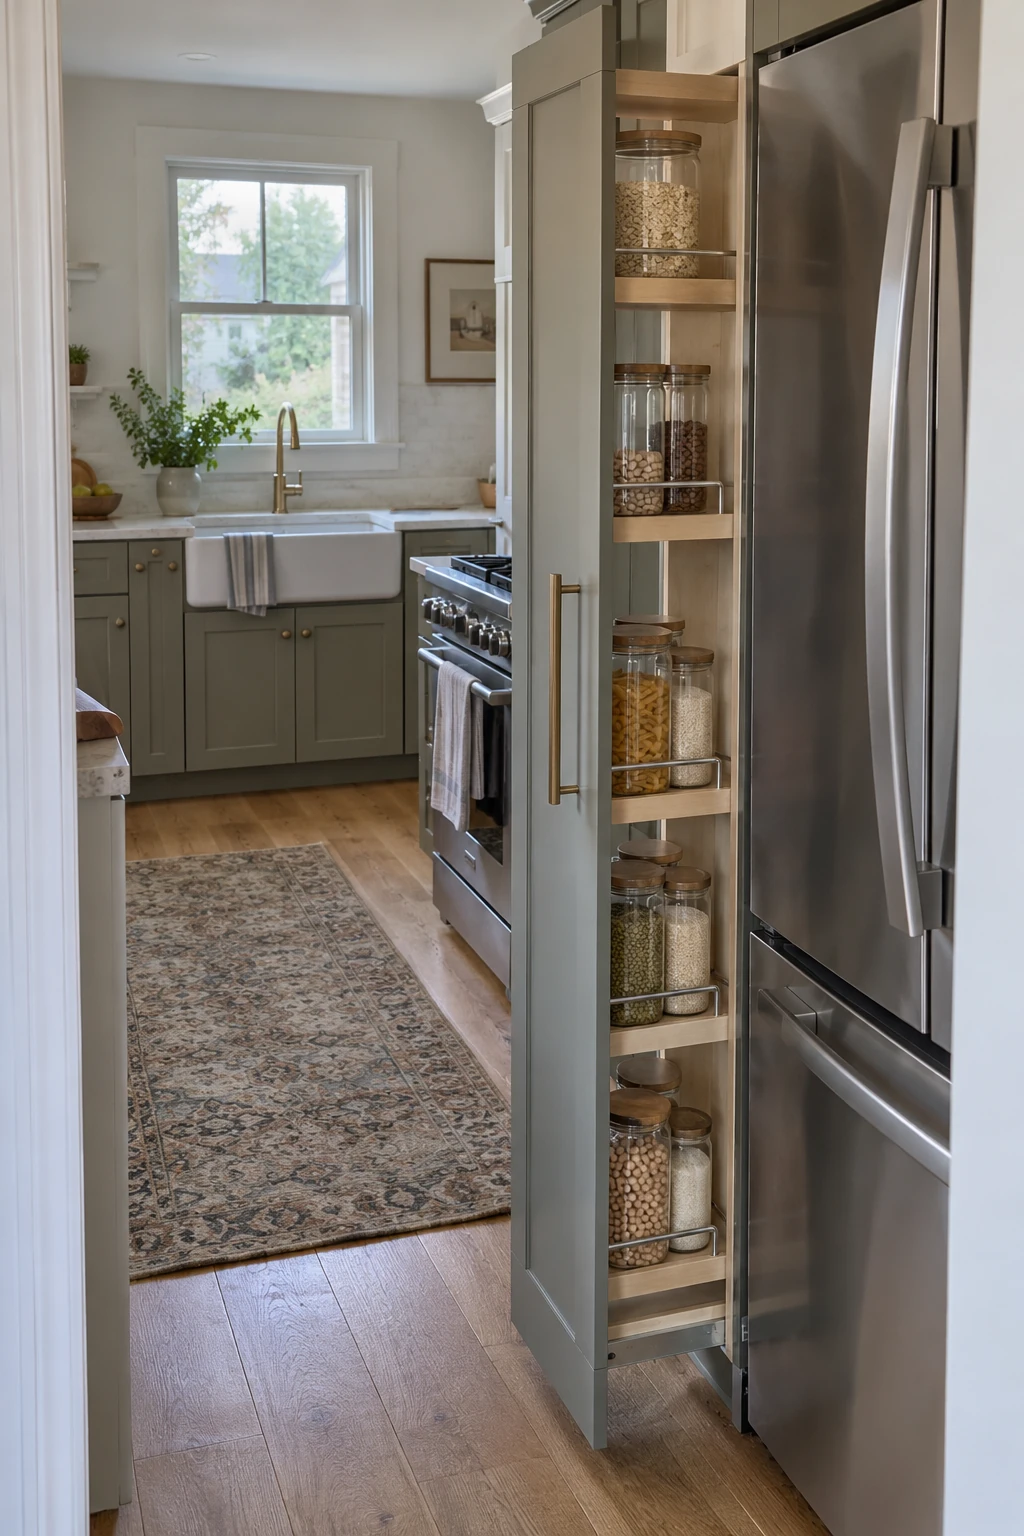
A slim pantry pullout can use the filler-like space beside a refrigerator while keeping jars visible from both sides. Shallow shelves prevent small packages from disappearing behind one another.
Use sturdy slides, adjustable rails, and a width that remains comfortable when loaded. Compare more storage approaches in these pantry organization ideas.
Appliance and Everyday-Use Zones
Appliances should support routines without dividing the counter into unusable scraps. Plan doors, ventilation, service access, outlets, and landing space together with the cabinetry.
9. Close Small Appliances Behind Pocket Doors
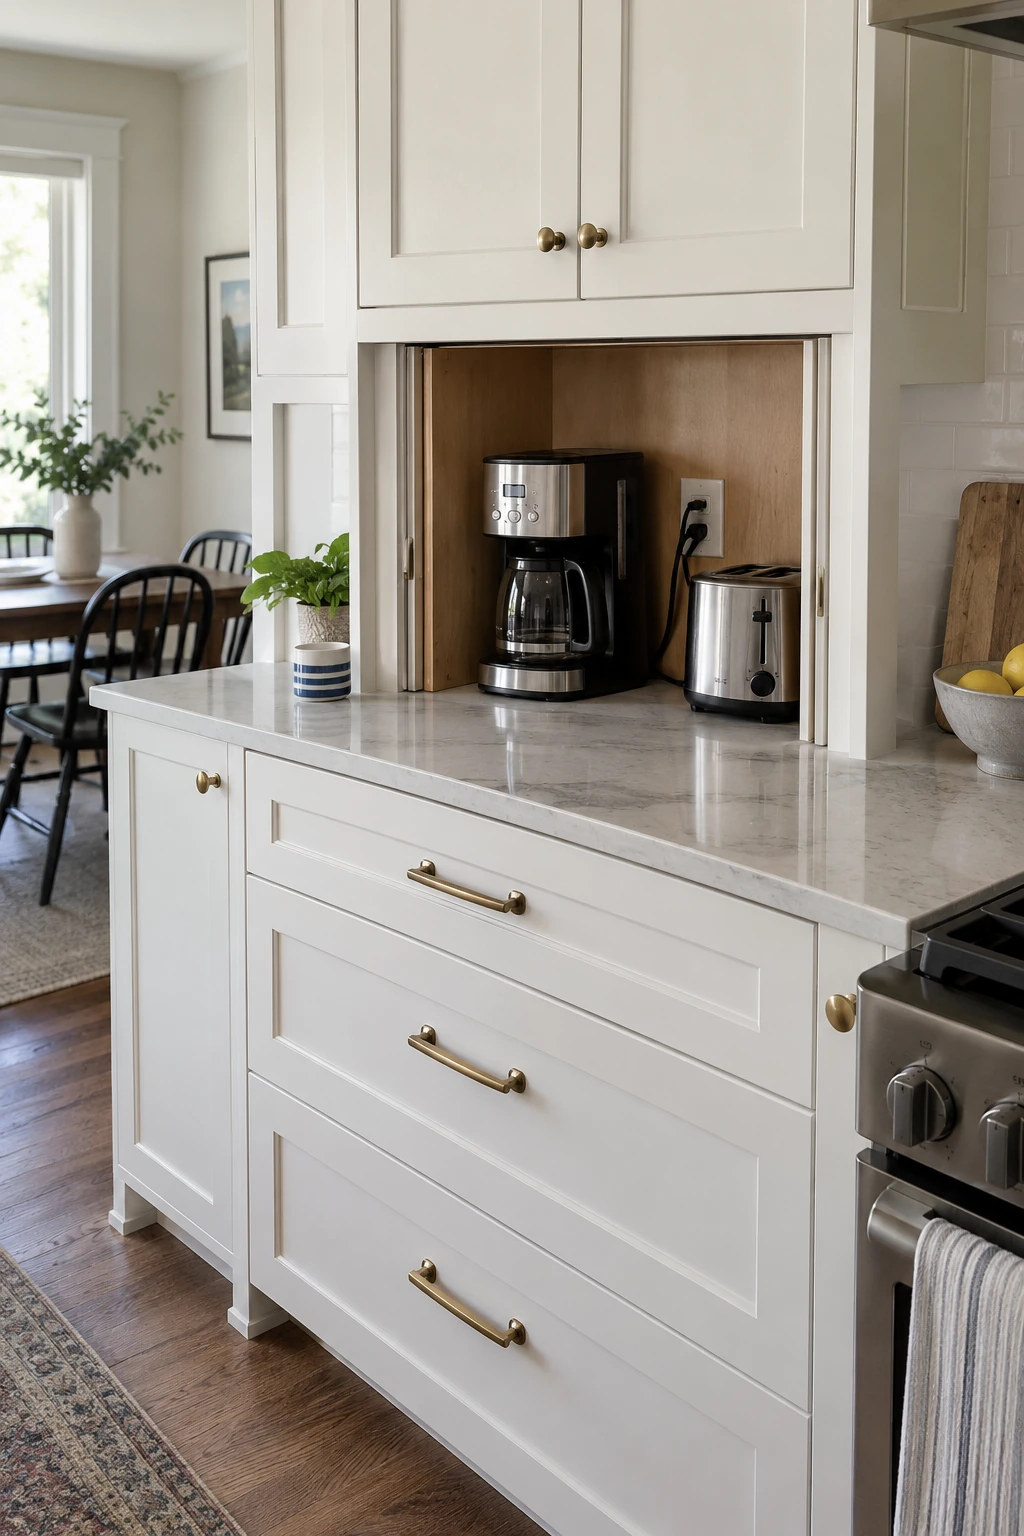
An appliance garage keeps the toaster and coffee maker ready while allowing the counter to look calmer. Pocket doors slide out of the work path instead of projecting beside hot or wet equipment.
Provide the clearances, receptacles, and ventilation each appliance requires. Do not run heat-producing equipment inside a closed cabinet unless the appliance and cabinet system are designed for it.
Continue the countertop into the garage and protect the back with a wipeable surface. A removable tray catches grounds and crumbs before they reach door hardware.
10. Panel the Refrigerator Without Trapping Heat
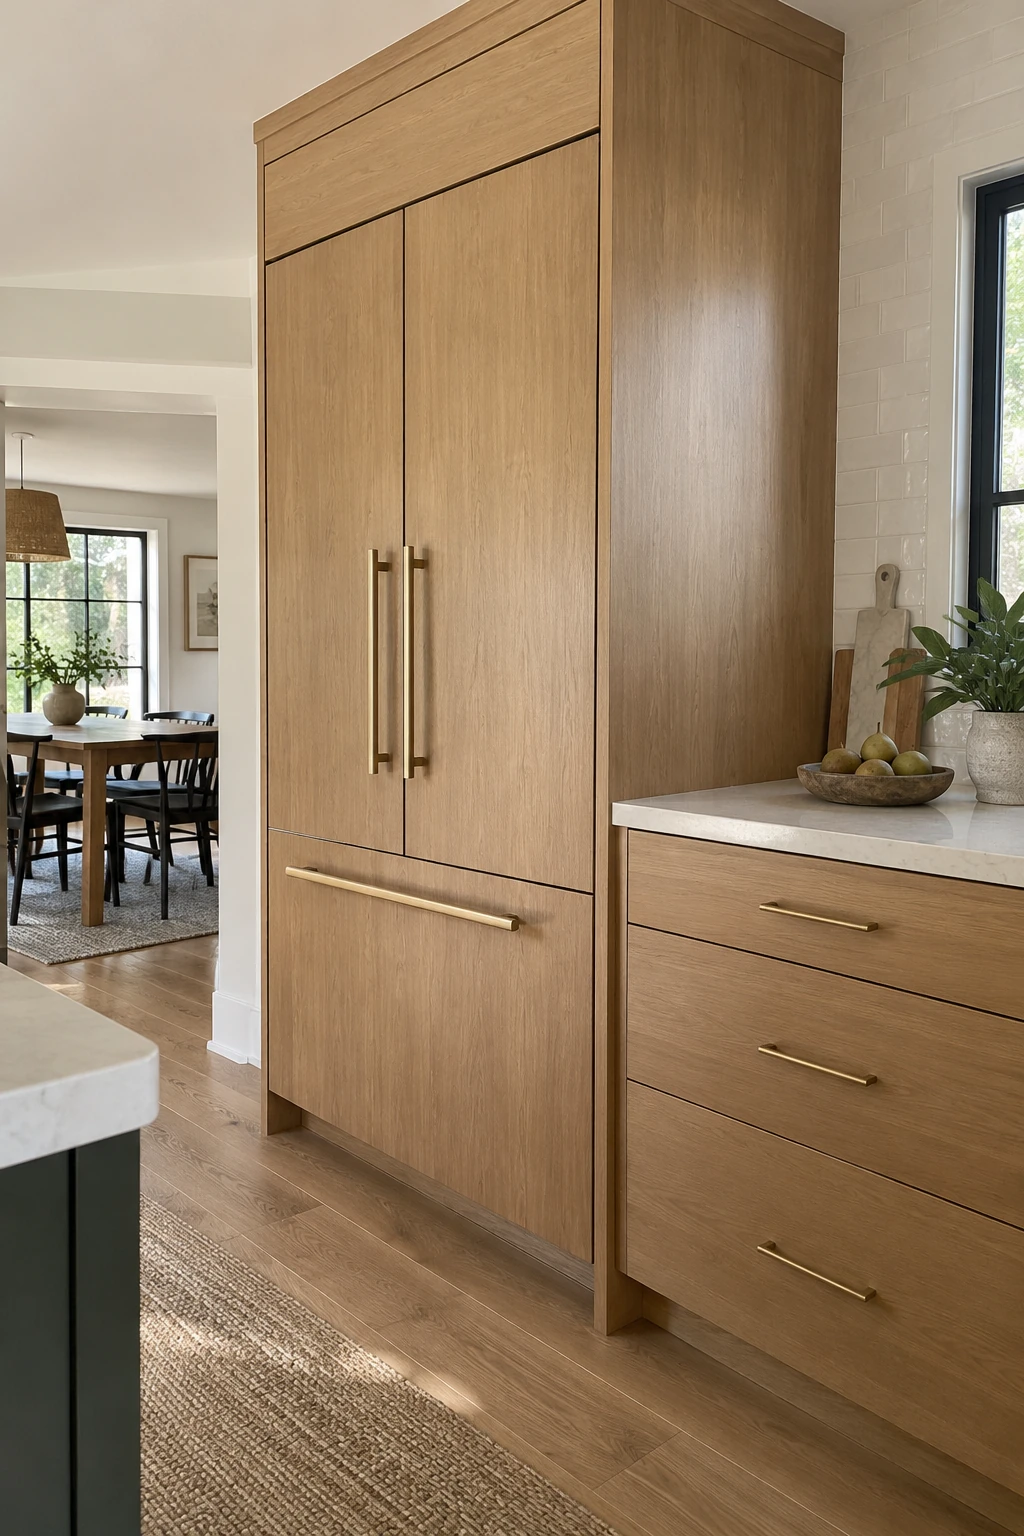
A panel-ready refrigerator can make a tall cabinet wall feel continuous. Align nearby doors and fillers so the appliance looks intentional even though its proportions differ from pantry cabinets.
Use the exact manufacturer enclosure, hinge, and ventilation dimensions. A decorative panel cannot restrict airflow or prevent full door opening and service access.
Planning check: Pause after the measured mockup and verify clearances before fabrication.
Order appliance and cabinetry from coordinated drawings. Millwork changes are costly after a refrigerator arrives with different hinge or panel requirements.
If the budget cannot support a true panel-ready model, recess a standard counter-depth refrigerator between finished side panels. Leave its ventilation gaps visible and correct.
11. Create a Separate Beverage Station
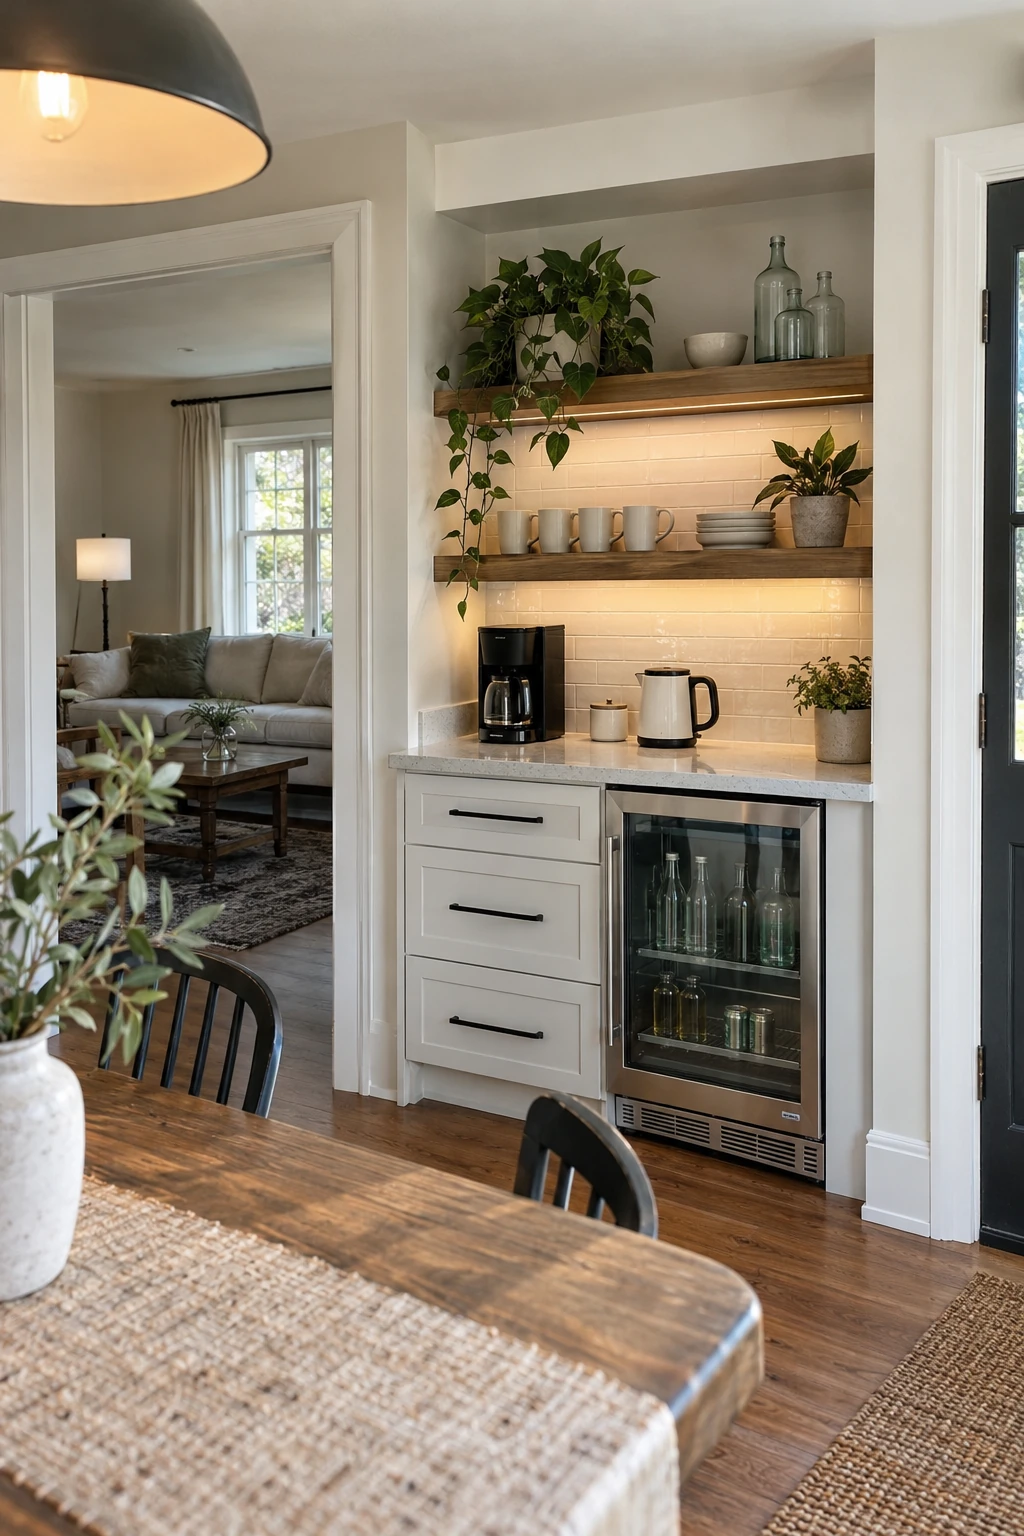
Move coffee, tea, and cold drinks outside the main cooking aisle so guests can serve themselves without crossing prep traffic. A short counter, mug drawer, and undercounter refrigerator can form a complete station.
Add a sink only when plumbing is nearby and the station will use it daily. Otherwise, a washable tray and direct route to the main sink avoid unnecessary cost and another leak point.
12. Choose an Induction Range With a Power Plan
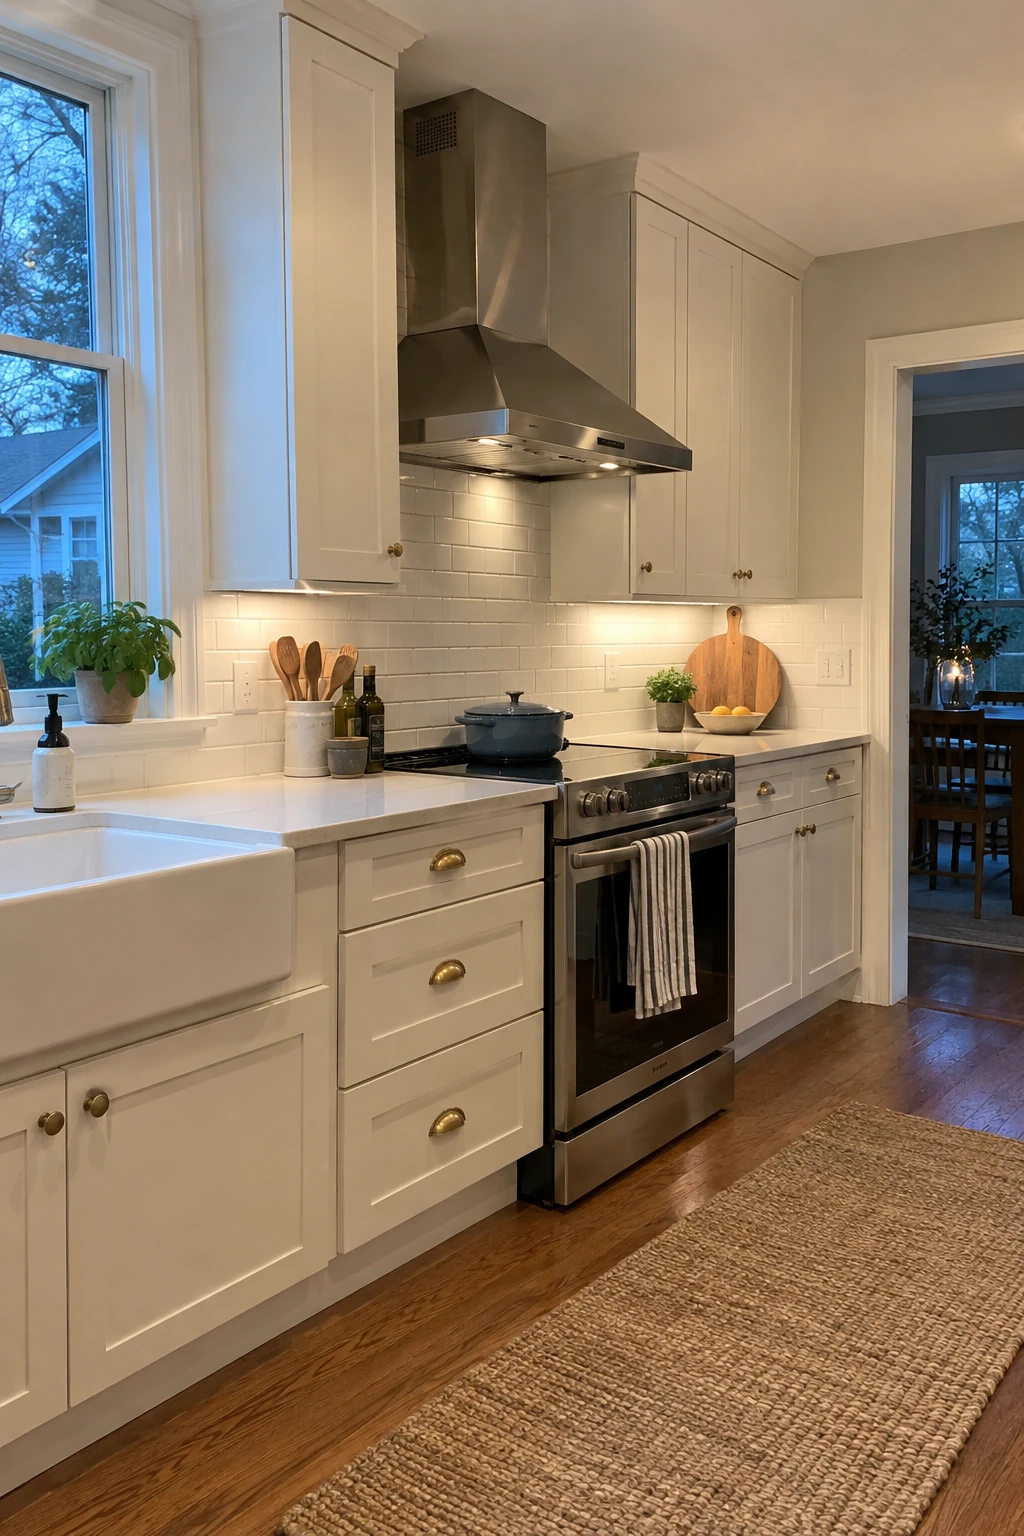
Induction offers a smooth cooking surface and responsive heat, but the electrical load may require a new circuit or service review. Have an electrician assess the panel before ordering the appliance.
Check cookware compatibility, control layout, oven capacity, and repair access. A portable induction burner is a low-commitment way to test the cooking method before a full replacement.
Keep landing space on both sides and coordinate the hood width and mounting height with the appliance instructions. The cooktop choice does not remove the need for effective ventilation.
Countertop, Backsplash, and Flooring Ideas
Finish materials should tolerate water, heat, dropped tools, grease, and the cleaners the household actually uses. Approve large samples under the final lighting before ordering.
13. Choose a Quiet Honed Countertop
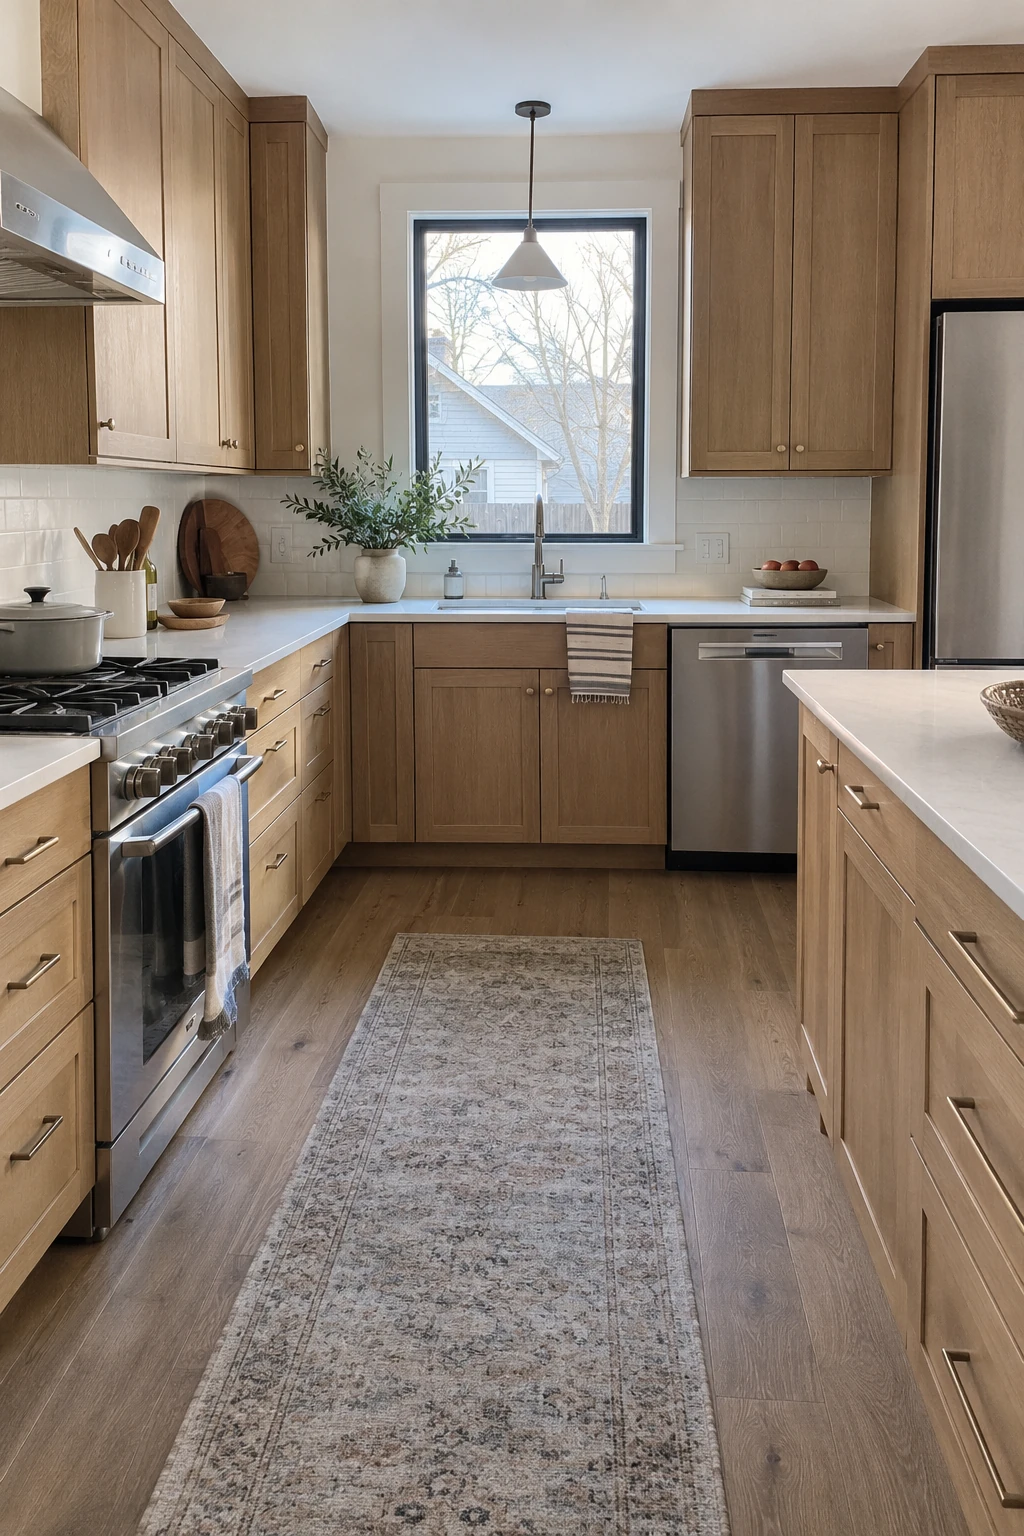
A low-sheen countertop reduces glare and lets wood, tile, or painted cabinets carry the room. View a full slab or large sample because small chips rarely show veining scale and finish variation.
Compare staining, heat, scratching, sealing, repair, seam placement, and edge fabrication for the exact material. Quartz, natural stone, porcelain, solid surface, and laminate solve different priorities.
Planning check: Pause after the measured mockup and verify clearances before fabrication.
Keep the longest seam away from the sink and the strongest visual focal point when fabrication allows. Confirm support for overhangs before cabinets arrive.
Save the product name, batch information, sealer, and care instructions. Future repairs are easier when the finish record survives the renovation.
14. Carry the Backsplash to the Ceiling
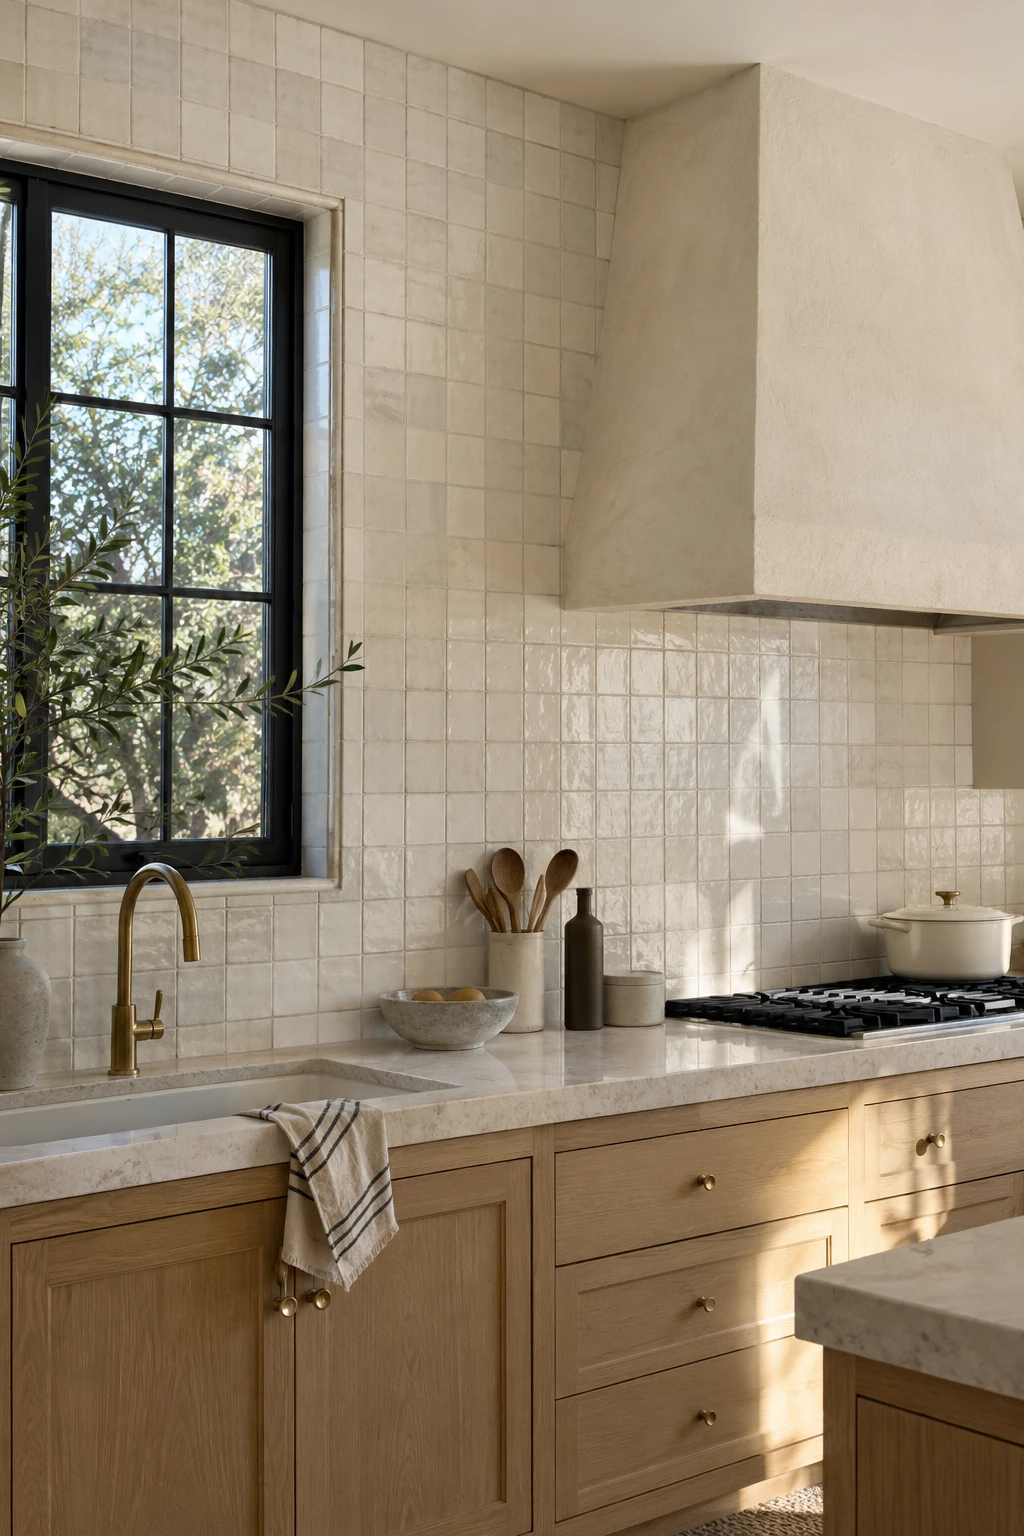
Running tile to the ceiling can unify a range wall and remove awkward paint strips above windows or cabinets. The effect is strongest on one contained wall rather than every surface.
Lay out joints around the hood, windows, and outlets before installation. These kitchen backsplash ideas show useful scales and edge conditions.
15. Use Large-Format Porcelain on the Floor
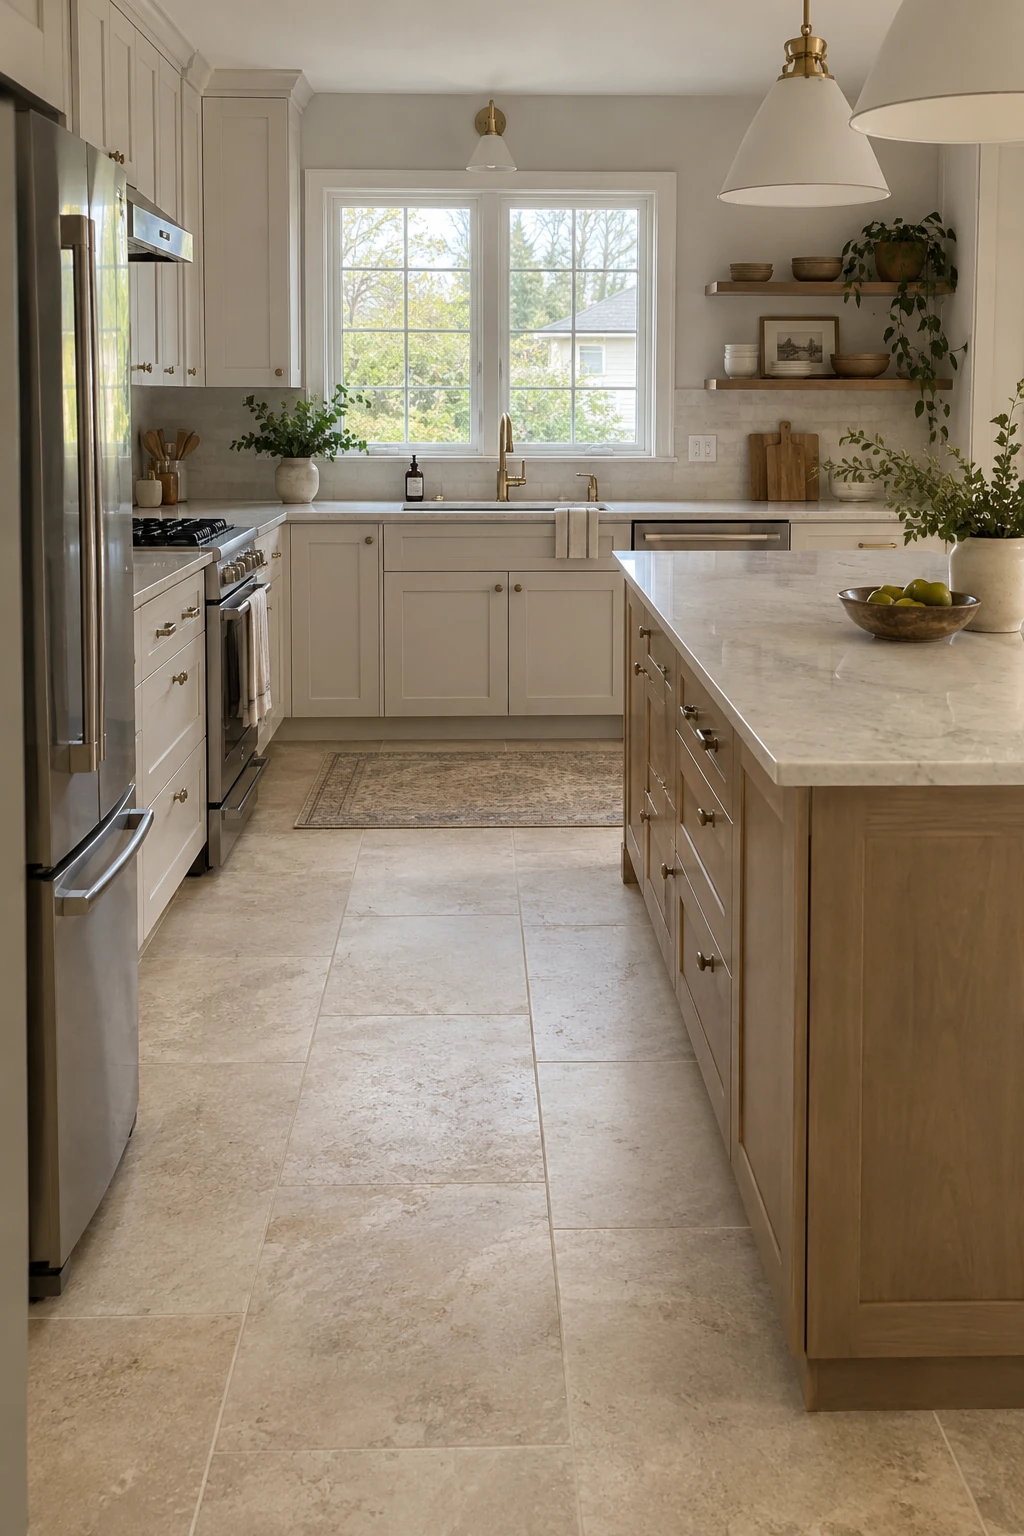
Large-format porcelain can reduce grout lines and handle kitchen moisture well when the tile and installation suit the substrate. A matte, slip-conscious finish is easier to live with than a highly polished surface.
Check floor flatness, joist movement, transitions, and finished height before selecting tile thickness. Correcting the substrate is part of the installation, not an optional finishing step.
Order enough material for cuts and future repairs from the same production lot. A later box may shift in tone or surface texture.
16. Warm the Island With a Wood Top
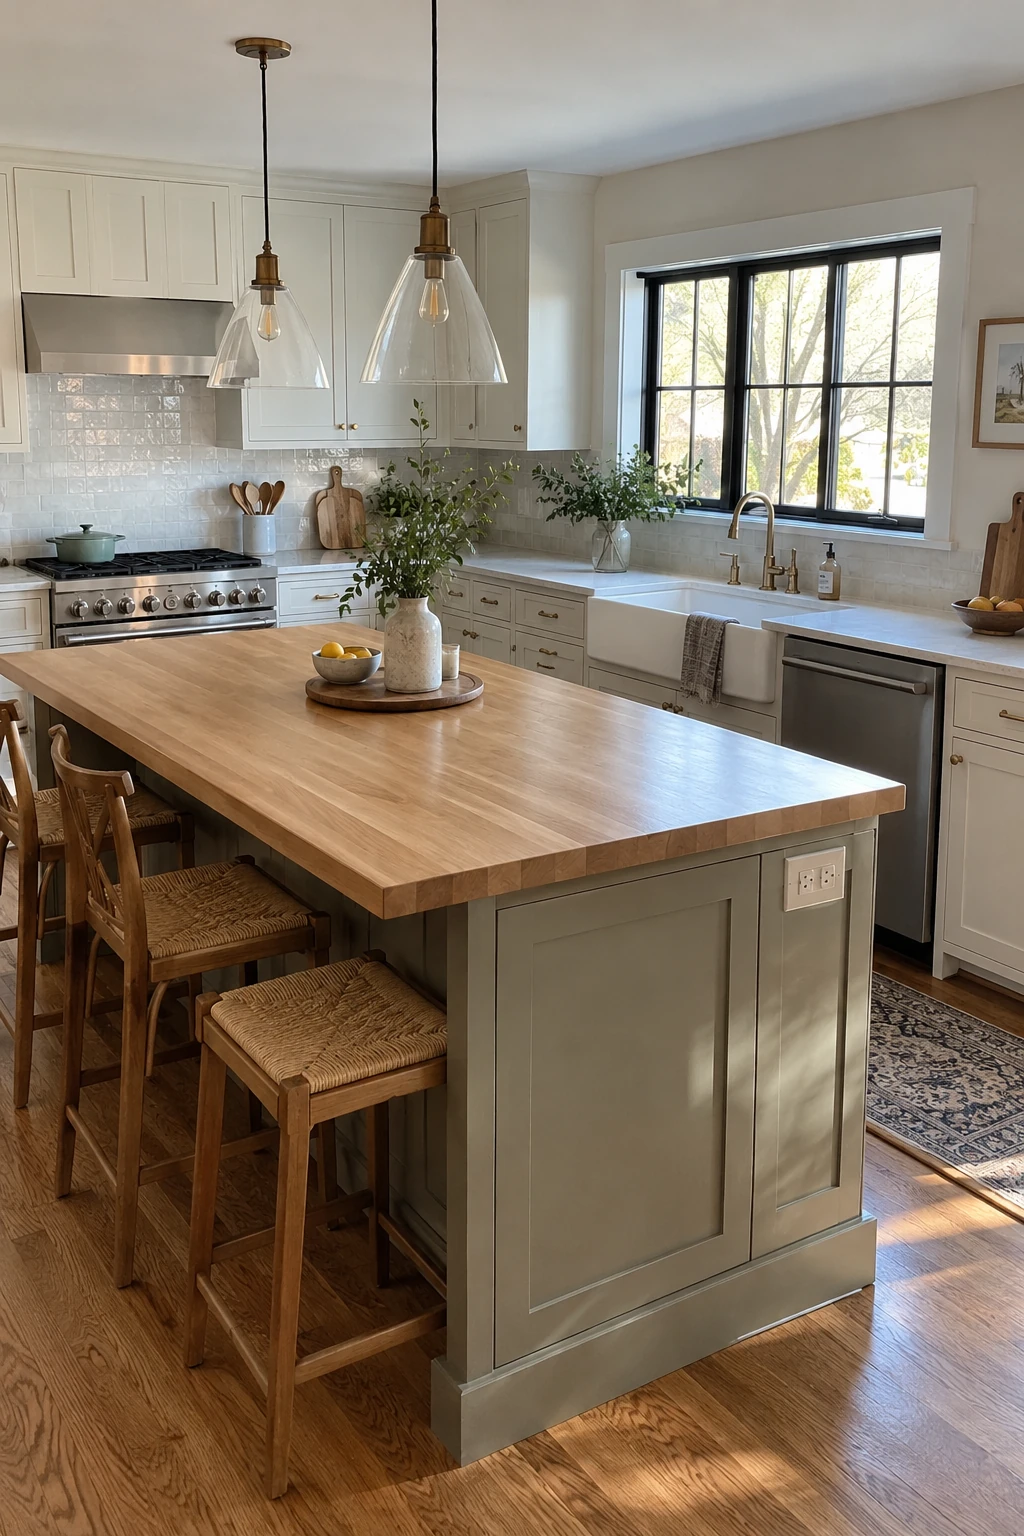
A wood island top softens a kitchen dominated by painted cabinets and stone. Use it where the warmth will be seen and touched, while keeping water-heavy perimeter counters in a more forgiving surface.
Choose the species, grain orientation, finish, and maintenance plan together. End grain, edge grain, and wide-plank tops wear differently and should not be selected only from a color sample.
Planning check: Pause after the measured mockup and verify clearances before fabrication.
Keep seams and cutouts away from the sink when possible, and wipe standing water promptly. Follow the finish maker’s cure and recoat schedule.
For a renter or smaller budget, add a freestanding wood worktable instead. It delivers the material contrast without altering fixed counters.
Lighting, Electrical, and Ventilation
Wiring and ductwork are cheapest to coordinate before walls close and cabinets arrive. Map every task light, control, appliance, outlet, and exhaust route on the same elevation drawings.
17. Layer Ceiling, Task, and Accent Lighting
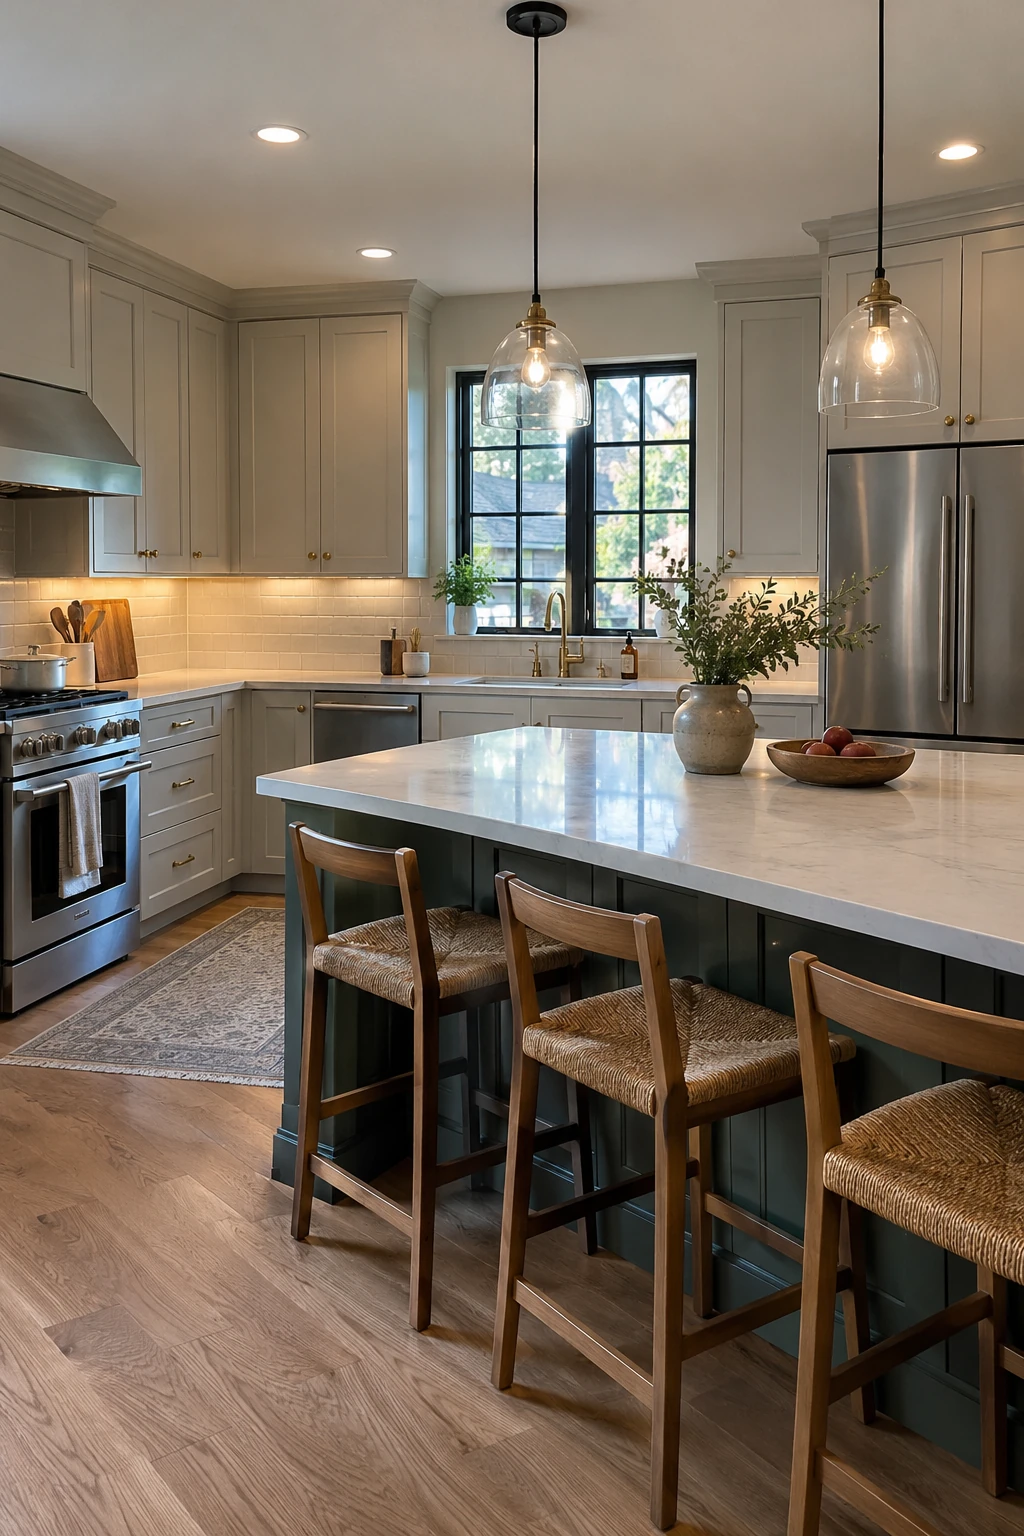
Use ceiling fixtures for circulation, under-cabinet lights for prep, and pendants for the island or table. Separate controls let the kitchen shift from bright work to a comfortable evening setting.
Place recessed lights near cabinet fronts so the user does not cast a shadow across the counter. Review more kitchen lighting ideas before finalizing fixture scale.
Match color temperature and color rendering across layers. Mixing very cool task lights with amber pendants can make finishes look unrelated.
18. Hide Continuous Lights Under Cabinets
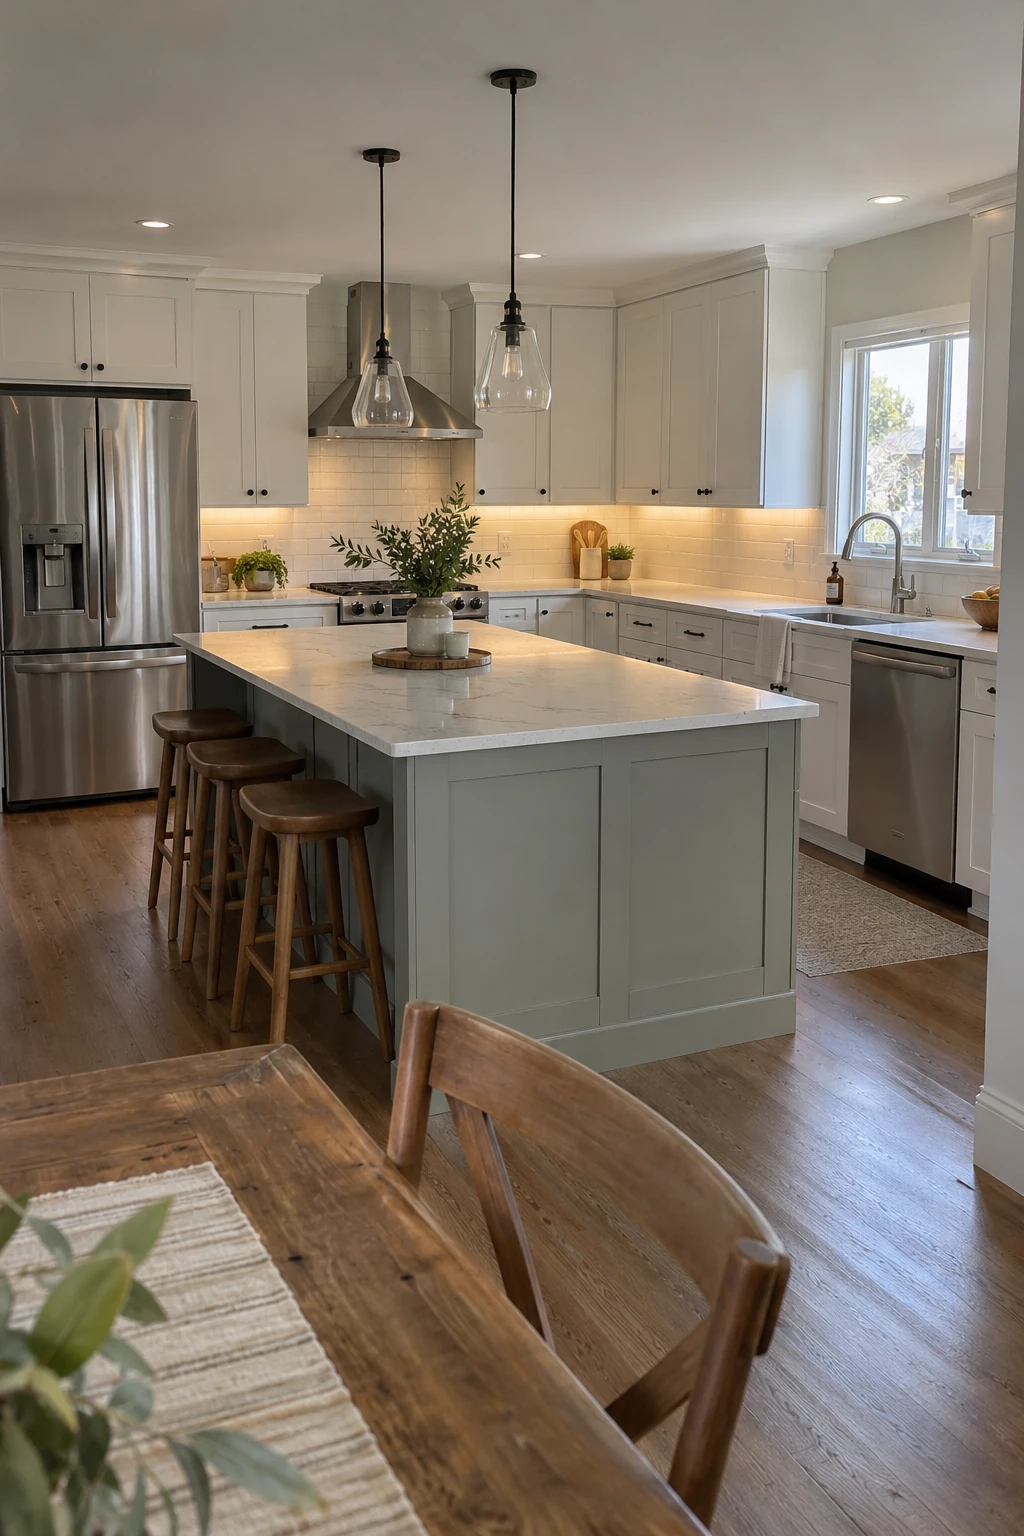
Continuous under-cabinet lighting removes dark prep areas and highlights the backsplash. Use an aluminum channel and diffuser for an even line instead of visible points reflected in polished stone.
Set the light near the cabinet front to cover more counter depth. Conceal the driver in an accessible location rather than sealing service parts behind tile.
19. Plan Island Power Before Ordering Cabinets
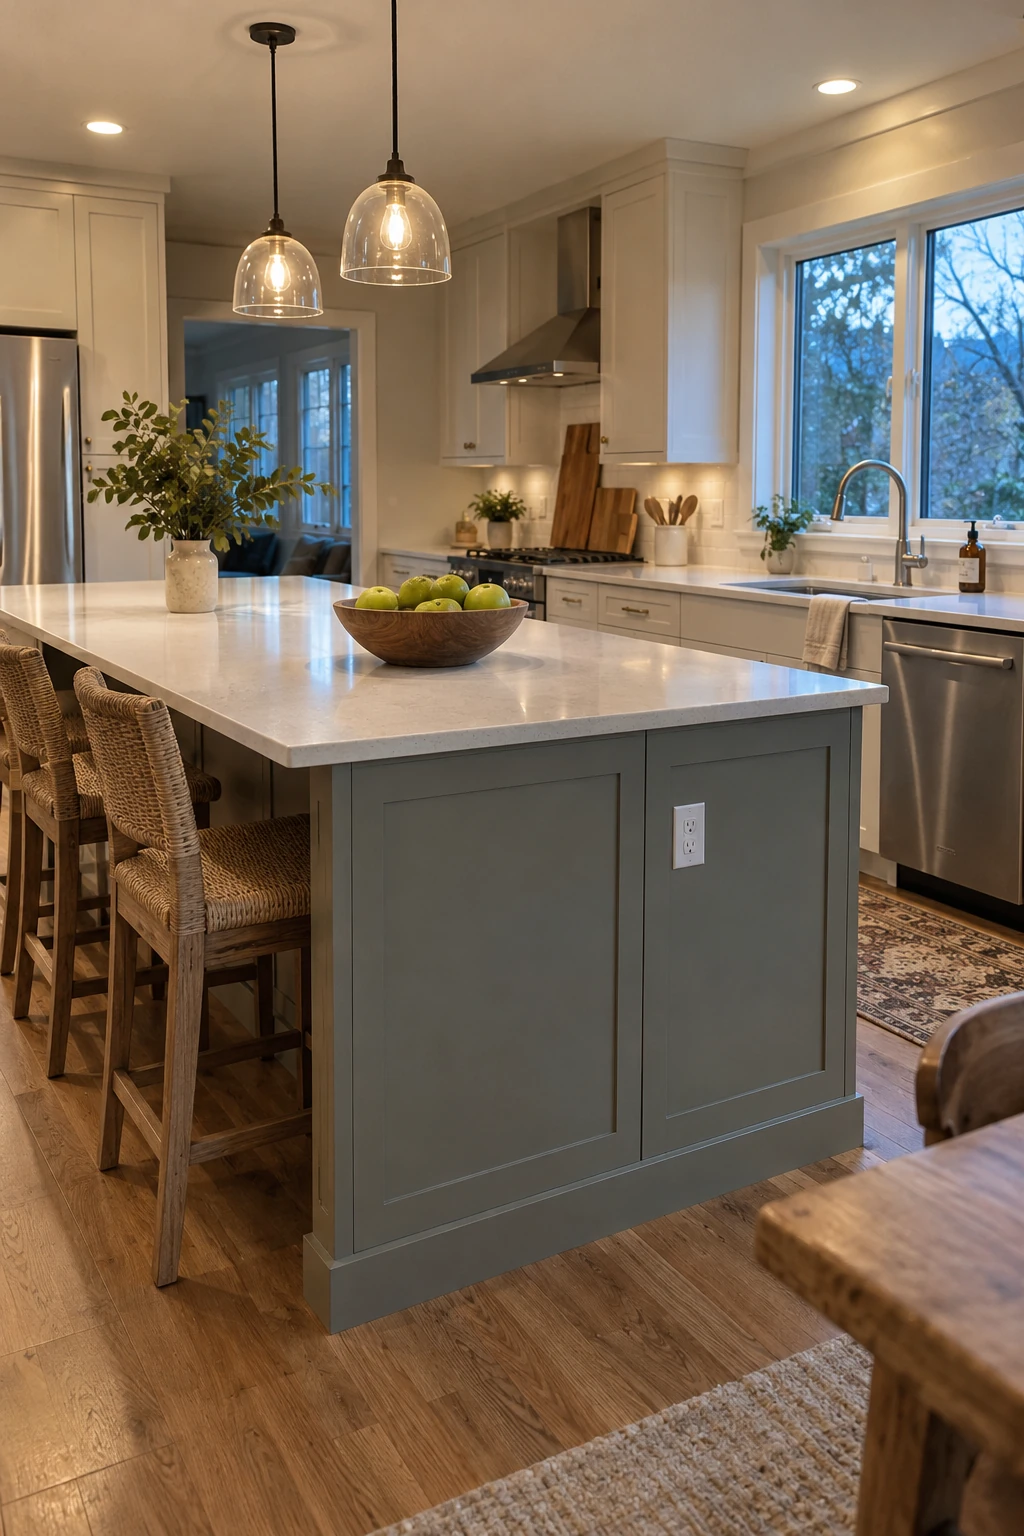
Decide how mixers, laptops, and small appliances will receive power before the island is fabricated. Current code treatment of island receptacles varies by adopted edition and location, so use a local electrical professional.
Avoid trailing cords across seating or walkways. The cabinet maker, electrician, and inspector should agree on listed devices, box depth, routing, and accessibility.
Locate controls where they remain reachable without creating a visual target on the main elevation. Never improvise power with an extension cord inside fixed cabinetry.
20. Vent the Range Hood Directly Outdoors
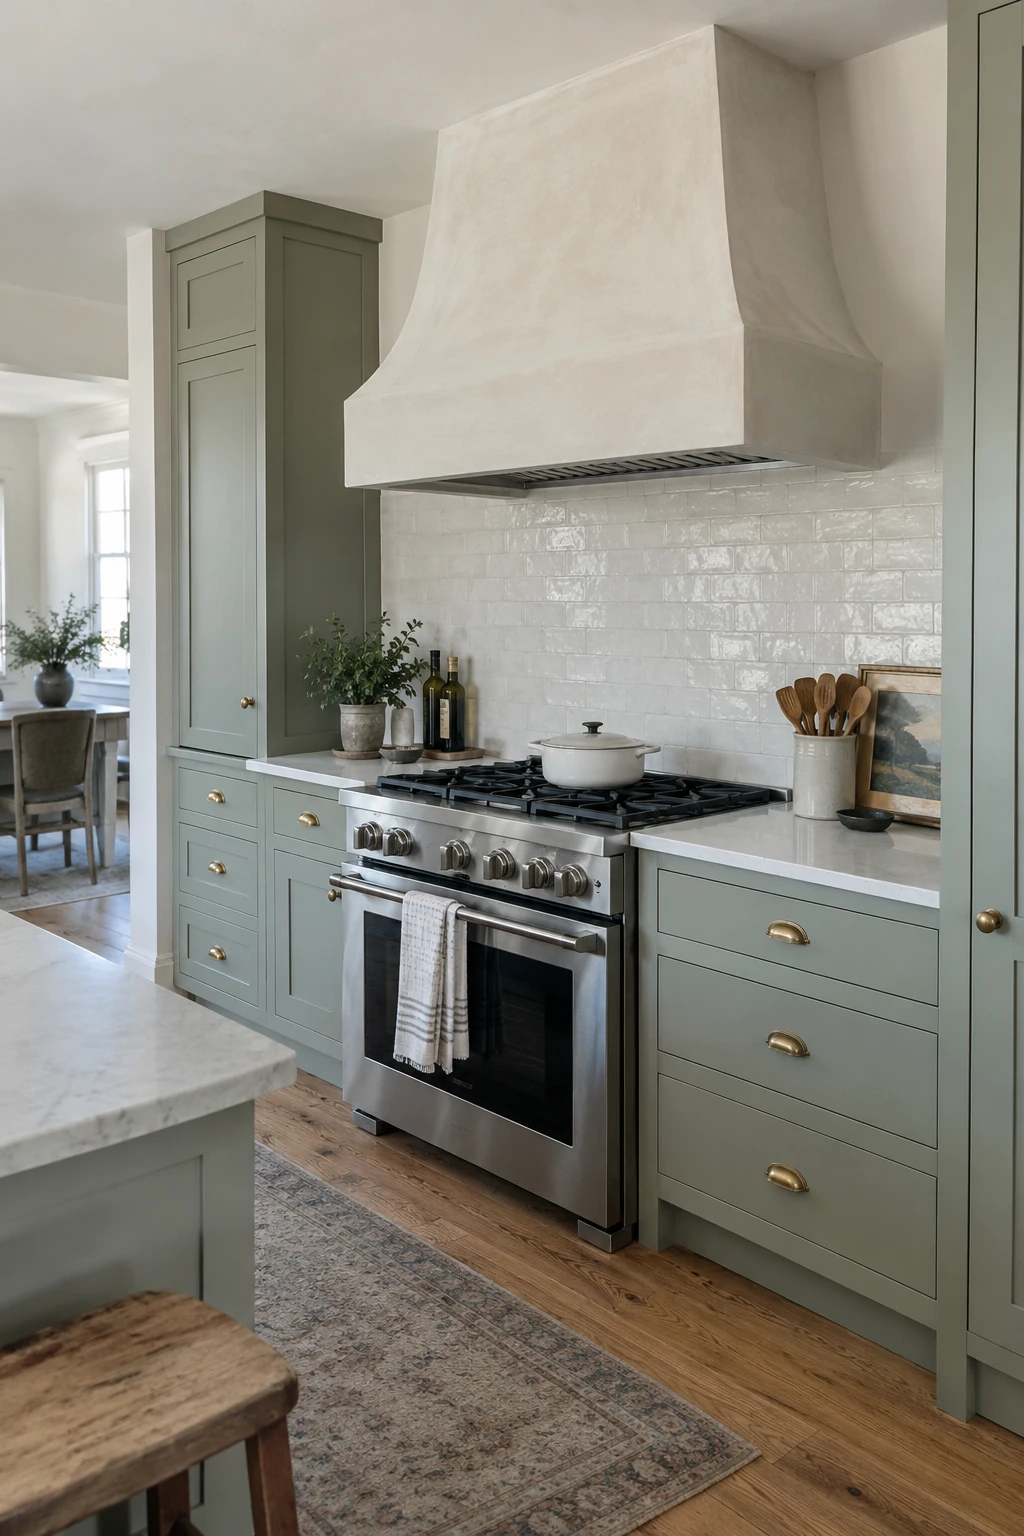
An exterior-vented hood removes cooking moisture and pollutants rather than returning filtered air to the room. Size capture area, airflow, mounting height, and duct route for the selected cooking equipment.
Use the shortest practical smooth duct with the diameter required by the hood. Excess elbows, undersized duct, and hidden reductions increase noise and reduce performance.
Planning check: Pause after the measured mockup and verify clearances before fabrication.
Powerful exhaust may require make-up air or a combustion-safety review. Coordinate HVAC, local code, and any fuel-burning equipment before choosing fan capacity.
Choose a hood quiet enough to use during ordinary cooking. Accessible filters and simple controls matter more than a rarely used maximum setting.
Budget-Smart Partial Renovations
A partial renovation succeeds when every retained element is measured and honestly assessed. Build the scope around sound cabinets, useful plumbing locations, and finishes that can accept repair.
21. Refinish Sound Cabinet Boxes
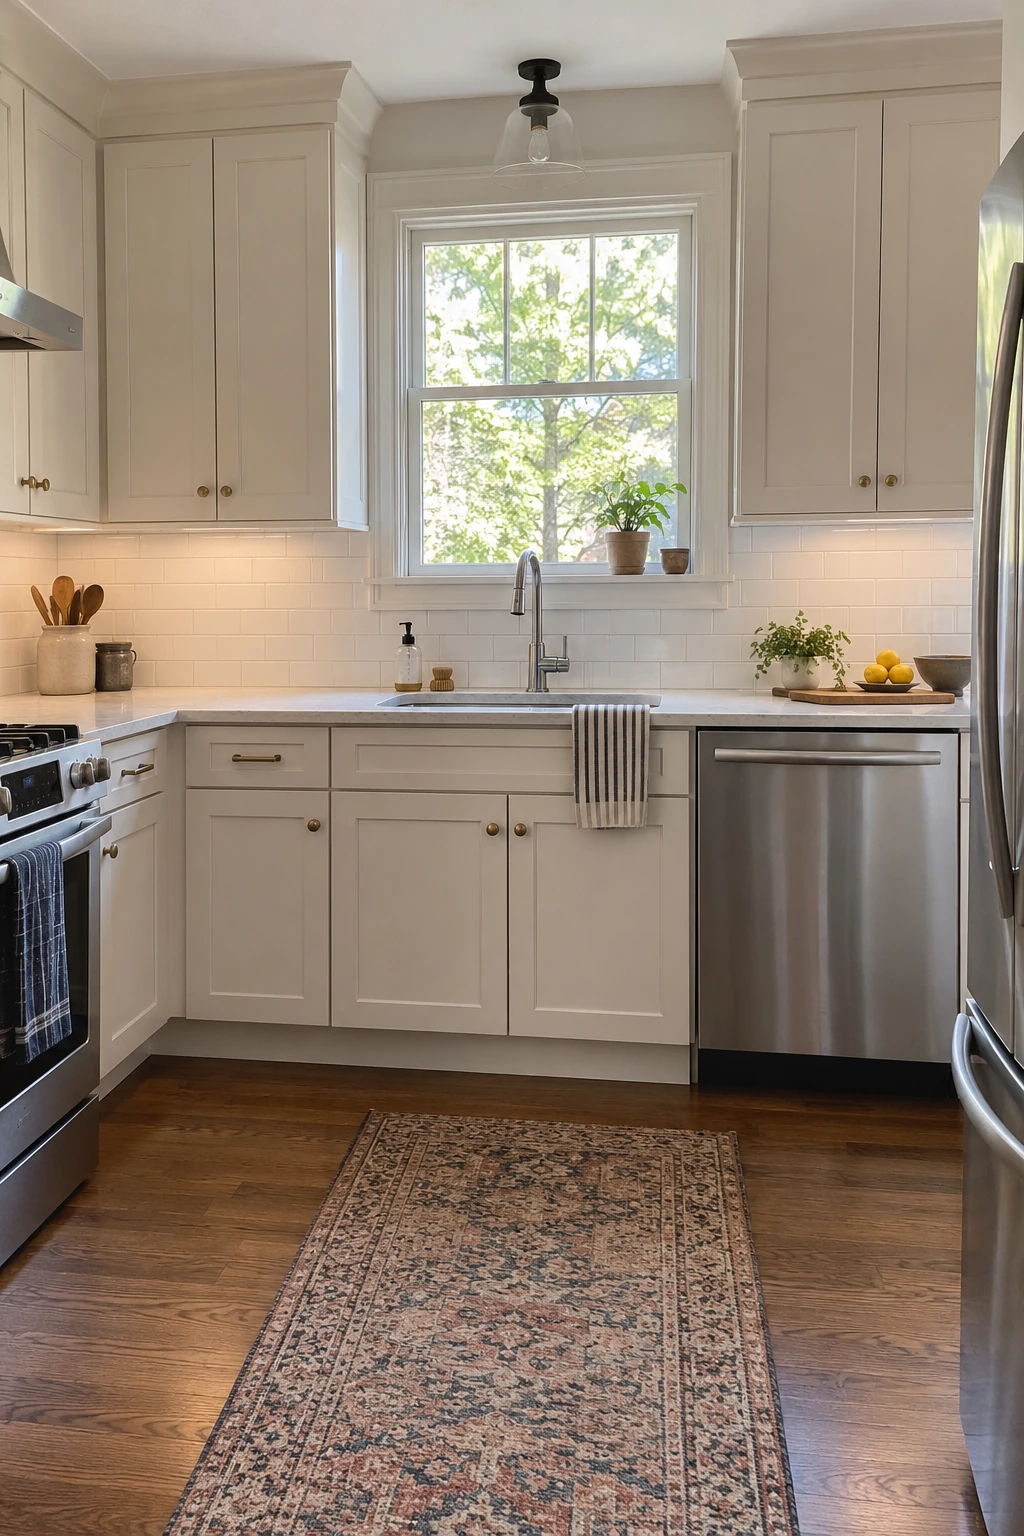
Keep cabinet boxes that are square, dry, securely installed, and arranged well. New doors, drawer fronts, hinges, and a durable sprayed finish can change the room without replacing every carcass.
Inspect sink bases for swelling, shelves for sagging, and face frames for damage before committing. Painting cannot repair weak material or correct a poor layout.
Planning check: Pause after the measured mockup and verify clearances before fabrication.
Remove doors and hardware for preparation rather than coating around them. Label every piece so adjusted doors return to the right opening.
Spend saved money on functional changes such as drawers, lighting, or ventilation. Those improvements are harder to add after new counters and backsplash are installed.
22. Replace Doors Before Replacing Cabinets
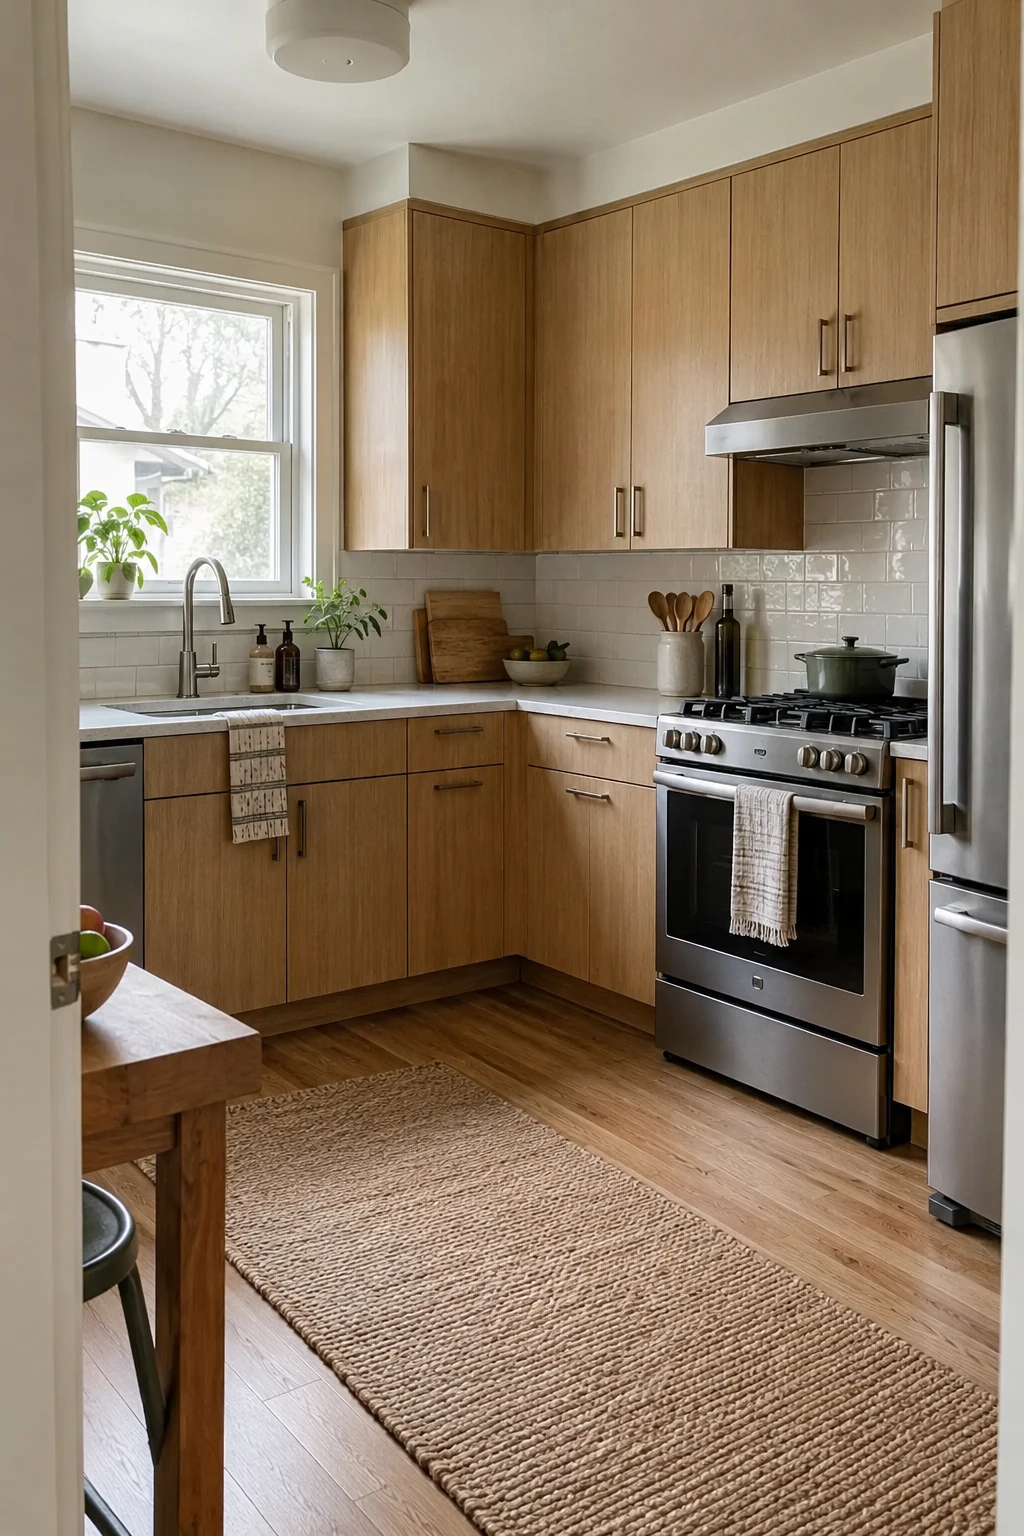
Replacement doors can update sound framed or frameless cabinets while keeping countertops intact. Order a sample door first to judge edge quality, finish, grain, and hinge boring.
Measure every opening and overlay method rather than assuming doors share a standard size. A cabinet shop can verify hinge compatibility and reveals before the full order.
23. Open One Upper-Cabinet Run
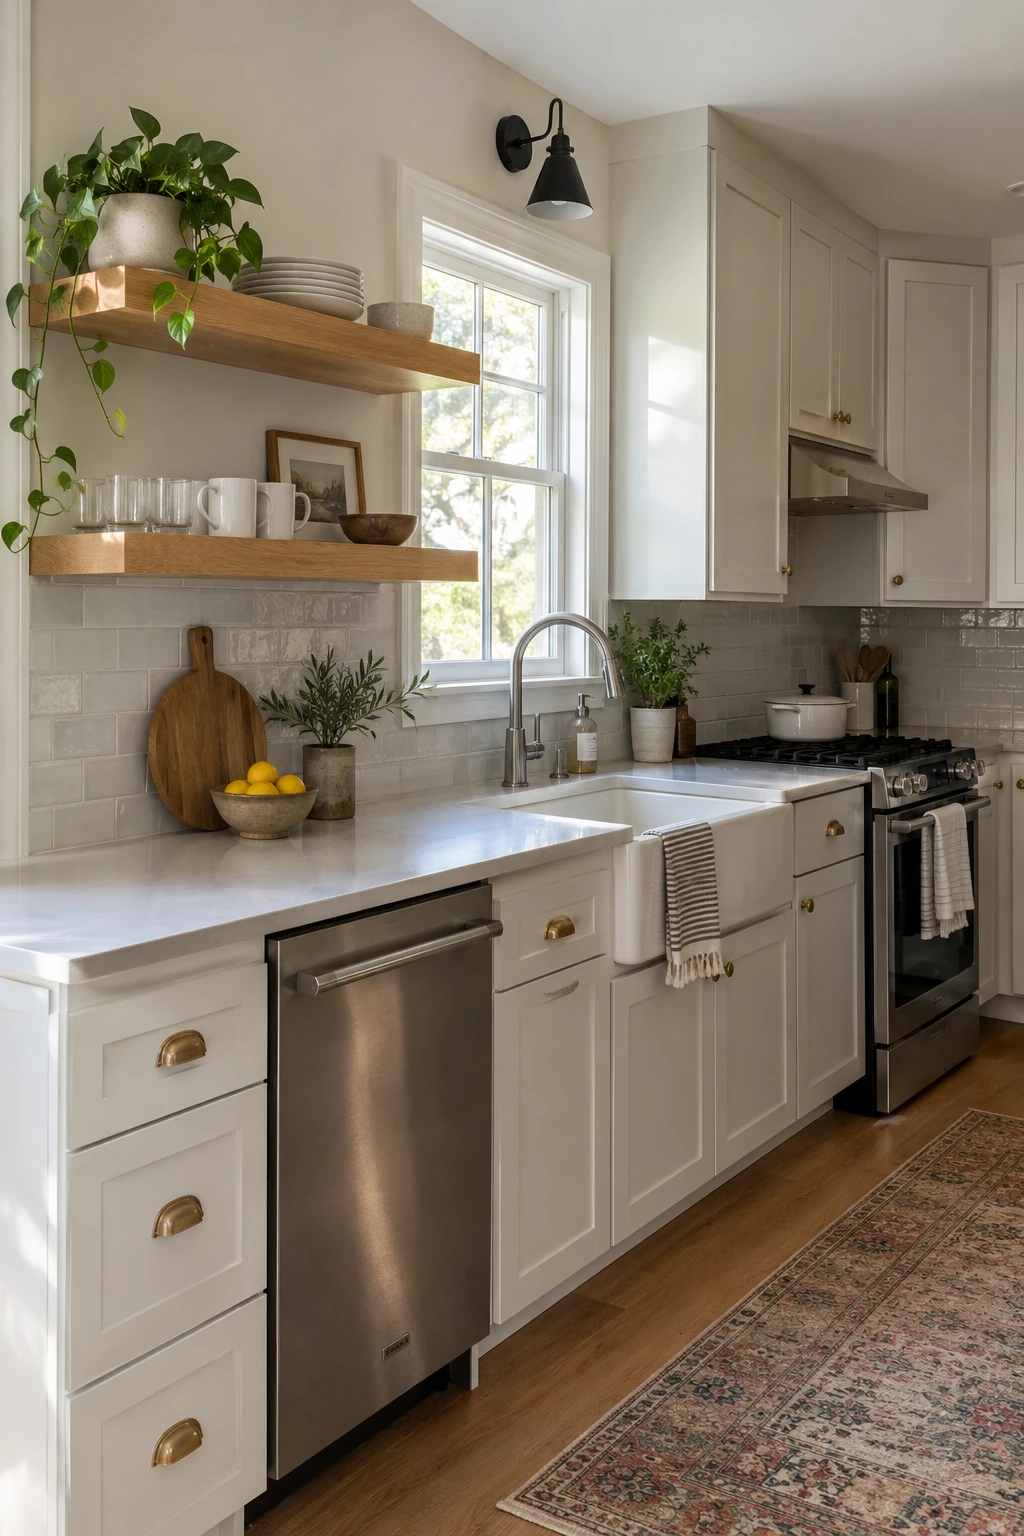
Replace only one short upper run with open shelves to gain breathing room while keeping most storage behind doors. Choose the wall used for everyday dishes rather than pantry food or mismatched appliances.
Anchor into studs or approved blocking and respect the shelf system’s load rating. These kitchen open shelving ideas help compare spacing and materials.
Mock the shelf depth with cardboard before ordering. Deep shelves can crowd the counter and collect grease near a range.
24. Use a Freestanding Island as a Trial
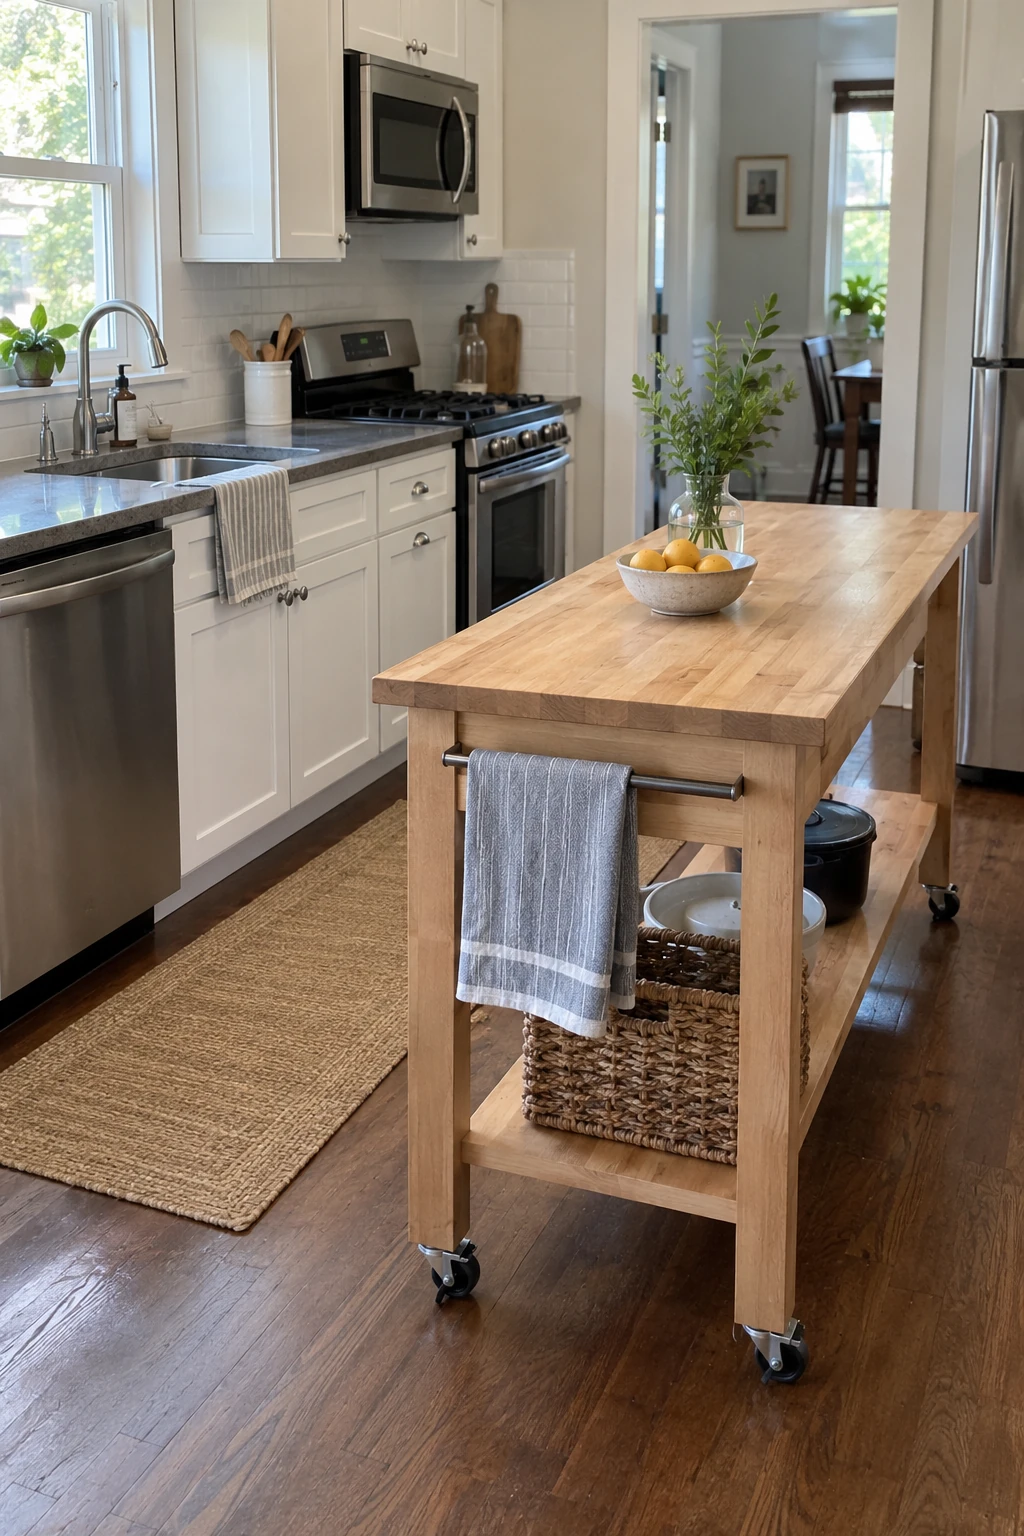
A freestanding worktable can test island size and placement before a permanent renovation. Choose a stable piece with locking casters or fixed legs and a top suited to food preparation.
Keep it clear of appliance doors, heating registers, and required pathways. Renters can take the piece with them instead of altering flooring, wiring, or cabinetry.
Planning check: Pause after the measured mockup and verify clearances before fabrication.
Use baskets or one low shelf for storage without making the cart top-heavy. Avoid a power cord crossing the aisle.
If the trial improves workflow for several months, record its exact footprint and aisle gaps. Those dimensions are stronger evidence than a showroom guess.
Sequencing, Safety, and Long-Term Maintenance
A durable renovation depends on decisions made before decorative work begins. Verify hidden conditions, order long-lead items, and preserve access to anything that may need service.
25. Lock the Appliance Schedule Before Fabrication
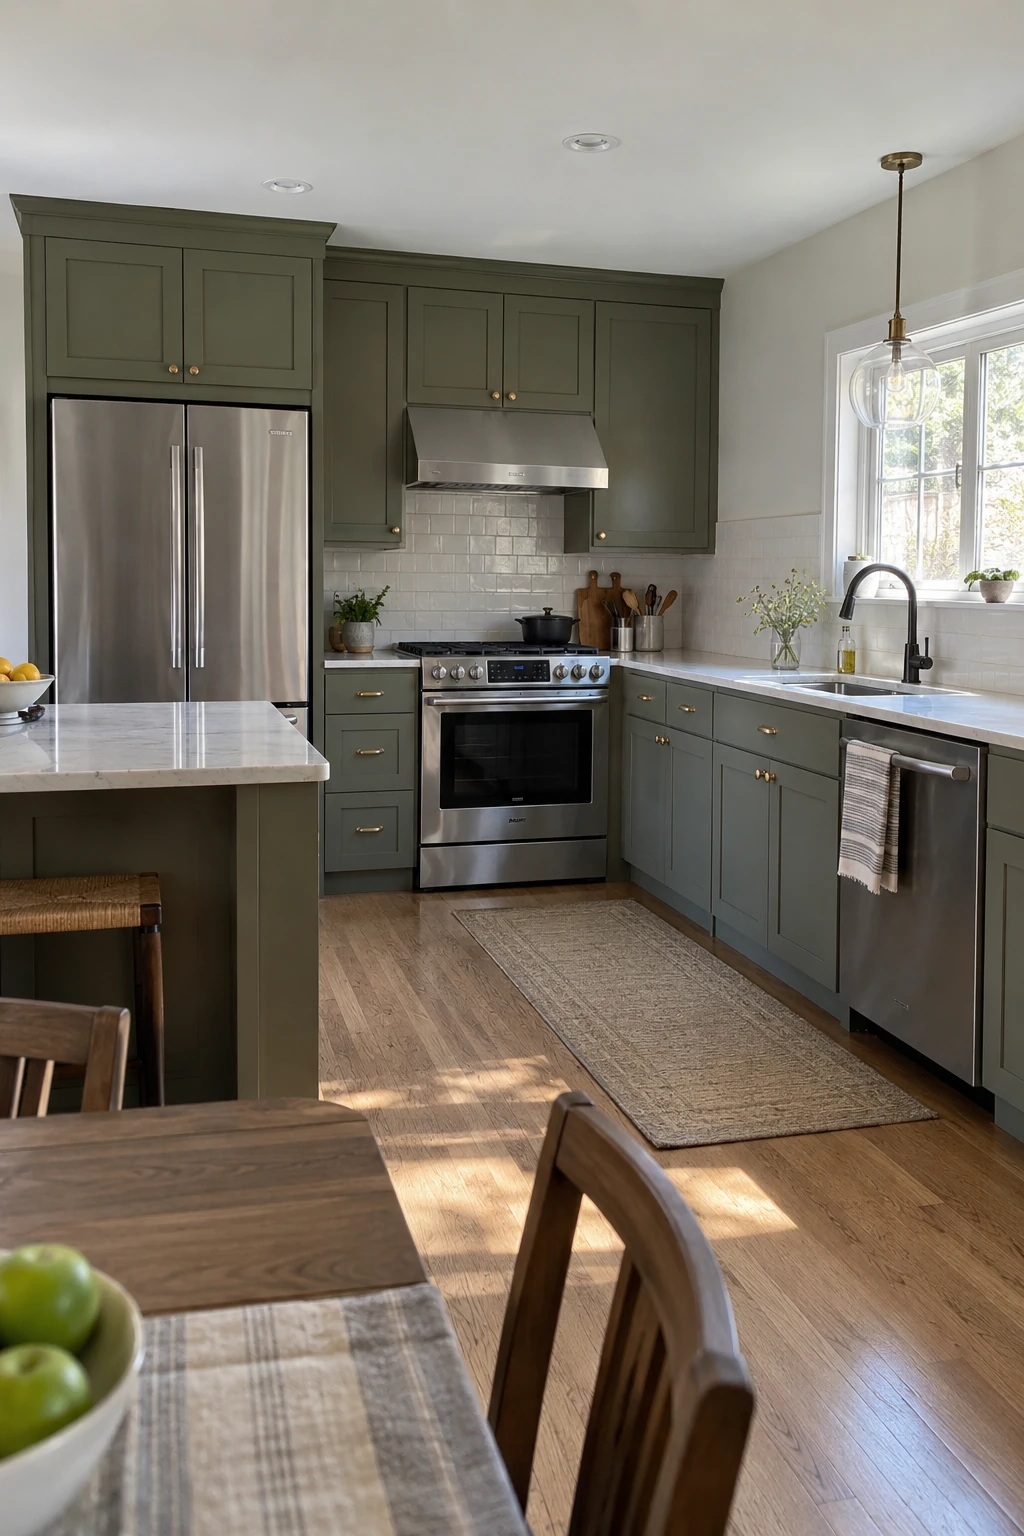
Select exact appliance models before cabinet and countertop drawings are released. Record cutouts, clearances, utilities, hinge swings, ventilation, trim kits, and delivery dimensions in one schedule.
Keep specification sheets with the approved drawings and recheck model numbers before fabrication. A late substitution can change a panel width, outlet location, or counter opening.
26. Rough In Utilities Before Walls Close
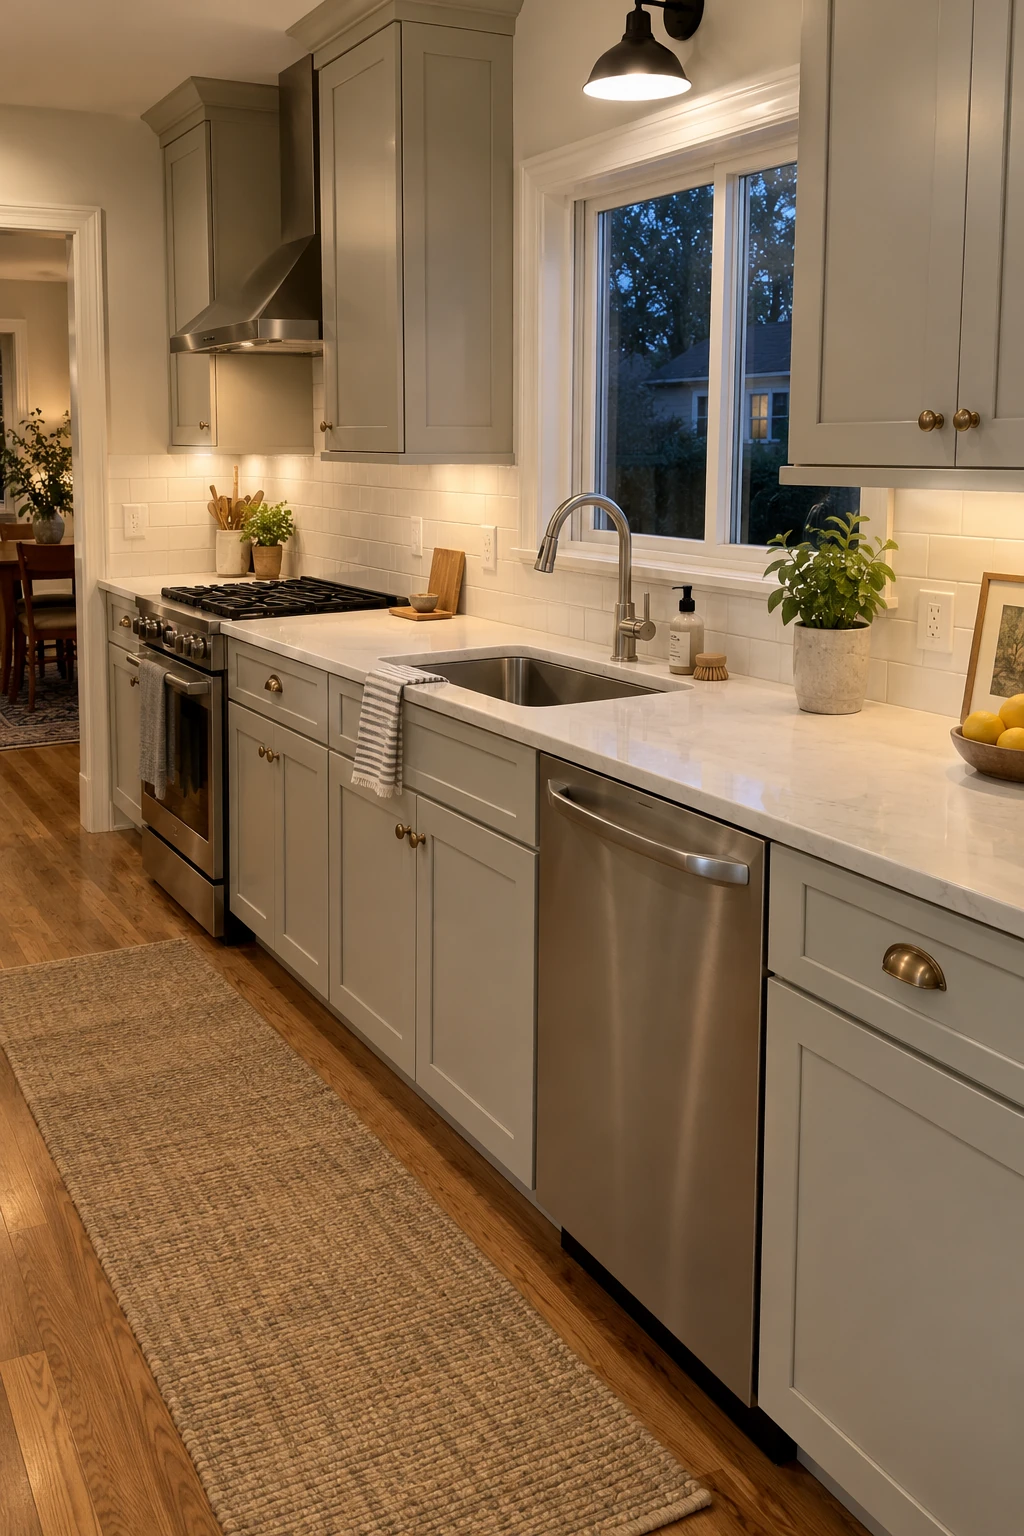
Complete plumbing, electrical, gas, ventilation, blocking, and air sealing before drywall and cabinets. Each rough-in should be checked against final cabinet elevations and appliance specifications.
Photograph open walls with a tape measure visible. The record helps future installers avoid pipes and wires when mounting rails, shelves, or a hood.
Schedule required inspections before covering work. Local rules determine permits, circuits, receptacle protection, shutoffs, and ventilation details.
27. Build a Temporary Kitchen Before Demolition
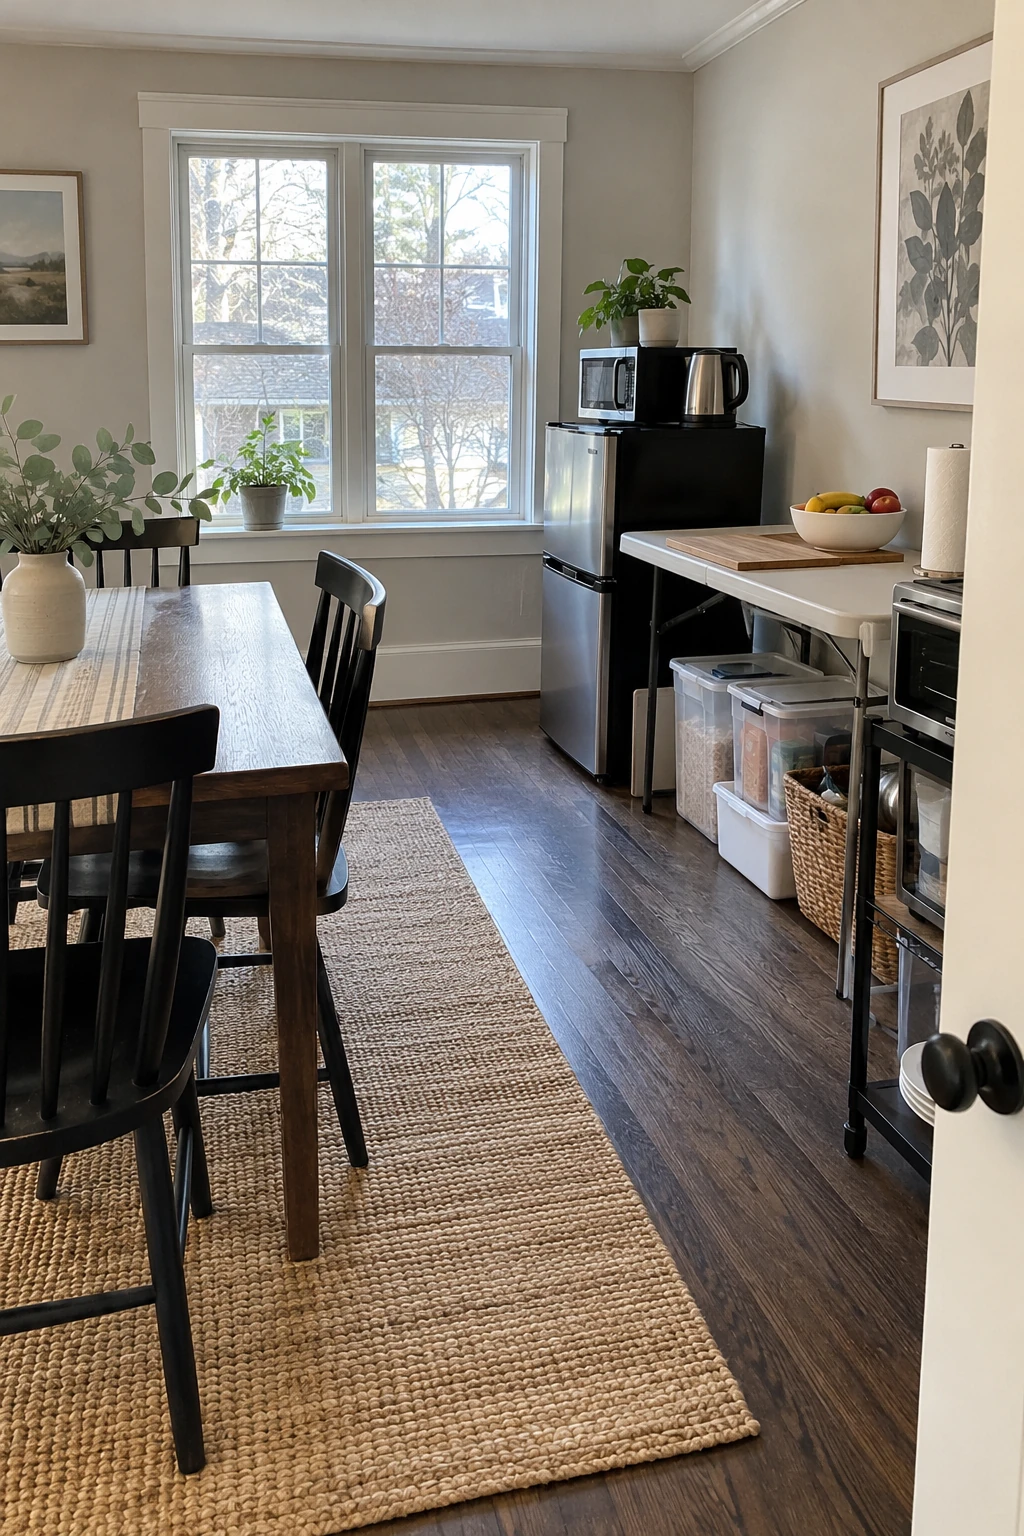
Set up a temporary food zone before demolition with refrigeration, a safe listed cooking appliance, water access, basic dishes, and sealed pantry bins. Keep it outside the dusty work path.
Avoid overloading one circuit with a microwave, kettle, toaster, and refrigerator. Plan dishwashing and waste routines so the temporary setup remains usable for the full project.
Planning check: Pause after the measured mockup and verify clearances before fabrication.
Seal doorways and protect supply registers during dusty work according to the project’s ventilation plan. Store food and dishes away from the construction zone.
Maintain a clear exit path and keep children and pets away from tools, debris, and temporary cords. Convenience should not weaken household safety.
28. Install in a Damage-Smart Order
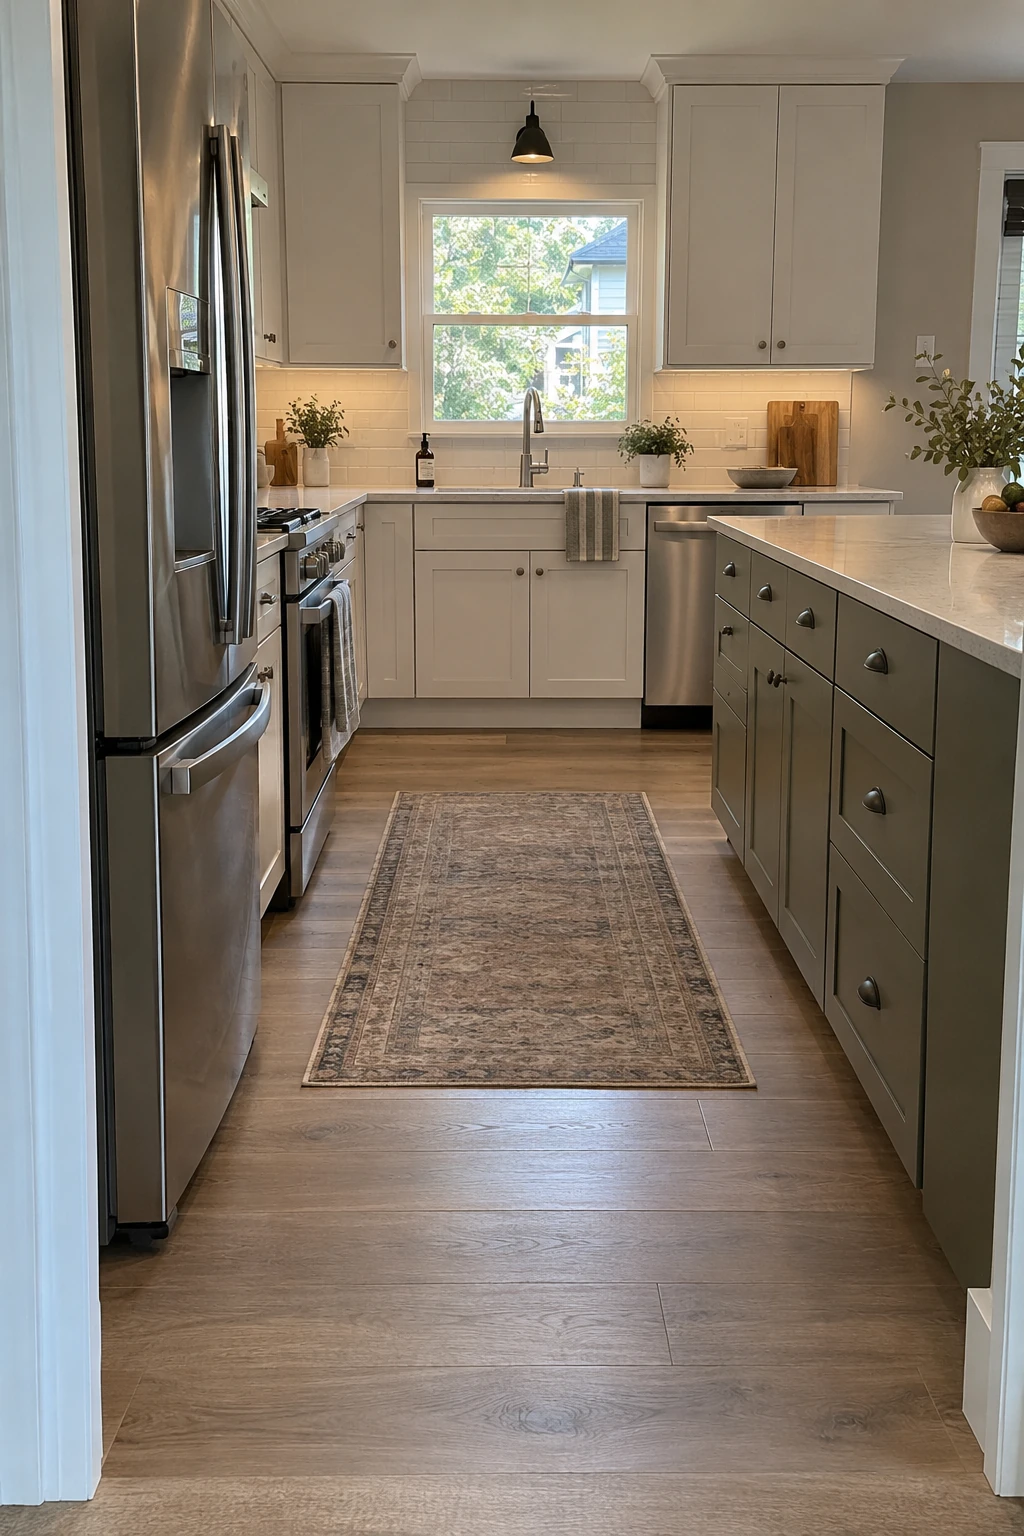
Coordinate demolition, framing, rough-ins, wall repair, cabinets, templates, counters, tile, finish electrical, plumbing, appliances, paint touchups, and final adjustment as one sequence. The exact order varies with flooring and cabinet type.
Do not template counters until base cabinets are fixed, level, and final. Backsplash follows the installed counter so the bottom joint can be measured accurately.
Planning check: Pause after the measured mockup and verify clearances before fabrication.
Protect finished floors and cabinet faces from later trades with breathable, surface-appropriate materials. Heavy protection still needs clean edges so trapped grit does not scratch underneath.
Reserve time for door alignment, caulk, paint repair, appliance leveling, and a complete punch list. A working kitchen can still need careful finishing.
Cleanup and Storage Details
Small cabinet decisions can remove daily friction when each opening is planned around a specific task. Keep heavy, wet, and frequently handled items close to where they are used.
29. Store Everyday Dishes Beside the Dishwasher
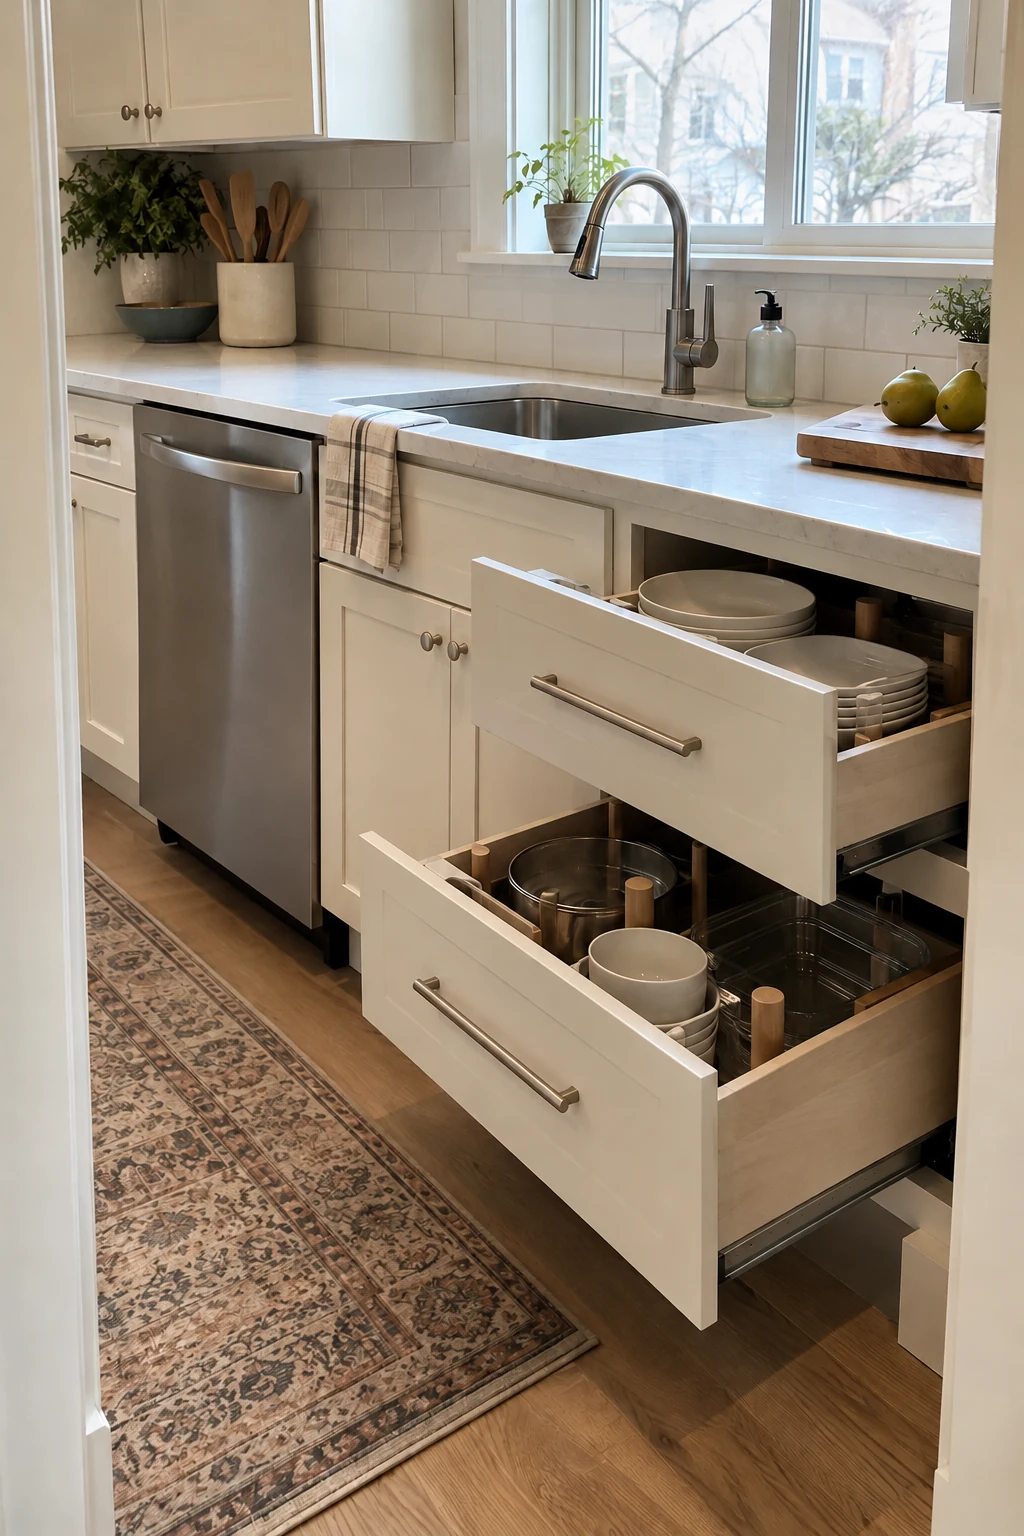
Place everyday plates, bowls, glasses, and flatware within one step of the dishwasher. Unloading becomes a short transfer instead of a trip across the cooking aisle.
Check the dishwasher door, nearby drawers, and the standing position together on the plan. Two useful cabinets can still conflict when their fronts overlap or trap the person unloading.
Use shallow pegs or adjustable dividers so stacks stay stable without wasting vertical space. Reserve distant upper cabinets for serving pieces used less often.
30. Pull Waste Sorting Into the Prep Zone
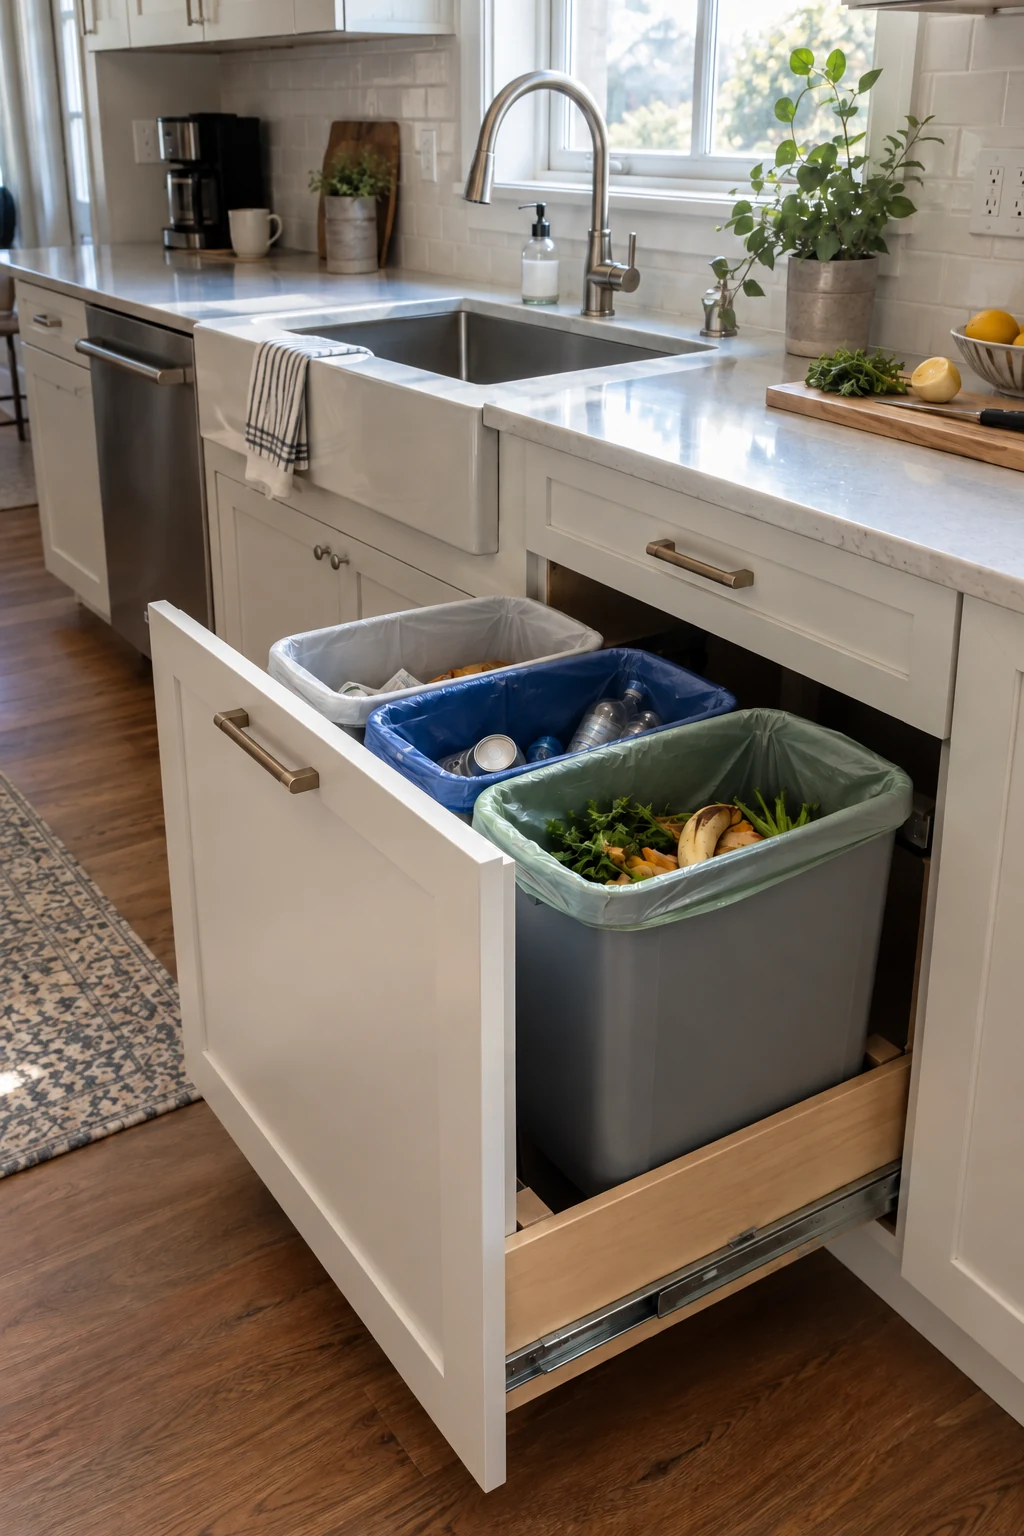
Locate trash, recycling, and compost beside the main prep surface so scraps move directly off the cutting board. A full-extension pullout keeps the floor clear and makes each bin easy to remove.
Size the cabinet around bags and collection rules already used in the household. Oversized bins become too heavy, while undersized bins create constant overflow.
Protect the cabinet floor with a removable tray and leave room for lids to open. Cleanable sides matter because this cabinet handles moisture and food residue.
31. Make a Blind Corner Reachable
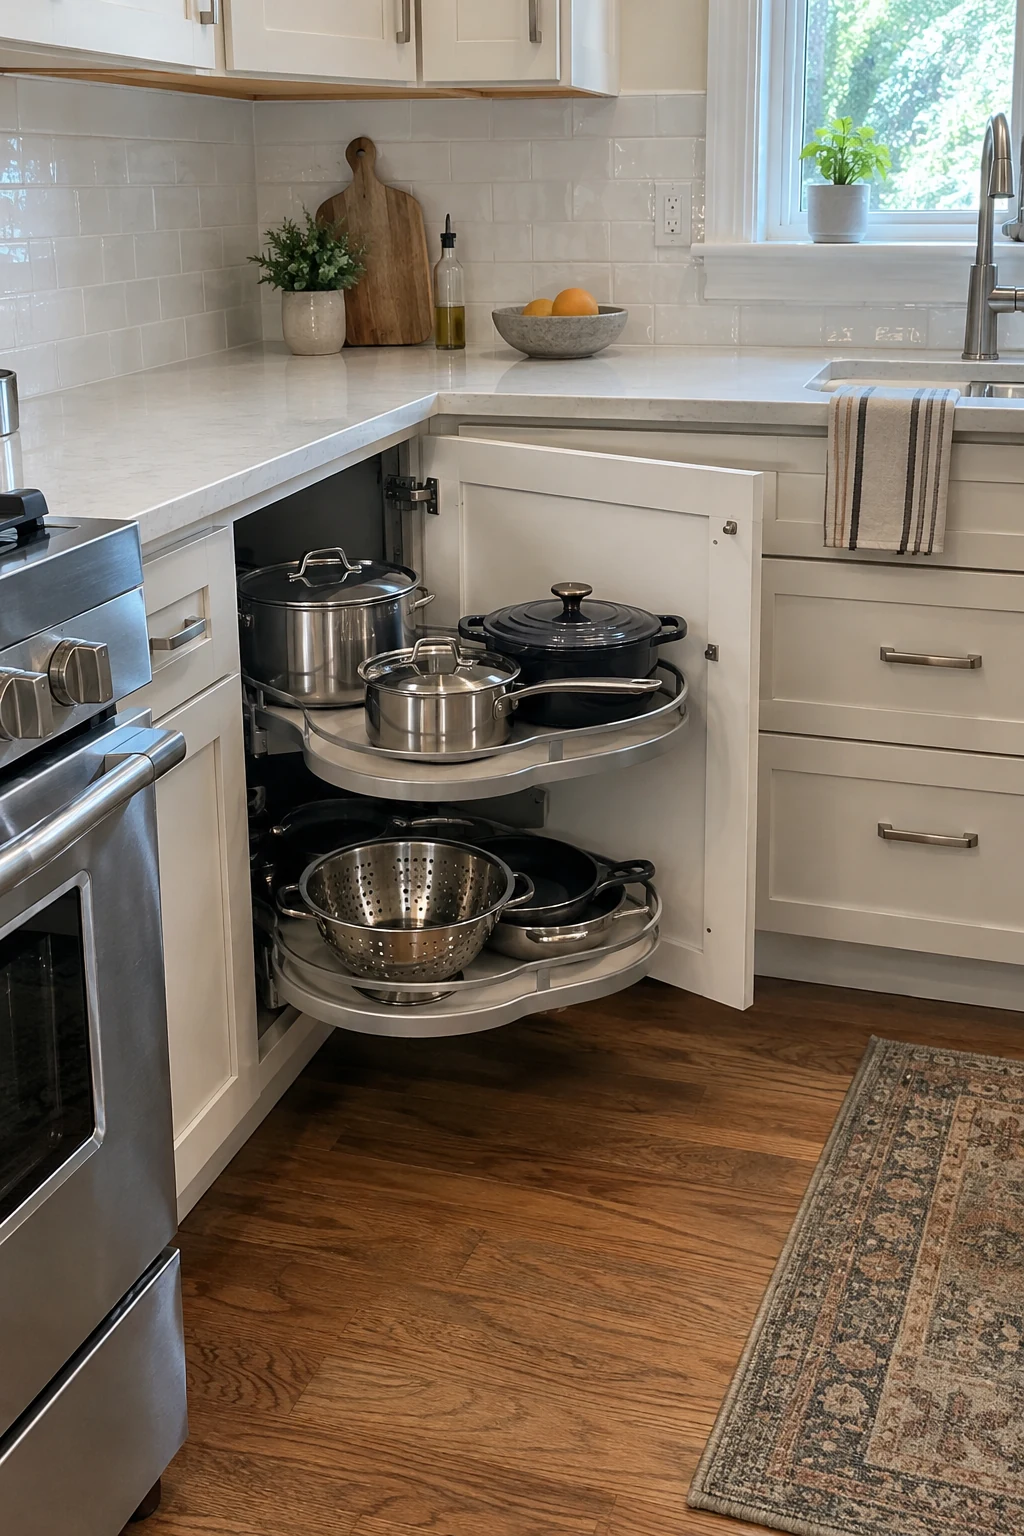
Fit a blind corner with a tested swingout, kidney shelf, or corner drawer system instead of a deep fixed shelf. Bring the mechanism into the aisle before judging what it can hold.
Confirm the door width, hinge side, adjacent handles, and appliance clearances from the hardware template. Store medium-weight pieces there and keep the heaviest cookware in straight drawer banks.
32. Stand Trays and Cutting Boards Upright
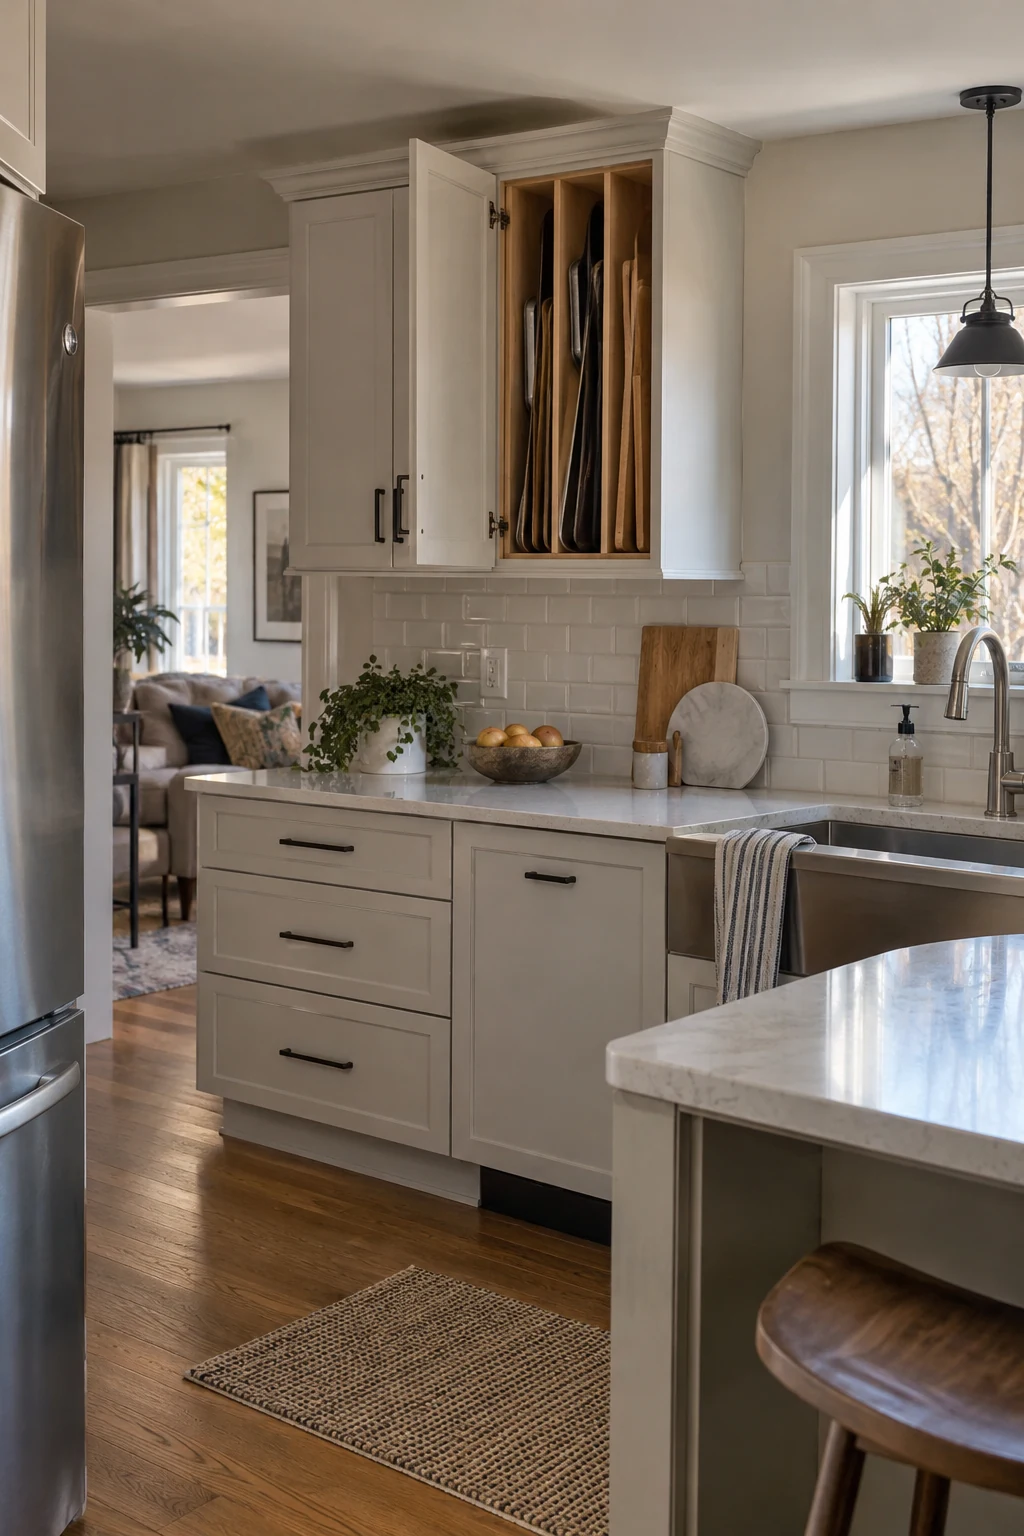
Use vertical dividers for sheet pans, cooling racks, cutting boards, and serving trays. Each piece slides out independently, so a heavy stack does not need to be lifted from a low shelf.
Place the cabinet near the oven or prep counter and allow enough height for the largest tray. Fixed dividers feel sturdier, while adjustable dividers make future changes easier.
33. Keep Pantry Shelves Shallow and Adjustable
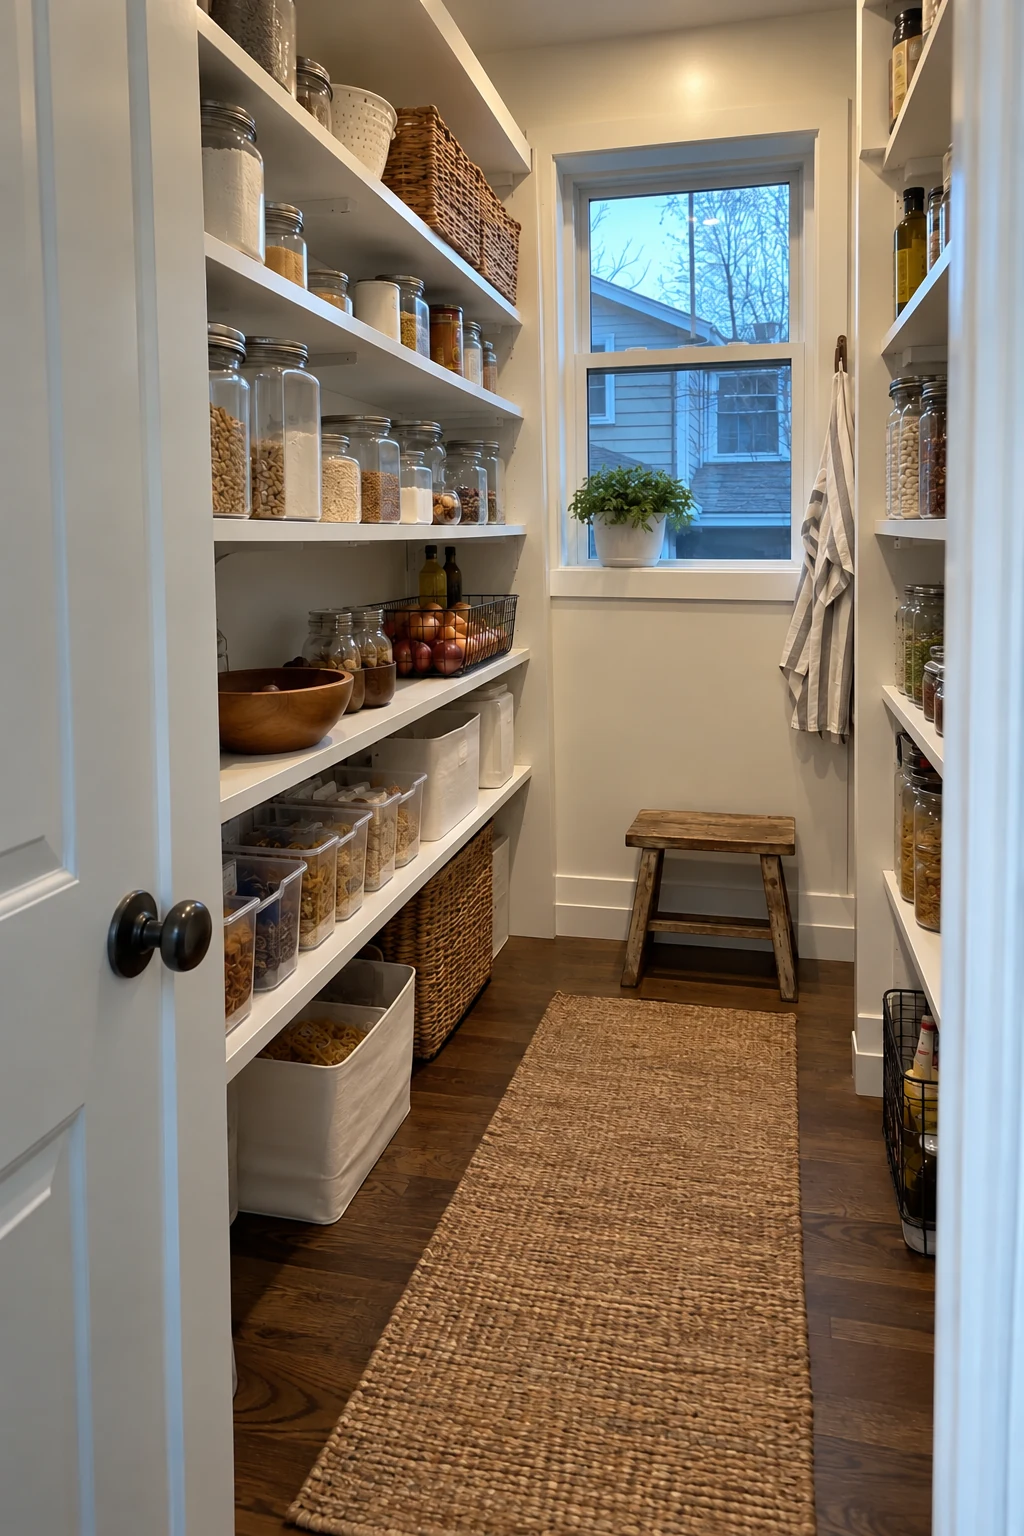
Shallow shelves keep cans, jars, and packages visible without a second row disappearing behind the first. Use deeper space only for appliances, bulk bins, or baskets that pull out as one unit.
Drill shelf-pin rows or use standards so heights can change when household purchases change. Tight fixed spacing often wastes more room than it saves.
Keep the floor clear for cleaning and leave a comfortable aisle. A pantry gains capacity from usable frontage, not from shelves that are too deep to reach.
34. Give Cleaning Tools a Tall Cabinet
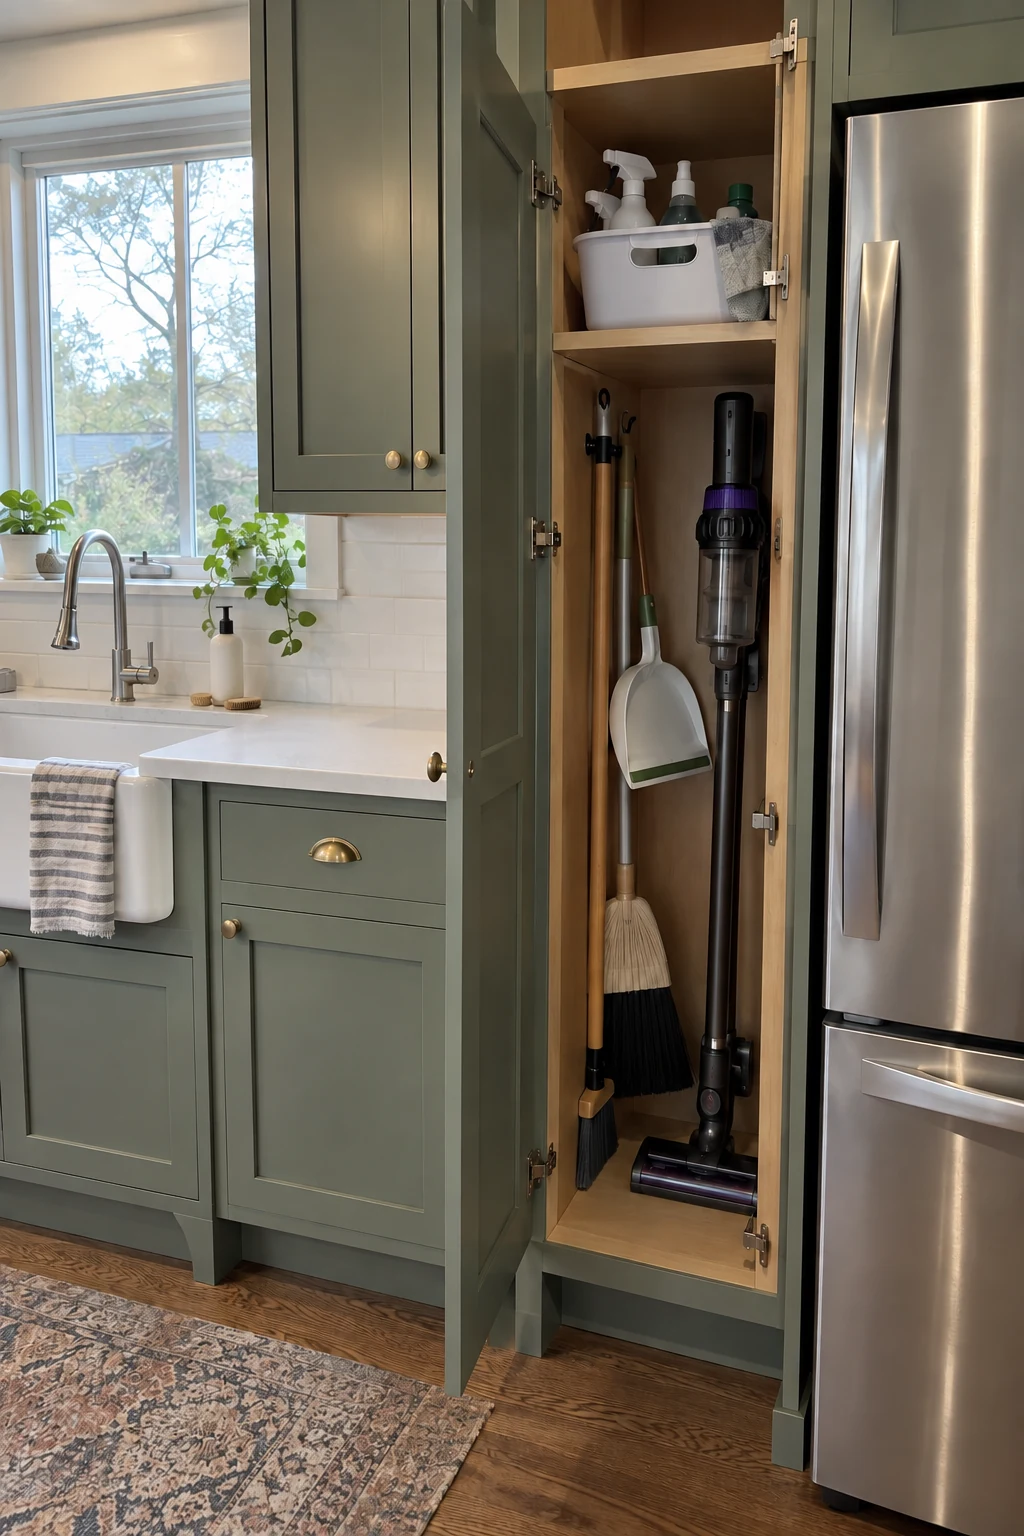
Dedicate a narrow tall cabinet to the broom, stick vacuum, dustpan, and a handled cleaning caddy. Vertical clips prevent long tools from falling across the doorway.
Separate chemicals from food and keep products in their original containers. If the vacuum charges inside, use a listed installation with ventilation and an accessible receptacle planned by the electrician.
Easier Reach and Accessible Use
A renovation can reduce bending, overhead reaching, and awkward door movement for everyone. Choose adaptable features that remain useful across different ages and abilities.
35. Build One Seated Prep Surface
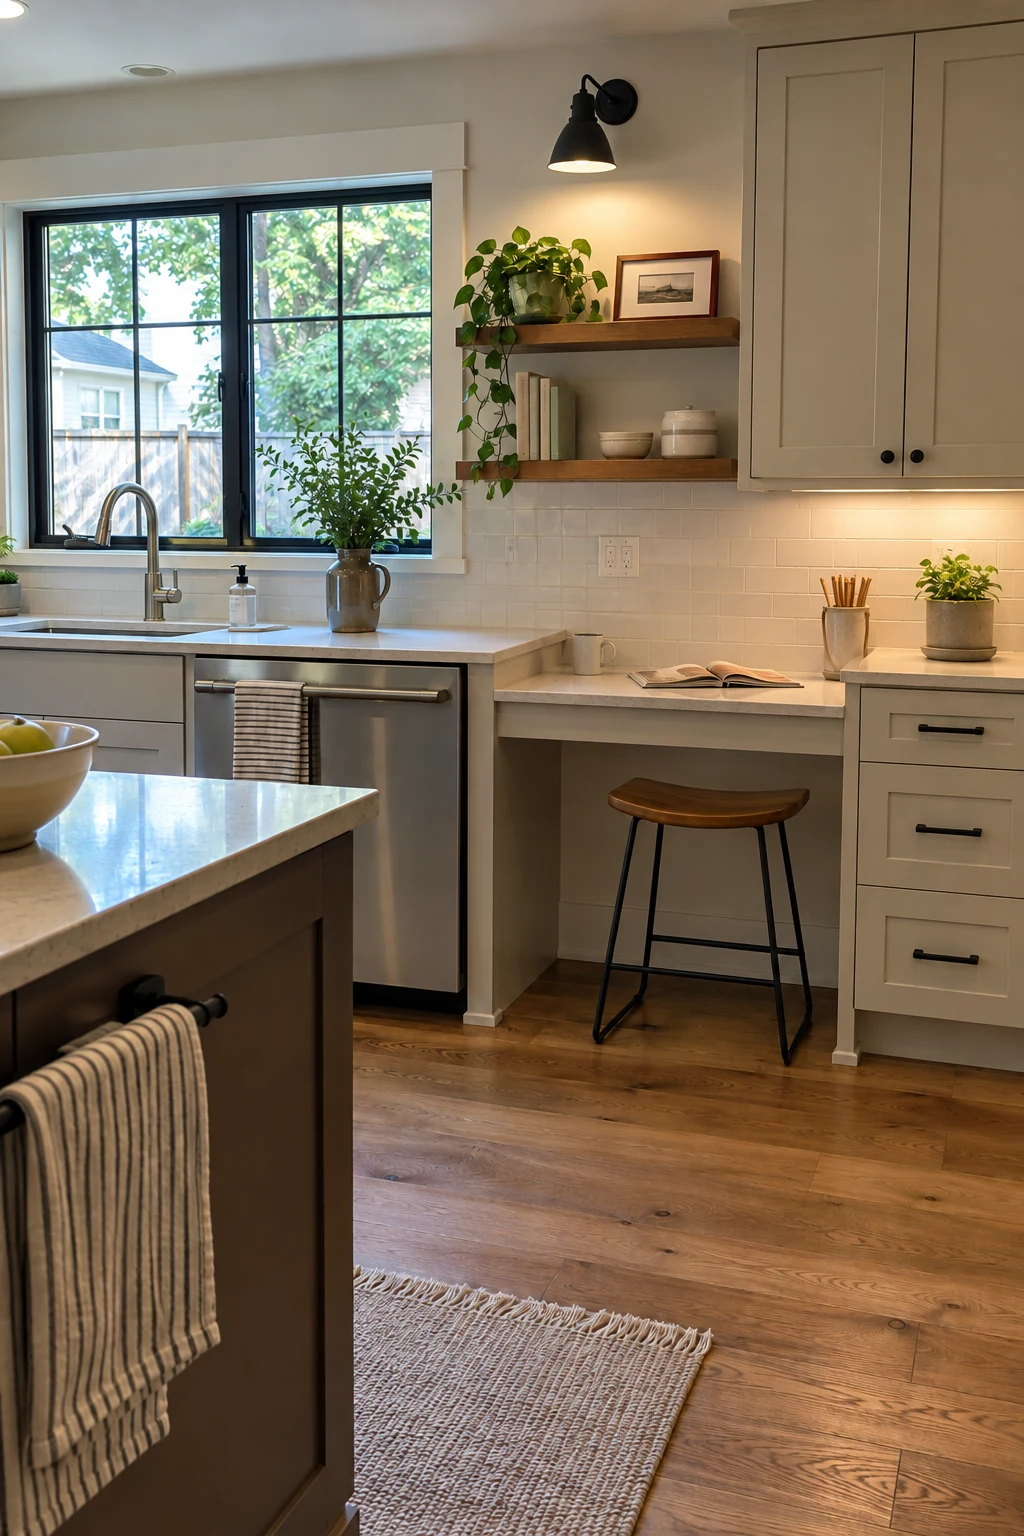
Include one lower work surface with open knee space for seated prep, children helping, or anyone who tires while standing. Keep it near the sink without placing it in a door swing.
Finish the wall and floor beneath the opening so removable base cabinetry can be added later. Protect exposed underside surfaces and route utilities away from knees and feet.
Planning check: Mock up the surface height, knee clearance, approach, and nearby drawer access before ordering cabinetry.
A movable drawer cart can restore storage when the open space is not needed. Verify the final height, width, depth, and approach with the person who will use it.
Accessibility standards can inform the design, but a private home should also reflect the user’s reach, chair, strength, and routines. Test the setup at full scale before fabrication.
36. Add a Pull-Down Shelf to One Upper Cabinet
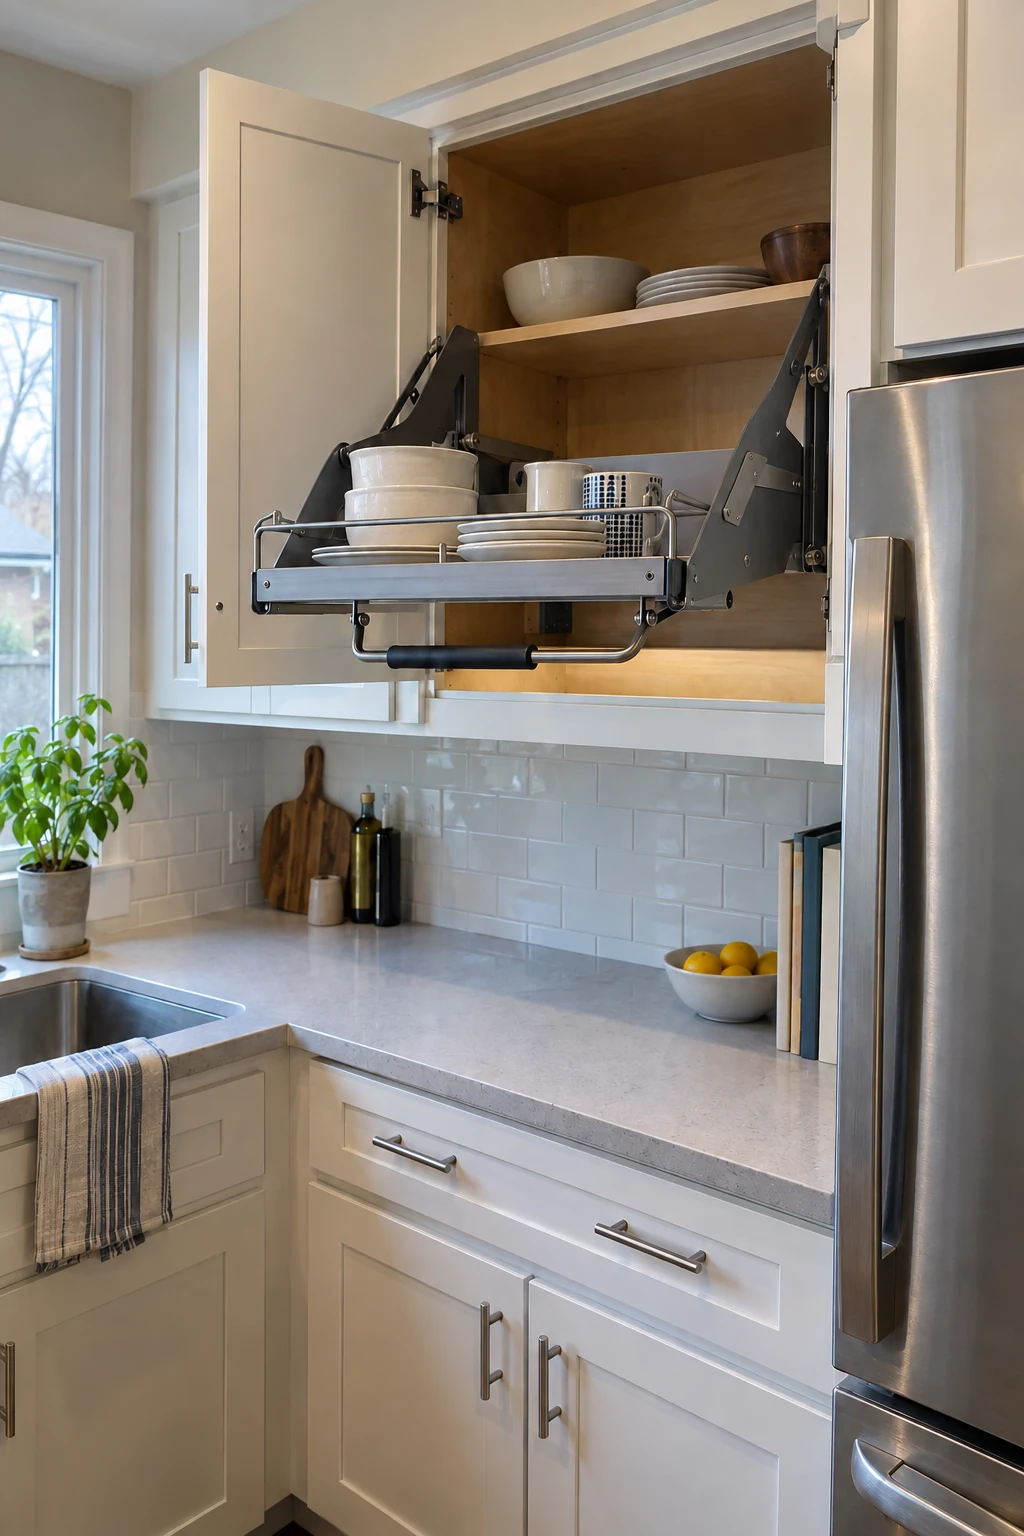
A pull-down fitting can bring lightweight dishes or pantry staples into a comfortable reach zone. Use it in one carefully chosen upper rather than filling every cabinet with complex hardware.
Check the mechanism’s load rating, handle reach, counter clearance, and pinch points. Keep heavy appliances in base drawers where lifting is safer.
The cabinet must be securely built and mounted for the moving load. Leave enough empty space below so the shelf can descend without striking the faucet or countertop items.
37. Raise the Dishwasher on a Short Plinth
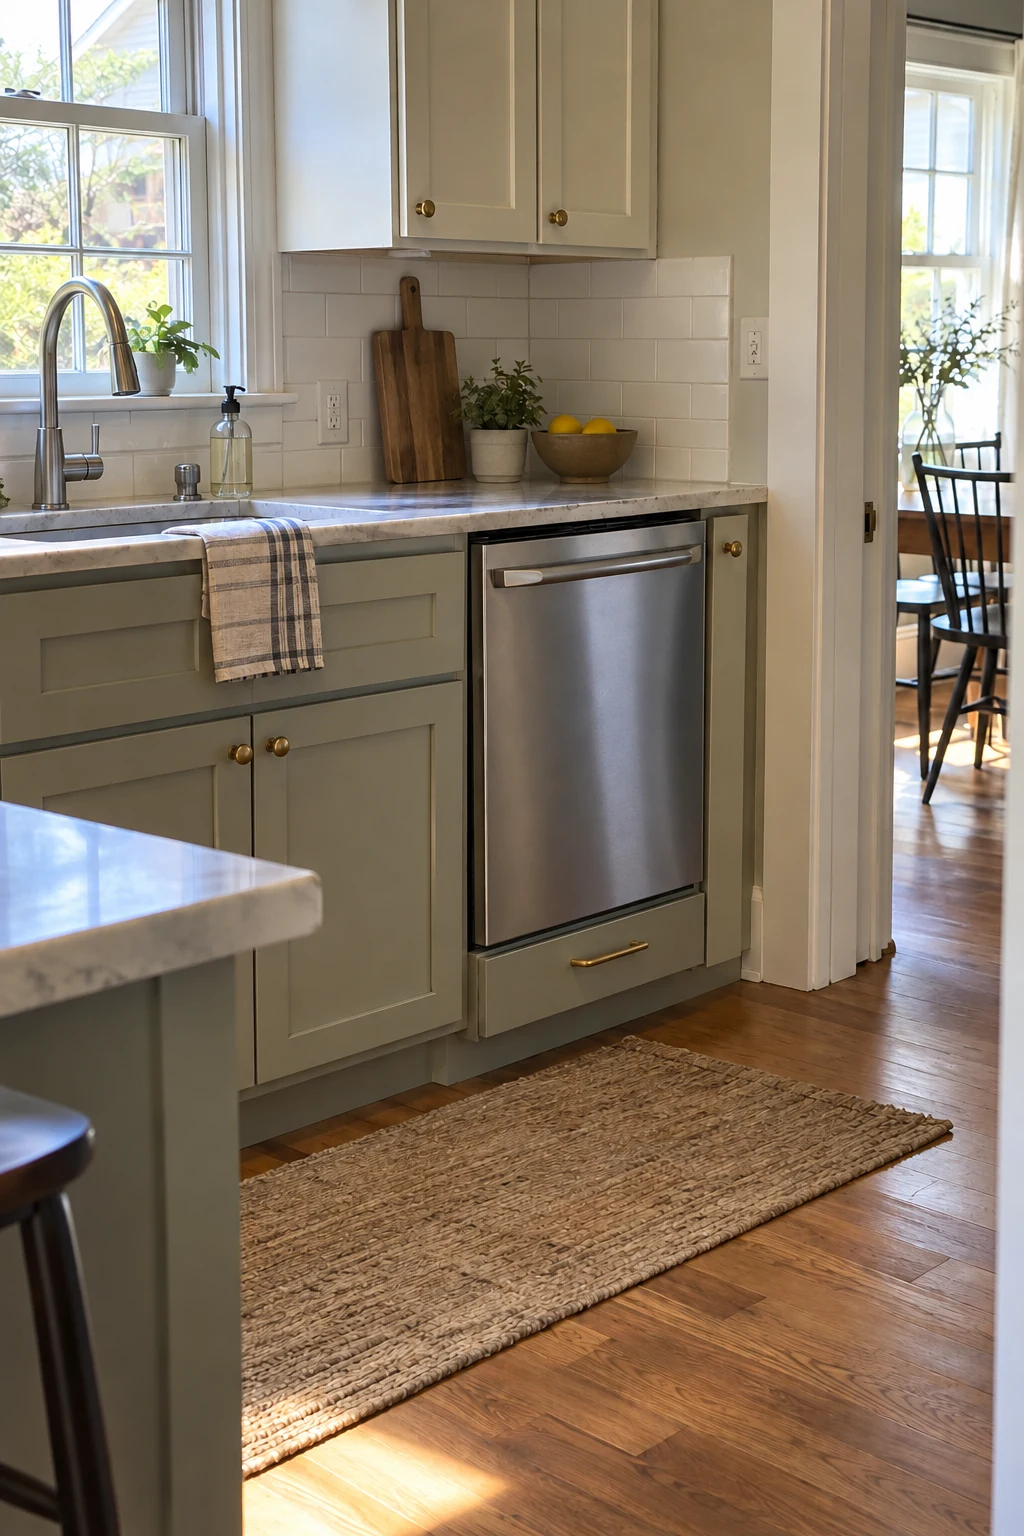
Raising the dishwasher several inches reduces bending during loading and unloading. It works best when the machine remains beside the sink and its open door does not block the standing space.
Use the appliance installation requirements to plan supply, drain, power, ventilation, fastening, and service removal. The platform must support the loaded appliance without flexing.
Align the raised top with a purposeful counter or cabinet detail. A shallow drawer below can use the plinth only when it does not compromise service access.
38. Choose a Side-Opening Wall Oven
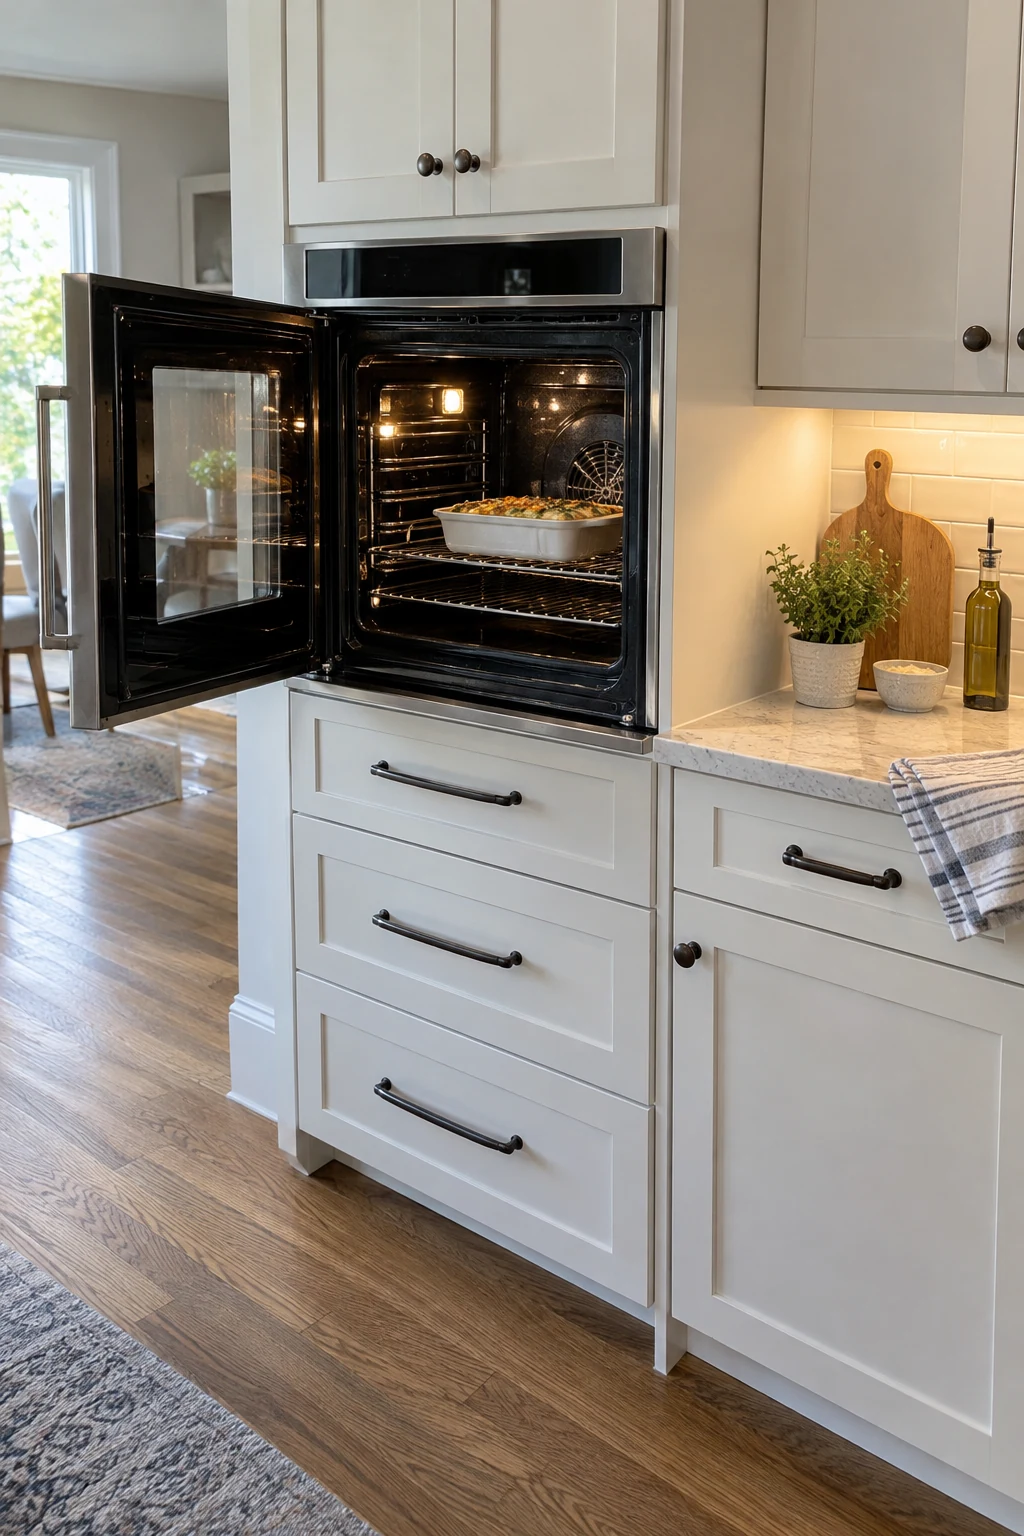
A side-opening wall oven can reduce the need to reach across a hot drop-down door. Install it at a height that keeps controls and the heaviest rack within comfortable reach.
Provide heat-safe landing counter beside the latch side so a pan can move in one controlled motion. Confirm the door swing will not collide with an island, handle, or passing route.
Model availability and hinge direction vary, so select the exact appliance before cabinet drawings. Follow its ventilation, support, electrical, and trim instructions.
Small-Space and Family Layout Moves
Compact kitchens benefit from furniture and openings that do more than one job. Measure door swings and circulation before adding storage to every available wall.
39. Replace a Loose Table With a Storage Banquette
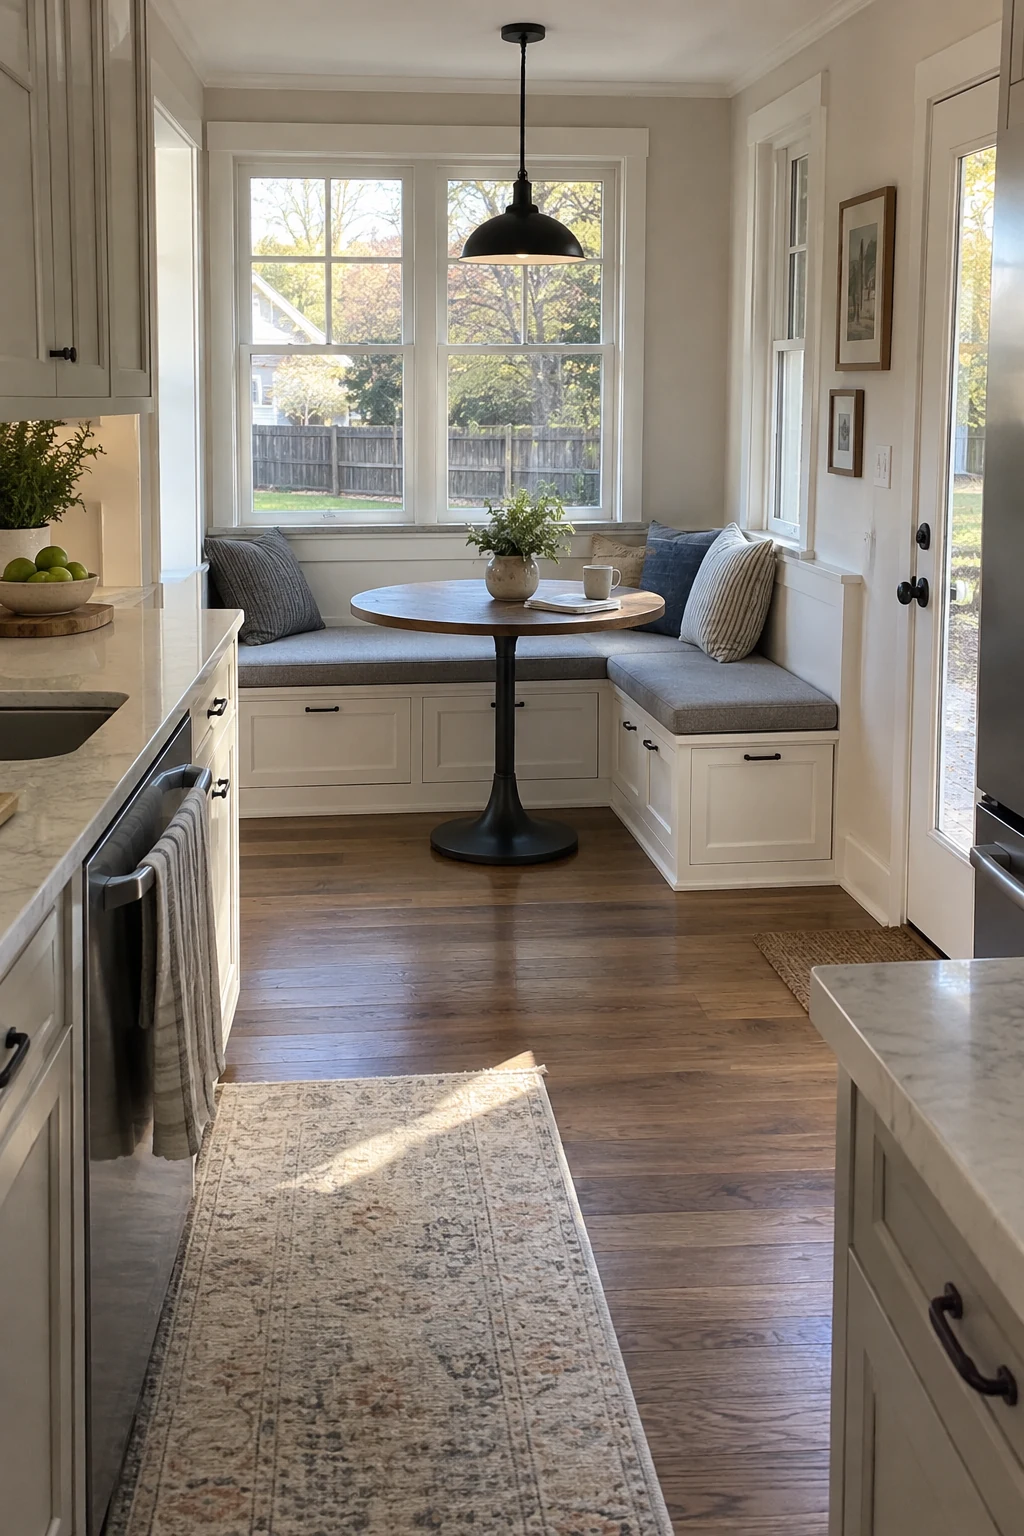
A built-in banquette can push seating against the wall and recover circulation around a breakfast table. Draw the table edge, seated bodies, and pull-out path before setting the bench depth.
Use drawers or lift-up seats for linens, games, or occasional serving pieces. Keep hinges protected and avoid deep bins that require moving every cushion.
A pedestal table usually gives knees and feet more freedom than four corner legs. Provide washable fabrics and enough light for meals, homework, and casual prep.
40. Use Slim-Depth Cabinets on a Tight Galley Wall
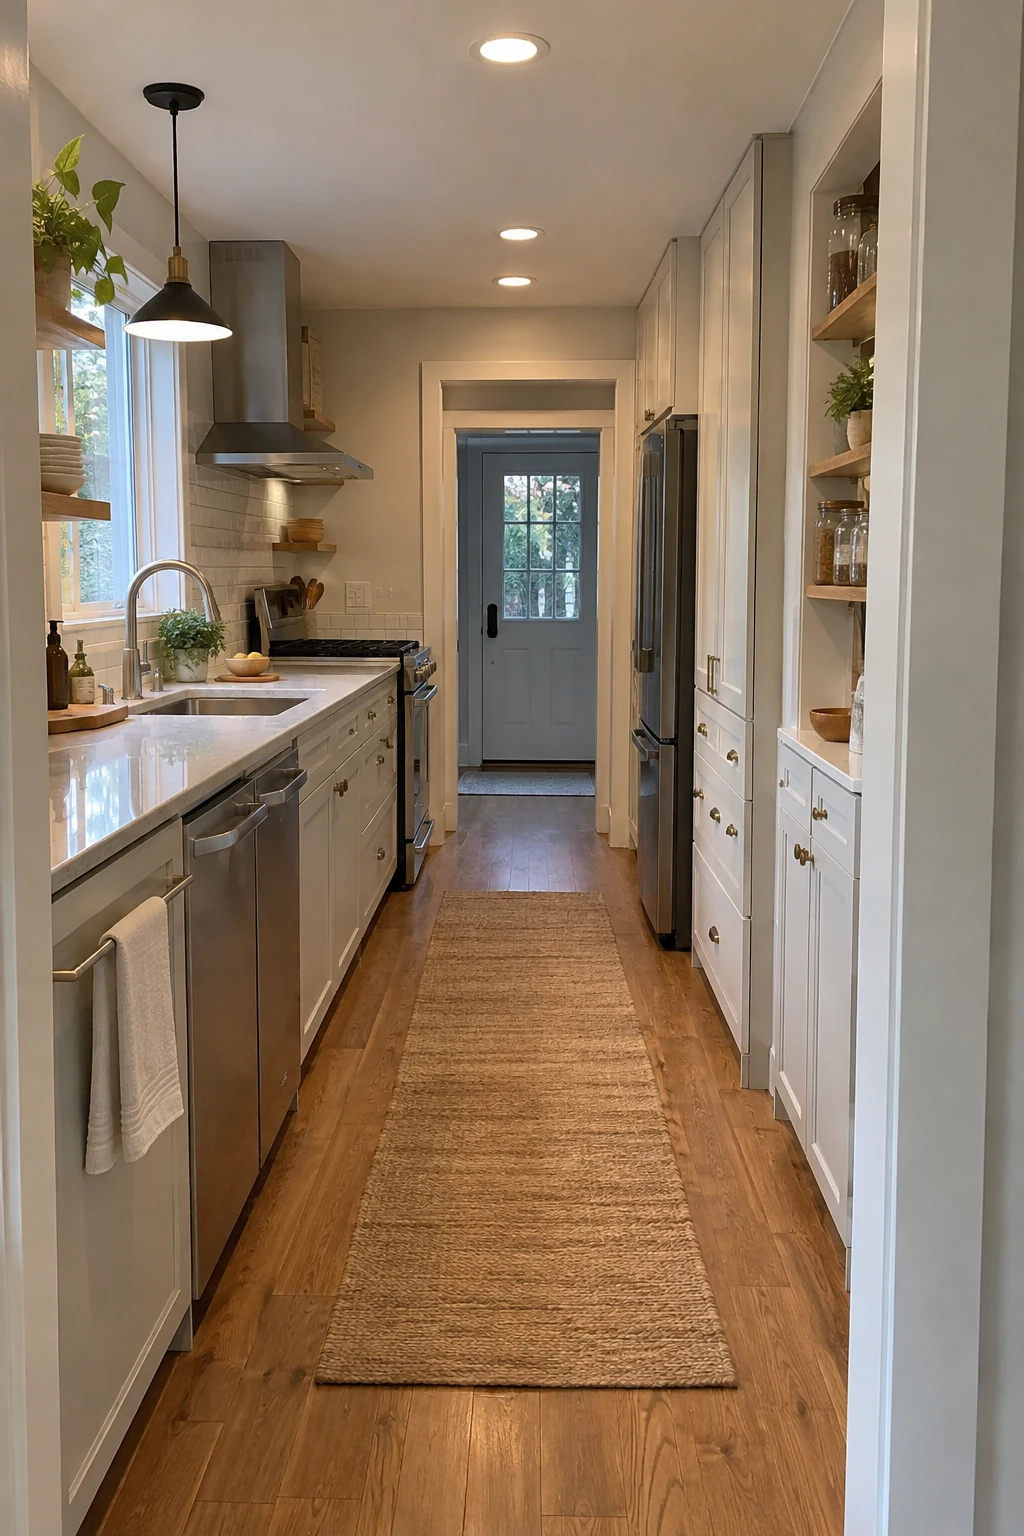
In a narrow galley, reduce cabinet depth on the secondary wall instead of squeezing the aisle. Slim bases can hold dishes, pantry jars, linens, and shallow drawers without projecting like standard counters.
Keep full-depth appliances, the sink, and major prep space on the primary run. The shallow side works well as a serving ledge or grocery landing strip.
Measure from finished handles and appliance faces because they define the real passage. Secure reduced-depth cabinets to appropriate framing so open drawers do not tip the run.
41. Swap a Swinging Pantry Door for a Pocket Door
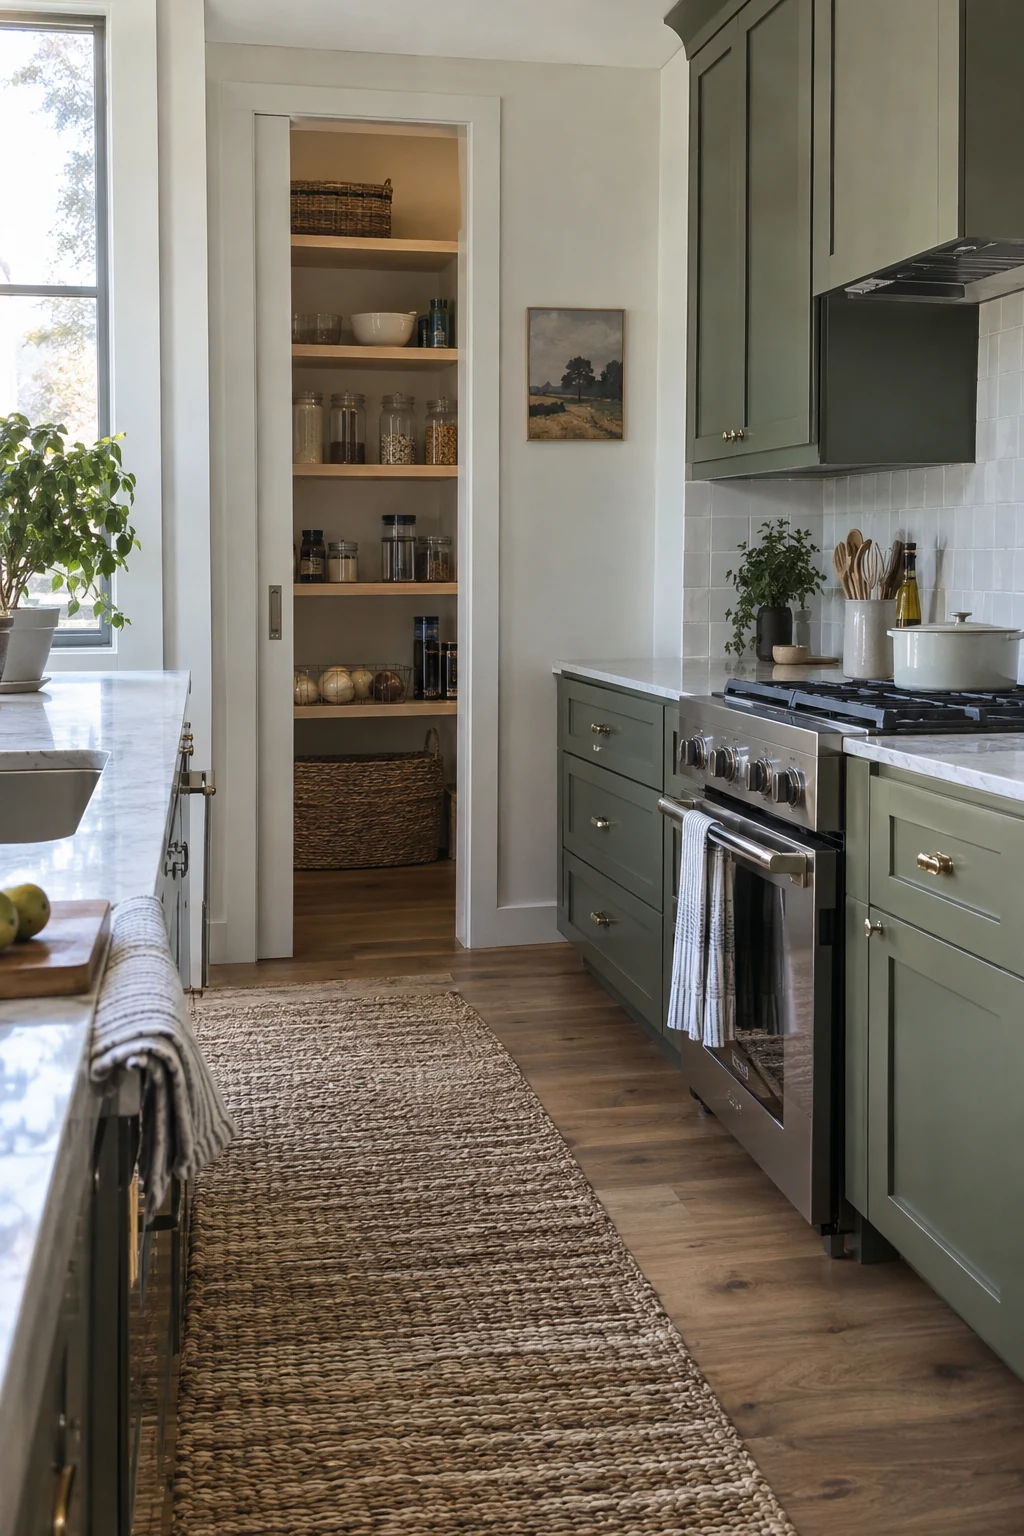
A pocket door can clear a narrow pantry entry when a hinged door blocks cabinets or traffic. The wall cavity must be free of plumbing, wiring, ductwork, and structural conflicts.
Choose durable track hardware with accessible adjustment and a pull that is easy to grasp. Keep the finished opening wide enough for baskets, small appliances, and comfortable passage.
42. Add a Small Prep Sink Only Where It Earns Its Space
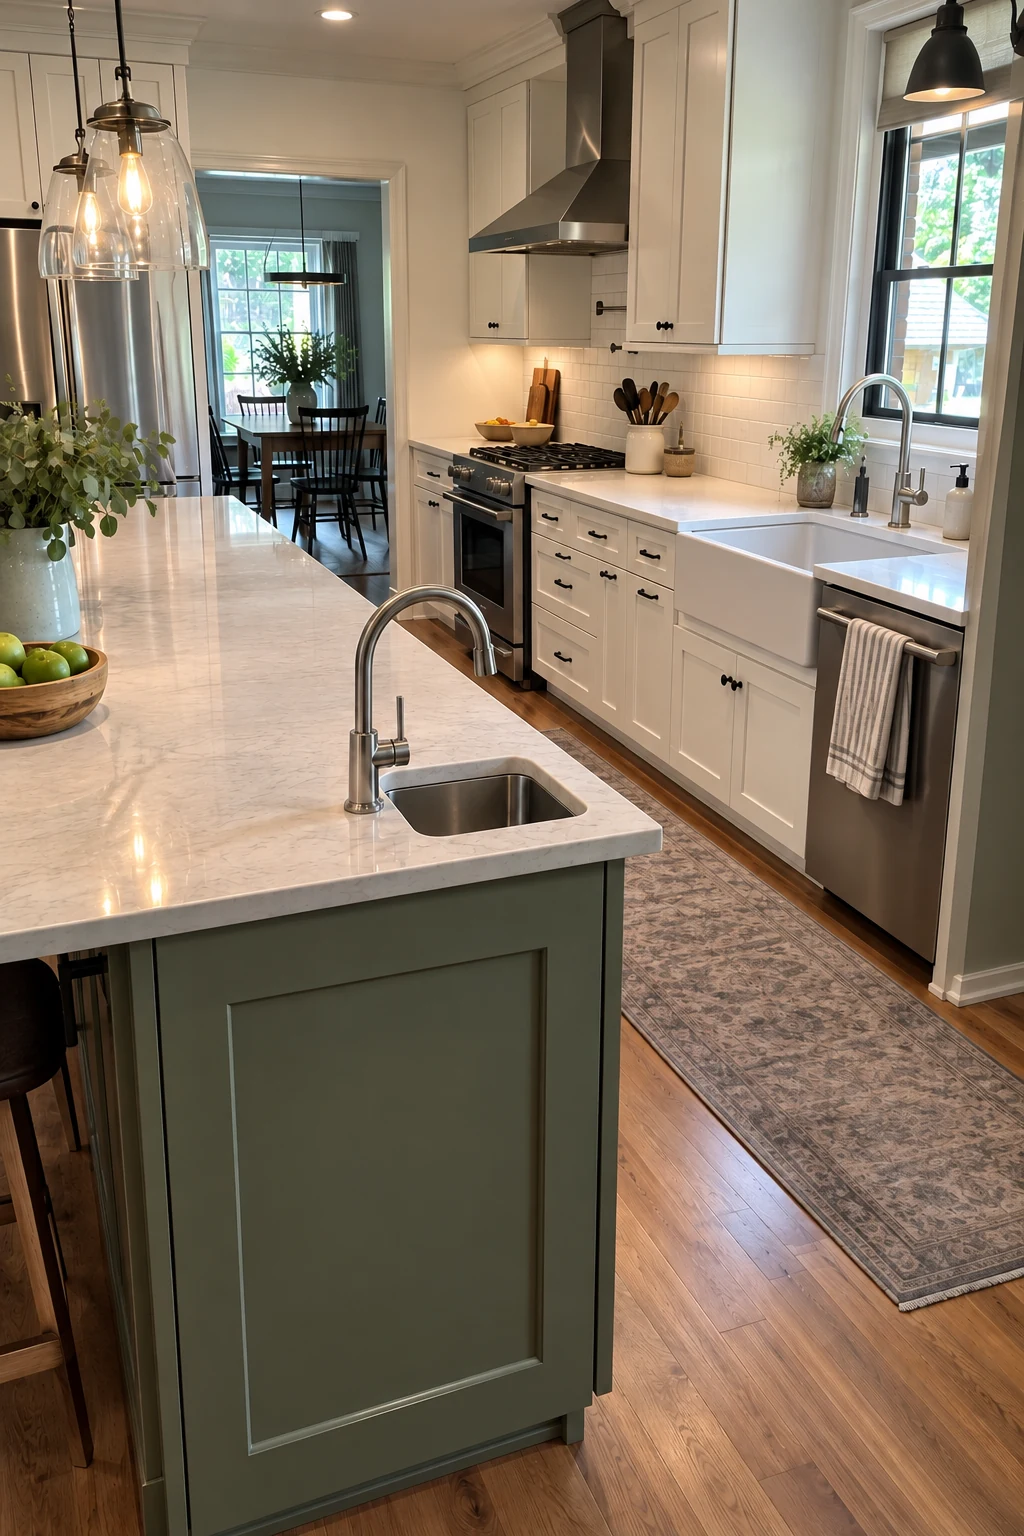
A compact prep sink can separate vegetable washing from the cleanup zone in a large kitchen. Place it where a second cook gains a complete work area instead of another obstacle.
Leave useful counter on at least one side and keep the faucet outside seating reach. Plan supply, drain, venting, shutoffs, and leak protection before the island is built.
Skip the second sink when it breaks up the only generous counter or requires a costly drain route. A water bowl and the main sink may support occasional helpers more efficiently.
43. Set the Microwave at an Easy-Reach Height
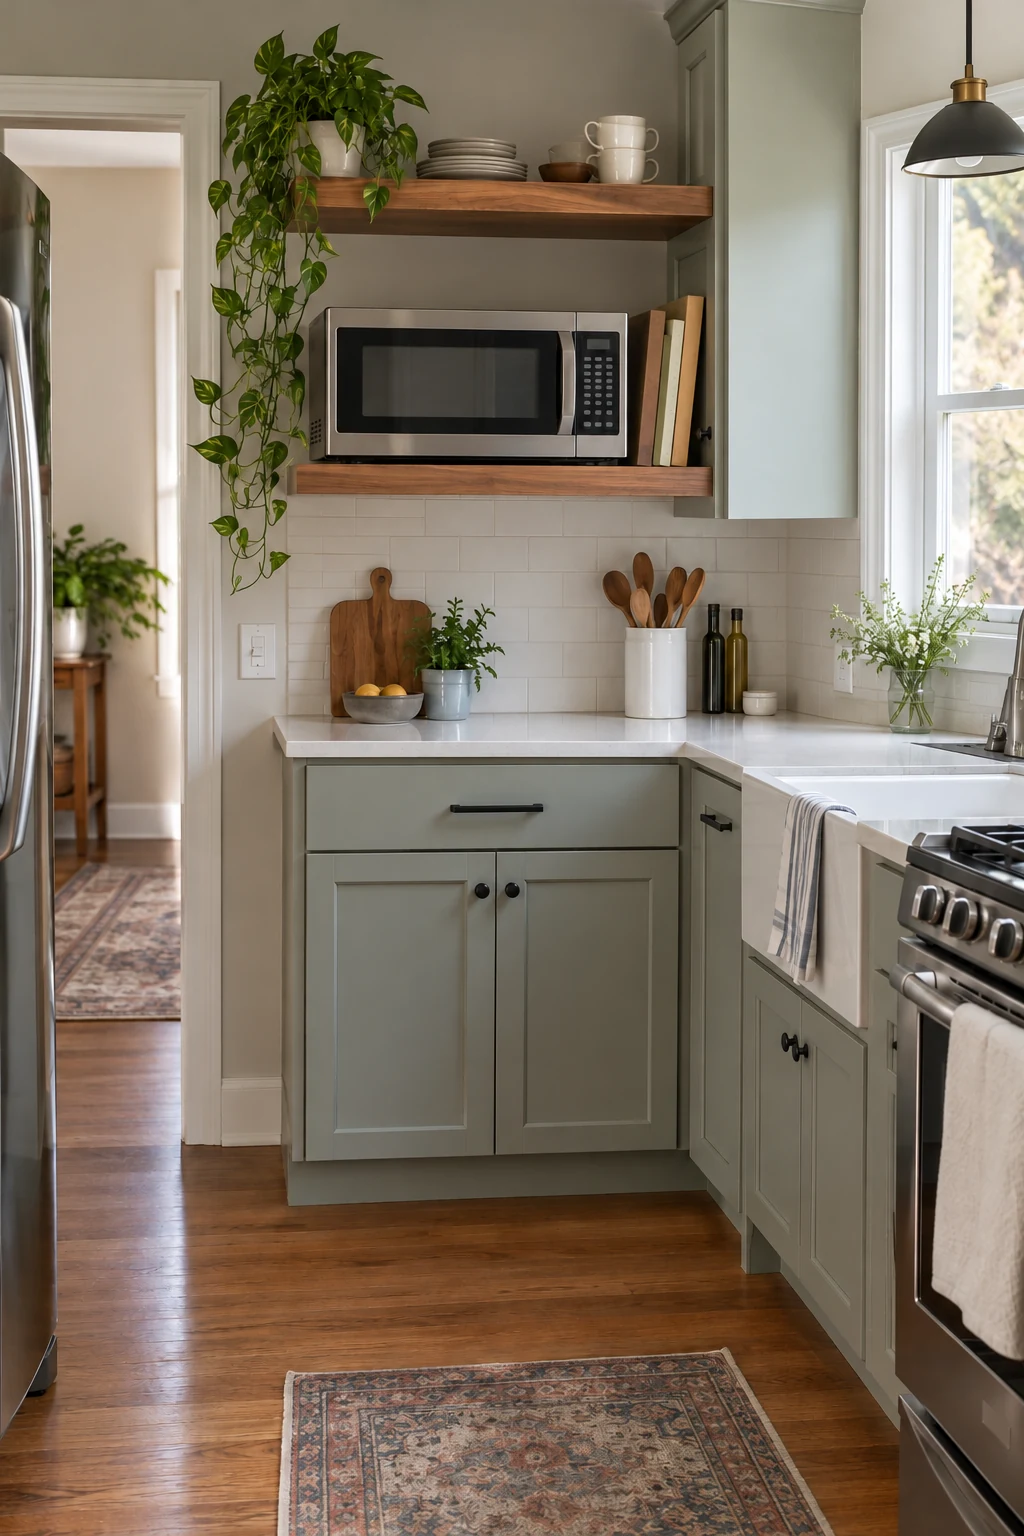
Place the microwave where hot bowls can move to a landing counter without being lifted overhead. A sturdy open shelf in a pantry wall often works better than a deep cabinet above the range.
Follow the appliance’s required ventilation and electrical instructions. Countertop models should not be enclosed unless the manufacturer approves a compatible built-in kit.
Check the door hinge, control height, and path from shelf to counter. Keep the appliance away from a tight corner where an open door blocks access.
Appliance, Light, and Service Planning
Separate task zones only when the room can support their utilities and landing space. Windows, openings, and hidden service details should be resolved on the same drawings as the cabinetry.
44. Separate the Cooktop and Wall Oven Zones
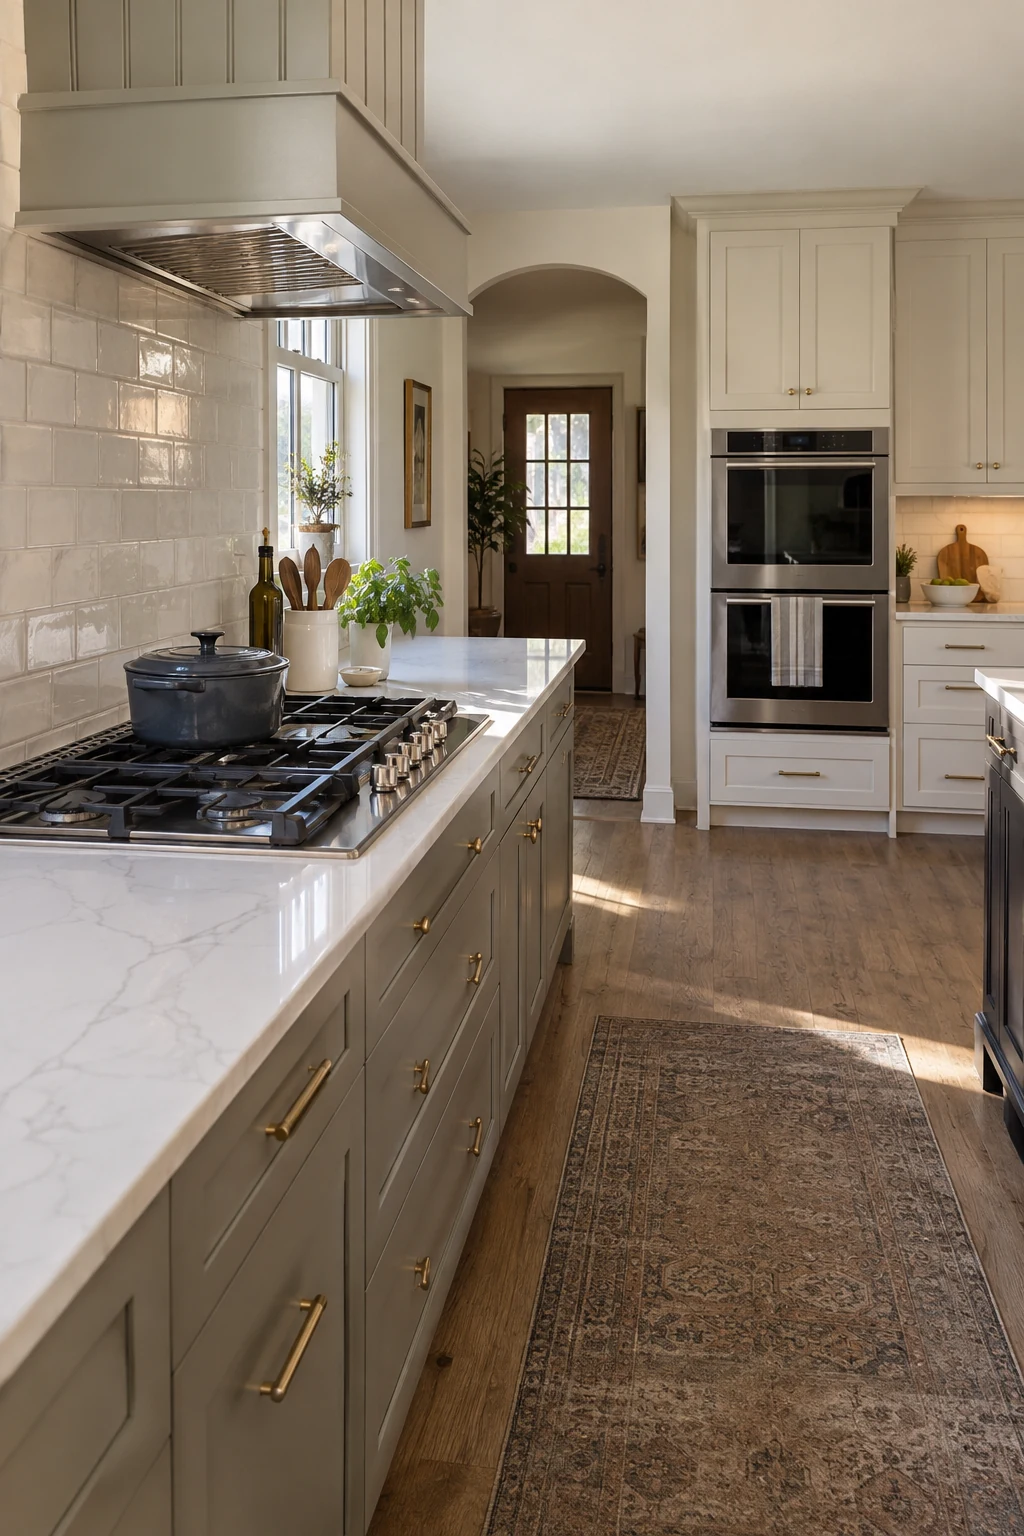
Separating the cooktop and wall oven lets one person stir while another uses the oven. It also places the oven at a chosen height instead of below the hottest work surface.
Give both appliances nearby landing space and keep their open doors outside the main path. The split adds cabinetry, wiring or gas, and ventilation coordination, so compare it with a range honestly.
Select exact models before final elevations. Control locations, clearances, cabinet support, electrical loads, and hood requirements vary by appliance.
45. Detail the Sink Window Before Ordering Cabinets
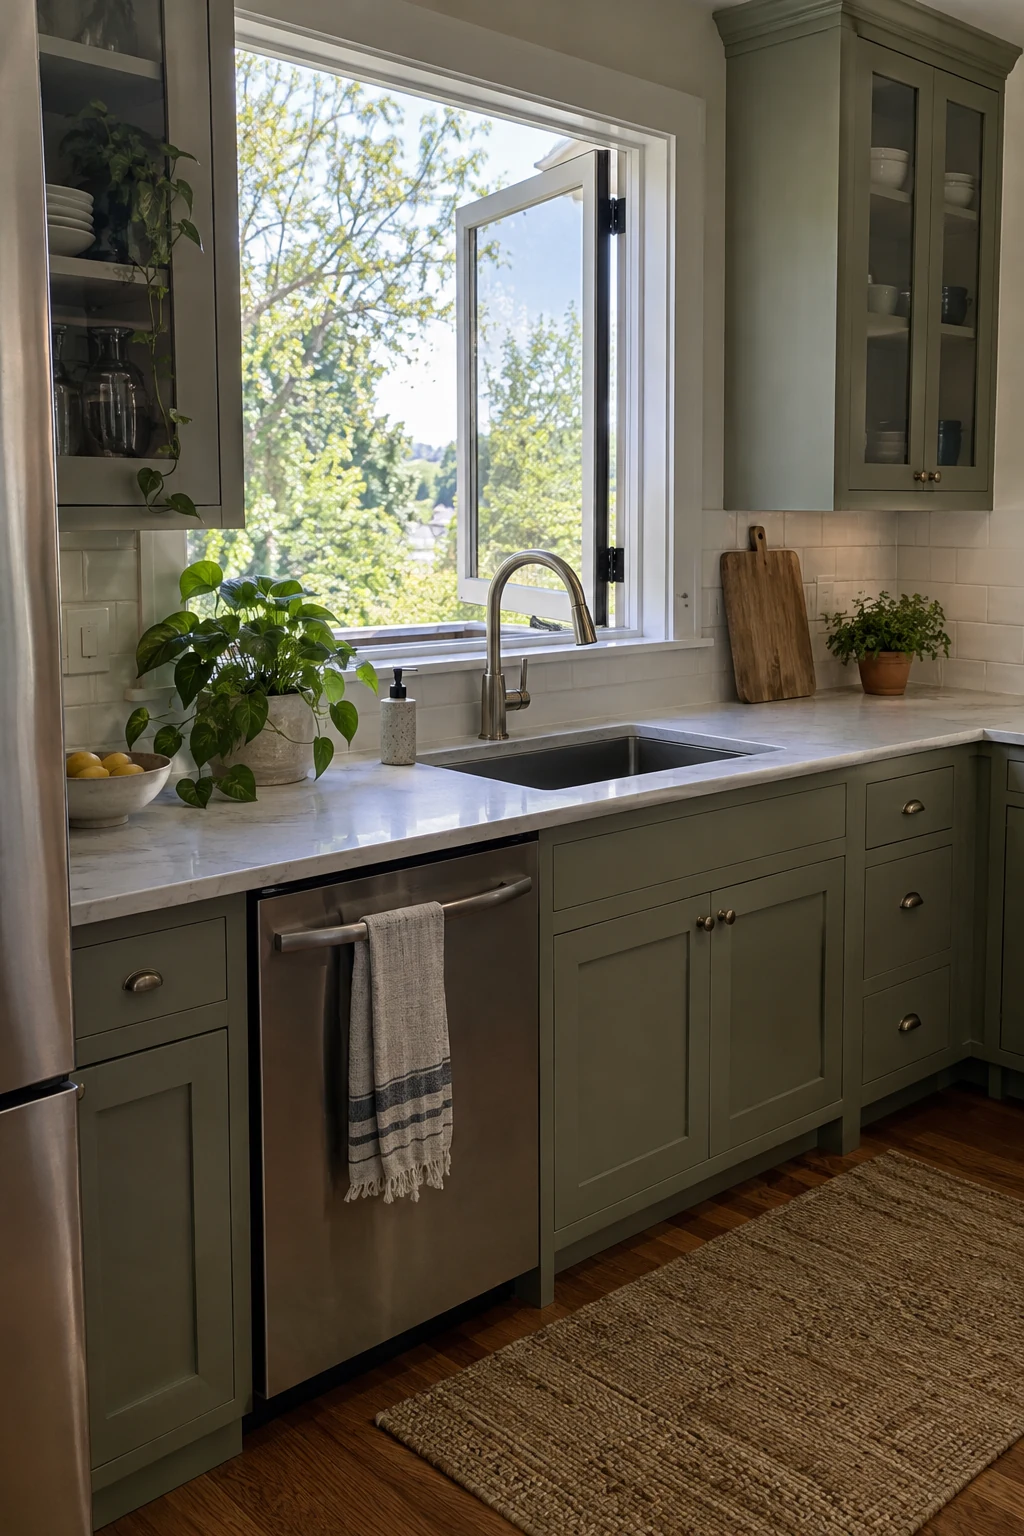
A new or enlarged sink window needs more planning than centering the basin on the glass. Draw the finished sill, faucet height, handle movement, backsplash edge, counter thickness, and cabinet centerline together.
Choose a window operation that clears the faucet and remains reachable across the sink. Protect the sill from standing water with a durable, sloped detail and compatible sealant.
Window changes may affect structure, exterior cladding, flashing, insulation, and permits. Resolve those layers before the cabinet order fixes the opening width.
46. Frame a Wide Cased Opening Instead of Removing Every Wall
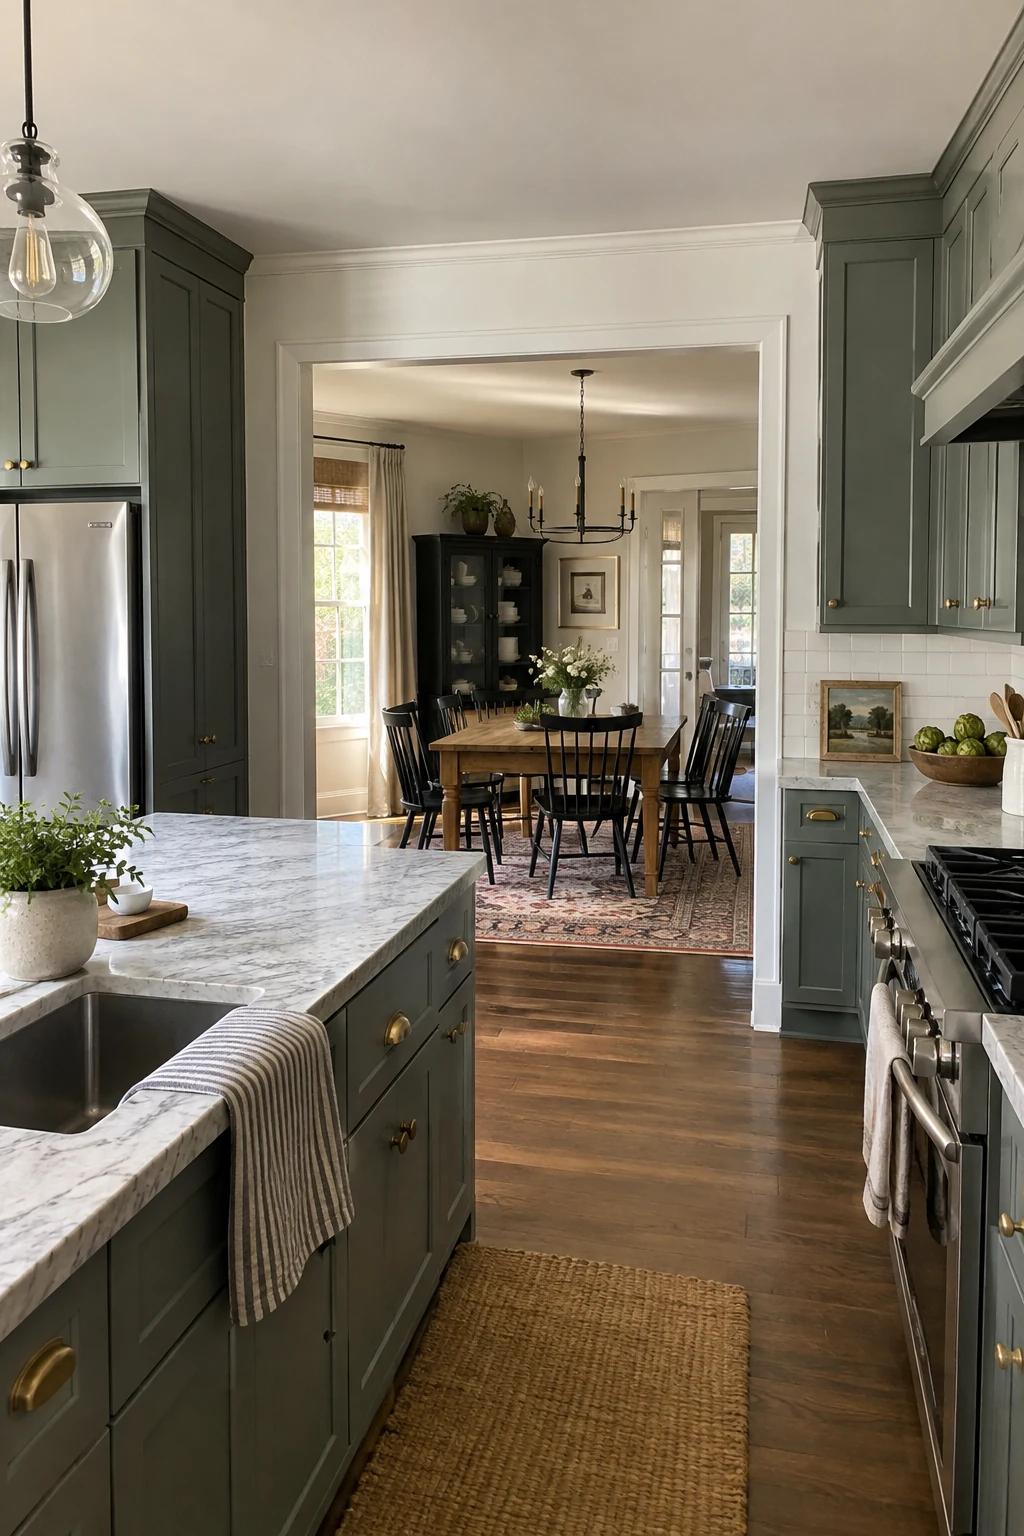
A wide cased opening can connect the kitchen and dining room while preserving wall space for cabinets, switches, and artwork. It also gives the ceiling transition a deliberate edge.
Have a qualified professional determine whether the wall carries floor, roof, or lateral loads. Posts, beams, ducts, wiring, and plumbing need a coordinated path before demolition.
Planning check: Resolve structure, utilities, cabinet returns, flooring repair, and the ceiling transition as one opening detail.
Keep enough side wall to protect cabinet doors and create a natural traffic lane. Mock the opening with tape on the existing wall to judge views from both rooms.
Match casing depth to the finished wall build-up and repair flooring across the old partition line. A clean threshold makes the connection feel planned.
47. Build a Leak-Resistant Sink Base
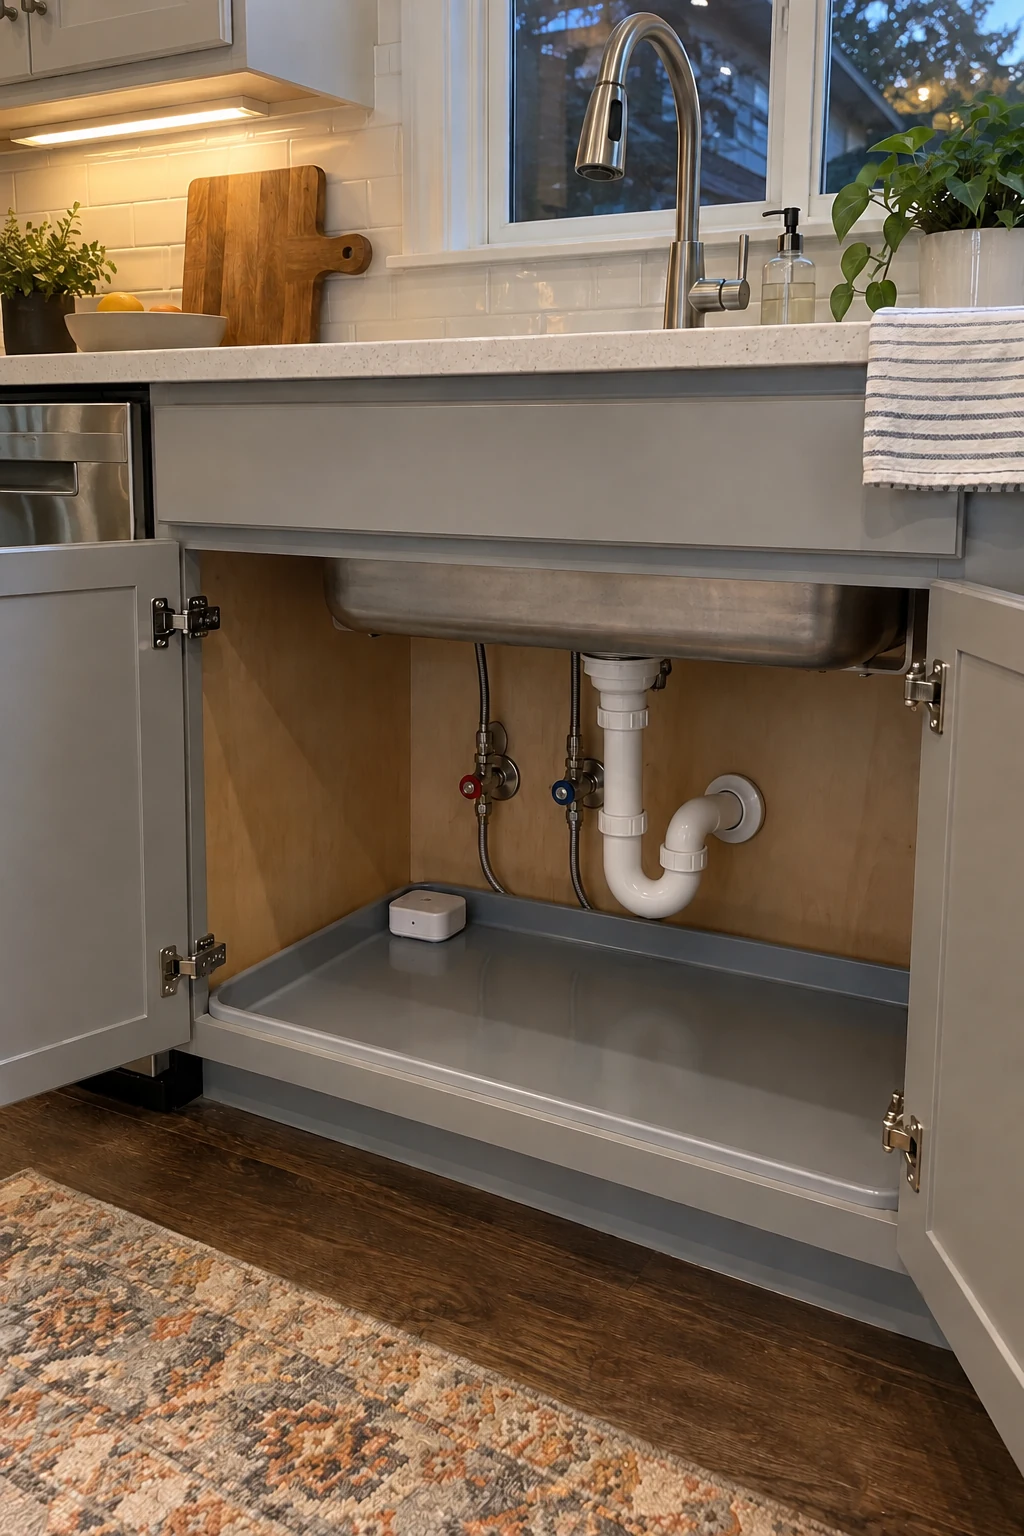
Line the sink base with a removable waterproof tray that turns small drips toward the front where they can be seen. Seal pipe openings neatly without blocking service access.
Keep shutoff valves reachable and label them outside the image in the household maintenance record. A leak sensor adds an early warning but does not replace sound plumbing or regular inspection.
Avoid packing the cabinet so tightly that moisture stays hidden. Use a handled caddy for cleaners and check supply lines, disposal fittings, and the dishwasher connection periodically.
48. Use a Listed Ventilated Charging Drawer
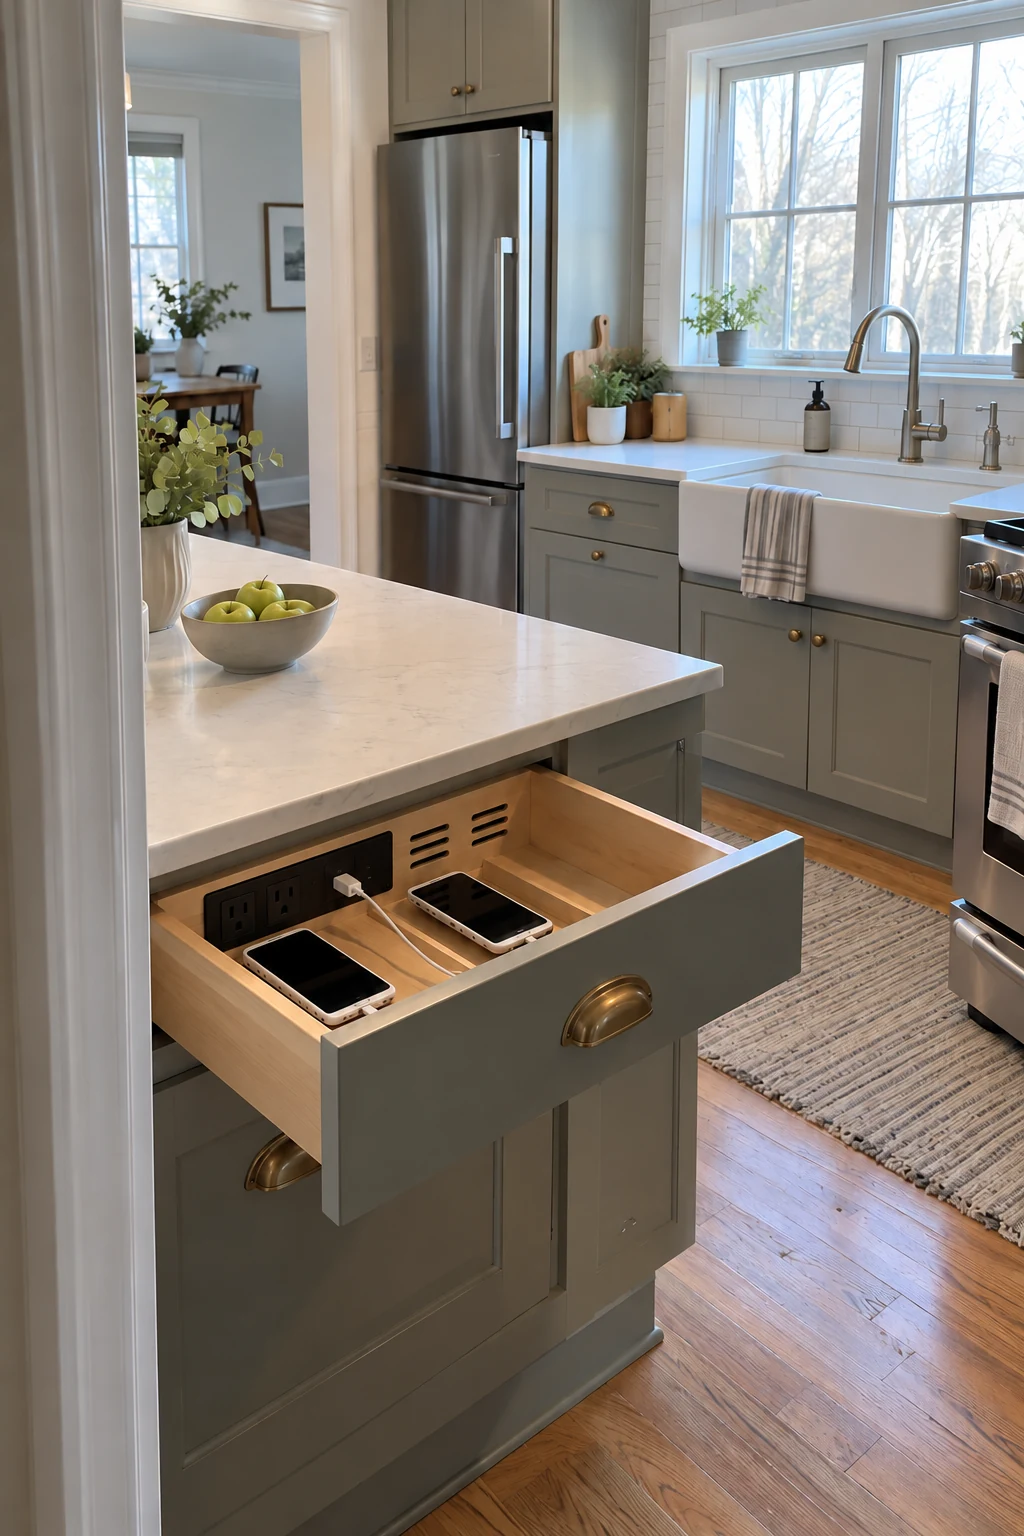
A charging drawer can keep phones and cables off the prep counter. Use a purpose-built listed in-drawer power system with strain relief and movement designed for repeated opening.
Provide ventilation around devices and chargers, and avoid stacking batteries under papers or towels. Do not improvise with a loose power strip pinched behind a moving drawer.
Place the drawer away from the sink, range, and children’s primary reach. The electrician and cabinet maker should coordinate the outlet, cable path, clearances, and service access.
Specialized Stations and Finishing Details
The last group should reflect real household routines rather than showroom extras. Add a station only when its location, storage, and cleaning plan are clear.
49. Recess a Fire Extinguisher Near the Exit
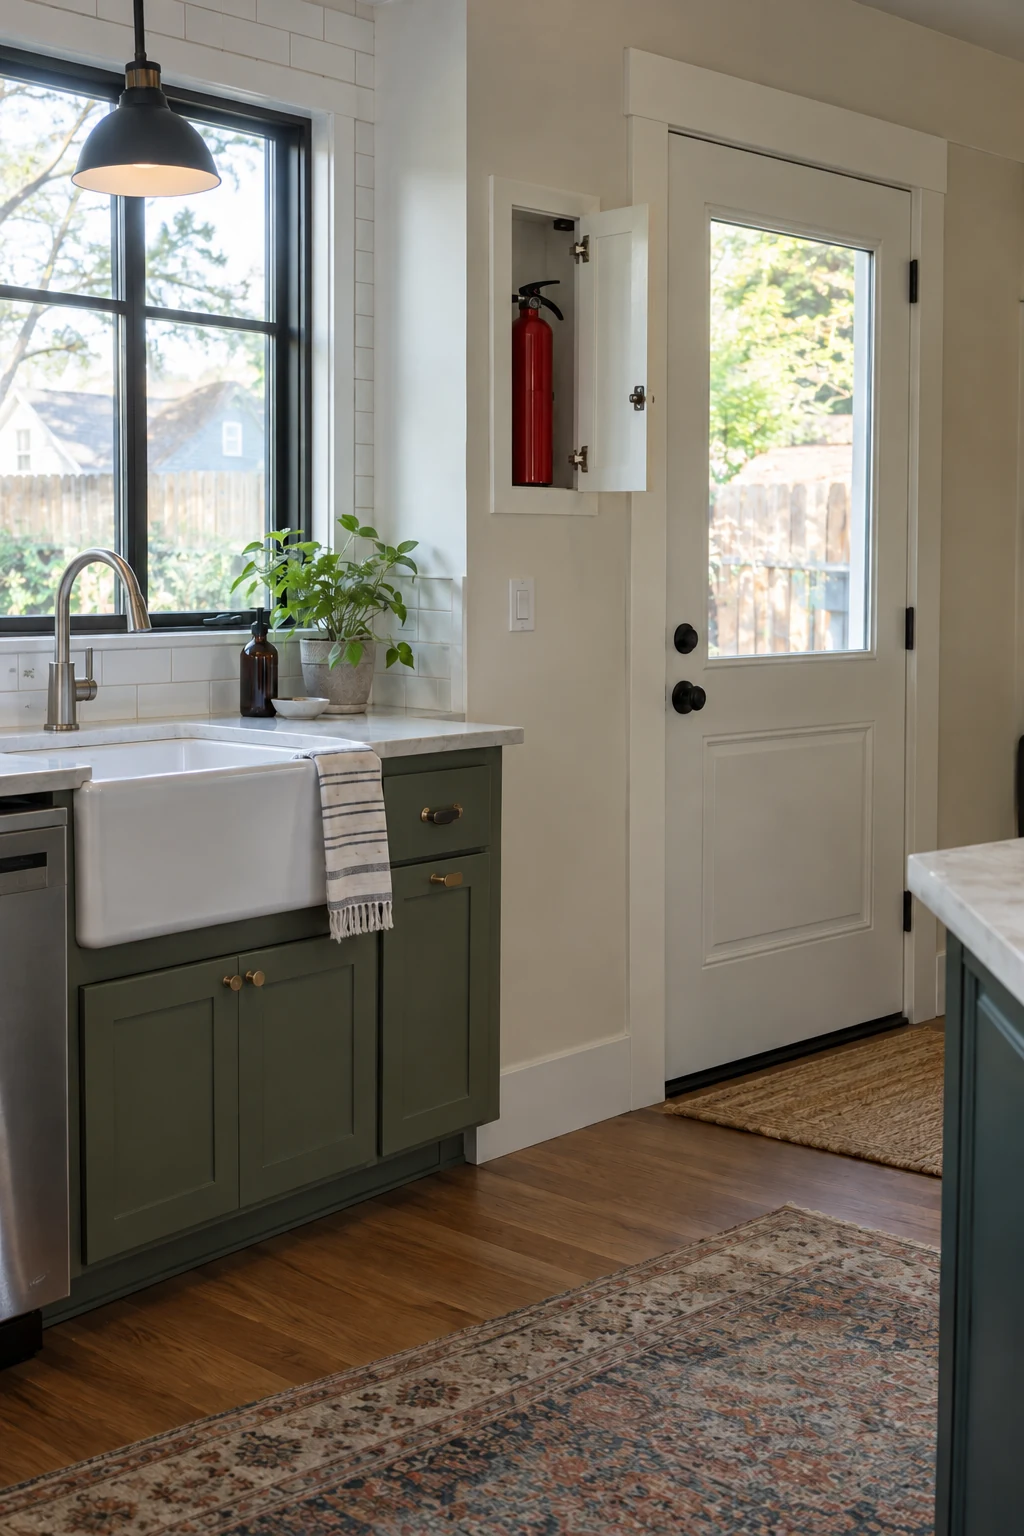
Keep an appropriate kitchen fire extinguisher visible and reachable near an exit, rather than beside the cooktop where a fire could block access. A shallow recessed cabinet can prevent it from becoming floor clutter.
Follow local fire guidance for type, mounting, inspection, and household training. The cabinet should open instantly without a key or decorative objects in front of it.
50. Create a Grocery Landing Zone at the Kitchen Entry
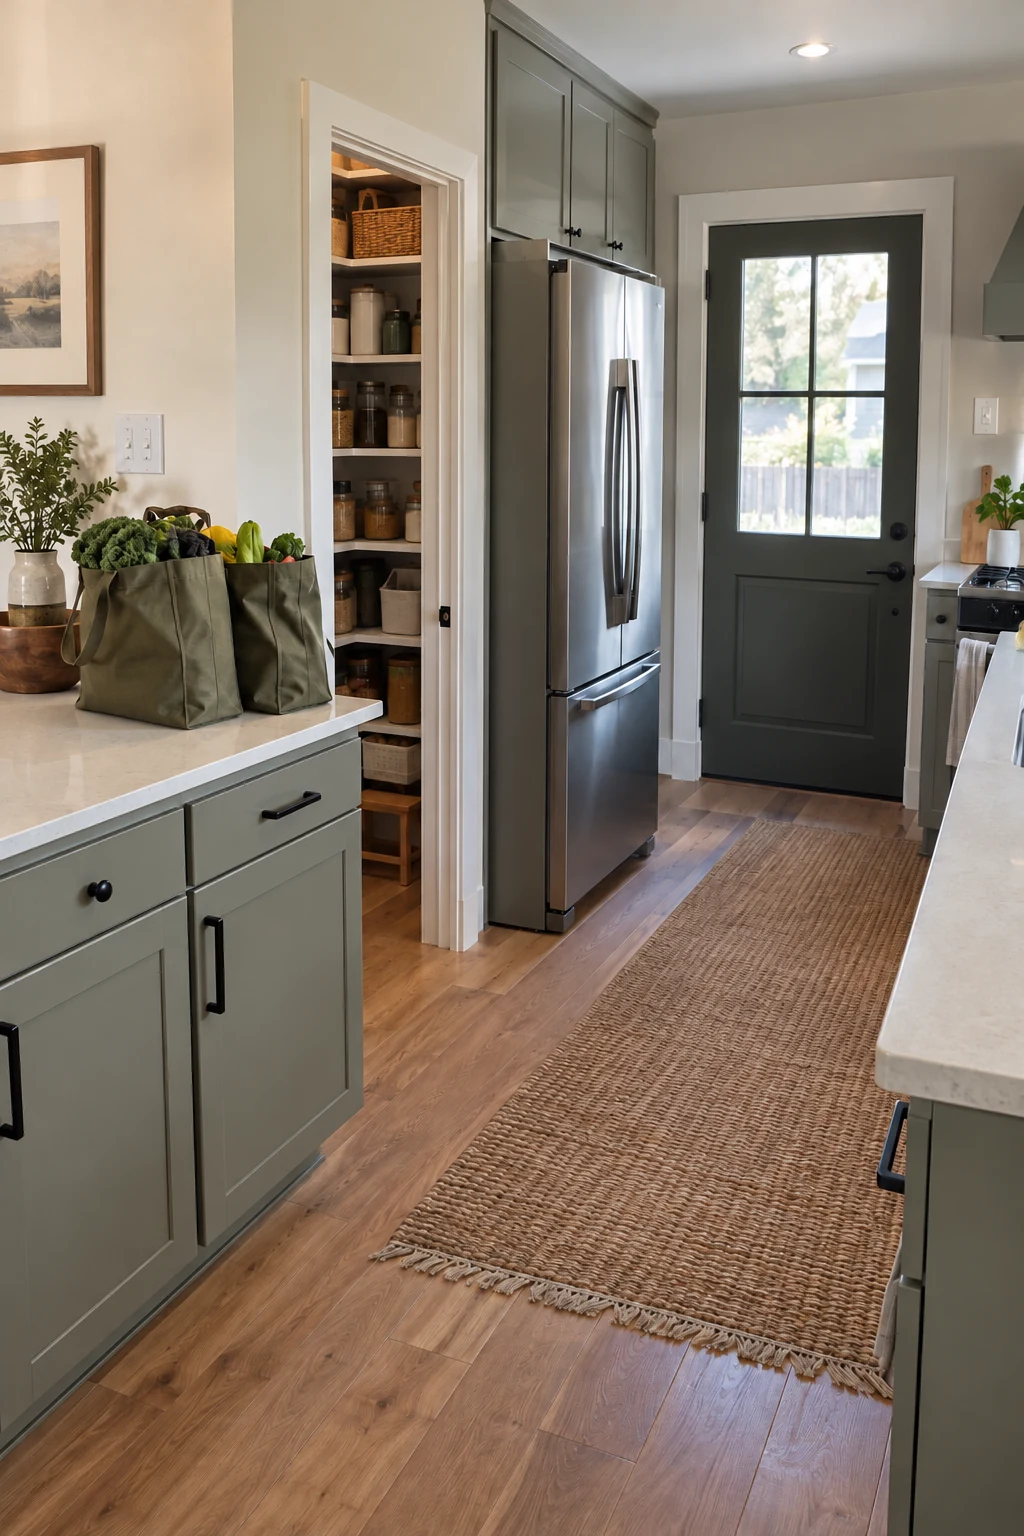
Reserve a clear counter near the route from the exterior door to the refrigerator and pantry. Grocery bags can land before cold, frozen, and shelf-stable items are sorted.
Keep the surface out of the cook’s main prep zone so incoming bags do not cover dinner work. A drawer below can hold reusable bags, coupons, and a marker for pantry labels.
Measure the door swing and carrying path with both hands occupied. Hooks and benches belong nearby only when they do not narrow the kitchen entrance.
51. Group Baking Tools Into One Work Center
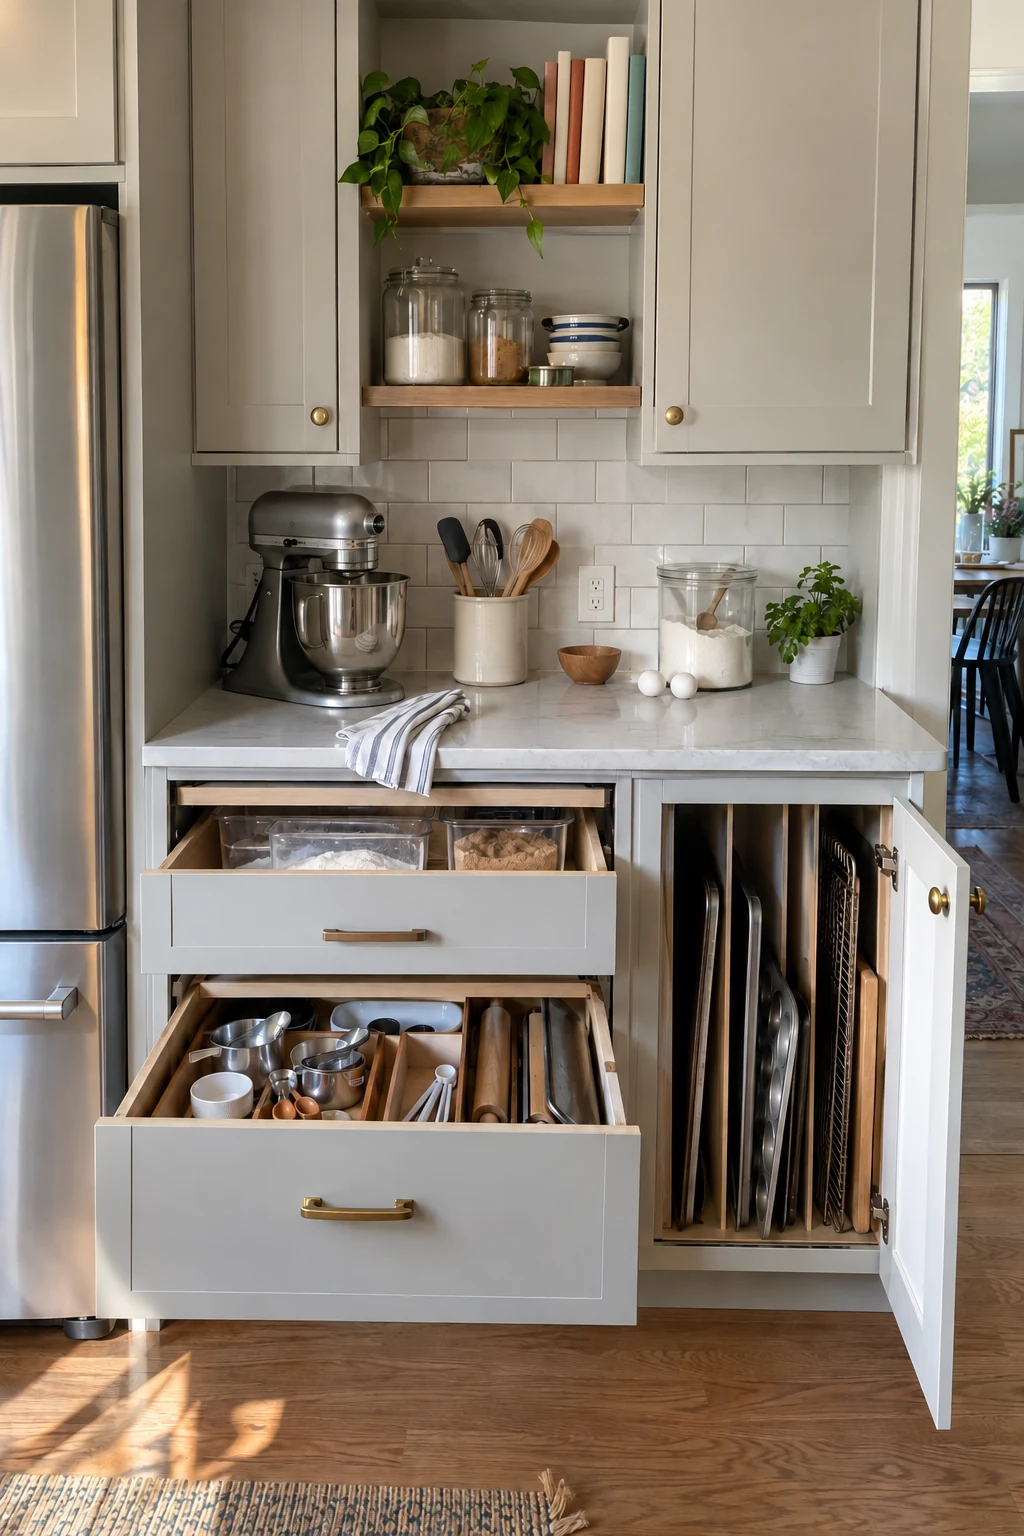
Group the mixer, scales, measuring tools, ingredients, bowls, and baking pans around one clear counter. A concentrated station prevents heavy equipment from traveling across the room.
Set the counter height for the baker and keep flour and sugar in sealed, removable bins below. Vertical dividers nearby handle sheets, racks, and muffin tins.
Add an outlet where the mixer cord stays on the counter instead of crossing an aisle. Keep the station outside the cleanup bottleneck if several people use the kitchen.
52. Tuck Pet Bowls Into a Pullout Station
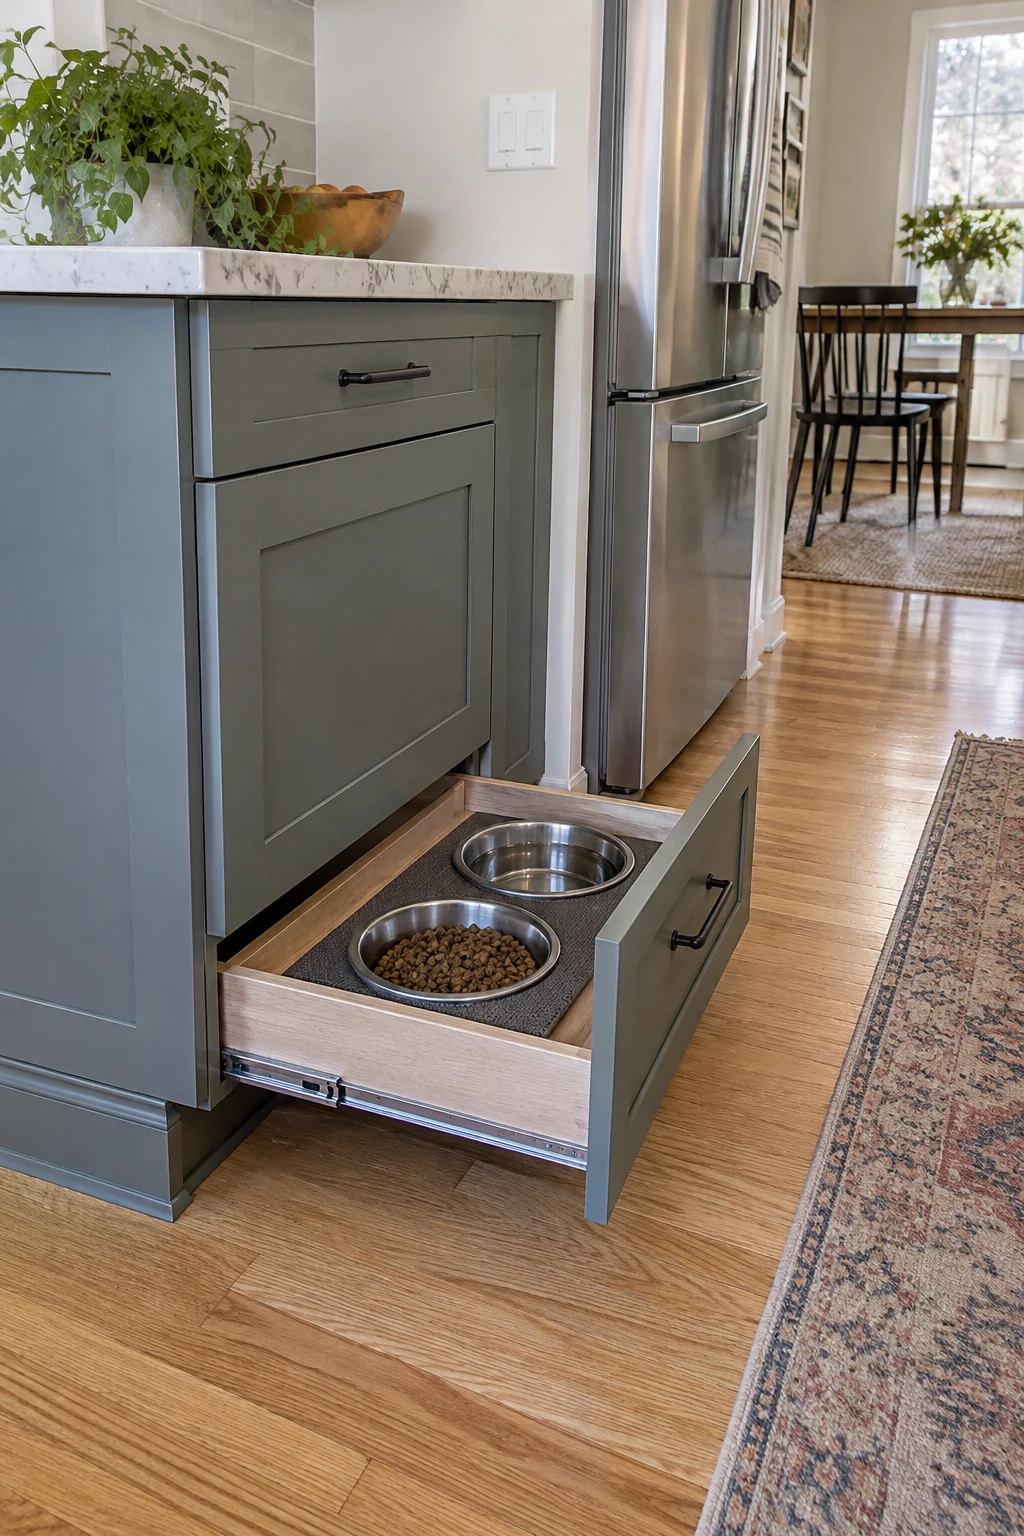
A low pullout can hold food and water bowls outside the main cooking path, then close when the floor needs cleaning. Use a waterproof removable mat and enough depth to catch splashes.
Keep the station away from hot appliances, swinging doors, and pantry food. Confirm the pet can approach comfortably without blocking the refrigerator or creating a trip point.
53. Finish Kitchen Entries With Flush Floor Transitions
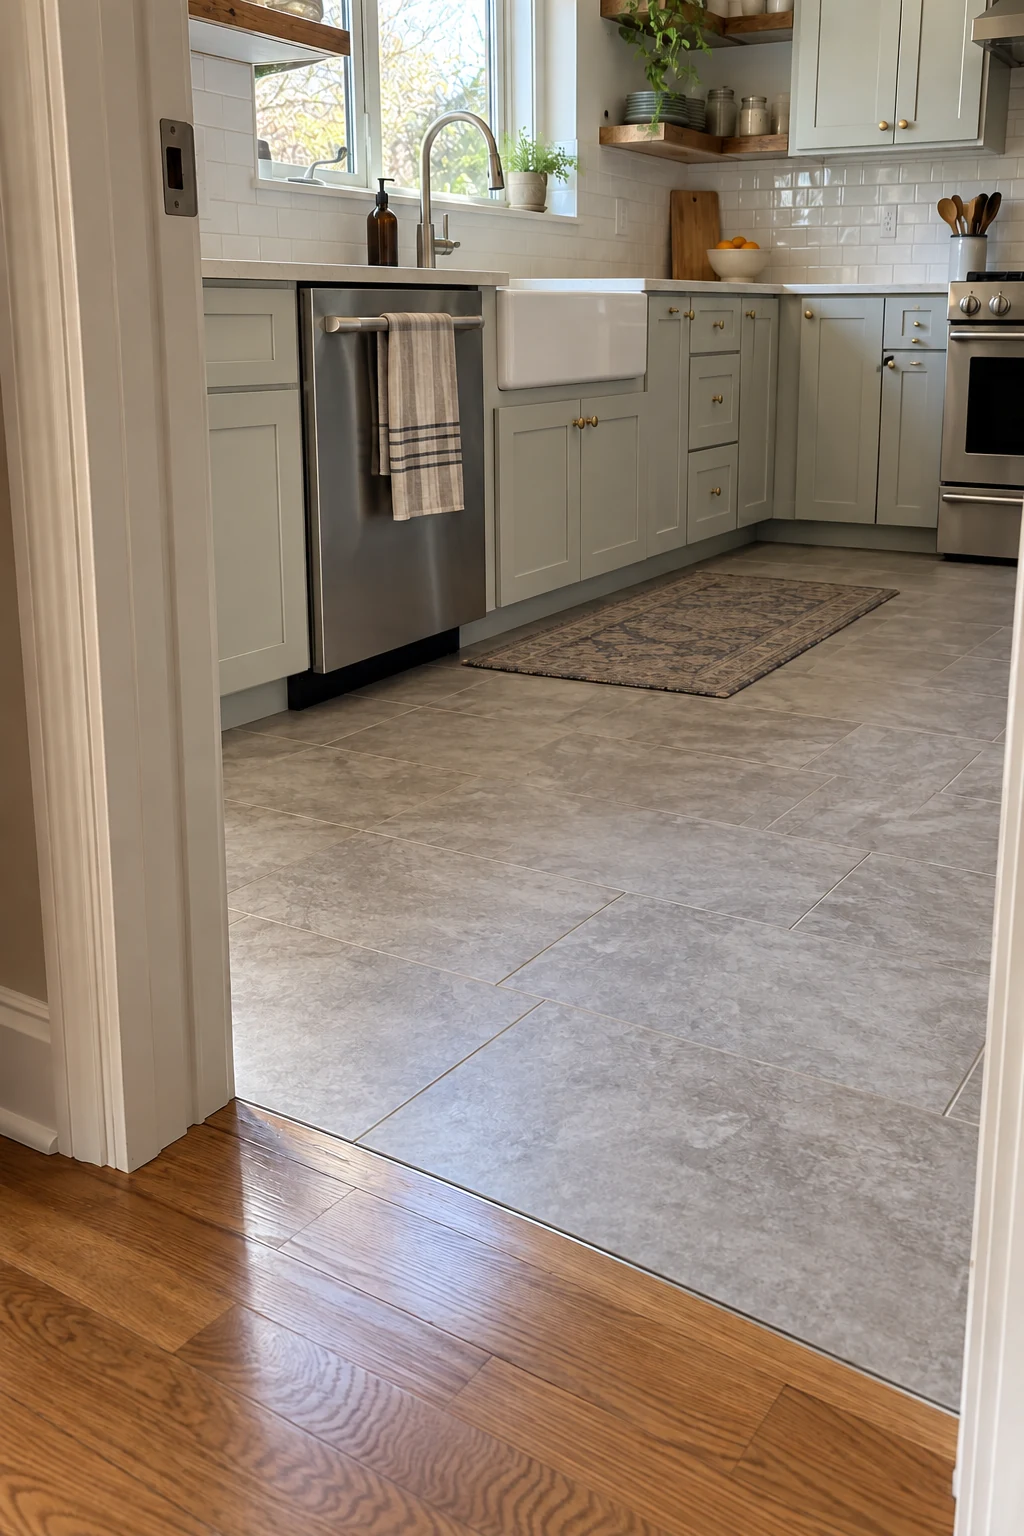
Coordinate subfloor, underlayment, tile, wood, and finish thicknesses before installation so adjoining rooms meet as closely as possible. A flush transition rolls, sweeps, and cleans more easily than a tall reducer.
Choose a narrow transition detail that allows the materials to move as required. Do not force tile and wood together without the expansion or edge treatment specified for each floor.
Protect the finished junction during appliance delivery and cabinet work. Save spare pieces from both materials because doorway repairs are difficult to disguise later.
Renovate the Decisions You Cannot Easily Undo First
Prioritize circulation, utilities, ventilation, cabinet function, and durable surfaces before decorative details. A smaller scope with accurate drawings and sound sequencing often performs better than a larger renovation driven by finishes.
Mock up major footprints, approve exact products, photograph concealed work, and keep a maintenance record. Those habits make the finished kitchen easier to use, service, and update over time.