50 Holiday Decor Storage Ideas for an Easier Next Season

This post may contain affiliate links: full affiliate disclosure.
Holiday decor is easier to enjoy when every wreath, light strand, ornament, and table accent has a protective home between celebrations.
These ideas emphasize visible systems you can adapt: divided cases, labeled zones, flat wrap storage, supportive shelving, and containers sized for their contents.
Start with the pieces you actually use, then choose storage around their shapes and your available space instead of buying matching bins first.
This post may contain affiliate links. See our full affiliate disclosure.
Build a Storage System Before You Pack
A few decisions made before packing prevent duplicate purchases, overloaded boxes, and the annual search for one missing tree stand or extension cord.
1. Photograph Every Decorated Zone Before Taking It Down
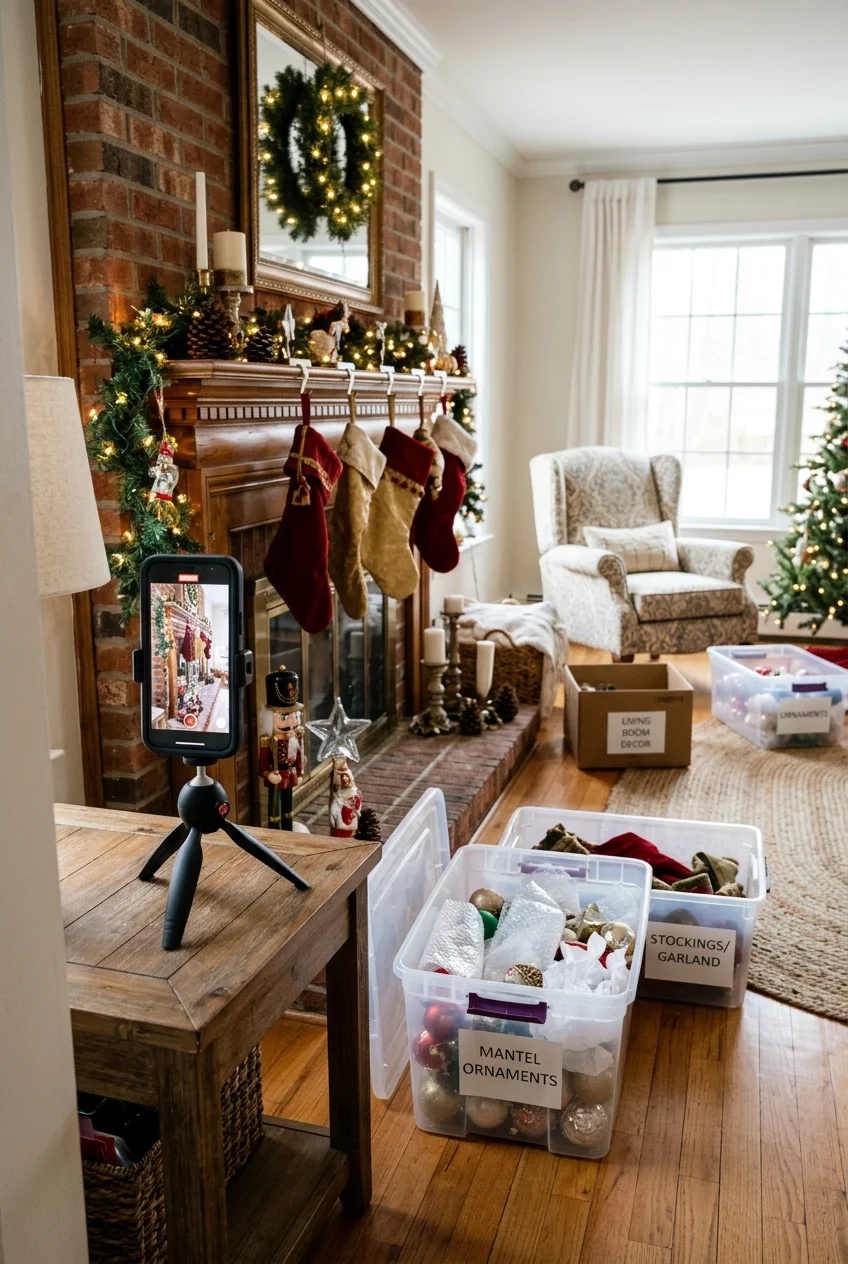
Take one wide photo and one detail photo of each finished area before removing anything. Capture mantel spacing, tree ornament balance, and tabletop layers.
Save the images in a clearly named album, then place a printed thumbnail inside the matching bin if household members prefer physical instructions.
Practical tip Photograph cord routes and timer locations separately, because those functional details are easy to miss in a beautiful room-wide picture.
2. Edit Broken, Unused, and Duplicate Decor Before Packing
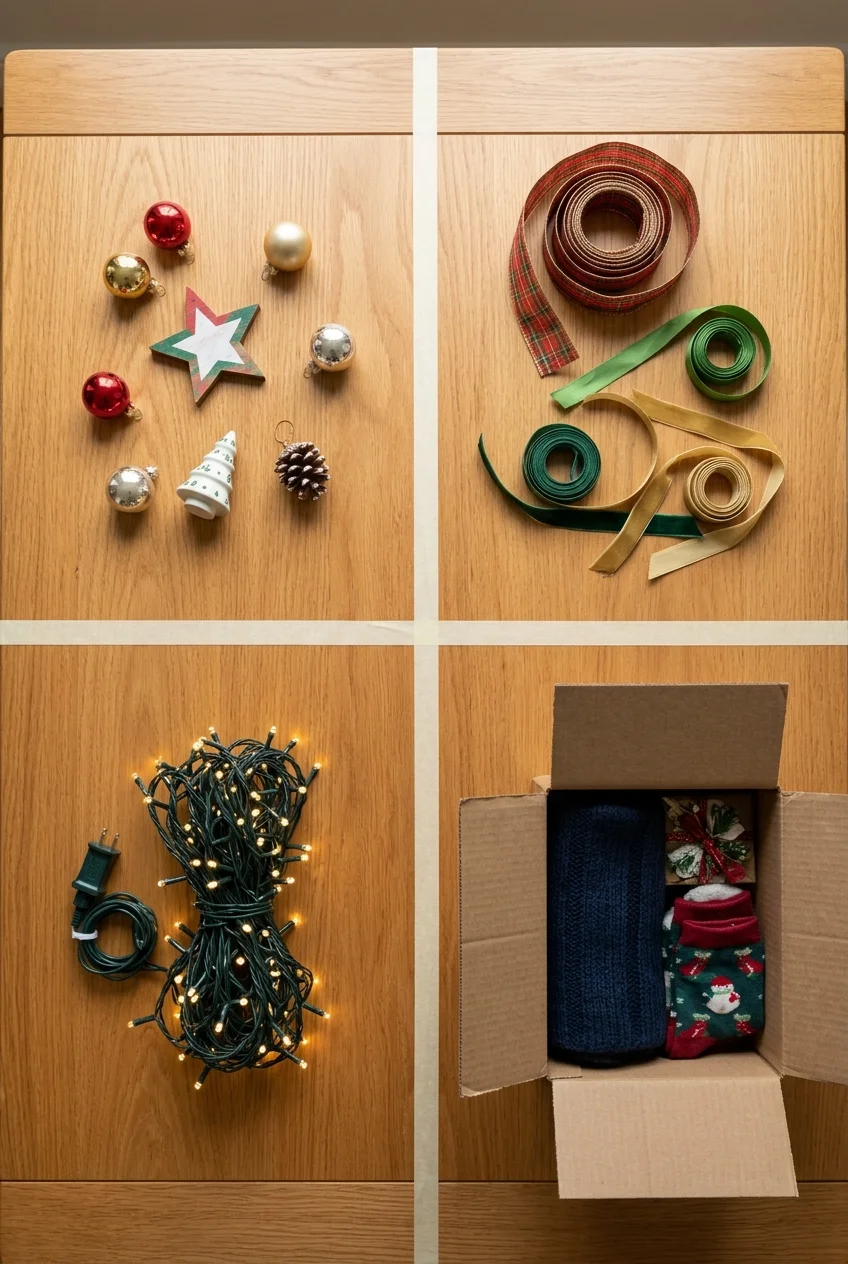
Create keep, repair, donate, and discard zones before anything enters long-term storage. Empty space is more valuable than carefully labeled clutter you avoid using.
Set a realistic repair deadline and store repairable pieces together. Discard damaged electrical decorations according to local guidance instead of returning them to usable stock.
- Keep pieces used this season
- Donate sound decor that no longer suits your plans
- Separate repairs with the needed parts
- Discard unsafe or irreparable items responsibly
3. Group Decorations by the Place You Use Them
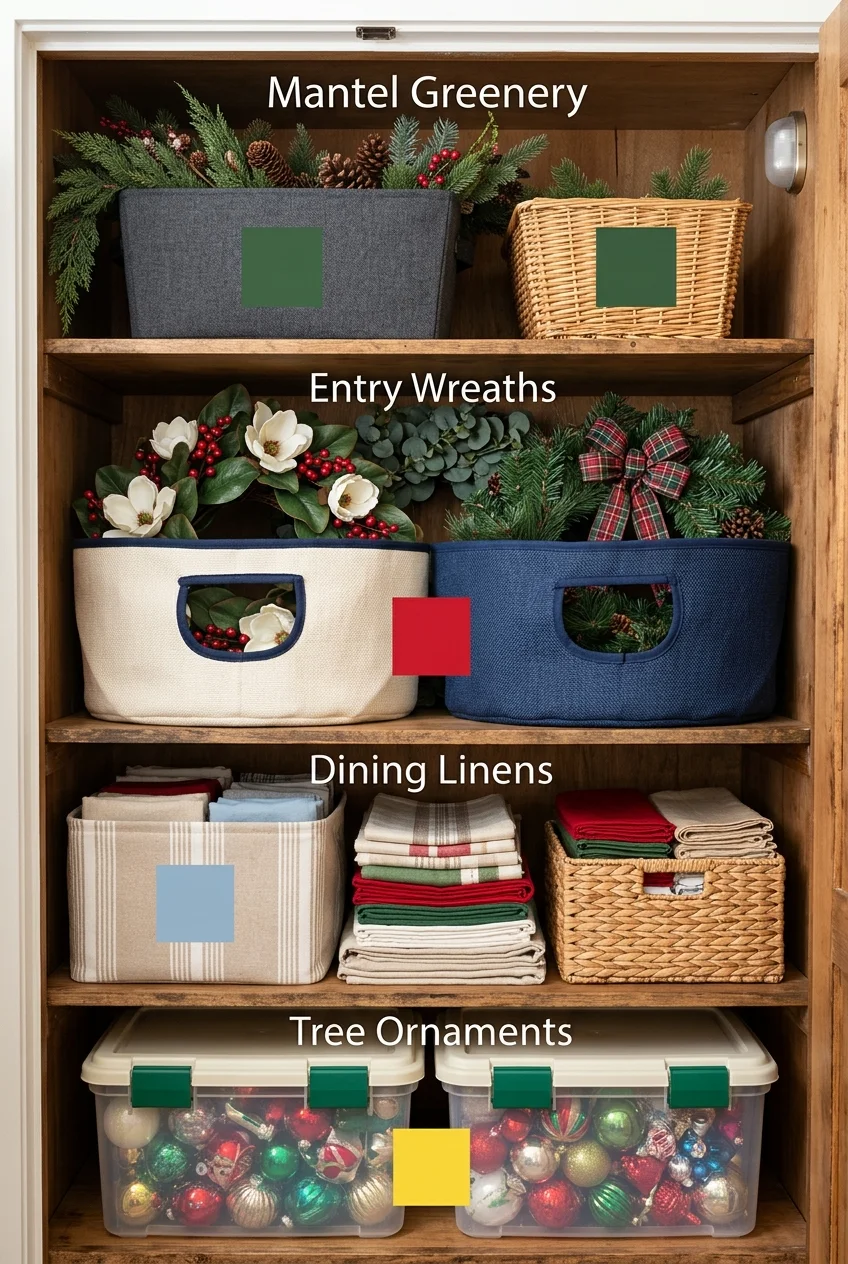
Pack the mantel, entry, dining table, and tree into separate zones when those arrangements repeat. Room-based bins reduce cross-house searching during setup.
Place flexible items, such as spare ribbon or neutral candleholders, in a shared supply bin rather than forcing them into one room forever.
If your home is compact, review these Christmas apartment decorating ideas before carefully deciding which decor deserves limited off-season space.
4. Give Each Holiday Its Own Color Cue
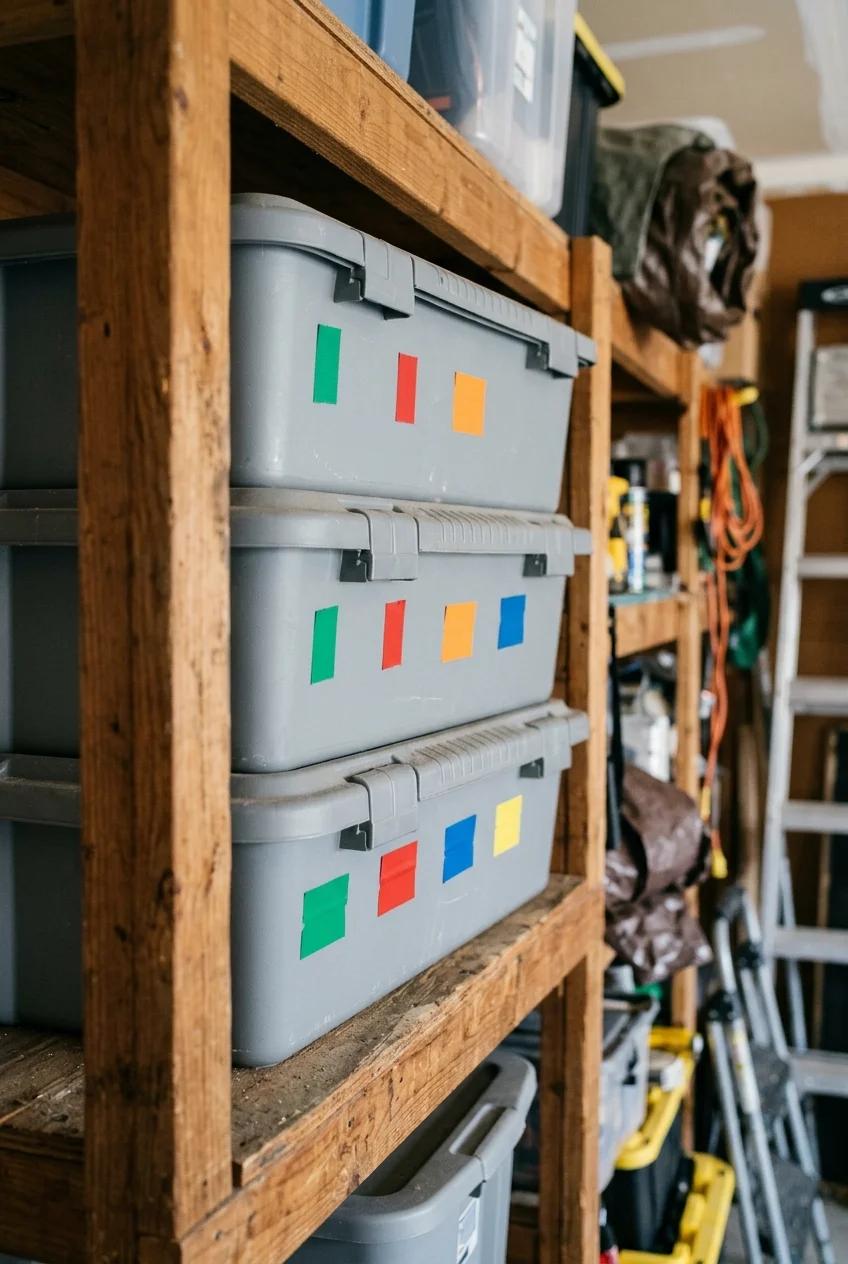
Add one consistent tape color or removable tag color to every container for the same holiday. The cue works even when bins are opaque.
Keep written labels too, because color alone cannot distinguish ornaments from linens or support every household member equally and reliably well.
5. Label Both the Short Side and the Lid
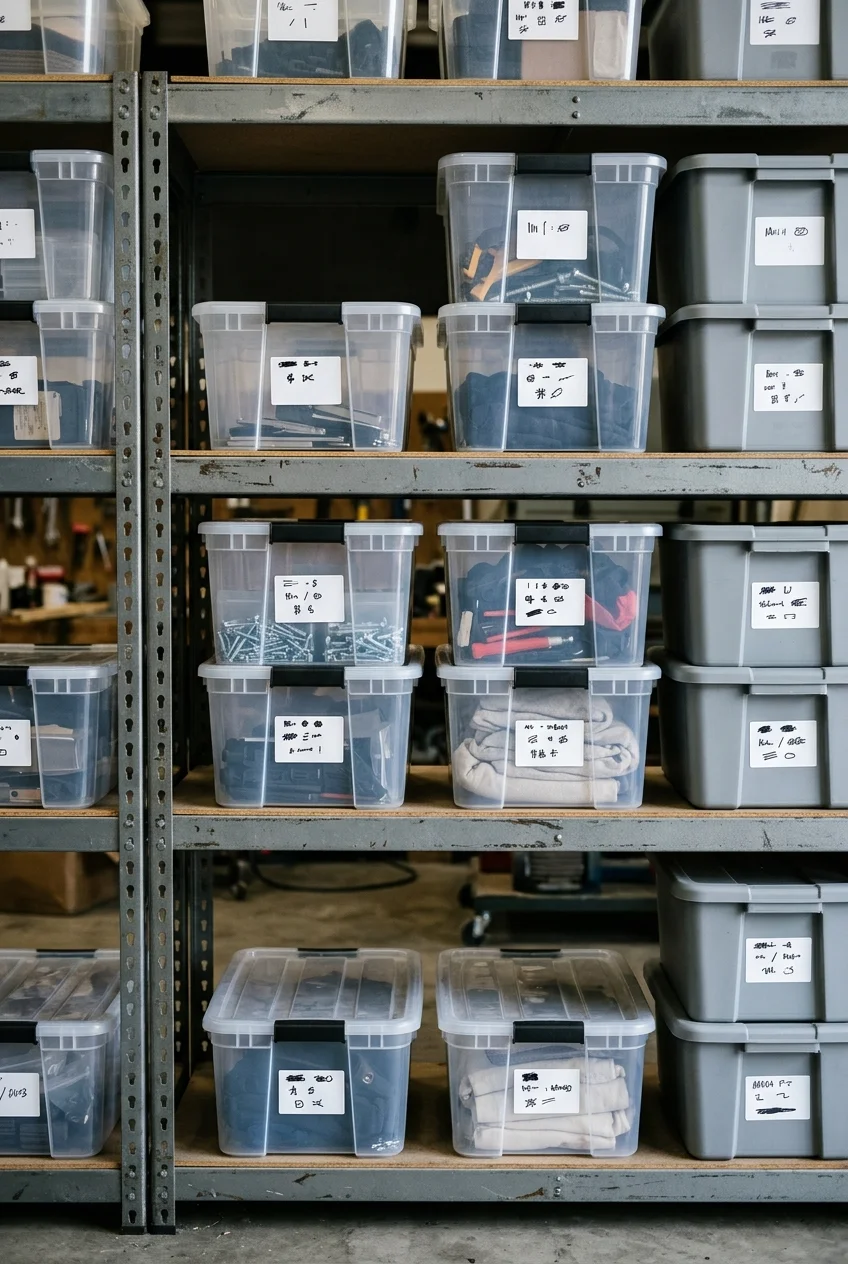
Place the main contents label on the outward-facing short side, then repeat it on the lid. Either label remains visible when bins move or stack.
Use specific descriptions such as “front porch greenery and clips” instead of “Christmas.” Add fragile or upright arrows only where handling truly matters.
6. Number the Bins and Keep a Simple Master List
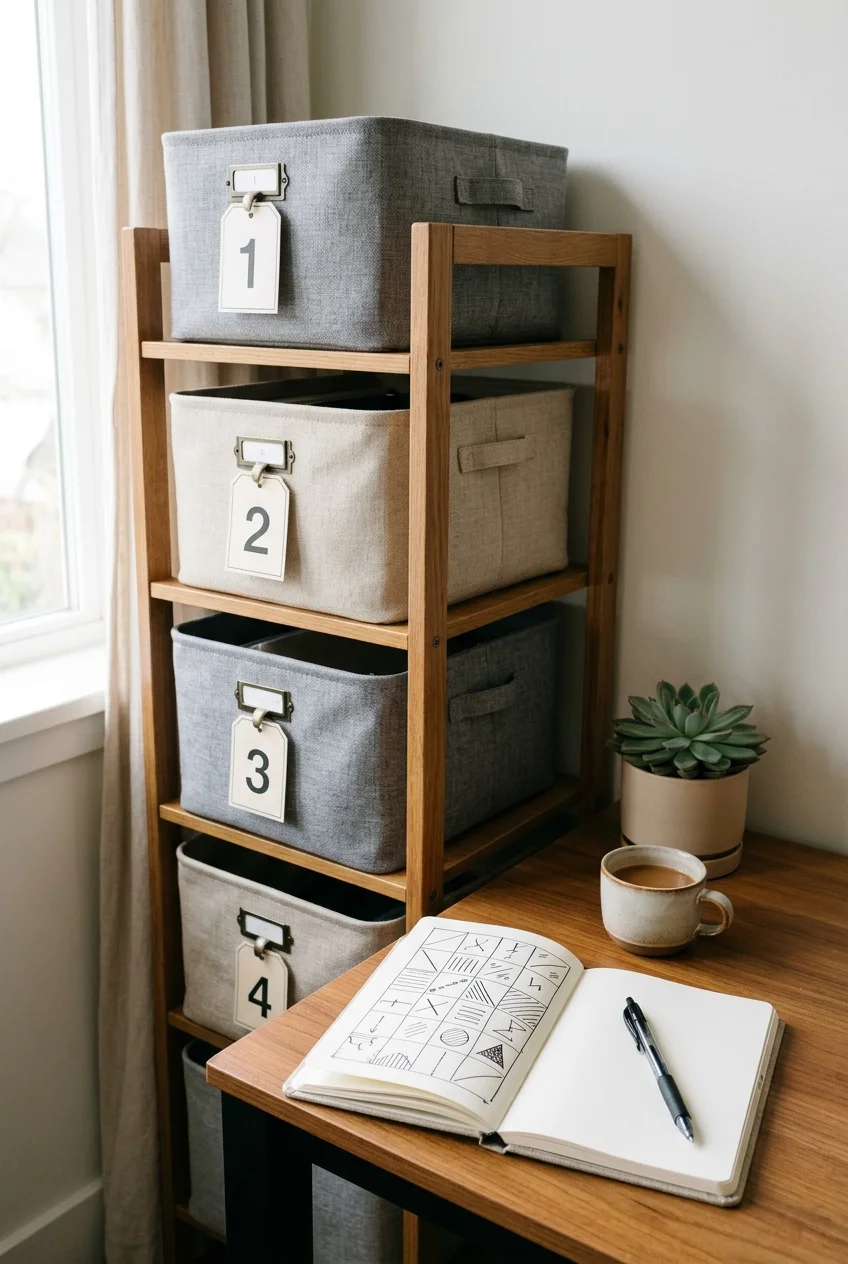
Assign each container a short number, then record its location and broad contents in a note or spreadsheet. Numbers stay useful when the contents evolve.
Keep the list short enough to update after packing. Record special items only when knowing their exact bin would save meaningful search time.
- Bin number
- Shelf or closet location
- Main decor category
- One or two hard-to-find pieces
7. Create a First-Out Decorating Kit
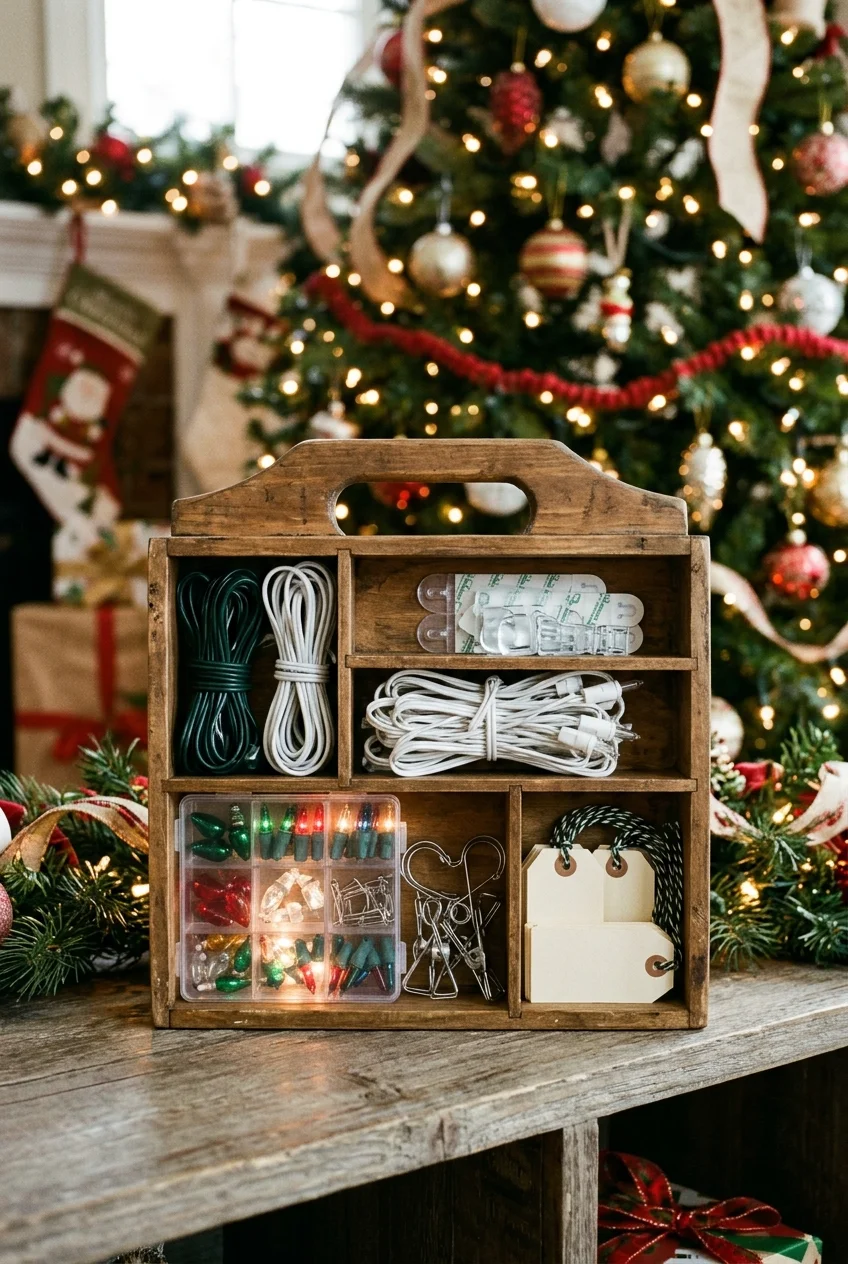
Reserve one small container for the items needed before full decorating begins: timers, tested extension cords, hooks, spare bulbs, clips, and label supplies.
Store this kit at the front of the holiday zone. It should be light enough to carry and separate from fragile decorations.
Setup note Remove depleted batteries before storage, and follow the decoration manufacturer’s instructions for any battery-powered item you plan to keep later.
8. Set a Container Limit for Each Decor Category
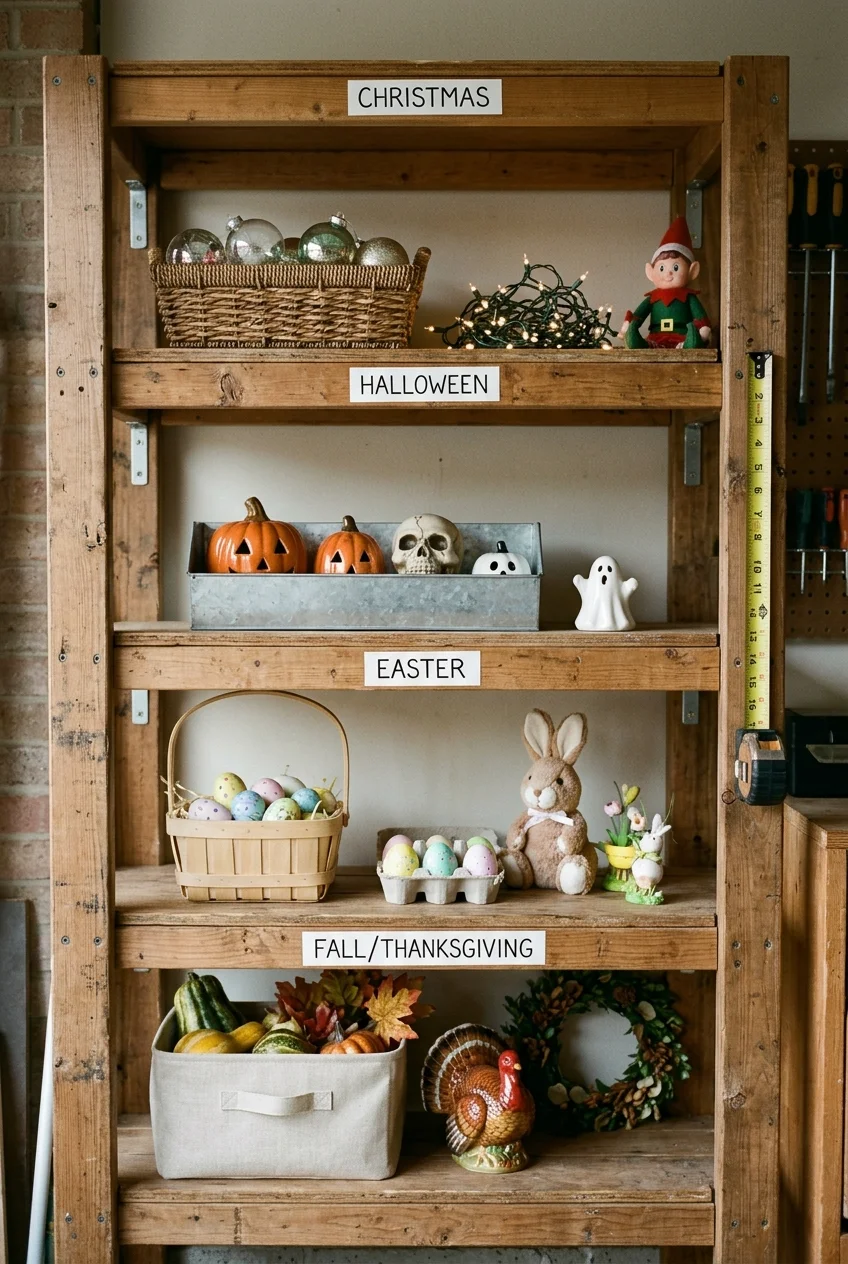
Choose a reasonable amount of shelf space for ornaments, textiles, outdoor pieces, and gift wrap. A physical boundary makes future editing decisions clearer.
When one category exceeds its space, compare pieces before adding another bin. Keep favorites and useful replacements rather than compressing delicate objects together.
A limit can change when your home or traditions change, but expanding it should remain a deliberate storage decision rather than an automatic purchase.
9. Keep Original Packaging for Specialty Pieces
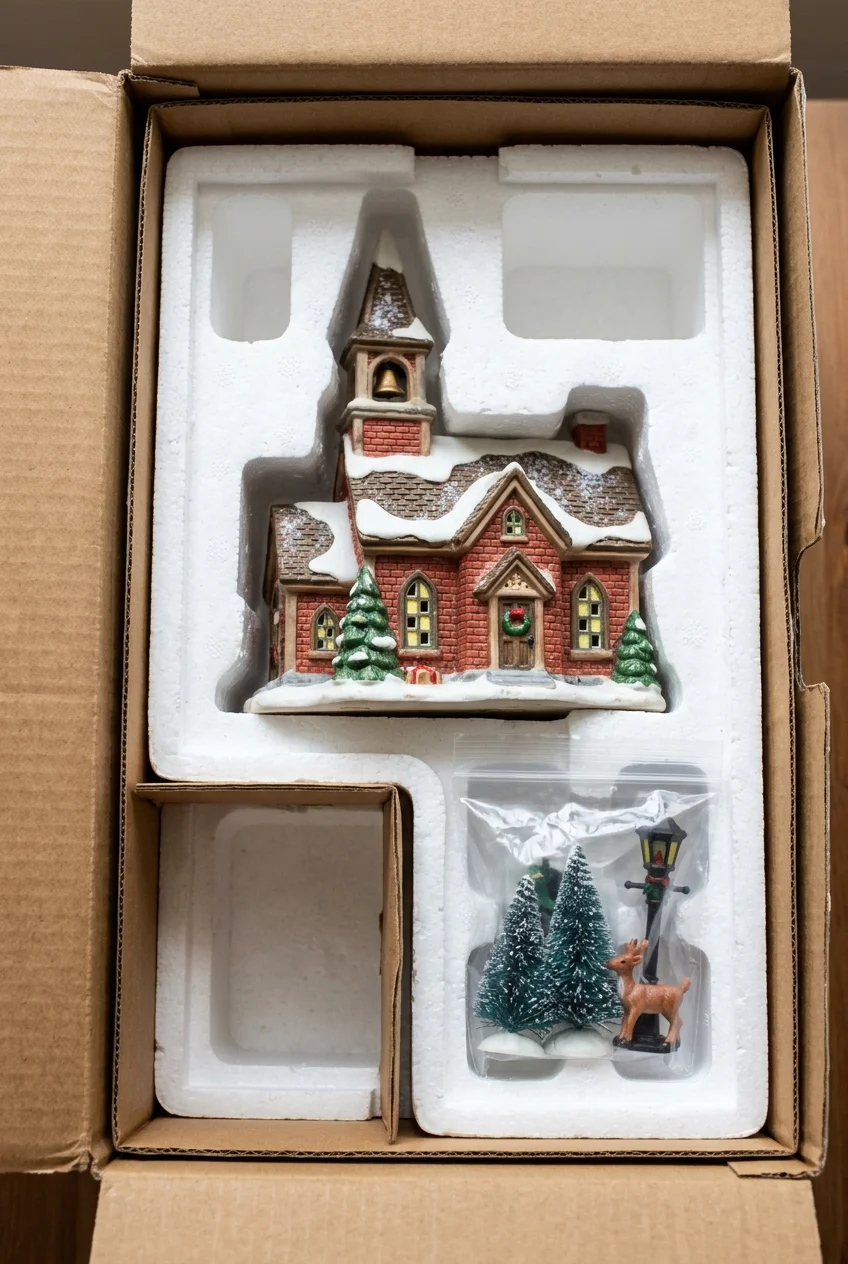
Save fitted packaging for ceramic villages, unusual glass ornaments, motorized displays, and shaped tree toppers when it genuinely protects their vulnerable points.
Mark the outer carton with the item name and orientation. Place small accessories in a sealed pouch inside so parts cannot migrate.
Watch for Do not force expanded greenery or textiles back into tight retail packaging when compression could bend frames, crush details, or trap moisture.
10. Pack in Reverse Order for Next Year
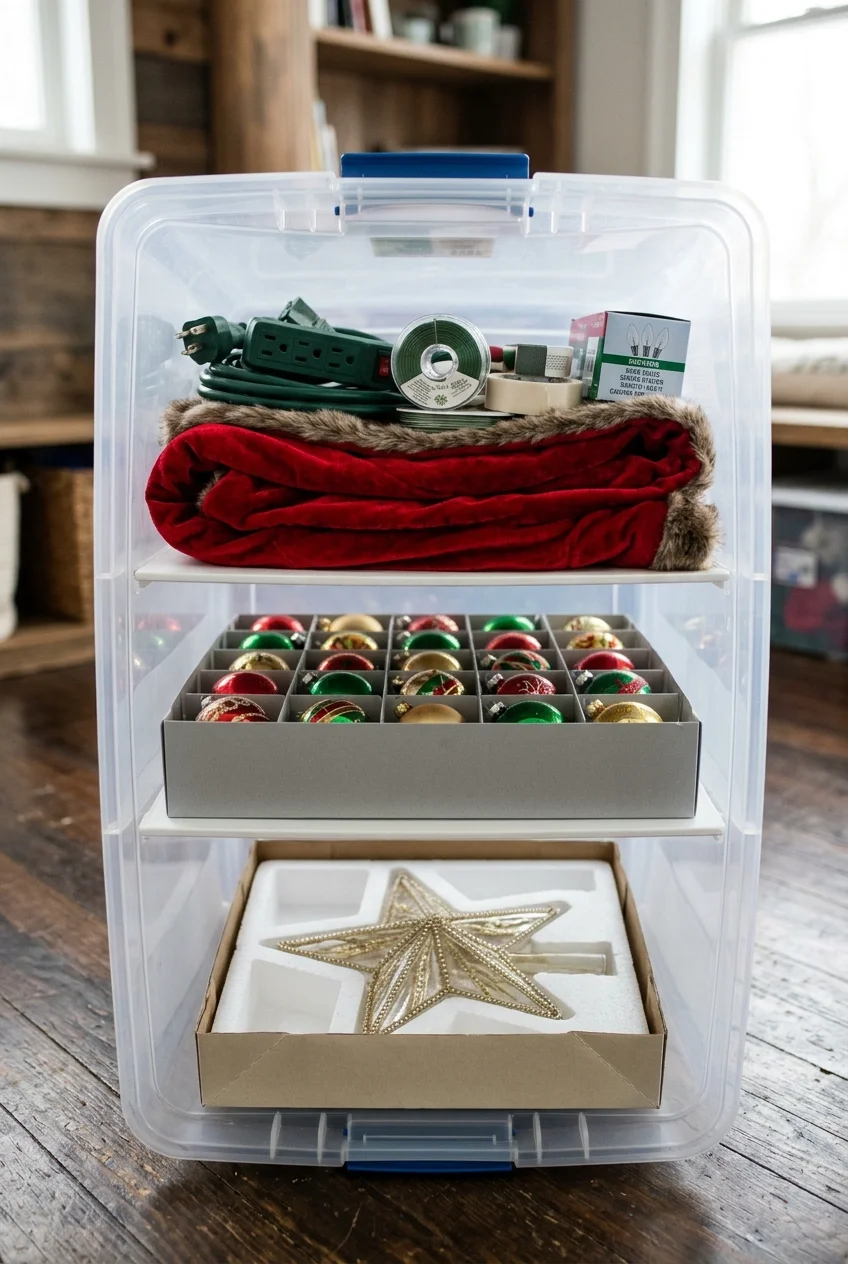
Place late-stage finishing pieces at the bottom and early setup items near the top. Next season, the container naturally reveals decorations in working order.
For a tree bin, store the topper below base ornaments and place hooks, lights, and the tree skirt where they can be reached first.
- Write the setup sequence
- Pack finishing details first
- Add the main decorations
- Place setup supplies on top
Protect Ornaments and Small Collectibles
Small decorations need separation more than compression. Match the cell size, wrapping material, and container strength to each item’s actual shape and fragility.
11. Use Adjustable Dividers for Mixed-Size Ornaments
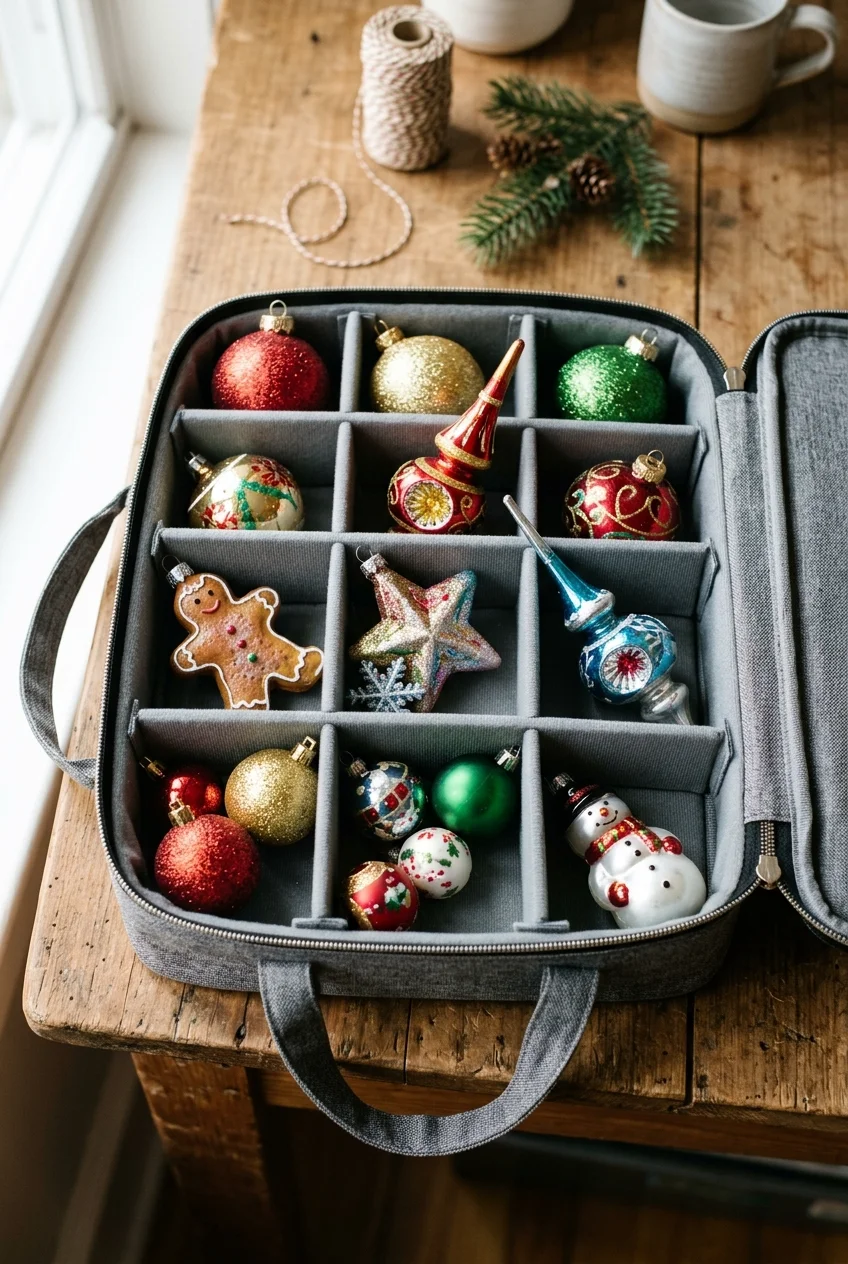
Adjustable cells let round baubles, finials, and wider keepsakes share one case without touching. Reconfigure empty spaces instead of squeezing ornaments into fixed squares.
A zippered ornament case with adjustable dividers can organize mixed shapes; measure your largest pieces and shelf clearance before choosing it.
Wrap especially delicate finishes before placing them in cells. Keep the case level during lifting, because fabric sides do not replace careful handling.
12. Build Larger Cells Around Oversized Ornaments
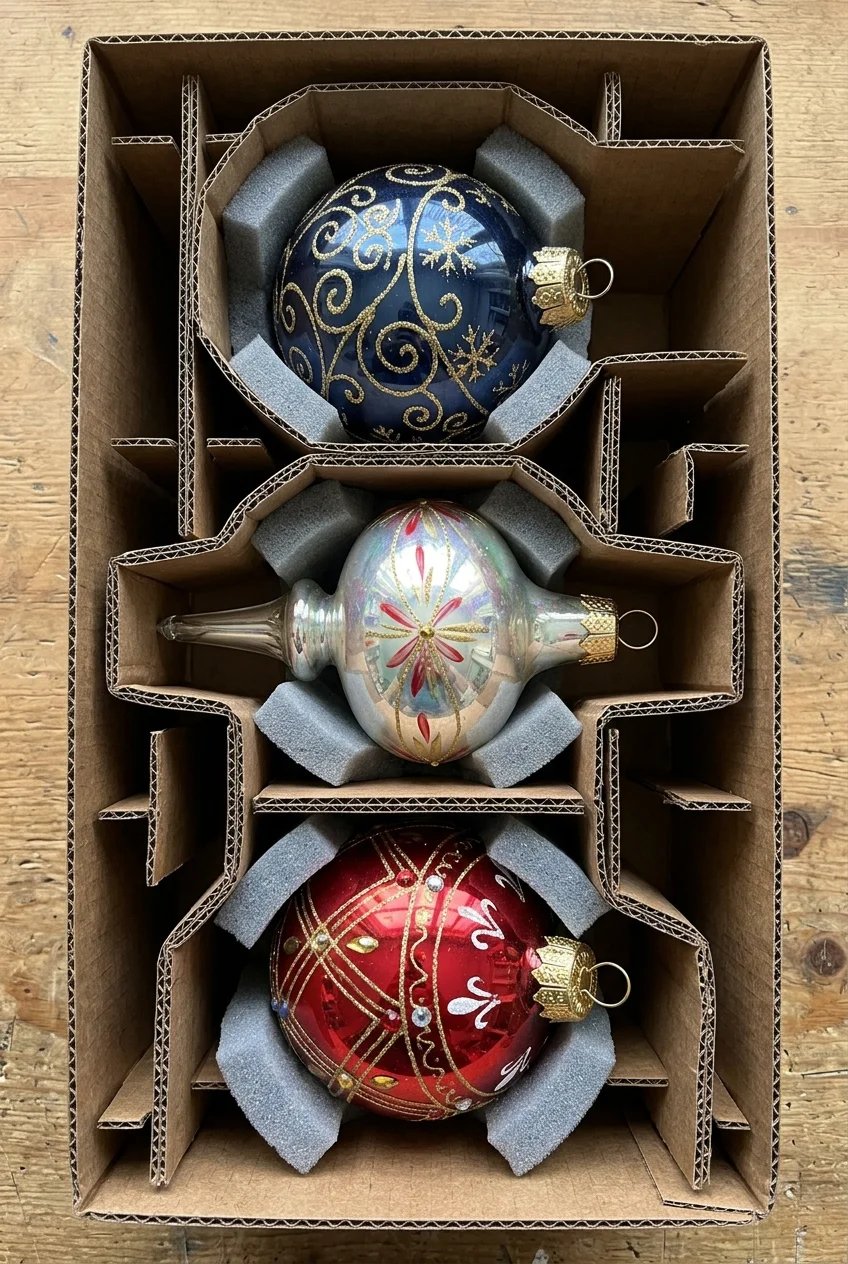
Remove unnecessary dividers or create wider corrugated-board cells for large ornaments. Each piece should rest without pressing against its cap, finial, or applied details.
Fill unused space with clean cushioning so the item cannot slide. Test the closed lid gently before stacking anything above the container.
- Measure the widest point
- Protect projections and hanging caps
- Cushion empty movement space
- Keep heavy pieces on the lowest tray
13. Wrap Heirloom Ornaments Individually
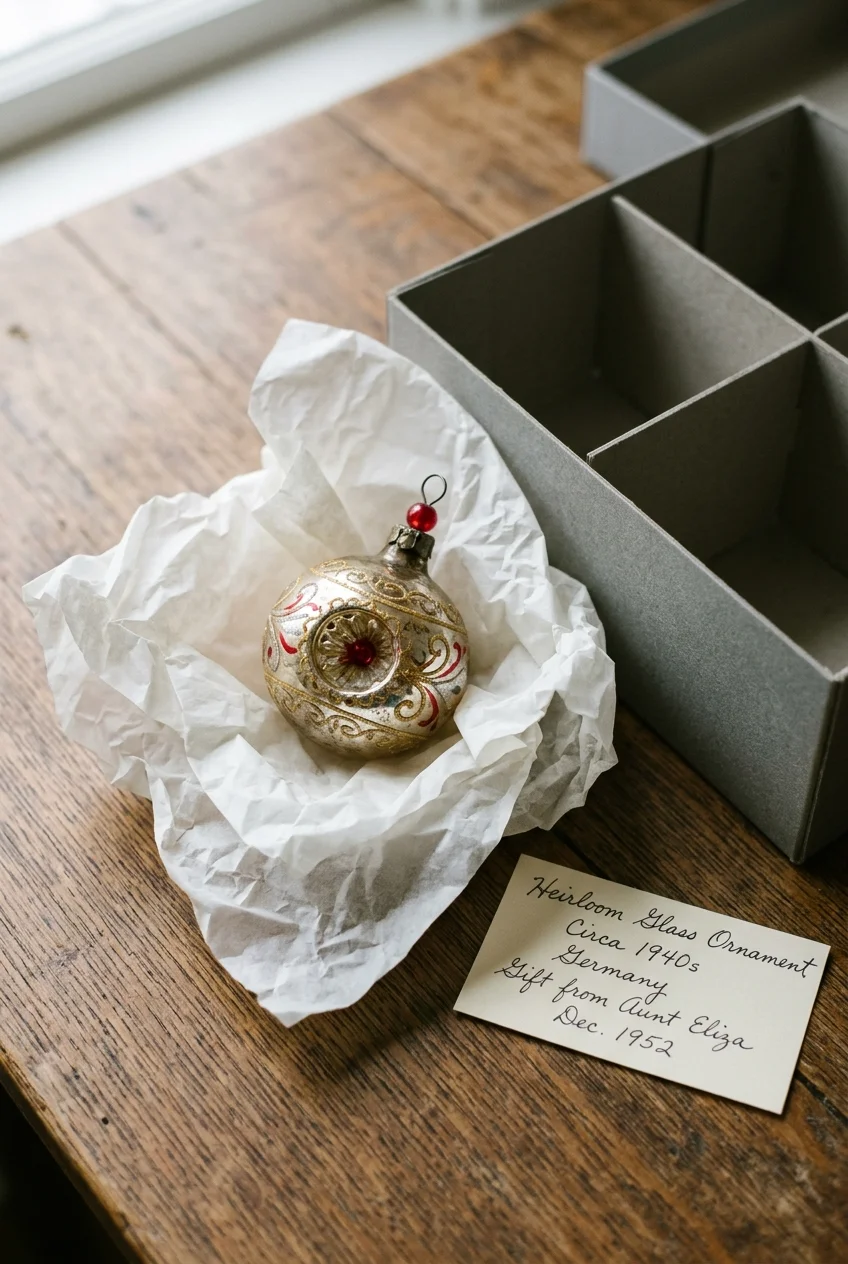
Use clean, nonabrasive, acid-free tissue around heirloom ornaments, then place them in rigid compartments. The wrap protects finishes while dividers prevent collisions.
Add a small identification card outside each wrapped bundle rather than writing on the ornament. Store the history separately if ink could transfer.
Keep sentimental pieces in a location with stable household conditions instead of an area exposed to large temperature or humidity swings.
14. Reuse Egg Cartons for Tiny Shatter-Resistant Pieces
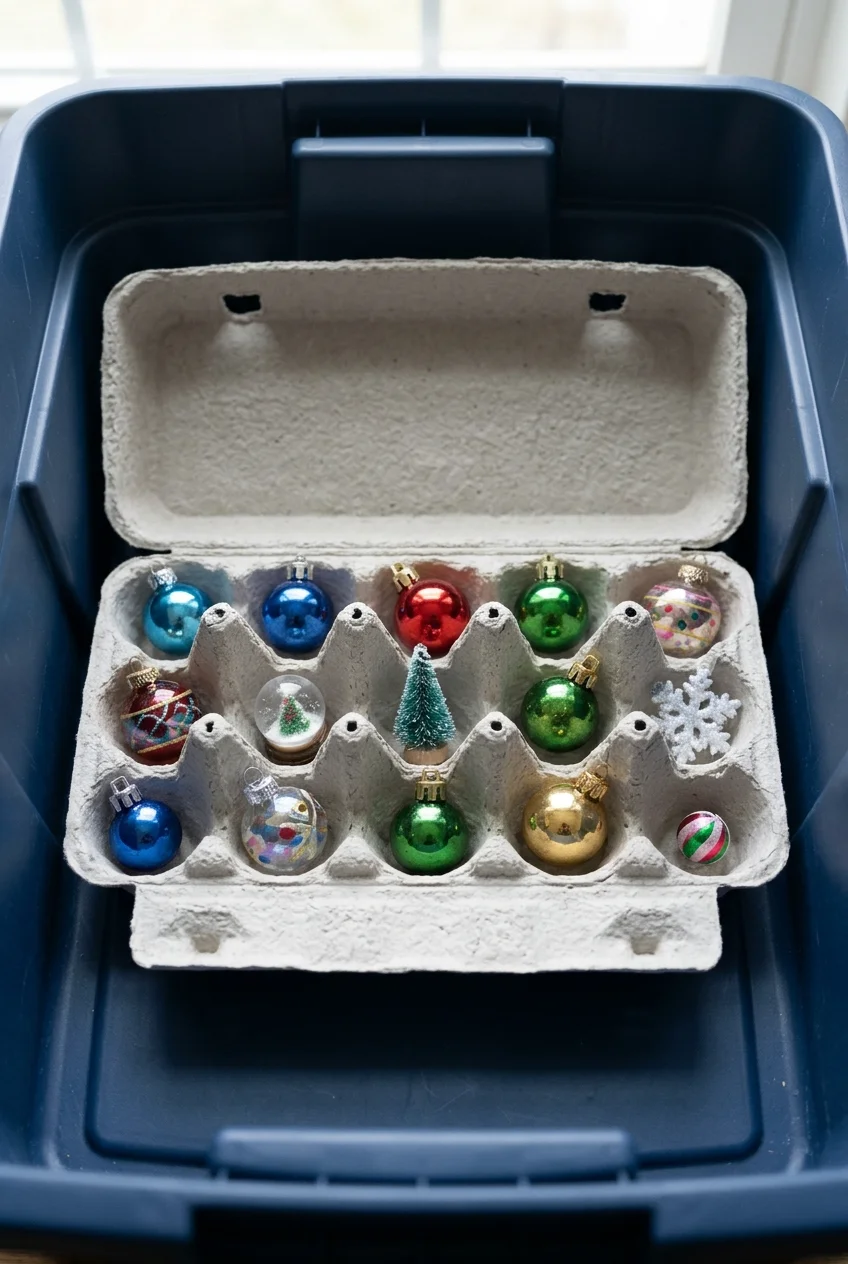
Clean paper egg cartons can separate miniature, non-delicate ornaments or small bells. Their shallow cups work best for lightweight pieces that fit without pressure.
Place the closed cartons inside a larger lidded bin so they remain level and protected from crushing. Avoid this method for valuable glass.
15. Store Ornament Sets in Small Lidded Boxes

Keep a coordinated set together in a small rigid box before placing it inside the main ornament container. This preserves the group without mixing loose pieces.
Choose boxes that close without contacting bows or applied decorations. A clear lid or exterior photo helps identify the set without opening it.
16. Return Village Buildings to Their Fitted Inserts
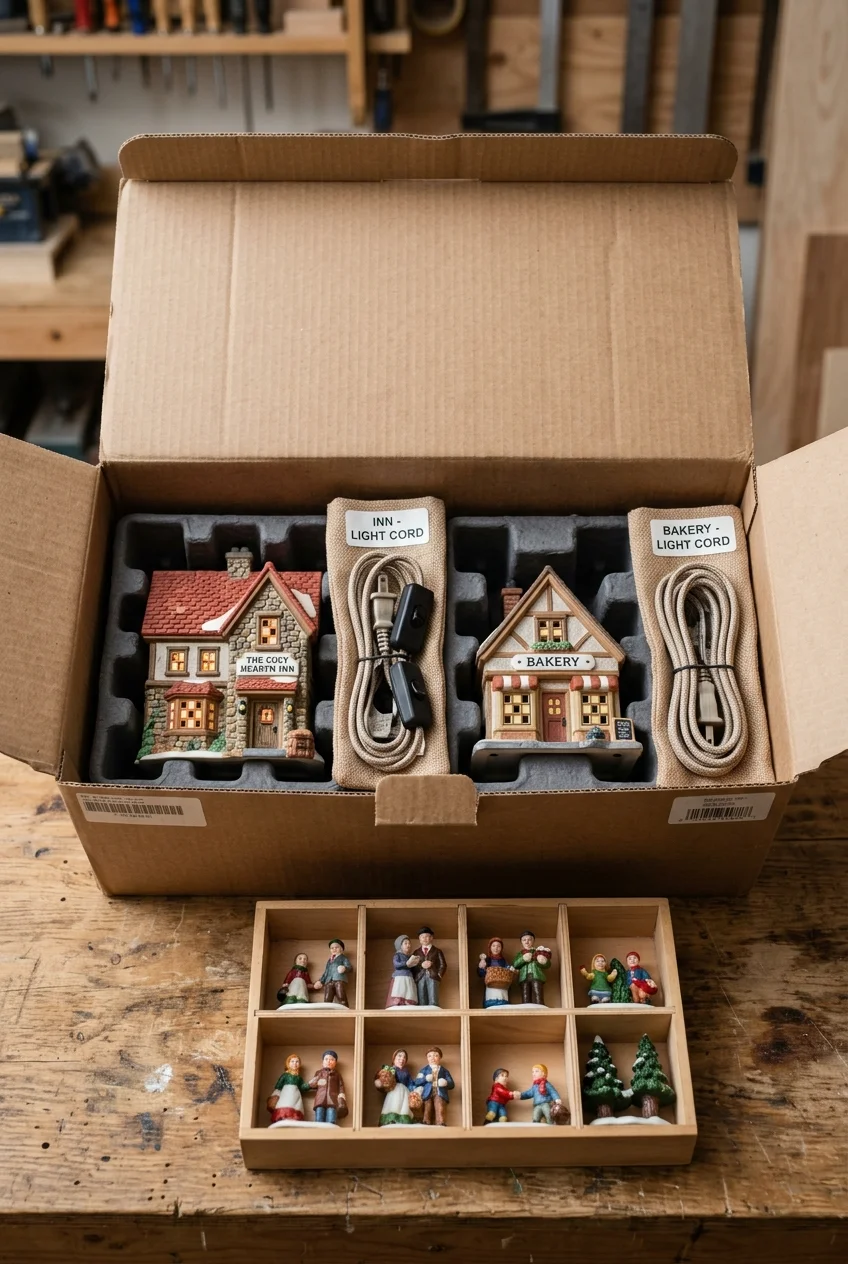
Ceramic village buildings are safest in fitted foam or molded inserts that support their bases and roofs. Keep each power cord with its matching building.
Photograph the packing arrangement before removing complicated pieces next year. Do not stack bare buildings together, even when they appear sturdy.
Setup note Place loose trees, figures, and lampposts in a divided accessory box rather than filling fragile building cavities with small parts.
17. Give a Nativity Set a Compartment Map
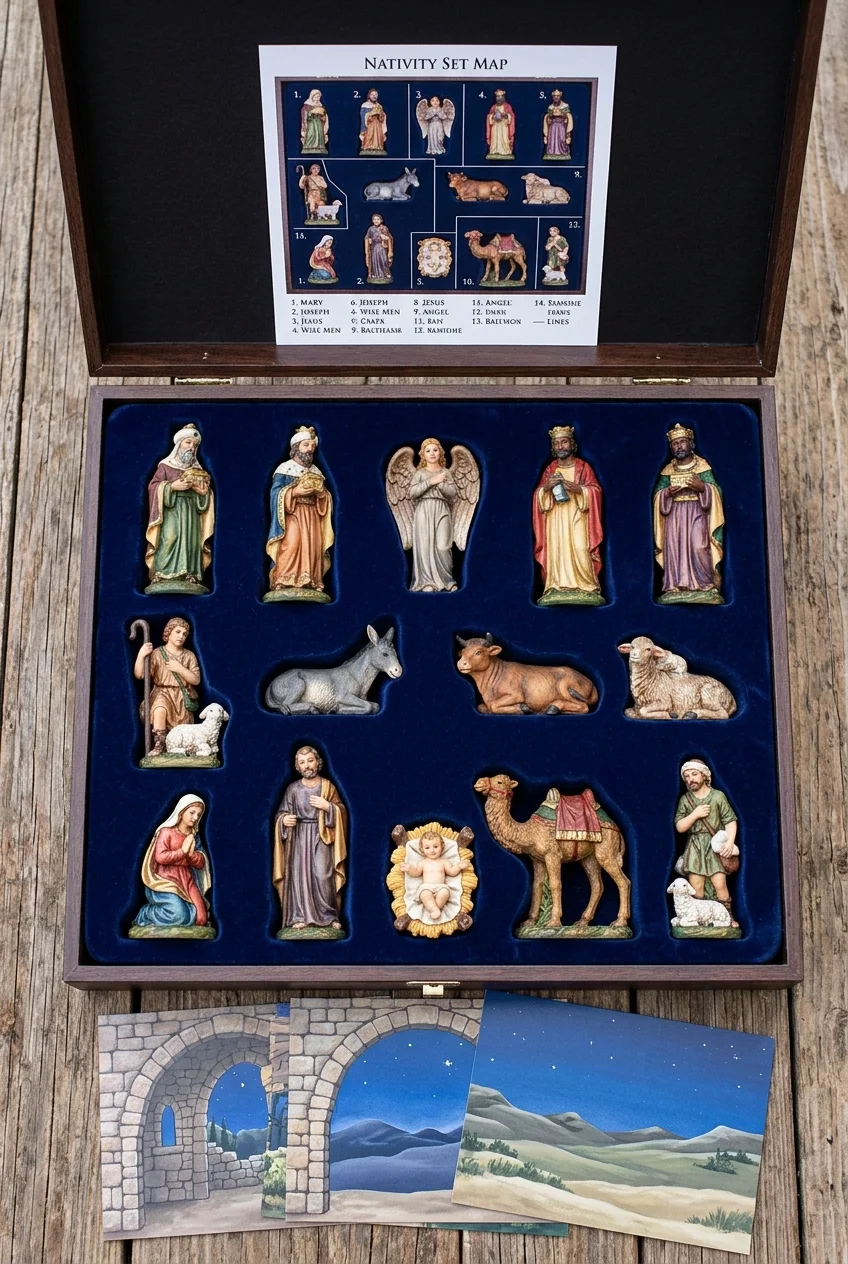
Assign every figure a padded compartment and photograph the complete tray before closing it. A map prevents guessing which shape belongs in each space.
Place tall or top-heavy figures on their sides when their fitted support allows it. Never let narrow bases carry pressure from the lid.
Store the stable, heavier tray below lighter decor, and keep any backdrop panels flat so corners cannot curl or bear weight.
18. Isolate Glittered Decor From Smooth Finishes
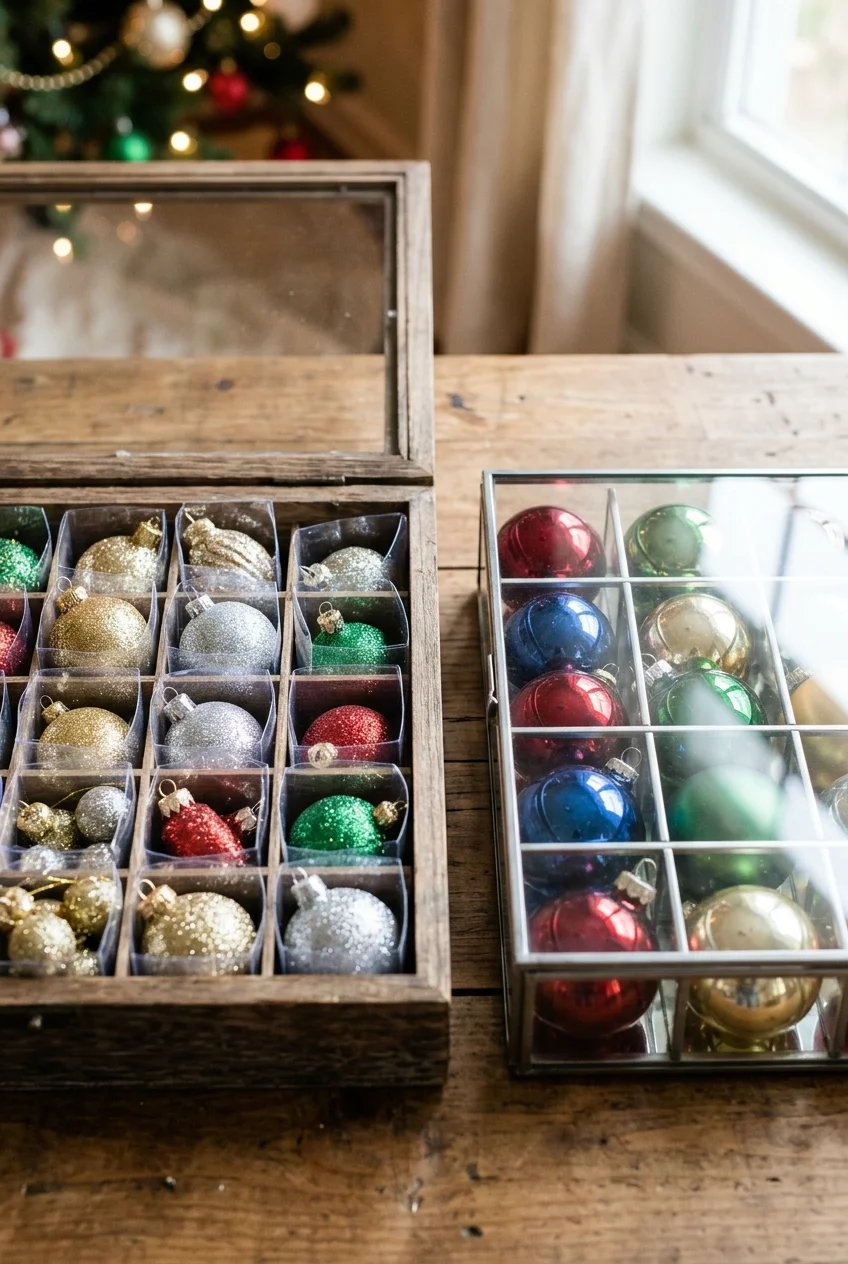
Place glittered ornaments and picks in their own closed container or individual sleeves. Separation keeps loose particles away from glass, fabric, and smooth painted finishes.
Clean the packing surface after handling glitter, then close the container before moving to other categories. Avoid crushing glittered surfaces under tight wrap.
19. Detach Ribbons and Removable Bows Before Storage
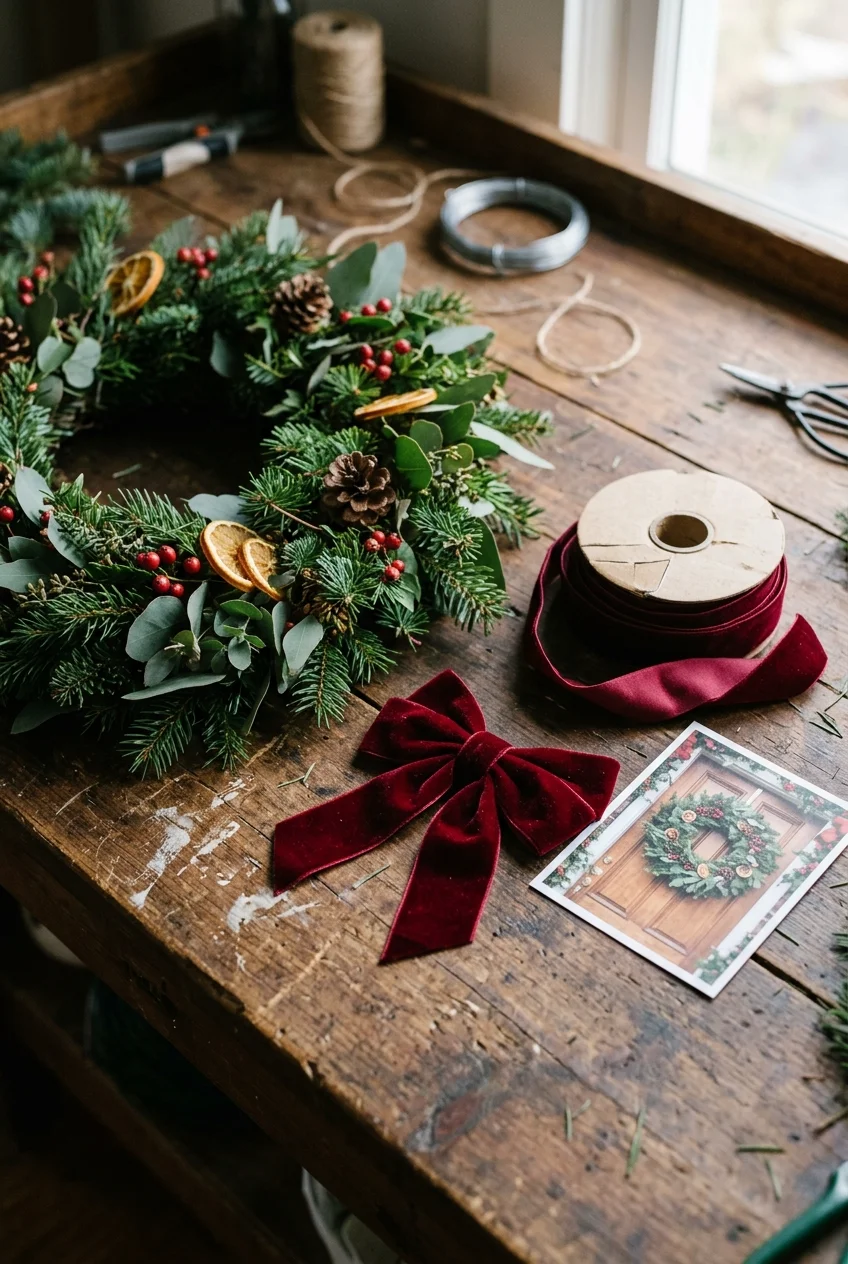
Untie removable bows from wreaths, bells, and ornaments when long-term pressure would crease them. Store ribbons loosely rolled around wide cores.
Keep a photo with each decoration so the bow position is easy to restore. Leave permanently wired embellishments attached and support their loops instead.
20. Corral Hooks, Caps, and Tiny Spare Parts
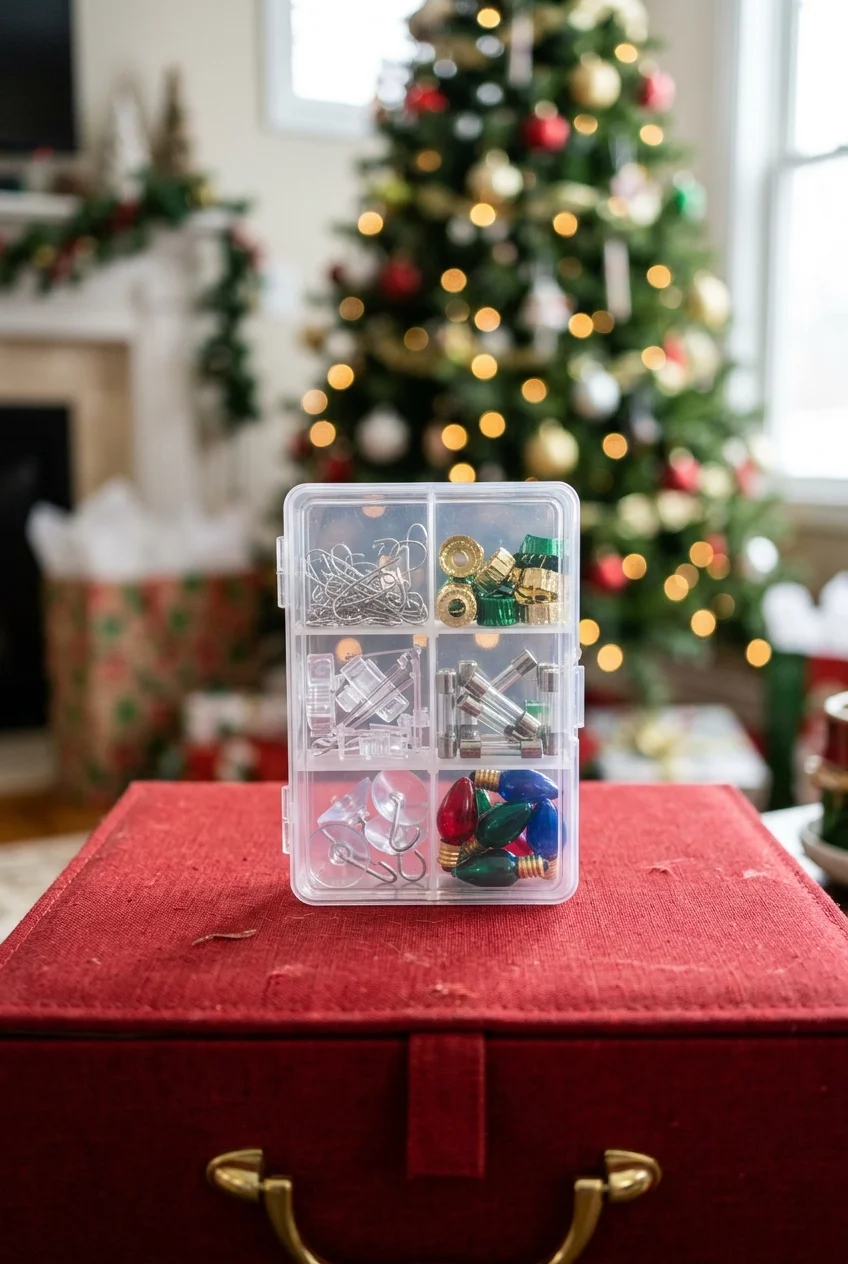
Use a small divided box for ornament hooks, replacement caps, suction cups, spare fuses, and specialty clips. Separate sharp hooks from delicate ribbons.
Place the closed parts box on top of the ornament tray or inside the first-out kit. Its location should remain consistent every year.
- Hooks and caps
- Fuses and spare bulbs
- Suction cups and clips
- Specialty hanging hardware
Store Lights, Greenery, and Large Decor
Long, bulky decorations keep their shape when they are wound, supported, and covered according to their construction instead of folded into convenient gaps.
21. Wind Each Light Strand on Its Own Reel
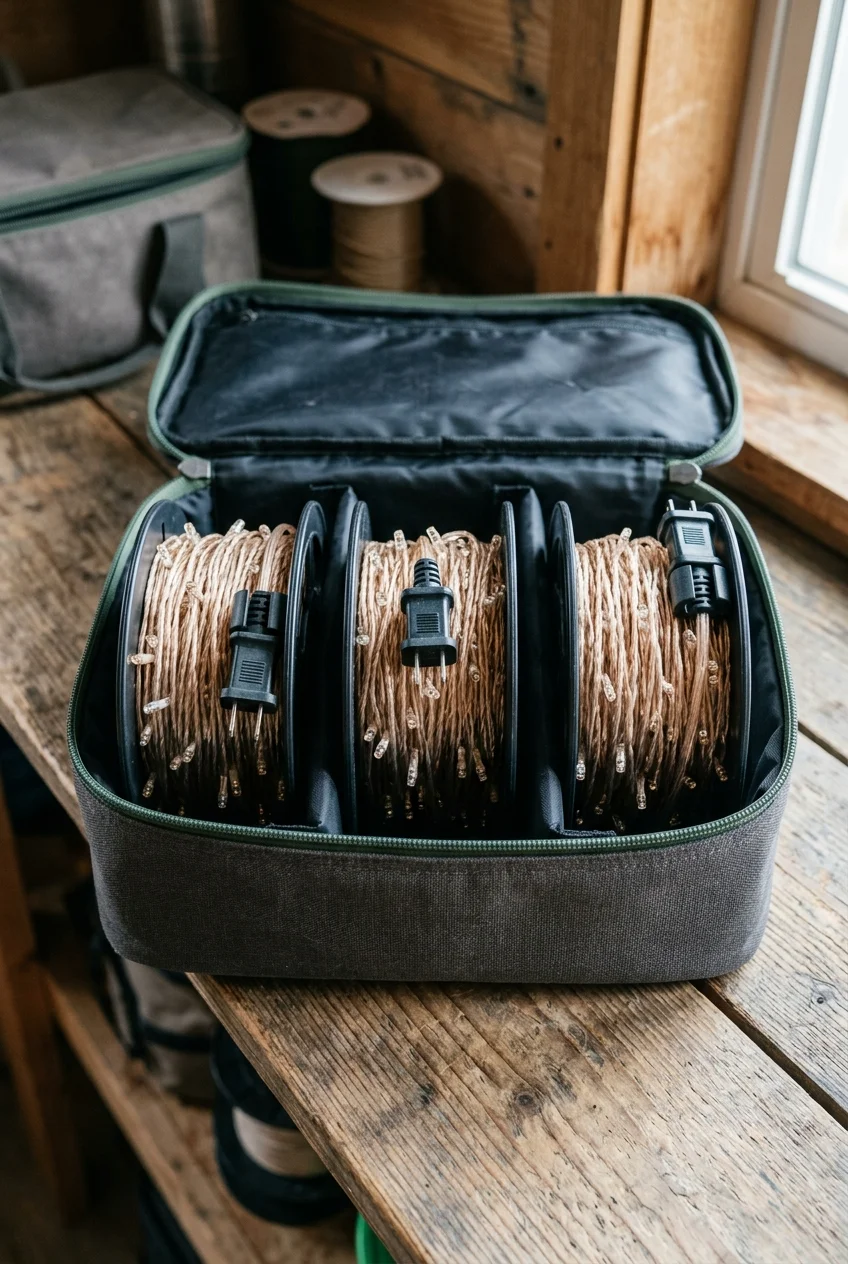
A reel keeps a light strand in a broad, orderly coil and prevents one set from knotting around another. Wind without pulling the wire tight.
For several strands, a light-reel storage bag with separate spools keeps the coils together; confirm the bag fits your shelf before buying.
Label each reel by location and strand length only when those facts are known. Store plugs where they cannot scratch bulbs or snag adjacent wires.
22. Cut Cardboard Winding Panels for a No-Cost Option
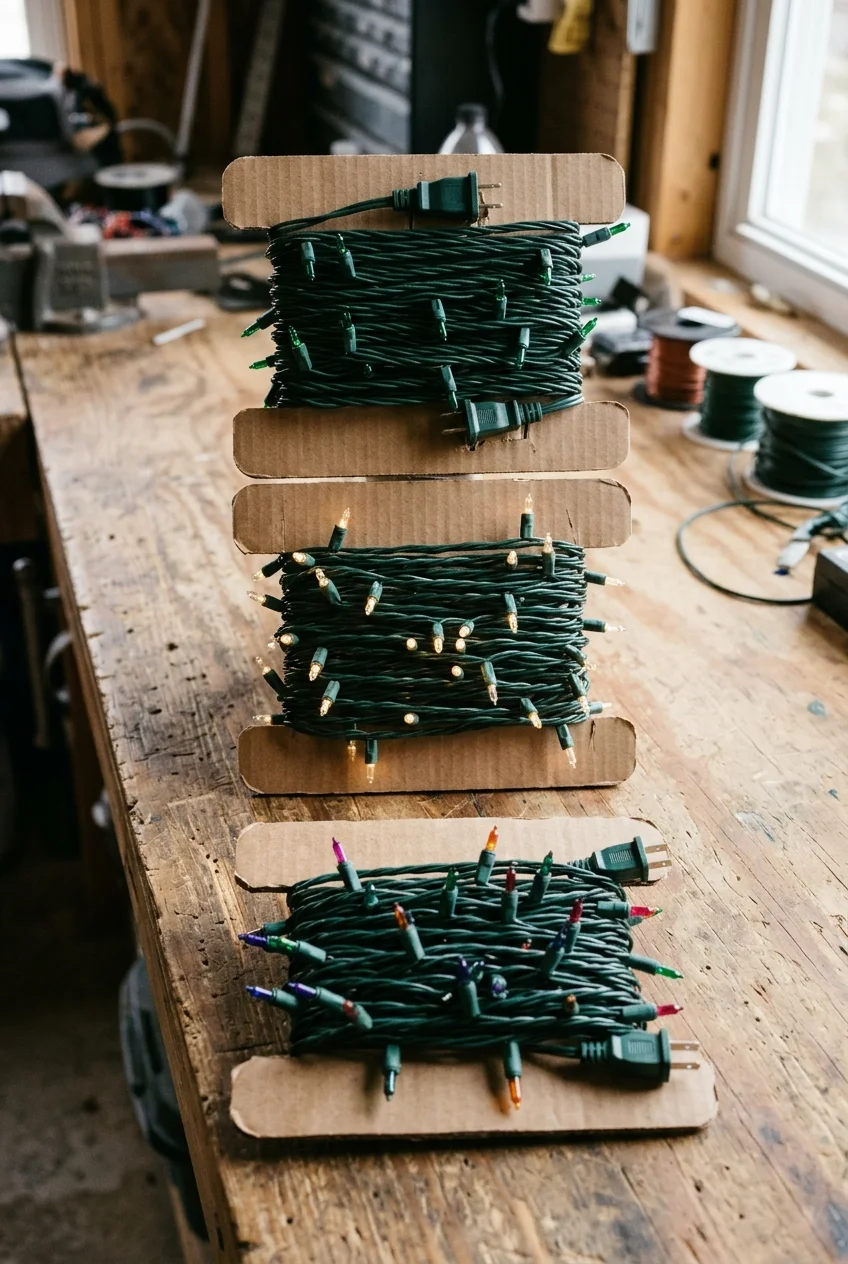
Cut sturdy cardboard into flat panels with shallow notches for the plug and final loop. Wrap one tested strand around each panel without sharp bends.
Stand the panels vertically inside a bin so their edges remain visible. Replace softened or bent cardboard before it stops supporting the coils.
- Cut a wide rectangle
- Add two shallow edge notches
- Wind the strand loosely
- Secure the plug without tape on the wire
23. Inspect and Label Light Strands Before Storage
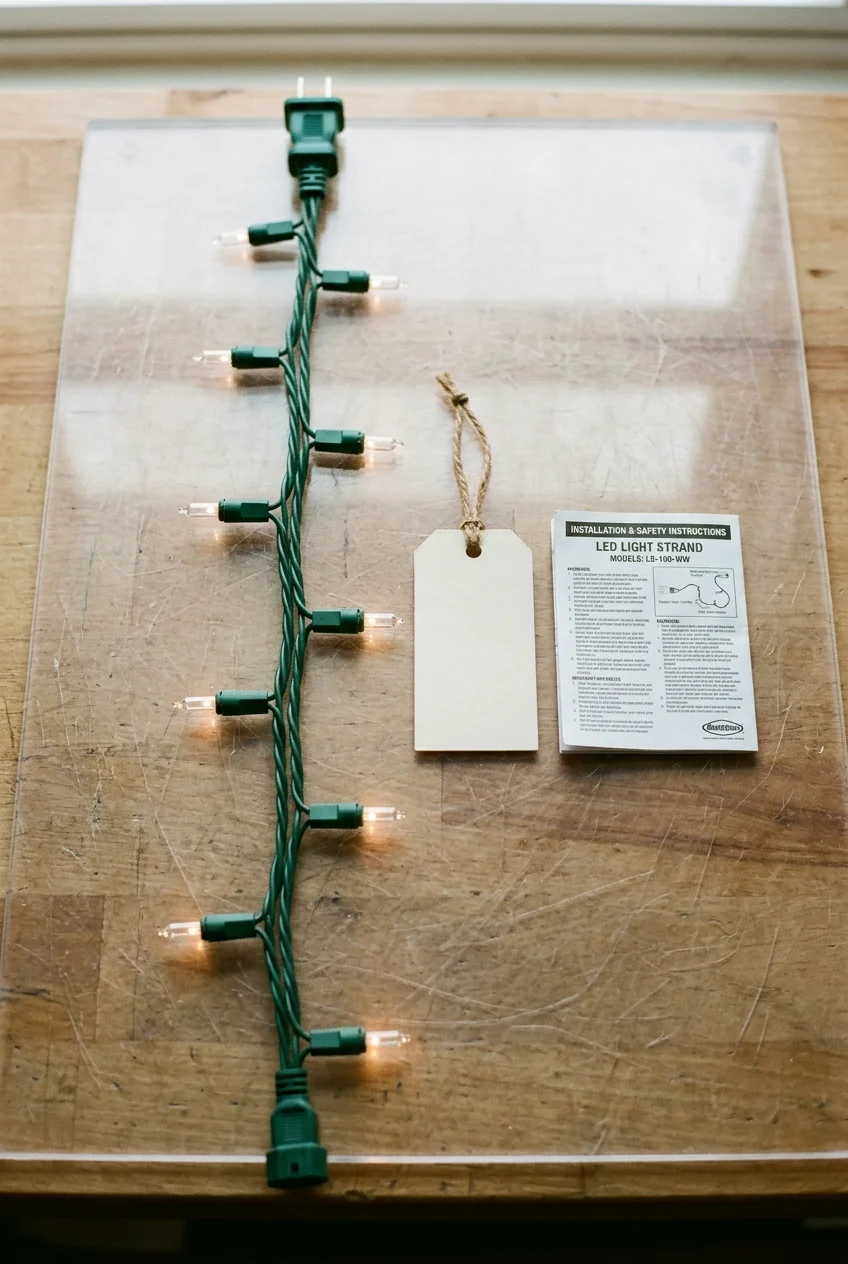
Check unplugged strands for visible damage before packing and follow the manufacturer’s guidance for repairs or disposal. Storage should not hide a known problem.
Attach a simple tag identifying the display location and any compatible controller. Keep instructions with unusual lighting modes instead of relying on memory.
Watch for Never mark a damaged strand as usable merely because it still lights; visible wire, socket, or plug damage requires proper evaluation.
24. Coil Garland in Wide, Relaxed Loops
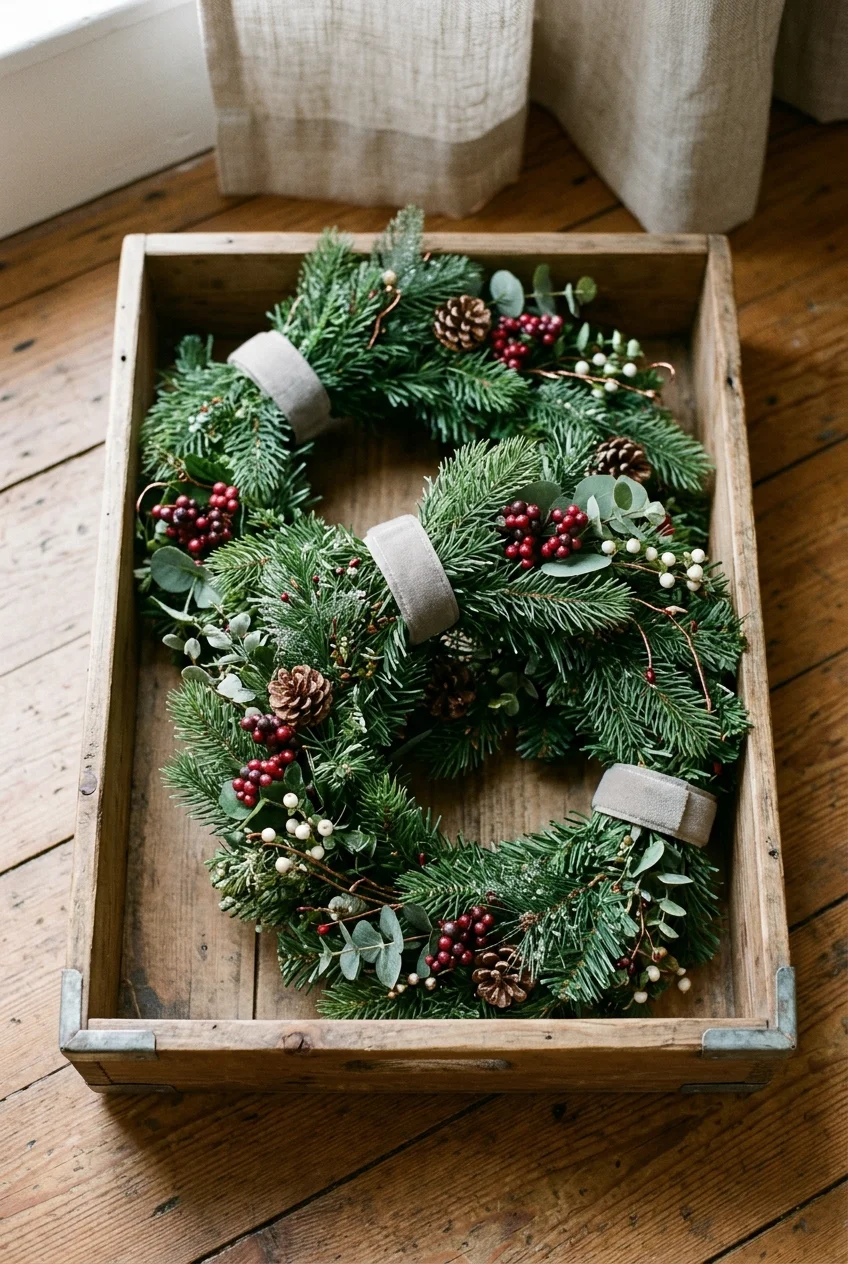
Form broad loops that follow the garland’s natural curve, then secure them with soft reusable ties. Tight coils can kink stems and flatten decorative clusters.
Lay the coil in a shallow bin or roomy bag without heavy objects above it. Tuck the ends inward so they cannot snag the zipper.
If the garland contains lights, keep the plug visible and avoid folding wires sharply where greenery branches from the main spine.
25. Protect Wreaths in a Full-Diameter Cover
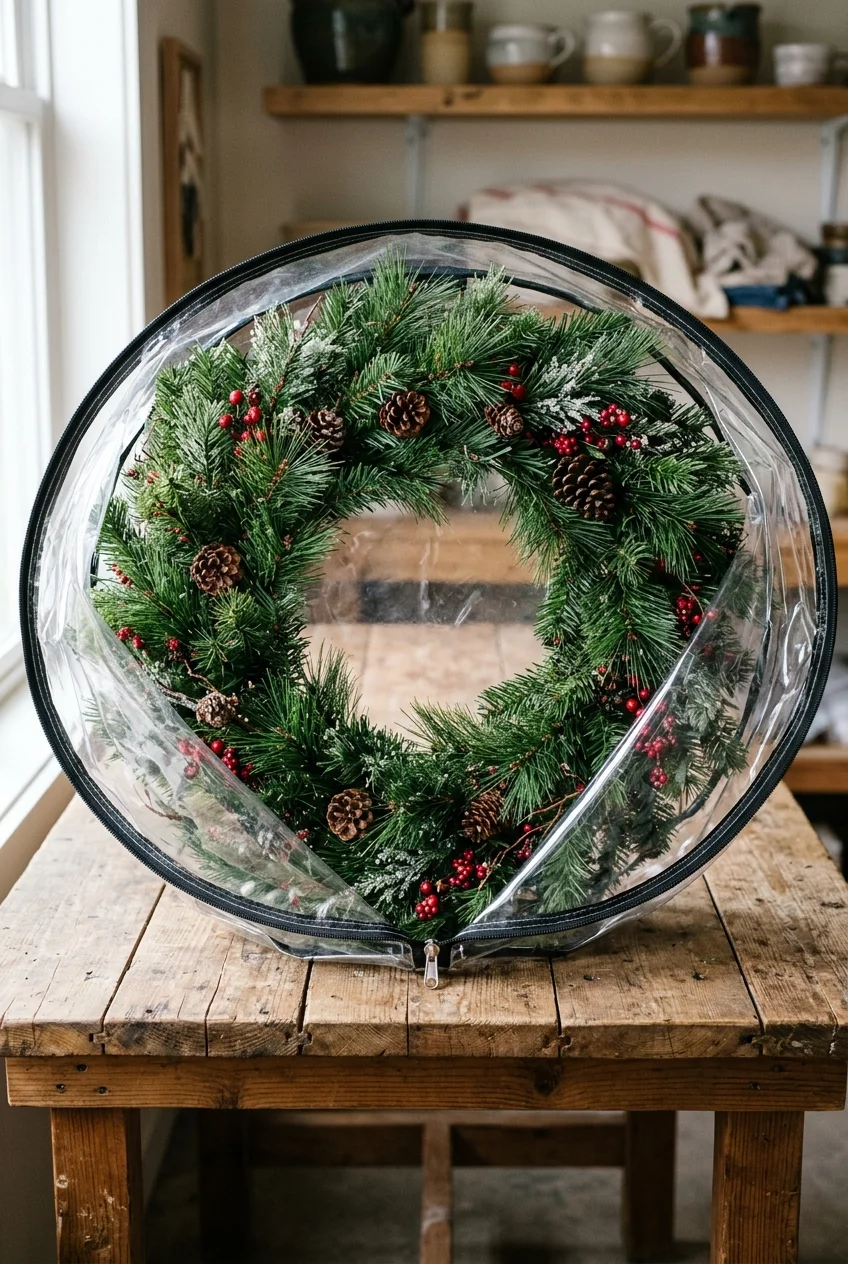
Measure the wreath across its widest decorated point, including bows or picks. A cover should close without forcing the frame into an oval.
A clear zippered wreath cover keeps the shape visible while blocking dust; check the wreath’s full diameter and depth before selecting it.
Support the covered wreath flat or hang it from its frame as the cover allows. Do not suspend a heavy wreath by delicate greenery.
26. Hang Wreaths From Their Frames on a Closet Rod
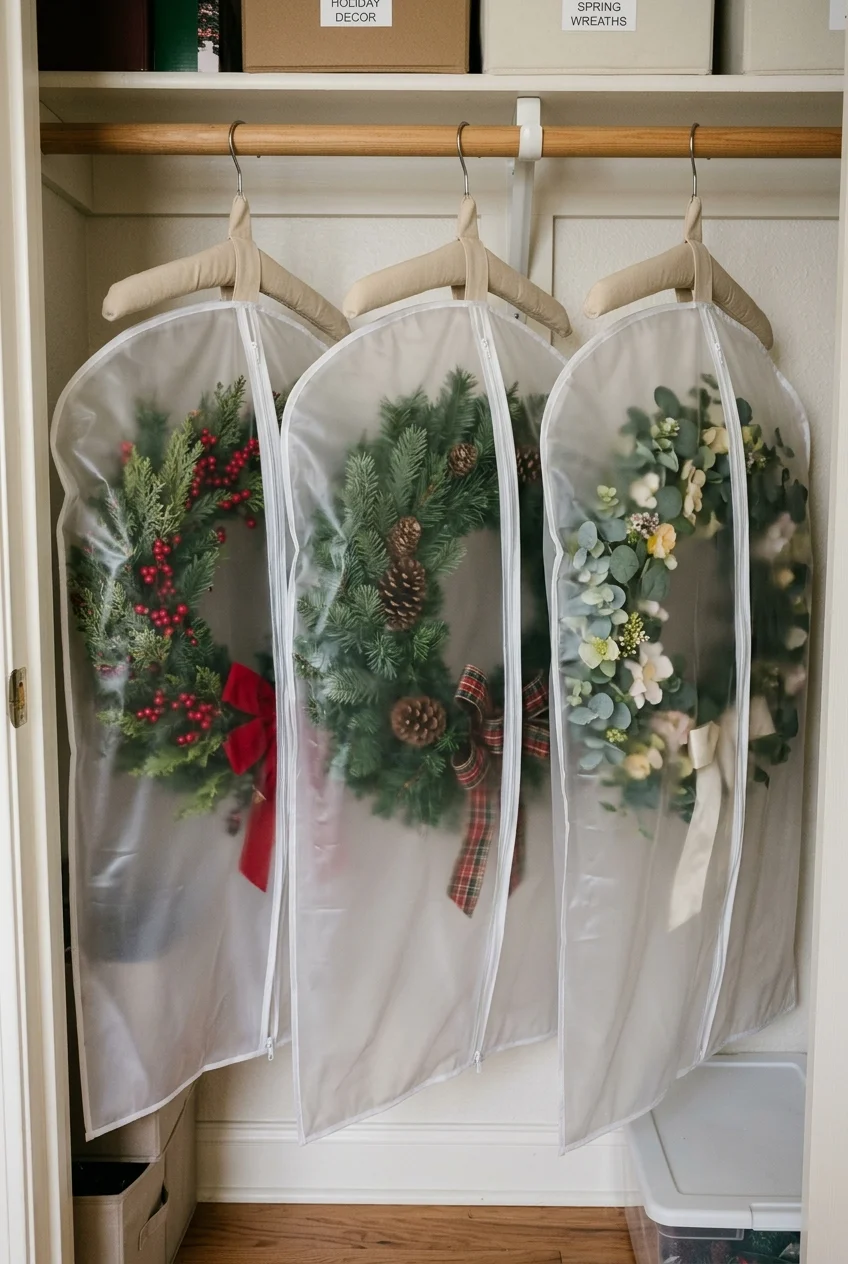
Use broad, padded hangers or sturdy hooks that carry the wreath frame rather than branches. Space wreaths so bows and foliage do not crush together.
Cover each wreath with a breathable clean garment bag when household conditions are dry. Confirm the rod and hardware support the combined load.
- Support the structural frame
- Leave space between decorations
- Keep covers clear of the floor
- Check rod and hook ratings
27. Label Artificial Tree Sections Before Bagging
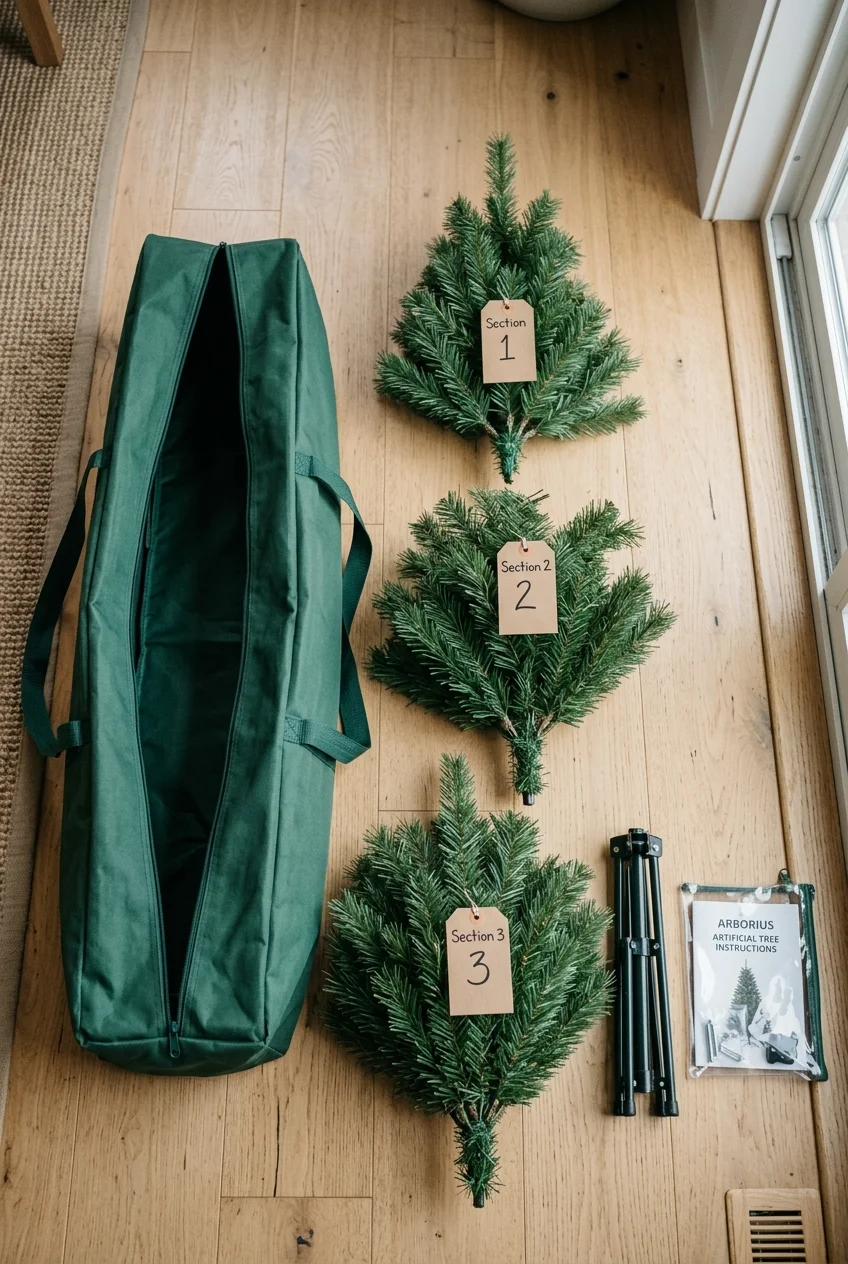
Mark each tree section according to its assembly order before placing it in a protective bag. Keep the stand and assembly instructions in one pouch.
Fold hinged branches only as the manufacturer directs, working around the tree rather than forcing the entire section against the trunk at once.
Choose a bag with handles positioned for balanced lifting. Large tree bags become awkward when one person must grip both ends from the same side.
28. Avoid Over-Compressing Artificial Tree Branches
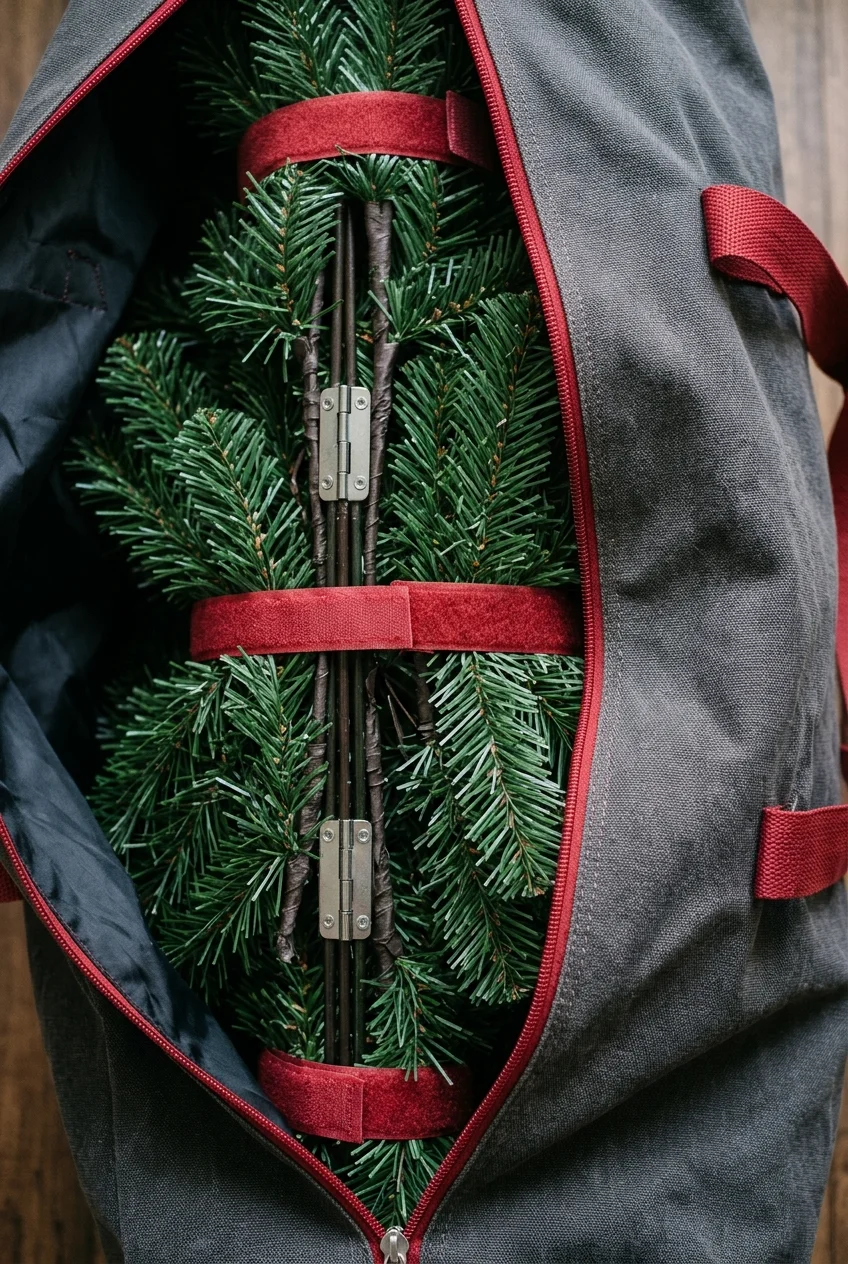
A smaller bag is not a space-saving win if it bends branch hinges, flattens flocking, or requires sitting on the tree to close it.
Use gentle ties to contain each section, then select storage that closes with light hand pressure. Restore displaced tips before they harden into tight bends.
Practical tip Measure the contained tree sections after tying them loosely, because retail tree height does not reveal the packed bundle’s actual diameter.
29. Nest Tabletop Trees in Rigid Totes
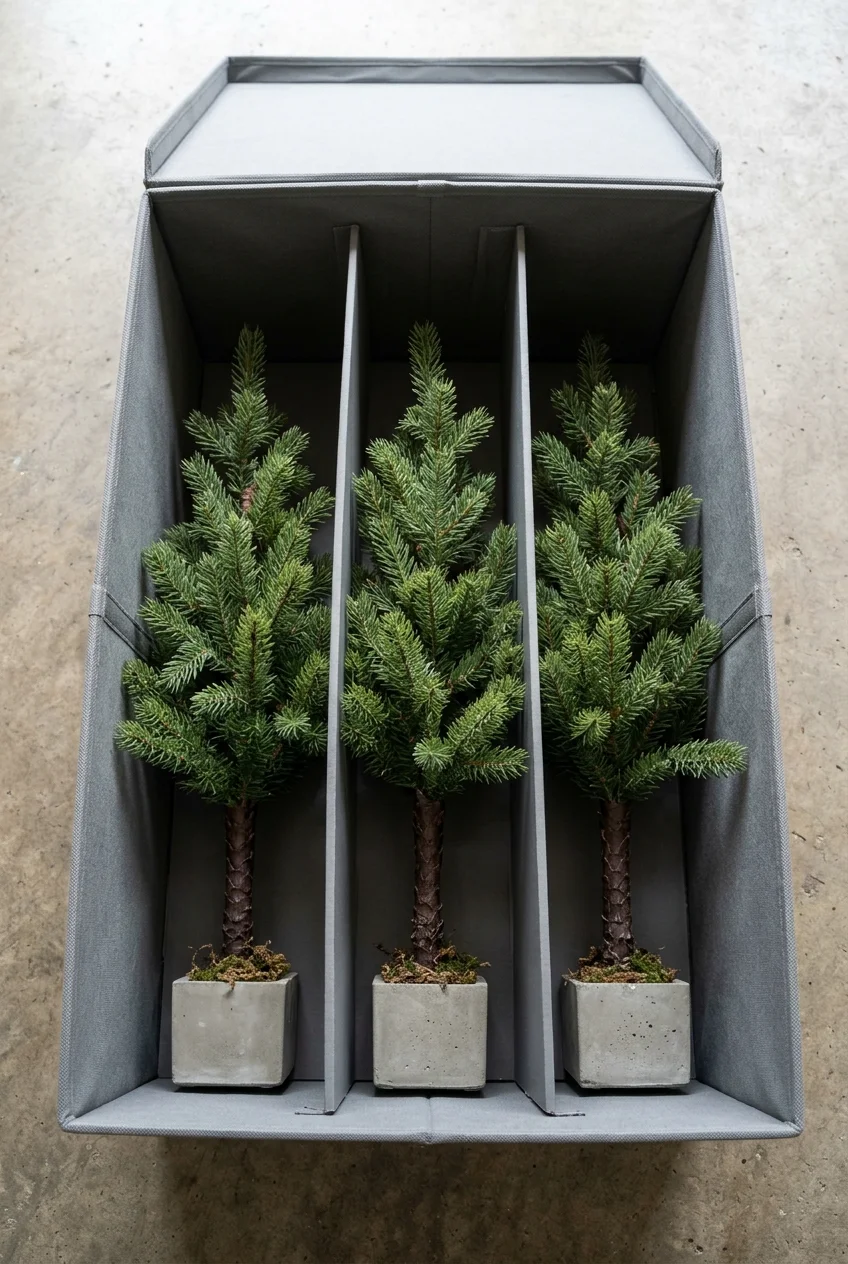
Place miniature trees upright in a rigid tote with dividers between bases. Remove loose ornaments first, but leave firmly attached branches in their natural positions.
Use a tote tall enough that the lid clears every treetop. Fill base gaps so pots cannot tip, then store nothing heavy above them.
30. Clean and Fully Dry Outdoor Inflatables
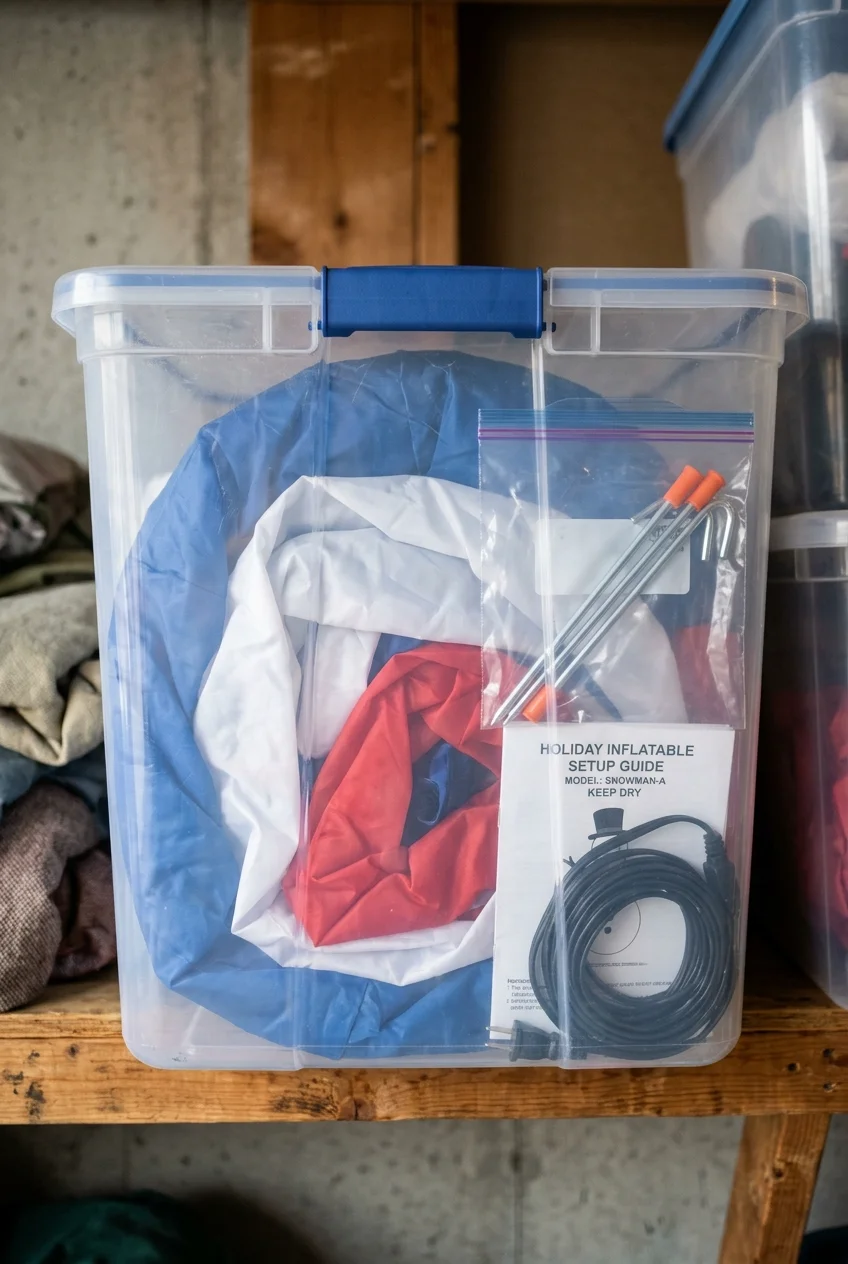
Wipe soil and debris from a deflated decoration according to its care instructions, then let every surface dry completely before folding it loosely.
Keep stakes, tethers, cords, and instructions in a sealed accessory pouch within the same bin. Protect sharp stakes from contacting the inflatable fabric.
Store the bin away from standing water and extreme conditions that conflict with the manufacturer’s directions. Label the outdoor scene shown inside.
Organize Holiday Textiles and Gift Wrap
Fabric and paper benefit from clean, dry storage with enough room to avoid permanent creases, crushed bows, faded surfaces, and mystery supplies next December.
31. Wash and Dry Table Linens Before Folding
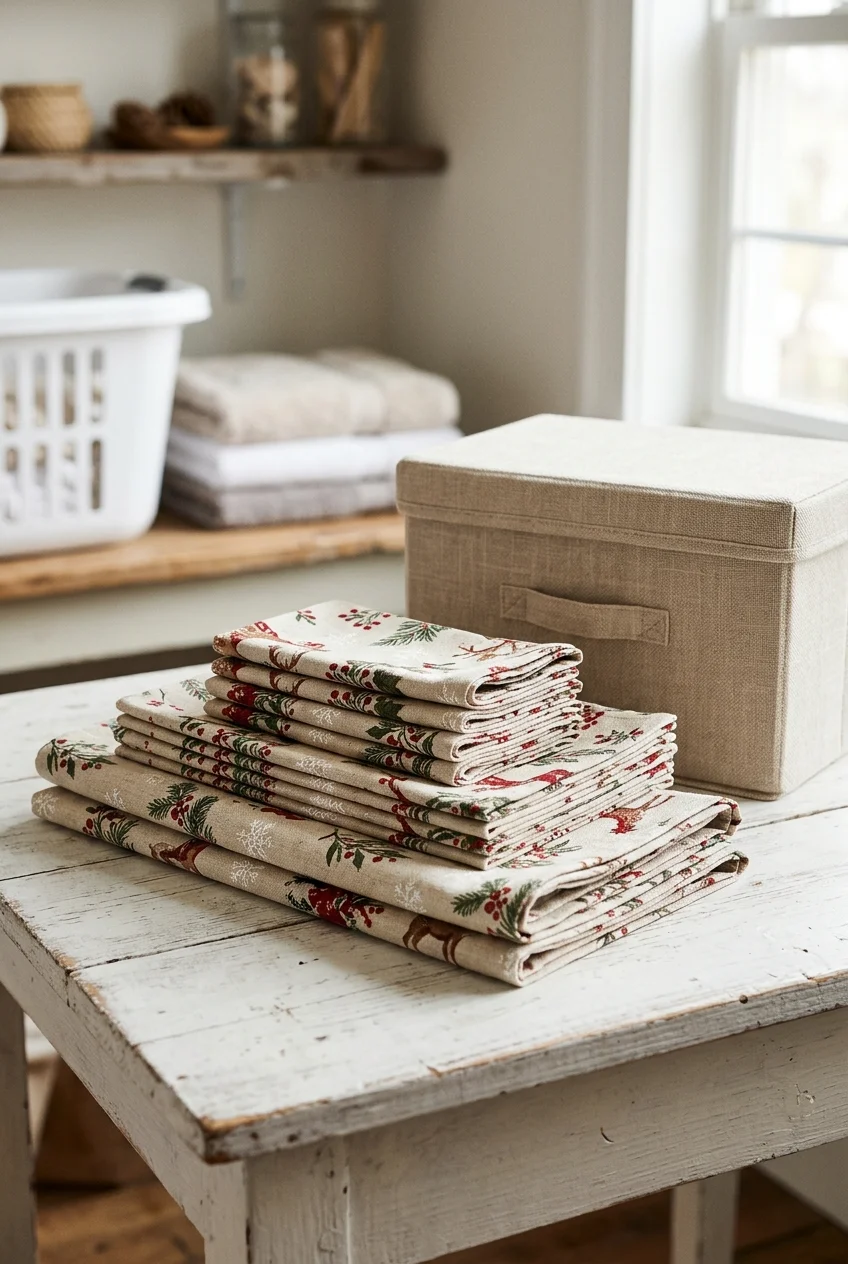
Follow each textile’s care label, remove food residue, and dry the fabric completely before storage. Hidden stains and trapped moisture become harder to address later.
Fold matching runners, napkins, and placemats together, then place the set in a clean container. Add a photo card if several tables use similar linens.
Keep linens away from candles, scented products, and loose greenery so wax, fragrance, or plant residue cannot transfer during the off-season.
32. Support Stockings Without Crushing Embellishments
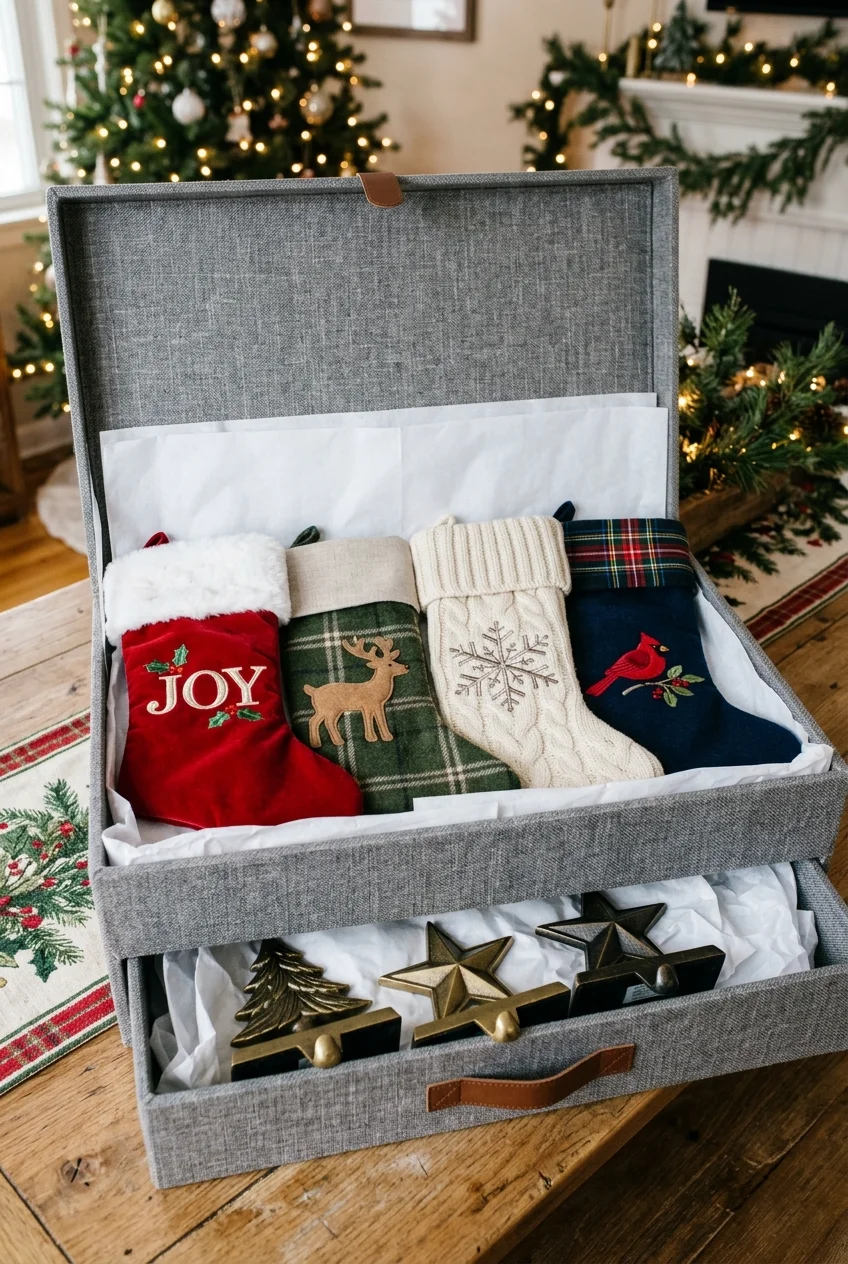
Lay simple stockings flat, but cushion dimensional cuffs, bells, or appliqués with clean tissue. Avoid stacking heavy linens directly over raised decoration.
Keep each household set together with removable name tags facing upward. Detach weighted stocking holders and store them separately at the bottom of a sturdy bin.
33. Store Pillow Covers Without the Inserts
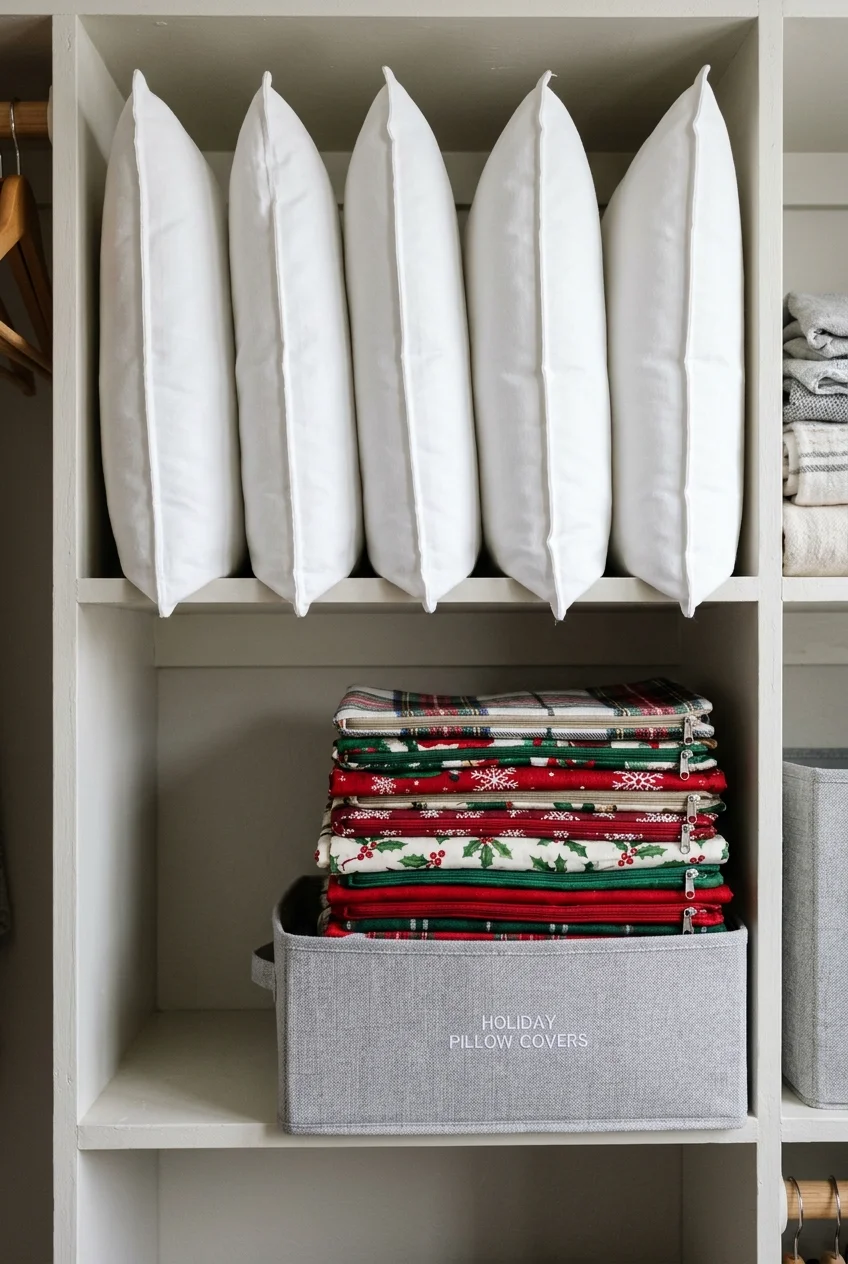
Remove washable seasonal covers from everyday pillow inserts when the construction allows it. Flat covers occupy far less space than complete decorative pillows.
Clean and dry the covers according to their labels, fasten zippers, and fold loosely. Store inserts where they retain their intended shape.
For more storage-aware seasonal choices, these Christmas apartment decorating ideas include compact displays and pieces that fold flat after the holidays.
34. Slide Gift Wrap Into a Low Under-Bed Case
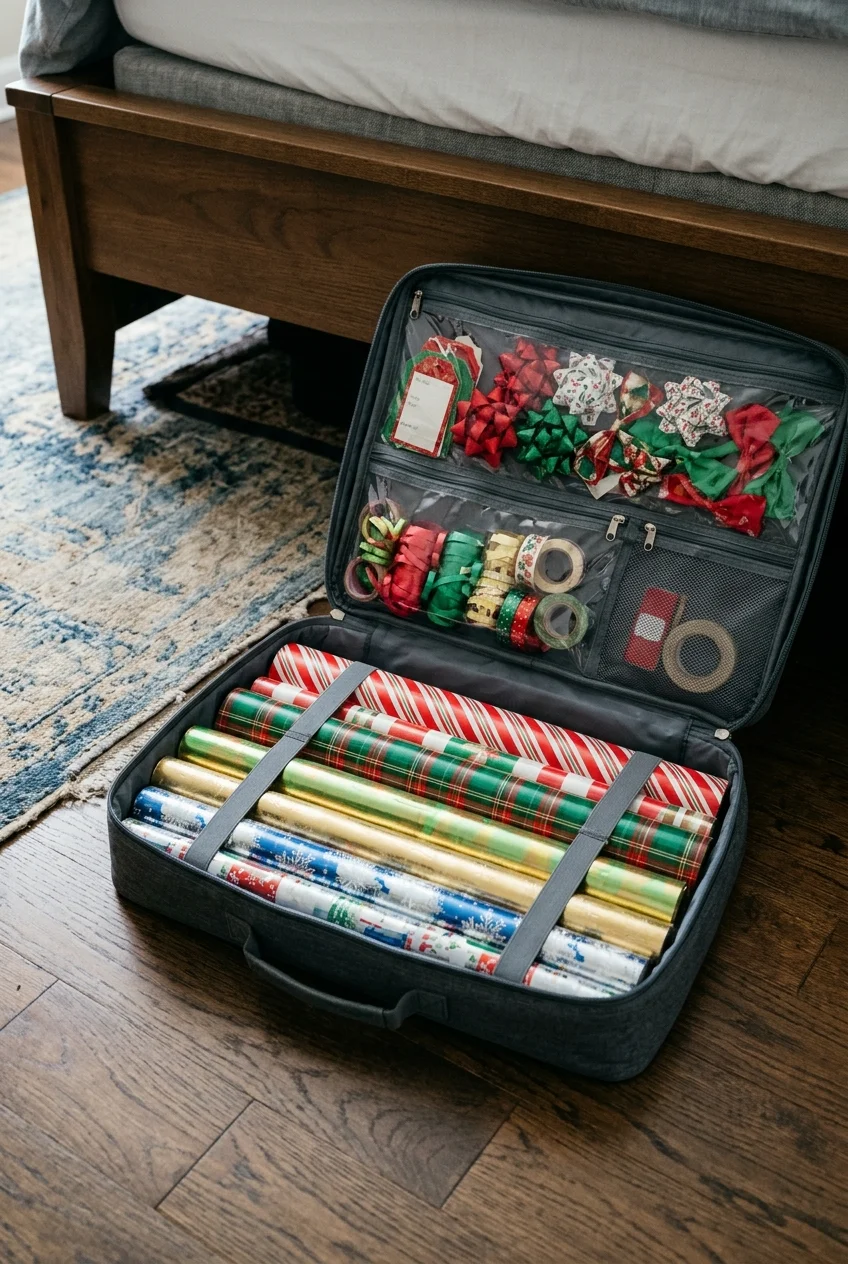
A low case keeps paper rolls horizontal, reducing bent ends while using space beneath a bed. Measure both the longest roll and floor clearance first.
This under-bed gift-wrap organizer with accessory pockets separates rolls from bows and ribbons; verify its external dimensions against your available opening.
Store the case where it will not block floor vents or bed mechanisms. Remove crushed rolls rather than forcing the zipper over them.
35. Stand Short Gift-Wrap Rolls in a Tall Bin
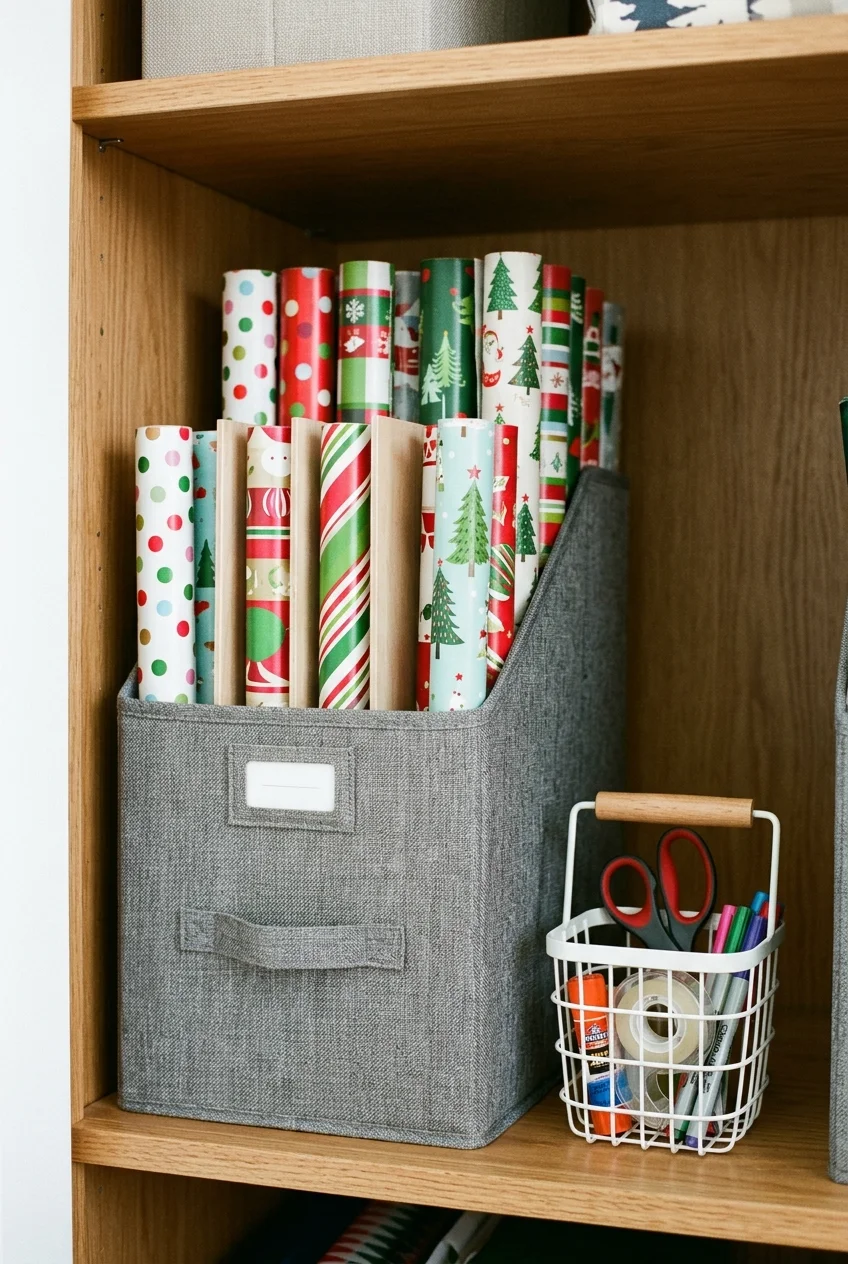
A tall narrow bin works well in a closet corner when paper rolls are shorter than the available shelf height. Keep every roll fully supported.
Add simple dividers for everyday, birthday, and holiday paper if the bin serves year-round wrapping. Store scissors and tape in a separate handled cup.
Watch for Do not stand long rolls where sprinkler heads, closet rods, or shelves force them to bend; horizontal storage is better in that space.
36. Keep Ribbon on Its Original Spools
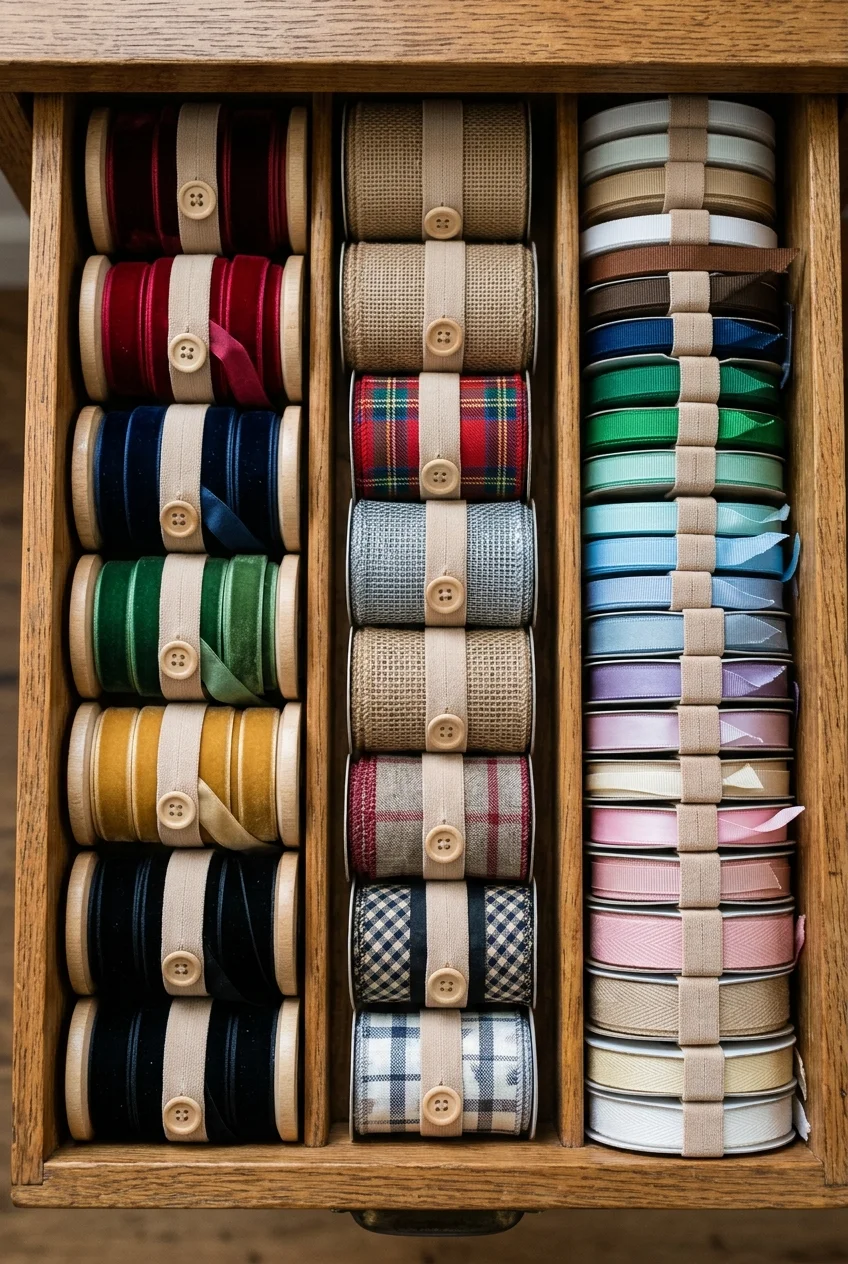
Leave usable ribbon on its spool so edges stay aligned and lengths remain easy to measure. Secure the loose end with a gentle reusable band.
Arrange spools vertically in a box or horizontally on removable rods. Choose the orientation that lets you remove one color without unloading everything.
- Separate wired and soft ribbon
- Keep loose ends contained
- Protect velvet from hard creases
- Store frequently used colors near the front
37. File Gift Bags Flat by Size
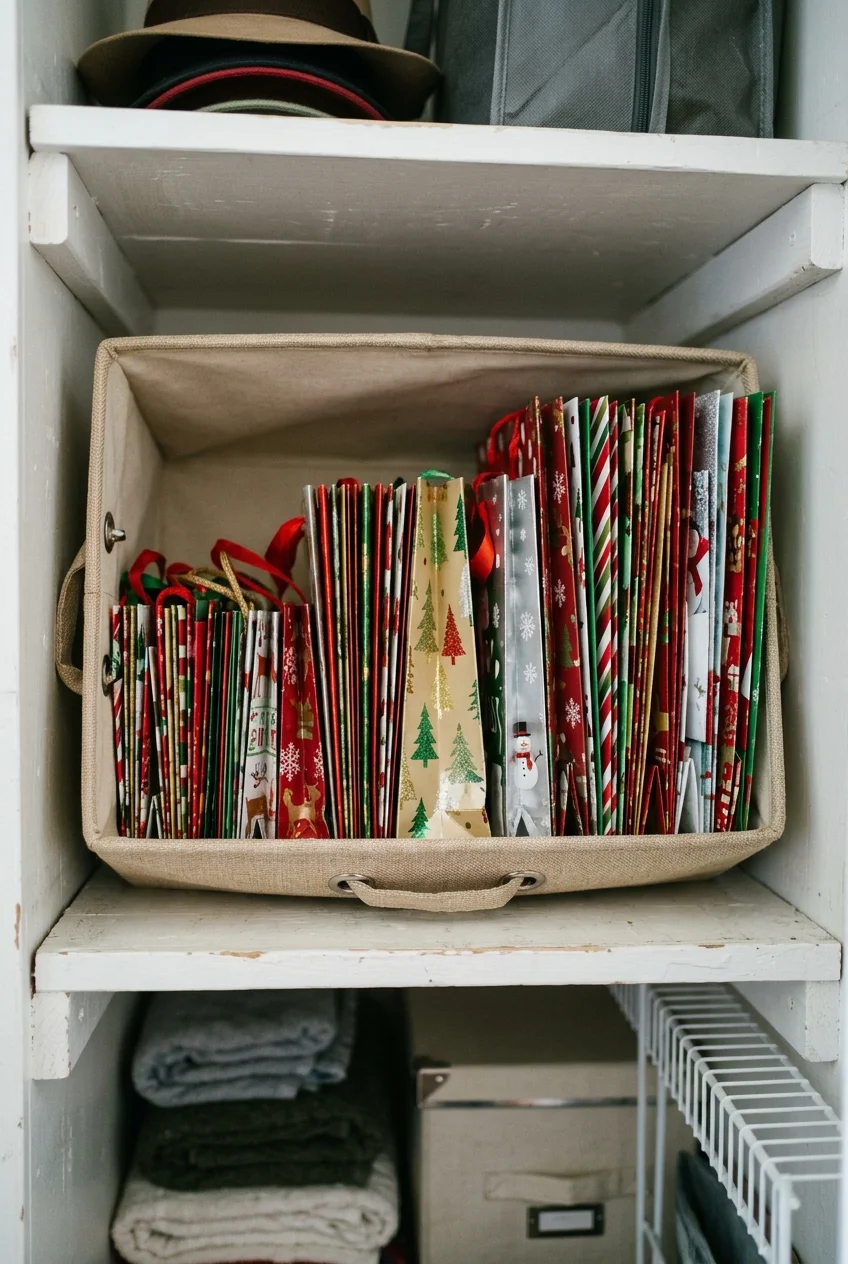
Flatten empty gift bags and sort them into small, medium, and large groups. Remove damaged tissue, loose tape, and tags before they enter storage.
Stand the groups like files in a shallow bin, with handles tucked inside. You can browse the edges without wrinkling every bag in the stack.
38. Protect Tissue Paper in a Flat Portfolio
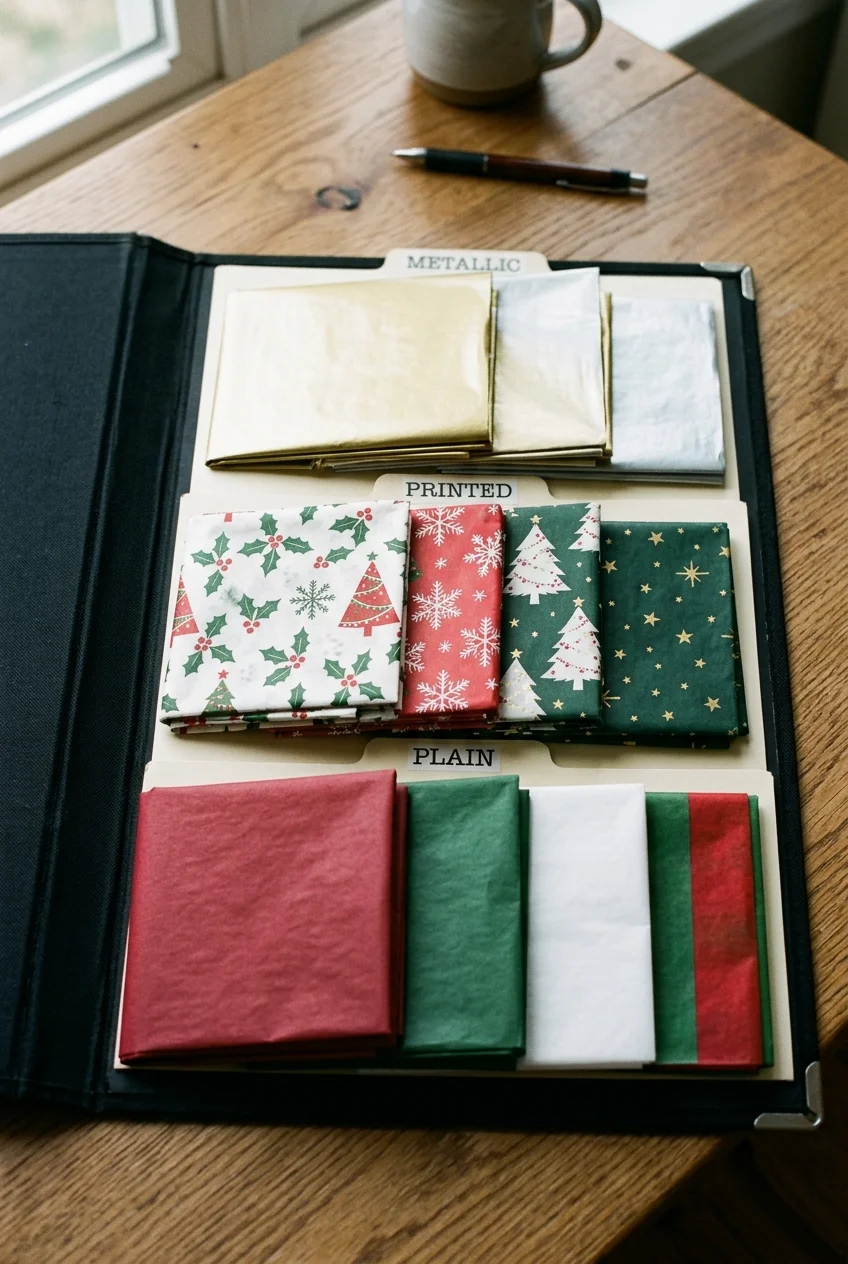
Smooth reusable tissue sheets, fold them once or twice along existing creases, and place them in a rigid art portfolio or document box.
Separate metallic, printed, and plain tissue with thin dividers if finishes transfer. Recycle torn sheets that cannot protect or present a gift cleanly.
39. Nest Reusable Gift Boxes Without Losing Their Lids
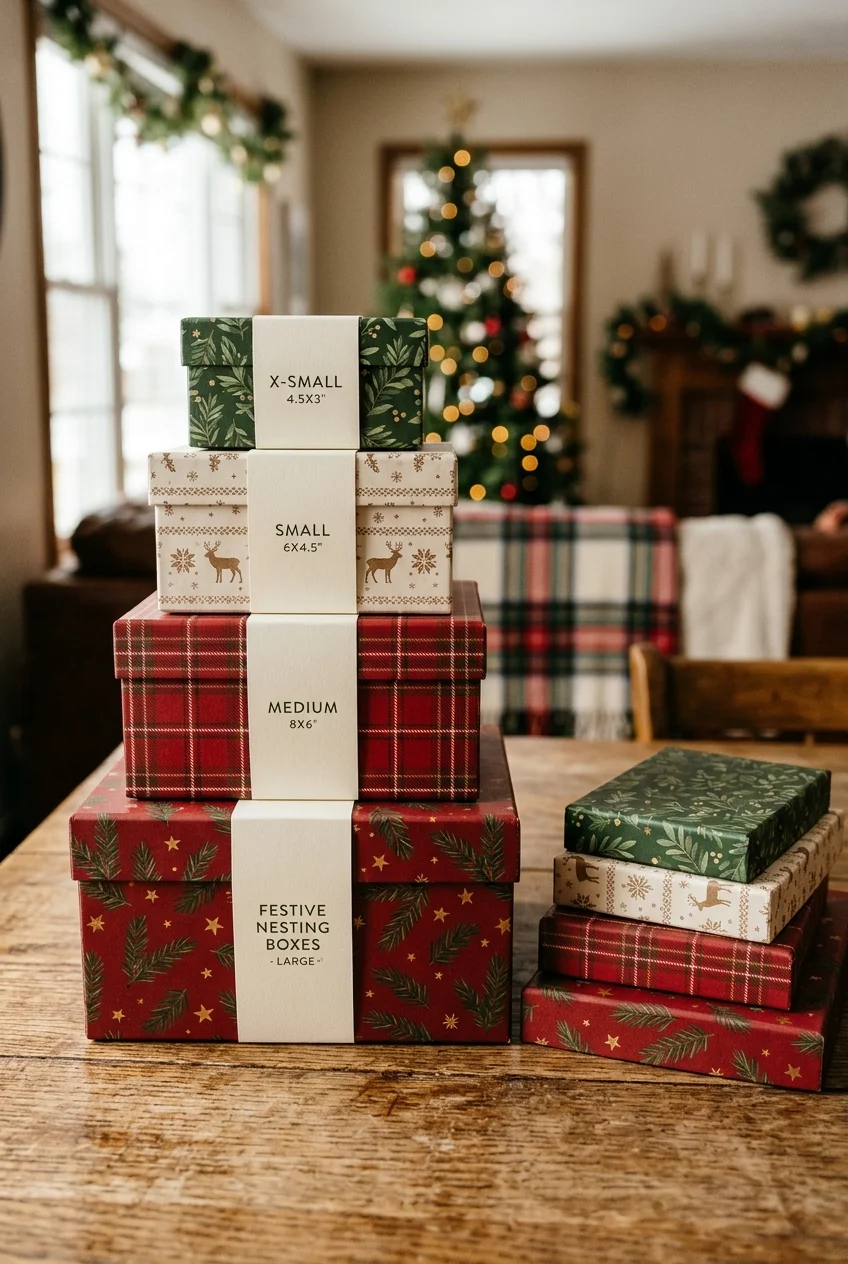
Place smaller boxes inside larger ones, then stack matching lids together in the same container. Keep unusually shaped lids paired with their bases.
Do not force rigid corners inward just to save space. A smaller collection of sound boxes is more useful than compressed boxes with split seams.
Practical tip Place one removable paper band around each nested group so lids and bases stay together when the main bin is lifted or tilted.
40. Archive Meaningful Cards in Yearly Envelopes
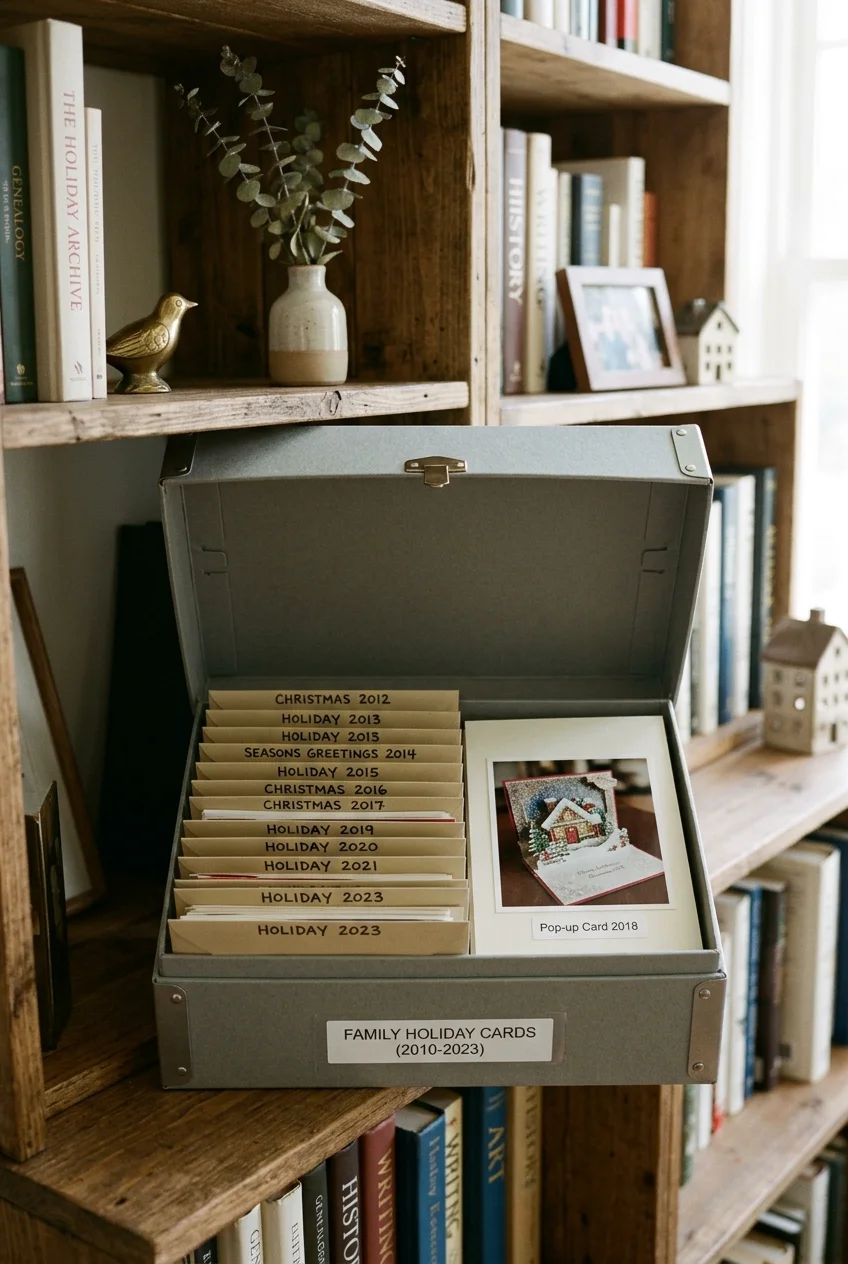
Choose the cards you genuinely want to keep, then place each year’s selection in a labeled archival-quality envelope or photo-safe document box.
Remove batteries, thick attachments, food residue, and unstable embellishments before archiving. Photograph bulky three-dimensional cards when keeping the physical piece is impractical.
Store the collection inside the home under stable conditions. A small annual limit keeps the archive meaningful and makes future browsing manageable.
Use Small Spaces and Storage Rooms Wisely
The best storage location balances access, environmental conditions, lifting safety, and household routines; it is not automatically the largest empty corner available.
41. Choose Stackable Totes That Fit the Shelves
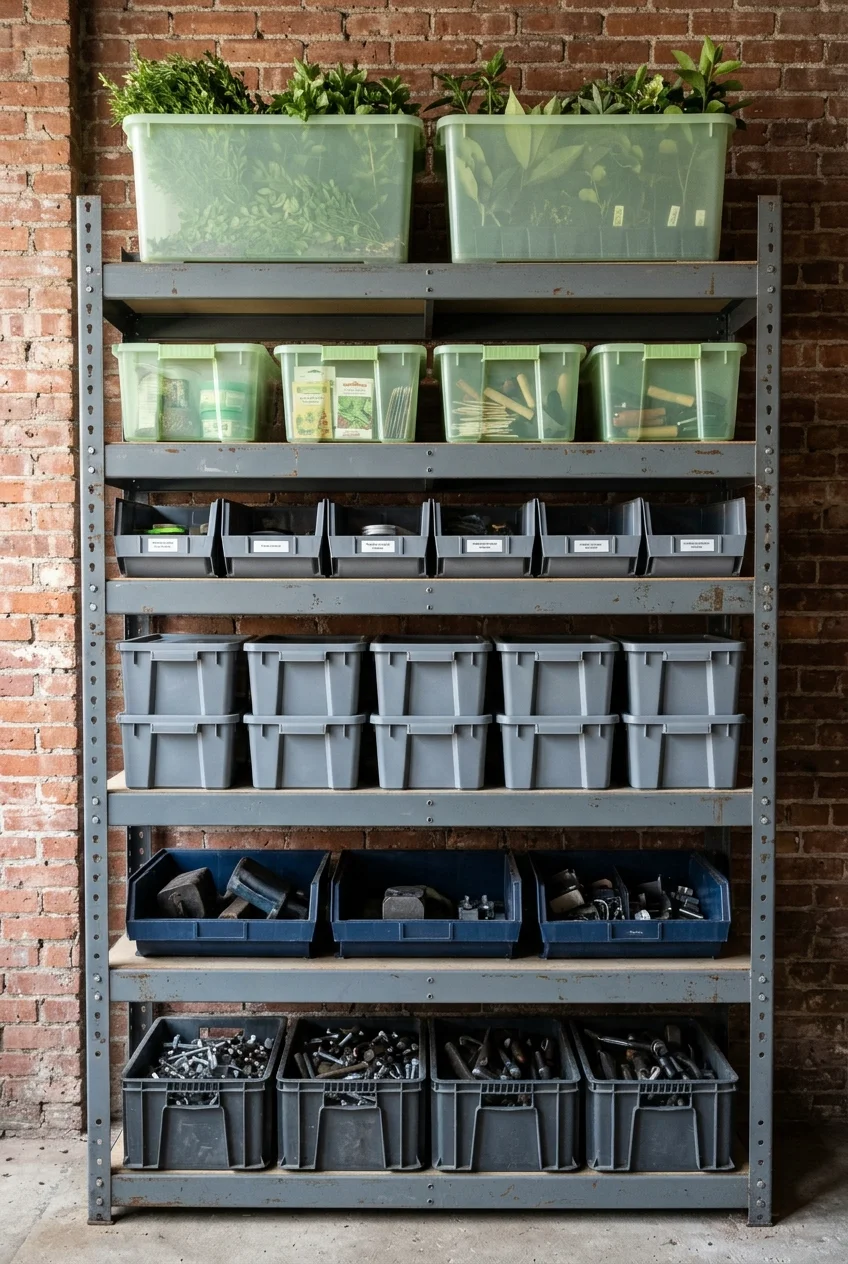
Measure shelf width, depth, and clear height before buying totes. Include handles, lid overhangs, and the space needed to tilt a bin forward.
Use smaller containers for dense items and larger ones for lightweight greenery or textiles. Matching footprints help stacking, but weight should decide the order.
- Measure the shelf opening
- Check the tote’s external dimensions
- Allow hand clearance
- Place heavier containers below lighter ones
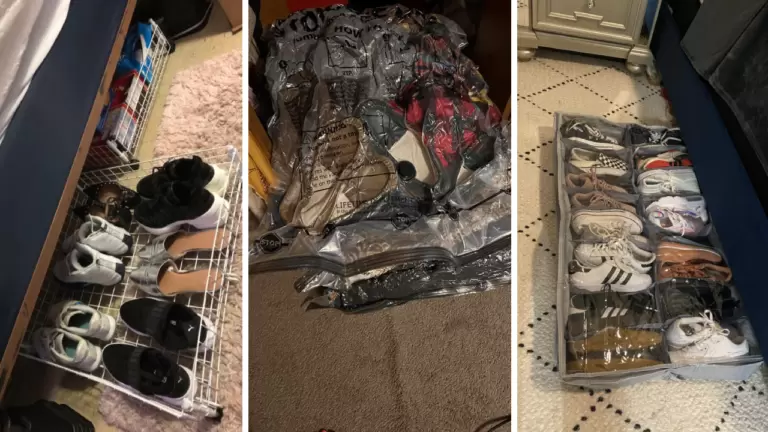
42. Use Shallow Bins Beneath a Bed
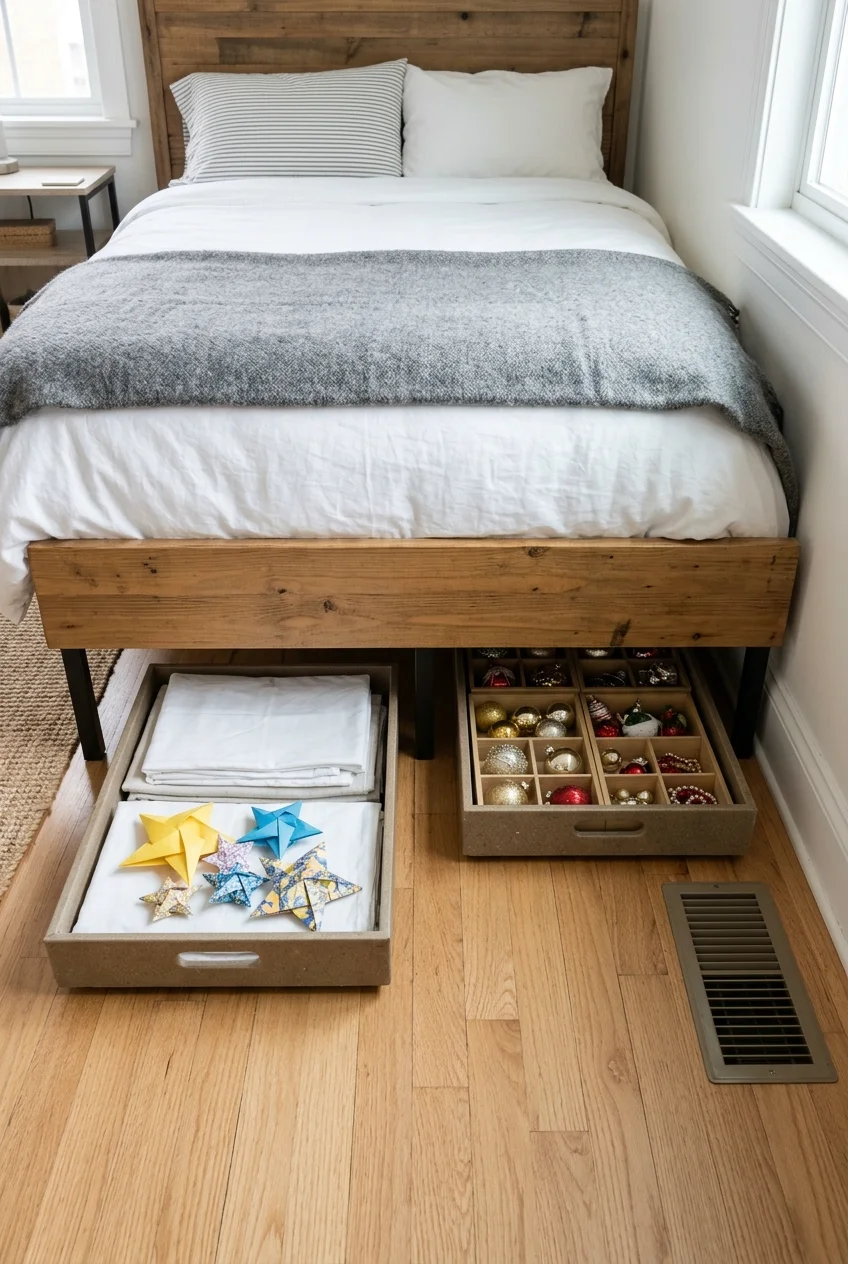
Under-bed bins suit flat linens, gift bags, paper stars, and low-profile ornament trays. Add sliders or smooth handles for retrieval without pulling the frame.
Measure the narrowest opening, including center supports and floor changes. Keep the bin clear of vents, outlets, adjustable-bed hardware, and stored shoes.
Choose rigid lids where objects could be pressed from above. Soft bags work best for flexible textiles that cannot snag on the bed structure.
43. Add Pull Handles to a High Closet Shelf
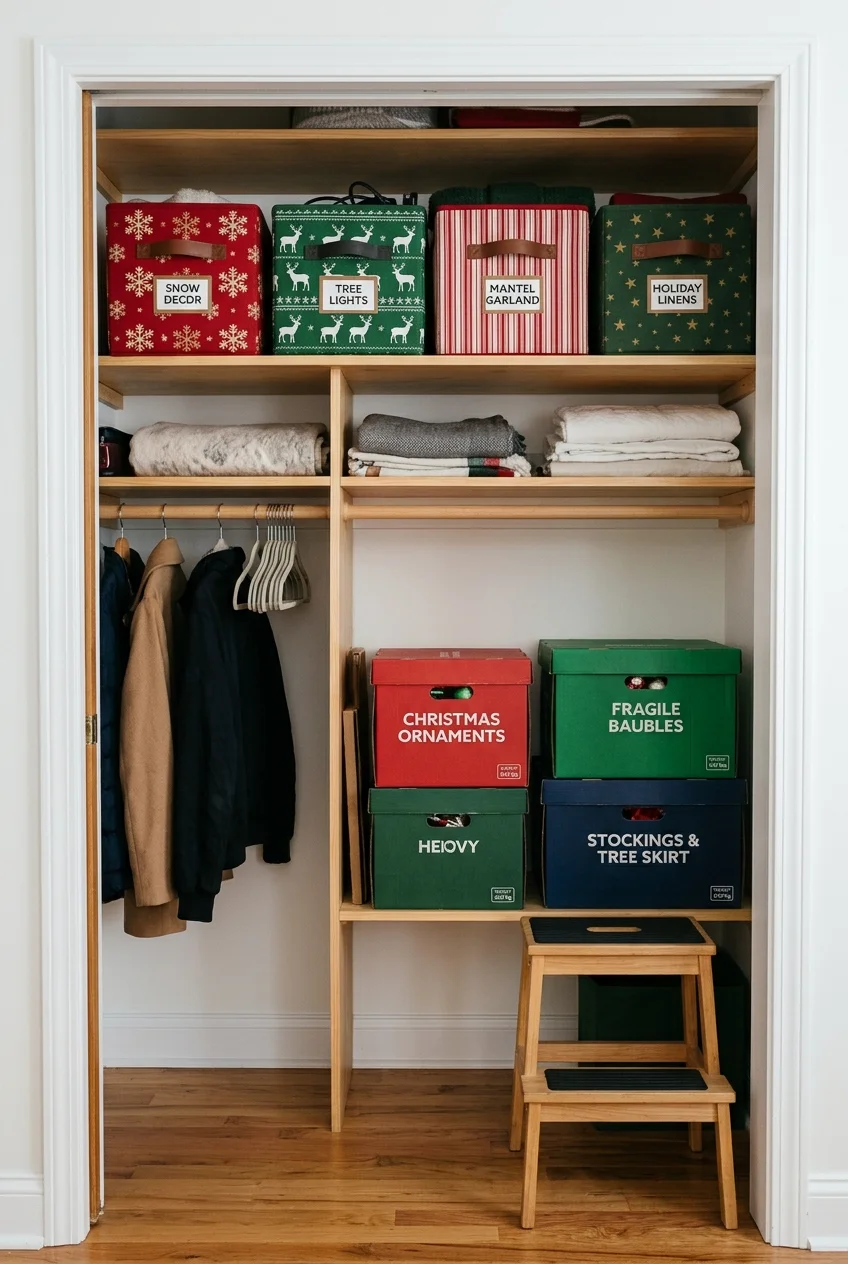
Use lightweight containers with dependable front handles on high shelves. The handle should pull the bin forward without requiring fingers beneath its base.
Keep fragile or heavy decor at waist height instead. A stable household step stool should provide safe access without climbing on nearby furniture.
Setup note Test the loaded bin at a low height first; if it twists, bows, or feels awkward, divide the contents before shelving it overhead.
44. Use Over-Door Pockets for Lightweight Supplies
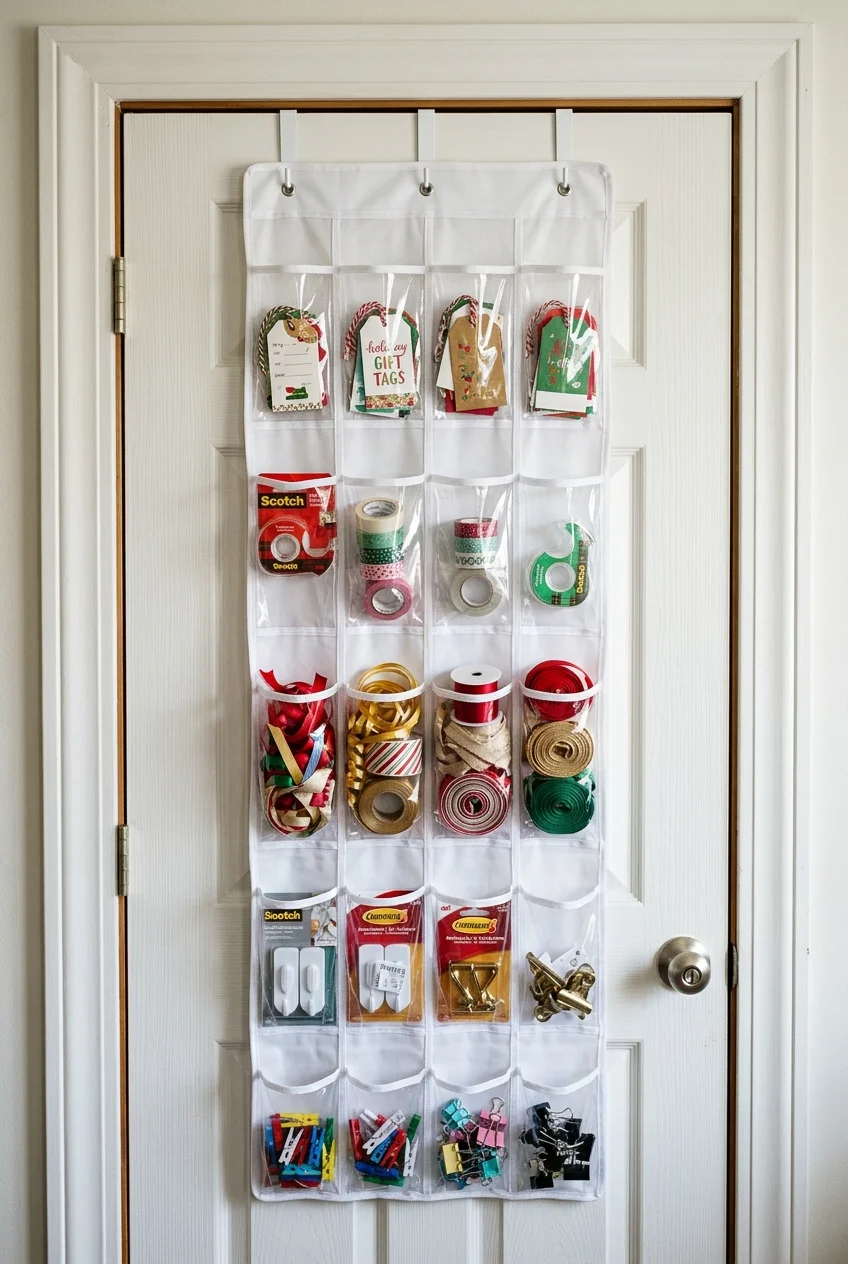
A clear pocket organizer can hold gift tags, tape, ribbon scraps, spare hooks, and lightweight clips. Reserve the lowest pockets for frequently used supplies.
Confirm the door closes freely and the hanger does not damage the frame. Avoid glass ornaments, candles, batteries, or anything heavy enough to swing.
45. Turn a Rolling Cart Into a Gift-Wrap Station
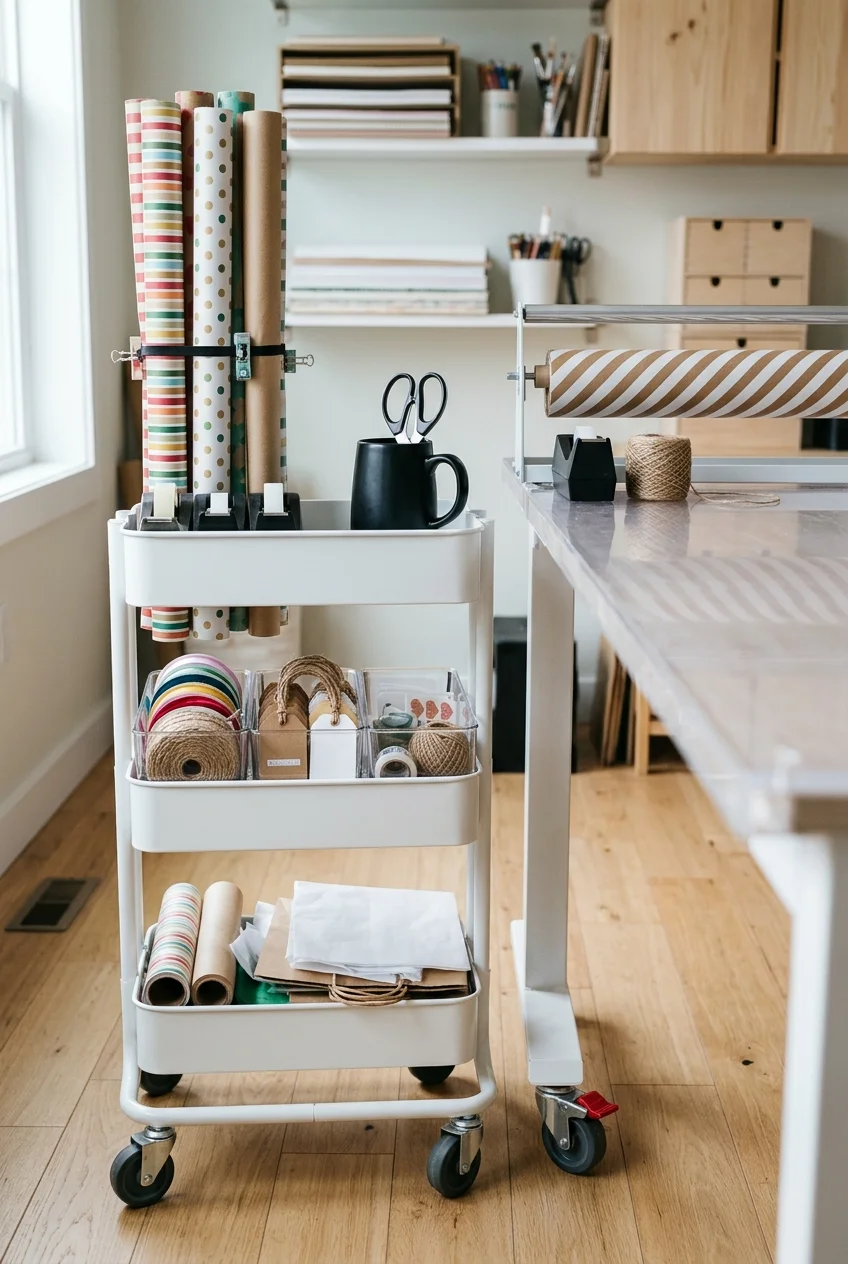
Use a slim cart for paper tools, ribbon, tags, and reusable bags when wrapping happens in different rooms. Give each shelf one clear function.
Keep tall rolls secured in a side holder and lock the casters during use. Return scissors to a closed cup before moving the cart.
After the season, roll the cart into a closet or repurpose it for everyday crafts. Store holiday-only supplies together in removable bins.
46. Give Seasonal Tools a Pegboard Zone
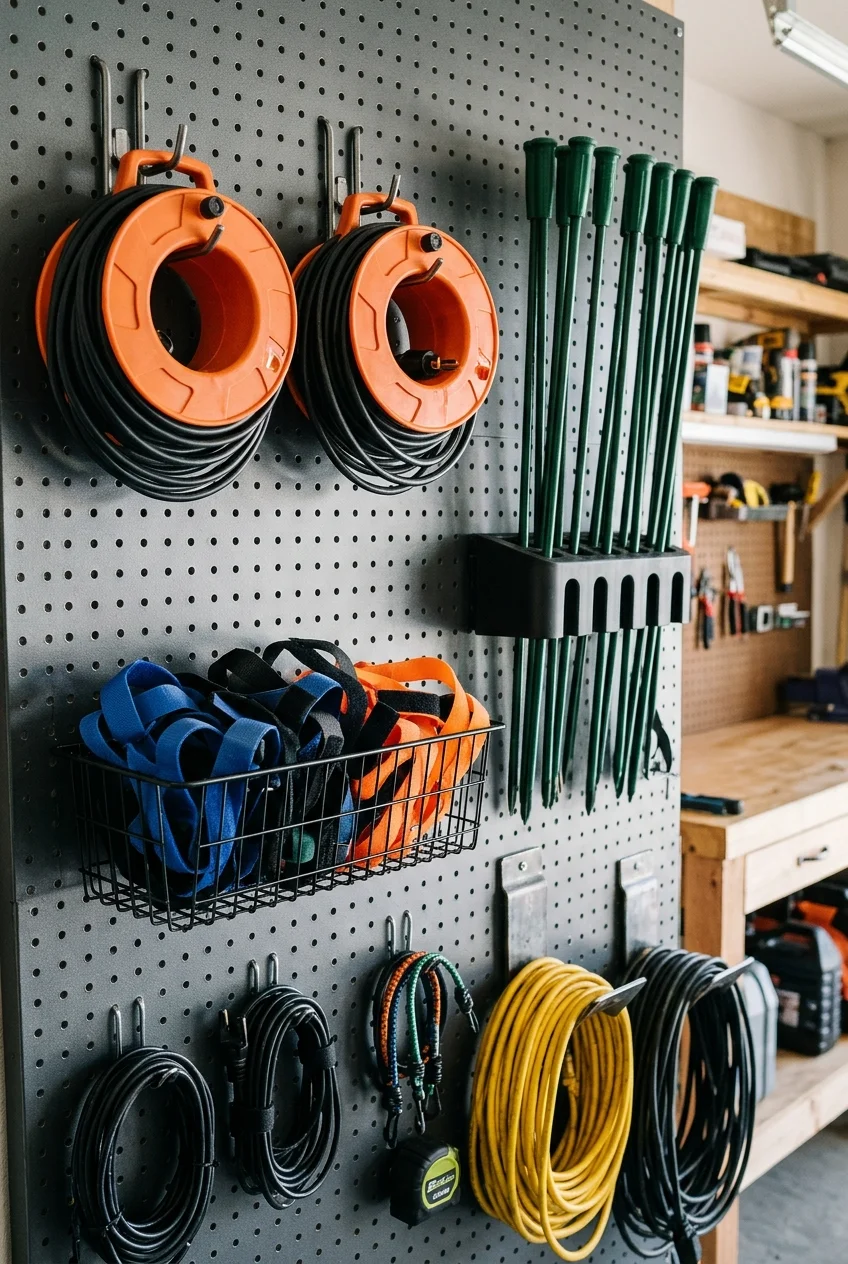
Reserve a small pegboard area for wreath hooks, light reels, extension cords, garland ties, and outdoor stakes. Outline zones with removable tape rather than permanent clutter.
Use hardware rated for each item and keep sharp stakes capped. The board should not interfere with doors, vehicles, utilities, or walking paths.
- Light reels on deep hooks
- Soft ties in a small basket
- Capped stakes in a vertical holder
- Extension cords on separate supports
47. Build a Dedicated Seasonal Bay in the Garage
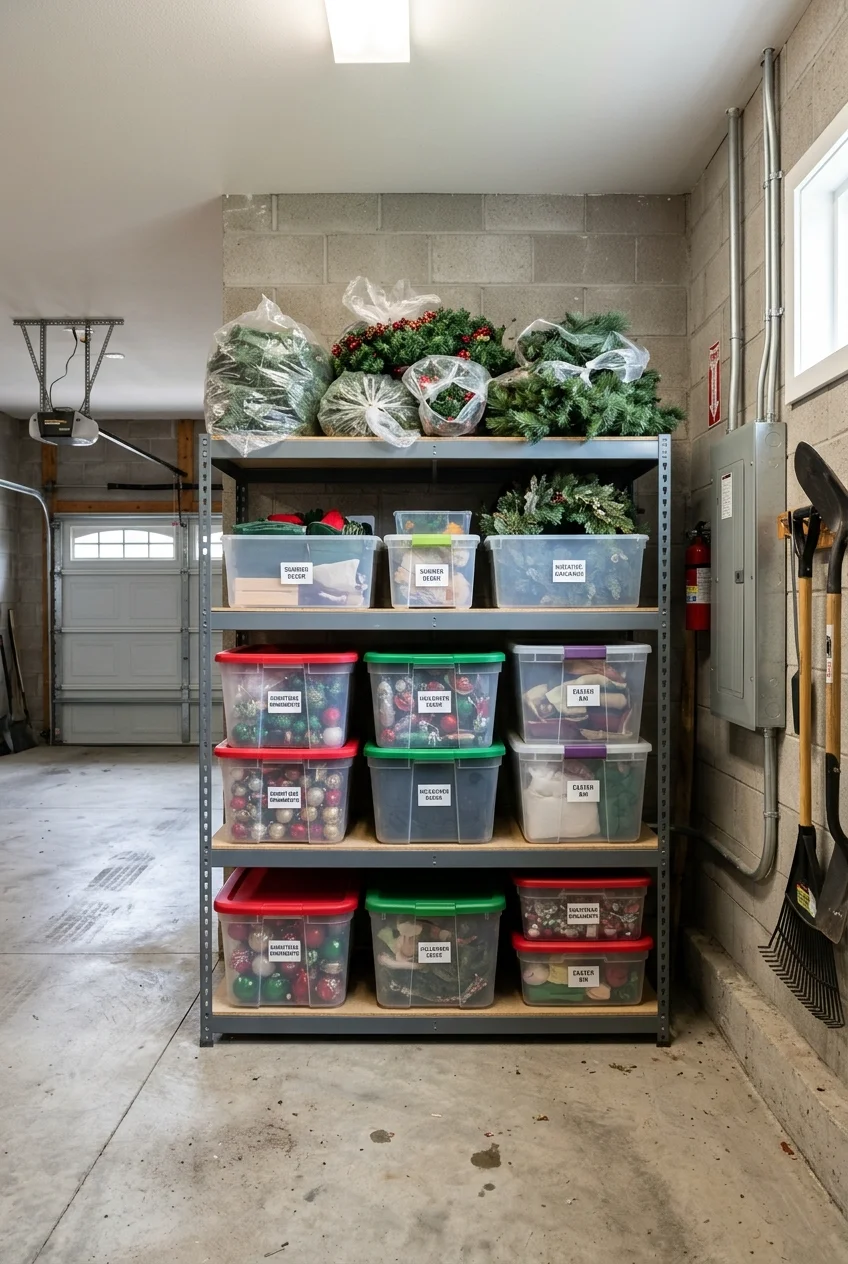
Concentrate holiday bins in one measured shelving bay so they do not spread behind tools, sports equipment, or household supplies. Keep the aisle clear.
Use the shelving and zoning principles in these garage organization ideas to plan rack depth, container access, and safe seasonal placement.
Store delicate paper, wax, sentimental pieces, and vulnerable finishes elsewhere when garage conditions conflict with their care needs. Follow manufacturer instructions for specialty decor.
Anchor shelving as required, respect load ratings, and place dense bins low. Nothing should project into the garage-door track, vehicle path, or utility access.
48. Use Sealed Totes Only for Clean, Dry Decor
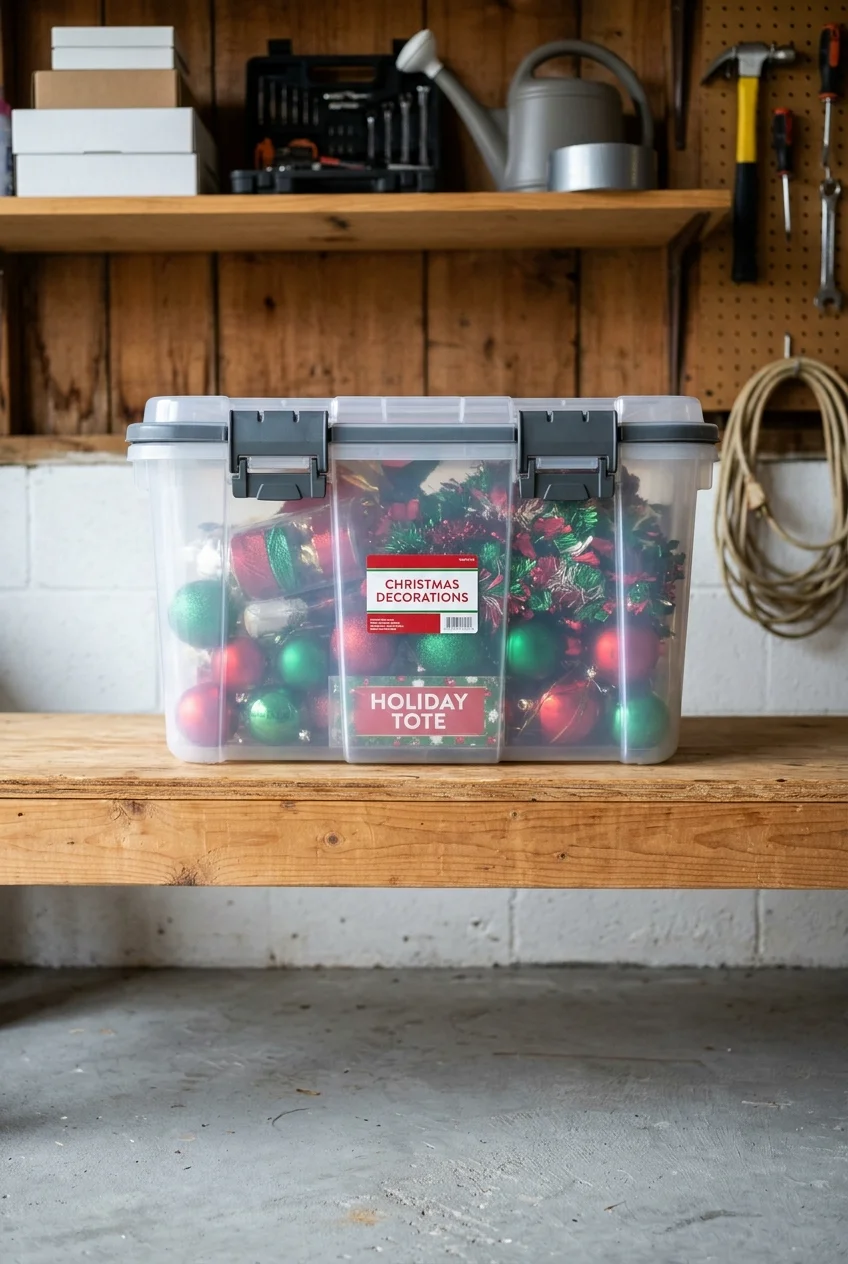
A tight lid blocks dust and casual pests, but it can also trap moisture already present. Pack only clean, completely dry decorations.
Inspect the tote and gasket for cracks before use, then close every latch evenly. Avoid placing wet greenery or freshly cleaned inflatables inside.
If the storage area has recurring leaks, condensation, or pest activity, correct the underlying condition instead of relying on a stronger container alone.
49. Create a Shelf Map With Photo Labels
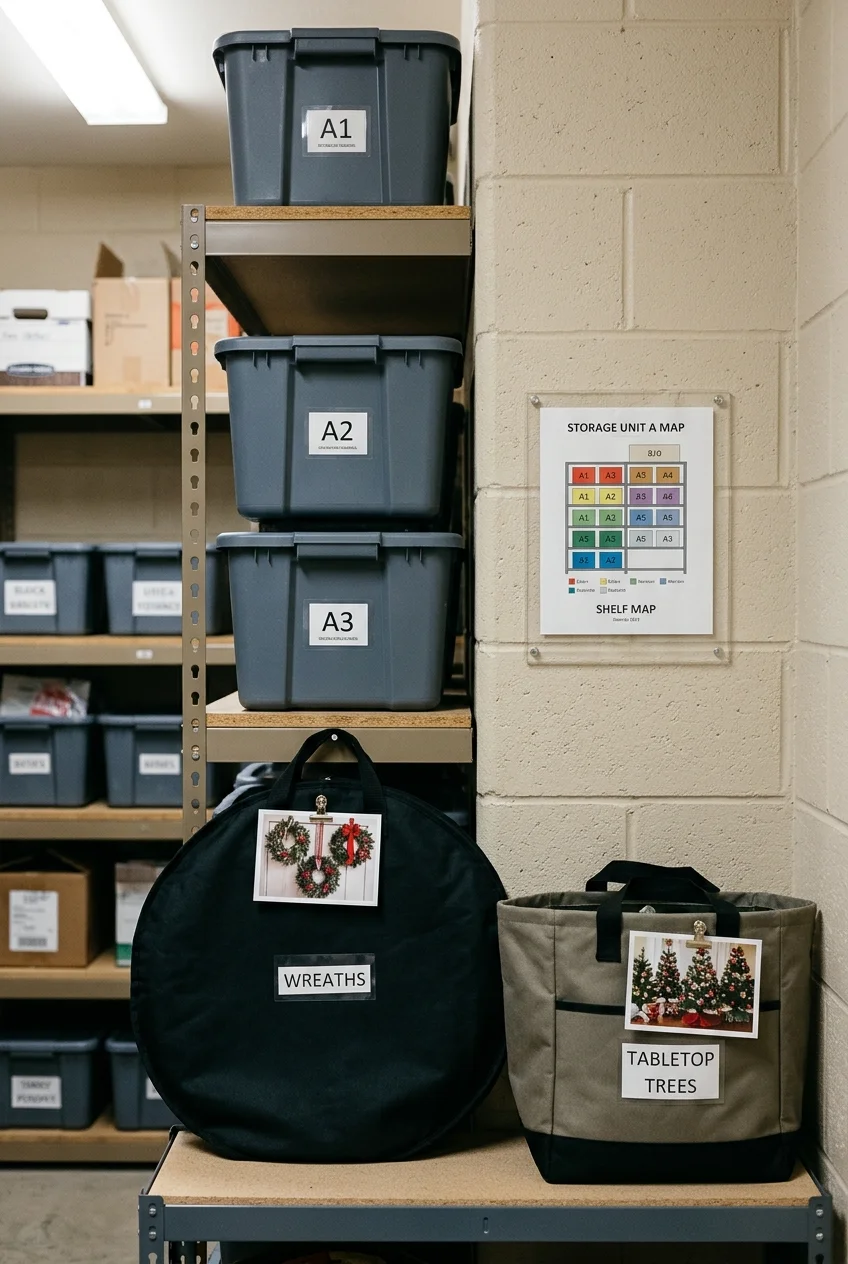
Photograph each storage shelf after packing and mark bin numbers on a simple diagram. The map helps when front containers hide those behind them.
Attach a small contents photo to bins holding visual collections, such as wreaths or tabletop trees. Keep written descriptions for accessibility and search.
Practical tip Update the map immediately after relocating a bin; an outdated inventory creates more searching than a simple, accurate shelf photograph.
50. End With a Ten-Minute Storage Reset
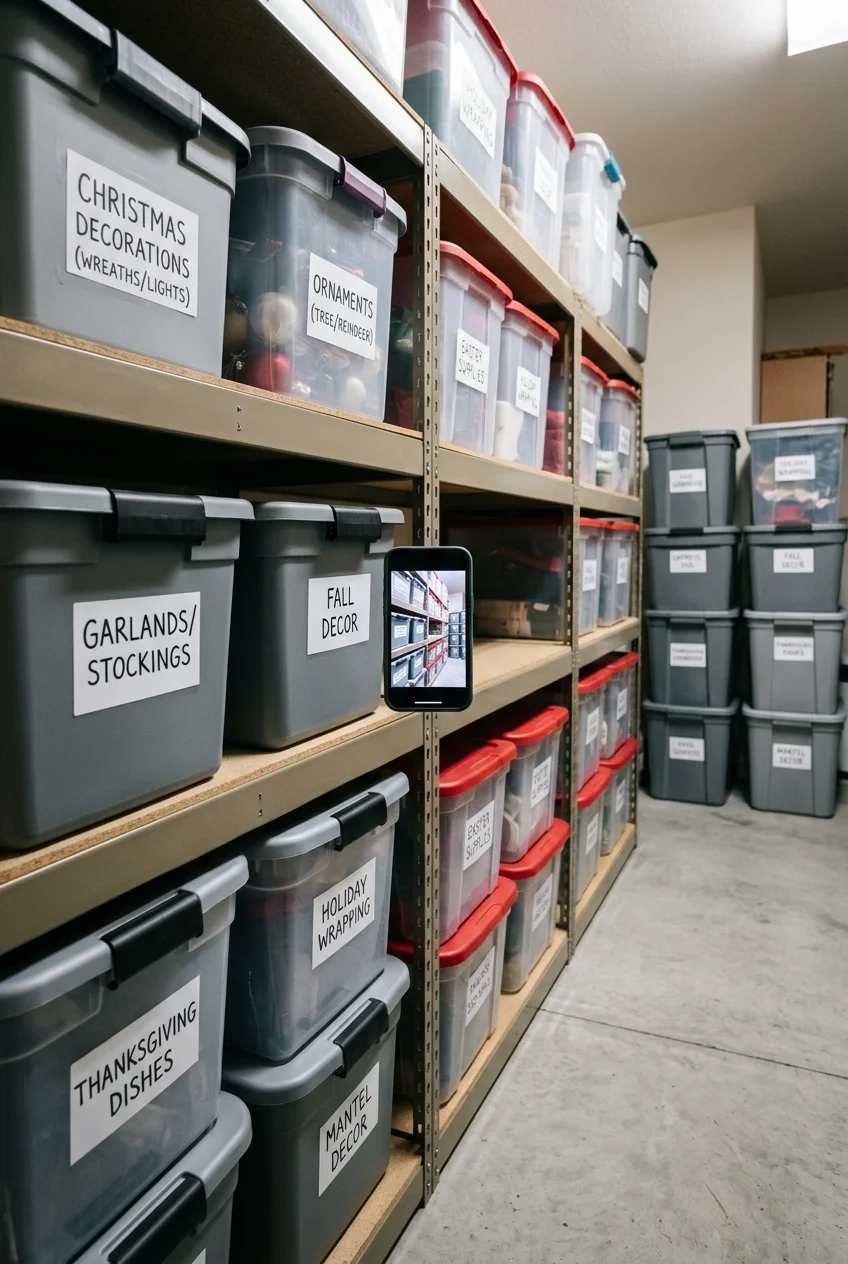
After every bin is shelved, return tools, sweep the packing area, and confirm labels face outward. Photograph the finished zone for next year.
Record supplies to replace, but wait before buying duplicates. Check the first-out kit and master list when seasonal displays return to stores.
A final reset protects ordinary household storage too, ensuring holiday containers do not block daily linens, cleaning tools, exits, or utility access.
- Face labels outward
- Confirm lids and zippers are closed
- Update the inventory
- Keep aisles and utilities clear
Frequently Asked Questions
Should holiday decorations be stored in clear or opaque bins?
Clear bins show contents quickly, while opaque bins reduce visual clutter and may limit light exposure. Choose based on location, then label either style clearly.
Container strength, fit, closure, and storage conditions matter more than color. Use interior dividers whenever fragile pieces could collide during handling.
What holiday decor should not go in a garage or attic?
Keep sentimental paper, photographs, wax items, delicate finishes, and materials with restrictive care guidance in stable household conditions whenever temperature or humidity swings are likely.
Always follow the manufacturer’s storage directions for electrical, motorized, inflatable, or specialty decorations. A sealed tote cannot correct unsuitable environmental conditions.
How can I store holiday decor in a small home?
Favor flat, collapsible decorations, pillow covers, under-bed cases, high-shelf textile bins, and one compact first-out kit. Measure every opening before purchasing containers.
Limit each category to a defined space and keep only decor you use. A smaller coordinated collection is easier to protect and retrieve.
Is it better to organize holiday decor by room or by item type?
Organize by room when displays repeat in the same places, and by type when pieces move frequently. Many homes benefit from combining both methods.
Keep specialty protections intact regardless of category: divided ornament cases, broad garland coils, separate light reels, and flat textile storage still matter.