50 Bathtub Shower Combo Remodel Ideas to Save and Compare

This post may contain affiliate links: full affiliate disclosure.
A tub shower combo can look completely different without becoming a separate shower and soaking tub. Start with the feature you most want to change.
Maybe the curtain closes off the room, the tile feels busy, or bottles cover every ledge. Those problems point toward different kinds of remodels.
These ideas help you compare finishes, enclosures, storage, and bathing upgrades. Save a few compatible choices, then check their fit before buying permanent components.
As an Amazon Associate, I earn from qualifying purchases.
Start With Changes You Can Picture
Compare the overall effect first: a quieter surround, a stronger floor, a lighter enclosure, or more useful fixtures. Each solves a different daily frustration.
1. Keep a Good White Tub and Rebuild the Subway Surround
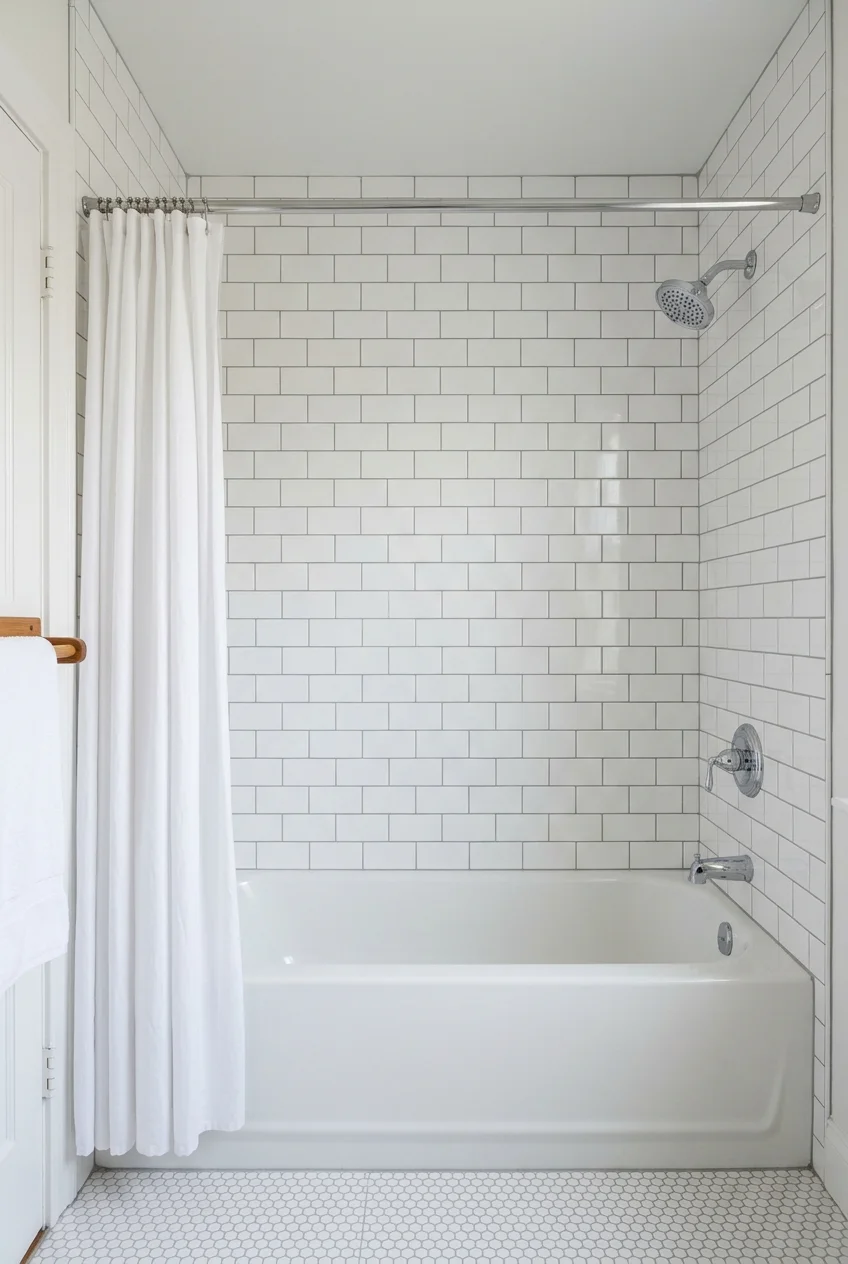
A plain white alcove tub gives new tile a clean starting point. Running subway tile around all three walls makes the bathing area feel deliberate.
Choose a grout close to the tile color if you want the wall to recede. A contrasting joint makes every offset and cut more visible.
Keeping the tub makes sense only when its condition, support, and drain connections are sound. Have those checked before committing to a new surround.
Setup note When the walls are open, confirm how the chosen waterproofing system connects to the tub flange. A neat bead of visible sealant cannot replace that connection.
2. Let a Patterned Floor Carry the Color
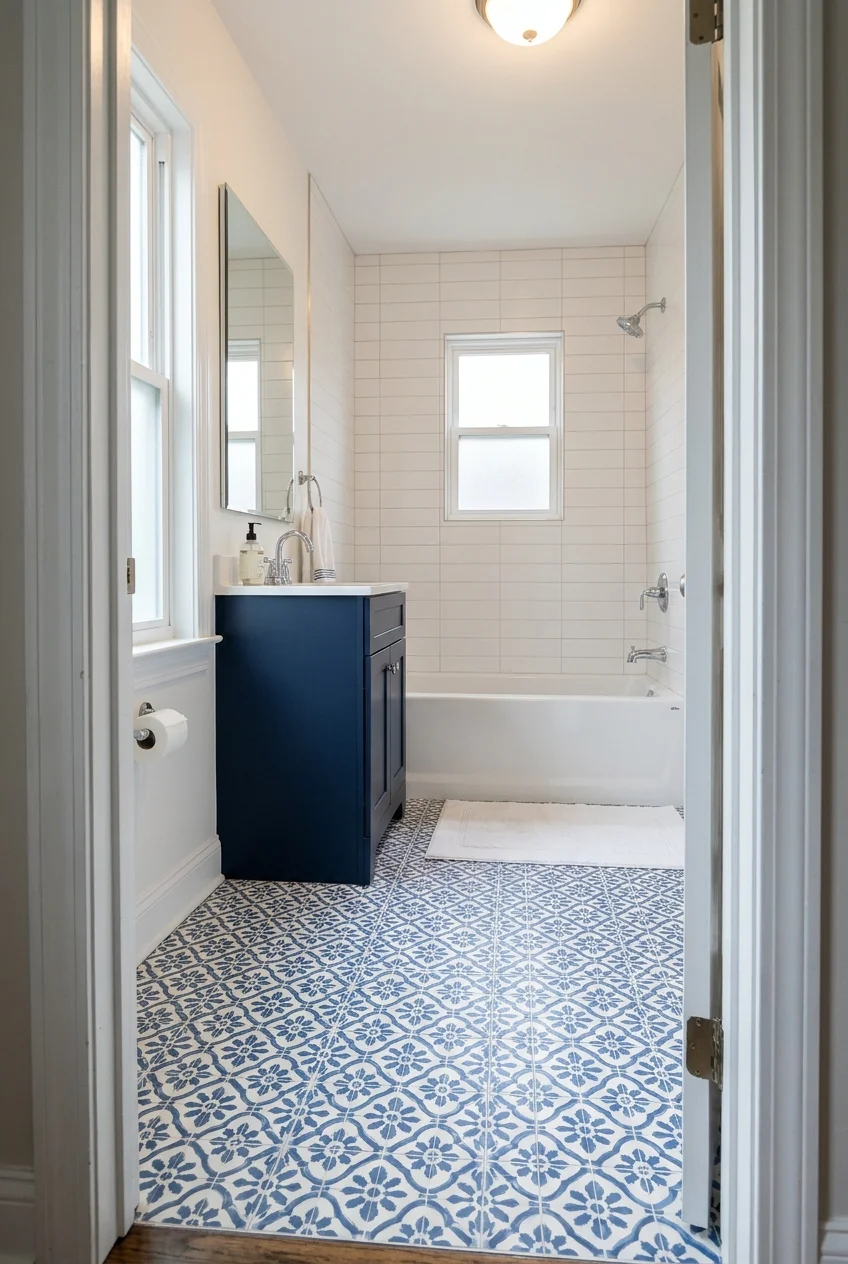
A graphic bathroom floor can change the room while a simple tub surround stays quiet. Keep the wall tile plain enough to separate the patterns.
Repeat one floor color in a towel or vanity finish, then stop. The tub area should give your eye somewhere calmer to land between motifs.
Choose flooring approved for the bathroom conditions you expect, and review slip information for that specific product. A printed pattern alone says nothing about grip.
3. Stack Rectangular Tile Vertically
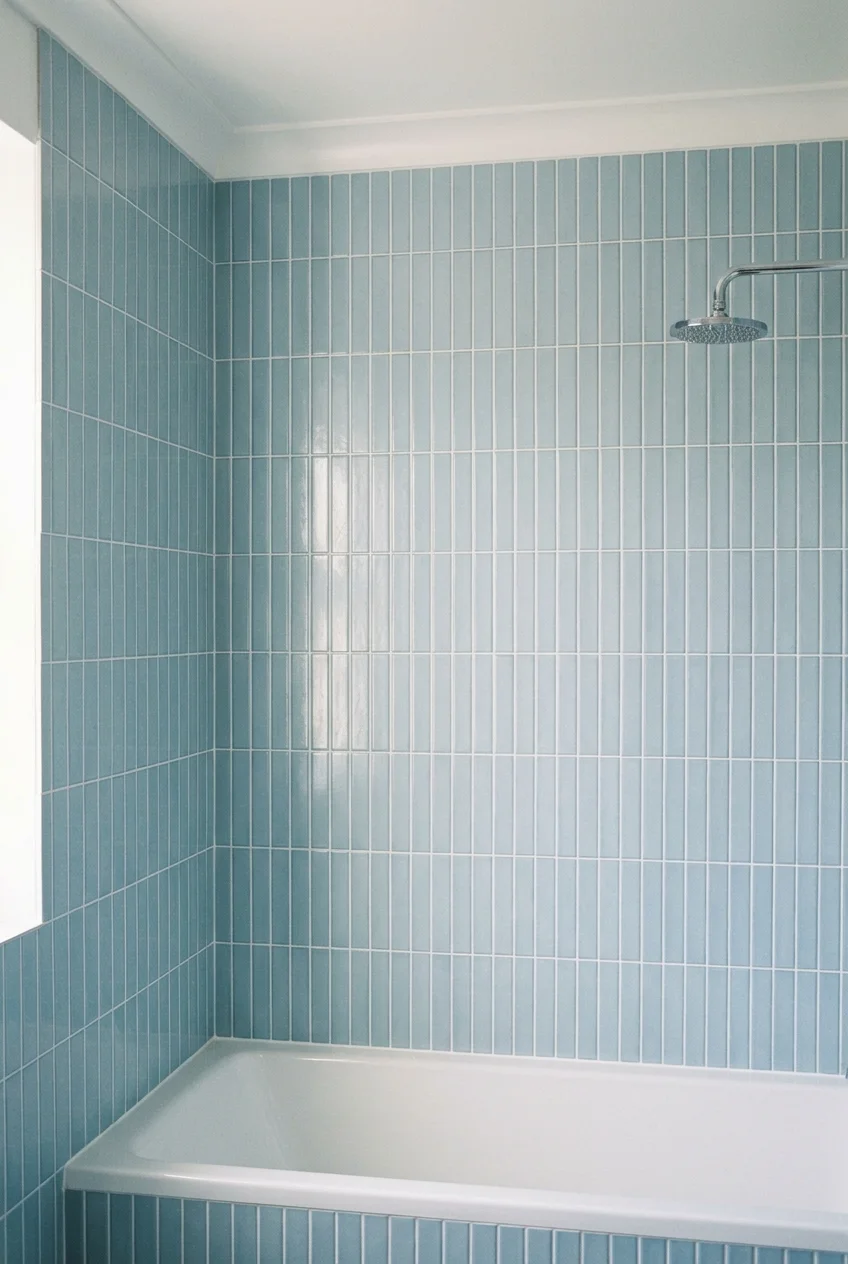
Upright rectangular tiles give a low alcove a different rhythm without adding another material. Straight stacking keeps the emphasis on long, continuous vertical joints.
Lay out the pattern around the actual wall height and tub rim. Adjusting the starting cut can prevent an awkward sliver at the ceiling.
Try the arrangement on one wall before ordering everything. Tile proportions and grout contrast determine whether the result reads as quiet lines or bold stripes.
4. Replace a Curtain With Clear Sliding Tub Doors
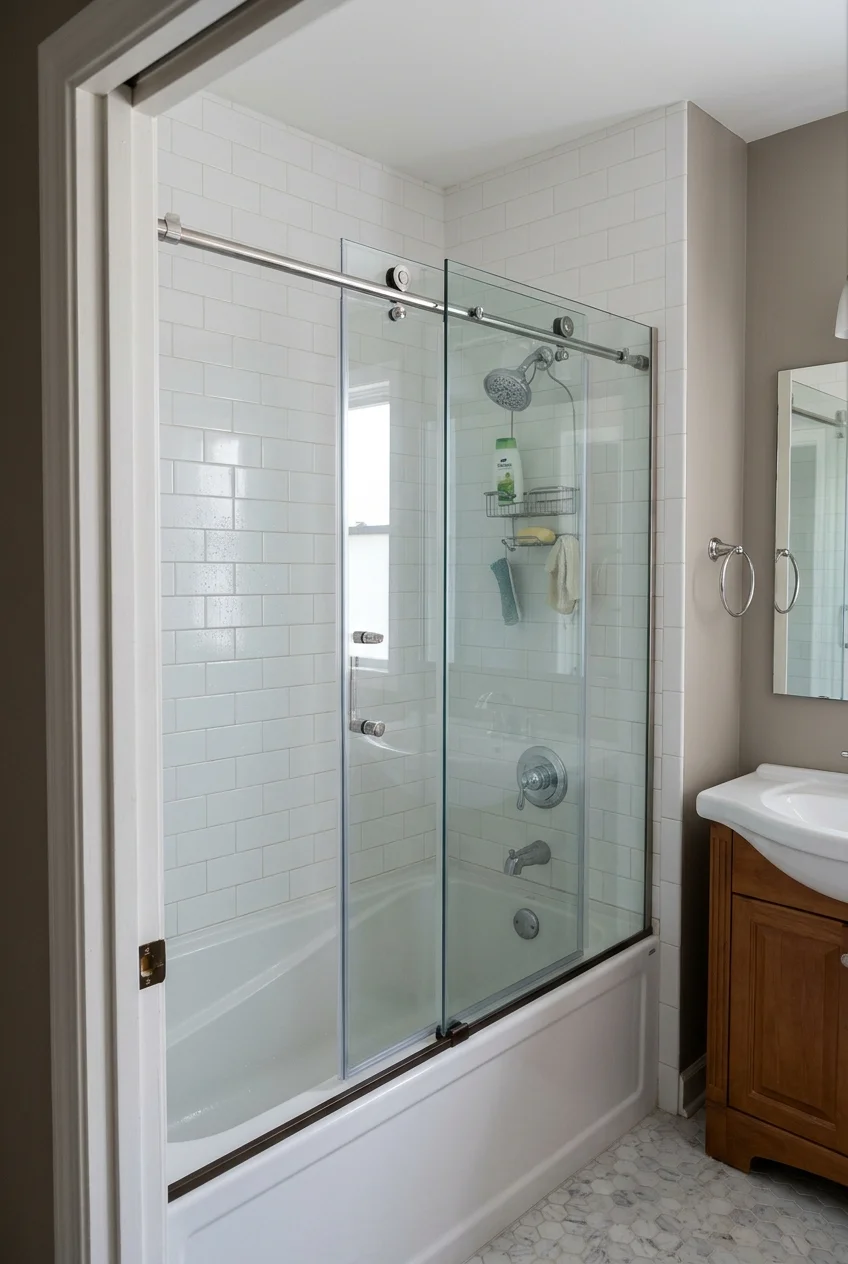
Clear sliders reveal the full surround and avoid a door swinging toward the vanity. They suit rooms where the walkway beside the tub is limited.
The tradeoff is access: overlapping panels usually leave only part of the tub front open. Measure that opening for actual entry and bath time routines.
- Check the door specification against the finished opening.
- Confirm the tub rim meets the door system requirements.
- Compare access to tracks and overlapping glass for cleaning.
Order the enclosure for the finished wall surfaces, following its measuring instructions. A nominal tub length is not enough information to select the glass.
Have the installer confirm wall support, out-of-plumb allowances, and permitted fastening locations. Different tubs and door systems handle mounting differently, especially along the rim.
5. Frame the Tub With a Tailored Shower Curtain
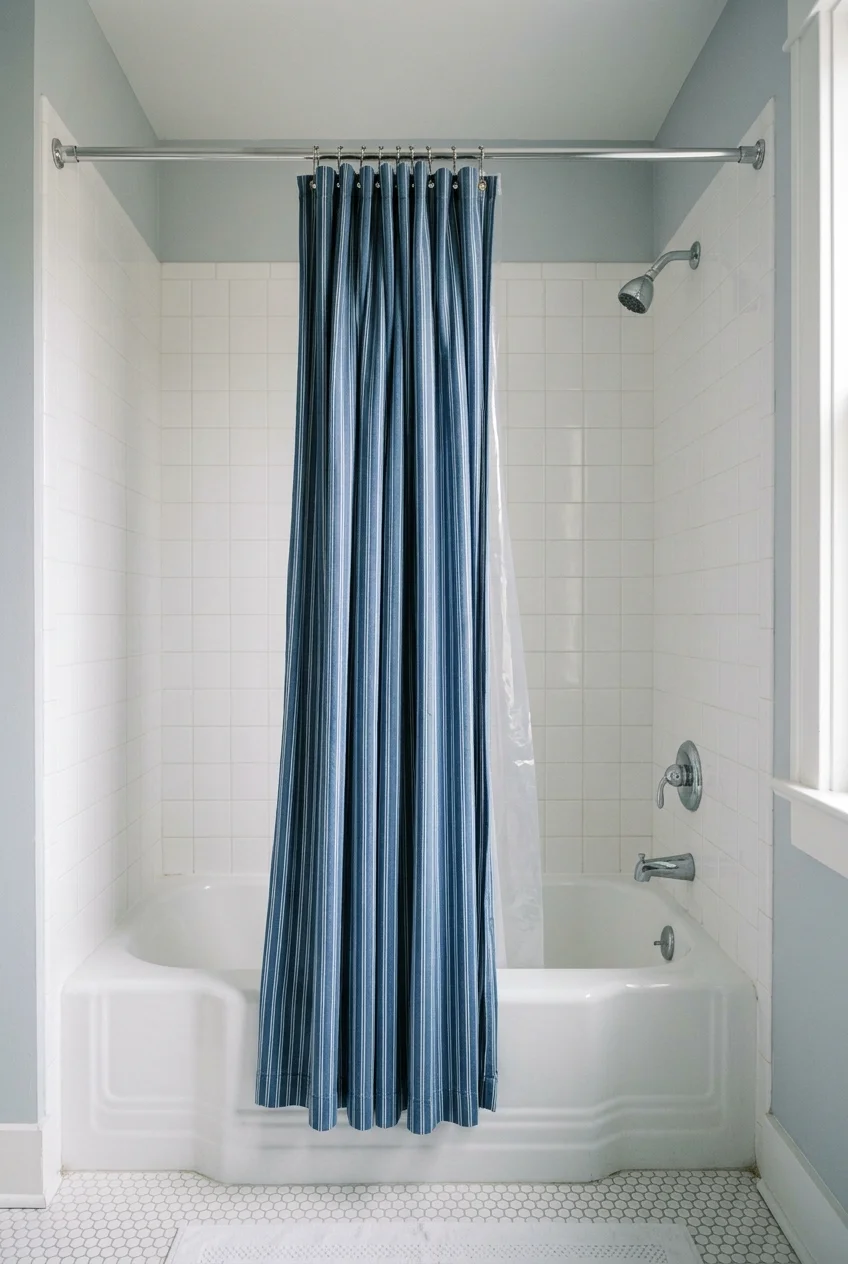
A substantial fabric curtain can make a standard alcove feel finished without glass. Choose a simple hem and a fabric that falls in relaxed folds.
Hang a separate water-resistant liner inside the tub, with the decorative curtain outside. Check the length against the installed rod so neither drags underfoot.
A narrow stripe or small check can supply pattern when the wall tile is plain. Avoid choosing a curtain so bulky it blocks the entry.
6. Choose a Showerhead With a Docked Handheld
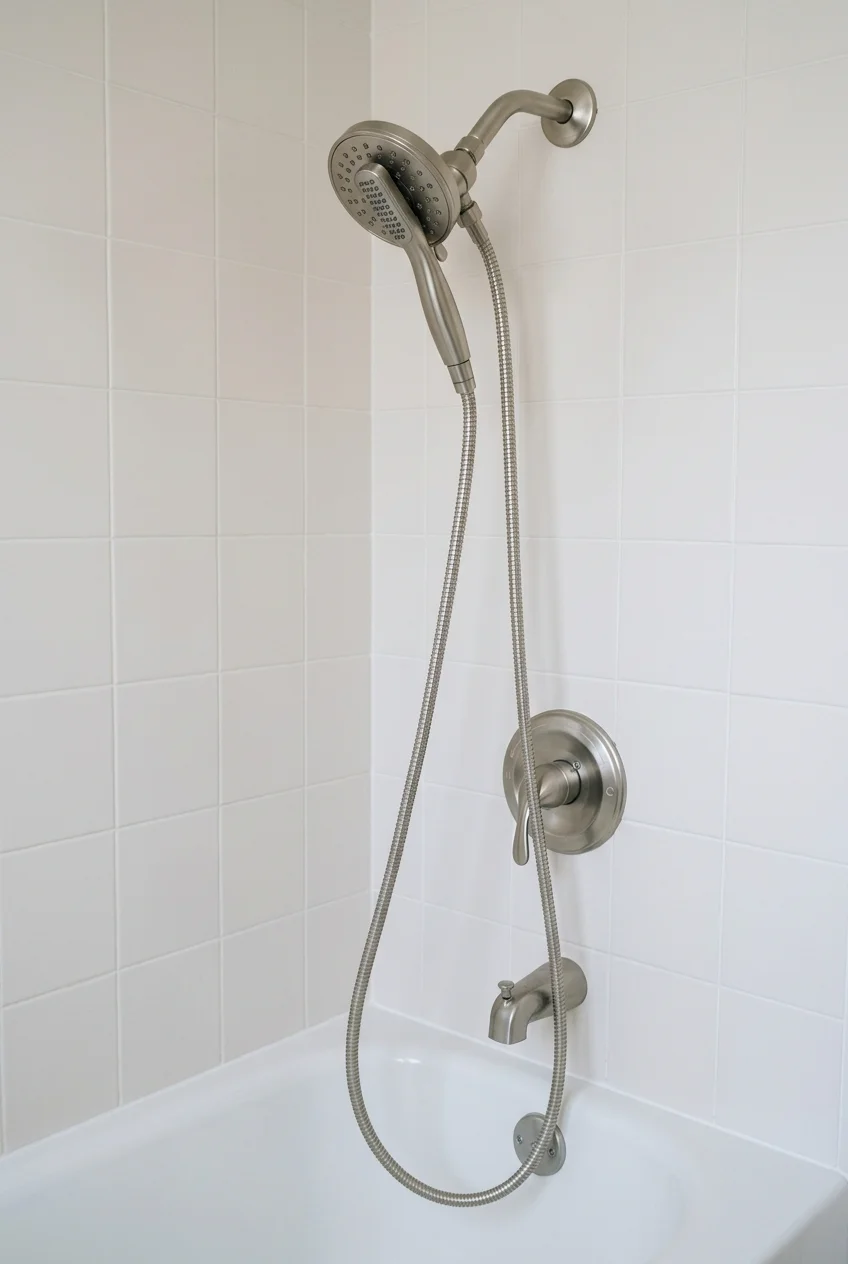
A handheld that docks within the main showerhead adds rinsing flexibility without a separate wall rail. It can help with bathing children and cleaning the tub.
The Delta Arvo tub and shower set includes an In2ition handheld arrangement. Treat it as a plumbing selection, with valve and spout compatibility checked before installation.
Replacing the head alone and replacing a complete faucet set are different projects. The included valve may require opening the wall rather than swapping visible trim.
Check how easily the handheld releases and returns to its dock. Plan hose storage so it hangs inside the bathing area without crossing the entry.
Practical tip A handheld adds reach, but it does not solve a difficult tub step. Consider the user’s entry and balance needs separately from the spray functions.
Give the Surround a Clear Visual Direction
Tile size, joint pattern, and surface texture change the tub area more than a collection of accessories. Compare samples together before committing to an entire surround.
7. Use Large Porcelain Tile for Broad, Quiet Walls
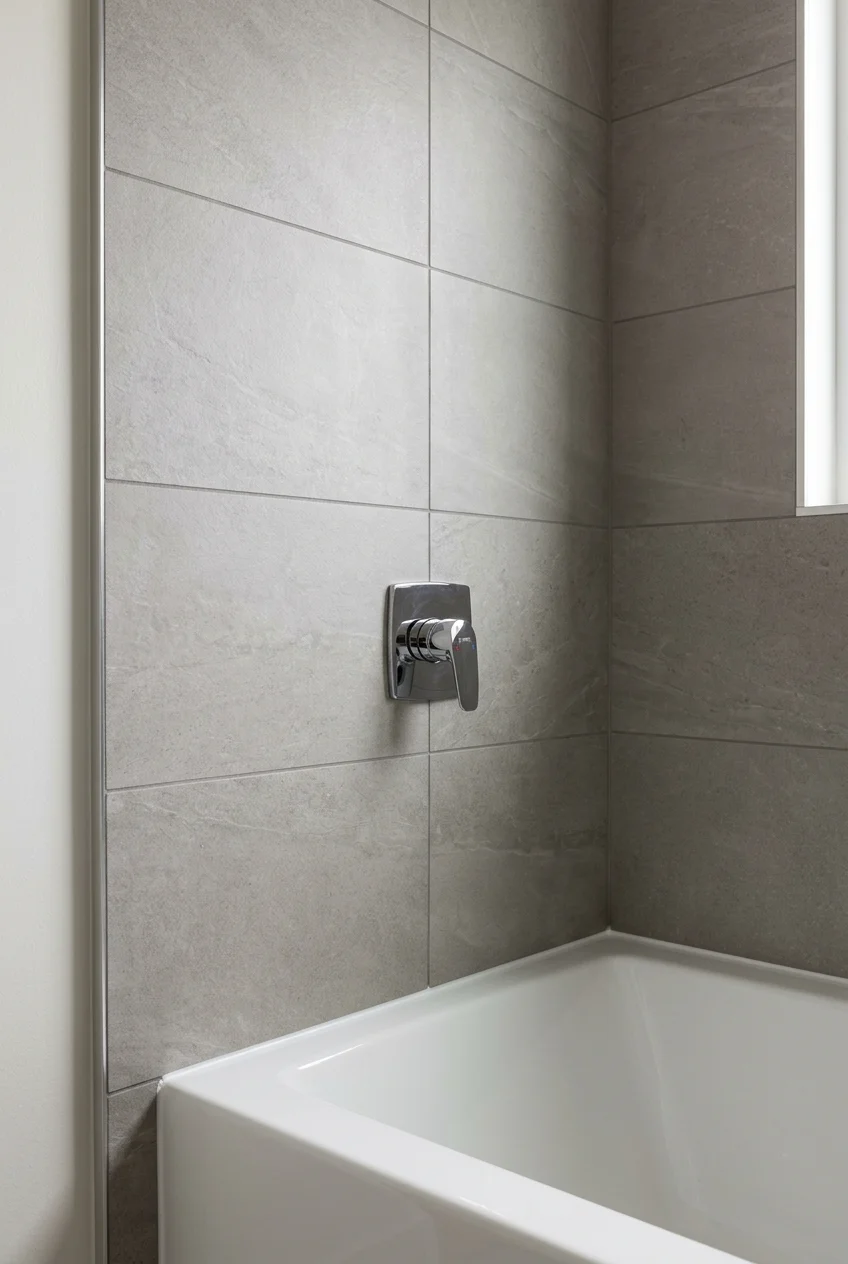
Large porcelain rectangles reduce the number of visible joints across a tub alcove. A restrained stone print keeps the surface from feeling like oversized wallpaper.
Ask for a layout drawing before installation. The best result depends on where seams meet the corners, fixtures, tub rim, and any planned storage.
- Review several tiles together for repeated printed faces.
- Confirm wet-wall suitability and the specified setting materials.
- Allow for proper substrate preparation rather than hiding uneven walls.
Big tiles do not eliminate grout or movement joints. Their size can also make handling and cutting harder, so include that work in the installation discussion.
8. Choose Smooth Solid-Surface Wall Panels
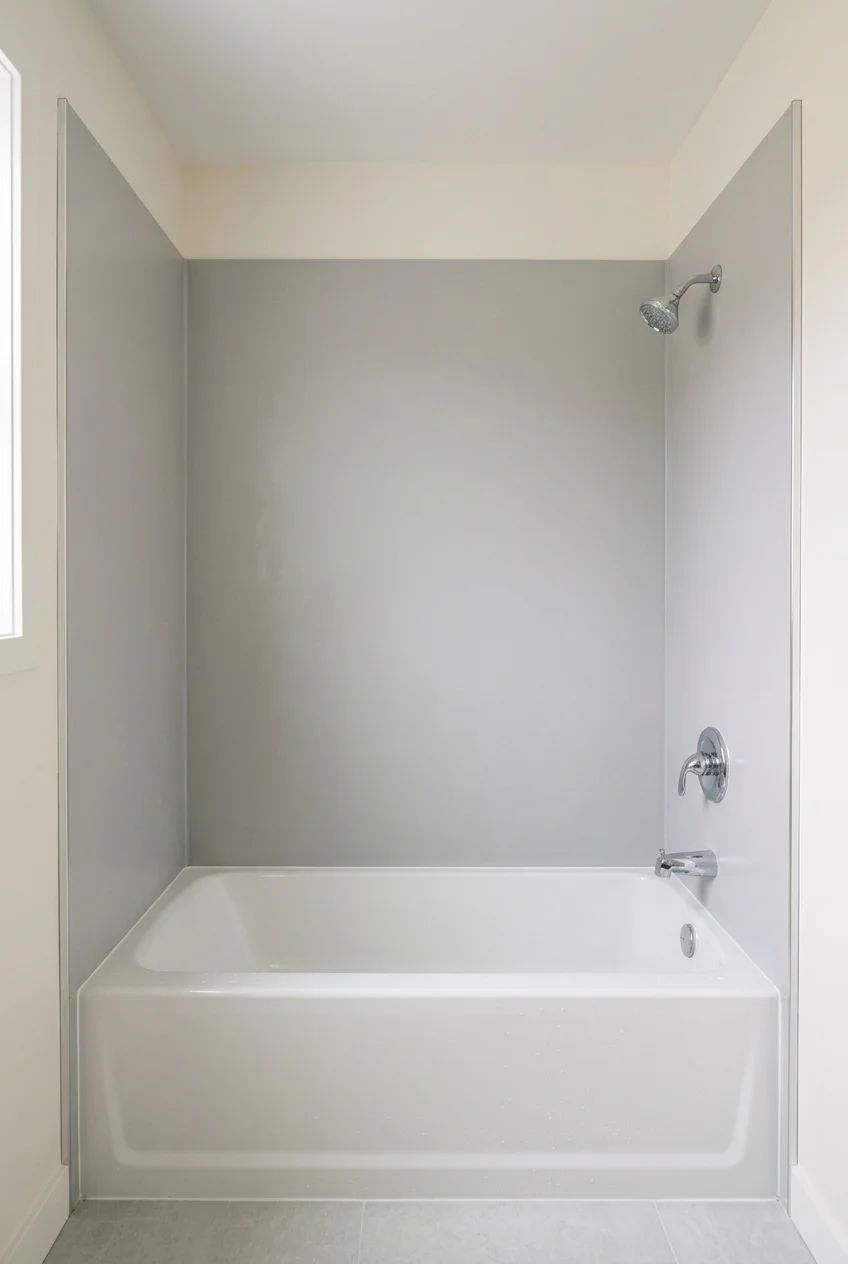
Broad solid-surface panels offer a different route when you want smooth walls with fewer joints. The finished effect depends on careful corner and edge detailing.
Compare the exact kit height with your showerhead location and splash area. A panel package that fits the tub length may still leave unsuitable wall exposed.
Glue-up and direct-to-stud systems have different preparation requirements. Follow the selected manufacturer’s assembly rather than assuming every panel can cover existing tile safely.
- Measure the alcove and review the complete wall system.
- Choose compatible trim, sealants, and any matching storage.
- Resolve substrate condition and fixture holes before panels are installed.
Keep the panel finish simple if you want the joints to recede. A heavily veined print can draw attention to seams that do not align.
9. Use a Matched Molded Surround With Built-In Shelves
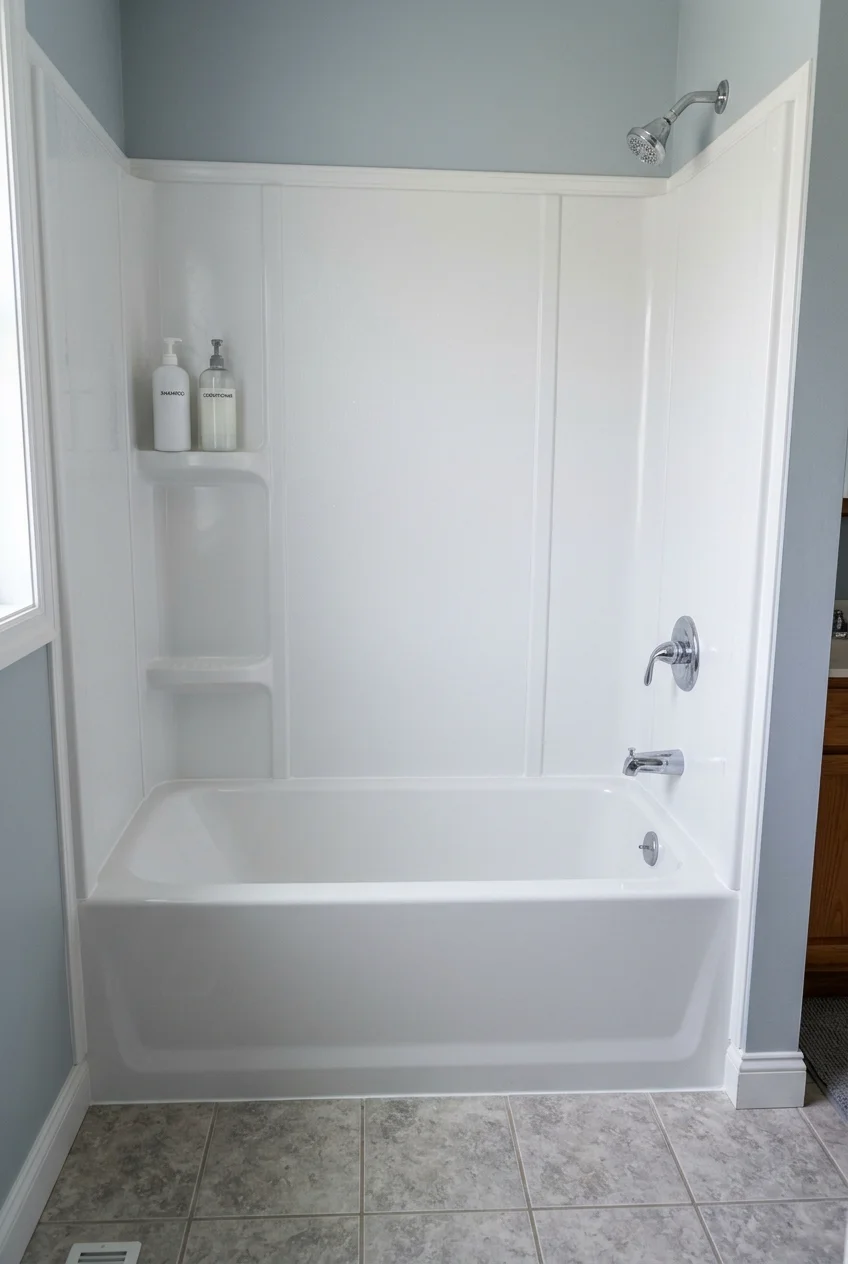
A molded wall set can put bottle shelves directly into the surround. It is useful when you prefer integrated storage over niches and individual metal baskets.
Choose the tub and wall set as a compatible system. Some modular surrounds fit only specified tub models, even when other tubs share nominal dimensions.
Check the shelf heights with the bottles you actually use. A generous-looking molded recess can still be inconvenient if a pump bottle will not stand upright.
- Confirm the specific base and wall set pairing.
- Review the route for carrying every piece into the bathroom.
- Follow the system’s joint and sealant instructions exactly.
The appearance will be more uniform than handmade tile, with fewer custom layout choices. That can be a benefit when easy daily use matters most.
10. Bring in Terrazzo Through Porcelain
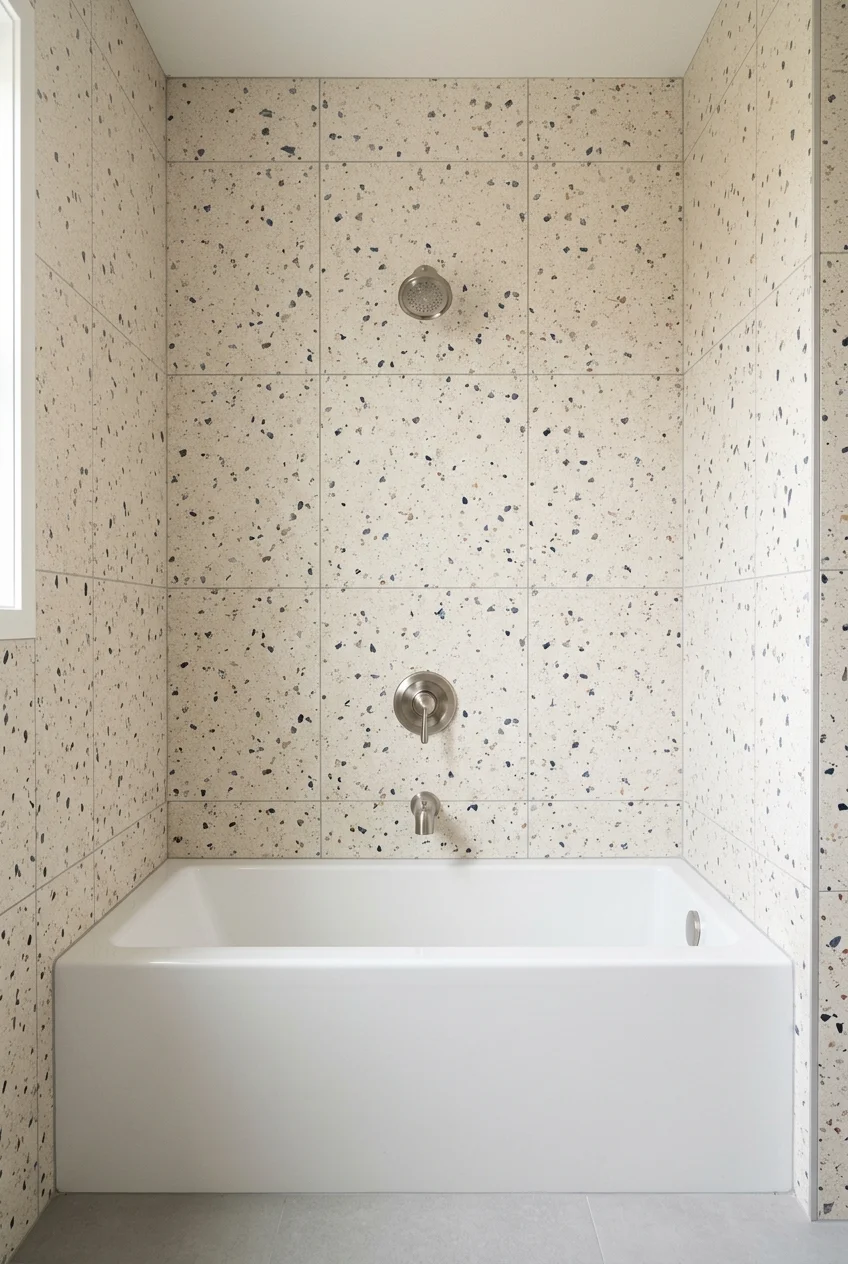
Speckled terrazzo-look porcelain adds small-scale movement without a repeating picture motif. Let the chips supply the color while the tub and fixtures stay simple.
Compare samples from a few feet away, not only in your hand. Dense chips can merge into a darker field once the entire wall is covered.
Choose a porcelain product approved for shower walls if you want this look without specifying poured terrazzo. Keep the grout close to its background color.
11. Let Glazed Square Tile Show Gentle Variation
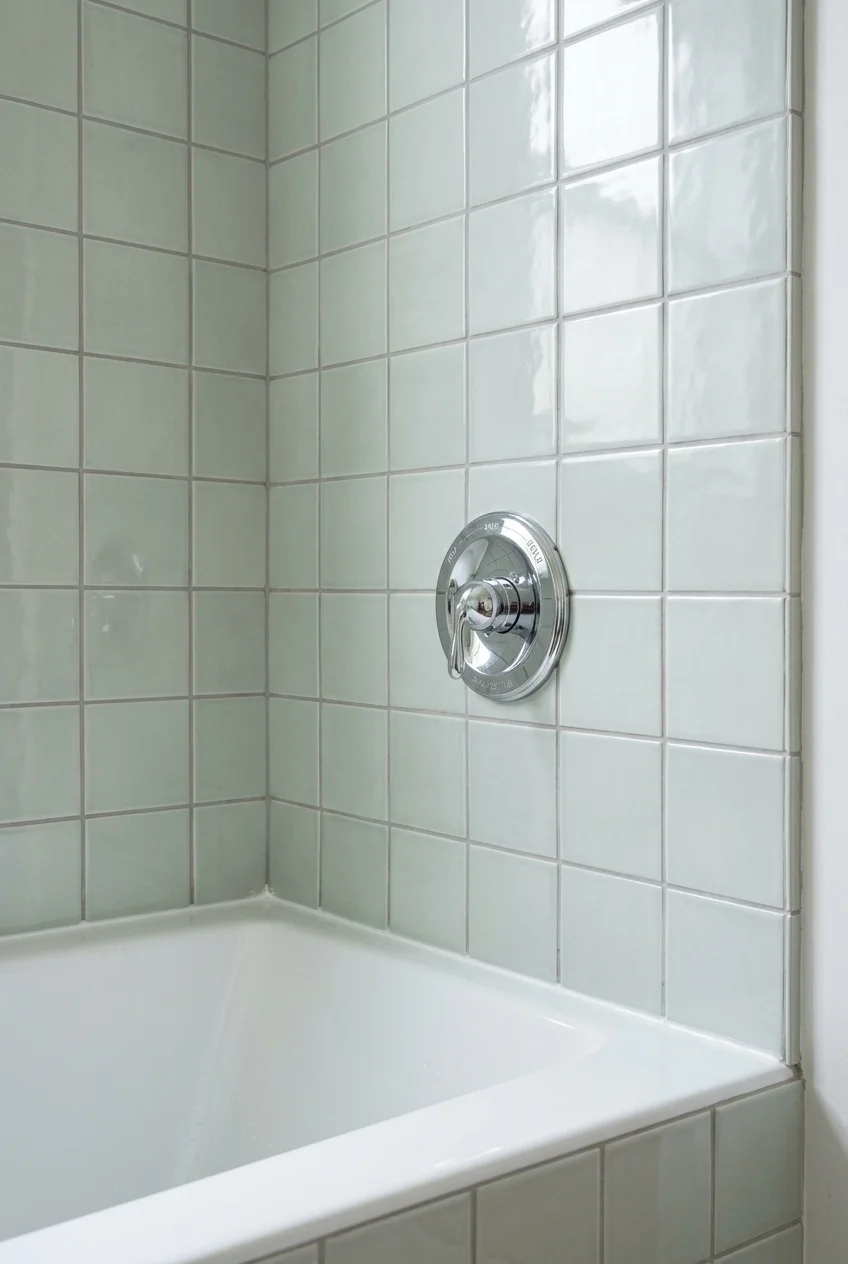
Small glazed squares bring variation through their surfaces rather than a separate accent stripe. A single color can still show shifts in tone and reflected light.
Choose actual shower-approved tile and review its care requirements. Handmade products vary, so the sample should represent the range you are willing to see.
Ask the installer how thickness differences, edge treatment, and grout joints will be handled. The goal is intentional variation with clean fixture connections and comfortable edges.
12. Reserve Herringbone for the Long Back Wall
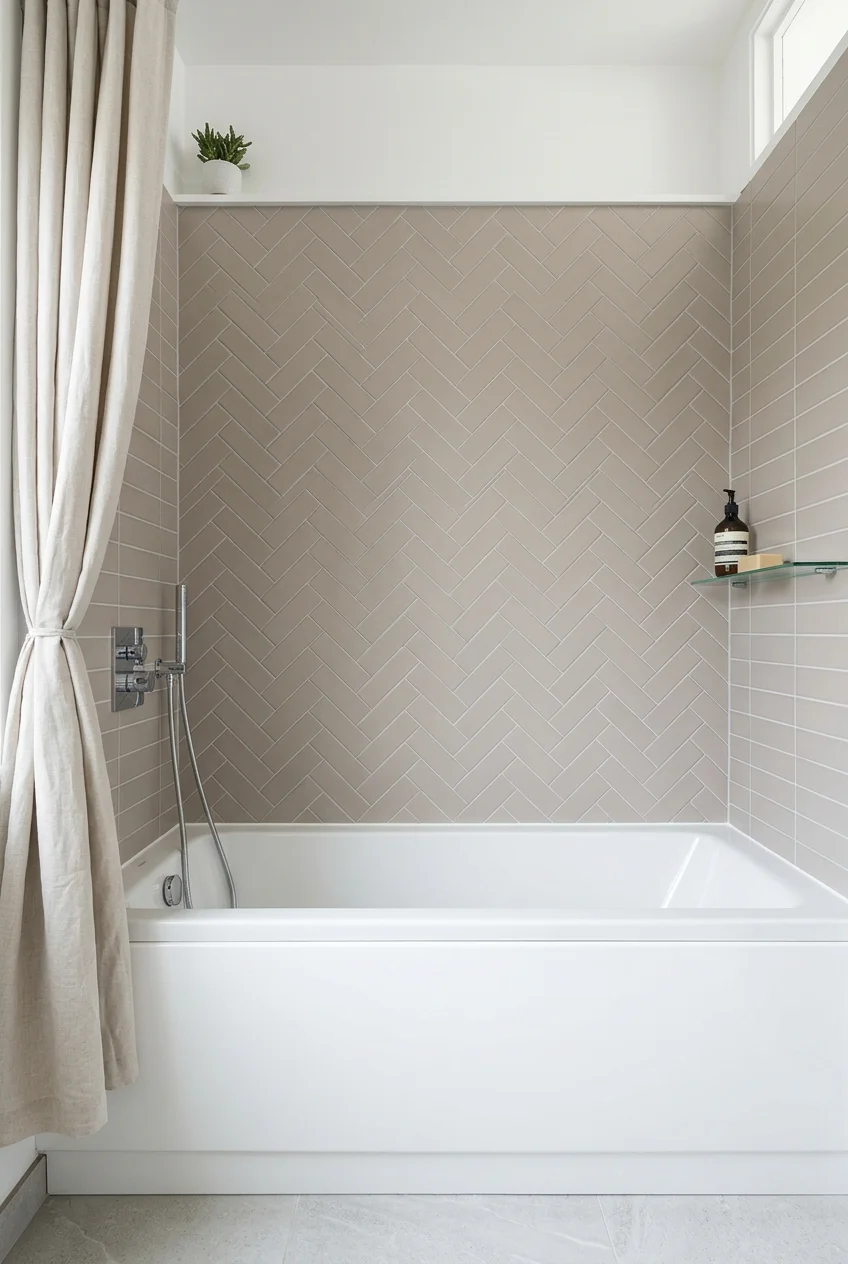
A herringbone back wall gives the alcove a focal point while simpler end walls contain the pattern. Using one tile color keeps that contrast manageable.
Plan the centerline with the tub and any niche, then review the edge cuts. Small uneven triangles become conspicuous when they repeat along both sides.
Plain end walls can use the same tile in a straight arrangement. Matching material thicknesses makes the corners easier to resolve than mixing unrelated tile collections.
13. Use Narrow Tile Strips as a Continuous Field
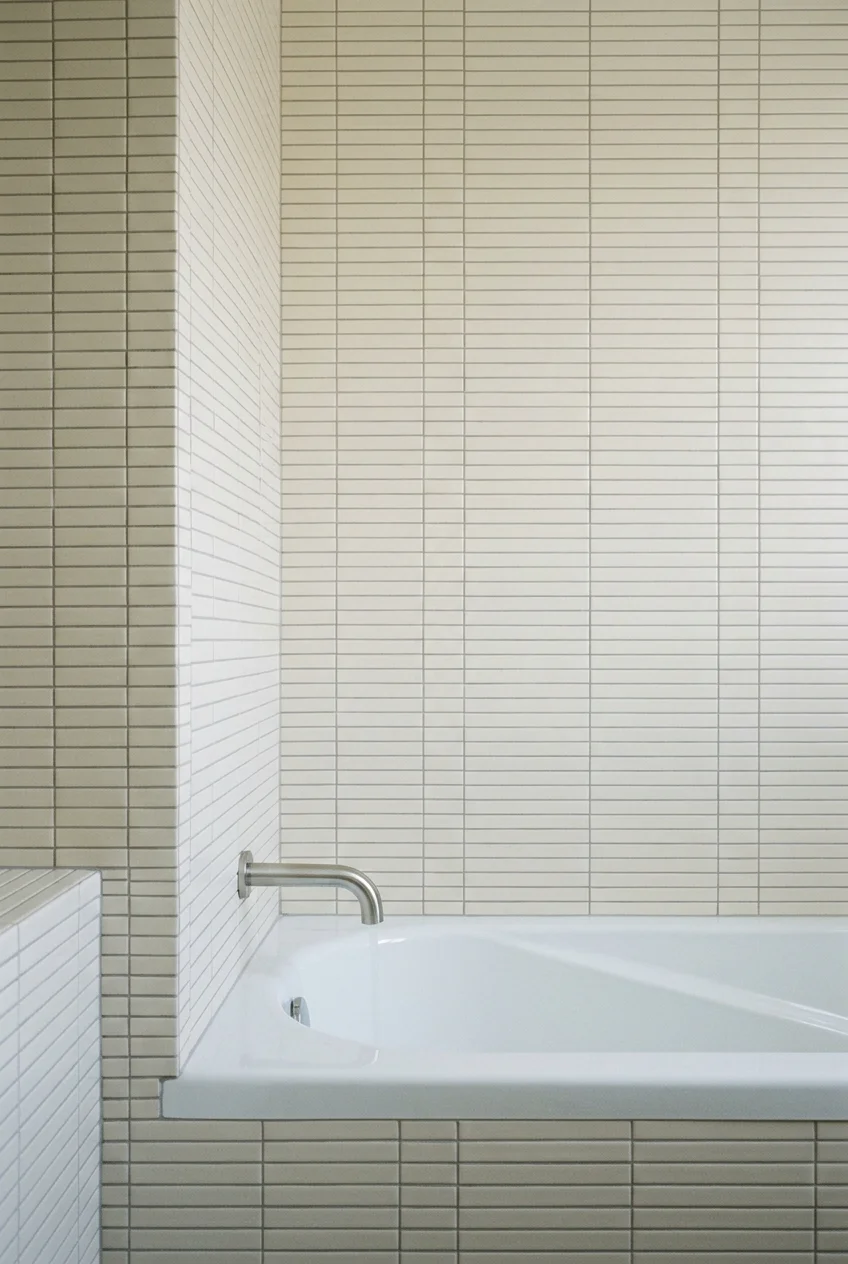
Slim finger-like tiles create a fine rhythm across the surround, especially when their grout nearly matches. The interest comes from proportion rather than extra colors.
Review a mounted sample for sheet lines before ordering mosaics. Repeated gaps between sheets can interrupt the effect more than the individual joints themselves.
A smooth surface is easier to specify here than deeply ridged tile. Choose a finish you can comfortably wipe around the fixtures and corners.
14. Make a Square Tile Grid the Main Detail
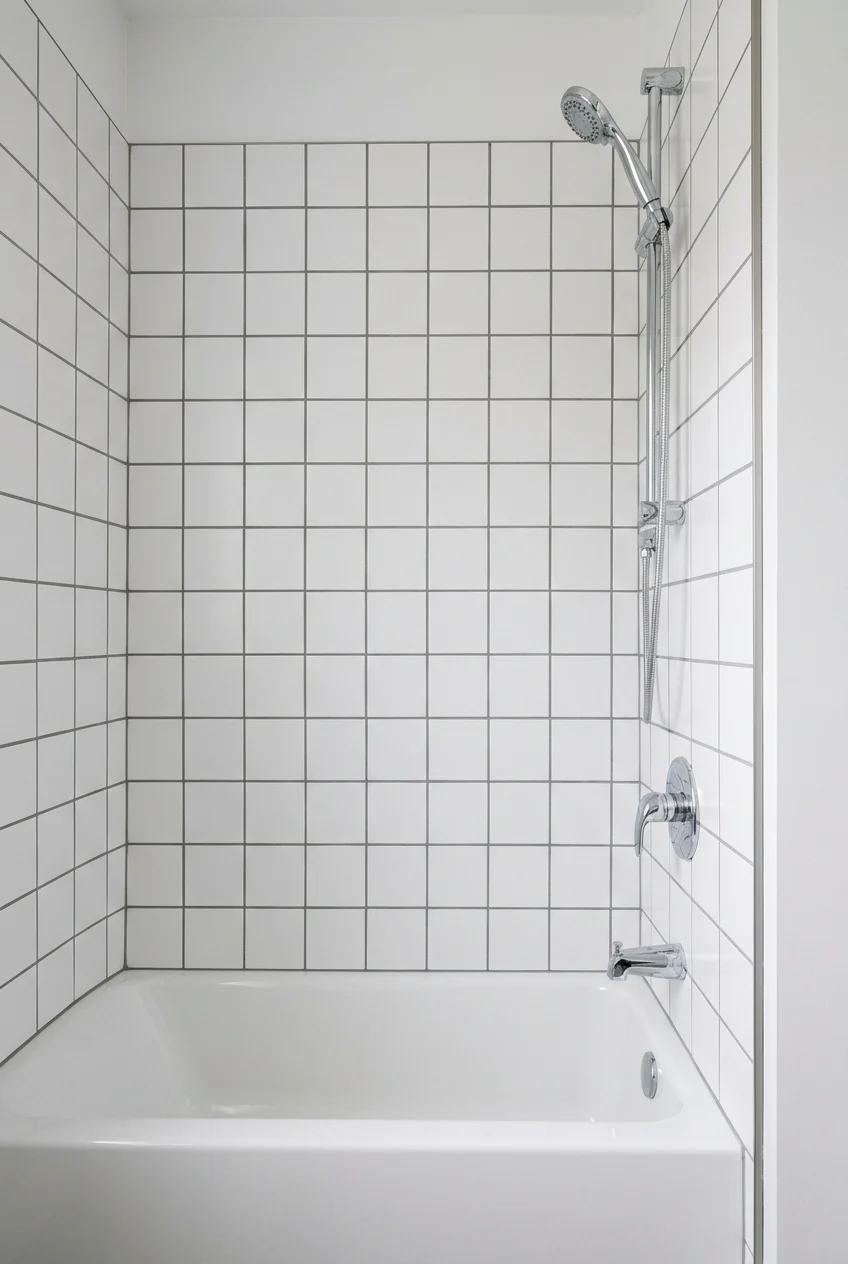
White square tile with contrasting grout gives an ordinary tub a graphic frame. Its regular grid works well when you prefer order over decorative motifs.
Contrast exposes misaligned cuts, so settle the layout around valves and corners before installation. Use restrained accessories to keep the grid clearly visible around them.
15. Build a Checkerboard Feature Wall
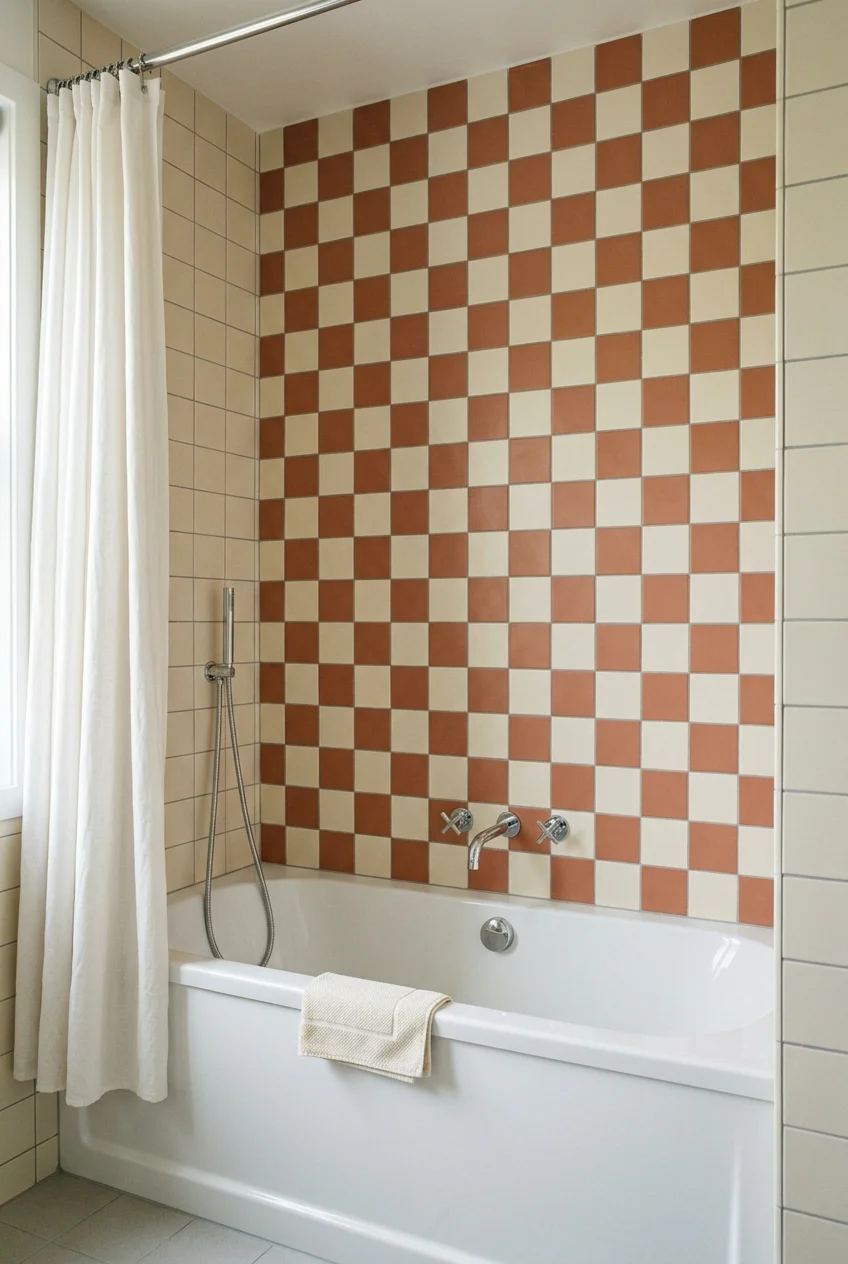
A two-color checkerboard turns the back wall into the main pattern. Smaller contrasts, such as cream and clay, feel less stark than black and white.
Keep both colors in the same tile size and compatible thickness. Alternating unrelated products can create unexpected joint widths and uneven faces at their intersections.
Use plain end walls if the bathroom already has a patterned floor. The checkerboard needs a clear boundary so it reads as one deliberate surface.
16. Add a Vintage Border Within a Plain Tile Field
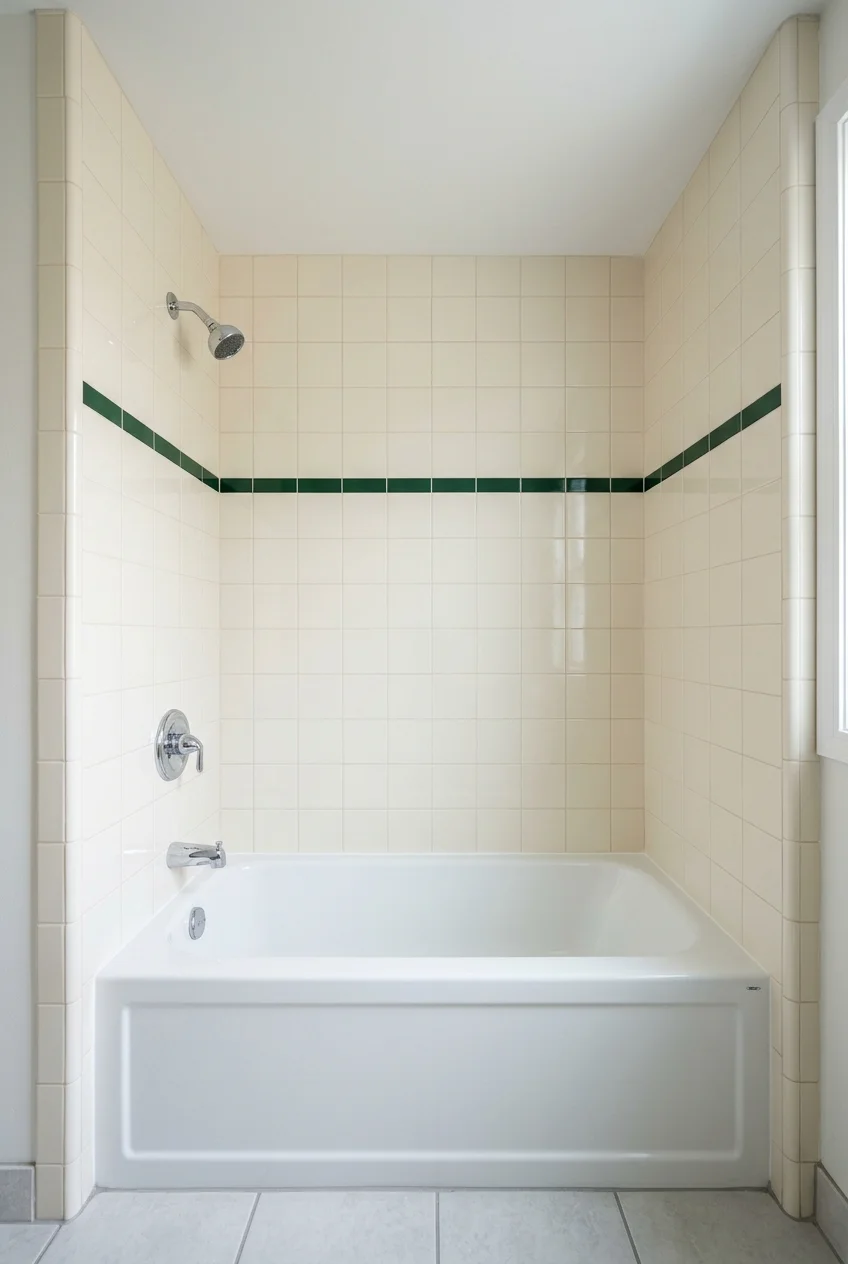
A narrow border can connect a tub remodel to an older bathroom’s proportions. Repeat the same trim around the alcove rather than adding scattered decorative inserts.
Choose the border height alongside the fixtures so it does not slice awkwardly through a control plate. Check that matching corner and edge pieces exist.
Pale square tile with a deep green border gives the idea definition without covering every wall in pattern. Keep the tub apron visually simple.
17. Run Colorful Stripes Around the Alcove
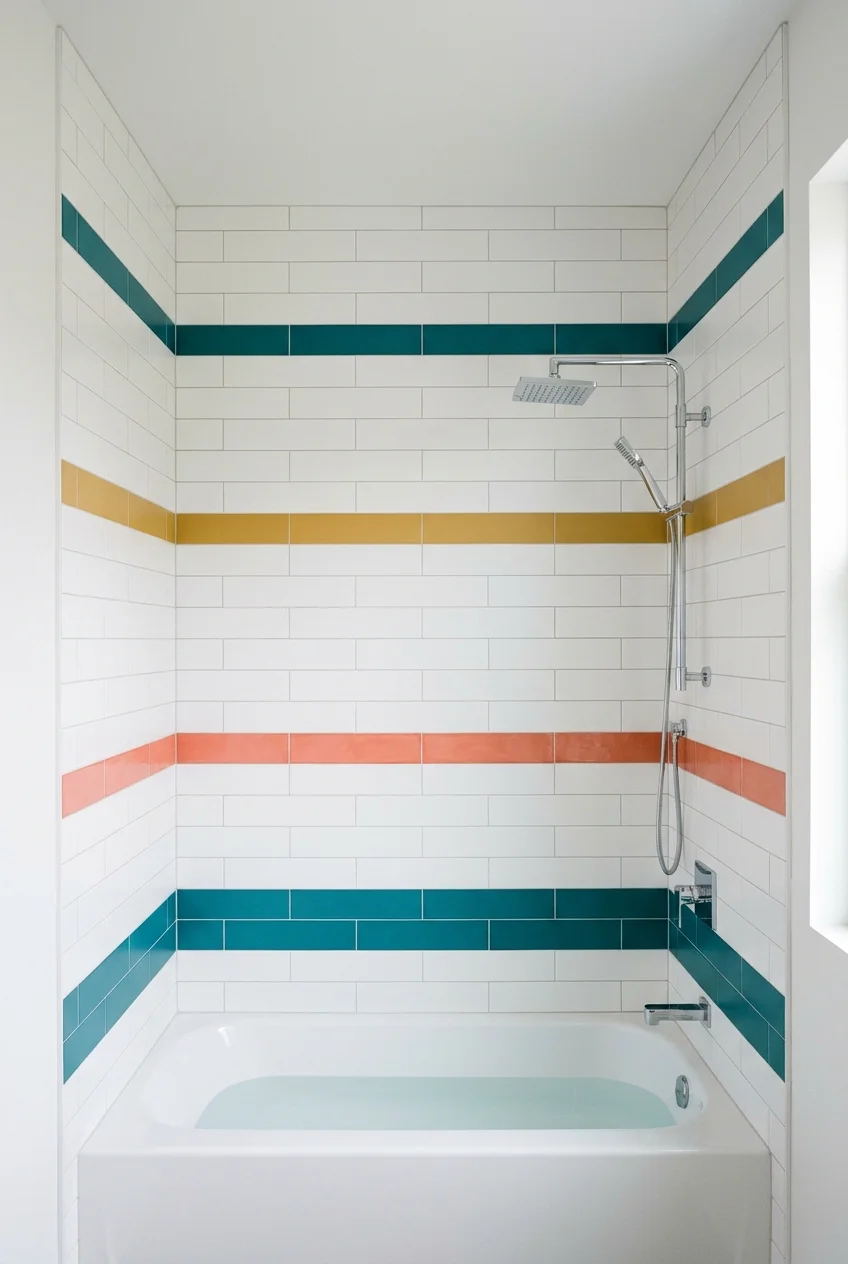
Stripes work best when the color sequence wraps coherently around the corners. Separate colored bands with white tile if you want each line to stay legible.
Start with a few colors you enjoy together rather than copying an entire rainbow. The white tub can serve as the quiet base beneath them.
Lay out the stripe sequence on paper, including the niche if you plan one. A recess can interrupt the pattern unless its lining is considered early.
Practical tip Order samples together before choosing the sequence. Similar-looking online colors can separate sharply when their actual glazes sit beside each other in bathroom lighting.
18. Use a Dark Surround With Light on Its Surface
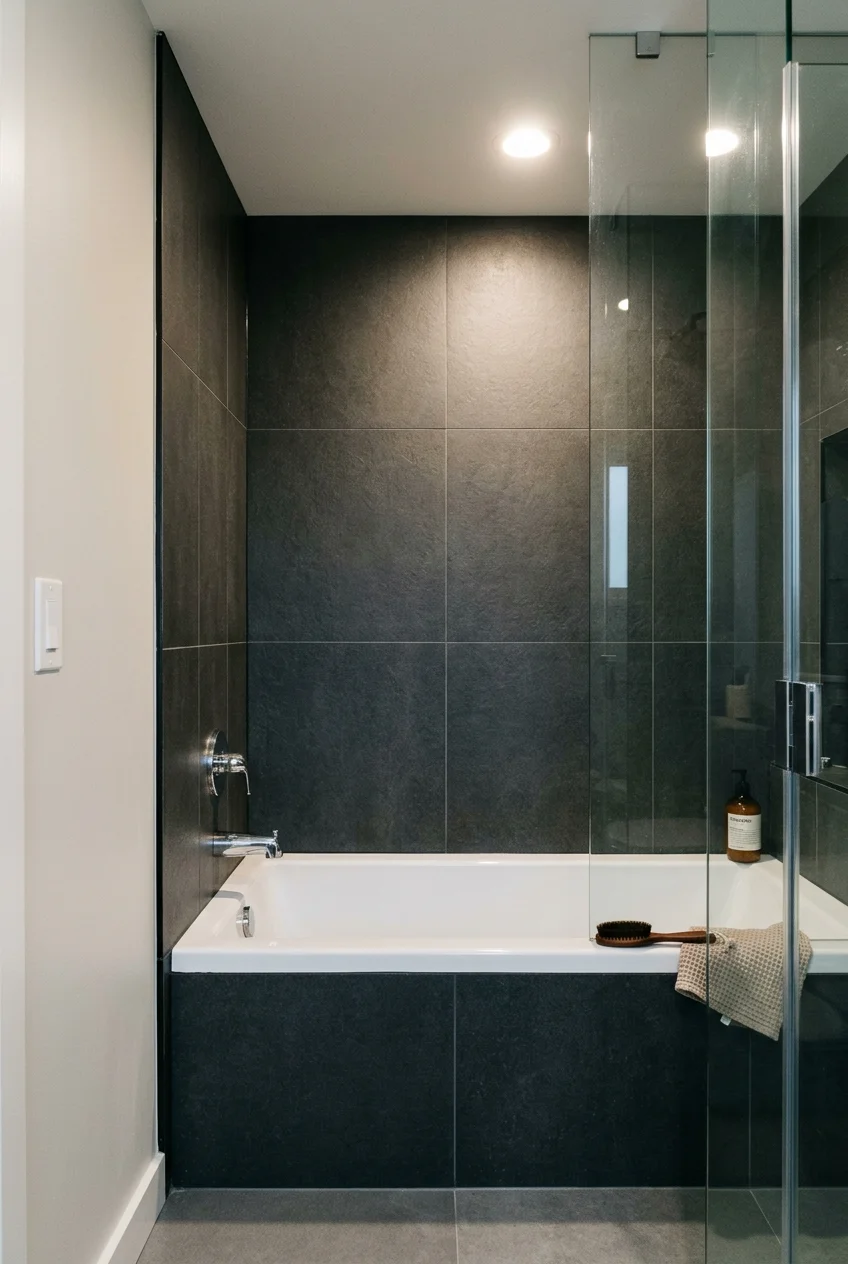
A deep charcoal surround can give a white bathtub a strong outline. It works better when the walls receive usable light instead of disappearing into shadow.
Compare the finish with dried water droplets on a sample if the supplier permits. Dark tile may make mineral marks more noticeable in your household.
Keep at least one neighboring surface lighter so the enclosure remains readable. This is a contrast choice, not a reason to darken the entire room.
19. Use Wood-Look Porcelain on the Fixture Wall
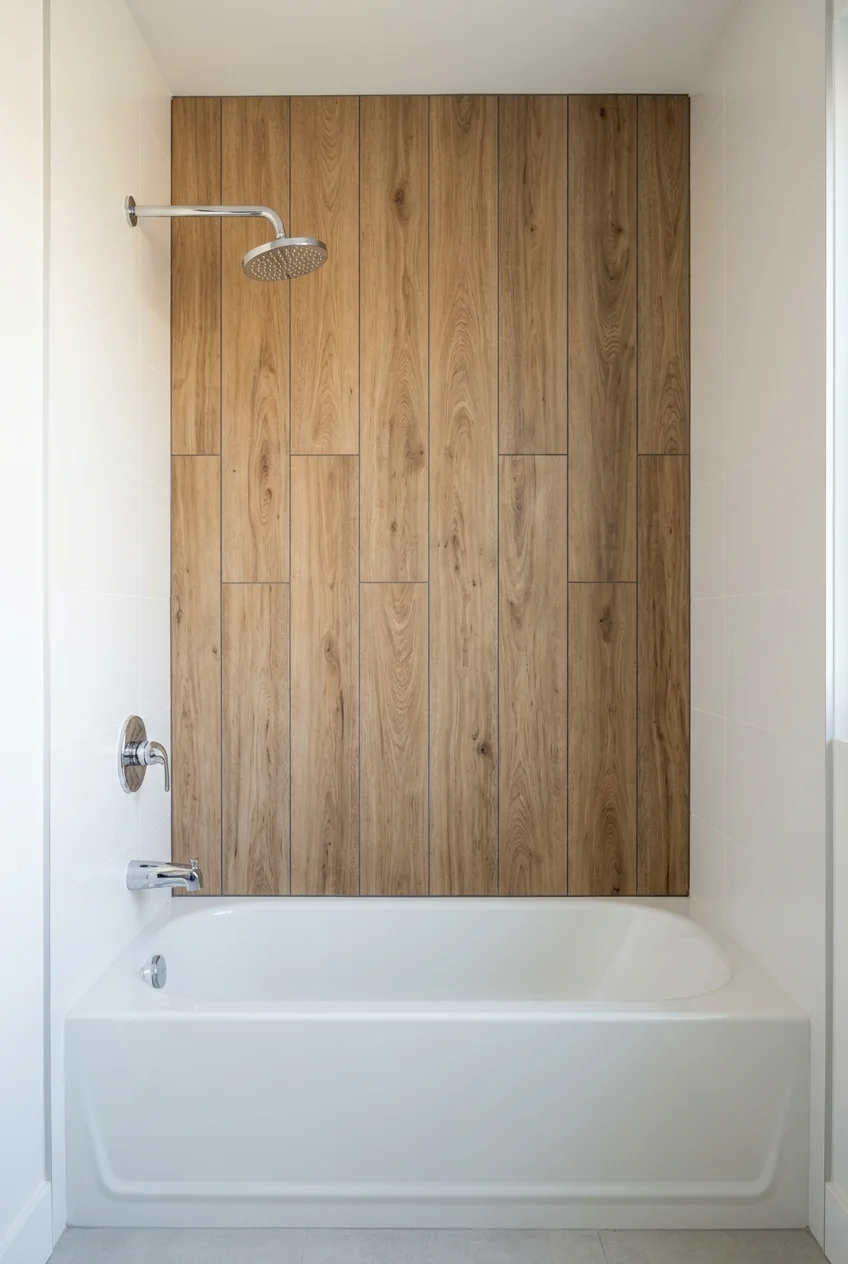
A wood-look porcelain end wall adds grain without putting ordinary wood in the spray zone. Keep the remaining surround plain so the grain has a clear role.
Choose a shower-wall-approved product with a believable scale and restrained print repetition. Lay out the cuts around the valve before the pattern is installed.
Pair the wall with a simple white tub and quiet hardware. Adding more wood finishes nearby can make the small alcove feel overly coordinated.
20. Inset a Mosaic Panel Like a Piece of Wall Art
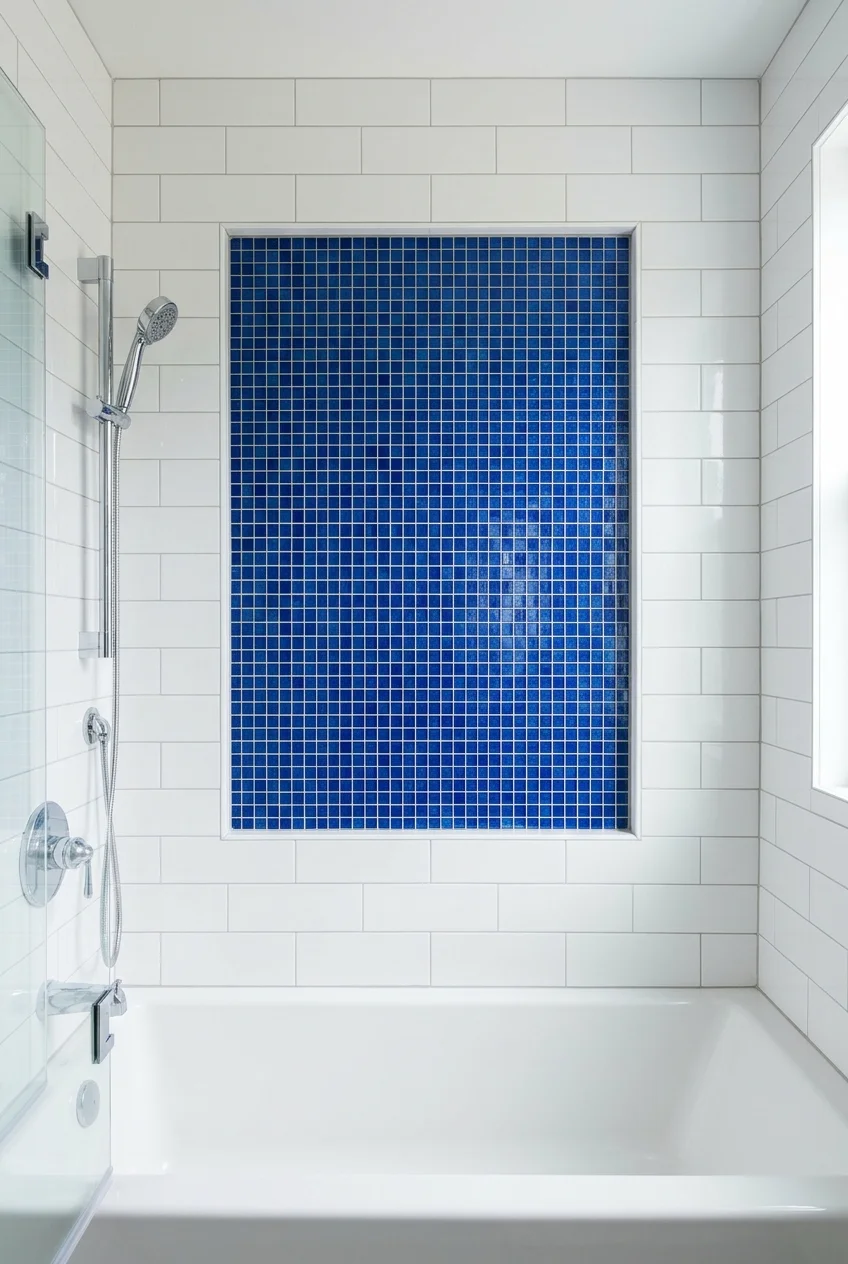
A mosaic rectangle can add detail without covering the whole alcove. Frame it within plain tile so it reads as an intentional panel behind the tub.
Choose mosaic materials approved for shower walls and match their installation needs. Some glass or stone products require different mortars, grout, or cleaning methods.
Set the panel height where it remains visible above the tub rim. Avoid placing the busiest section directly behind a cluster of controls or shelving.
Choose How the Tub Opens to the Room
The enclosure affects entry, cleaning, privacy, and splash control. Compare its open position as carefully as its appearance when every panel or curtain is closed.
21. Keep the Sightline Open With One Fixed Glass Screen
Image pending: No image is attached to this draft for idea 21 (image-21).
A single fixed screen leaves part of the tub front open and puts less hardware across the view. It suits a deliberately controlled spray arrangement.
It also contains less water than a complete enclosure. Panel size, showerhead direction, tub shape, and user habits all affect whether the bathroom stays dry.
Ask the glass supplier to assess the proposed setup, including how you enter beside the screen. Do not choose panel width from a photograph alone.
If the open end will face a nearby vanity or door, compare a full enclosure instead. An attractive panel is unhelpful when splashes reach vulnerable finishes.
Practical tip A fixed screen can obstruct reaching into the tub for cleaning or helping a child. Rehearse that reach before choosing a permanently closed section.
22. Fold the Screen Back When the Tub Is in Use
Image pending: No image is attached to this draft for idea 22 (image-22).
A folding tub screen can open more of the rim than a fixed panel. That may help when the same bath serves showering and assisted bathing.
Compare the folded stack with your taps, window trim, and grab bars. The panels need a place to park without striking another fitting or blocking access.
- Check the supplier’s minimum mounting surface and support requirements.
- Review folded depth and the usable tub opening.
- Confirm how hinges, seals, and panel overlaps are cleaned.
Choose a screen made for tub installation, using the manufacturer’s permitted hinge arrangement. A folding door intended for another opening is not an interchangeable substitute.
Try the movement in a showroom or review its measured drawings closely. A screen that technically folds may still be awkward beside your particular fixtures.
23. Use a Full Hinged Tub Door Where Swing Space Allows
Image pending: No image is attached to this draft for idea 23 (image-23).
A hinged door can create a larger clear opening than some bypass sliders. It needs enough space outside the tub to open without hitting bathroom fixtures.
Draw the full swing on the floor plan, including the handle projection. Check it against the bathroom entry door, vanity drawers, toilet, and towel hardware.
The glass system must be designed for the tub and supported walls. Have the supplier confirm hinge loads and the exact rim and opening requirements.
This is most useful when entry space matters more than avoiding a swing. Choose the opening direction with the installer rather than improvising after delivery.
Practical tip Review the door in its cleaning position as well as its entry position. Corners behind the open panel should remain reachable without standing precariously.
24. Outline the Alcove With a Dark Framed Enclosure
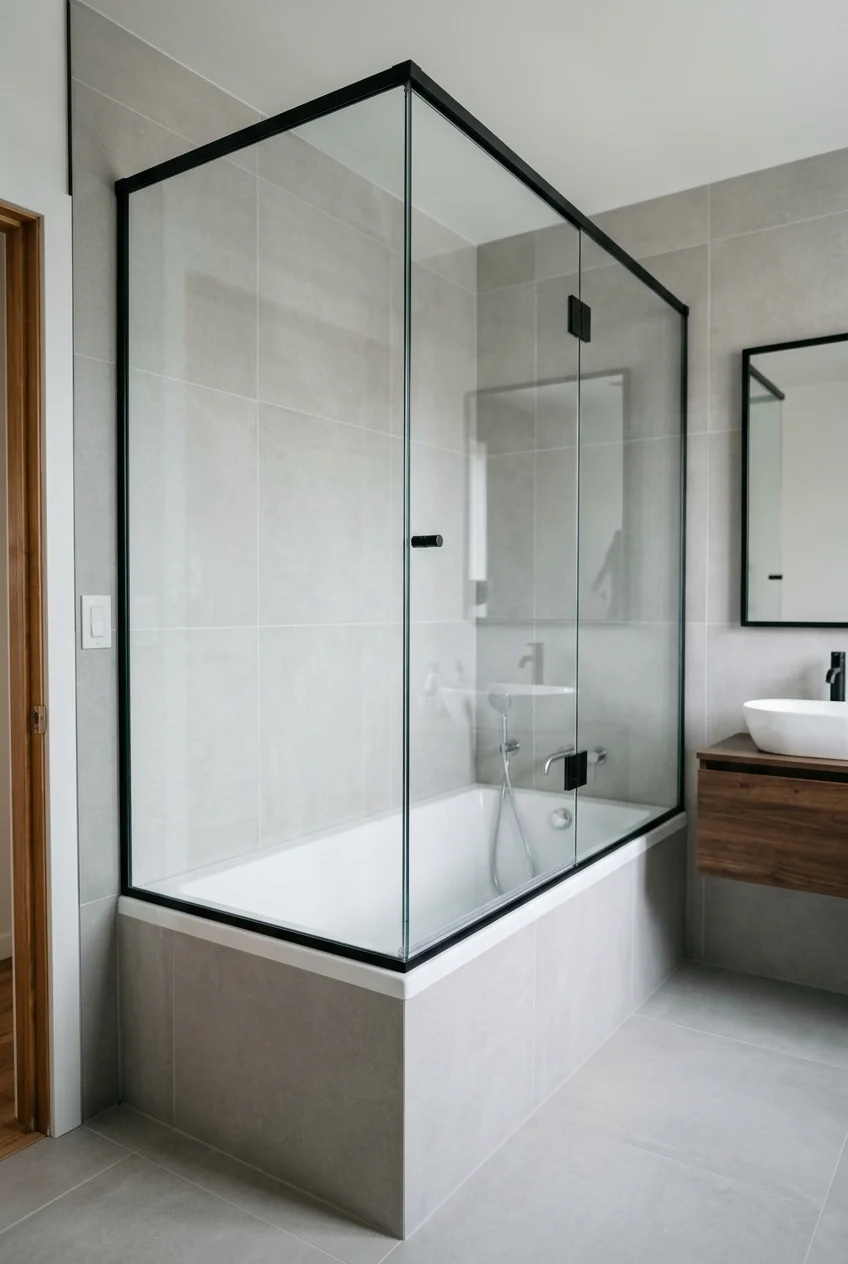
Dark framing gives the tub a visible architectural outline. Use simple tile behind it so the metal divisions do not compete with several other patterns.
Compare actual frame profiles before ordering. Heavy rails can hide more tile than expected, while decorative grids add surfaces that may need extra cleaning.
Repeat the dark finish selectively in a mirror or cabinet pull. You do not need every bathroom fixture to become black for the enclosure to belong.
25. Choose Frosted Glass When Privacy Matters
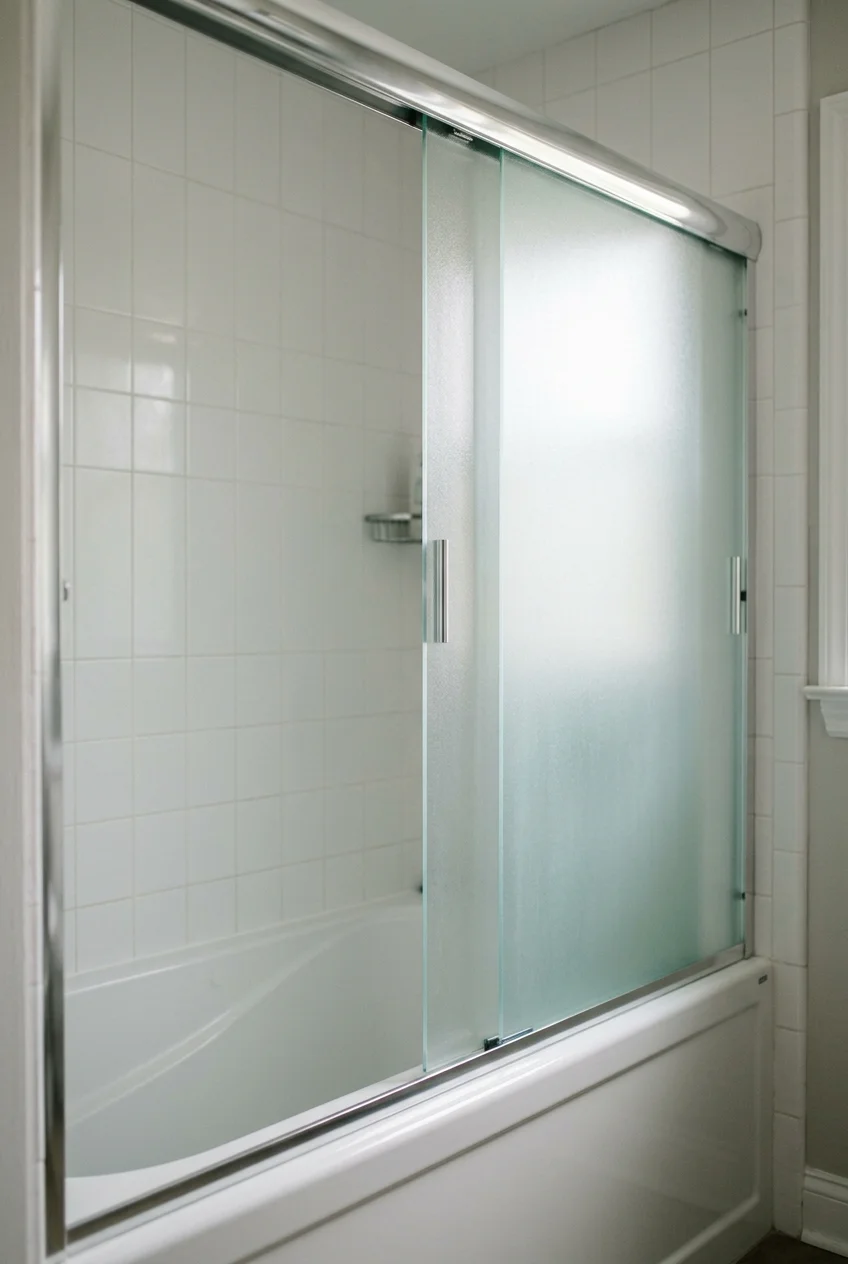
Frosted tub glass softens the view into the bathing area while still admitting light. It can suit a shared bathroom where clear glass feels too exposed.
Ask which side carries the textured or etched finish and follow its care instructions. Different glass treatments do not all clean or age the same way.
Keep enough contrast between the glass and the tub edge for easy orientation. Privacy glass changes visibility; it does not improve a difficult step into the tub.
26. Gain Elbow Room With a Curved Curtain Rod
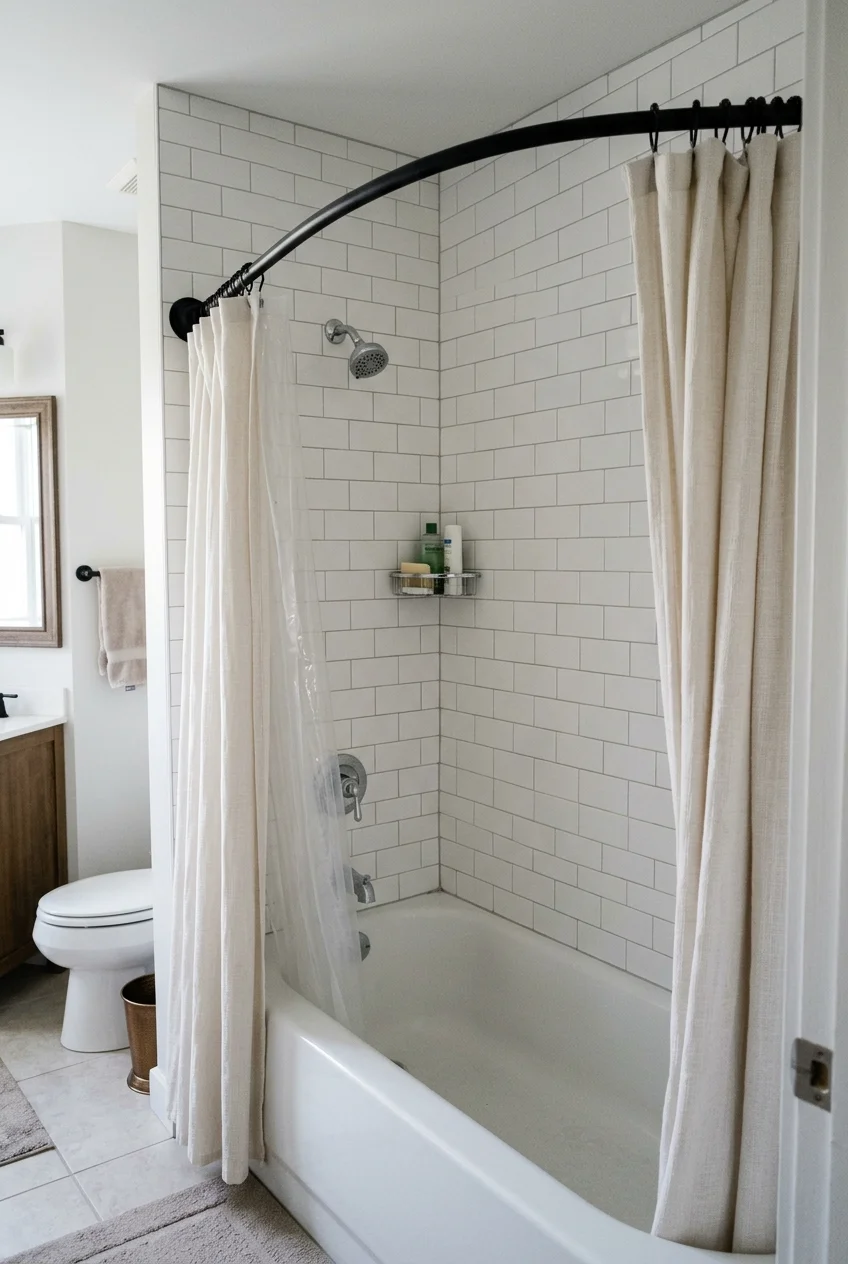
A curved rod moves the curtain away from your shoulders without changing the tub. The useful gain depends on its projection and the room outside it.
The PrettyHome curved shower rod is listed as adjustable and drill-mounted. Check its stated range against your wall spacing and confirm suitable mounting before selecting it.
Make sure the outward curve does not crowd the toilet or narrow the walkway. The liner must still fall inside the tub despite the wider rod.
Setup note Mock up the rod’s outermost projection with a temporary measuring reference. It is easier to assess the walkway before making holes in finished tile.
27. Enclose a Two-Sided Tub With a Glass Return
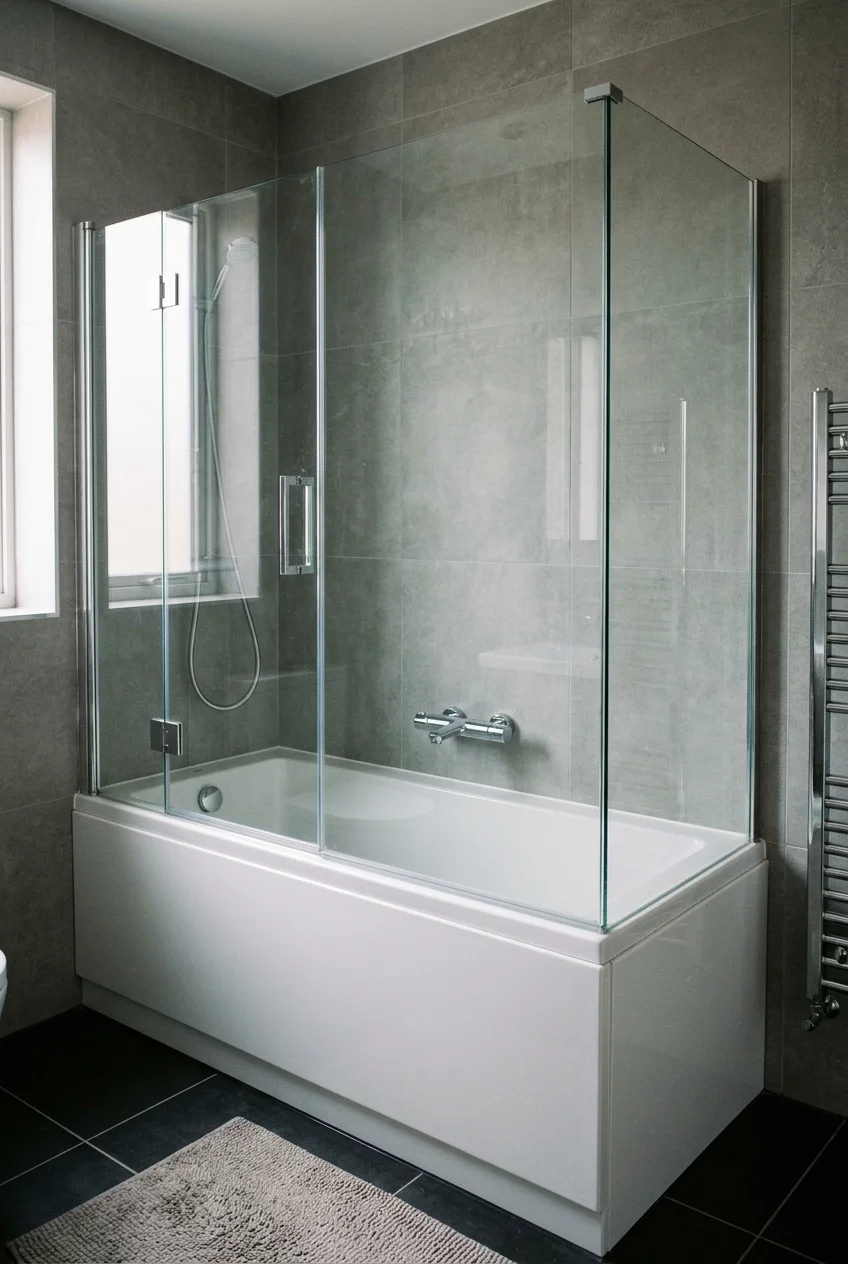
A tub with one exposed short end needs a different enclosure than a three-wall alcove. A glass return can contain that open side while preserving light.
Choose a tub approved for this shower configuration, with the necessary flange or compatible water-management details. An ordinary freestanding soaking tub is not automatically suitable.
Have the tub, glass, and waterproofing details designed together. The corner where the return, tub rim, and adjoining wall meet needs a specific solution.
- Check support and attachment points for both glass sections.
- Confirm the entry opening and any door swing.
- Resolve splash protection at the exposed tub end.
Use the layout where a solid end wall would block a useful sightline. Custom glass and additional detailing make this a more involved change than replacing a curtain.
28. Use a Ceiling Track for a Cleaner Curtain Line
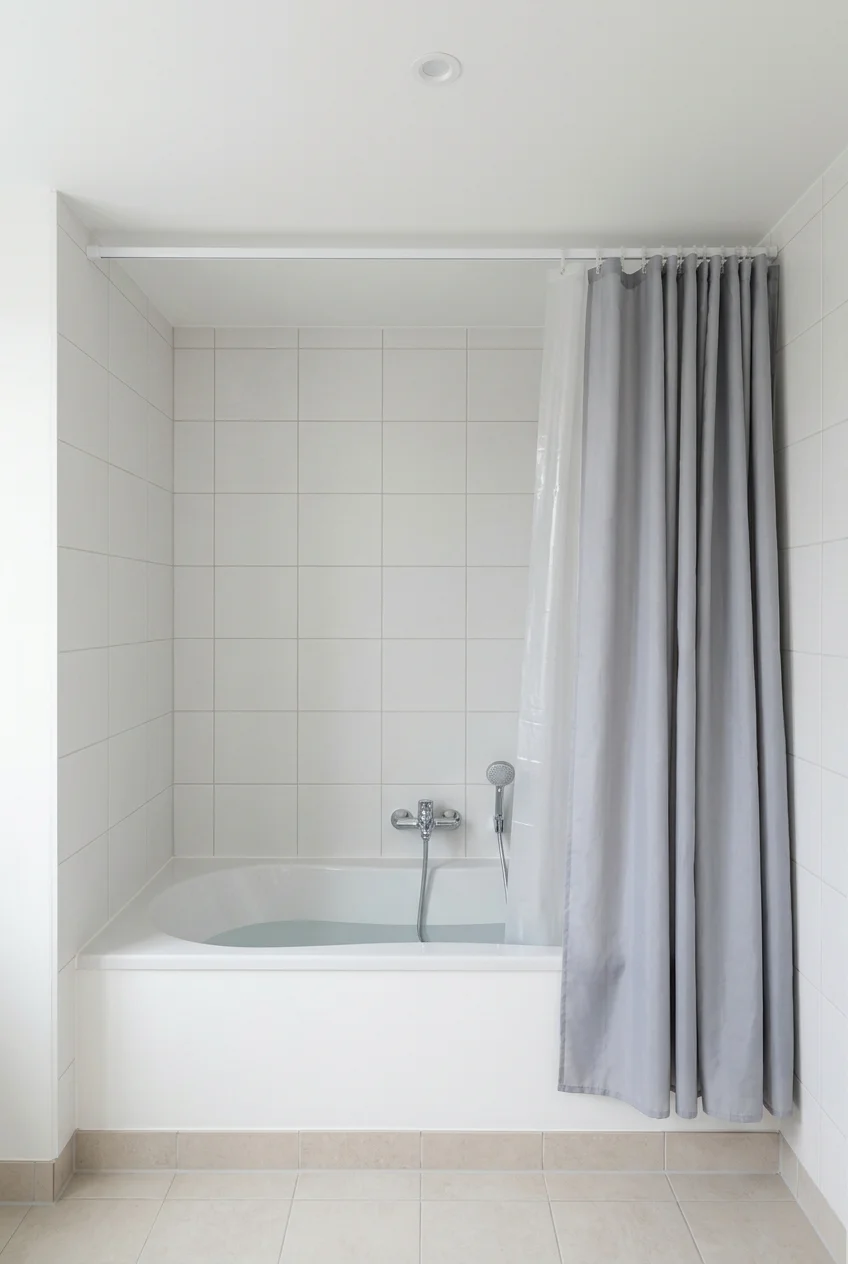
A ceiling-mounted curtain track removes the visible rod from the alcove opening. It can help when a high curtain is part of the room’s proportions.
Check the track’s support requirements and curtain weight before installing it. A thin ceiling finish alone may not provide the backing the chosen system needs.
Plan the curtain length from the actual ceiling height, keeping the liner inside the tub. Avoid a heavy floor-puddling hem in the wet entry area.
The curtain should stack where it leaves fixtures reachable and the opening clear. Review ceiling slopes, lighting, and ventilation grilles before choosing the track route.
Build Storage Around What You Actually Use
Storage works best when bottles, soap, toys, and towels each have a reachable place. Choose built-in features during construction and reversible solutions for an intact surround.
29. Stretch a Horizontal Niche Along the Back Wall
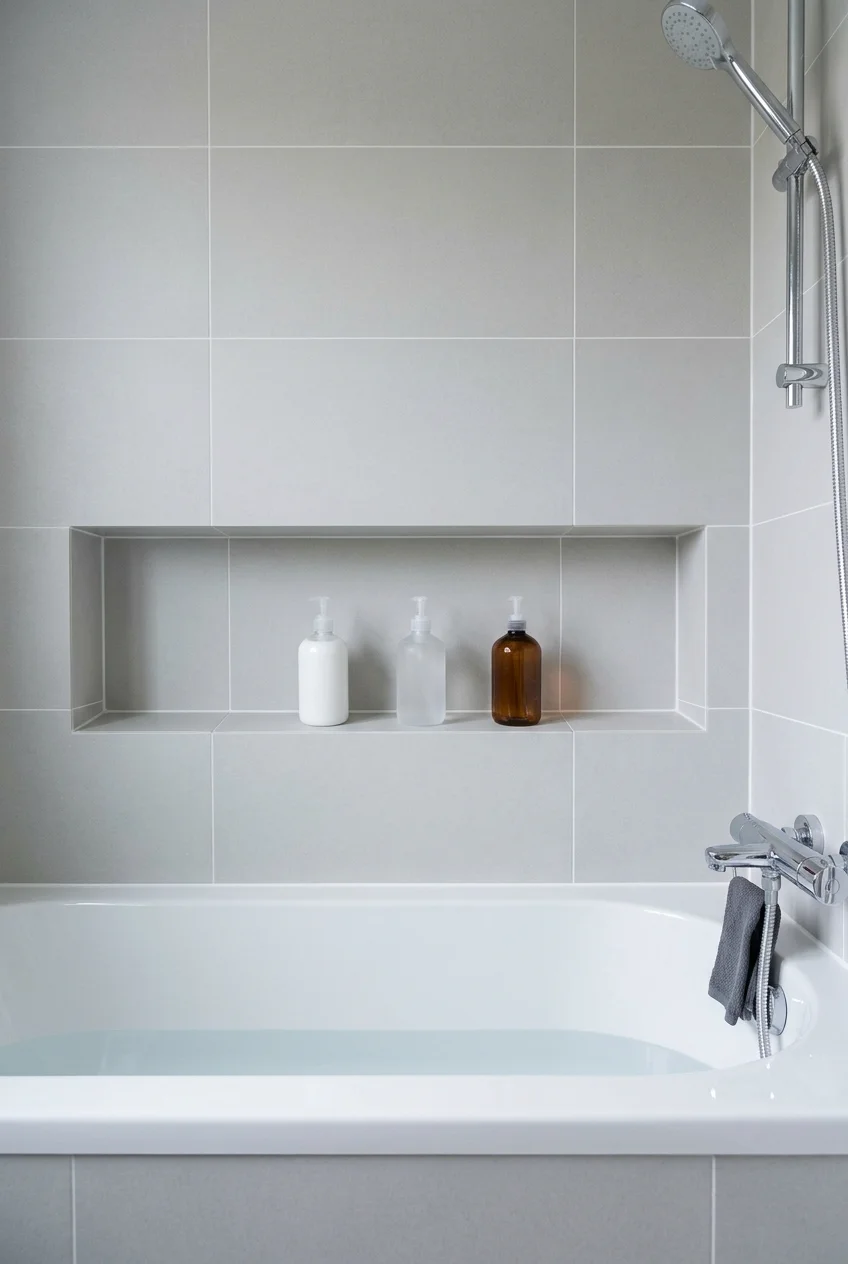
A long recessed niche can gather daily products into one band above the tub. Matching its lining to the wall keeps the storage visually quiet.
Choose the height with the actual users and bottles in mind. A niche that photographs neatly may be too high for a seated bather to reach.
Its width depends on framing, plumbing, and the wall assembly. Have structural changes assessed rather than cutting through studs to chase a continuous horizontal look.
- Group the bottles and measure their tallest working height.
- Locate a feasible opening with the installer before waterproofing.
- Coordinate niche edges with the surrounding tile layout.
Specify the complete waterproofing detail and a draining tiled sill. A long recess adds corners and joints, so it deserves more attention than a decorative tile insert.
If the available wall cannot accommodate the opening, use two smaller recesses or an approved surface shelf. Keeping sound framing matters more than matching an inspiration photo.
30. Divide a Tall Niche Into Bottle and Soap Levels
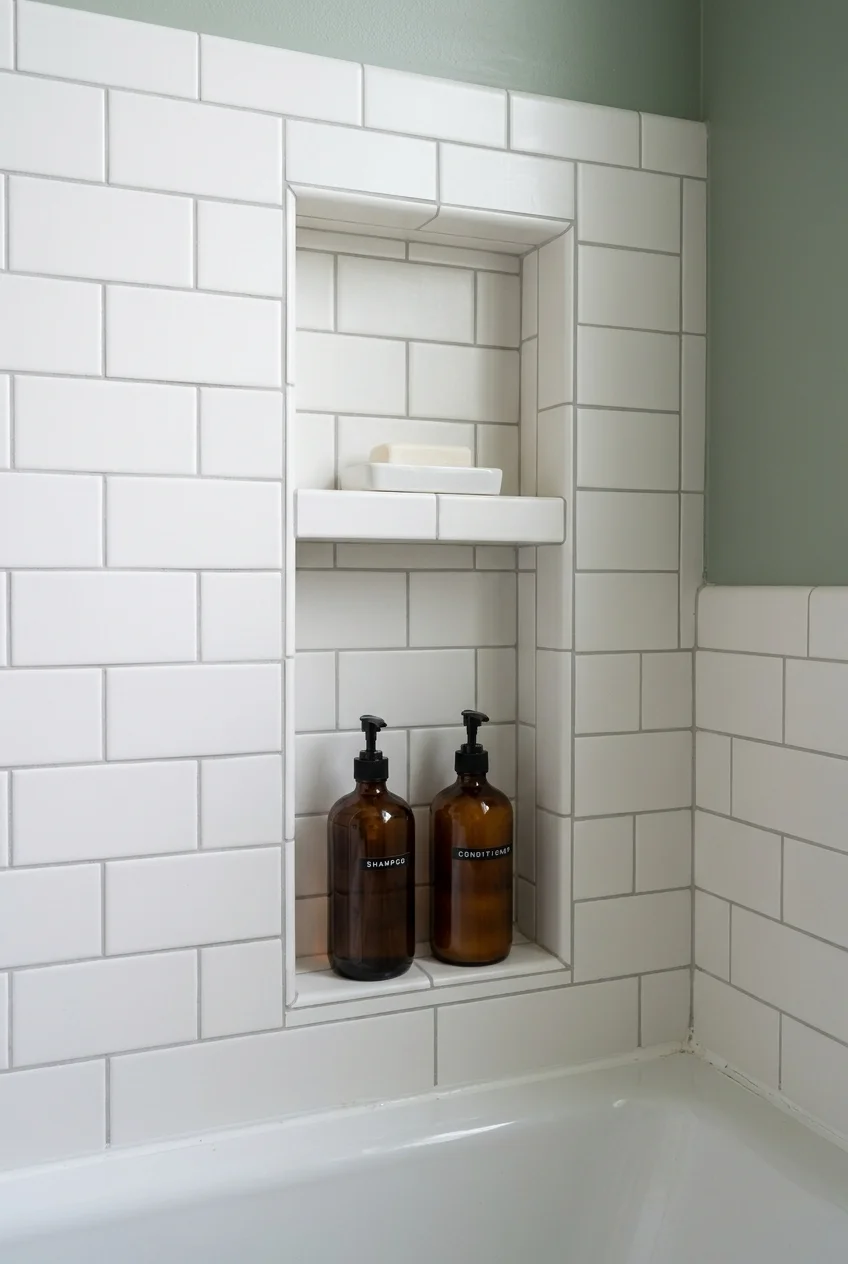
A taller recess uses vertical space when a wide niche will not fit. A divider separates tall bottles from smaller soap or grooming items.
Set shelf spacing from the tallest pump bottle with room for your hand above it. Equal compartments often waste usable height or squeeze daily products.
Use a shelf and waterproofing detail approved for the niche assembly. Tiled horizontal surfaces should drain toward the tub rather than holding a puddle.
Practical tip Place the soap level where drips cannot fall directly onto another item you want to keep dry. Removable trays can make residue easier to clean.
31. Create a Continuous Ledge With a Shallow Built-Out Wall
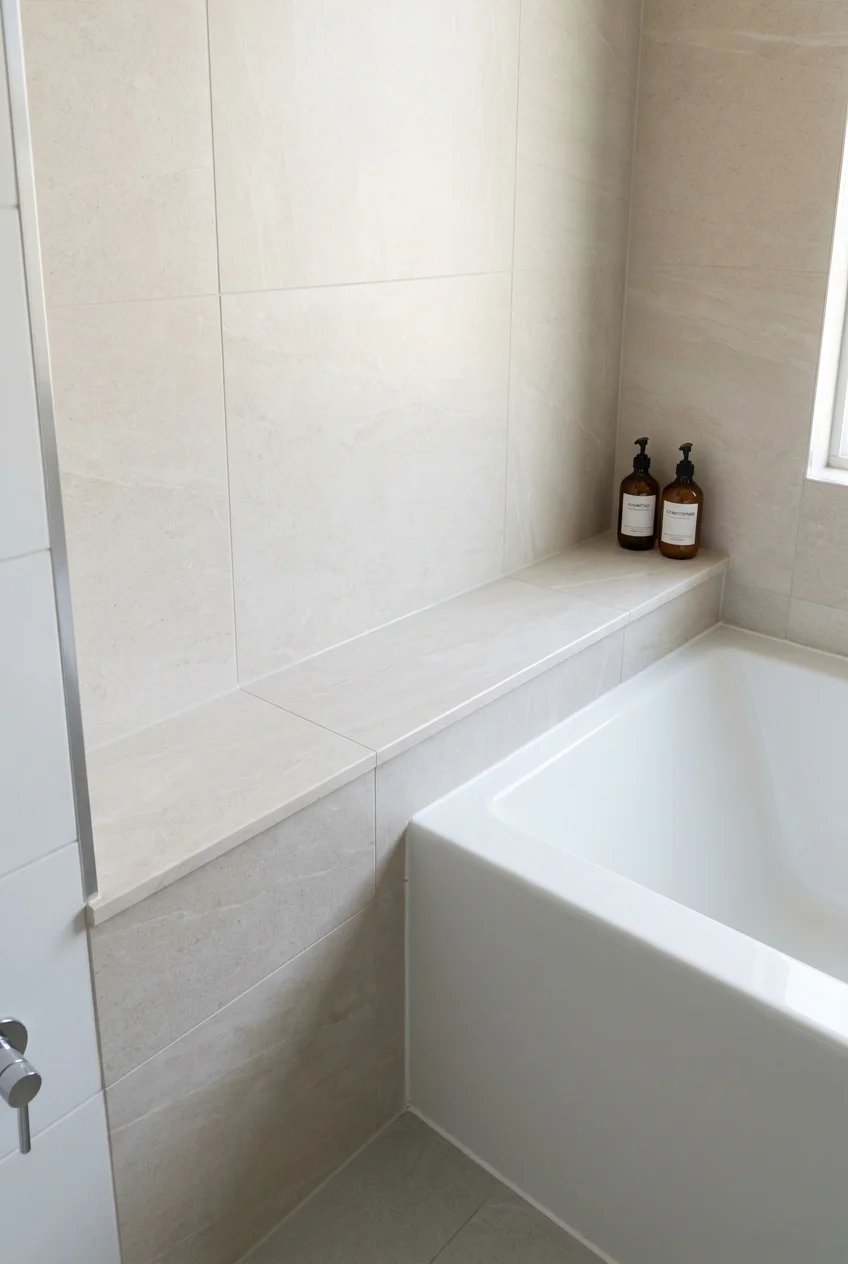
A shallow built-out wall can form a long ledge behind the tub without a recessed niche. It offers a continuous landing place for bathing essentials.
The ledge needs a complete wet-area assembly, including waterproofed transitions and a top surface that drains inward. Tile alone does not protect the wall behind it.
Check the finished projection against the tub’s usable space and planned fixtures. A large ledge can consume room you would rather keep for shoulders and elbows.
- Resolve the wall build-out before choosing the tub position.
- Keep bottle storage away from the entry grip area.
- Use a simple cap with easy-to-clean edges.
This is a construction choice rather than a shelf glued onto finished tile. Ask the installer to coordinate the tub junction and the new wall profile.
32. Add Purpose-Designed Corner Shelves to Existing Tile
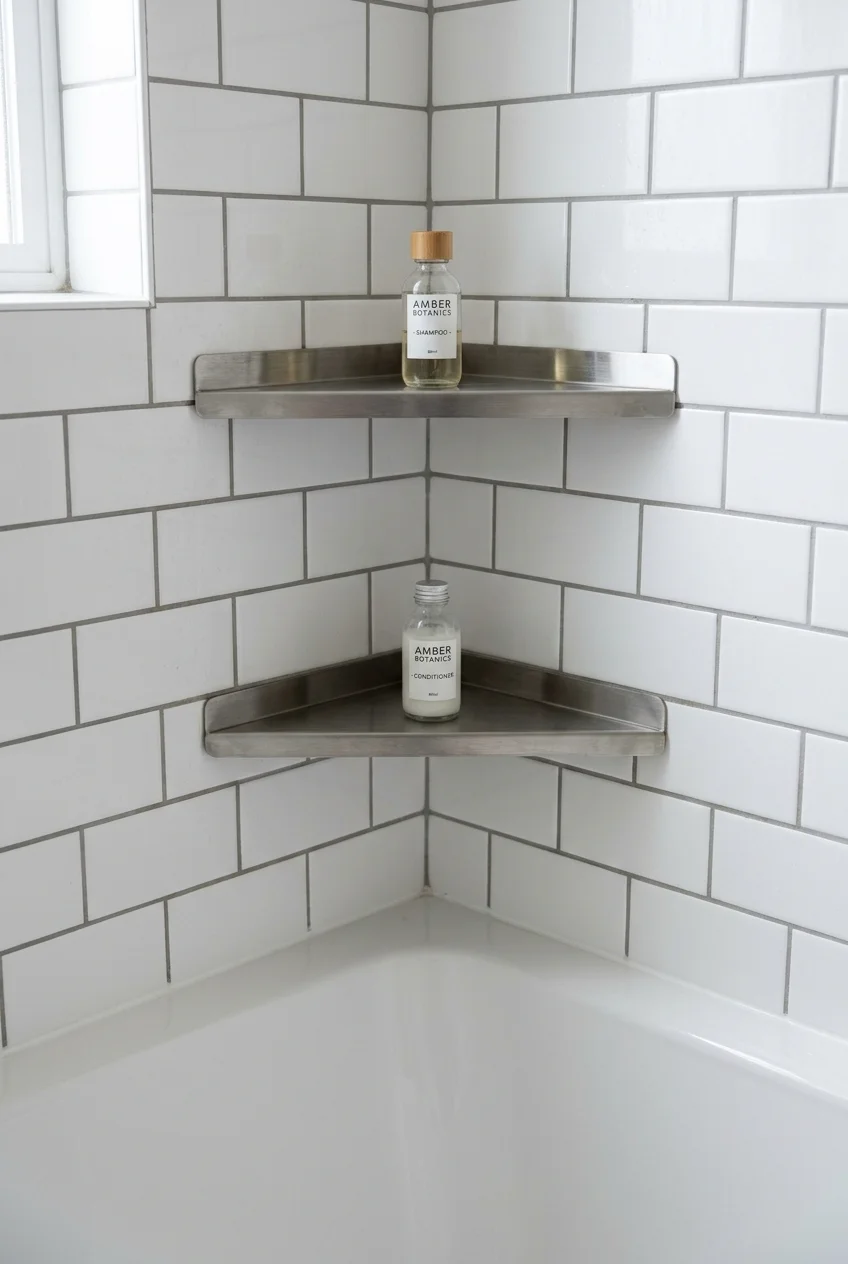
Corner shelves can add storage when the surround is staying intact. Choose a system designed for retrofit installation rather than improvising a shelf attachment.
Some products fit into suitable grout joints; others use specified adhesive or fasteners. Check compatibility with the actual tile, joint dimensions, and waterproofing assembly.
Place shelves outside your normal shoulder and elbow path. Two shallow shelves with useful spacing may work better than a crowded tower of small ledges.
Practical tip Test bottle placement with paper shelf outlines first. Include the pump overhang and your hand movement so a shelf does not become a daily obstruction.
33. Mount Dispensers Where They Do Not Block Movement
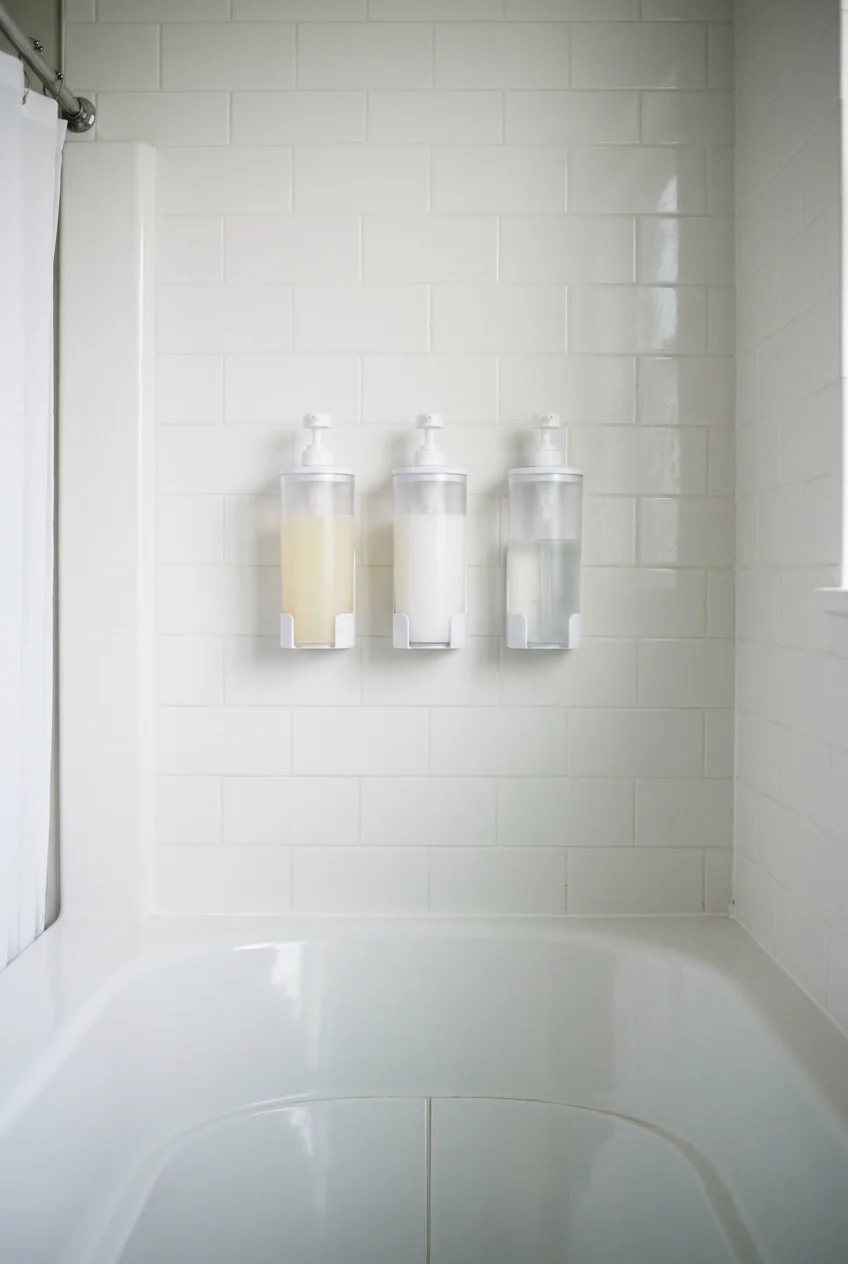
Wall dispensers reduce the number of bottles on the tub rim. They are useful when everyone uses a small, consistent set of refillable products.
Check which liquids the dispenser accepts and how it refills before choosing one. Very thick products and frequent product changes can make a neat-looking system frustrating.
Follow the mounting requirements for the exact model and surface. Position the pumps within comfortable reach while leaving the shower control and grab area unobstructed.
34. Give Bath Toys a Draining Home
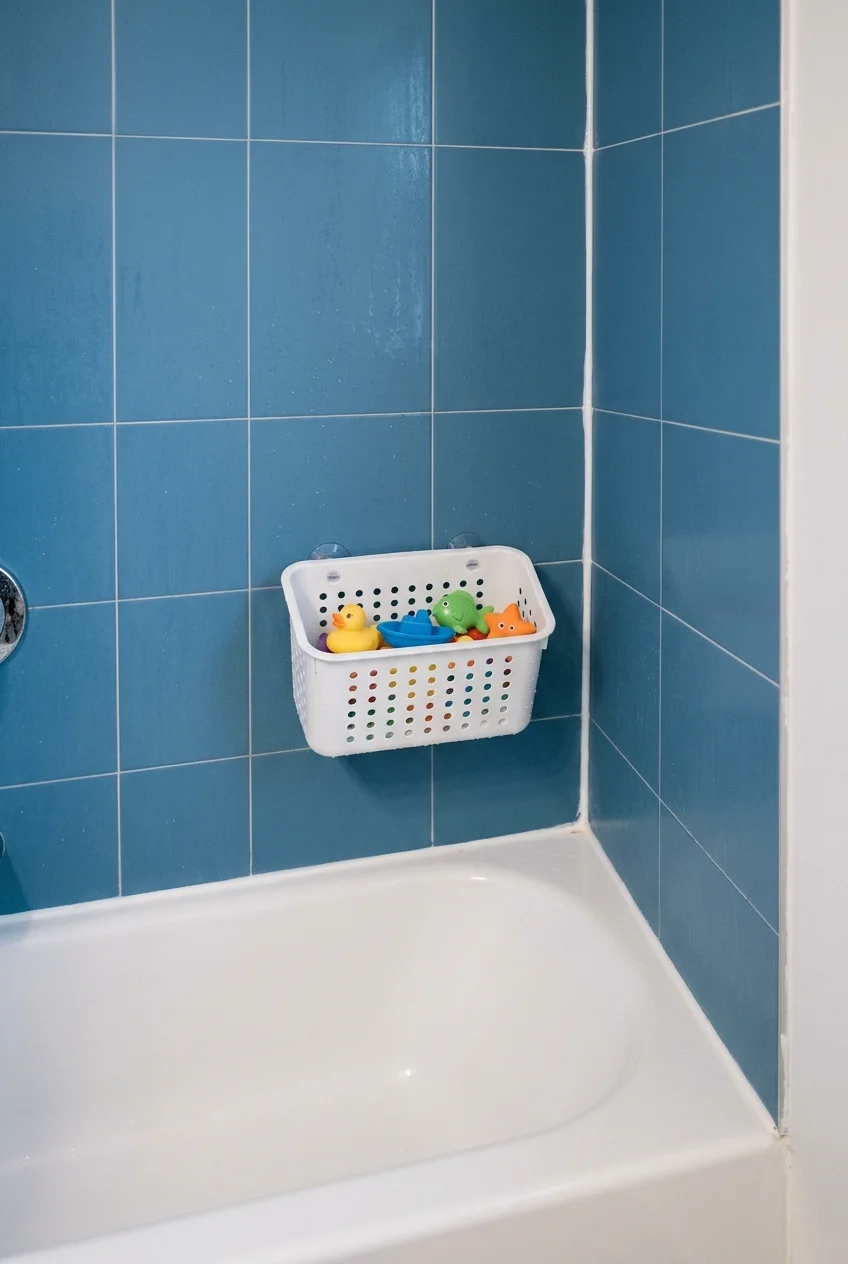
A removable draining basket keeps toys together after bath time without turning the rim into storage. Choose a position that leaves the tub entry open.
Use the mounting method approved for the basket and wall surface, then respect its load limit. Empty and clean the basket regularly rather than trapping wet toys.
Store only what can dry between uses and inspect toys for retained water. A smaller rotating collection is easier to manage than a basket packed tightly.
35. Put Towels in a Cabinet Outside the Spray Zone
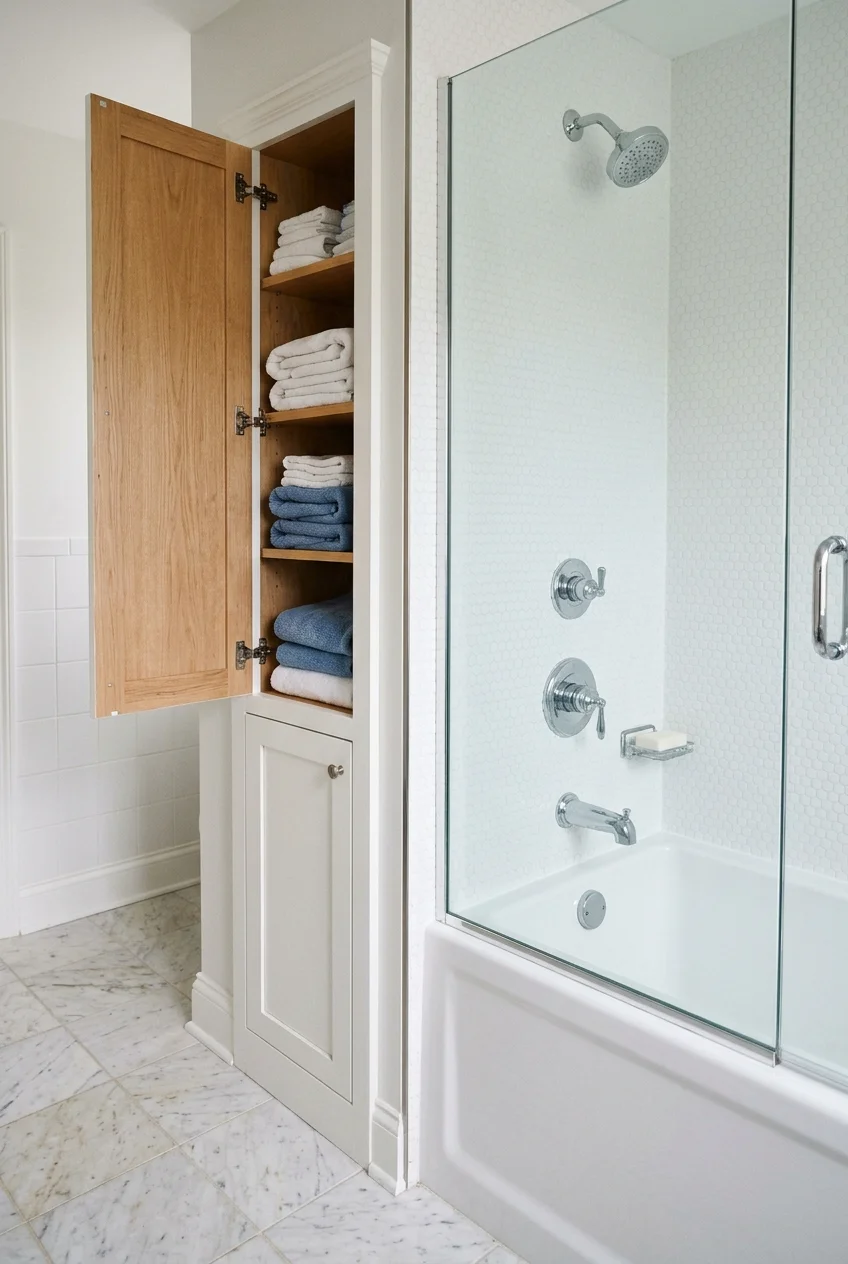
A narrow cabinet beside the tub can keep towels close without putting them on shower shelves. Position it beyond the enclosure and expected splash area.
Check door and drawer movement against the tub screen and bathroom entry. A cabinet that fits the gap is not useful if its storage cannot open.
For additional storage beyond the wet area, compare these small bathroom storage ideas and choose a layout that keeps the route to the tub clear.
36. Give a Squeegee Its Own Reachable Hook
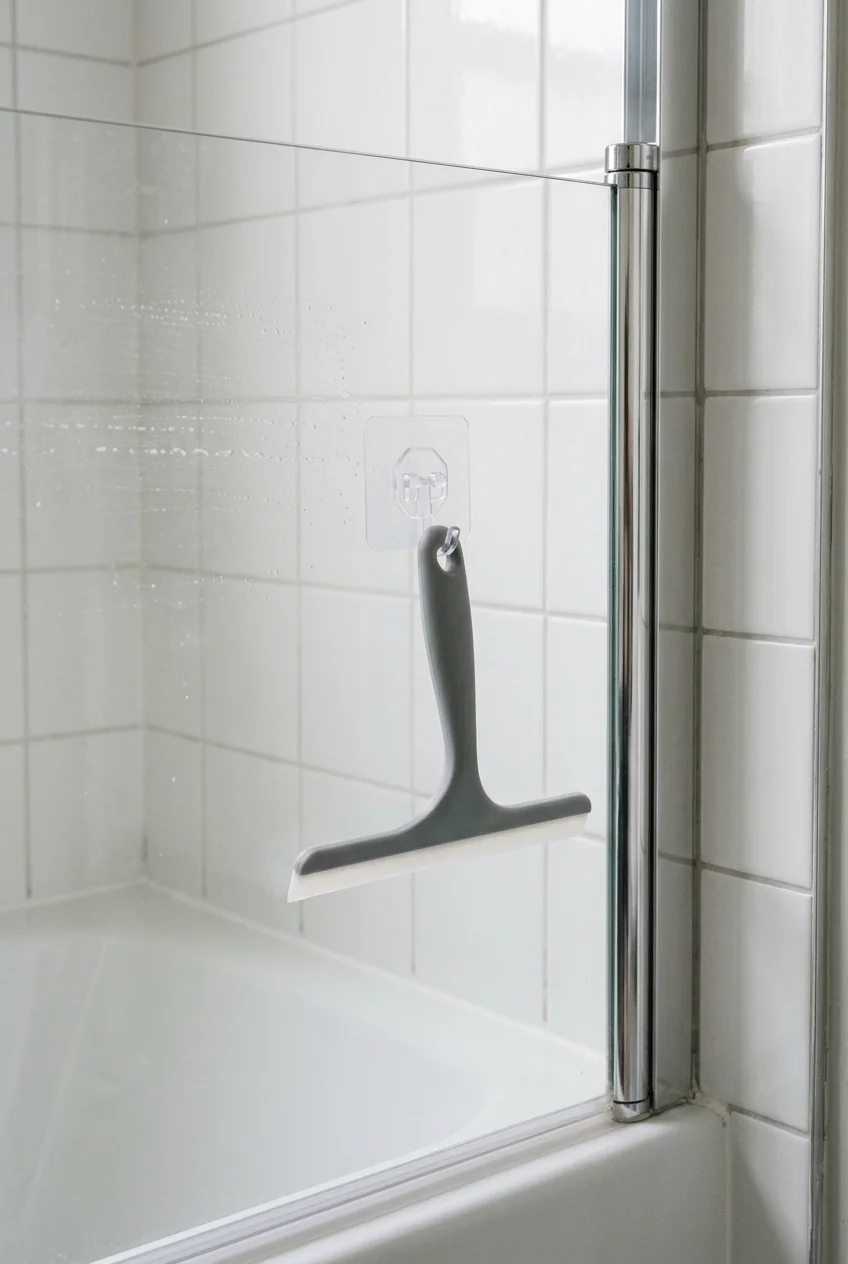
A simple cleaning tool is more likely to be used when it has a reachable home. Put its hook where it does not interrupt the glass opening.
An OXO silicone-blade squeegee provides one option. Choose a compatible holder for your surface, and follow the enclosure maker’s cleaning instructions for any glass coating.
Keep the blade off the tub floor and rinse it after use. A squeegee can help remove droplets, but it does not replace periodic cleaning.
Make the Shower Easier to Use
A fixture upgrade should improve an actual routine, such as rinsing, adjusting spray height, or reaching controls. Coordinate the visible choices with the plumbing behind them.
37. Put a Handheld Shower on an Adjustable Rail
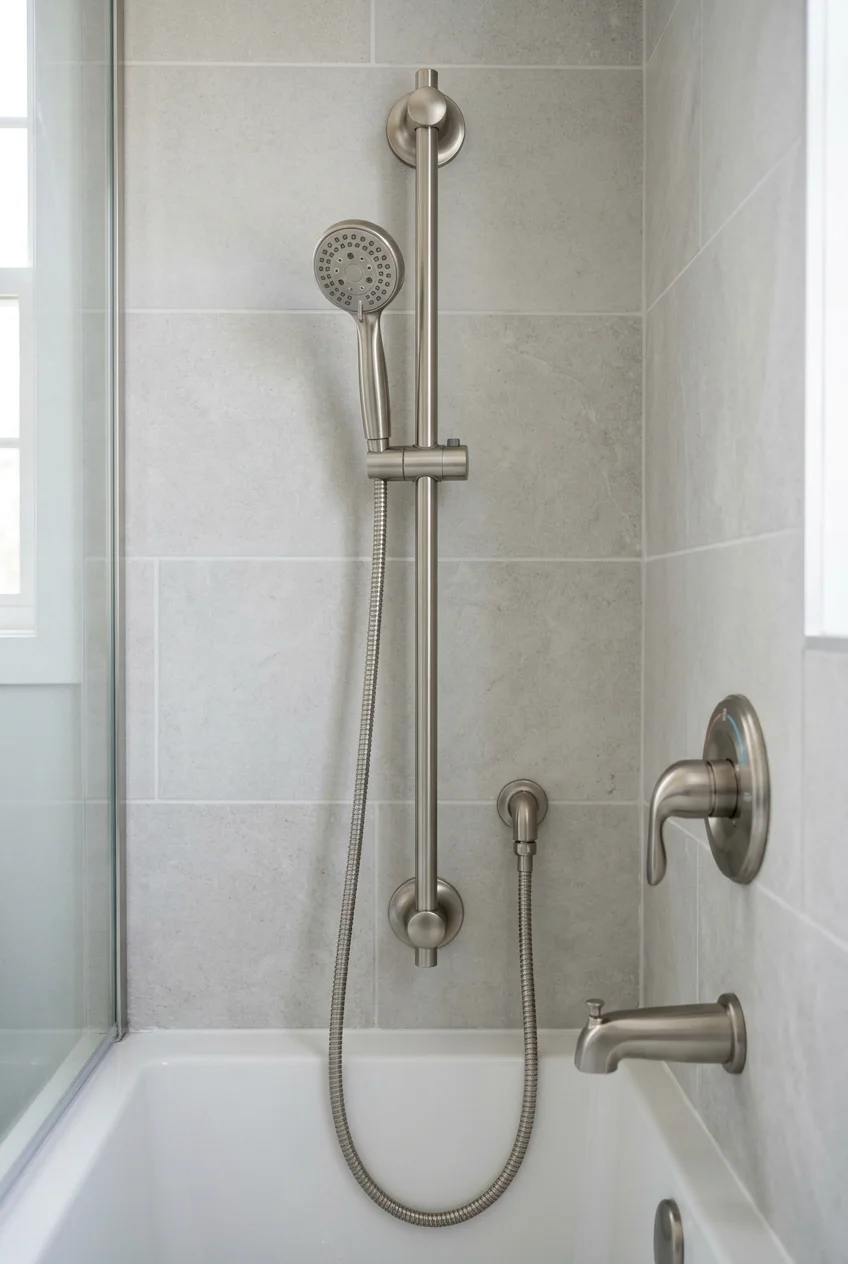
A slide rail lets different users set the handheld at a comfortable height. It is especially useful when one fixed showerhead position cannot serve everyone well.
Plan the rail around the control, hose, and shelf positions so those parts do not collide. Check that the holder adjusts without an awkward reach.
The mounting points need the support and sealing required by the chosen system. A slide rail is not a grab bar unless specifically rated for that purpose.
- Confirm hose reach without stretching across the entry.
- Check the holder position at its highest and lowest settings.
- Keep the hose away from sharp trim or obstructing fittings.
Choose the handheld and holder together when possible. An attractive replacement head may not sit securely in a rail cradle designed around another connection or handle.
38. Center an Overhead Spray Over the Standing Area
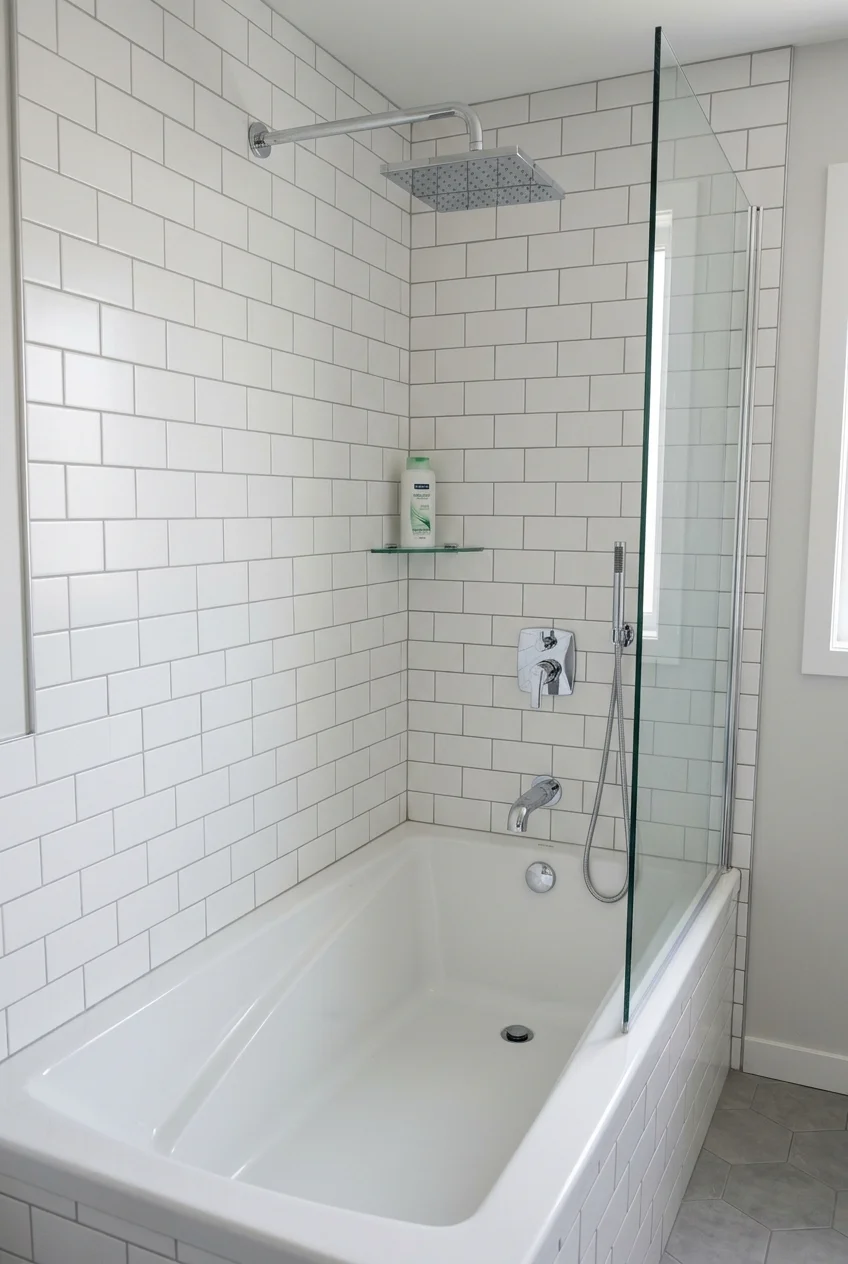
A longer wall arm can place an overhead shower farther into the tub’s standing zone. The important relationship is spray position, not the showerhead’s diameter.
Choose the arm and head as a supported, compatible assembly. Ask the plumber to check leverage at the wall connection rather than adding a heavy head indiscriminately.
Test the planned position against the tub’s slope, enclosure, and user height. Standing too close to a sloping backrest can make a beautiful spray position impractical.
Practical tip Keep a handheld if targeted rinsing is part of your routine. A broad overhead spray does not perform every task comfortably, especially when cleaning the tub.
39. Separate Temperature Adjustment From Water Volume
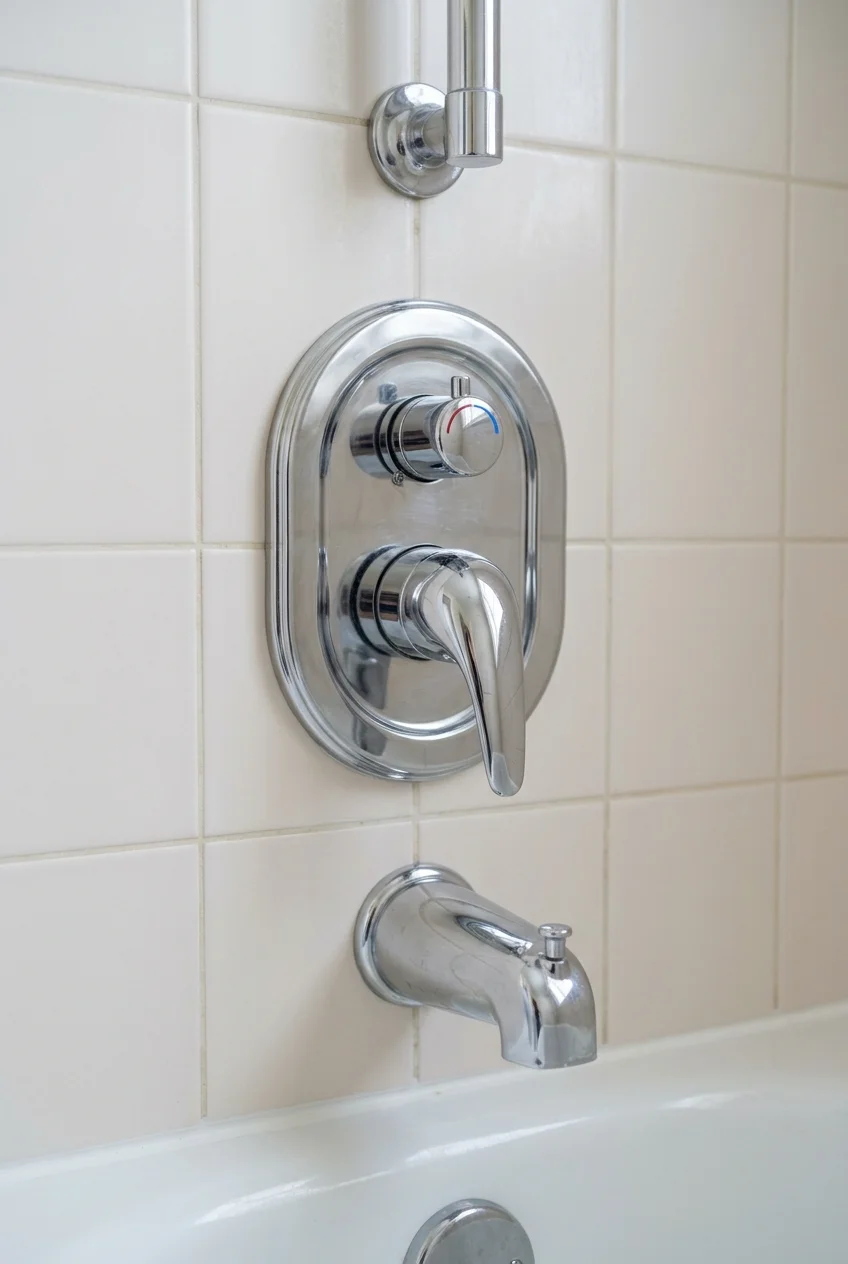
Separate temperature and volume controls let you adjust the amount of water without deliberately changing the temperature setting. Compare that function before choosing the visible trim.
Dual-function pressure-balanced and thermostatic systems are different options, with compatibility determined by the valve. Two visible handles alone do not identify what a system actually does.
Have the plumber confirm the rough-in, trim, tub-filling arrangement, and temperature limit adjustment together. A new faceplate cannot add functions the installed valve does not support.
- Choose the control functions you want for daily use.
- Confirm the compatible valve and tub spout requirements.
- Coordinate access and wall work before the surround is finished.
This upgrade makes most sense when the wall is already open or the existing valve supports compatible trim. Otherwise, compare the benefit with the required disruption.
40. Move the Control Toward the Open Entry
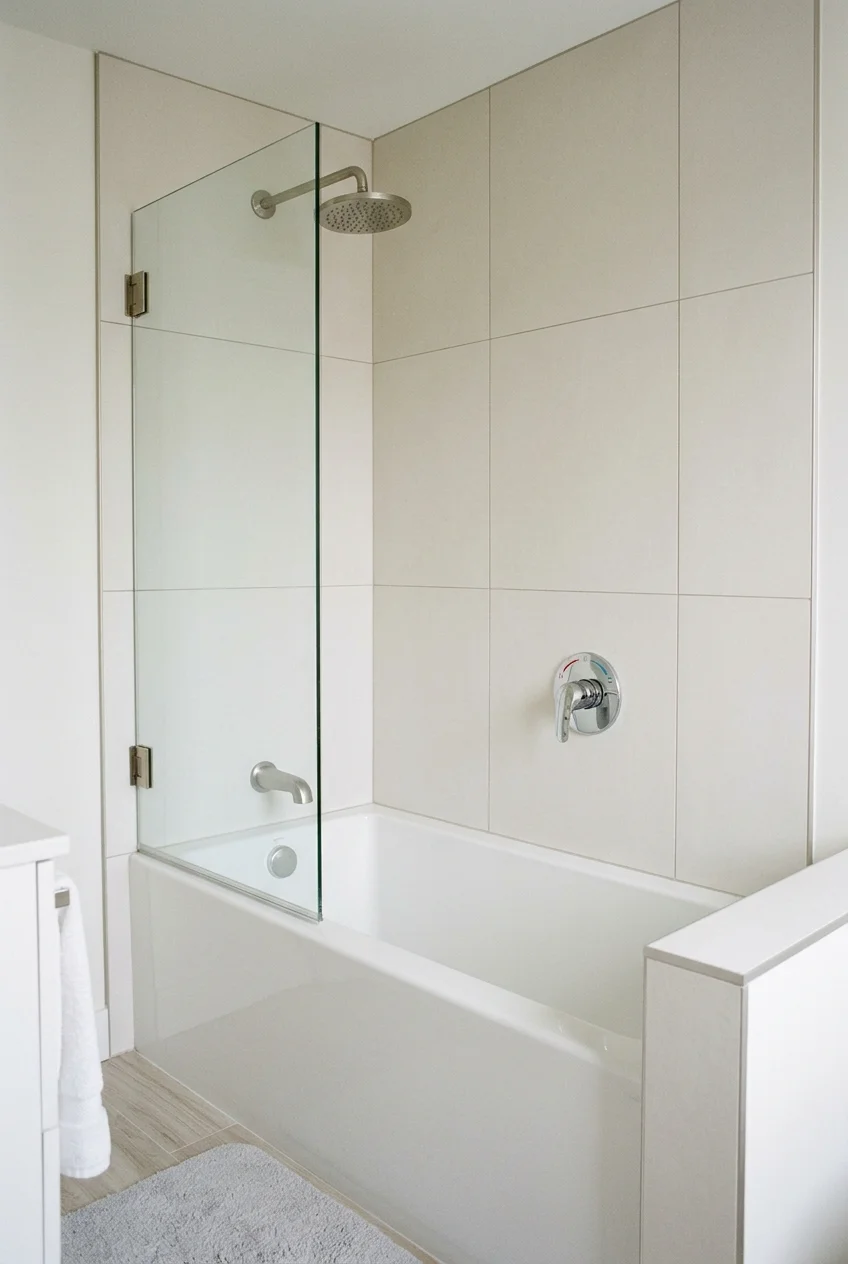
An entry-side control can let you start the water before stepping under the spray. It is worth considering when the plumbing wall is being rebuilt.
The new position must work for showering and tub filling, not only the first reach. Have the plumber design the routing and confirm the selected valve’s requirements.
Check the reach with the actual glass or curtain position. A control beside the entry loses its advantage if a fixed panel blocks your hand.
Mark the proposed control and spout locations on a measured drawing. Review how they relate to bathing, cleaning, storage, and any planned support bars before construction.
Practical tip Keep the control visually distinct from a niche or dark accent stripe. Clear placement helps users find it without adding labels across the tiled wall.
41. Coordinate Real Grab Bars With the Tub Finish
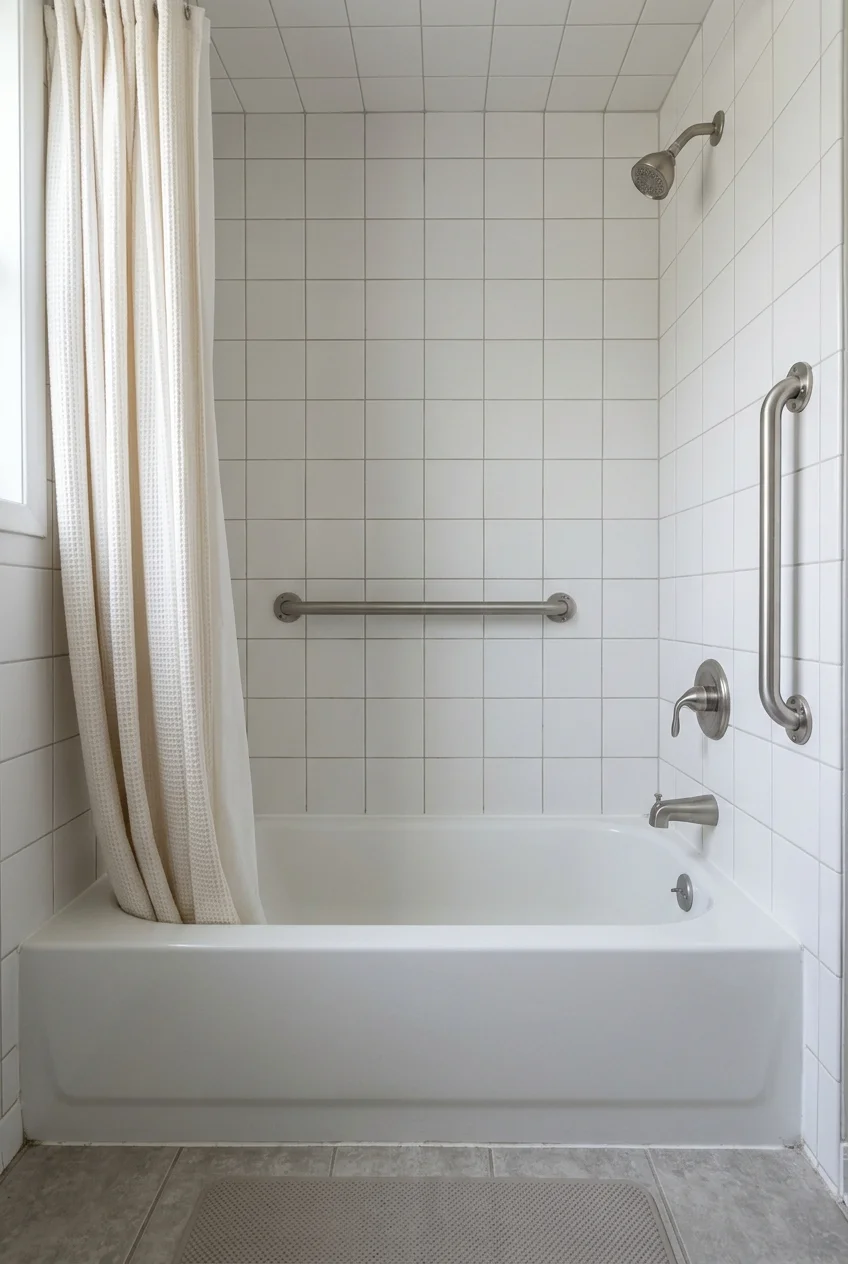
Purpose-designed grab bars can look intentional when their finish relates to the shower fittings. Plan their locations for the user’s movements before the wall is closed.
The mounting system must suit the wall construction and the product instructions. Tile, adhesive hooks, and ordinary towel bars cannot be assumed to provide support.
Ask the installer to resolve backing, fastening, and sealed penetrations as part of the surround assembly. Keep the intended grip areas clear of bottles and screen hardware.
- Choose bars rated for their intended support use.
- Review positions with the person who will use the tub.
- Check the opening and reach with the enclosure installed.
Pair this planning with a tub surface appropriate for bathing and showering. A textured appearance alone does not establish slip performance, and support bars do not remove the step.
Practical tip If stepping over the tub is already difficult, assess the whole bathing setup before committing to a remodel. A matching finish should follow the user’s practical needs.
42. Light the Alcove and Plan Ventilation Together
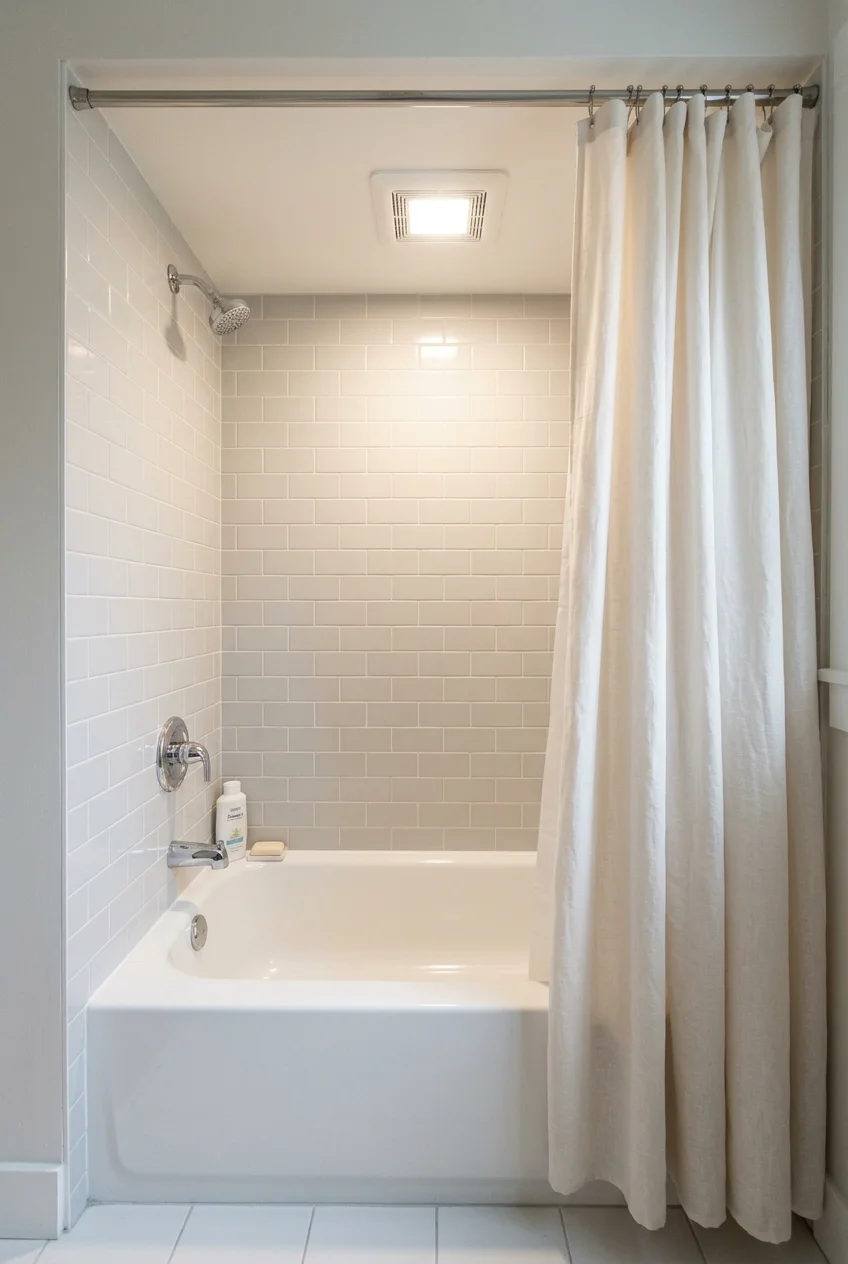
A curtain can leave the tub darker than the rest of the bathroom. Lighting within the alcove makes the bathing zone easier to see.
Select equipment listed for its precise location and follow its electrical protection requirements. A bathroom label alone does not establish suitability directly over a tub.
A compatible fan-and-light arrangement can combine functions, but the ventilation still needs suitable sizing and ducting. Have those details checked instead of choosing by appearance alone.
Place the light to reveal the control and tub edge without creating harsh glare on glass. Keep the grille accessible for cleaning after the enclosure is installed.
Practical tip Compare tile samples under the lighting you plan to use. A warm lamp can change pale gray tile enough to alter your grout choice.
43. Detail an Existing Window as Part of the Wet Wall
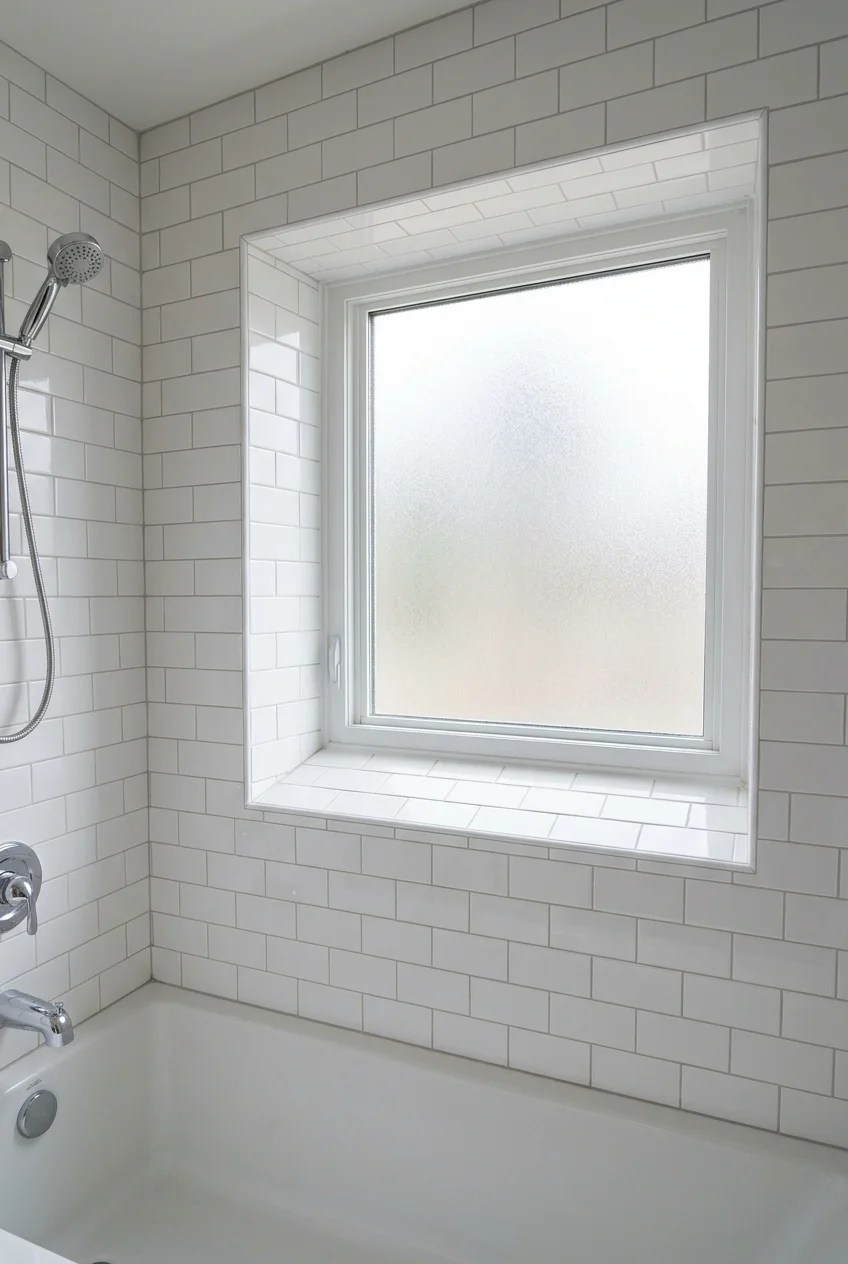
A window can bring light into the tub alcove, but its surround becomes part of the wet-area design. Treat the sill and frame junctions deliberately.
Have the installer assess waterproofing, frame suitability, and drainage toward the tub. New tile around an unsuitable or leaking window does not solve the underlying problem.
Discuss privacy glazing and any applicable safety-glazing requirements with the window professional. Avoid relying on a decorative shade that will sit in the spray.
Keep bottles off the sill if you want the light and clean outline to remain visible. A nearby niche can take over storage without covering the window.
Choose the Tub Shape Around the Room
Replacing the tub changes more than its appearance. Compare the rim, interior standing area, drain position, and enclosure requirements alongside the space available around it.
44. Compare Lower-Rim Tubs for a Smaller Step
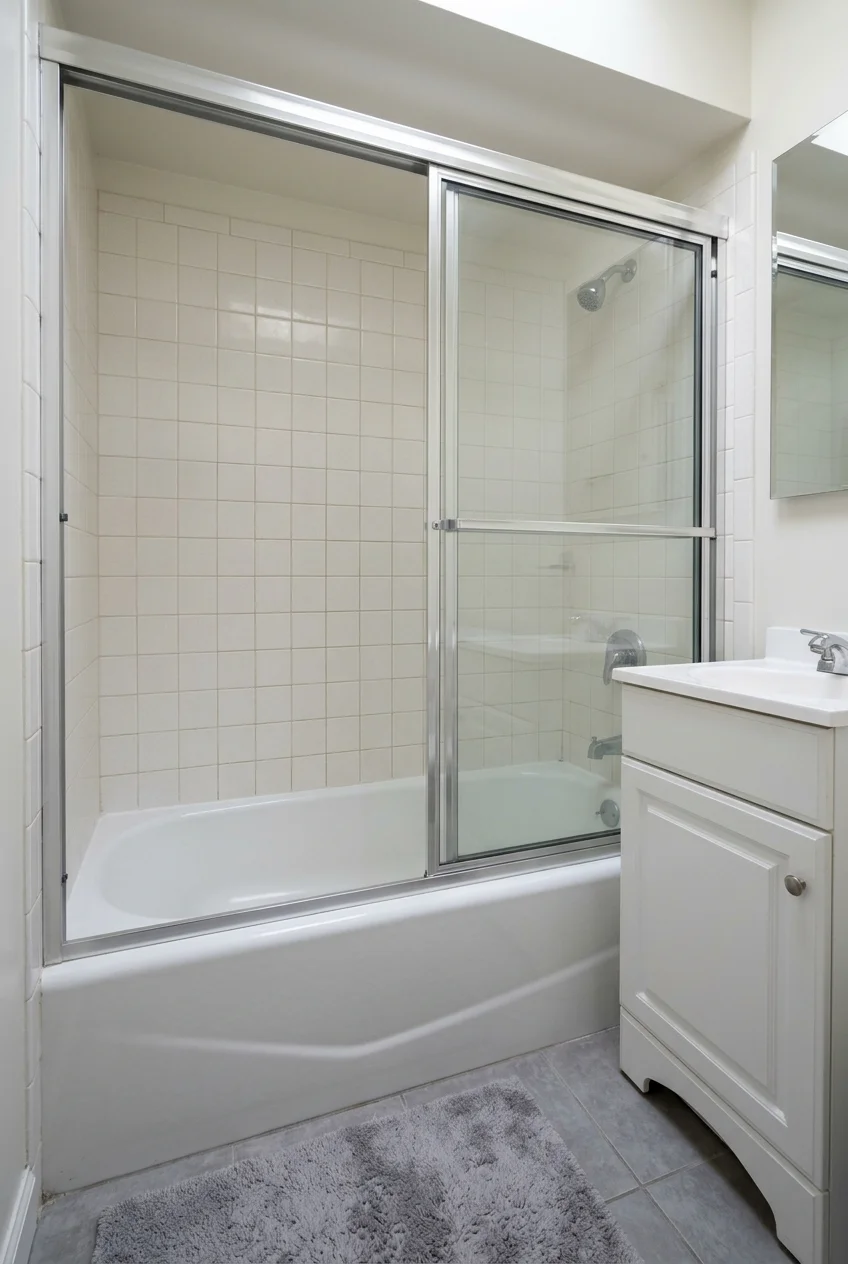
A lower tub rim may reduce the height you step over, but the interior depth and floor relationship matter too. Compare actual installed dimensions.
Review the tub’s specified support, drain assembly, and enclosure compatibility before ordering. A lower-looking product photograph cannot tell you how the finished installation will feel.
Try a full-size showroom example if possible, or make a careful measured comparison. Include any planned grab bars and the opening created by the enclosure.
A lower rim still requires a step over the side. If easier entry is the main goal, evaluate whether retaining a tub suits the user at all.
If you are weighing the tub against other bathing layouts, review these shower remodel ideas before committing to a replacement that keeps the same entry challenge.
45. Choose a Deeper Bath That Is Also Designed for Showering
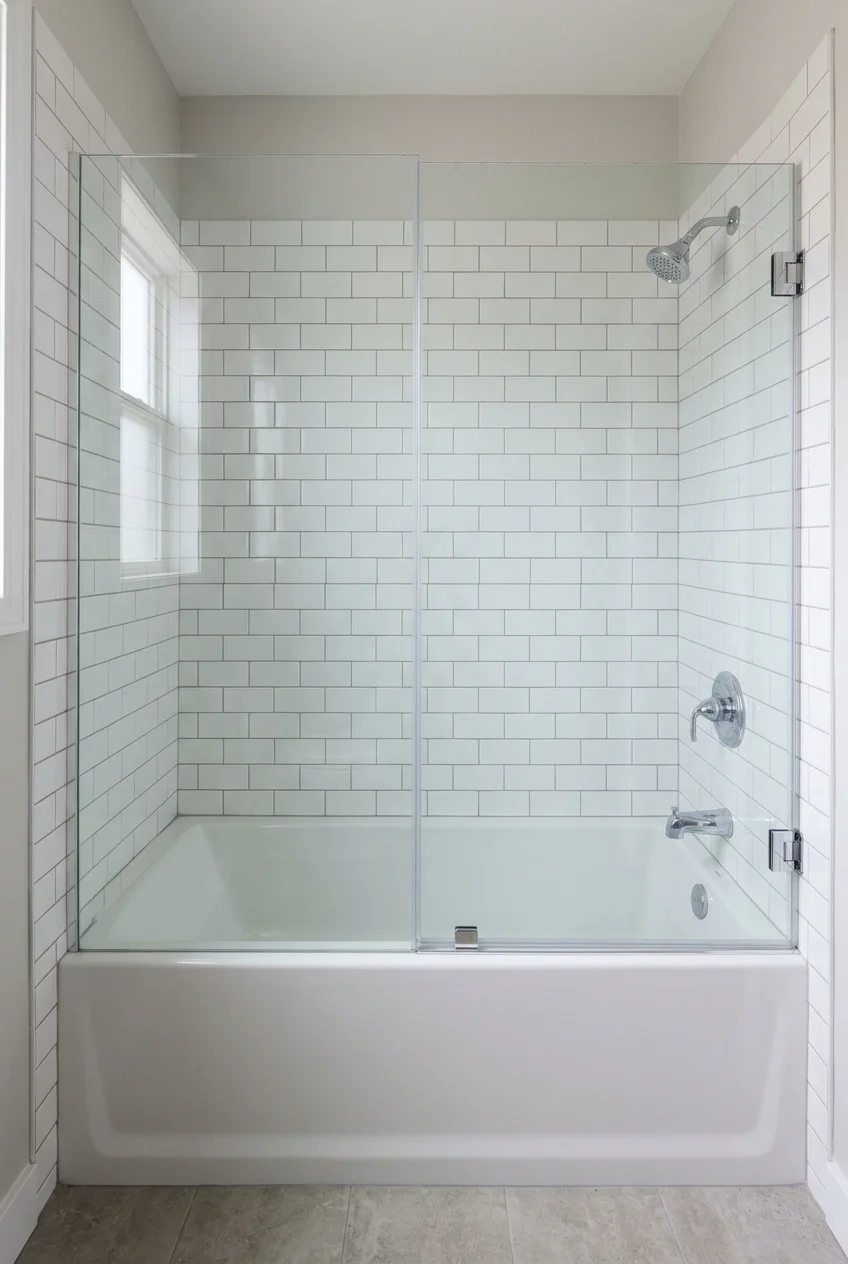
A deeper tub can improve soaking within an alcove footprint, provided the model is designed for a shower installation. Do not choose depth from exterior height alone.
Compare the manufacturer’s water depth, interior shape, overflow position, and standing area. A tub that feels comfortable seated may have limited flat space for showering.
- Confirm the flange and approved surround details.
- Review the filled installation load with the appropriate professional.
- Check hot-water capacity and drain compatibility.
- Compare entry height with the intended users.
Choose the enclosure at the same time, since a deeper tub may change glass height and access. Keep controls reachable from both standing and bathing positions.
If your interest is a separate soaking tub within a larger waterproofed zone, that is a different layout. Do not substitute a freestanding bath into this alcove detail.
For that larger alternative, compare tubs inside walk-in shower layouts while keeping their drainage and floor-space requirements separate from a standard alcove remodel.
46. Choose a Straight Apron to Protect a Narrow Walkway
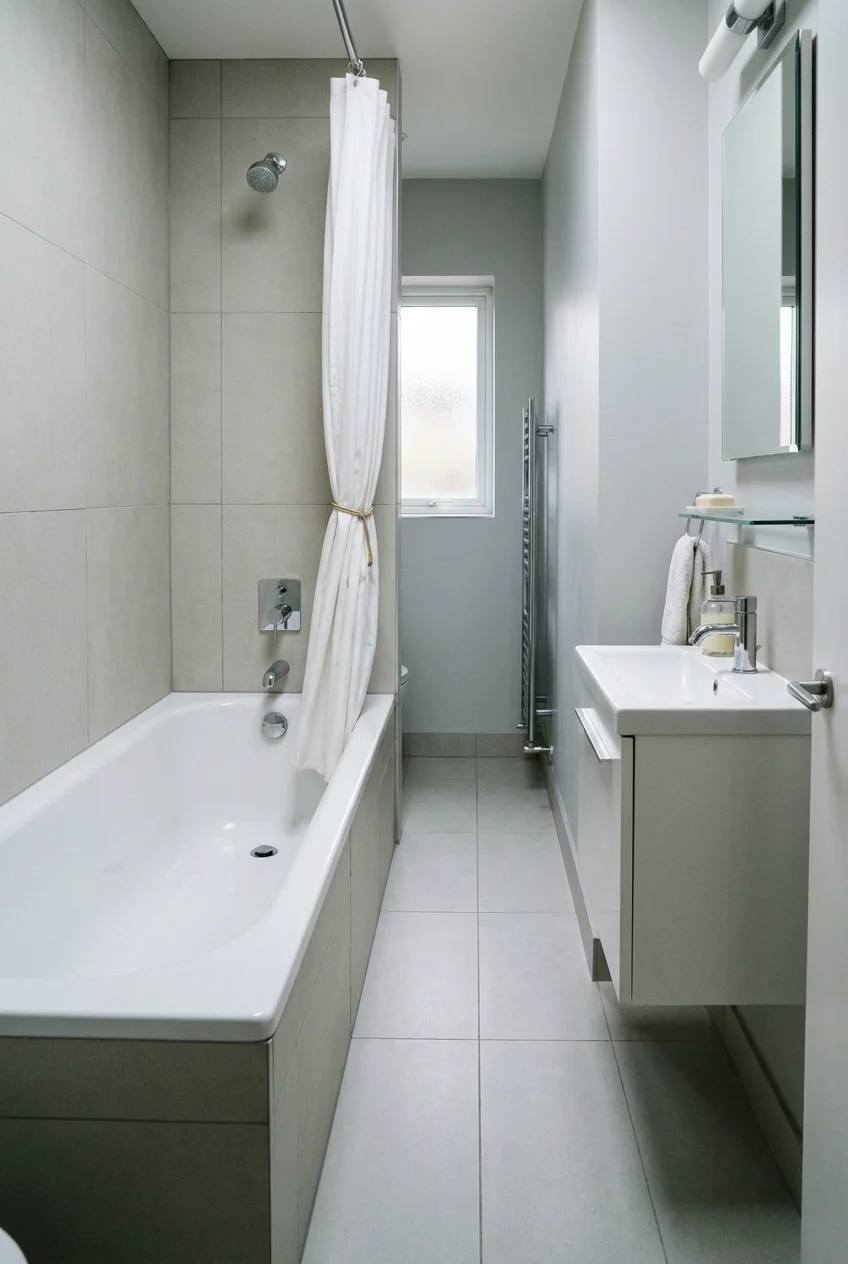
In a tight bathroom, a straight tub front can preserve space beside the vanity or toilet. Compare actual exterior widths rather than relying on nominal lengths.
The interior also matters: a narrower shell can reduce comfortable standing room. Review the tub’s internal dimensions and backrest shape alongside the walkway you gain.
Check local fixture clearances and the enclosure opening with your designer or installer. Saving a little floor space should not create an awkward or noncompliant bathing arrangement.
A curtain can keep the opening flexible when a glass door would crowd the same narrow area. Choose it with the users and cleaning routine in mind.
47. Try a Bowed Apron Only Where the Room Can Spare Space
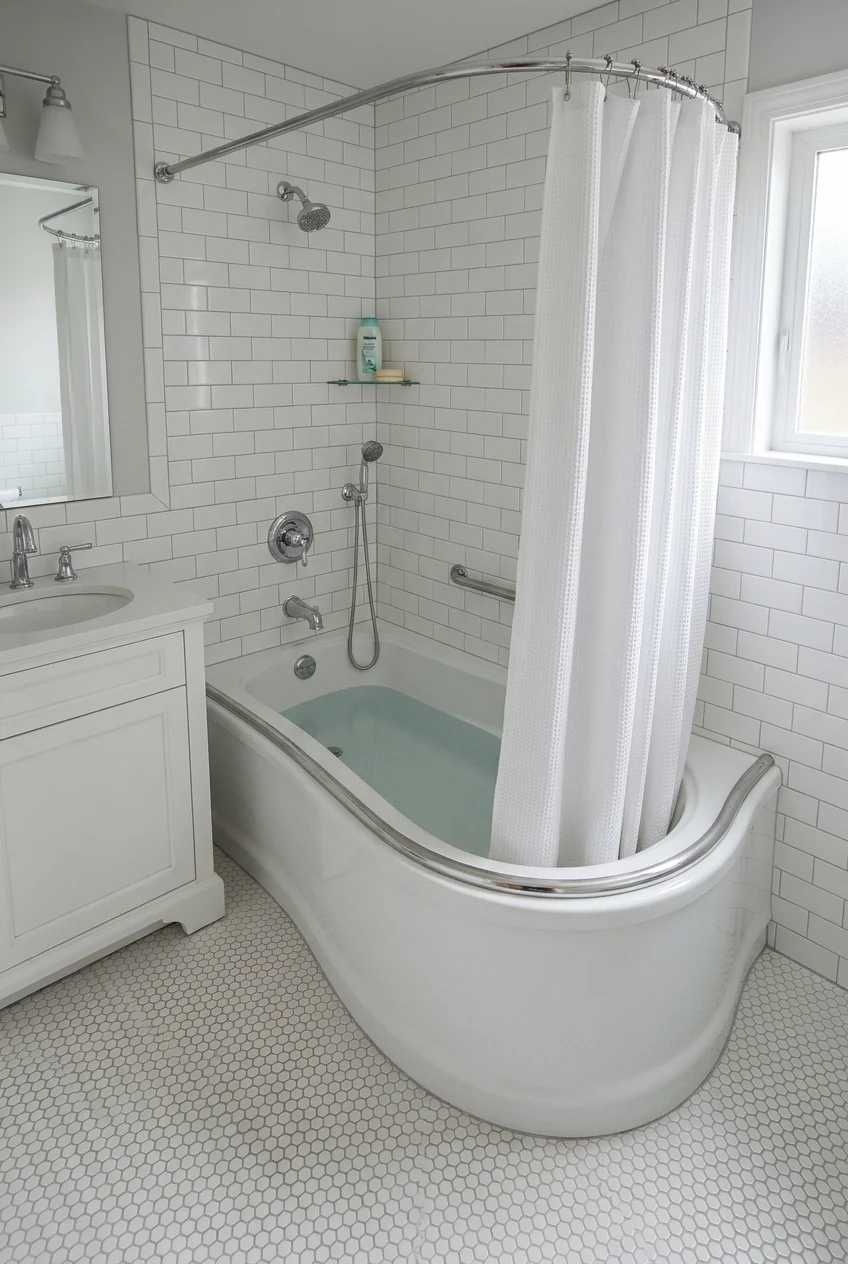
A tub with a curved front can provide a different bathing shape while using a familiar alcove position. Its outward projection still affects the bathroom walkway.
Review the exact model drawing and compatible enclosure choices. A straight glass door may not suit a curved rim, and matching systems can have specific requirements.
Compare the widest point against the toilet, vanity, and bathroom door. More room inside the tub is a poor exchange if getting past it becomes uncomfortable.
Watch for A curved curtain rod and a curved tub are separate choices. Combining both can push the bathing zone farther into the room than expected.
48. Wrap a Shower-Approved Built-In Tub With a Tiled Apron
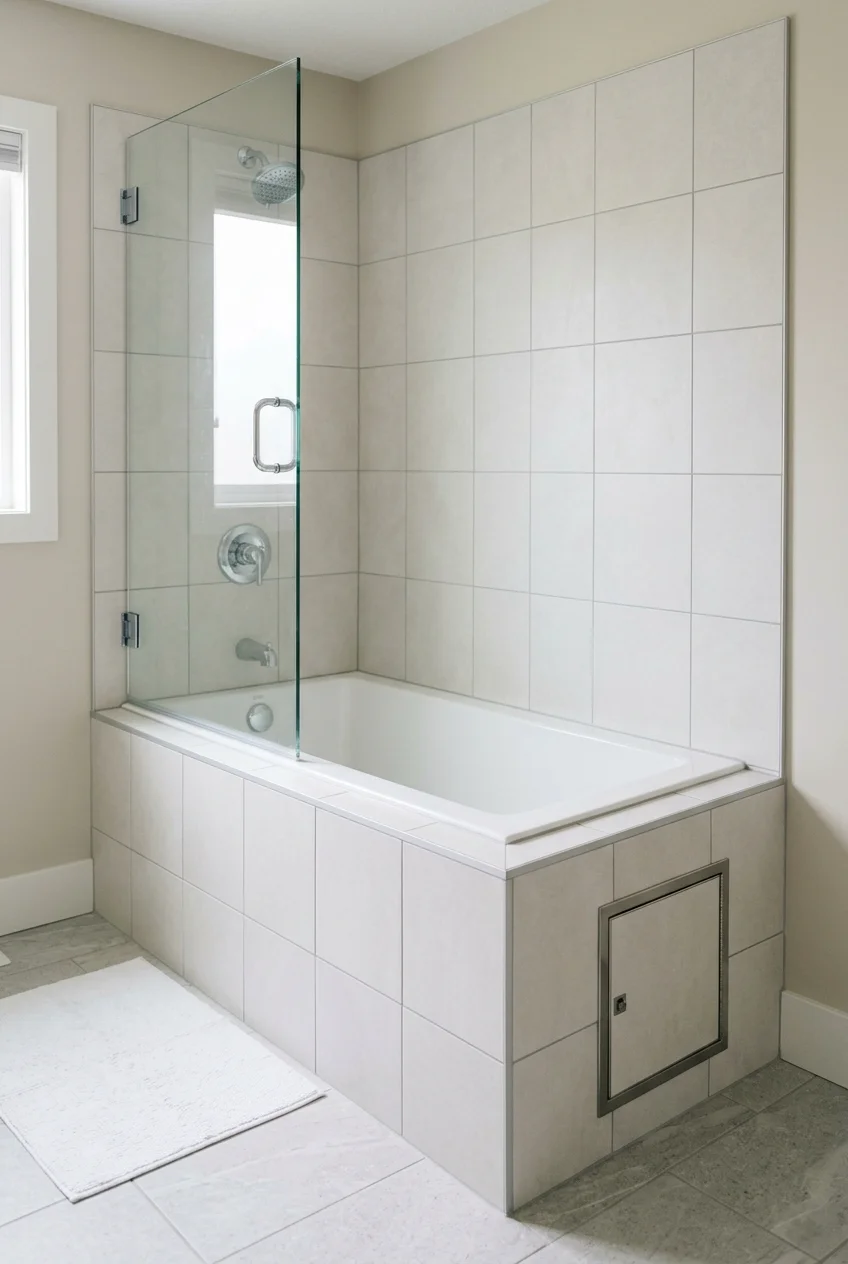
A tiled apron can make the tub look integrated with the surround. It requires a bath and installation detail suitable for the combined shower use.
Do not assume a drop-in soaking tub accepts a shower simply because tile surrounds it. Confirm the flange or approved water-management arrangement with the manufacturer.
Keep the deck proportionate and avoid a wide horizontal shelf that catches spray. The deck, rim, wall, and apron junctions need coordinated waterproofing details.
- Select the tub and verify its shower installation requirements.
- Design the support, deck, and service access before tiling.
- Coordinate apron cuts with the surround and adjacent flooring.
Use a simple apron pattern if the shower wall already carries detail. Where service access is required, plan it visibly or discreetly according to the equipment instructions.
This approach adds construction complexity compared with an integral apron tub. Choose it for a specific integrated appearance, with the extra joints and maintenance understood.
49. Place the Alcove Across the End of a Galley Bathroom
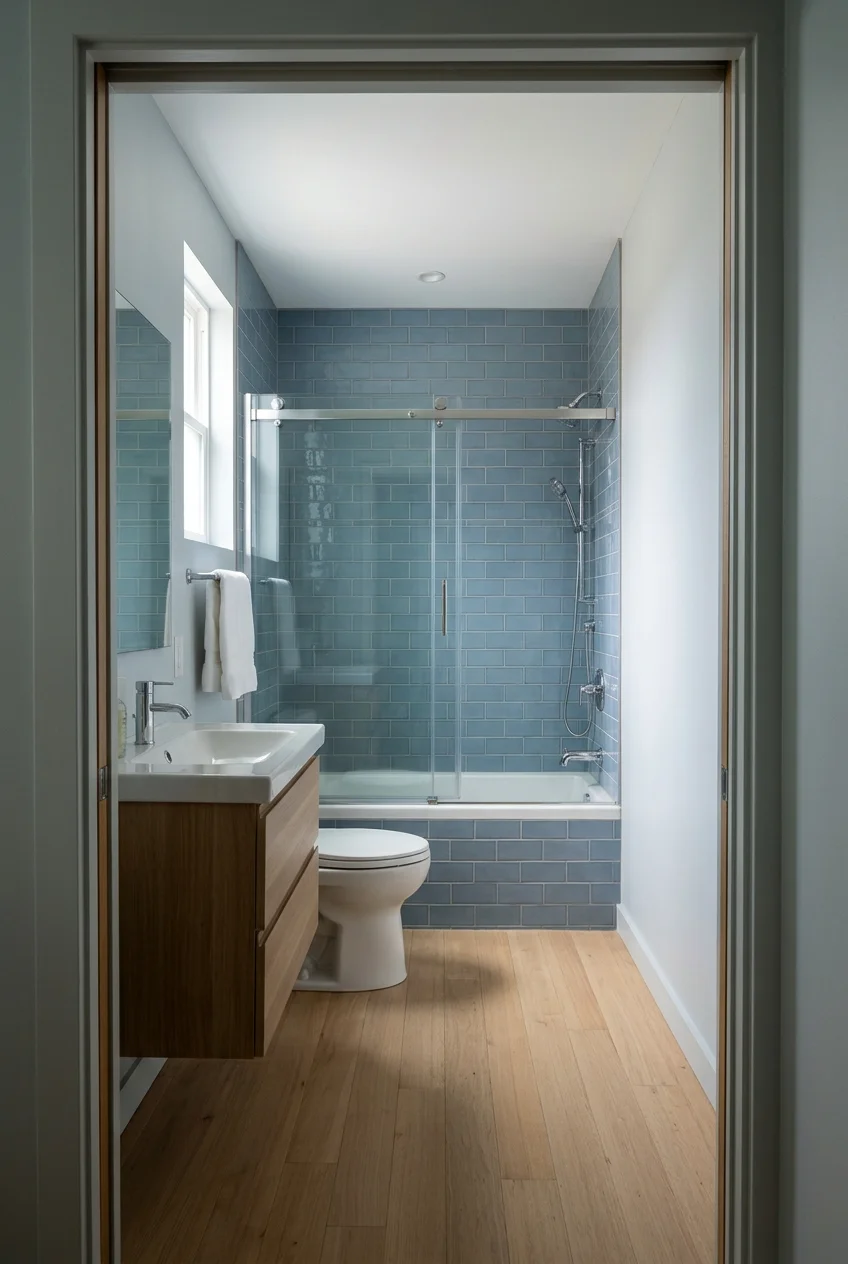
Running the tub across the far end can give a narrow bathroom a clear destination. The vanity and toilet then line the approach without dividing the bathing zone.
This works only when the room width and fixture clearances support it. Keep measured dimensions and actual enclosure access ahead of a symmetrical-looking inspiration photo.
Use one continuous wall treatment around the end alcove to hold the view together. A clear enclosure can reveal that full width from the doorway.
Before moving a tub, compare the plumbing and structural work with keeping its current location. A strong visual arrangement is only useful when the plan is feasible.
- Check the full route from doorway to tub entry.
- Include vanity drawers and the bathroom door in clearance drawings.
- Keep towel storage outside the approach and glass opening.
50. Put the Shower at the Tall End Beneath a Sloped Ceiling
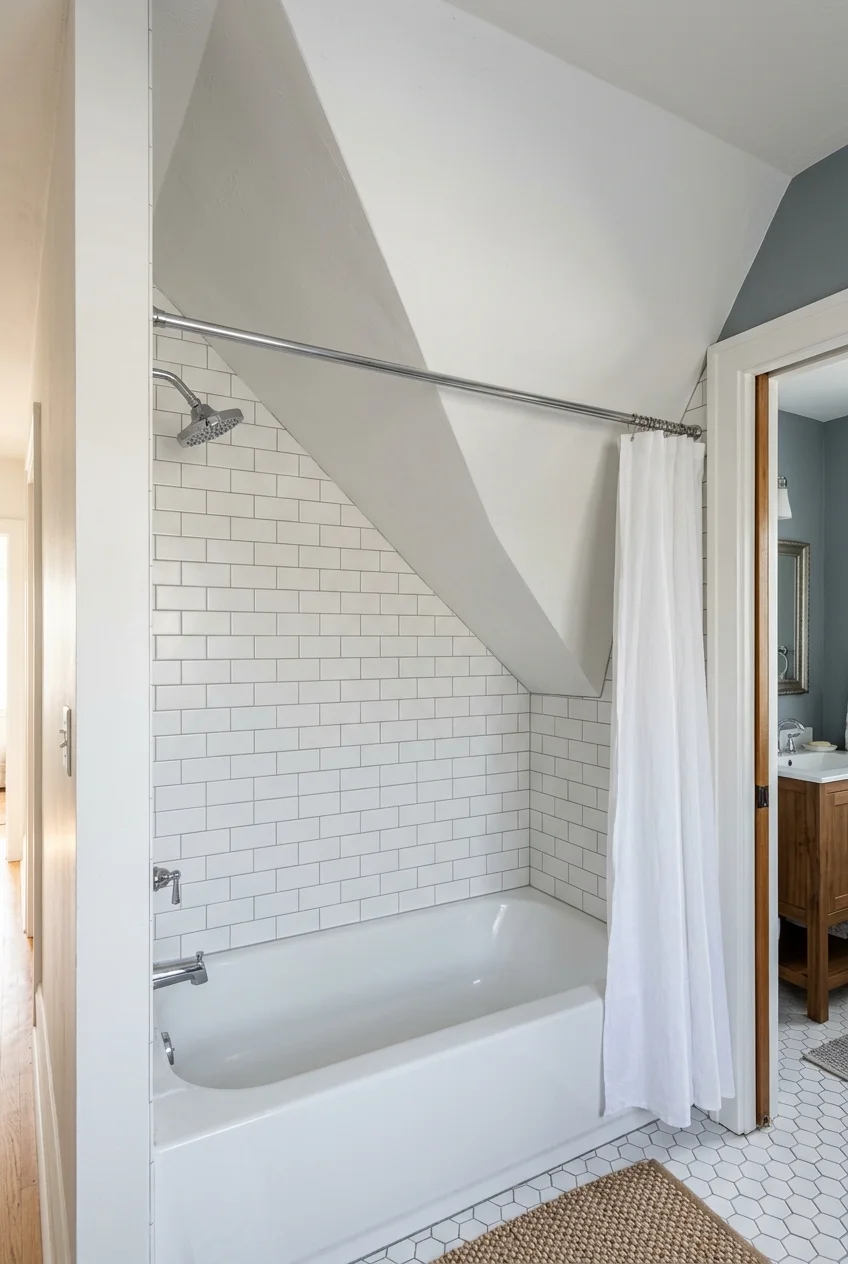
A sloped ceiling can make an upstairs tub alcove workable for bathing while complicating standing use. Position the shower where the available height is greatest.
Verify required headroom, fixture clearances, structure, and ventilation with the project professionals. A tub fitting beneath the roof slope does not prove the shower can fit there.
Check the user’s actual standing position inside the basin, not just the height at the tub edge. A sloping backrest may move that position inward.
Choose enclosure hardware that works with the ceiling geometry. A curtain or custom glass may be possible, but each needs its own support and water-containment plan.
If the tall area is still insufficient, reconsider the layout. Do not angle the showerhead into a cramped corner merely to preserve an attractive bathtub position.
Frequently Asked Questions
Can I replace the surround without replacing the bathtub?
Sometimes, if the tub is sound and its flange and connections can be integrated with the new assembly. Have the exposed conditions assessed before proceeding.
Replacing tile or panels can reveal damage that changes the scope. Keep the decision conditional until the installer can evaluate the tub and surrounding construction.
Does a glass tub screen work better than a curtain?
It depends on the task. Glass keeps tile visible, while a curtain can offer a wider opening and fewer permanent obstacles for assisted bathing.
Compare splash containment, cleaning access, and the actual entry width. A partial screen is less enclosing than full doors, so shower placement matters more.
Are tile and grout enough to waterproof a tub shower?
No. A tiled tub shower needs an appropriate water-management assembly behind the finish, with the tub connection, corners, fixtures, and recesses detailed as a system.
Ask the installer which assembly will be used and follow its manufacturer’s instructions. Surface sealant maintenance matters, but it cannot correct a missing waterproofing connection.