60 Builder Grade Kitchen Makeover Ideas That Look Considered

This post may contain affiliate links: full affiliate disclosure.
A builder-grade kitchen can function well while still feeling unfinished. The best makeover keeps useful parts, then changes the details that dominate the view.
Start with one visual problem and one daily frustration. These ideas range from reversible styling to cabinet refacing, with practical checks beside larger projects.
This article contains affiliate links. If you buy through them, we may earn a commission at no extra cost to you.
Fast Visible Upgrades Without Rebuilding the Kitchen
1. Clear the Counters, Then Return Only One Working Group
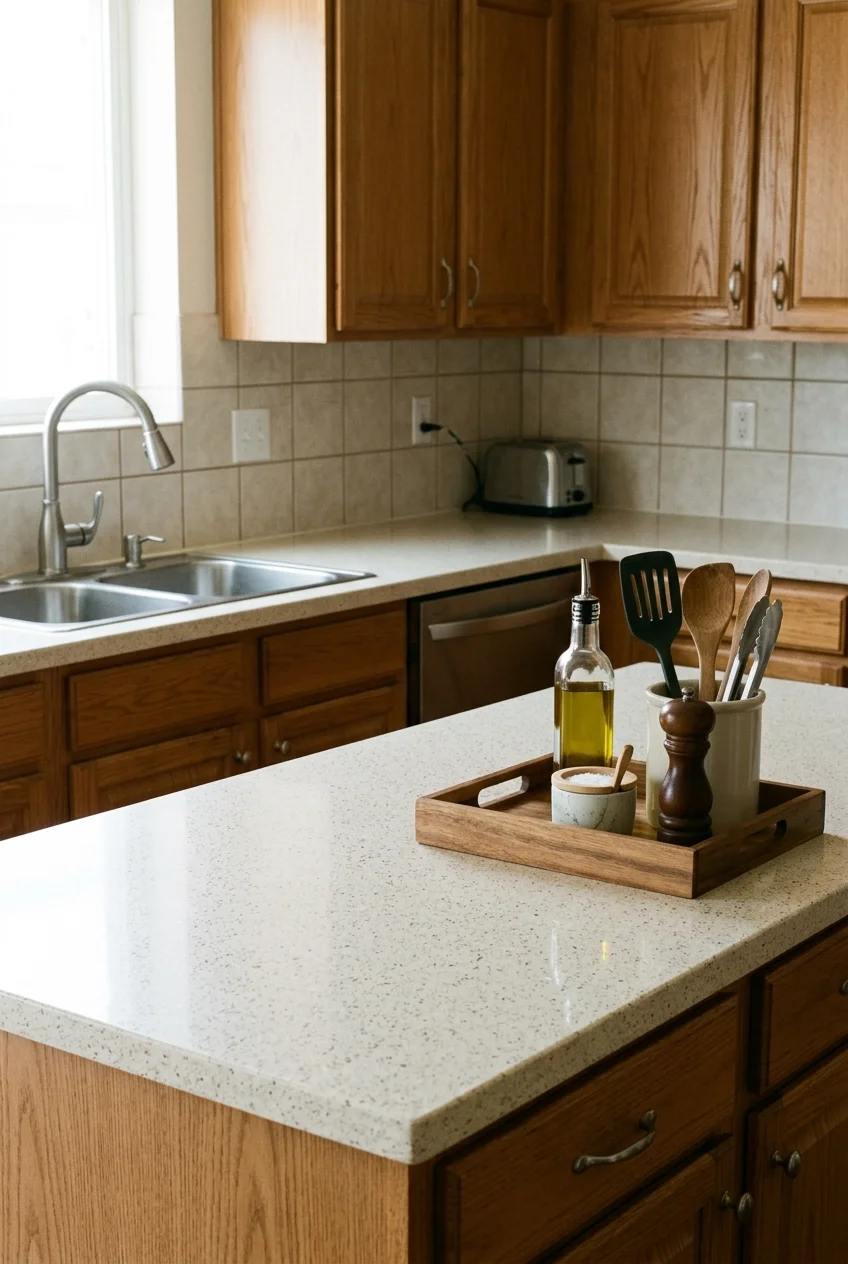
Remove everything from the counters before judging finishes. An open work surface reveals which builder-grade features truly bother you and which clutter exaggerated.
Return one useful grouping, such as oil, salt, and utensils on a washable tray. Keep the main preparation stretch empty enough for actual cooking.
Photograph the edited room from its main entrance. The wider view makes scattered objects, awkward color repeats, and unfinished cabinet ends easier to notice.
2. Paint the Walls to Connect Cabinets and Counters
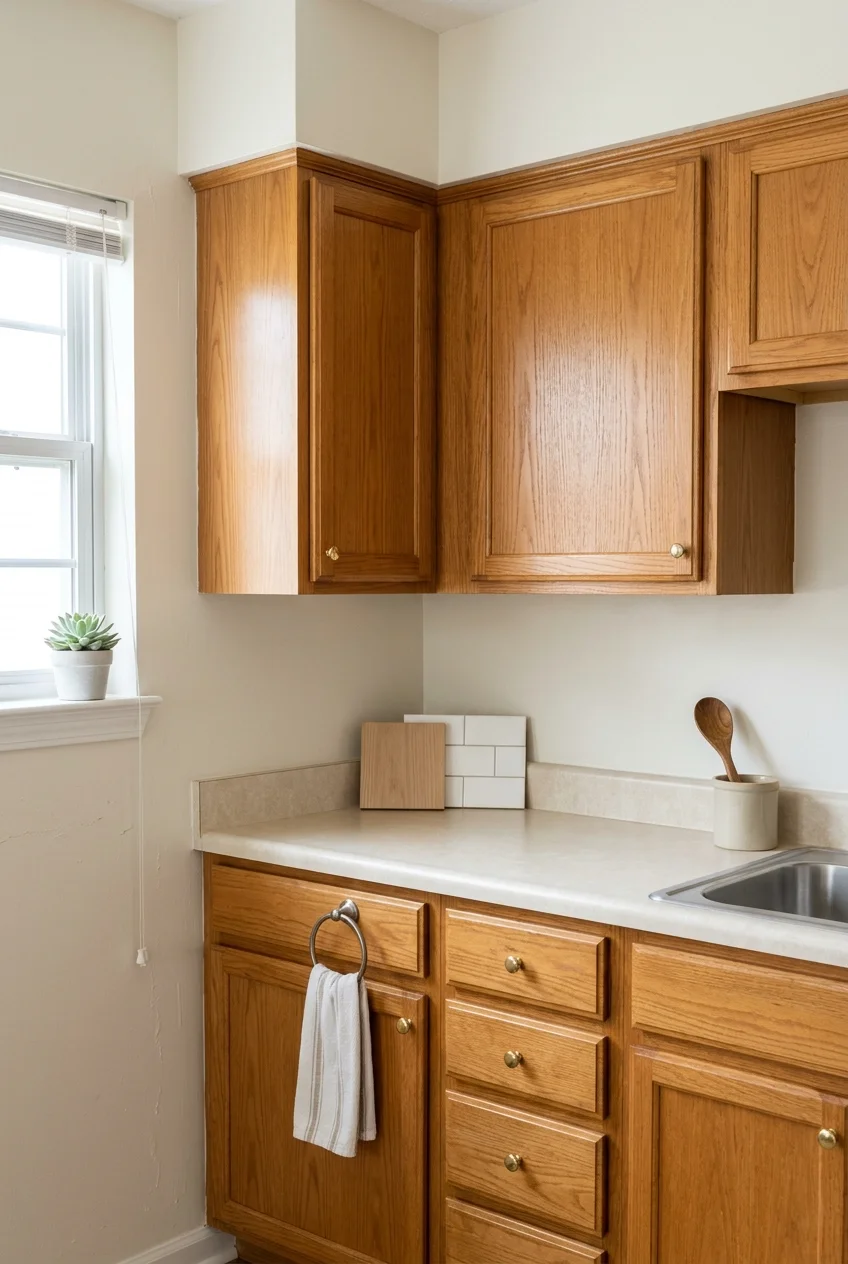
Choose wall color from the undertones already fixed in the room. A muted warm white can connect cream counters with oak better than a stark new white.
Paint large sample boards and move them beside the backsplash, flooring, and cabinet doors. Check morning and evening light before buying the full quantity.
3. Replace Hardware Using the Holes You Already Have
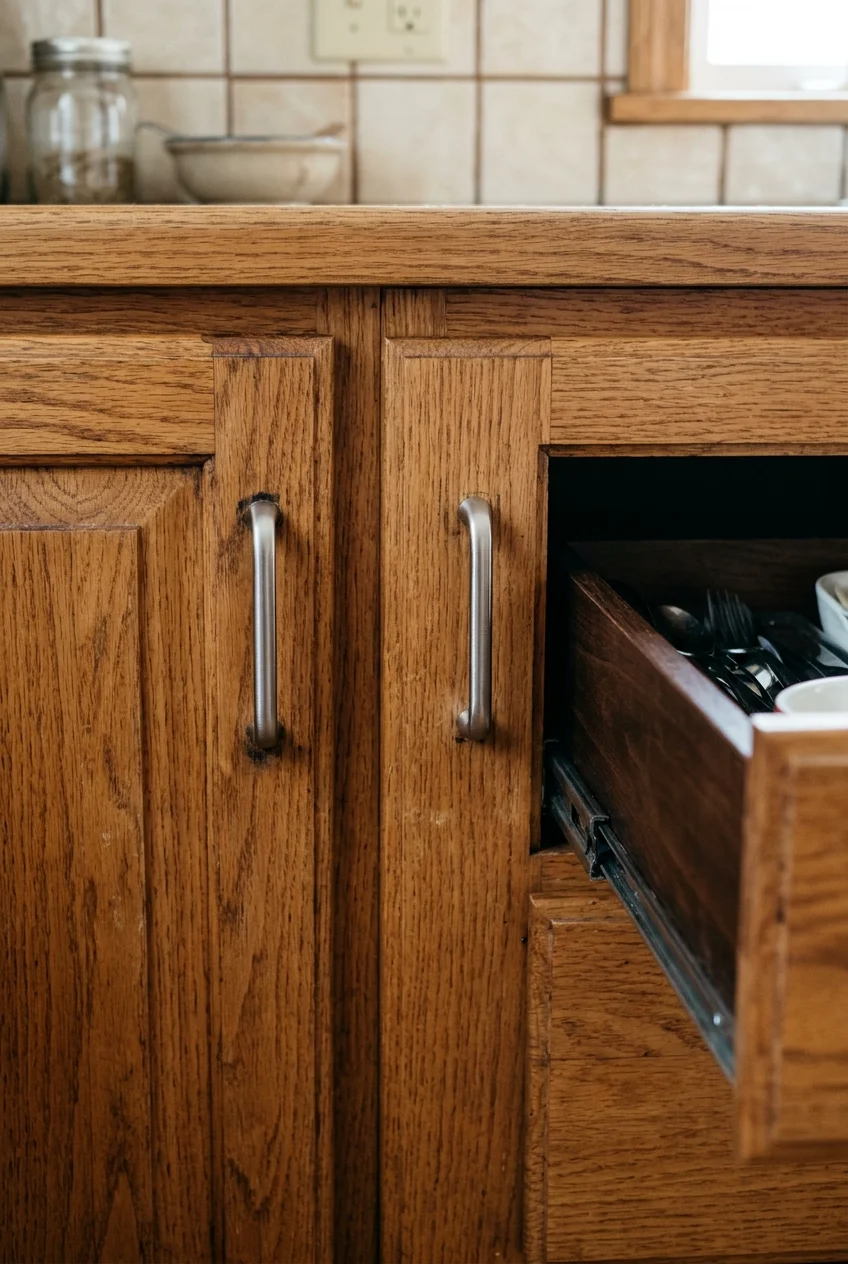
Measure the center-to-center distance between existing screw holes before shopping. Reusing sound holes avoids filling visible scars and reduces the chance of misaligned pulls.
Buy one sample and test finger clearance, corner collisions, and screw length. A long pull may look balanced yet catch the neighboring drawer when both open.
If new drilling is unavoidable, an adjustable cabinet hardware jig can repeat hole placement; clamp a scrap test first and verify every measurement before touching a door.
4. Add Backplates Behind Small Knobs
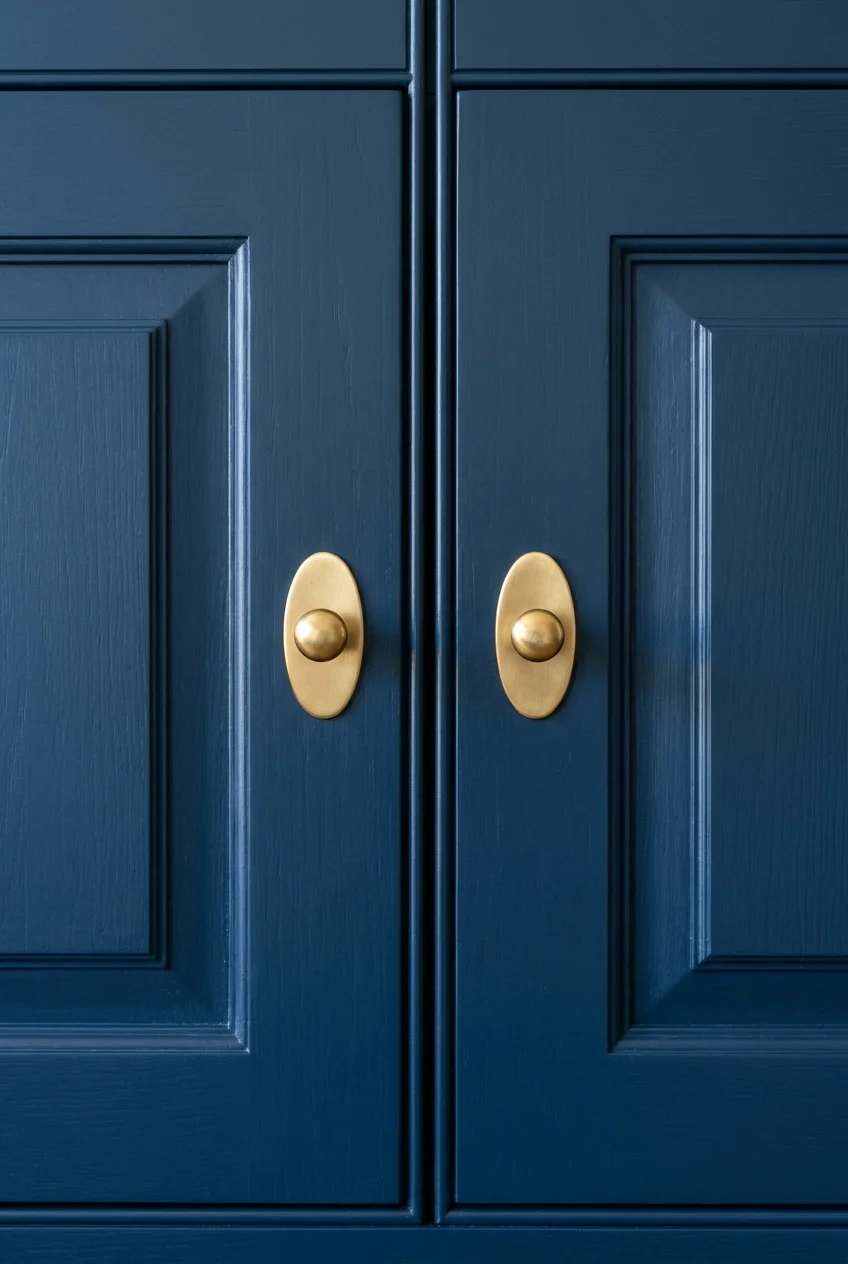
A slim backplate can give undersized knobs more presence and cover light finish shadows left by previous hardware. Match its outline to the cabinet door profile.
Test the plate against rails, bevels, and paired doors. It should sit completely flat without crossing a panel edge or crowding the neighboring knob.
Remove one original knob before shopping and inspect the finish beneath it. A plate hides discoloration, but it cannot stabilize damaged wood or stripped holes.
5. Change the Faucet Without Changing the Sink
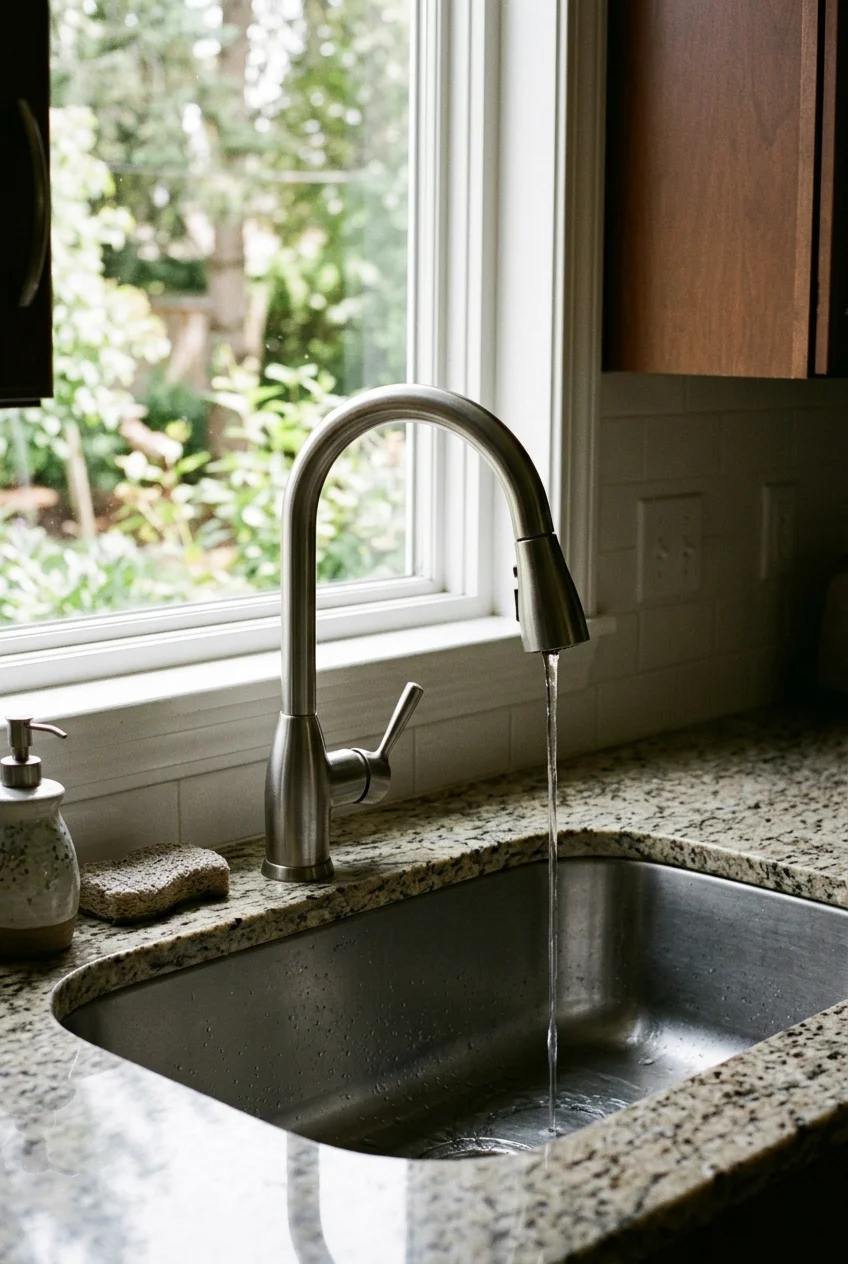
A faucet with a simpler silhouette can update the sink area while the basin and countertop remain. Match the mounting holes and available deck space first.
Confirm spout reach, handle movement, supply connections, and clearance below the sink. Hire a plumber when valves, corroded fittings, or unfamiliar connections complicate replacement.
Fit check Open the nearby window and cabinets before choosing faucet height, because a tall arc can collide with trim or restrict movement behind the sink.
6. Coordinate Switch Plates With the Backsplash
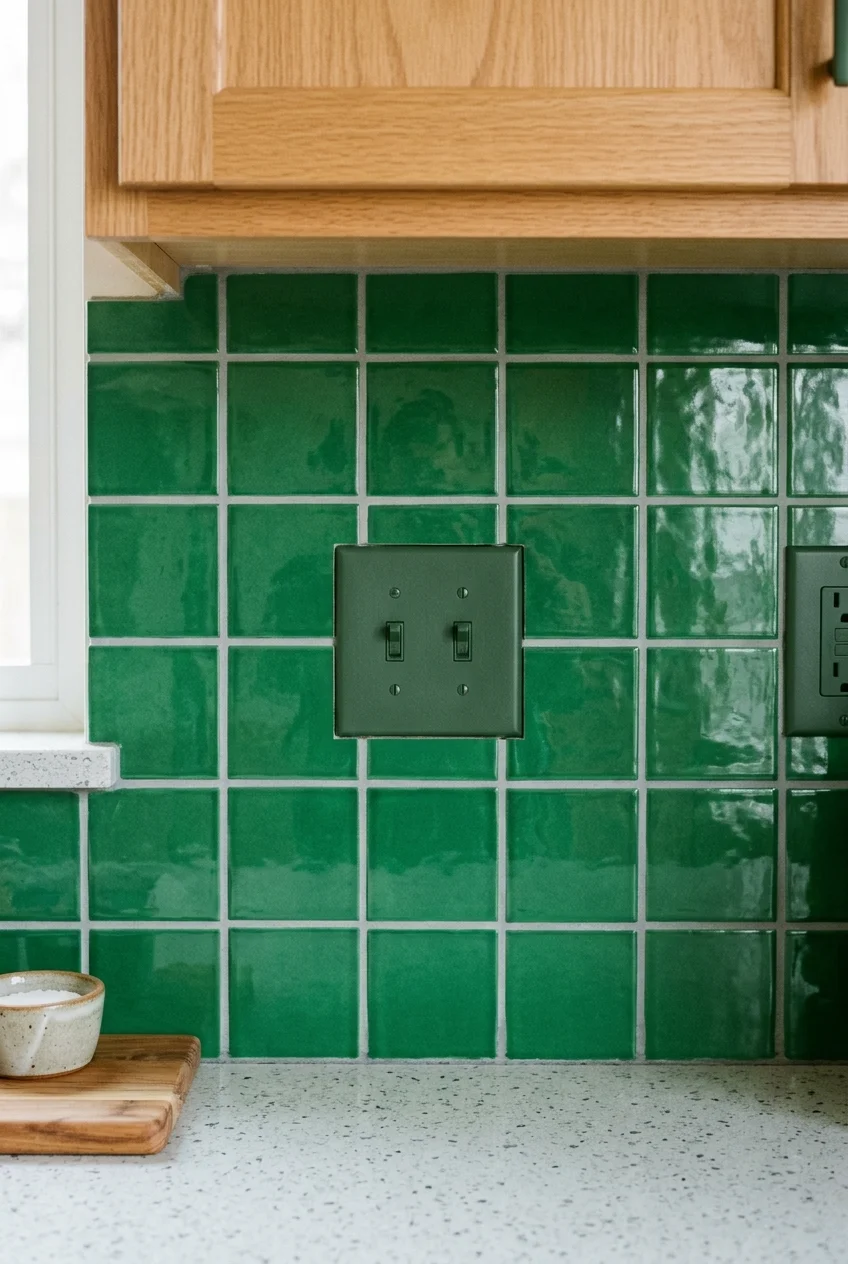
Bright plastic plates can interrupt a darker or handmade-looking backsplash. Choose a finish that quiets the outlets without pretending they are decorative tile.
Keep every device accessible and properly fitted. Turn power off before plate removal, and call an electrician for loose devices, damaged wiring, or box adjustments.
7. Add Plug-In Task Lighting Under the Upper Cabinets
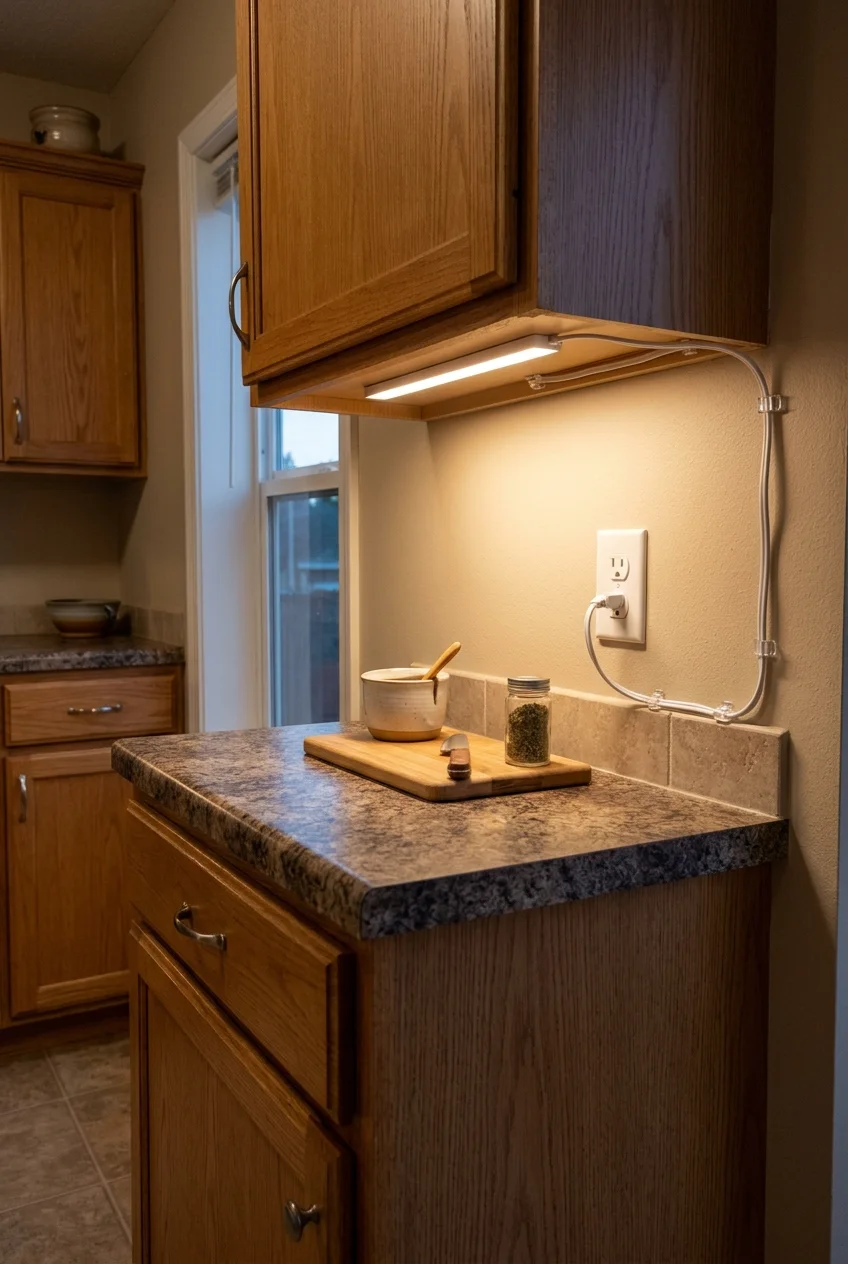
Under-cabinet light should brighten the work surface, not the wall behind it. Position a temporary fixture near the cabinet front and check reflections after dark.
A 24-inch plug-in light bar offers a soft-white option; verify cabinet length, outlet location, cord routing, control access, and glare before ordering.
Keep cords secured away from water, heat, sharp edges, and moving doors. Hardwired changes belong with a qualified electrician and the fixture instructions.
8. Give the Main Ceiling Fixture a Quieter Shape
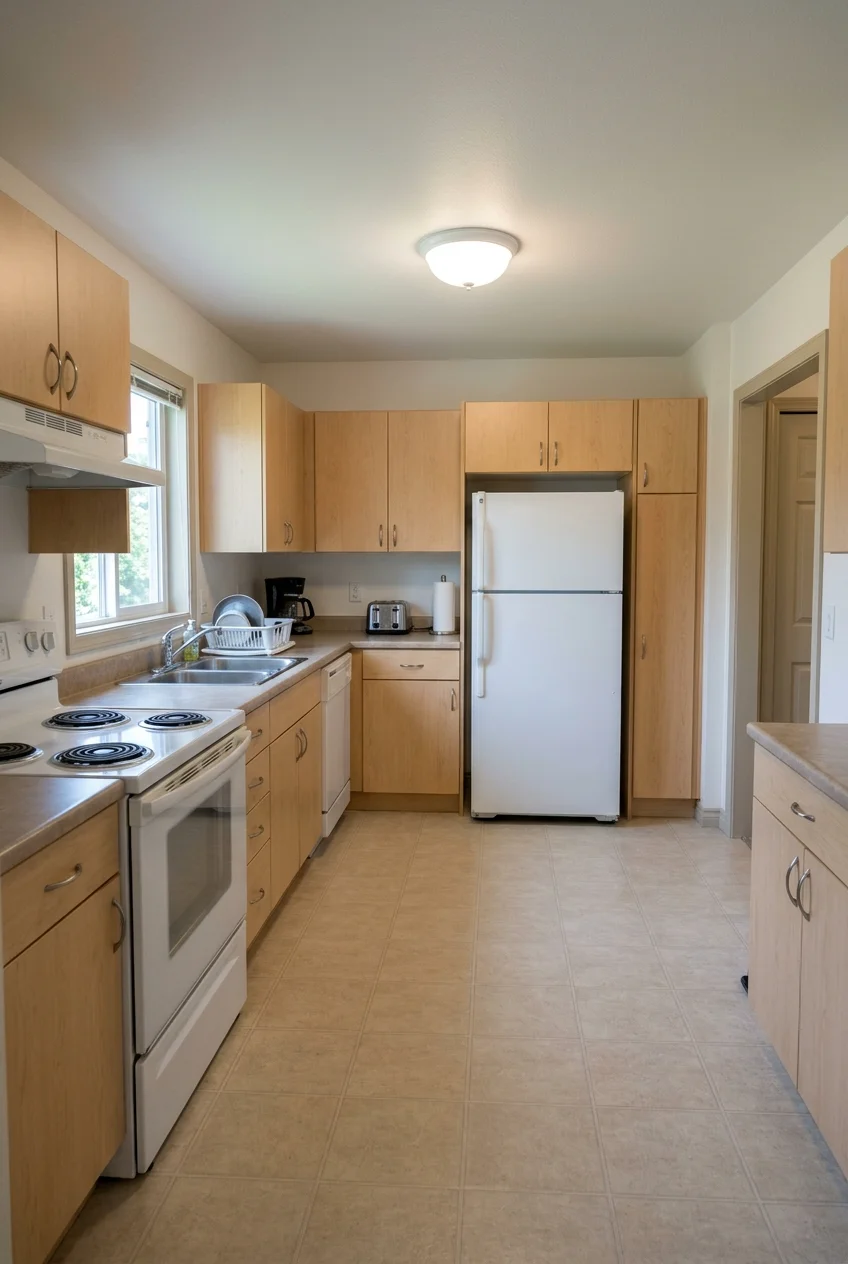
Replace a bulky flush mount with a lower-profile diffuser that suits the room's scale. A simple ceiling shape lets cabinet, hardware, and backsplash changes lead.
Check ceiling-box support, fixture weight, door clearance, and required electrical work. Decorative shades cannot compensate for inadequate task lighting over counters.
Evaluate the lamp color beside cabinet and counter samples after sunset. Light that shifts undertones can undo careful paint and backsplash coordination.
9. Use a Tailored Window Shade Instead of a Decorative Valance
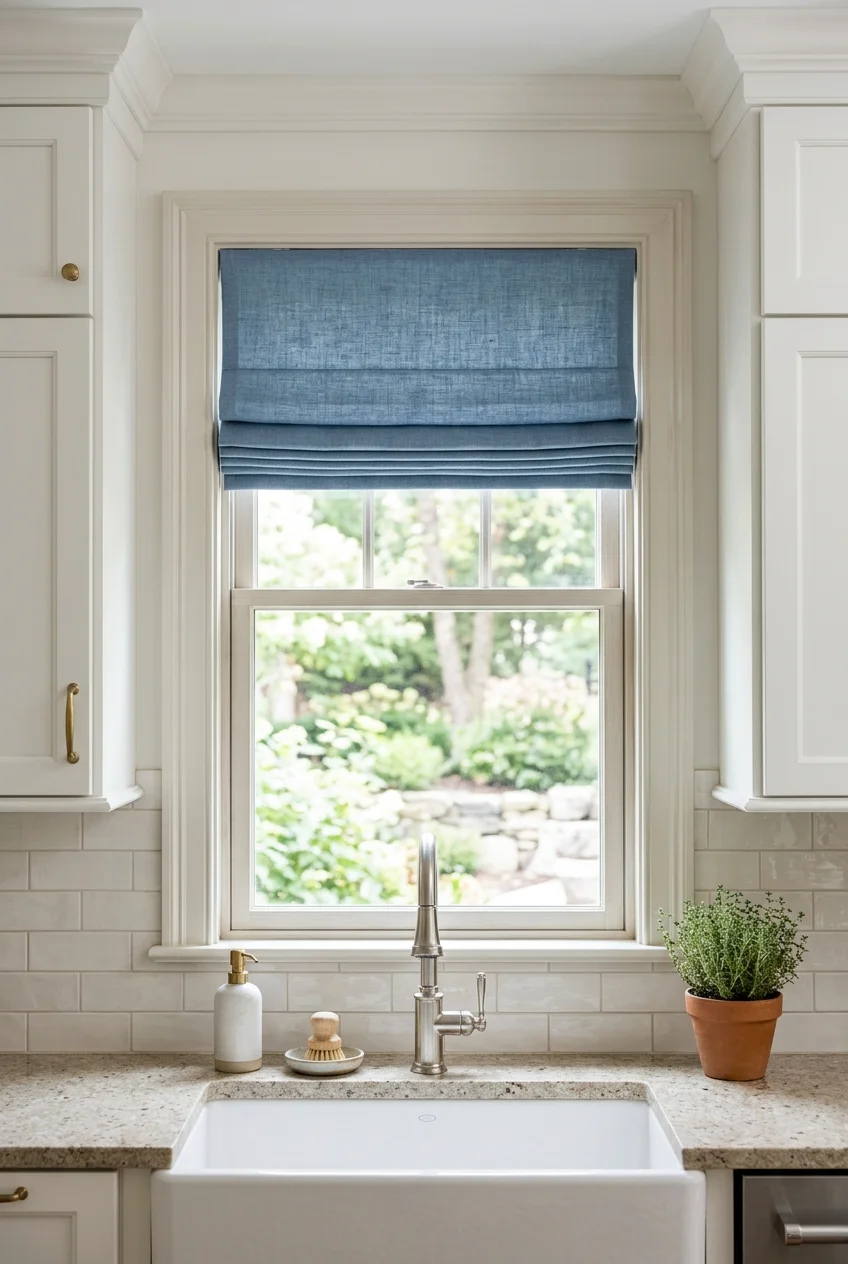
A fitted roller or Roman shade can simplify the sink wall without removing cabinetry. Choose washable material that clears the faucet and window hardware.
Mount the shade so the window still opens and the fabric avoids routine splashes. Repeat one kitchen color rather than introducing another unrelated pattern.
10. Ground a Long Run With a Washable Runner
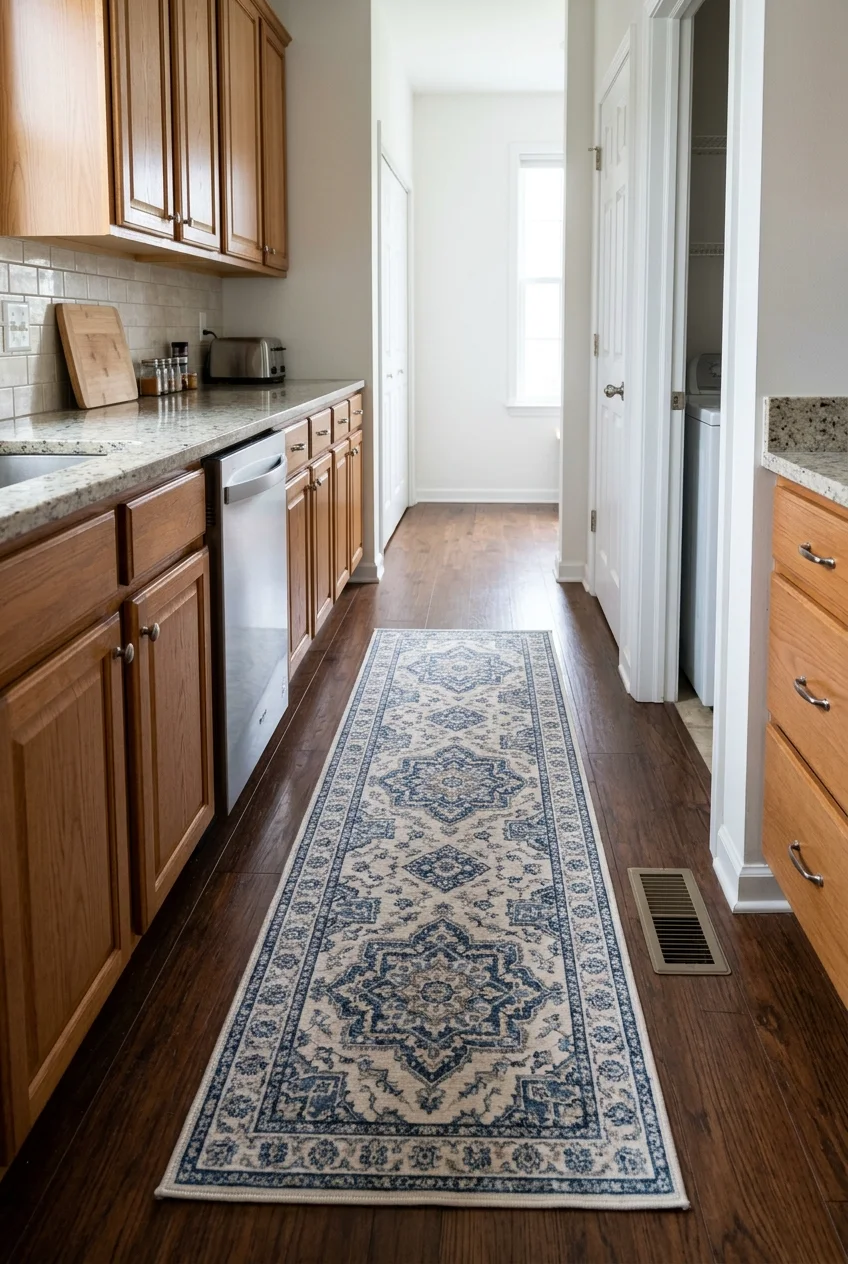
A runner introduces color along a plain cabinet run without committing to new surfaces. Keep its width clear of vents, doors, and major appliance hinges.
Use a low-profile nonslip arrangement appropriate for the flooring and household. Test whether cabinet doors, robot vacuums, and feet catch its edges.
Choose pattern scale from the whole room rather than a close product image. A restrained stripe can lengthen the run without competing with busy flooring.
11. Style One Counter Corner Around Daily Use
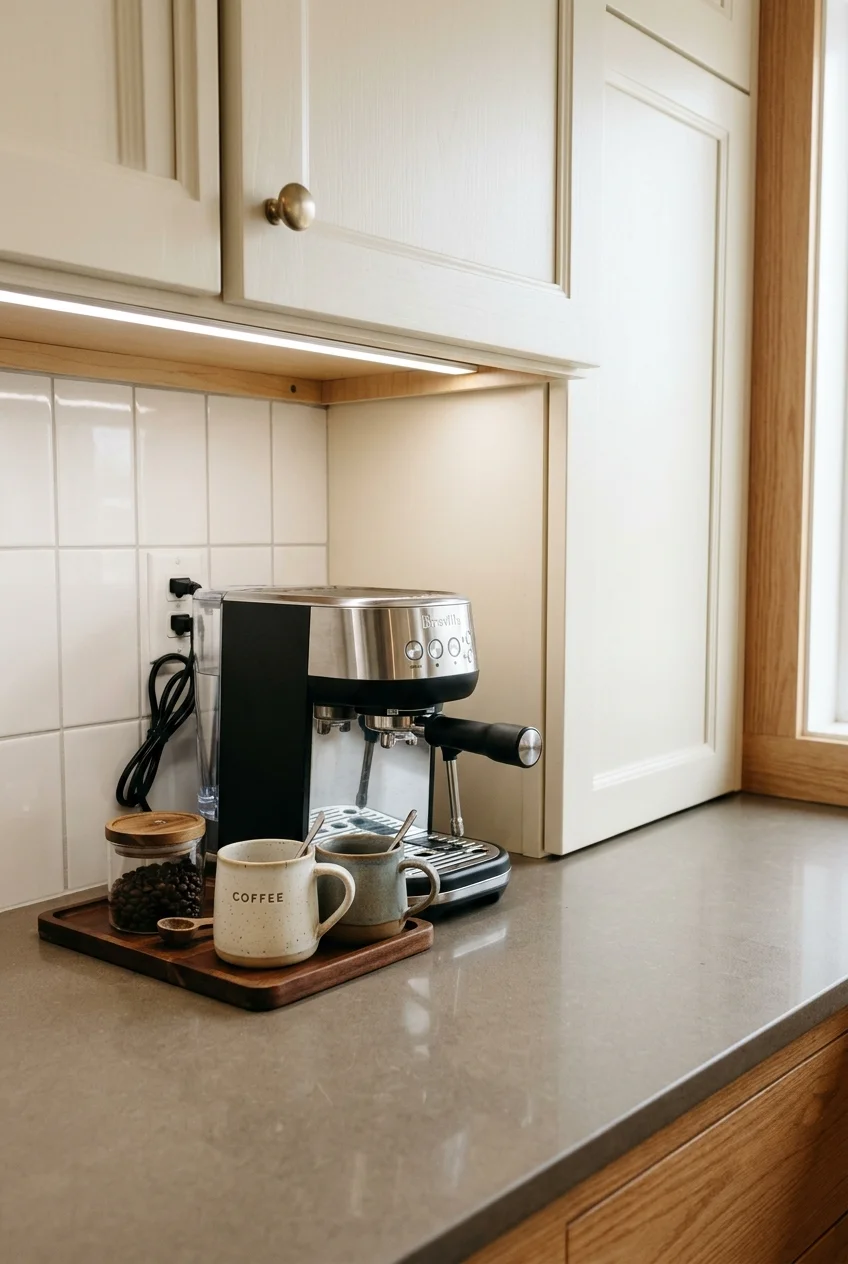
Use one quiet corner for a coffee maker, kettle, or fruit bowl, then leave breathing room around it. Repeated small decorations make basic counters feel busier.
For more practical arrangements, compare these kitchen countertop styling ideas and keep only groupings that preserve your primary preparation space.
12. Repeat One Metal Finish in Three Small Places
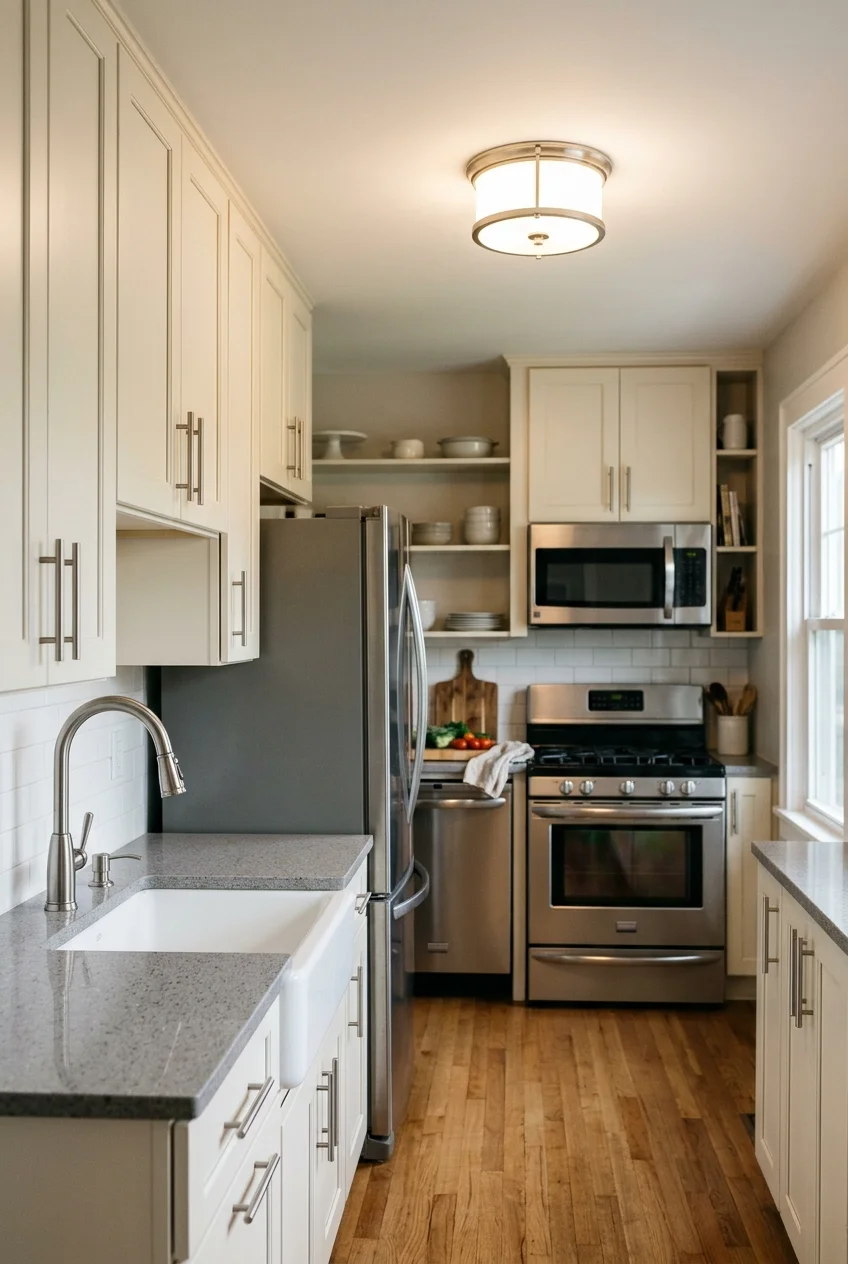
Connect existing elements by repeating one metal at cabinet pulls, the faucet, and a small light detail. Exact brand matching is less important than compatible undertones.
Avoid replacing sound fixtures solely for uniformity. A controlled mix can work when each finish repeats and no single orphan piece appears accidental.
Compare samples against stainless appliances before committing. Warm brass and cool steel can coexist when each has a clear role and repeats at least once.
Cabinet Finishes and Fronts That Change the Room
13. Paint Cabinets a Warm White That Respects Fixed Finishes
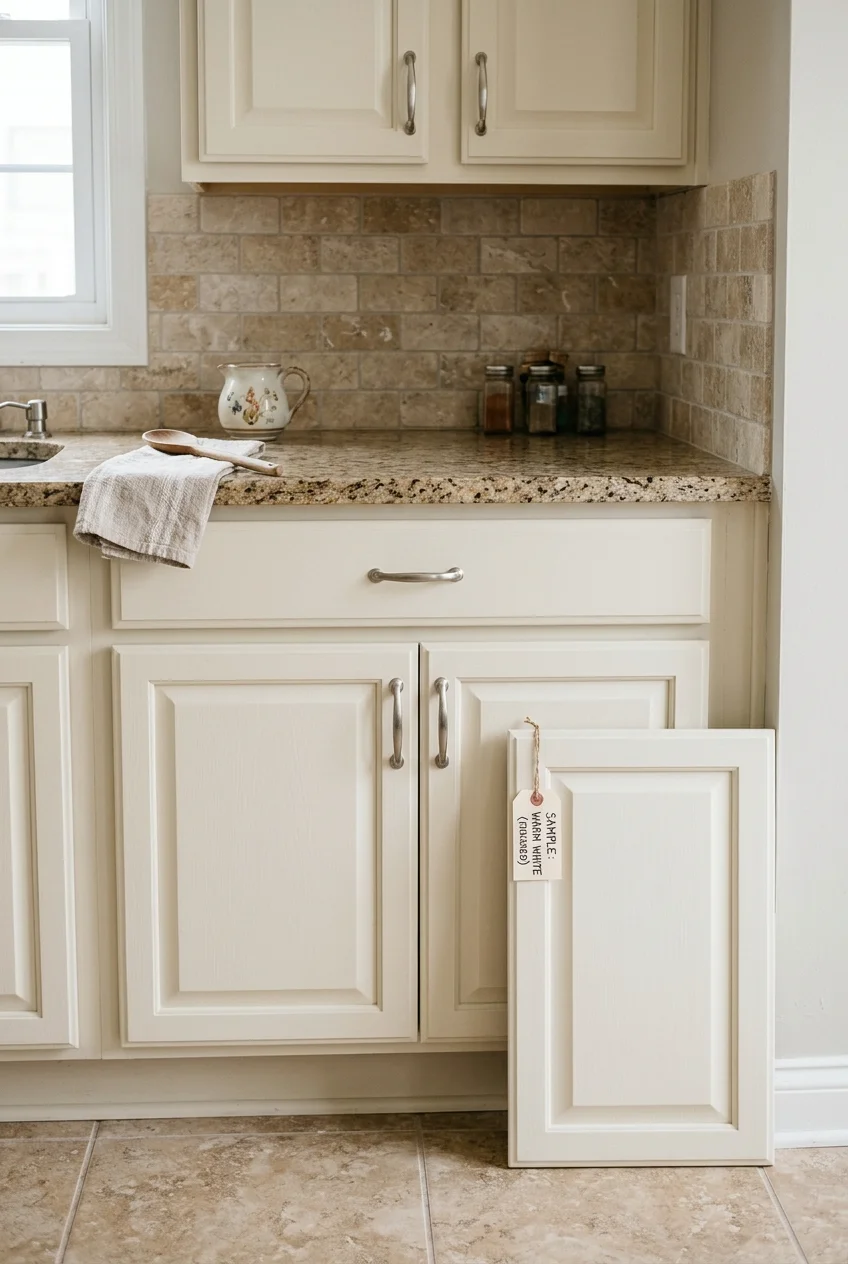
Warm white can soften a builder-grade cabinet run when counters and floors lean cream, tan, or brown. Use samples beside every fixed surface first.
Degrease thoroughly, label doors, test adhesion, and use a compatible cabinet coating system. Follow each product's preparation, recoat, cure, ventilation, and return-to-service instructions.
- Photograph and label every door and hinge position.
- Clean the test door until grease no longer transfers.
- Prepare, prime, and coat one representative door.
- Approve adhesion, sheen, and color before continuing.
If the home predates 1978, painted surfaces may require lead-safe precautions before sanding or scraping. EPA recommends lead-safe practices and qualified help for covered work.
14. Put Color on the Base Cabinets Only
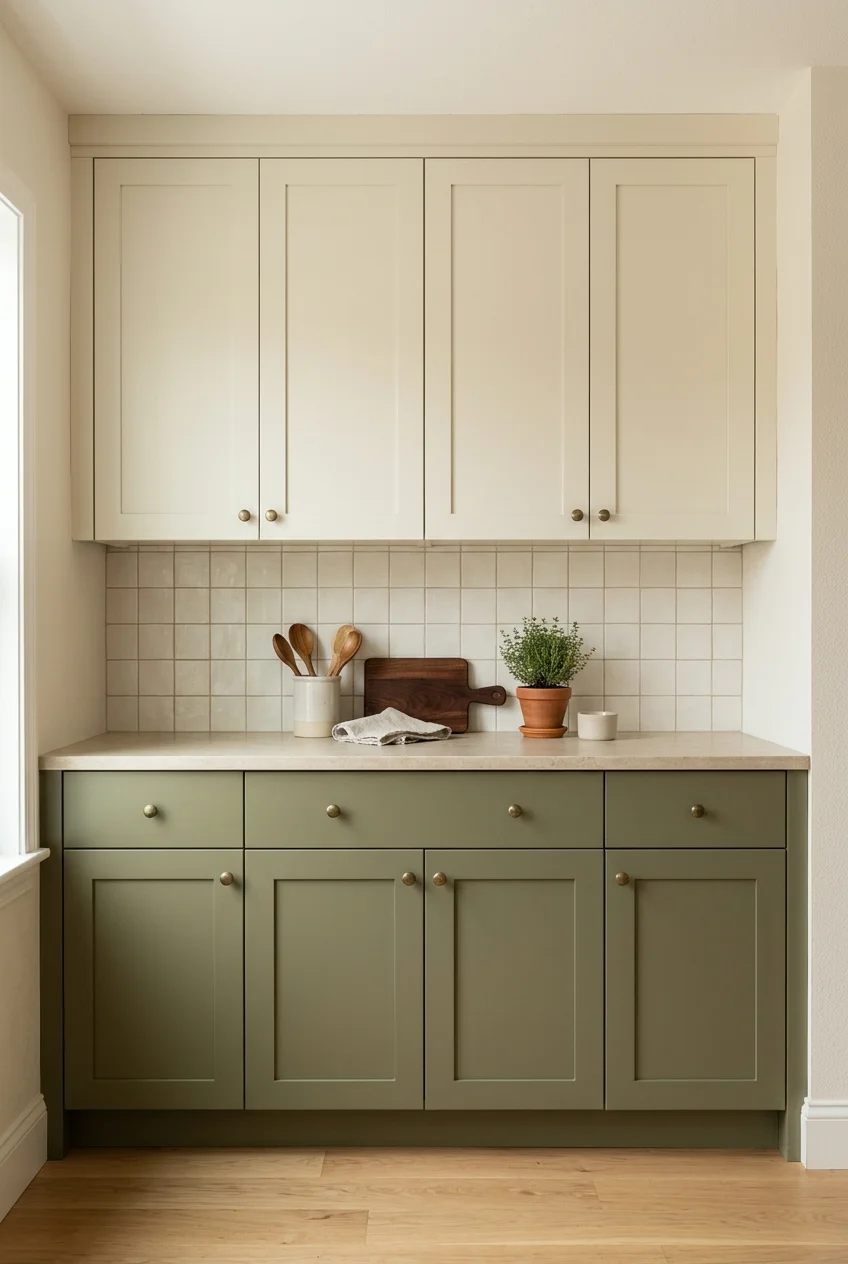
A muted green, blue, or clay base run adds color below eye level while pale uppers keep the room visually open. Stop at clear cabinet boundaries.
Carry the lower color across drawers, doors, and exposed end panels. Compare the chosen hue with countertop undertones and flooring before painting the entire run.
15. Paint Only the Island as a Furniture Piece
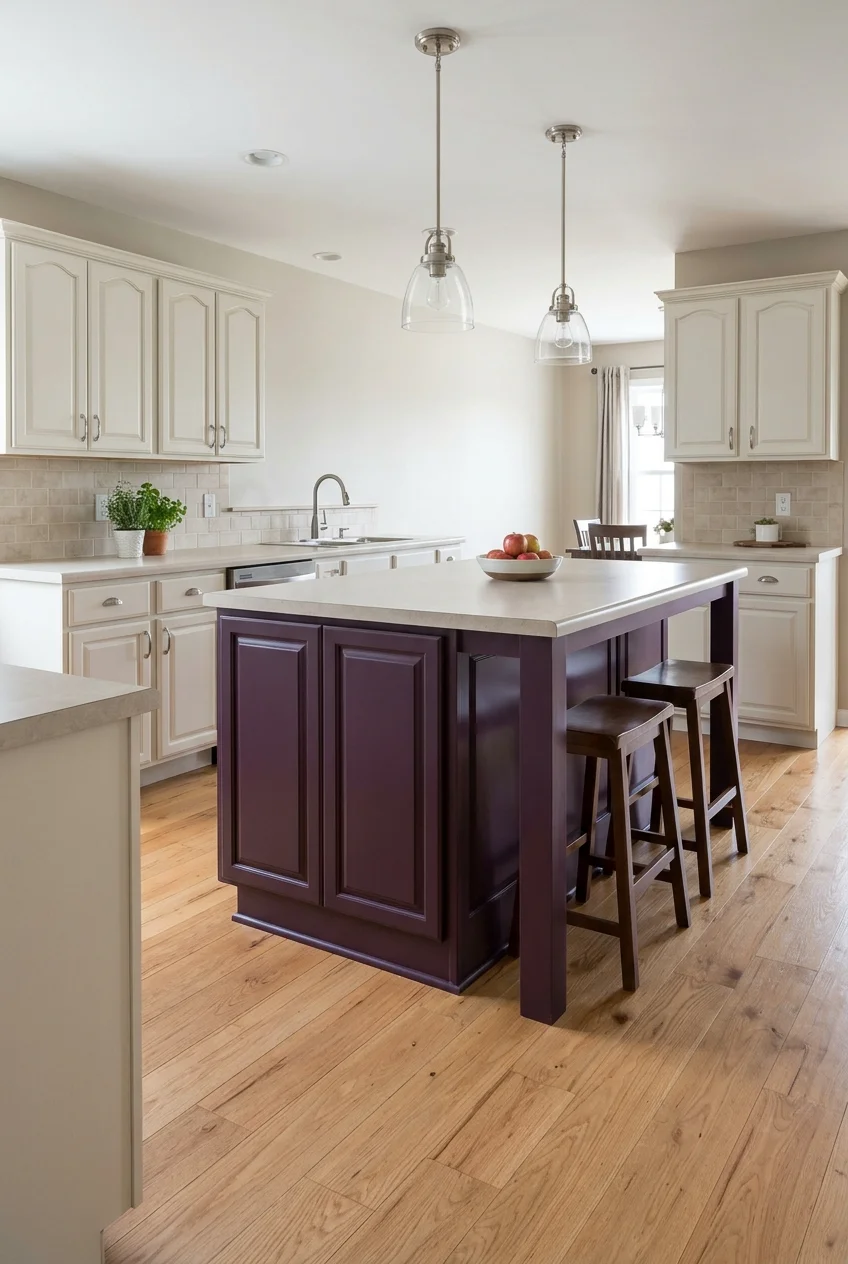
A separate island gives saturated color a natural stopping point. Deep blue, aubergine, or moss can create contrast without refinishing every perimeter cabinet.
Include the seating side, end panels, toe kick, and working doors in one finish plan. A missed surface becomes obvious from the adjoining room.
Browse these kitchen island ideas for color and storage directions, then test a full-size sample against your floor, counters, and nearby furniture.
16. Keep Honey Oak and Quiet the Colors Around It
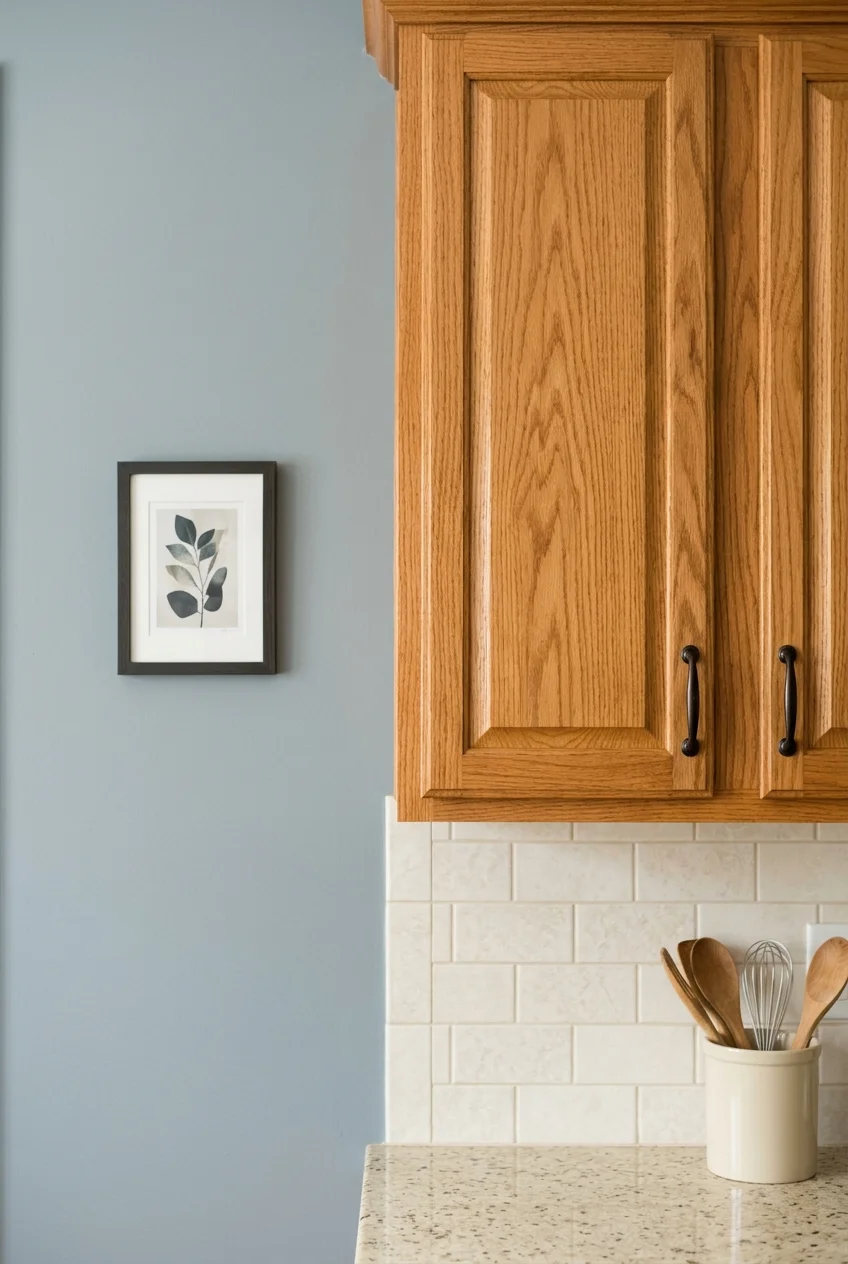
Honey oak becomes easier to read when competing orange, yellow, and busy brown accents disappear. Let the wood grain remain the strongest warm element.
Pair it with restrained wall color, simple hardware, and a backsplash that repeats a quieter cabinet tone. Clean the existing finish according to its requirements.
Inspect worn edges after cleaning. Local repairs or professional refinishing may preserve sound wood better than painting every door to hide isolated damage.
17. Reduce Heavy Gloss Without Changing the Wood Color
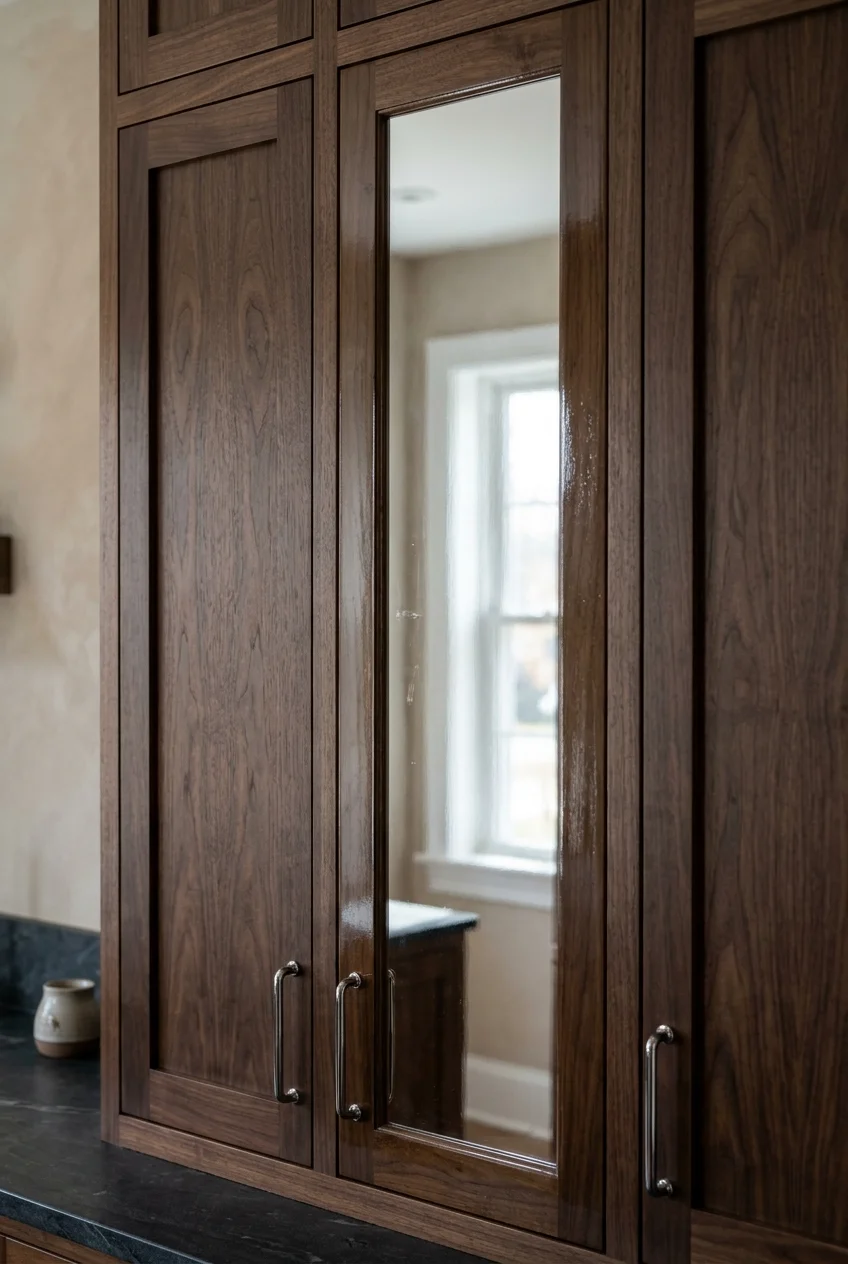
Sometimes reflected glare dates dark cabinets more than their stain. A professional assessment can determine whether the existing clear finish can be renewed in a softer sheen.
Do not scuff and coat an unknown surface blindly. Test compatibility, adhesion, color shift, and sheen on a concealed area or sample door first.
Watch for Thin veneer, printed surfaces, failing coatings, and previous silicone polish can change the preparation plan; identify the substrate before sanding or applying another finish.
18. Replace Cathedral Doors With Simple Flat-Panel Fronts
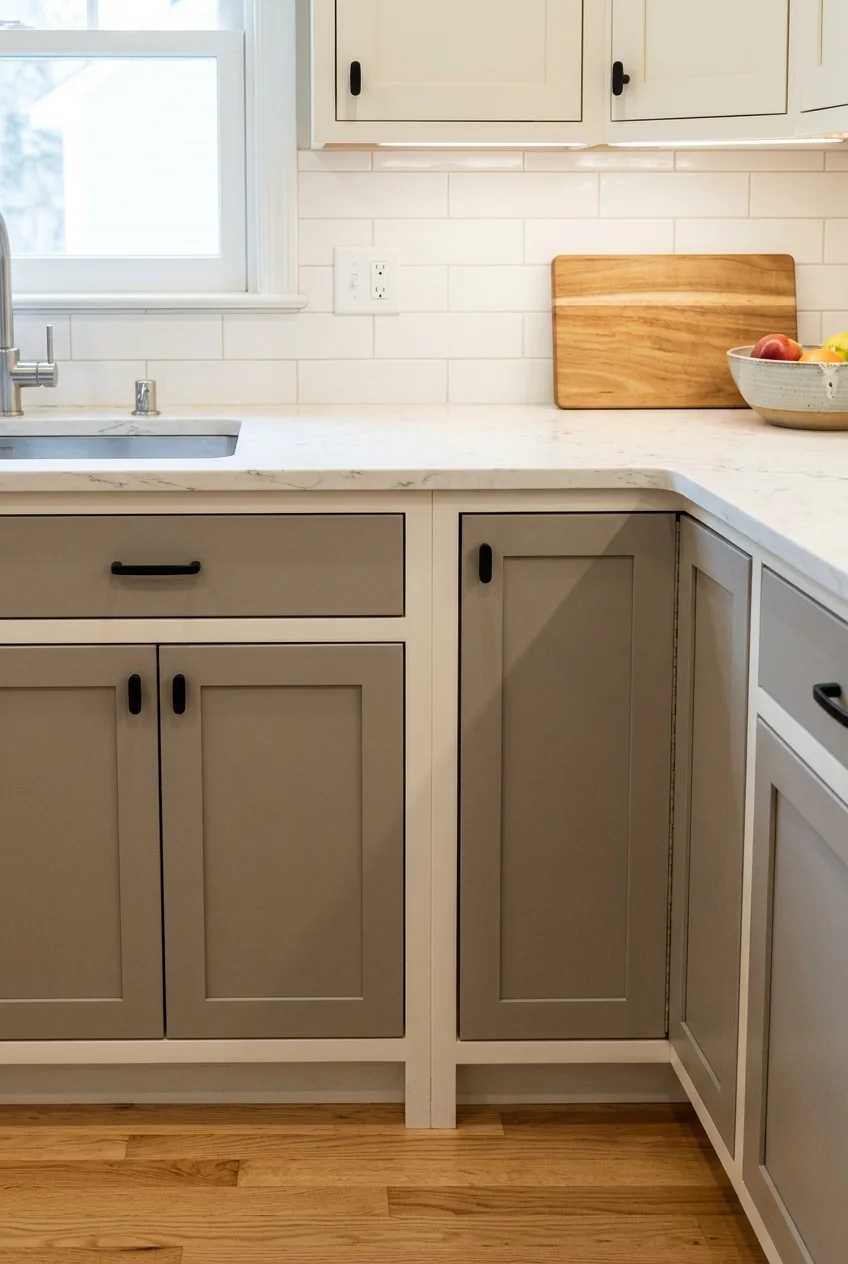
Strong arched profiles can dominate a builder-grade kitchen even when the boxes remain sound. Simple replacement fronts change that outline without moving the layout.
Record overlay, hinge boring, door thickness, corner conditions, and every opening. Ordering by old door width alone can preserve uneven gaps and collisions.
Decide how shallow drawer fronts will relate to the new doors. Slab fronts often look calmer than tiny framed panels squeezed into limited height.
- Confirm framed or frameless cabinet construction.
- Measure each opening and required overlay.
- Check hinge cups, screw positions, and door thickness.
- Approve one finished sample before the full order.
19. Use Slim Shaker Fronts for Lighter Detail
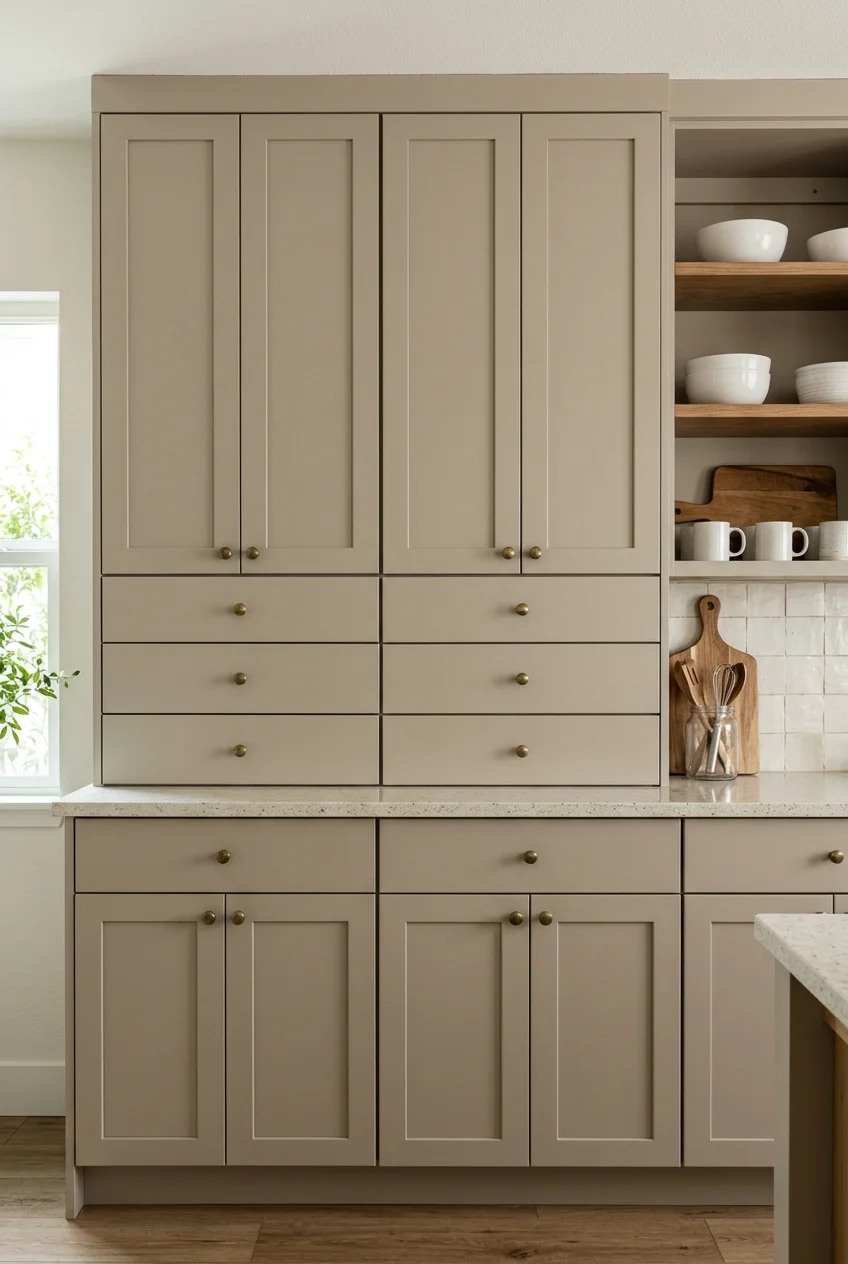
Narrow-frame Shaker doors retain traditional depth while reducing the heavy grid created by wide rails. They suit compact kitchens with many small cabinet fronts.
Coordinate shallow drawers carefully; some look cleaner with slab fronts than compressed miniature frames. Confirm hinge geometry, overlay, and handle clearance through a supplier sample.
Refacing makes sense only when cabinet boxes, layout, and mounting remain sound. Swelling, loose joints, or chronic poor access deserve repair or replacement first.
20. Switch to Slab Doors for a Calm Cabinet Wall
Image pending: No image is attached to this draft for idea 20 (image-20).
Flat slab fronts reduce repeated panel lines and make a long cabinet run read as broad surfaces. Matching finished edges and end panels become especially important.
Choose pulls or edge hardware only after checking door thickness and gaps. New slab fronts do not convert framed cabinet boxes into a frameless system.
Handle a finished sample near the sink before ordering. Fingerprints, edge seams, sheen, and cleaning marks appear differently on broad uninterrupted surfaces.
21. Reface Sound Boxes With Coordinated Wood Veneer
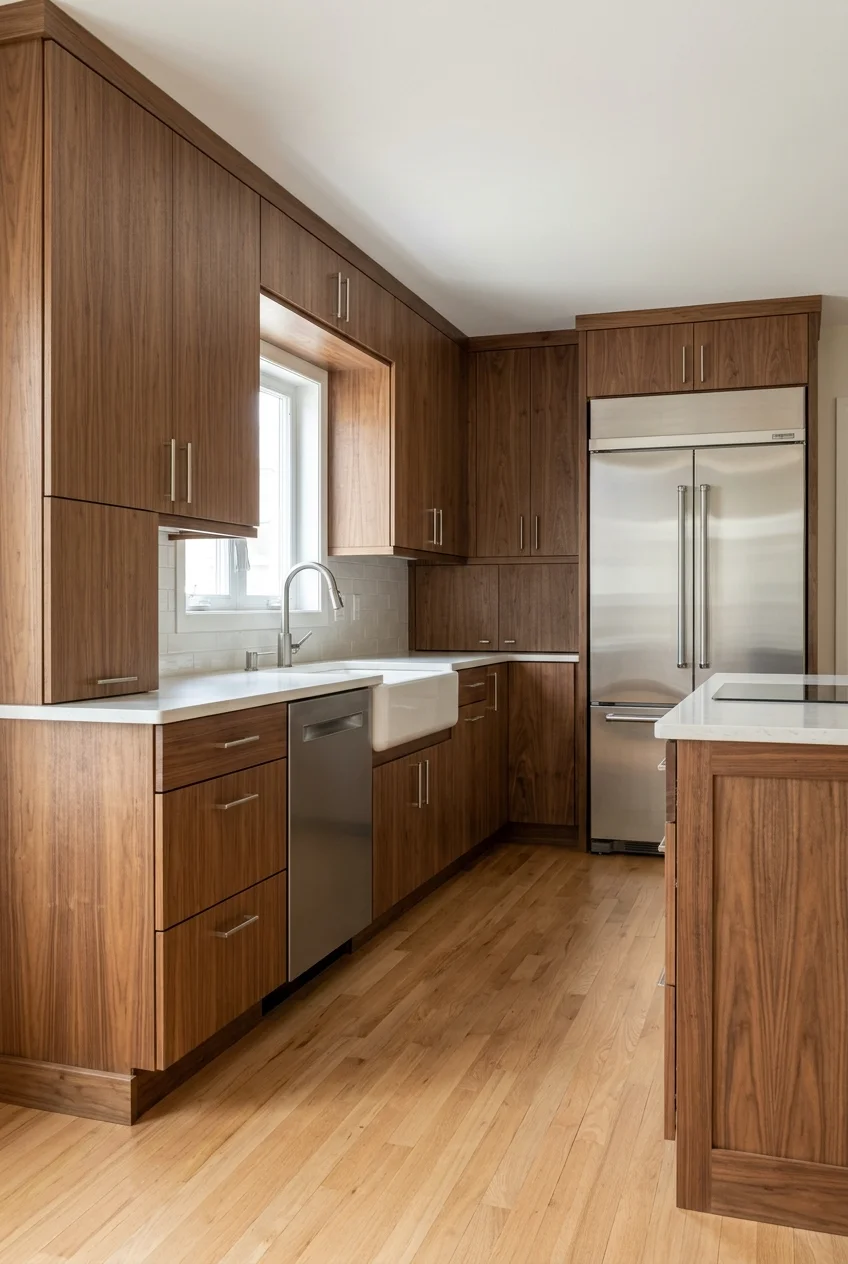
Refacing keeps the cabinet footprint while replacing visible doors, drawer fronts, face frames, and end treatments. Coordinated grain can unify mismatched builder-grade finishes.
Begin with box condition and door operation, not a veneer swatch. Water damage, loose joints, or an unsuitable layout will remain beneath the new surface.
- Map every visible frame, filler, trim piece, and cabinet end.
- Approve grain direction with the finish sample.
- Account for added thickness at corners and appliances.
- Plan replacement doors for profiles that cannot wrap cleanly.
Follow the selected veneer system for substrate preparation, adhesive pressure, trimming, and finishing. Raised-panel doors usually need replacement rather than decorative film across complex contours.
Confirm grain direction at every drawer and exposed end before fabrication. Random changes become especially obvious when multiple fronts share one long sightline.
Decision point Price the complete visible elevation, including new fronts and end panels; a low sheet price does not describe the labor required for finished refacing.
22. Wrap Intact Slab Doors With Cabinet-Suitable Film
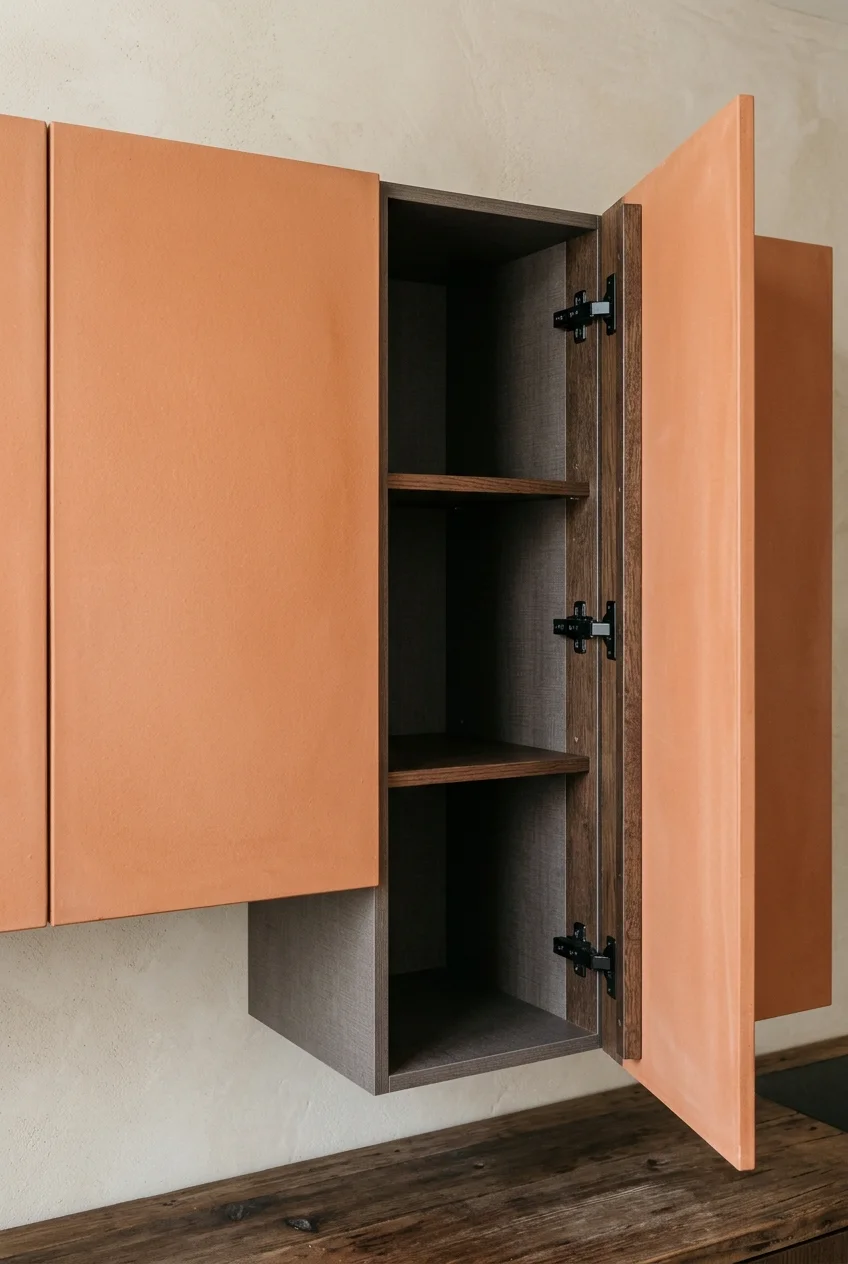
Furniture film can change smooth slab doors without adding another profile. It is less convincing on routed, damaged, peeling, or heavily textured fronts.
Test adhesion and removal in a hidden place, especially in a rental. Weak coatings can lift, and aggressive adhesive may leave residue despite removable marketing.
- Clean and repair the approved smooth substrate.
- Dry-fit an oversized piece on one sample door.
- Apply gradually while smoothing trapped air outward.
- Trim edges carefully and test door movement.
Surface flaws can telegraph through thin film, so fill and smooth defects first. Keep the material within its stated heat, moisture, and cleaning limitations.
Plan matching treatment for face frames, fillers, and exposed ends before wrapping doors. Untreated surrounding surfaces can make a successful sample look disconnected.
23. Use Reeded Glass in One Upper Cabinet Pair
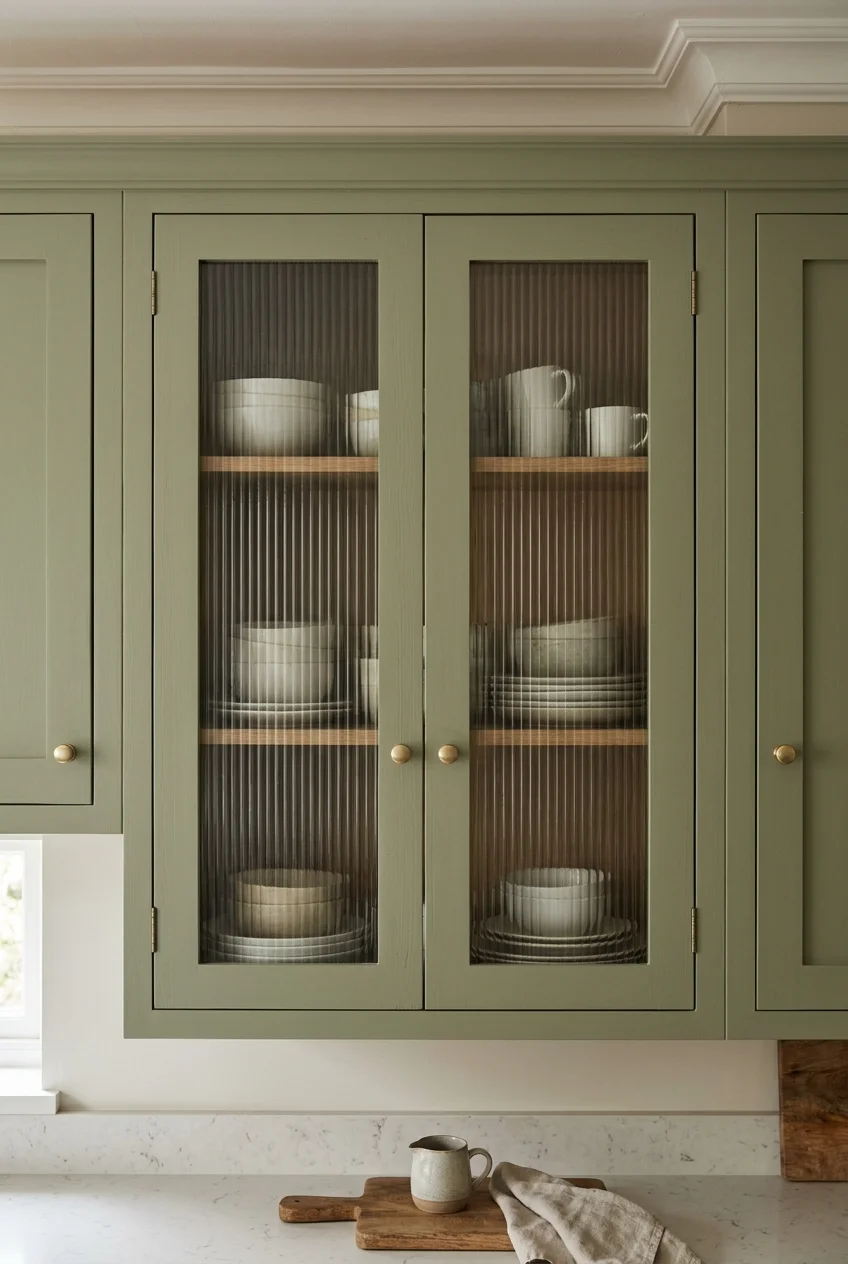
Reeded glass interrupts a wall of solid doors while softening the view of everyday dishes. Limit it to one pair so the texture stays deliberate.
Confirm glazing thickness, frame construction, retention method, and hinge capacity with a cabinetmaker or door supplier. Molded or fragile doors may not accept conversion.
Place actual cupboard contents behind a sample first. Reeded glass blurs packaging but does not completely conceal color, shapes, or crowded shelves.
24. Remove One Door Pair for an Open Dish Cupboard
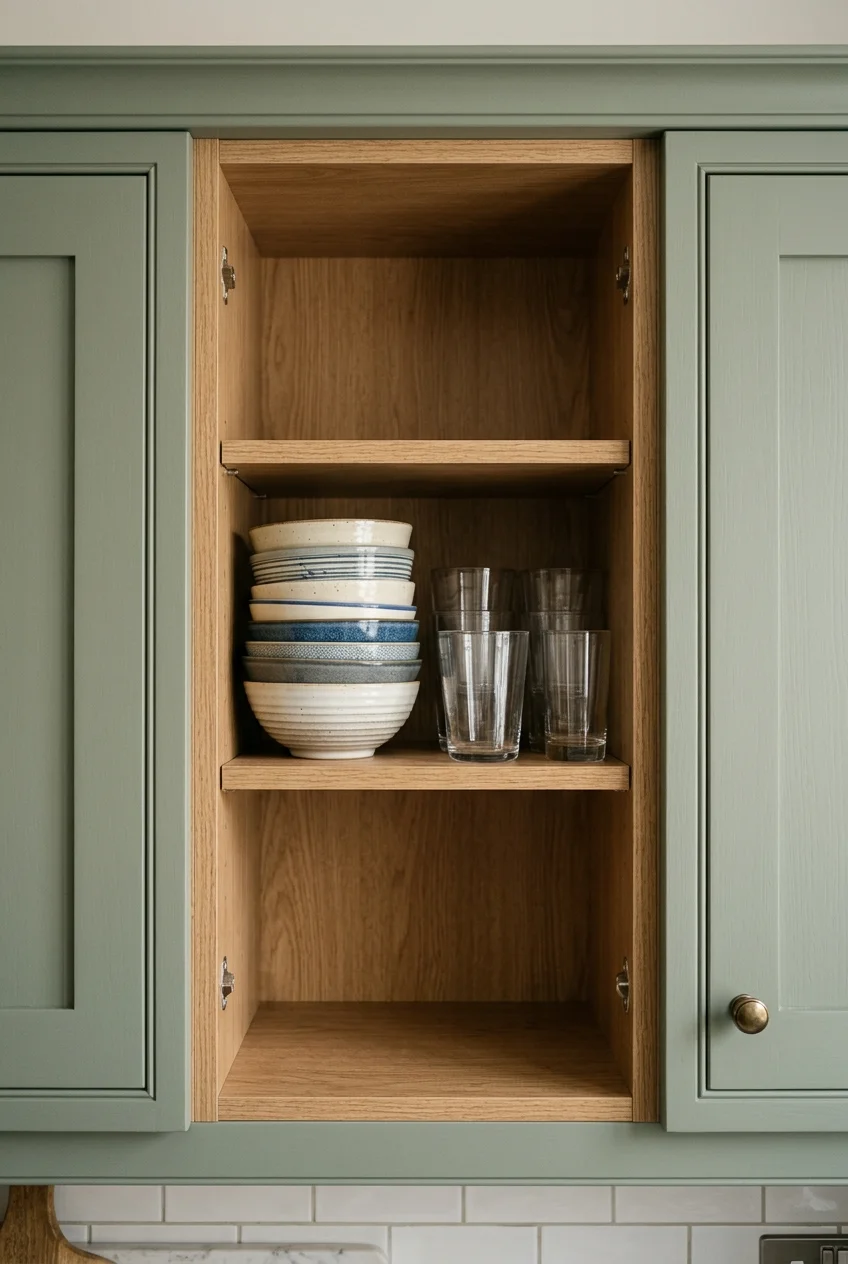
One open cupboard can break a heavy upper run and keep daily bowls easy to reach. Try living with the doors open before removing them.
Store labeled doors and hardware for reversal, then finish exposed holes and edges. Keep heavy dishes on sound shelves and avoid splatter-prone locations.
Relocate the removed contents on paper before committing. If packages migrate onto the counter, the visual openness will cost more usable workspace than it gains.
Millwork and Island Details That Look Built In
25. Finish Upper Cabinets With Proportionate Crown
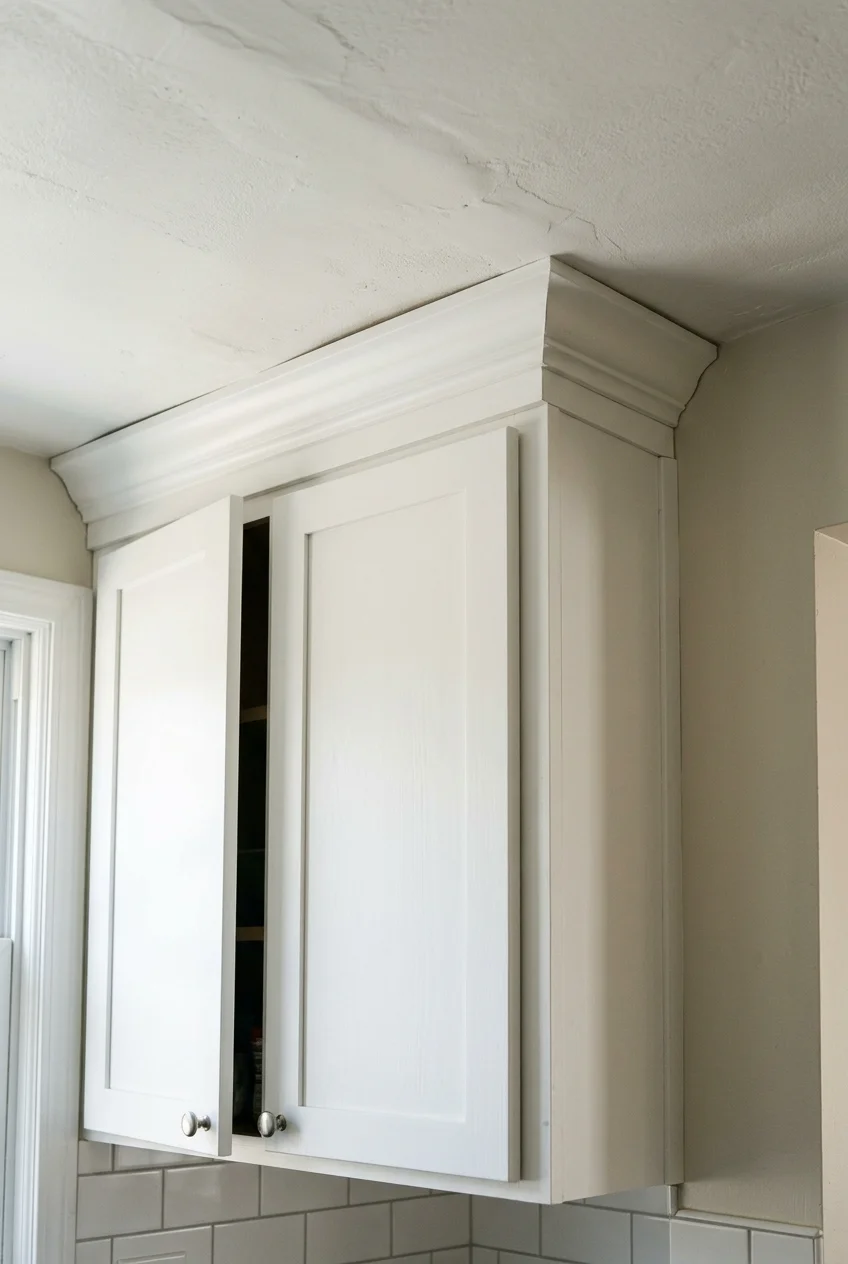
A modest crown profile can connect traditional doors to the ceiling line without making standard cabinets top-heavy. Hold a full-size sample above the doors first.
Measure ceiling variation, corner returns, and top-door clearance. Provide appropriate backing instead of fastening decorative trim to thin cabinet surfaces that cannot support it.
Keep the crown language consistent across returns and exposed ends. An oversized profile above shallow doors can make the original cabinet proportions look smaller.
26. Close a Shallow Ceiling Gap With Plain Infill
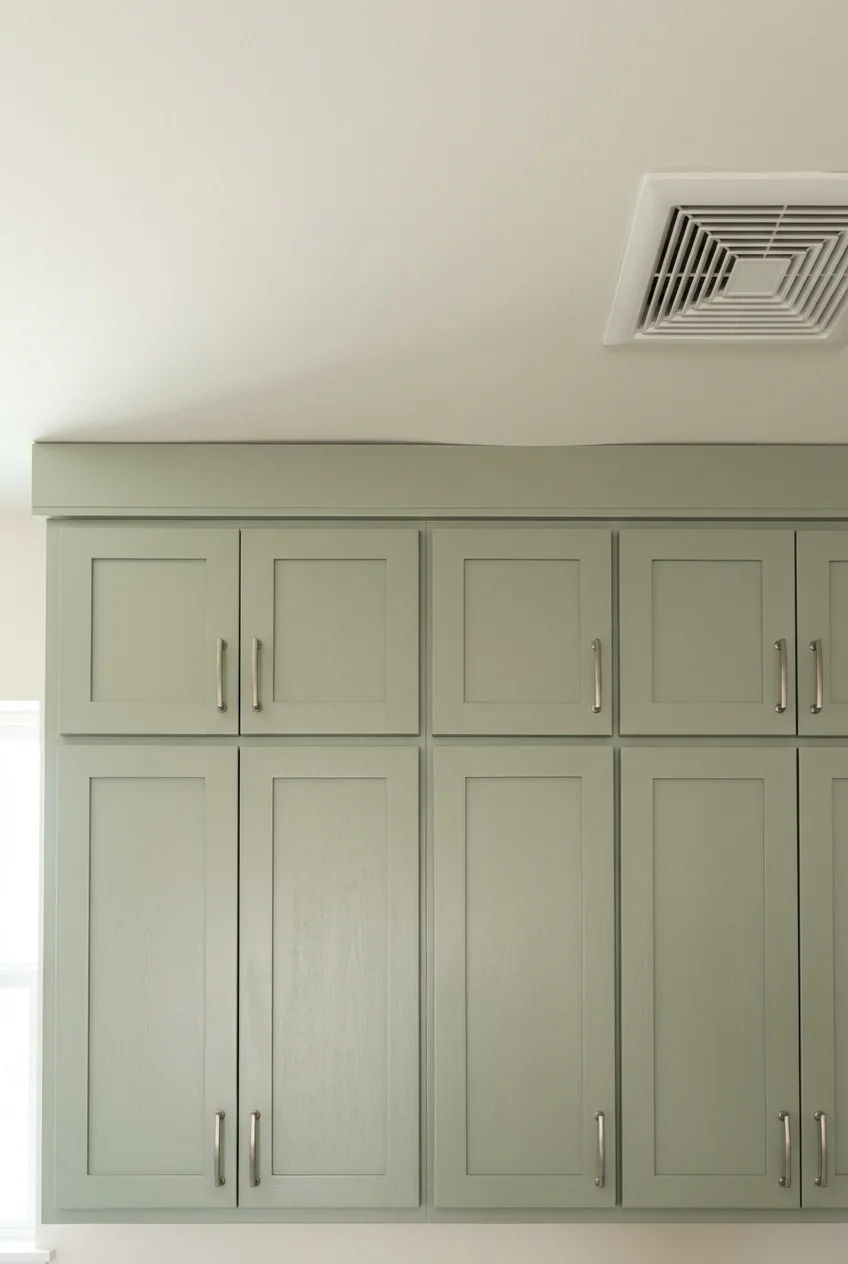
A simple painted infill can quiet a narrow dust-catching gap above cabinets. It works best when it reads as architecture rather than tiny unusable storage.
Inspect the gap for vents, wiring access, and uneven ceilings before closing it. Preserve every service opening and scribe visible edges for a fitted result.
27. Frame Exposed Cabinet Ends Like the Doors
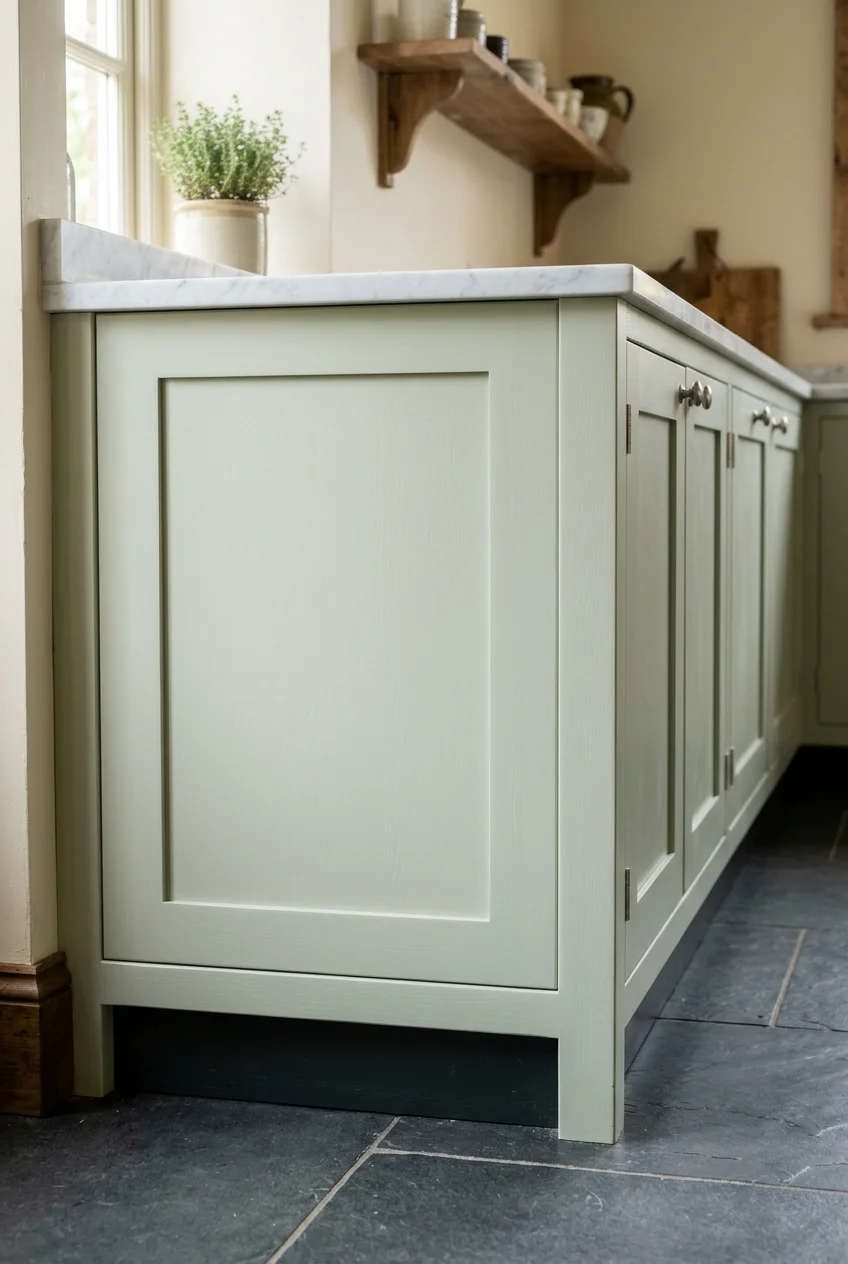
A blank cabinet side often faces the dining room more than any door. Shallow applied rails can connect that exposed end with existing Shaker fronts.
Match surrounding rail widths and paint rather than introducing ornate trim. Keep projections clear of handles, stools, baseboards, and narrow walking routes.
28. Straighten an Ornate Sink Valance
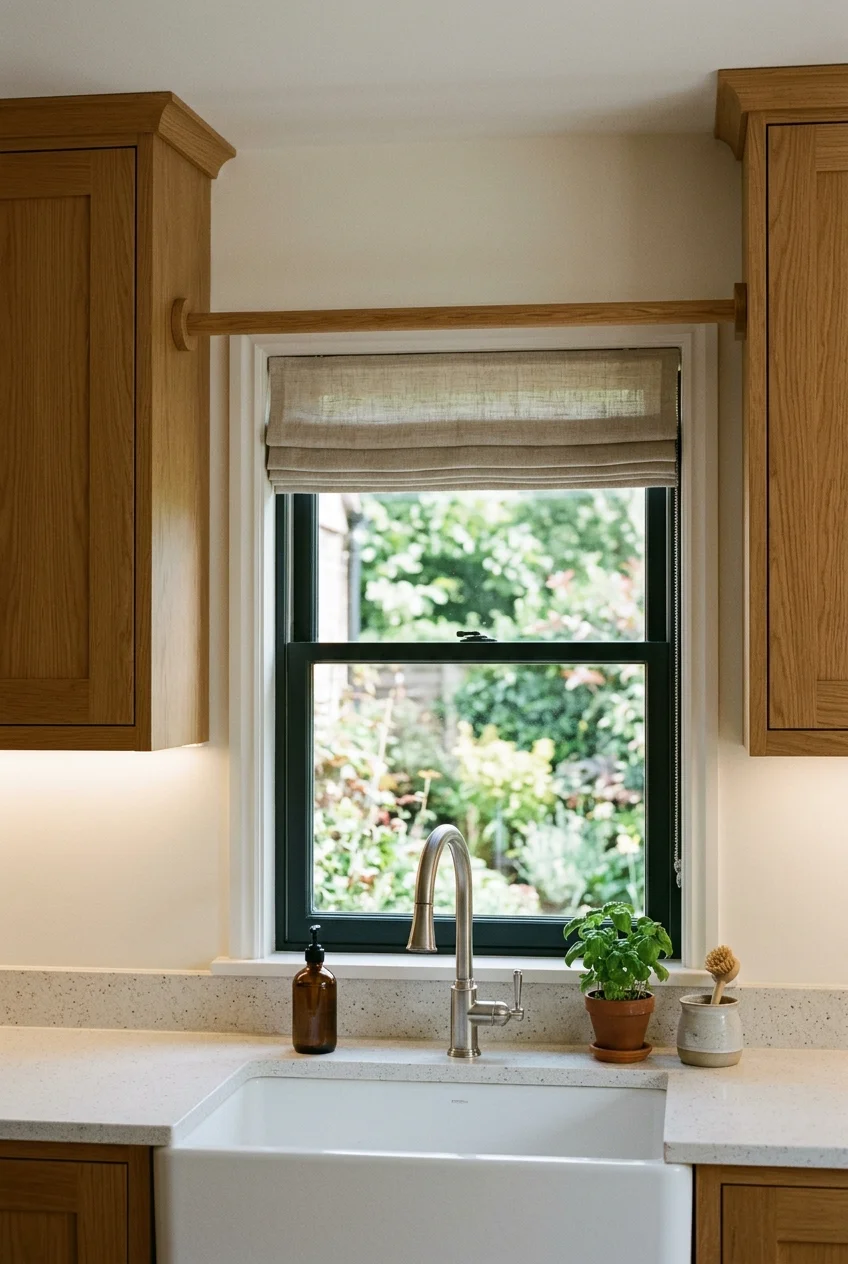
A scalloped board above the sink can date otherwise serviceable cabinets. Replacing it with a straight rail simplifies the window opening without changing surrounding storage.
First determine whether the piece hides lighting, wiring, or structural connections. Keep the window and shade fully operable after any replacement trim is installed.
29. Frame a Plain Island With Shallow Applied Panels
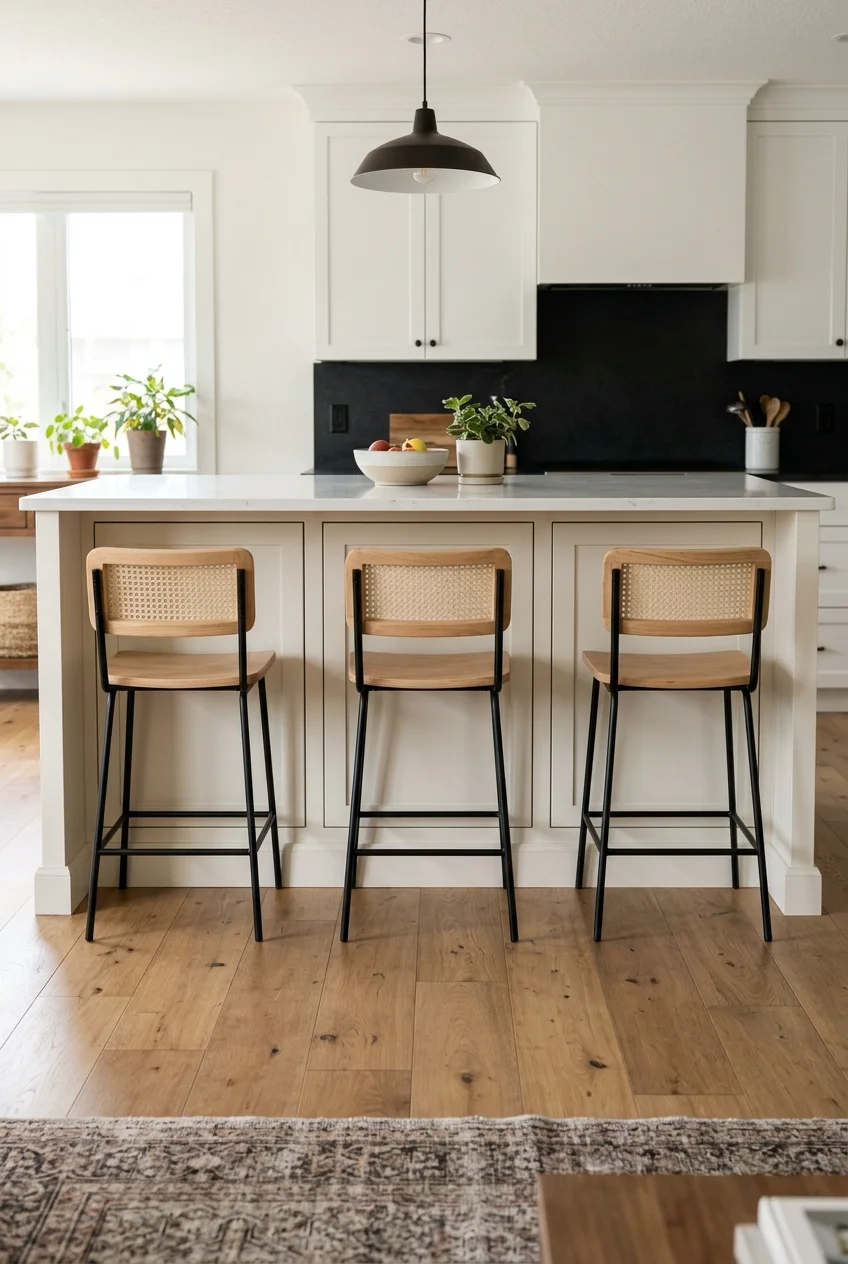
Simple rails and stiles can give a blank island back better proportions while leaving working storage unchanged. Align panel widths with doors or seating bays.
Use shallow material where stools and walkways pass close by. Finish every cut edge and stop the frame cleanly above the toe kick or floor.
Mock up the pattern with removable tape before cutting. An extra narrow panel at one end usually looks more accidental than fewer balanced divisions.
30. Use Beadboard on the Peninsula Back
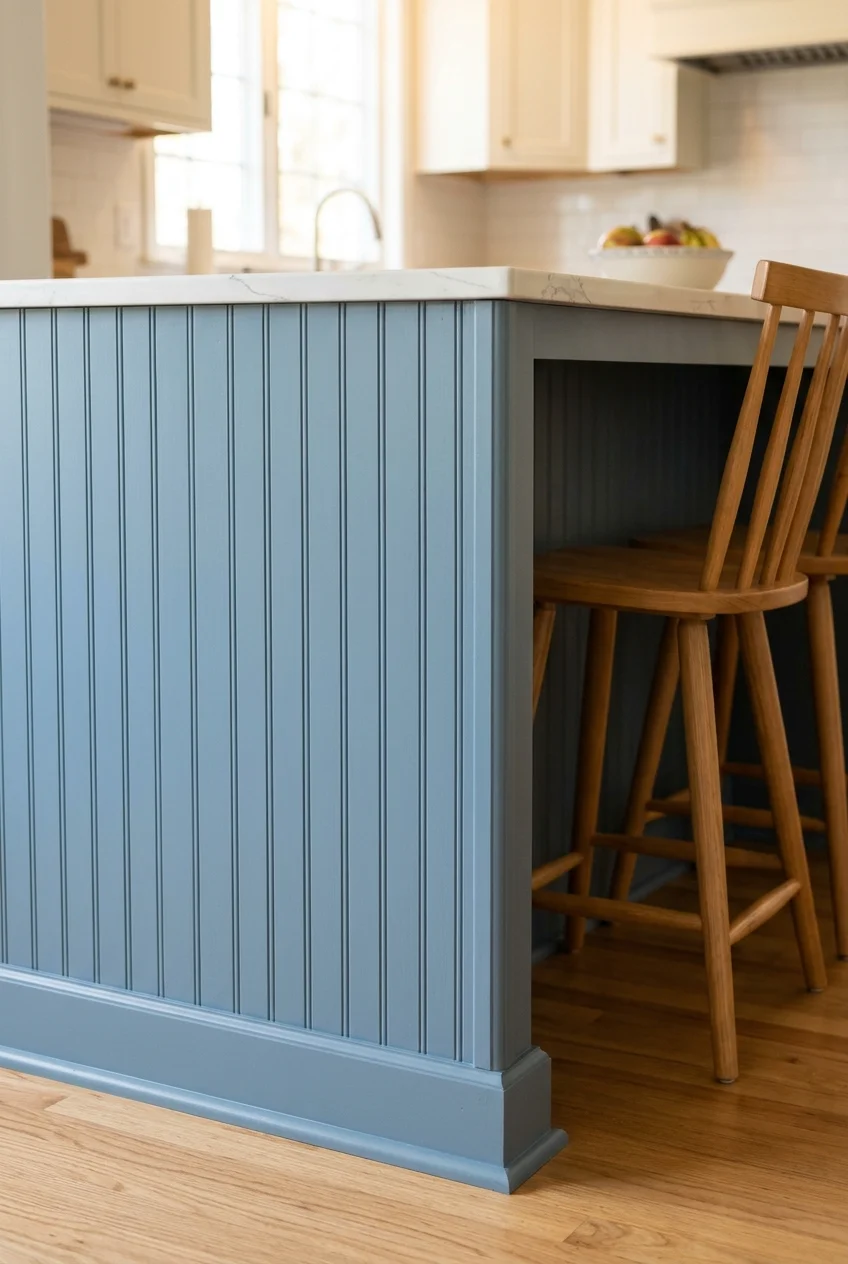
Vertical beadboard adds rhythm to one broad peninsula surface without altering doors on the working side. A washable painted finish suits occasional shoe marks and spills.
Seal vulnerable cut edges as the panel manufacturer directs, especially near flooring. End the grooves cleanly at corners and preserve usable knee clearance for seats.
Repeat the panel color on one small nearby detail rather than every cabinet. The peninsula should read as a contained furniture-like element.
31. Add Modest Furniture Feet at Selected Ends
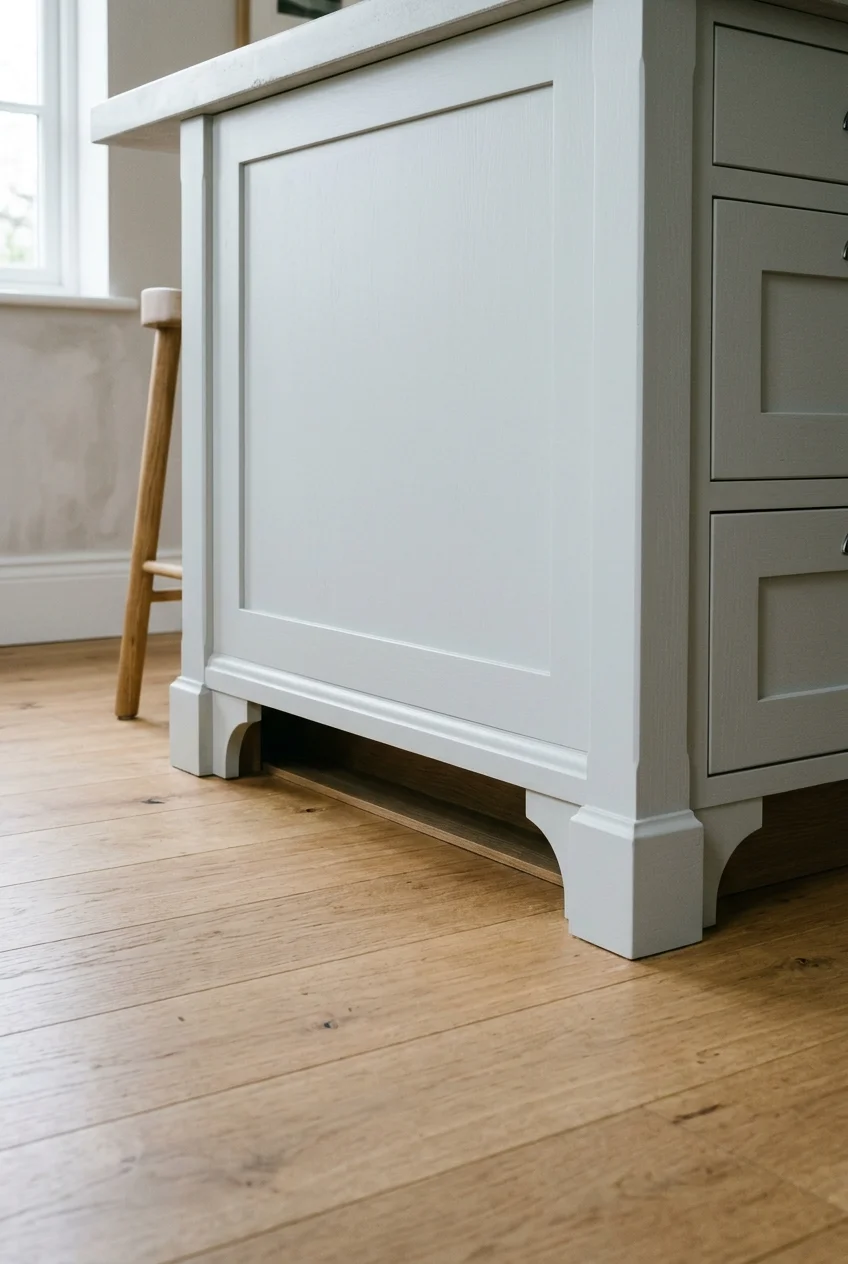
Small bracket feet can make an island or hutch section read as one furniture piece. Limit them to selected ends so the detail retains purpose.
Keep structural supports and toe space unchanged. Decorative blocks should not trap appliance panels, narrow walkways, or create difficult cleaning gaps at the floor.
32. Give One Cabinet Interior a Contrasting Color
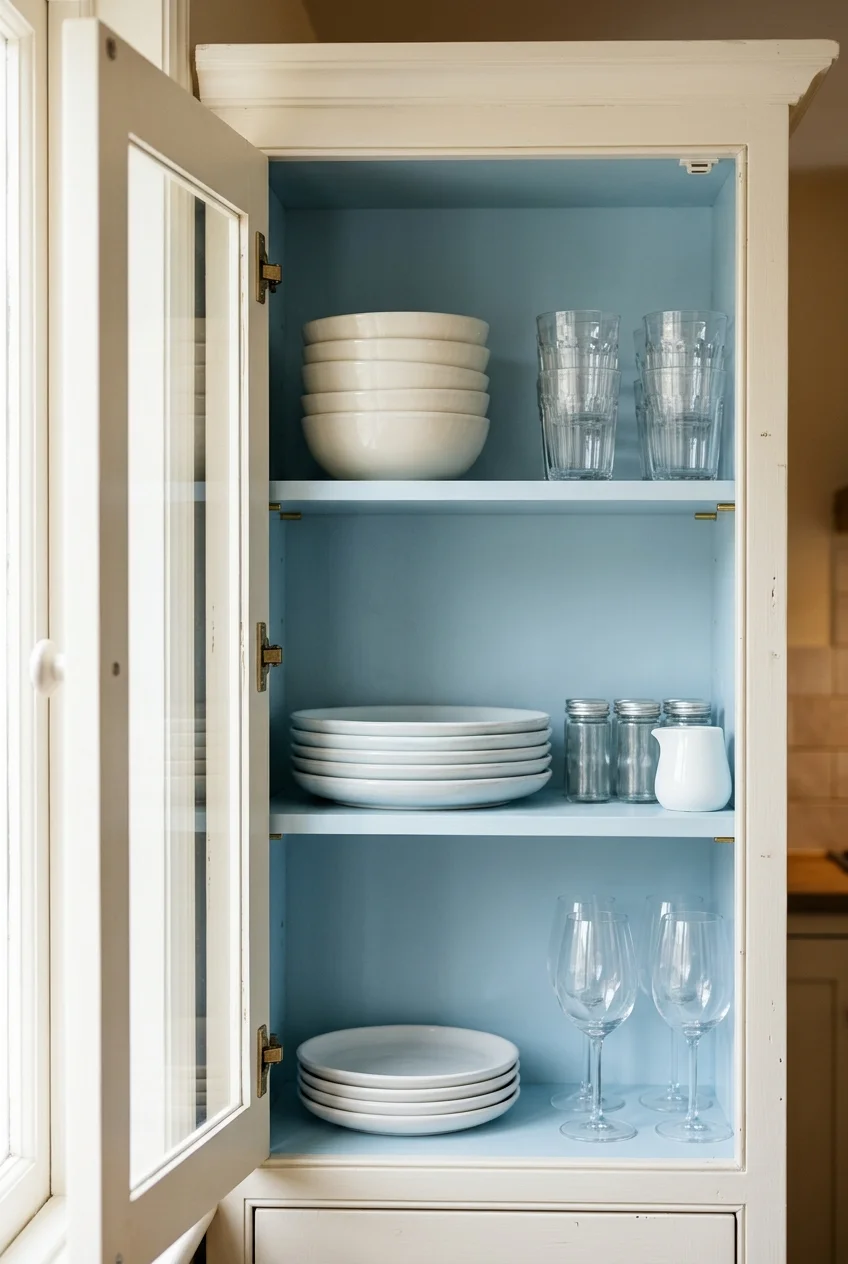
A pale blue or ochre cupboard interior makes opening an everyday dish cabinet part of the makeover. Keep the exterior connected to the surrounding run.
Remove adjustable shelves, protect hinge mechanisms, and keep pin holes clear. Use a compatible coating system and wait for its stated return-to-service stage.
Sample first Place a painted removable board behind your dishes before committing; white ceramics, clear glass, and shadows can make the color read very differently.
33. Refresh Drawer Interiors With Nonadhesive Liner
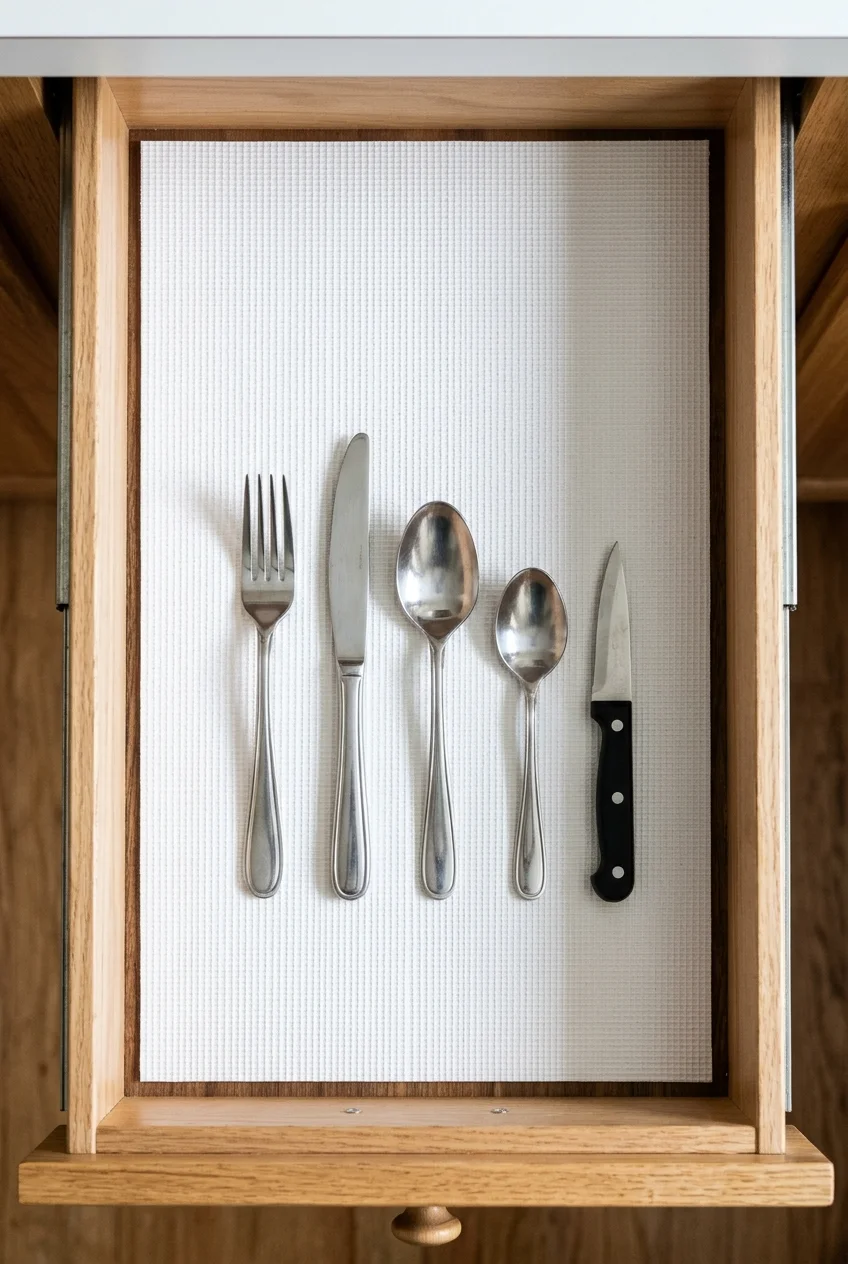
Clean drawer boxes can still feel tired when bases are scratched or mismatched. A fitted nonadhesive liner adds a neat, removable surface without hiding damage.
This 12-inch nonadhesive white shelf liner is a current cut-to-fit option; measure every drawer and confirm finish compatibility before ordering.
Make a paper template around corners, then cut the liner slightly inside the drawer edges. Repair moisture problems first and inspect beneath the liner periodically.
Storage Upgrades That Make Existing Cabinets Work Harder
34. Upgrade Worn Hinges Without Claiming Hidden Performance
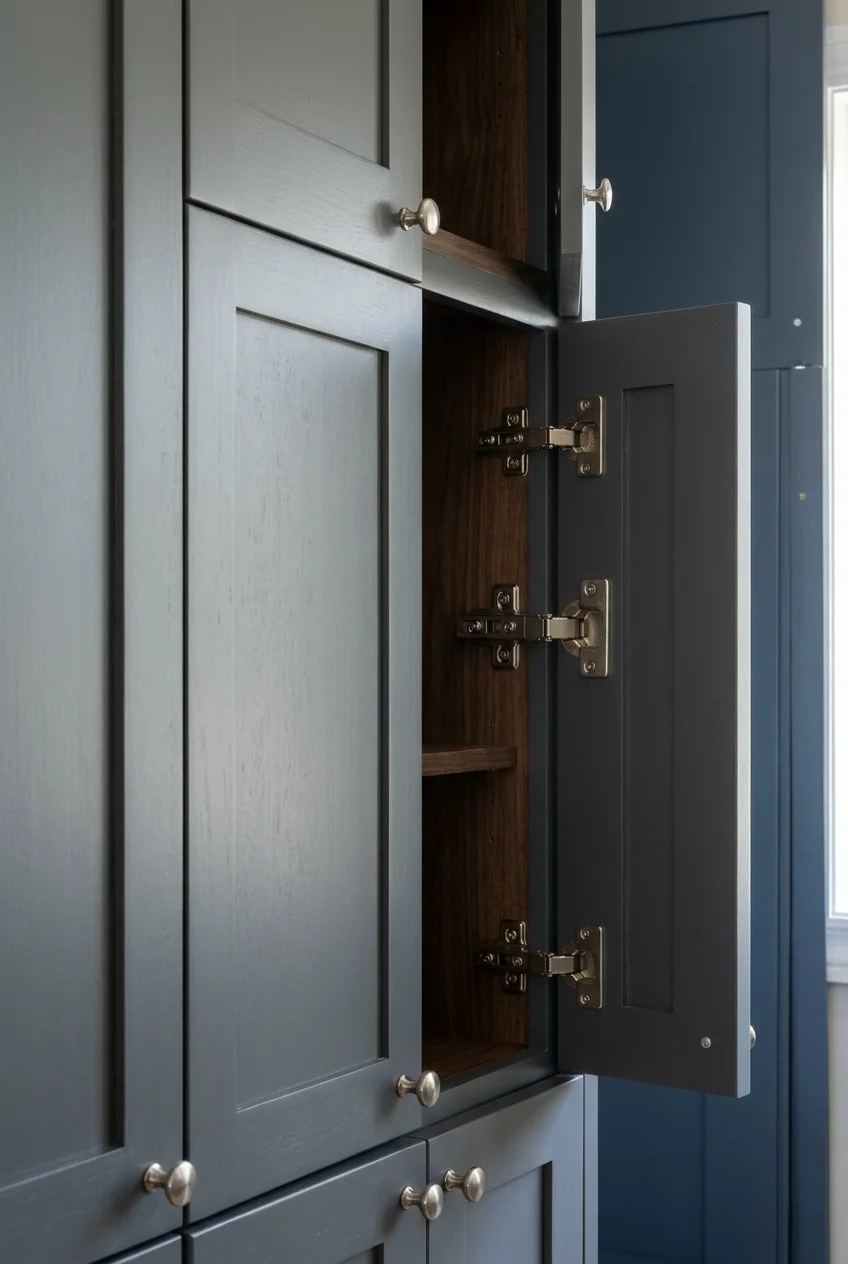
Sagging doors and uneven gaps can make fresh paint look unfinished. Replace worn hinges only with hardware compatible with the cabinet construction and door boring.
A cabinet professional can identify overlay, cup size, mounting plate, and adjustment range. A finished photograph cannot verify load rating or soft-close performance.
35. Bring Deep Base Shelves Forward With Rollout Trays
Image pending: No image is attached to this draft for idea 35 (image-35).
A fitted rollout makes the back of a deep cabinet visible without replacing the box. It works well for cookware, bowls, or small appliances used often.
Measure the clear doorway with the door fully open; hinges and center stiles reduce usable width. Confirm depth, fastening material, and rated load for the system.
- Record clear width at hinge height.
- Check the tallest stored item and tray sides.
- Allow room for handles and neighboring doors.
- Confirm mounting points in sound cabinet material.
For related options, review these kitchen storage ideas and choose the smallest retrofit that solves the access problem you actually have.
36. Convert One High-Use Base Cabinet to Deep Drawers
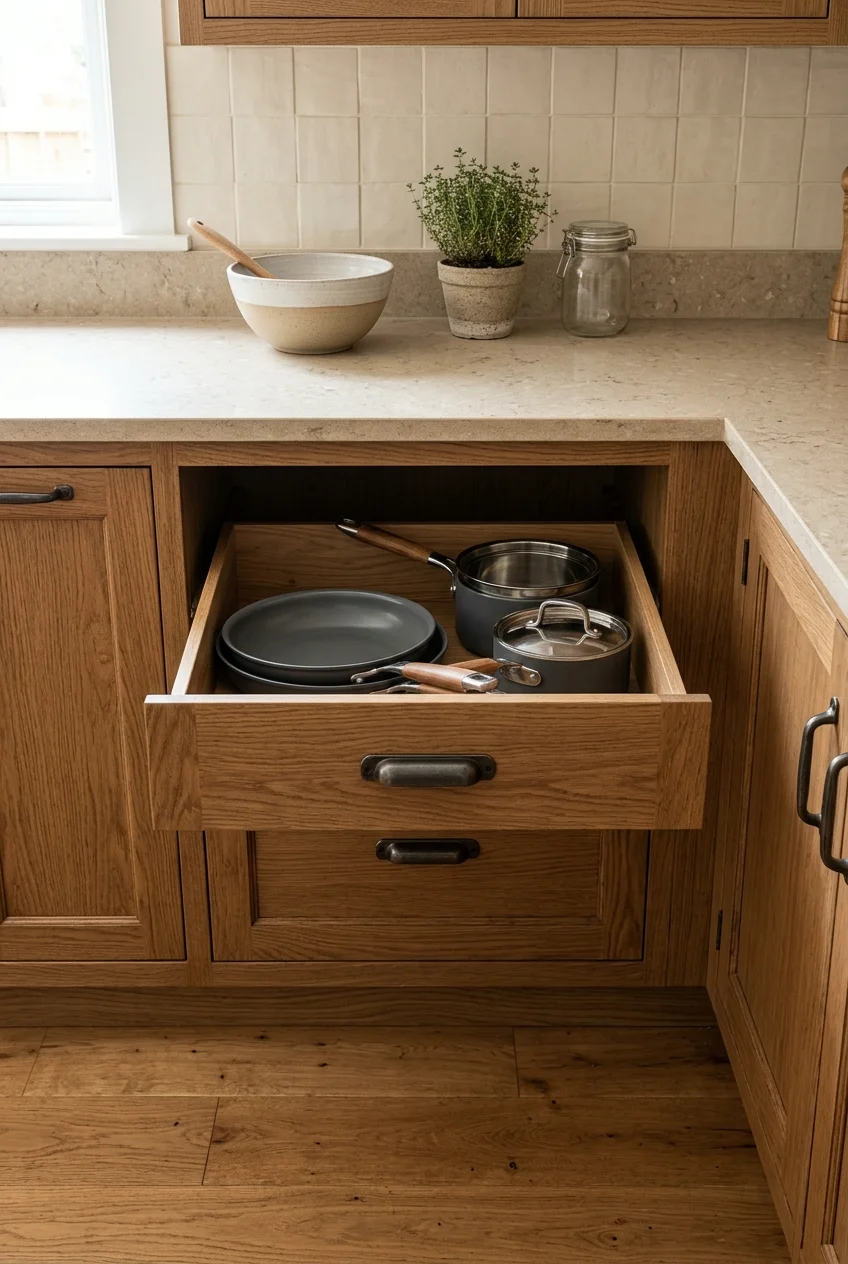
Deep drawers reveal cookware from above and reduce reaching through a narrow door. Targeting one busy cabinet can improve daily use without rebuilding the entire kitchen.
Existing face frames, center stiles, plumbing, and cabinet squareness determine feasibility. Do not cut structural-looking parts until a cabinetmaker has assessed their role.
- Inventory the cookware intended for the new drawers.
- Have the box and frame assessed for conversion.
- Plan drawer heights around actual contents and slides.
- Fit boxes before aligning final fronts and handles.
A narrower drawer arrangement may preserve more of the existing frame. Compare that option with simple interior rollouts before committing to major cabinet alteration.
Load the fitted drawers gradually and test full extension before final adjustment. Drawer fronts need even reveals without scraping neighboring doors or appliance handles.
37. Stand Trays and Cutting Boards in Vertical Dividers
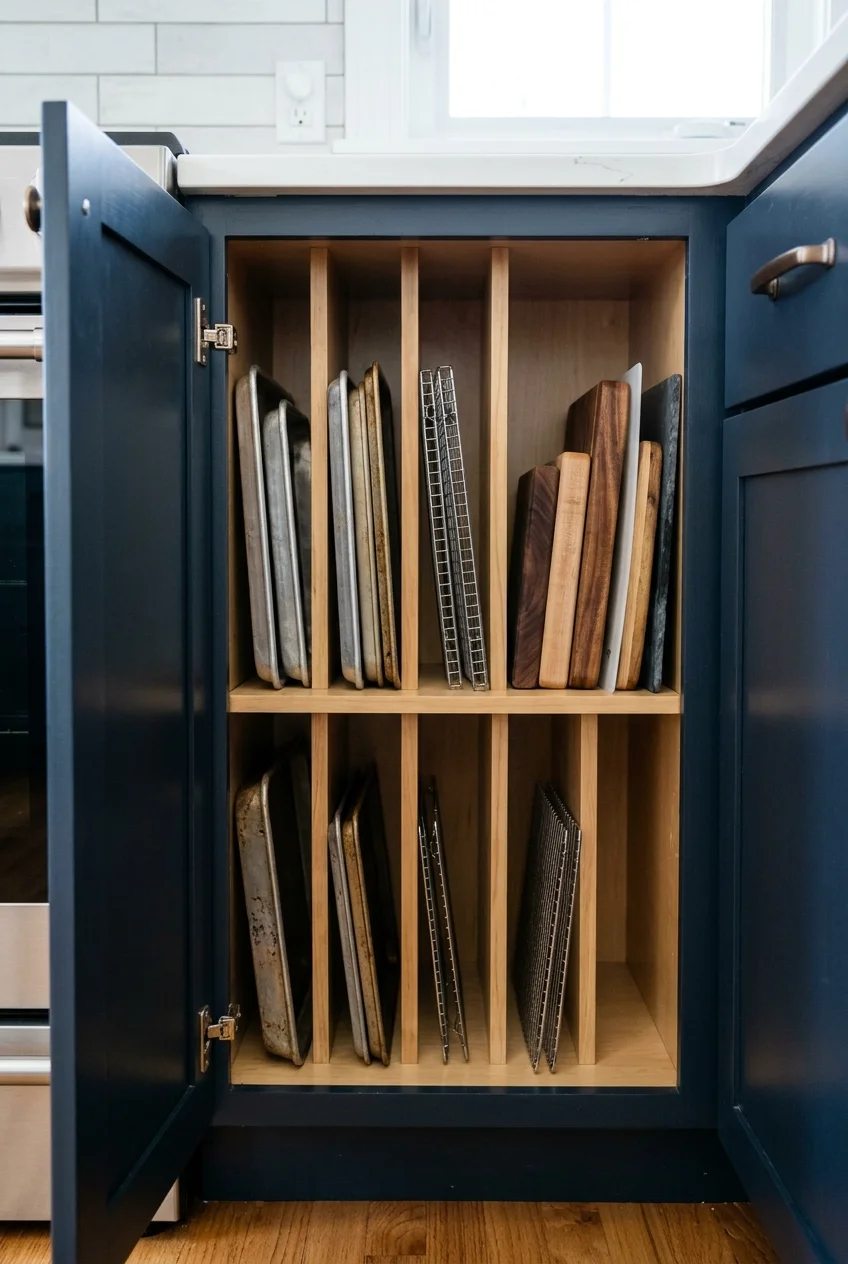
Vertical bays make sheet pans, cooling racks, and boards removable without lifting a heavy stack. A narrow base cabinet near preparation often works well.
Set spacing from the widest rim and tallest handle you own. Leave one generous bay instead of creating several slots too narrow for useful pieces.
38. Fit Under-Sink Storage Around the Plumbing
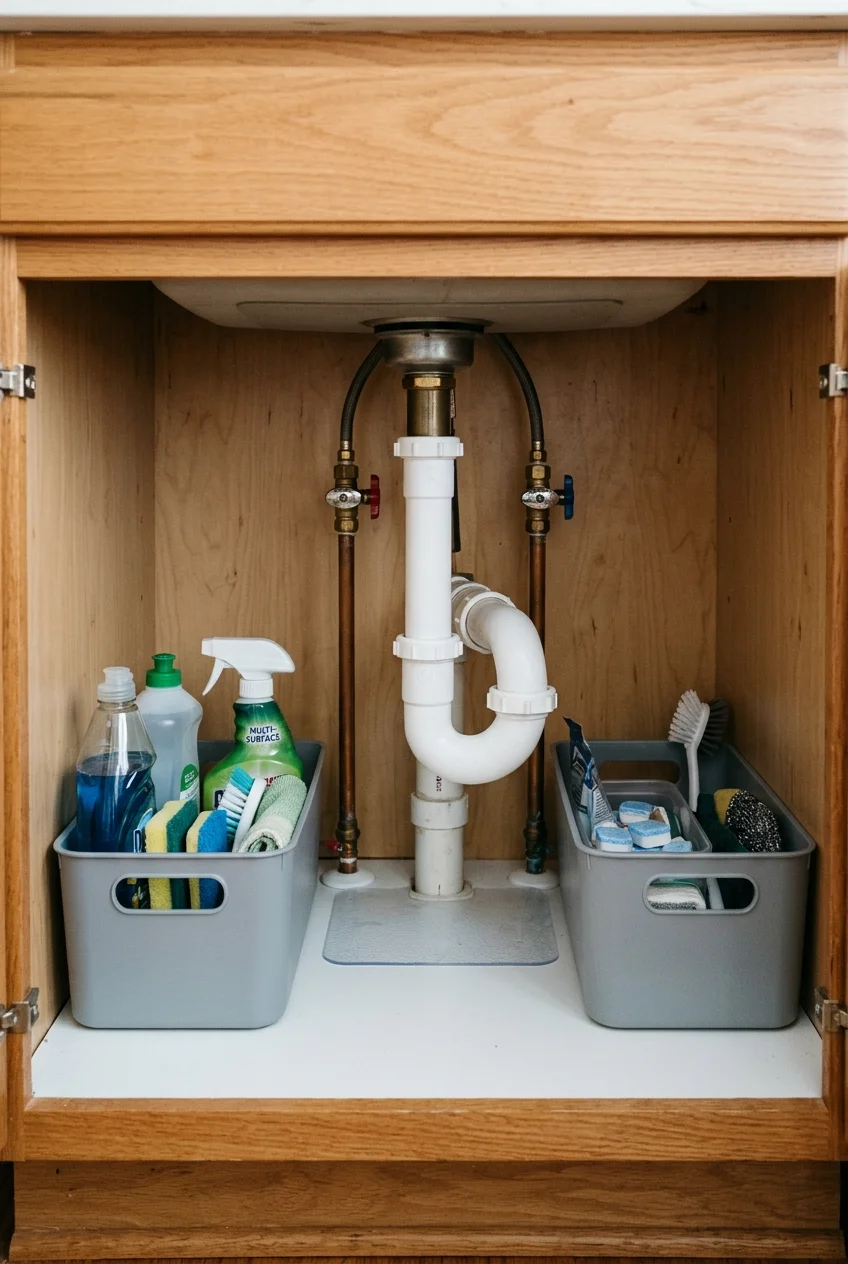
Measure the trap, supply lines, disposal, shutoff valves, hinges, and door opening before buying organizers. Two smaller units often fit better than one wide shelf.
Keep valves visible and leak-sensitive paper elsewhere. A removable tray can contain minor drips while leaving enough open space to inspect connections during cleaning.
Choose containers that can leave the cabinet without disconnecting plumbing. An organizer is not useful when the trap prevents its removal for washing.
- Dishwashing supplies in one removable bin.
- Surface cleaners in a second stable caddy.
- Spare cloths stored away from pipe joints.
- Clear access to both shutoff valves.
39. Turn a false Sink Front Into a Tip-Out Tray
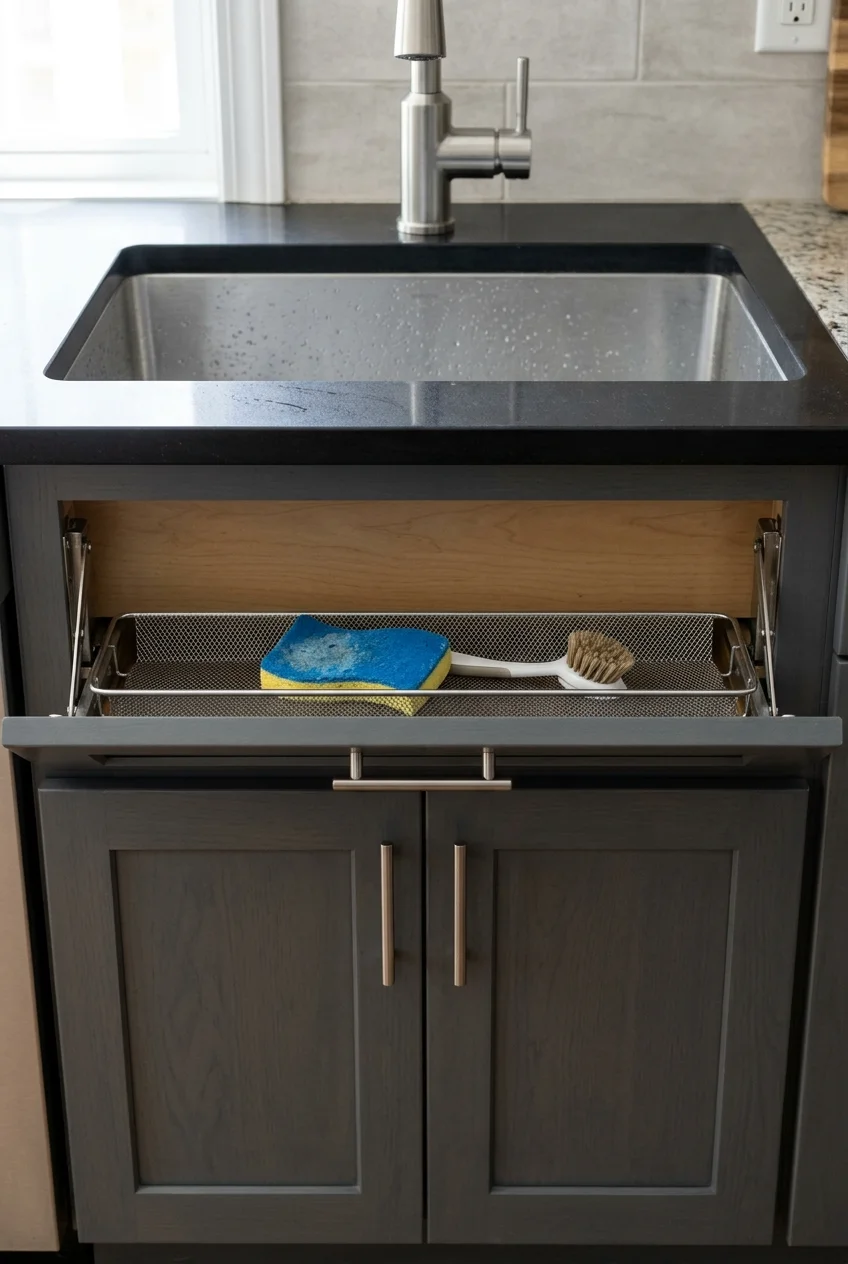
A tip-out tray can move a sponge and small brush off the sink ledge when the false front has enough depth and compatible construction.
Check clearance from the sink bowl, clips, faucet hardware, and cabinet frame. Wet items still need airflow, cleaning, and a removable insert that catches drips.
40. Hide Trash and Recycling Near the Prep Zone
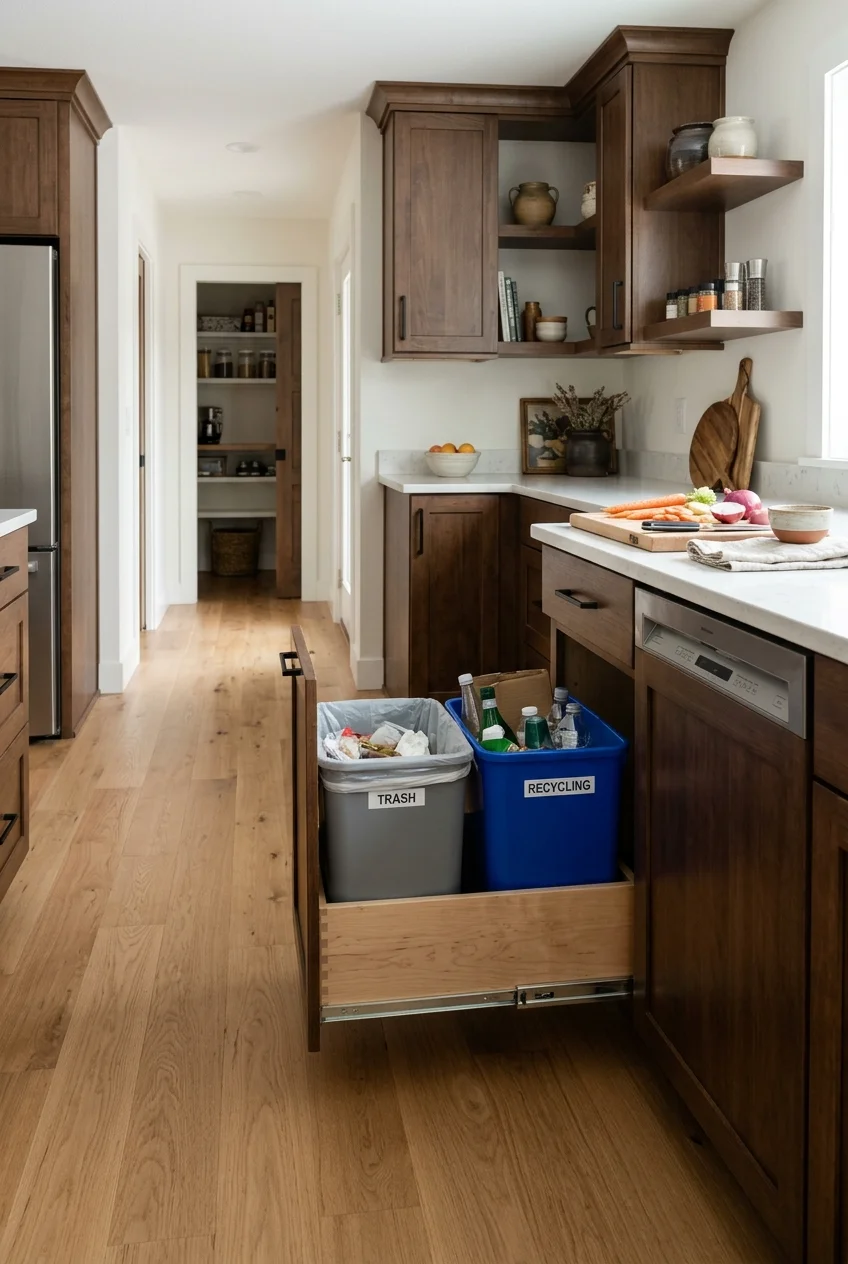
A divided pullout keeps freestanding bins out of sight and shortens the route from cutting board to waste. Use separate containers only when both remove easily.
The open pullout must clear dishwasher doors, corner handles, stool legs, and the main aisle. Choose washable interiors and leave room to lift bins vertically.
Placement check Tape the pullout footprint on the floor, then open every nearby appliance and cabinet together; hidden storage fails when its working position blocks another task.
41. Build a Coffee Station Inside One Cabinet Bay
Image pending: No image is attached to this draft for idea 41 (image-41).
Concentrate coffee equipment, mugs, filters, and beans in one bay so supplies stop spreading across the main counter. Leave an open surface for pouring.
Confirm outlet access, appliance ventilation, steam clearance, and door movement. A retractable shelf or appliance garage requires hardware designed for the intended load and heat.
42. Add a Short Rail for Everyday Tools
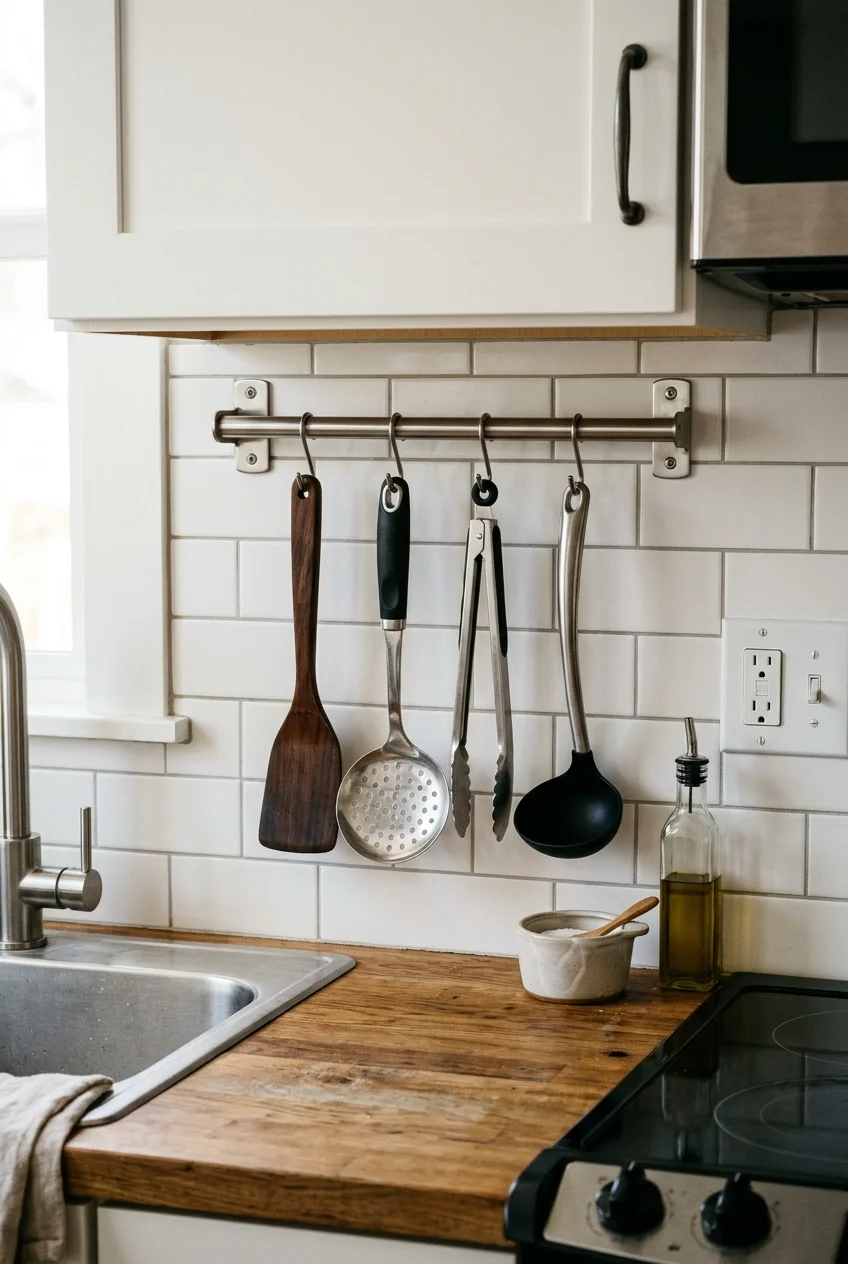
A short wall rail can free a crowded drawer while keeping frequently washed tools beside preparation. Limit it to items used often enough to stay clean.
Anchor for the expected load and position utensils away from burners, sink splashes, and door swings. Keep sharp blades in safer dedicated storage.
Backsplashes and Counters With Clear Stopping Points
43. Install Peel-and-Stick Tile on an Approved Smooth Wall
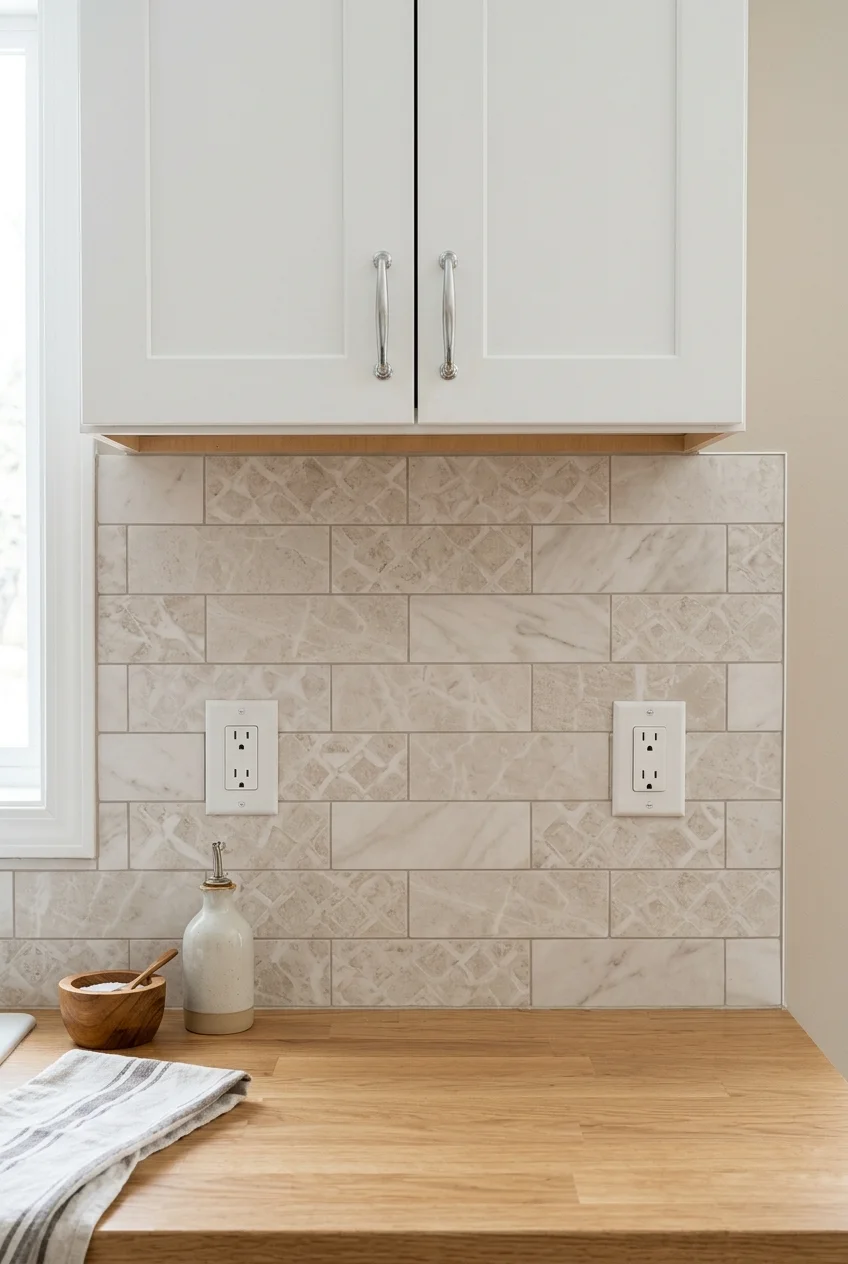
Peel-and-stick tile can change a plain backsplash without wet mortar, but surface condition controls the result. The wall must meet the selected product's instructions.
This beige-and-white peel-and-stick tile set is one current visual option; verify coverage, substrate approval, heat limits, and every cut before purchase.
Clean, dry, and repair the wall, then test one inconspicuous area. Newly painted surfaces may need weeks to cure, depending on paint and tile instructions.
Order enough matching material for planned cuts and potential mistakes. Small color or print differences between batches can become obvious across one continuous wall.
- Plan full sheets from the main focal area.
- Dry-fit corners, outlets, and end cuts.
- Apply gradually while pressing trapped air outward.
- Finish exposed edges with an approved trim method.
Rental note Get written permission and test removal first; self-adhesive products can lift weak paint or leave residue, so removable does not guarantee damage-free.
44. Stack Simple Subway Tile Vertically
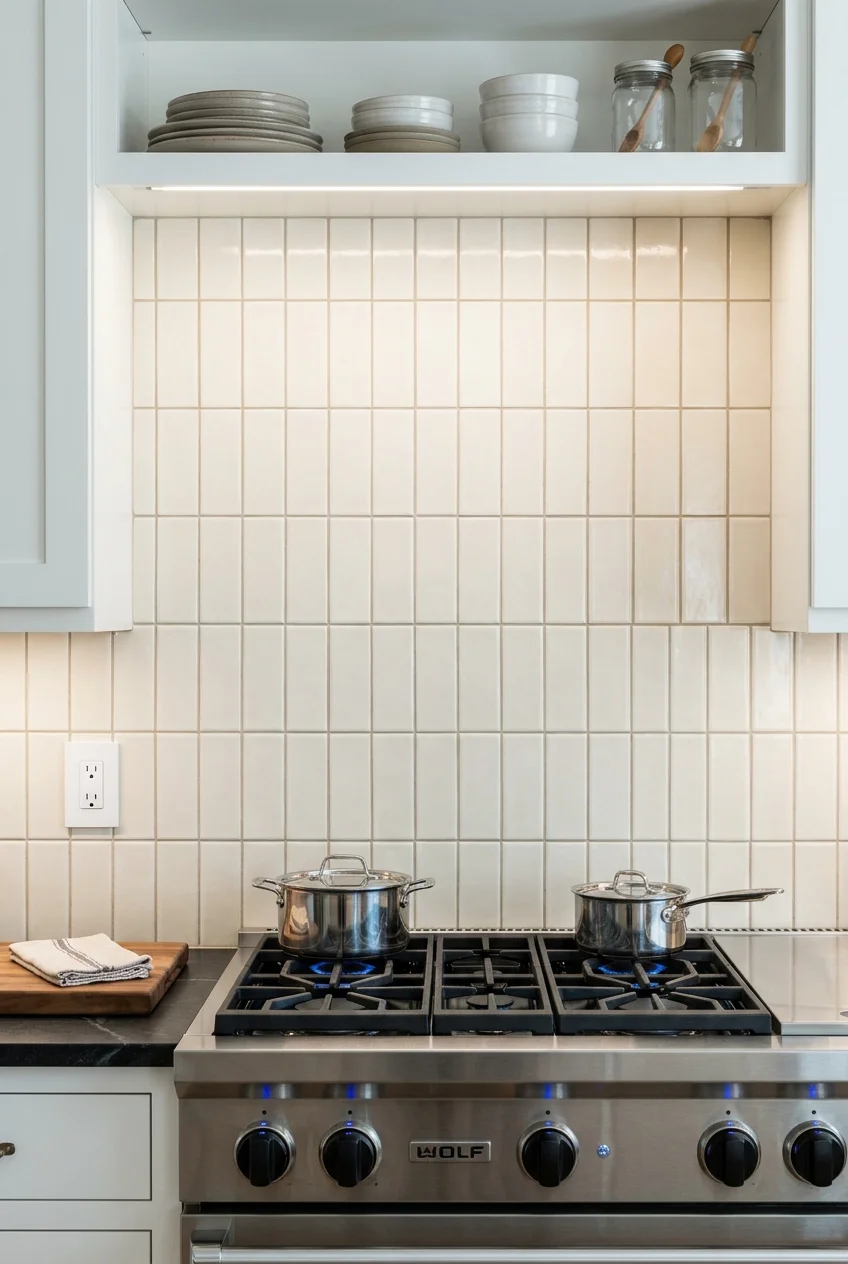
A vertical stacked layout changes the rhythm of familiar rectangular tile without adding another color. It can visually lift the space between counter and upper cabinets.
Center the layout on the range or principal sink view, then plan side cuts before setting tile. Corners and outlets should interrupt consistent courses cleanly.
45. Use Square Tile With Soft Color Variation
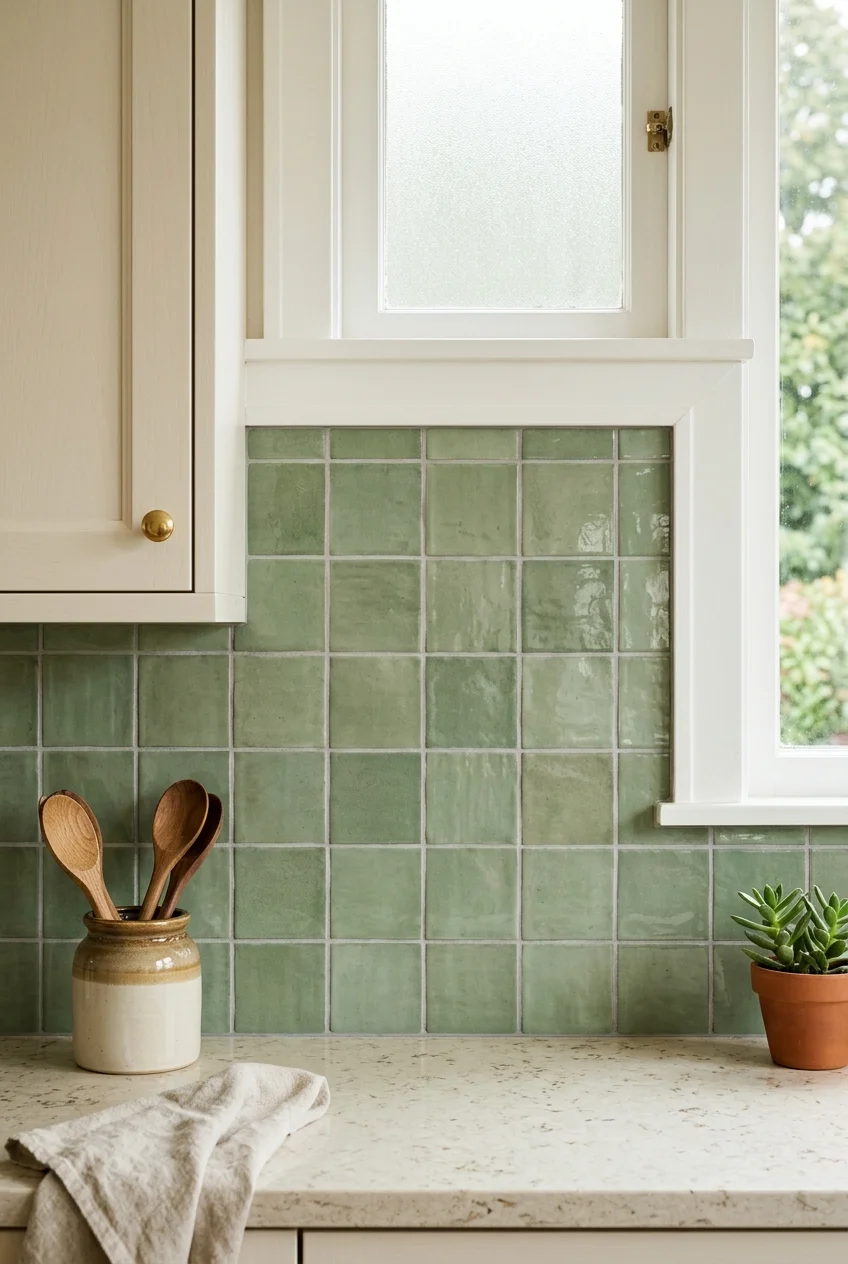
Small square tile introduces visible texture through repeated joints and slight tonal change. Keep cabinet and counter patterns quieter so the backsplash remains the clear feature.
Inspect multiple boxes together before installation and blend variation across the wall. Plan cuts, grout, edge trim, and cleaning requirements with the actual tile.
46. Refresh Grout Instead of Replacing Sound Tile
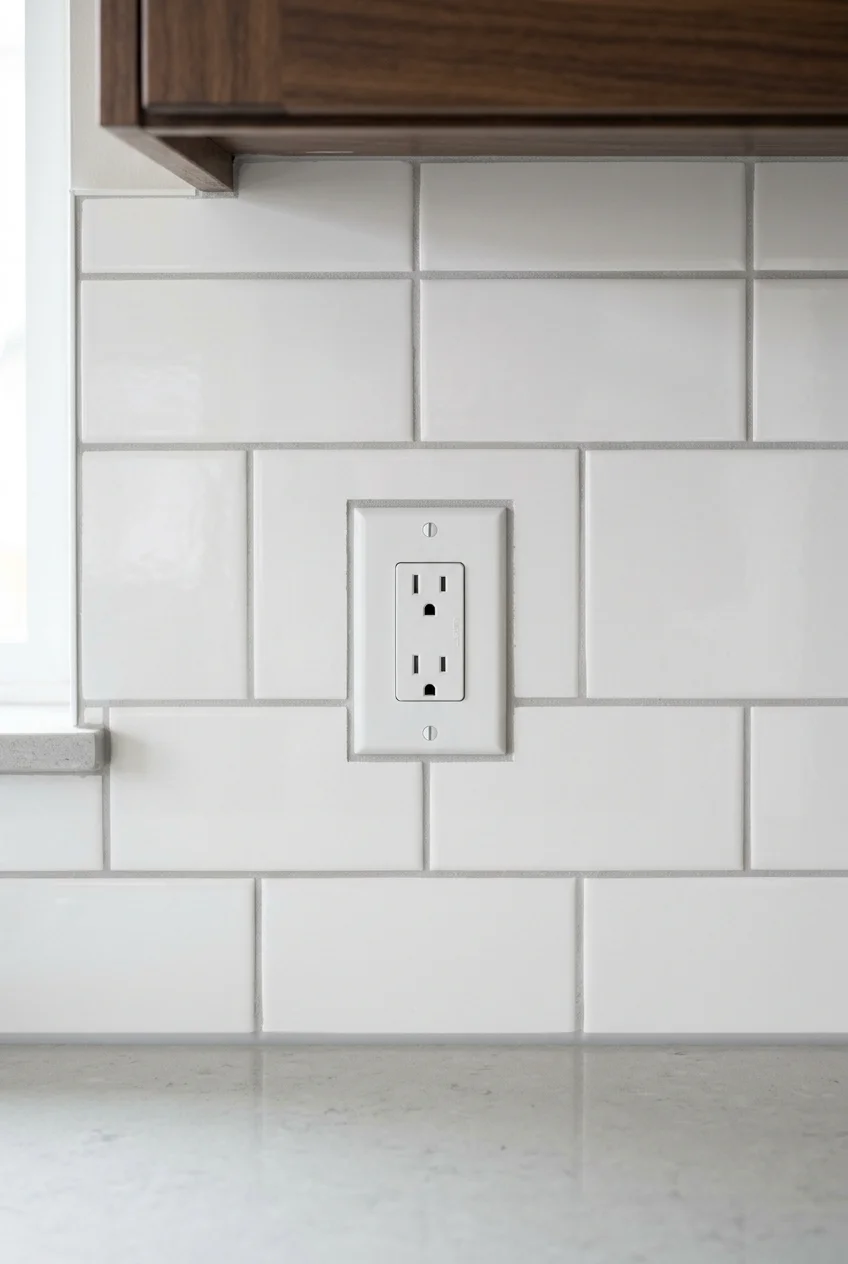
Dirty or uneven grout can make serviceable tile look older than it is. Start with cleaning appropriate to the tile and grout rather than immediate recoloring.
Repair cracked or failing joints with guidance suited to the installation. Test any grout colorant or sealer in a hidden area because sheen and color can shift.
47. Use Painted Paneling Only in Suitable Backsplash Zones
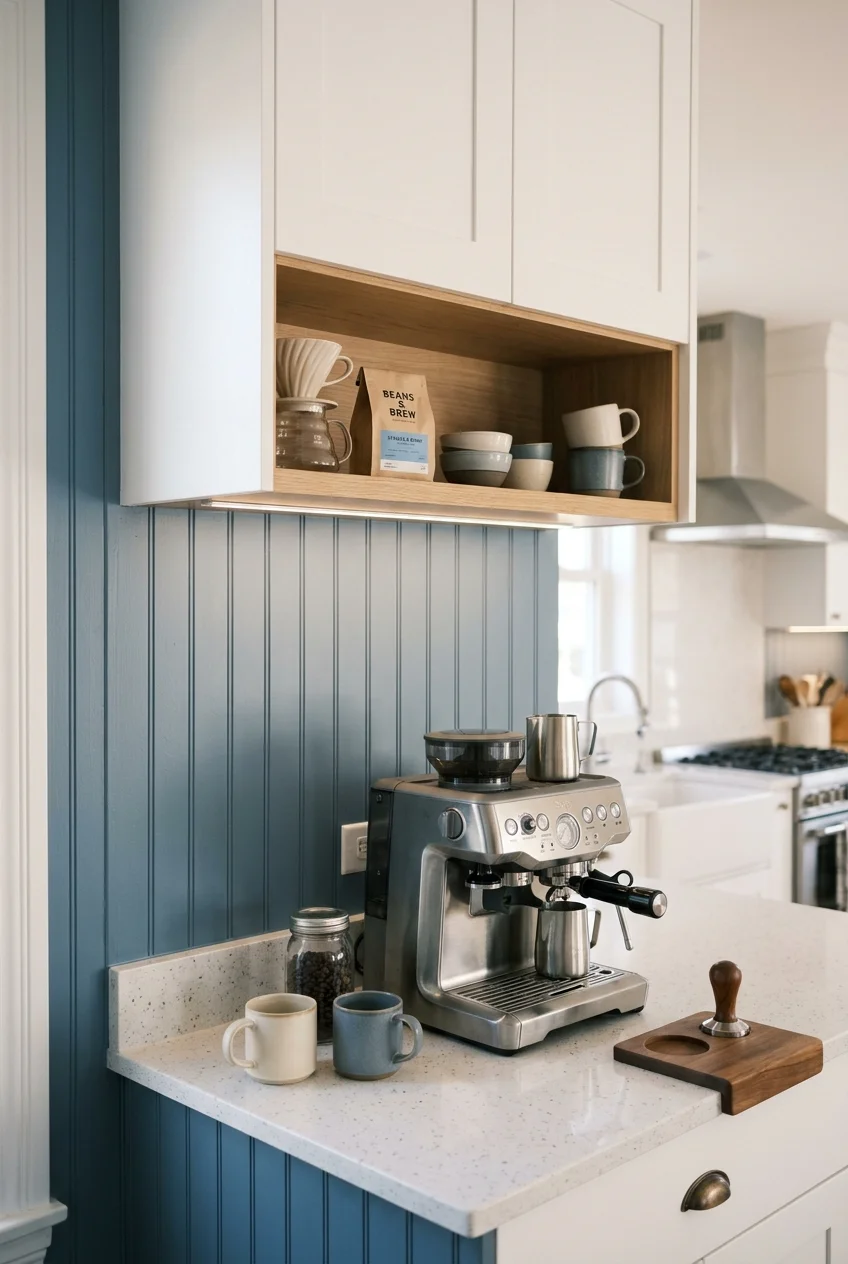
Narrow painted paneling can suit a dry coffee station or quiet counter wall, adding line and color without tiling every surface.
Keep combustible or moisture-sensitive materials away from heat, flame, and heavy splashes unless the product and local requirements approve that exact location.
Use a scrubbable compatible finish and seal cut edges as directed. Tile, glass, or another rated surface may be better behind cooking and wet zones.
48. Carry One Slab Material Up as a Short Backsplash
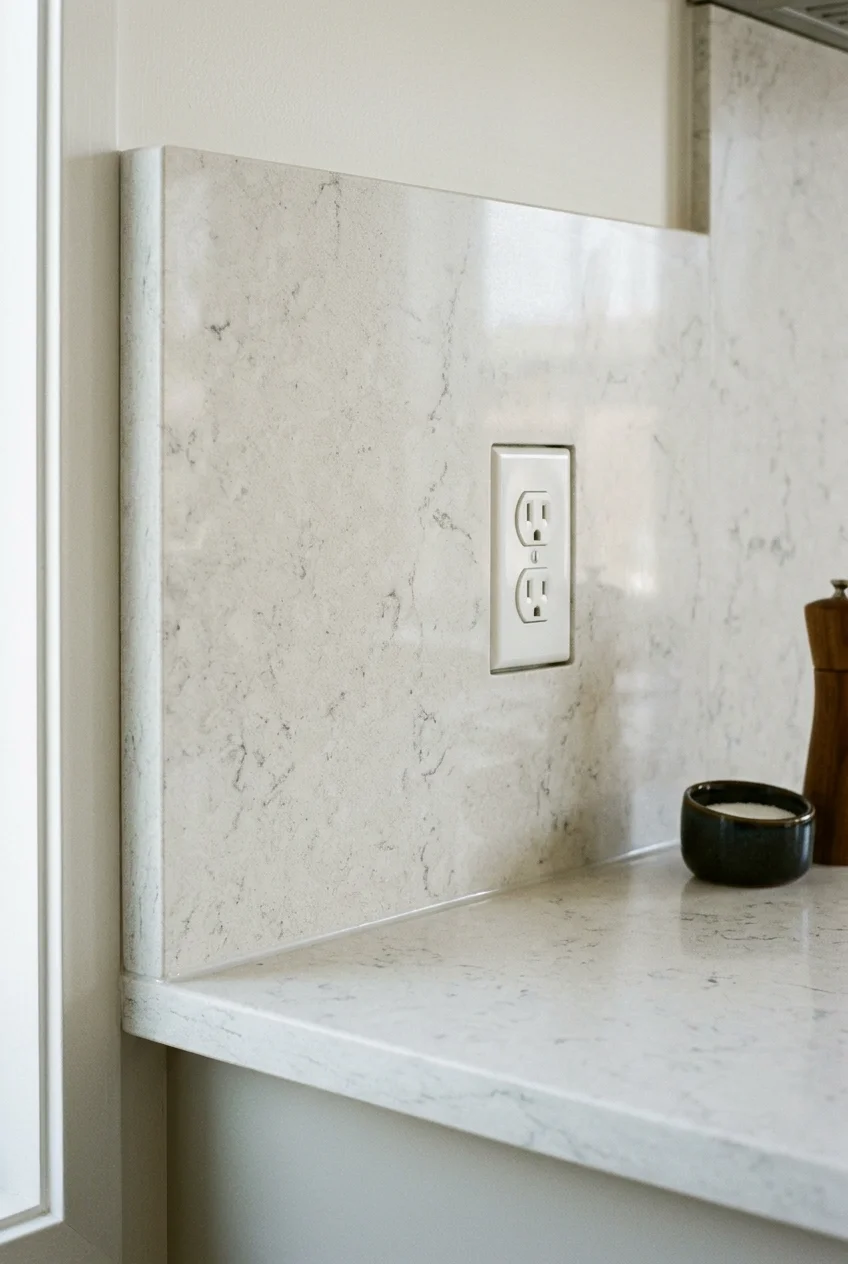
A short matching backsplash creates one continuous counter line and avoids numerous grout joints. It works best when the retained wall above is smooth and deliberate.
Fabrication must account for outlets, corners, seams, appliance clearances, and wall irregularities. Ask the counter installer how edges and joints will be finished.
49. Top the Island With a Contrasting Wood Surface
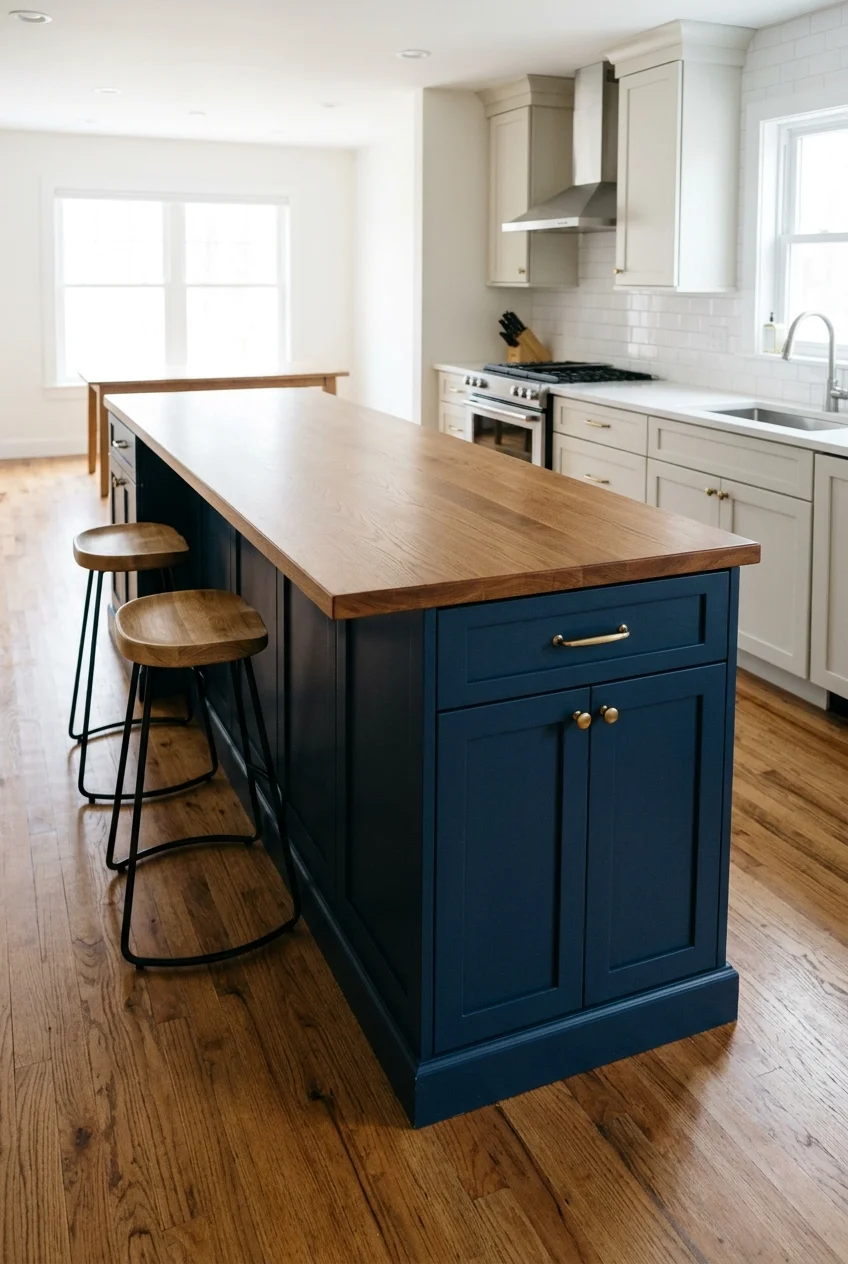
A wood island top can warm a kitchen whose perimeter counters are plain laminate or stone. Keep the contrast contained to the separate island footprint.
Specify a finish and maintenance plan suited to kitchen use, then protect sink, heat, and appliance clearances. Wood movement and seams need professional consideration.
50. Choose New Laminate With a Deliberate Edge Profile
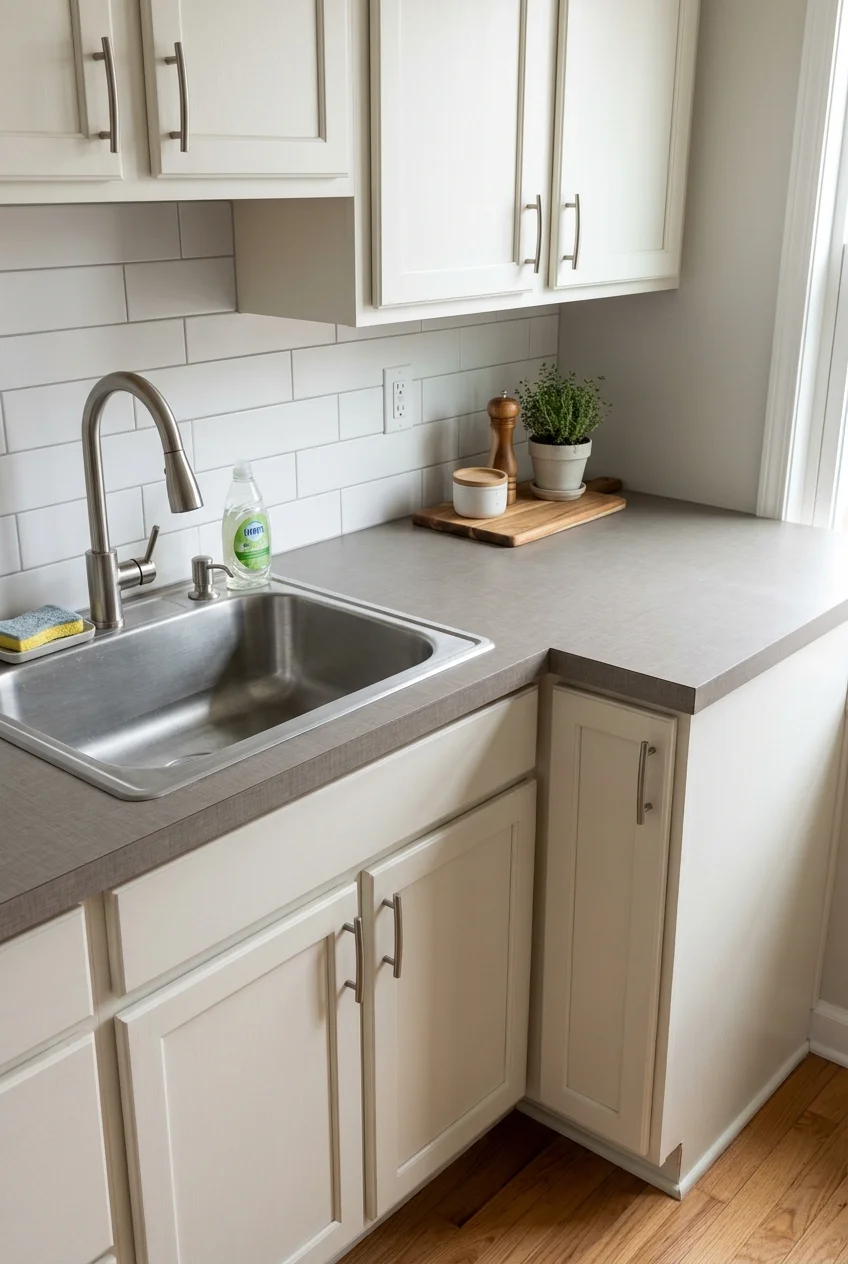
Modern laminate can replace a visibly damaged builder counter without forcing a stone budget. A restrained pattern and clean edge often matter more than imitation drama.
Review full-size samples beside cabinets and floors. Plan sink cutouts, seams, end caps, backsplash junctions, and heat protection with the fabricator or manufacturer.
51. Replace Only the Countertops When the Layout Works
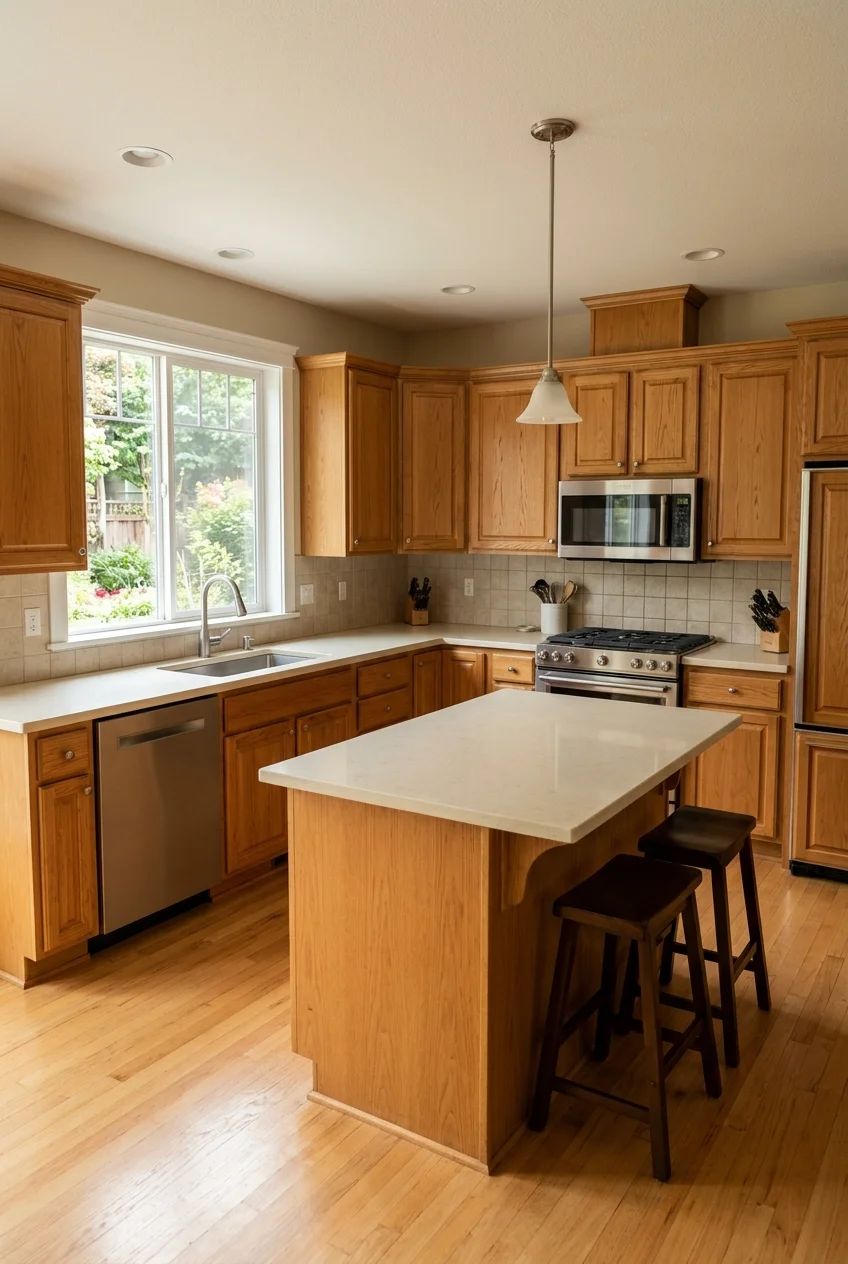
New counters can shift the entire palette while cabinets and plumbing remain in place. Choose them after deciding which cabinet finish truly deserves to stay.
A fabricator should assess base support, level, seams, overhangs, sink mounting, faucet holes, and appliance gaps. Counter removal can also damage the existing backsplash.
Protect cabinets during demolition and discuss wall repair before installation day. A new counter rarely meets an old backsplash at precisely the same height.
Sequence note Finalize cabinet finish samples before templating and discuss backsplash removal early; changing surface thickness can expose wall gaps or alter outlet and window relationships.
Lighting, Appliance Surrounds, and Finishing Personality
52. Replace a Decorative Range Hood Cover Carefully
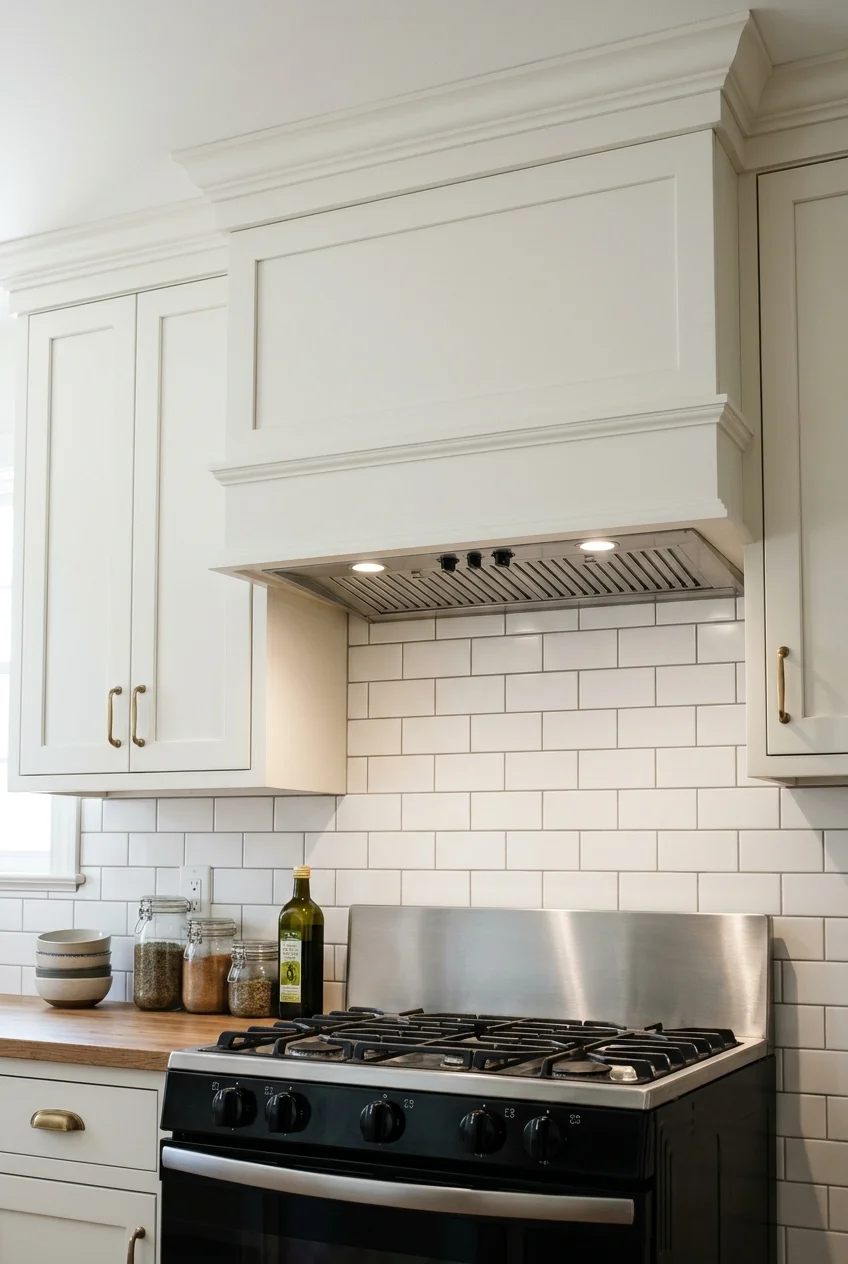
A simplified hood surround can remove an oversized builder detail while keeping ventilation as the functional priority. The visible cover must suit the actual insert.
Confirm manufacturer clearances, duct route, service access, electrical requirements, and wall support. Never reduce required spacing to copy a tightly cropped inspiration photograph.
Coordinate the new cover with nearby cabinet rails or backsplash edges. Let a qualified installer handle changes involving ductwork, power, gas appliances, or combustible materials.
Keep filters, controls, and service fasteners reachable after the surround is finished. A decorative shell should never turn routine cleaning into partial demolition.
53. Make the Microwave Less Dominant Without Hiding Ventilation
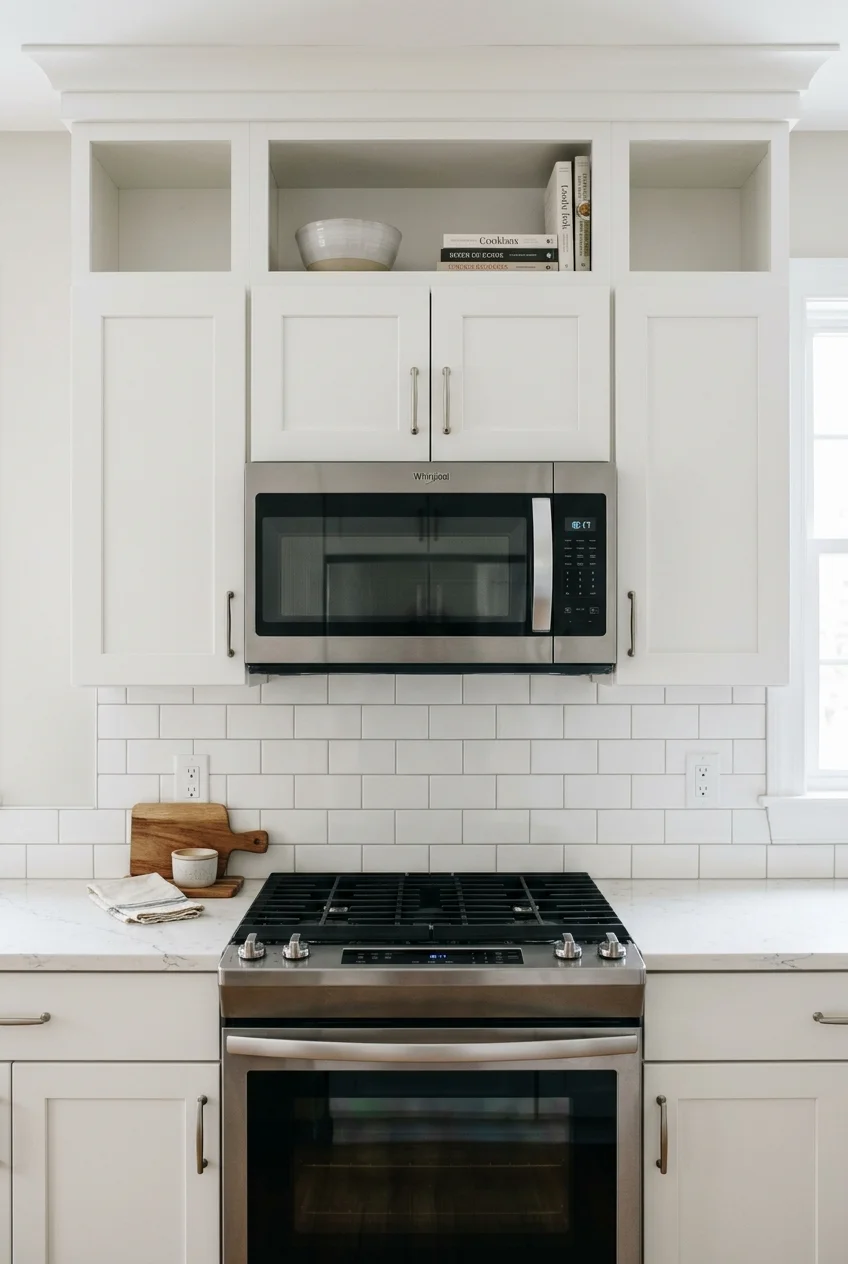
An over-range microwave can feel less isolated when its color relates to nearby hardware and the backsplash has a clear stopping line around it.
Do not box in required vents or service panels. Replacement, relocation, and cabinet modifications must follow the appliance instructions and may need qualified electrical or ventilation work.
54. Frame the Refrigerator With Side Panels and a Top Cabinet
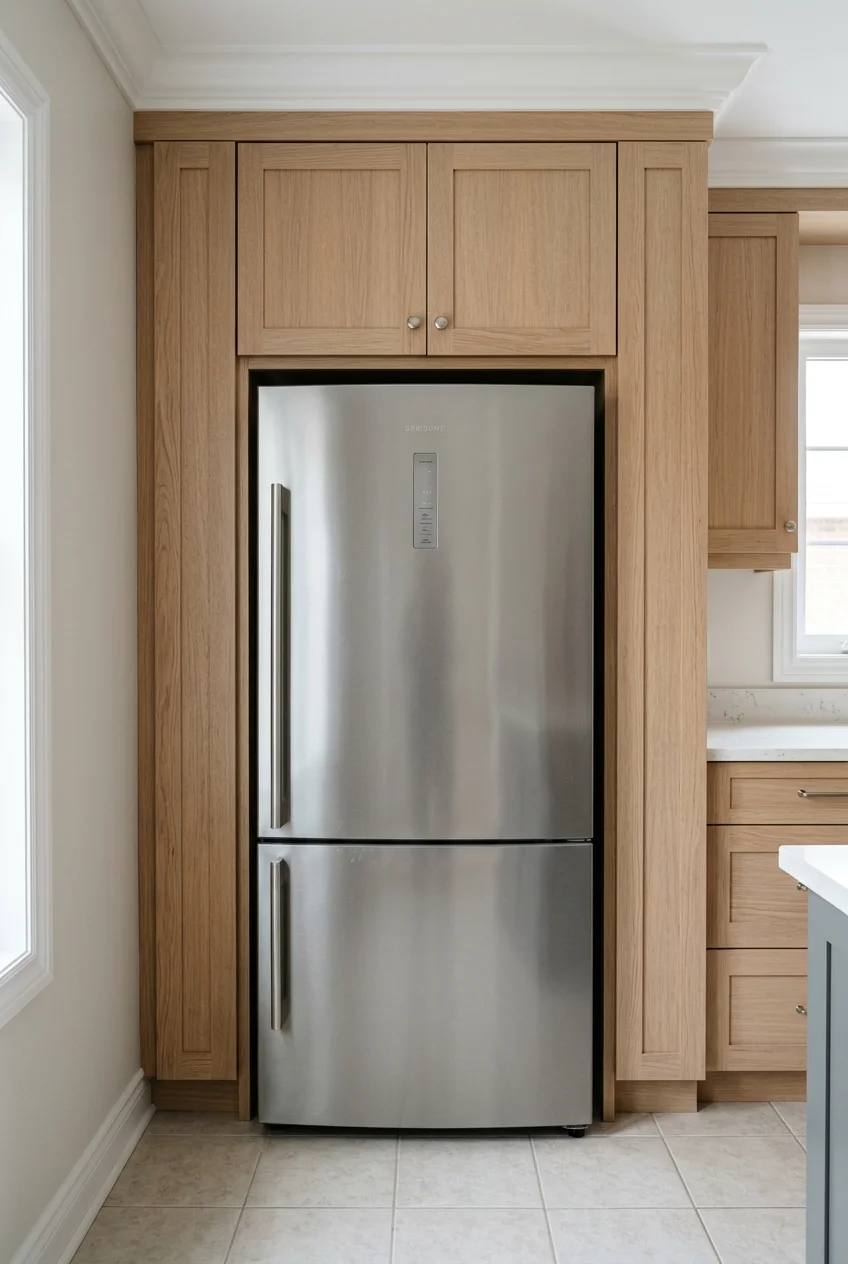
Finished side panels and a proportionate top cabinet can make a freestanding refrigerator feel connected to the cabinet run without pretending it is fully built in.
Use the exact refrigerator specifications for ventilation, hinge movement, handle clearance, water connection, and removal path. Leave every required gap serviceable.
Carry panel color and toe-kick logic from neighboring cabinets. A too-tight surround creates more trouble than the visual improvement is worth.
Open both refrigerator doors and nearby drawers together on the plan. Thick handles and hinges can require more side clearance than the cabinet opening suggests.
55. Replace One Upper Cabinet With Two Useful Shelves
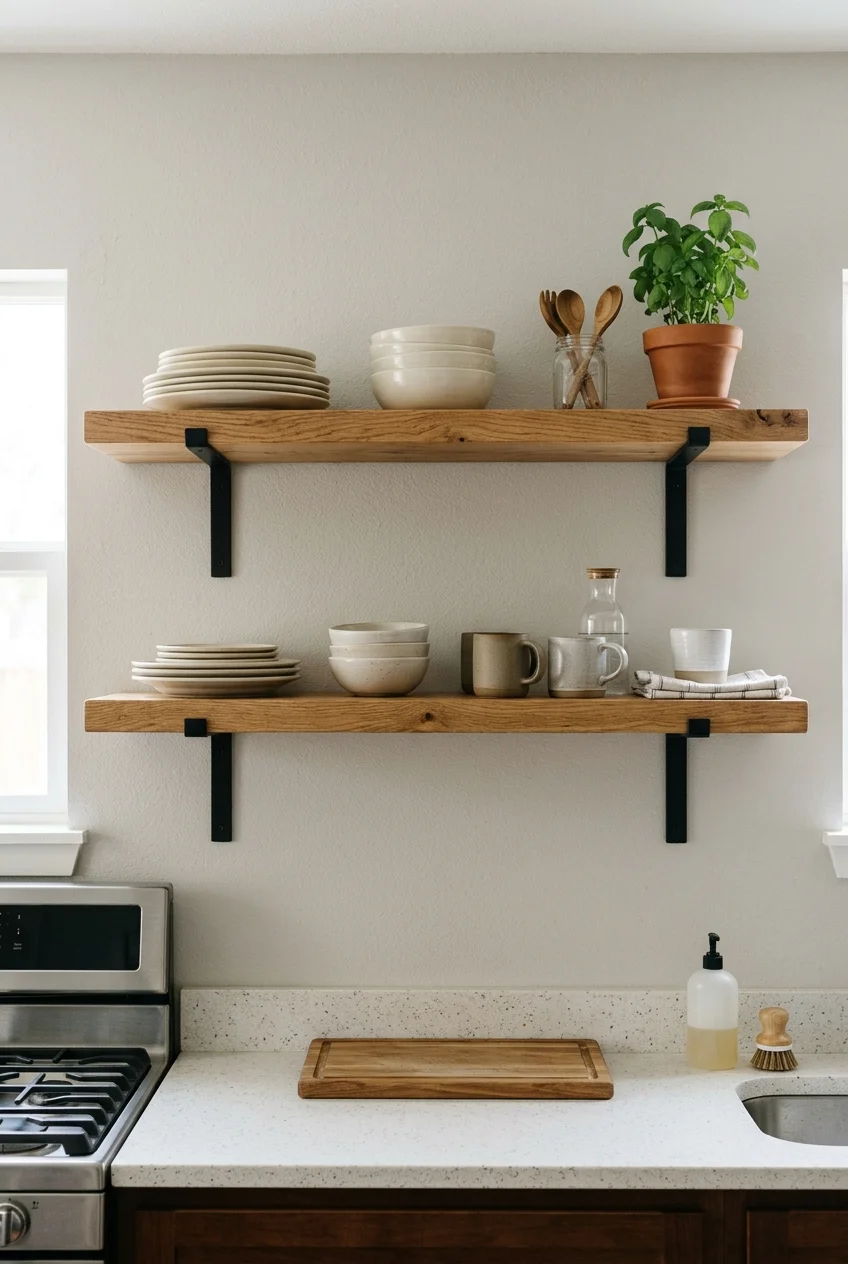
Two shelves can lighten a short wall when the removed cabinet contents already have another home. Choose a location away from heavy grease and steam.
Supports, wall structure, shelf span, and loaded weight must work together. Keep everyday dishes within reach and leave windows, doors, and appliances free to operate.
Match shelf thickness to nearby cabinet rails or counters. One carefully sized opening looks more intentional than scattered shelves squeezed into leftover gaps.
56. Turn an Empty Wall Into a Shallow Pantry
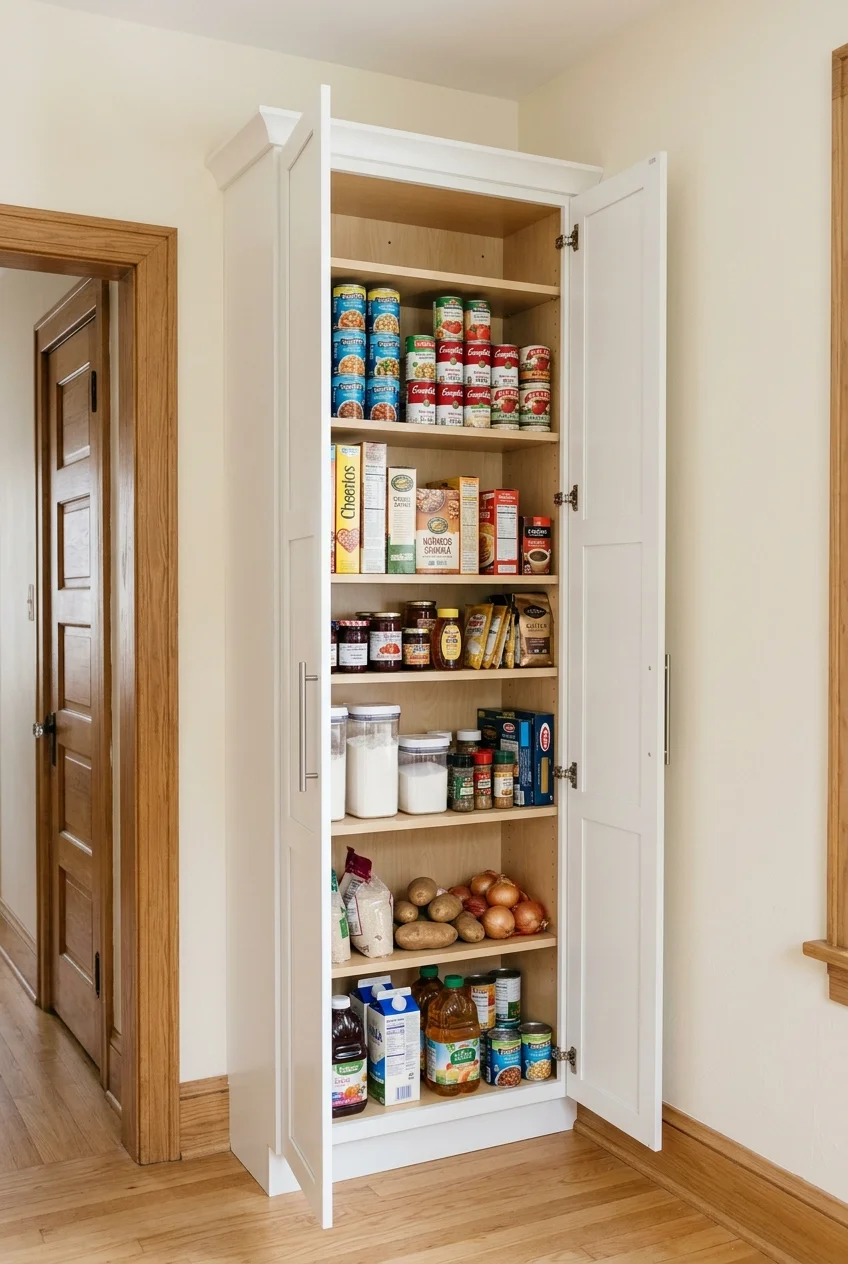
A shallow pantry can store cans, jars, and breakfast supplies without the deep stacks of a standard cabinet. Use adjustable shelves around actual package sizes.
Measure baseboards, doorway clearance, handle projection, and the room's walking path. Anchor tall furniture or cabinetry appropriately and keep it clear of heat.
- Daily food at comfortable eye and hand height.
- Heavy containers on lower fixed shelves.
- Light occasional items on the highest shelf.
- Clear space for doors or removable bins.
57. Add a Rolling Worktable Instead of a Fixed Island
Image pending: No image is attached to this draft for idea 57 (image-57).
A movable worktable can add preparation space when a permanent island would crowd appliance doors. Choose locking casters and a stable, wipeable surface.
Measure its parked position, working position, and complete travel route. Store heavier objects low and move the table away whenever it narrows necessary circulation.
58. Paint the Pantry Door as a Controlled Accent
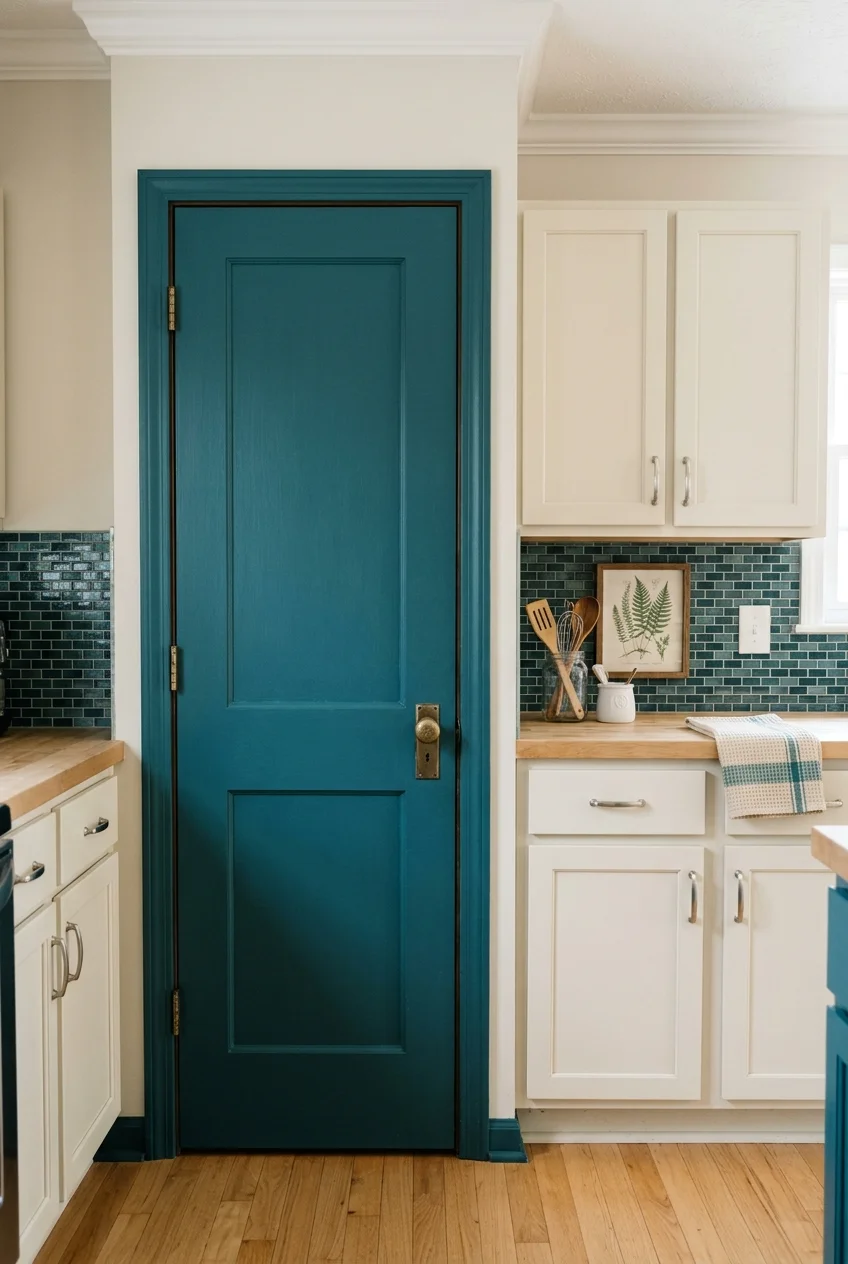
A pantry door offers a contained place for color when cabinets must remain unchanged. Choose a shade already present in tile, textiles, or adjoining rooms.
Prepare the door for its actual material and existing coating, then use a durable compatible finish. Keep hinges, latch, weather stripping, and swing fully functional.
59. Use Removable Pattern Inside a Glass Cabinet
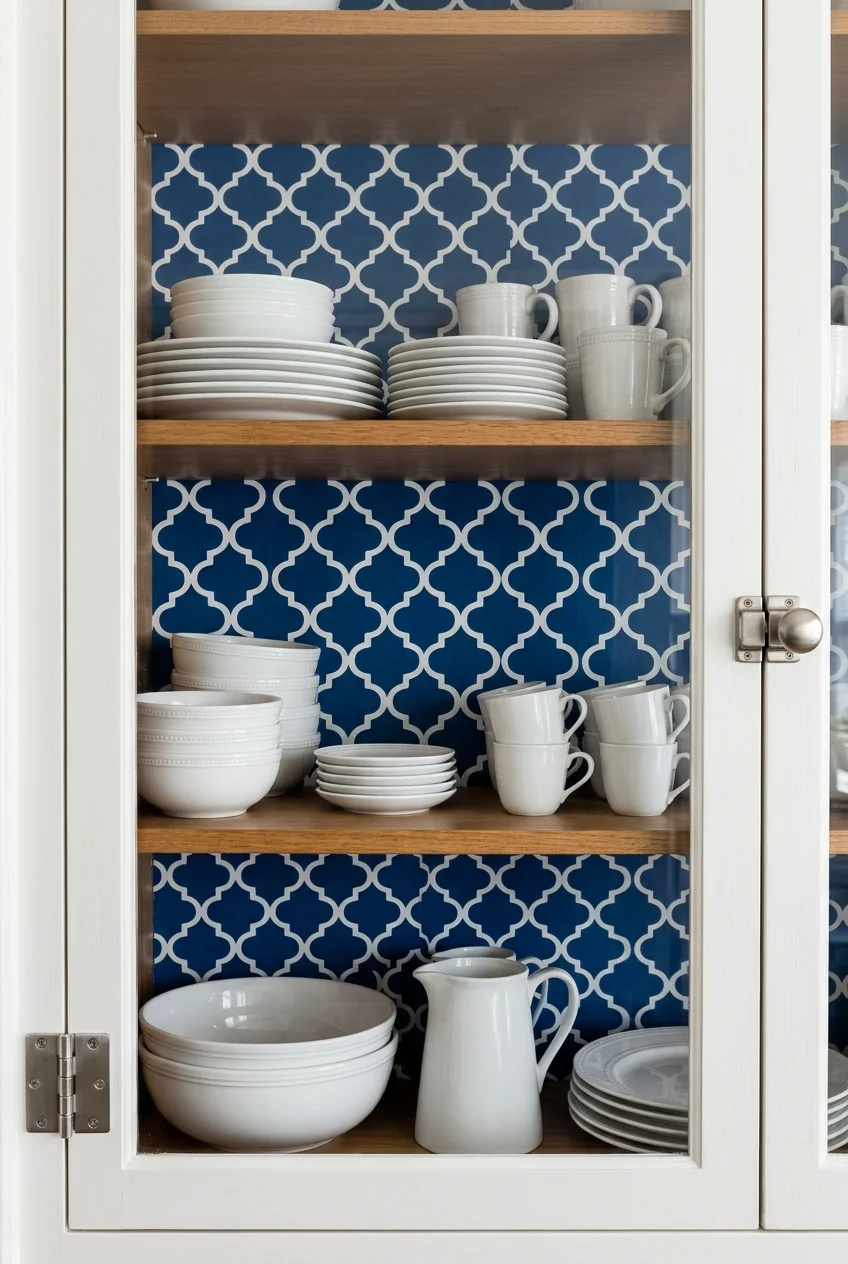
A patterned removable back panel adds personality behind dishes without covering every wall. Fit paper or fabric to a separate board for easier cleaning and reversal.
Keep the panel in a dry cabinet away from heat and splashes. Secure it without blocking shelf pins, door closure, lighting, or ventilation.
60. Repeat One Accent Color Across Three Scales
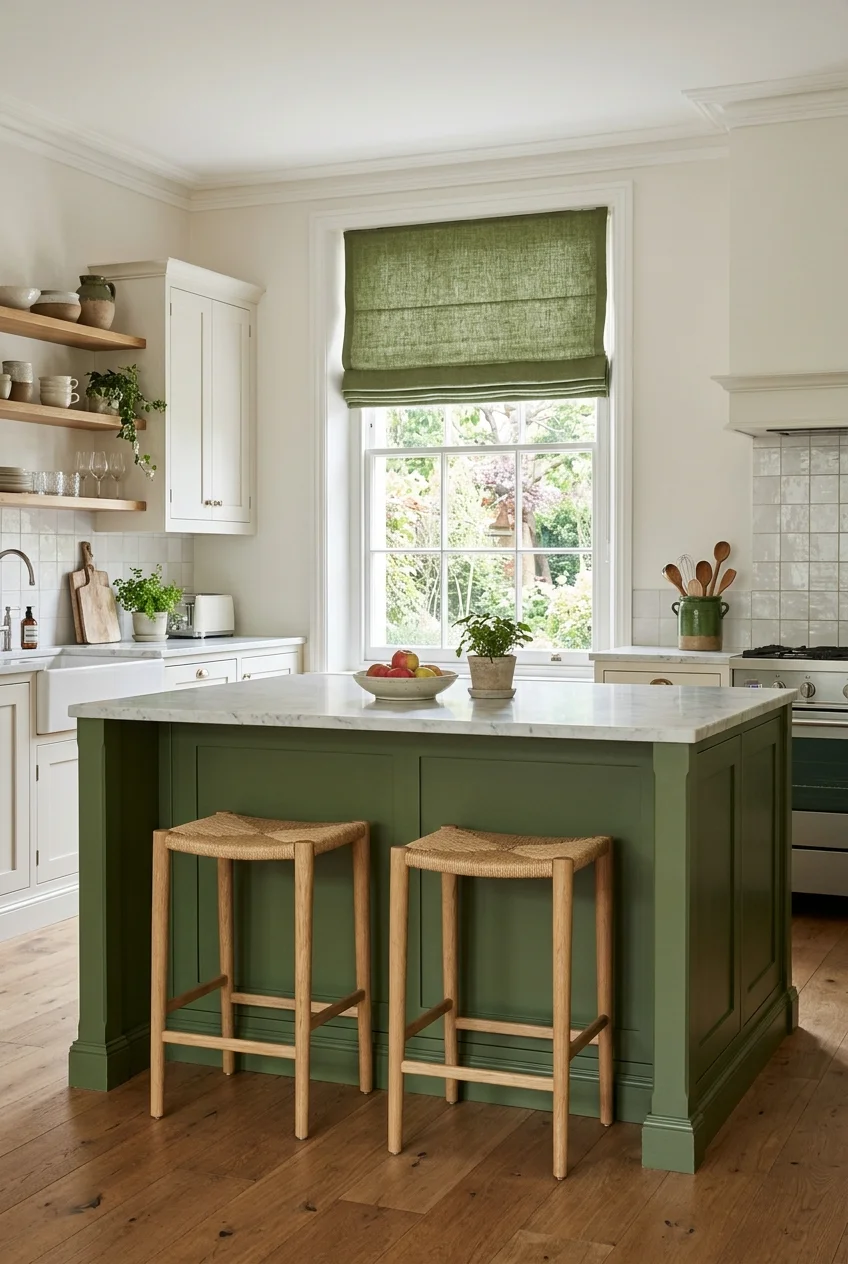
Choose one color for a large element, one medium repeat, and one small detail. An island, window shade, and utensil crock can form a clear hierarchy.
Keep the repeats related rather than perfectly matched, and let neutral space separate them. Adding the same accent everywhere turns a useful thread into a theme.
Frequently Asked Questions
What should I change first in a builder-grade kitchen?
Begin with cleaning, repairs, and full-size finish samples. Hardware, wall color, and lighting can reveal whether cabinets or counters truly need replacement.
Choose the change visible from the room's main entrance, then solve one daily access problem. This keeps purchases coordinated and limits unnecessary demolition.
Is painting builder-grade cabinets always worthwhile?
Painting is worthwhile when boxes, doors, layout, and hinges remain sound. Swollen panels, peeling laminate, or poor access may justify repair, refacing, or replacement.
Test cleaning, preparation, primer, and topcoat on one representative door. Follow the coating system completely, including cure time before normal handling resumes.
Can renters use these makeover ideas?
Renters can focus on counter editing, removable textiles, plug-in lighting, and hardware that reuses existing holes, provided the lease and owner allow each change.
Get written permission for adhesive coverings, paint, drilling, plumbing, or electrical work. Store original hardware and document the condition before making reversible updates.
How do I keep several updates from looking mismatched?
Build one finish board containing cabinets, counters, backsplash, flooring, paint, and hardware. Review the group under daytime and evening kitchen light.
Repeat a limited color or metal in a few places, but vary scale. Leave quiet surfaces between focal details so every upgrade does not compete.