50 Bathroom Faucet Ideas for a Better-Looking, Better-Fitting Sink

This post may contain affiliate links: full affiliate disclosure.
A bathroom faucet occupies little space, yet its height, reach, handles, and finish can change how the entire sink area looks and works.
Use these ideas to compare distinct silhouettes and pairings, then check the mounting holes, basin proportions, backsplash clearance, and cleaning needs before ordering.
This article contains affiliate links. We may earn a commission from qualifying purchases at no additional cost to you.
Start With a Faucet That Fits the Sink
Begin with the sink and counter already in the room. Their holes, depth, rim, and wall clearance narrow the choices before finish enters the conversation.
1. Use a Single-Hole Lever on a Compact Vanity
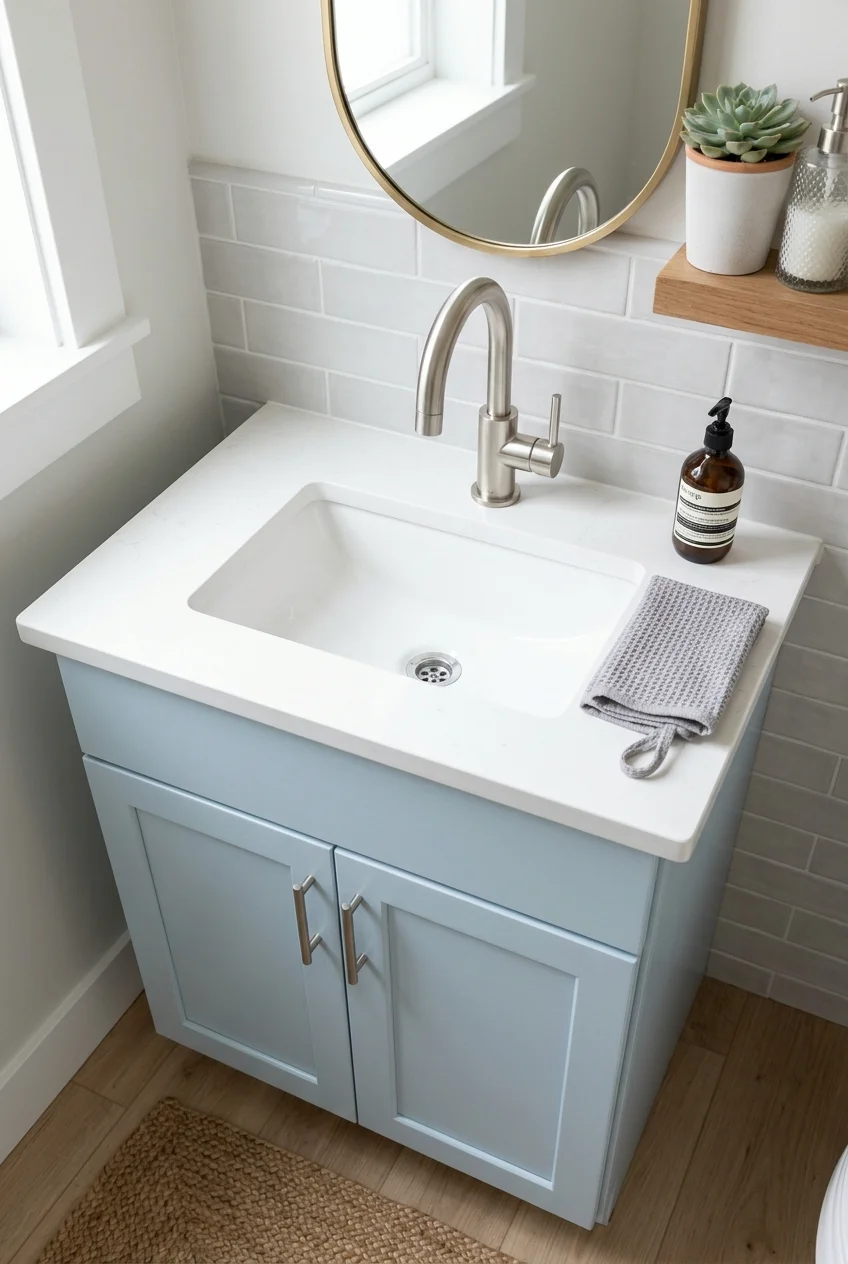
A single post leaves more visible counter around a small basin and reduces the number of tight seams collecting toothpaste, soap, and mineral residue.
For a streamlined example, compare this brushed-nickel single-hole faucet, which includes an optional deck plate for compatible three-hole, four-inch installations.
Confirm whether the plate is optional before planning a bare-base look. Some models need their escutcheon, while others seal correctly without one.
2. Keep a Centerset Faucet for a Four-Inch Sink
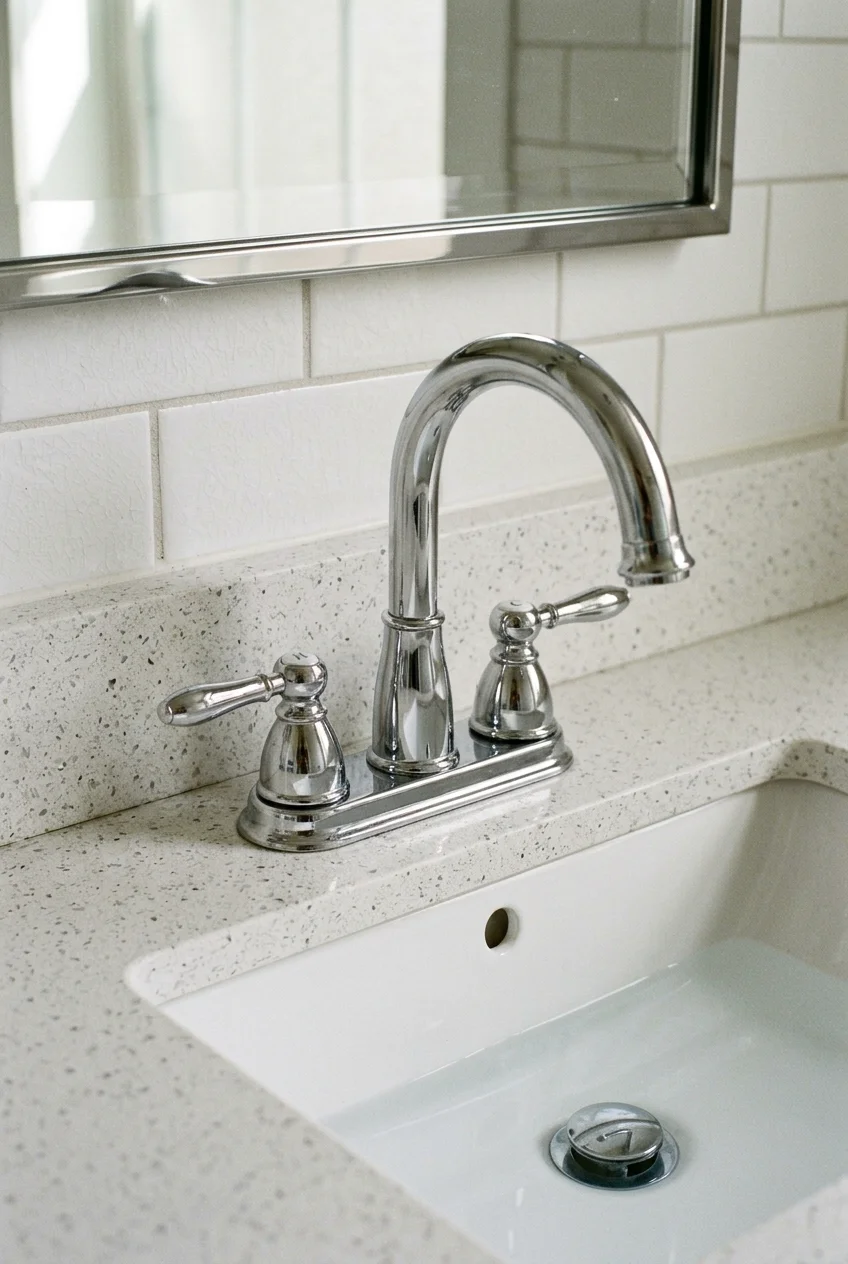
A centerset faucet places two handles and the spout on one compact base, fitting many sinks with three holes spaced four inches apart.
This configuration suits a straightforward refresh because the existing sink can remain. Choose a base long enough to cover old impressions without crowding the backsplash.
Fit check Measure hole centers underneath the sink when possible, because trim and mineral buildup can make the spacing difficult to judge accurately from above.
3. Spread the Handles Across a Generous Counter
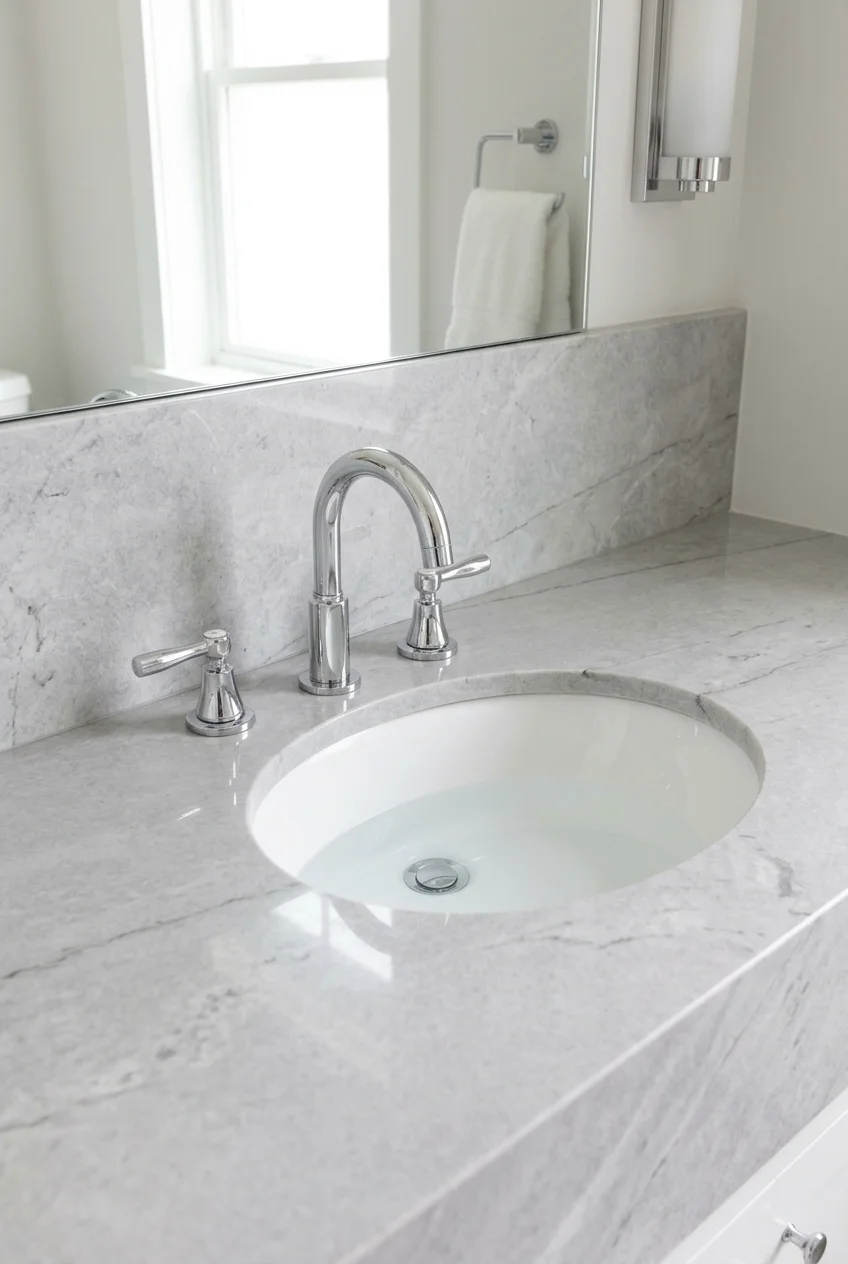
A widespread faucet separates the hot handle, spout, and cold handle, giving a broad stone counter a balanced arrangement with easier cleaning between components.
The open spacing makes each piece feel intentional, but installation requires three suitable holes and enough room below for valves, hoses, and connections.
One current polished-chrome widespread faucet lists a three-hole installation range from four to sixteen inches and a five-and-one-half-inch spout reach.
Treat those dimensions as model-specific, not universal. Compare every specification sheet with the actual hole spacing, basin centerline, and usable cabinet space.
4. Move the Faucet to the Wall for a Clearer Counter
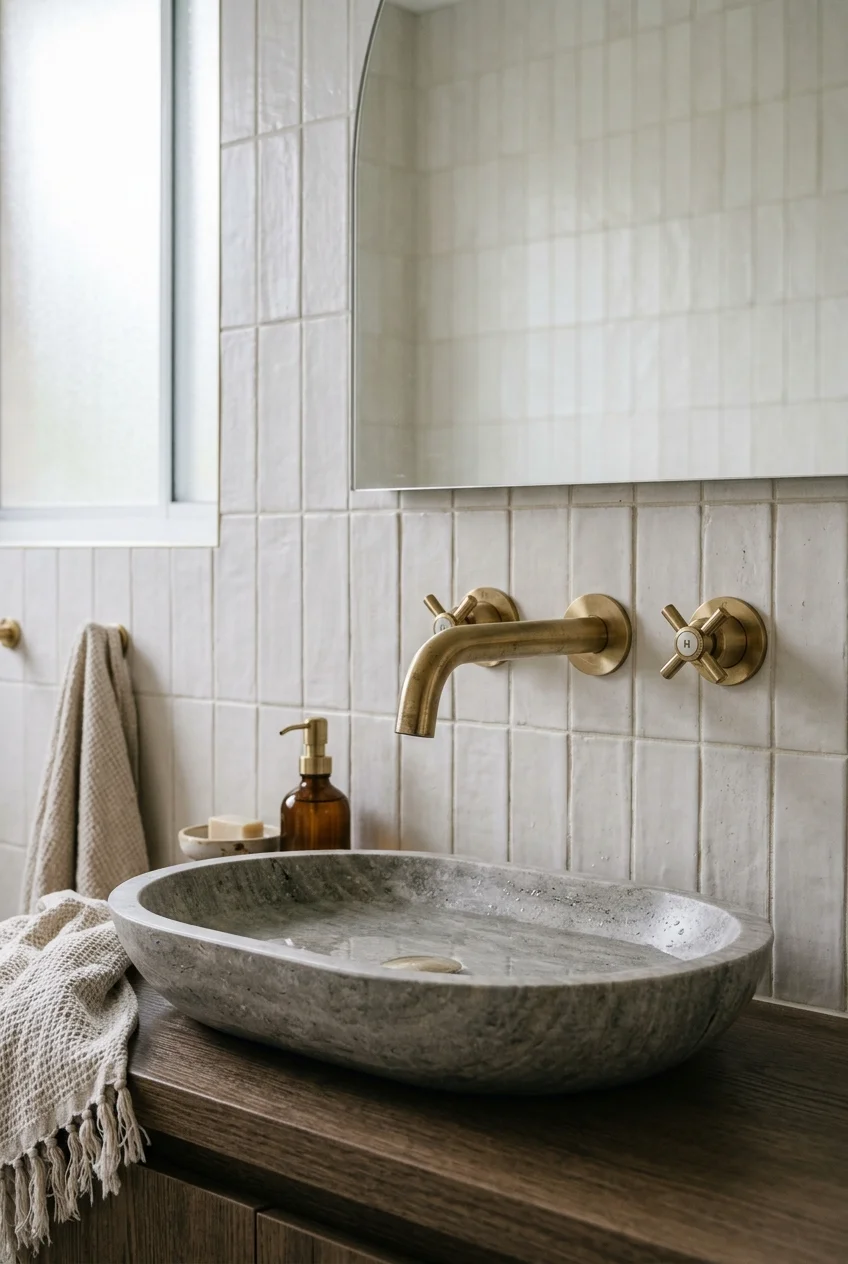
A wall-mounted faucet leaves the sink deck open, emphasizing a sculptural basin and removing the difficult cleaning seam directly behind a deck-mounted spout.
Its spout must project far enough over the bowl without pushing the stream against the front slope. Outlet height also affects splashing.
Coordinate the valve body, waterproofing, tile depth, and finished spout position as one assembly. Small wall-thickness changes can shift the visible trim noticeably.
- Confirm the finished wall thickness before setting the valve depth.
- Coordinate spout centerline with the installed basin, not only the cabinet.
- Preserve service access according to the manufacturer’s installation instructions.
Because plumbing sits inside the wall, this is usually a renovation decision. Have the selected faucet and sink specifications available before rough-in begins.
Ask the installer how the concealed valve remains serviceable later. A finished wall should not make ordinary cartridge replacement or leak diagnosis unnecessarily destructive.
5. Raise the Spout for an Above-Counter Vessel Bowl
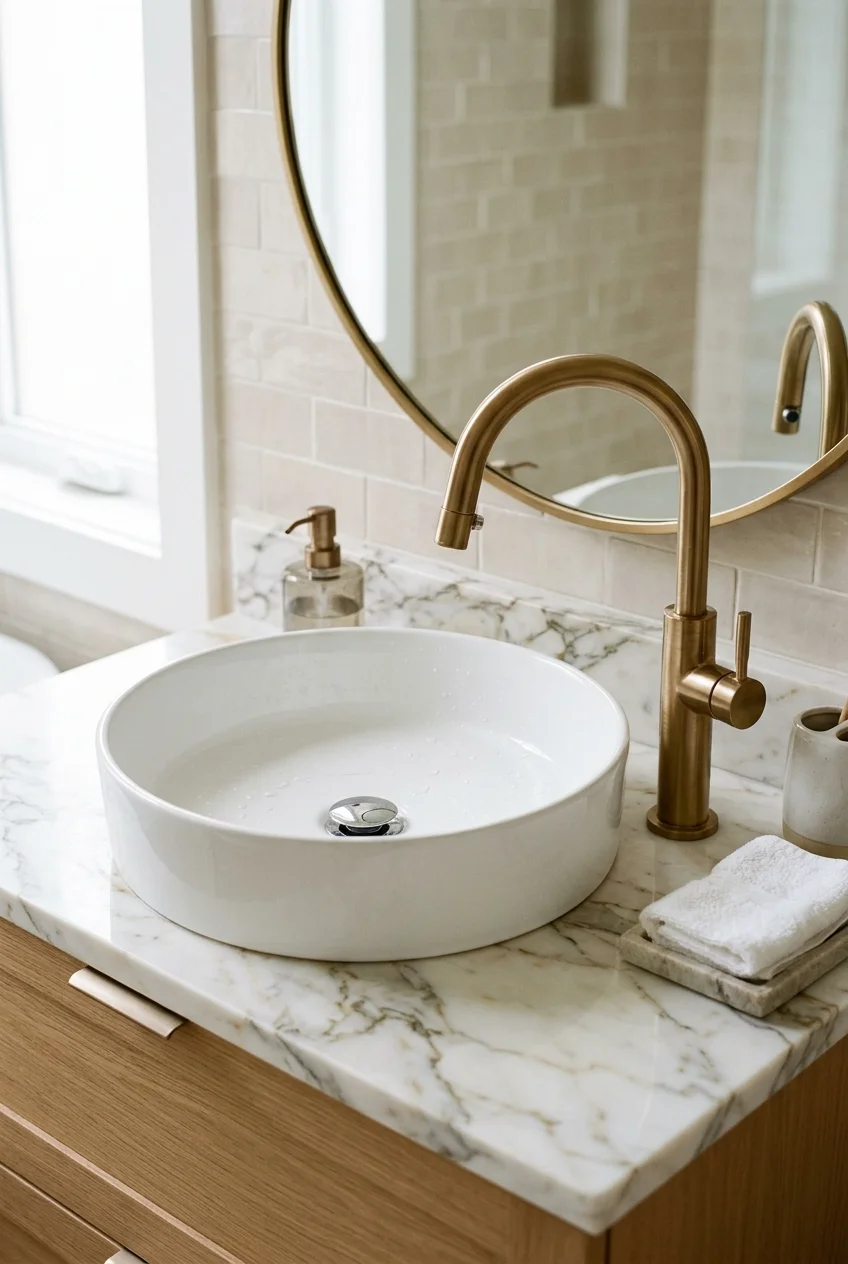
A vessel sink needs a faucet tall enough to clear its rim while keeping the outlet comfortably inside the bowl instead of hovering near the edge.
Measure from the finished counter, then compare spout height and reach with the bowl’s installed rim height, wall thickness, and drain position.
This champagne-bronze vessel faucet is designed for a single-hole vessel-sink configuration and is listed as WaterSense labeled on its current Amazon product record.
Leave room behind the faucet for its control and any drain mechanism. A tall body can fit vertically while still crowding a close backsplash.
Splash test When possible, test the basin and faucet pairing with running water before final installation, because bowl slope can redirect an otherwise centered stream.
6. Choose a Bridge Faucet for Visible Structure
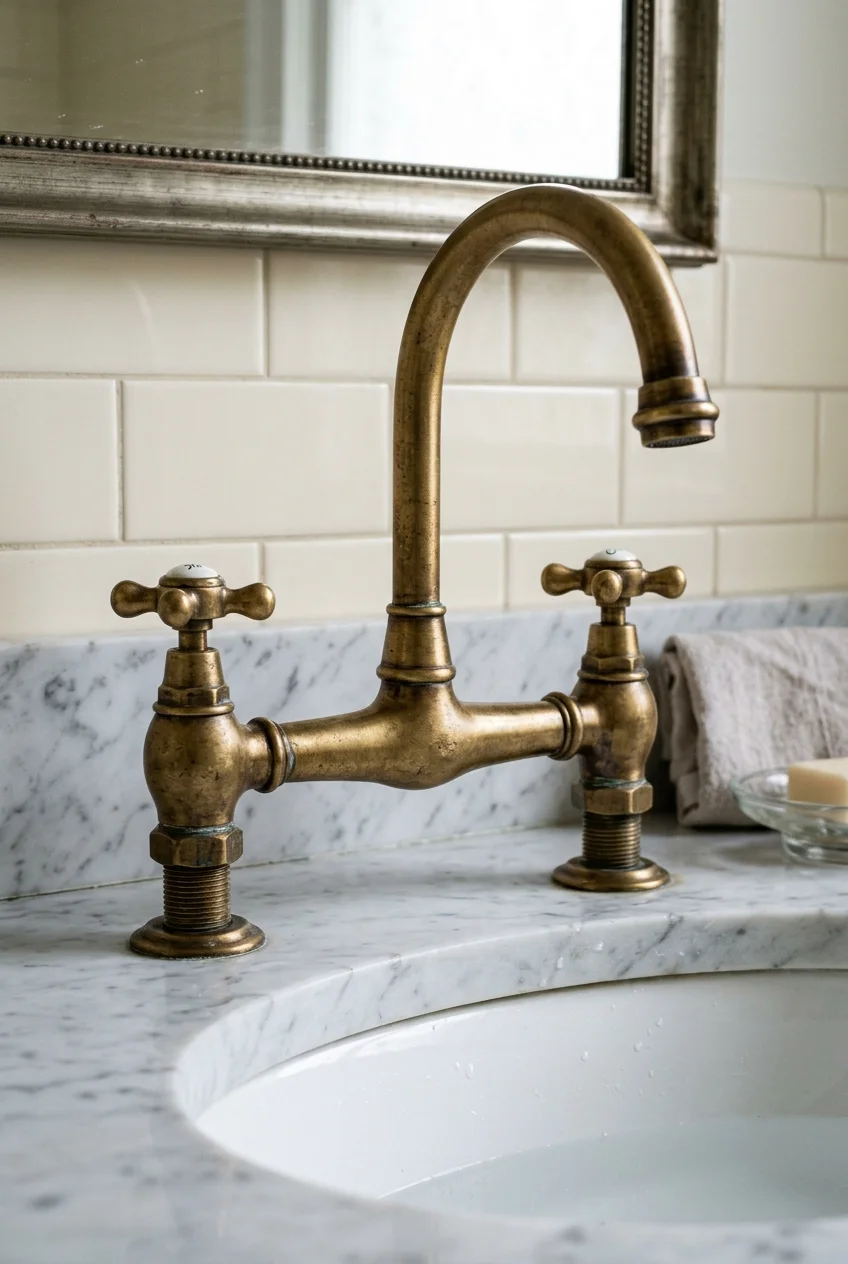
A bridge faucet connects separate hot and cold valves with an exposed horizontal bar, turning functional plumbing into the design’s strongest traditional detail.
Pair the open framework with a simple sink and restrained backsplash so the silhouette remains legible instead of competing with several ornate features.
Check the required hole spacing carefully. Many bridge designs are widespread installations, and their fixed upper connection allows less visual forgiveness than separate pieces.
7. Use a Deck Plate to Cover Unused Faucet Holes
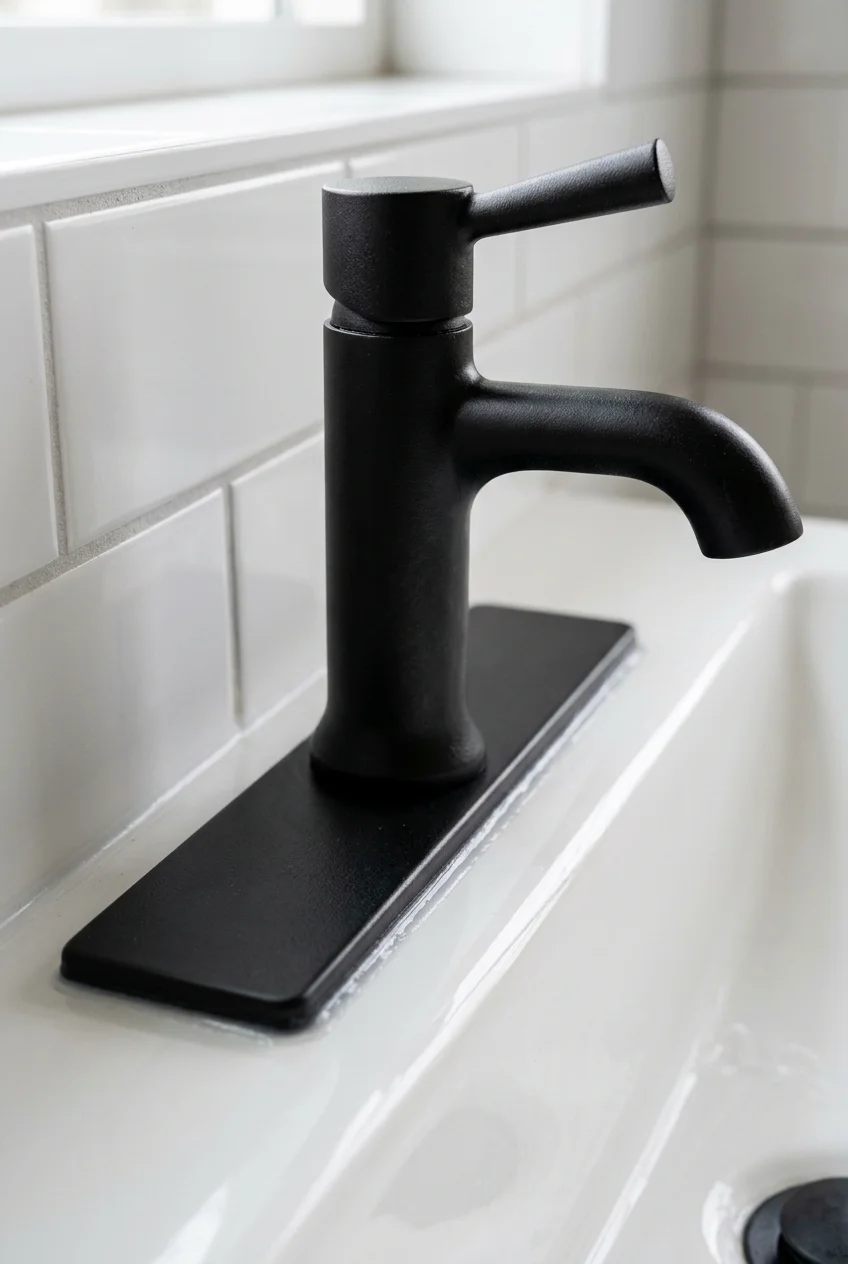
A slim escutcheon can let a single-hole faucet work visually on an existing three-hole sink, avoiding exposed openings during a modest fixture update.
Choose the plate specified for the exact faucet whenever possible. Its opening, gasket, finish, and base profile need to mate correctly with that model.
Make sure the plate covers every hole and remains within the sink deck. A too-wide plate can collide with the backsplash or raised rim.
8. Keep the Profile Low Beneath a Medicine Cabinet
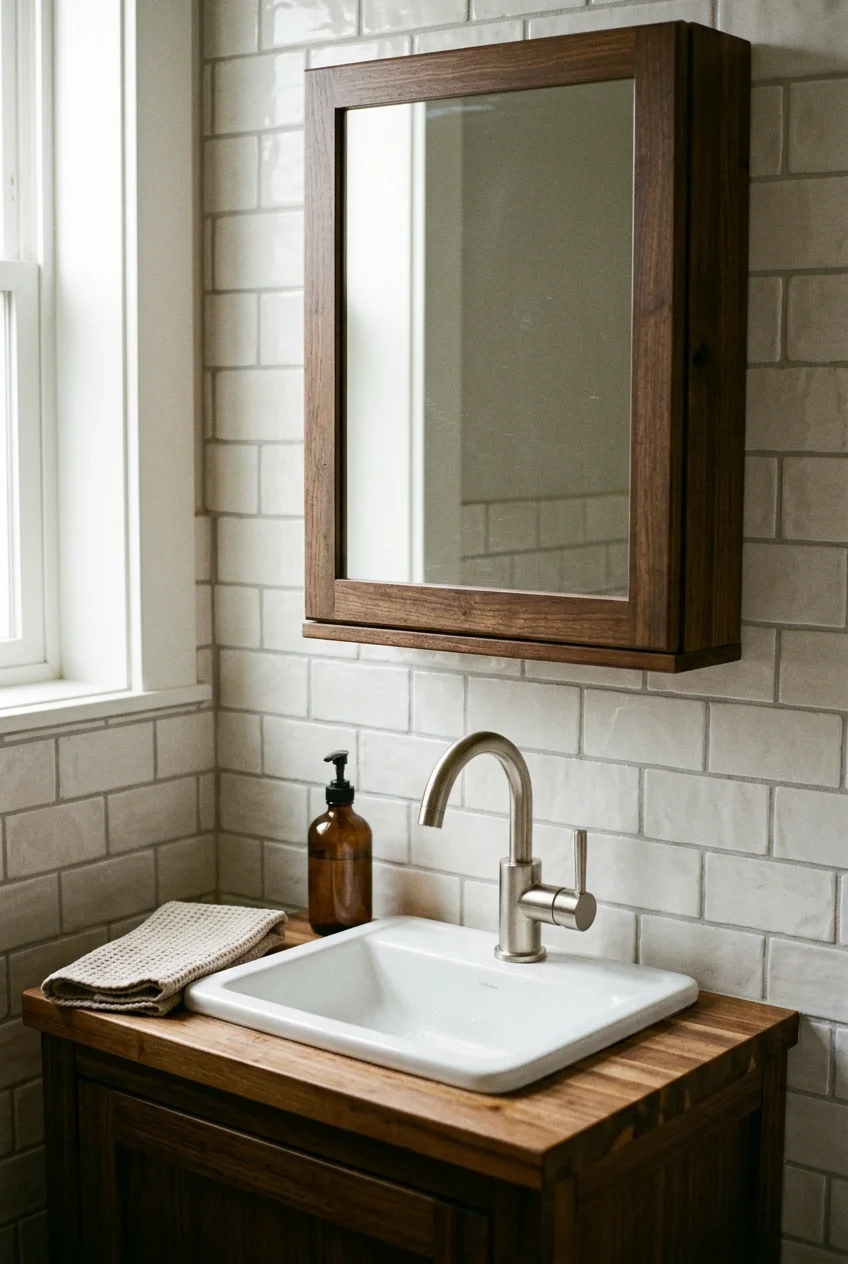
A low-arc faucet prevents a shallow vanity from feeling crowded when a surface-mounted medicine cabinet or projecting mirror occupies the wall directly above it.
Check handle travel as well as spout height. A rear-tilting lever can strike the mirror even when the faucet body appears comfortably below it.
Setup note Tape a cardboard profile at full scale behind the sink to test visual height and control clearance before purchasing a hard-to-return fixture.
9. Turn the Handle Sideways When Back Clearance Is Tight
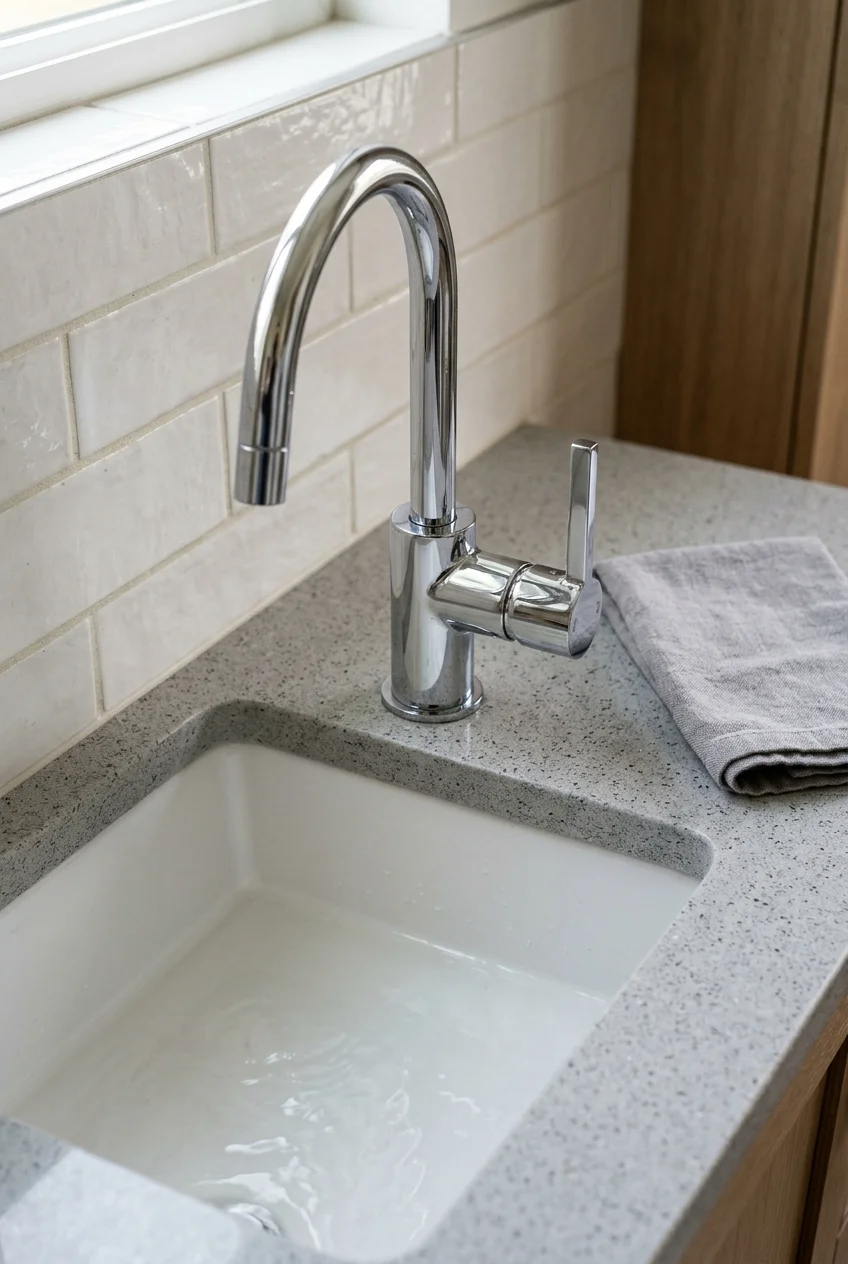
A side-operated single lever can solve the awkward gap between a faucet and backsplash, provided the handle remains clear of the wall and basin rim.
Confirm which direction controls hot water and whether full movement stays over the counter. Reversed placement can create inconvenient operation or confusing temperature changes.
10. Center the Faucet on an Offset Basin
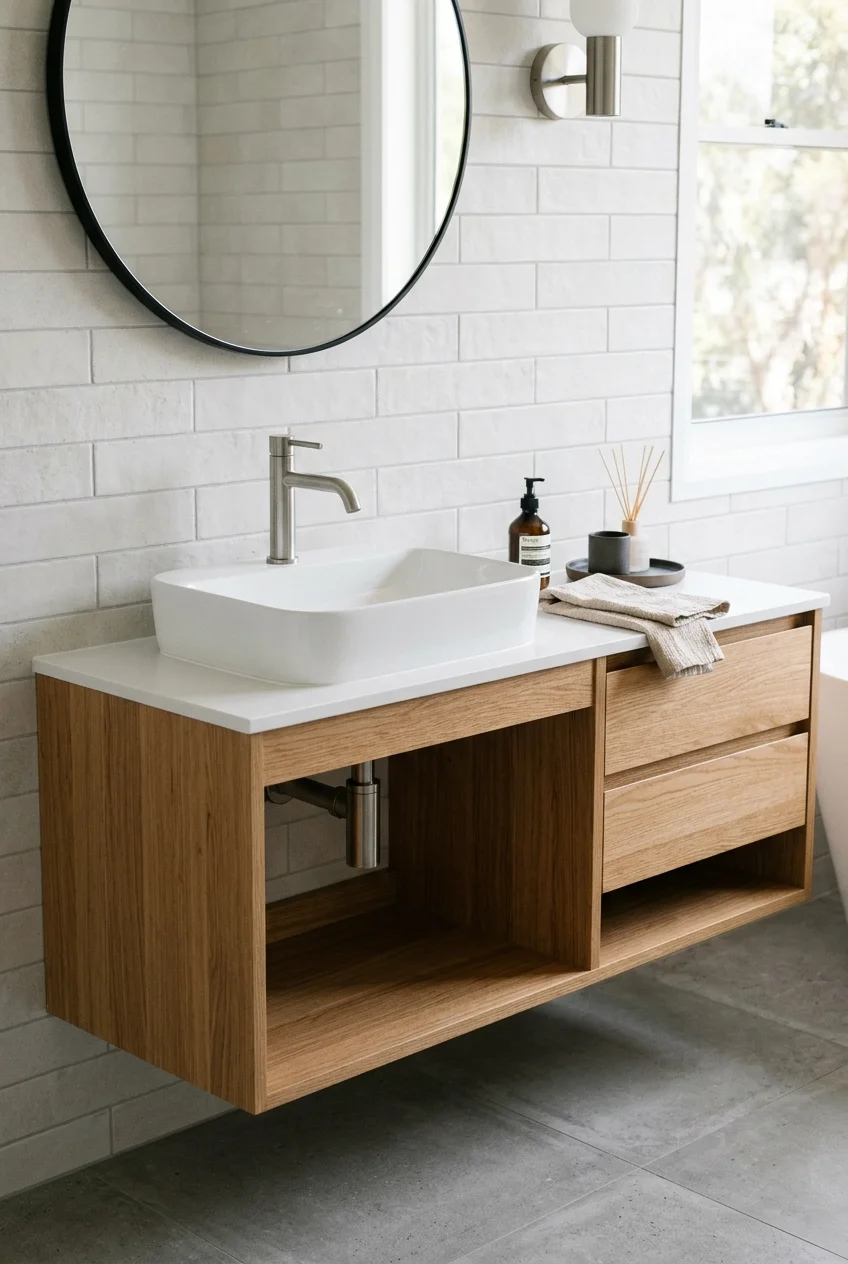
An offset sink can preserve a longer preparation area on one side of a small vanity, but the faucet should still align with the bowl.
Review small bathroom storage ideas alongside the plumbing plan, because drawer depth and under-sink organizers may benefit from the same asymmetrical layout.
Use the drain and basin centerline as the visual anchor. Centering the faucet on the cabinet instead can make the stream land off target.
Choose a Finish That Shapes the Look
Finish changes contrast, warmth, and maintenance more than shape alone. Compare samples beside the countertop, mirror, hardware, and actual bathroom lighting before committing.
11. Let Polished Chrome Add a Clean Flash
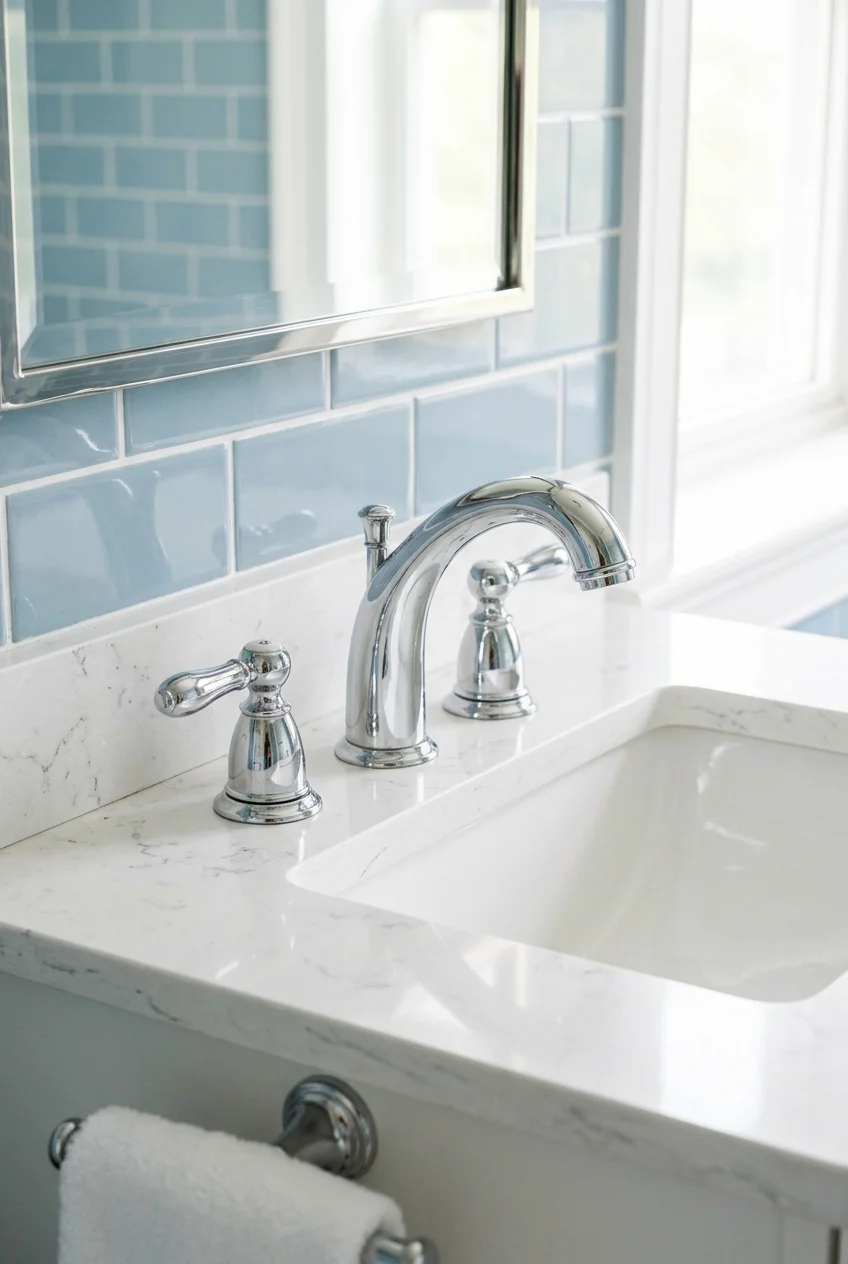
Polished chrome reflects nearby color and light, making a small faucet visually crisp without introducing another strong hue beside tile, paint, or stone.
Use it where frequent wiping feels realistic, because fingerprints and dried droplets remain more visible on a mirror-like surface than on many brushed finishes.
12. Soften the Room With Brushed Nickel
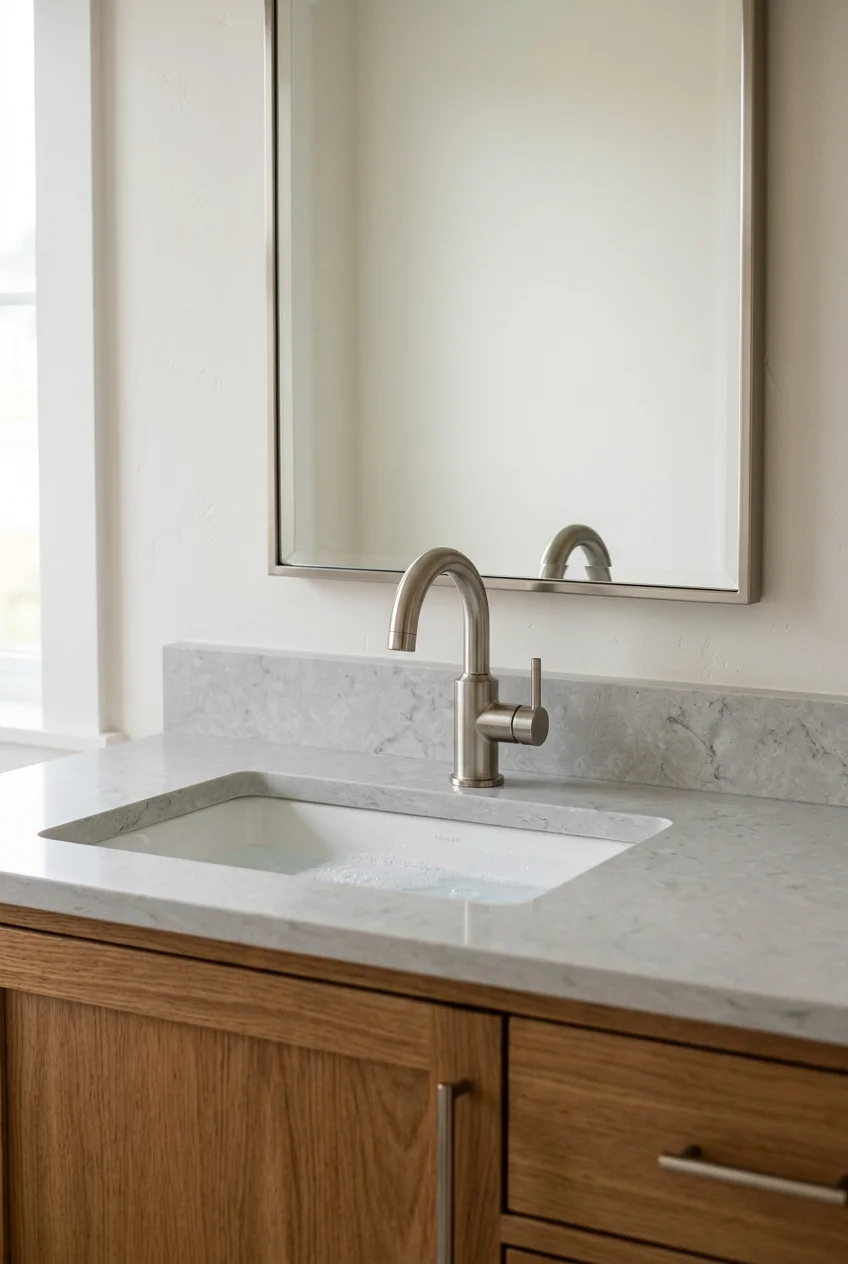
Brushed nickel offers a muted silver surface that sits comfortably with gray stone, painted cabinetry, and warm wood without demanding the strongest contrast.
Repeat the soft sheen on one or two nearby details, such as the mirror frame or towel ring, rather than filling every surface with matching metal.
13. Use Polished Nickel for Warmer Reflection
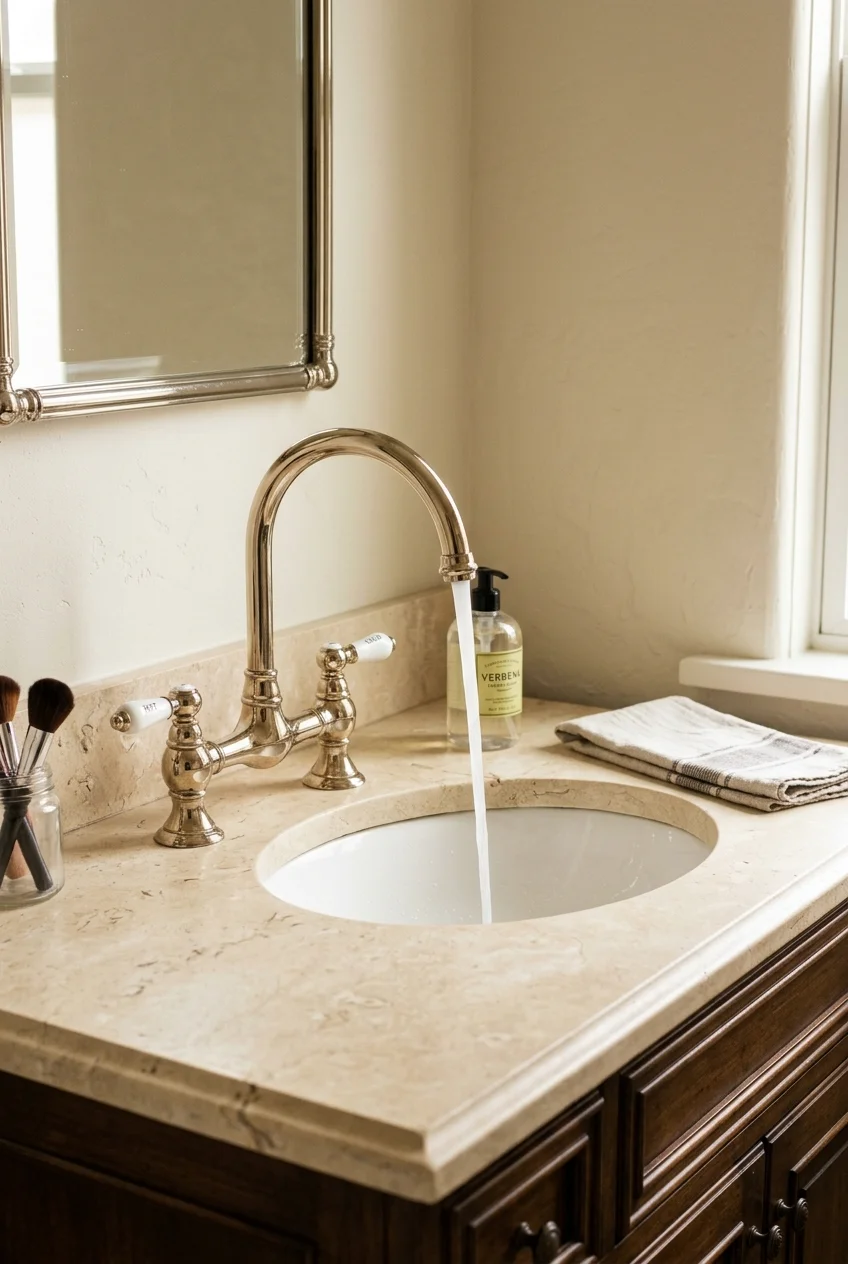
Polished nickel brings a reflective finish with a warmer cast than chrome, working especially well beside creamy stone, putty paint, and traditional profiles.
Do not select it from a screen alone. Compare a real sample with chrome under the bathroom’s lighting, because subtle undertones shift by manufacturer.
Shopping note Order coordinated pieces from the same finish family when a close match matters; identical finish names from different brands can look noticeably different together.
14. Draw a Graphic Line With Matte Black
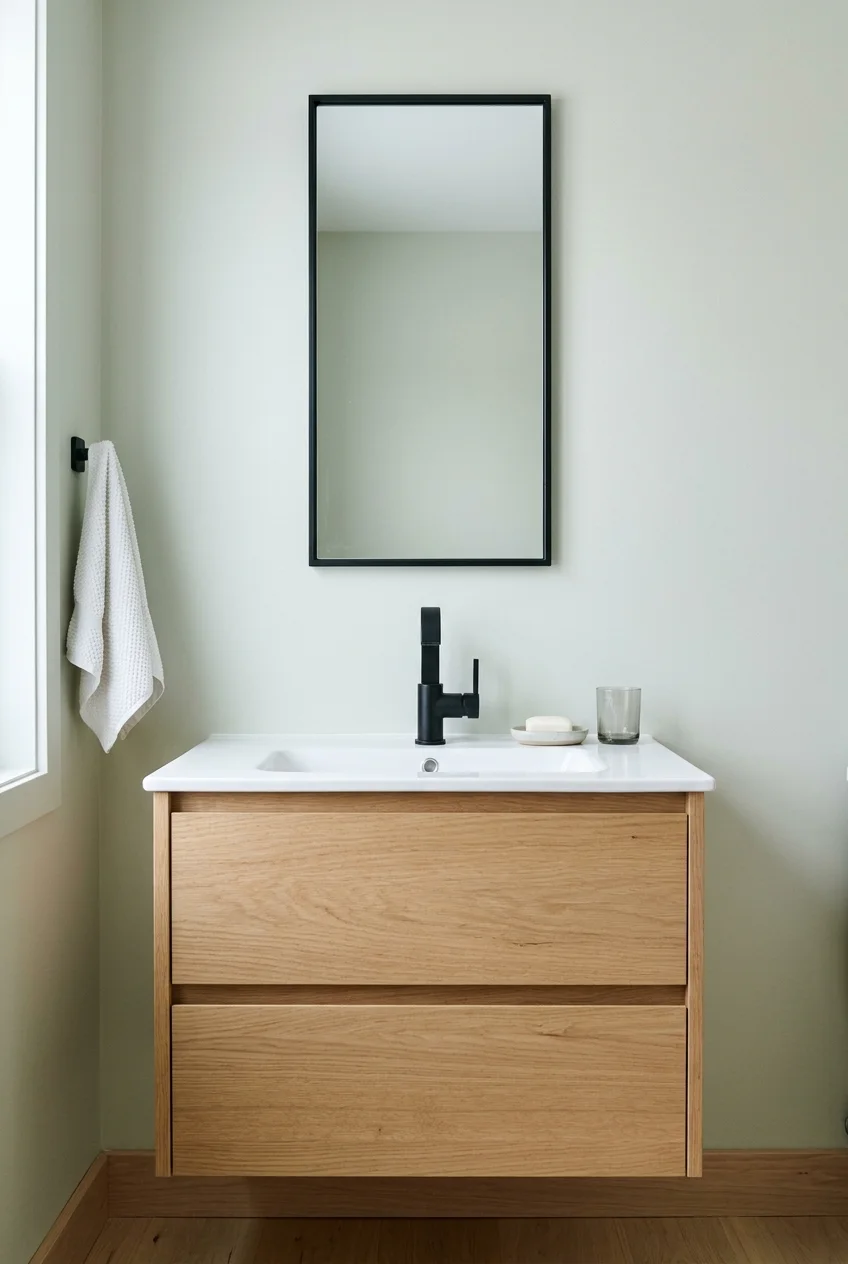
A matte-black faucet creates a clear outline against a pale sink and backsplash, making even a simple profile read as an intentional design decision.
Balance that contrast with another black element above or beside the sink. A narrow mirror frame usually provides enough repetition without darkening the room.
For a broader low-cost refresh, these builder-grade bathroom makeover ideas can help coordinate the faucet with paint, lighting, and hardware changes.
15. Warm Pale Stone With Champagne Bronze
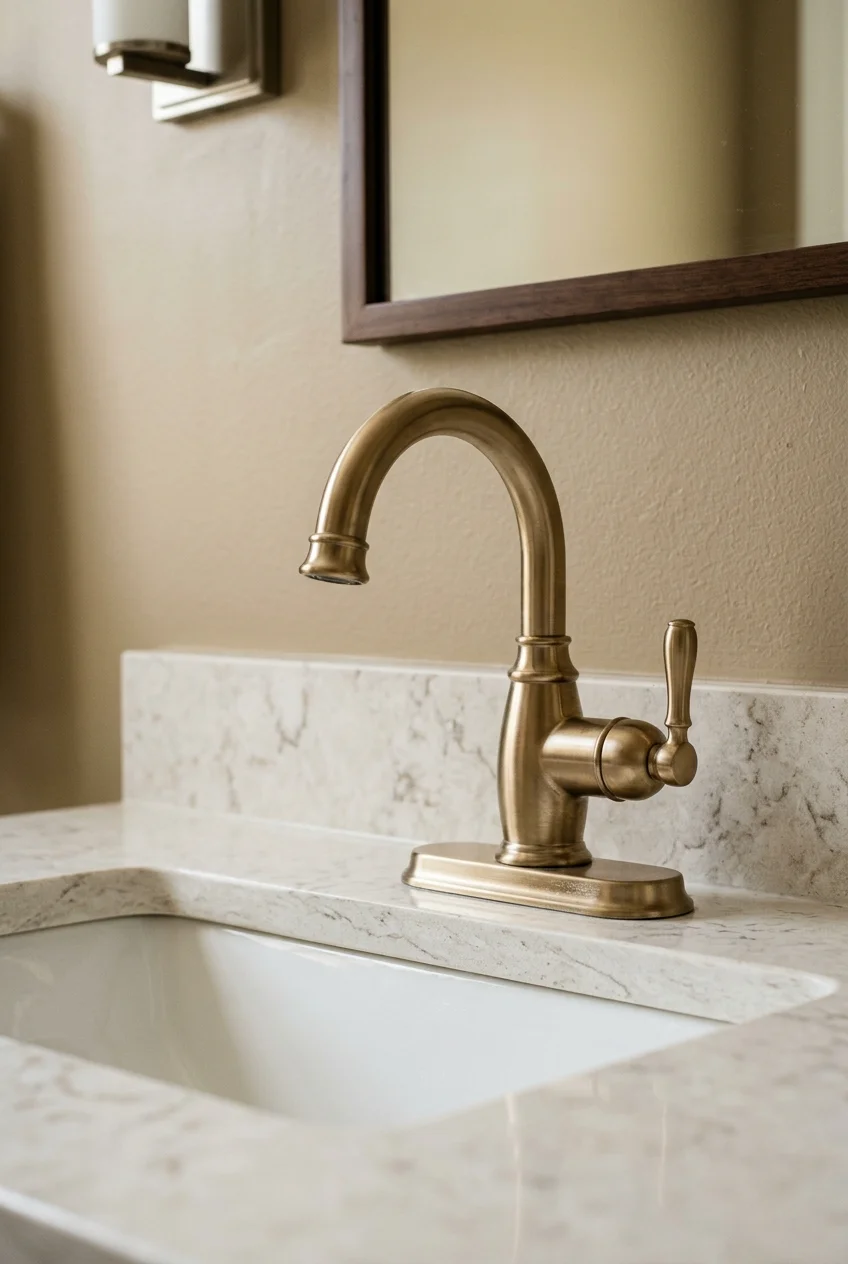
Champagne bronze adds gentle warmth without the stronger yellow note of bright brass, pairing naturally with ivory quartz, taupe paint, and veined stone.
Keep the backdrop quiet enough to see the metal’s muted tone. Several competing warm finishes can make the intended softness look accidental instead.
16. Let Unlacquered Brass Develop a Patina
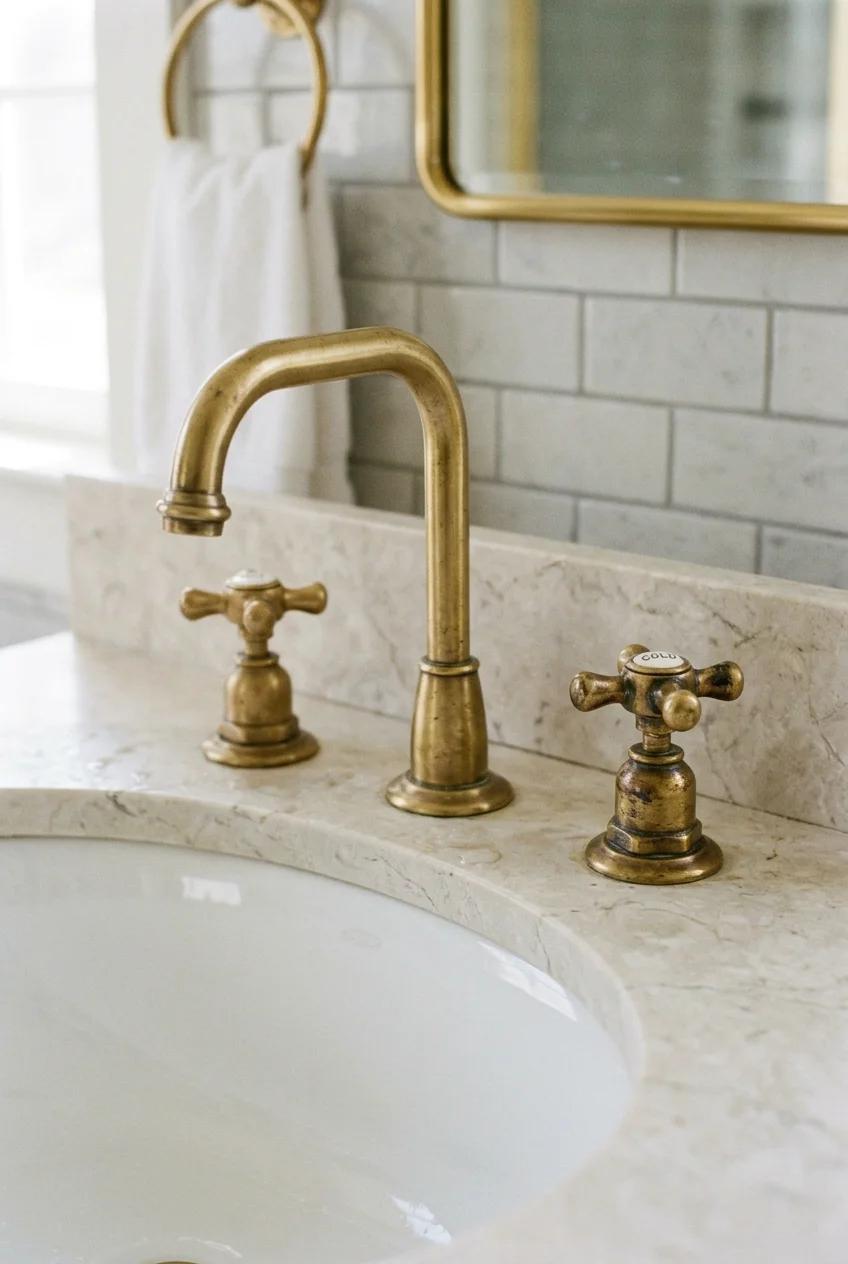
Unlacquered brass changes as it contacts air, moisture, and hands, creating a living finish suited to rooms where gradual variation is genuinely welcome.
Choose it deliberately rather than expecting permanent showroom brightness. Cleaning and polishing choices will influence how evenly or quickly the surface changes.
- Request the manufacturer’s exact finish description.
- Ask whether a protective coating is present.
- Follow that brand’s care instructions before using polish.
17. Ground a Traditional Sink With Oil-Rubbed Bronze
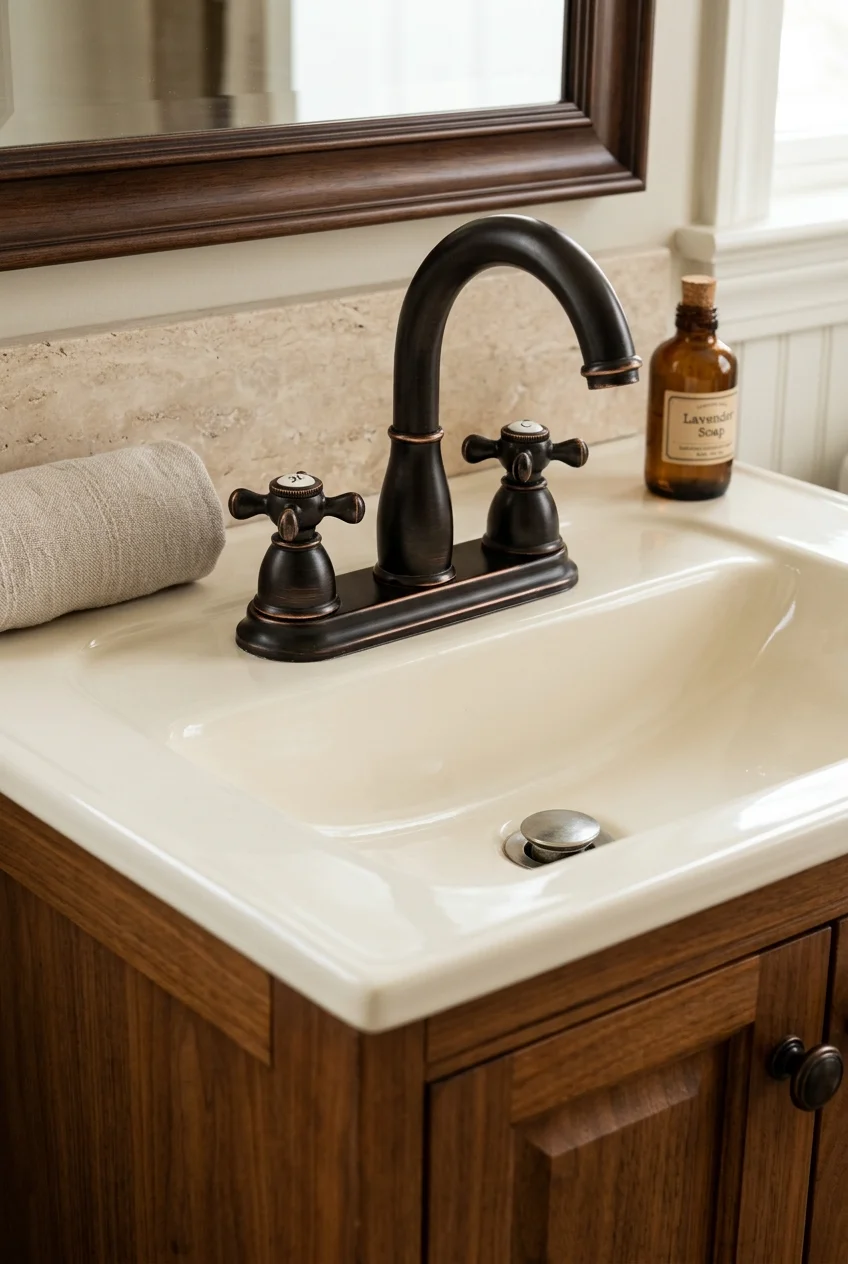
Oil-rubbed bronze gives cross handles and curved spouts a dark, substantial presence, especially against warm tile, cream ceramic, or medium-toned wood cabinetry.
Study the actual finish sample, since bronze can range from nearly black to visibly brown with copper-colored highlights along edges and raised details.
18. Try a White Faucet Against Saturated Color
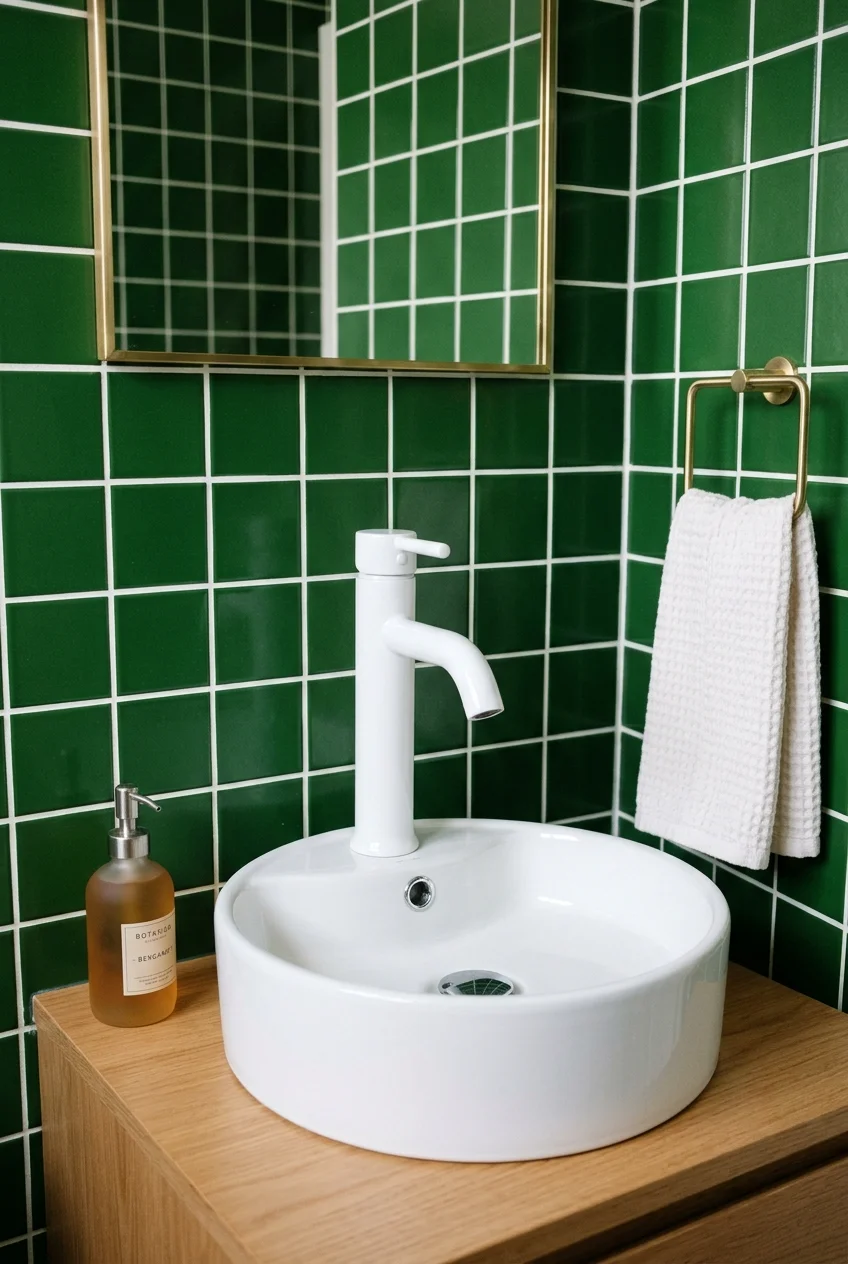
A white faucet can look crisp and unexpected against a cobalt, forest-green, or terracotta backsplash while remaining visually connected to a white basin.
The effect depends on a clean color boundary. Avoid stacking several nearly white materials whose different undertones make the faucet appear mismatched.
Watch for Check the care guide before using colored cleaning products or abrasive pads, which can mark a coated finish even when the fixture still functions properly.
19. Use a Two-Tone Faucet as the Metal Bridge
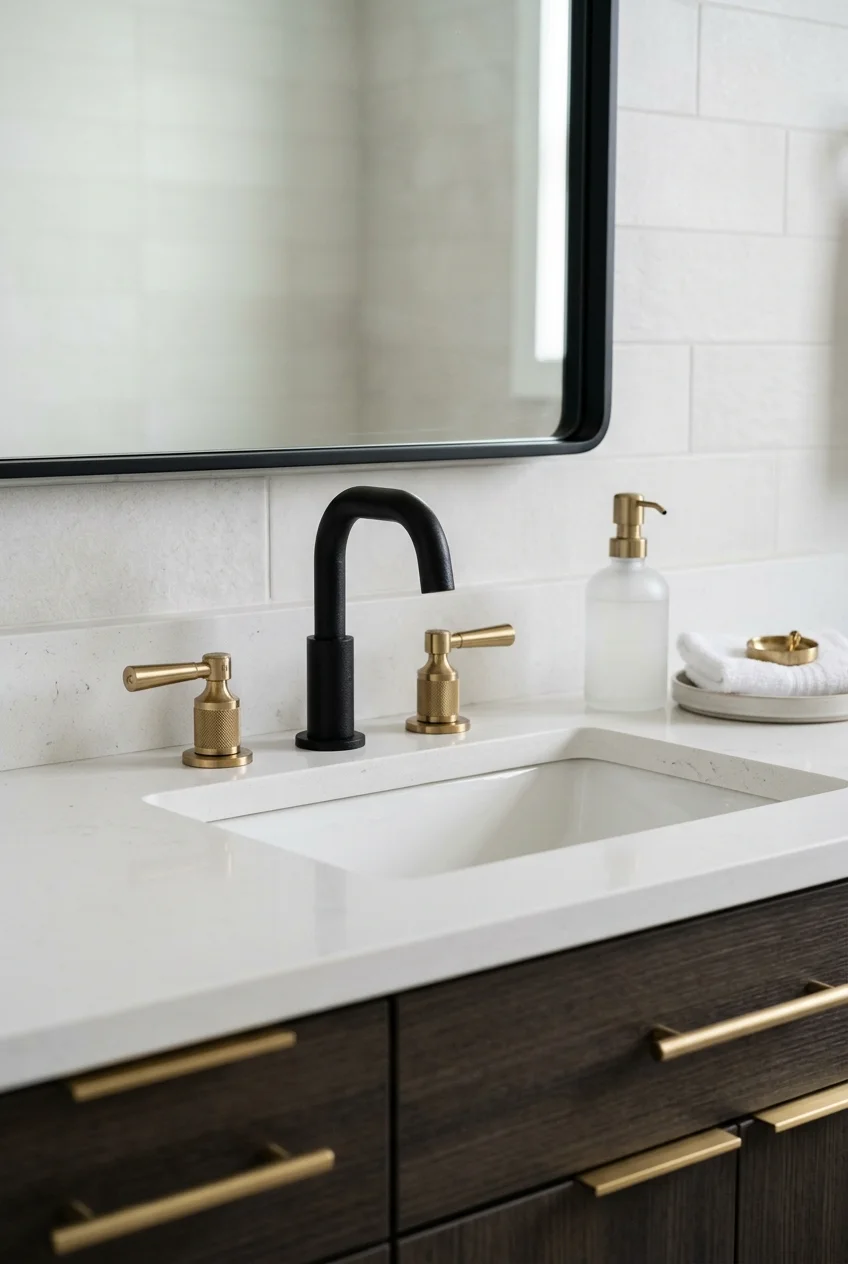
A faucet combining black and brass can connect dark mirror framing with warm cabinet hardware, reducing the need for every nearby metal to match.
Keep the two finishes clearly assigned to different components, such as a black body with brass handles, so the contrast reads as designed rather than patched.
20. Repeat the Faucet Finish in the Mirror Frame
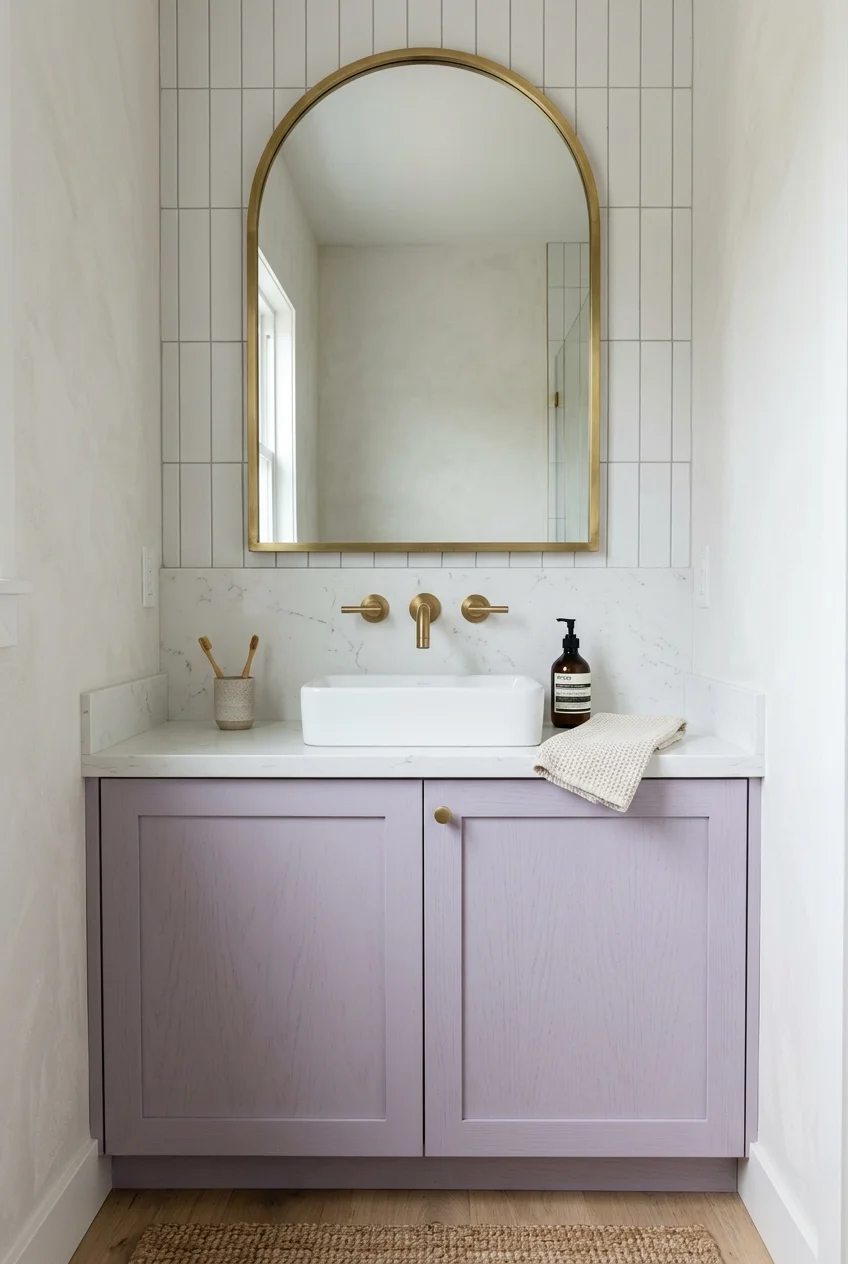
Matching the faucet with a slim mirror frame creates an easy vertical connection, helping a small vanity composition feel complete without a fully coordinated accessory set.
Browse these bathroom vanity ideas for more ways to balance mirror shape, cabinet color, counter material, and fixture scale around the sink.
A close tonal relationship is enough. The frame and faucet need not be identical products when their sheen and undertone remain compatible in person.
21. Mix Metals With One Dominant Finish
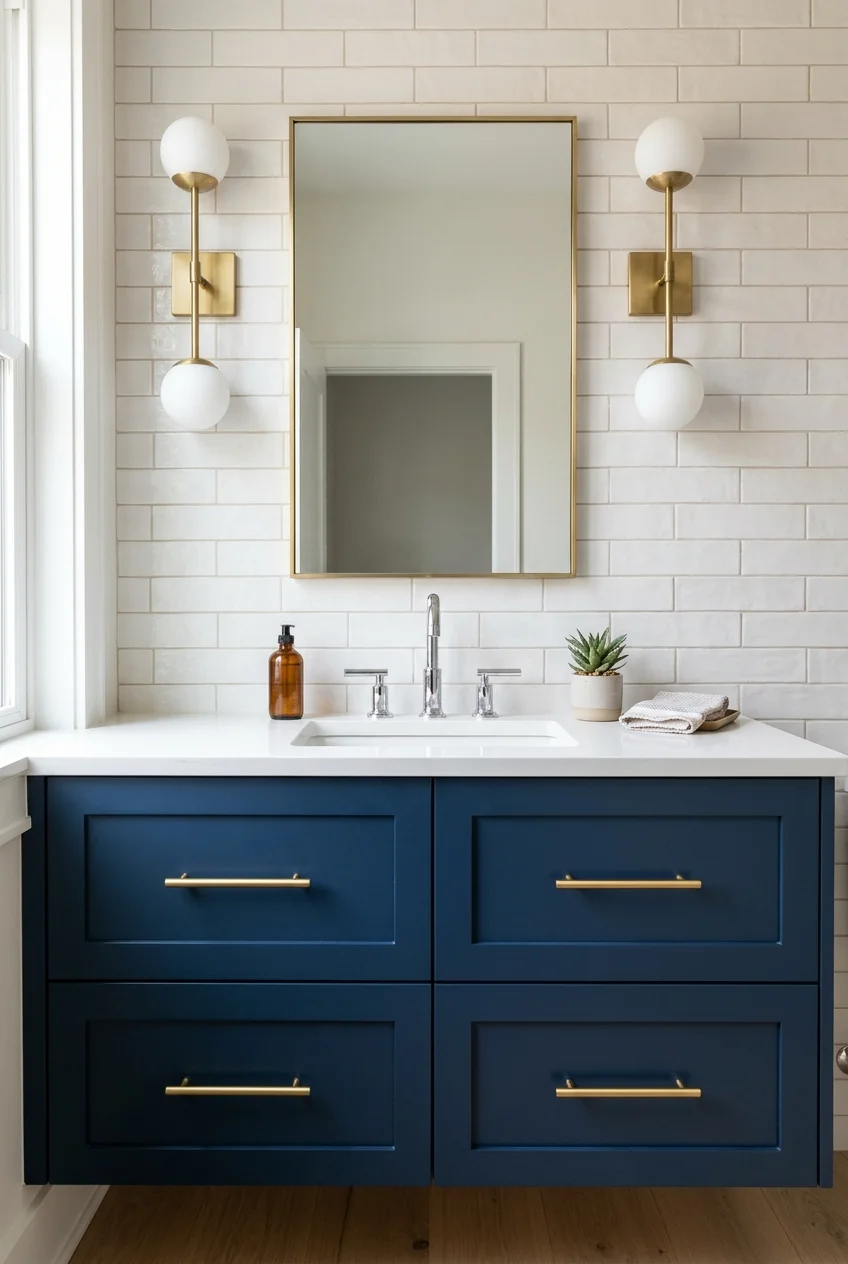
Mixed metals look deliberate when the faucet establishes the dominant finish and a secondary metal repeats in two smaller details rather than appearing once.
For example, pair a chrome faucet and drain with brass sconces and cabinet pulls. Keeping each functional group consistent prevents a scattered, replacement-part effect.
- Choose one dominant finish for plumbing trim.
- Repeat the accent finish at least twice.
- Separate contrasting metals instead of clustering near-identical shades.
22. Pair Gunmetal With Charcoal Stone
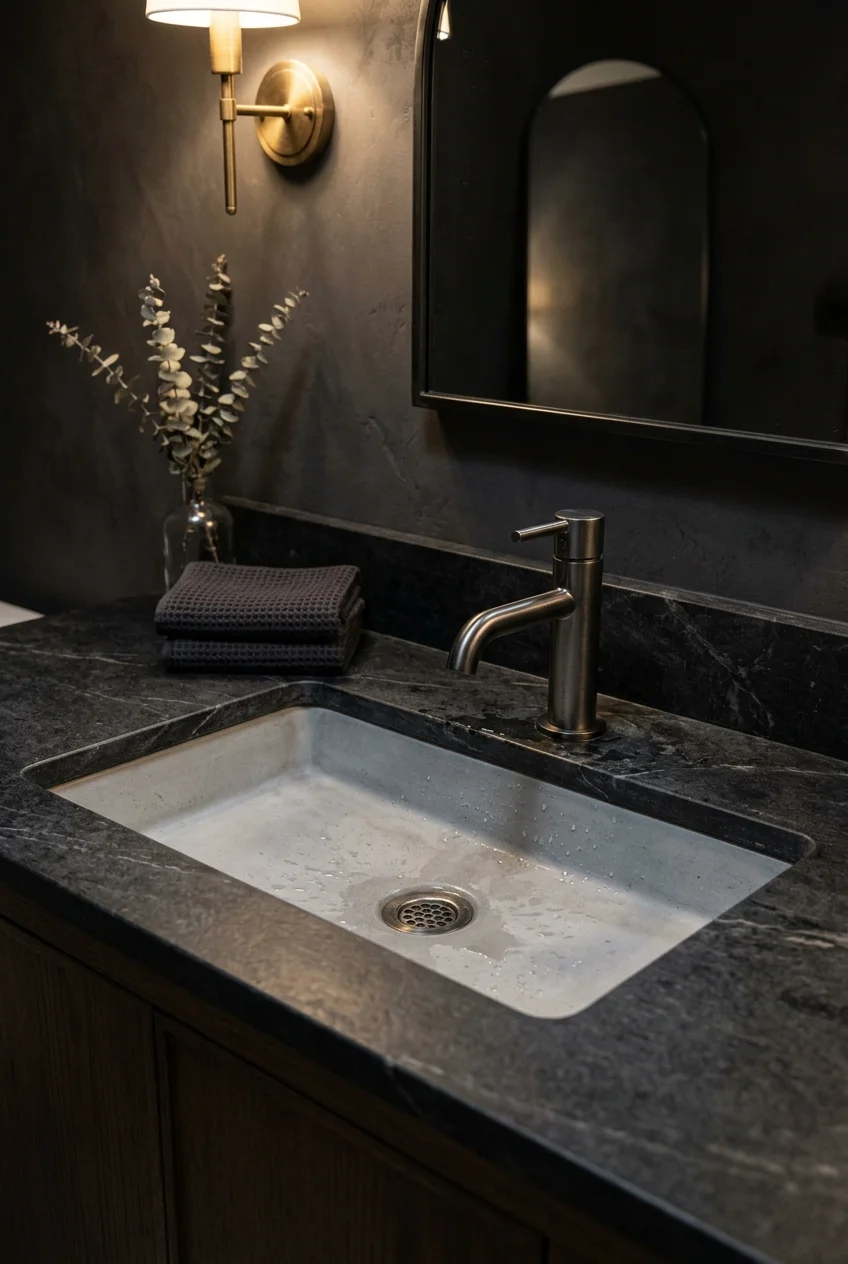
Gunmetal gives a dark vanity definition with a softer, more metallic surface than flat black, especially when charcoal stone provides a tonal background.
Preserve enough value difference to see the faucet’s outline. A lighter basin, pale grout, or controlled wall light can separate neighboring dark surfaces.
Pick a Silhouette and Control Style
Curves, angles, handles, and spout openings create the faucet’s personality. Choose a form that remains comfortable to operate and properly aimed into the basin.
23. Choose a Low Arc for a Shallow Basin
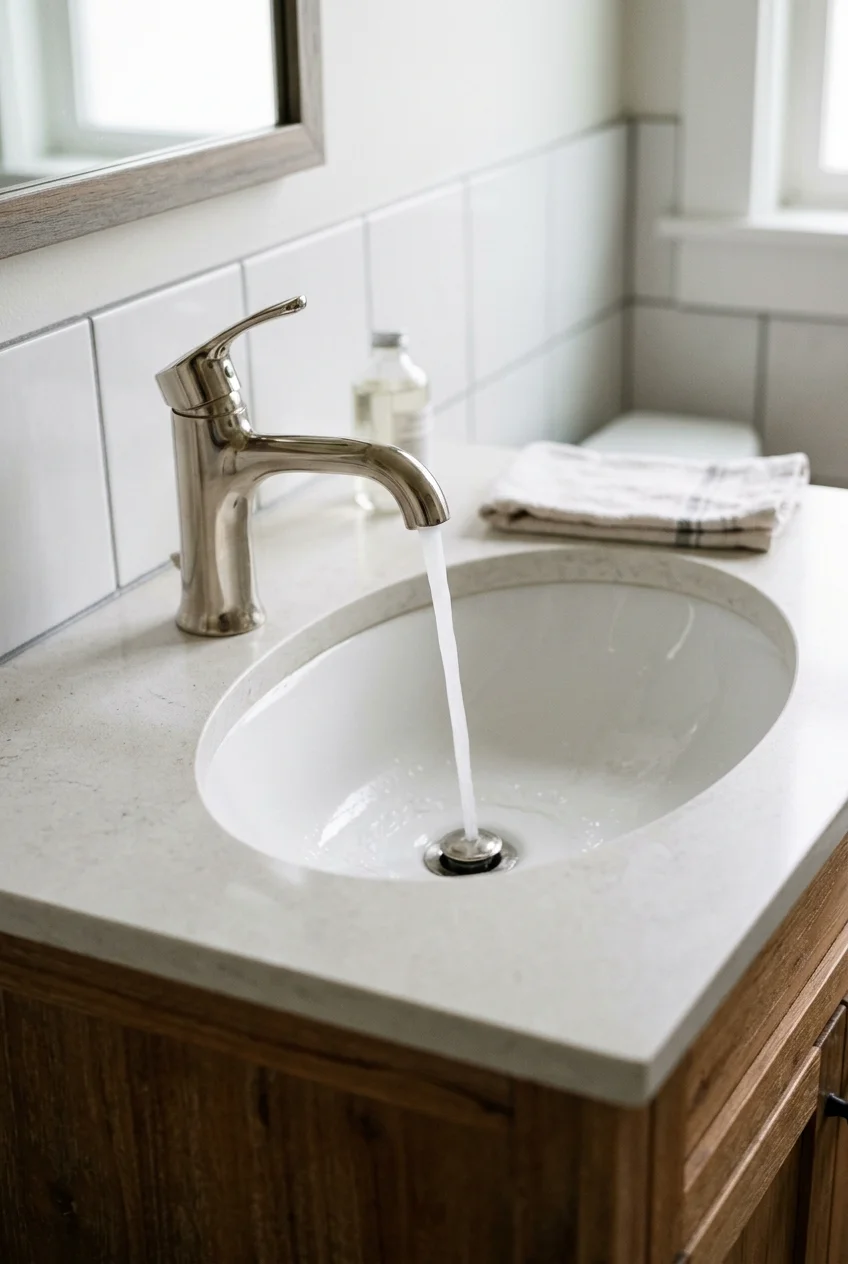
A low spout keeps water closer to a shallow bowl and preserves open sightlines across a compact vanity, especially beneath a low mirror.
Do not choose height alone. The reach must still carry the outlet beyond the back rim so hands fit comfortably beneath the stream.
24. Give a Deep Basin a Taller Arc
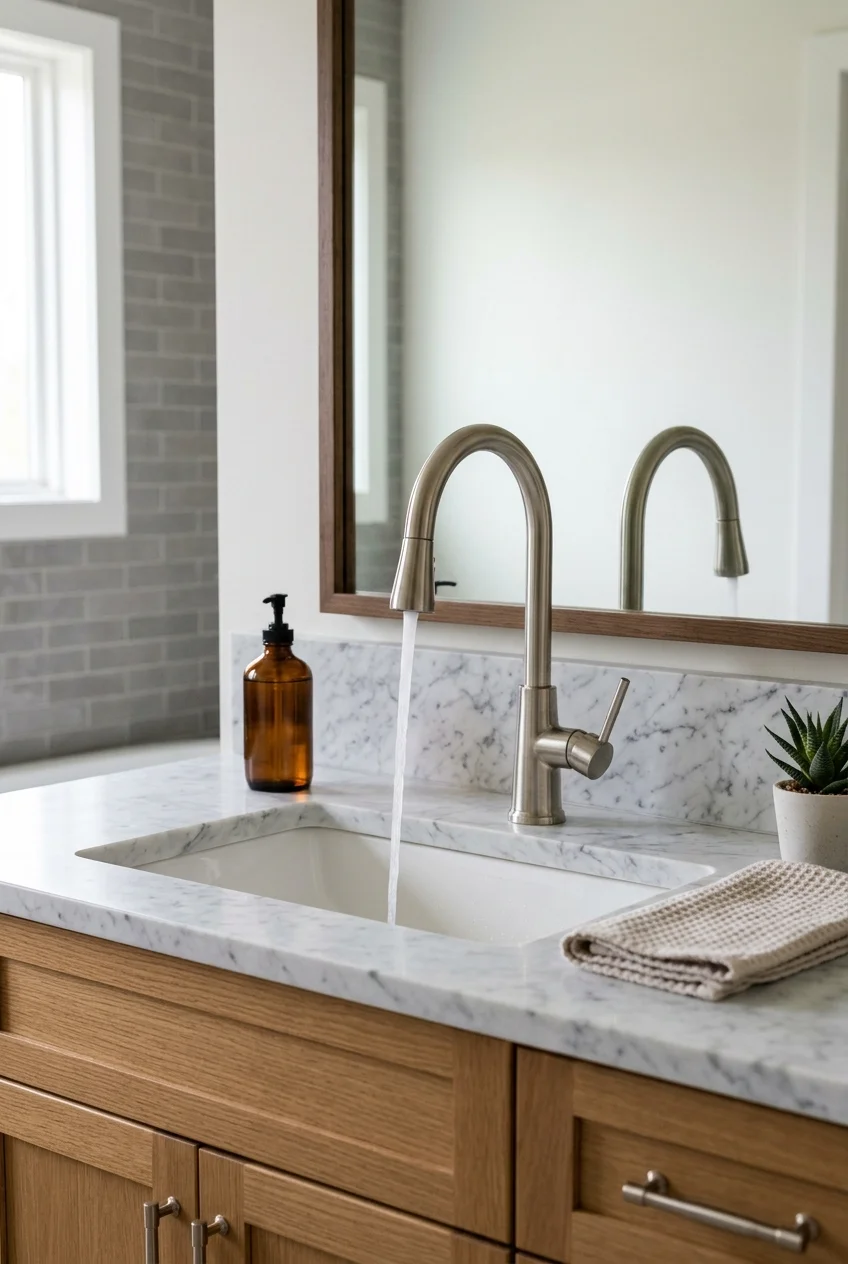
A taller arc provides useful hand clearance above a deeper basin and creates a strong vertical curve on a vanity with generous mirror space.
Balance that height with basin depth and outlet angle. A high stream striking a hard, steep surface can create more splash than expected.
Proportion check Photograph a cardboard silhouette at eye level before ordering; the mockup reveals when a dramatic arc overwhelms a short backsplash or narrow mirror.
25. Add a Rounded Gooseneck for a Sculptural Curve
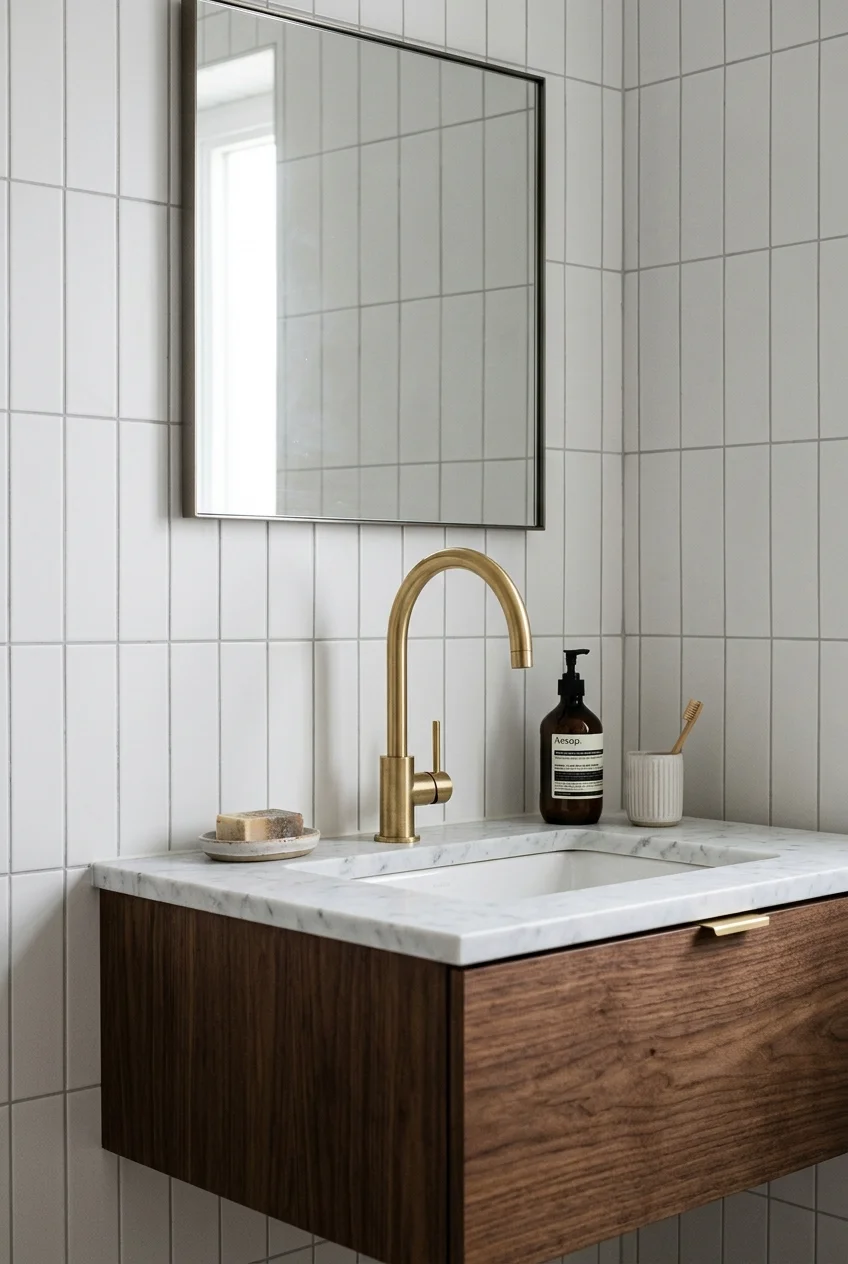
A rounded gooseneck introduces one generous curve that softens a room filled with rectangular tile, slab cabinet fronts, and a sharp-edged mirror.
Let the arc remain the focal gesture by choosing simple handles and limiting nearby circular accessories. Too many repeated curves can feel themed.
26. Make the Water Visible With an Open Waterfall Spout
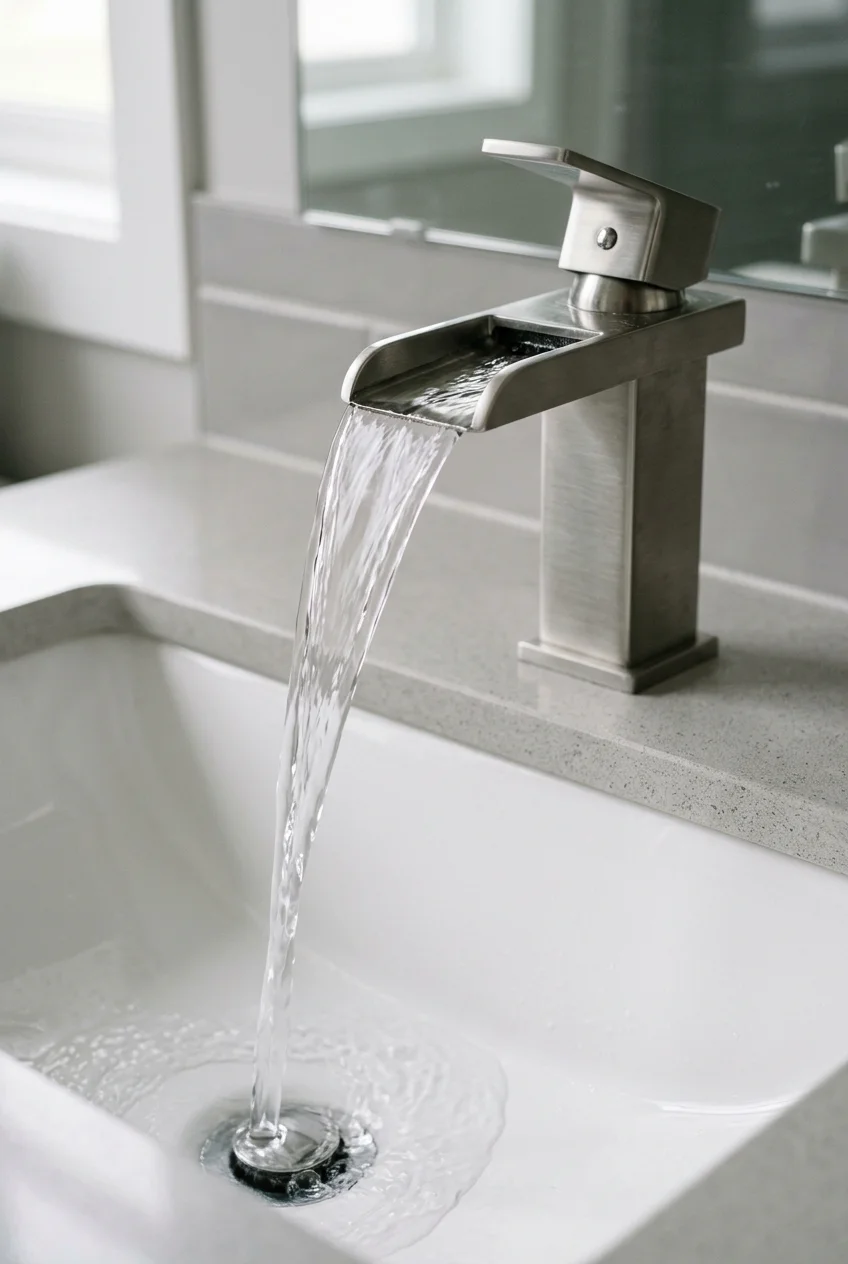
An open-channel waterfall spout makes flowing water part of the design, adding movement to a simple sink area even when the fixture is compact.
The exposed channel also stays visible when dry, so check how easily its surface can be reached for routine cleaning and mineral removal.
Pair the outlet with a broad basin that catches the sheet of water. A narrow or steep bowl may send droplets toward the counter.
27. Use a Flat Rectangular Spout for Crisp Geometry
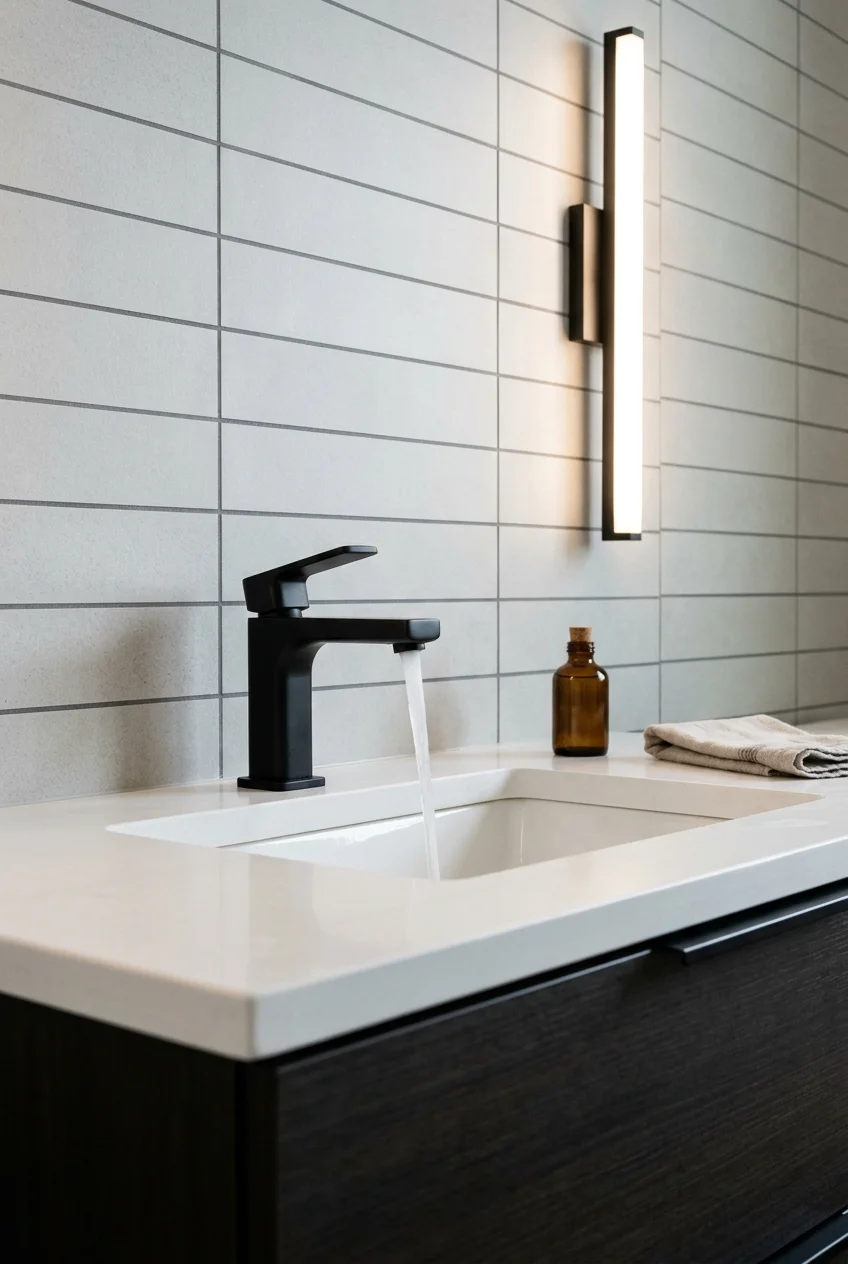
A flat rectangular spout echoes slab vanities, linear sconces, and straight grout lines, giving a contemporary bathroom a deliberately architectural rhythm.
Keep the edges comfortable around daily handwashing. Very sharp visual lines can still have eased corners and a smooth underside where hands pass.
28. Keep the Shape Simple With a Tubular Faucet
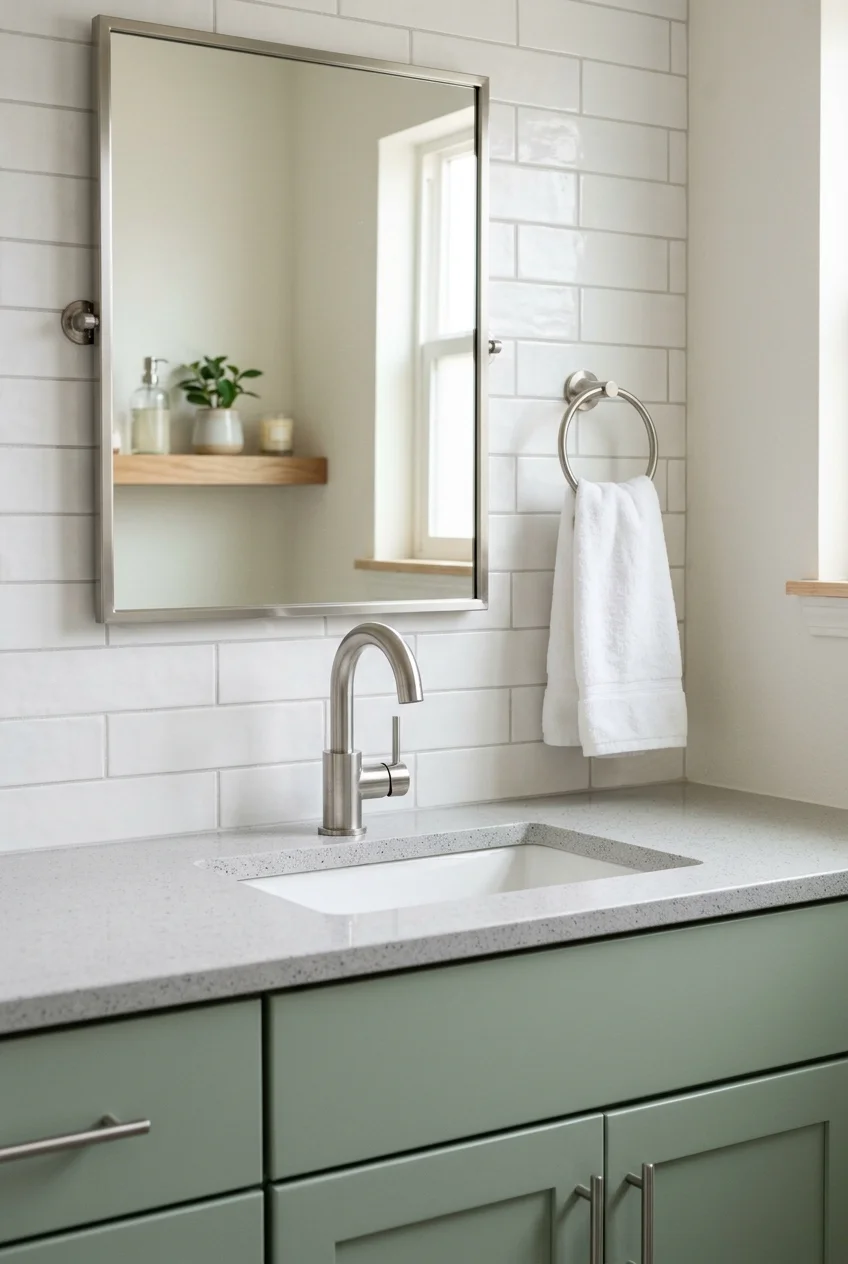
A cylindrical body and round spout create a quiet modern profile that works across many cabinet styles without forcing the room into strict minimalism.
Repeat the round section sparingly in a towel ring or sconce stem, then let the vanity and mirror introduce contrasting flat planes.
29. Bring Character With Cross Handles
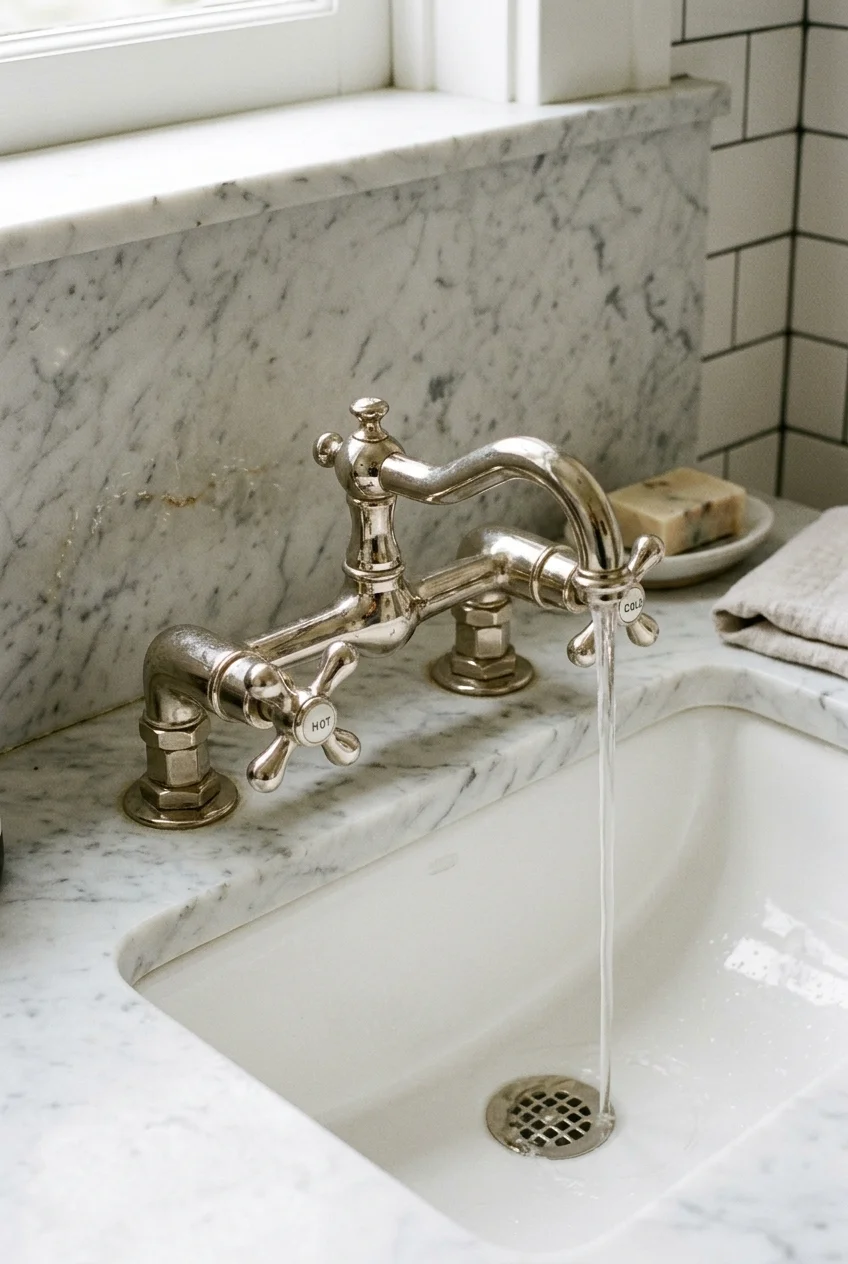
Cross handles give a faucet a recognizable vintage or industrial note, and their open spokes remain visible even on a compact sink deck.
Check gripping comfort before choosing them for a frequently used sink. Small, smooth spokes can be harder to turn with wet or limited hands.
Choose larger crosses with rounded ends when function matters more than delicacy, or reserve tiny decorative versions for a lightly used powder room.
30. Use Slim Lever Handles for Easy Operation
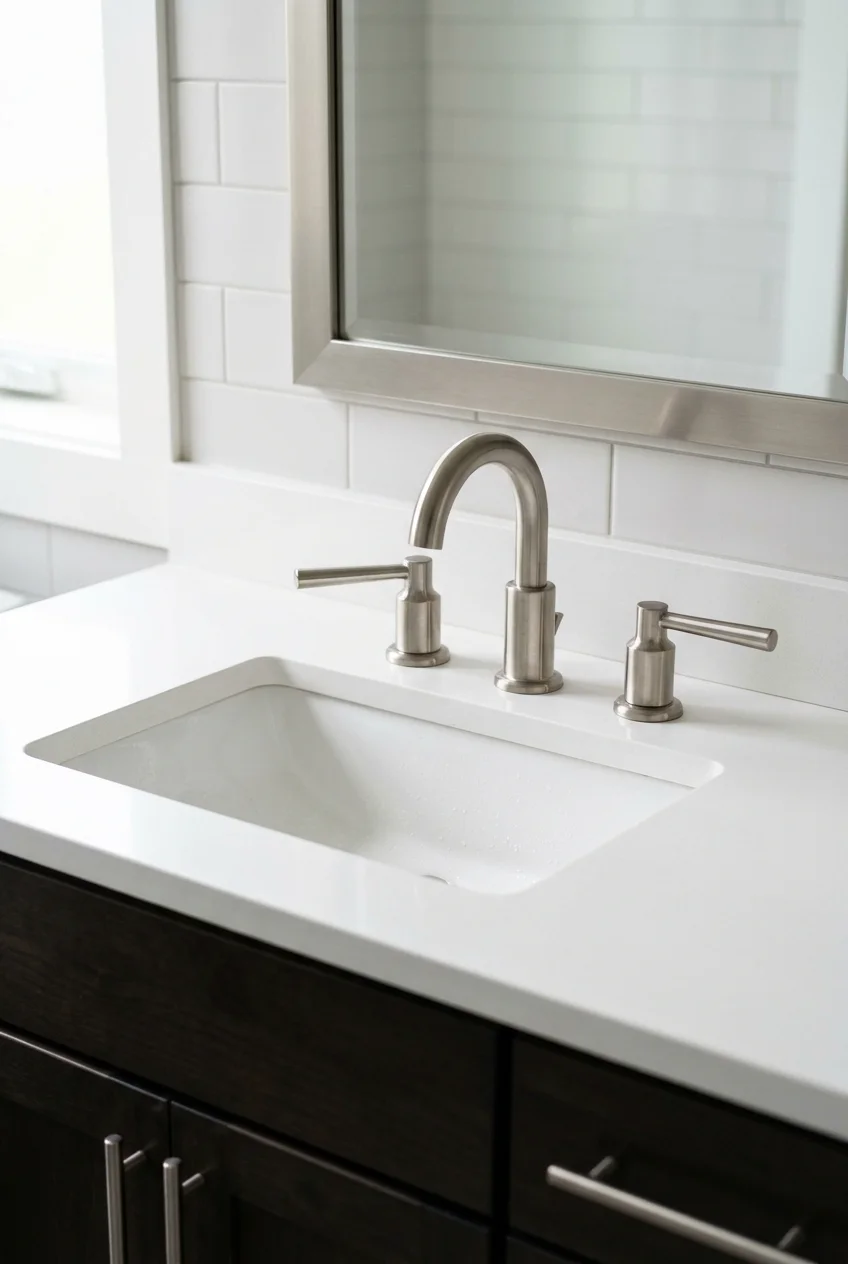
Long lever handles provide a clear visual line and can be operated with less twisting than small knobs, supporting varied hands and daily routines.
Leave enough space around each lever for its full path. Decorative trays, backsplash ledges, and vessel rims should not interrupt movement.
- Test the handle with an open palm.
- Check hot and cold direction labels.
- Confirm full travel before placing accessories.
31. Try a Top-Mounted Joystick on a Tiny Sink
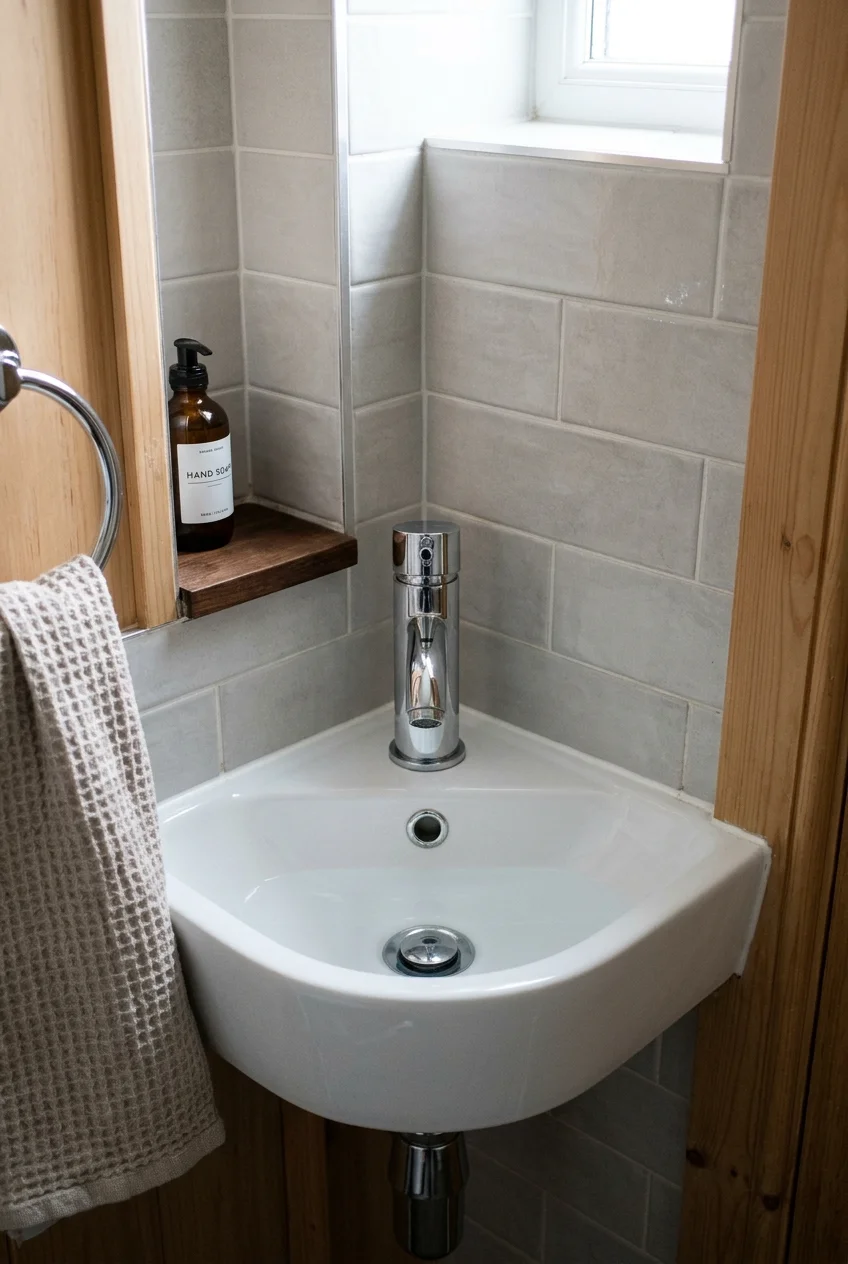
A compact joystick control mounted above the faucet body reduces side clearance needs, making it useful beside a narrow bowl or close wall.
Operate a display model before buying when possible. A small control saves space only if its movement remains intuitive and comfortable for regular users.
32. Add Grip and Detail With Knurled Handles
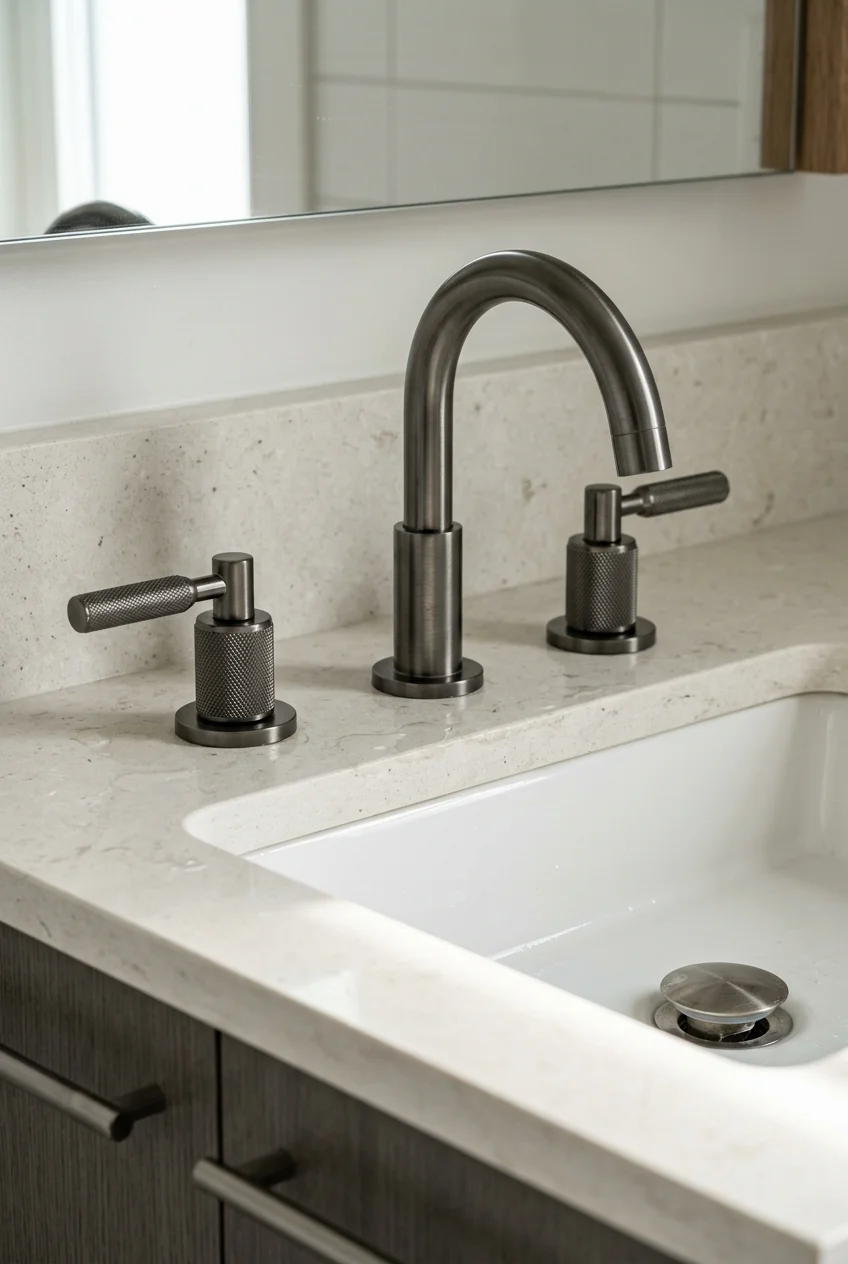
Knurled handles add fine texture that catches side light and provides a more tactile surface than a completely smooth cylindrical control.
Use the texture as a close-view detail rather than repeating it everywhere. Cabinet pulls with simpler forms prevent the vanity from becoming visually busy.
Care check Inspect how deep the pattern is and follow the finish instructions, because aggressive brushes can damage coatings while shallow grooves remain easier to wipe.
33. Use Porcelain Index Caps for a Cottage Detail
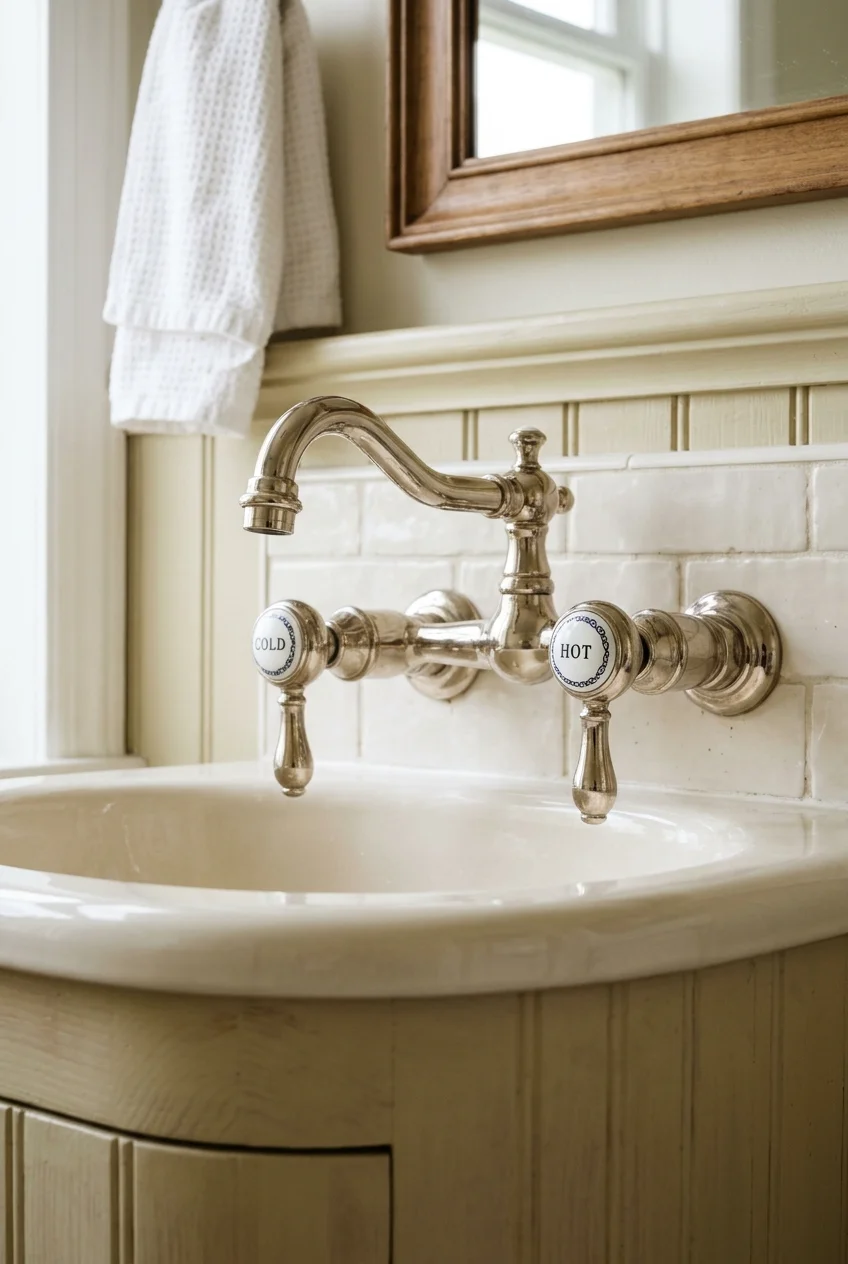
Small porcelain index caps on metal handles add a restrained period reference without requiring an ornate sink, patterned wallpaper, or heavily distressed cabinetry.
Choose clear hot and cold markings that remain readable at normal distance, then keep the surrounding palette simple enough for the detail to register.
34. Reduce Handle Touches With a Sensor Faucet
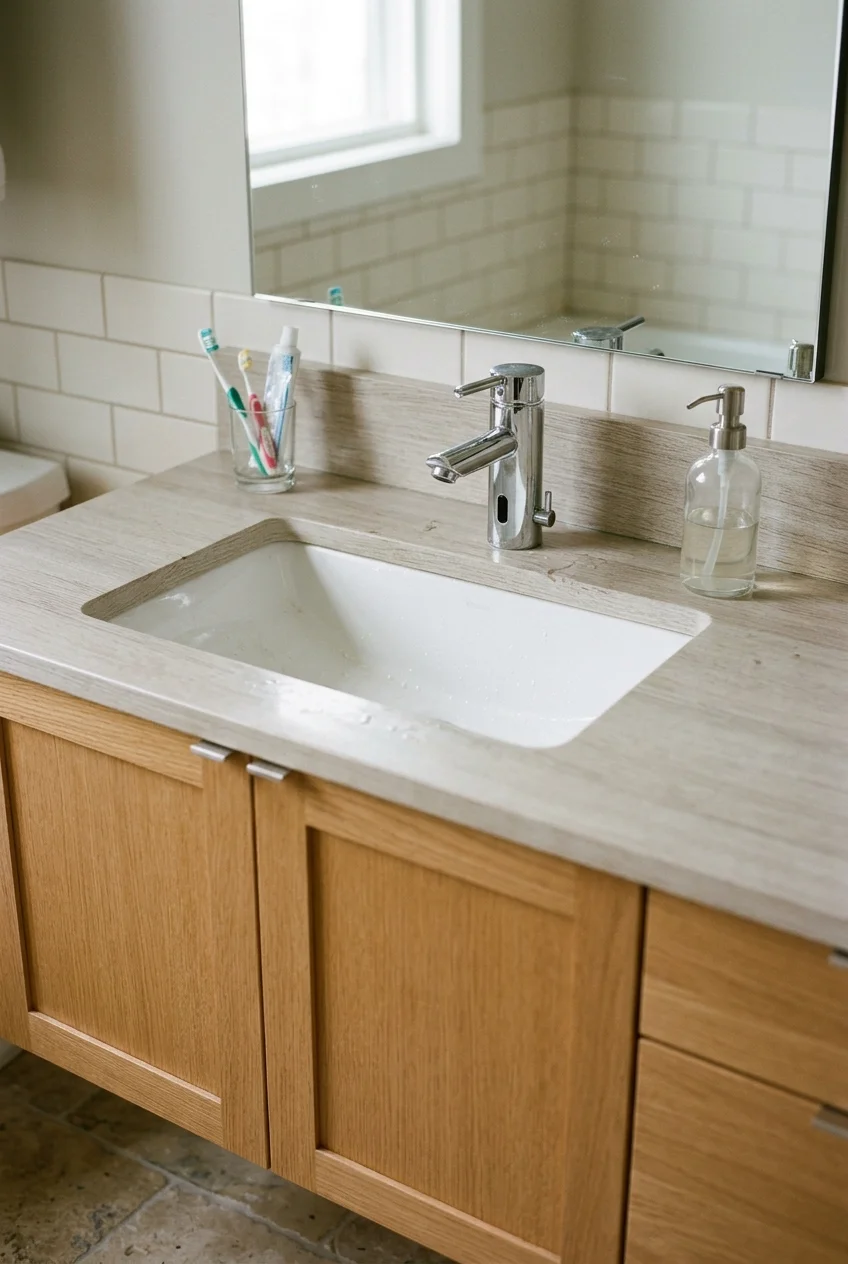
A sensor faucet can reduce routine handle contact at a busy sink, particularly when children arrive with paint, toothpaste, or garden dirt on their hands.
Pair the fixture choice with these kids bathroom remodel ideas when planning reachable storage, durable surfaces, shared routines, and safe circulation around the same sink.
Check the power source, mixing controls, sensor range, manual override, and required under-sink equipment. Leave service access rather than packing the cabinet tightly.
Decide how users will adjust temperature before installation. Some sensor models use a separate mixer, while others offer controls on the faucet body.
Setup note Confirm the sensor can detect intended users at the installed basin depth; a successful showroom demonstration does not guarantee identical placement at home.
35. Choose a Broad Paddle Lever for Varied Hands
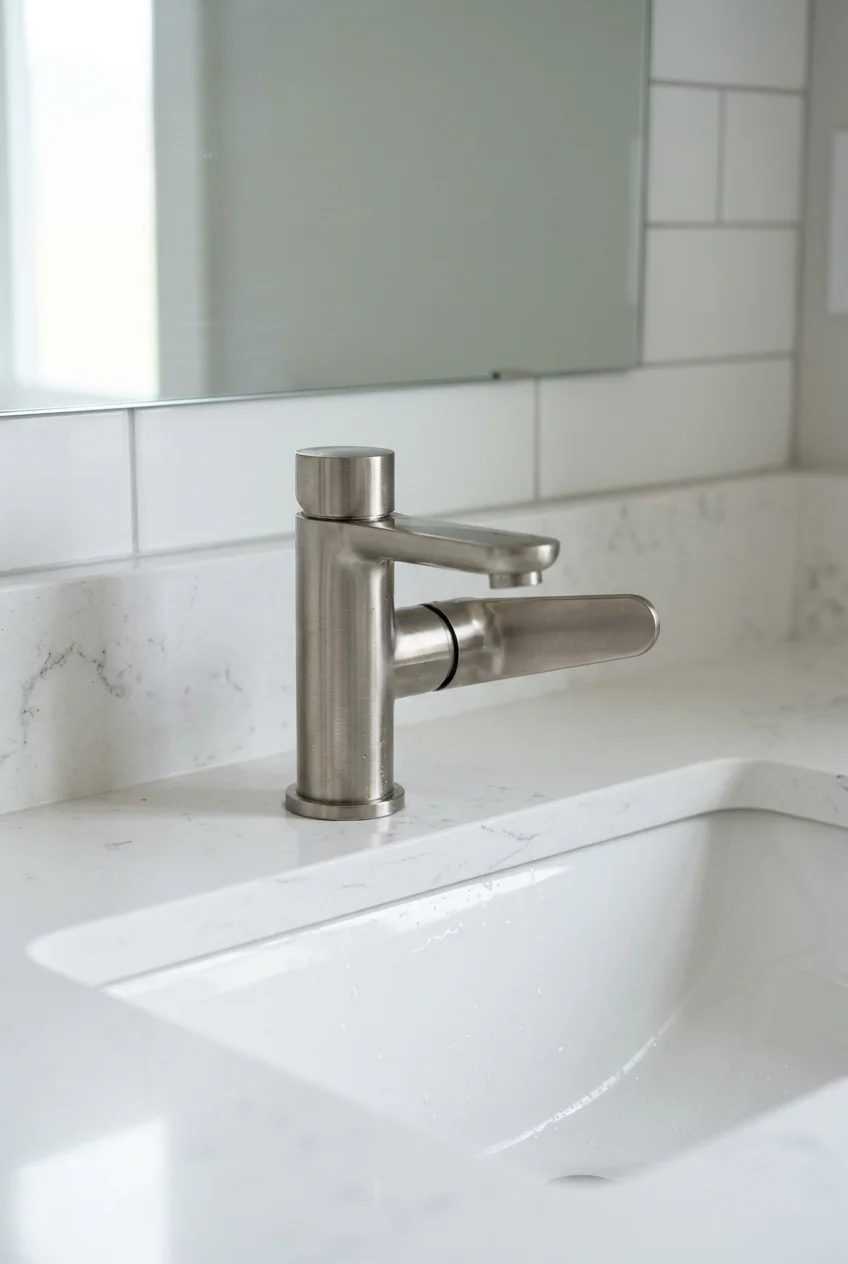
A broad paddle-shaped lever offers a larger contact surface than a narrow pin, allowing operation with a hand, wrist, or forearm when necessary.
Keep the surrounding counter clear and confirm the selected model’s force and travel. Shape alone does not establish accessibility for every user.
For a shared bathroom, involve the people who will use the sink. Their reach, grip, and preferred temperature control should guide the final choice.
36. Pick a Flared Spout for a Classic Transition
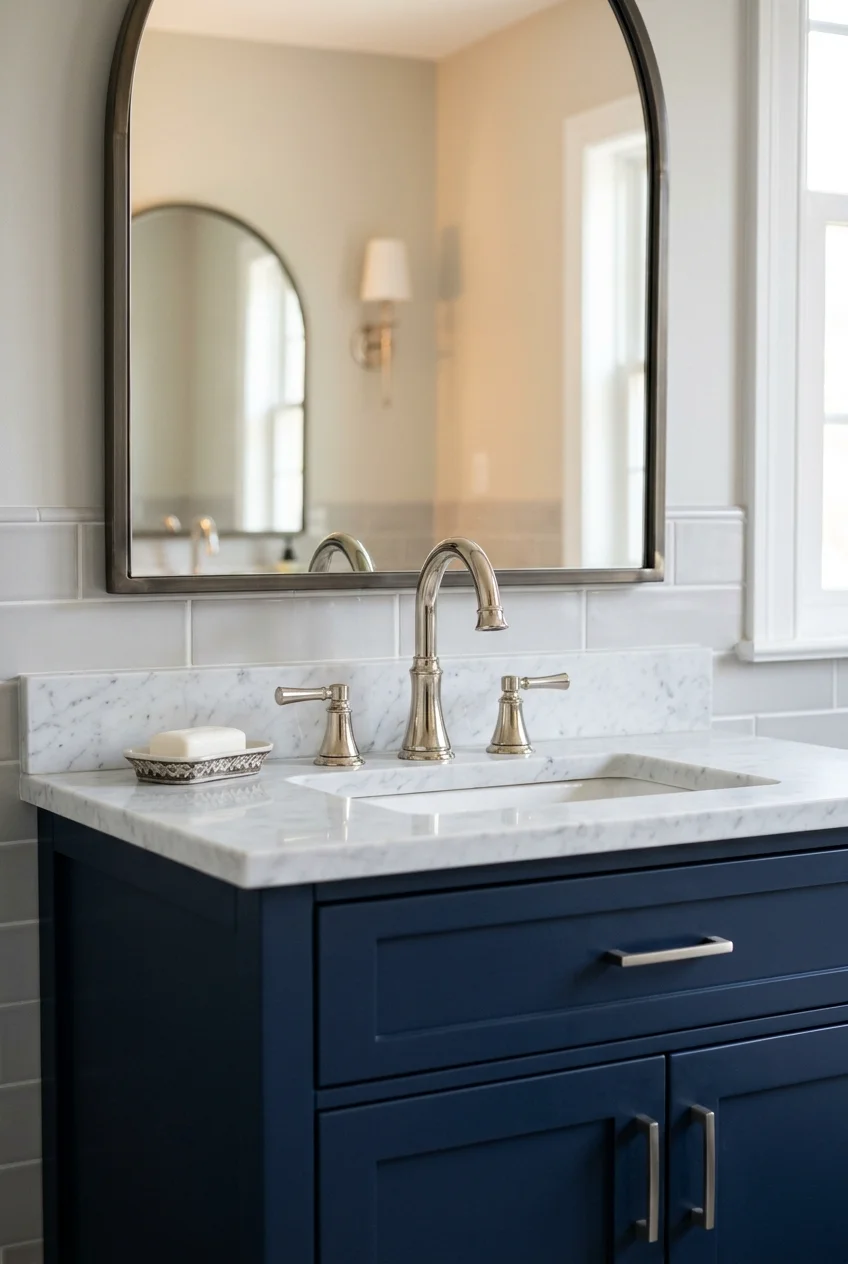
A gently flared base and curved outlet sit between strict traditional and modern styles, making the faucet adaptable when a bathroom mixes old and new elements.
Pair it with plain lever handles rather than decorative crosses for a cleaner reading, then repeat one soft curve in the mirror or sconce.
Pair the Faucet With the Vanity and Surround
The same faucet can appear quiet, graphic, traditional, or playful depending on its background. Let nearby color, texture, and scale clarify the intended effect.
37. Set the Faucet Against a Full-Height Stone Splash
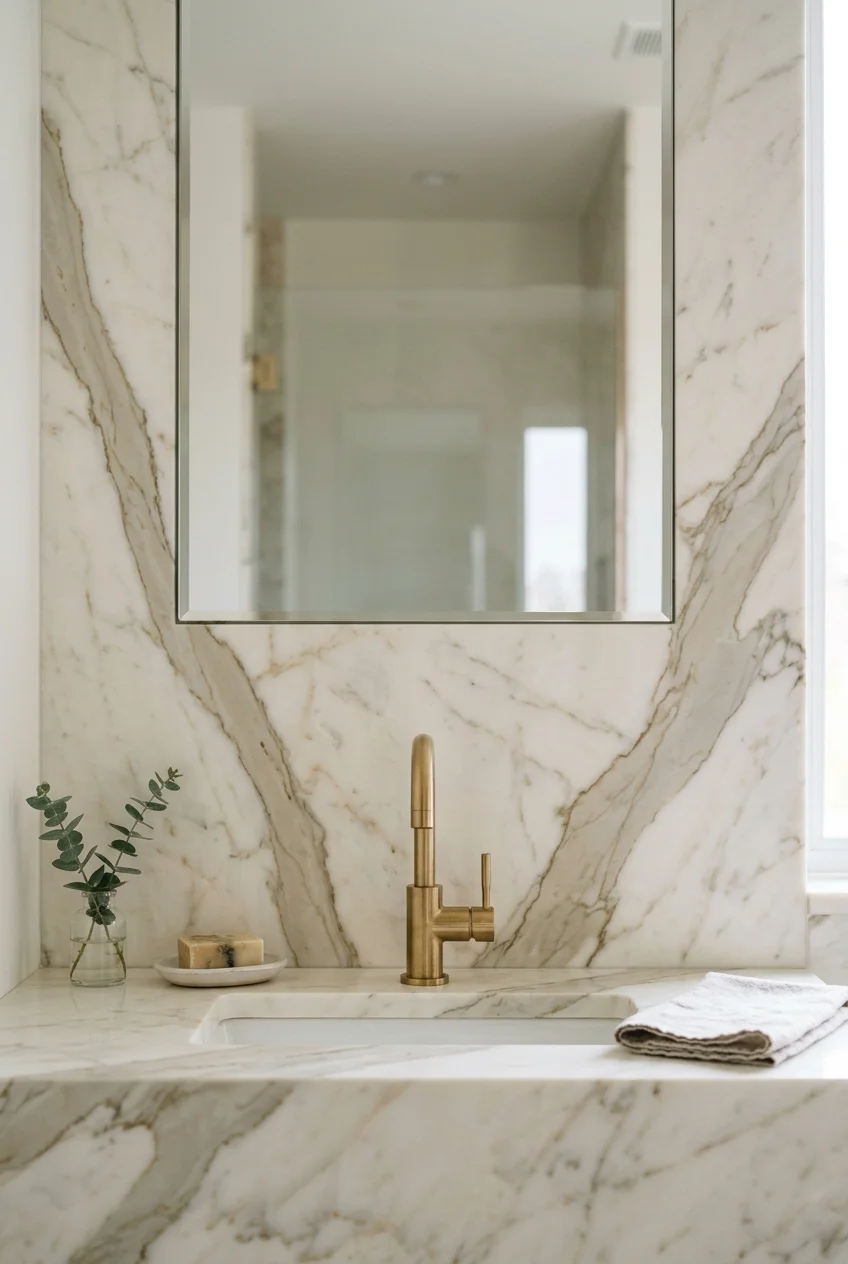
Continuing stone from counter to mirror gives a small faucet a substantial backdrop and removes the visual break of a short, separate backsplash strip.
Position veining around the fixture before cutting. A strong line running directly through the spout can either emphasize alignment or create distracting tension.
Leave the manufacturer’s required clearance behind deck-mounted controls, and detail penetrations carefully if the faucet itself mounts through the vertical stone.
38. Contrast a Precise Faucet With Handmade Tile
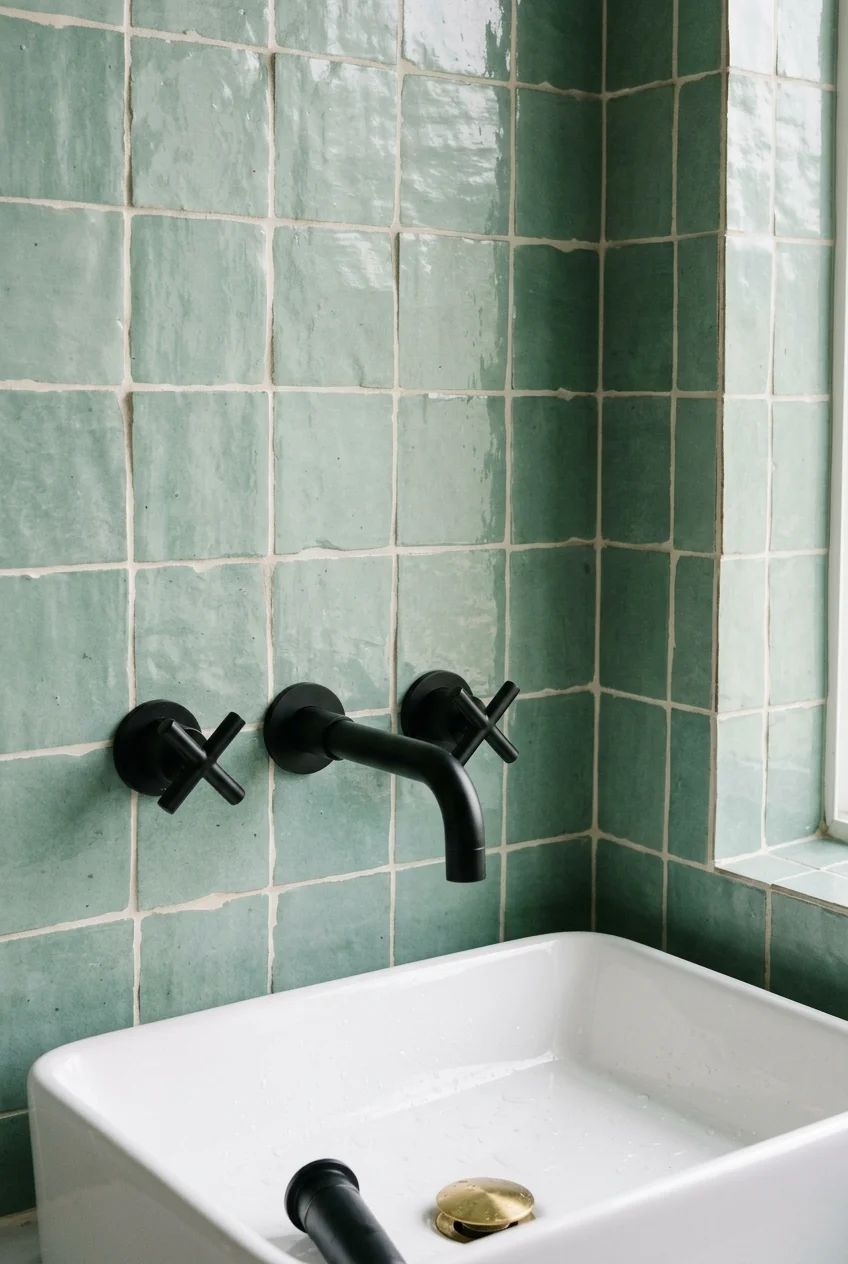
A clean-lined faucet looks especially crisp against handmade tile, where slight variation in surface and grout joints introduces movement without adding another pattern.
Use trim or carefully planned cuts around outlets and wall-mounted components. Irregular tile edges should remain intentional, not leave awkward gaps behind faucet plates.
Layout tip Dry-lay several rows around the fixture centerline so the most visible cuts remain balanced on both sides of the sink and mirror.
39. Warm a Floating Wood Vanity With Brushed Metal
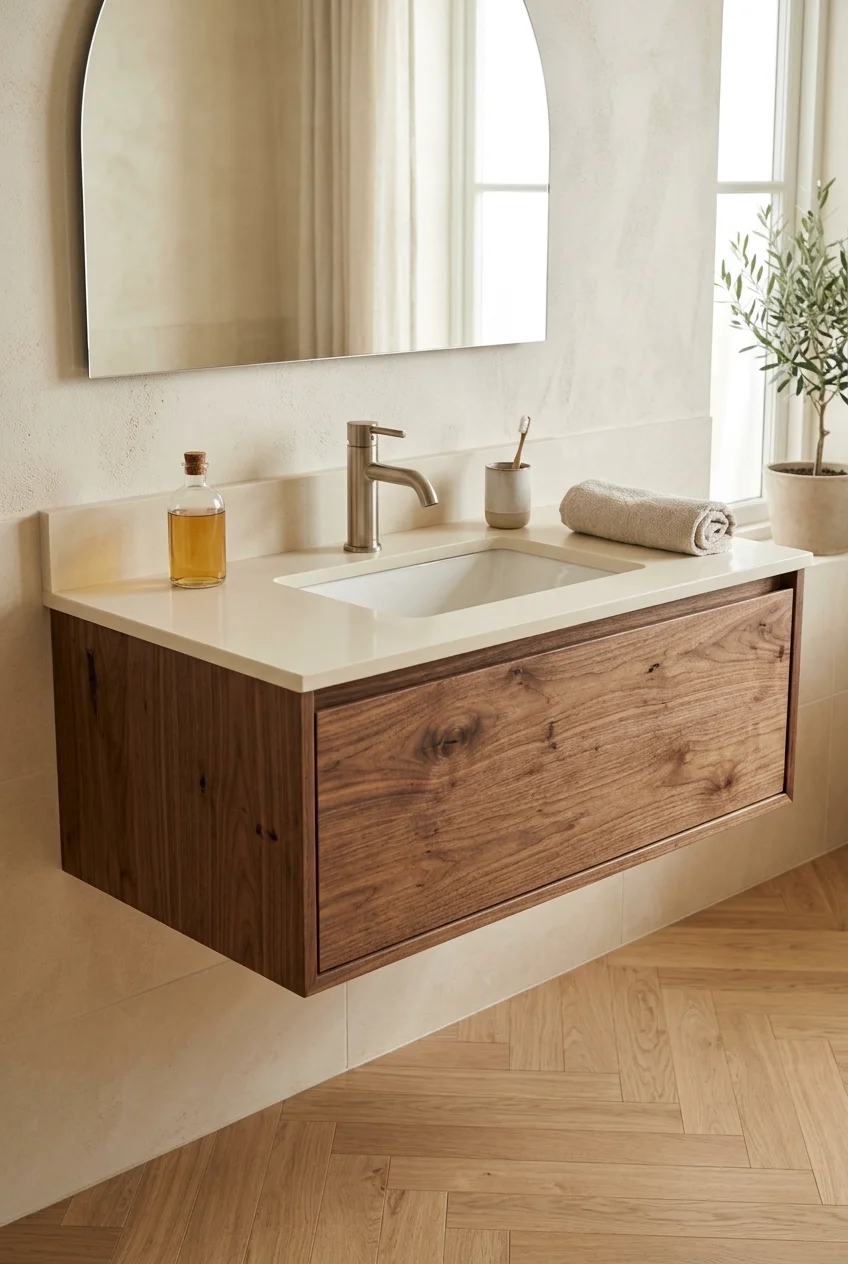
A brushed-metal faucet complements the grain of a floating wood vanity without copying its warmth, while the open floor below keeps the composition visually light.
Protect the cabinet top with an appropriate sink or counter material. The image of warm wood should not imply that every unfinished surface tolerates repeated splashes.
Choose a faucet projection that keeps water inside the bowl, then leave enough dry counter between the sink and exposed wood edges for routine wiping.
40. Use the Faucet to Finish a Painted Vanity
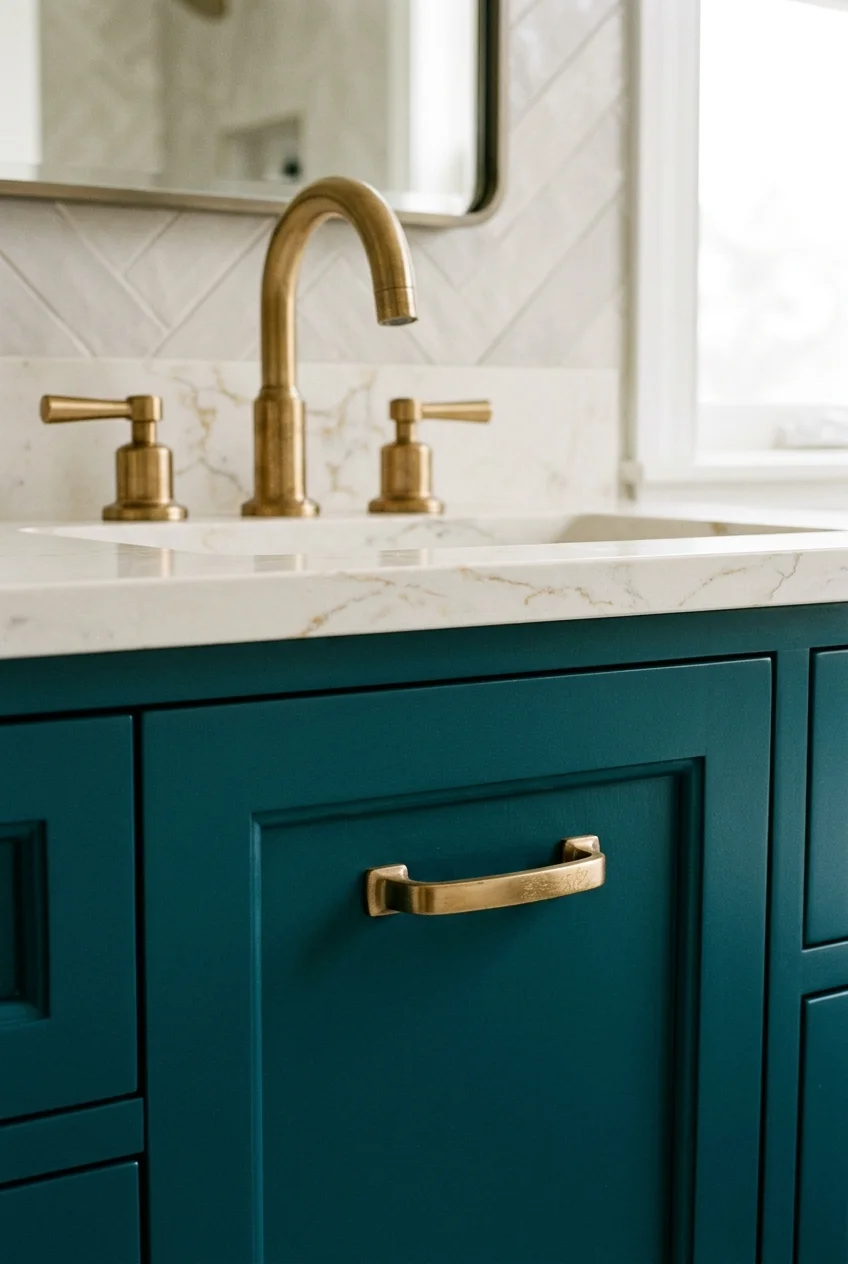
A faucet can sharpen the color story of a painted vanity: brass warms blue or green, while chrome keeps saturated cabinetry feeling cooler and clearer.
Sample the paint and metal beside the counter, not in isolation. Counter undertones often determine whether the combination feels connected or slightly discordant.
41. Balance a Fluted Vanity With a Plain Faucet
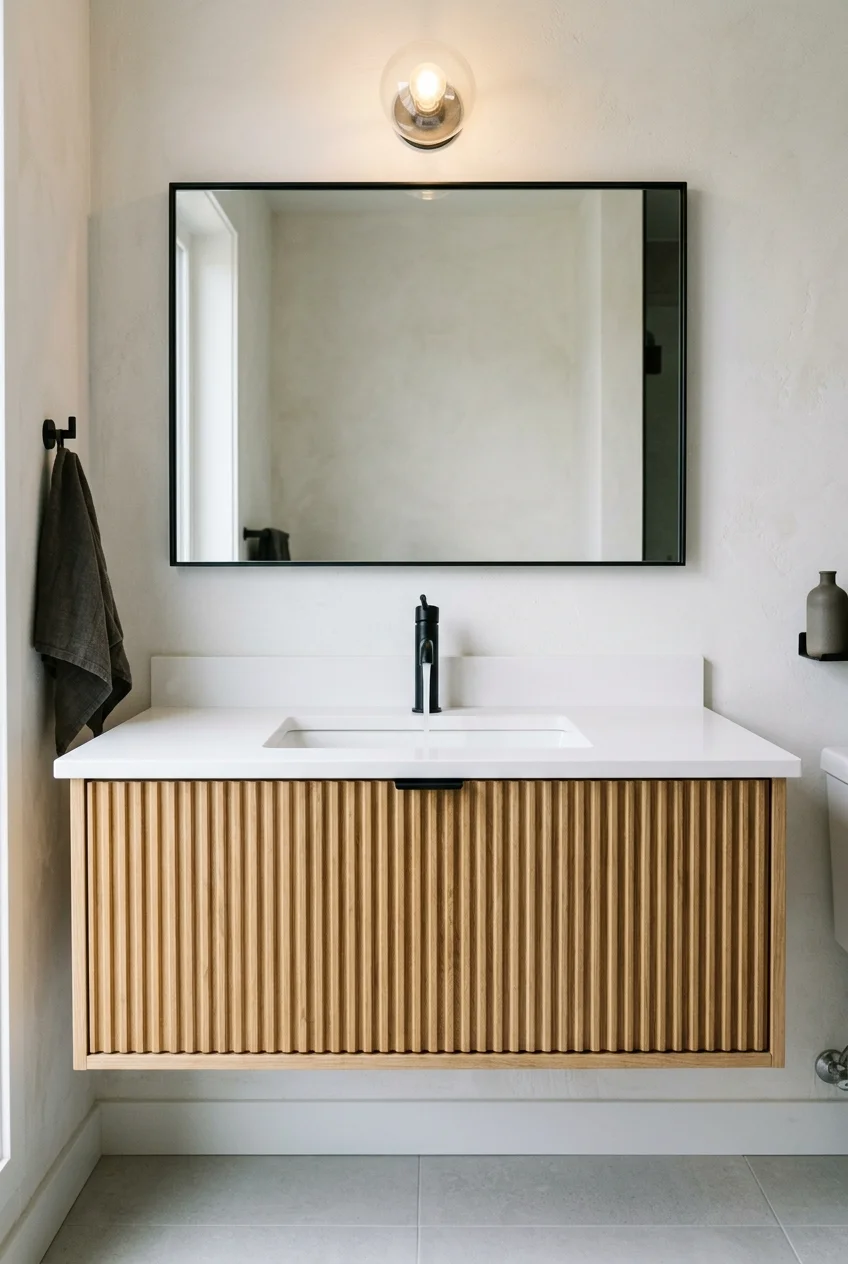
Fluted cabinet fronts already create strong texture, so a smooth faucet with simple controls gives the eye a quiet resting point above the counter.
Align the faucet with a flute or the center between two grooves when the pattern is regular. Small misalignments become surprisingly noticeable in frontal views.
Visual check Mark the basin, drain, faucet, mirror, and cabinet centerlines together before drilling, especially when several strong vertical rhythms share one narrow wall.
42. Respect the Scale of a Pedestal Sink
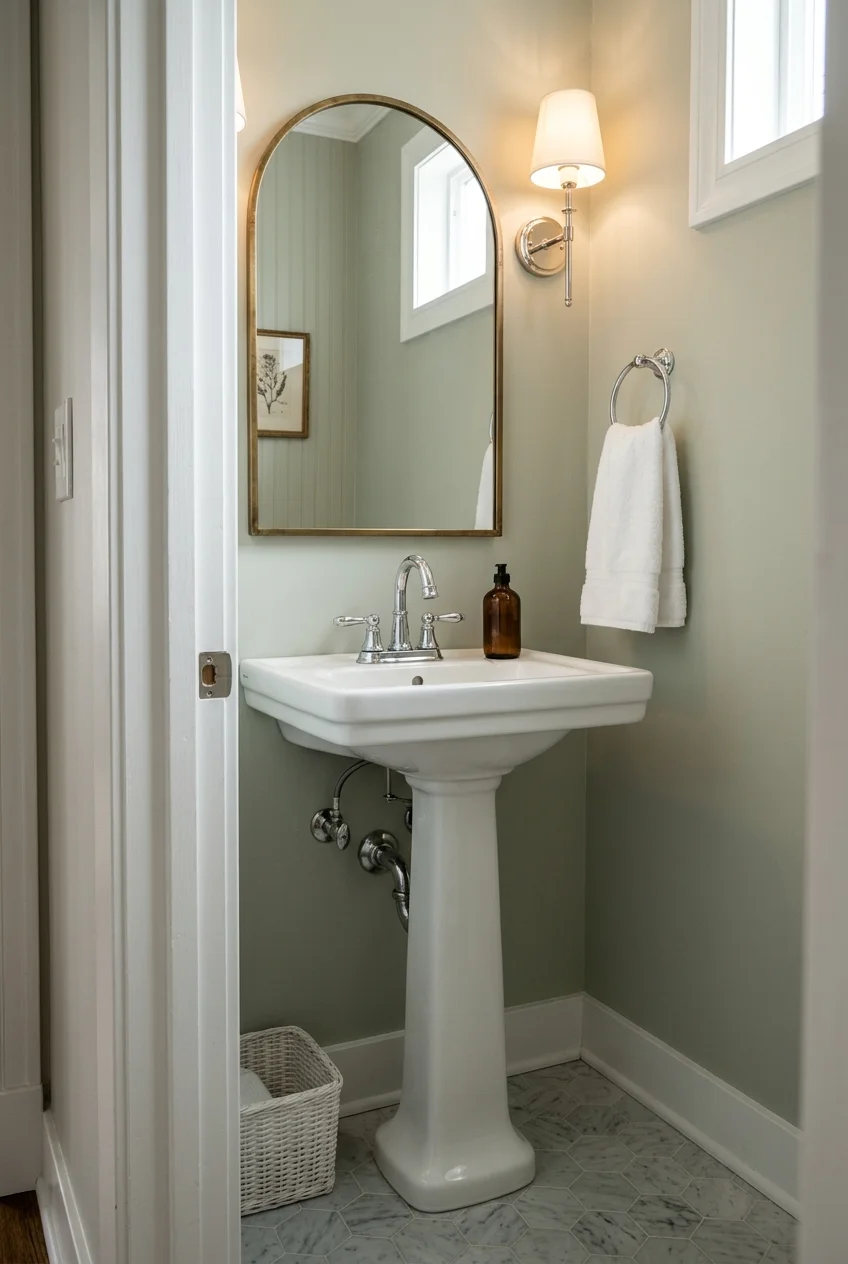
A pedestal sink looks best with a faucet that fits its compact deck and does not visually outweigh the narrow ceramic base below.
A small centerset or restrained single-hole model usually preserves the sink’s outline. Oversized handles can crowd the rim and complicate cleaning near the wall.
Verify supply and drain appearance because the pedestal may not conceal every connection from side angles, particularly in a room with an open doorway.
43. Keep an Integrated Sink Visually Continuous
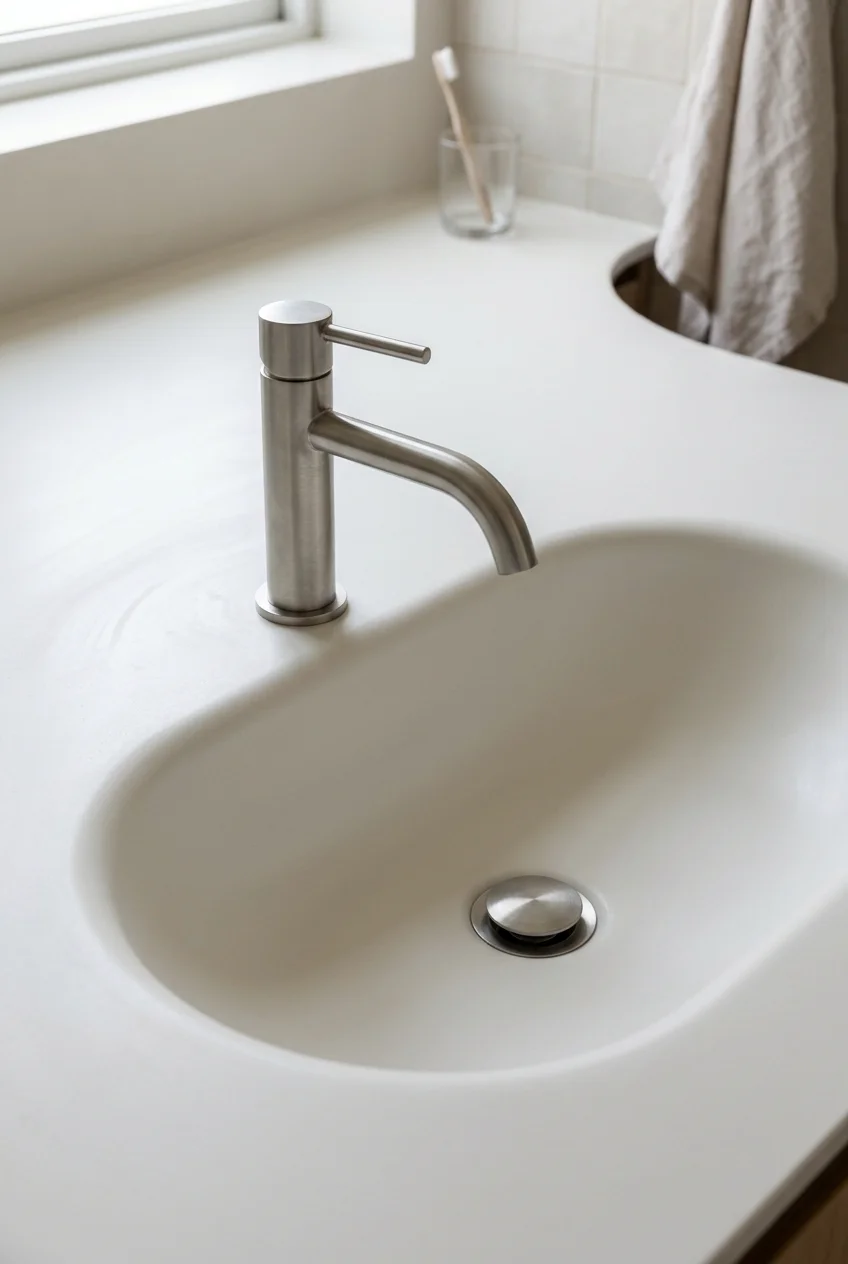
An integrated counter and basin create one uninterrupted surface, so a simple single-hole faucet preserves that clean transition better than a crowded assembly.
Use the fabrication drawing to place the hole precisely. The seamless look still depends on correct reach, drain alignment, and enough material around the opening.
44. Add a Warm Faucet to a Concrete Trough
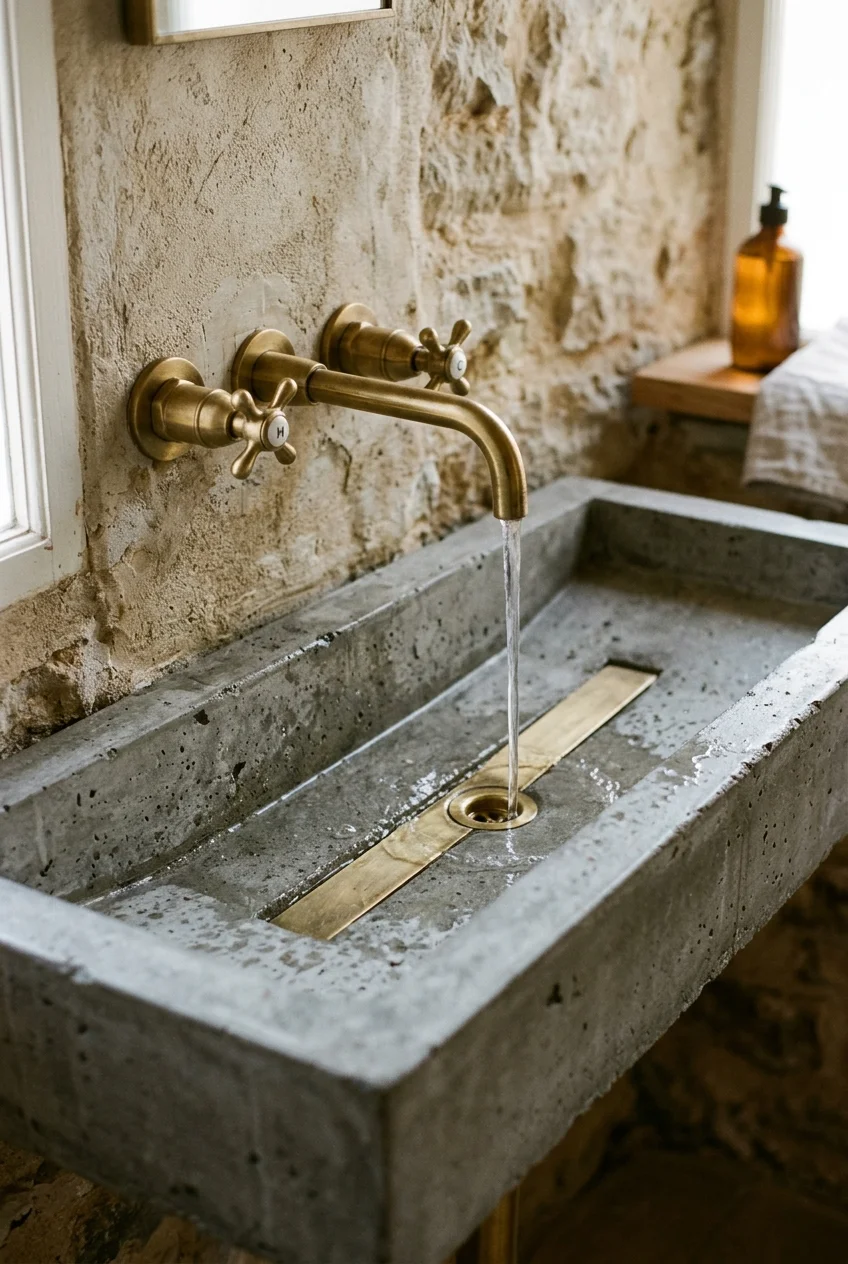
A brass or bronze faucet brings warmth to a gray concrete trough, while the long basin gives a strong horizontal counterpoint to curved or upright spouts.
Confirm where the water lands along the sloped trough. A beautiful centered fixture can still leave the stream too far from the drain channel.
Concrete composition, sealing, and care vary widely, so follow the fabricator’s guidance rather than assuming every basin tolerates the same cleaners or standing water.
45. Angle the Faucet Carefully on a Corner Vanity
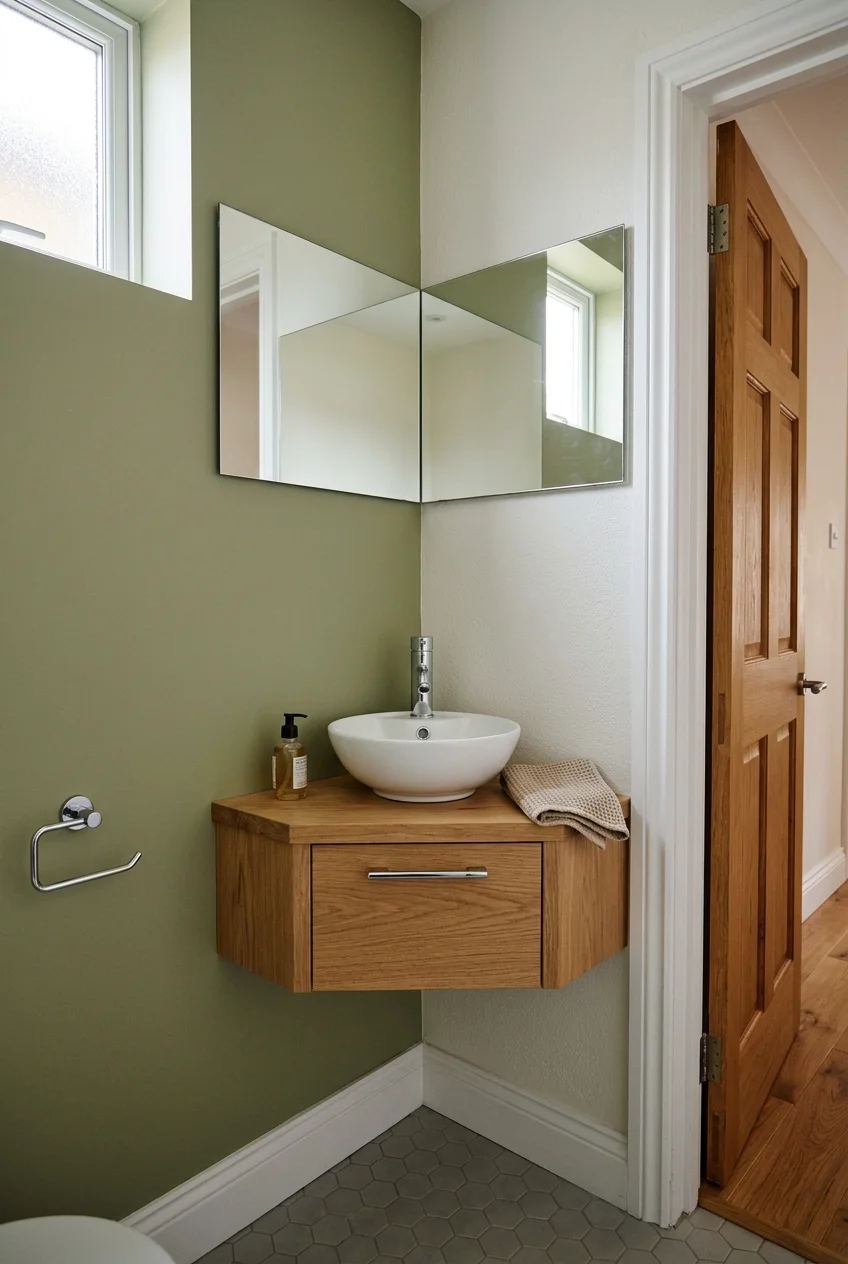
A corner vanity can reclaim an awkward powder-room footprint, but faucet placement must respect two walls, the basin opening, mirror angle, and handle movement.
A compact single-hole faucet often works best when centered toward the room rather than aimed diagonally into either wall. Test the approach path first.
Confirm where supply lines and the drain can pass through the cabinet without weakening narrow panels or consuming the only practical storage zone.
- Mark both wall projections on a full-size counter template.
- Place the sink and faucet cutouts on the template.
- Test handle travel, mirror clearance, and standing position.
Do not rely on a perspective rendering alone. A taped floor outline and cardboard counter reveal shoulder space and door conflicts more honestly.
46. Repeat the Faucet Rhythm Across a Double Vanity
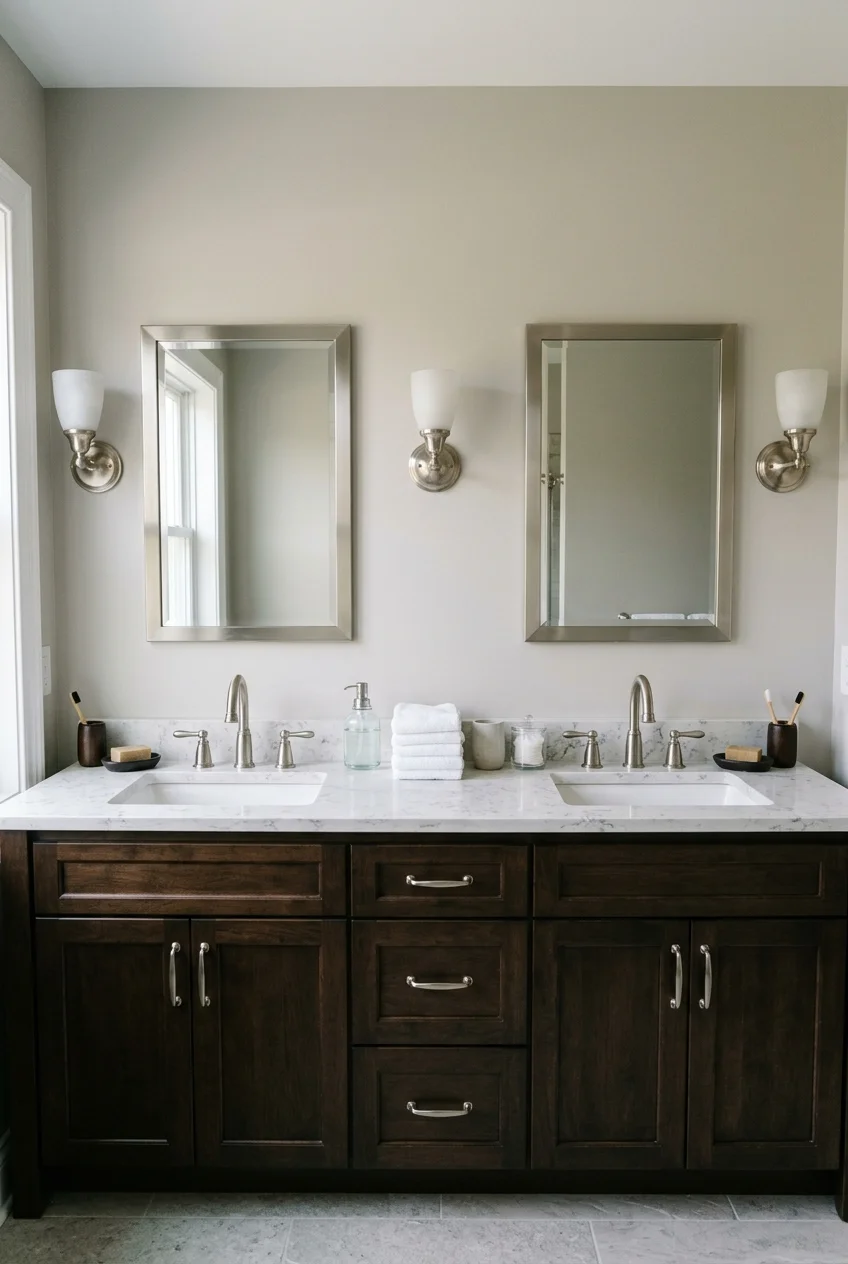
Two matching faucets create a steady rhythm across a double vanity when each aligns with its own basin, mirror, light, and usable counter zone.
Measure the full wall before choosing oversized fixtures. Generous spacing in a product photo can disappear once two basins and side clearances share one cabinet.
Keep both faucet centerlines consistent with the cabinet doors or drawer stacks below, particularly when the vanity uses strong symmetrical paneling.
Make the Everyday Details Work Better
A successful choice also handles daily use, cleaning, water flow, and varied hands. These final ideas keep the visible design connected to practical performance.
47. Look for a WaterSense-Labeled Model
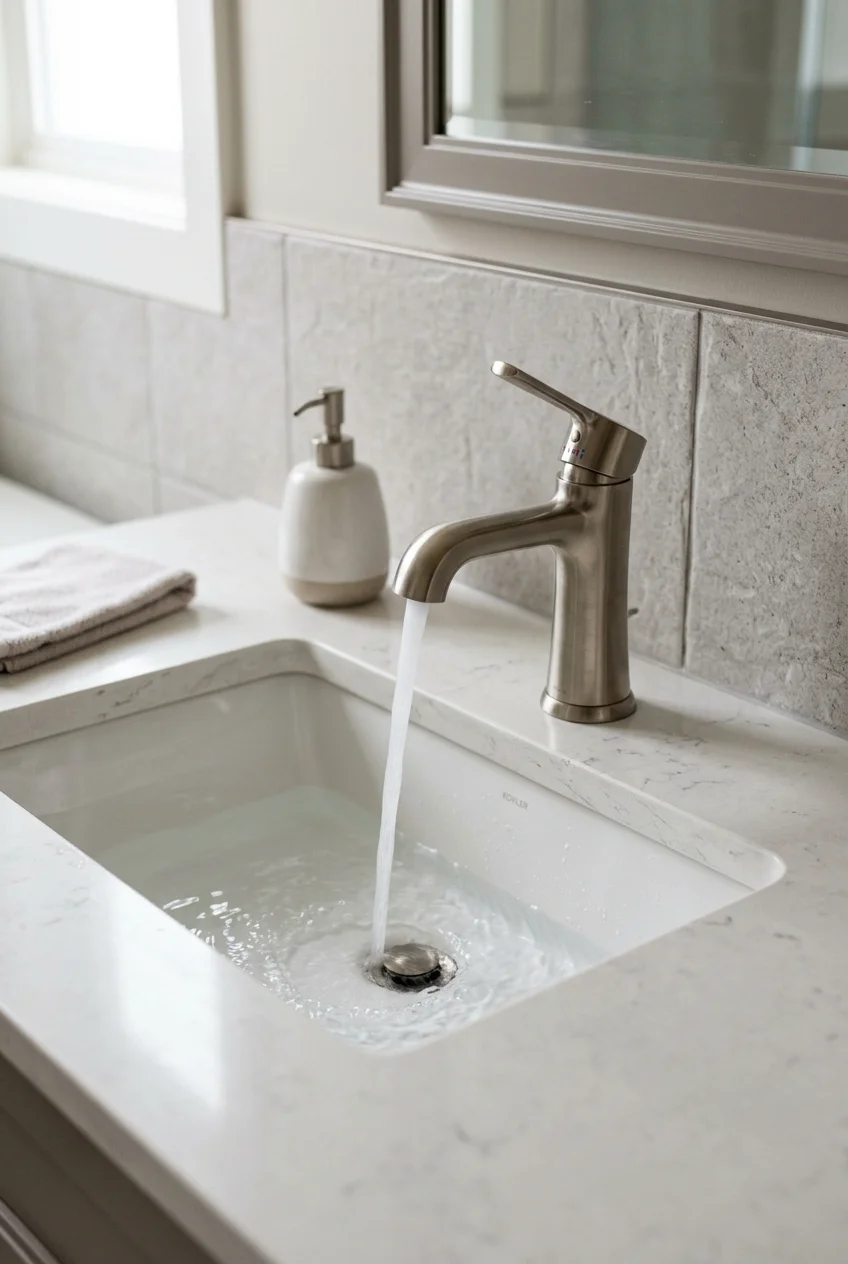
A WaterSense label identifies a bathroom faucet or accessory that has completed independent certification for EPA water-efficiency and performance criteria, not merely a low-flow claim.
Search the exact model number in the WaterSense product database before ordering, because similar-looking faucets within one collection may have different specifications.
Efficiency still needs good placement. Match the certified fixture’s reach and outlet height to the basin so normal handwashing remains comfortable and contained.
48. Match the Drain and Overflow Trim
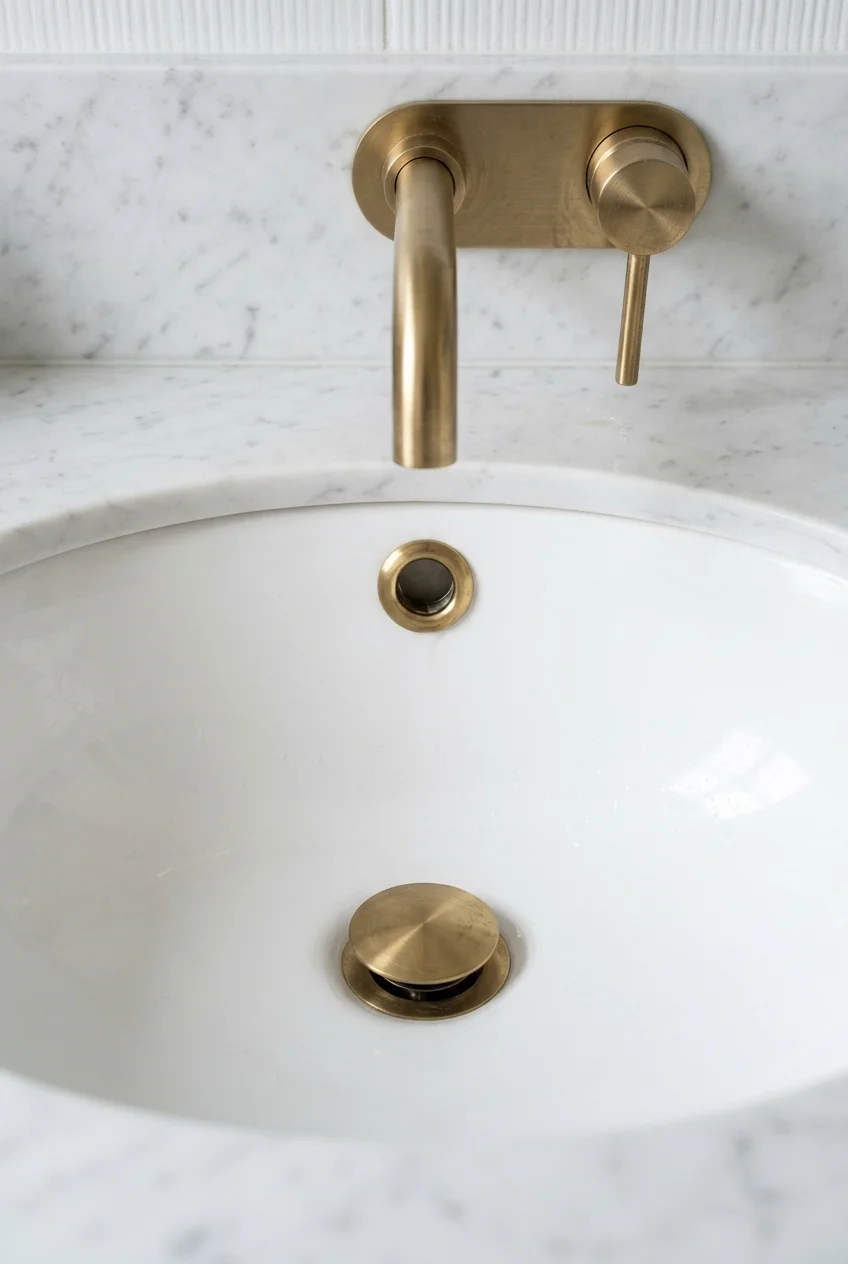
Repeating the faucet finish at the drain and visible overflow creates a complete composition inside the basin, where mismatched trim is especially easy to notice.
Confirm compatibility before choosing by appearance. Drain type depends on the sink, overflow provision, countertop thickness, and the parts supplied with the selected faucet.
Ordering note List every visible plumbing trim piece on one sample board, because brass, bronze, nickel, and black finishes can differ noticeably between manufacturers.
49. Choose a Finish Care Routine You Will Keep
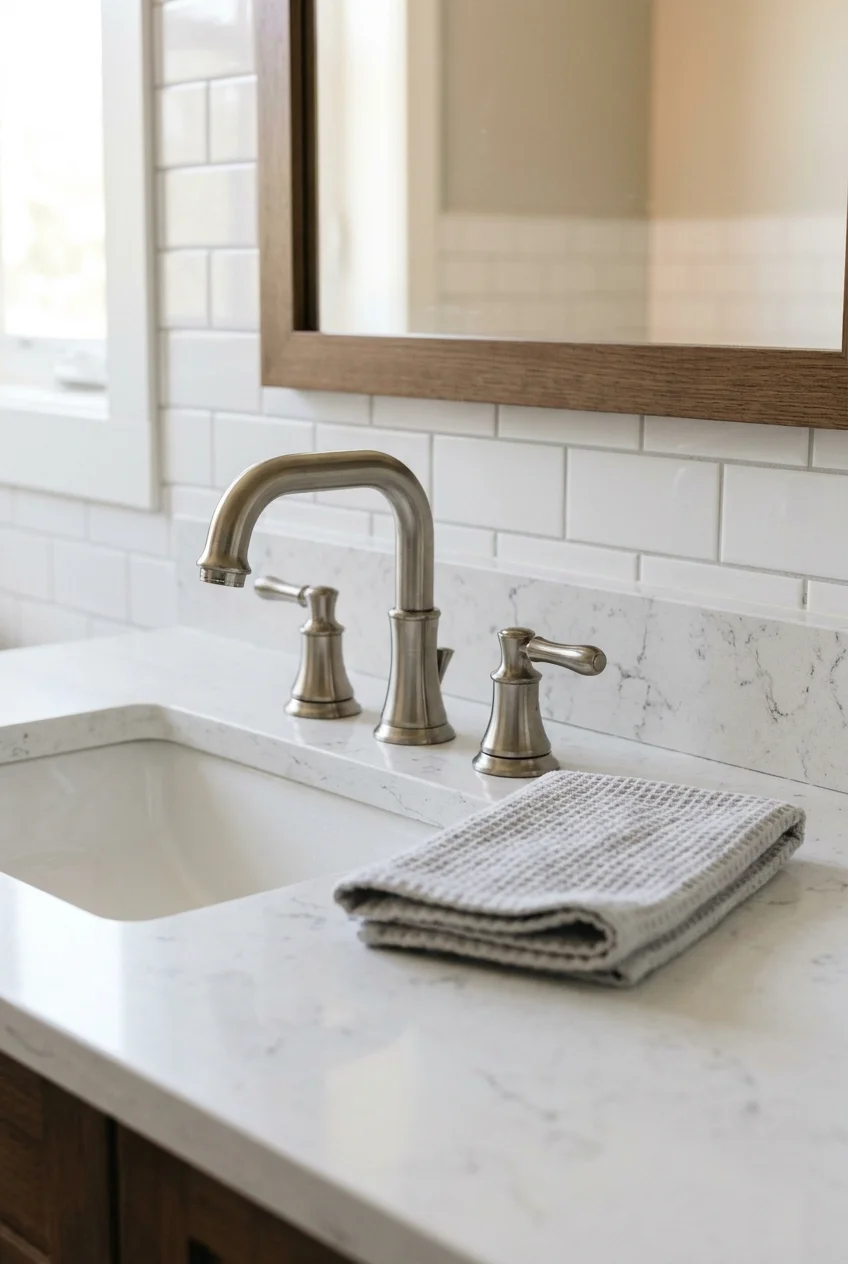
A finish stays attractive when its care instructions fit household habits. Highly reflective metal rewards frequent drying, while brushed surfaces usually disguise light handling marks better.
Start with a soft cloth and the manufacturer’s approved method. Abrasive pads and harsh bathroom cleaners can damage faucet coatings even when ceramic remains unharmed.
- Keep a soft drying cloth within reach.
- Blot droplets instead of scrubbing dried residue.
- Check the care guide before trying a new cleaner.
50. Preserve Access for Future Faucet Service
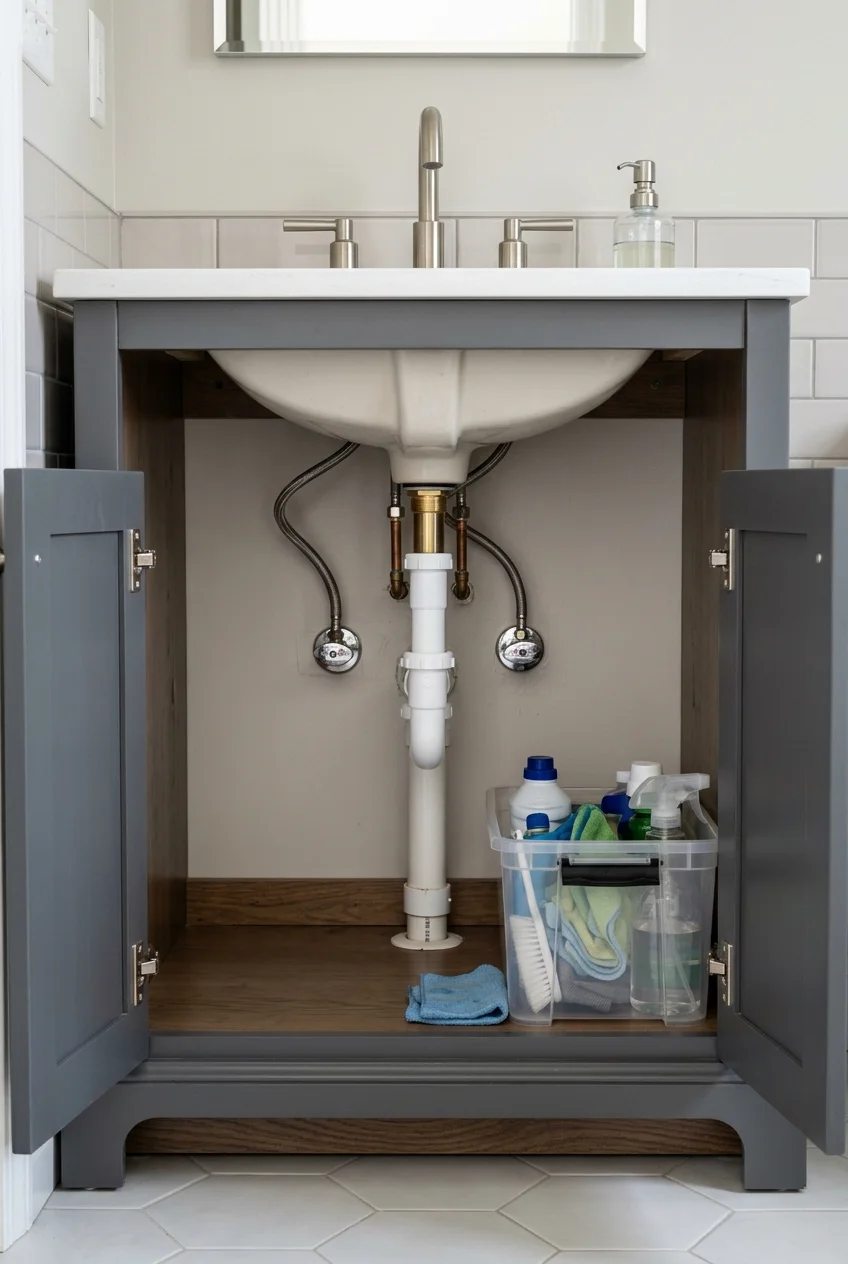
A beautiful faucet is easier to live with when shutoffs, supply connections, cartridges, batteries, or control boxes remain reachable after storage returns beneath the sink.
Review the parts diagram and warranty before purchase, then keep the model number and installation manual where the household can find them later.
Arrange organizers around plumbing instead of in front of it. A removable bin often provides better service access than tightly fitted permanent shelving.
Practical tip Photograph the finished connections and label the faucet model inside the cabinet, without covering shutoffs, hoses, outlets, or ventilation openings.
Frequently Asked Questions
How do I know which bathroom faucet will fit my sink?
Count the mounting holes and measure their center-to-center spacing. Also record counter thickness, basin depth, backsplash distance, and available space beneath the sink.
Compare those measurements with the manufacturer’s specification sheet, including spout reach, maximum deck thickness, supply connections, drain parts, and required installation clearances.
Where should the faucet stream land in the basin?
Aim for the stream to land comfortably inside the bowl, usually near the drain, without striking a steep sidewall that sends water outward.
Use the specification drawing to compare reach and outlet height with the installed sink, because countertop drawings and product photos can distort real proportions.
Do all bathroom metals need to match?
No. A mixed-metal room feels deliberate when one finish dominates and a second appears at least twice in clearly separated, similarly scaled details.
Keep each functional group consistent when possible, such as matching the faucet with its drain trim, while lighting and cabinet hardware carry the secondary metal.
What does the WaterSense label mean for a bathroom faucet?
WaterSense-labeled bathroom faucets and accessories complete independent certification for EPA efficiency and performance criteria, so the label provides more information than appearance alone.
Confirm the exact model in the WaterSense product search rather than assuming an entire collection or every finish shares the same certified specification.