50 Bathroom Countertop Ideas for Materials, Sinks, Edges, and Styling

This post may contain affiliate links: full affiliate disclosure.
Bathroom countertops have to manage water, grooming products, and daily cleaning, but they also set the visual direction for the entire vanity wall.
Use these ideas to compare materials, sink relationships, edges, backsplashes, color pairings, and realistic styling before you commit to one finished composition.
Start with the concepts that suit your room and routine, then verify samples, dimensions, fabrication details, installation requirements, and care guidance for the exact products.
Bathroom Countertop Materials With Distinct Character
Start with the surface itself when you want the vanity to anchor the room. Compare appearance alongside moisture exposure, cleaning habits, and fabrication needs.
1. Choose Warm White Quartz for a Quiet, Practical Base
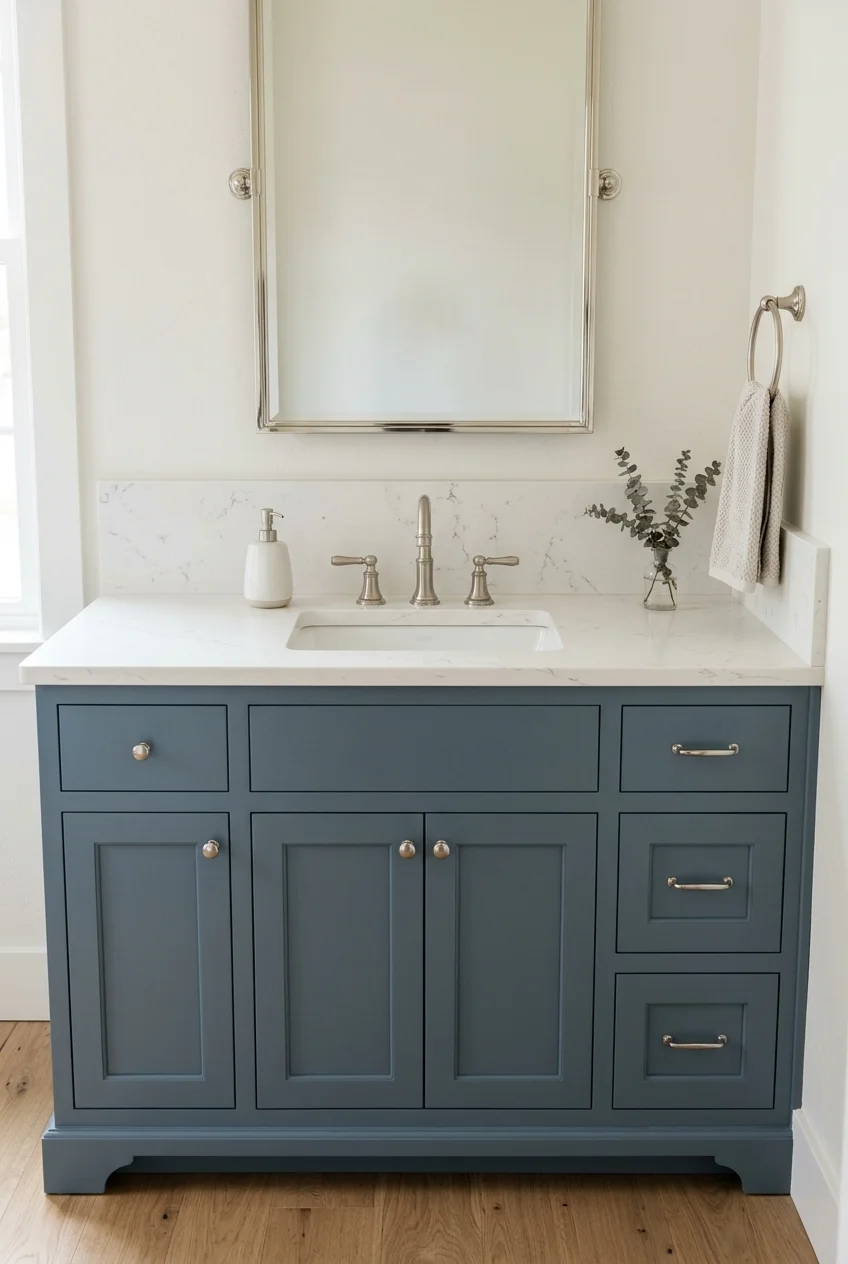
Warm white quartz softens a bathroom filled with hard surfaces while leaving room for stronger cabinet color, patterned tile, or expressive metal finishes.
Choose restrained veining when the vanity is narrow, since a large dramatic pattern may disappear around the sink cutout and faucet holes.
Engineered quartz generally needs routine gentle cleaning rather than sealing, but follow the selected manufacturer’s instructions for chemicals, heat, and stubborn residue.
2. Let Bold Quartz Veining Cross a Wide Double Vanity
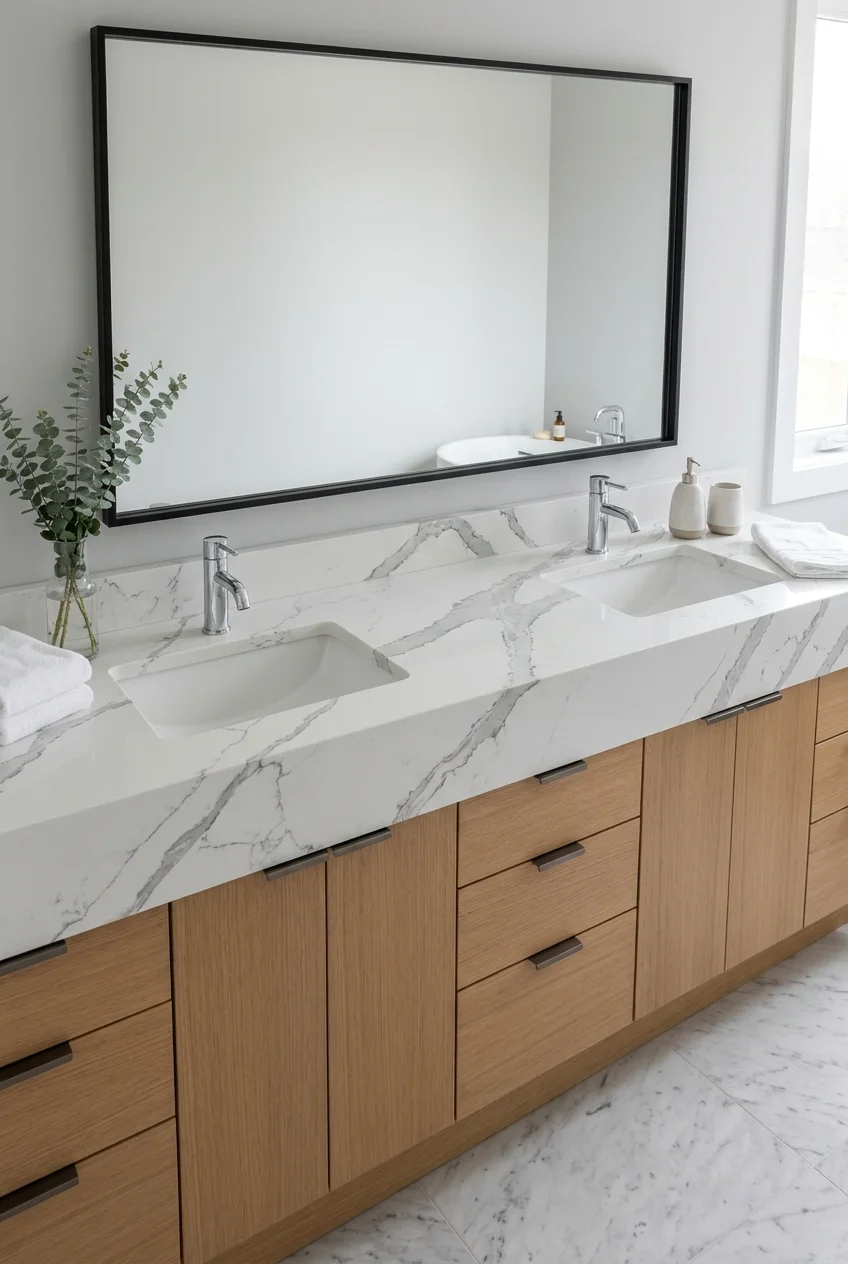
A wide double vanity gives broad quartz veining enough uninterrupted surface to read clearly, especially across the center between two sink openings.
Approve the slab layout before fabrication so the most expressive movement remains visible instead of being removed by bowls, faucets, or a seam.
- Ask where a seam would fall.
- Mark both sink cutouts on the slab image.
- Keep the center zone visually continuous.
Pair the active pattern with simple cabinet fronts and limited counter accessories. The stone should remain the feature rather than competing with several small objects.
3. Use Honed Marble for a Soft, Lived-In Finish
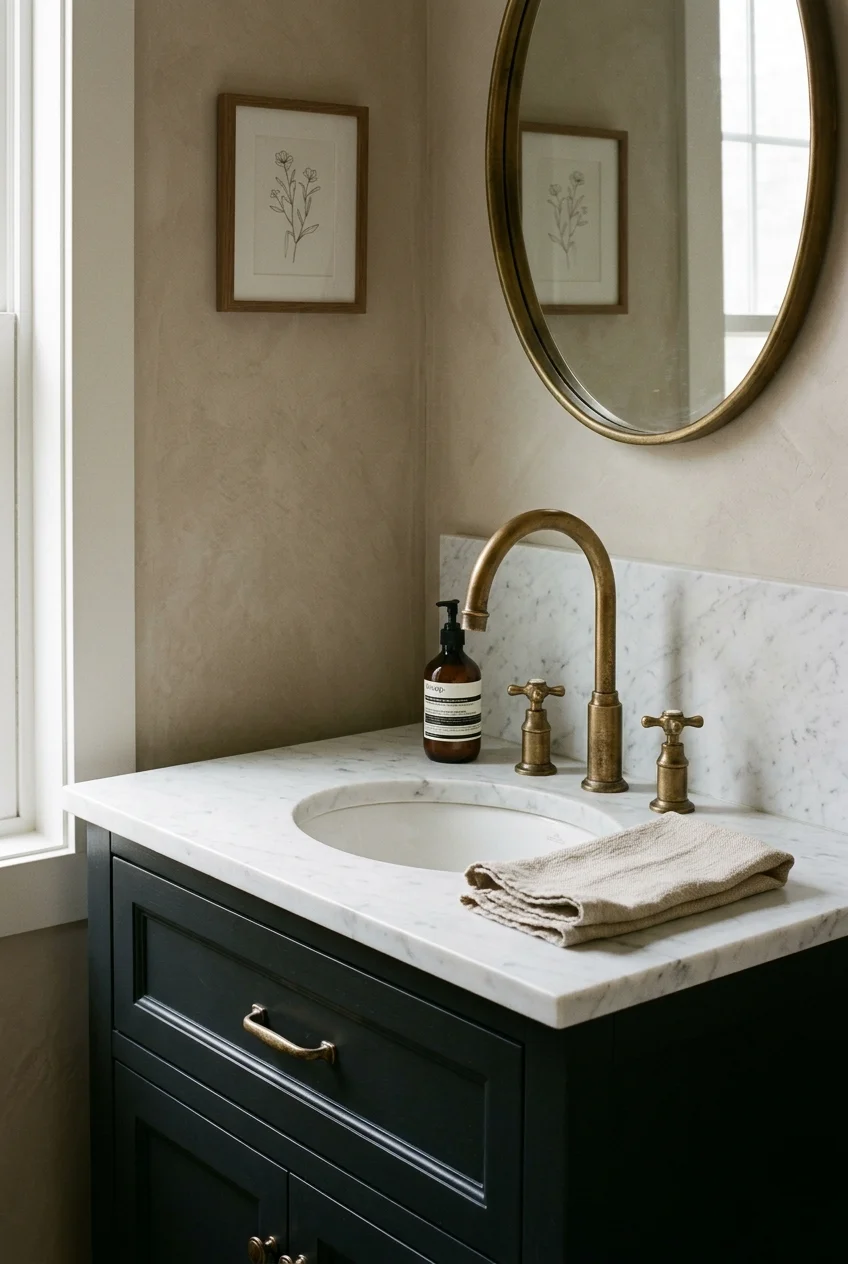
Honed marble reflects less light than a polished slab, making veining appear softer and helping an ornate vanity feel less formal or glossy.
Marble can etch when exposed to acidic products, and sealer improves stain resistance without making stone stain-proof. Accept patina or choose another material.
Watch for Keep acidic toilet-bowl cleaners and vinegar-based sprays away from marble. Use the stone supplier’s recommended cleaner and care schedule instead.
A smaller powder-room top limits the amount of stone required, but fabrication, sink cutouts, edge work, and installation still shape the final cost.
4. Ground Pale Cabinets With Leathered Black Granite
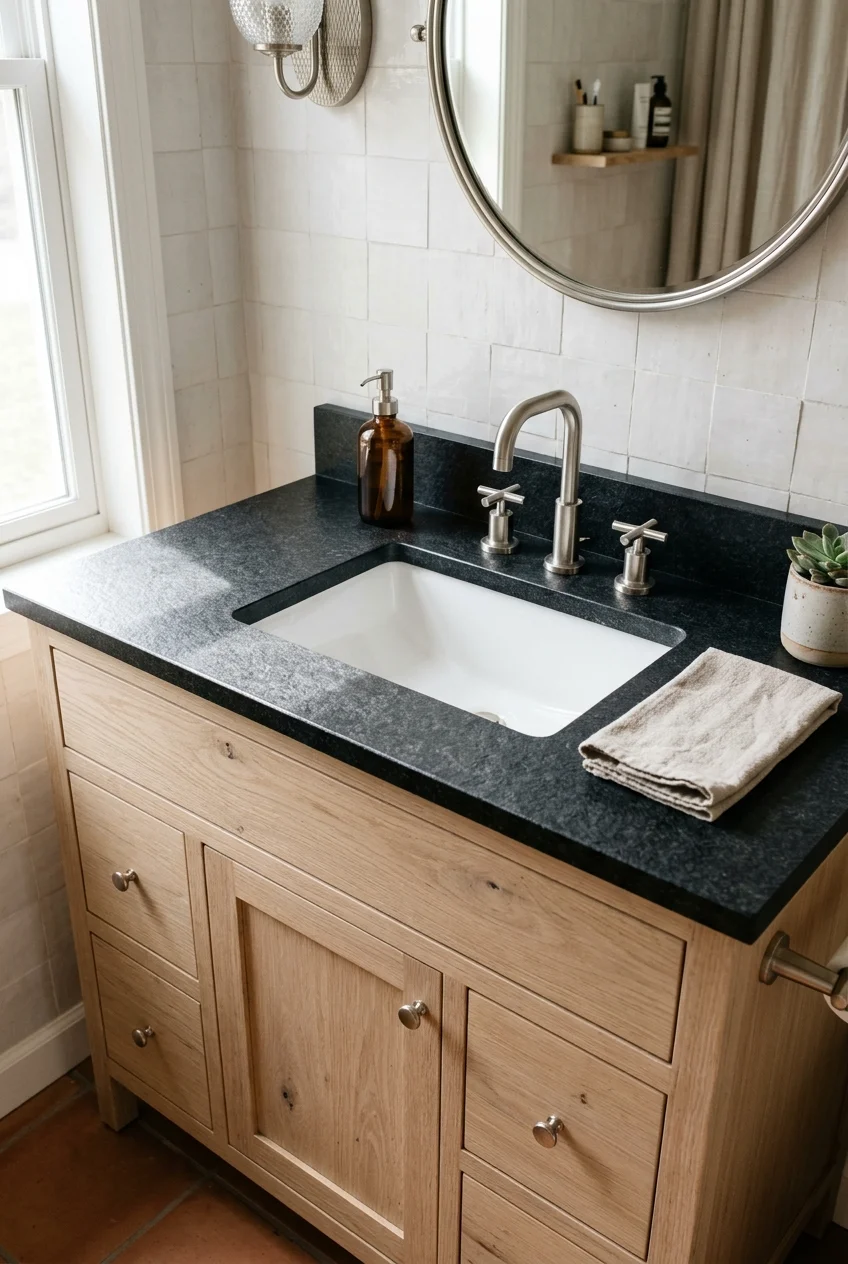
Leathered black granite adds texture without the mirrorlike reflection of polished stone. It creates a strong horizontal line beneath pale cabinetry or light walls.
View a full sample under the bathroom lighting because dark textured finishes can reveal dust, dried droplets, or fingerprints differently throughout the day.
Natural stones vary, so confirm sealing and cleaning guidance with the supplier for the exact slab rather than relying on advice for granite generally.
5. Try Deep Green Soapstone With Cream Cabinetry
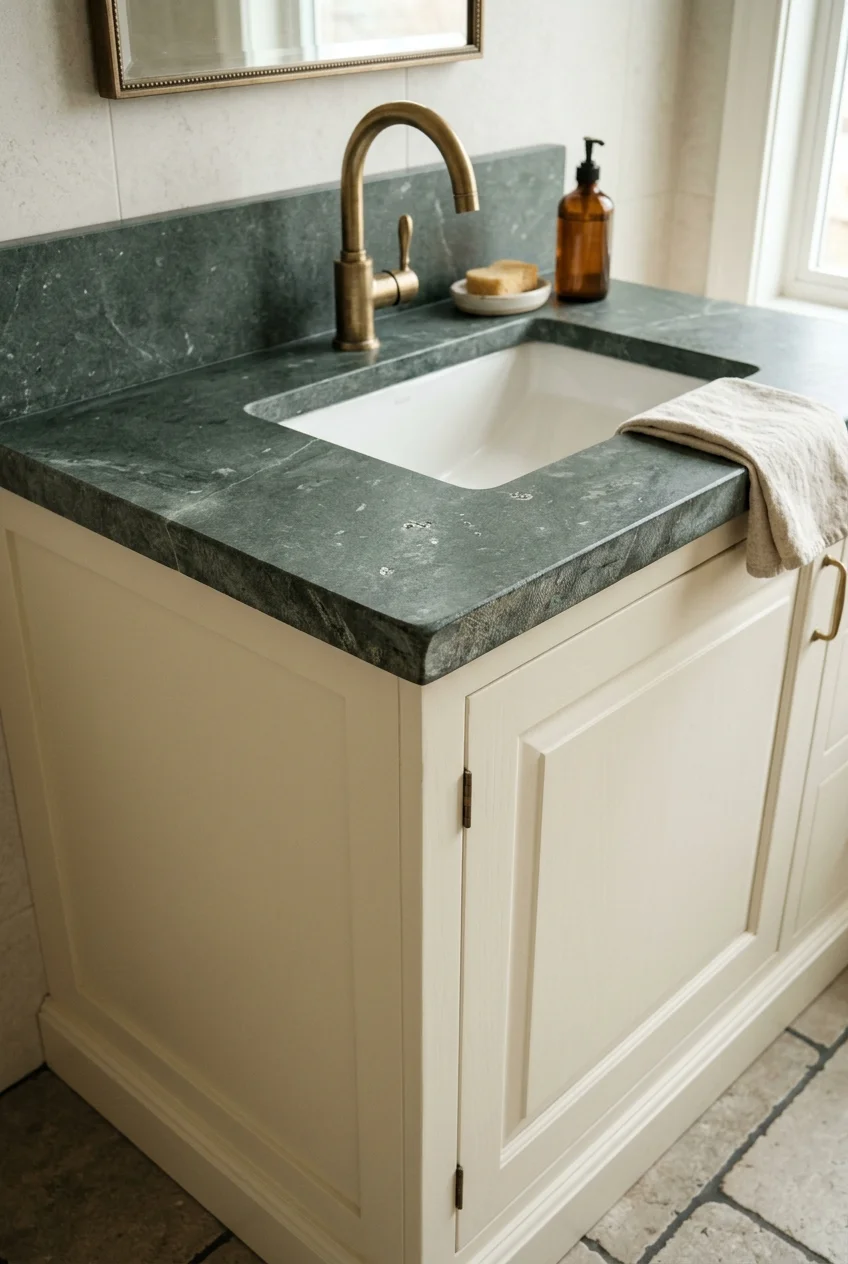
Dark green-gray soapstone brings natural movement to a bathroom without the high contrast of black. Cream cabinetry keeps the combination warm and legible.
Soapstone develops surface marks and a changing patina. Ask the fabricator to explain optional oiling, scratch care, and how the chosen slab ages.
Keep the edge simple so the material’s cloudy variation remains the focus. An eased profile also suits both traditional and restrained contemporary cabinet fronts.
6. Choose Quartzite When You Want Natural Stone Movement
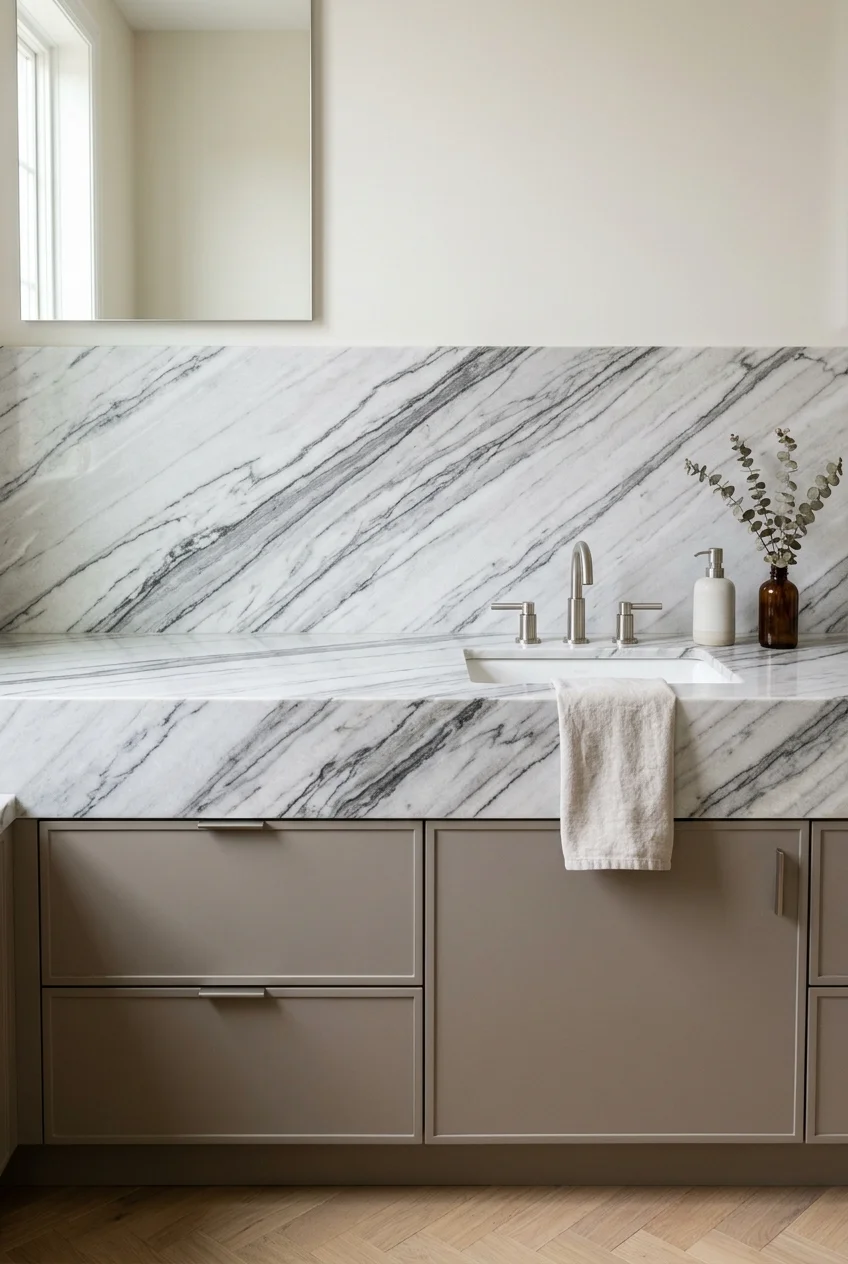
Quartzite can provide dramatic natural veining with a different character from engineered patterns, making it useful when the countertop should be the room’s artwork.
Names can be confusing across stone yards, so verify the actual material, finish, absorption expectations, and care requirements for the slab being quoted.
- Inspect the full slab, not only a sample.
- Confirm sink and faucet cutout locations.
- Request the supplier’s written care guidance.
Use a quieter backsplash when the slab already carries strong diagonal movement. Repeating one cabinet or wall tone helps the vanity composition remain settled.
7. Make Terrazzo the Source of the Room’s Color Palette
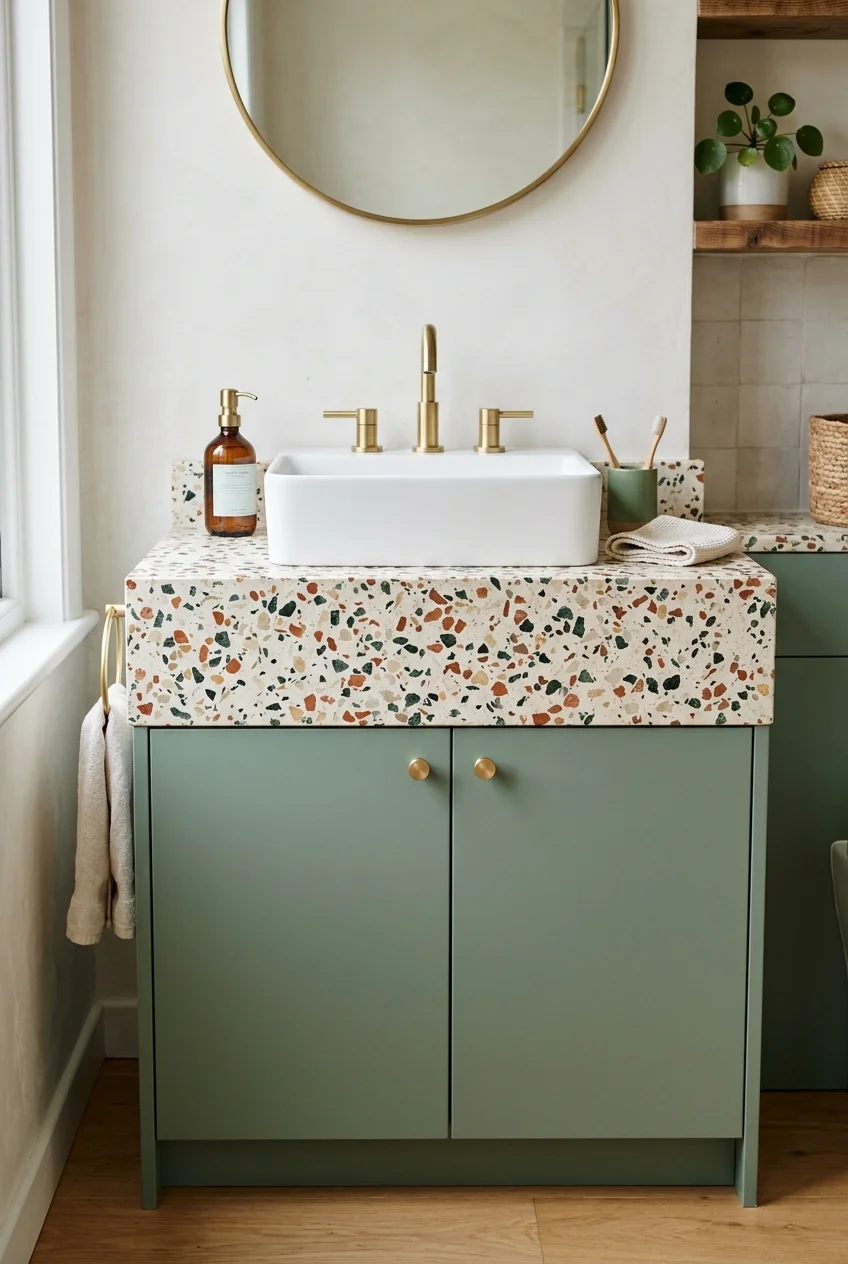
Terrazzo can gather several colors in one surface, giving you a practical starting point for cabinet paint, towels, tile, and small accessories.
Choose the aggregate scale deliberately. Fine chips read as quiet texture from across the room, while large fragments create a more graphic focal point.
Carry only one or two chip colors elsewhere. Matching every fleck can make the room feel overly coordinated instead of naturally connected.
8. Shape a Seamless Solid-Surface Top and Sink
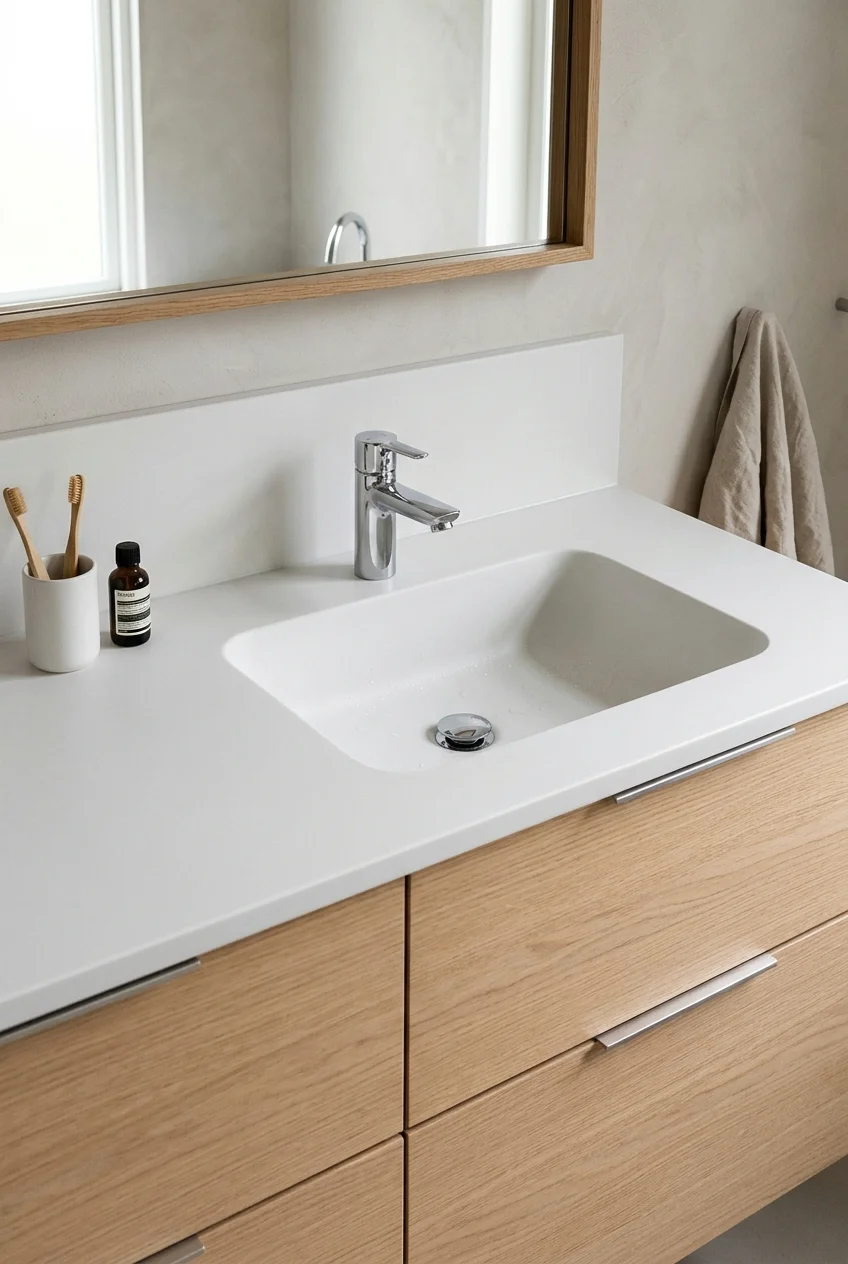
A solid-surface countertop can join visually with a compatible integrated basin, reducing the raised rims and contrasting joints that interrupt a small vanity.
This approach suits a calm monochrome bathroom, but the fabricator still needs accurate faucet positions, overflow requirements, basin dimensions, and wall conditions.
- Choose the sink form and usable bowl depth.
- Set faucet and control locations around that bowl.
- Confirm the backsplash and side-return details.
- Approve fabrication drawings before production.
Setup note Ask how visible seams, scratches, and future repairs are handled for the exact color, because darker solid surfaces can show wear differently.
Request a physical color sample because pale neutrals can shift beside tile and cabinet finishes. Compare it vertically and horizontally under bathroom lighting.
Discuss overflow channels and drain access rather than judging the basin only from above. A seamless appearance still needs practical cleaning and service details.
Select a gently contrasting cabinet finish to keep the vanity from looking like one featureless block. Pale oak or saturated paint both provide definition.
9. Use Porcelain Slab for a Thin, Precise Look
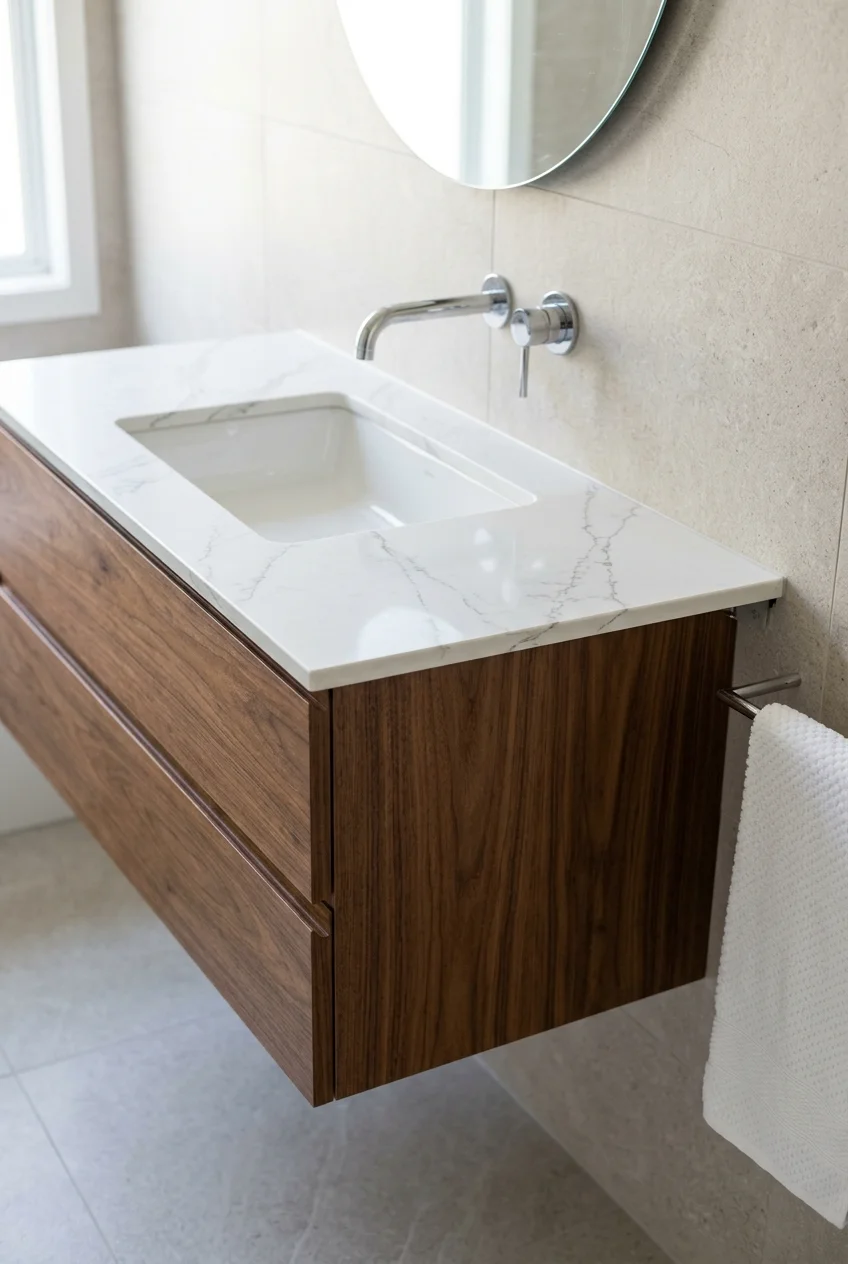
Porcelain slab can create a slim, crisp countertop with printed stone or solid-color effects. Its visual lightness works well above floating cabinetry.
Large-format porcelain requires experienced measuring, cutting, edge finishing, transport, and support. Discuss vulnerable edges and sink details before selecting a very thin profile.
Repeat the same surface behind the faucet only when the pattern alignment is intentional. A mismatched printed vein can expose the composition as separate pieces.
10. Pick Stone-Look Laminate for a Controlled Refresh
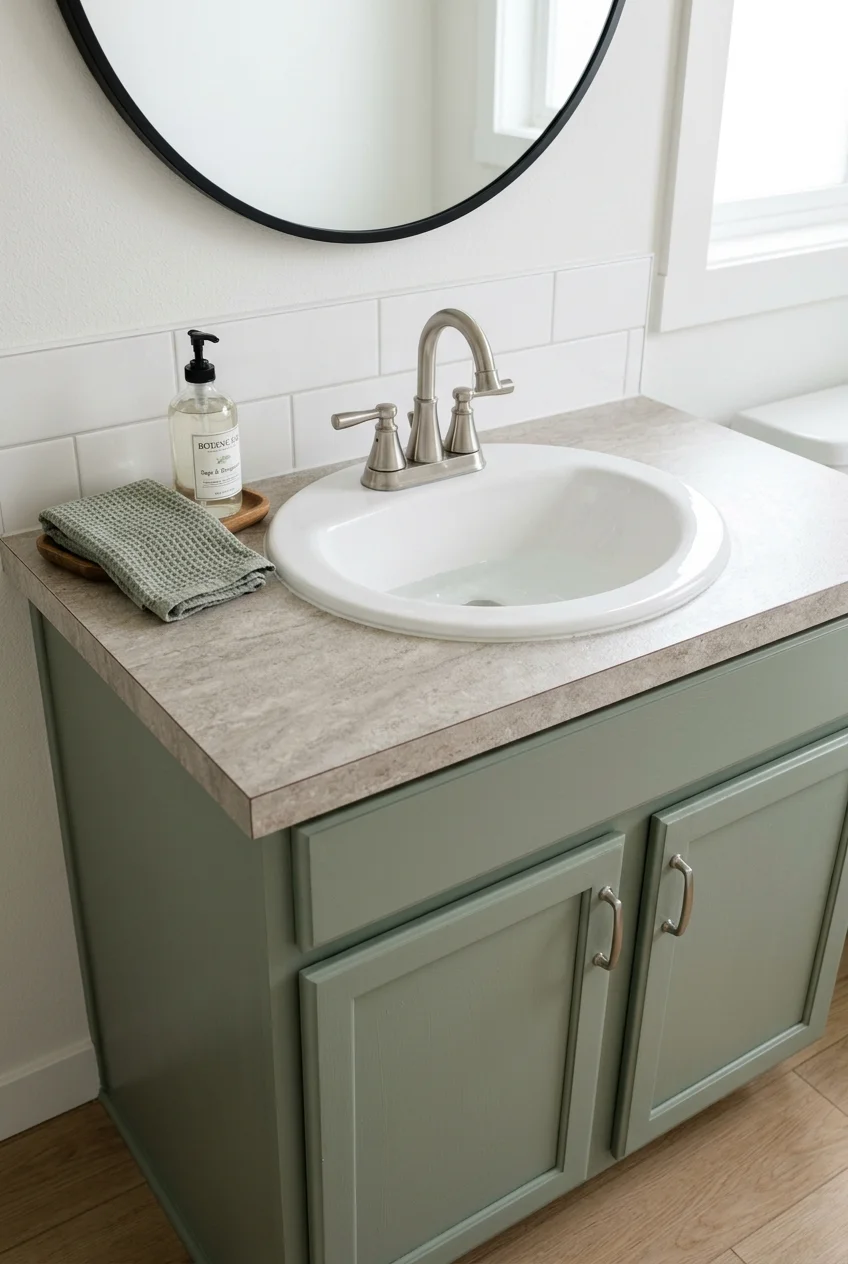
Modern laminate offers convincing stone, solid, and wood visuals when a full slab replacement exceeds the project’s scope. A simple edge improves credibility.
Water can damage the substrate through seams and unsealed cutouts, so sink edges, faucet holes, wall joints, and exposed ends need careful fabrication.
Watch for Do not flood laminate during cleaning, especially near seams. Wipe with the manufacturer’s recommended method and dry the surface after rinsing.
If the whole bathroom needs proportionate updates, review these builder-grade bathroom makeover ideas before assigning the entire budget to the top.
11. Build a Graphic Countertop With Large Porcelain Tile
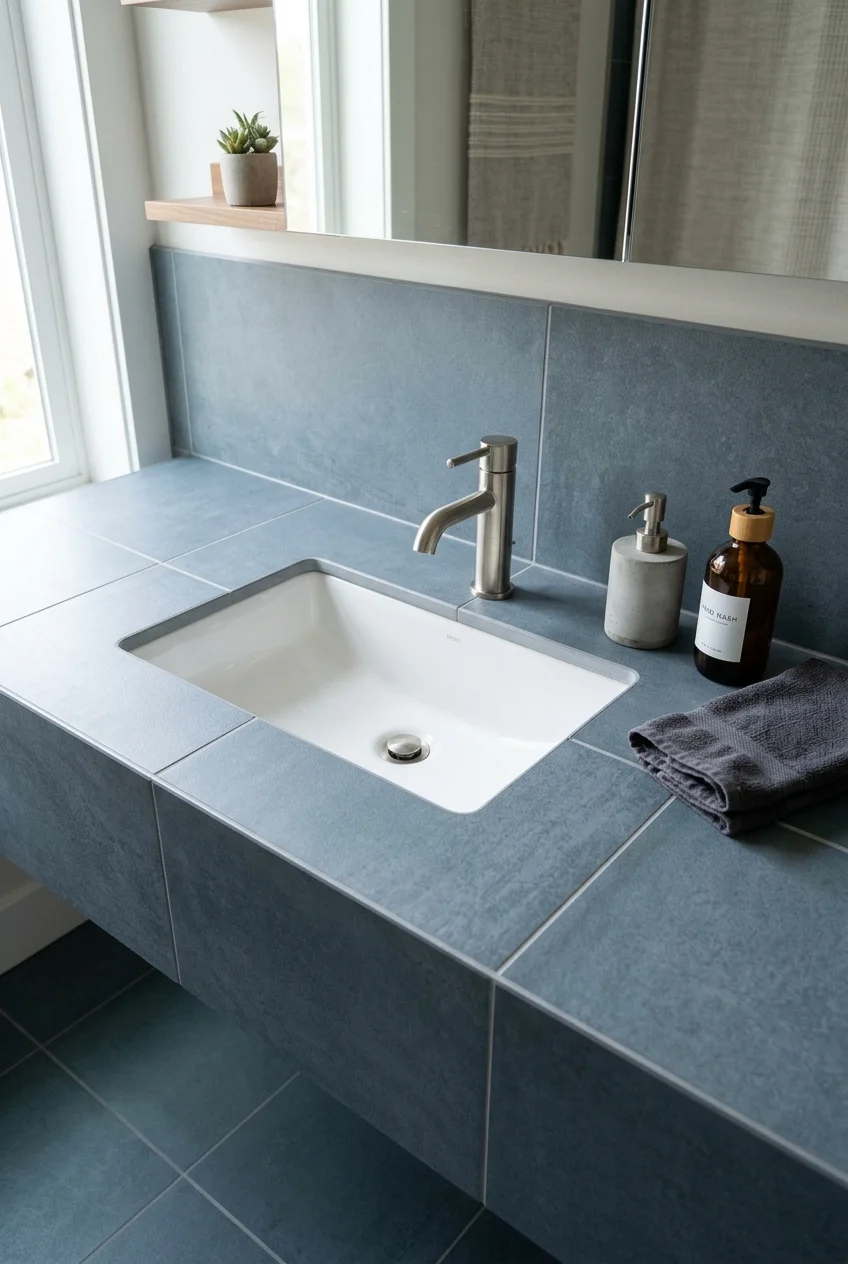
Large porcelain tiles can make a tiled vanity top feel calmer than many small units because fewer grout joints cross the working surface.
Plan the grid from the sink and front edge, not from an arbitrary wall corner. Awkward slivers immediately weaken an otherwise deliberate layout.
- Use an appropriate substrate and waterproofing system.
- Choose edge trim before setting tile.
- Keep grout joints consistent around the sink.
- Confirm the grout’s bathroom care requirements.
Mock up the front edge with tile and trim together. The exposed thickness can change the perceived weight of an otherwise slim vanity.
A drop-in basin simplifies the visible cut edge, while an undermount arrangement demands a suitable finished transition. Confirm compatibility before buying either component.
Tile countertops remain a detail-heavy installation. Choose them for their visible grid and color possibilities, not because they imitate a seamless slab.
12. Warm the Vanity With a Properly Finished Wood Top
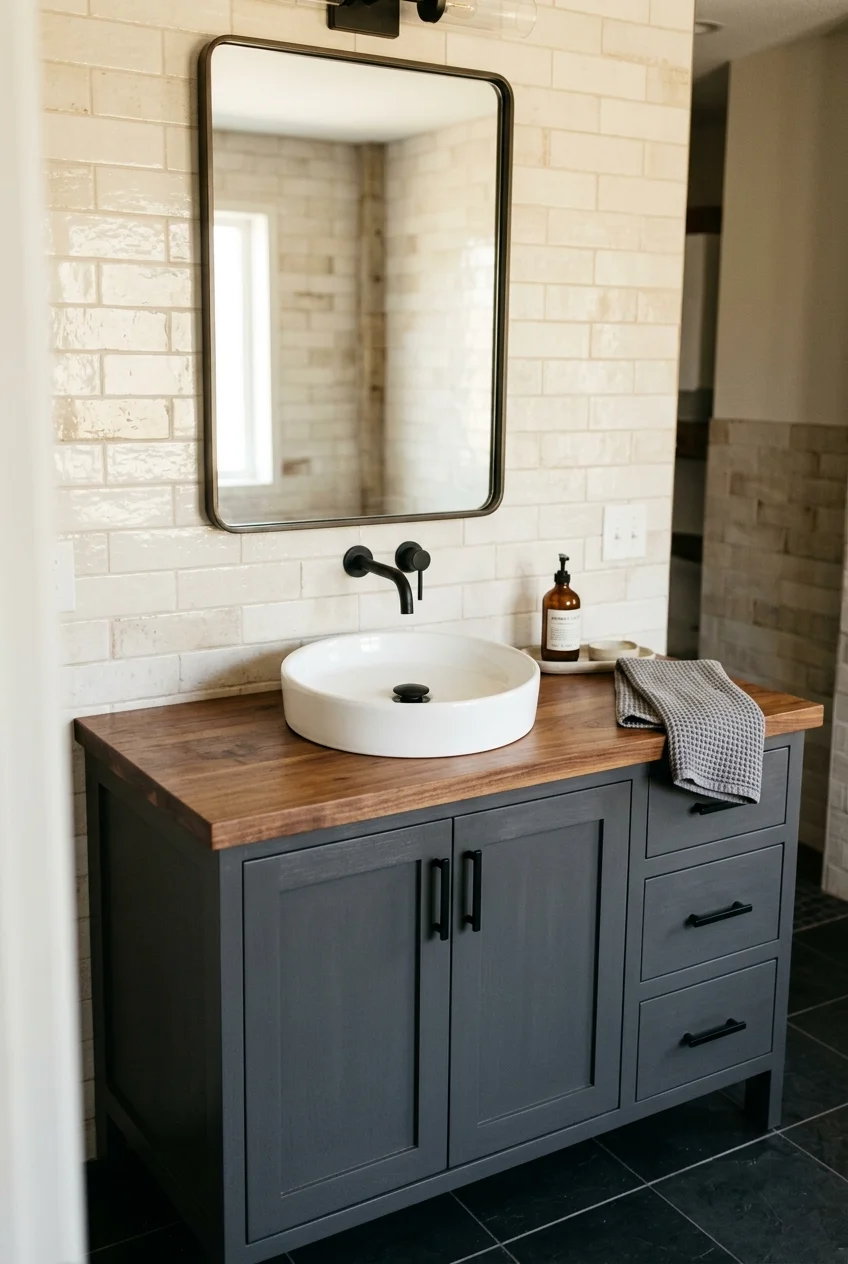
A wood countertop introduces warmth beside ceramic, glass, and tile, especially when the vanity has painted doors rather than another wood finish.
Bathroom moisture makes finish selection, sealed penetrations, splash control, ventilation, and maintenance essential. Confirm the full system with the finish and sink manufacturers.
Use a vessel or drop-in sink only after checking how its rim, drain opening, and faucet holes will be sealed against repeated standing water.
Specify every exposed edge, including the underside near the basin and any wall cutout. Water often reaches places omitted from the presentation view.
Ask how the finish is renewed and which cleaners are compatible. A maintenance plan should be realistic for the household using the bathroom daily.
Practical tip Keep a dry cloth nearby and wipe puddles promptly. A beautiful finish cannot compensate for water repeatedly entering an unprotected joint.
13. Add Light With a Recycled-Glass Composite Surface
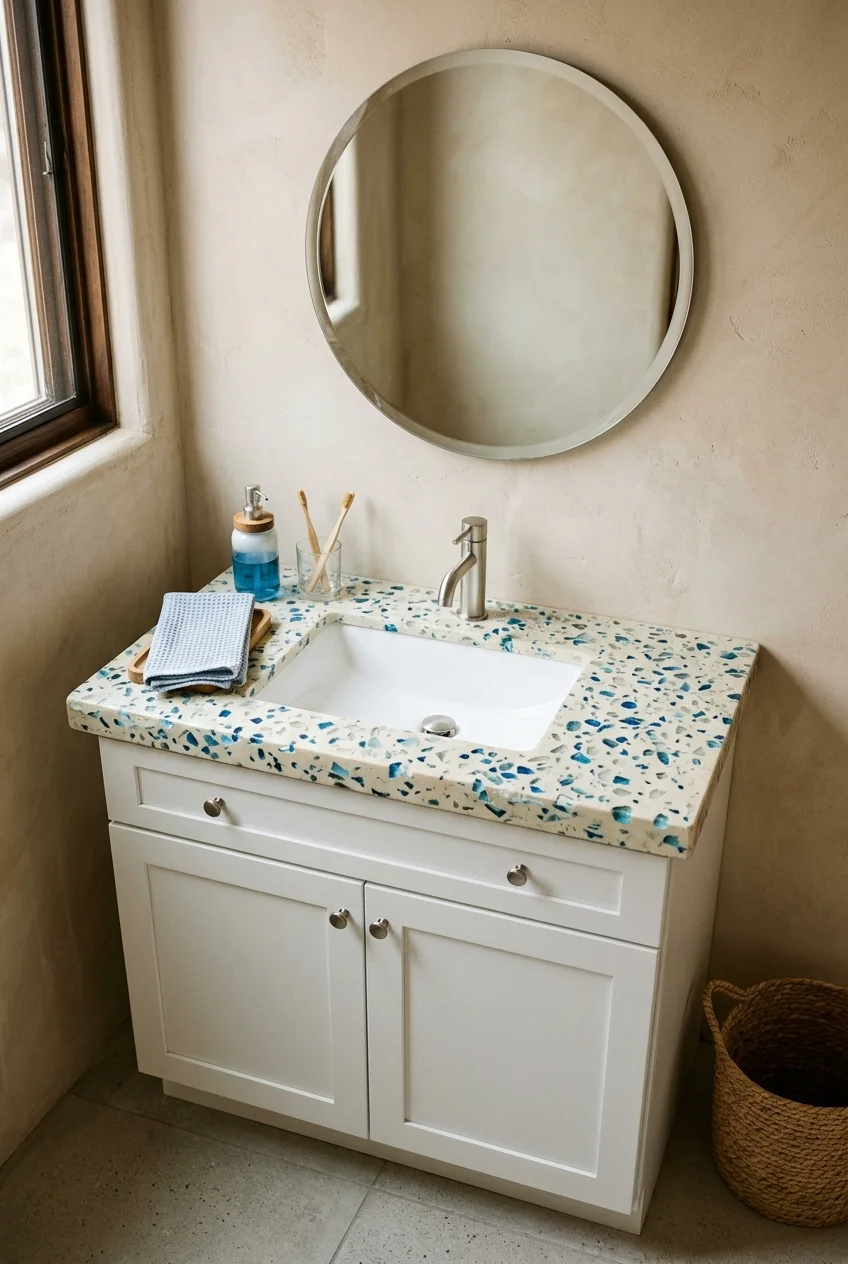
Recycled-glass composite surfaces can scatter color and light across a vanity, giving a small bathroom pattern without relying on a busy wall treatment.
Samples may look different from a full installation because chip density and scale become more apparent. View a larger piece before coordinating surrounding colors.
Ask the supplier about fabrication, edge options, cleaning, and stain or heat guidance for the exact product, since composite formulas and recommendations differ.
14. Use Cultured Marble for an All-in-One Vanity Top
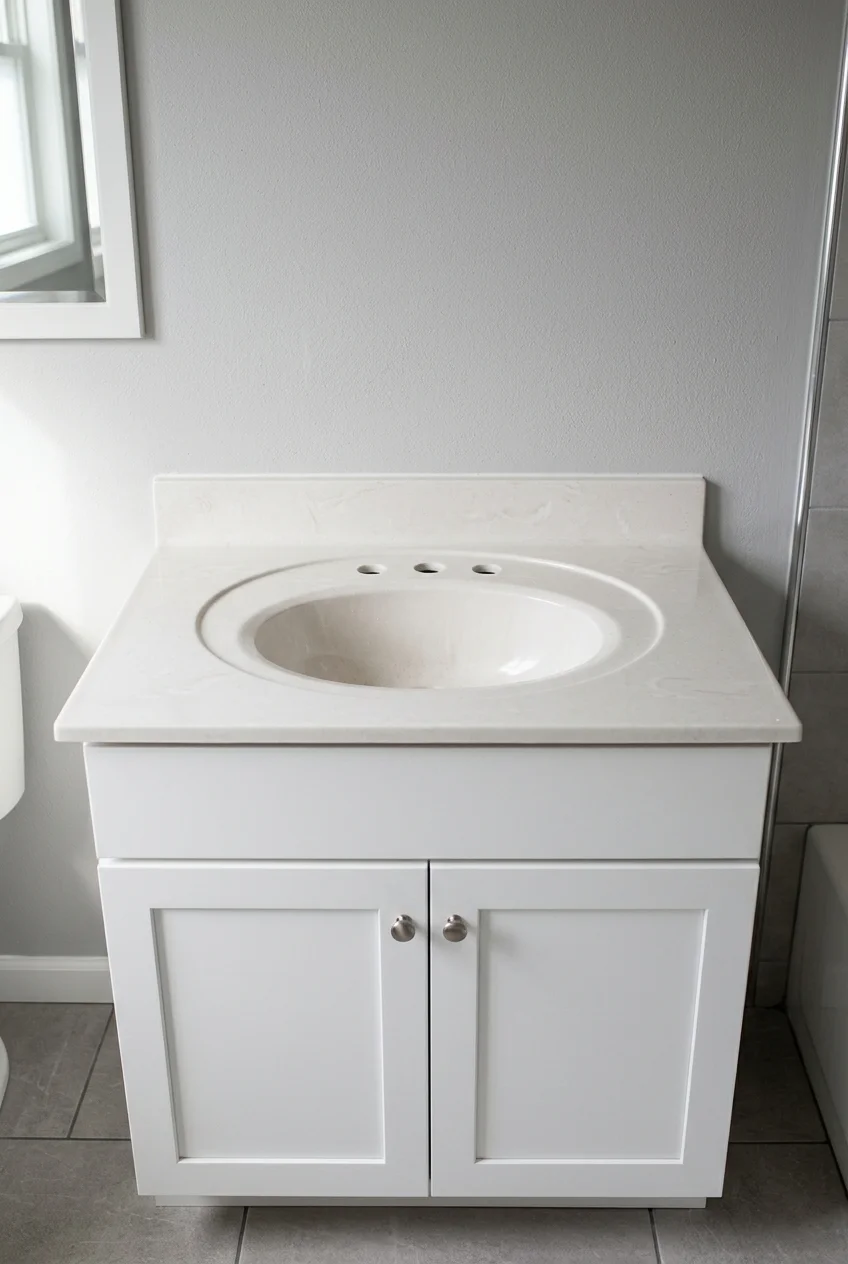
A cultured-marble vanity top can combine the counter, basin, and backsplash in one coordinated unit, simplifying the visual composition and reducing separate selections.
Confirm the cabinet width, faucet-hole spread, bowl position, overflow, and wall fit before ordering. Prefabricated dimensions leave less room for onsite adjustment.
- Measure cabinet width at the front and back.
- Check walls for out-of-square conditions.
- Match faucet configuration to drilled holes.
- Plan sidesplashes before installation.
Choose subtle veining when you want the top to recede. Strong molded patterns can become the main decorative feature in a compact bathroom.
Sink Forms and Countertop Layouts That Change How the Vanity Works
The sink removes working surface and establishes faucet placement, so choose its form alongside the countertop. Attractive proportions still need usable bowl depth and clearances.
15. Keep the Surface Open With an Undermount Sink
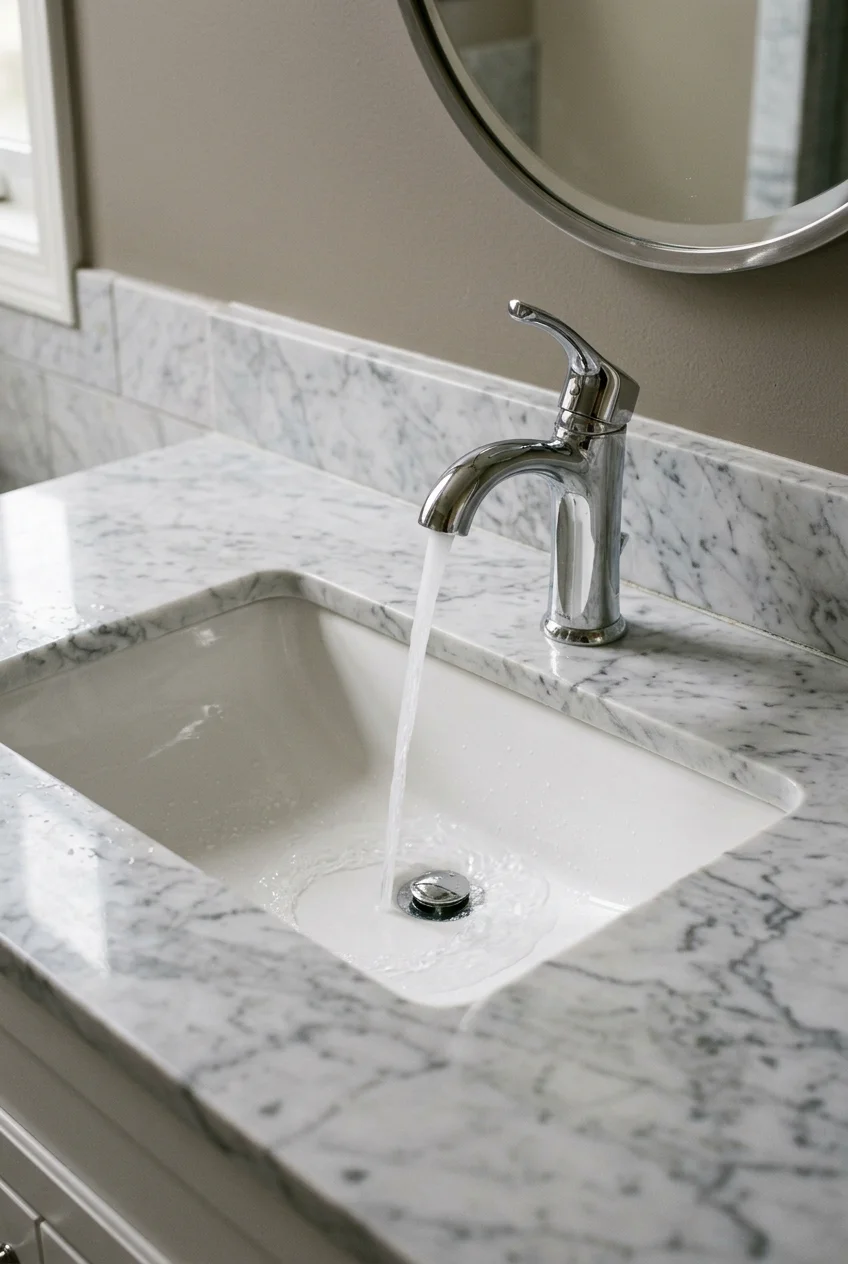
An undermount sink leaves the countertop edge visible and allows water to be wiped directly toward the bowl without crossing a raised sink rim.
The exposed cutout must be finished for the selected material, and the bowl needs suitable support. Confirm reveal style and faucet clearance before fabrication.
Use this arrangement when easy surface wiping matters more than making the sink itself a decorative object. It works especially well with expressive stone.
16. Turn a Vessel Sink Into the Countertop’s Focal Point
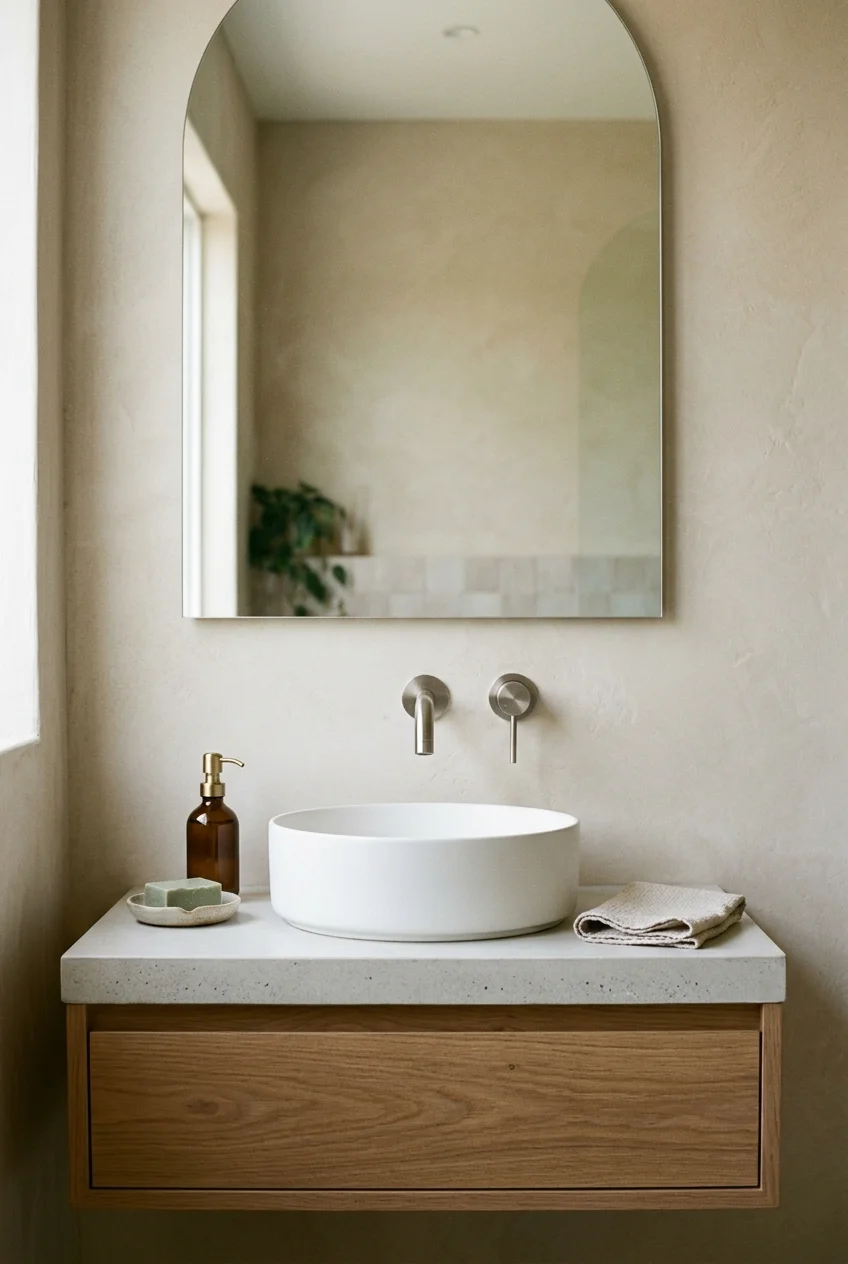
A vessel basin preserves more visible countertop around its base and introduces a sculptural shape. It also raises the usable rim above the cabinet.
Coordinate cabinet height, countertop thickness, bowl height, faucet reach, and mirror position together. Adding a vessel to a standard-height vanity can feel uncomfortably tall.
- Check the finished rim height.
- Match faucet height and spout reach to the bowl.
- Allow cleaning access around the base.
- Confirm drain and overflow requirements.
Test the spout position over the actual bowl whenever possible. Water should land comfortably inside without striking a steep side and splashing outward.
Leave enough space behind the basin to wipe the wall and counter junction. A narrow unreachable strip quickly undermines the sculptural effect.
A simple counter pattern keeps the basin legible. If both bowl and surface are highly figured, the composition can lose its strongest feature.
17. Choose a Drop-In Sink for a Straightforward Replacement
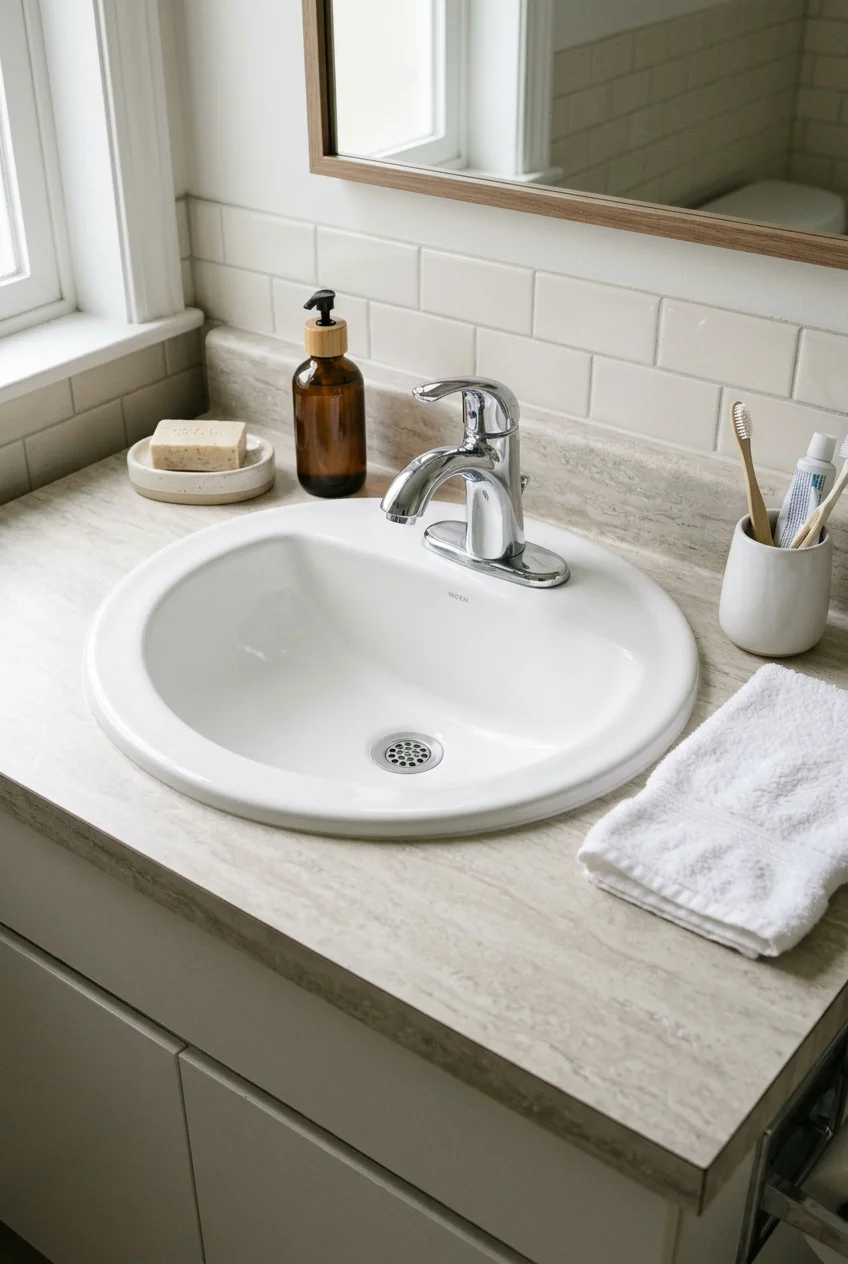
A drop-in sink covers the cutout edge with its rim, which can make it practical when replacing a worn basin without ordering a polished opening.
The visible rim creates another cleaning edge, so choose a basin whose profile suits the room and leave enough deck space around the faucet.
For a larger surface-and-cabinet update, these builder-grade bathroom makeover ideas can help you decide which surrounding details deserve attention at the same time.
18. Specify an Integrated Trough for a Shared Vanity
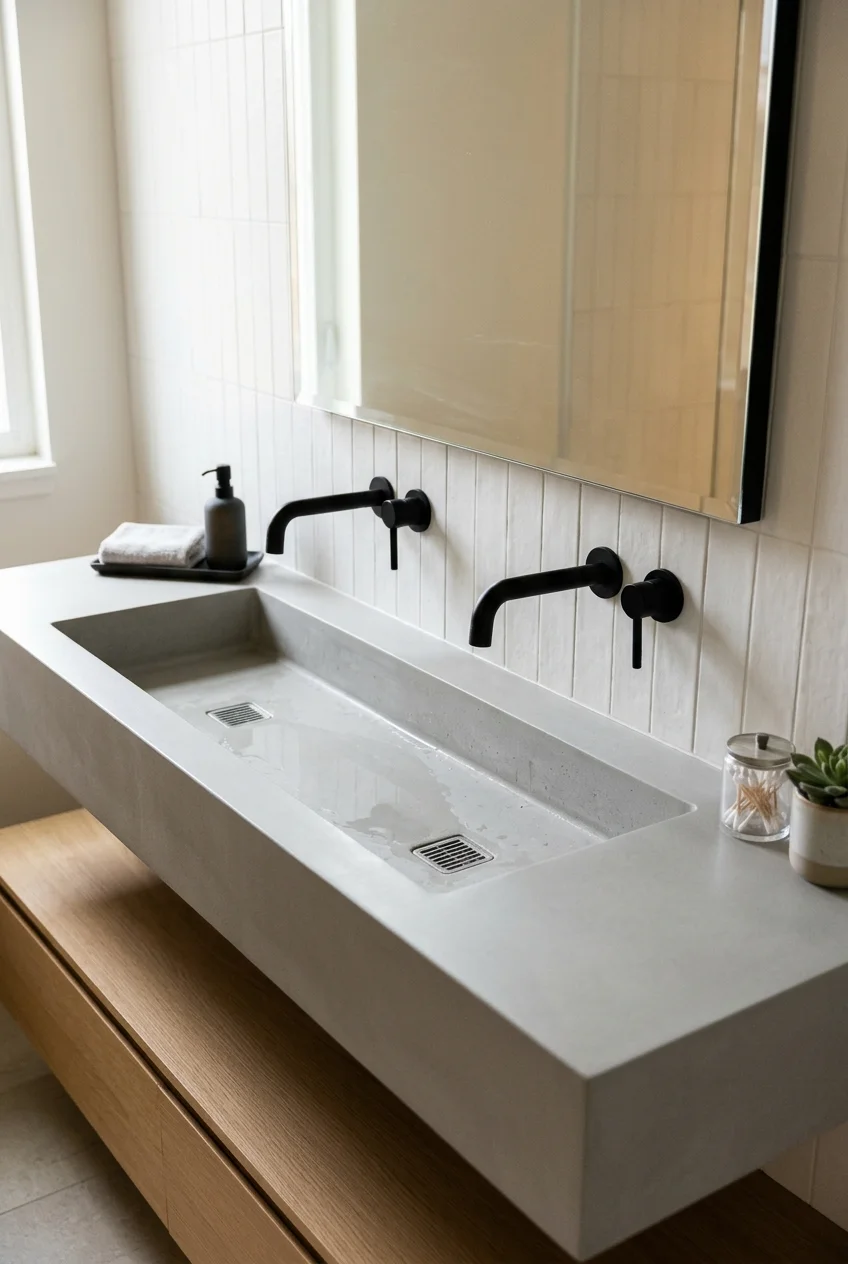
One long integrated trough can serve a shared vanity while maintaining a continuous counter line. It suits households that value open elbow room.
Decide whether one or two faucet positions fit actual routines. Bowl slope, drain placement, splash behavior, and maintenance matter more than the uninterrupted appearance.
- Map each user’s standing position.
- Place faucets over usable basin zones.
- Confirm drainage across the full trough.
- Reserve dry landing space at both ends.
Setup note A still photograph cannot prove drainage. Review technical drawings and approved samples with the fabricator before treating a shallow trough as practical.
Decide whether users need simultaneous mirror access and electrical outlets. The long basin should not consume every place required for ordinary grooming equipment.
Plan cabinet divisions around drain locations and support, preserving drawers where plumbing permits. A beautiful shared surface should still provide useful personal storage.
Keep accessories off the central working zone. Wall storage or end drawers prevent a beautiful long basin from becoming a crowded shelf.
19. Separate Two Sinks With a Useful Center Landing Zone
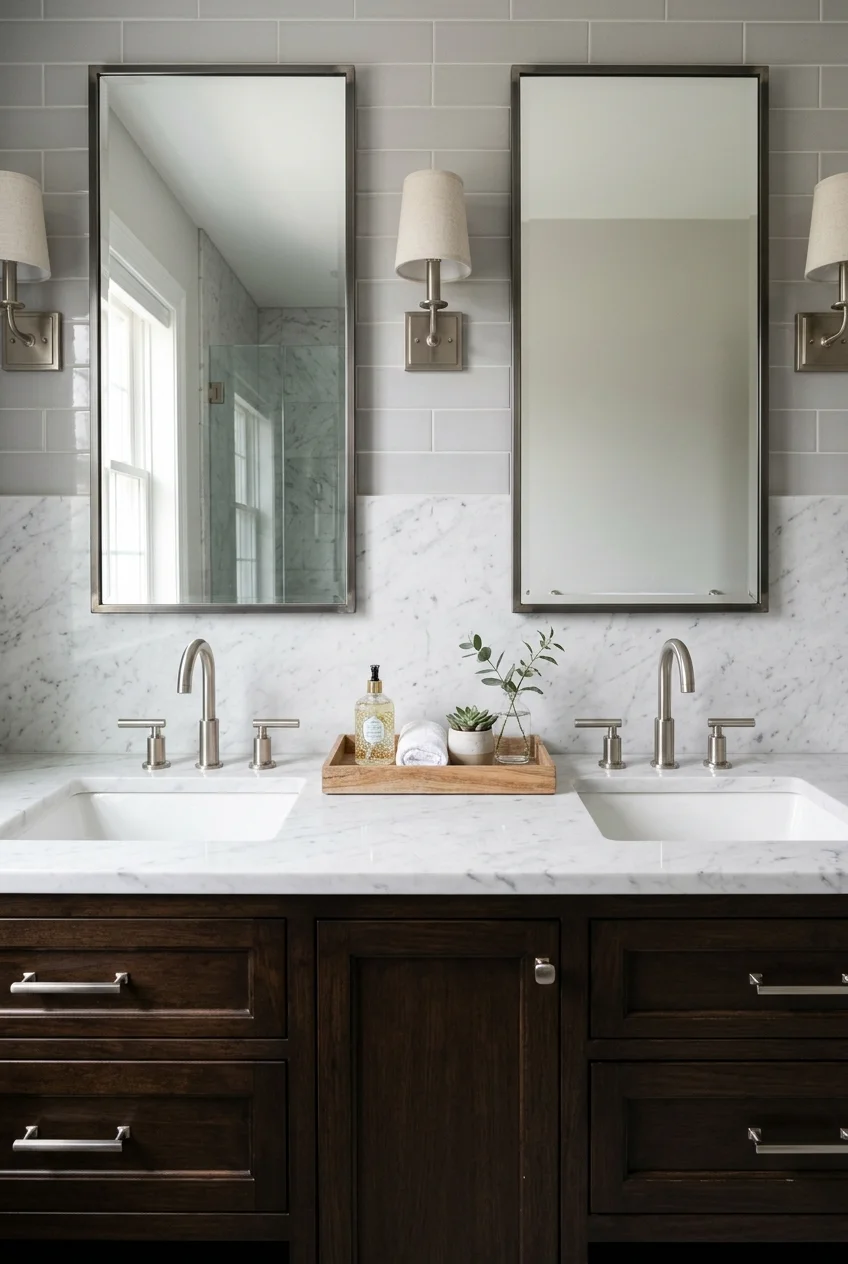
A generous center zone between two basins gives a shared vanity one stable place for soap, a tray, or items used by both people.
Position the sinks from actual standing space and cabinet storage, not simply equal distances across the wall. Drawer stacks may influence the best centers.
Keep the center arrangement low enough that it does not interrupt the mirror. A narrow tray is usually more useful than several unrelated objects.
20. Offset the Sink to Create One Real Work Zone
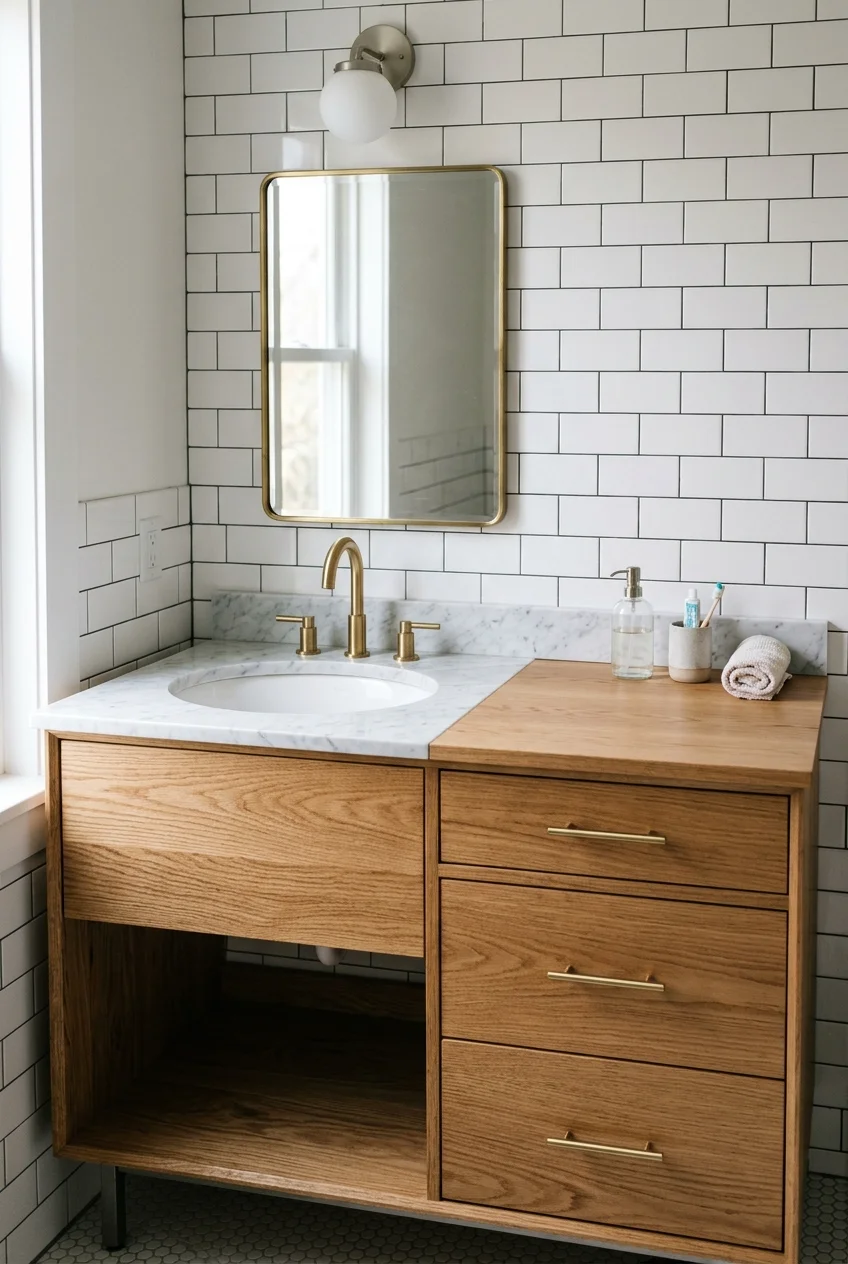
Moving a single sink away from center can create a genuinely useful expanse for grooming, changing a baby, or setting out accessibility-related equipment.
The cabinet layout must support the bowl and plumbing while preserving the intended drawers. Check mirror and lighting alignment before committing to asymmetry.
Practical tip Mark the bowl and clear work zone with painter’s tape on the existing vanity. Test the arrangement during an ordinary morning before ordering.
Use the larger clear side intentionally instead of filling it with decor. The value comes from uninterrupted surface available when routines demand it.
21. Stretch the Counter Wall to Wall in a Narrow Bathroom
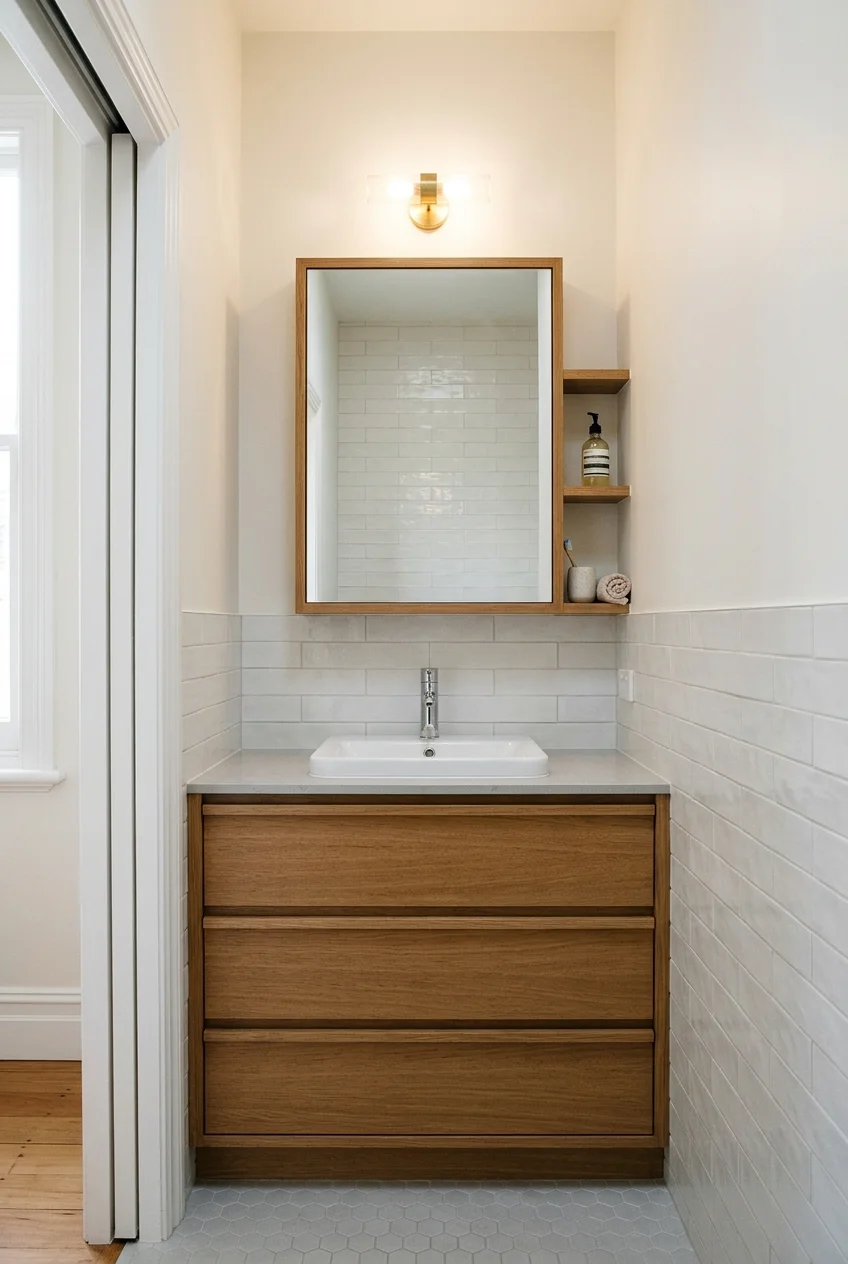
A wall-to-wall counter makes use of every inch in an alcove and can visually widen the room through one uninterrupted horizontal surface.
Measure walls at several depths because small rooms are rarely perfectly square. Decide how fillers, side splashes, and cabinet doors resolve uneven conditions.
A shallow custom counter may preserve circulation where a standard vanity projects too far. Verify the basin and faucet still fit the reduced depth.
22. Float a Slab Counter Above Open Floor
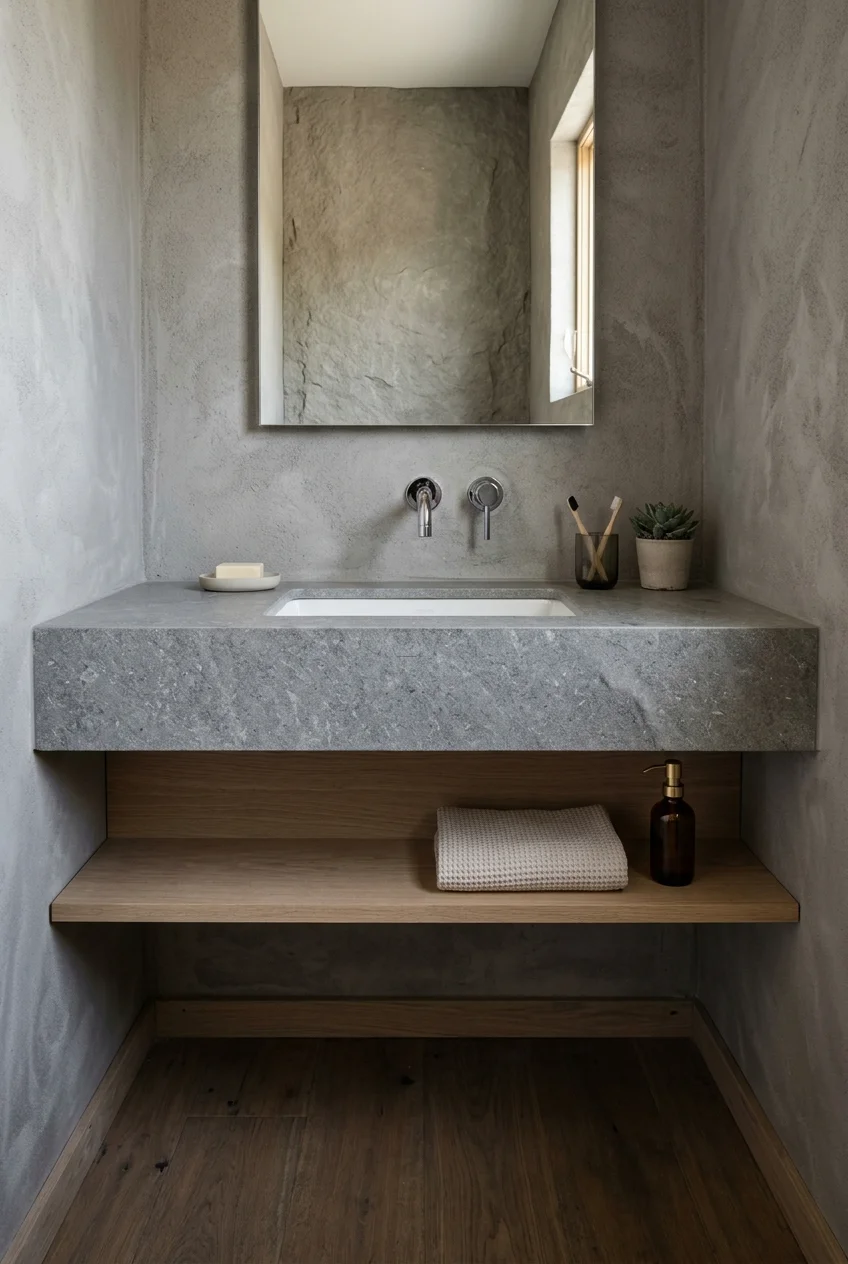
A floating slab counter reveals more floor and creates visual breathing room in a small bathroom. The support strategy remains part of the design.
Coordinate concealed supports, wall construction, sink weight, plumbing, counter thickness, and any accessible knee space with qualified professionals before fabrication or installation.
Map the drain and supply lines as visible design elements or conceal them within an approved enclosure. Random exposed plumbing weakens the floating effect.
If towels sit below, leave air and hand clearance between shelf and counter. A tightly packed stack makes the open composition difficult to maintain.
Wall-mounted storage can replace some lost cabinetry, but place it where doors and drawers would not obstruct standing room or the main mirror.
A single shelf below can hold folded towels without rebuilding a full cabinet. Keep it shallow enough that knees and cleaning tools still move comfortably.
23. Top a Vintage Dresser With a Durable Stone Surface
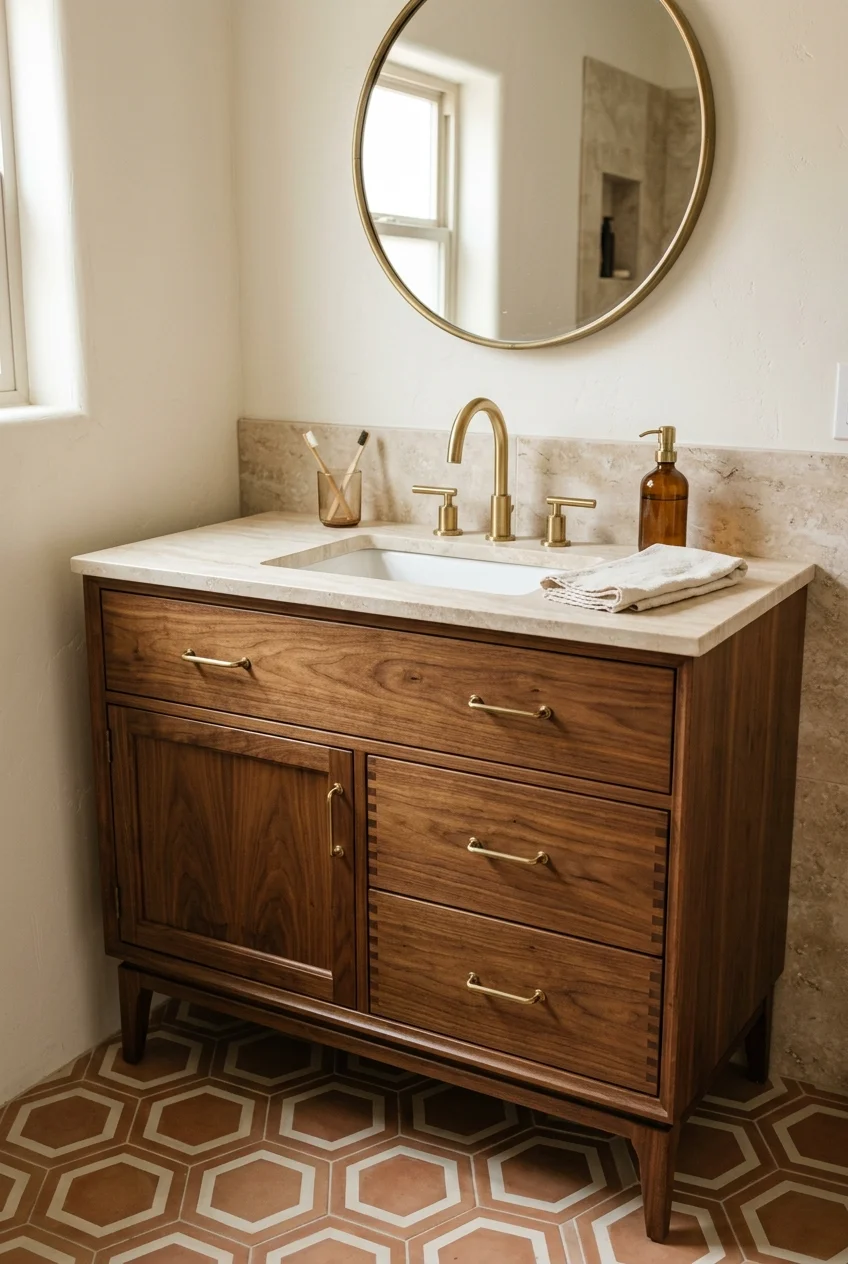
A dresser-style base gives the bathroom furniture character, while a fitted stone top protects the upper surface and creates a clean sink opening.
The cabinet requires structural assessment and thoughtful drawer modifications for plumbing. Counter depth, bowl position, and door clearance determine whether the conversion remains useful.
- Confirm the furniture can support the completed assembly.
- Map plumbing before altering drawers.
- Protect exposed cabinet edges from splashes.
- Retain usable storage wherever possible.
Old furniture dimensions may produce an unusual finished height or shallow counter. Measure the intended sink arrangement before purchasing a piece for conversion.
Seal or finish cabinet surfaces for bathroom conditions without erasing useful character. Drawer runners and interior wood also need attention after plumbing modifications.
Choose a top that contrasts slightly with the wood so the new functional layer reads clearly rather than pretending the piece was never altered.
24. Use a Corner Vanity With a Purpose-Shaped Top
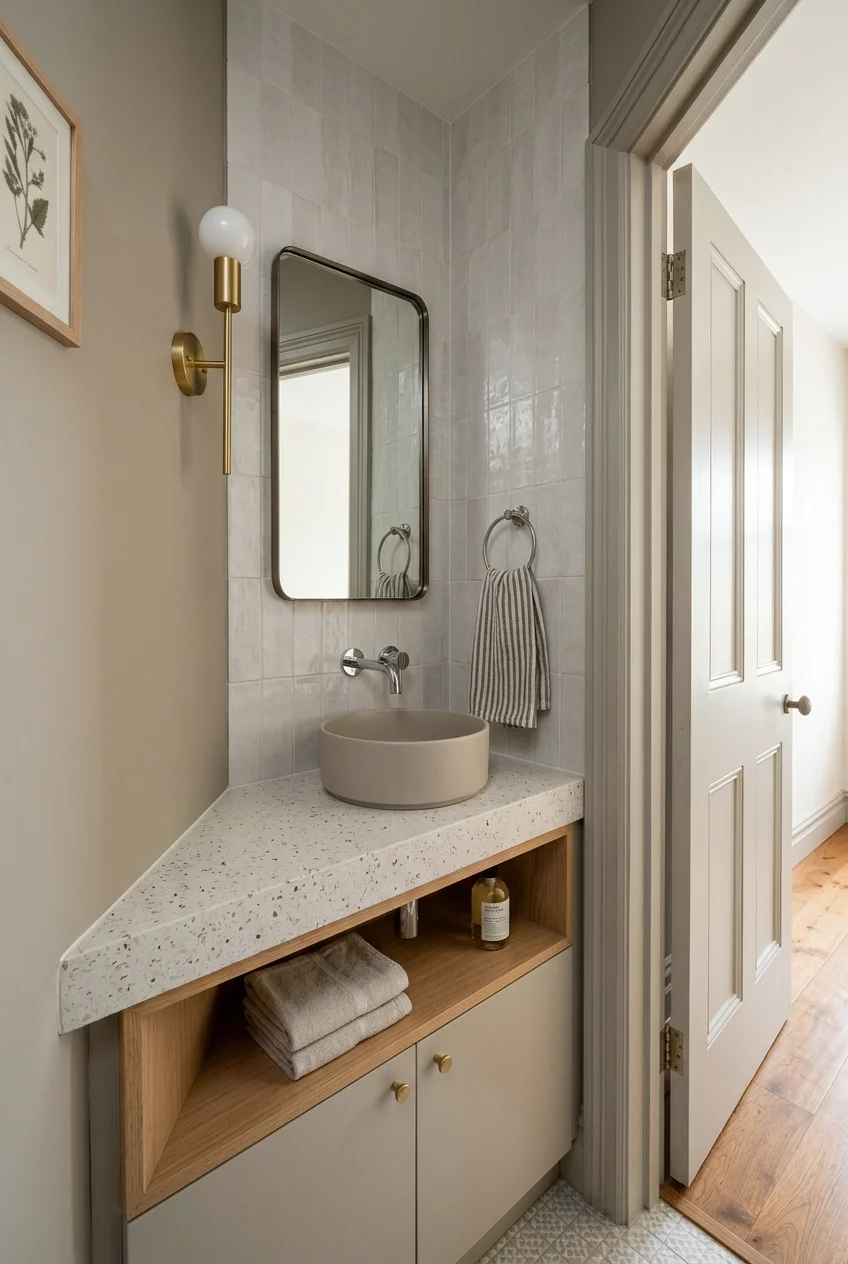
A corner vanity can reclaim an awkward powder-room angle, but its counter should follow the available circulation rather than forcing a standard rectangular projection.
A rounded or clipped front corner reduces a sharp obstruction near the doorway. Confirm comfortable standing space and faucet reach around the compact basin.
If the top leaves a small usable corner, borrow restraint from these corner countertop decor ideas instead of crowding the sink with miniature accessories.
25. Add a Narrow Makeup Perch Beside the Main Sink
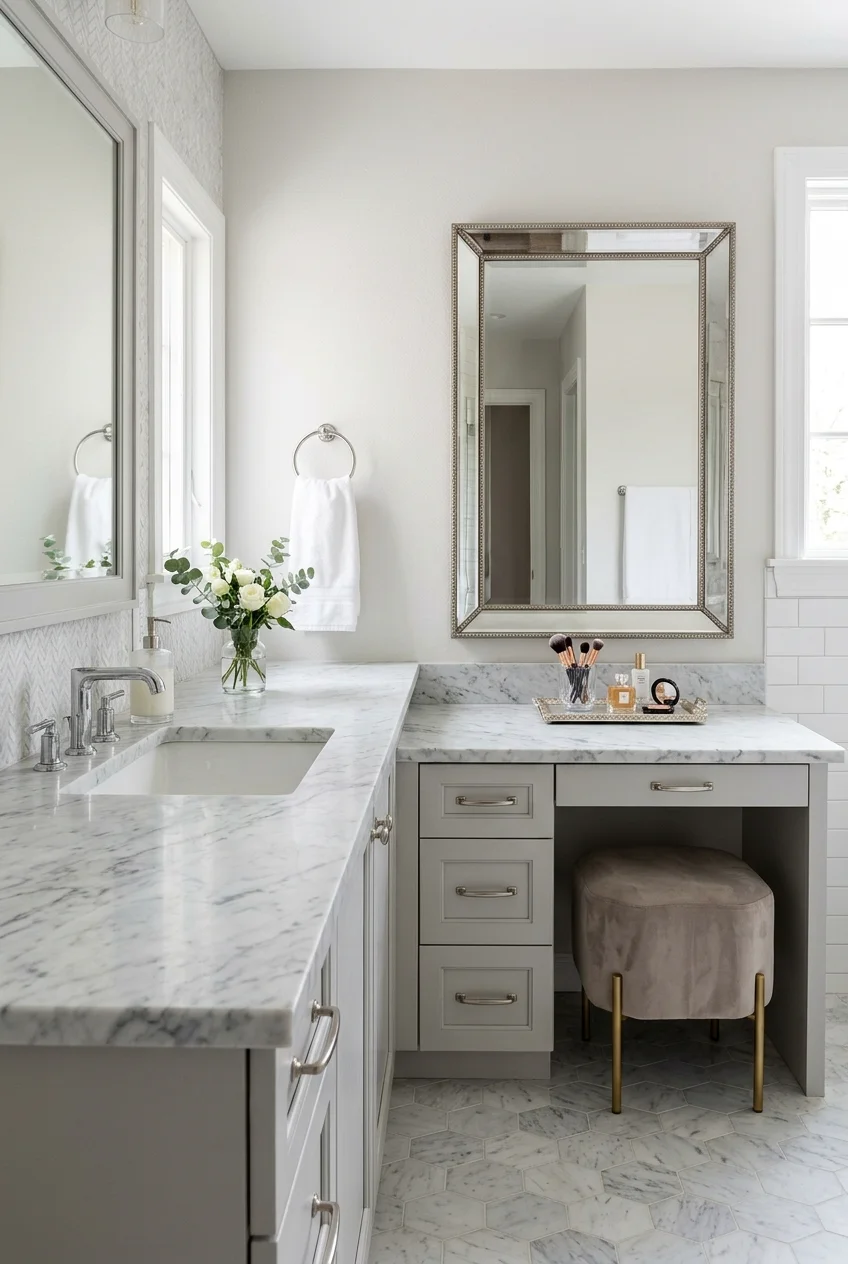
Extending the counter beside the sink creates a seated grooming perch without duplicating a full vanity. A drawer below keeps the surface available.
Set the height, knee clearance, lighting, mirror, outlet placement, and stool storage around the intended user rather than copying the standing counter.
For storage arrangements around cosmetics and tools, explore these makeup vanity ideas and adapt only the features that suit a humid bathroom.
Continue one countertop material across both zones for cohesion, then separate them functionally with drawer placement and a dedicated wall mirror.
Edges and Backsplashes That Finish the Countertop Composition
Edge thickness and wall transitions can change the same surface dramatically. Resolve these details before fabrication so faucet, mirror, cabinet, and tile lines agree.
26. Create Substance With a Mitered Thick Edge
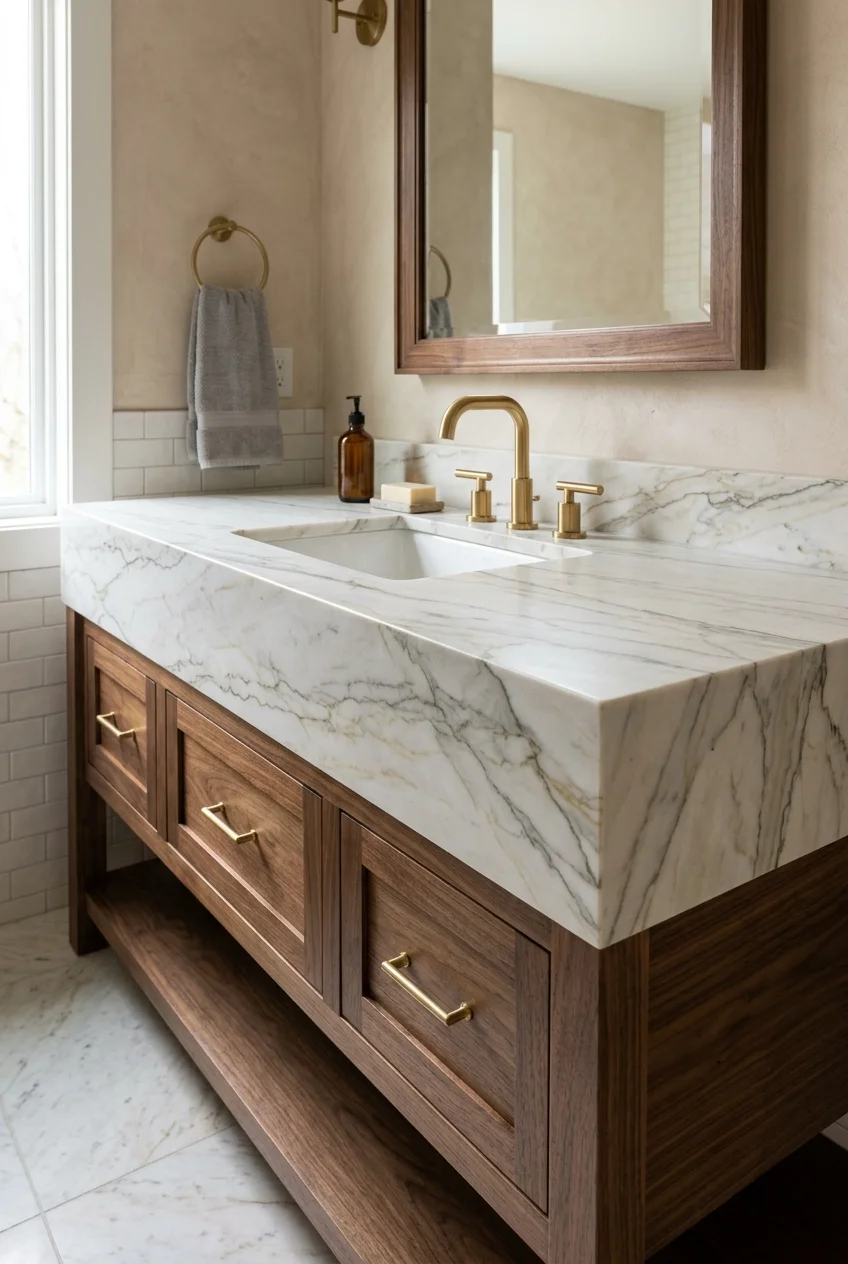
A mitered build-up makes the front appear cut from a thicker block without requiring the entire counter to use that full material thickness.
This detail can balance a large vanity or strong cabinet base. On a tiny unit, the same visual weight may overwhelm the available proportions.
Ask to see a fabricated sample because pattern alignment, corner quality, edge durability, and support determine whether the illusion remains convincing up close.
27. Keep a Floating Vanity Light With a Slim Edge
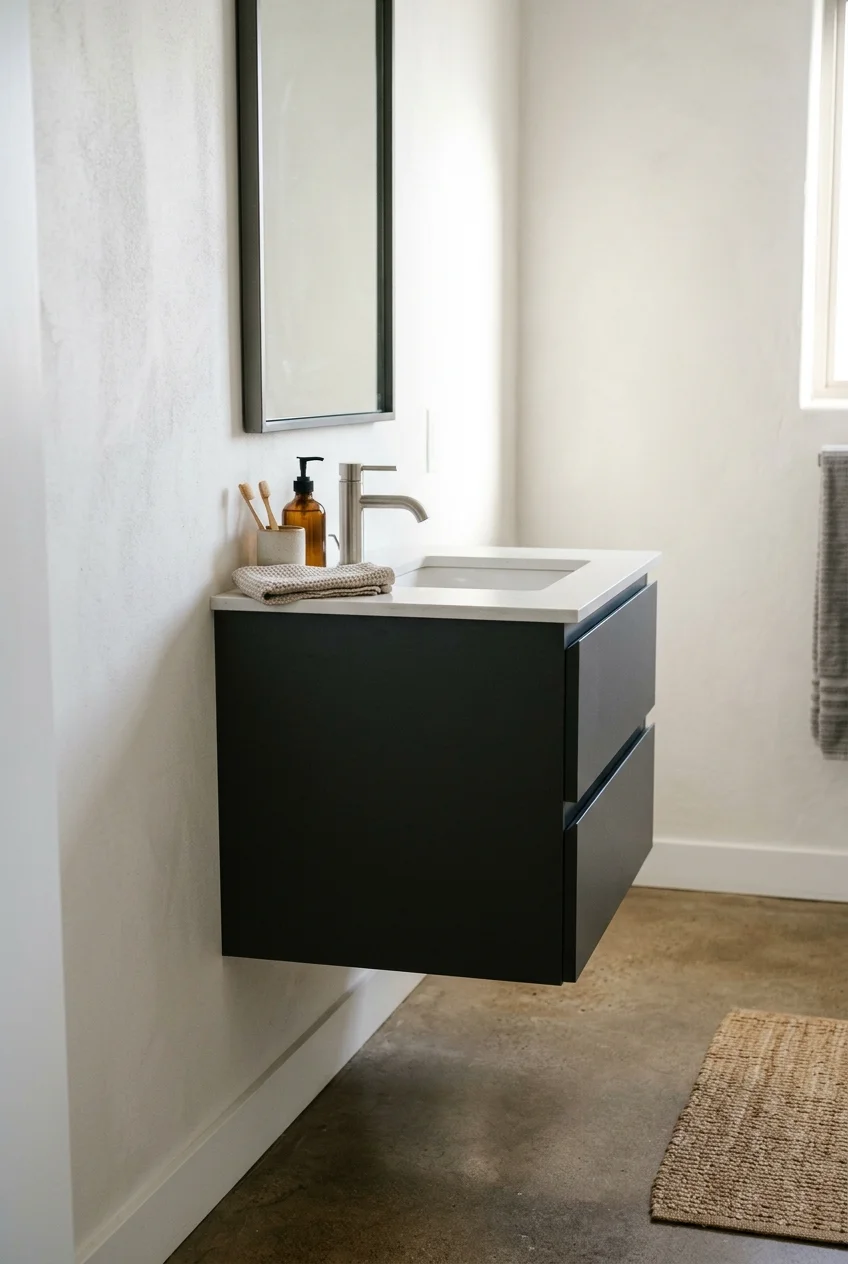
A slim edge reinforces the light appearance of wall-hung cabinetry, especially when the counter and cabinet do not extend across the whole wall.
Thin-looking does not mean unsupported. The fabricator must match material, span, sink opening, overhang, substrate, and concealed support to the specification.
Use a simple eased profile rather than an elaborate edge that contradicts the narrow silhouette. Keep accessories low and limited near the basin.
28. Run the Countertop Down One Side as a Waterfall
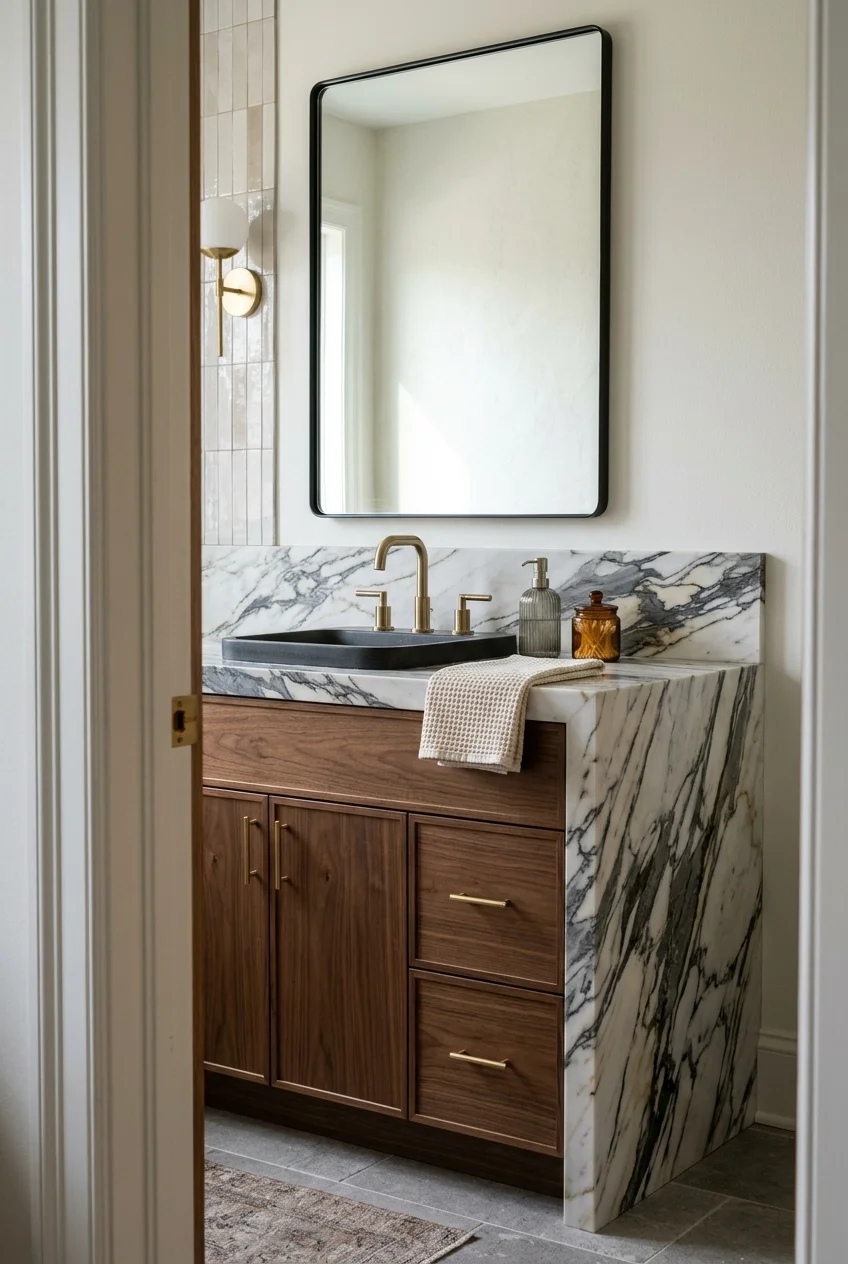
A waterfall end carries the counter material vertically beside the cabinet, creating a strong frame when that side remains visible from the doorway.
Reserve the detail for an exposed end; placing it tightly against a wall hides the effect. Align directional patterns across the top and vertical panel.
- Choose the visible end from the main approach.
- Approve pattern direction across the corner.
- Protect drawer and door clearances.
- Resolve the base transition before fabrication.
One waterfall side often supplies enough emphasis. Repeating the treatment at both ends can make a small vanity appear heavier than necessary.
29. Soften a Family Vanity With a Rounded Edge
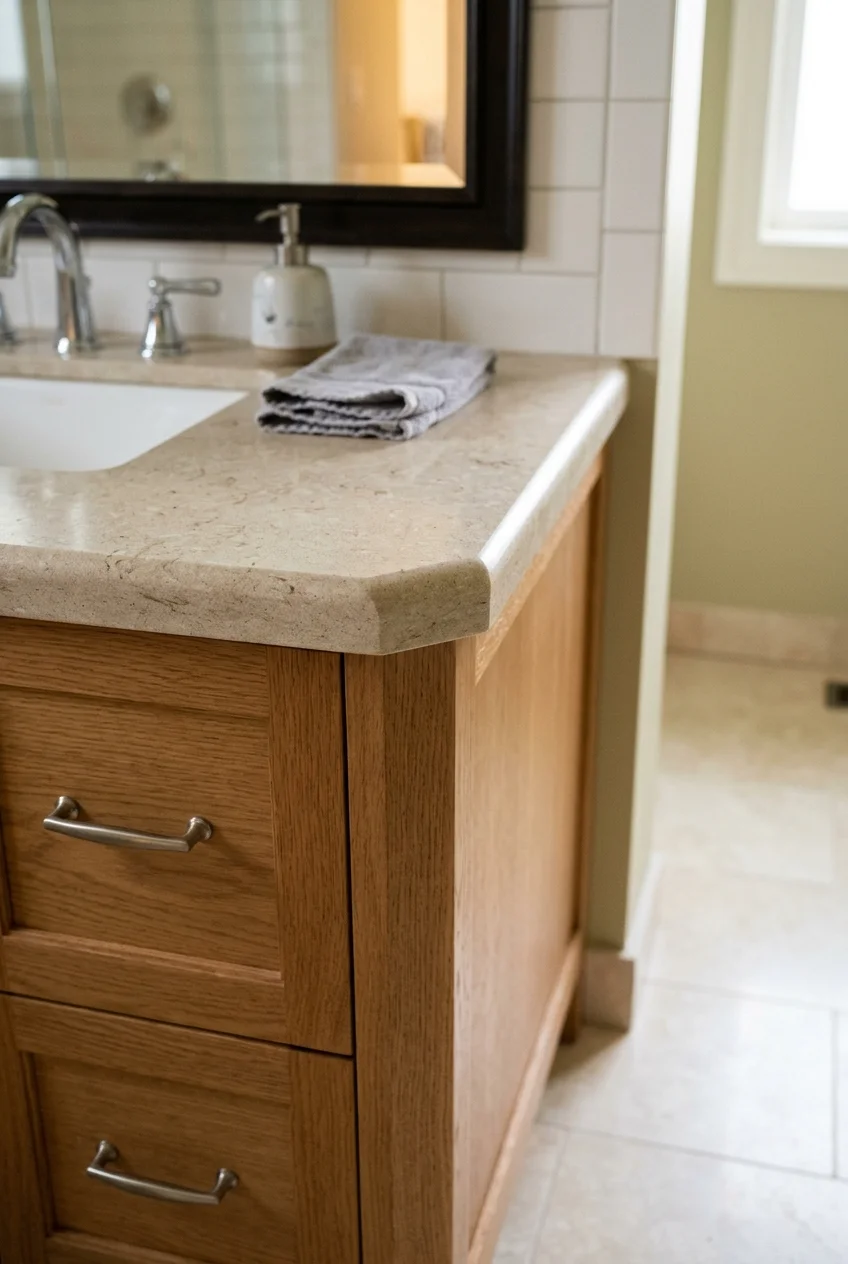
A rounded bullnose or eased radius removes the sharp visual line of a square edge and can feel more forgiving along a busy circulation path.
Compare full-size edge samples because a slight radius looks contemporary, while a full bullnose creates a stronger traditional profile and reduces apparent thickness.
The edge choice does not replace sensible layout. Keep projecting corners away from door swings and narrow passages wherever the room allows.
30. Use an Ogee Edge to Support Traditional Cabinetry
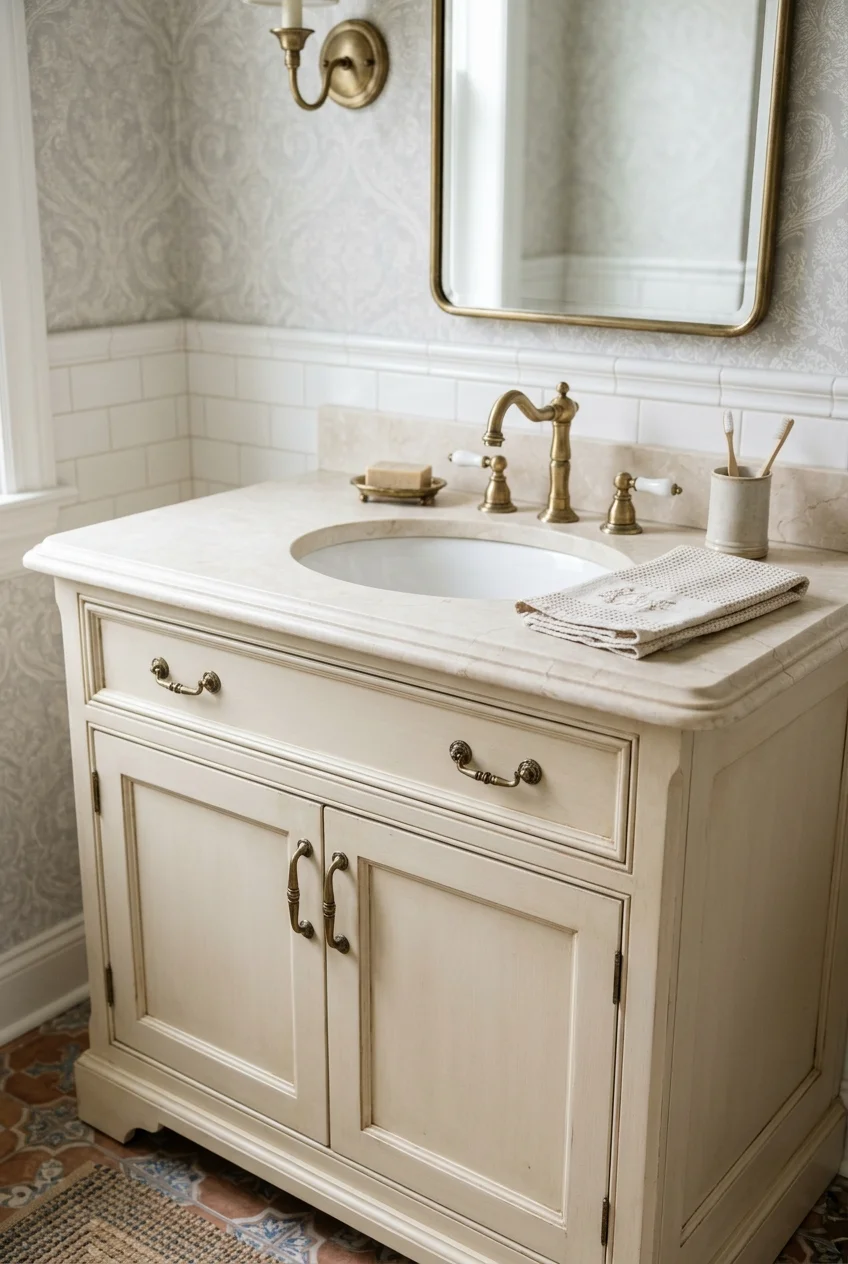
An ogee profile adds shadow and movement beneath the countertop, connecting well with framed cabinet doors, furniture feet, and traditional metal finishes.
Keep the stone pattern relatively quiet so the edge remains readable. Strong veining, ornate hardware, and a detailed profile can compete in limited space.
Practical tip Request an actual edge sample in the chosen material. A profile shown on a diagram can look substantially different at bathroom scale.
Use the detail on a powder-room vanity when you want a furniture-like impression without adding decorative objects across the working surface.
31. Add a Short Matching Backsplash for Simple Protection
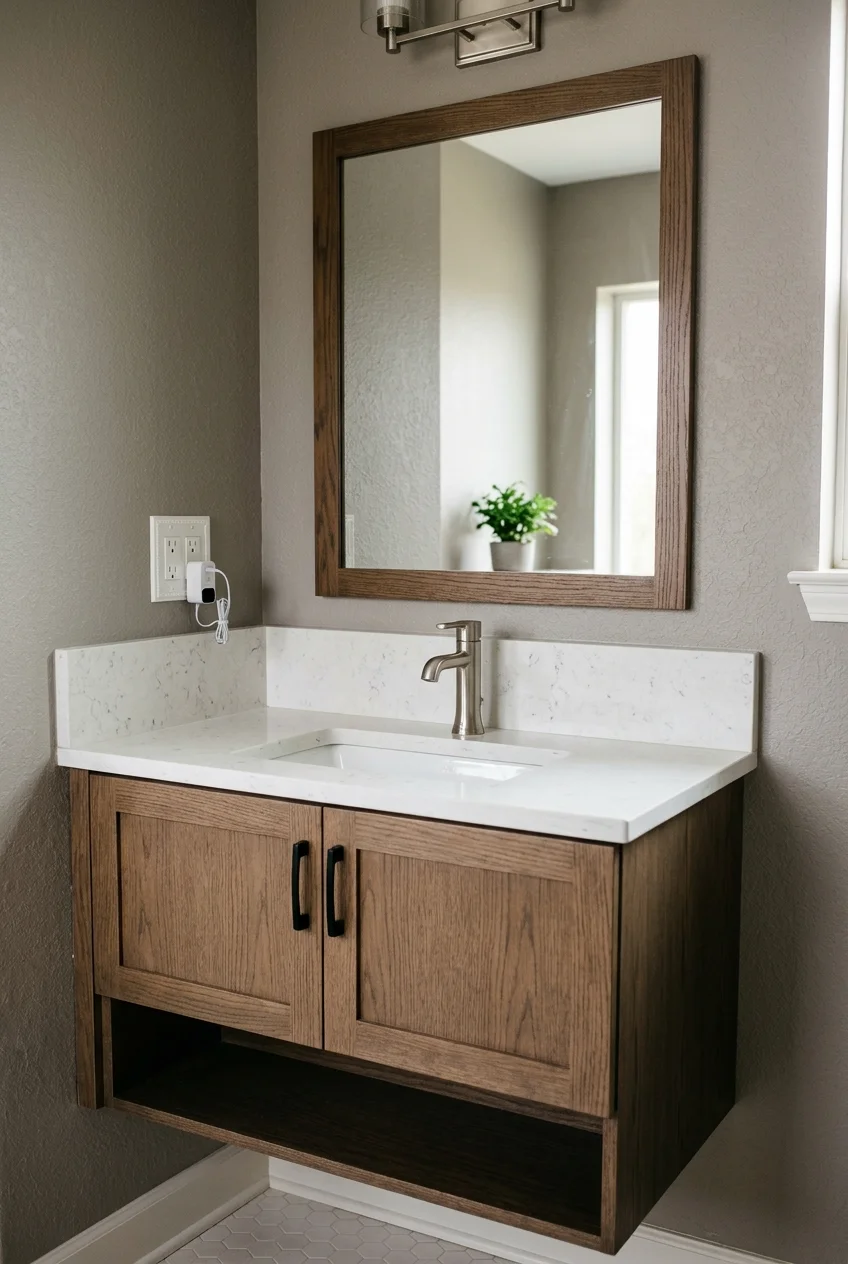
A short backsplash made from the countertop material creates a clean stop behind the faucet and protects the most frequently splashed strip of wall.
Set its height with the faucet, outlets, mirror, and any side return in mind. An arbitrary strip can collide awkwardly with nearby elements.
Use a neat flexible joint where horizontal and vertical surfaces meet, following the installer’s system. Grout alone may not suit every change of plane.
32. Continue the Slab Up to the Mirror
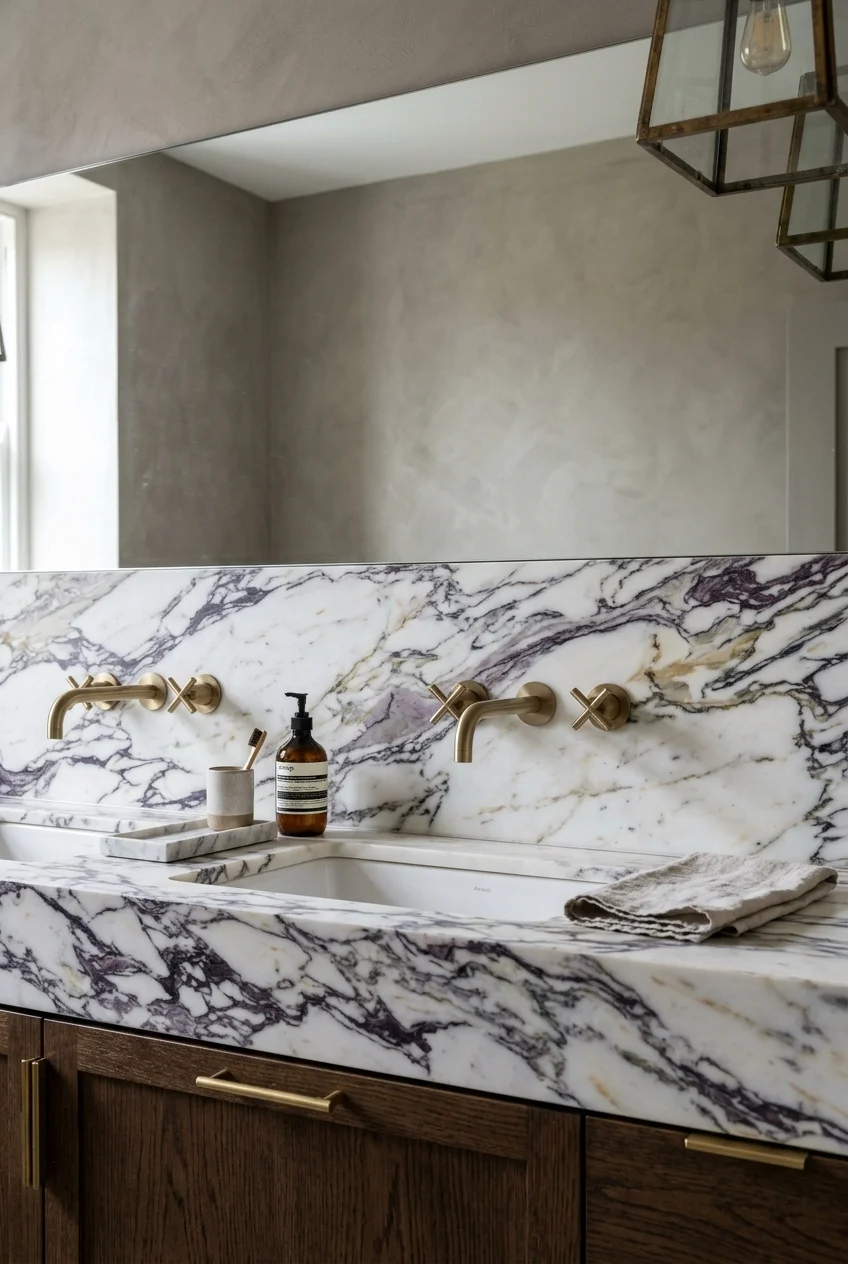
Running the counter material to the mirror creates a broad, wipeable backdrop and gives expressive stone more room than the horizontal surface alone.
Plan faucet holes, outlets, mirror mounting, seams, and pattern placement before fabrication. Every penetration becomes more visible across an uninterrupted slab field.
- Set the mirror’s finished bottom edge.
- Place faucets and outlets within the composition.
- Map slab seams and directional movement.
- Coordinate installation order with every trade.
Decide whether the mirror overlaps the slab or begins precisely above it. That small junction changes both installation sequence and the visible shadow line.
Provide removable access where concealed valves or electrical components require it. A continuous surface should not make future service unnecessarily destructive.
Limit smaller wall finishes nearby so the slab reads as one intentional plane rather than another pattern in an already crowded room.
33. Tile From Counter to Mirror for Color and Rhythm
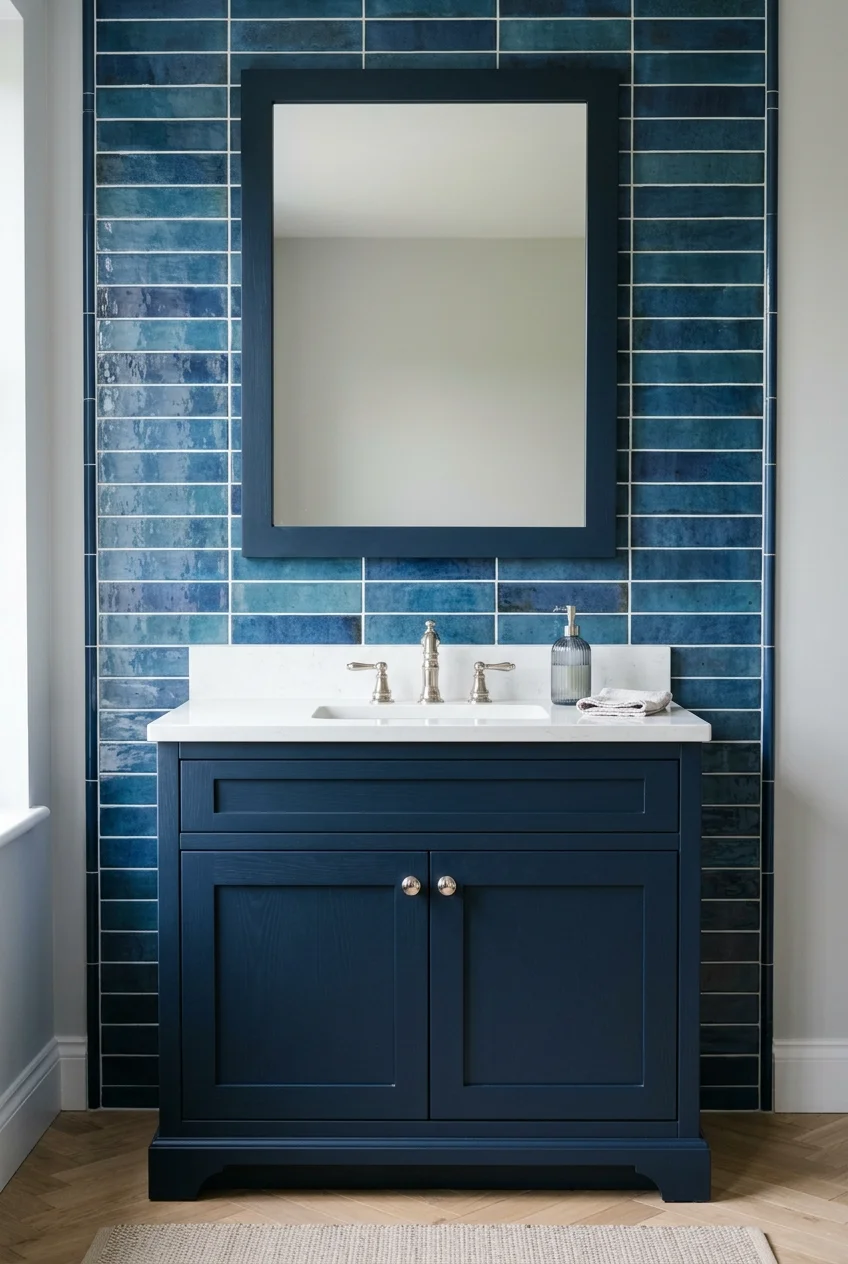
Tile between the counter and mirror introduces scale, color, and repeated joints without committing the entire bathroom to the same pattern.
Center the layout on the sink or vanity composition, then resolve cuts at both ends. A strong pattern needs a deliberate stopping point and finished edge.
Choose grout color for the desired contrast and realistic maintenance. Closely matching grout creates texture; contrasting grout makes every line part of the design.
34. Protect an End Wall With a Coordinated Sidesplash
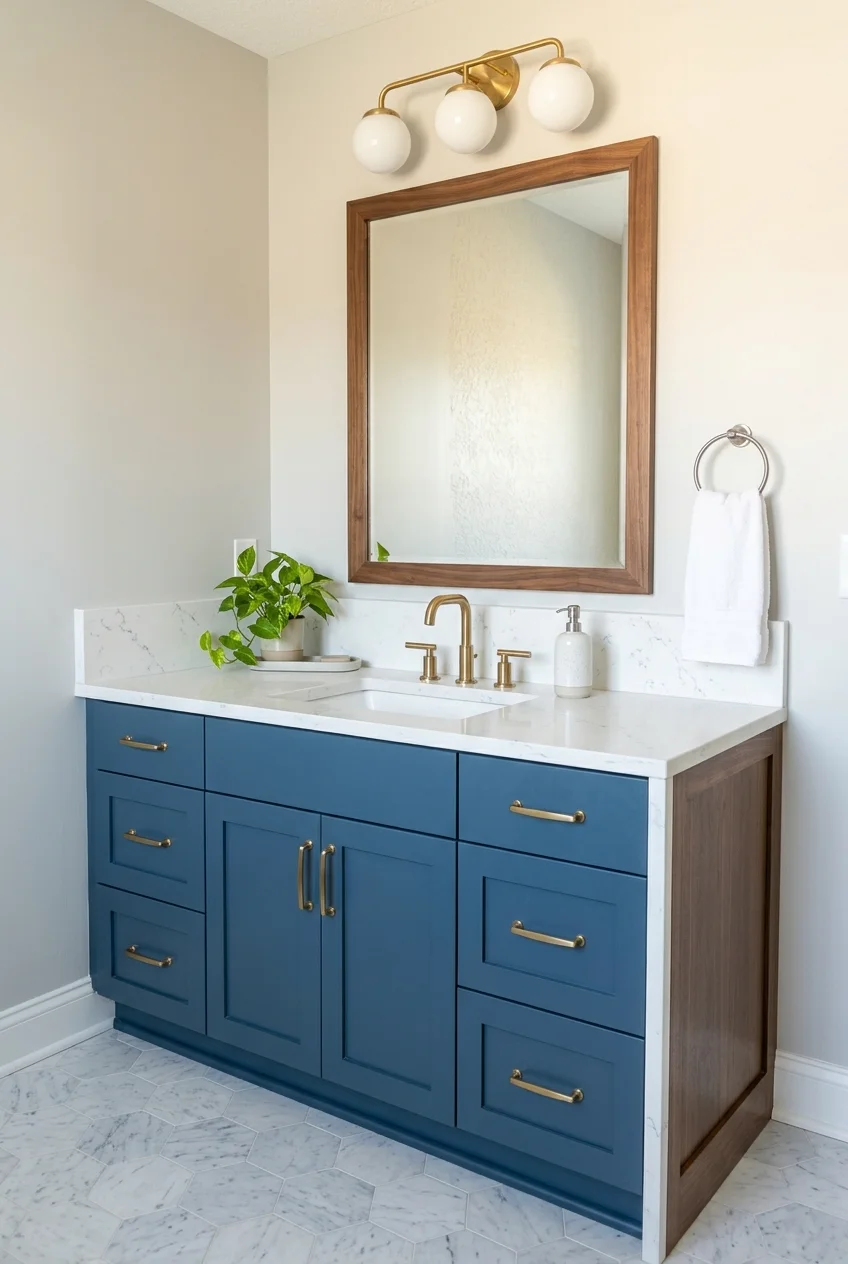
A sidesplash helps where a vanity meets a wall closely and handwashing repeatedly sends water toward that corner. It should look intentionally connected.
Match the backsplash height and material, or design a full tiled return. A mismatched short offcut often looks added after the main installation.
Do not add a sidesplash to an open end without a moisture reason. The exposed countertop edge may look cleaner when left visible.
Color and Material Pairings Worth Saving
A countertop rarely stands alone. These pairings use contrast, repetition, or controlled color so the vanity feels connected to the cabinet and surrounding room.
35. Pair White Stone With a Navy Vanity
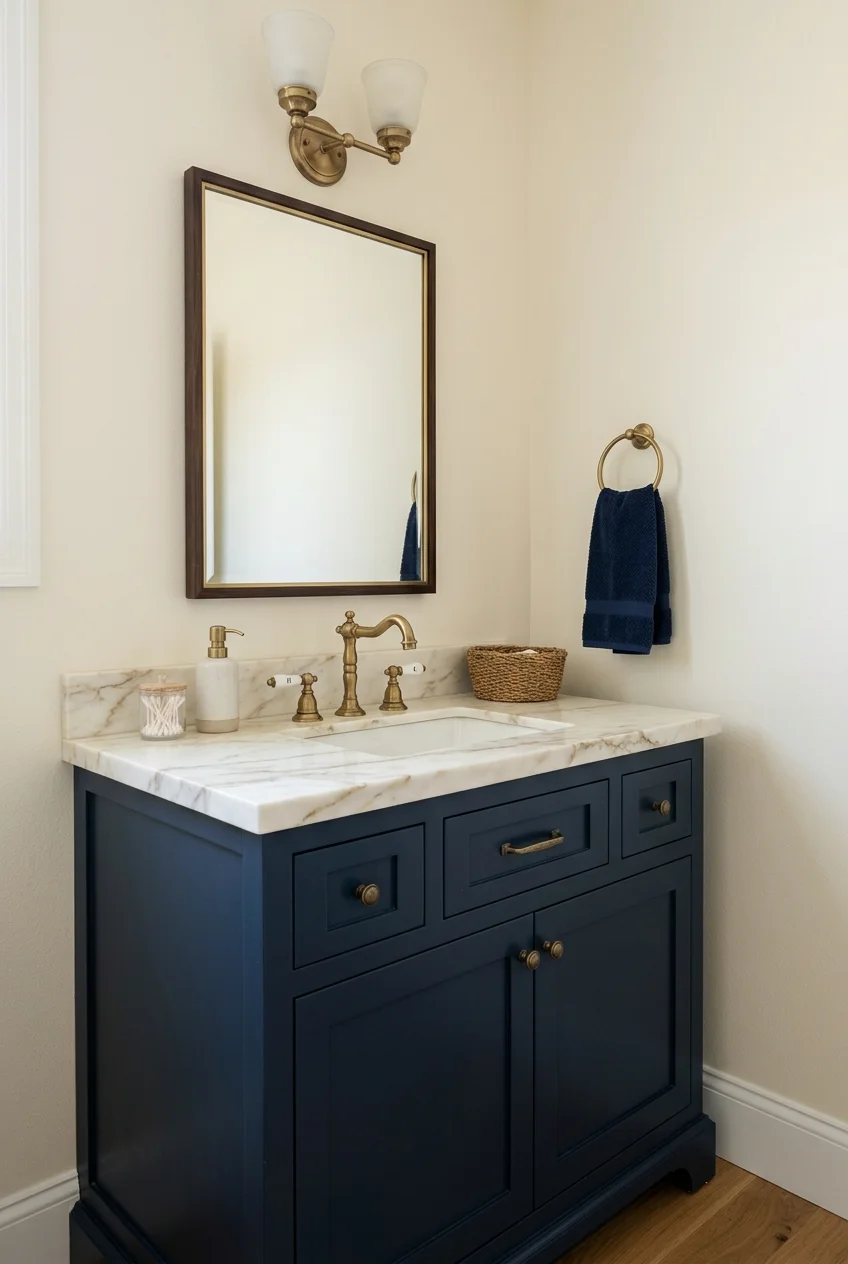
A white countertop gives navy cabinetry a crisp upper boundary and keeps the deep color from absorbing every bit of light around the sink.
Choose warmer white for aged brass or creamy walls, and cooler white for chrome or blue-gray tile. Compare samples in the actual room.
36. Set a Black Countertop Above Pale Oak
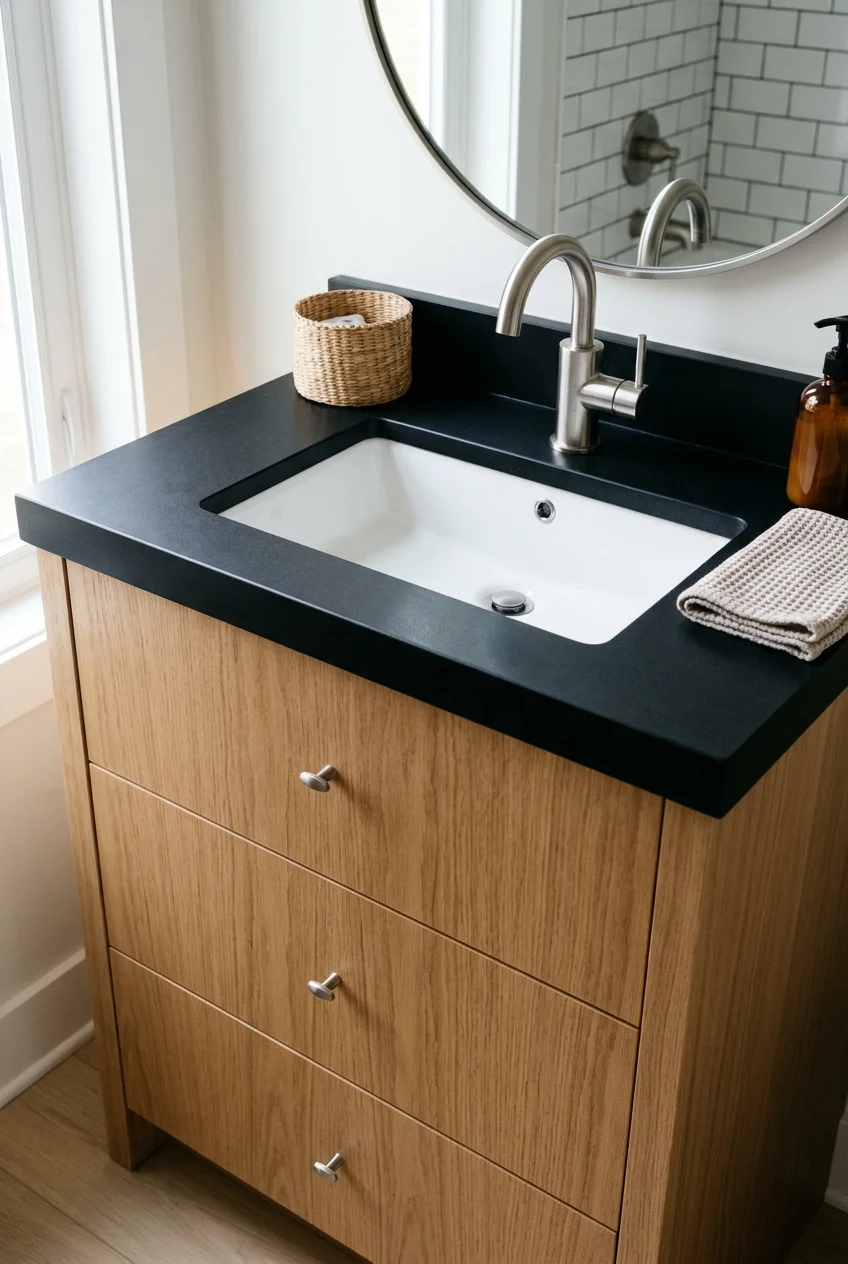
Black stone creates a precise top line over pale oak, allowing the cabinet grain to remain warm while the counter supplies strong graphic contrast.
A matte finish reduces glare but may reveal dried droplets differently. Test a sample beside the sink, then keep the basin silhouette clearly visible.
37. Combine Green Stone With Walnut Cabinetry
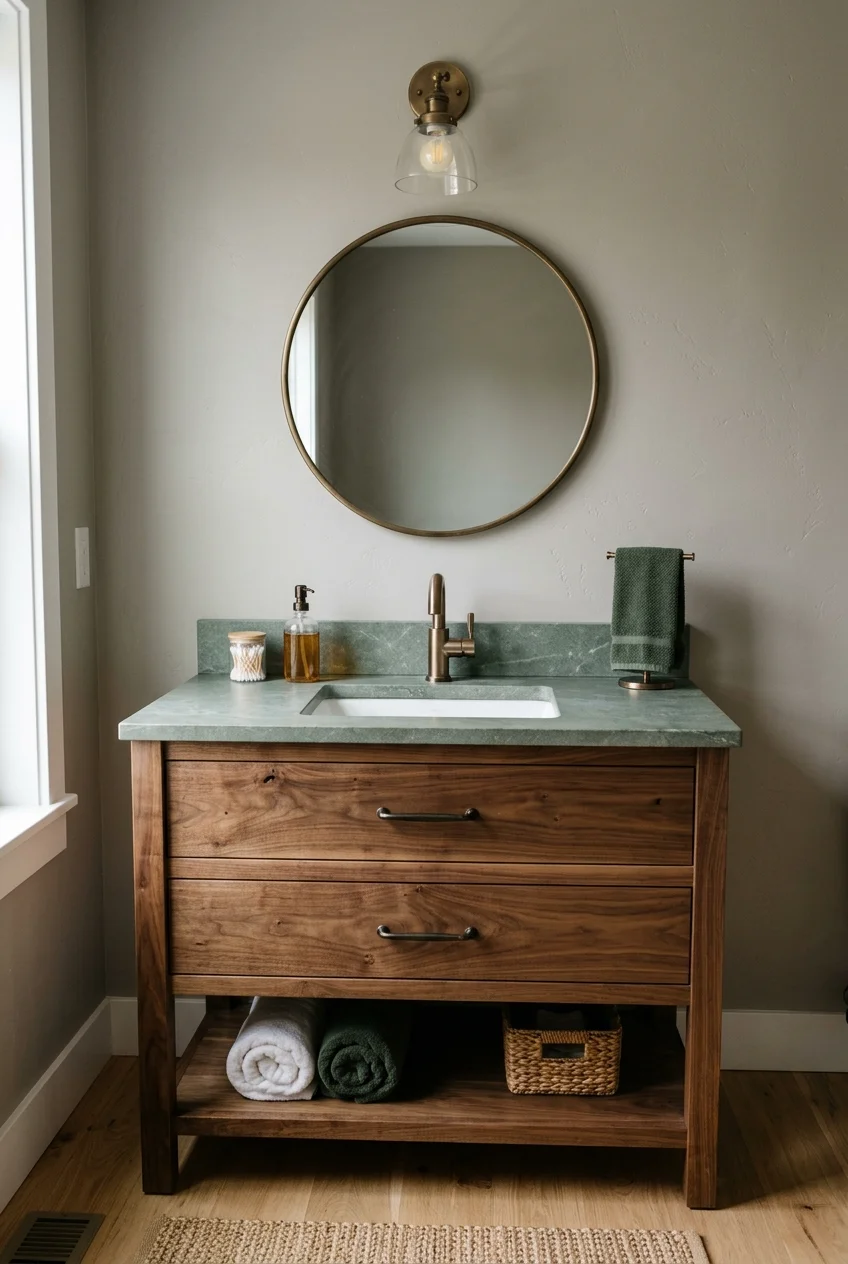
Green stone and walnut share natural warmth without matching exactly. The stone contributes movement while the cabinet brings a calmer repeated grain.
Place samples together because undertones matter: blue-green stone can fight orange wood, while muted olive or gray-green often sits more comfortably.
38. Let Blush Terrazzo Brighten a Small Powder Room
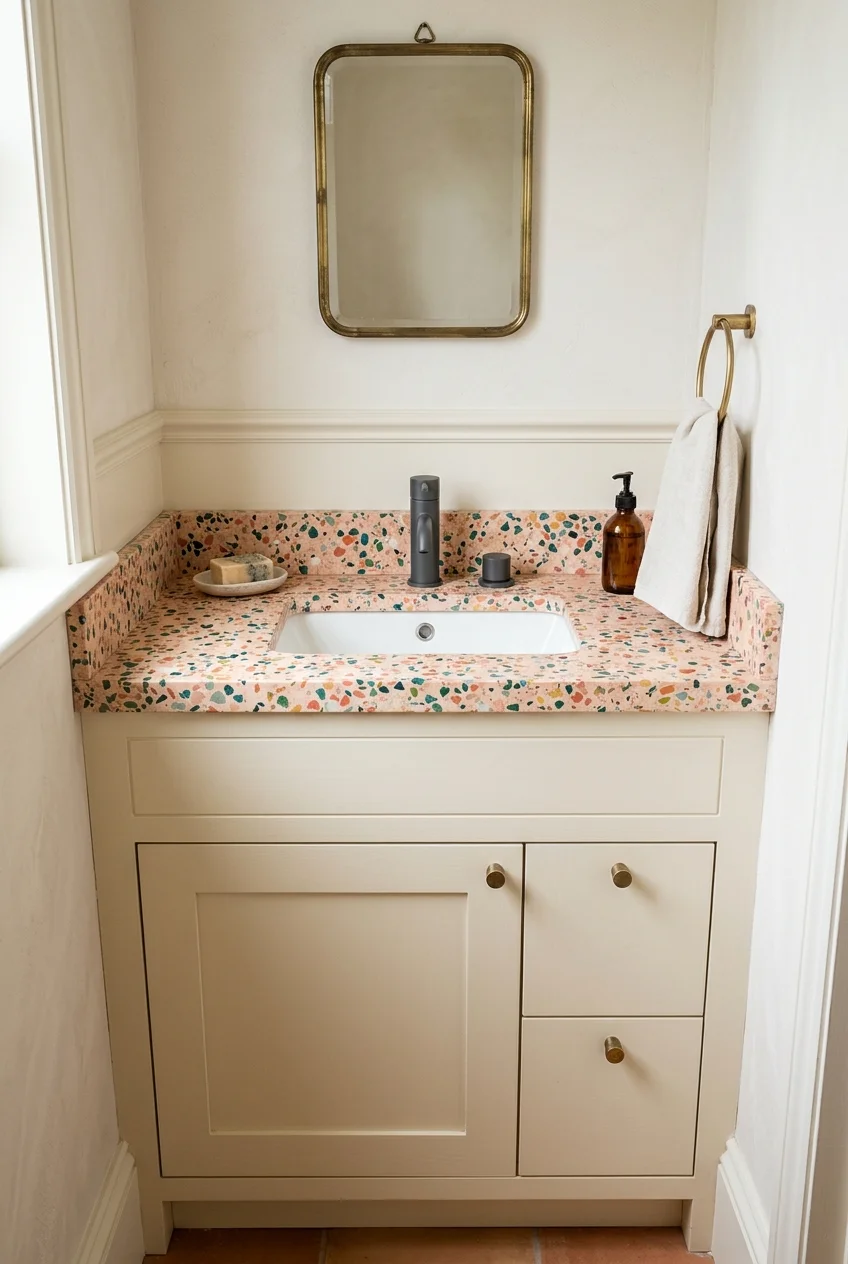
Blush terrazzo adds color without relying on a painted vanity, and scattered aggregate keeps the pink from reading as one flat decorative block.
Choose one neutral chip color for the cabinet or wall, then introduce a darker faucet finish to define the sink against the patterned surface.
39. Use Checkerboard Tile for a Playful Vanity Top
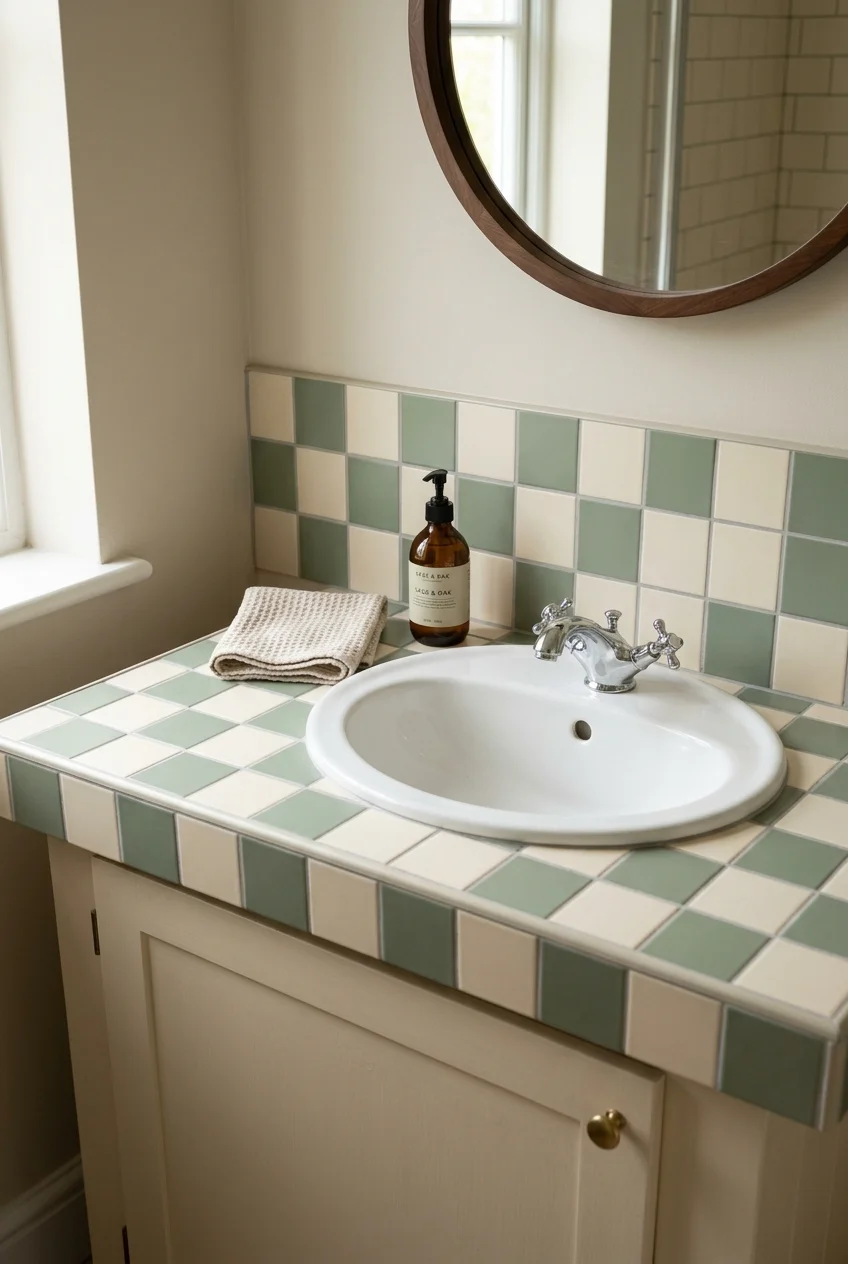
A checkerboard tiled countertop turns the grid itself into the feature, working best when the surrounding floor and walls use quieter, larger fields.
Plan complete squares around the sink and front edge before setting tile. Random narrow cuts will make the pattern look accidental rather than playful.
- Limit the pattern to two durable tile colors.
- Choose a coordinated finished edge.
- Keep grout width exact throughout.
- Use a simple sink shape.
This surface has more joints than a slab, so accept the cleaning routine as part of the look instead of treating it as a maintenance-free substitute.
40. Build a Monochrome Vanity With Subtle Texture Changes
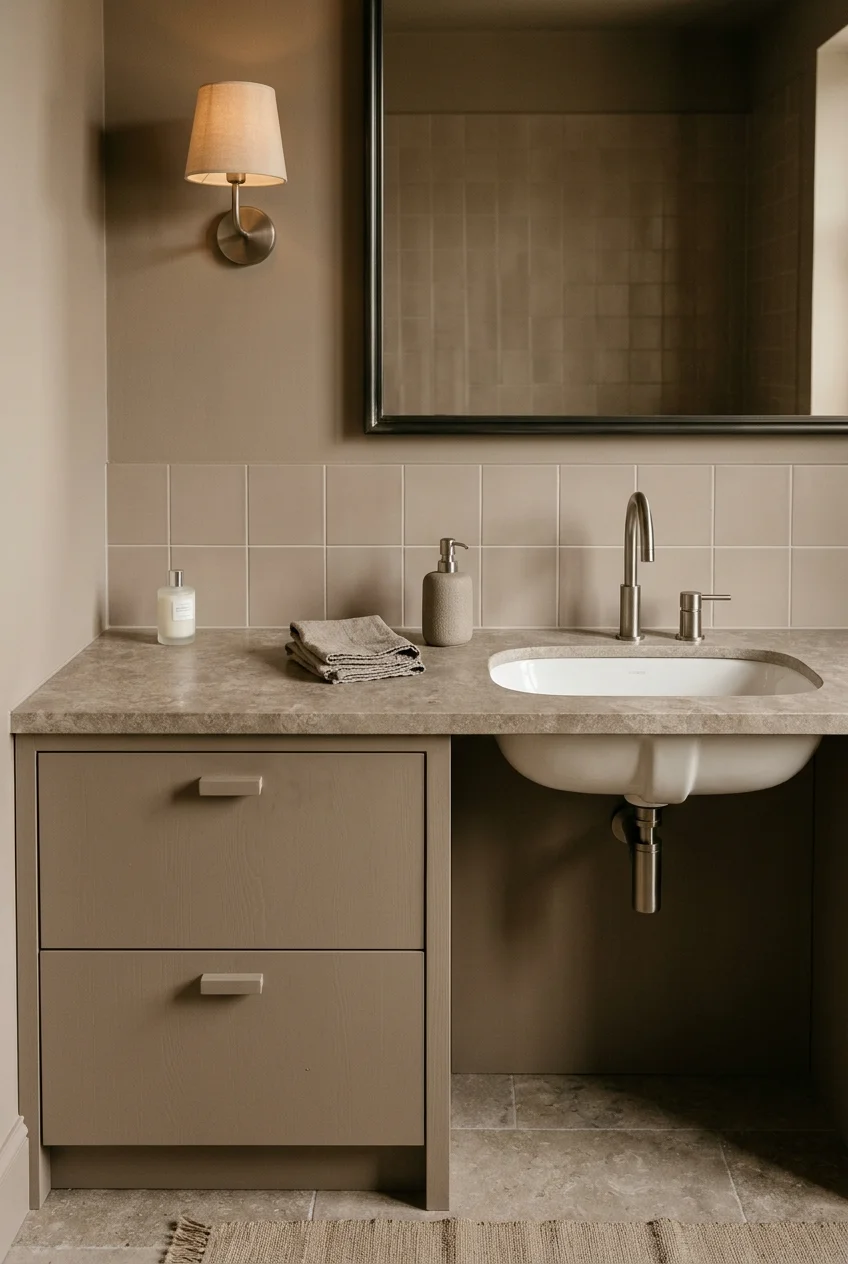
Using one color family across cabinet, counter, and backsplash can calm a narrow bathroom, provided each surface contributes a different texture or sheen.
Combine matte painted drawers, softly mottled stone, and satin tile, while giving the sink and faucet enough contrast to remain visually clear.
41. Repeat the Counter Material on a Shower Ledge
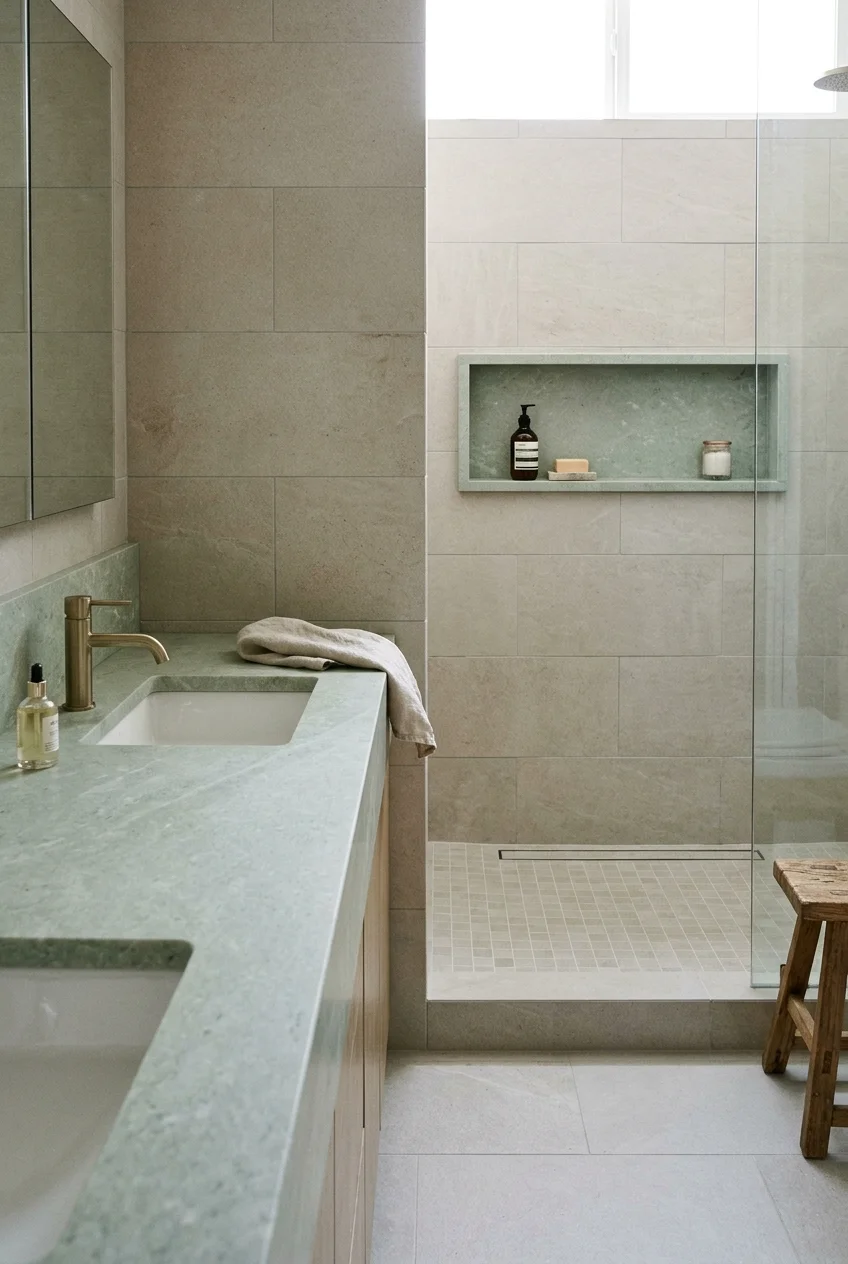
Repeating the vanity counter on a shower curb cap, niche shelf, or ledge can connect separated bathroom zones without covering every wall in stone.
Use the material only where the shower assembly permits, with correct slope, waterproofing, joints, and edge detailing handled by qualified installers.
Watch for Visual continuity does not prove a wet-area detail is properly built. Require the shower system’s installation guidance and professional coordination.
Confirm whether the selected stone or composite needs different care in a shower than on a relatively dry vanity, especially around repeated product residue.
Align the ledge thickness with nearby tile courses when practical. An arbitrary narrow strip can look disconnected even when the material matches perfectly.
Keep the repeat narrow so it reads as a deliberate line. Large secondary slabs can compete with the vanity rather than linking to it.
42. Divide a Long Vanity With Two Counter Materials
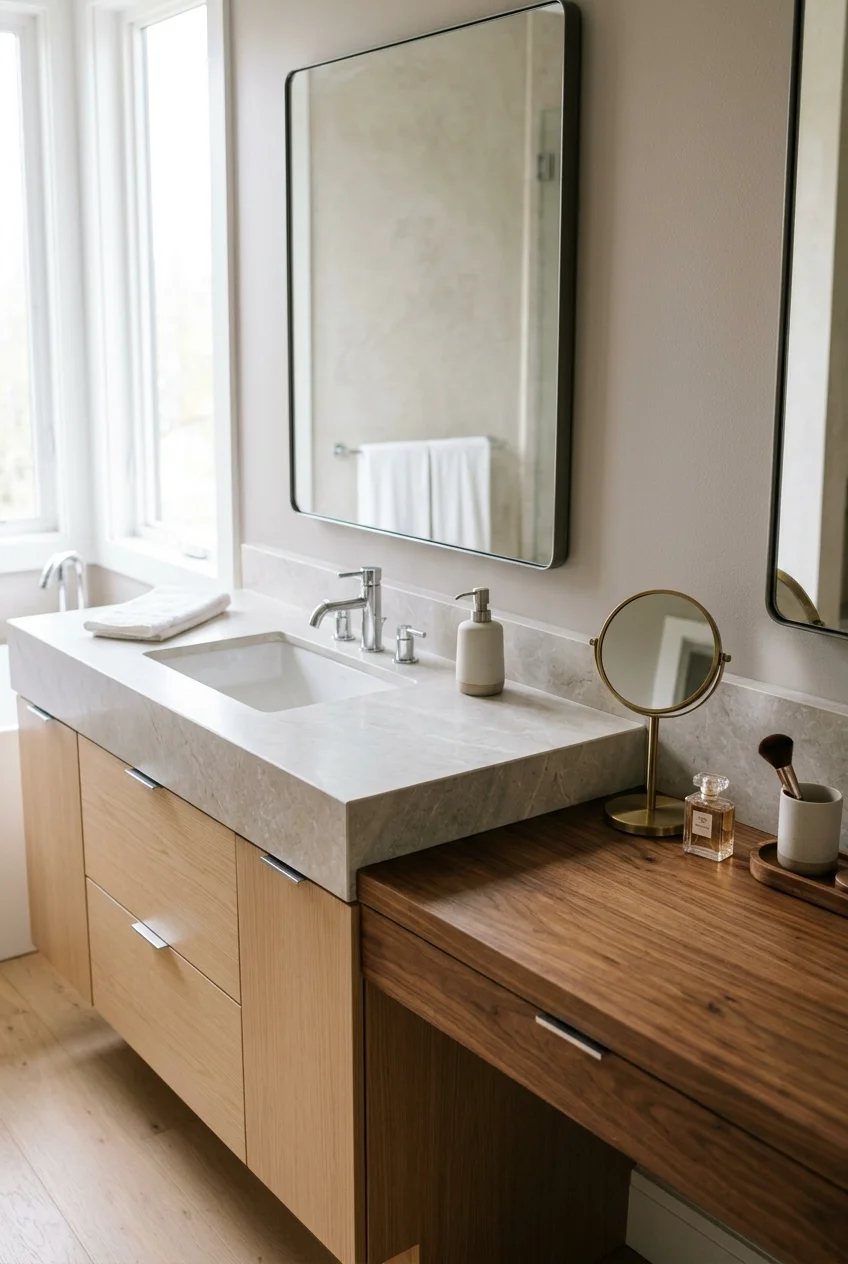
Two materials can distinguish washing and seated grooming zones along a very long vanity, especially when each zone has a different height or function.
Place the transition over a cabinet division and design a clean intentional joint. Avoid ending one material randomly beneath an open working area.
Limit the contrast to one meaningful change, such as stone beside sealed wood. Additional edge profiles and colors would make the composition unnecessarily busy.
Countertop Styling and Organization That Preserve Working Space
The best counter styling supports actual routines. Keep visible objects limited, easy to clean around, and proportioned to the dry space left after the sink.
43. Group Soap and Lotion on One Washable Tray
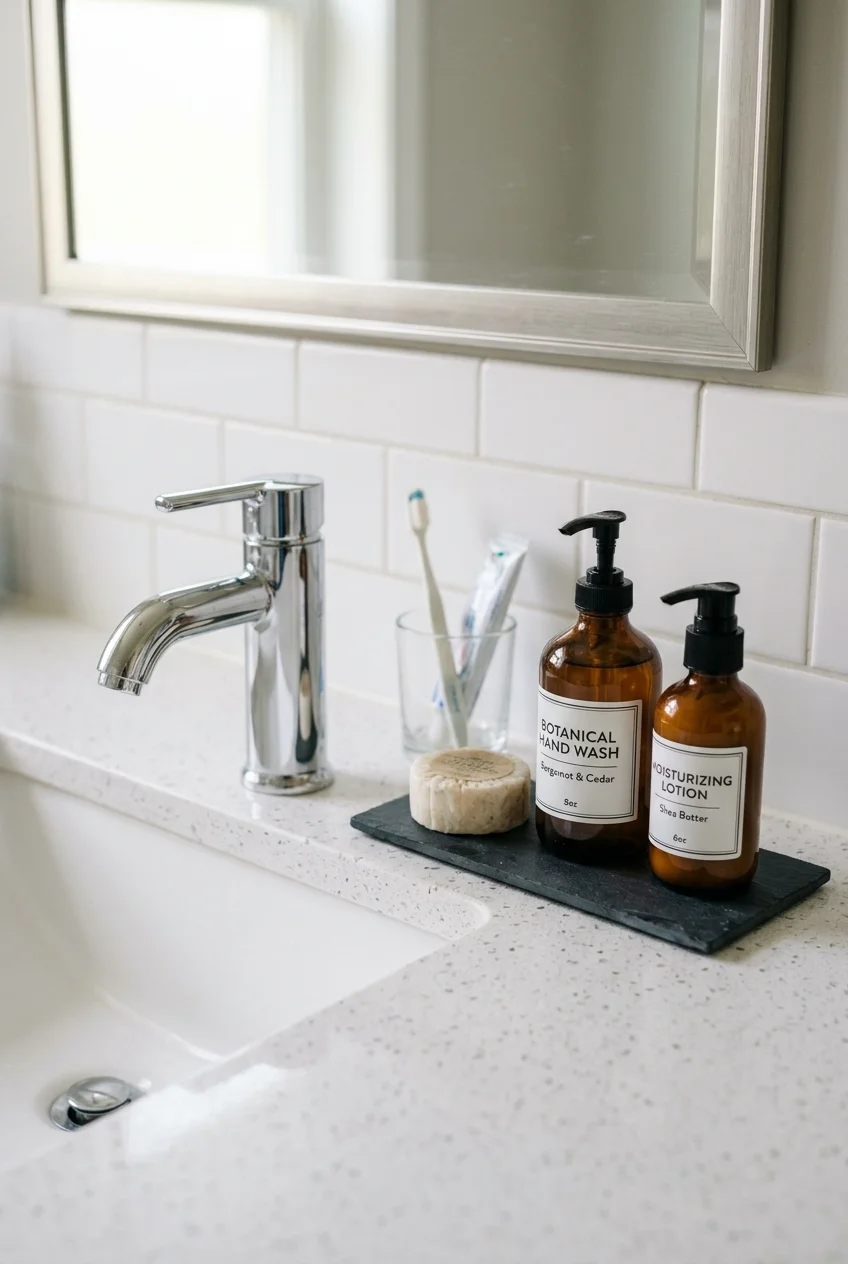
A low tray creates one visual unit beside the sink and catches small drips from pump bottles. Choose a footprint that preserves handwashing space.
As an Amazon Associate, we earn from qualifying purchases.
A small silicone sink tray can contain soap-area residue without adding fragile material near the basin. Confirm its dimensions suit your faucet and bottles.
Keep only products used at that sink on the tray. Backup toiletries belong in a cabinet, preventing the display from becoming long-term overflow storage.
44. Place a Low Shared Tray Between Double Sinks
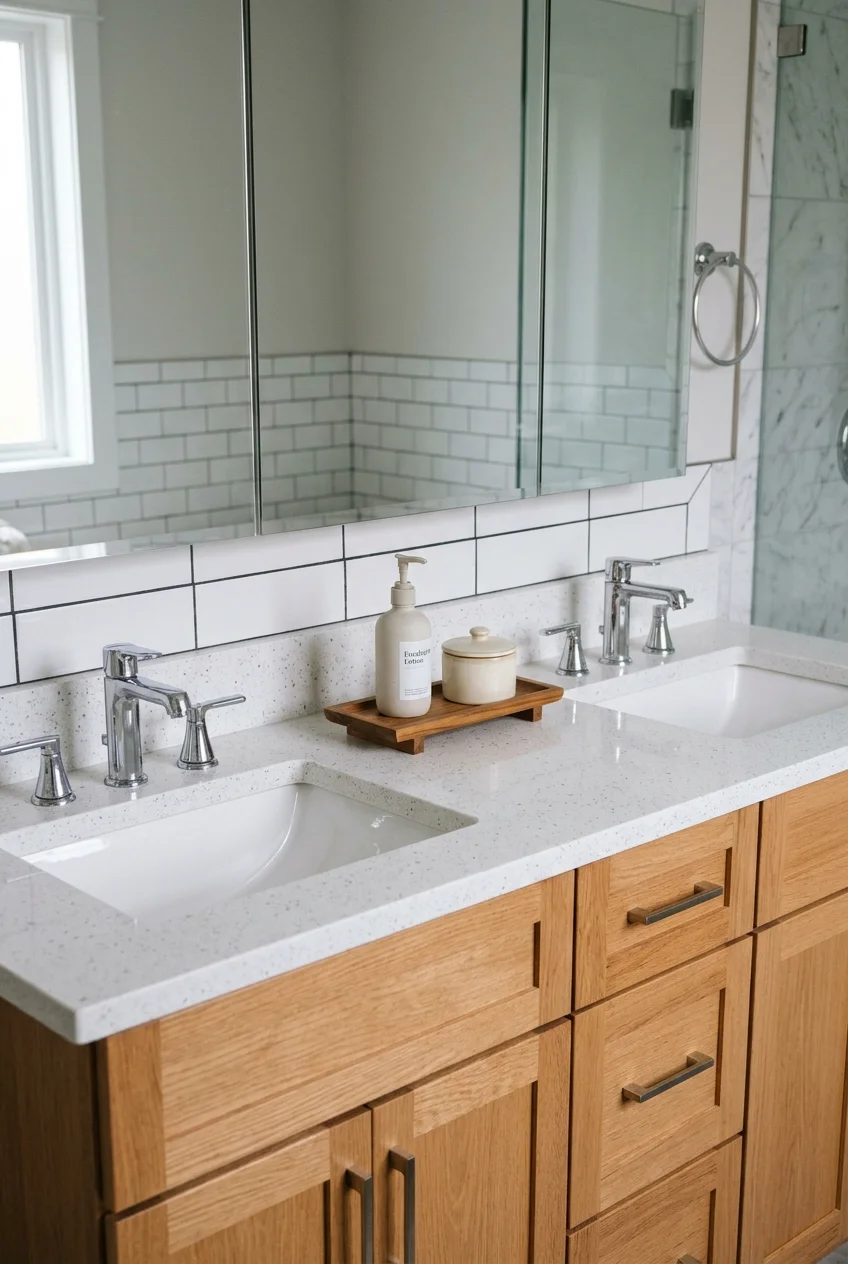
The center of a double vanity can hold one shared tray for hand lotion, tissues, or a small lidded container used by both people.
Keep it below mirror sightlines, narrower than the center space, and easy to lift for cleaning, while preserving a clear landing area beside each bowl.
45. Add Vertical Storage With a Two-Tier Organizer
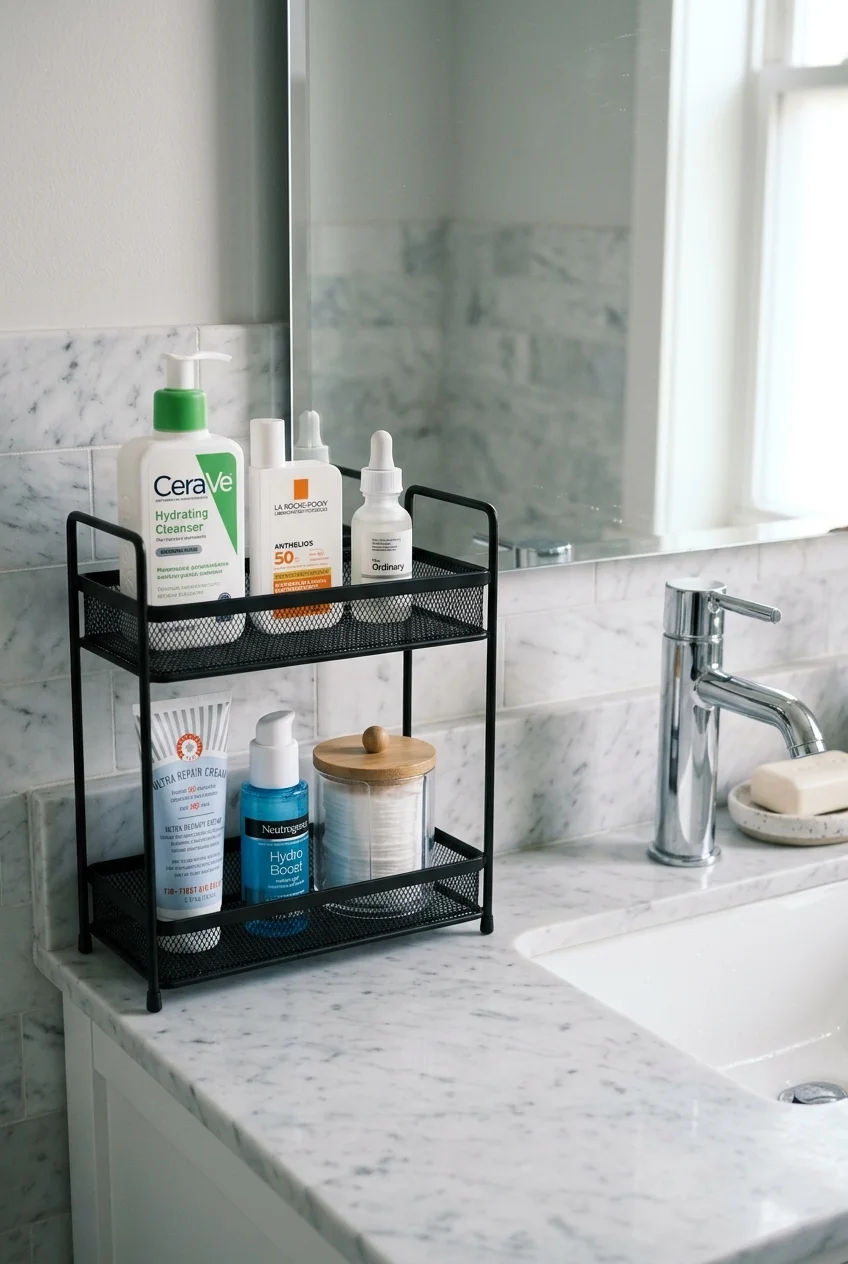
A two-tier organizer uses height rather than spreading bottles across a small counter. Reserve it for daily products that genuinely need open access.
This compact two-tier bathroom organizer offers open shelves and a small basket. Measure the footprint, total height, and bottle clearance before choosing it.
- Place taller bottles on the open lower tier.
- Keep small loose items inside the basket.
- Leave faucet handles and outlets unobstructed.
- Lift the unit regularly to clean below.
If even a vertical organizer overwhelms the vanity, these small bathroom storage ideas offer ways to move supplies off the countertop entirely.
46. Use Lidded Canisters Only for True Daily Essentials
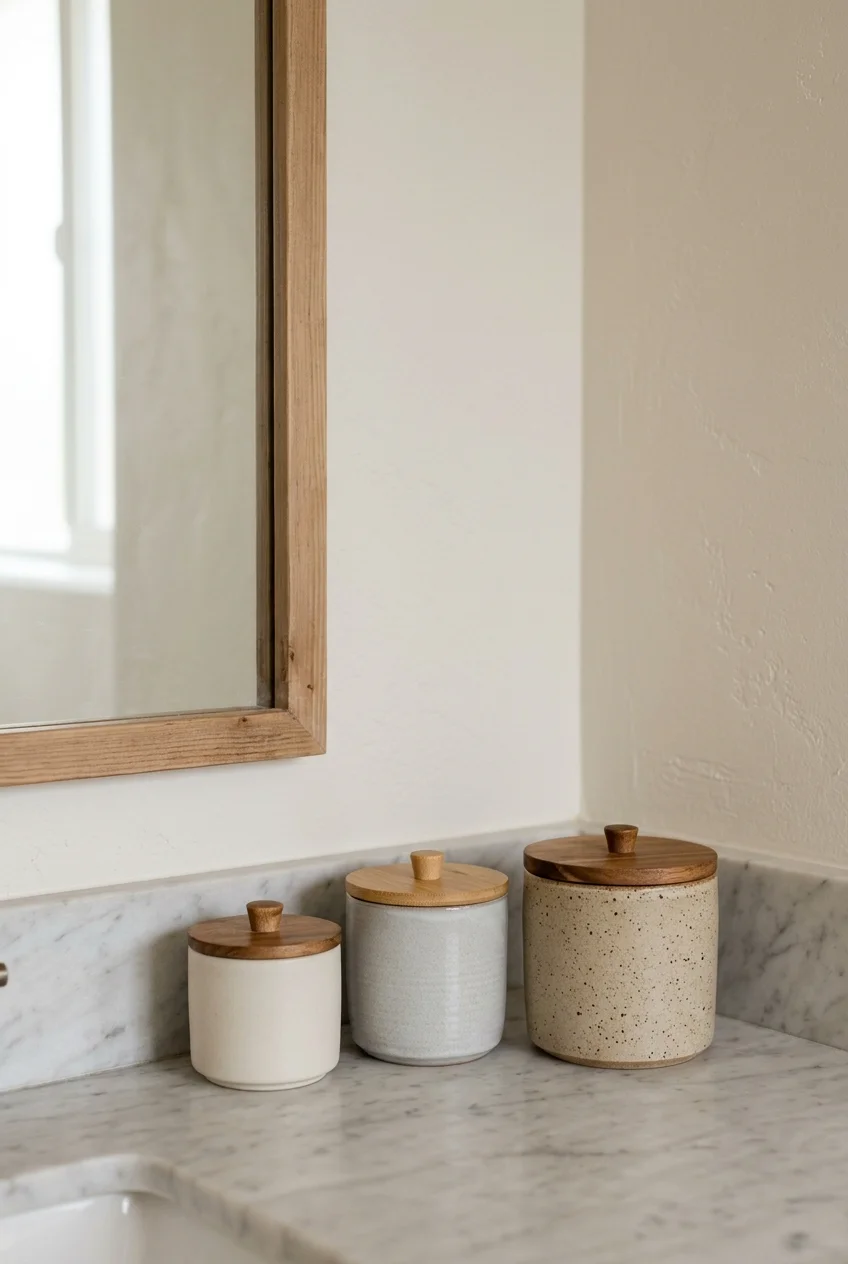
Two or three low canisters can contain cotton rounds, floss picks, or hair ties while keeping the contents protected from splashes and settling dust.
Choose wide, washable openings, and never decant medications or products needing instructions, dates, or child-resistant packaging merely to create decorative uniformity.
47. Give Hot Tools a Heat-Resistant Landing Place
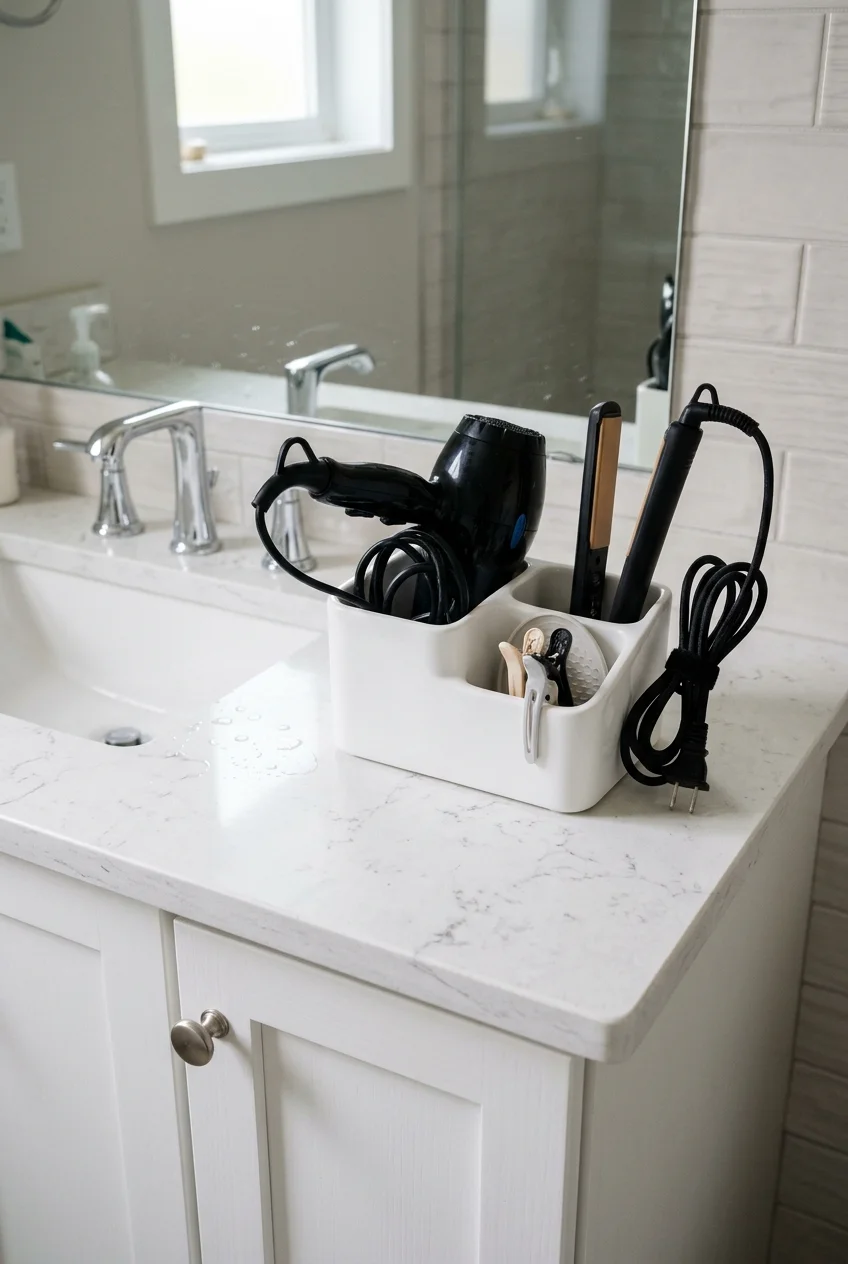
A dedicated organizer prevents curling irons, brushes, and cords from spreading across the basin area. It should sit on a stable, dry counter zone.
A countertop hot-tool organizer with a heat-resistant mat creates separate storage for tools. Verify dimensions and follow each appliance’s cooling and safety instructions.
- Choose a location clear of water and faucet spray.
- Check organizer and tool dimensions together.
- Set hot tools only where the product permits.
- Unplug, cool, and store cords without tangles.
Watch for An organizer does not make electrical use near water safe. Follow the appliance instructions and keep plugs, cords, and heated parts away from wet areas.
Check whether the organizer accommodates the largest barrel, brush, and dryer handle without tipping. Product categories do not guarantee a useful physical fit.
Place the cord route away from drawer pulls and walking paths. A dedicated landing place fails if cables still cross the active sink zone.
48. Reserve One Dry Corner for a Small Plant
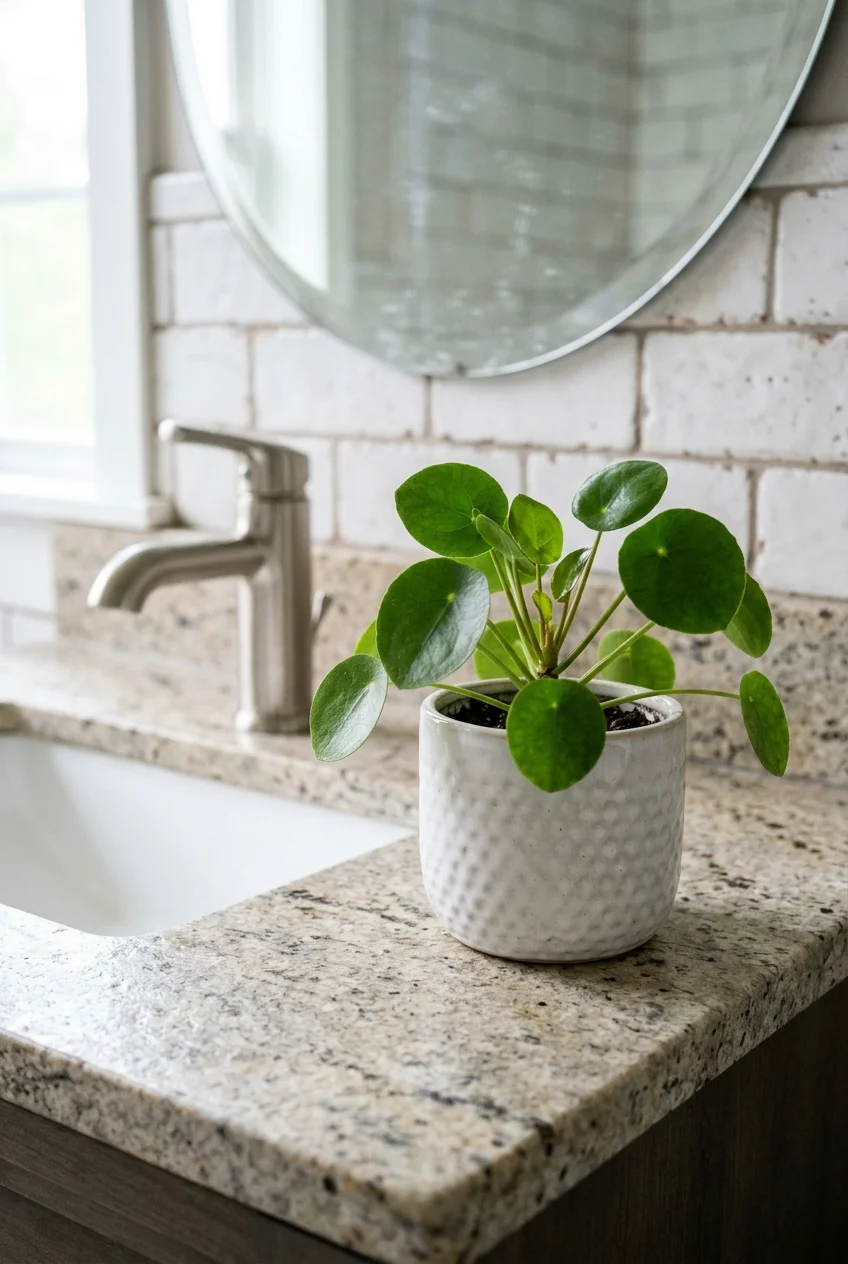
One plant can soften a stone counter and introduce height without multiplying decorative objects. Choose a position outside the faucet’s working and splash zones.
Choose a plant for the actual light, protect the surface from drainage, and use these corner countertop decor ideas to keep the arrangement smaller than the available space.
49. Clear the Deck With a Wall-Mounted Faucet
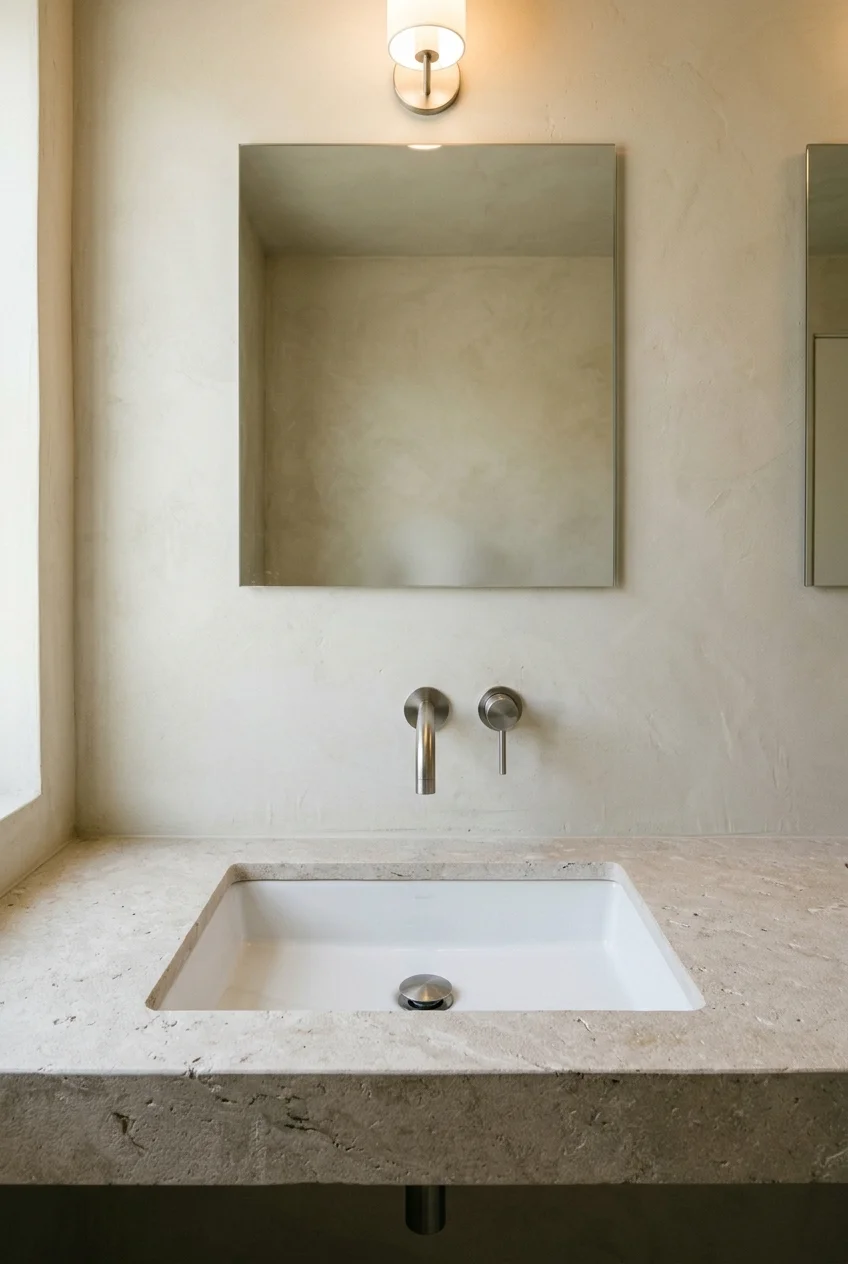
A wall-mounted faucet removes deck holes and can leave more usable counter behind a shallow basin, creating a particularly clean slab or tiled surface.
The spout must reach the intended bowl area at a useful height, while concealed plumbing, service access, waterproofing, and wall structure require early coordination.
- Select the basin before setting spout reach.
- Coordinate valve depth with the finished wall.
- Keep controls reachable without leaning awkwardly.
- Plan future service access.
Mock up the finished wall, basin rim, and water landing point together. Catalog dimensions alone do not reveal every splash or reach problem.
Decide how the backsplash meets faucet trim plates and mirror edges. Tight collisions make routine cleaning difficult and can expose careless sequencing.
Use the newly open counter as working space rather than filling it automatically. The visual benefit comes from an uninterrupted surface around the bowl.
50. Move Daily Clutter Into a Recessed Medicine Cabinet
Image pending: No image is attached to this draft for idea 50 (image-50).
A recessed medicine cabinet can place toothpaste, skincare, and grooming tools near the sink while preserving the countertop as a clear working surface.
Wall cavities may contain plumbing, wiring, blocking, or vents, so confirm conditions before cutting. Door swing and internal depth also affect what fits.
Use these small bathroom storage ideas to plan overflow items elsewhere, because one shallow cabinet should not carry every bathroom supply.
Adjustable shelves help the cabinet accommodate bottles without wasting vertical space. Measure the tallest daily item before selecting an interior depth and layout.
A mirrored door can replace a separate mirror, but nearby lighting must remain even and unobstructed when the door opens for everyday access.
Keep only soap and one current routine item on the counter. A nearly clear surface makes daily wiping faster and lets the chosen material remain visible.
Frequently Asked Questions
What should I choose first: the bathroom sink or the countertop?
Choose them together because sink type controls cutouts, support, faucet placement, finished height, and cleaning edges, while countertop material limits compatible fabrication details.
Which bathroom countertop is easiest to keep looking orderly?
A low-pattern surface with an undermount or integrated sink simplifies visual lines, but orderly results depend equally on landing space and nearby closed storage.
Does every bathroom vanity need a backsplash?
Not every vanity needs the same backsplash, but the wall behind a sink requires an appropriate moisture-resistant finish and carefully detailed changes of plane.
How do I keep decor from crowding a small bathroom counter?
Keep one contained group beside the sink, move backups elsewhere, and protect a clear handwashing zone. If cleaning around it feels awkward, remove it.