50 Small Full Bathroom Ideas With a Tub

This post may contain affiliate links: full affiliate disclosure.
Keeping a tub can make a small bathroom harder to plan, especially when the sink, toilet, towels, and morning routines need the same limited space.
Start with the arrangement that resembles your room, then compare enclosure, tile, and storage ideas. You can borrow one improvement without copying an entire renovation.
These ideas show different ways to keep bathing useful and the room inviting. Some change only the visible details; others need measured plans and professional installation.
As an Amazon Associate I earn from qualifying purchases.
Layouts That Give the Tub a Clear Place
A good starting point is a room with proportions like yours. Compare the route between fixtures before falling for a particular tub shape or finish.
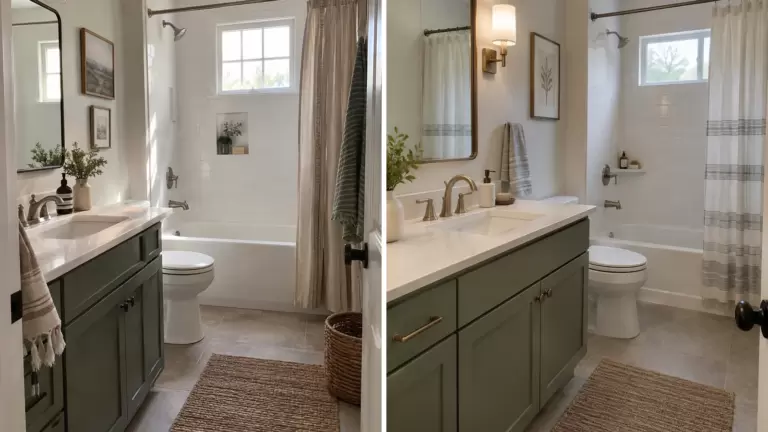
1. Run an alcove tub across the far wall
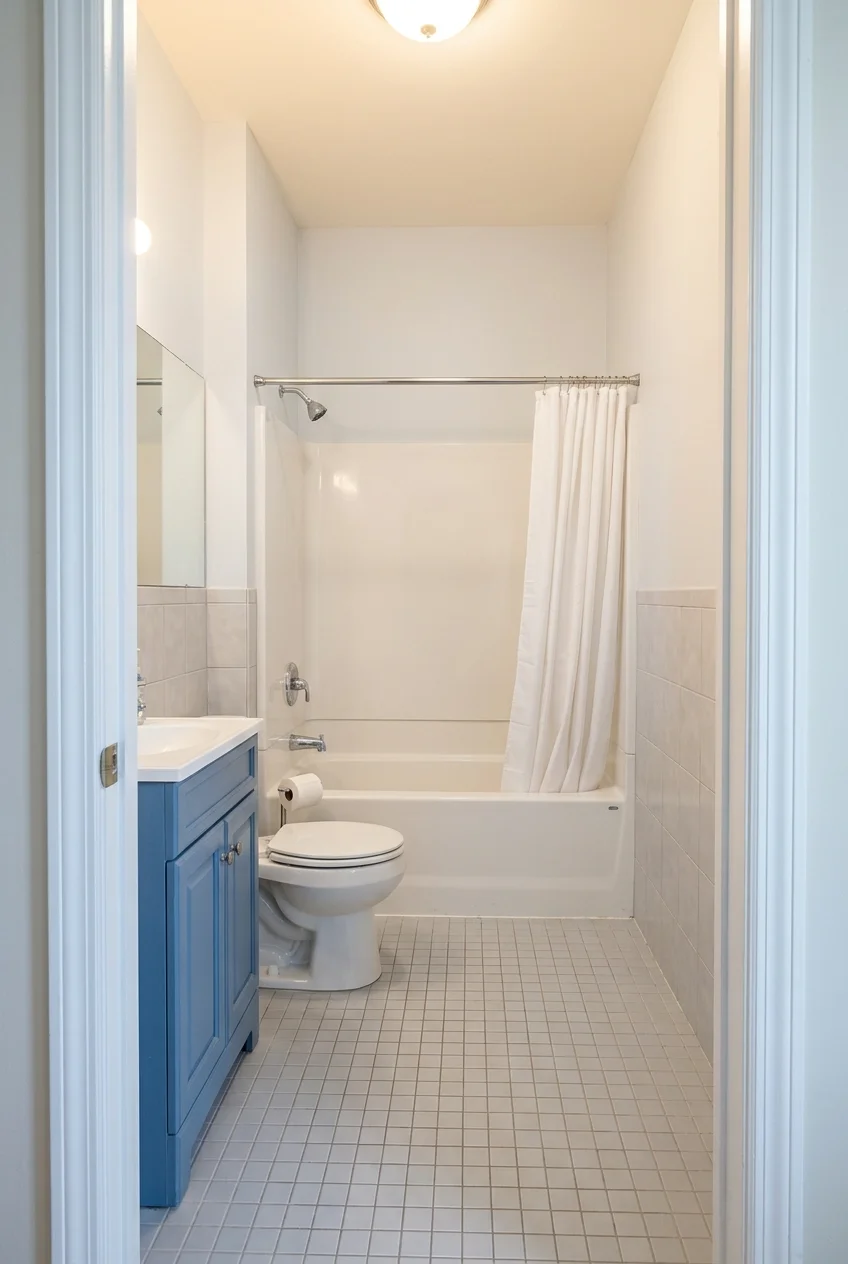
An end-wall tub gives a narrow bathroom a clear destination. Keep the vanity and toilet along one side so the center remains a usable approach.
Let the tub surround be the main backdrop, with a simple curtain pulled aside when dry. This reveals the full width from the doorway.
Preserving a workable fixture arrangement can avoid unnecessary plumbing changes. Replace a bulky vanity or intrusive cabinet before assuming the bathtub itself needs to move.
- Compare the actual tub apron with the doorway opening.
- Include the toilet and vanity in the measured plan.
- Check space to step out and reach a towel.
Have the finished layout checked against local requirements. A room photograph can suggest an arrangement, but it cannot establish required fixture clearances or safe access.
2. Choose a shallow vanity beside the tub approach
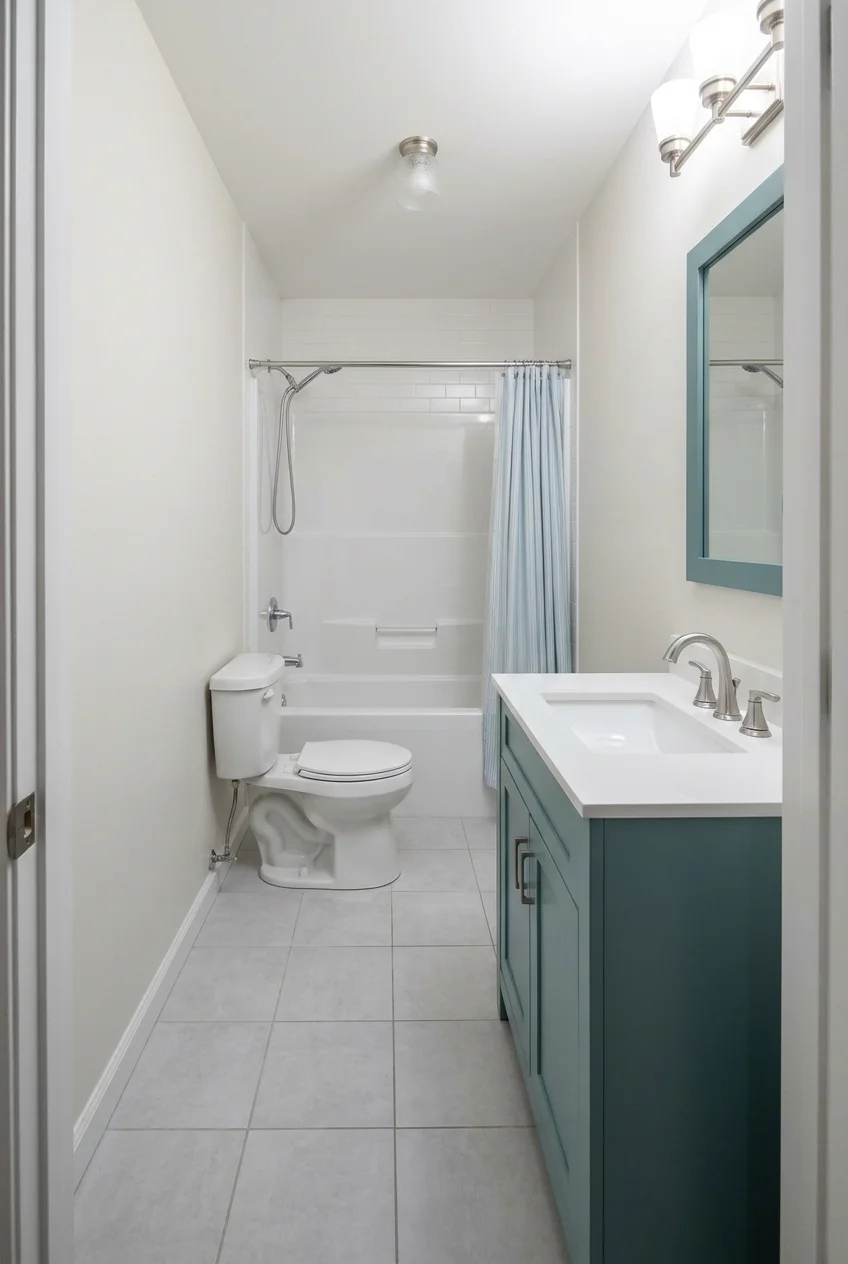
A vanity can be narrow from side to side yet still project too far into the room. Reduced depth addresses that particular squeeze near the tub.
Use a sink designed for its matching shallow cabinet, rather than forcing a large bowl onto a narrow counter. Check usable handwashing space around the faucet.
Tape the proposed front edge onto the floor and try the route with the bathroom door open. Include handles, which can catch hips in tight passages.
Practical tip If the shallower cabinet loses essential storage, add a mirrored cabinet above it before choosing an equally deep freestanding tower beside the bathing area.
3. Place the tub lengthwise in a narrow room
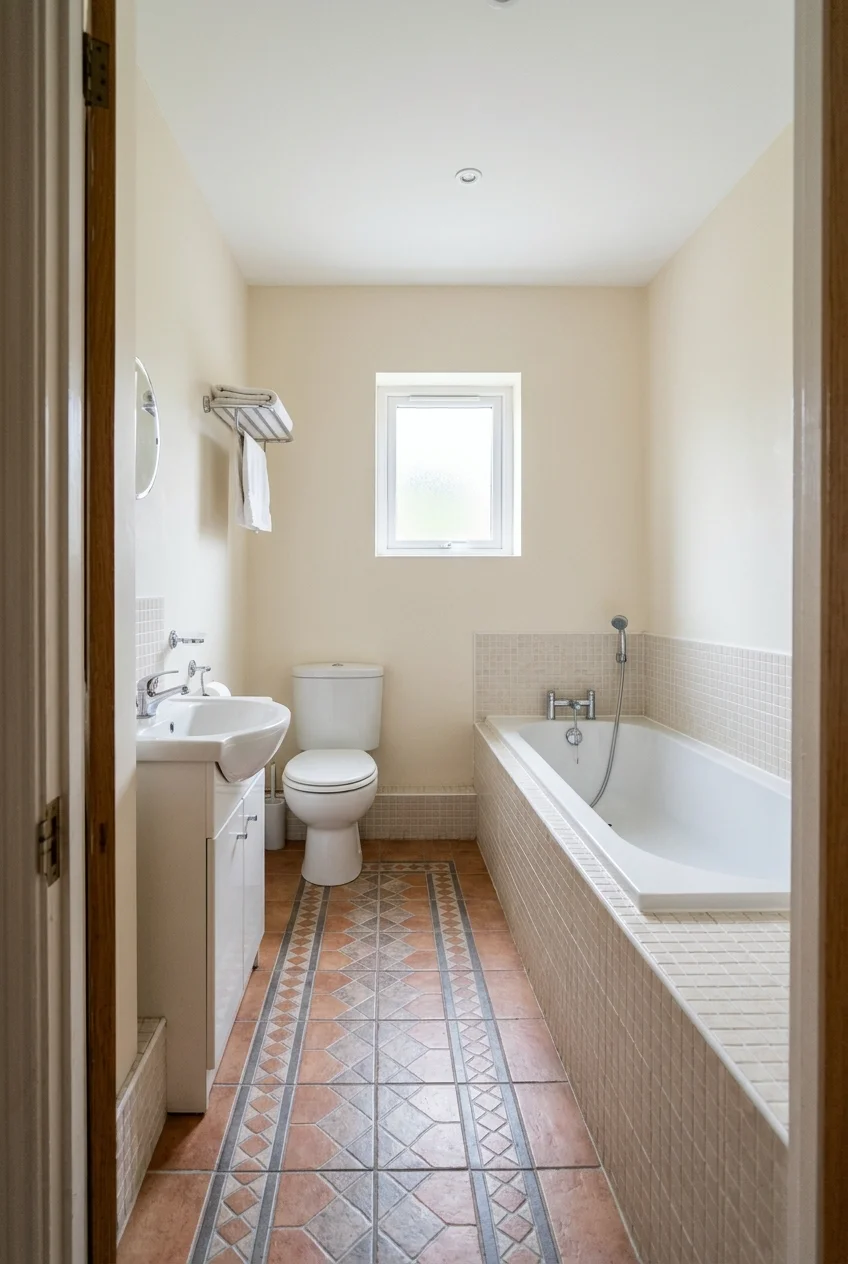
A side-wall tub suits a bathroom whose far wall cannot hold the full bathing zone. Its long apron can guide the eye toward a window.
Keep the opposite fixtures compact and group their storage above counter level. A deep cabinet facing the tub often creates the pinch point in this arrangement.
The entry position matters as much as room length. Sketch the door swing, then confirm you can approach the sink without squeezing between two projecting corners.
A curtain contained within the alcove keeps the long edge simple. Glass may work too, provided the entry opening lands beside genuinely usable standing space.
4. Compare a shorter tub by its bathing well
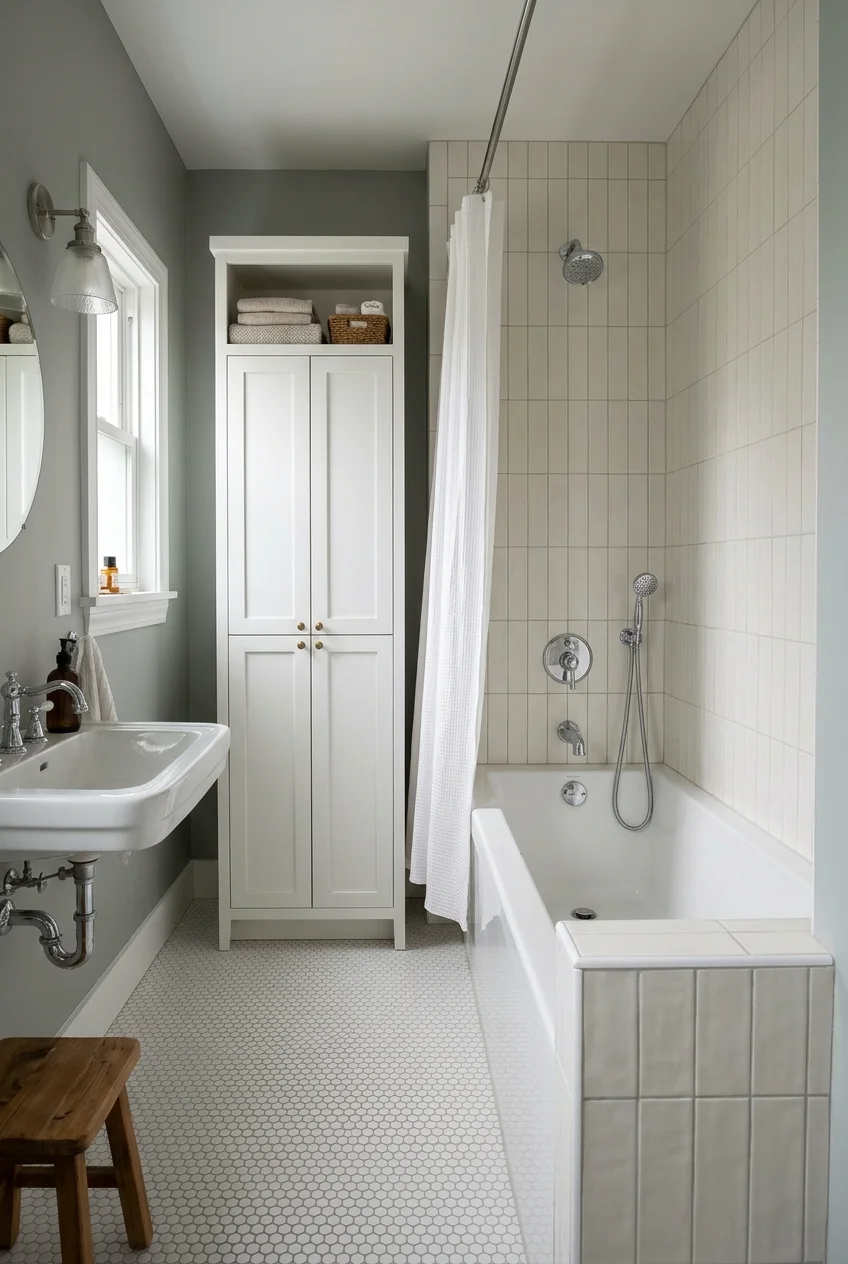
A compact soaking tub can release wall length for a small storage cabinet. Its shorter outside dimension does not tell you how comfortably you will bathe.
Compare the interior bathing well, backrest angle, overflow height, and step-over height. A deeper basin may allow upright soaking while making entry harder for some users.
The MAAX bathtub shopping guide distinguishes outside size from bathing-well dimensions. Use the selected model’s drawing, rather than a photograph, to assess both.
- Check the finished alcove and required installation opening.
- Confirm drain location and available hot water.
- Assess the filled, occupied load with a qualified professional.
- Try the intended bathing position when a showroom sample is available.
Shortening the tub only helps if the released strip is usable. Avoid creating a narrow gap that traps water or cannot be reached for cleaning.
If the shorter option feels cramped inside, keep the existing tub length and look for savings at the vanity instead. Comfort is the reason to retain it.
5. Use a back-to-wall soaker when baths take priority
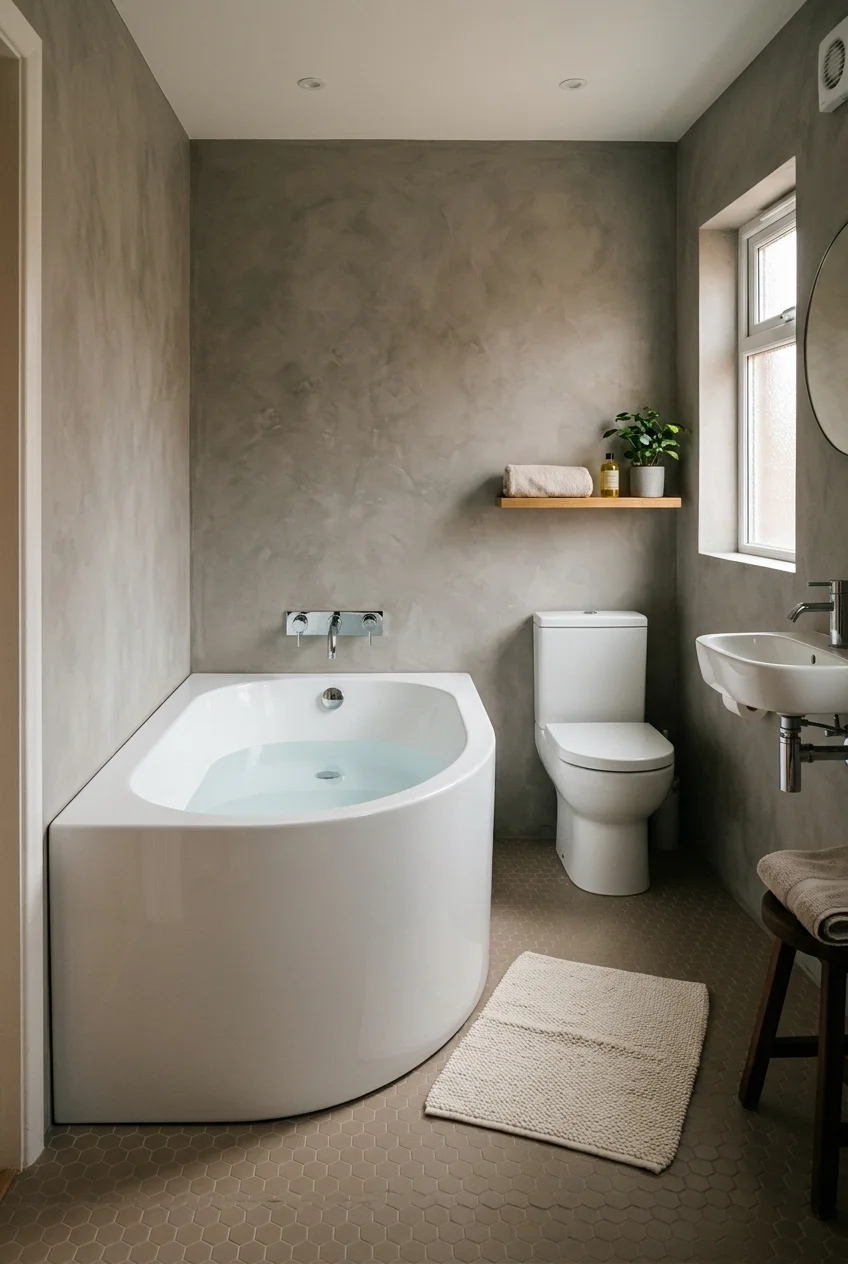
A back-to-wall tub offers a sculpted front without leaving an awkward cleaning gap behind it. It can suit a compact full bathroom used mainly for baths.
Choose a model intended for that installation, with a compatible faucet and accessible waste connection. A freestanding tub pushed against a wall is a different proposition.
Keep enough room beside the curved front for stepping out and cleaning. The tub should sit within a planned bathing area rather than wedge between fixtures.
Setup note If this bathroom also needs daily showers, prioritize a tub designed for a shower enclosure. A soaking-only arrangement will not satisfy that household routine.
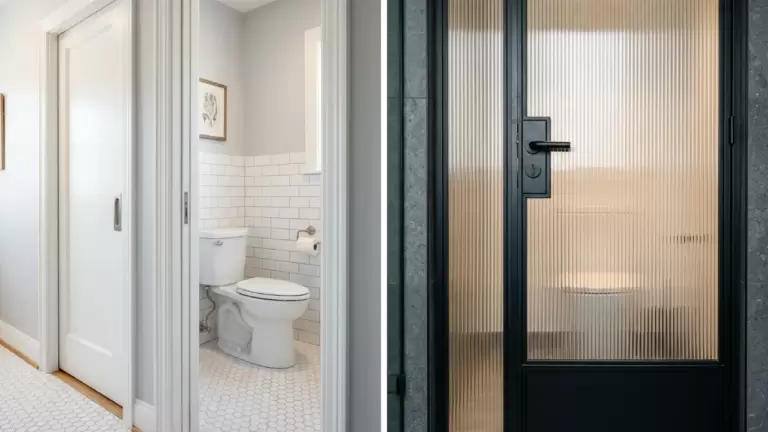
6. Replace an obstructive door swing with a pocket door
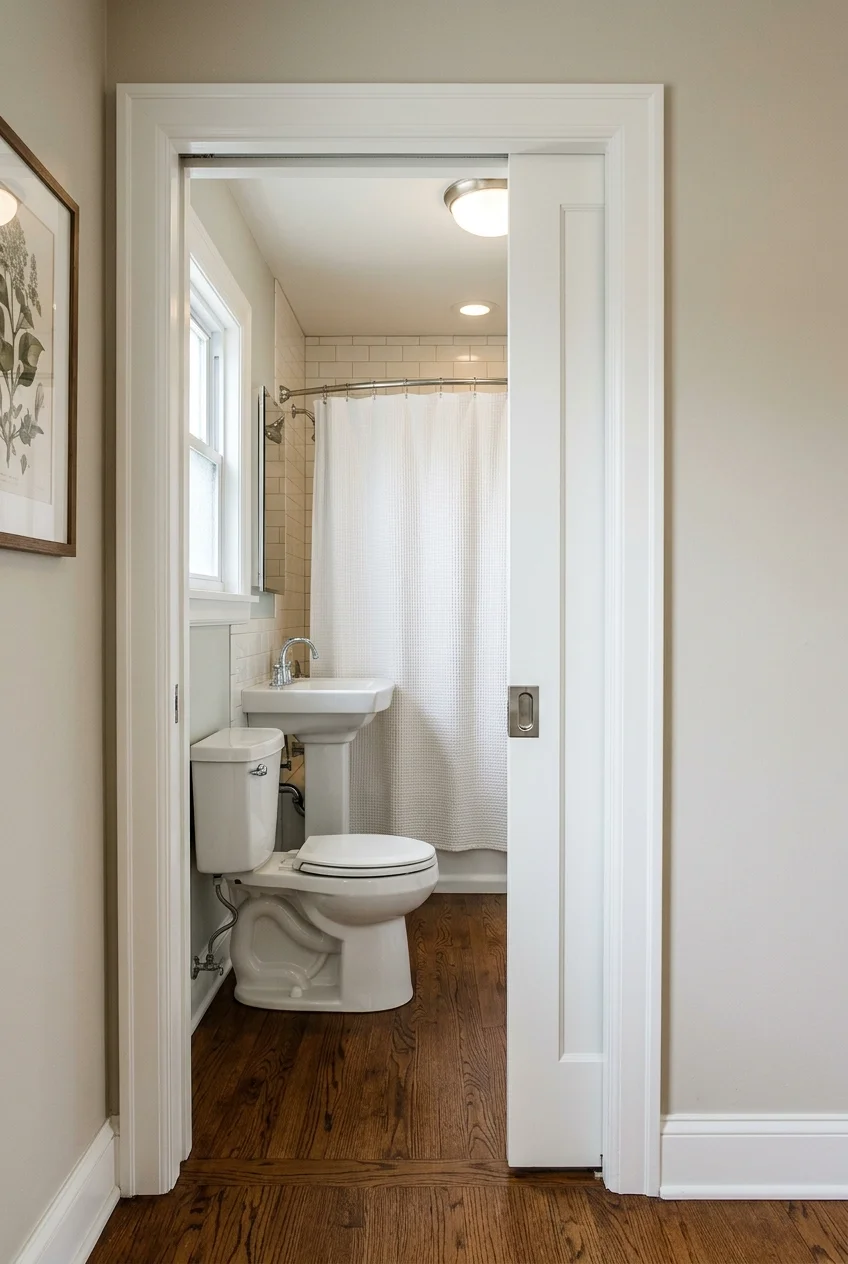
A pocket door can free the floor area that an inward-swinging door occupies beside the tub. The improvement comes from removing that collision, not enlarging the room.
Check the wall the door would slide into before selecting hardware. Pipes, wiring, structural conditions, and the required pocket length can rule out an apparently simple conversion.
Plan the privacy latch, usable handle, and release from outside for emergencies. Confirm that household members can operate the door without pinching or awkward reaching.
- Map the existing doorway and proposed pocket with a qualified installer.
- Select a compatible frame, door, and bathroom privacy hardware.
- Coordinate wall fixtures before closing the pocket wall.
A pocket wall also changes where you can attach accessories. Do not drive long screws through it to hang a towel bar after the door is installed.
Where a pocket is impractical, discuss another approved door arrangement with the installer. Protect the hall route as well as the space inside the bathroom.
7. Try a shorter toilet projection beside the tub
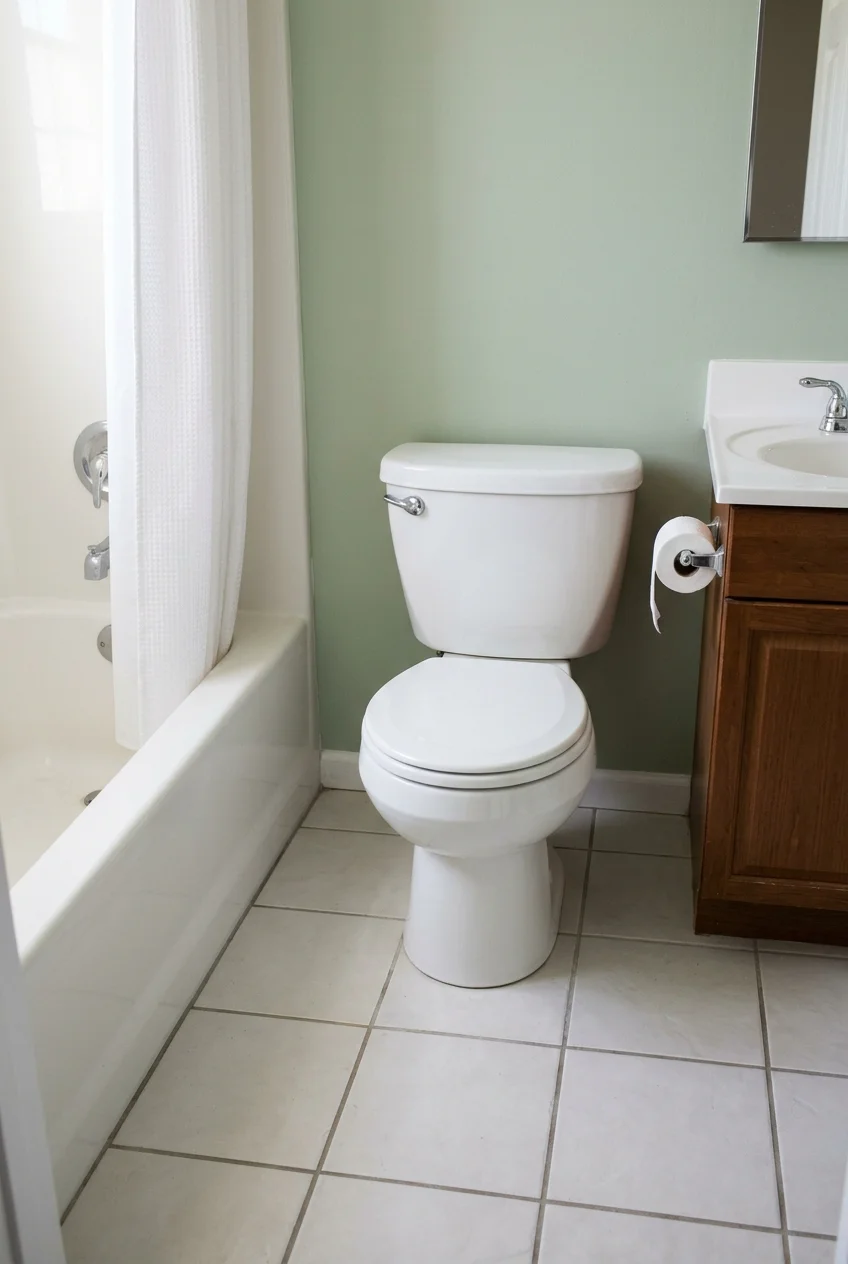
A compact toilet can open the view past the tub corner when the existing bowl projects into the walkway. Compare complete fixture depth rather than seat shape alone.
Round-front models are worth comparing, but their dimensions vary. Check rough-in, tank clearance, seat comfort, and the floor space required by the actual selected fixture.
Mark the replacement footprint before ordering. If the problem is spacing beside the toilet rather than in front, a shorter bowl may not solve it.
8. Tuck a soaking tub beneath a sloped ceiling
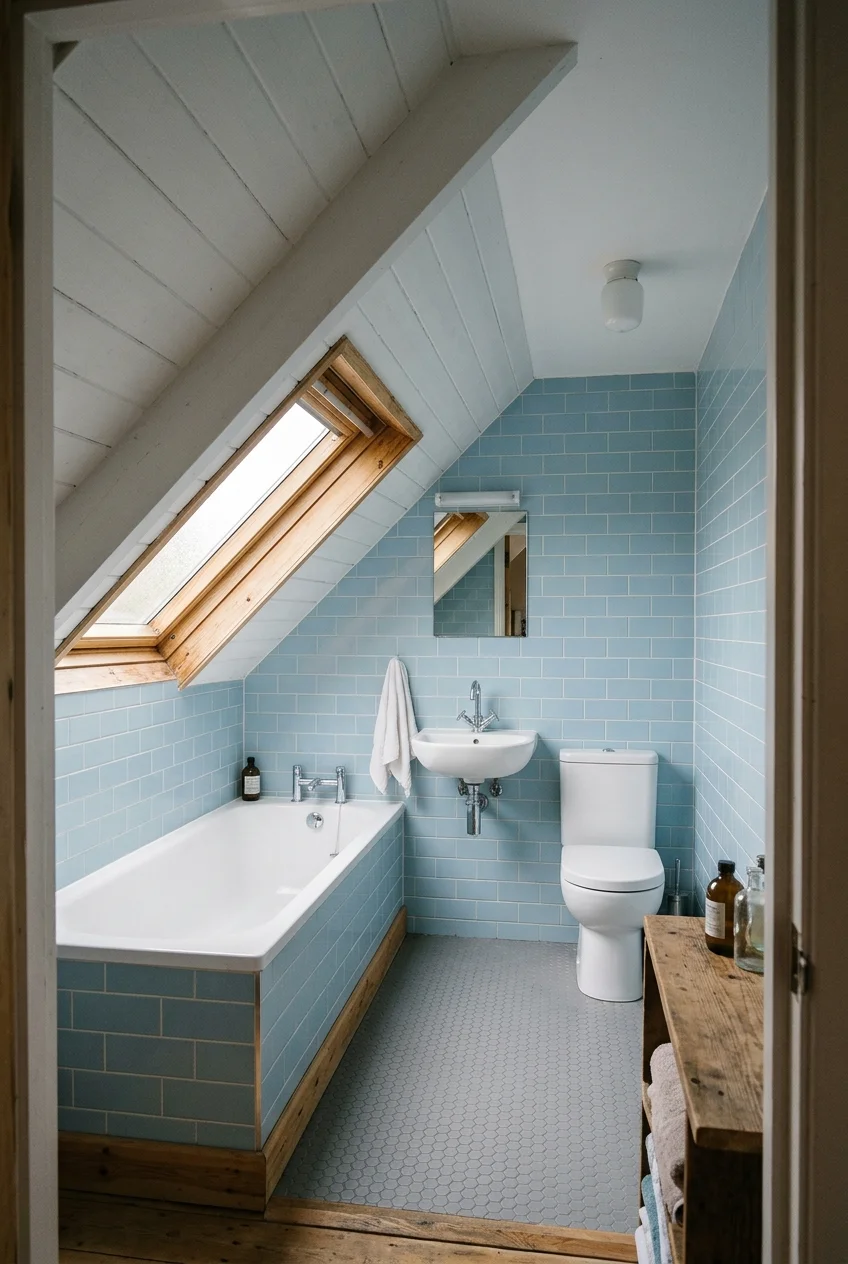
The low side of an attic bathroom can work for seated bathing while the taller side serves the sink. Keep the tub entry where standing feels comfortable.
Check headroom along the entire approach and step-out area with a designer or contractor. The attractive part of the slope should not dictate an awkward entry.
A shower over this tub needs adequate standing height where someone will actually stand. Otherwise, reserve the alcove for bathing and reconsider the room’s daily shower needs.
Practical tip Use a simple sloped wall finish and avoid hanging shelves above the bather. The ceiling geometry already gives this small bathing nook its character.
Curtains, Glass, and Surrounds That Change the View
The tub enclosure occupies a large part of a small room’s view. Choose its opening and coverage for everyday use before comparing the decorative finish.
9. Frame the tub with a higher curtain line
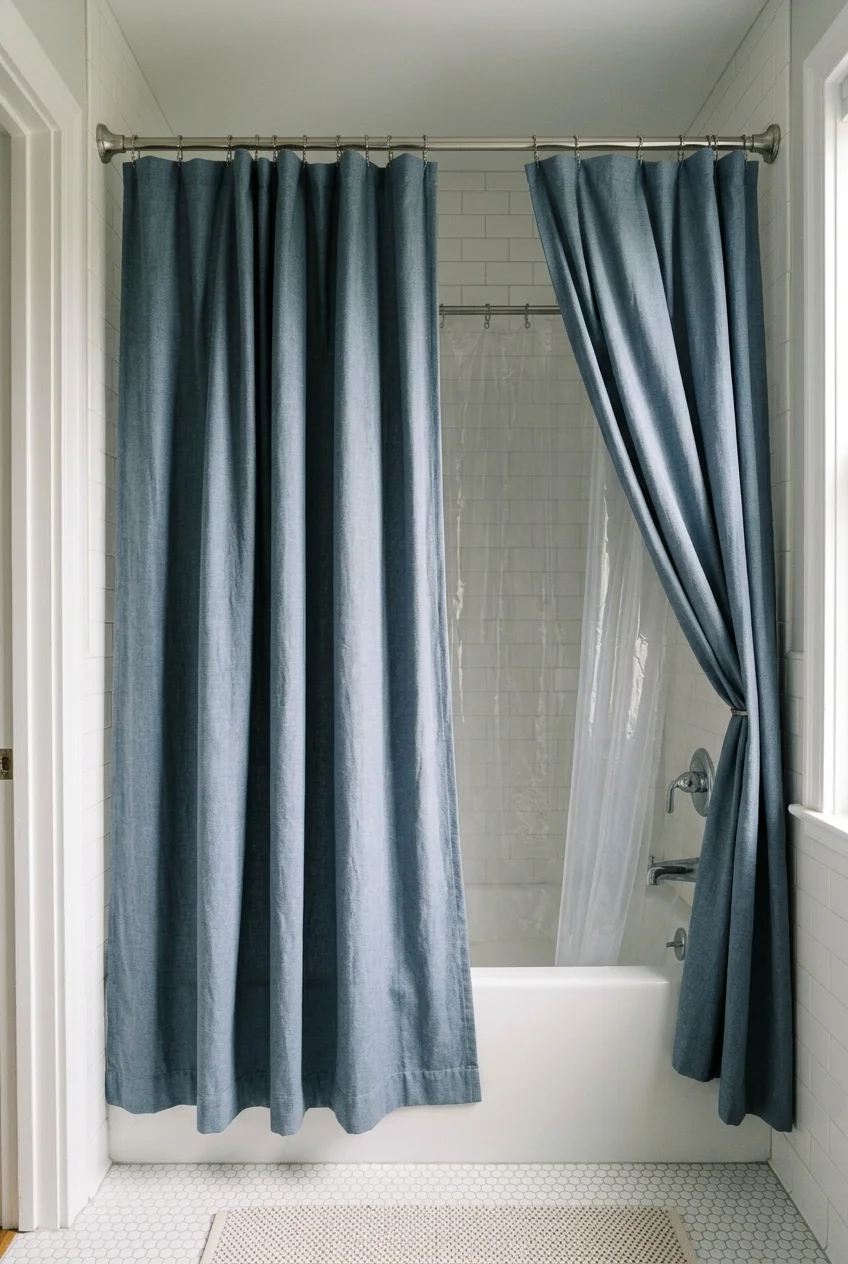
A higher curtain rod makes the bathing alcove read as a taller opening. It works especially well when a low existing rod cuts across attractive tile.
Measure for the curtain and liner before relocating anything. The liner must hang inside the tub as intended, while the outer fabric avoids dragging on the floor.
Keep the curtain easy to open fully and able to dry after use. Leaving fabric bunched permanently in a damp corner defeats the cleaner visual line.
10. Let a light-filtering curtain top brighten the tub
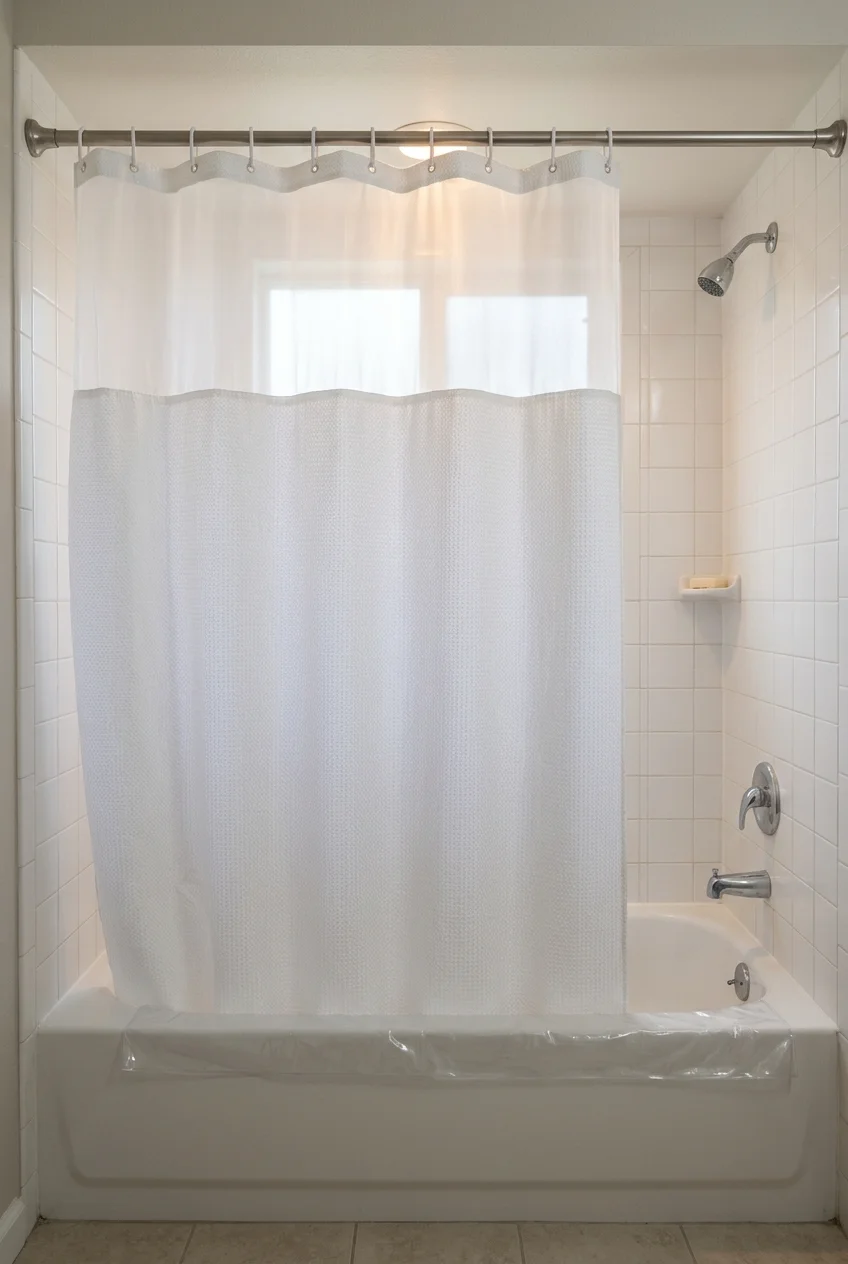
A curtain with a translucent upper band admits room light while keeping the lower bathing area screened. This helps when the ceiling light sits outside the alcove.
A downluxe waffle curtain with snap-in liner (paid link) includes a mesh top. Check the listed 71-by-74-inch size against your rod and tub.
The mesh section does not replace bathroom ventilation or guarantee privacy from every angle. Check sightlines from the doorway, particularly if the room is shared.
Follow the product’s care instructions for its detachable liner. A removable inner layer is useful when you want to clean splash residue without dismantling the curtain.
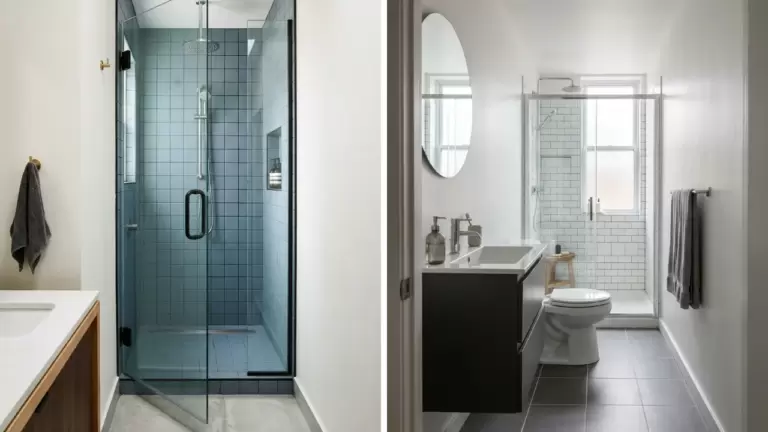
11. Reveal the tile with a fixed glass tub screen
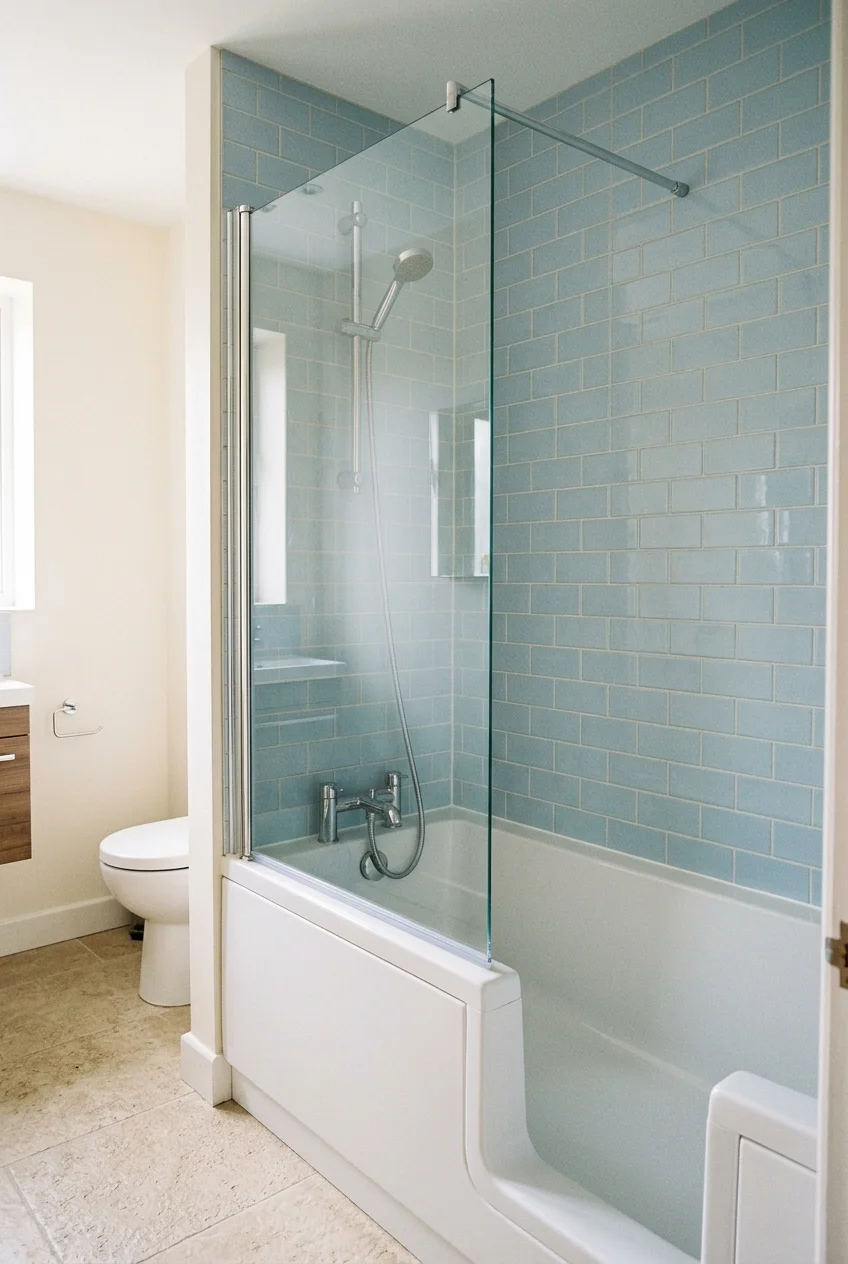
A single clear screen keeps the tub wall visible from the doorway. Place it at the shower end so the other end remains available for entry.
Coverage depends on the shower position and the screen’s size, so discuss splash control with the installer. An open panel is less forgiving than a full enclosure.
Check the tub’s approved mounting surface, screen support, and available access before ordering. Specify bathing-enclosure safety glass and follow the complete manufacturer installation requirements.
Practical tip If you regularly lean across the tub to bathe a child, test that reach first. A fixed screen can obstruct care even when the room looks open.
12. Use sliding glass where a swinging panel would collide
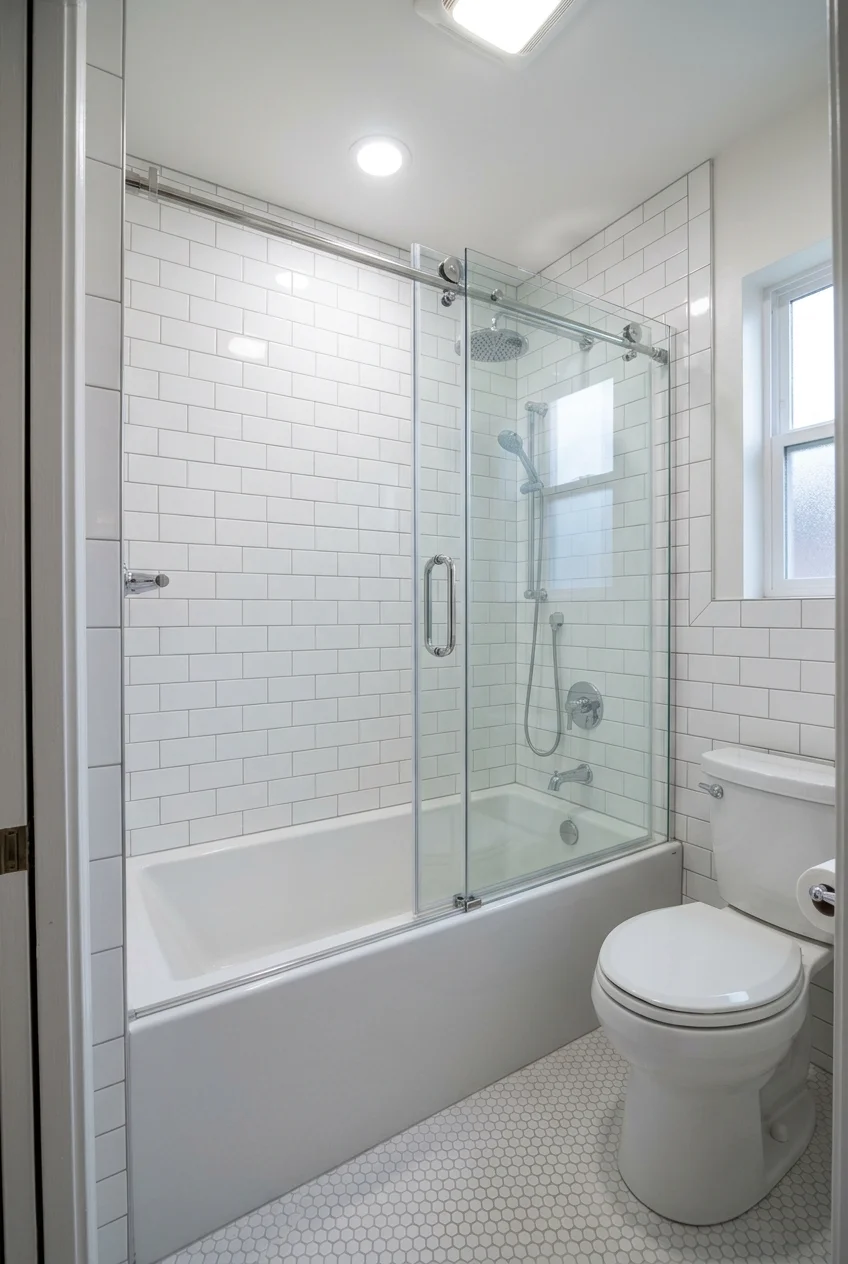
Sliding tub doors keep the opening movement along the tub rather than into the walkway. They can suit a room with a toilet close to the apron.
Compare the actual clear opening with your bathing needs. Two overlapping panels never open the entire tub front, which matters for cleaning and helping another person bathe.
Follow Delta’s enclosure measuring guidance and the selected door’s specifications. Finished opening width and height both matter, especially when existing walls are uneven.
- Verify tub-rim width and approved attachment methods.
- Check the panel opening beside the toilet and vanity.
- Look at the bottom track’s cleaning access.
- Confirm handles do not interfere with nearby fixtures.
Clear glass shows the tile but also shows water residue. Choose a door you can realistically wipe and maintain rather than assuming an invisible barrier stays invisible.
13. Fold the glass aside for wider bathing access
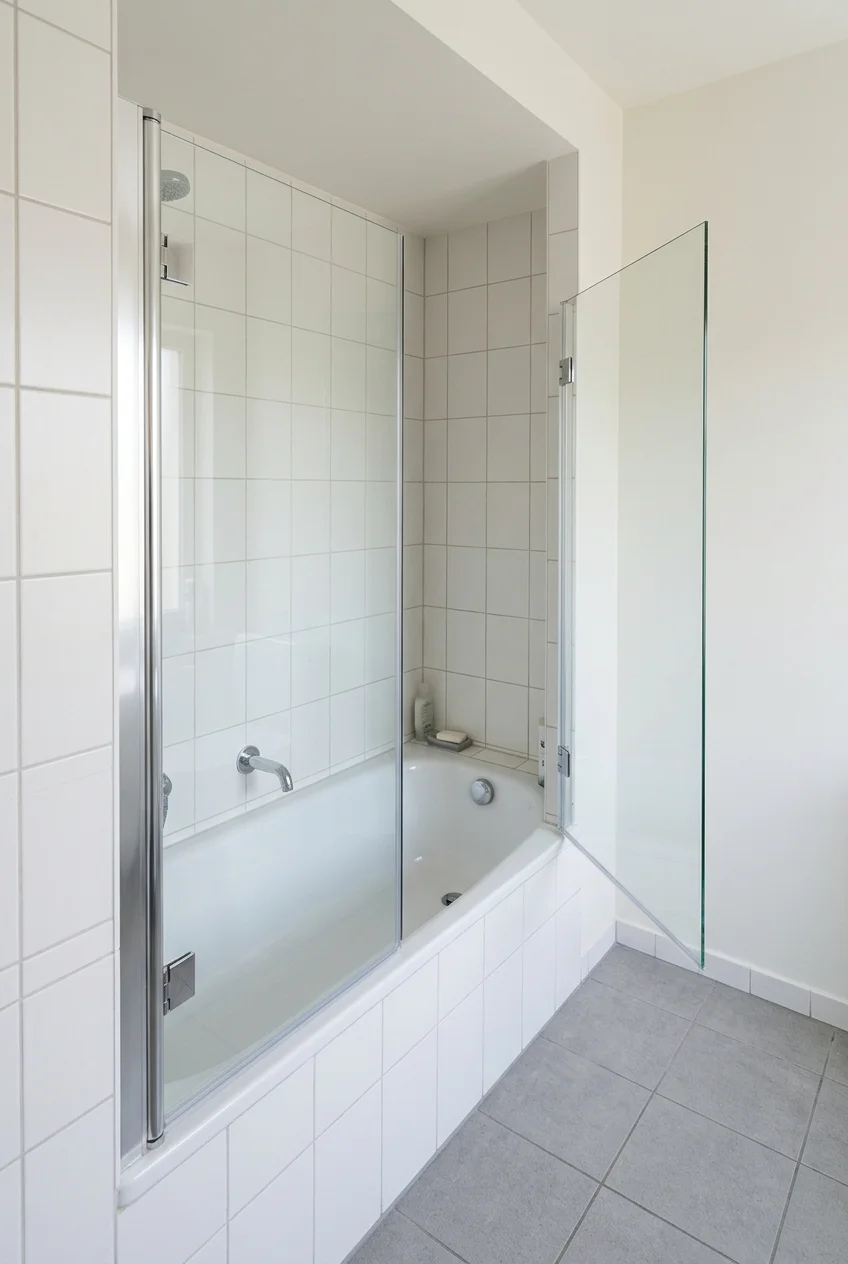
A folding tub screen offers a middle option between a fixed panel and a curtain. Its articulated sections can move aside when you need more access.
The fold direction is product-specific. Some screens pivot outward, so the room still needs space clear of the toilet, vanity, and anyone using them.
The MAAX Axial Access screen illustrates outward-folding panels. Check the installation drawing and folded position rather than assuming every folding screen parks inside the tub.
Choose this for its access benefit, then assess splash coverage in the working position. A folded screen is an access arrangement, not a showering arrangement.
14. Choose smooth wall panels instead of a busy tile grid
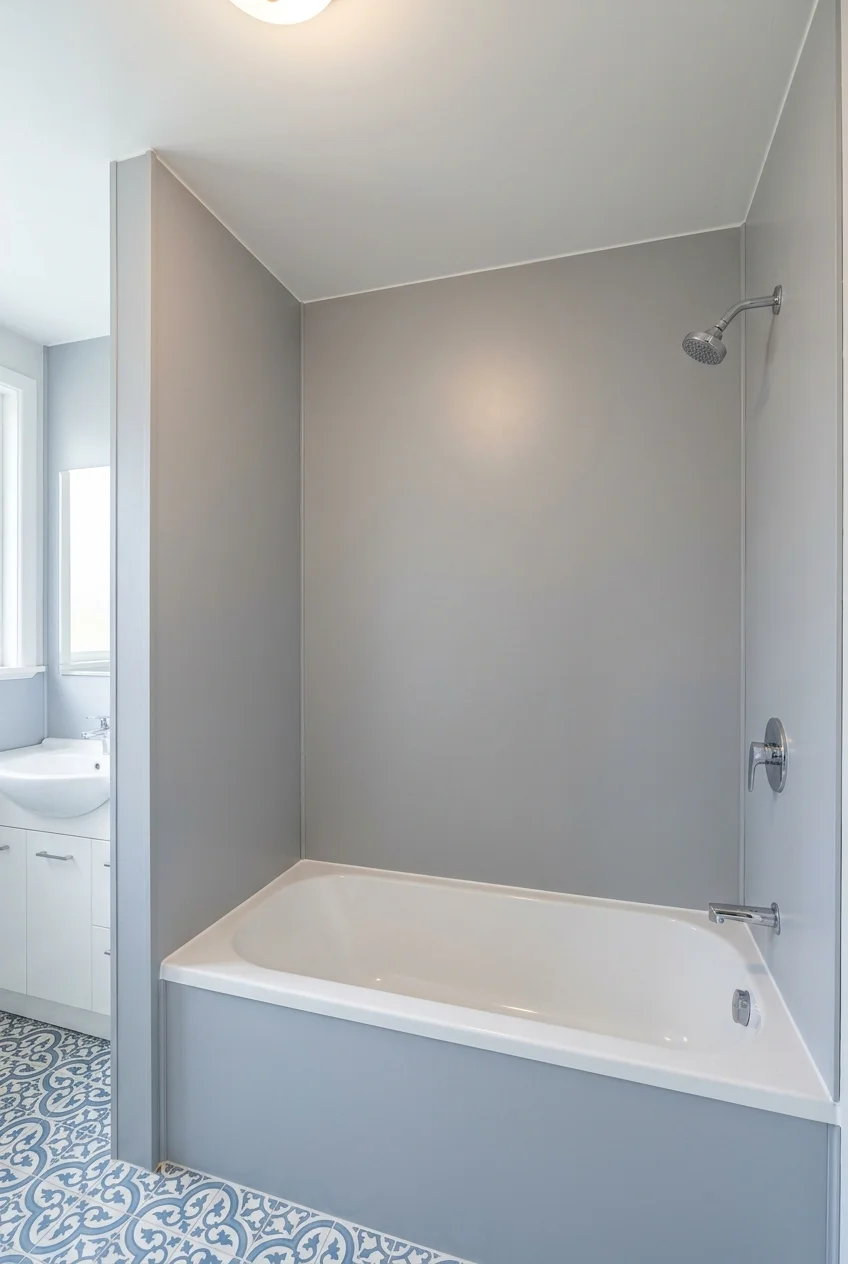
A smooth panel surround gives the tub a broad, quiet backdrop. It is useful when the room already has a patterned floor you want to keep.
Select a system designed for tub-shower walls, with compatible trims, corners, and sealants. Decorative wall cladding intended for dry rooms is not an interchangeable substitute.
Compare the panel layout around the faucet, window, and existing tub flange before purchase. Fewer visible seams can look simple while still requiring careful installation.
Choose a restrained surface pattern and carry its background color onto the dry walls. That connection makes the enclosure feel part of the room rather than a separate insert.
Tile and Wall Treatments With a Distinct Point of View
Choose the surface you want to notice first: the floor, the bathing wall, or the tub front. Give surrounding finishes a quieter supporting role.
15. Carry the tub tile all the way to the ceiling
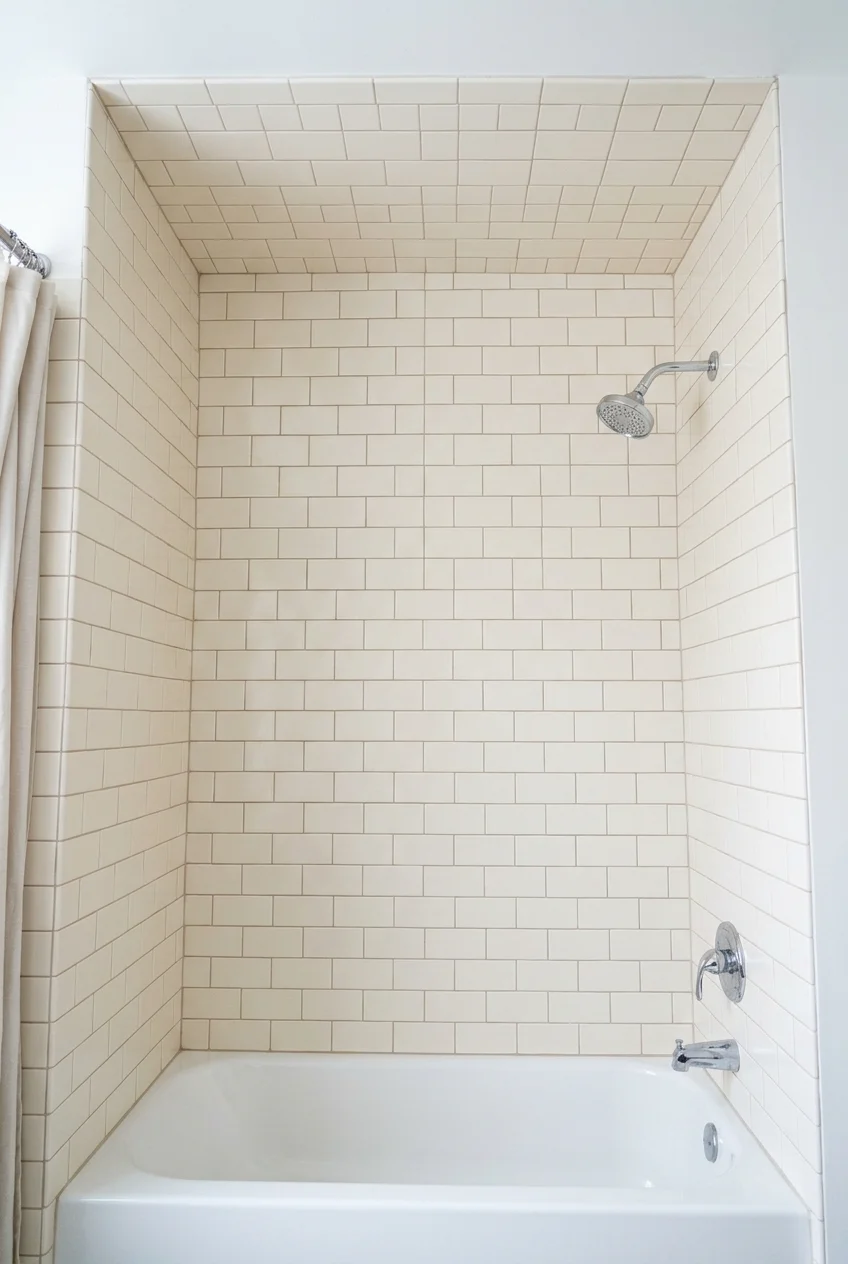
Full-height tile gives an alcove a finished outline without a painted strip above it. The continuous field is particularly effective behind a curtain that stays open.
Plan the top course and both side edges before installation. A balanced layout avoids leaving a conspicuously thin sliver where the tile meets the ceiling.
Tile is the finish, not the waterproofing system. Have the installer coordinate the substrate, tub connection, corners, and penetrations with the chosen wet-area assembly.
Setup note If the ceiling is visibly uneven, discuss how the final course will be cut. A deliberate perimeter detail can look calmer than forcing identical top cuts.
16. Stack slim tile vertically around the bath
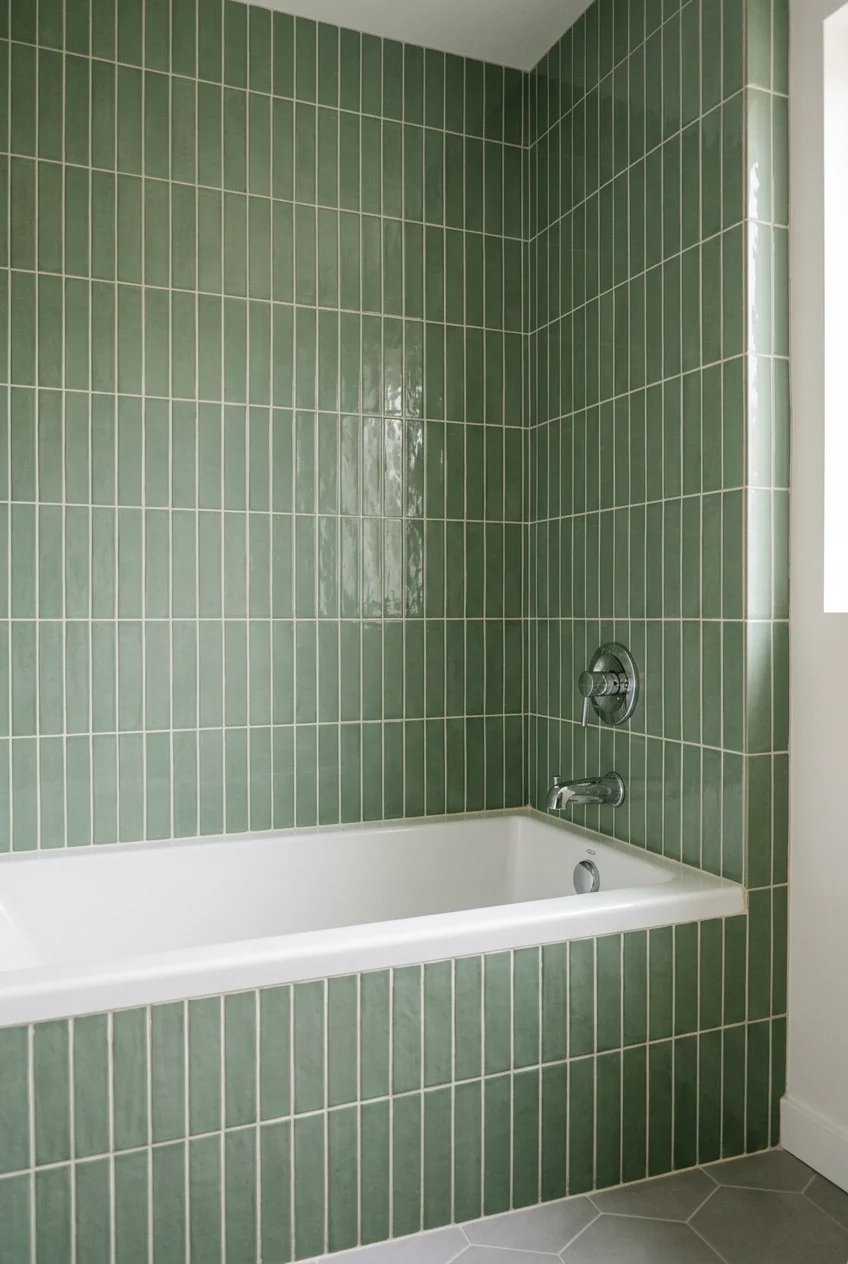
Vertically stacked rectangles give the tub wall an orderly upward rhythm. Keep grout close to the tile color when you want texture without a strong grid.
Use one orientation across the main wall and returns, then resolve the niche separately. Preview the corner cuts so the pattern does not suddenly change scale.
Pair the vertical walls with a simpler floor pattern. The contrast between upright lines and a quiet horizontal surface makes the arrangement easier to read.
17. Make large-format tile the quiet backdrop
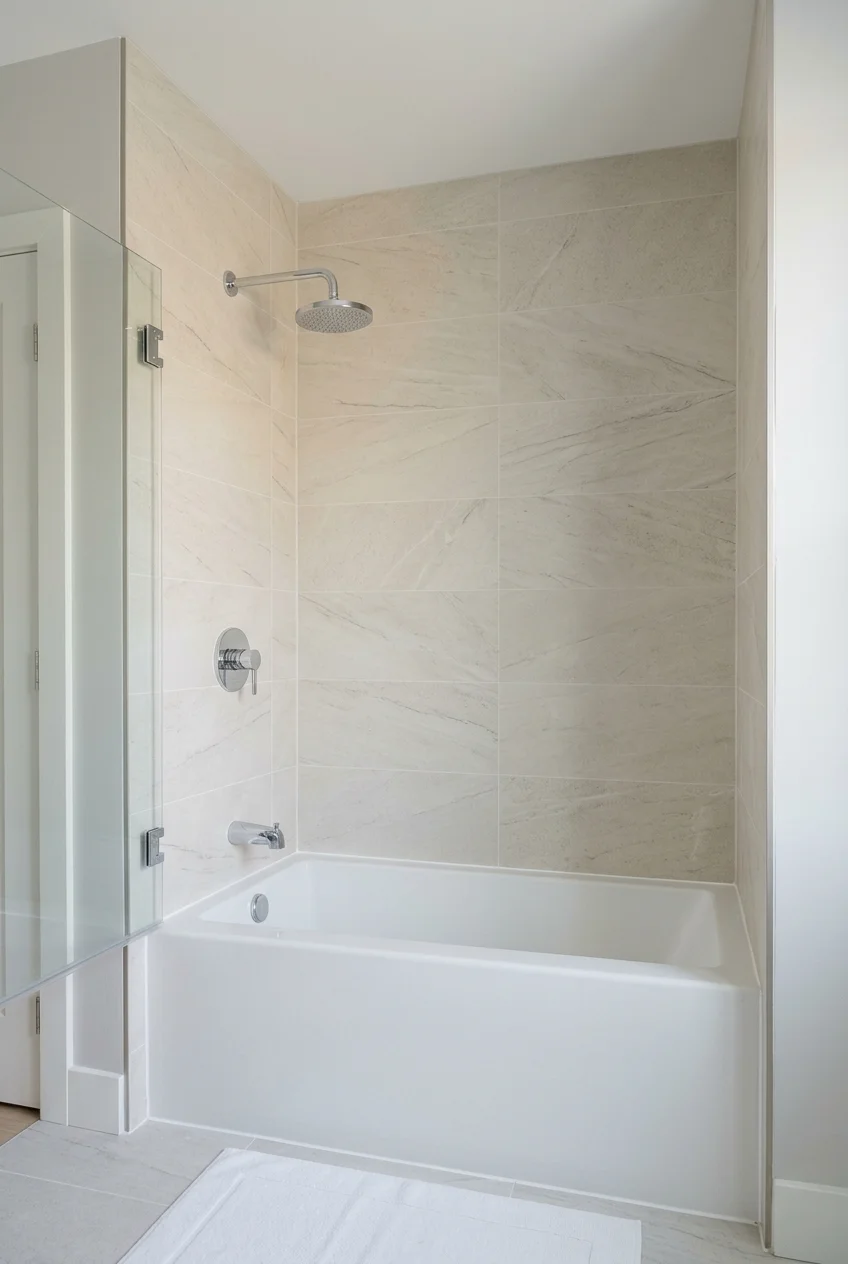
Large-format porcelain can reduce the number of visible joints around a tub. Choose subtle movement so the small room does not become a collection of competing veins.
Compare a layout drawing before ordering. Big tiles may still produce awkward cuts around a narrow end wall, niche, or window if placement is an afterthought.
The installer needs suitable wall preparation and setting materials for the selected tile. Large pieces make uneven surfaces and careless alignment easier to notice.
For contrasting surface ideas, explore these bathroom tile combinations and compare samples together. Keep the floor’s suitability for wet use separate from its appearance.
18. Let a patterned floor carry the room
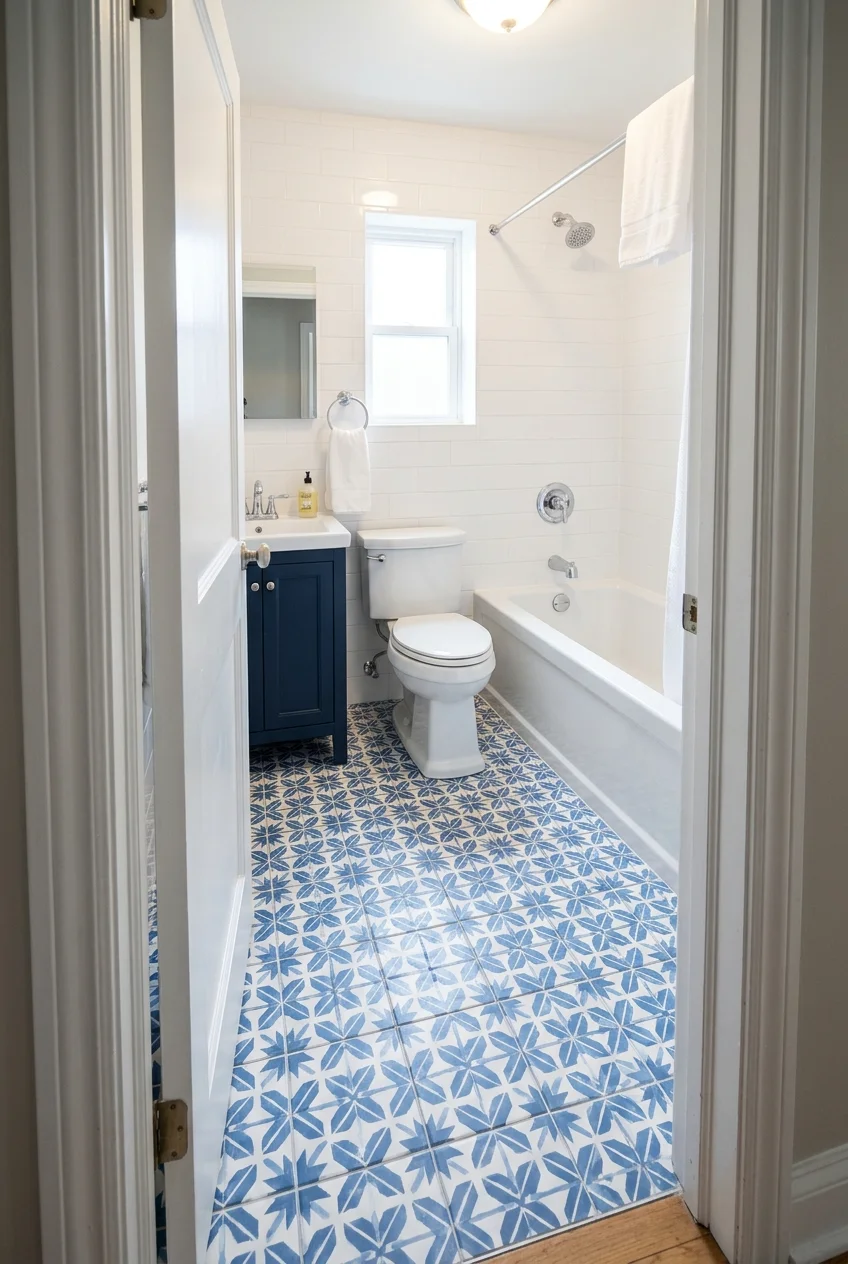
A patterned floor gives a small bathroom a clear focal surface while the tub and walls stay straightforward. Repeat one pattern color in a towel or cabinet.
Lay out the pattern before installation so the doorway view feels balanced. Check how the design ends at the tub apron rather than centering only on the room.
Use tile approved for the intended bathroom floor application. A decorative wall tile or a product photograph does not establish performance under wet bare feet.
19. Outline a small mosaic floor with a simple border
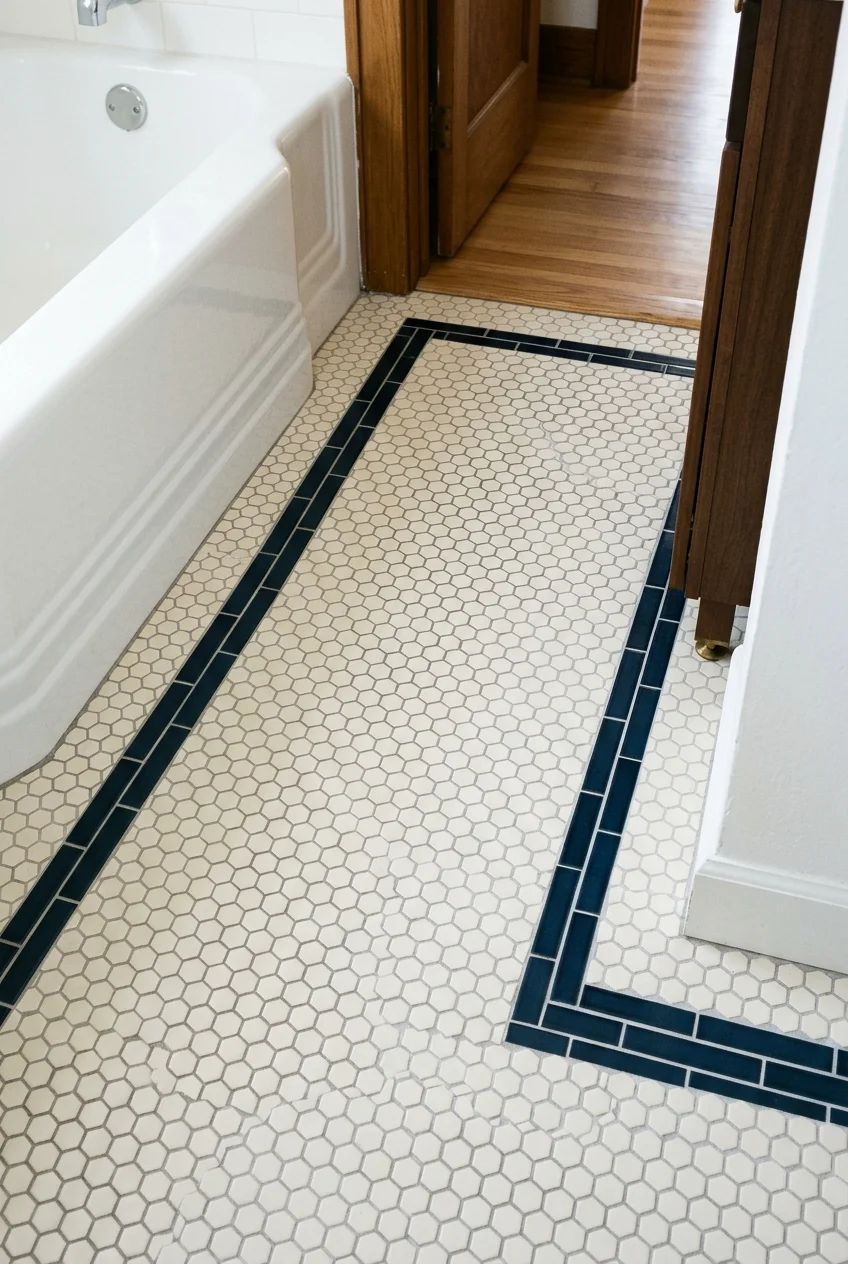
A restrained border gives a small mosaic floor a deliberate edge beside a plain tub. It can provide detail without filling every wall with pattern.
Ask the installer to map the border around door casings and fixture footprints. Tiny leftover strips can look fussier than omitting the border from an awkward corner.
Mosaics introduce many grout joints to clean. Compare that maintenance with the visual effect before choosing a high-contrast combination for the entire floor.
20. Define the bathing wall with one strong tile color
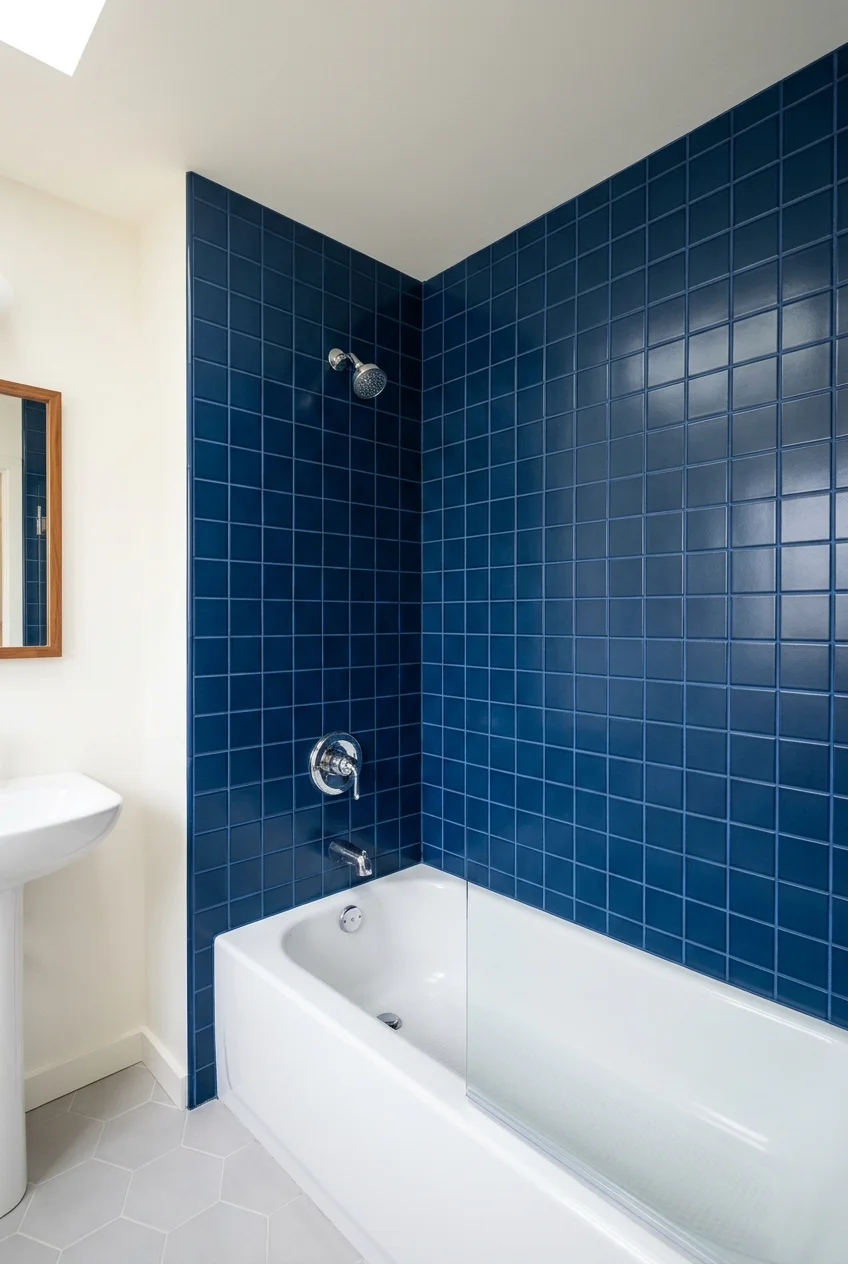
A saturated tub wall can make the bath feel deliberately placed instead of squeezed in. Limit the color to the enclosure and keep the adjoining dry walls quieter.
Choose a tile whose surface interests you at close range, such as a softly varied glaze. That supplies detail without requiring another shelf of decorative objects.
Carry the color onto both alcove returns so the bathing area reads as a complete zone. Resolve the outside edges with a planned trim detail.
21. Face the tub apron with the floor tile
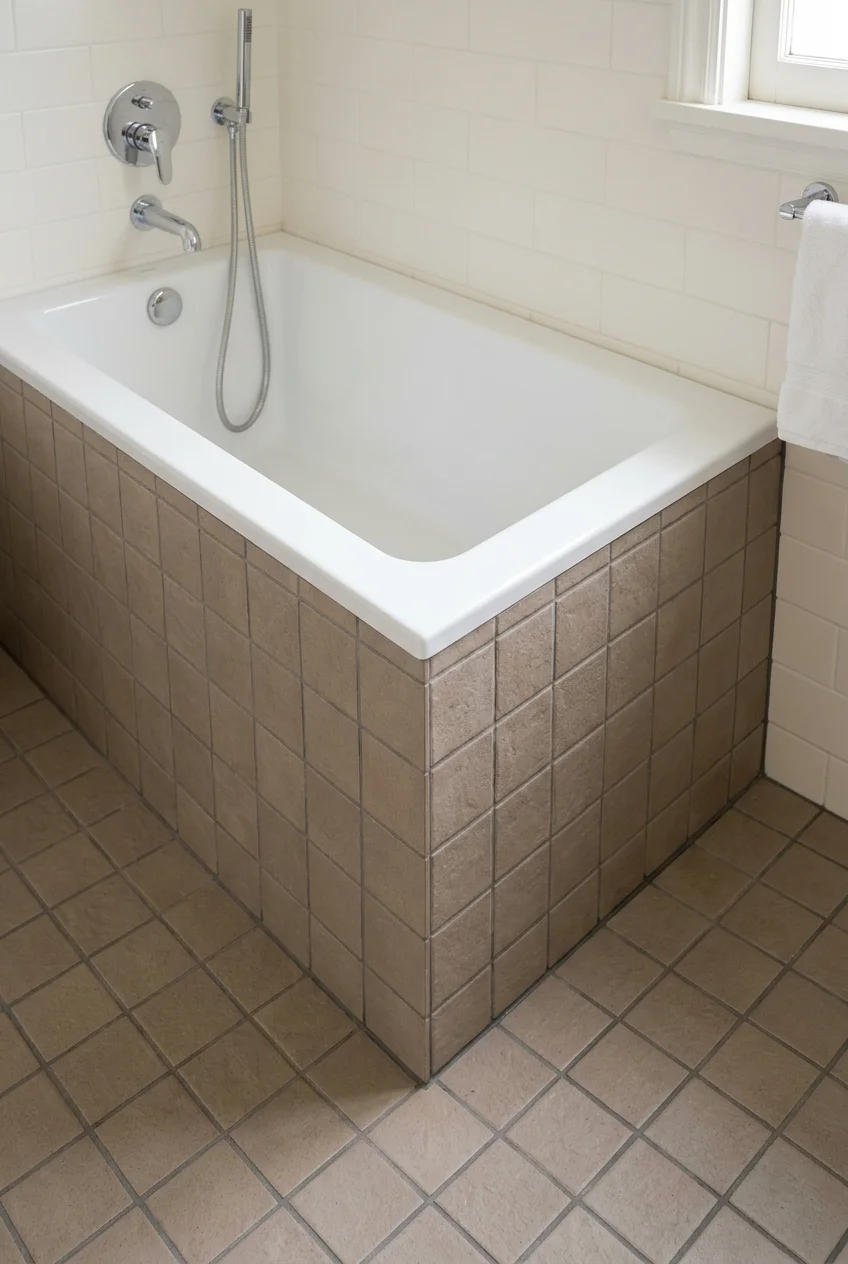
Wrapping the tub front in the floor tile can make the bath feel integrated with the room. It works best with a restrained pattern and carefully resolved corners.
Specify a tub and enclosure designed for a tiled apron. Do not tile over an acrylic front unless the manufacturer explicitly permits the proposed assembly.
Plan tile thickness, edge trims, and any required service access before construction. The finished apron should not push into floor clearance you were relying on.
Keep the tub rim visibly separate from the tiled front. That clear material junction makes the built-in detail look intentional rather than like floor tile climbing over everything.
22. Continue a tile wainscot onto the dry walls
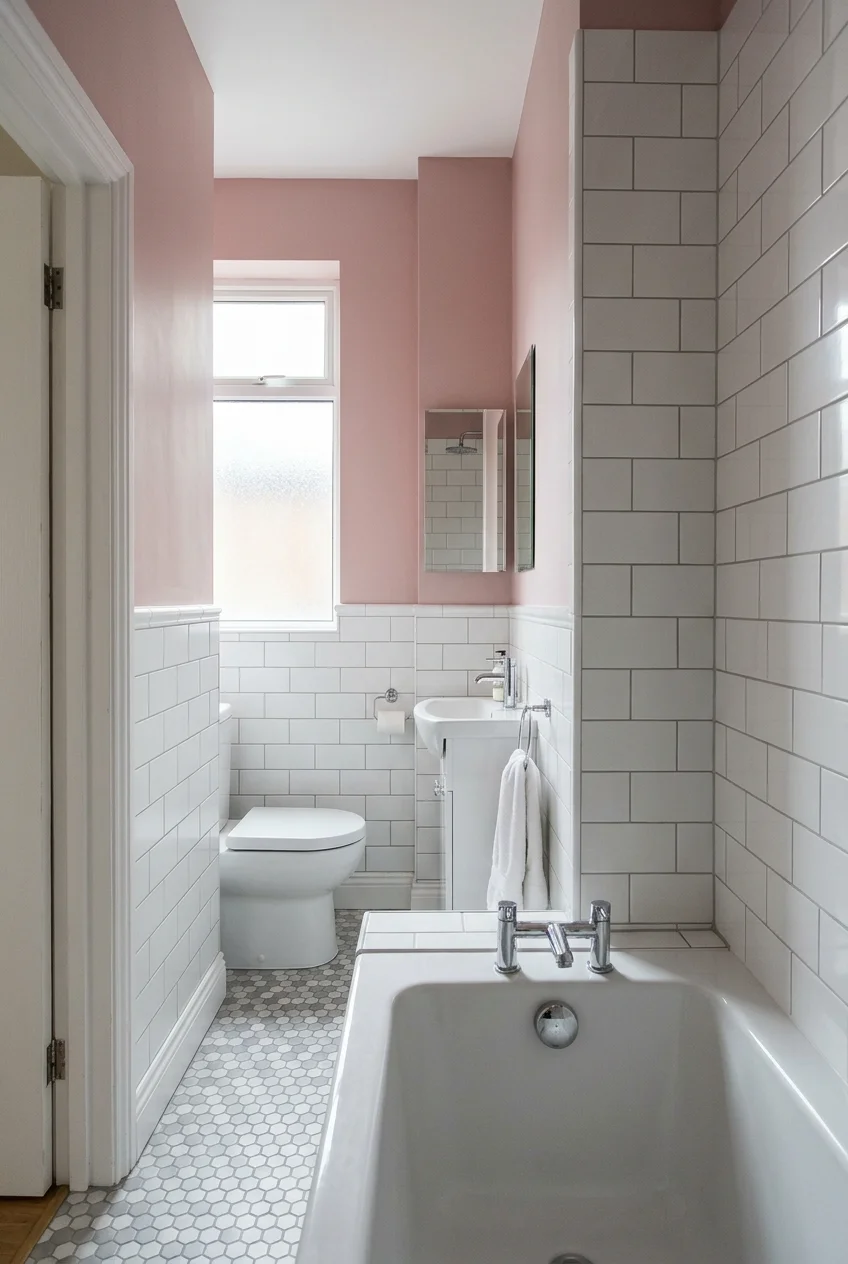
A lower tile band outside the enclosure connects the sink and toilet to the tub. It gives the room a shared horizontal line without tiling every surface.
Coordinate its height with the vanity backsplash, window sill, and switch locations. A line that nearly meets several different features can look accidentally uneven.
Use a finished cap or edge profile where tile meets paint. Keep the full shower surround separately planned for water exposure rather than stopping waterproofing at wainscot height.
23. Keep sound vintage tile and change its surroundings
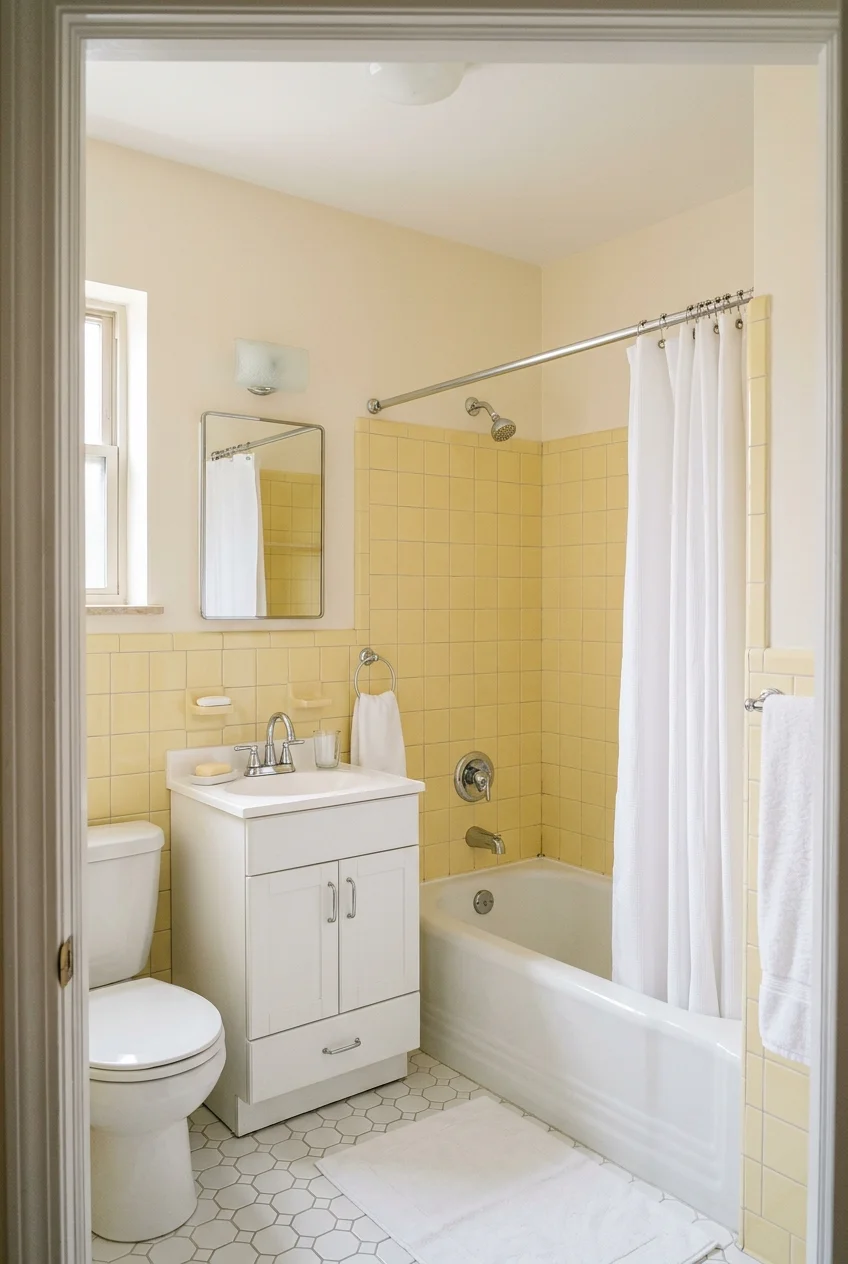
An intact older tile surround can become the room’s character rather than the demolition target. Choose the new wall paint against the actual tile undertone.
For pale yellow tile, try a clean cream wall and simple chrome hardware before adding another competing color. Bring samples home and compare them under room lighting.
Have loose tile, persistent leaks, or soft backing assessed before treating the update as cosmetic. New accessories cannot correct a failing tub surround or damaged substrate.
Budget tip Spend first on the details touching the old tile: curtain, paint, and lighting. Replace unrelated fixtures only when their condition or function justifies the expense.
24. Use wallpaper above the dry-side wall treatment
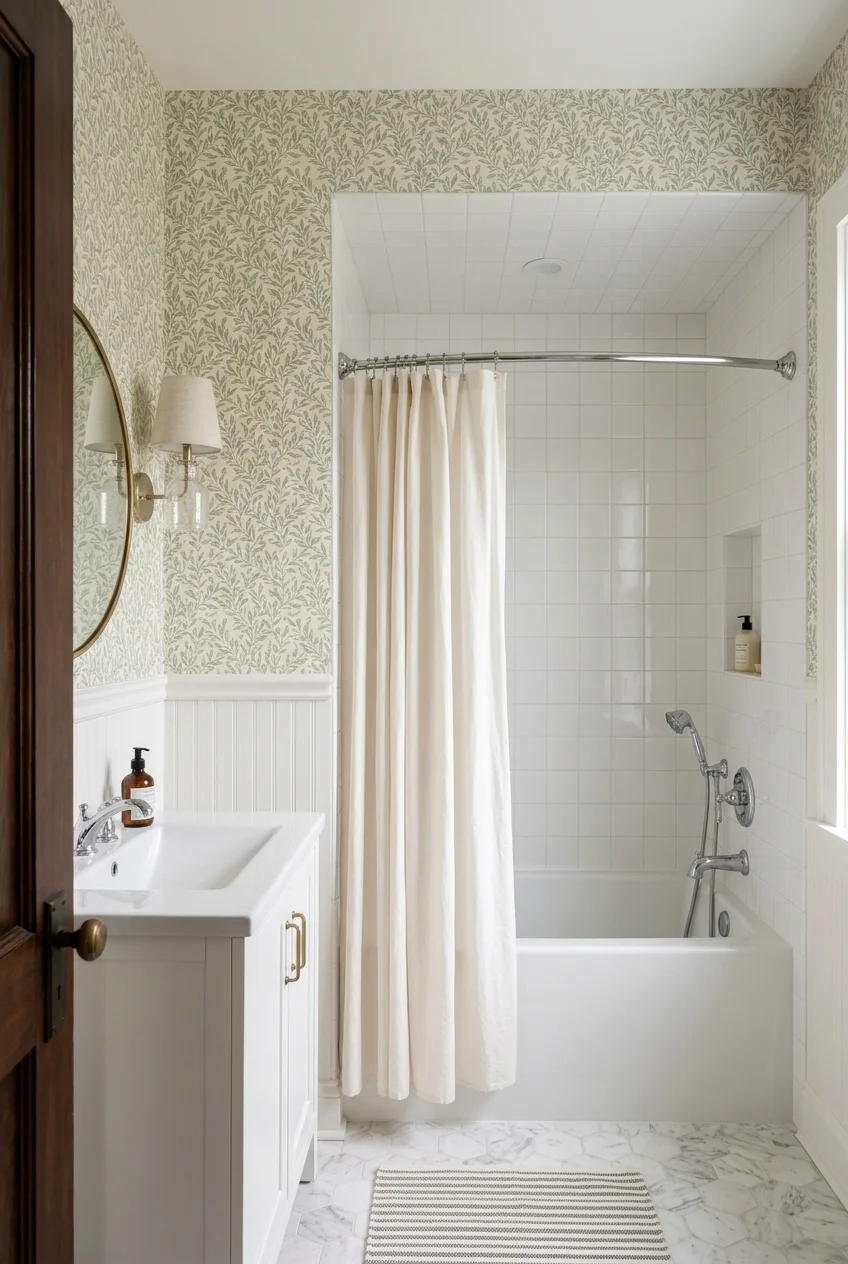
A botanical or graphic wallpaper can give the dry side of a small bath its main decorative moment. Leave the tub-shower enclosure to water-appropriate materials.
Select wallpaper whose manufacturer permits the bathroom conditions you have, then manage humidity with effective ventilation. Peel-and-stick adhesive does not make a product suitable for direct spray.
Keep the pattern’s background related to the tile so the room remains connected. A simple curtain prevents the two largest printed surfaces from competing.
For dry-wall proportions, these bathroom beadboard ideas offer another treatment to compare. Keep paneling and wallpaper outside direct shower spray and follow their material-specific instructions.
Vanities and Storage That Leave the Floor Usable
The best storage choice depends on what you actually keep beside the tub. Separate daily supplies from backups before choosing between open floor and larger cabinets.
25. Lift the vanity off the floor
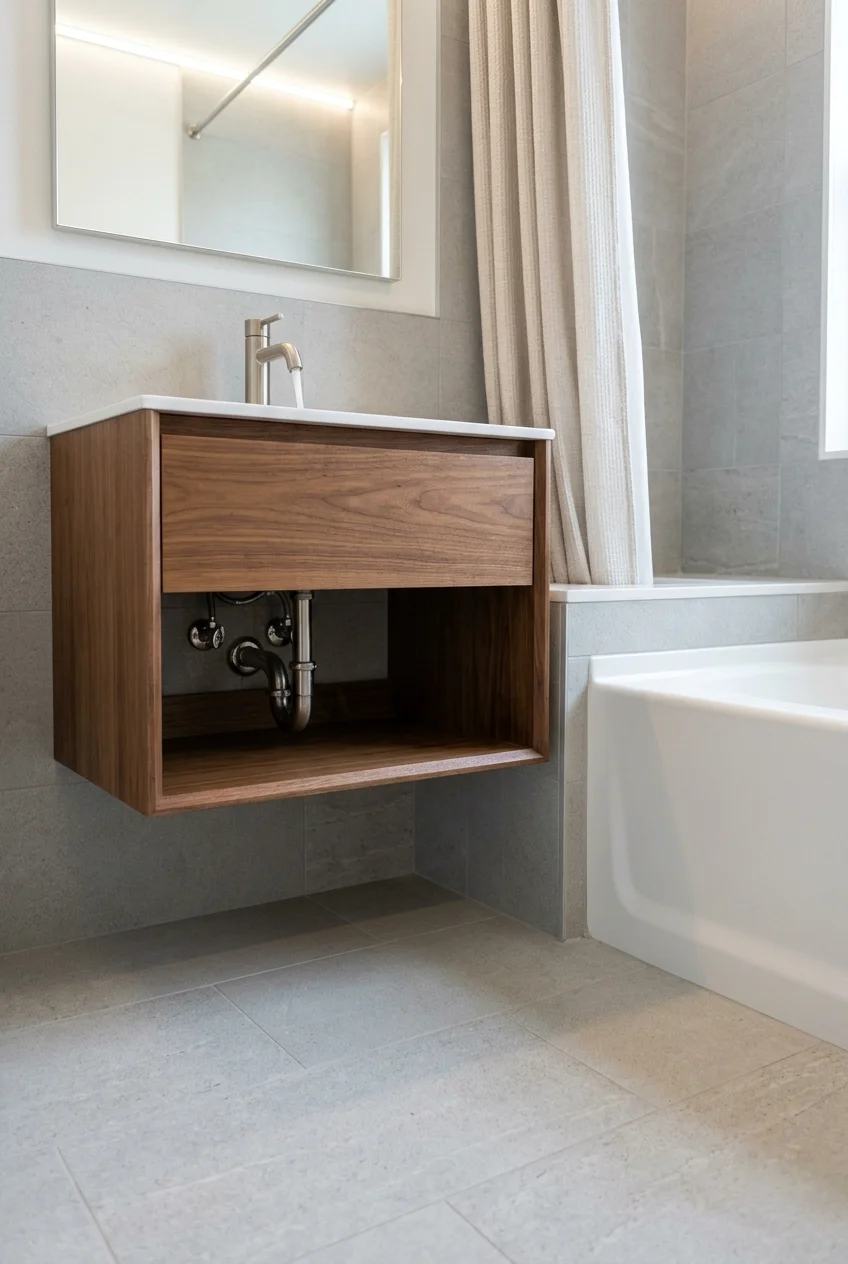
A wall-hung vanity exposes the floor beneath the sink, making the tub and vanity feel less like two solid blocks facing each other across a narrow aisle.
Choose its width and depth for the real room, then plan the plumbing within the cabinet. A floating installation does not automatically make a deep unit less obstructive.
The wall must support the installed cabinet, basin, counter, and intended load. Have suitable framing and fixings confirmed before committing to the wall-hung arrangement.
IKEA’s wall-mounted vanity guidance illustrates the suspension approach. Follow your chosen cabinet’s instructions rather than transferring another model’s mounting method or hardware.
Leave the floor below accessible for cleaning instead of filling it with loose containers. Keep towels or toiletries inside the drawers if maintaining the open look matters.
Practical tip Check the visible underside as well as the front. A neatly finished cabinet base and contained plumbing matter when the installation puts them on view.
26. Use drawer storage instead of one deep cupboard
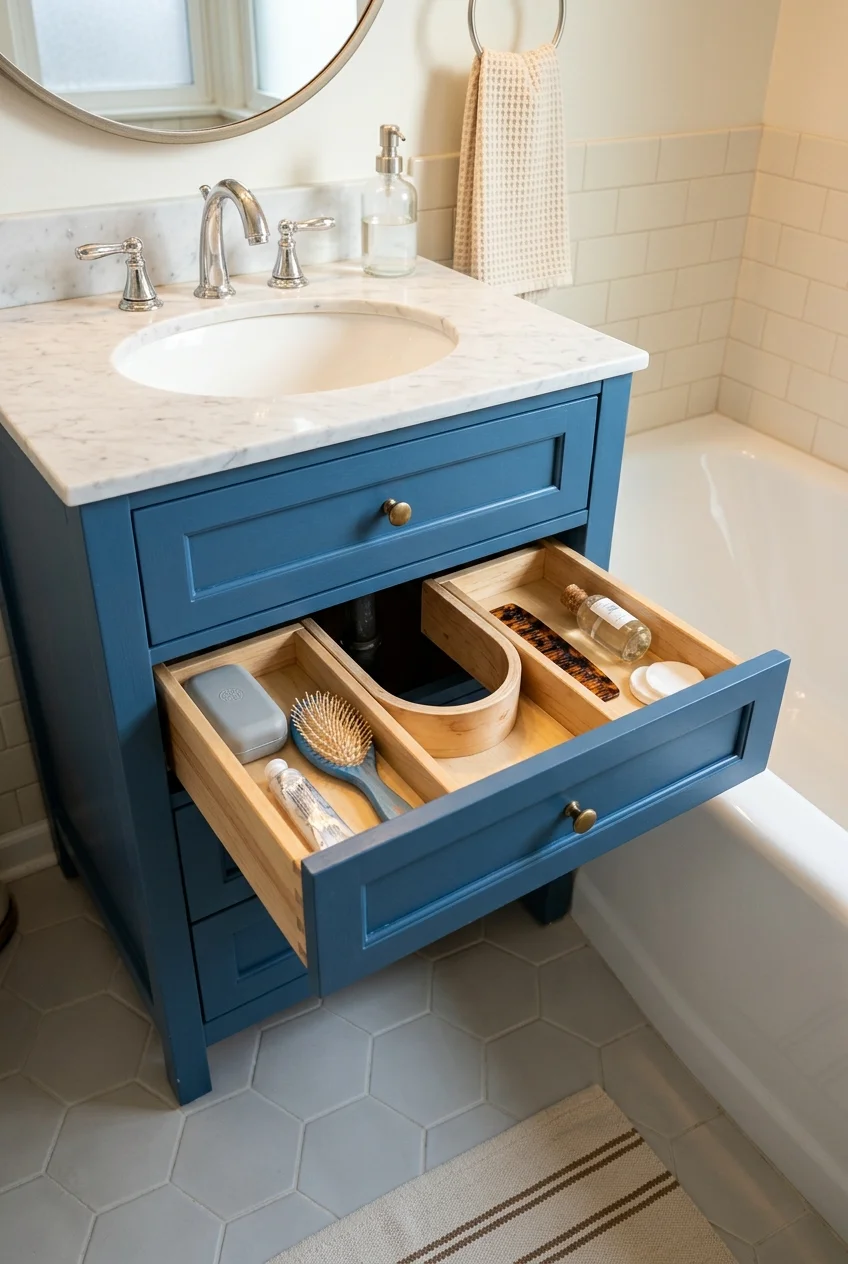
Drawers bring toiletries forward so you can reach them without kneeling beside the tub. They are especially useful when a small vanity must hold several daily routines.
Check the actual drawer interiors around the basin and drain. A full-width front can conceal a much smaller usable space or a plumbing cutout inside.
- Reserve a shallow section for dental and grooming items.
- Stand taller bottles only where the drawer clears the basin.
- Keep spare stock separate from daily products.
Try the drawer with the bathroom door open and a person standing at the sink. Its extension should not create a surprise collision beside the bathing area.
27. Pair a pedestal sink with a separate narrow cabinet
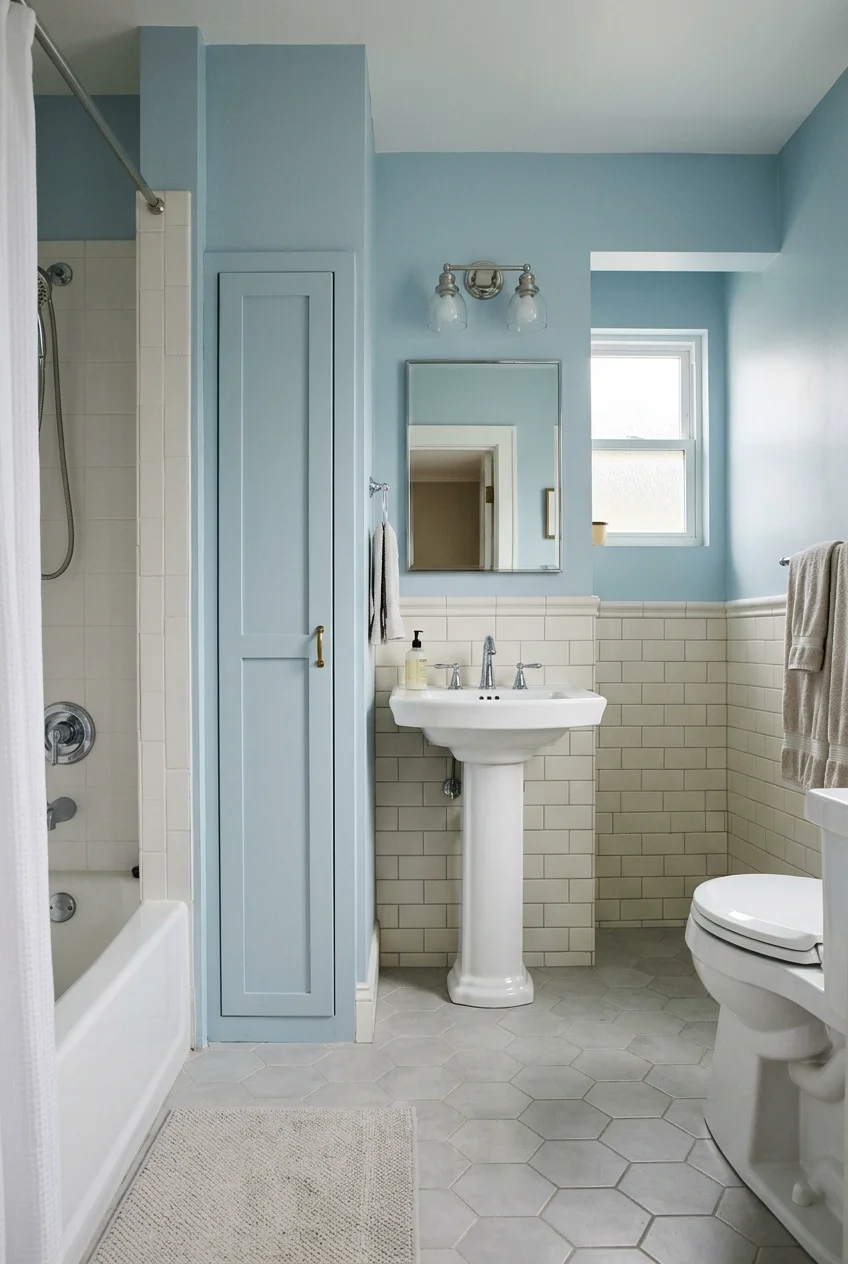
A pedestal sink can preserve an open view in a tight bathroom where a cabinet vanity feels bulky. Its drawback is the storage it removes.
Put a shallow closed cabinet on a dry wall away from the tub entry. Choose a location where its door opens without trapping someone at the toilet.
Measure the sink’s usable rim before assuming it holds soap and a toothbrush cup. A small wall-mounted soap dish can handle one item without adding countertop furniture.
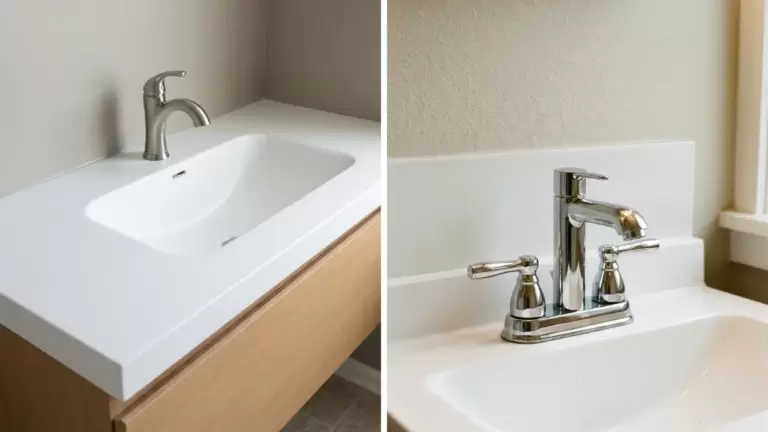
28. Move the sink faucet onto the wall
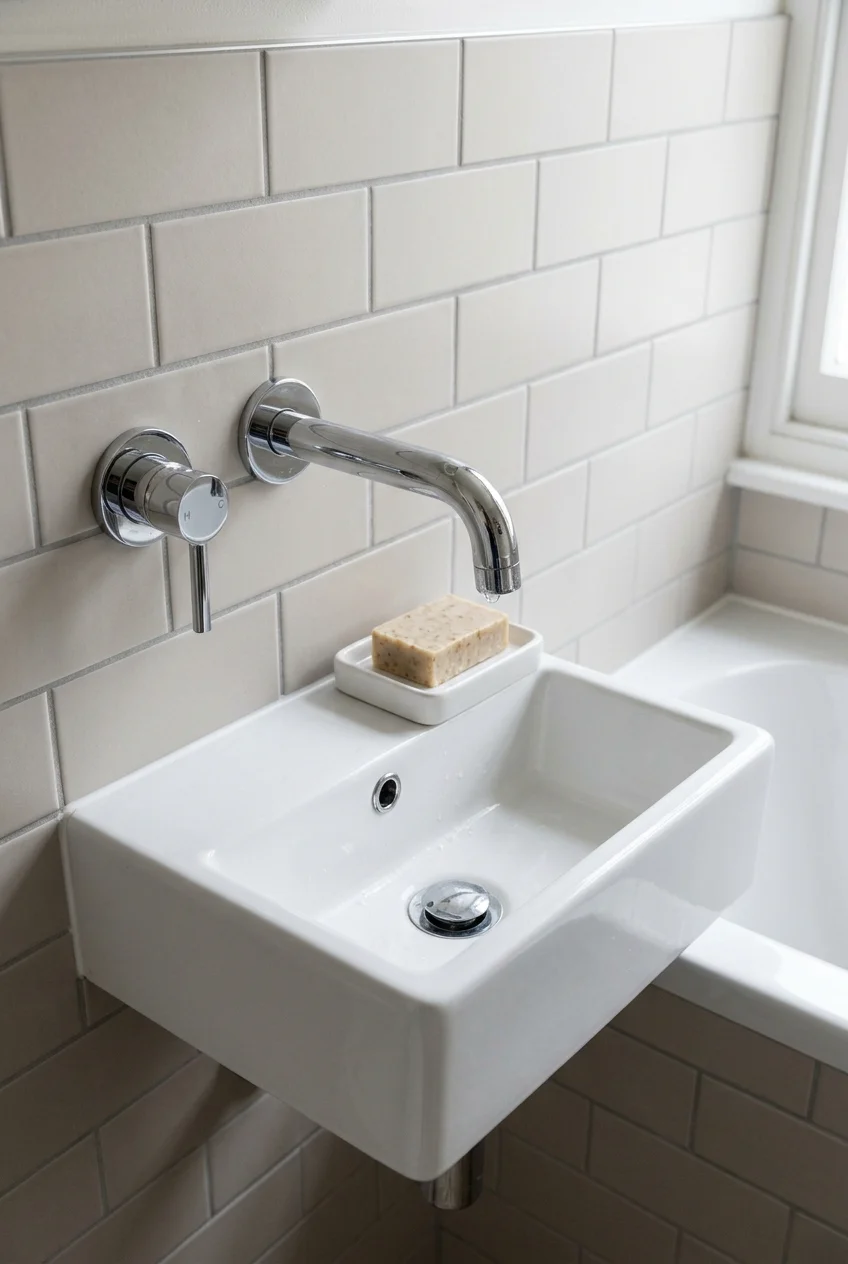
A wall-mounted faucet frees the sink deck from a faucet base, which can help a compact basin feel less crowded. It changes the plumbing plan, however.
Coordinate spout reach, outlet height, basin shape, and splash behavior as a set. The stream should land within the intended basin area rather than close to its edge.
Plan valve access and wall waterproofing where applicable before finishing the wall. This is a renovation choice, not a simple swap for every existing deck-mounted faucet.
Keep the remaining ledge useful for soap rather than filling the newly freed space with decor. Choose a deck-mounted arrangement if the wall work outweighs that benefit.
29. Recess the medicine cabinet behind the mirror
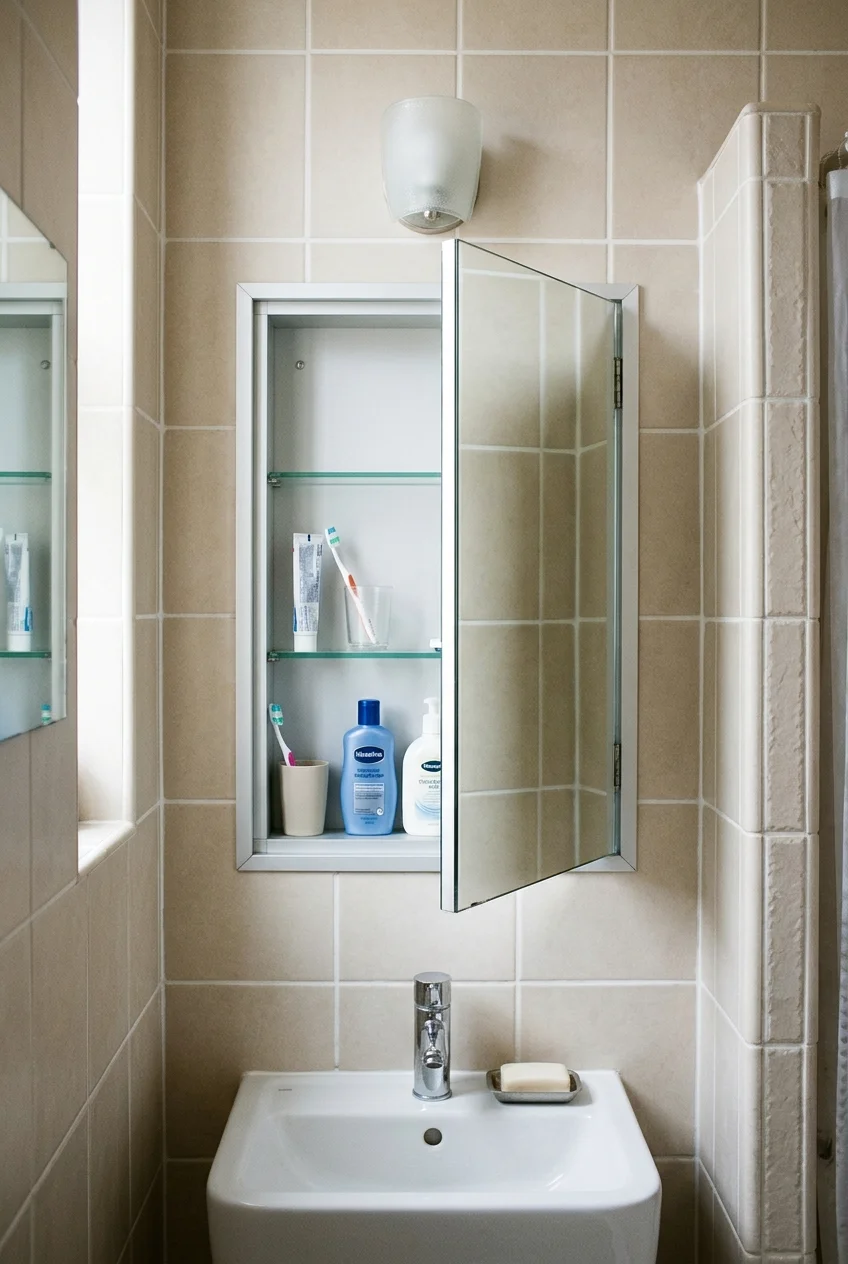
A recessed mirrored cabinet puts daily supplies into the wall rather than onto the sink. Its flatter profile is useful beside a close tub or doorway.
Check wall depth, framing, wiring, and pipes before choosing the cabinet size. Recessed storage depends on the actual wall cavity, not simply the mirror’s outside dimensions.
Plan the door hinge side and its full opening. A cabinet that hits a sconce or towel hook will be frustrating even if it fits inside the wall.
- Match the rough opening to the selected cabinet instructions.
- Check shelf depth against your actual bottles.
- Keep the lowest useful shelf within comfortable reach.
- Choose a surface-mounted alternative if the cavity is unsuitable.
Robern offers recessed and surface-mounted configurations, illustrating why installation type belongs in the selection process. Compare the finished projection and required accessories before ordering any model.
Store only products that tolerate the room’s conditions. Move medications elsewhere when their labels require cool, dry storage, and keep hazardous items secured from children.
30. Widen the mirror across a short vanity wall
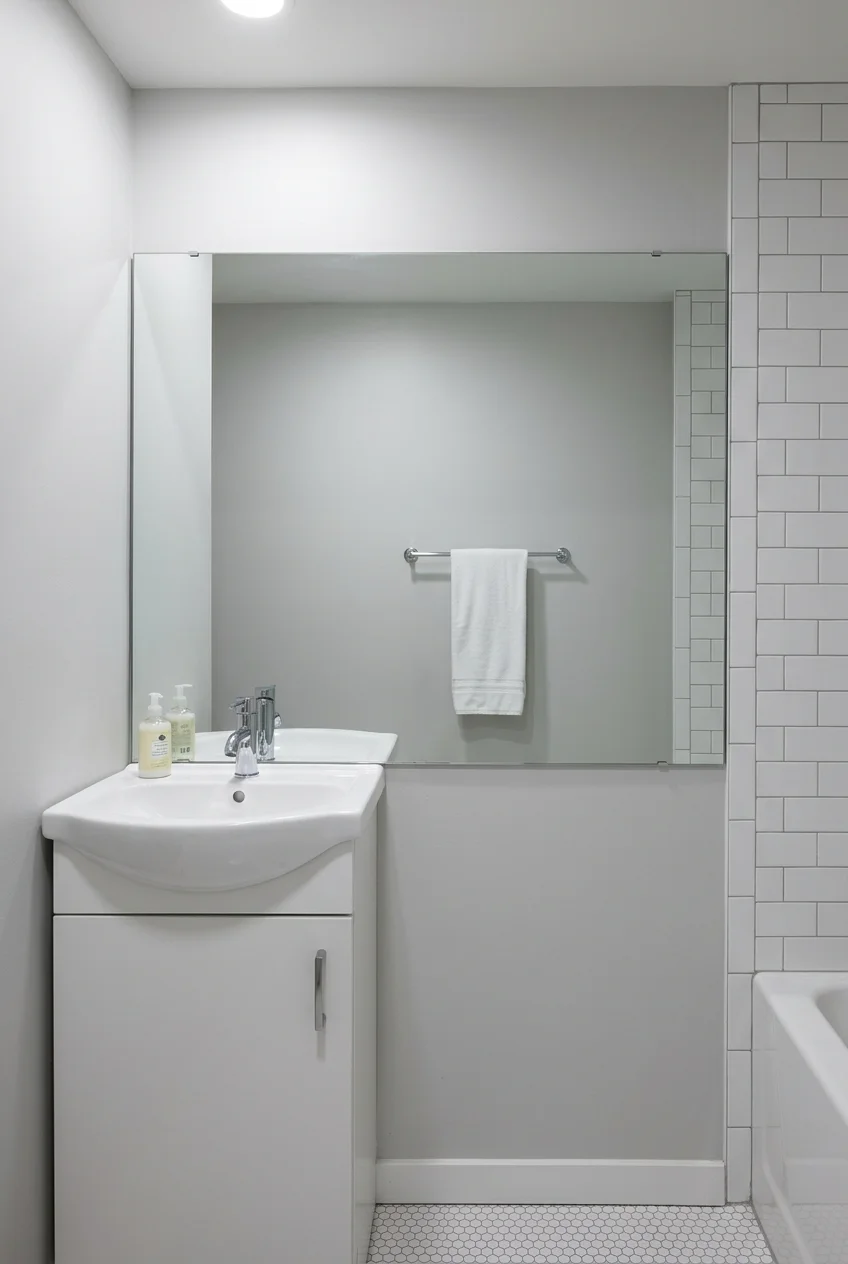
A broad mirror can reflect the room beyond the sink instead of leaving a small isolated rectangle. Let it stop cleanly before the tub enclosure or door casing.
Check the reflected view before deciding its size, then choose appropriate bathroom mounting hardware. An open tiled wall is a better reflection than crowded shelves.
31. Offset the sink to create one useful landing area
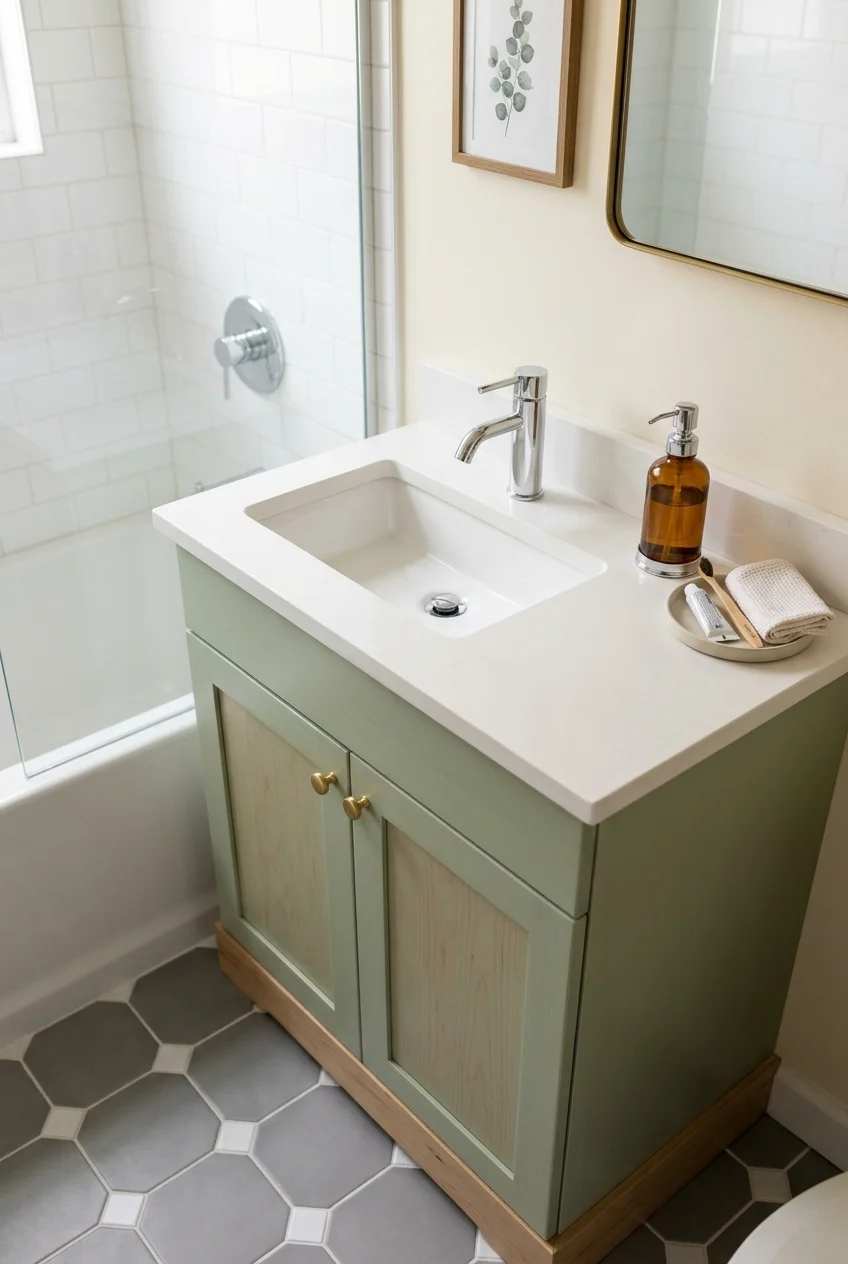
An off-center basin can leave a genuinely usable counter patch on one side instead of two narrow strips. That suits a small vanity shared by daily essentials.
Choose a vanity top designed for the offset arrangement and confirm cabinet and plumbing compatibility. Cutting a new sink position into an unsuitable top is not a styling adjustment.
Put the landing area on the side that suits your routine without crowding the tub entry. Leave only daily items there so it remains a working surface.
32. Build a narrow linen tower beside the vanity
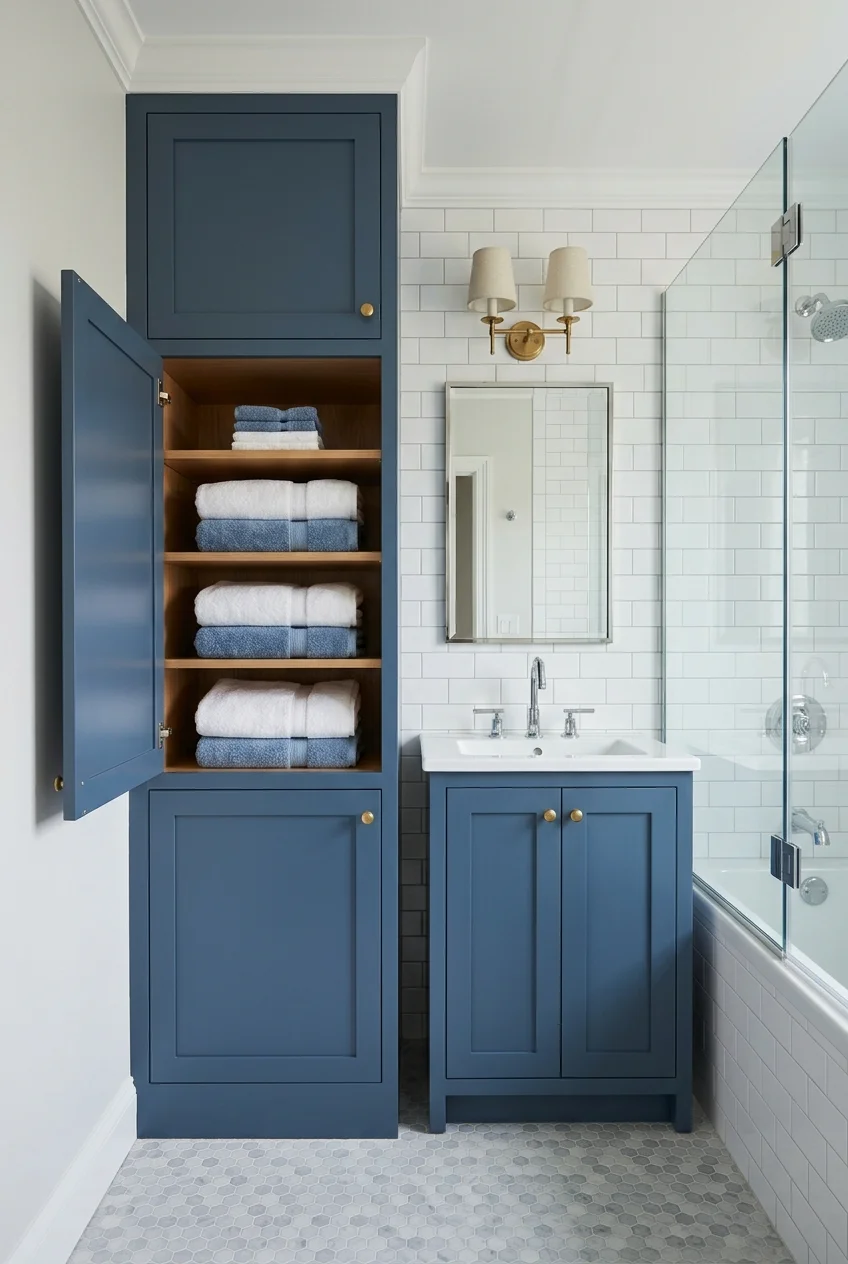
A tall, shallow cabinet can hold folded towels without extending a bulky vanity across the whole wall. Align its front thoughtfully with the sink cabinet below.
Keep the tower outside the tub’s splash zone and away from the door swing. Use secure wall anchoring and follow the cabinet manufacturer’s mounting requirements.
- Choose shelf spacing for your folded towel size.
- Reserve lower shelves for frequently used supplies.
- Keep the upper section closed if visual clutter bothers you.
A narrow cabinet is useful only when its opening is usable. Test both cabinet doors and vanity drawers on the plan before making the joinery permanent.
33. Give small grooming items shallow drawer compartments
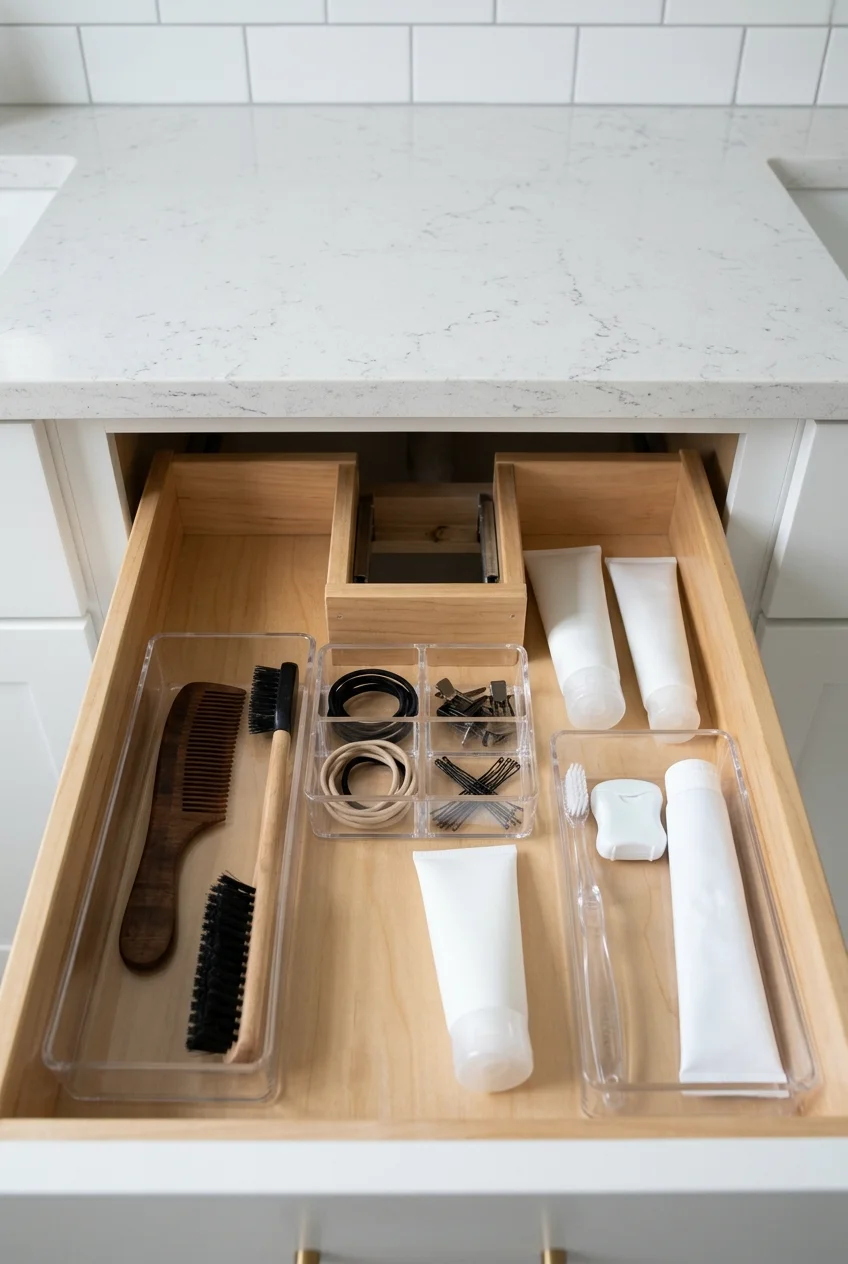
Small trays keep daily tools in one layer, so a compact bathroom needs fewer items left on the counter. Group them by routine rather than matching packaging.
Measure the clear drawer interior, including height beneath the sink and clearance at the back. Several small removable trays often fit irregular spaces better than one expandable insert.
Keep a separate compartment for items that need to stay dry. Wipe trays occasionally and return products dry rather than letting water collect underneath them.
If storage still feels short, compare these small bathroom storage ideas for another usable location. Add capacity where it stays accessible, rather than stacking over your daily items.
34. Fit under-sink storage around the actual pipes
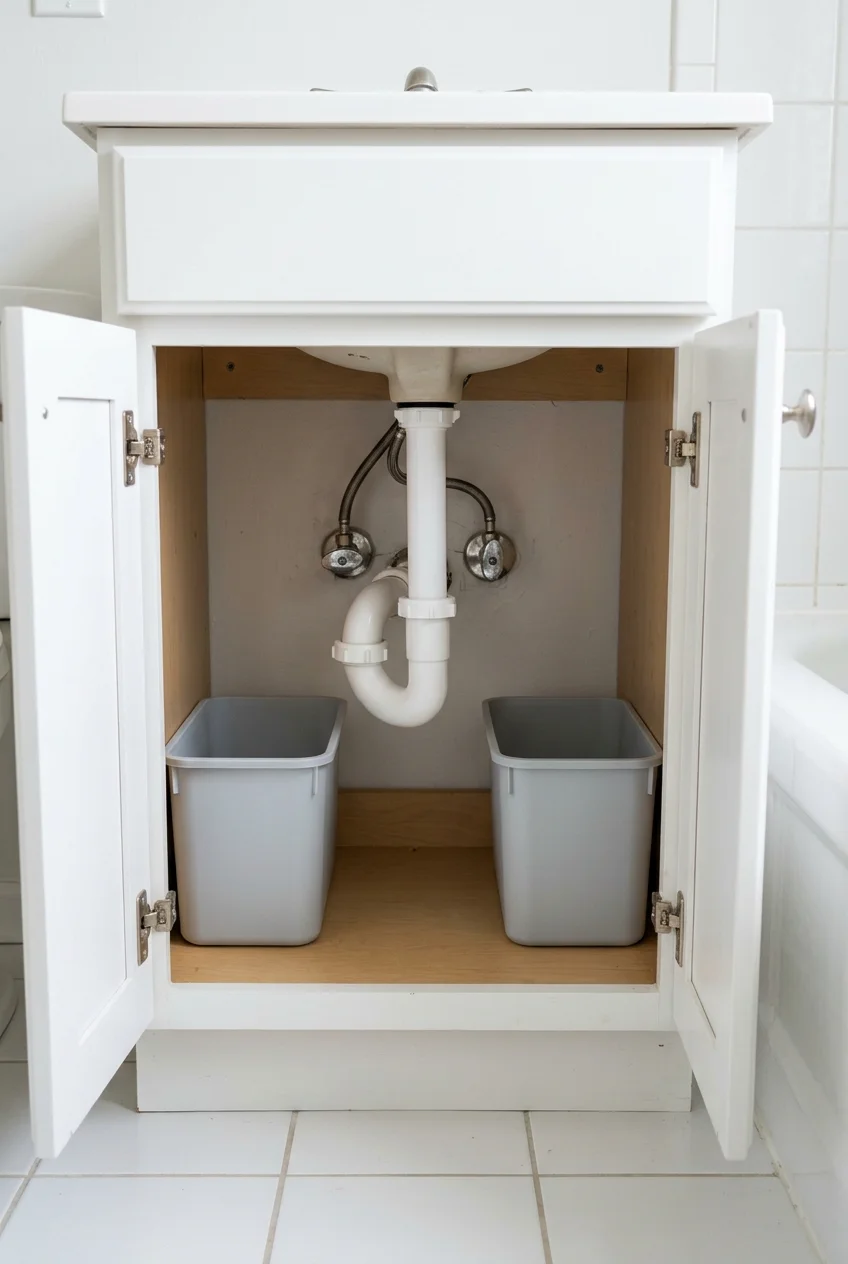
Under-sink storage works best when the organizer follows the plumbing space. Start with the basin underside, trap, shutoffs, hinges, and door opening before looking at storage products.
A low removable bin may use the space better than a tall two-tier frame. Leave valves and the trap reachable without dismantling a complicated storage installation.
- Empty the cabinet and measure each usable side of the plumbing.
- Check the route through the door, not just the interior width.
- Test a cardboard footprint with the doors closed.
- Choose removable bins or a compatible installed organizer.
Separate daily toiletries from cleaning supplies and secure hazardous products as household needs require. Keep containers off any area showing dampness until the source has been corrected.
An installed pull-out also needs solid mounting and extension clearance. Verify that its moving tray clears the trap and hinges throughout the full travel.
Setup note Do not sacrifice plumbing access for a perfectly filled cabinet. A little empty space can make leak checks and ordinary maintenance much easier later.
Bathing Details That Keep the Rim Clear
Give wet items a home where they are used, then leave the tub edge available for entry. Built-in storage and removable accessories solve different problems.
35. Build one tall niche for bottles of different heights
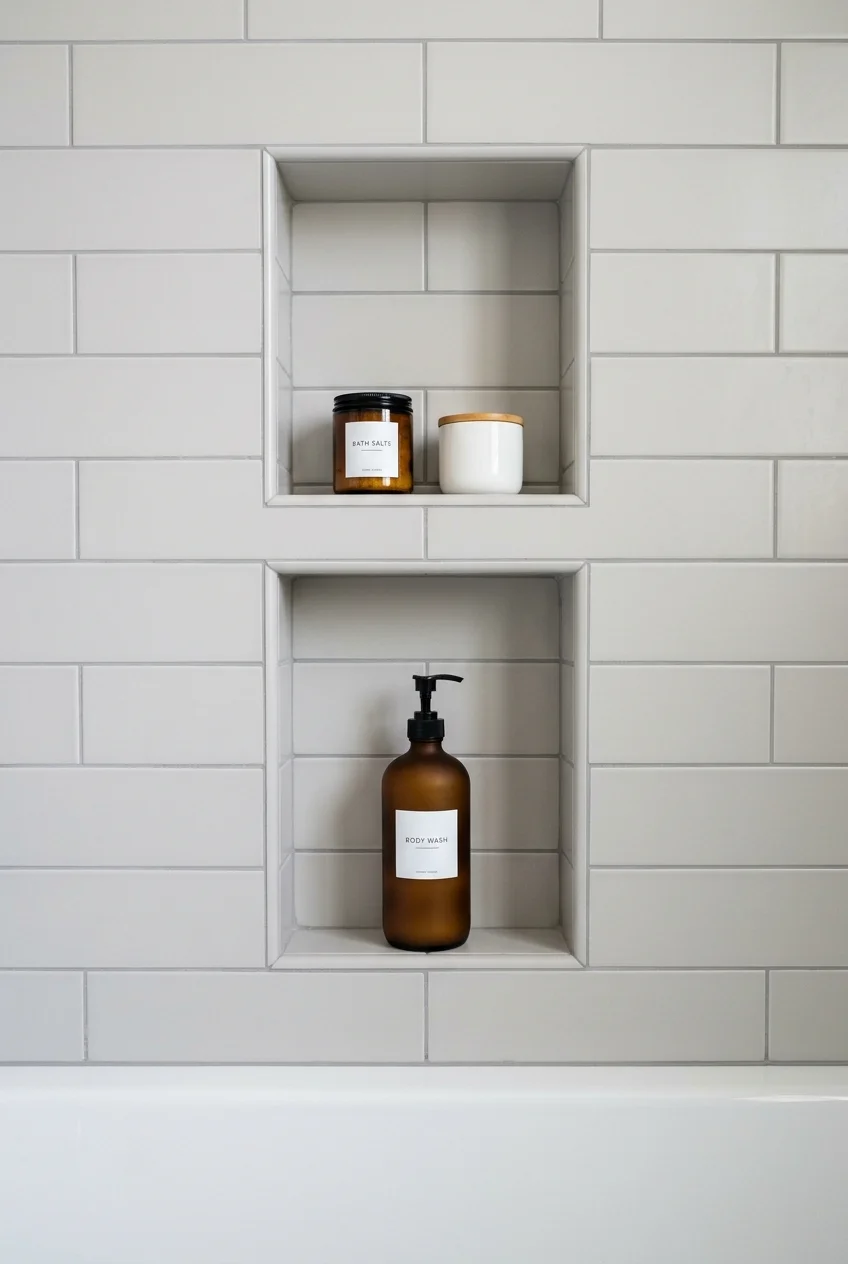
A tall, narrow niche can hold bathing supplies without projecting into a small tub. Divide it according to the tallest bottles you actually use.
Place the opening within comfortable reach and away from the main spray where possible. Confirm the wall cavity can accommodate it without compromising structure or required insulation.
The niche must connect to the surrounding waterproofing system, including its corners and perimeter. A tiled recess alone is not evidence of a watertight installation.
Schluter’s prefabricated shower niche information shows how one system handles the connection. Have the installer follow the selected assembly’s complete instructions.
- Measure bottles with pump heads fully extended.
- Allow hand clearance above each shelf.
- Plan tile cuts and shelf edges together.
- Follow the selected system’s drainage and waterproofing details.
Keep the niche for the current bathing routine rather than every spare bottle. More compartments are not useful if each opening becomes too short to use comfortably.
36. Create a shallow ledge along the tub wall
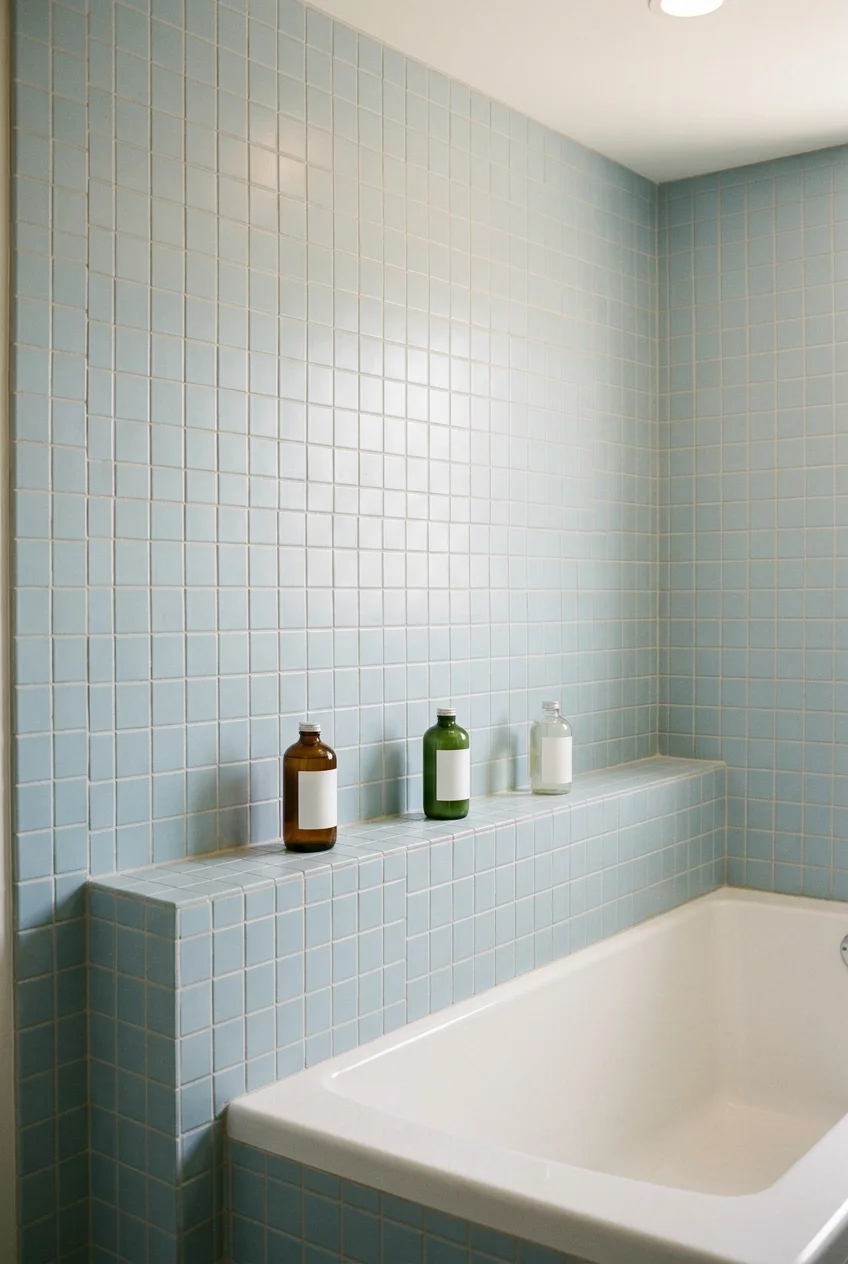
A continuous ledge can give several bathers room for supplies without multiple separate niches. It reads as a horizontal architectural line along the tub wall.
Building the ledge may bring the finished wall into the bathing area. Check the resulting tub space and coordinate its waterproofing, top surface, and ends before construction.
Keep it shallow enough for the intended bottles and easy to wipe. A broad ledge invites piles of products and collects more water after showering.
Practical tip An end-wall ledge is an alternative when a long ledge would intrude. Choose the location for reach and water exposure before choosing its tile color.
37. Use one corner shelf when the surround stays
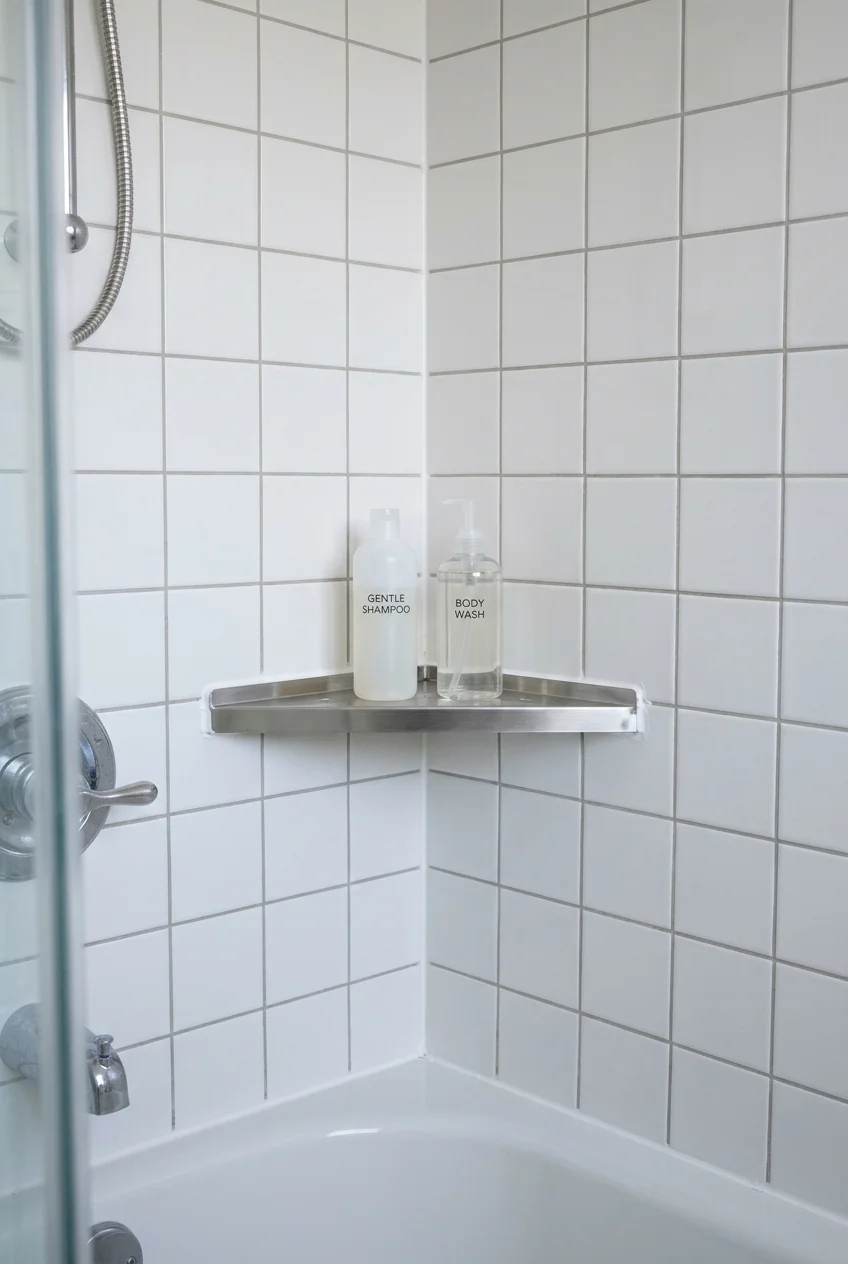
A compact corner shelf can organize the existing tub without rebuilding the wall. Position it where bottles are reachable but do not crowd the shower controls.
Choose a shelf specifically suited to the wall material and wet location. Adhesive, suction, and mechanical attachments have different surface requirements and load limits.
Follow the attachment and curing instructions before loading it. If drilling is required, have the waterproofing implications addressed rather than treating the tile as an ordinary dry wall.
38. Hang a removable caddy below the showerhead
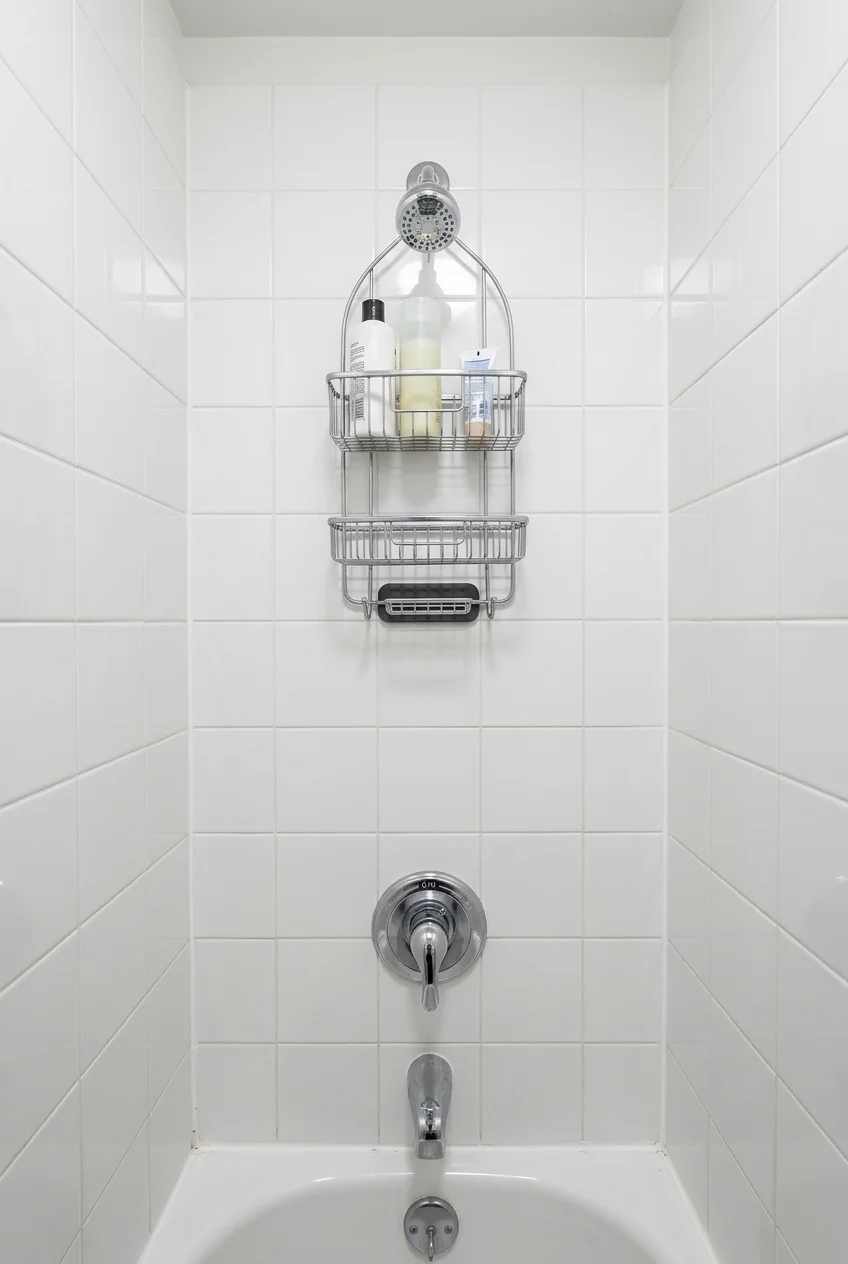
A hanging caddy gives an existing tub-shower a defined place for daily bottles. It suits a refresh where cutting a niche would be disproportionate to the work.
Check shower-arm compatibility and the caddy’s stabilizing method before choosing one. It should not pull against a handheld hose or cover the controls below it.
- Compare the full caddy height with the valve position.
- Check bottle clearance below the showerhead.
- Follow the stated loading and wall-surface requirements.
Choose open draining shelves that can be removed for cleaning. Keep the contents limited so the organizer stays a practical bathing tool rather than a wall of bottles.
39. Let bath toys drain in a removable mesh holder
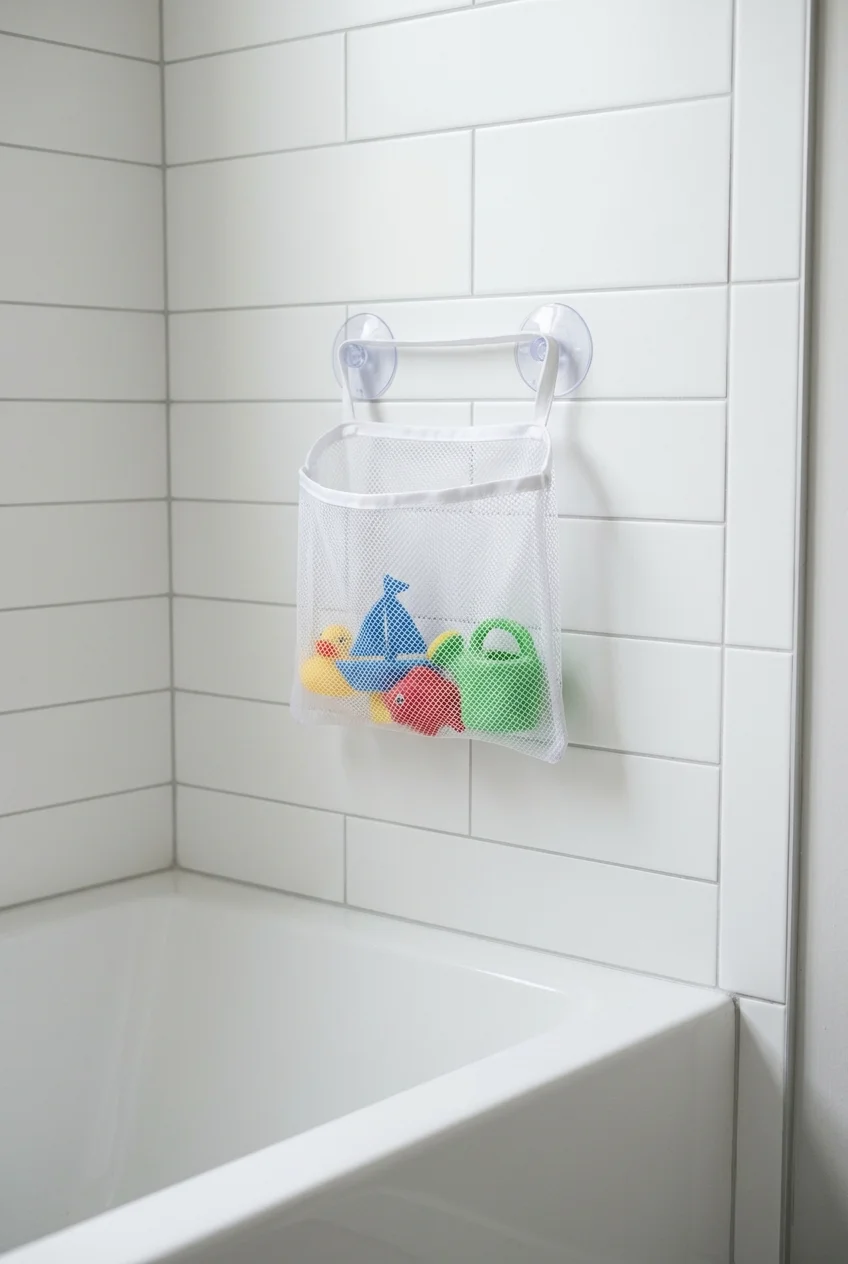
A small mesh holder gives wet toys a drying location without leaving them along the tub rim. Empty it occasionally so trapped water and residue do not accumulate.
Choose an attachment suited to the wall and keep it clear of controls and entry. Remove toys with retained water or damage during routine cleaning.
40. Put towel hooks on the wall behind the open door
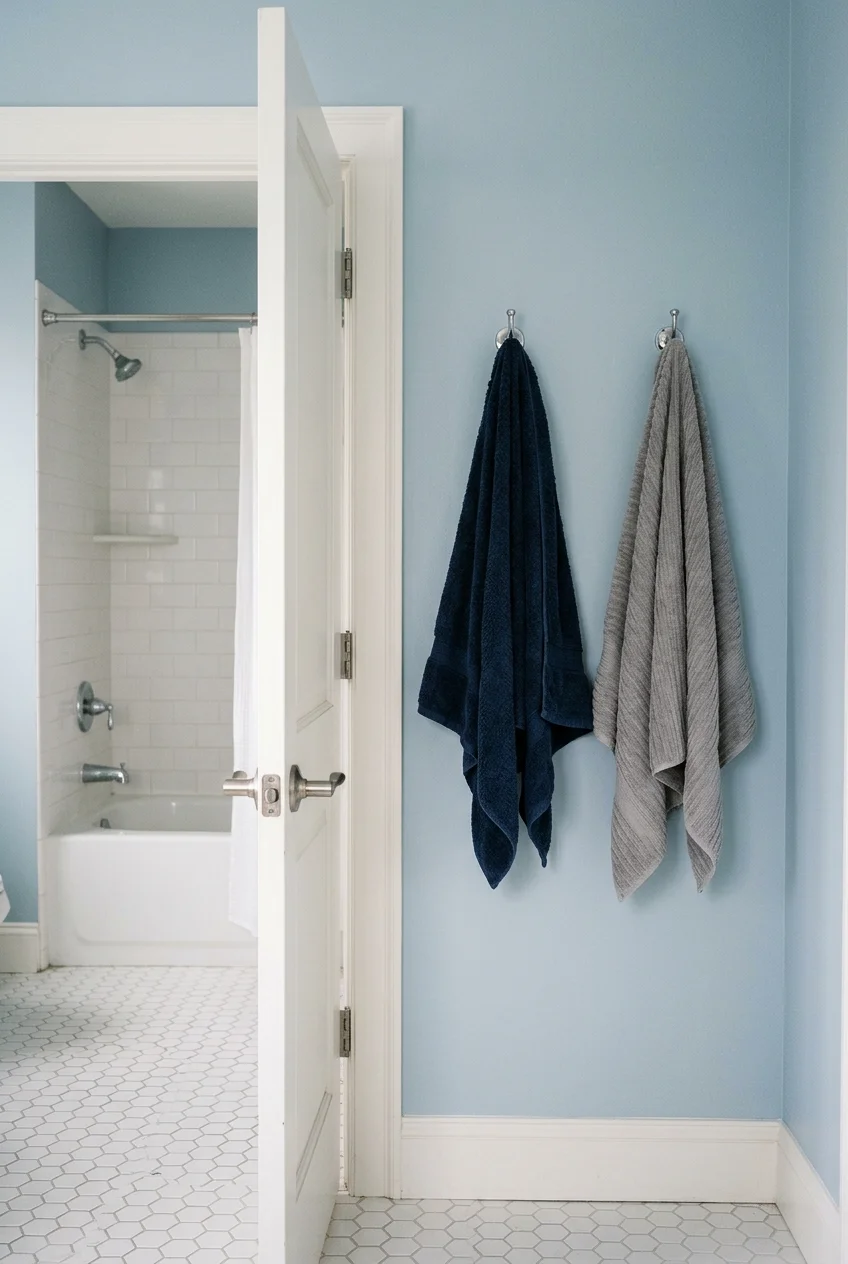
The dry wall behind the entry door can hold towels without adding another object beside the tub. Hooks work when the door still opens fully past hanging fabric.
Check the space with actual towels before mounting hooks with suitable fixings. Thick fabric can bunch against the wall or interfere with the moving door.
41. Stack towel rails on a narrow dry wall
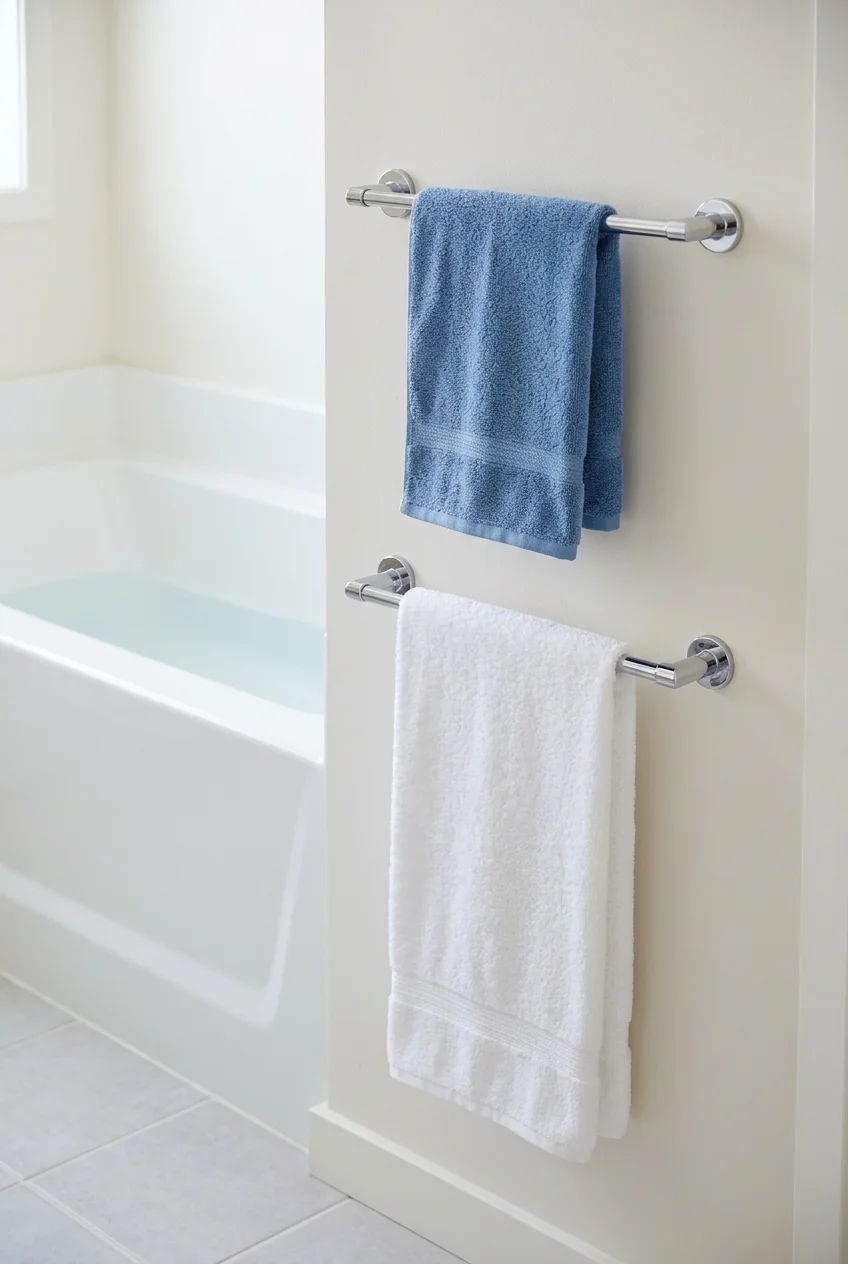
Two short rails use wall height when a single long towel bar will not fit. Give each towel enough vertical space to hang separately and dry.
Place the rails outside direct shower spray and within a comfortable reach after bathing. A narrow wall near the tub is useful only if the towels avoid the walkway.
Mount the rails for their intended towel load and leave access to adjacent switches. These are drying and storage fittings, not substitutes for properly installed grab bars.
42. Add a handheld shower for flexible rinsing
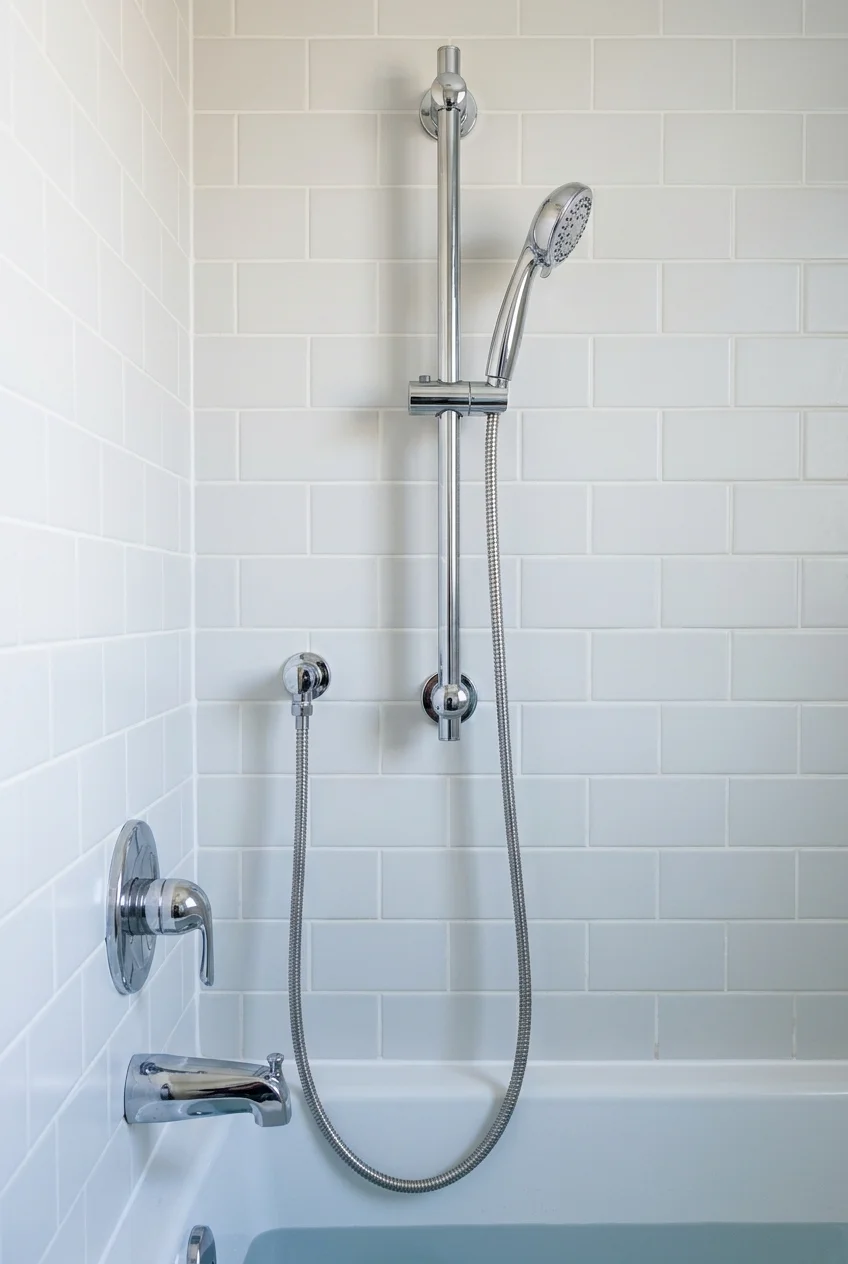
A handheld shower makes rinsing the tub and directing water easier without adding another bathing zone. A rail can keep the handpiece at different usable heights.
Coordinate the valve, diverter, hose, and handpiece as a compatible system. A slider rail is not a support bar unless the manufacturer specifically rates it for that purpose.
Plan the hose route so it hangs inside the tub without catching on a screen or control. Confirm mounting, plumbing protection, and water-temperature controls with a qualified installer.
Choose the simplest arrangement that serves the routine. A single adjustable handpiece may be more useful in a compact bath than several fixed outlets competing for space.
43. Coordinate real grab bars with the bath hardware
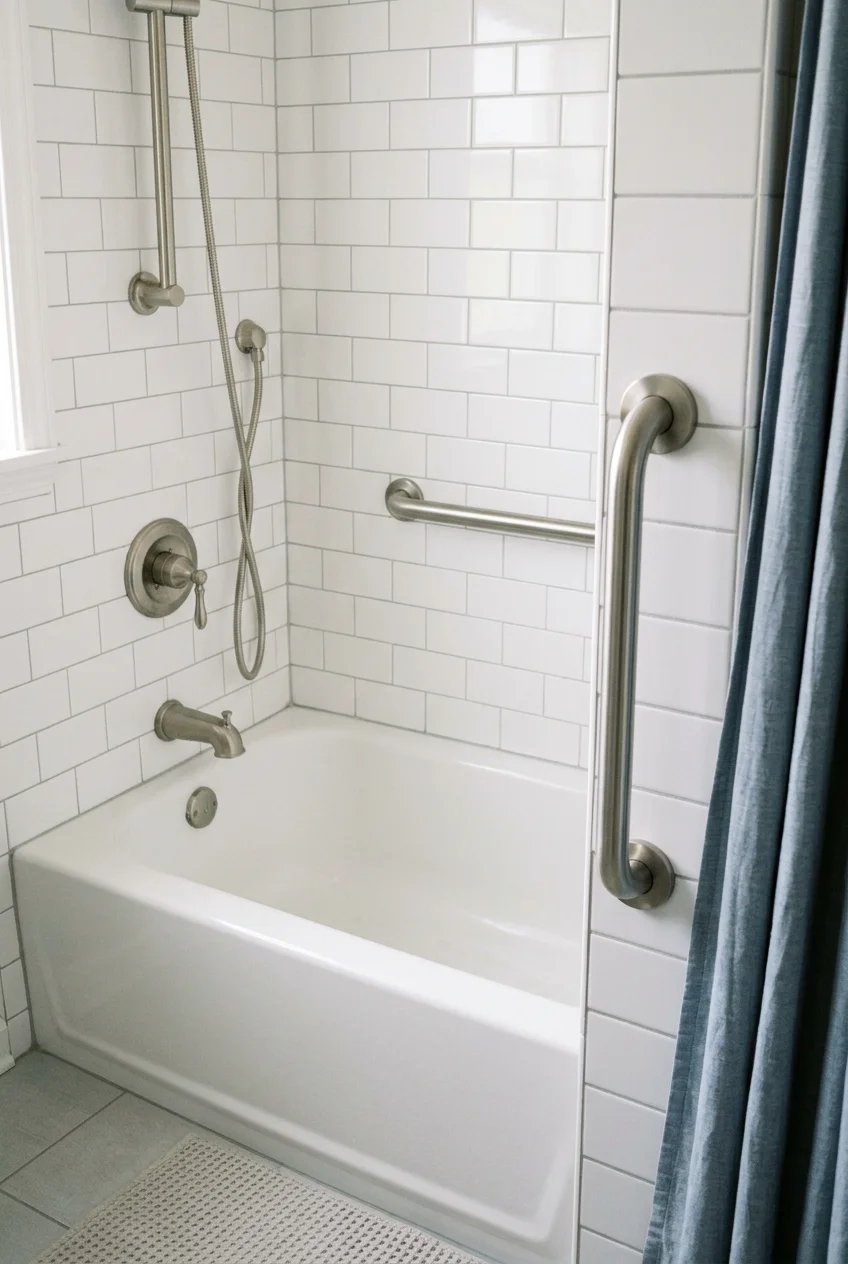
A purpose-made grab bar can fit the room’s finish while providing planned support at the bath. Choose the function first, then coordinate its appearance with the fittings.
Have placement and mounting assessed for the person using it and the actual wall construction. A decorative towel rail or suction accessory is not an equivalent support installation.
Use the selected model’s instructions; Moen’s grab-bar installation resources illustrate why product-specific fixings and installation requirements matter. Matching metal finishes alone says nothing about support.
A grab bar does not make a high-sided tub accessible for everyone. If stepping over the rim is difficult, seek an individualized bathing-access assessment before committing to the layout.
Light, Privacy, and Finishing Details That Earn Their Space
Finish with the things you use every day: light at the mirror, privacy at the window, and somewhere for laundry. Keep the bathing route in view.
44. Use obscured glass to keep a tub-side window open visually
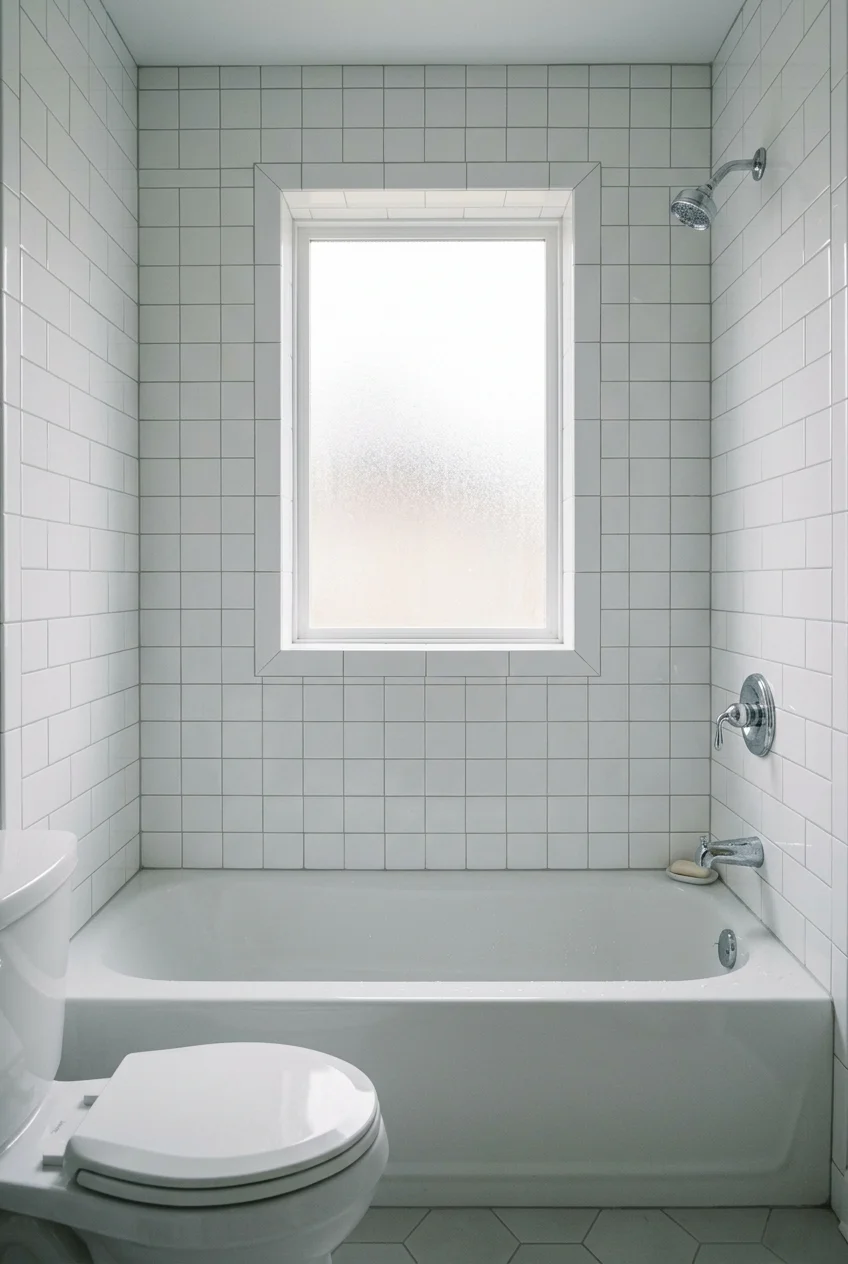
Obscured glazing can preserve daylight without adding a bulky window covering beside the tub. Check privacy under nighttime interior lighting as well as during the day.
A window inside a tub-shower needs a suitable frame, glazing, and waterproof installation detail. Ordinary painted trim and a decorative film do not resolve direct water exposure.
Keep the sill free of bottle collections so the opening remains the focal point. Use the tub’s separate storage rather than turning the window into another shelf.
45. Bring roof light into a windowless tub bathroom
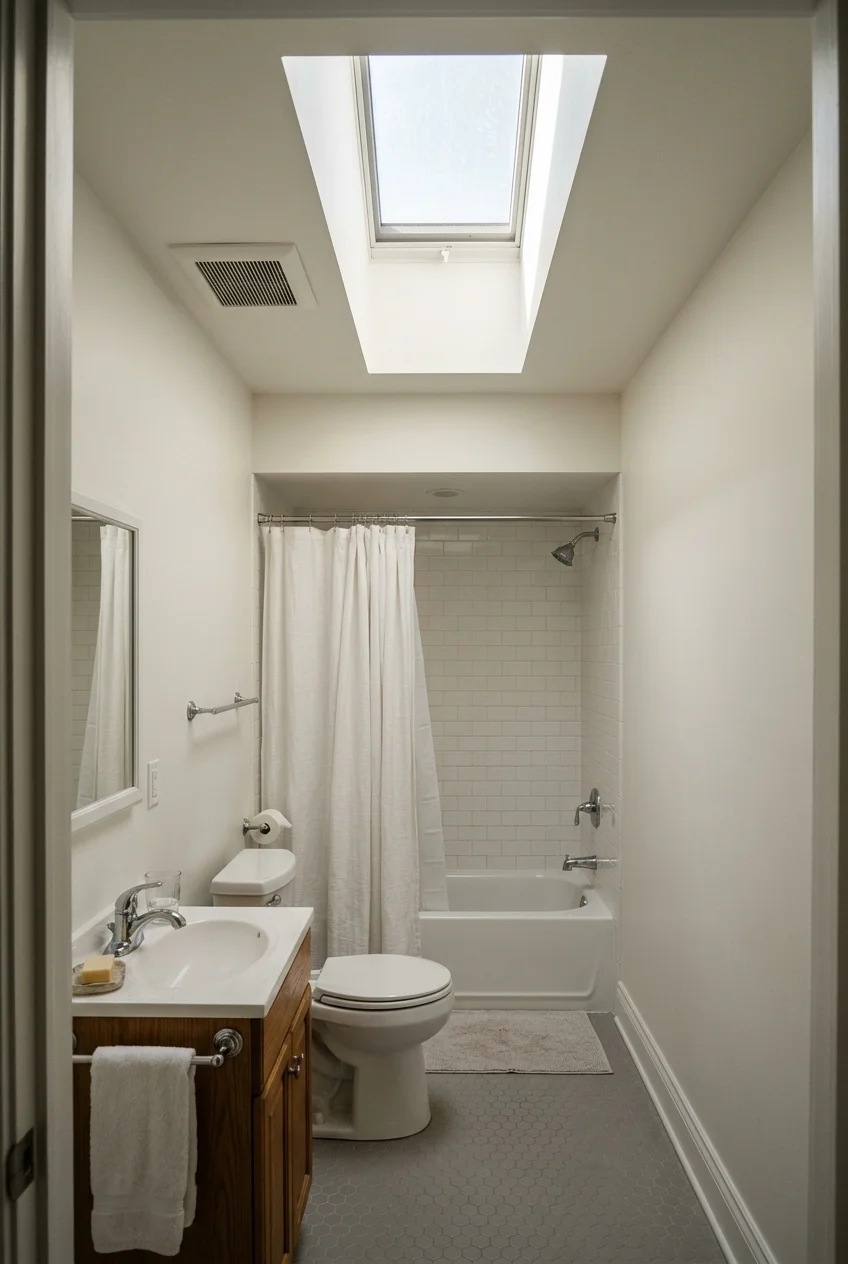
A roof window or skylight can brighten the center of a compact bathroom without using wall space. It is a renovation option when the roof arrangement permits it.
Have the opening, flashing, shaft, glazing, and condensation conditions assessed together. An attractive ceiling opening still needs the correct installation for the building and local climate.
Keep the mechanical bathroom exhaust plan even if the skylight opens. Occasional fresh air through the roof is not automatically equivalent to the ventilation the room requires.
Practical tip A tubular daylight device may suit a smaller available roof route. Compare expected light distribution and installation feasibility before deciding that a large roof opening is necessary.
46. Light the mirror from both sides
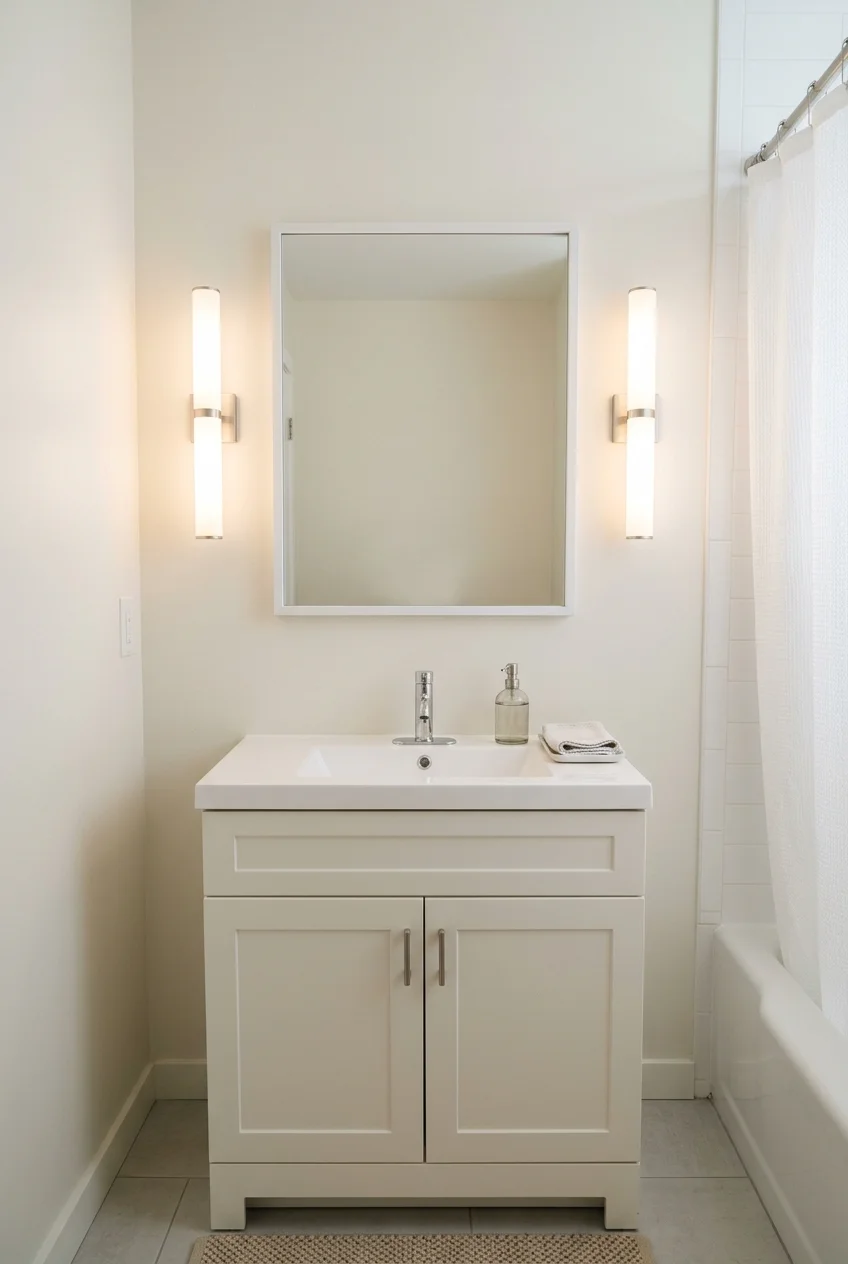
A pair of slim sconces can light the face more evenly than a ceiling fixture alone. They also give a small sink wall a deliberate vertical frame.
Check that the mirror, lights, and cabinet doors fit together at real sizes. Oversized shades can crowd the wall or block a mirrored cabinet from opening.
Use fixtures suitable for their location and have electrical work completed to applicable requirements. Place the pair in the dry vanity zone rather than beside direct shower spray.
47. Use concealed low-level light beneath a floating vanity
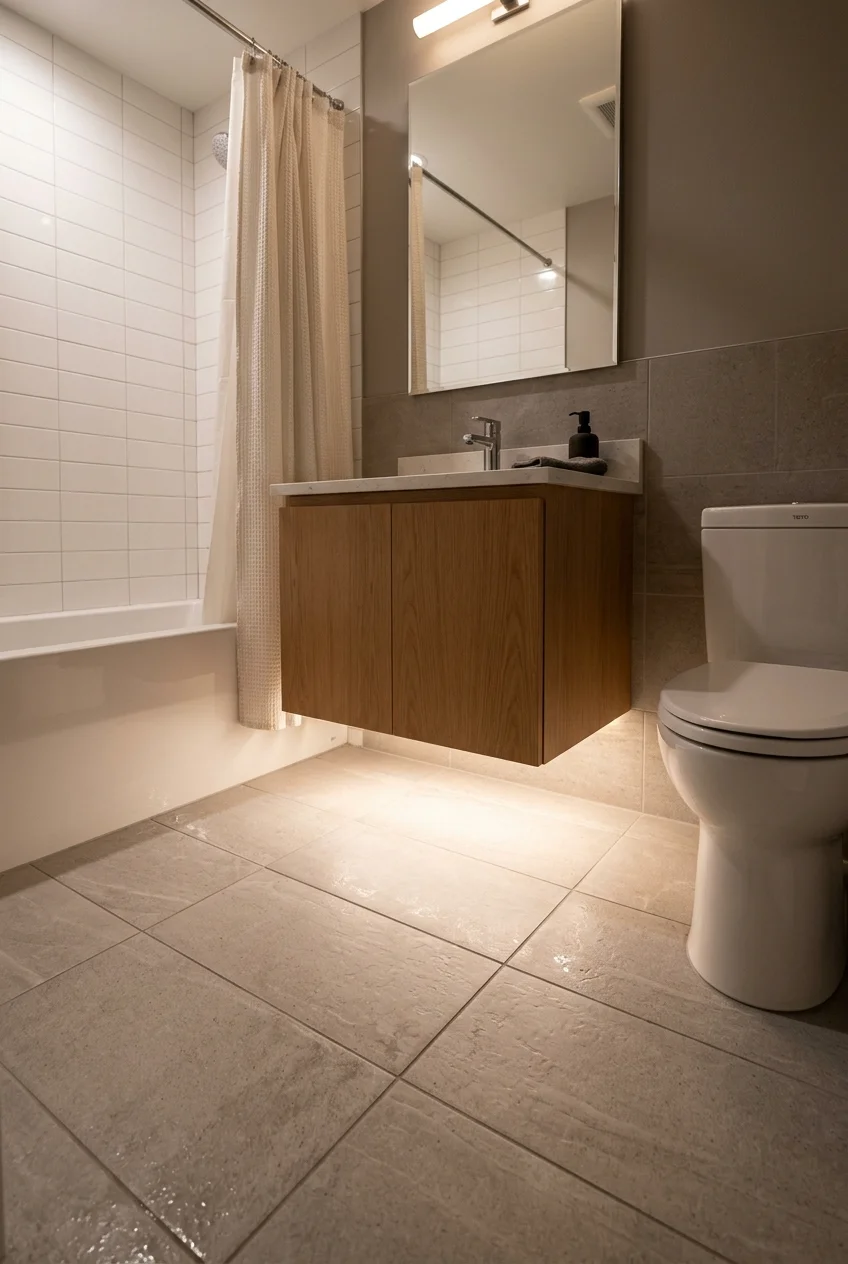
A concealed light beneath the vanity can make the floor edge easier to see at night. Keep it secondary to proper room and mirror lighting.
Choose a bathroom-appropriate lighting system and have its wiring and controls planned professionally. Loose cords or improvised power strips have no place beside the tub.
Shield the source so the effect is a soft floor wash rather than a line of bright dots. Check the reflection on glossy floor tile before final positioning.
48. Keep the painted ceiling and dry walls close in color
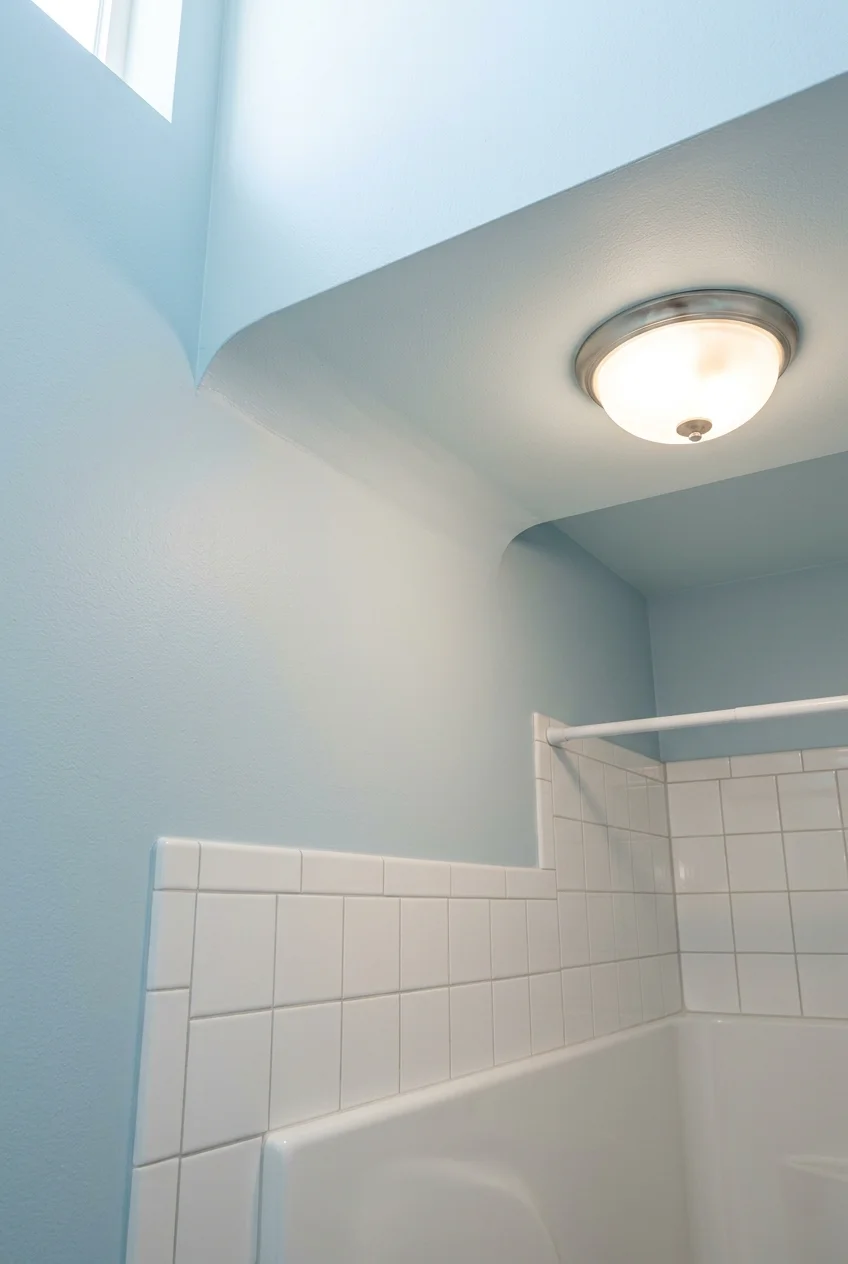
Closely related ceiling and wall colors reduce the sharp outline above a small bathroom. This can soften an awkward soffit without changing the room’s structure.
Test bathroom-suitable paint beside the tub before deciding. A white bathtub can expose unexpected pink, green, or yellow undertones that disappear on a small sample card.
49. Put a pull-out hamper in the dry vanity zone
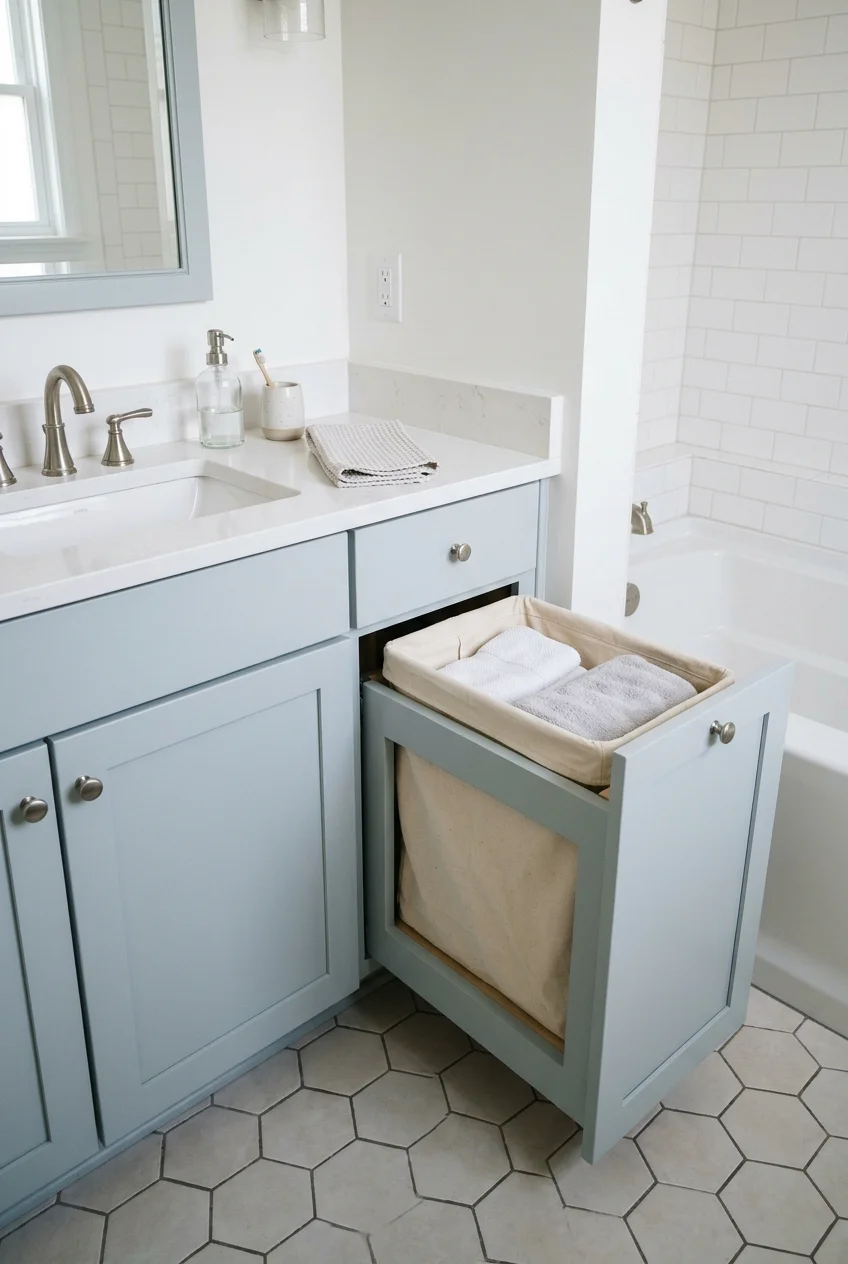
A built-in hamper can remove a laundry basket from the narrow space beside the tub. It works when the vanity has capacity beyond everyday toiletries.
Use a cabinet arrangement designed for the insert, with room for its opening and removal. Plumbing and drawers may make an apparently empty bay unsuitable.
- Measure the insert and its full opening travel.
- Choose a removable washable liner or container.
- Keep damp towels spread out to dry before storing them.
- Preserve access to valves and adjacent drawers.
A hamper sacrifices other storage, so compare its value with using a laundry location outside the bathroom. It is useful only if the change keeps the bathing floor clearer.
50. Keep a quiet exhaust grille within the ceiling design
Image pending: No image is attached to this draft for idea 50 (image-50).
A small bathroom still needs a way to remove humid air even when its finishes look complete. A simple flush grille can keep that essential equipment visually restrained.
Choose the fan for the room and duct arrangement, then compare sound ratings. Have the installation assessed rather than assuming a smaller grille means adequate extraction.
ENERGY STAR describes bathroom fans that exhaust outdoors as a moisture-control feature. Keep the grille accessible for cleaning and avoid covering it with decorative ceiling treatments.
Position and control the fan as part of the bathroom plan. A visible grille in an inspiration image cannot prove the duct route or installed airflow.
Frequently Asked Questions
Which ideas are easiest to try without replacing the tub?
Start with a correctly sized curtain, dry-wall towel storage, drawer organization, and paint suited to the existing finishes. These changes can improve daily use without relocating fixtures.
Renters should check permission for paint, drilling, and adhesive products. Keep original fittings when required, and avoid altering the tub surround or plumbing without authorization.
Should a small tub bathroom use a curtain or glass?
Choose a curtain when you need the tub front to open widely or want an easier reversible change. Glass can reveal tile but needs compatible mounting and cleaning.
Compare the actual entry opening and access to the faucet before choosing. A smaller visual barrier is not helpful when it makes bathing or cleaning awkward.
Can a smaller tub make every cramped bathroom work?
A smaller tub helps only when the released space improves access or storage. Compare the interior bathing well, entry height, and fixture arrangement before reducing its footprint.
Some rooms benefit more from a shallower vanity or a different door arrangement. Have the complete measured plan reviewed rather than assuming compact fixtures guarantee required clearances.