50 Wrapping Paper Storage Ideas

This post may contain affiliate links: full affiliate disclosure.
Wrapping paper stays usable when every roll is supported, protected from moisture, and easy to remove without shifting the whole collection. Start by measuring the paper and the storage space, then choose vertical storage for quick access or horizontal storage for long-term support.
How to Store Wrapping Paper Without Crushing It
This guide narrows 93 researched candidates to 50 distinct wrapping paper storage ideas. The final set covers closets, doors, walls, under-bed zones, furniture, awkward ceilings, ribbon and bag storage, renters, children and pets, budget levels, labeling, and maintenance.
Dimensions here are planning prompts because roll sizes, doors, walls, beds, cabinets, and organizers vary. Verify product instructions, mounting requirements, and the capacity of the specific wall, door, shelf, drawer, or furniture piece before installation.
Start With the Rolls You Actually Own
The best container depends on roll length, roll diameter, quantity, and how often you wrap. Measure the longest roll, the thickest new roll, and the space where the organizer will live before choosing a vertical or horizontal setup.
1. Use a Tall Lidded Floor Bin
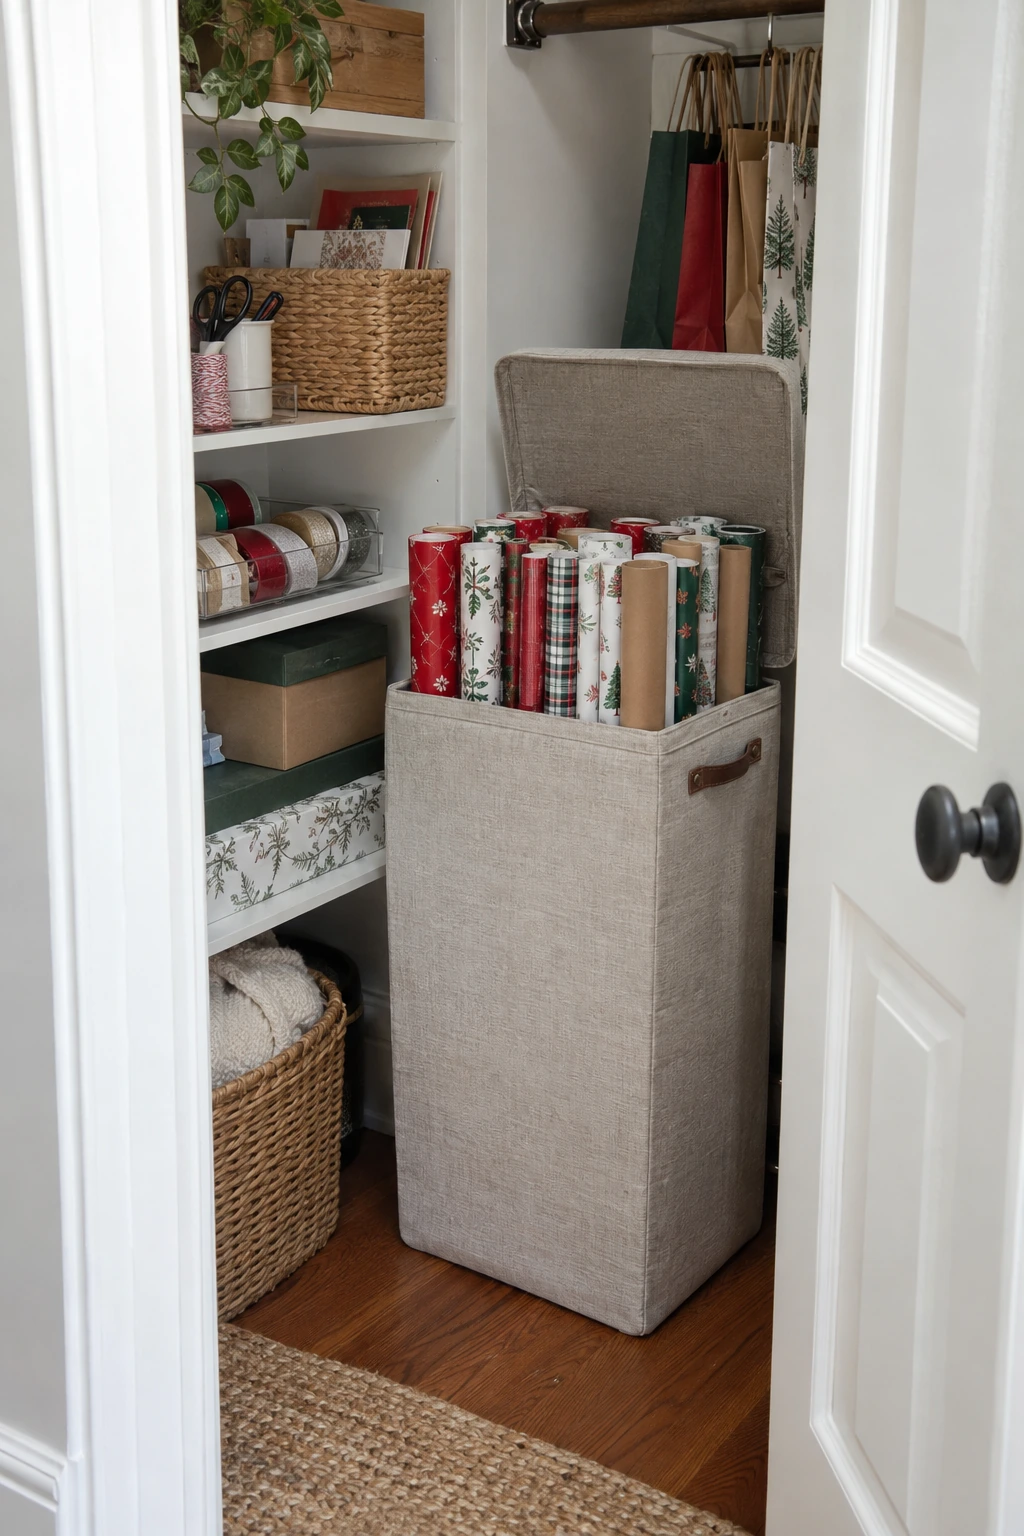
A tall, lidded bin keeps everyday rolls upright without letting the ends flare across the closet floor. Choose a container that supports most of each roll, then group unusually tall rolls separately so they do not lean and crease neighboring paper.
Measure the tallest roll and its widest diameter before shopping. Leave enough headroom to lift each roll straight out, and position the bin where a closet rod, shelf, or door does not block that upward movement.
Planning note: Measure the longest roll, the widest new roll, and the full lift-out clearance before choosing the bin.
A fabric or rigid-sided model can work, but the base must stay flat when full. Add a washable liner if the closet floor collects dust, and keep the bin away from damp exterior walls.
Label the lid by season or paper style. A small inventory card prevents buying another birthday print when three usable rolls are already buried at the back.
2. Slide a Covered Organizer Under the Bed
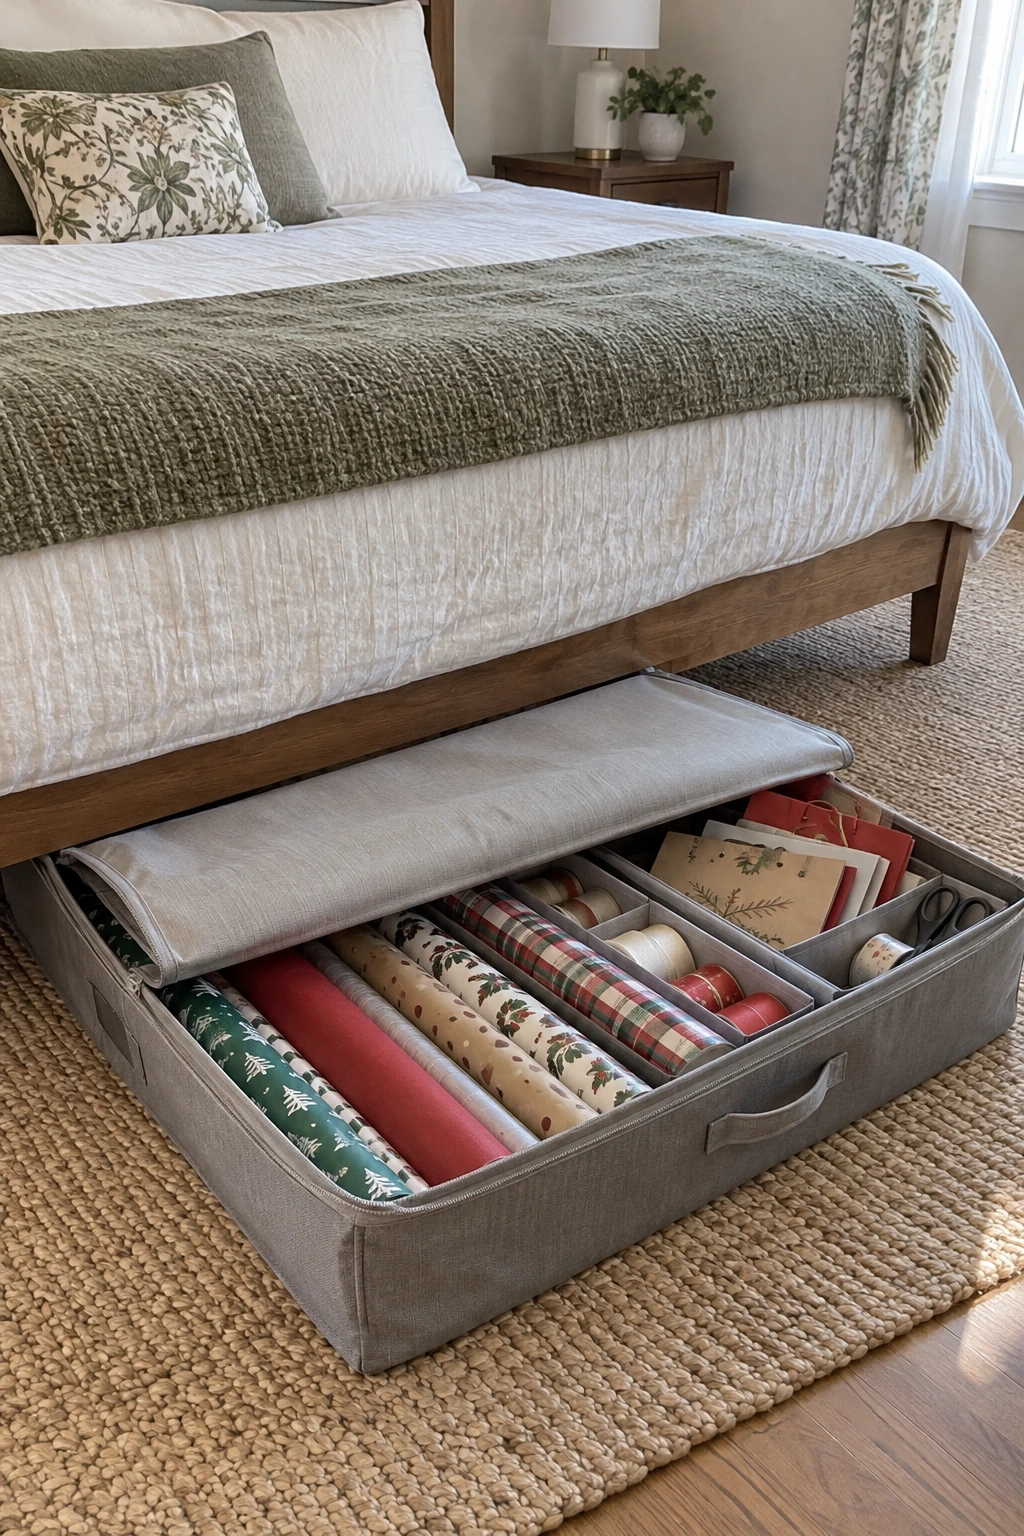
Horizontal under-bed storage protects long rolls in rooms with little closet space. Measure from the floor to the lowest bed-frame obstruction, including center supports, and confirm the container can turn through the room and clear the bed legs.
Lay rolls parallel with the long sides and avoid stacking heavy supplies on top. A firm base or shallow tray reduces sagging, while a zippered or lidded cover limits dust and keeps loose ribbon from winding around wheels.
Planning note: Check the organizer's outside dimensions against your bed clearance; product measurements and bed hardware determine the real fit.
Keep scissors in a separate closed pocket so blades cannot scrape paper. Pull the organizer by two handles when it is heavily loaded instead of twisting one corner across the floor.
Shop the Primode under-bed gift-wrap organizer on Amazon
3. Turn a Rolling Bed Drawer Into a Gift-Wrap Drawer
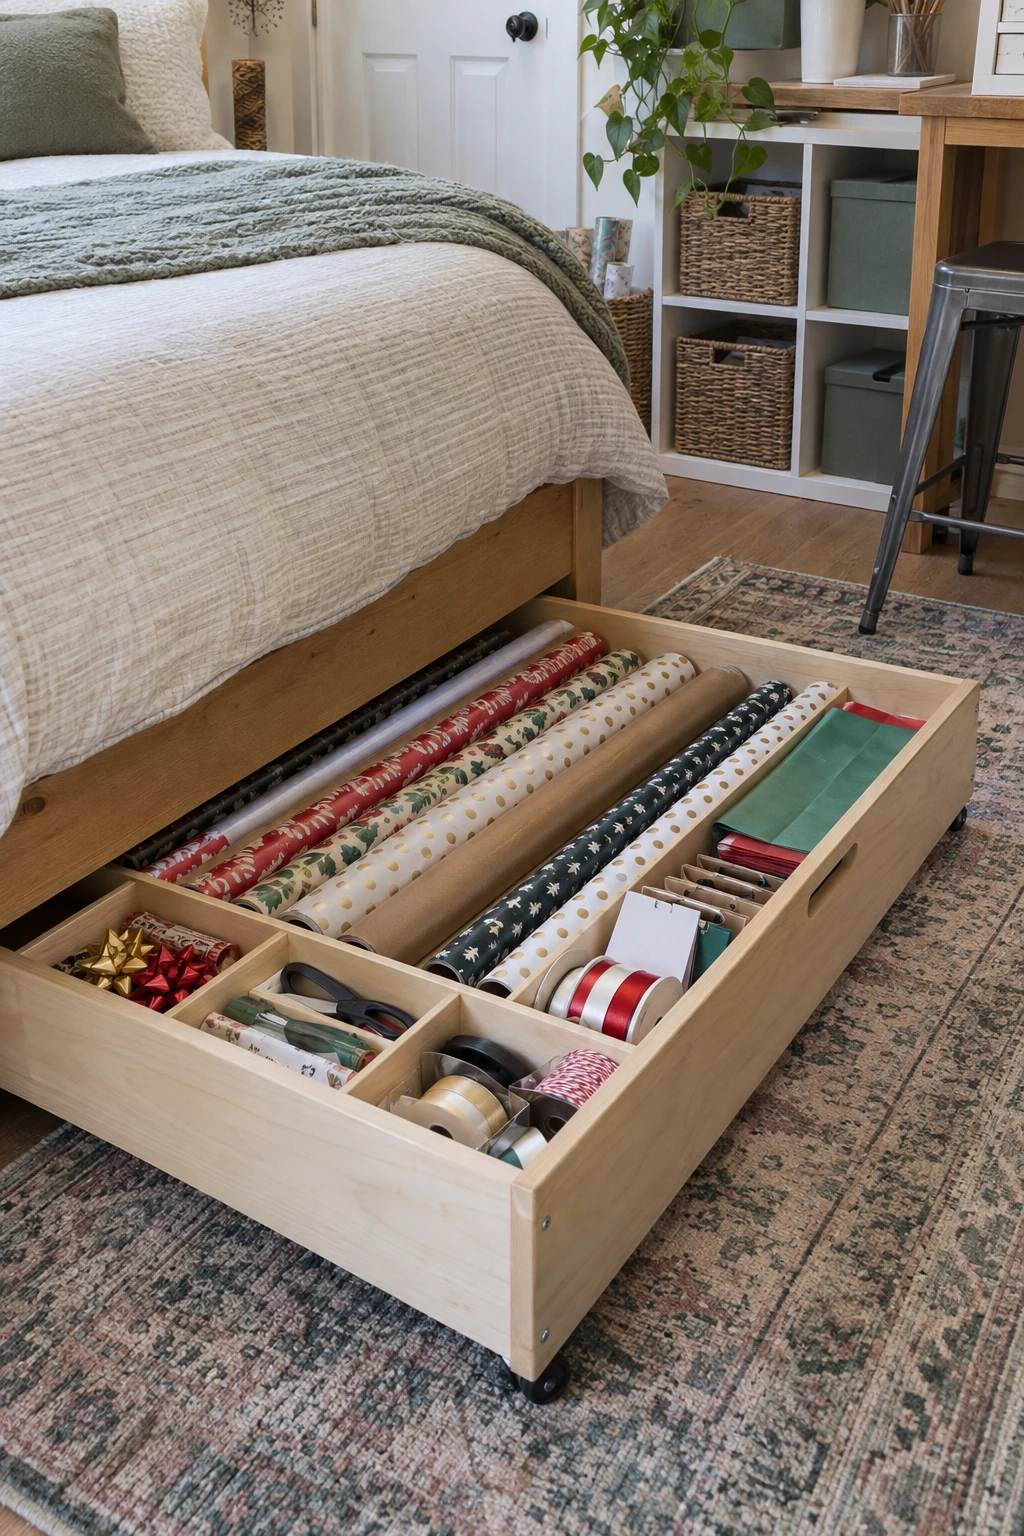
A rigid rolling drawer gives paper more support than a soft bag and is easier to pull from a deep bed. Fit low sides that contain the rolls while leaving the patterns visible, then reserve one end for a removable tray of tape and tags.
Use smooth casters suited to the flooring and confirm they cannot catch on a rug edge. Stop blocks or a recessed pull keep the drawer from disappearing too far under the frame.
4. Store Long Rolls in a Top-Shelf Box
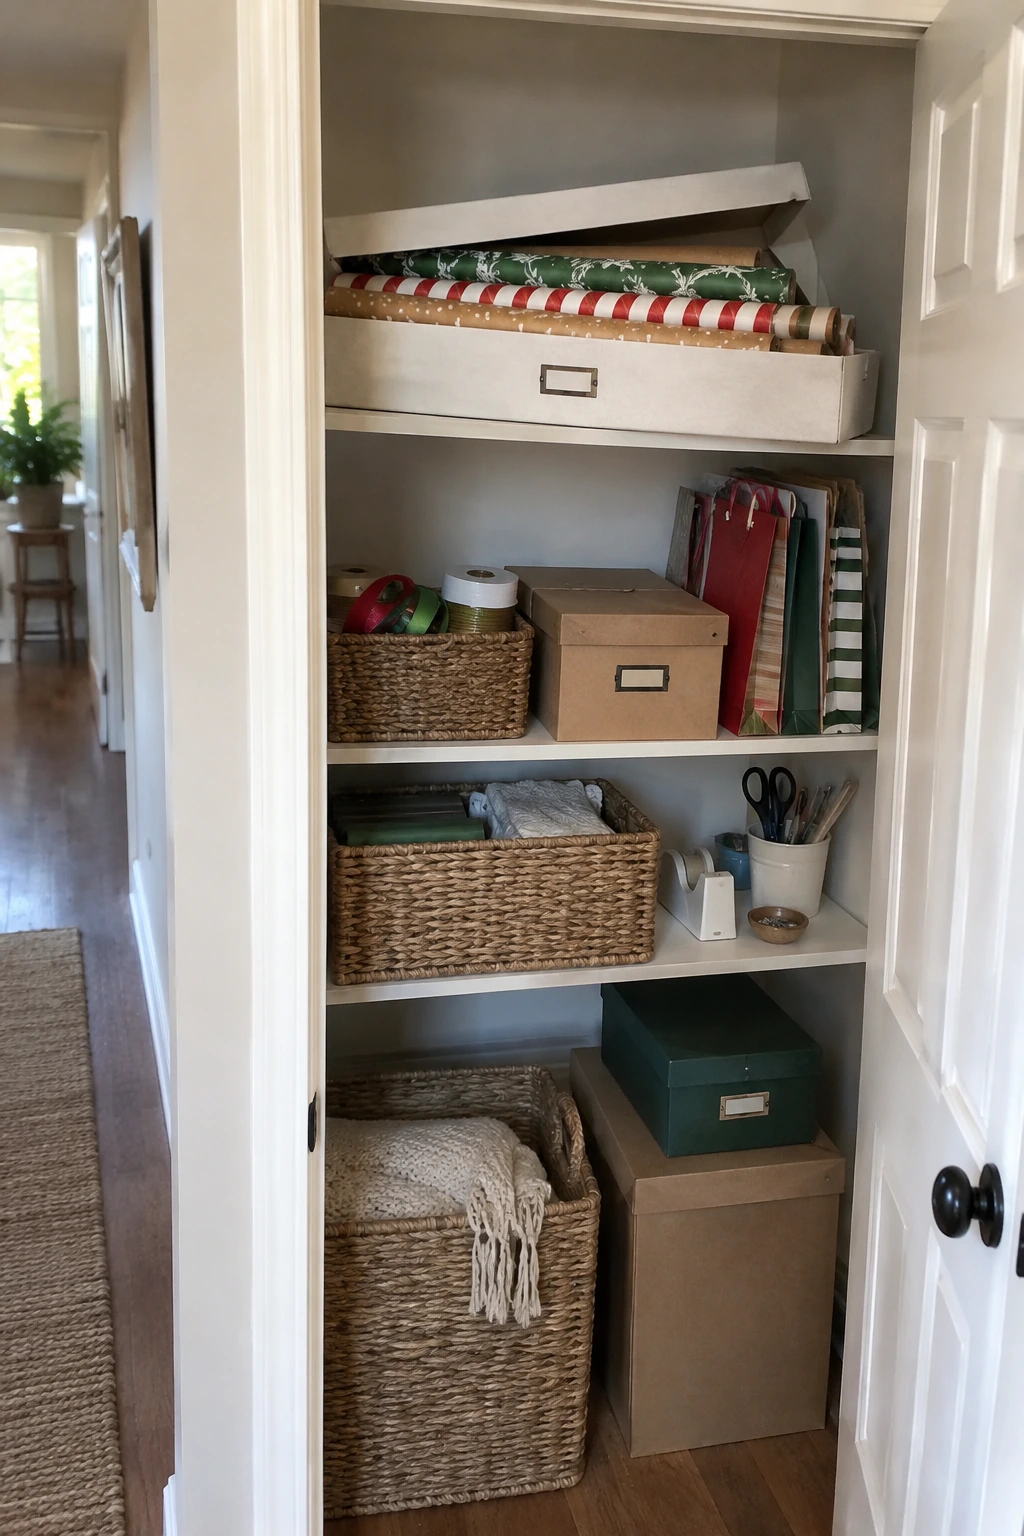
A long, shallow box makes sense when the closet has a continuous top shelf and wrapping happens only a few times a year. Store rolls in one layer where possible so the lower tubes do not flatten under a heavy pile.
Confirm that the box can pass through the closet opening at an angle. Use two pull handles or a stable step stool for retrieval, and keep frequently used tape and scissors lower so the large box is moved less often.
- Shelf supports remain secure
- Box clears the door header
- Safe step stool is stored nearby
Write the contents on the short end that faces the room. Seasonal color bands can make the correct box visible without opening every container.
5. Protect Special Paper in Mailing Tubes
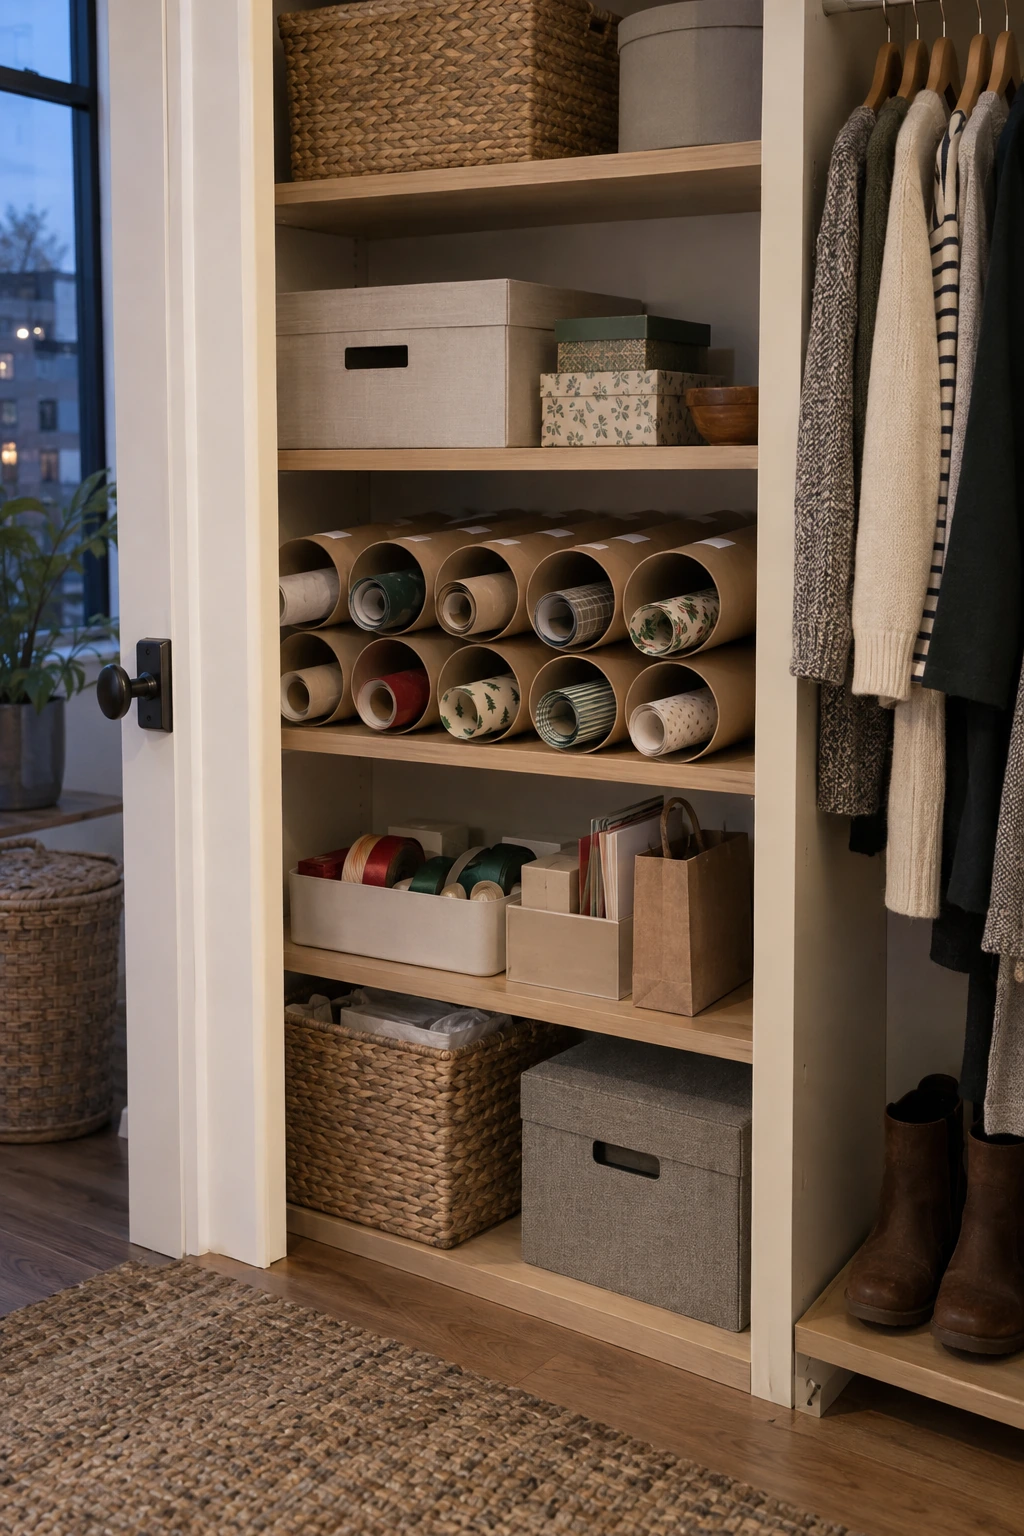
Use sturdy mailing tubes for handmade, metallic, or keepsake paper that dents easily. Roll each sheet around a clean core with the printed side protected, then cap the tube only after confirming the paper is dry and free of tape residue.
- Occasion
- Dominant color
- Approximate paper length
Label the outside with the occasion, color, and usable length instead of opening every tube. Store tubes horizontally with full-length support, or upright in a deep compartment that prevents tipping.
6. Keep Short Remnant Rolls in an Umbrella Stand
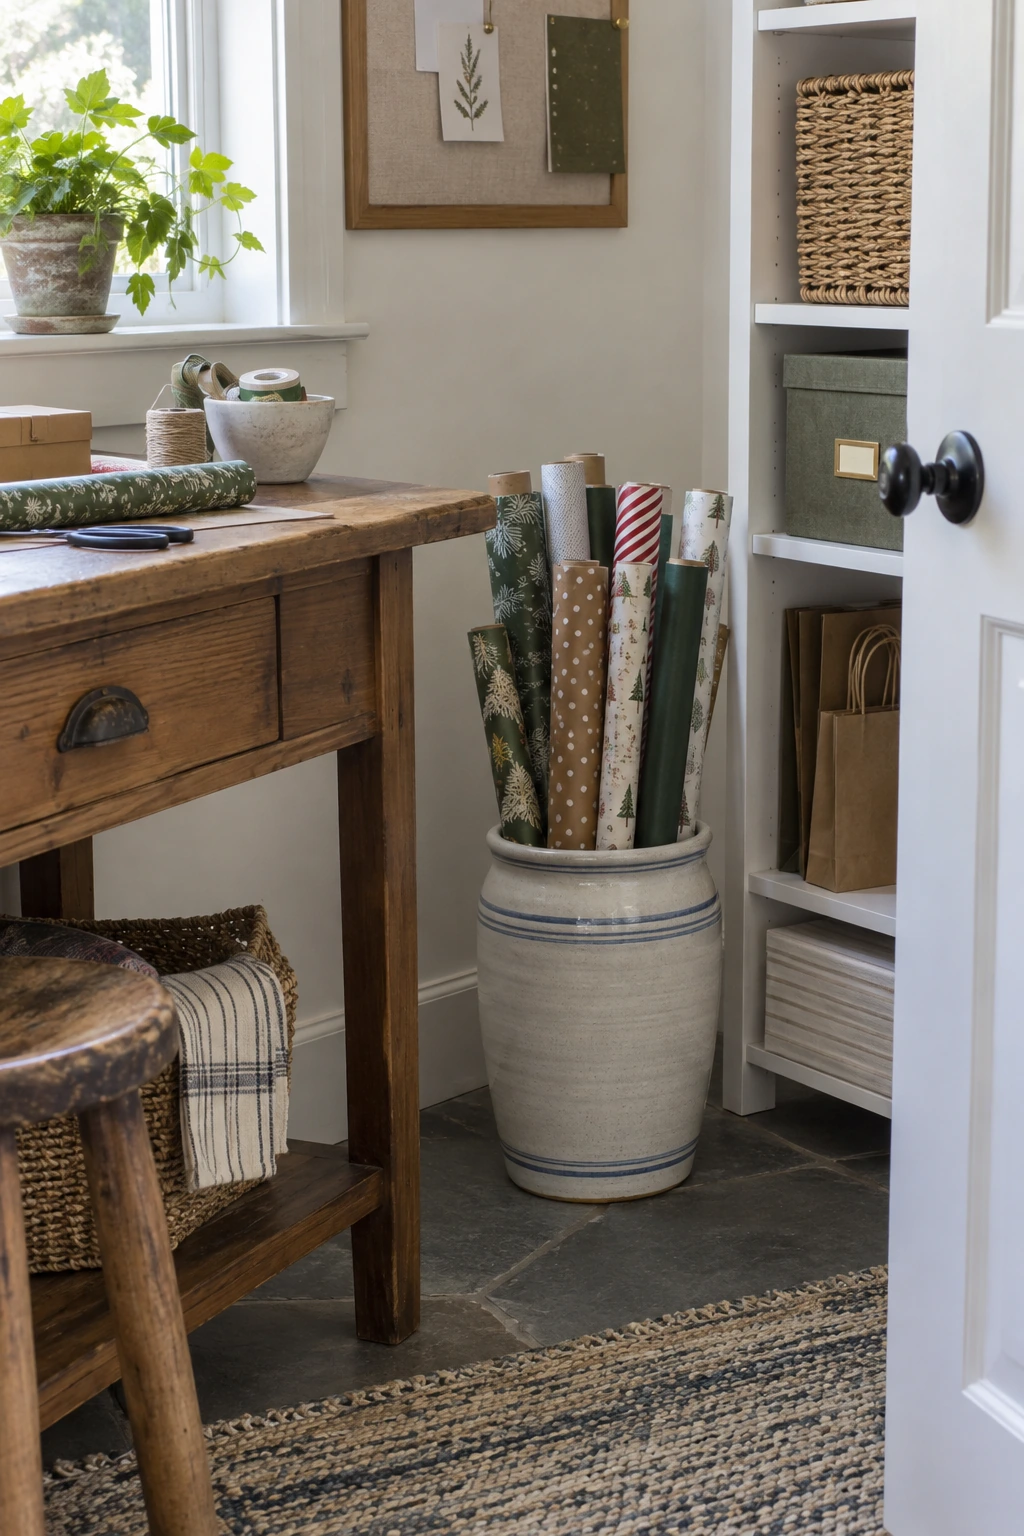
An umbrella stand gives short, partly used rolls a compact upright home beside a desk or cabinet. Reserve it for rolls that sit below the stable rim; long rolls create leverage and can tip a narrow stand.
Choose a wide, weighted base and line the bottom so rough pottery cannot scuff paper edges. A cardboard divider separates everyday kraft paper from bright seasonal remnants and stops small tubes from sliding underneath larger ones.
Use Doors and Closet Walls Without Blocking Them
Door and wall storage can recover a narrow strip of space, but hardware, hinges, trim, and walking clearance matter. Test the full swing before loading any organizer and follow the mounting instructions and capacity limits for the specific door or wall.
7. Hang a Full-Length Organizer Over the Door
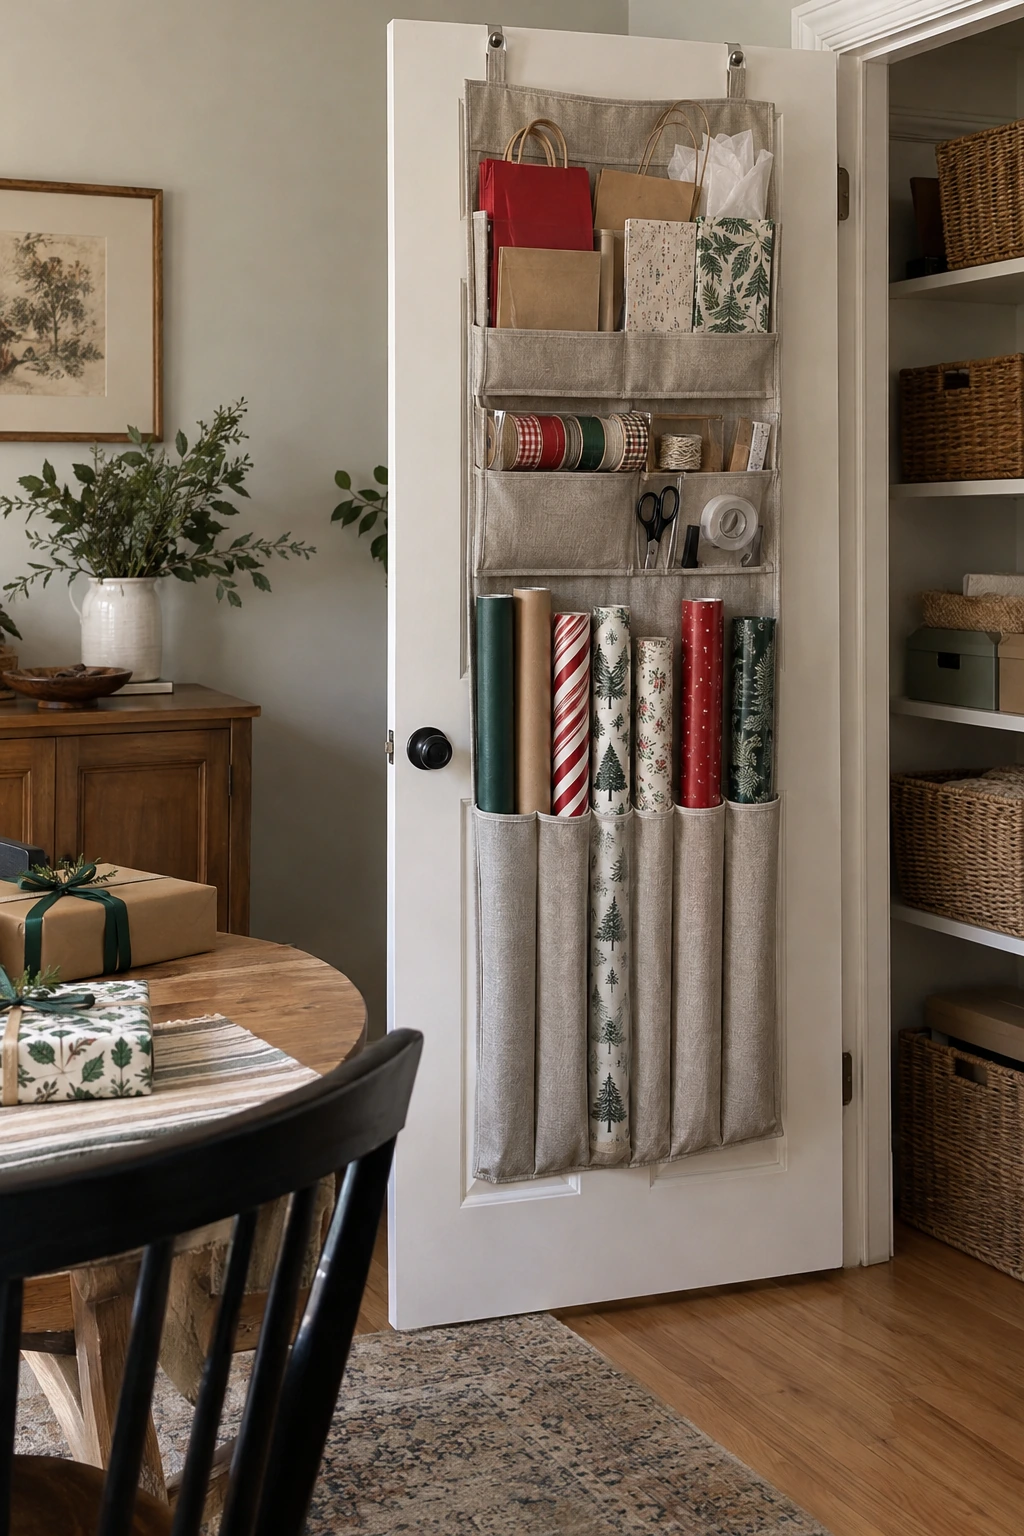
A purpose-built hanging organizer can combine roll sleeves, gift-bag pockets, and small accessory compartments on one door. Put the longest, heaviest rolls low so the door stays balanced and the organizer does not bow outward.
Measure the door thickness, top gap, handle position, and floor clearance before buying hooks. Close the door slowly during setup and check that the organizer misses the frame, shelves, and anything stored behind it.
Planning note: Open and close the loaded door through its full swing, then recheck the hooks after a week of use.
Use soft sleeves for paper and closed pockets for bows. Avoid loose cords near the hinge side, where ribbon can snag or keep the door from closing completely.
8. Build a Door-Mounted Basket Corral
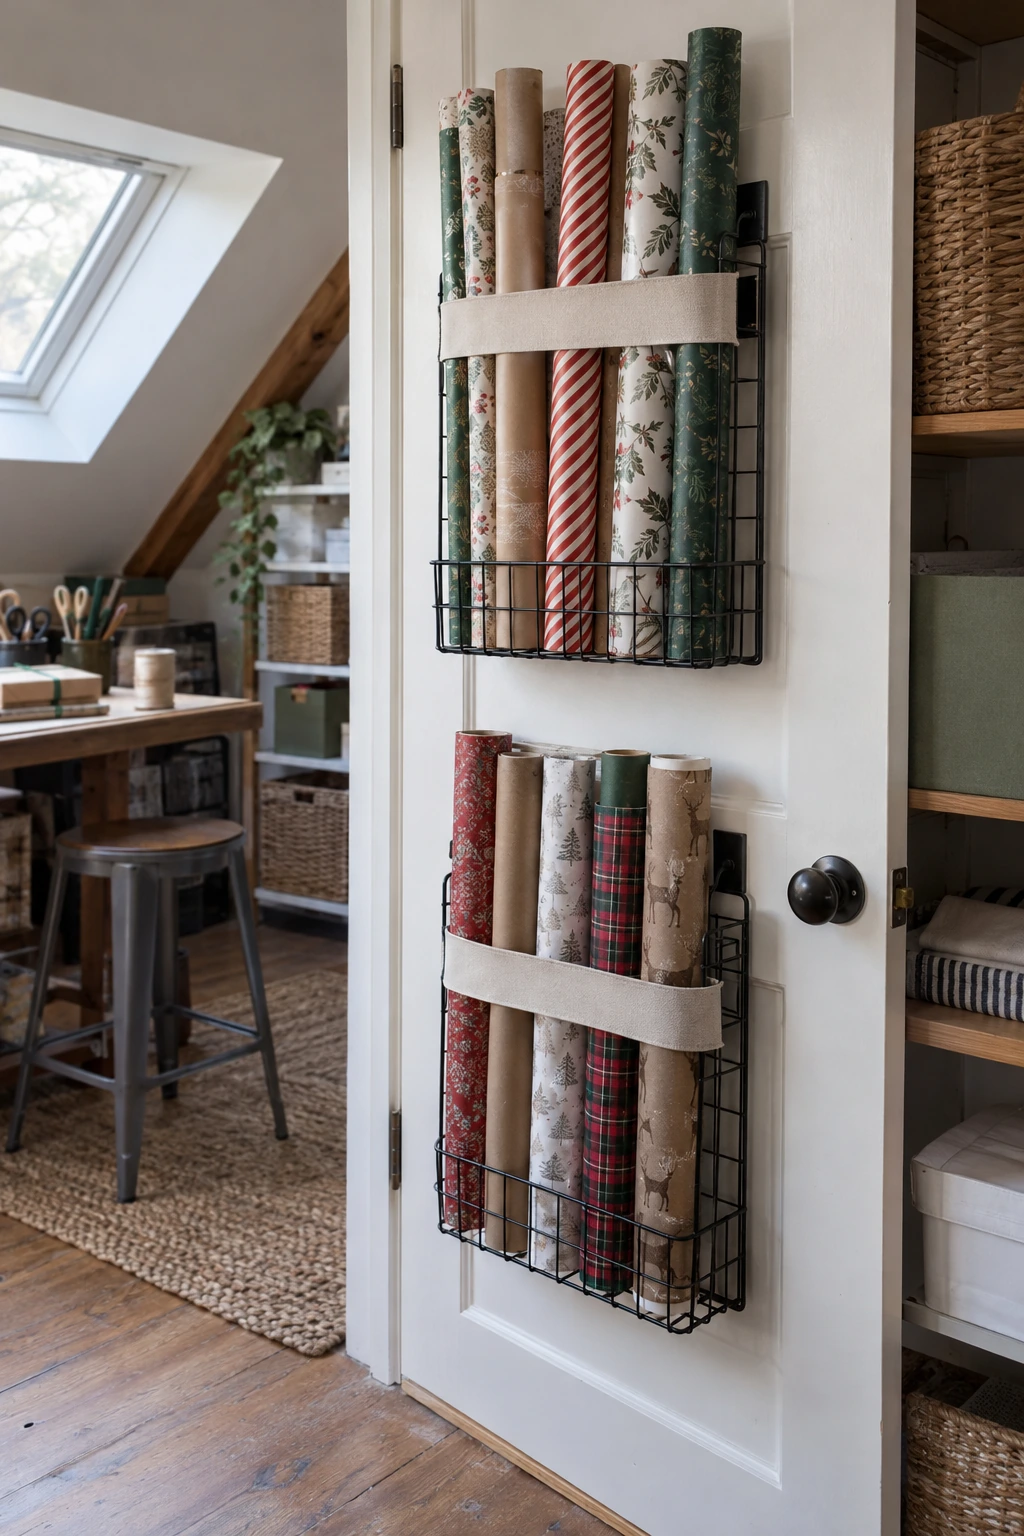
Two shallow baskets can cradle rolls against a solid door when a fabric organizer feels bulky. Space the baskets far enough apart to control both the lower and upper portions of each roll, then add a soft retaining strap across the open fronts.
Verify the door construction and the rack manufacturer's mounting method before drilling. Keep hardware clear of panels and glass, stay within the stated capacity, and confirm screws cannot project through the finished face.
- Handle turns freely
- Baskets miss the frame
- Rolls cannot reach the floor
Reserve this setup for a modest number of rolls. Excess weight stresses hinges and makes a lightweight door swing abruptly, especially where children or pets pass.
9. Make a Renter-Friendly Door Strap System
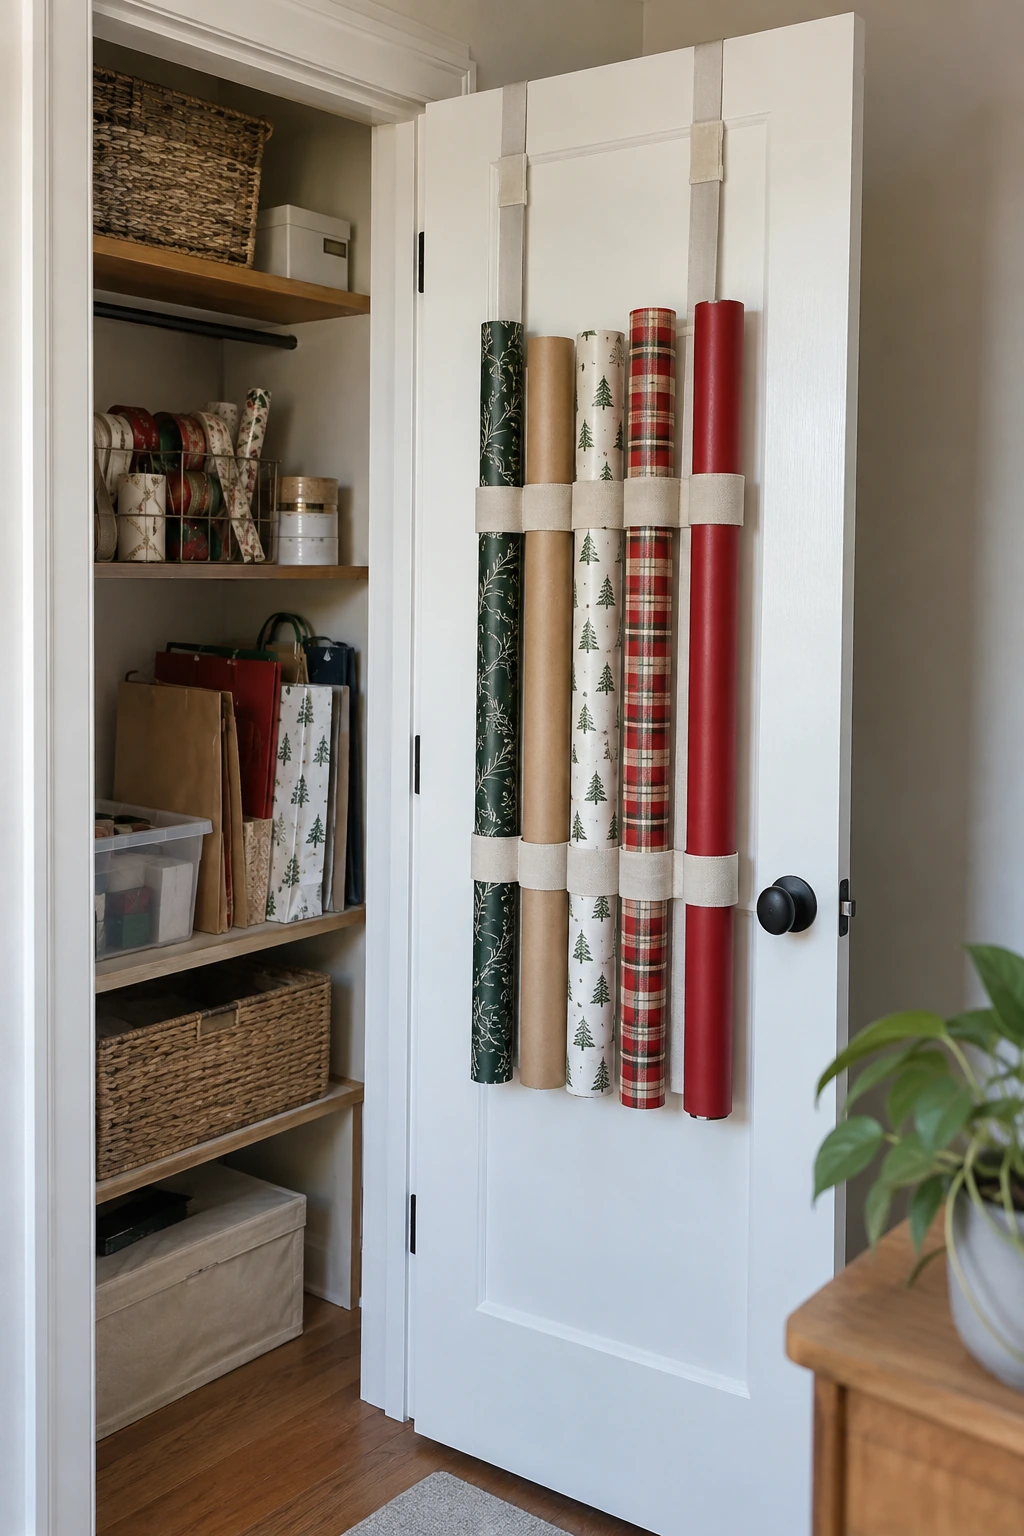
Removable over-door straps can secure a small bundle of rolls without holes. Choose padded hooks that fit the door precisely, and use two adjustable loops so the tubes stay vertical rather than swinging when the door moves.
Protect painted surfaces with the material recommended by the hook maker and test the door latch after installation. Remove the system if the top gap becomes tight, the door rubs, or the straps mark the finish.
10. Turn Tension Rods Into Closet Dispensers
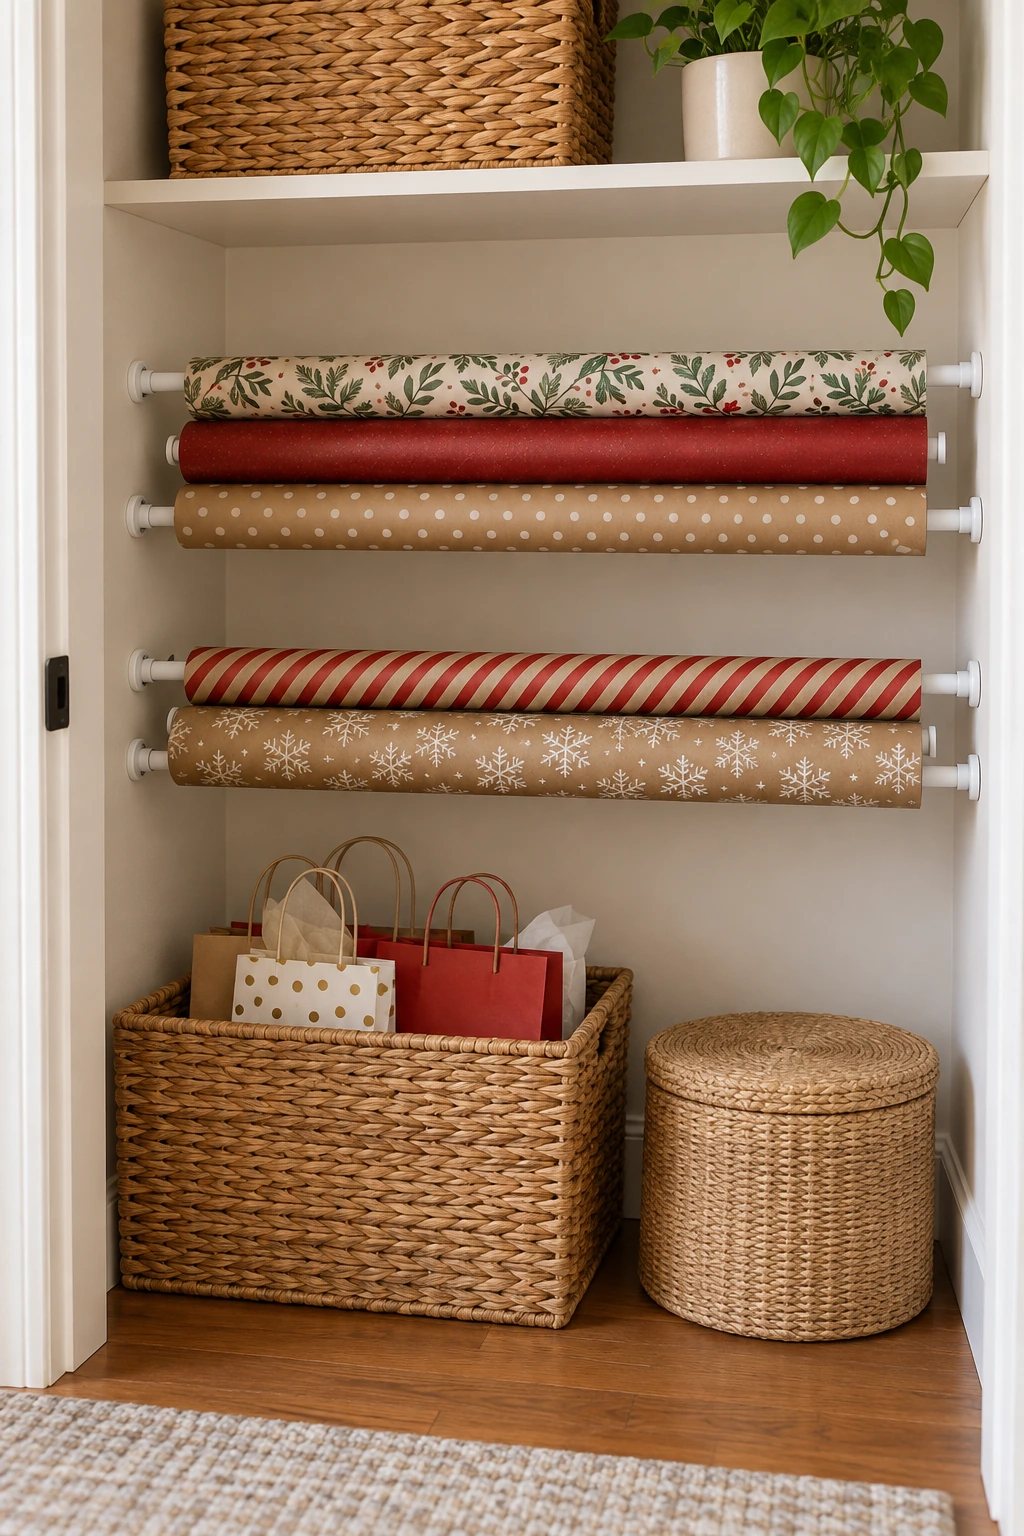
A slim tension rod passed through a roll's hollow core can turn a narrow closet bay into a simple dispenser. Give each roll its own rod so the paper rotates freely and the pattern stays visible from the doorway.
This works only between sound, parallel surfaces and within the rod maker's span and load guidance. Test each loaded rod, mark any movement, and keep the setup away from door tracks, clothing, and sprinkler or utility access.
Planning note: Tension hardware is convenient, but the product instructions and the wall finish determine whether it is suitable.
Measure the roll core before buying rods, because thick end caps may not slide through. Leave enough clearance between rows for the largest roll to turn without rubbing the one above it.
Check tension seasonally because temperature and repeated pulling can loosen the fit. Renters should confirm the end pads do not stain or compress painted drywall.
11. Mount Two Dowel Rails as a Dispenser
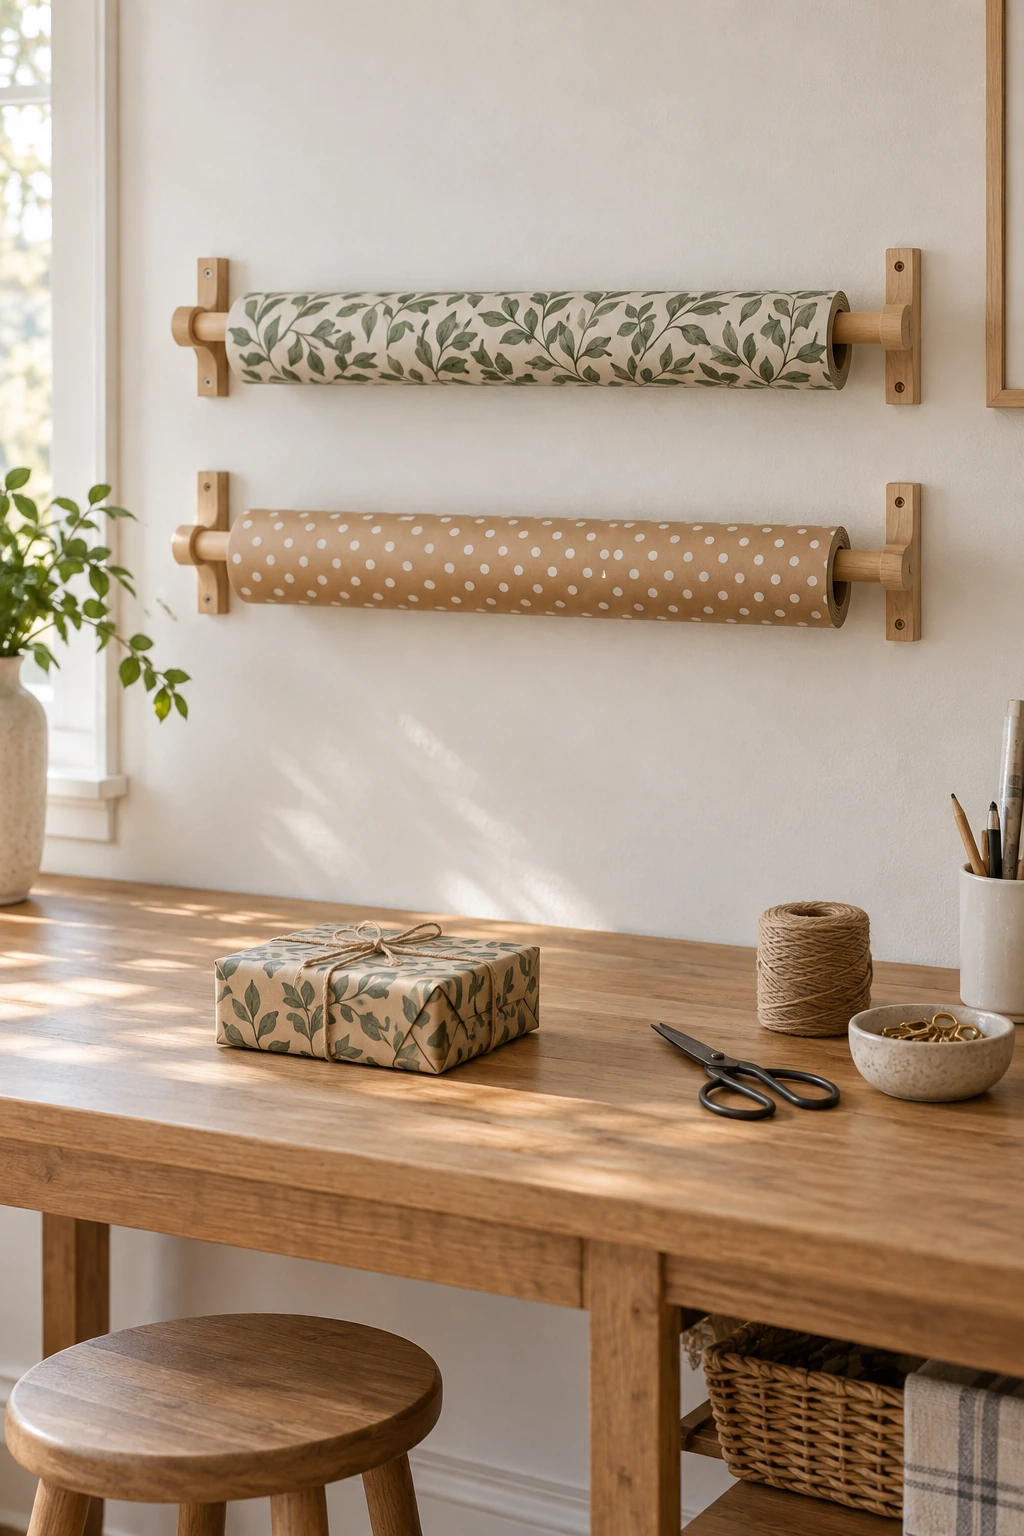
Two removable dowels turn a short wall above a wrapping surface into active roll storage. Space the brackets for the actual paper widths and leave room for the thickest roll to rotate without scraping the wall or the rail below.
Anchor the brackets for the wall type and follow the hardware capacity. Use dowels that cannot jump out during a pull, yet can be removed without unloading the entire station.
- Roll width
- Full-roll diameter
- Hand clearance for changing paper
Keep only current papers on the dispenser and store the reserve elsewhere. Sunlight can fade exposed prints, while kitchen moisture or garage humidity can soften paper edges.
12. Create a Pegboard Gift-Wrap Station
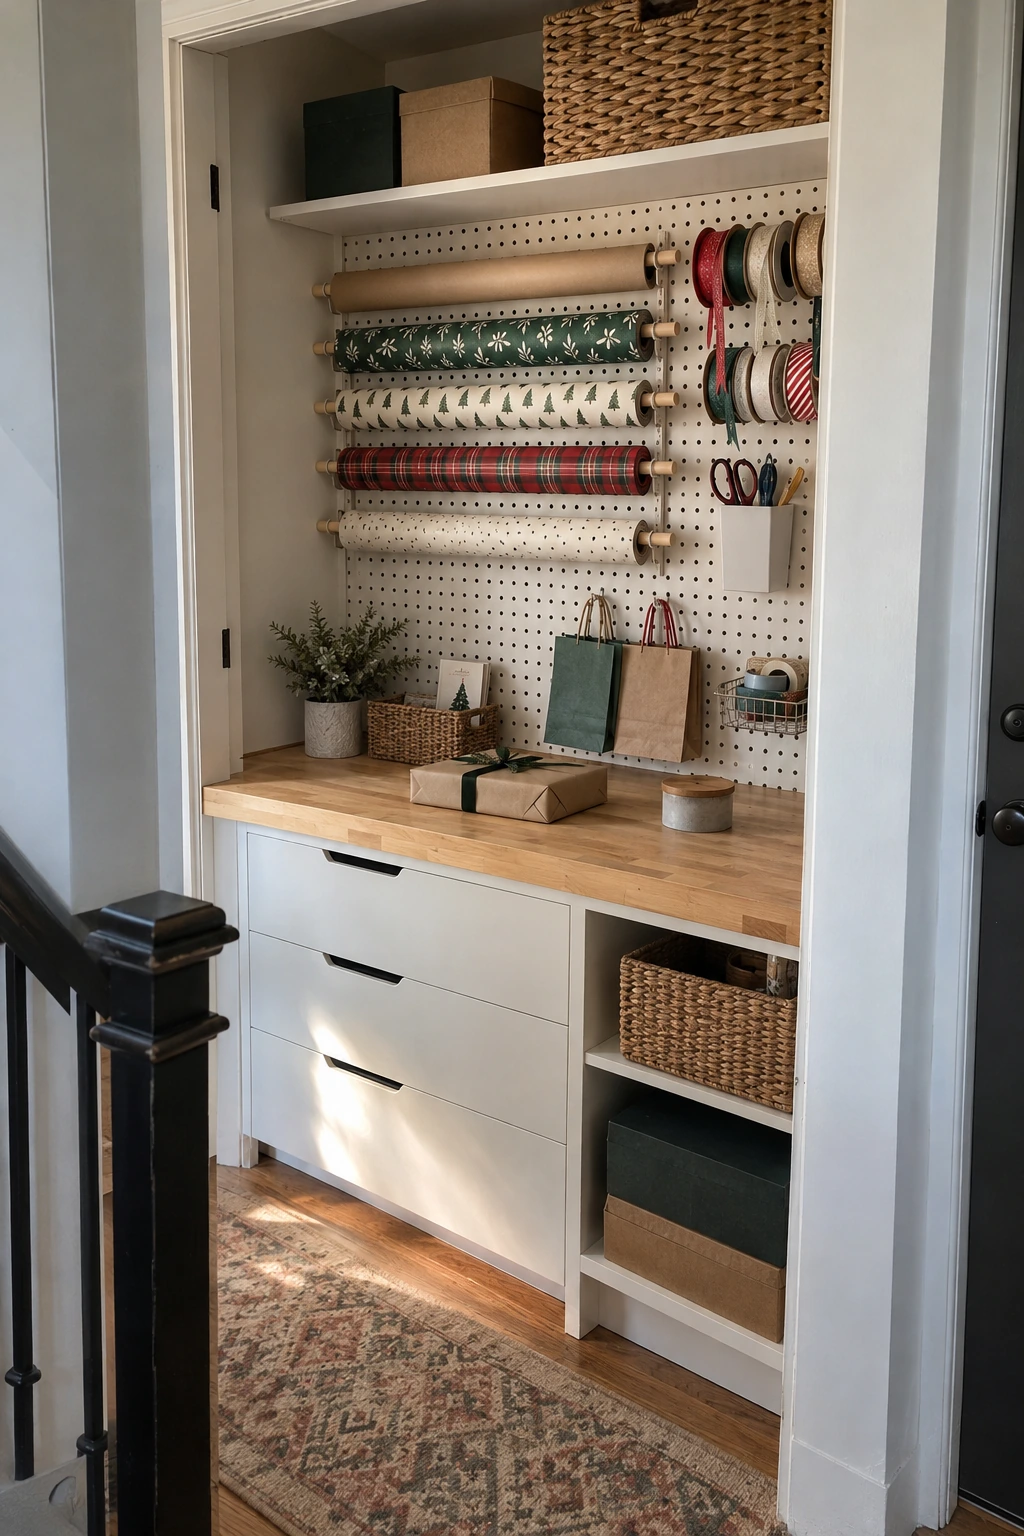
Pegboard makes small tools adjustable while paper rolls sit on dedicated dowels below. Arrange tape, tags, and ribbon around the wrapping zone according to use, leaving the center open enough to remove a roll without knocking hooks loose.
Choose hooks and spacers made for the board system, secure the board to appropriate support, and use locking accessories where available. Store scissors in a closed or downward-facing holder beyond a child's reach.
Planning note: Leave working clearance around every dowel and test that loaded hooks cannot lift out during use.
Photograph the finished layout before seasonal changes. The reference makes it easier to return tools to safe positions instead of letting the board become a catchall.
Keep a small waste bin under the station for paper offcuts, then empty it after each session. Loose ribbon and plastic tape dispensers should never collect on the floor.
13. Install an Adjustable Slatwall System
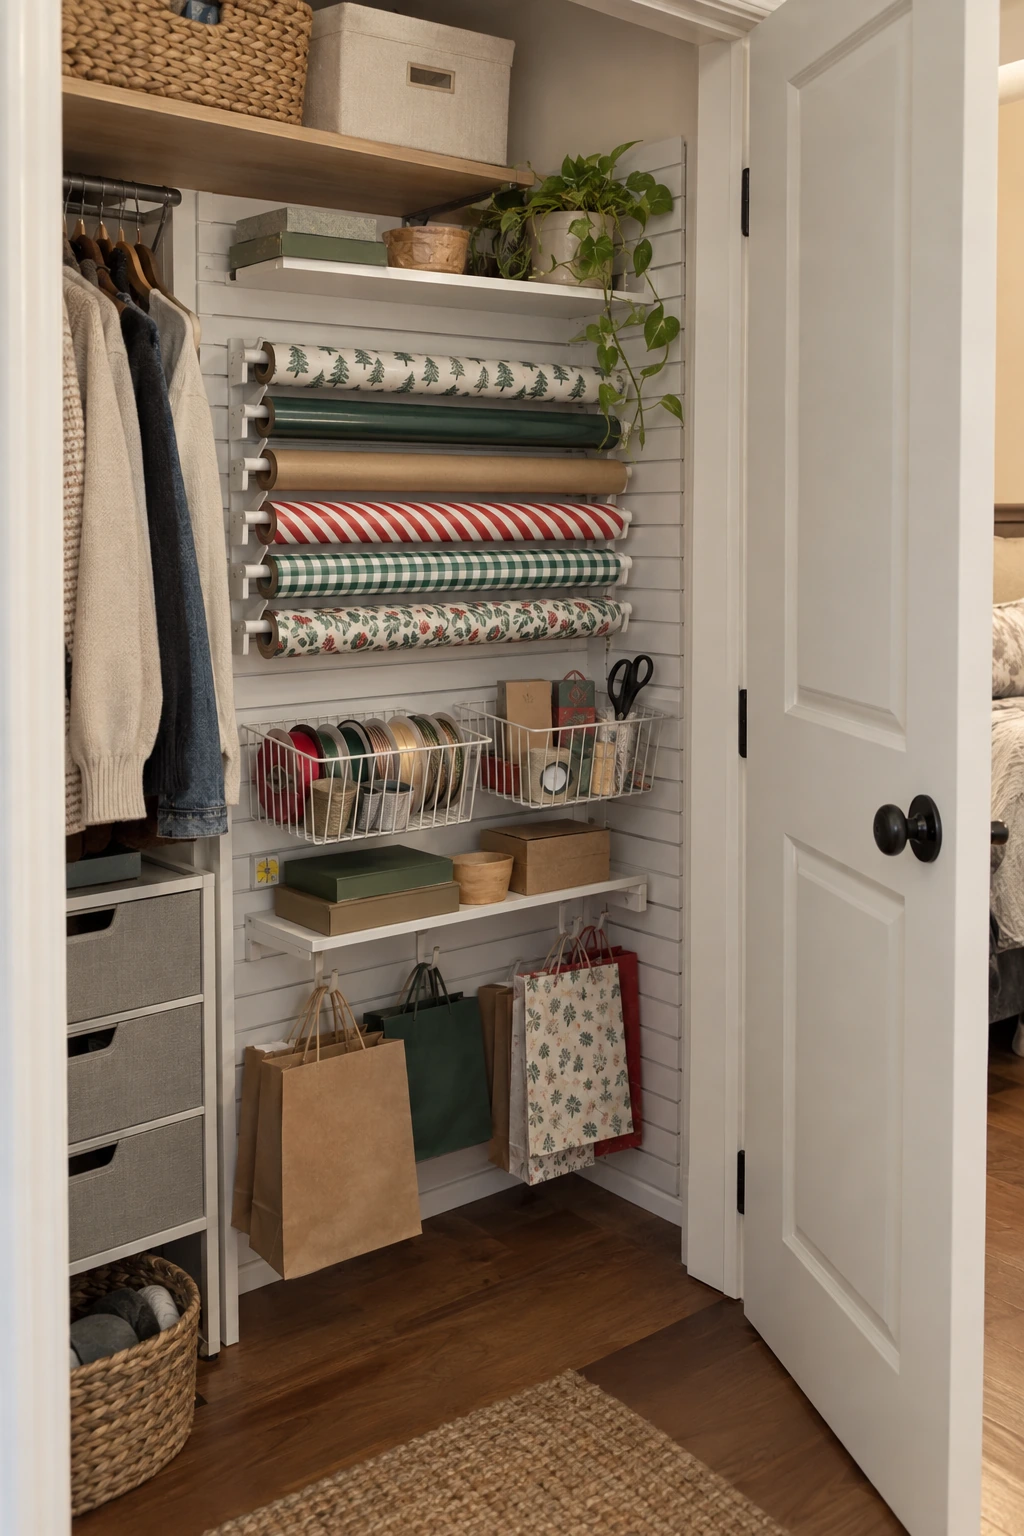
Slatwall supports baskets, short shelves, and roll brackets that can move as the collection changes. Use deeper accessories low for paper and gift bags, with light ribbon and tags higher where they remain visible.
Confirm that the panel, fasteners, and accessories are compatible and rated for the planned load. Keep the system clear of switches and vents, and preserve enough floor space to step back while pulling paper.
Build Storage Into Shelves, Cabinets, and Furniture
Built-in and furniture-based storage protects paper from light and traffic. The most useful layouts keep roll ends supported, let drawers and doors open fully, and reserve shallow zones for supplies that otherwise vanish behind large tubes.
14. Divide a Tall Shelf Into Vertical Bays
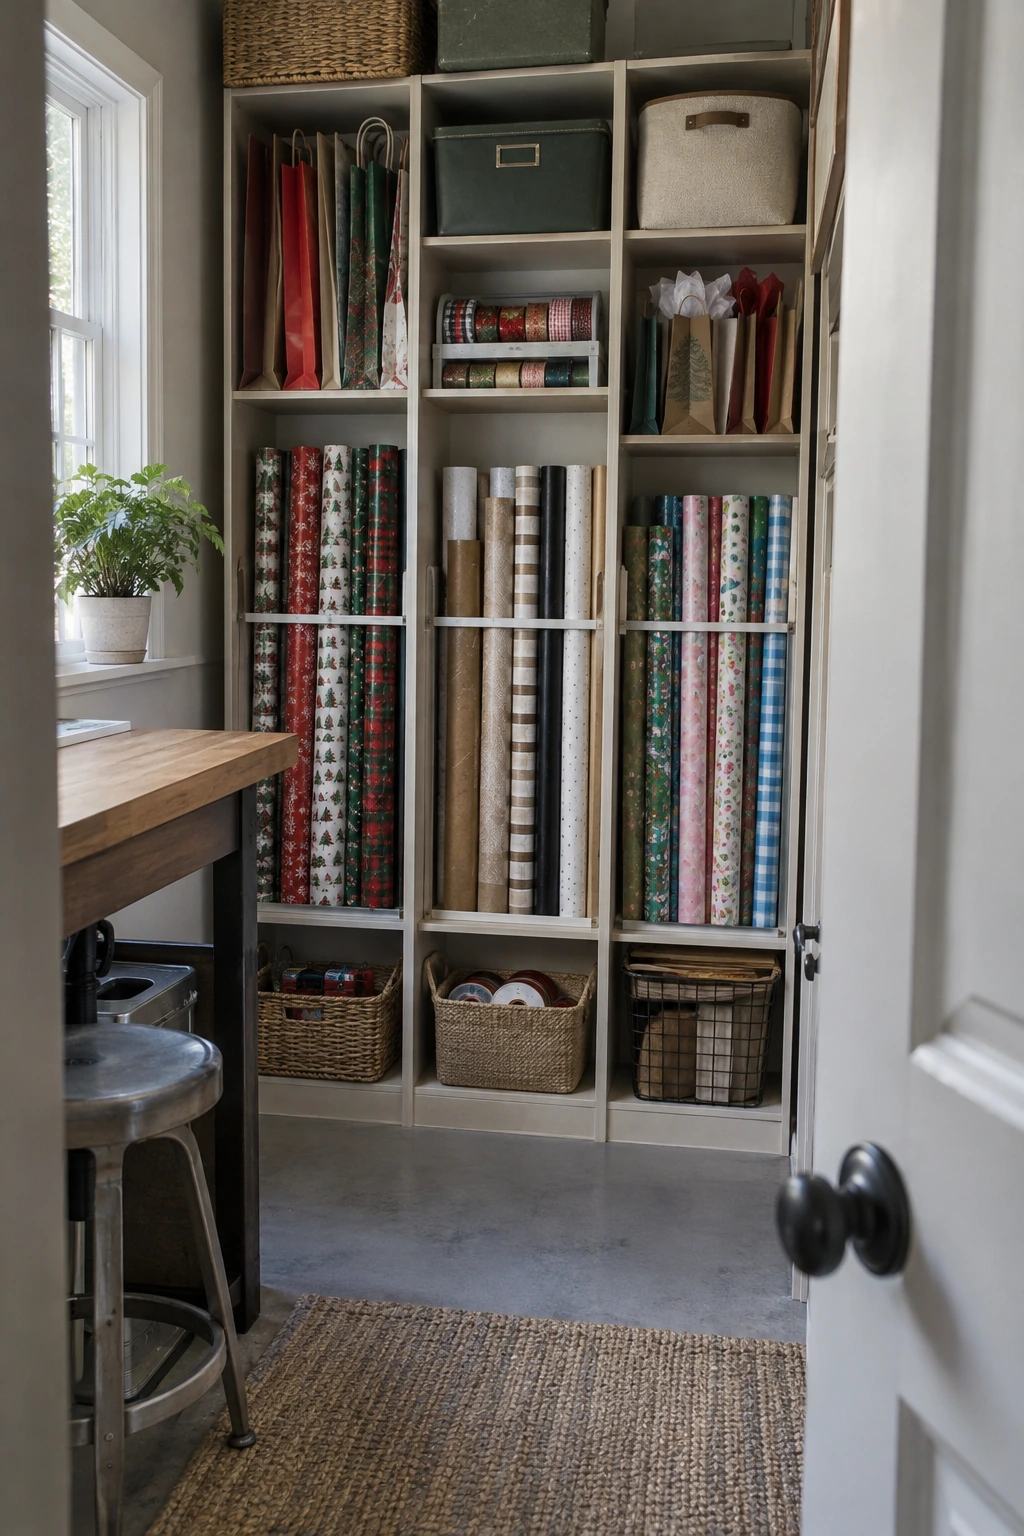
Vertical dividers stop a large group of rolls from collapsing into one tangled bundle. Make each bay narrow enough to hold paper upright but wide enough to remove one roll without scraping the printed surface.
Fasten dividers according to the shelf material and keep their front edges smooth. Place the longest paper in the tallest bay, then assign smaller bays to kraft paper, birthday prints, and seasonal wrap.
- Everyday
- Seasonal
- Special finish
Do not wedge rolls tightly against an adjustable shelf above. Paper expands slightly at loose edges, and crushing the top can leave a permanent curl or tear.
15. Create Horizontal Cubbies for Roll Families
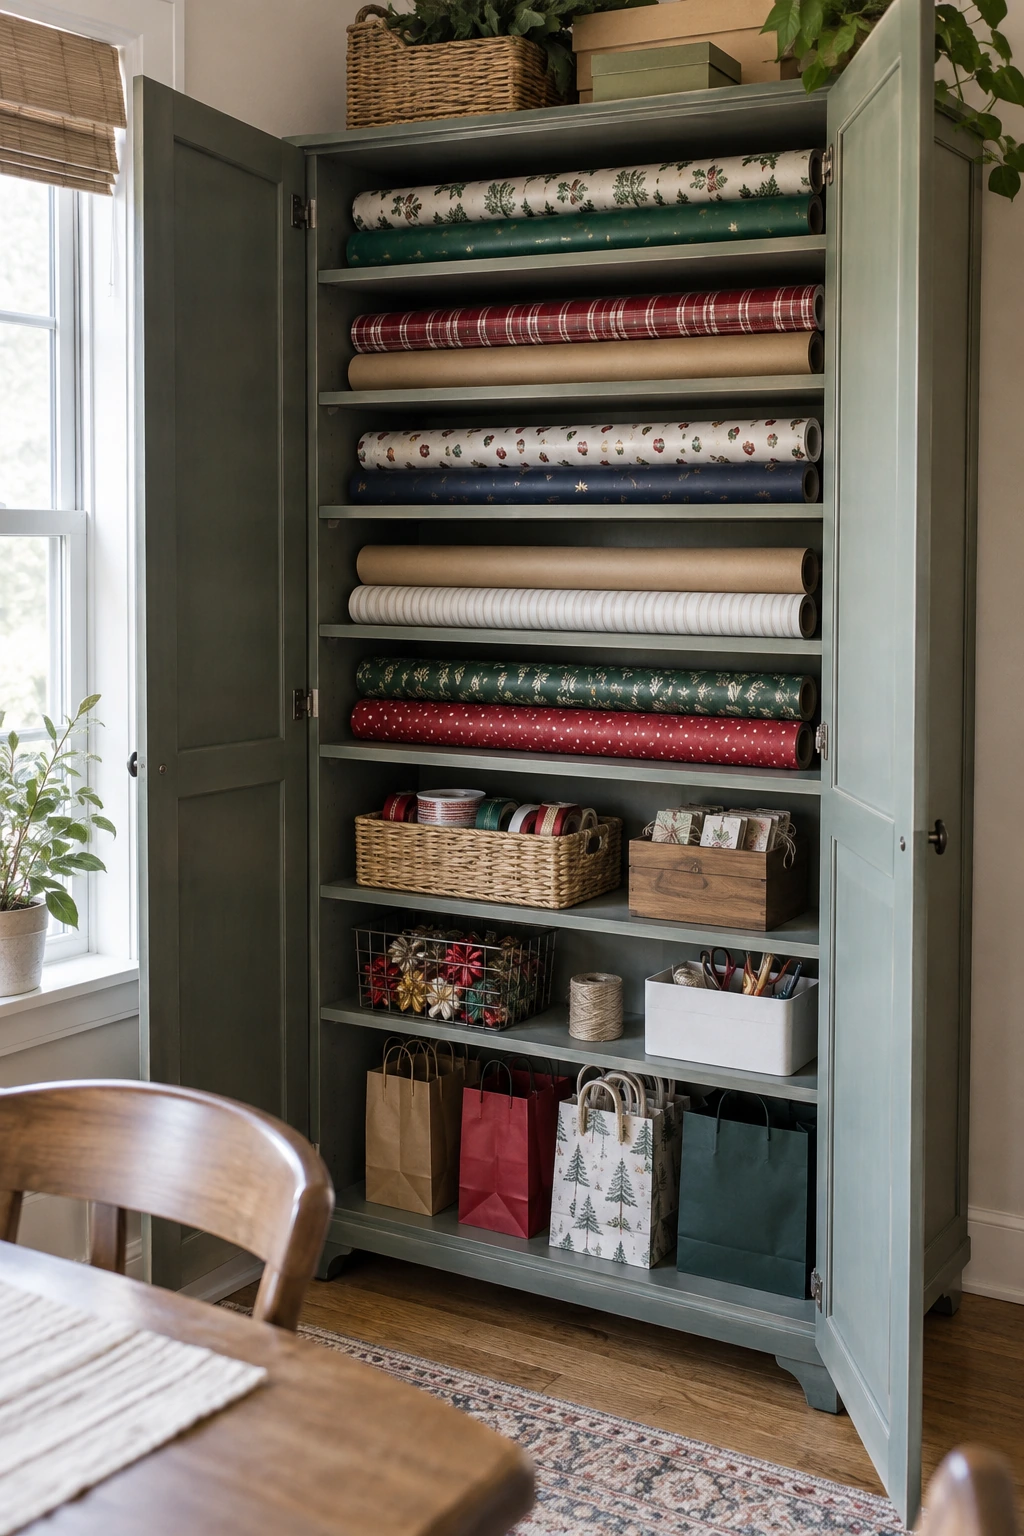
Wide horizontal cubbies support rolls along their length and make color groups easy to scan. Keep each compartment shallow enough to reach the back without dragging the front rolls onto the floor.
Sort by use rather than tiny color differences: everyday, children, winter holidays, and special finishes. Leave one cubby partly empty so new rolls have a home before the next decluttering session.
16. Dedicate a Deep Drawer to Full Rolls
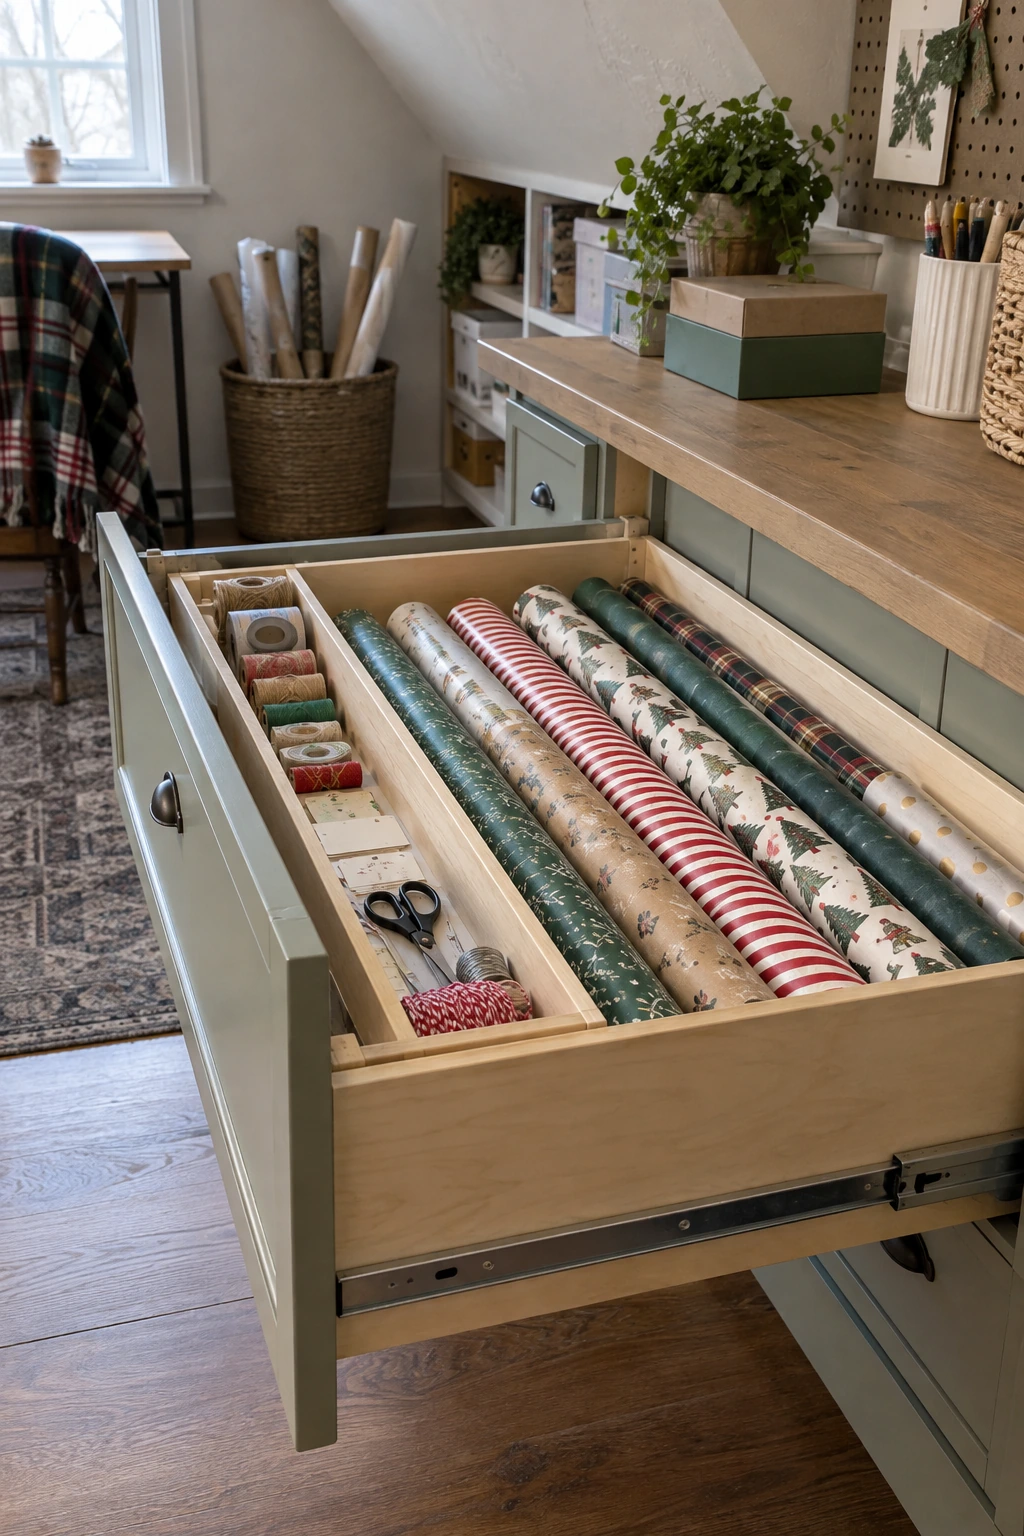
A wide, deep drawer hides rolls near the work surface and protects them from dust. Lay paper front to back or side to side according to the drawer's clear inside dimensions, including hinges, slides, and any handle screws.
Check the slide capacity and avoid stacking until the drawer is hard to close. Full-extension hardware improves access to the back, while a shallow removable tray can hold tape without resting directly on the paper.
Planning note: Measure the drawer's clear interior after hardware, not the cabinet's outside width.
Line the drawer with smooth, clean material and vacuum it occasionally. Grit trapped under a heavy roll can emboss or scratch metallic paper.
17. Add a Pull-Out Roll Cradle to a Base Cabinet
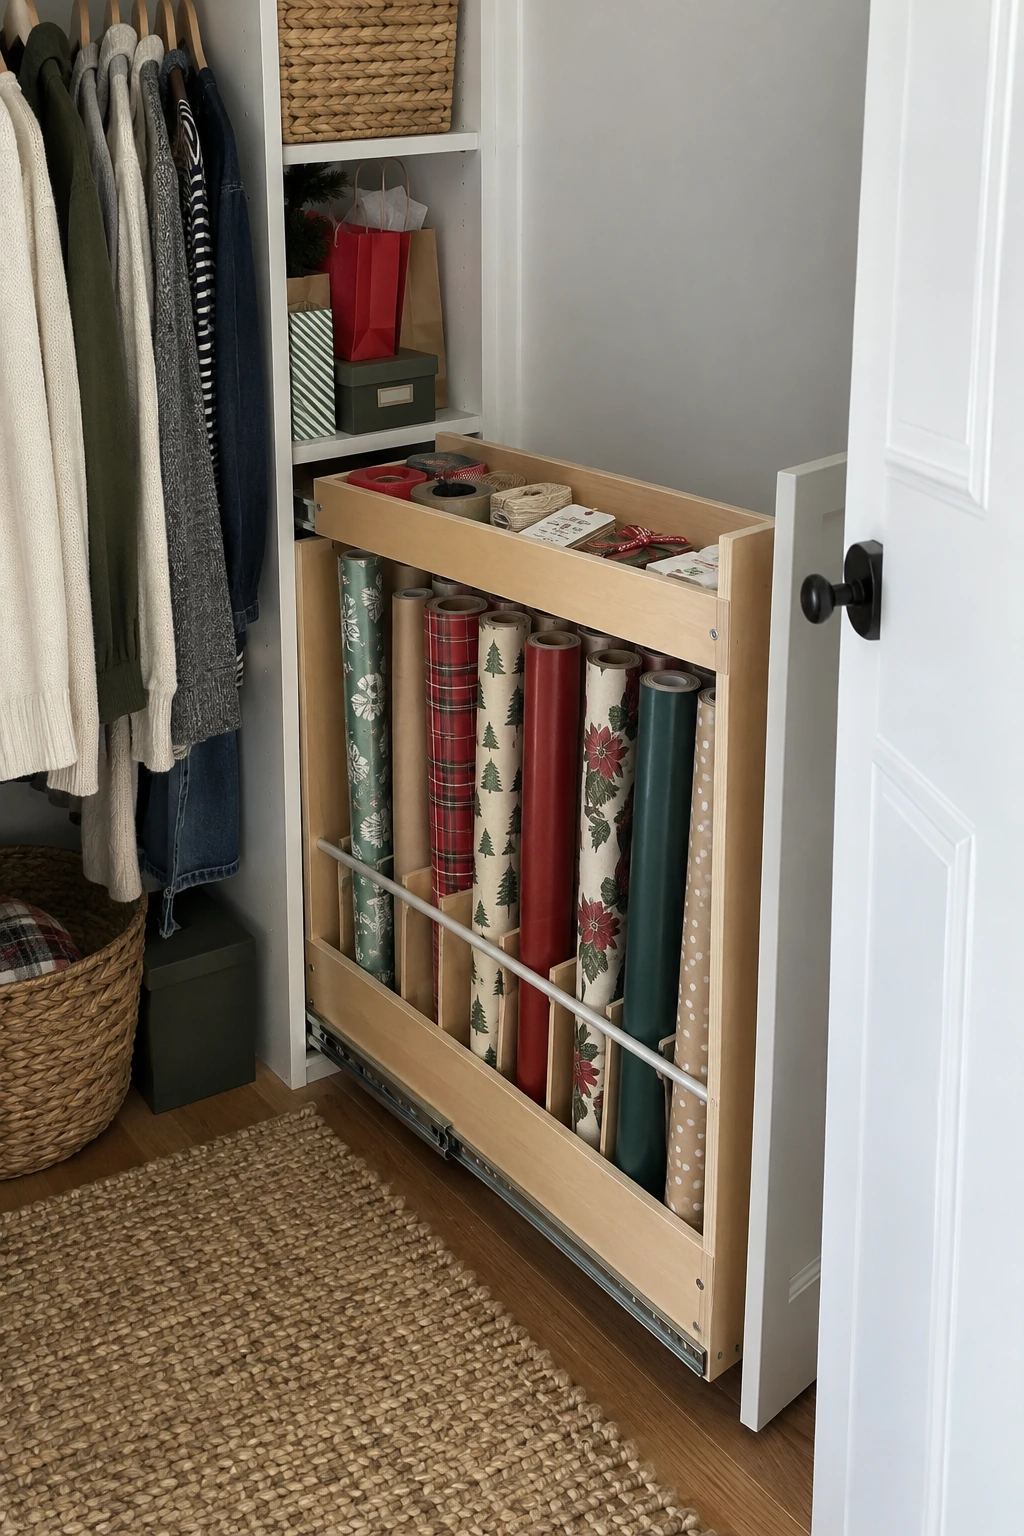
A narrow pull-out converts a deep base cabinet into visible vertical storage. Divide the lower section so rolls cannot cross the slide path, and place lightweight tools in a top tray that lifts out for wrapping.
The cabinet opening, face frame, hinge, and slide clearances determine the usable width. Follow the slide maker's load and installation guidance, then test the pull-out fully loaded before storing delicate paper.
- Clear opening
- Slide capacity
- Nearby heat or moisture
Keep the pull-out away from plumbing leaks and warm appliances. A dry interior cabinet near a dining table or craft desk offers better paper protection than a basement utility zone.
Use a stop or tall divider for short remnants so they do not fall behind the carriage. Clear labels on the tray make restocking tape and tags quick.
18. Fit a Long Drawer Beneath a Craft Counter
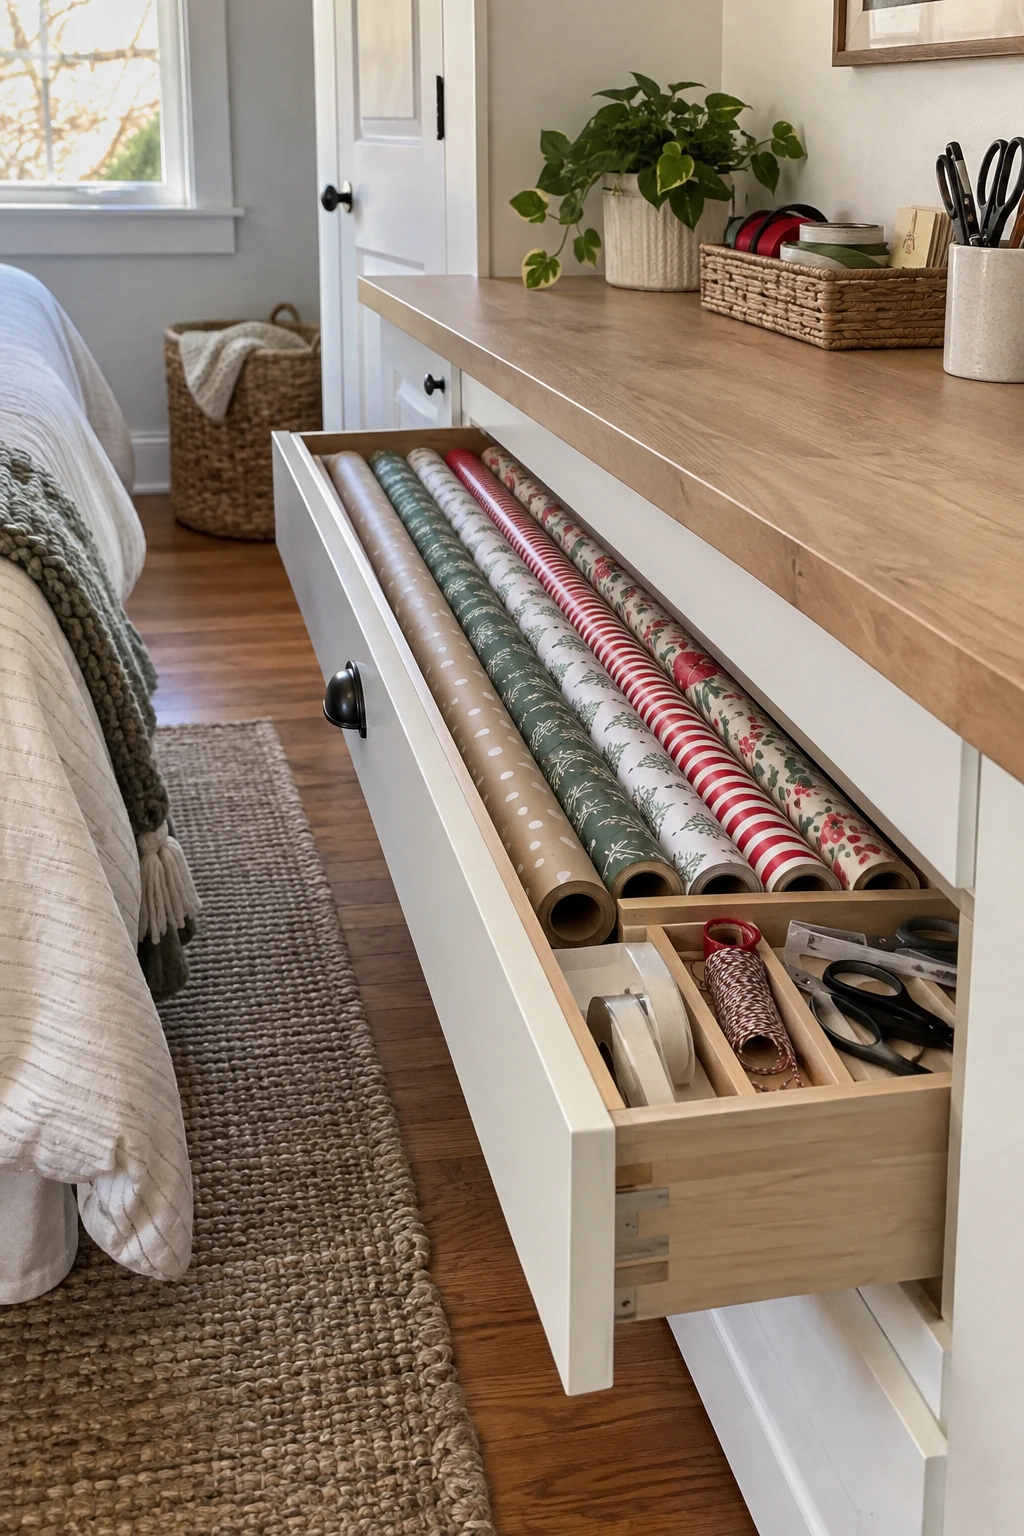
A long drawer directly under the wrapping counter keeps rolls flat and close to the work. Limit the drawer to one easy-to-scan layer, with dividers that stop tubes from rolling into the slide hardware.
Place frequently used neutral papers at the front and seasonal rolls farther back. If the drawer spans a wide cabinet, confirm the bottom and slides can resist sagging under the combined load.
19. Hide Rolls in a Storage Bench
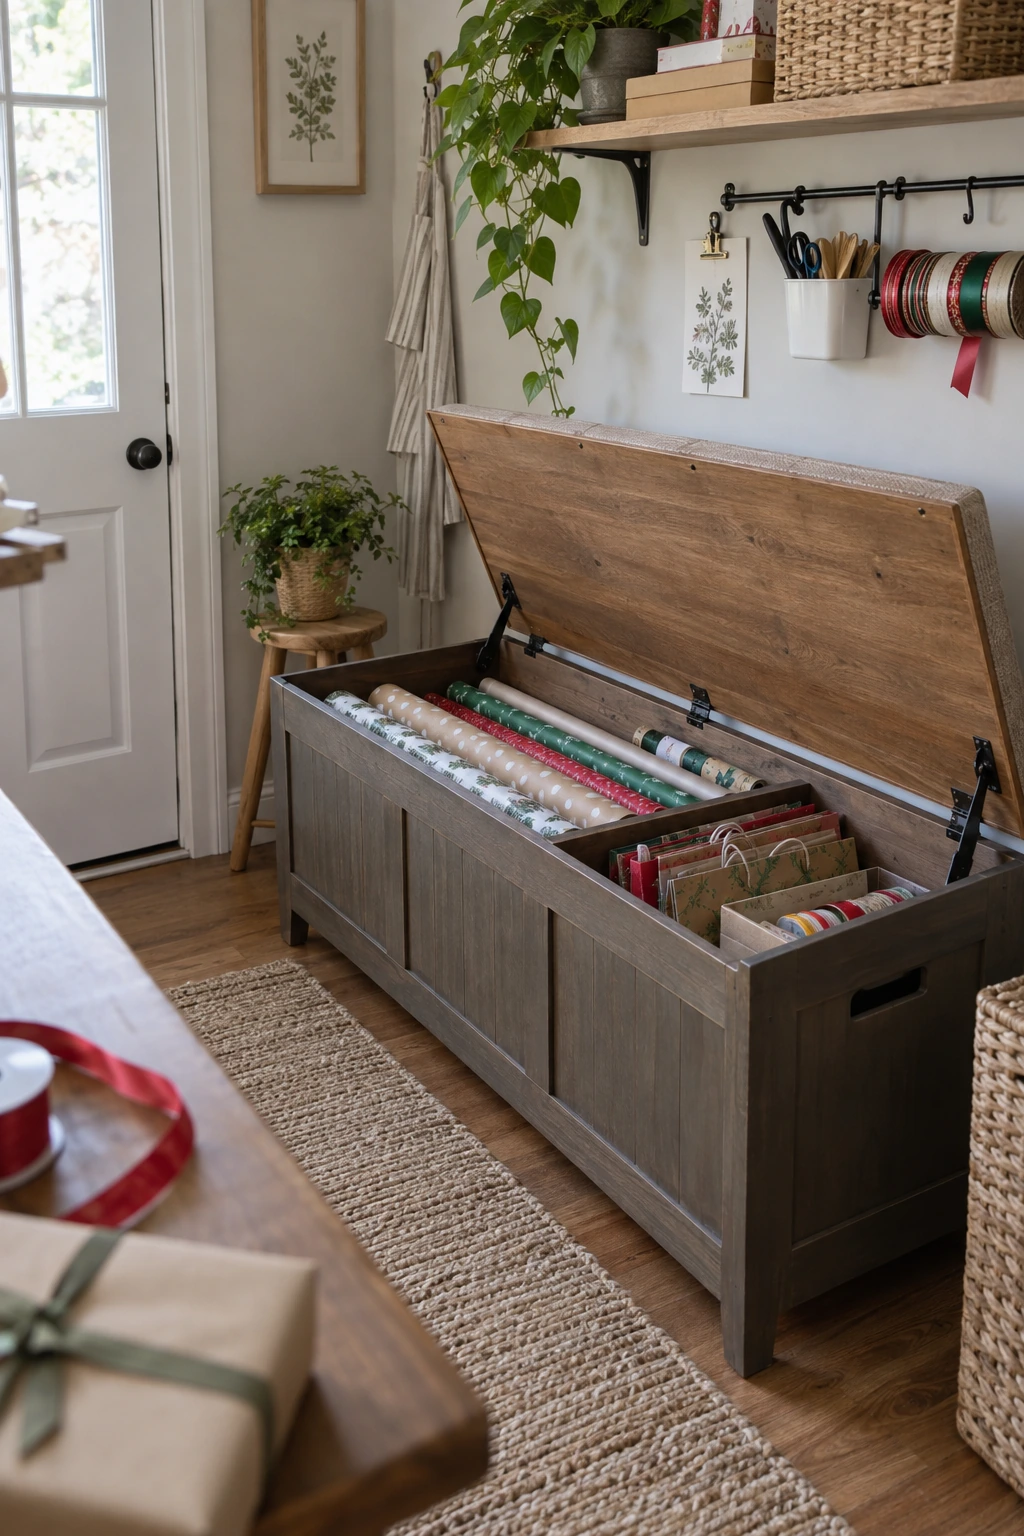
A bench with a long interior can store rolls near a dining table without making the supplies visible. Add a removable tray for tissue and bags so light materials are not crushed under the tubes.
Use lid-support hardware and follow the bench capacity instructions. Keep fingers clear of hinges, store cutting tools in a latched container, and place the heaviest rolls low enough that the bench remains stable.
Planning note: Choose a bench with controlled lid support and keep sharp tools in a separate closed box.
Humidity can collect in furniture against an exterior wall. Leave a small air gap, inspect the paper seasonally, and avoid sealing damp tissue or fresh greenery inside.
20. Add Roll Wells to the Side of a Craft Desk
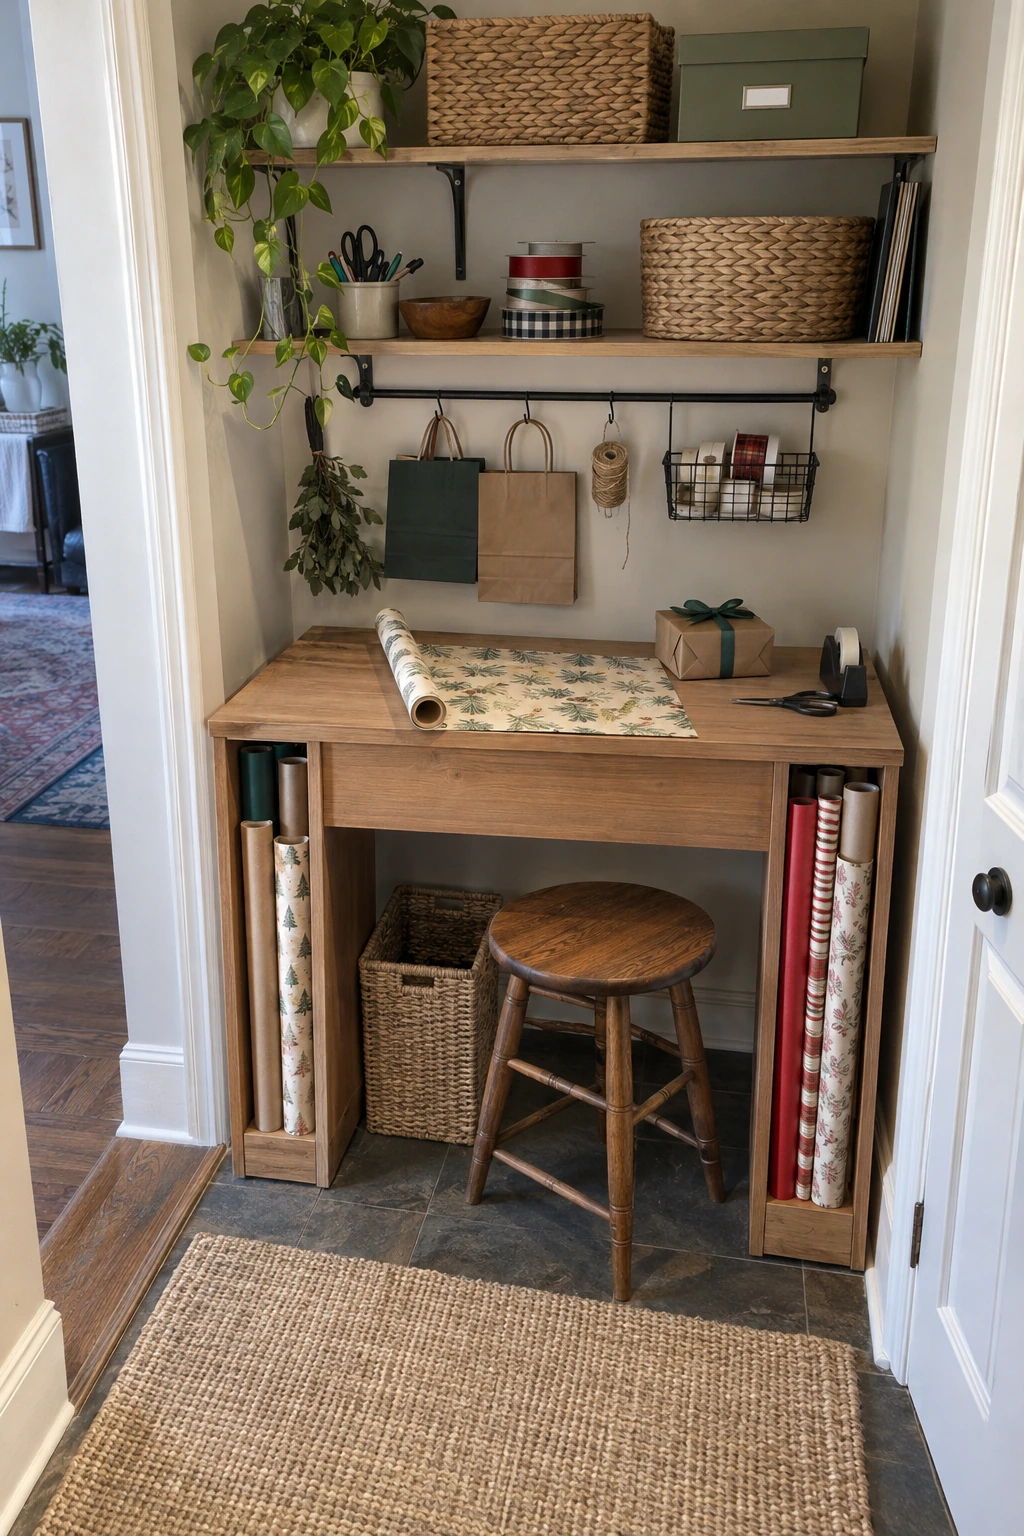
Narrow roll wells on one or both desk ends keep paper vertical while leaving knee space and the worktop clear. Size each well for the actual roll diameter and include a smooth base that supports paper above floor dust.
Place the wells outside the chair path and round exposed corners. If the desk is freestanding, secure the add-on according to its construction so the weight of tall rolls cannot pull it sideways.
Planning note: Mock up each roll well with cardboard before building so chair, knee, and walking clearance remain comfortable.
Use one well for active rolls and one for reserve paper. That limit keeps the desk useful for wrapping instead of turning every open slot into long-term storage.
Choose Mobile and Flexible Stations
Mobile storage suits homes where wrapping happens at a dining table, kitchen island, or folding table. Keep the center of gravity low, lock casters during use, and give the station a parking place before adding supplies.
21. Turn a Narrow Rolling Cart Into a Wrap Station
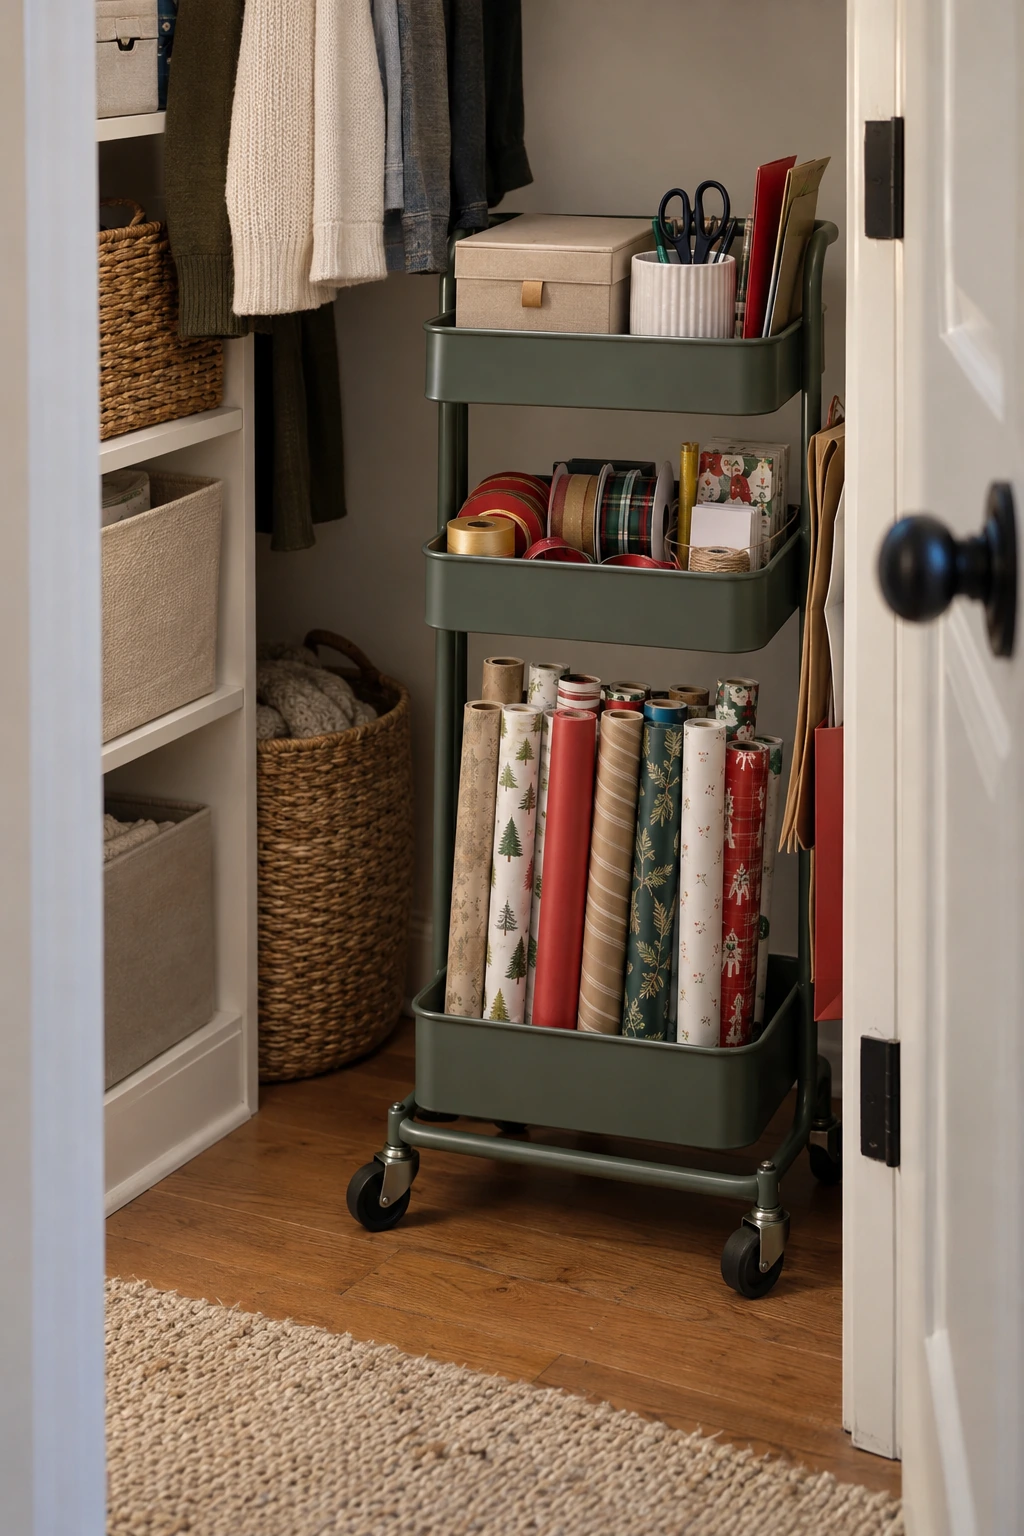
A narrow cart gathers paper, ribbon, tags, and tape, then rolls to the table when needed. Put full rolls and other heavy items on the lowest level, with lightweight ribbon and labels above to keep the cart stable.
Measure the parking niche, doorway, and table clearance before choosing the cart. Locking casters are useful during wrapping, while a side rail keeps tall rolls from fanning into the walkway.
- Top: closed tool tray
- Middle: ribbon and tags
- Bottom: paper rolls
Give each tier one function and leave the top partly open for a portable tool tray. A crowded top basket makes scissors harder to secure and encourages tape to disappear under bows.
Return the cart to a dry closet after each session. Sunlight and cooking humidity can damage paper when a mobile station becomes permanent kitchen furniture.
22. Hang a Gift-Wrap Garment Bag
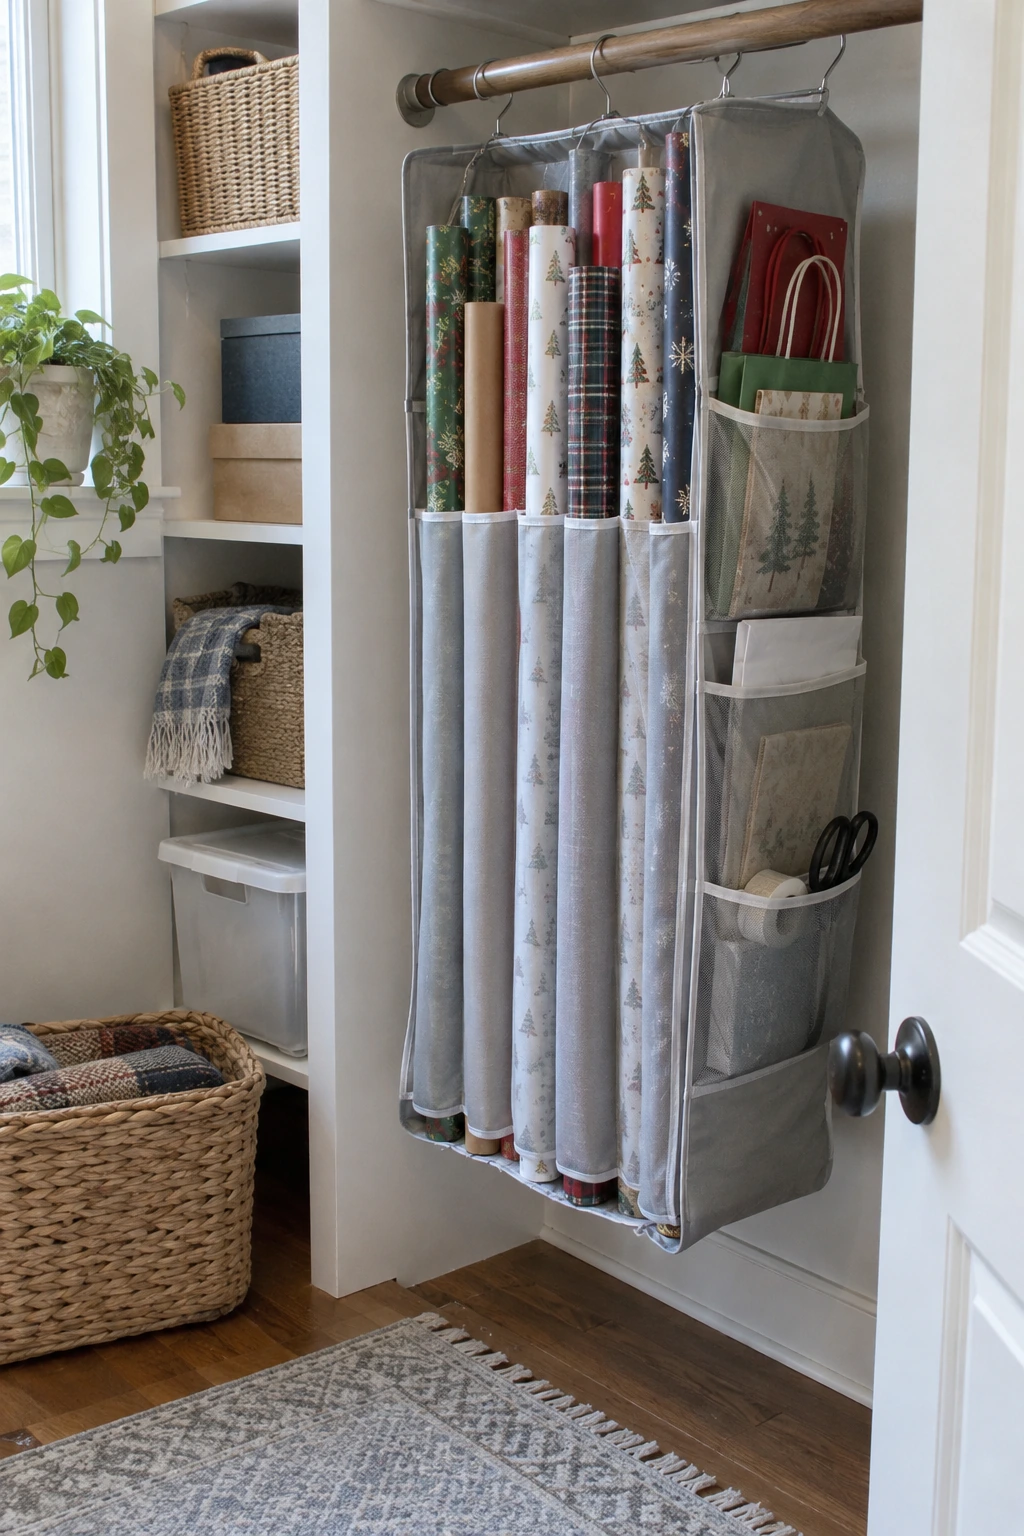
A garment-style organizer uses closet rod space while containing rolls in a long fabric sleeve. Look for a reinforced hanger and a shape that keeps paper vertical without bending around shoes or storage bins below.
Spread the load on a sound closet rod and keep the organizer clear of sliding doors. Store flat gift bags in outside pockets, then remove scissors before lifting the entire unit from the rod.
- Rod capacity
- Floor clearance
- Door-track clearance
This approach works well for renters because the room itself remains unchanged. Check the hanger seam and rod connection seasonally, especially after adding heavy premium rolls.
23. Carry an Everyday Wrapping Caddy
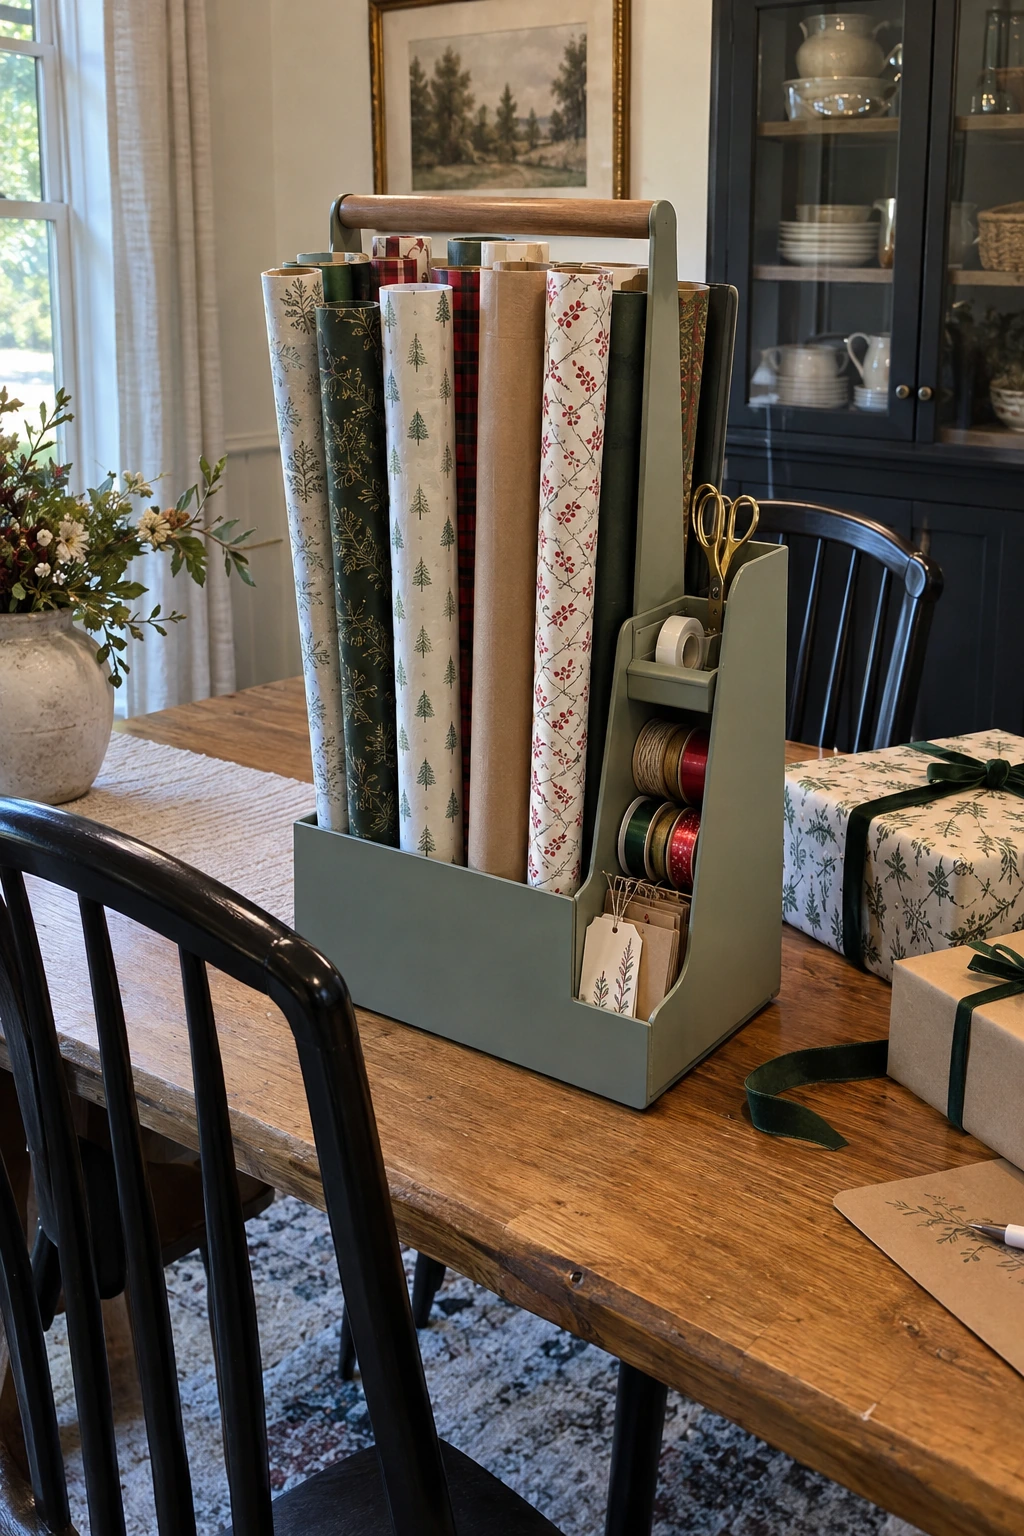
Keep tape, tags, a pencil, a short ribbon selection, and safety-capped scissors in one handled caddy. The paper can remain in its larger storage zone while the small tools travel to the table in one trip.
Choose compartments that hold the caddy upright when carried and keep blades closed. Restock after wrapping, discard dried markers and empty tape cores, and return the caddy above a child's reach if it contains sharp tools.
24. Use a Folding Table With Clip-On Roll Holders
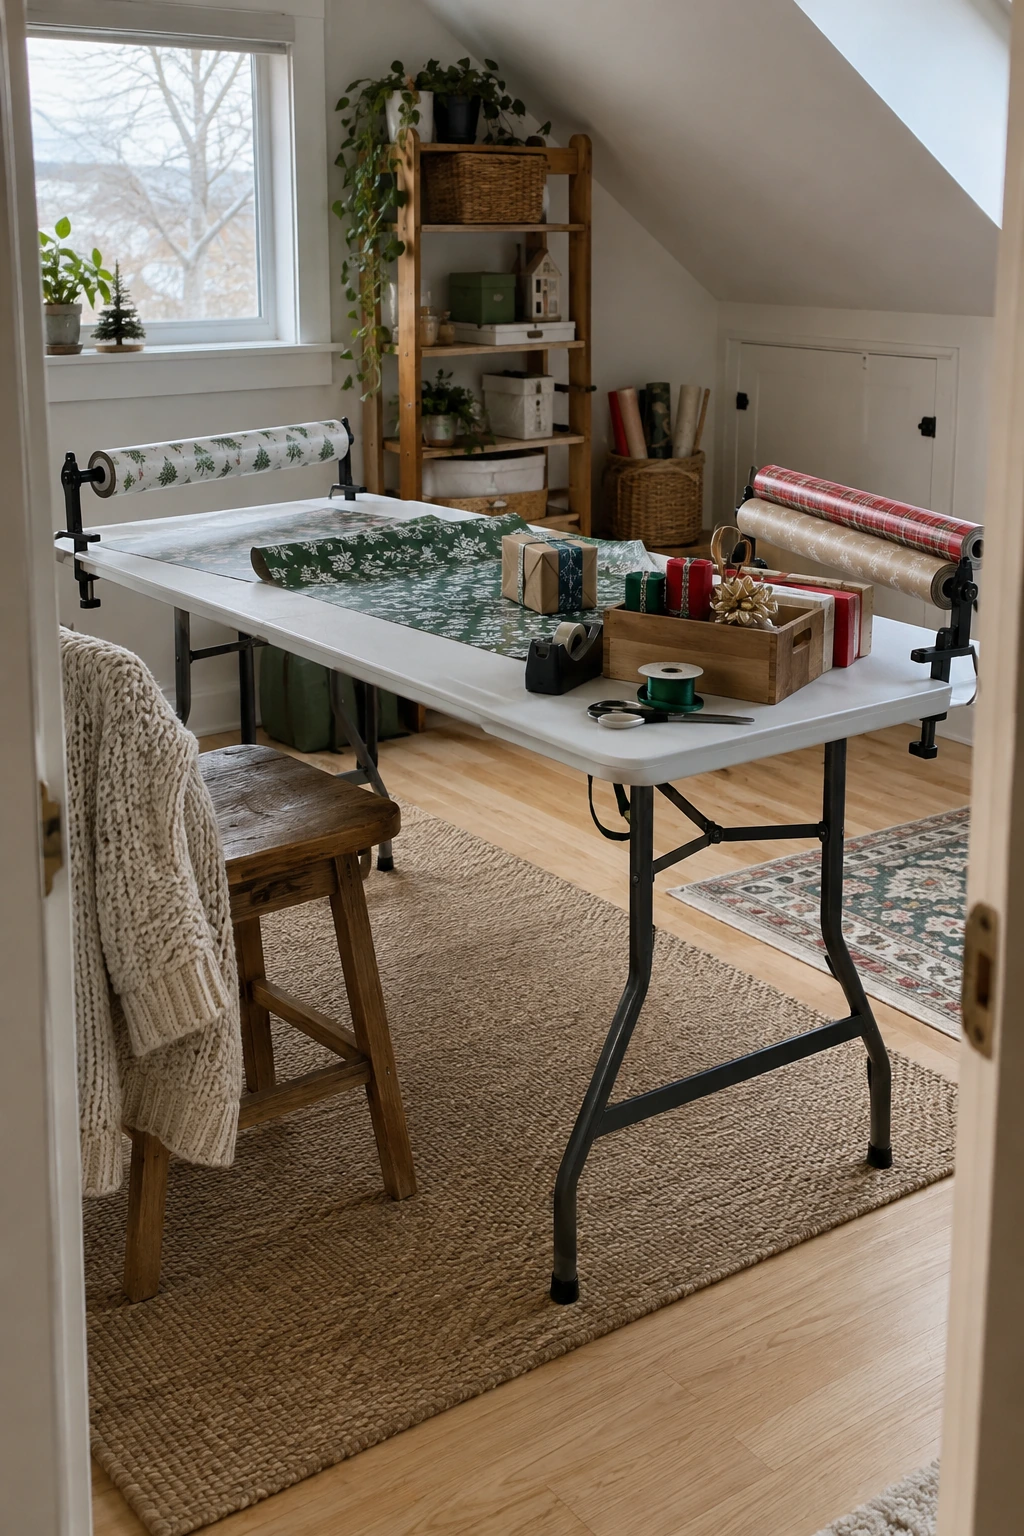
Clip-on roll holders turn a folding table into a temporary dispensing station during busy seasons. Confirm the clamps fit the table edge without crushing it, and leave enough clearance for the roll to turn above knees and chair legs.
Remove the holders before folding the table and store their hardware in the tool caddy. The table remains useful year-round, while rolls return to a covered closet or under-bed container between sessions.
Planning note: Follow the table and clamp instructions; capacity and edge construction vary widely.
Place the table on a level floor and lock any braces completely. Do not pull paper hard enough to drag a lightweight table or collapse a poorly seated clamp.
Solve Awkward Rooms and Small Spaces
Awkward spaces are useful only when the storage can be reached safely. Favor low pull-outs beneath slopes, shallow units behind doors, and supported horizontal rolls where full-height bins will not clear.
25. Fit Low Cabinets Beneath a Sloped Ceiling
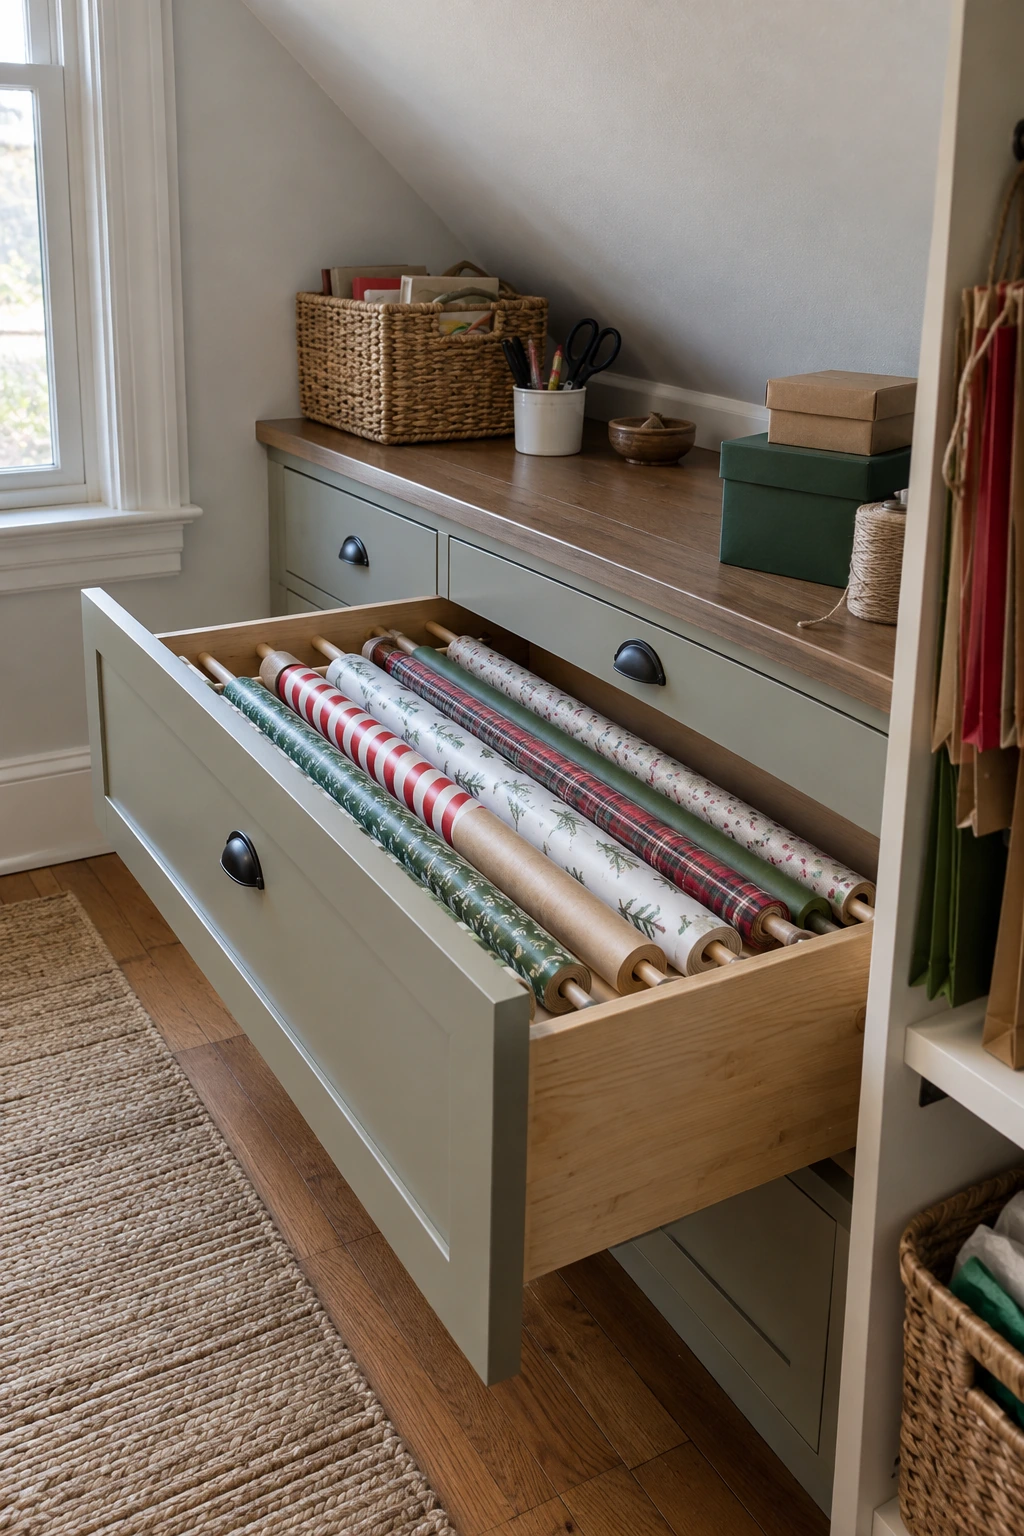
Low cabinets beneath a sloped ceiling can hold horizontal rolls in full-extension drawers. Place the deepest storage where headroom is lowest and keep the accessible front edge in the part of the room where an adult can stand comfortably.
Measure the roof slope, baseboard, door swing, and drawer travel before choosing cabinetry. Preserve required access to eaves, wiring, plumbing, or ventilation, and consult the appropriate professional before enclosing utilities.
- Standing headroom
- Drawer travel
- Utility access
Use shallow trays above the rolls for tags and tissue. A motion light inside the cabinet makes dark corners easier to inspect without balancing a lamp near paper.
Keep the floor dry and check roof-adjacent storage after storms or seasonal humidity changes. Paper is an early warning surface for leaks and condensation.
26. Use Graduated Pull-Outs Under the Stairs
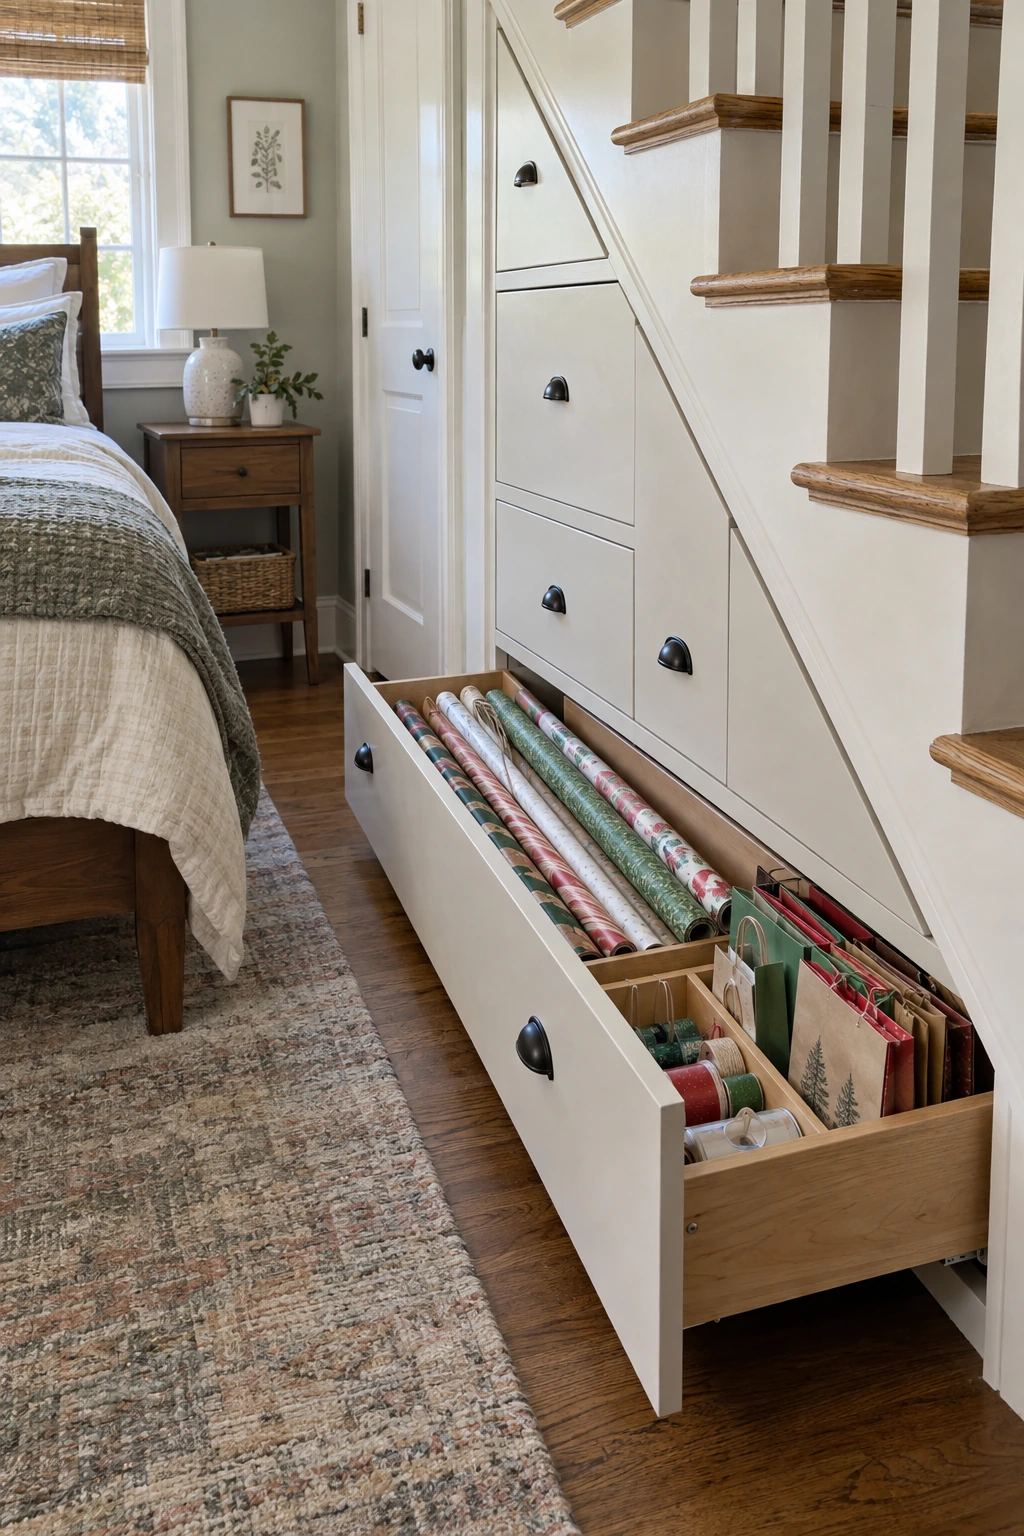
The long lower portion of an under-stairs cabinet can support paper horizontally, while shorter drawers above hold bags, ribbon, and boxes. Make each pull-out match the changing stair angle so inaccessible triangular pockets do not collect loose supplies.
Structure, fire separation, utilities, and stair construction vary, so built-ins need site-specific planning. Keep drawer handles outside the walking path and include stops that prevent a loaded unit from tipping forward.
Planning note: Verify structure, required access, and local requirements before altering the enclosure beneath stairs.
This zone can also support a broader closet system; see these under-the-stairs closet ideas for adjacent storage layouts. Reserve the longest drawer for paper to keep its purpose clear.
27. Tuck a Shallow Rack Behind a Door
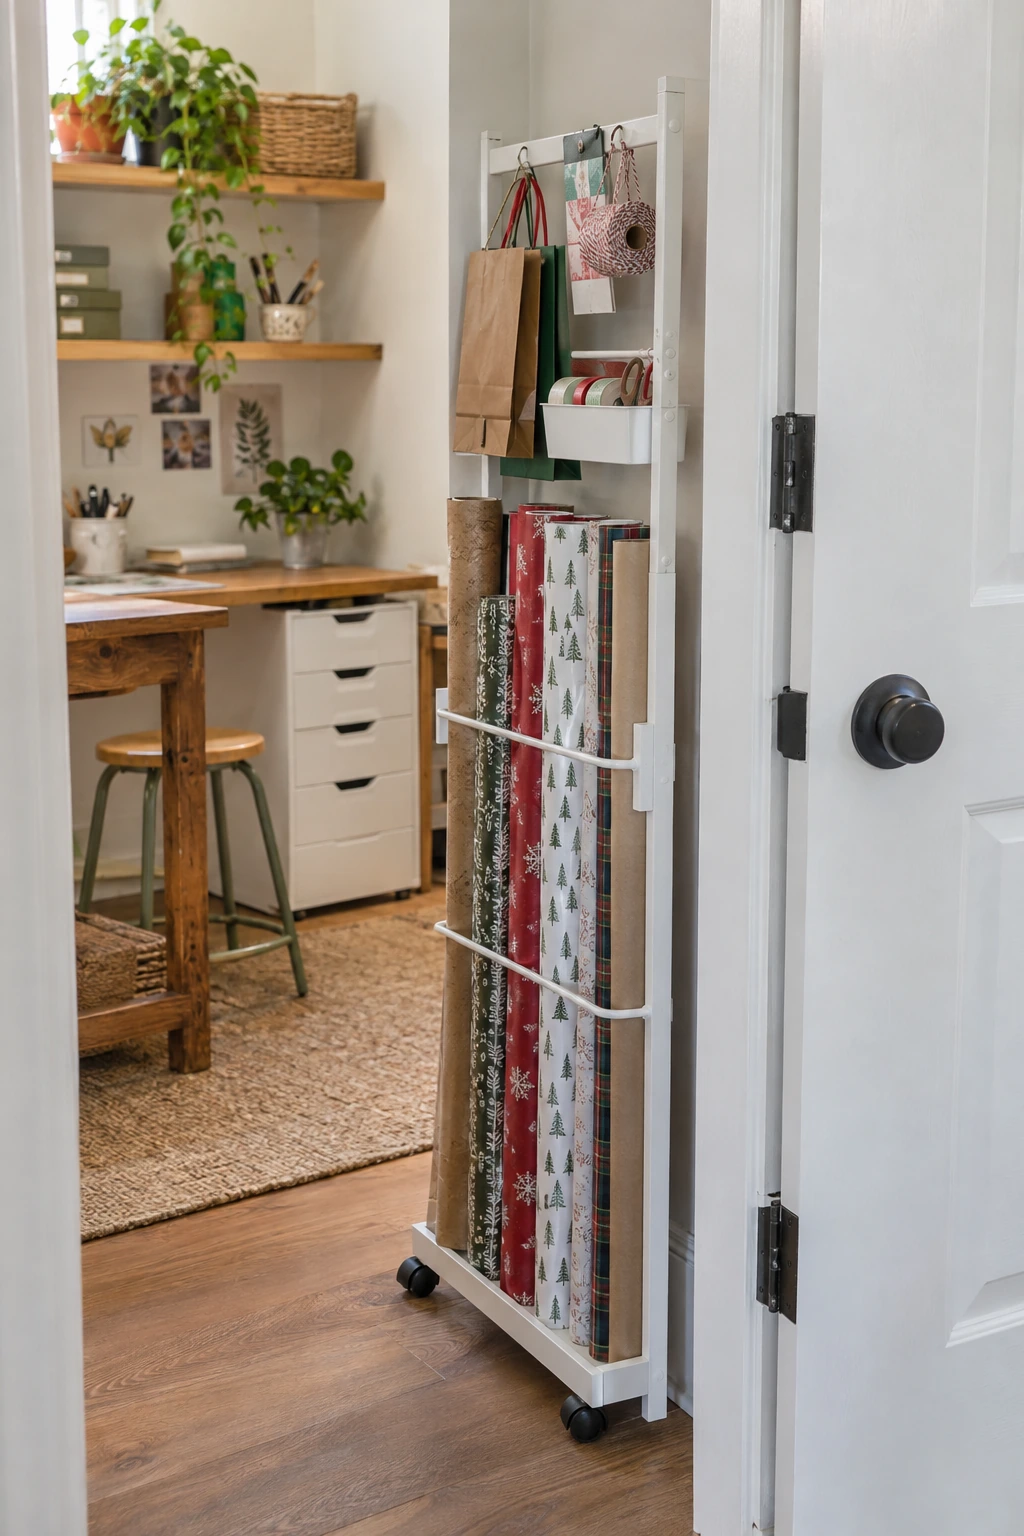
A shallow freestanding rack can occupy the wall strip behind an open door without attaching to the door itself. Keep the rack below the handle and outside the hinge arc, then contain rolls with two rails so they cannot fan into the swing path.
Tape the proposed footprint on the floor and operate the door fully before buying anything. Secure tall furniture as directed, maintain baseboard clearance, and avoid blocking a switch, return-air grille, or emergency path.
28. Create an Above-Door Long-Box Shelf
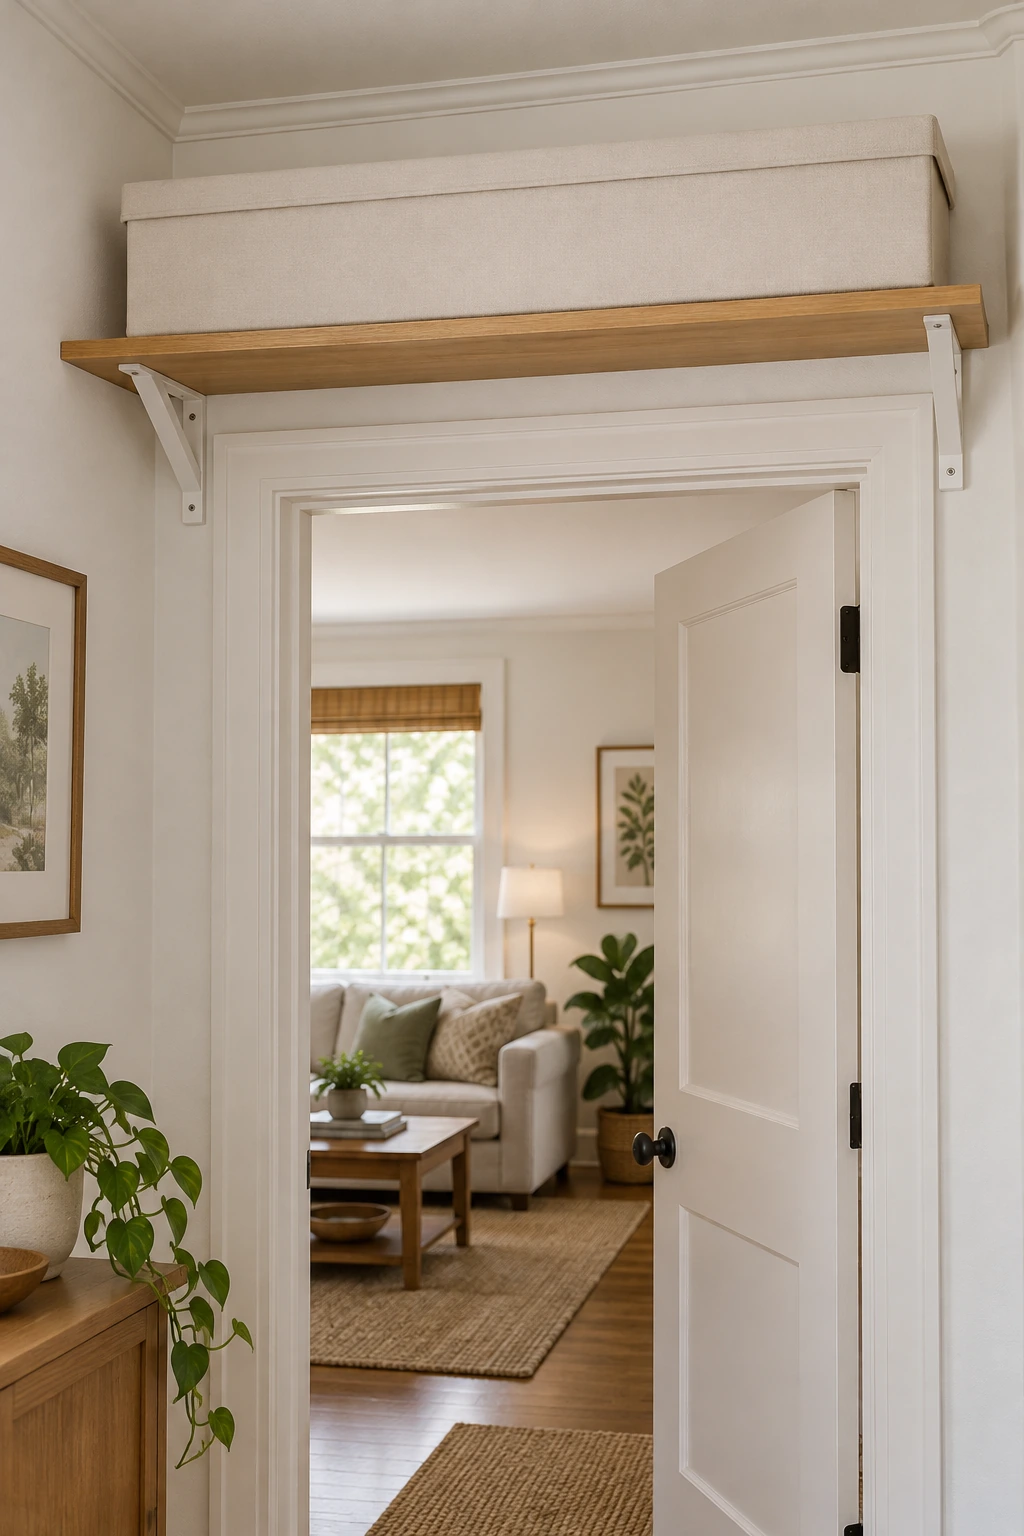
The wall above a closet door may hold one long, lightweight paper box when lower storage is scarce. Keep the box shallow, clearly labeled, and limited to seasonal rolls so it comes down only occasionally.
High shelves require appropriate wall support and safe retrieval. Verify the shelf and fasteners for the wall, keep the box from projecting into the doorway, and never climb on a chair to reach it.
- Light contents only
- Stable step stool
- Nothing projects over the opening
For broader small-home planning, pair this with small apartment storage ideas that protect walkways and preserve multipurpose furniture.
29. Use a Narrow Closet Side-Wall Tower
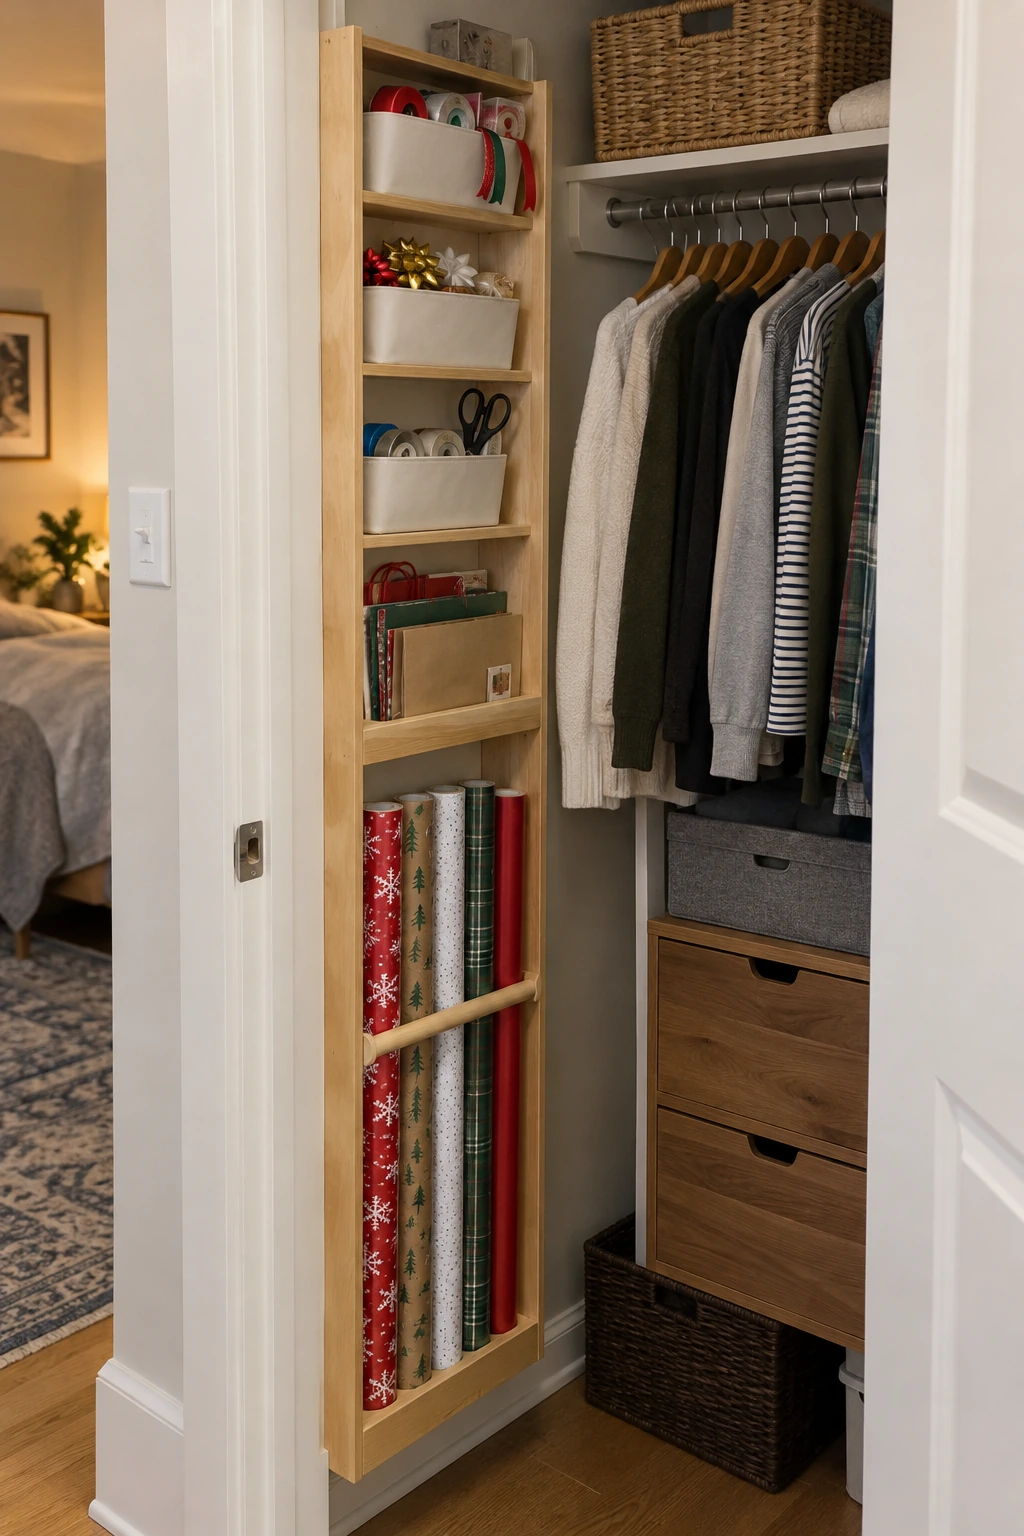
A slim tower on the side wall uses the narrow return beside a closet opening. Put vertical rolls in the lowest compartment and small bins above, keeping the main clothing rod and center floor area available.
Measure the doorway return, shelf depth, and clothing hang before planning the tower. These small reach-in closet ideas show how door and side-wall choices affect access.
- Closet rod
- Door hardware
- Floor cleaning
Use a light interior color so patterns are easy to see. Shelf lips should be low and smooth, while the unit itself must follow the anchoring guidance for its construction.
30. Park a Slim Cart at the End of a Narrow Closet
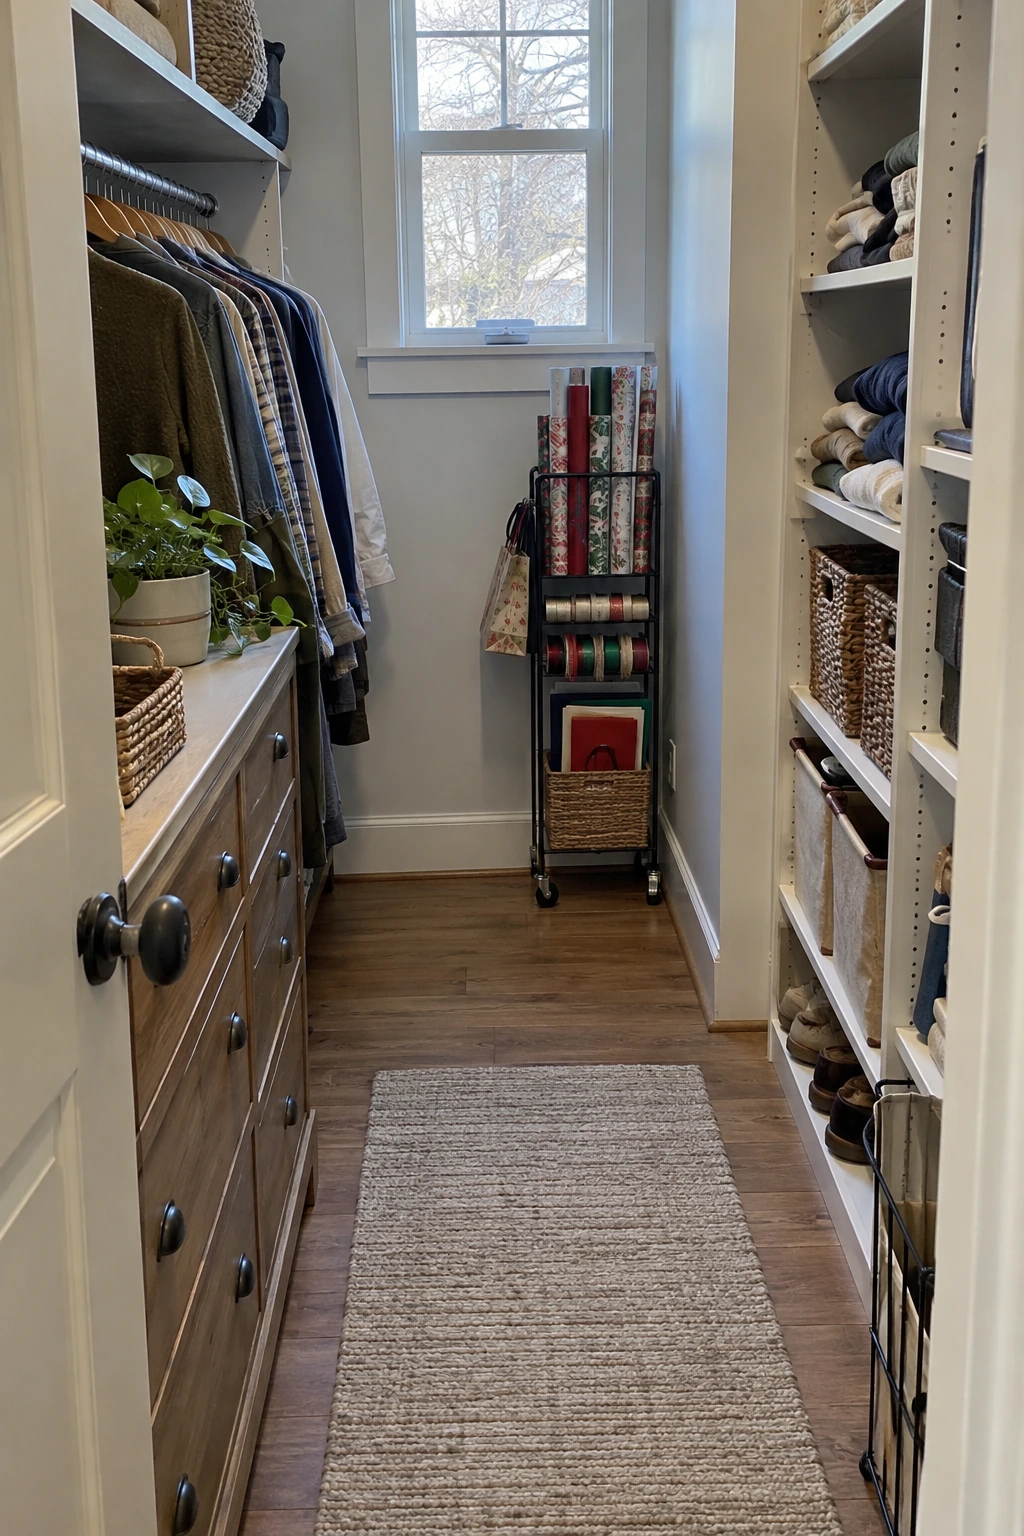
The short end wall of a narrow walk-in can hold a slim cart if the aisle remains clear. Face paper rolls toward the doorway and keep tools in shallow drawers so nothing projects into hanging clothes.
Compare the parked and pulled-out footprints, including caster turns. Use narrow walk-in closet ideas to coordinate the cart with rods, drawers, lighting, and the remaining passage.
Planning note: Maintain a clear passage and verify that the cart can turn through the closet doorway when fully loaded.
Store the heaviest paper low and lock the cart if the floor slopes. Motion lighting at the end wall improves visibility without running a cord across the aisle.
Organize Ribbon, Bags, Tissue, Tags, and Tools
Paper rolls are only one part of wrapping storage. Small supplies need shallow, visible homes so they stay usable, while blades and loose ribbon require deliberate safety controls.
31. File Tissue Paper in an Expanding Folder
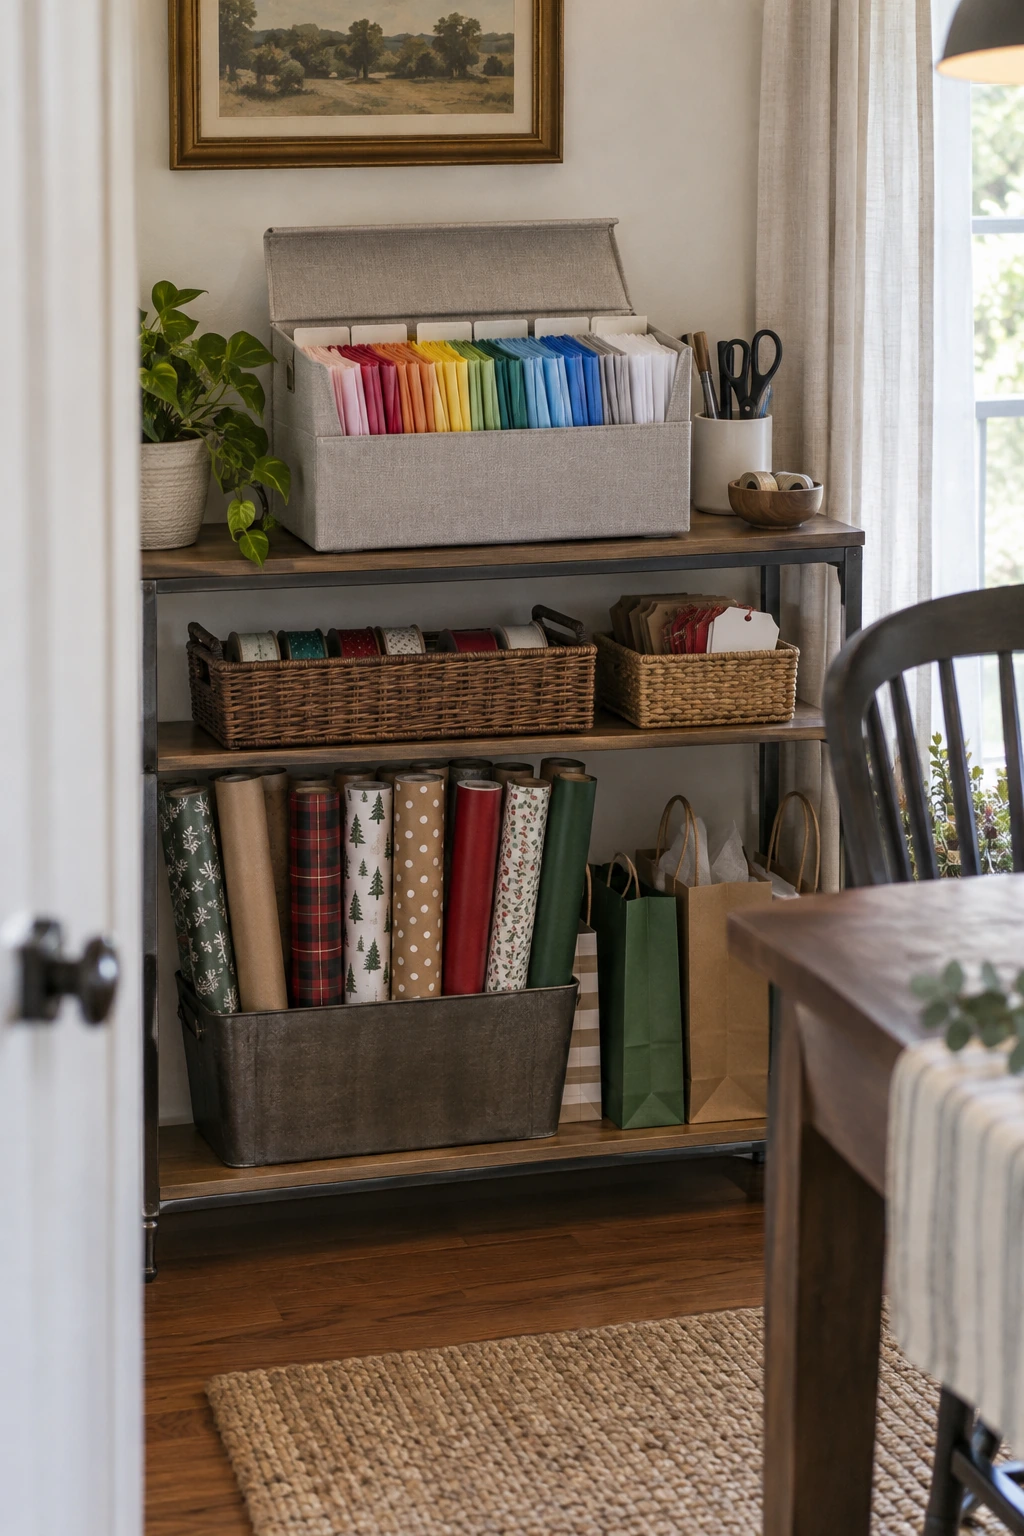
Fold reusable tissue along existing creases and file it upright in an expanding folder. Broad categories such as neutral, bright, metallic, and seasonal are easier to maintain than a separate pocket for every shade.
Discard torn or heavily wrinkled sheets instead of compressing them into the folder. Keep the file dry, do not overfill the gussets, and place delicate metallic tissue between plain sheets if surfaces rub.
32. Store Flat Wrap in an Art Portfolio
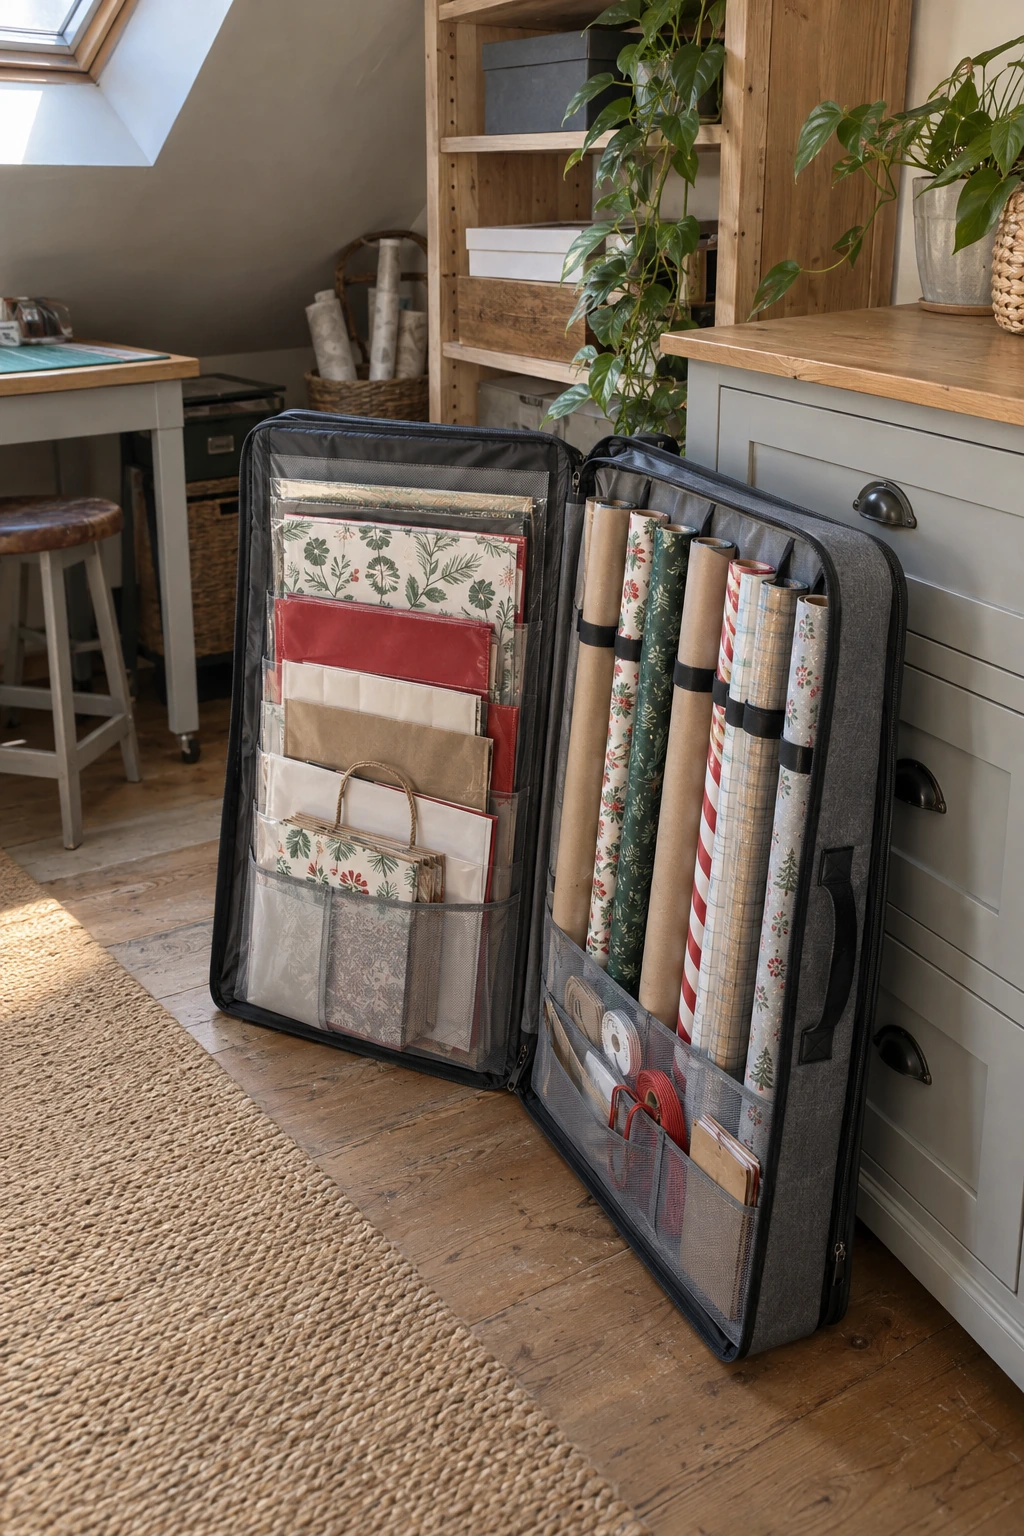
An art portfolio protects flat gift-wrap sheets, oversized paper, and clean remnants that should not be rerolled. Slip a rigid backing board behind the stack and separate delicate surfaces with plain paper.
- Flat specialty sheets
- Large usable remnants
- Unused gift-wrap panels
Store the portfolio upright only if the contents are fully supported and the case cannot slump. Otherwise, place it flat on a shelf with nothing heavy above it, and label the spine with the largest sheet size.
33. Sort Folded Gift Bags in Magazine Files
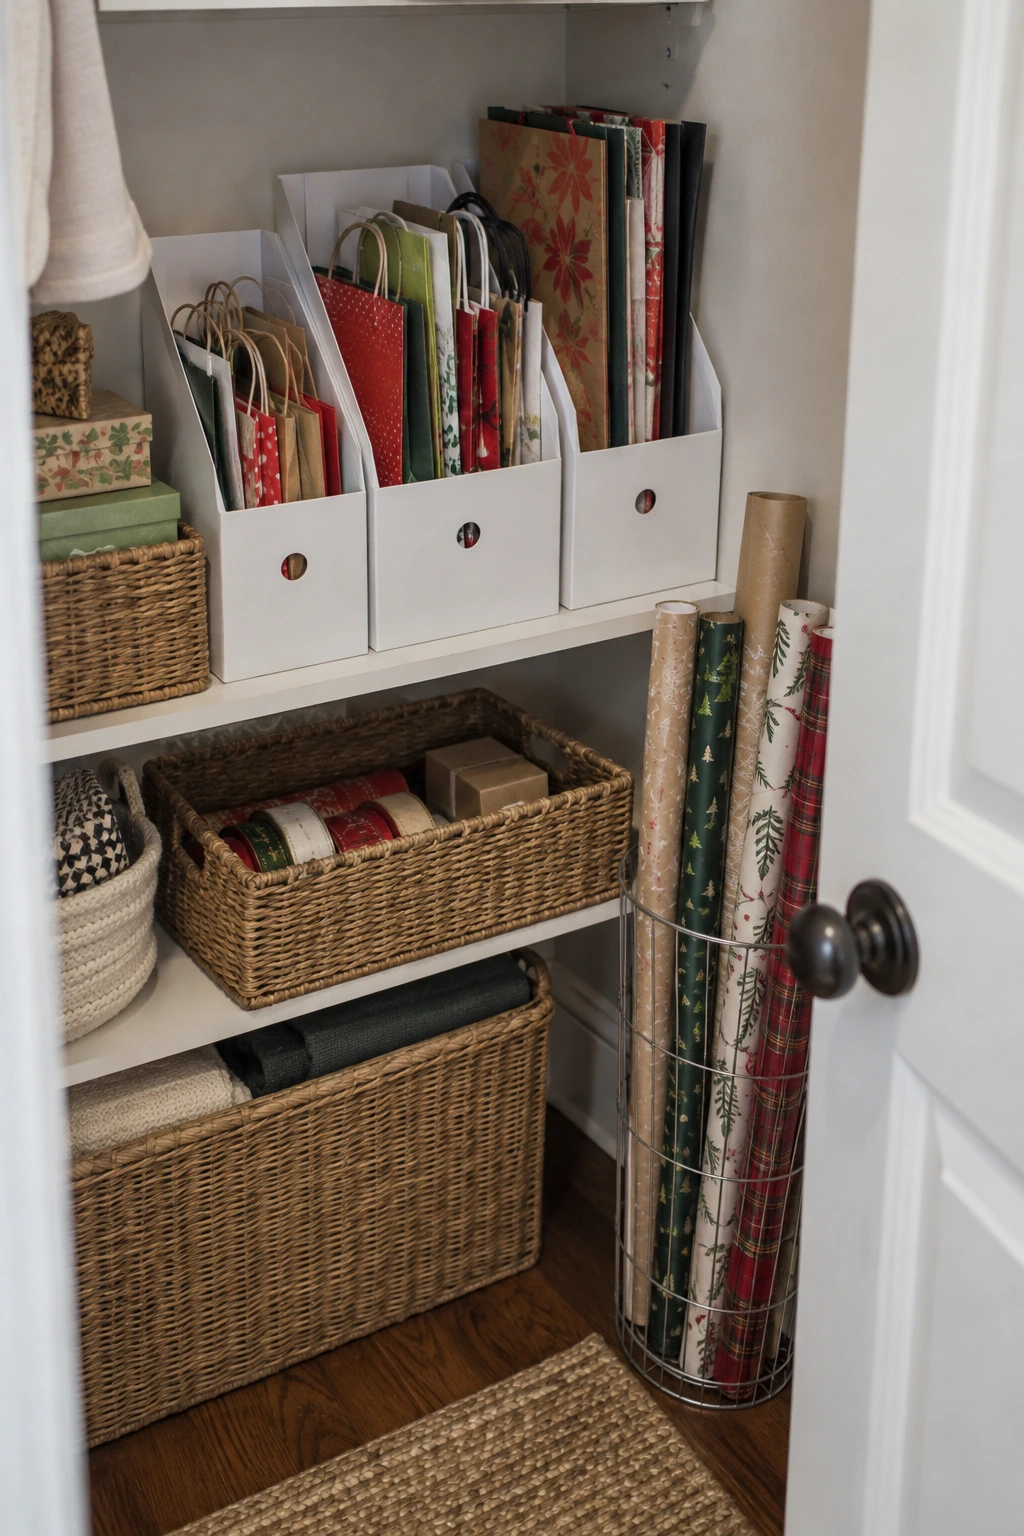
Sturdy magazine files keep reusable gift bags upright and visible on a shelf. Fold handles inside, then sort by small, medium, and large so one bag can be removed without disturbing the entire stack.
Choose files deep enough to support the bag bottoms and place heavier bags near the shelf ends or dividers. Keep one file for plain bags that work year-round and rotate only the seasonal file.
Planning note: A reusable-bag library stays useful only when damaged bags leave before new ones enter.
Review the bags after holidays. Recycle or discard pieces with torn handles, split corners, or names that cannot be covered neatly.
34. Create a Reusable Gift-Bag Library
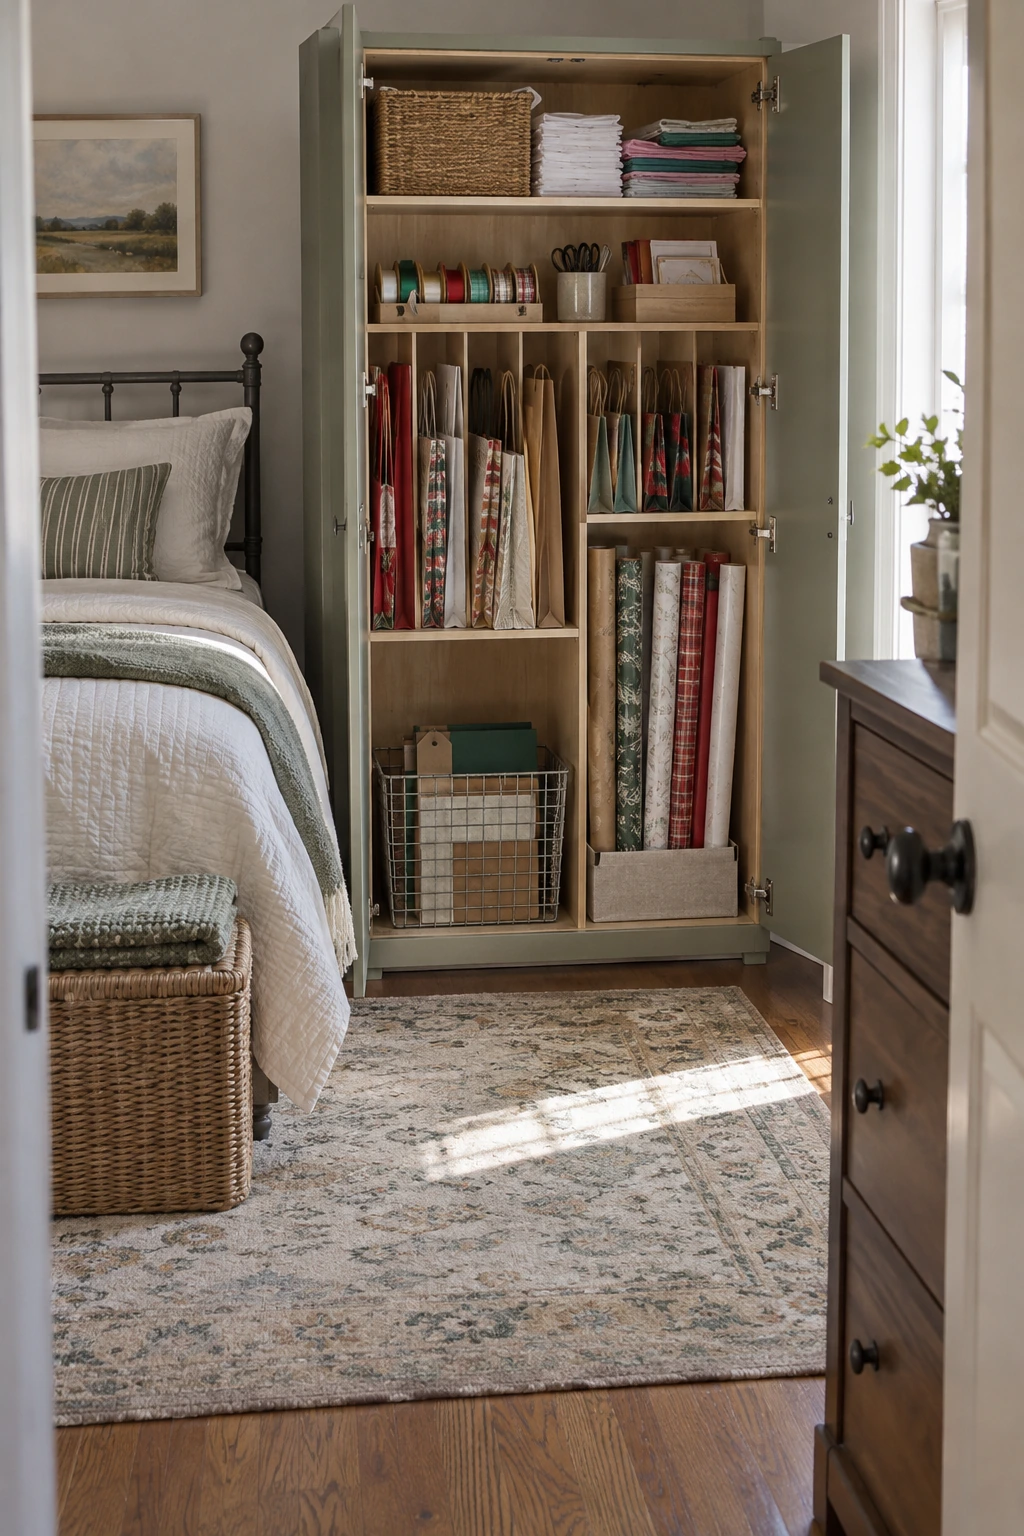
Give gift bags their own shallow cabinet zone with size dividers and one return slot. The return slot holds bags awaiting tape removal, name-covering, or handle repair so unfinished cleanup does not contaminate the ready supply.
Place everyday solid colors at eye level and holiday designs higher or lower. Cap each size category at the space available; when the section is full, keep the best condition and release the rest.
- Ready to use
- Needs repair
- Tissue and tags
A small tissue folder beside the bags creates complete reusable sets. Avoid storing crushed bows inside bags because they deform both items.
Wipe glossy bags before storage and let them dry fully. Moisture trapped between coated surfaces can cause sticking, odor, or color transfer.
35. Thread Ribbon Spools on a Basket Dowel
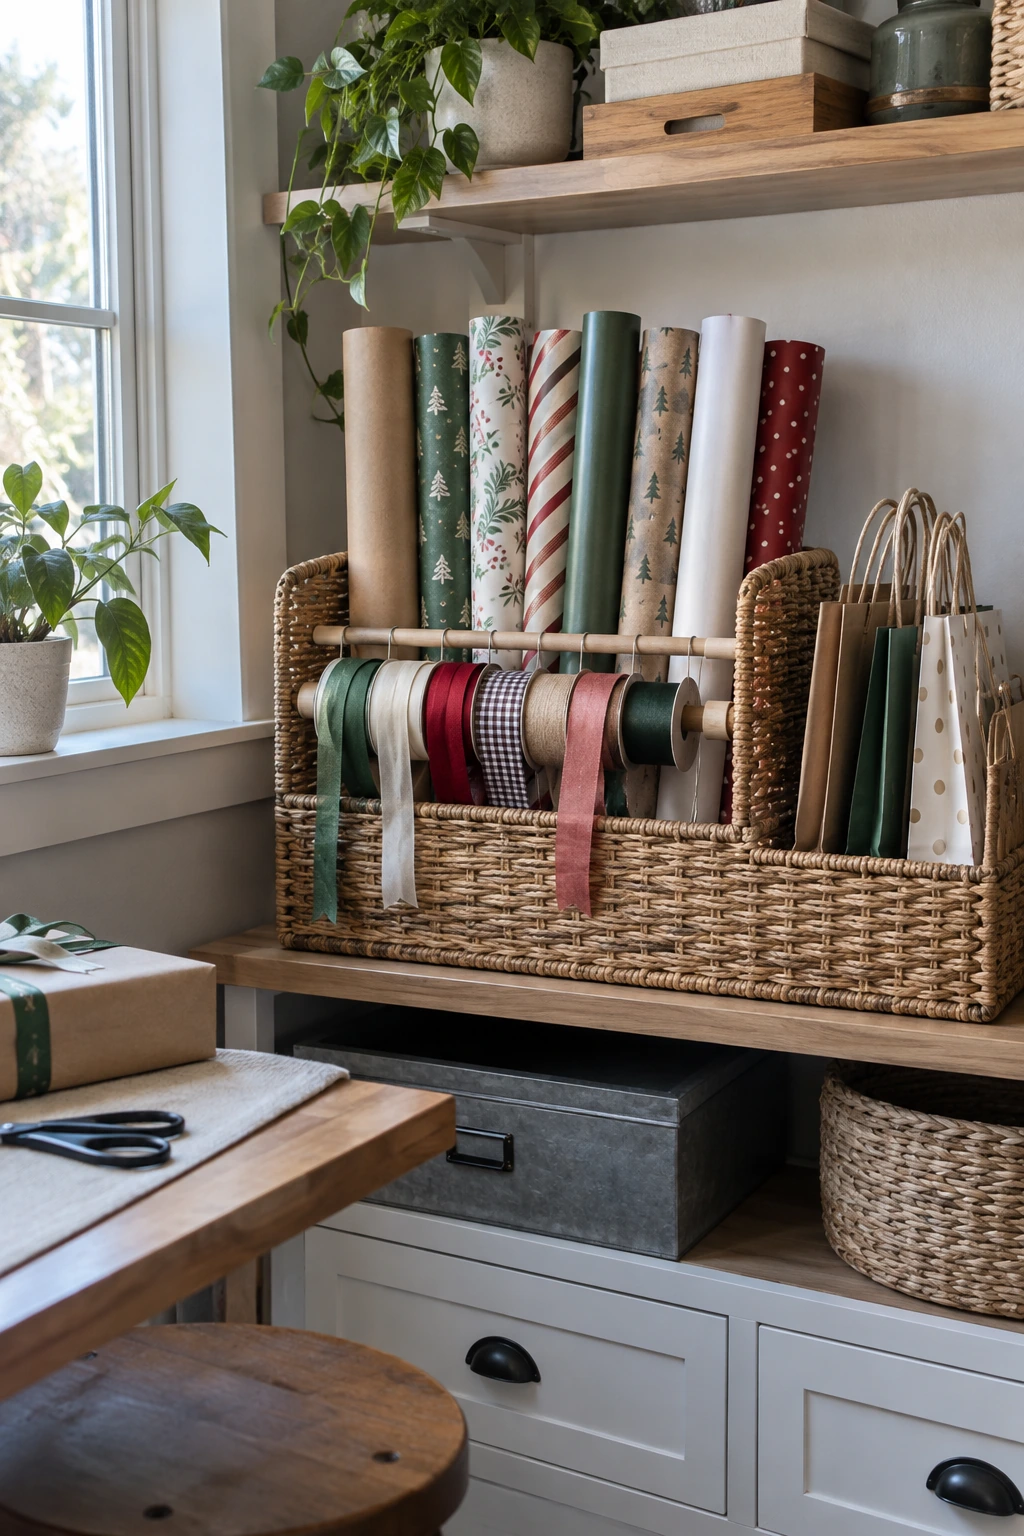
Slide ribbon spools onto a smooth dowel that passes through the sides of a sturdy open basket. The basket contains loose tails while the dowel lifts out when one spool needs replacement.
Fit end caps or retainers so the dowel cannot slide free during use. Group ribbon by width or material, secure each tail with a reusable band, and avoid pins where hands reach blindly.
36. Mount a Ribbon Rail Inside a Cabinet Door
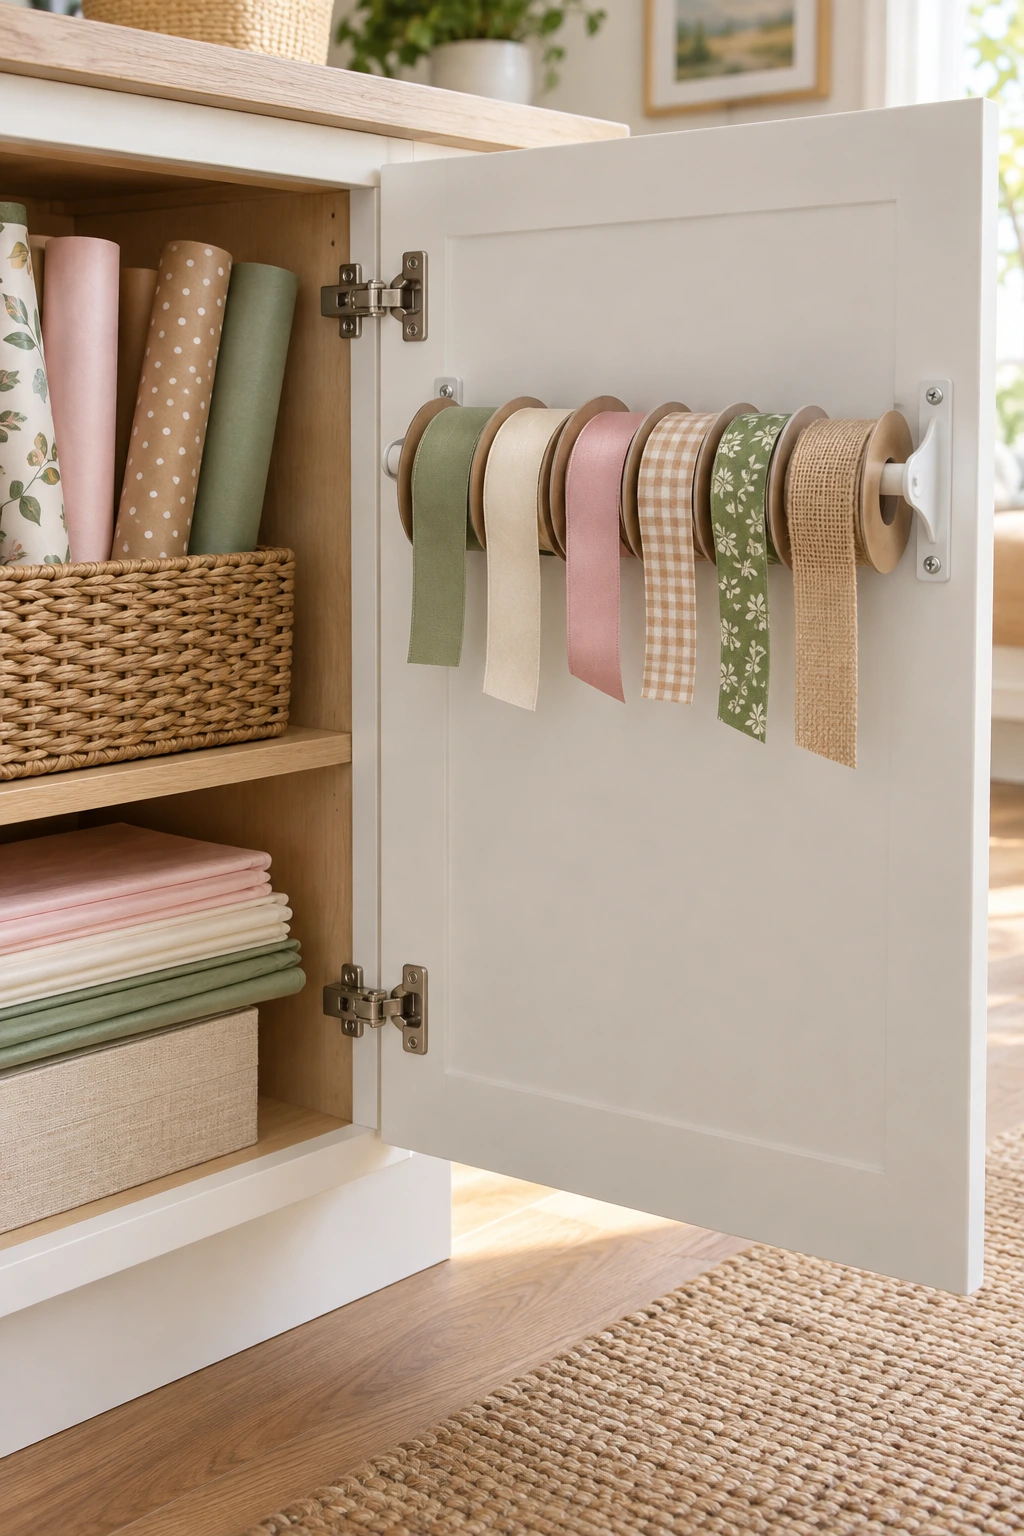
A slim removable rail inside a cabinet door turns ribbon into visible, dispensable storage. Position it where full spools clear the shelves, hinges, and cabinet contents through the complete door swing.
Keep the load light and follow the cabinet and hardware instructions. Add a small elastic keeper across the spool fronts so ribbon remains contained when the door closes.
Planning note: Test the cabinet door with the largest spool installed before mounting the remaining rails.
Trim frayed ends before winding tails under reusable clips. Avoid adhesive tape directly on delicate ribbon because residue transfers to future gifts.
37. Divide a Shallow Drawer for Tags and Bows
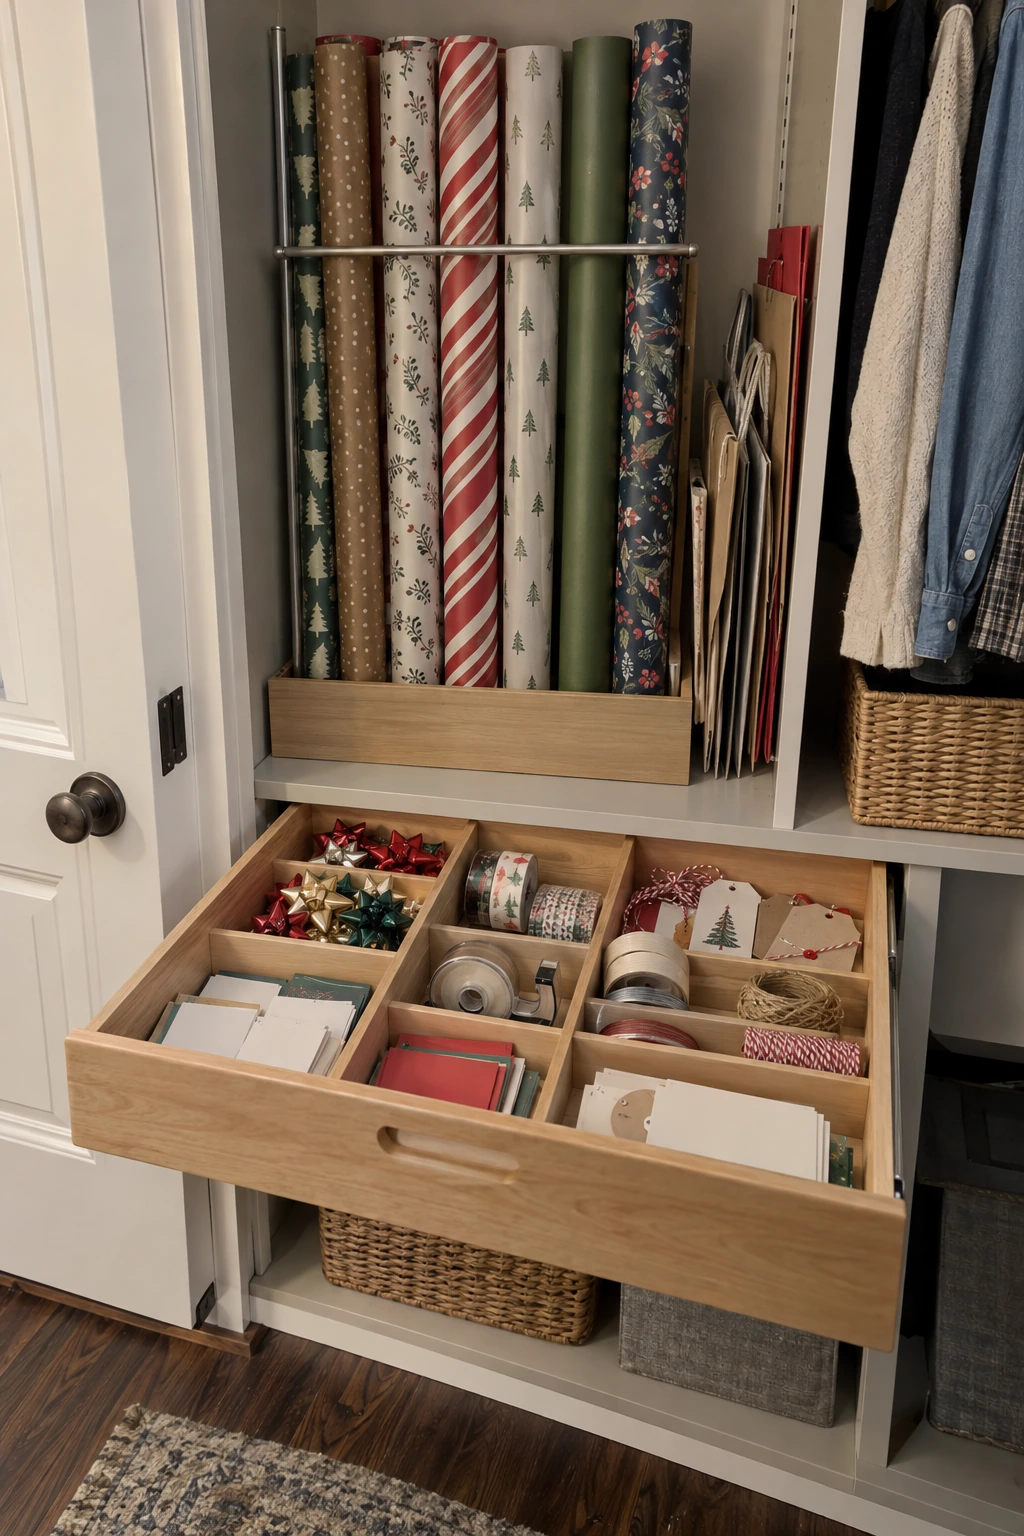
Adjustable dividers turn a shallow drawer into visible storage for tags, bows, tape, twine, and seals. Size compartments around the largest useful category, then leave one flexible section for odd-shaped toppers.
Keep bows in a single layer or loosely stacked so loops do not crush. Put refill tape behind the active dispenser and remove tiny scraps that make the drawer look full without adding usable supplies.
- Tags
- Bows
- Tape
- Twine
A front-to-back layout makes every category visible when the drawer opens halfway. Use pantry shelving ideas for more examples of shallow, one-item-deep organization.
38. Keep Small Bows in Lidded Boxes
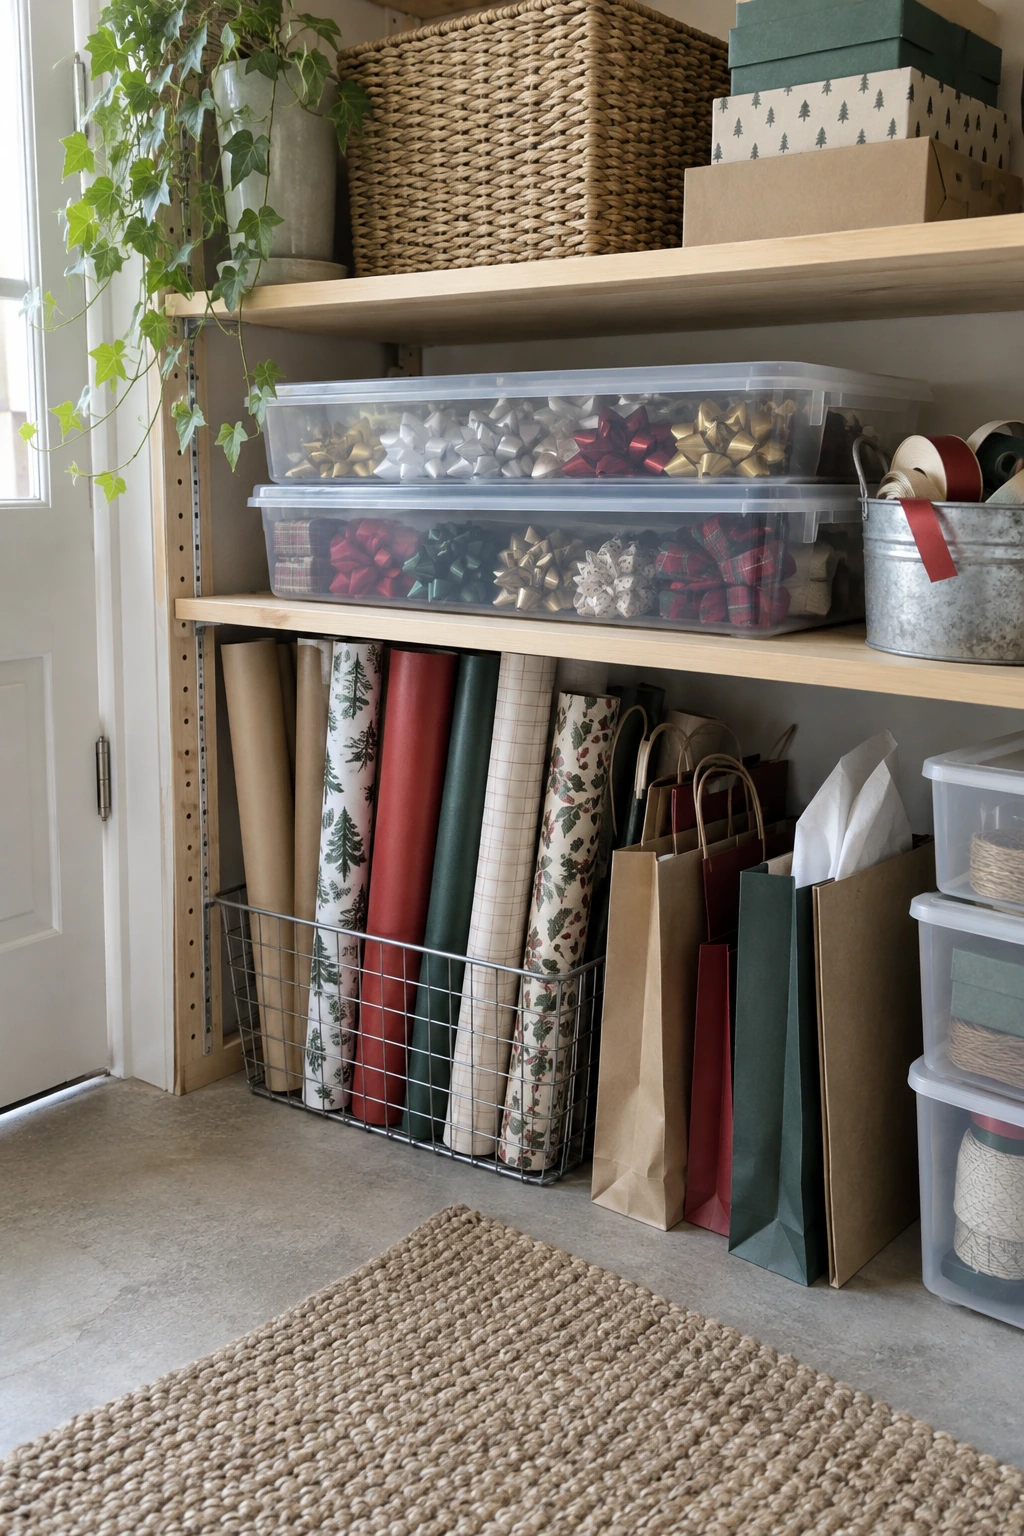
Shallow lidded boxes protect premade bows from dust and pressure. Arrange them in one loose layer and separate delicate fabric bows from adhesive-backed styles that can stick to neighboring loops.
Choose boxes that fit the shelf without a precarious overhang. Label by size or palette, then resist packing empty space with heavier tape dispensers or paperweights.
39. Hang Tags and Twine in Zipper Pouches
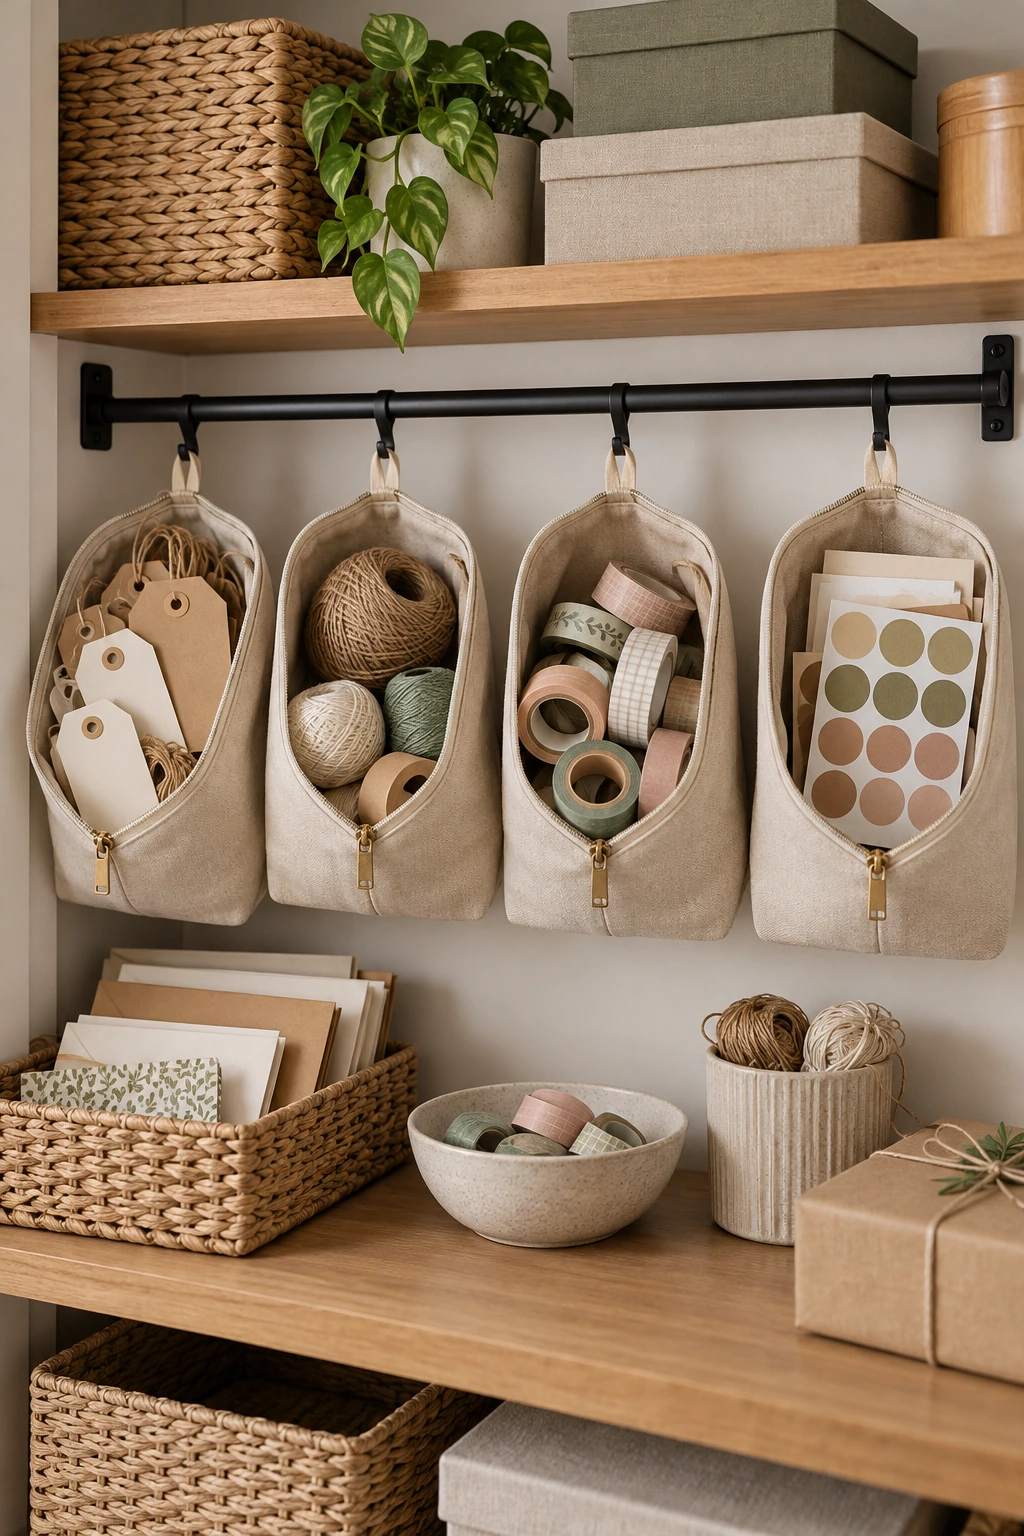
Zipper pouches keep loose tags, seals, twine, and tiny embellishments together without open-bin spillover. Assign each pouch by function or occasion and use a clear window or sample tag outside rather than long written labels.
Hang the pouches from a rail, pegboard, or closet rod within easy reach. Avoid overloading adhesive hooks, and keep small choking hazards above the access level of young children and pets.
Planning note: Treat small bells, clips, and embellishments as choking hazards and store them securely.
Empty one pouch at a time onto the table during wrapping. This limits loose pieces and makes cleanup a quick visual check instead of a room-wide search.
40. Lock Scissors and Blades in a Tool Box
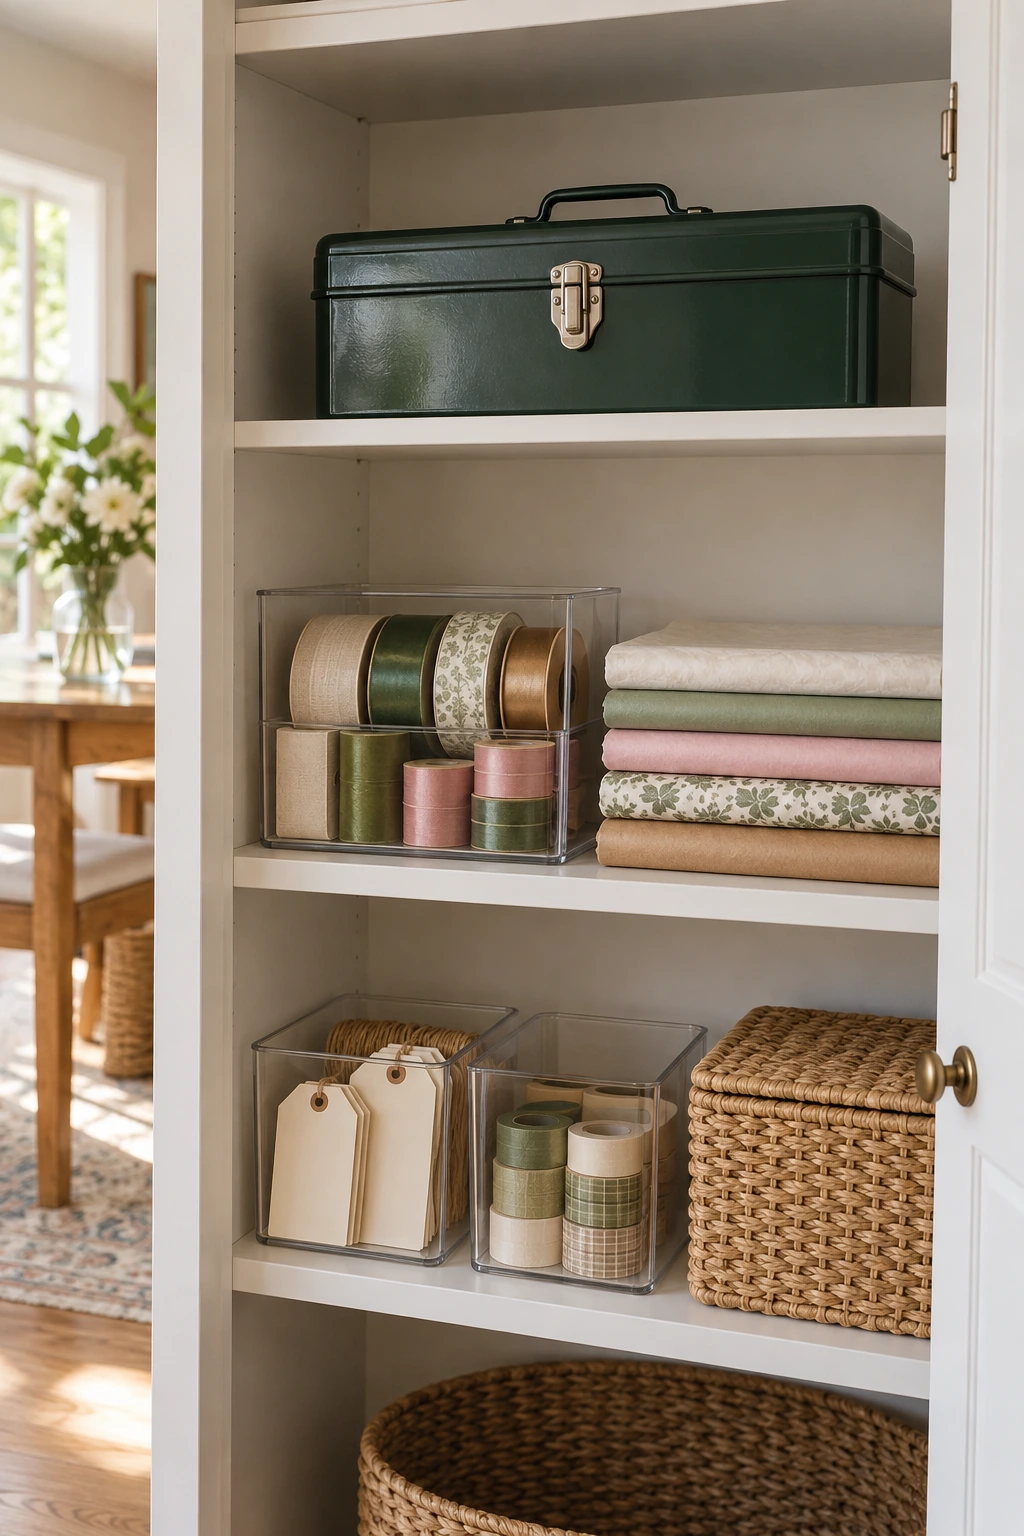
A small latched tool box creates one controlled home for scissors, craft knives, replacement blades, and sharp ribbon cutters. Use fitted sleeves or dividers so edges cannot strike other tools when the box moves.
Store the box high or in a locked cabinet when children are present, and follow each tool's safety guidance. Count blades during cleanup, retract or cover them, and discard damaged cutting tools safely.
- Blades covered
- Scissors closed
- Latch engaged
Keep the safe tool box separate from the everyday tape caddy. Adults can carry it to the work surface only when needed and return it immediately after wrapping.
Choose a box with a broad base and a handle that closes without contacting the contents. A bright latch makes the secured state easy to check.
Keep the System Safe, Dry, and Easy to Maintain
A useful wrapping station survives the months between occasions. Protect paper from moisture and crushing, rotate seasonal stock, and place supplies at heights that match the people who use them.
41. Separate Everyday Paper From Seasonal Paper
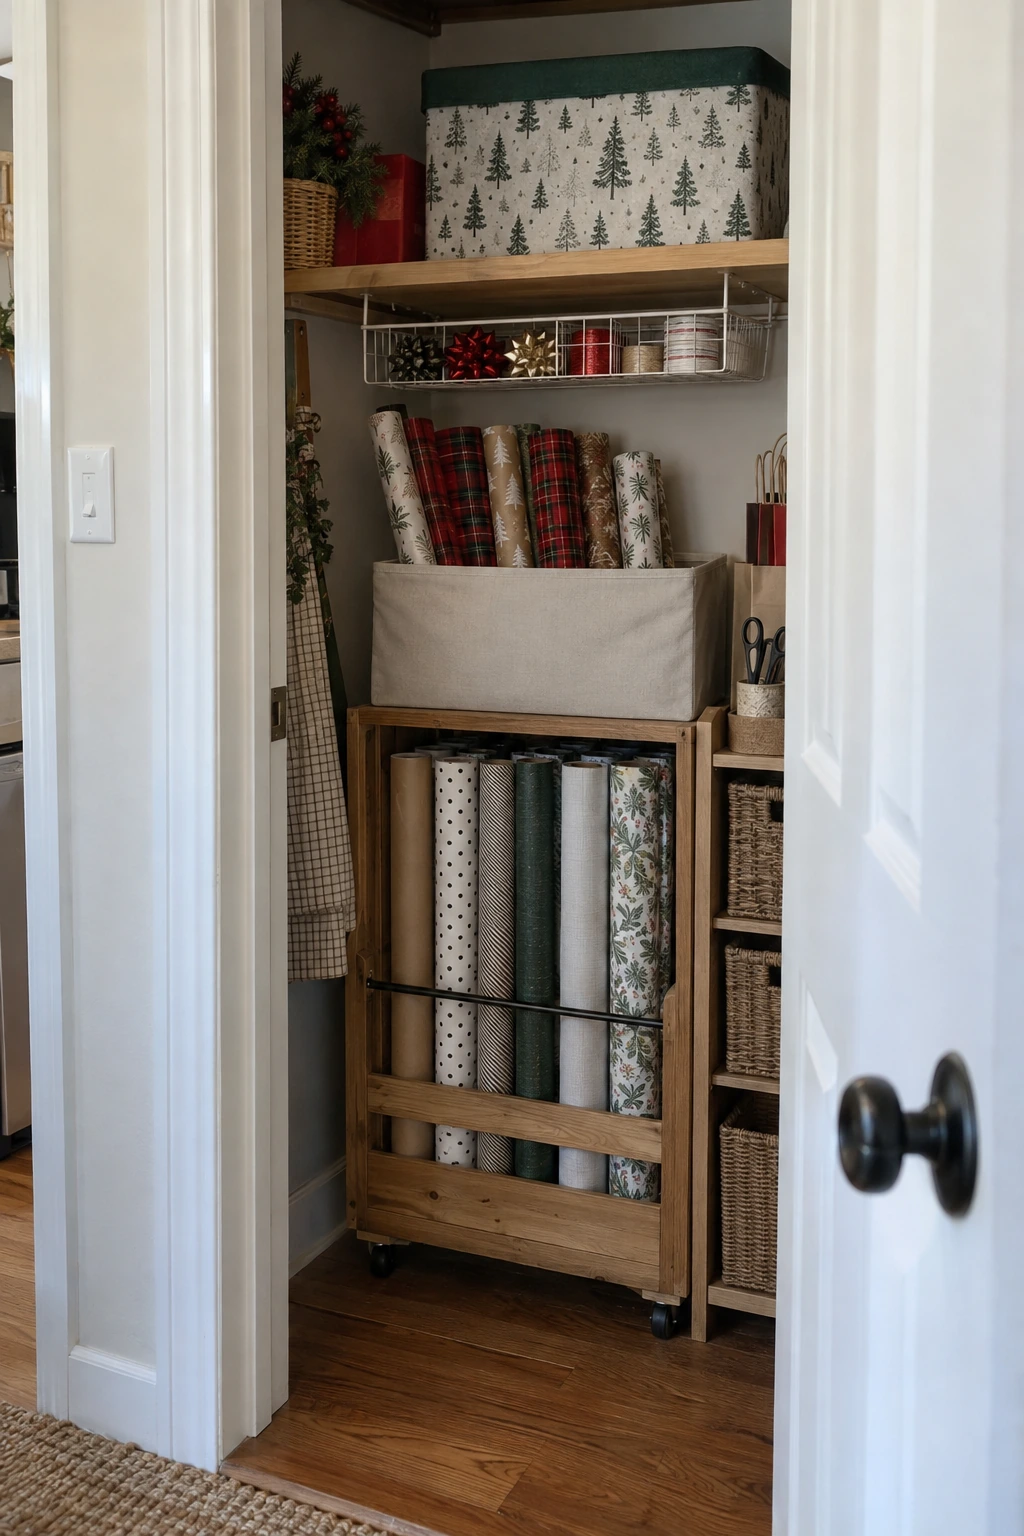
Keep neutral, birthday, and congratulations paper in the easiest-to-reach zone. Move Christmas and other limited-use rolls into a covered upper or under-bed container so daily wrapping does not require shifting seasonal stock.
Rotate the active zone a few weeks before the season, then return leftovers after a quick condition check. This keeps the visible collection small and reveals what should be used before another purchase.
- Active paper within easy reach
- Seasonal paper covered and labeled
Use two broad labels instead of many narrow categories. A simple active and seasonal split is easier for the whole household to maintain.
42. Label Rolls With Removable End Bands
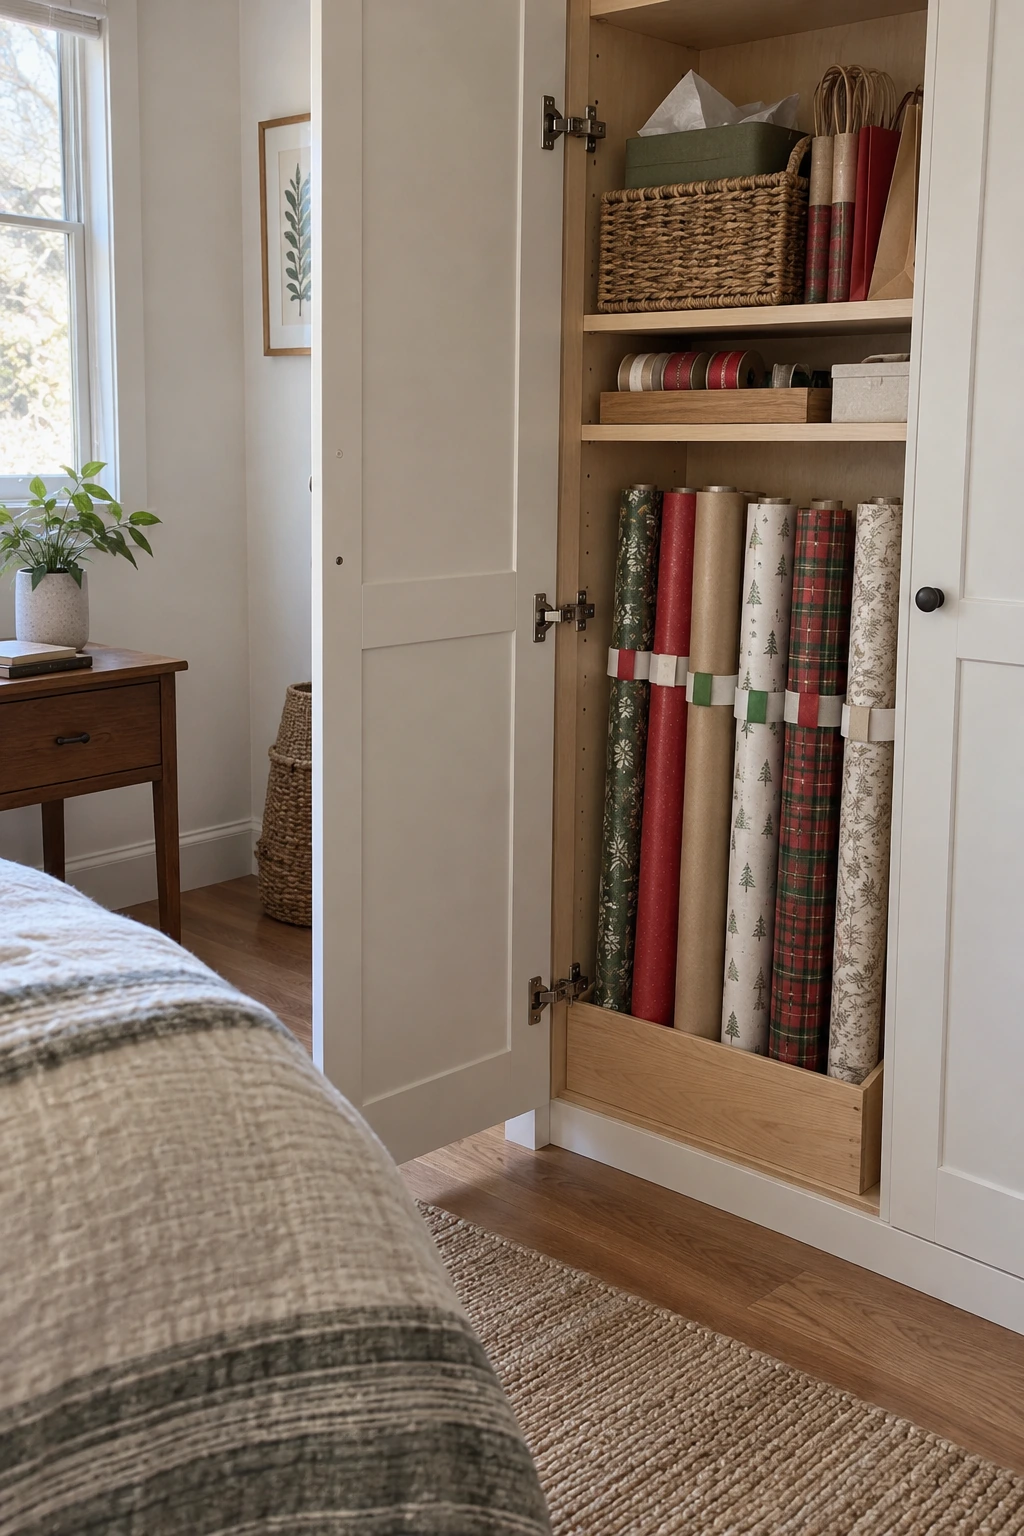
Reusable bands keep partly used rolls from unfurling without placing adhesive on the paper. Add a small end tab for occasion or remaining length so a narrow storage bay can be scanned from the front.
Choose bands that hold gently around the thickest layer and remove them before dispensing paper. Tight elastic can dent a nearly empty roll, while tape can tear printed surfaces and leave residue.
43. Track Inventory on the Container Lid
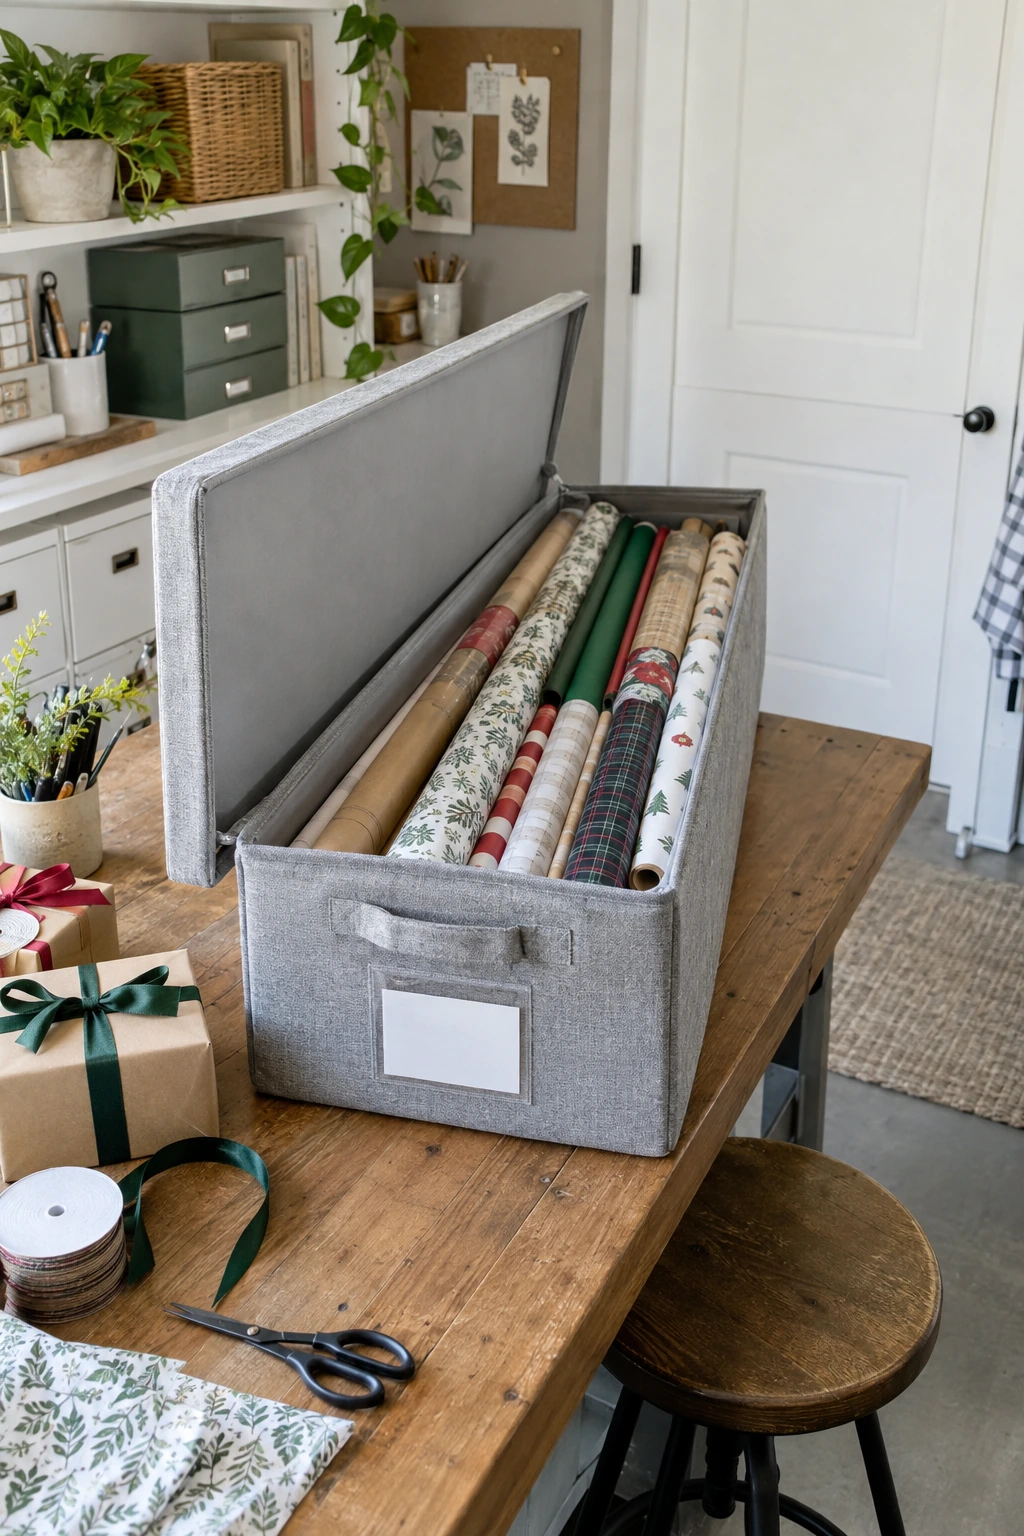
Attach a reusable inventory card to the outside of a closed container. Record broad counts such as neutral rolls, birthday rolls, gift bags, and tape refills, then update the card during seasonal rotation.
The list should prevent duplicate shopping rather than catalog every pattern. Photograph the open container after organizing and store the image with the household inventory if the box lives in a hard-to-reach location.
Planning note: Count categories, not individual designs; the inventory should take less than a minute to update.
Keep dates and detailed notes off decorative labels that will be visible in the room. A small practical card is easier to replace as the system changes.
44. Use Clear End Windows Instead of Clear Plastic Bins
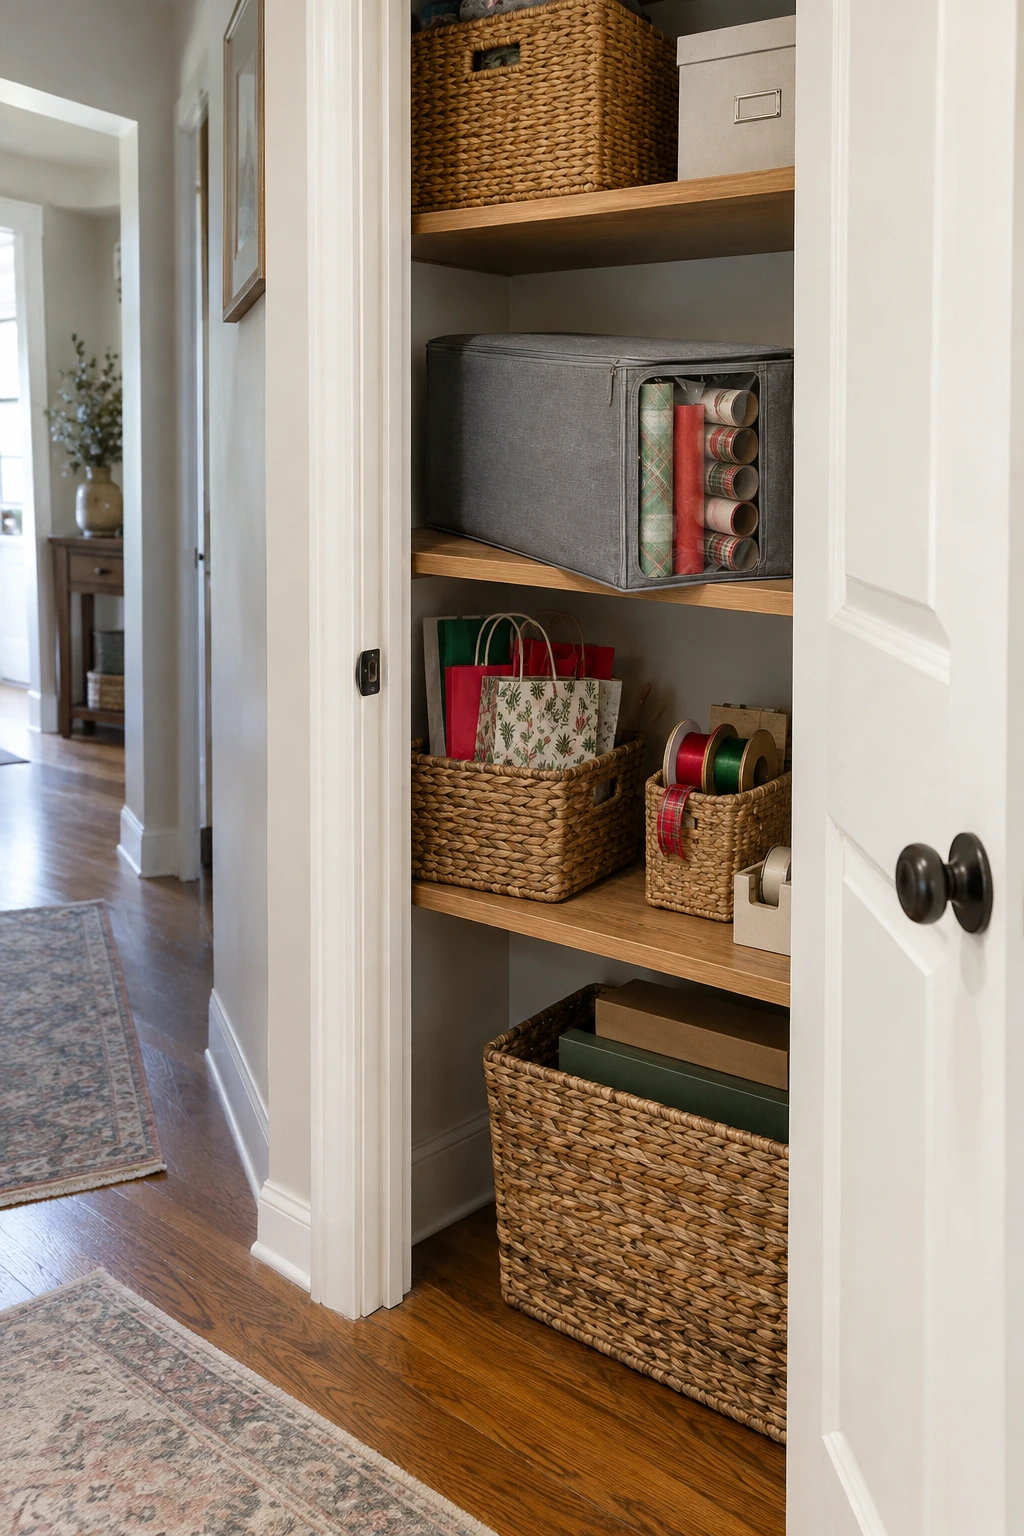
A fabric box with a small clear end window balances visibility with protection from light and dust. Face the window toward the aisle so roll colors are visible without exposing the full length of paper.
Choose a structured base and smooth interior seams. Wipe the window with a soft cloth, avoid overfilling, and replace a cracked panel before it can scrape delicate paper.
45. Store Paper in a Dry Interior Zone
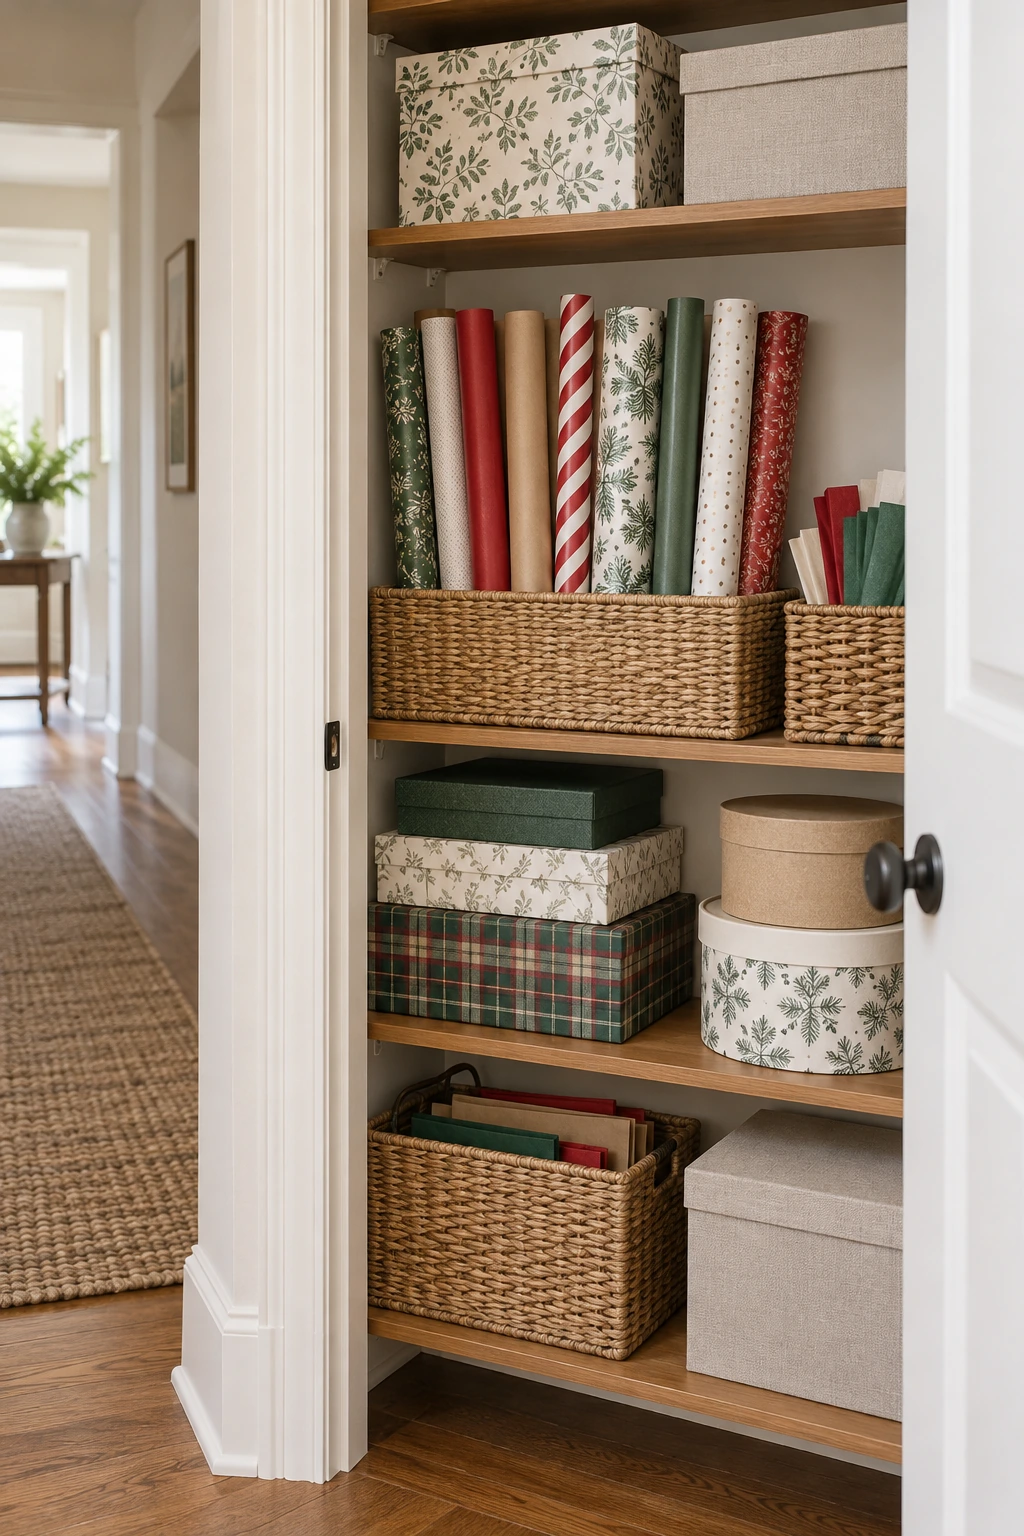
Paper lasts best in a dry interior closet away from leaks, exterior condensation, and strong temperature swings. Raise covered containers slightly above the floor and keep them separate from cleaners, paint, or scented products.
Inspect the wall, shelf, and container during seasonal rotation. A musty odor, soft tube, rippled paper, or condensation means the location needs attention before supplies return.
- Musty odor
- Rippling paper
- Soft cardboard tubes
Do not seal damp tissue or freshly handled natural decorations with paper. Let reusable items dry fully, and leave enough space around containers for inspection and air movement.
Basements and garages can work only when their conditions are reliably dry and moderate. Monitor the actual storage spot rather than assuming the whole room behaves the same.
46. Prevent Crushing With Rigid Dividers
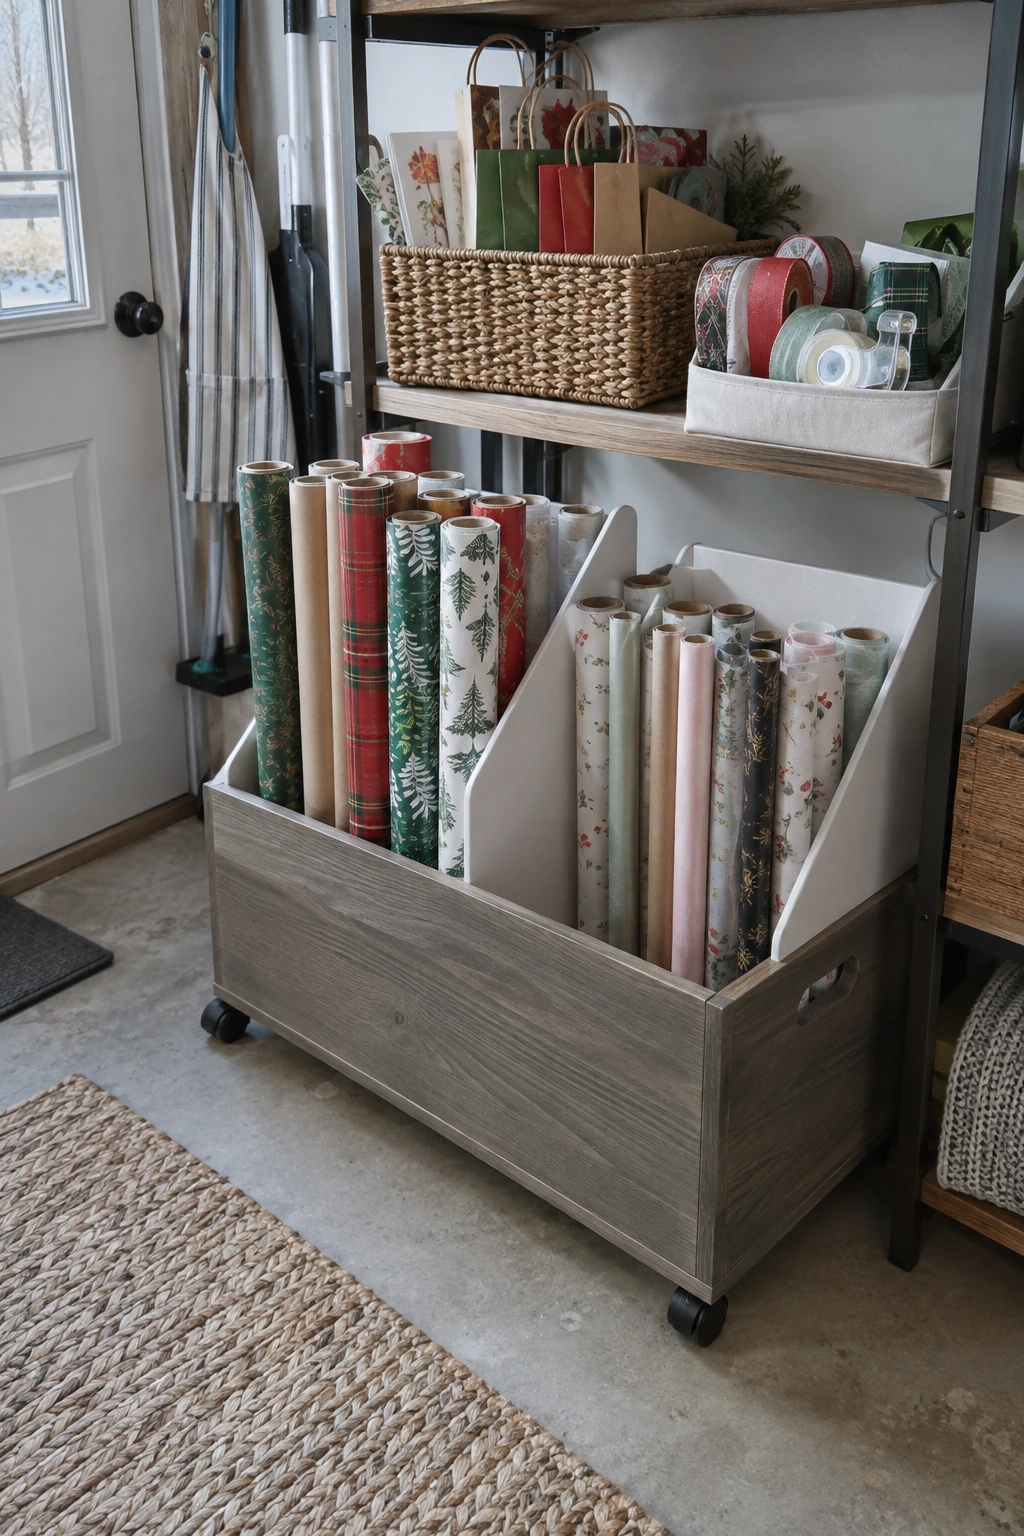
Rigid dividers prevent heavy kraft paper from settling onto thin metallic or handmade rolls. Separate by weight and diameter, then support long tubes near both ends when they lie horizontally.
Avoid packing a container until the lid presses on roll edges. Leave finger space for removal, smooth any cut divider edges, and replace bent cardboard partitions that no longer carry the load.
Planning note: Heaviest rolls belong low, while delicate papers need their own supported compartment.
For under-bed systems, compare the same ideas with under-bed storage ideas that emphasize clearance, lids, and easy retrieval.
47. Set an Accessible Middle Shelf for Shared Supplies
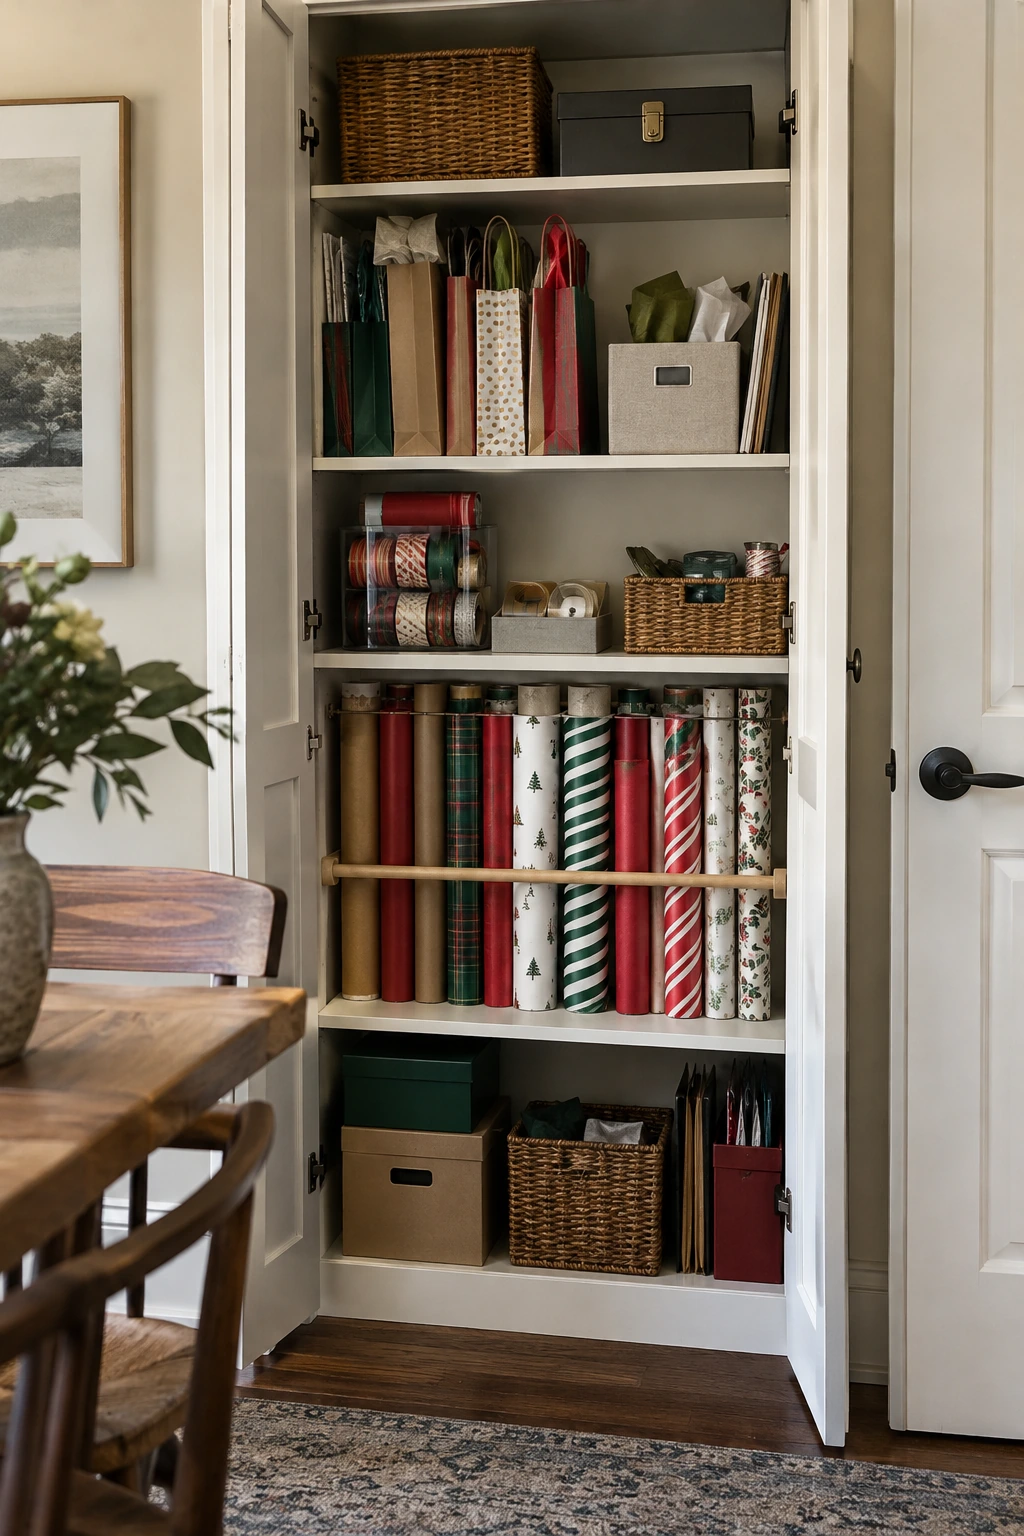
Place paper, bags, tape, and tags on a middle shelf that the primary users can reach without bending deeply or climbing. Keep a clear front edge so someone with limited hand strength can slide out a lightweight bin.
Sharp tools, small magnets, and choking hazards belong in a latched high cabinet or locked box. Children can use a separate caddy with paper-safe tape, blunt tools appropriate for their age, and adult supervision.
- Visible labels
- Lightweight bins
- Hazards secured separately
Use large visual labels and consistent container shapes for shared supplies. Accessibility improves when the item can be identified, gripped, and returned with one straightforward motion.
48. Create Budget Tiers Before Buying Organizers
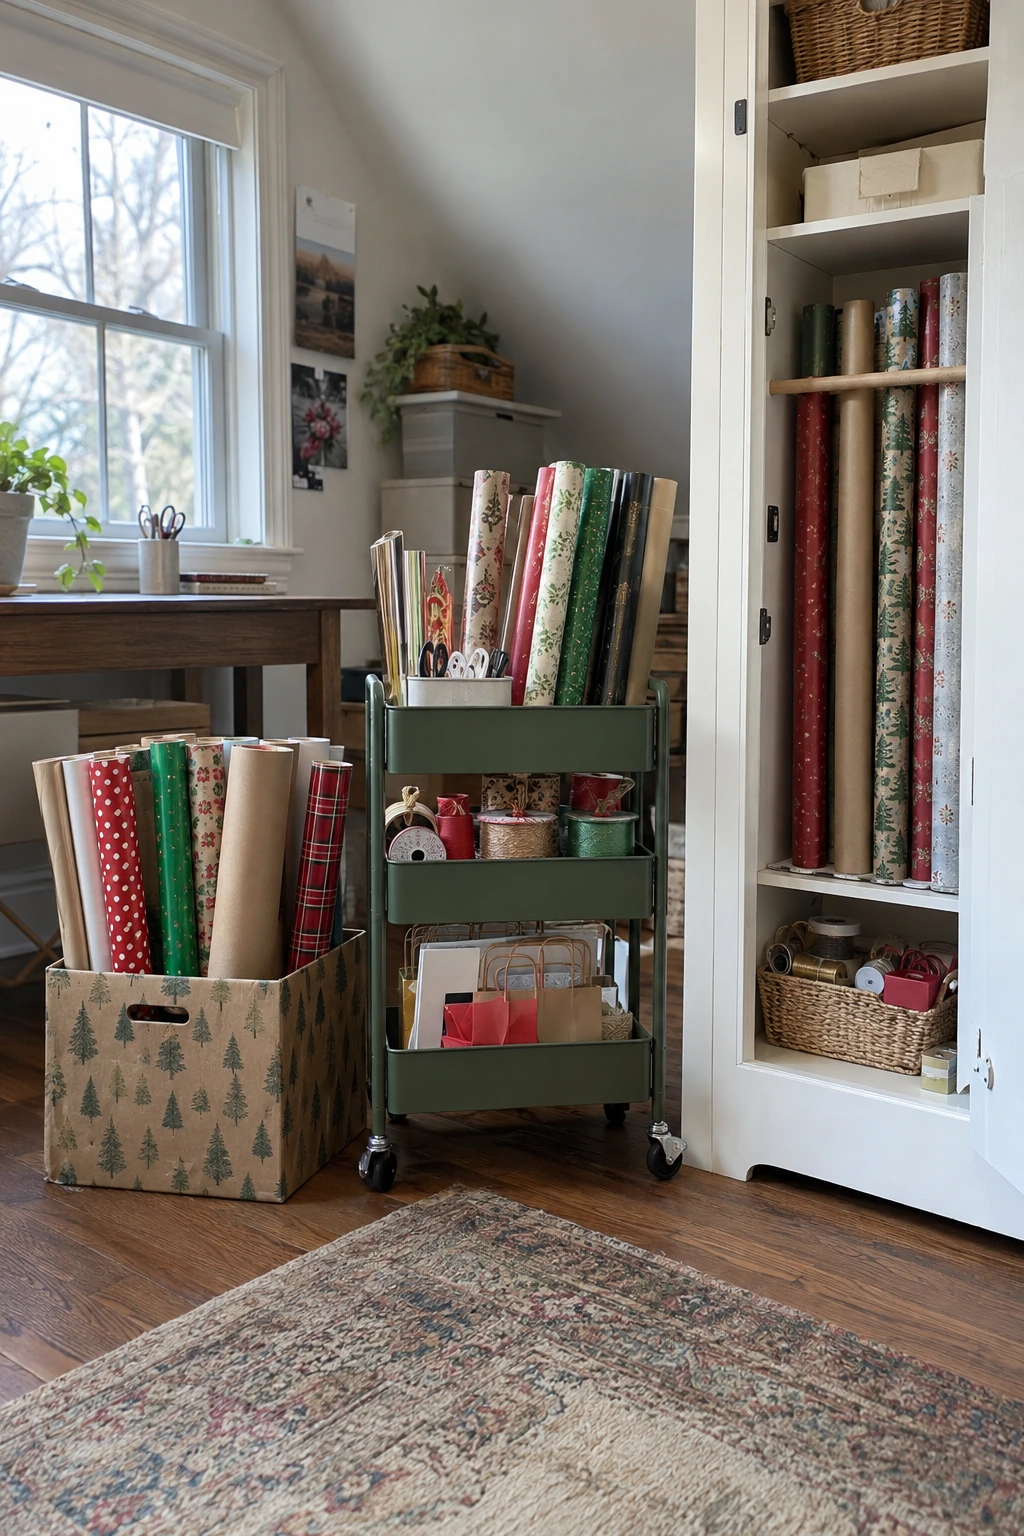
At the lowest budget, reuse a clean long box, sturdy hamper, file folders, and a handled caddy. A moderate budget may add an under-bed organizer or cart, while built-in drawers and wall systems belong to a higher, measured plan.
Spend first on protection, safe tool storage, and a fit that uses existing space. Decorative matching bins can wait until the layout proves useful through several wrapping sessions.
Planning note: Prototype the layout inexpensively, then upgrade only the parts that solve a recurring problem.
Price the complete setup, including mounting hardware, dividers, casters, labels, and delivery. A cheap organizer that blocks a door or crushes long rolls costs more when it must be replaced.
Try the low-cost version with cardboard mockups before commissioning cabinetry. Real use will reveal the best height, orientation, and category sizes.
49. Schedule a Five-Minute Reset After Wrapping
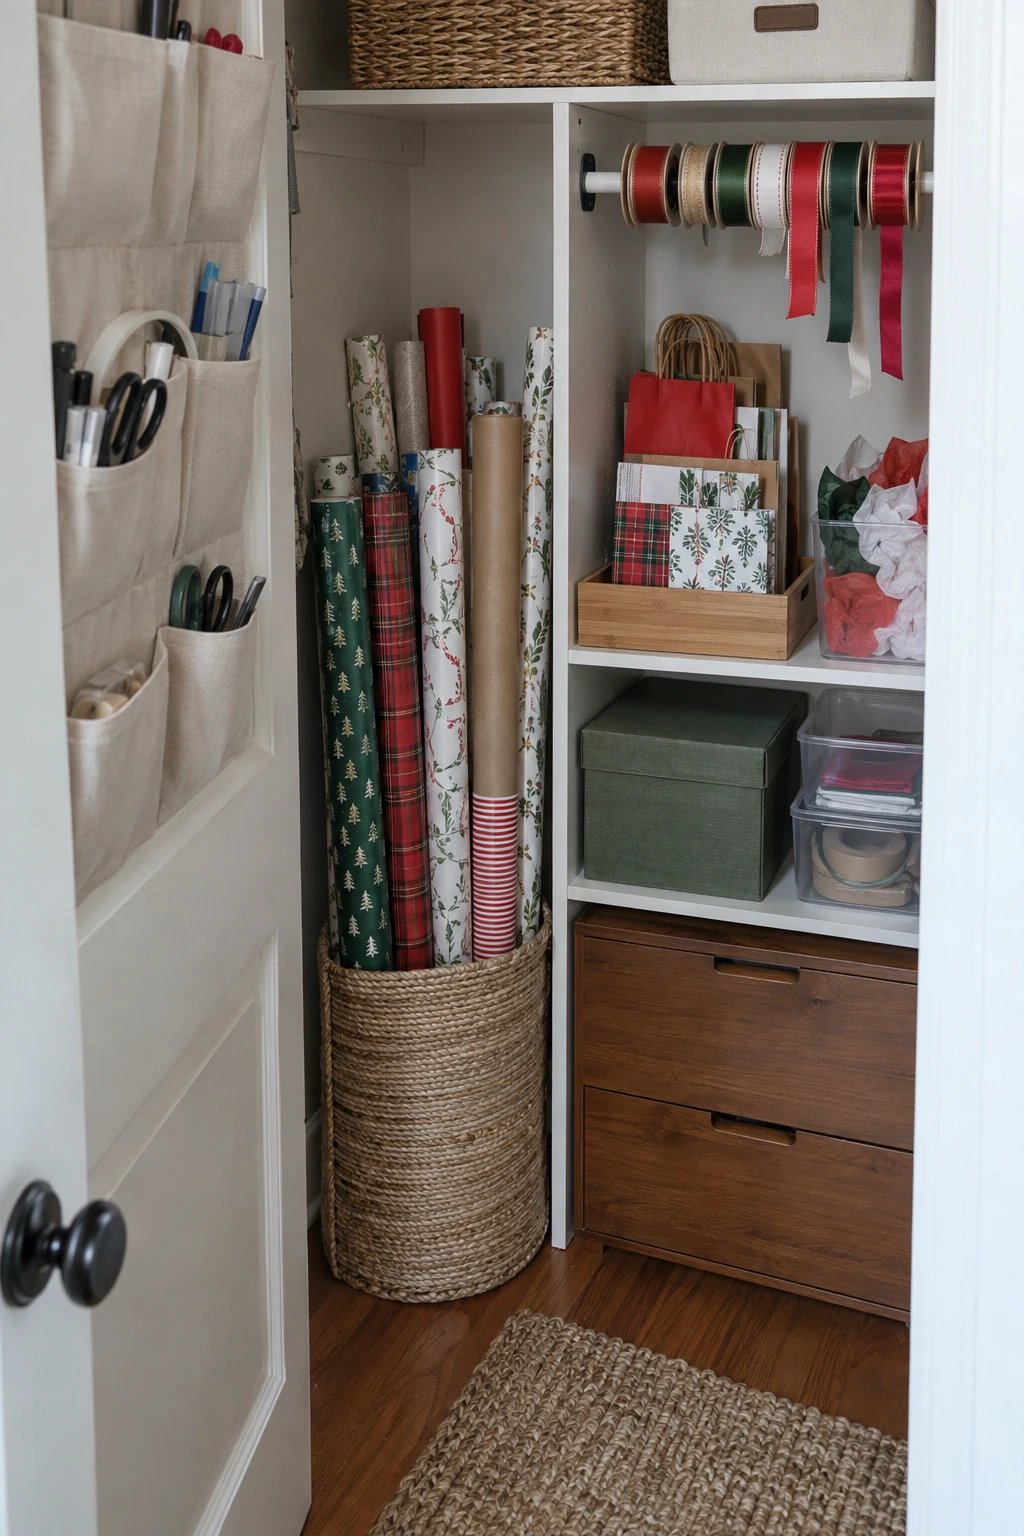
End each session by banding open rolls, folding reusable tissue, clipping ribbon tails, and returning tools to their assigned containers. Recycle scraps too small for a useful gift, then place larger remnants in the flat-paper file.
Restock tape when the active roll becomes low instead of during the next deadline. Wipe the work surface and floor so adhesive, ribbon, and paper slivers do not collect around casters or attract pets.
- Secure rolls
- Contain tools
- Sort reusable pieces
- Clear the floor
A short reset protects the storage system from gradual collapse. Keep the sequence posted inside a cabinet only if the household benefits from the reminder.
50. Review the Collection at Every Seasonal Rotation
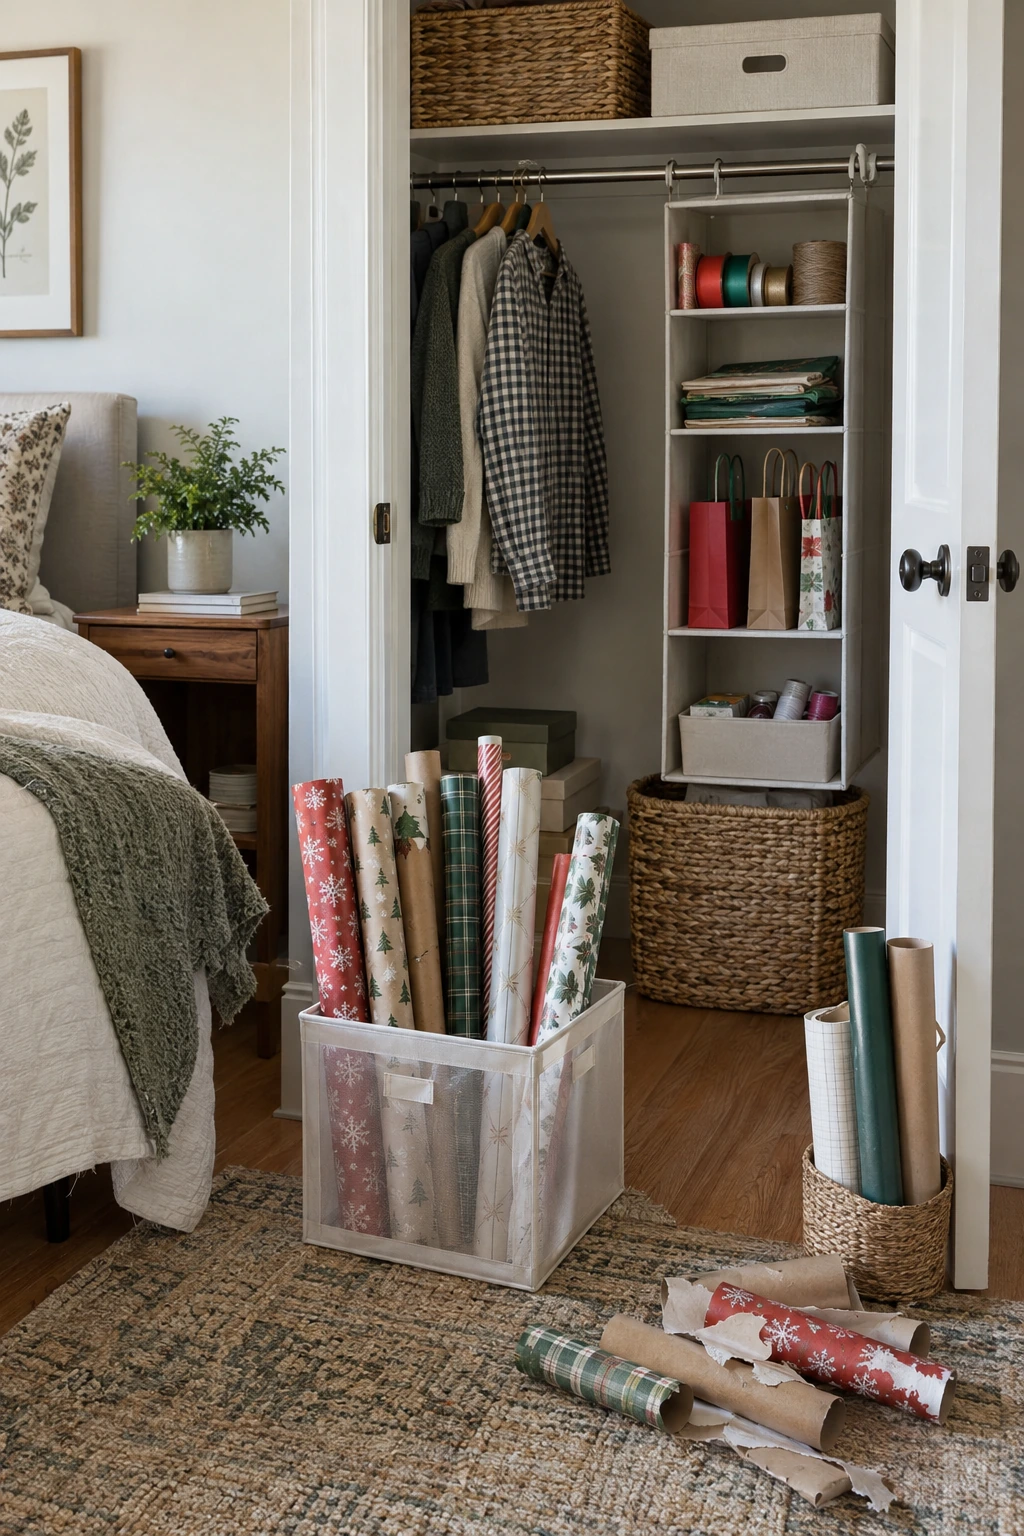
When seasonal paper moves into the active zone, inspect every roll for tears, fading, moisture, and crushed tubes. Keep designs you will use, combine small remnants into the flat-paper file, and release duplicates that exceed the container limit.
Check mounting hardware, drawer slides, caster locks, labels, and tool latches at the same time. Maintenance is easiest while the containers are already empty and accessible.
Planning note: A seasonal review should reduce clutter, verify hardware, and leave every retained item with a defined home.
Record what ran out and what went untouched. That evidence guides the next purchase better than a memory formed during a rushed holiday week.
Return paper with heavy rolls low, delicate finishes supported, and current supplies easiest to reach. The goal is a system that remains safe and understandable until the next rotation.
Choose the Smallest System That Protects the Whole Collection
A useful setup keeps rolls straight, small supplies visible, and sharp tools controlled. Measure first, choose one primary orientation, and give seasonal paper a covered home so everyday wrapping never requires unpacking the entire closet.
Review the system when seasons change. Remove damaged supplies, tighten or replace hardware as directed, update the inventory, and keep paper away from moisture, crushing, traffic, and curious children or pets.