55 Smart Pantry Shelving Ideas

This post may contain affiliate links: full affiliate disclosure.
Maximizing pantry space requires a balance between accessibility and density. Proper shelving choices prevent food waste by keeping every item visible and within reach.
Focus on sturdy materials and logical heights to create a system that works for daily cooking needs.
Walk-In Pantry Shelving Ideas
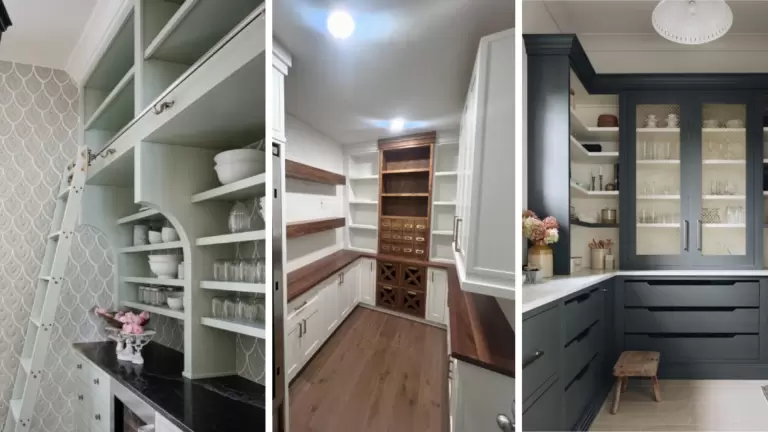
1. Floor-to-Ceiling Pantry Shelves
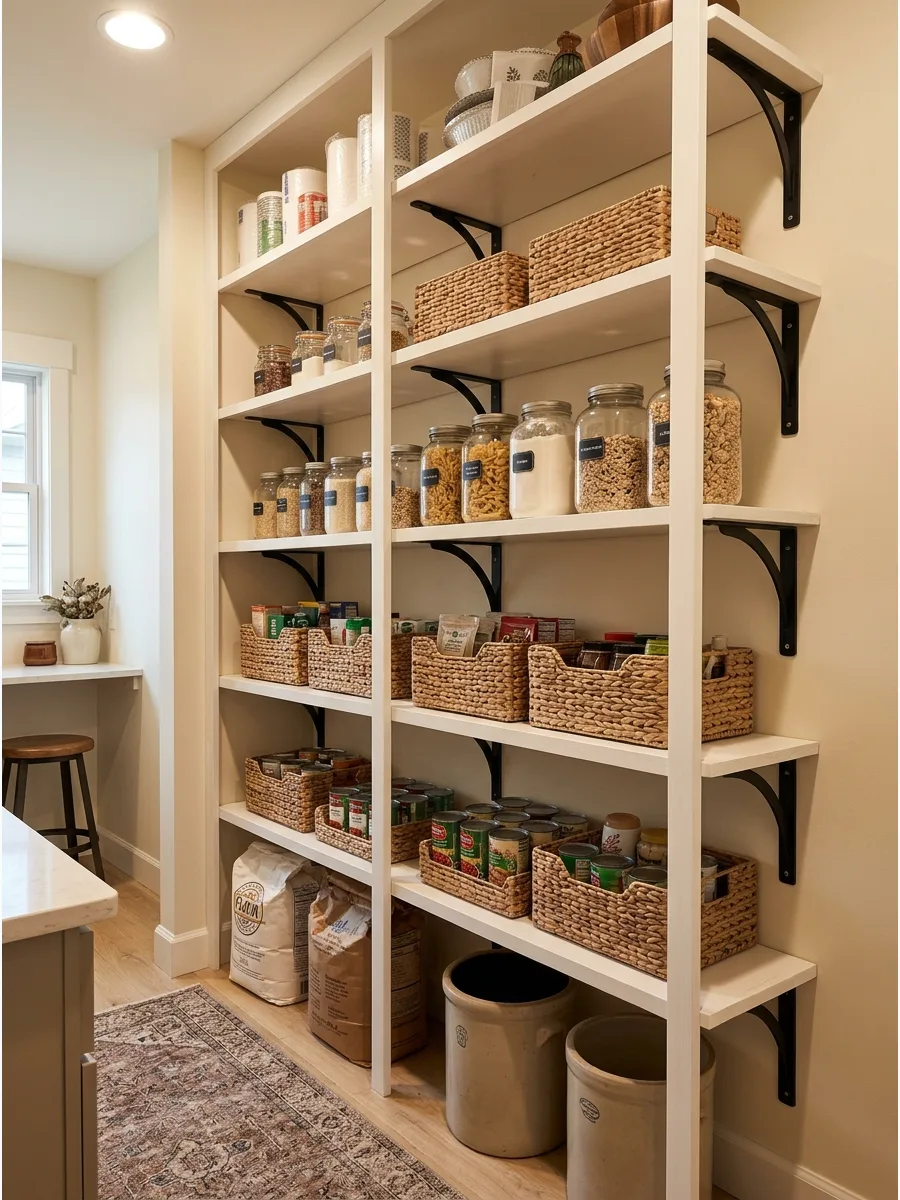
Tall shelving units utilize the often-ignored space near the ceiling for seasonal items or paper goods. Store everyday snacks at eye level and keep heavy bulk items near the floor.
Stack shelves all the way to the top to gain extra storage without increasing the footprint of the room. Sturdy wood or metal supports prevent sagging under the weight of glass jars.
- Budget: $200-$500 depending on material
- Install vertical supports directly into wall studs for safety
- Use a step stool for accessing top-tier items
Quick win: Store lightweight items like paper towels or extra napkins on the highest shelves to make them easy to grab with a reaching tool.
2. U-Shaped Walk-In Pantry Shelving
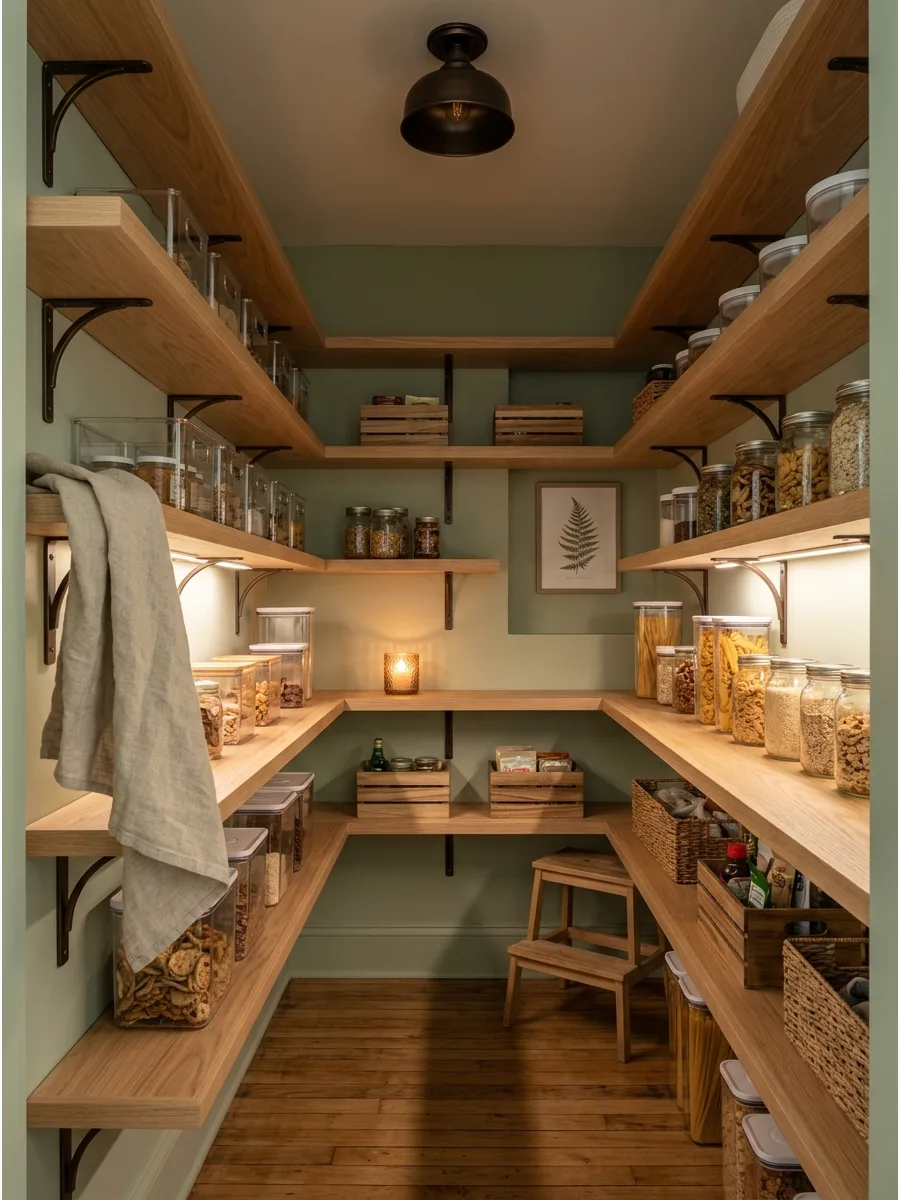
A U-shaped layout creates a wrap-around experience that puts everything in view at once. This configuration works best in square walk-in closets where the center remains open for movement.
Mount shelves on three contiguous walls to maximize the horizontal surface area available for organization. It eliminates the need for deep, dark corners where food often expires unnoticed.
- Mid-range budget for custom-cut shelving
- Maintain at least 30 inches of floor space in the center for movement
- Ensure corner joints are reinforced with L-brackets
Most people skip this: Leave one side of the U slightly shallower to accommodate wider items like serving platters without blocking the path.
3. L-Shaped Pantry Shelving
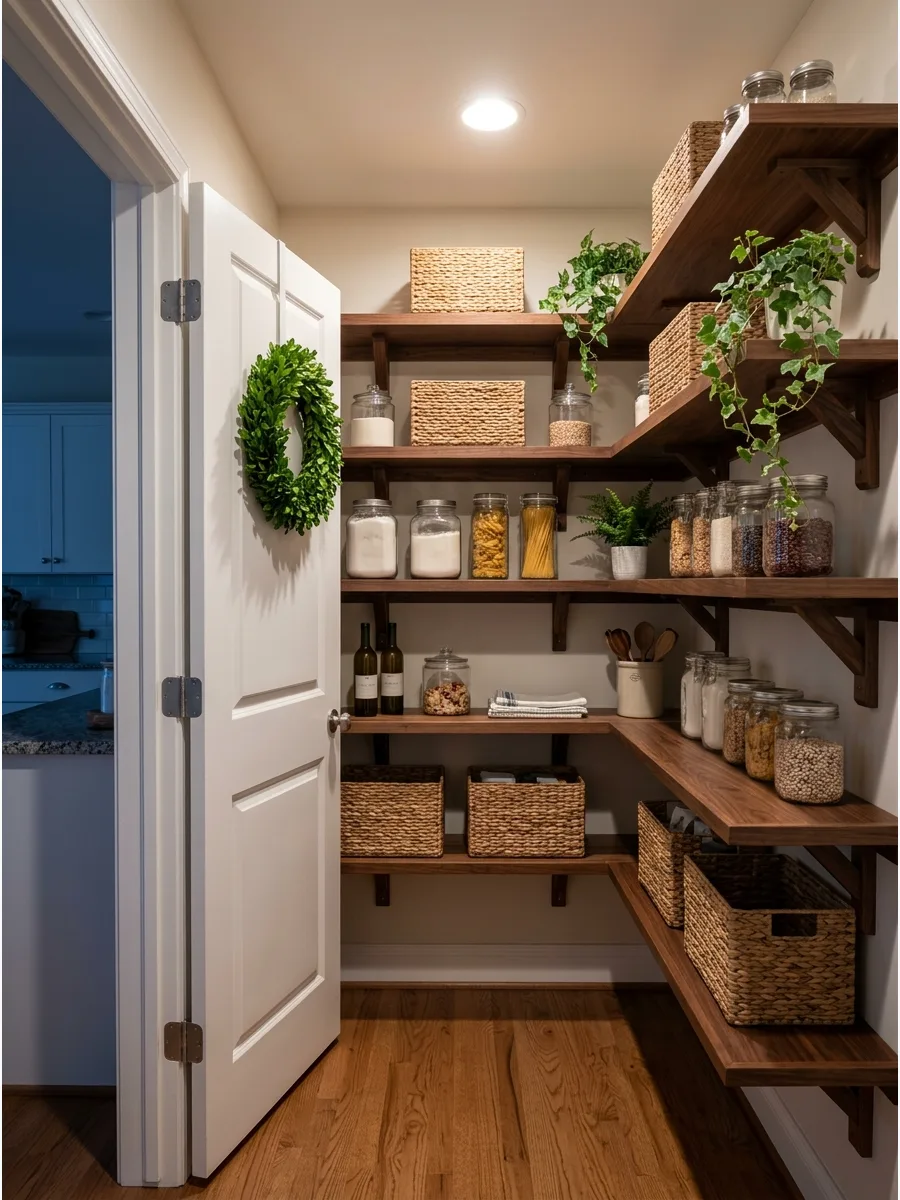
L-shaped shelves are the perfect solution for rectangular walk-in pantries with a door on one side. This layout leaves one long wall open for hanging storage or a broom rack while providing ample shelf space.
Connect two perpendicular walls with shelving to create a seamless flow of storage categories. It offers a clear sightline from the doorway to every item in the room.
- Affordable DIY option using standard lumber
- Place the longer run on the wall opposite the door for maximum visibility
- Use the open wall for a pegboard or spice rack
Best shortcut: Use a rotating turntable in the L corner to prevent jars from getting trapped in the dead space.
4. Adjustable Pantry Shelves
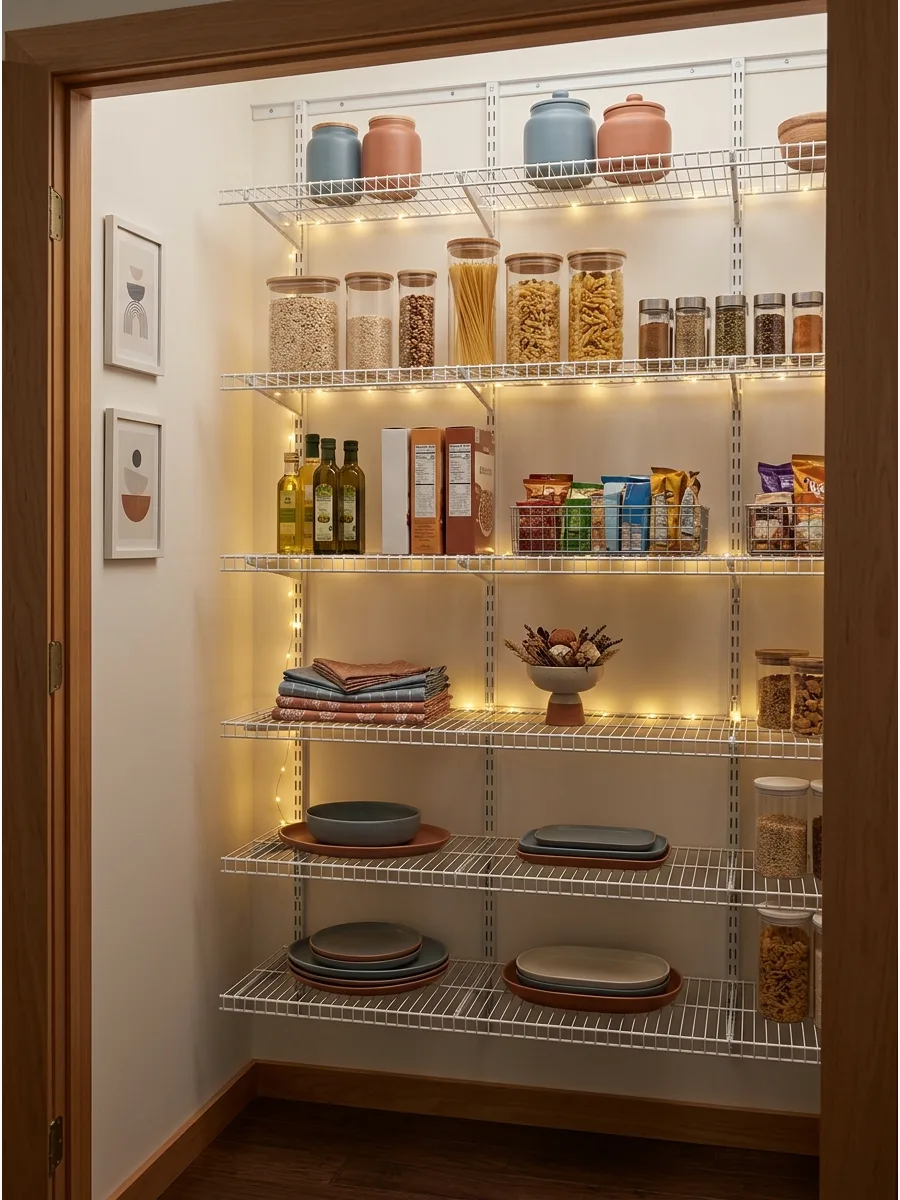
Fixed shelves often lead to wasted vertical space between the top of a jar and the shelf above it. Vertical tracks allow for micro-adjustments as grocery needs change over time.
Install a track-and-bracket system to customize the height for varying bottle sizes and bulky cereal boxes. This flexibility ensures the pantry remains functional even as family sizes or shopping habits evolve.
- Moderate cost for track systems
- Space tracks every 16 inches for maximum weight capacity
- Label tracks with height markers for easier re-leveling
Quick win: Group items by height first, then adjust the shelf to sit just two inches above the tallest item in that group.
5. Deep Lower Shelves and Shallow Upper Shelves
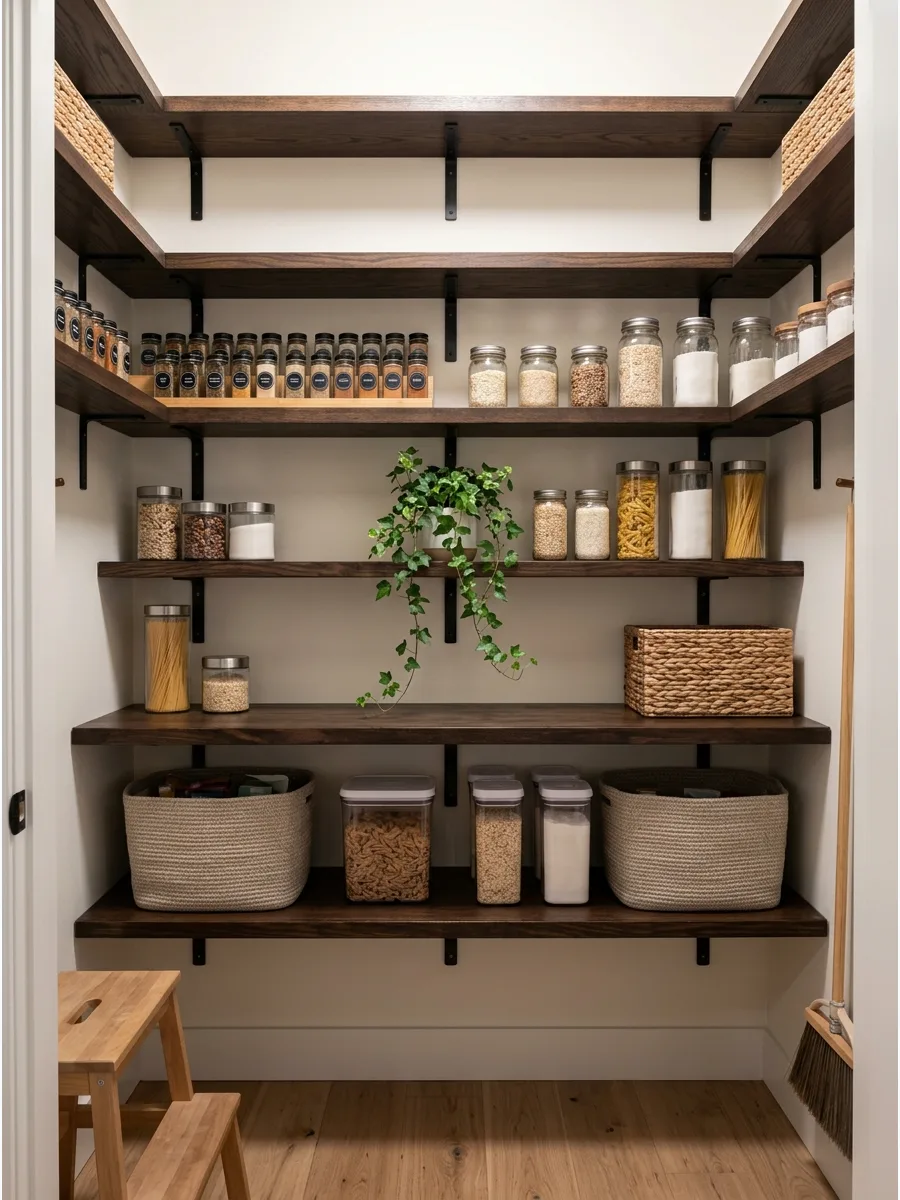
Tiered depths prevent the black hole effect where small items get lost behind larger ones. Deep bottom shelves handle heavy appliances or bulk pet food bags with ease.
Use 18-inch deep shelves for the bottom levels and transition to 12-inch shelves at chest height for better visibility. This staggered approach makes the space feel larger and prevents items from being buried.
- Budget-friendly using off-the-shelf lumber sizes
- Secure deep shelves with heavy-duty brackets to prevent tipping
- Keep the shallowest shelves at eye level for quick inventory checks
Most people skip this: Use the deep bottom shelves for a rolling bin system to make reaching back items effortless.
6. Wraparound Corner Pantry Shelves
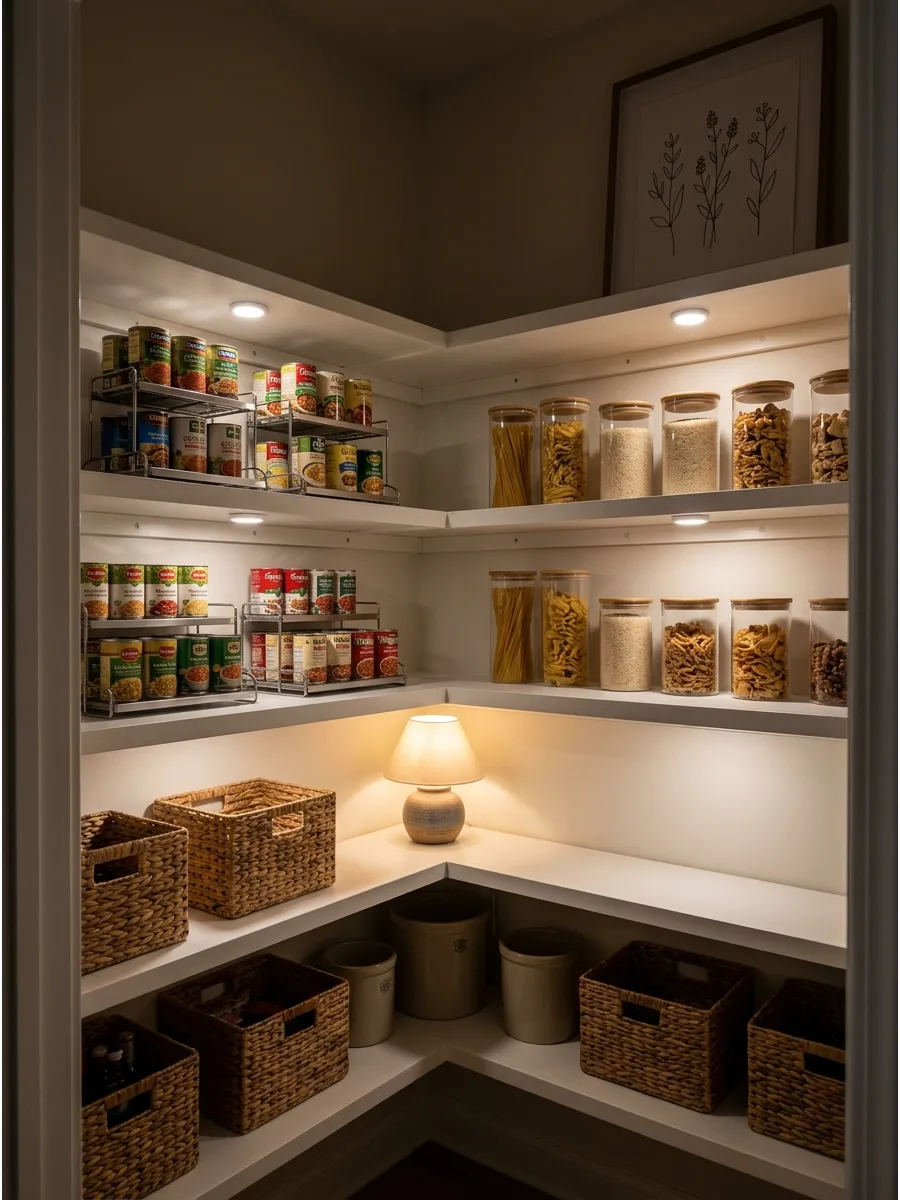
Standard shelving often stops short of corners, leaving valuable square footage unused. Custom-cut corner pieces bridge the gap between wall runs for a continuous storage surface.
Install curved or diagonal corner shelves to eliminate sharp angles and increase usable storage area. This creates a high-end, built-in look that utilizes every inch of the pantry interior.
- Higher cost for custom corner cuts
- Ensure corner supports are anchored into studs on both walls
- Use this area for large, round items like cake stands or salad bowls
Best shortcut: If custom cutting is too hard, use a pre-made corner unit and butt straight shelves against it for a similar effect.
7. Narrow Aisle Pantry Shelving
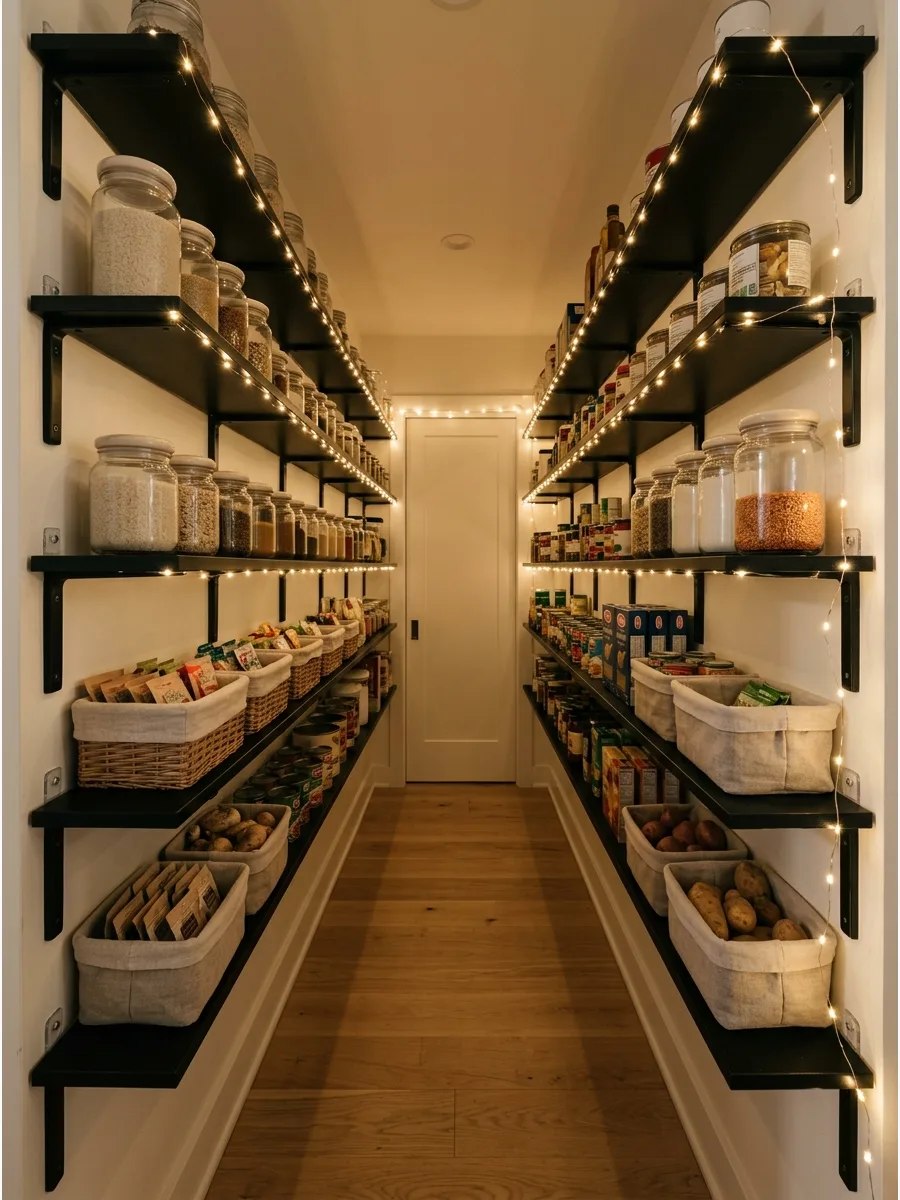
Narrow walk-ins require slim shelving to maintain a functional walkway. Shallow shelves prevent double-stacking, meaning you never have to move one item to reach another.
Mount 6-inch to 9-inch deep shelves on both sides of a narrow corridor to maximize storage without crowding the aisle. This layout is ideal for canned goods, spices, and boxed pastas.
- Low cost for slim profile shelving
- Avoid shelving deeper than 10 inches if the aisle is less than 36 inches wide
- Use wall-mounted spice racks to save even more space
Quick win: Paint the back wall a light color to reflect light and make a narrow aisle feel wider.
8. Pantry Shelves Above a Countertop
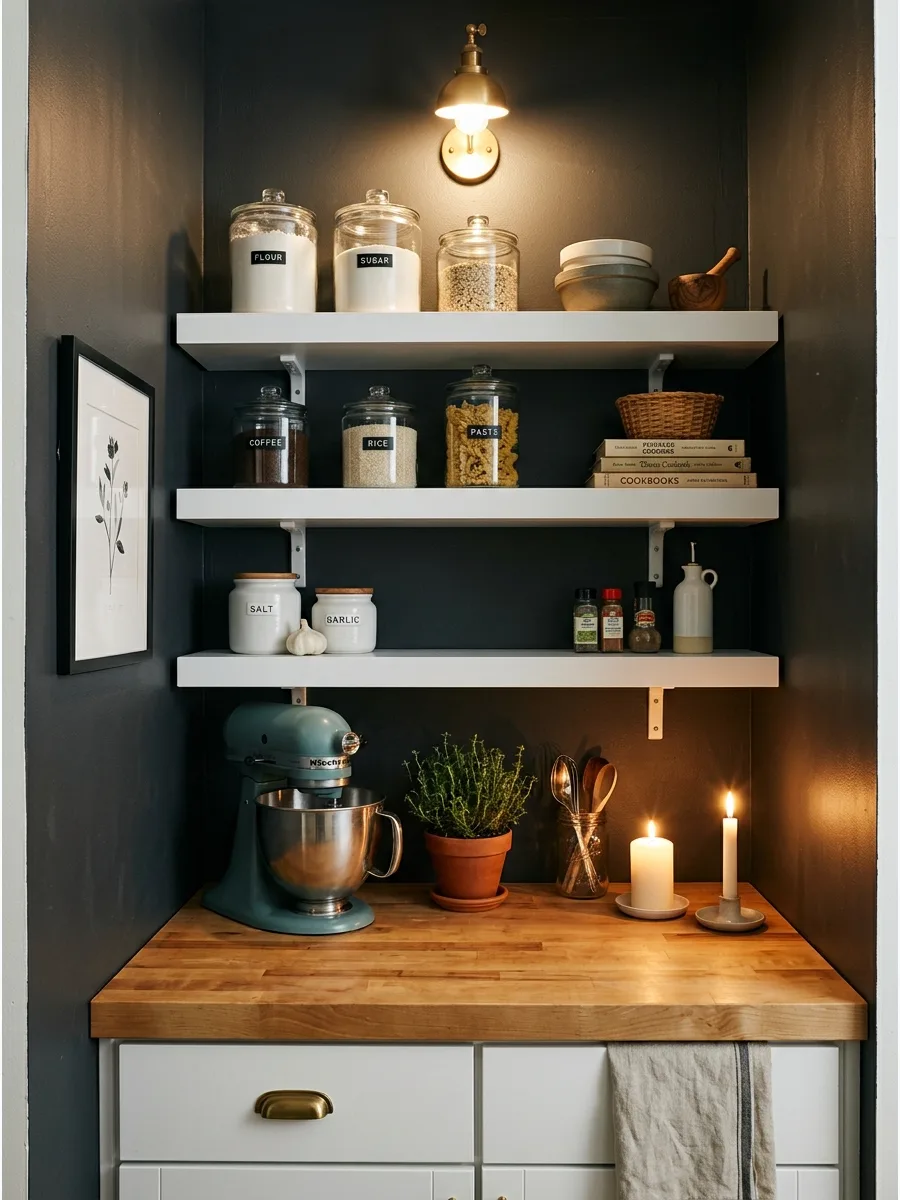
Integrating a small counter provides a landing zone for groceries or a spot for small appliances. Open shelving above the counter keeps frequently used ingredients within arm's reach.
Place a sturdy wood or stone countertop at waist height with floating shelves above for a coffee or baking station. It transforms a storage closet into a functional extension of the kitchen.
- Mid-to-high budget for countertop installation
- Install an outlet near the counter for small appliance use
- Keep the counter clear of clutter to maintain a prep space
Most people skip this: Under-shelf lighting above the counter makes reading recipes or measuring ingredients much easier.
9. Appliance Shelf Pantry
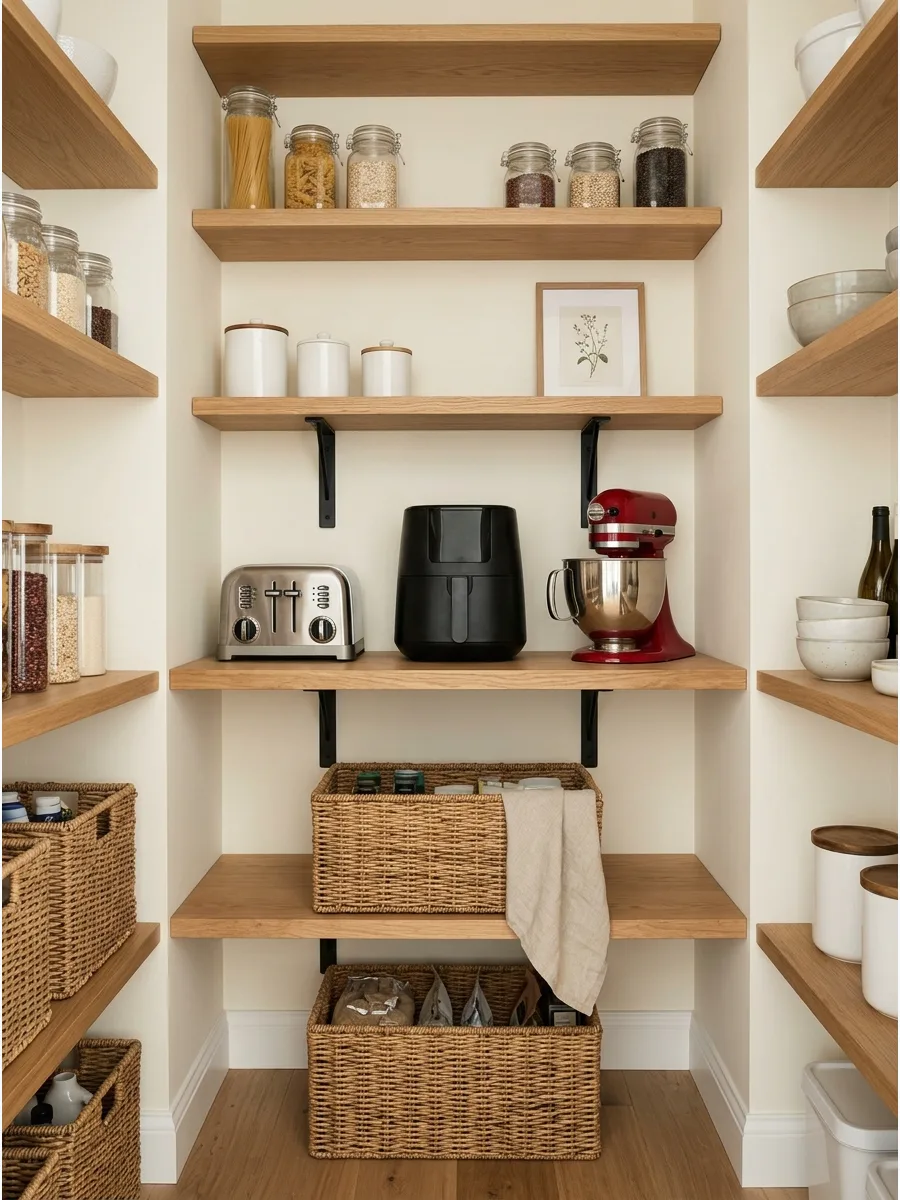
Heavy appliances like mixers and air fryers need dedicated, reinforced shelving. Placing these items at waist height prevents back strain during lifting.
Reinforce one specific shelf with extra brackets to hold the weight of heavy small appliances. Keeping these off the main kitchen counters creates a cleaner, more organized cooking environment.
- Low cost for extra bracket reinforcement
- Ensure the shelf depth accommodates the largest appliance's footprint
- Leave 4 inches of clearance above appliances for easy grabbing
Best shortcut: Use a pull-out shelf for the heaviest appliance so you don't have to lift it at all.
10. Pantry Shelving With a Prep Zone
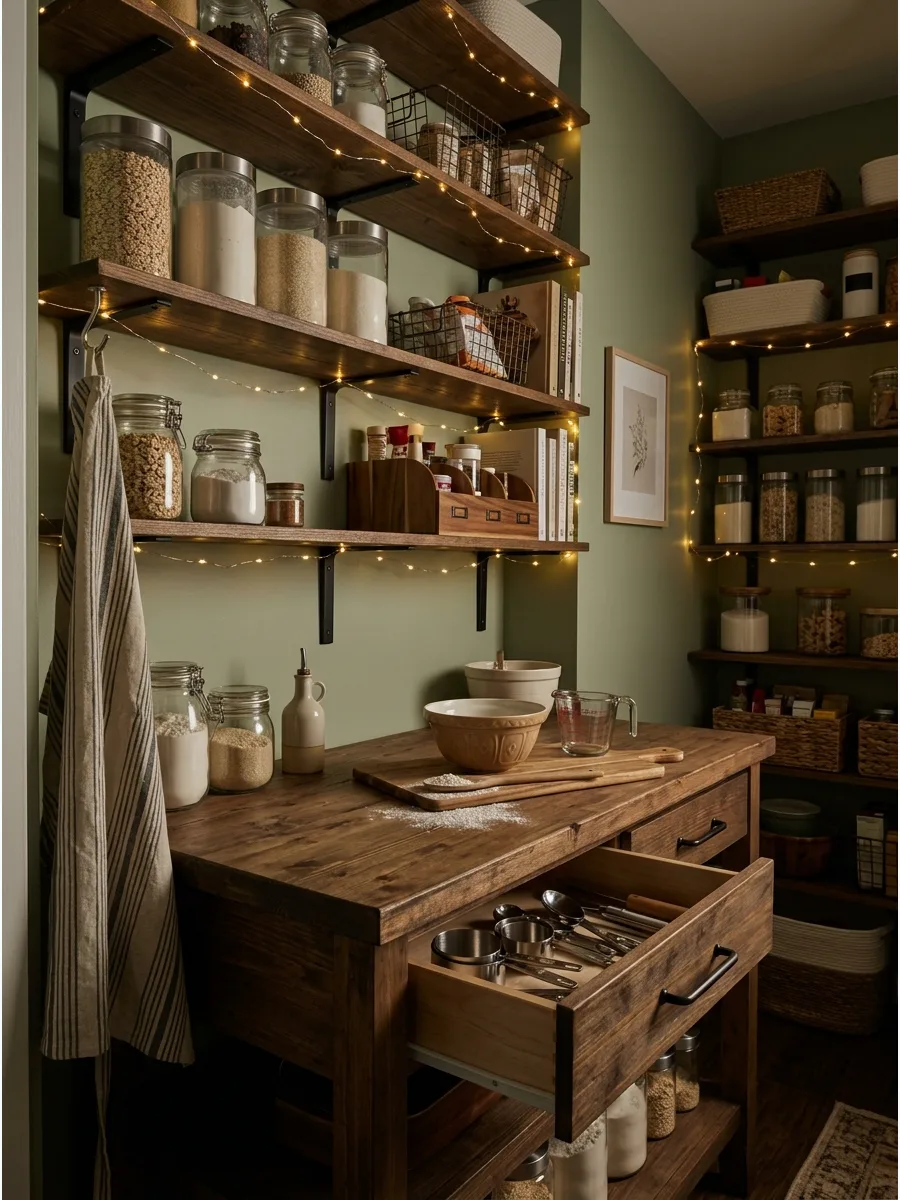
A prep zone inside the pantry allows for messy tasks like flouring meat or mixing dough to stay out of the main kitchen. Shelves surrounding the prep area should hold all necessary tools and bulk dry goods.
Designate a central section of shelving for a small workspace to keep kitchen counters clear for serving. This setup works particularly well for avid bakers who need a dedicated flour station.
- Moderate budget for workspace integration
- Choose a durable surface like laminate or wood for the prep area
- Install task lighting directly above the work surface
Quick win: Hang a magnetic strip on the wall near the prep zone to keep measuring spoons organized and accessible.
Small Pantry Shelving Ideas
11. Small Closet Pantry Shelves
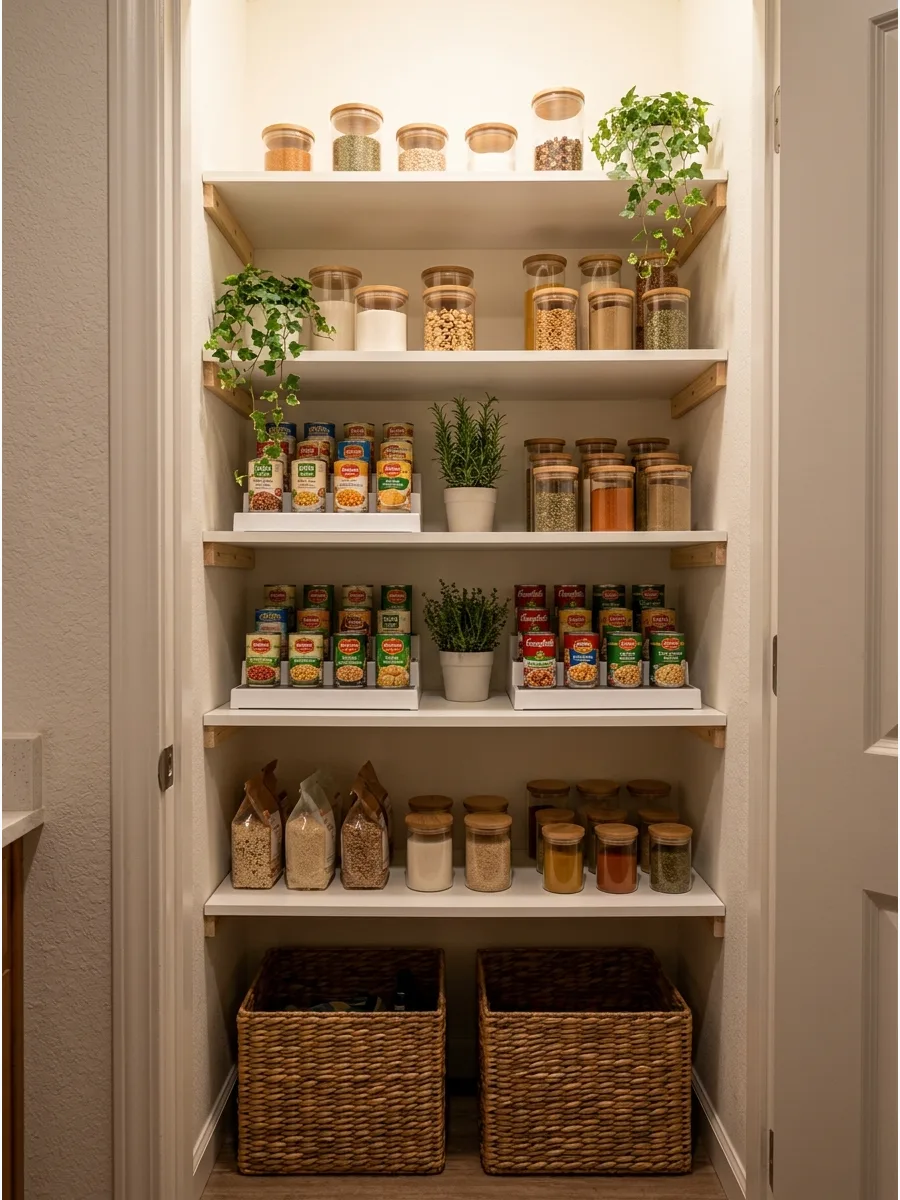
Even a standard reach-in closet can become a high-functioning pantry with the right shelf spacing. Wall-to-wall shelves maximize every inch of the closet width.
Replace wire racks with solid wood or melamine shelves to prevent small items from tipping over. This simple upgrade instantly makes a basic closet feel like a custom-designed pantry.
- Affordable weekend DIY project
- Measure the door opening to ensure shelves don't block the entry
- Use shelf liners if sticking with existing wire racks
Most people skip this: Paint the interior of the closet a bright white or light gray to make the contents pop against the background.
12. Narrow Pantry Shelves
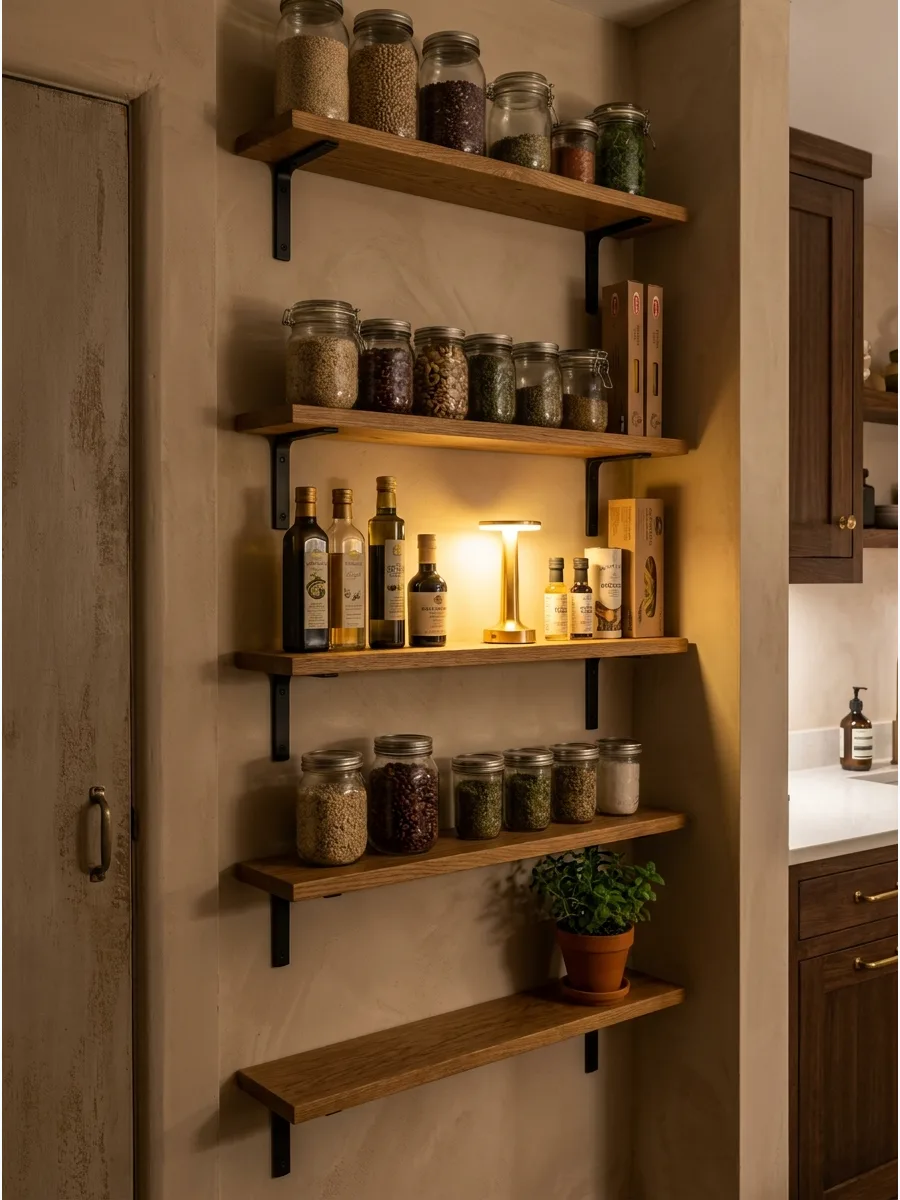
Shallow shelving is the secret to a tidy pantry because nothing can hide in the back. In a small space, these shelves keep the footprint light while providing massive organization.
Install shallow shelves that are only one item deep to maintain perfect visibility of all goods. This is especially effective for spices, oils, and snacks that often get lost.
- Low budget for narrow lumber
- Mount shelves directly to the wall with small L-brackets
- Perfect for dead walls behind kitchen doors
Best shortcut: Use clear acrylic lipped shelves to prevent small bottles from sliding off the narrow surface.
13. Corner Pantry Shelving
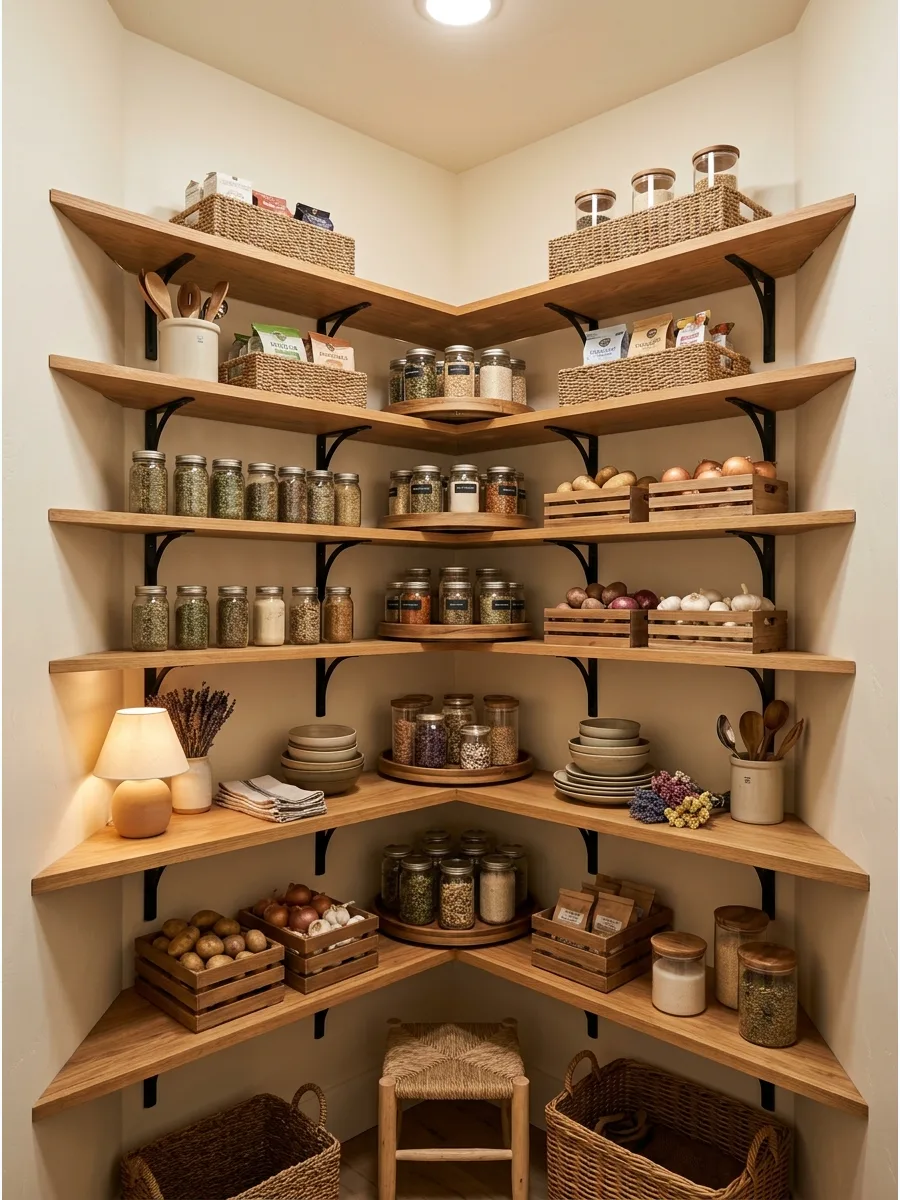
Corner pantries often have deep, awkward angles that make reaching items difficult. Shelving should follow the perimeter to keep the center open for access.
Use a combination of straight shelves and specialized corner units to make the most of an angled pantry layout. This prevents the back of the corner from becoming a graveyard for old ingredients.
- Moderate cost for angled shelving
- Consider a lazy susan for the deepest part of the shelf
- Prioritize bright lighting so the corners aren't dark
Quick win: Place large, rarely used items like holiday platters in the very back of the corner space.
14. Over-the-Door Pantry Shelving
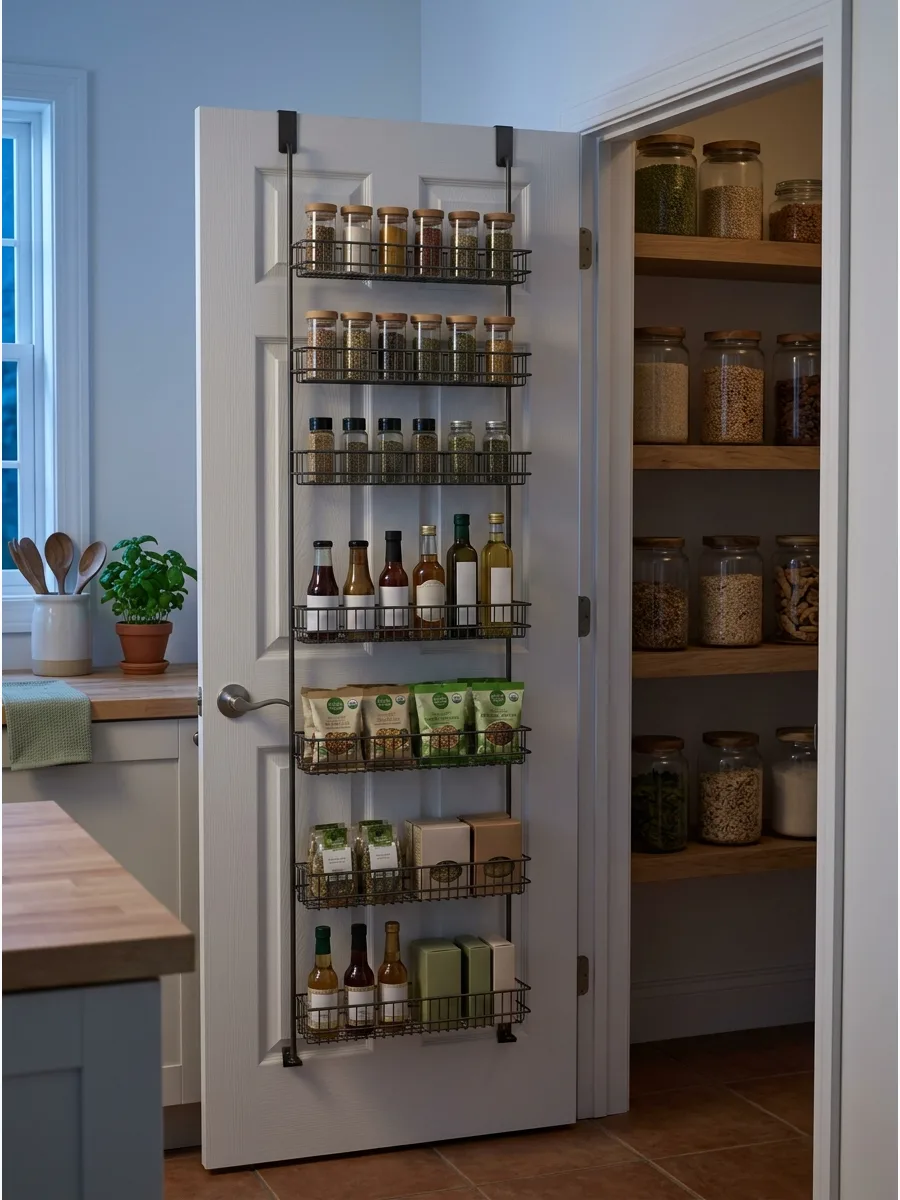
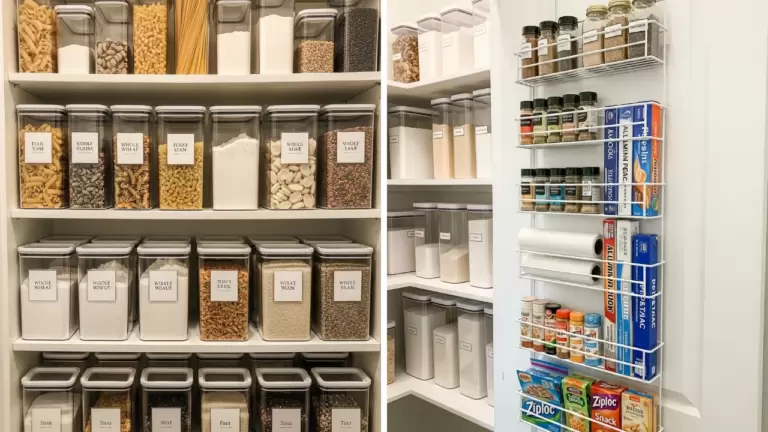
The back of the pantry door is prime real estate that often goes to waste. Door-mounted racks provide extra tiers for small, lightweight items like spices or snack packs.
Attach an over-the-door rack system to double your storage capacity for small pantry staples. This keeps the main shelves clear for larger boxes and heavier jars.
- Very low budget and renter-friendly
- Ensure the rack is securely fastened so it doesn't rattle when the door moves
- Check door clearance to make sure it still closes fully
Most people skip this: Use the door rack for items with upcoming expiration dates so they stay top-of-mind.
15. Floating Pantry Shelves
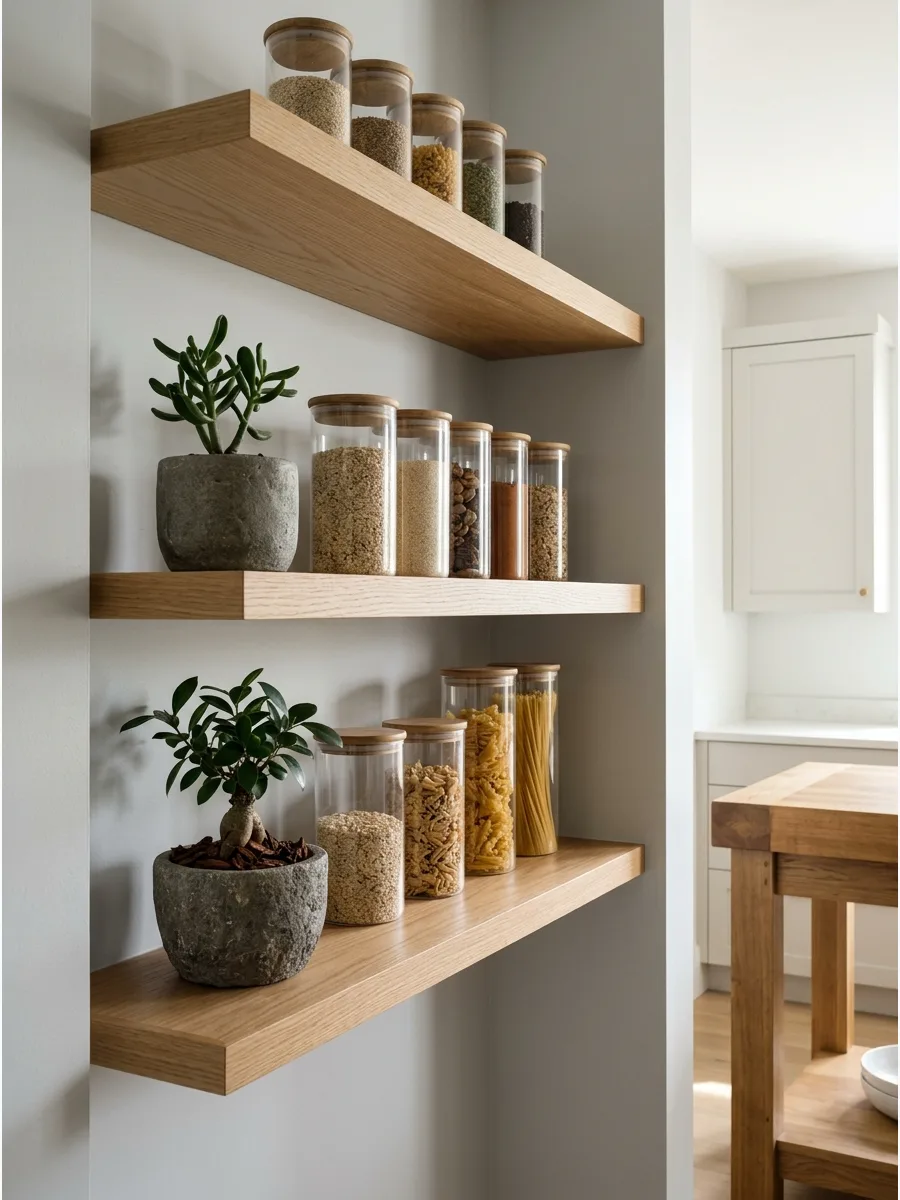
Floating shelves offer a modern, airy look that prevents a small pantry from feeling cramped. Without visible brackets, the shelves appear to blend into the walls.
Install thick floating shelves in an open pantry nook for a clean and accessible storage solution. This style is perfect for showing off attractive glass jars and uniform containers.
- Moderate cost for floating shelf hardware
- Ensure the wall can support the weight of heavy jars
- Use a level during installation for a professional finish
Best shortcut: If weight is a concern, use hidden bracket shelves that look floating but offer more support.
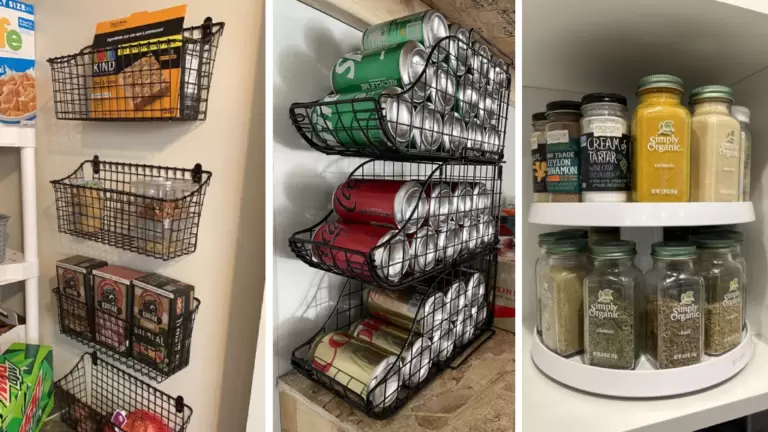
16. Pantry Shelves With Baskets
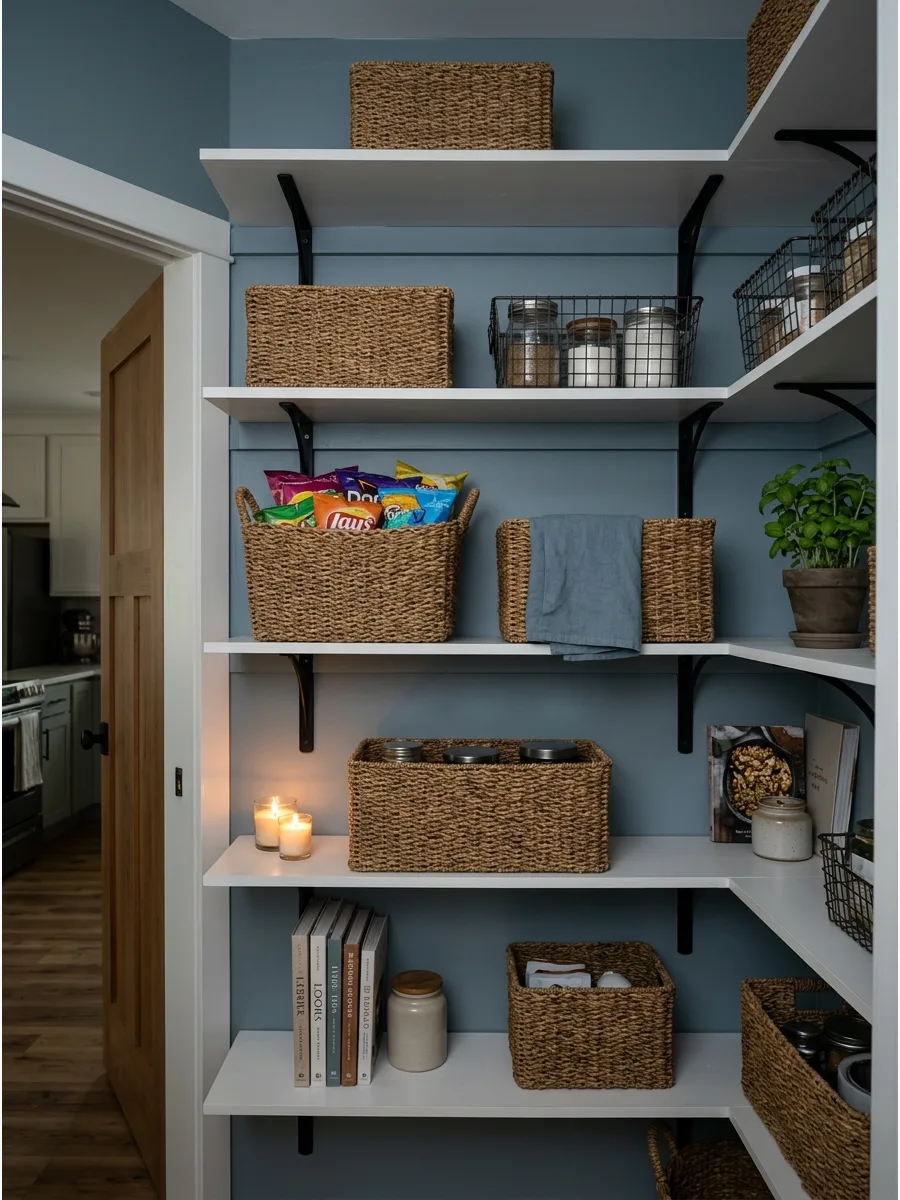
Group similar items like snacks or baking supplies into matching woven or wire baskets. This prevents small bags and loose items from cluttering the shelf surface and making the space look messy.
Line baskets with fabric or plastic inserts to catch crumbs and prevent spills from reaching the shelf below. Solid-sided baskets hide visual clutter while keeping essentials within easy reach.
- IKEA or Target sourcing
- Slide baskets directly onto existing shelves
- Use wire baskets for better airflow around produce
Quick win: Label the front of each basket with a clip-on tag so everyone in the house knows exactly where the chips go.
17. Pantry Shelves With Clear Bins
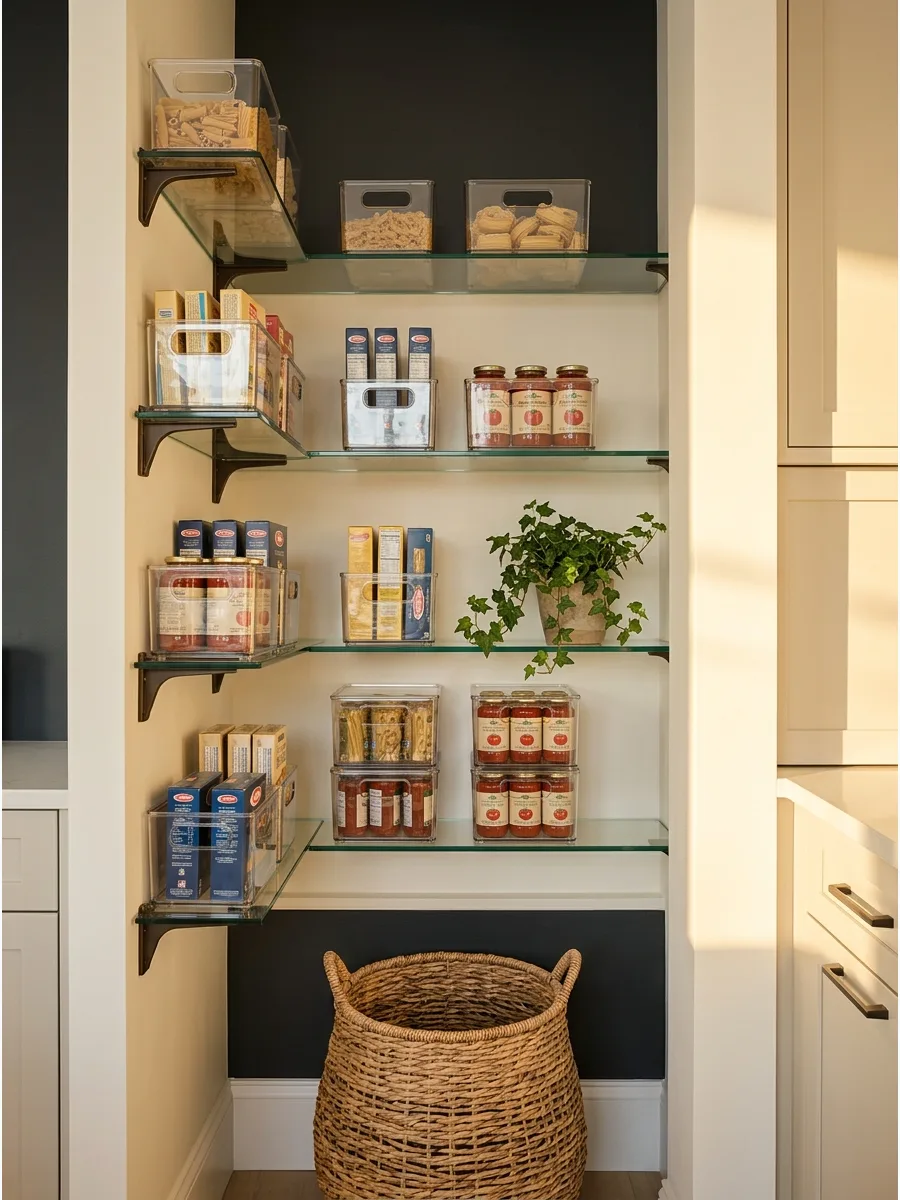
Transparent acrylic bins allow for an instant inventory check without moving a single item. They work perfectly for tall, narrow items like pasta boxes or condiment bottles that tend to tip over on wire shelving.
Select stackable bins to double the storage capacity in tall shelf gaps. Seeing the food levels helps prevent overbuying at the grocery store.
- Amazon or The Container Store sourcing
- Measure shelf height and depth before buying
- Choose BPA-free plastic for food safety
Most people skip this: Use deep bins that reach the back of the shelf to eliminate wasted space in the rear of the cabinet.
18. Tiny Pantry With Labeled Shelves
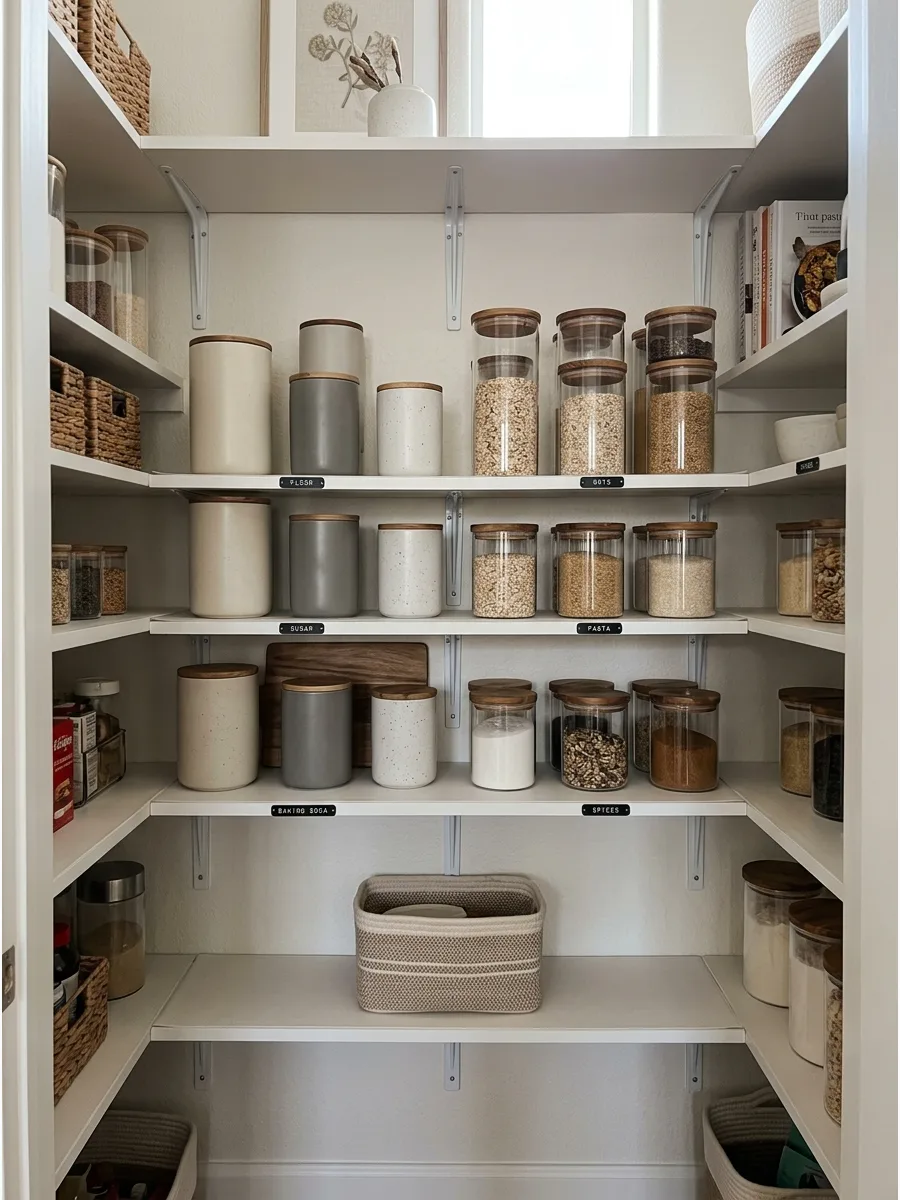
In a small space, every inch must have a dedicated purpose to avoid chaos. Use a label maker or vinyl stickers to mark the front edge of each shelf for specific categories like Grains or Canned Goods.
Apply the labels directly to the shelf trim or the edge of the shelf liner for a clean look. Strict zones ensure that even the smallest pantry feels organized and manageable.
- Label maker or vinyl decals
- Apply to clean and dry shelf edges
- Use magnetic label holders for wire shelves
Best shortcut: Use magnetic label holders on wire shelving to easily swap categories as your grocery needs change.
19. Pantry Shelving Around a Fridge
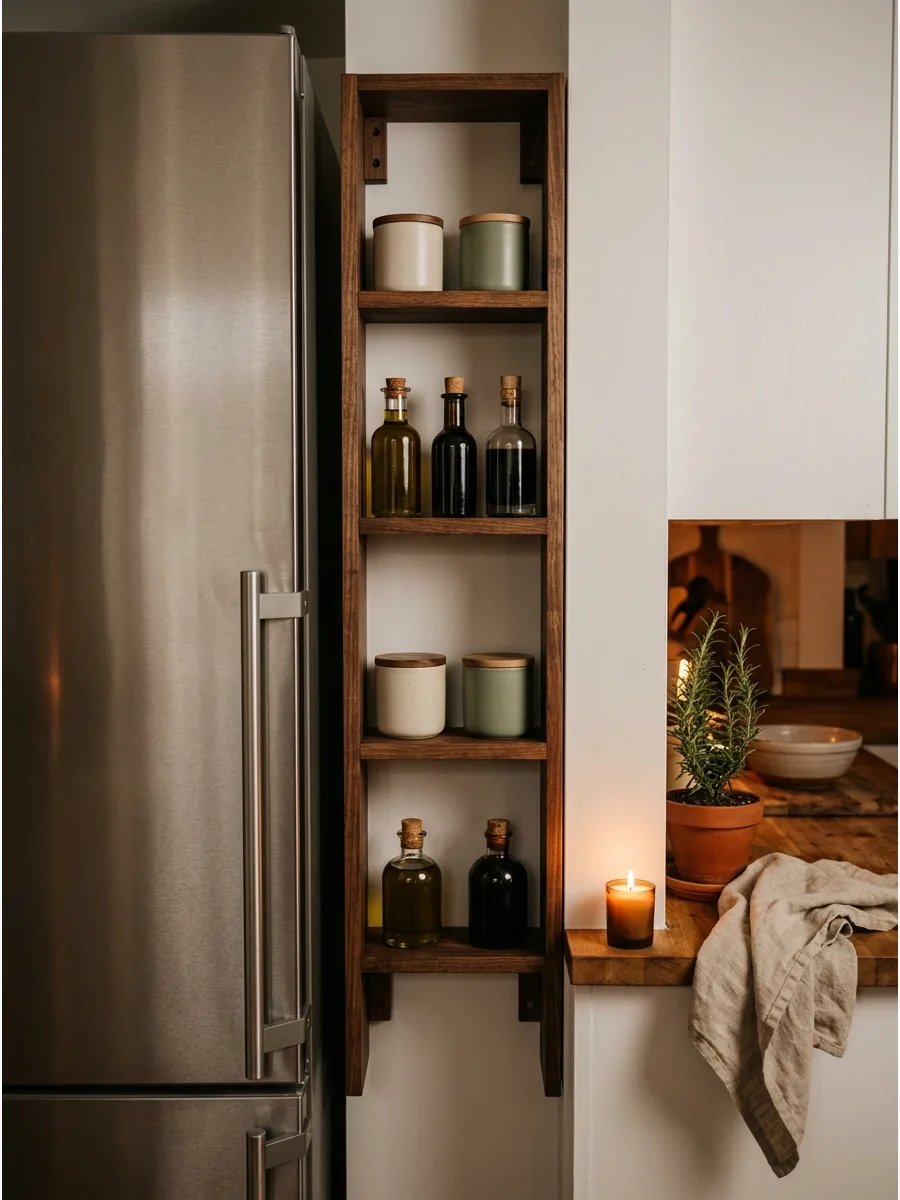
The narrow gap between a refrigerator and the wall is often wasted square footage. Install custom slim shelves or a built-in unit to store oils, vinegars, and spices that do not need refrigeration.
Ensure there is at least an inch of clearance for fridge ventilation to prevent the appliance from overheating. This setup turns an awkward architectural gap into a high-functioning storage zone.
- Custom build or pre-fab slim unit
- Bolt the unit to the wall for stability
- Use a lip on shelves to prevent bottles from sliding
Quick win: Use a lip or railing on these narrow shelves to keep bottles from sliding off when the fridge door vibrates.
20. Slim Pull-Out Pantry Shelving
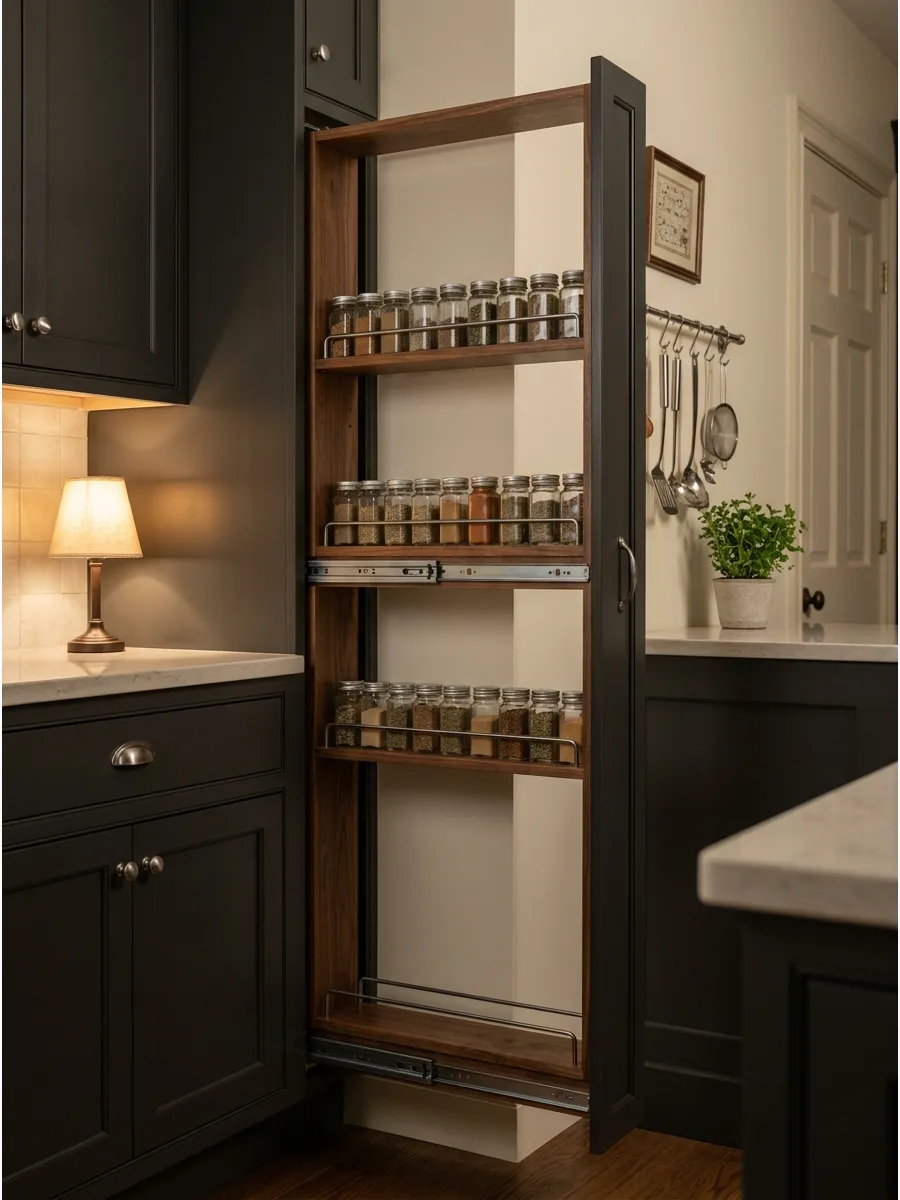
A narrow pull-out unit provides deep storage that remains completely accessible from both sides. This is the ultimate solution for canned goods or spice jars that usually get lost in the back of a cabinet.
Mount heavy-duty full-extension slides to the floor and wall to support the weight of heavy glass jars. Vertical storage like this maximizes capacity without requiring a wide footprint.
- Hardware store or online sourcing
- Requires precise measurement of the cabinet gap
- Install on ball-bearing slides for smooth motion
Best shortcut: Install a pegboard style pull-out to customize shelf heights for different bottle sizes over time.
Pull-Out and Hidden Pantry Shelving Ideas
21. Pull-Out Pantry Shelves
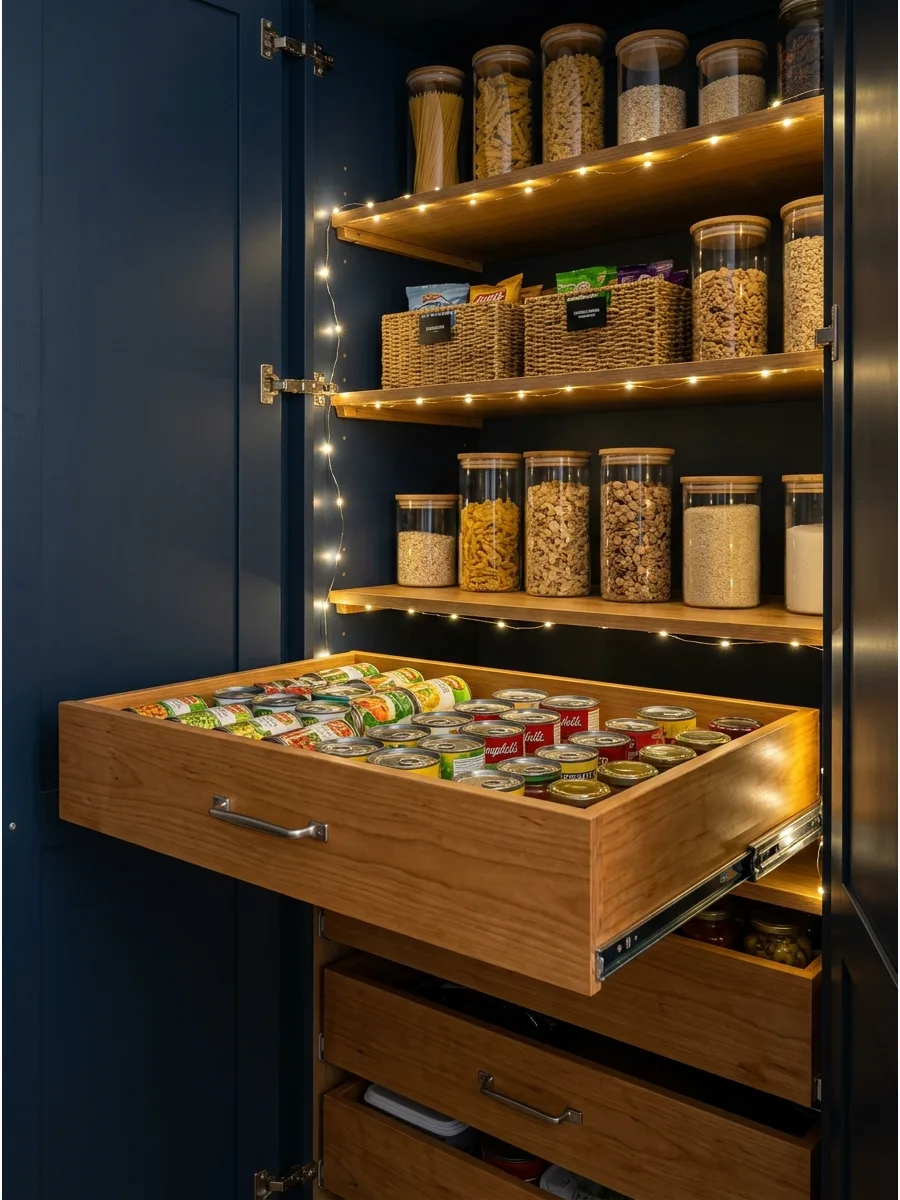
Standard deep shelves make it impossible to see items in the back without a flashlight. Replacing static boards with pull-out drawers allows the entire contents to glide forward into the light.
Install drawers with high sides to prevent tall boxes from tipping over the edge during movement. Gliding shelves save your back and knees by bringing the food directly to you.
- Cabinet hardware kit sourcing
- Fits most standard 24-inch deep cabinets
- Retrofit into existing cabinetry
Most people skip this: Leave enough vertical space between pull-outs to reach in and grab items without fully extending the drawer every time.
22. Tall Pull-Out Pantry Cabinet
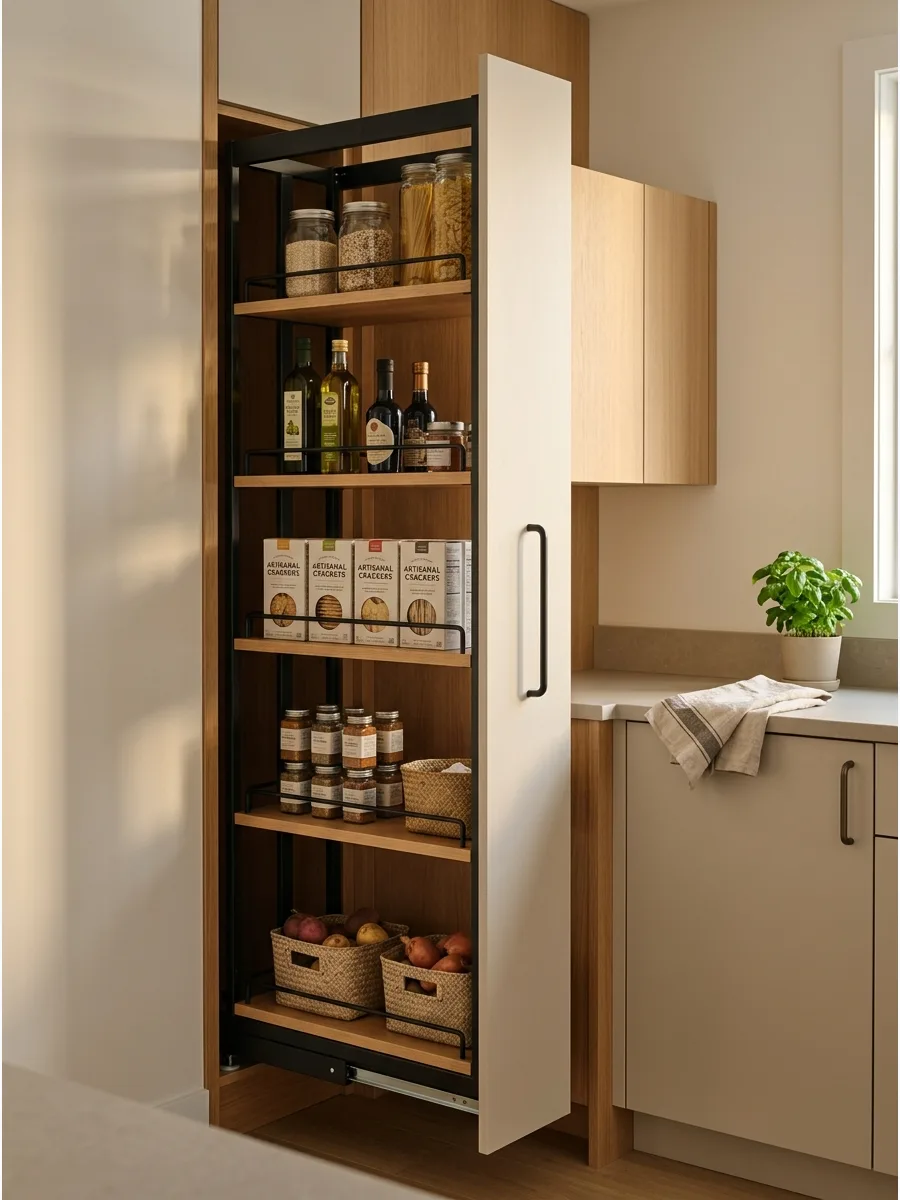
A full-height pull-out cabinet acts like a giant vertical drawer for the entire kitchen. It provides massive storage for dry goods, snacks, and oils in a very compact floor area.
Choose a model with adjustable shelf heights to accommodate tall cereal boxes and short tuna cans. This design is the most efficient way to use a narrow space in a modern kitchen.
- Kitchen remodel or retrofit sourcing
- Professional installation recommended for tall units
- Mount to cabinet floor and top for stability
Quick win: Store the heaviest items like flour bags or gallon jugs on the bottom shelf to keep the unit stable and easy to pull.
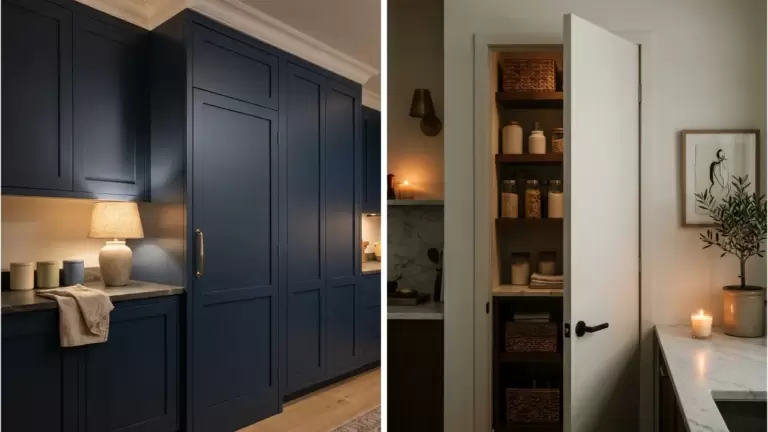
23. Hidden Pantry Shelving Behind Cabinet Doors
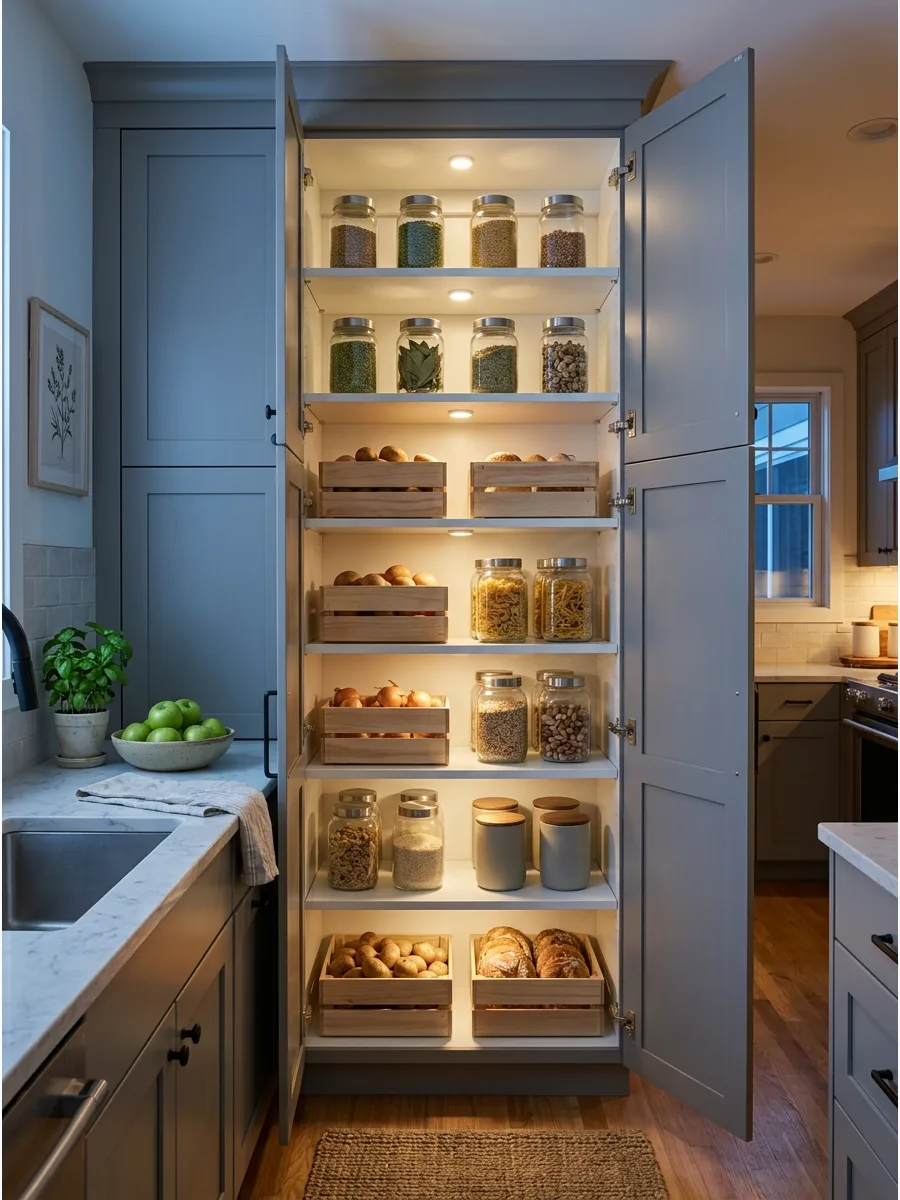
For a streamlined kitchen, hide the pantry shelves behind doors that match the rest of the cabinetry. This conceals the visual noise of mismatched food packaging and creates a cohesive look.
Use 180-degree hinges so the doors can swing completely out of the way for easy access. Cabinet doors offer a furniture-like finish that works well in open-concept floor plans.
- Custom cabinetry sourcing
- Matches existing kitchen style and finish
- Requires space for the doors to swing open
Most people skip this: Paint the interior of the hidden pantry a bright white to reflect light and make it easier to find items.
24. Pantry Shelves Behind Pocket Doors
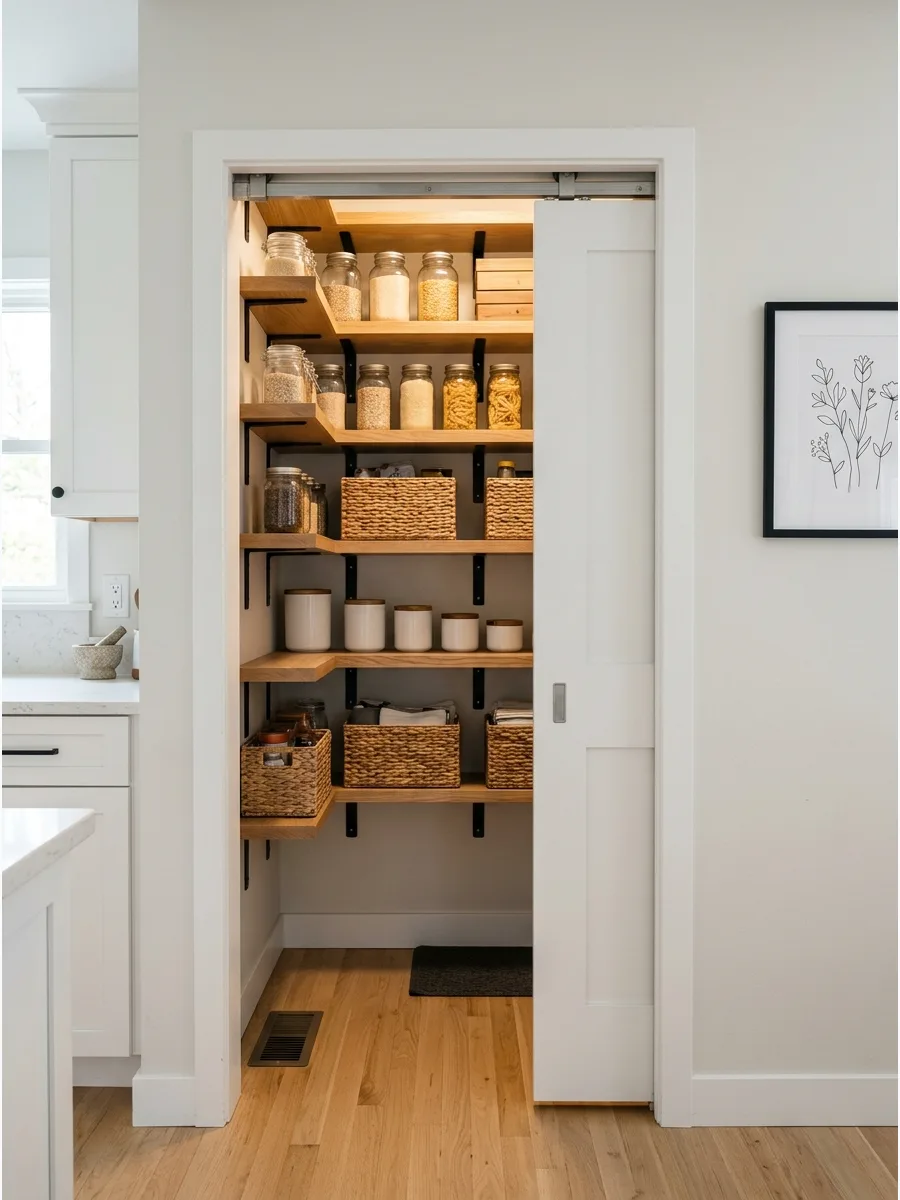
Pocket doors are the best solution for tight kitchens where a swinging door would block a walkway. The doors slide into the wall, leaving the pantry wide open for heavy cooking sessions.
Ensure the pocket door track is rated for heavy use to prevent sticking or jumping off the rail. This setup provides the convenience of an open pantry with the option to hide the mess instantly.
- Contractor installation required
- Requires empty wall cavity space
- Saves floor space in narrow hallways
Best shortcut: Install a motion-sensor light inside so the pantry illuminates the moment the pocket door is opened.
25. Appliance Garage Shelving
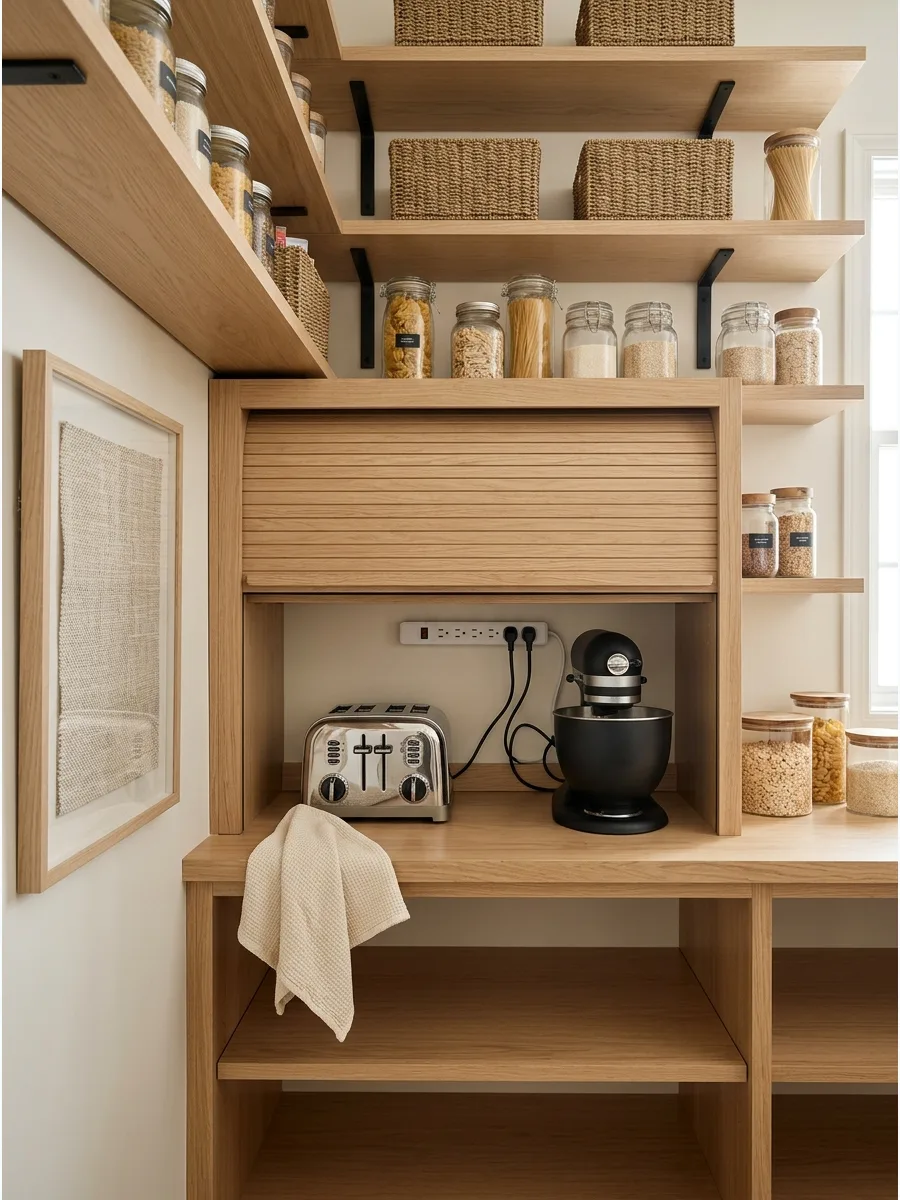
Dedicate a specific shelf zone at counter height for bulky appliances like blenders and stand mixers. This keeps heavy machines off the main workspace while keeping them plugged in and ready to use.
Include a built-in power strip at the back of the shelf to eliminate cord clutter. Closing the door on these gadgets instantly tidies up the kitchen.
- Custom or DIY kit sourcing
- Position near existing electrical outlets
- Use a tambour or lift-up door
Quick win: Use a pull-out tray for the coffee maker so you can easily fill the water tank without moving the whole machine.
26. Pull-Out Baking Shelf
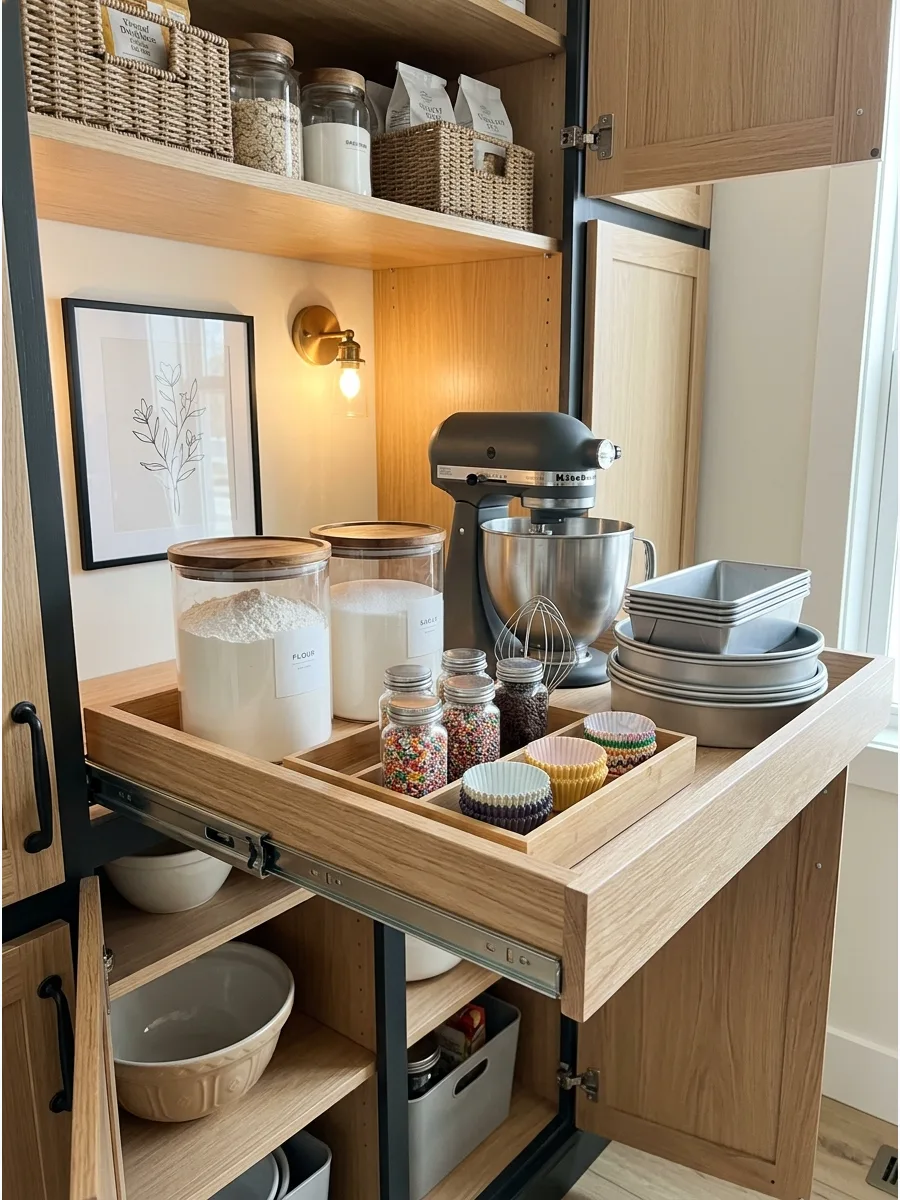
Organize all baking essentials on one dedicated pull-out shelf to make cookie day much easier. Keep flour, sugar, and heavy mixers on a reinforced shelf that can handle the weight.
Group small items like sprinkles and cupcake liners in a shallow tray within the pull-out for better visibility. Having everything in one spot prevents hunting through different cabinets.
- Heavy-duty slide sourcing
- Support up to 100 lbs for mixers
- Mount at waist height for ergonomics
Most people skip this: Install the baking shelf at a slightly lower height than the counter to make kneading dough more comfortable.
Pantry Shelving Ideas
27. Narrow Pantry Pull-Out Racks
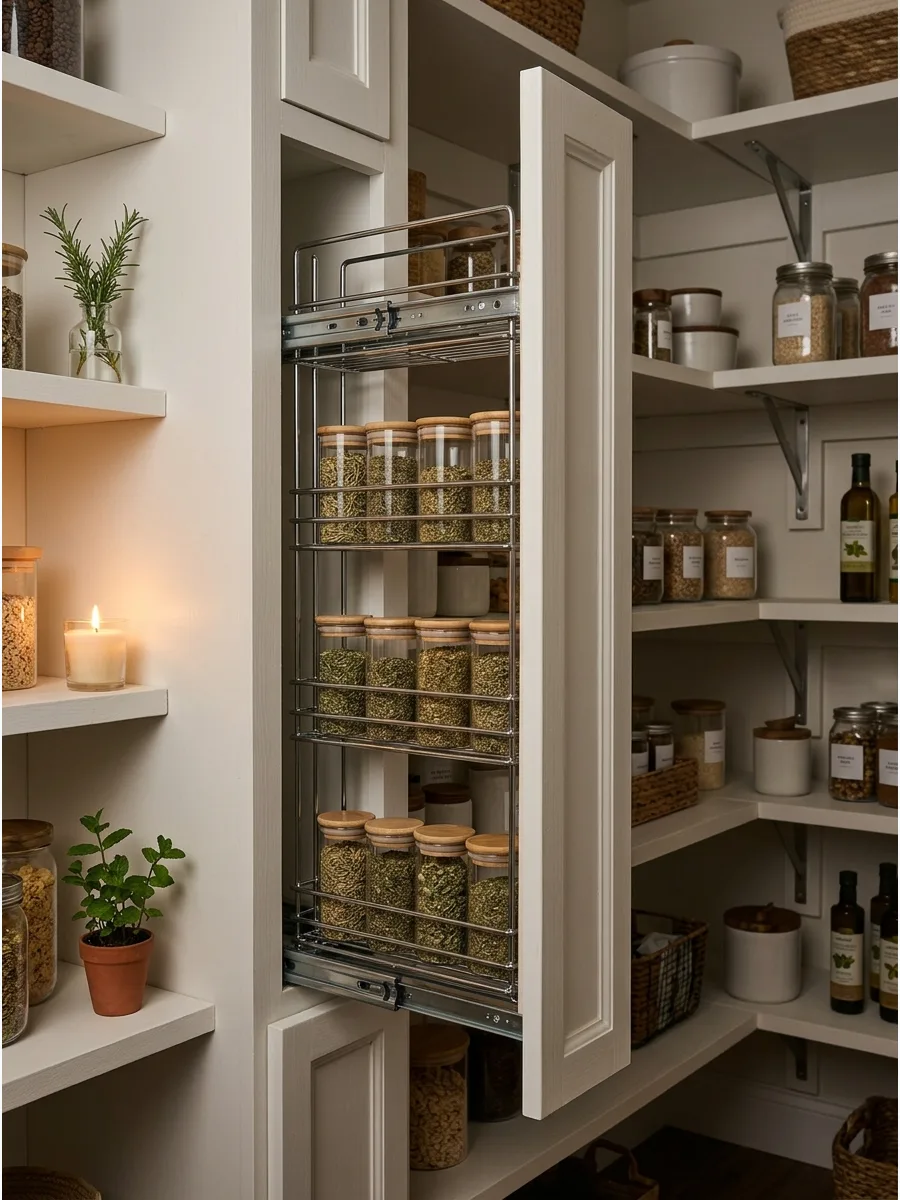
Slim pull-out units transform unused vertical gaps into high-capacity storage for small jars. These sliding systems keep labels visible and prevent items from getting lost in the back of deep shelves.
Install a tiered slide-out rack at eye level to ensure every seasoning remains within reach during meal prep. Utilizing the vertical dead space between shelf supports is the most efficient way to double storage capacity without a full renovation.
- Prefabricated metal sliders cost between $30 and $60 and take less than an hour to install.
- Mount the tracks directly to the pantry shelf or side wall using a level to ensure smooth gliding.
- Swap standard spice jars for uniform glass containers with top-facing labels to make identification even faster.
Most people skip this: Measure the height of the tallest spice bottle before mounting the upper shelf to avoid clearance issues.
Pull-Out and Hidden Pantry Shelving Ideas
28. Hidden Breakfast Station Shelves
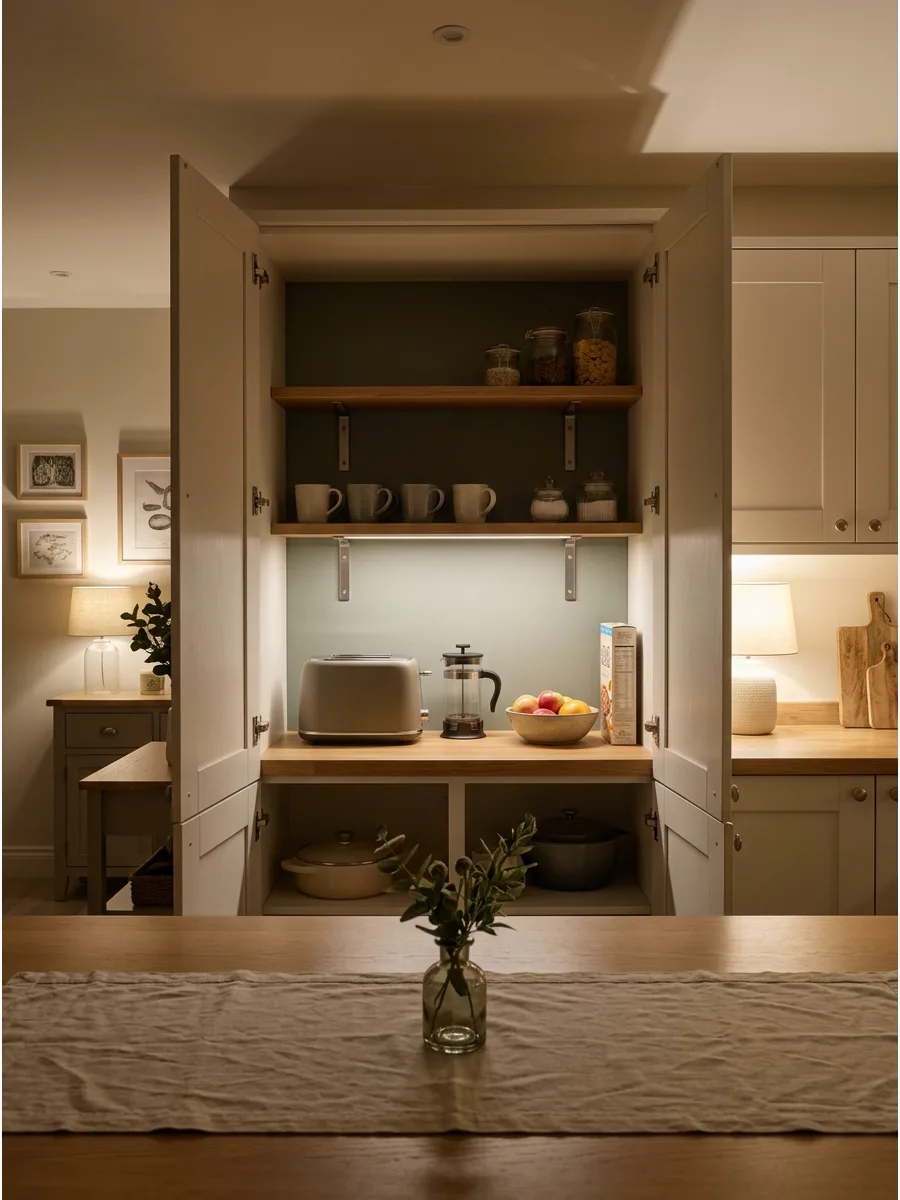
Create a morning sanctuary by grouping the toaster, coffee beans, and cereal boxes on one shelf. This zone can be hidden behind doors to keep the kitchen looking clean after the morning rush.
Install a small shelf above the toaster for mugs and sugar bowls to maximize vertical space. This dedicated spot streamlines the morning routine and keeps the family in one area.
- Dedicated shelf space sourcing
- Use existing cabinet or pantry shelf
- Install near a water source if possible
Best shortcut: Place a washable silicone mat under the coffee station to catch drips and grounds for easy cleanup.
29. Pantry Cabinet With Roll-Out Shelves
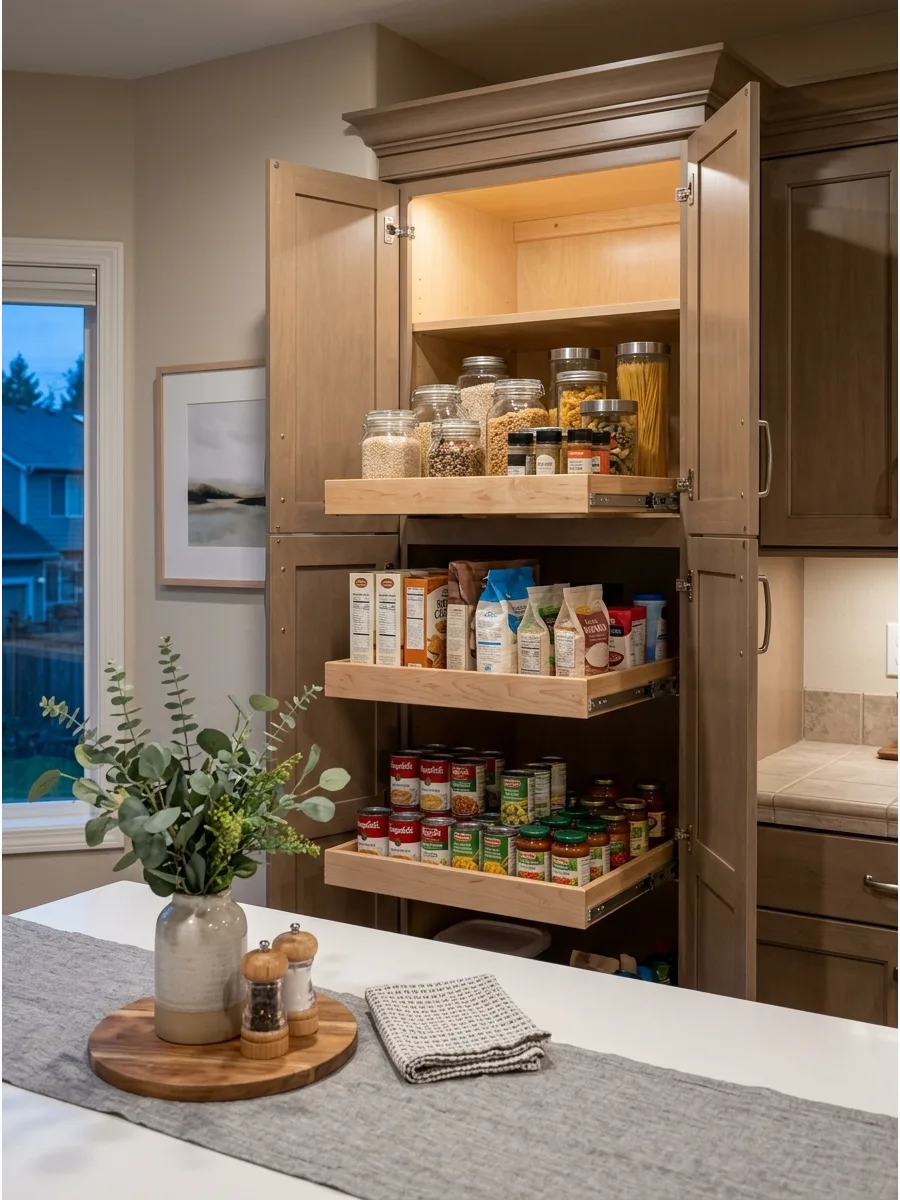
Converting a deep, dark cabinet into a pantry is easy with the addition of roll-out shelves. These trays act like shallow drawers, allowing you to access the very back of the cabinet without kneeling.
Adjust the spacing between roll-outs to fit your specific inventory, like tall cereal boxes or flat canned goods. Roll-outs are the most effective way to upgrade a standard builder-grade cabinet.
- Retrofit kit sourcing
- Easy DIY project for homeowners
- Measure internal cabinet width accurately
Quick win: Choose roll-outs with soft-close hardware to prevent jars from rattling or tipping when you close the drawer.
Pantry Shelving Ideas
30. Low-Profile Pantry Snack Drawer
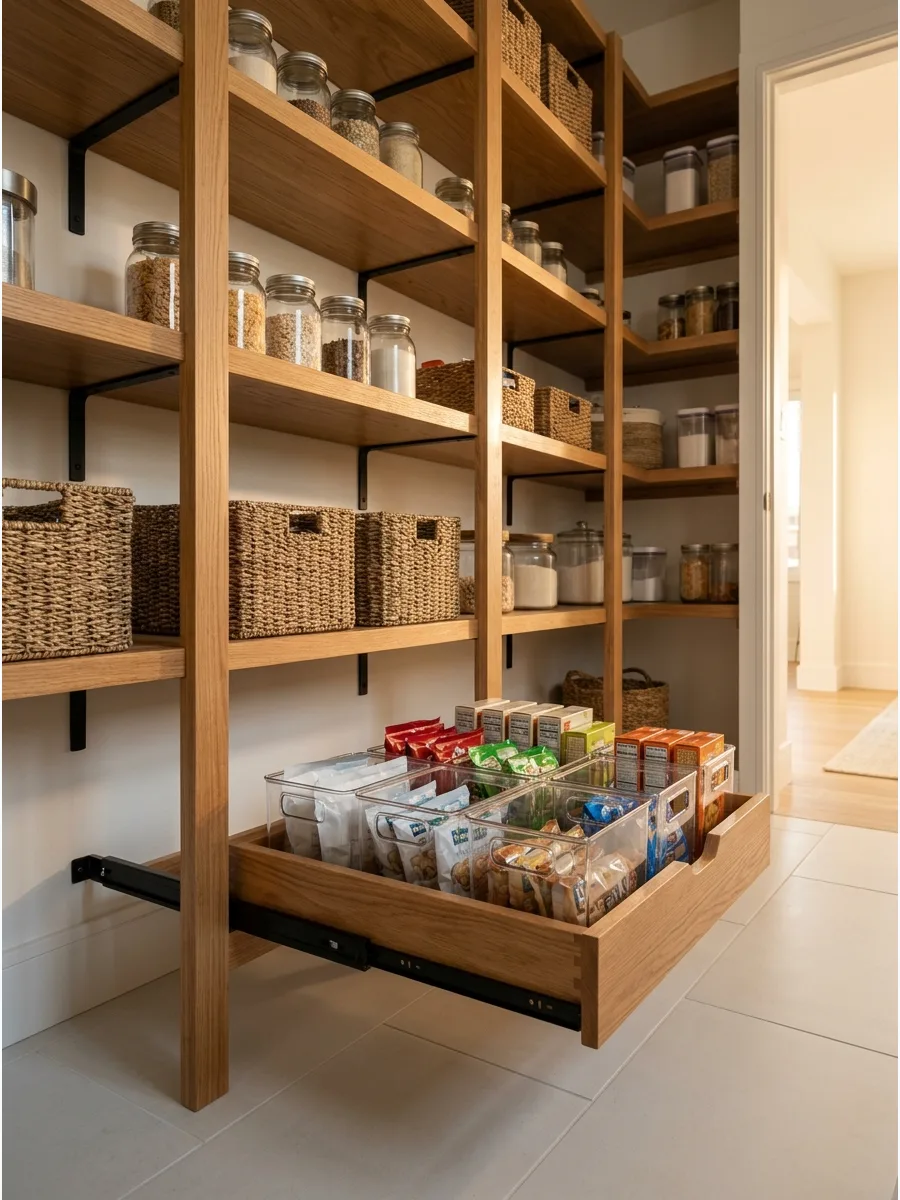
High shelves often lead to spills or unsafe climbing when children attempt to reach their own food. Install a shallow pull-out tray at the very bottom of the pantry to create a dedicated self-service zone. This placement keeps visual clutter below eye level while empowering kids to manage their own snacks.
Using clear acrylic bins inside the drawer ensures every item remains visible without needing to dig through boxes.
- Budget $40–$60 for a heavy-duty drawer slide and a pre-cut wood panel; assembly takes roughly two hours.
- Mount the slides directly to the pantry floor or the lowest fixed shelf to maximize weight capacity for heavy juice boxes.
- Swap snacks for art supplies or lunchbox containers if the kitchen organization needs change over time.
Quick win: Line the bottom of the tray with a silicone mat to prevent bins from sliding when the drawer is pulled quickly.
Open Pantry Shelving Ideas
31. Open Pantry Wall Shelves
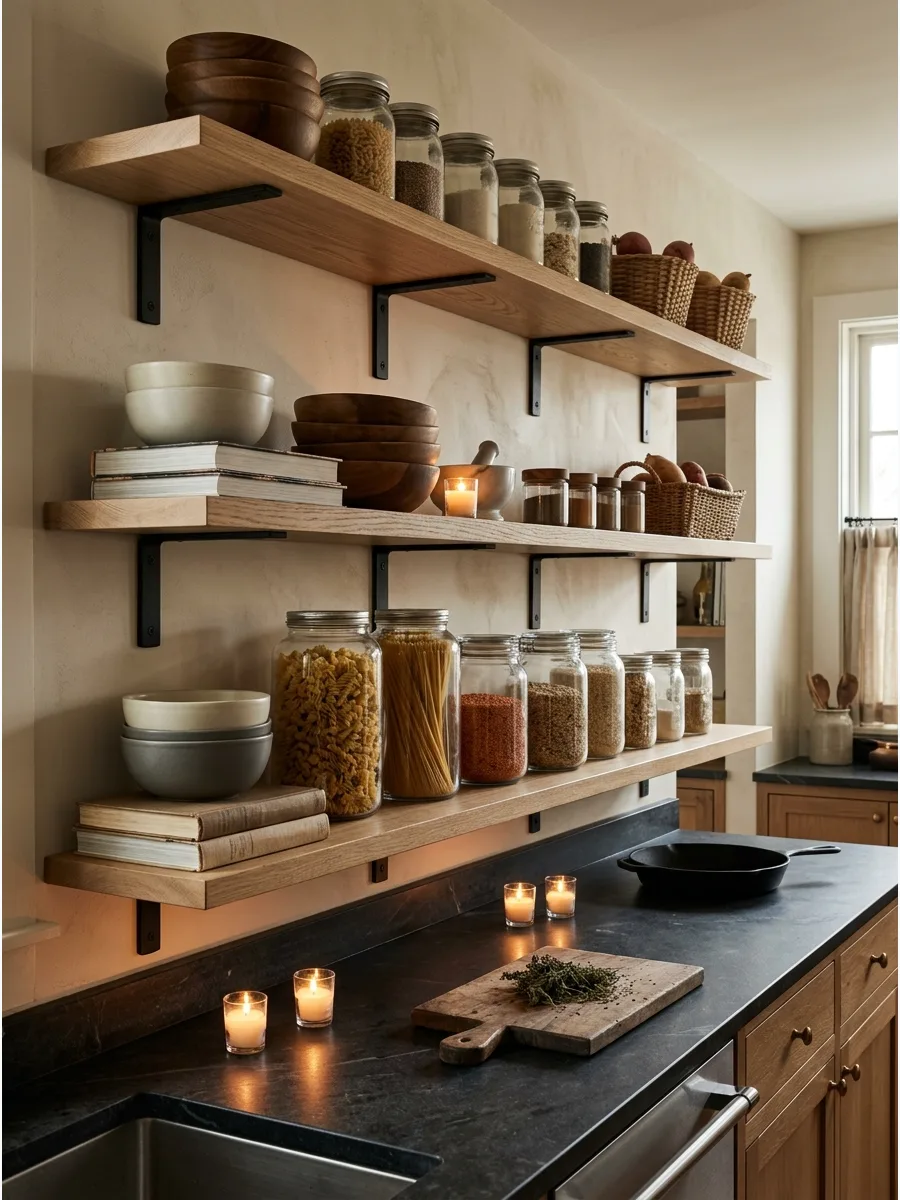
Open shelves turn a blank kitchen wall into a functional storage zone for jars and cookbooks. This setup keeps daily essentials within reach without the bulk of heavy cabinet doors.
Mount the lowest shelf at counter height to keep the workspace open and usable. Sturdy brackets are a must to prevent any sagging under the weight of heavy dry goods.
- $100 to $300 for wood and brackets
- Mount brackets directly into wall studs for safety
- Best for kitchens with limited upper cabinet space
Quick win: Group items by height to create a cleaner visual line across the open wall.
32. Styled Pantry Shelves
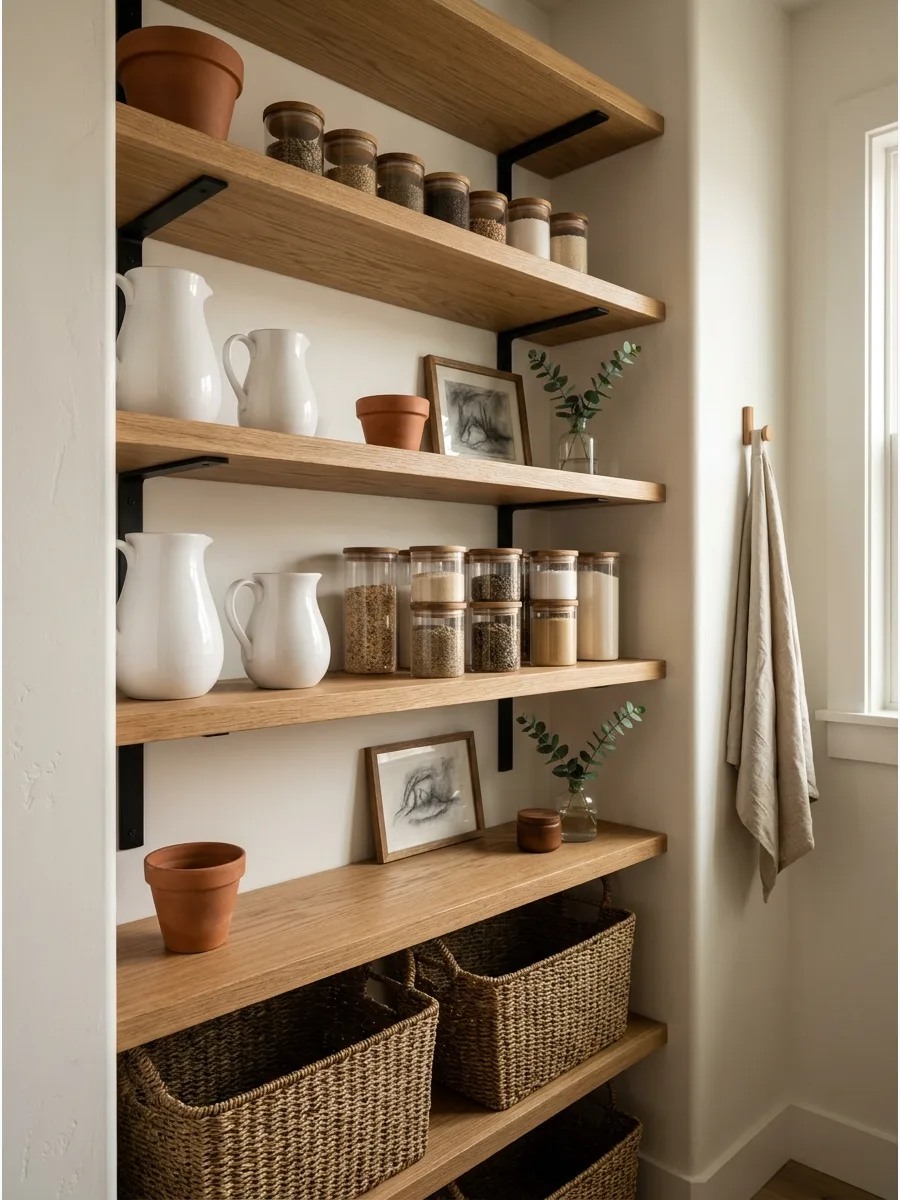
A well-styled pantry uses a mix of textures like woven wood and smooth ceramic to look intentional. Place larger, heavier items on the bottom and lighter glassware at eye level.
Use decorative objects like a small clay pot or a framed sketch to break up rows of food containers. This makes the pantry feel like a designed part of the home rather than just a utility closet.
- $50 for decorative accents and storage
- Space items two inches apart for a balanced look
- Use for high-visibility walk-in pantries
Most people skip this: Leave ten percent of the shelf space empty so the area doesn't feel cluttered.
33. Open Shelves With Matching Jars
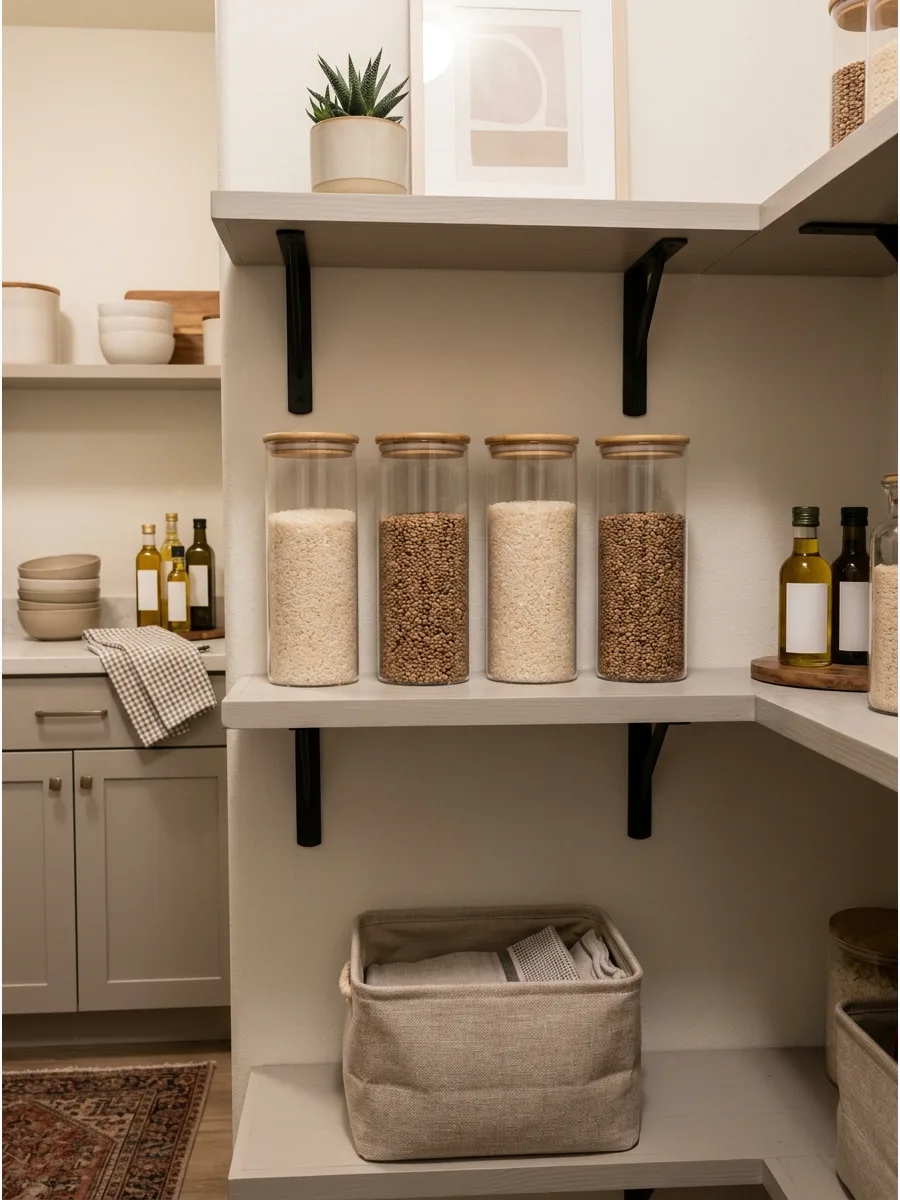
Uniform glass jars eliminate the visual noise of mismatched cardboard boxes and plastic bags. Seeing the exact amount of flour or rice left makes grocery shopping much simpler.
Transfer dry goods into jars immediately after shopping to maintain a clean look. Glass is better than plastic because it won't absorb odors or stain over time.
- $10 to $15 per jar
- Wipe jar rims before sealing to ensure a tight fit
- Great for bulk shoppers and frequent bakers
Best shortcut: Use a chalk marker on the bottom of the jar to track expiration dates.
34. Open Shelves With Woven Baskets
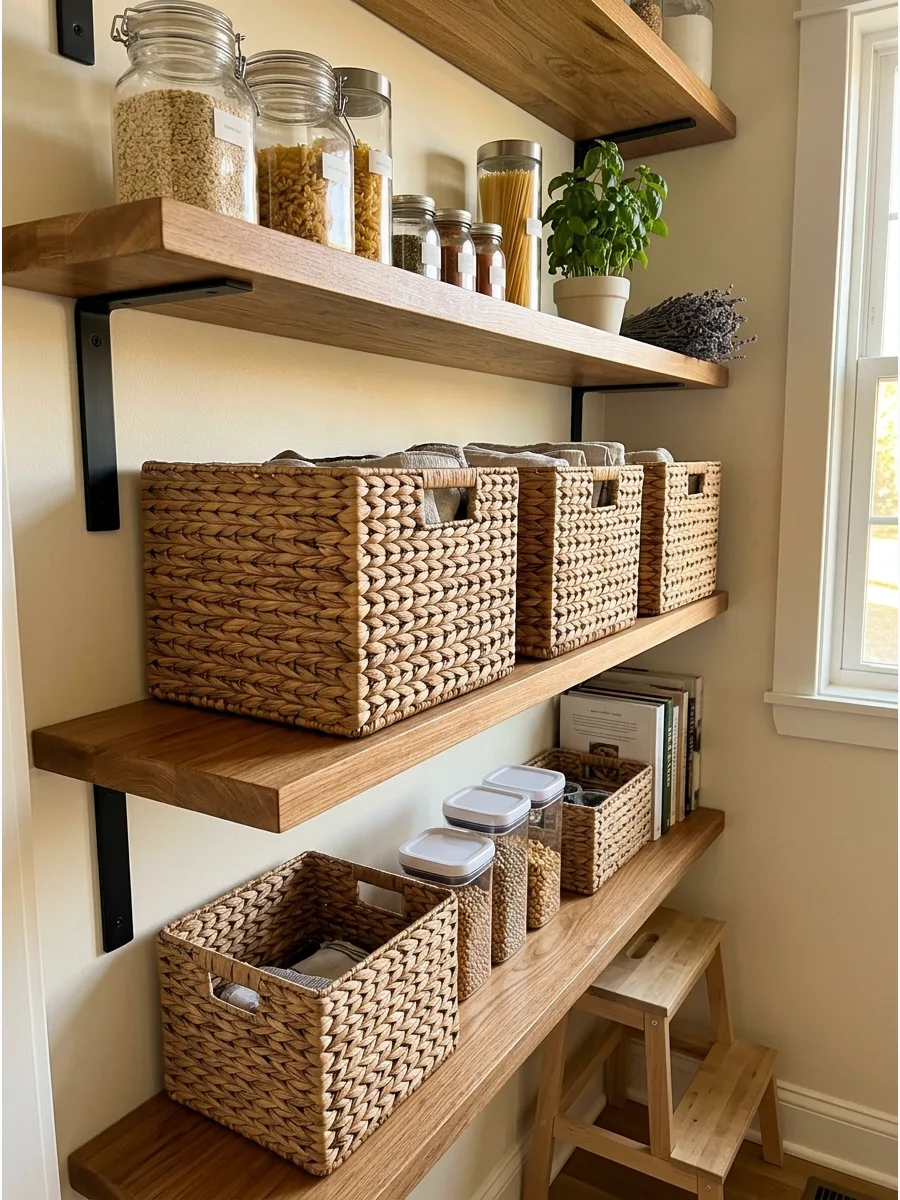
Woven baskets are the best way to hide bags of chips and snack packs that look messy on open shelves. They add a natural texture that warms up a cold, white kitchen space.
Choose baskets with straight sides to maximize the interior storage space on the shelf. Sturdy handles make it easy to pull the entire basket down to find what is needed.
- $20 to $40 per basket
- Measure shelf depth before buying to avoid overhang
- Ideal for hiding colorful or irregular packaging
Quick win: Add clip-on metal labels to the front of each basket to identify contents at a glance.
35. Café-Style Pantry Shelves
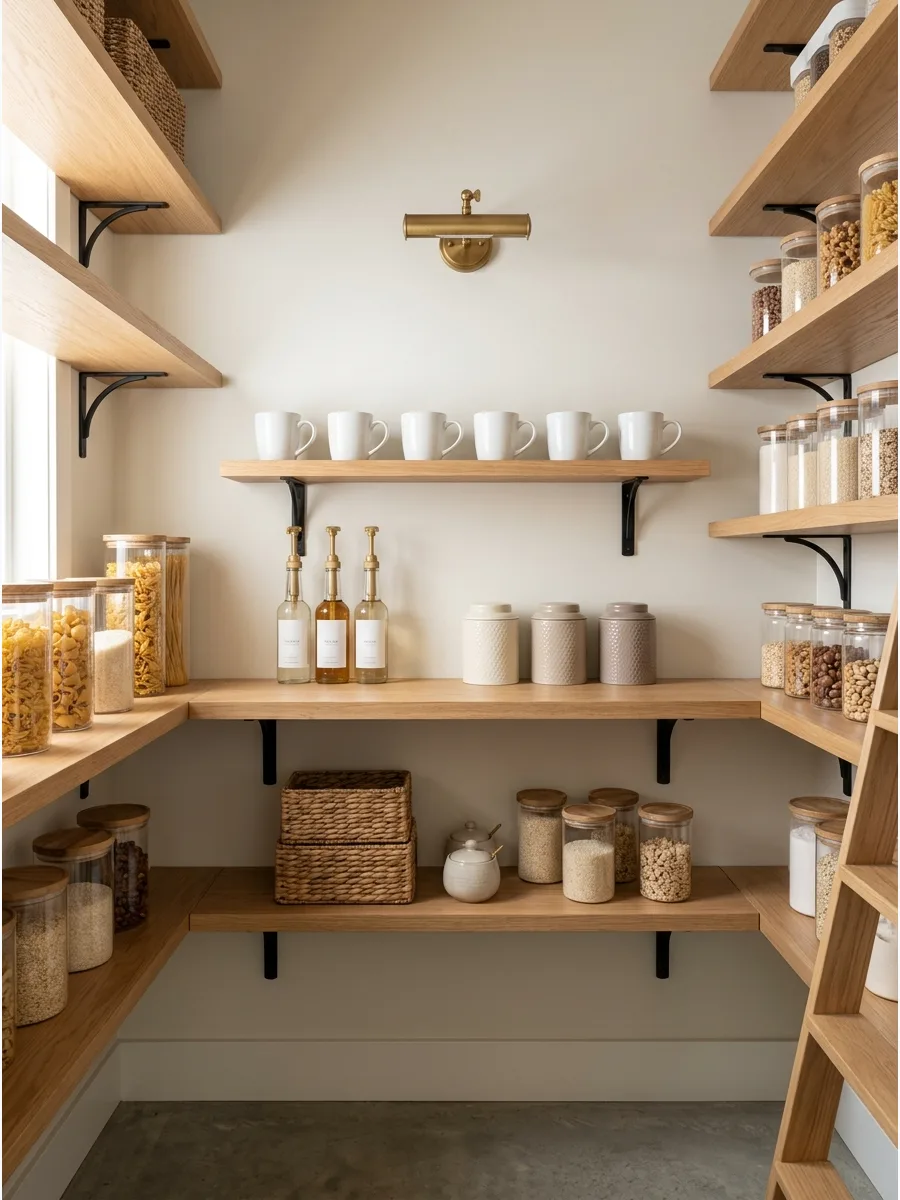
Dedicate a section of shelving to a coffee and tea station for a boutique hotel feel. Group syrups, mugs, and tea tins together so everything for a morning routine is in one spot.
Install a small shelf specifically for mugs to free up space on the main counter. This setup keeps the main kitchen counters clear of small appliance clutter.
- $30 for specialized accessories
- Place near a water source or the coffee maker
- Perfect for creating a morning beverage routine
Best shortcut: Use a tiered riser for syrup bottles so you can see the labels in the back row.
36. Pantry Shelves With Cookbooks
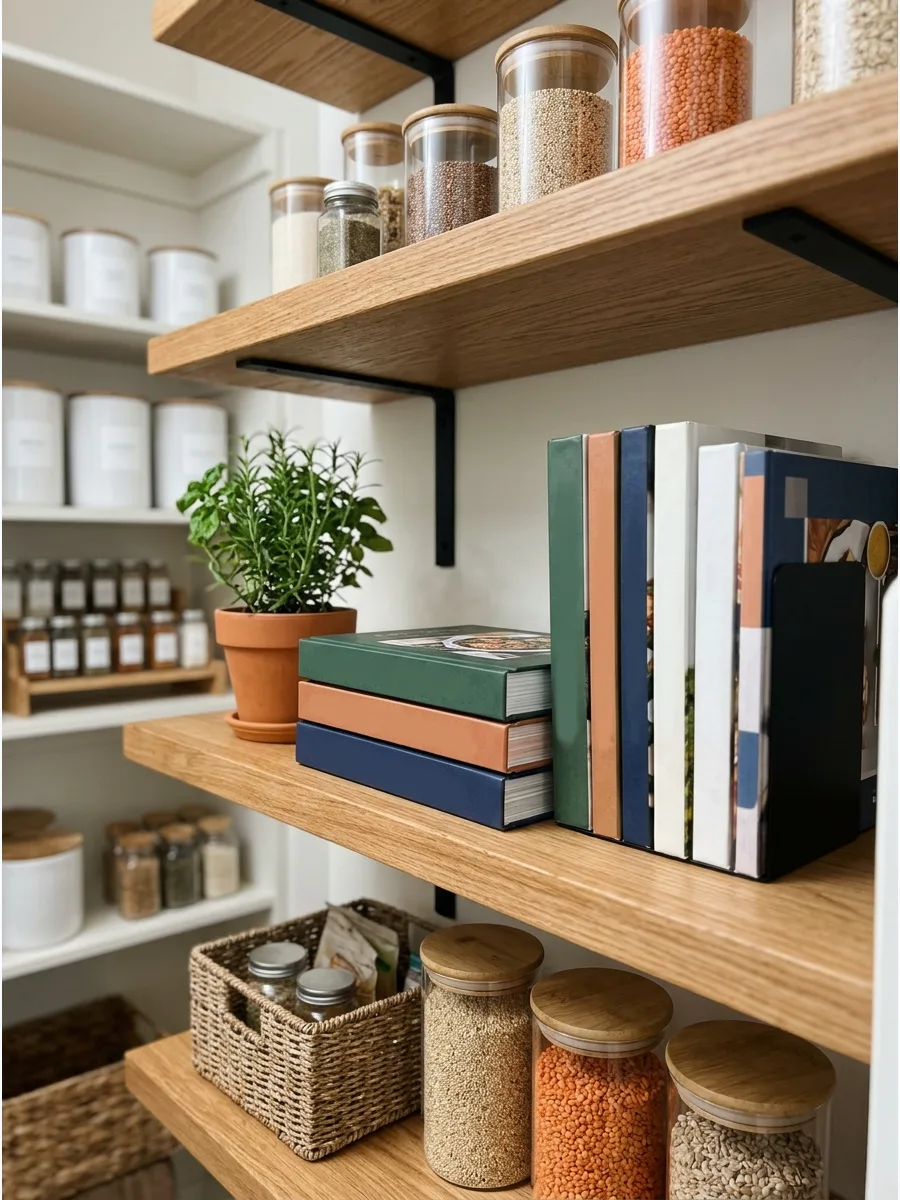
Storing cookbooks in the pantry keeps them close to the ingredients but away from stove grease and splatters.
It adds a pop of color and personality to an otherwise utilitarian space. Store books vertically with bookends to prevent them from leaning and warping over time. This makes the pantry feel like a cozy, lived-in extension of the kitchen.
- $0 using existing books
- Group by spine color for a cleaner visual look
- Best for deep shelves that have extra room behind food jars
Quick win: Place your most-used recipe book at eye level for easy access during meal prep.
37. Open Pantry With Wood Shelves
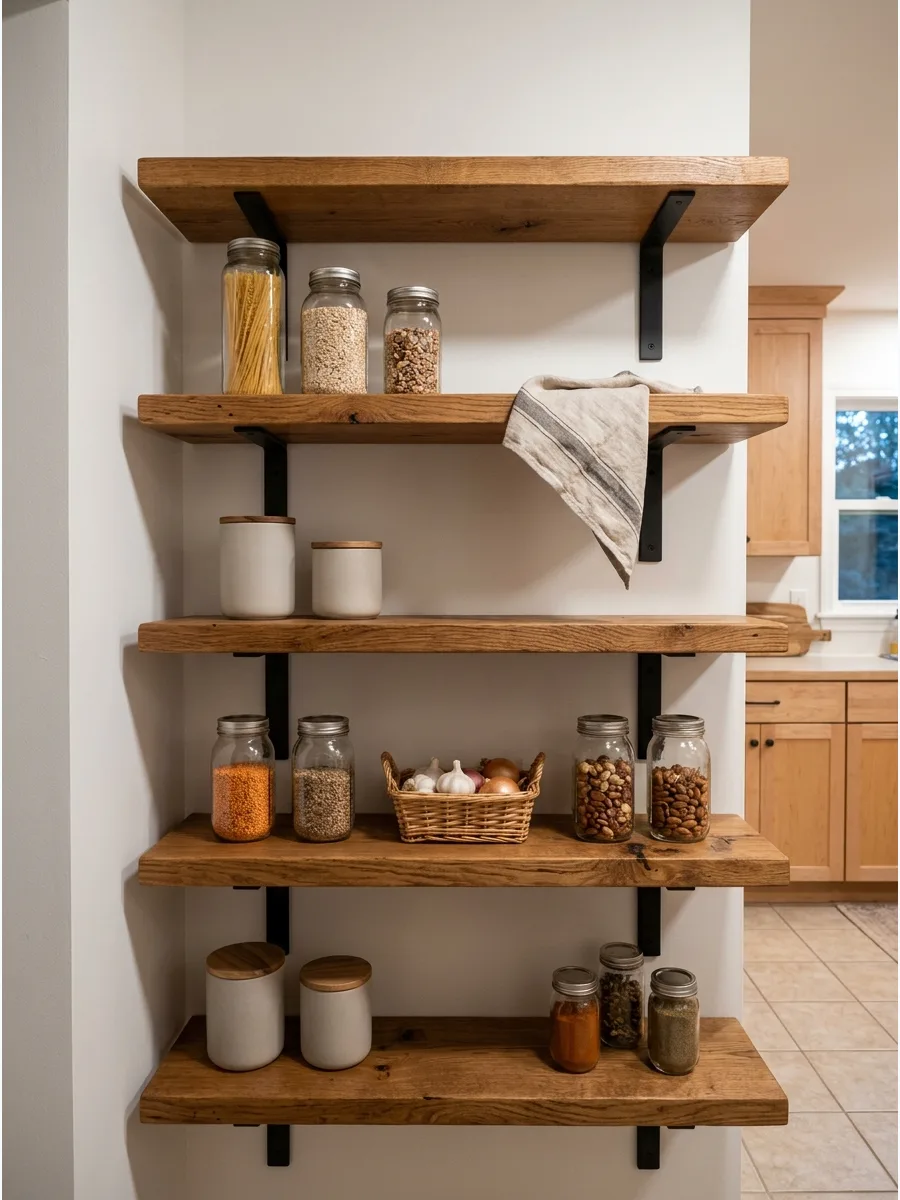
Natural wood shelves provide a high-end, custom look that contrasts beautifully with light-colored walls. The warmth of the grain makes a pantry feel more like a room and less like a storage closet.
Seal the wood with a clear matte finish to protect it from oil spills and moisture. Thick, chunky wood planks offer the best support for heavy canned goods.
- $150 to $400 for materials
- Use two-inch thick planks for a modern look
- Works well in farmhouse or organic modern styles
Most people skip this: Sand the edges of the wood extra smooth to prevent splinters when reaching for items.
38. Open Pantry With Brass Rails
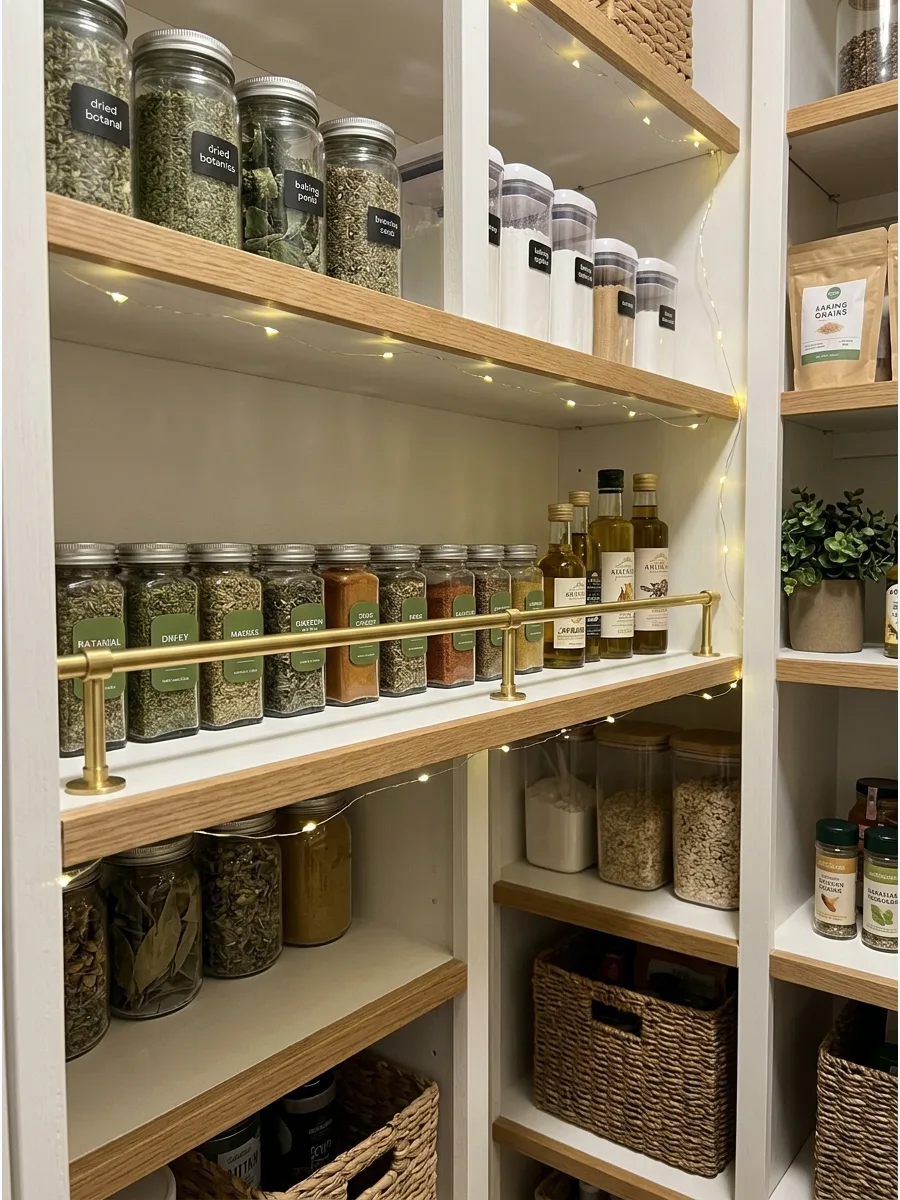
Slim brass rails across the front of shelves prevent items from sliding off and add a touch of vintage elegance. This detail is especially useful for shallow shelves holding oils or spices.
Install the rail about two inches above the shelf surface to keep small jars secure. It turns simple shelving into a polished design feature.
- $40 to $80 for hardware
- Requires a drill and small screws for installation
- Best for high-traffic areas where items might get bumped
Best shortcut: Use brass gallery rail kits for an easy, professional-looking installation.
39. Open Pantry With Picture Lights
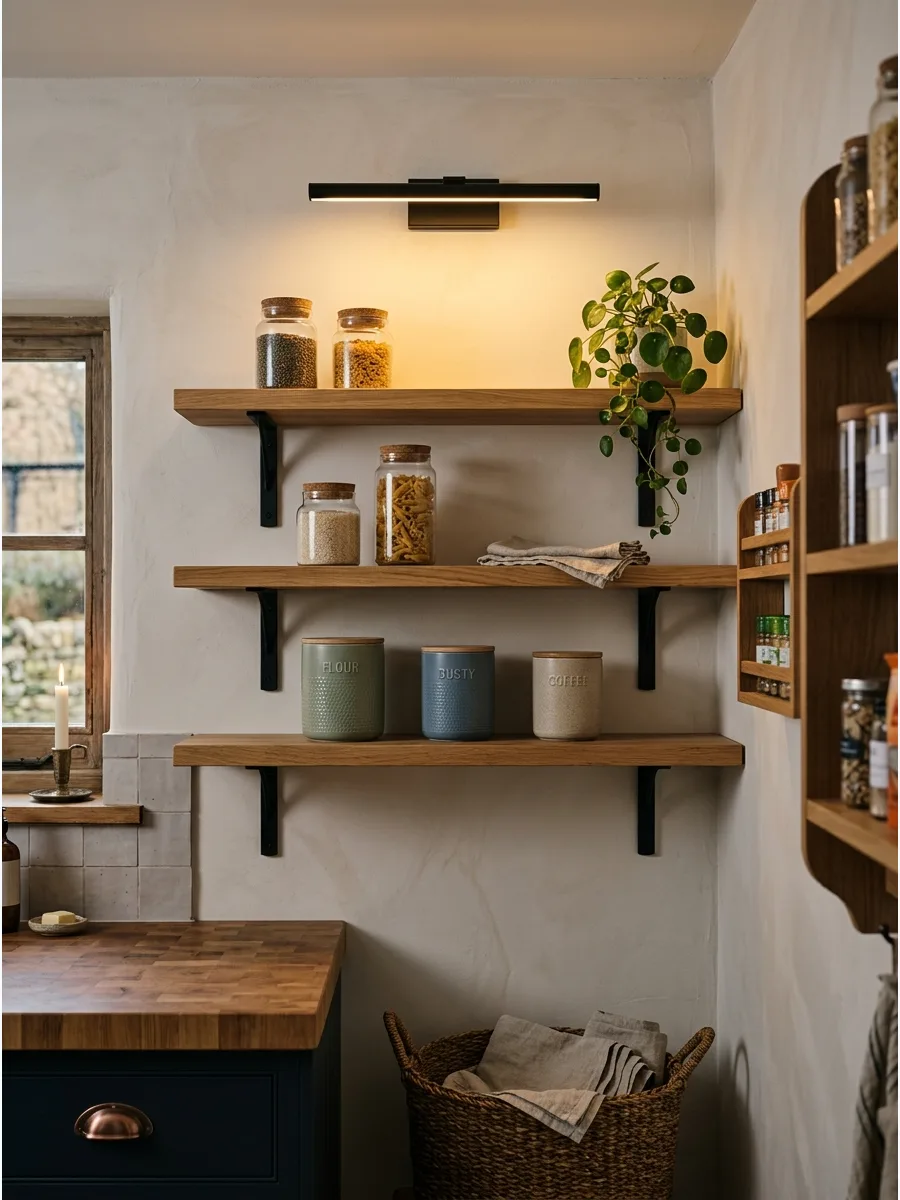
Hardwired or battery-operated picture lights mounted above pantry shelves create a high-end gallery feel. Good lighting makes it much easier to find items tucked in the back corners.
Position the light so it shines directly on the middle shelves where most activity happens. This is a great way to make a windowless pantry feel bright and intentional.
- $30 to $100 per light
- Use warm-toned bulbs for a cozy atmosphere
- Ideal for dark walk-in pantries or deep alcoves
Quick win: Choose remote-controlled LED lights to avoid the need for expensive electrical wiring.
Material and Finish Pantry Shelving Ideas
40. White Oak Pantry Shelves
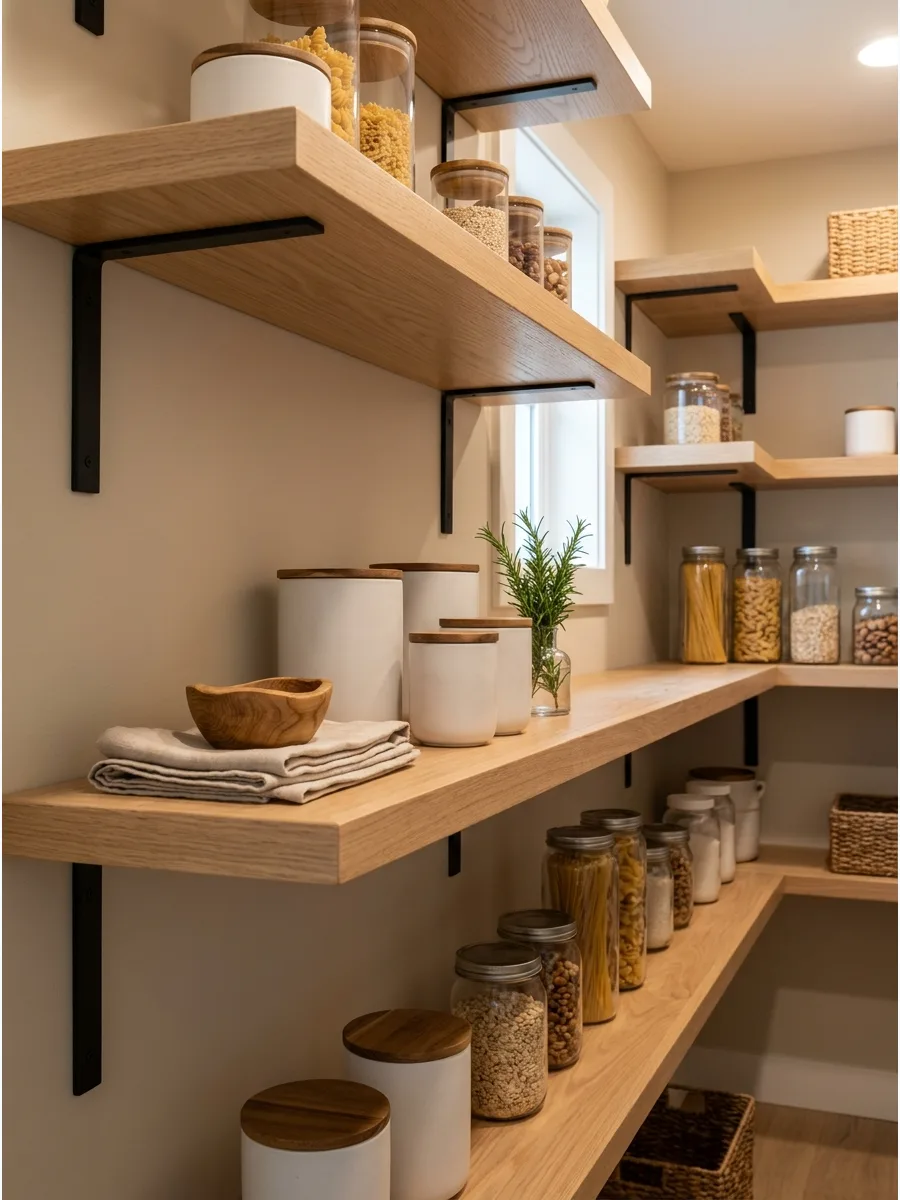
White oak is a durable hardwood that offers a light, airy feeling perfect for modern kitchens. Its tight grain resists wear and tear better than softer woods like pine.
Pair white oak with black hardware for a sharp, contemporary contrast. This material stays in style for years and adds real value to a kitchen renovation.
- $200 to $500 for custom cuts
- Use a water-based finish to prevent the wood from yellowing
- Best for modern and Scandinavian designs
Most people skip this: Order rift sawn white oak for the straightest, cleanest grain pattern.
41. Walnut Pantry Shelves
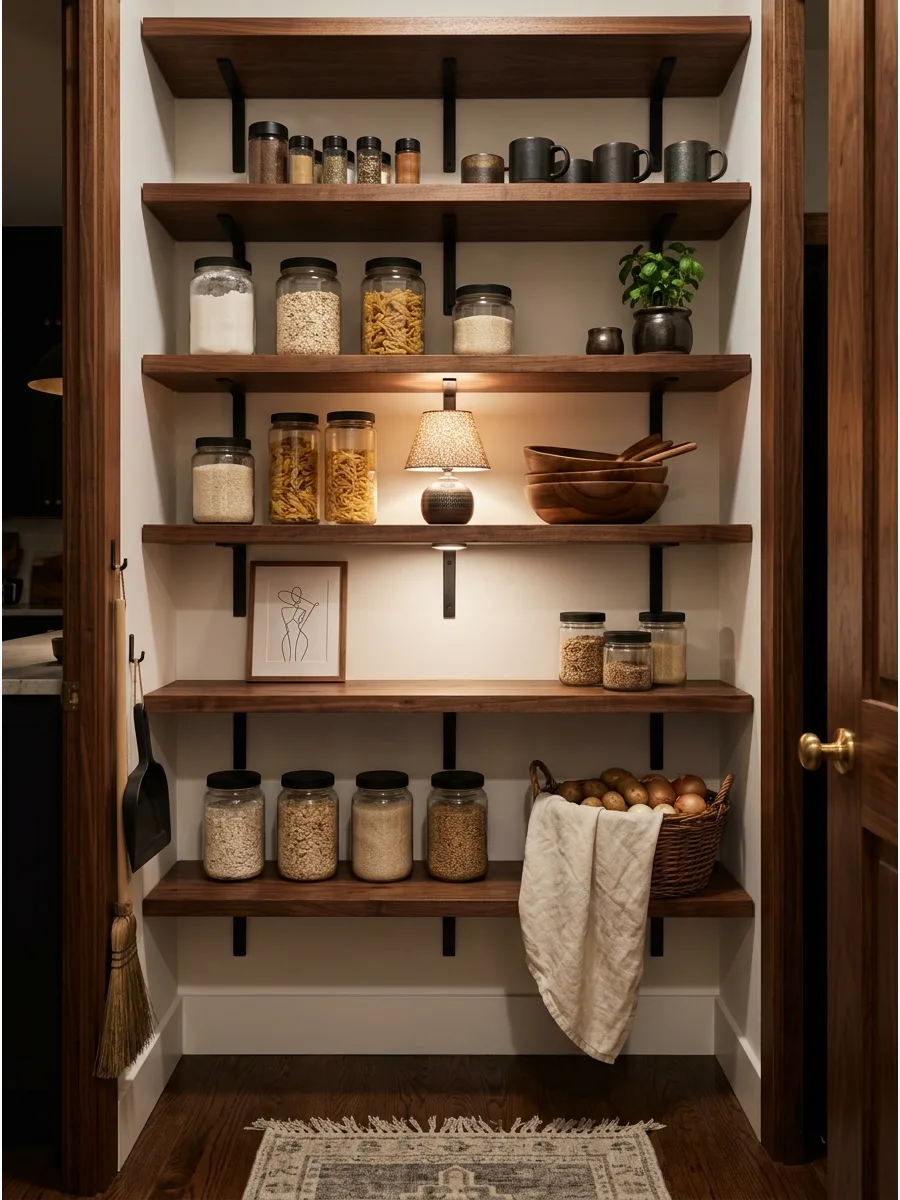
Walnut shelves bring a sense of luxury and depth to a pantry with their rich, chocolate-brown tones. This dark wood hides small scuffs and marks better than lighter materials.
Use walnut in a pantry with plenty of light to keep the space from feeling too dark. It provides a stunning backdrop for white labels and clear glass jars.
- $300 to $700 for premium wood
- Apply a coat of furniture wax for extra shine
- Perfect for traditional or mid-century modern homes
Quick win: Use simple, hidden brackets to let the beauty of the dark wood be the main focus.
42. Painted Pantry Shelves
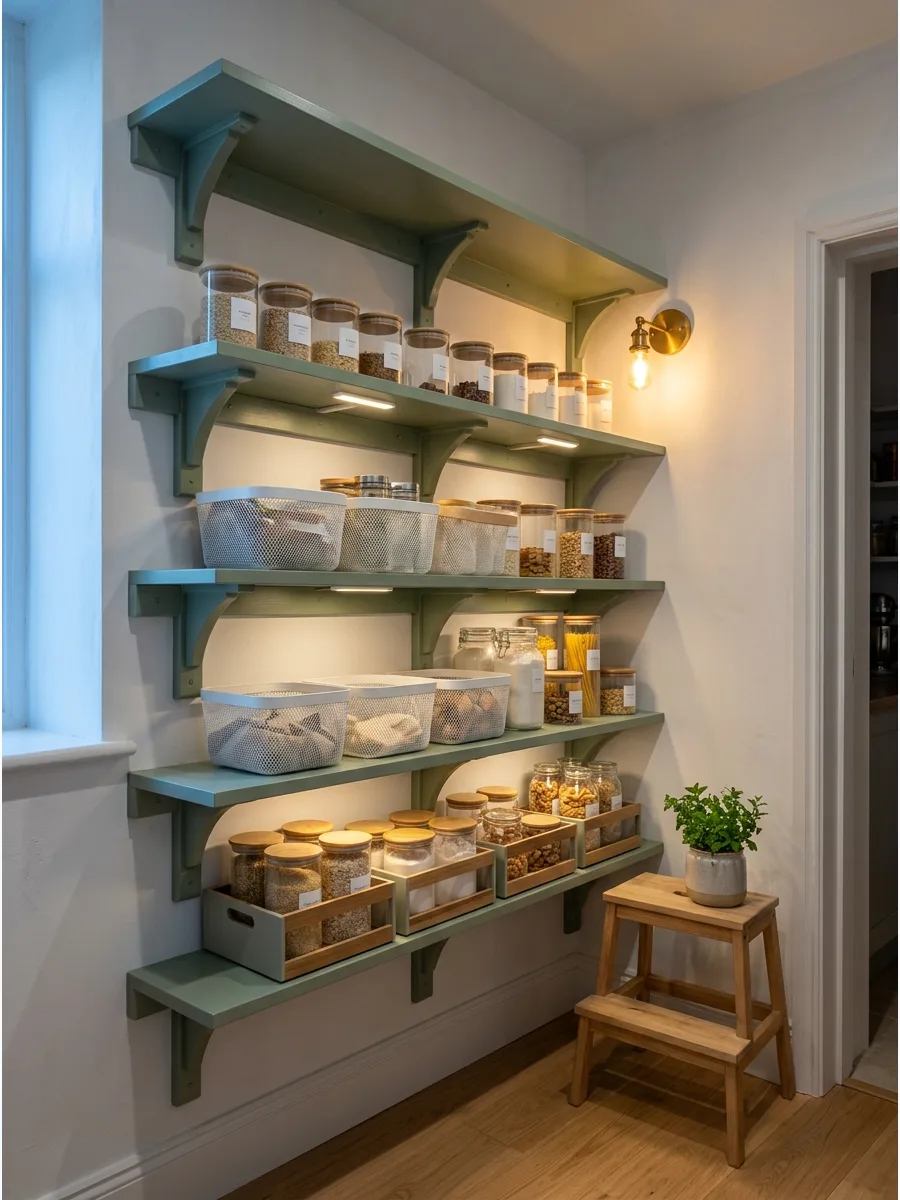
Painting shelves in a soft color like sage green or taupe makes the pantry feel like a custom-designed room. It is an affordable way to update old or mismatched shelving units.
Use a high-quality enamel paint to ensure the surface is scrubbable and resistant to chips. A semi-gloss finish is best because it reflects light and is easy to wipe down.
- $50 for paint and supplies
- Sand and prime shelves before painting for the best grip
- Great for updating existing builder-grade shelves
Best shortcut: Paint the back wall of the pantry a slightly darker shade than the shelves for added depth.
43. White Pantry Shelving
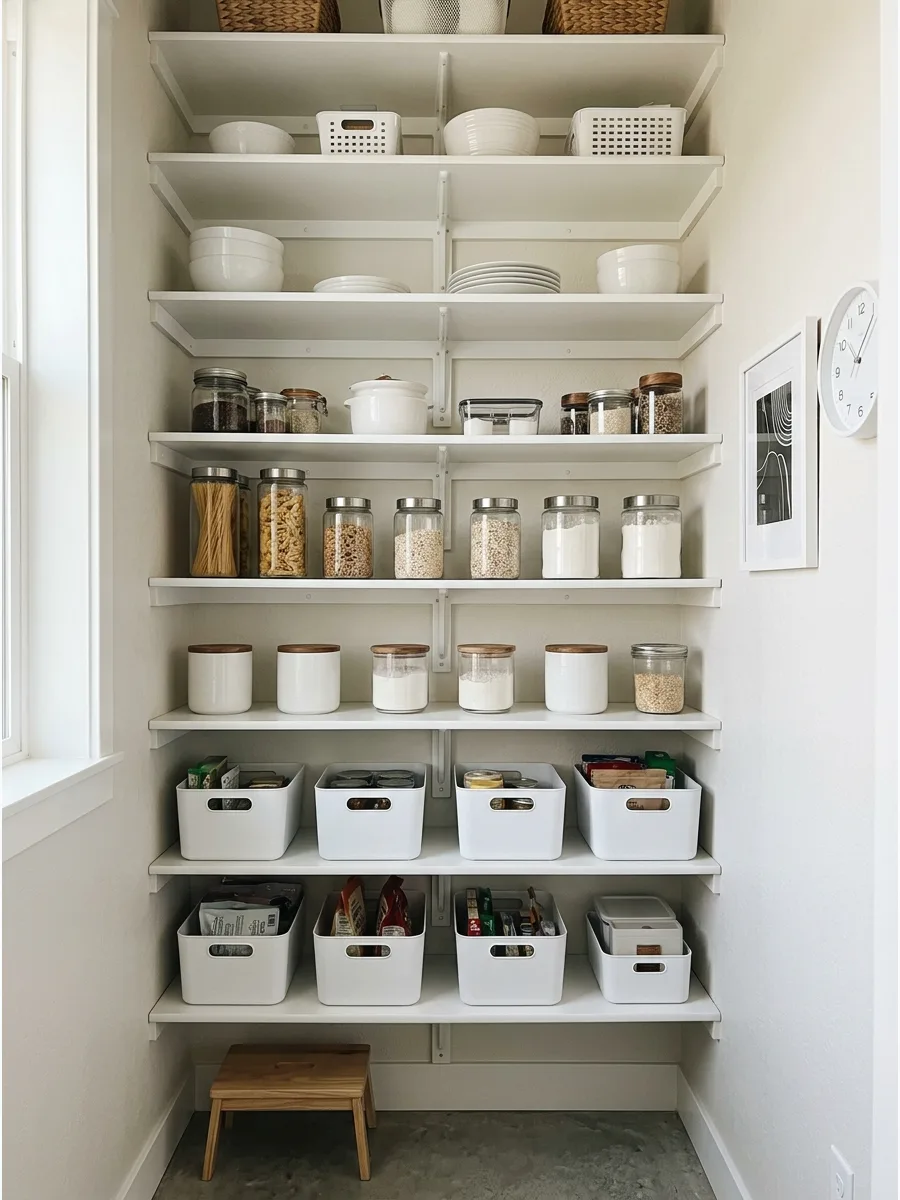
Classic white shelves make any pantry look instantly cleaner and more organized. They reflect the most light, which is essential for seeing into deep corners or bottom shelves.
Use white plastic or metal bins to maintain a seamless, monochromatic look. White shelving is the most versatile choice and fits into any kitchen style.
- $50 to $200 depending on material
- Easy to find at most home improvement stores
- Best for small, dark, or windowless pantries
Quick win: Use white edge banding on plywood shelves to give them a professional, finished look.
44. Black Pantry Shelving
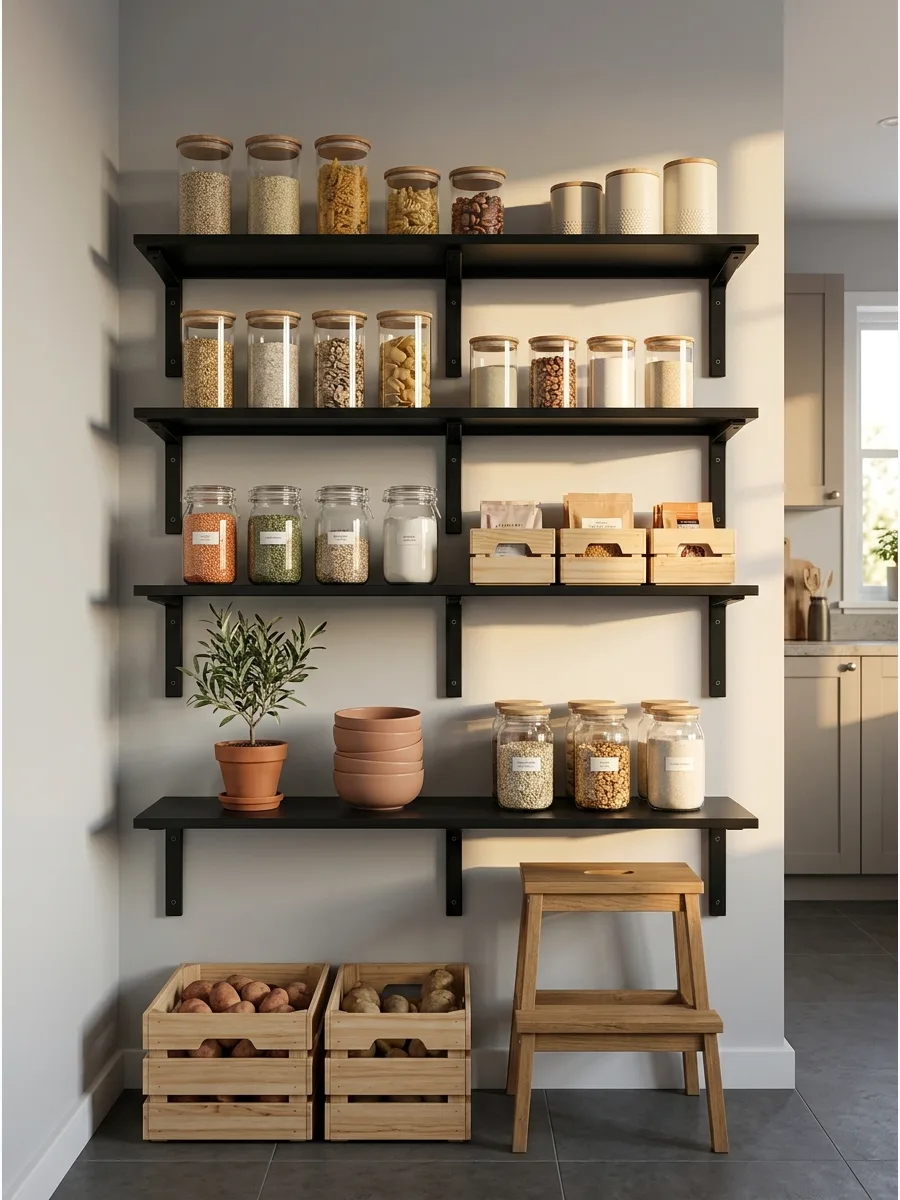
Black shelves create a bold, dramatic look that makes colorful food labels and wooden baskets pop. This modern choice works well in open-concept kitchens with industrial or minimalist vibes.
Choose a matte black finish to avoid visible fingerprints and glare from overhead lights. It provides a sophisticated foundation for a very organized storage system.
- $100 to $300 for metal or painted wood
- Pair with warm wood accents to soften the industrial look
- Ideal for modern or industrial kitchen styles
Most people skip this: Use light-colored labels on black shelves so they are easy to read from a distance.
45. Stone-Look Pantry Counter With Shelves
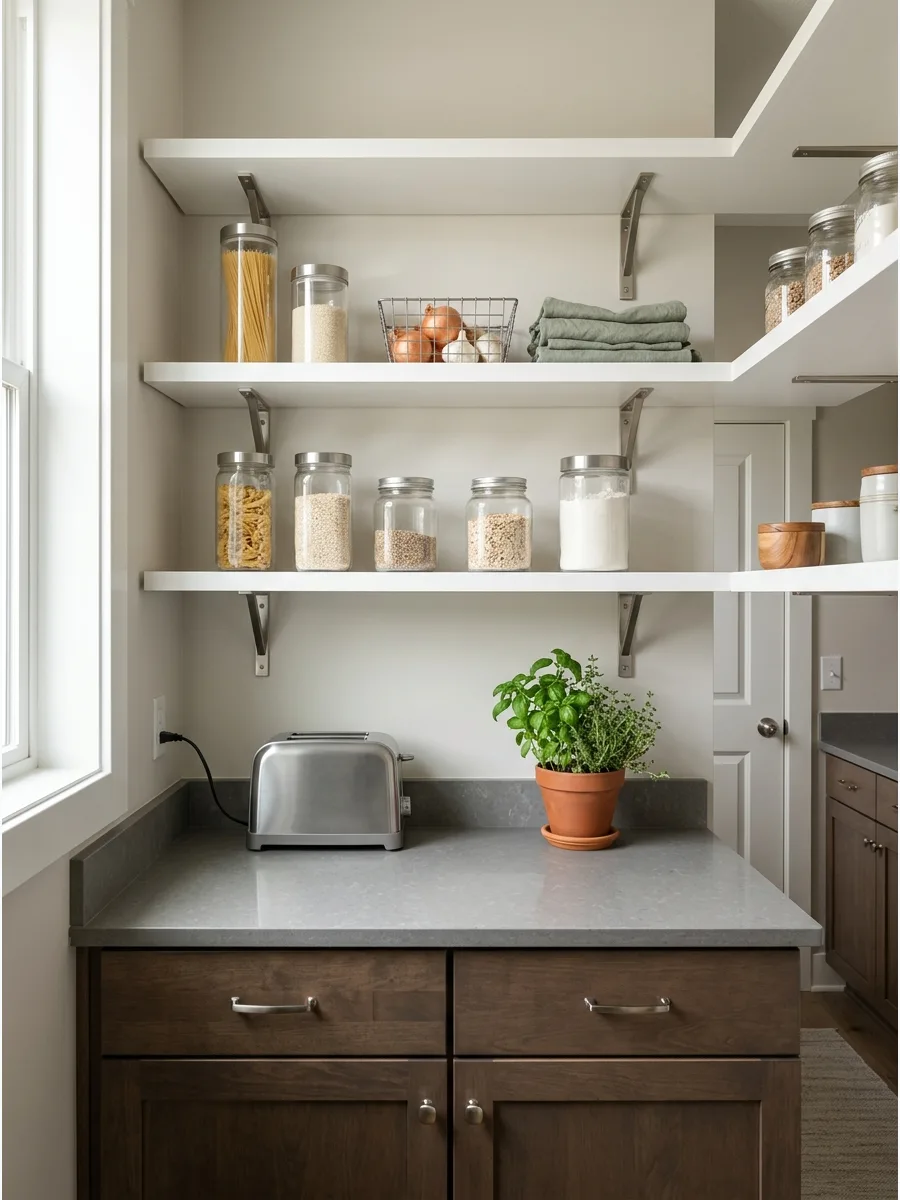
Installing a stone-look countertop beneath upper shelves provides a durable surface for heavy appliances or food prep. This setup mimics a high-end butler’s pantry and adds significant utility.
Select a quartz or laminate material that is non-porous and easy to sanitize after use. It creates a dedicated zone for a toaster or stand mixer.
- $200 to $600 for countertop material
- Ensure the base cabinets can support the heavy weight
- Best for walk-in pantries with enough floor space
Quick win: Match the pantry counter to your kitchen island for a cohesive whole-house design.
46. Metal Pantry Shelving
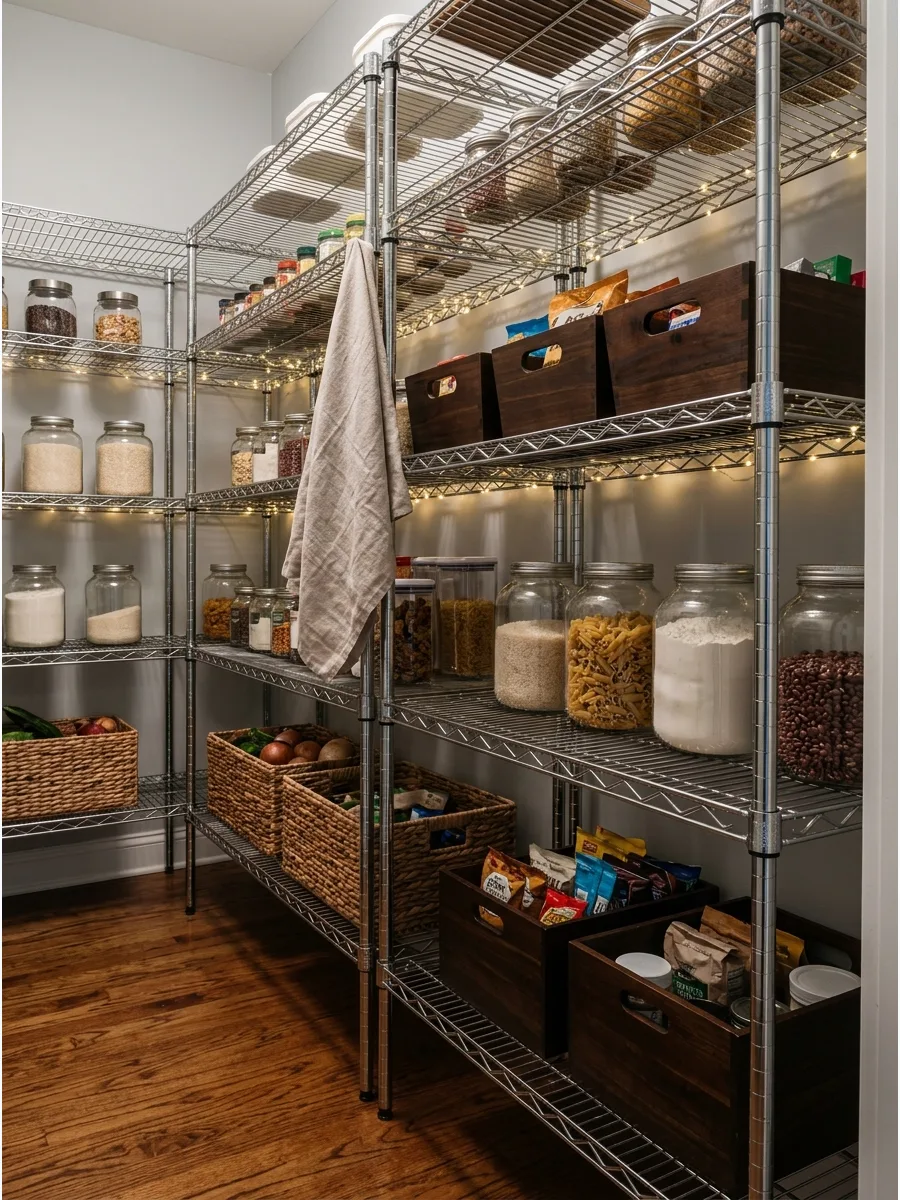
Metal shelves are the workhorses of a functional storage space because they handle heavy loads without sagging. They are ideal for storing bulk canned goods or heavy kitchen appliances that might warp wood or plastic.
Choose commercial-grade chrome wire shelving to allow for better air circulation around fresh produce and dry goods. This material is also extremely easy to wipe down if a jar leaks or a bag of flour breaks.
- Costs $80 to $150 and takes about one hour to assemble.
- Add snap-on plastic liners to the wire tiers to prevent small items from tipping over.
- Use these units in garage or basement pantries for maximum weight capacity.
Most people skip this: Measure the height of your tallest appliance before setting the shelf intervals to ensure a perfect fit.
47. Wood and Metal Pantry Shelves
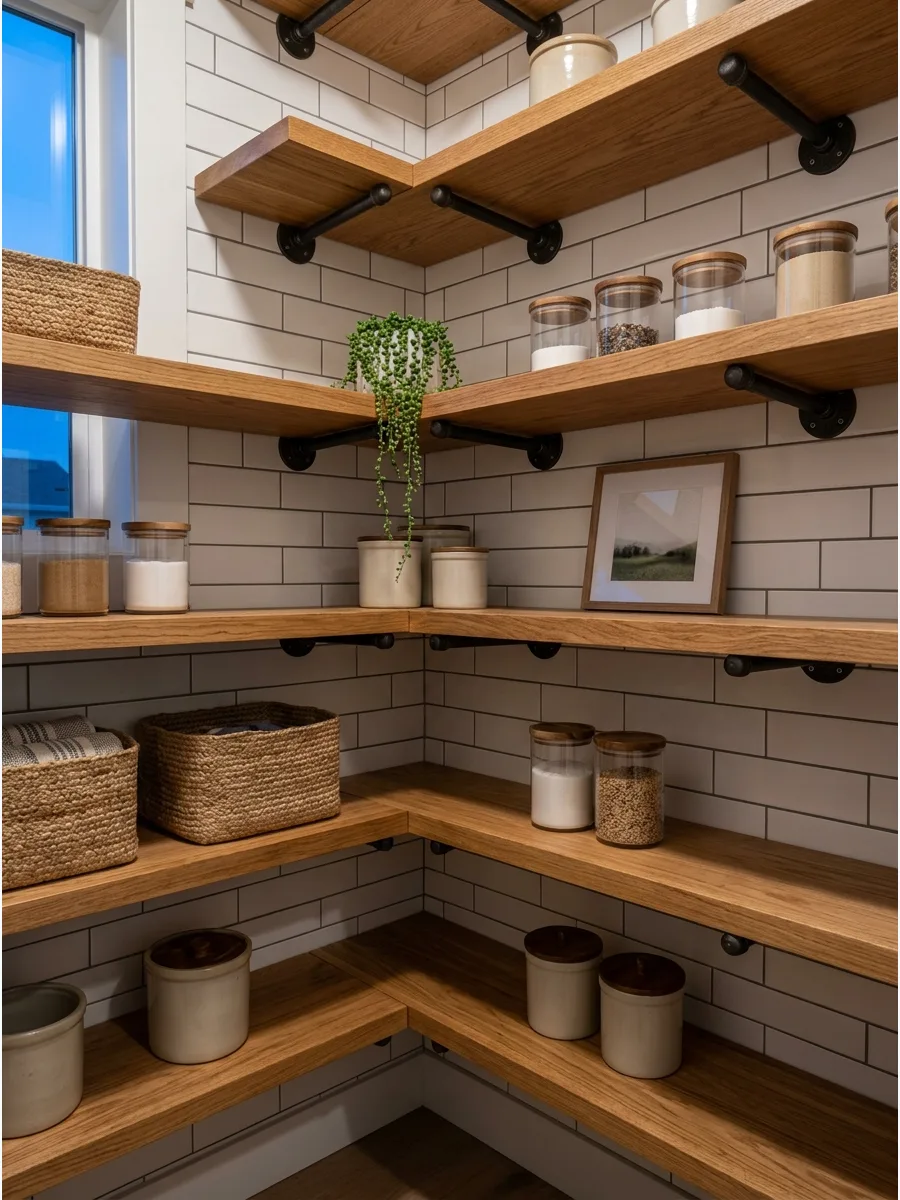
Mixing natural wood with metal hardware creates a sturdy industrial look that feels more high-end than basic wire. The metal brackets provide the structural support needed for heavy weight while the wood planks offer a flat, solid surface for small bottles.
Install thick pine or oak planks on top of black iron pipe brackets for a high-contrast shelving design. This combination is particularly effective for open-concept pantries where style is just as important as function.
- Budget $50 to $120 depending on the wood type and bracket style.
- Mount brackets directly into wall studs to safely support the weight of the wood and pantry items.
- Swap pine for reclaimed wood or stained plywood to match the existing kitchen cabinetry.
Quick win: Use a matte clear coat on the wood to prevent oils and spices from staining the natural grain.
Organization Pantry Shelving Ideas
48. Baking Zone Pantry Shelves
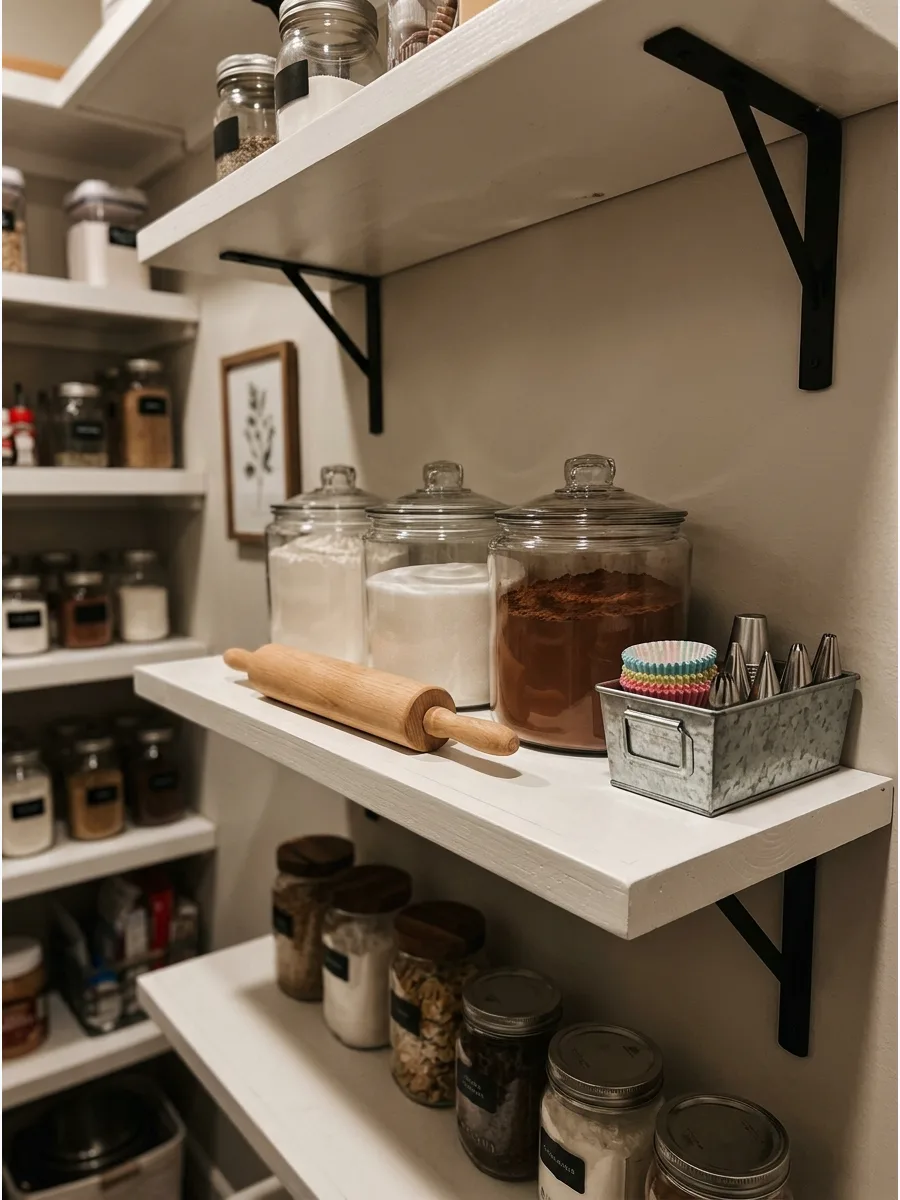
Grouping all baking supplies onto one dedicated shelf prevents the need to hunt through multiple areas while cooking. Store flour, sugar, and cocoa powder in airtight canisters to keep them fresh and visible.
Keep a dedicated baking shelf at waist height for heavy canisters of flour to avoid lifting them from high places. Adding a small bin for decorating tools and cupcake liners keeps the small items from getting lost behind large bags.
- Set up costs $20 to $60 for a set of quality airtight containers.
- Place frequently used ingredients at the center of the shelf for ergonomic access.
- Use uniform containers to maximize the horizontal space and create a clean look.
Best shortcut: Keep a set of measuring cups inside the flour and sugar canisters to shave minutes off meal prep.
49. Snack Zone Pantry Shelves
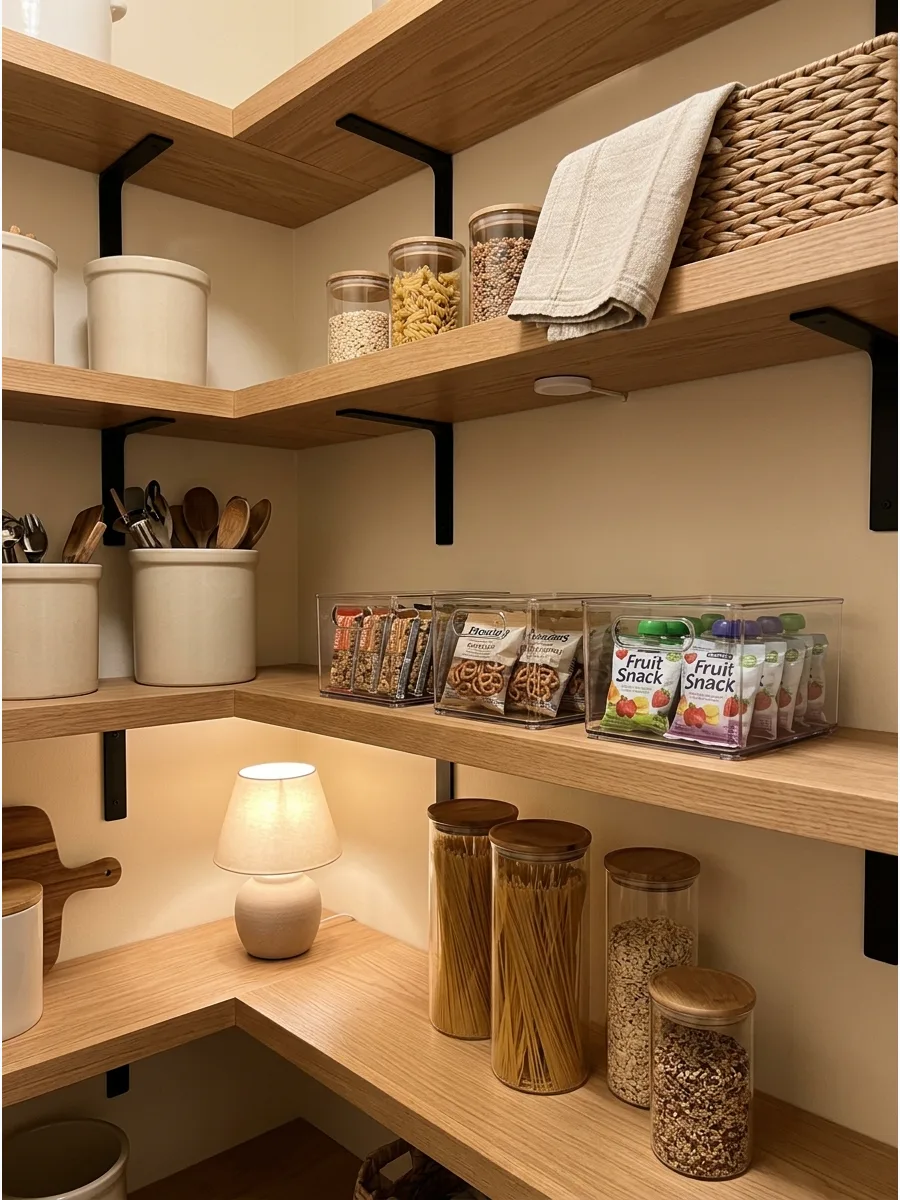
A dedicated snack zone prevents family members from rummaging through dinner ingredients to find a quick bite. Using open bins or baskets allows everyone to see exactly what is available and when it is time to restock.
Place clear bins or wire baskets on middle shelves so kids can reach their own snacks without assistance. This setup also makes it easier to unpack groceries by simply dumping individual bags into their assigned bins.
- Budget $15 to $40 for a set of three to four stackable bins.
- Group similar snacks like salty crackers and sweet bars into separate containers.
- Choose clear plastic over wicker if visibility is the main priority for the household.
Quick win: Remove snacks from their bulky cardboard boxes to reclaim up to twenty percent of your shelf space.
50. Breakfast Zone Pantry Shelves
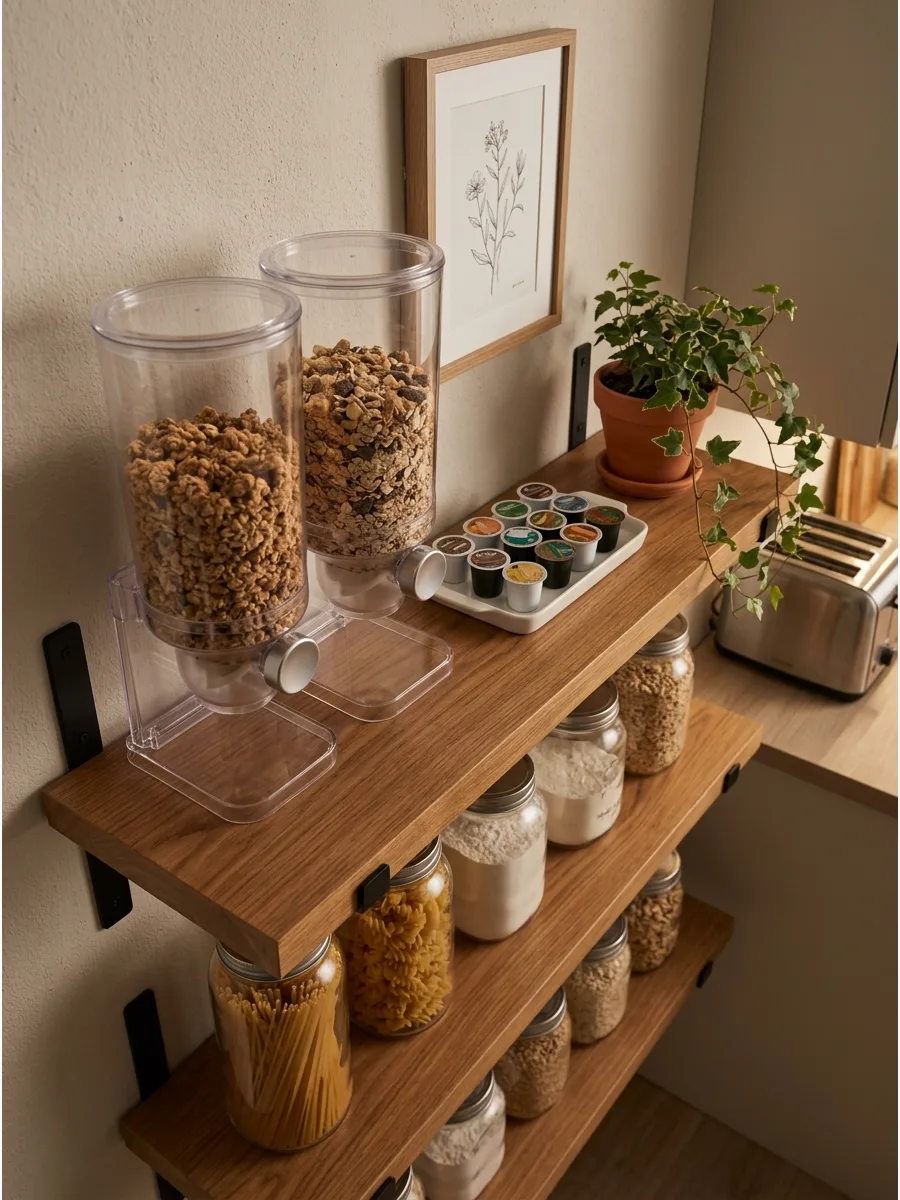
Creating a breakfast station on a single shelf streamlines the morning routine by keeping cereal, oatmeal, and coffee together. This works best when the shelf is located near the toaster or coffee maker to minimize movement across the kitchen.
Store cereal in dispensers and coffee pods in a small tray on a single shelf to speed up the morning rush. It turns a cluttered pantry into a functional part of the daily workflow.
- Expect to spend $30 to $70 for dispensers and organization trays.
- Dedicate a shelf near the pantry entrance for the fastest access during busy mornings.
- Include a small basket for honey, spreads, or peanut butter to keep everything in one spot.
Most people skip this: Use a shallow tray under coffee pods or syrups to catch drips and protect the shelf surface.
51. Dinner Prep Pantry Shelves
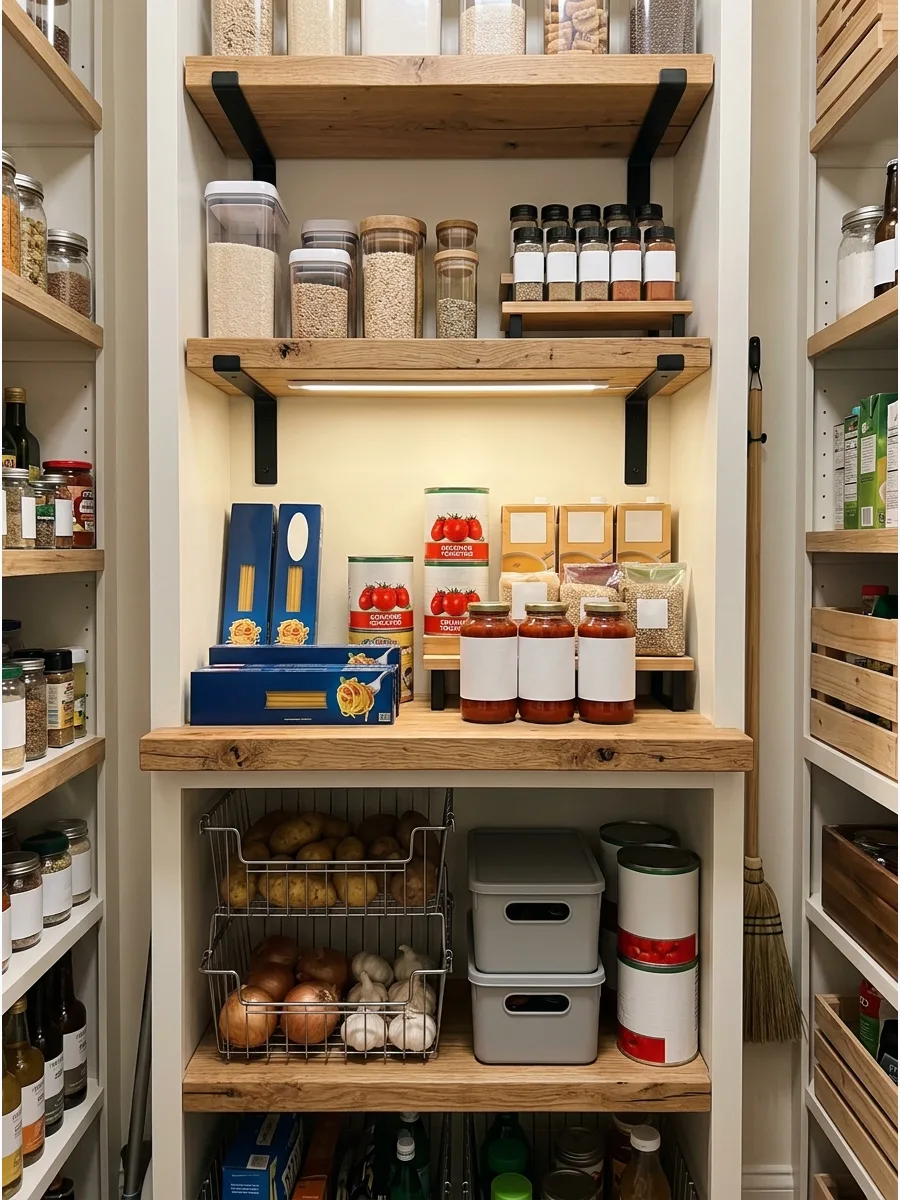
Organizing dinner basics like pasta, rice, and sauces on an eye-level shelf makes meal planning effortless. When these staples are grouped together, it is easy to see at a glance what is missing for a complete meal.
Arrange pasta boxes and sauce jars together on one eye-level shelf for quick dinner planning and inventory checks. Keeping the heavy canned tomatoes and broth boxes toward the back ensures the shelf remains balanced and organized.
- Sourcing items is free; organization takes about 20 minutes of sorting.
- Arrange pasta boxes by shape or size to maximize the horizontal shelf space.
- Keep heavy jars at the back of the shelf and lighter boxes toward the front.
Best shortcut: Store pasta in tall, clear containers to see exactly how many servings are left before you start cooking.
52. Spice and Oil Pantry Shelves
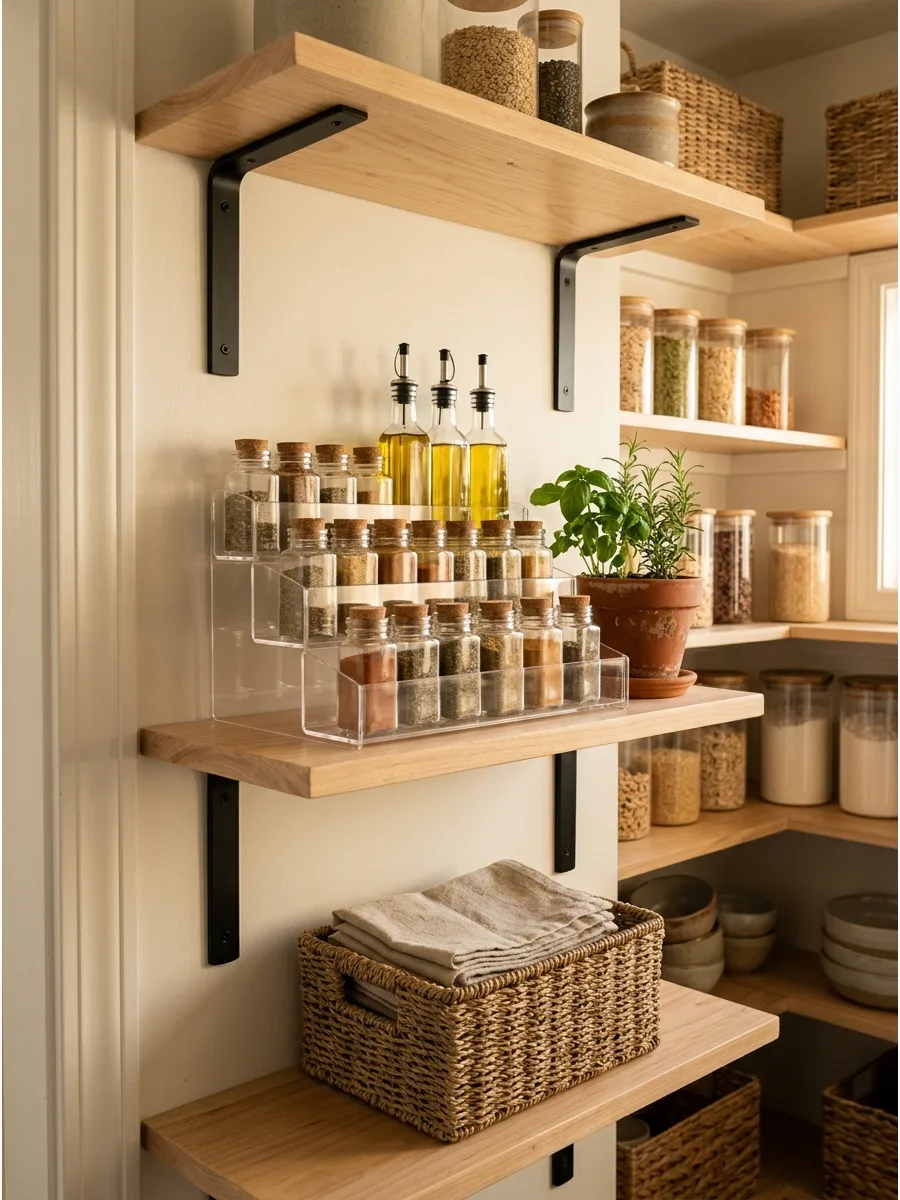
Spices and oils are often the hardest items to find in a deep pantry because they are small and easily hidden. Using tiered risers or very narrow shelving ensures that every label is visible without moving other bottles.
Add a three-tier acrylic riser to a shallow shelf to make every spice label visible at a glance. This prevents buying duplicates of spices that are already hiding in the back of the pantry.
- Costs $15 to $25 and takes 10 minutes to set up.
- Place the riser on a shelf at or below eye level for the best visibility.
- Organize bottles by height with the tallest oils and vinegars in the back row.
Quick win: Group spices alphabetically or by cuisine type to find exactly what you need in seconds.
53. Backstock Pantry Shelving
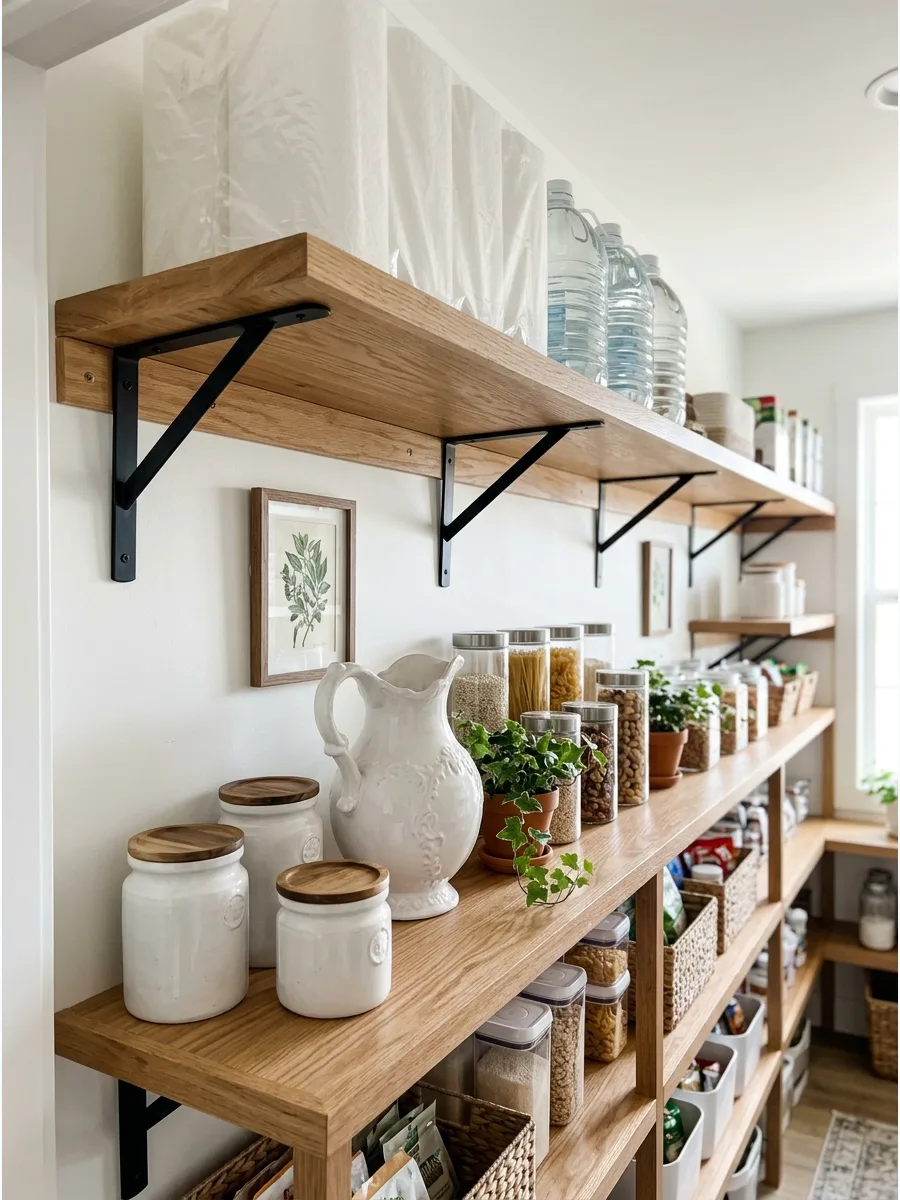
The highest shelves in a pantry are often wasted space because they are difficult to reach for daily items. Reserve this area for bulk backstock like extra paper towels, unopened jugs of oil, or seasonal party supplies.
Reserve the highest shelves for bulk paper products or extra bottles of water to keep the main shelves clear. This strategy keeps the prime real estate at eye level for the things used every day.
- Uses existing space for zero cost; a folding step stool costs $30 to $50.
- Store seasonal items like holiday platters or large roasting pans on these upper levels.
- Keep a sturdy step stool tucked inside the pantry for safe and easy access.
Most people skip this: Use large, lightweight baskets for high-shelf backstock so you can pull down one bin instead of individual items.
54. Labelled Pantry Shelf System
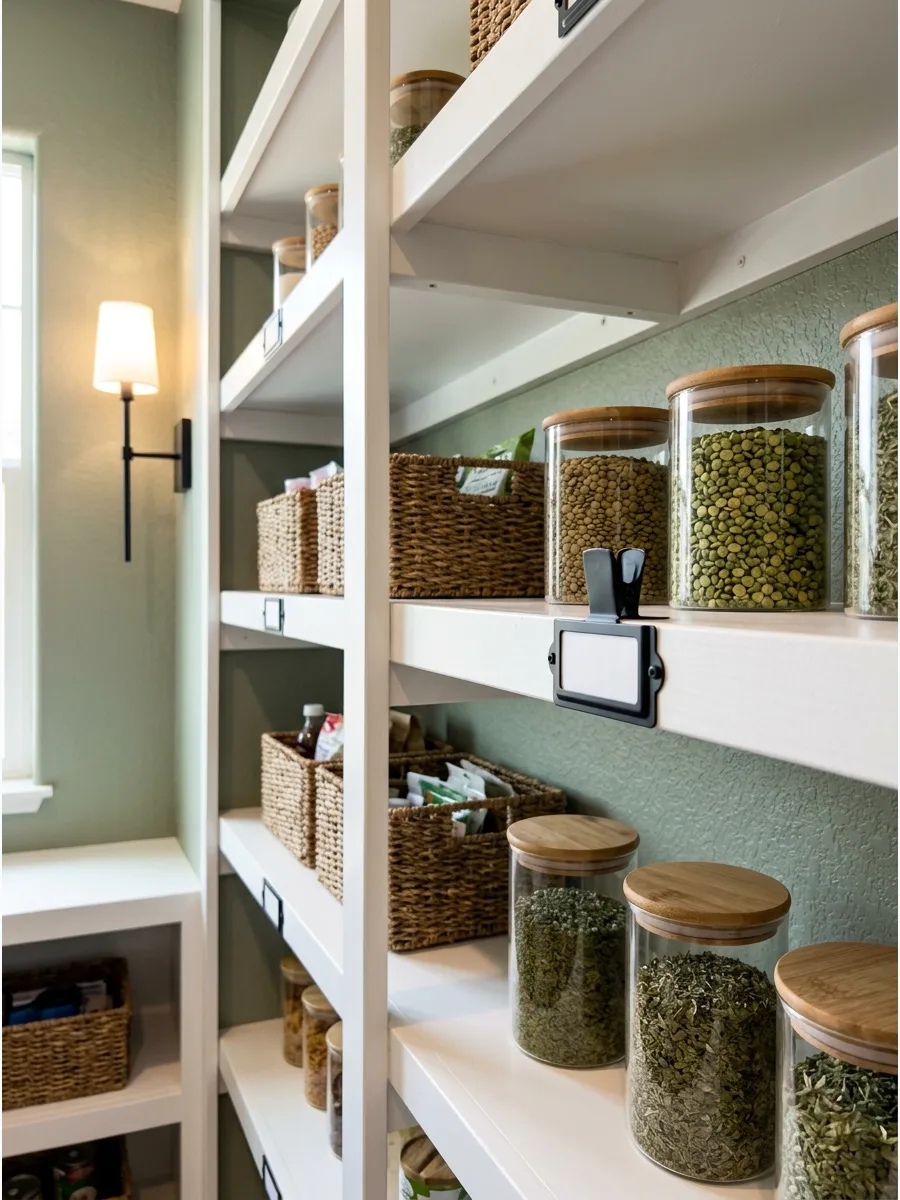
Labels are the secret to maintaining a pantry once it has been organized. They act as a guide for every family member to return items to their correct homes, preventing clutter from building up.
Apply clip-on tags or vinyl lettering to the front edge of each shelf to maintain the organization system. It turns a generic storage space into a professional-looking pantry that stays tidy long-term.
- Labels cost $10 to $20 and take about 30 minutes to apply.
- Position the labels directly in the center of each category group for clear identification.
- Use erasable markers on metal or plastic clips so the categories can be updated easily.
Best shortcut: Label the shelf itself rather than the bin so the system stays in place even when the bin is being used on the counter.
55. Pantry Shelving With Mixed Storage
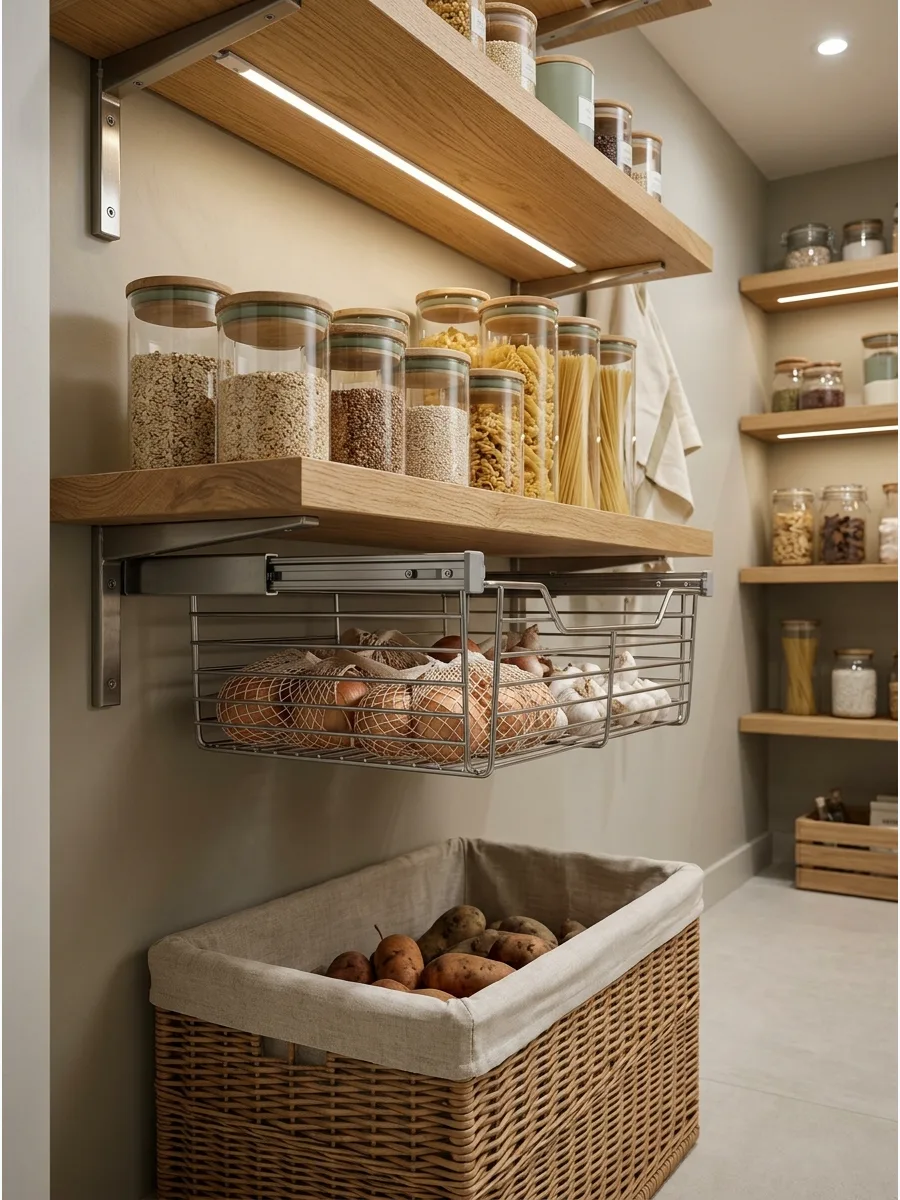
A truly efficient pantry uses a variety of storage types to accommodate different shapes and sizes of food. Combining flat shelves with pull-out drawers and floor baskets ensures that nothing is wasted, from the ceiling to the floor.
Mix deep pull-out baskets for root vegetables with slim open shelving for jars to maximize every inch of the pantry. This customized approach allows the space to adapt to changing grocery needs throughout the year.
- Budget $100 to $300 for a full mix of drawers, baskets, and shelving.
- Install sliding drawers on the lowest levels to access deep corners without kneeling.
- Use floor-level baskets for bulky items like bags of potatoes or oversized bags of pet food.
Quick win: Place a heavy-duty turntable in the corner of a shelf to make items in the very back easy to reach.
Frequently Asked Questions
What is the ideal depth for pantry shelves?
The ideal depth for pantry shelves is typically between 12 and 16 inches. This range strikes the perfect balance between providing ample storage capacity and ensuring items don't get lost or forgotten in the back.
How much vertical space should I leave between pantry shelves?
Plan for 8 to 10 inches for canned goods and 14 to 16 inches for tall cereal boxes or small appliances. Using adjustable tracks is a smart way to customize your vertical space as your grocery needs evolve.
Is wood or wire shelving better for a pantry?
Solid wood shelving is generally the superior choice because it provides a stable surface that prevents small bottles from tipping over. While wire racks are budget-friendly, wood is much easier to wipe clean and offers a more polished, durable look for heavy items.
How do I maximize storage in a small reach-in pantry?
Maximize every inch by installing U-shaped shelving to utilize the side walls and corners. Adding an over-the-door rack is another excellent solution for organizing spices and snacks without crowding your primary shelves.
What are the best shelving ideas for heavy items like stand mixers or bulk flour?
Store heavy items like stand mixers or bulk bags of flour on reinforced bottom shelves or pull-out floor bins. This placement provides the necessary weight support and makes it much safer to lift these items during meal prep.