50 Range Hood Ideas for Every Kitchen Style and Layout

This post may contain affiliate links: full affiliate disclosure.
A range hood can disappear into cabinetry or become the kitchen’s strongest focal point. Start by deciding which role suits your room and renovation scope.
These ideas compare shapes, finishes, and layouts while flagging the practical choices that affect capture, cleaning, headroom, ducting, and everyday cooking.
Save the looks that fit your kitchen, then confirm dimensions with the specific hood, insert, range, and local requirements before construction begins.
As an Amazon Associate I earn from qualifying purchases.
Soft and Sculptural Range Hood Finishes
Plaster, tile, and stone turn ventilation into architecture. Their success depends on a convincing silhouette, clean edges, and a serviceable insert inside.
1. Shape a Warm White Plaster Hood with a Tapered Face
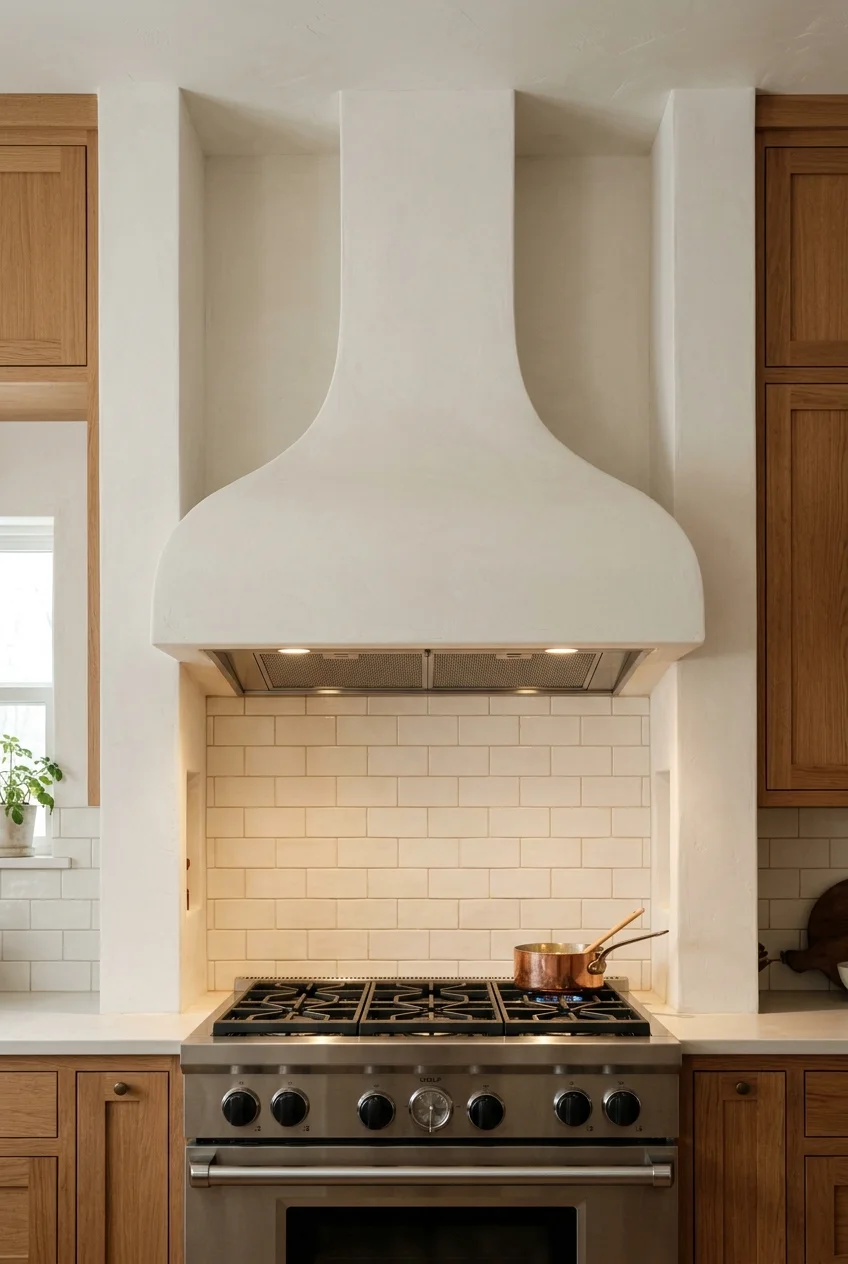
A gently tapered plaster surround gives the cooking wall presence without introducing another shiny surface. Keep the base wider than the upper chimney for balance.
Choose a warm white related to the wall color, then compare samples beside the backsplash and cabinets under daytime and evening lighting.
- Confirm the insert’s required enclosure dimensions.
- Keep filters and controls fully accessible.
- Plan a washable transition at the lower edge.
The surround is decorative, not the ventilation system. Let the insert manufacturer’s clearance, duct, and access instructions determine the hidden construction.
2. Round the Corners of a Compact Plaster Hood
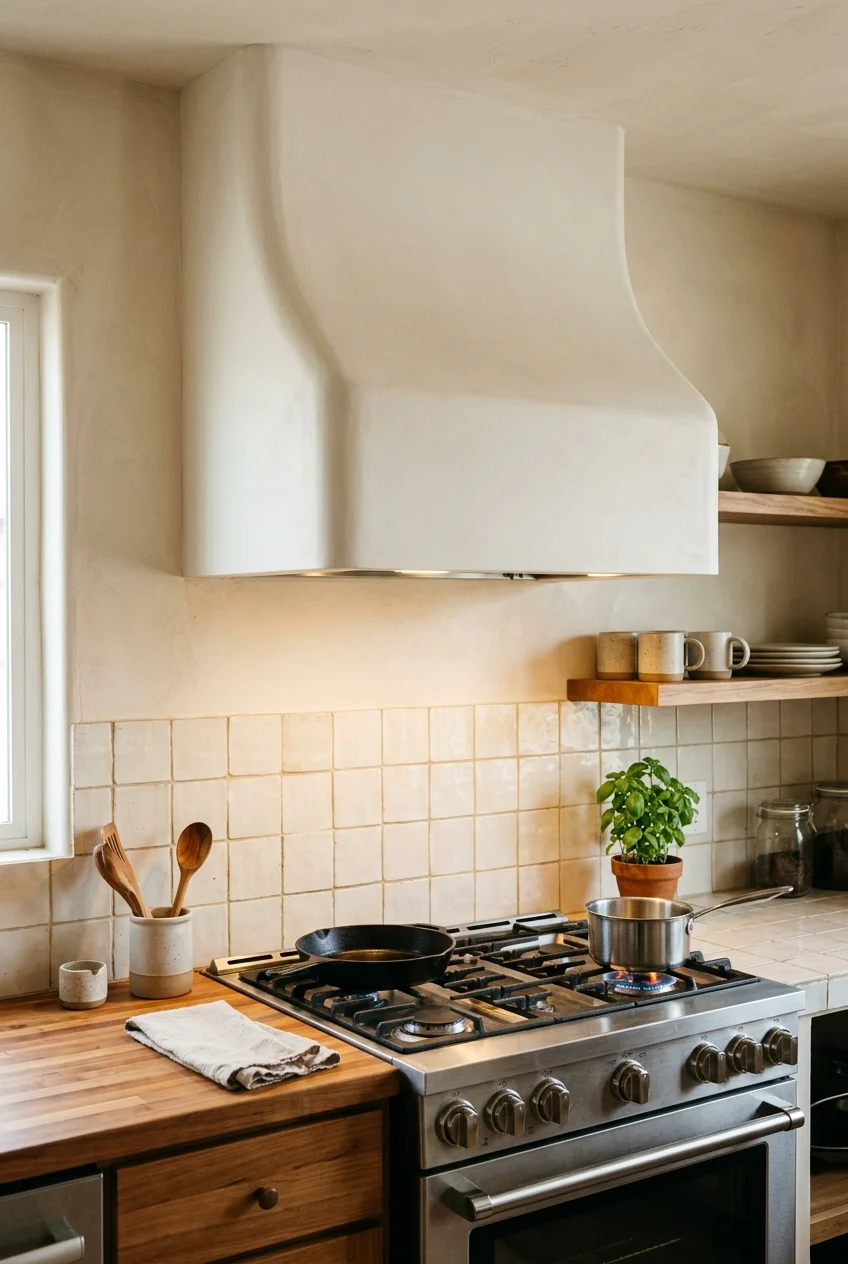
Rounded corners soften a boxy enclosure and suit a smaller kitchen where a deep, sharply projecting hood might feel heavy at eye level.
Use a shallow radius rather than an exaggerated bubble shape. The curve should begin above the lower capture edge so the hood remains visually grounded.
Setup note Ask the fabricator to mock up the profile at full size, because small elevation drawings can hide how far a curved surround projects.
3. Carry Handmade-Look Tile Across the Hood Face
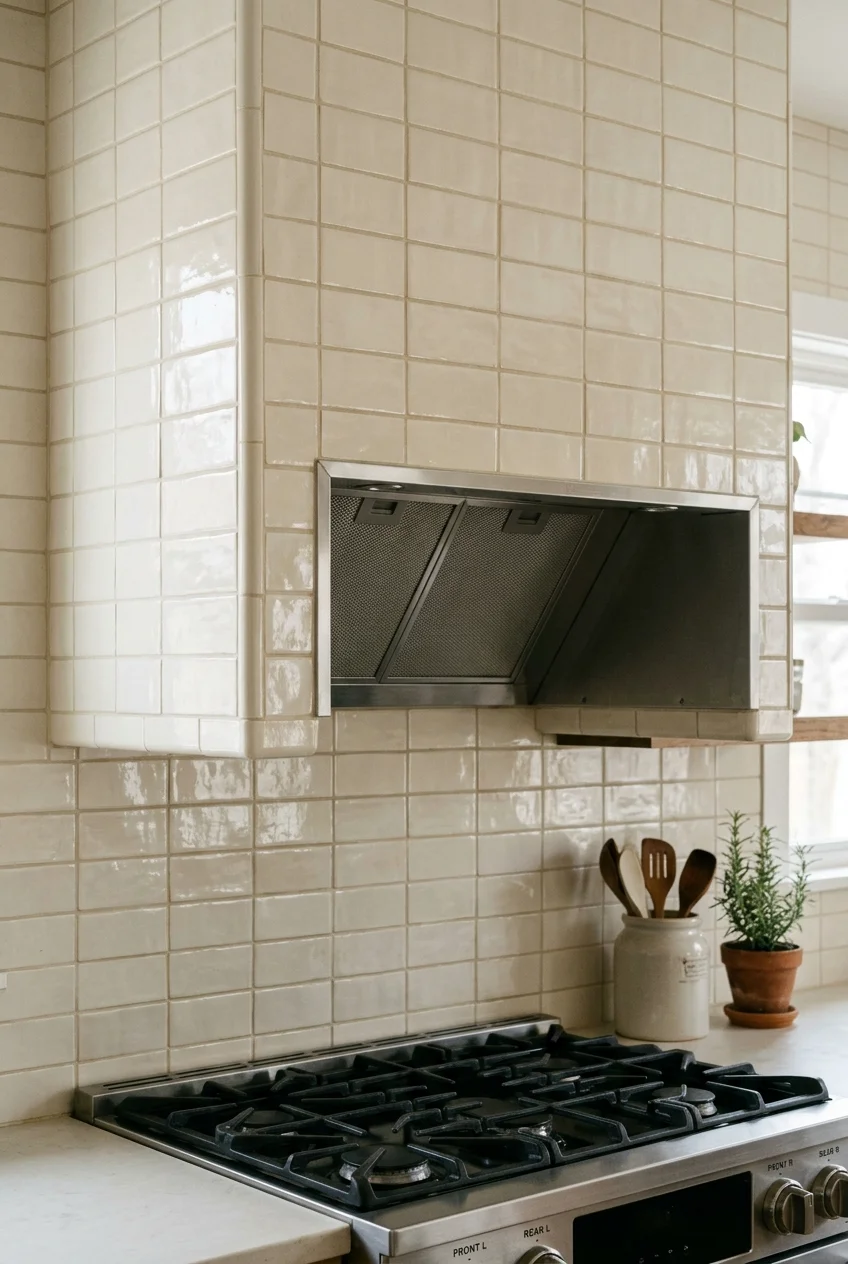
Tiling the hood can connect it directly to the backsplash, especially when small tile units can turn corners without awkward cuts or broken patterns.
Keep grout joints aligned where the wall meets the surround. A simple rectangular hood usually handles tile more cleanly than a tight compound curve.
- Choose a tile size that suits every return.
- Resolve exposed edges with trim or finished tile.
- Keep removable service panels free of permanent tile.
Discuss substrate, heat exposure, weight, and cleaning with the installer. A photograph cannot establish whether a tiled enclosure meets the insert’s requirements.
4. Use Venetian Plaster for Gentle Tonal Movement
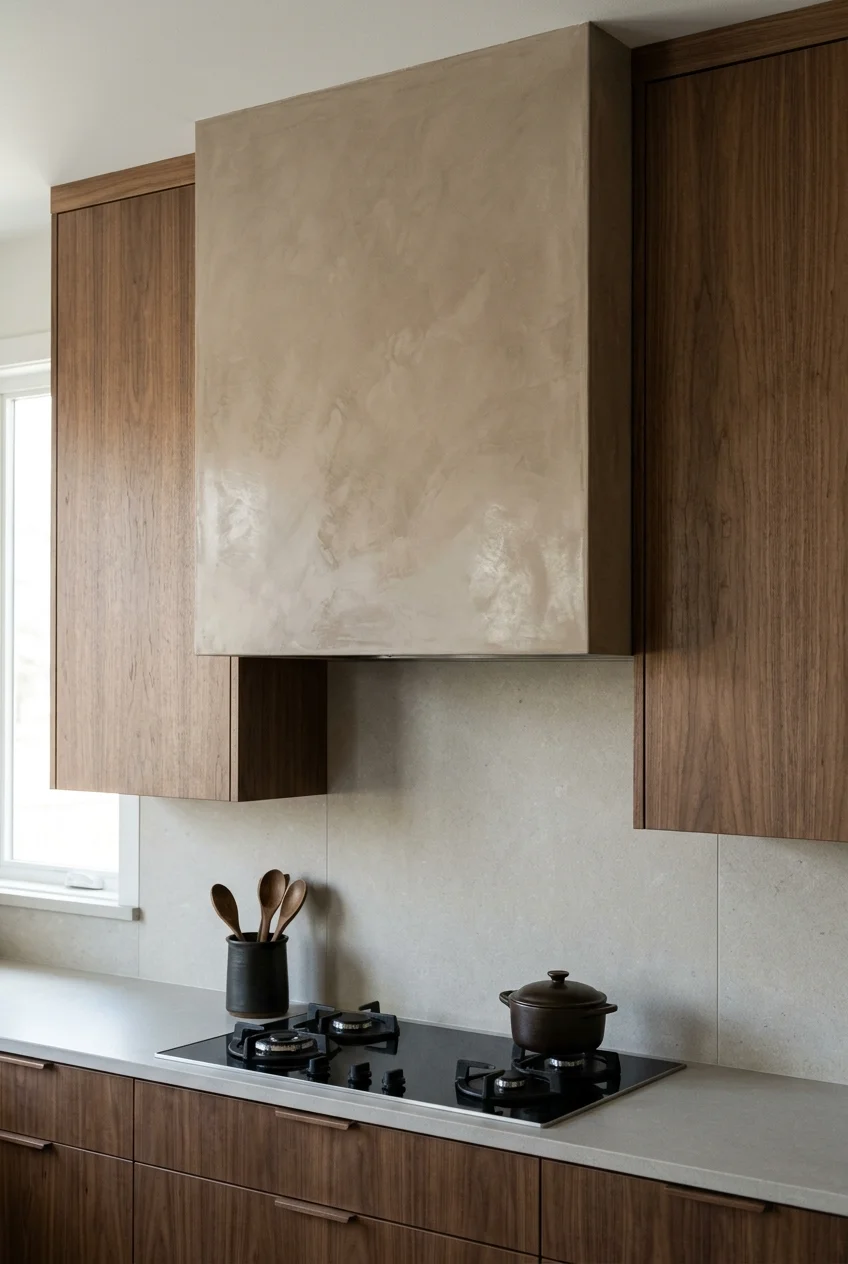
Venetian plaster adds cloudlike depth without a printed pattern. A low-contrast taupe or clay tone works best when neighboring cabinet fronts remain visually quiet.
Sample the sheen as carefully as the color. Highly polished plaster can emphasize every reflection, while a softer finish reads more architectural beside stone counters.
5. Build a Limewashed Hood into a Matching Wall
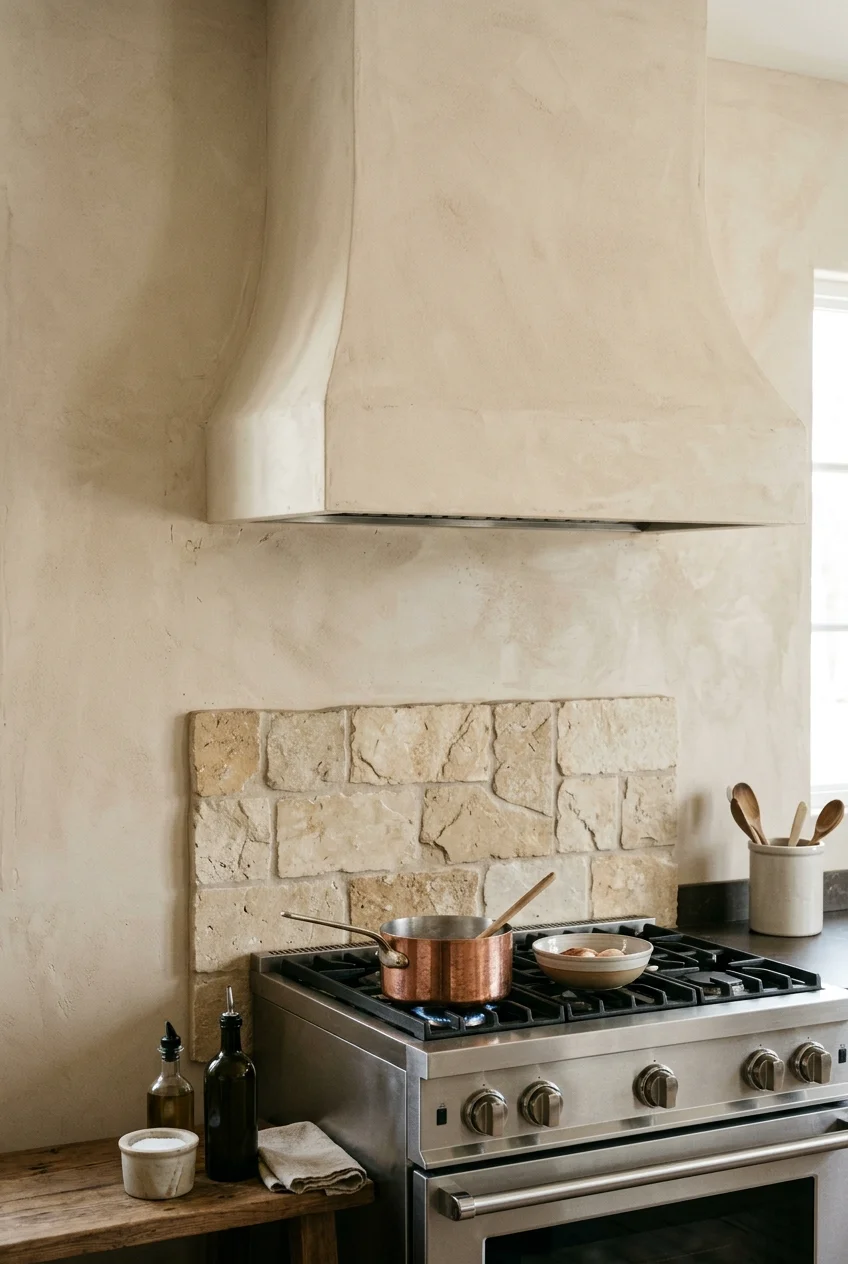
Painting the hood and wall in the same mineral-looking finish creates one continuous backdrop. The silhouette remains visible through shadow rather than color contrast.
This approach suits a simple hood shape and restrained backsplash. Protect the cooking zone with a cleanable surface where splashes actually reach.
6. Wrap a Straight Hood in Large Stone Slabs
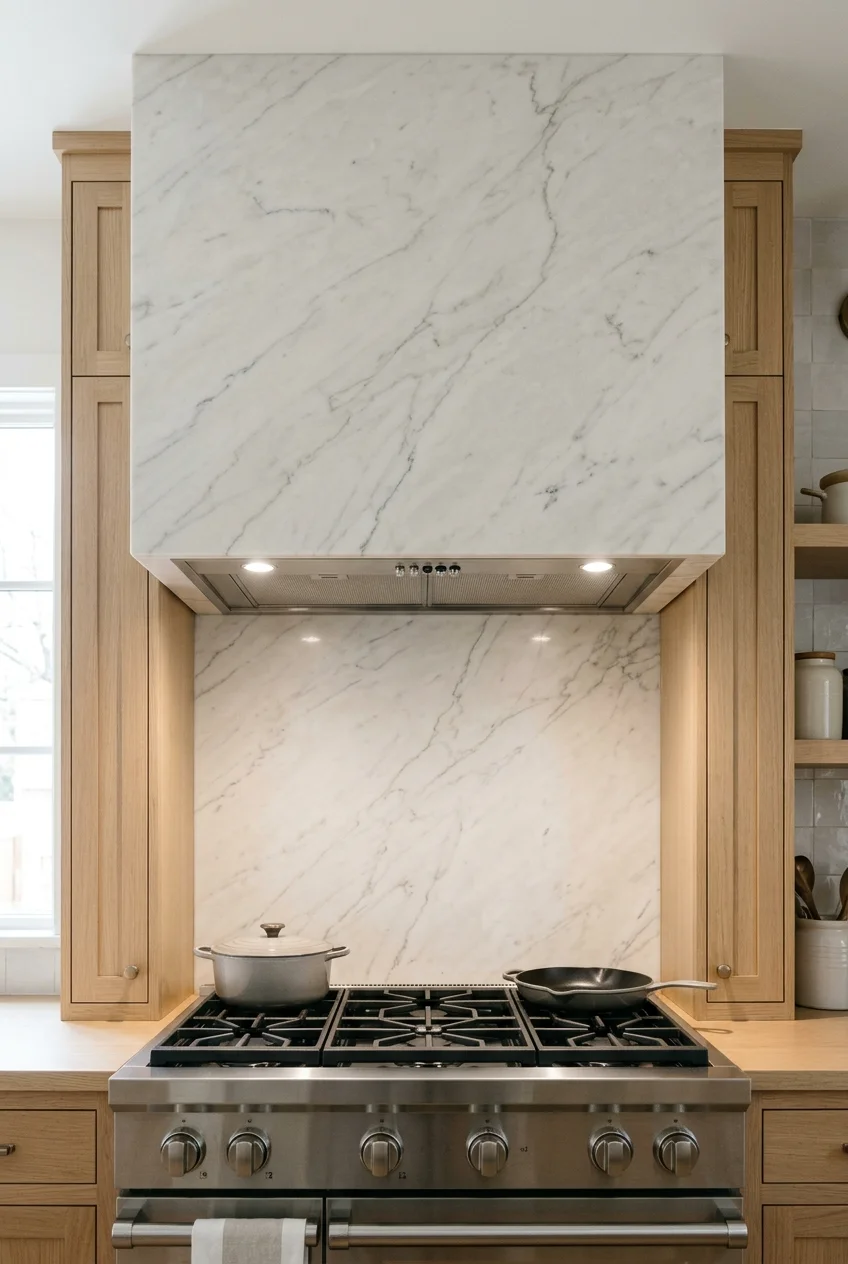
A slab-clad hood can make the cooking wall feel deliberately monolithic. Straight planes display veining more clearly and require fewer complicated corner transitions.
Map the vein direction before fabrication so the hood relates to the backsplash rather than looking assembled from unrelated remnants.
Stone adds weight and fabrication complexity. The structure, attachment method, insert access, and material suitability need professional review before the finish is ordered.
Request a dimensioned shop drawing showing every slab joint, lower edge, access opening, and support location before approving fabrication or cutting expensive material.
7. Frame a Plaster Hood with a Slim Wood Band
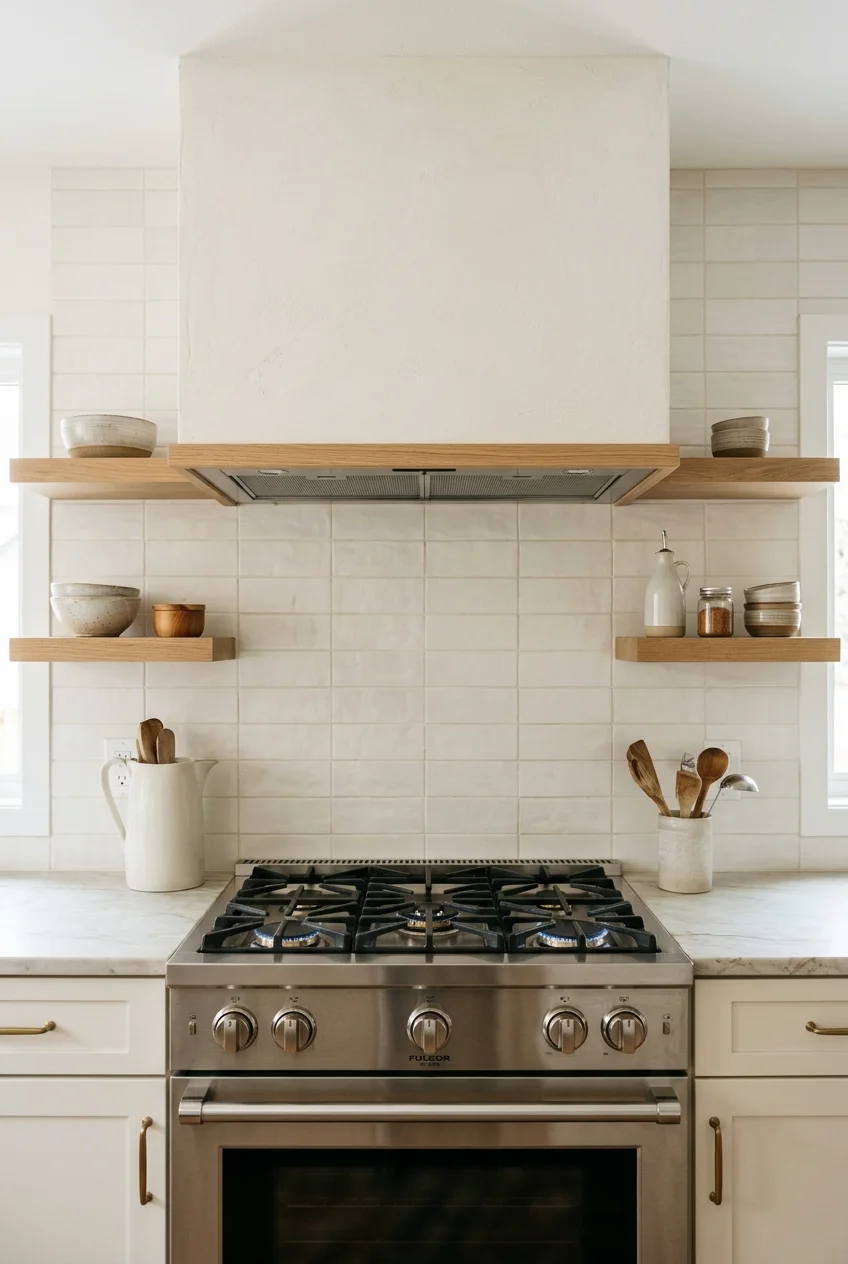
A narrow wood band gives a pale plaster hood a crisp lower edge and connects it to nearby oak shelves or cabinet interiors.
Keep the band visually light and outside the insert’s hot, grease-prone working surfaces. Its finish should tolerate routine wiping without appearing plastic.
Practical tip Repeat the same wood species only once or twice nearby; too many matching accents can make the cooking wall look like a coordinated furniture set.
8. Create a Stepped Art Deco Plaster Profile
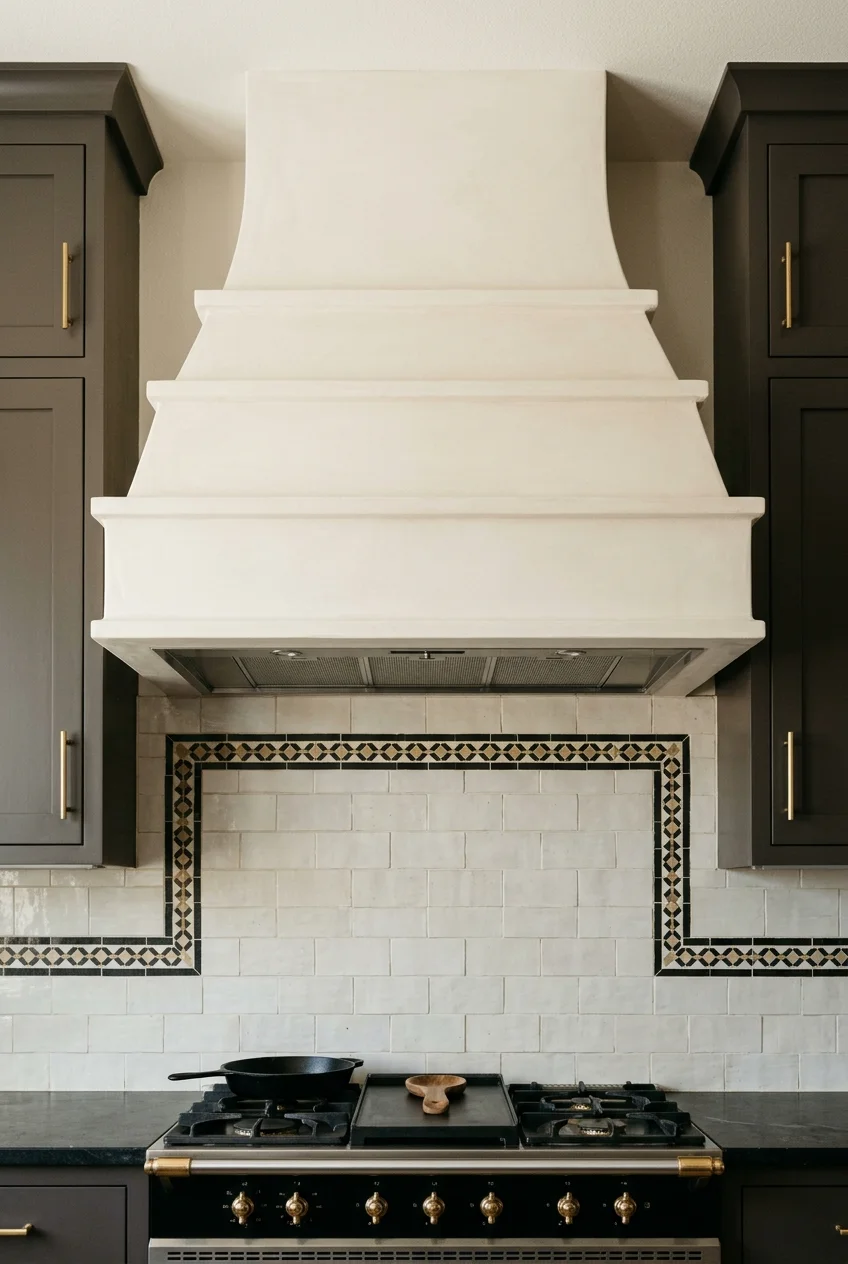
Two shallow setbacks can give a plaster hood an Art Deco rhythm without applied ornament. Keep the geometry symmetrical around the cooking surface.
Echo the stepped profile sparingly in cabinet hardware or a backsplash border. Repeating it everywhere weakens the hood’s role as the focal point.
Because each ledge collects residue, avoid deep horizontal shelves over active cooking. A subtle relief is easier to clean than a heavily tiered surround.
9. Choose Microcement for a Crisp Contemporary Hood
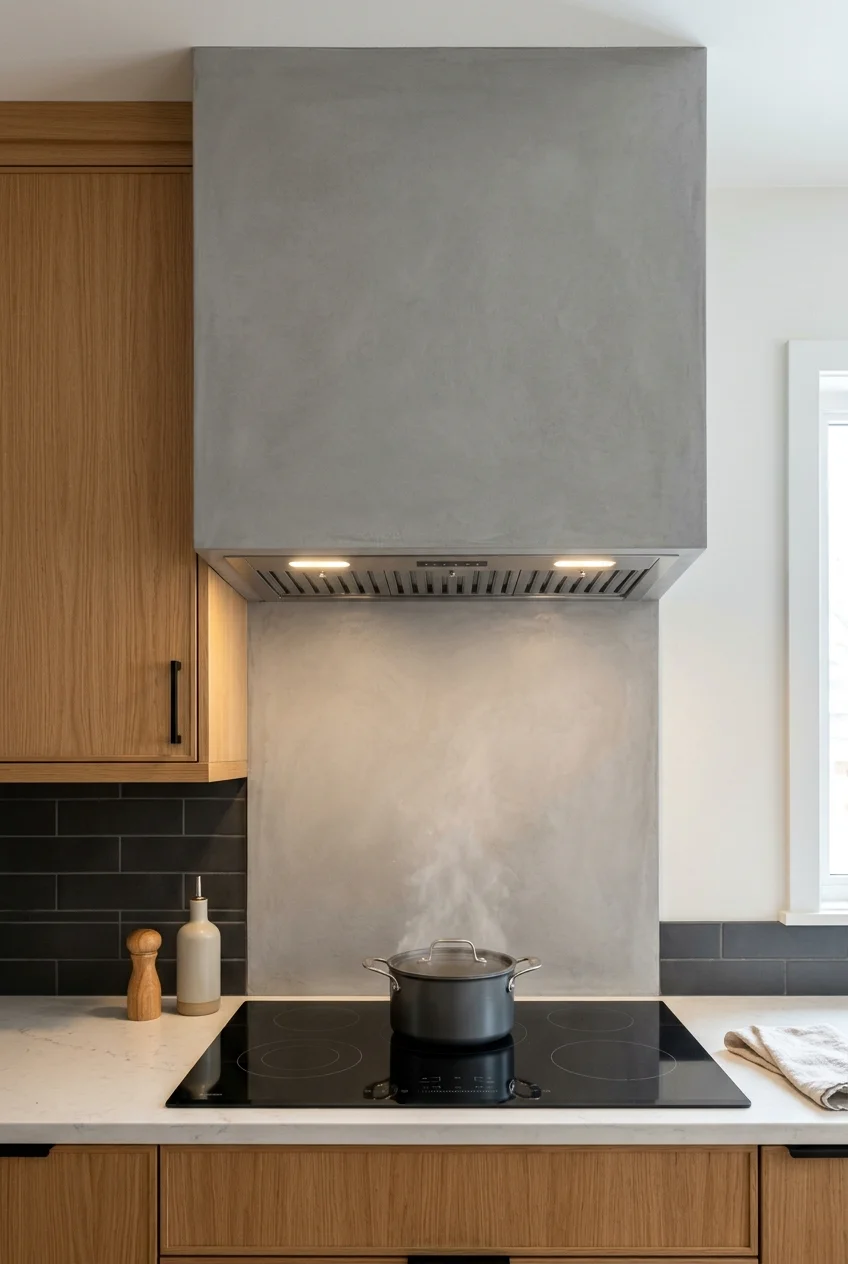
Microcement can give a simple hood a continuous concrete-like surface without prominent joints. Mid-gray works well against warm wood and pale countertops.
Confirm the specified system suits this location, including substrate preparation, sealing, heat exposure, and cleaning. Decorative appearance alone does not establish performance.
10. Tile Only the Lower Hood Band
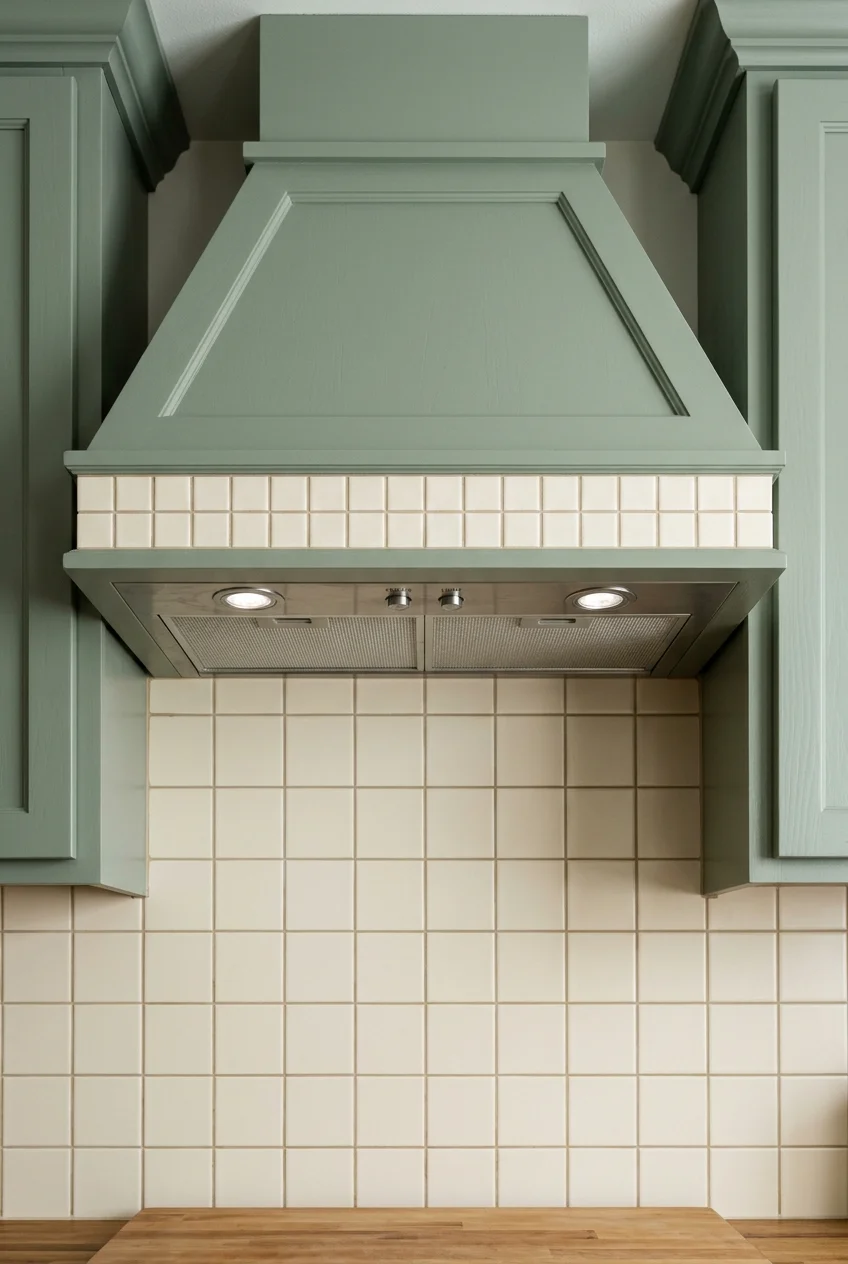
A tiled lower band introduces texture without covering the entire enclosure. It can also visually connect a painted hood to the backsplash below.
Align the band height with a nearby cabinet rail or shelf edge. That shared line helps the mixed materials look intentional rather than patched together.
Use a finished edge where tile meets paint, and keep controls, lights, filters, and removable panels unobstructed for cleaning and service.
Wood and Painted Range Hood Covers
Wood and cabinet finishes can either integrate the hood or deliberately contrast it. Scale, grain direction, and cleaning access matter more than decorative complexity.
11. Match the Hood Cover to Painted Cabinetry
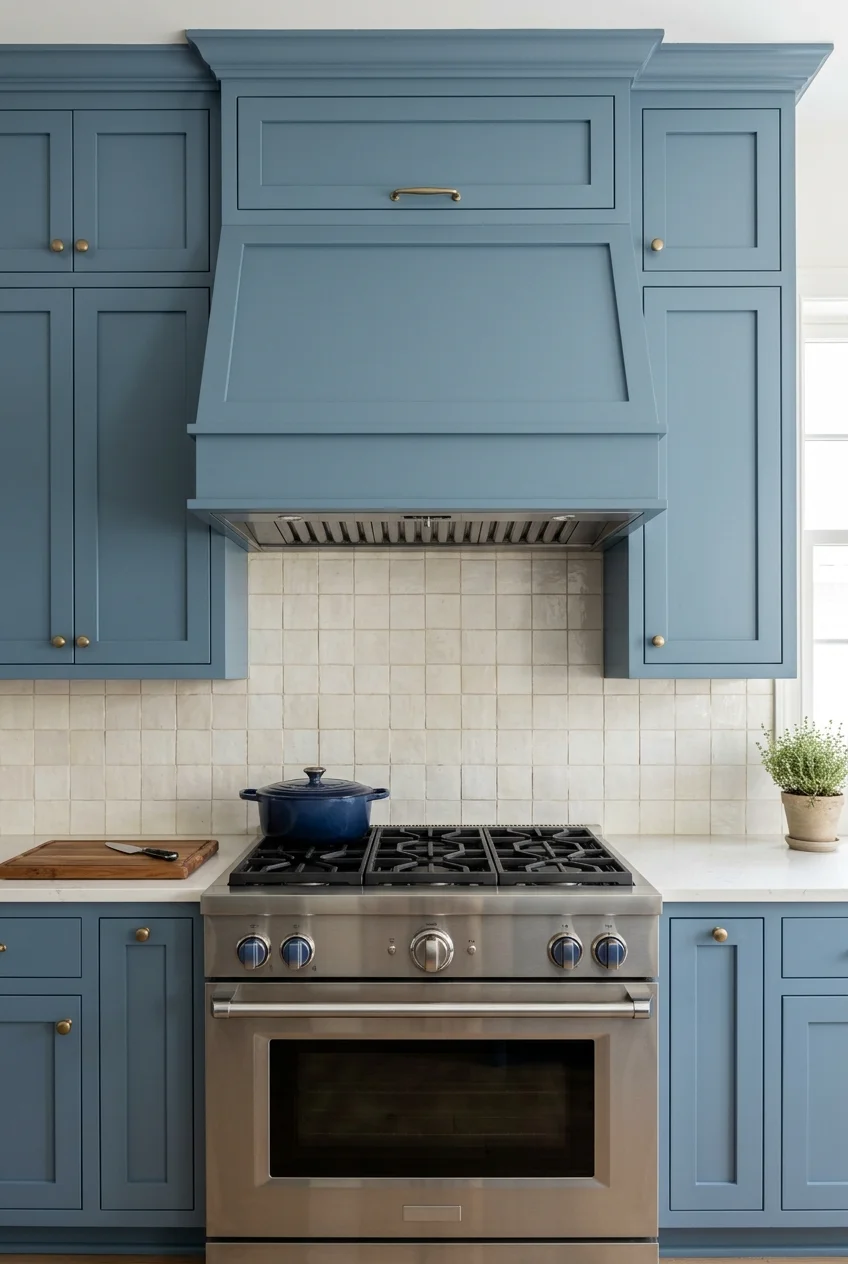
A cabinet-colored hood cover keeps the perimeter calm and makes the range feel built into the room. Use the same sheen for convincing continuity.
Vary the shape instead of the color: a shallow taper or modest crown can identify the hood without breaking the cabinetry palette.
- Match door profile and paint sheen.
- Center the cover on the cooking surface.
- Leave manufacturer-required service access intact.
12. Let Rift-Cut Oak Grain Run Vertically
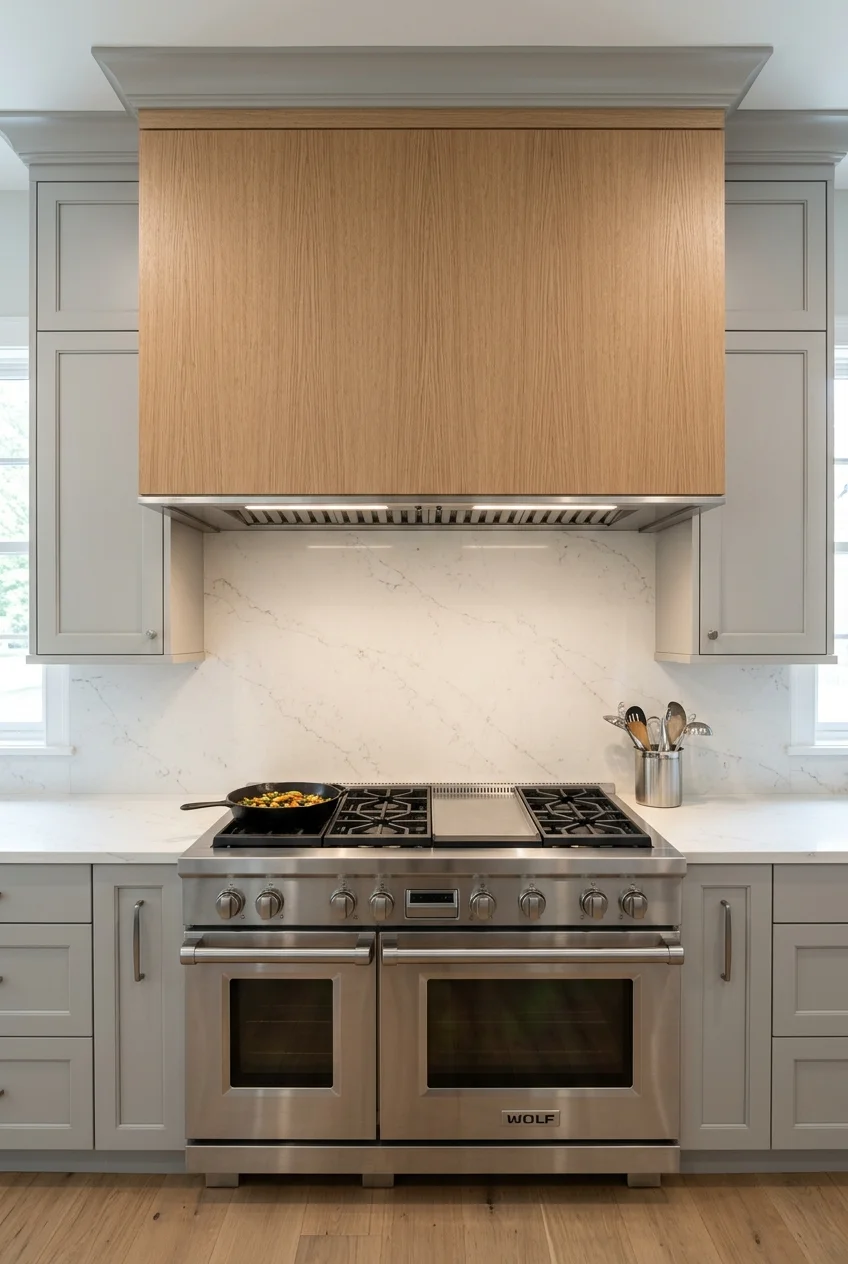
Vertical rift-cut oak grain makes a broad hood appear taller and quieter. Bookmatched or consistently sequenced panels prevent a patchwork effect across the face.
Keep adjacent cabinet grain equally disciplined, or use painted cabinetry so the hood remains the single wood focal point. Finish samples should be viewed beside flooring.
13. Use a Dark Walnut Hood as the Only Deep Wood Accent
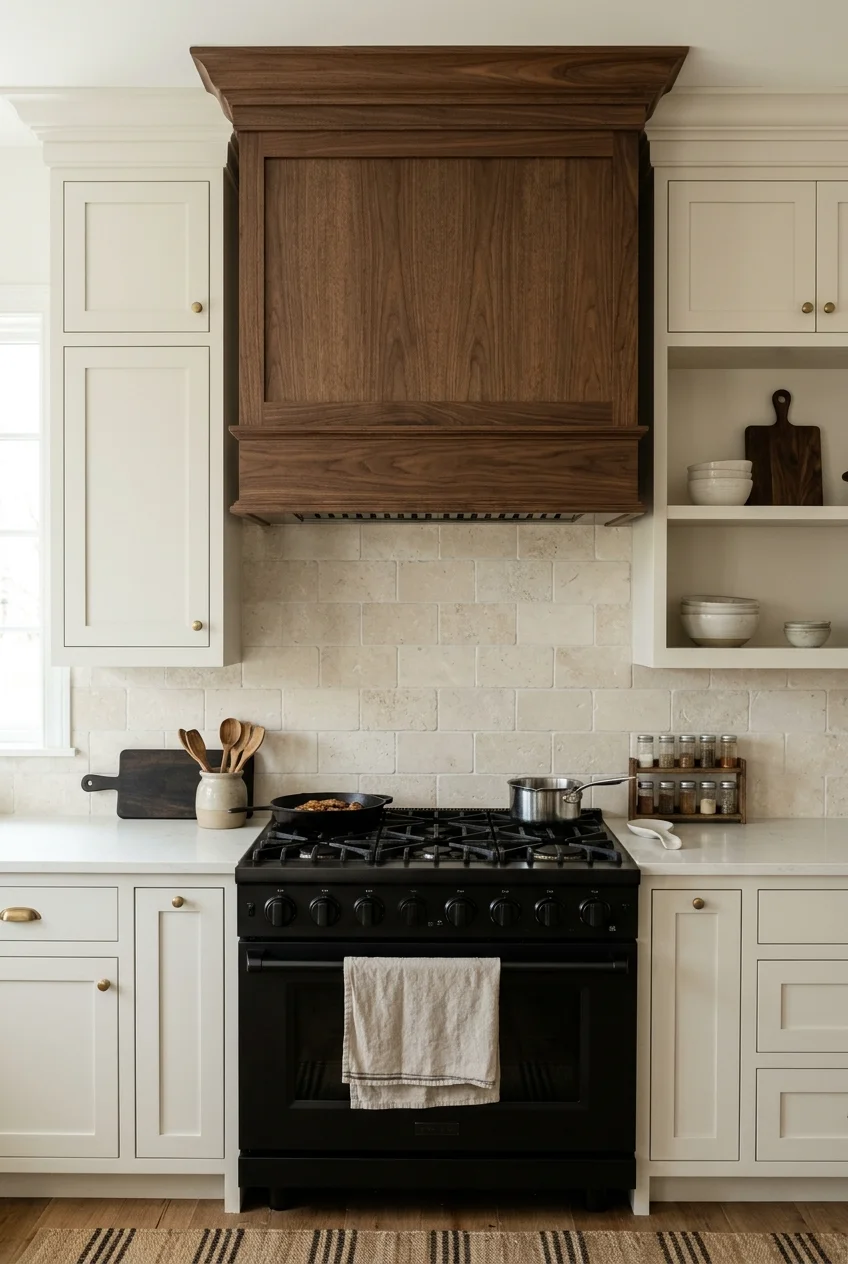
A dark walnut hood creates a strong center on a pale cooking wall. Limiting that wood tone to one major feature prevents the room from feeling top-heavy.
Repeat the color in small, distant details such as stool frames or a cutting board, not in every cabinet and shelf surrounding the range.
14. Add Narrow Vertical Reeding to a Wood Hood
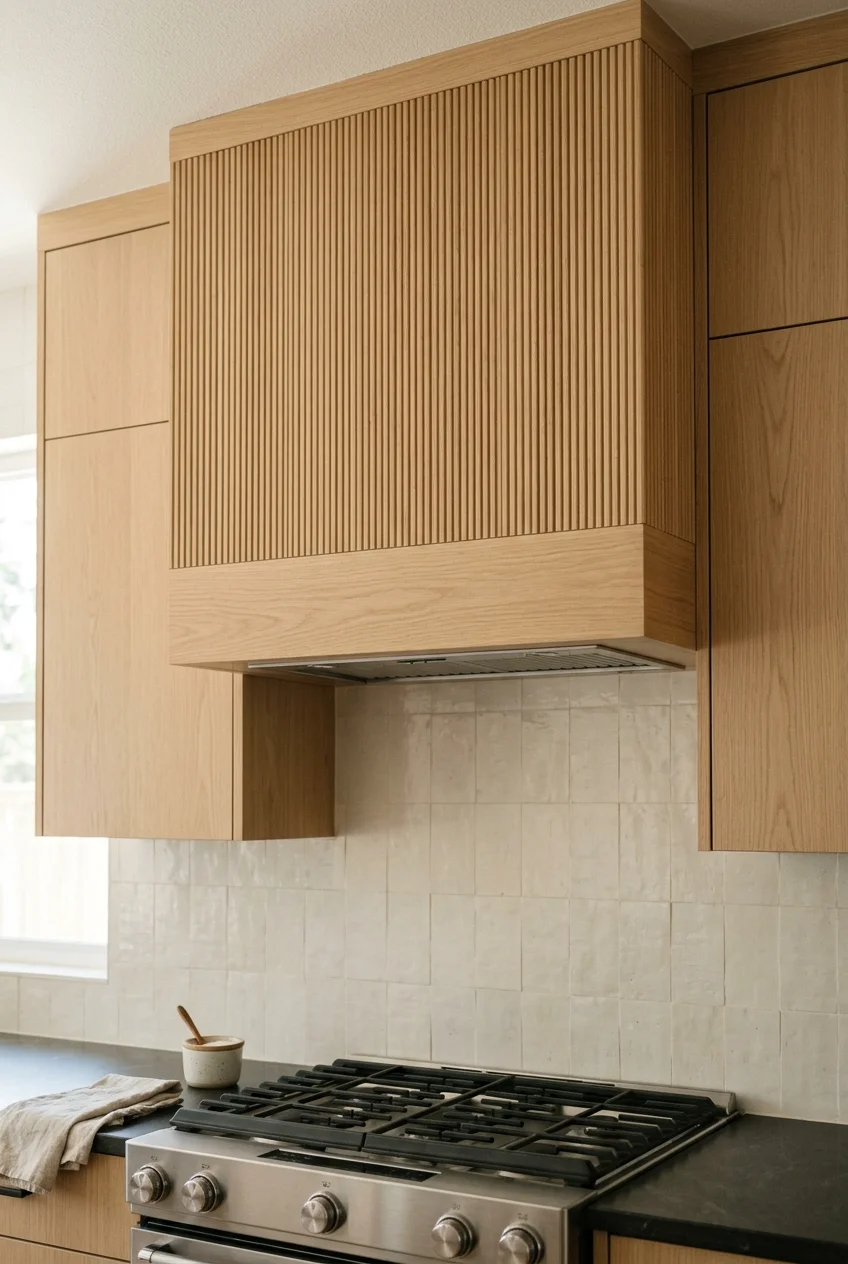
Fine vertical reeding adds shadow and texture to a simple hood box. Keep grooves shallow enough that routine dusting and grease removal remain manageable.
A plain lower rail gives the reeded field a clean stopping point. Avoid carrying grooves onto service doors or the insert’s working surfaces.
Use reeding where the kitchen already has simple planes. Combining it with busy tile, ornate doors, and prominent veining can overwhelm a compact wall.
15. Build a Traditional Mantel Hood with Restrained Corbels
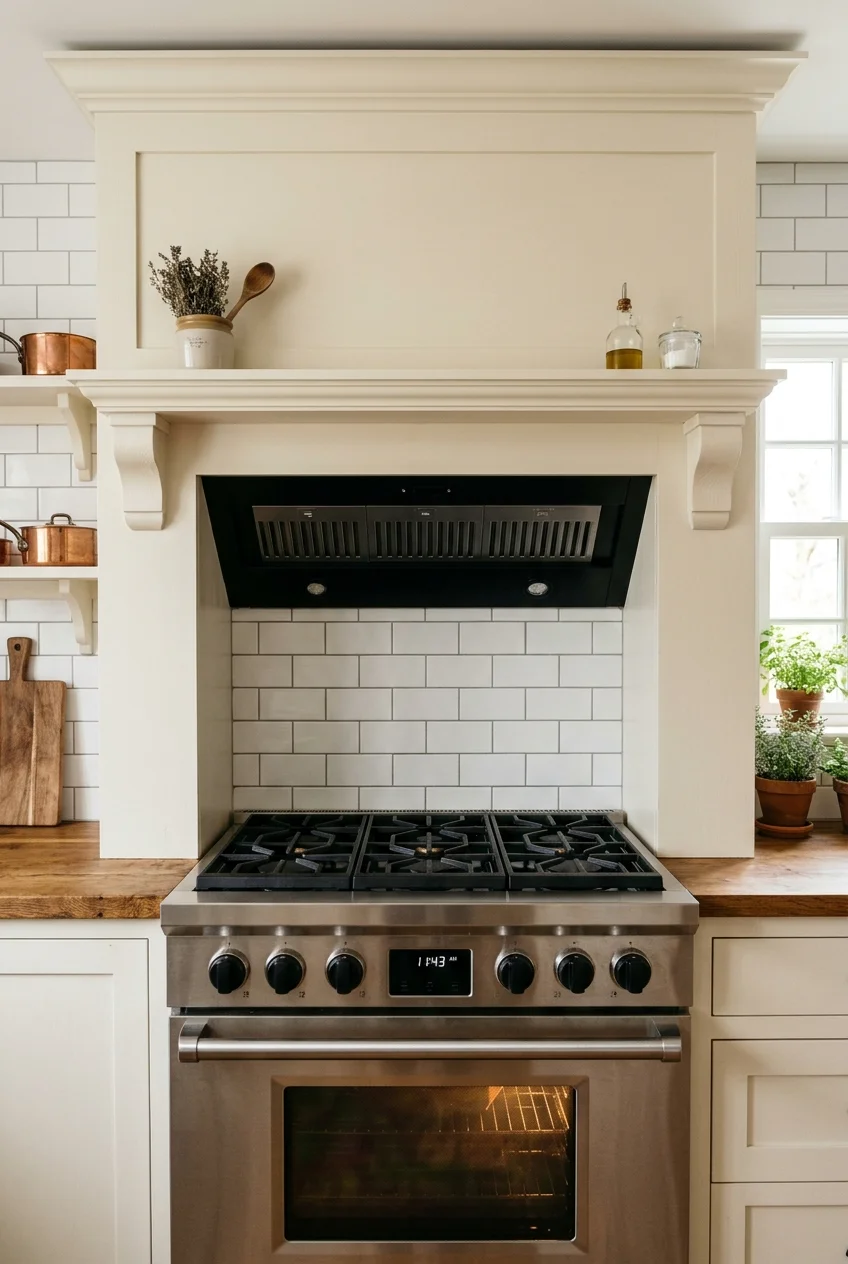
A mantel-style hood suits a traditional kitchen when its shelf, pilasters, and corbels follow the scale of surrounding cabinetry rather than oversized furniture proportions.
Keep corbels outside the active capture opening and away from cookware. Their placement should frame the range without narrowing usable space at shoulder height.
Watch for Deep mantel shelves collect cooking residue and invite unsafe storage above heat, so keep the ledge shallow and decorative items away from the range.
16. Give a Cottage Hood a Simple Scalloped Edge
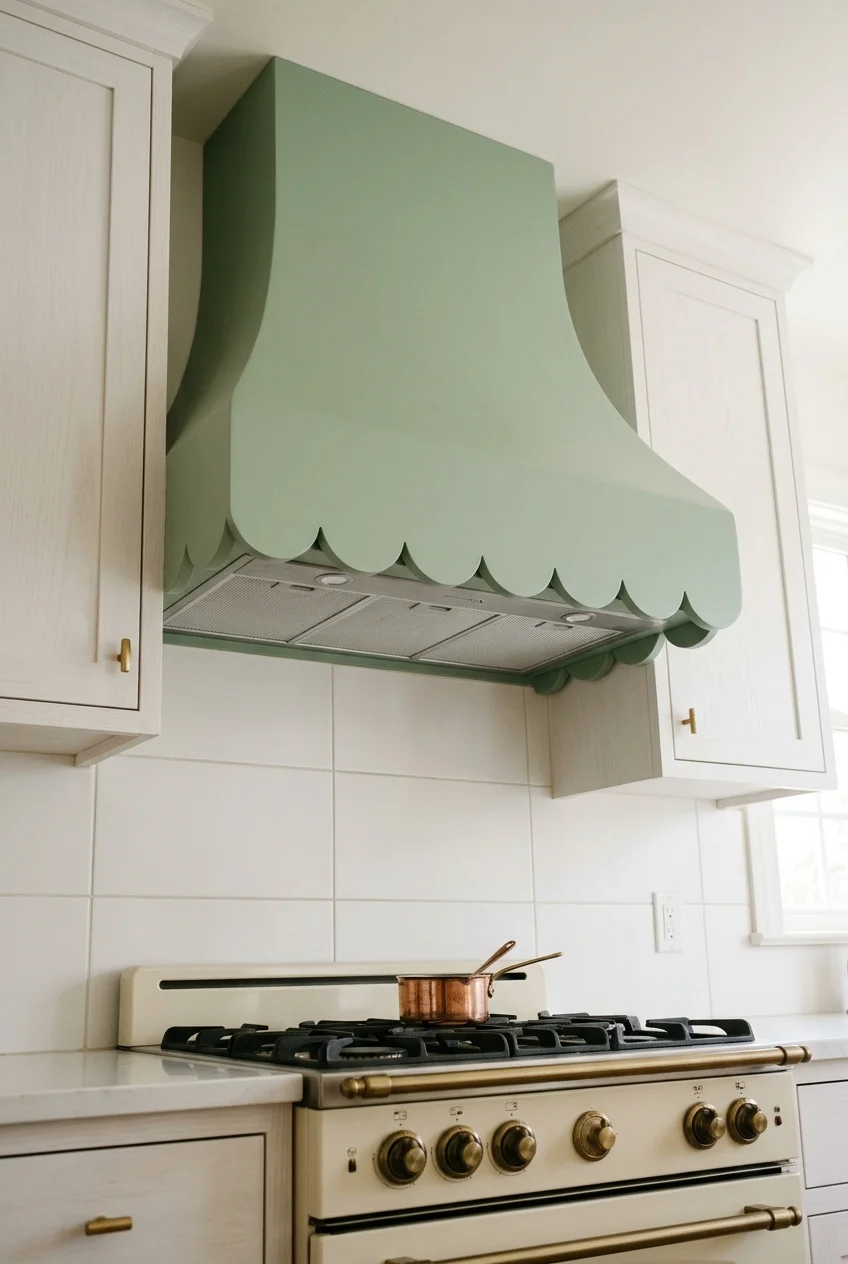
One broad, shallow scallop can soften a painted wood hood in a cottage kitchen. The curve should feel structural, not like applied craft trim.
Pair it with plain cabinet doors and modest hardware so the silhouette remains readable. Multiple tiny scallops can look busy and trap more residue.
17. Paint the Hood One Shade Darker Than the Cabinets
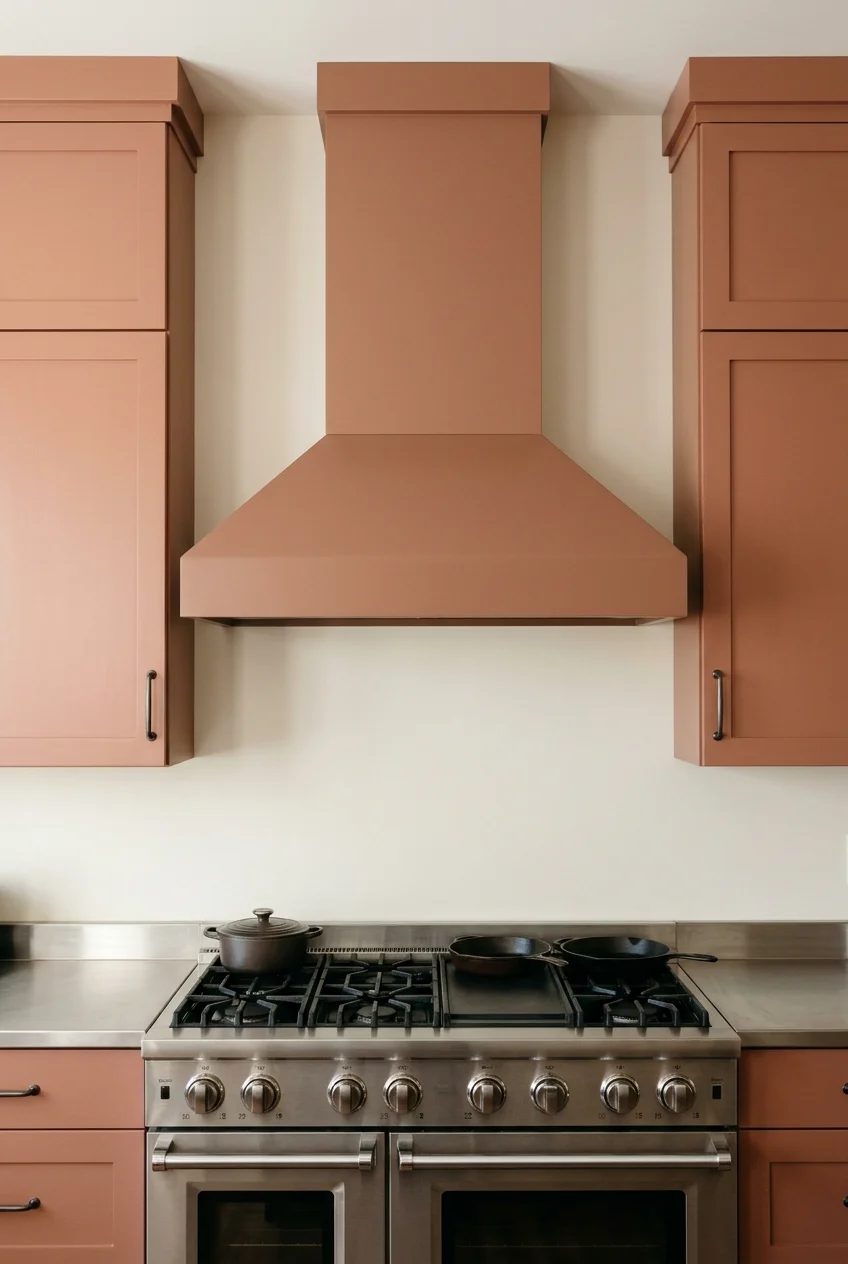
Using a deeper version of the cabinet color creates definition without introducing a separate palette. This works especially well with muted blue, green, or clay.
Compare large painted samples vertically because color reads differently on a hood face than on horizontal counters. Keep both finishes at compatible sheen levels.
18. Bridge the Hood with Floating Shelves on Both Sides
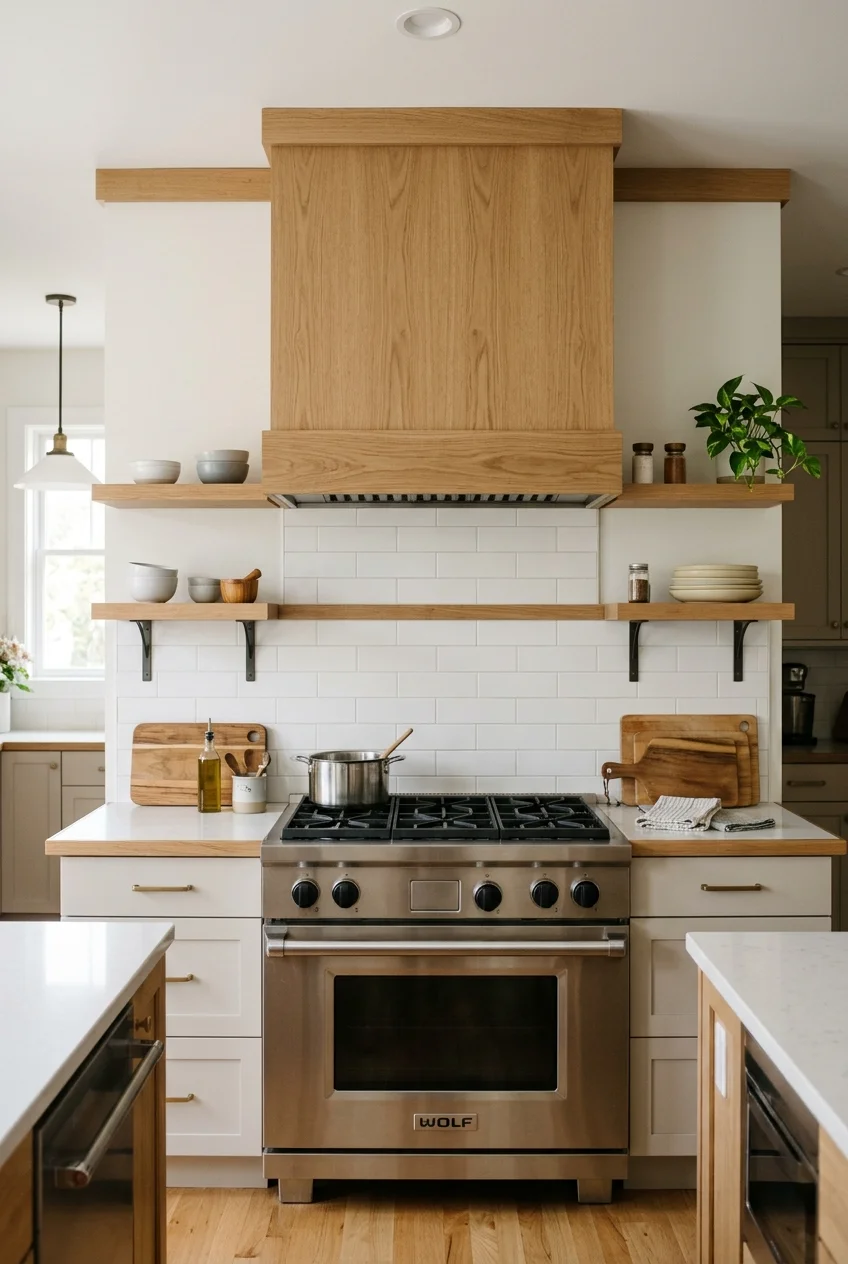
Short shelves can connect a central hood to the surrounding wall while keeping the cooking zone more open than full upper cabinets.
Stop shelves far enough from the hood and burners to respect product clearances and reduce grease exposure. Store washable, frequently used objects rather than delicate art.
- Align the shelf thickness with the hood’s lower trim.
- Anchor shelves to suitable framing.
- Preserve comfortable reach over the counter.
- Keep flammable objects away from cooking heat.
For broader cabinet and shelf changes, compare the practical tradeoffs in these kitchen cabinet makeover ideas before finalizing the wall.
19. Wrap Only the Hood Face in Wood
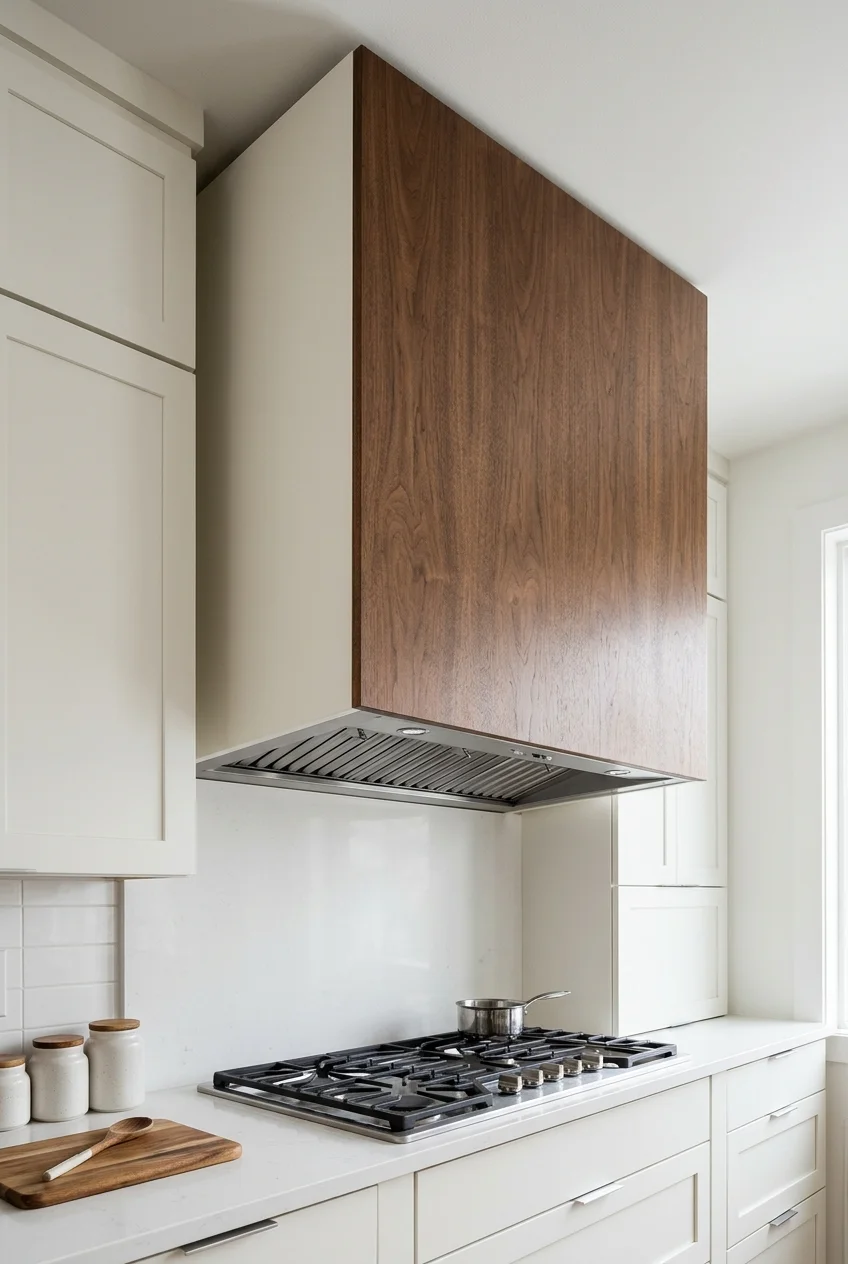
Applying wood to the front face while painting the side returns reduces visual mass. The hood reads warm from the room without becoming a full wooden block.
Use crisp corner transitions and repeat the painted return color on the wall. This detail works best on a straight, uncomplicated enclosure.
20. Keep a DIY Box Cover Visually Light
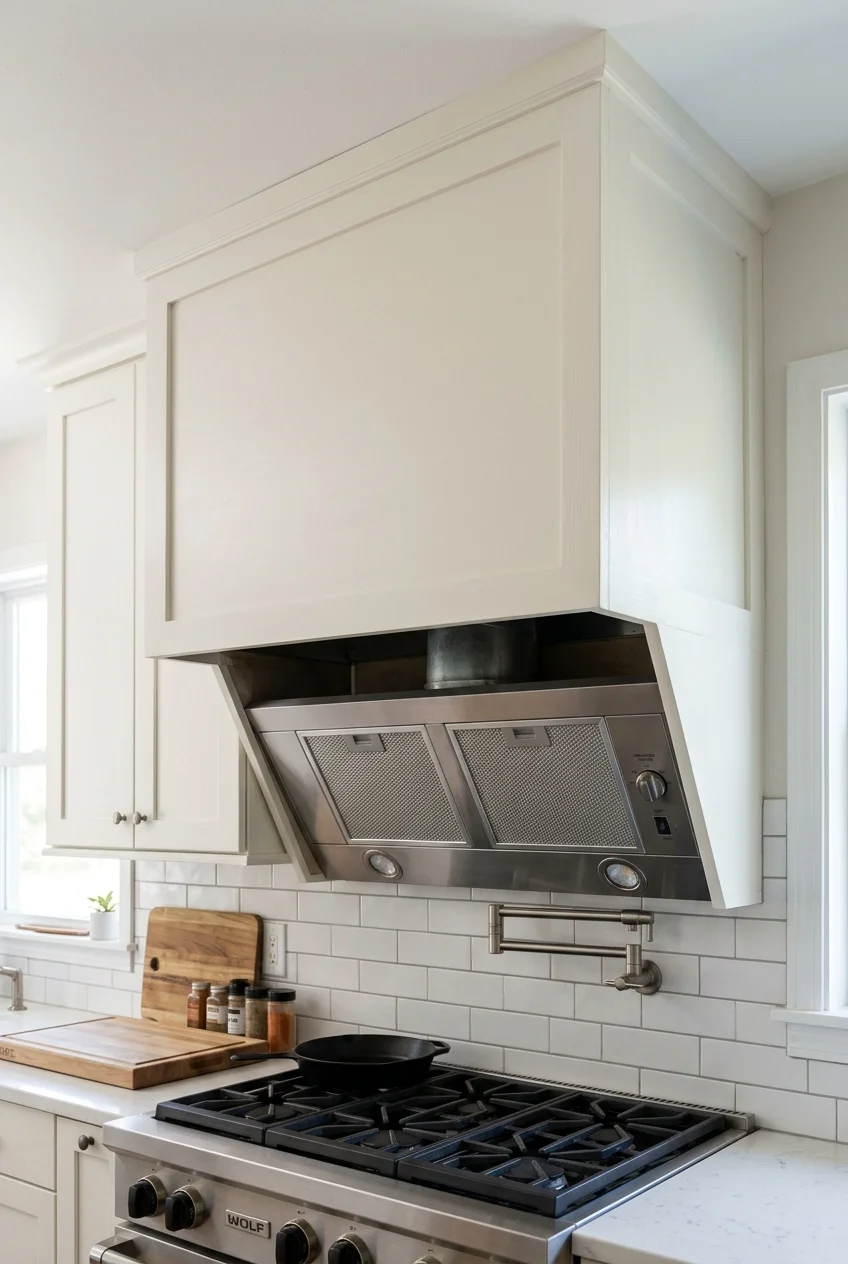
A simple box cover can improve an exposed insert without pretending to be heavy millwork. Thin trim and a shallow profile suit modest kitchens best.
Do not box in a listed hood casually. Confirm ventilation openings, electrical access, heat clearances, mounting, and warranty conditions before adding any decorative enclosure.
If the existing unit is not designed for a cover, choose a compatible built-in insert rather than hiding vents or controls behind homemade panels.
Make a removable cardboard mockup first to judge headroom and projection, but treat it only as a scale study, never an installation guide.
Metal Range Hoods with Strong Character
Metal can look crisp, industrial, traditional, or softly aged. Choose the finish with its cleaning method, expected patina, and neighboring appliance metals in mind.
21. Center a Brushed Stainless Chimney Hood
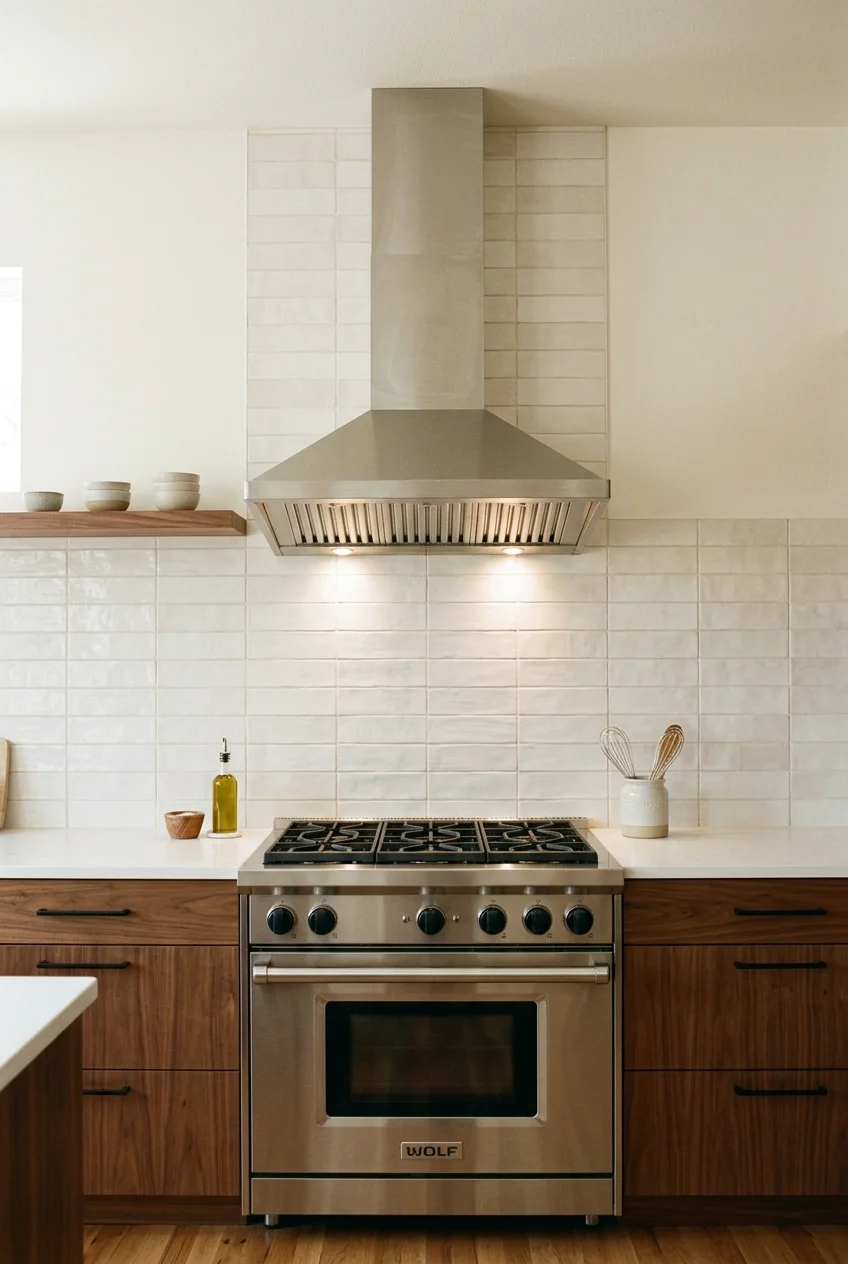
A straightforward stainless chimney hood brings a professional note without custom cladding. Its clean geometry works well when surrounding cabinets stop short of the appliance.
Match the hood width to the cooking surface at minimum, then check the exact model’s coverage, mounting height, duct route, and chimney-extension options.
Repeat stainless selectively through the range or sink, while warmer wood and textured tile keep the wall from feeling entirely commercial.
22. Choose Hammered Copper for Visible Texture
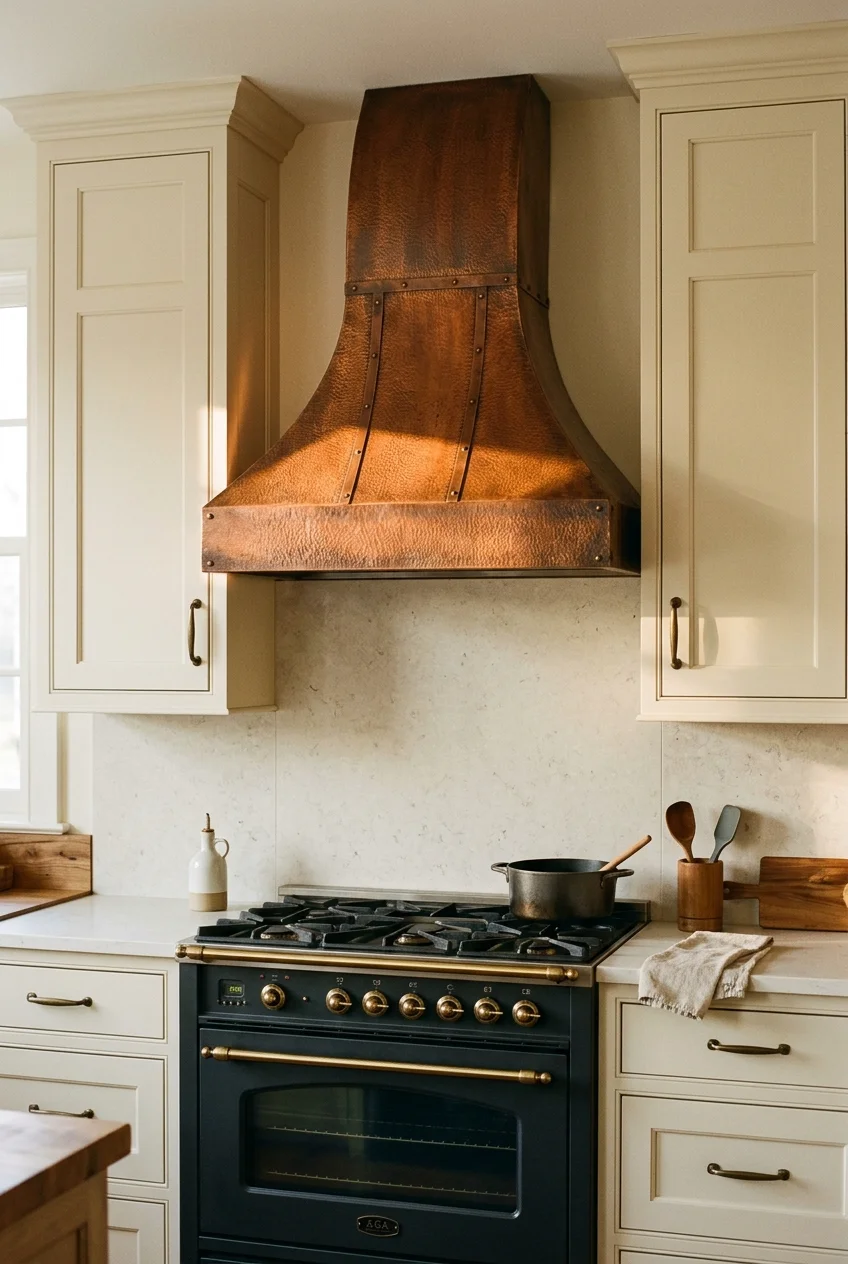
Hammered copper catches light across a large hood without needing applied decoration. It pairs naturally with quiet stone, painted cabinetry, and restrained warm hardware.
Ask whether the finish is sealed, living, or intentionally patinated. Cleaning instructions differ, and aggressive polishing can remove a surface treatment or alter color.
Practical tip Bring the copper sample beside faucets and cabinet pulls; close but mismatched warm metals can look accidental when they occupy the same sightline.
23. Use Matte Black Steel to Outline the Cooking Zone
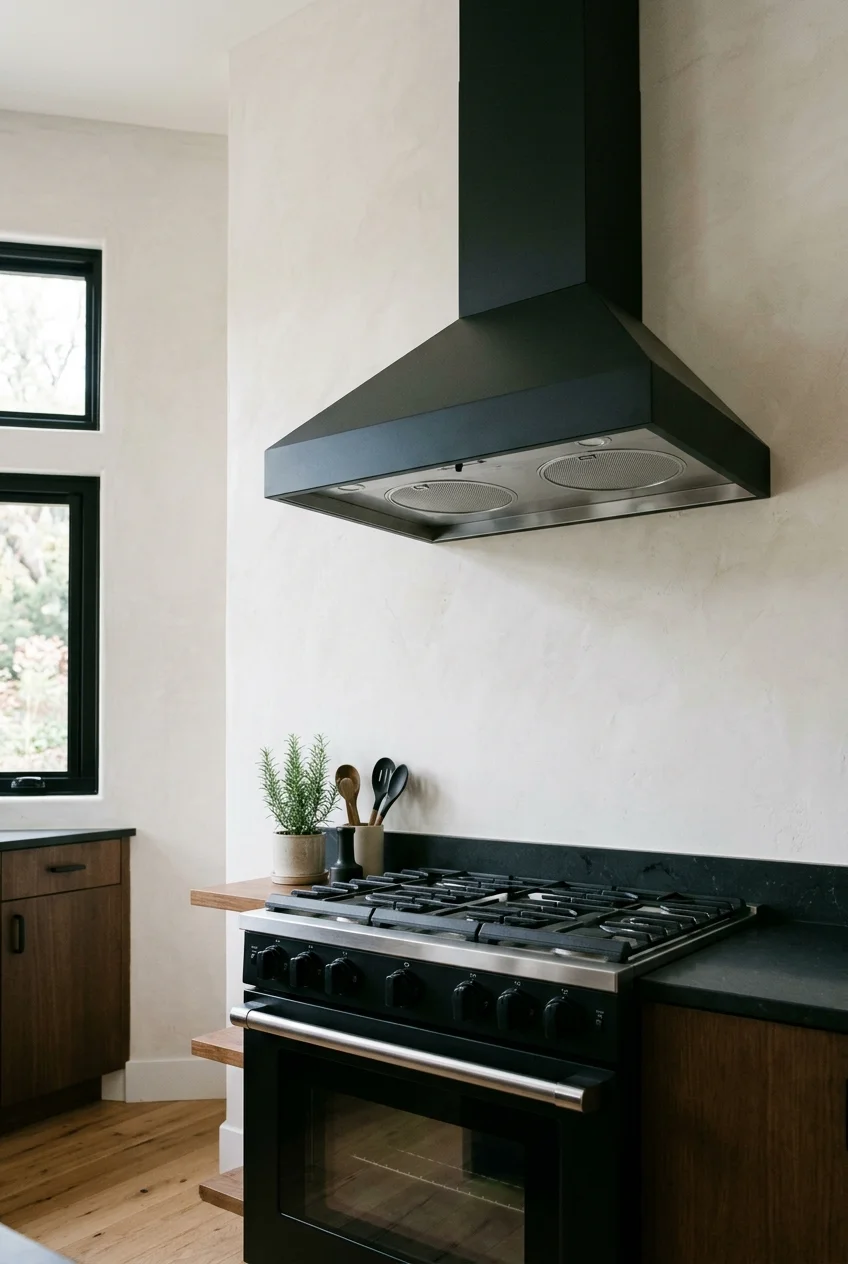
A matte black hood creates a precise silhouette against pale tile or plaster. It can anchor black window frames or dark cabinet hardware elsewhere.
Keep the form simple when the color is this strong. A clean trapezoid or narrow chimney usually needs less ornament than a lighter painted cover.
Check how the finish handles fingerprints, cooking residue, and touch-ups. A sample panel reveals whether the black reads chalky, satin, or softly reflective.
24. Keep a Stainless Hood Clean-Lined and Easy to Wipe
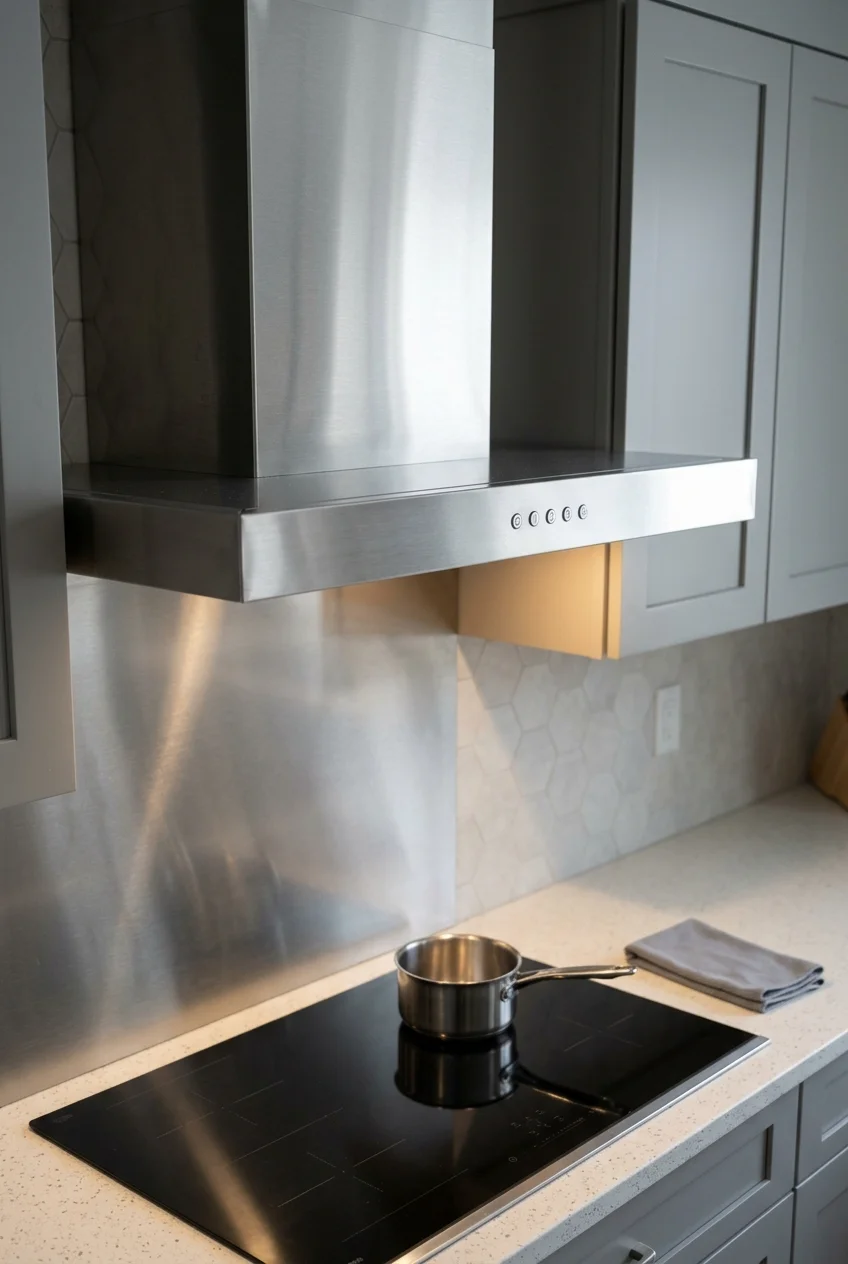
A flat-front stainless hood works best when seams, buttons, and trim align neatly. Brushed grain also makes the direction of wiping visually important.
For routine exterior care, a reusable stainless-steel cleaning cloth set (paid link) uses separate cleaning and polishing cloths. Follow the hood manufacturer’s approved method first.
Wipe with the visible grain and test any product on an inconspicuous area. Abrasive pads can permanently change the sheen of brushed metal.
25. Band a Plaster Hood with Aged Brass
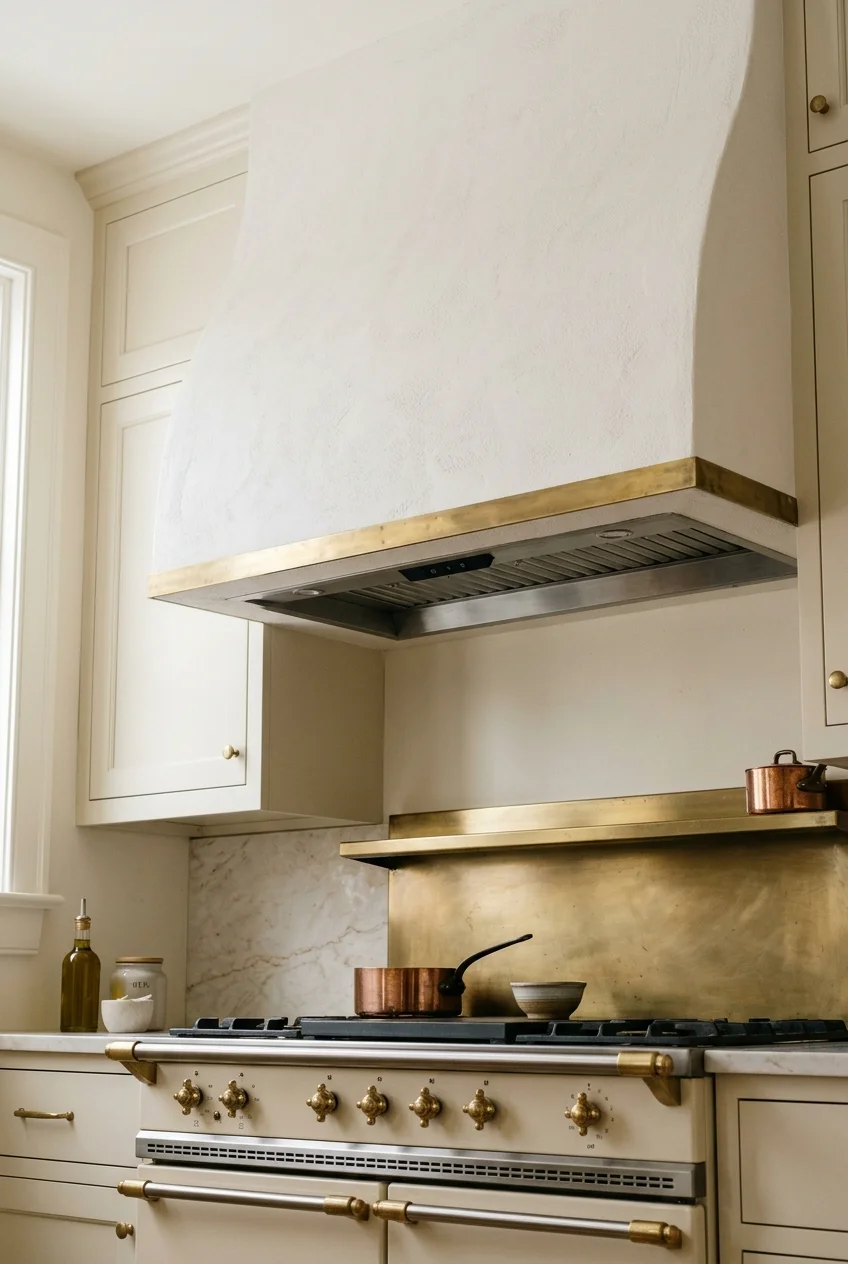
A slim aged-brass band adds definition to a plaster hood without turning the entire appliance metallic. It works best as one continuous, carefully aligned line.
Choose the band finish alongside nearby hardware, but allow slight tonal variation. Identical plated finishes can look flatter than a thoughtfully related metal palette.
Keep the decorative band outside removable panels and high-heat surfaces. The insert and enclosure details still need to follow their respective installation instructions.
26. Let a Patinated Zinc Hood Age Unevenly
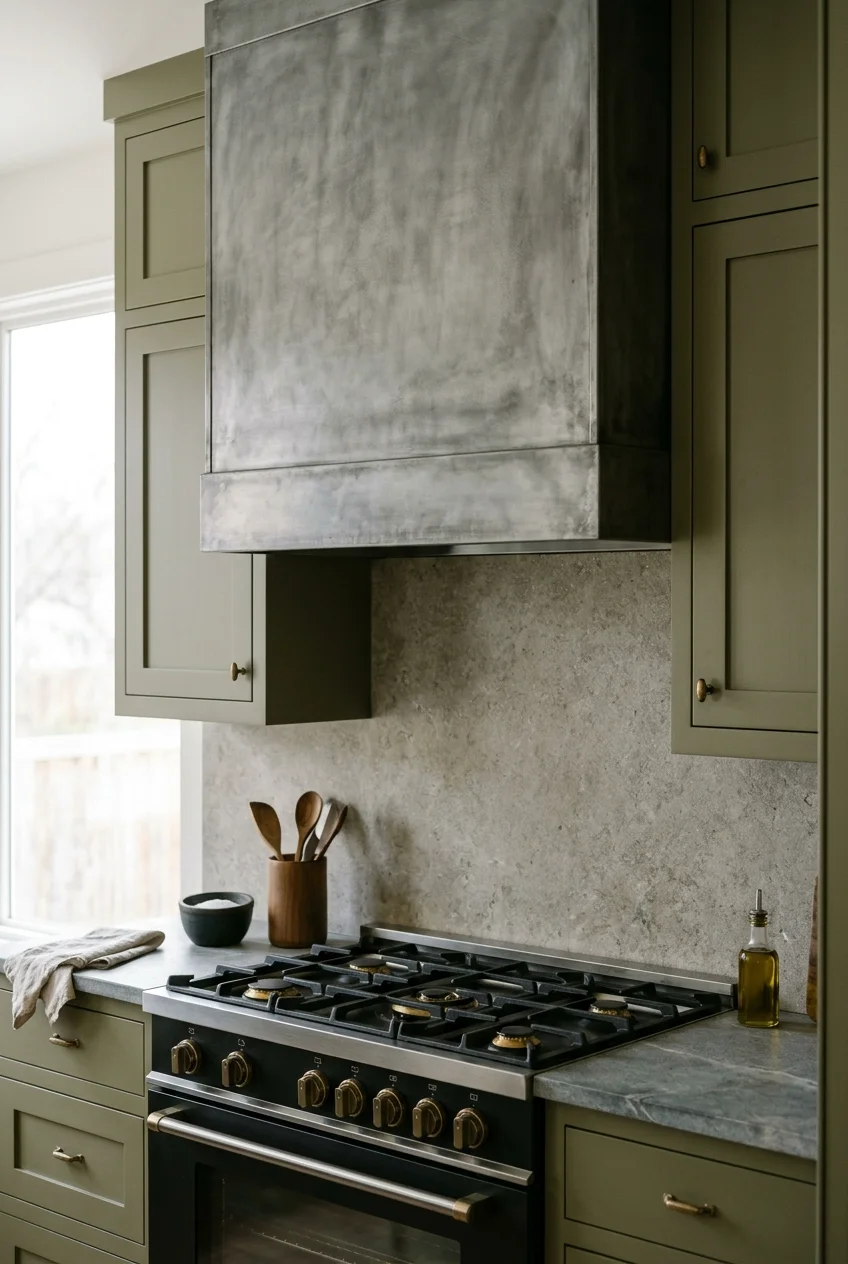
Zinc brings a softer gray than stainless steel and may develop tonal variation over time. That changing surface should be an intentional part of the design.
Request a representative finish sample and written care guidance. A staged sample may not show how splashes, fingerprints, and cleaning affect the installed hood.
Pair zinc with materials that tolerate variation, such as muted paint and natural stone, rather than demanding a permanently uniform industrial-gray surface.
27. Try an Enameled Hood in a Muted Color
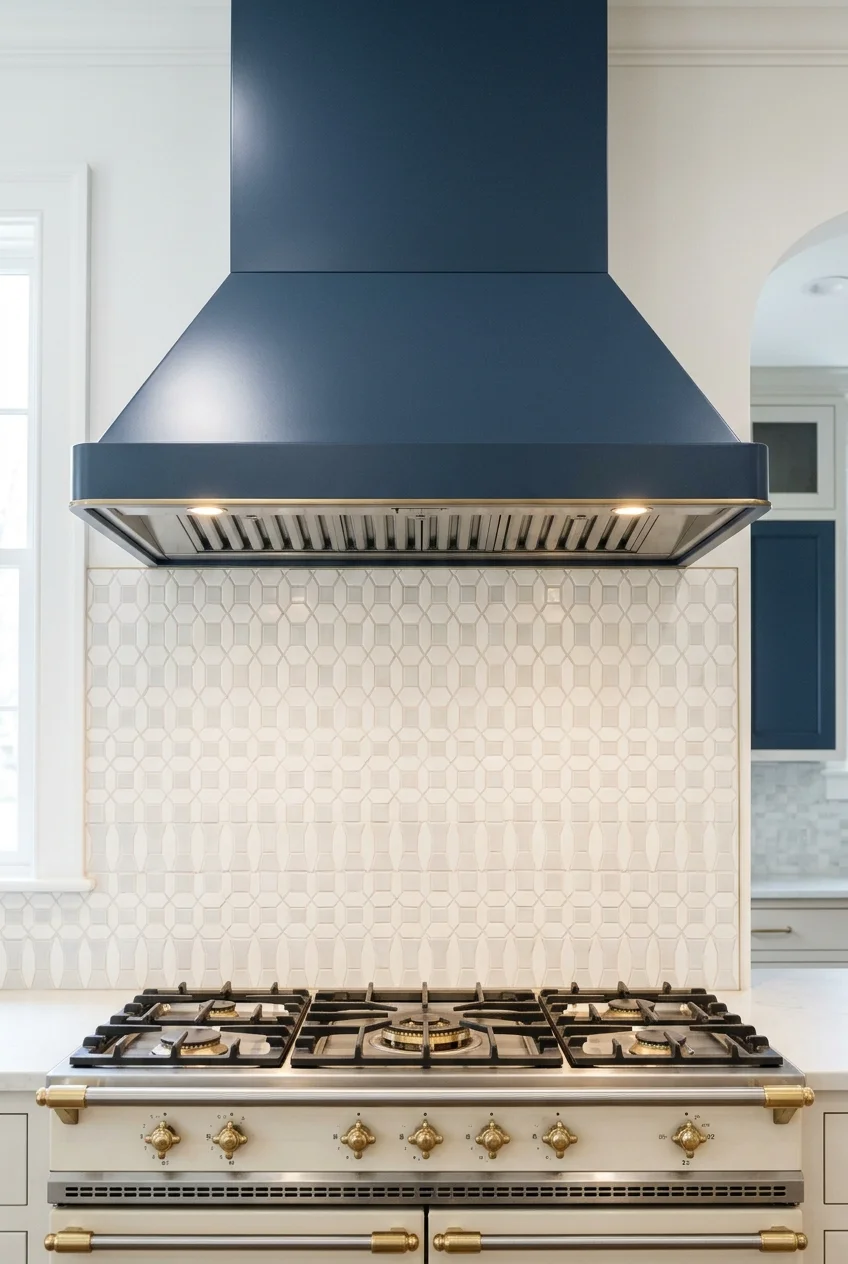
An enameled metal hood introduces durable-looking color with a smoother surface than painted wood. Muted navy, forest, or cream can coordinate with a range.
Decide whether the hood should match the appliance exactly or merely relate to it. Near-matches are most convincing when separated by backsplash material.
Confirm the actual finish, care, and repair options with the manufacturer. A glossy sample can reveal fingerprints or reflected clutter more readily than expected.
28. Mix Black Steel with a Narrow Brass Rail
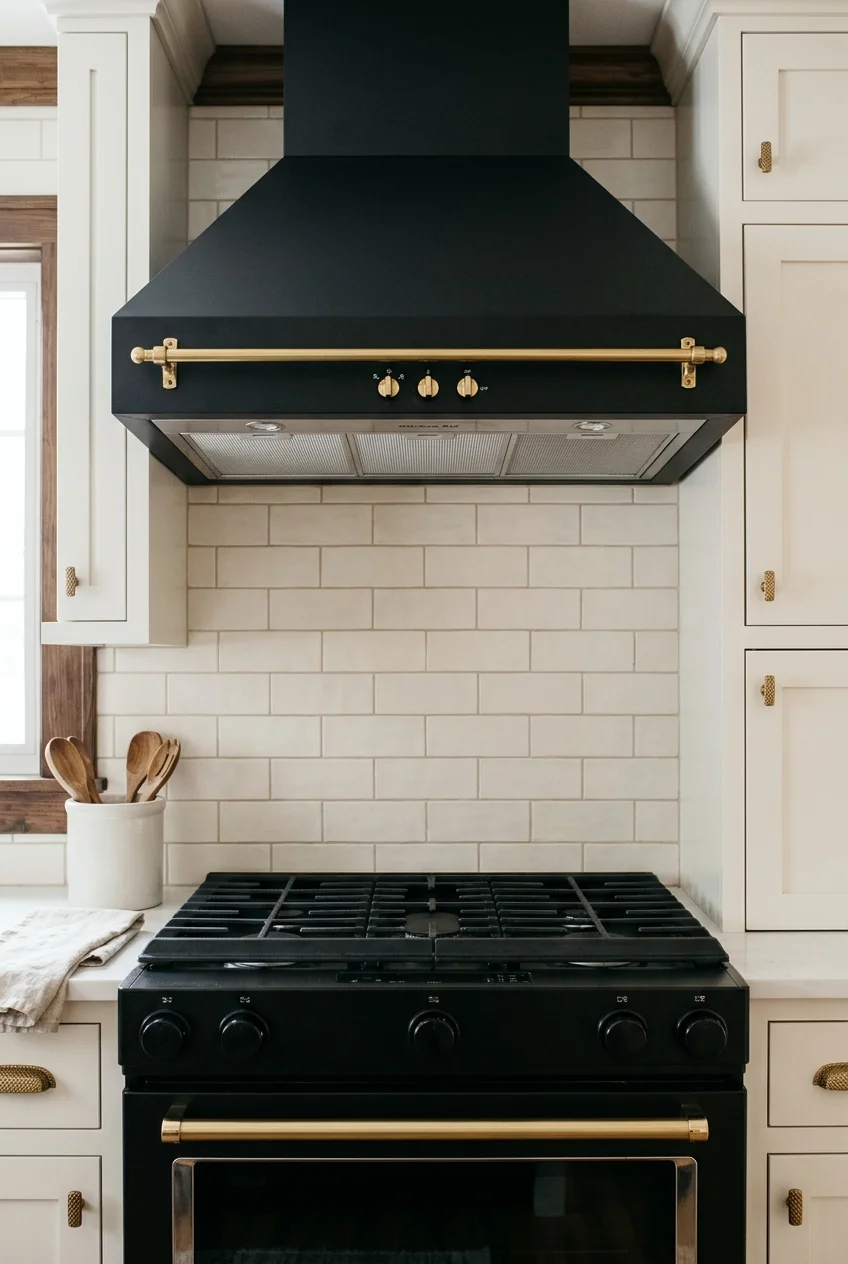
A narrow brass rail can warm a black hood and create a useful visual baseline. Treat it as trim, not as storage above active burners.
Keep the rail shallow, securely integrated, and clear of controls or filter access. Avoid hanging towels, utensils, or combustible decorations from it.
Repeat brass in small hardware rather than another large fixture, allowing the hood’s two-metal contrast to remain the primary statement.
29. Choose White Metal for a Quiet Contemporary Look
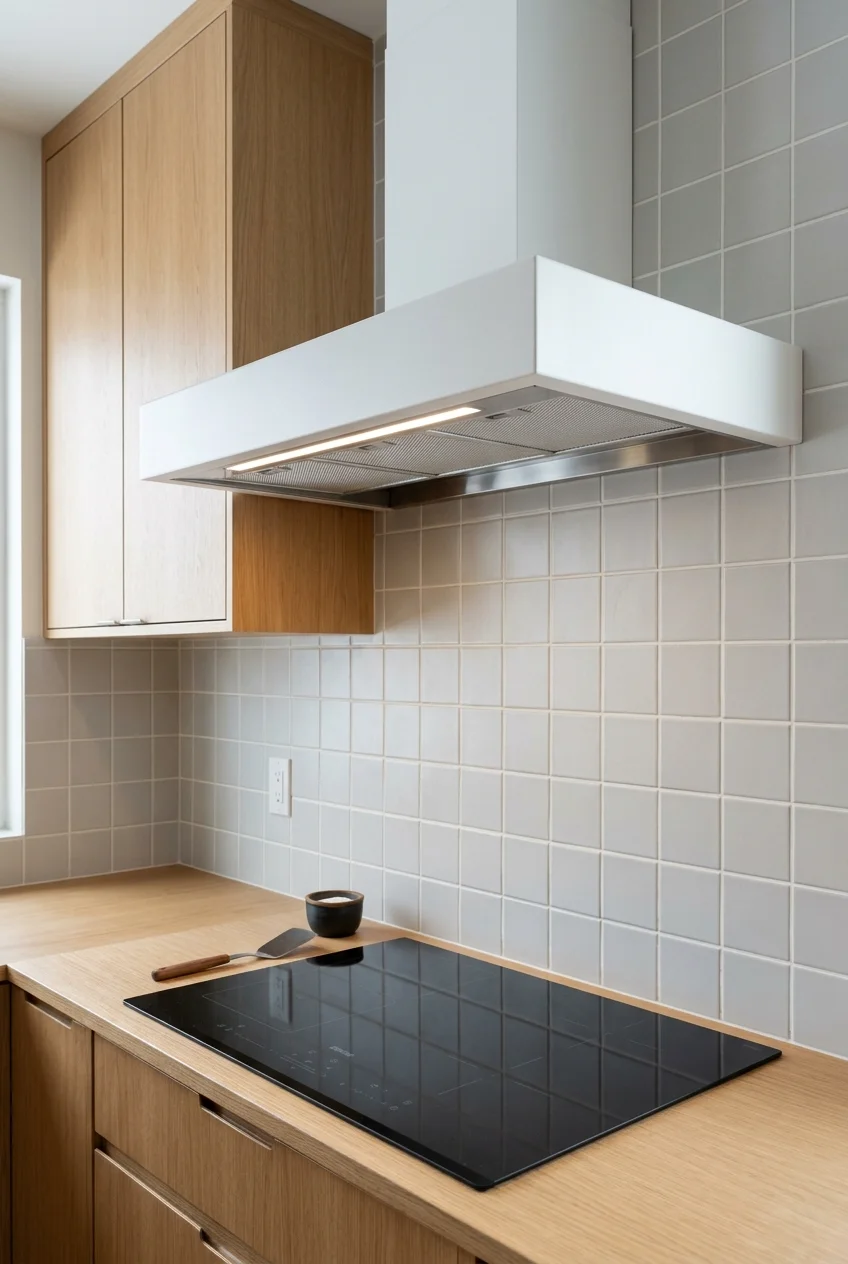
A powder-coated white hood gives you the crispness of metal without the visual contrast of stainless steel. It suits clean-lined kitchens with pale walls.
Use a subtly different white from the backsplash so the outline remains legible. Exact matches can make seams and shadows appear accidental.
30. Expose Dark Steel in an Industrial Kitchen
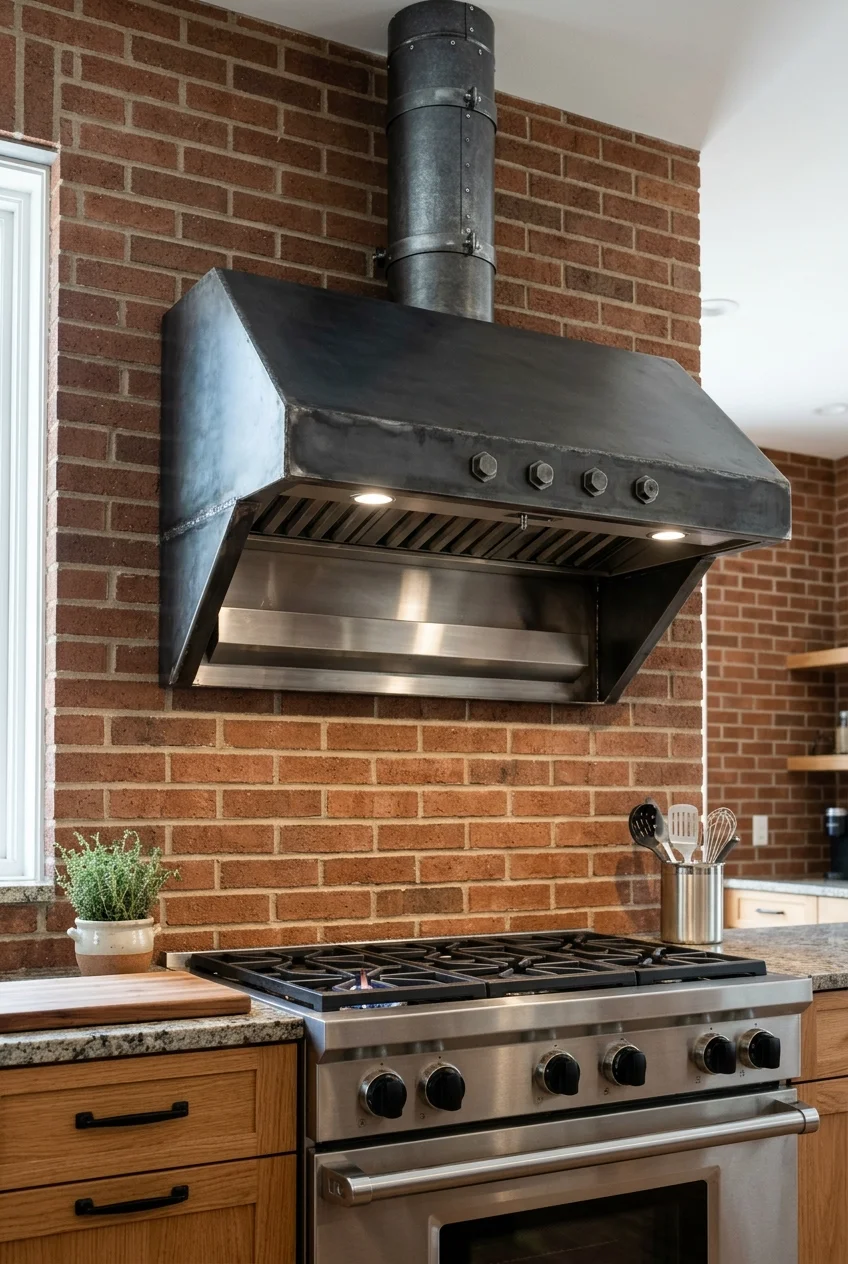
A dark steel canopy can suit brick, concrete, or utilitarian cabinetry when its scale remains appropriate to a residential cooking wall.
Use visible fasteners only when they are part of the fabricated design. Decorative rivets should not imply removable access panels that no longer open.
Balance the hood with warm wood or painted surfaces, then keep ducts and transitions orderly. Industrial style still benefits from precise alignment and clean finishing.
Integrated and Space-Smart Range Hood Ideas
Integrated options preserve storage lines or headroom, but concealment must never block airflow, controls, filters, or the access needed to service the unit.
31. Hide the Insert Inside a Cabinet-Matching Box
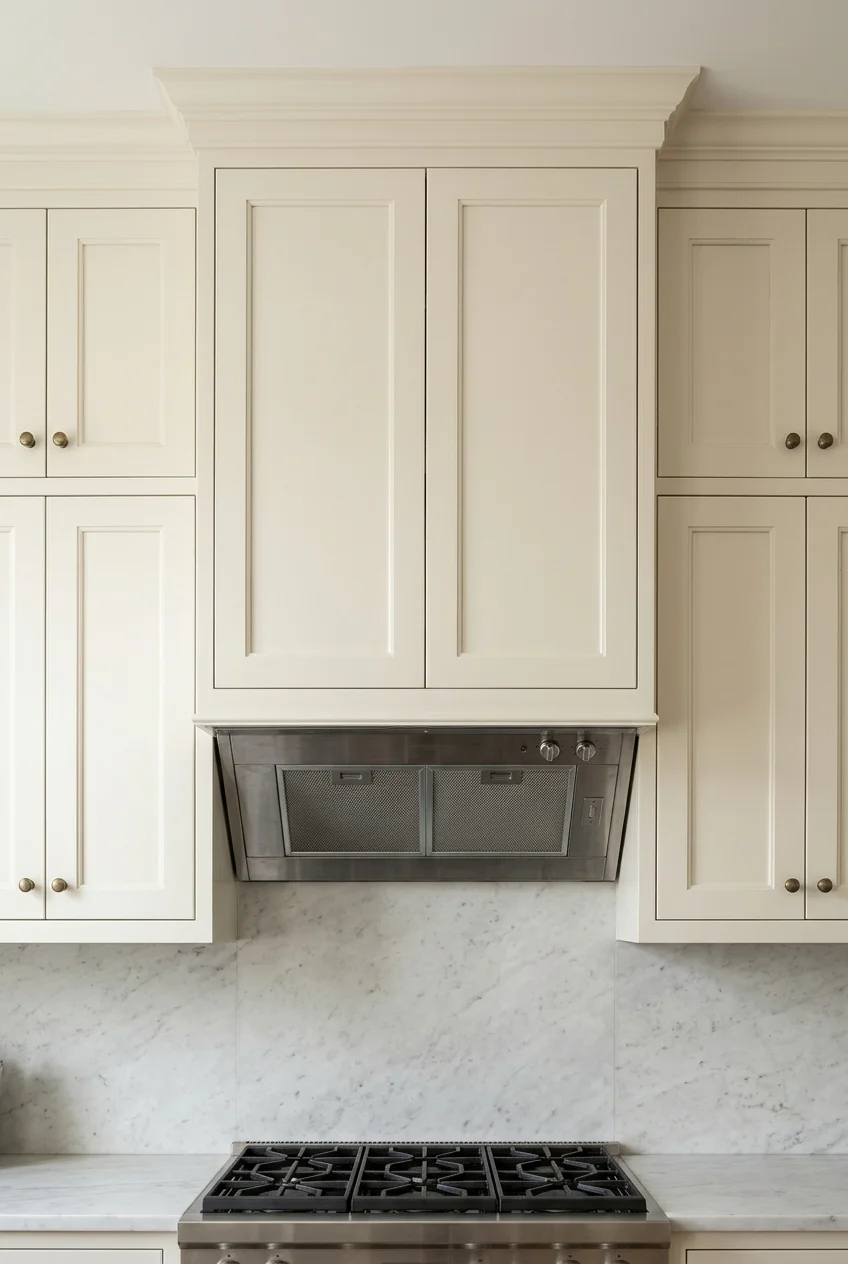
A cabinet-matching box lets the hood recede into a run of upper storage. Keep its door pattern aligned even when the interior is not usable storage.
False doors should remain visually convincing without inviting people to force them open. Nearby working cabinets need enough clearance for handles and hinges.
- Confirm the insert is approved for built-in use.
- Preserve filter removal and control access.
- Route ducting without crushing or narrowing it.
- Mark any genuine service panel for installers.
This solution is carpentry around an appliance, not a decorative shell alone. Coordinate cabinet dimensions with the selected insert before boxes are ordered.
Include the actual insert cut sheet in the cabinet order so interior rails and false fronts do not occupy required appliance space.
32. Use a Shallow Under-Cabinet Hood in a Small Kitchen
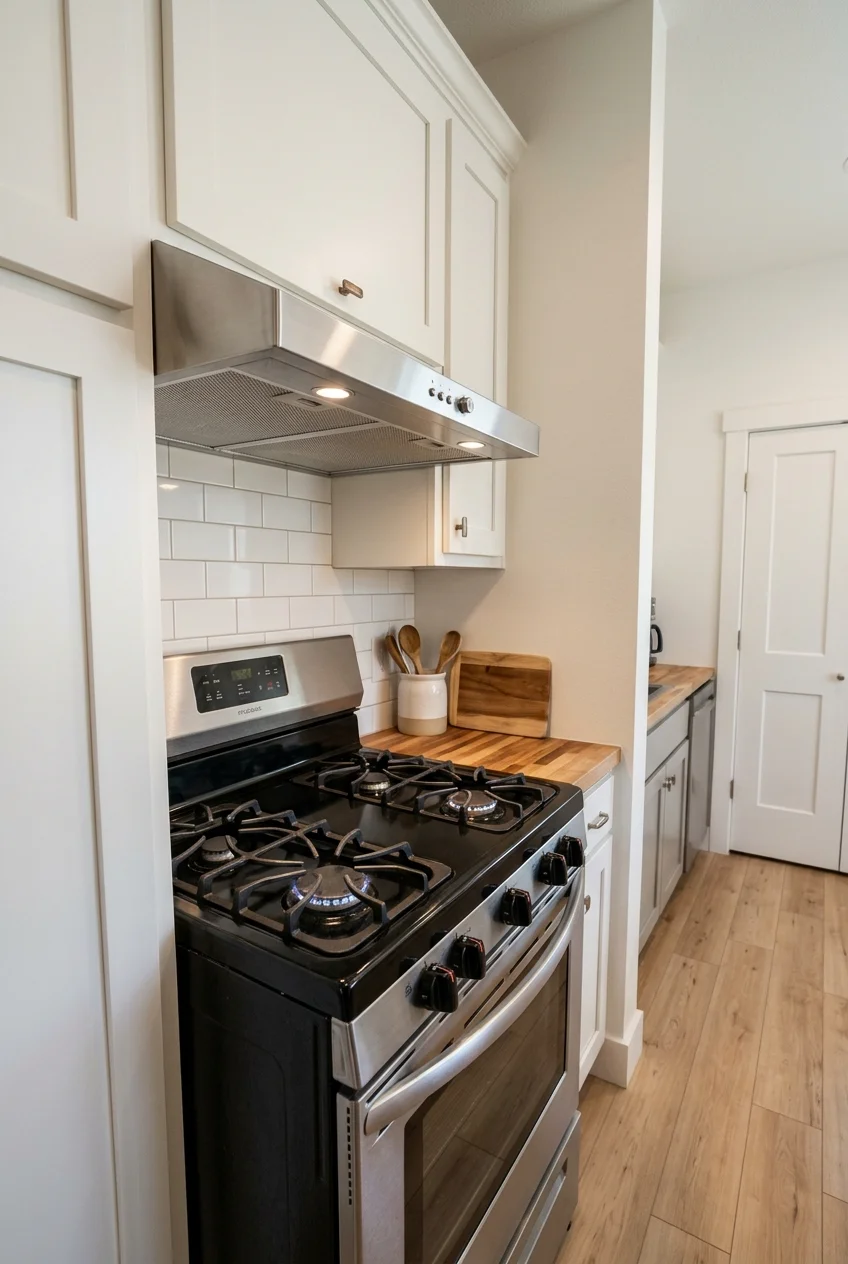
A low-profile under-cabinet hood preserves more visual continuity than a large chimney model. It can suit a compact rental or modest remodel.
Measure the cabinet depth, cooktop width, mounting height, duct path, and control reach. The hood should not project awkwardly into a narrow working aisle.
If the entire room is tight, narrow kitchen layout ideas can help you evaluate circulation comfortably beyond the cooking wall.
33. Choose a Telescoping Hood That Extends for Cooking
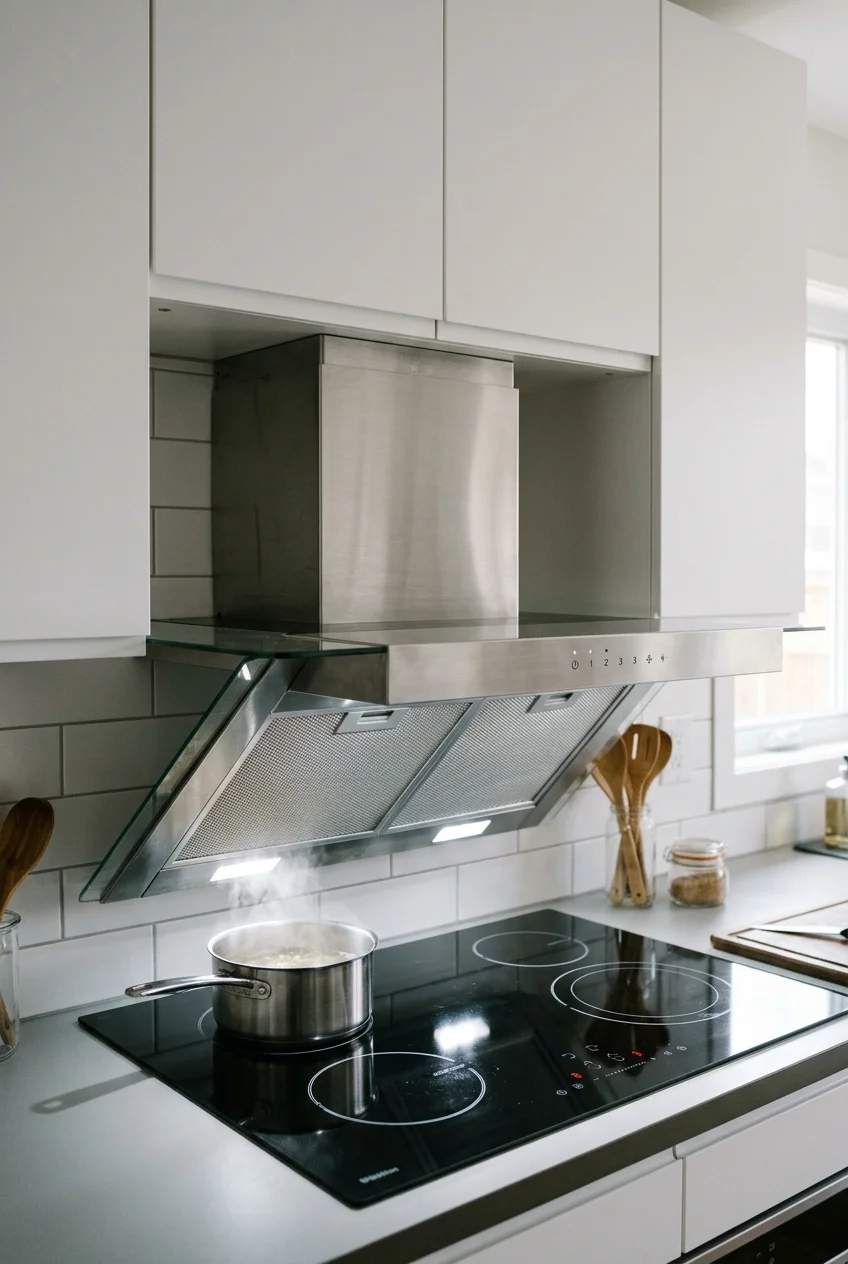
A telescoping hood keeps a slim profile when idle, then extends its capture surface during cooking. It works best when users can reach it comfortably.
Check the fully extended depth, cabinet integration, filter access, and recommended mounting position. A retracted display should not disguise the space required in use.
Keep the cabinet face simple so the moving section remains visually clear. Decorative trim must not interfere with extension or retraction.
34. Fit a Compact Hood Between Two Windows
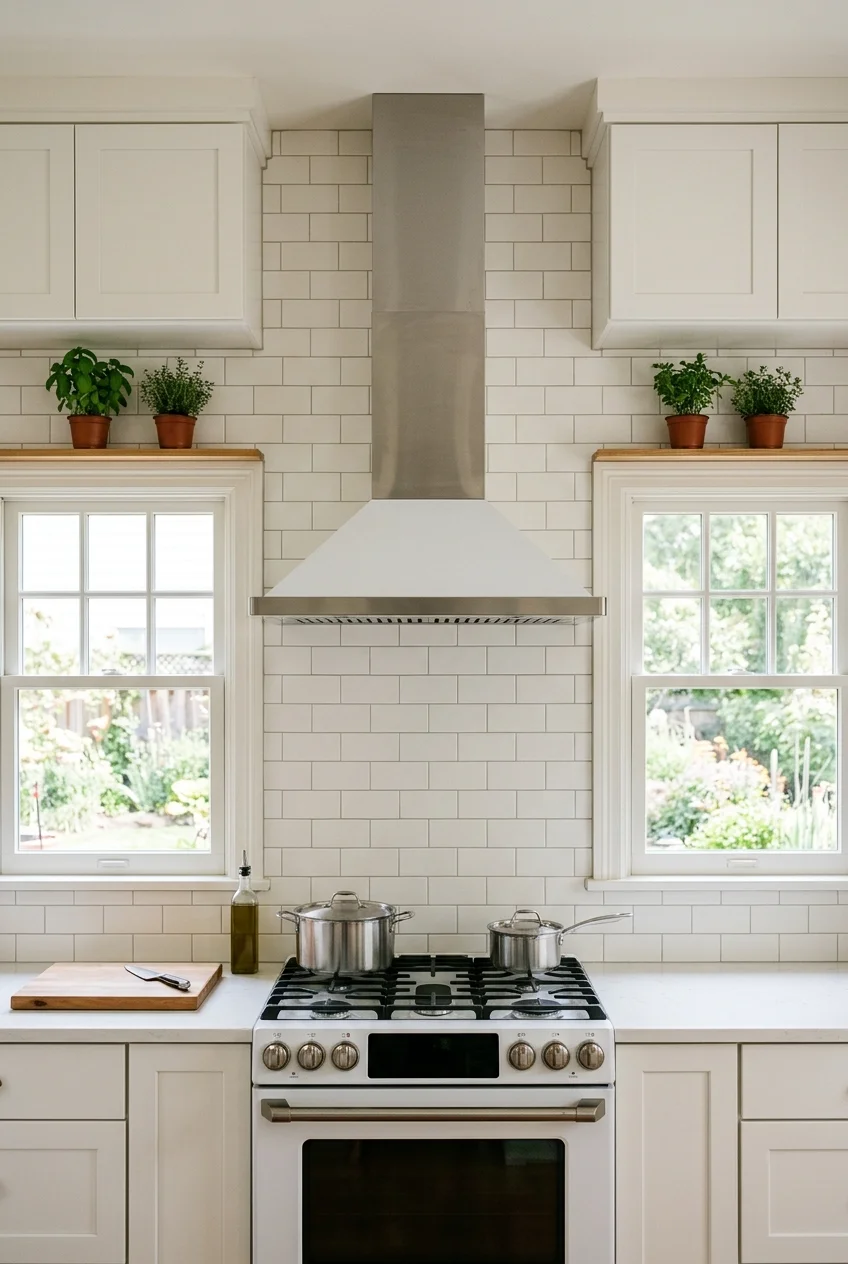
A narrow hood centered between windows can make a cooking wall feel bright and symmetrical. The available wall width determines whether this arrangement is realistic.
Account for window trim, casings, curtains, heat exposure, and hood width before centering the range. Do not squeeze the appliance into an undersized gap.
Use washable shades only if the manufacturer and local requirements permit them near cooking. Leaving windows uncurtained often keeps the composition cleaner.
35. Suspend an Island Hood with a Light Visual Profile
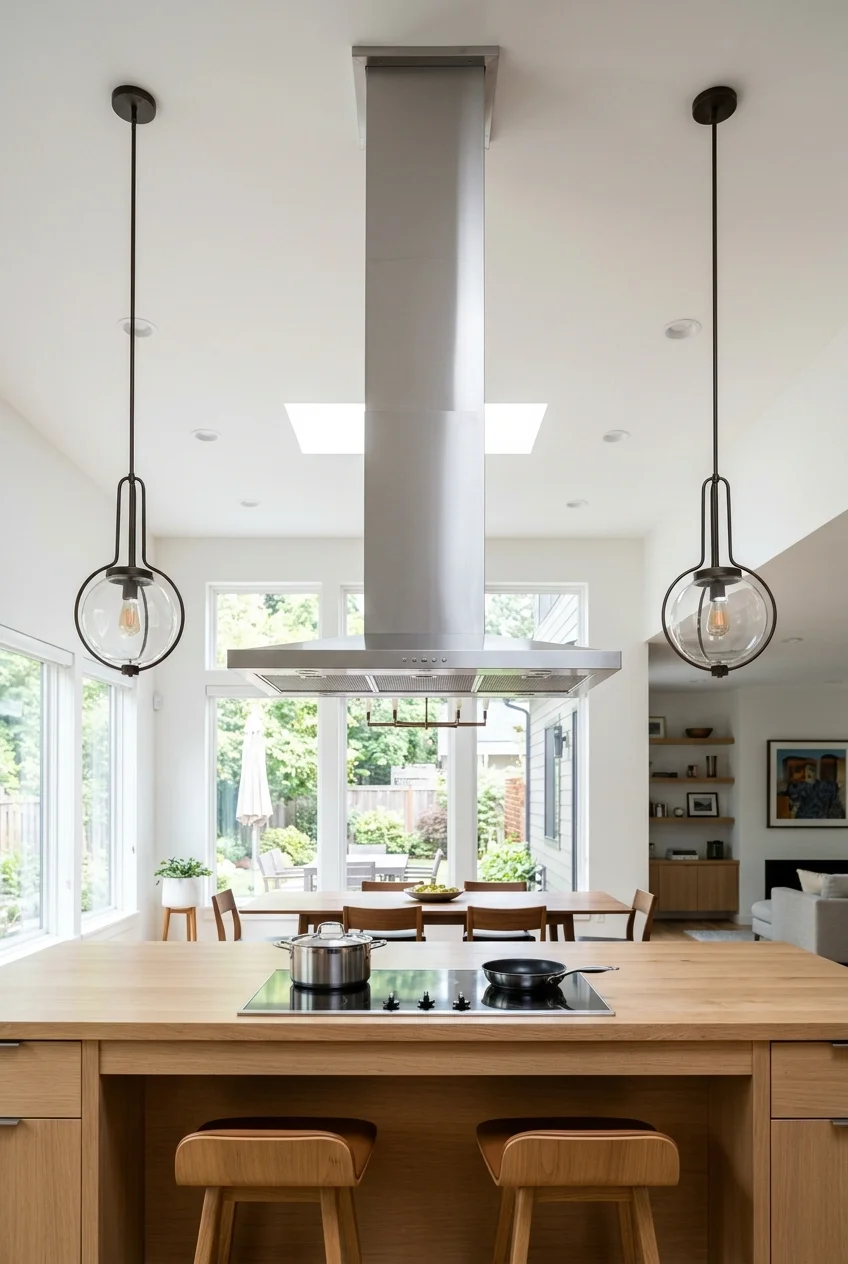
An island hood is visible from every direction, so a slim canopy and orderly chimney reduce obstruction across an open-plan kitchen.
Island capture is more exposed to cross-drafts than wall-mounted ventilation. Size, airflow, mounting, and duct planning should follow model-specific professional guidance.
Layout note Check pendant positions and sightlines together; lights placed too close to the hood can crowd the ceiling and complicate cleaning or maintenance.
36. Use a Ceiling-Mounted Hood for an Open Sightline
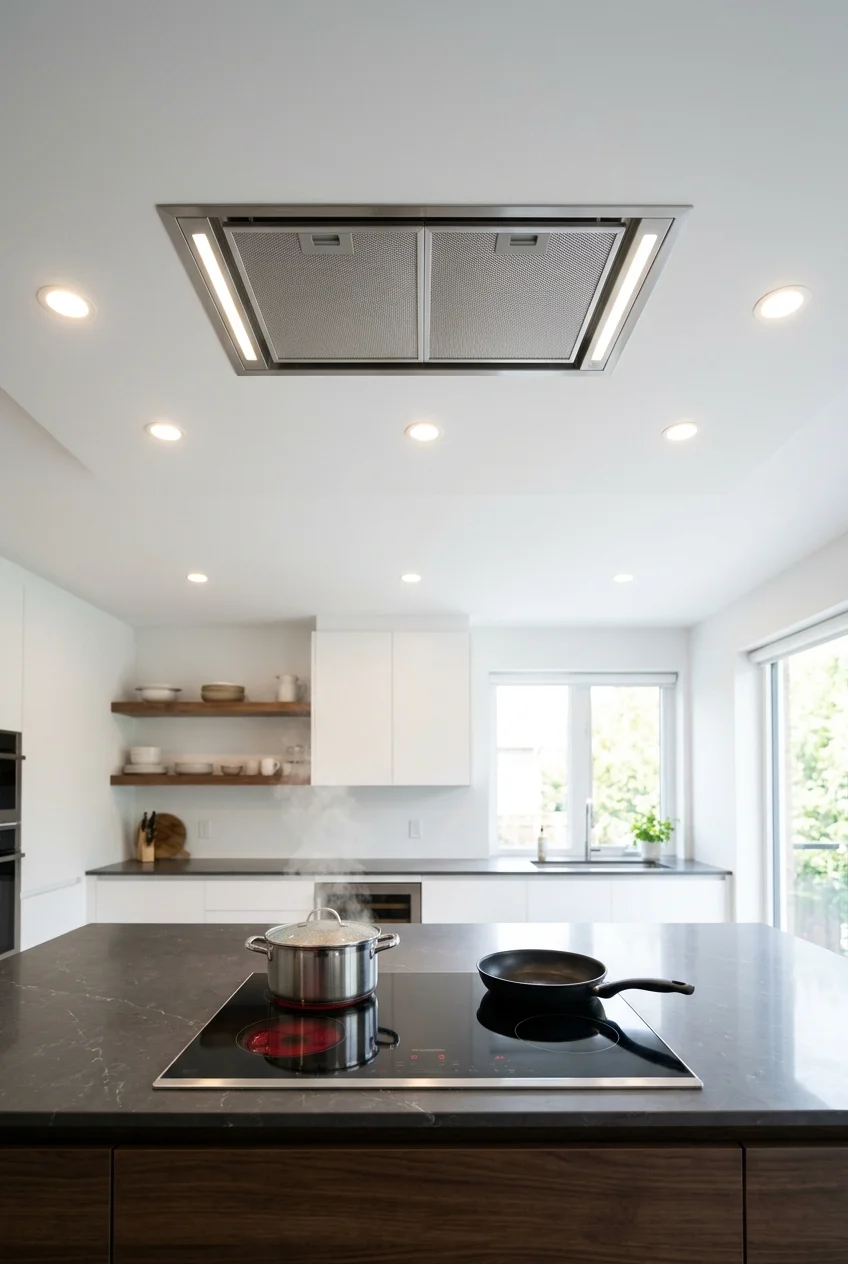
A ceiling-mounted extraction unit keeps the area above an island visually open, especially when a hanging chimney would interrupt a long room view.
Greater distance from the cooking surface changes capture demands. Confirm the chosen model’s permitted height, coverage, airflow, ceiling structure, duct route, and controls.
Treat the ceiling unit as a precise architectural panel. Align it with the cooktop and nearby ceiling features instead of centering it on the room.
Plan filter removal from below without moving furniture or lighting. Remote controls should have an obvious, convenient home near the cooking zone.
37. Tuck a Hood into a Cooking Alcove
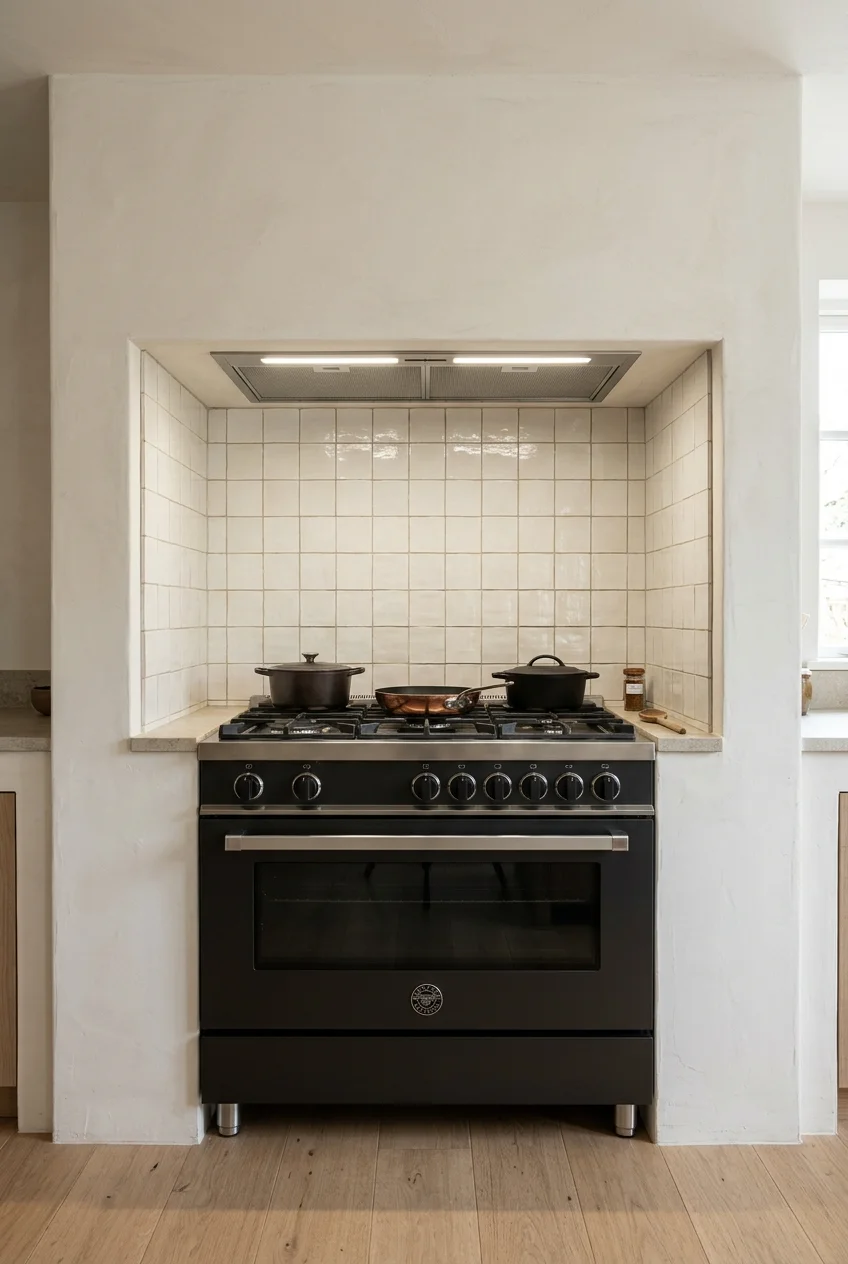
A recessed cooking alcove frames the range and lets the hood disappear into the upper architecture. Side walls also make the zone feel intentionally contained.
The alcove must still accommodate the range, hood width, clearances, ventilation, and comfortable pot handling. Decorative narrowing can create real working conflicts.
- Check range-door and oven-handle clearance.
- Keep side returns away from burner heat.
- Provide a cleanable backsplash on every exposed surface.
- Maintain access to filters, lights, and controls.
A shallow niche can provide the visual effect without deeply enclosing the cook. Mock up the side returns before framing to test elbow room.
Continue the washable backsplash onto short returns where splashes can reach, while keeping decorative plaster away from the most exposed lower surfaces.
38. Place a Corner Hood over a Diagonal Cooktop
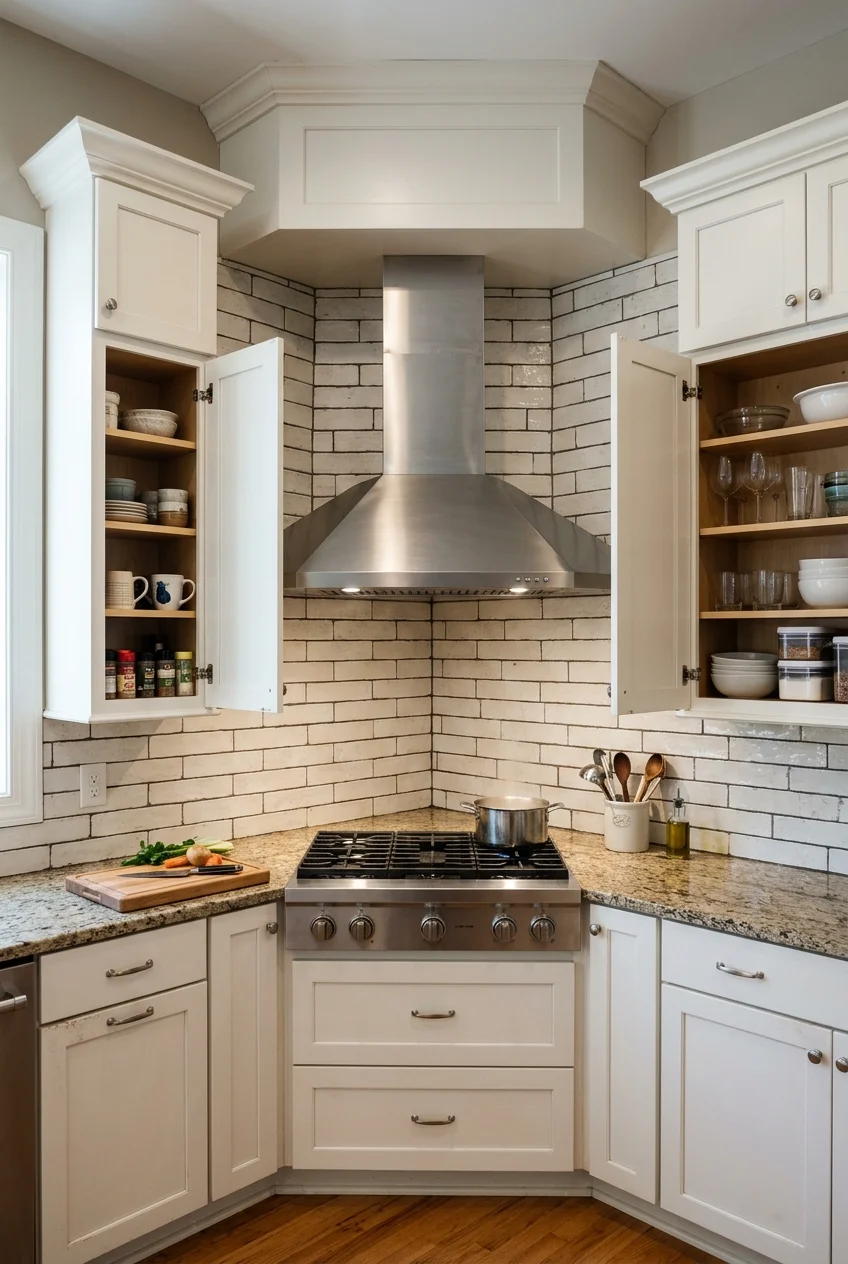
A corner hood can solve an existing diagonal range layout, but it should be designed for that geometry rather than adapted from a standard wall model.
Check capture coverage across the entire cooktop, cabinet-door swings on both walls, duct routing, and the triangular spaces that may become difficult to clean.
Use a simple hood face and continuous backsplash to calm the unusual angles. Extra trim can make a compact corner feel even more crowded.
39. Run a Full-Width Hood Across an Appliance Wall
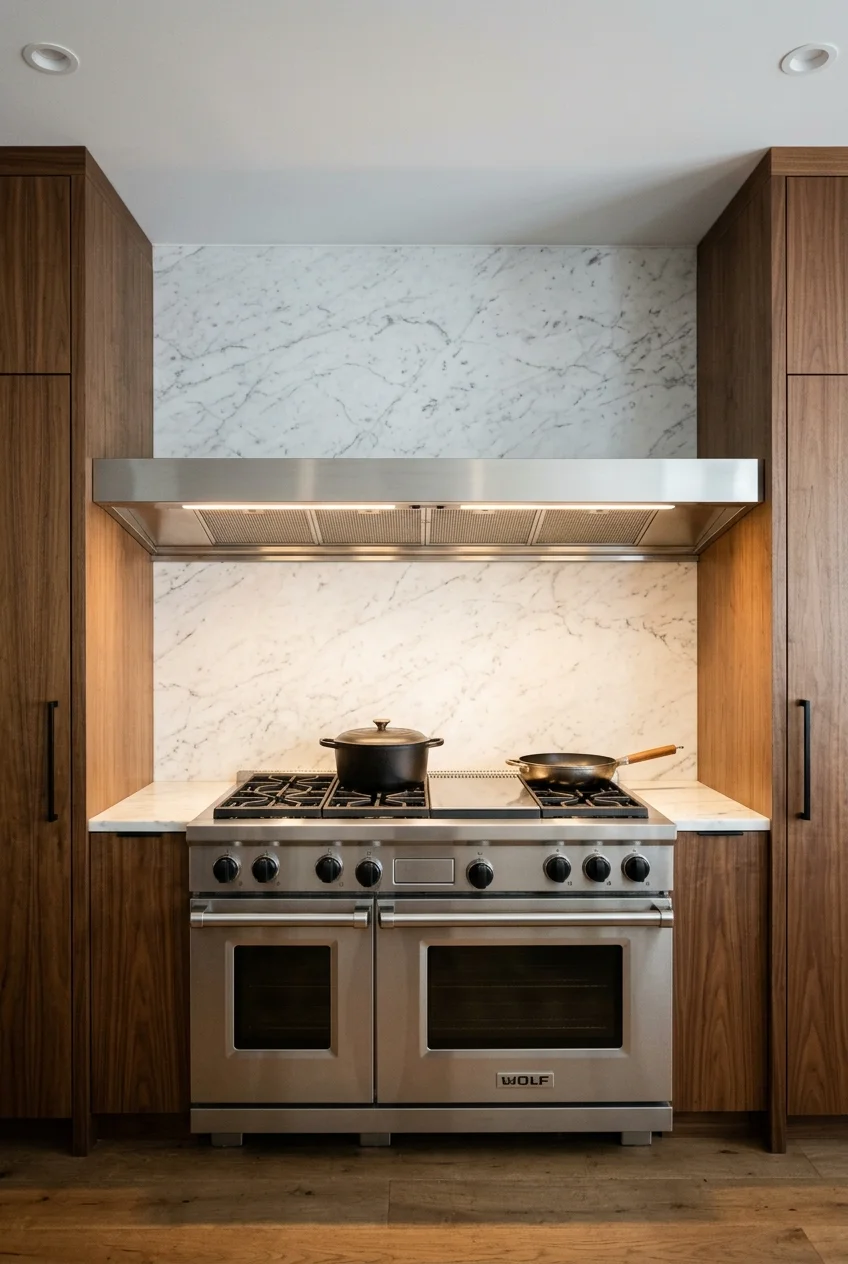
A wide linear hood can unify a generous cooking zone with multiple burners or a large range. The horizontal form becomes part of the wall architecture.
Do not size it from appearance alone. The selected equipment, capture area, blower, ducting, makeup-air requirements, structure, and service access drive the design.
Keep adjacent tall cabinets visually quiet and leave the backsplash uninterrupted. A continuous material helps the oversized hood feel integrated rather than commercial.
Ask the fabricator how filters divide across the span, because several manageable sections are easier to remove and clean than one oversized panel.
40. Leave the Hood Exposed on a Wall without Upper Cabinets
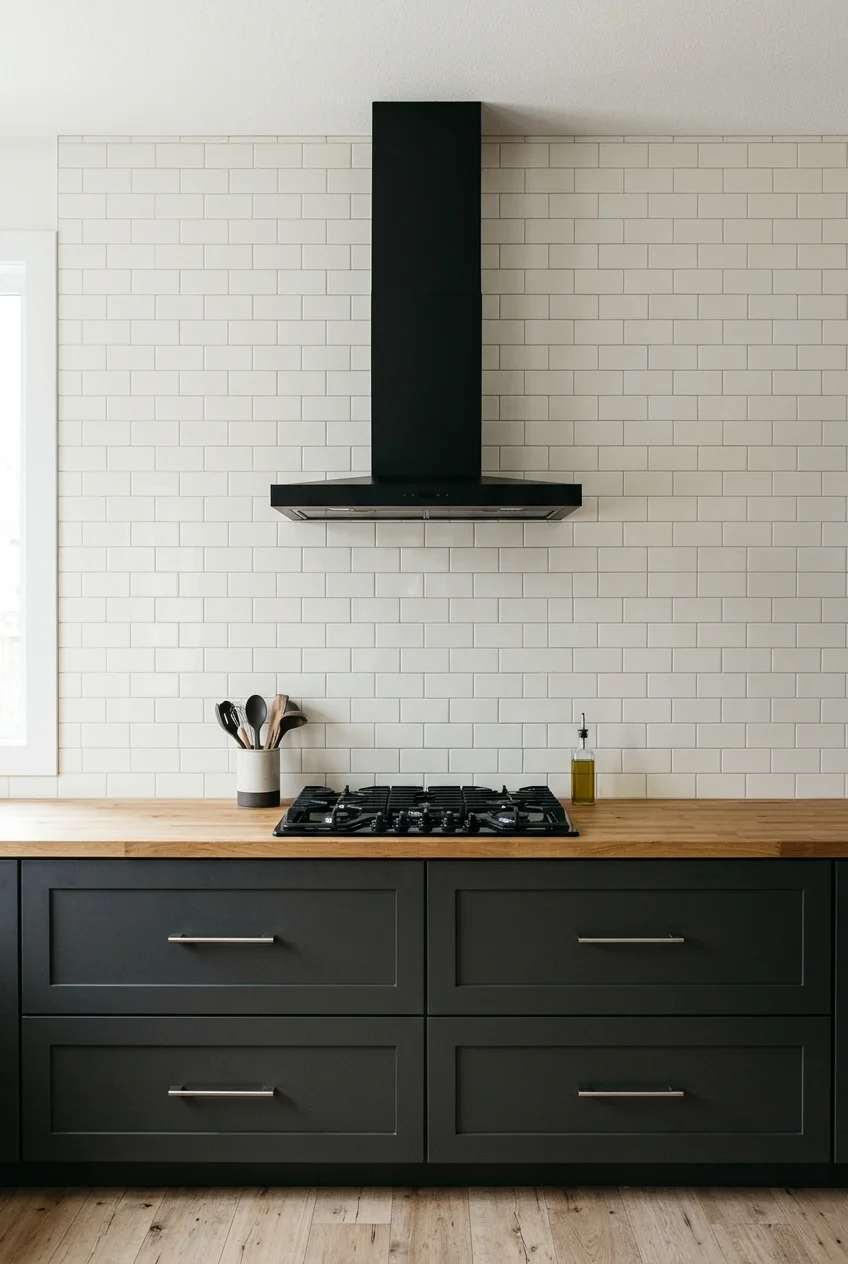
Removing upper cabinets around the hood gives a small cooking wall breathing room. The exposed hood must be attractive from the sides as well as front.
Use the cleared wall deliberately with tile, paint, or stone rather than scattering small decorations. The negative space makes the appliance’s alignment more noticeable.
Replace lost storage elsewhere before removing cabinetry. Drawers, a pantry, or one distant shelf usually serves cooking tools better than objects beside rising grease.
Range Hood Proportion, Color, and Finishing Details
The final ten ideas focus on proportion and supporting details. Small changes in shape, color, backsplash, and lighting can change how a hood reads.
41. Extend the Hood Slightly Beyond the Cooktop
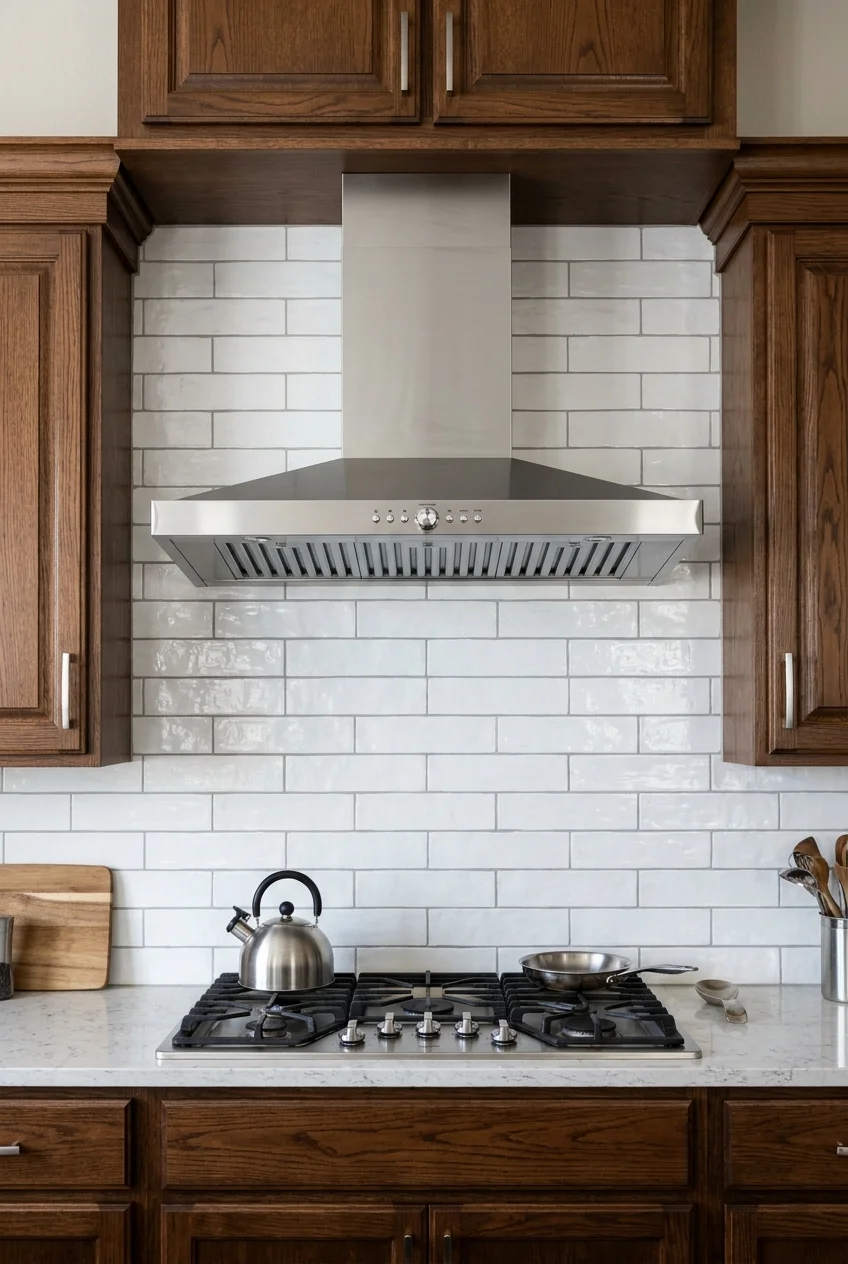
A hood that extends modestly beyond the cooking surface can look well-proportioned and improve the visual sense of coverage on a broad wall.
Exact width and depth should follow the chosen model, cooking equipment, and manufacturer guidance. Wider is not automatically better if cabinets or windows interfere.
Planning tip Tape the proposed outline on the wall, then stand at the sink, island, and doorway to judge scale from the room’s usual viewpoints.
42. Use an Arched Hood to Echo a Nearby Doorway
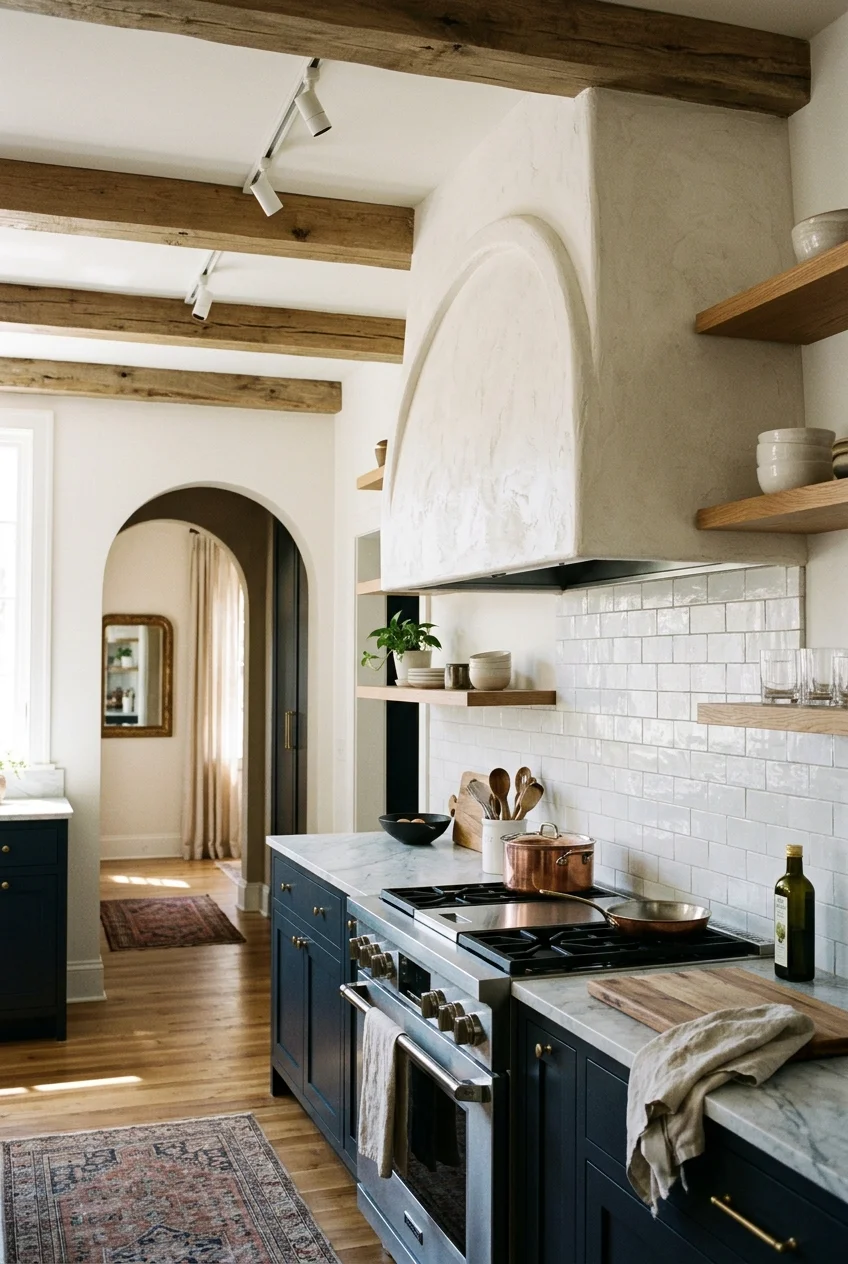
A shallow arch can connect the cooking wall to an arched doorway without copying every curve. Match the visual language, not necessarily the exact radius.
Keep the hood opening broad and the curve above the active capture edge. A low arch can reduce headroom and make filter access awkward.
One echoed arch is usually enough. Curved shelves, cabinet doors, backsplashes, and hardware in the same view can turn a clear idea into a theme.
43. Balance a Tall Hood under a Vaulted Ceiling
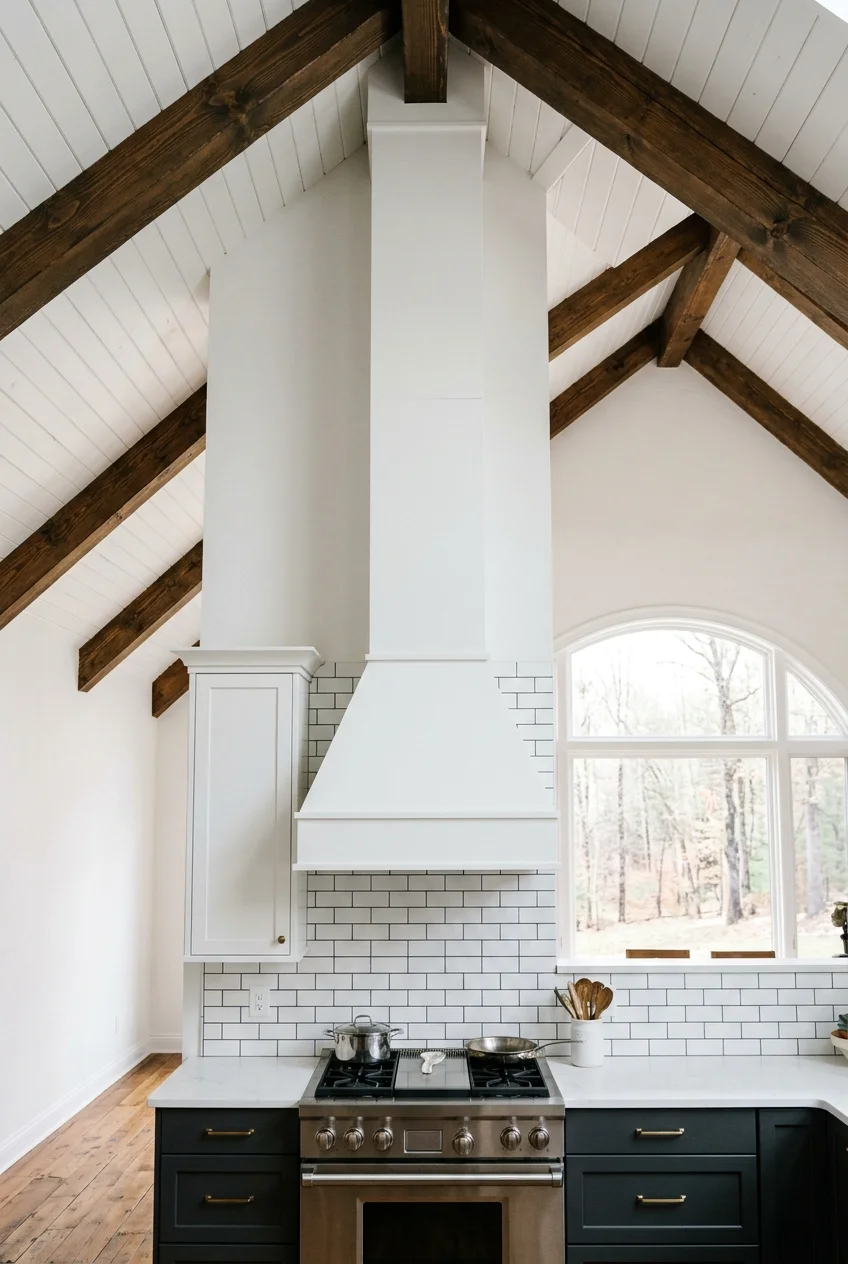
A vaulted ceiling can make a standard chimney look abruptly short. A taller enclosure gives the hood enough vertical presence to connect with the architecture.
Do not stretch an unsupported decorative box to the ridge. Structure, duct length, chimney extensions, roof penetrations, and service access need coordinated planning.
Keep the upper section visually simpler than the lower canopy. Excess molding high overhead exaggerates scale and competes with the ceiling lines.
Review the elevation from the adjoining room as well as the cooktop, since a tall hood becomes part of the home’s longest sightline.
44. Pair the Hood with a Full-Height Slab Backsplash
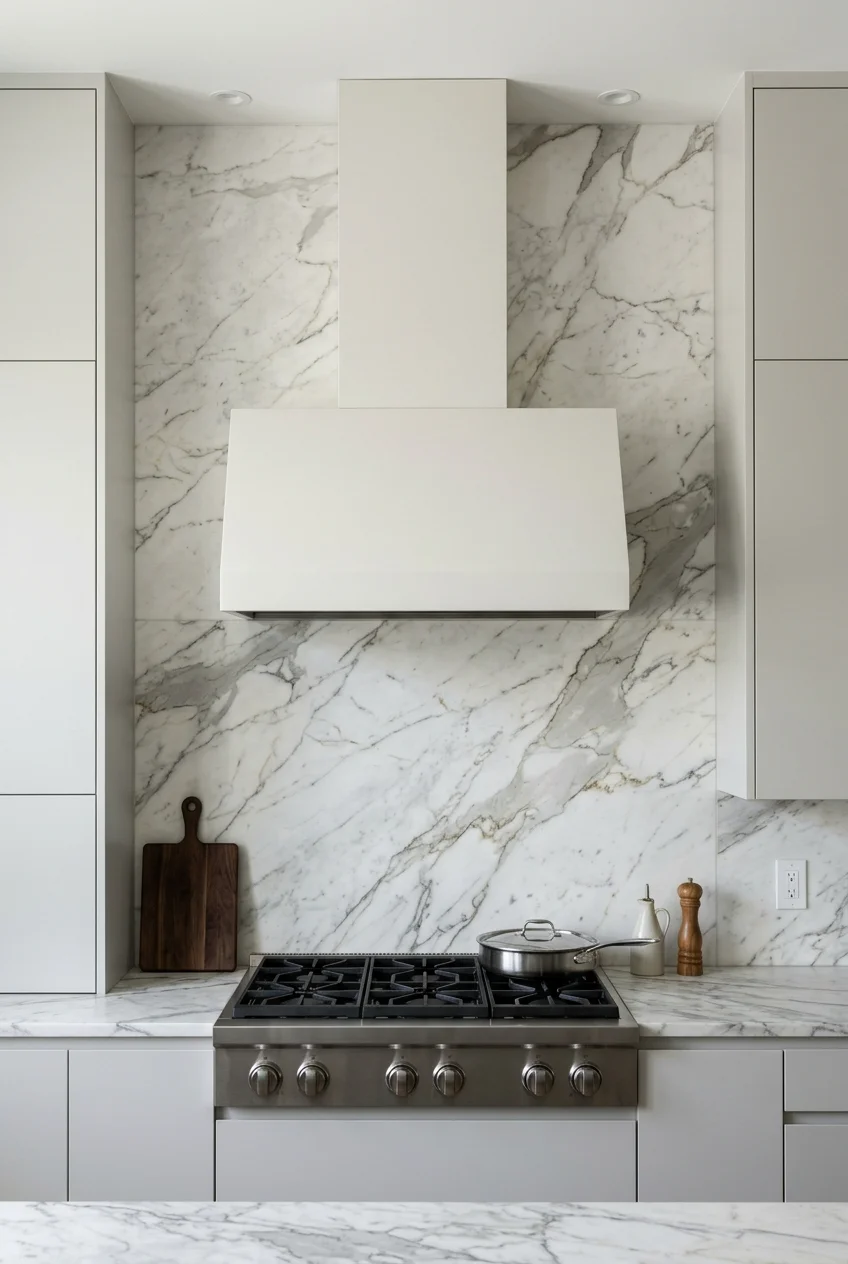
Running one slab from counter to hood creates a strong vertical panel and reduces grout lines in the busiest part of the cooking wall.
Decide where the slab stops before cabinets and hood are installed. Symmetrical edges and deliberate vein placement make the composition easier to read.
- Confirm the slab material suits the cooking location.
- Coordinate outlet and switch cutouts early.
- Leave appliance clearances and service panels unobstructed.
- Protect exposed wall edges with a finished transition.
Keep adjacent counters edited rather than bare; these kitchen countertop styling ideas offer ways to contain useful objects away from active burners.
45. Center the Hood within a Symmetrical Cabinet Run
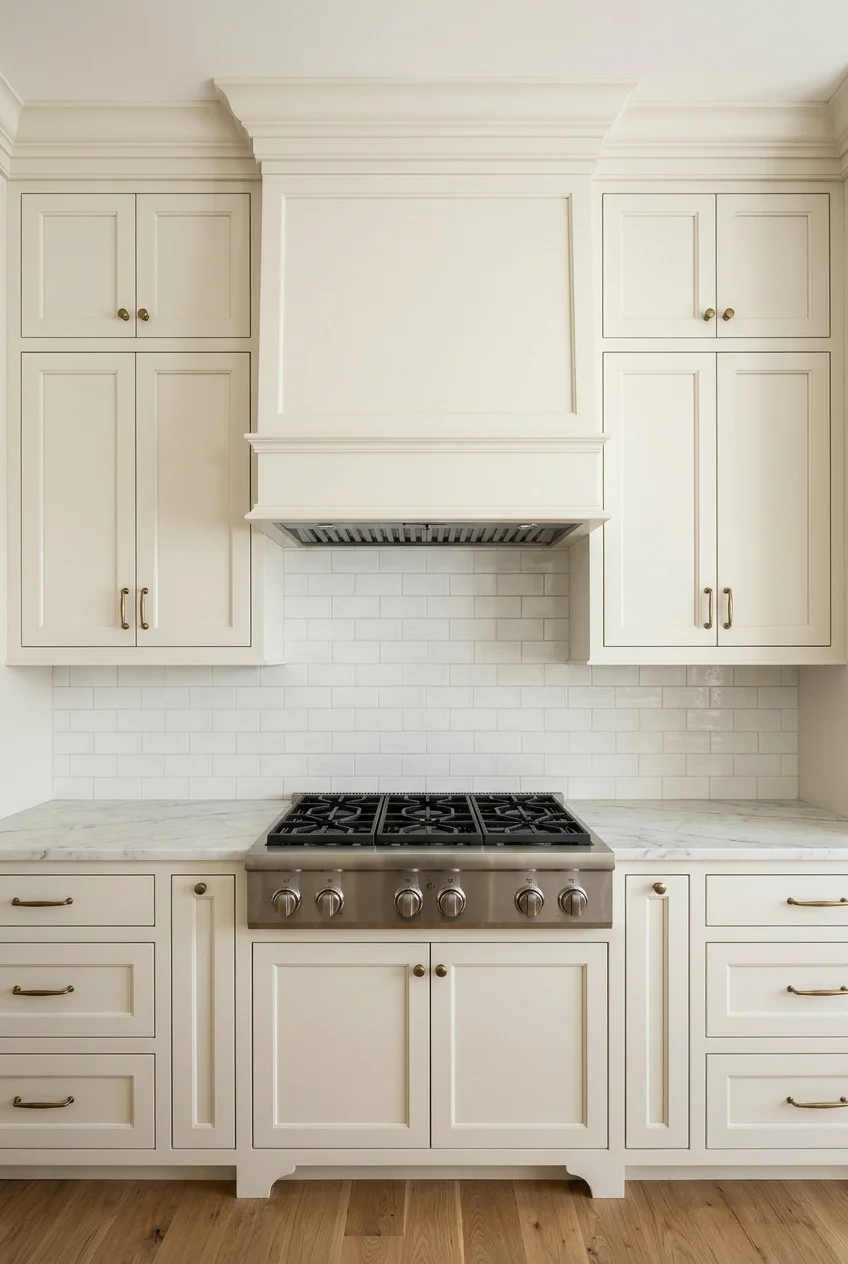
Symmetry makes a hood feel settled, particularly in traditional or transitional kitchens. Equal cabinet widths and aligned rails create a clear visual hierarchy.
Do not force symmetry if it harms storage or appliance clearances. A narrow filler can correct small differences, but major imbalances need a layout decision.
Center the hood on the cooktop first, then build outward. Centering it on the wall while the range sits elsewhere creates a more obvious problem.
46. Use Deliberate Asymmetry beside Open Shelving
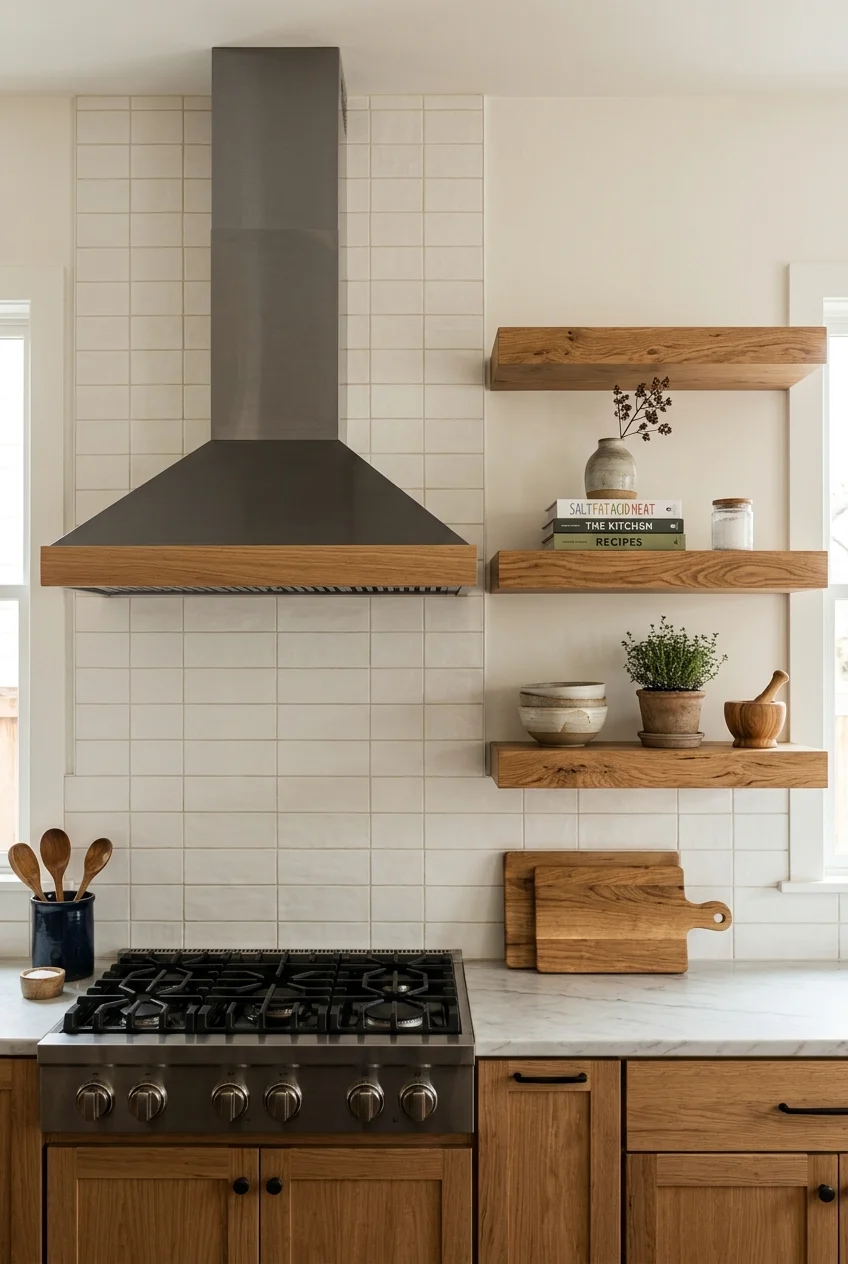
An asymmetrical wall can still feel balanced when the hood anchors one side and a substantial shelf composition carries visual weight on the other.
Keep the range and hood aligned even when surrounding elements differ. Asymmetry belongs in the wall composition, not between ventilation and cooking surface.
Repeat one material across both sides, such as the same oak or black metal, so the unequal elements still read as related.
47. Add Focused Task Lighting beneath the Hood
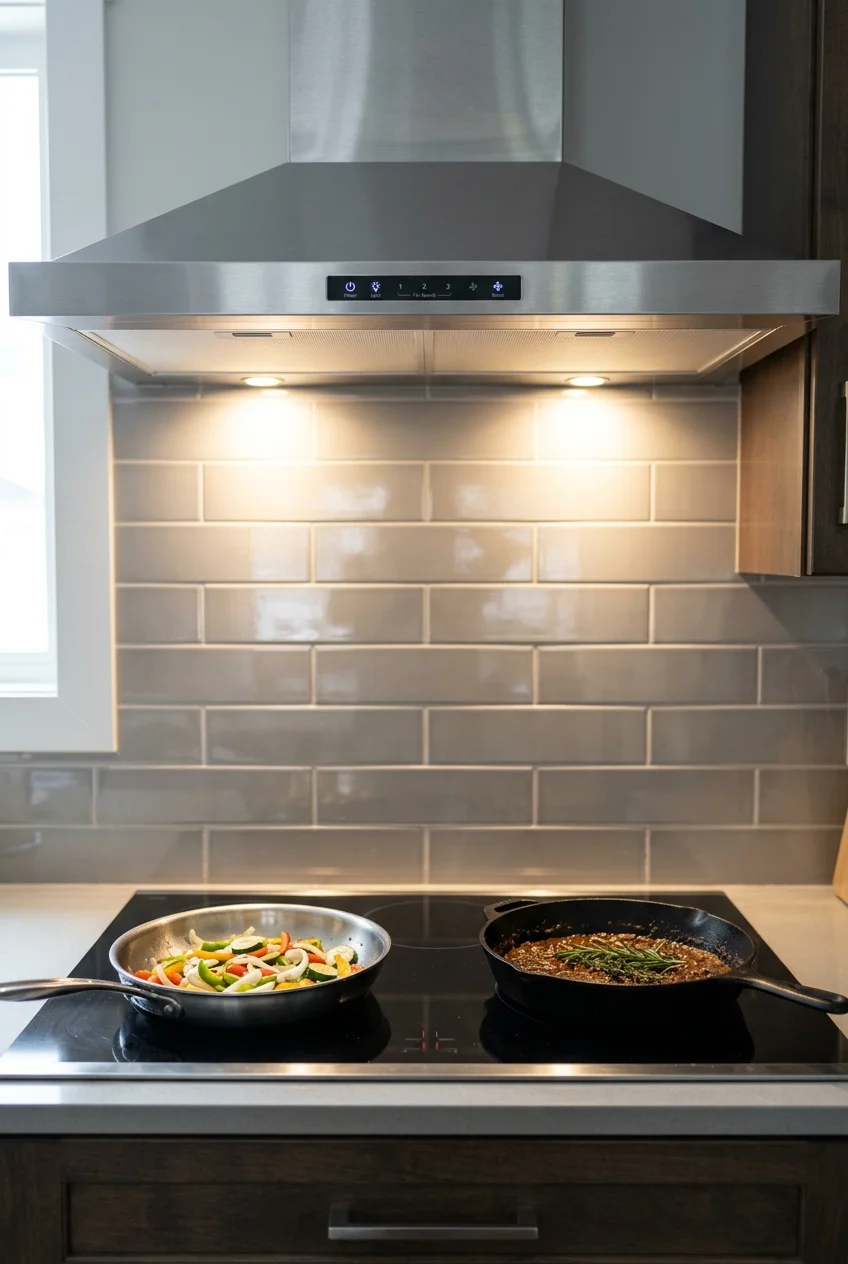
Good hood lighting should illuminate cookware without creating harsh glare on a glossy backsplash. Integrated fixtures keep the working light centered over burners.
Compare color temperature with other kitchen lights and check how controls operate. Replacement lamps must match the hood manufacturer’s approved type and rating.
Lighting check Test the light from normal standing positions; a bright source that looks attractive from across the room may reflect directly into the cook’s eyes.
48. Let the Backsplash Pattern Frame a Plain Hood
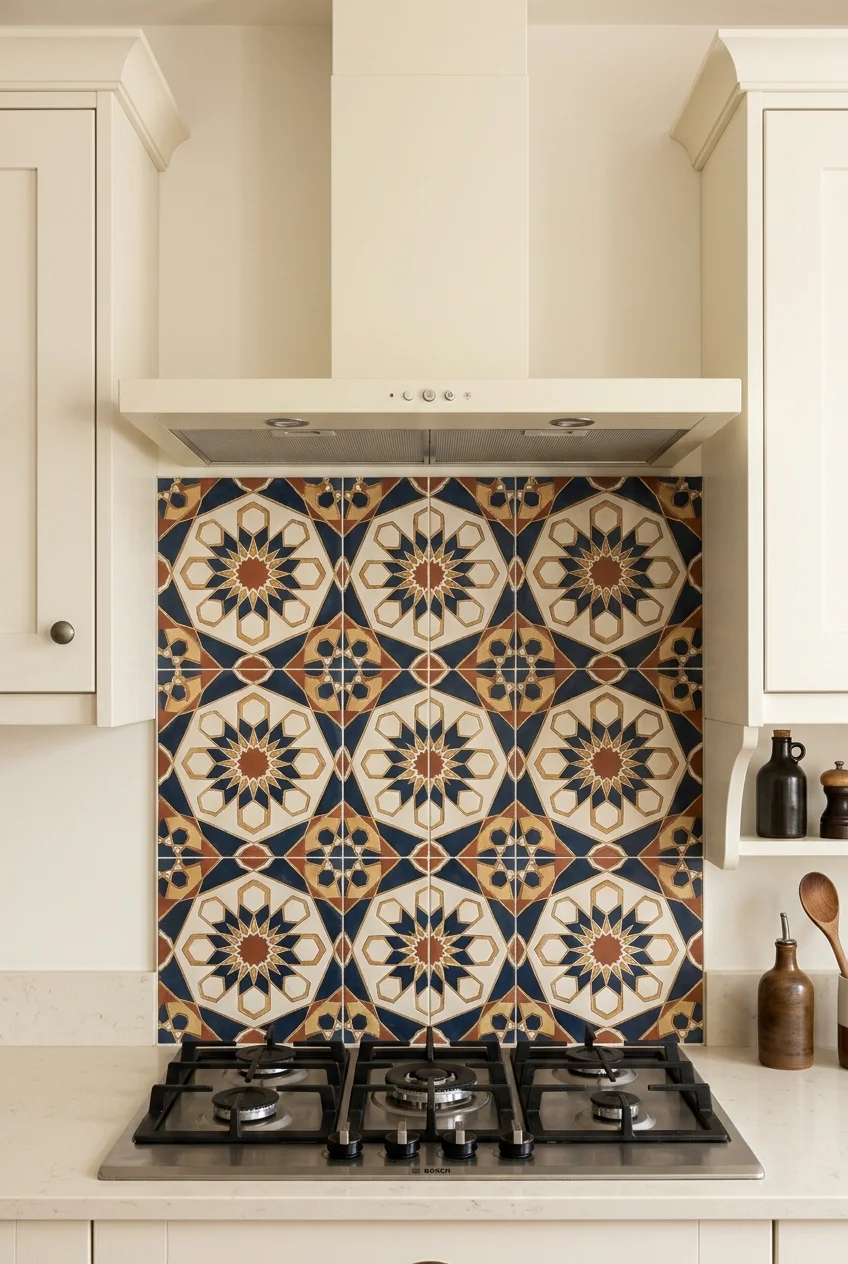
A patterned backsplash can provide the visual interest while the hood remains quiet. Center the pattern so it supports the appliance rather than drifting behind it.
Choose a repeat that can turn corners and stop cleanly around cabinets. Large motifs may need more wall width than a small kitchen provides.
Print or tape a full-scale pattern section behind the range before ordering. Small samples rarely show how the repeat interacts with the hood width.
49. Coordinate the Hood with Mixed Appliance Finishes
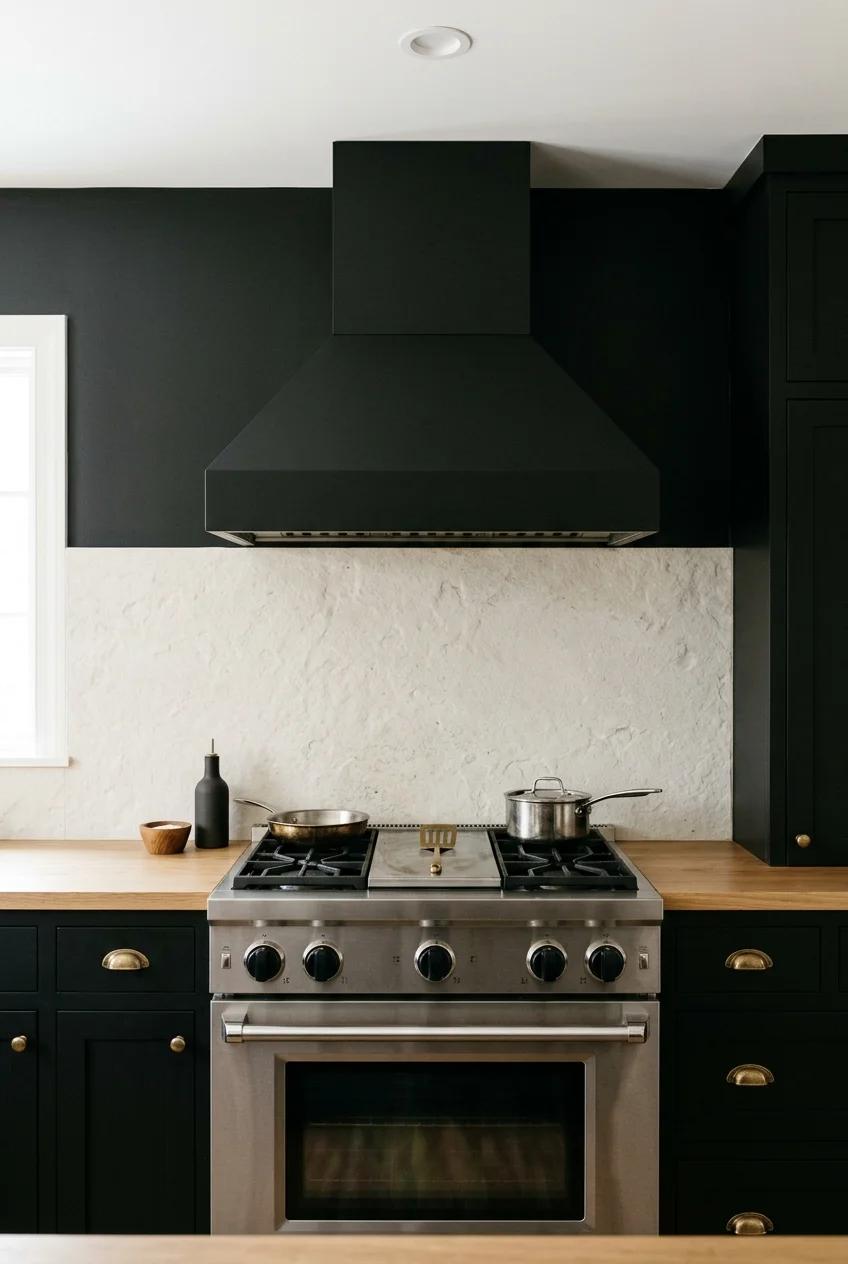
A hood does not need to match every appliance. It can relate to cabinet hardware while stainless range panels connect with smaller metal details.
Choose one dominant finish, one supporting finish, and a limited accent. This hierarchy prevents black, brass, stainless, and bronze from competing equally.
- Compare finishes in the same lighting.
- Separate near-matches with another material.
- Repeat each accent at least once, but sparingly.
- Keep large appliances visually quieter than focal pieces.
50. Refresh the Wall around an Existing Hood
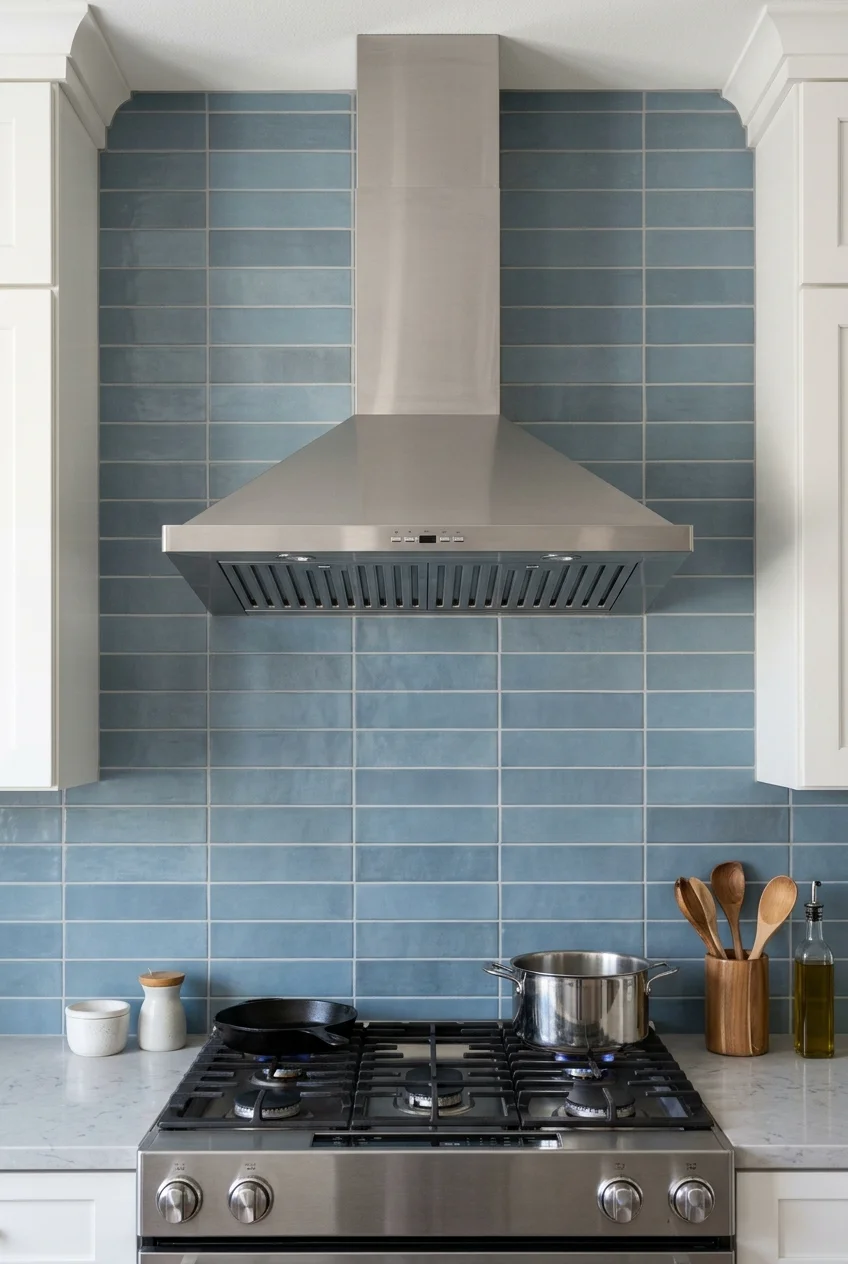
When the hood works well, changing the backsplash, wall color, or nearby cabinet finish may improve the composition without replacing a serviceable appliance.
Start by cleaning the hood according to its manual and removing countertop clutter. Then judge whether the actual problem is scale, contrast, or surrounding finishes.
A quiet tile field can make an ordinary stainless hood look intentional, while a deeper wall color can give a white hood enough definition.
Budget tip Photograph the wall straight on and test finish samples in that image before buying materials; changing the background is easier than altering the appliance.
Keep the existing model number and manual accessible during planning so new tile, trim, or cabinetry does not cover service points or ventilation openings.
Frequently Asked Questions
How wide should a range hood be?
The hood should generally be at least as wide as the cooking surface, but the selected model’s installation instructions remain the controlling source.
Some designs use additional width or depth for greater capture. Confirm cabinet gaps, windows, ceiling conditions, blower performance, and cooktop requirements before ordering.
How high should a range hood be above the cooktop?
There is no universal height for every combination. Hood type, cooktop fuel, output, capture design, and manufacturer instructions all affect the permitted range.
Follow both appliance manuals and use the more restrictive requirement. Mounting too high can reduce capture, while mounting too low can create safety and usability problems.
Can a decorative cover go over any range hood?
No. Decorative enclosures are typically planned around compatible inserts or liners, with specified clearances, ventilation openings, support, ducting, electrical access, and service space.
Covering vents, controls, lights, or removable filters can impair operation and void instructions. Confirm compatibility before building, rather than adapting the cover afterward.
Should I choose ducted or recirculating ventilation?
Ducted systems exhaust captured air outdoors, while recirculating models filter air and return it indoors. Available routes, model performance, and renovation scope matter.
Use the manufacturer’s guidance for duct size, length, termination, and filters. Local requirements and higher airflow may also affect makeup-air planning and professional involvement.