50 Open Kitchen Design Ideas

This post may contain affiliate links: full affiliate disclosure.
An open kitchen works best when cooking, dining, and relaxing feel connected without competing. The right layout balances conversation, movement, storage, light, and everyday cleanup.
These ideas compare islands, peninsulas, compact plans, visual boundaries, hidden storage, lighting, ventilation, and flexible details for rooms of many sizes and styles.
Save the arrangements that fit your space, then map cabinet doors, appliance doors, seats, and walking routes at full scale before committing to construction.
As an Amazon Associate I earn from qualifying purchases.
Layouts That Open the Room
Begin with the room's physical shape. A strong open plan shortens kitchen tasks while keeping major circulation routes away from hot, wet, and busy work zones.
1. Face a One-Wall Kitchen Toward the Living Area
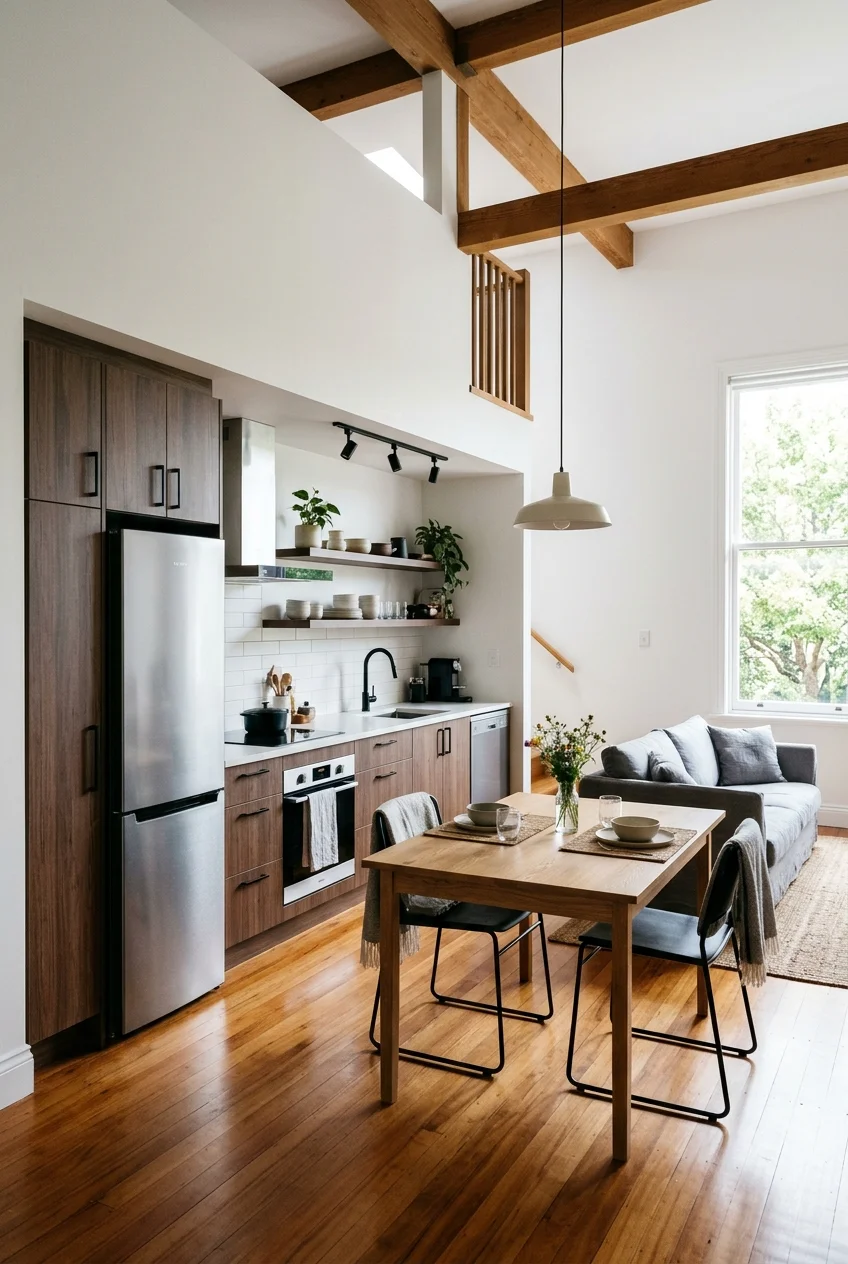
A one-wall run preserves the largest possible shared floor area, making it useful for studios, lofts, and narrow homes with one primary gathering space.
Group tall pantry and refrigerator cabinets at one end so the central counter remains visually open and useful for preparation, serving, and everyday appliances.
Use a dining table or movable island opposite the run only after confirming that open appliance doors will not interrupt the main walking path.
2. Turn an L-Shaped Kitchen Toward the Dining Table
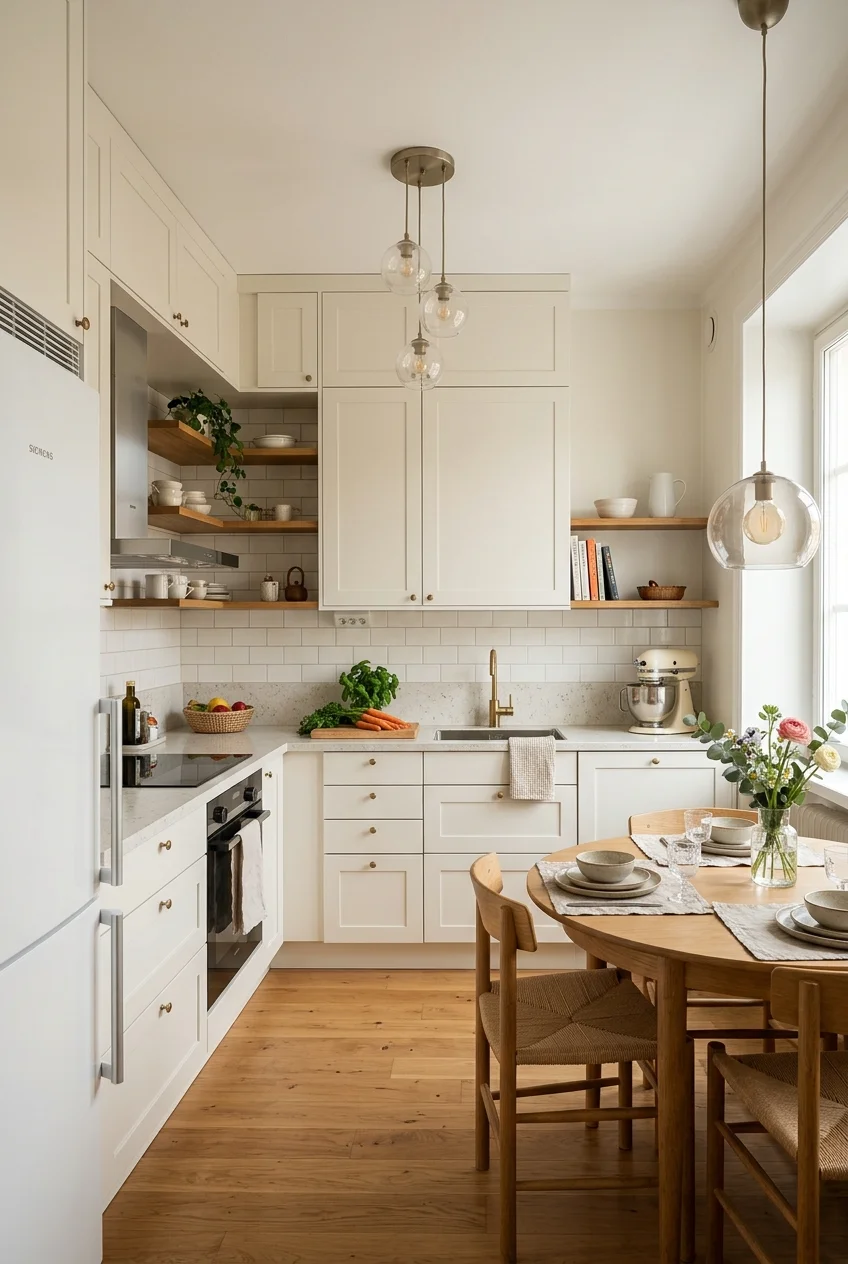
An L-shaped kitchen uses two adjoining walls while leaving the opposite corner open, naturally creating room for a dining table or compact seating group.
Place the busiest preparation stretch where it faces the table, while keeping the refrigerator accessible from both the kitchen and the shared room.
Layout check Open the corner cabinet, dishwasher, oven, and refrigerator on the plan together; overlapping doors can make an attractive L-shaped layout frustrating during busy meals.
3. Open One Side of a U-Shaped Work Zone
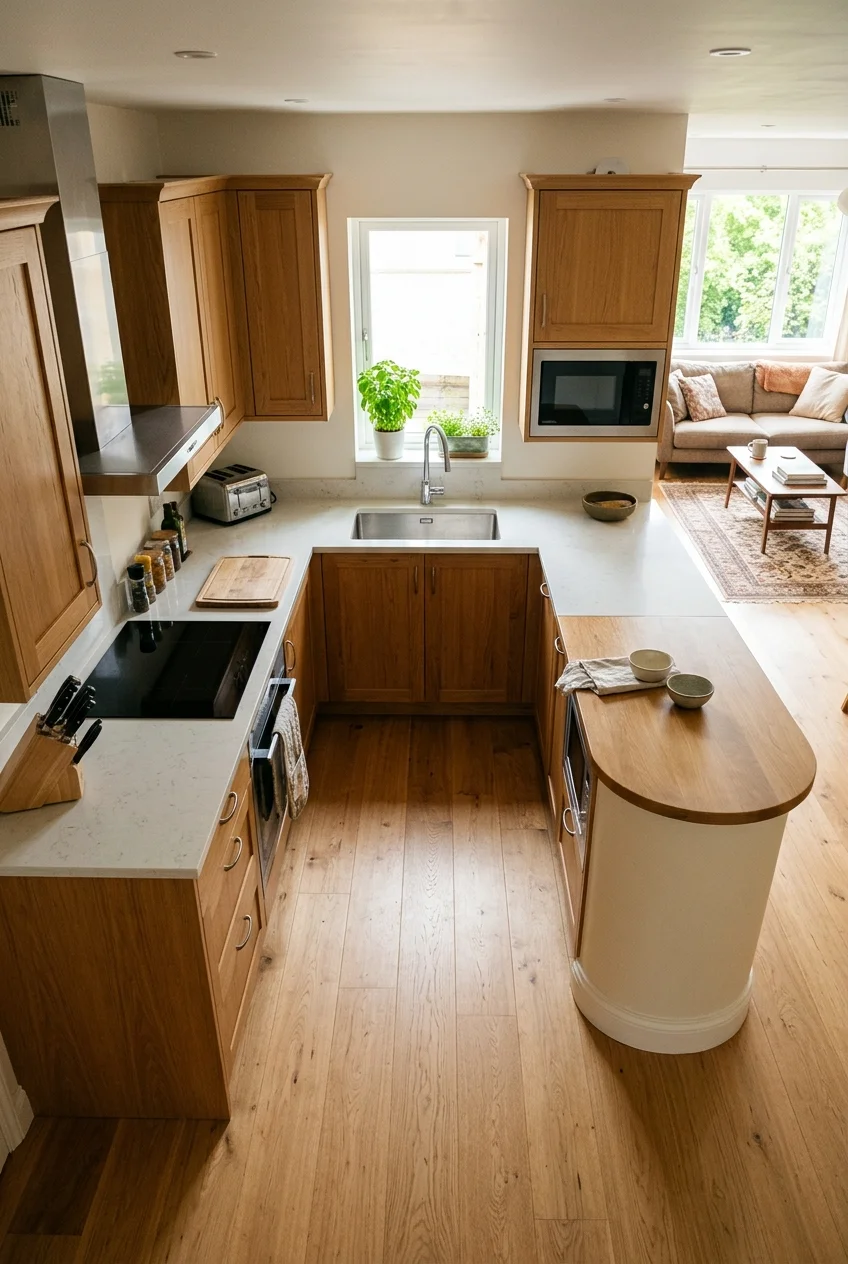
A U-shaped plan can keep preparation compact while one open side maintains conversation and daylight. It suits cooks who want defined work surfaces without walls.
Avoid placing a tall cabinet at the open corner, where it can form a visual barrier. Finish that end with a lower counter or rounded shelf.
Keep through-traffic outside the U whenever possible, allowing someone to cross the shared room without passing directly between the sink, range, and refrigerator.
4. Choose a Peninsula When an Island Will Not Fit
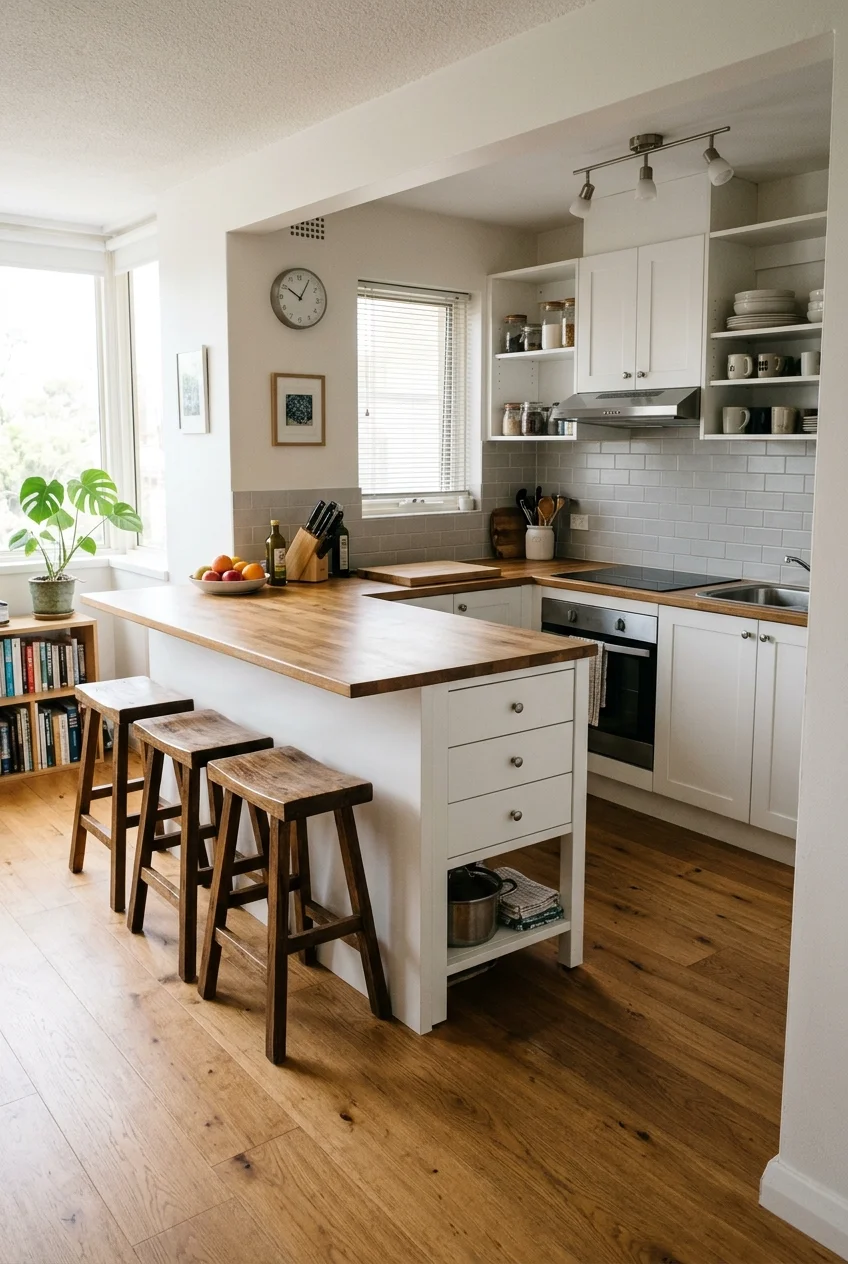
A peninsula provides preparation space, storage, and casual seating while attaching to one wall, so it needs circulation space on fewer sides than an island.
Place stools on the room-facing side and working storage inside the kitchen. This separates social seating from drawers, dishwashers, and hot cooking tasks.
- Check stool pullout space beside the main route.
- Keep the open end easy to walk around.
- Plan outlets and lighting before closing the base.
- Avoid a narrow pinch point at adjoining cabinets.
5. Use a Slim Island as a Preparation Spine
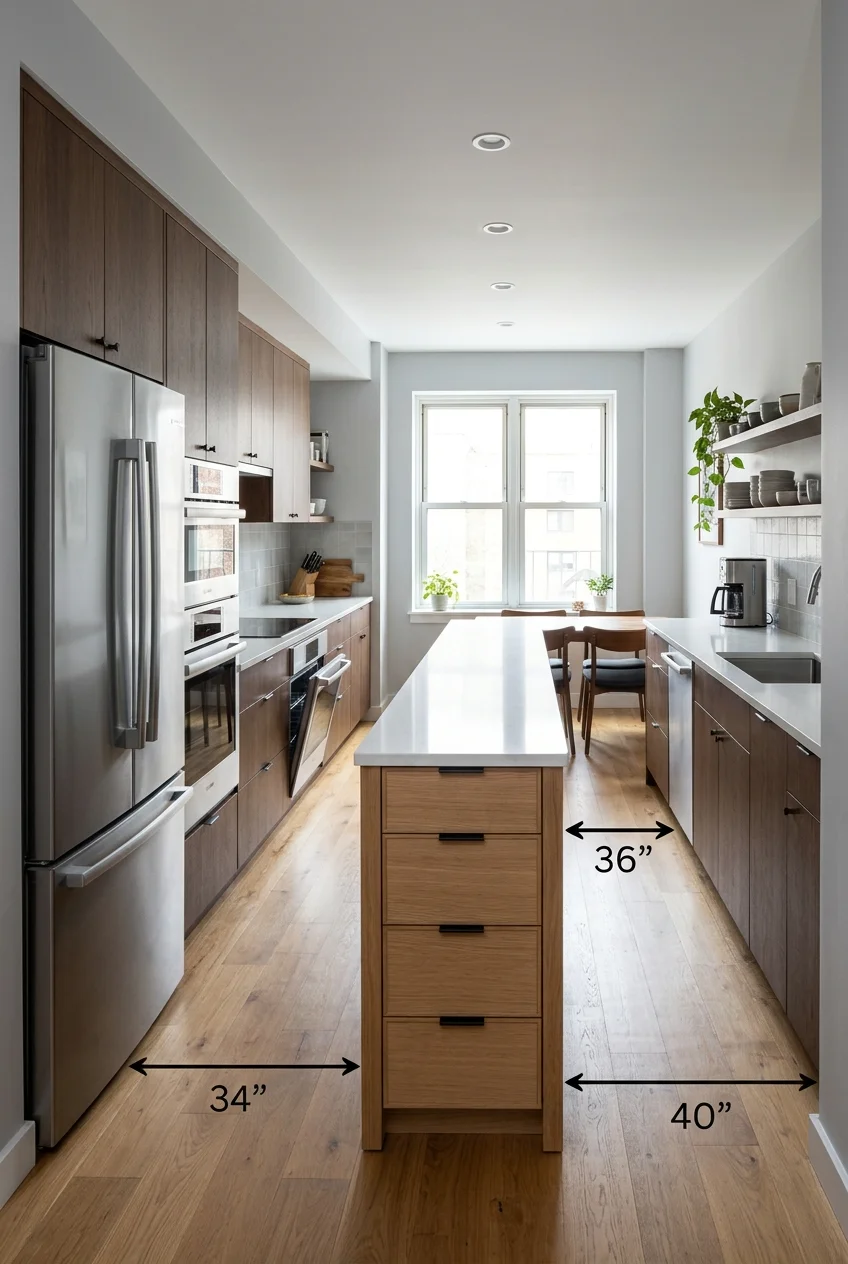
A narrow island can add a landing and preparation surface without dominating the room. Compare these narrow kitchen with island ideas before choosing its proportions.
Keep its top visually quiet and reserve bulky appliances for the wall run. A clear island surface makes the shared room feel calmer between meals.
Tape the exact footprint on the floor, then open every nearby door and rehearse carrying groceries, unloading dishes, and passing another person.
6. Put Seating at the Island End
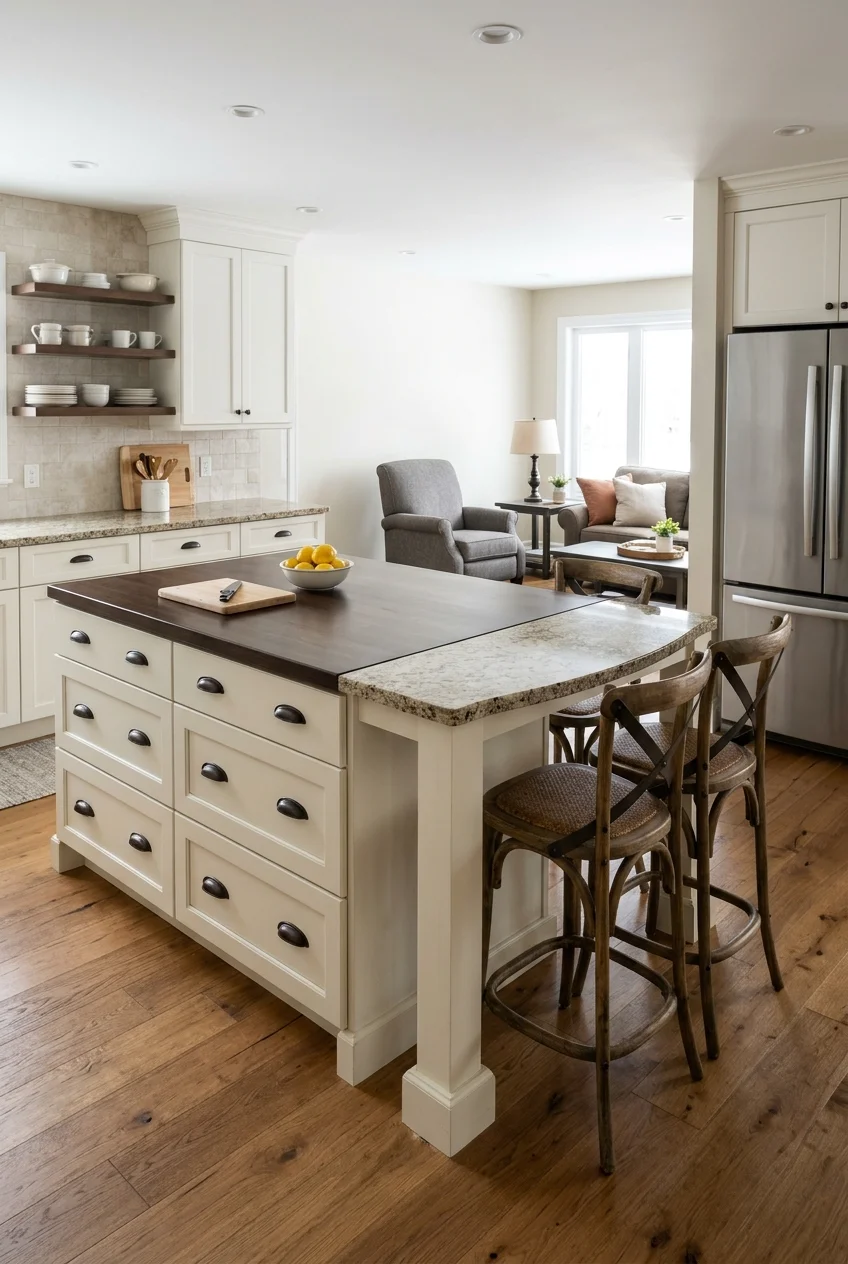
End seating lets guests face one another instead of lining every stool toward the cook, creating a more conversational arrangement in the shared room.
Keep the long working side free for drawers and preparation. The seating overhang should be planned with appropriate support and comfortable knee space.
Position the seated end away from the refrigerator and main doorway so pulled-out stools do not obstruct grocery trips or cross-room circulation.
7. Leave the End of a Galley Open
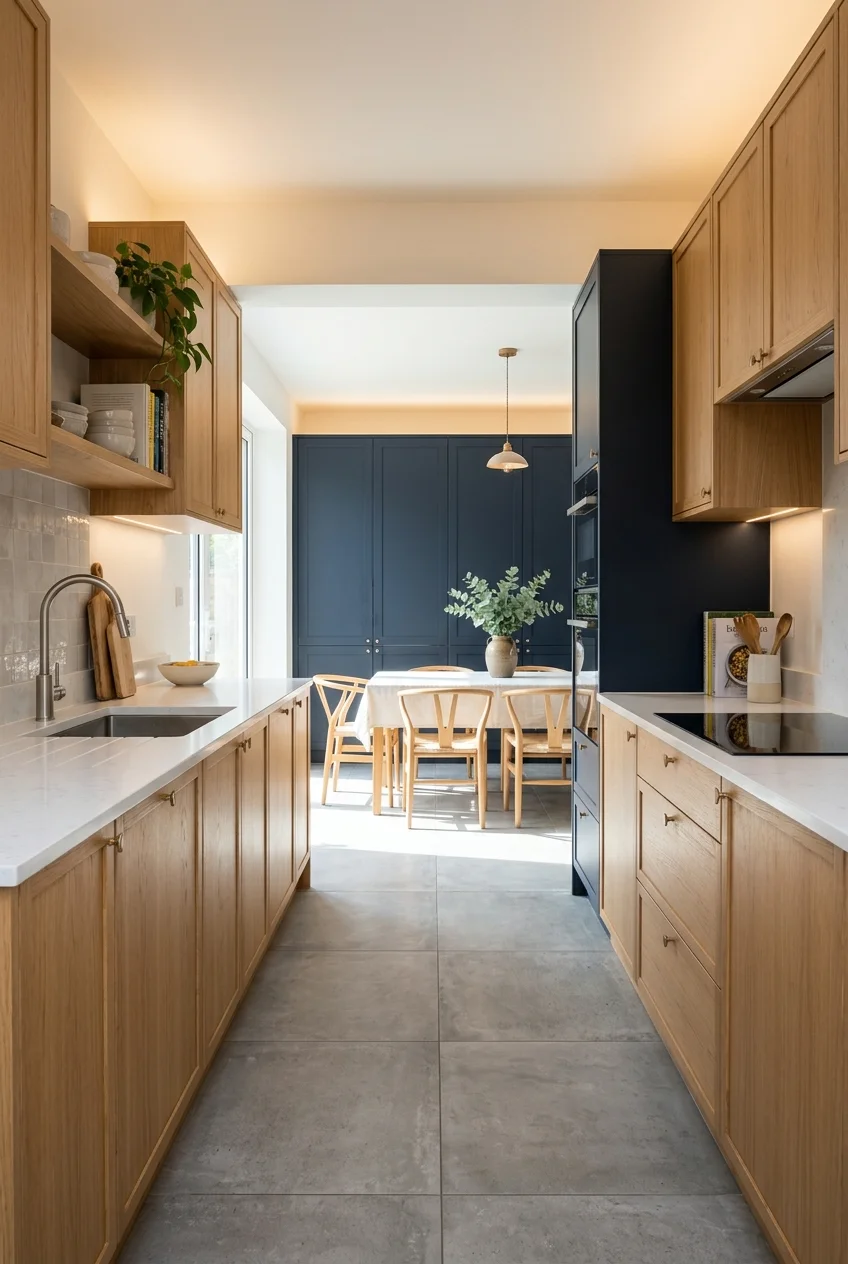
Two parallel runs can deliver efficient storage while an open end connects directly to dining. This works well when the opposite end is not a busy passage.
Keep tall cabinets grouped near the closed end, allowing the dining-facing ends to stay low, bright, and visually connected to the larger room.
Traffic note A galley should not become a shortcut between entrances; redirect the main household route outside the two working counters whenever the plan allows.
8. Turn a Half Wall Into a Useful Counter
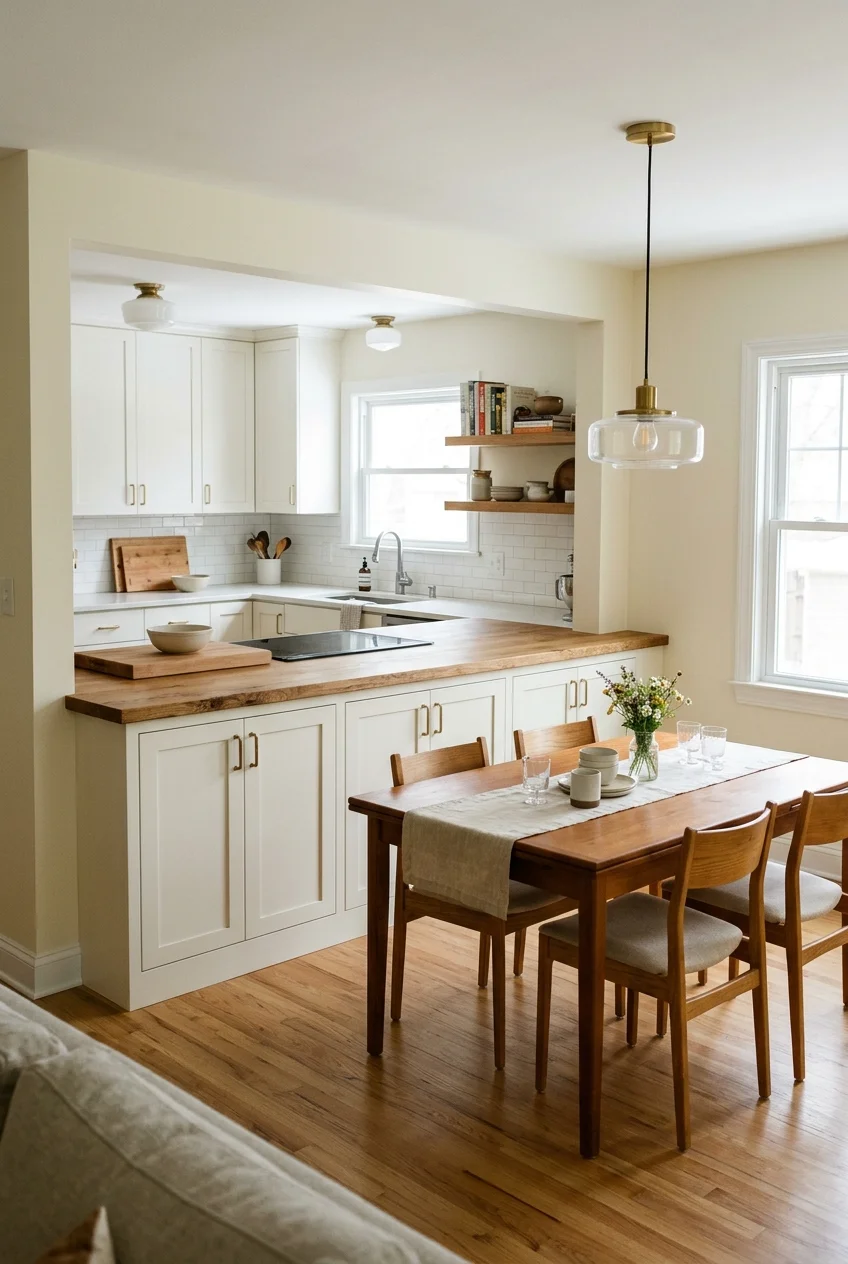
A retained half wall can conceal base cabinets and countertop clutter while preserving conversation above, offering a comfortable compromise between enclosed and fully open.
Cap it with a durable counter that aligns intentionally with nearby surfaces. Use the room-facing side for shallow storage, display, or occasional serving.
Before altering an existing wall, have qualified professionals assess structure, utilities, permits, and safe detailing rather than assuming it is a simple partition.
9. Widen a Pass-Through for Connection Without Full Removal
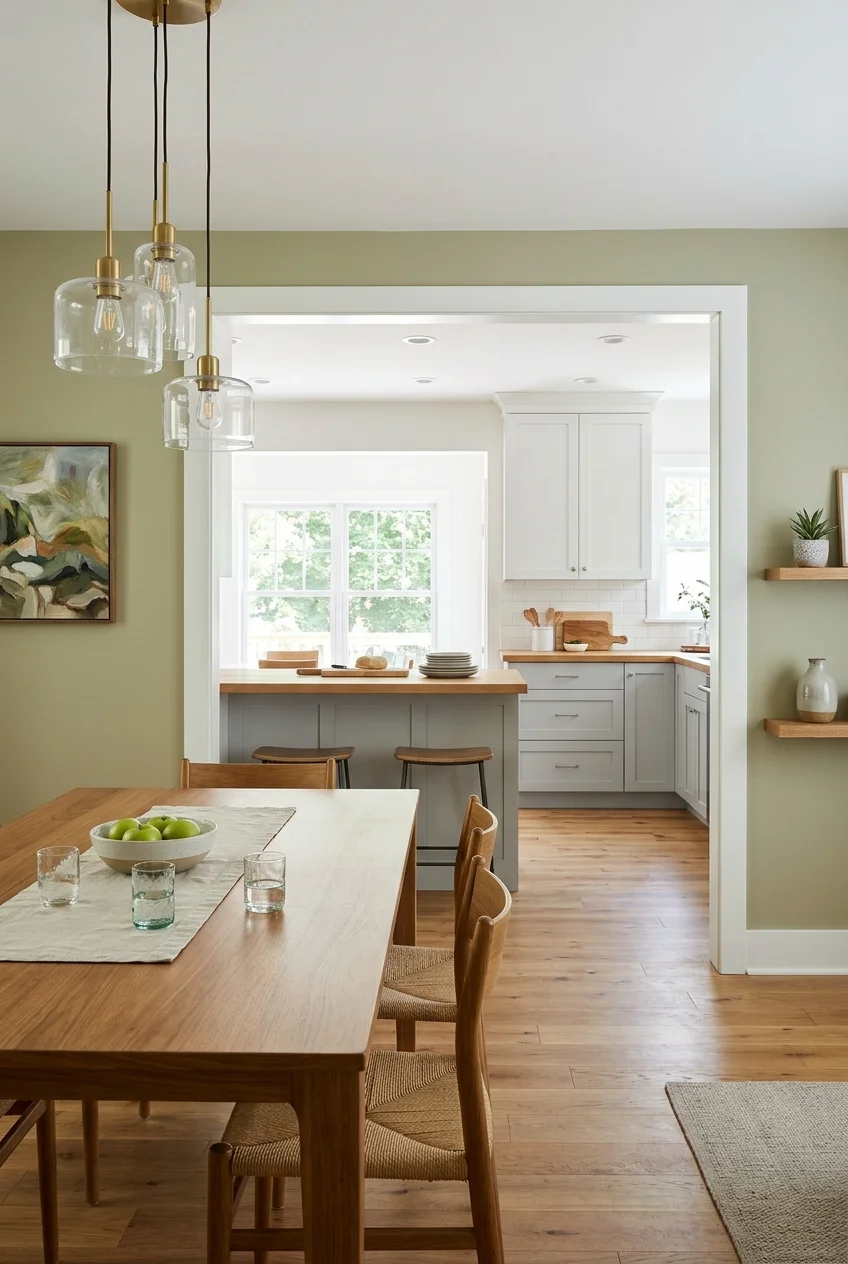
An enlarged pass-through can share light, conversation, and serving access while retaining wall space for cabinets, artwork, or furniture in both rooms.
Set the opening where it frames an attractive preparation or dining view, not a refrigerator side panel, crowded sink, or exposed utility area.
Structural framing, electrical routes, plumbing, and required approvals need professional review before cutting. Finish the sill and returns as intentional architectural surfaces.
10. Add a Sliding Glass Partition for Flexible Openness
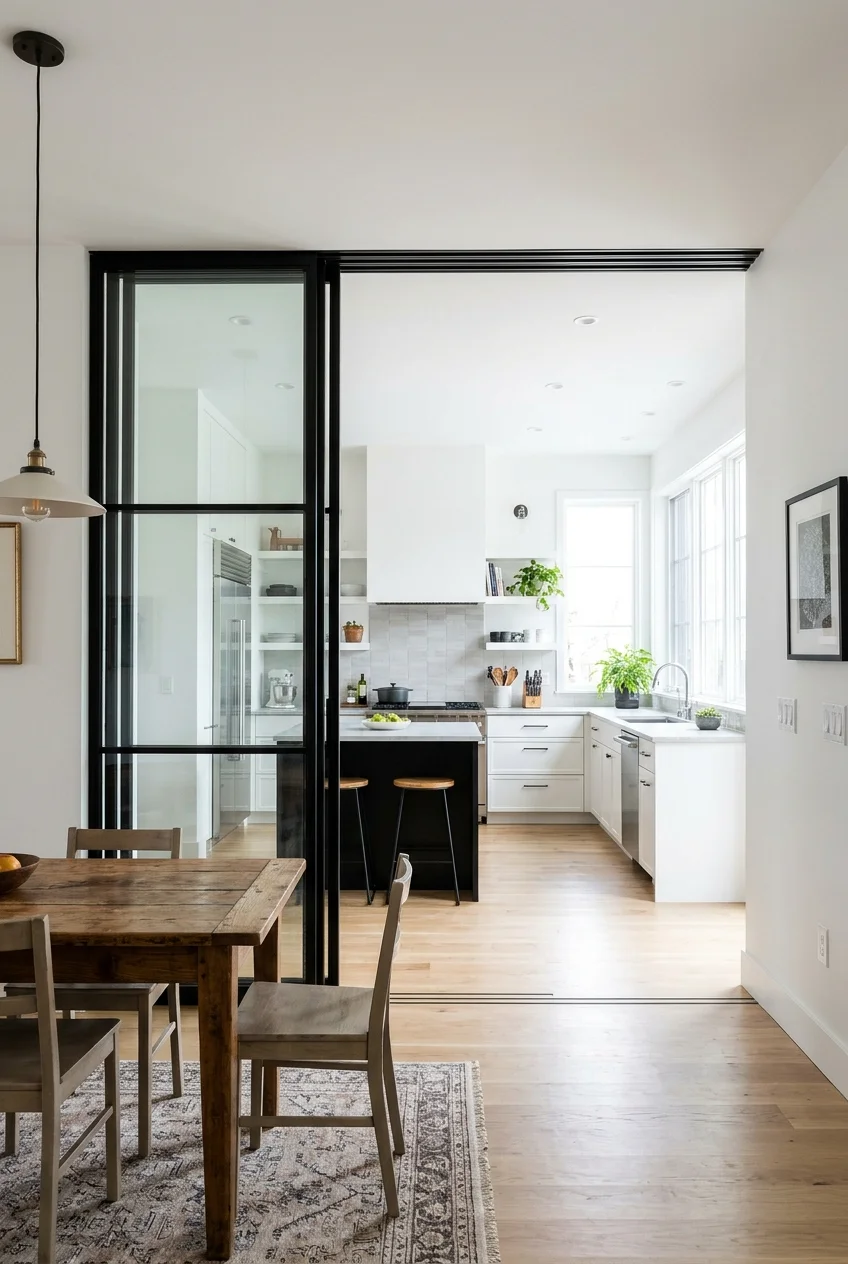
A glazed sliding partition can keep light and sightlines flowing while containing some cooking activity when guests arrive or focused quiet matters elsewhere.
Plan a clear stacking or pocket location so open panels do not block cabinets, switches, artwork, or the main route between kitchen and dining.
Choose safe glazing, hardware, tracks, and installation details appropriate to the opening, then coordinate the frame finish with nearby doors and windows.
Ways to Connect and Zone the Shared Room
Open does not have to mean undefined. Furniture, lighting, flooring, and repeated finishes can give each activity a clear place while preserving one continuous room.
11. Align the Dining Table With the Island
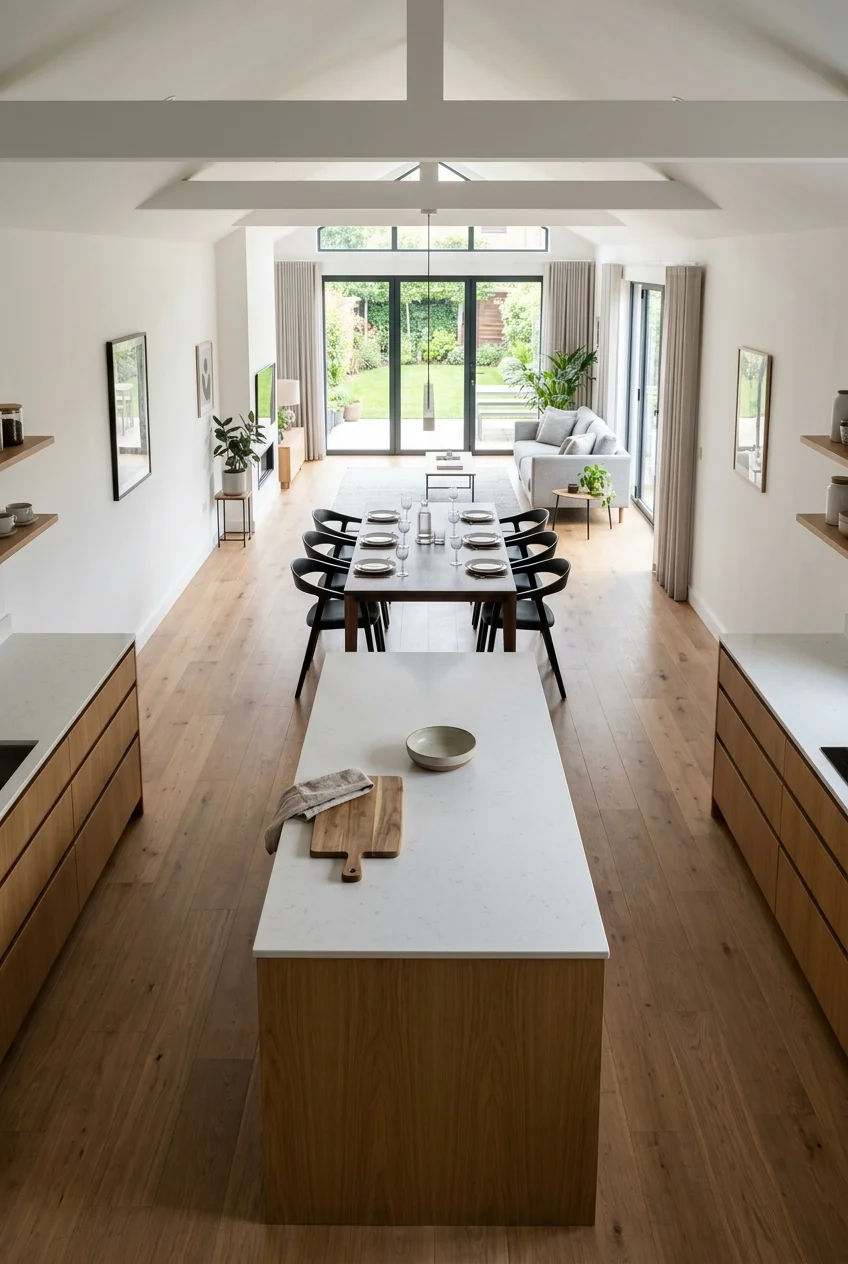
Placing the table on the island's centerline creates an orderly visual axis and a direct serving route, especially in long rectangular open rooms.
Leave enough space to use chairs and island storage independently. A perfect visual alignment is not helpful when pulled-out seats block working drawers.
12. Tuck a Banquette Along the Room Edge
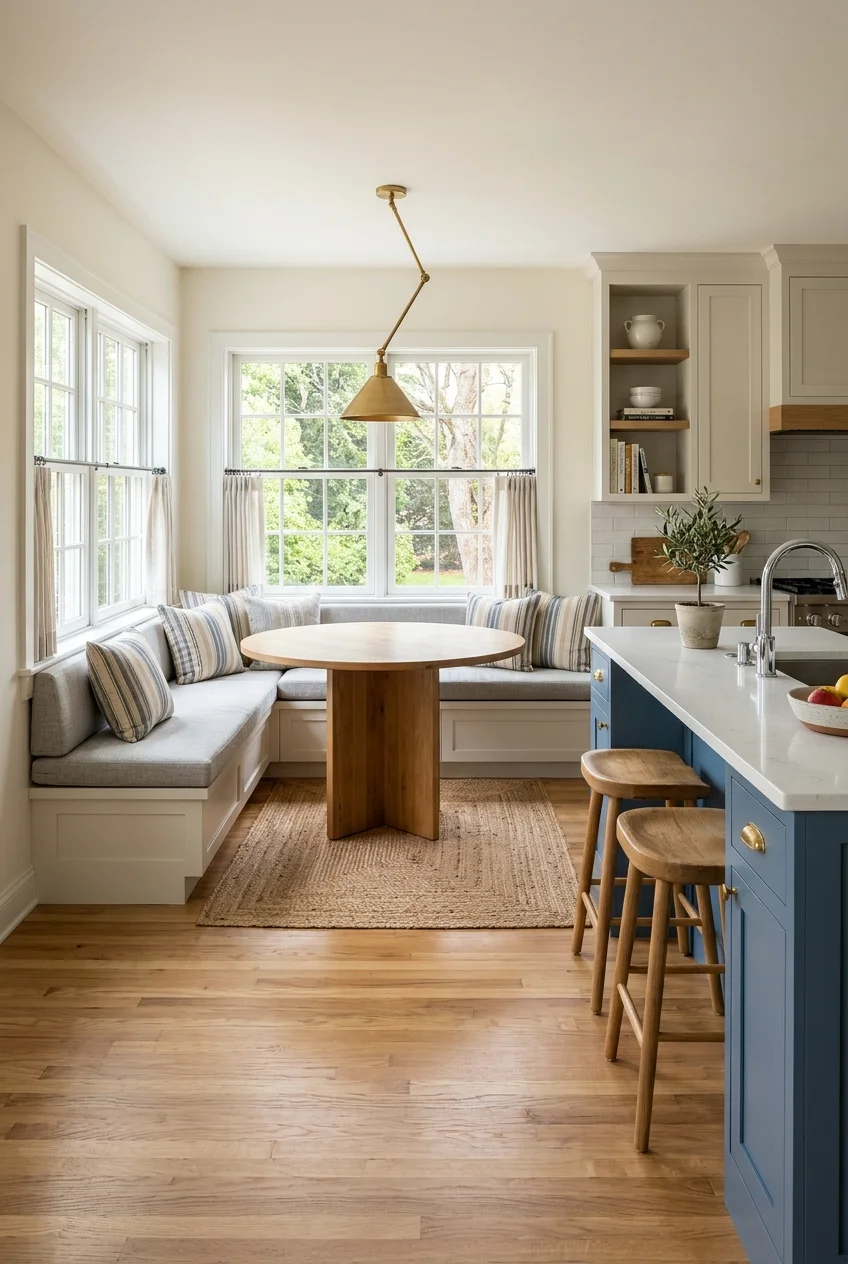
A wall-hugging banquette can concentrate dining at the edge of an open kitchen, leaving the center clearer for circulation. Explore more breakfast nook ideas for different arrangements.
Use a pedestal table or carefully positioned legs so diners can slide inward. Keep upholstery removable or easy to clean near food preparation.
Comfort check Mock up the seat depth, back angle, table edge, and access before building; attractive banquettes often fail when the table traps diners against the wall.
13. Use Backless Stools That Disappear Under the Counter
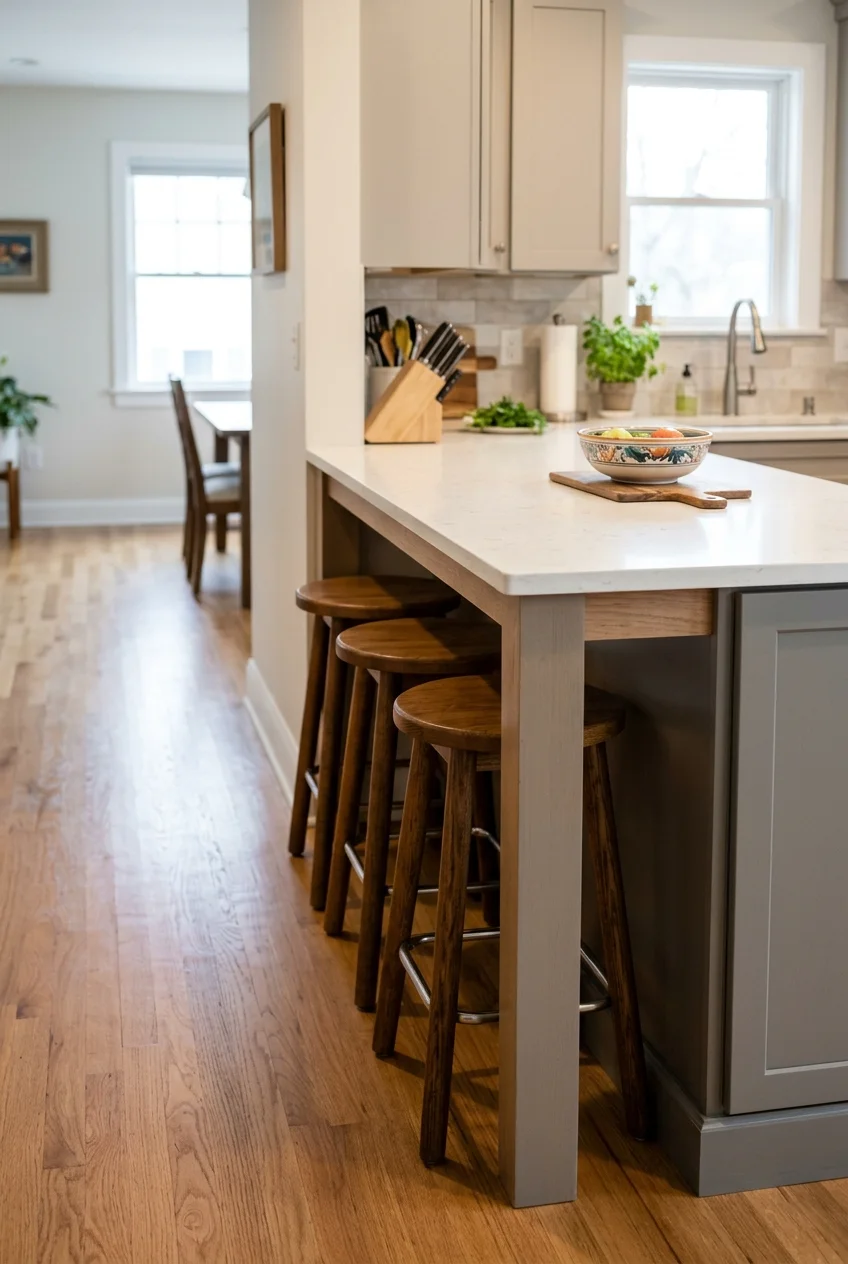
Backless stools can slide fully beneath an island or peninsula, restoring a clean circulation edge when casual seating is not being used.
Choose a seat height that matches the counter and test comfort before buying. Compact proportions should not sacrifice a stable base or practical foot support.
14. Let the Sofa Back Mark the Living Zone
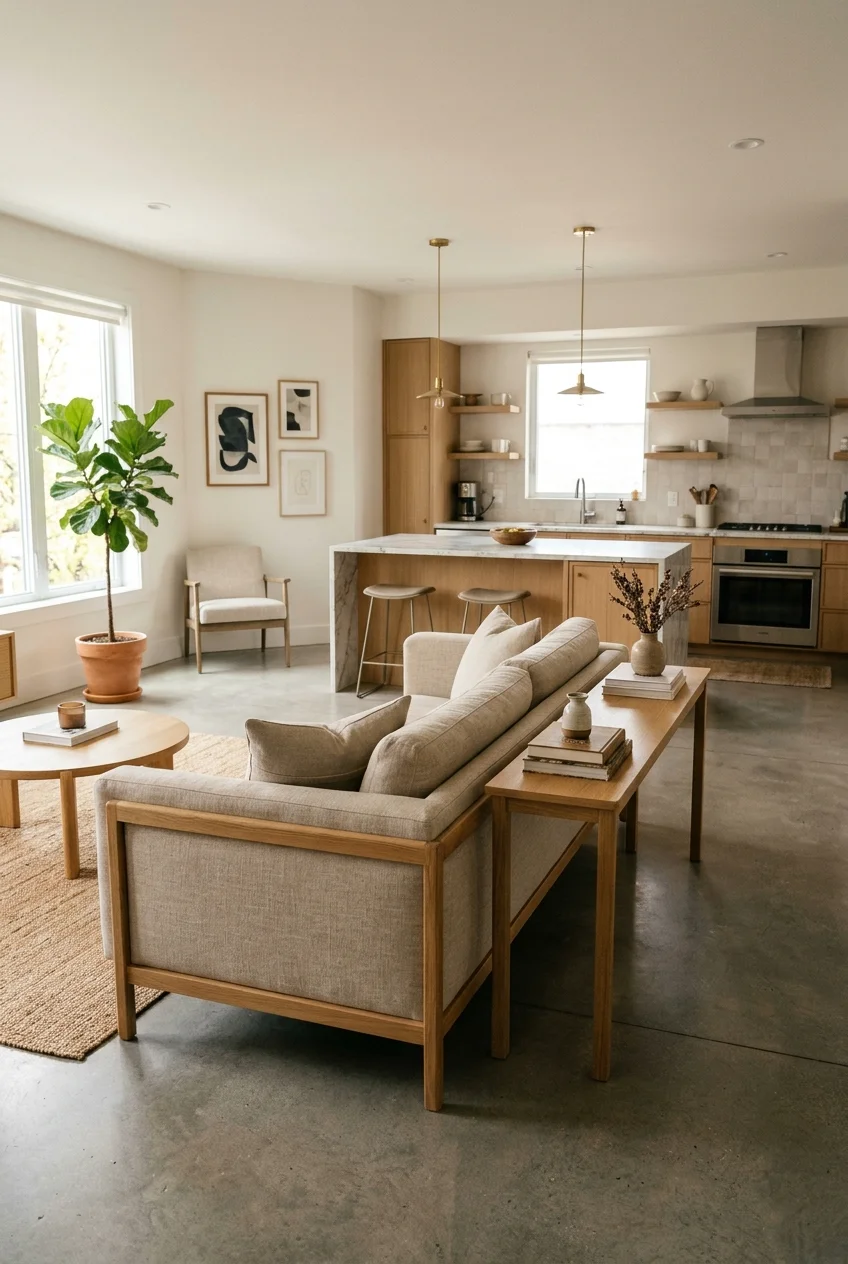
A sofa facing away from the kitchen creates a clear living-room edge without adding a wall, screen, or tall piece that blocks shared daylight.
Keep a comfortable route behind it and choose a finished sofa back. A narrow console can add lamps or storage without becoming a clutter shelf.
Confirm that the seating orientation still allows easy conversation with someone at the island, rather than making the two zones feel deliberately disconnected.
15. Anchor the Living Area With a Rug
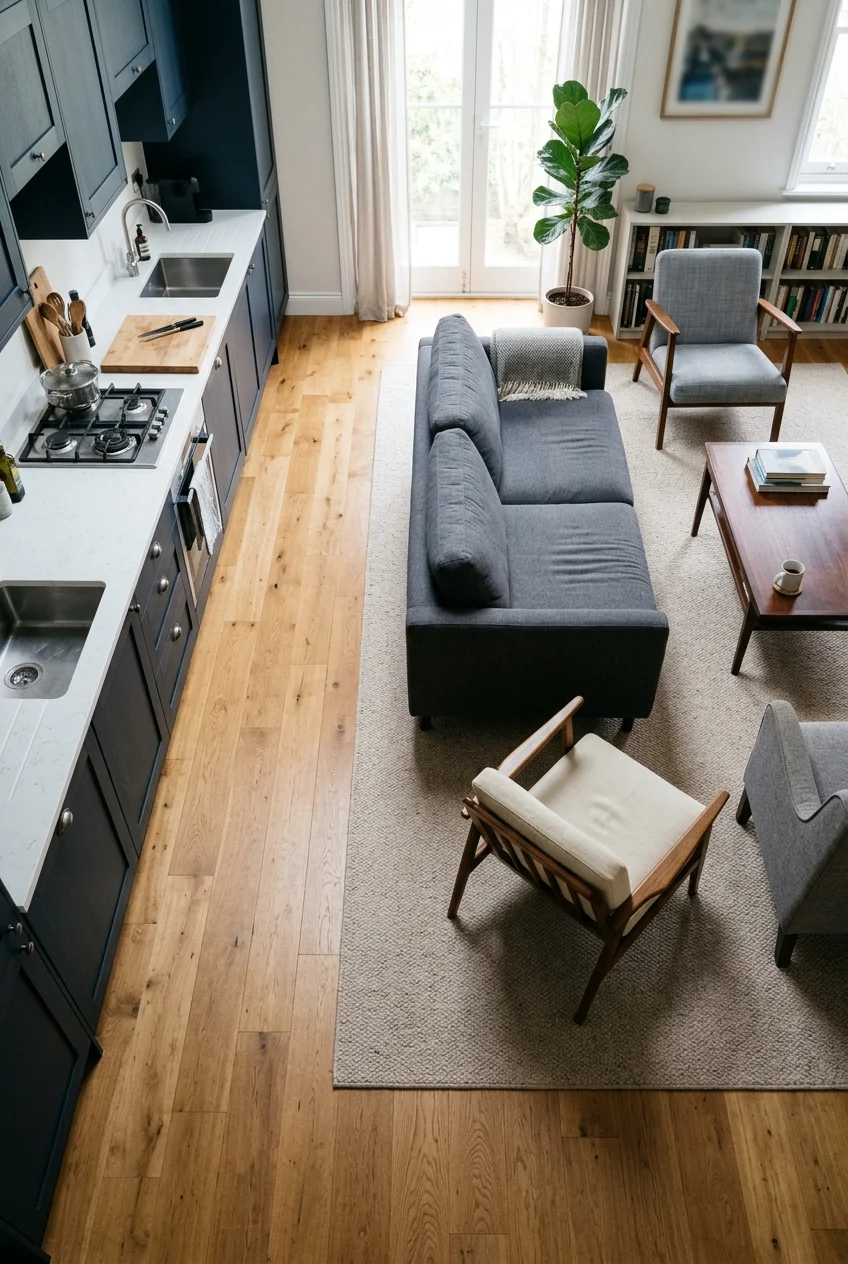
A large rug can visually gather the sofa and chairs, making the living zone legible while the kitchen remains on an easy-clean hard surface.
Keep the rug away from cooking splatter, sink drips, and the primary kitchen path. Secure edges so the transition does not create a trip hazard.
16. Define the Kitchen With a Ceiling Treatment
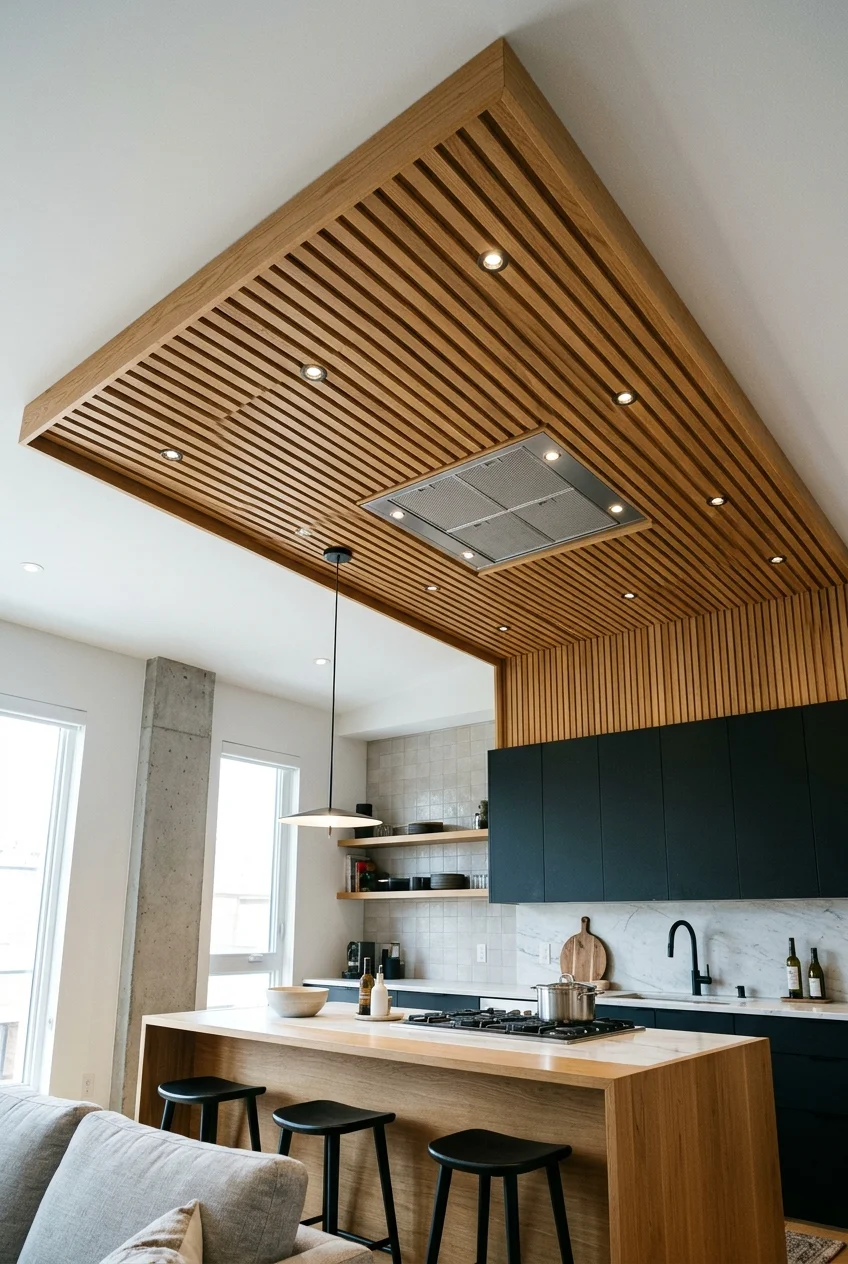
A shallow wood slat panel, painted recess, or restrained beam pattern can outline the kitchen overhead while the floor remains visually continuous.
Align the ceiling feature with actual cabinet or island edges. A floating shape that nearly matches the plan can make the room feel unresolved.
Coordinate lighting, ventilation, sprinklers, alarms, and access requirements carefully before installation, using qualified professionals for any structural or building-system changes.
17. Use Pendants to Draw the Island Boundary
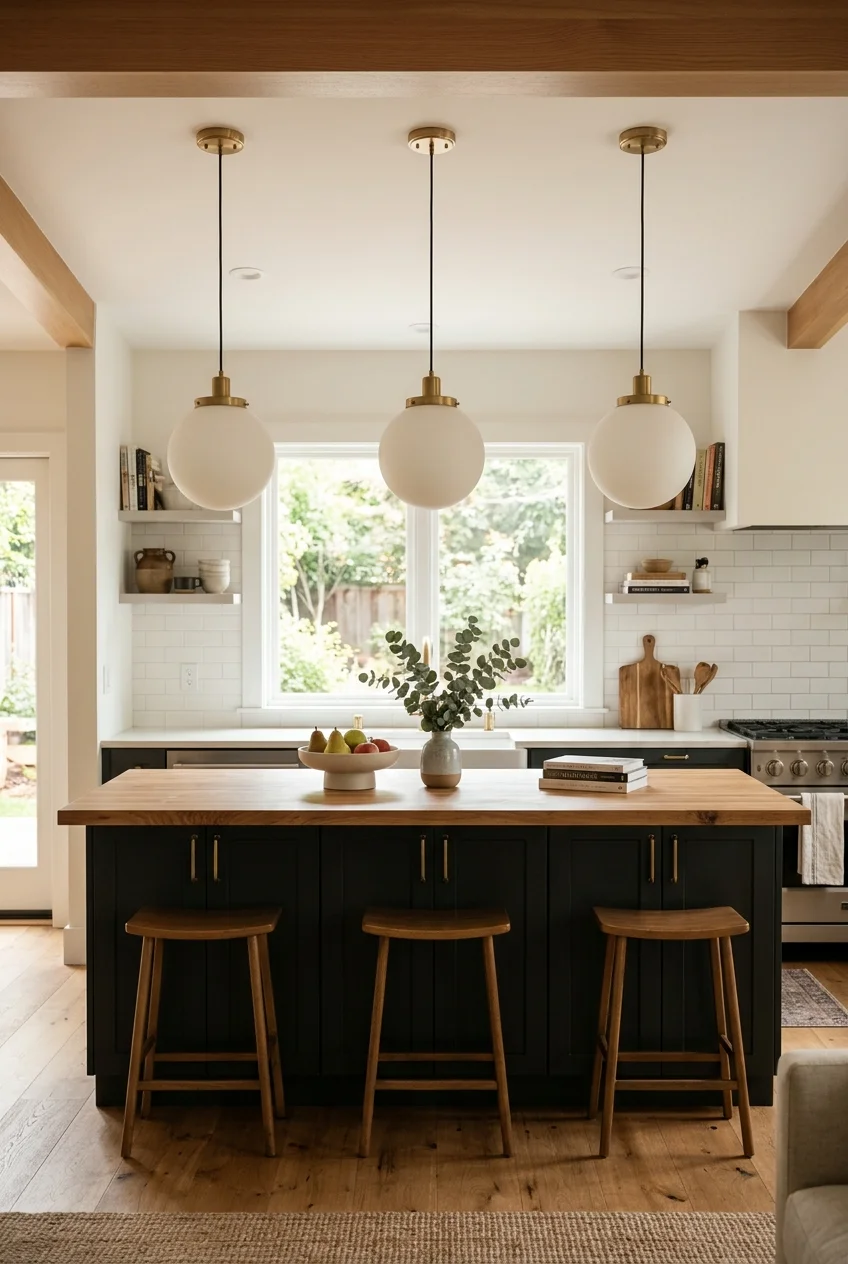
A measured row of pendants gives the island a clear visual address, helping the kitchen read as a zone within a larger undecorated ceiling.
Size and hang fixtures so they illuminate the surface without blocking standing sightlines. Coordinate their centers with the island, not nearby room edges.
Before wiring Suspend paper or cardboard silhouettes at the proposed height, then view them from the sofa, table, doorway, and main preparation position.
18. Run One Floor Through Every Zone
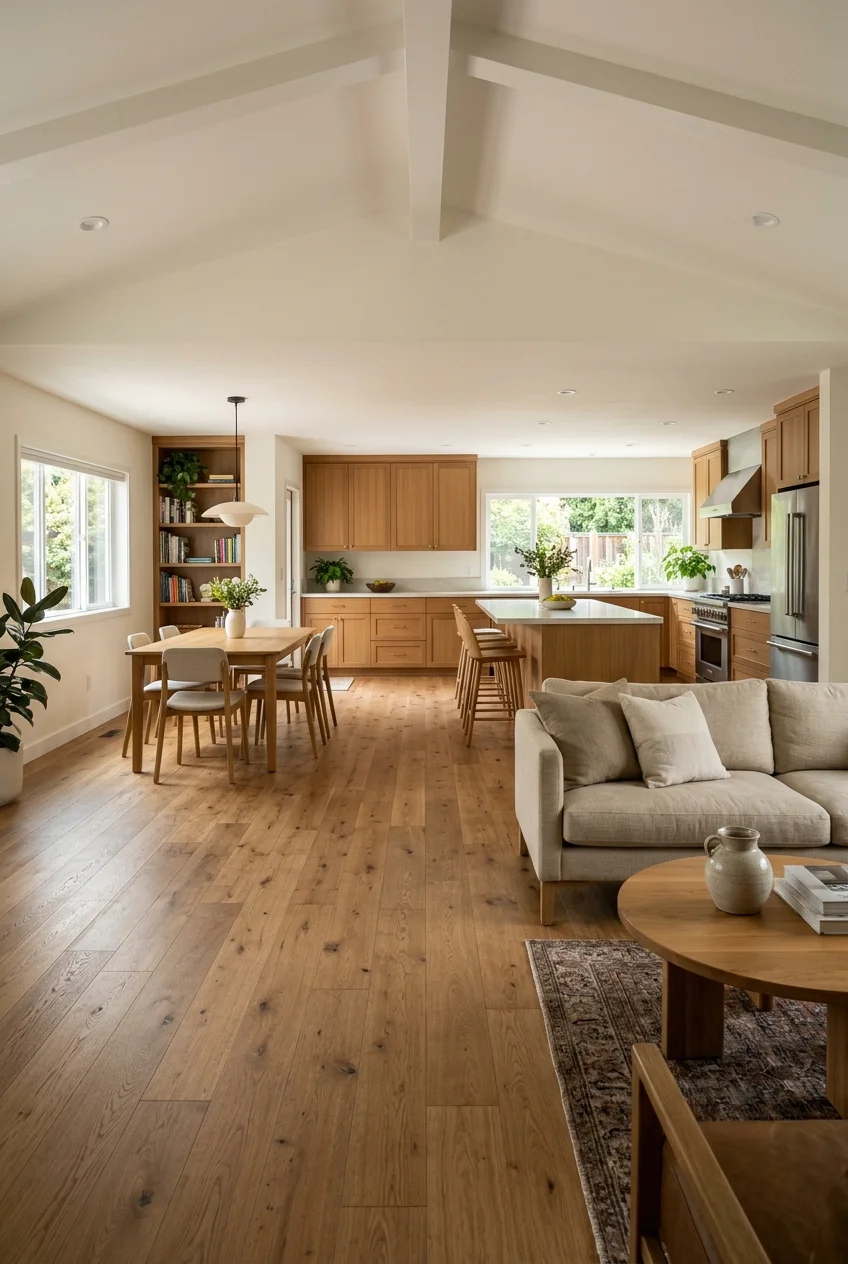
Continuous flooring makes kitchen, dining, and living areas feel larger and calmer by removing visual seams from the broadest surface in the room.
Select a material and installation system suitable for kitchen moisture, traffic, cleaning, sunlight, and the actual subfloor conditions across the connected space.
Plan required movement details and transitions with the installer. Visual continuity should never depend on ignoring technical needs of the chosen floor.
19. Change Flooring at a Clean Architectural Line
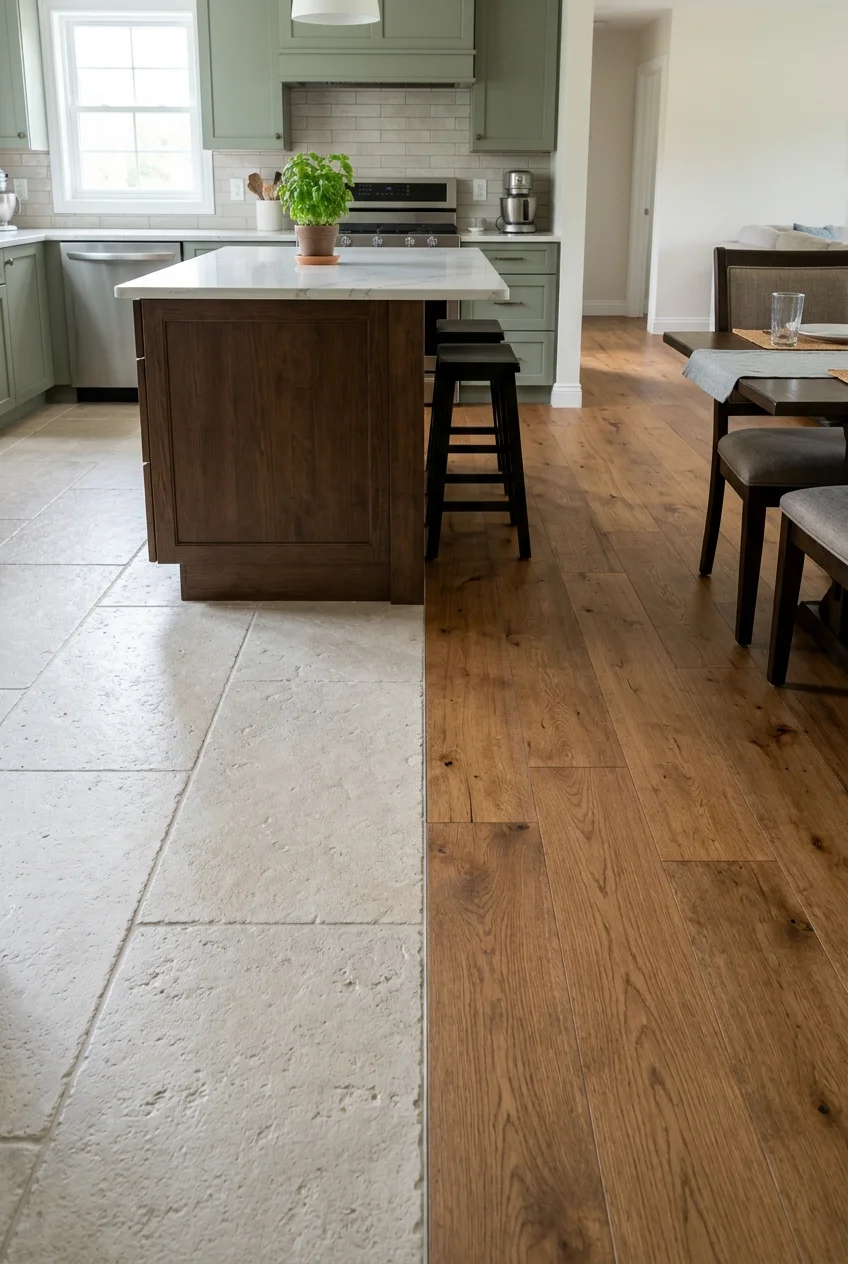
Different flooring can protect the cooking zone and add definition, provided the transition follows a straight cabinet line, doorway, beam, or deliberate border.
Resolve height differences, edge protection, movement, and cleaning before choosing materials. A flush, intentional joint matters more than a decorative pattern alone.
20. Repeat One Finish Across the Shared Room
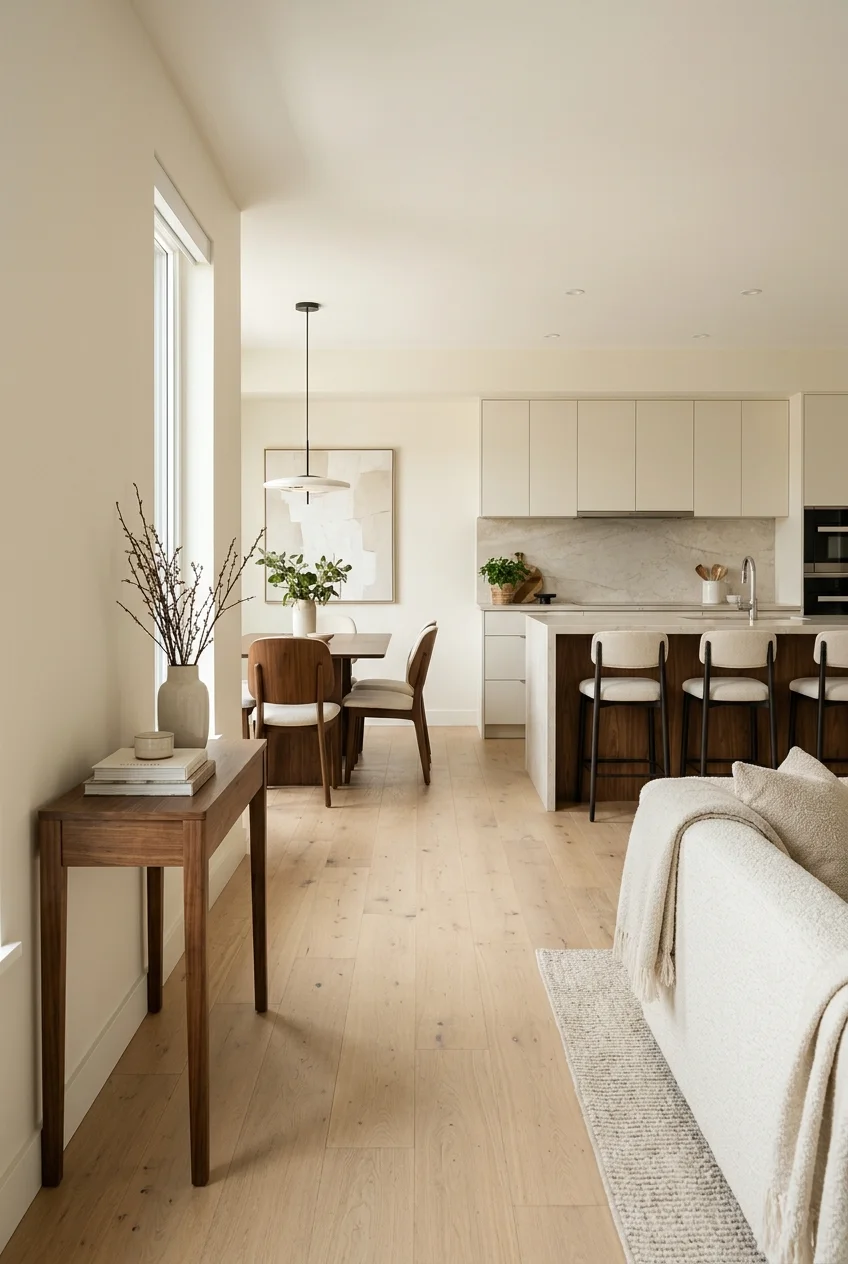
Repeating one wood tone, metal, or restrained color creates a visual thread without forcing kitchen cabinets and living furniture to match exactly.
Use the chosen finish at different scales, such as island panels, dining chairs, and one console detail. Repetition feels intentional when surrounded by quieter materials.
Compare physical samples together under daytime and evening lighting, because similar wood stains or metals can clash when their undertones differ slightly.
Storage That Calms Open-Kitchen Sightlines
Because an open kitchen is visible from several seats, storage should support quick cleanup. Prioritize frequently seen counters, room-facing cabinet ends, and everyday drop zones.
21. Consolidate Storage Into a Full-Height Pantry Wall
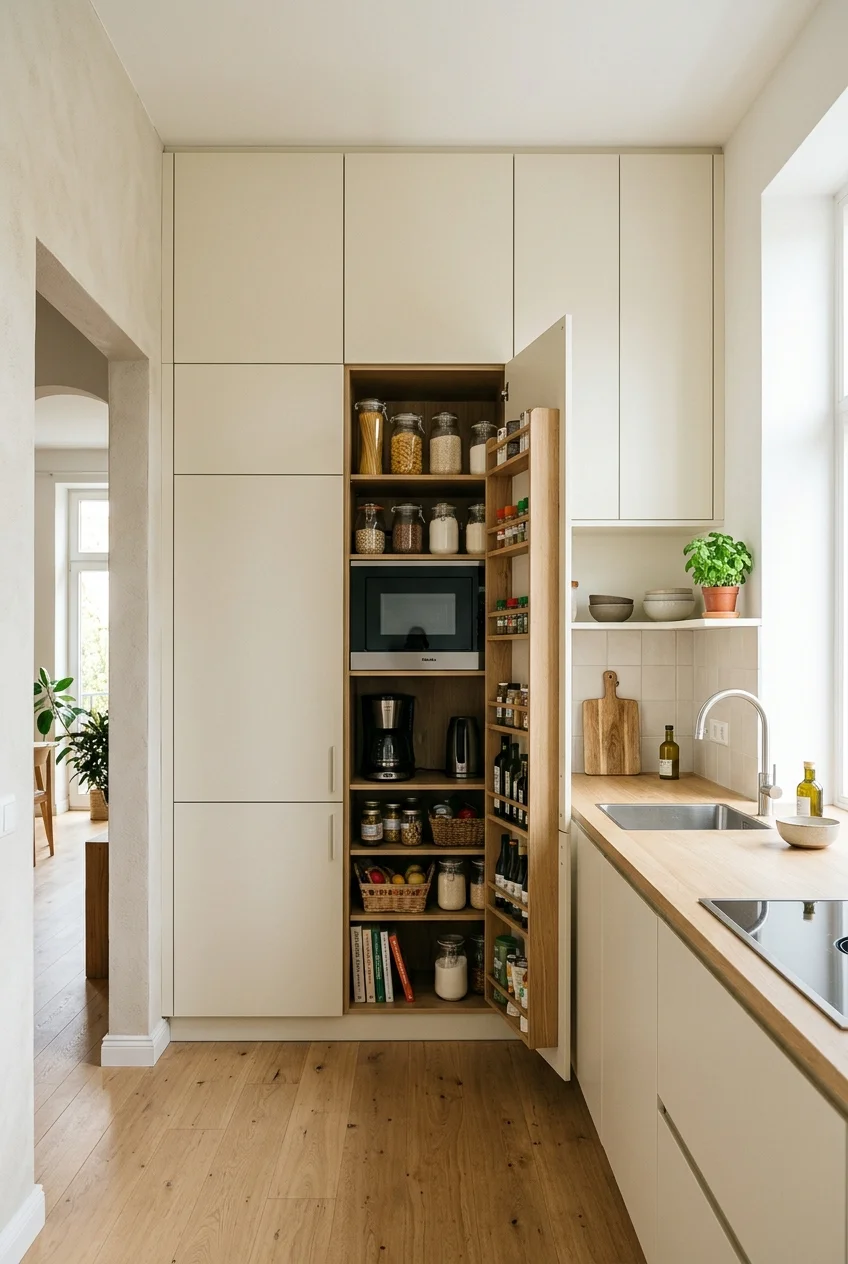
One organized bank of tall cabinets can hold food, small appliances, serving pieces, and cleaning supplies while allowing the remaining kitchen to feel lighter.
Keep the fronts visually consistent and assign interiors by task. These kitchen cabinet makeover ideas offer more ways to refine visible cabinetry.
Locate the pantry wall near grocery entry but outside the tight preparation zone, so someone can find a snack without crossing behind the cook.
22. Hide Small Appliances in an Appliance Garage
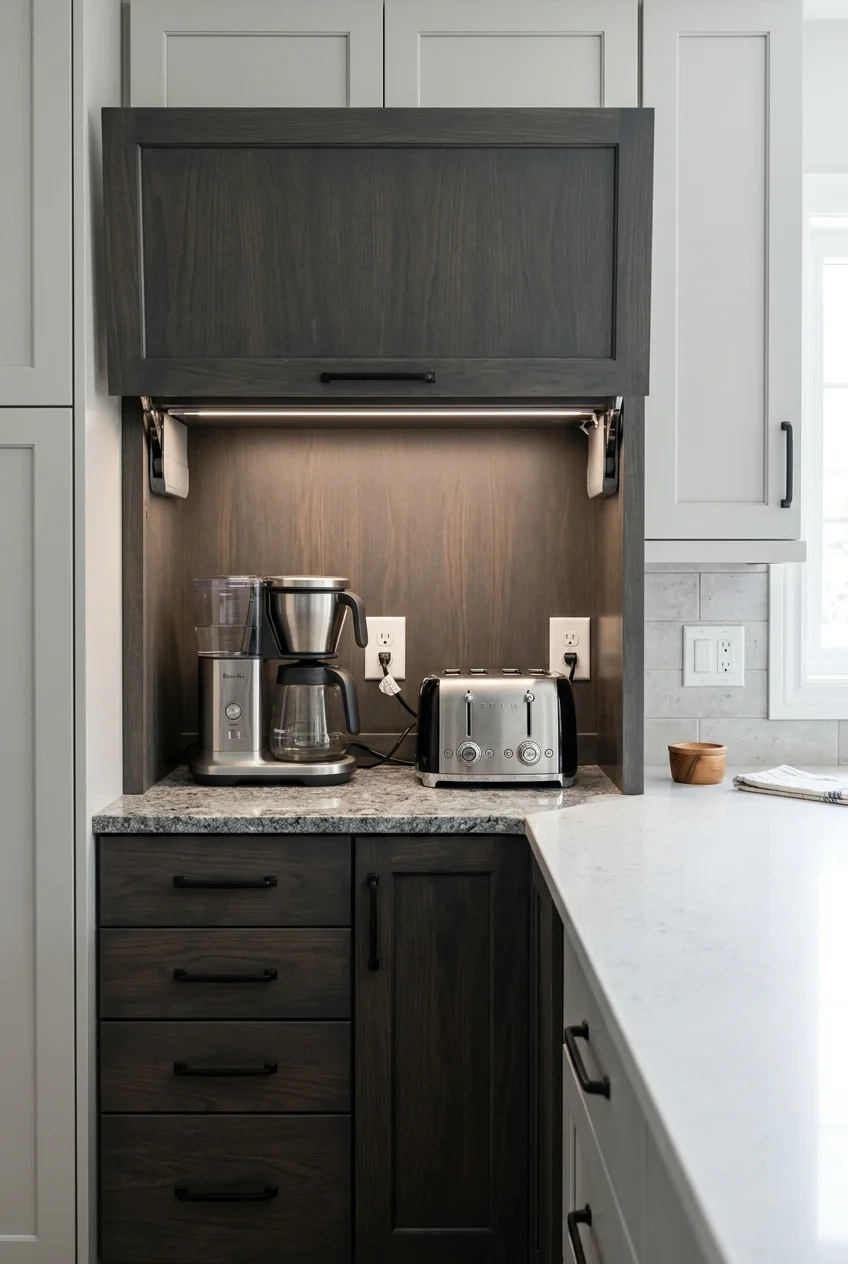
An appliance garage gives frequently used machines a nearby home while allowing the main counter to look composed from the dining and living areas.
Choose a door that opens without blocking the work surface or nearby cabinet. Plan ventilation, heat, outlets, and usage around manufacturer requirements.
Safety note Do not operate a heat-producing appliance inside a closed cabinet unless the appliance and cabinet design explicitly support that use.
23. Create a Closable Breakfast Station
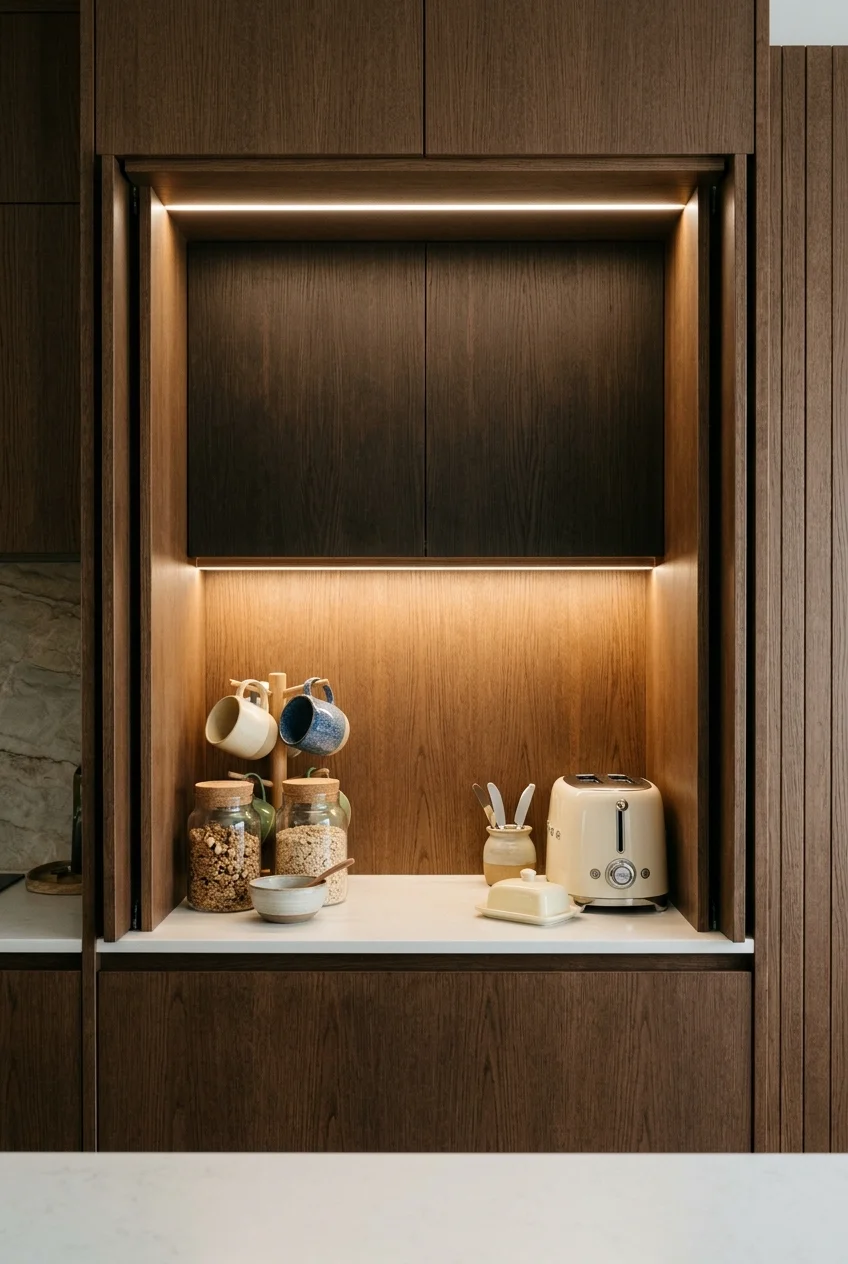
A breakfast station groups mugs, cereal, bread, and drink supplies away from the main preparation area, reducing morning traffic around the cook.
Use pocketing or folding doors only when they can remain safely open during use. Include a wipeable counter and task lighting inside.
Return every item to the station before closing it, turning a visually busy routine into one calm cabinet front after breakfast.
24. Put Deep Drawers Beside the Preparation Zone
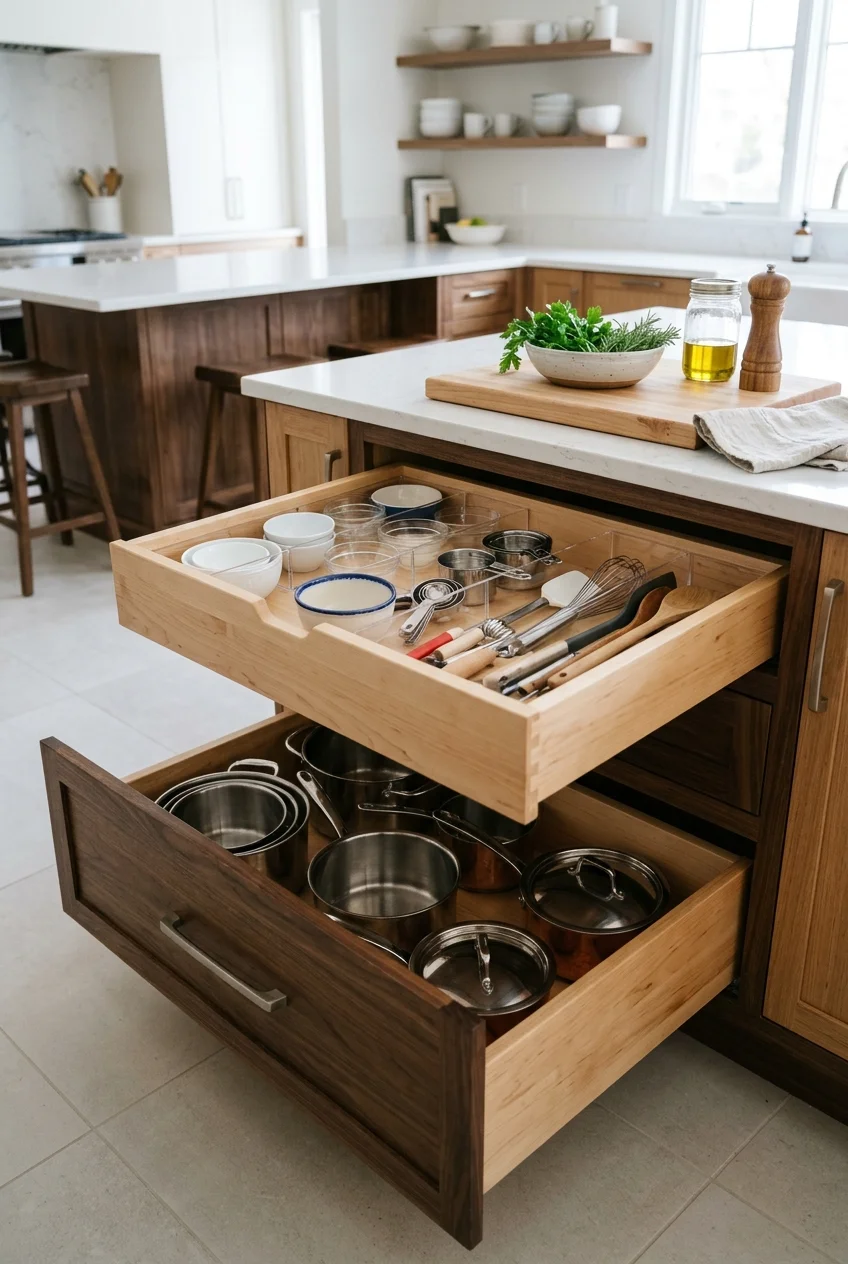
Wide drawers bring pots, bowls, and pantry staples into view from above, shortening the search that can make a visible kitchen feel hectic.
Store items near their point of use and add dividers that fit the actual contents. Avoid stacking so deeply that everything becomes difficult to lift.
25. Use the Living Side of the Island for Storage
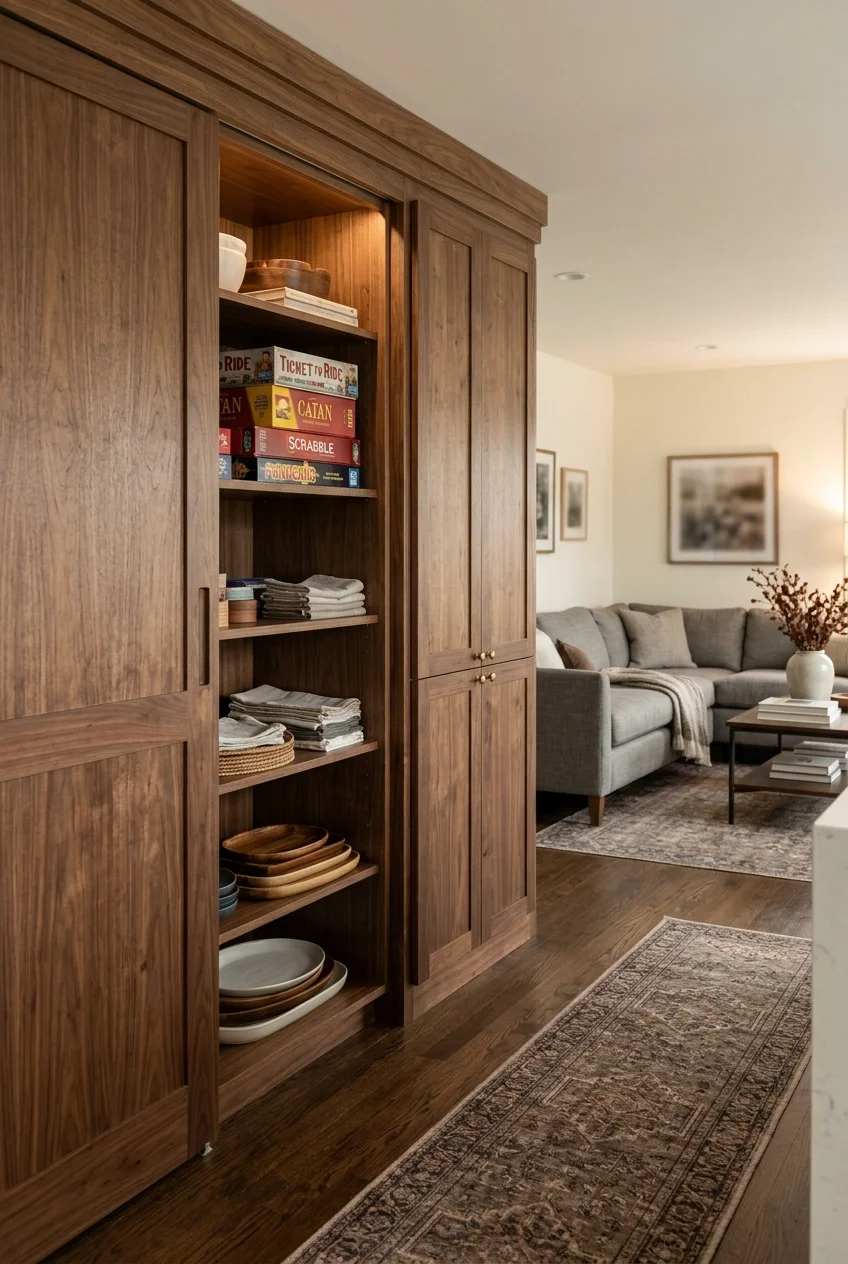
Shallow cabinets on the island's living side can hold board games, linens, candles, or serving pieces without drawing family traffic into the cooking zone.
Choose sliding or carefully hinged fronts where furniture stands nearby. Keep frequently used items at reachable heights and heavy objects close to the floor.
Match or complement surrounding furniture so this face reads as part of the shared room rather than the unfinished back of kitchen cabinetry.
26. Limit Open Shelves to One Quiet Wall
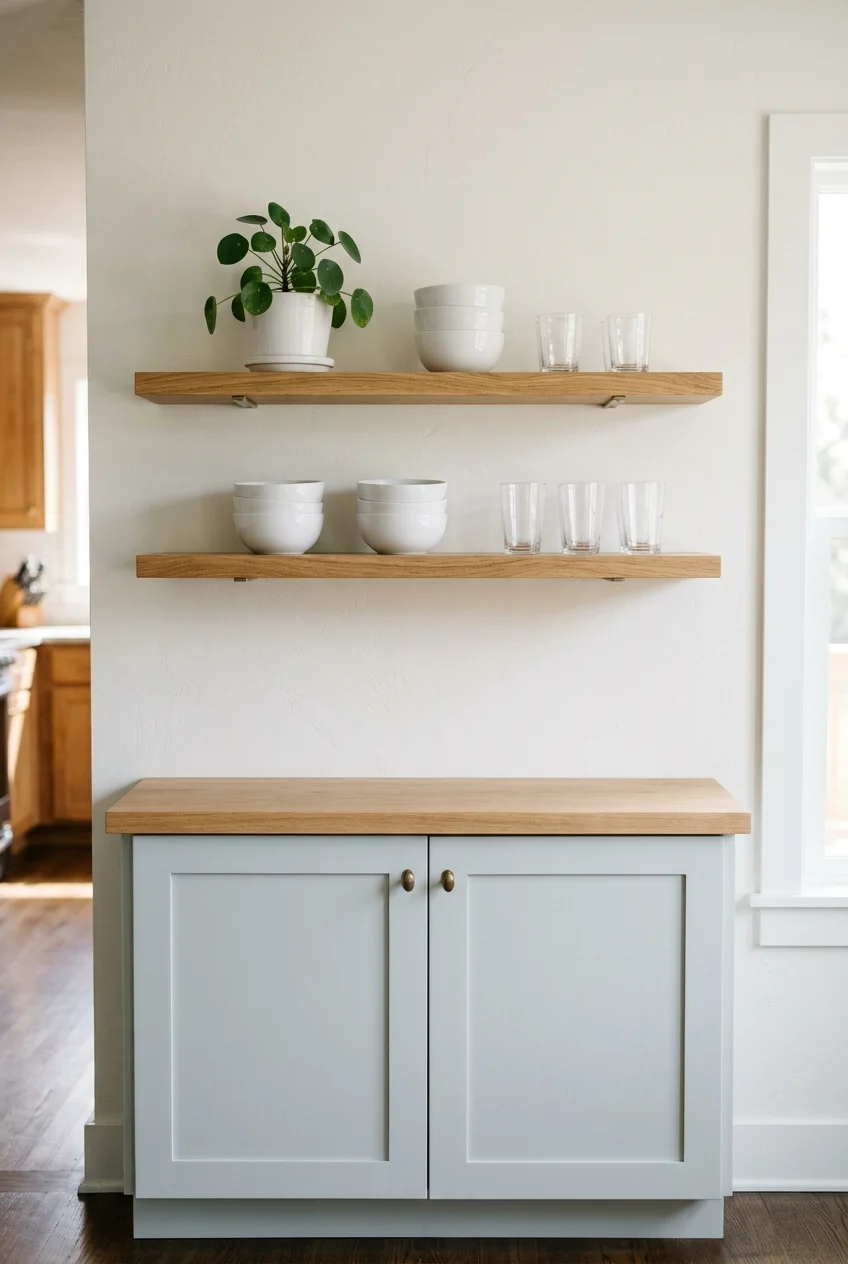
A short run of open shelves adds lightness and personality without exposing every dish. Place them away from heavy grease, steam, and crowded preparation.
Display a small working set with breathing room, then keep mismatched supplies behind doors. Repetition and empty space matter more than constant decorative restyling.
- Use secure supports appropriate to the wall and load.
- Keep everyday pieces within comfortable reach.
- Avoid shelving above a splattering cooktop.
- Leave nearby doors and windows free to operate.
27. Bridge Kitchen and Dining With a Glass-Front Hutch
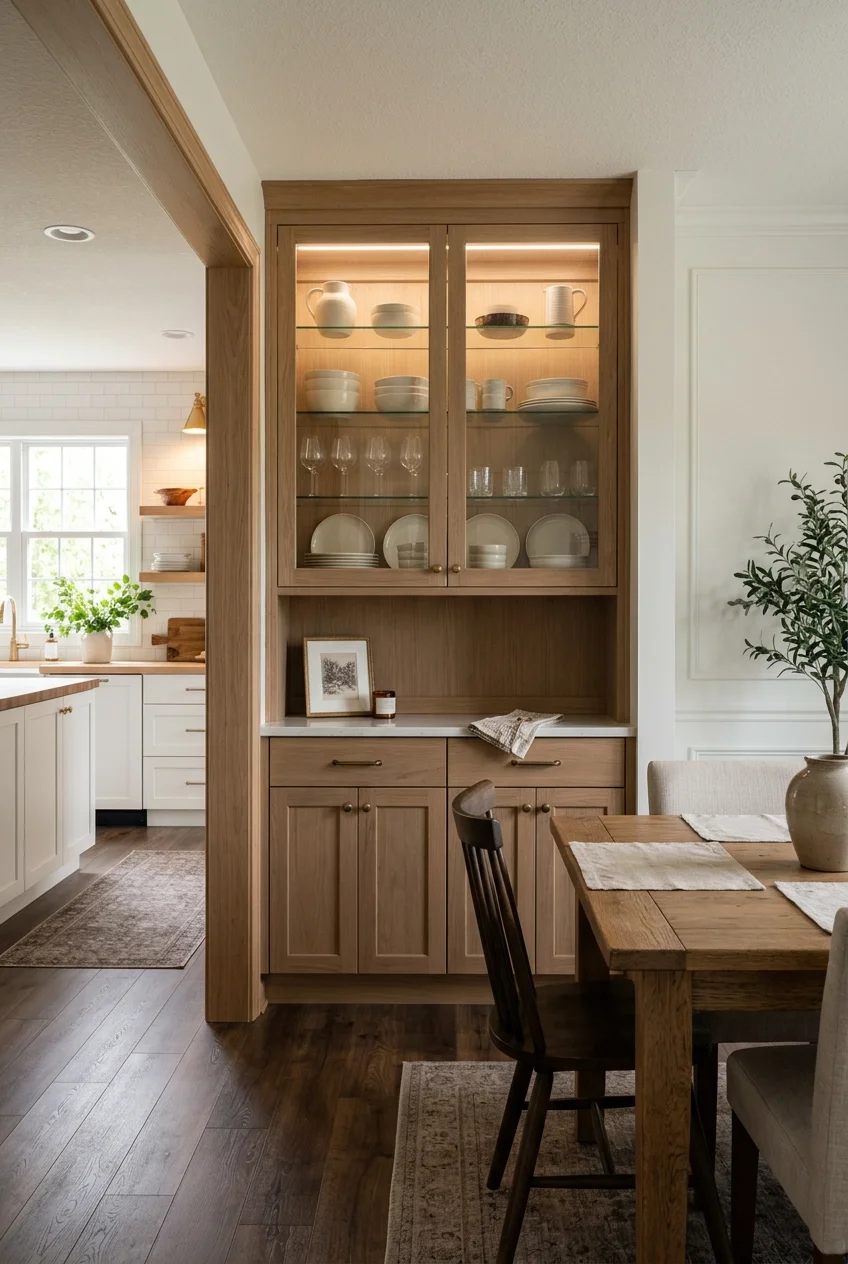
A hutch placed between kitchen and dining can store tableware where both zones need it, while glass fronts make the transition feel lighter.
Use interior lighting and a limited palette so the display remains calm from across the room. Store visually noisy supplies in closed lower cabinets.
Keep the hutch shallower than nearby work cabinetry when circulation is tight, and anchor freestanding furniture appropriately for local conditions.
28. Place Tall Cabinets at the Outer Edge
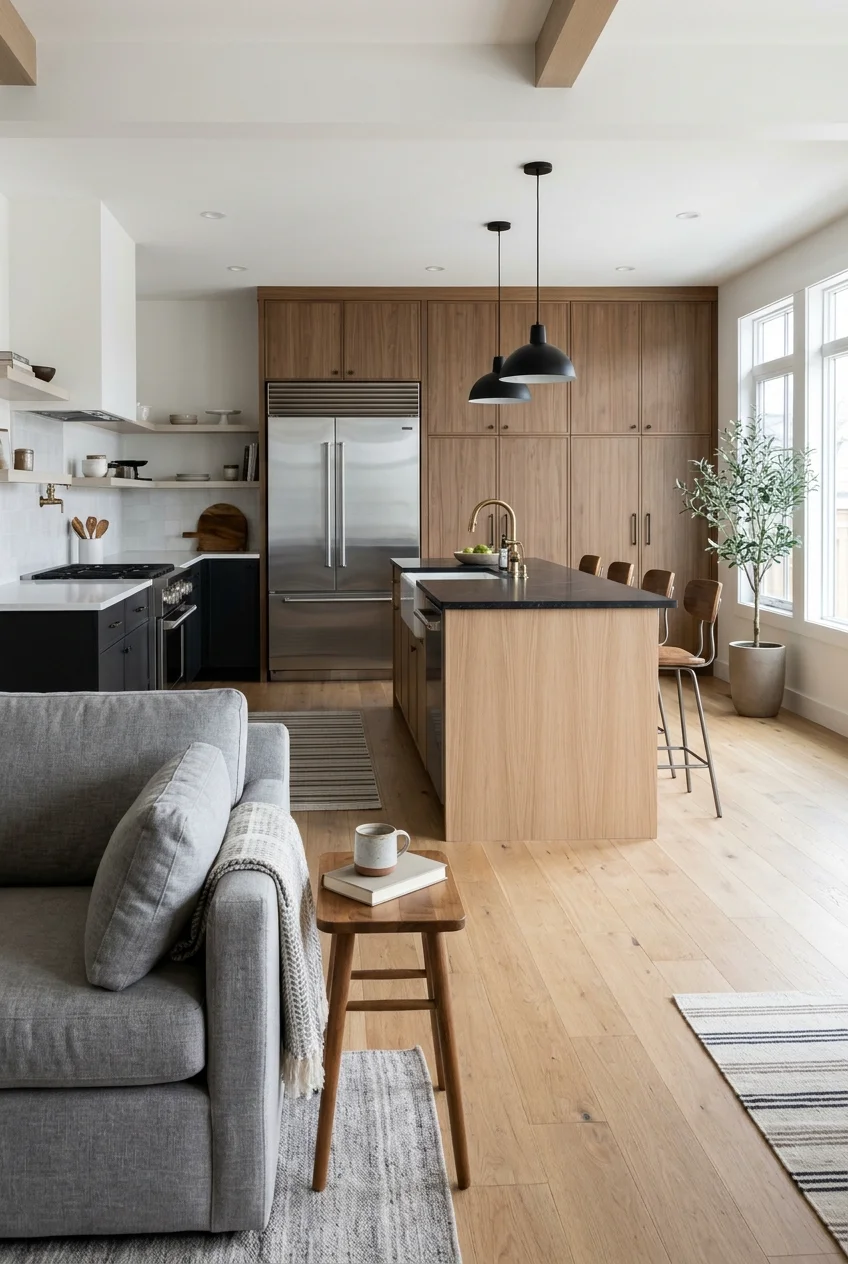
Moving full-height storage to the room's outer edge protects central sightlines and prevents the kitchen from presenting a tall visual barrier to living areas.
End the low run cleanly with a finished panel or open shelf, then align tall cabinet tops for a composed architectural appearance.
29. Integrate Large Appliances Into Cabinet Lines
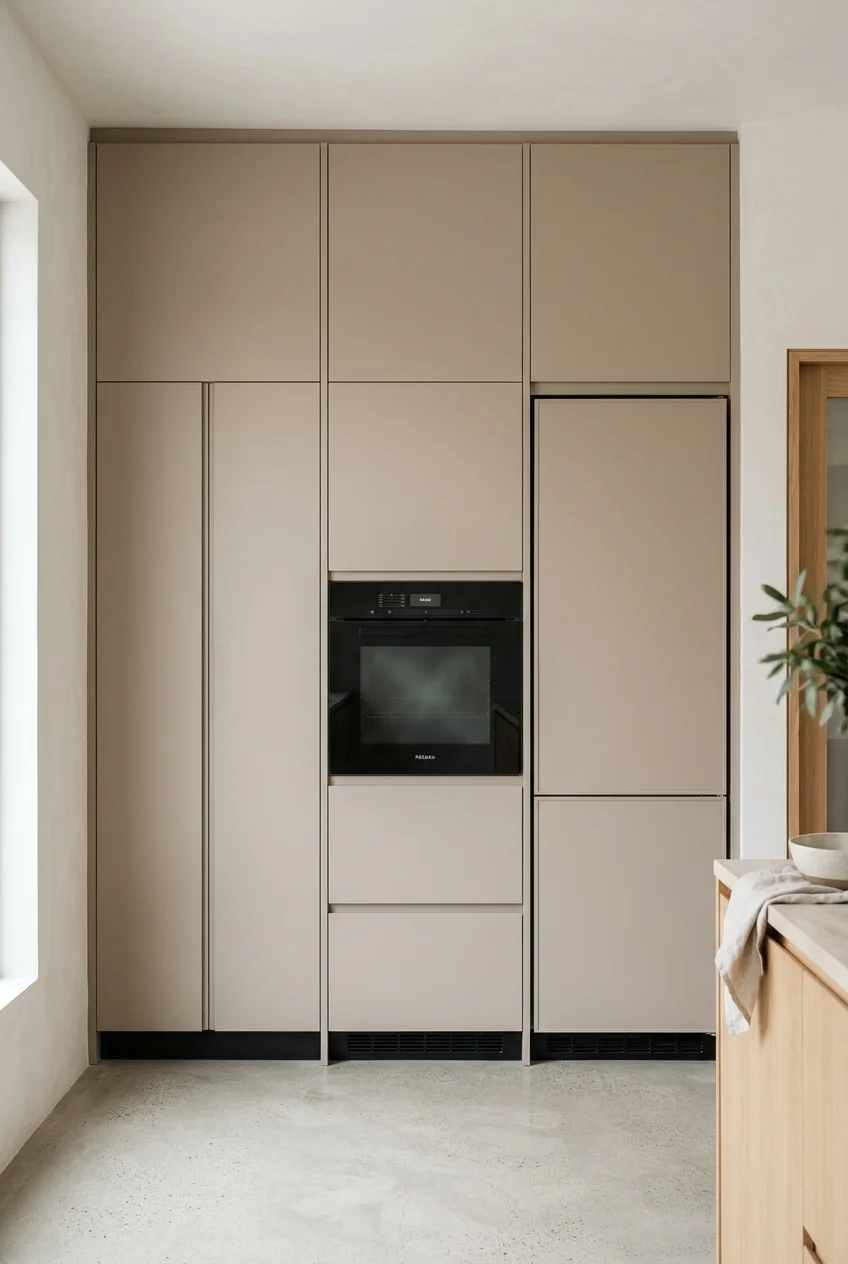
Aligned appliance and cabinet fronts create a calmer wall when the kitchen remains visible all day, especially from a nearby sofa or entry.
Follow appliance-specific ventilation, clearance, door-swing, electrical, plumbing, and panel requirements. A visually flush result must still remain serviceable and safe.
Planning tip Confirm exact model specifications before cabinetry is finalized; generic appliance dimensions do not capture hinges, handles, airflow, connections, or required removal space.
30. Hide Waste and Recycling Near the Prep Counter
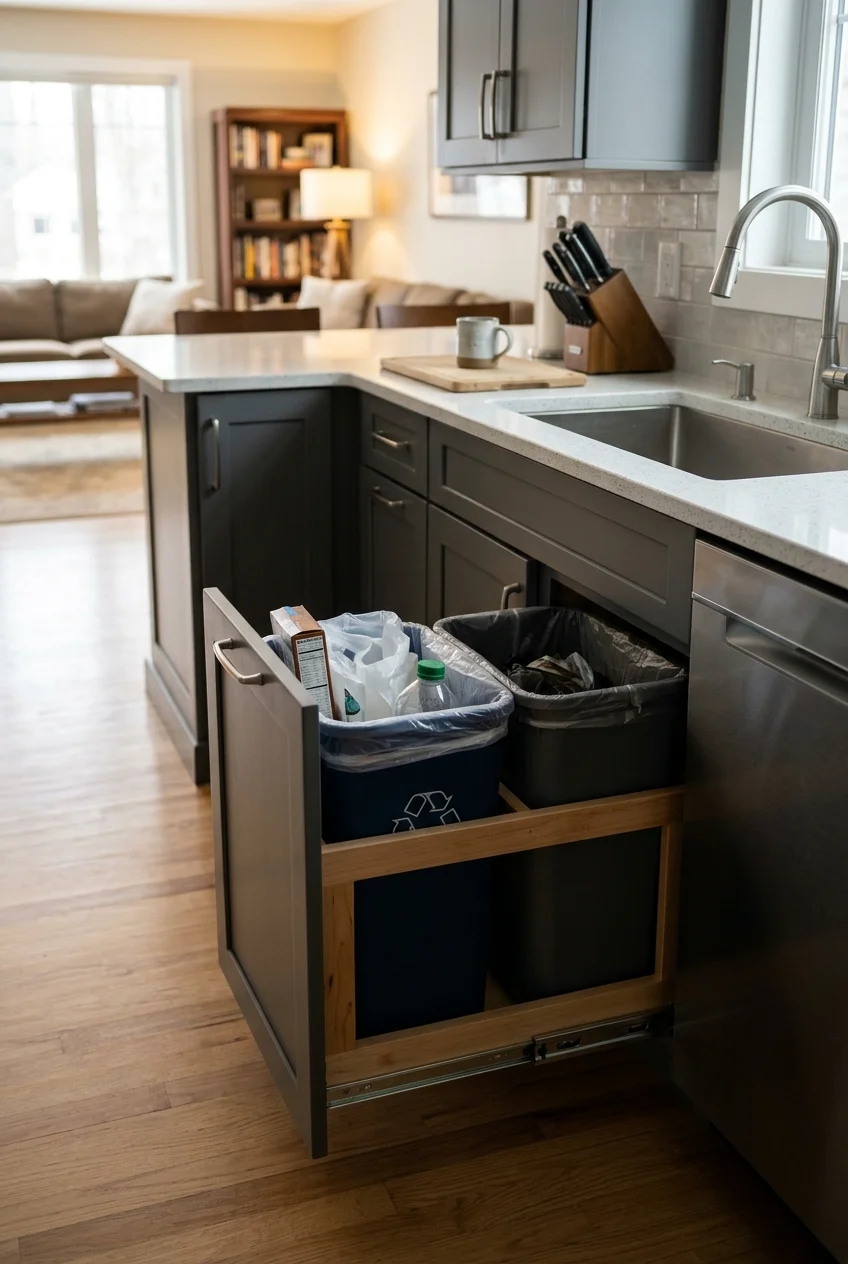
A divided pullout beside the main preparation area makes scraps and packaging easy to sort without leaving visible bins in the shared room.
Place it where an open drawer will not trap someone at the sink or block the principal aisle. Use washable liners and accessible handles.
Match container capacity to actual collection routines, because undersized compartments overflow quickly while oversized bins can become unpleasant before pickup day.
Light, Air, and Sound in an Open Kitchen
A shared room magnifies dim counters, lingering odors, and appliance noise. Layered light, effective exhaust, and thoughtful placement make openness comfortable beyond the photograph.
31. Brighten Worktops With Under-Cabinet Task Lighting
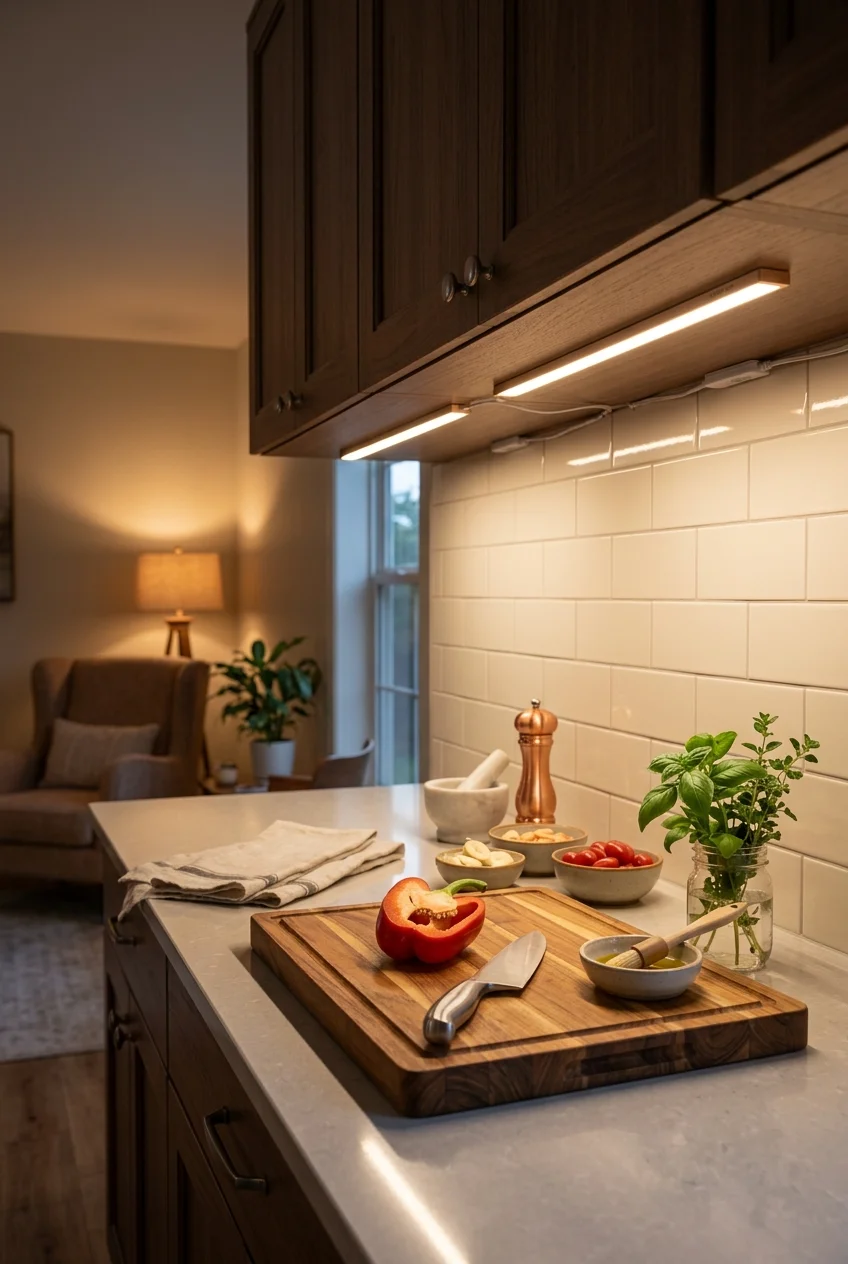
Under-cabinet lighting brightens preparation surfaces without flooding the living area, helping the kitchen remain useful when the room's ambient lights are softened.
These dimmable plug-in under-cabinet light bars (paid link) show one current option; verify length, cord route, outlet position, controls, and light quality before ordering.
Mount the light toward the cabinet front so illumination reaches the working area, then conceal cords without pinching them or crossing wet and hot zones.
Light test Temporarily position one fixture after dark and check glare from the sofa, because shiny counters can reflect exposed diodes across the shared room.
32. Choose Island Pendants That Preserve the View
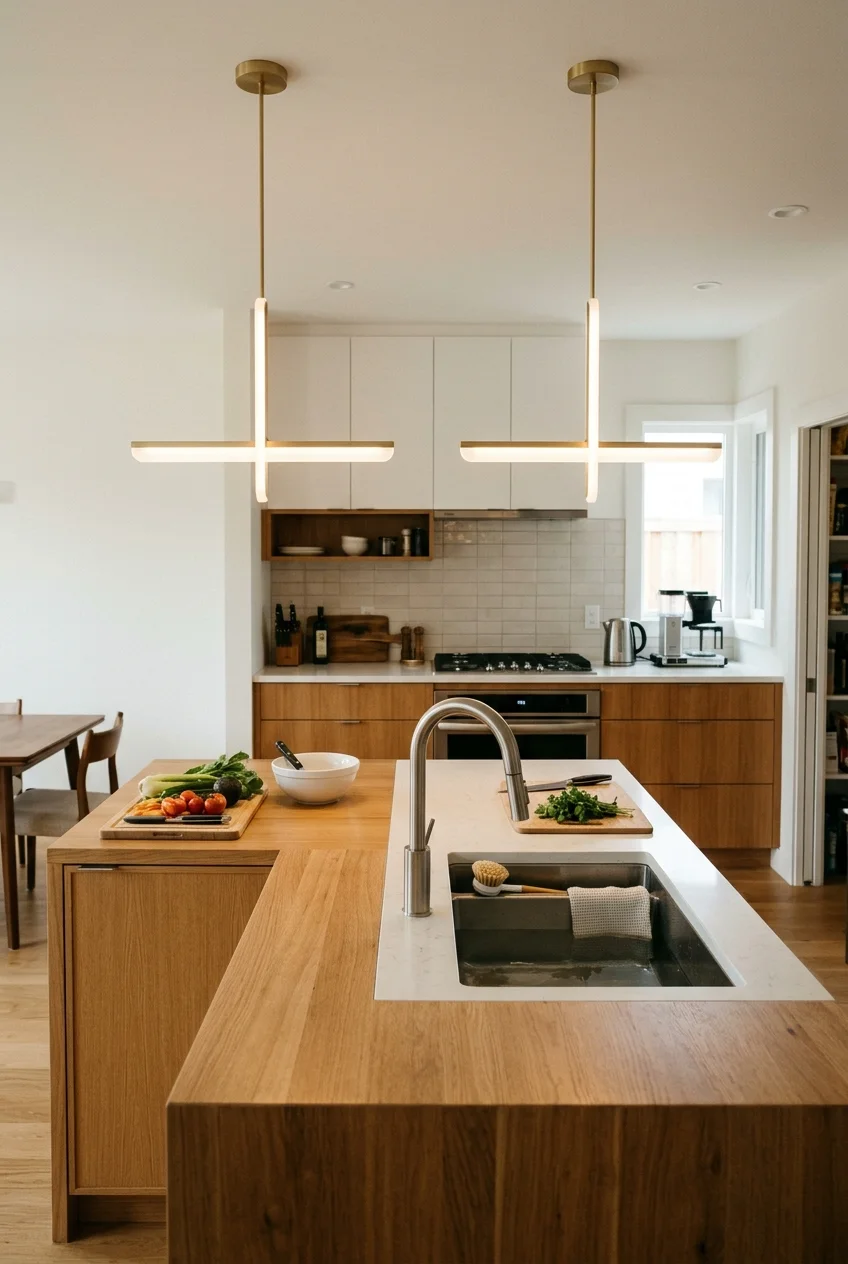
Clear, slim, or softly diffused pendants can light an island without creating a heavy barrier between someone cooking and guests across the room.
Evaluate brightness at the counter and glare at seated eye level. Decorative transparency is not useful when an exposed lamp becomes uncomfortable.
Center fixtures over usable counter sections rather than the sink opening or tall faucet, where visual and physical conflicts can occur.
33. Give the Dining Table Its Own Light
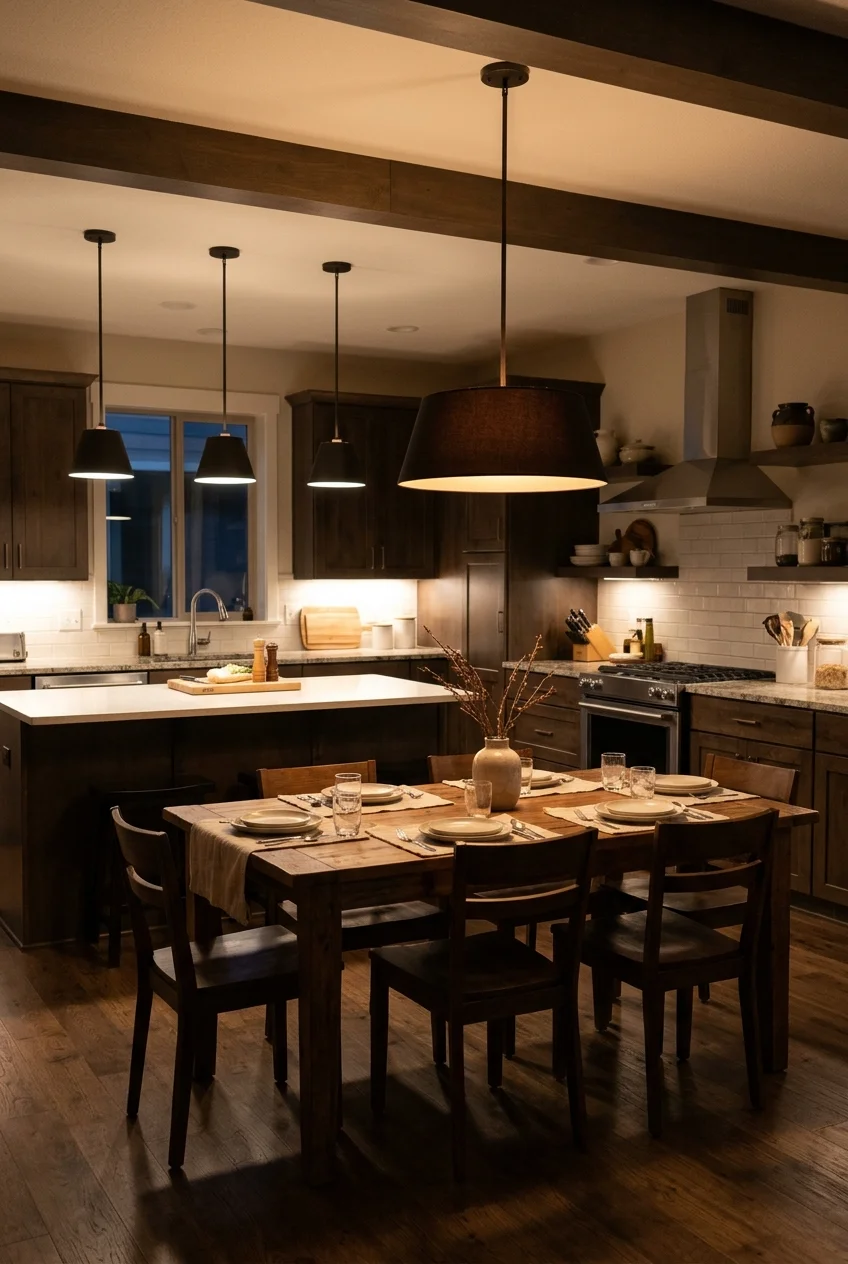
A dedicated dining fixture creates an evening destination and lets the table feel distinct even when kitchen, dining, and living share one ceiling.
Relate its finish or shape to island lighting without choosing an identical fixture. Separate dimming controls allow each activity to set its own mood.
Center the fixture on the table's intended position, then confirm that the table can remain there without compromising circulation or chair movement.
34. Protect the Daylight Path Across the Room
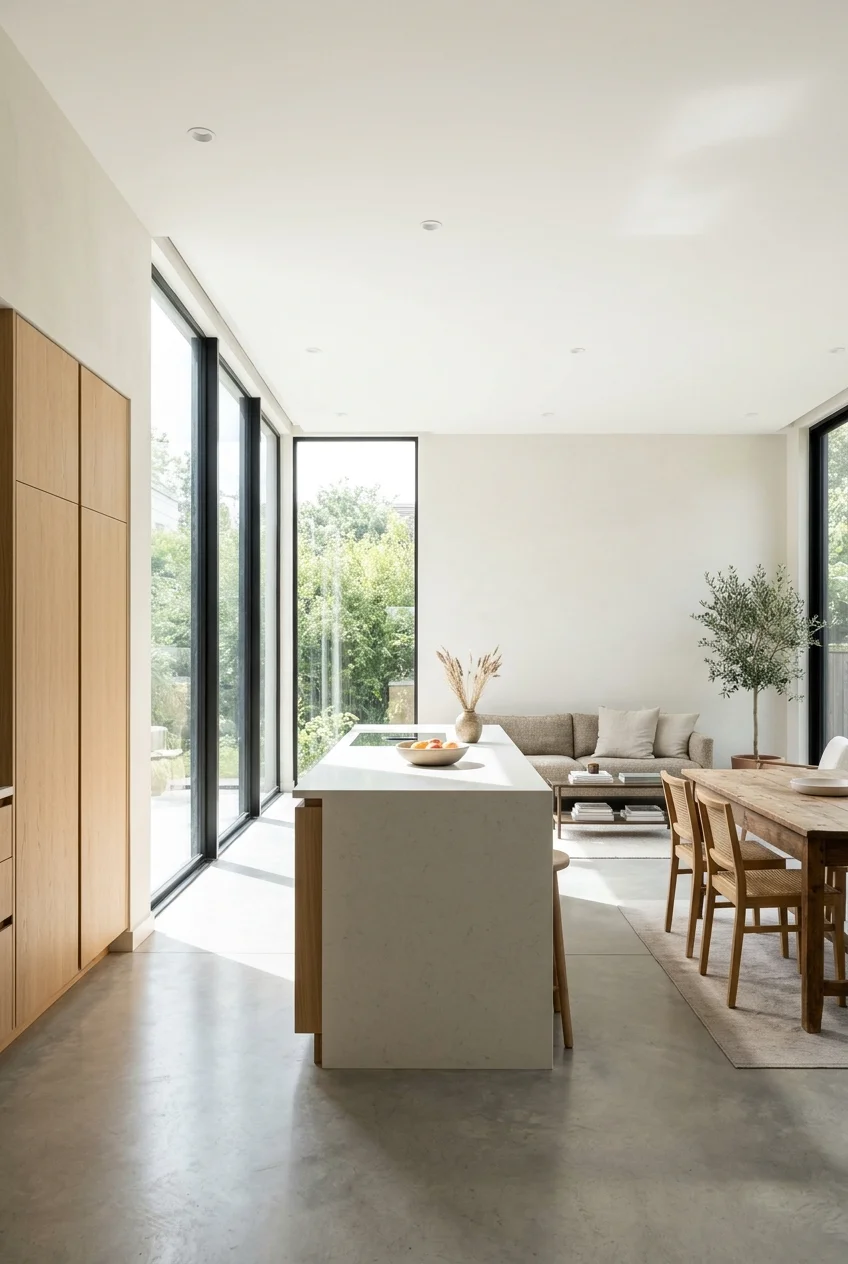
Keep tall storage away from the line between major windows and the shared room, allowing daylight to travel across counters, dining, and seating.
Use lower furniture and visually lighter pendants in that path. Reflective pale surfaces can spread light, but control uncomfortable glare on glossy counters.
Observe the room at several times of day before finalizing cabinet heights, window treatments, and screen placement, since the light direction changes seasonally.
35. Bring High Daylight Into an Interior Kitchen
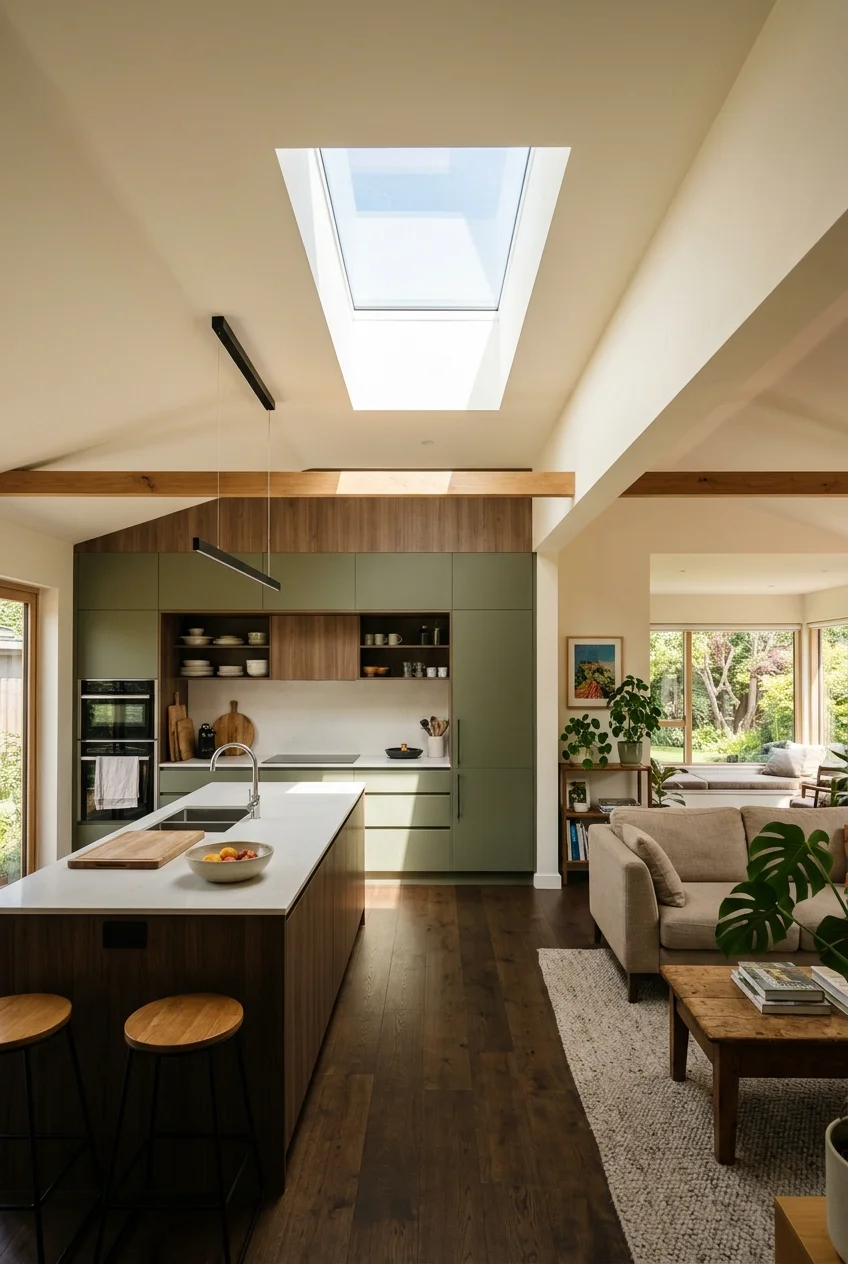
A skylight, roof light, or high clerestory can brighten an interior kitchen without sacrificing wall space needed for storage and appliances.
Position high glazing to wash a preparation surface rather than produce glare on screens or intense heat over a frequently occupied seat.
Roof structure, waterproofing, insulation, shading, local approvals, and future maintenance require careful project-specific professional planning before selecting the final opening.
36. Layer Light Around Dark Cabinetry
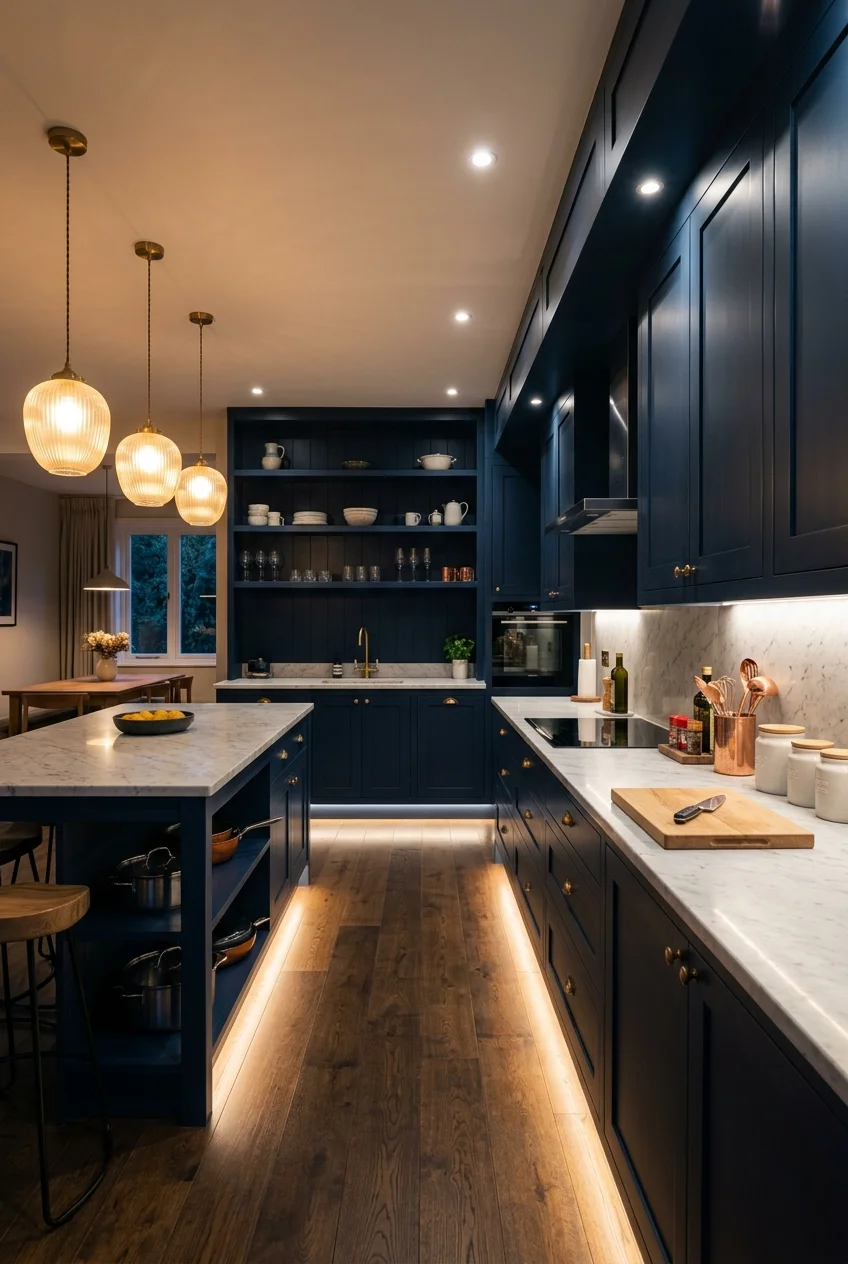
Deep green, navy, or black cabinets can feel rich in an open room when work surfaces, cabinet interiors, and circulation edges remain clearly illuminated.
Combine ambient ceiling light, focused task light, and a modest decorative layer. Relying on one bright fixture creates glare and leaves vertical surfaces dull.
- Test cabinet samples in daytime and evening light.
- Light preparation counters without casting body shadows.
- Keep floor edges and steps clearly visible.
- Use dimming where fixtures and controls support it.
37. Plan Effective Kitchen Exhaust to the Outdoors
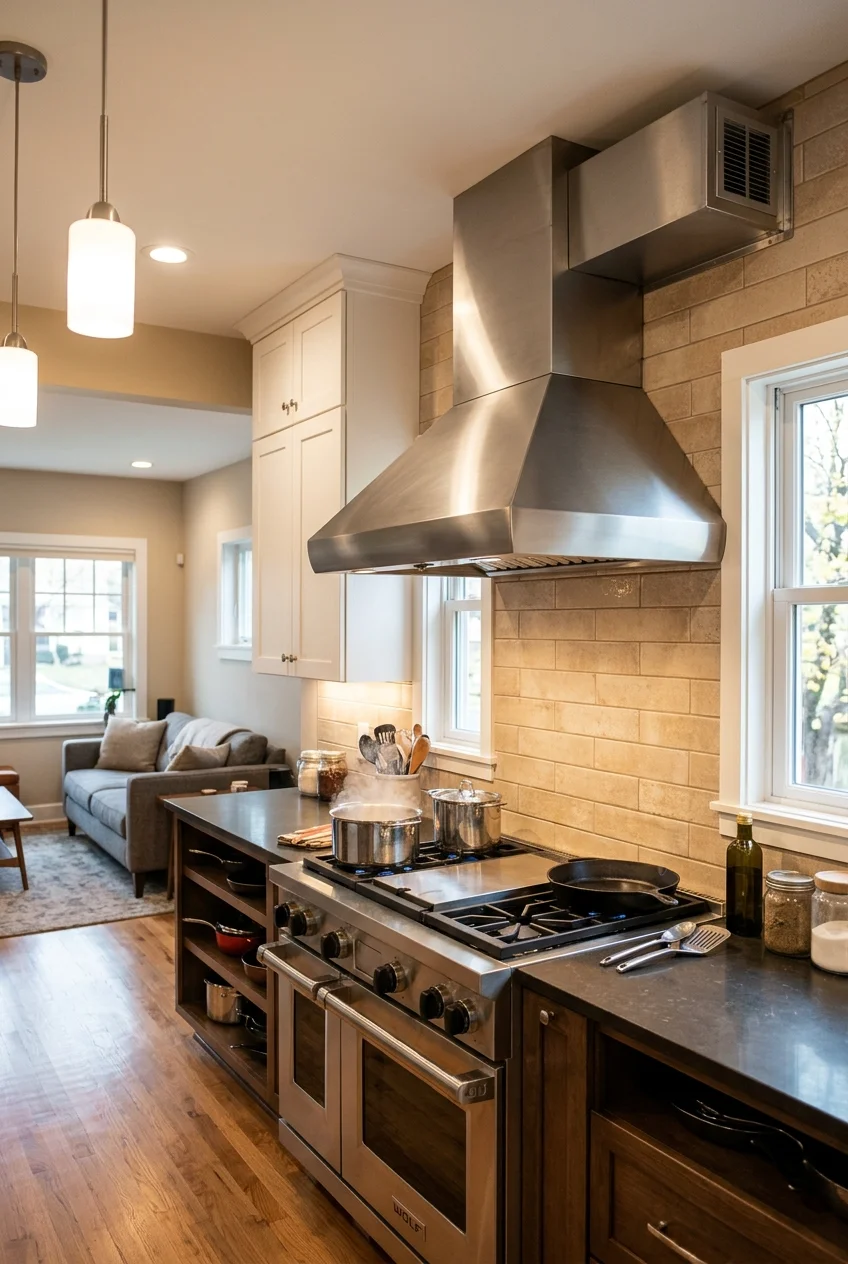
In an open plan, cooking moisture, odors, and fumes can spread quickly. A correctly selected and installed exhaust system should discharge outdoors.
Coordinate hood location, capture area, duct route, makeup-air needs, noise, controls, and clearances with the appliance instructions and applicable local requirements.
Do not terminate kitchen exhaust in an attic, crawlspace, floor cavity, or another indoor area. Use qualified professionals for project-specific design and installation.
Everyday habit Turn exhaust on before cooking begins and keep filters maintained according to the manufacturer's guidance, so the system can work as intended.
38. Keep the Cooktop on the Wall and the Island Social
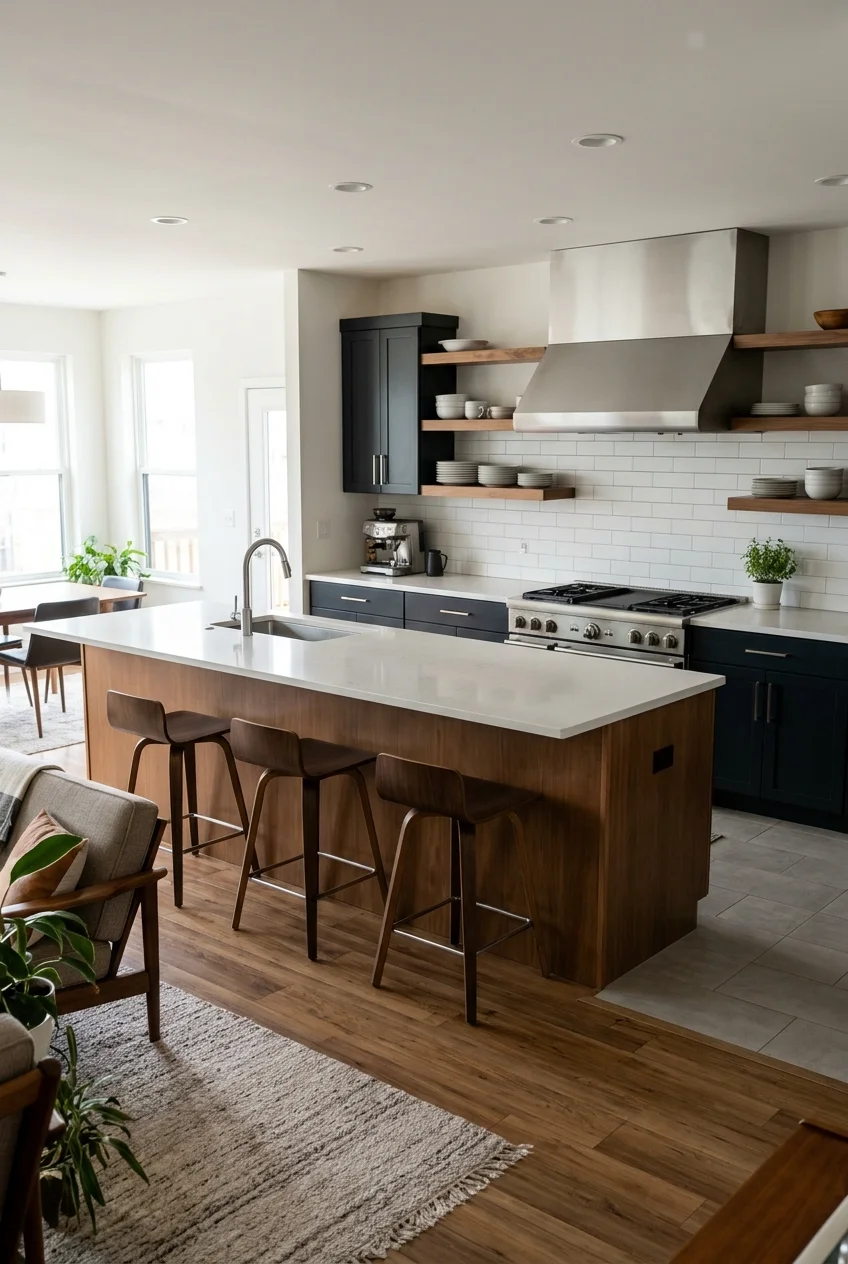
Placing the cooktop on a wall can simplify the island into a clear preparation and gathering surface, with no hot zone between seated guests.
A wall location may also provide a more direct setting for the hood and duct, depending on the building and the final ventilation design.
Keep landing space and storage where the cook needs them, then position island seating beyond the principal movement between range, sink, and refrigerator.
39. Soften Sound With Washable Textiles
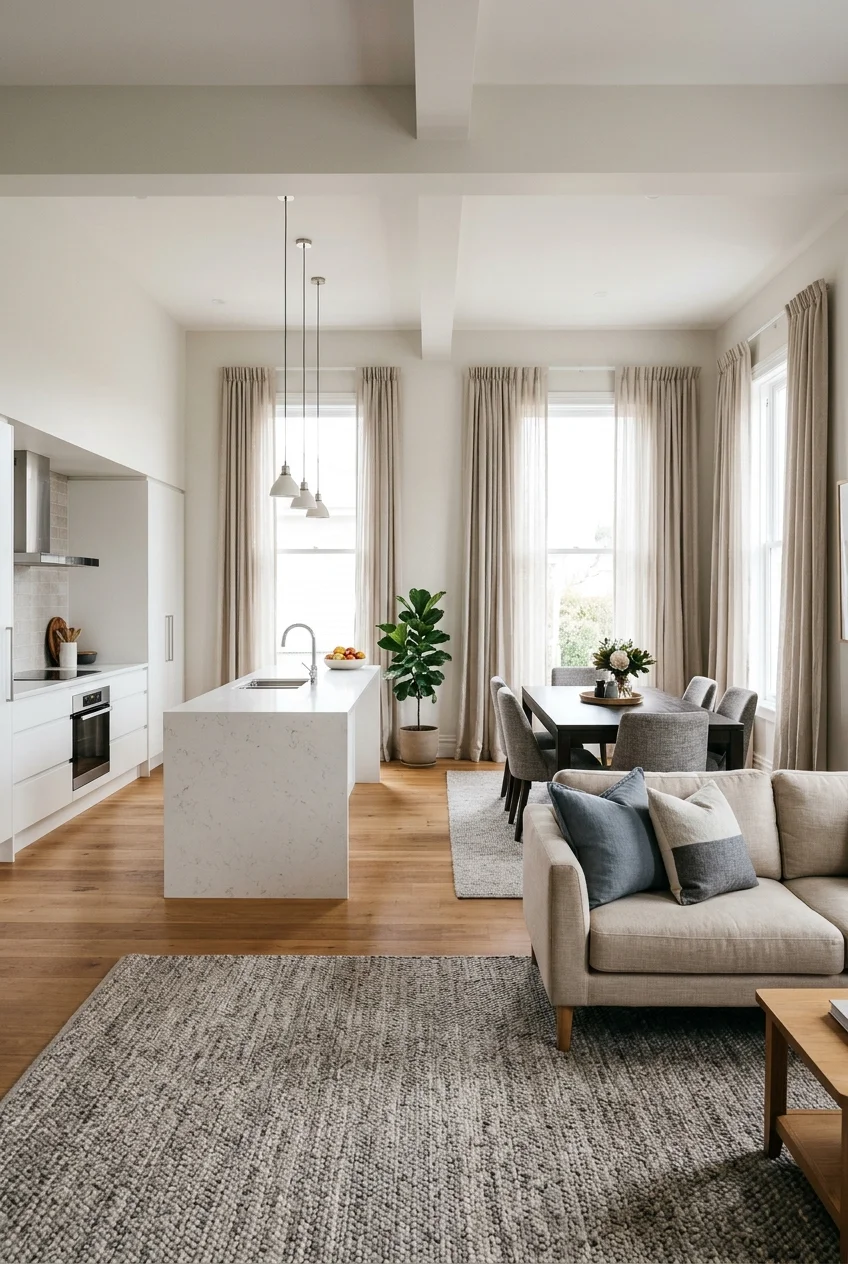
Curtains, upholstered dining seats, a living-room rug, and fabric shades can reduce the hard-surface feeling that makes clatter more noticeable in open rooms.
Place washable, securely fitted textiles away from flames, hot appliances, splatter, and wet work. Keep required clearances and manufacturer guidance in mind.
Spread soft materials across dining and living areas instead of crowding the kitchen, preserving easy cleaning where spills and grease are most likely.
40. Place Noisy Tasks Away From the Sofa
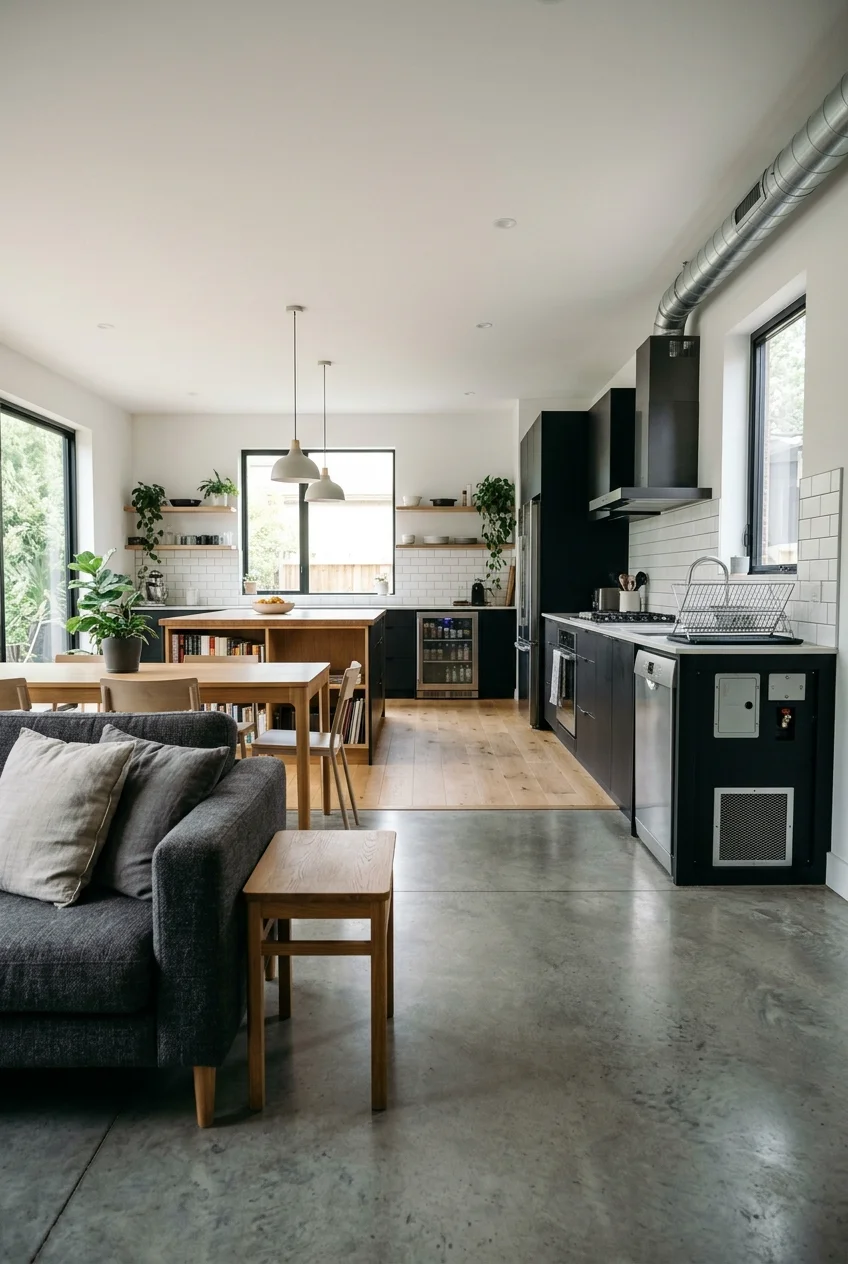
When possible, locate dishwashing, ice-making, and small-appliance stations on the kitchen's far side rather than directly behind the main living-room seat.
Use solid installation, fitted panels, and manufacturer-recommended clearances to prevent rattles. Never obstruct ventilation or access in pursuit of quieter cabinetry.
Test likely sound paths on the plan by considering walls, openings, and seating orientation before finalizing plumbing and appliance positions.
Character and Flexibility for Everyday Living
Once layout and utilities work, shape the kitchen's personality. Furniture-like details, adaptable pieces, and carefully planned curves can make the shared room feel welcoming.
41. Choose a Furniture-Style Island
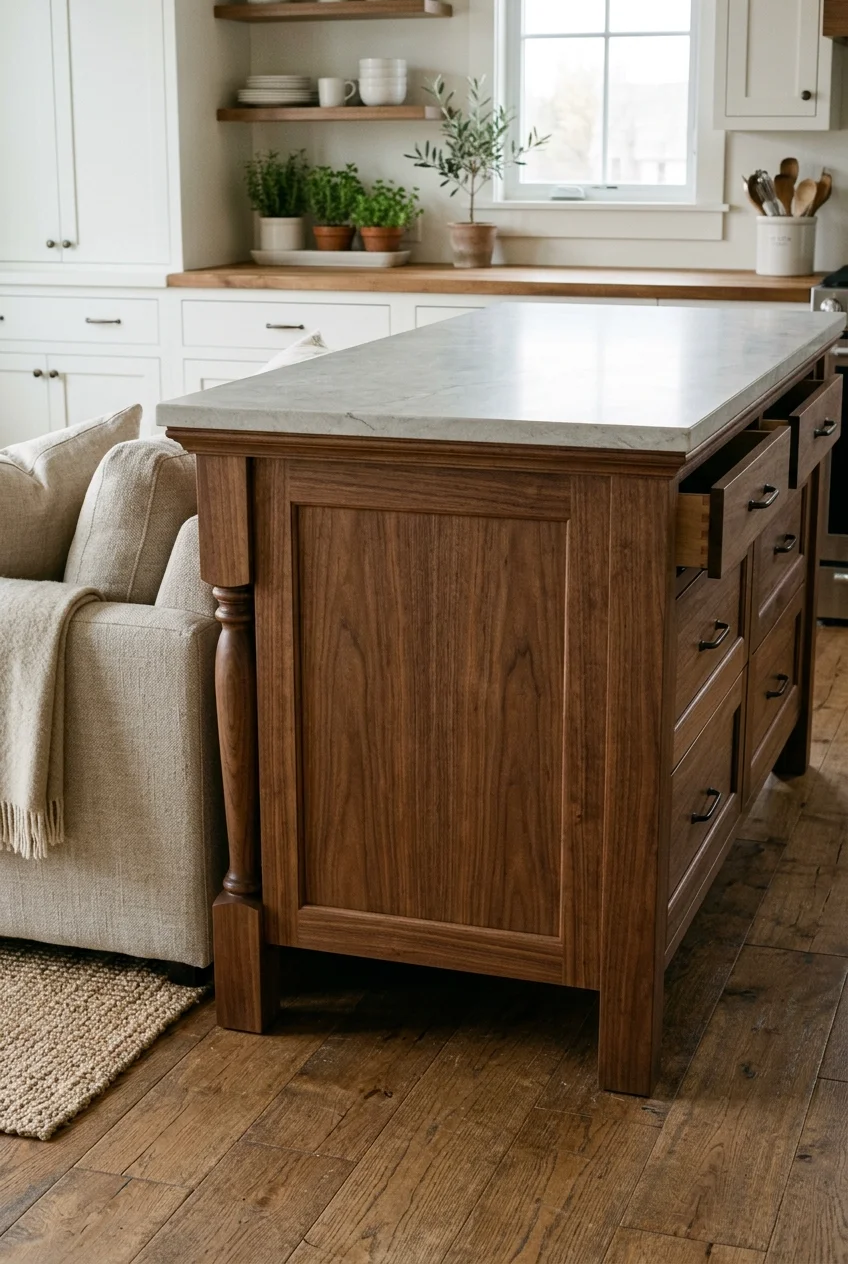
An island with visible legs, inset panels, or a contrasting wood finish can bridge built-in kitchen cabinetry and freestanding living-room furniture.
Keep decorative details clear of feet, stools, and working drawers. The island still needs a durable top, stable construction, and practical storage.
Repeat one small detail elsewhere, such as a dining-table wood tone or console hardware, so the island belongs to the whole room.
42. Use a Two-Tone Island to Link the Zones
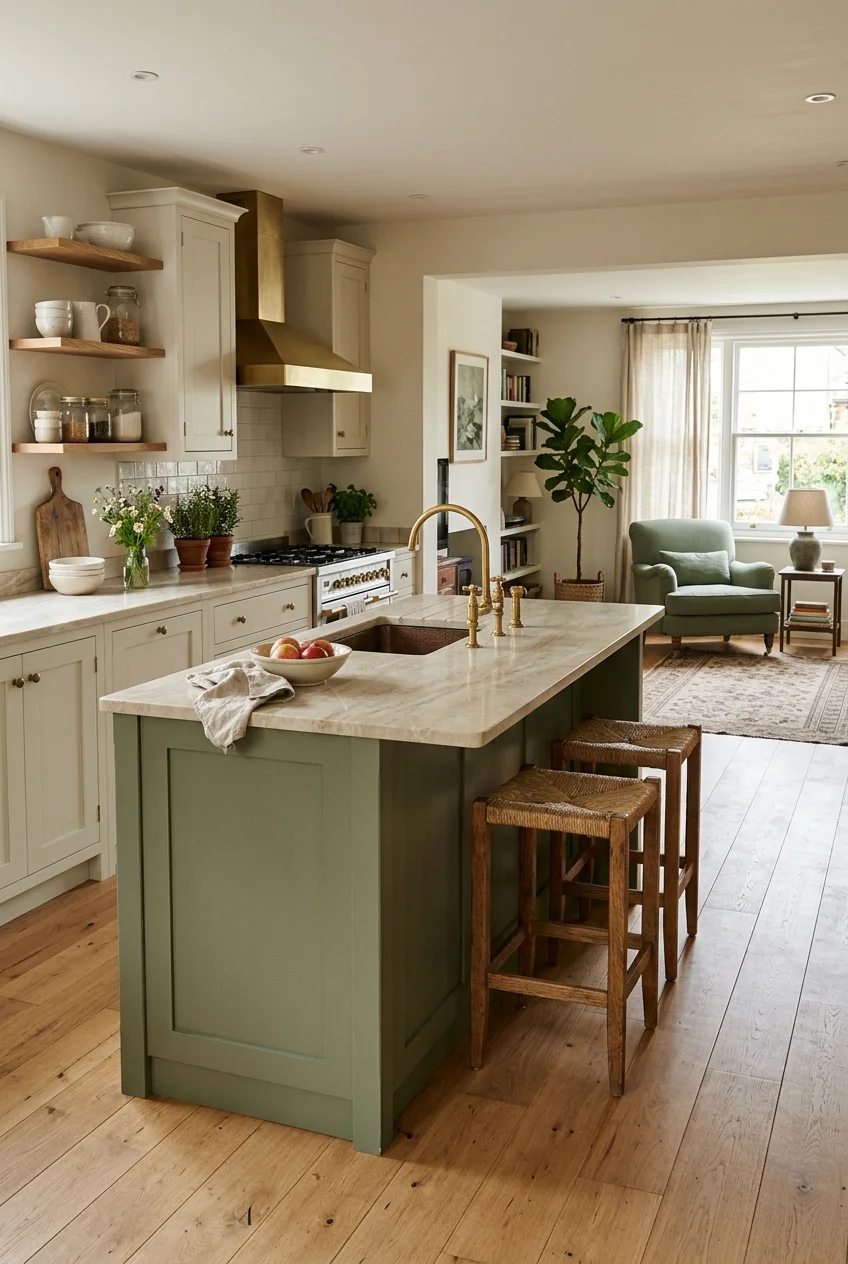
A contrasting island can borrow color from the living room while perimeter cabinets remain quiet, creating connection without coating every surface identically.
Choose the contrast from a fixed element or substantial furnishing, then test large samples beside flooring, counters, and upholstery in changing light.
43. Face the Living Room With a Waterfall End
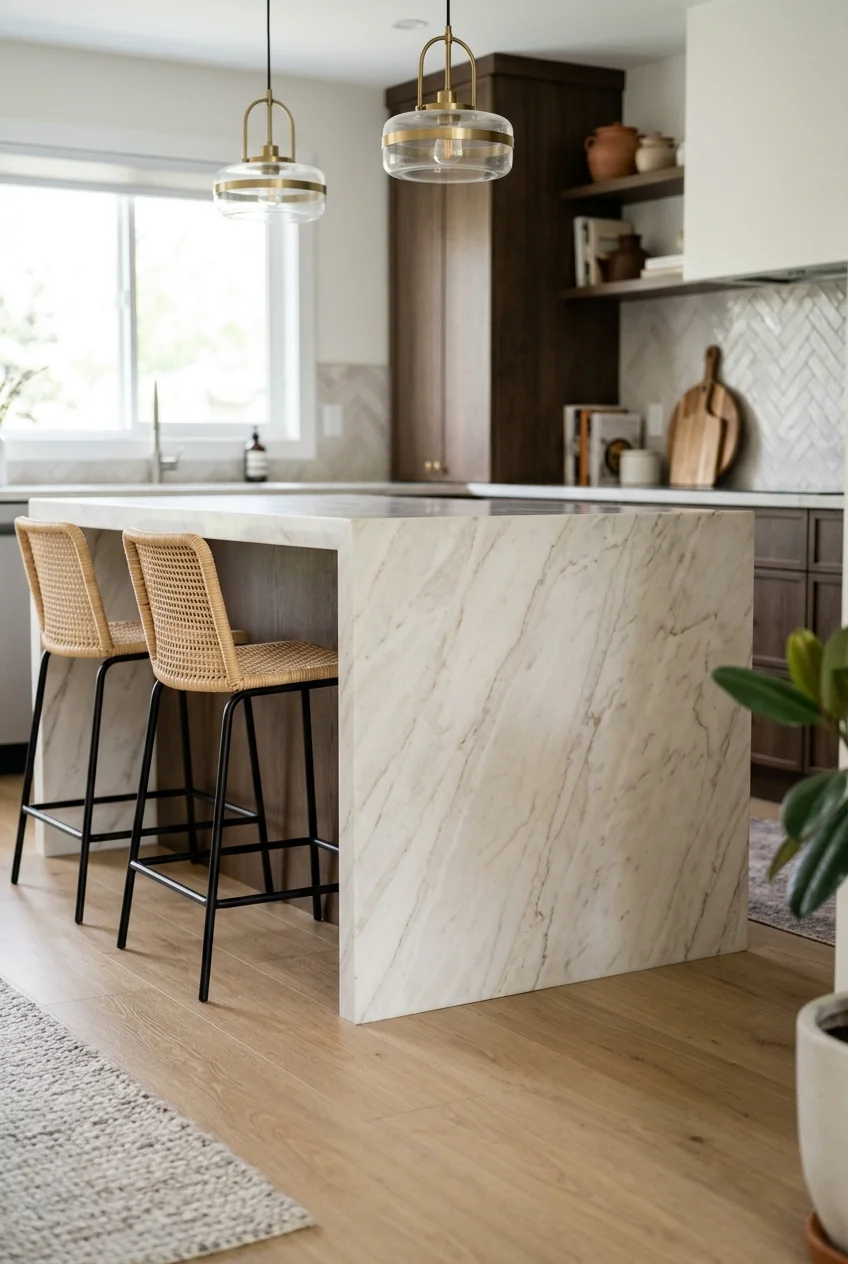
A waterfall counter can give the room-facing island end a finished architectural plane, hiding cabinet seams from the primary living-room view.
Review slab size, pattern direction, edge alignment, floor conditions, installation tolerances, and impact risk with the fabricator before approving the detail.
Reserve waterfall treatment for the most visible end rather than automatically using both, especially when the opposite side needs seating or accessible storage.
44. Round the Island End Near a Busy Route
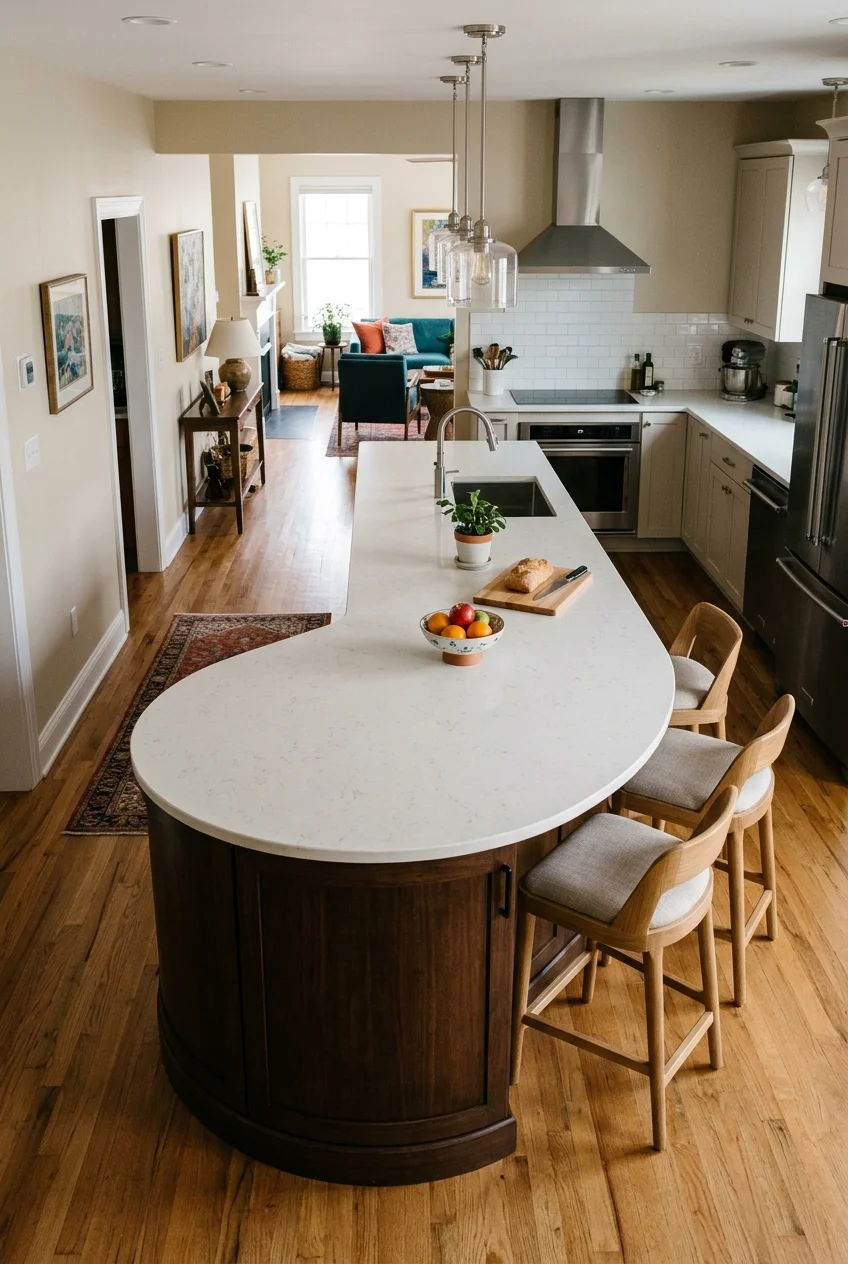
A curved island end can ease the visual turn between kitchen and living zones and remove a sharp projecting corner beside a frequent path.
Make the curve generous enough to look intentional and coordinate cabinetry, counter fabrication, edging, and floor layout before ordering any component.
The curve does not replace adequate circulation space. Map the complete route around stools, open doors, and adjacent furniture at full scale.
45. Place a Dining Nook Beside the Window
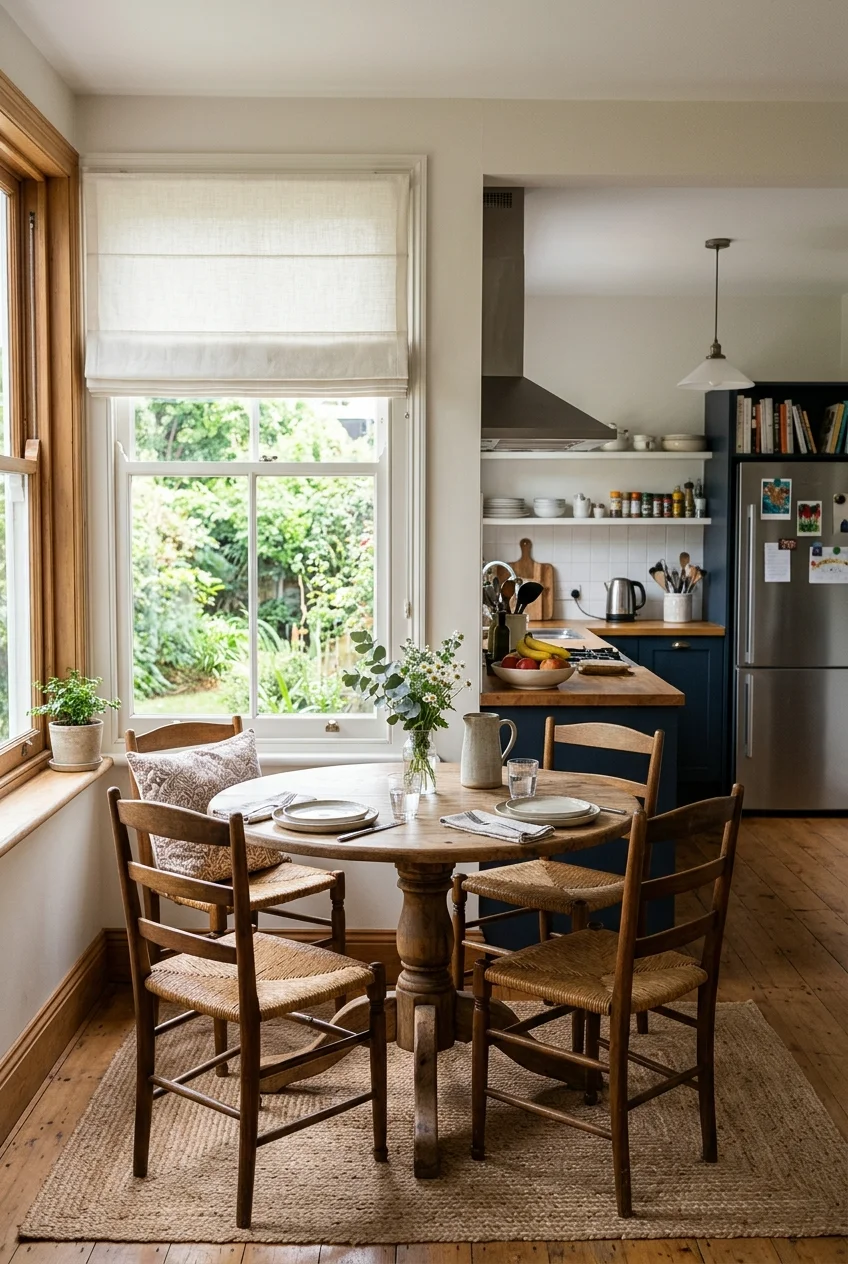
A small table beside a window creates an inviting everyday destination, keeping the larger open room available for living space or occasional entertaining.
Use a compact pedestal or trestle base that allows comfortable entry, and select window treatments that remain clear of food and hot surfaces.
Keep the route from kitchen to nook direct but outside appliance door swings, so serving breakfast does not interfere with cleanup or refrigerator access.
46. Use a Drop-Leaf Table in a Small Open Plan
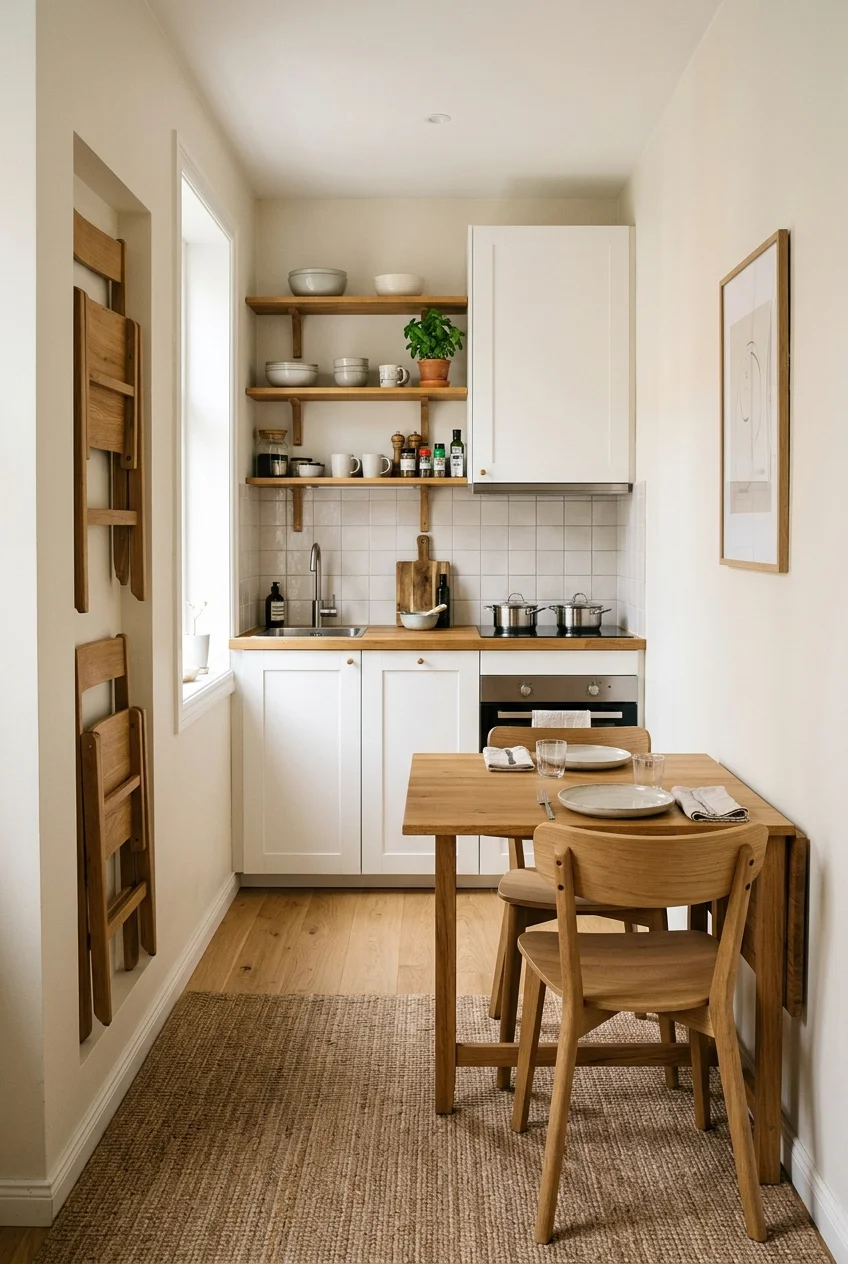
A drop-leaf table can remain narrow for daily movement, then expand for meals, projects, or extra preparation without permanently filling a compact shared room.
Choose a stable mechanism and confirm both open and closed footprints. Store folding chairs nearby rather than leaning them in the kitchen path.
Floor test Mark the expanded tabletop and every pulled-out chair on the floor, because the useful footprint is much larger than the folded furniture.
47. Add a Freestanding Island for a Rental
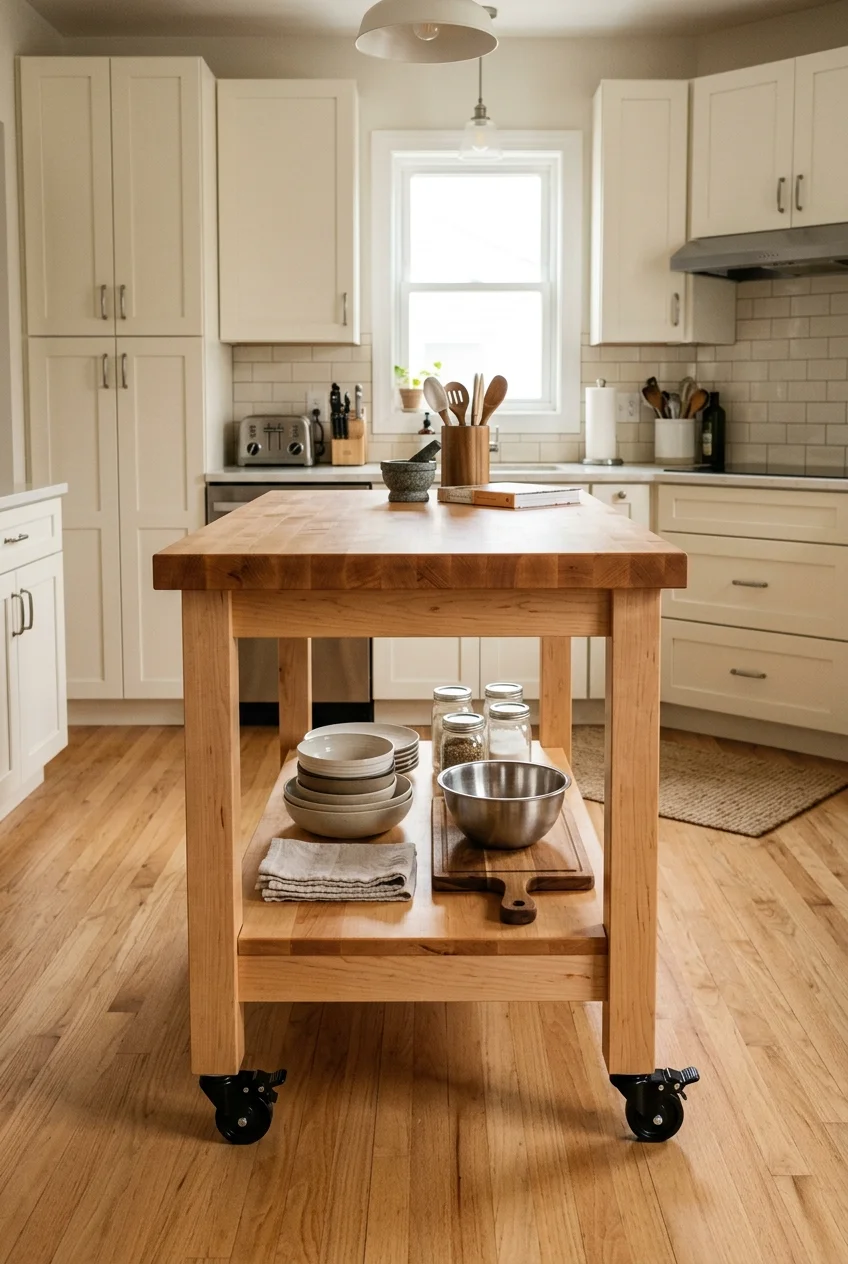
A sturdy freestanding worktable can add preparation space and storage without altering fixed cabinetry, making it useful for rentals and evolving layouts.
Select a stable size and appropriate work surface, then follow lease terms. Locking casters should stay locked during preparation and appliance use.
Avoid running loose extension cords across walkways. If power is needed, use the setup only as allowed by product guidance and local requirements.
48. Plan for Different Bodies and Abilities
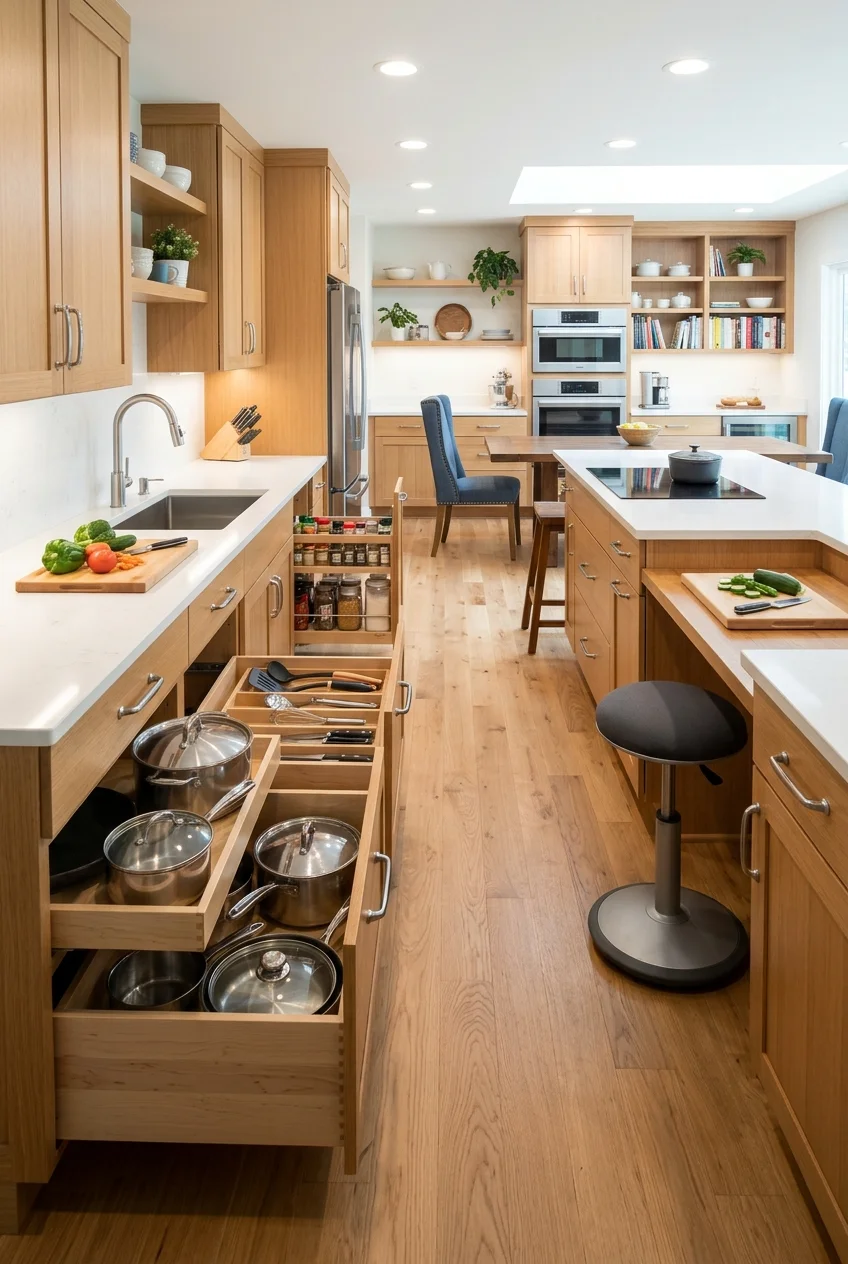
An inclusive open kitchen considers clear routes, reachable storage, comfortable controls, useful lighting, and a seated work or conversation position from the beginning.
Avoid treating one measurement as universal. Review the actual household, tasks, mobility equipment, strength, vision, and future needs with qualified design professionals.
Keep frequently used items between comfortable reach levels and provide multiple seating choices, so participation does not depend on standing at one tall counter.
- Test routes with doors and drawers fully open.
- Provide glare-controlled light over important tasks.
- Choose hardware that is easy to grasp.
- Include at least one comfortable seated surface.
49. Build a Pet Station Into a Quiet End Panel
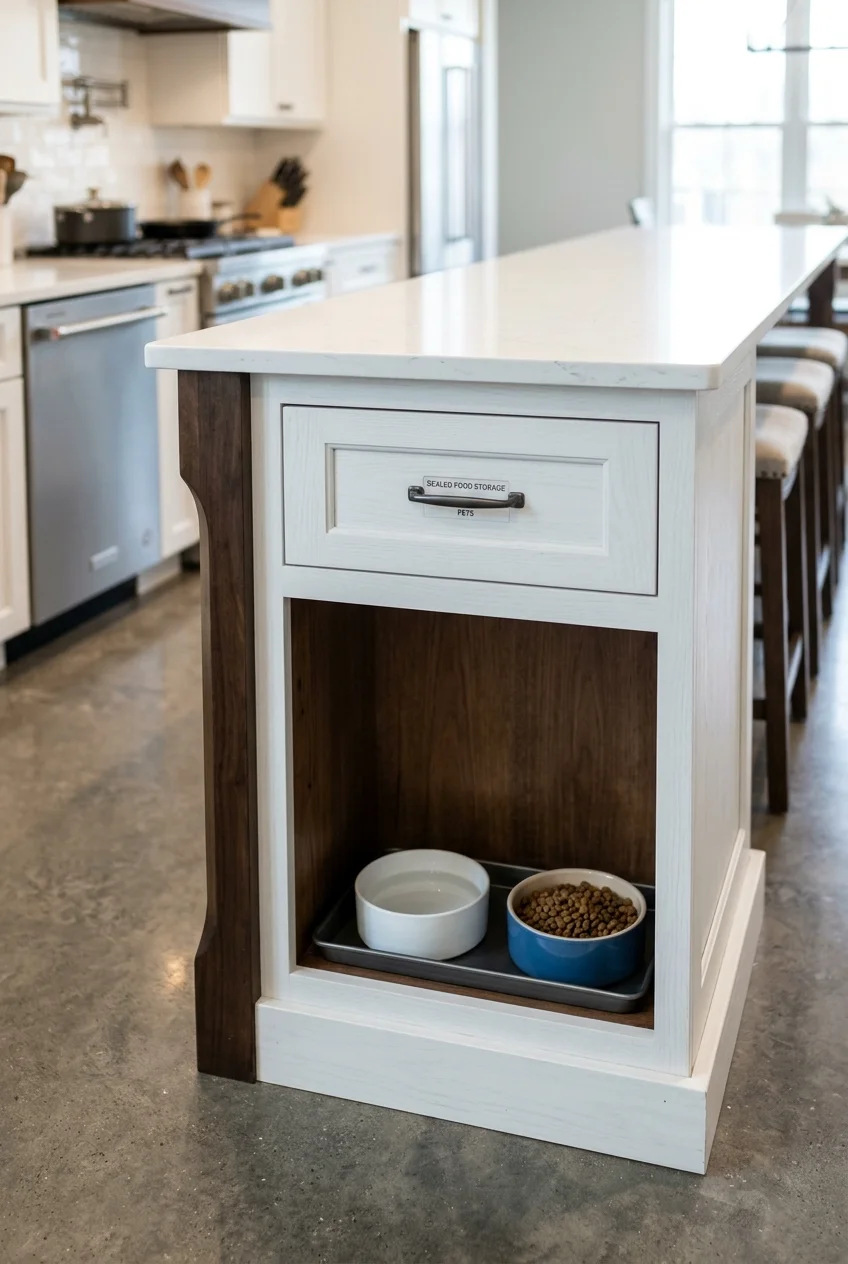
A feeding niche at the island's quiet end keeps bowls from drifting into busy kitchen aisles while making cleanup supplies easy to store nearby.
Choose a washable, moisture-resistant base and size the opening for the actual pet. Keep food storage sealed and separate from cleaning products.
Place the niche away from hot appliances, opening doors, and stool legs, where the animal can eat without being surrounded by foot traffic.
50. Mock Up the Open Plan Before Remodeling
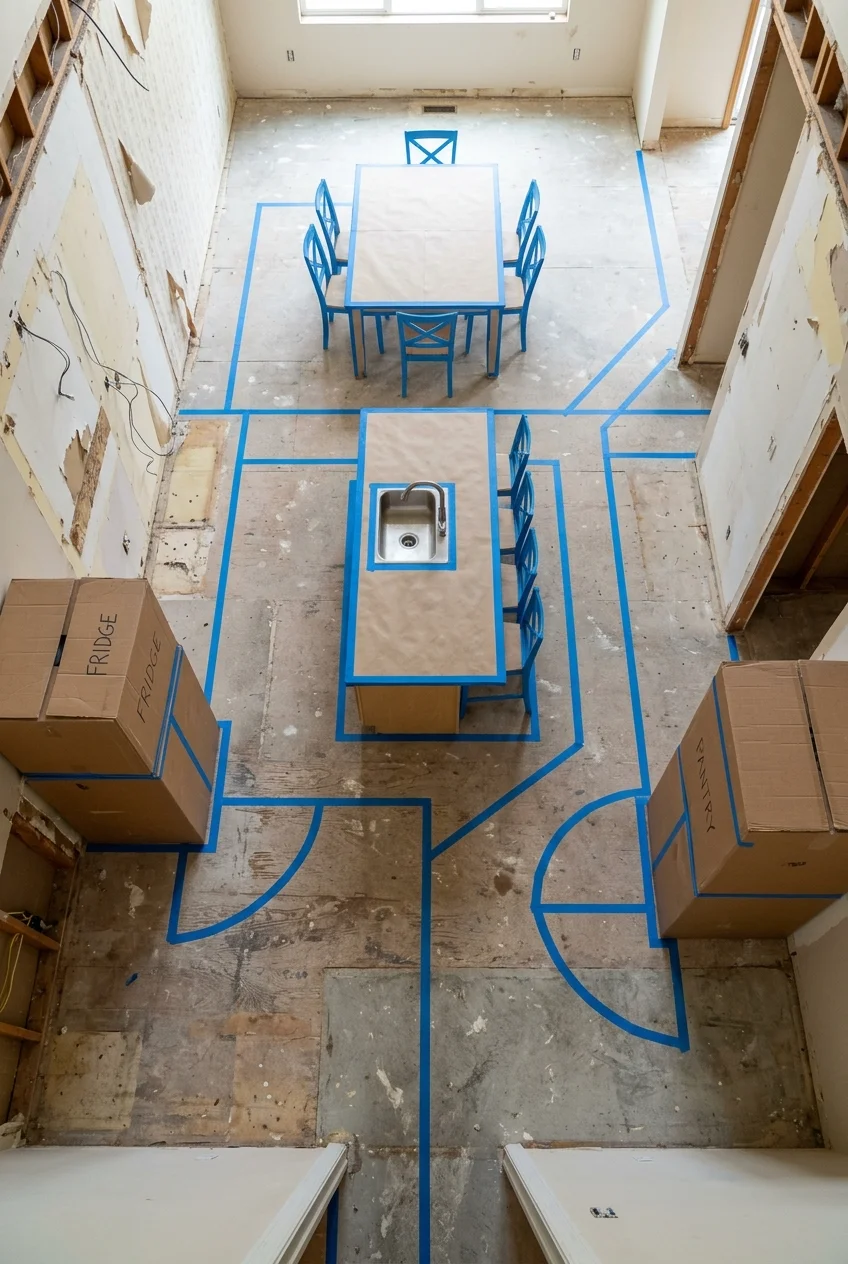
Full-scale tape, cardboard boxes, and temporary furniture can reveal blocked sightlines, awkward corners, and tight routes before cabinets or walls become expensive commitments.
Mark every cabinet, overhang, stool, chair, appliance door, and passage on the floor, then build cardboard elevations for major tall elements.
Rehearse ordinary actions from several viewpoints: unloading groceries, cooking together, serving dinner, watching television, cleaning up, and moving through the room at night.
Revise the layout wherever two activities compete. A plan that survives real movement is more valuable than one optimized only for a single photograph.
Frequently Asked Questions
How can an open kitchen feel connected without making every zone match?
Repeat one or two finishes across zones, then let furniture, rugs, lighting, and storage give each activity a distinct identity within the shared palette.
Is an island or peninsula better for a small open kitchen?
A peninsula often needs fewer circulation paths, while an island offers access on every side. Test both footprints with doors, stools, and routes marked full scale.
How can I control cooking odors in an open kitchen?
Plan a correctly selected and installed kitchen exhaust system that discharges outdoors, follow appliance and local requirements, use it while cooking, and maintain filters.
How do I reduce visual clutter in an open kitchen?
Prioritize closed storage near each task, consolidate tall cabinets, limit open shelves, give daily appliances a home, and keep the island surface mostly clear.