45 Best Backsplash Ideas for Brown Kitchen Cabinets

This post may contain affiliate links: full affiliate disclosure.
Brown cabinets bring a natural warmth that serves as a beautiful foundation for any kitchen. Choosing the right backsplash requires balancing those dark tones with light, texture, and pattern to keep the room feeling bright and intentional.
Light and Neutral Backsplash Ideas
1. Warm White Zellige Backsplash
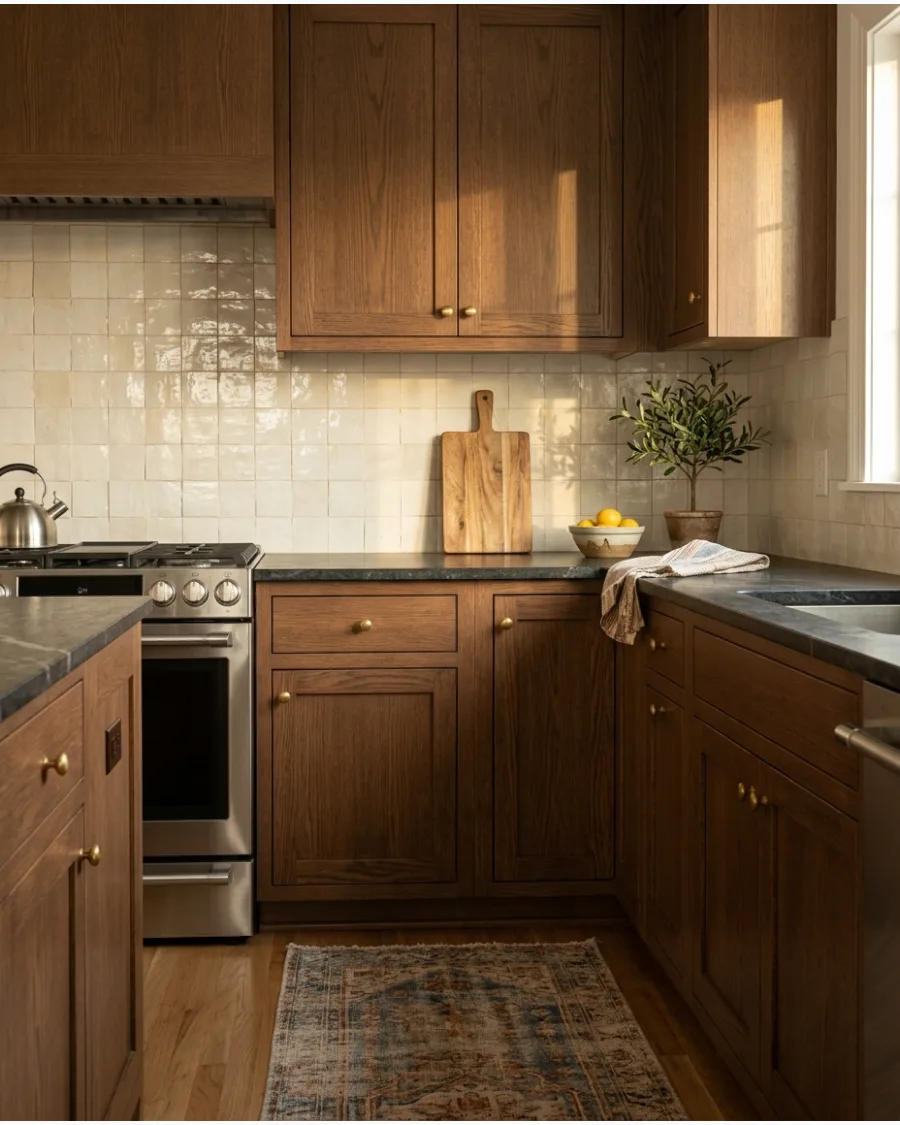
Pair brown cabinets with warm white zellige tiles for a bright backsplash that still feels soft and handcrafted. The uneven glazed surface reflects light and prevents the neutral color from looking flat.
Install these tiles with a very thin grout line to let the natural edges shine. Handcrafted tiles provide a depth that perfectly balances the solid look of wood grain.
- Expect higher material costs for genuine clay zellige tiles compared to standard ceramic.
- Use a wedge spacer during installation to accommodate the natural size variations of the tile.
- Choose a high-gloss finish for dark kitchens to maximize the reflection of ambient light.
Most people skip this: Order 15% more tile than needed because the natural edges of zellige are prone to chipping during shipping.
2. Cream Subway Tile Backsplash
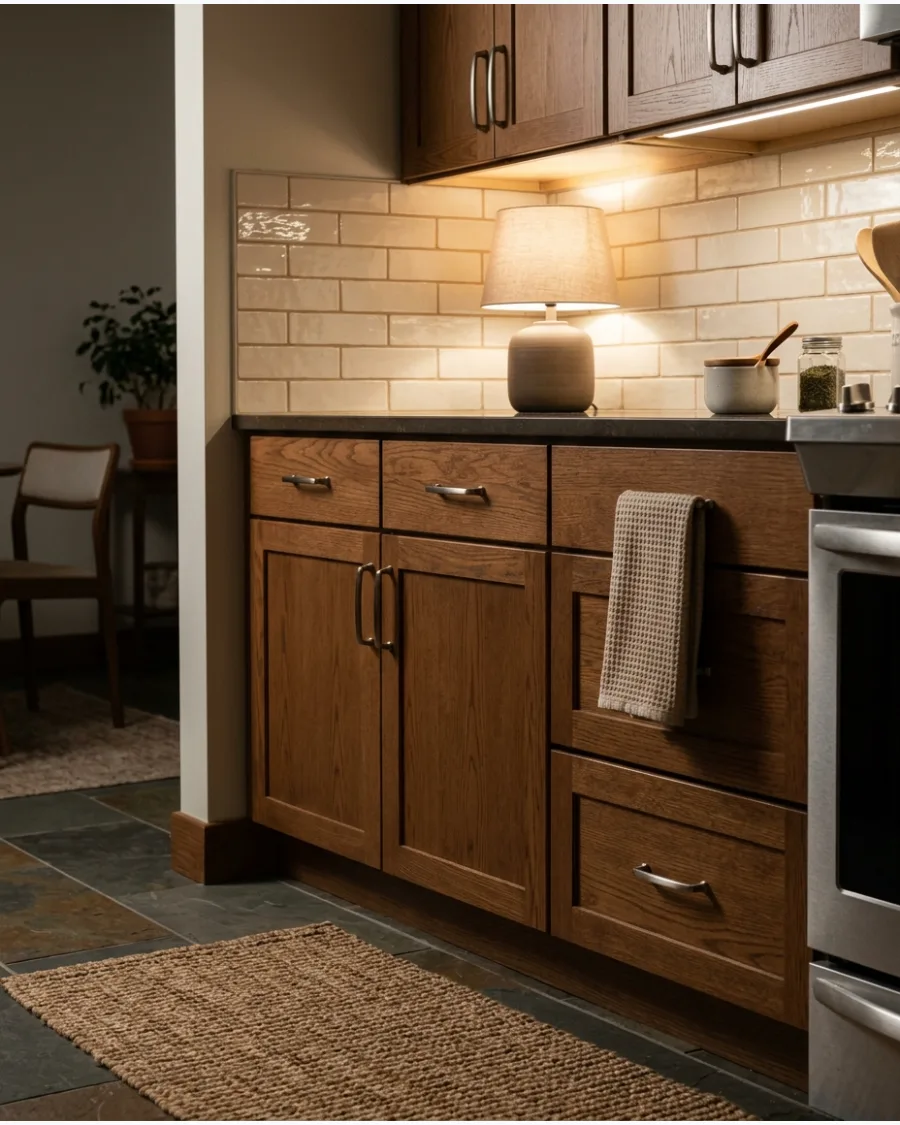
Choose cream subway tiles instead of stark white to complement the warm undertones of brown cabinetry.
Install them with beige grout for a seamless and inviting finish. Match your grout color to the tile for a clean, seamless look. Cream tones are much more forgiving than bright white when it comes to showing daily kitchen wear.
- Budget around $5 to $10 per square foot for high-quality ceramic subway tile.
- Install in a classic running bond pattern to keep the focus on the cabinet wood grain.
- Select a beveled edge subway tile to add subtle shadows and depth to a flat wall.
Quick win: Use a cream-colored silicone caulk at the joint where the tile meets the countertop for a professional finish.
3. Ivory Square Tile Backsplash
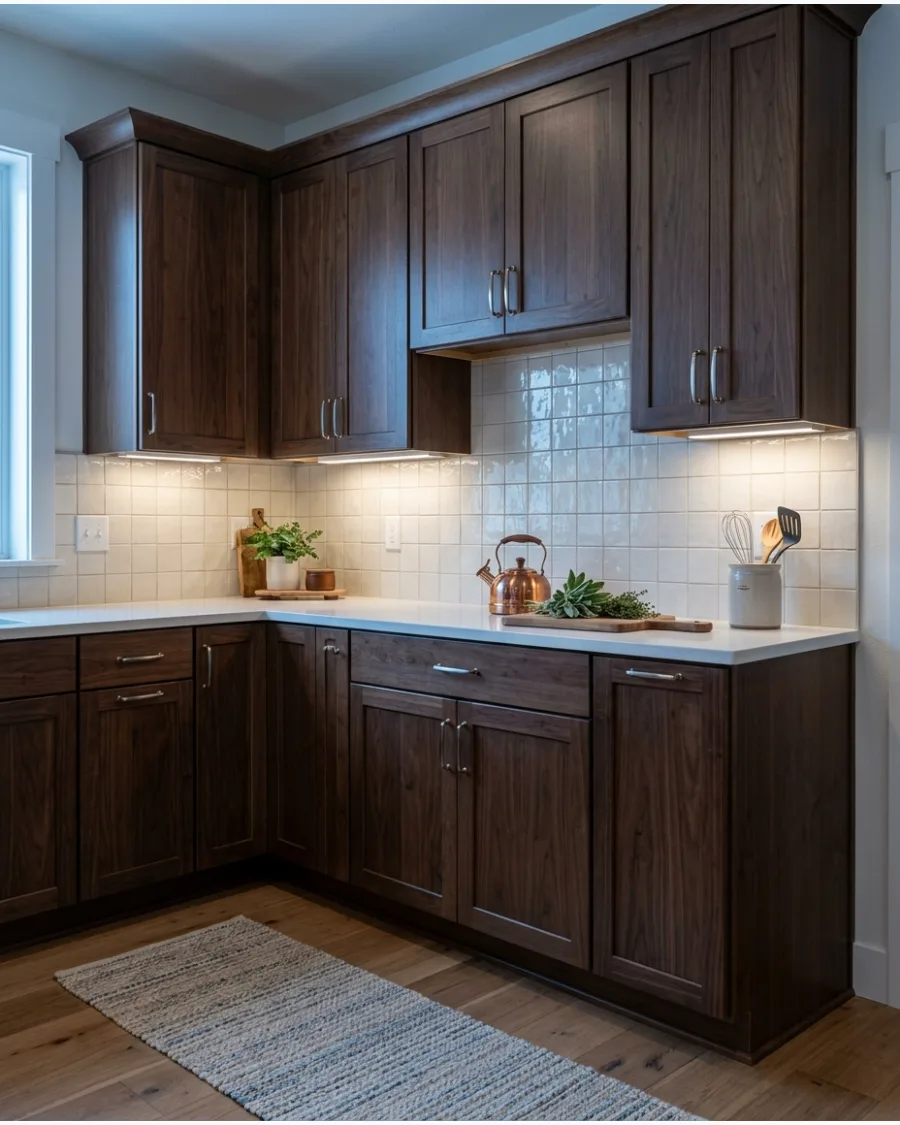
Use simple ivory square tiles to balance dark brown cabinets without creating harsh contrast. A glossy finish can help brighten kitchens with limited natural light.
Choose a high-gloss finish to reflect light into dark corners. Square tiles are a great way to get a classic look without the predictable feel of a standard subway layout.
- Look for 4×4 or 6×6 inch squares to maintain a balanced scale with standard cabinet heights.
- Apply tile over a clean, primed drywall surface for the best adhesion.
- Incorporate a few decorative relief tiles in the same ivory color for a subtle custom detail.
Best shortcut: Use pre-mixed grout in an off-white shade to save time and ensure color consistency across the wall.
4. Off-White Vertical Tile Backsplash
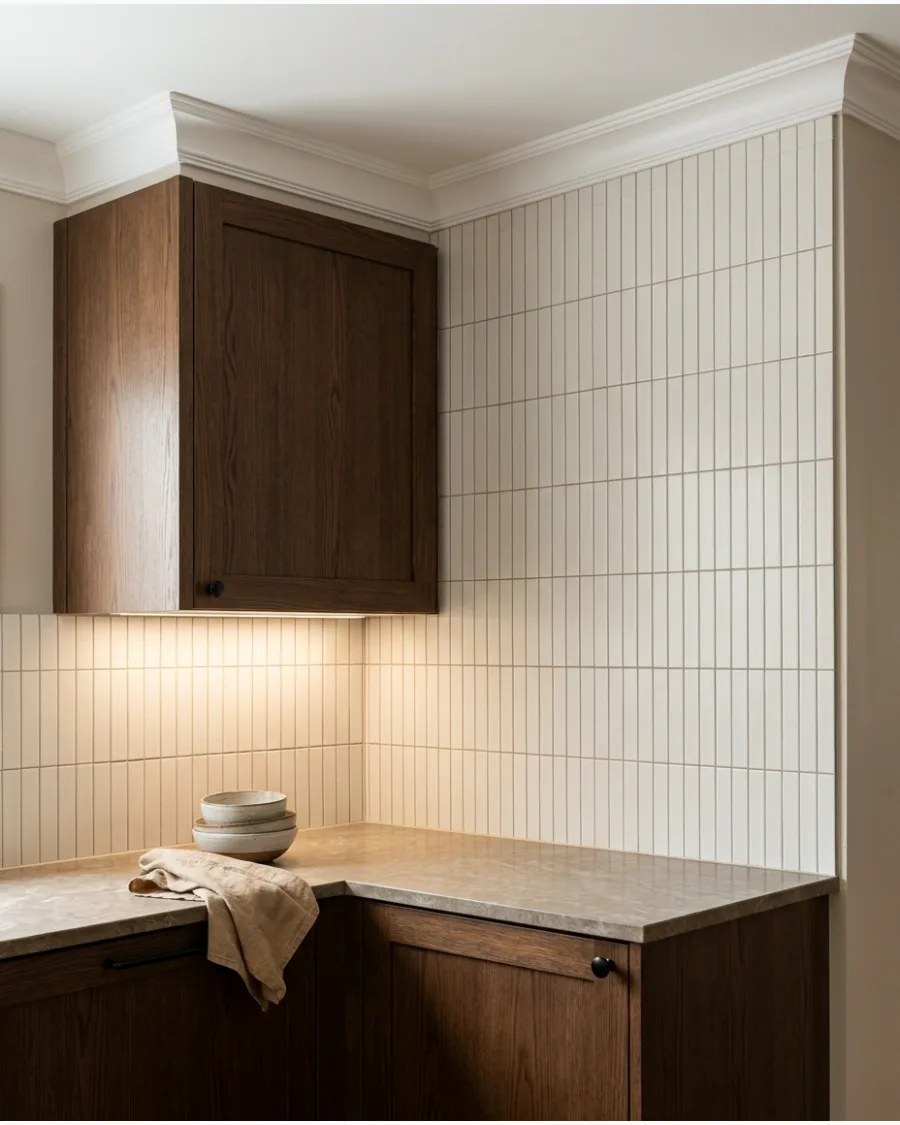
Arrange slim off-white tiles vertically to make the backsplash area appear taller. This layout brings a cleaner and more contemporary look to traditional brown cabinets.
Stack the tiles vertically to draw the eye upward and make the ceiling feel higher. A vertical layout is the easiest way to make a standard kitchen feel custom and modern.
- This project typically takes a full weekend including prep, tiling, and grouting.
- Start the first row from the center of the wall to ensure even cuts at the corners.
- Renters can achieve this look using vertical peel-and-stick tile sheets over existing surfaces.
Most people skip this: Check that your vertical lines are perfectly level every three feet to avoid a leaning appearance.
5. Beige Handmade Tile Backsplash
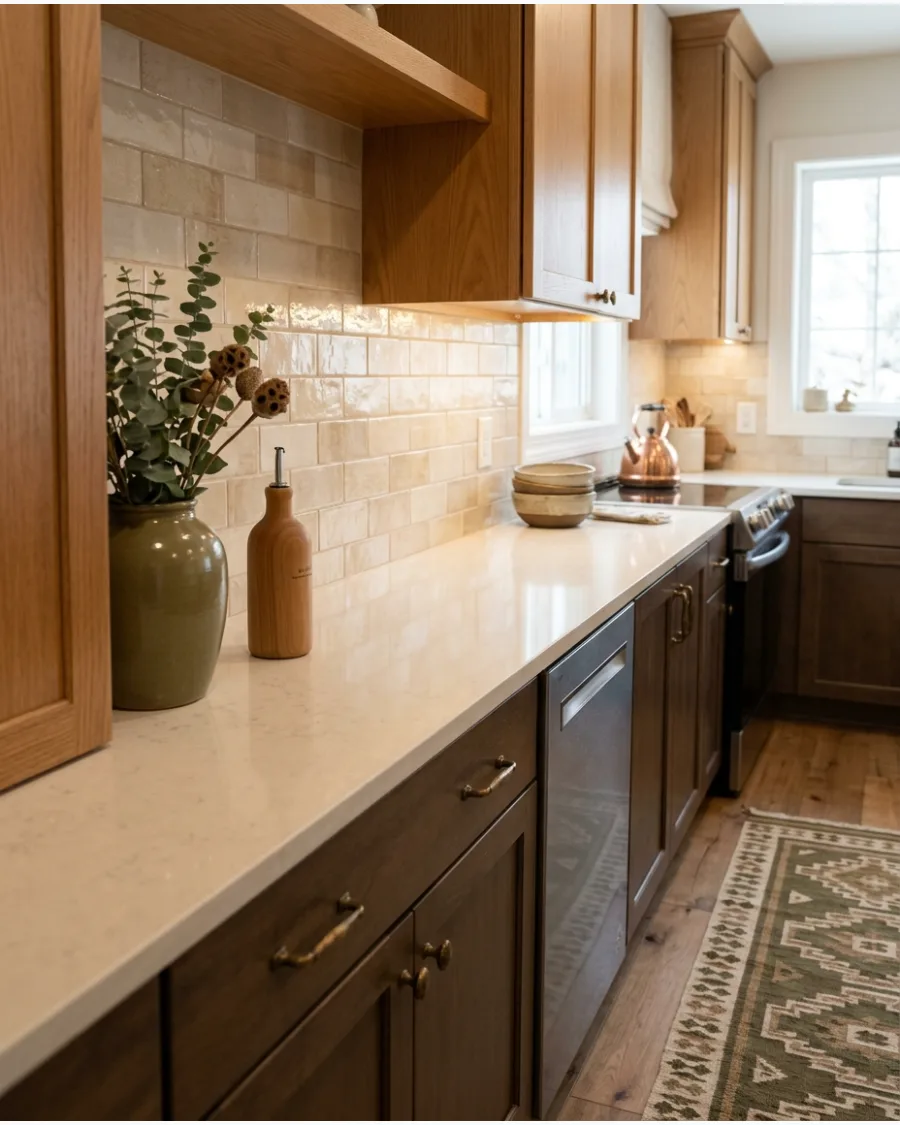
Choose beige handmade-look tiles with gentle variations in color and texture. They create a relaxed transition between brown cabinets and light countertops.
Mix tiles from several different boxes during installation to ensure the color variations look natural. Variations in the tile glaze help hide small splashes and keep the kitchen looking clean longer.
- Handmade-look tiles are available at most home centers for $8 to $15 per square foot.
- Use a non-sanded grout for these tiles to prevent scratching the delicate glaze.
- Pair with a rustic wood shelf to enhance the organic, handcrafted feel of the space.
Quick win: Lay your tiles out on the floor first to plan the color distribution before applying any thin-set to the wall.
6. Greige Subway Tile Backsplash
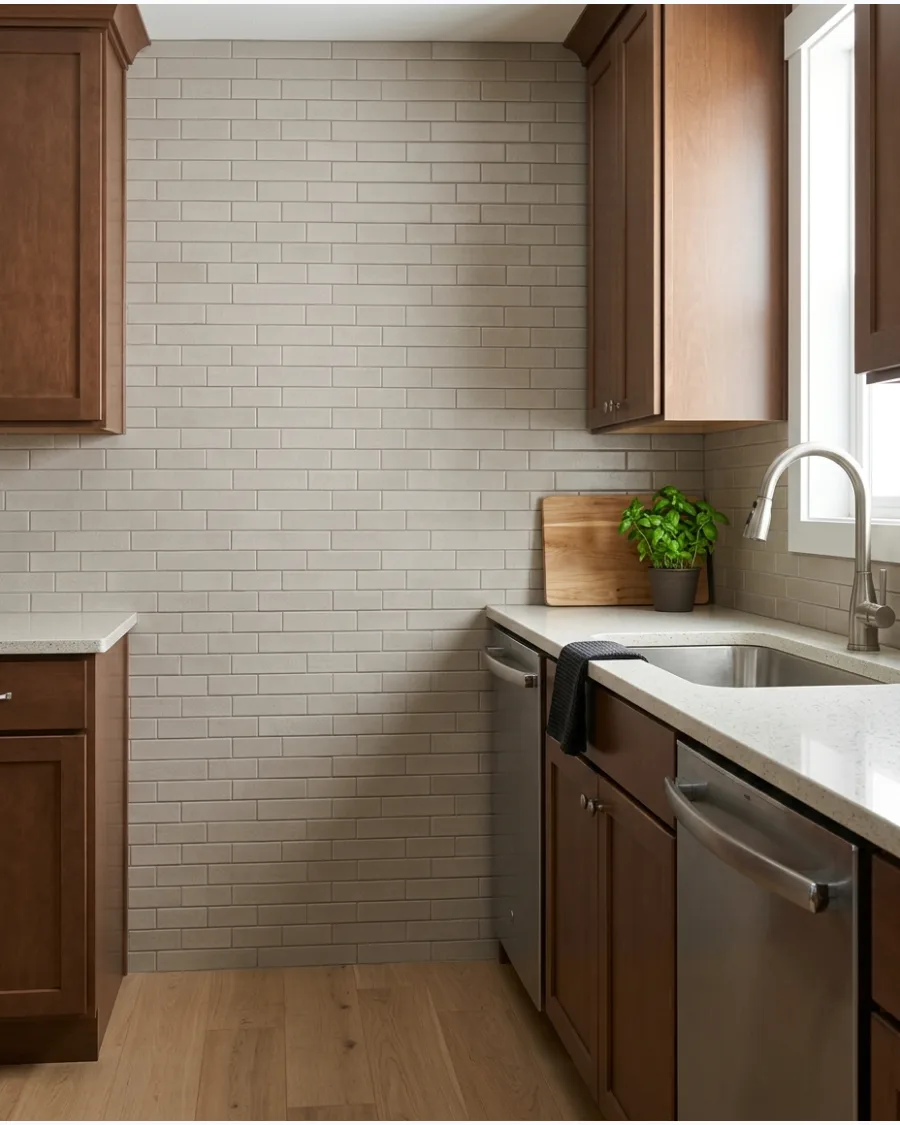
Greige tiles combine warm beige with subtle gray, making them easy to pair with both brown cabinets and stainless-steel appliances. Use a tonal grout to maintain a calm appearance.
Use greige tiles to bridge the gap between warm wood cabinets and cool stainless steel appliances. This color is the perfect middle ground for anyone who cannot decide between warm and cool tones.
- Greige tiles are a standard stock item and can be purchased and installed in one day.
- Wipe tiles down with a damp sponge immediately after grouting to prevent haze.
- Use this color in kitchens with gray-flecked granite to tie the whole palette together.
Best shortcut: Bring a cabinet door to the tile shop to see how the greige shifts under different lighting.
7. Oatmeal Ceramic Tile Backsplash
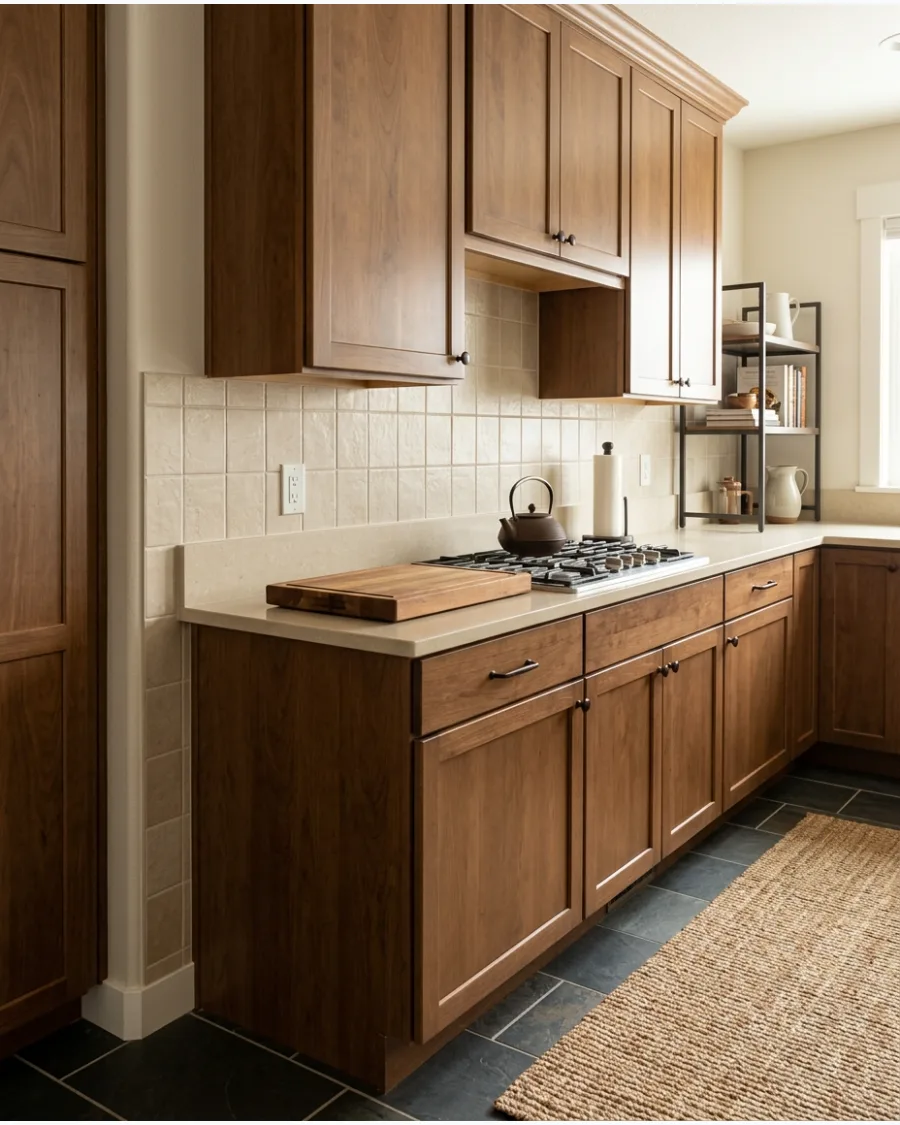
An oatmeal-colored backsplash introduces warmth without competing with the cabinet grain. The soft neutral works especially well with medium walnut and honey-brown finishes.
Pair oatmeal tiles with medium-toned wood to create a soft, monochromatic feel. Matte oatmeal finishes are excellent at softening the look of heavy oak or cherry cabinetry.
- Matte ceramic tiles are budget-friendly and easy to cut with a standard manual tile snapper.
- Space tiles with 1/8-inch spacers for a traditional look that suits older homes.
- Swap out chrome hardware for oil-rubbed bronze to lean into the warm oatmeal palette.
Most people skip this: Apply a grout sealer twice a year to keep the light oatmeal grout from darkening over time.
8. White Herringbone Backsplash
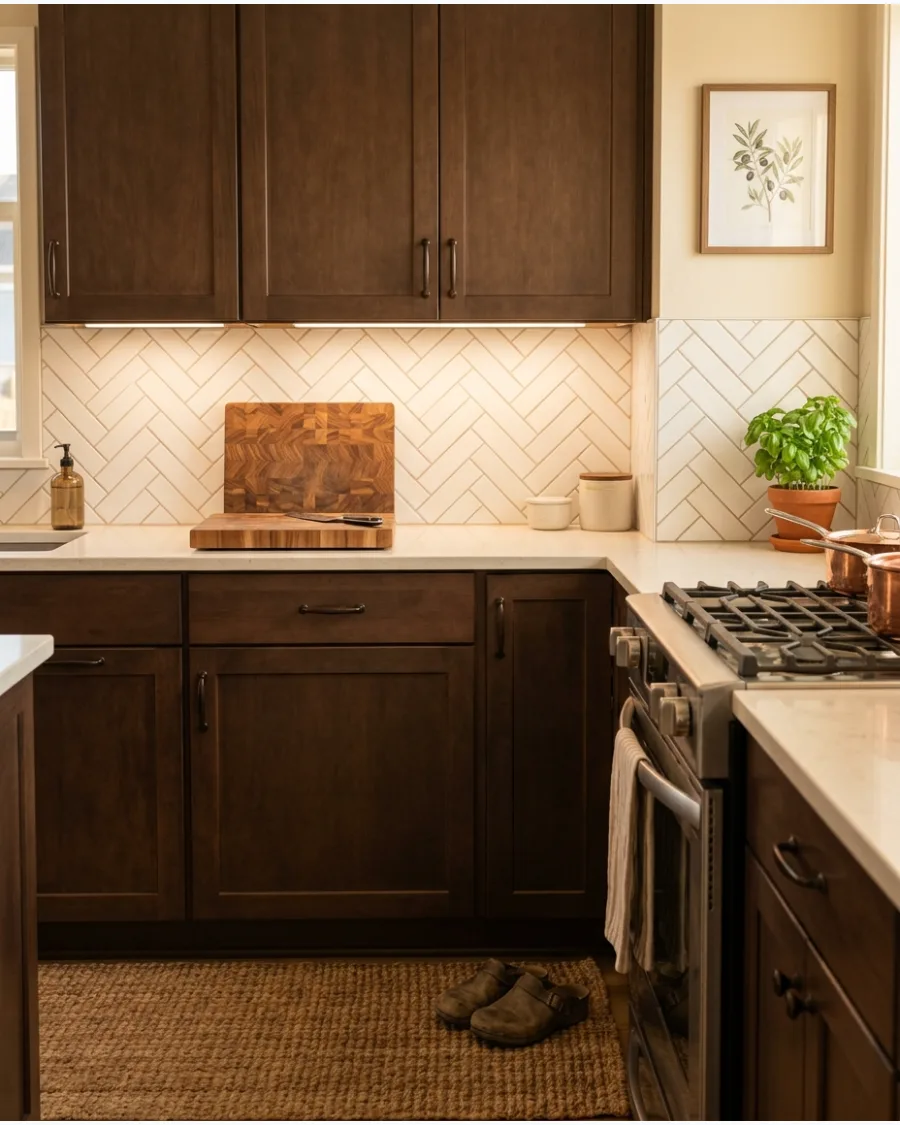
Arrange white tiles in a herringbone pattern to add movement behind brown cabinets. Warm white grout can soften the contrast and connect the backsplash to the cabinetry.
Use a warm white grout to bridge the gap between the bright tile and the dark wood. The herringbone pattern is busy enough that you should keep the countertop pattern very simple to avoid visual clutter.
- Herringbone requires more cutting time; allow an extra day for installation.
- Purchase mesh-backed herringbone sheets to simplify the layout and keep lines straight.
- This pattern works best as a focal point behind the stove or between large windows.
Quick win: Start the herringbone pattern at the bottom center of the wall to ensure the 'V' shape is perfectly centered.
9. Cream Picket Tile Backsplash
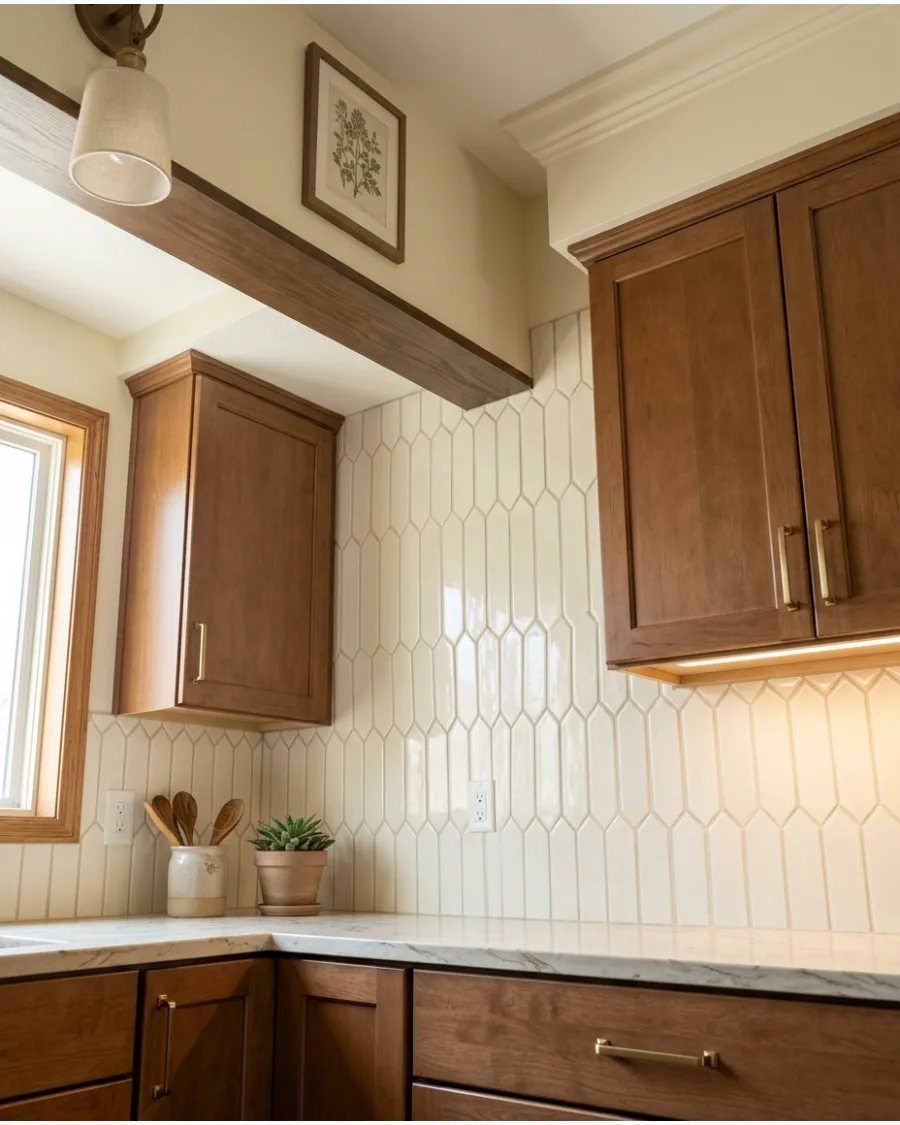
Use elongated picket tiles for a subtle geometric detail. A cream glaze keeps the design elegant while the unusual shape gives the kitchen more personality.
Point the tips of the picket tiles toward the ceiling to create a sense of height. Picket tiles offer a more sophisticated look than hexagons while still providing that trendy geometric feel.
- Picket tiles are mid-range in price, typically $12 to $18 per square foot.
- Use a laser level to keep the long vertical lines of the picket shape perfectly straight.
- Pair with cream-colored cabinets on top and brown on the bottom for a modern two-tone look.
Best shortcut: Look for picket tiles on mesh sheets to avoid the headache of spacing each individual point by hand.
10. Soft Taupe Tile Backsplash
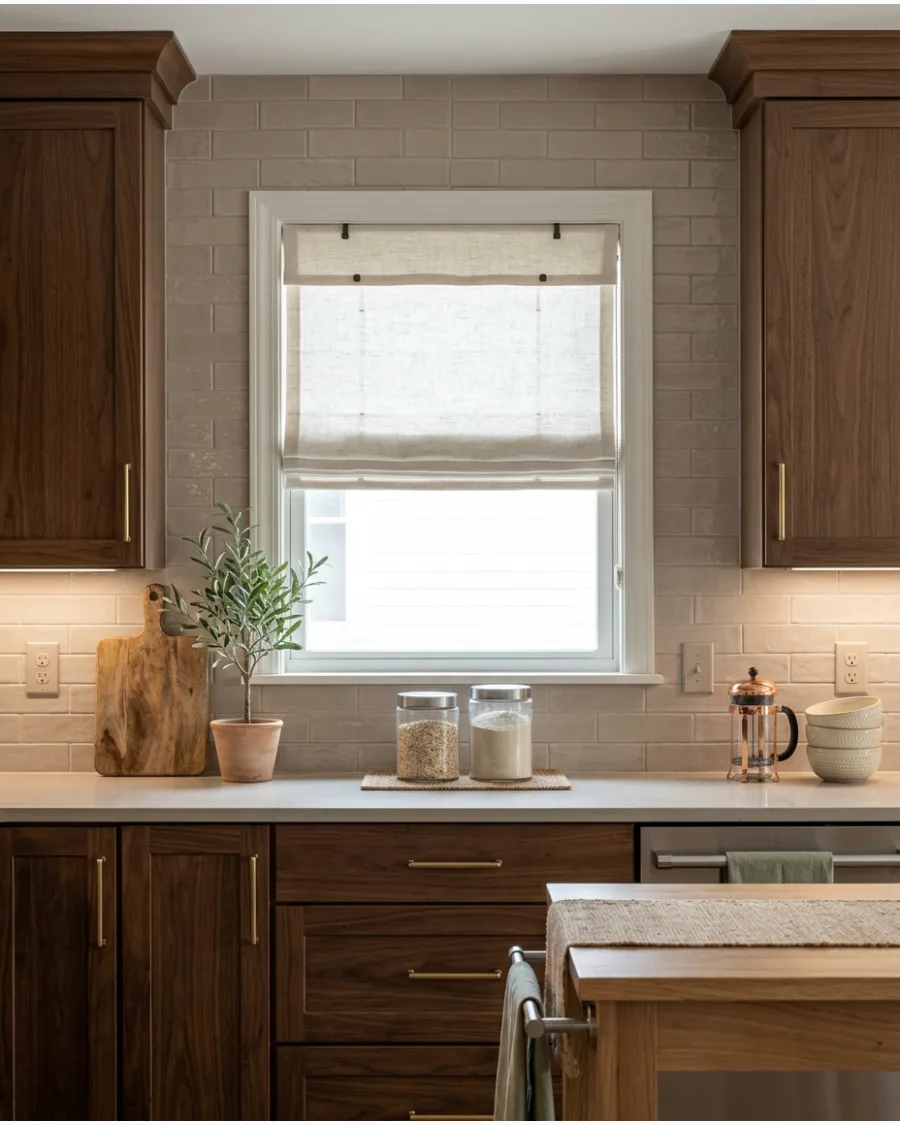
Taupe backsplash tiles create a tonal look with brown cabinets while maintaining enough contrast to define the wall. Pair them with light quartz counters for a balanced palette.
Pick a taupe tile that is two shades lighter than your cabinets for perfect contrast. Taupe is a sophisticated choice that makes a kitchen look more expensive than standard white.
- Taupe ceramic tiles are widely available and very low-maintenance.
- Apply a bead of clear silicone at the base of the tile to prevent water from seeping behind the counter.
- Use taupe tiles to modernize 1990s-era honey oak cabinets without painting them.
Quick win: Paint your outlet covers in a matching taupe color so they disappear into the backsplash.
Natural Stone Backsplash Ideas
11. White Marble Slab Backsplash
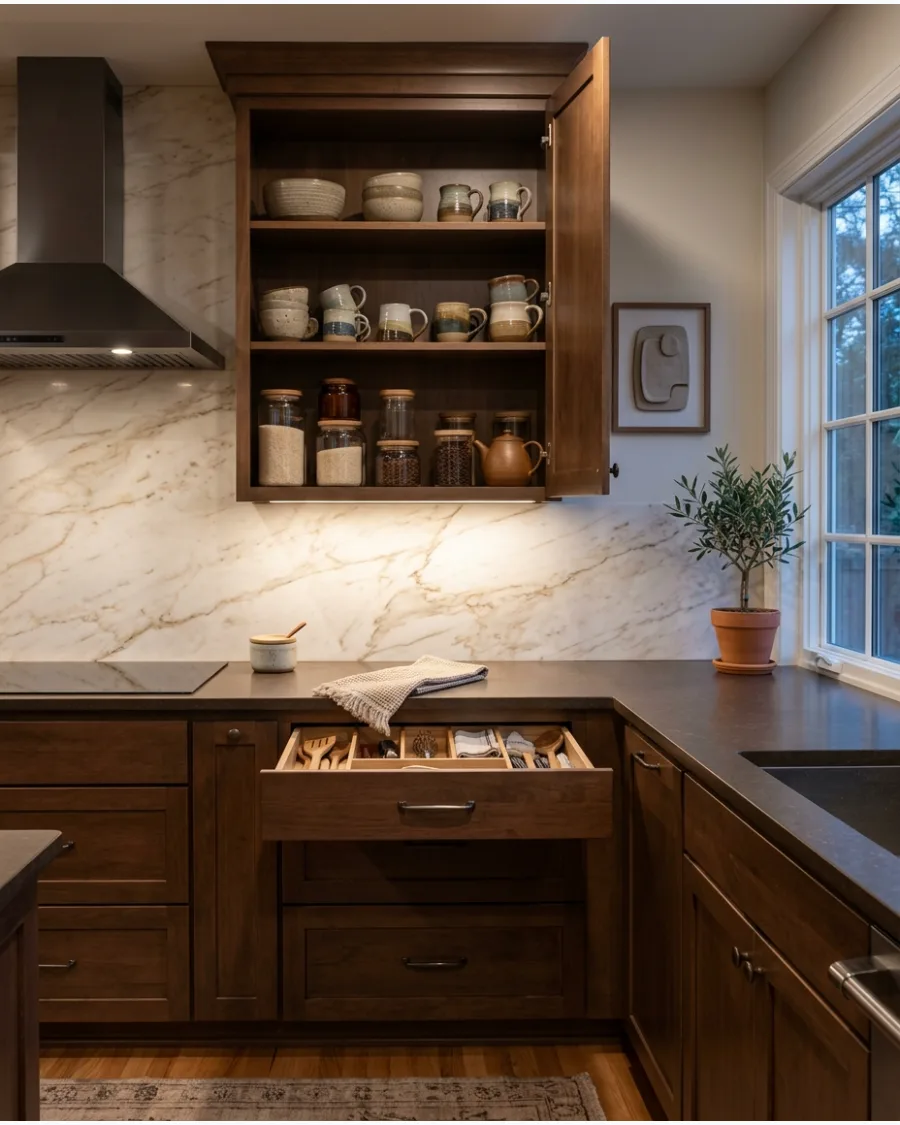
Install a full-height white marble slab behind brown cabinets for a refined contrast. Choose stone with warm beige or brown veining to connect it naturally to the wood.
Select a slab with warm beige or gold veining to tie the stone to the wood grain. Eliminating grout lines with a slab makes the kitchen much easier to clean after heavy cooking.
- Slab installation requires professional measuring and heavy-duty equipment.
- Budget for a significant investment, as slabs are priced by the square foot plus fabrication.
- Seal the marble every six months to prevent staining from oils and acidic foods.
Most people skip this: Visit the stone yard in person to approve the specific slab and choose which part of the veining sits behind the stove.
12. Cream Quartzite Backsplash
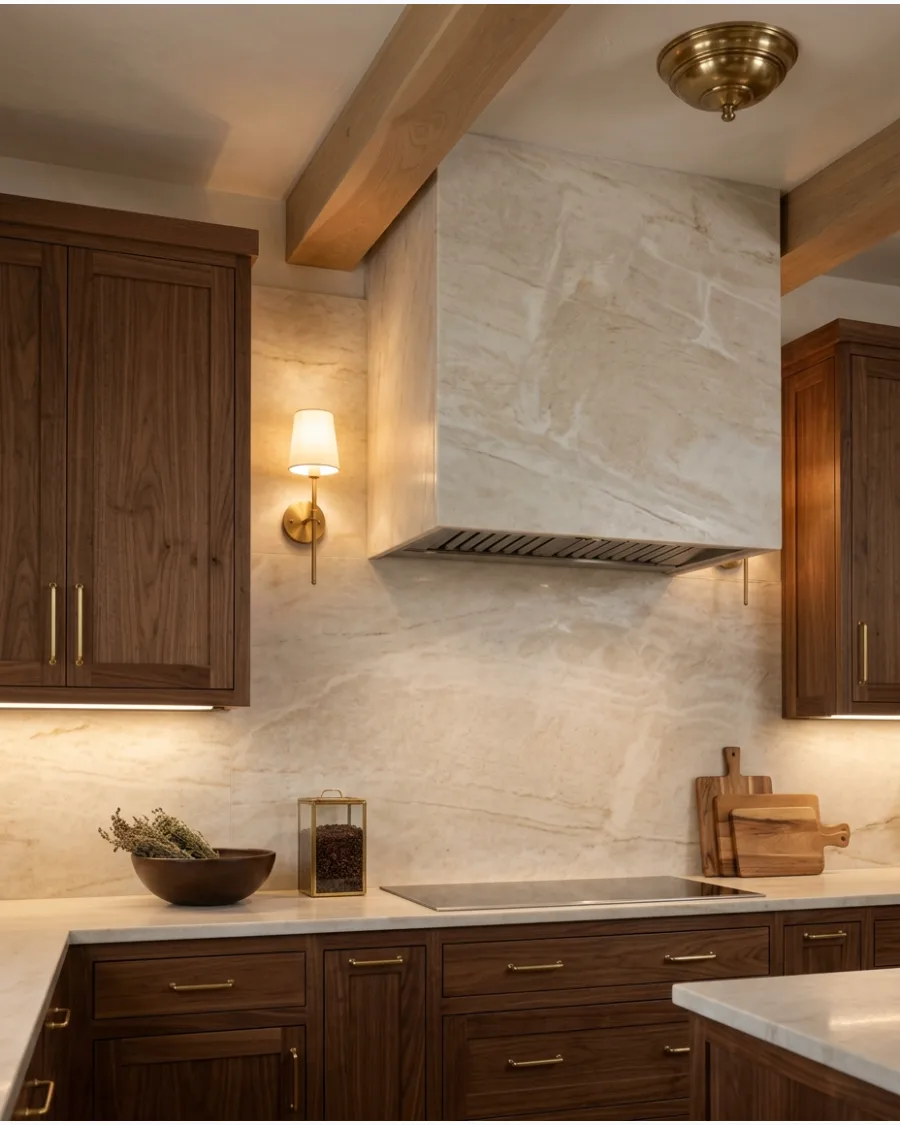
Cream quartzite provides the elegance of natural stone with subtle movement and warm undertones. It pairs beautifully with walnut cabinets and brass hardware.
Extend the stone all the way to the ceiling behind a range hood for a high-end look. Quartzite is much more durable than marble and handles the heat of a stove much better.
- Quartzite is a very hard stone; ensure your installer uses diamond-tipped blades for cuts.
- Wipe the surface with a soft microfiber cloth to maintain the natural stone luster.
- Coordinate the stone with brass or gold cabinet pulls to highlight the warm cream tones.
Best shortcut: Ask for 'remnant' pieces at stone yards to save money on a small backsplash area.
13. Travertine Tile Backsplash
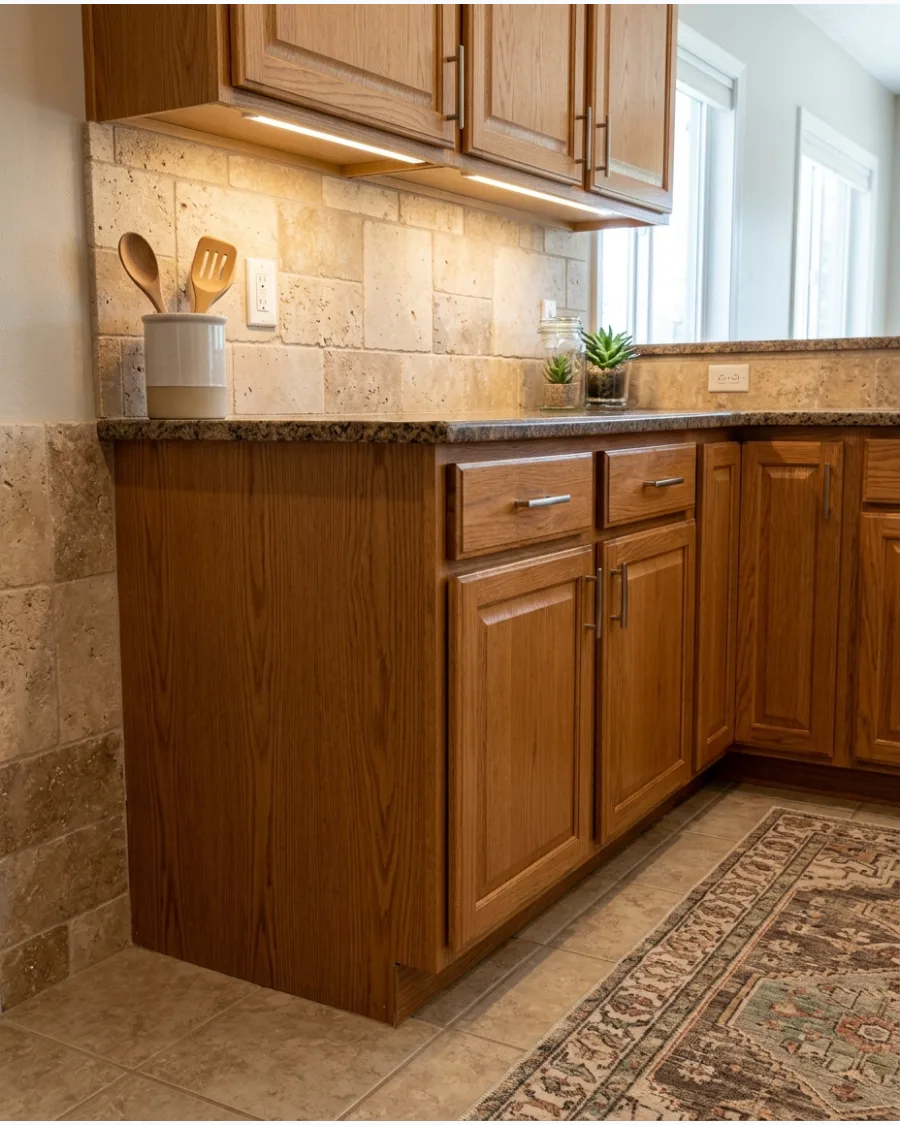
Use tumbled or honed travertine tiles to enhance the earthy character of brown cabinets. Larger rectangular pieces can give this traditional material a cleaner 2026 update.
Opt for large-scale travertine tiles to minimize grout lines and modernize the space. Tumbled travertine has a rustic feel that works best when paired with very simple, modern cabinet hardware.
- Travertine is porous and must be sealed before and after grouting.
- Choose a 'filled and honed' travertine for a smoother surface that is easier to wipe clean.
- Use this material in Mediterranean or farmhouse-style kitchens for an authentic feel.
Quick win: Use a grout color that matches the darkest pits in the travertine for a natural, aged look.
14. Travertine Slab Backsplash
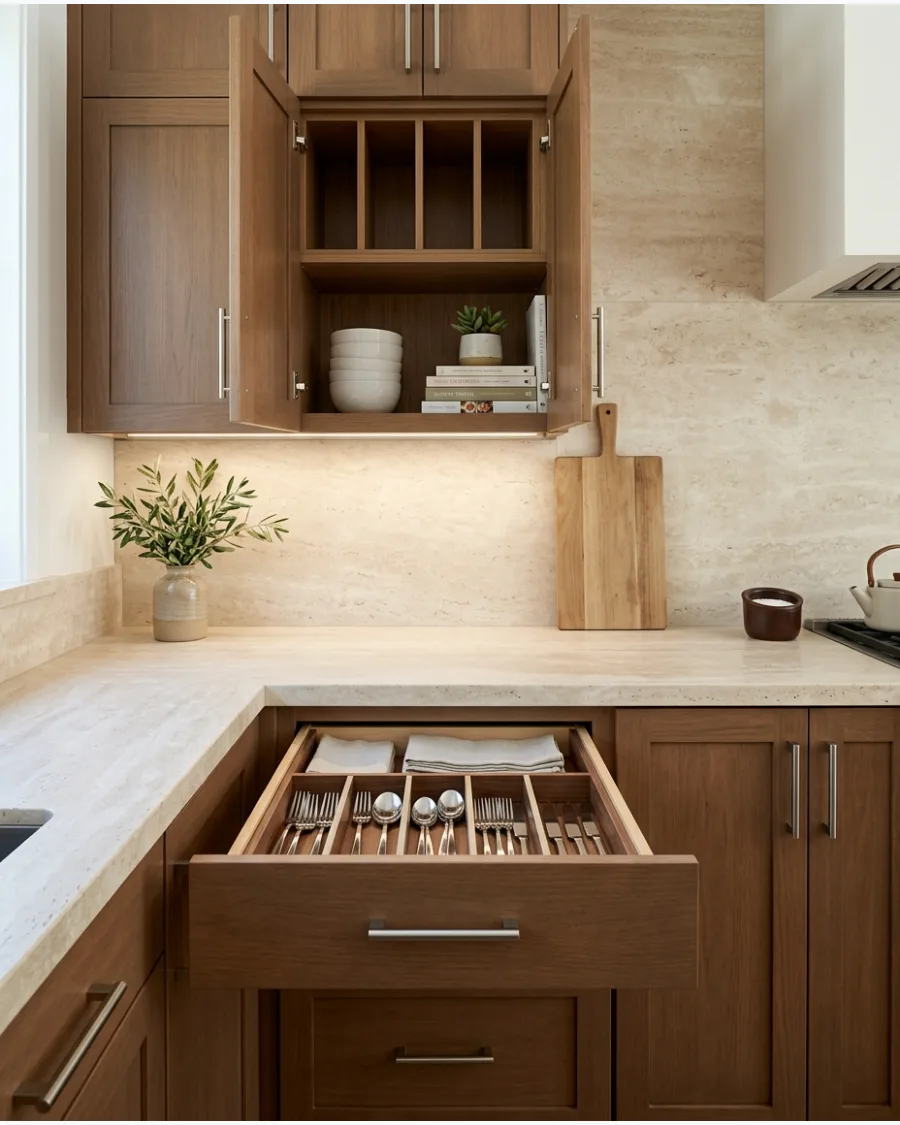
Continue a travertine countertop vertically onto the wall for a seamless countersplash. The natural beige variation creates depth without introducing a busy pattern.
Carry your countertop material up the wall for a clean, unified appearance. Using the same material for both surfaces is a smart way to make a small kitchen feel much larger.
- Order your countertop and backsplash from the same stone lot for a perfect color match.
- Keep the slab thickness to 2cm for the wall to avoid adding too much weight to the structure.
- This look works best with flat-panel brown cabinets for a sleek, contemporary aesthetic.
Most people skip this: Have the fabricator 'bookmatch' the stone so the patterns flow continuously from the counter up the wall.
15. Beige Limestone Backsplash
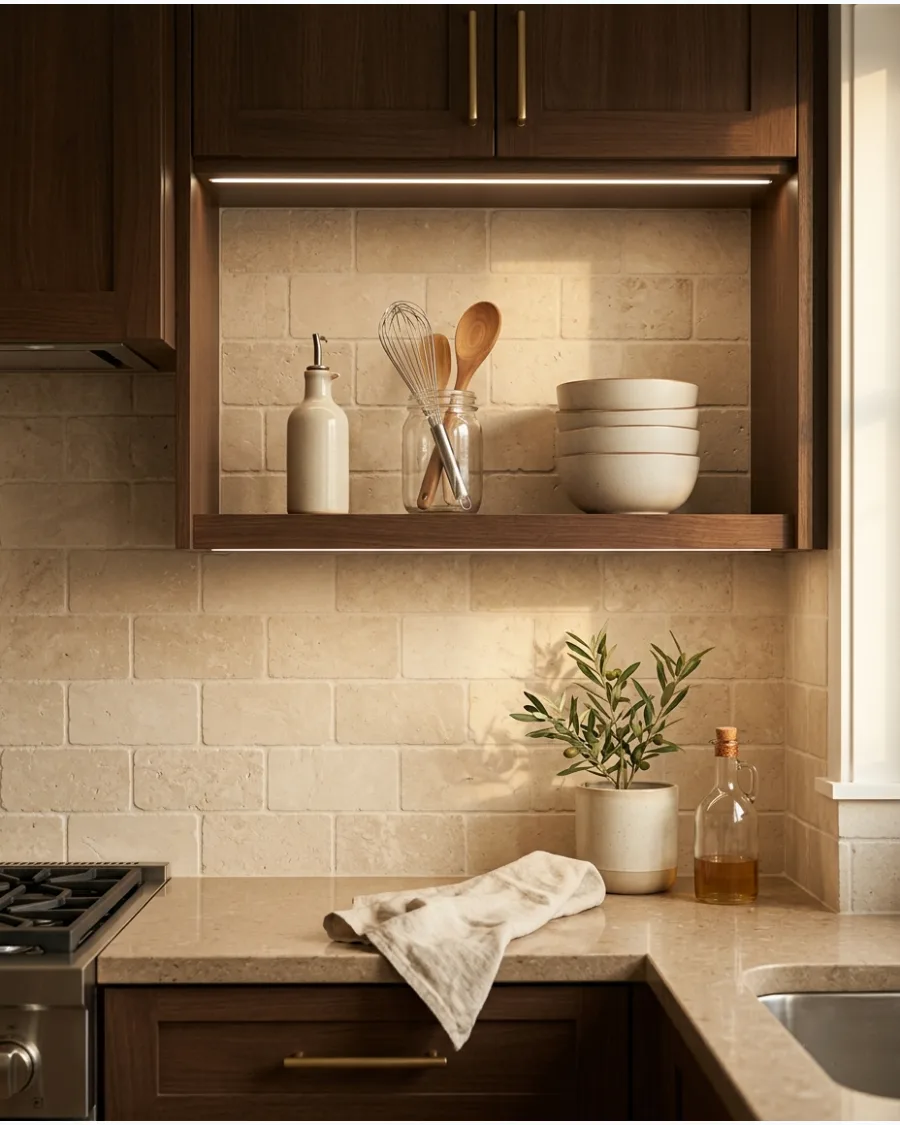
A honed limestone backsplash gives brown cabinetry a soft, organic backdrop. Its quiet texture works especially well in minimalist and Mediterranean-inspired kitchens.
Seal the limestone properly to protect the porous surface from kitchen splashes. Limestone has a quiet elegance that allows high-quality wood grain to be the star of the kitchen.
- Honed limestone provides a matte finish that diffuses light beautifully.
- Avoid using harsh chemical cleaners; stick to pH-neutral stone soaps.
- Install limestone in large 12×24 inch tiles to create a monolithic, slab-like appearance on a budget.
Best shortcut: Use a stone-safe impregnating sealer to provide maximum protection without changing the color of the limestone.
16. Veined Quartz Backsplash
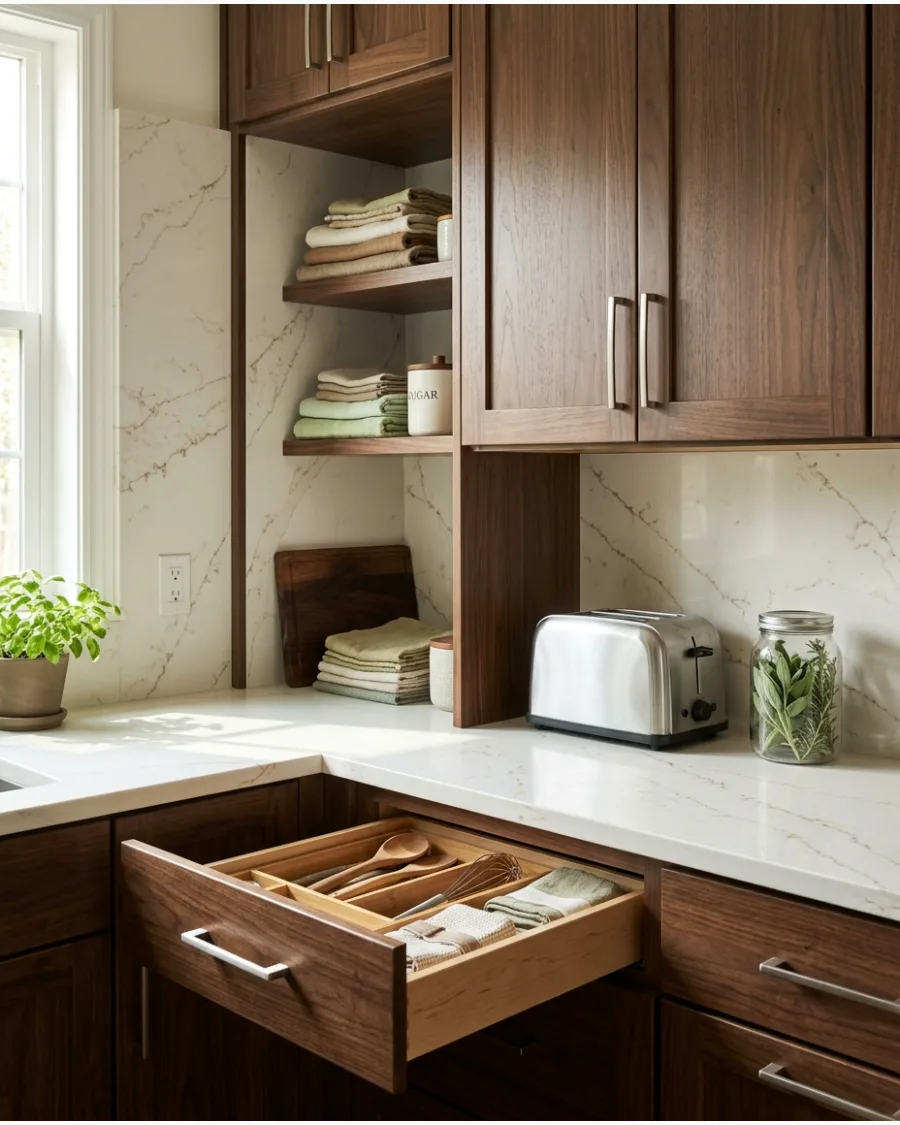
Select warm white quartz with delicate brown or gold veining to bridge the gap between counters and cabinets. Running the same quartz from the countertop up the wall creates a seamless look that makes a kitchen feel taller. It eliminates grout lines that often break up the visual flow in smaller spaces.
Using a stone with gold flecks specifically highlights the warmth in oak or cherry wood grains.
- Cost varies by slab size and installation labor.
- Measure for electrical outlet cutouts before the stone is fabricated.
- Use a matte finish quartz to avoid harsh glares from under-cabinet LED strips.
Best shortcut: Ask the fabricator for remnants if the backsplash area is small to save on the cost of a full second slab.
17. Brown Marble Backsplash
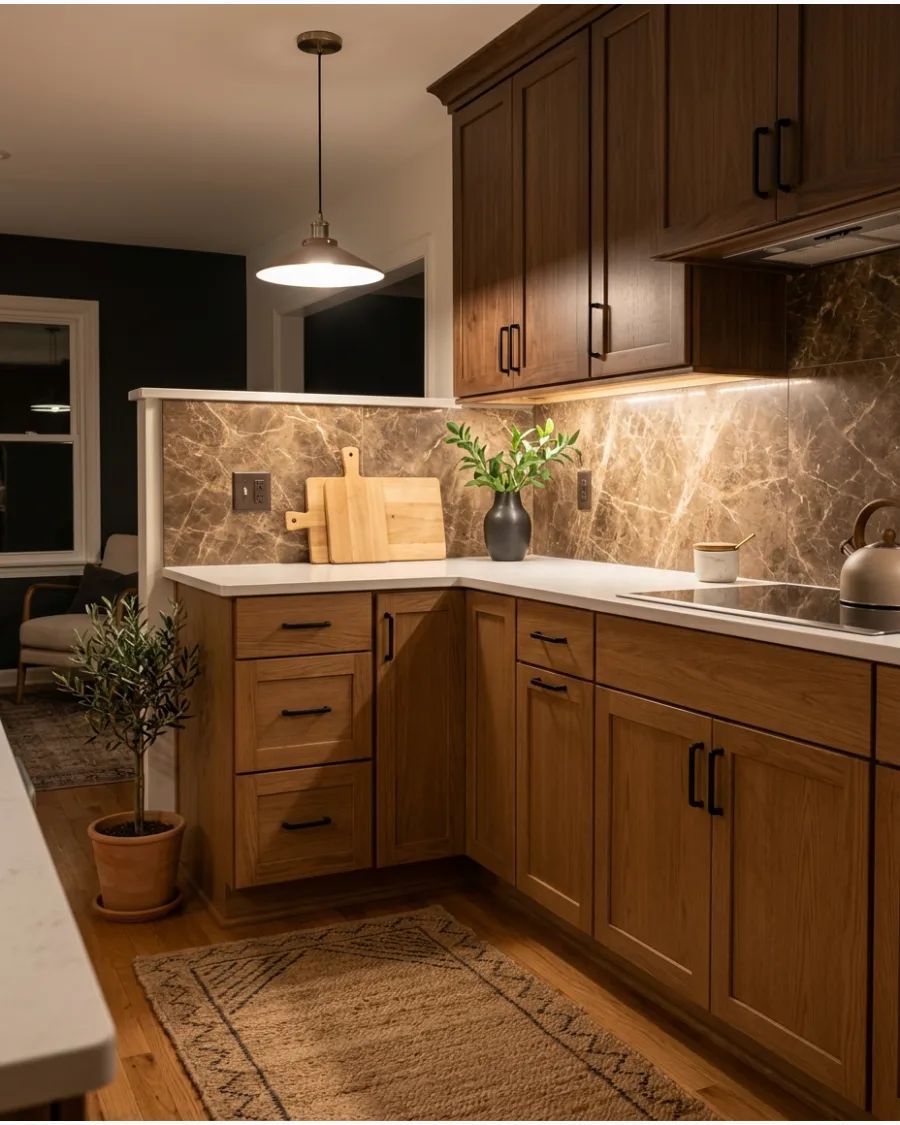
Pair medium or dark brown cabinets with a lighter brown marble containing cream veining for a rich, tonal effect. This approach works best when the marble has enough contrast to keep the wall from blending into the woodwork.
Choose a honed finish for the marble to prevent it from looking dated or overly shiny against natural wood grains. Simple hardware and plain countertops allow the stone’s pattern to remain the main focus of the room.
- Marble requires sealing every six to twelve months to prevent staining.
- Install using a neutral-colored thin-set to prevent the stone from darkening.
- Swap ornate handles for slim black pulls to keep the look modern.
Quick win: Use a penetrating sealer specifically made for natural stone to protect against oil splashes behind the stove.
18. Soapstone Backsplash
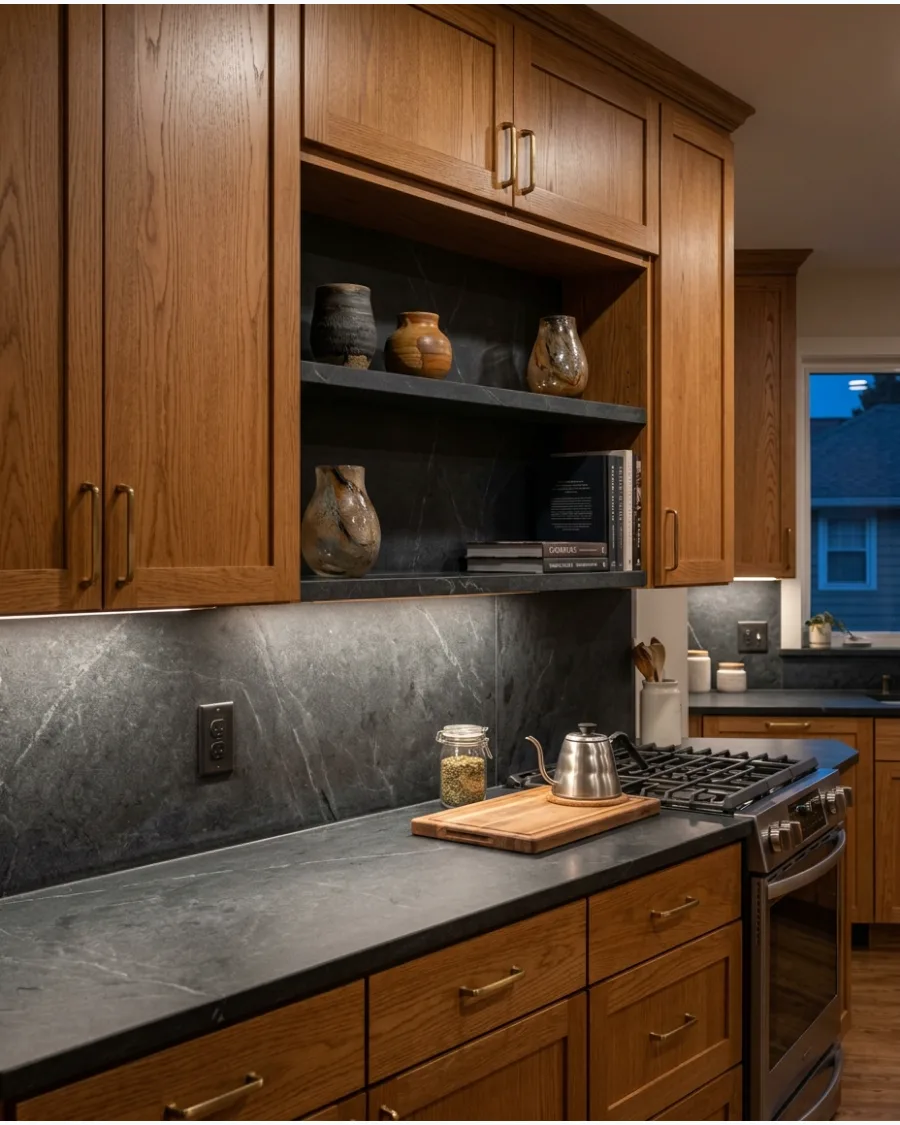
A dark soapstone backsplash can create a dramatic contrast with medium-brown or light oak cabinets. The matte, charcoal-gray surface of the stone feels soft to the touch and naturally resists heat.
Apply mineral oil to the soapstone to deepen its color and help it match the darker knots in your wood cabinetry. Repeating the material on the countertops gives the kitchen a cohesive, built-in appearance.
- Soapstone is sold by the square foot and is typically more expensive than granite.
- Clean with mild soap and water only to maintain the natural patina.
- Sand out small scratches easily with fine-grit sandpaper and a dab of oil.
Most people skip this: Sand the edges of the soapstone backsplash for a slightly rounded look that feels more high-end.
19. Honed Granite Backsplash
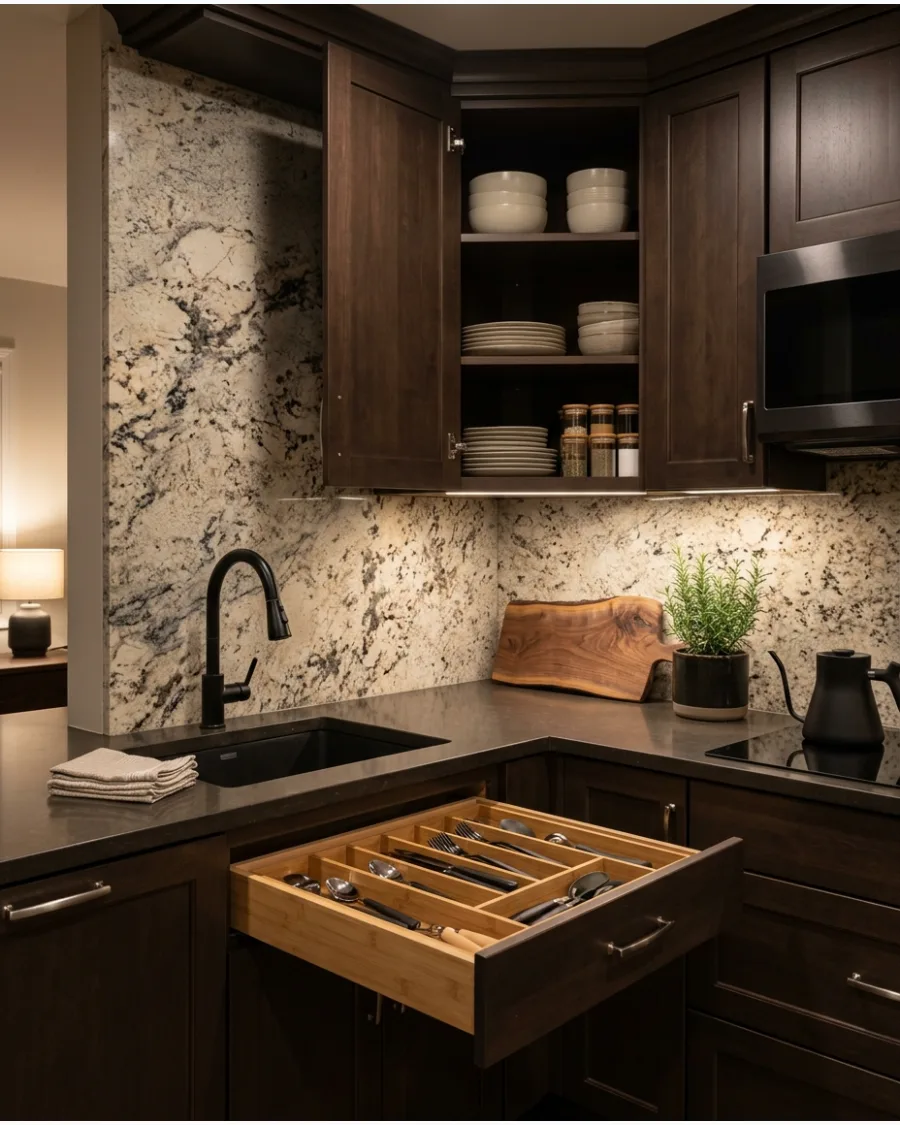
Use a honed granite slab for natural variation without a highly reflective surface. Select a pattern containing cream, charcoal, and brown to tie the cabinets and appliances together.
A honed finish softens the look of granite, making it feel more like natural stone and less like a showroom display. This material is incredibly durable and handles the heat of a cooktop without cracking or fading.
- Order a 2cm thickness for the backsplash to keep it from looking too bulky on the wall.
- Schedule installation after the base cabinets are perfectly level.
- Use granite-safe daily cleaners to avoid stripping the sealer over time.
Quick win: Match the grout color to the darkest fleck in the granite to make any seams virtually disappear.
20. Bookmatched Stone Backsplash
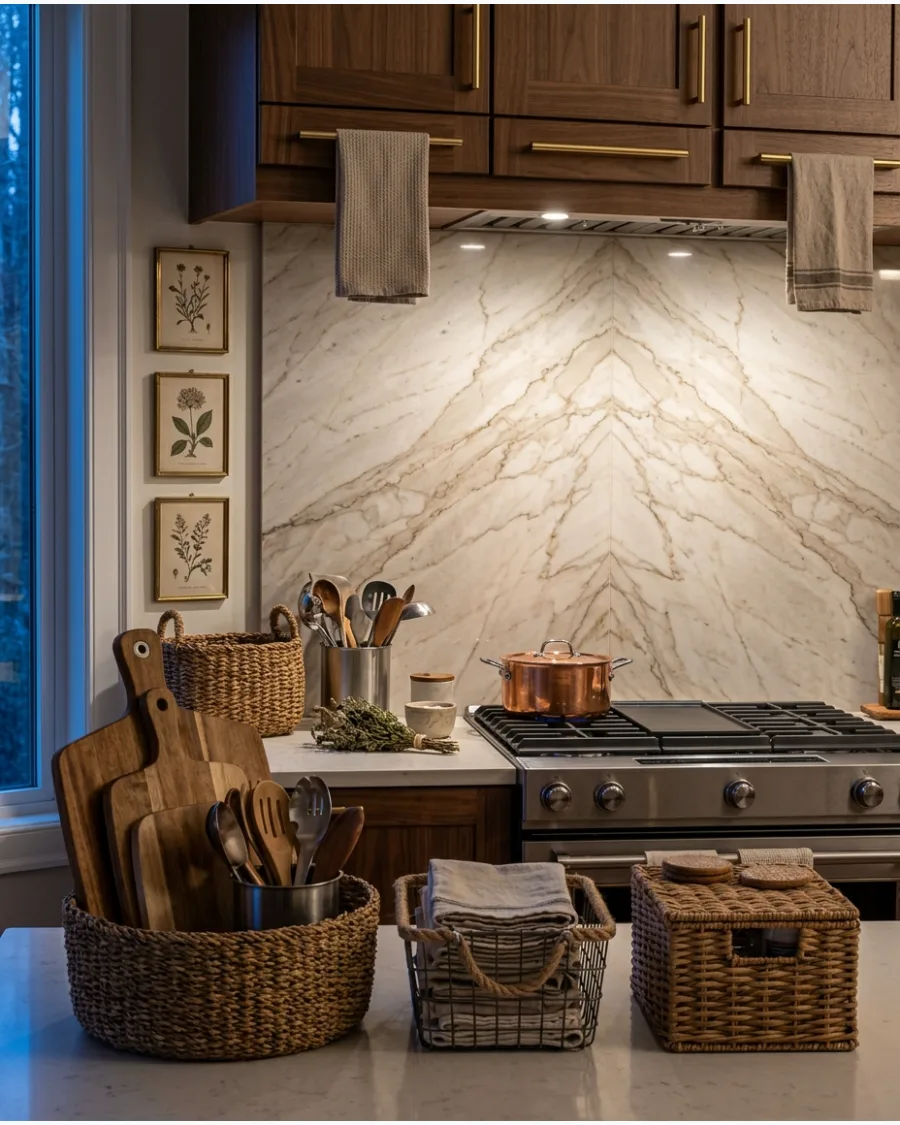
Position two coordinating stone slabs so their veining mirrors across the cooking area to create a symmetrical pattern. This creates an artistic focal point while keeping the material palette restrained and elegant.
Focus the bookmatching directly behind the stove or the sink where the visual impact is the strongest. It turns a functional surface into a custom piece of art that complements the organic feel of wood.
- This technique requires purchasing two consecutive slabs from the same stone lot.
- Hire a fabricator who specializes in precision V-groove or bookmatch seams.
- Keep surrounding walls a neutral paint color to avoid competing with the stone pattern.
Best shortcut: Use a high-quality porcelain slab that mimics stone if real bookmatched marble is outside the budget.
Warm and Earthy Tile Ideas
21. Terracotta Tile Backsplash
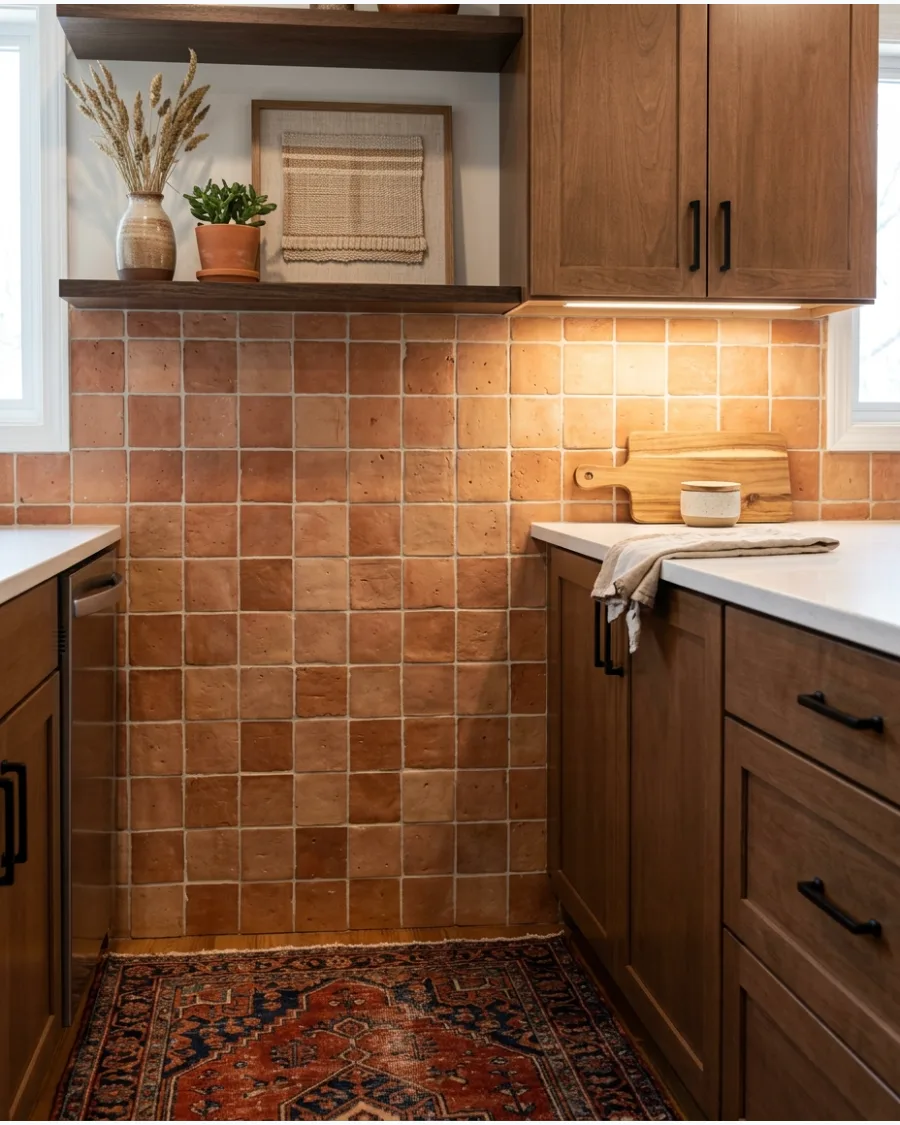
Combine brown cabinets with handmade terracotta tiles for a warm and earthy kitchen that feels lived-in. The natural orange and red tones in the clay highlight the warmth of wood grain.
Use a light-colored grout to define the shape of each tile and prevent the wall from looking too heavy. Light countertops and cream walls can keep the rich palette from feeling too dark or enclosed.
- Unglazed terracotta must be sealed before and after grouting to prevent staining.
- Expect size variations in handmade tiles, which adds to the rustic charm.
- Pair with wrought iron hardware to lean into a Mediterranean or Southwestern style.
Most people skip this: Dip the tiles in water before laying them to prevent them from sucking the moisture out of the thin-set too quickly.
22. Terracotta Zellige Backsplash
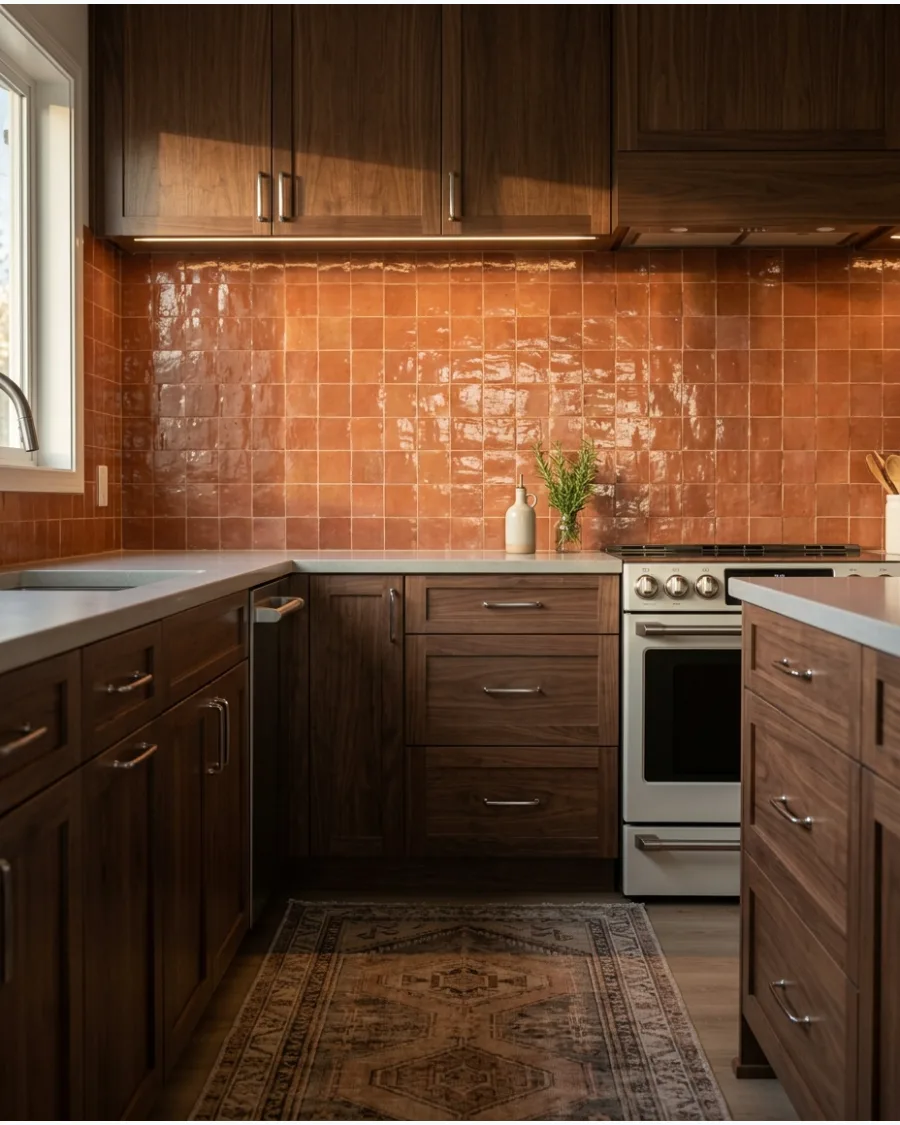
Choose glossy terracotta-colored zellige for a more reflective interpretation of the natural clay look. The tonal variation in these Moroccan tiles pairs especially well with walnut and espresso cabinets.
Install zellige tiles with very tight grout lines to emphasize the shimmering, uneven surface of the glaze. The gloss finish helps bounce light around a kitchen that might otherwise feel dark due to brown cabinetry.
- Zellige tiles are typically 4×4 inches and vary in thickness between pieces.
- Use a wedge spacer to manage the irregular edges during installation.
- Clean with a soft cloth to avoid scratching the delicate glazed surface.
Best shortcut: Buy pre-mixed grout in a sandy beige color to match the natural clay edges of the tiles.
23. Rust-Colored Tile Backsplash
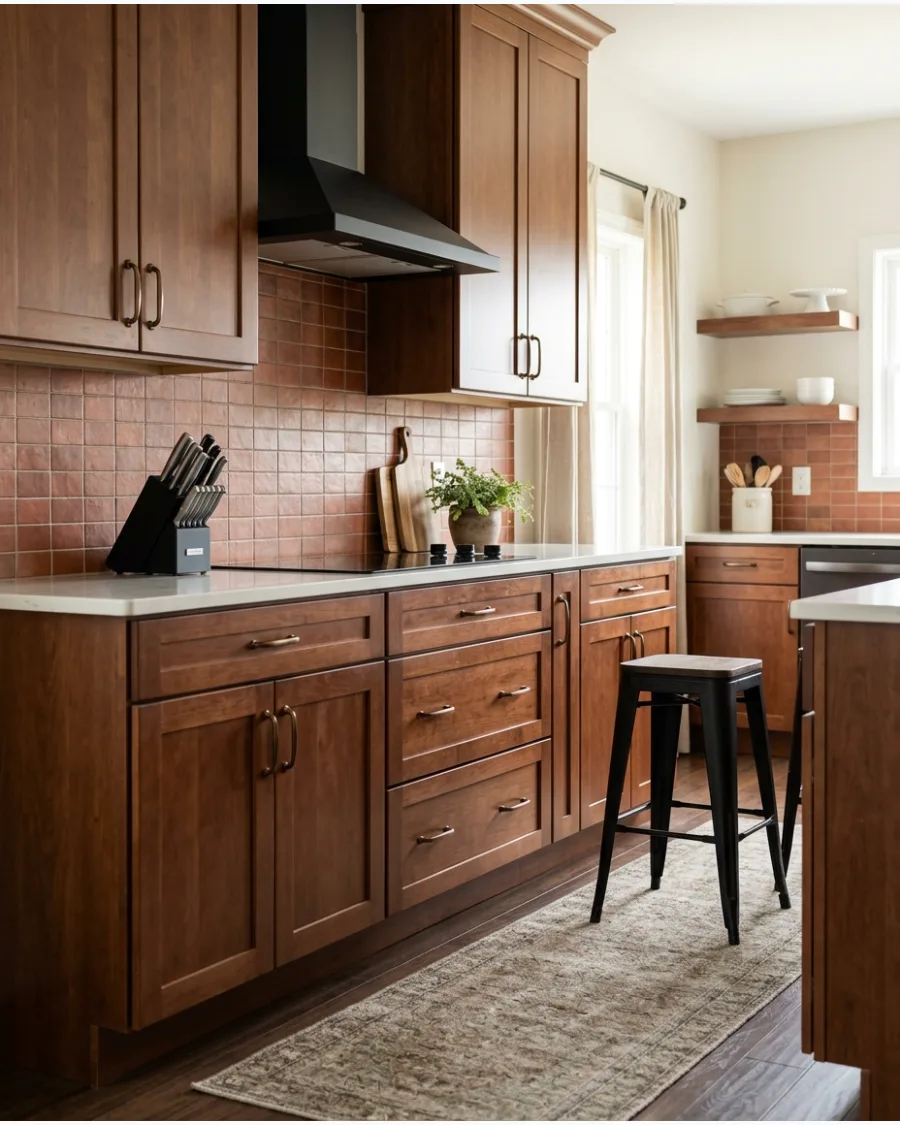
Rust tiles bring out the red and amber undertones found in many brown wood finishes like cherry or mahogany. Use them as a full backsplash or as a focused feature behind the range for a pop of color.
Combine rust tiles with matte black hardware to give the kitchen a modern, industrial edge. The deep color provides a sophisticated backdrop that makes white dishes or copper pans stand out.
- Look for tiles with high shade variation to get a more organic, multi-tonal look.
- Use a dark brown or charcoal grout to minimize the appearance of grime.
- This color works best in kitchens with plenty of natural light.
Quick win: Use a rust-colored caulk at the joint where the tile meets the countertop for a professional finish.
24. Caramel Glossy Tile Backsplash
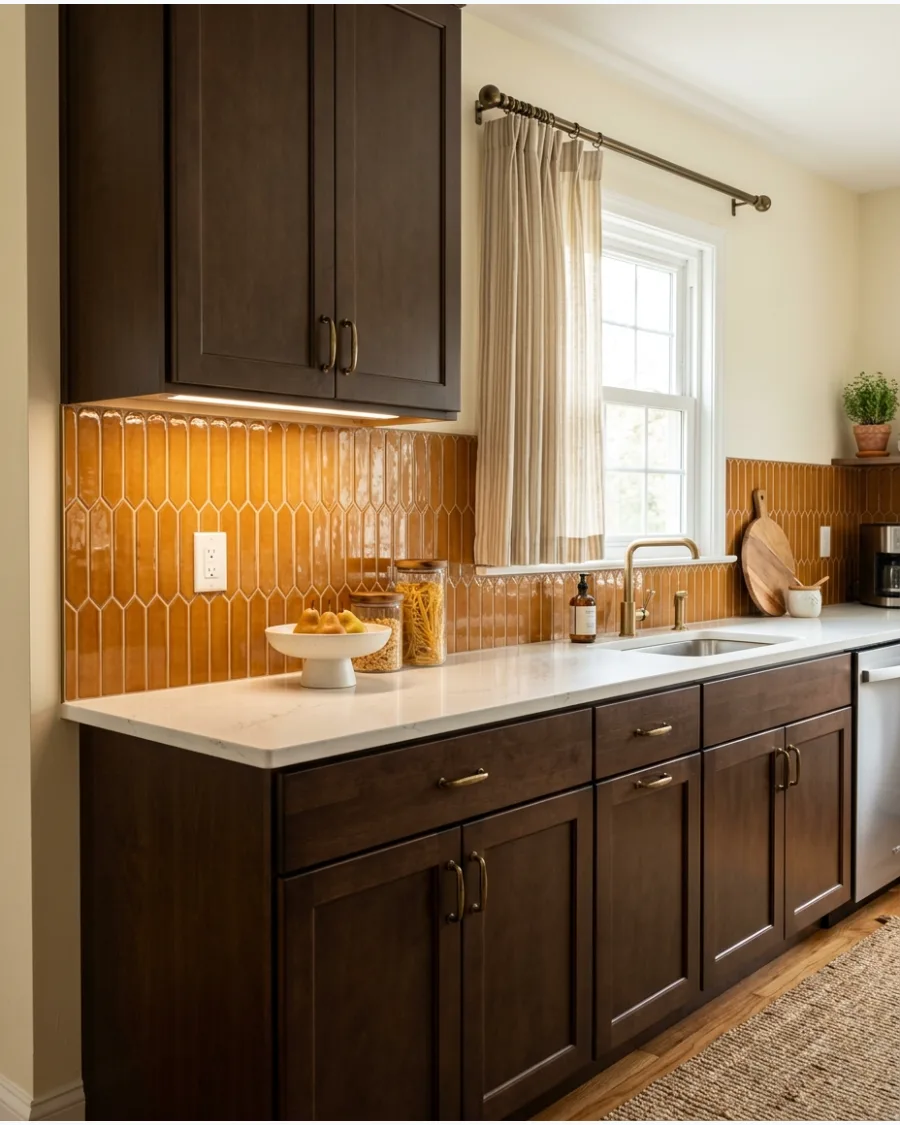
Caramel-colored tiles create a rich tonal combination with dark brown cabinets that feels warm and inviting. Their glossy finish reflects under-cabinet lighting and adds visual depth to the backsplash area.
Choose a long, thin picket or subway shape to give the caramel color a more contemporary feel. This shade bridges the gap between traditional beige and dark brown, making the transition feel intentional.
- Glossy tiles are much easier to wipe clean of grease than matte options.
- Space tiles at 1/16th of an inch for a clean, modern look.
- Use warm-toned LED bulbs in under-cabinet lights to enhance the caramel glow.
Most people skip this: Check the tile color under your specific kitchen lighting, as caramel can shift toward yellow depending on the bulb.
25. Mushroom Tile Backsplash
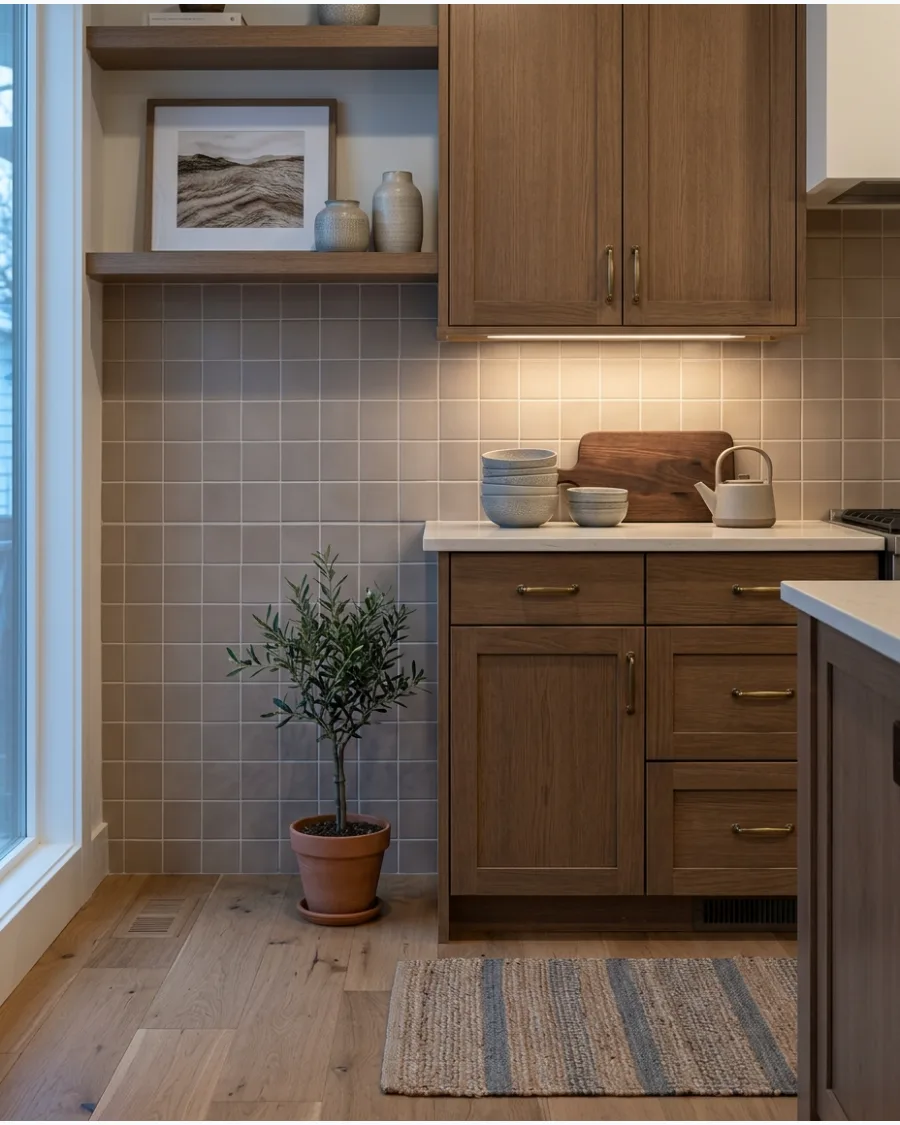
Mushroom-colored tiles offer a softer alternative to traditional beige and work perfectly with medium-brown cabinets. This muted, earthy tone coordinates naturally with creamy quartz and aged brass hardware.
Opt for a matte finish mushroom tile to create a calm, sophisticated atmosphere that doesn't compete with wood grain. It provides enough contrast to brighten the space without the starkness of pure white.
- This color is widely available in standard subway and hex shapes at most stores.
- Use a grout color that is one shade lighter than the tile for subtle texture.
- Mushroom tones hide dust and water spots better than darker or lighter tiles.
Quick win: Bring a cabinet door to the tile shop to ensure the mushroom undertone doesn't look too green against your wood.
26. Chocolate Brown Tile Backsplash
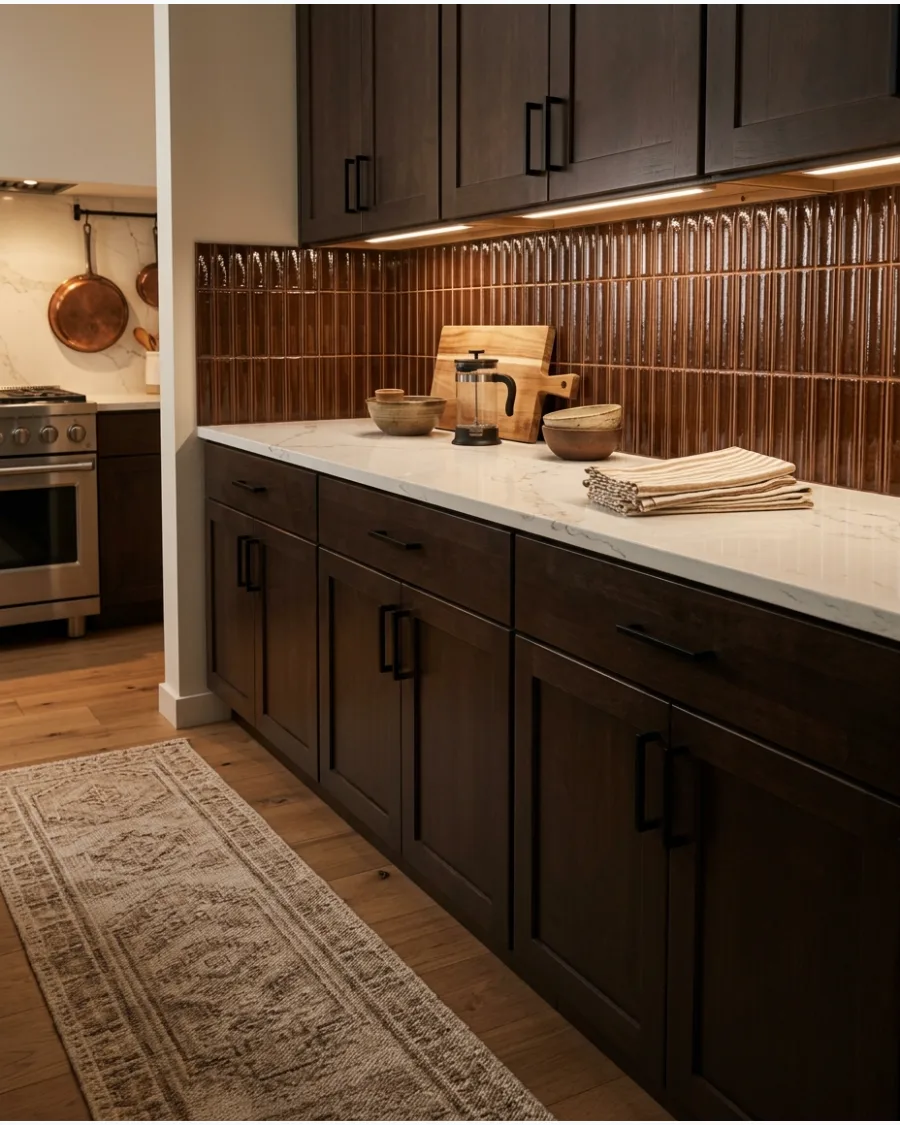
Create a color-drenched kitchen by pairing brown cabinetry with chocolate-colored tiles for a moody, high-end look. Vary the sheen or tile texture, such as using a ribbed or 3D tile, so the backsplash remains distinct from the cabinets. This monochromatic approach makes the kitchen feel cozy and can actually make a large space feel more intimate.
It works best when paired with high-contrast elements like white countertops.
- Use a high-quality adhesive to support the weight of heavier, textured tiles.
- Install bright task lighting to ensure the workspace doesn't feel too dark.
- Choose a grout that matches the tile exactly for a seamless wall-of-color effect.
Best shortcut: If you want this look without a permanent commitment, use a high-gloss chocolate brown peel-and-stick tile.
27. Clay Pink Backsplash
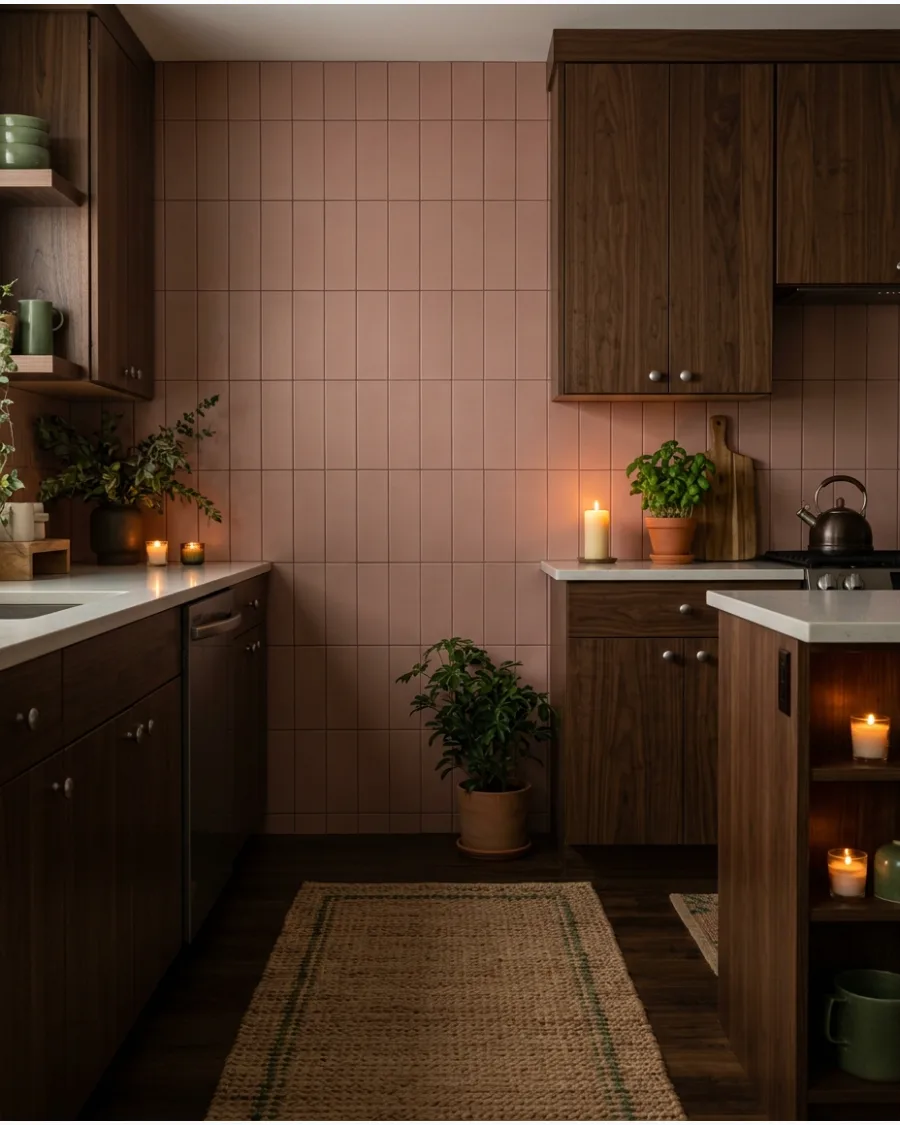
Muted clay pink adds gentle contrast to walnut and dark brown cabinets without looking overly feminine. Its warm undertone keeps the pairing cohesive and prevents the kitchen from feeling cold.
Use a vertical stack pattern with clay pink tiles to add height to the room and a modern touch to traditional wood. It is a sophisticated way to introduce color while staying within a natural, earthy palette.
- Clay pink pairs beautifully with both silver and gold hardware finishes.
- Choose a matte or satin glaze to keep the pink from looking like a bathroom tile.
- This color works exceptionally well with butcher block wooden countertops.
Quick win: Use a light gray grout instead of white to give the pink tiles a more modern, industrial-chic vibe.
28. Warm Ochre Tile Backsplash
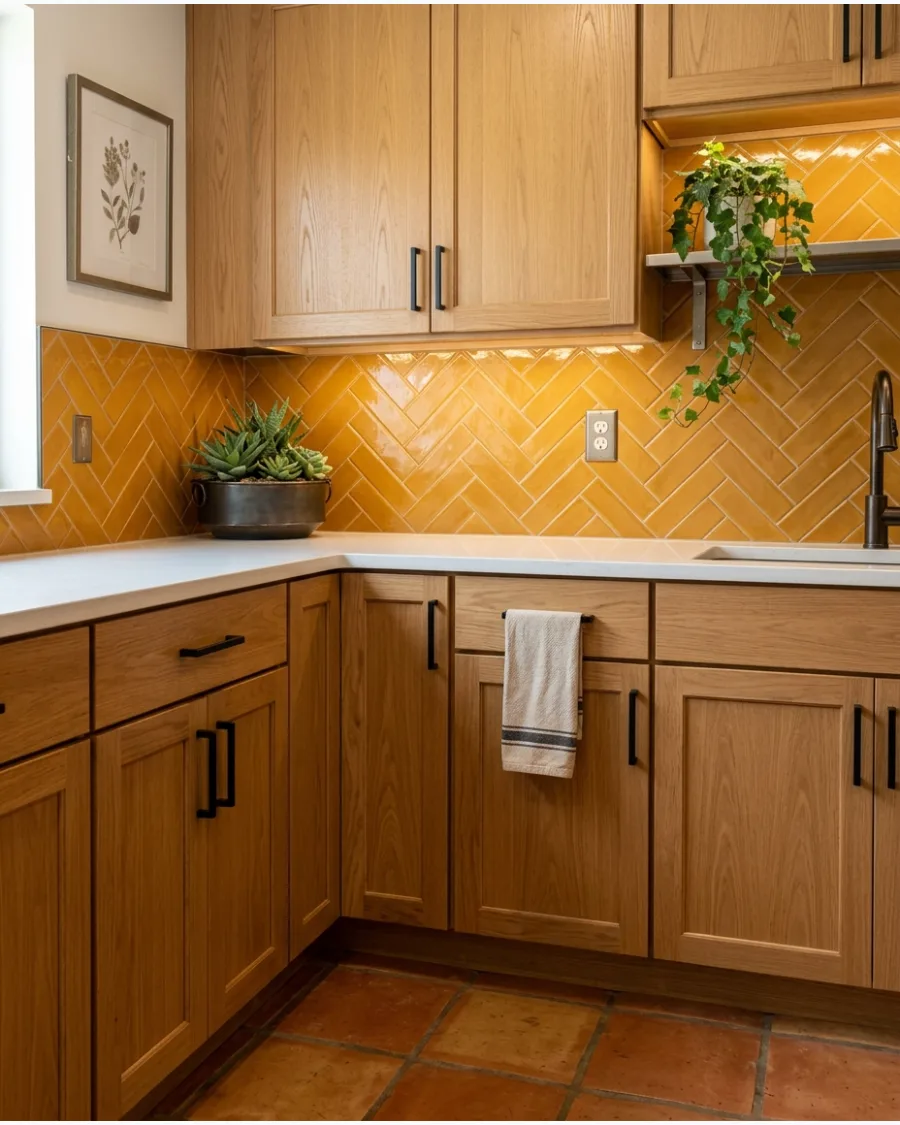
Ochre tiles can highlight the golden undertones of oak and chestnut cabinets, making the wood look richer. This bold, sunny color brings a lot of energy to the kitchen and pairs well with natural textures like wicker.
Keep the countertop pale, such as a white or light gray, to give the rich ochre backsplash enough breathing room. It is an excellent choice for kitchens that do not get much natural sunlight.
- Ochre is a strong color, so consider using it only on the main backsplash wall.
- Pair with light wood or white floating shelves to break up the color.
- Use a neutral cream grout to soften the transition between the bright tiles.
Most people skip this: Try a crackle glaze ochre tile to add even more depth and a vintage feel to the kitchen.
29. Sand-Colored Brick Tile Backsplash
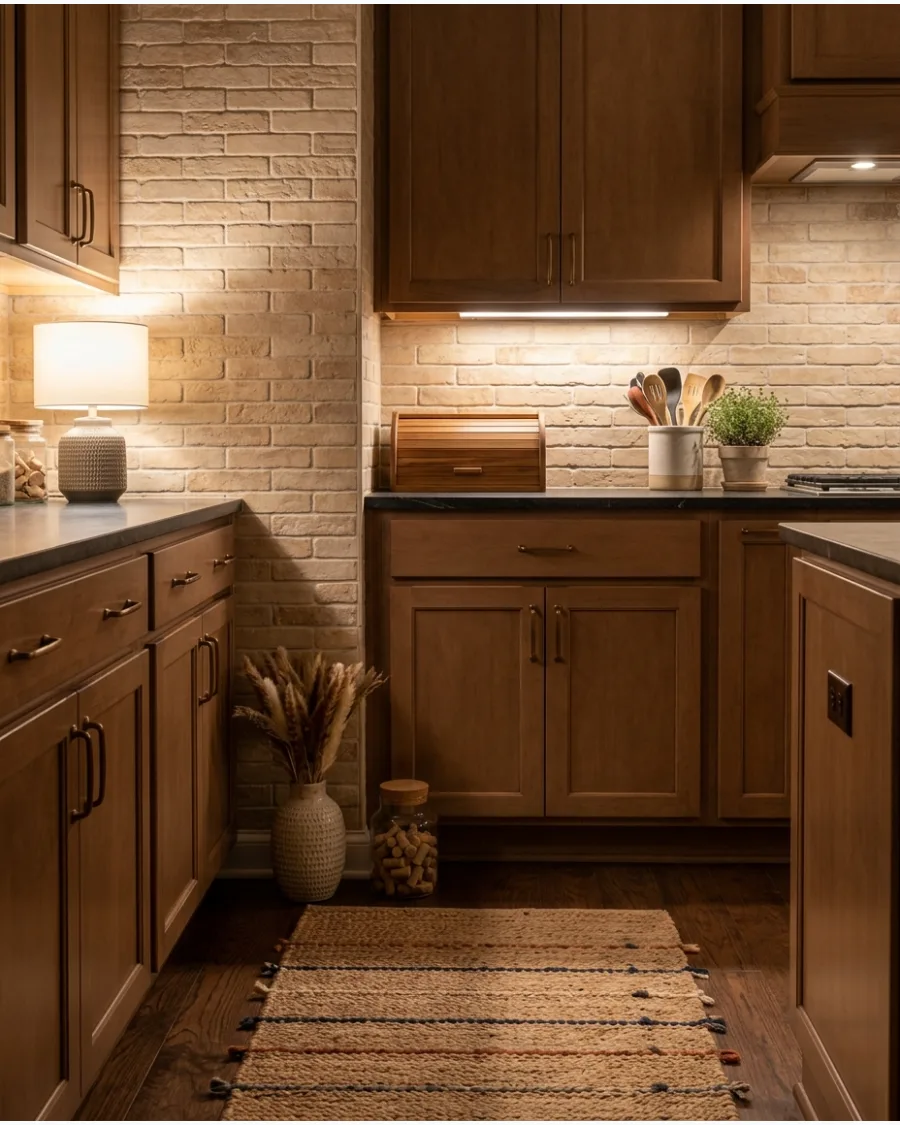
Use narrow sand-colored tiles with a slightly irregular surface to imitate the look of handmade brick. Their light earthy tone provides texture while brightening the area around brown cabinetry.
Lay these brick-style tiles in a traditional running bond pattern to lean into a classic, cottage-inspired aesthetic. The variation in the sand tones helps hide splashes and cooking messes better than flat ceramic.
- Thin brick tiles are lighter and easier to install on drywall than full-sized bricks.
- Seal the brick tiles to prevent them from absorbing cooking grease and odors.
- Use a wide grout joint of about 3/8 inch to mimic real masonry.
Best shortcut: Use a pre-sealed brick tile to save time on the installation process and ensure immediate protection.
30. Copper-Tone Mosaic Backsplash
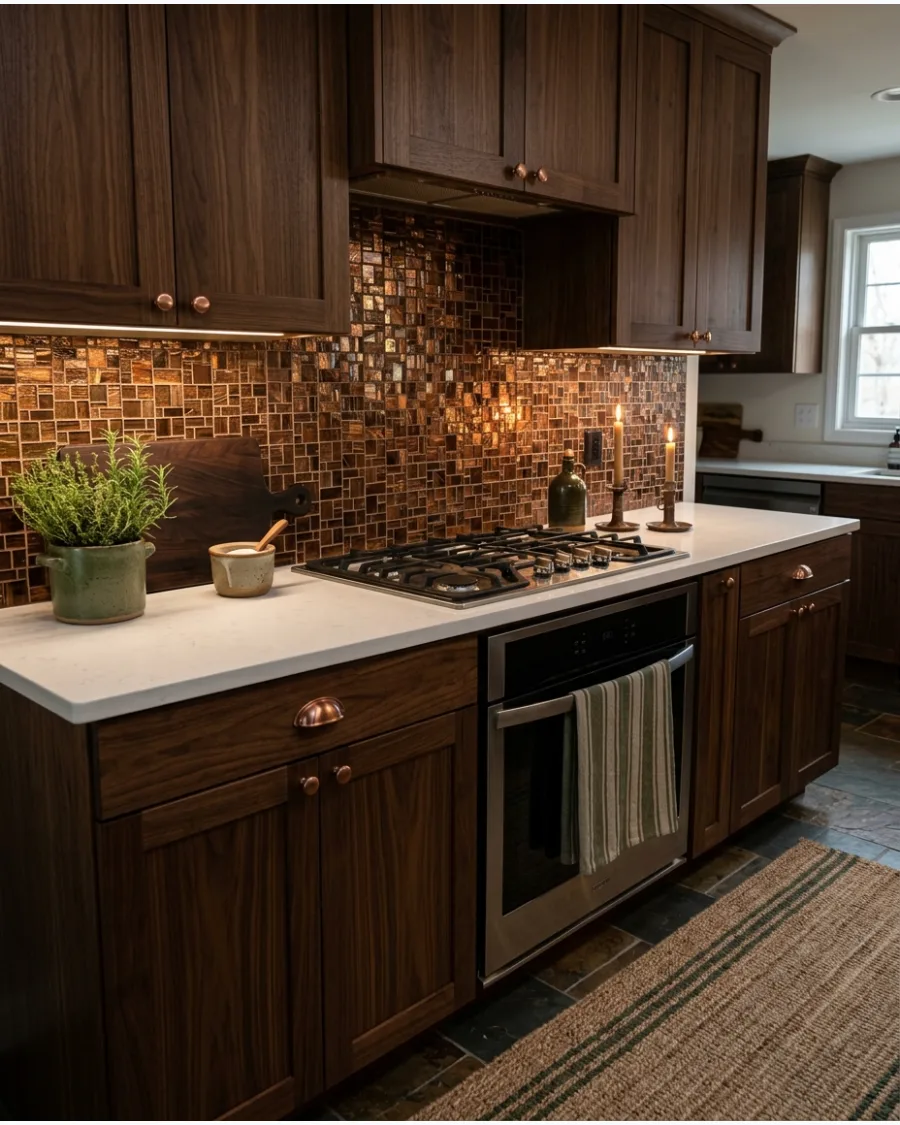
Combine copper, bronze, and brown mosaic tiles for a warm metallic effect that glows under your kitchen lights. This material adds a layer of luxury and shimmer that complements the matte look of most wood cabinets.
Limit the mosaic to a smaller area, like behind the stove, if the cabinets already have a very busy wood grain. The metallic surfaces reflect light, helping to brighten the workspace in dark kitchens.
- Mosaic tiles usually come on mesh sheets for faster and easier installation.
- Use a non-sanded grout to avoid scratching the metallic finish of the tiles.
- Wipe down regularly with a soft cloth to maintain the copper shine.
Quick win: Pair copper mosaic with oil-rubbed bronze hardware to tie the metallic tones throughout the entire kitchen.
Green and Blue Backsplash Ideas
31. Olive Green Zellige Backsplash
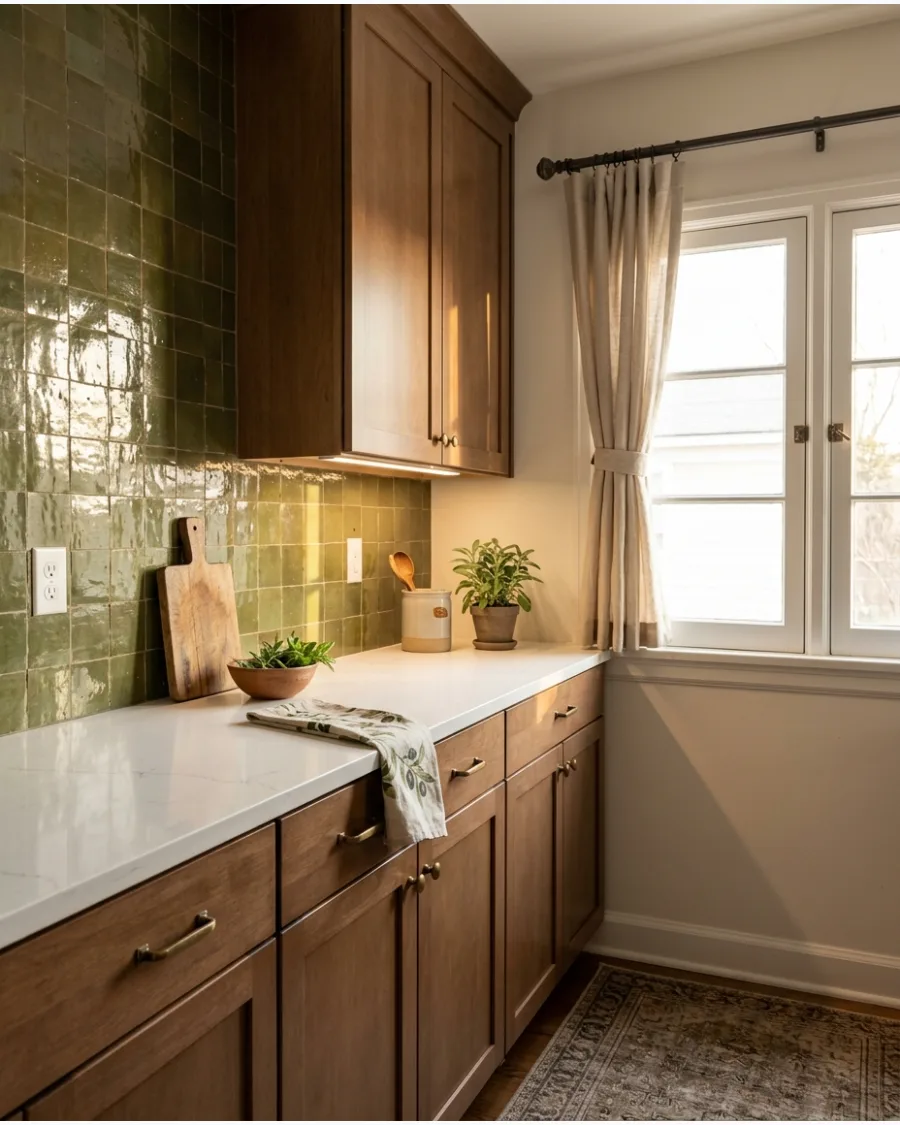
Olive zellige tiles create an earthy combination with brown cabinets. Their glossy handmade surface keeps the deeper green from making the room feel heavy.
Choose a tile with high shade variation to add depth and texture to the wall. A dark olive tone grounds the space while reflecting enough light to keep it airy.
- Expect a 2-4 week lead time for handmade zellige tiles.
- Install the tiles with very thin grout lines to emphasize the natural edges.
- Gold or brass cabinet hardware highlights the warm undertones of olive green.
Most people skip this: Use a grout color that matches the darkest tile in the set to hide the slight gaps common in zellige.
32. Forest Green Tile Backsplash
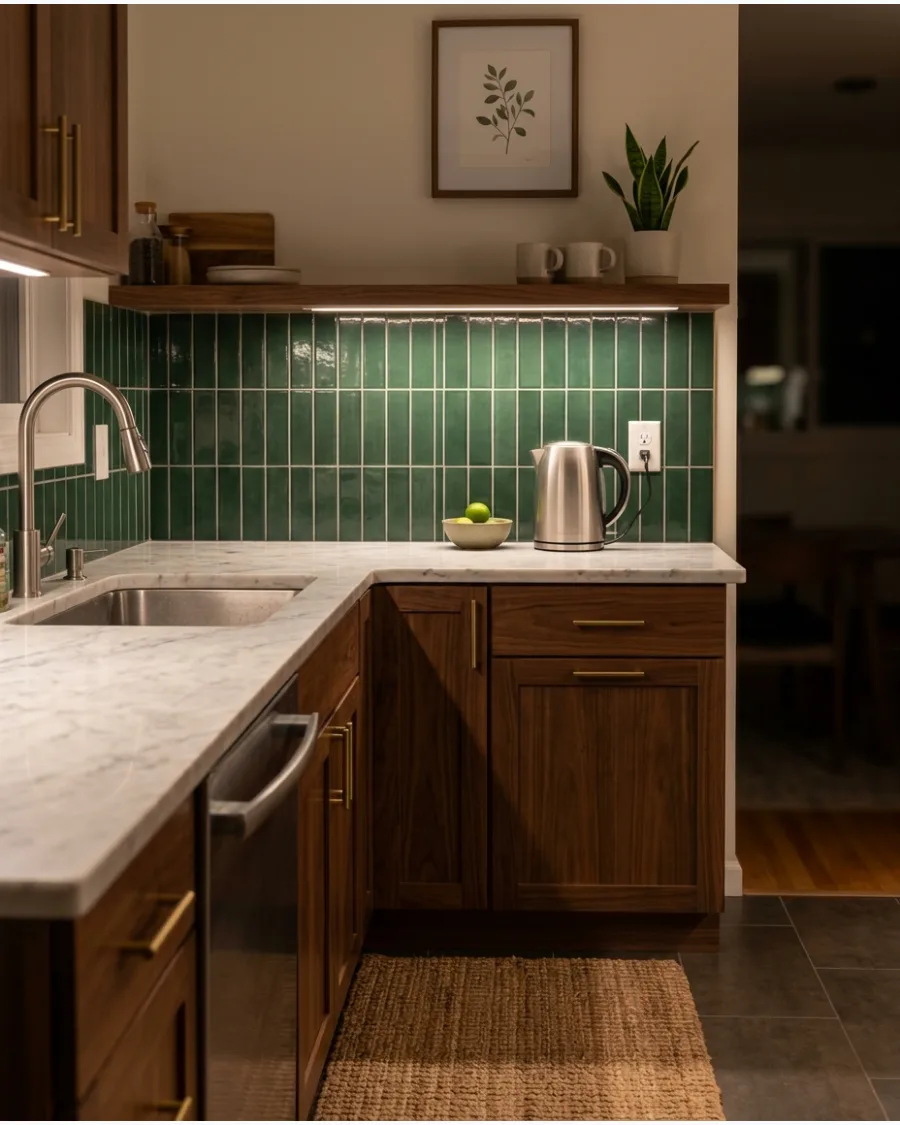
Use deep forest green tiles behind walnut or medium-brown cabinetry for a dramatic nature-inspired palette. Light counters and strong task lighting will balance the darker materials.
Place under-cabinet LED strips to highlight the rich color and prevent the area from feeling like a dark cave. This moody combination feels high-end and timeless.
- Budget $10 to $20 per square foot for quality ceramic subway tiles.
- Install the tiles vertically for a more modern, height-boosting look.
- This color works best in kitchens that receive plenty of natural sunlight.
Quick win: Match your cabinet hardware to the tile’s undertone by using warm brass for yellow-greens or cool nickel for blue-greens.
33. Sage Green Tile Backsplash
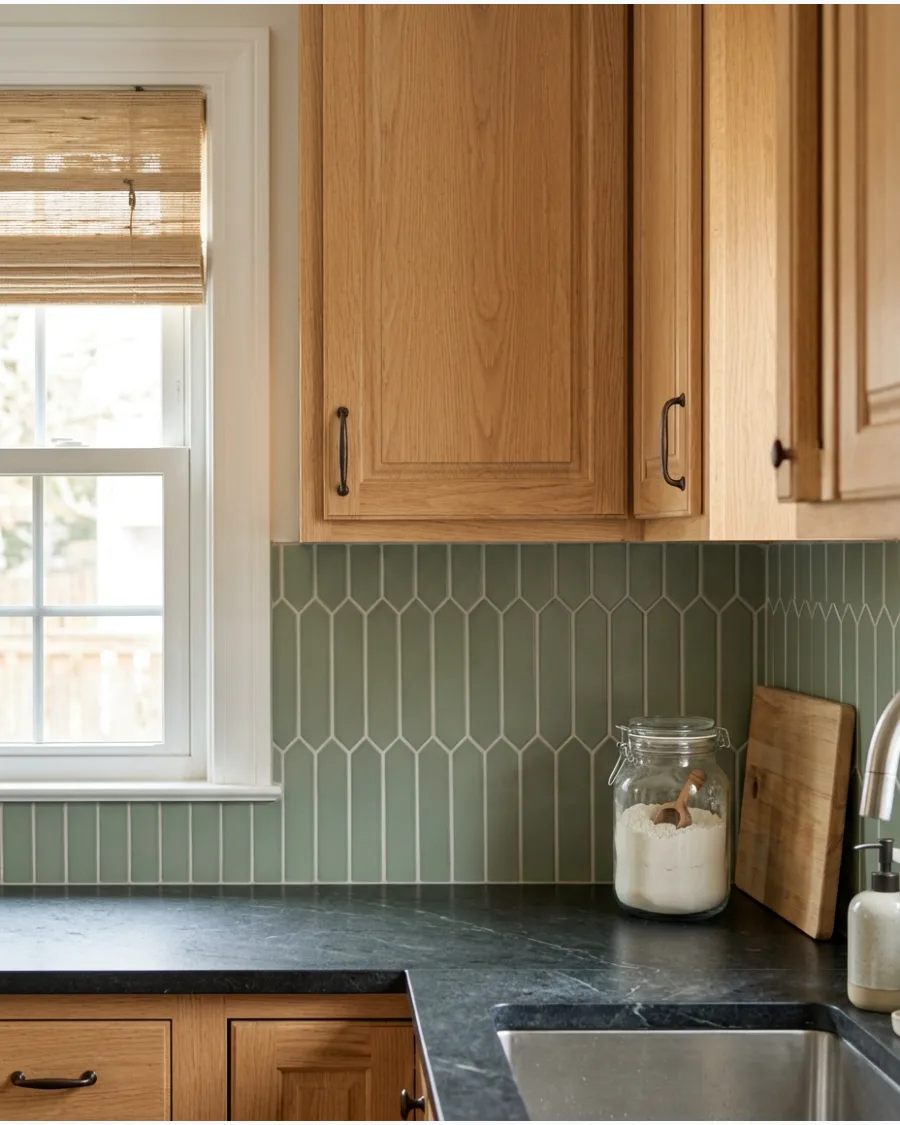
Sage tiles add soft color while allowing brown cabinets to remain the dominant feature. Select a muted shade with warm undertones rather than a cool gray-green.
Use a light-colored grout to define the tile shape without creating high-contrast lines. This subtle green acts like a neutral in a busy kitchen.
- Choose a matte finish to give the kitchen a softer, more organic feel.
- Pair with light wood or honey oak cabinets to keep the space bright.
- Standard ceramic sage tiles are easy to find at local home improvement stores.
Best shortcut: Bring a cabinet door to the tile shop to ensure the sage green doesn't make the wood look too orange.
34. Moss Green Square Tile Backsplash
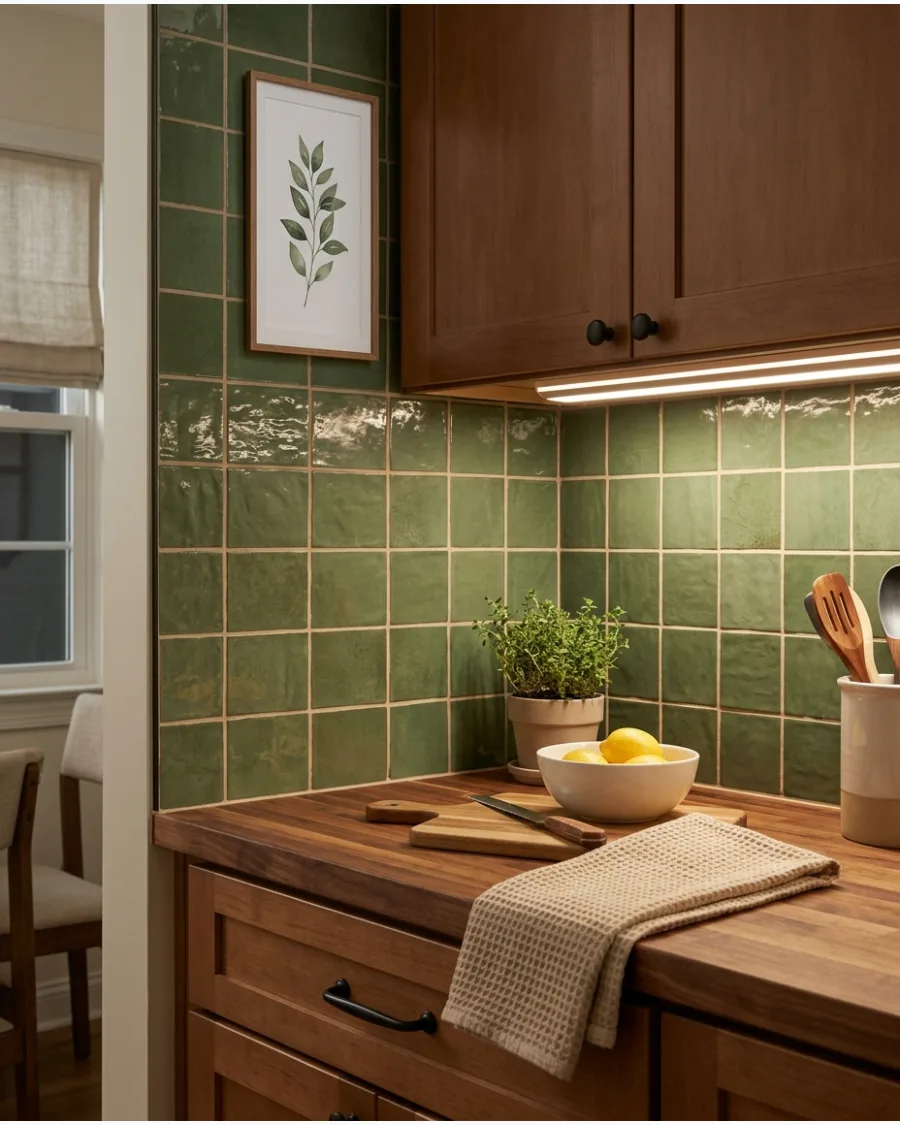
Moss-green square tiles create a rich organic backdrop for wood cabinets. Beige grout can soften the grid and connect the tile to warm countertops.
Opt for a hand-pressed tile with slight surface ripples to catch the light at different angles. The slight color variations in green mimic the natural tones found in wood grain.
- Square tiles are often more affordable and easier to install for DIYers.
- Use a 1/8-inch grout joint for a clean, traditional grid appearance.
- This pairing works well in Craftsman or rustic-style kitchen designs.
Most people skip this: Seal the grout twice in high-splatter areas behind the stove to keep the moss green looking fresh.
35. Eucalyptus Green Backsplash
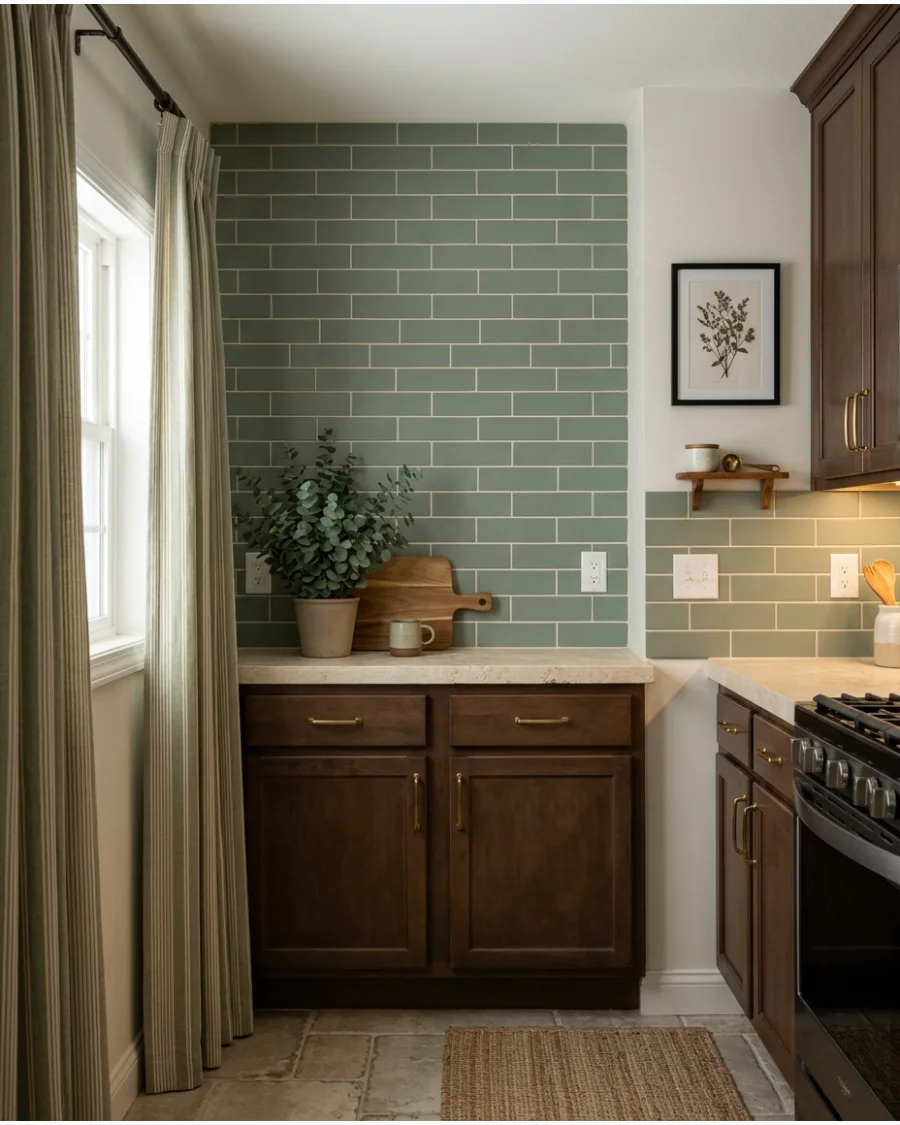
A dusty eucalyptus backsplash provides gentle contrast with espresso or chocolate cabinets. Pair it with cream stone and brushed brass for a calm contemporary kitchen.
Select a matte finish to prevent the light green from looking too much like a bathroom tile. This shade provides a sophisticated bridge between dark wood and light counters.
- Glass tiles in eucalyptus often have a deeper, more luminous quality.
- Install with white thin-set mortar so the color remains true through the tile.
- Works beautifully in small kitchens to add color without overwhelming the space.
Quick win: Use a cream-colored grout instead of bright white to keep the eucalyptus tone from looking too cold.
36. Teal Tile Backsplash
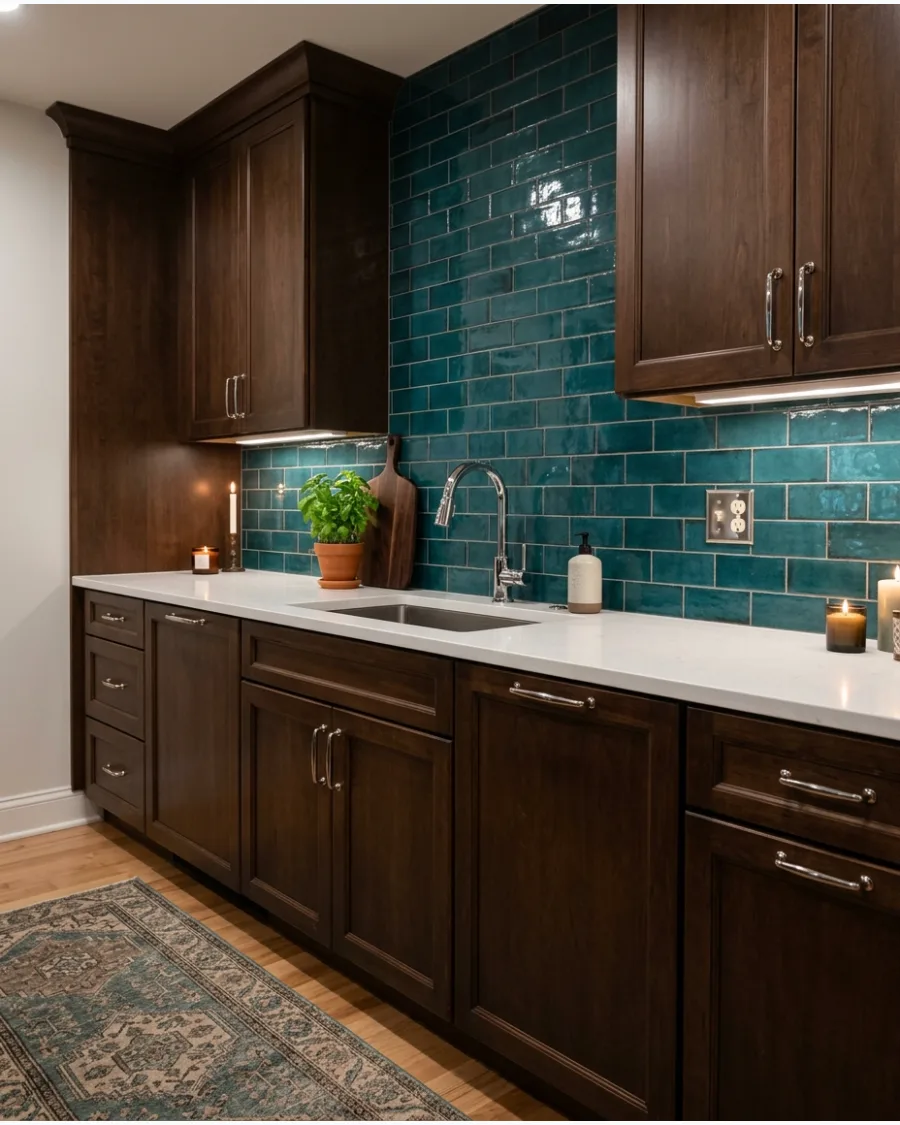
Deep teal can energize dark brown cabinetry without losing its sophisticated character. Use a glossy finish to reflect light and reveal variations in the tile color.
Pair the tile with chrome or polished nickel hardware to make the blue tones pop. The gloss helps bounce light around a dark corner without needing white paint.
- Teal is a bold choice that works best as a full-wall feature.
- Buy 15% extra tile to account for cuts and potential color batch variations.
- This color pairs best with dark walnut or espresso wood finishes.
Best shortcut: Use a dark gray grout to make the teal tiles look like one continuous, saturated surface.
37. Dusty Blue Backsplash
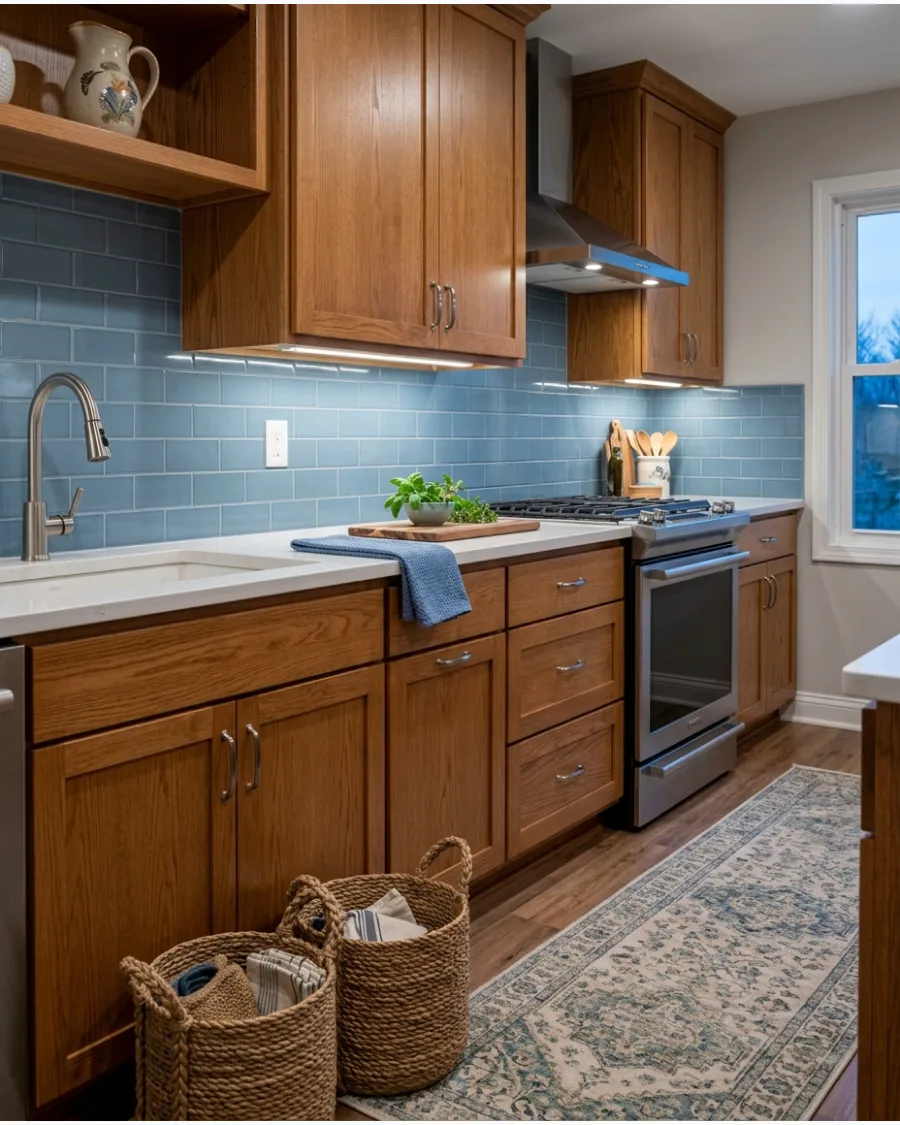
Dusty blue tiles provide a soft complementary contrast to warm brown cabinets. The pairing works particularly well in transitional, cottage, and coastal kitchens.
Keep the grout color close to the tile color to keep the look calm and unified. This combination is a great way to cool down very orange-toned wood.
- Dusty blue is a safe way to introduce color without it feeling dated quickly.
- Standard 3×6 subway tiles are the most cost-effective way to get this look.
- Pairs well with white or light gray countertops to maintain a bright feel.
Most people skip this: Paint the window trim the same dusty blue to tie the backsplash into the rest of the room.
38. Navy Blue Tile Backsplash
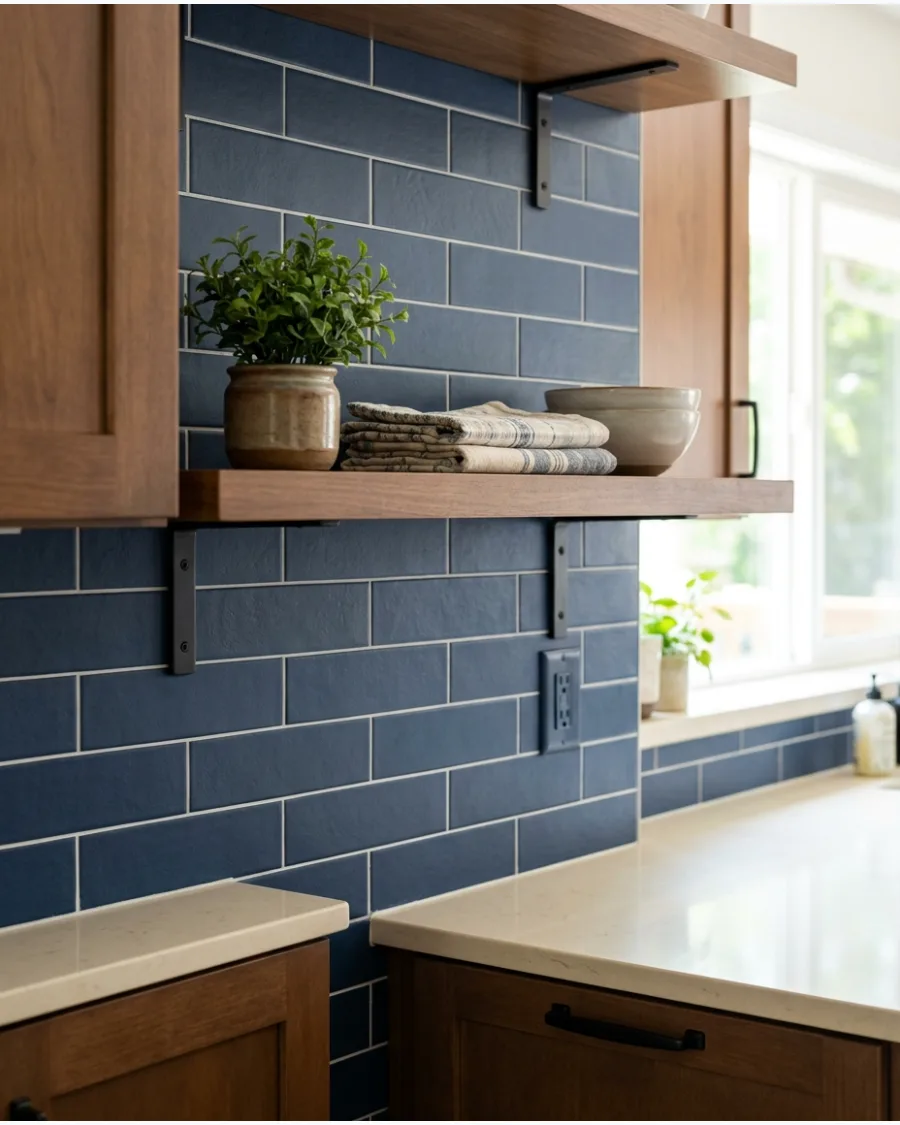
Navy tiles can make medium-brown cabinetry feel richer and more polished. White or cream countertops help separate the two dark surfaces.
Balance the look with plenty of white space on the upper walls or by using open shelving. Navy acts as a sophisticated neutral that feels more intentional than gray.
- Matte navy tiles hide fingerprints and water spots better than glossy ones.
- Works well with black or dark bronze hardware for a moody, modern look.
- Requires excellent lighting to prevent the kitchen from feeling too dark.
Quick win: Use warm wood accessories like a walnut fruit bowl to bridge the gap between navy and brown.
39. Blue and White Patterned Tile
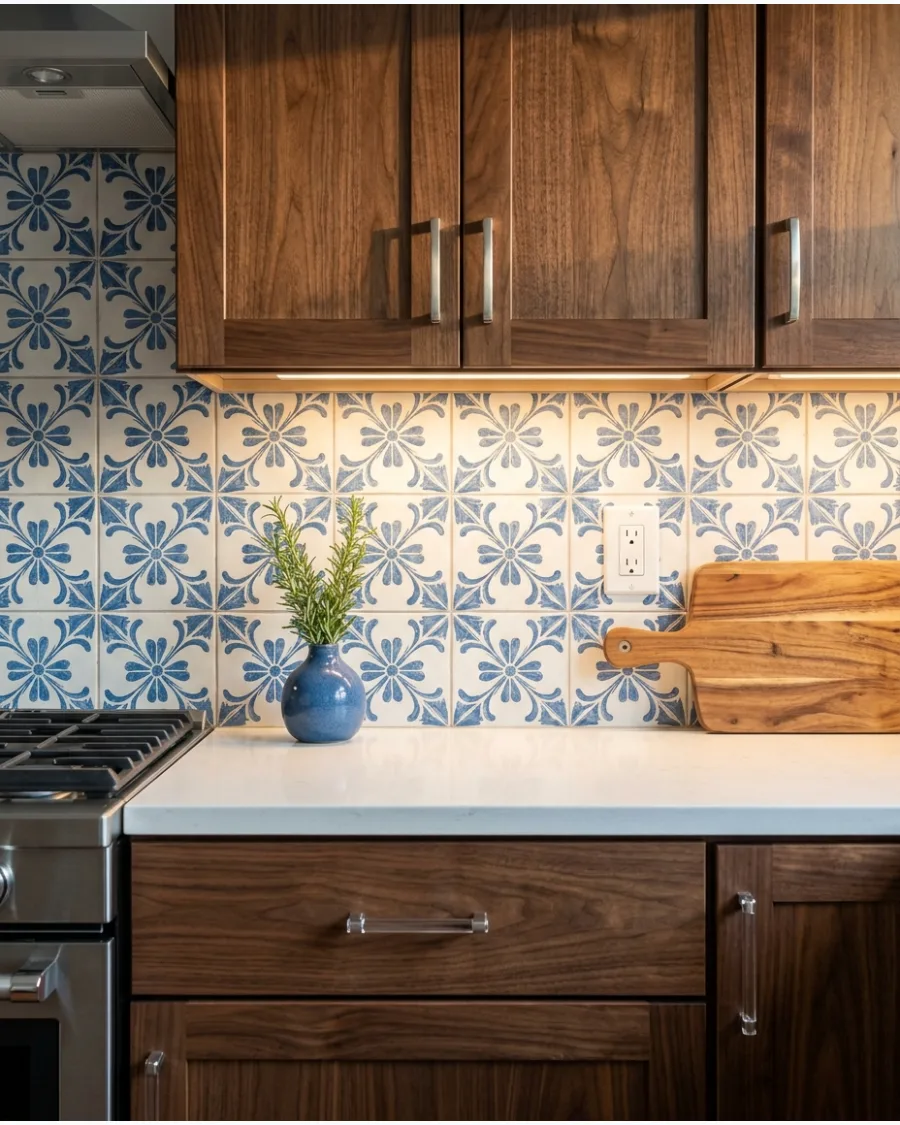
Install blue and white patterned tiles to introduce color and detail behind simple brown cabinets. Repeat the blue in small accessories so the pattern feels intentional.
Center the pattern on the wall between the countertop and the upper cabinets to ensure visual balance. It gives a plain kitchen a custom, high-end look.
- Cement tiles are thick, so check that your outlet covers will still fit.
- Seal patterned cement tiles before and after grouting to prevent staining.
- Perfect for adding personality to a kitchen with very simple cabinet doors.
Best shortcut: Peel-and-stick versions of this look are great for renters who want to cover old brown cabinetry backsplashes.
40. Blue-Green Fish Scale Tile
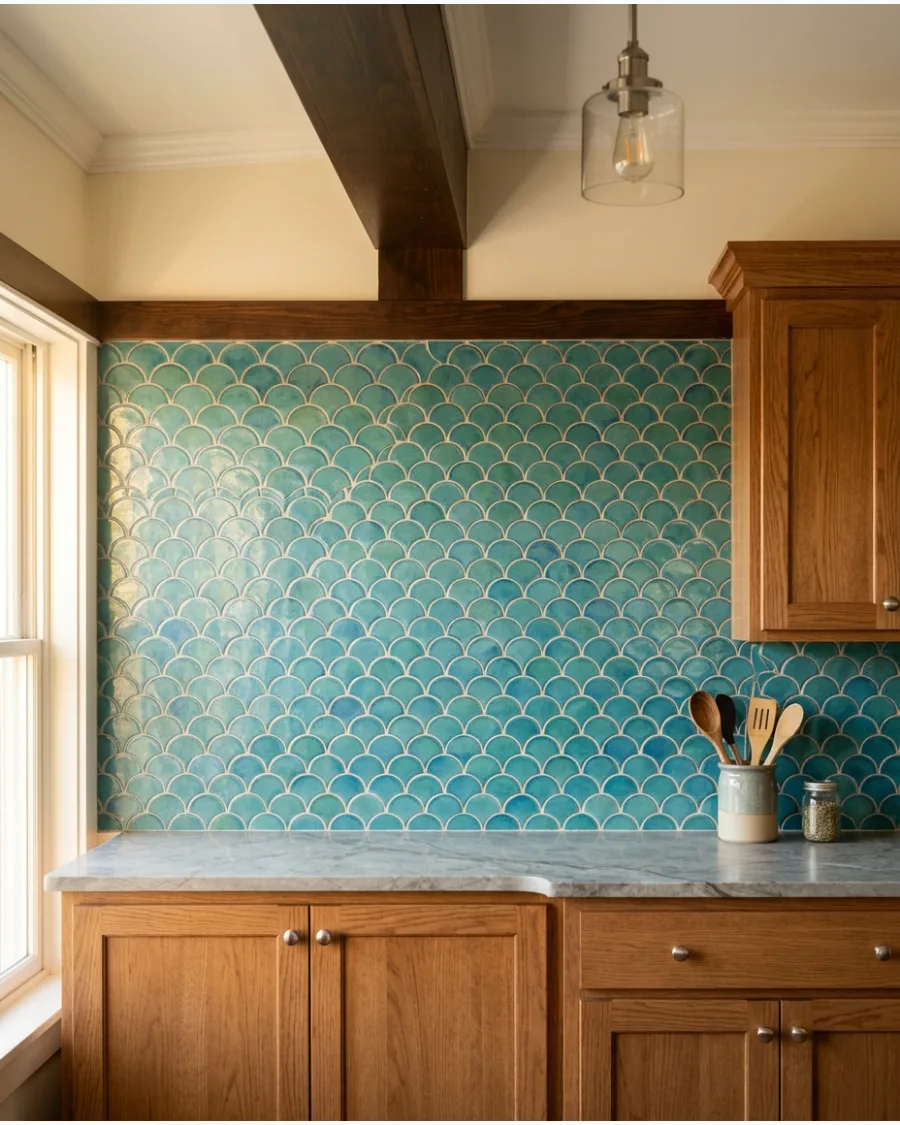
Use blue-green fish scale tiles to create gentle movement and an aquatic touch. The curved shape contrasts nicely with the straight lines of Shaker-style brown cabinets.
Point the tiles upward to make the ceiling feel higher in a kitchen with low cabinets. The curves help break up the heavy rectangular feel of traditional cabinetry.
- Fish scale tiles require more precise cutting at the edges and corners.
- Choose a tile with a crackle glaze for an aged, artisan appearance.
- Works best with light-to-medium brown wood to keep the look airy.
Most people skip this: Start the layout from the center of the wall so the 'scales' are cut evenly on both ends.
Patterned and Geometric Backsplash Ideas
41. Brown and Cream Checkerboard Backsplash
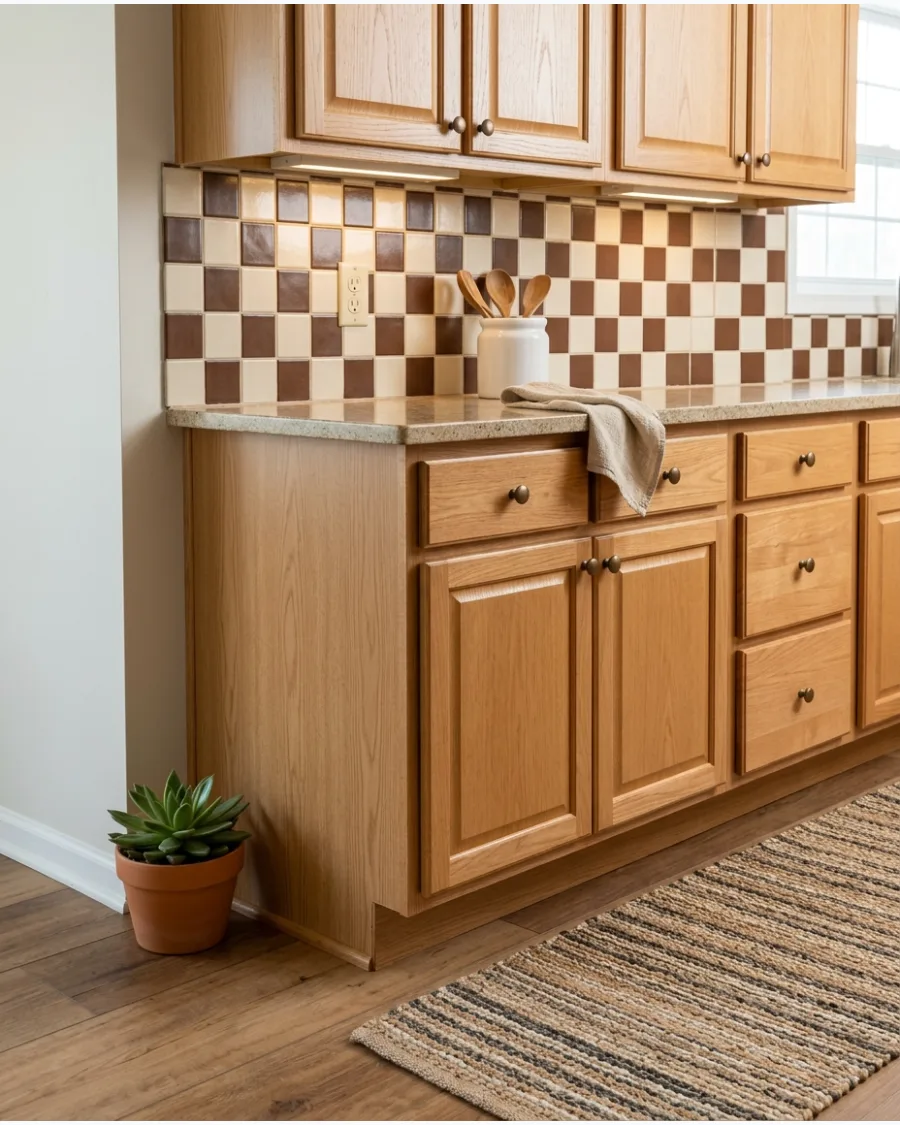
Create a small checkerboard using brown and cream tiles. The repeated cabinet color makes the pattern cohesive while the cream squares brighten the wall.
Use two-inch square tiles to keep the pattern from looking too busy or overwhelming the wood grain. It’s a classic look that adds a vintage feel to standard brown cabinets.
- You can create this look by mixing two colors of the same tile line.
- Use a neutral cream grout to let the pattern speak for itself.
- This design hides small splatters better than a solid white backsplash.
Quick win: Place the tiles diagonally in a 'diamond' checkerboard to make a narrow kitchen feel wider.
42. Micro-Check Tile Backsplash
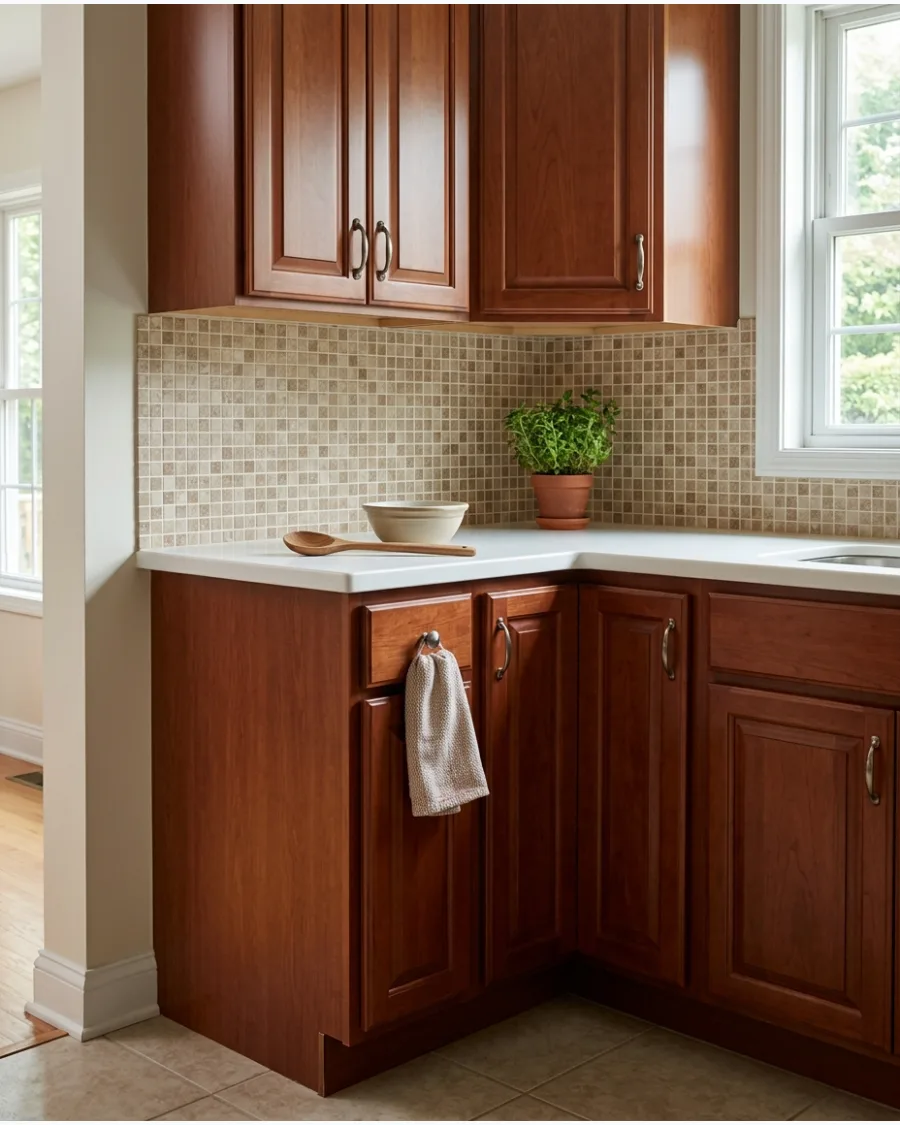
Use small-scale checks in beige, brown, or muted terracotta for a subtle retro reference. The compact pattern introduces personality without overpowering the cabinetry.
Install this pattern on mesh-backed sheets to ensure the tiny tiles stay perfectly aligned. This scale is perfect for small kitchens where large patterns feel cramped.
- Mesh-backed mosaic sheets make this a much faster installation.
- A 1/2-inch or 1-inch tile size works best for the micro-check effect.
- Pairs well with retro-style appliances or mid-century modern cabinets.
Best shortcut: Use a pre-mixed grout to save time on the high volume of grout lines required for mosaic tiles.
43. Neutral Geometric Tile Backsplash
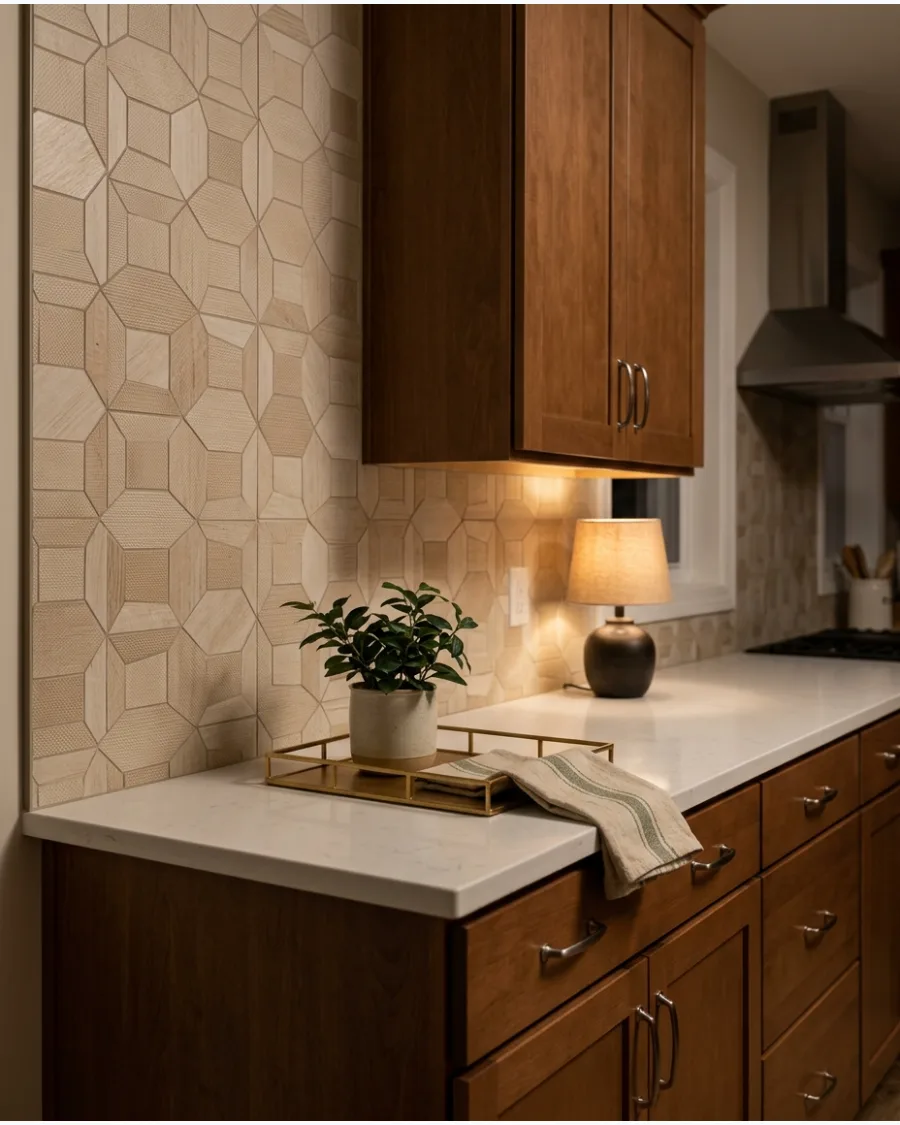
Choose geometric tiles in cream, tan, and soft brown. A limited tonal palette allows the pattern to stand out while remaining connected to the cabinets.
Pick a design with a matte finish to keep the focus on the shapes rather than the shine. Tonal patterns provide visual interest without making the wall look cluttered.
- Look for 'deco' tiles that come in pre-mixed patterns within one box.
- Keep the rest of the kitchen decor simple to let the geometry shine.
- Works best with flat-panel cabinets for a clean, architectural look.
Most people skip this: Map out the pattern on the floor before applying it to the wall to avoid two identical tiles touching.
44. Moroccan-Inspired Patterned Tile
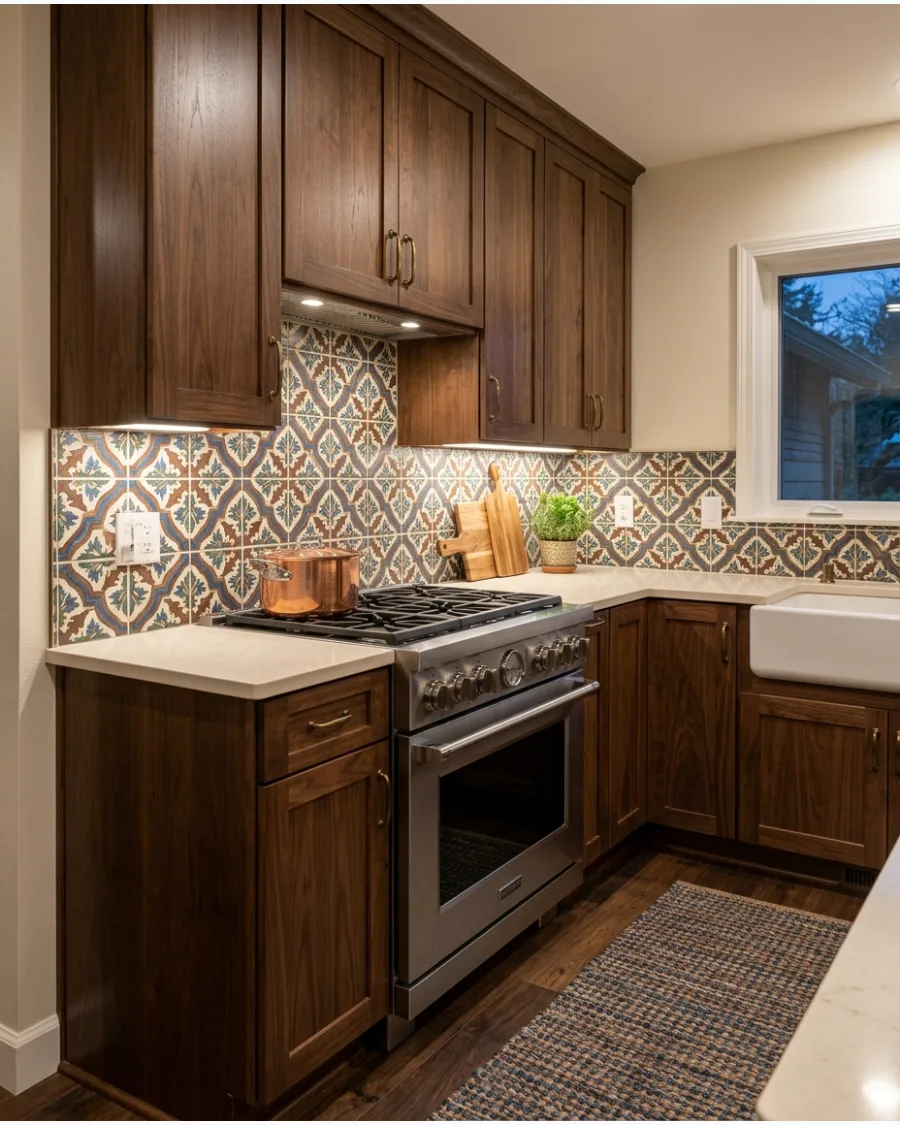
Use a Moroccan-inspired design containing brown, cream, blue, or green. Place it behind the range or across the full backsplash depending on how bold you want the room to feel.
Mix a patterned section behind the stove with solid tiles on the other walls to save money while making a statement. This style pairs beautifully with the natural textures of wood.
- Ensure the tile is heat-rated if you are installing it directly behind a stove.
- Choose a pattern with a bit of the cabinet’s brown tone to tie it together.
- Heavily patterned tiles are excellent for hiding grease marks in a busy kitchen.
Quick win: Use a grout color that matches the background color of the tile to make the pattern look seamless.
45. Hexagon Tile Backsplash
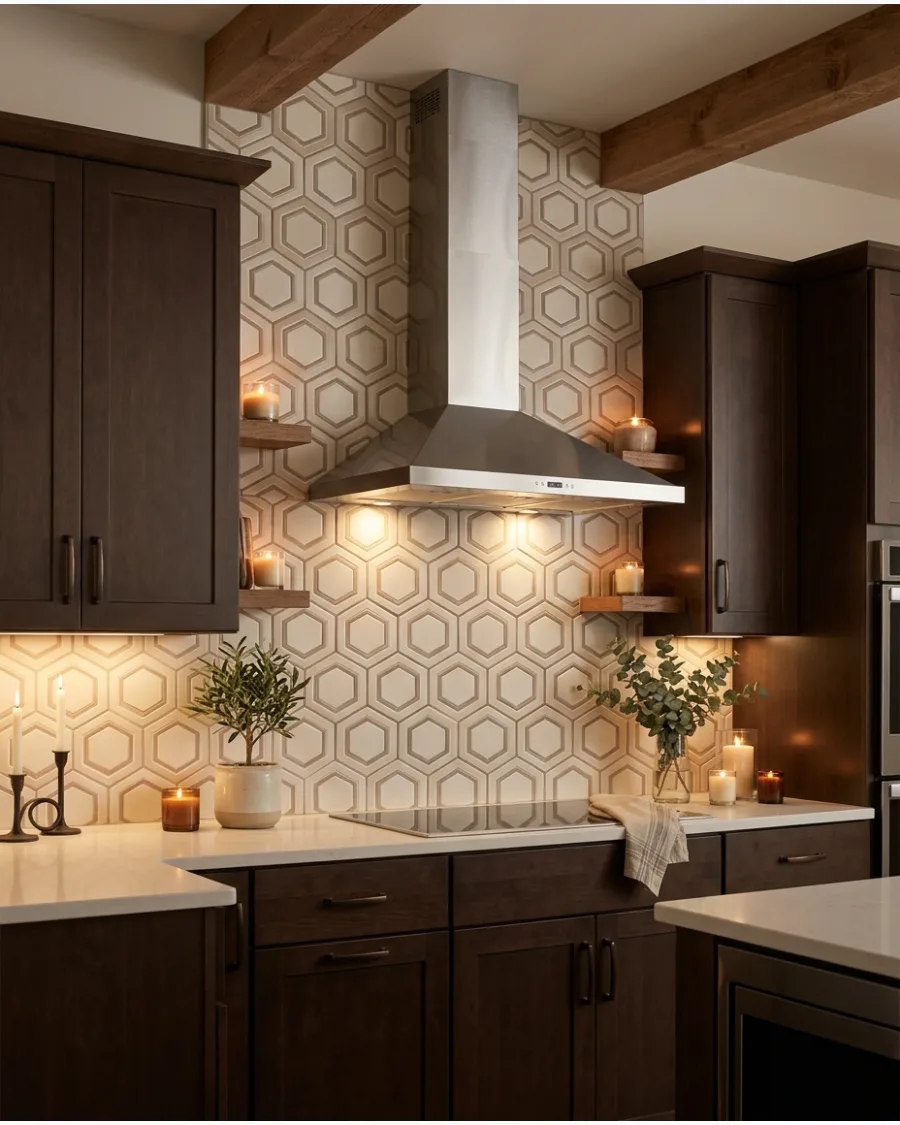
Pair brown cabinets with ivory, beige, or taupe hexagonal tiles. The geometric shape adds modern interest without requiring a strong color.
Run the hexagon pattern all the way to the ceiling behind a range hood to create a focal point. It breaks up the straight lines of traditional cabinetry.
- Large 4-inch or 6-inch hexagons look more modern than small penny rounds.
- Contrasting grout makes the hexagon shape stand out more clearly.
- Works well with both light and dark brown cabinet finishes.
Best shortcut: Use a laser level to keep the horizontal rows of hexagons perfectly straight across a long wall.
Frequently Asked Questions
What backsplash color makes brown cabinets look modern?
To give brown cabinets a modern edge, try using off-white, cream, or cool-toned greens and blues. These shades provide a fresh contrast that brightens the space without the starkness of a pure white tile.
Should I use a light or dark backsplash with dark espresso cabinets?
Light-colored tiles are usually the best choice for dark espresso cabinets because they create a high-contrast look that prevents the kitchen from feeling too heavy. While a dark backsplash offers a moody, monochromatic style, lighter tones are typically preferred to make the rich wood grain pop.
Does grey backsplash go with brown cabinets?
Yes, grey can work beautifully with brown cabinets if you choose a "greige" that balances warm and cool tones. This transitional shade acts as a bridge, ensuring the backsplash complements the wood's natural warmth rather than clashing with it.
What tile pattern works best with busy wood grain like oak?
When working with the busy grain of oak cabinets, it is best to stick with simple tile patterns like herringbone or a vertical stack. These clean lines provide visual interest and structure without competing with the natural movement of the wood.
How do I choose a grout color for a backsplash with brown cabinets?
For a seamless and clean look, match your grout color as closely as possible to your tile. Alternatively, choosing a grout that is slightly darker can help pull in the rich tones of your brown cabinets and highlight the geometric shape of the tile.