55 Modern Laundry Room Cabinet Ideas

This post may contain affiliate links: full affiliate disclosure.
The right cabinets turn a messy laundry room into a functional workspace. Smart storage keeps detergents, linens, and cleaning supplies organized and out of sight.
Use these cabinetry solutions to maximize your vertical space and make laundry day much easier.
Full-Wall and Built-In Laundry Room Cabinet Ideas
1. Floor-to-Ceiling Laundry Cabinets
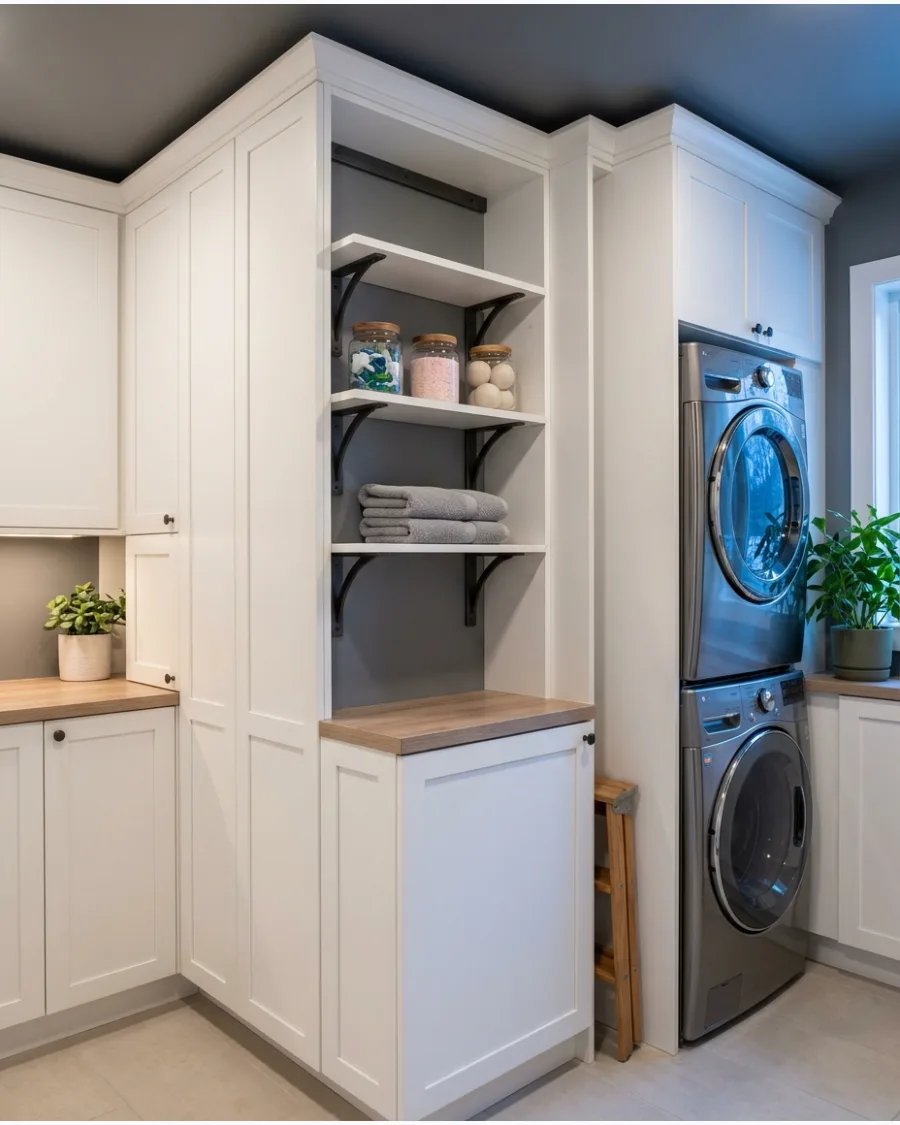
Use the full height of the wall to grab every bit of storage space. Keep heavy detergents at waist height for easy reaching and save the top shelves for bulk paper towels.
Running cabinets all the way to the ceiling prevents dust from settling on top of the units. A step stool tucked into a slim side gap is a must for those high shelves.
- Cost: $800-$2,500 depending on materials.
- Secure the top of the cabinets to wall studs for safety.
- Use baskets on the highest shelves to keep small items from getting lost.
Quick win: Store light items like extra sponges up high so they aren't dangerous if they fall.
2. Wall-to-Wall Laundry Room Cabinetry
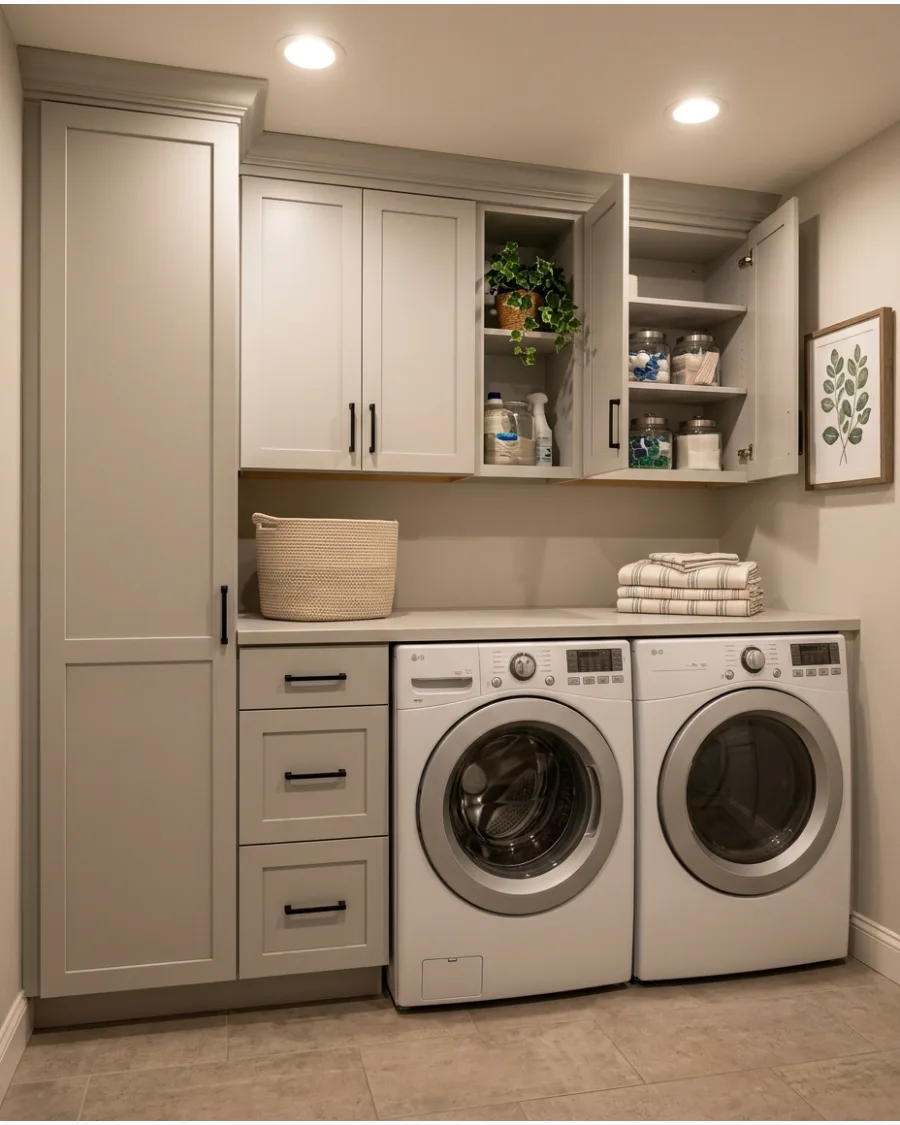
Filling an entire wall makes the room look bigger and more organized. Mix tall locker-style units with standard drawers to handle everything from tall mops to small dryer sheets.
A continuous line of cabinets creates a high-end built-in look that hides all the visual clutter. Uniform hardware across all doors makes the whole wall feel like one cohesive piece.
- Budget: High-end custom or mid-range modular units.
- Measure the entire wall width twice before ordering.
- Choose a neutral paint color to prevent the wall from feeling heavy.
Best shortcut: Use stock cabinets with filler strips to get that custom wall-to-wall fit.
3. Cabinets Surrounding the Washer and Dryer
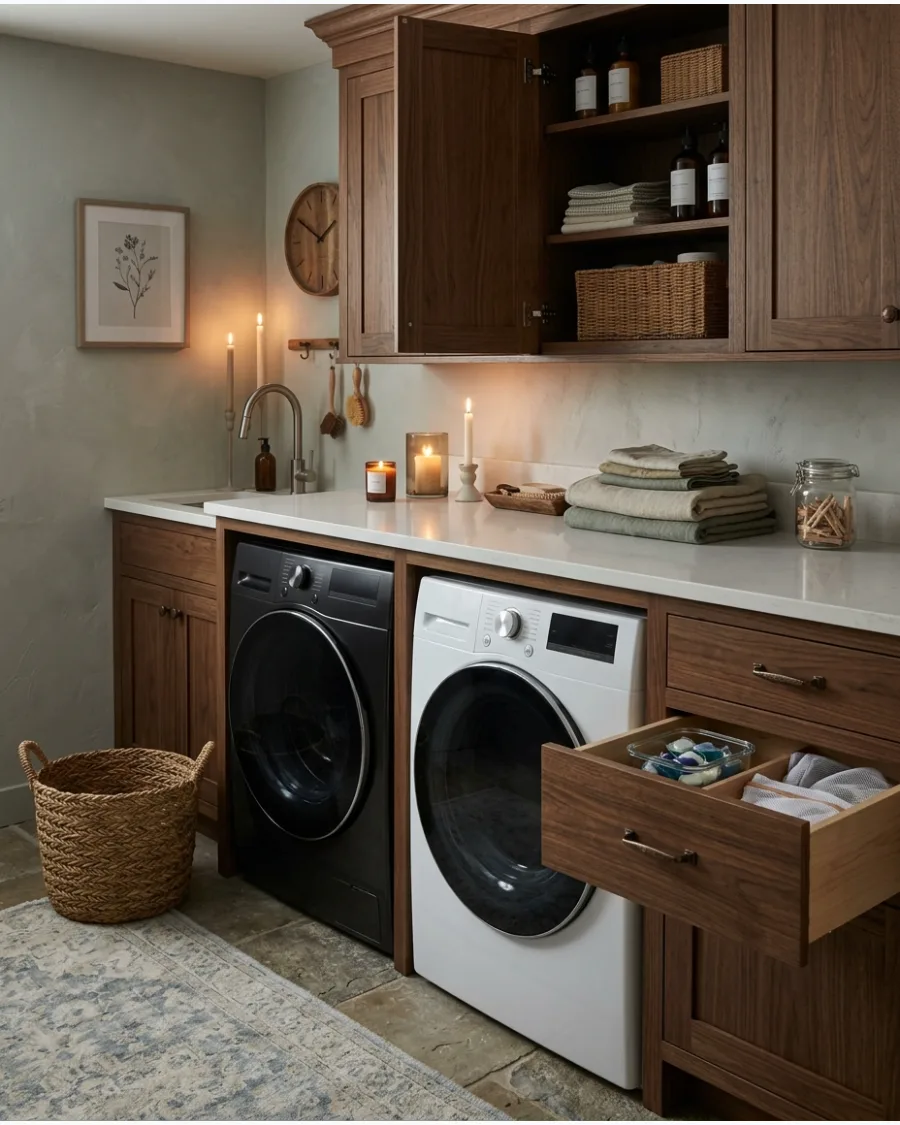
Frame the appliances with cabinetry to make them look like part of the furniture. This layout provides a natural spot for a countertop right above the machines for sorting.
Leaving a two-inch gap around the appliances ensures they have enough air and don't rattle against the wood. It is much easier to keep the room tidy when the machines have a dedicated home.
- Cost: $500-$1,200 for the surround.
- Ensure the countertop is removable for easy appliance repair access.
- Match the cabinet finish to the appliance color for a sleek look.
Most people skip this: Leave space behind the machines for hoses so they don't get pinched.
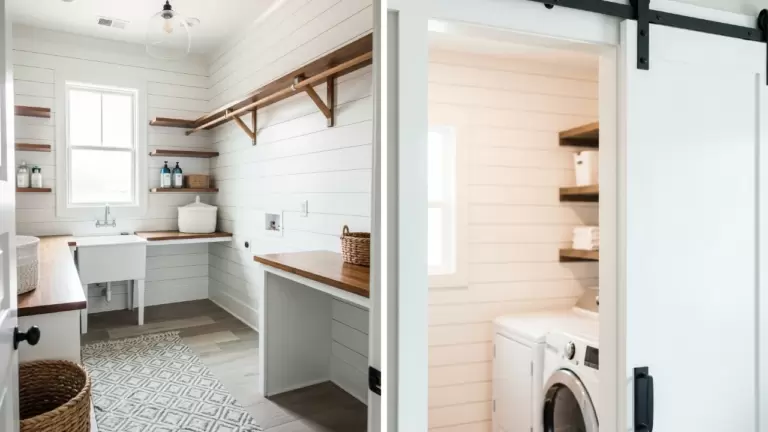
4. Built-In Cabinet Wall With Open Niche
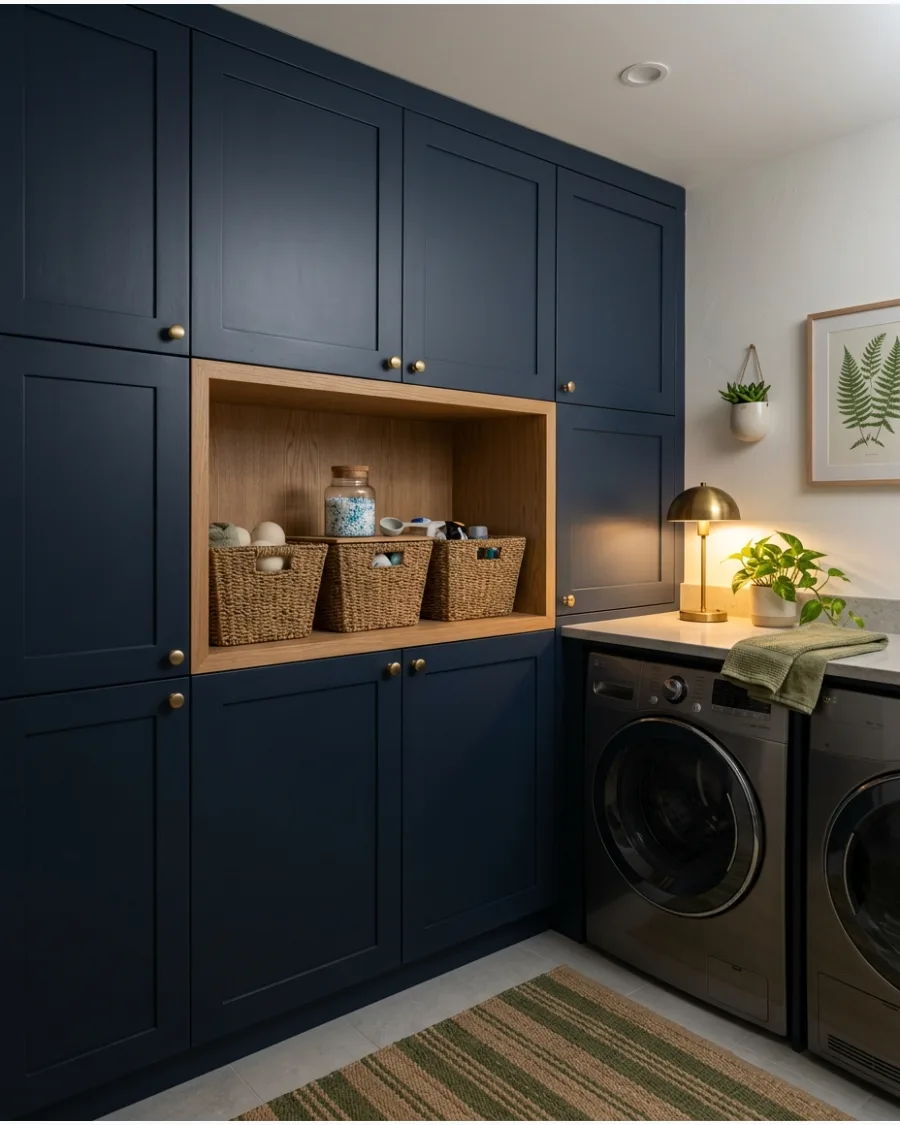
Break up a solid wall of doors with an open shelf or niche right in the middle. This spot is perfect for things used every single day, like a glass jar of scent boosters.
An open niche prevents a small laundry room from feeling too closed-in or boxed-over. Using a contrasting wood tone inside the niche adds a nice touch of style.
- Budget: Standard cabinet cost plus a small DIY shelf.
- Position the niche at eye level for the best visual balance.
- Keep the niche organized with uniform jars or containers.
Quick win: Line the niche with peel-and-stick wallpaper for a pop of color.
5. Custom Cabinetry for an Irregular Room
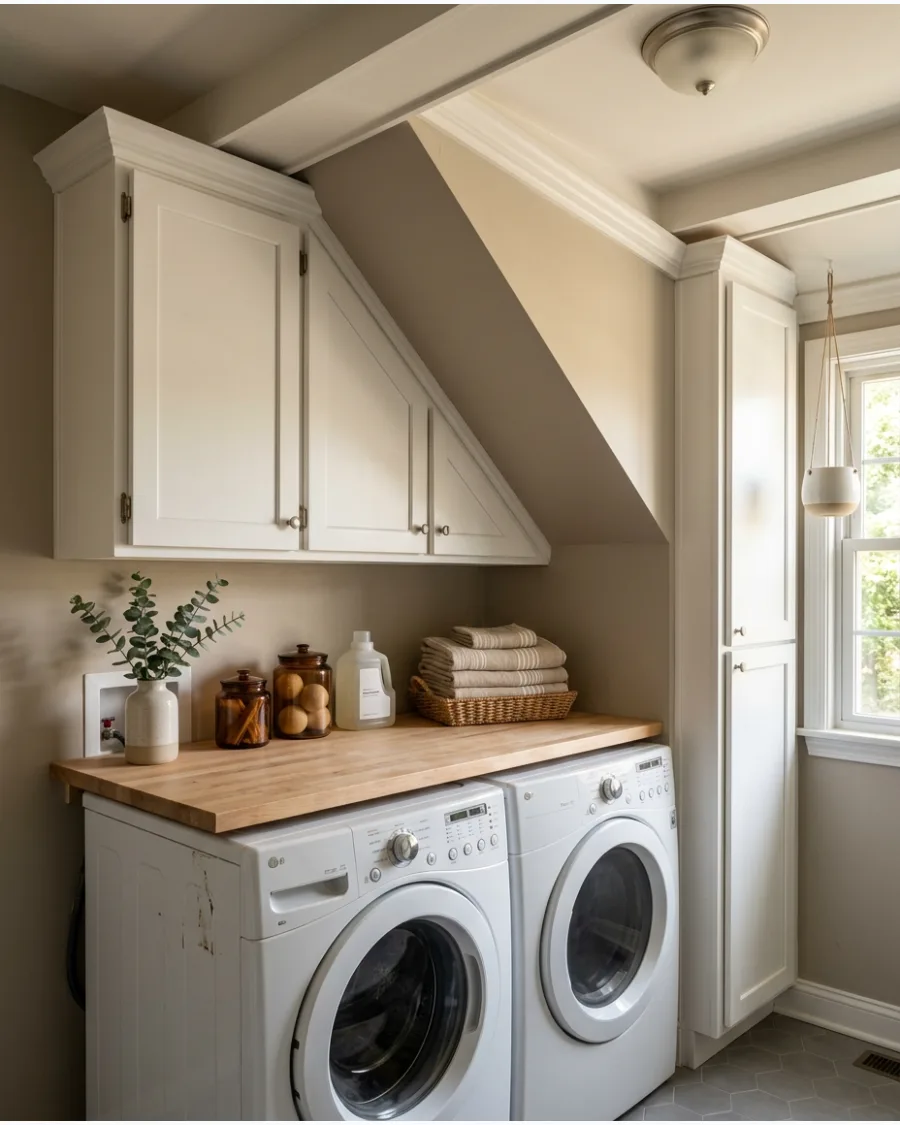
Sloped ceilings or weird corners shouldn't stop the storage plan. Custom units can follow the angle of a roofline to turn a dead corner into a linen closet.
Tailoring the cabinet shape to the room's unique angles makes the most of every square inch. It is the best way to handle those awkward under the stairs laundry spots.
- Cost: Custom work usually starts at $1,500.
- Hire a professional for precise measurements on angled cuts.
- Use pull-out drawers in deep, narrow corner cabinets.
Best shortcut: Use adjustable shelving inside angled cabinets to handle different item heights.
6. Built-In Cabinets With Crown Molding
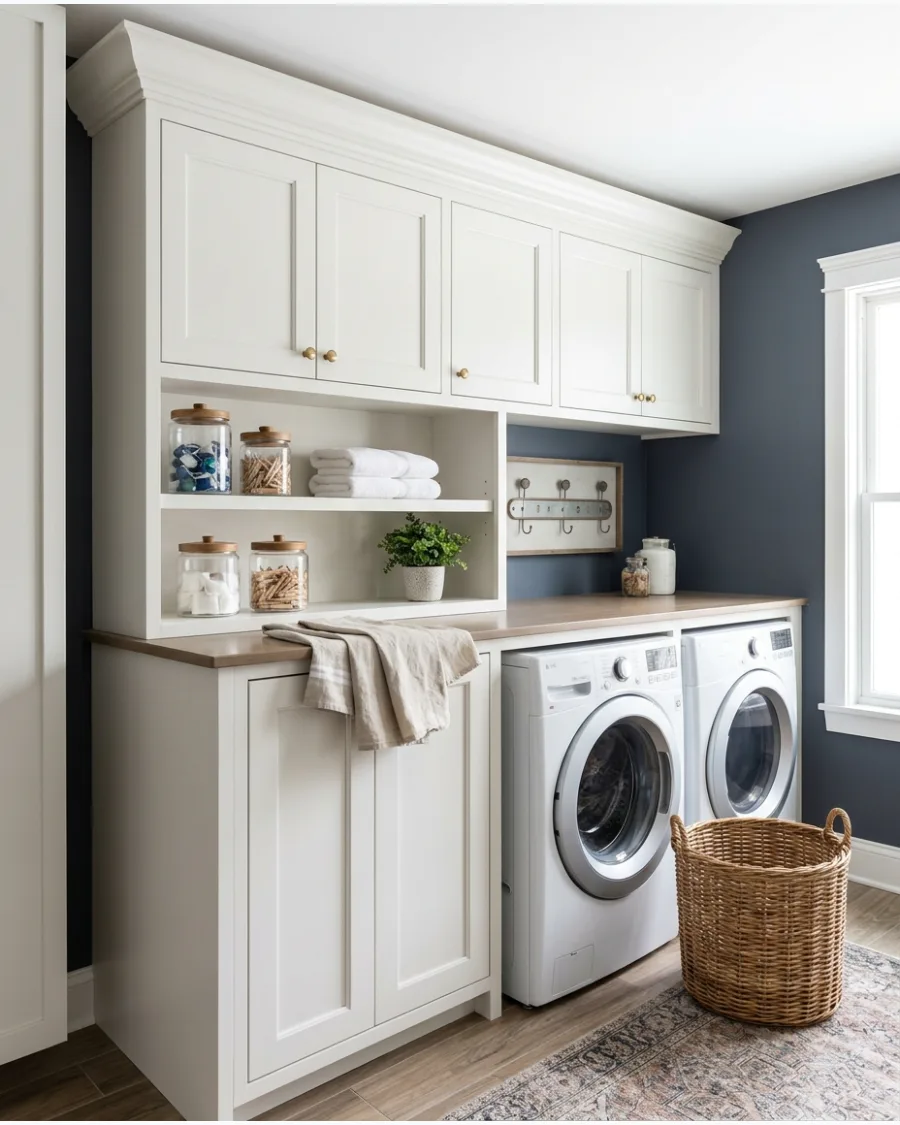
Adding molding to the top of the cabinets bridges the gap between the storage and the ceiling. This detail makes basic cabinets look like expensive custom furniture.
Matching the crown molding to the cabinet color creates a seamless transition that elevates the whole room. It also keeps dust from building up on that hard-to-reach top ledge.
- Budget: $50-$150 for molding materials.
- Use a miter saw for clean, professional-looking corner joints.
- Fill any gaps with caulk before painting for a smooth finish.
Quick win: Use extra-wide molding if there is a larger gap between the cabinet and ceiling.
7. Cabinetry Wrapped Around a Window
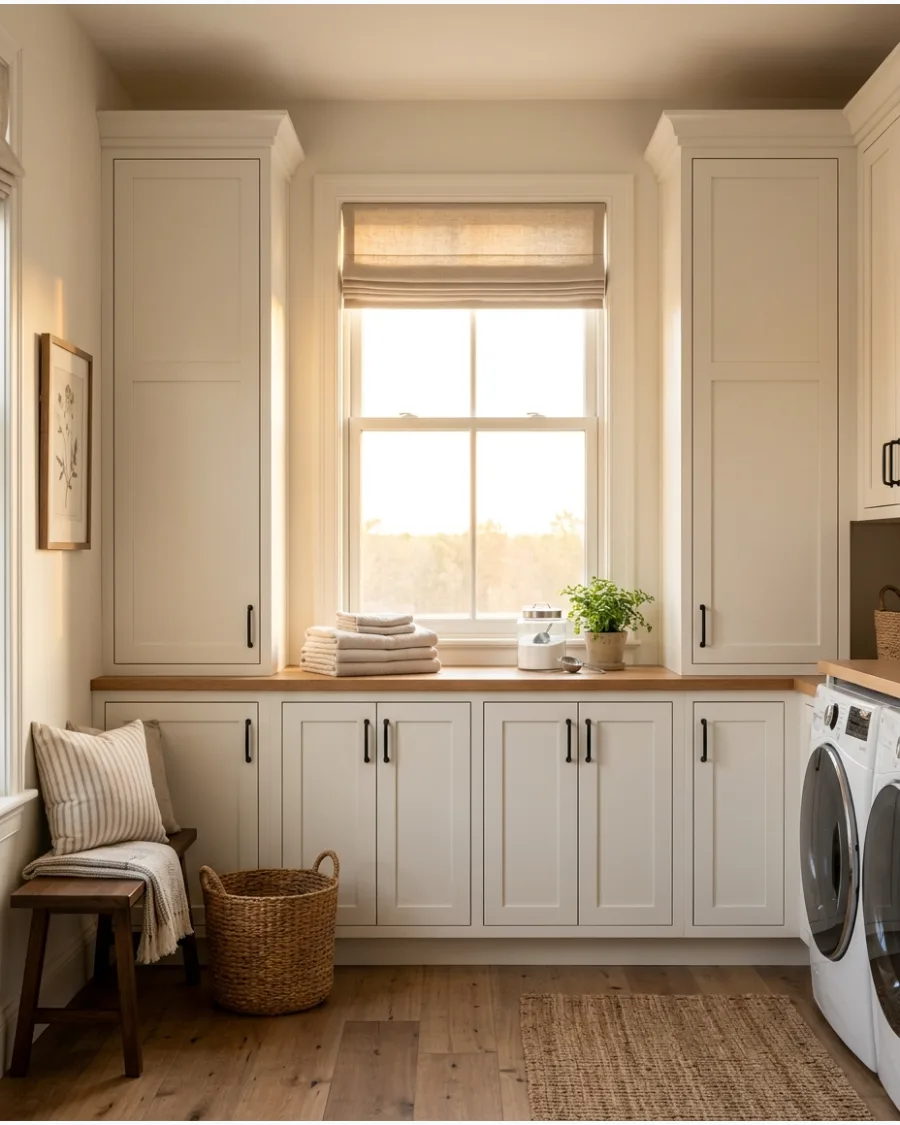
Don't block the light just to get more storage. Low cabinets can run under the window while tall towers sit on either side.
Framing a window with cabinets keeps the room bright while providing a sunny spot for folding laundry. This layout works perfectly for long, narrow rooms with a window at one end.
- Cost: $1,000-$3,000 for the full set.
- Keep the countertop height just below the window casing.
- Use a moisture-resistant countertop material near the window.
Most people skip this: Make sure the cabinet doors can open fully without hitting the window trim.
8. Built-In Cabinets With Recessed Lighting
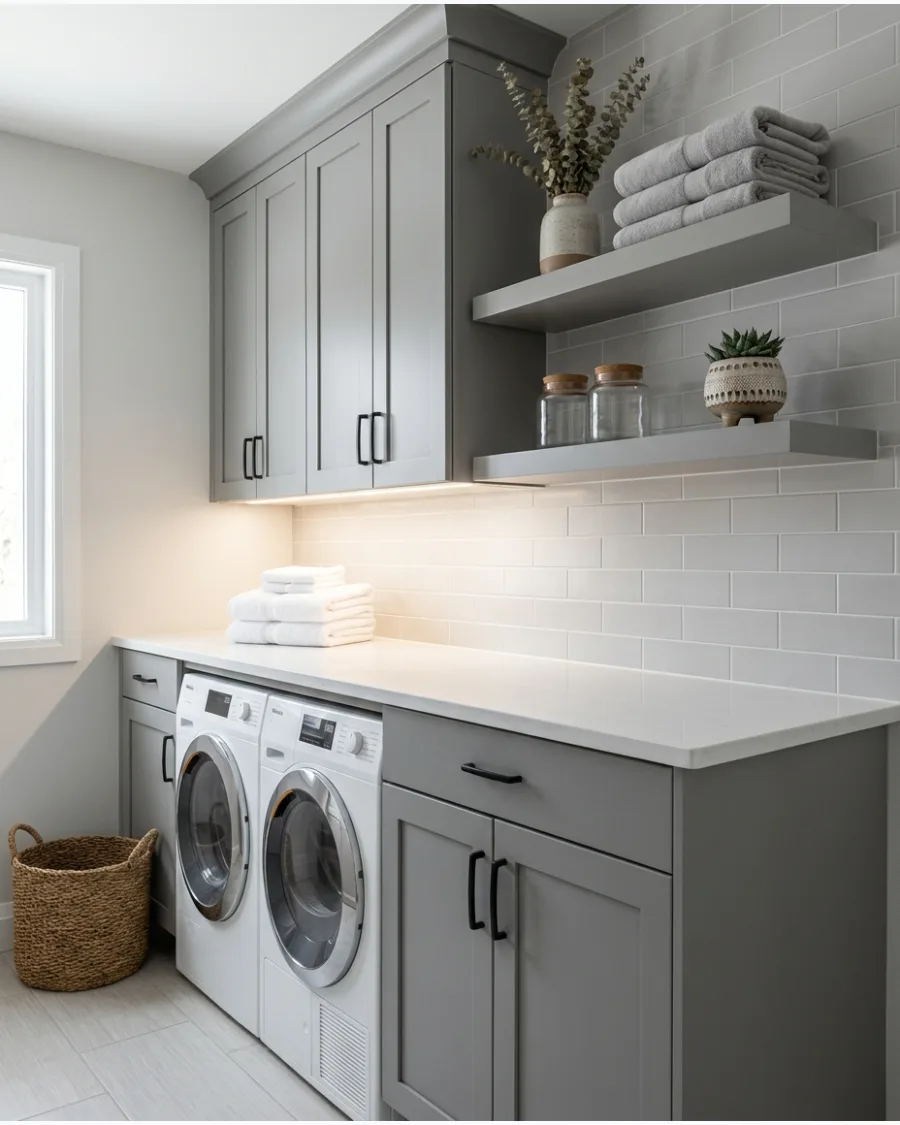
Good lighting is the secret to a functional laundry space. Small puck lights under the cabinets or strips inside deep units help with spotting stains.
Installing recessed lights under upper cabinets eliminates shadows on the folding surface. It makes the room feel much more high-end and professional.
- Budget: $20-$100 for battery or plug-in LED kits.
- Use warm-white bulbs to accurately see clothing colors.
- Hide the wires behind the cabinet face frame for a clean look.
Best shortcut: Use motion-sensor lights inside dark cabinets so they turn on automatically.
Cabinets Above the Washer and Dryer
9. Upper Cabinets Above Side-by-Side Appliances
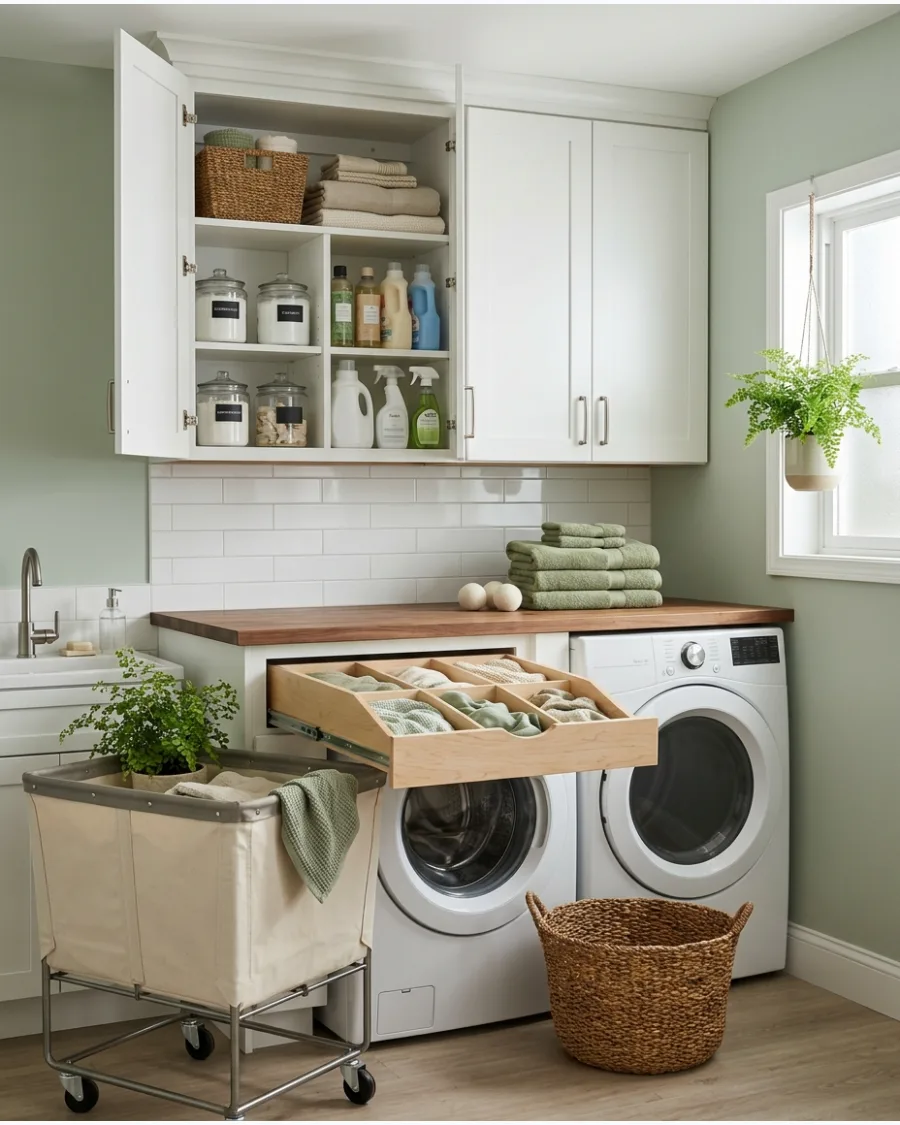
Standard upper cabinets are the go-to for a reason. They keep chemicals safely out of reach for kids and pets.
Mounting cabinets at least 18 inches above the machines provides plenty of room for detergent bottles. Choosing a simple shaker style keeps the room looking clean and timeless.
- Cost: $150-$400 per cabinet unit.
- Use heavy-duty wall anchors if you can't hit a stud.
- Check the depth to ensure you won't bump your head while loading.
Quick win: Line the bottom shelf with a plastic tray to catch any soap drips.
10. Extra-Tall Upper Laundry Cabinets
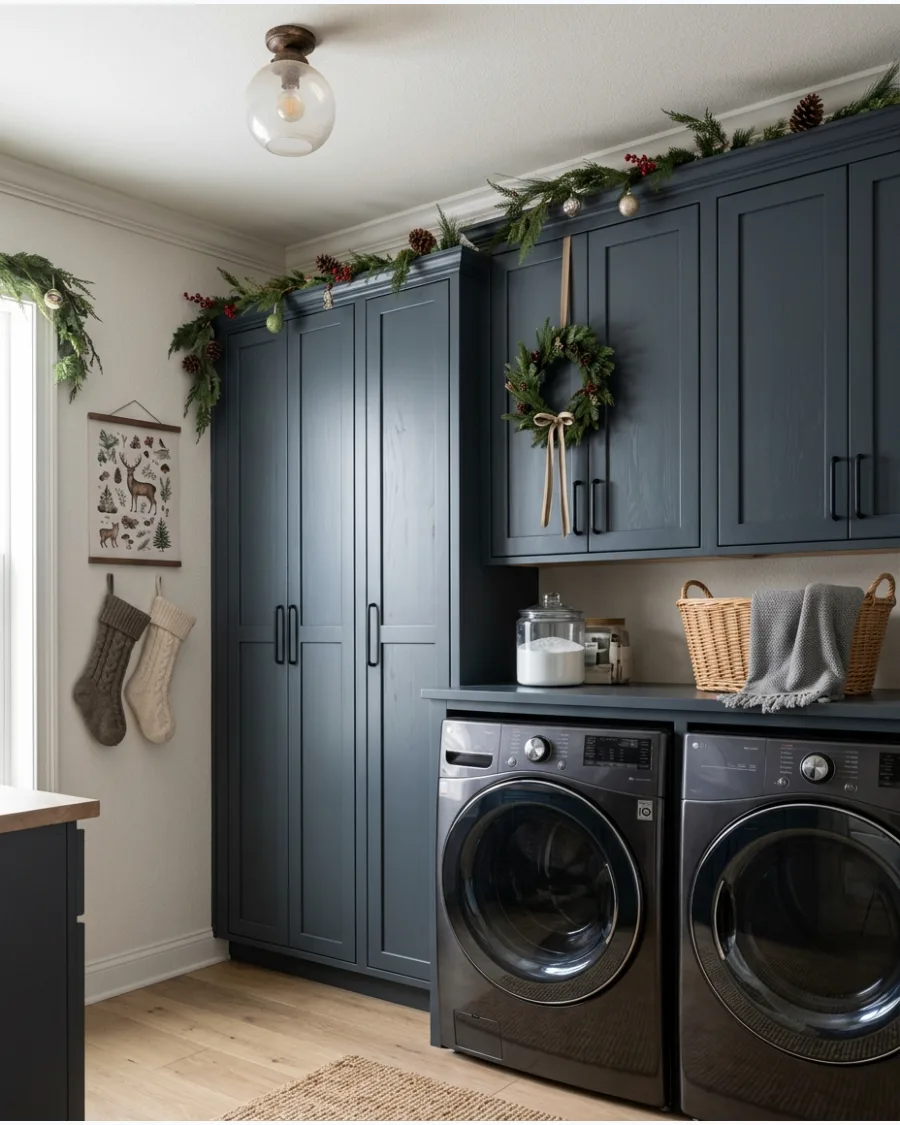
Instead of the standard 30-inch height, go for 42-inch cabinets.
This eliminates the dead space at the top where junk usually accumulates. Extra-tall cabinets provide the perfect home for seasonal items like beach towels or heavy winter blankets. It makes the ceiling feel higher and the room more organized.
- Budget: Usually 20% more than standard height cabinets.
- Store a lightweight folding ladder nearby for the top shelves.
- Use clear bins inside so you can see what is way up high.
Most people skip this: Leave an inch of space at the top so the doors don't rub the ceiling.
11. Two Cabinets With a Center Shelf
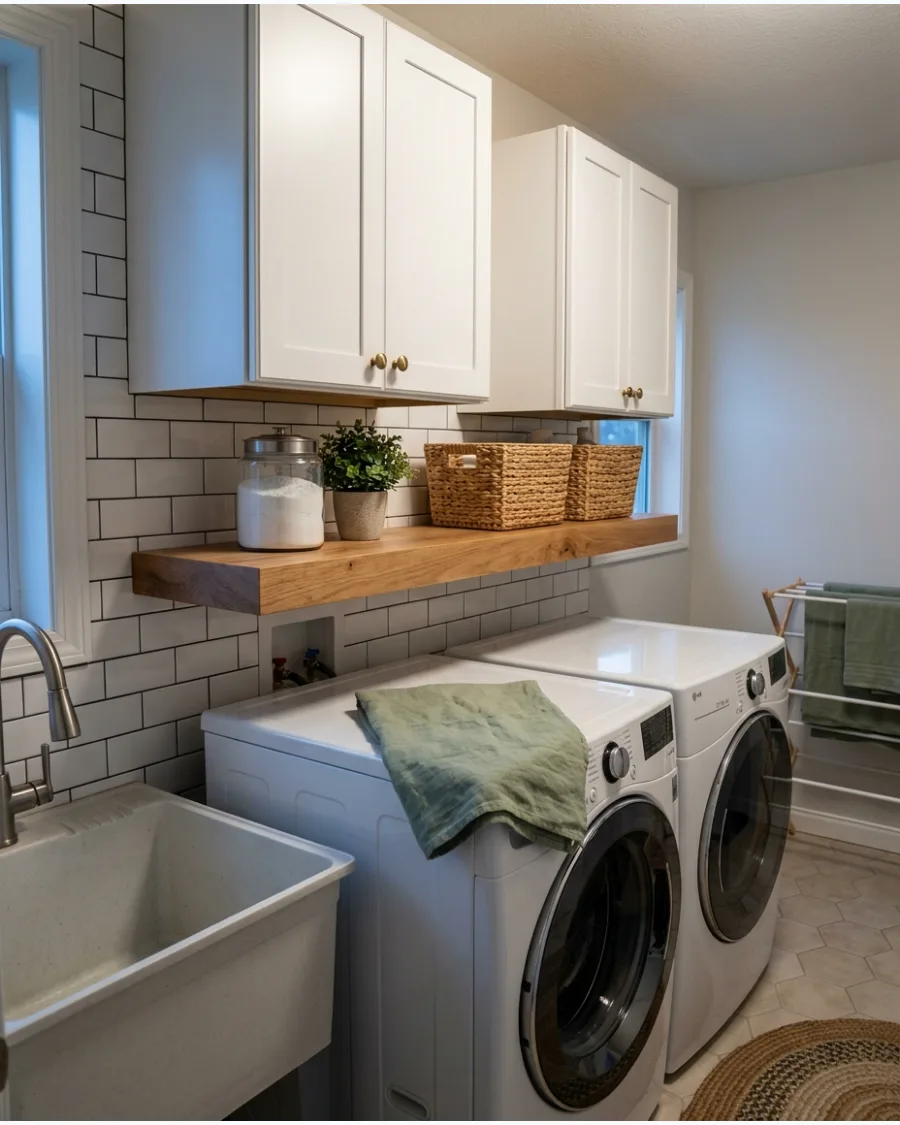
This bridge design gives you the best of both worlds. The closed cabinets hide the messy stuff, while the open shelf keeps the pretty baskets out.
A center shelf between two cabinets creates a balanced look that doesn't feel too heavy on the wall. It is a great spot for a timer or a small plant.
- Cost: $300-$600 for the set.
- Ensure the center shelf is thick enough to prevent sagging.
- Match the shelf material to the countertop for a coordinated look.
Quick win: Use the open shelf for frequently used items like dryer balls to save time.
12. Cabinets With an Under-Cabinet Hanging Rod
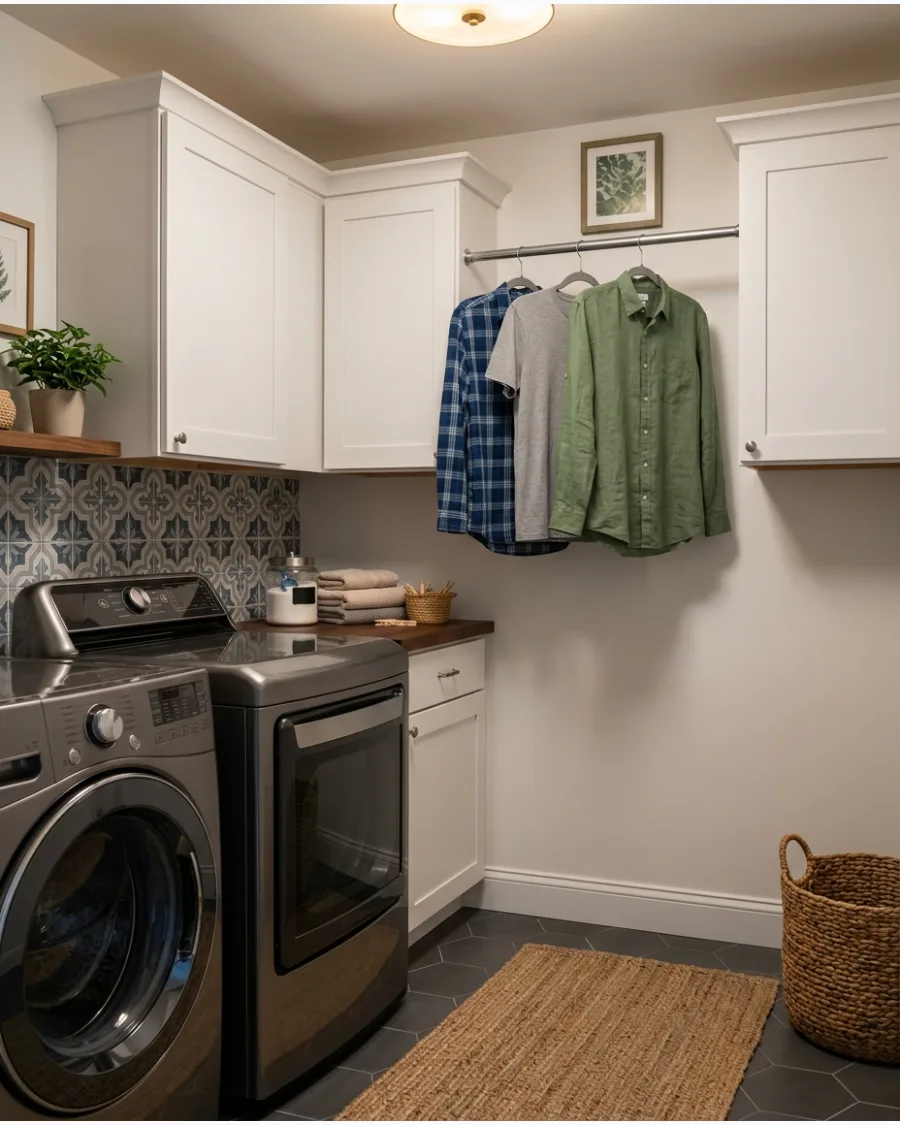
A simple rod tucked under the cabinets is a total game changer. It gives you a place to hang shirts straight out of the dryer to prevent wrinkles.
Adding a hanging rod beneath upper cabinets uses space that usually goes to waste. It keeps the floor clear of bulky, folding drying racks.
- Budget: $15-$40 for the rod and brackets.
- Mount the rod high enough so long shirts don't touch the counter.
- Choose a rod finish that matches your cabinet hardware.
Best shortcut: Use a tension rod if you aren't ready to commit to a permanent screw-in version.
13. Cabinets With a Built-In Drying Rail
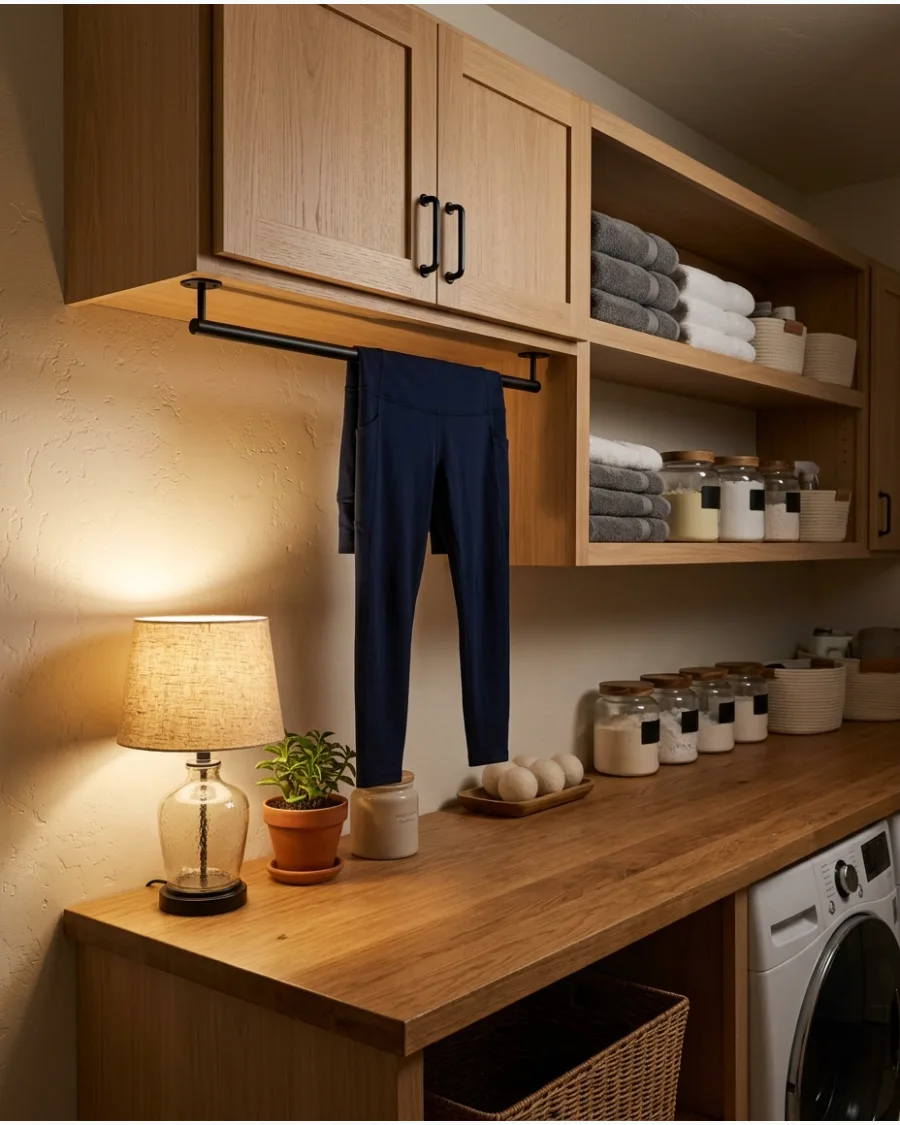
A slim rail mounted to the underside of the cabinet is perfect for small items. It is less bulky than a full rod and keeps things looking tidy.
A built-in rail is the best way to air-dry delicates without cluttering the laundry room. It is almost invisible when nothing is hanging on it.
- Cost: $10-$30 for a basic rail.
- Ensure the rail is mounted into the solid wood cabinet frame.
- Use S hooks for even more hanging options on a single rail.
Most people skip this: Position the rail away from the wall to allow for better airflow around damp clothes.
Laundry Room Cabinet Ideas
14. Hidden Pull-Down Drying Slats
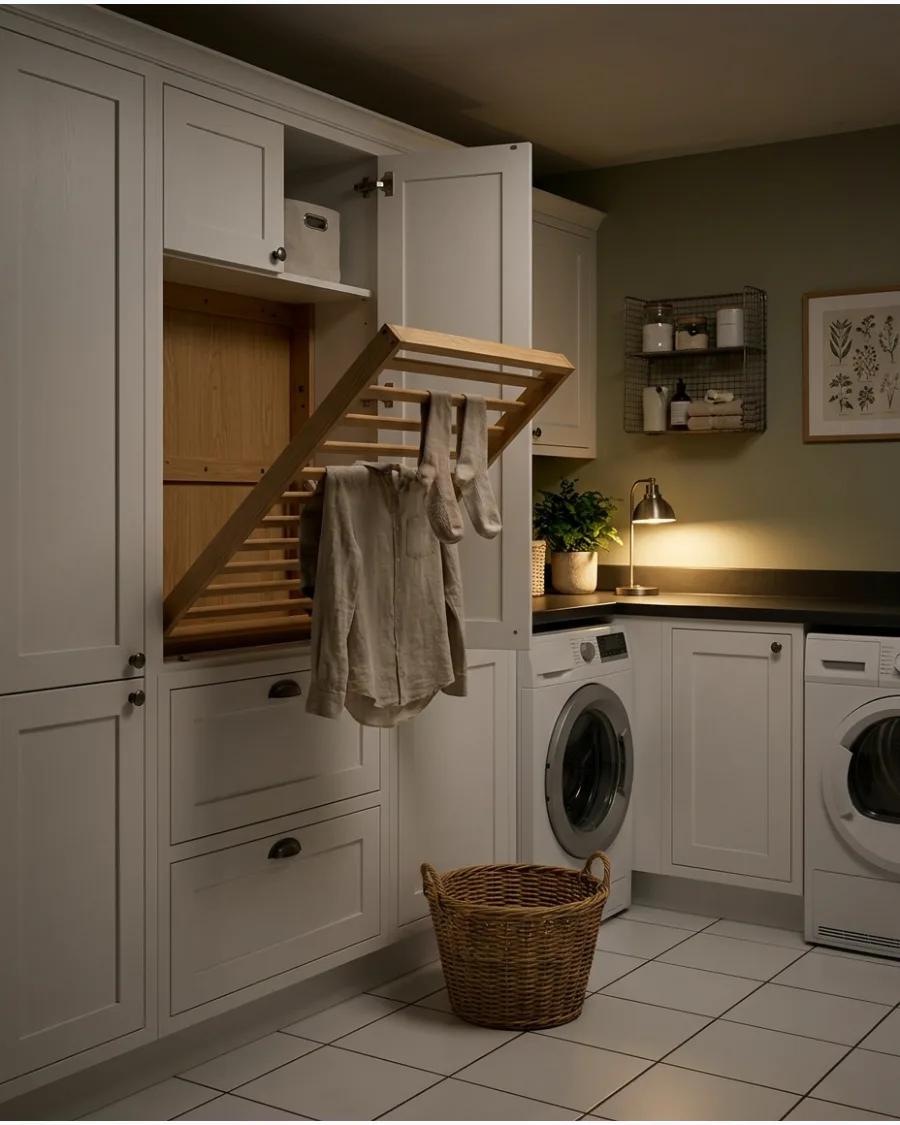
Transitioning from bulky floor racks to integrated cabinet solutions saves valuable square footage in small laundry rooms. Install a fold-out rack within a false drawer front or a tall utility cabinet to keep damp clothes out of sight. This setup maintains a streamlined aesthetic while providing immediate airflow for delicates.
A wooden rack is often superior to metal because it prevents snagging on fine fabrics.
- Ready-made kits cost between $150 and $400 depending on the cabinet width.
- Mount the unit at chest height to ensure long garments do not touch the floor.
- Paint the rack frame the same color as the cabinetry for a seamless, built-in look.
Most people skip this: spacing the rack slats at least three inches apart ensures enough airflow to prevent musty odors during the drying process.
Cabinets Above the Washer and Dryer
15. Shallow Cabinets Above Top-Load Machines
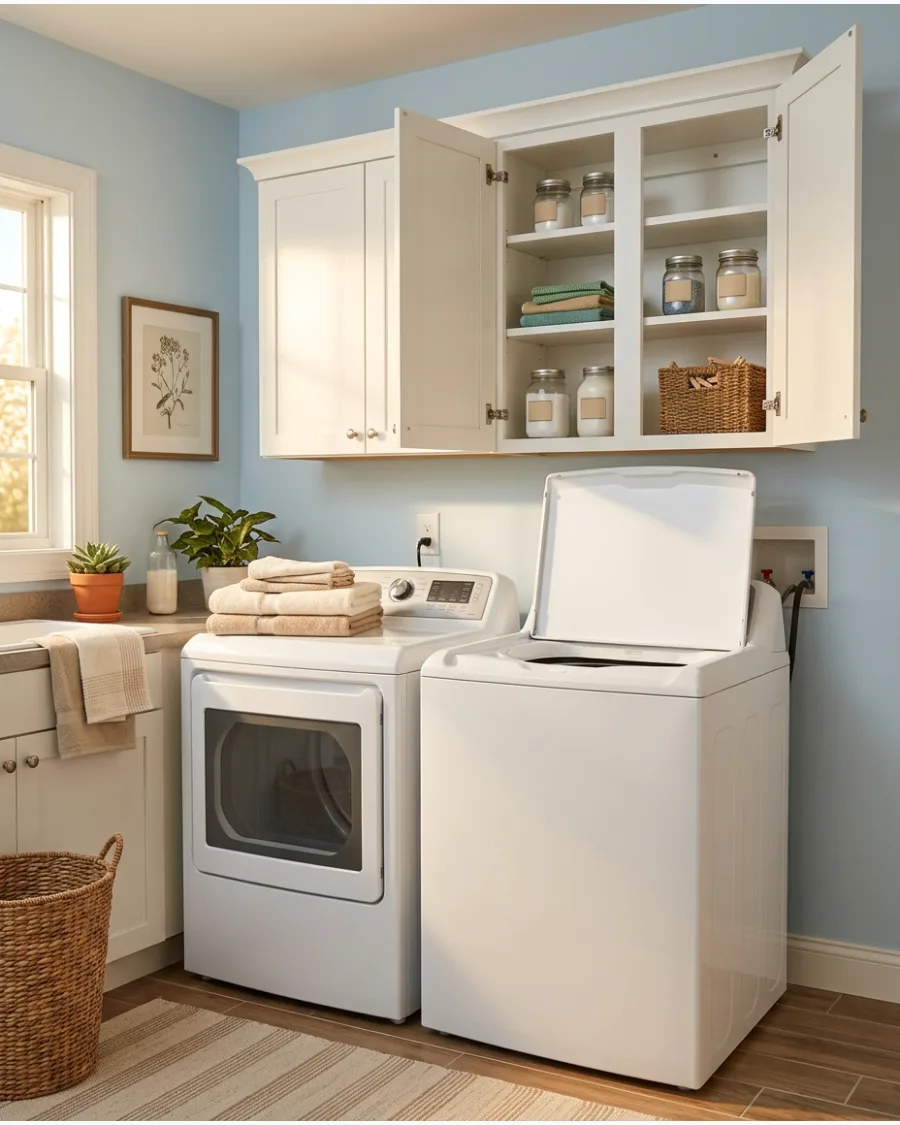
Top-loaders need room for the lid to swing up. Using shallow cabinets prevents the lid from hitting the doors every time you do a load.
Shallow upper cabinets allow for full lid clearance while still offering plenty of storage for smaller bottles. It prevents that annoying clink of the lid hitting the cabinet.
- Cost: $100-$300 per unit.
- Measure the lid height while fully open before mounting.
- Use the shallow shelves for narrow items like stain sticks and lint rollers.
Best shortcut: If you already have deep cabinets, mount them 6 inches higher than usual to clear the lid.
16. Floating Cabinets Above the Laundry Counter
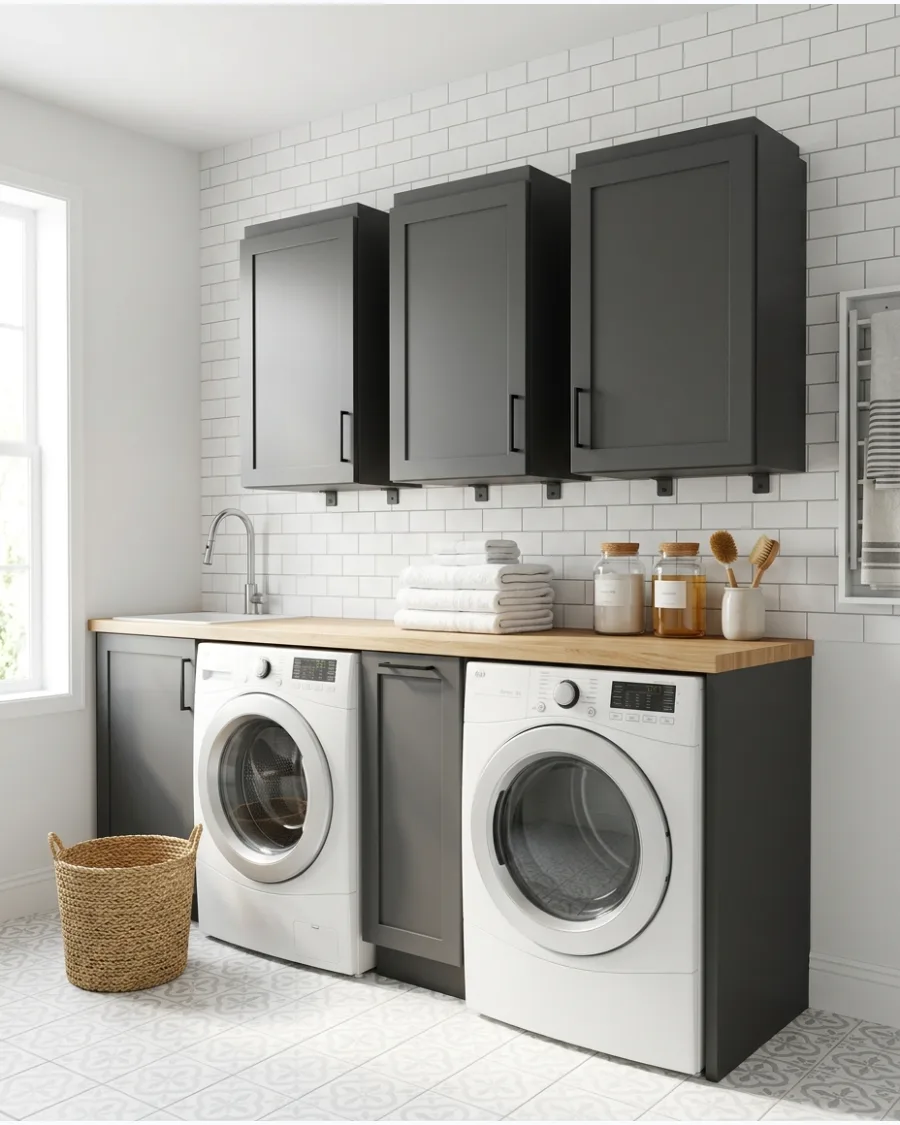
Mount cabinets a few inches higher than standard height above a long countertop. This creates a breathing room that prevents the folding station from feeling boxed in.
Leaving a gap between the counter and the cabinet bottom allows for taller bottles and easier cleaning. Floating designs make a small room feel airier because more of the wall remains visible.
- Budget: $200–$600 depending on cabinet material.
- Mount into at least two wall studs for weight support.
- Paint the wall behind the gap a contrasting color for a custom look.
Quick win: Install a small tension rod in the gap for quick-drying delicates.
Small Laundry Room Cabinet Ideas
17. Narrow Cabinet Beside the Washer
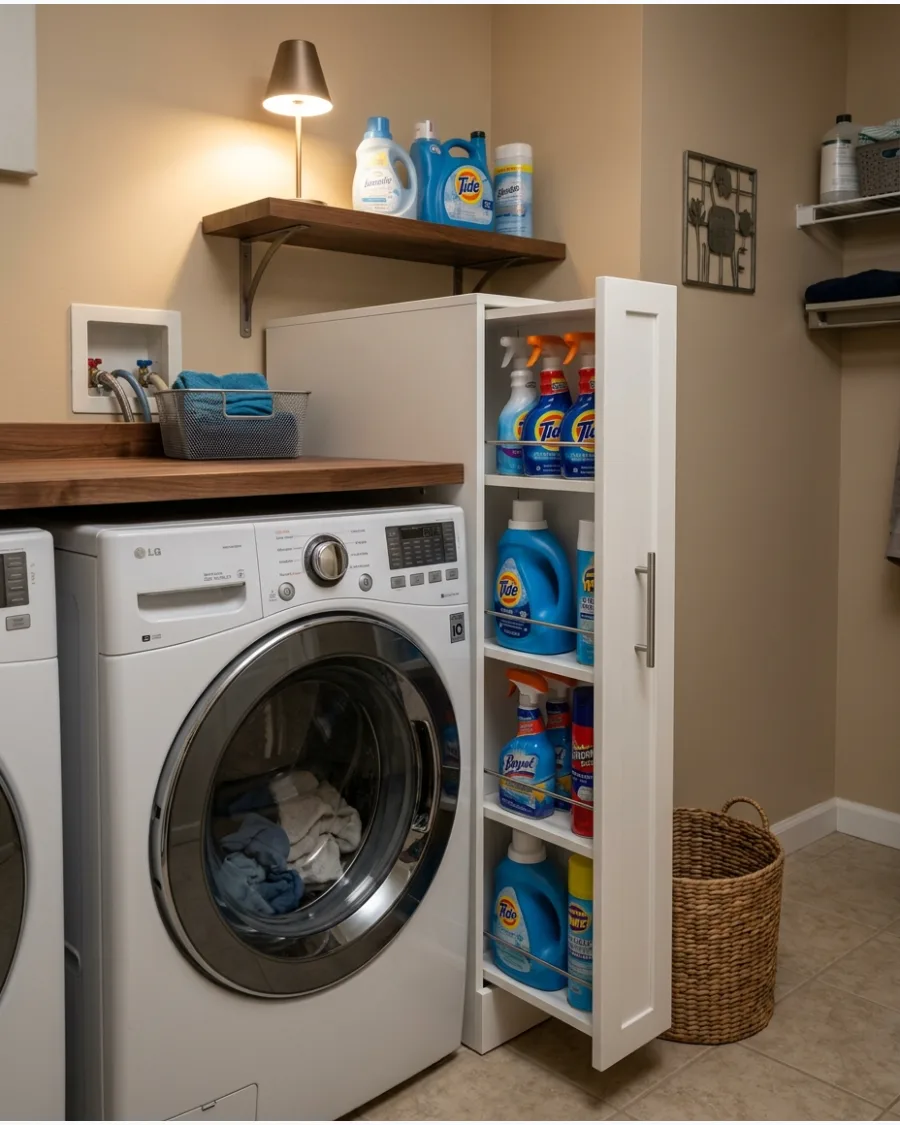
Squeeze a slim vertical cabinet into the awkward gap between the machine and the wall. It is the perfect spot for tall detergent bottles and stain sprays that usually clutter the floor.
A cabinet as narrow as six inches can still hold a surprising amount of cleaning gear. Using every inch of floor space prevents the common problem of socks and lint disappearing into dark crevices.
- Sourcing: Search for 'filler cabinets' or 'slim pantry' units.
- Ensure the cabinet door can fully clear the machine's side panel.
- Add a small handle that matches existing room hardware for a cohesive look.
Most people skip this: Measure the gap at both the floor and the top to account for uneven walls.
18. Pull-Out Cabinet Between Appliances
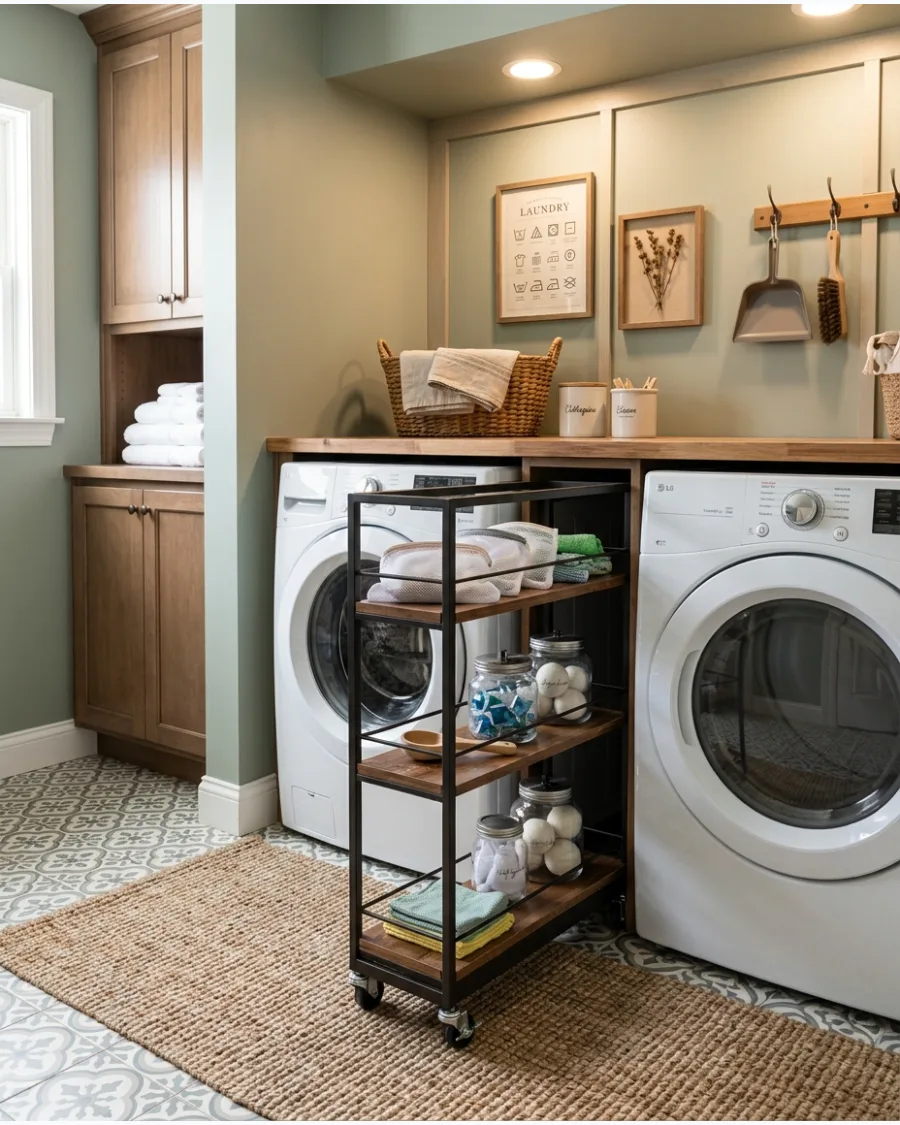
Slide a rolling storage tower into the space between your washer and dryer. This keeps smaller items like dryer balls and mesh bags organized and within easy reach.
A pull-out design ensures you never have to reach into a dark, deep corner for a lost bottle. Rolling units are better than stationary ones here because they make it easy to clean the floor behind the machines.
- Budget: $30–$80 for a high-quality rolling unit.
- Place the most used items on the top tier for quick access.
- Choose a model with raised edges to prevent bottles from falling off while moving.
Best shortcut: Use a unit with heavy-duty casters to handle the weight of large liquid jugs.
19. Corner Laundry Room Cabinet
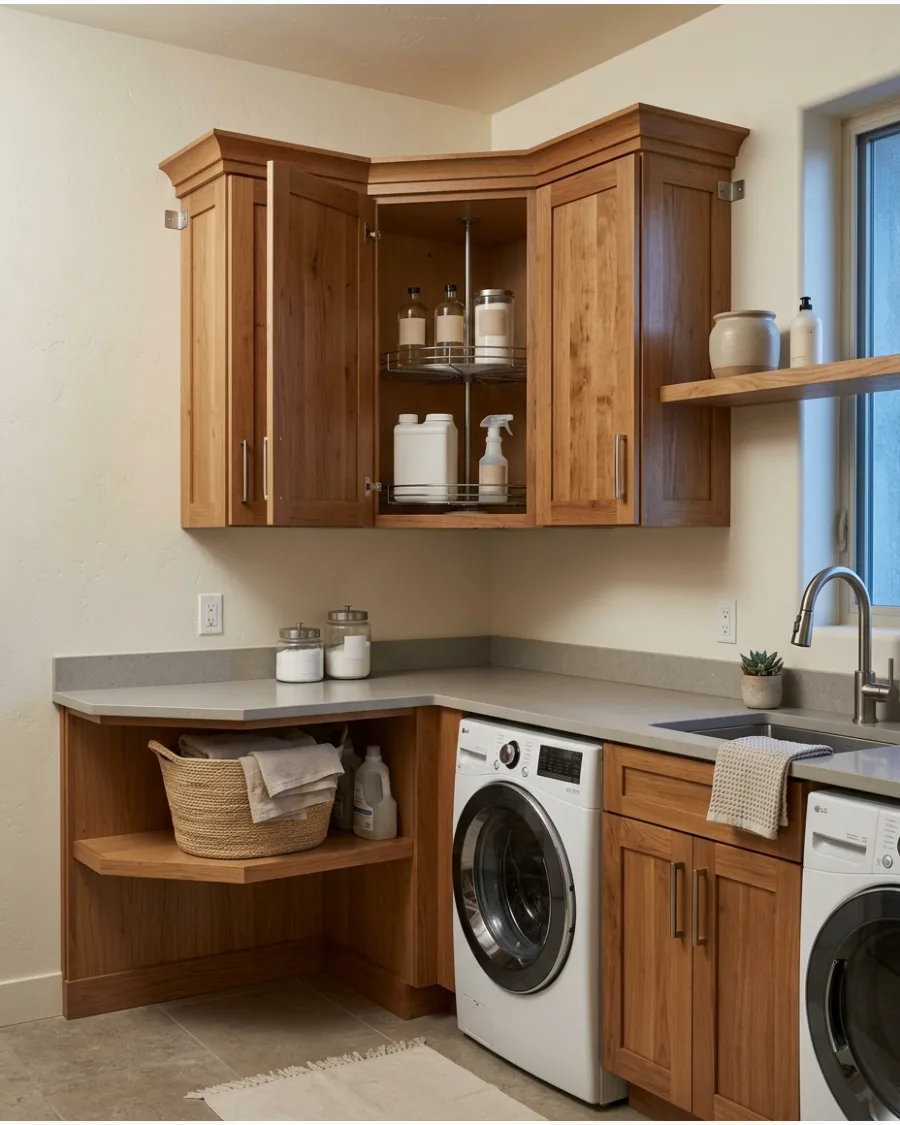
Install a diagonal or L-shaped cabinet to capture the wasted space in a room corner. Adding a Lazy Susan inside allows you to rotate supplies to the front without knocking things over.
Corner units provide deep storage for bulky items like gallon-sized vinegar or spare paper towels. Diagonal cabinets offer a softer look and more interior volume than standard 90-degree corners.
- Sourcing: Available at most home improvement centers as 'upper corner cabinets'.
- Install at the same height as surrounding wall cabinets for a flush line.
- Use the very top shelf for items you only need once a year.
Quick win: Store your light bulbs and extra sponges here since they are light and easy to grab from a height.
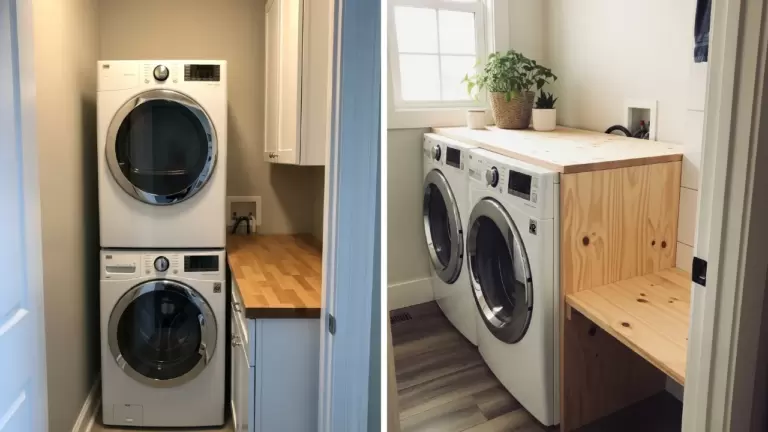
20. Cabinets Above a Stacked Washer and Dryer
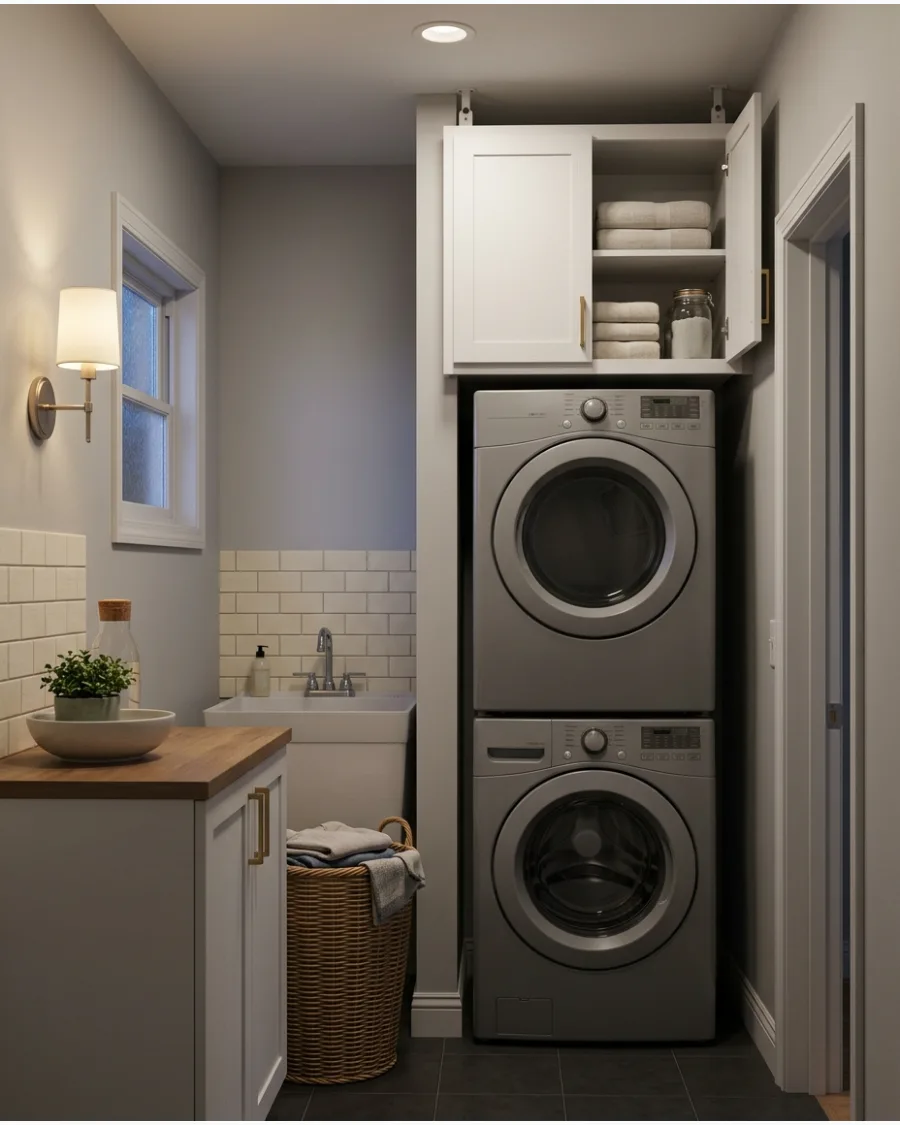
Place a compact cabinet in the vertical space remaining above a stacked washer and dryer unit. This setup is ideal for storing seasonal items or light linens you do not use every day.
Mounting cabinets high keeps hazardous cleaning chemicals safely out of reach of children. Use a cabinet that matches the depth of the stacked units to create a seamless, built-in appearance.
- Timing: Takes about 1 hour to measure and mount.
- Use heavy-duty wall anchors if you cannot find a stud behind the unit.
- Leave at least three inches of clearance above the appliance for ventilation.
Most people skip this: Keep a small, foldable step stool nearby to make this high storage accessible.
21. Slim Floor-to-Ceiling Storage Tower
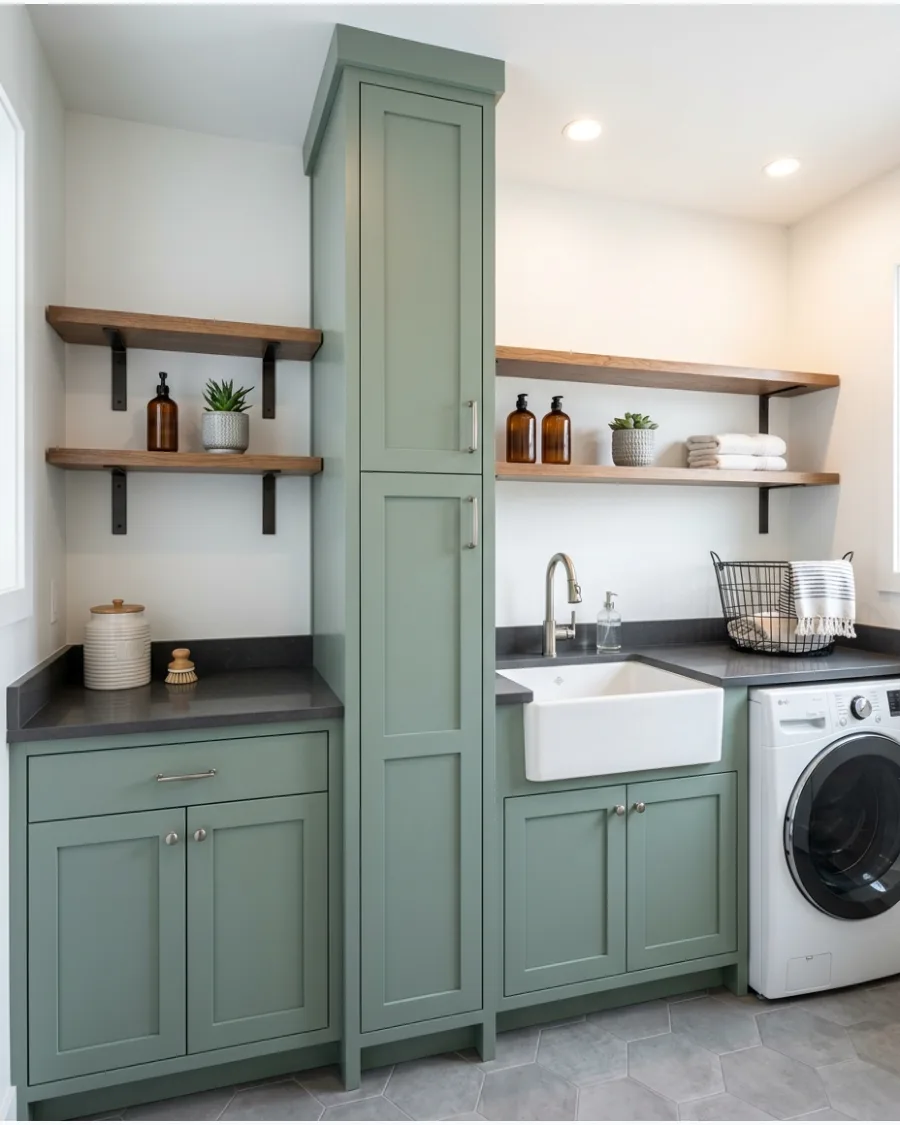
Add a very tall, narrow cabinet wherever a standard width won't fit. Adjustable internal shelves let you customize the height for brooms, mops, or stacks of towels.
A floor-to-ceiling unit draws the eye upward and makes low ceilings feel much higher. Vertical towers are the best way to separate clean linens from messy cleaning tools in one spot.
- Budget: $150–$400 for pre-fabricated pantry towers.
- Anchor the top of the cabinet to the wall to prevent tipping.
- Remove some shelves to create a long slot for an ironing board.
Best shortcut: Use adjustable shelves to change the layout as your storage needs evolve.
22. Cabinet Above a Laundry Closet
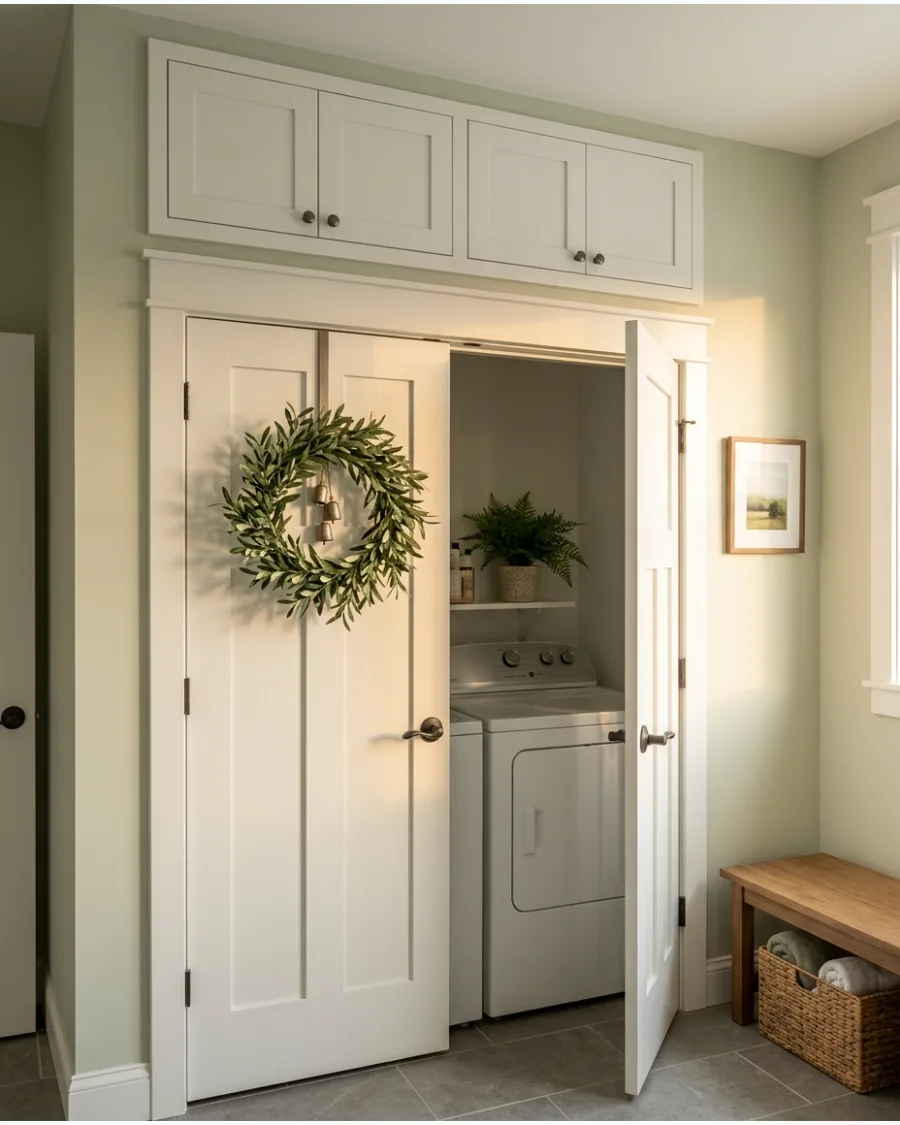
Utilize the empty wall space above a laundry closet for enclosed cabinetry. This keeps your utility supplies hidden when the closet doors are open.
Using cabinets instead of open wire shelves prevents dust from settling on your clean laundry supplies. Matching the cabinet color to the wall helps the storage blend in and keeps a hallway feeling wide.
- Sourcing: Kitchen 'over-the-fridge' cabinets work perfectly for this height.
- Ensure the cabinets are shallow enough that they don't hit your head when you lean in.
- Install magnetic catches to keep doors firmly shut above the machinery vibrations.
Quick win: Label the tops of the doors so you can see what is inside without climbing a ladder.
23. Over-the-Door Cabinet Storage
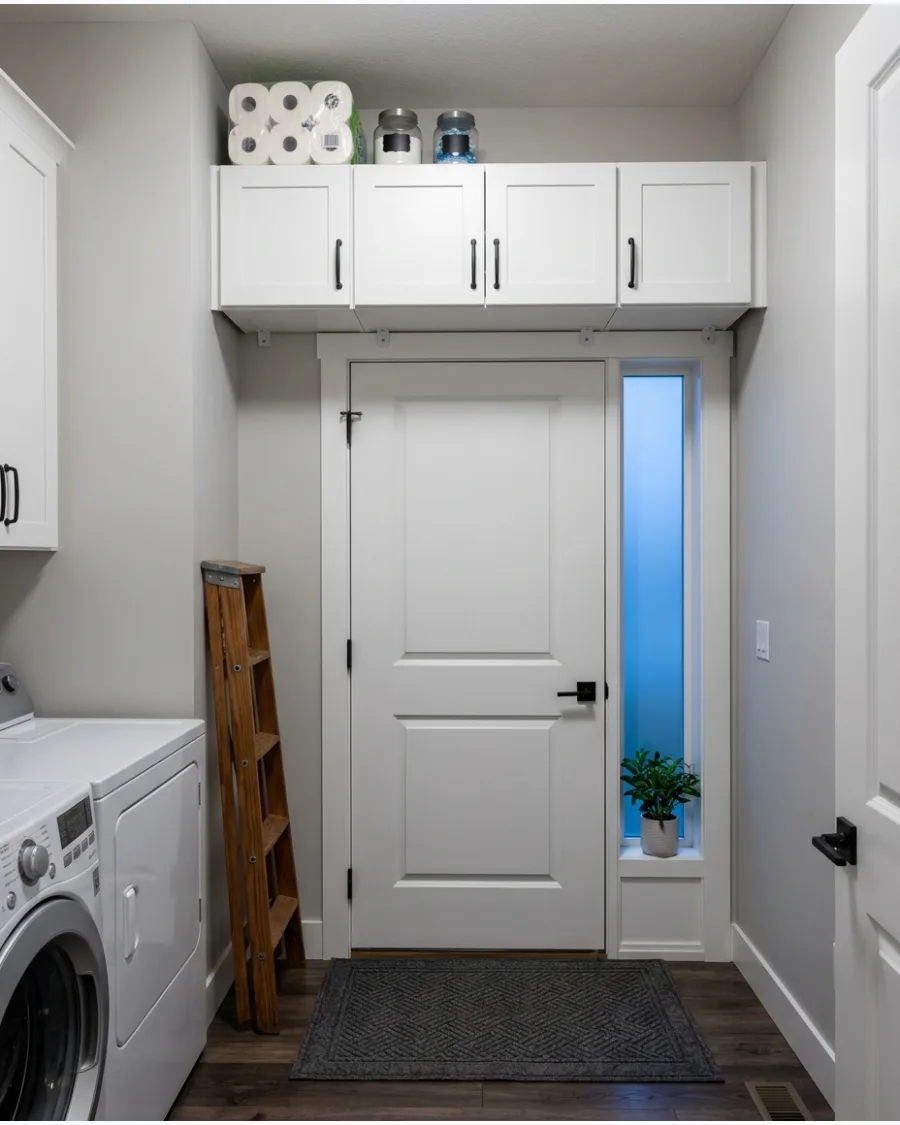
Extend cabinetry across the top of the laundry room entrance. This high-altitude storage is perfect for bulk purchases or items used only once a month.
Building cabinets over the door frame turns dead wall space into a high-capacity storage zone. This is the smartest place for a step stool, which you will need to reach these high shelves anyway.
- Setup: Requires a ladder and two people for safe installation.
- Use shallow cabinets (12 inches or less) to avoid a heavy, top-heavy look.
- Match the trim of the cabinet to the door casing for a professional finish.
Most people skip this: Reinforce the wall studs with a horizontal ledger board before mounting heavy units above a door.
24. Compact Cabinet With Sliding Doors
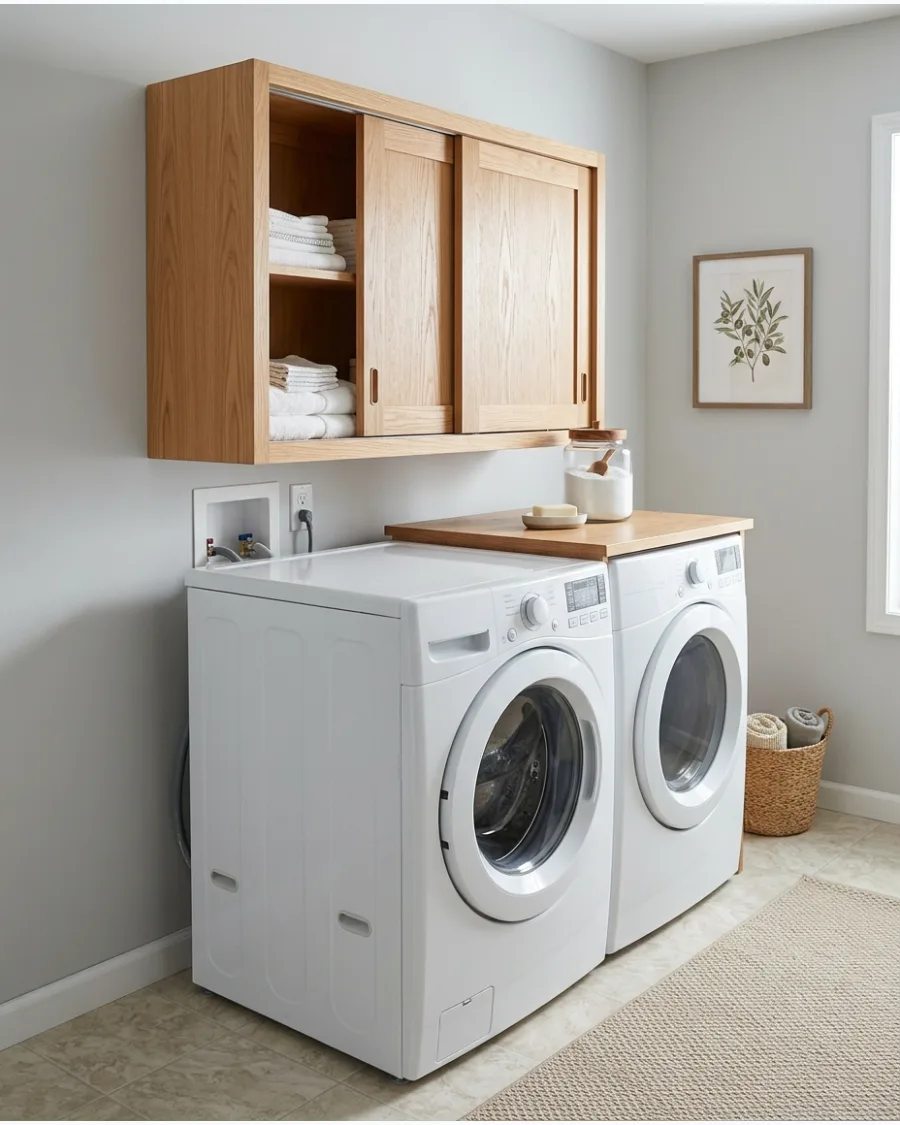
Choose sliding doors for your laundry cabinets if your room is narrow. They do not swing out, so they never block the walkway or hit the person doing the laundry.
Sliding doors are a lifesaver in tight laundry closets where a swinging door would hit the washer. Track-style doors give the room a modern, clean look while saving significant floor space.
- Budget: Mid-range; sliding hardware can be slightly more than hinges.
- Clean the tracks monthly to prevent lint buildup from sticking the doors.
- Opt for frosted glass sliders to hide clutter while still letting light through.
Best shortcut: Rub a little wax or silicone spray on the tracks to keep the doors gliding silently.
Hidden and Space-Saving Cabinet Ideas
25. Washer and Dryer Hidden Behind Cabinet Doors
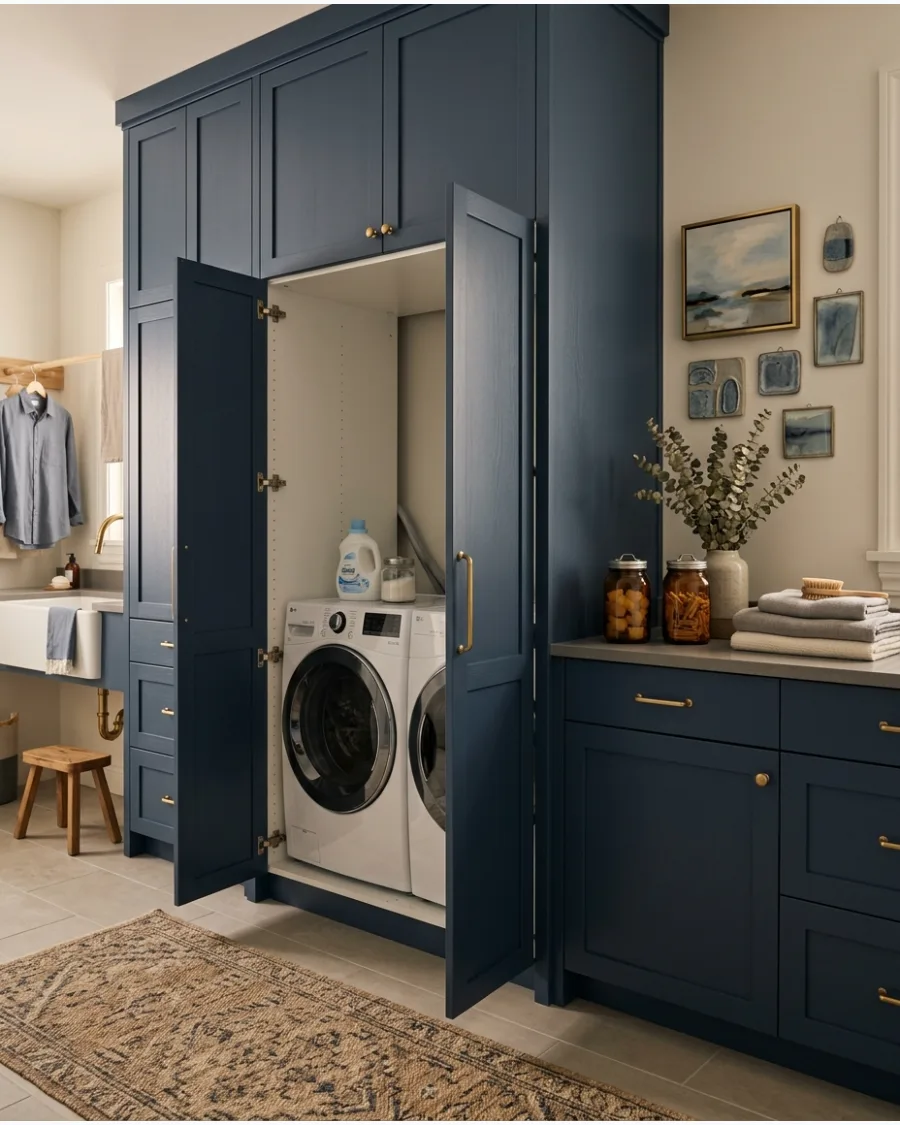
Conceal your machines behind large, floor-length cabinet doors for a completely tidy look. This works best in multi-purpose rooms like kitchens or mudrooms where you want to hide the utility vibe.
Closing the doors also helps muffle the noise of a spinning washer during dinner or meetings. Ensure the cabinet is deep enough to allow for hoses and vents without the machines touching the doors.
- Sourcing: Use tall utility cabinets or custom-sized pantry doors.
- Leave at least 2 inches of space on all sides of the machines for airflow.
- Install the doors on heavy-duty hinges that can handle frequent opening.
Quick win: Add a few small vent holes or a decorative grate to the door panels to prevent heat buildup.
26. Pocket Cabinet Doors for Appliances
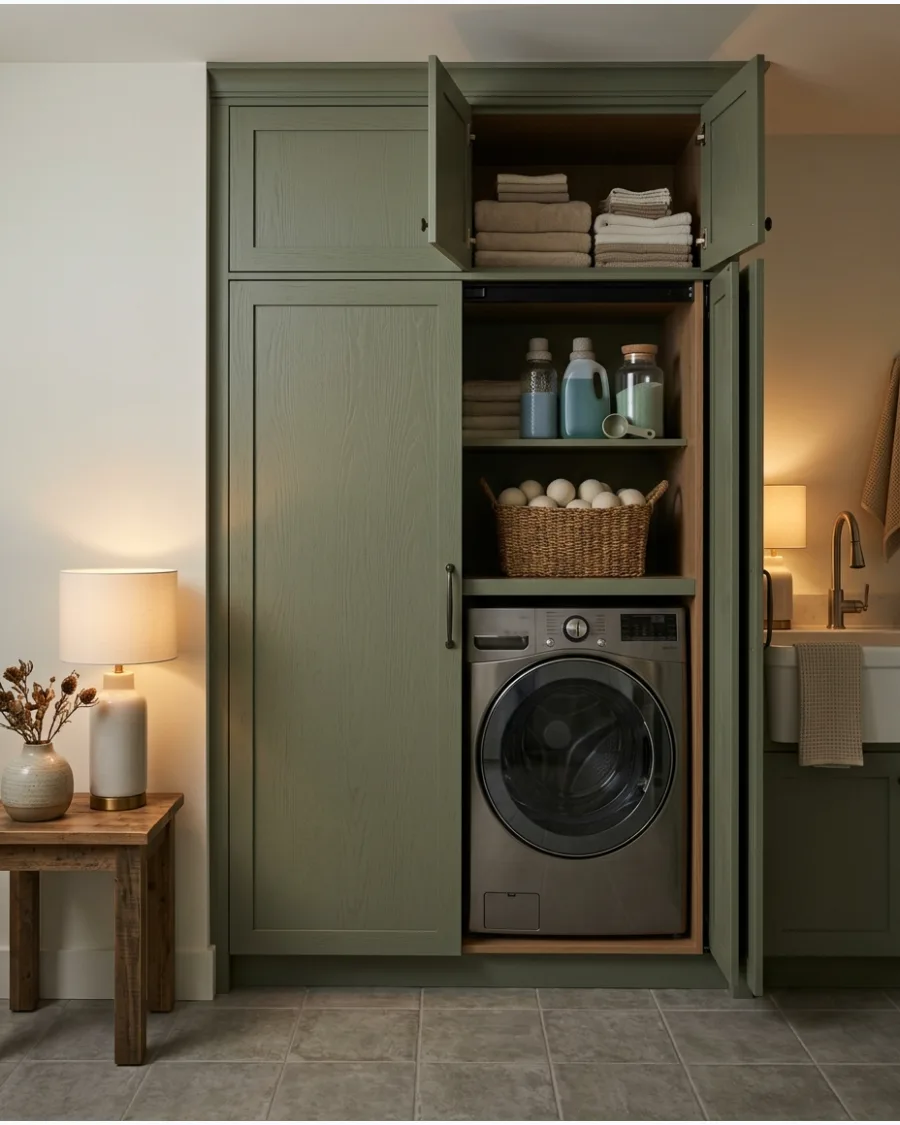
Install pocket doors that slide back into the sides of the cabinet frame when opened. This removes the obstacle of open doors sticking out into the room while you work.
Pocket doors provide the clean look of hidden appliances without the hassle of navigating around swinging panels. This is the premium choice for high-traffic laundry rooms where space is at a total premium.
- Logistics: Requires specific 'pocket door' cabinet hardware and extra width.
- Best for front-loading machines where you need constant access to the front.
- Ensure the cabinet interior is finished since it will be visible when the doors are tucked away.
Most people skip this: Check the clearance requirements for the pocket hardware before building the cabinet frame.
27. Bi-Fold Appliance Cabinet Doors
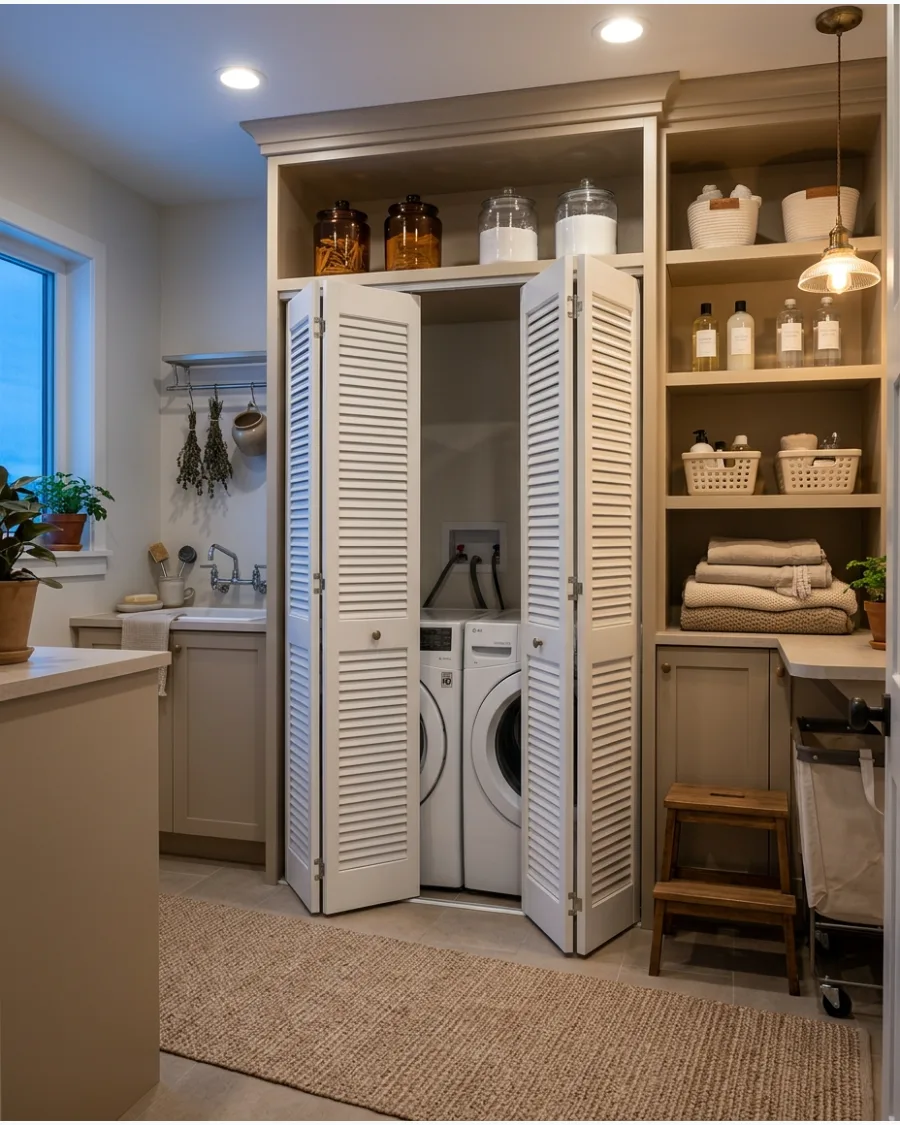
Use folding bi-fold doors to cover your laundry units. They take up half the floor space of a standard door when open, making them great for hallway laundry stations.
Bi-fold panels allow you to see both machines at once without a massive door blocking the path. Louvered bi-fold doors are excellent because they allow for airflow even when the machines are running.
- Budget: $100–$250 for a standard set of bifold doors.
- Install a top track to keep the doors aligned and prevent them from dragging.
- Paint the doors the same color as your wall trim for a built-in look.
Best shortcut: Use magnetic catches at the top and bottom to ensure the doors stay perfectly flush when closed.
28. Retractable Cabinet Doors
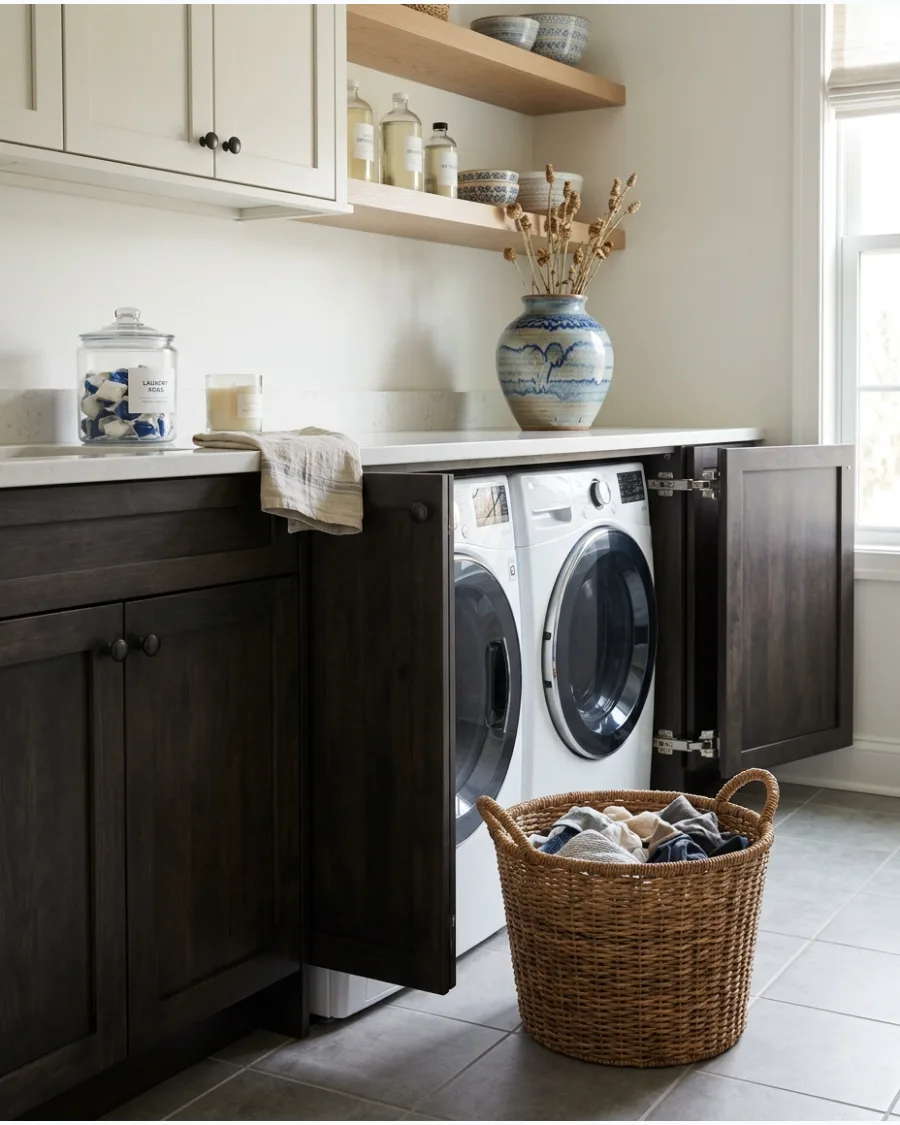
Opt for retractable doors that slide back along the interior cabinet walls. This keeps the control panels and detergent drawers easily accessible throughout the entire laundry cycle.
Retractable hardware prevents the door from sagging over time since it is supported inside the cabinet. These are perfect for lower cabinets where a swinging door would be a constant trip hazard.
- Setup: Best installed during the initial cabinet build.
- Leave enough room inside the cabinet for the door thickness when retracted.
- Use soft-close retractable slides to avoid slamming inside the cabinet.
Quick win: Choose soft-close hinges to prevent the doors from bouncing back when you push them in.
29. Cabinet With a Pull-Out Folding Table
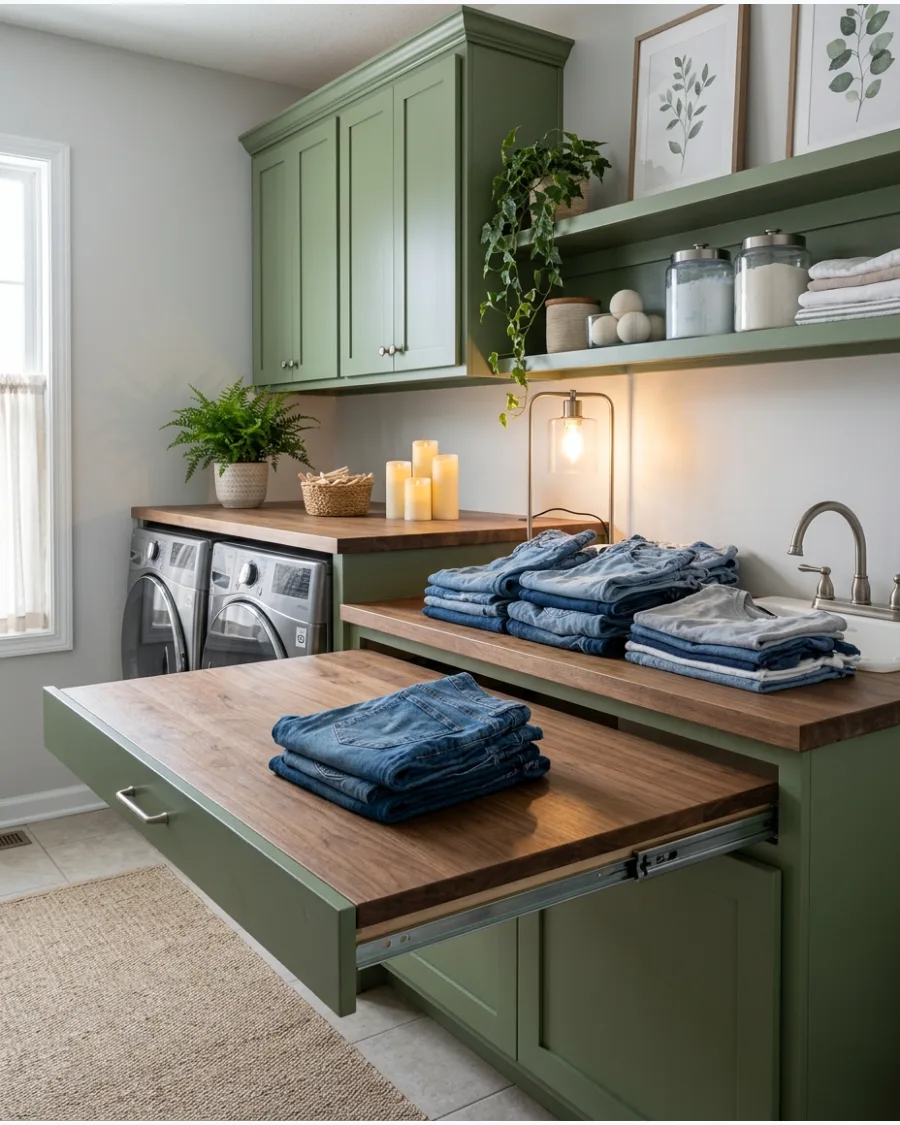
Integrate a sliding surface into a base cabinet that acts as a temporary folding station. It stays hidden as a drawer front until you need a flat spot to sort clothes.
A pull-out table provides extra workspace without requiring a larger room footprint. Position this at waist height to prevent back strain during long folding sessions.
- Sourcing: Look for 'pull-out table' hardware or 'breadboard' slides.
- Use a moisture-resistant finish like polyurethane on the wood surface.
- Ensure the base cabinet is securely anchored to the floor or wall studs.
Most people skip this: Check the weight limits of the slides; most are rated for 50–100 pounds of laundry.
30. Fold-Down Counter Cabinet
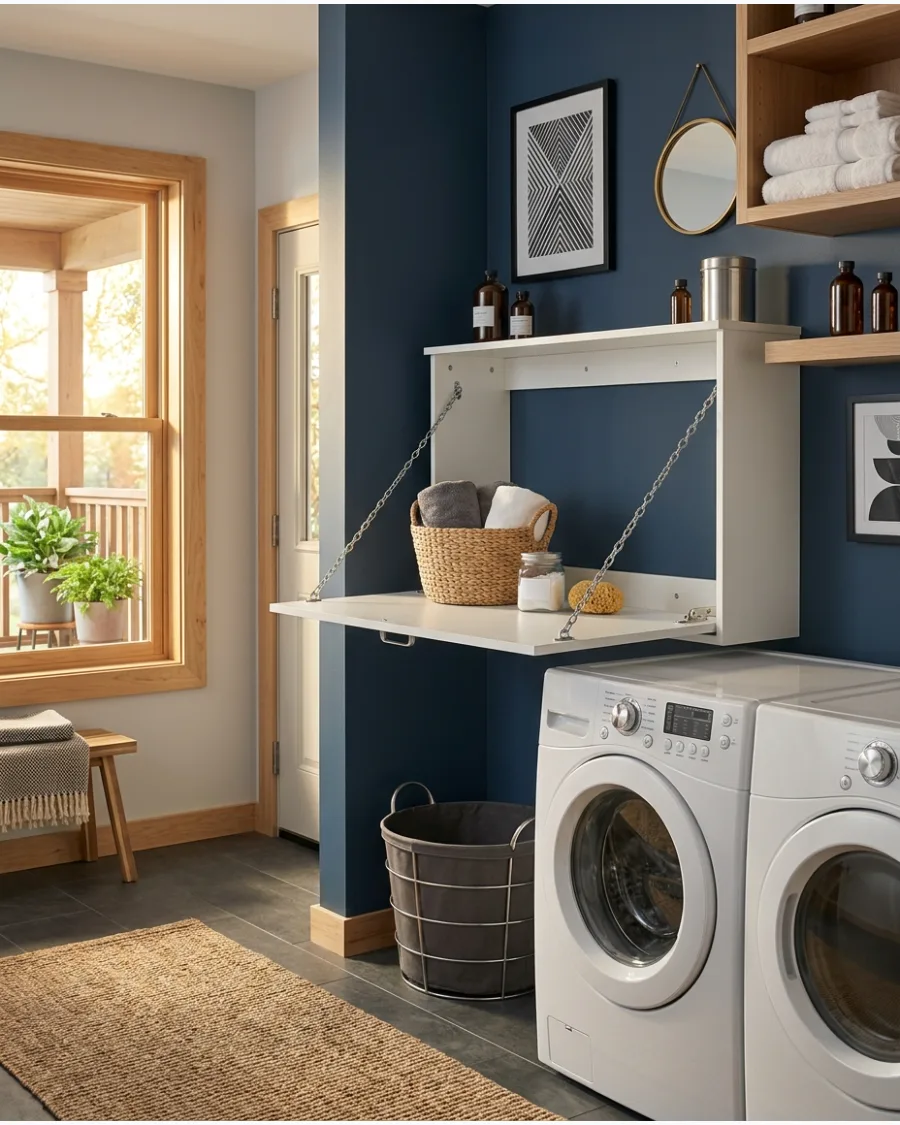
Install a wall cabinet where the front panel hinges down to create a small shelf. This is a clever way to add a temporary counter for folding or treating stains in a tiny space.
When the task is done, the counter folds up and latches securely to keep the room clear. Use heavy-duty chains or folding brackets to ensure the counter can handle the weight of a full laundry basket.
- Budget: $50–$150 if building from a basic wall cabinet.
- Mount the cabinet at a comfortable standing height (about 36 inches).
- Use a piano hinge at the bottom for the smoothest and strongest opening.
Best shortcut: A piano hinge provides much better support along the entire edge than two standard hinges.
Laundry Room Cabinet Ideas
31. Pivoting Recessed Ironing Cabinet
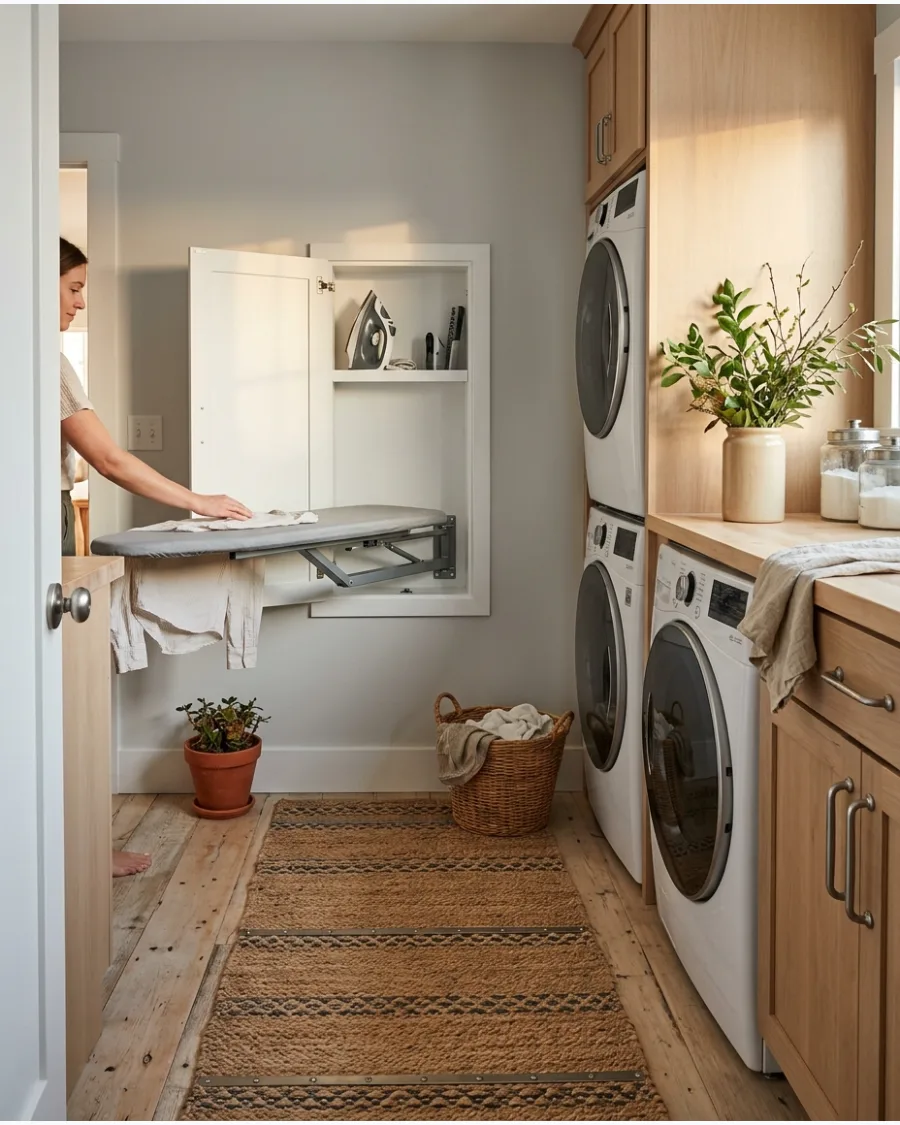
A recessed ironing station maximizes floor space by tucking the board directly into a slim wall cabinet between studs. The swiveling mechanism allows for comfortable use in tight corners or narrow hallways where a standard board would block traffic.
Install the unit at elbow height to ensure ergonomic comfort during longer pressing sessions. While many standard boards are flimsy, choosing a heavy-duty steel frame prevents the annoying wobbling common with fold-down models.
- Measure the depth between wall studs to ensure a flush fit before purchasing a recessed kit.
- Mount the cabinet near a dedicated electrical outlet for convenient iron cord reach.
- Replace the standard cover with a heat-reflective metallic fabric to speed up the ironing process.
Quick win: Spray the board cover with a light starch or water before the first use to help the fabric settle perfectly onto the frame.
Hidden and Space-Saving Cabinet Ideas
32. Cabinet With a Retractable Hanging Rack
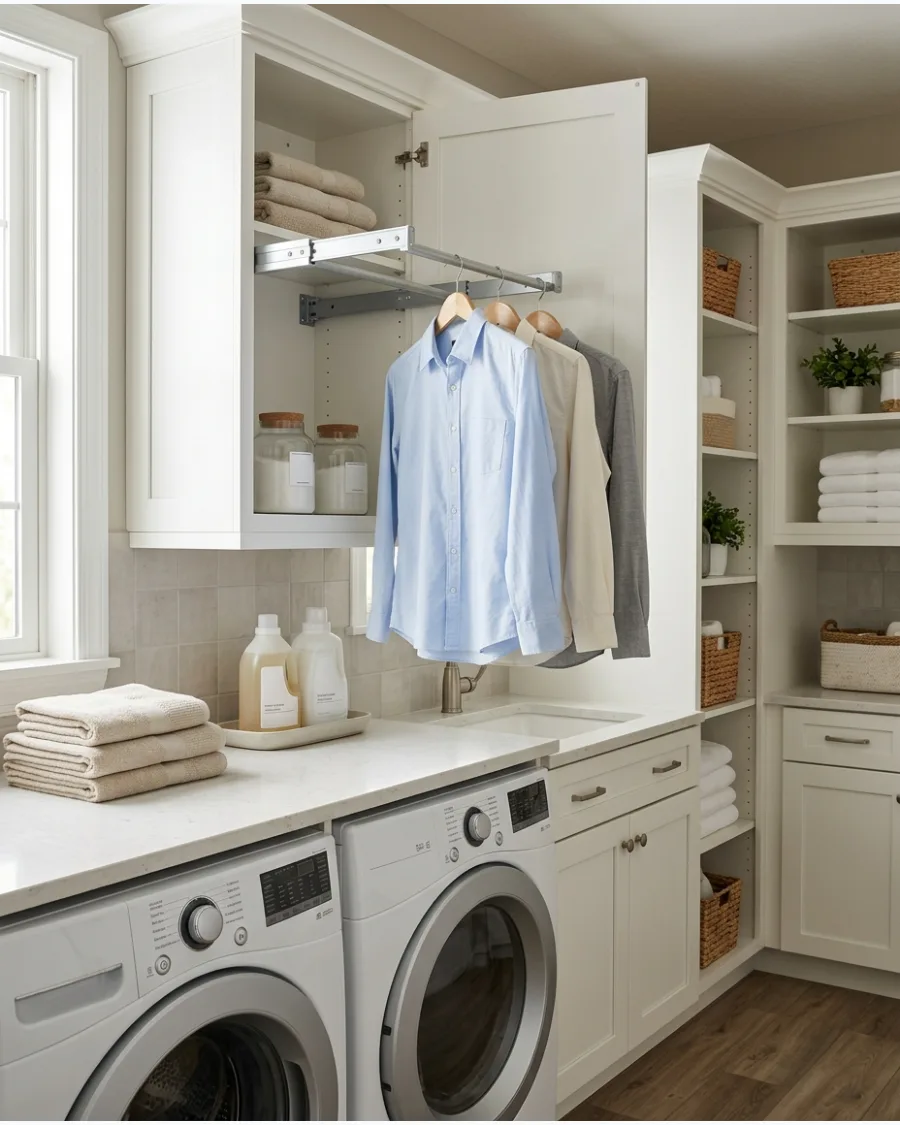
A retractable rail fits inside a standard upper cabinet to provide temporary hanging space. It slides out when clothes need to air dry or stay wrinkle-free after ironing.
Position the rack near the dryer so items can go straight onto hangers. This keeps the room looking tidy when the laundry is finished.
- Heavy-duty slide-out rods usually cost $25 to $50.
- Secure the rail to the cabinet ceiling using reinforced screws.
- Opt for a telescoping rod to maximize hanging capacity in shallow cabinets.
Best shortcut: Use rubber-coated hangers to prevent clothes from sliding off the rack when it moves.
Laundry Room Cabinet Color Ideas
33. Warm White Laundry Cabinets
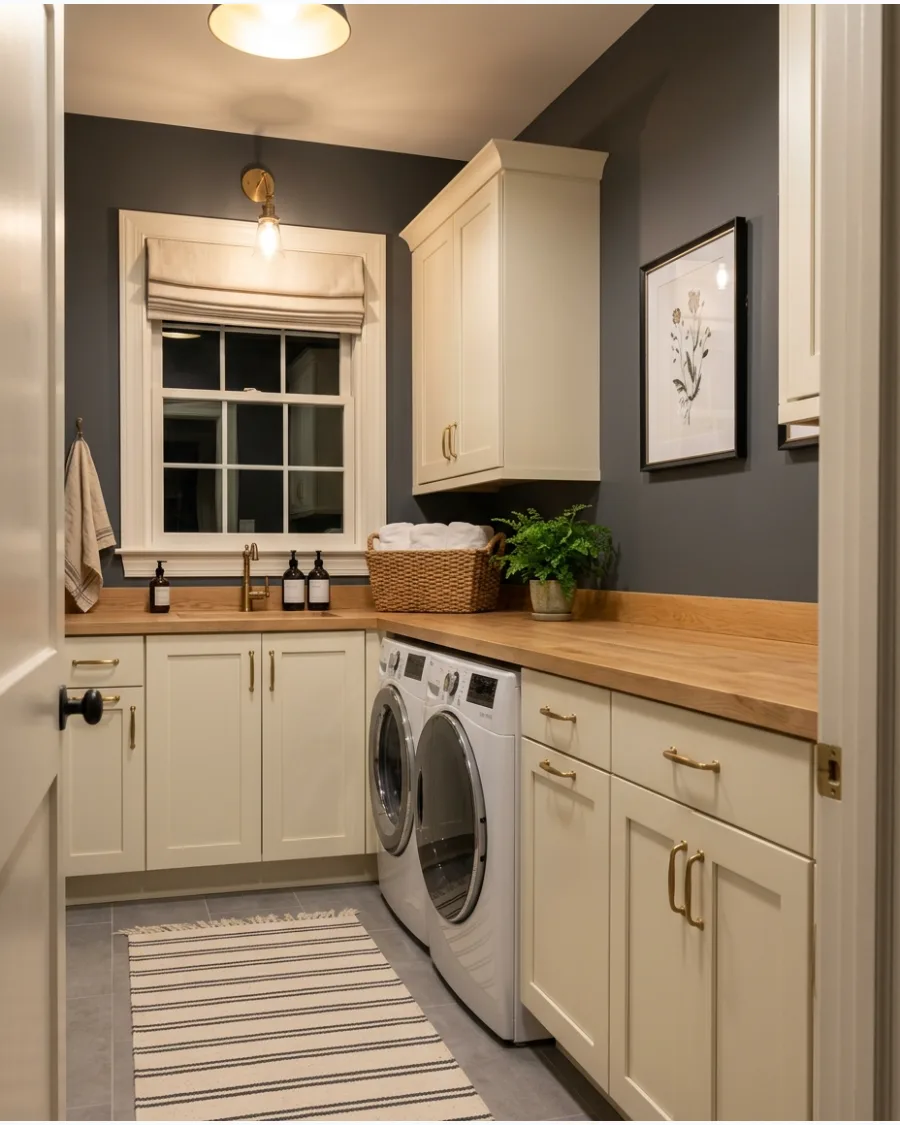
Creamy white cabinets offer a softer alternative to clinical bright whites. This shade brings a cozy feeling to a room that often feels cold and functional.
Pair warm white doors with brass handles to pull out the golden undertones in the paint. It creates a timeless look that works well with natural wood accents.
- Paint and new hardware cost roughly $100 to $200 for a DIY refresh.
- Use a semi-gloss finish for easy wiping of detergent drips.
- Select a warm white with yellow or beige undertones rather than gray.
Most people skip this: Test paint swatches at different times of day, as warm whites can shift under artificial laundry lights.
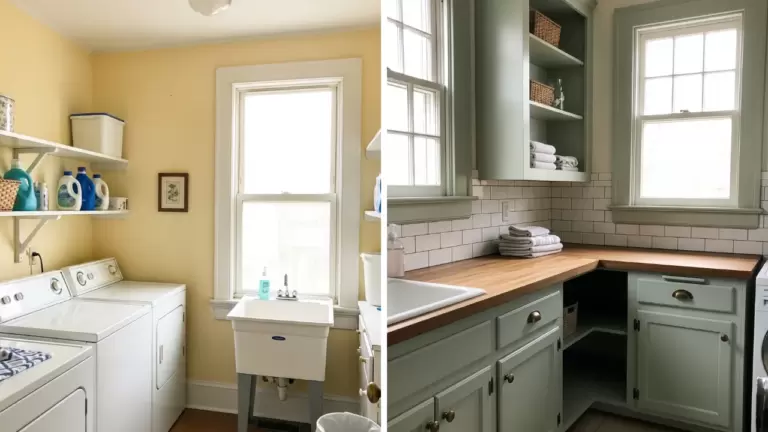
34. Sage Green Laundry Cabinets
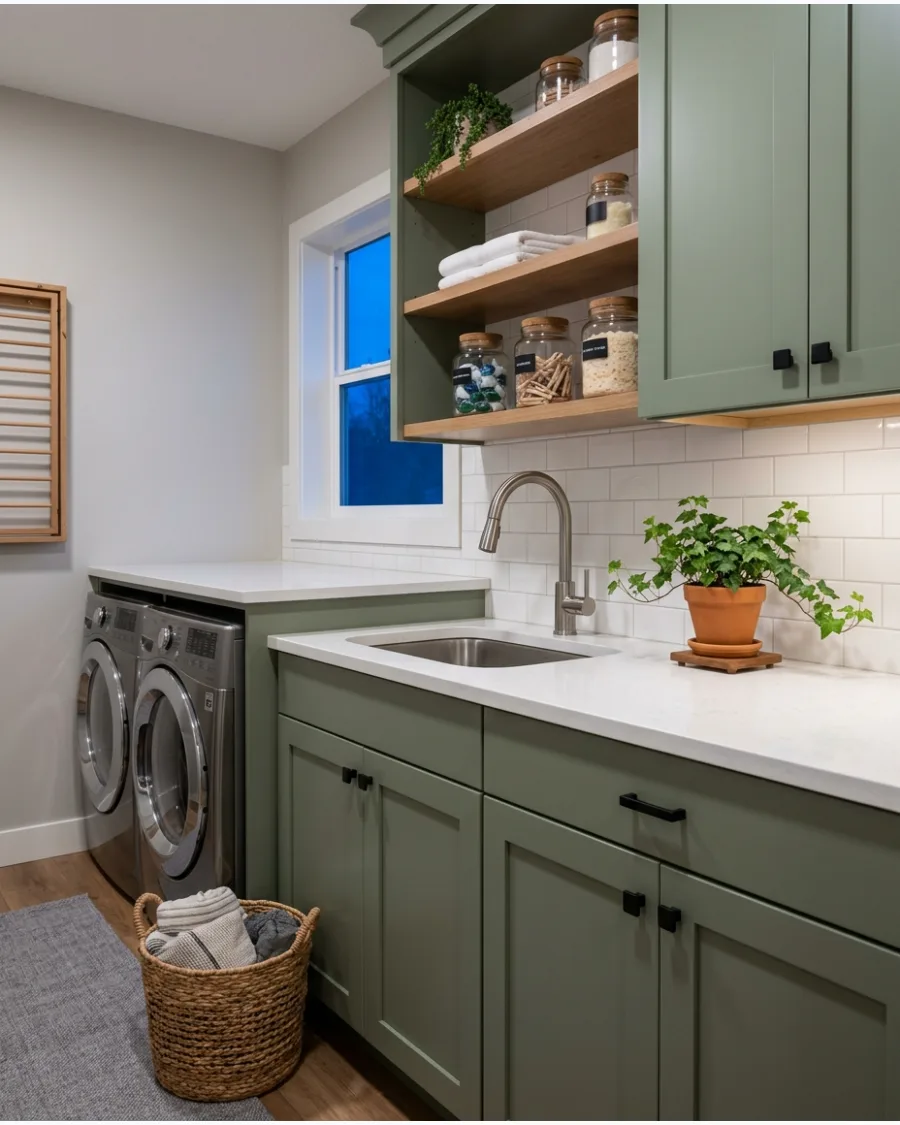
Sage green is a muted, earthy tone that makes a utility room feel like a calm retreat. It provides enough color to be interesting without feeling overwhelming or loud.
Use matte black hardware to ground the green and give the cabinets a modern edge. This color looks especially sharp against a crisp white subway tile backsplash.
- Sage green paint is widely available at most home centers.
- Apply a durable primer first to ensure the green tone stays true over time.
- Match with cream-colored walls to keep the space feeling bright.
Quick win: Use a high-density foam roller for a smooth, factory-like finish on cabinet doors.
35. Deep Forest Green Cabinets
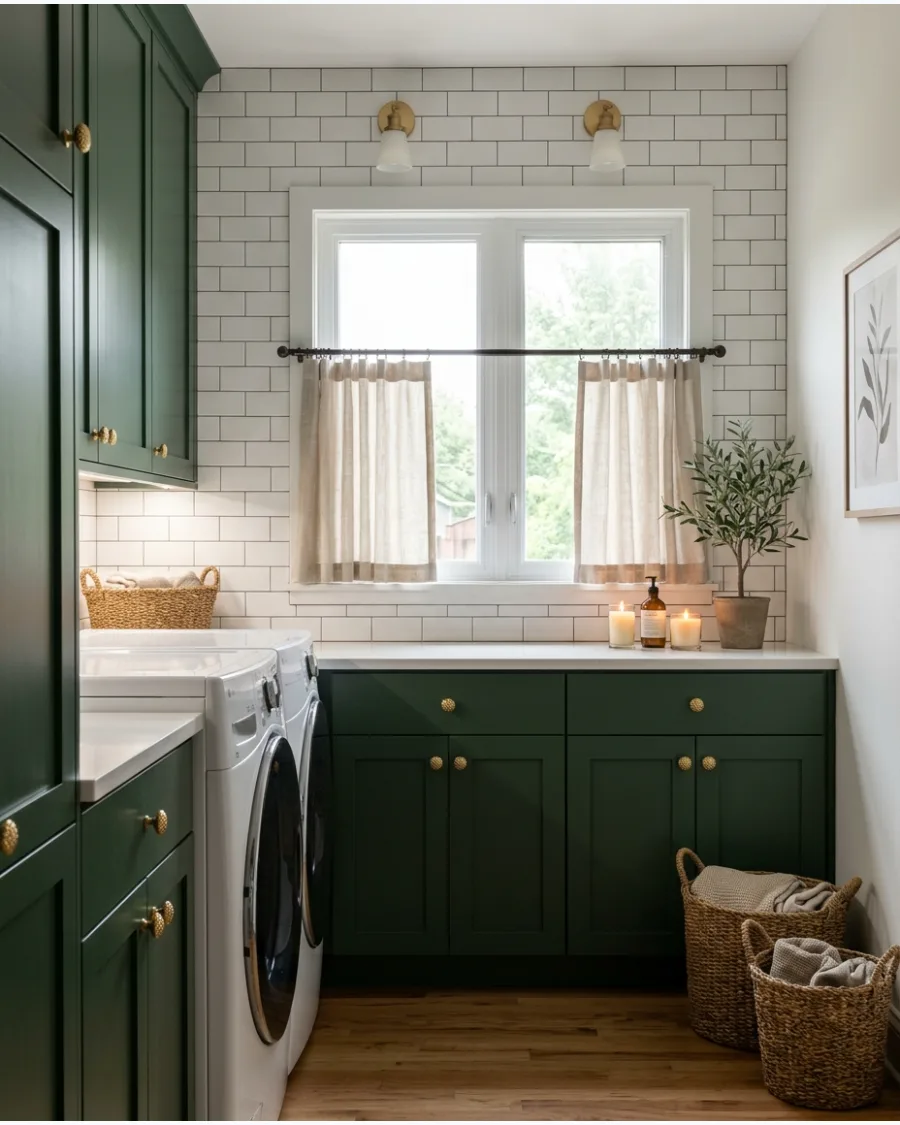
Dark green cabinets add a sense of luxury and depth to a laundry area. The rich color creates a sophisticated backdrop for chores and hides scuffs well.
Install bright under-cabinet lighting to ensure the workspace stays functional despite the dark paint. It provides a high-end look that feels more like a designed room than a mudroom.
- Allow two to three days for deep pigment paints to fully cure before heavy use.
- Balance the dark green with light-colored flooring like light oak or pale tile.
- Choose a satin finish to hide fingerprints better than a high-gloss paint.
Best shortcut: Use a white or light gray primer to help the dark green paint cover the surface in fewer coats.
36. Dusty Blue Laundry Cabinets
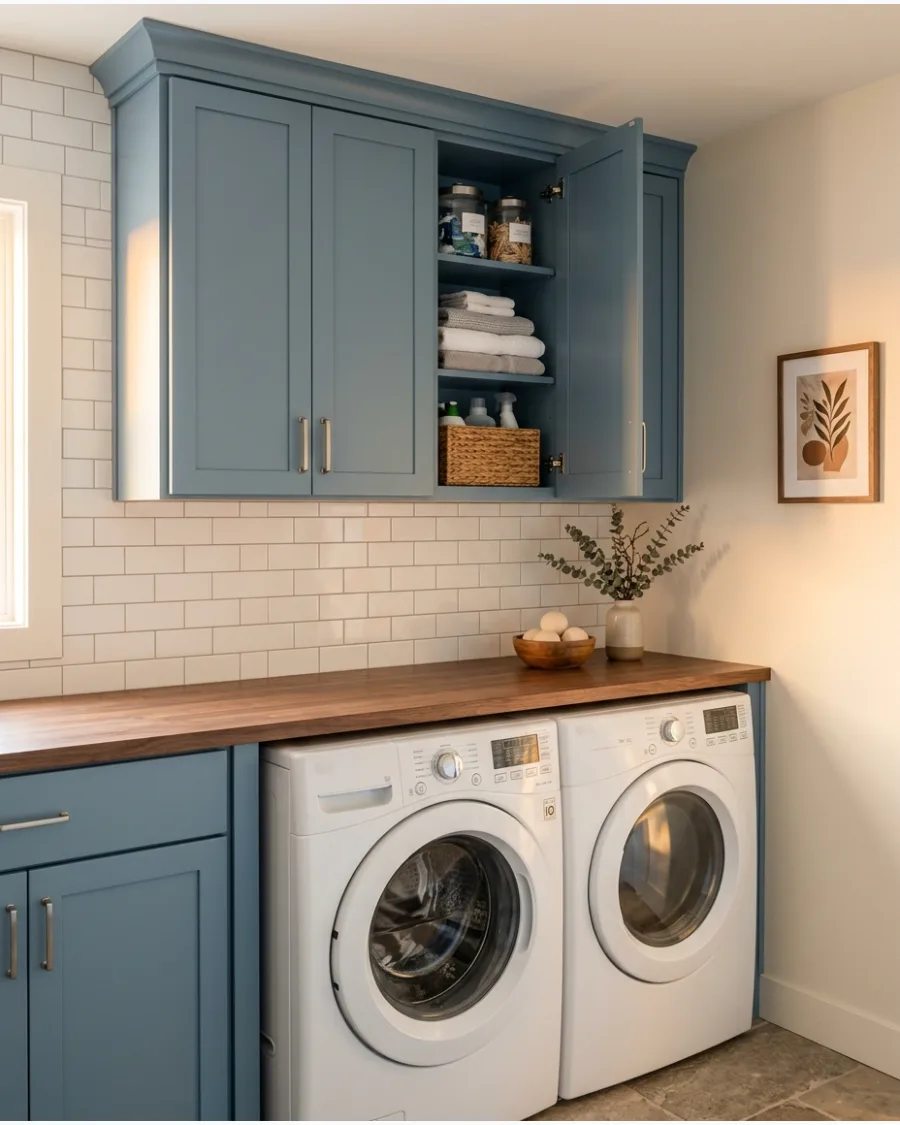
Dusty blue is a classic choice that feels fresh and airy in a small laundry space. This color works beautifully with white appliances, making them look intentional rather than basic.
Select brushed nickel hardware to complement the cool tones of the blue paint. It creates a relaxing environment for folding and sorting.
- A standard gallon of cabinet-grade paint costs between $50 and $80.
- Remove all doors and hardware before painting for the cleanest results.
- Coordinate with blue and white striped laundry bins for a cohesive look.
Most people skip this: Label the back of each cabinet door with a number when removing them to ensure they go back in the right spot.
37. Navy Blue Cabinets
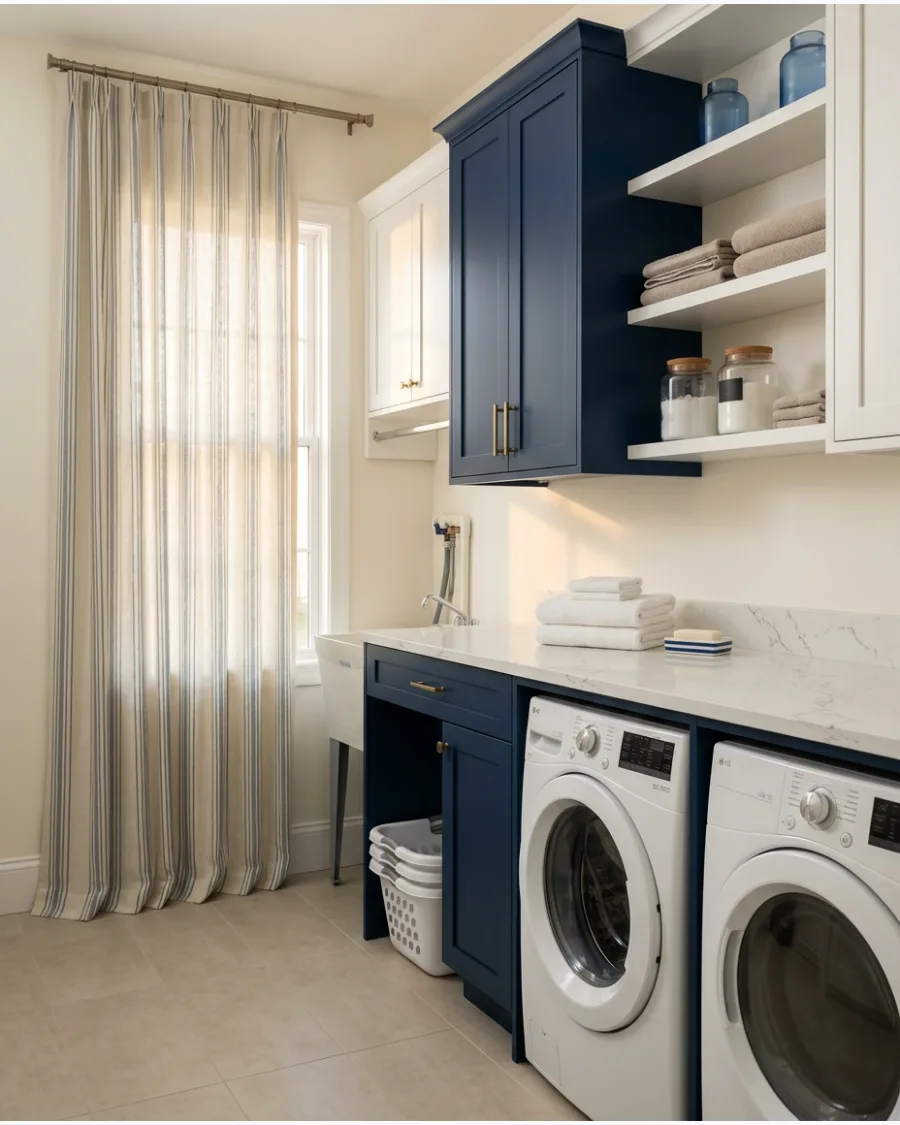
Navy blue cabinets provide a bold contrast that never goes out of style. This deep shade works best on lower cabinets to keep the upper half of the room feeling open.
Contrast the dark blue with a white countertop to keep the folding area bright and visible. It brings a nautical or traditional feel to the home.
- Navy paint requires a high-quality primer to prevent the old color from bleeding through.
- Use navy on the bottom cabinets and white on top to prevent a small room from feeling cramped.
- Wipe down doors frequently as dust shows up more on dark navy surfaces.
Quick win: Swap out old plastic outlet covers for white or silver ones to pop against the navy paint.
38. Burgundy Laundry Room Cabinets
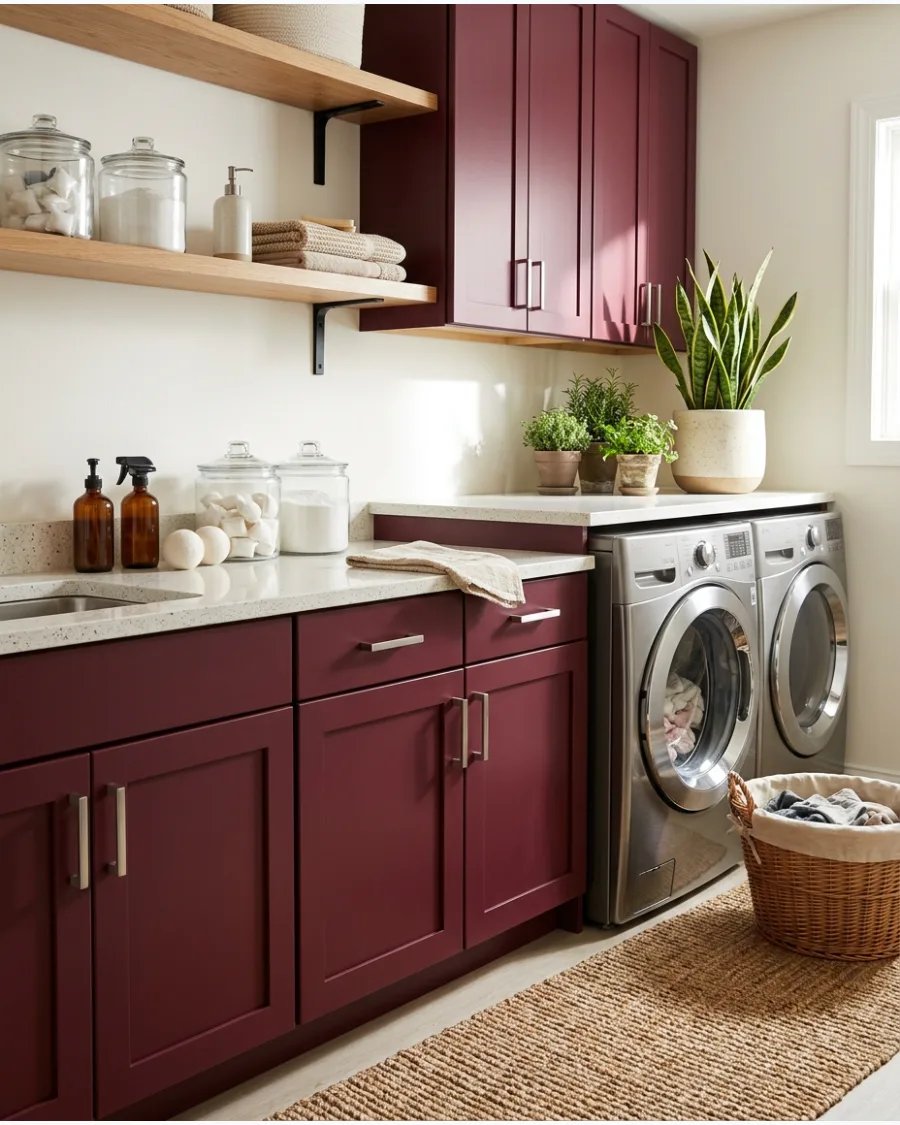
Burgundy offers a rich and unexpected pop of color in a utility space. This warm, deep red makes the room feel cozy and high-end.
Keep the rest of the room neutral with white walls and simple hardware to let the cabinets be the star. It is a great way to add personality to a part of the house that is usually ignored.
- Burgundy paint often needs three coats for full, even coverage.
- Use warm-toned light bulbs to enhance the richness of the red paint.
- Pair with a light gray countertop to bridge the gap between the red and white.
Best shortcut: Buy a small sample pot first, as burgundy can look very different under fluorescent laundry lights.
39. Warm Eucalyptus Cabinets
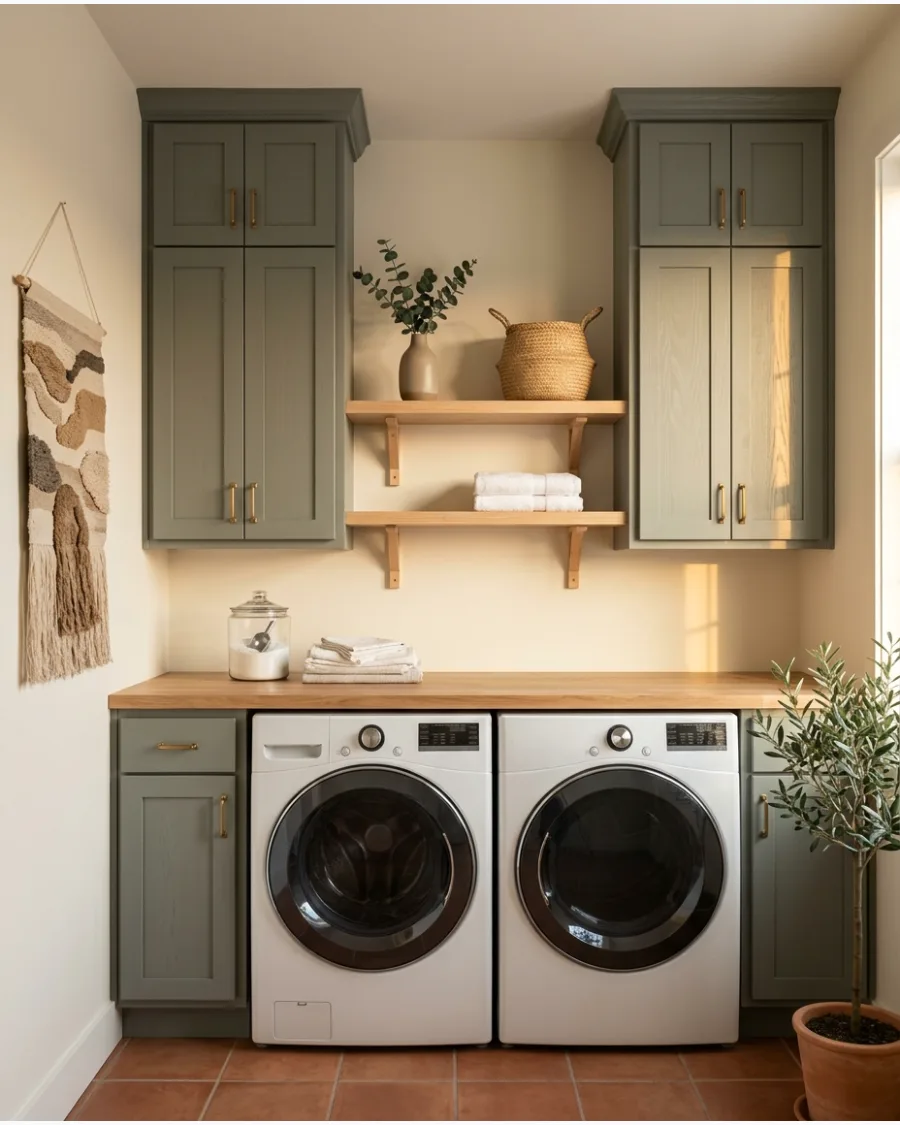
Eucalyptus green is a soft, grayish-green that feels contemporary and organic. This color pairs naturally with earth tones like terracotta and wood.
Use light wood shelving nearby to enhance the natural, earthy vibe of the eucalyptus paint. It is a perfect choice for a modern farmhouse or transitional style home.
- Eucalyptus tones look best with matte or eggshell finishes.
- Complement the color with woven seagrass baskets for storage.
- Use a wood-grain contact paper inside the cabinets for a surprise natural detail.
Most people skip this: Sand the cabinets lightly between coats of paint to get a professional, smooth-to-the-touch surface.
40. Soft Yellow Laundry Cabinets
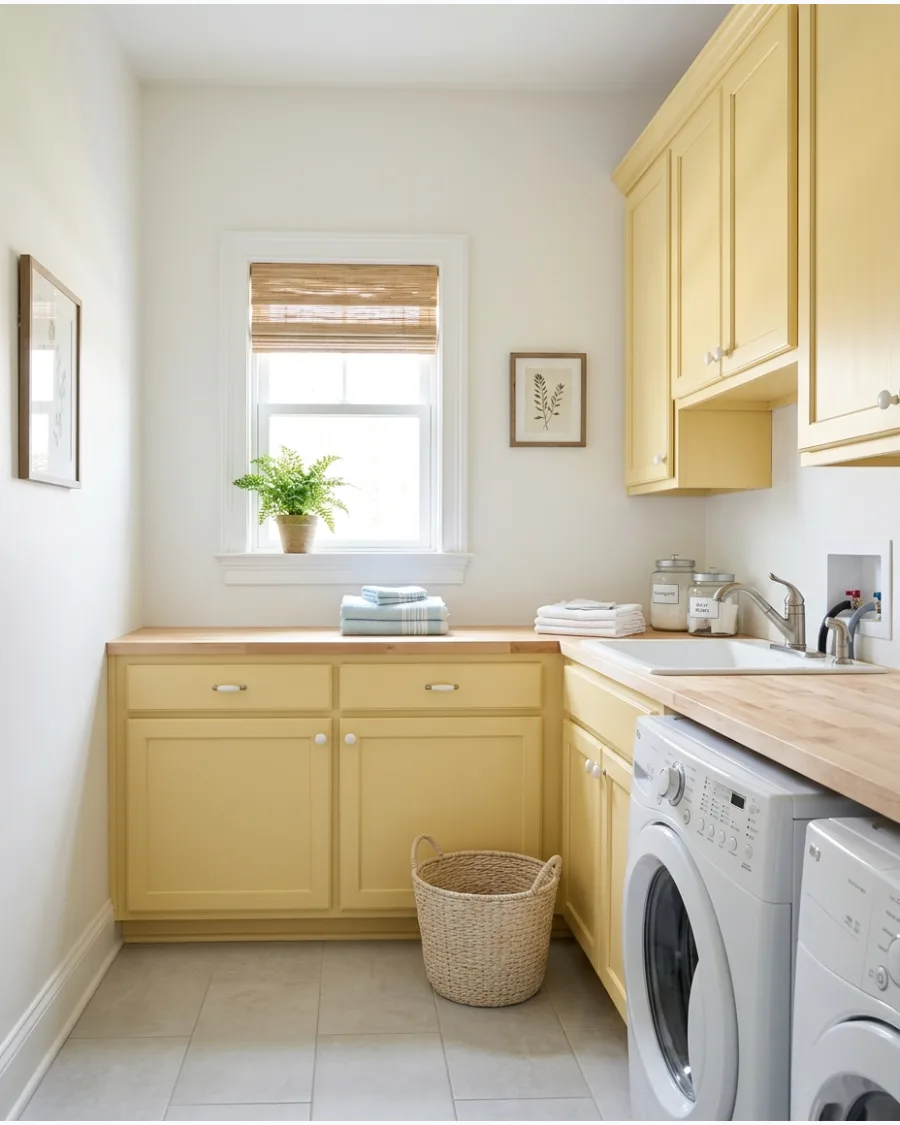
Soft yellow cabinets can make a windowless laundry room feel sunny and bright. This cheerful color makes chores feel less like a burden.
Choose a buttery, muted yellow rather than a neon shade to keep the space feeling sophisticated. It works well with white trim and light-colored appliances.
- Yellow paint is an affordable way to brighten a dark basement laundry zone.
- Pair with white appliances to keep the look clean and classic.
- Use a water-based enamel paint for a durable finish that won't yellow further over time.
Quick win: Add a small rug with yellow accents to pull the color from the cabinets down to the floor.
41. Charcoal Gray Cabinets
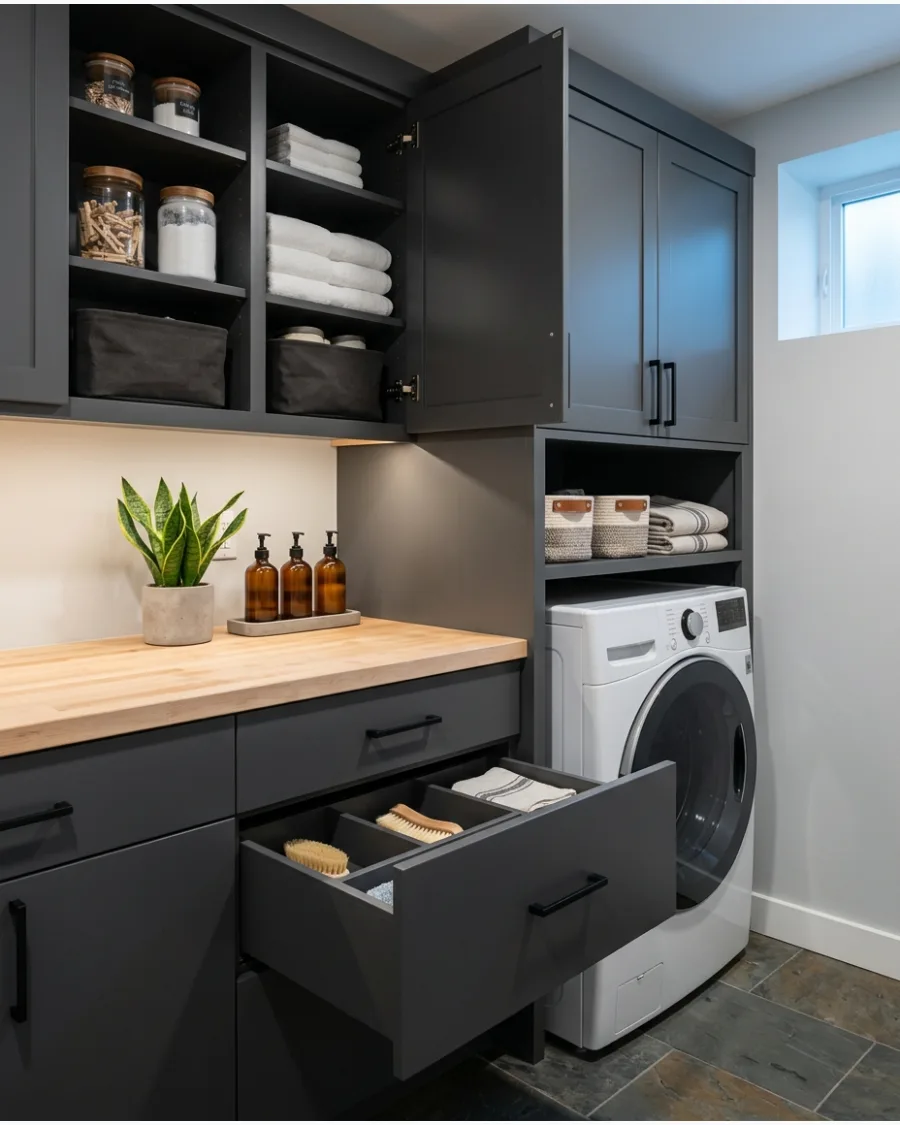
Charcoal gray provides a sleek, modern look that is excellent at hiding the occasional detergent spill. This dark neutral acts as a perfect anchor for a room with many white appliances.
Balance the dark gray with a pale butcher block or light stone countertop. It creates a professional, clean-lined appearance that suits modern homes.
- Charcoal gray is a forgiving color for high-traffic laundry rooms with kids or pets.
- Use stainless steel hardware to match the gray tones and modern feel.
- Ensure the room has adequate overhead lighting to prevent the gray from looking gloomy.
Best shortcut: Use a paint with a built-in topcoat to save time on the finishing process.
42. Two-Tone Laundry Cabinets
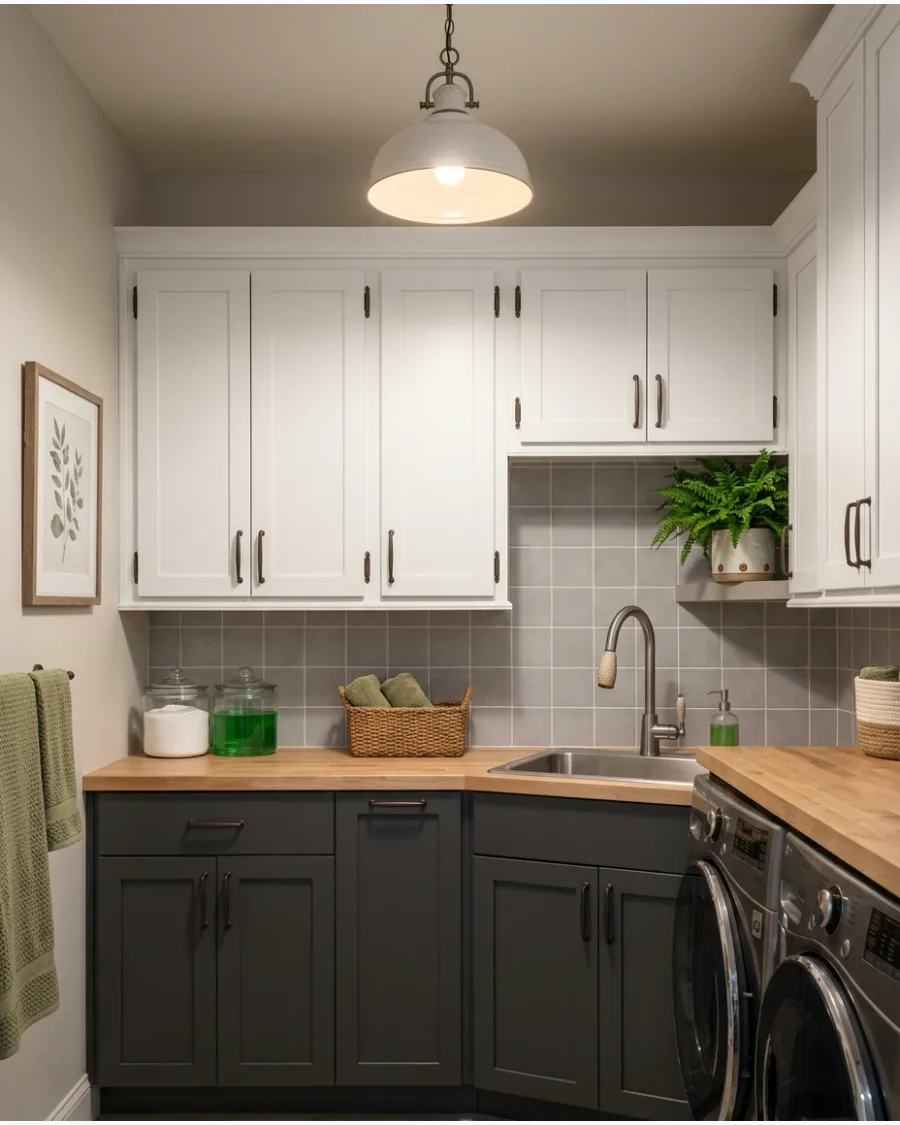
Using two different colors for upper and lower cabinets adds visual interest and depth. Usually, the darker color goes on the bottom to ground the space, while the lighter color stays on top.
Pick a dark charcoal for the base and a crisp white for the uppers to make the ceiling feel higher. This technique is a great way to use a bold color without it feeling heavy.
- Focus on one color family, like light and dark gray, for a foolproof look.
- Use the same hardware on both the top and bottom to tie the two colors together.
- Paint the walls the same color as the upper cabinets to make the room feel taller.
Most people skip this: Use the darker color on the cabinet that houses the sink, as it hides water spots better.
43. Color-Matched Cabinets and Walls
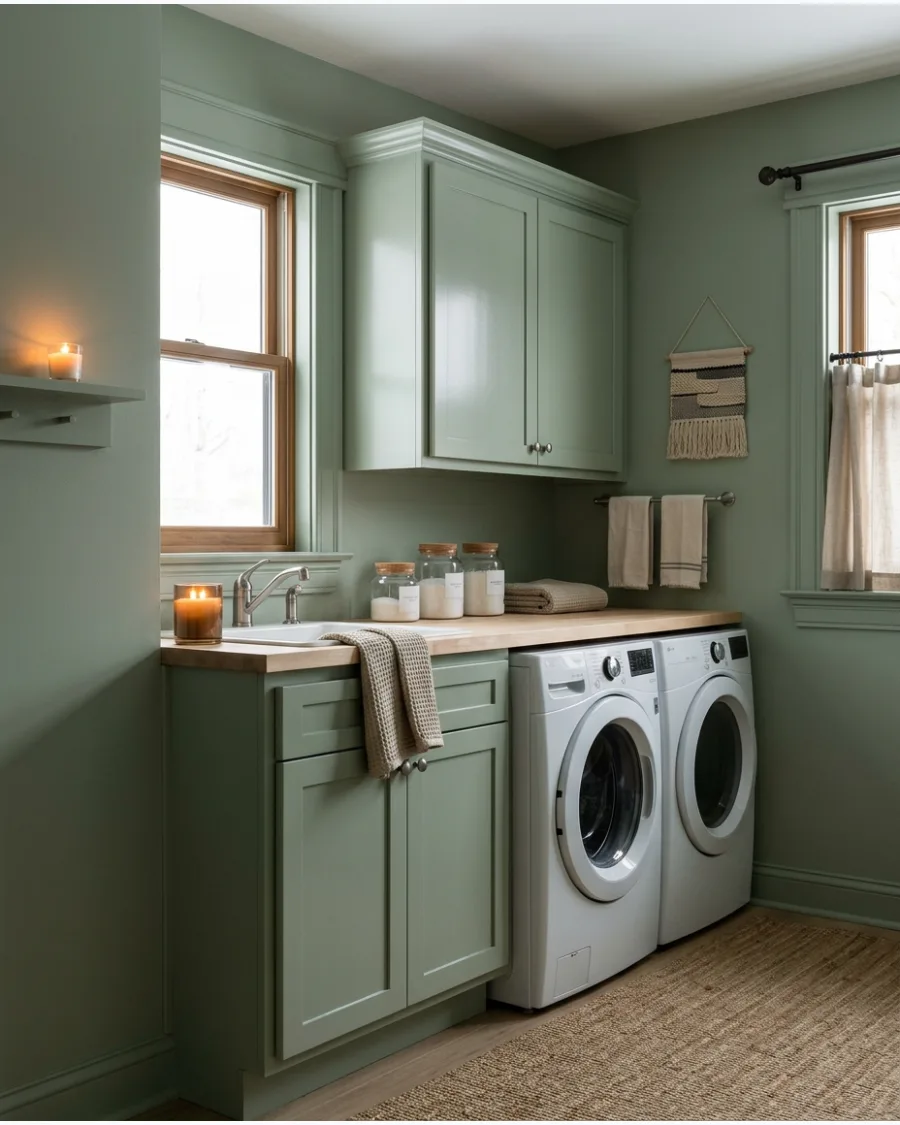
Painting the cabinets, walls, and trim the same color creates a seamless, color-drenched look. This trick can make a small, cluttered laundry room feel much larger and more organized.
Use different sheens, like matte for walls and semi-gloss for cabinets, to add subtle texture. It makes the cabinetry look like a custom architectural feature of the room.
- Buy the paint in large quantities to ensure the color match is perfect across all surfaces.
- This style works best with soft neutrals or muted greens and blues.
- Keep decor minimal to maintain the clean, monochromatic effect.
Quick win: Paint the back of the laundry room door the same color to complete the immersive look.
Wood and Textured Cabinet Ideas
44. Natural Oak Laundry Cabinets
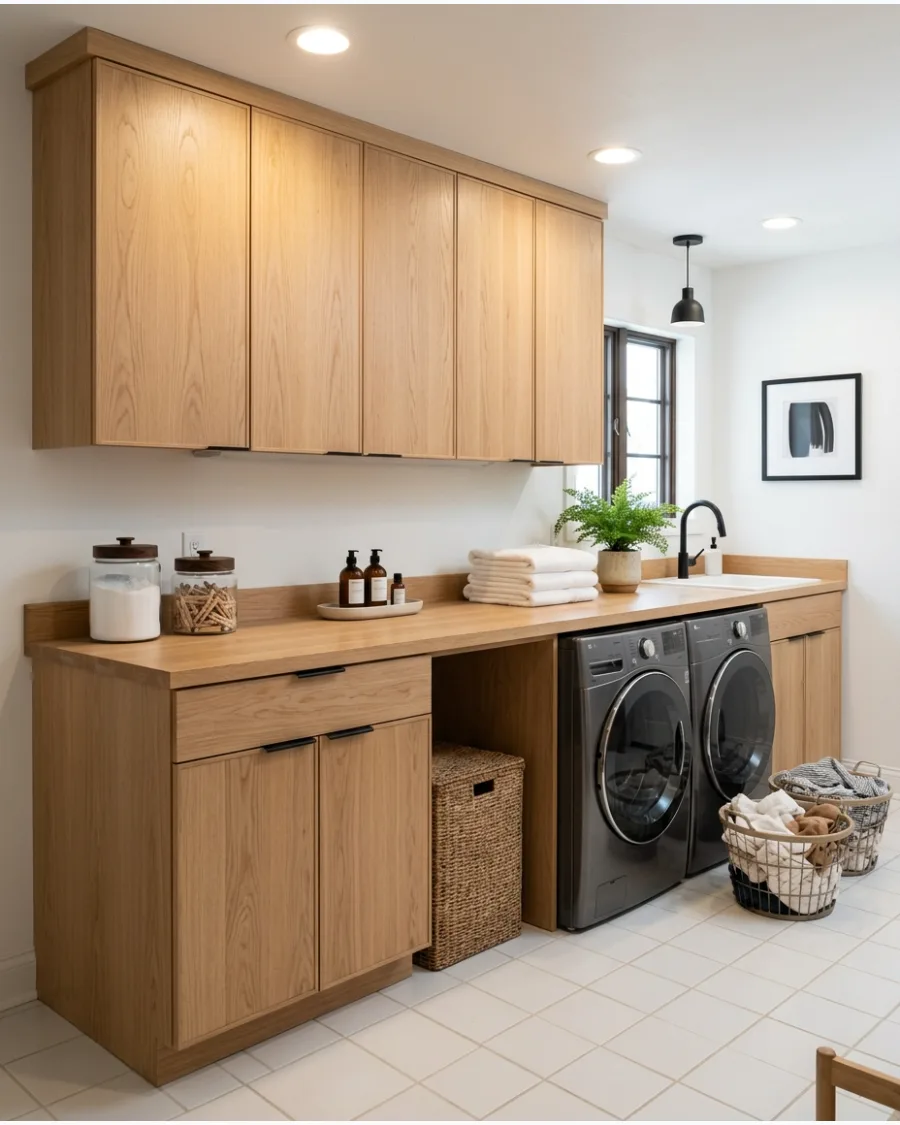
Light oak cabinets bring a warm, organic feel to a functional space. The visible wood grain adds texture that painted surfaces lack.
Choose a flat-panel or simple shaker door style to keep the oak looking modern rather than dated. It pairs perfectly with white walls and black accents for a contemporary look.
- Unfinished oak cabinets can be sealed with a clear poly to protect against moisture.
- Oak is a durable wood choice that stands up well to heavy laundry baskets.
- Pair with a white quartz counter to keep the wood from feeling too heavy.
Best shortcut: Use a matte clear coat to protect the wood without making it look shiny or plastic-like.
45. Dark Walnut Laundry Cabinets
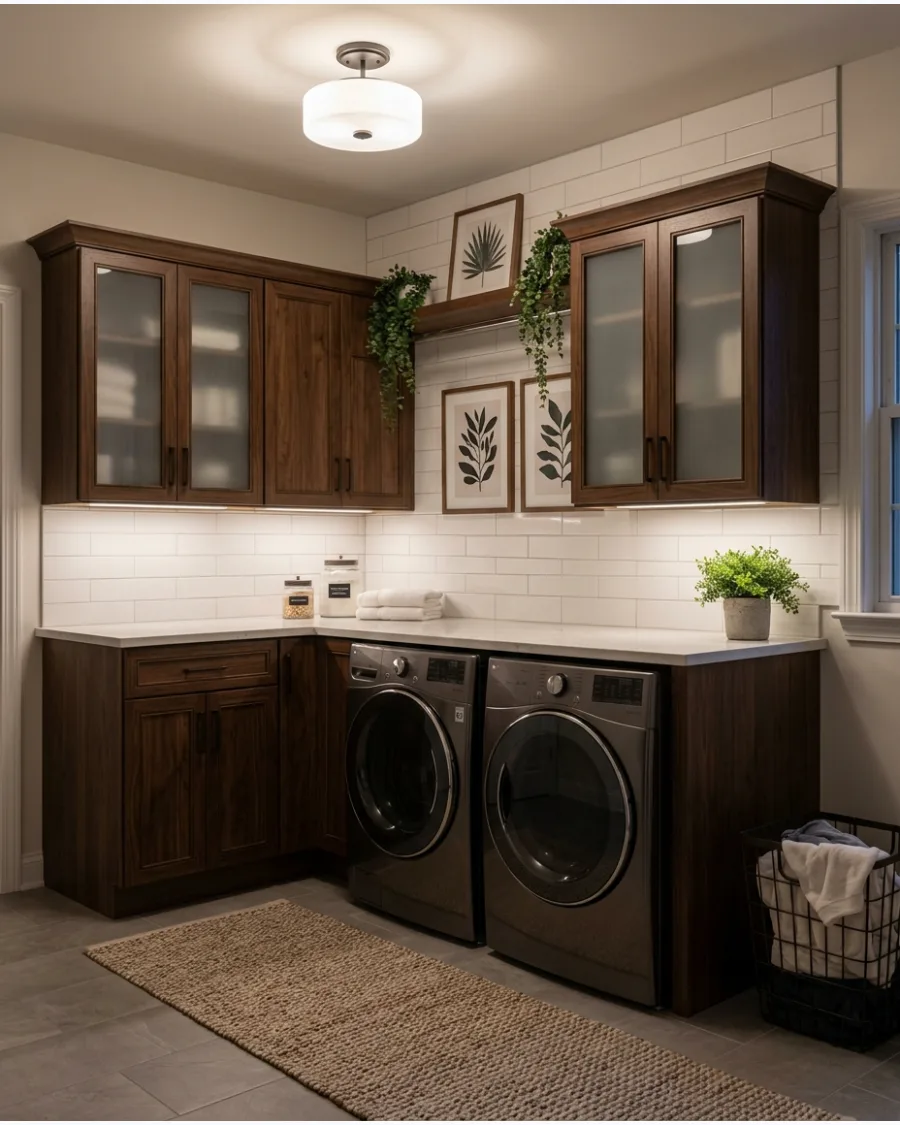
Dark walnut cabinetry creates a sophisticated, furniture-like appearance in the laundry room. The deep chocolate tones make the space feel like an extension of the home's living areas.
Contrast the dark wood with bright white walls and a light stone countertop to keep the room from feeling like a cave. It is a high-end choice that adds significant value and style.
- Walnut is a premium wood, so consider walnut veneers for a more budget-friendly version.
- Use warm LED lighting to highlight the rich brown tones of the wood.
- Keep hardware simple, like slim gold or silver bars, to let the wood grain stand out.
Most people skip this: Clean walnut cabinets with a wood-specific oil to keep the finish from looking dry or dull over time.
46. Reeded Wood Cabinet Doors
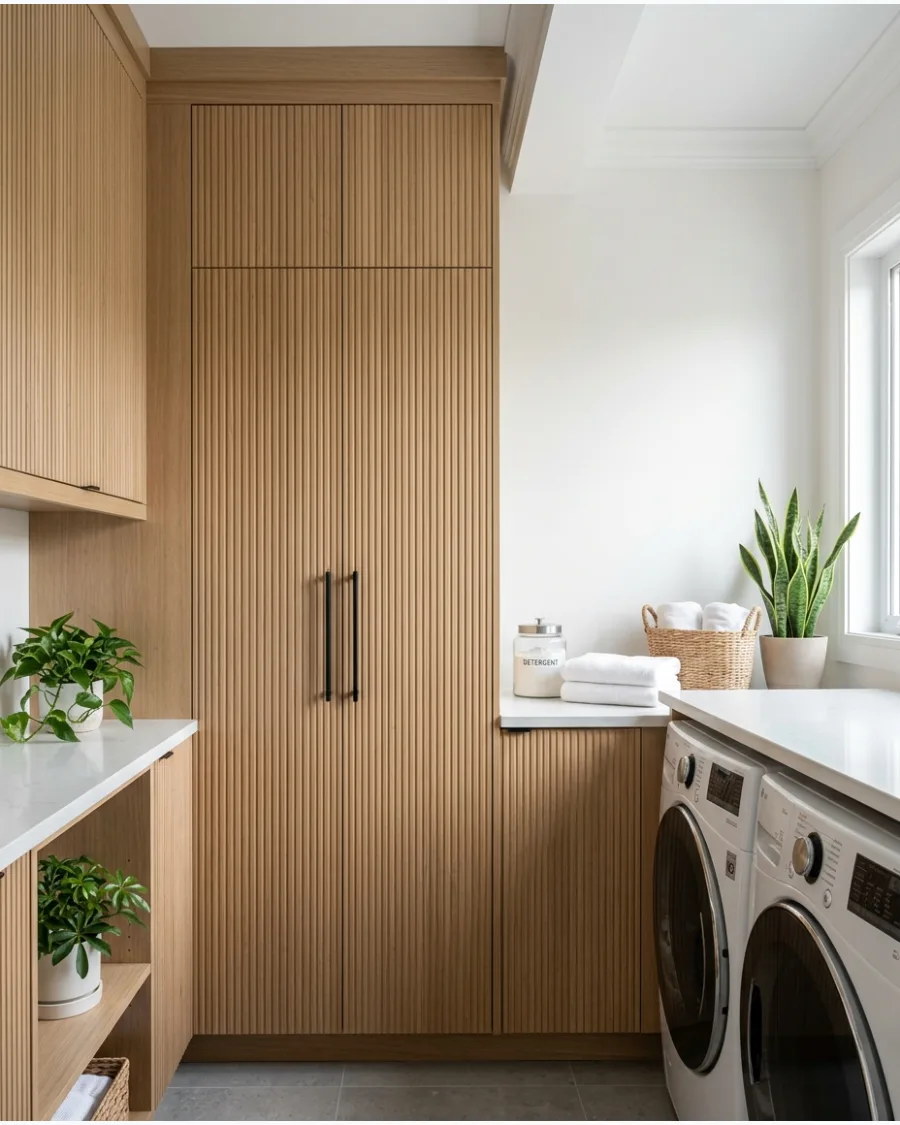
Vertical reeded details add a layer of texture that breaks up a flat wall of cabinetry. Use this finish on a single tall pantry cabinet or a central island to create a focal point without overwhelming the small space.
Install the reeded panels on upper cabinets to draw the eye upward and make the ceiling feel higher. It works because the texture hides minor fingerprints better than smooth surfaces.
- Budget $200-$600 for custom door fronts and 3-5 days for installation.
- Mount doors with soft-close hinges to protect the delicate wood ridges from slamming.
- Use this on one accent cabinet in a small room to avoid a cluttered look.
- Quick win: Use a toothbrush to clean dust out of the grooves every few months.
Quick win: Use a toothbrush to clean dust out of the grooves every few months.
47. Stained Wood Shaker Cabinets
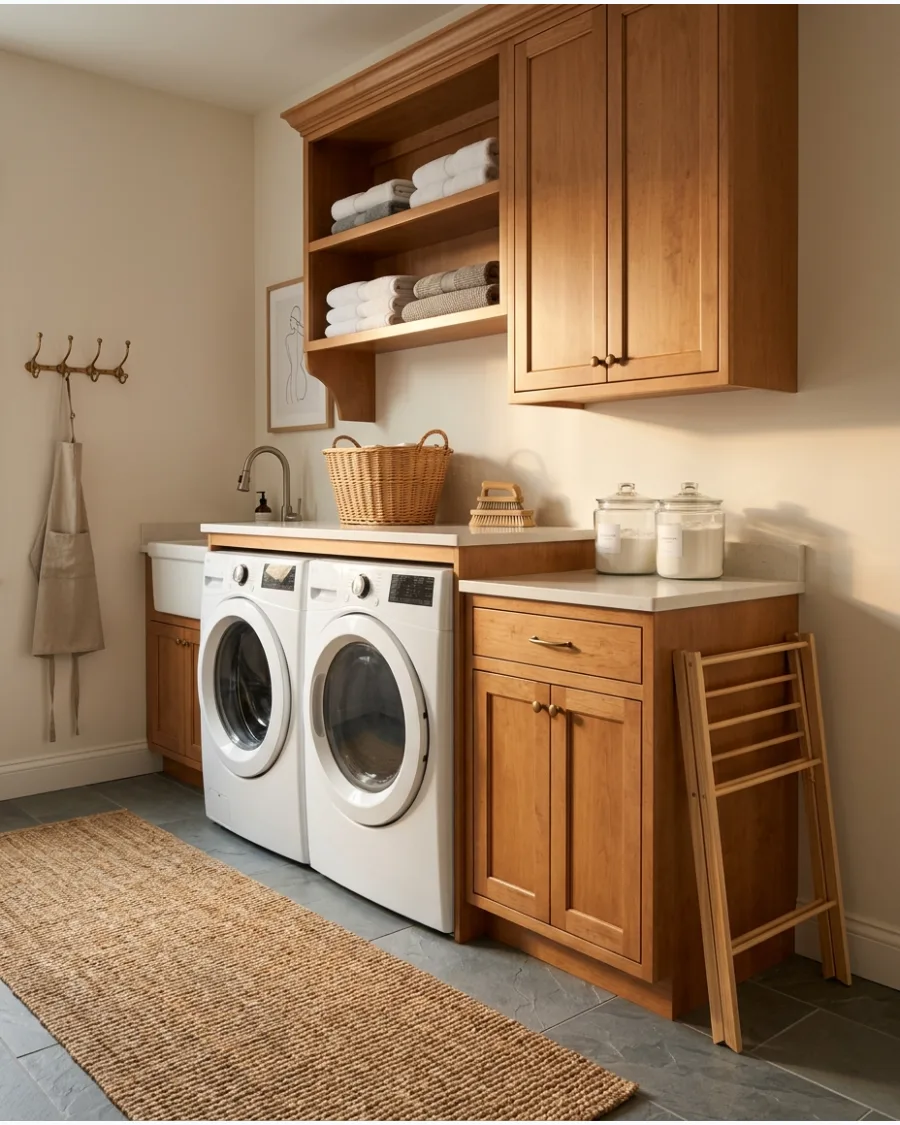
A warm wood stain brings out the natural grain of Shaker-style doors for a timeless look. This style balances the clinical feel of white appliances with organic warmth and durability.
Apply a clear topcoat over the stain to protect the wood from the high humidity often found in laundry rooms. It is a great way to hide the inevitable scuffs that happen in a high-traffic utility area.
- Budget $150-$400 for staining materials and 2-3 days of labor.
- Apply stain in the direction of the wood grain for an even professional finish.
- Choose a medium-tone stain like cherry or oak to hide dust better than very dark stains.
Most people skip this: Test the stain on the back of a door first to see how the wood absorbs the color.
48. Mixed Wood and Painted Cabinets
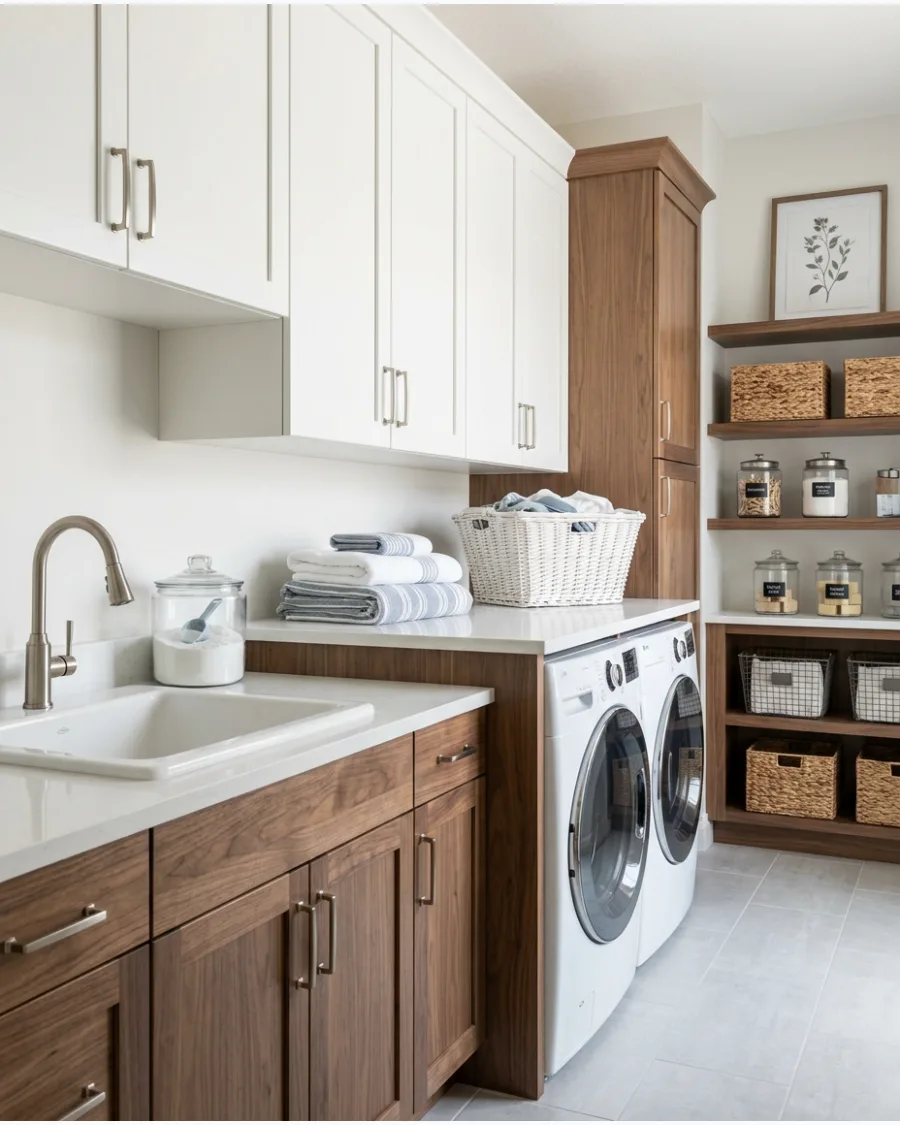
Pairing painted uppers with wood base cabinets prevents the room from feeling too heavy or dark. This combination allows for a bright airy feeling at eye level while keeping the durability of wood where feet might hit.
Use the same hardware across both styles to create a sense of visual unity throughout the space. It works because it makes the room look intentionally designed rather than just functional.
- Budget $500-$1,200 for mixed cabinet sets depending on wood species.
- Place the darker wood cabinets on the bottom to anchor the room visually.
- Use a light paint color on top to reflect overhead light back into the workspace.
Best shortcut: Match the wood tone to your home's flooring for an instant cohesive look.
49. Micro-Shaker Cabinet Doors
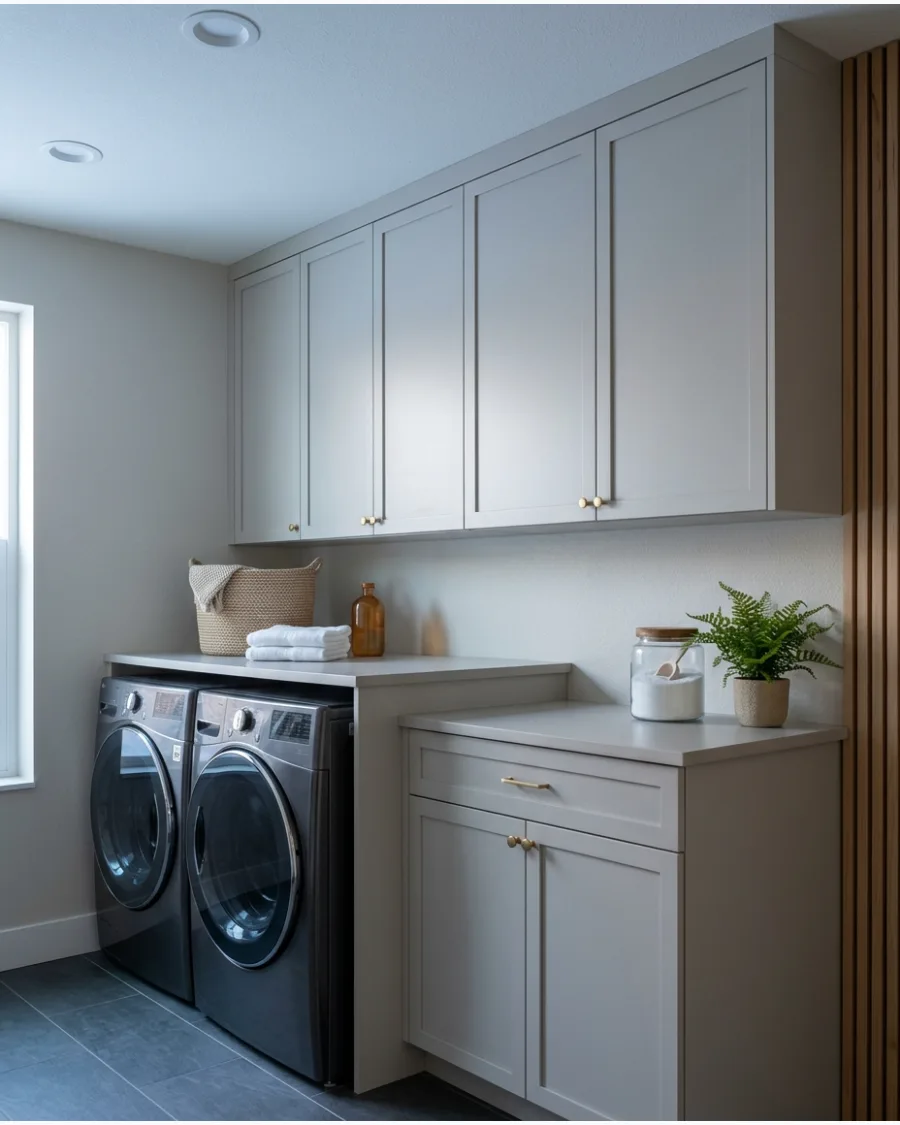
Micro-Shaker doors feature a much thinner frame than the standard three-inch Shaker rail. This slim profile offers a modern clean aesthetic that fits perfectly in tight laundry closets or narrow hallways.
Select a matte finish for these doors to keep the slim lines looking sharp and sophisticated. It provides just enough detail to look high-end without the bulk of traditional trim.
- Budget $400-$900 for a full set of replacement doors.
- Measure the frame width carefully to ensure all doors match perfectly across the run.
- Choose this style for modern or transitional homes where traditional Shaker feels too heavy.
Quick win: Pair these with slim "finger pull" hardware to maintain the minimalist look.
50. Glass-Front Laundry Cabinets
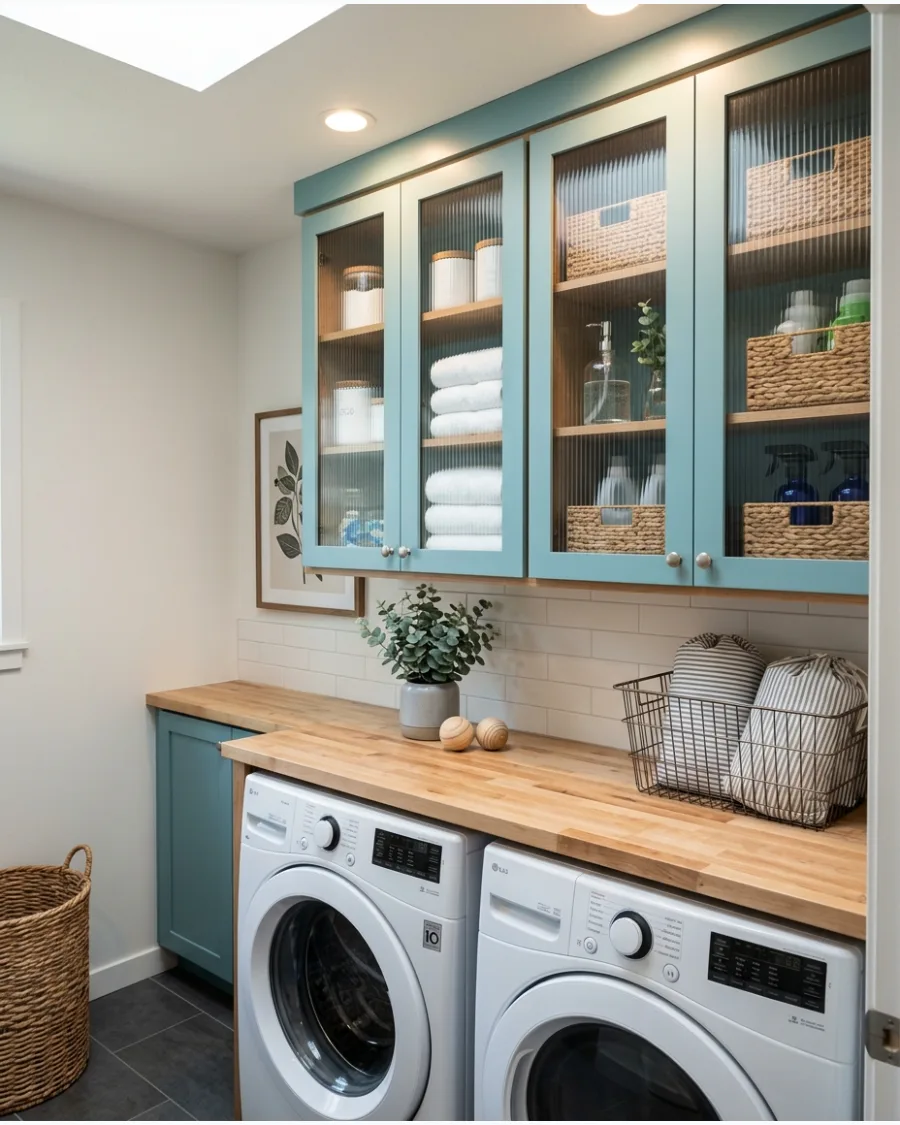
Glass inserts turn storage into a display area for attractive laundry essentials like glass detergent jars or folded linens. Using frosted or fluted glass is a smart way to hide the labels of mismatched spray bottles while still letting light through.
Organize items in uniform baskets behind the glass to maintain a tidy appearance at all times. It breaks up the wall of boxes look that solid cabinets often create.
- Budget $100-$300 per door for glass inserts and professional installation.
- Install battery-operated puck lights inside the cabinet to highlight the glass panels at night.
- Use tempered glass for safety in a busy utility room where items might bump the door.
Most people skip this: Use fluted glass to obscure clutter while still keeping the airy feel of a window.
Multifunctional Laundry Cabinet Ideas
51. Cabinet With Pull-Out Hampers
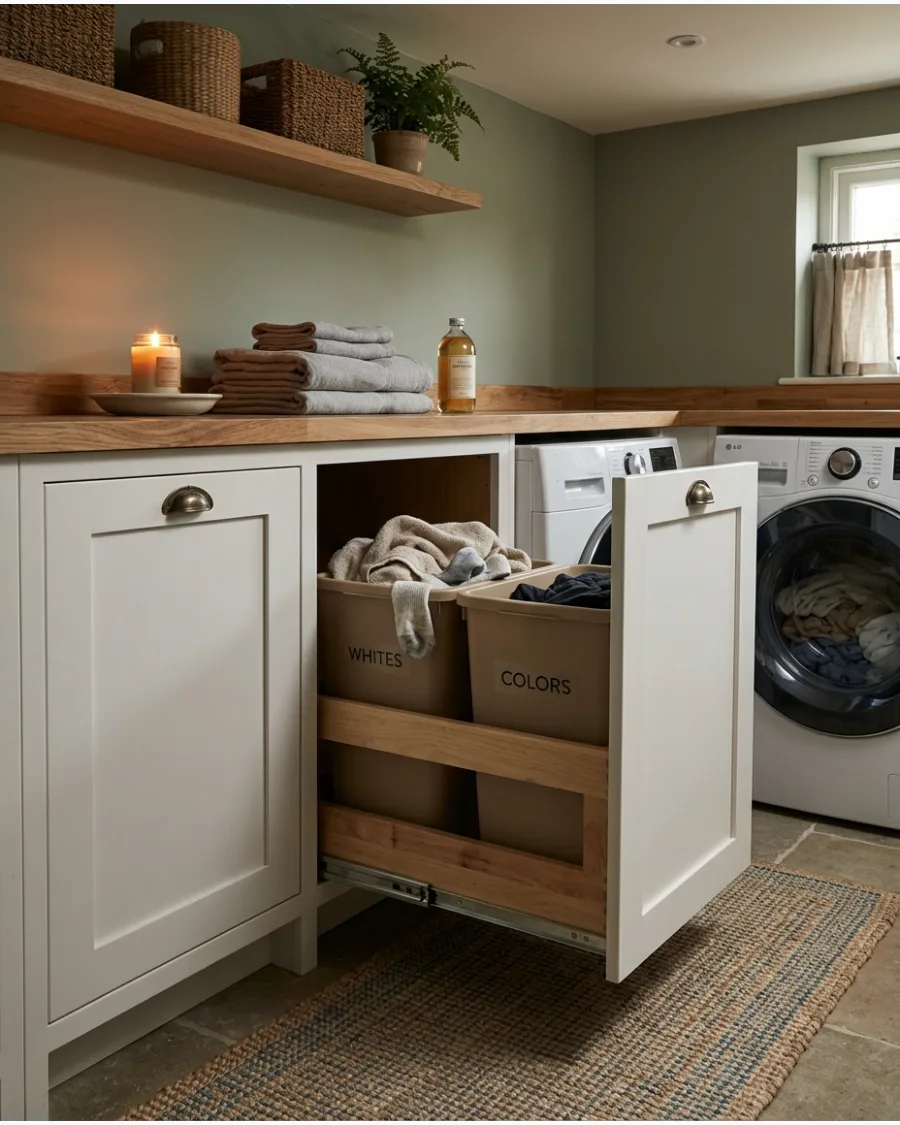
Integrated hampers keep dirty laundry off the floor and out of sight until it is time for a wash. Separate bins allow for immediate sorting of whites and colors which saves time during the actual laundry process.
Label the inside of the cabinet door so every family member knows exactly where their clothes belong. This setup prevents the laundry mountain that usually forms in front of the machines.
- Budget $150-$350 for the pull-out hardware kit and installation.
- Mount the heavy-duty slides to the floor of the cabinet for maximum weight support.
- Choose removable plastic bins that are easy to wipe down and sanitize regularly.
Best shortcut: Buy extra bins so you can swap a full one for an empty one instantly.
52. Laundry Cabinet With Utility Sink
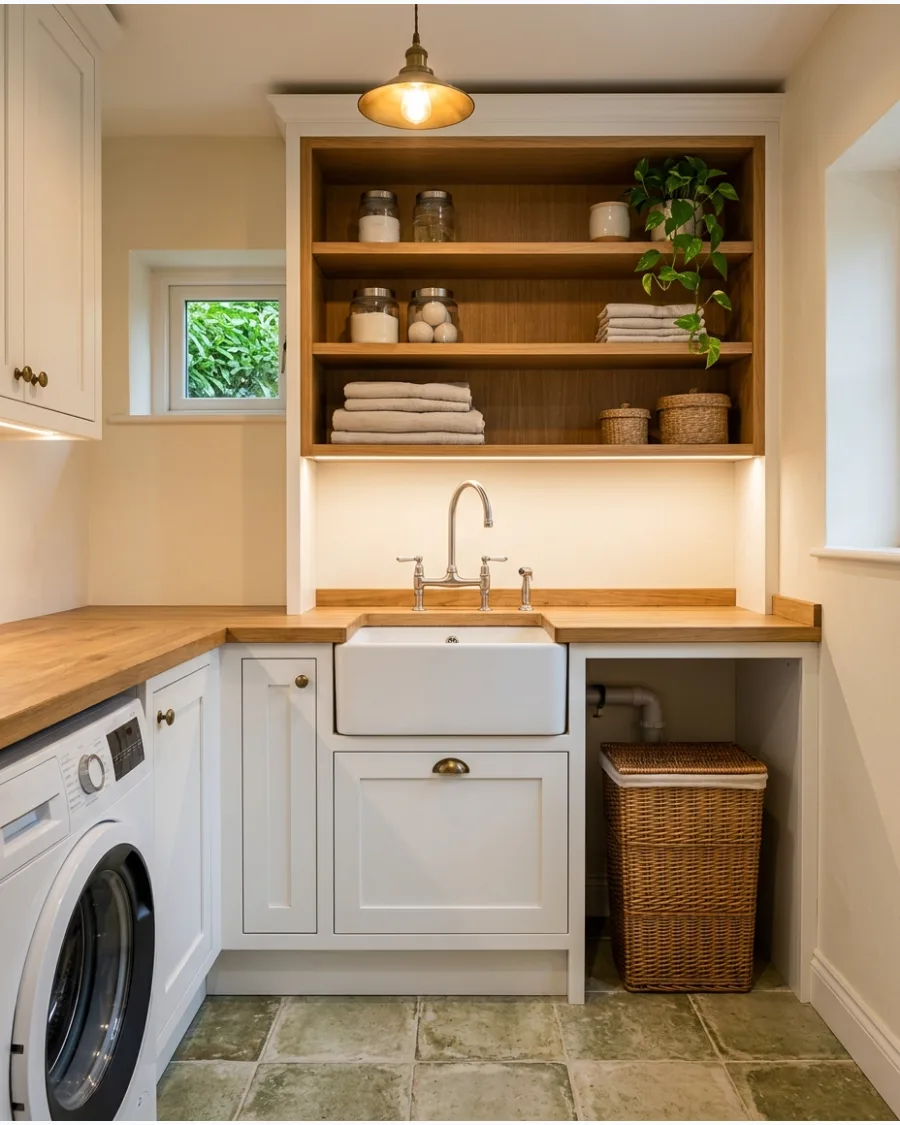
A built-in sink cabinet provides a dedicated spot for hand-washing delicates or pre-treating tough stains. Surrounding the sink with cabinets ensures that sponges and scrubbing brushes are always within reach but hidden from view.
Choose a deep stainless steel or fireclay sink that can handle large buckets and messy cleanup tasks. It keeps the mess contained in one durable easy-to-clean zone.
- Budget $400-$1,000 including the sink unit and plumbing labor.
- Ensure there is at least 18 inches of counter space on one side for drying wet items.
- Use waterproof cabinet liners inside the sink base to protect the wood from leaks.
Quick win: Install a pull-out sprayer faucet to make rinsing large buckets much easier.
53. Mudroom and Laundry Cabinet Combination
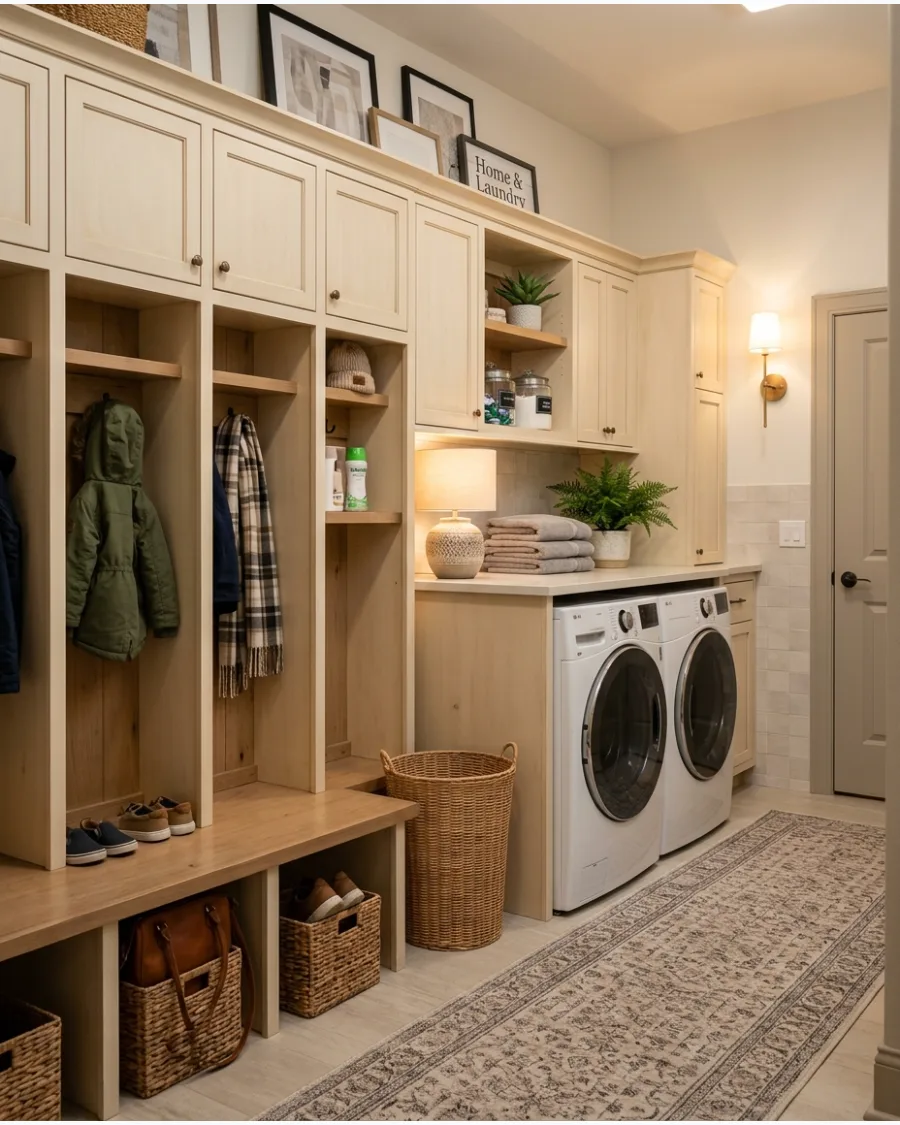
Combining laundry and mudroom storage creates a high-efficiency transition zone for the home. Large lockers or tall cabinets provide a spot for coats and shoes right next to the washer for easy cleaning of muddy gear.
Assign one vertical locker to each person to keep backpacks and sports equipment organized and off the floor. This works best in homes where the laundry room serves as the primary entrance.
- Budget $1,500-$4,000 for a full custom wall unit installation.
- Use heavy-duty hooks that can support the weight of wet winter coats and heavy bags.
- Choose a durable laminate or bench material that can withstand scratches from shoes.
Most people skip this: Add a power strip inside one locker for charging phones or flashlights.
54. Pet Station Laundry Cabinets
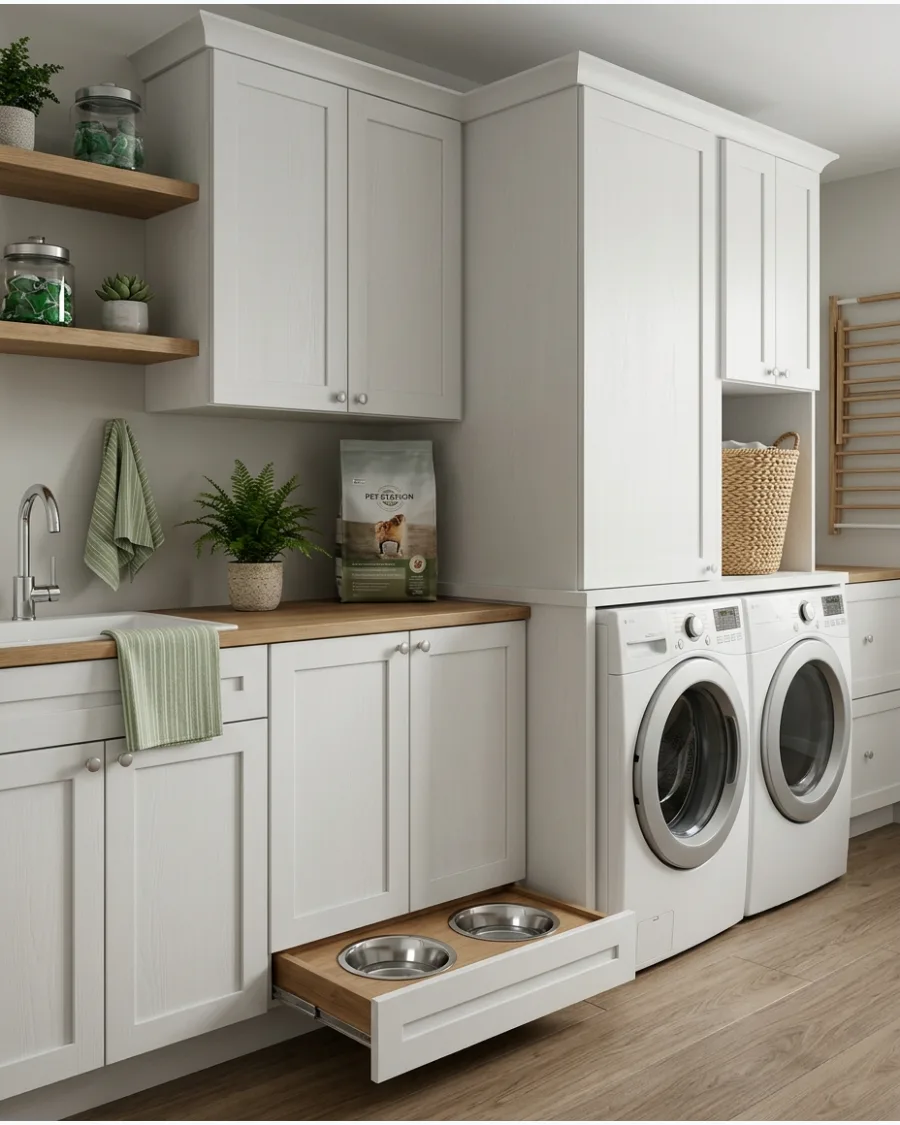
A dedicated pet zone in the laundry room keeps food bowls and grooming supplies from cluttering the kitchen. Pull-out drawers at the floor level can hold food and water bowls that slide away when the pets are finished eating.
Store large bags of pet food in a pull-out bin to keep the food fresh and the floor clear of bulky bags. It turns a utility space into a functional hub for the whole family.
- Budget $200-$500 for a custom drawer insert and hardware.
- Use a water-resistant sealer on the wood around the bowl cutouts to prevent rot from spills.
- Place this station away from the main walkway to avoid tripping over the drawer when it is open.
Best shortcut: Line the food drawer with a silicone mat for easy cleanup of spilled kibble.
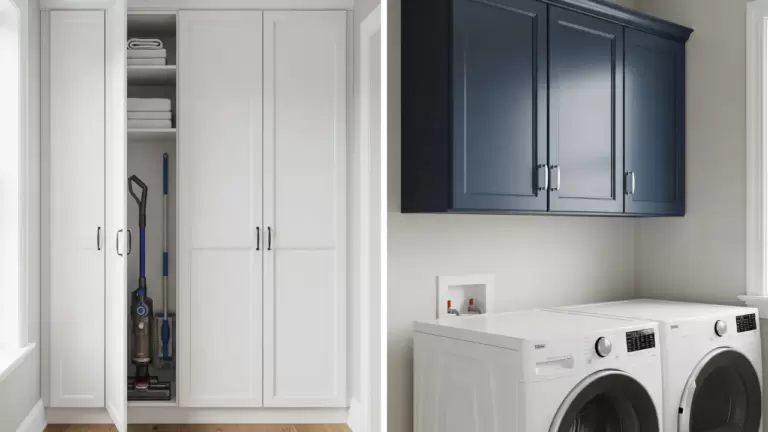
55. Cleaning Supply Cabinet With Tool Storage
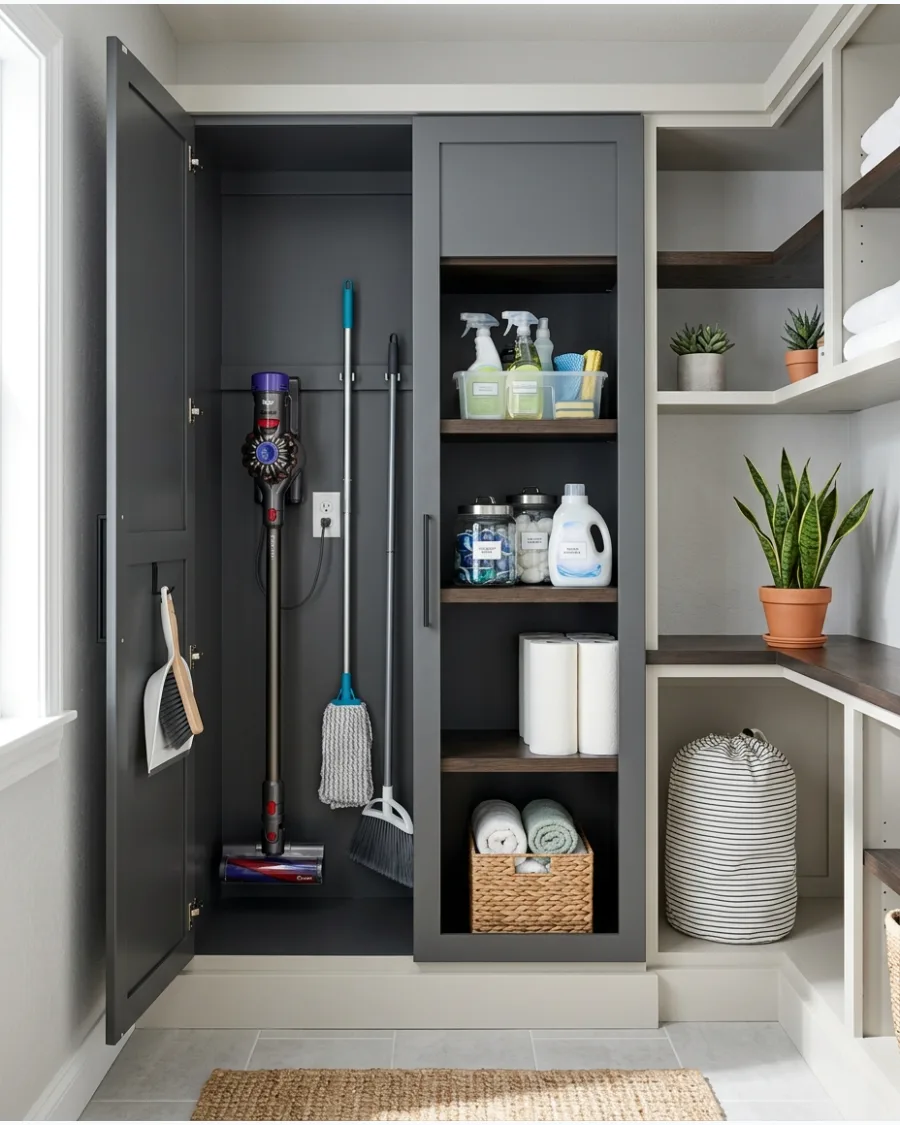
A tall narrow utility cabinet is the perfect home for long items like brooms, mops, and vacuum cleaners. Adding adjustable shelves on one side allows for organized storage of cleaning chemicals and rags.
Install an interior electrical outlet to create a hidden charging station for a cordless stick vacuum. It keeps the most used cleaning tools organized and ready for action at a moment's notice.
- Budget $300-$700 for the tall cabinet unit and interior organizers.
- Use wall-mounted grippers to keep brooms from falling over when the cabinet door opens.
- Group cleaning supplies into portable caddies so you can grab a whole set for a specific room.
Quick win: Stick a motion-sensor LED light inside the cabinet so you can see into the back corners.
Frequently Asked Questions
What is the best height for laundry room upper cabinets?
Standard installation is typically 18 inches above the countertop for front-load machines, but you should allow at least 24 inches of clearance for top-load lids to open fully. This ensures comfortable ergonomics while providing enough space to sort and fold laundry on the surface below.
Should I choose open shelving or closed cabinets for a laundry room?
Closed cabinets are excellent for hiding bulky detergent jugs and cleaning supplies to maintain a clutter-free look. Open shelving is a practical choice for frequently used items like towels or baskets, as it keeps essentials accessible and adds an airy feel to the room.
How do I add cabinets to a small laundry closet?
Maximize your vertical space by installing floor-to-ceiling cabinetry or using slim-profile units designed for tight footprints. Utilizing the area directly above the machines with custom-fit shelving can significantly increase storage without making the closet feel cramped.
What cabinet materials are best for high-humidity laundry areas?
Opt for moisture-resistant materials like high-quality thermofoil or marine-grade plywood to prevent warping from dryer heat and humidity. These durable surfaces are also much easier to clean if you happen to have a detergent spill or chemical leak.
Can I use stock kitchen cabinets for my laundry room?
Yes, using stock kitchen cabinets is a fantastic, budget-friendly way to get a high-end look using standard-sized units. Because they are readily available in various finishes, you can easily create a cohesive, custom-looking design that fits your specific laundry layout.