50 Scullery Kitchen Ideas

This post may contain affiliate links: full affiliate disclosure.
A scullery works best when it solves a specific pressure point: messy cleanup, crowded pantry storage, small-appliance clutter, or overflow prep during busy meals.
Use these ideas to compare layouts, finishes, and storage features, then keep only the elements that shorten your routine and fit the available footprint.
The most convincing spaces balance attractive details with clear counters, sensible door swings, and enough room to carry dishes safely between work zones.
As an Amazon Associate I earn from qualifying purchases.
Scullery Layouts and Entrances
Start with the route between rooms, because a beautiful scullery becomes frustrating when doors collide, groceries travel backward, or cleanup crosses the cooking zone.
1. Hide the Scullery Behind a Cabinet-Front Door
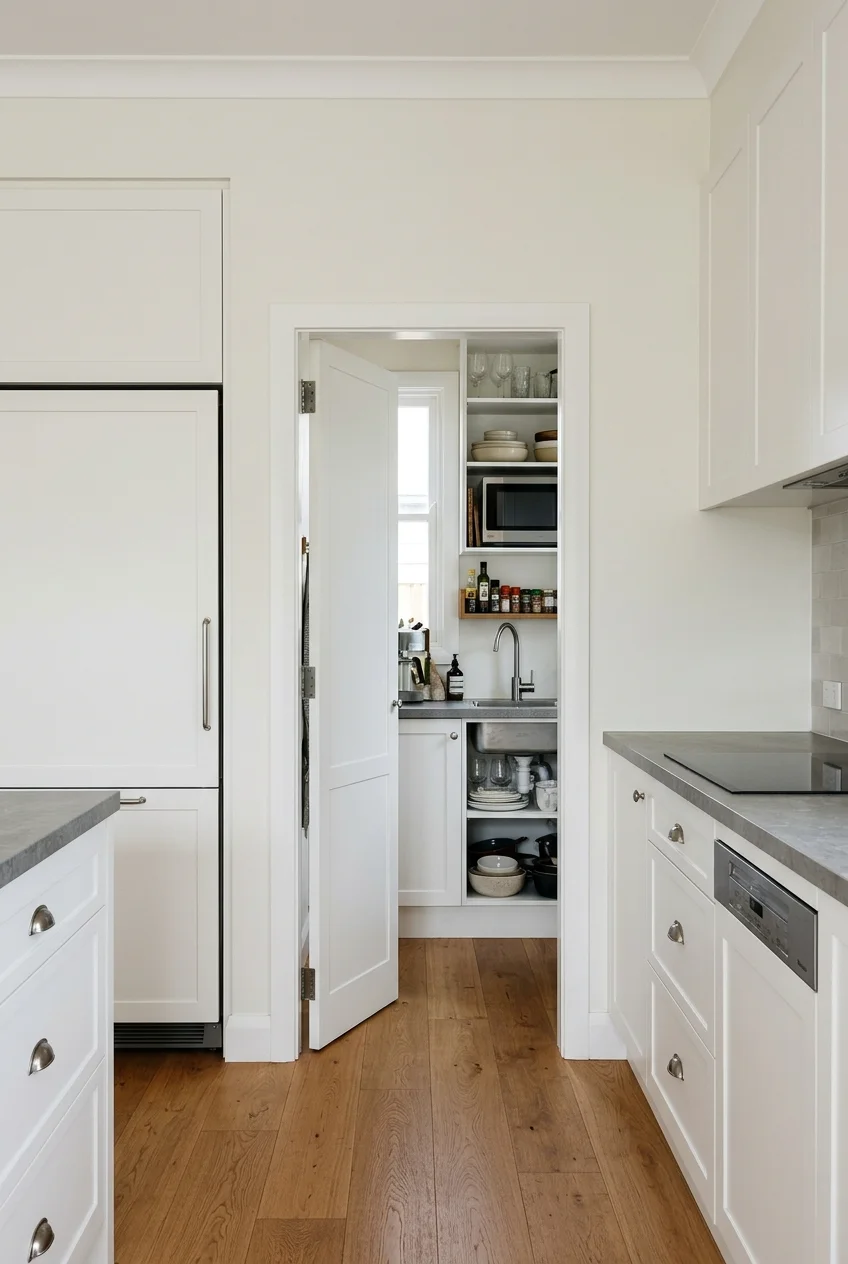
Continue the main kitchen cabinetry across the entrance so the closed door reads as another tall panel. Keep nearby handles and reveals visually consistent.
This works best when the opening sits away from major appliance doors. A flush effect still needs comfortable hardware, safe egress, and clear floor space.
Setup note Mark the hidden door clearly on construction drawings so electrical switches, trim, and cabinet fillers do not interfere with its full swing.
2. Use a Pocket Door Where Swing Space Is Tight
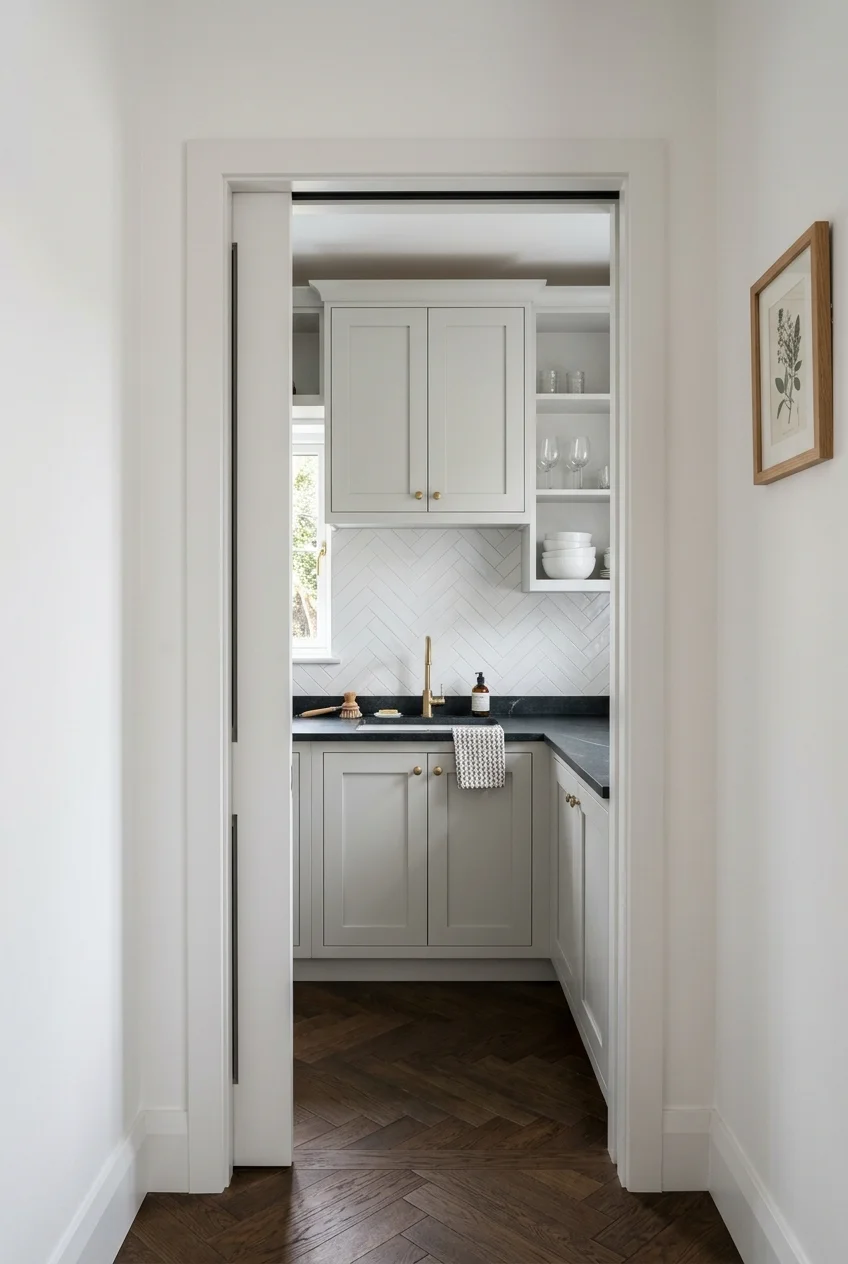
A pocket door can close off noise and dishes without occupying the narrow aisle. Choose it early, because the wall cavity cannot contain conflicting services.
Use a substantial pull that is easy to grip with damp hands. The open panel should disappear fully instead of narrowing the working entrance.
- Confirm the wall is wide enough for the full door slab.
- Keep plumbing, wiring, and blocking out of the pocket cavity.
- Plan accessible hardware before finalizing the door thickness.
3. Offset an Open Entrance From the Dining Sightline
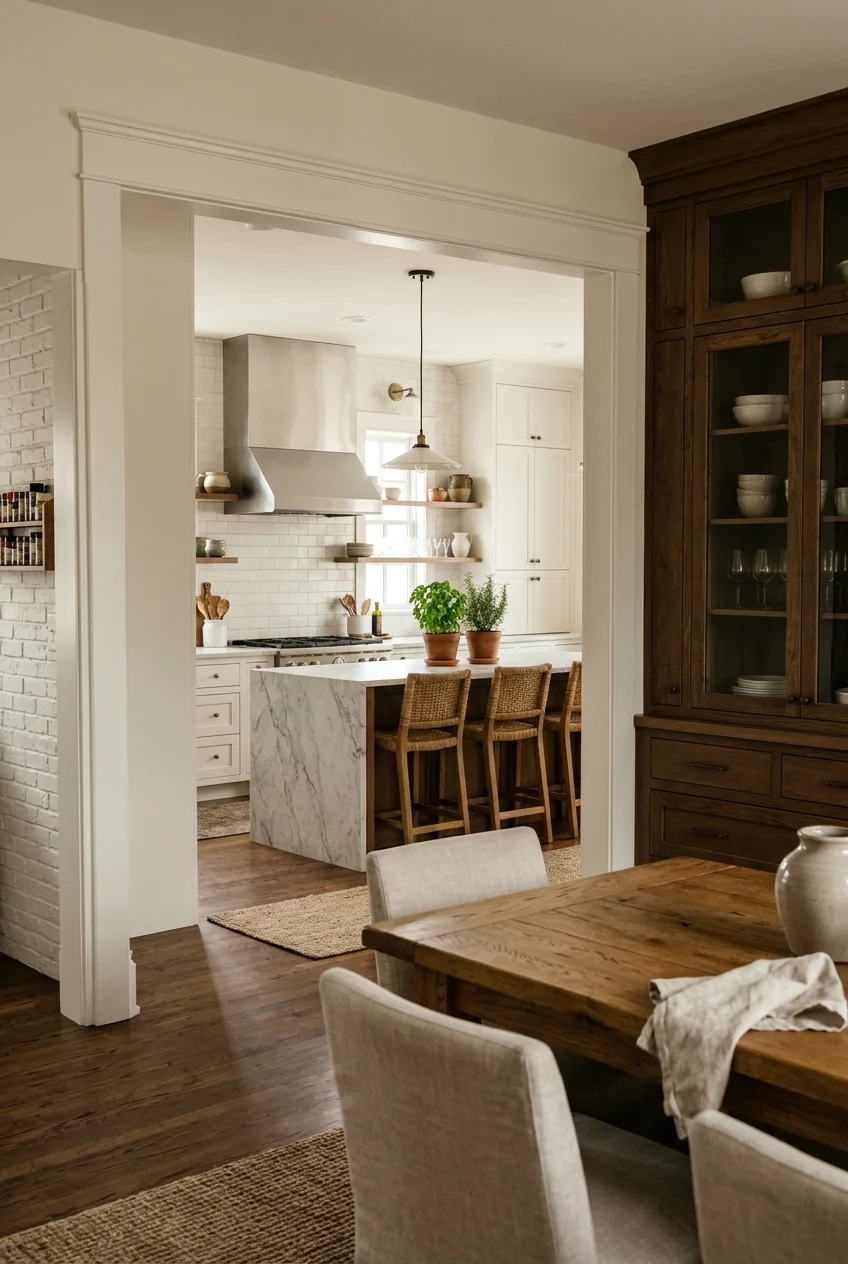
A doorless opening feels convenient when it faces the cook, yet it can still hide the sink from the dining area. Test views from seated eye level.
Use a short return wall or tall cabinet to screen the messiest counter. Avoid creating a blind corner where two people regularly meet carrying dishes.
4. Run a Galley Scullery Directly Behind the Kitchen
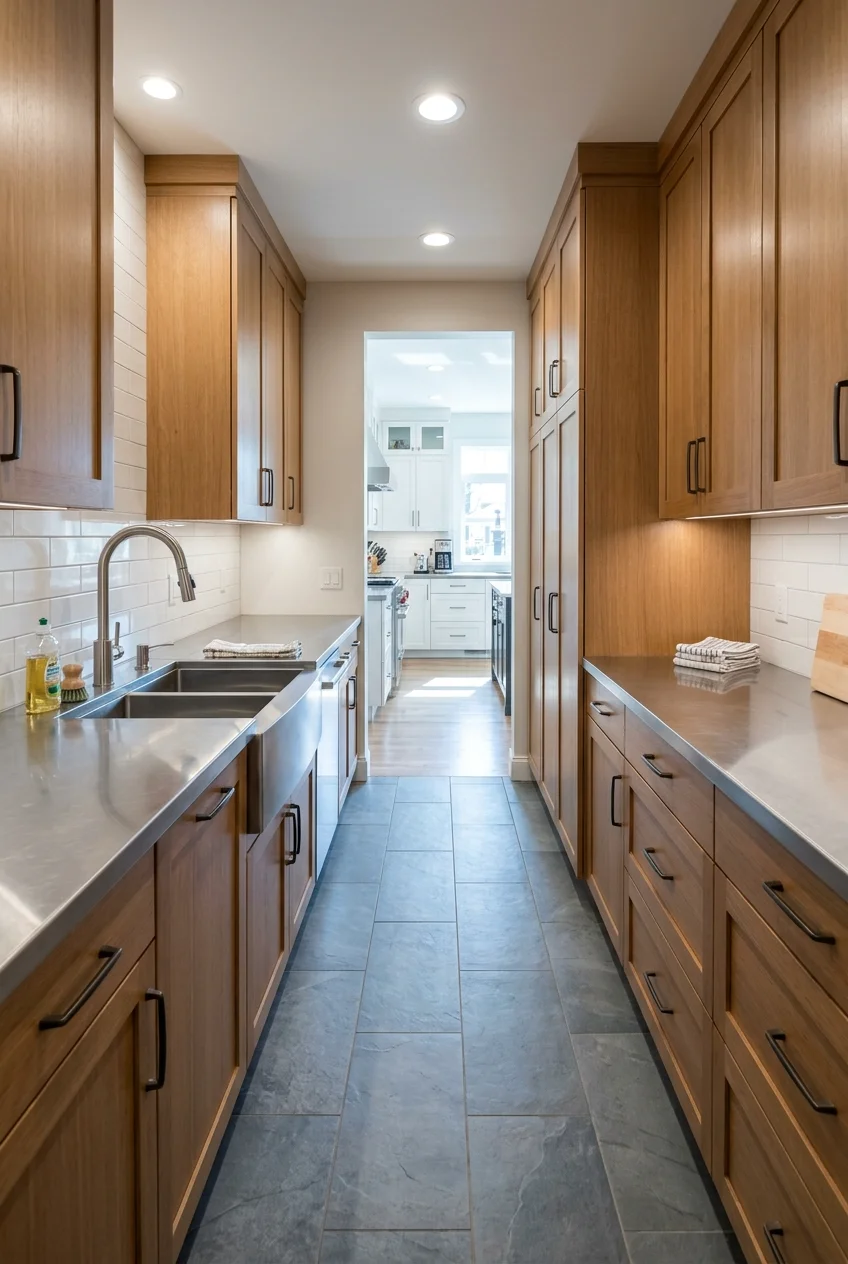
A narrow galley behind the main kitchen keeps prep and cleanup close while preserving a separate work zone. Place related stations back-to-back when plumbing allows.
Measure between opposing counter and appliance fronts, not cabinet boxes. NKBA recommends at least 42 inches for one cook and 48 inches for multiple cooks.
Check every dishwasher, refrigerator, and cabinet door on the plan. A generous center aisle can still fail when two open doors overlap its busiest point.
Map wet dishes, groceries, and food preparation as separate routes. The shortest connection is not helpful when each task repeatedly crosses another active station.
5. Build a One-Wall Scullery for a Shallow Nook
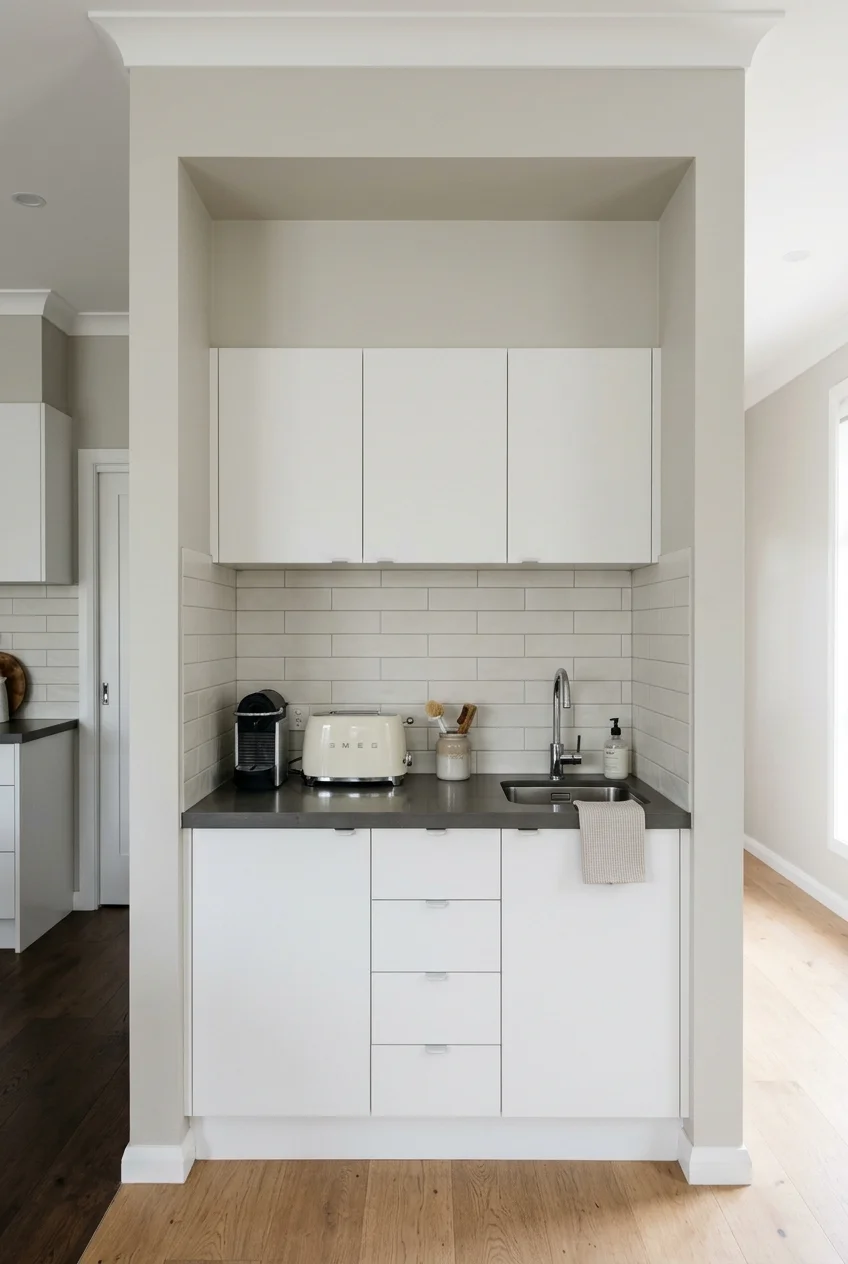
A single counter wall can deliver most scullery functions without a walk-in room. Group the sink, landing space, small appliances, and closed storage in sequence.
Keep the opposite side free for circulation rather than adding token shelves everywhere. A continuous worktop makes a slim setup feel deliberate and usable.
For more compact planning options, compare these small-kitchen storage solutions before filling the wall with permanent cabinetry that may crowd the available walkway.
6. Create a Walk-Through Grocery Route
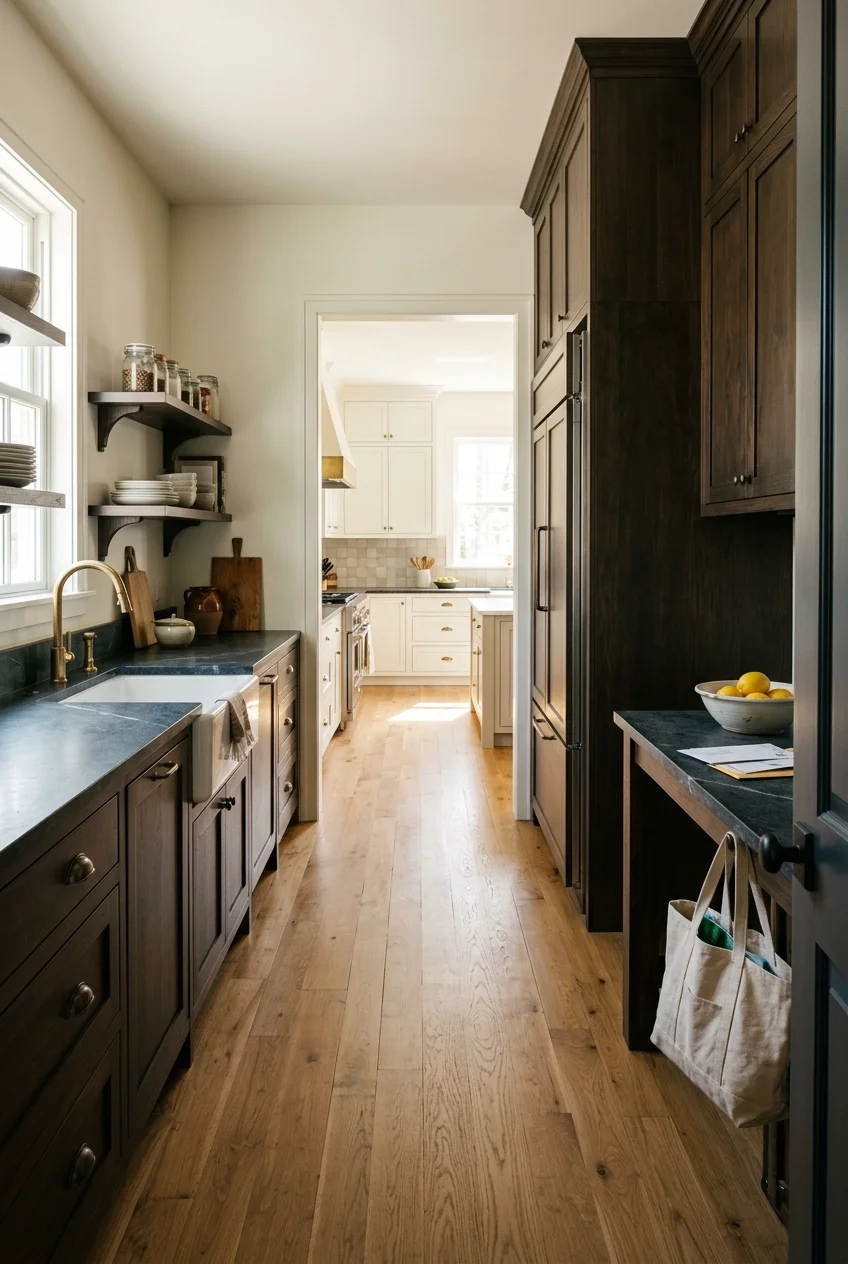
Connect the garage or mudroom side to the kitchen through the scullery, giving grocery bags a landing counter before food reaches pantry and refrigerator storage.
Keep the travel lane distinct from open appliance doors and active prep space. Daily traffic should not force someone between the sink and a hot surface.
- Place the landing counter nearest the entry.
- Store everyday pantry goods along the route to the kitchen.
- Keep cleaning supplies away from the grocery drop zone.
- Provide a direct, uncluttered path through both openings.
7. Wrap an L-Shaped Scullery Around a Corner
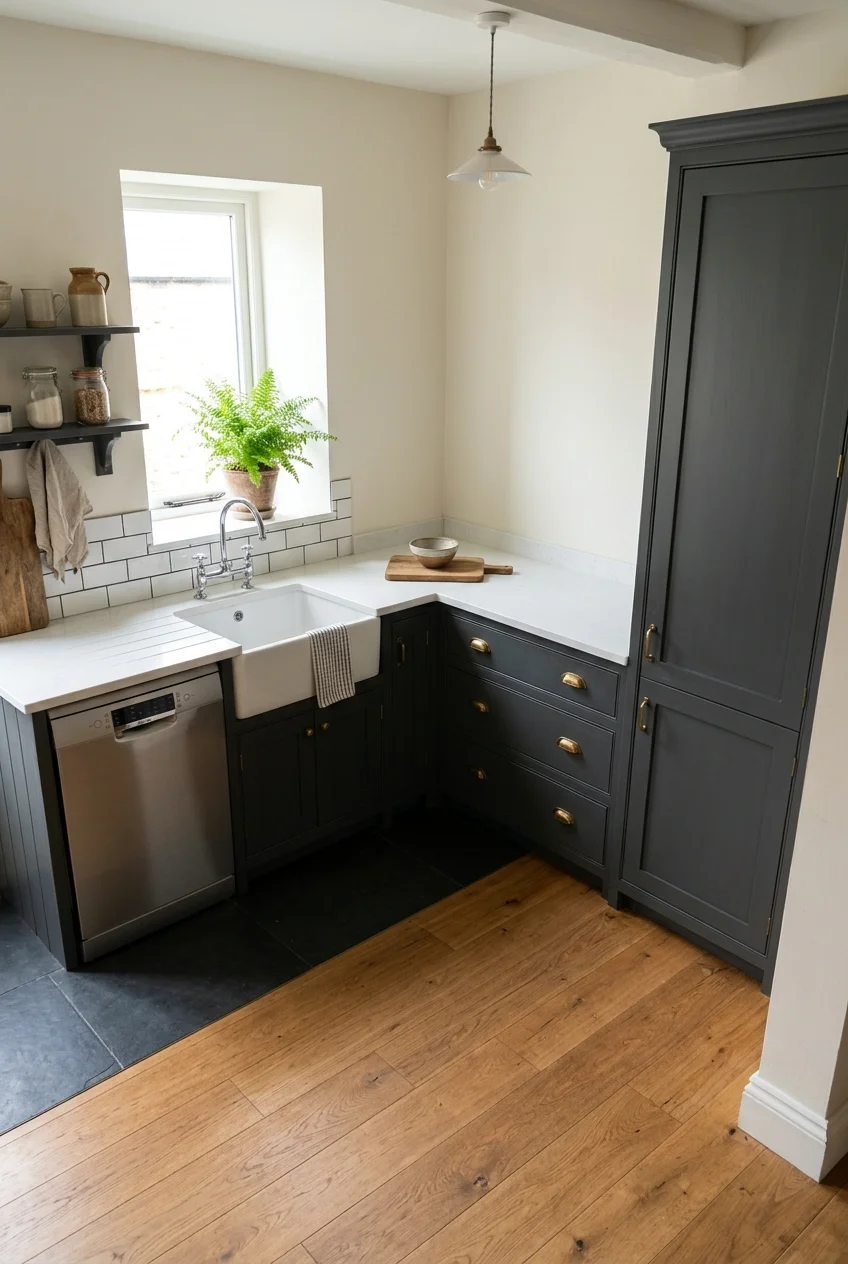
An L layout separates wet cleanup from dry storage without requiring two full opposing runs. Put the sink on one leg and pantry functions on the other.
Protect the inside corner from competing drawers and doors. A corner left partly open can provide more useful landing space than complicated hardware.
8. Use a U-Shape Only When the Center Stays Generous
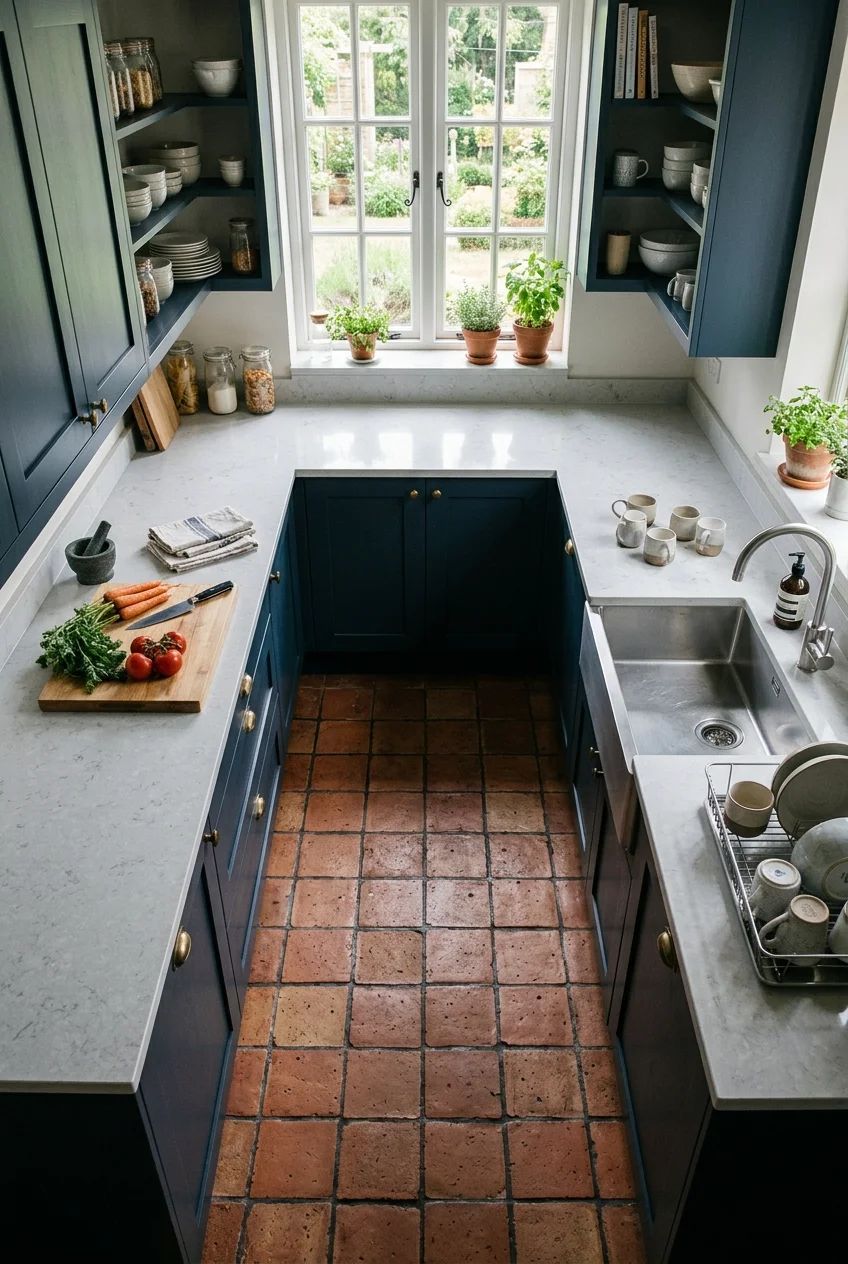
Three counter runs can add enormous capacity, but they also multiply corner conflicts. Reserve the back wall for the least interruption, such as open prep surface.
Model appliance doors and body positions before committing. If the center feels pinched, remove one short run and gain a calmer, more flexible galley.
Watch for A U-shaped plan needs turning room as well as standing room; local accessibility requirements and household mobility needs may demand additional clearance.
9. Choose Half-Glazed Doors to Borrow Light
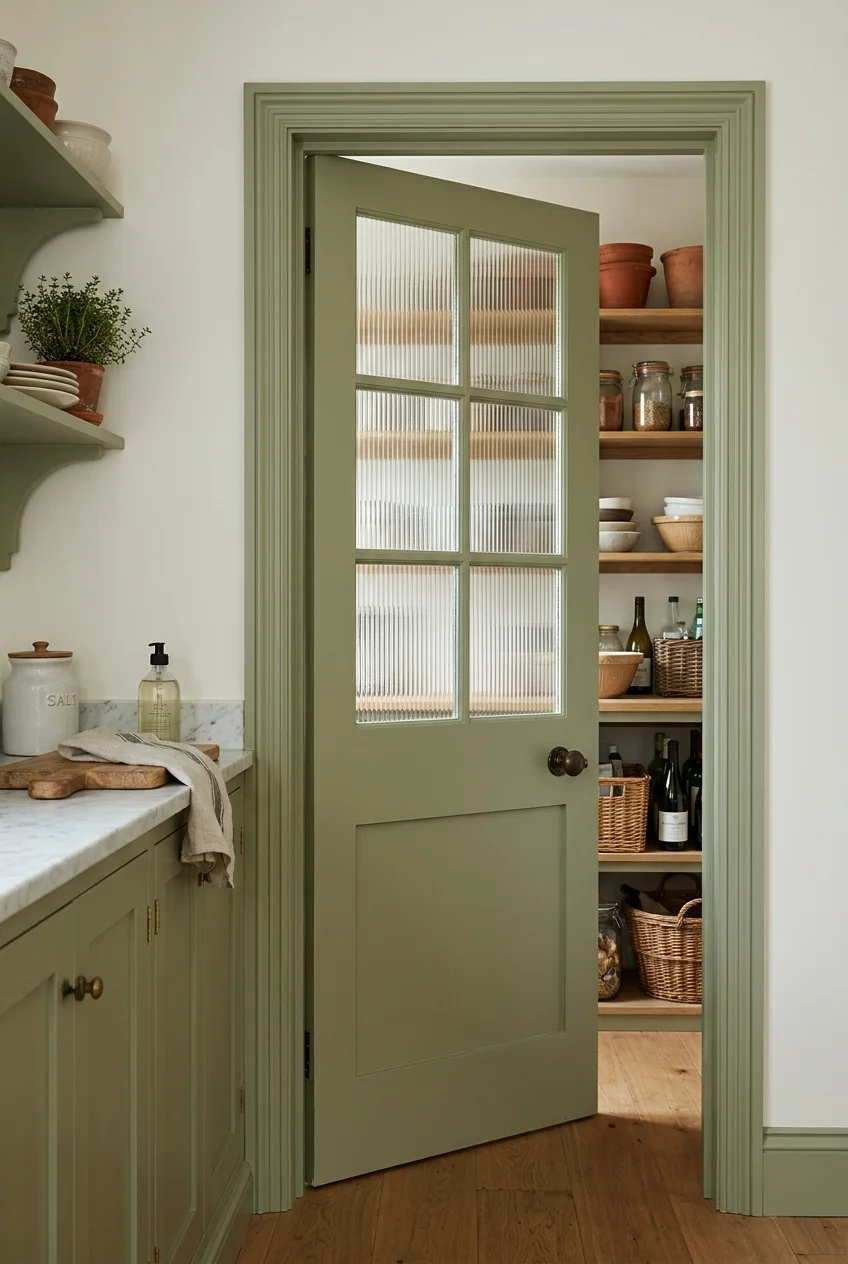
Glass in the upper half of a door shares light and depth while the solid lower panel screens floor-level storage. Reeded glass softens detailed views.
Align the glazing with nearby windows or cabinet proportions. Use safety glazing where required, and select a texture that still allows practical visibility.
10. Add an Interior Window Above the Counter
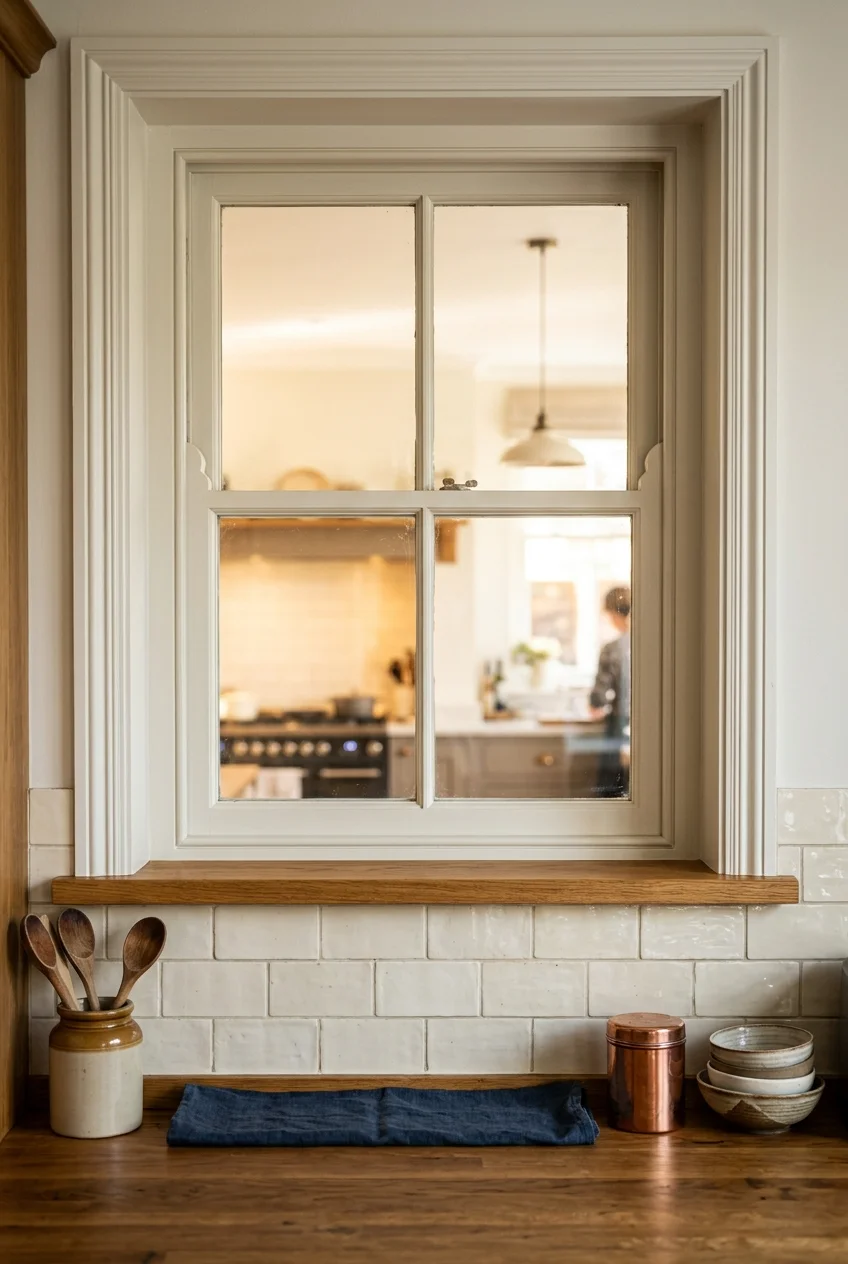
An interior window can make a windowless scullery feel connected without exposing every lower cabinet. Set the sill above the working backsplash and faucet spray zone.
Use the opening to share light, not to create an awkward pass-through unless serving is genuinely useful. Frame both sides with washable, finished trim.
Working Zones and Appliances
Decide which jobs truly move out of the main kitchen. A focused cleanup, baking, beverage, or prep zone usually works better than duplicating every appliance.
11. Center the Cleanup Zone on a Generous Sink
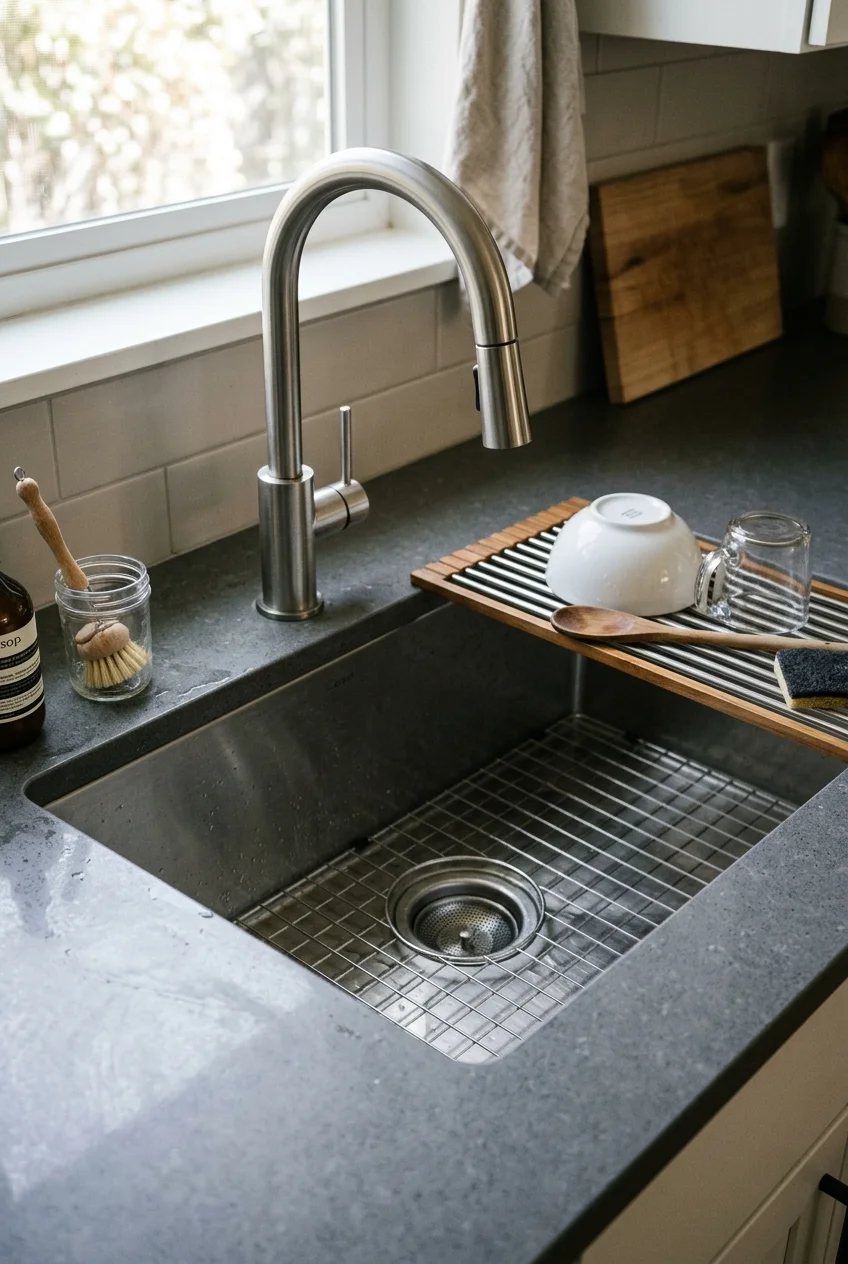
Choose a sink large enough for sheet pans and serving pieces, then preserve landing space on both sides. Depth matters only when the cabinet fits below.
Position the faucet outlet over the bowl, with the base fully supported by its mounting surface. Nearby dish storage shortens the unload-and-put-away route.
If delicate glassware is common, consider a removable basin mat and a dedicated drying area. Keep electrical outlets away from likely splash paths.
12. Place a Dishwasher Beside the Dish Storage
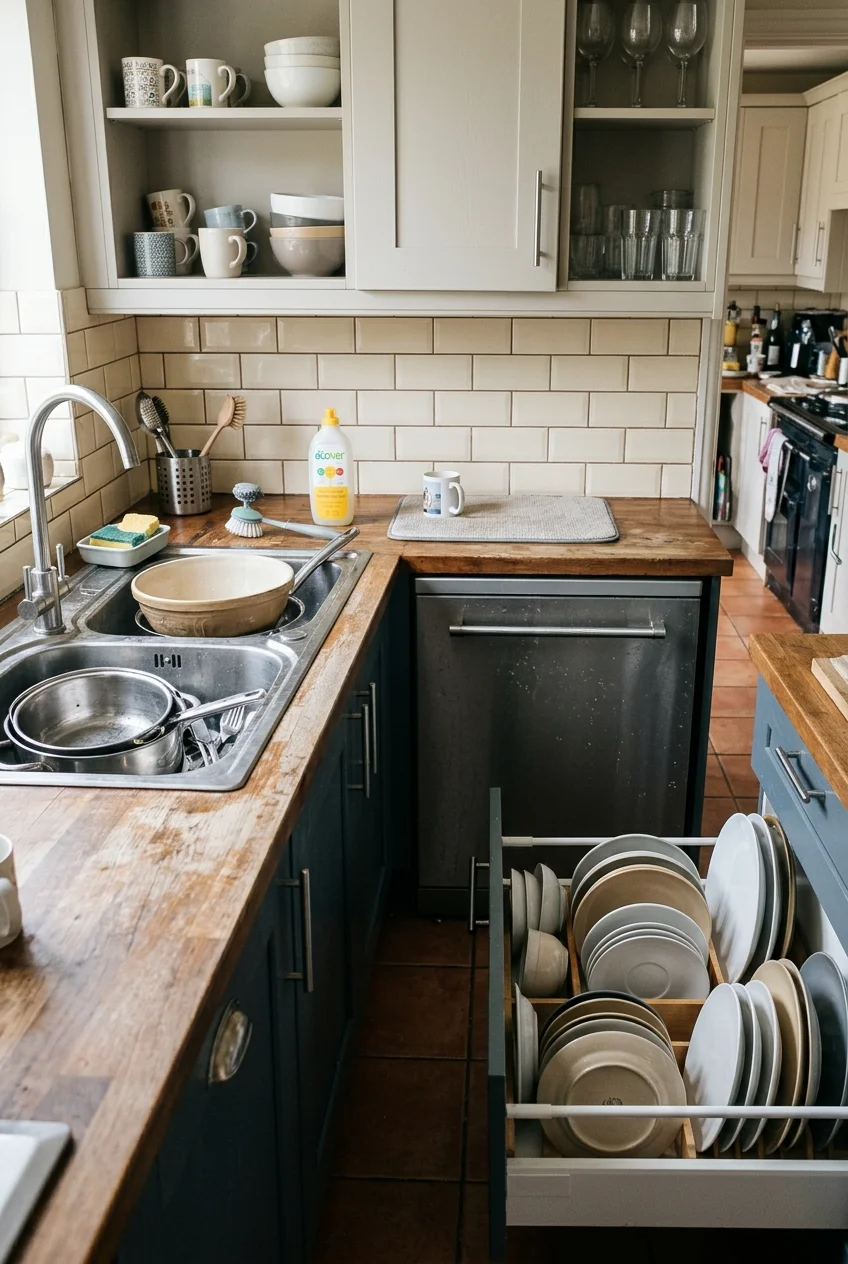
Put the dishwasher next to the cleanup sink and within an easy reach of everyday plates. The open door should not block the only exit.
Store dishes in drawers, a nearby cabinet, or a plate rack so unloading requires fewer turns. Confirm the machine can open without striking adjacent pulls.
- Open the dishwasher fully on the floor plan.
- Mark the standing position for unloading.
- Check the path to plate, glass, and flatware storage.
- Move conflicting drawers before cabinetry is ordered.
13. Give Countertop Appliances a Ready-to-Use Bay
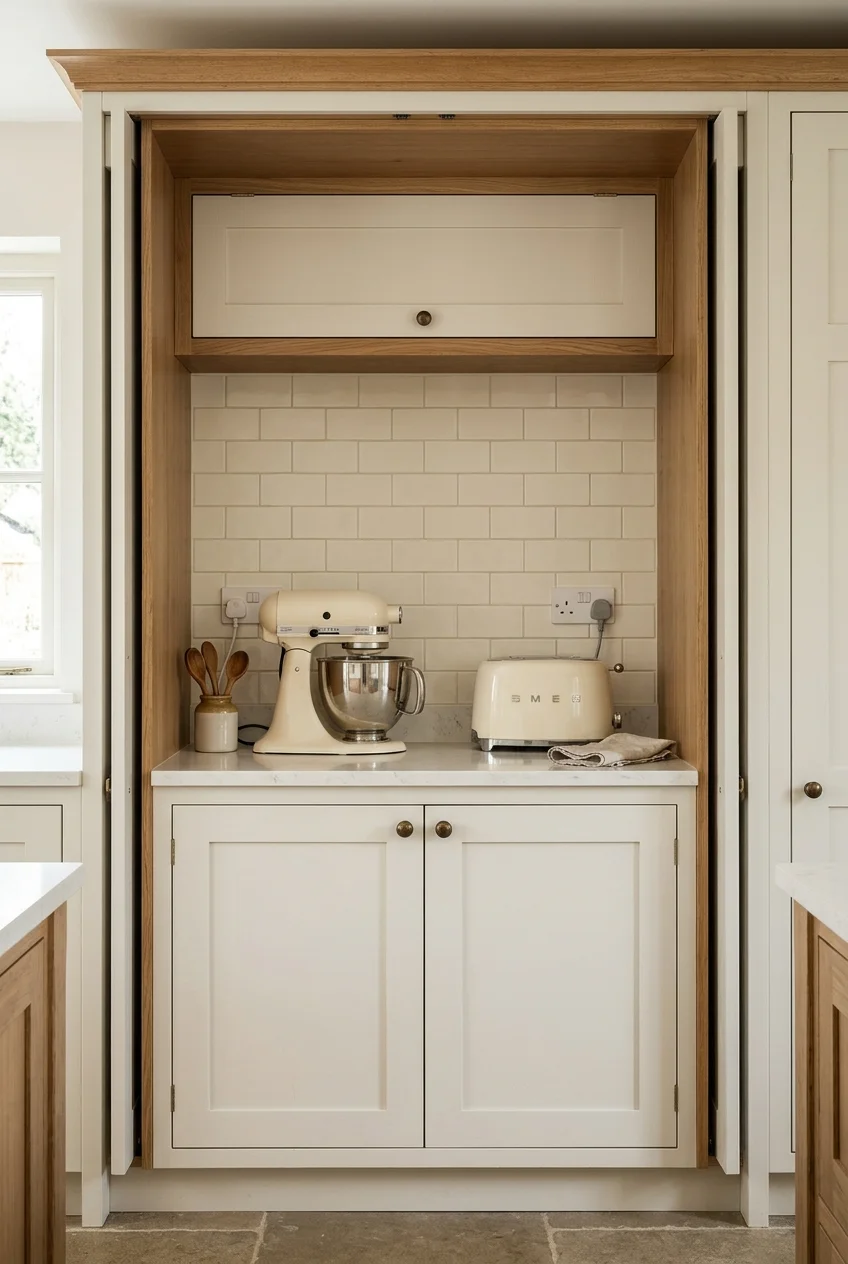
Dedicate one counter stretch to the mixer, blender, toaster, or air fryer used most often. Each appliance needs ventilation and clearance required by its manufacturer.
Provide outlets where cords reach without crossing the sink or walkway. Keep the bay open during use, even if pocket or lift-up doors conceal it later.
Setup note List appliance heights with lids raised and attachments installed; a closed-cabinet measurement can miss the clearance that daily operation actually requires.
14. Reserve a Baking Counter With Ingredient Drawers
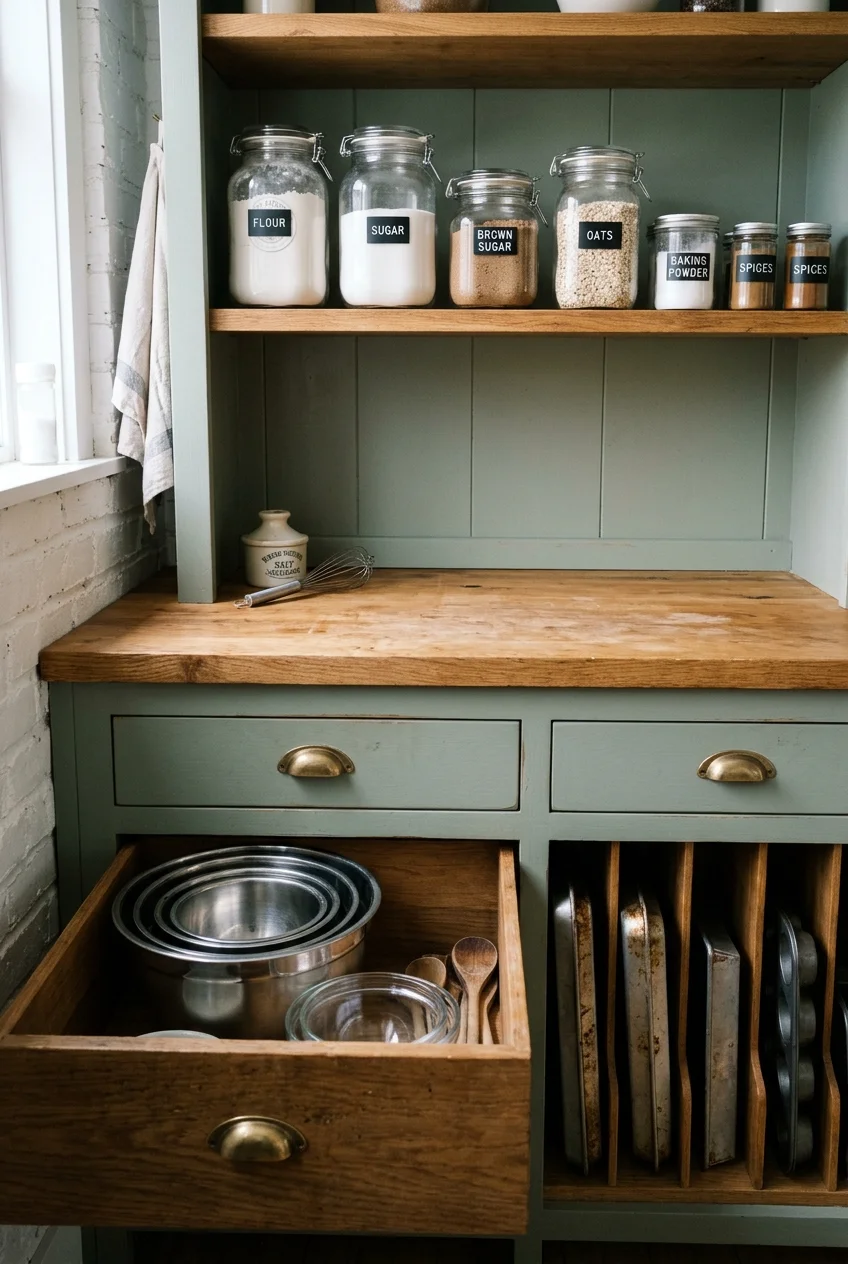
Keep flour, sugar, mixing bowls, and sheet pans around one uninterrupted counter. A slightly lower surface may help some bakers, but comfort varies by user.
Use deep drawers for heavy bowls and vertical dividers for trays. Store ingredients away from steam, direct heat, and any cleaning chemicals sharing the room.
- Mixing tools in the top drawer
- Bowls and scales below the counter
- Sheet pans in a vertical divider
- Dry ingredients in sealed, reachable storage
15. Set Up a Coffee and Breakfast Station
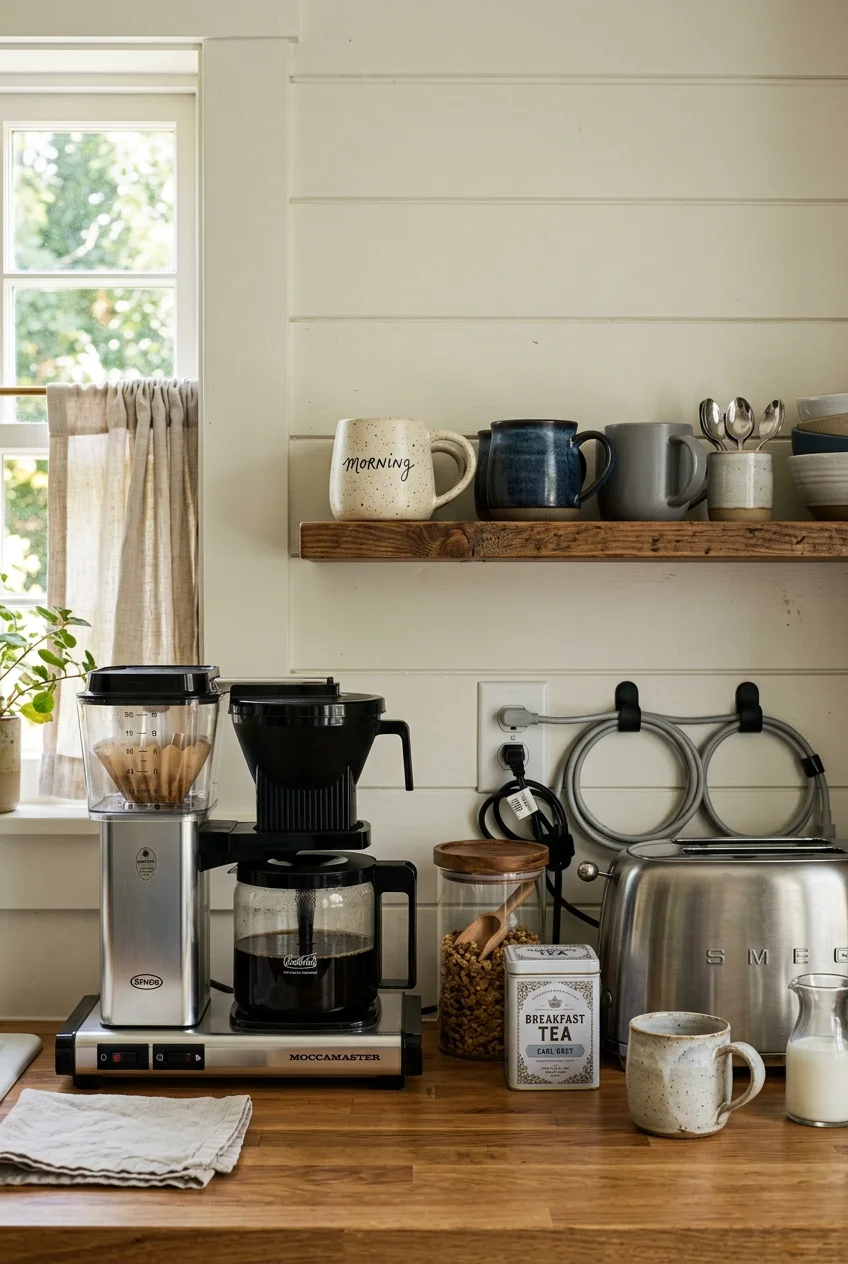
Group the coffee maker, mugs, tea, cereal, and toaster where morning traffic avoids the main cooking zone. Include nearby water access only when plumbing is practical.
A shallow drawer handles spoons, filters, and packets better than a deep cabinet. Leave counter space for pouring instead of surrounding appliances with decorative storage.
16. Create a Produce-Washing and Prep Zone
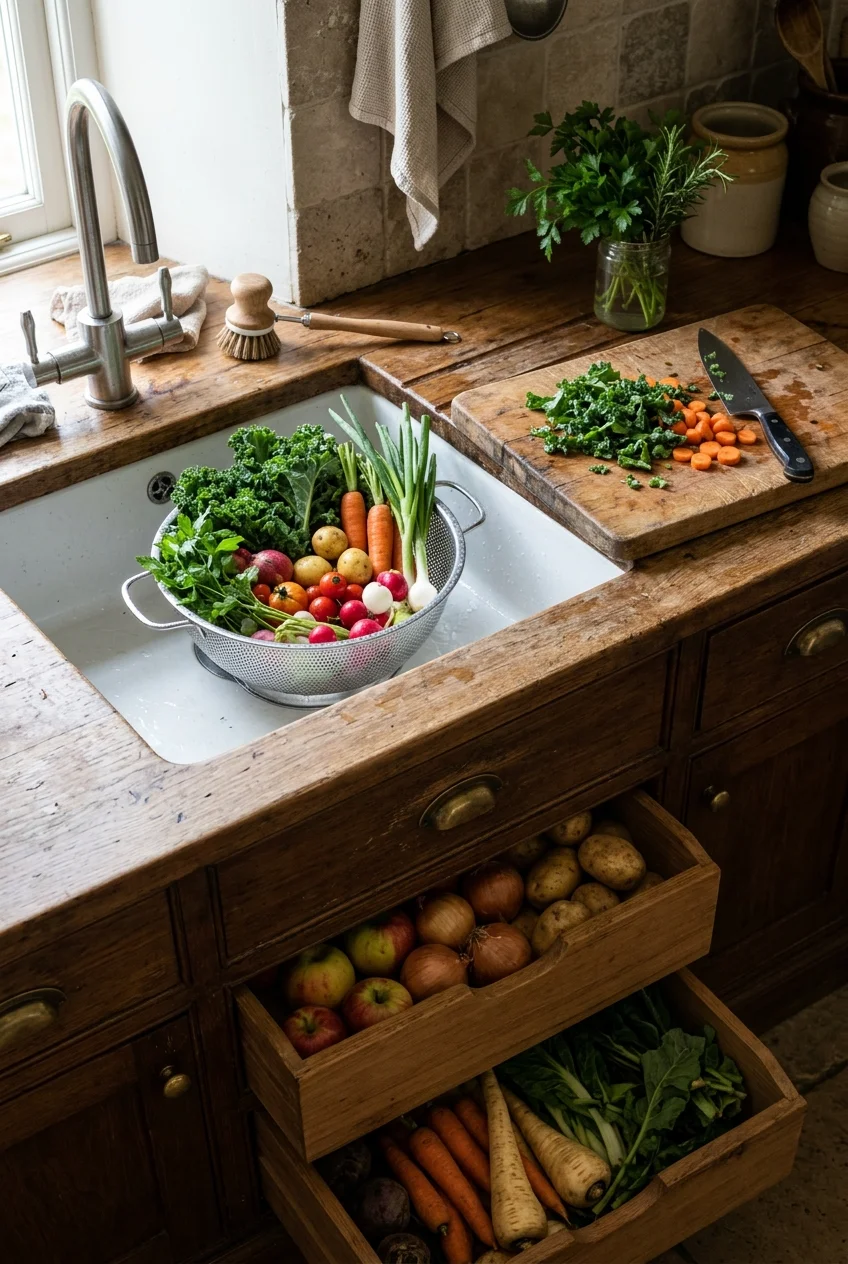
Place a colander-friendly sink beside a durable cutting surface and food-storage drawers. This zone should shorten the route from groceries to washing, trimming, and refrigeration.
Keep compost or food-scrap collection below the prep surface, separate from clean produce. Use a removable board rather than bridging the sink permanently during washing.
17. Pull Trash, Recycling, and Compost Into One Cabinet
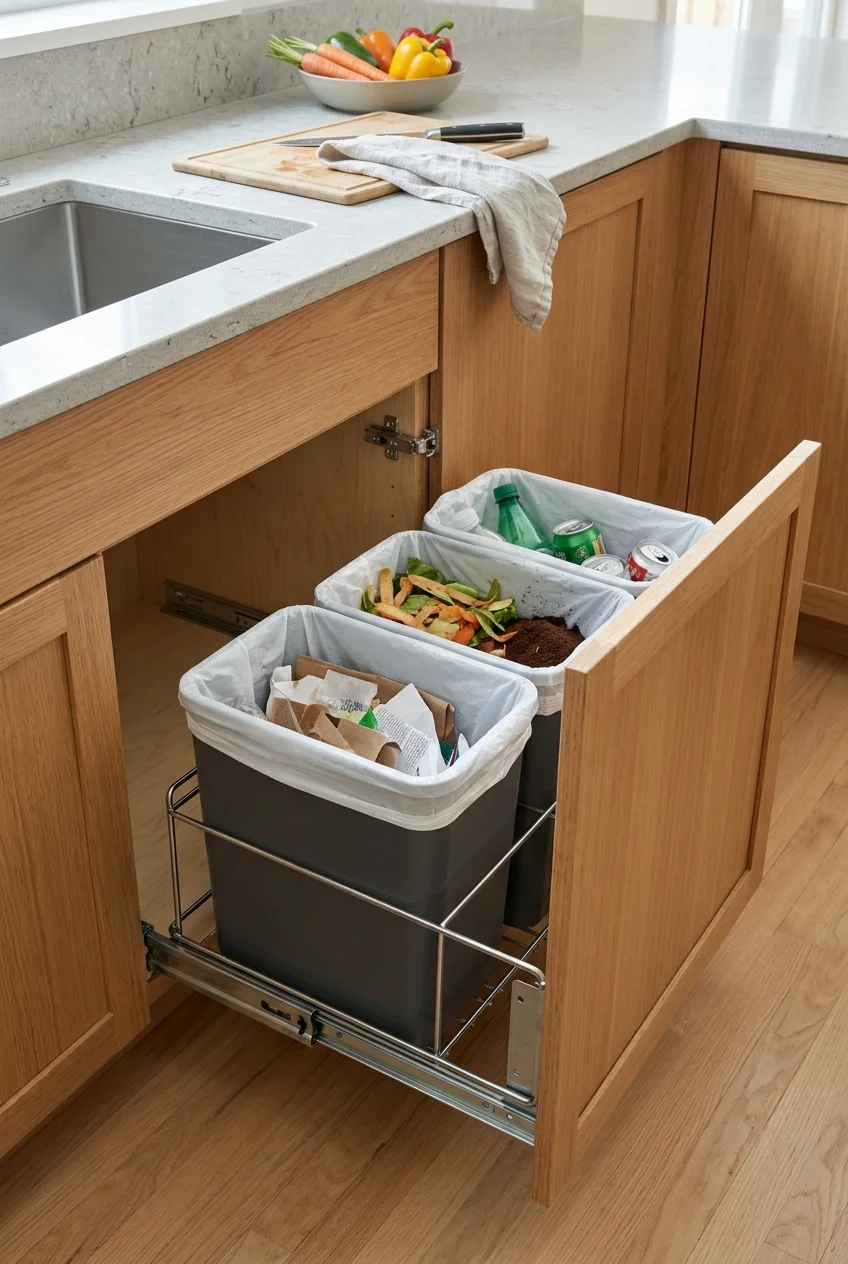
A divided pull-out near the prep and cleanup zones keeps waste handling contained. Size bins for the household rather than maximizing capacity that becomes difficult to lift.
Leave enough clearance for lids and drawer hardware, and plan a washable cabinet interior. Local recycling rules determine whether additional sorting compartments are useful.
18. Add Cold Storage for Overflow, Not Duplication
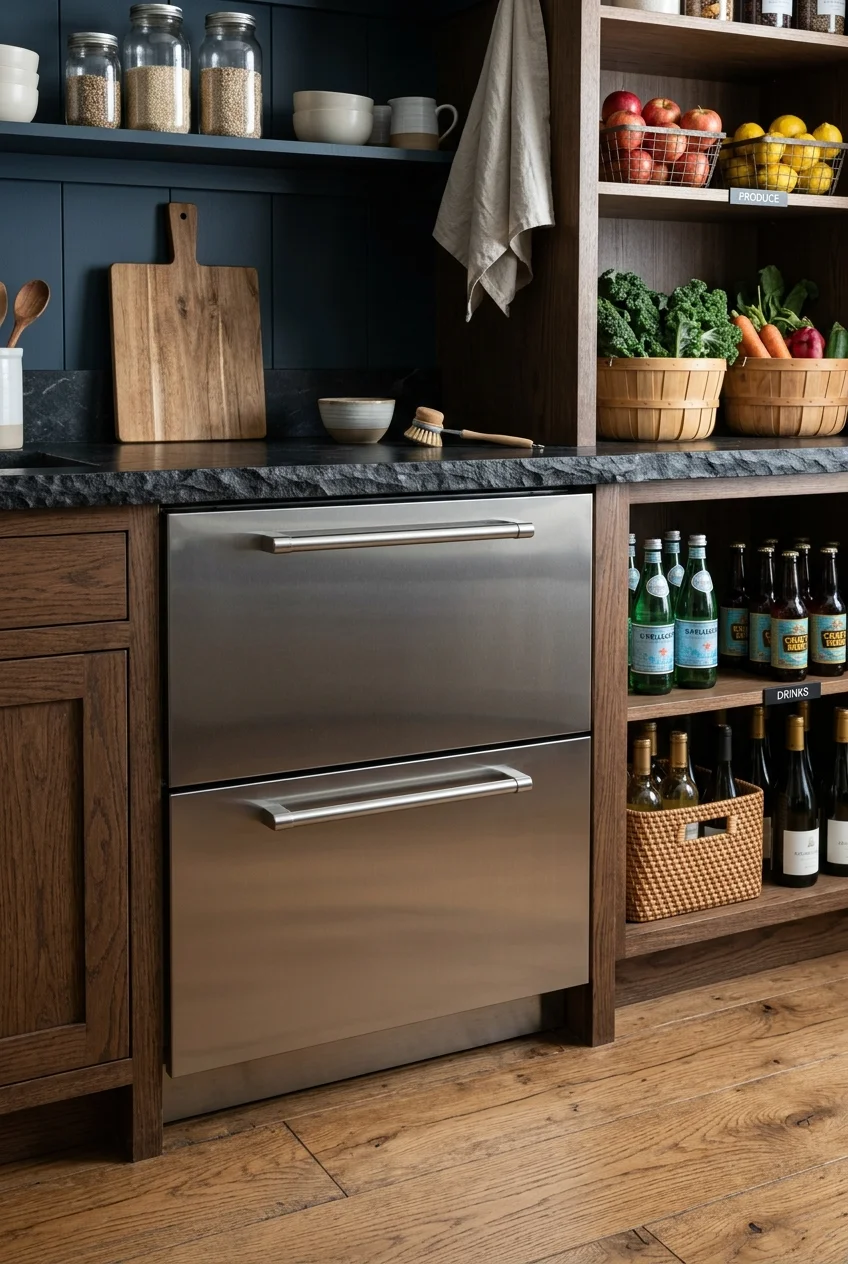
A refrigerator drawer or compact second fridge can hold party drinks, baking ingredients, or produce overflow. Define its job before surrendering valuable base-cabinet space.
Keep ventilation clear and verify door or drawer movement in the aisle. Storing everyday essentials too far from the main kitchen can increase unnecessary steps.
19. Vent a True Cooking Zone Correctly
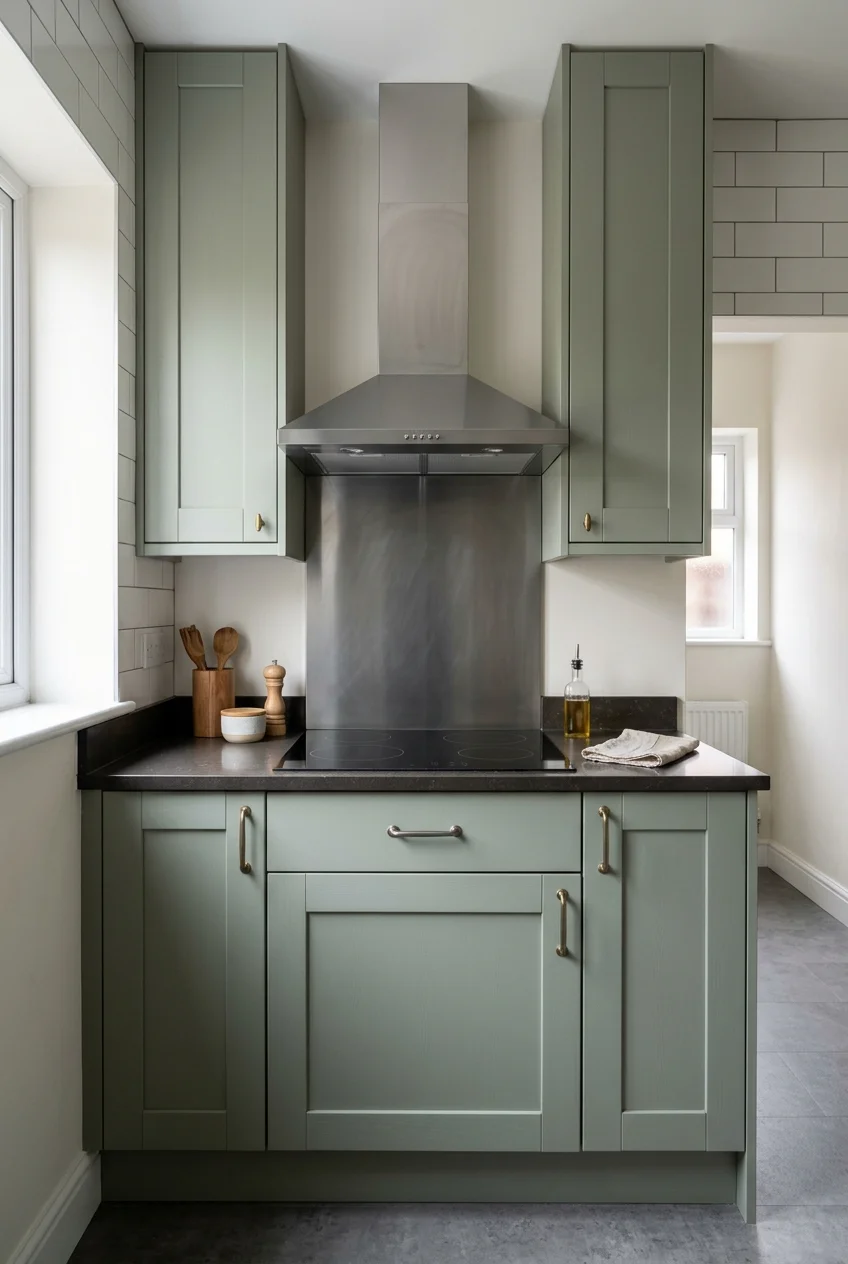
Moving frying or simmering into the scullery requires more than adding a cooktop. Plan compliant ventilation, makeup air when required, clearances, and heat-safe surrounding materials.
Keep the cooking surface away from traffic and combustible storage. A designer, appliance manufacturer, and qualified trades should resolve local requirements before cabinetry is finalized.
Decide whether the room supports light reheating or regular high-heat cooking. That choice changes ventilation, electrical or gas service, fire protection, and cleaning needs.
Preserve counter space beside the appliance for hot pans and ingredients. A crowded cooking wall can shift risky carrying and cooling tasks back into the aisle.
Watch for A decorative fan or recirculating unit may not handle the intended cooking load; match the ventilation approach to the appliance and local code.
20. Combine Laundry Only When the Workflows Can Separate
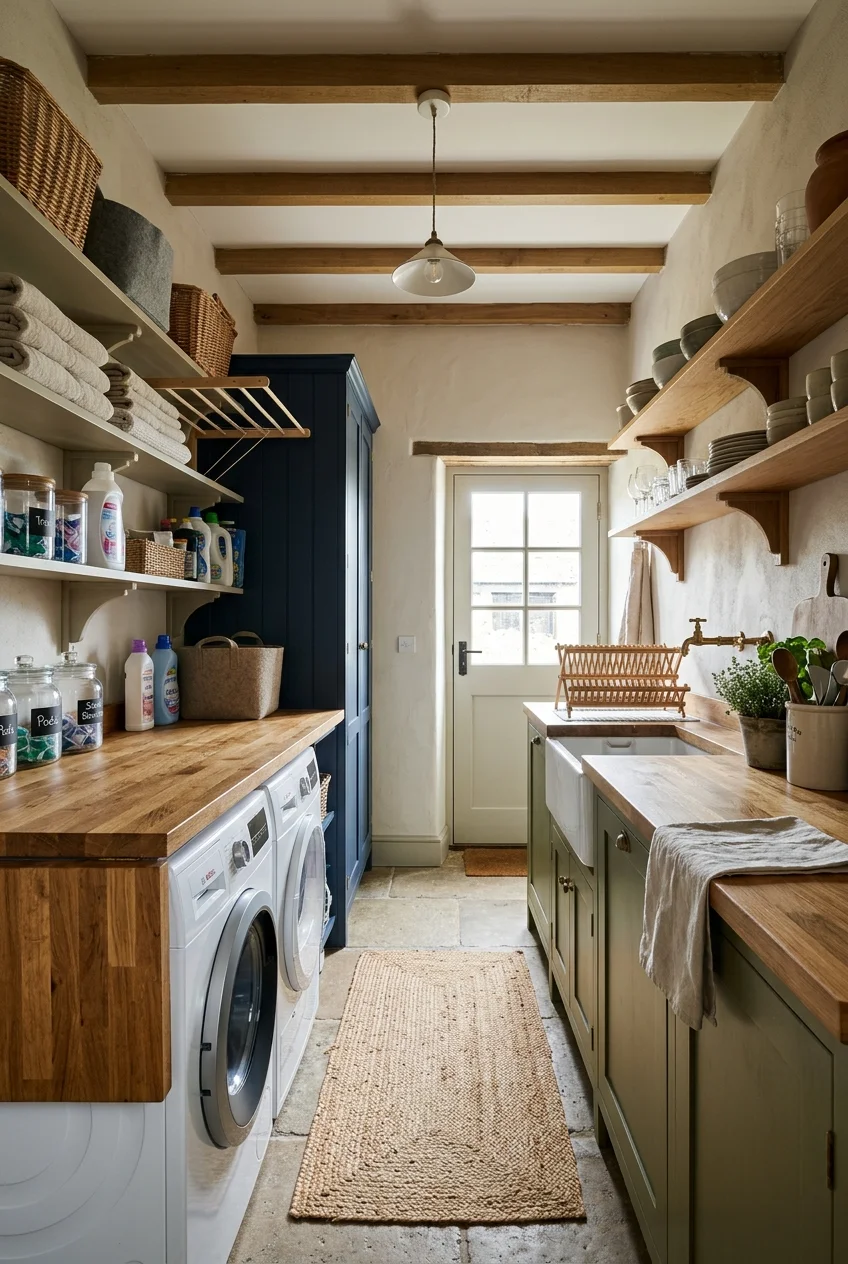
A washer and dryer can share a large scullery, but laundry baskets should not occupy food-prep counters or block pantry and dishwasher access.
Place machines behind doors or under a separate folding surface, with detergent stored away from food. Confirm ventilation, drainage, and manufacturer clearances independently.
If the room is narrow, prioritize the kitchen function and relocate laundry. Two crowded work zones usually create more clutter than either solves.
Plan separate baskets and landing areas so clean textiles never occupy the sink counter. A closed door cannot compensate for overlapping daily routines.
Storage That Earns Its Space
Storage should match what the scullery actually handles. Shallow shelves help small items, deep drawers support heavy equipment, and mixed fronts control visual clutter.
21. Use Shallow Shelves for Everyday Ingredients
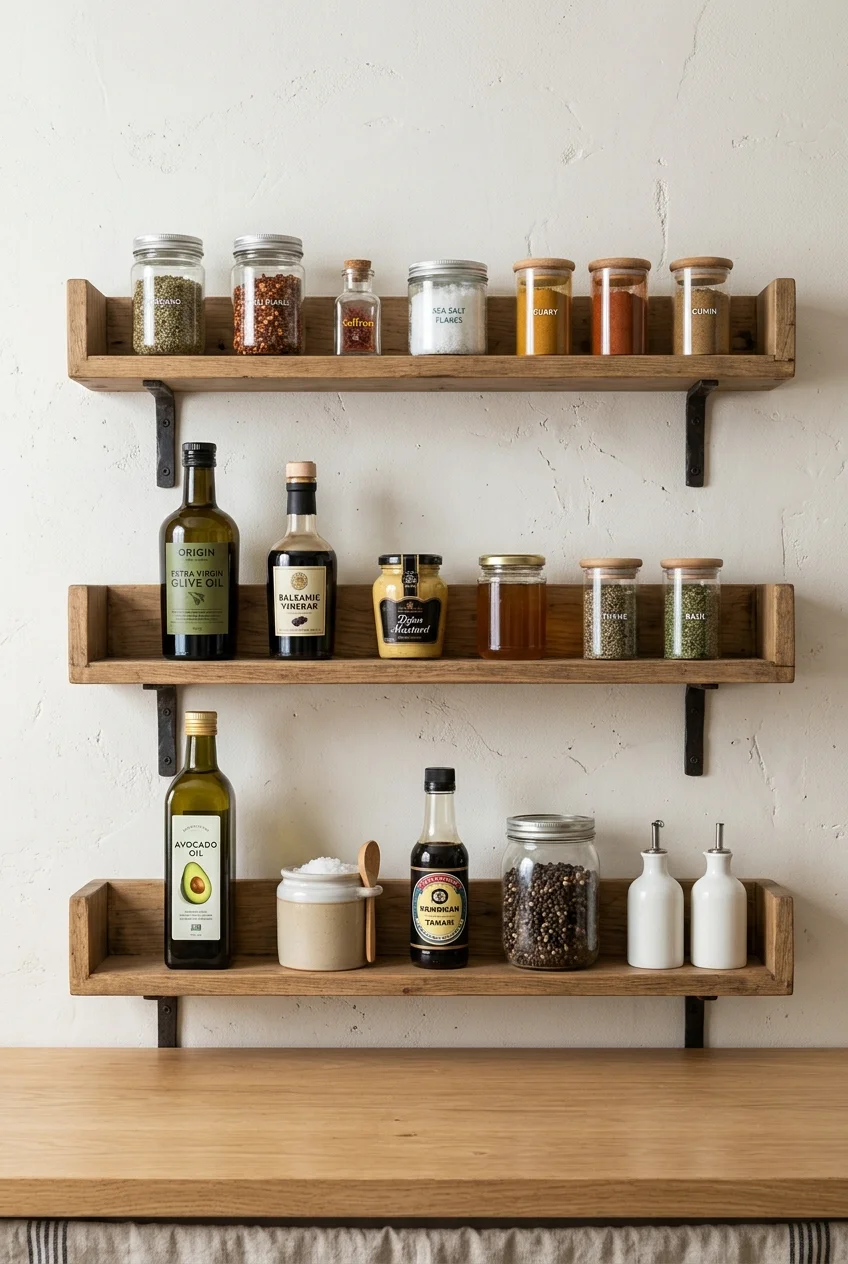
Shelves one item deep keep oils, spices, and jars visible without creating a forgotten back row. Match depth to the largest regularly used container.
Position heavier bottles between waist and shoulder height. Open storage near cooking needs regular wiping, so avoid placing it where steam or grease accumulates.
For additional shelf arrangements, review these pantry shelving ideas and adapt only the options that fit your inventory, reach, and available wall depth.
22. Run Closed Cabinets to the Ceiling
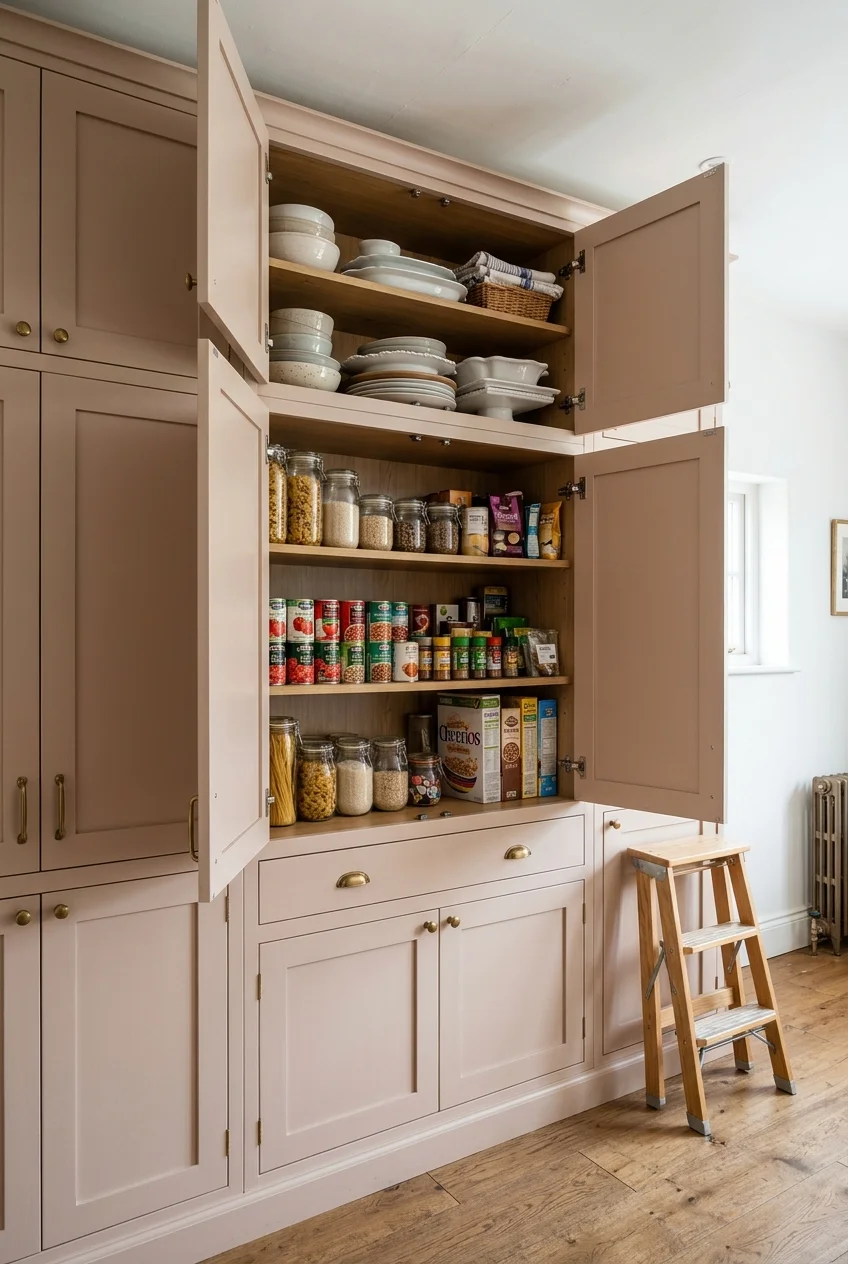
Tall closed cabinets absorb bulk food, seasonal serving pieces, and visual clutter. Divide the interior by frequency so everyday items remain reachable without a stool.
Use the highest shelves for lightweight, rarely needed pieces rather than heavy appliances. Secure tall cabinetry appropriately and keep a safe step stool nearby.
23. Install a Plate Rack That Also Dries Dishes
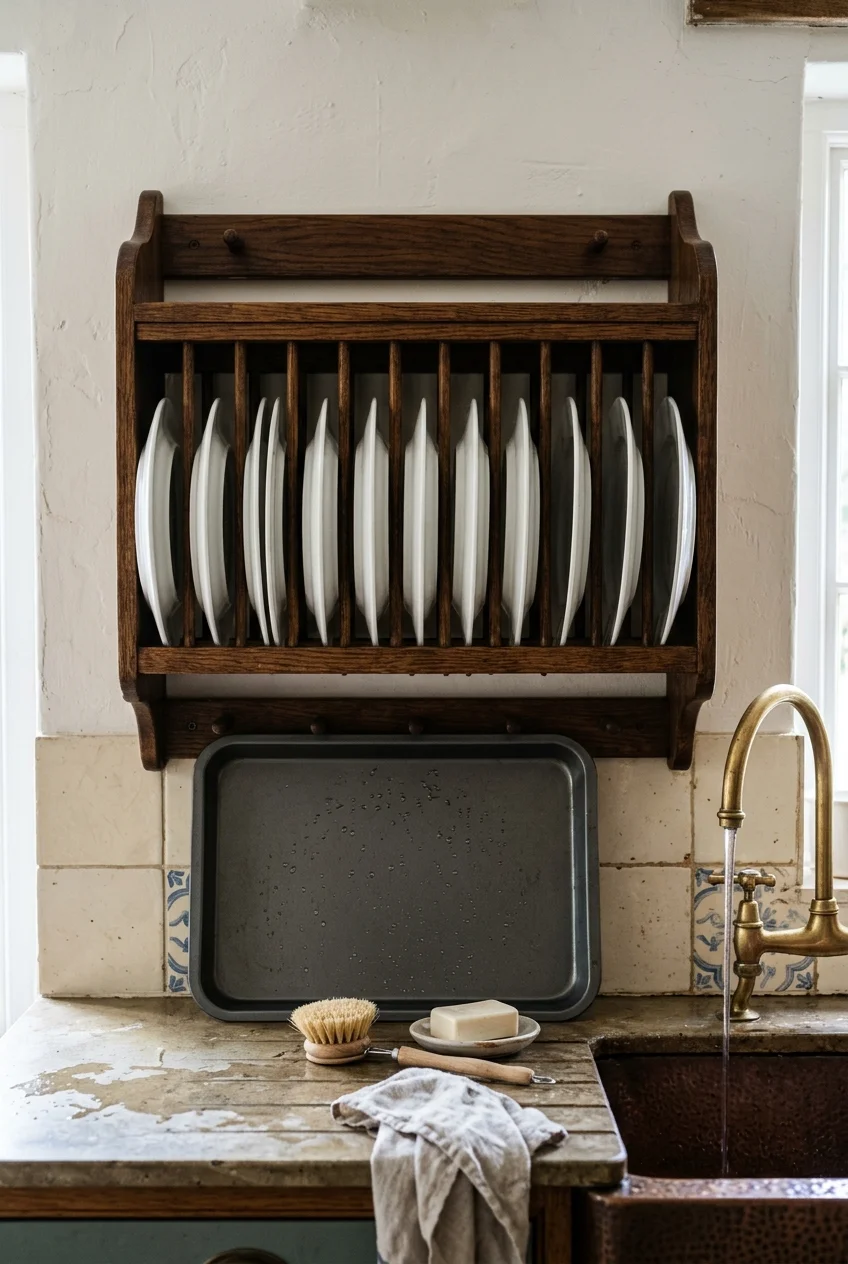
A wall-mounted plate rack near the sink keeps everyday dishes visible and shortens unloading. Choose slot spacing for the actual plates, including thicker handmade pieces.
If wet dishes will enter the rack, provide a washable drip surface below and use moisture-tolerant finishes. Decorative racks alone may lack suitable drainage.
24. Stand Trays and Cutting Boards Upright
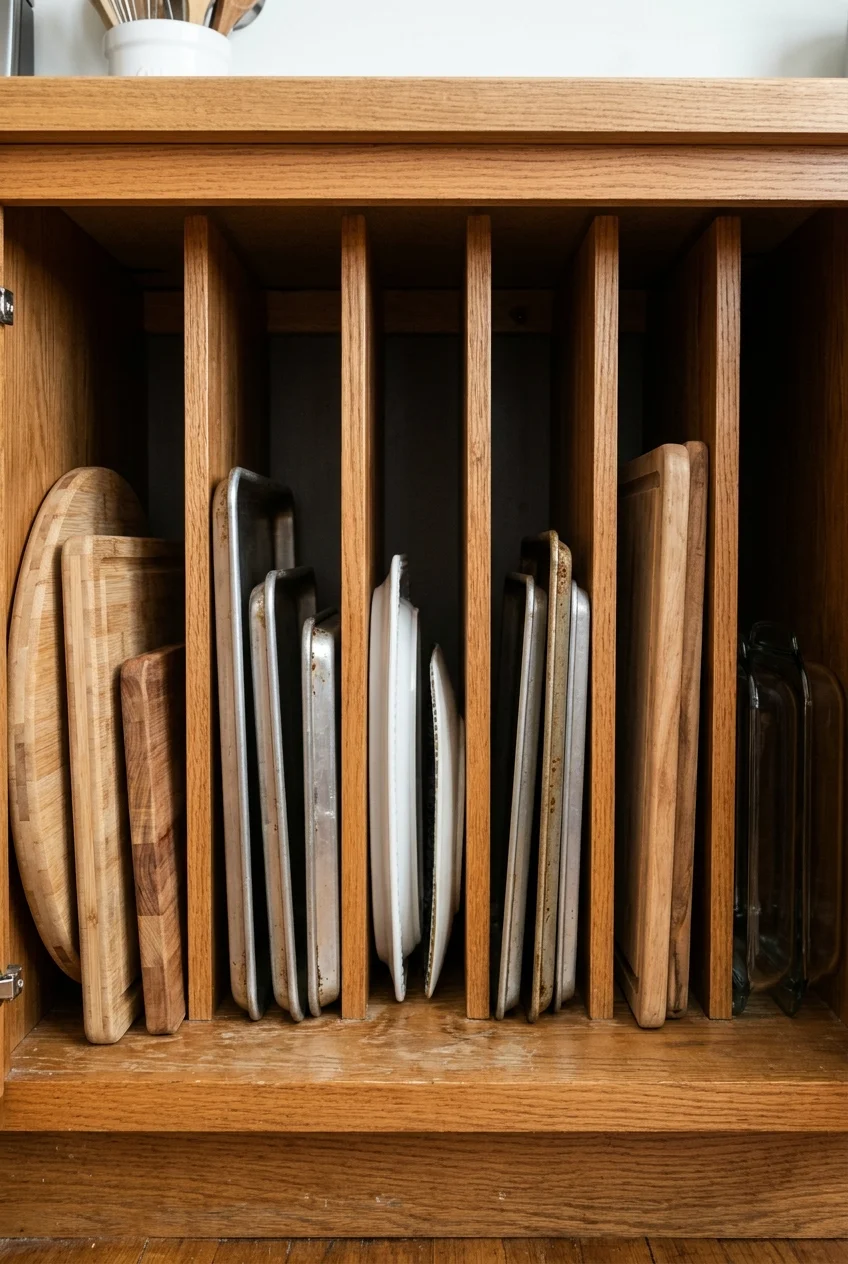
Vertical dividers prevent sheet pans, platters, and cutting boards from becoming a heavy stack. Place the compartment near baking or prep rather than across the room.
Make each bay wide enough for fingers and varied rim shapes. Removable dividers allow the storage to adapt when cookware changes.
25. Choose Deep Drawers for Heavy Bowls and Pots
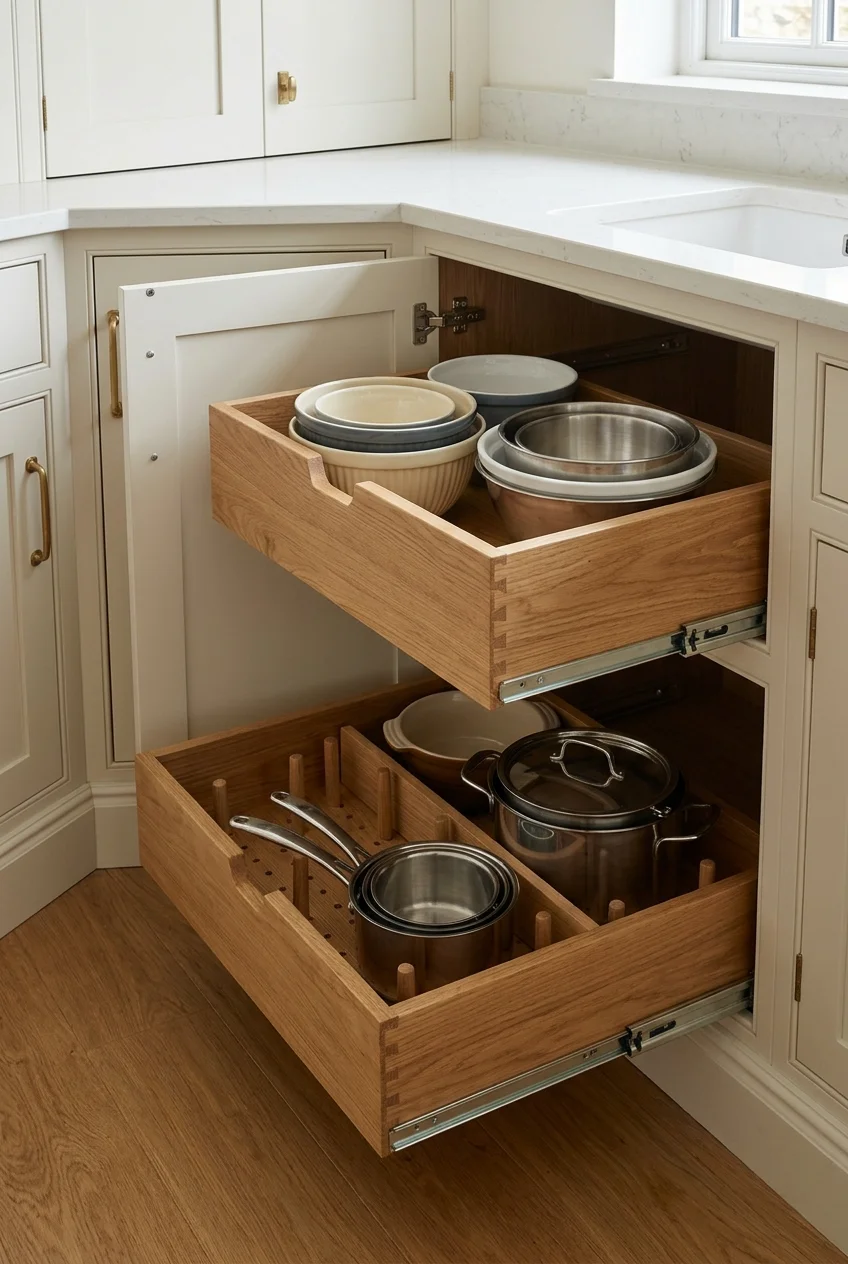
Wide drawers bring heavy cookware forward without kneeling and reaching behind other pieces. Use pegs or dividers only when they improve stability for the real inventory.
Confirm drawer hardware capacity with the cabinet supplier, then distribute weight instead of loading every heavy item into one box. Keep handles clear of adjacent corners.
If the contents are smaller or frequently mixed, these kitchen drawer organization ideas offer adaptable divider approaches for tools that would shift inside a deep, open box.
26. Add a Pull-Out Organizer to a Deep Base Cabinet
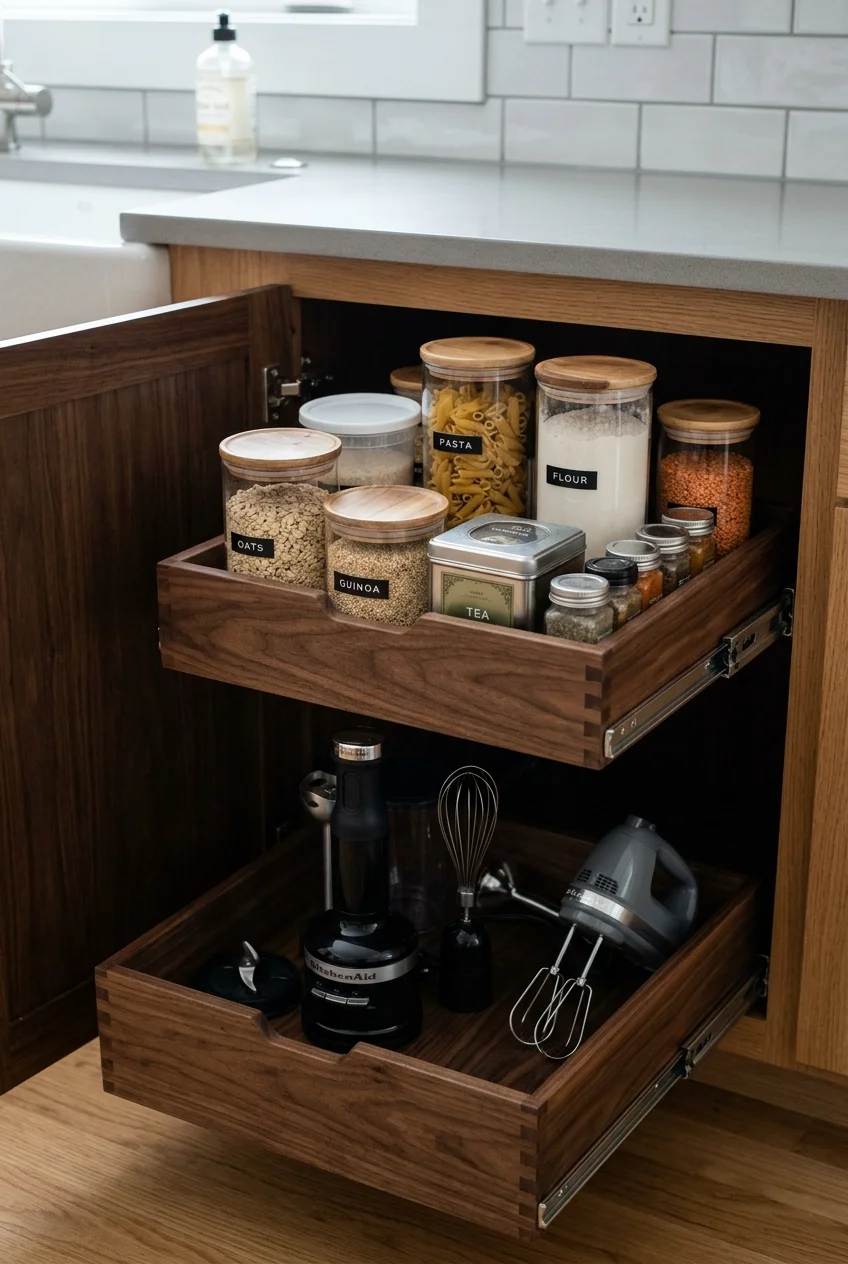
A full-extension pull-out can rescue a deep cabinet where small appliances or supplies disappear. Measure the clear opening, interior depth, hinges, and any front lip first.
One current option is this two-tier pull-out cabinet organizer (paid link), whose listing specifies a 12-inch minimum opening and 22.5-inch interior depth; verify every dimension before ordering.
Mounting quality matters more than the number of tiers. Follow the manufacturer instructions, confirm cabinet condition, and keep heavy contents within the stated limits.
27. Double Vertical Space With Adjustable Shelf Risers
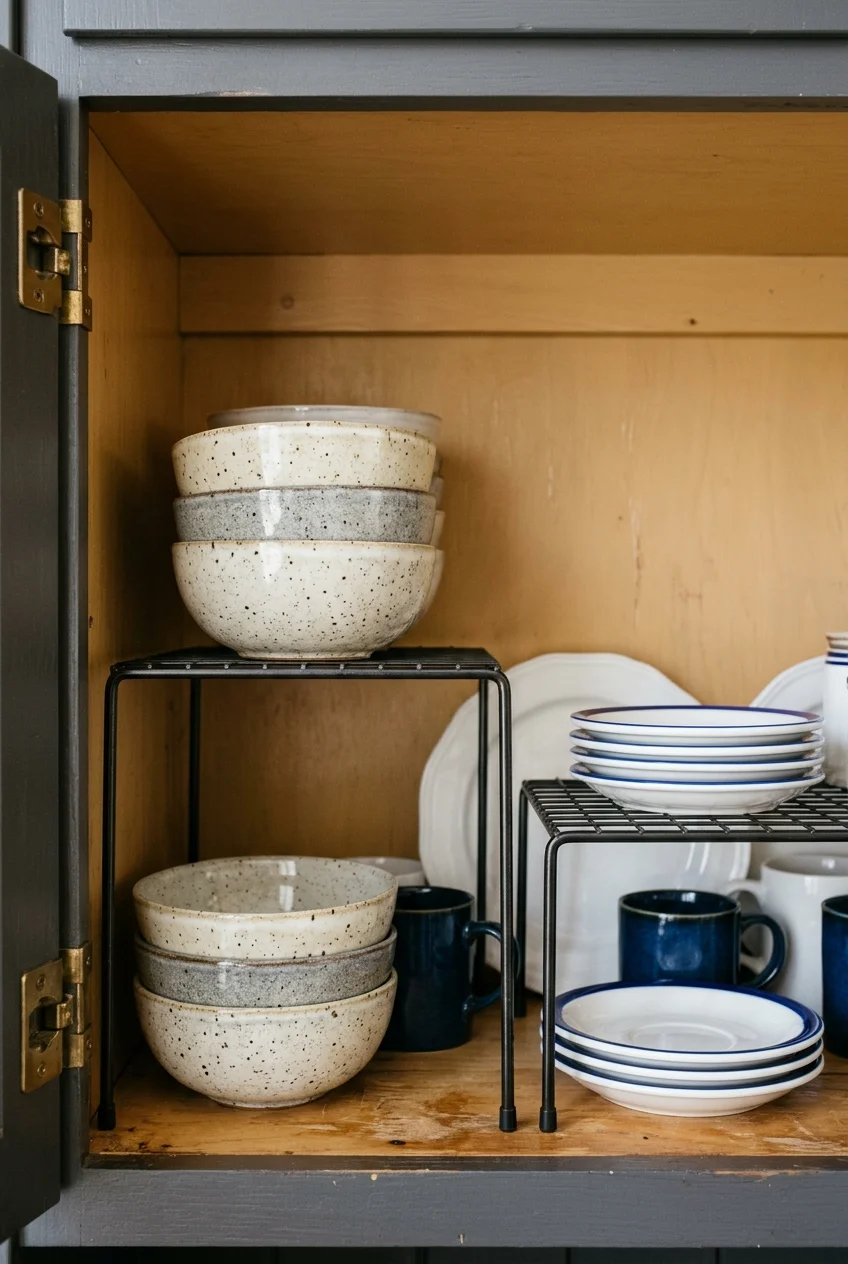
Freestanding risers create a second level for cups, bowls, or pantry cans without altering cabinetry. They work best where shelf height exceeds the stored objects.
For an adaptable setup, consider these expandable cabinet shelf risers (paid link), listed as adjustable from 15.5 to 25.5 inches long and 5.5 to 8.1 inches high.
Measure usable width around hinges and shelf pins, then test the arrangement before buying multiples. Keep heavy dishes low and within the manufacturer load guidance.
28. Assign Upper Shelves to Lightweight Backstock
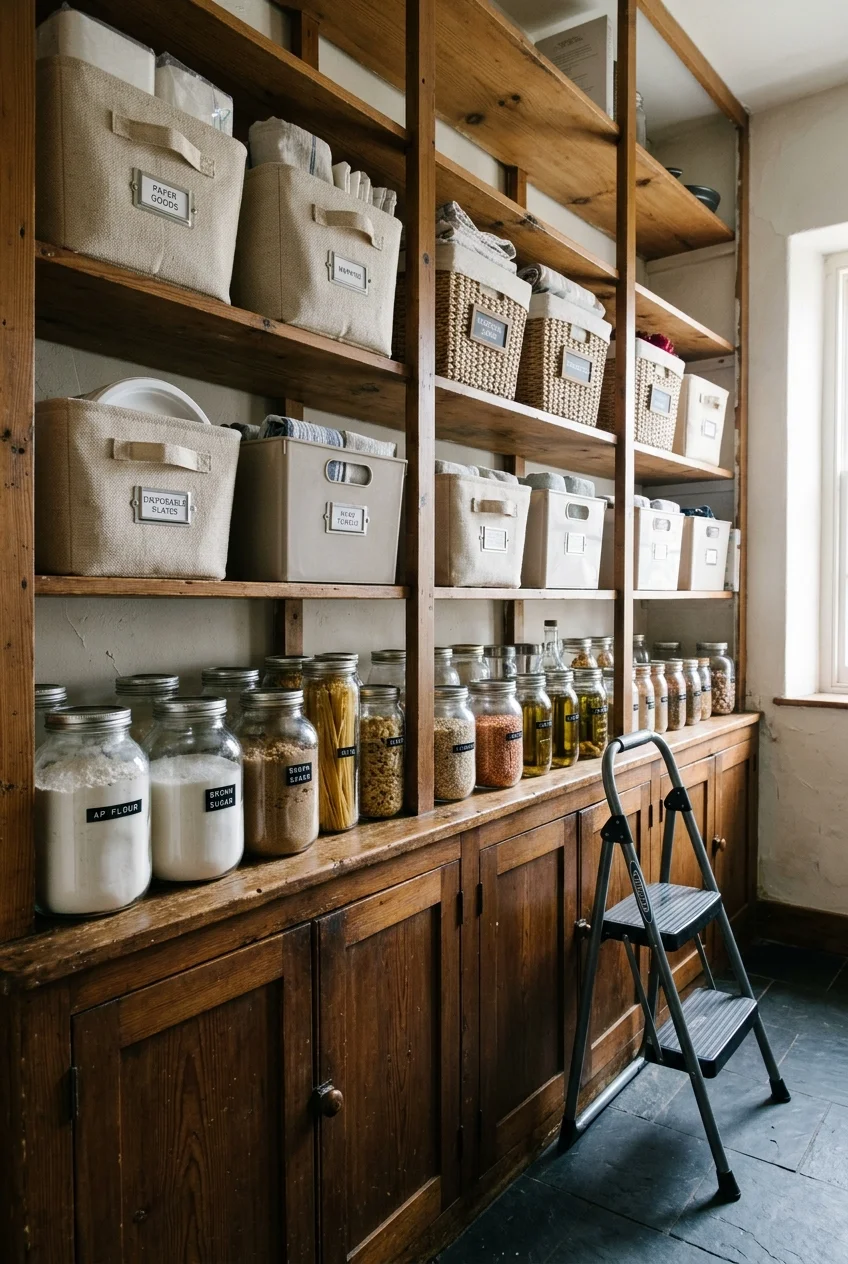
Reserve the highest shelves for paper goods, empty serving baskets, and seasonal linens rather than glass jars or heavy appliances. Group each category in one handled container.
A written inventory inside the door prevents forgotten duplicates. Use a stable step stool, and bring the entire lightweight container down before removing individual contents.
29. Give Glassware a Shallow, Protected Cabinet
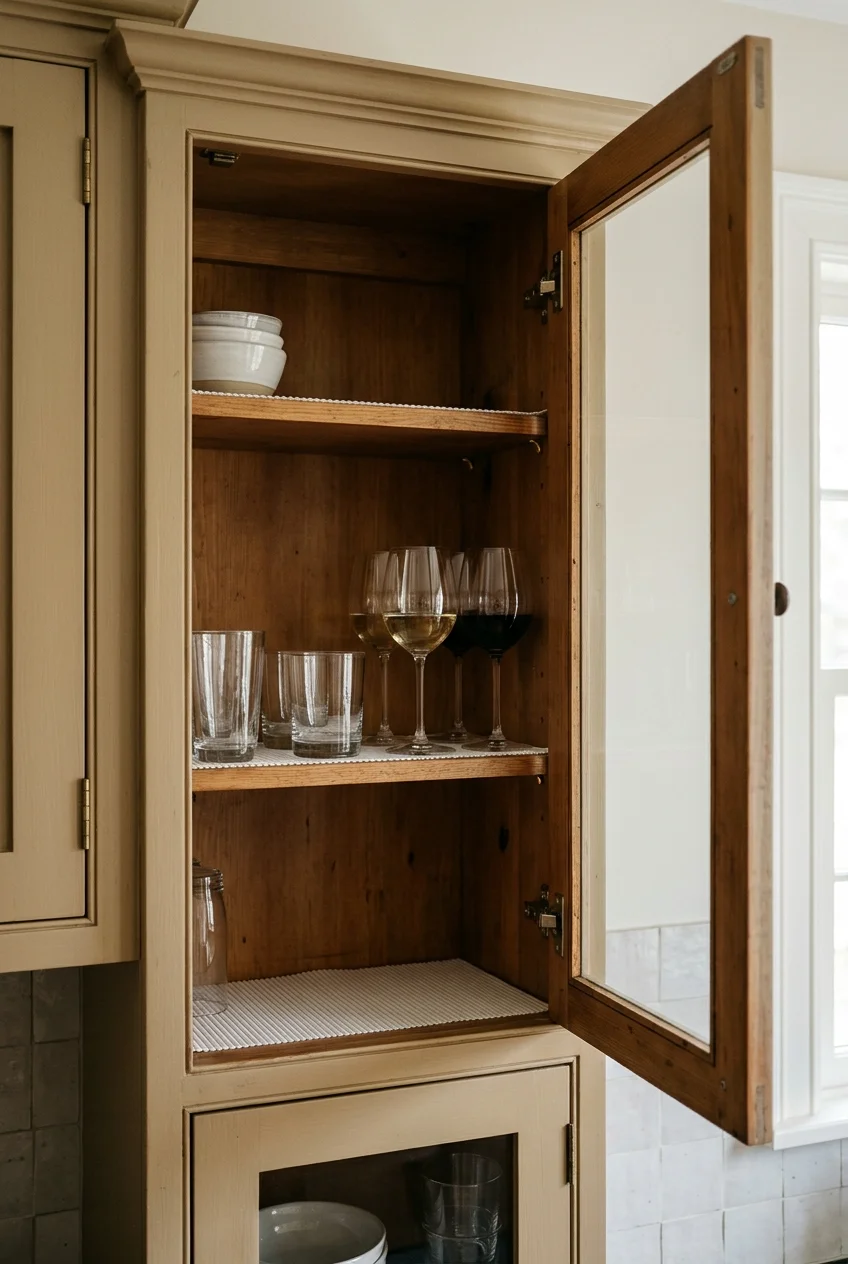
A shallow upper cabinet keeps stems and tumblers from hiding in double rows. Adjustable shelves should fit the tallest regular glass without wasting excessive space above.
Choose solid doors for visual calm or glass fronts for display, then add shelf lining if delicate pieces shift. Keep storage away from slamming appliance doors.
30. Store Linens and Serving Tools in a Wide Drawer
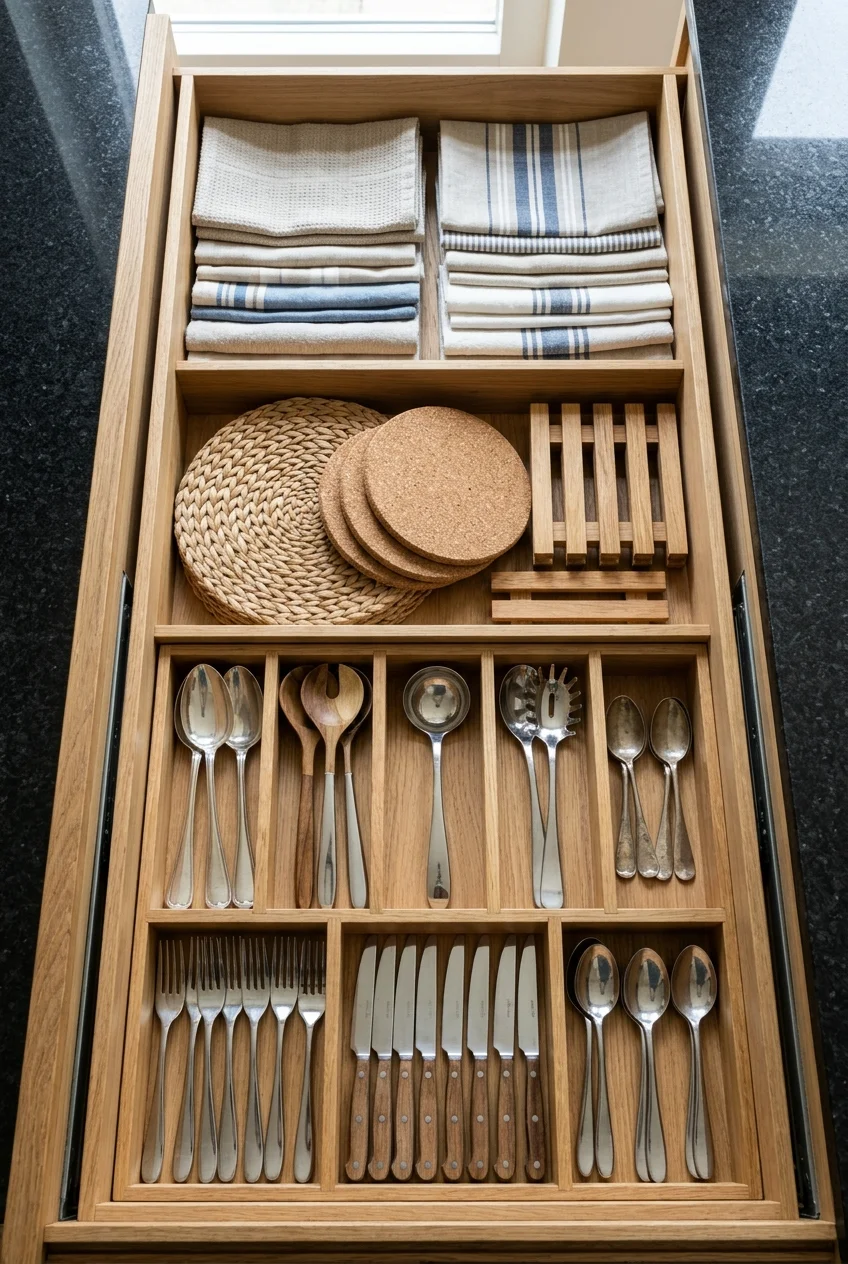
A wide, shallow drawer can hold folded napkins, trivets, serving spoons, and table-setting pieces near the dining route. Dividers prevent small tools from migrating.
Keep textiles away from a damp sink cabinet and cooking splatter. Group sets by use rather than color so preparation stays quick during ordinary meals and gatherings.
Materials, Colors, and Character
Because the room is partly concealed, it can carry stronger color or texture than the main kitchen. Durable surfaces still matter around water, heat, and groceries.
31. Color-Drench a Small Scullery
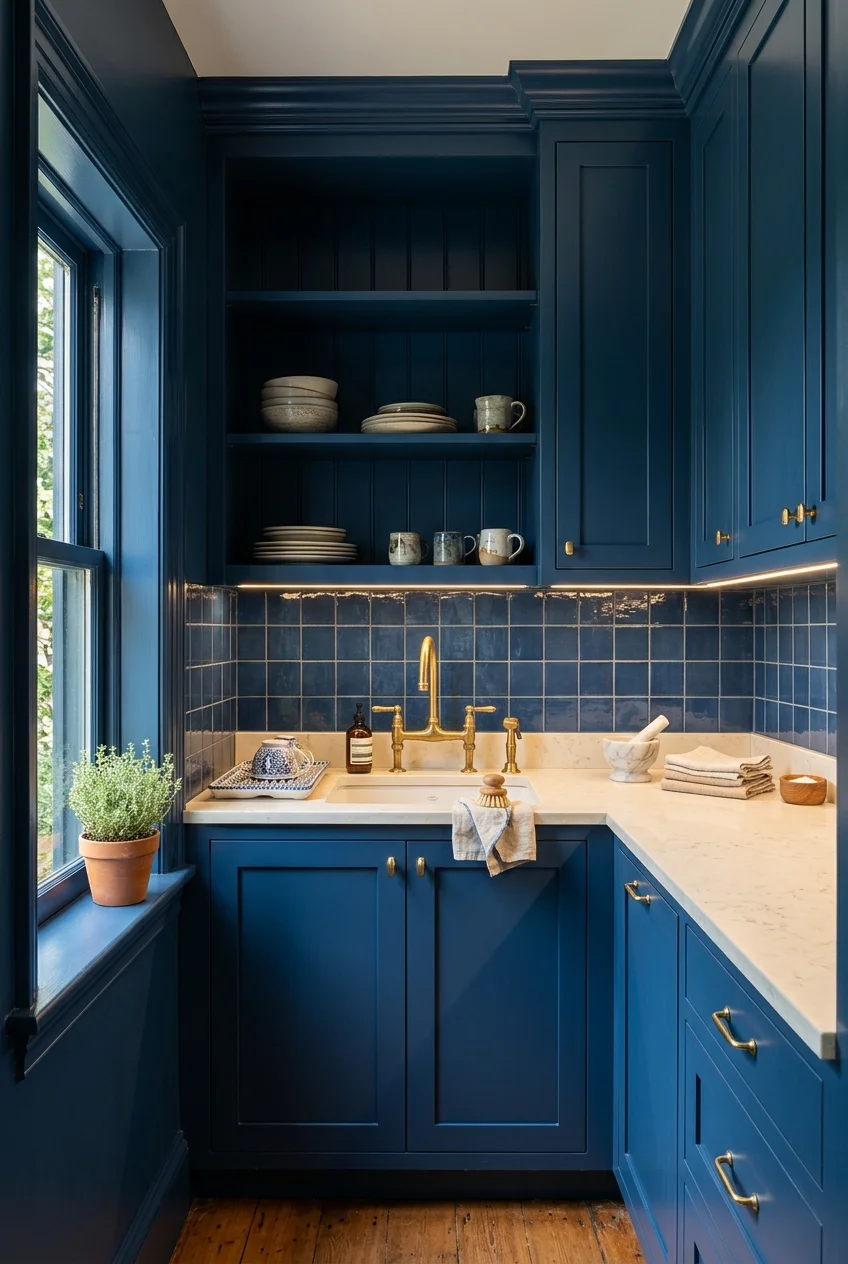
Paint walls, trim, and cabinetry one saturated color to make a compact room feel intentional. Vary the sheen so doors, walls, and woodwork remain readable.
Test the color under the actual task lighting before committing. Deep shades can be wonderfully enveloping, but counters and labels still need enough contrast to function.
32. Pair Dark Cabinets With a Light Work Surface
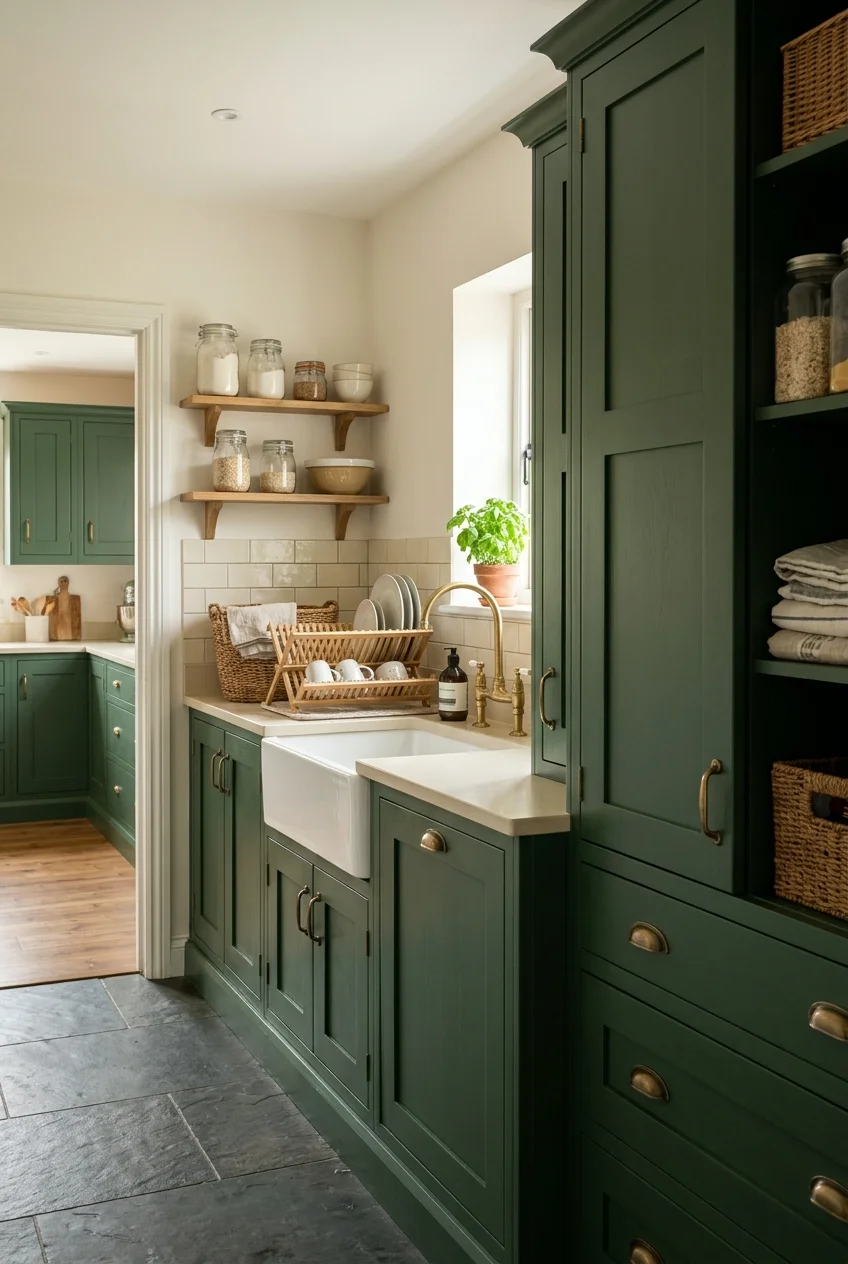
Charcoal, navy, or forest cabinets can ground a hardworking room, while a lighter counter improves visibility during prep. Repeat one small finish from the main kitchen.
Balance contrast with practical upkeep: very dark flat paint may show dust, while highly polished surfaces reveal fingerprints. Sample both color and sheen together.
33. Let Natural Wood Bring Warmth to Utility Storage
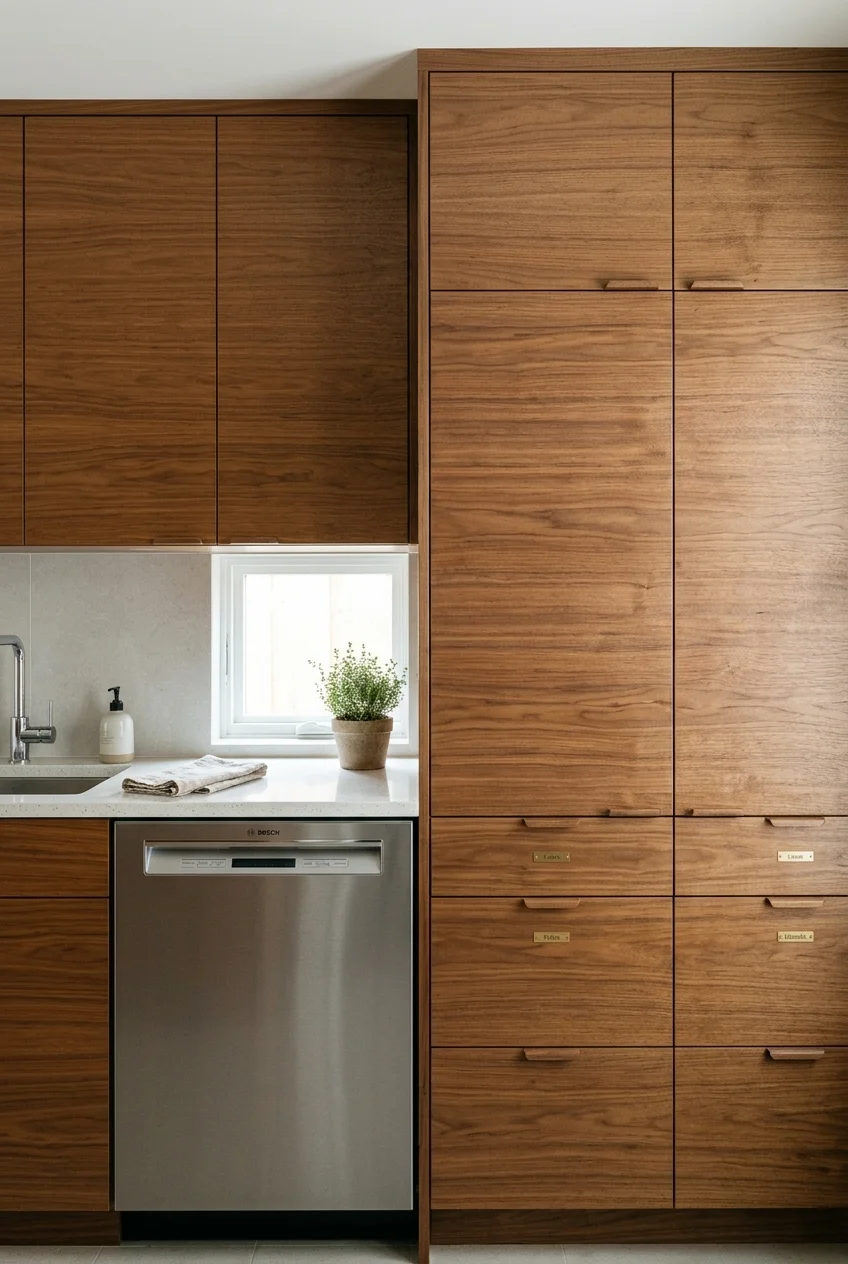
Wood cabinetry can soften stainless appliances and hard counters without turning the room rustic. Choose a finish that tolerates routine wiping and occasional moisture.
Keep grain direction consistent across neighboring doors and drawers. Use restrained hardware so the material remains prominent without making every surface visually busy.
34. Use Painted Beadboard for Washable Texture
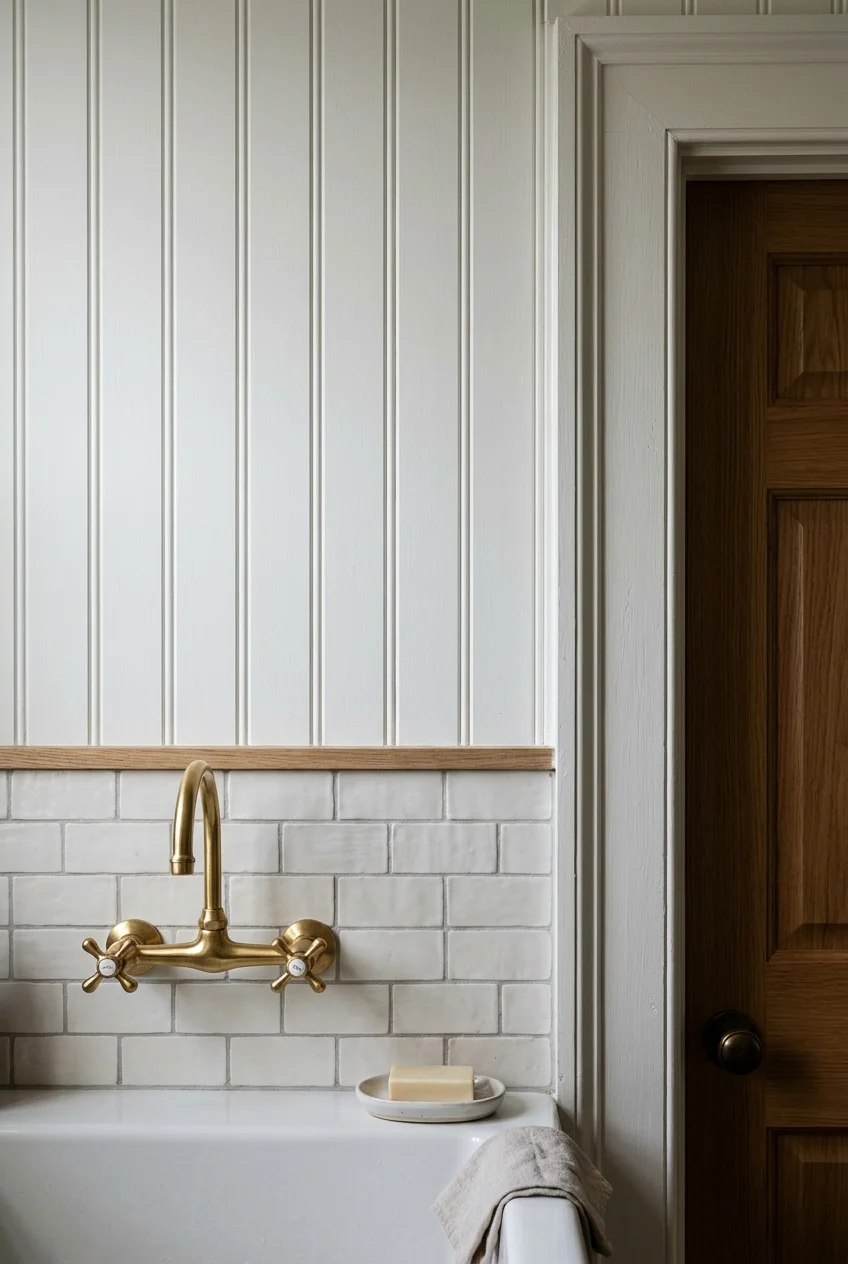
Beadboard adds fine-scale pattern to a plain scullery and suits walls that do not need full tile coverage. Use a washable finish appropriate for the location.
Stop paneling cleanly at counters, casing, and cabinet edges. Around sinks, protect splash-prone areas with materials and detailing suitable for repeated moisture exposure.
35. Tile the Backsplash for Easy Wiping
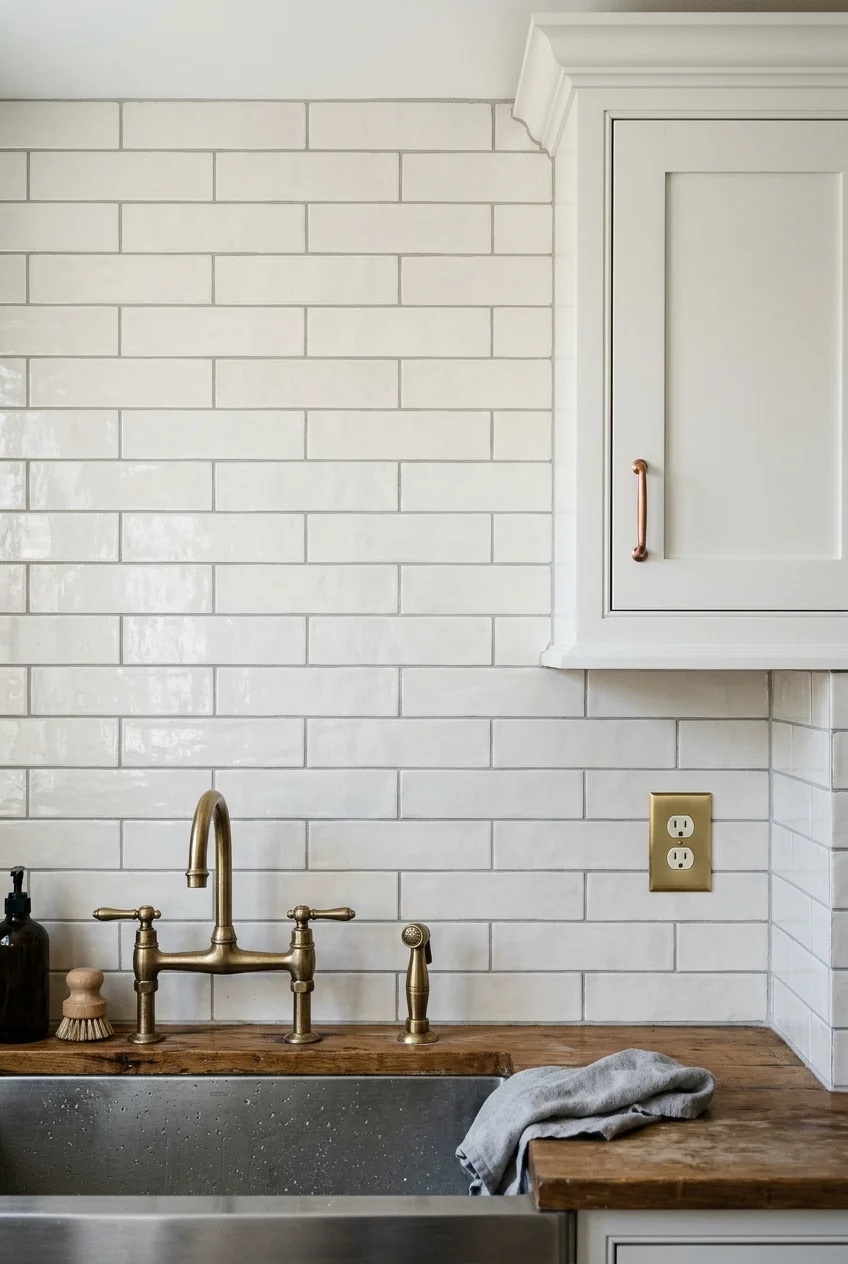
A full-height backsplash behind the sink or cooking zone protects the busiest wall and offers visible character. Choose grout and tile proportions suited to frequent cleaning.
Plan courses around outlets, corners, and cabinet ends before installation. Consistent joints and deliberate edge trim look calmer than narrow tile slivers at every boundary.
Practical tip Tape the proposed tile grid onto the wall elevation so awkward cuts become visible before materials, outlet positions, and final trim are locked.
36. Use a Patterned Floor to Define the Back Kitchen
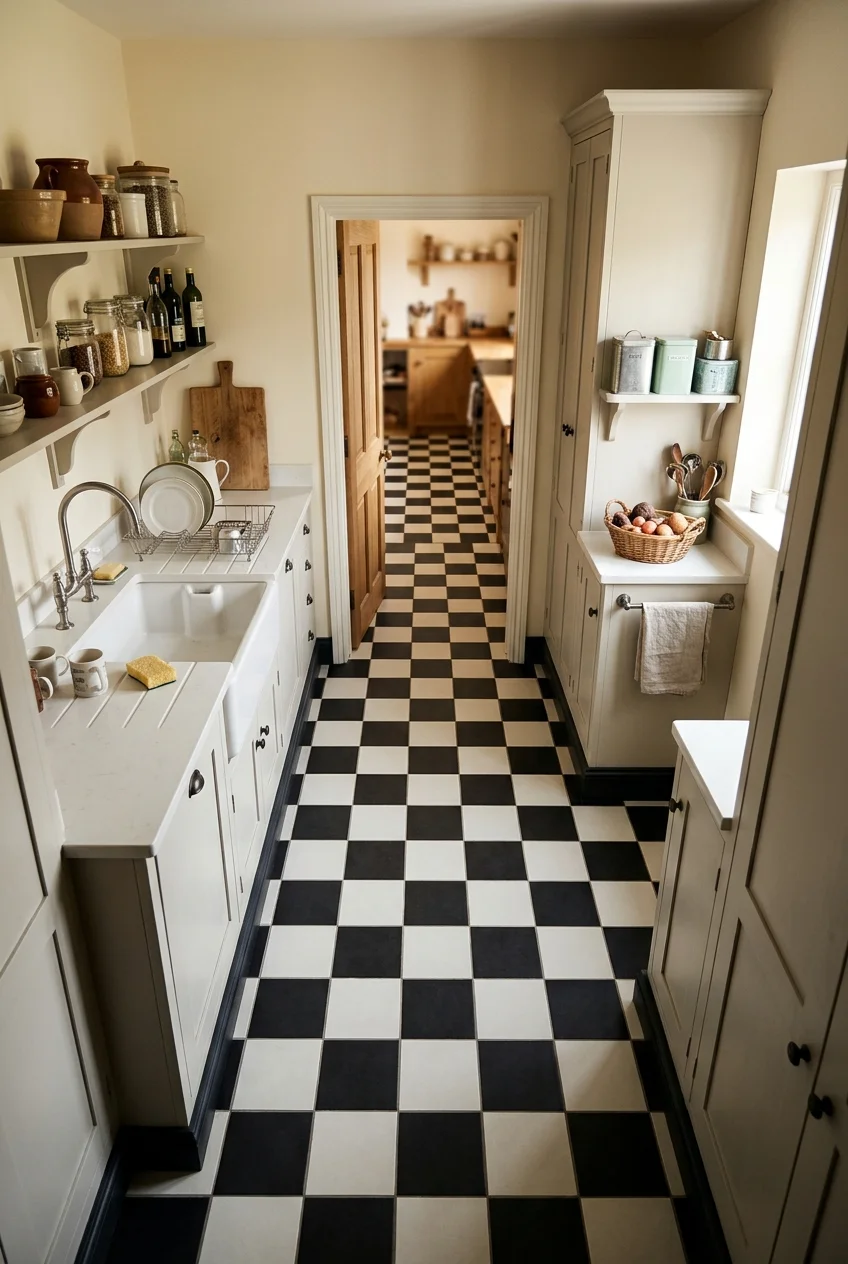
Checkerboard, geometric tile, or resilient patterned flooring can distinguish the scullery from the main kitchen. Keep the scale legible in the room’s narrow footprint.
Choose slip resistance, cleaning needs, and transitions before color alone. Align the pattern thoughtfully at doorways so the threshold does not look accidentally clipped.
37. Choose a Continuous Counter Around Wet Work
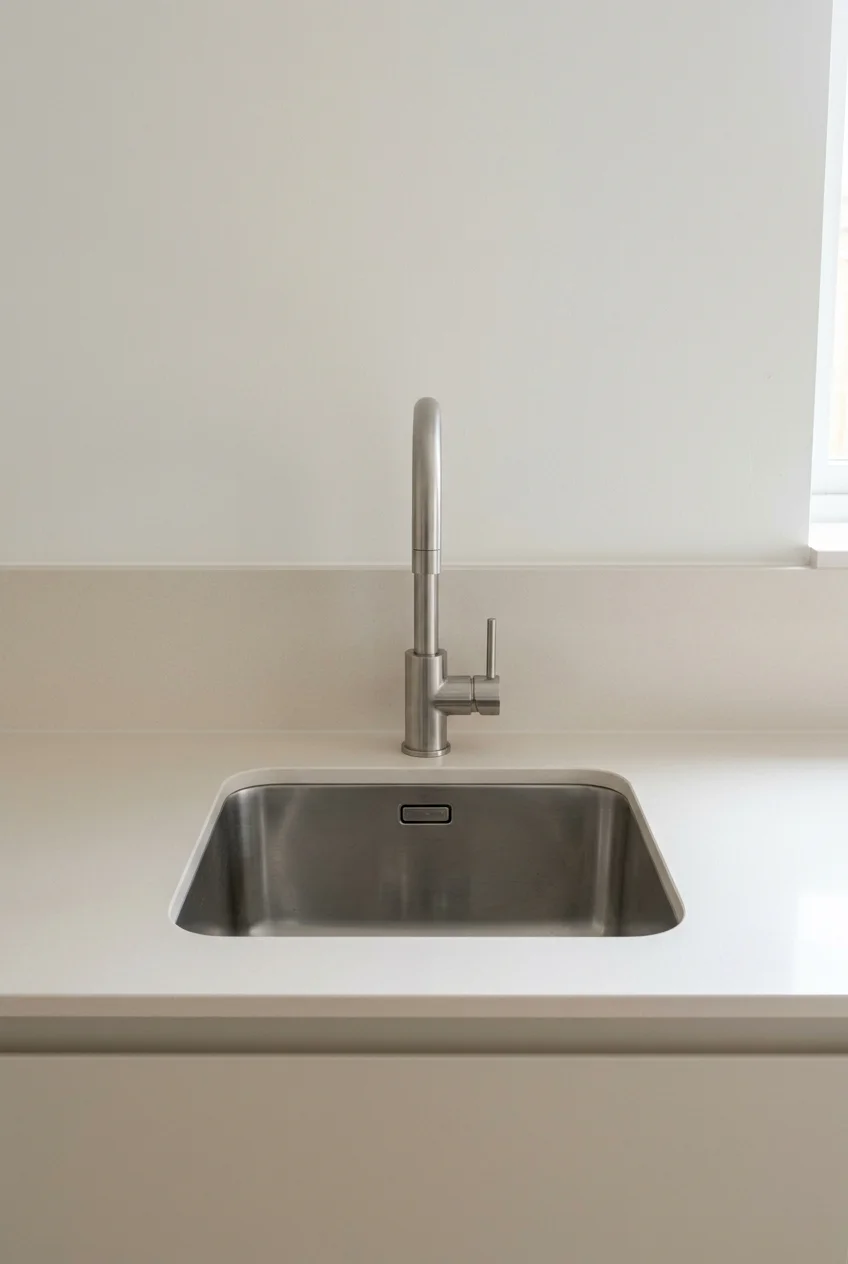
A nonporous, easily wiped counter simplifies cleanup around the sink and recycling zone. Fewer seams reduce places where crumbs and moisture collect during daily use.
Material performance varies, so review heat, stain, repair, and support requirements with the fabricator. Preserve adequate counter on both sides of major work centers.
38. Reserve Butcher Block for a Dry Prep Stretch
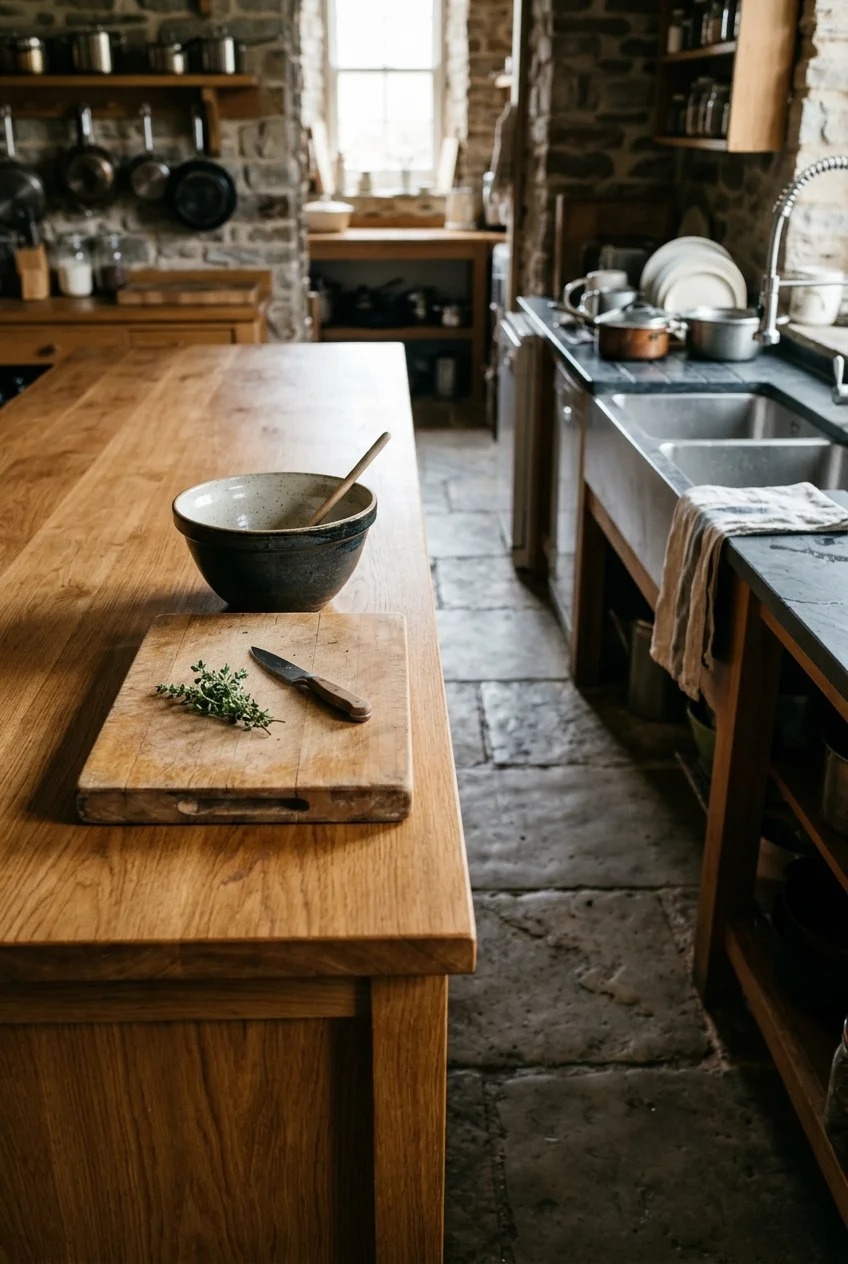
A wood counter can warm a baking or serving zone away from persistent splashes. Use the species, finish, and maintenance schedule recommended for the intended use.
Avoid treating decorative wood as an automatically food-safe cutting surface. A removable board is easier to clean, replace, and move when direct preparation is needed.
39. Soften Lower Storage With a Tailored Curtain
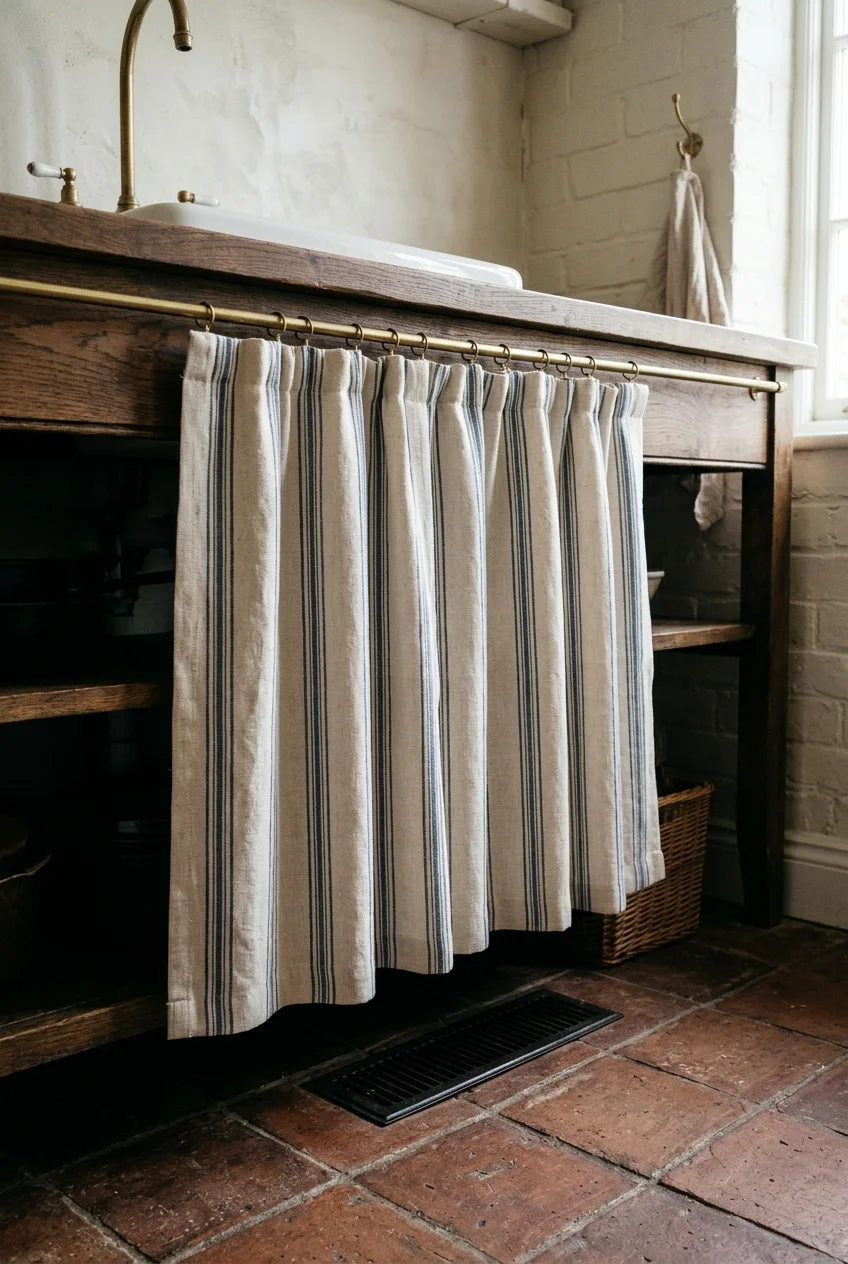
A fitted fabric curtain can conceal bins or infrequently used appliances while adding pattern. Keep the hem clear of the floor and any cabinet ventilation openings.
Use washable fabric and hardware that slides easily. Curtains work best in dry zones; choose doors where splashing, grease, pets, or frequent access would complicate upkeep.
40. Mix Open and Closed Storage Deliberately
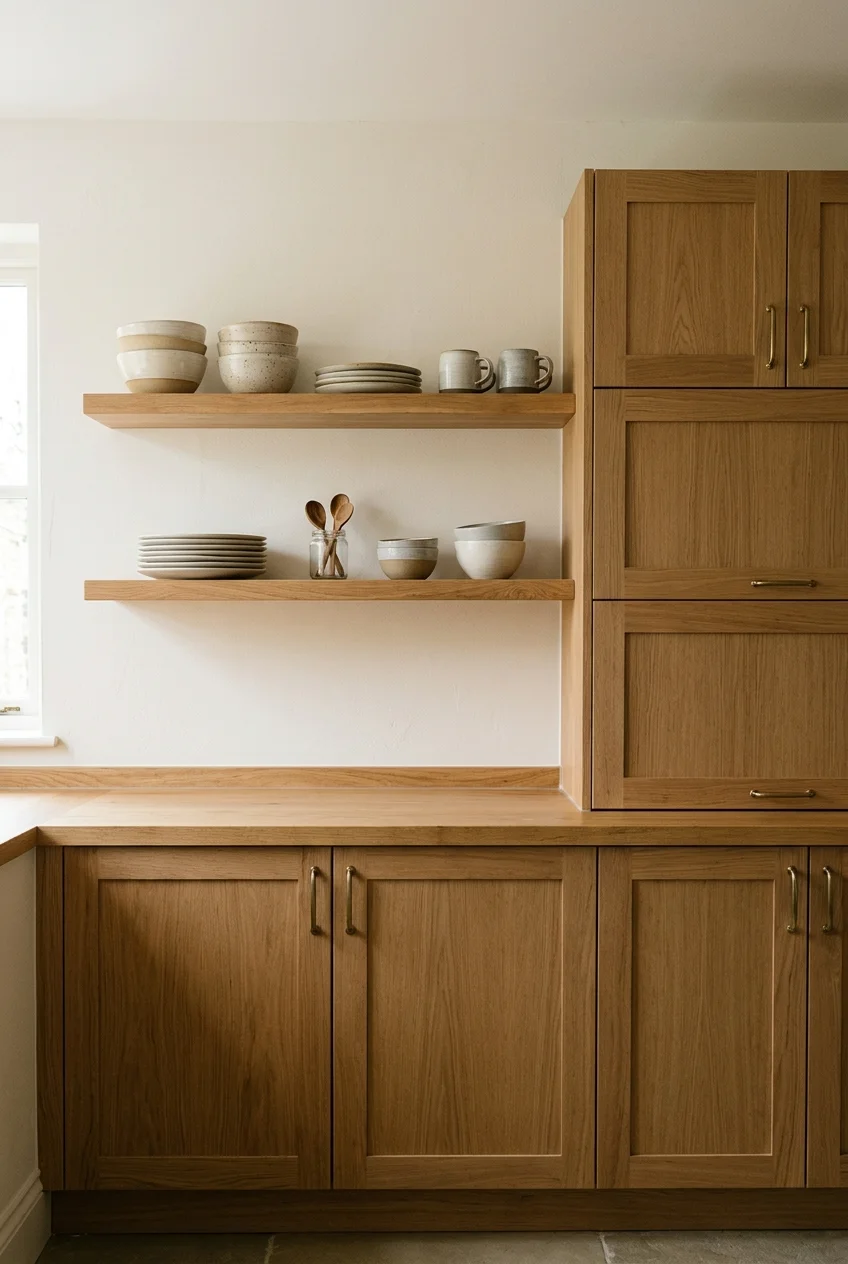
Display frequently reached dishes or attractive jars on open shelves, then hide bulk packages, cleaning products, and irregular appliances behind doors. The mix controls visual noise.
Repeat shelf thickness or cabinet color to unify both types. Leave some open space instead of filling every surface simply because storage is available.
If existing cabinets need improvement before new storage is added, these kitchen cabinet makeover ideas can help assess practical updates.
Lighting, Organization, and Small-Space Solutions
The final layer makes the room easier to use daily: focused light, visible zones, clear landing space, and compact features that remain flexible as routines change.
41. Run Task Lighting Under Upper Cabinets
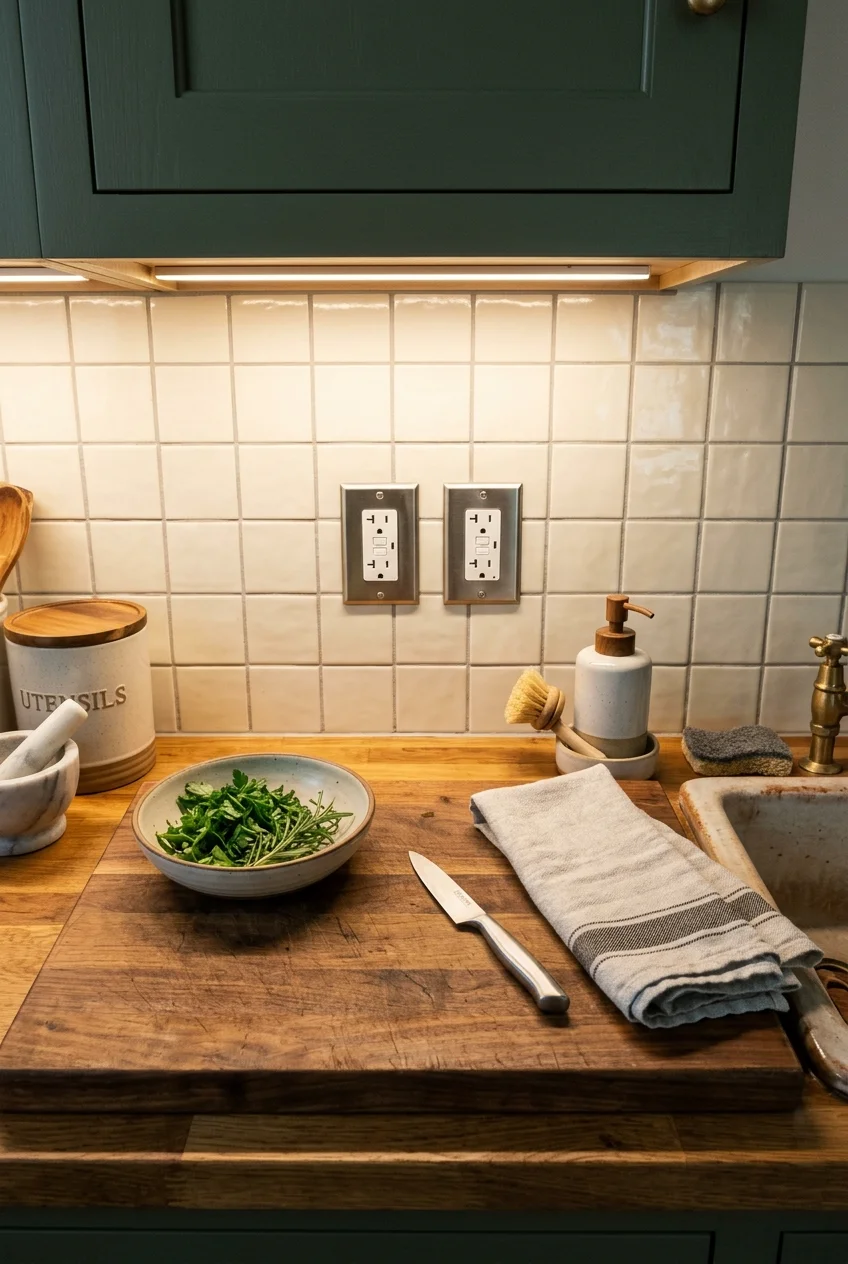
Continuous under-cabinet lighting removes shadows from prep and cleanup counters. Choose a color temperature that renders food and finishes naturally beside the main kitchen lighting.
Plan wiring, drivers, switching, and heat clearance before cabinets arrive. A front-positioned light often illuminates the work surface more evenly than one hidden at the wall.
42. Use a Decorative Ceiling Fixture Without Losing Task Light
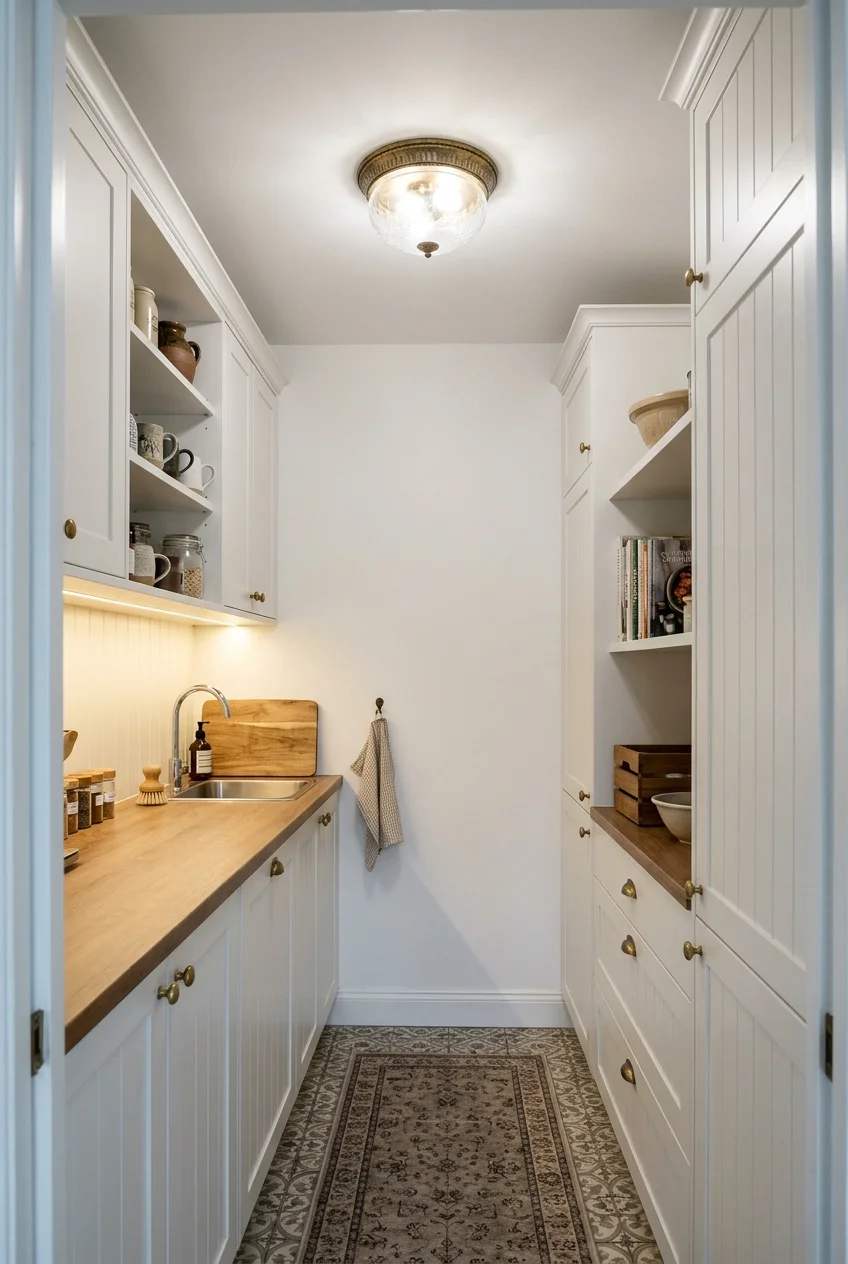
A pendant or compact flush mount can give the scullery character, but it should support rather than replace focused counter lighting. Keep heads clear in narrow passages.
Center the fixture on the room or work zone, not automatically between cabinet boxes. Confirm door swings, ceiling height, and cleaning access before choosing its drop.
43. Keep a Window Above the Working Counter
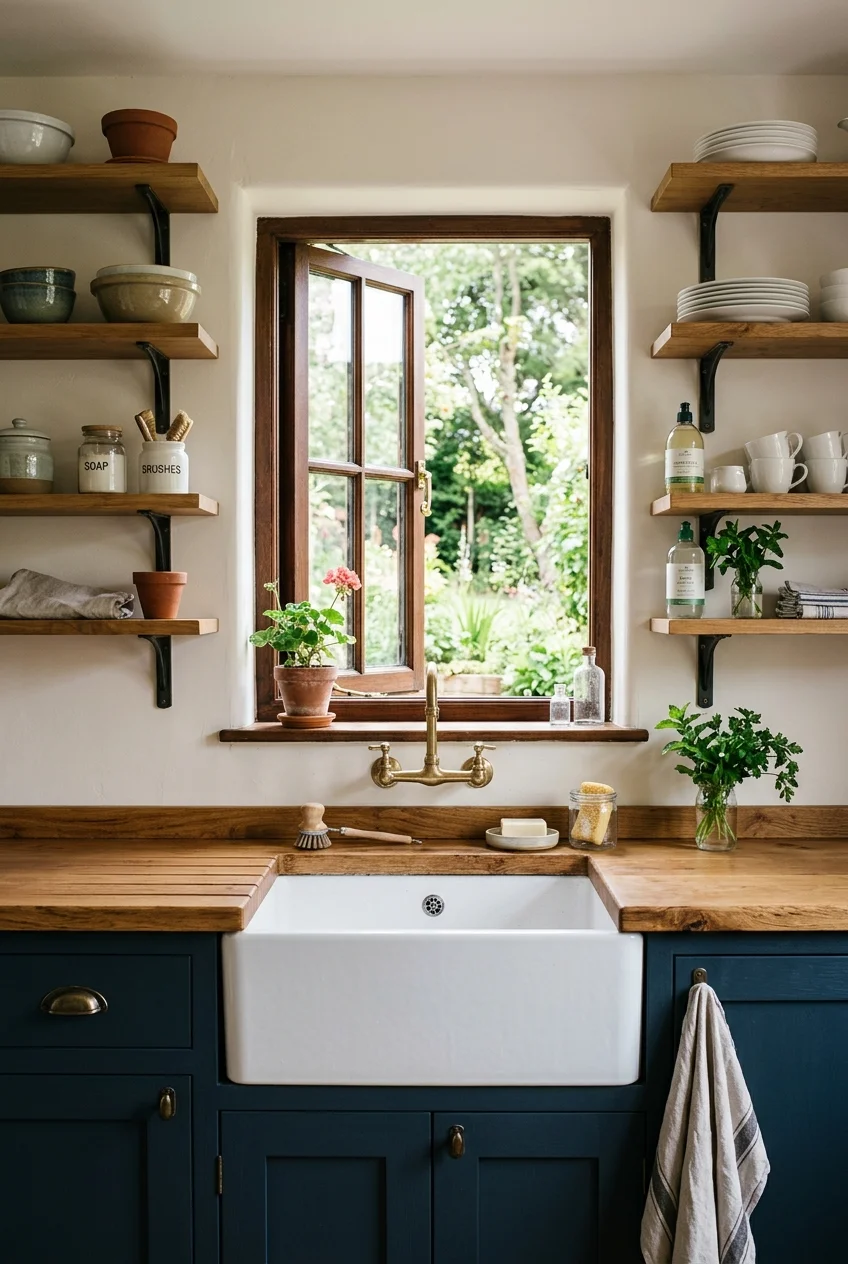
A window can make repetitive prep and cleanup more pleasant while providing useful daytime illumination. Preserve enough wall space for storage where the room needs it most.
Coordinate sill height with the counter and faucet, then plan privacy and glare control for the actual exposure. Avoid blocking operable sections with fixtures.
44. Bring Daylight Down With a Roof Light
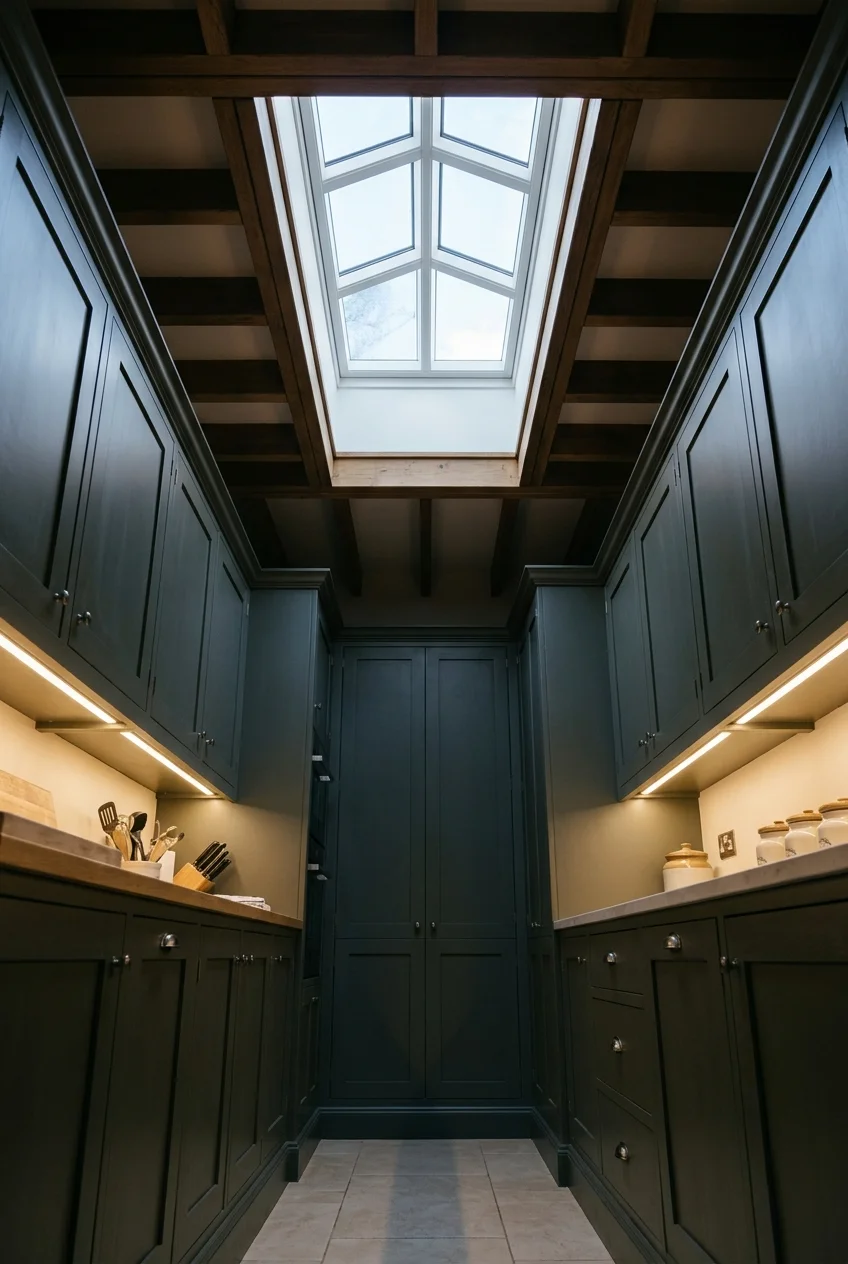
A skylight or roof light can brighten an internal scullery where exterior walls are unavailable. Its position should illuminate the aisle and counters without creating harsh glare.
Roof structure, waterproofing, insulation, and local approvals require professional design. Use layered electric lighting so the room remains functional after sunset and on overcast days.
45. Use a Slim Rolling Cart as Flexible Prep Space
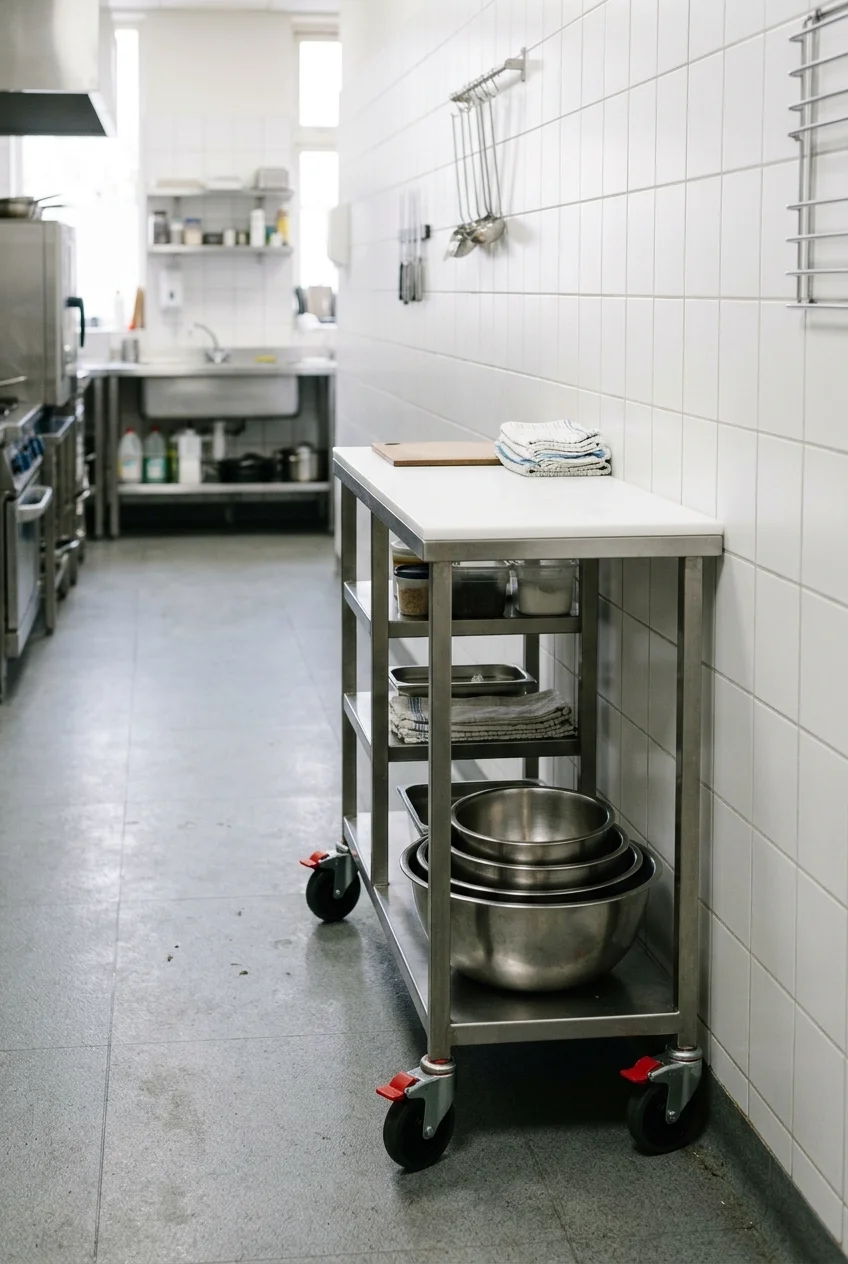
A narrow cart adds landing space without permanent cabinetry and can move aside for deliveries or cleaning. Choose locking casters and a stable, wipeable top.
Measure the parked position and the route it must travel. Store heavier items low, and never let the cart reduce a required or comfortable passage.
46. Organize Shelves by Workflow Instead of Container Type
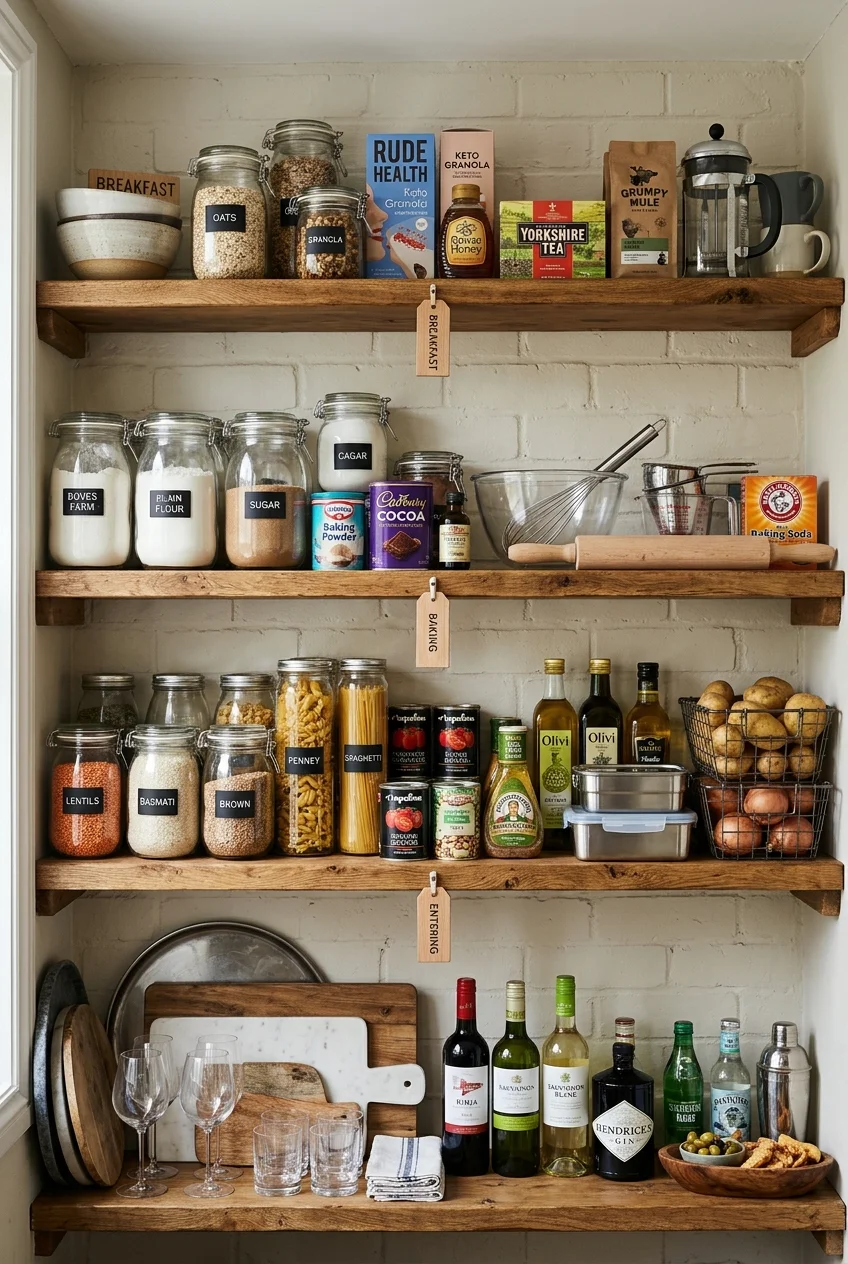
Group breakfast, baking, lunch packing, and entertaining supplies according to tasks. This keeps ingredients and tools together even when their packages or materials look unrelated.
Place the busiest zone nearest its appliance or counter, then move occasional supplies outward. Review the arrangement after several weeks instead of labeling every shelf permanently.
- Breakfast near the toaster and coffee maker
- Baking beside the longest clear counter
- Lunch supplies near food storage and bags
- Entertaining pieces near the dining route
47. Label Only What Others Cannot Identify Quickly
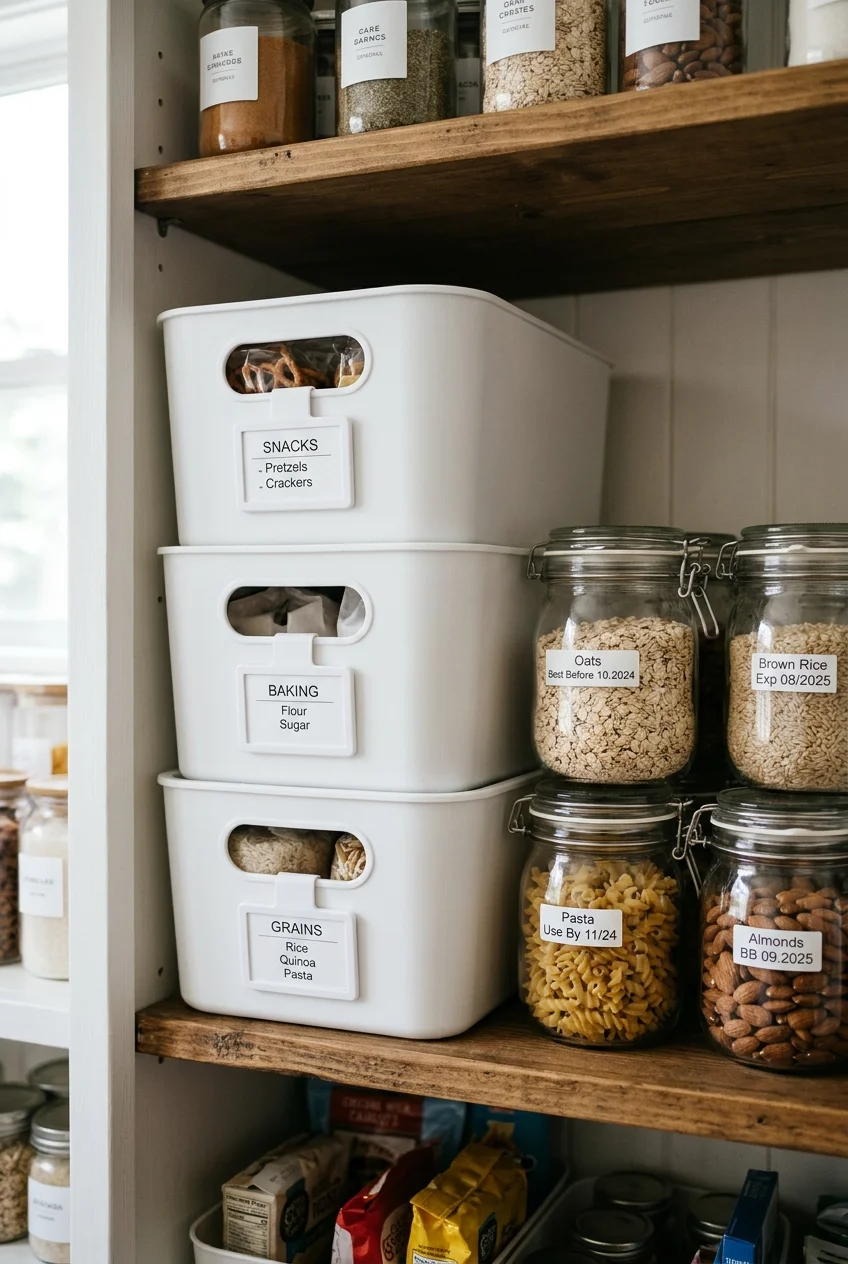
Labels help with opaque bins, backstock, and shared household routines, but obvious glass jars rarely need extra words. Use short category names rather than decorative sentences.
Choose removable labels so zones can change. Place them where they remain visible when shelves are full, and avoid covering expiration dates or safety information.
48. Protect One Counter as a Permanent Landing Zone
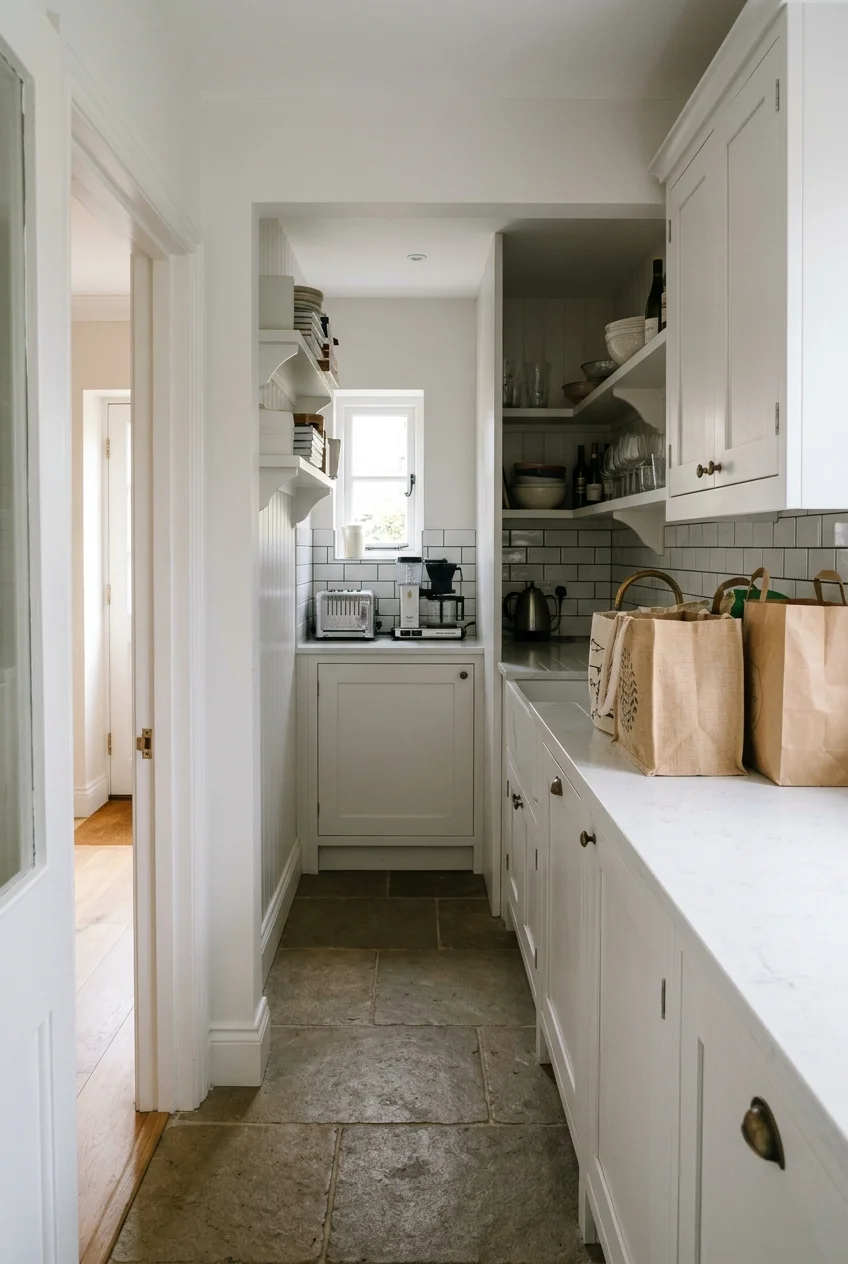
Leave one counter section empty for grocery bags, party trays, or dishes awaiting cleanup. A free surface is often more useful than another permanent appliance station.
Locate it near the entrance and away from the sink splash zone. Store chargers, mail, and decorative objects elsewhere so the space stays genuinely available.
Practical tip Outline the landing zone on the cabinetry plan and assign every nearby appliance a home before move-in; otherwise empty counter space quickly disappears.
49. Turn a Pantry Closet Into a Compact Sink-and-Storage Nook
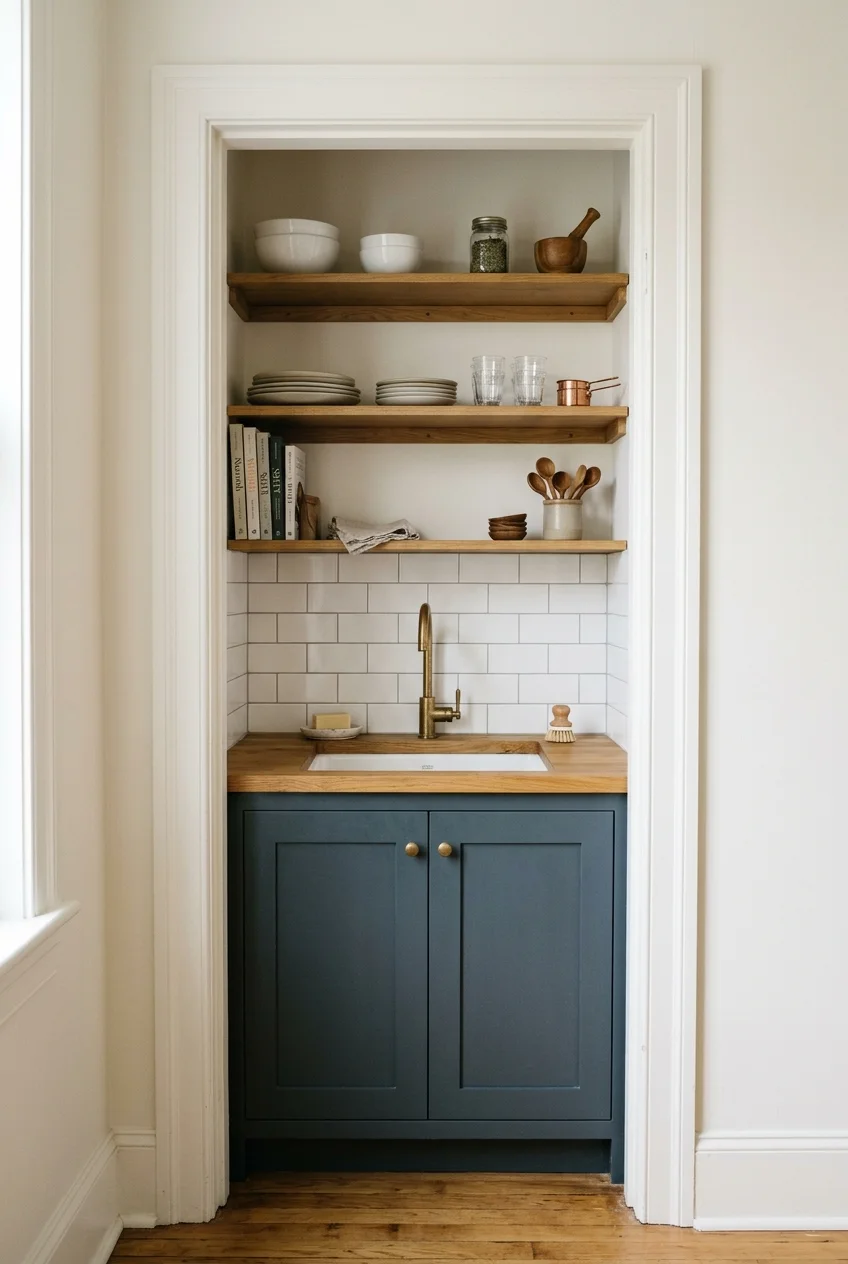
A former pantry can become a miniature scullery when plumbing, ventilation, structure, and access allow. Keep the program modest: one sink, one counter, and efficient storage.
Avoid squeezing in appliances that eliminate landing space or block the opening. Use shallow uppers and under-sink storage sized around real pipes, valves, and service access.
Have a qualified professional assess plumbing routes, electrical needs, ventilation, and wall changes before demolition. A small footprint does not make utility work automatically simple.
For very tight rooms, compare aisle and door-swing strategies in these narrow-kitchen island ideas before adding any movable center surface to the compact plan.
50. Echo the Main Kitchen, Then Change One Feature
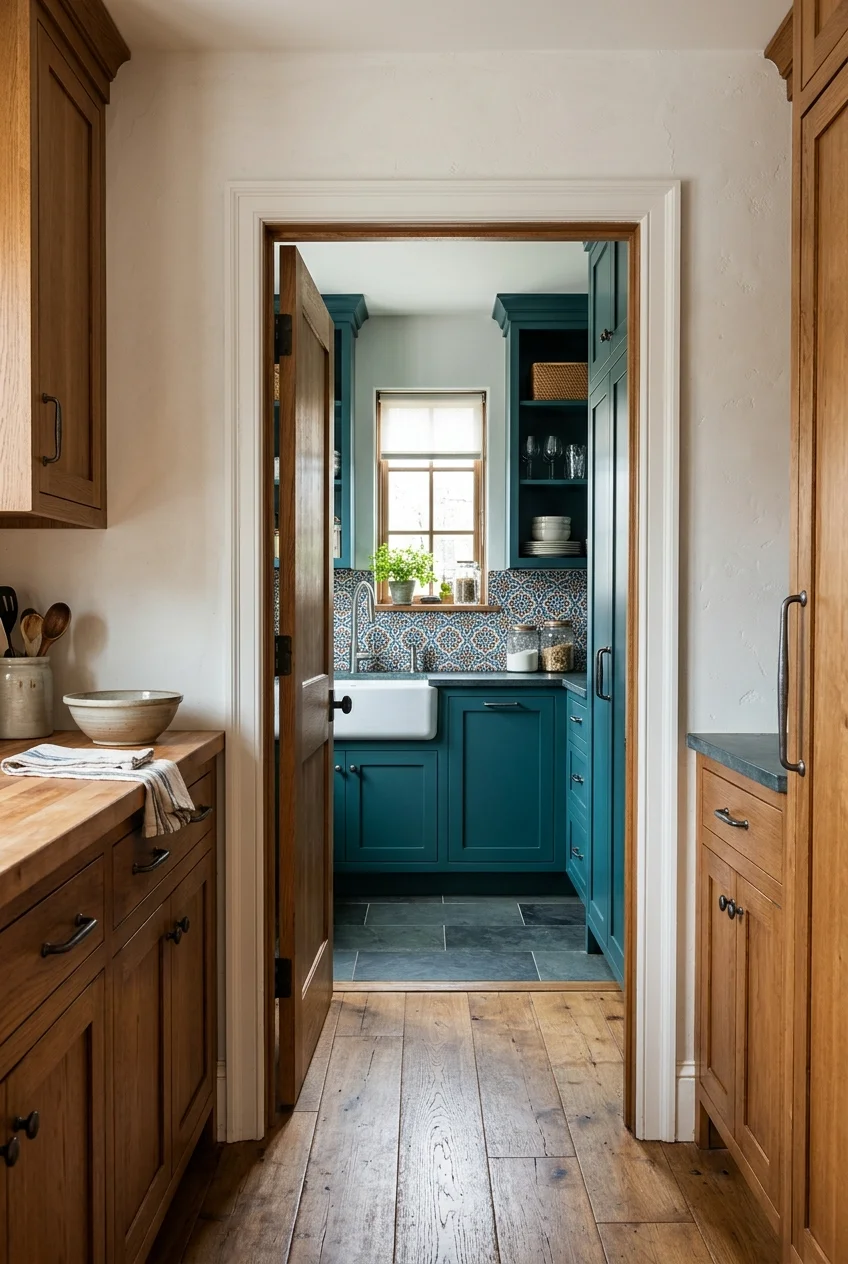
Repeat the main kitchen’s cabinet profile, metal finish, or counter tone so the rooms feel related. Change one element, such as color, tile, or hardware scale.
This approach creates character without turning the scullery into an unrelated theme room. View both spaces through the doorway before approving the final samples.
Let function guide the difference: a tougher floor, darker paint, or more open shelving can reflect the back kitchen’s heavier workload without sacrificing cohesion.
Frequently Asked Questions
What is the difference between a scullery and a butler’s pantry?
A modern scullery usually handles active food preparation and cleanup, often with a sink or appliances; a butler’s pantry more commonly supports serving and storage.
Does a scullery need a sink?
No, but a sink makes cleanup or produce preparation independent from the main kitchen. Without one, focus the room on storage, appliances, or serving support.
Can a small kitchen still have a scullery?
Yes. A one-wall niche, upgraded pantry closet, or appliance bay can provide scullery functions without a separate room, provided circulation and storage remain practical.
Should a scullery match the main kitchen?
The rooms should share at least one visual cue, but identical finishes are unnecessary. Repeating cabinet profiles or hardware lets the scullery support stronger color or pattern.