50 Attic Bathroom Ideas

This post may contain affiliate links: full affiliate disclosure.
Attic bathrooms can feel generous and private when the layout follows the roof instead of fighting it. Start with headroom, structure, drainage, stair access, and moisture control; finishes only work after those hidden decisions are coordinated.
Research produced 88 credible candidates across layout, structure, plumbing, ventilation, insulation, waterproofing, daylight, lighting, heating, storage, accessibility, and finish strategy. The final set saturated at 50 distinct ideas after removing repeated fixture swaps, color-only variations, and impractical concepts.
How to Plan an Attic Bathroom
Treat every dimension as a planning prompt. Verify the locally adopted code, permit path, product instructions, and actual site conditions, then involve an engineer or licensed trade whenever structure, roofing, plumbing, electrical work, or waterproofing is affected.
Plan Around the Roofline and Access
A useful attic plan puts standing tasks beneath the highest ceiling and seated or low-storage functions under the eaves. Map the roof planes and stair arrival before choosing any fixture.
1. Put the Shower at the Roof Ridge
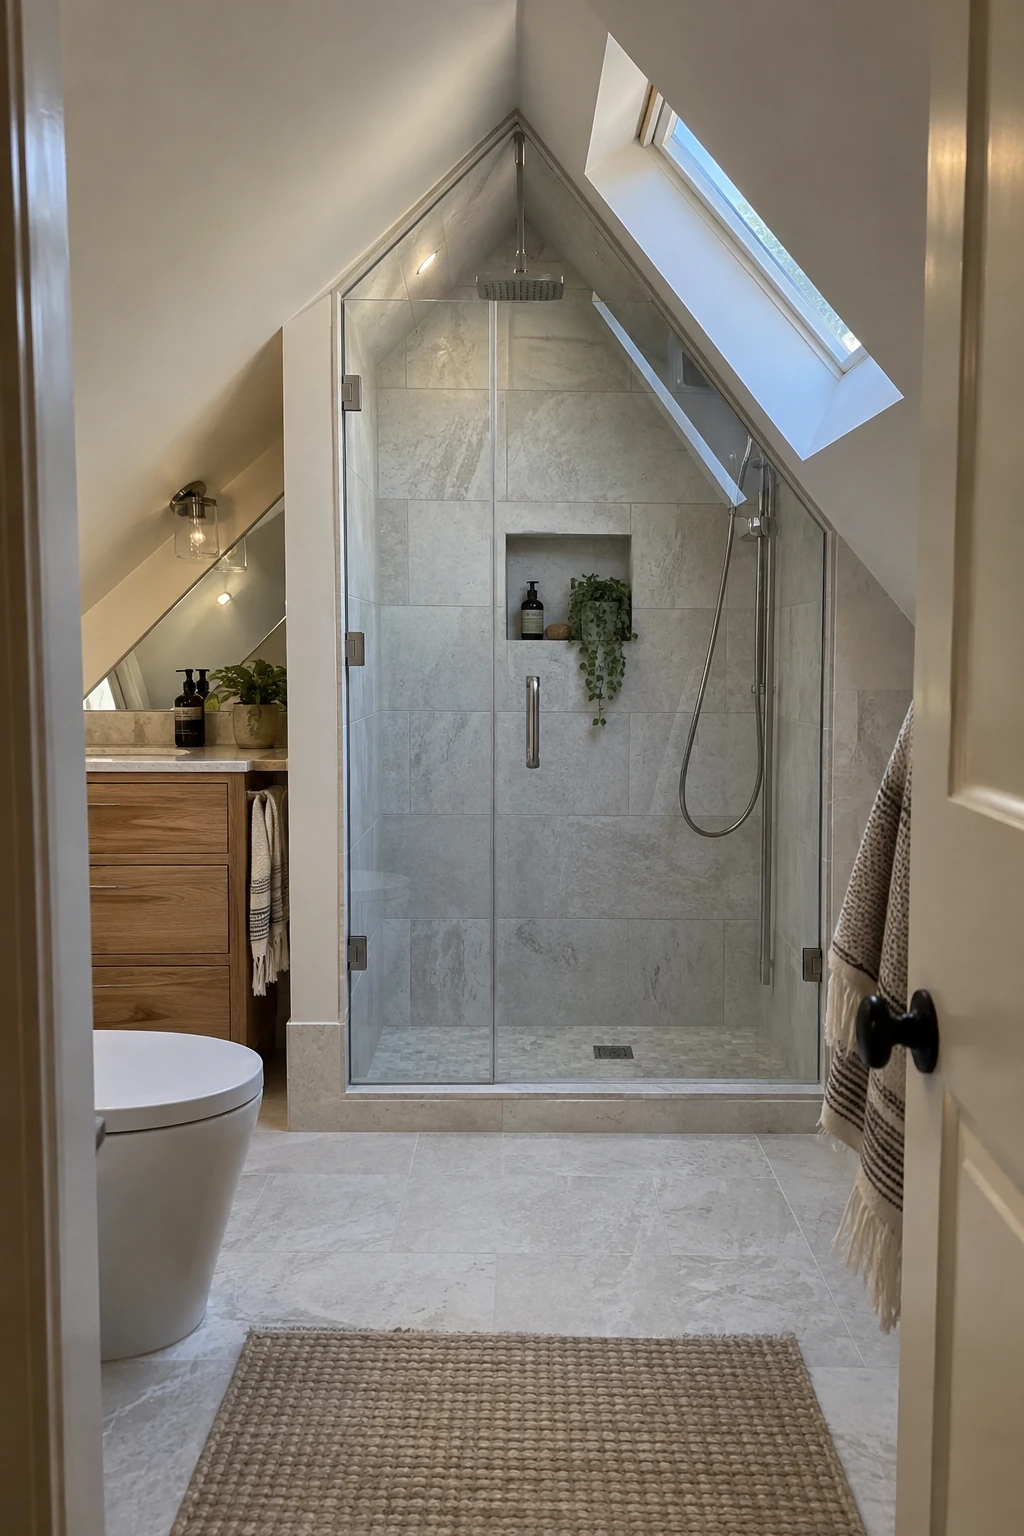
Reserve the tallest part of the attic for the shower, where people need comfortable standing room and space to raise their arms. Draw the finished ceiling profile, showerhead, curb or entry, and glass height together rather than checking floor area alone.
A ridge-centered shower can simplify the enclosure because its main walls stay vertical. Confirm that the drain, valve, and supply routes avoid structural members, and have the plumber coordinate rough-ins before the framing or roof insulation is closed.
Planning check: confirm finished headroom after the shower base, tile, ceiling build-up, and glass hardware are included.
Mock up the enclosure with tape and a temporary showerhead position. Verify headroom and fixture clearances under local requirements and manufacturer instructions; a plan that looks centered on paper may feel tight once tile and glass reduce the finished space.
2. Place the Tub Beneath the Lowest Slope
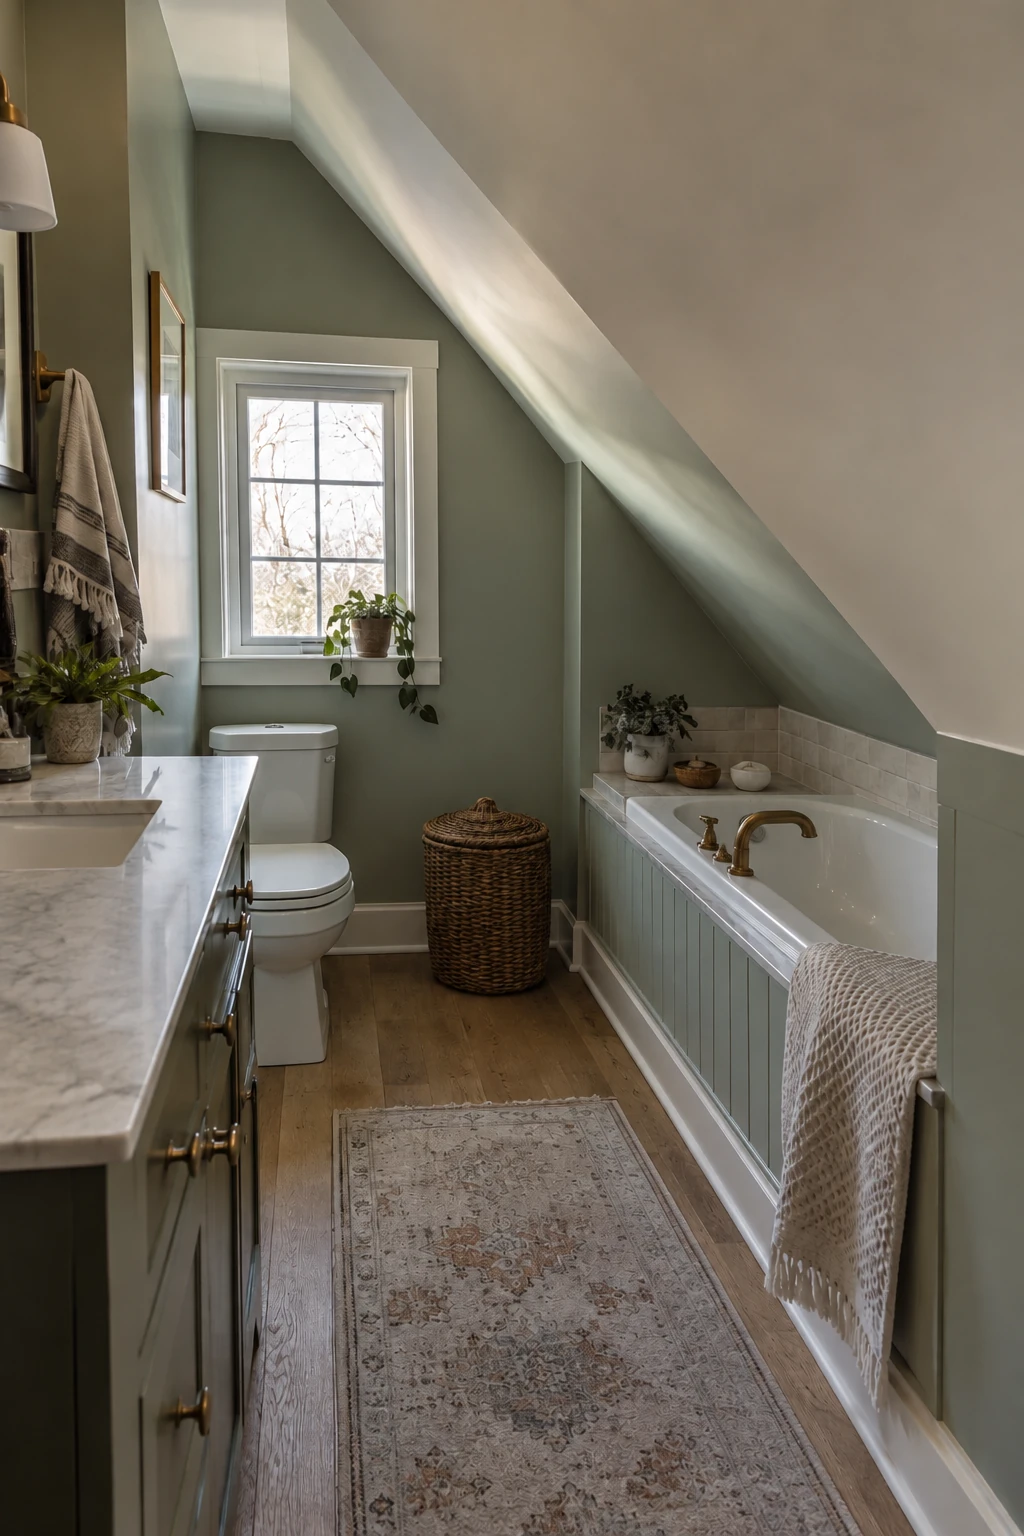
A tub uses low headroom better than a shower because most of the time is spent seated or reclining. Keep the entry end nearer the taller ceiling so stepping in, drying off, and helping a child do not require ducking.
Check the filled tub weight with the structure, especially when the attic floor was designed only for storage. A structural engineer should review joists and bearing before a heavy cast-iron, stone, or deep soaking model is ordered.
Planning check: review filled tub weight and entry headroom before ordering the fixture.
Leave a cleanable gap at the wall or use a properly detailed built-in surround. The roof slope still needs moisture-safe finishes, insulation continuity, and enough clearance for any operable window or blind above the tub.
3. Build a Dormer Around the Shower
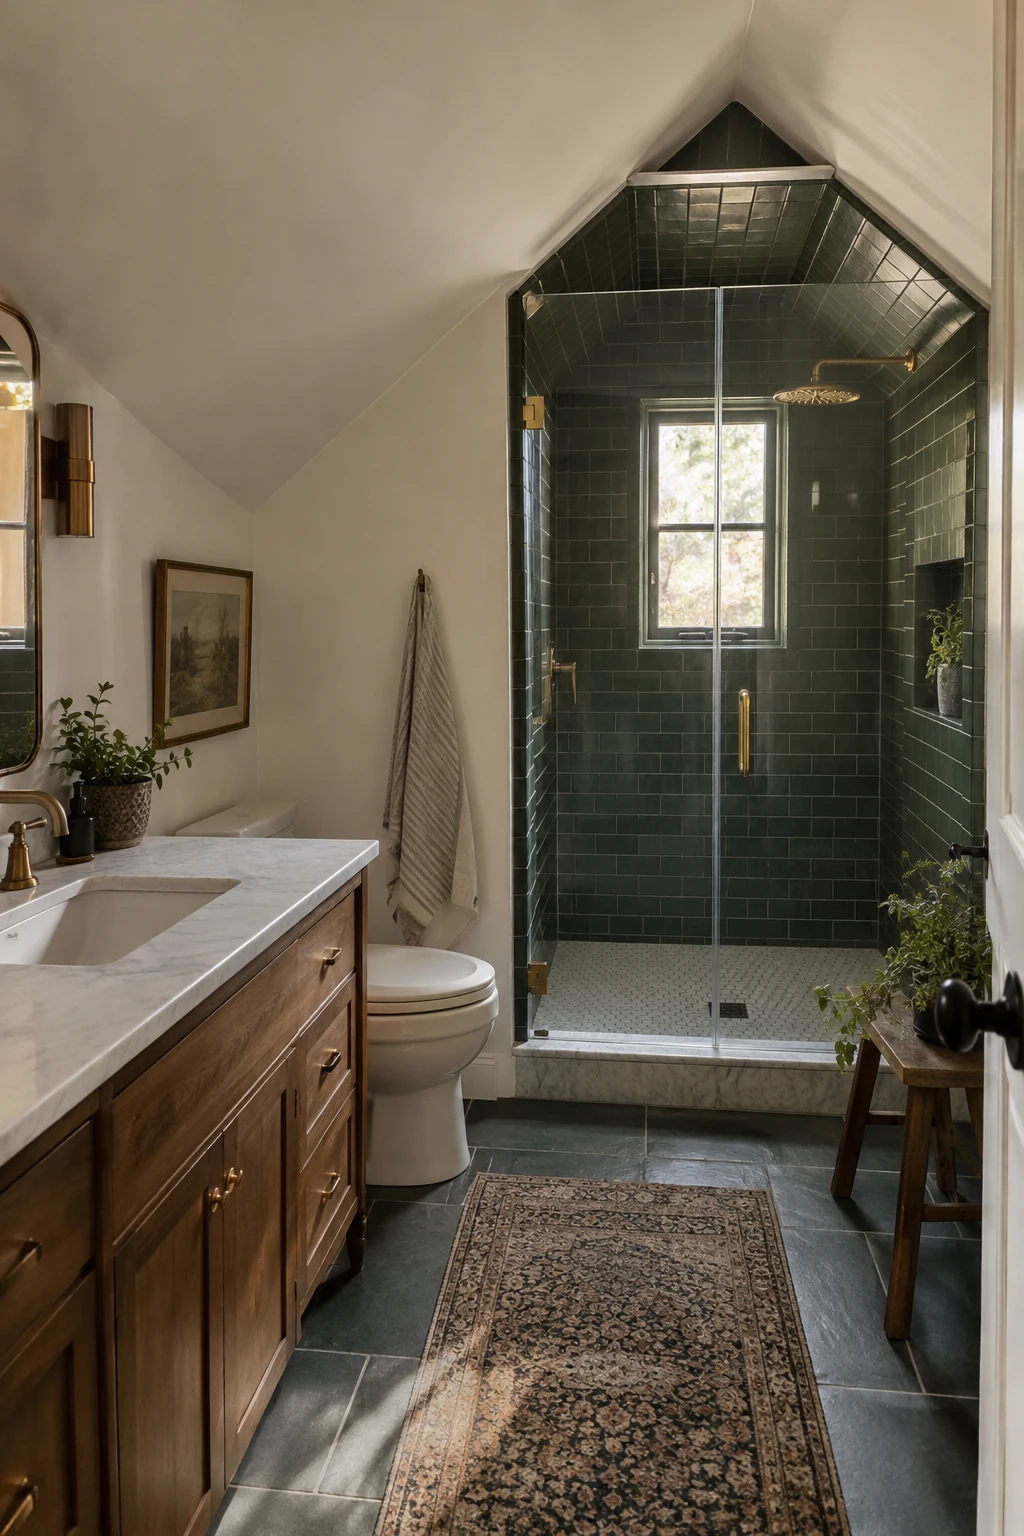
A dormer can turn an unusable slope into a full-height shower bay with vertical walls for tile and glass. It also creates a clearer place for a window, exhaust route, or recessed niche without forcing those elements into angled framing.
Because a dormer changes the roof, expect design, structural, flashing, insulation, and permit work. Have the architect or engineer coordinate the opening, and use a qualified roofer so the new valleys and transitions shed water correctly.
Permit check: coordinate structure, flashing, insulation, and roof drainage as one scope.
Keep the shower glass and door swing inside the new usable volume. A dormer adds cost, so compare it with moving the shower to an existing full-height zone before committing to exterior construction.
4. Use the Gable Wall for the Vanity
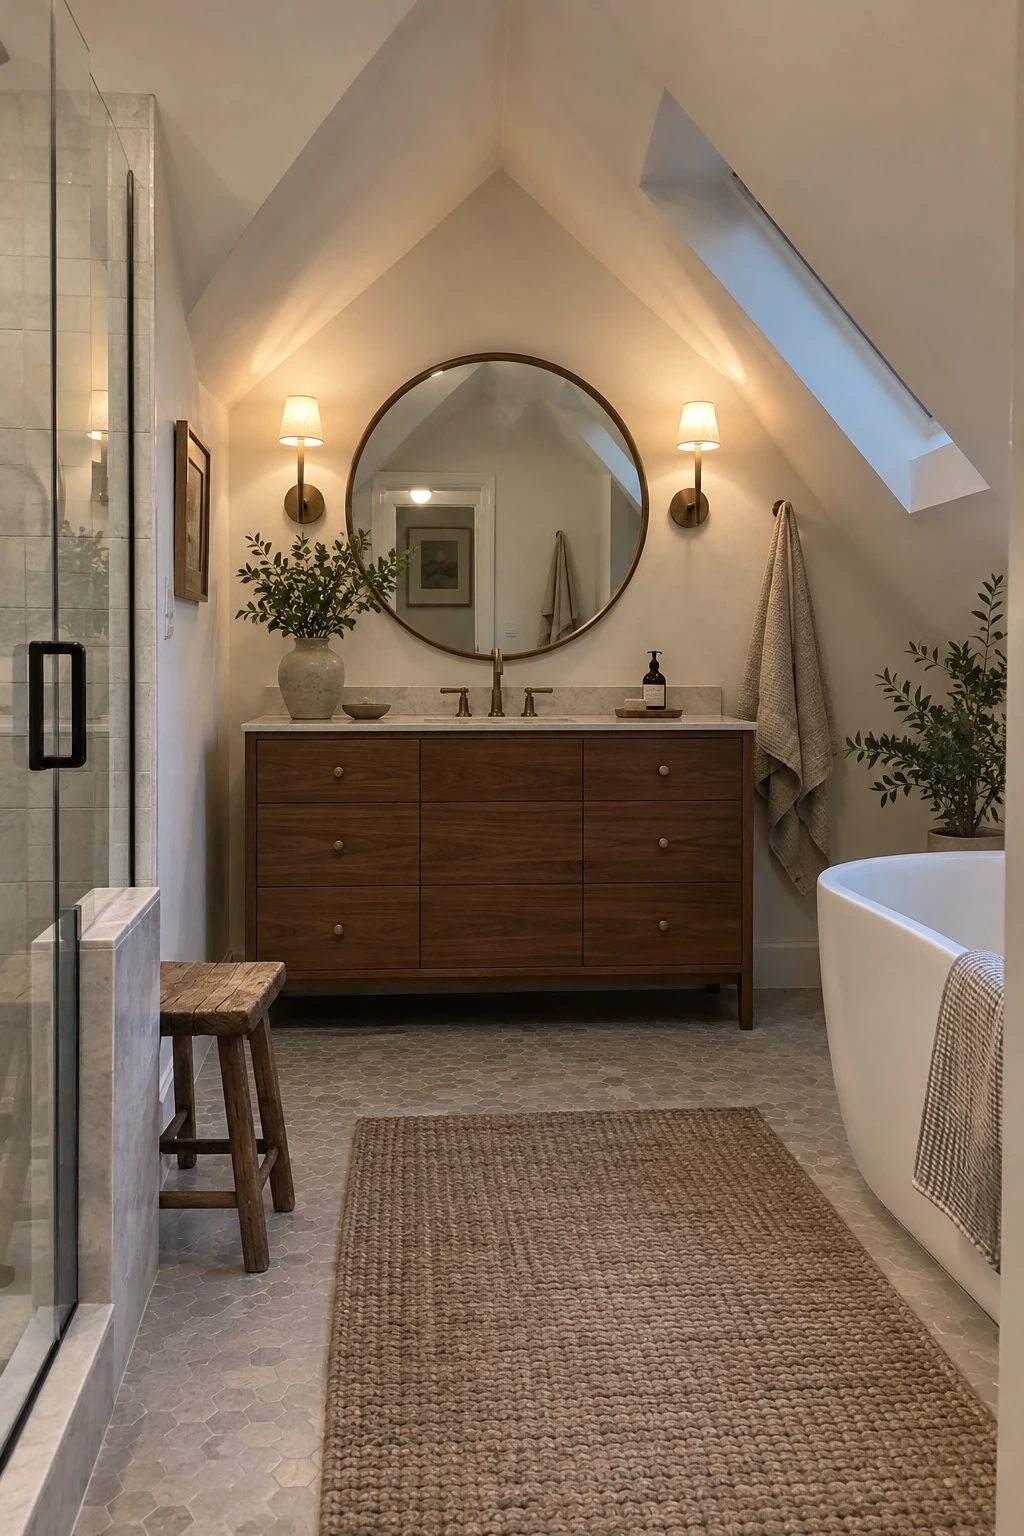
A full-height gable wall gives the vanity, mirror, and sconces a conventional vertical surface. This keeps the daily standing zone away from the low eaves and prevents an angled ceiling from cutting through the mirror composition.
Measure the faucet, backsplash, mirror, and light fixtures as one elevation. Verify electrical clearances and damp-location ratings with the adopted code and product instructions, then place outlets where cords can be used without crossing the sink.
Envelope check: avoid recesses that interrupt insulation without a designed thermal detail.
If the gable is an exterior wall, preserve insulation and air sealing behind any recessed cabinet or wiring box. Surface-mounted storage may be the better choice when a deep recess would weaken the thermal layer.
5. Keep the Toilet Near the Plumbing Stack
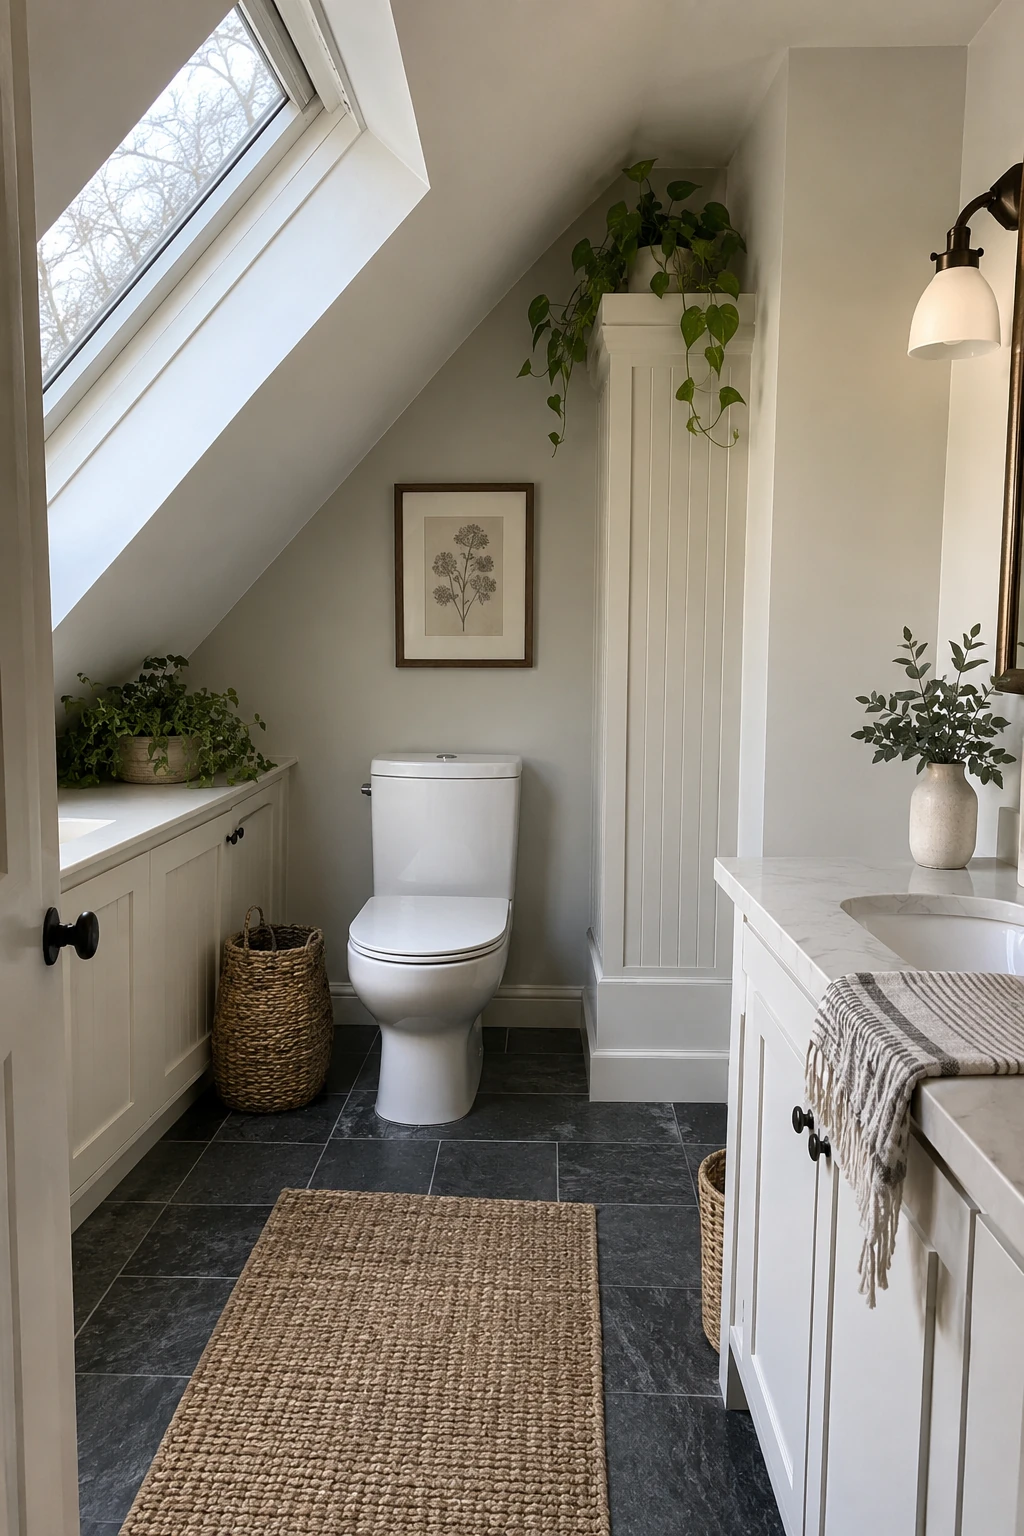
Locating the toilet close to an existing stack can reduce long drain runs, floor disruption, and boxed-down ceilings below. Start with the plumbing route rather than placing the toilet solely where it looks balanced.
The toilet still needs usable headroom, side space, and a clear approach. Mark the roof slope at finished height and confirm the layout against local plumbing requirements before the plumber drills or alters any framing.
Service check: keep cleanouts, shutoffs, and concealed connections accessible.
Use the stack chase as part of the design with a shallow ledge or painted enclosure, but keep cleanouts and connections serviceable. A removable panel is more valuable than a seamless wall that must be demolished for repairs.
6. Reserve a Full-Height Circulation Lane
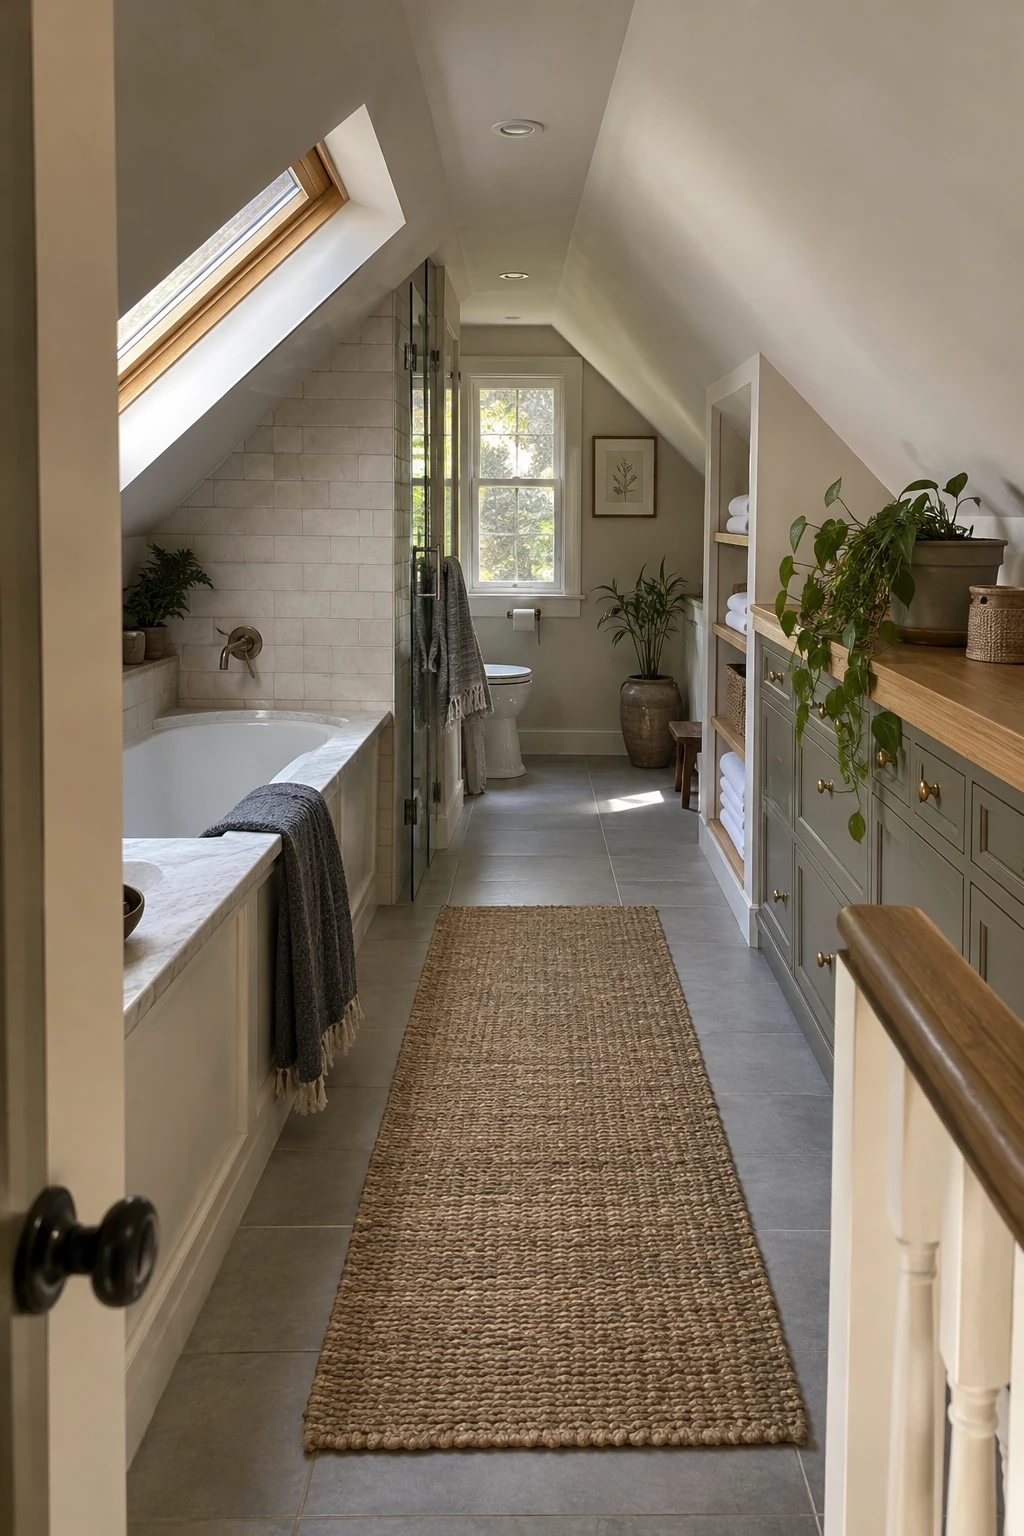
Keep the main walking route beneath the ridge or another full-height strip. Low fixtures can flank this lane, allowing the roof slopes to become useful edges rather than obstacles people hit while moving through the room.
Draw the path from the stair landing to the sink, toilet, and shower. Include open doors, drawers, towel hooks, and glass panels because a clear aisle can disappear once moving parts project into it.
Access check: walk the taped route with every door, drawer, and glass panel open.
Tape the route on the subfloor and walk it before rough-in. Verify required headroom and egress conditions locally, especially where the bathroom is reached by an older stair with limited width or a tight turn.
7. Create a Compact Wet-Room Layout
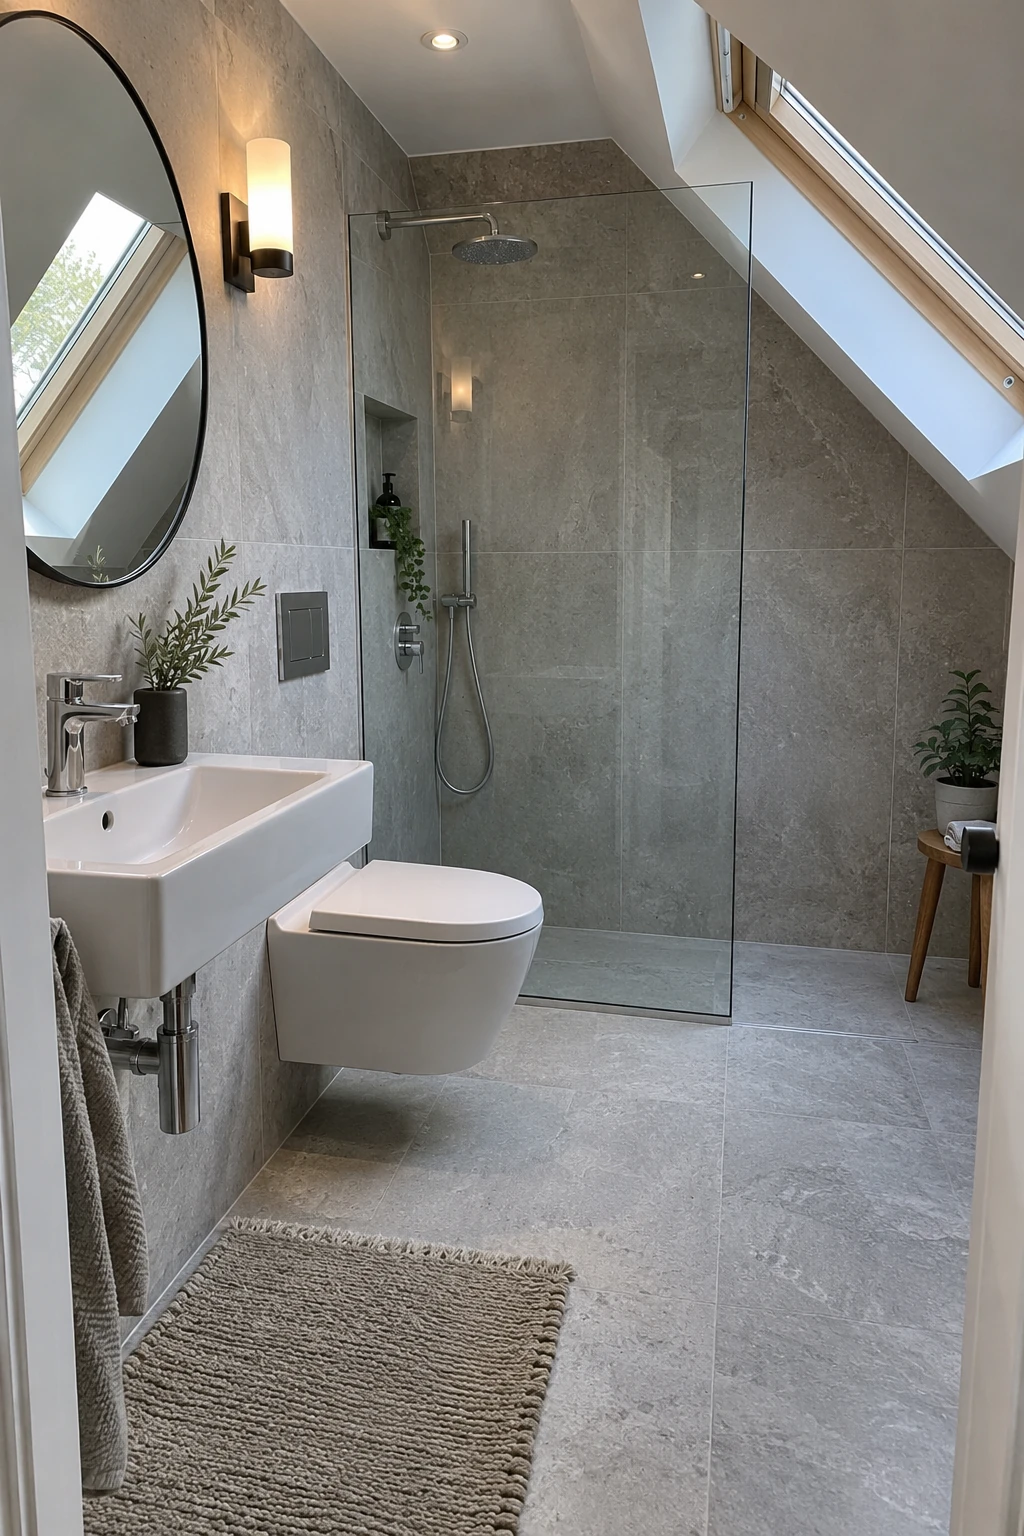
A wet-room layout can eliminate a bulky shower tray and make an irregular attic footprint read as one space. It works best when the whole floor assembly, door threshold, and splash pattern are planned as a coordinated waterproof system.
Place the drain and floor falls before choosing tile. The installer must create reliable slope without trapping water at the vanity or doorway, and the structure may need adjustment to keep the finished floor from rising awkwardly at the landing.
Waterproofing check: treat the doorway and floor transition as part of the wet-room assembly.
Use a fixed panel or short return wall to control spray, then provide strong mechanical ventilation. Ask a waterproofing specialist to detail penetrations, transitions, and upturns; decorative grout and sealant are not substitutes for the membrane below.
8. Plan a Low-Threshold Shower for Future Use
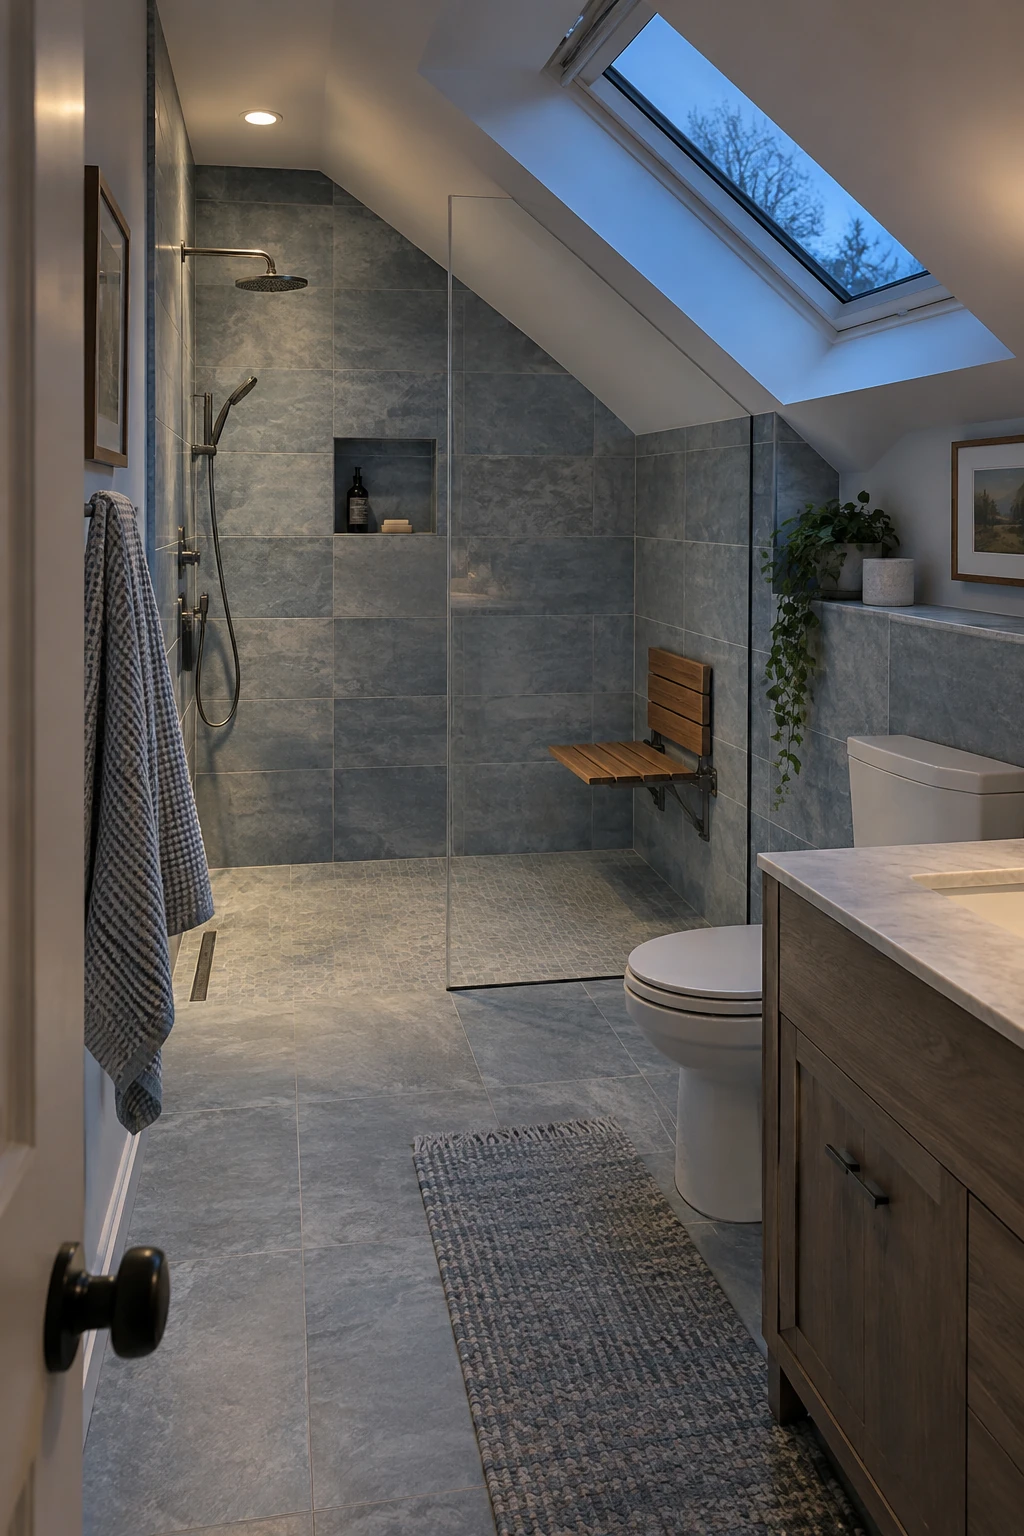
A low threshold reduces a trip point and can make an attic bathroom easier to use over time. Pair it with a clear approach, reachable controls, a handheld shower, and blocking for future supports rather than treating the entry detail alone as accessibility.
Review these zero-entry shower examples, then have the designer coordinate drainage, waterproofing, structure, and door clearance. A truly barrier-free transition may require more floor depth than the attic framing provides.
Route check: future accessibility begins at the stair, landing, and doorway.
Remember that stairs can remain the larger access barrier. Discuss the entire route with the household and local professionals before describing the room as accessible; future-friendly features still improve comfort even when full accessibility is not feasible.
9. Use a Pocket Door to Recover Floor Space
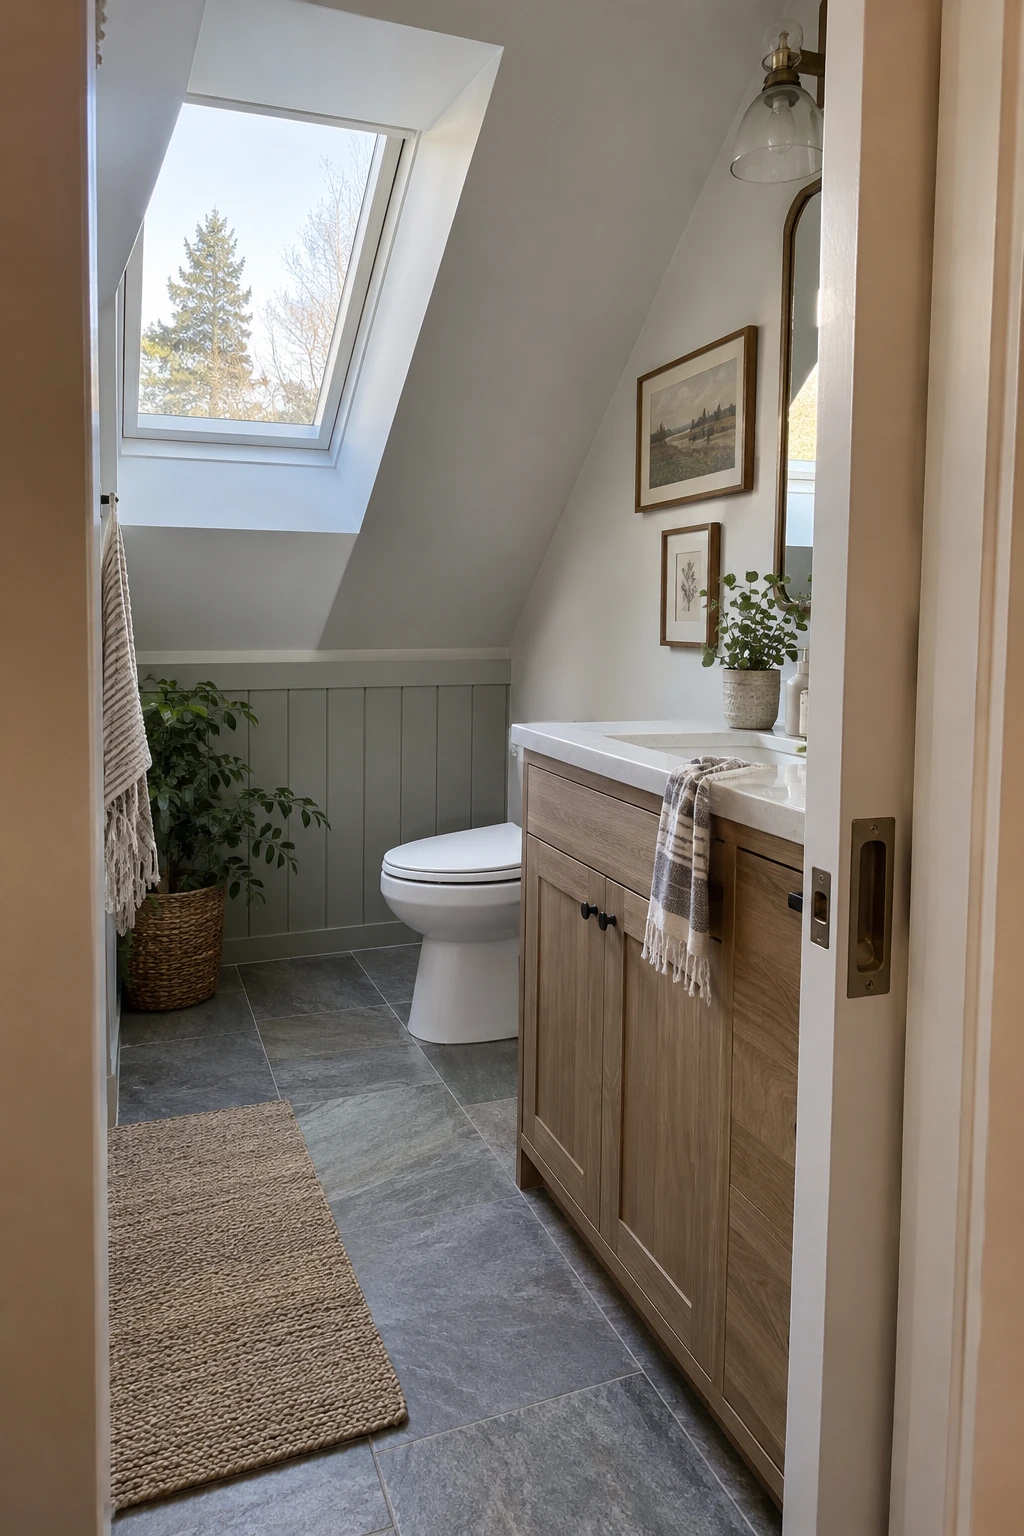
A pocket door removes a swing that might collide with the vanity, toilet, or shower glass. It can also keep the narrow stair landing clear when an inward-swinging door would consume the only comfortable standing space.
Check the wall for plumbing, wiring, structure, and the door pocket before rough-in. A surface-mounted slider is a useful fallback when the wall cannot be opened, but it needs privacy hardware and enough uninterrupted wall length.
Wall check: confirm the pocket contains no plumbing, structure, or required wiring.
Confirm local requirements for bathroom doors and safe emergency access. Use quality hardware with an accessible pull, then keep towel bars and switches away from the moving panel.
10. Protect the Stair Landing and Door Swing
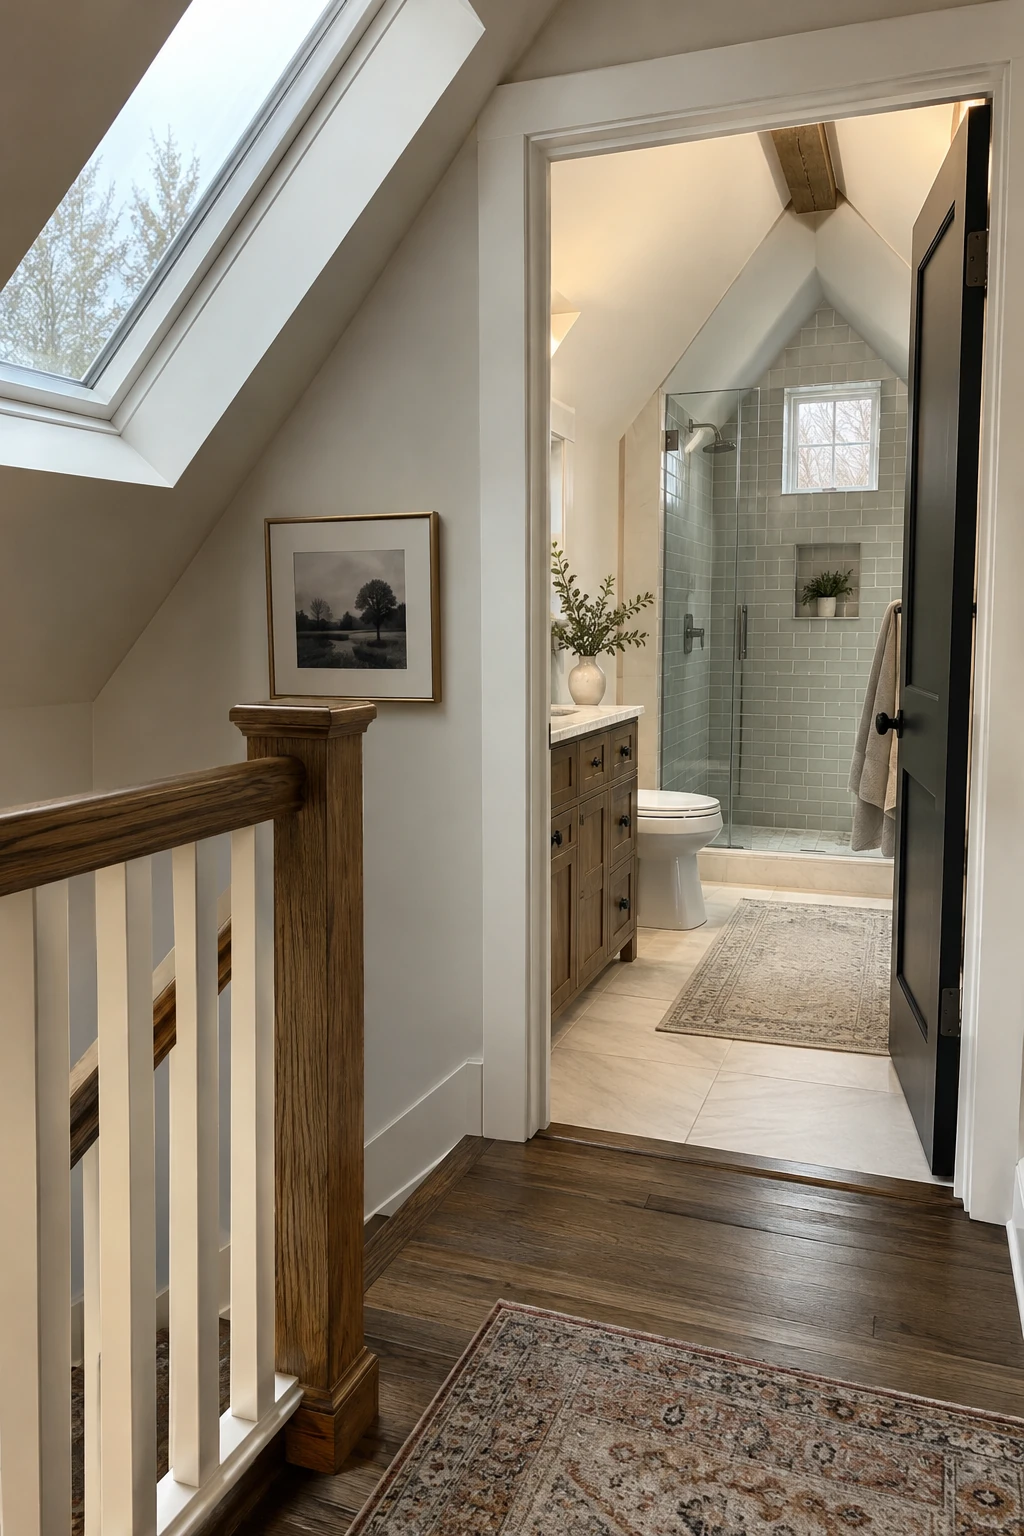
Treat the top of the stair as part of the bathroom plan. The door, bath mat, hamper, and towel hooks should not crowd the landing or force someone to step backward toward the stairs.
Coordinate landing size, guards, handrails, lighting, and headroom with the locally adopted code. An architect or qualified contractor should review older stairs before the attic changes from storage to regular living space.
Place a light switch where it is reachable before entering the room and avoid slick finish transitions. The safest plan offers a level pause between the final stair tread and the bathroom threshold.
Coordinate Structure, Plumbing, and the Building Shell
The hidden work carries more risk than the visible finishes. Sequence engineering, drainage, roof repairs, insulation, ventilation, waterproofing, and electrical planning before tile or cabinetry is ordered.
11. Verify the Floor Before Choosing Heavy Finishes
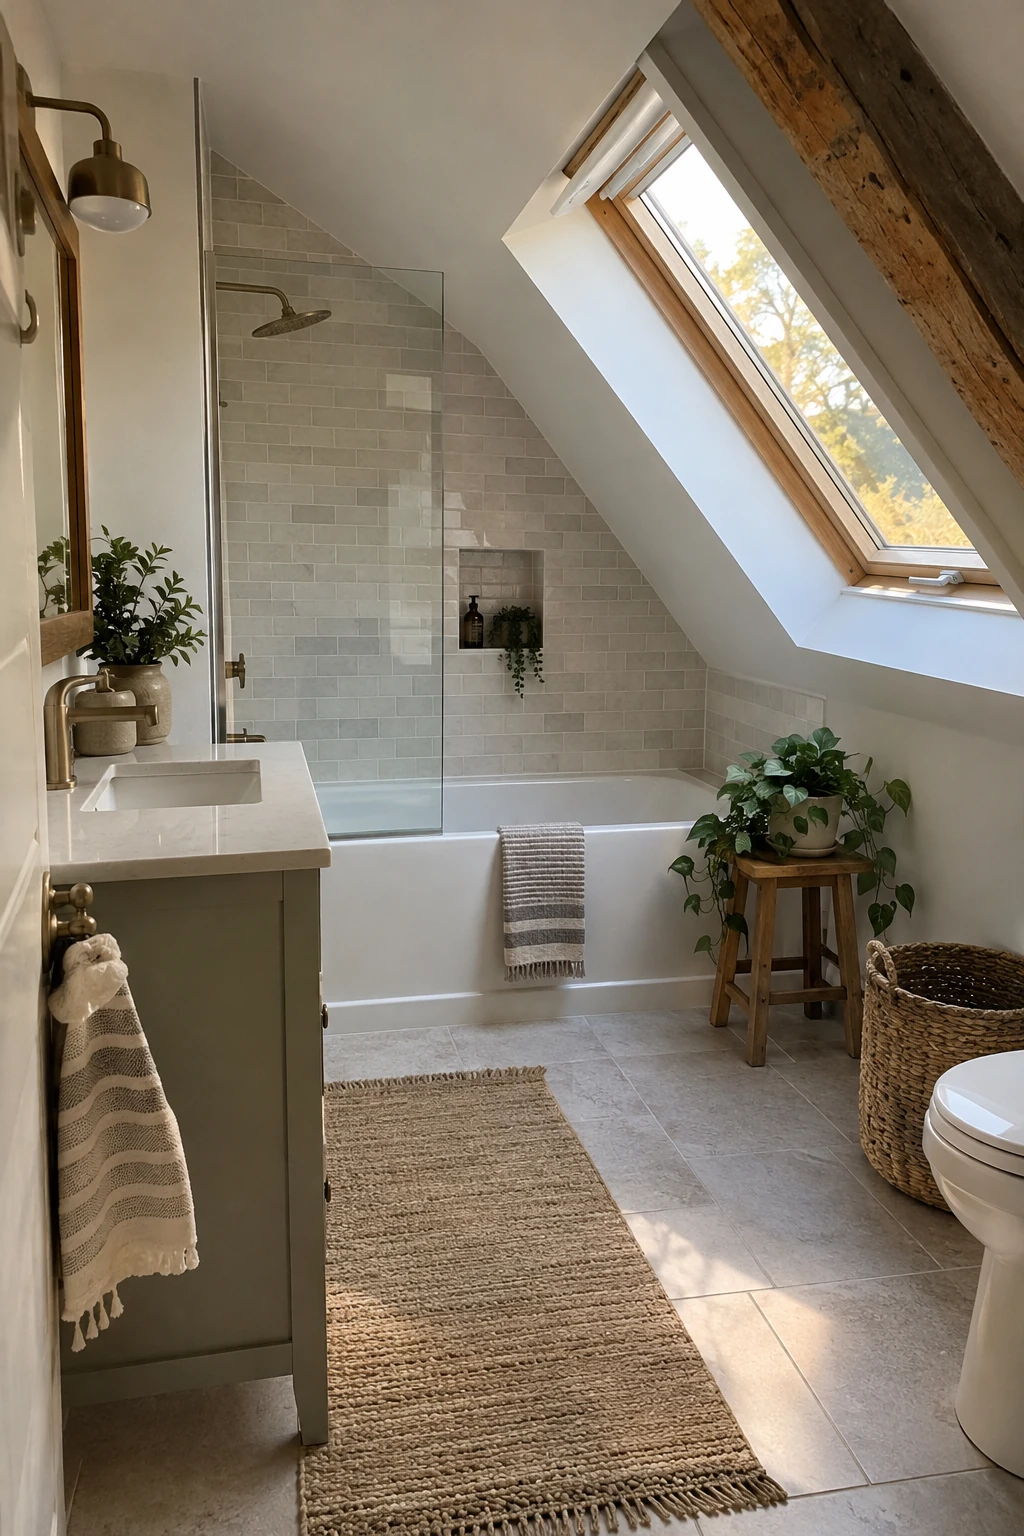
Attic joists may have been sized for ceiling support or light storage rather than a bathroom. Ask a structural engineer to review the span, bearing, deflection, openings, and combined weight of water, fixtures, tile, underlayment, and occupants.
Lightweight porcelain, an acrylic tub, and a carefully designed floor assembly may reduce load, but material substitutions do not replace analysis. Tile also needs a sufficiently stiff substrate to avoid cracking when the structure moves.
Structure check: approve the full assembly weight before finishes are purchased.
Complete this review before purchasing stone slabs or a cast-iron tub. Structural changes can alter finished floor height, stair geometry, and plumbing routes, so they belong near the beginning of the budget.
12. Route Drains Before Locking the Layout
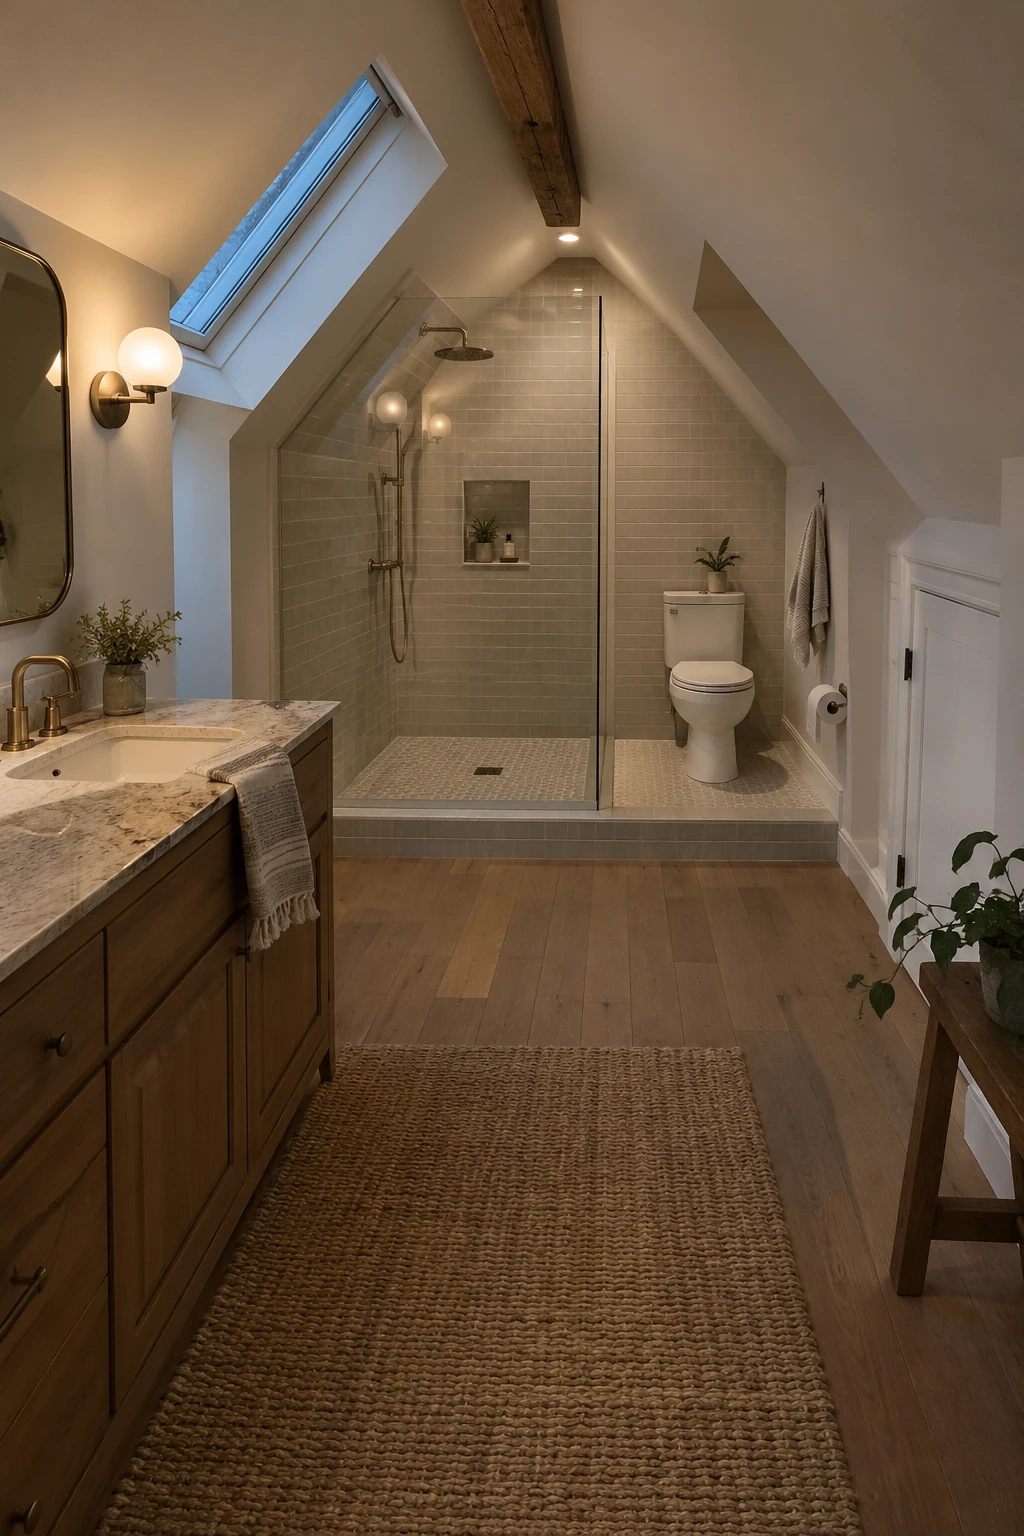
Waste lines need a workable route and slope, which can be difficult across shallow attic framing. Have the plumber map every drain, vent, and cleanout before fixture locations become fixed.
Do not notch or drill joists by guesswork. The plumber and structural engineer should agree on permitted openings, reinforcement, or an alternate route such as a service platform or boxed ceiling below.
Compare layouts by total plumbing impact, not fixture price alone. Moving the toilet a few feet can cost more than upgrading the vanity if it triggers structural work and a long concealed drain run.
13. Build a Service Chase Into the Eaves
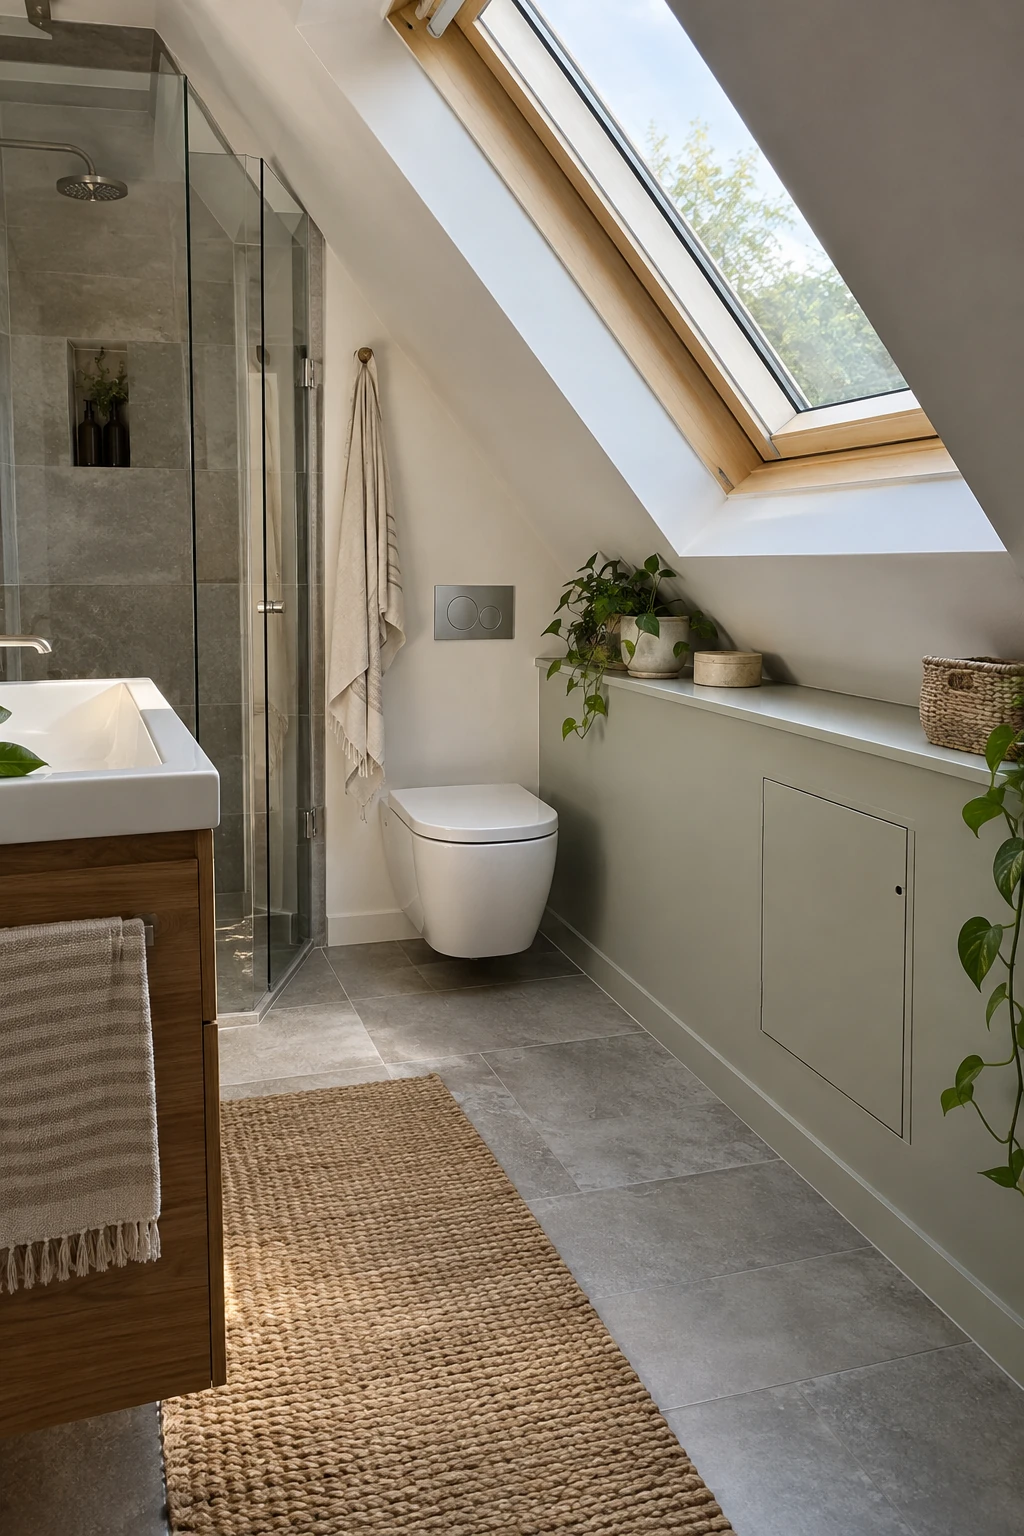
A shallow knee-wall chase can hold supply lines, vent piping, wiring, or cistern components while preserving the main roof insulation. It also gives low eaves a deliberate purpose instead of leaving an unusable triangular void.
Keep pipes on the conditioned side where climate and assembly design allow, and insulate against condensation or freezing as required. Coordinate the chase with the building-envelope professional so services do not puncture critical air or vapor-control layers carelessly.
Include labeled, removable access for valves, traps, cleanouts, and connections. A slim ledge can finish the top, but avoid permanent storage that blocks service.
14. Repair Roof Leaks Before Closing the Ceiling
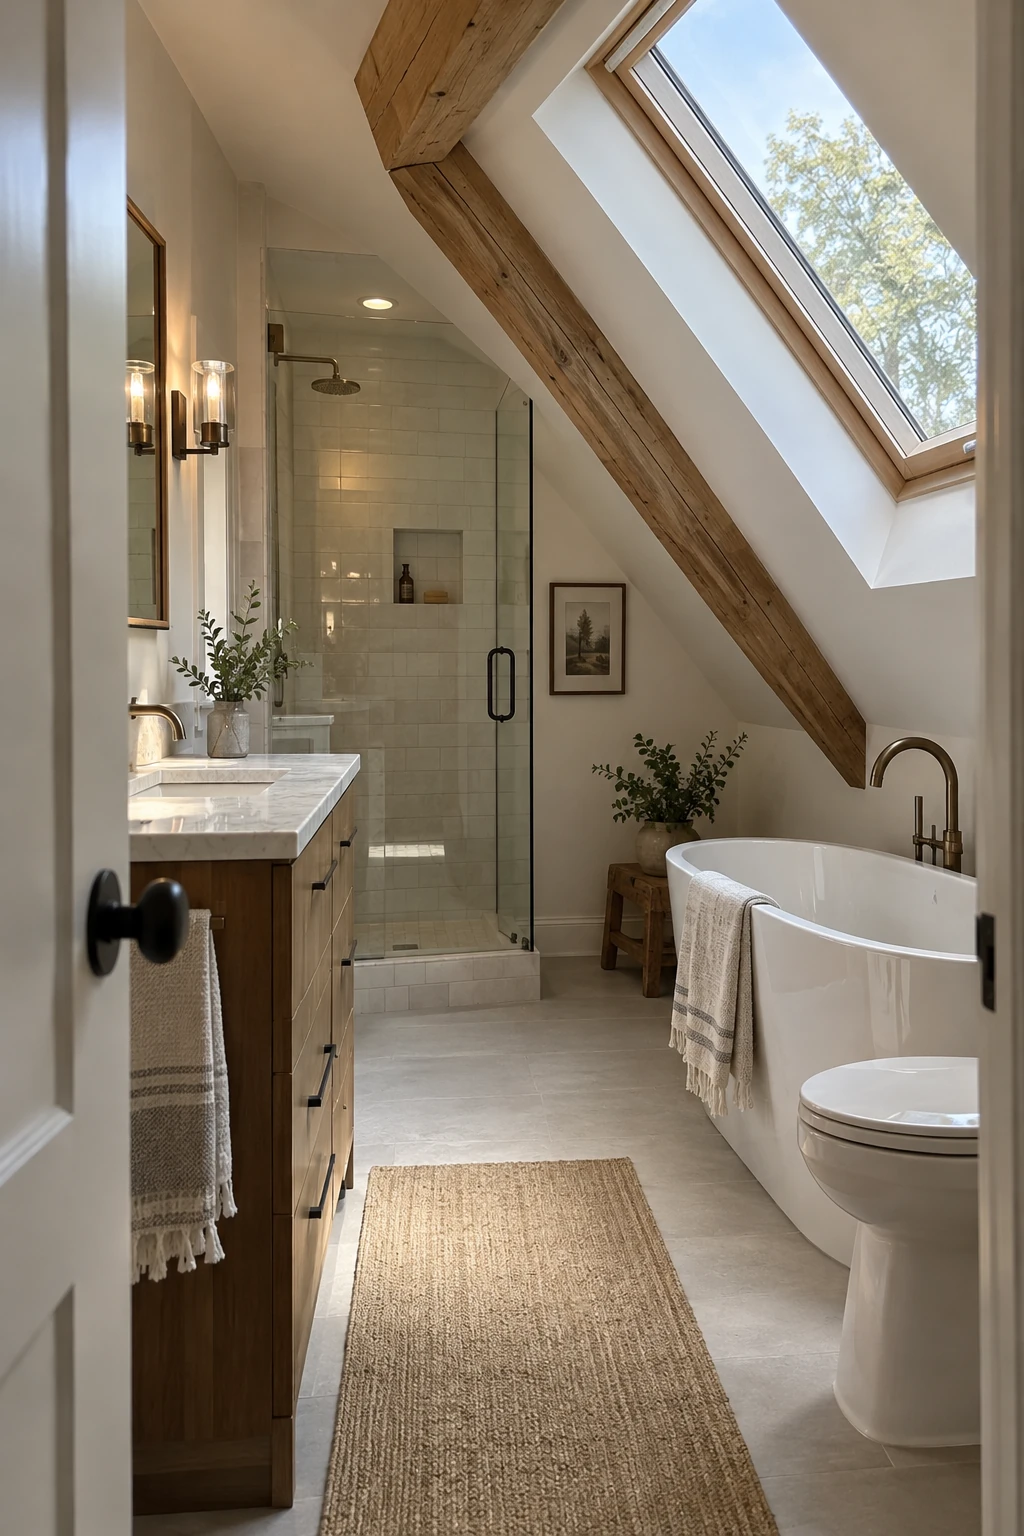
Fix active leaks, damaged flashing, and damp roof materials before adding insulation or bathroom finishes. Closing wet assemblies can hide decay and create a much larger mold or rot problem above the new ceiling.
Have a roofer inspect valleys, penetrations, chimney junctions, and proposed vent or window openings. Record repairs with photos before they are covered, then allow materials to dry and address any remediation properly.
Include roof contingencies in the first budget phase. Beautiful tile is easy to postpone; waterproof exterior work is not once the bathroom ceiling has been sealed.
15. Continue Insulation Through the Roof Slope
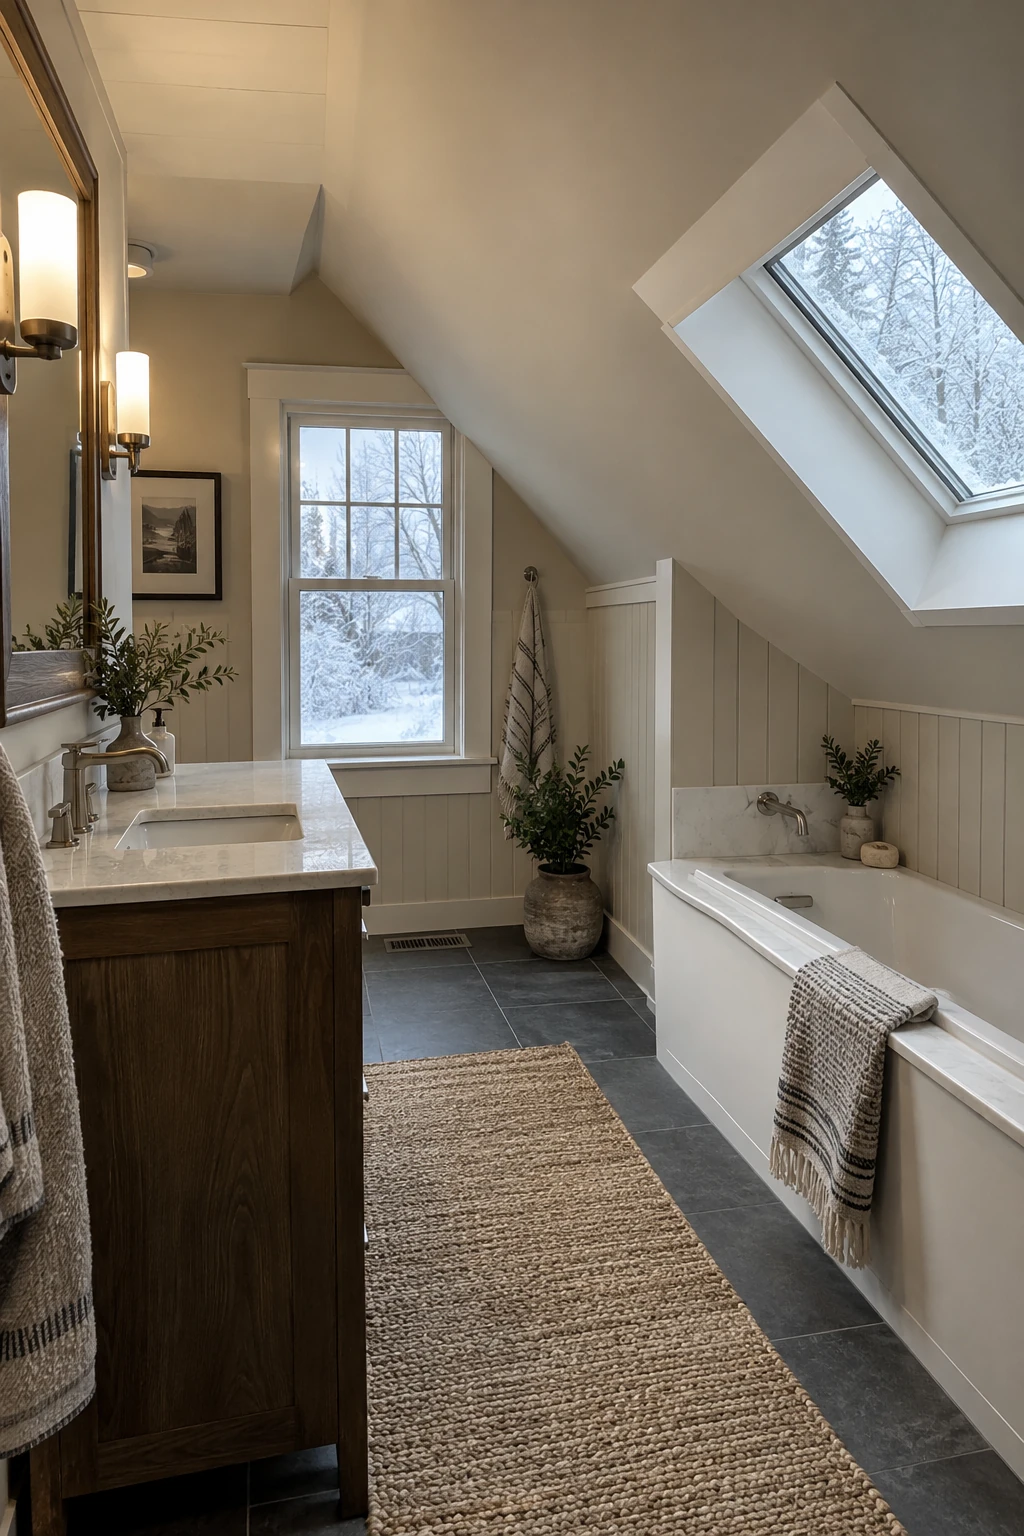
A bathroom under the roof needs a continuous thermal and air-control strategy to reduce cold surfaces and condensation risk. Preserve the intended ventilation channels or unvented-roof assembly instead of stuffing insulation around fixtures without a plan.
Minimize ceiling penetrations and seal approved boxes, ducts, and window curbs as part of the assembly. A building-envelope professional can select materials for the climate, roof type, and local requirements.
Coordinate insulation thickness with finished headroom. A ceiling that drops several inches after design approval can make a shower or circulation zone unusable.
16. Vent the Exhaust Fan Directly Outdoors
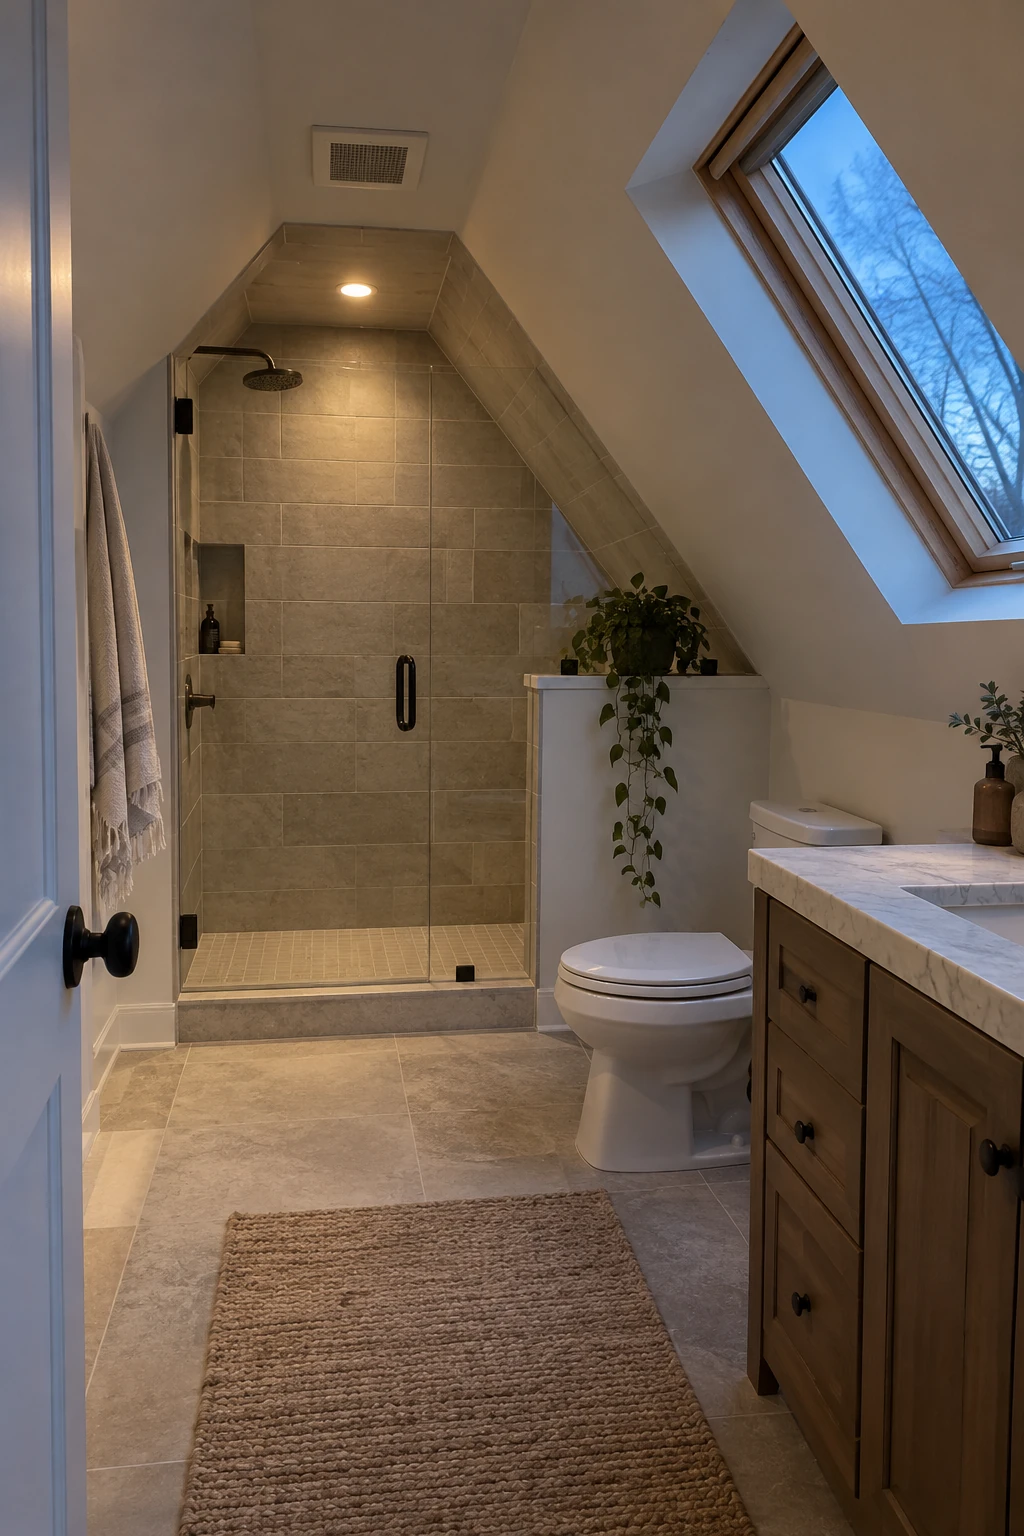
An attic bathroom fan must exhaust outdoors, never into the surrounding roof space. A short, well-planned duct route with an exterior termination helps remove shower moisture before it reaches cold framing or insulation.
Size and install the fan, duct, backdraft control, and exterior cap according to product instructions and local requirements. In cold areas, condensation control may require insulated ductwork and careful routing by a qualified installer.
Moisture check: verify that the fan terminates outdoors and moves air after installation.
Place the intake near the main moisture source without conflicting with the shower enclosure, lights, or roof framing. Confirm actual airflow after installation rather than assuming a noisy motor is moving enough air.
17. Track Humidity After Every Shower
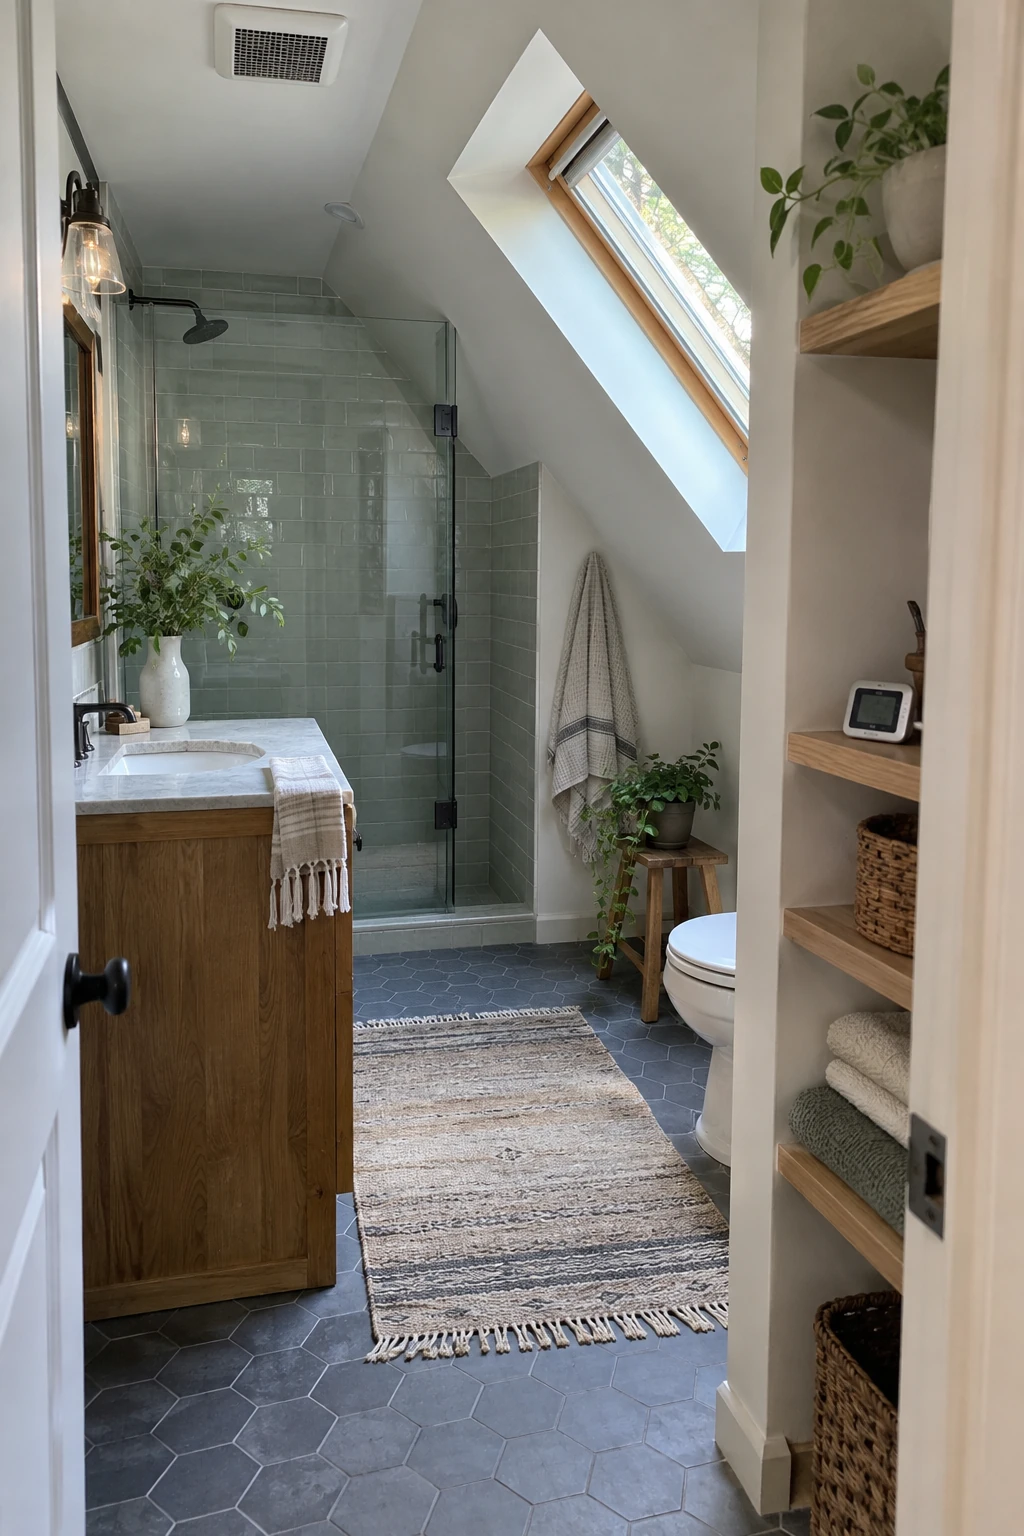
A small humidity monitor helps show whether moisture clears promptly after bathing. Place it outside direct spray and compare readings over time, especially during cold weather when roof surfaces are more likely to run cool.
Use the pattern to adjust fan run time, door position, or maintenance, then investigate persistent moisture rather than masking it with fragrance. Condensation on windows or ceilings can point to ventilation, insulation, or air-leakage problems.
Monitoring check: log normal post-shower drying before changing ventilation settings.
A monitor is a diagnostic aid, not a cure. Keep the exhaust system clean and have recurring dampness assessed before paint, caulk, or cabinetry begins to deteriorate.
Shop the NOKLEAD digital humidity monitor on Amazon
18. Waterproof Beyond the Shower Footprint
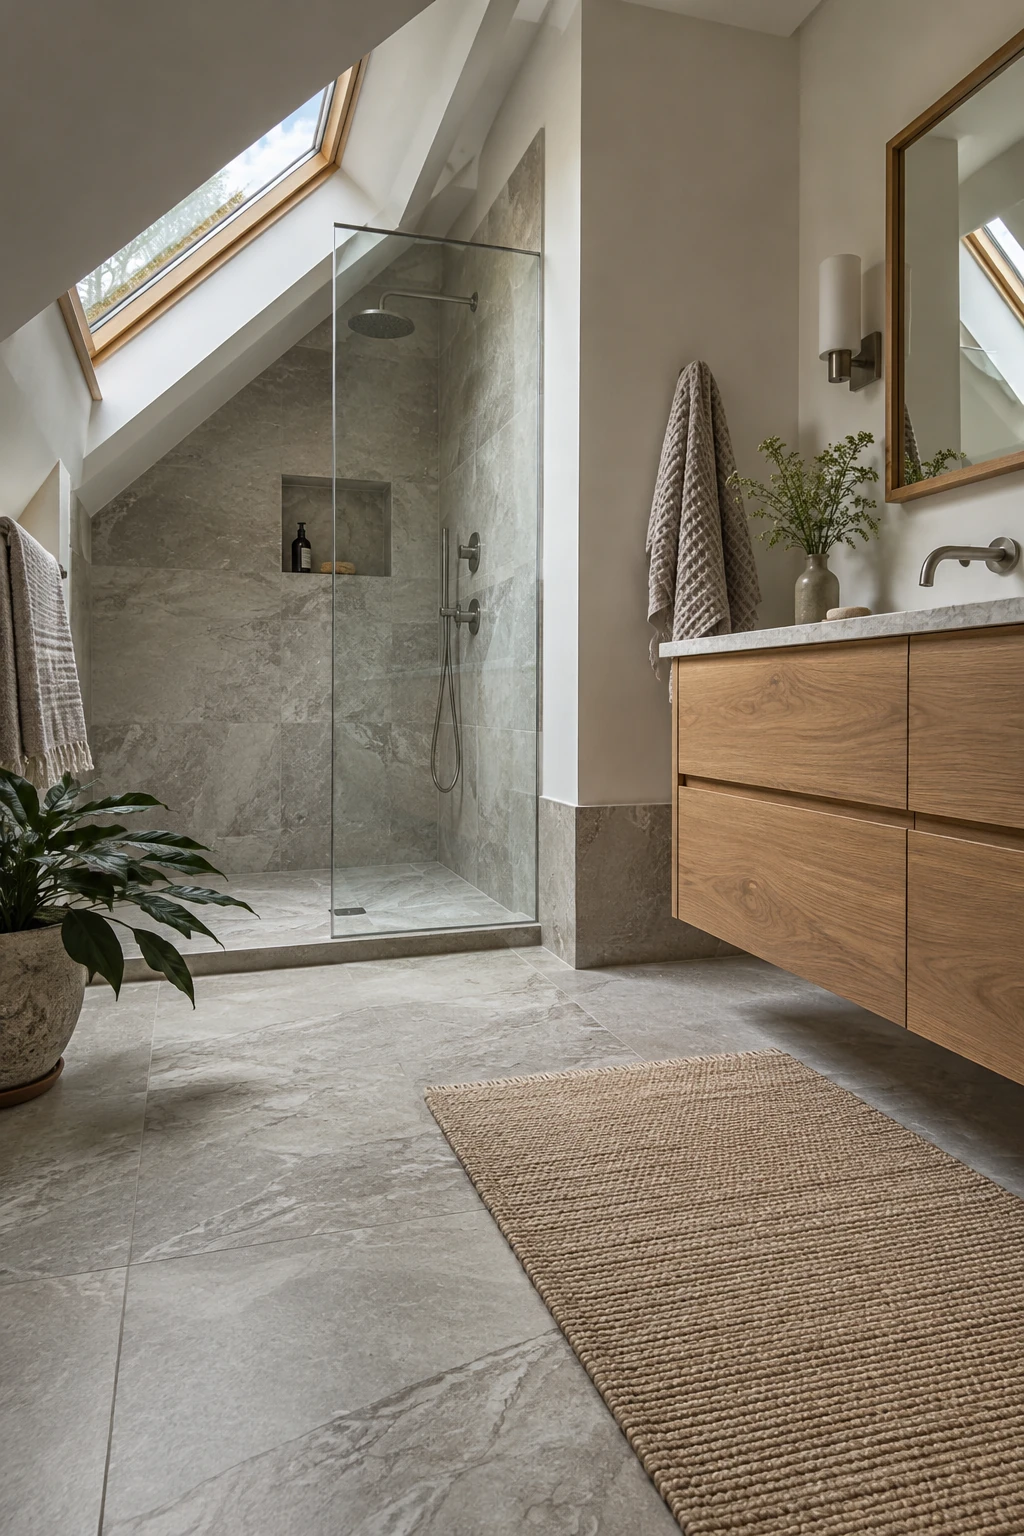
Extend the waterproofing strategy beyond the obvious shower rectangle when an open enclosure can send water toward the vanity or door. Include wall-to-floor transitions, penetrations, and the route water takes during cleaning.
Choose one tested assembly and follow its sequence, overlaps, cure times, and compatible sealants. Mixing unrelated membranes and drains can leave gaps even when each product is individually reputable.
Flood testing or other required verification should happen before tile hides the work. Photograph the completed membrane and keep product records for future repairs.
19. Add Sound Control Around Pipes and Floors
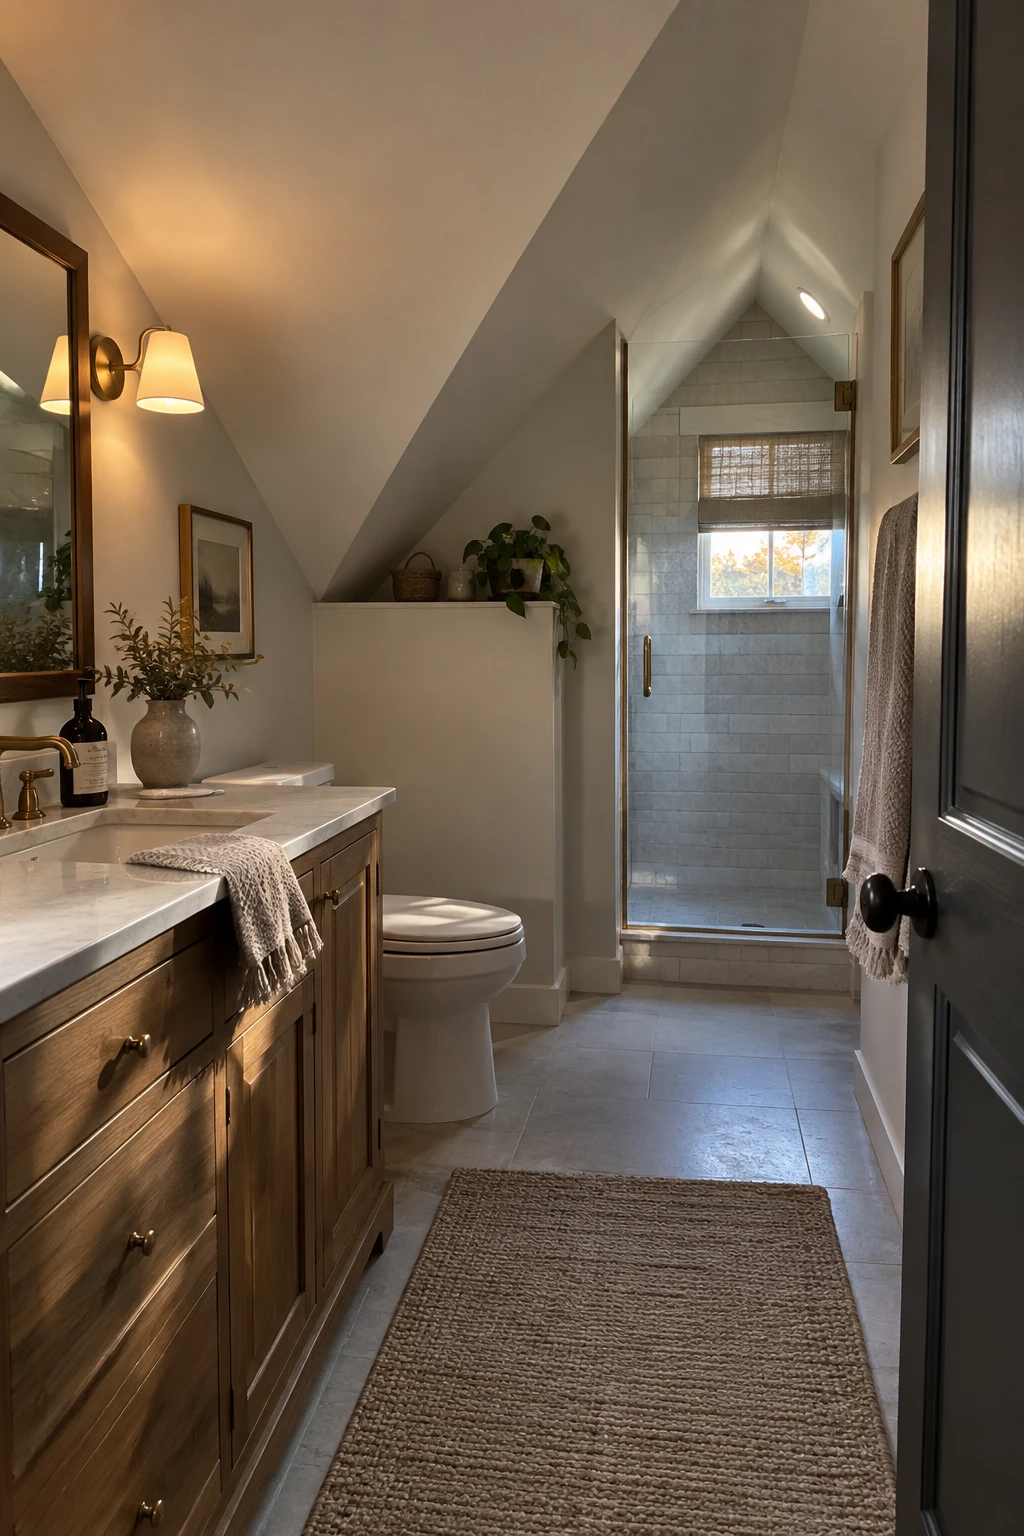
Water and waste noise travels easily through the ceiling below an attic bath. Plan acoustic insulation, isolated pipe supports, a solid door, and sealed penetrations while cavities are still open.
Keep sound materials compatible with fire, moisture, and building-envelope requirements. A plumber can reduce rattling with proper supports, while a designer can avoid placing the toilet directly above a quiet bedroom when another layout works.
Use soft finishes only where they can dry and be cleaned. Rugs and fabric shades can soften echo, but they should not compensate for uninsulated pipes or gaps around the floor assembly.
20. Add Electric Heat Under an Approved Floor
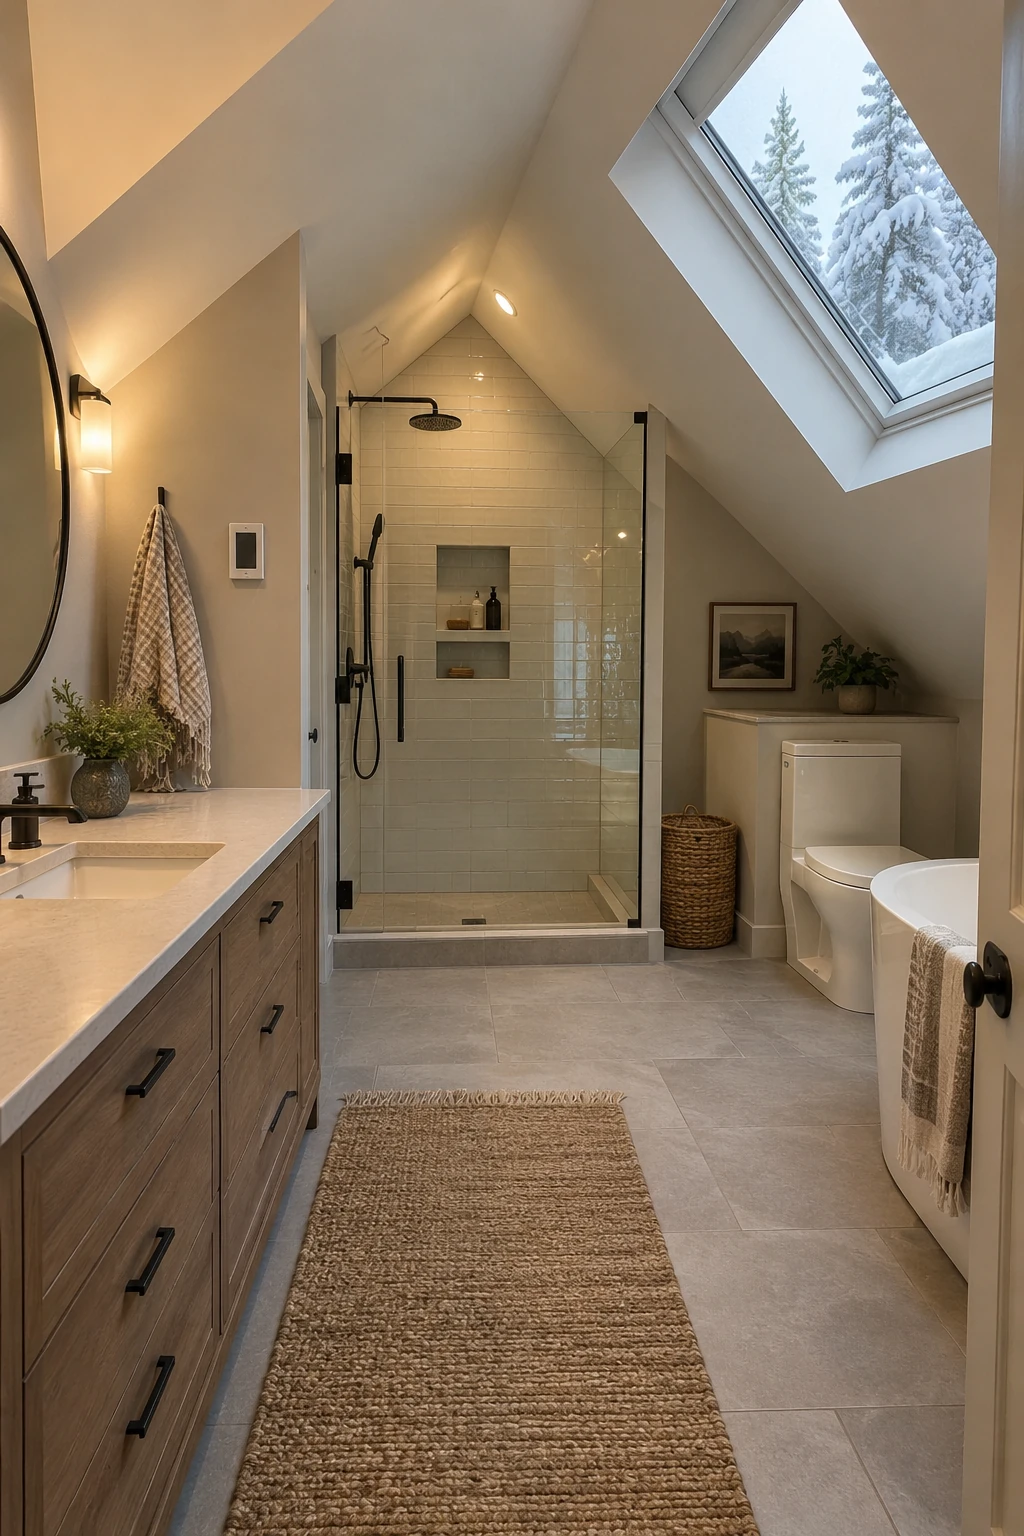
Radiant electric heat can make an attic floor comfortable without consuming wall space. Select a complete system approved for the chosen floor finish and wet-room conditions, then include sensor and thermostat locations in the electrical plan.
A licensed electrician should coordinate power, controls, protection, and required clearances with the tile installer. Photograph cable or mat locations before they are covered so future fasteners avoid them.
Treat floor heat as comfort, not the only moisture strategy. The room still needs effective ventilation, insulation, and a heating design suited to the climate and heat loss.
Bring In Daylight and Layer the Lighting
Roof geometry creates deep shadows and unusual sightlines. Combine controlled daylight with task, ambient, and low-level lighting so the room works at every hour without filling the slopes with fixtures.
21. Center a Roof Window Over the Tub
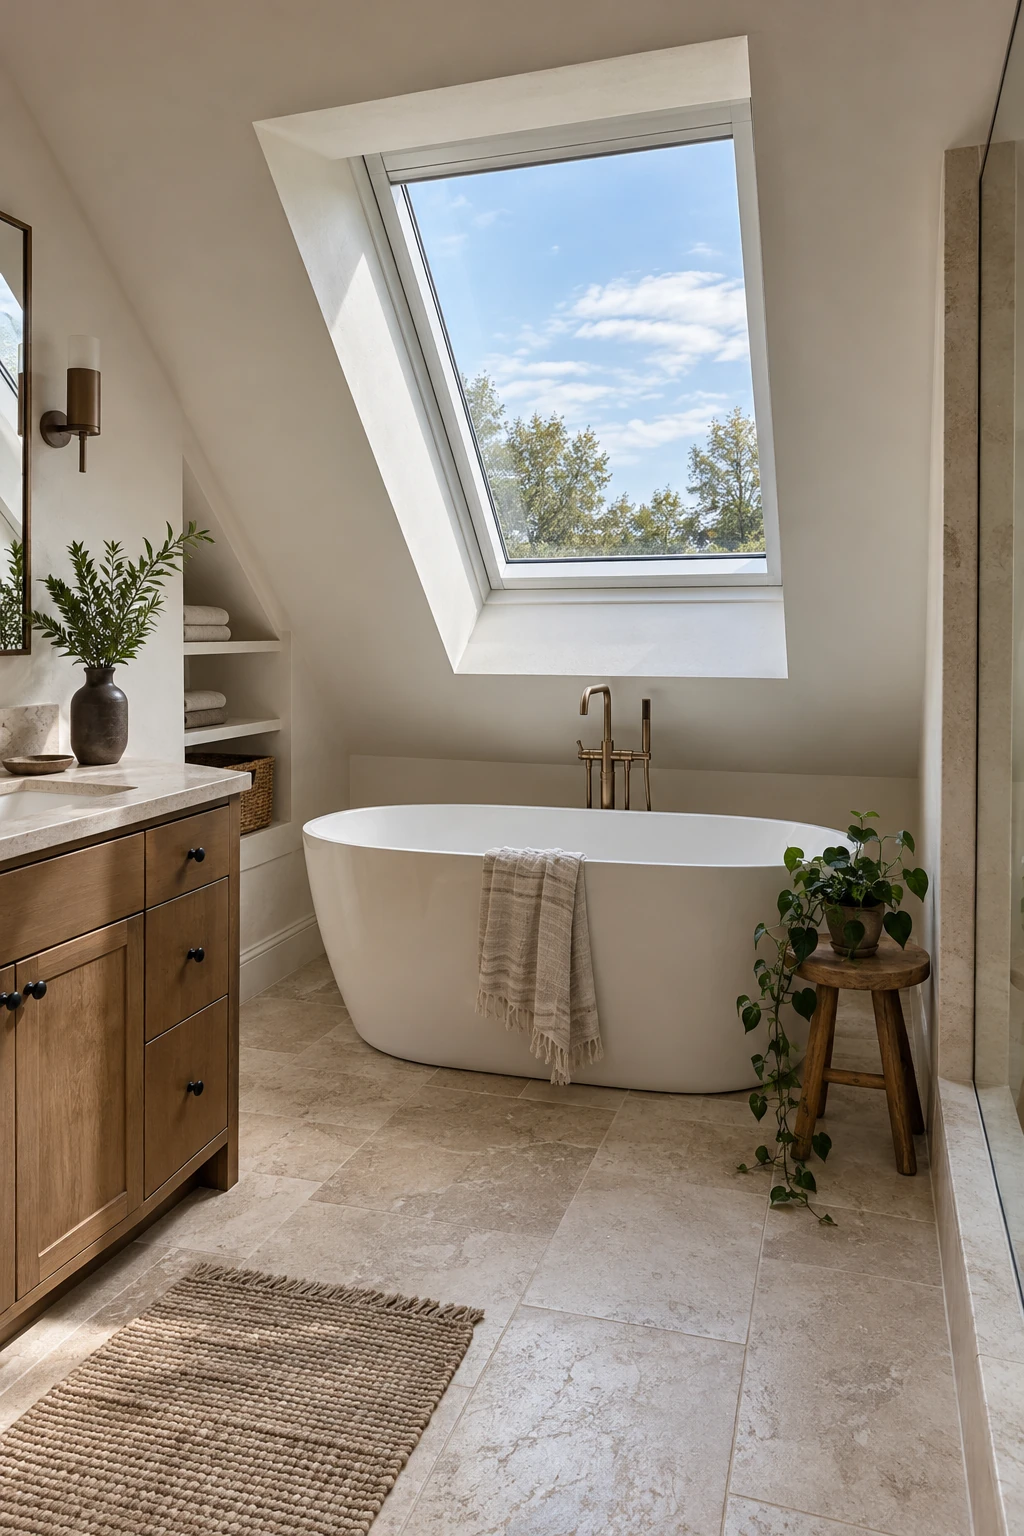
A roof window above the tub brings daylight into the lowest zone and turns the sky into the main focal point. Keep the tub entry on the taller side and confirm that the sash, handle, or blind can be operated safely.
Coordinate the opening with rafters, flashing, insulation, and interior drainage paths. A qualified roof-window installer should follow the manufacturer details and local permit requirements rather than improvising the curb and underlayment.
Plan privacy and summer heat control early. Moisture-safe shades, glazing choices, and external shading may matter more than adding another decorative light.
22. Add a High Gable Window for Privacy
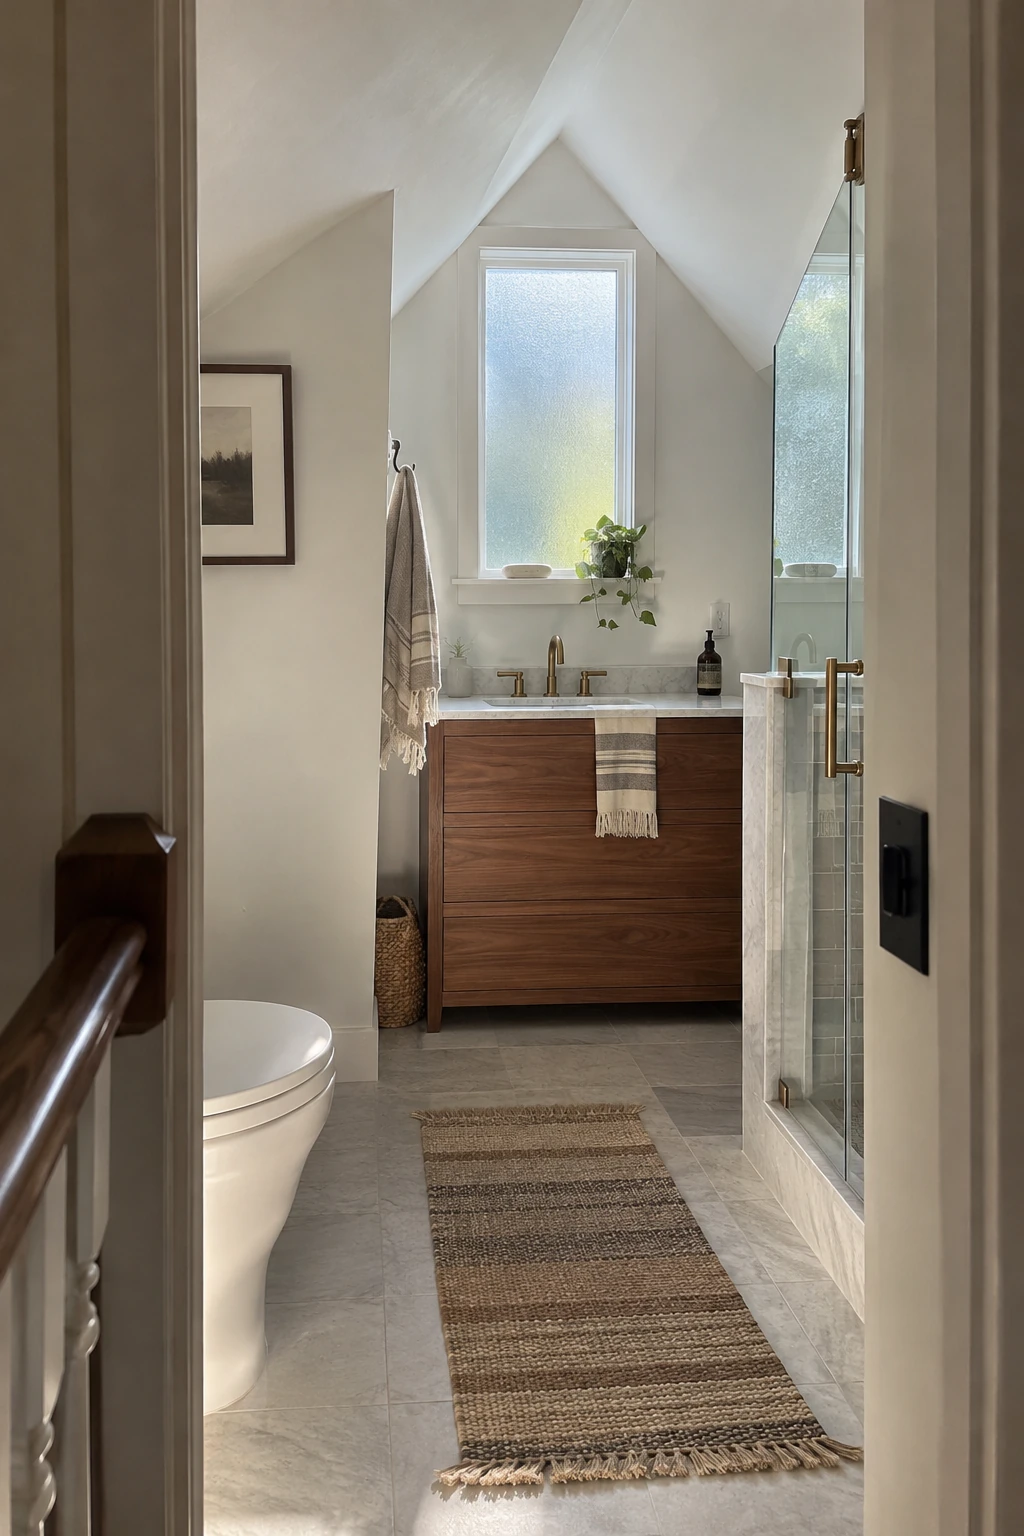
A high window in the gable can bring in side light while keeping views away from the tub or toilet. It also leaves the lower wall available for a vanity, towel rail, or shallow storage.
Size the opening around structure and the exterior elevation, then detail flashing and insulation with the wall assembly. Tempered or safety glazing may be required by location; verify the adopted code and exact product certification.
Use obscured glazing only where it still provides the desired daylight. Test samples because heavily patterned glass can darken a small attic more than expected.
23. Use a Sun Tunnel Where a Window Will Not Fit
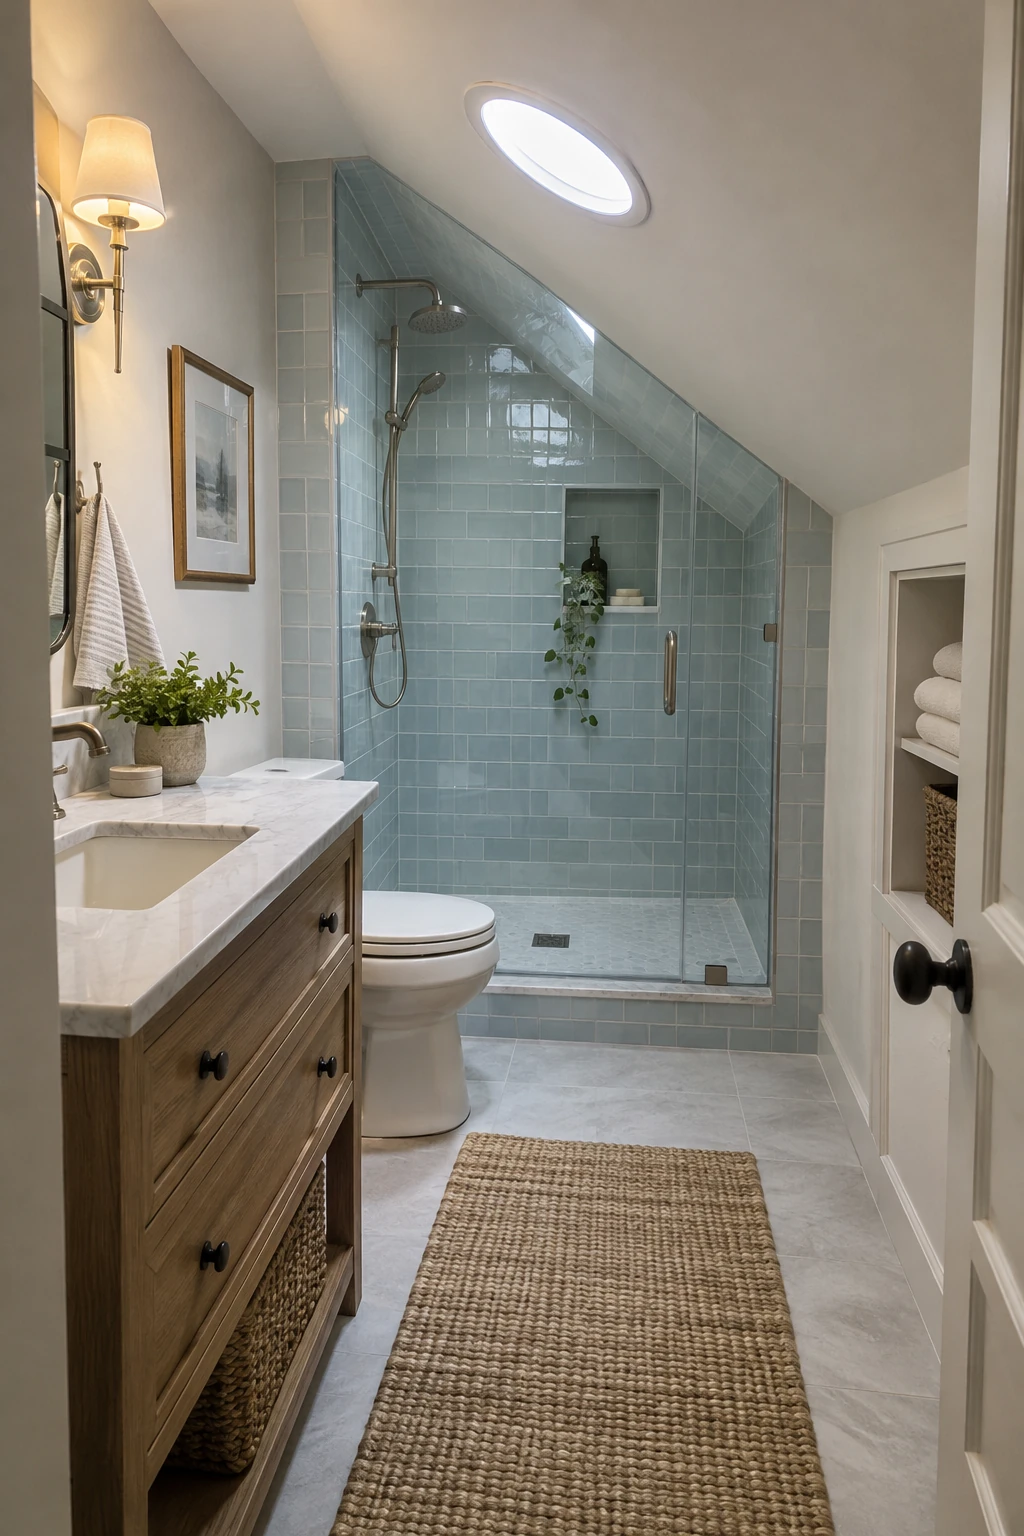
A tubular daylight device can brighten a central attic bath when views, rafters, or neighboring roofs make a conventional window difficult. Its small ceiling diffuser also uses less visual space on a busy slope.
The tube still penetrates the roof and must be routed around structure and services. Use the manufacturer flashing kit and a qualified installer, then insulate and air-seal the shaft to reduce condensation risk.
Pair daylight with electric lighting because output changes with weather and season. Keep the diffuser away from the exhaust intake if the product instructions require separation.
24. Use an Operable Skylight With a Moisture-Safe Shade
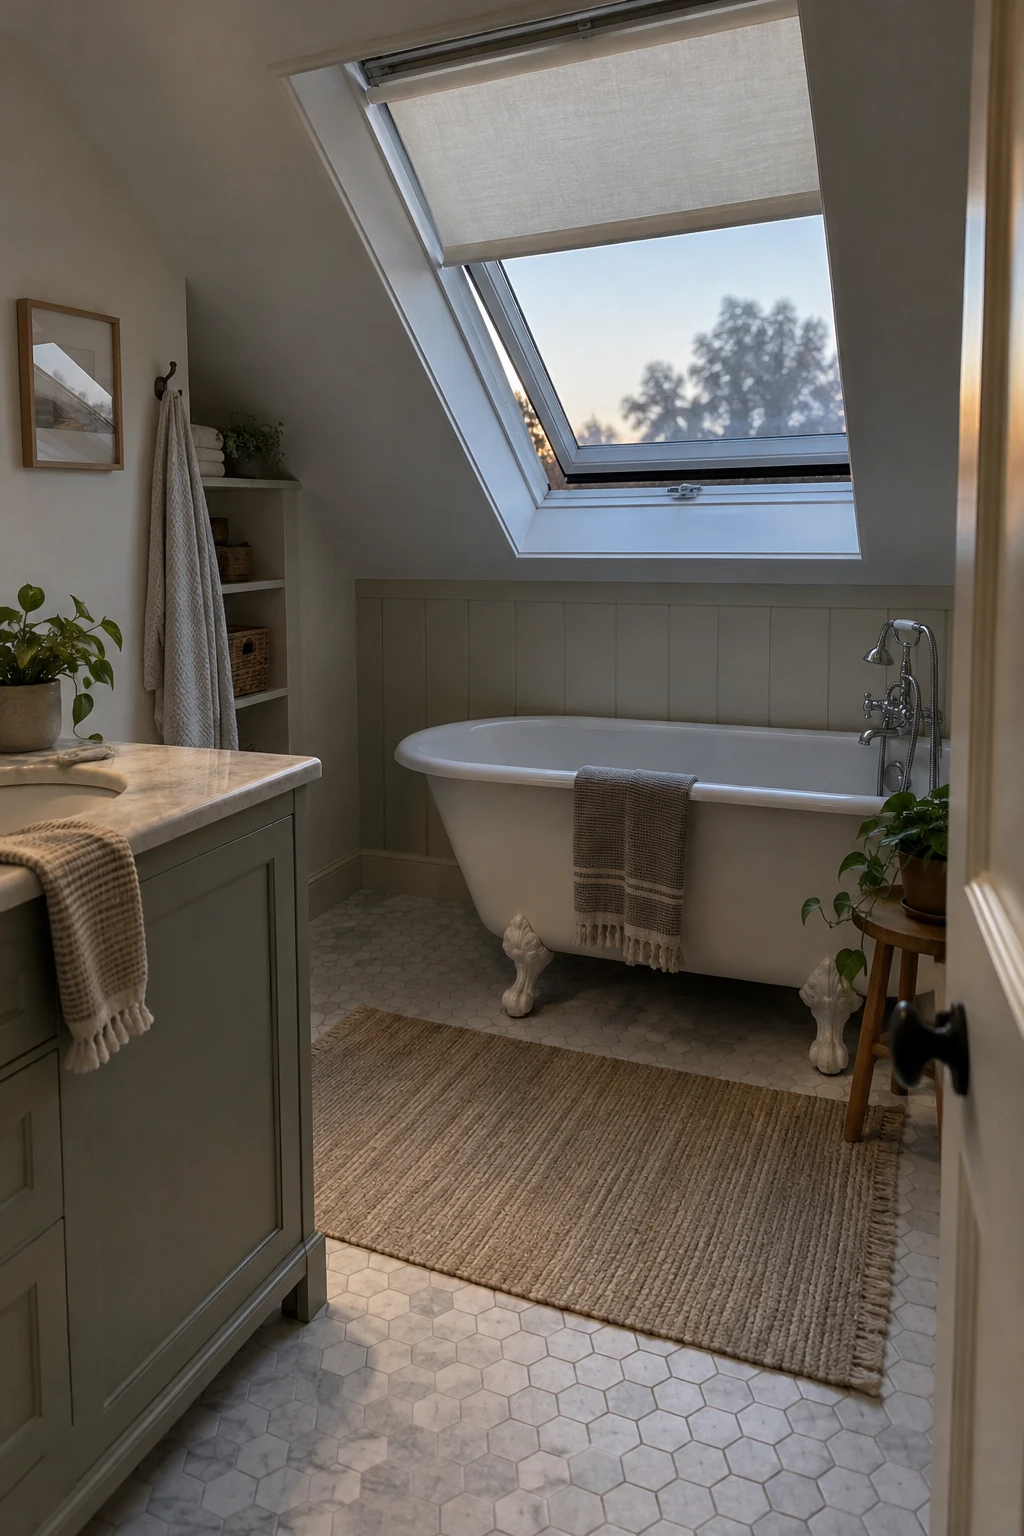
An operable skylight can release heat and provide occasional fresh air, while a fitted shade controls glare and privacy. It should supplement the exhaust fan rather than serve as the bathroom's only moisture control.
Choose a shade designed for the window and humid conditions so it does not sag into the sash. Confirm safe reach, rain sensors, insect screens, and electrical connections before finishing the ceiling.
Browse these bathroom window treatment ideas only after checking compatibility with a sloped roof window. Standard curtains rarely operate well overhead.
25. Layer Ridge Lights With Vanity Sconces
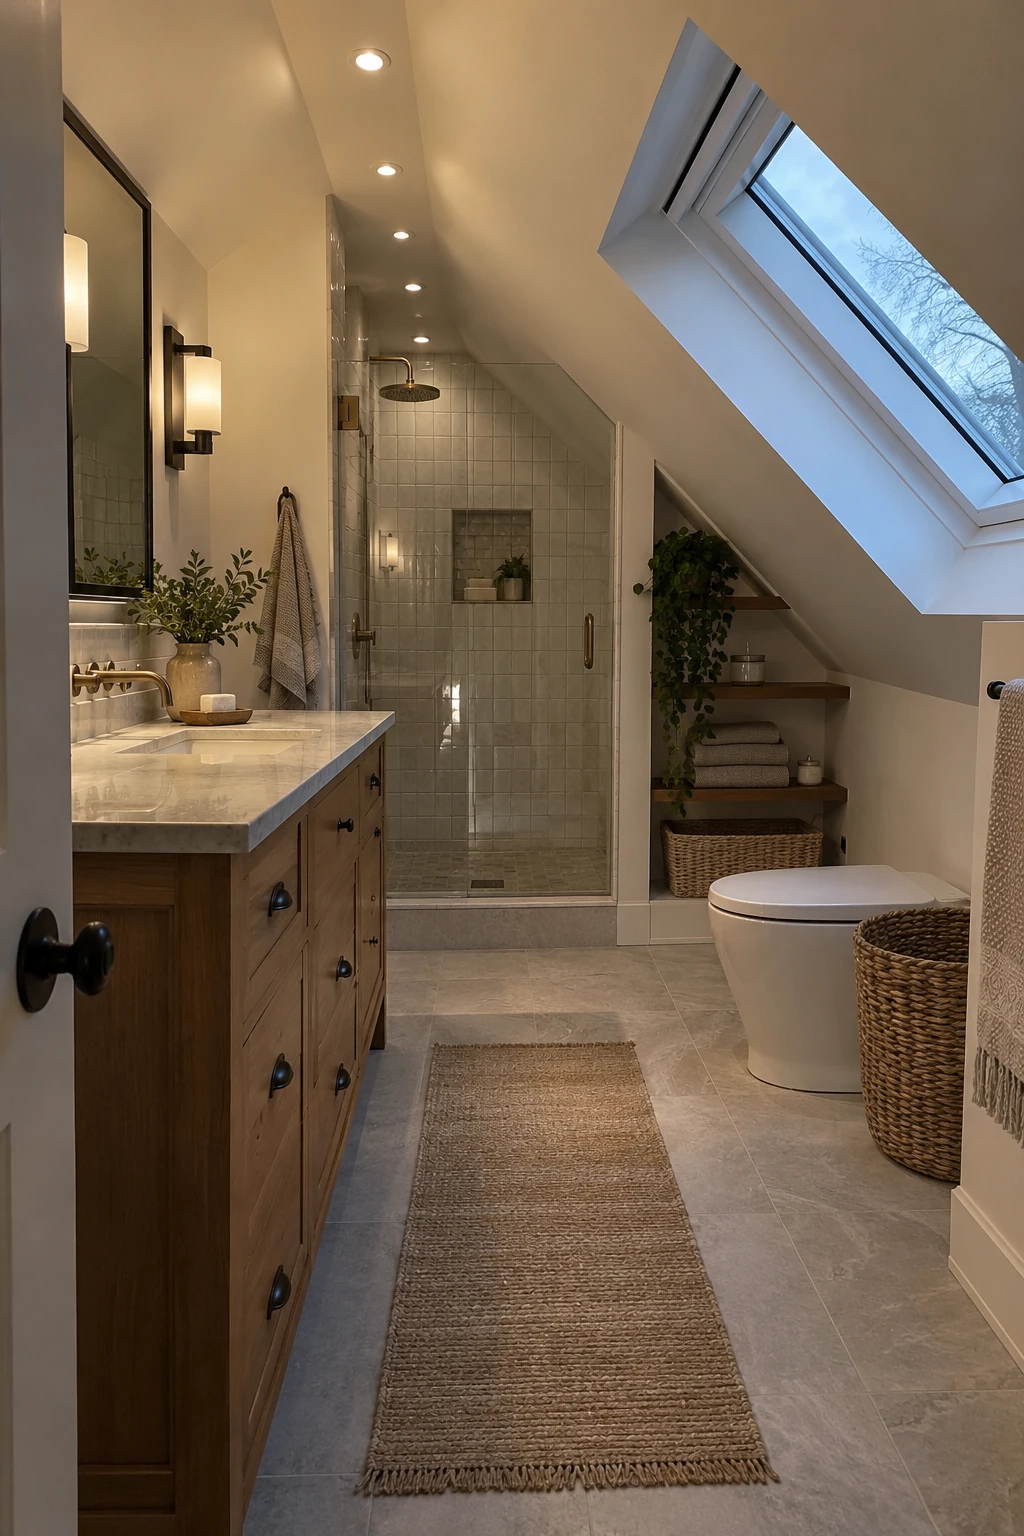
Use a few ambient fixtures along the highest line, then add face-level light at the mirror. This prevents the roof slopes from casting one heavy shadow across the vanity and keeps the room functional when daylight fades.
Avoid filling every rafter bay with recessed cans. Each penetration complicates insulation and air sealing, so surface or shallow fixtures may be better for a thin roof assembly.
Have a licensed electrician verify damp or wet ratings, clearances, controls, and protection. Put general and vanity lighting on separate switches so the room can be bright for grooming and softer at night.
26. Wash the Sloped Ceiling With Indirect Light
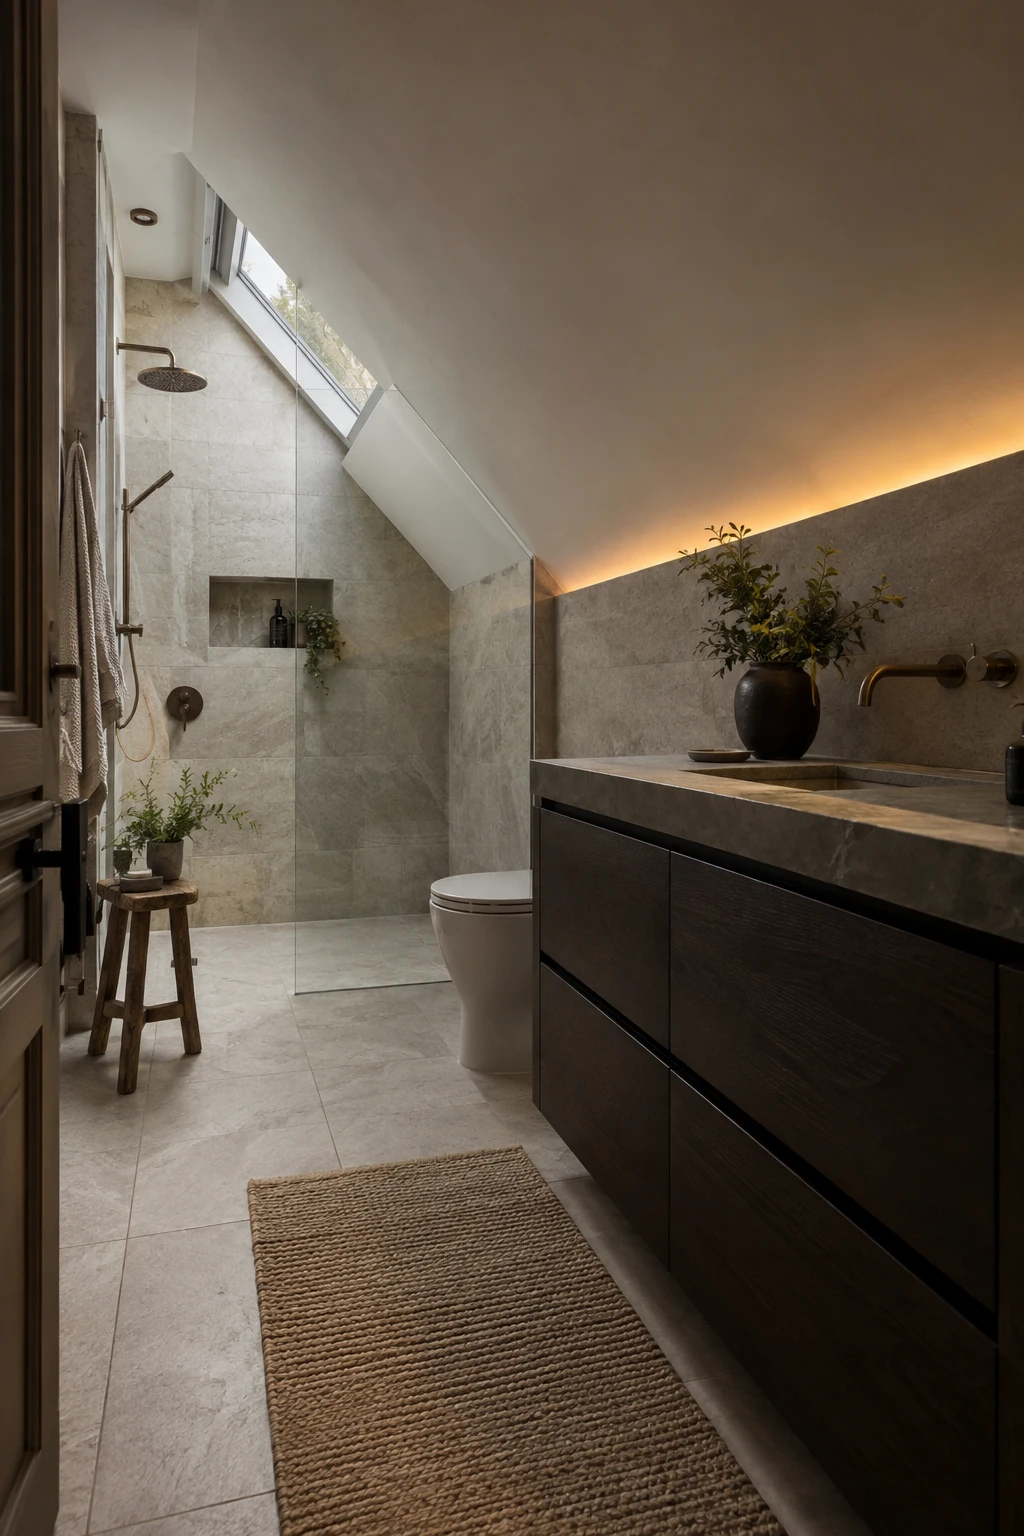
Concealed linear light can graze a clean roof slope and make the attic volume feel intentional. Place it behind a ledge or beam where the source stays hidden from normal eye level and reflections remain controlled.
Use bathroom-rated components, accessible drivers, and a channel that diffuses individual light points. The electrician should keep the installation away from wet zones unless the entire system is approved for that location.
Test the light before painting. Grazing illumination reveals every joint and ripple, so uneven drywall may need a smoother finish or a softer beam angle.
27. Put Task Lighting Around the Mirror
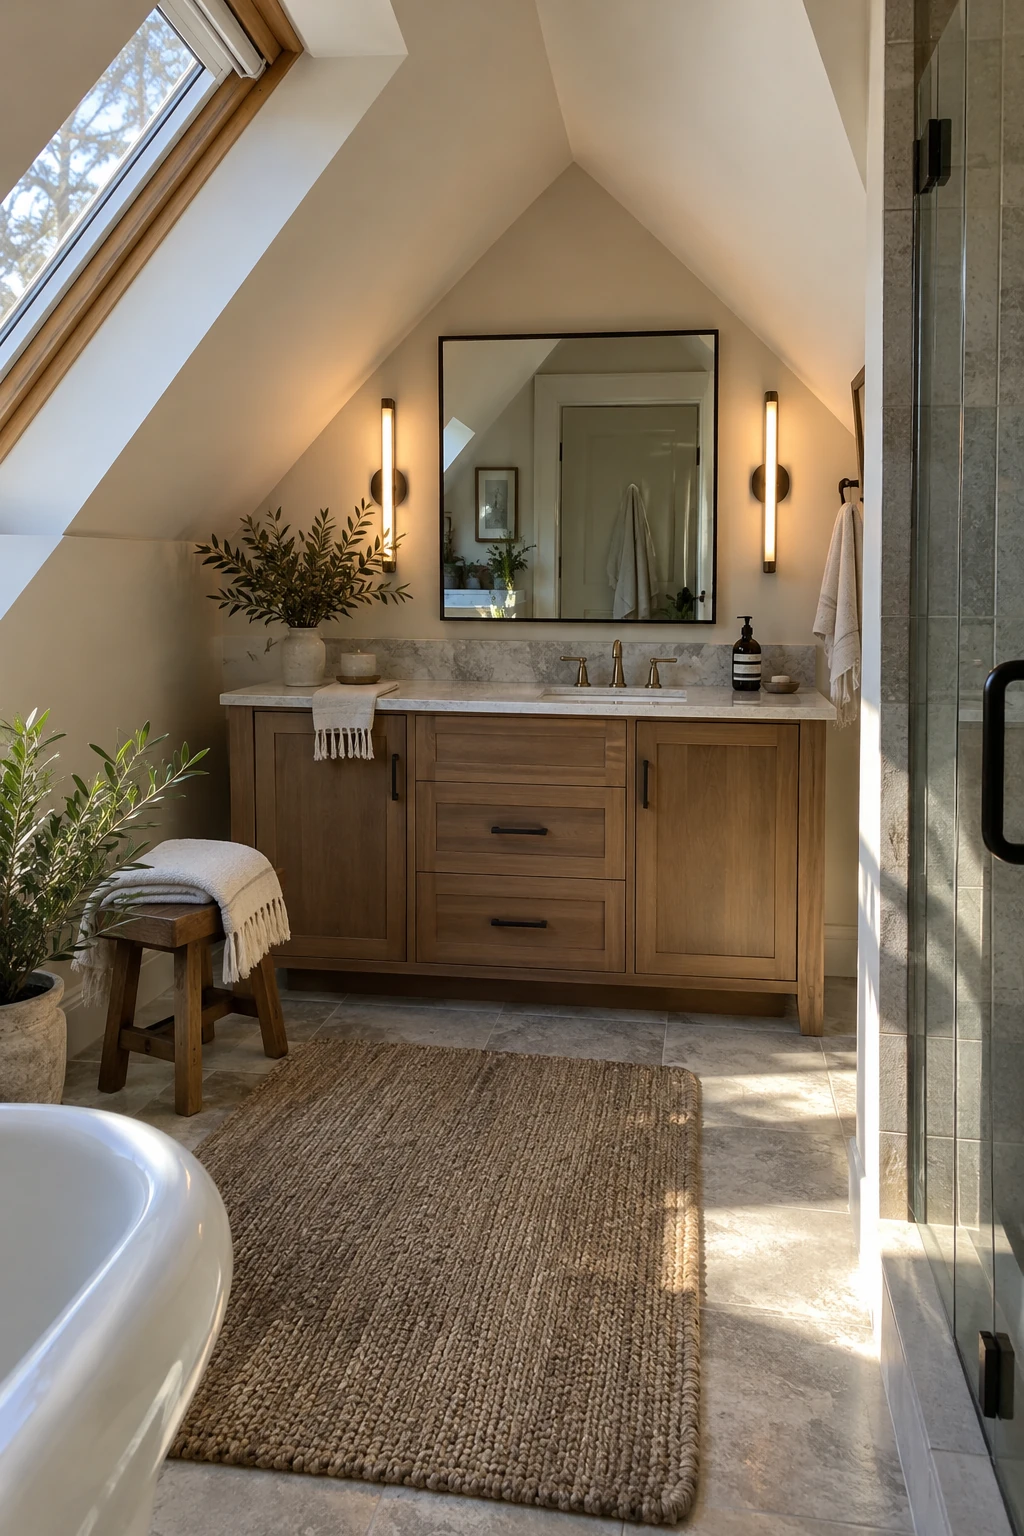
Vertical lights beside the mirror give more even face illumination than one strong ceiling fixture. A top light can supplement them when the roof slope crowds one side or the mirror must sit lower than usual.
Check the mirror width, medicine-cabinet swing, faucet, and sconce projection together. Place boxes before tile or paneling, then verify all electrical clearances and fixture ratings locally.
Use accurate, comfortable light and a dimmer compatible with the selected lamps or integrated fixtures. Avoid a very warm decorative bulb that distorts color during grooming.
28. Add Low Night Lighting Along the Eaves
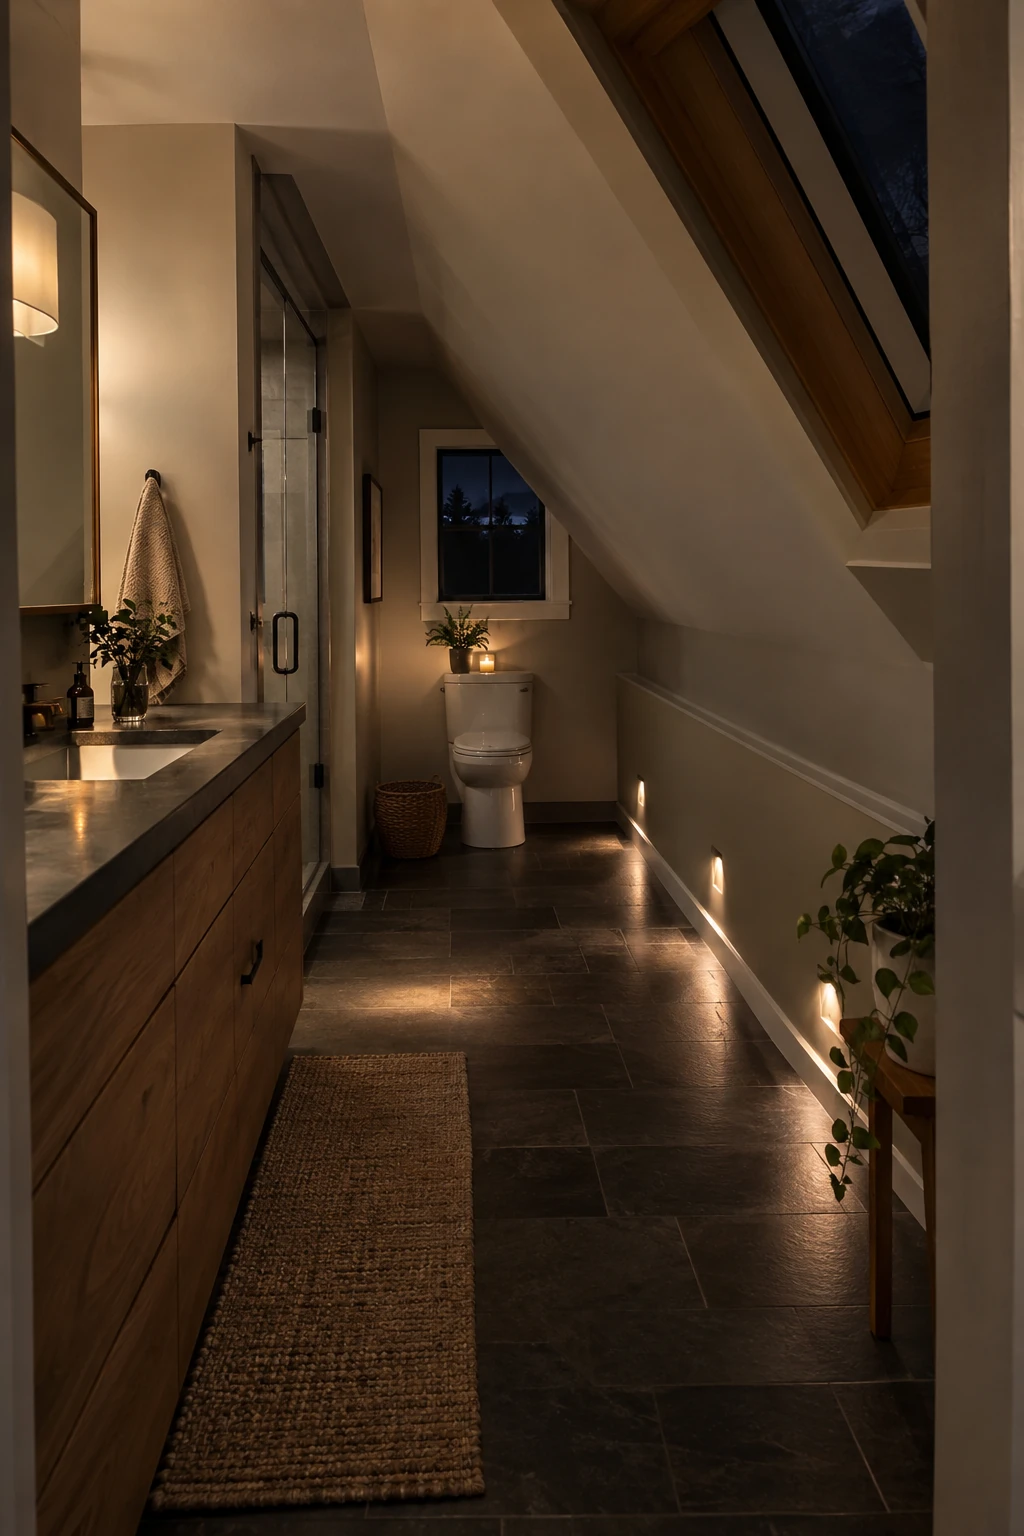
Low-level lighting near the floor can mark the path from the stair landing to the toilet without flooding the attic with glare. It is especially helpful where the ceiling changes height abruptly.
Recess lights into a knee wall, vanity toe kick, or shallow ledge, keeping them out of direct spray. A motion sensor or separate switch should allow the main fixtures to stay off overnight.
Coordinate every fitting with insulation, wiring, and access. Use listed fixtures and have the electrician confirm placement around wet areas and combustible materials.
Choose Fixtures That Fit the Angles
Compact fixtures help only when their real projections, service needs, and clearances fit the finished room. Compare specification drawings, not showroom impressions.
29. Fit a Low-Profile Back-to-Wall Tub
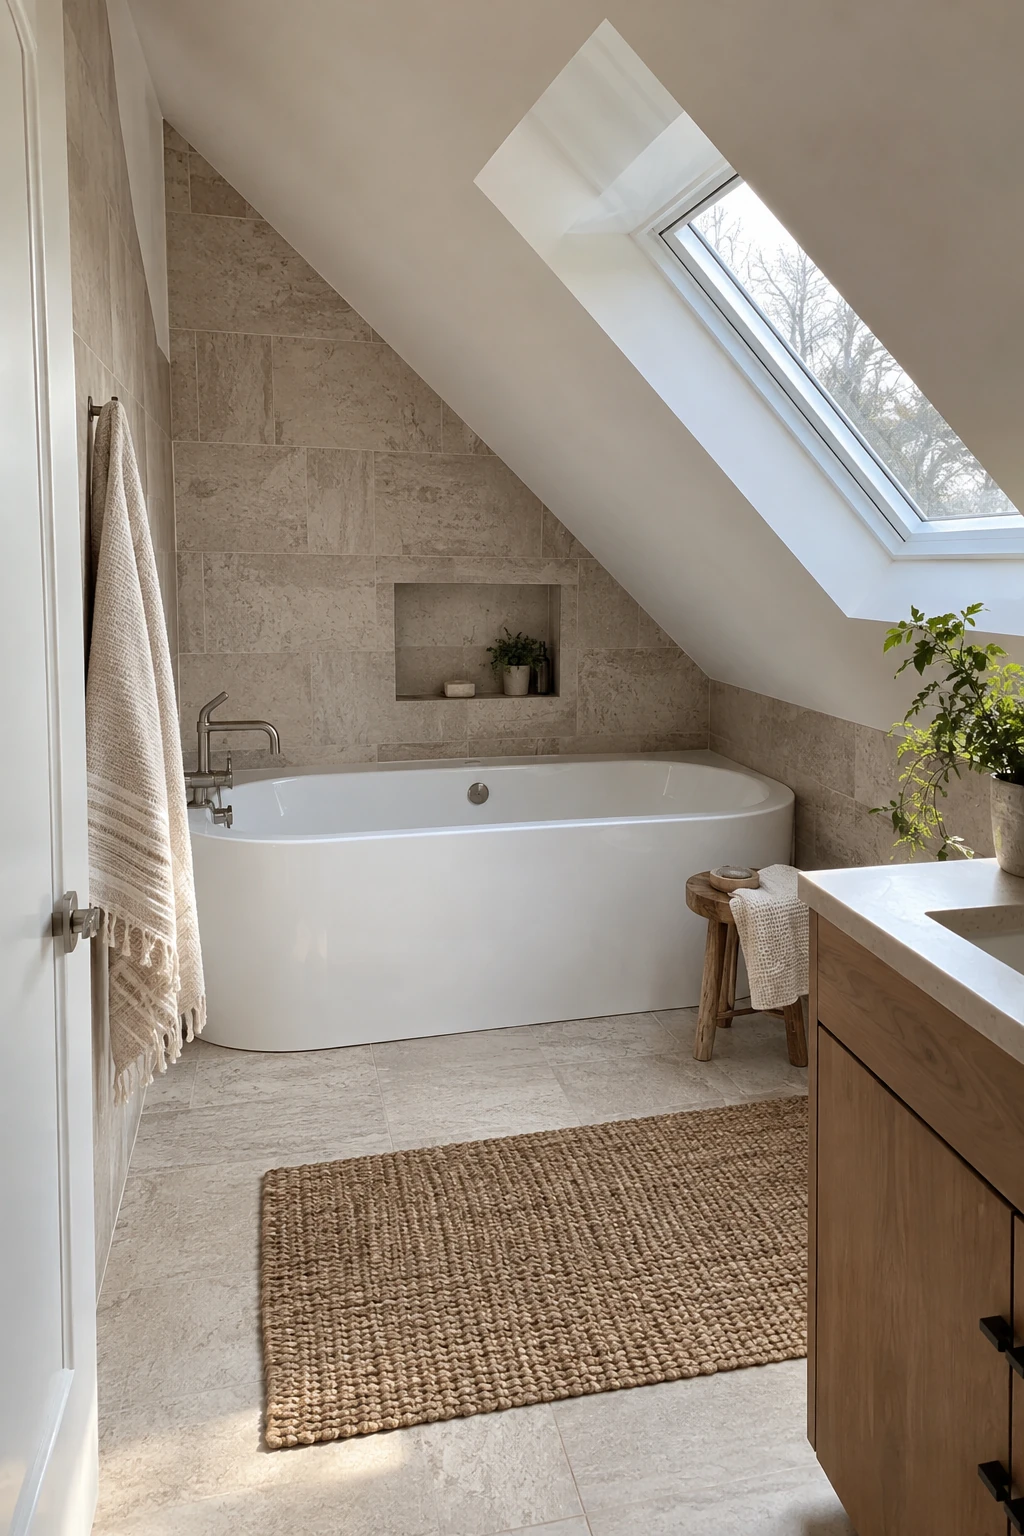
A back-to-wall tub gives the look of a freestanding bath while closing the hard-to-clean gap behind it. Its straight rear edge can sit neatly against a knee wall beneath the roof slope.
Check the standing end, rim height, filler reach, waste access, and finished weight. Keep the tap and controls where they can be serviced without removing the tub.
Use a model and installation method approved for the site conditions. If the tub sits below a window, coordinate the sash, shade, and splash-resistant wall finish before rough-in.
30. Choose a Small, Deep Soaking Tub
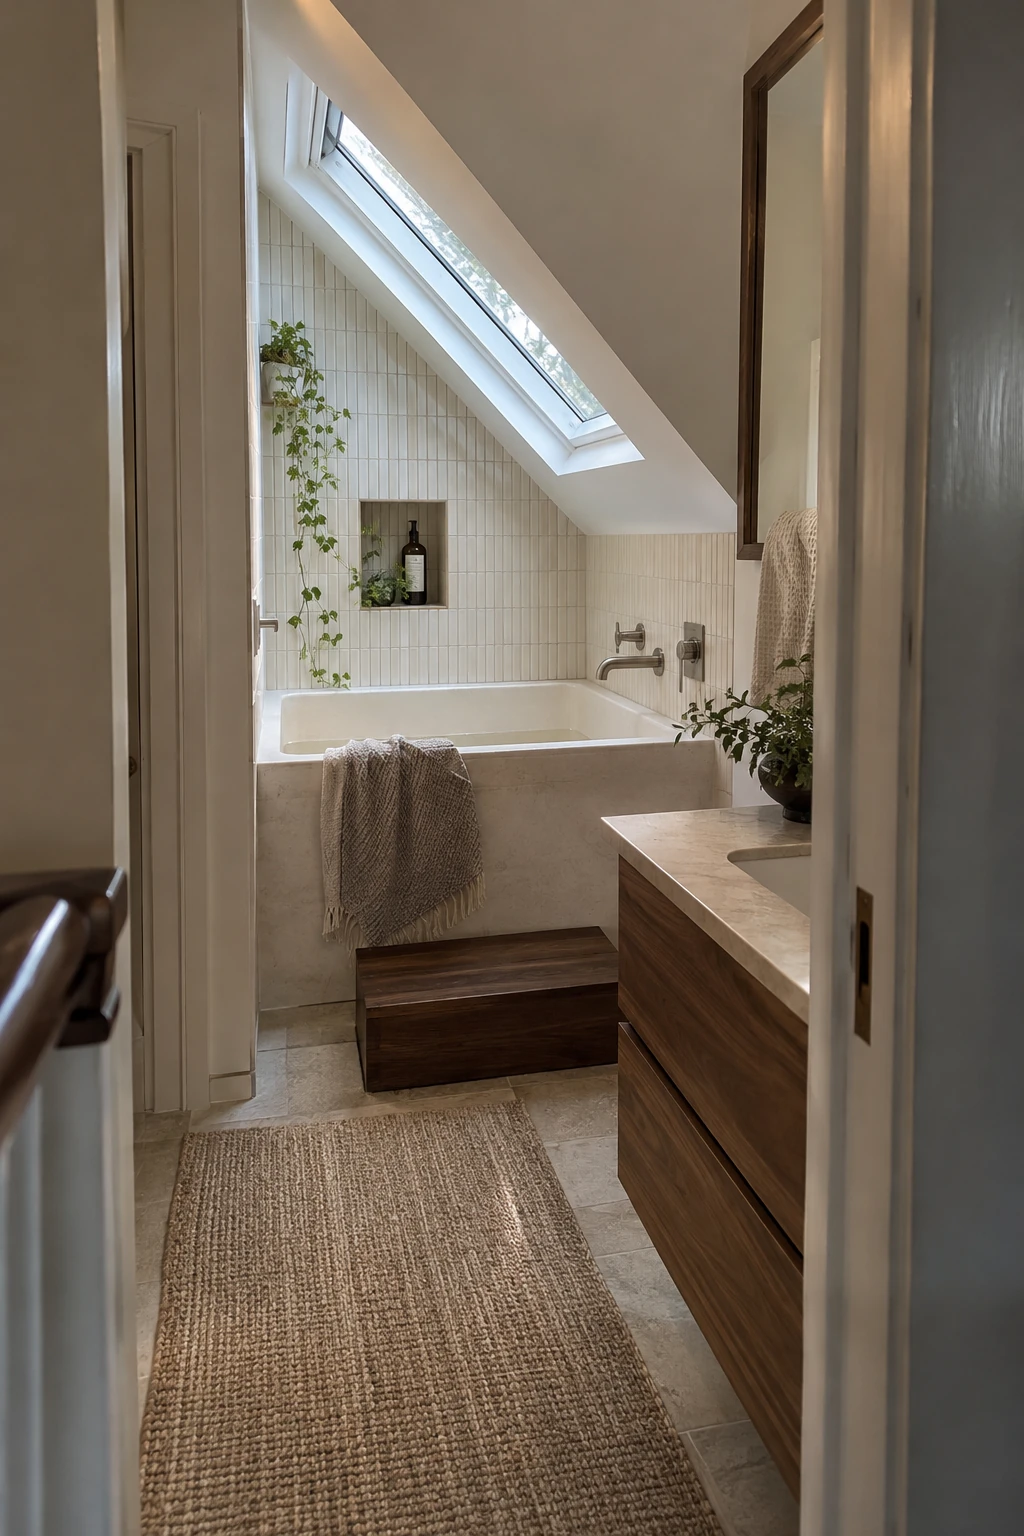
A short, deep tub can fit an attic bay that will not take a standard long bath. It preserves more circulation space, but the high sides and water volume change entry, comfort, and loading.
Sit in the exact model before buying and plan a stable handhold or step only when approved. The structure should be reviewed for the filled weight, and the plumber must confirm supply, overflow, and drain access.
Keep the entry beneath adequate headroom and avoid squeezing the tub into a corner that cannot be cleaned. A dramatic shape is only useful when everyday access remains safe.
31. Float the Vanity Above the Floor
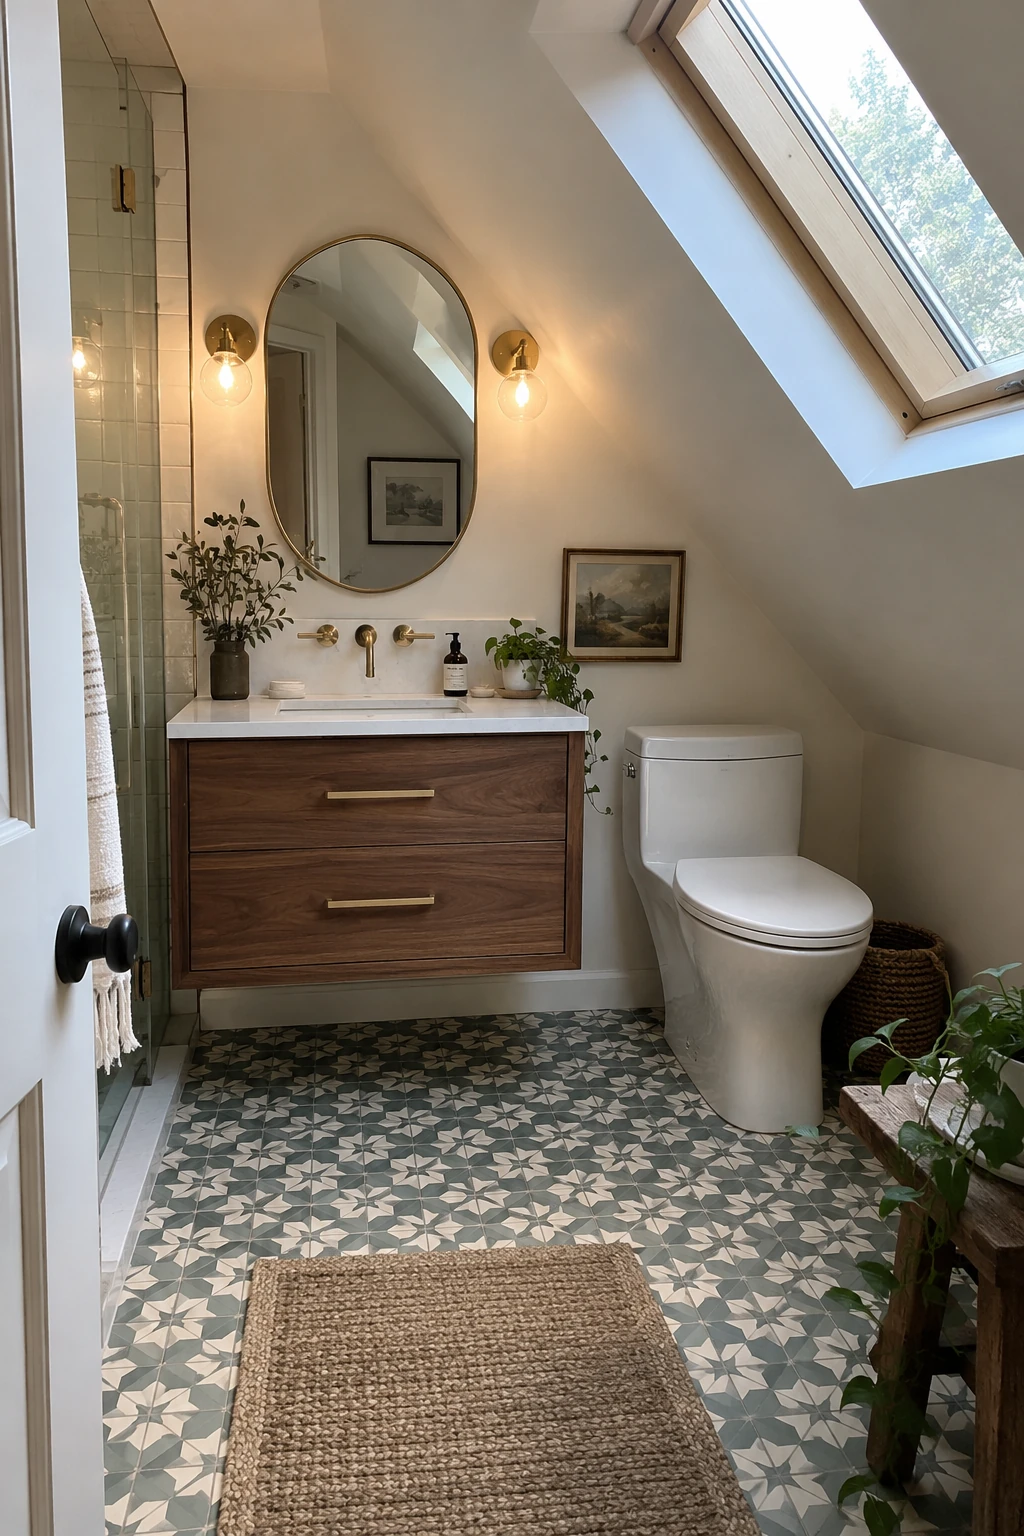
A wall-hung vanity reveals more floor and can make a tight attic bathroom feel less blocked. It also allows the cabinet height to respond to the users rather than a standard toe kick.
Reinforce the wall for the exact cabinet and sink load, and coordinate the trap, supplies, and shutoffs so they fit inside the drawers. Exterior or sloped walls may need a framed service zone to preserve insulation.
Compare more bathroom vanity ideas by real width and projection. Leave enough floor visible to clean easily without creating an unreachable strip below.
32. Use a Shallow Console Sink
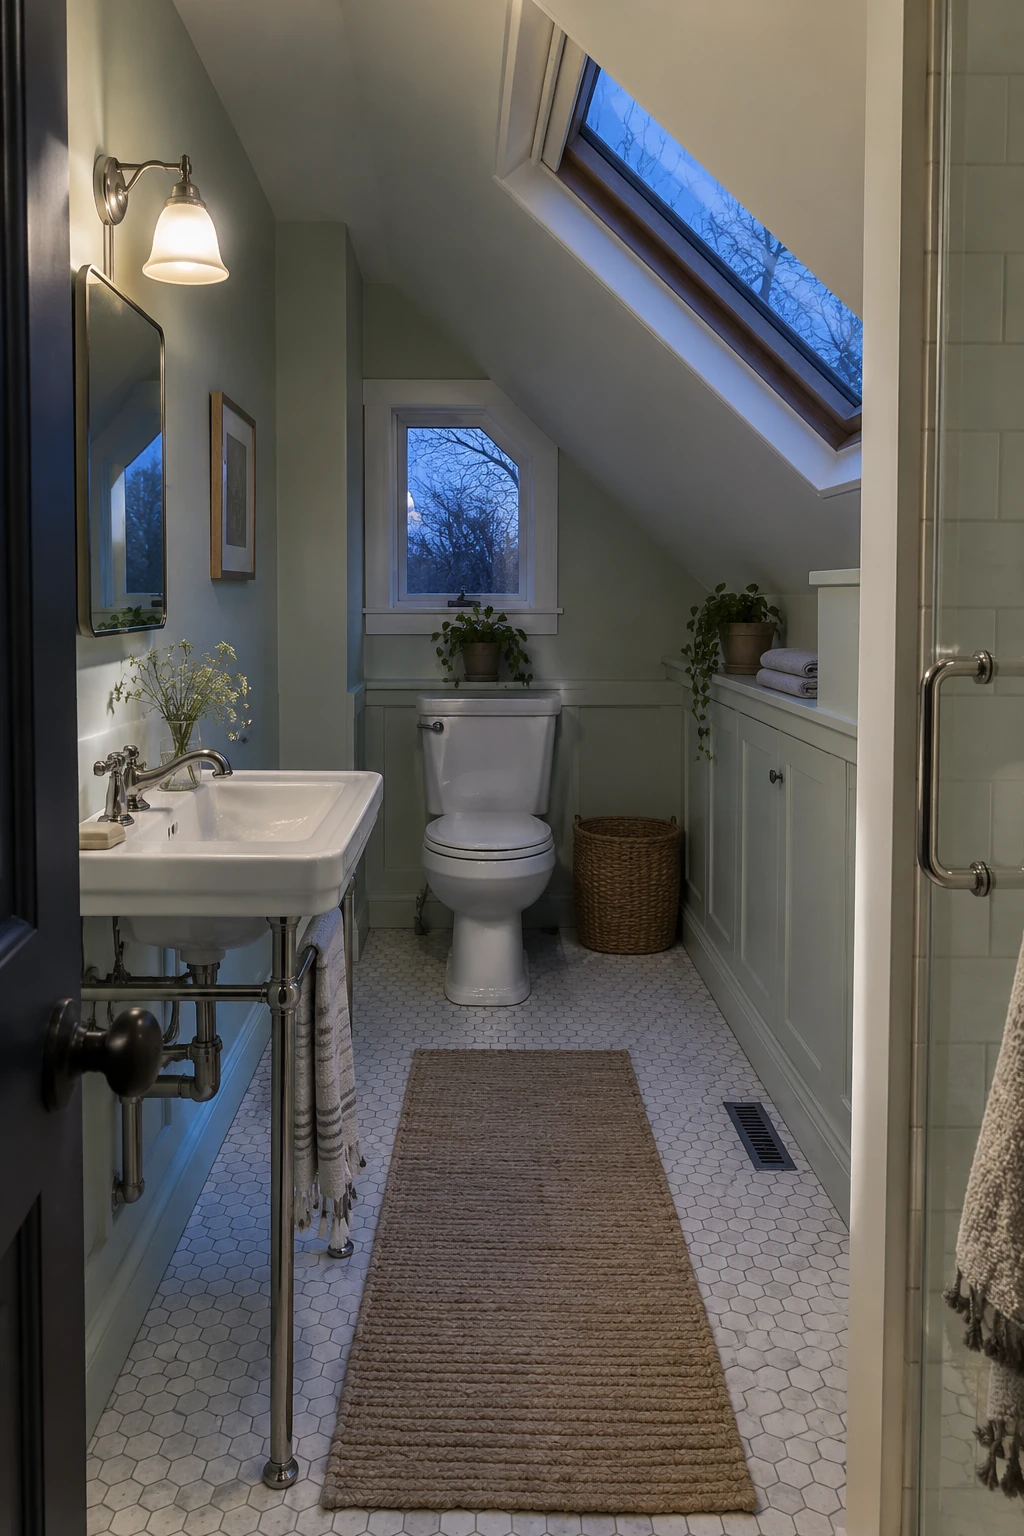
A shallow console sink preserves a narrow aisle and keeps the room visually open. It works well for a guest attic bath where a large cabinet is less important than comfortable circulation.
Check the basin projection, faucet reach, trap, and towel location from the specification sheet. Some compact sinks splash easily when the faucet is too tall or the bowl is very shallow.
Add a recessed cabinet or nearby eaves storage for toiletries. Keep exposed plumbing orderly and use a licensed plumber for secure supports and connections.
33. Tuck a Corner Basin Into a Tight Bay
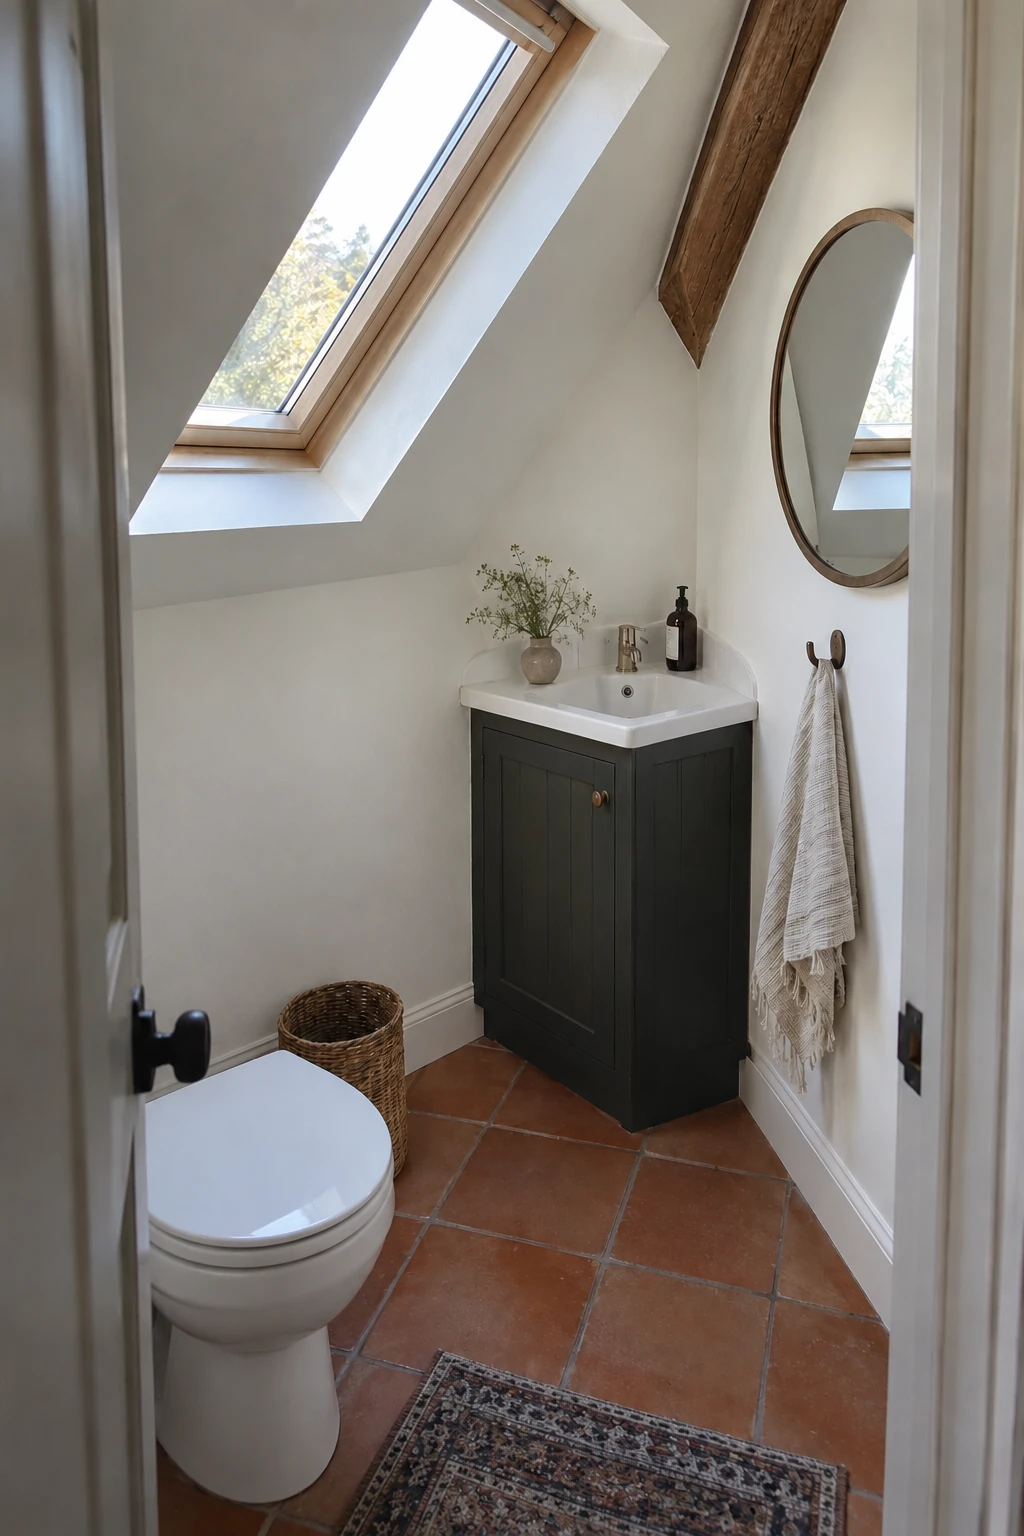
A corner basin can turn an awkward bay into a hand-washing zone while protecting the center path. It is most useful in a very small guest bath where counter space is secondary.
Stand at the proposed corner and test elbow room, mirror sightline, and door clearance. The bowl should not force users beneath a low slope or make the faucet difficult to reach.
Plan the trap and supplies before selecting a pedestal or cabinet. A compact fixture still needs secure support, service access, and enough backsplash to protect the adjoining walls.
34. Mount the Faucet on the Wall
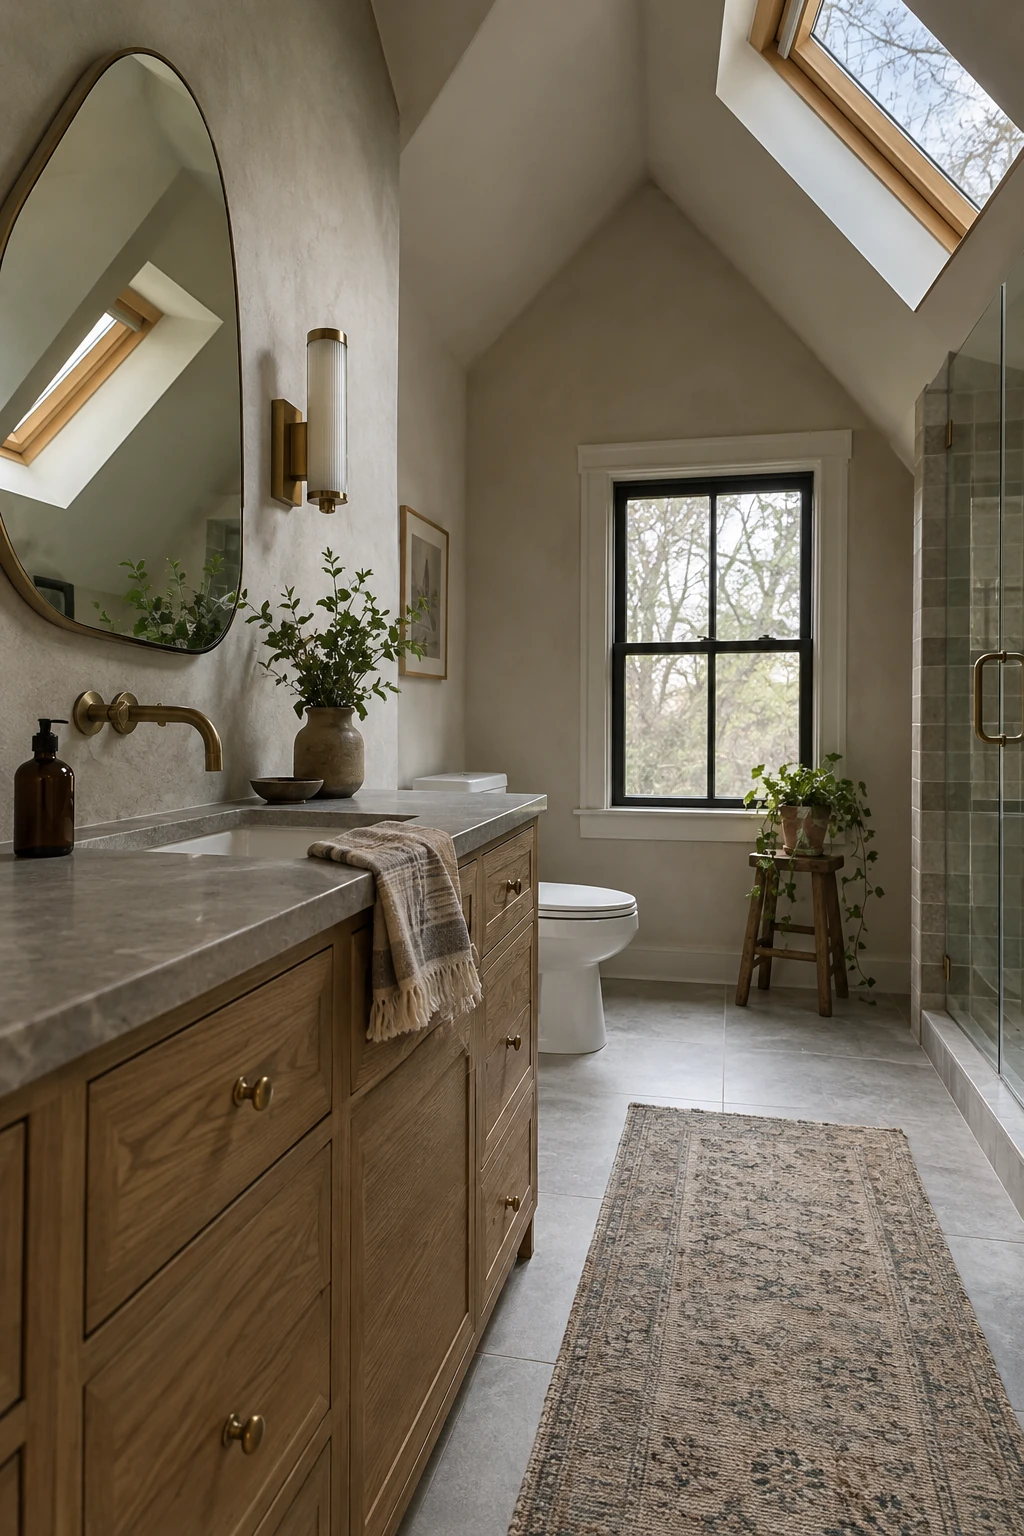
A wall-mounted faucet frees space behind a shallow basin and can make a slim vanity more usable. It also gives the backsplash a clean, deliberate focal point.
Set the spout reach and height from the exact sink template to limit splashing. Rough-in valves must remain accessible, and the wall needs solid support plus a waterproof finish at penetrations.
Coordinate installation with the plumber before closing the wall. Future replacement is easier when the concealed body uses serviceable parts and the access route is documented.
35. Cut Frameless Glass to Follow the Roofline
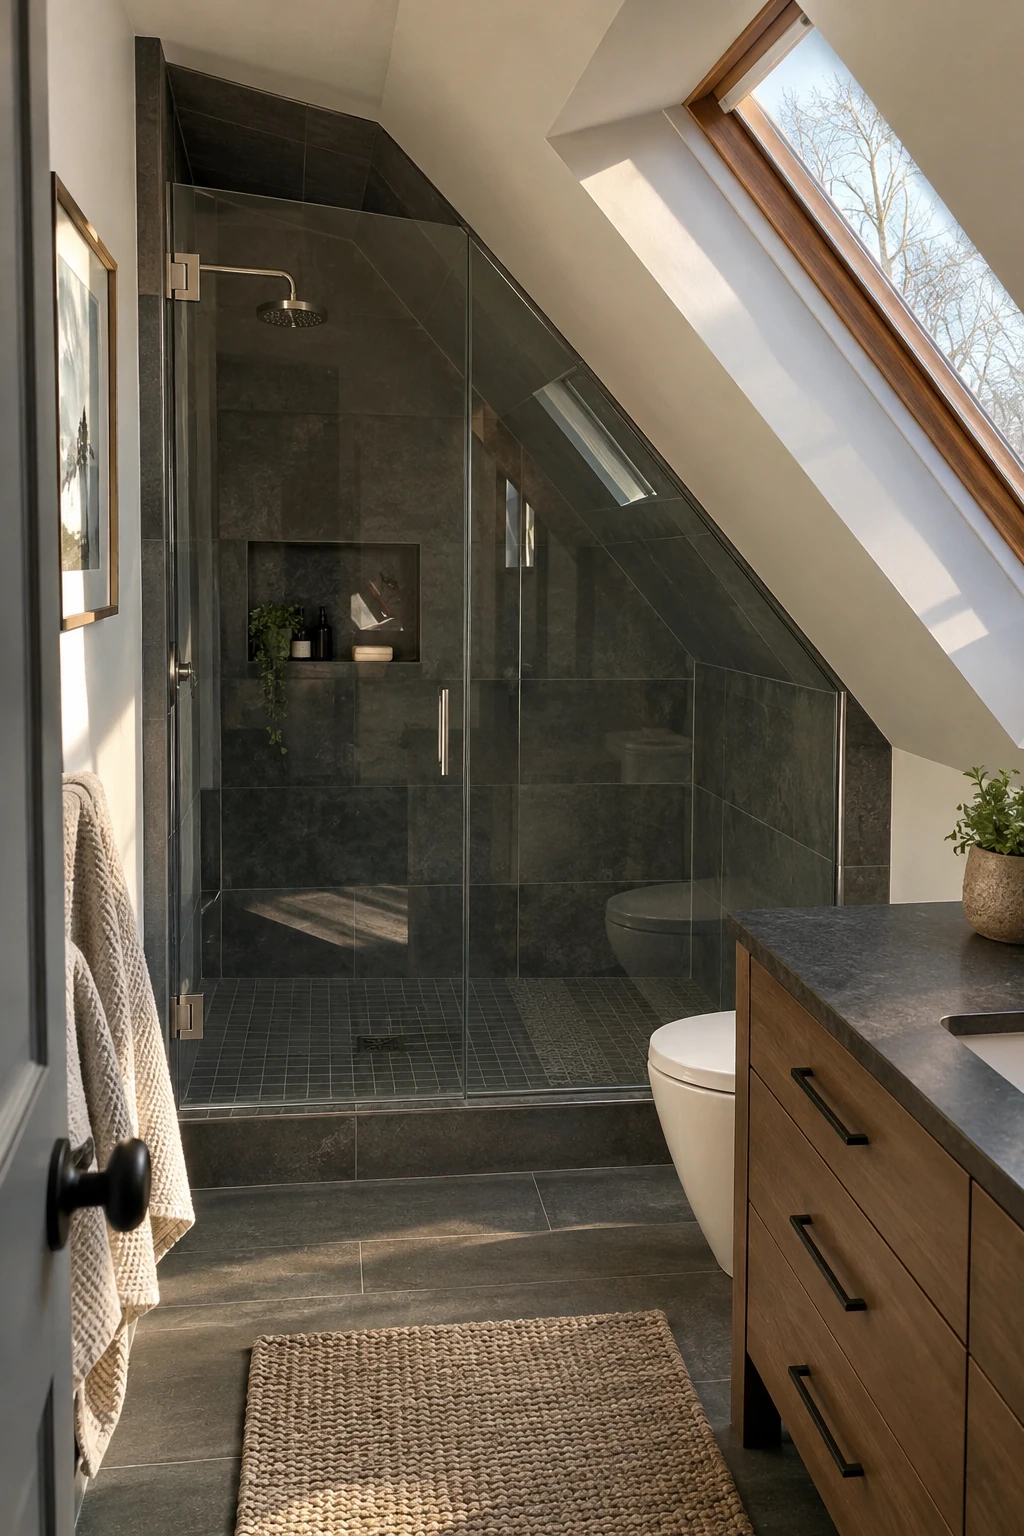
Custom glass can follow an angled ceiling and keep a ridge-positioned shower feeling open. The clean line works only when walls are plumb, the roof angle is measured after tile, and hardware has solid backing.
Use a qualified glass fabricator to template the finished opening. Door weight, hinge positions, panel bracing, and safe clearances should be resolved together rather than forcing stock glass into an irregular bay.
Keep the enclosure simple to reduce cost and visual clutter. Confirm that the door clears the slope, vanity, and towel location without creating an impossible overlap.
36. Use a Fixed Half-Panel Instead of a Door
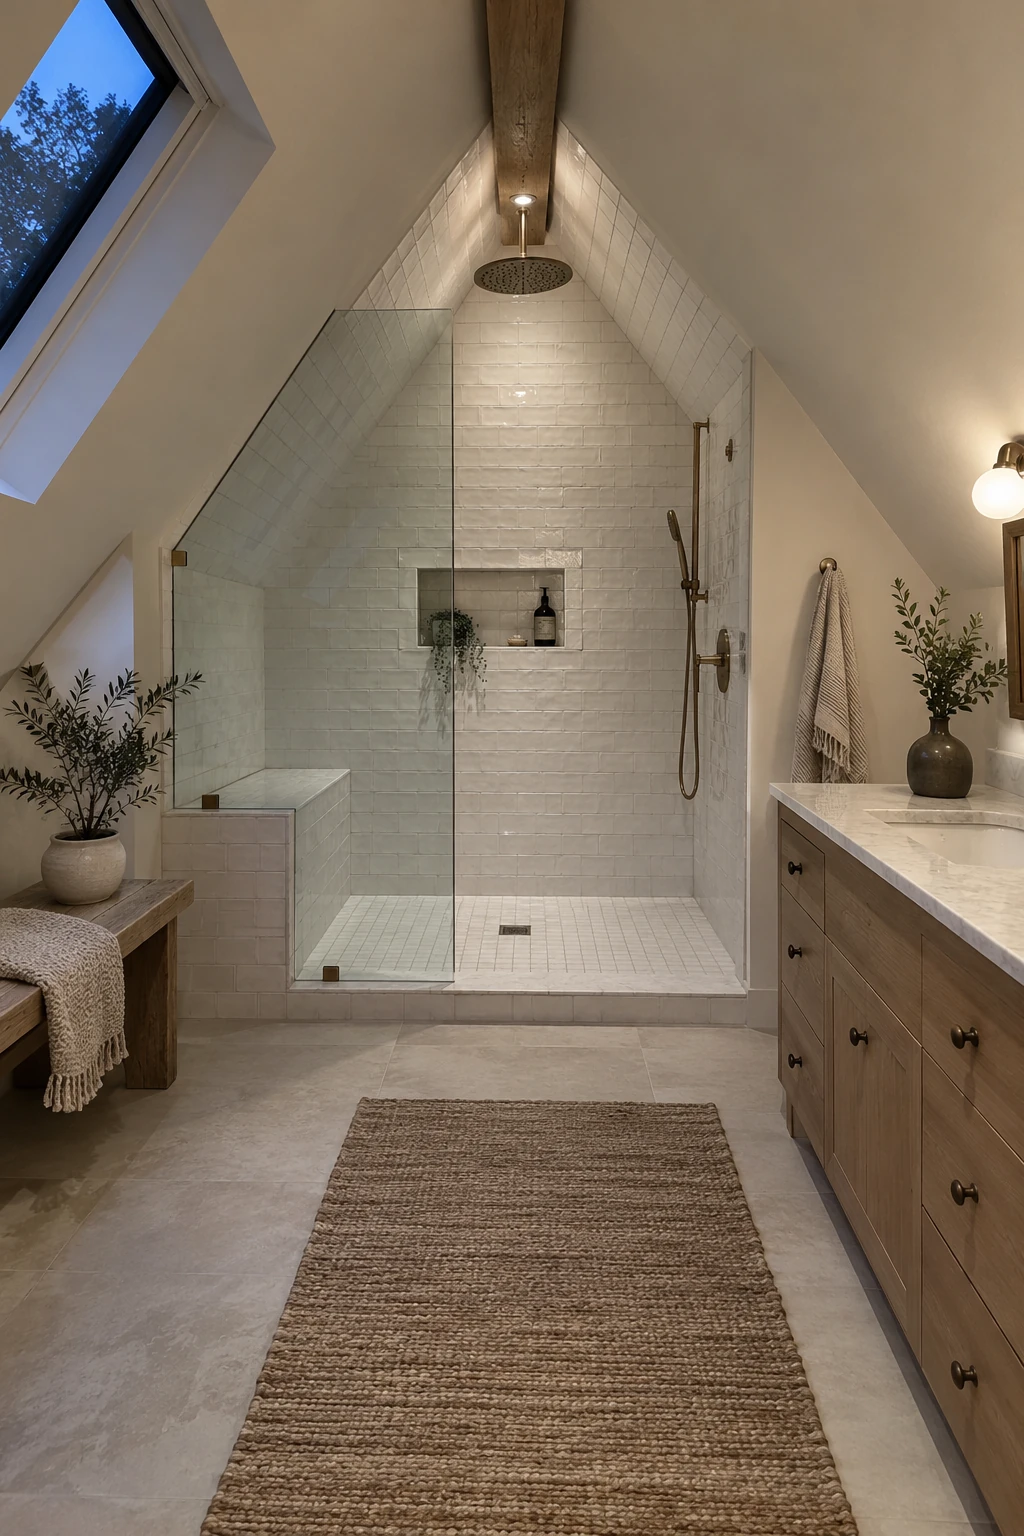
One fixed panel avoids a door swing in a narrow attic and reduces hardware near the roof slope. It can also share daylight between the shower and vanity.
Size the screen from actual spray patterns, showerhead direction, and user movement. An opening that looks generous may send water onto the door or floor if the panel stops too soon.
Provide warmth and ventilation without relying on a fully open room. The glass edge, floor slope, and entry should be checked against product instructions and local safety-glazing requirements.
37. Build the Shower Bench Into the Low Side
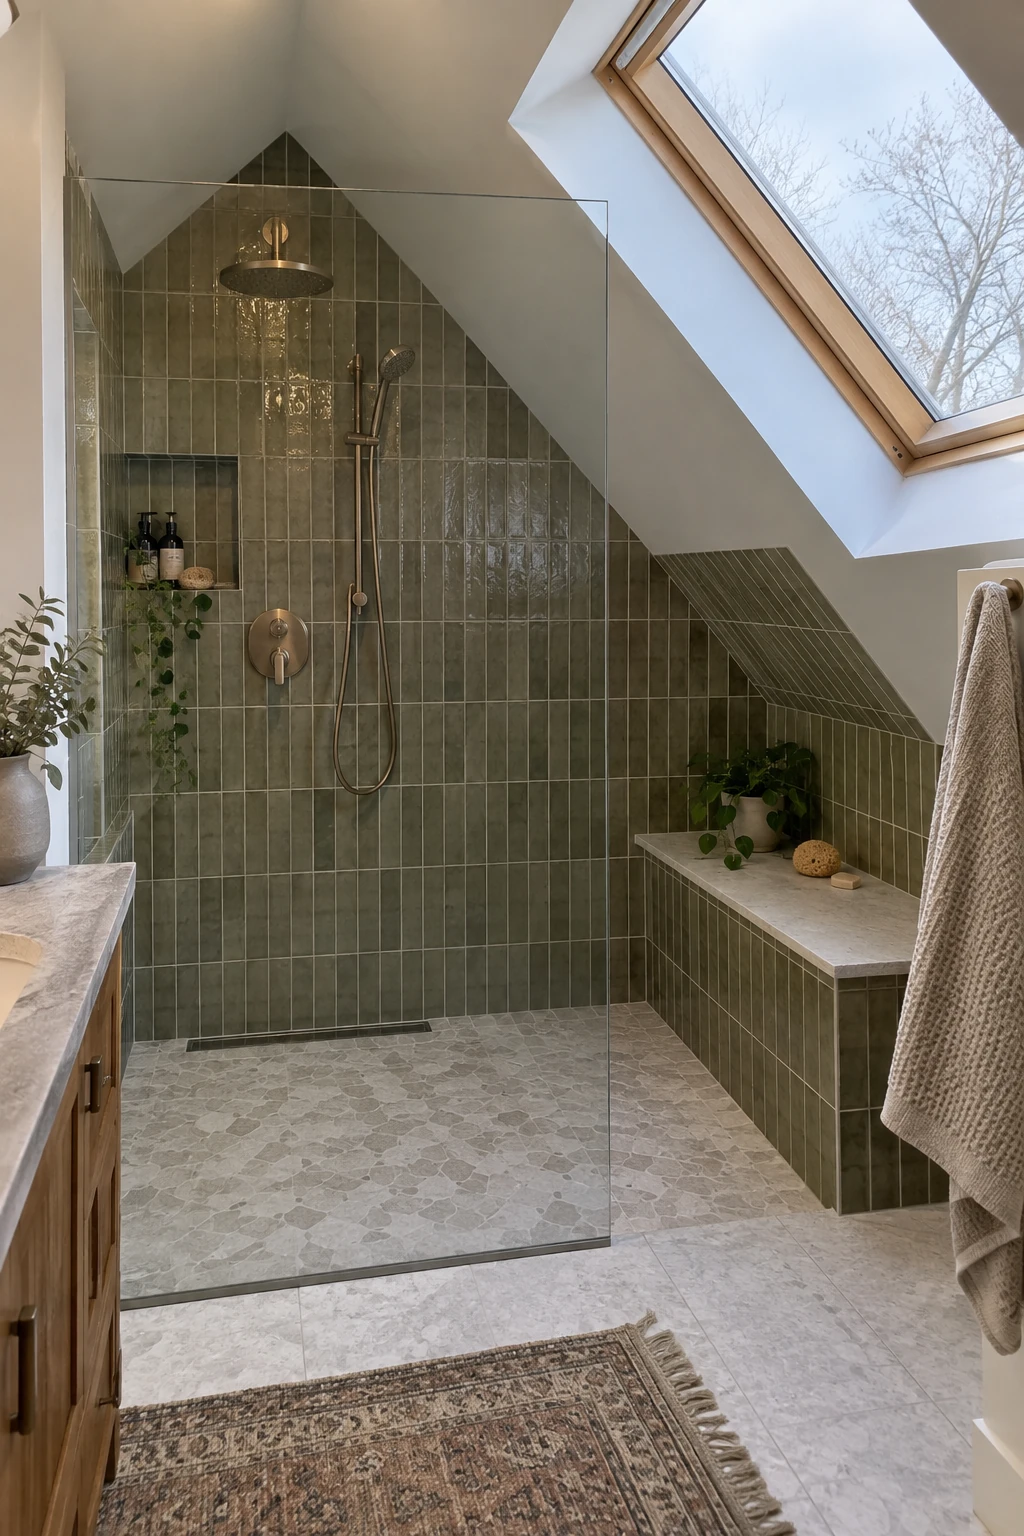
A bench can occupy the lower side of a sloped shower while leaving the ridge for standing. Set its position so a seated user has headroom and can reach the handheld shower without twisting.
Frame, waterproof, and slope the seat as part of the approved shower system. Avoid hollow ledges or flat tops that collect water, and keep glass supports away from vulnerable membrane details.
A bench can improve comfort but does not automatically make the shower accessible. Confirm height, approach, controls, and support needs with the intended users and applicable guidance.
38. Put the Shower Niche on a Gable Wall
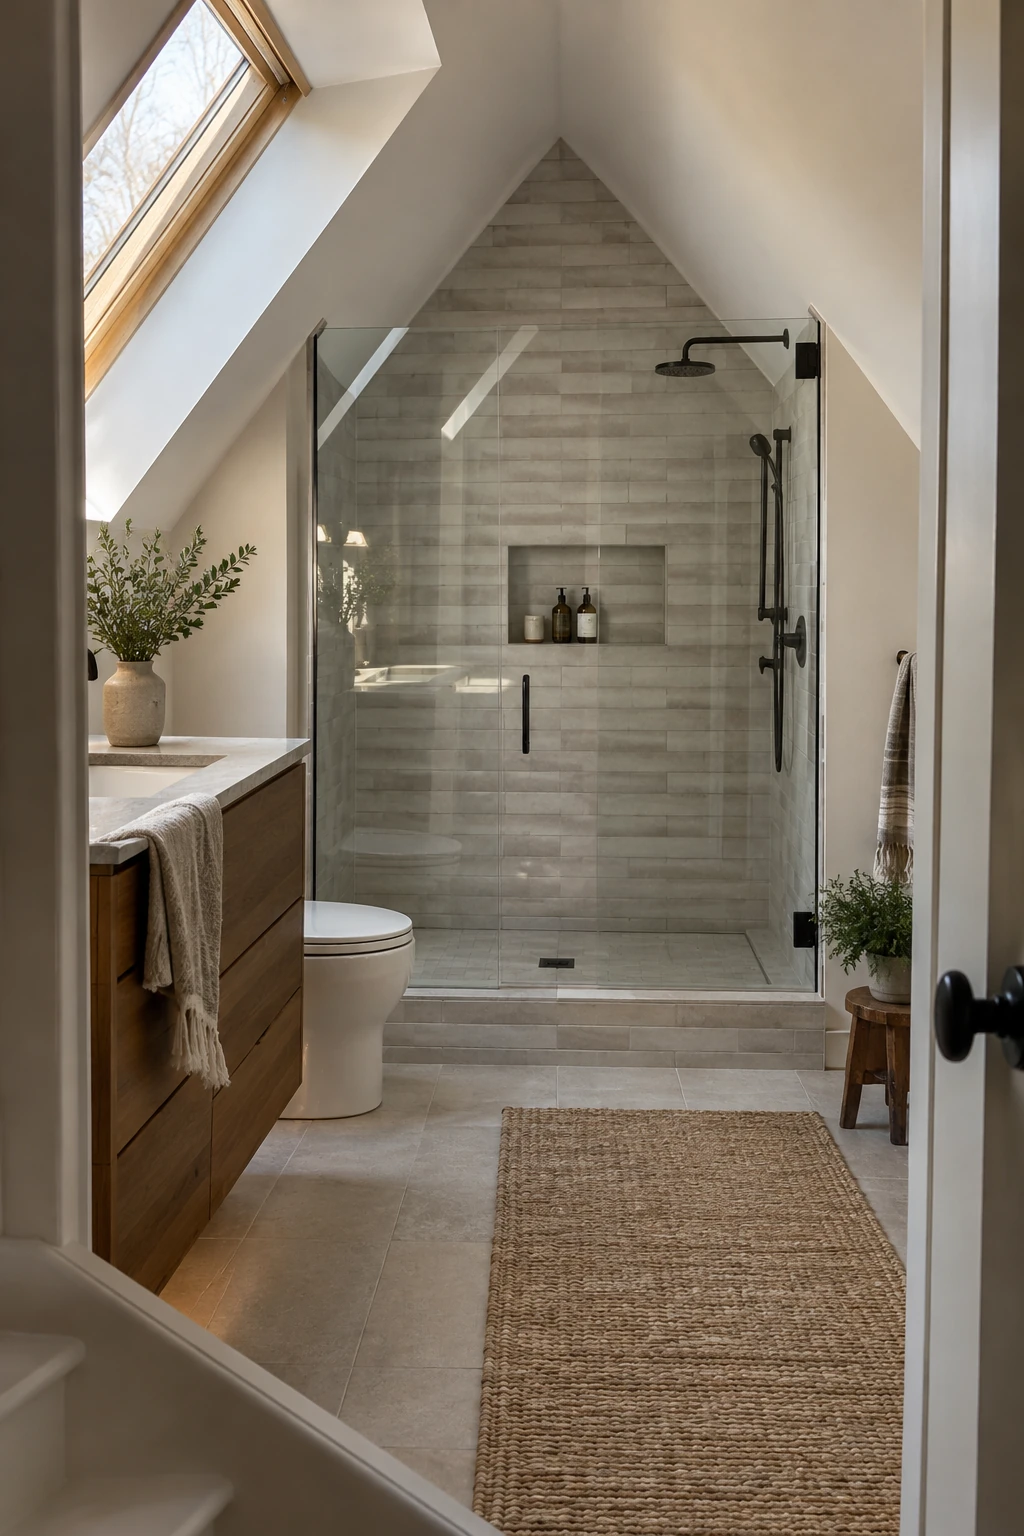
A niche is easier to frame and waterproof on a full-height interior gable wall than in a thin roof slope. It also avoids displacing roof insulation where condensation risk is harder to manage.
Measure real bottles and align the opening with the tile layout. These shower niche ideas can help with proportion, but structure and waterproofing should determine the final location.
Slope every shelf toward the shower and use solid pieces at horizontal surfaces. Check the stud bay for pipes and wiring before cutting.
Use the Eaves for Storage and Style
Low zones are valuable when storage stays reachable, dry, and serviceable. Use built-ins to follow the roofline, then keep the finish palette quiet enough for the architecture to remain clear.
39. Build Drawers Into the Knee Wall
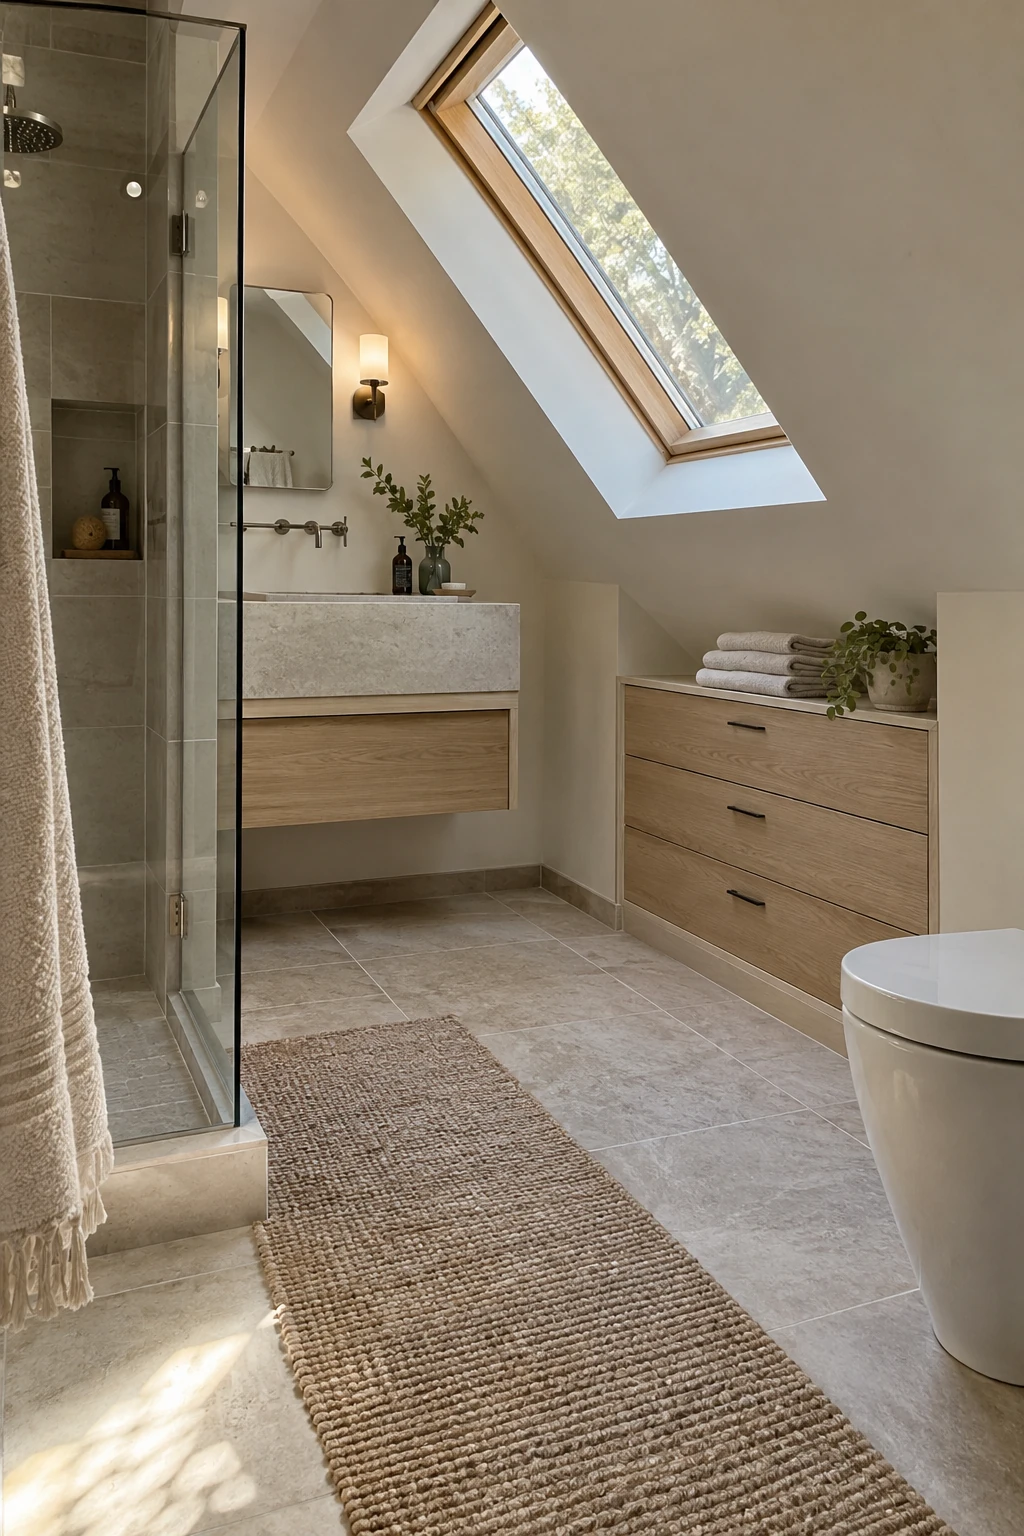
Deep drawers can use the triangular eaves volume without requiring anyone to crawl into it. Wide, full-extension hardware keeps towels and backups visible and easier to reach.
Map rafters, insulation, wiring, and ventilation paths before framing the boxes. Keep the cabinetry on the room side of the intended envelope or have the assembly redesigned professionally.
Use moisture-tolerant materials and leave service access where pipes or valves share the eaves. More small-bathroom storage ideas can help organize the finished drawers without overfilling them.
40. Add a Low Linen Cabinet Under the Eaves
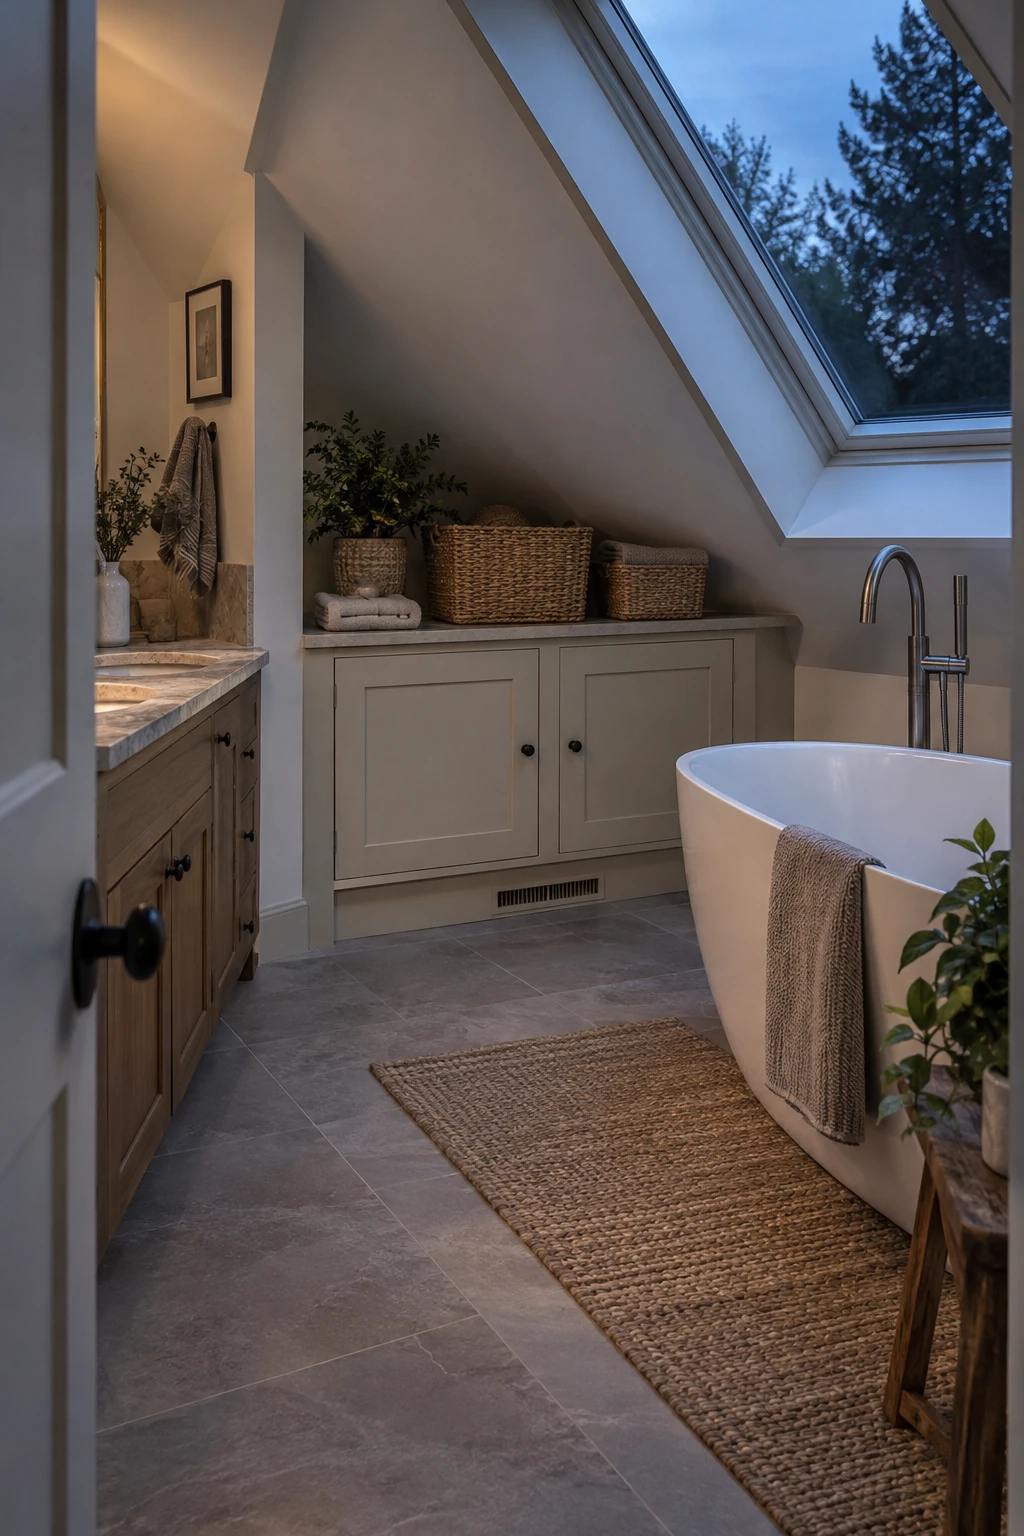
A low cabinet beneath the slope stores folded towels and paper goods where standing headroom is unnecessary. Fitted doors make the irregular wall feel intentional and keep visual clutter out of a compact room.
Limit depth so shelves remain reachable, and use drawers or pull-out trays at the back. Provide ventilation around damp linens and keep the cabinet outside direct splash.
Scribe fillers to the roofline instead of forcing doors into acute corners. Hinges and handles should open without striking the ceiling or blocking the circulation lane.
41. Recess the Medicine Cabinet Into a Full-Height Wall
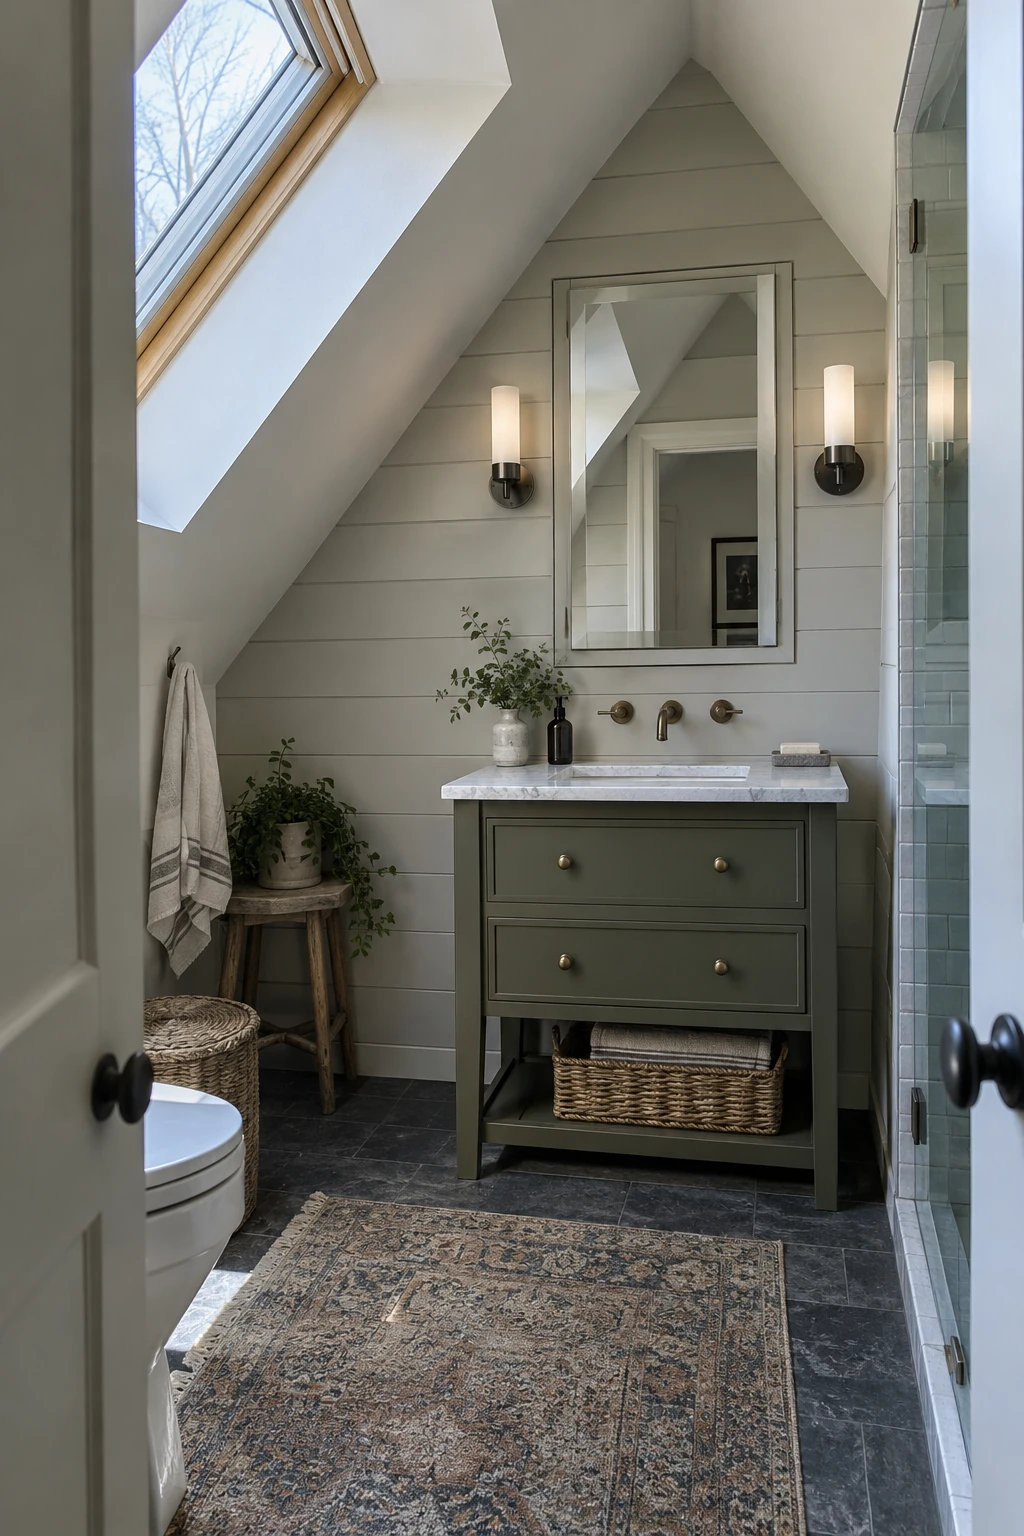
A recessed mirrored cabinet adds eye-level storage without projecting far over a narrow sink. Use a full-height interior wall so the cabinet does not displace roof or exterior-wall insulation.
Check studs, wiring, vent pipes, and the door swing before selecting width. Center the cabinet on the basin even when framing requires a smaller model or surface-mounted alternative.
Store daily toiletries here and follow product guidance for medicines that should avoid heat or humidity. Keep shelves adjustable so tall bottles do not consume an entire level.
42. Run a Floating Shelf Along the Knee Wall
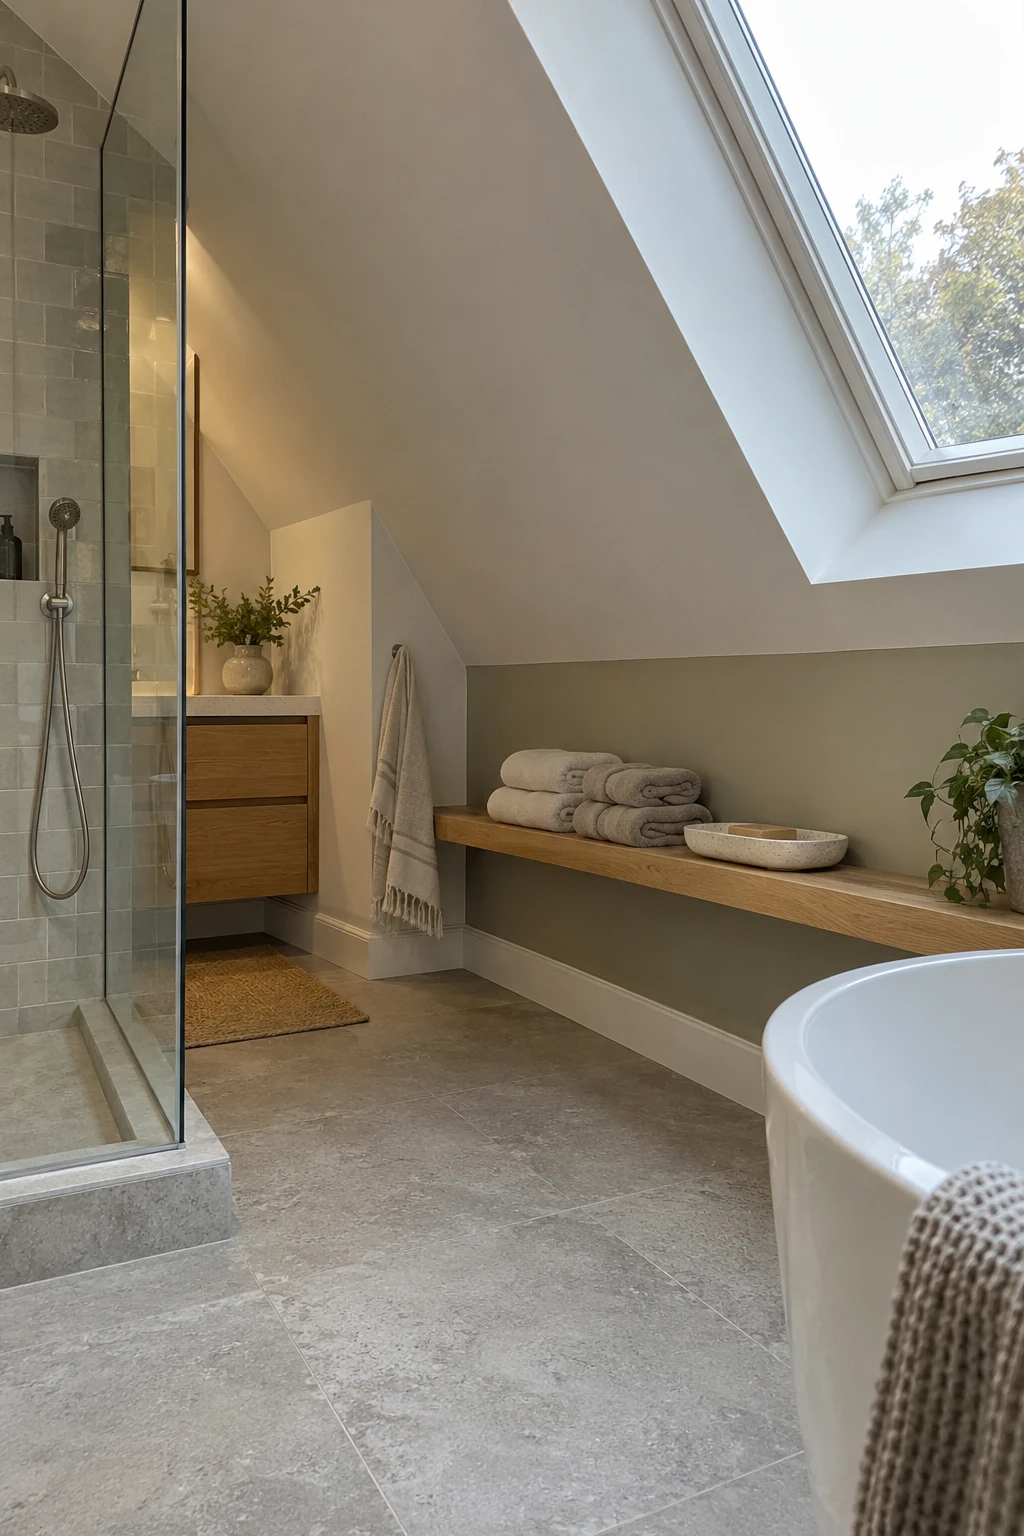
A shallow shelf can turn the top of a knee wall into useful storage without adding a bulky cabinet. It works for rolled towels, a tray, or a few frequently used items.
Keep the shelf narrow enough that people do not hit it when rising from the tub or toilet. Secure it to framing and protect the wall junction with a cleanable, moisture-resistant finish.
Avoid filling the ledge with small decor. A restrained display preserves the roofline and makes routine dusting easier.
43. Create Towel Cubbies Beside the Tub
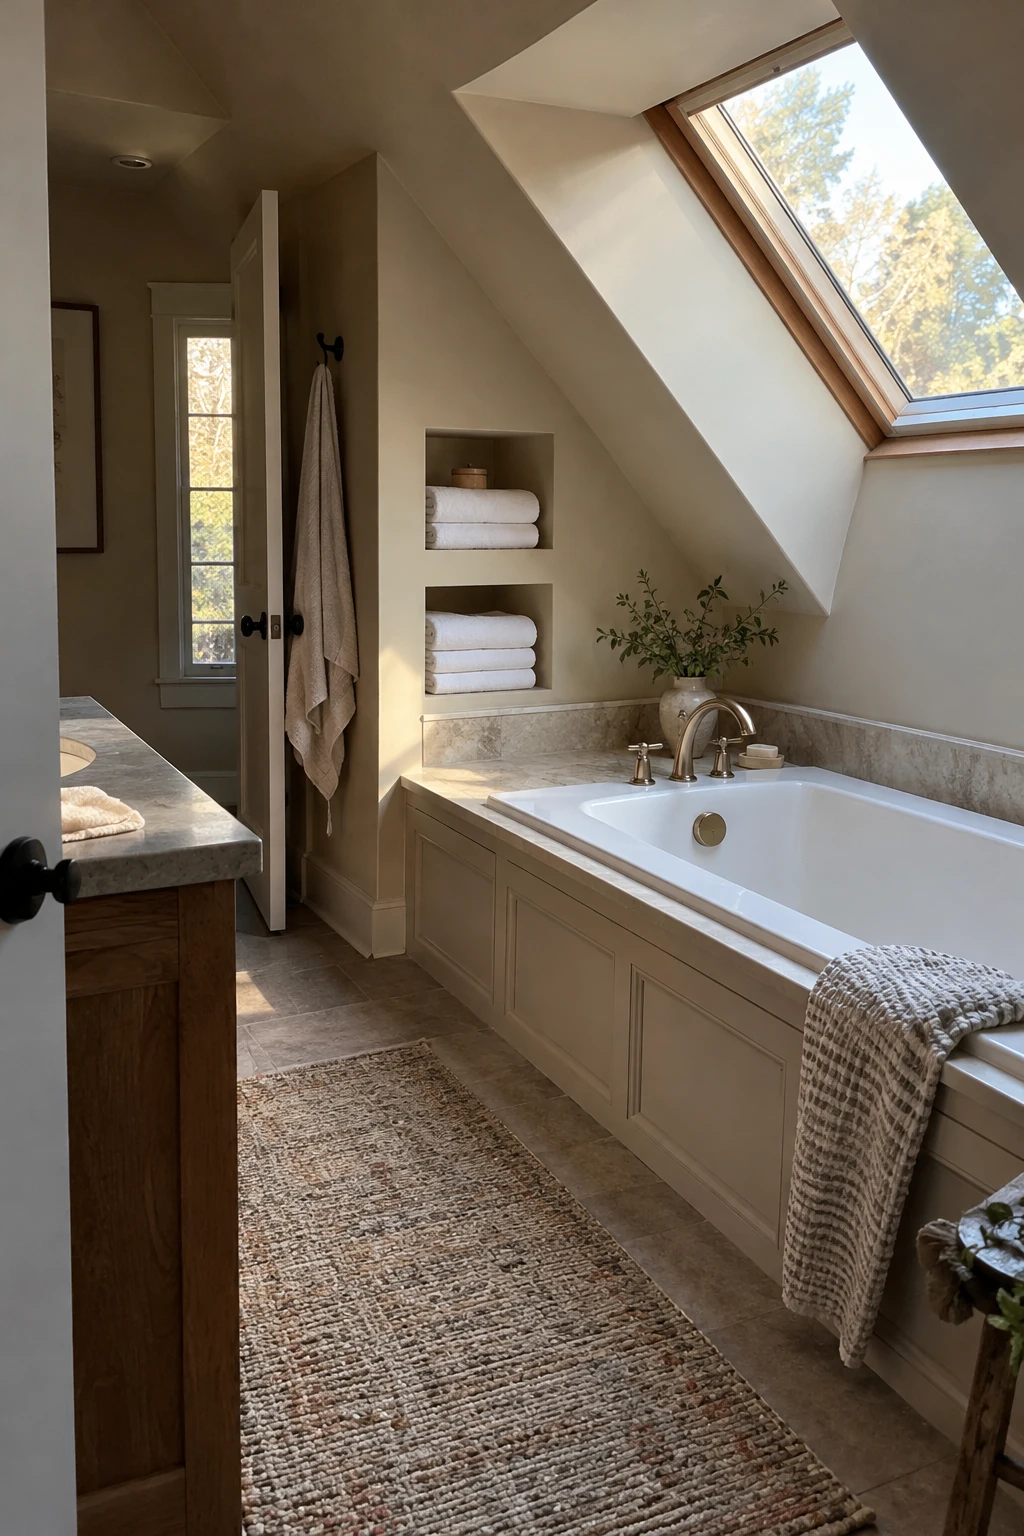
Open cubbies beside the tub keep clean towels reachable without using full-height wall space. Position them in a dry return wall rather than inside the splash zone.
Size the openings around folded towel stacks and leave enough depth for air circulation. Seal every surface with a bathroom-suitable finish and avoid raw fiberboard at exposed edges.
Keep the lowest cubby above routine floor splashes and the highest within safe reach. Baskets can corral small items, but they should slide out without scraping the slope.
44. Hide Plumbing Access Behind Matching Panels
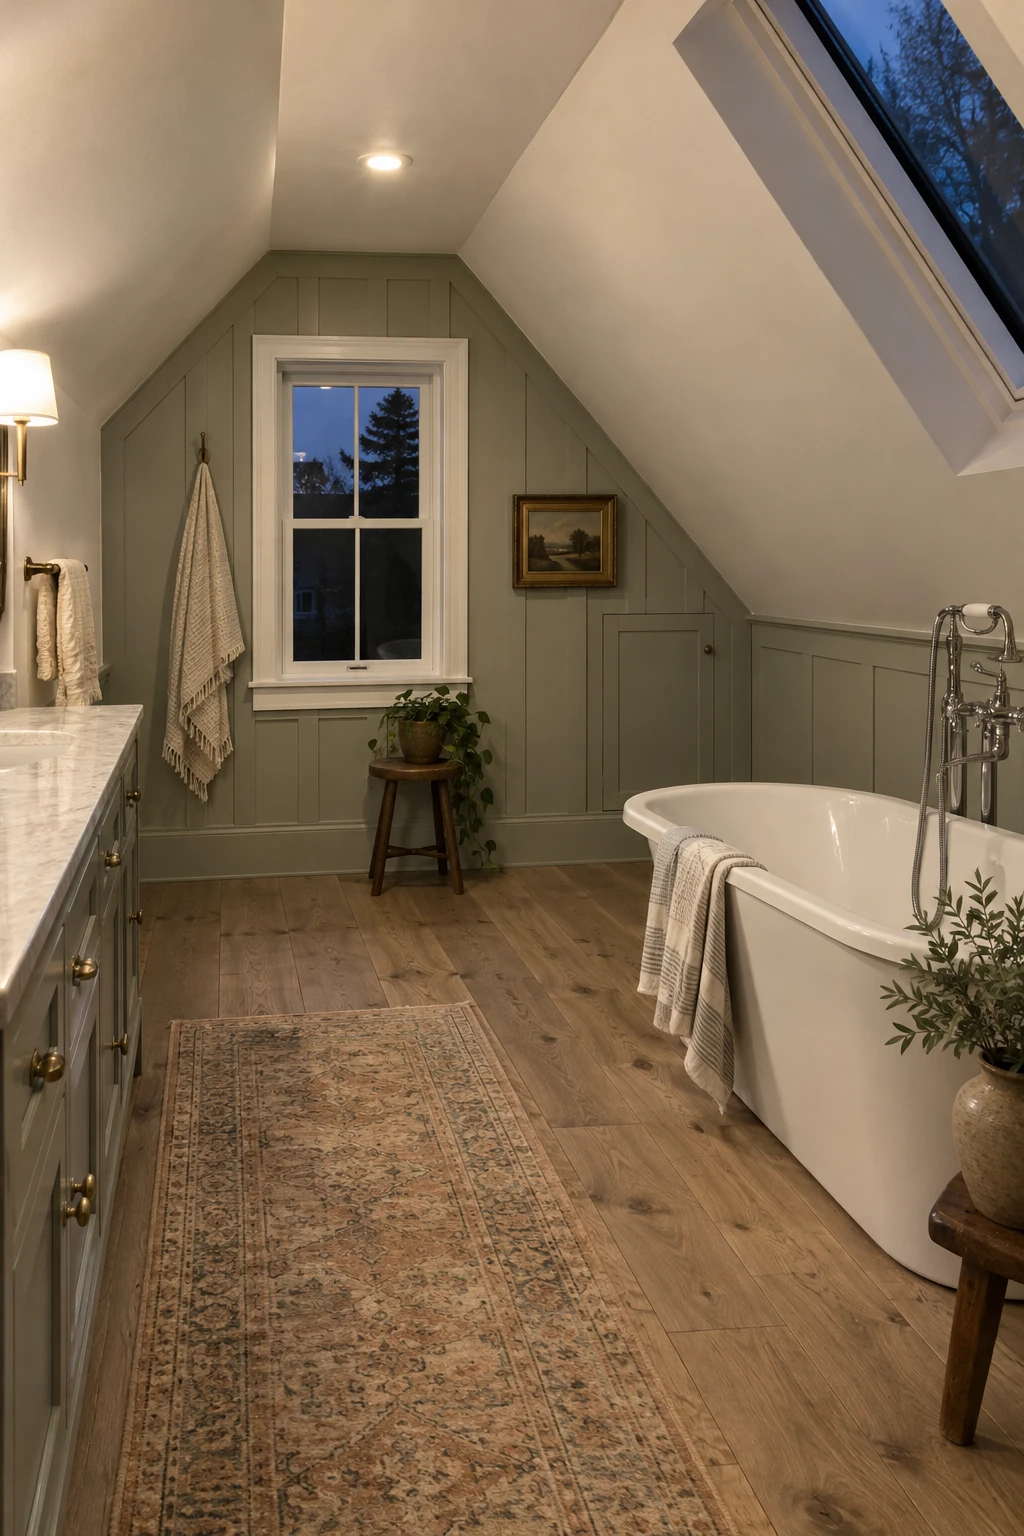
Removable panels can conceal tub valves, cisterns, cleanouts, or eaves services without making the room look unfinished. Align seams with trim, tile joints, or cabinet divisions so the access reads as part of the design.
Use corrosion-resistant fasteners or magnetic hardware appropriate to the panel weight. Label the reverse side and photograph the services behind it before closing.
Access must be large enough for the actual repair, not only visual inspection. Confirm service needs with the plumber and electrician before millwork dimensions are finalized.
45. Follow the Roofline With Vertical Tile
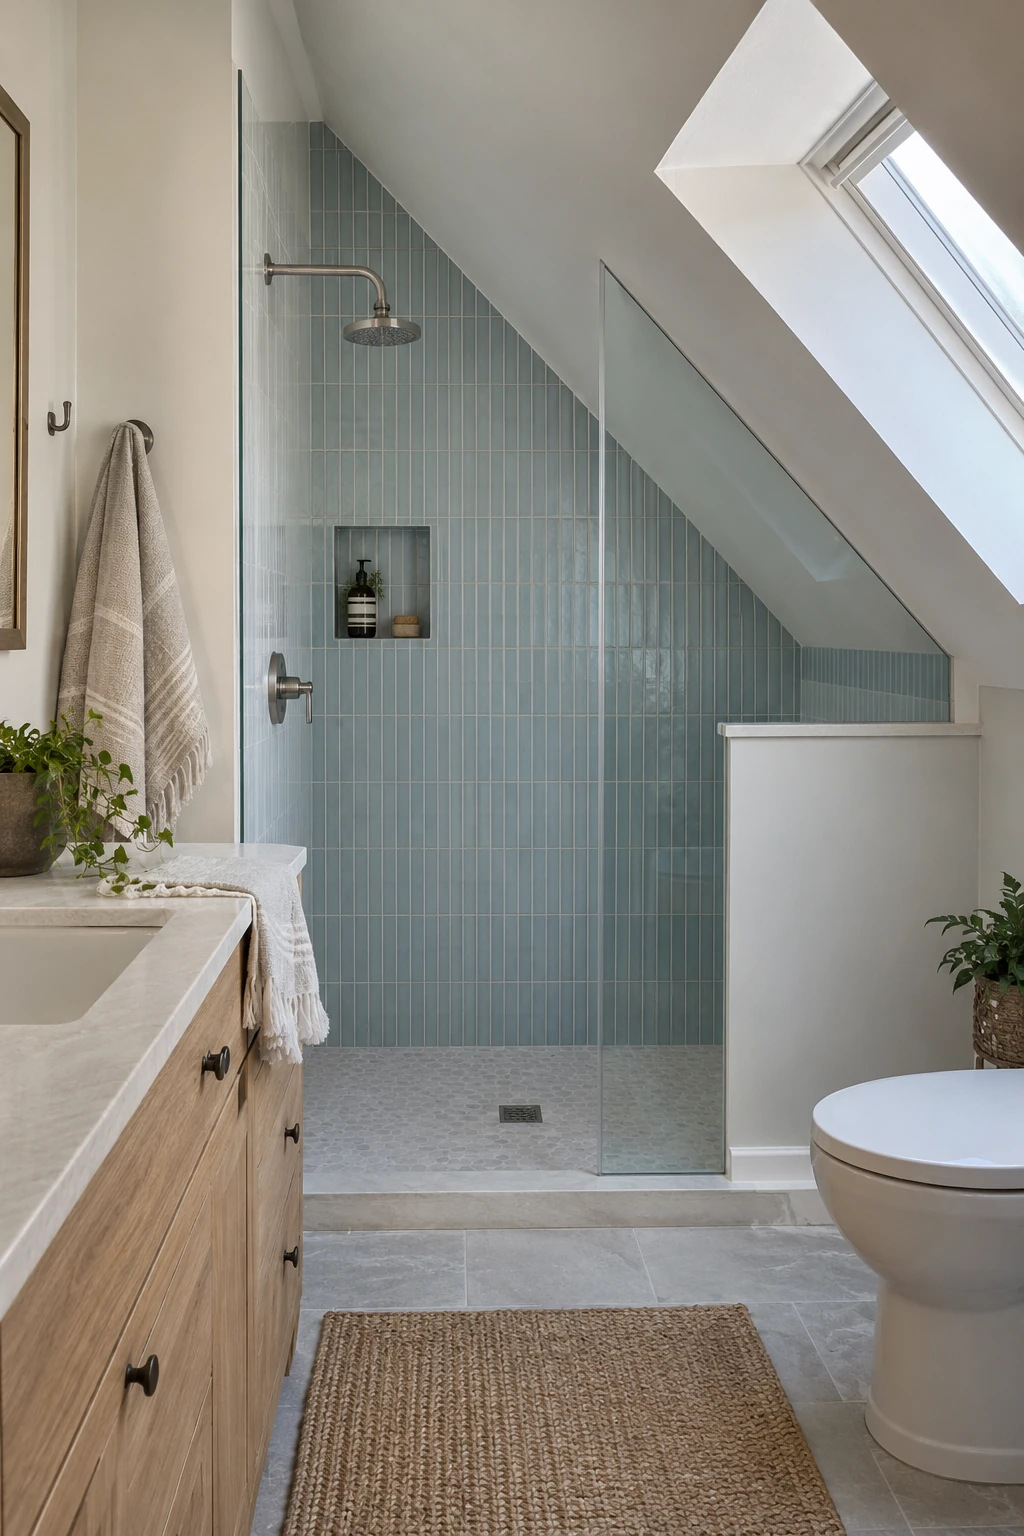
Vertical tile can emphasize the highest point of the attic and simplify the transition into an angled ceiling. Use the pattern on one shower or vanity wall rather than wrapping every plane in narrow joints.
Set the layout from the most visible edge and avoid tiny triangular cuts at the slope. A skilled tile installer can balance full pieces, movement joints, and the actual roof angle after substrates are finished.
Keep the grout color close to the tile for a calm line. Strong contrast magnifies every cut and can make a small roof shape feel busier.
46. Use One Pale Tile Across Floor and Wet Walls
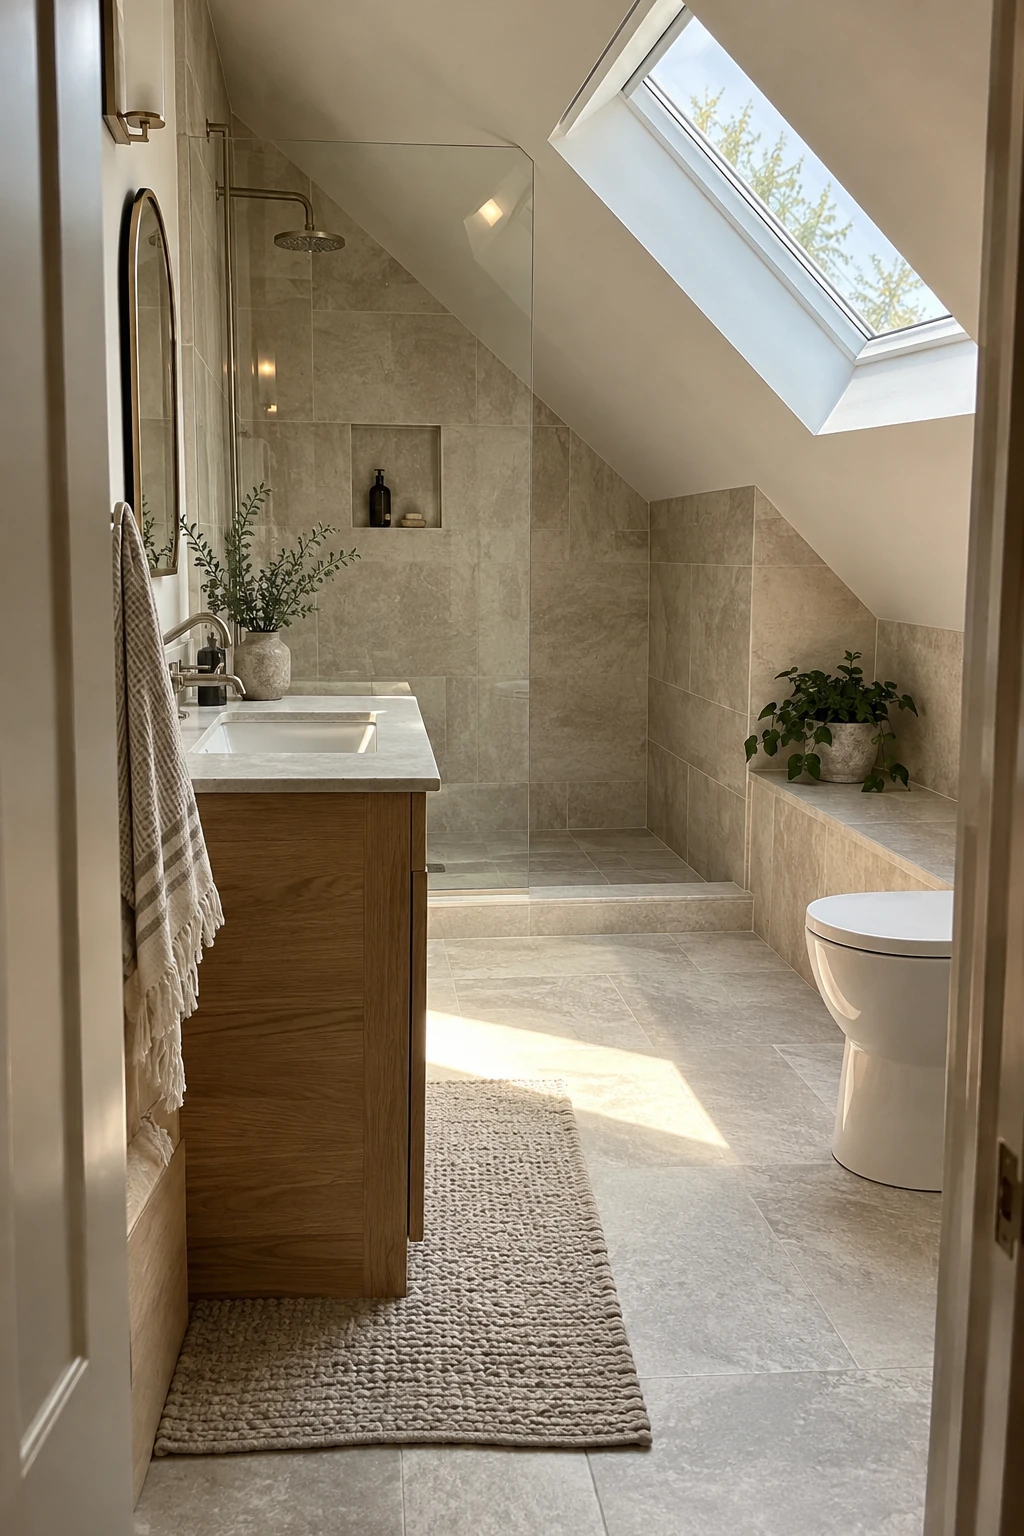
Repeating one pale porcelain across the floor and wet walls reduces visual breaks in an irregular attic. Vary the format where drainage requires smaller pieces while keeping the color and undertone consistent.
Select a floor finish suited to wet-foot traction and verify compatibility with the waterproofing and heating systems. Wall tile does not automatically belong on a shower floor.
Study more bathroom flooring ideas, then compare weight, thickness, maintenance, and edge details. Order enough from one production lot for cuts and future repairs.
47. Ground the Room With a Patterned Floor
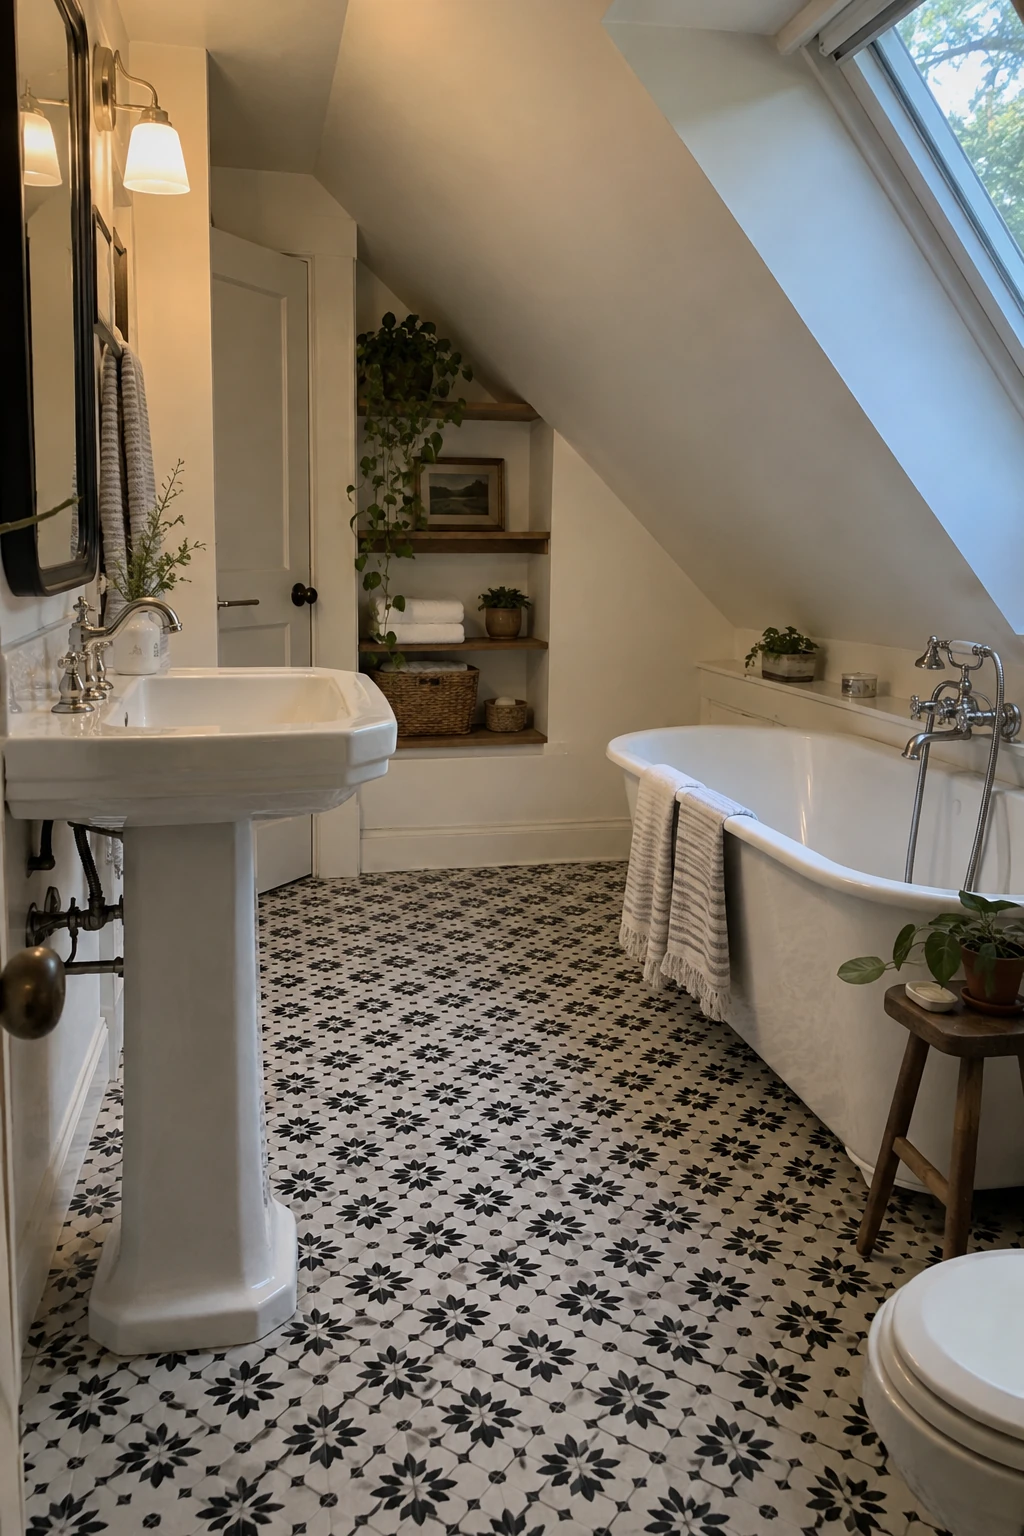
A patterned floor can give the eye a stable horizontal plane while the ceiling angles shift above. Keep walls and fixtures quiet so the room has one clear focal surface.
Choose a repeat that survives cuts around irregular eaves and fixtures. Dry-lay the center lines, doorway view, and shower transition before setting tile.
Use a porcelain or other bathroom-appropriate material with suitable traction, and confirm the floor assembly can support it. Small patterns hide minor dirt, but busy grout still needs practical cleaning access.
48. Wrap Dry Slopes in Painted Paneling
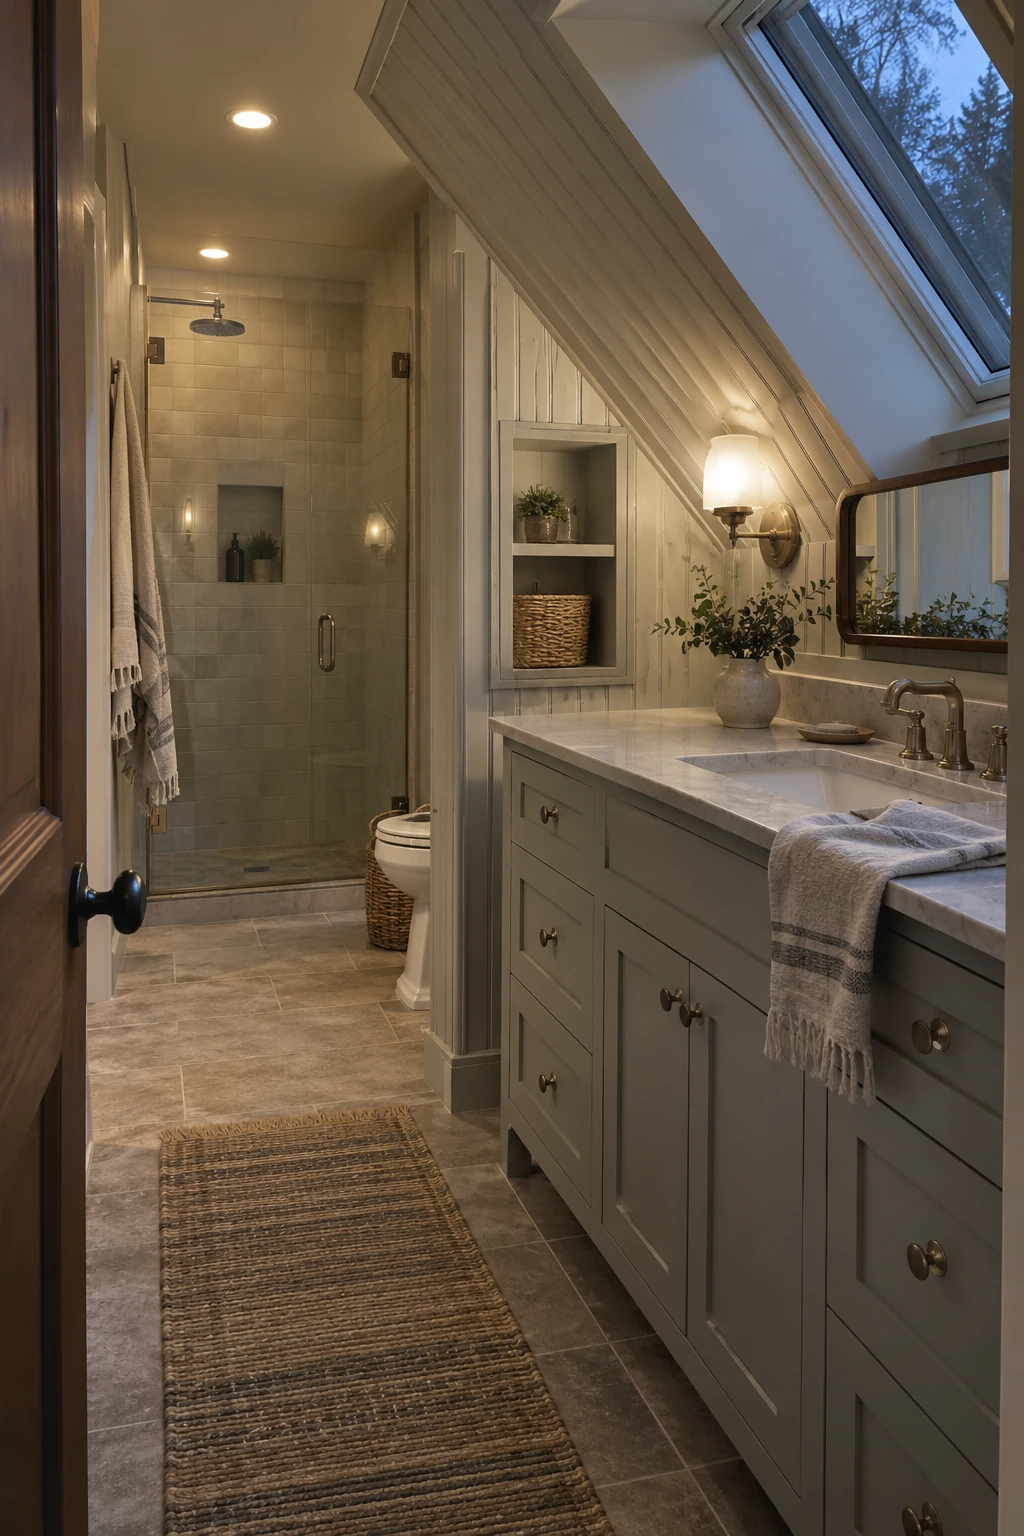
Painted tongue-and-groove or beadboard can emphasize the roof shape and soften a tile-heavy bathroom. Reserve it for dry zones unless the exact product and assembly are approved for direct water exposure.
Prime cut edges, allow required movement, and use a washable bathroom finish. These bathroom beadboard ideas can guide proportions without replacing the moisture requirements for an attic ceiling.
Keep ventilation effective and inspect joints near windows or cold corners. Paneling should not hide recurring condensation or roof leaks.
49. Pair Warm Wood With Pale Stone
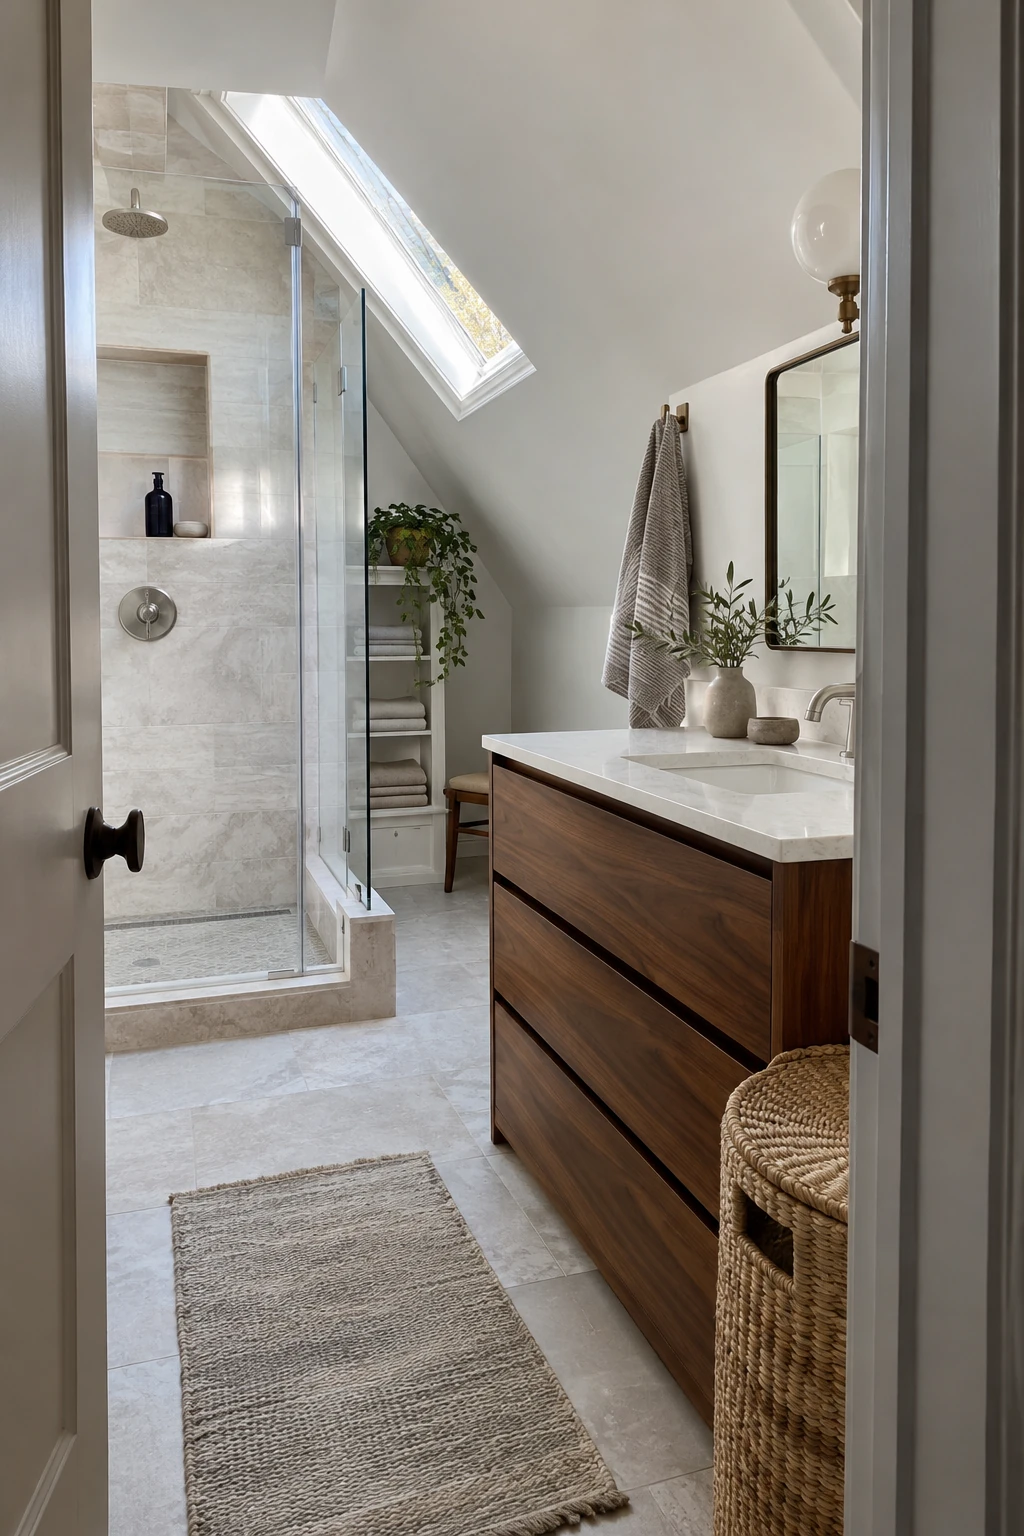
Warm wood cabinetry balances the cool, hard surfaces needed in a bathroom and makes an attic feel connected to the roof structure. Pale stone or stone-look porcelain keeps the limited daylight moving through the room.
Use durable cabinet construction, sealed edges, and ventilation around drawers. Real stone may add weight and maintenance, so compare it with lighter porcelain or engineered surfaces after structural review.
Repeat each material only a few times: wood at the vanity and shelf, pale stone at wet surfaces, and simple paint above. This restraint lets the roof angles provide the character.
50. Paint the Gable Wall a Deep Color
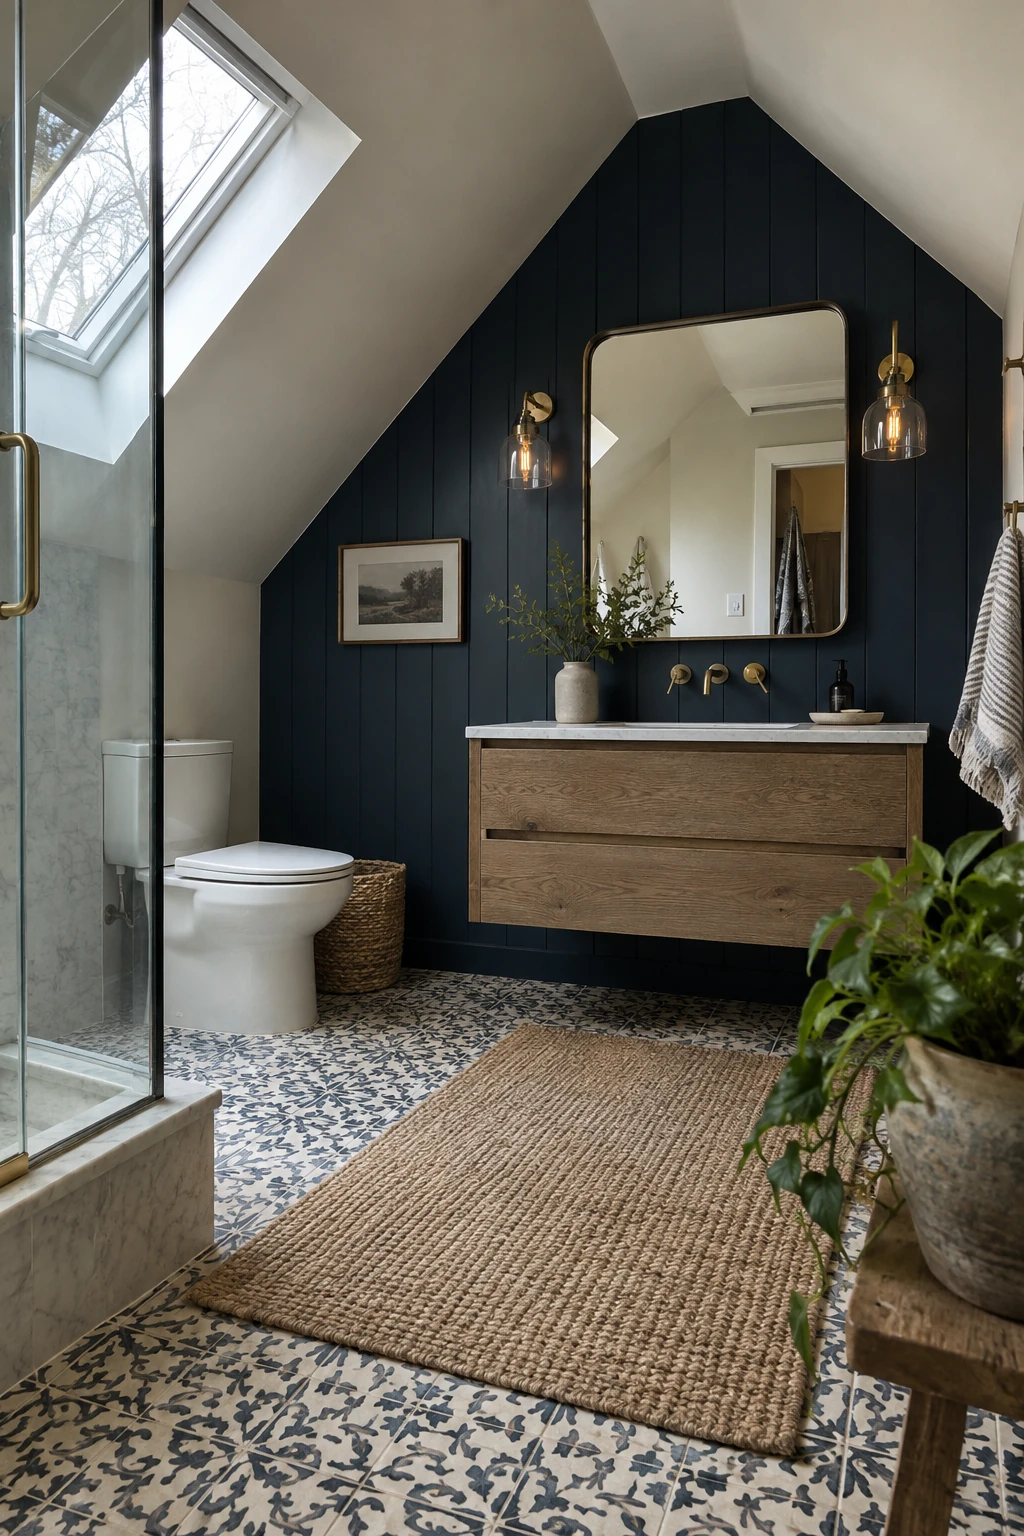
A deep color on the full-height gable wall can visually anchor the room while the slopes stay pale and open. It works especially well behind a vanity, where the mirror and lights break up the darker field.
Test the color in daylight and under the finished bulbs because attic light changes sharply through the day. Use a washable bathroom paint and prepare the wall carefully; dark finishes reveal patches and uneven texture.
Finish check: test dark paint in daylight and under the final lamps.
Keep tile, cabinetry, and towels restrained so the gable remains the single strong statement. A budget-friendly paint focal point is most effective after ventilation and moisture problems have been solved.
Build the Attic Bathroom From the Hidden Work Out
The strongest attic bathrooms begin with a measured roof profile, a safe route from the stairs, and fixtures assigned to the right headroom zones. Structure, drainage, insulation, ventilation, and waterproofing should be settled before decorative choices narrow the options.
Sequence the budget the same way: surveys and permits first, then framing and services, then the building shell, and finishes last. When the geometry or hidden work is uncertain, a structural engineer, architect, roofer, plumber, electrician, or waterproofing specialist can prevent an expensive redo.