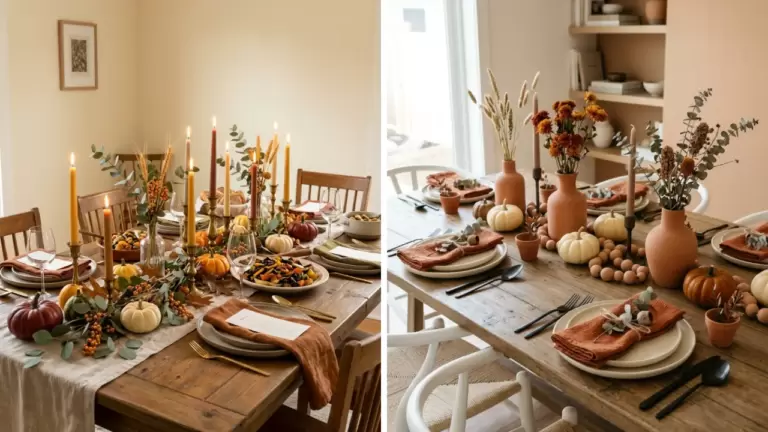
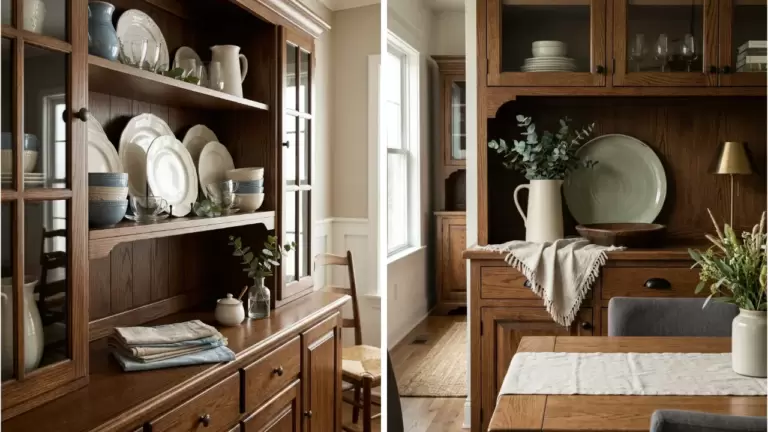
50 Vintage Halloween Decorating Ideas

This post may contain affiliate links: full affiliate disclosure.
Vintage Halloween styling relies on a mix of nostalgic textures and classic color palettes to create a curated look. Focus on using authentic motifs like paper cutouts and papier-mâché to bring a sense of history into a modern room without the clutter.
Classic Vintage Halloween Decorations
1. Vintage Black Cat Paper Cutouts
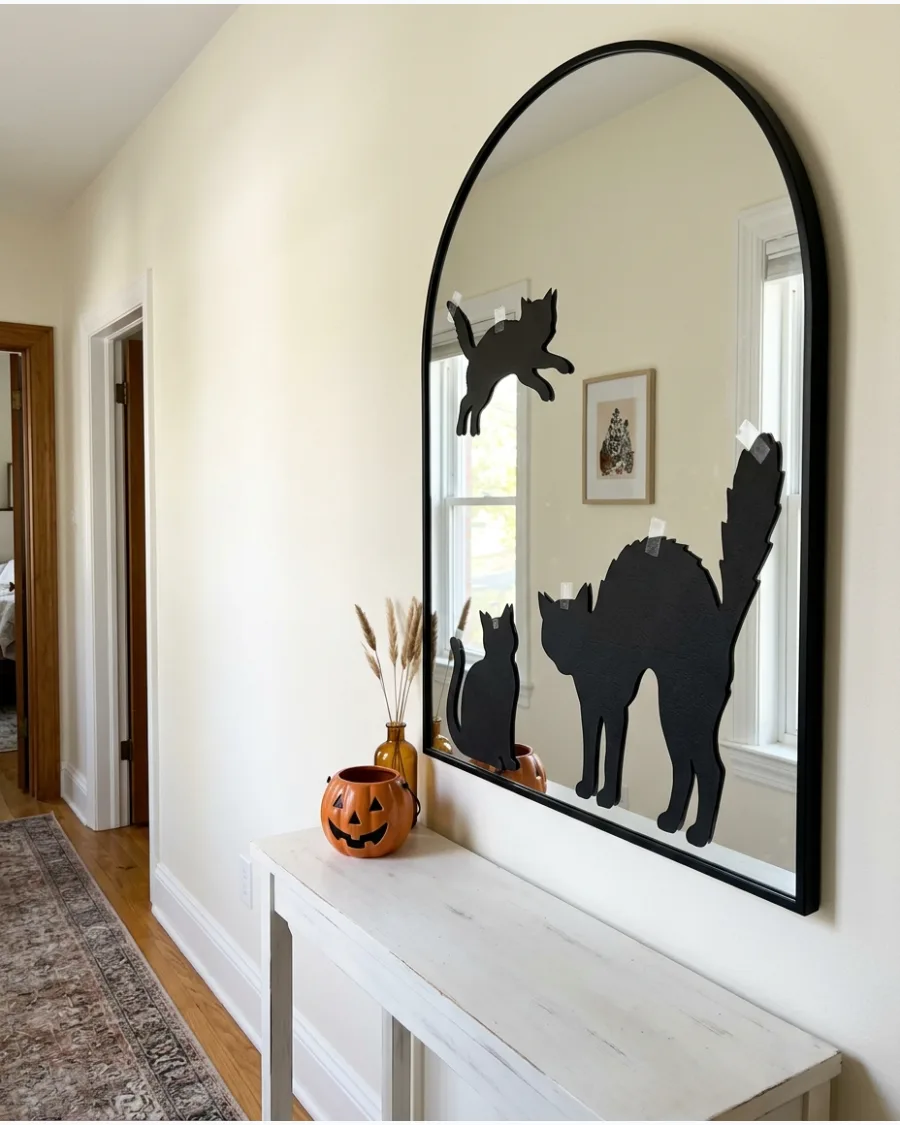
These paper cats bring a playful, retro energy to vertical surfaces without the weight of heavy frames. Look for designs from the early 20th century featuring arched backs and oversized yellow eyes for the most authentic look.
Mount these lightweight cutouts directly onto a large hallway mirror using small pieces of removable adhesive putty. Flat paper decor works best when layered over reflective surfaces to add depth to a flat wall.
- Sourcing: Look for Beistle reproduction packs online or at local craft stores for under $15.
- Setup: Use clear removable putty to avoid damaging paint or leaving residue on glass.
- Adaptation: For renters, stick these to the back of a bookshelf or inside a glass-front cabinet.
Most people skip this: Angle the cats so they appear to be walking along the frame of the mirror or peeking from behind a nearby plant.
2. Papier-Mâché Jack-o’-Lantern Buckets
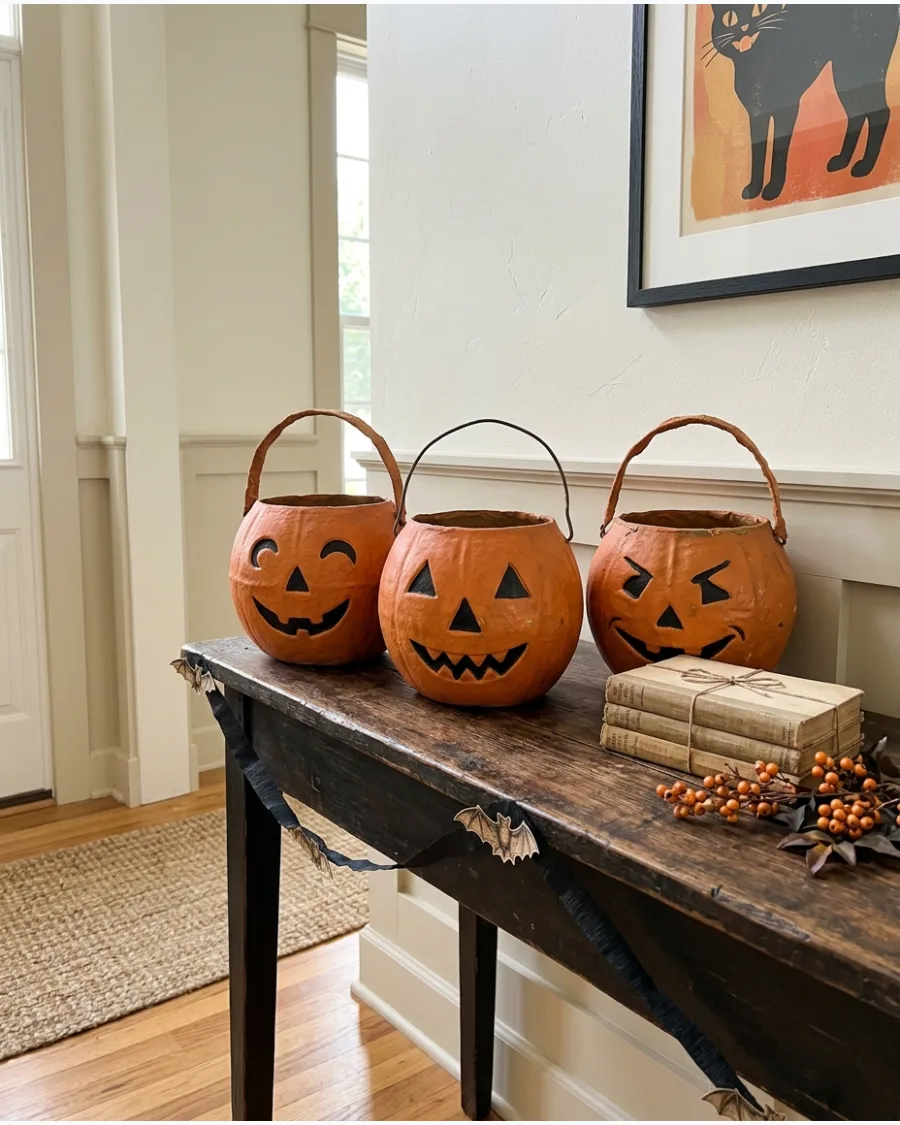
Authentic-looking papier-mâché pumpkins offer a matte texture that feels much more sophisticated than modern plastic buckets. The hand-painted faces and wire handles give each piece a unique, artisanal character that anchors a tabletop display.
Group three pumpkins of different heights on a wooden entry console to create an immediate focal point. These containers are surprisingly sturdy but should be kept away from open flames or damp areas.
- Sourcing: Modern reproductions cost between $20 and $50 and are much more durable than true antiques.
- Setup: Weight the bottom of the buckets with a few river stones to prevent them from tipping over.
- Adaptation: Place a battery-operated tea light inside to create a soft glow without damaging the paper interior.
Quick win: Line the inside with a small glass jar if you plan to use them as vases for dried flowers to protect the paper from moisture.
3. Antique Halloween Postcard Gallery
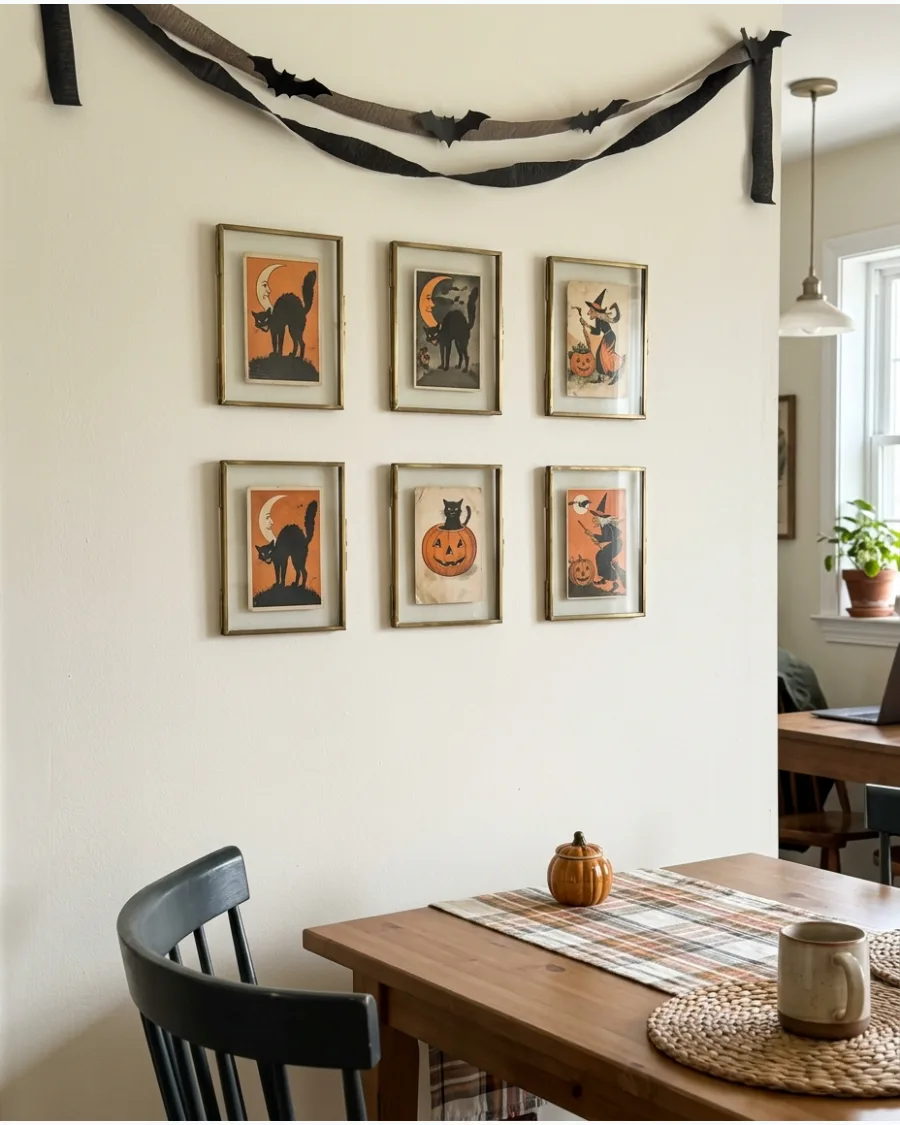
Small-scale art like vintage postcards adds a layer of intricate detail that large posters often miss. Framing these in mismatched brass or dark wood frames creates a collected look that feels like an inherited family treasure.
Arrange five to seven framed cards in a tight grid on a small wall section to maximize the visual impact of the tiny illustrations. This approach keeps the decor from looking cluttered while celebrating the graphic style of the early 1900s.
- Sourcing: Download high-resolution public domain images and print them on heavy cardstock for a budget-friendly DIY.
- Setup: Use Command strips for the small frames to avoid making multiple holes in the drywall.
- Adaptation: Use a single large frame with a multi-opening mat to display a themed set of cards.
Best shortcut: Scour local antique malls in the ephemera section where you can often find original cards for a few dollars each.
4. Vintage Honeycomb Paper Pumpkins
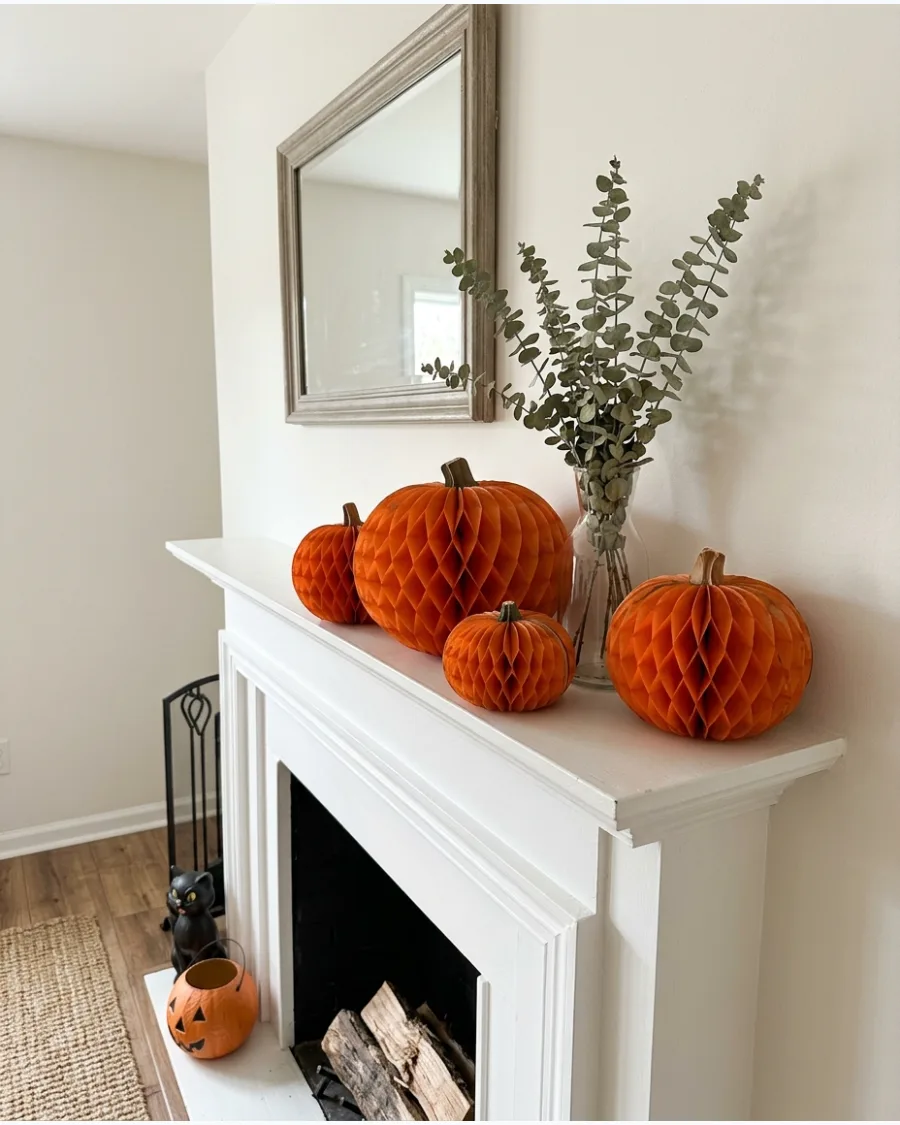
Honeycomb paper decorations are a staple of mid-century holidays and provide a pop of bright orange with a unique geometric texture. These pumpkins fold flat for easy storage, making them a practical choice for small homes with limited closet space.
Scatter different sizes of honeycomb pumpkins across a fireplace mantel among sprigs of dried eucalyptus. The contrast between the bright paper and the organic greenery makes the display feel intentional rather than just a party store setup.
- Sourcing: Bulk packs of honeycomb decor are widely available and very affordable for filling large spaces.
- Setup: Secure the paper fans with a small paperclip instead of the adhesive strip so they can be folded back up for next year.
- Adaptation: Hang smaller versions from a chandelier or a branch in a vase using clear fishing line.
Most people skip this: Mix in a few black or cream-colored honeycomb spheres to break up the solid block of orange.
5. Retro Halloween Blow Molds
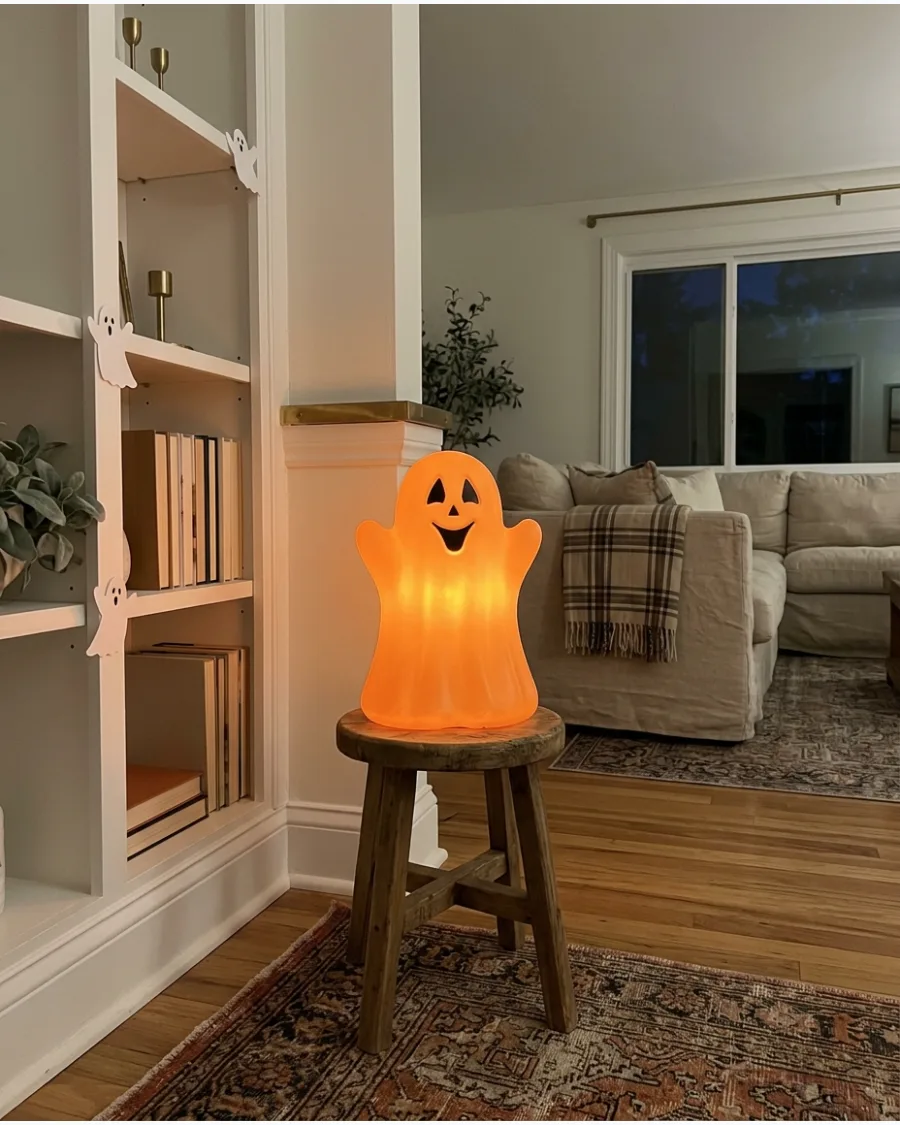
Blow molds are the quintessential outdoor-turned-indoor decor for fans of 1960s and 70s nostalgia. Their glowing, translucent plastic bodies bring a warm, kitschy light to dark corners or entryways.
Place a single large blow mold on a low stool in a corner to act as an accent lamp during evening hours. These pieces have a bold presence, so one or two well-placed items usually work better than a crowded shelf.
- Sourcing: Check estate sales and online marketplaces for originals, or buy modern reproductions for safer electrical wiring.
- Setup: Replace old incandescent bulbs with cool-running LED bulbs to prevent the plastic from warping over time.
- Adaptation: Use unlit blow molds on a covered porch if you prefer a daytime-only display.
Quick win: Clean the plastic surface with a damp cloth and a drop of dish soap to restore the shine before displaying.
6. Antique-Inspired Witch Figurines
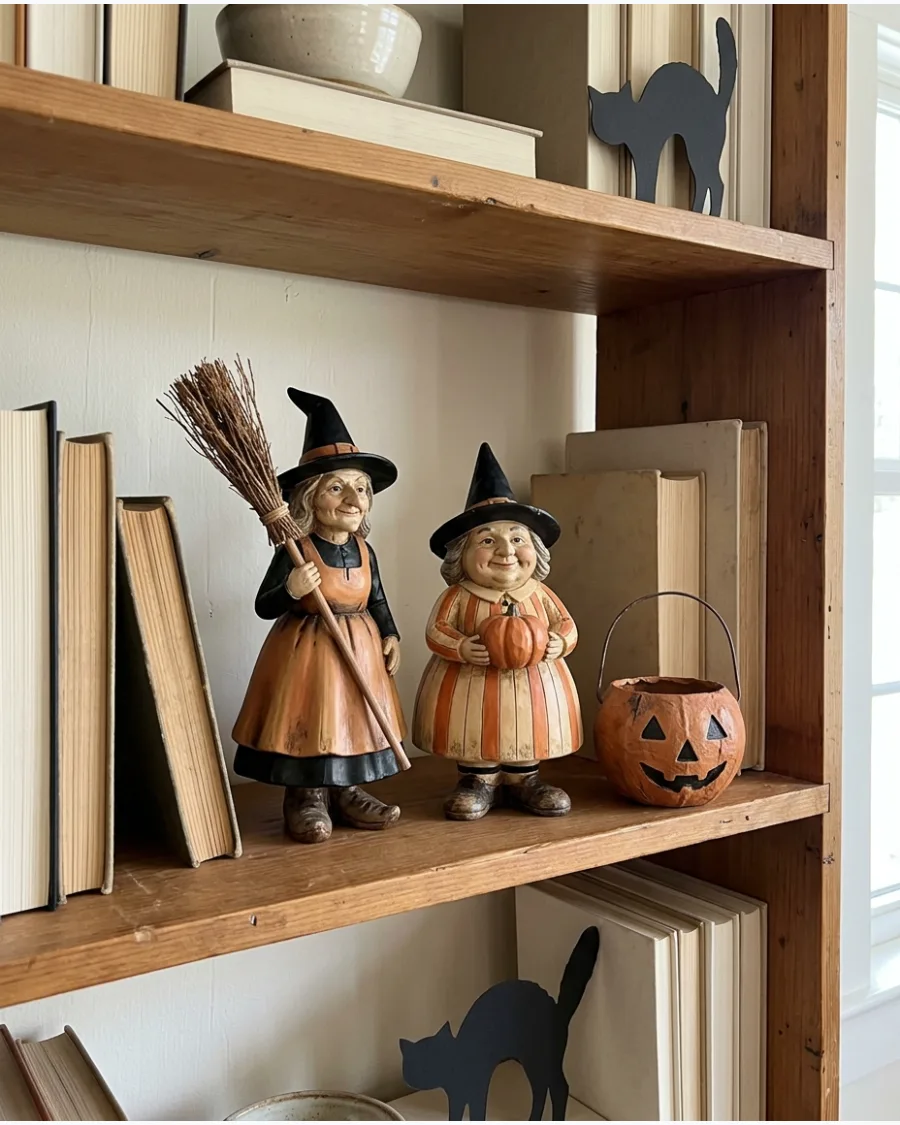
Modern witch decor can sometimes lean toward the spooky side, but vintage-inspired figurines focus on whimsical expressions and classic silhouettes.
These pieces often use muted colors like sage green and cream, which blend easily into a sophisticated room palette. Set a group of three figurines on a bookshelf, tucking them between stacks of leather-bound books for a scholarly look. The key is to treat them like high-quality sculptures rather than temporary holiday trinkets.
- Sourcing: Designer brands often release limited-edition vintage-style figurines that hold their value well.
- Setup: Use a small amount of museum wax on the base of the figurines to keep them stable on high shelves.
- Adaptation: If space is tight, use a single larger figurine as a centerpiece for a small dining table.
Best shortcut: Look for figurines with fabric accents like felt hats or lace trim to add a tactile, high-end feel.
7. Vintage Owl Decorations
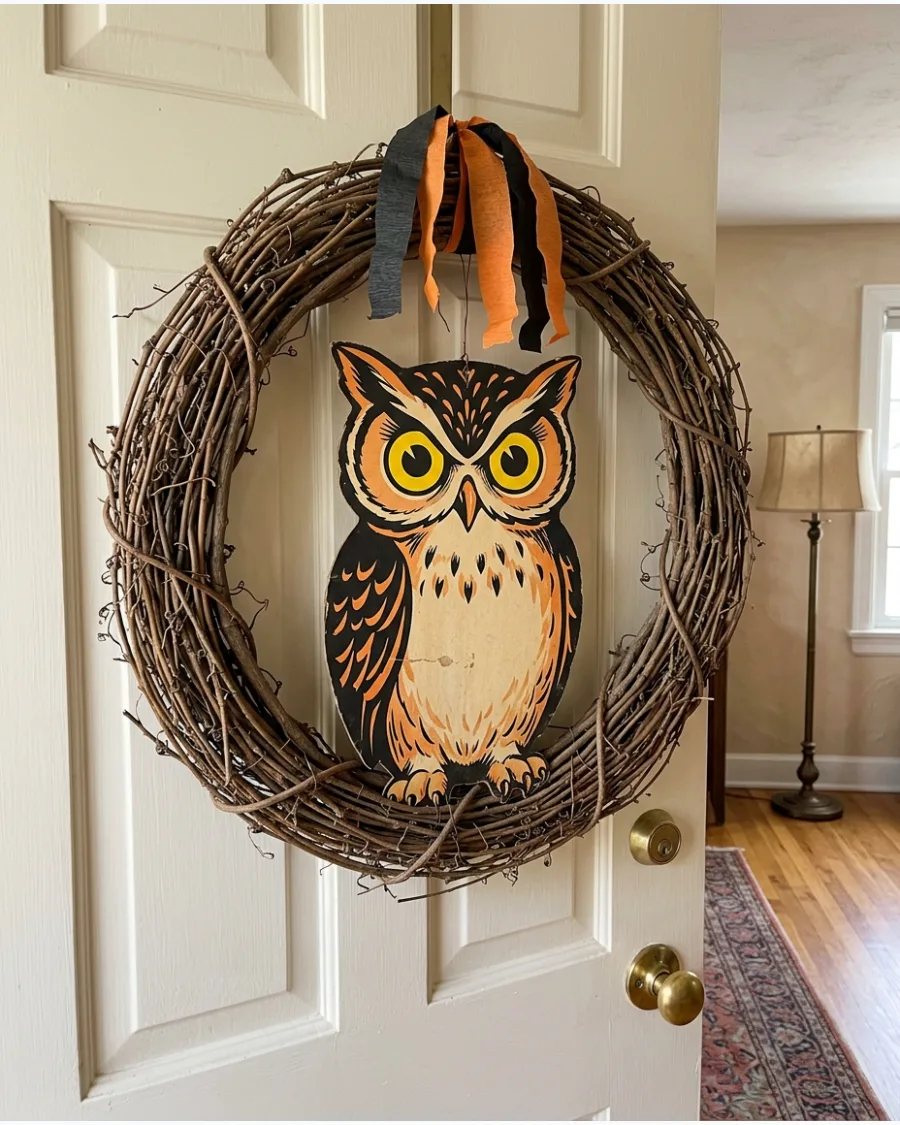
Owls were a major theme in early 20th-century Halloween decor, often appearing with wide, expressive eyes and stylized feathers. Unlike bats or spiders, owls feel appropriate for the entire autumn season, allowing you to keep them out from September through November.
Place a vintage-style owl print or cutout in the center of a fall wreath to give it a specific Halloween focus. Their neutral brown and cream tones make them a versatile bridge between harvest and holiday styling.
- Sourcing: Look for folk art style owls in ceramic or wood for a more permanent decor piece.
- Setup: Pair owl figurines with natural elements like pinecones or acorns to ground the look.
- Adaptation: Use small owl ornaments to decorate a Halloween tree or a large potted indoor plant.
Most people skip this: Position owls at eye level or higher to mimic their natural perch in a tree.
8. Old-Fashioned Pumpkin Candy Containers
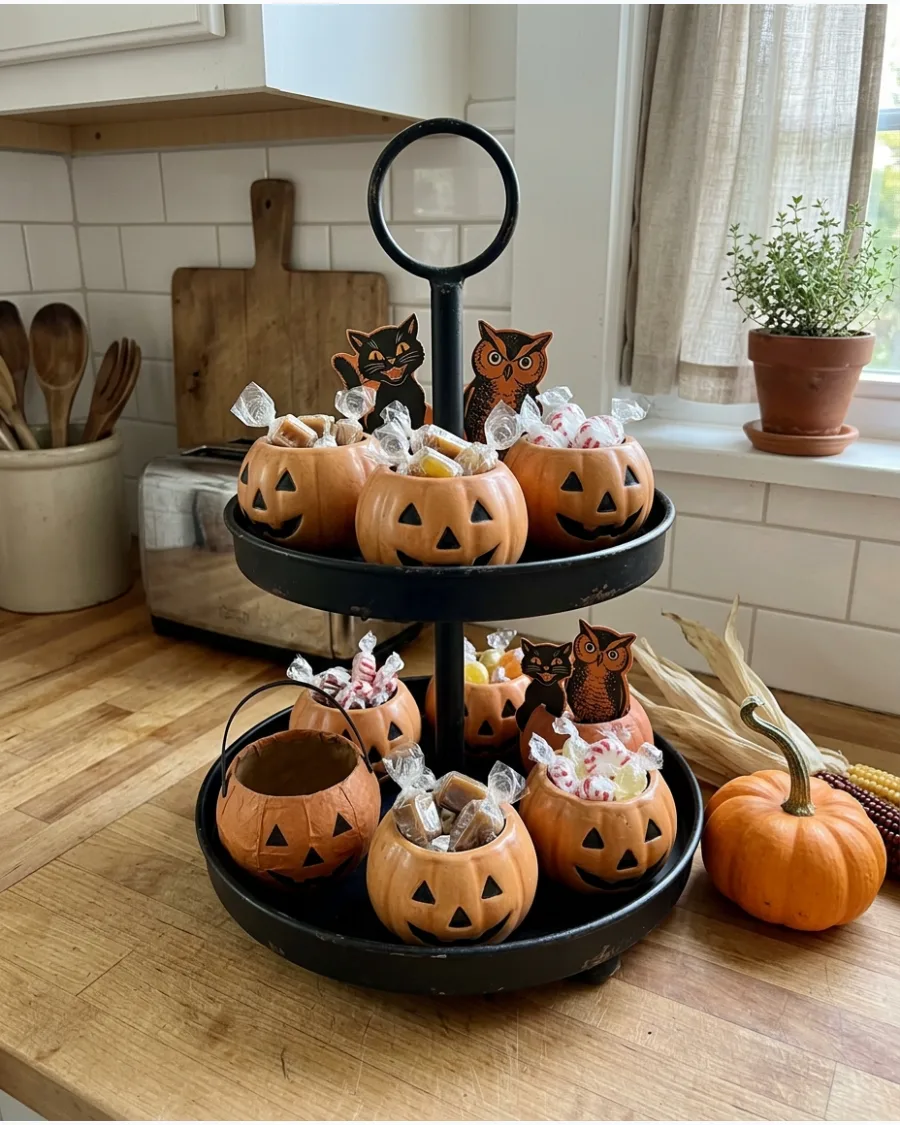
Small pumpkin containers were originally designed for party favors, but they serve as excellent decorative accents for coffee tables or nightstands.
Using reproduction pieces allows you to actually use them for food without worrying about damaging a fragile antique. Fill several small pumpkin containers with classic orange and black candies and arrange them on a tiered tray. This creates a functional snack station that looks like a curated part of the room's design.
- Sourcing: Ceramic and glass versions are easier to clean and more food-safe than old cardboard originals.
- Setup: Group odd numbers of containers together for a more natural and balanced arrangement.
- Adaptation: Use these as place card holders for a Halloween dinner party by tucking a name card into the lid.
Quick win: Use these to hold non-candy items like paperclips in a home office or cotton swabs in a guest bathroom for a subtle seasonal touch.
9. Vintage Halloween Masks
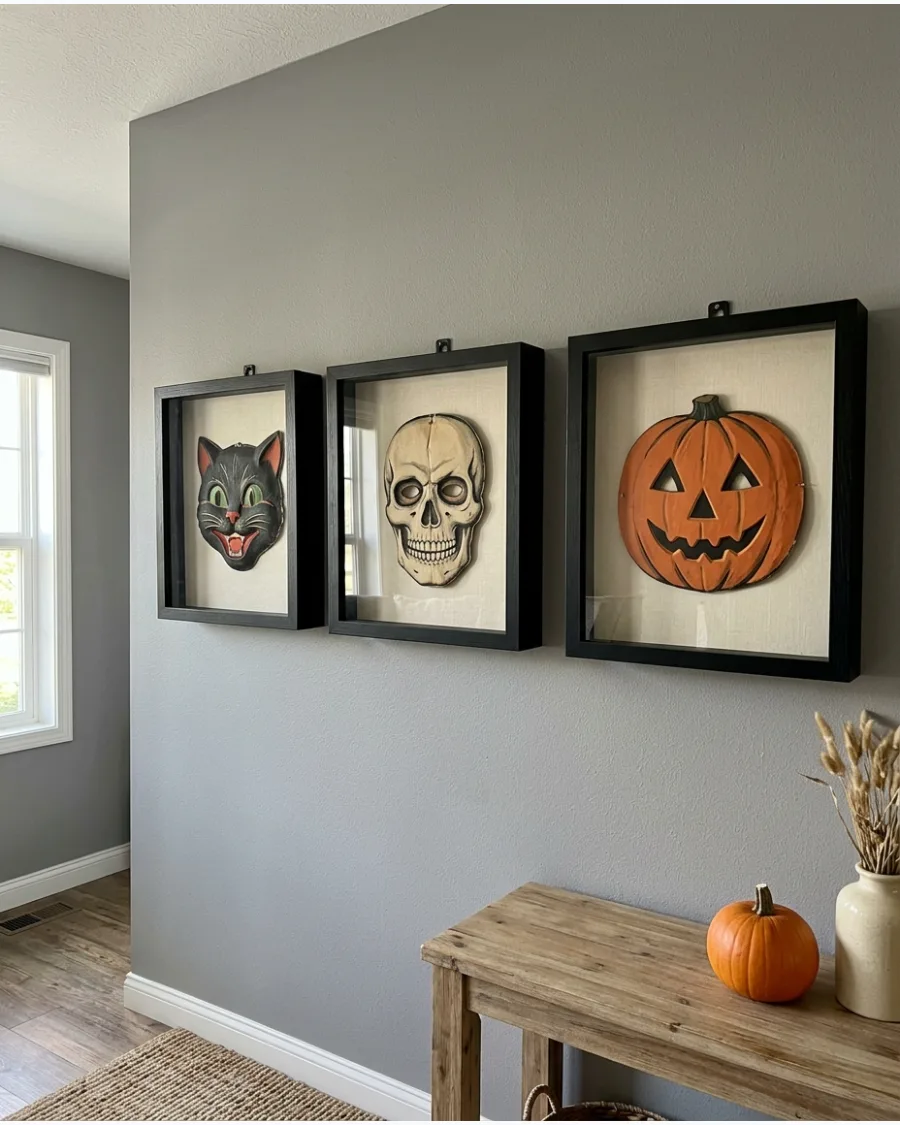
The graphic style of mid-century Halloween masks is both nostalgic and visually striking when treated as art. Instead of wearing them, display them as wall decor to show off the vibrant colors and exaggerated features of classic characters.
Mount three different masks inside deep shadow boxes to protect the delicate cardboard and give them a gallery-quality finish. This elevates what was once a cheap toy into a sophisticated design element.
- Sourcing: Reproduction mask sets are often sold in books or packs, making it easy to get a coordinated set.
- Setup: Use acid-free mounting tape to secure the masks inside frames to prevent yellowing over time.
- Adaptation: Lean a single mask against the back of a shelf for a low-effort styling win.
Best shortcut: Look for masks with the original elastic string still attached to add to the authentic found look.
10. Antique Halloween Advertising Signs
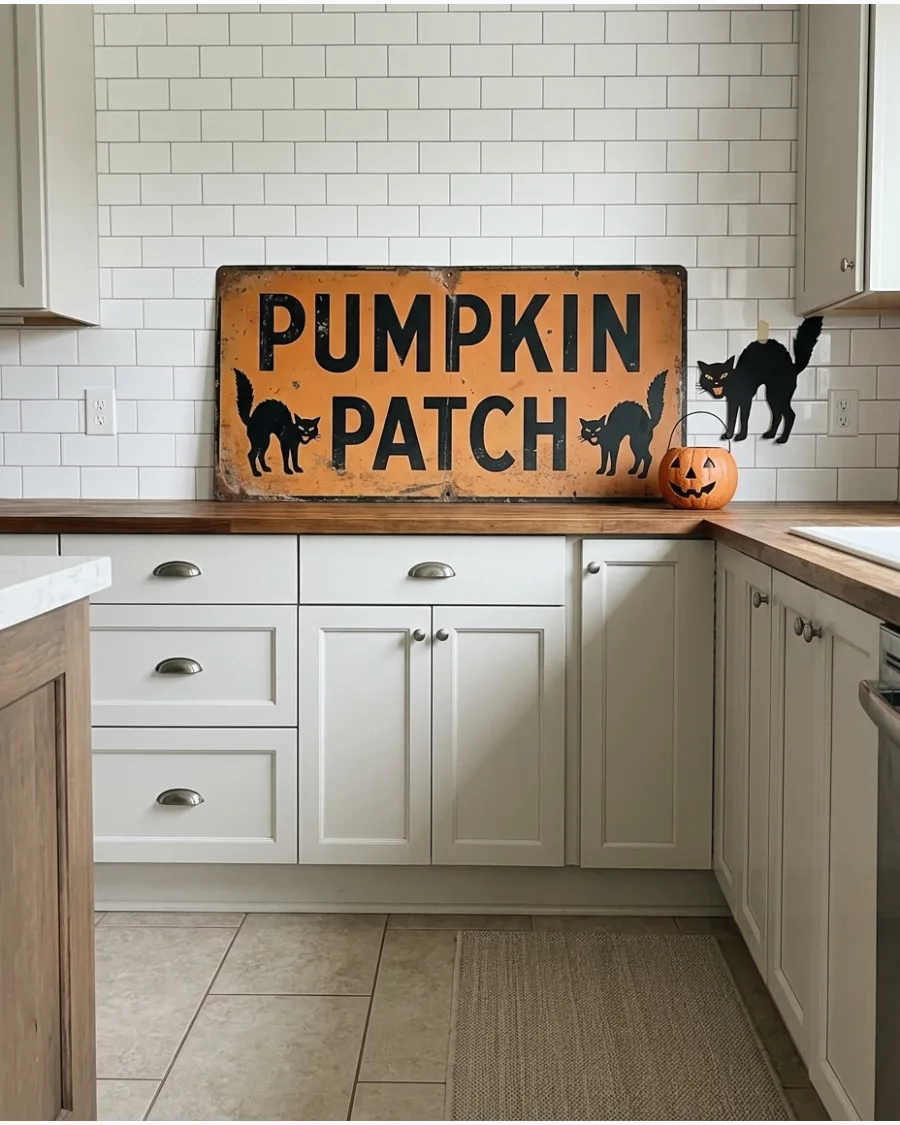
Signs with aged typography and faded colors provide a narrative element to your decor, suggesting a storied past. These pieces work well in kitchens or mudrooms where they can lean against a backsplash or hang near a door.
Prop a large wooden or tin sign against the wall on a kitchen counter to add height and interest to a utilitarian space. The faded look of these signs helps them blend into a home's existing color scheme better than bright modern signage.
- Sourcing: Tin signs are durable and affordable, while wooden versions offer a more substantial feel.
- Setup: If hanging on the wall, ensure the sign is level to maintain the polished look of the room.
- Adaptation: Choose signs with neutral colors if your home has a minimalist or modern aesthetic.
Quick win: Lightly sand the edges of a new sign to reveal a bit of the base material for an even more authentic aged appearance.
Vintage Halloween Mantel Ideas
11. Antique Mirror Halloween Mantel
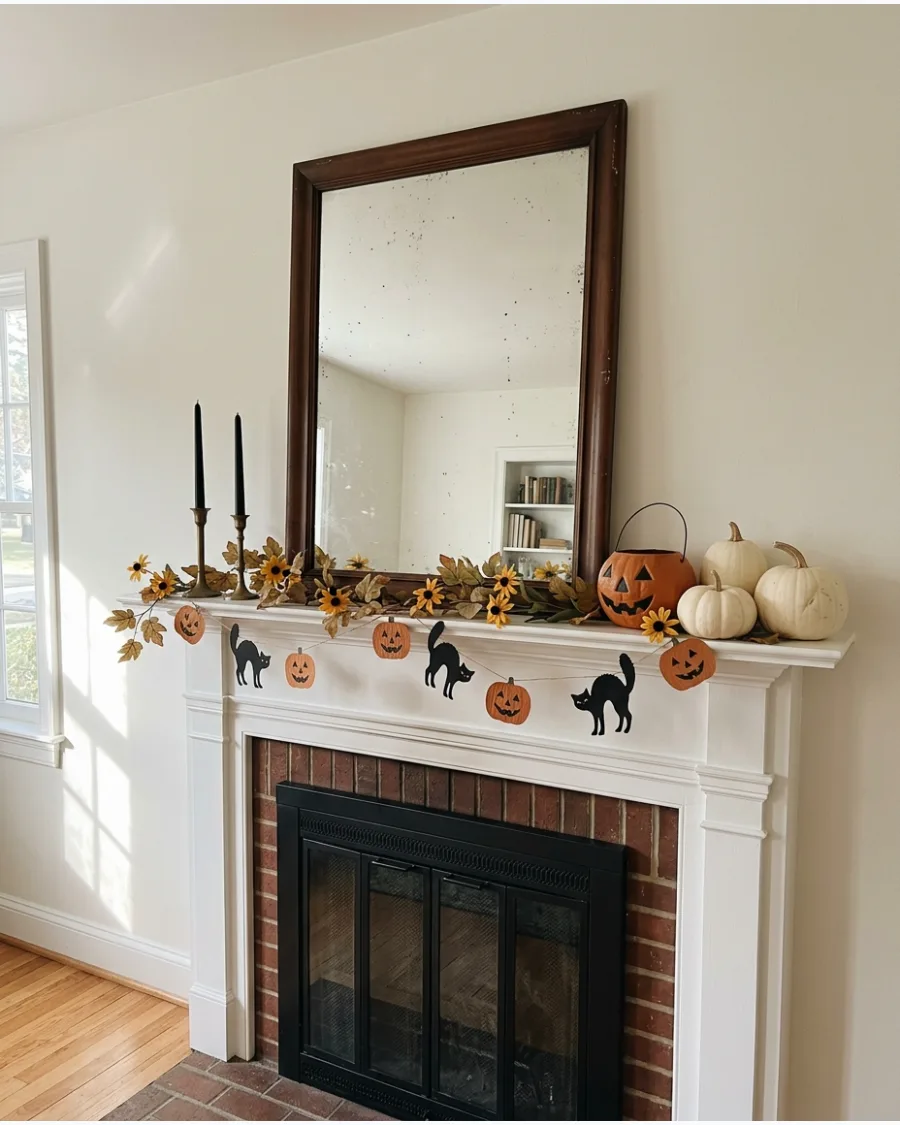
Leaning a foxed or distressed mirror creates an instant sense of history on a mantel. Surround the base with black taper candles and twisted dried branches to add height and texture.
Place the mirror slightly off-center to allow room for a cluster of miniature pumpkins on the opposite side. This setup avoids the too-perfect look of modern decor sets.
- Search thrift stores or estate sales for mirrors with natural silvering loss.
- Secure the mirror to the wall with a hidden bracket if you live in an earthquake zone.
- Swap the pumpkins for pinecones and evergreen sprigs to transition this look into winter.
Quick win: Use a piece of fine-grit sandpaper on the back of a cheap modern mirror to mimic the look of aged silvering.
12. Vintage Halloween Ceramic Tree
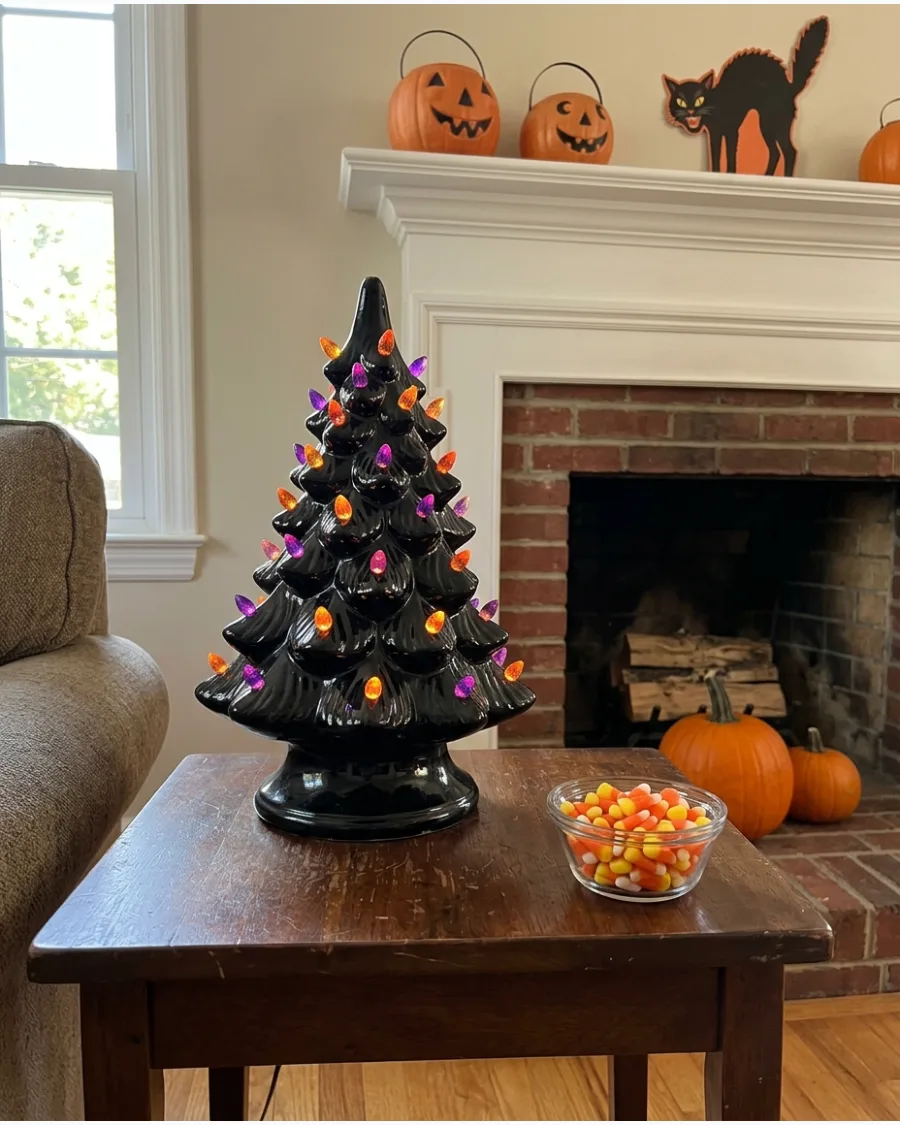
These trees bring a heavy dose of mid-century nostalgia to any flat surface. The black or orange glaze reflects light from the small, bulb-shaped ghosts and pumpkins.
Plug the tree into a timer so it greets guests with a warm glow every evening without manual effort. It works best as a standalone centerpiece on a mantel or a side table.
- Expect to pay more for authentic 1970s versions versus modern reproductions.
- Place the tree near a wall outlet to avoid running visible orange extension cords across the floor.
- Choose a cream-colored tree if your home has a lighter, more minimalist color palette.
Most people skip this: Replace standard clear bulbs inside the tree with a flicker-flame bulb for a spookier effect.
13. Black Feather Halloween Tree
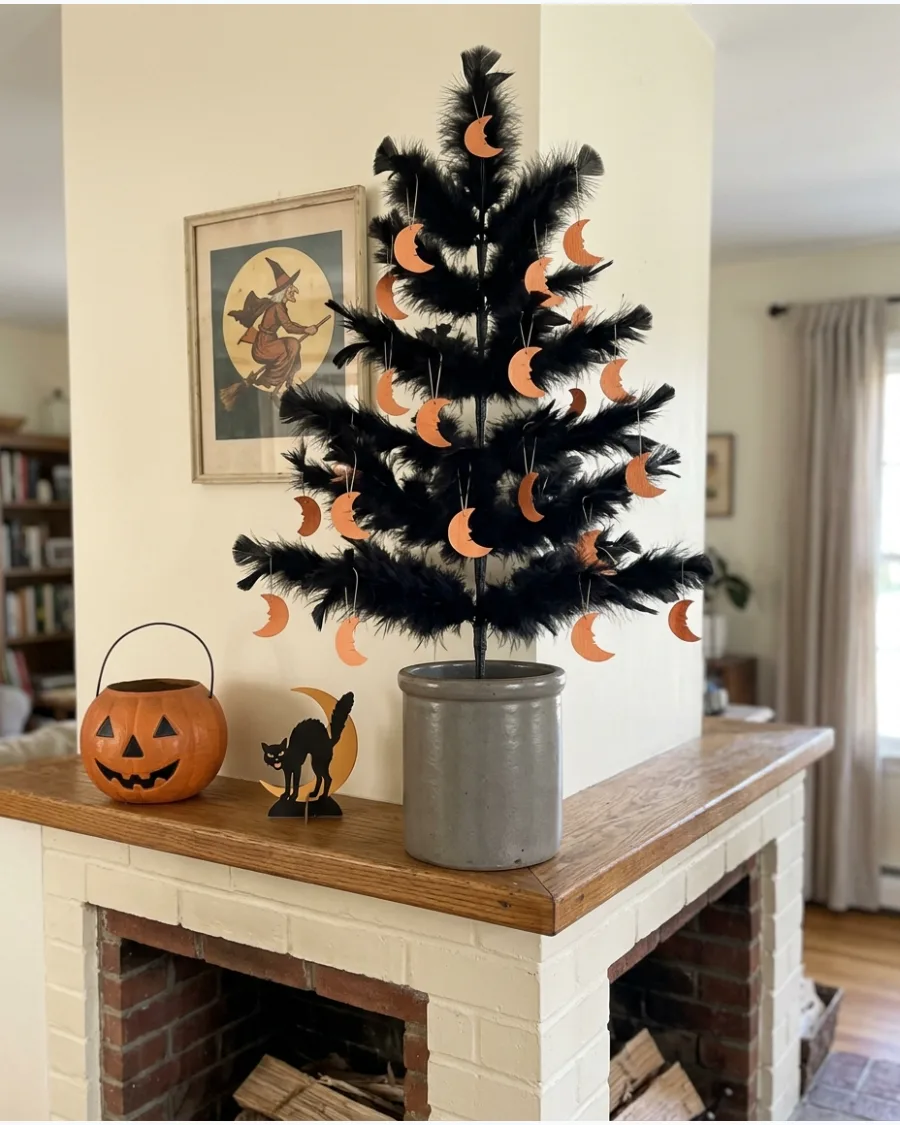
Feather trees were a staple of early 20th-century holiday decor and offer a delicate, airy look. Their wire branches are perfect for hanging lightweight paper cats, moons, and tiny witch hats.
Secure the base of the tree inside a heavy stoneware crock to keep it from tipping over under the weight of ornaments. This provides a sophisticated alternative to bulky plastic decorations.
- Look for trees with wire-core branches that can be bent to hold heavier glass ornaments.
- Drape the base with black crepe paper to hide any metal stands or plastic pots.
- Use a 12-inch version for small apartment mantels or bookshelves.
Best shortcut: Use small black binder clips to attach paper cutouts to the branches without damaging the delicate feathers.
14. Antique Clock Halloween Display
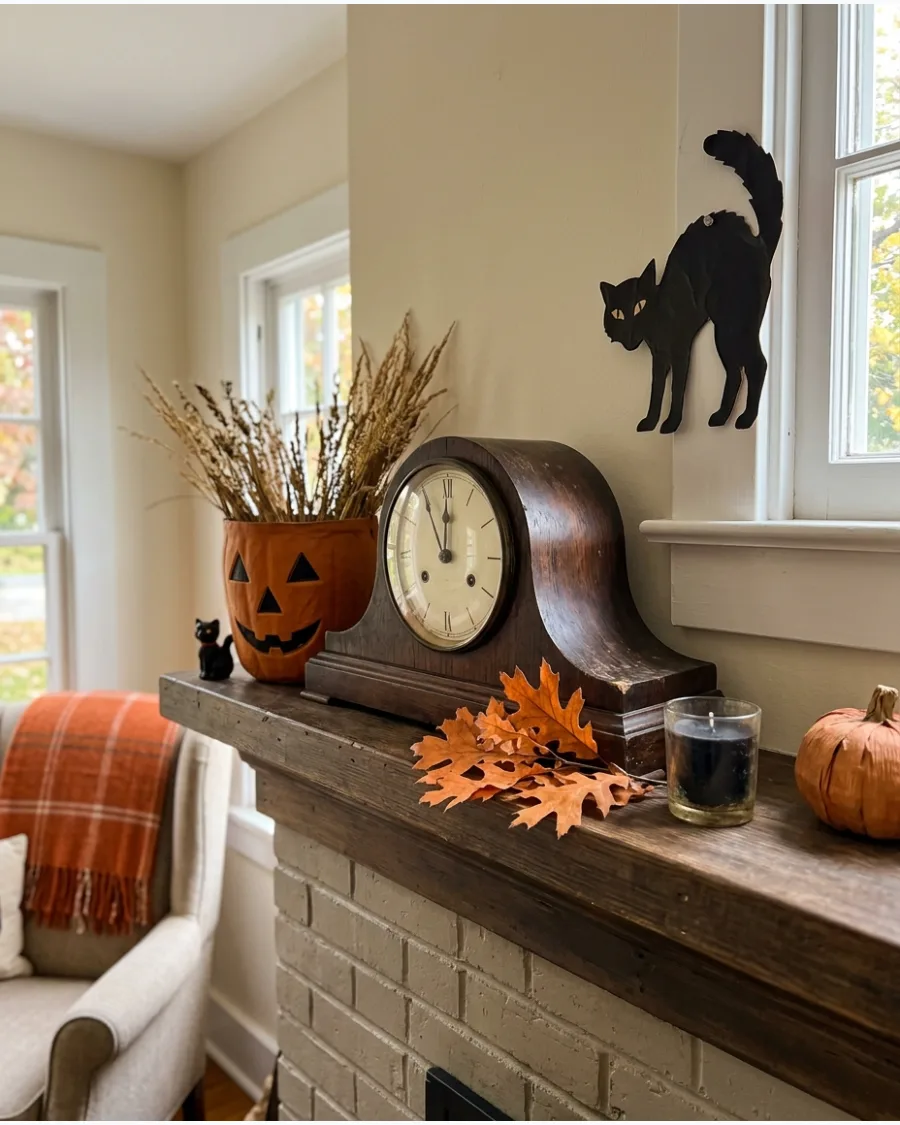
An old wooden mantel clock adds a subtle haunted house vibe without being over the top. Setting the hands just before midnight creates a sense of suspense for guests.
Tuck a few dried orange marigolds or dark leaves around the clock base to soften the transition to the mantel surface. It is a sophisticated way to lean into a theme without using plastic props.
- Find non-working clocks at antique malls for a fraction of the price of functional ones.
- Position the clock in the center of the mantel to act as the primary focal point.
- Add a small battery-operated tealight inside the clock face if the glass is missing for an eerie glow.
Quick win: If the clock is too small, stack it on top of two black hardcover books to give it more presence.
15. Vintage Halloween Village
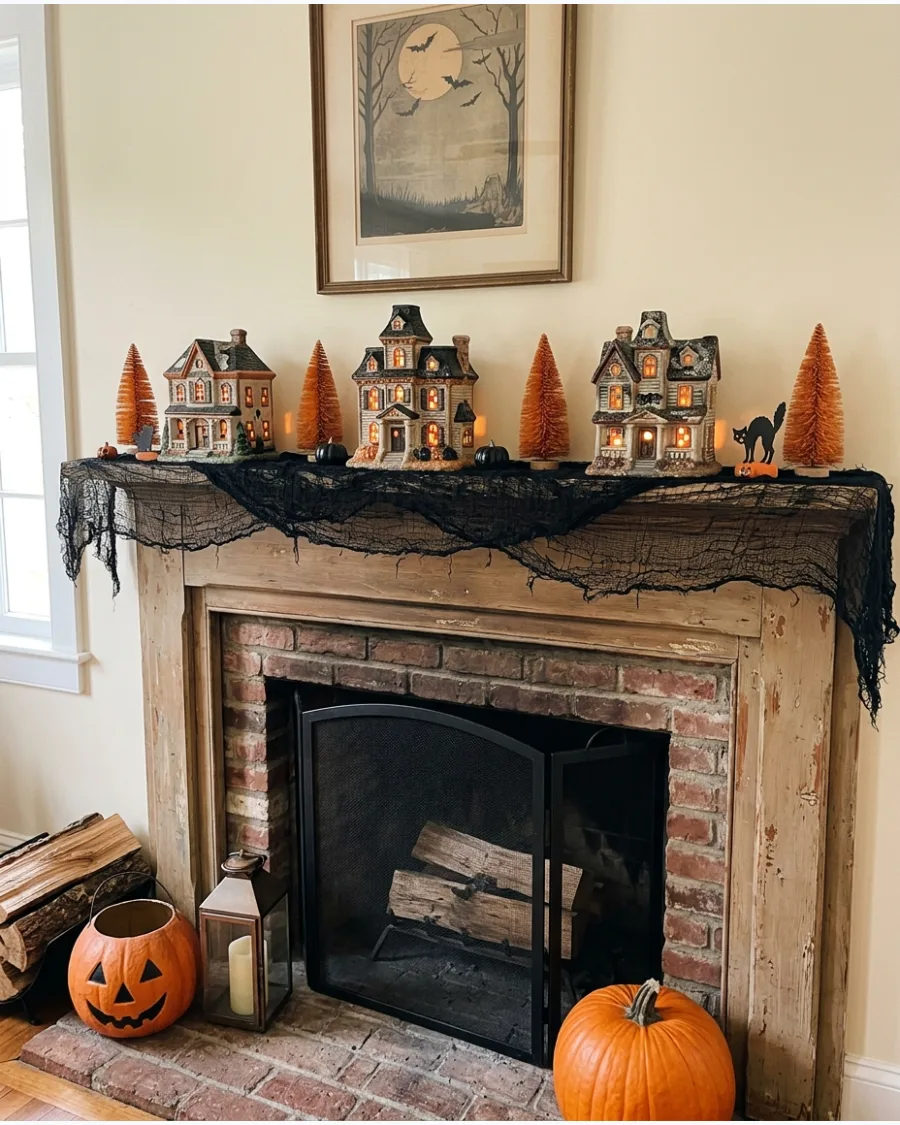
Building a tiny town of ceramic haunted houses and apothecary shops creates a detailed focal point. Use bottle-brush trees in shades of orange and black to add varied heights between the buildings.
Hide the battery packs for the lit windows behind a thick layer of black cheesecloth draped along the mantel. This creates a textured ground for your village while concealing messy wires.
- Buy one new building each year to build a high-quality collection over time.
- Use museum wax on the bottom of the houses to keep them from sliding on smooth mantel surfaces.
- Mix in small plastic pumpkins and black cat figurines to fill the gaps between houses.
Most people skip this: Vary the heights of the houses by placing some on small wooden blocks hidden under the fabric base.
16. Old Books and Pumpkin Figurines
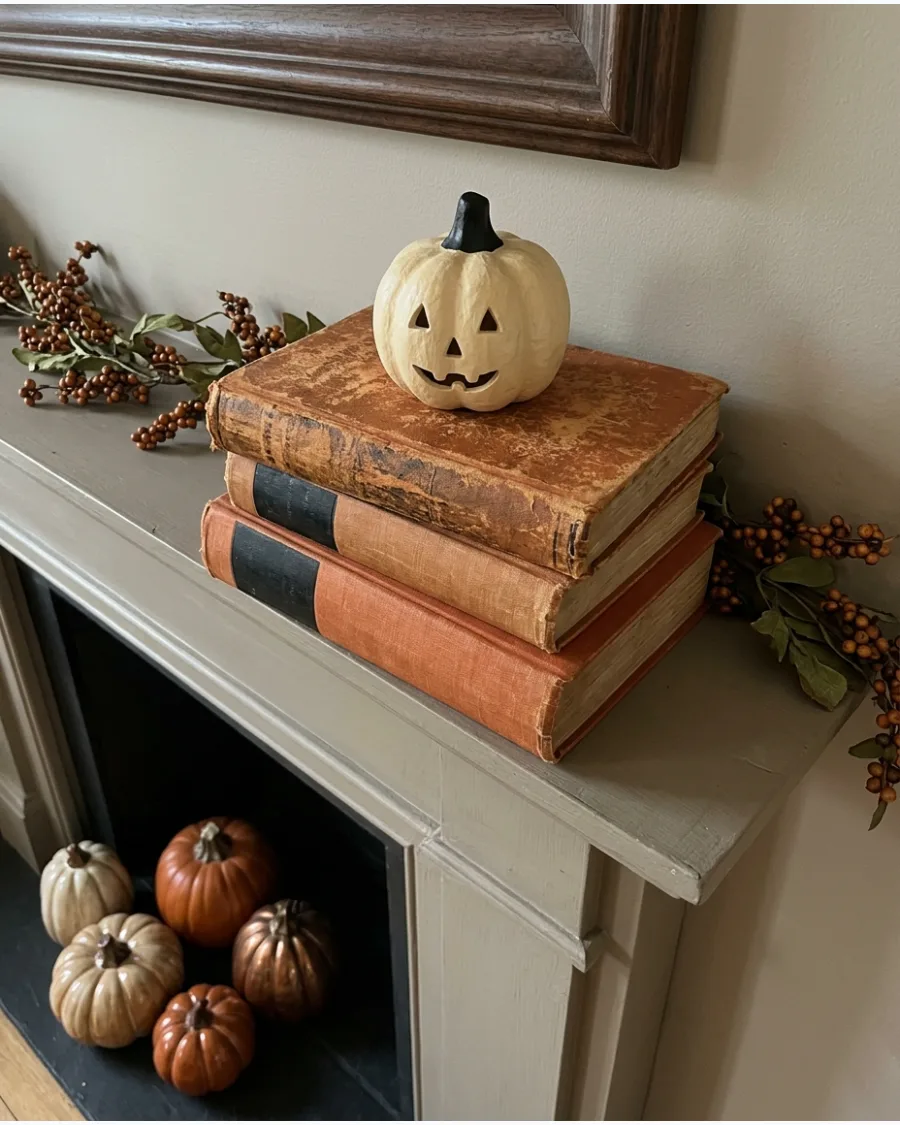
Stacking old books with worn spines in seasonal colors like black, orange, and mustard provides instant height. Top the highest stack with a papier-mâché pumpkin to draw the eye upward.
Turn the book spines inward to show the aged yellow paper if the titles do not match your Halloween theme. This uses items you likely already own for a curated, intellectual look.
- Check the 'free' bins at local libraries or used bookstores for damaged books with great colors.
- Stack books in odd numbers like three or five for a more balanced visual arrangement.
- Use large books at the bottom of the stack to ensure the display is stable and safe.
Best shortcut: Tie the book stacks together with black twine or orange velvet ribbon to keep them from shifting.
17. Vintage Halloween Banner
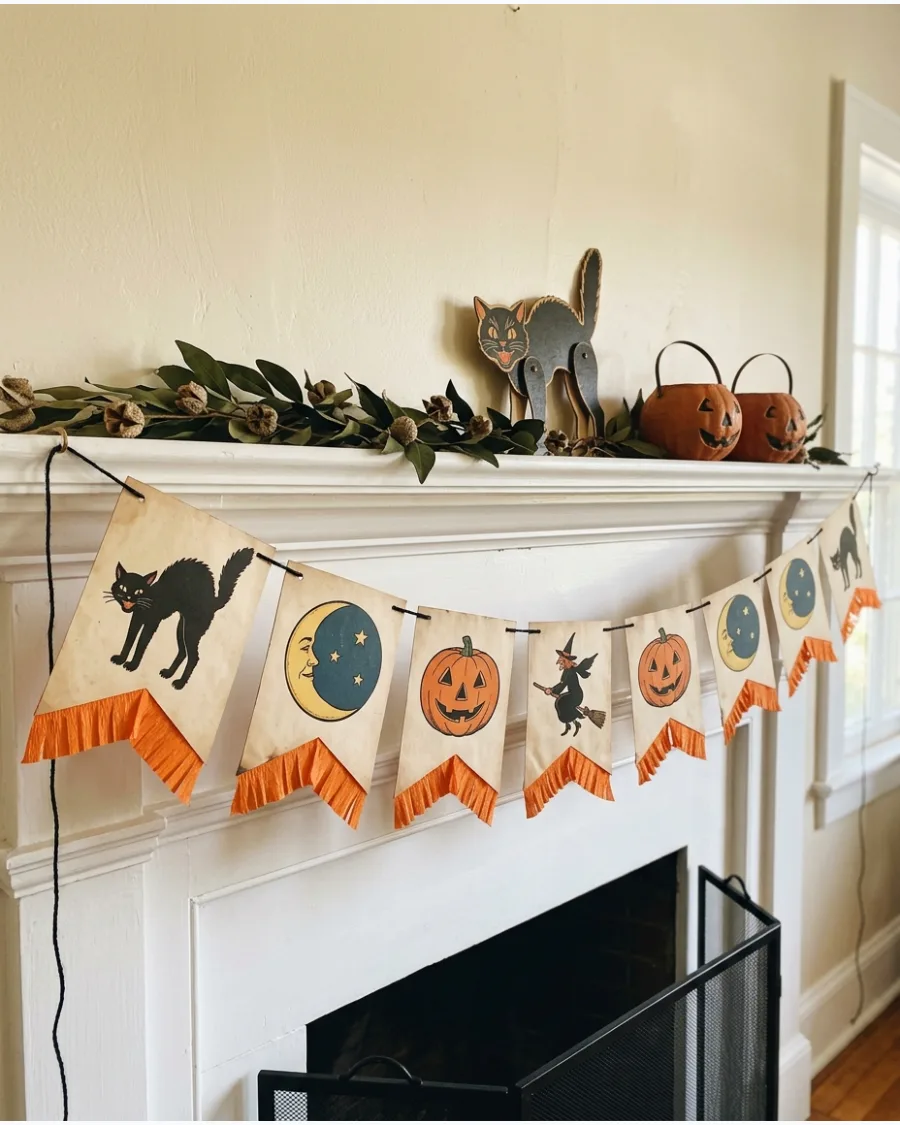
A paper banner with crepe-paper fringe adds movement and a festive, old-school party feel to the room. Look for chunky lettering and classic orange-and-black pennants that feel slightly weathered.
Drape the banner in a low arc across the front of the mantel rather than pulling it tight against the wall. The gentle sag makes the display feel more relaxed and authentic.
- Store paper banners flat between sheets of cardboard to prevent the fringe from wrinkling.
- Use clear removable hooks on the underside of the mantel to avoid damaging the wood or stone.
- Layer two different banners at different heights for a more maximalist vintage look.
Quick win: Spray the banner lightly with a mixture of water and a drop of brown paint to give it an instant tea-stained, antique look.
18. Brass Candlestick Collection
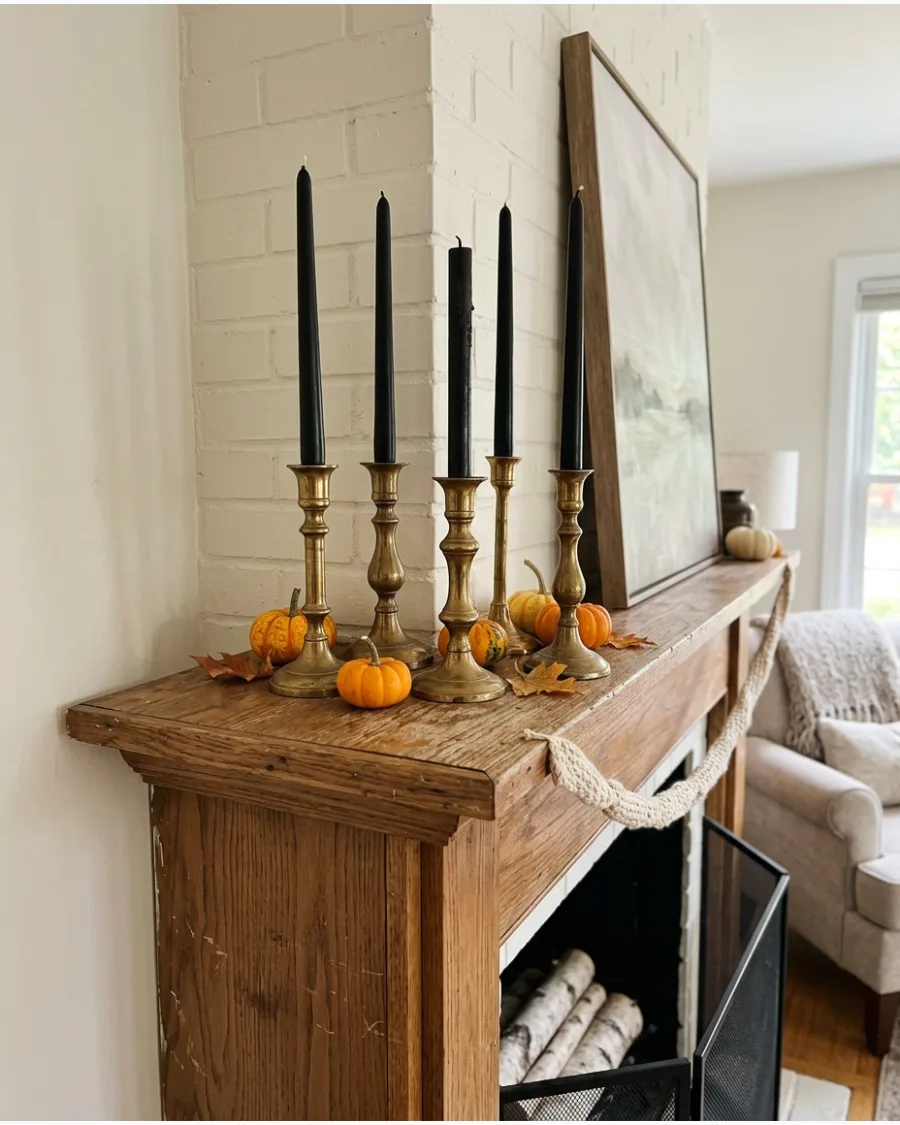
Mixing different heights of brass candlesticks adds a warm, metallic glow that balances dark Halloween colors. Use black or burnt-orange taper candles to keep the palette strictly seasonal.
Scatter a few miniature pumpkins or loose acorns between the bases to ground the tall metal pieces. Brass feels much more high-end and authentic than plastic or painted wood alternatives.
- Clean brass with a mixture of lemon and baking soda to restore the shine without using harsh chemicals.
- Mix and match different styles of holders from different eras for a collected-over-time feel.
- Use flameless LED taper candles if you have pets or small children to avoid fire hazards.
Most people skip this: Use a small dab of floral putty in the bottom of the holder to keep the candles perfectly straight.
19. Halloween Curiosities Under Glass Cloches
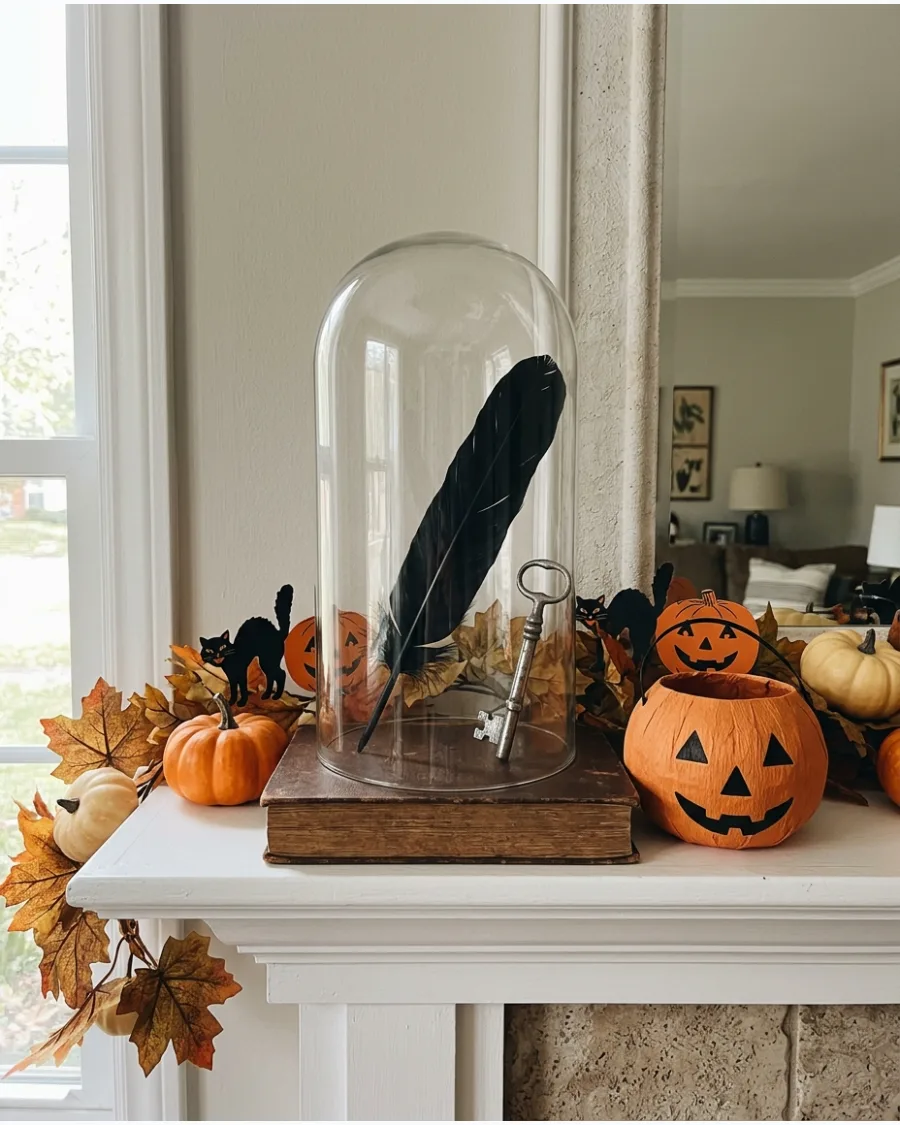
Protecting small items like antique keys, faux insects, or tiny skulls under glass cloches makes them feel like museum artifacts. Elevate some of the cloches on stacks of worn paper or small books for visual interest.
Place a single, striking object like a large black feather in the tallest cloche to create a clear focal point. This keeps small items from looking like messy clutter.
- Wipe the inside of the glass with a lint-free cloth before sealing it to avoid visible fingerprints.
- Use cloches of varying widths and heights to create a more dynamic mantel grouping.
- Swap the contents for dried flowers or pinecones after Halloween is over.
Best shortcut: Use a wine glass turned upside down as a mini cloche for very small items like vintage rings or buttons.
20. Vintage Silhouette Mantel
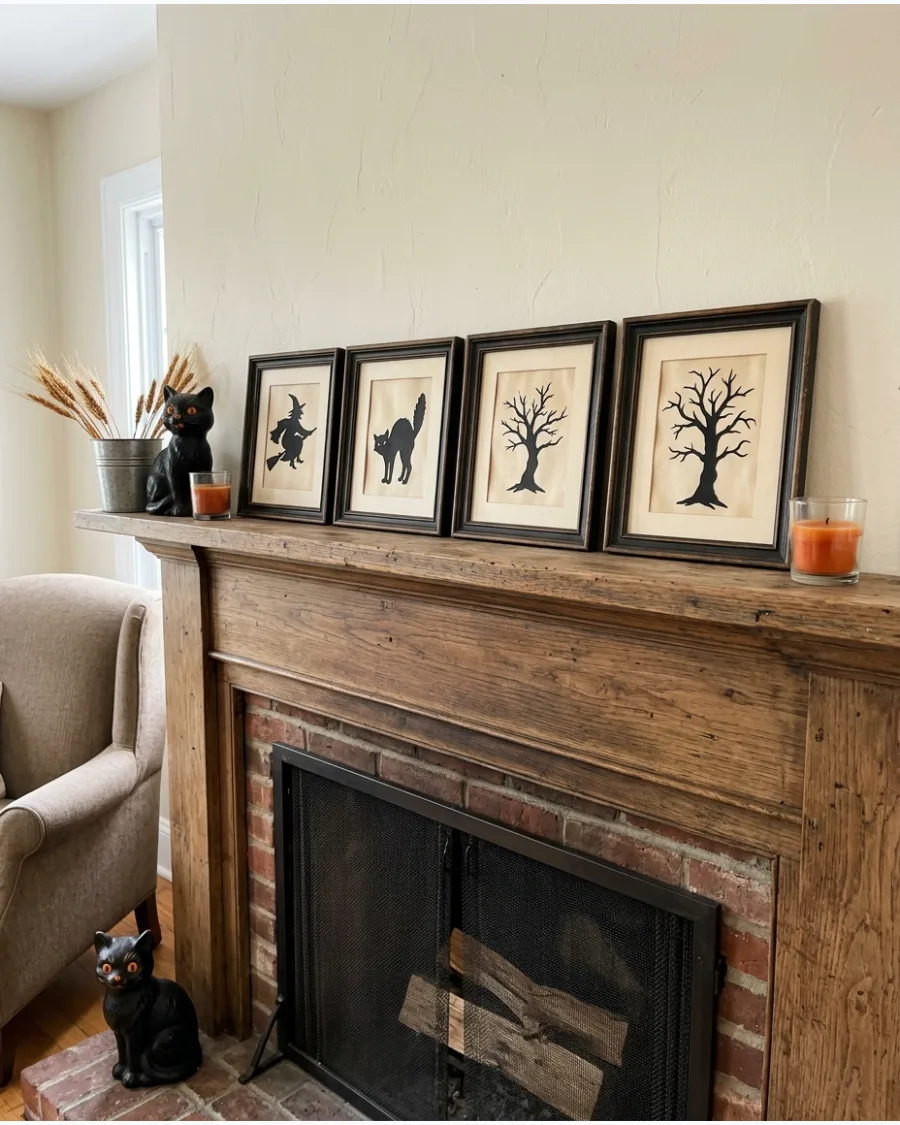
Paper silhouettes of witches and bare trees offer a clean, graphic look that fits well in modern homes. Frame them against cream-colored backgrounds to make the black shapes pop without using harsh bright white.
Line the silhouettes up in a row and place orange tea lights in front of them to cast long shadows on the wall. It creates a moody atmosphere once the sun goes down.
- Print silhouettes onto heavy black cardstock and cut them out with a precision craft knife.
- Use frames with different textures, like matte wood and shiny metal, to add depth to the display.
- Space the frames exactly two inches apart for a clean, gallery-style appearance.
Quick win: Use black electrical tape to create a temporary 'frame' directly on the wall if you do not have enough physical frames.
Vintage Halloween Table Decor
21. Antique Candelabra Centerpiece
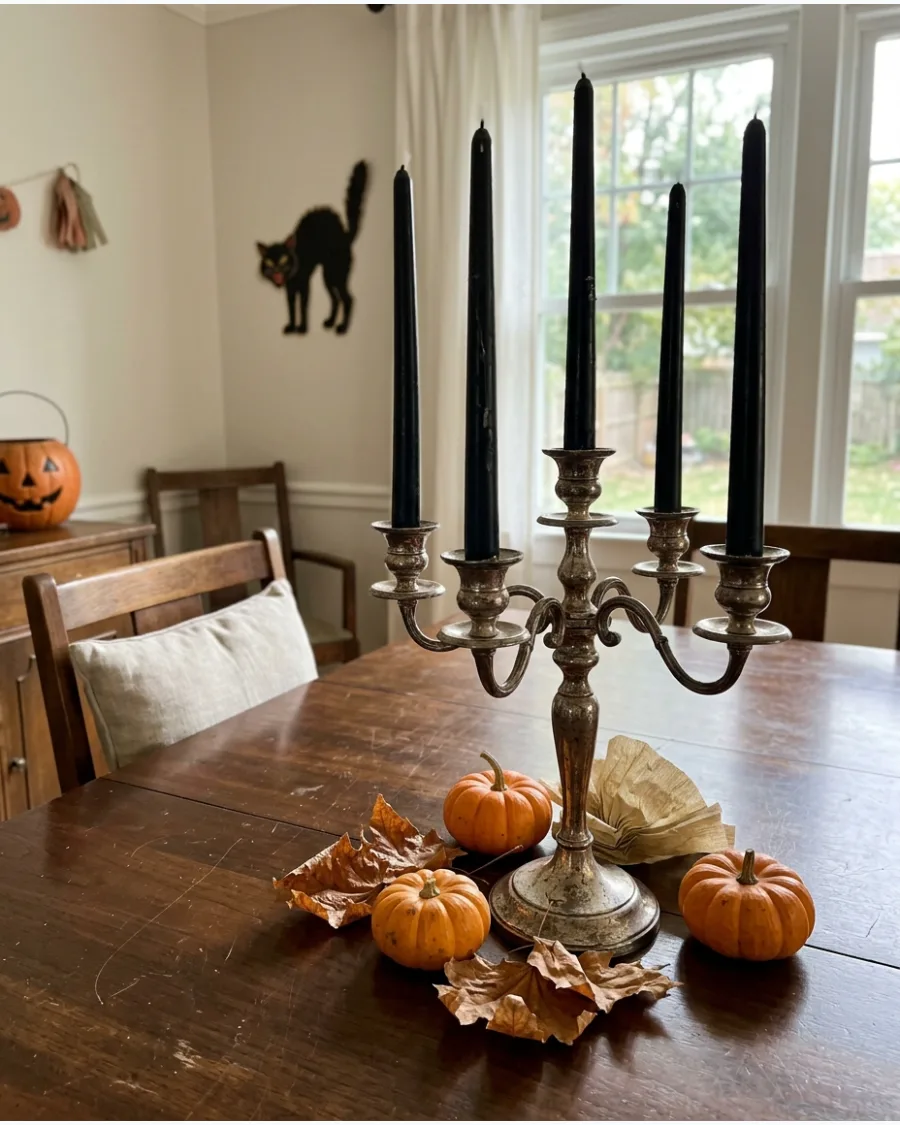
A tarnished candelabra brings instant weight and history to a dining table. Surround the base with deep burgundy flowers, small orange pumpkins, and a few dried oak leaves to ground the metal.
Choose beeswax or black taper candles to avoid the cheap look of white paraffin. This setup feels like a found treasure rather than a store-bought kit.
- Sourcing: Check local estate sales or thrift shops for heavy metal pieces with natural patina.
- Setup: Use museum wax on the bottom of candles to keep them perfectly upright in the holders.
- Adaptation: Swap real flowers for high-quality silk stems in dark plum for a reusable version.
Quick win: Drip a little black wax down the sides of the candles before the party starts to give them an aged look.
22. Vintage Halloween Tablecloth
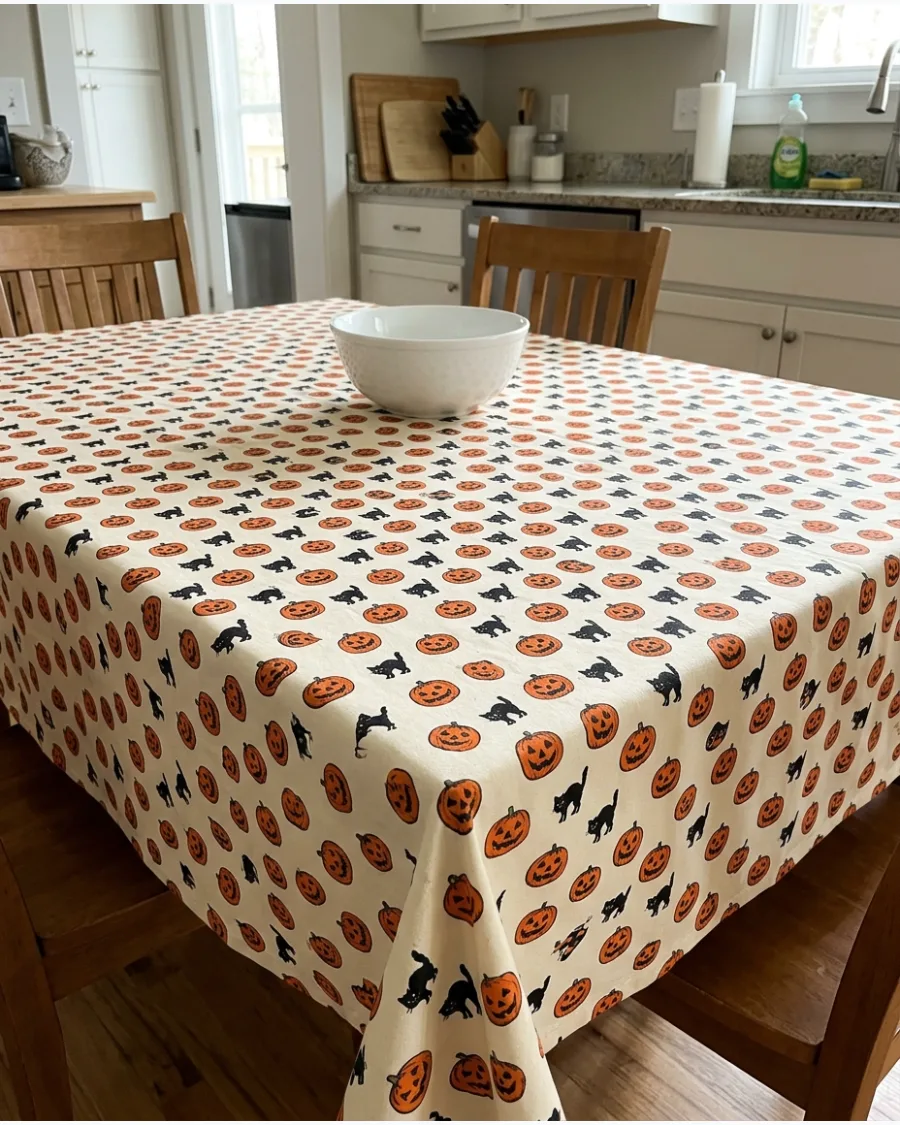
Look for prints that feature the iconic 1940s-style smiling pumpkins and crescent moons. Muted tones like mustard orange and charcoal black keep the pattern from feeling too loud or childish.
Iron the cloth thoroughly to ensure the vintage graphics lay flat and crisp against the table surface. It serves as the perfect foundation for a nostalgic meal.
- Sourcing: Look for reproduction prints on specialty linen sites or vintage-inspired home stores.
- Setup: Layer a solid black runner over the top if the pattern feels too busy for the whole room.
- Adaptation: Use a smaller square cloth at a diagonal on a round table for a casual breakfast nook look.
Most people skip this: Always check the fabric content; a cotton-linen blend hangs much better than thin polyester.
23. Old Apothecary Bottle Collection

Amber glass bottles create a mysterious, laboratory-like atmosphere without needing scary props. Group bottles of different heights on a silver or wooden tray to create a focal point.
Add hand-stained paper labels with faux ingredients like Wolfsbane or Nightshade using a fine-tip black marker. This adds a layer of storytelling to your table styling.
- Sourcing: Collect empty brown glass vitamin bottles or buy sets of amber jars in bulk.
- Setup: Fill some bottles with water and a drop of green food coloring for a subtle potion effect.
- Adaptation: Tuck in a few dried twigs or a single black faux feather for height and texture.
Best shortcut: Use a wet tea bag to lightly stain the edges of white paper for an instant antique label look.
24. Papier-Mâché Pumpkin Centerpiece
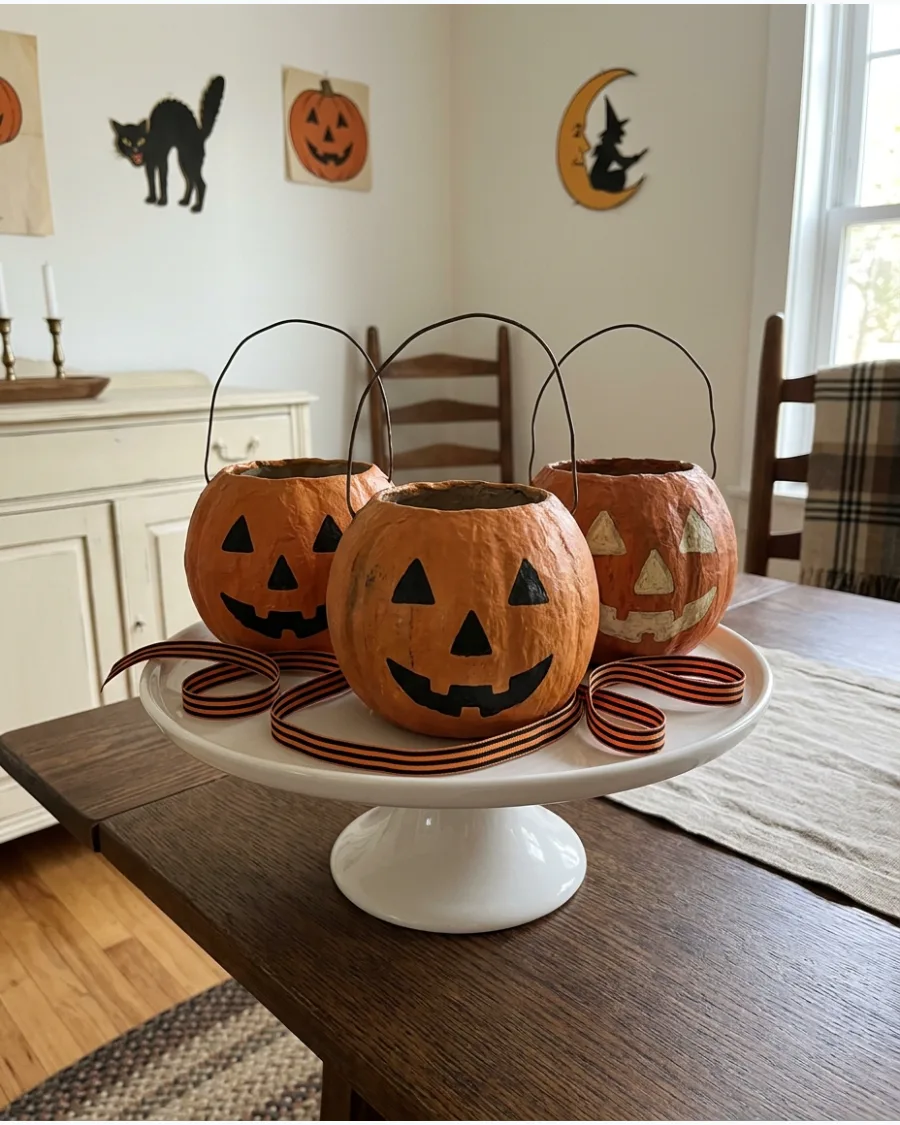
Authentic-looking papier-mâché pumpkins have a matte, textured finish that plastic versions just cannot mimic. Elevate them on a glass or ceramic cake stand to give them importance in the middle of the table.
Weave a length of striped orange and black ribbon through the pumpkins to connect the different sizes. This creates a cohesive look that feels curated.
- Sourcing: Look for brands like Beistle or Bethany Lowe for high-quality reproductions of old designs.
- Setup: Stuff the bottom of the pumpkins with tissue paper so they sit high and show their faces.
- Adaptation: Fill the pumpkins with wrapped nostalgic candies like salt water taffy for guests to grab.
Quick win: Place a battery-operated tea light inside each pumpkin for a safe, warm glow during dinner.
25. Antique Silver Halloween Table
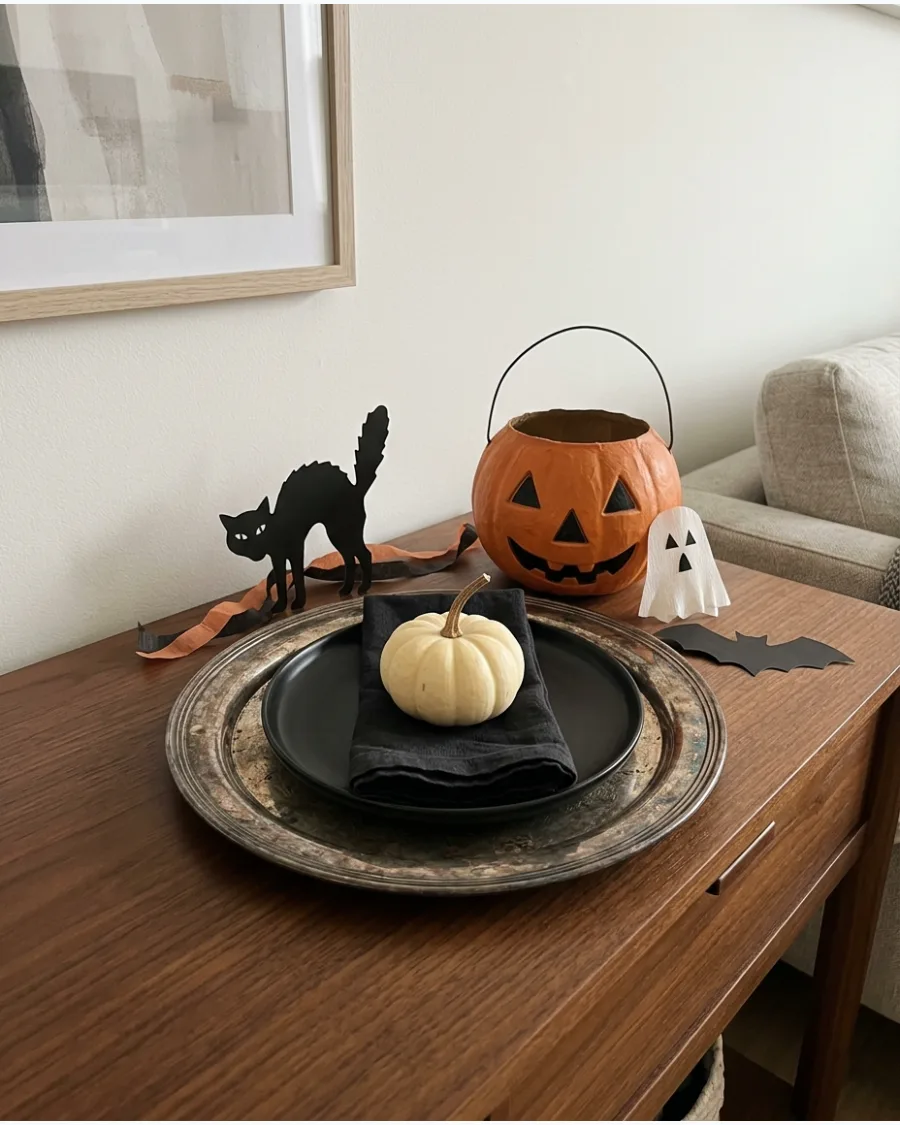
Mixing tarnished silver with Halloween colors creates a sophisticated haunted mansion vibe. Use silver trays as chargers under black ceramic plates to add reflective light to the setting.
Balance the heavy metals with soft cream-colored pumpkins and linen napkins to keep the table from looking too dark. It is an easy way to use what you already own in a new way.
- Sourcing: Scour thrift stores for silver-plated pieces that have a bit of tarnish or visible wear.
- Setup: Polish only the raised details of the silver to leave dark patina in the crevices for more character.
- Adaptation: Use silver creamers or sugar bowls as mini vases for small orange marigold stems.
Most people skip this: Mix different silver patterns to avoid a matched set look that feels too formal.
26. Jadeite Halloween Tablescape
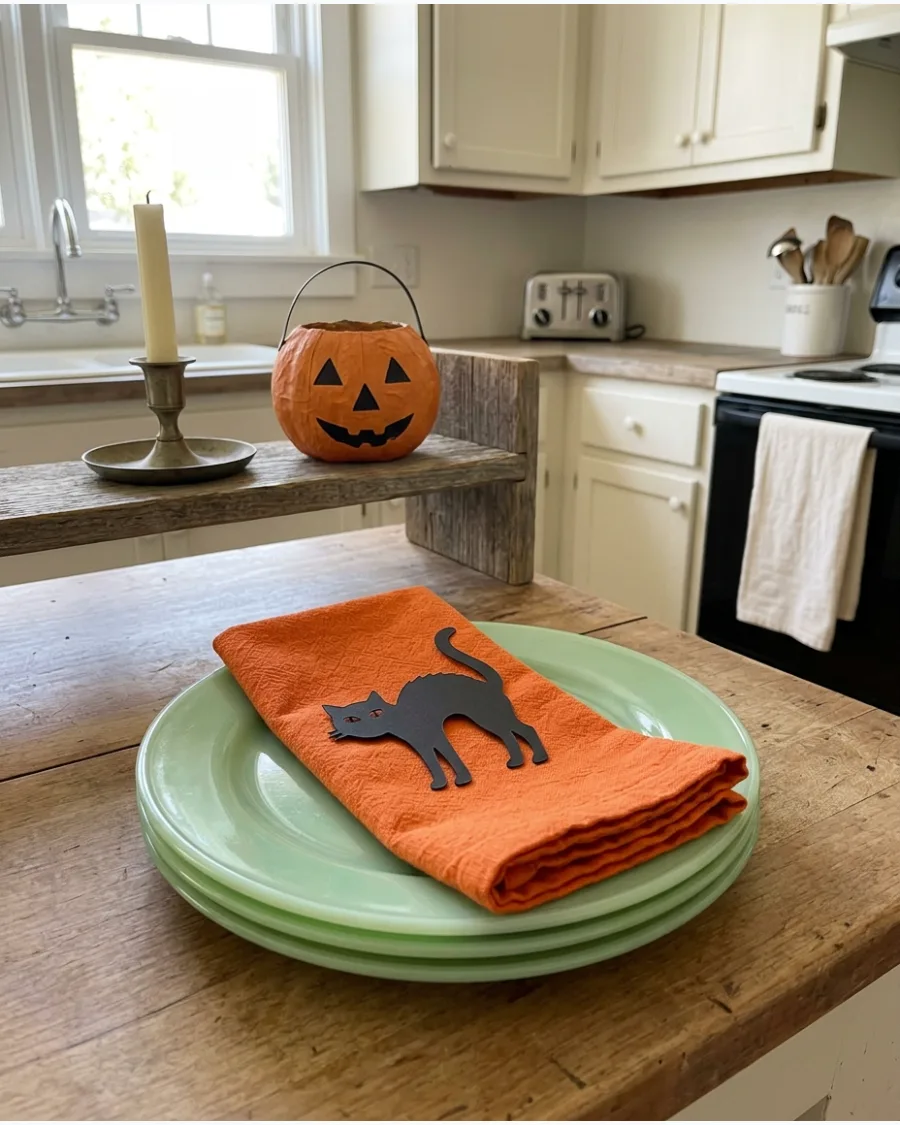
The milky green color of jadeite glass provides a surprising but perfect contrast to traditional orange.
Use jadeite plates or bowls alongside orange napkins to lean into a 1950s kitchen aesthetic. Stick to black taper candles in simple holders to ground the bright green and orange color palette. This look is cheerful and nostalgic without being overly spooky.
- Sourcing: Search for milky green glass or specific jadeite reproductions for a more affordable option.
- Setup: Use a white or cream tablecloth to make the green and orange colors pop.
- Adaptation: Place a single orange pumpkin in a jadeite mixing bowl as a simple, sturdy centerpiece.
Quick win: Use jadeite mugs to serve hot cider; the green glass makes the amber liquid look beautiful.
27. Vintage Halloween Place Cards
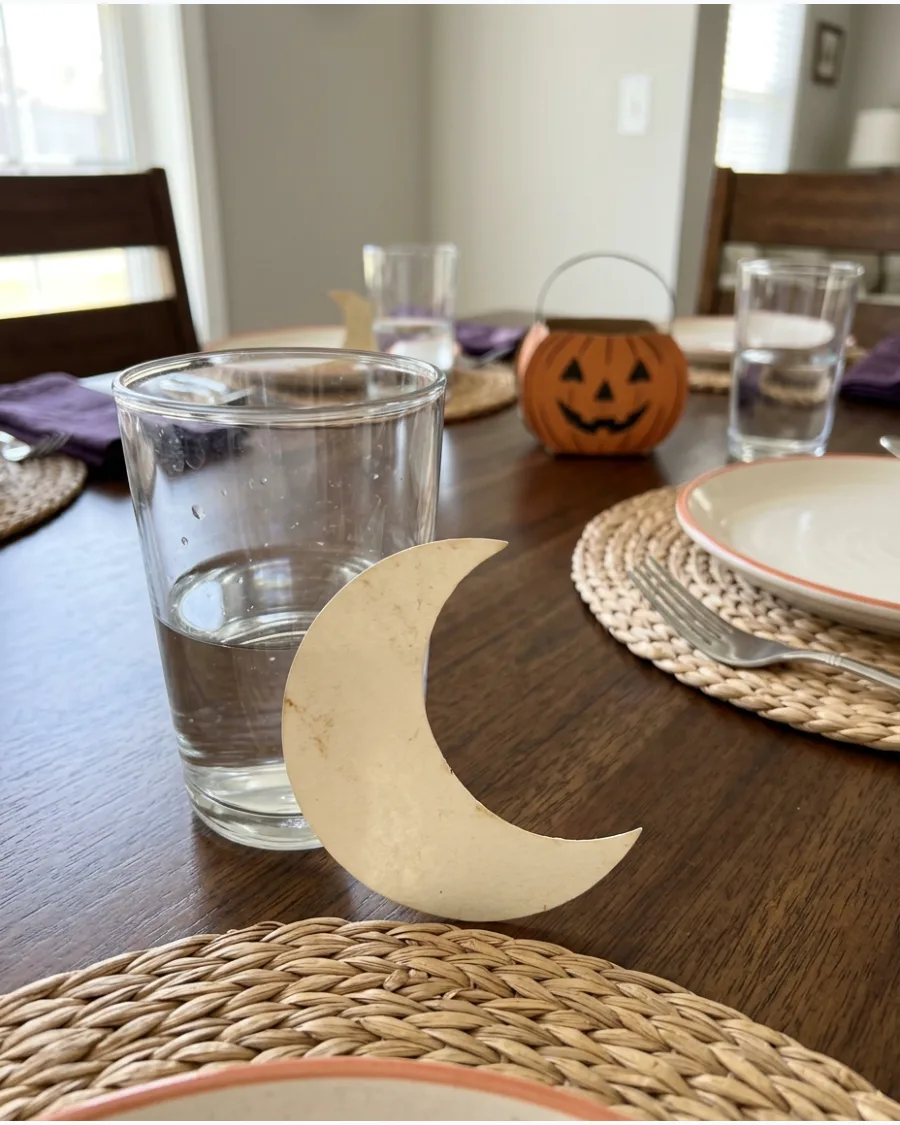
Small details like handwritten place cards make a holiday meal feel special. Use cream-colored cardstock and a fountain pen to mimic the look of early 20th-century stationery.
Cut the cards into simple shapes like moons or cats to echo the motifs found in vintage paper decorations. It is a low-cost way to add a personal touch to the table.
- Sourcing: Buy heavy cream cardstock from a craft store and use a simple template for shapes.
- Setup: Prop the cards against a small gourd or inside the tines of a fork at each setting.
- Adaptation: Use a small hole punch and tie the card to a napkin ring with black cotton twine.
Best shortcut: Lightly sand the edges of the cardstock with fine-grit sandpaper to give them a worn, feathered look.
28. Old Glass Candy Jars
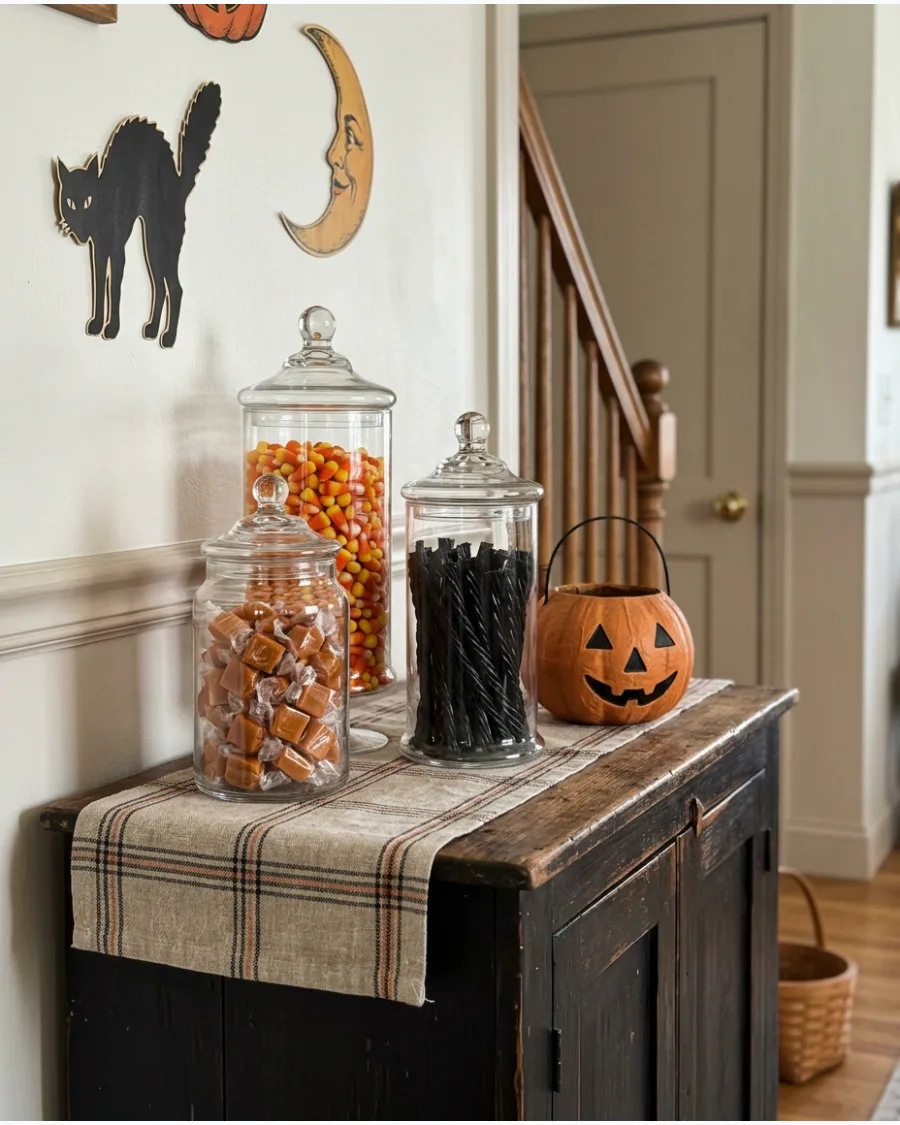
Displaying classic candies in glass jars brings the feel of an old-fashioned candy shop to your home. Choose jars with lids and varying shapes to create visual interest on a sideboard or table.
Layer different types of candy, like black licorice and orange gumdrops, to create distinct color bands. This serves as both decoration and a treat for guests.
- Sourcing: Thrift stores often have glass canisters, or you can buy matching sets of apothecary jars.
- Setup: Place the tallest jar in the center and the shorter ones on the sides for visual balance.
- Adaptation: Use small chalkboard labels to identify the candies in a vintage-style font.
Most people skip this: Keep the jars away from direct sunlight to prevent the candy from melting or fading.
29. Vintage Halloween Party Hats
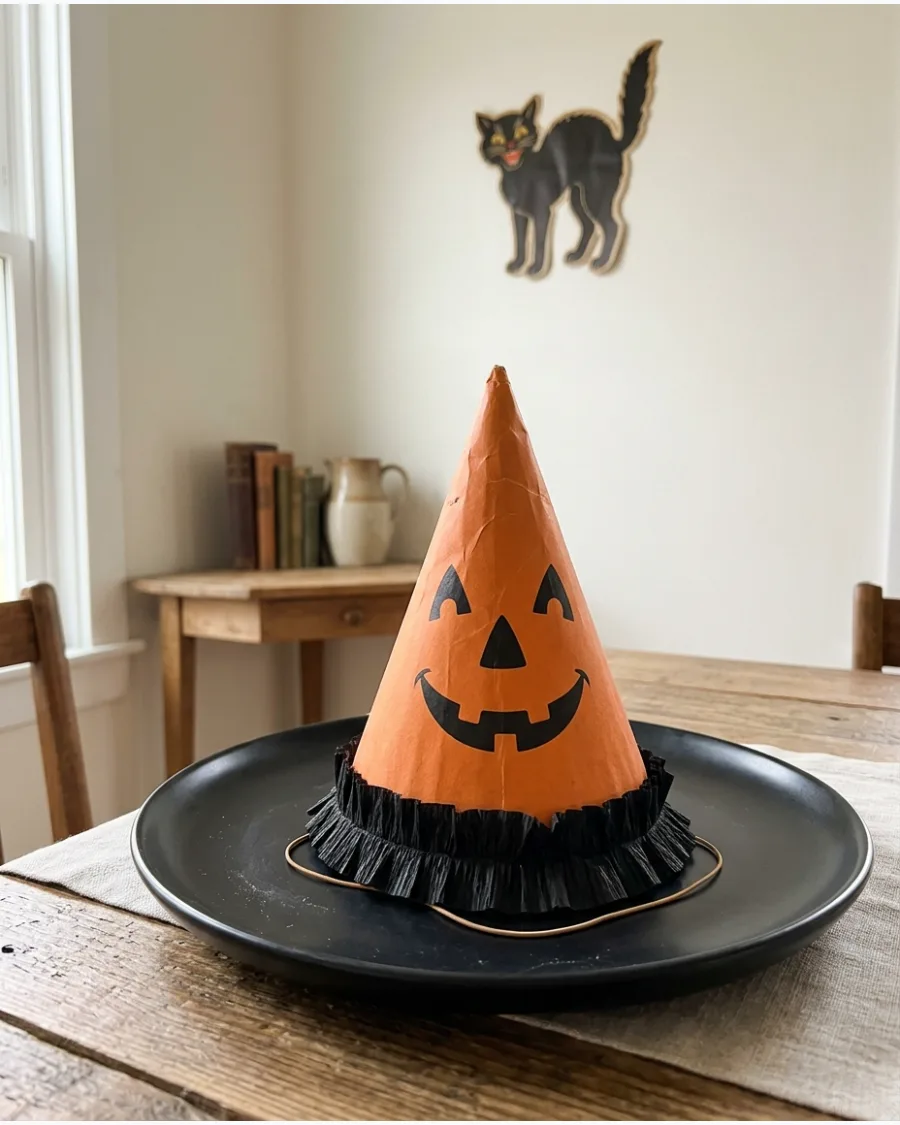
Cardboard party hats with crepe-paper fringe are a staple of mid-century celebrations. Place one at each setting to act as a whimsical topper for the plates.
Look for designs featuring the classic smiling faces for the most authentic retro feel. They add height to the table and serve as a great conversation starter.
- Sourcing: Many companies now make high-quality reproductions of 1920s and 30s party hats.
- Setup: If the hats are light, place a small piece of wrapped candy inside to weigh them down.
- Adaptation: String several hats together to create a unique wall garland if table space is tight.
Quick win: Use the hats as cones to hold popcorn or snacks if you are not using them as headwear.
30. Antique Dough Bowl Pumpkin Display
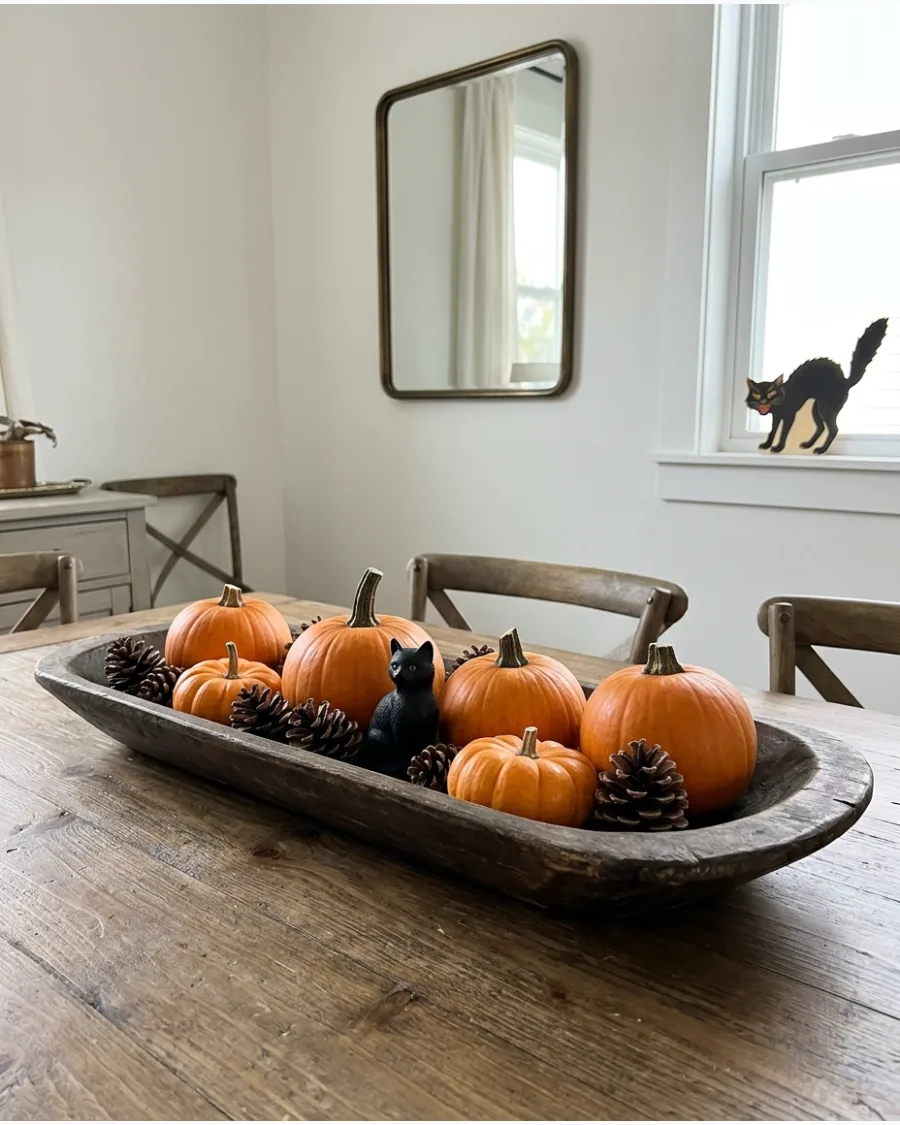
A long wooden dough bowl provides a rustic, grounded base for a seasonal centerpiece. Fill it with a mix of real miniature pumpkins, dried pinecones, and a few black taper candles in low holders.
Tuck in one vintage-style black cat figurine to break up the natural elements with a bit of Halloween character. The wood texture keeps the display feeling warm and lived-in.
- Sourcing: Look for reproduction dough bowls if you cannot find an authentic antique one locally.
- Setup: Use a handful of dried moss to fill in any gaps between the pumpkins and pinecones.
- Adaptation: Add a few faux spider webs stretched very thinly over the pinecones for a subtle spooky touch.
Best shortcut: Use white pumpkins or gourds if your dining room is already very dark to add needed contrast.
Vintage Halloween Porch Decor
31. Glowing Blow-Mold Porch Steps
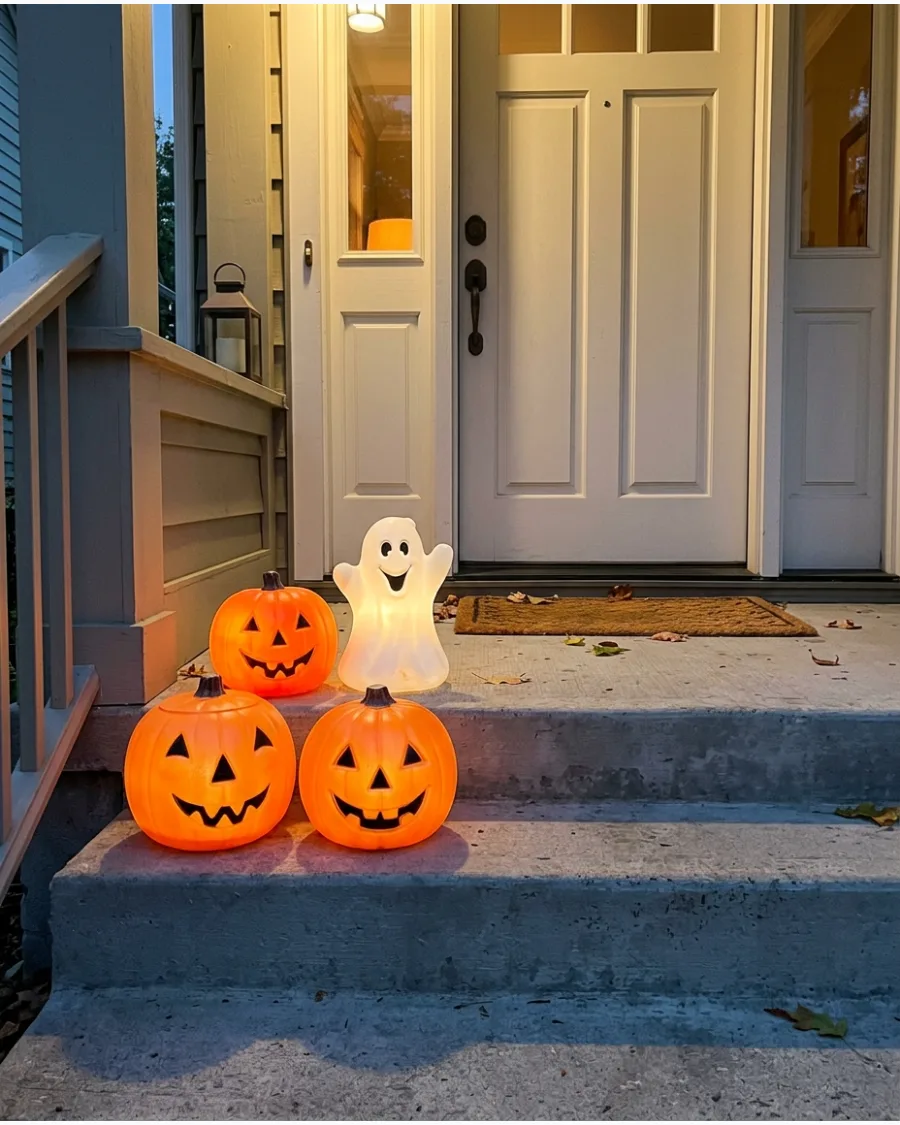
Line the porch steps with illuminated pumpkin and ghost blow molds. Mix different faces, shapes, and sizes instead of using a perfectly matching set.
Stagger the heights of the molds to create a more dynamic visual path up to the front door. This setup works because the warm internal glow highlights the translucent plastic texture common in mid-century decor.
- Source these from estate sales or high-quality retro replicas.
- Plug them into a weather-proof outdoor timer for automatic lighting.
- Use sandbags inside lightweight molds to prevent them from tipping in the wind.
Quick win: Use a multi-plug outdoor extension cord hidden behind the molds to keep wires tidy.
32. Vintage Black Cat Door Decoration
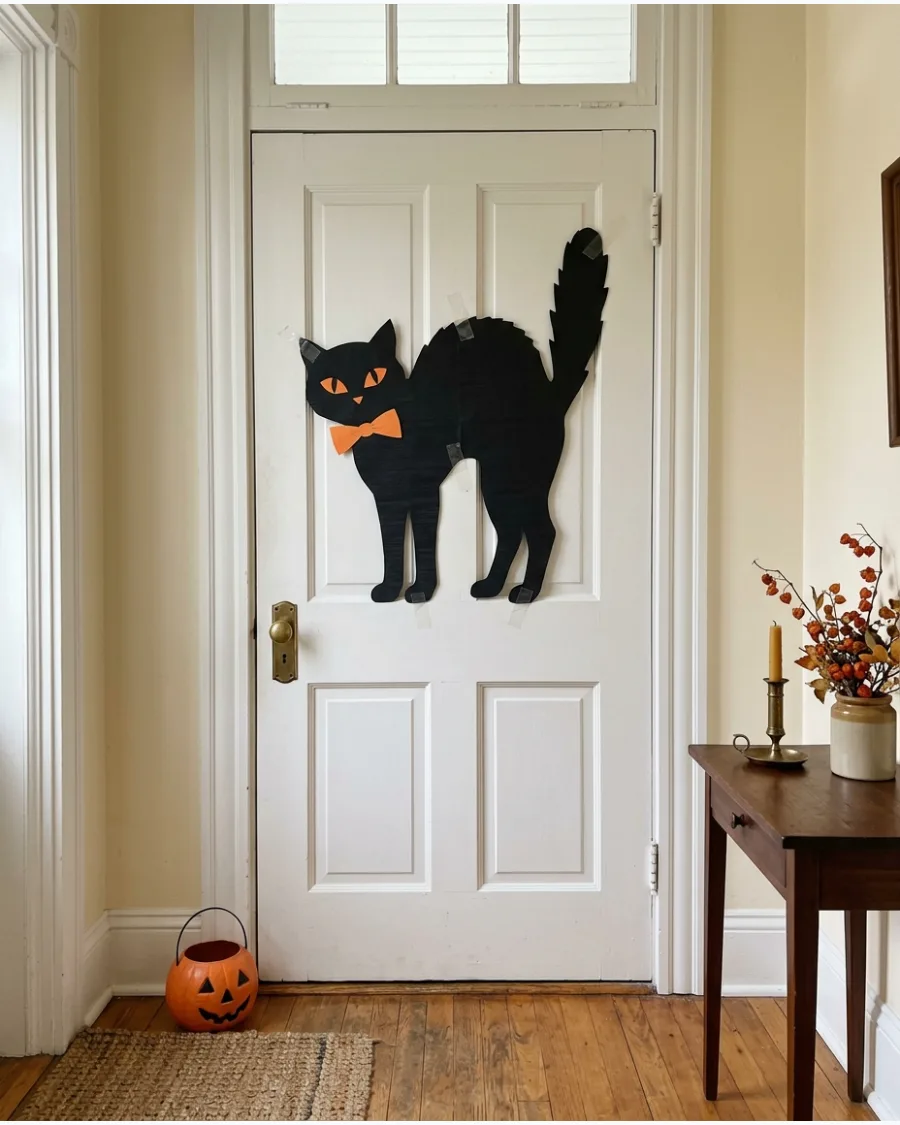
Hang a large black cat cutout or sign on the front door. Choose a design with an arched back, curled tail, surprised expression, or orange bow tie.
Secure the bottom of the cutout with a small piece of removable adhesive to prevent it from flapping when the door opens. This classic motif provides an instant focal point that feels curated rather than cluttered.
- Look for Beistle-style cardstock reproductions for an authentic mid-century look.
- Use a clear over-the-door hook to keep the hanging hardware invisible.
- Choose a cat with yellow or green eyes to provide high contrast against a dark door.
Best shortcut: Laminate paper cutouts if your porch is not fully covered to protect them from damp autumn air.
33. Antique-Inspired Halloween Wreath
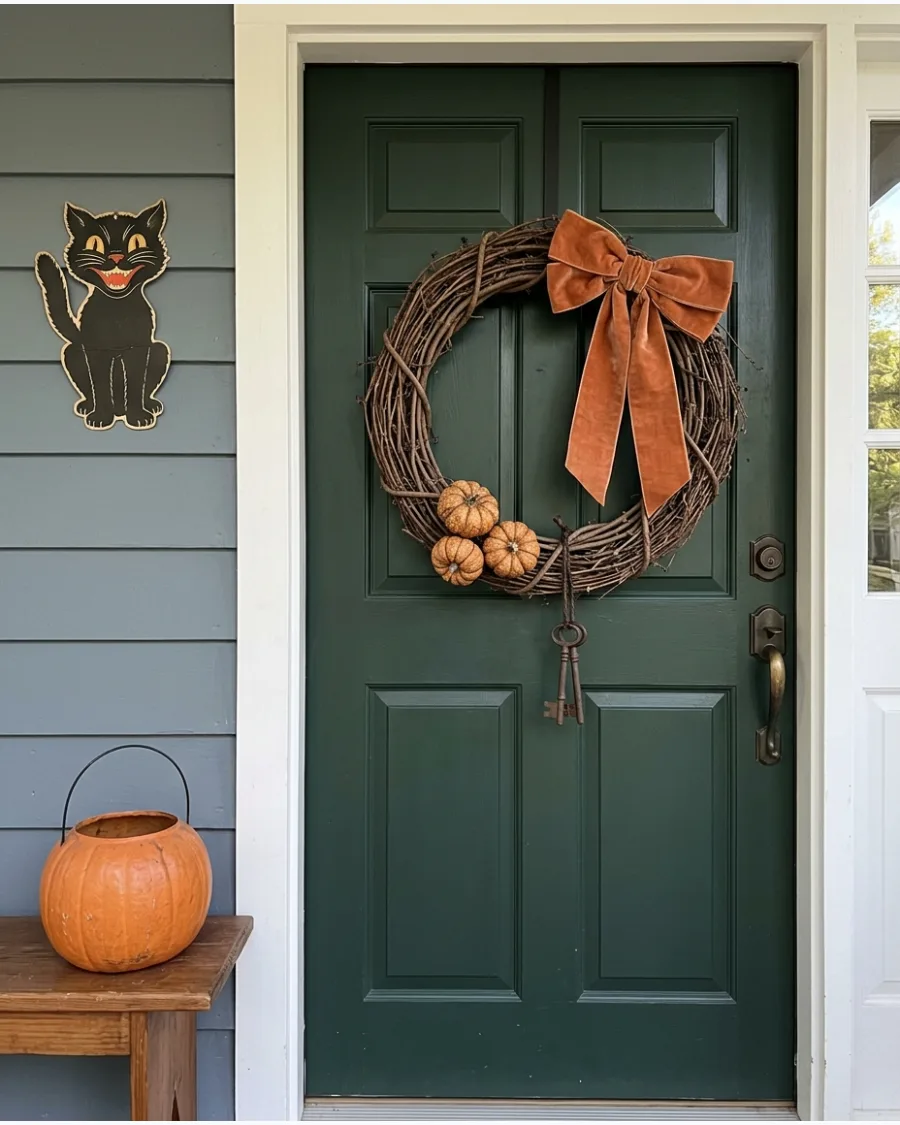
Create a wreath using faded velvet ribbon, dried leaves, miniature pumpkins, old keys, and black feathers. A slightly asymmetrical arrangement will make it feel naturally aged.
Tuck in small vintage Halloween images or postcards between the branches to add a layer of storytelling. This approach avoids the bright, shiny look of modern plastic wreaths.
- Gather dried grapevine or straw wreath bases for a rustic foundation.
- Use floral wire to secure heavy items like keys or pumpkins without using glue.
- Spray the finished piece with a matte sealant to preserve dried leaves and berries.
Most people skip this: Use a ribbon in a muted burnt orange or mustard instead of neon orange to keep the antique feel.
Home Decor
34. Retro Mask Statement Wreath
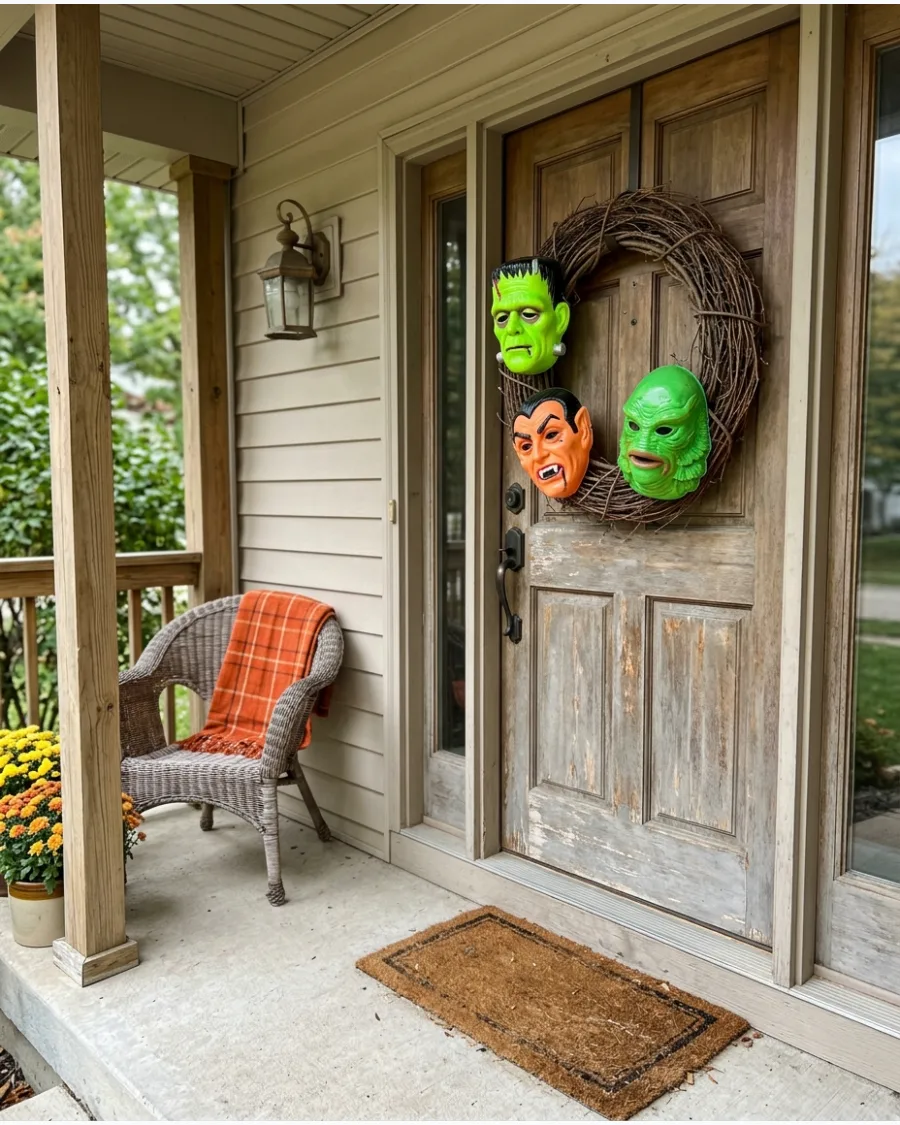
This door display uses mid-century plastic masks to create a nostalgic and slightly eerie focal point. Arrange three to five vacuum-formed masks in a circular pattern onto a sturdy wire or grapevine frame. It provides an instant hit of kitschy charm that stands out from standard floral wreaths.
Opting for masks with vibrant, saturated colors ensures the display remains visible from the street rather than blending into the shadows.
- Source authentic vintage masks on auction sites or find modern reproductions for a more budget-friendly approach.
- Use floral wire or pipe cleaners threaded through the mask eye holes to secure them firmly without damaging the plastic.
- Fill gaps between masks with black tinsel or dried orange eucalyptus for added texture and depth.
Quick win: Spray the back of the masks with a clear sealant to prevent the old plastic from cracking when exposed to autumn humidity.
Vintage Halloween Porch Decor
35. Old-Fashioned Trick-or-Treat Station
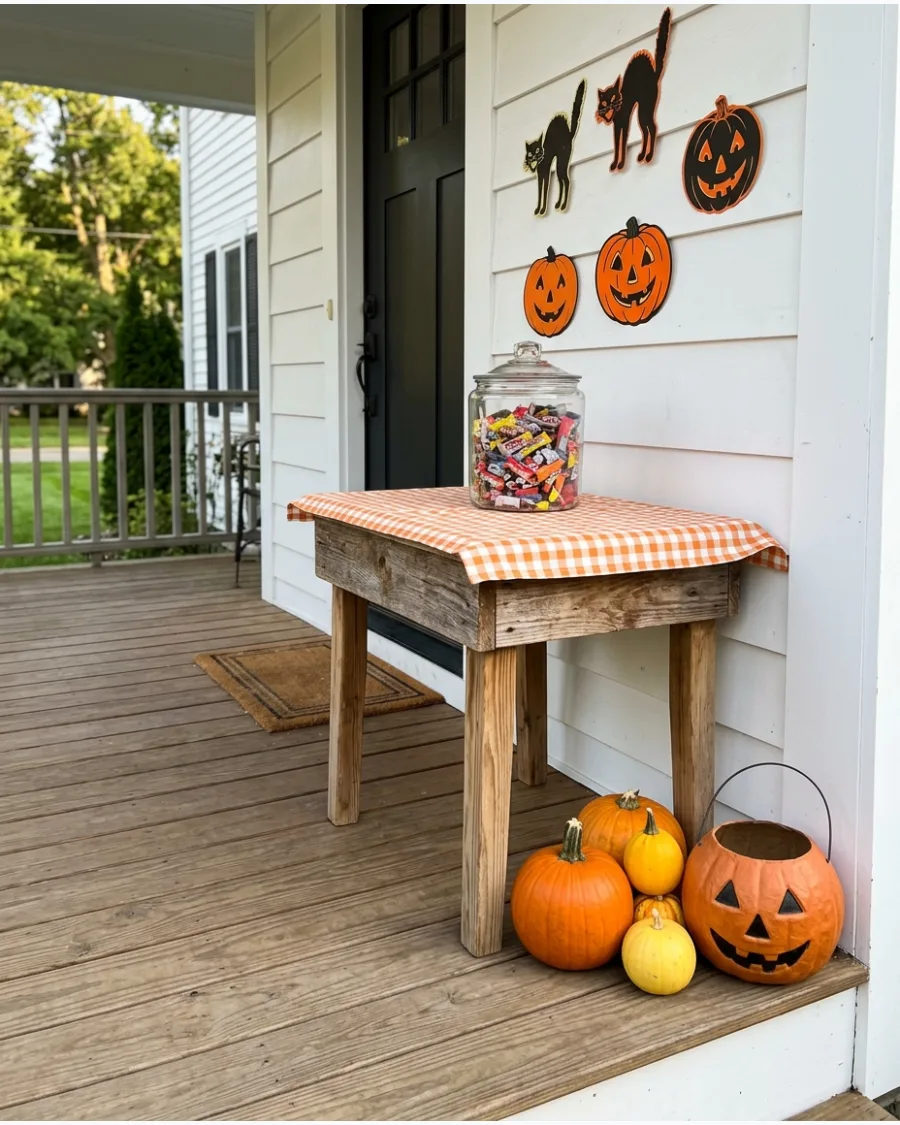
Set up a small wooden table with striped candy bags, pumpkin buckets, and large glass candy jars. Add an orange gingham tablecloth for a nostalgic finishing touch.
Position the table to the side of the door to keep the walkway clear for guests. It turns a simple bowl of candy into a thoughtful, decorated experience.
- Use heavy glass jars to prevent them from blowing over in the wind.
- Pre-fill small paper bags for a grab-and-go setup that looks organized.
- Add a small vintage-style sign with the word Treats in a classic font.
Best shortcut: Use battery-operated puck lights inside the candy jars to make the treats glow at night.
36. Antique Lantern Pumpkin Display
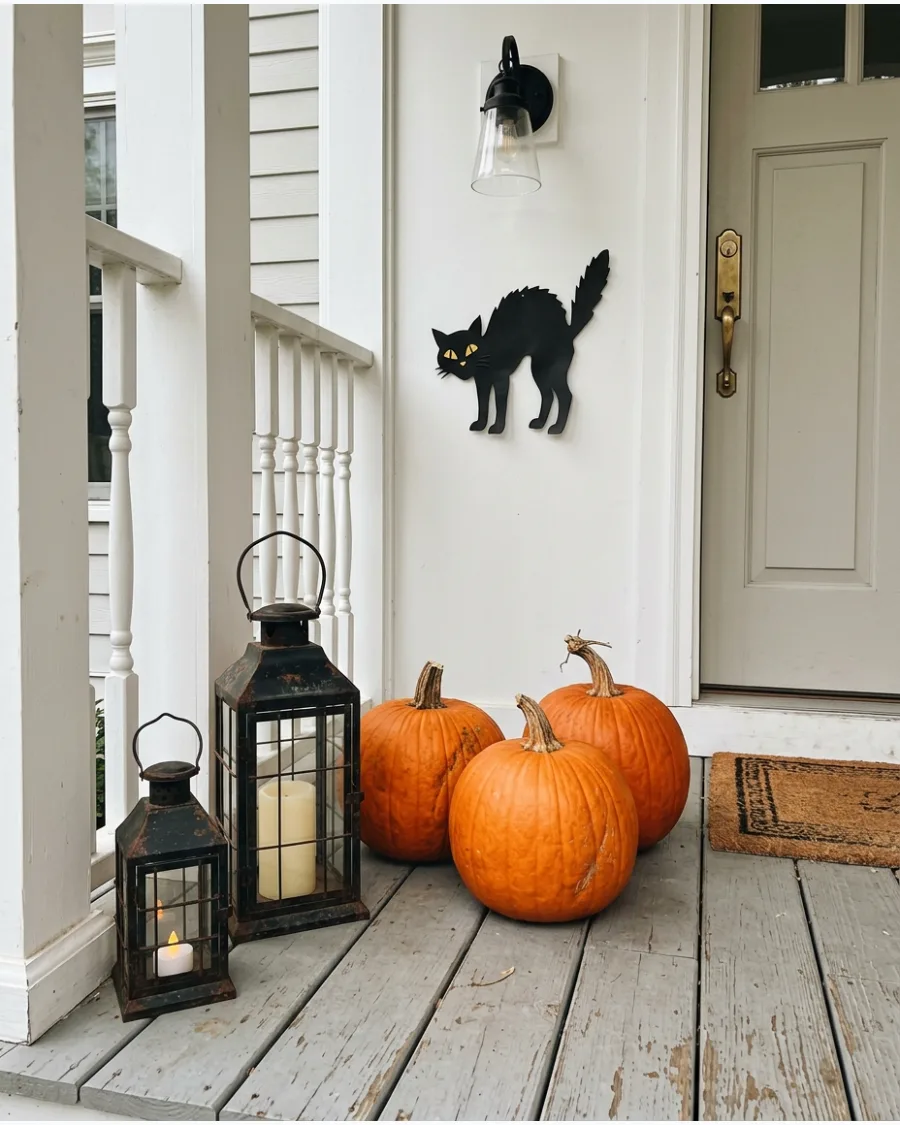
Place old metal lanterns among carved pumpkins on the porch. Use battery-operated candles to create a warm glow without placing an open flame near paper or dried decorations.
Group the lanterns in odd numbers like three or five to create a balanced, professional-looking cluster. The mix of metal and organic pumpkin shapes adds texture to the entry.
- Scout local thrift stores for lanterns with unique character and patina.
- Use flicker-flame LED candles for a realistic look that lasts all night.
- Place larger lanterns in the back and smaller pumpkins in front for better depth.
Most people skip this: Clean the glass panes of the lanterns so the light shines through clearly instead of looking muddy.
37. Vintage Ghost Yard Stakes
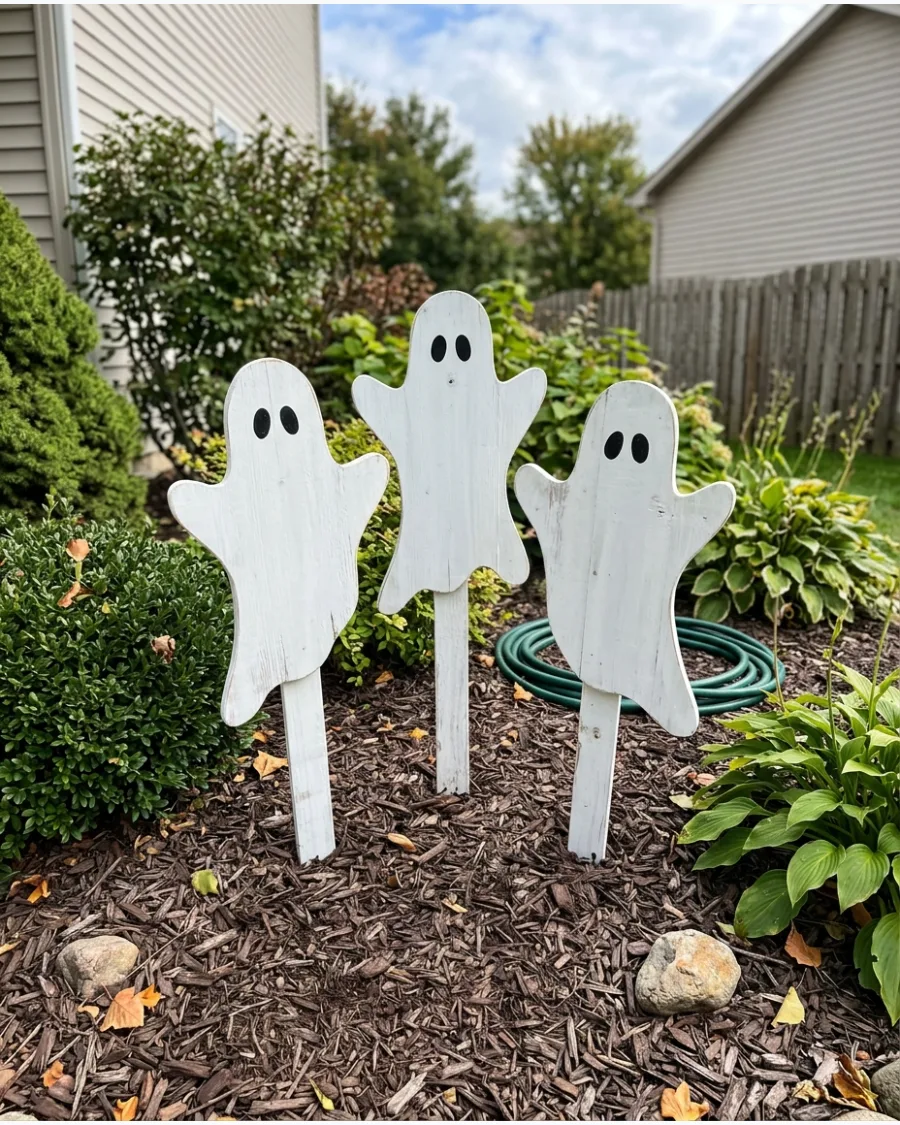
Decorate flower beds with flat wooden or metal ghosts featuring simple painted faces. Their handmade appearance will feel more nostalgic than realistic modern figures.
Space the ghosts at uneven intervals to make them look like they are floating through the garden. These simple shapes provide a clean, graphic look that stands out against green foliage.
- Look for painted plywood or sheet metal designs for durability.
- Ensure the stakes are long enough to stay upright in soft garden soil.
- Face the ghosts toward the primary walkway for the best visual impact.
Quick win: Paint the back of the stakes white too so they look finished from every angle.
38. Classic Cornstalk and Pumpkin Porch
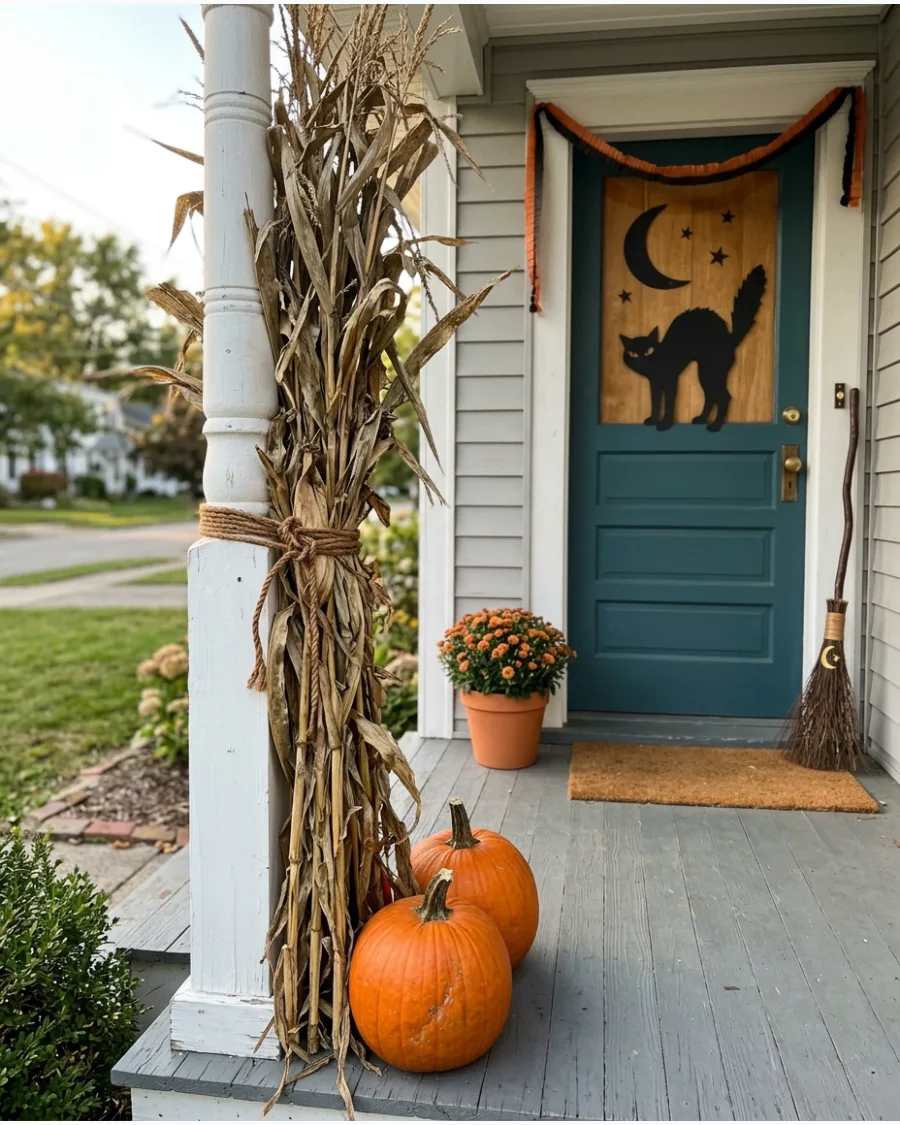
Combine cornstalks, hay bales, and carved pumpkins around the doorway. Add one vintage witch or black cat decoration to shift the arrangement from fall to Halloween.
Tie the cornstalks to porch pillars using thick twine for a secure and rustic look. This traditional base allows the vintage specific items to pop against the natural textures.
- Source cornstalks from local farms or garden centers for the best price.
- Layer hay bales to create different heights for displaying pumpkins.
- Check for pests before bringing natural materials onto the porch area.
Best shortcut: Use heavy-duty zip ties to secure cornstalks, then cover the plastic ties with decorative twine.
Home Decor
39. Retro Paper Door Banner
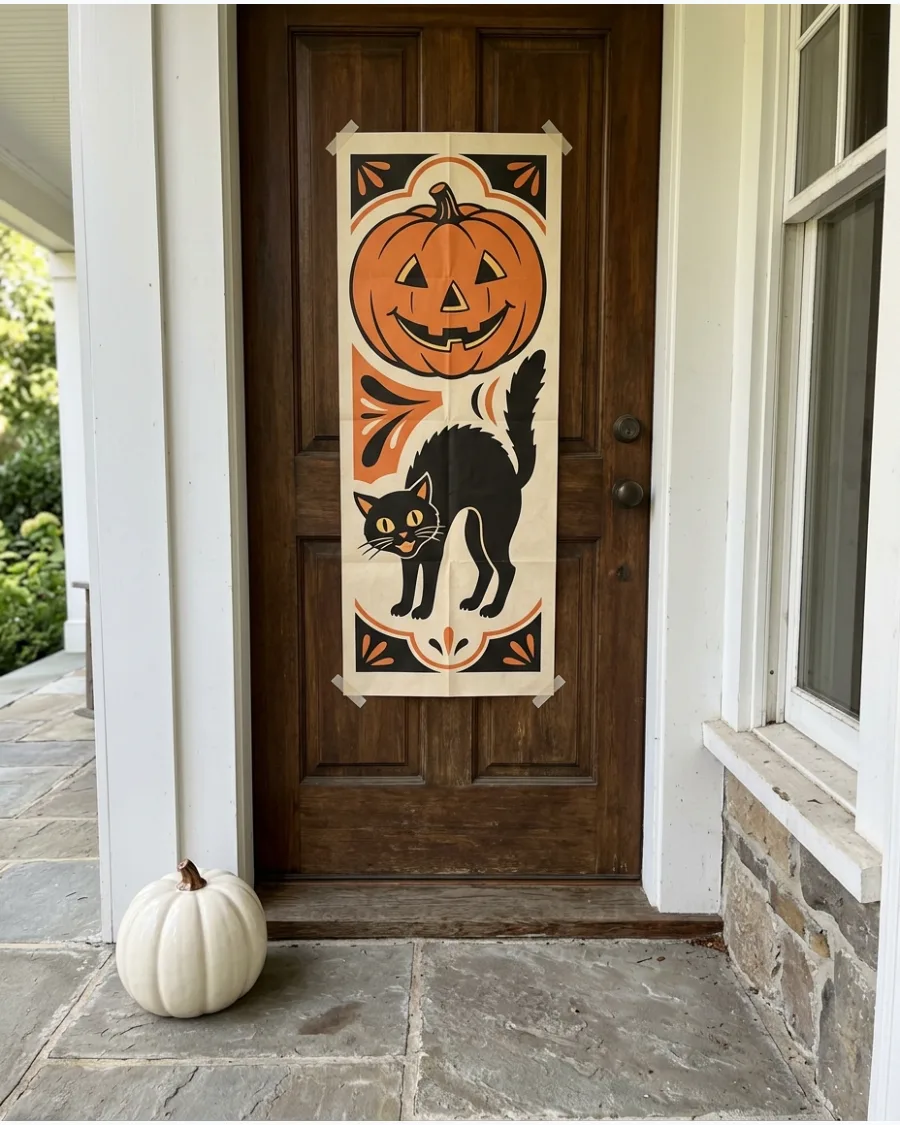
A vintage-style paper or fabric door banner instantly transforms an entryway without the clutter of multiple small pieces. These designs often feature classic mid-century illustrations like grinning jack-o'-lanterns or arched black cats.
Secure the banner to the interior side of a glass storm door to protect the paper graphics from autumn dampness and wind. This approach provides a high-impact focal point while remaining easy to store flat once the holiday ends. Investing in a high-quality fabric version ensures the colors won't fade or tear after a single season.
- Source heavy-weight cardstock or weather-resistant polyester versions for under twenty dollars.
- Use non-marking adhesive putty or magnetic hooks for metal doors to prevent surface damage.
- Frame the banner with a simple orange light strand to illuminate the vintage graphics after dark.
Quick win: Use a hair dryer on a low heat setting to gently smooth out any persistent fold lines in fabric or vinyl banners before hanging.
Vintage Halloween Porch Decor
40. Orange Globe Light Porch

Outline the doorway or porch railing with large orange globe lights. Pair them with plastic pumpkin pails and paper decorations for a late-20th-century Halloween look.
Wrap the light strings tightly around railings to ensure the globes stay evenly spaced. These lights offer a softer, more nostalgic glow than modern LED strings.
- Search for G40 or C7 sized orange bulbs for an authentic retro feel.
- Always check that the string is rated for outdoor use before installation.
- Replace any burnt-out bulbs before hanging the full strand to ensure a clean look.
Most people skip this: Use black wire strings instead of green to make the cord disappear against the shadows at night.
Thrifted and Handmade Vintage Halloween Decor
41. Haunted Thrifted Portraits
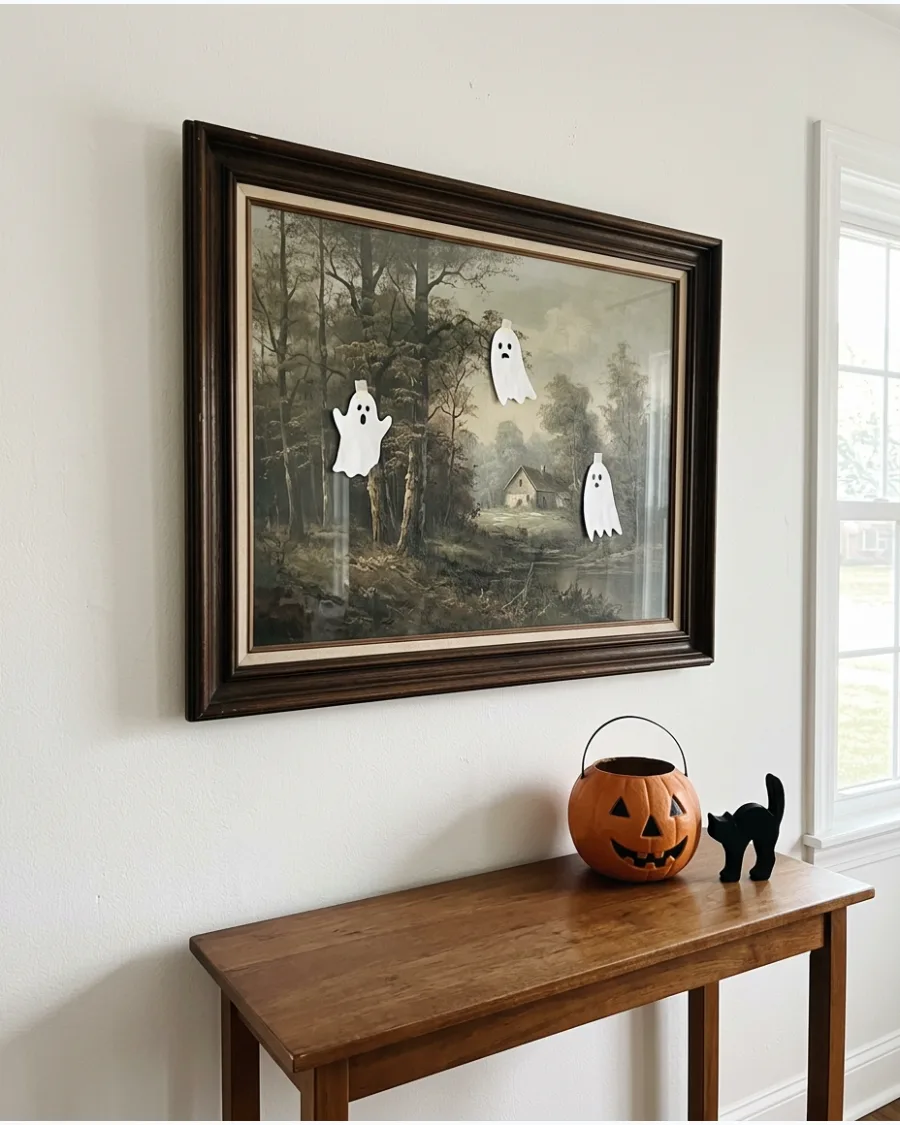
Find inexpensive framed portraits or landscape paintings at a thrift store. Add removable ghosts, bats, glowing eyes, or mysterious shadows without permanently damaging valuable artwork.
Use small pieces of white cardstock for ghosts to ensure the original art stays safe for future use. Subtle additions always look more sophisticated than covering the whole canvas.
- Search thrift stores or estate sales for frames under ten dollars.
- Use low-tack adhesive or painter's tape on the glass to avoid residue.
- Scale the ghosts to match the painting's perspective for a realistic look.
Quick win: Use a white chalk marker on the glass to draw ghosts that wipe off instantly after the holiday.
42. Antique Frame Halloween Gallery
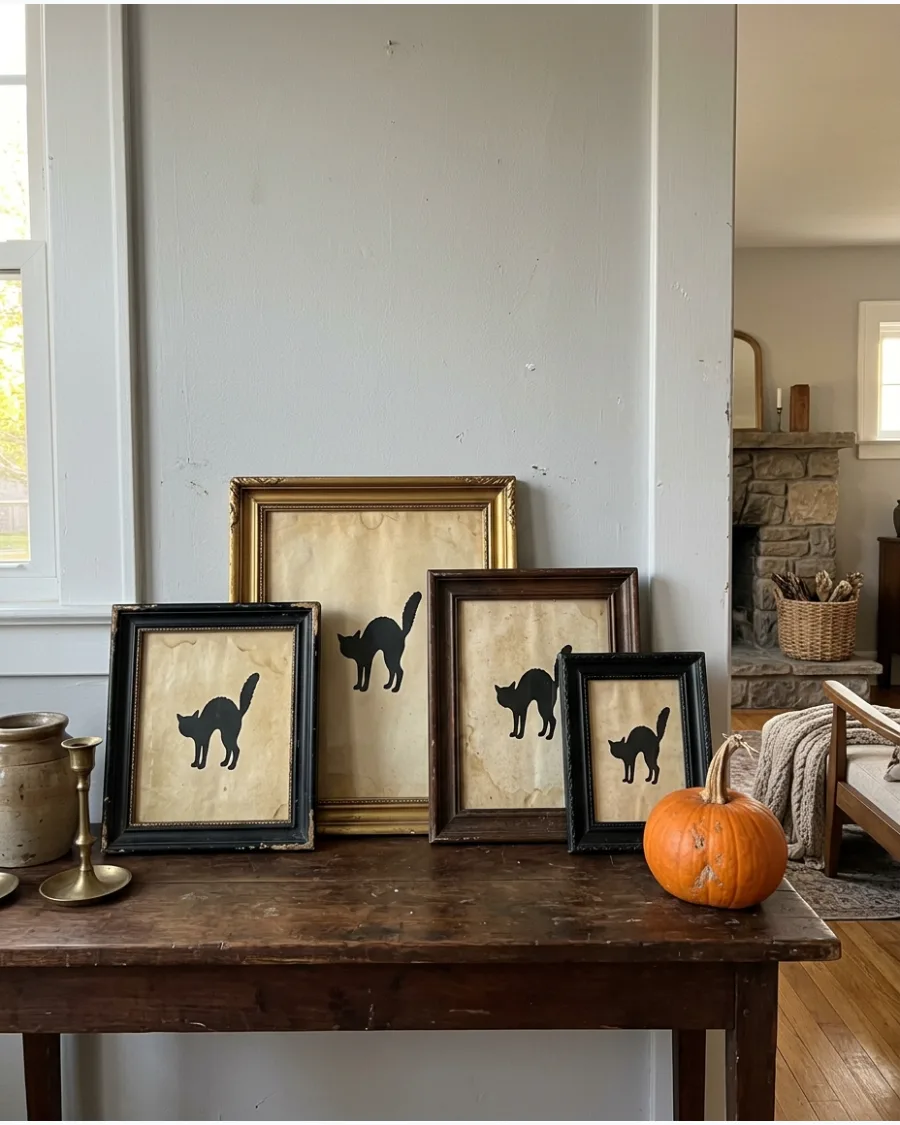
Collect ornate thrifted frames and paint a few black while leaving others aged or gilded. Fill them with vintage Halloween prints, handwritten spells, silhouettes, and old photographs.
Vary the heights of the frames to create a dynamic visual line across your mantel or wall. Black frames provide the necessary contrast to make cream-colored vintage paper pop.
- Source frames from flea markets and garage sales for the best variety.
- Group by color or texture to keep the gallery wall looking intentional.
- Command strips work best for a renter-friendly and adjustable gallery layout.
Most people skip this: Sand the edges of newly painted black frames to let the wood or gold peek through for an aged look.
43. Vintage Suitcase Halloween Display
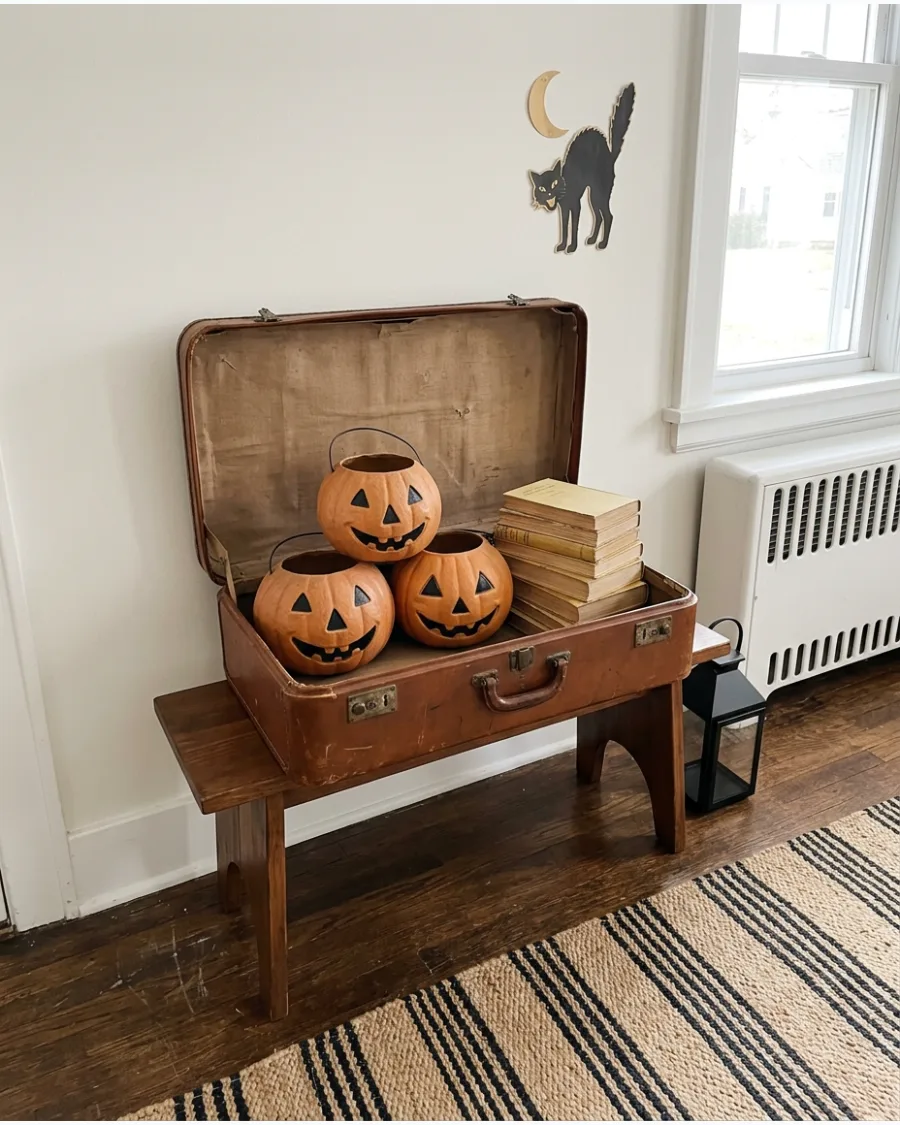
Open an old suitcase and fill it with paper pumpkins, antique books, masks, candy containers, and folded black fabric. Display it on a table as though someone has unpacked decades of Halloween memories.
Prop the lid open with a sturdy book to prevent it from snapping shut on your display. Lining the bottom with a dark textile creates a rich backdrop for smaller items.
- Look for second-hand shops or attic finds with original hardware.
- Layer the tallest items in the back to ensure everything is visible.
- Use crumpled tissue paper underneath the fabric to add height to small objects.
Quick win: Tuck a battery-operated amber fairy light string under the fabric to make the contents glow from within.
44. Handmade Crepe-Paper Rosettes
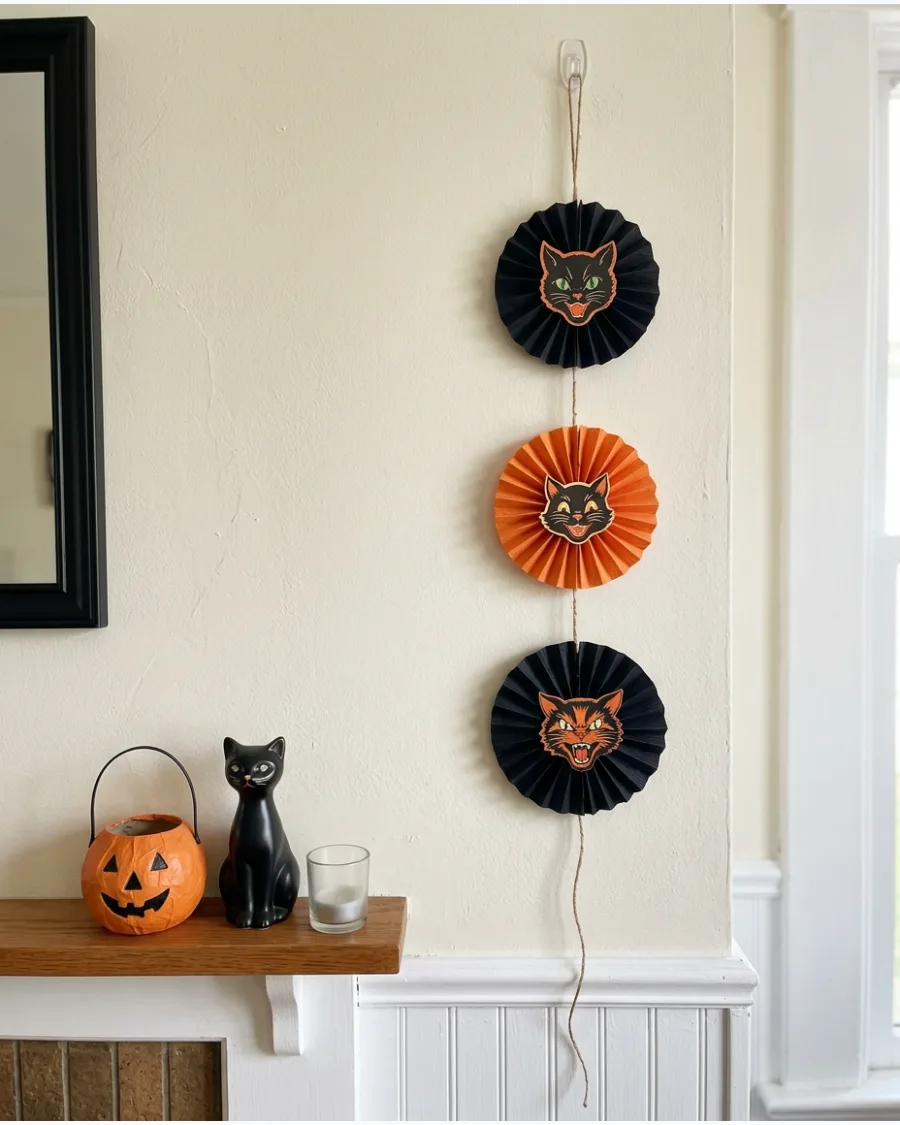
Create layered orange, black, cream, and mustard paper rosettes. Add vintage pumpkin, witch, cat, or owl illustrations to the centers and hang them together on a wall.
Staple the folds in the center before fanning them out to keep the circular shape perfectly even. Heavyweight crepe paper holds its shape much better than the thin party-store streamers.
- Buy high-quality crepe paper and cardstock from a craft store.
- Assemble with hot glue for a permanent bond that lasts multiple seasons.
- Mix different diameters for a professional and curated look.
Best shortcut: Use pre-made paper fans and just glue the vintage-style cutouts to the middle to save time.
45. DIY Vintage Pumpkin Pails
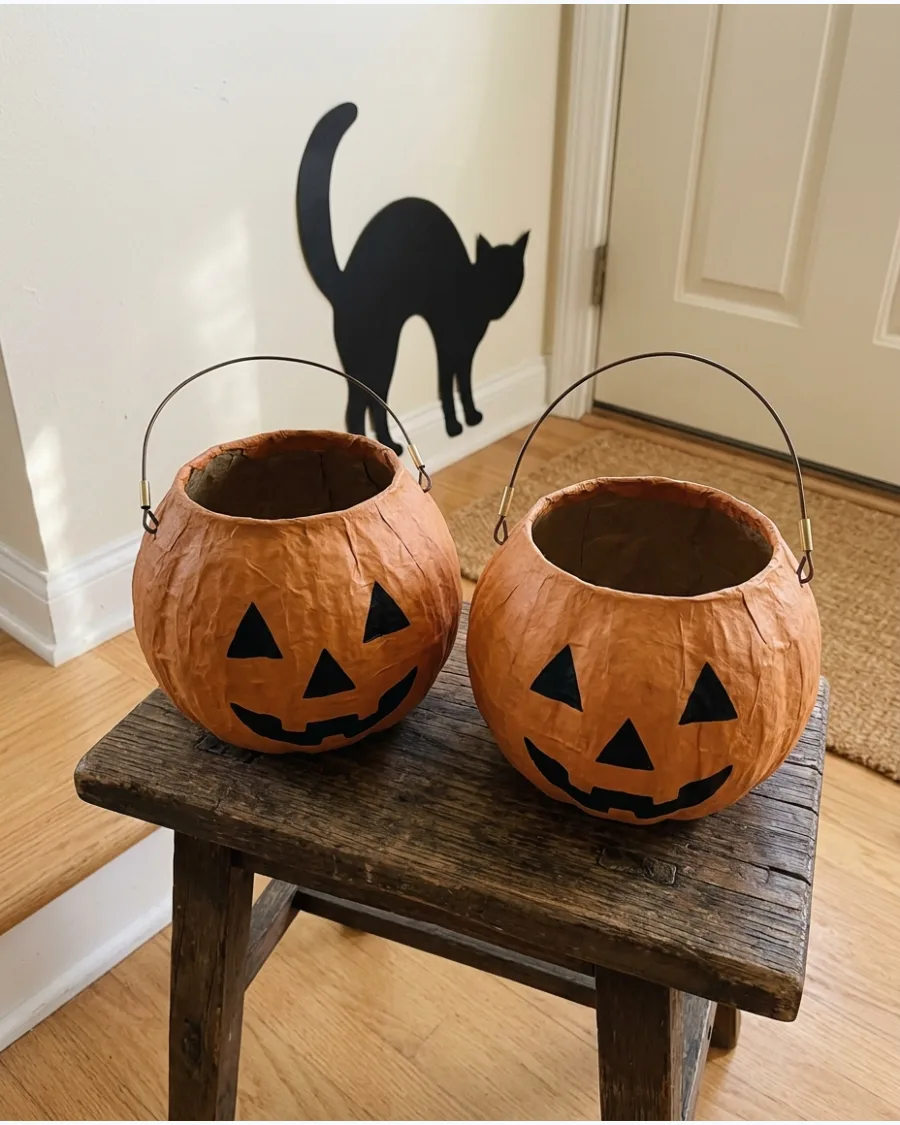
Cover inexpensive plastic pumpkin pails with papier-mâché and repaint their faces. Use slightly uneven brushwork and muted colors to imitate older handmade candy containers.
Apply a matte clear coat after painting to remove the plastic sheen and protect the finish. Muted oranges and off-whites feel much more authentic than neon plastic tones.
- Use standard plastic trick-or-treat pails as the base mold.
- Create a flour and water paste with newspaper strips for the papier-mâché.
- Use acrylic paint in burnt orange and cream for a weathered appearance.
Most people skip this: Mix a little bit of cinnamon into the brown paint for the stem to add texture and a subtle scent.
46. Vintage Halloween Shadow Box
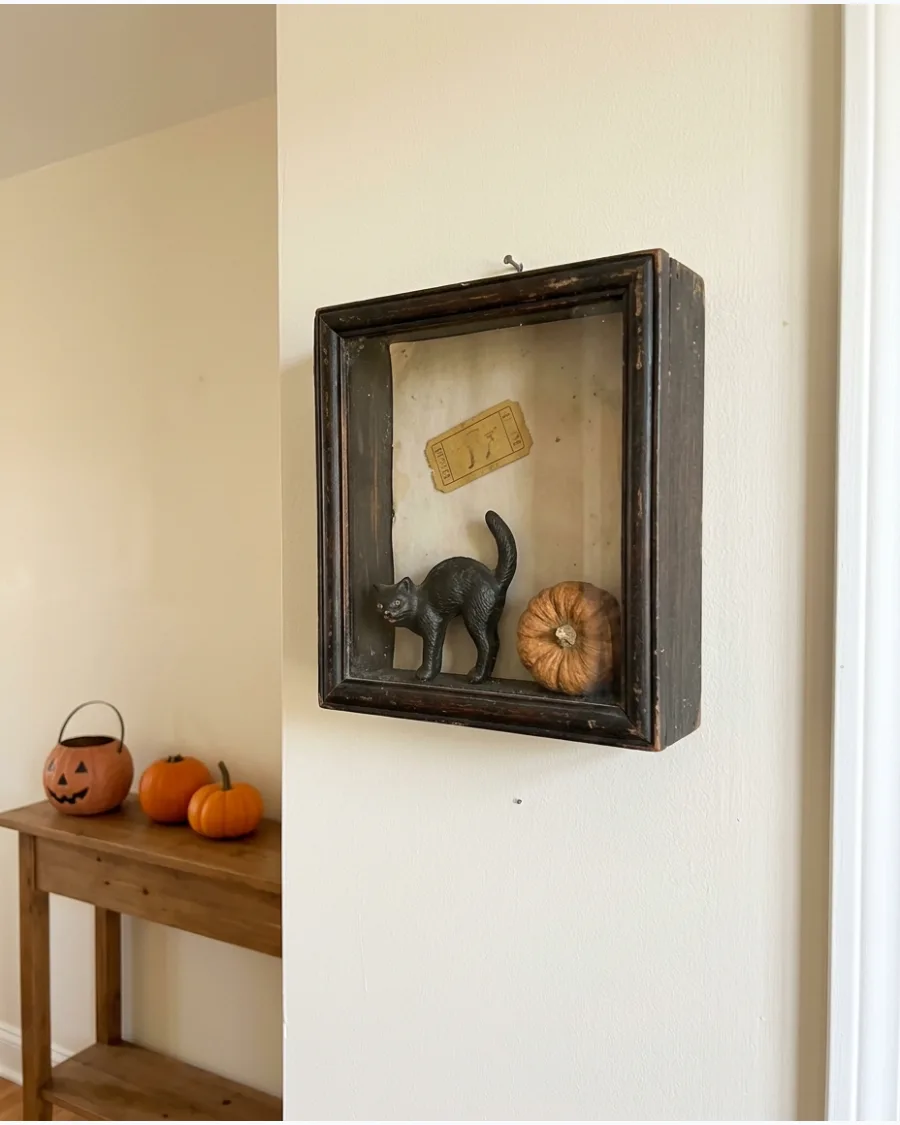
Fill a wooden shadow box with miniature pumpkins, cats, moons, paper tickets, old photographs, and tiny party favors. Layering the pieces will make it resemble an antique Halloween keepsake.
Secure heavier items with a small dab of museum wax so they stay in place when the box is moved. Keeping the items tightly packed makes the display look like a curated collection rather than a random box.
- Purchase new shadow boxes at craft stores or look for thrifted versions.
- Use archival-safe glue for old photos to prevent discoloration over time.
- Add a velvet or linen backing inside the box for extra texture.
Best shortcut: Use a deep picture frame if you cannot find a traditional shadow box.
47. Handmade Sheet Ghosts
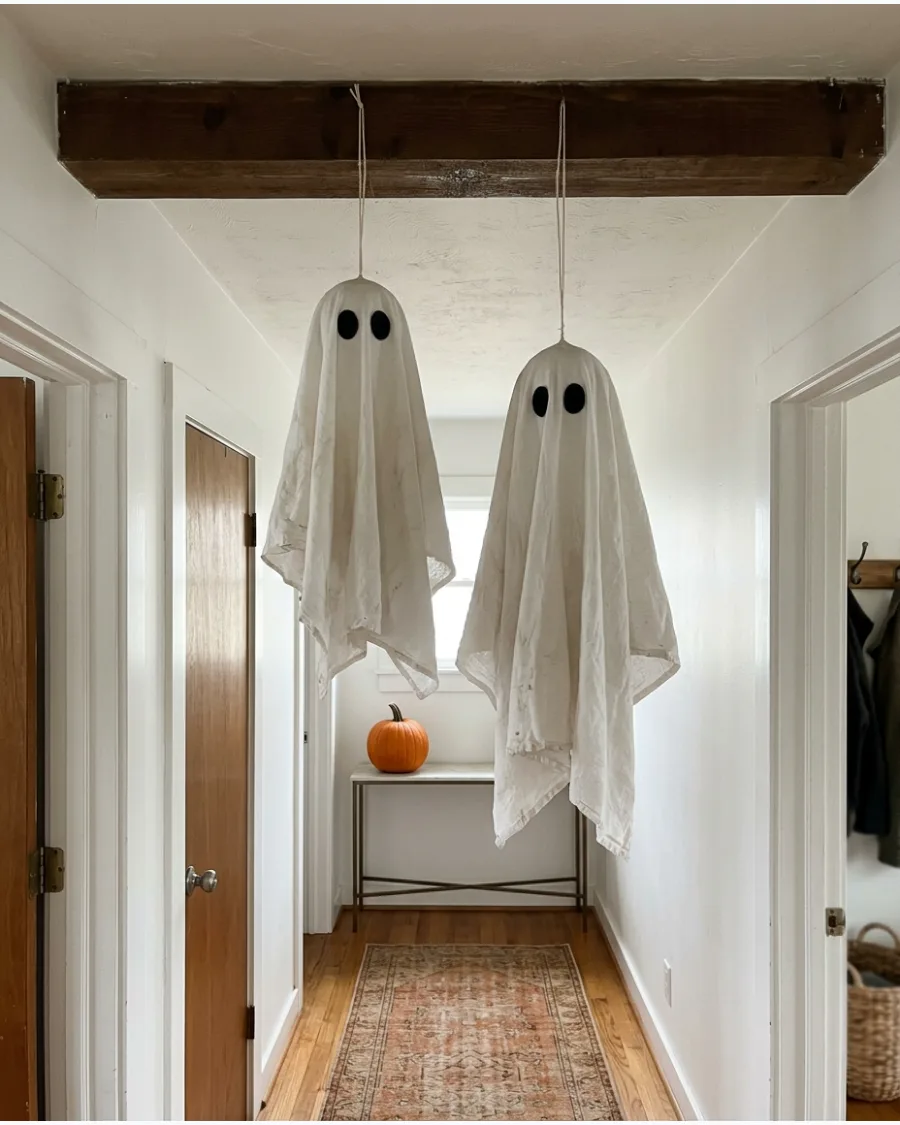
Create simple hanging ghosts from lightweight white fabric. Give them imperfect hand-cut eyes and mouths to recreate the homemade Halloween style popular during the 1980s and 1990s.
Stiffen the fabric with spray starch so the ghosts hold a more voluminous, haunting shape. Using old cotton sheets gives the ghosts a soft, matte look that modern polyester cannot replicate.
- Repurpose old cotton bedsheets or buy muslin fabric by the yard.
- Use clear fishing line for an invisible hanging effect from the ceiling.
- Stuff the heads with newspaper or poly-fill to maintain a round shape.
Quick win: Tea-stain the white fabric before assembly to give the ghosts an aged-in-the-attic appearance.
48. Vintage Halloween Kitchen Shelf
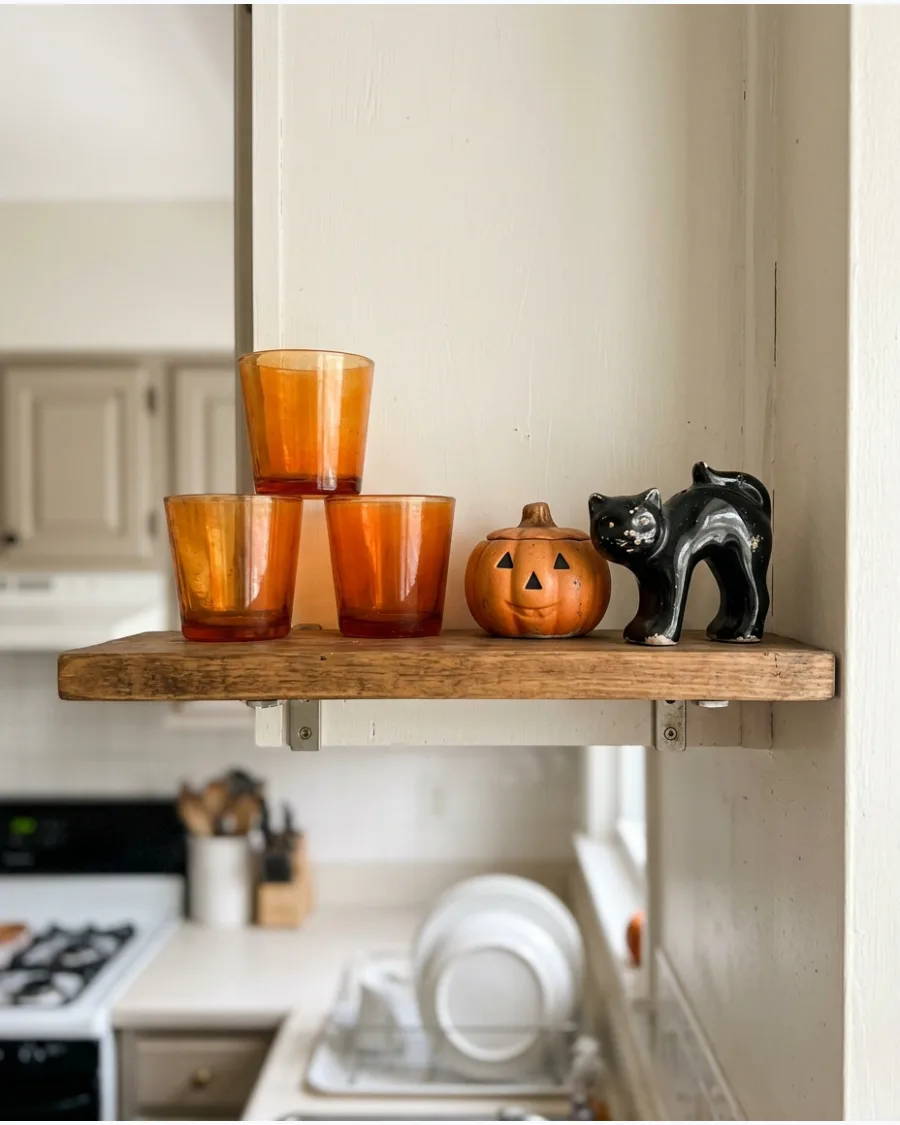
Style an open kitchen shelf with orange glassware, ceramic pumpkins, old recipe cards, copper molds, candy jars, and black cat figurines. Use practical kitchen pieces alongside seasonal decorations.
Keep the most-used items on the lower shelves so the decor does not interfere with daily cooking. Mixing functional copper or wood with orange ceramics prevents the shelf from looking like a store display.
- Check kitchen cabinets or open shelving for unused vertical space.
- Combine functional everyday items with purely decorative seasonal pieces.
- Use small plate stands to display old recipe cards or vintage postcards.
Most people skip this: Place a few sprigs of dried wheat in a jar to bridge the gap between summer and fall.
49. Antique Cabinet of Halloween Curiosities
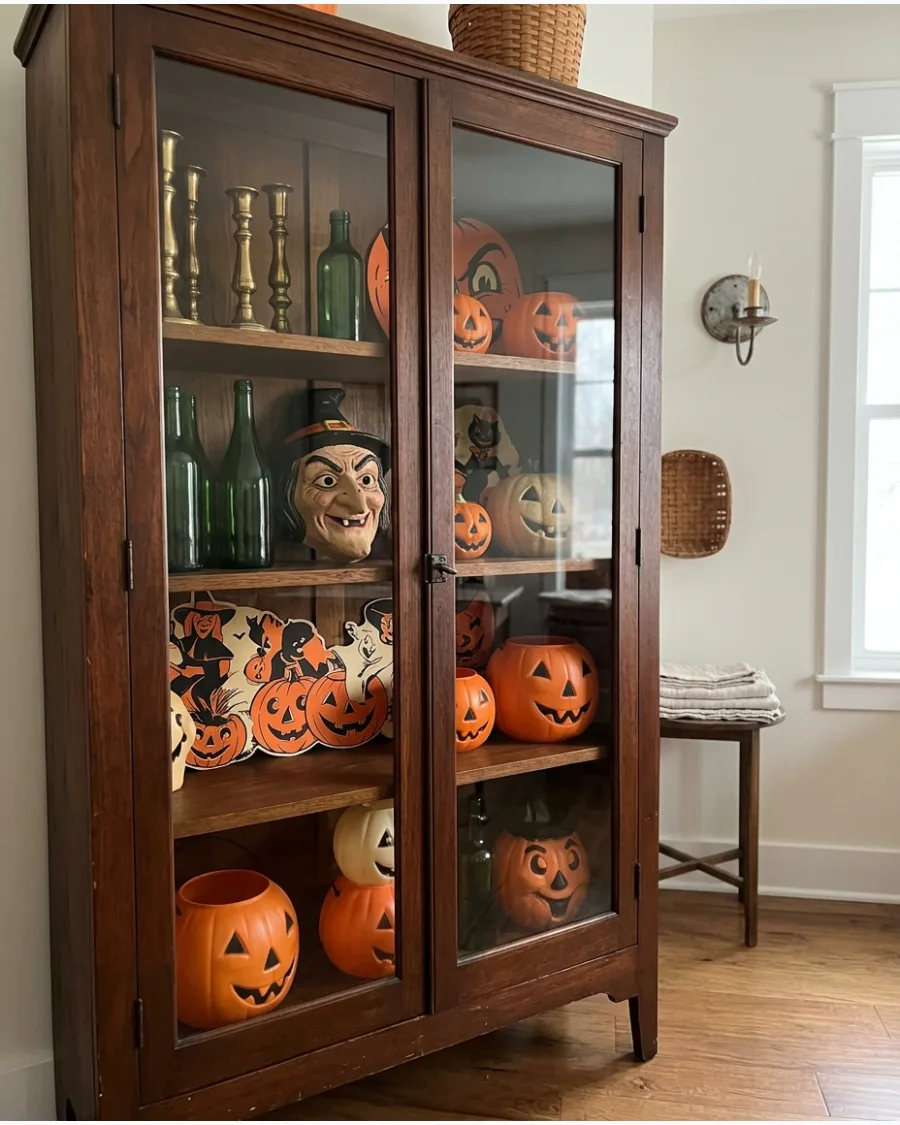
Fill a glass-front cabinet with old bottles, feathers, dried flowers, brass candlesticks, vintage books, masks, and small Halloween figurines. Keep the colors dark and slightly faded for an authentic collector’s display.
Group items in odd numbers to create a more natural and interesting arrangement behind the glass. Darker corners of the cabinet are the perfect spots for hidden details like small plastic spiders or ravens.
- Use a hutch, china cabinet, or bookcase with glass doors.
- Stick to a palette of black, gold, and deep green for a moody feel.
- Use acrylic risers to create height in the back of the display.
Quick win: Print out apothecary labels on tea-stained paper and glue them to old glass jars for instant character.
50. Mixed-Era Vintage Halloween Collection
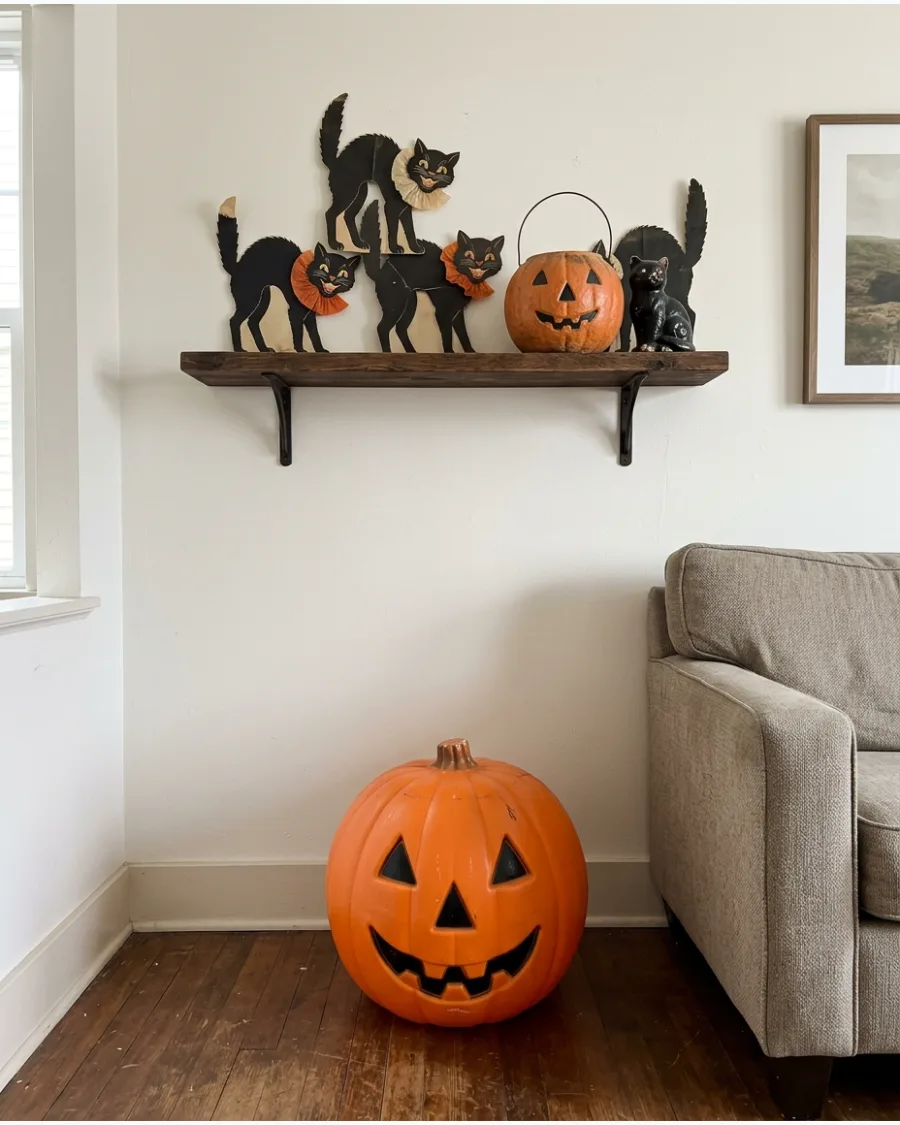
Combine early folk-art paper decorations, mid-century ceramics, 1970s blow molds, 1980s pumpkin pails, and handmade 1990s crafts. Repeating orange, black, cream, mustard, and muted green throughout the room will help the different decades feel coordinated.
Place larger items like blow molds on the floor and smaller paper items on higher surfaces to balance the weight of the room. A consistent color palette is the secret to making mismatched eras look like a deliberate collection.
- Mix different eras for a curated and lived-in feel.
- Repeat three to four core colors for visual unity across the space.
- Place the oldest and most fragile items in protected spots away from traffic.
Best shortcut: Use a single large anchor piece from your favorite era to set the tone for the entire room.
Frequently Asked Questions
How can I tell the difference between authentic vintage Halloween decor and modern reproductions?
Authentic vintage pieces typically feature thick, recycled cardboard and heavy-duty metal eyelets or staples that show slight oxidation. Look for matte, non-uniform paint finishes and a weathered feel that mass-produced modern glossies simply cannot replicate.
What are the most iconic vintage Halloween brands to look for?
Keep an eye out for Beistle's classic jointed paper cutouts and Dennison’s intricate crepe paper designs. Gurley candle figures are also highly collectible, instantly recognizable by their charming molded wax shapes and nostalgic color palettes.
How do I style vintage paper decorations without damaging my walls?
Use archival-safe, acid-free adhesive putty or museum wax to secure lightweight paper pieces without leaving oily residues. For rare or fragile cutouts, consider placing them in UV-protected floating frames to showcase the art while preserving its condition.
What color palette should I use for a 1950s-inspired Halloween look?
While orange and black are staples, a true 1950s aesthetic incorporates soft cream, metallic silver, and pale yellow accents. These lighter tones help soften the contrast and create that classic mid-century party atmosphere in your home.
How do I safely display and light vintage plastic blow molds indoors?
Always use low-heat LED bulbs to prevent the vintage plastic from warping or discoloring over time. Ensure cords are tucked safely behind furniture and double-check that all original wiring is intact and free of frays before plugging them in.