50 Two Person Walk In Shower Ideas

This post may contain affiliate links: full affiliate disclosure.
Designing a shower for two requires more than just extra space; it involves smart plumbing, strategic drainage, and enough elbow room for everyone to stay comfortable. These layouts turn a basic daily routine into a functional shared experience without making the bathroom feel crowded.
Double Shower Head Walk-In Shower Ideas
1. Double Shower Head Walk-In Shower
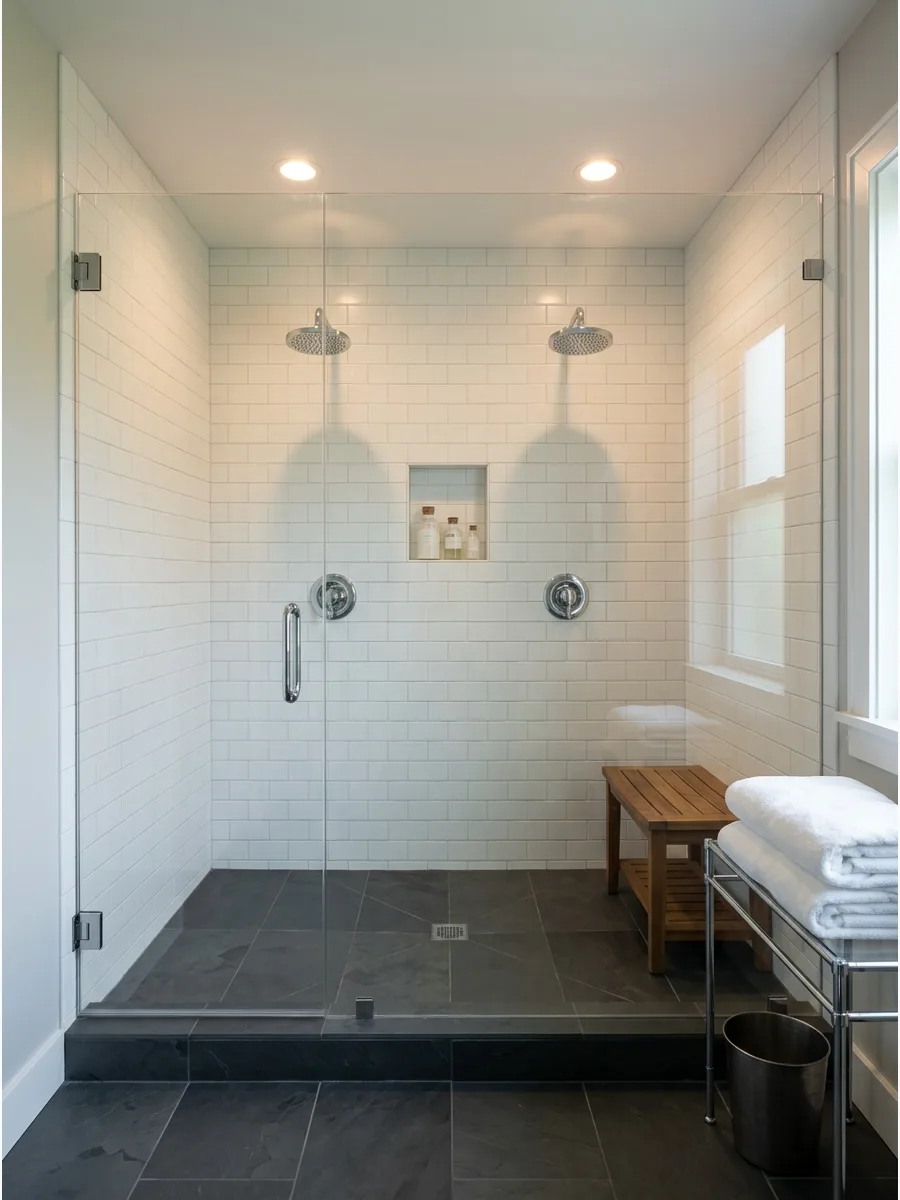
Adding a second shower head eliminates the wait for hot water during busy mornings. This setup works best when the floor space is at least 60 inches wide to prevent bumping into each other.
Position the heads far enough apart so each person has a dedicated spray zone without water cross-interference. It turns a basic utility into a functional shared space that feels intentional.
- Budget $500 to $1,500 for extra plumbing and fixtures.
- Mount heads 36 to 48 inches apart for optimal spacing.
- Use mismatched heights if one partner is significantly taller.
Quick win: Install a dual-port diverter valve to control both heads from a single main water line if the budget is tight.
2. Side-by-Side Shower Heads
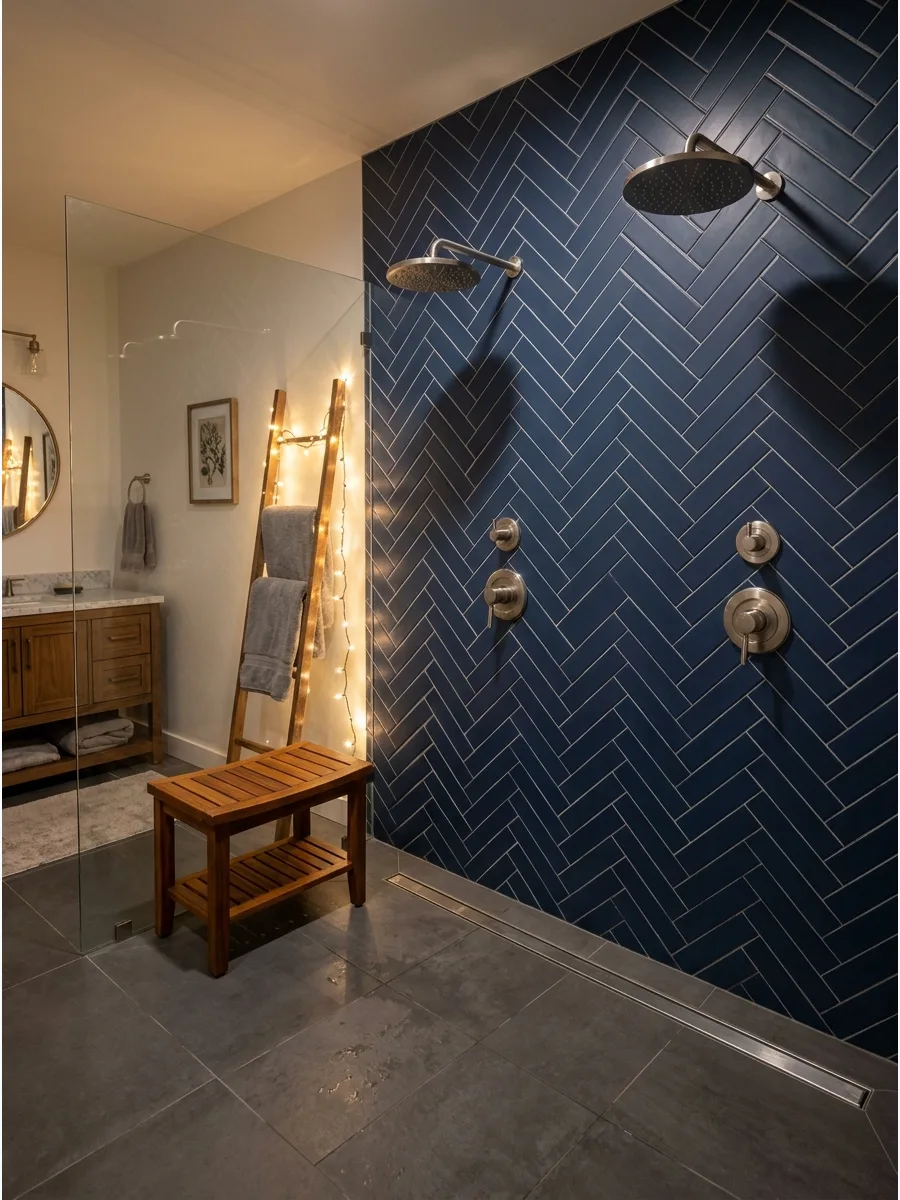
Mounting both fixtures on the same long wall creates a streamlined look that mimics high-end hotels. This layout is ideal for narrower bathrooms because it keeps all the plumbing pipes concentrated on one side of the room.
Use a single long linear drain along the fixture wall to handle the double water volume efficiently. It makes the room feel organized and provides a balanced visual aesthetic.
- Costs $800 to $2,000 for fixtures and expert labor.
- Align heads perfectly on a horizontal line for visual balance.
- Choose a wall at least 72 inches long for maximum comfort.
Most people skip this: Check the water heater's capacity to ensure it can handle two heads running at the same time.
3. Opposite Wall Shower Heads
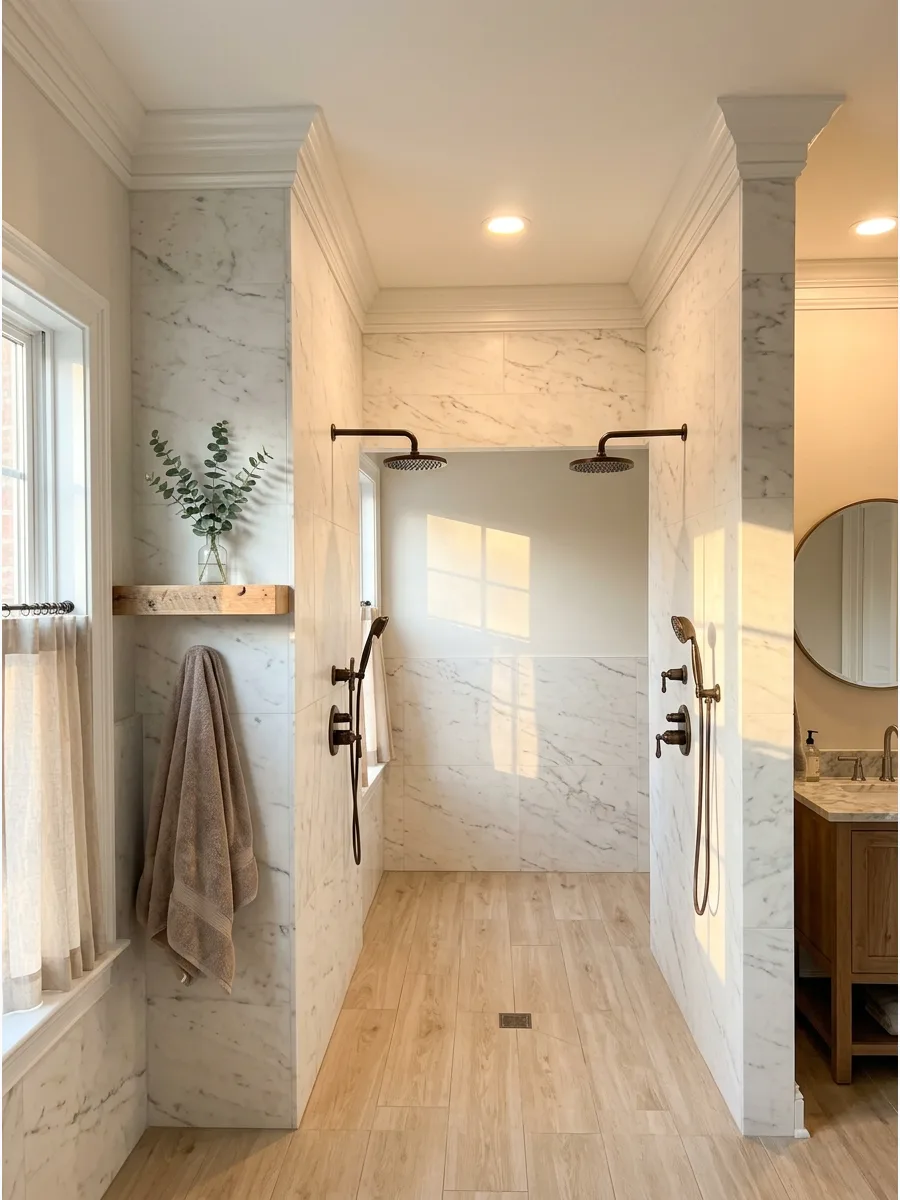
Placing fixtures on opposite walls creates a tunnel of water that feels incredibly spacious. This design prevents the cold shoulder effect where one side of the body stays chilly while the other is warm.
Aim for a minimum of four feet between the walls to allow for easy movement in the center of the shower. It provides a symmetrical and architectural feel to a primary bathroom renovation.
- Budget $1,200 to $3,000 for dual-wall plumbing installation.
- Place controls near the entry so the water can be turned on without getting wet.
- Use a central floor drain to manage water from both sides.
Quick win: Install a built-in bench on one of the side walls to give each person a place to rest away from the spray.
4. Rainfall and Handheld Shower Combo
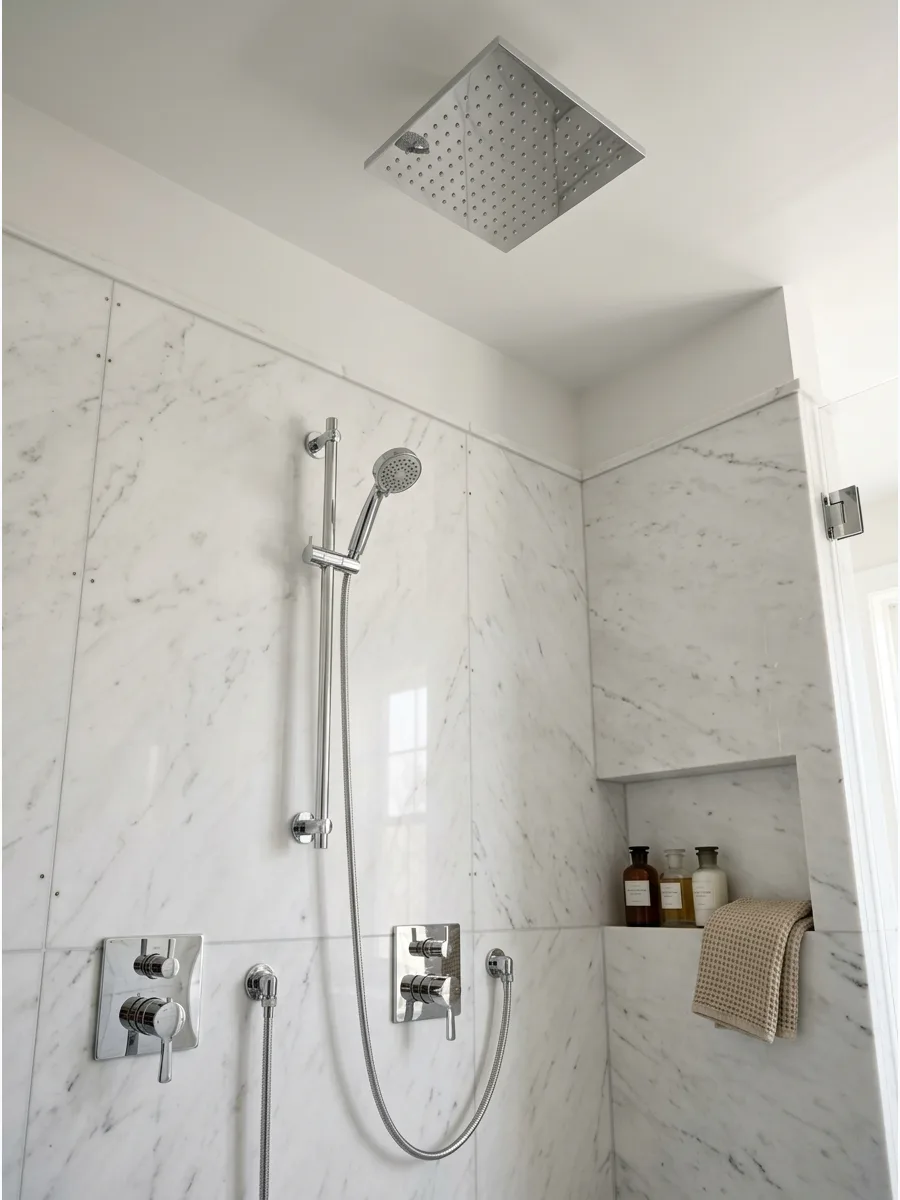
Combining a fixed ceiling rainfall head with a wall-mounted handheld unit offers the best of both worlds. One person can enjoy a steady soak while the other uses the wand for targeted rinsing or hair washing.
Mount the handheld bracket at waist height so it is easy to reach while sitting or standing. This mix makes cleaning the shower walls and glass much faster too.
- Costs $400 to $900 for a complete combo kit.
- Install the handheld slide bar near the entrance for easy access.
- Great for families with pets or small children who use the space.
Best shortcut: Buy a 2-in-1 shower head that has a detachable center if you cannot open the walls for new plumbing.
5. Two Rainfall Shower Heads
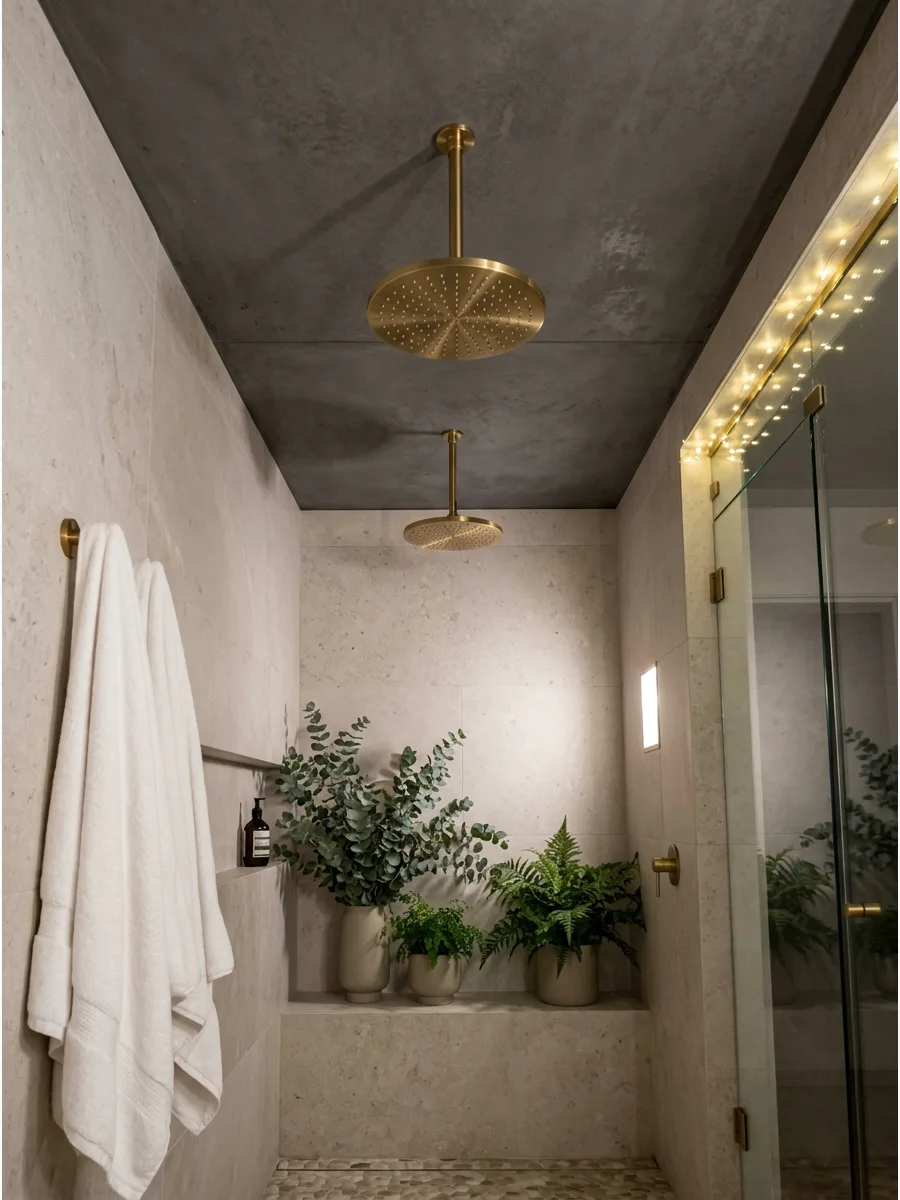
Ceiling-mounted rainfall heads provide a gentle, vertical spray that feels like a luxury spa. Placing two of these in a large wet room creates a high-end focal point that doesn't clutter the walls.
Ensure the ceiling height is at least 84 inches to prevent the water from splashing too aggressively against the body. This layout works best with a completely open or doorless entry design.
- Budget $600 to $1,800 for ceiling fixtures and plumbing.
- Requires plumbing routed through the ceiling joists by a professional.
- Best for homes with high-pressure water systems.
Most people skip this: Use a 12-inch or larger diameter head to get full body coverage from the ceiling.
6. Dual Black Fixture Shower
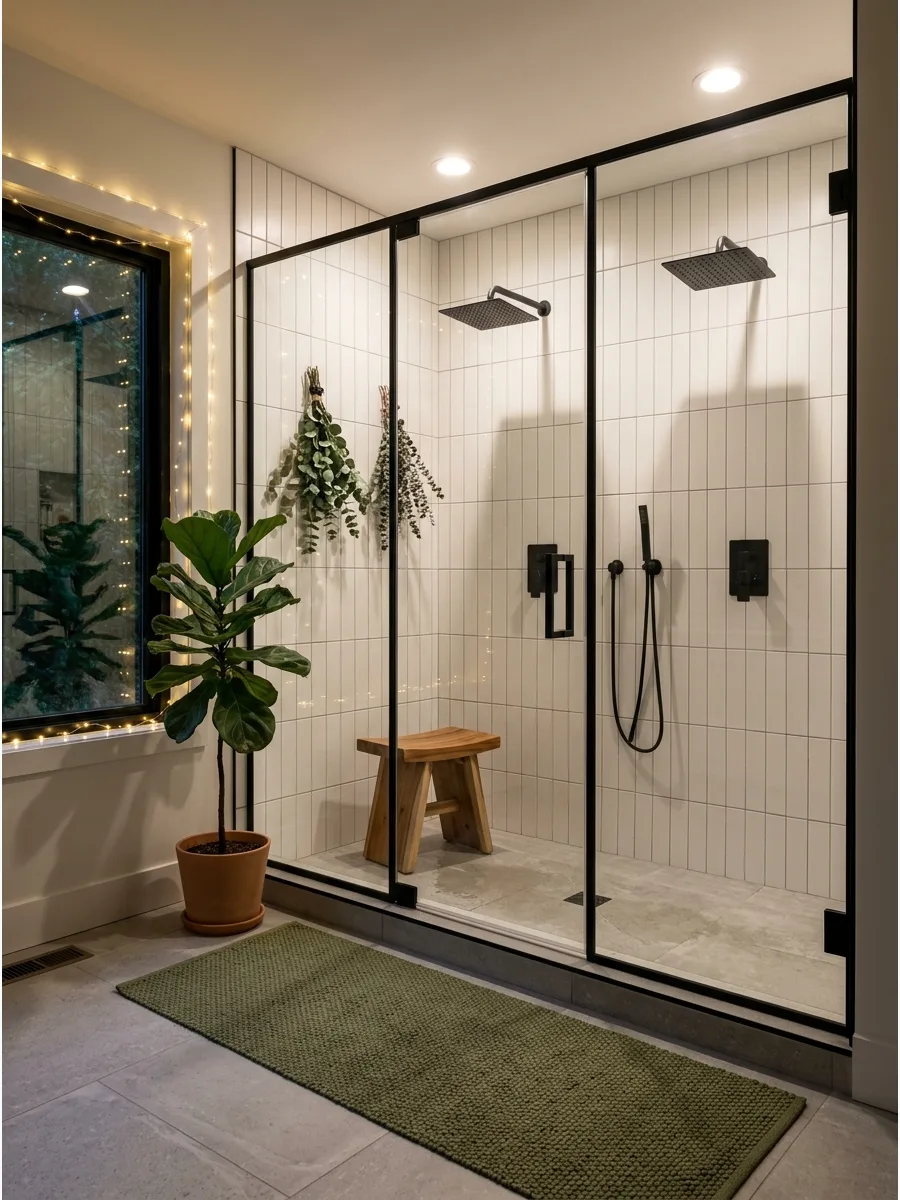
Matte black fixtures pop beautifully against light-colored tiles like white marble or pale gray. This modern aesthetic is bold and hides water spots better than polished chrome or nickel.
Pair these fixtures with black-framed glass doors to tie the whole graphic look together. It creates a crisp style that feels very current in a modern home.
- $300 to $700 per fixture set depending on the brand.
- Clean with a soft microfiber cloth to avoid scratching the matte finish.
- Matches industrial, farmhouse, or modern minimalist styles.
Quick win: Use black grout with white tile to echo the dark hardware and make the space feel cohesive.
7. Dual Brass Fixture Shower
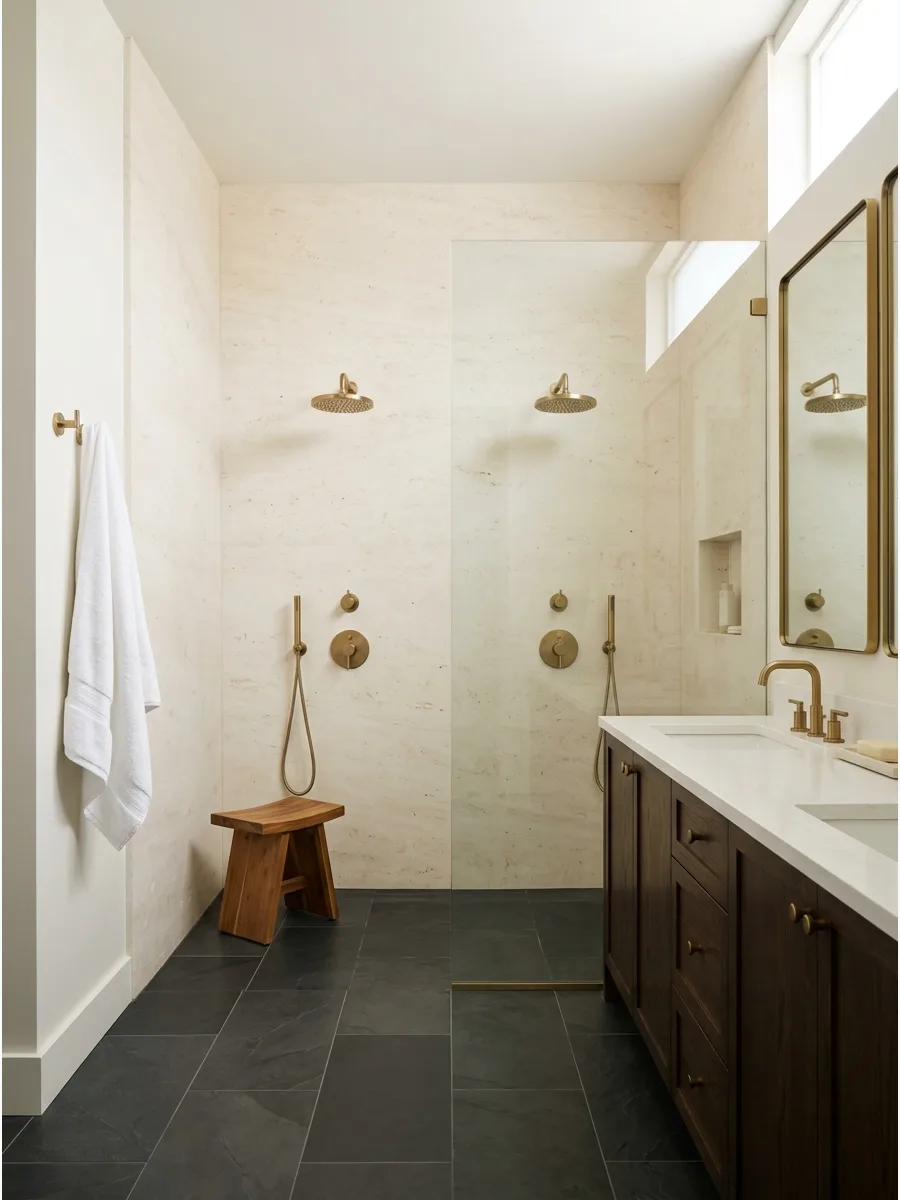
Brushed brass adds a layer of warmth that silver-toned metals lack in a bathroom. It pairs perfectly with natural stone or beige porcelain for a timeless, organic vibe.
Choose a PVD finish for the brass to ensure it resists corrosion and stays bright for years without tarnishing. This look is especially effective in bathrooms that receive lots of natural light.
- Costs $500 to $1,200 for premium brass finishes.
- Works best with warm-toned LED lighting to highlight the metal.
- Easy to update later by swapping out matching cabinet pulls.
Best shortcut: Look for champagne bronze finishes if you want a softer, less yellow version of traditional brass.
8. Separate Shower Controls
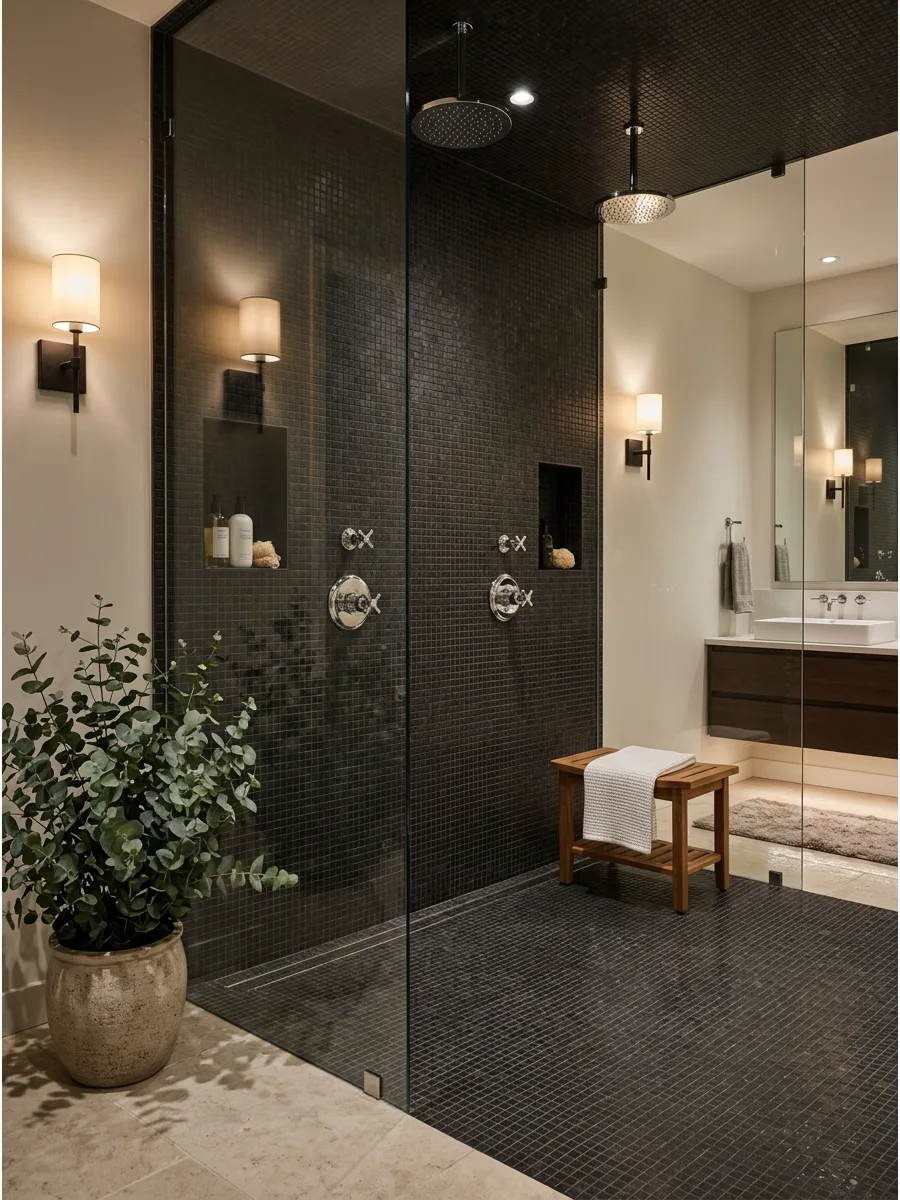
Having two separate valves allows each person to choose their own perfect water temperature. One person can have a steaming hot rinse while the other keeps it cool.
Install the controls on the wall furthest from the spray so you can adjust the water without getting your hair wet. It eliminates the morning argument over the thermostat settings.
- Budget $200 to $500 for the extra valve and installation.
- Requires a 3/4-inch supply line to maintain pressure for both heads.
- Place controls exactly 48 inches above the floor for easy reach.
Most people skip this: Label the controls or use distinct handle styles if they operate different types of heads like rain versus wall-mount.
Large Two Person Walk-In Shower Ideas
9. Large Open Walk-In Shower
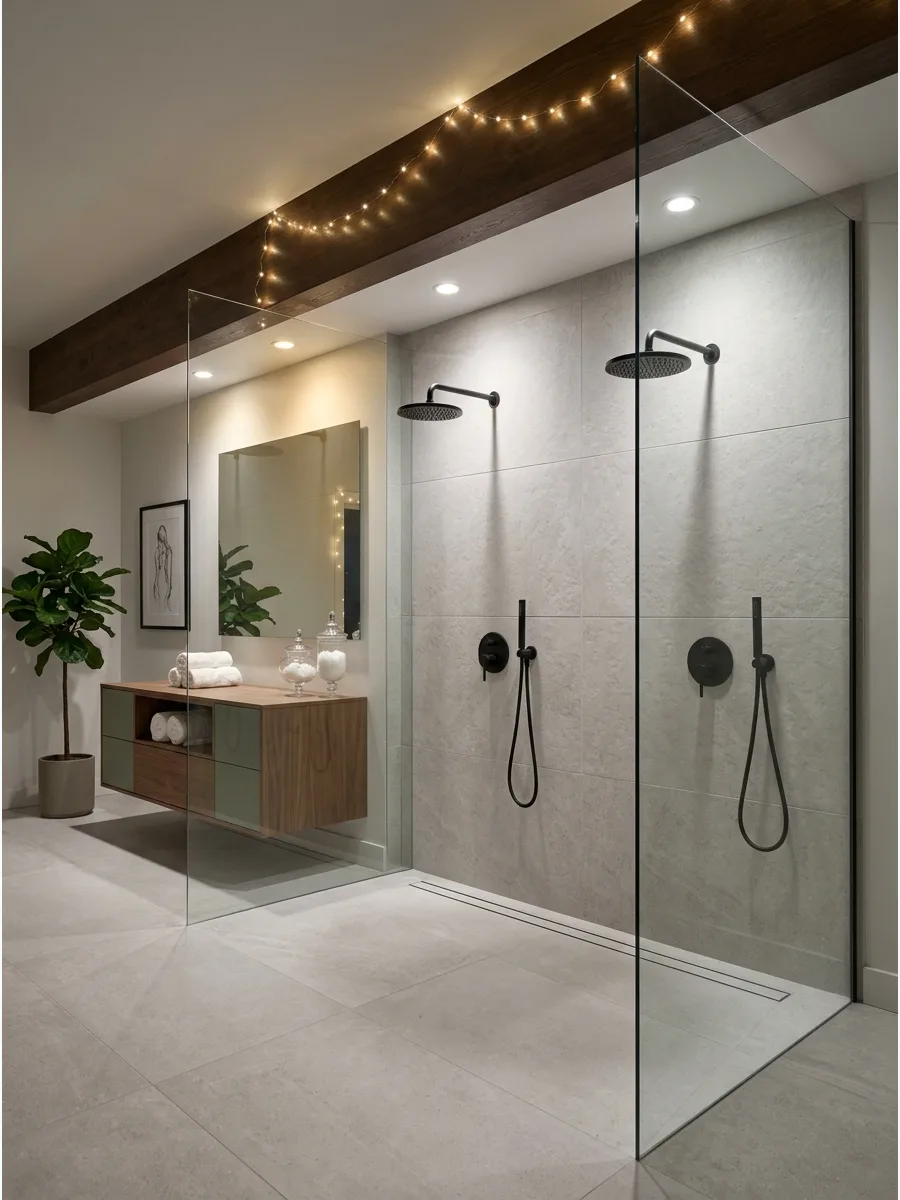
An open layout uses a single large glass panel to define the space without closing it off with a door. This design makes even a medium-sized bathroom feel twice as big.
Slope the floor toward a back wall drain to keep the rest of the bathroom floor dry and safe. It creates a seamless transition from the vanity area to the shower zone.
- Costs $1,500 to $4,000 for custom-cut tempered glass.
- Requires at least a 6-foot depth to prevent splashing into the dry zone.
- Great for universal design and aging-in-place accessibility.
Quick win: Use a textured floor tile to prevent slipping in the open transition area where water may track.
10. Wall-to-Wall Walk-In Shower
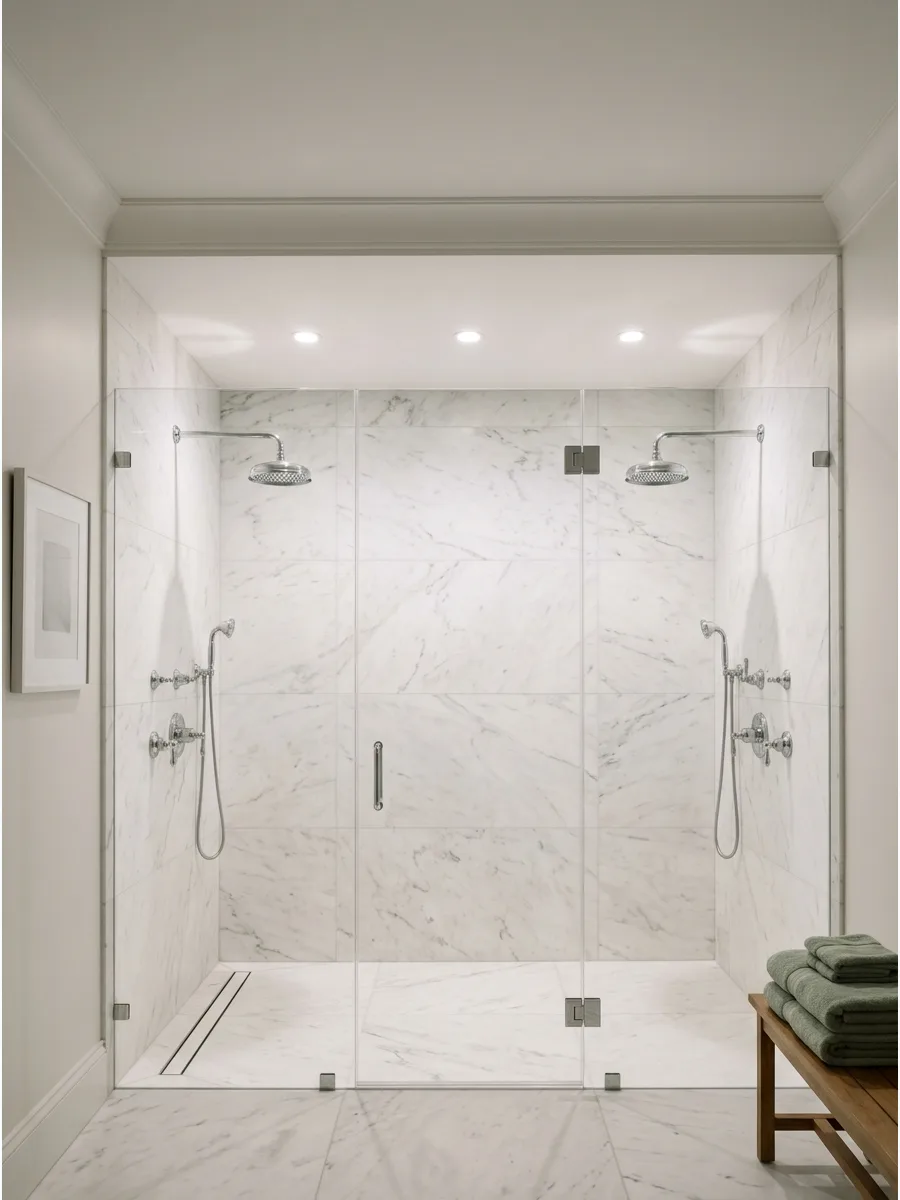
Utilizing the entire back wall of the bathroom creates a massive showering zone for two people. This is a great way to replace an old garden tub with something more functional.
Run the wall tile all the way to the ceiling to make the room feel taller and more expansive. It provides a true wet room experience that increases home resale value.
- Budget $3,000 to $7,000 for a full wall-to-wall renovation.
- Adds significant value to the primary suite for future buyers.
- Provides enough room for a built-in storage niche for each person.
Best shortcut: If you can't tile the whole wall, use a high-quality waterproof wall panel system for a similar look on a budget.
11. Long Rectangular Shower Layout
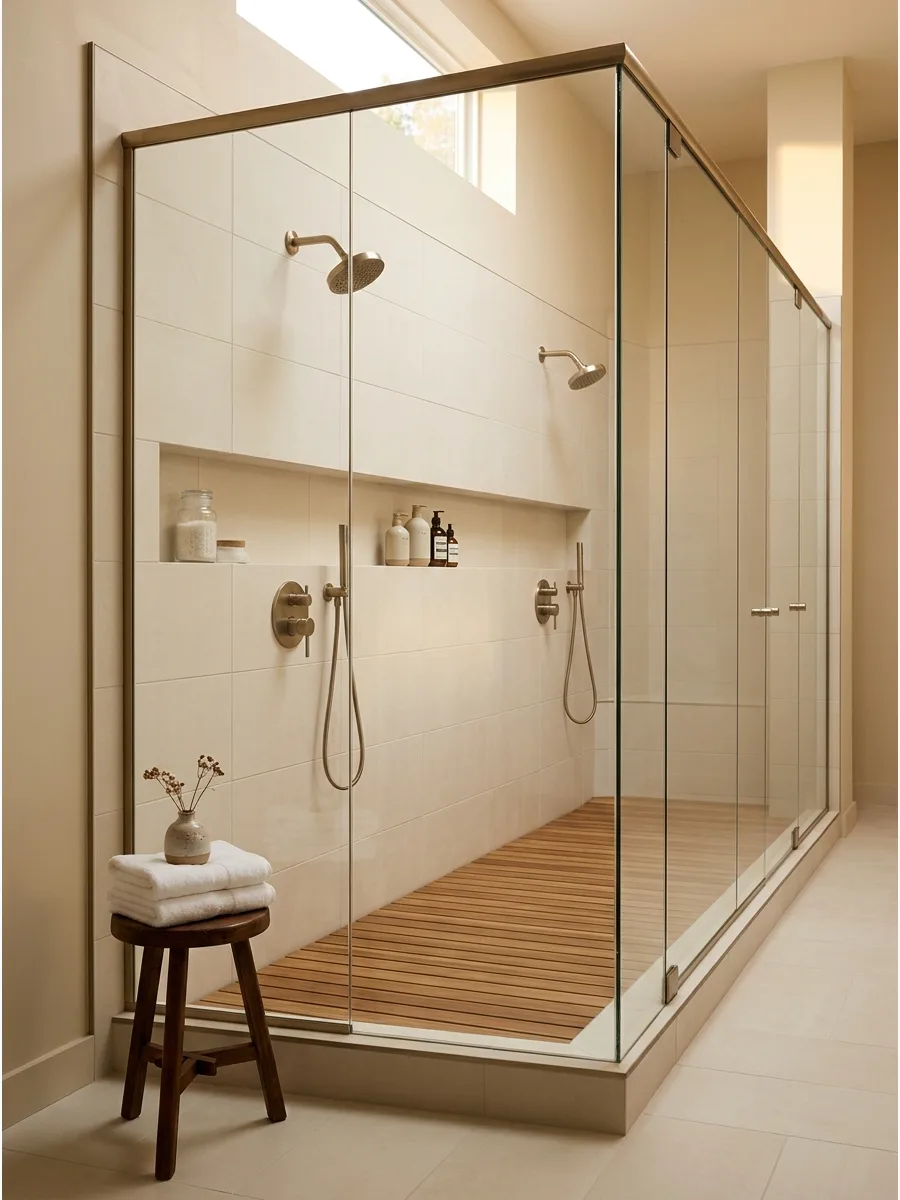
A long, narrow footprint allows two people to stand in a row without getting in each other's way. This layout is perfect for primary suites where the bathroom is long and skinny.
Install a recessed niche that runs the entire length of the back wall to hold everyone's supplies. It keeps the floor clear and the design looking sharp and uncluttered.
- Costs $2,000 to $5,000 depending on tile and plumbing choices.
- Requires at least 3 feet of width for comfortable movement.
- Use vertical tiles to emphasize the length and height of the space.
Most people skip this: Place a light fixture at each end of the rectangle so there are no dark shadows in the middle.
12. Wide Shower With Center Entry
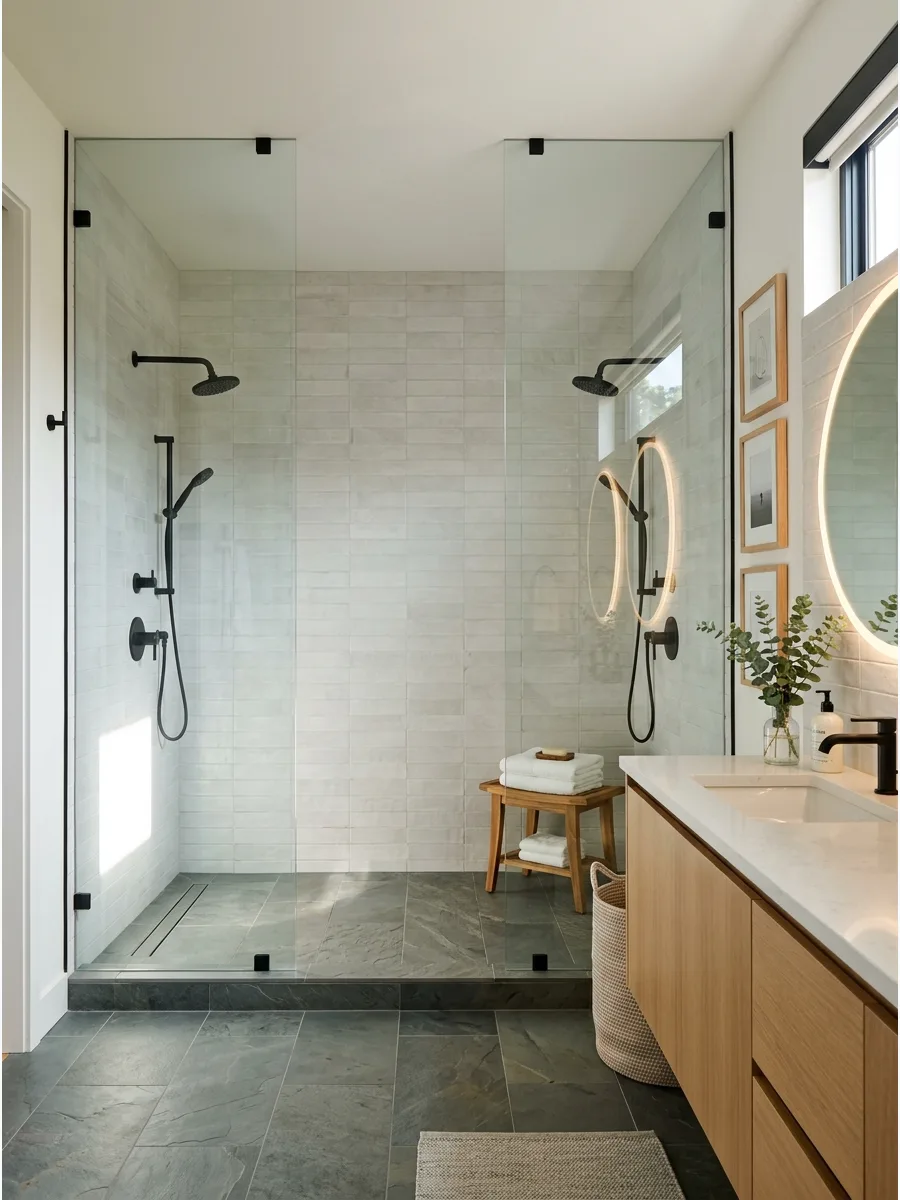
A center entrance creates two distinct wings for each person to have their own space. This symmetry is visually pleasing and keeps the wet zones tucked into the corners.
Use two separate glass doors or a single wide opening with no door for a breezy feel. It makes the shower feel like a private sanctuary for two people.
- Budget $1,800 to $3,500 for the glass and layout work.
- Requires a minimum 8-foot wide wall to work effectively.
- Perfect for bathrooms with a central window that provides light.
Quick win: Place a plush bath mat directly in front of the center entry to catch any stray drips when exiting.
13. Shower Behind a Privacy Wall
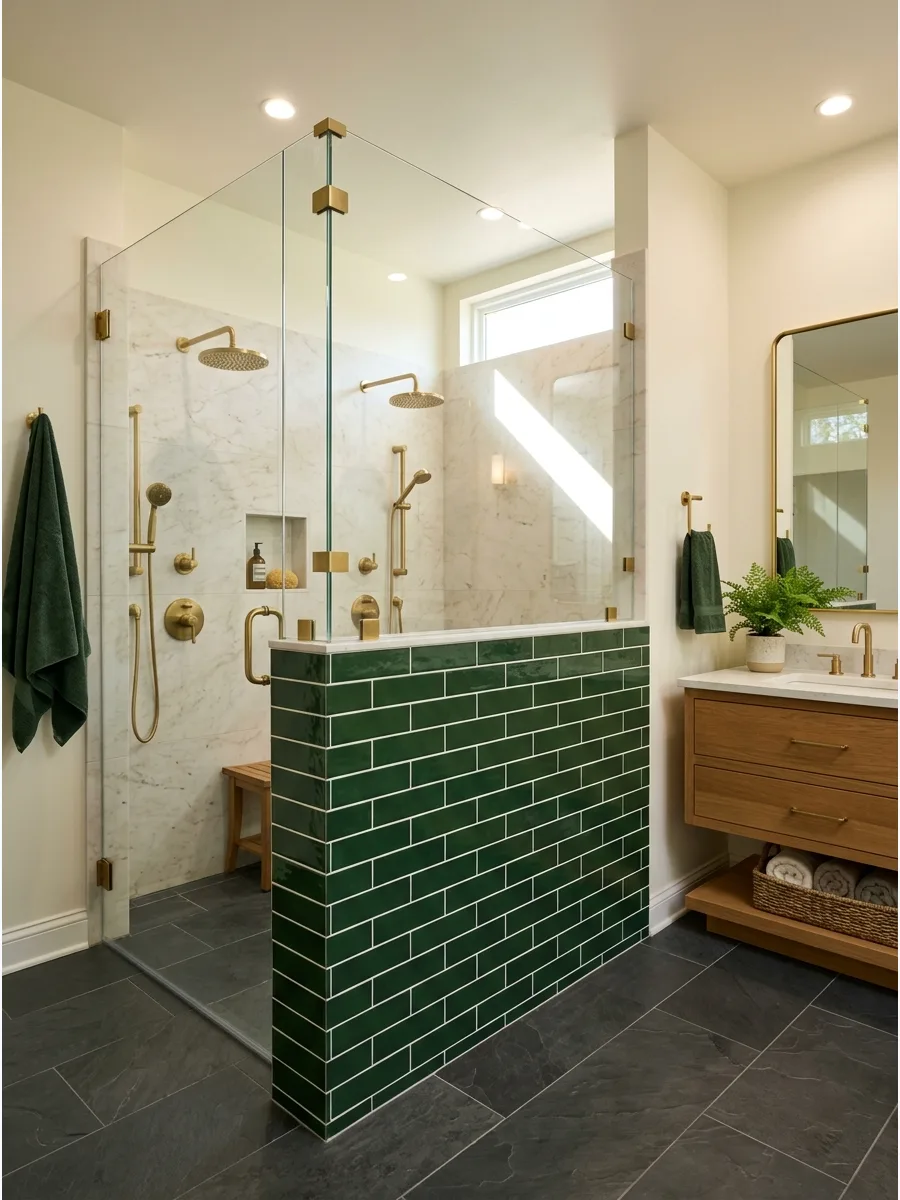
A tiled partial wall hides the shower area from the rest of the bathroom without the need for glass panels. This is a smart choice for those who want a walk-in feel but prefer not to clean glass every day.
Add a small window or glass cutout in the top of the wall to let in natural light. It provides a cozy, tucked-away feeling for the shower.
- Costs $1,000 to $2,500 for wall construction and tiling.
- Eliminates the cost of expensive frameless glass panels.
- Provides a solid surface for extra towel hooks or a robe bar.
Best shortcut: Build the wall high enough to hide the shower heads but leave 12 inches of space at the ceiling for steam to escape.
14. Walk-In Shower With Glass Divider
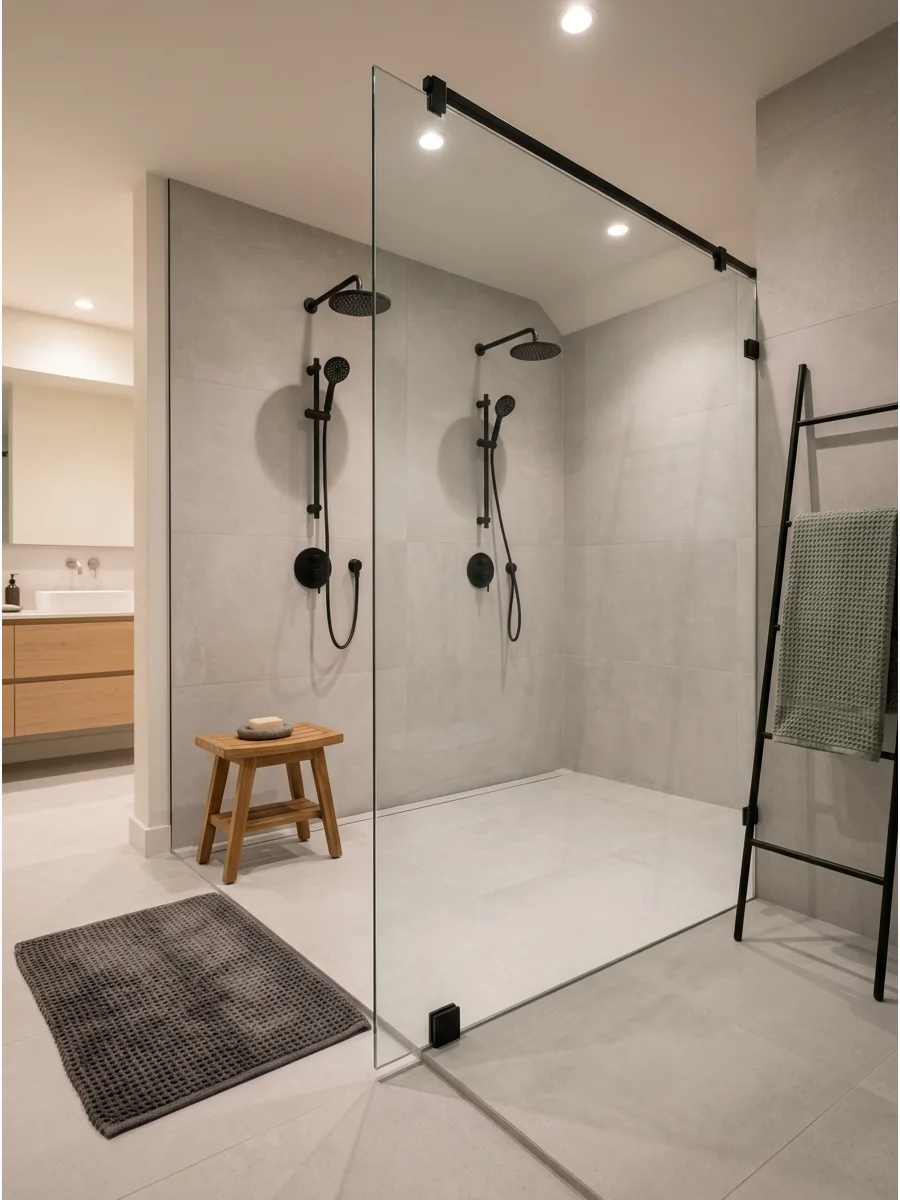
A fixed glass divider is the ultimate minimalist solution for a two-person shower. It keeps the water contained while maintaining a completely unobstructed view of the tile work.
Secure the glass with a small metal floor clip and a top support bar for maximum safety. This design is very easy to maintain since there are no hinges or rubber seals to clean.
- Budget $600 to $1,200 for the glass panel and hardware.
- Use 3/8-inch or 1/2-inch tempered glass for durability.
- Apply a water-repellent coating to the glass to reduce water spots.
Most people skip this: Choose low-iron glass to avoid the green tint that standard glass often has in a white bathroom.
15. Two Person Shower With No Door
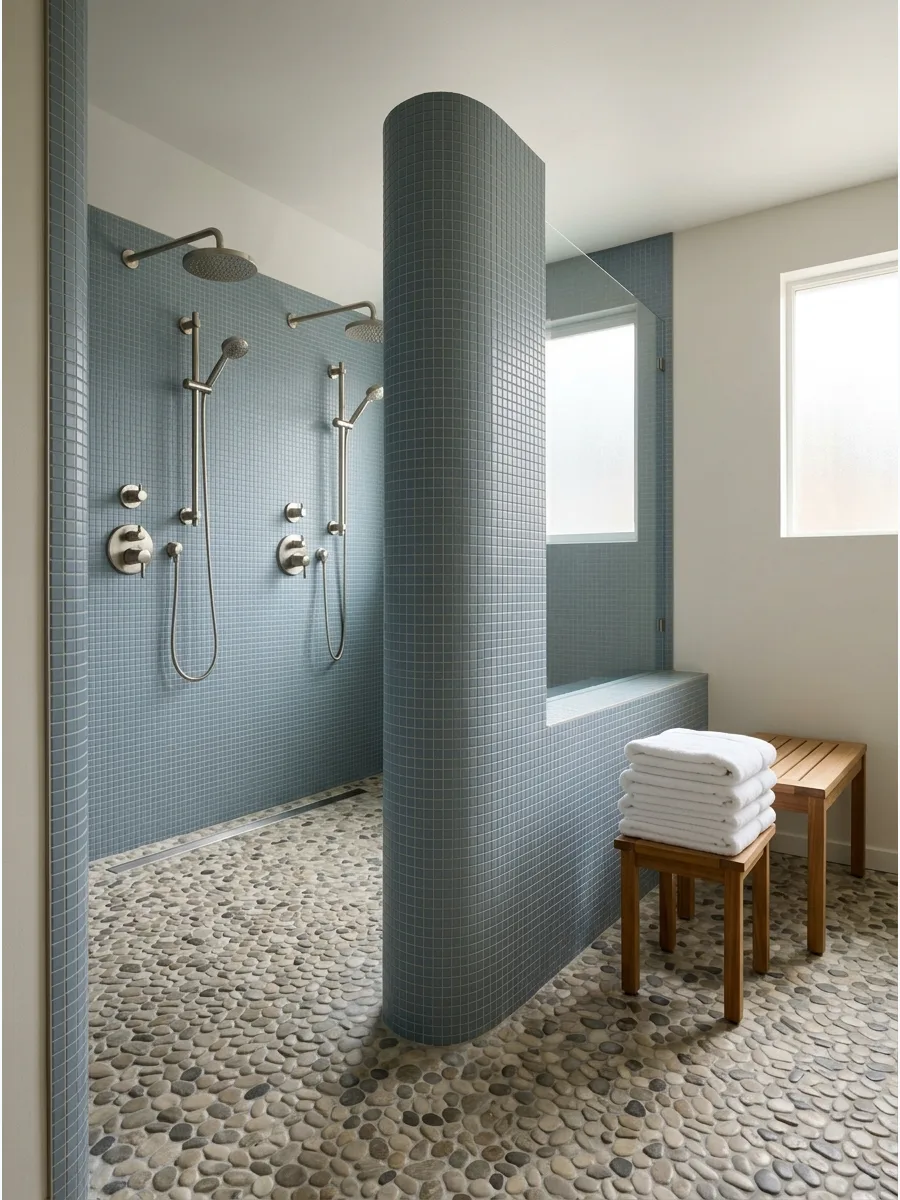
A doorless shower relies on a deep layout and a properly pitched floor to keep water where it belongs. This creates a spa-like entry that is easy to walk into and out of without any barriers.
Ensure the splash zone is at least 4 feet from the entry to avoid soaking the bath mat. It is the most accessible option for users of all ages and abilities.
- Costs $2,500 to $6,000 depending on the complexity of the drain.
- Requires a large footprint of at least 5×7 feet to work well.
- Check local codes for drainage requirements in open-concept rooms.
Quick win: Install an overhead heat lamp near the entry to stay warm while drying off outside the water spray.
16. Luxury Primary Bathroom Shower
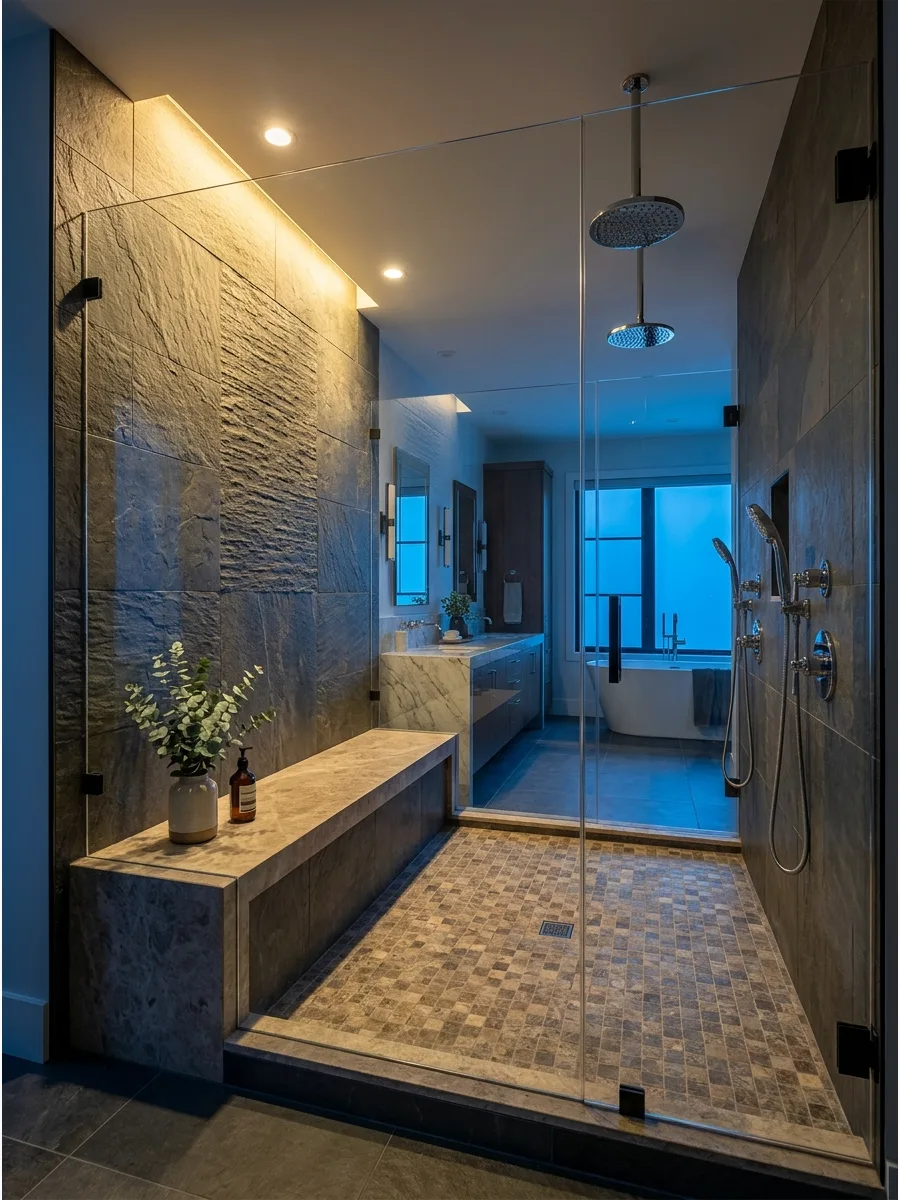
High-end main bathrooms benefit from heavy materials like stone-look porcelain tile that feels solid underfoot. Install recessed warm lighting in the ceiling to highlight the texture of the walls and create a relaxing mood. Incorporating a sturdy bench provides a place to rest and adds to the architectural feel.
Using different textures for the floor and walls keeps a large space from looking too plain.
- Stone-look porcelain tile costs $5 to $15 per square foot.
- Position warm LED pot lights directly over the shower heads and bench.
- Swap standard grout for epoxy grout to prevent staining in high-moisture zones.
Quick win: Use a dimmer switch for the shower lights to easily transition from a bright morning routine to a soft evening soak.
Curbless and Wet Room Shower Ideas
17. Curbless Two Person Shower
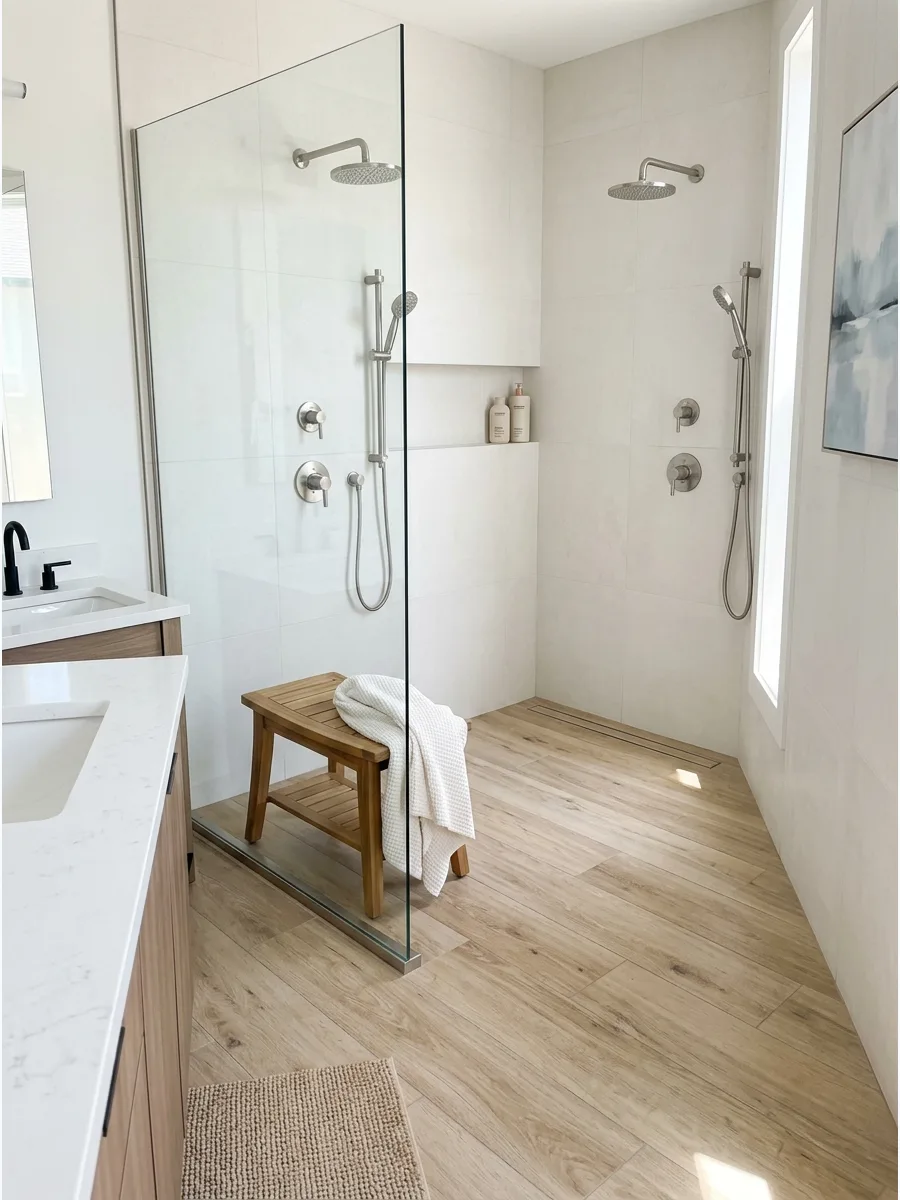
A curbless entry removes the physical barrier between the main floor and the shower zone. Ensure the subfloor is sloped correctly toward the drain to prevent water from migrating into the dry area of the bathroom. This layout makes the room feel much larger because the eye sees one continuous floor.
It is a smart choice for long-term accessibility without sacrificing style.
- Requires professional subfloor sloping which takes 2 to 3 days.
- Align floor tiles perfectly at the threshold for a high-end look.
- Best for large bathrooms where the splash zone is far from the door.
Most people skip this: Check that your bathroom door has enough clearance to swing over the new floor height if you are tiling over old layers.
18. Wet Room Two Person Shower
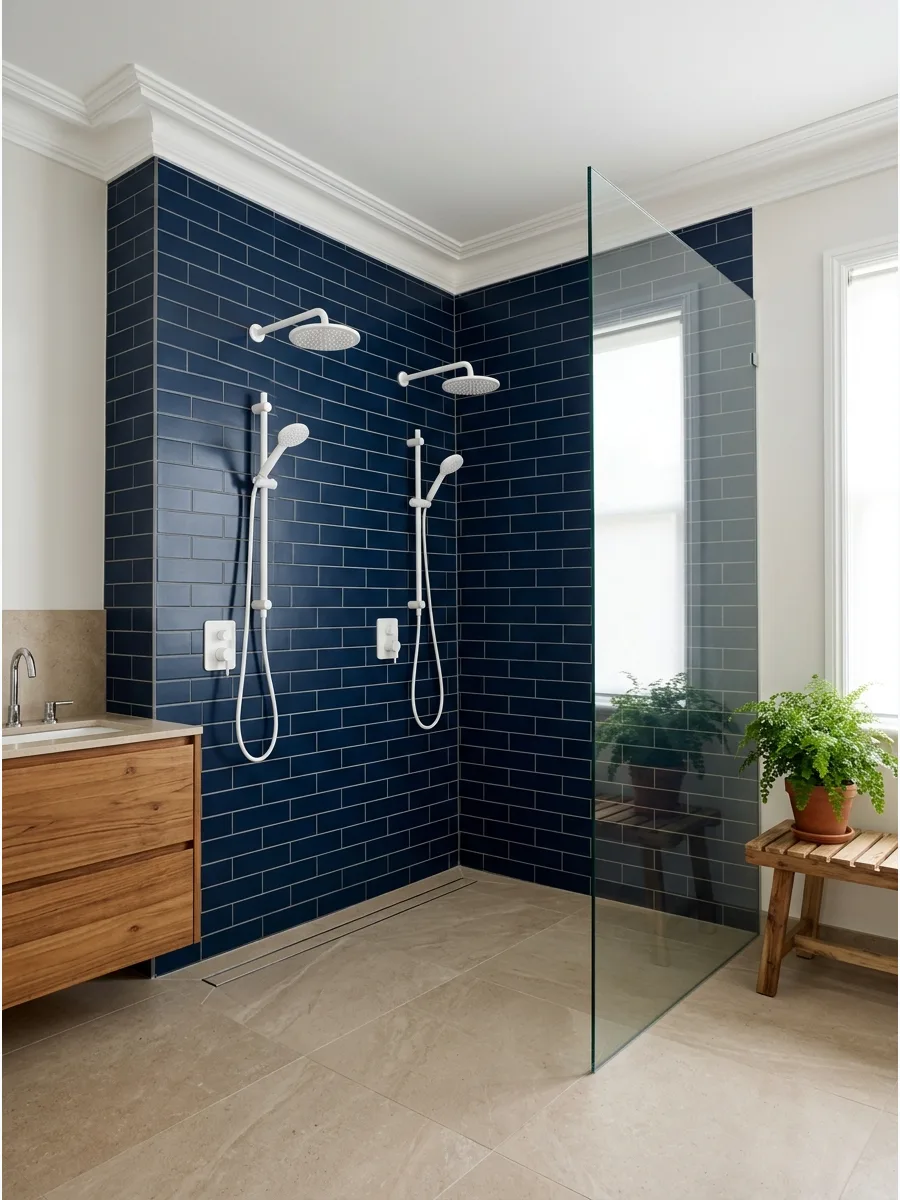
A full wet room layout means the entire bathroom floor is waterproofed and tiled. Use a single glass partition to separate the dual shower heads from the vanity while keeping the rest of the space open. This setup is incredibly easy to clean since there are no tight corners or tracks.
It works best in rooms with high ceilings to allow steam to dissipate quickly.
- Full waterproofing for a wet room adds $2,000 to $4,000 to a remodel.
- Mount two shower heads at least 4 feet apart for personal space.
- Use slip-resistant tiles with a high DCOF rating for safety.
Best shortcut: Install a wall-mounted vanity in a wet room to make floor cleaning faster and prevent water damage to cabinet bases.
19. Tub and Double Shower Wet Room
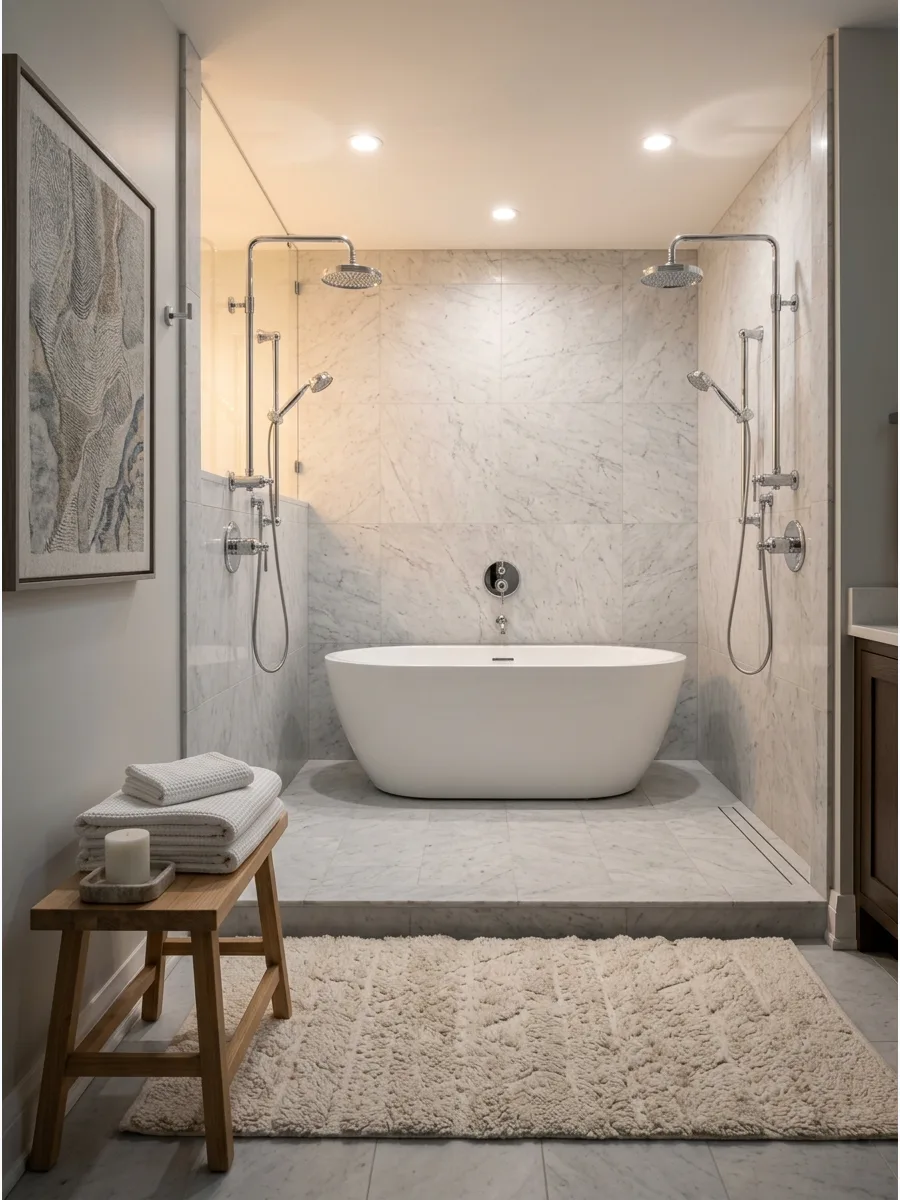
Placing a freestanding tub and a two-person shower in the same waterproof zone creates a dedicated spa area. Set the tub at the far end of the wet zone so it stays dry while the shower heads are in use. This layout saves space by eliminating the need for separate glass enclosures.
It creates a focal point that feels intentional and high-end.
- Allow at least 60 square feet for a comfortable tub and shower combo.
- Install the tub filler on the wall to save floor space.
- Use a large-format tile to reduce the number of grout lines in the wet zone.
Most people skip this: Make sure the floor can support the weight of a filled tub plus two people before starting the renovation.
20. Open Shower With Linear Drain
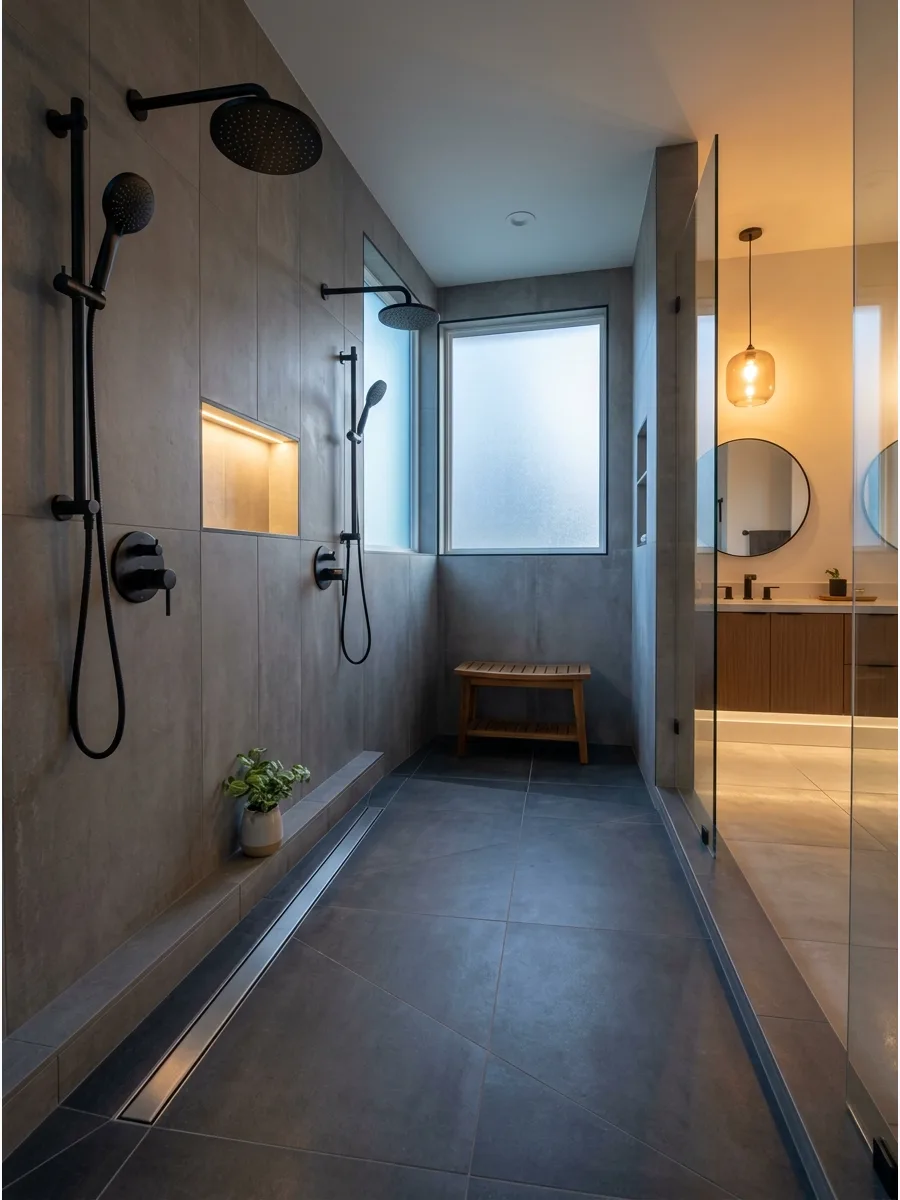
Linear drains are more efficient at catching water than traditional center drains. Install the drain along the back wall or at the entrance to keep the shower floor clean and modern. Because they only require the floor to slope in one direction, you can use much larger tiles.
This prevents the 'choppy' look that small mosaic tiles often create.
- Linear drains start around $150 for stainless steel models.
- Position the drain against the wall to avoid stepping on it while showering.
- Choose a tile-in grate to make the drain almost invisible.
Quick win: Buy a linear drain with a removable hair strainer to prevent clogs in a high-use two-person shower.
21. Doorless Wet Room Shower
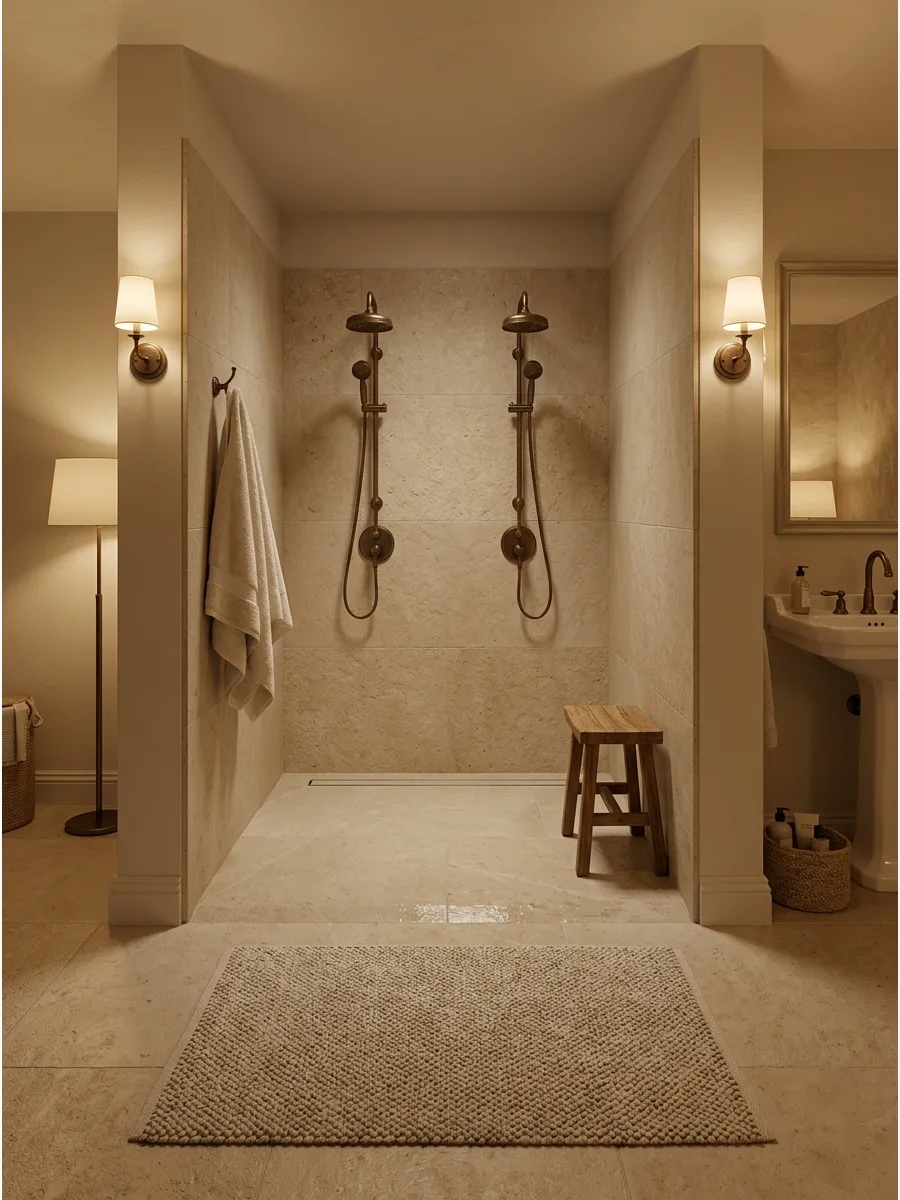
Going doorless removes the hassle of cleaning water spots off glass panels. Slope the floor toward the back wall to ensure water never reaches the dry part of the bathroom. This design relies on a deep layout to keep splashes contained.
It feels incredibly airy and makes the morning routine feel less cramped.
- Design the shower depth to be at least 6 feet to prevent splashing.
- Use waterproof plaster or tile on all walls to handle high humidity.
- Add a heat lamp near the drying area since doorless showers can feel drafty.
Best shortcut: Use a rain shower head that drops water straight down to minimize the splash radius in a doorless setup.
22. Spa Wet Room With Bench
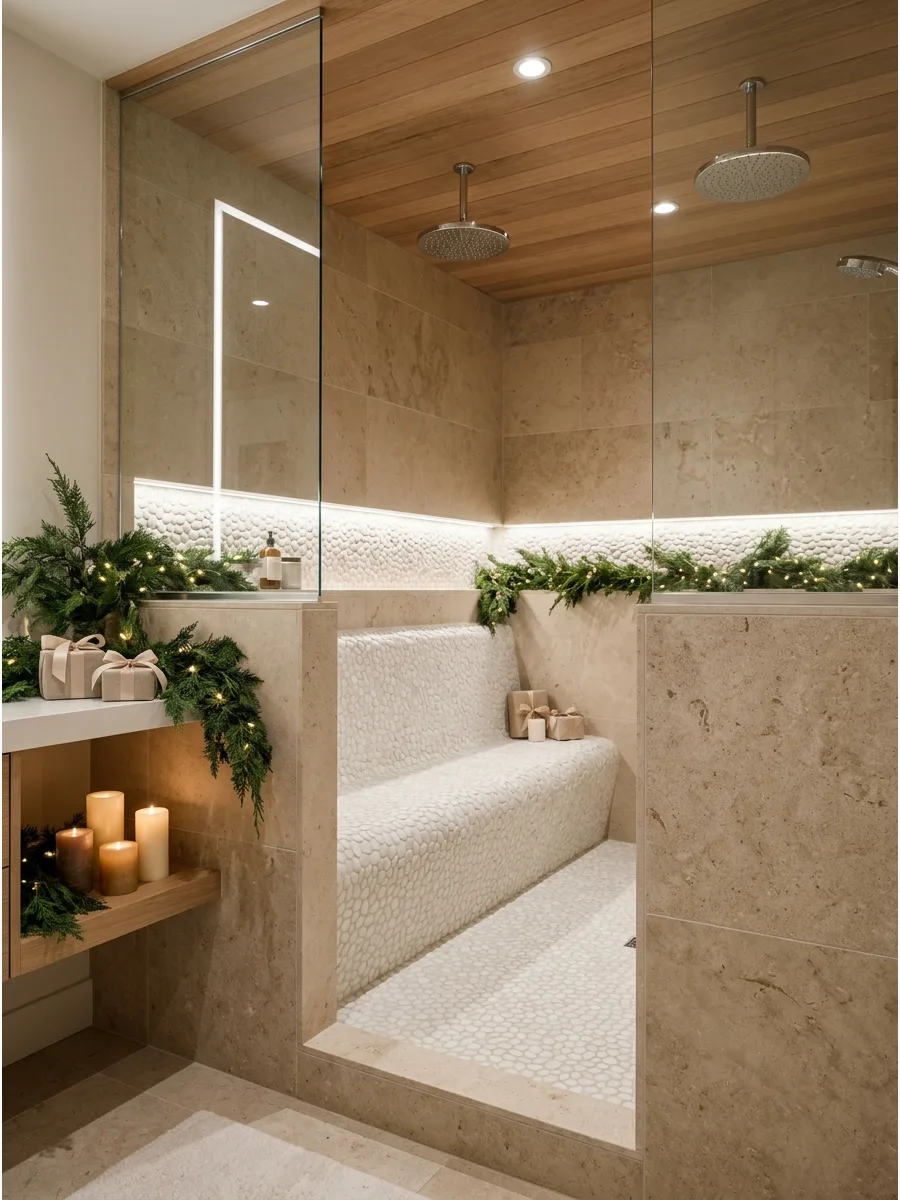
A built-in bench creates a functional spot for grooming or relaxing under the water. Cover the bench in the same pebble tile as the floor to create a cohesive spa-like texture. Pair this with dual rainfall heads to mimic a luxury hotel experience.
Warm stone tiles help retain heat, making the shower feel cozy even in winter.
- Pebble tile provides natural slip resistance and foot massage.
- Ensure the bench has a slight 1/4-inch pitch so water drains off the seat.
- Mix stone textures to keep the monochromatic look interesting.
Quick win: Install a handheld sprayer next to the bench to make it easy to rinse off the seat after every use.
23. Barrier-Free Double Shower
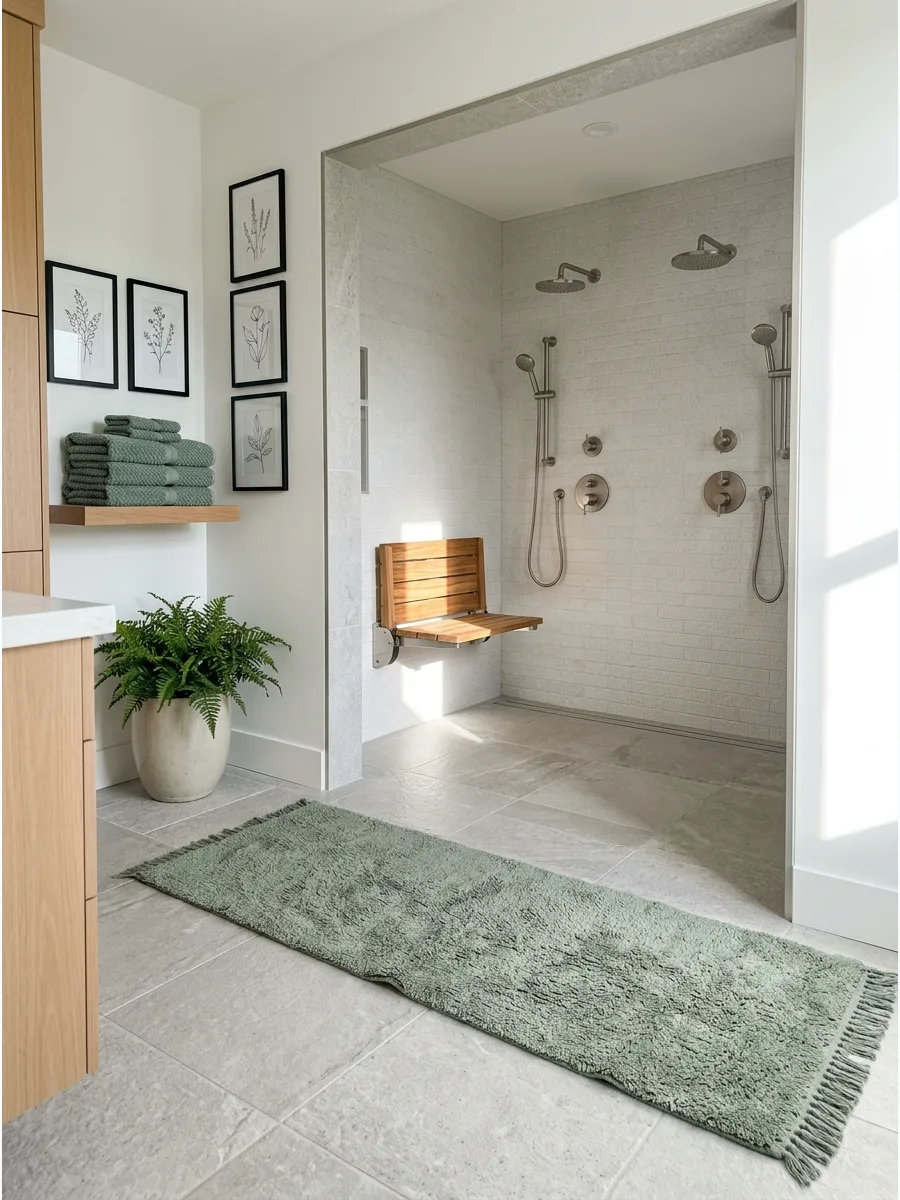
A barrier-free shower uses a wide opening and a flat floor to make the space accessible for everyone. Include a fold-down teak seat if you want the option of a bench without taking up permanent floor space. This layout is perfect for two people who need extra room to move around.
It looks modern while being incredibly practical for long-term home value.
- Teak seats are durable and naturally resistant to rot and mold.
- Keep the entry width at least 36 inches for full accessibility.
- Use matte-finish tiles to provide the best grip for bare feet.
Most people skip this: Install grab bars that match your shower hardware finish so they look like a design choice rather than an afterthought.
24. Continuous Floor Tile Shower
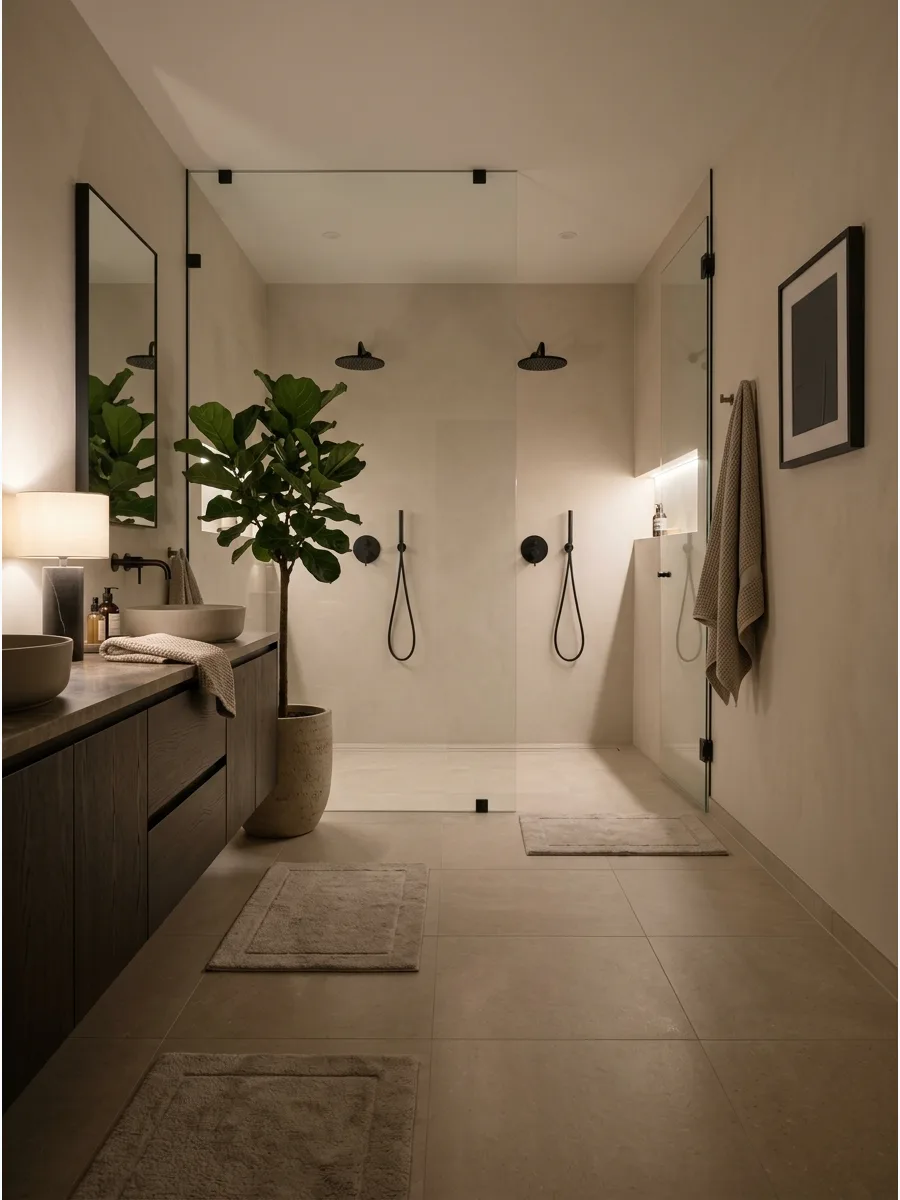
Running the same tile from the vanity all the way through the shower creates a high-end, seamless look. Avoid using transition strips or different colors to keep the floor plane looking as long as possible. This trick is especially effective in smaller bathrooms to trick the eye into seeing more square footage.
It works best with large-format tiles that have minimal grout lines.
- Large tiles (24×24 or 12×24) make a space feel modern and clean.
- Ensure the tile is rated for wet areas to avoid slips.
- Use a matching grout color to make the seams disappear.
Best shortcut: Order 15% extra tile for a continuous floor to ensure the patterns align perfectly across the threshold.
Two Person Shower With Bench Ideas
25. Built-In Bench Double Shower
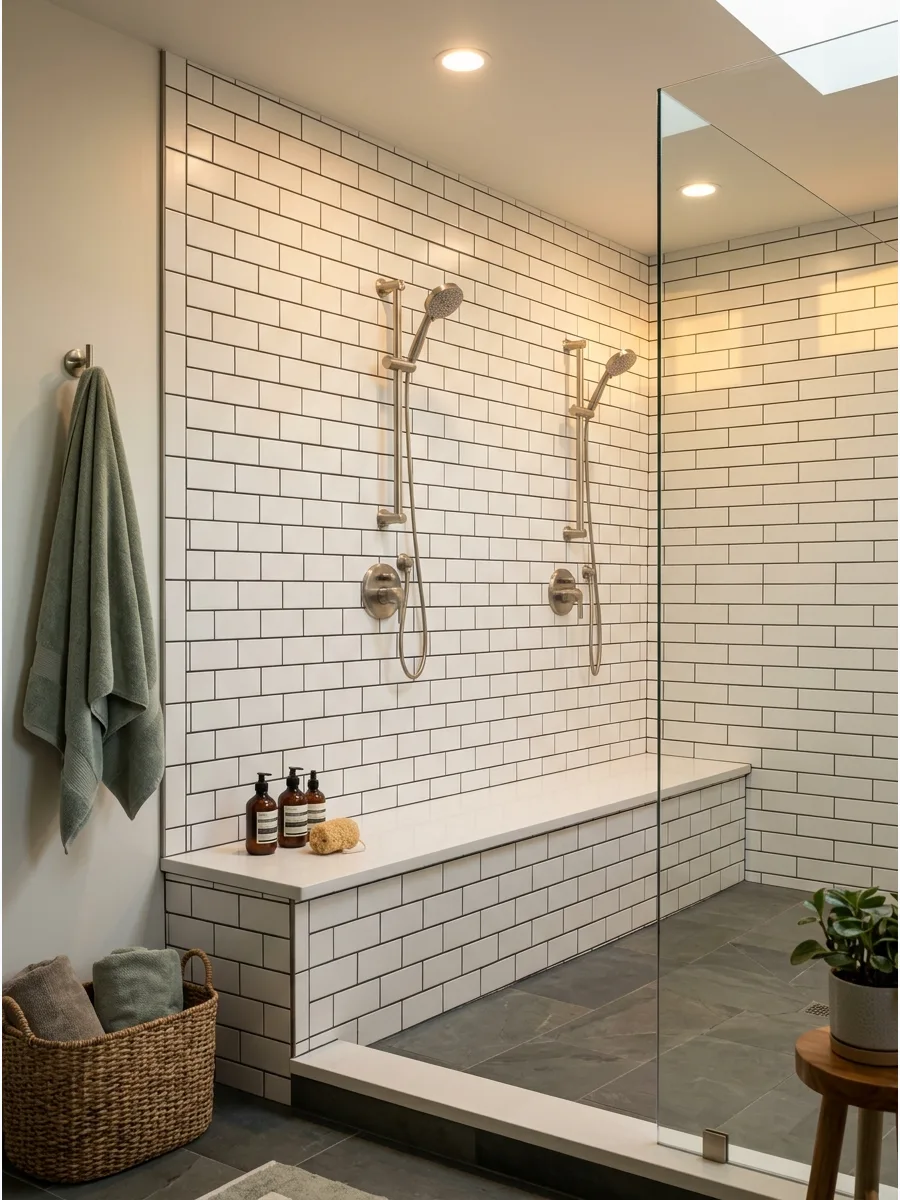
A long built-in bench provides a custom, architectural look that pre-fabricated seats cannot match. Run the bench along the longest wall to provide seating for two people or extra space for toiletries. Tiling the bench to match the walls makes it feel like part of the room's structure.
It is a solid choice for those who want a permanent, sturdy feature.
- A standard bench height is 17 to 19 inches from the floor.
- Use a solid stone slab for the bench top to avoid grout lines on the seat.
- Plan the bench location away from the direct spray to keep it comfortable.
Most people skip this: Insulate the inside of a built-in bench during construction so the stone doesn't feel freezing cold when you sit down.
26. Floating Bench Shower
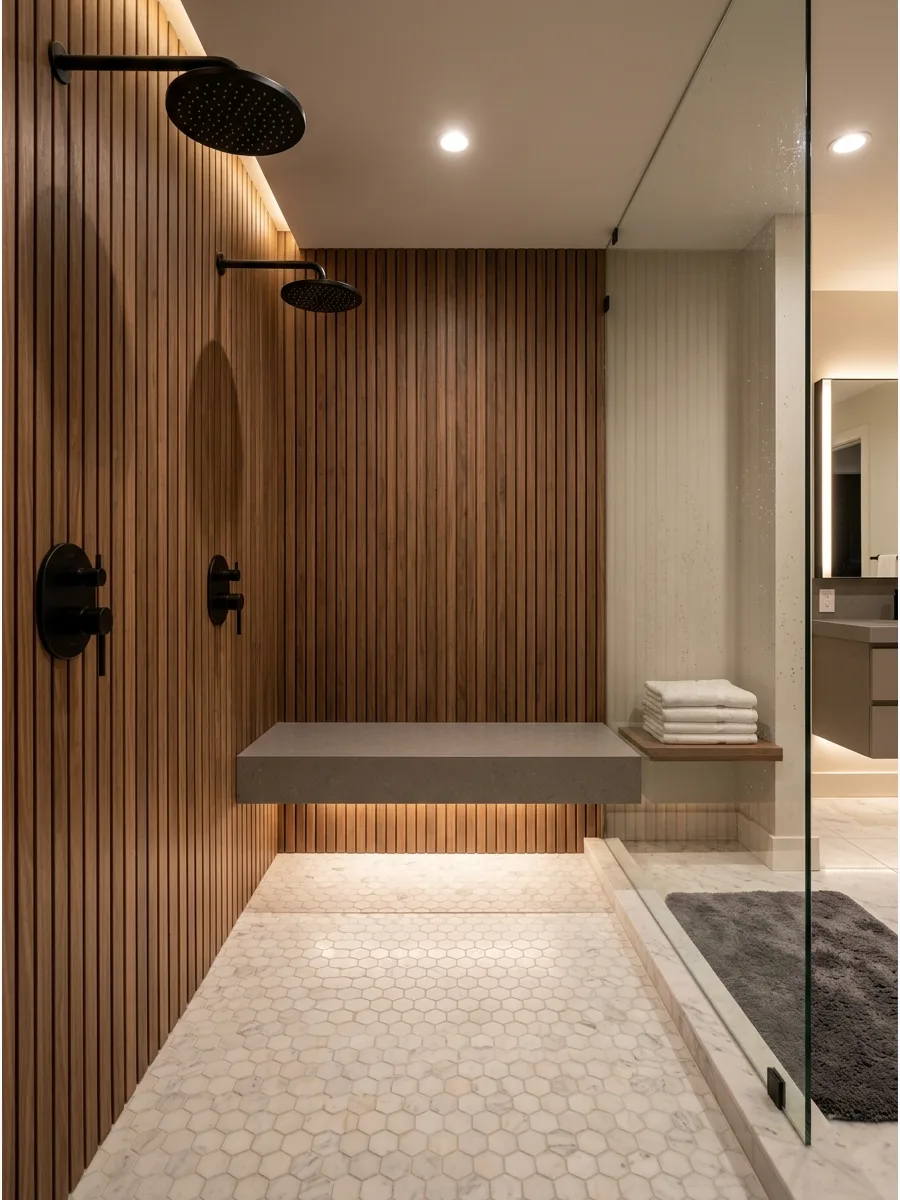
A floating bench keeps the floor visible, which makes a shower feel more open and less cluttered. Use a thick slab of quartz or granite and mount it with heavy-duty hidden brackets for a clean look. This style is perfect for modern bathrooms with minimalist fixtures.
It also makes cleaning the shower floor much easier since there are no legs in the way.
- Hidden brackets must be anchored directly into the wall studs.
- Quartz is a non-porous material that is excellent for wet environments.
- Leave at least 12 inches of clearance under the bench for easy floor cleaning.
Quick win: Match the floating bench material to your vanity countertop for a professionally designed, coordinated look.
27. Corner Bench Two Person Shower
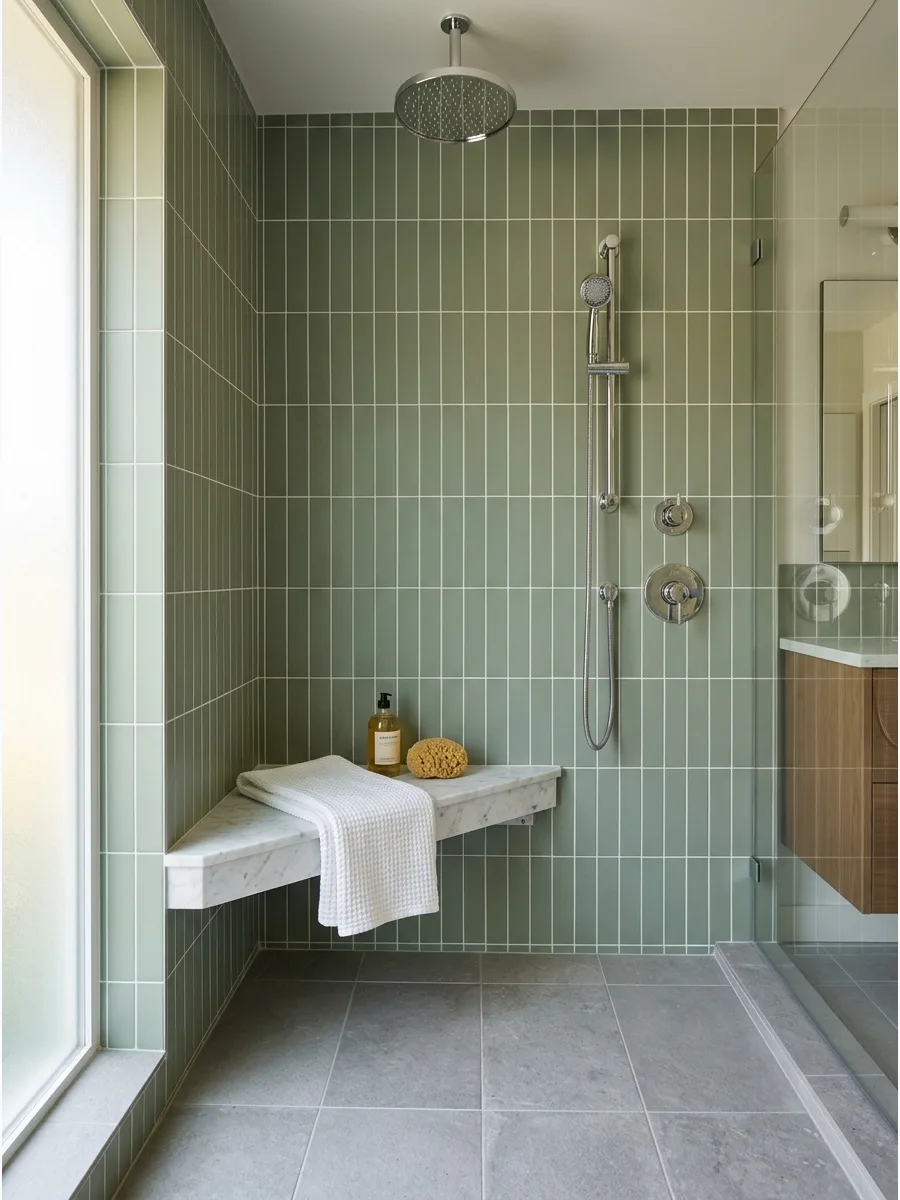
In showers where floor space is at a premium, a corner bench adds function without blocking the walkway. Tuck the bench into the corner furthest from the entry to maximize the standing area for two people. This is a great spot to prop a foot or store a few daily essentials.
It keeps the center of the shower clear for movement.
- Corner benches are easy to retro-fit during a tile renovation.
- Marble or granite remnants from a local shop are often enough for a corner seat.
- Ensure the corner is waterproofed twice as heavily before the seat goes in.
Best shortcut: Buy a pre-sloped corner bench form to ensure water never pools in the back corner of the seat.
28. Long Bench Between Two Shower Heads
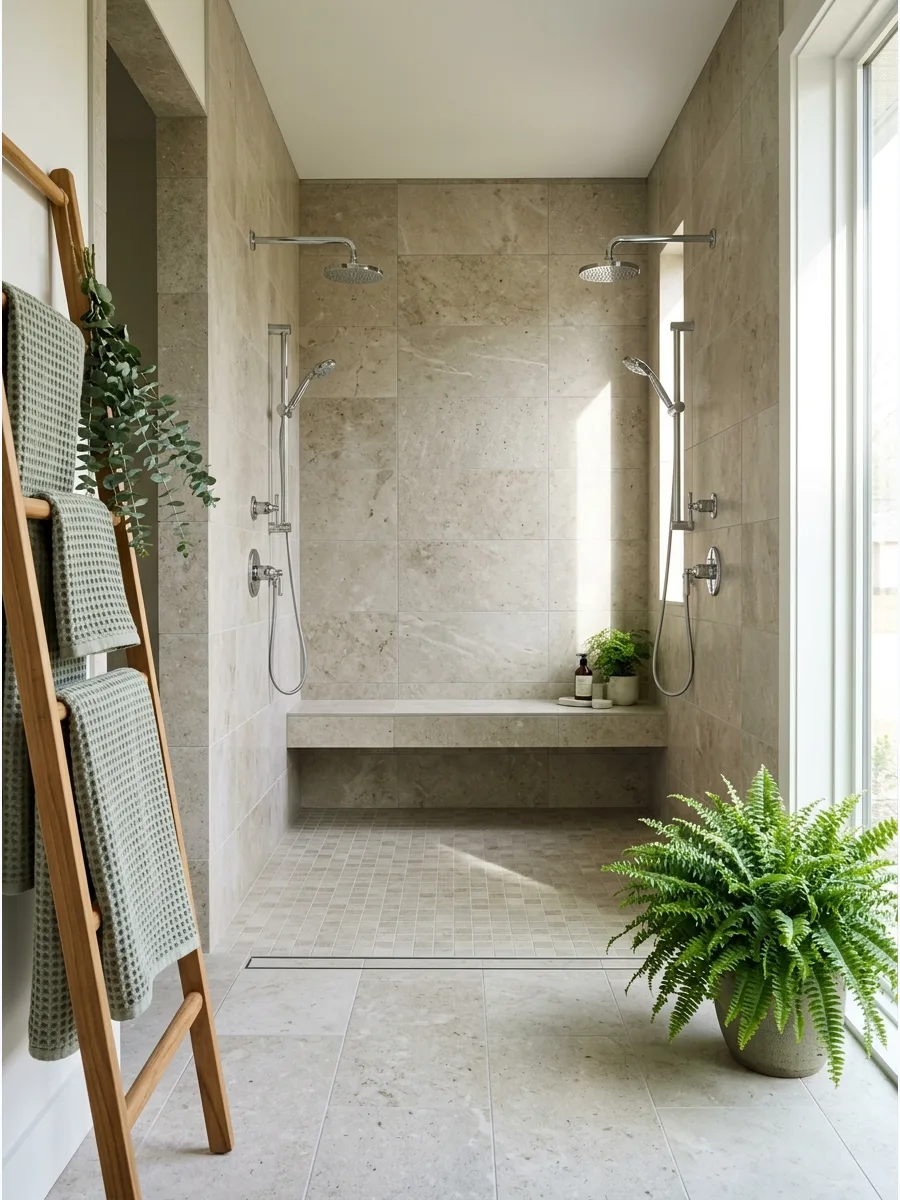
Centering a bench between two shower zones creates a symmetrical and balanced layout. Place the temperature controls within reach of the bench so you can adjust the water without standing up. This setup feels like a luxury hotel and provides a shared space for both people.
It works best in long, rectangular shower configurations.
- Allows for a 5-foot to 6-foot bench length in most standard primary bathrooms.
- Symmetry makes the bathroom feel more organized and high-end.
- Install a handheld wand on at least one side for maximum versatility.
Most people skip this: Ensure the plumbing valves are installed at the same height on both sides for visual balance.
29. Stone Bench Walk-In Shower
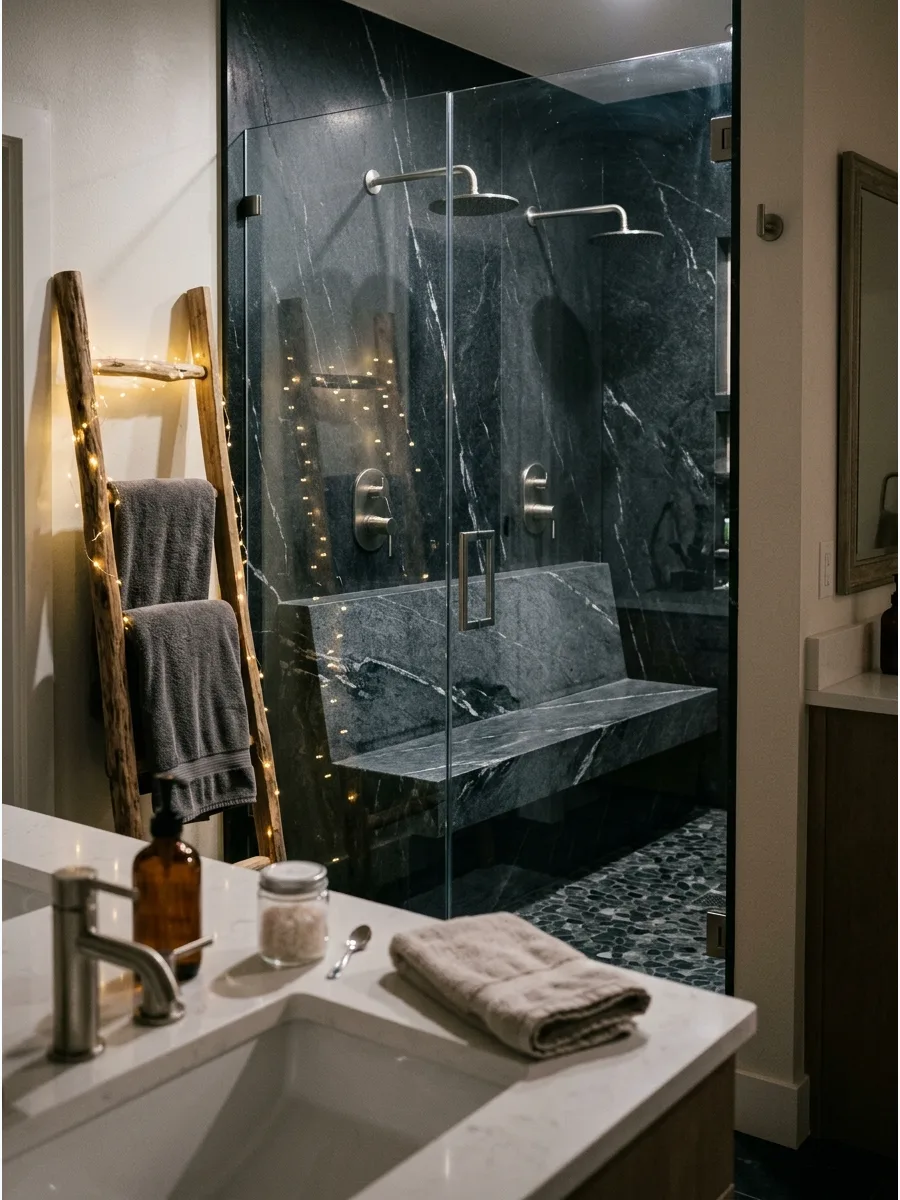
Using large stone slabs for both the walls and the bench creates a seamless, monolithic look. Choose a stone with bold veining to make the bench look like a piece of sculpture within the room. This eliminates almost all grout lines, which is the best way to reduce mold growth.
It is a high-end choice that makes a bold design statement.
- Natural stone slabs require sealing every 6 to 12 months.
- Darker stones hide soap scum better than bright white marble.
- Professional installation is required due to the weight of the stone slabs.
Quick win: Ask your stone fabricator to 'bookmatch' the veins so the pattern flows from the wall right onto the bench seat.
30. Bench With Hidden Niche Above
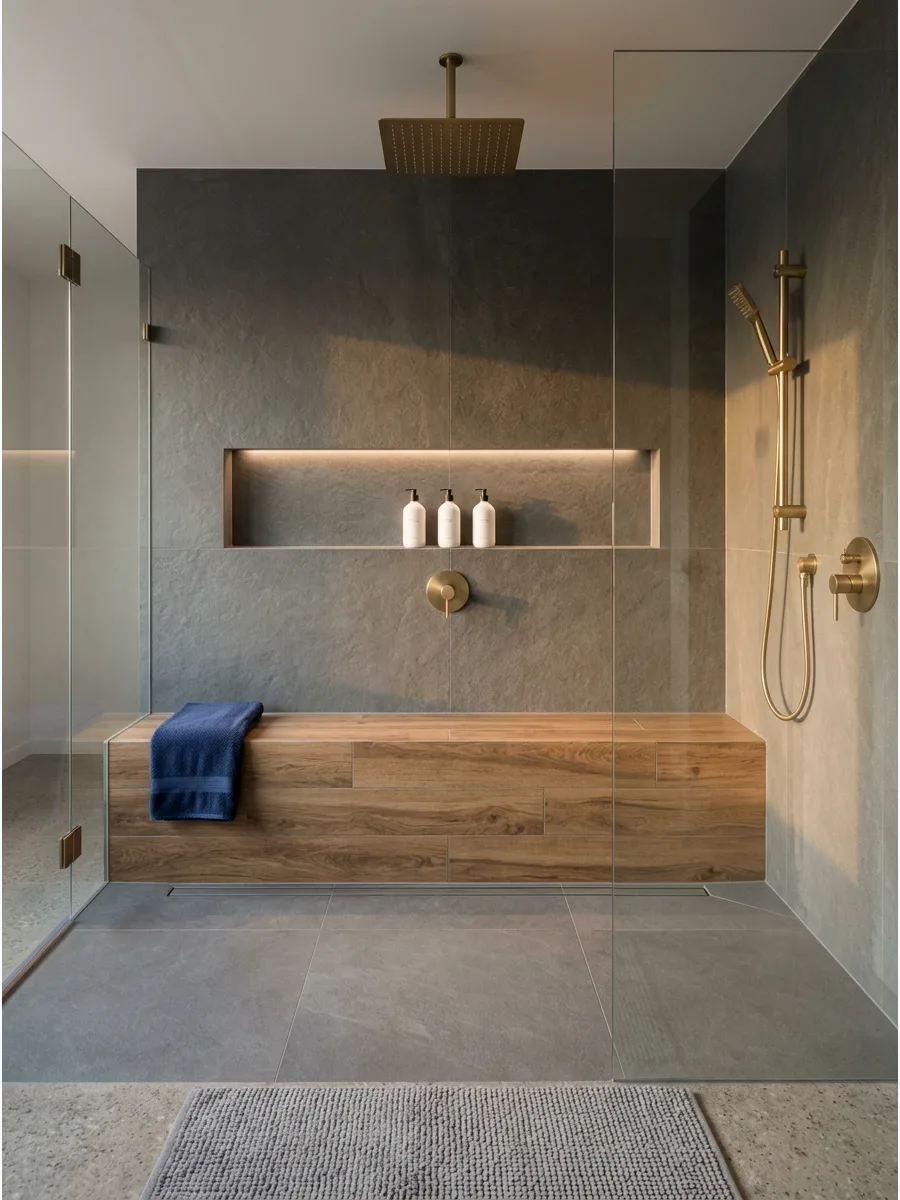
Recessing a niche directly above the bench keeps shampoo and soap within easy reach but out of sight.
Design the niche to be long and horizontal to match the lines of the bench below. This prevents bottles from cluttering the floor or the seat of the bench. It makes the shower look tidy and professionally organized.
- Install the niche about 10 inches above the bench seat for easy access.
- Use a contrasting tile inside the niche to add a pop of color.
- Slope the bottom ledge of the niche slightly so water doesn't sit in the corners.
Best shortcut: Use uniform pump bottles for your soaps to make even a simple niche look like a high-end spa display.
31. Spa Bench With Rainfall Shower
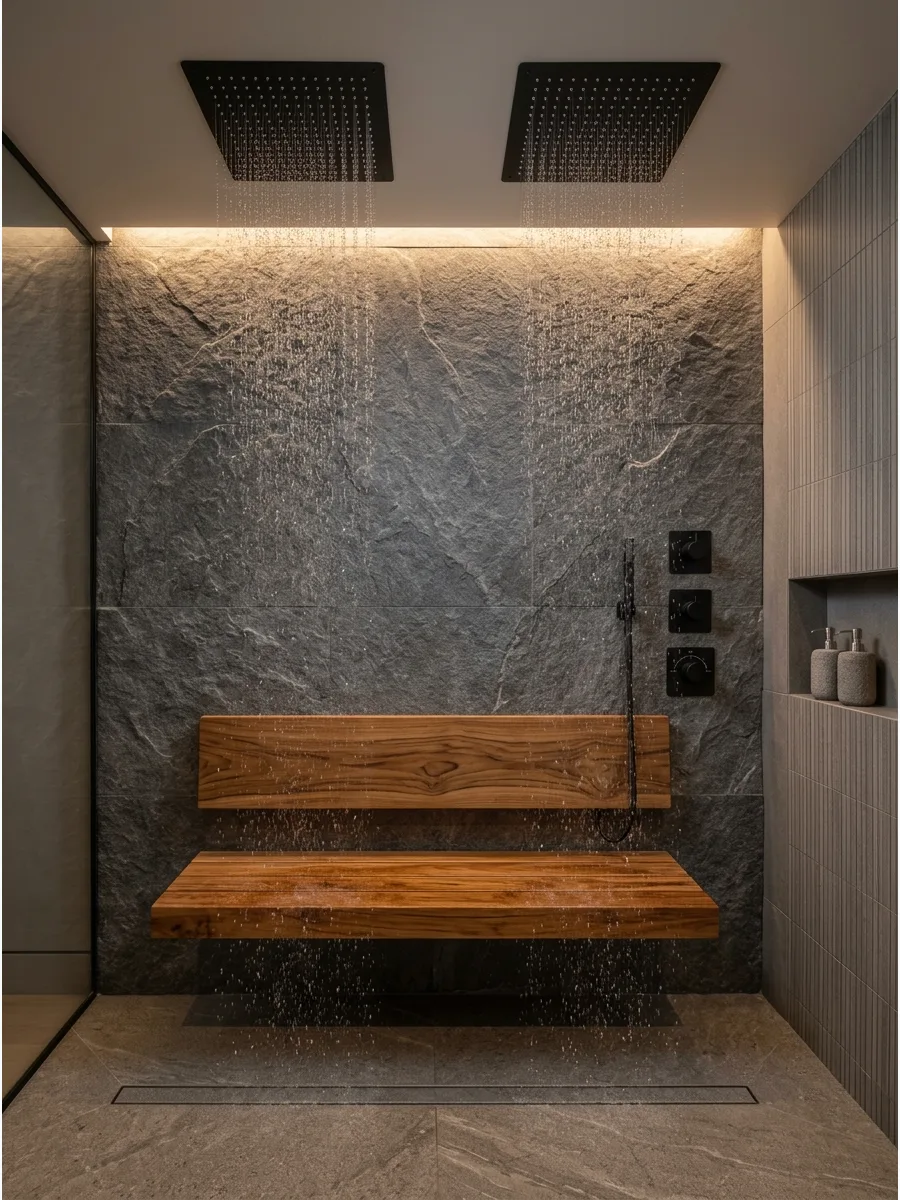
Combining a sturdy bench with overhead rainfall fixtures creates a dedicated zone for relaxation. This setup allows one person to sit while the other uses the space, making the routine feel less rushed.
Install the rainfall heads directly centered over the seating area to maximize the steam-room effect. A bench should be at least 12 inches deep to be truly comfortable for sitting.
- $500 – $1,500 budget for materials.
- Mount rainfall heads 84 inches from the floor for best clearance.
- Use teak or stone for the bench surface to resist moisture.
Most people skip this: Ensure the ceiling is sloped slightly toward the drain if using multiple rainfall heads to prevent pooling.
32. Curbless Shower With Bench and Grab Bar
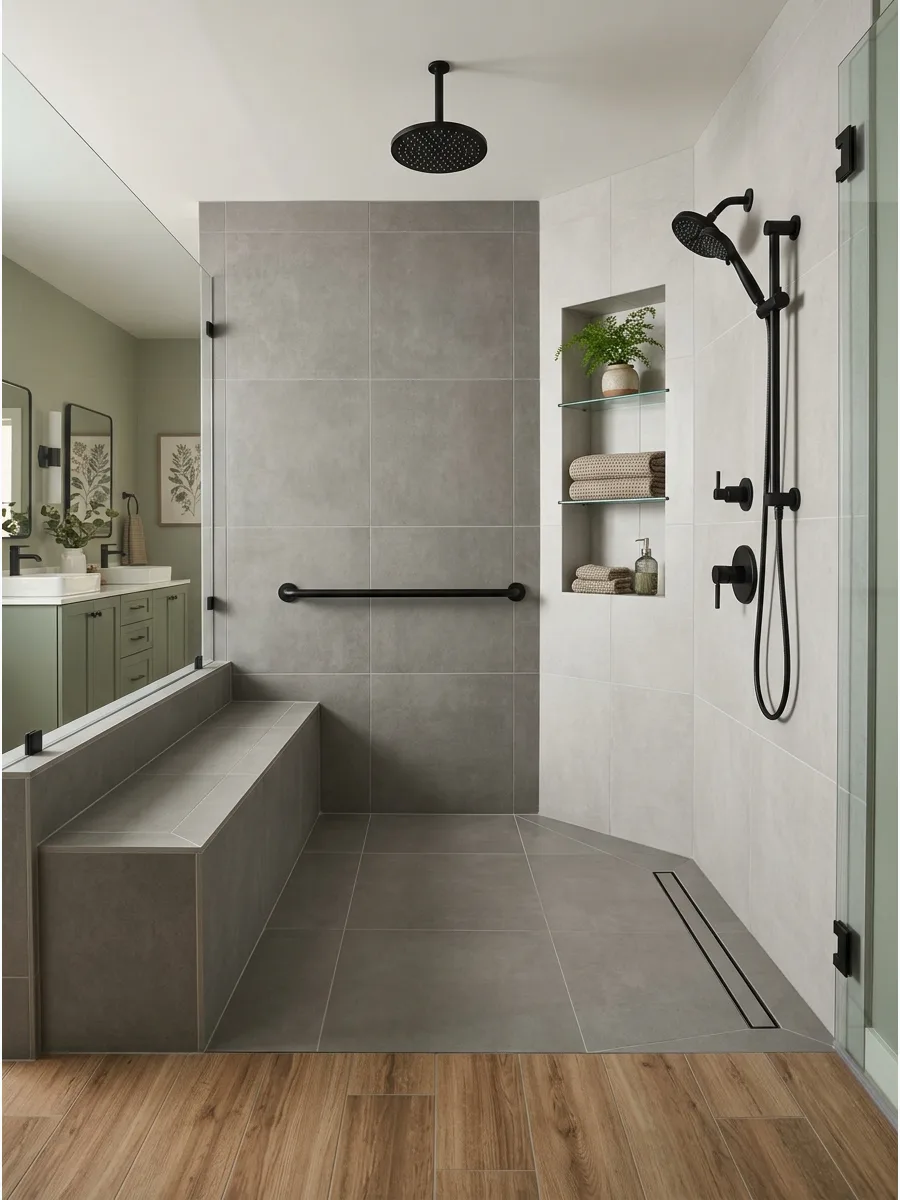
A curbless entry with a built-in bench and a sleek grab bar ensures the space is accessible for everyone without looking institutional. Choosing a grab bar that matches the finish of the shower heads keeps the design cohesive.
Position the grab bar horizontally along the bench wall at a height of 33 to 36 inches for the best support. Curbless designs require a recessed subfloor to achieve a perfectly flat transition.
- $2,000 – $4,000 for specialized floor prep.
- Place the bar within easy reach of the bench.
- Match the bar finish to the shower valves for a custom look.
Quick win: Buy a grab bar that doubles as a towel rack or a small shelf to maximize function in tight spaces.
Tile and Material Two Person Shower Ideas
33. Large-Format Tile Double Shower
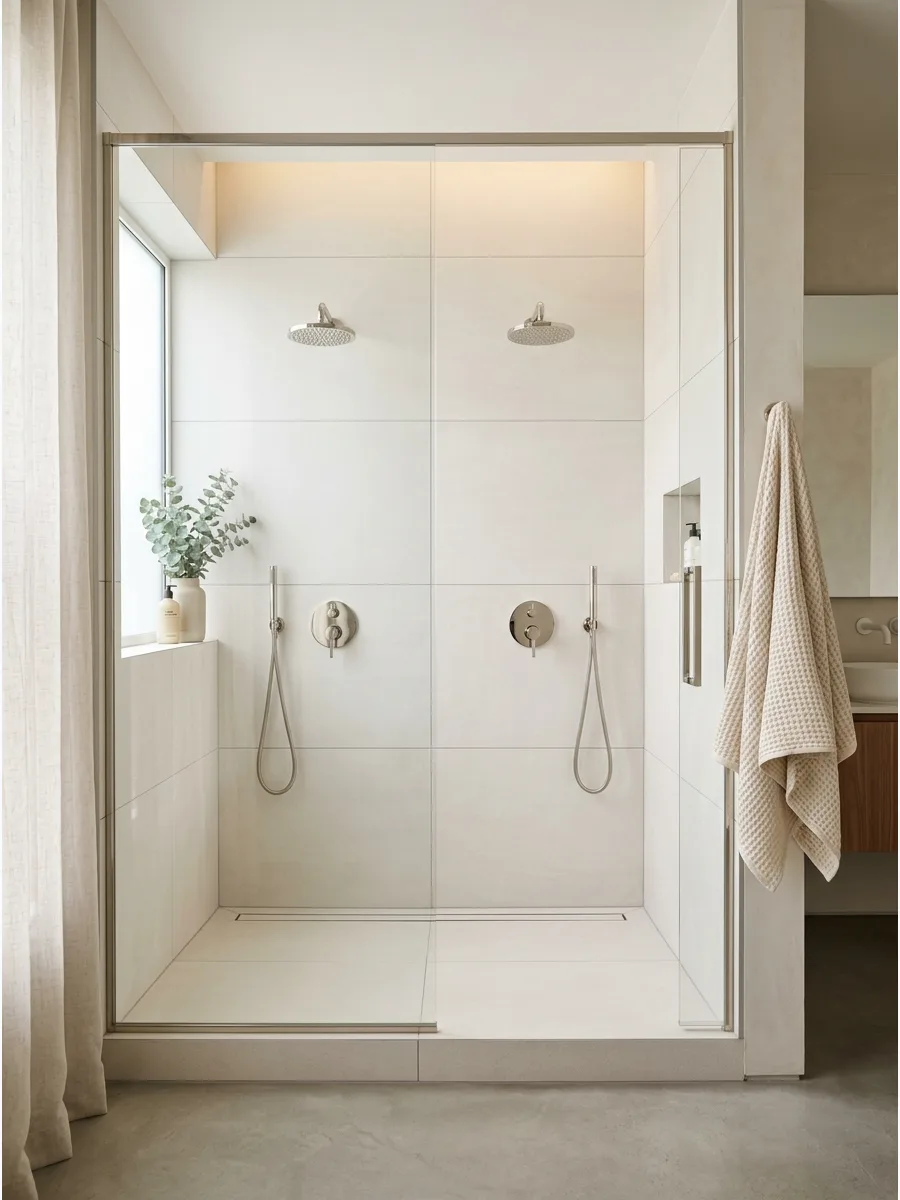
Large-format tiles minimize grout lines, which makes a shared shower feel much bigger and easier to clean. These tiles create a sleek, uninterrupted surface that highlights the scale of a two-person layout.
Select tiles that are at least 24 by 48 inches to significantly reduce the number of joints on the main wall. Fewer grout lines mean less scrubbing and a more modern look overall.
- $10 – $25 per square foot for materials and labor.
- Use a tile leveling system during installation to prevent lippage.
- Choose a matching grout color to hide seams between tiles.
Best shortcut: Use a matching epoxy grout for large tiles to ensure the color stays consistent and resists stains better than cement grout.
34. Porcelain Slab Shower Walls
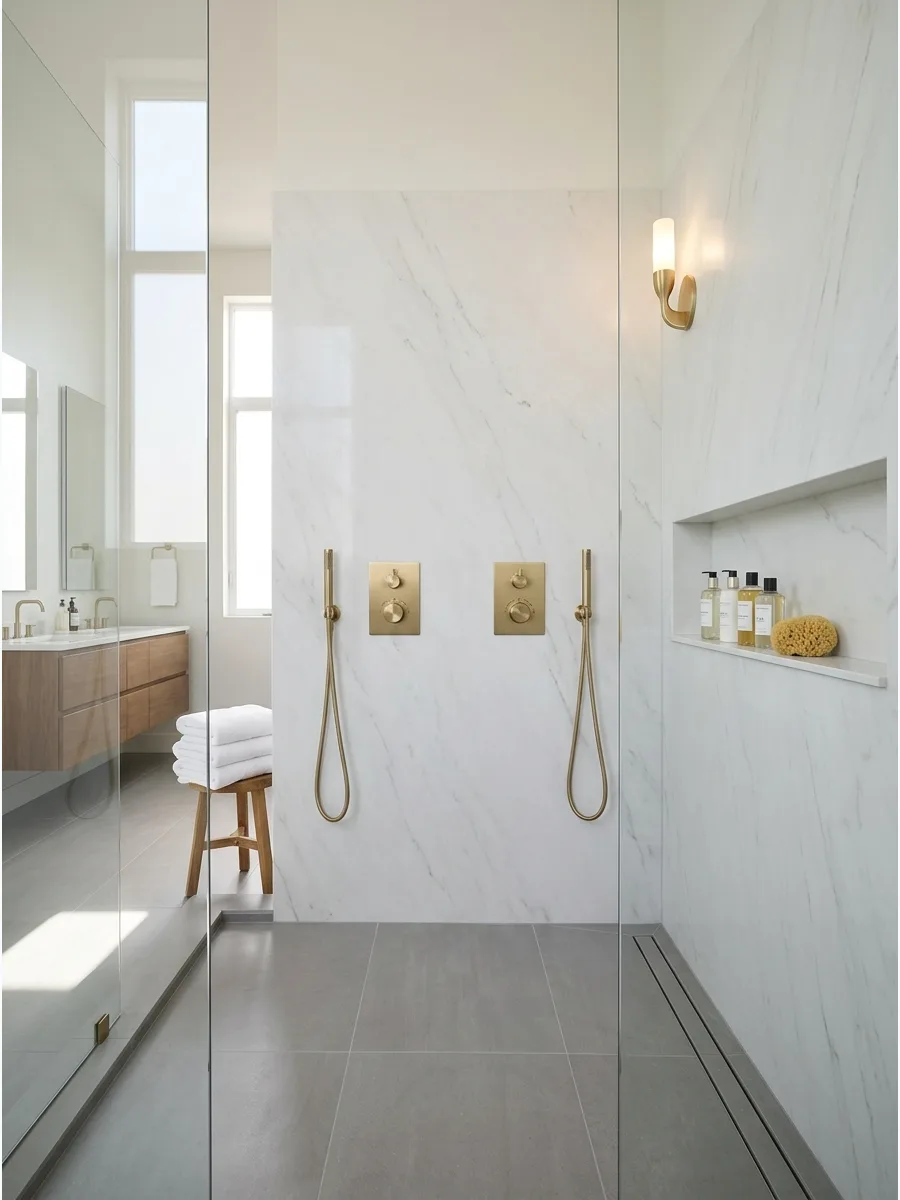
Porcelain slabs offer a high-end, seamless look because they can cover an entire wall with just one or two pieces. This material is incredibly durable and non-porous, making it perfect for the heavy moisture levels of a double shower.
Map out the plumbing valves carefully before cutting the slab to ensure the handles are perfectly centered. Slabs are heavy and require professional installation to avoid cracking during the move.
- $3,000 – $7,000 per slab depending on size and pattern.
- Hire a specialist team for the heavy lifting and precise cutting.
- Seal the edges with high-grade silicone to prevent water intrusion.
Quick win: Ask the fabricator to book-match the slabs so the patterns flow continuously across the corner joints.
35. Marble-Look Two Person Shower
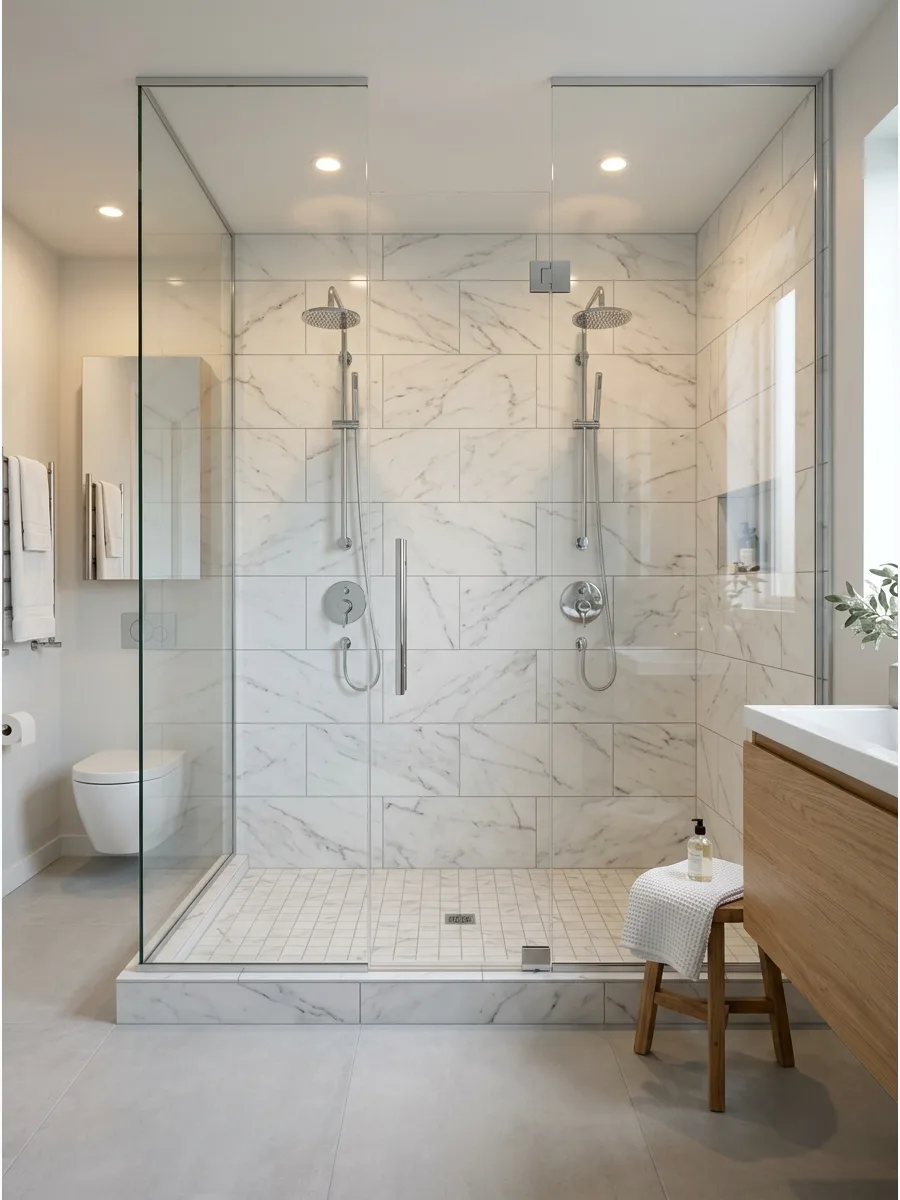
Marble-look porcelain gives the luxury of natural stone without the high maintenance and staining risks. It provides a timeless backdrop for two separate shower stations, especially when paired with classic chrome or nickel fixtures.
Use 12 by 24 inch tiles in a staggered pattern to create a natural, varied appearance across the walls. Porcelain won't react to soaps and shampoos the way real marble does.
- $6 – $12 per square foot for porcelain tile.
- Use white thin-set mortar to prevent color bleed through the tile.
- Apply a staggered offset pattern for a traditional stone look.
Most people skip this: Look for tiles with high variation ratings to avoid seeing the same pattern repeated too often on the wall.
36. Travertine-Look Walk-In Shower
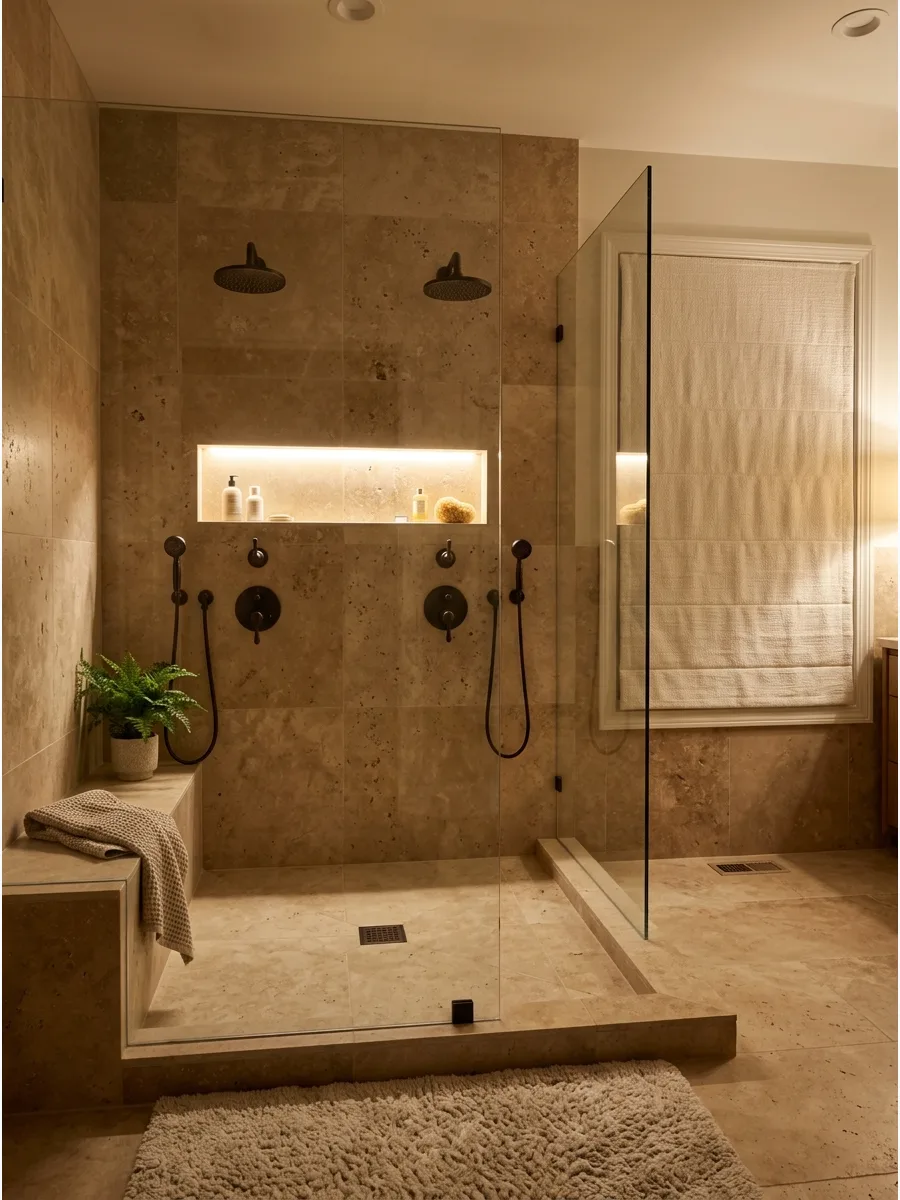
Travertine-style tile brings a warm, earthy texture to a walk-in shower that feels cozy rather than cold. The natural pits and variations in the look of travertine add depth to a large shower space.
Opt for a matte or honed finish to provide better slip resistance on the shower floor. This style works best with bronze or copper fixtures to lean into the warm tones.
- $5 – $15 per square foot for high-quality porcelain travertine.
- Use a cream-colored grout to blend with the tile edges.
- Mix tiles from several different boxes during install for color balance.
Best shortcut: Use a large-format travertine-look tile on the walls and a smaller mosaic version of the same tile on the floor for better grip.
37. Warm Beige Tile Shower
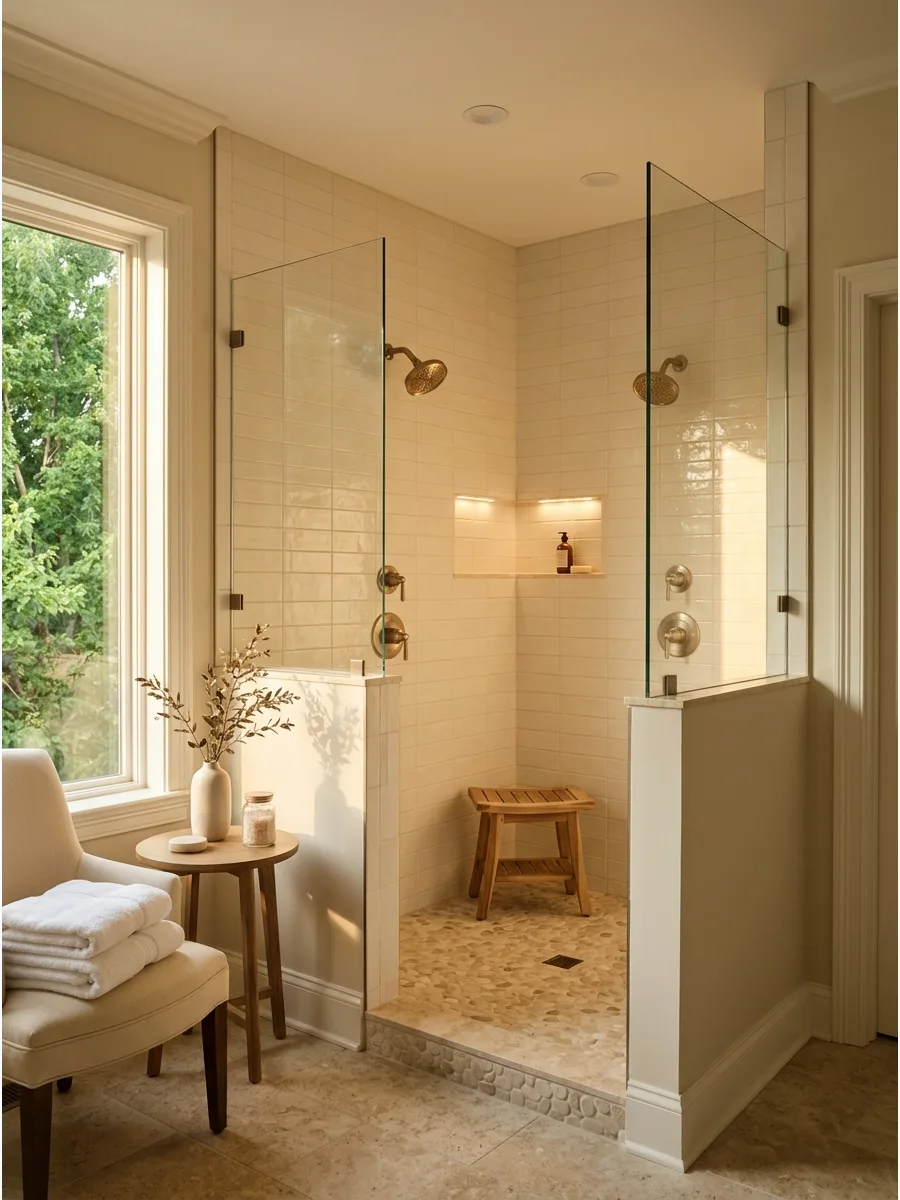
A warm beige or cream palette creates a soft, inviting atmosphere that makes a large double shower feel less like a locker room. These neutral tones reflect light well, keeping the space bright even if there isn't a window nearby.
Combine different textures of beige tile, such as a smooth wall tile with a pebbled floor, to add visual interest. Beige is much more forgiving with hard water spots than dark colors like black or navy.
- $4 – $10 per square foot for ceramic or porcelain.
- Use warm-white LED lighting to enhance the tile tones.
- Seal the grout regularly to prevent it from darkening over time.
Quick win: Use a grout color that is one shade lighter than the tile to make the space feel even more airy and seamless.
38. Microcement-Style Shower
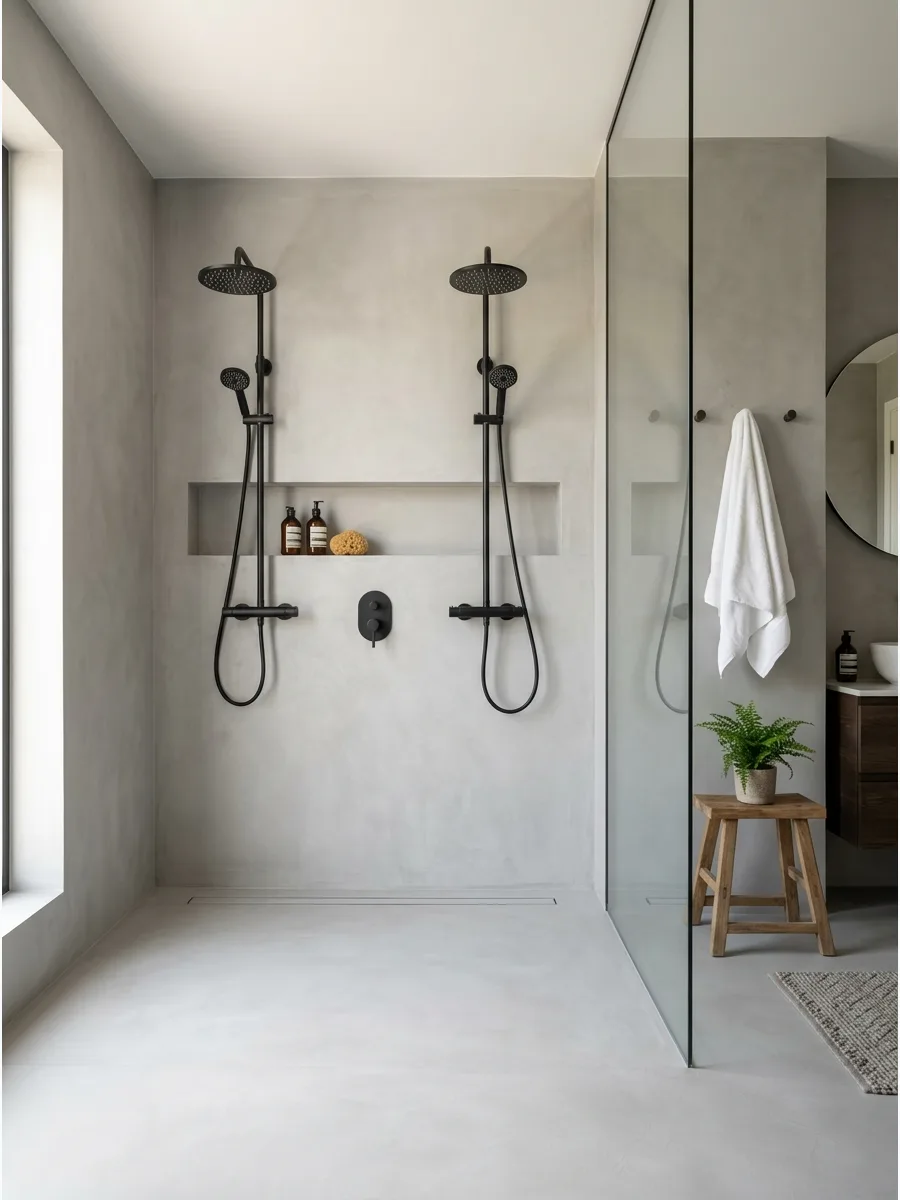
Microcement creates a completely seamless, grout-free finish that is ideal for a minimalist, modern bathroom. It can be applied over existing surfaces and provides a smooth, tactile feel underfoot that isn't cold like traditional stone.
Apply a high-quality polyurethane sealer to ensure the finish remains completely waterproof and stain-resistant. This material allows for custom-built features like integrated benches or niches that blend perfectly into the walls.
- $15 – $30 per square foot for professional application.
- Apply in thin, multiple layers for the best durability.
- Requires a 7-day cure time before the first shower use.
Most people skip this: Make sure the subfloor is extremely rigid, as any movement can cause microcement to develop fine hairline cracks.
39. Vertical Tile Double Shower
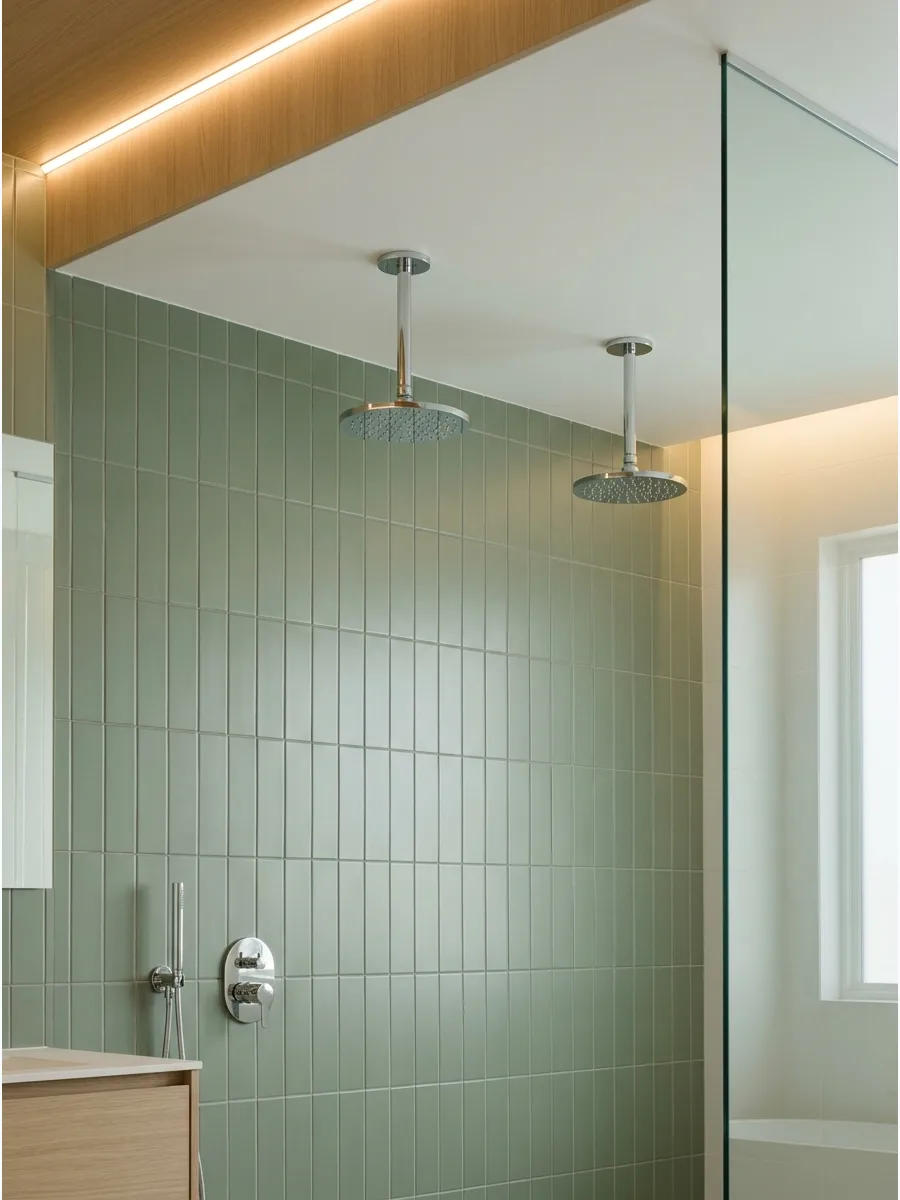
Installing tiles vertically draws the eye upward, making the ceiling in a double shower feel much higher. This layout is especially effective in smaller primary bathrooms where you want to maximize the sense of vertical space.
Choose a slim, rectangular tile like a 2 by 10 inch subway tile for a modern, stacked look. Vertical lines provide a structured backdrop that contrasts beautifully with round shower heads.
- $5 – $12 per square foot for subway-style tiles.
- Use spacers for perfectly straight lines during the vertical stack.
- Plan the layout from the center of the wall for symmetrical ends.
Best shortcut: Start your tile layout from the center of the main shower wall so the cut tiles at the corners are equal in size.
40. Textured Feature Wall Shower
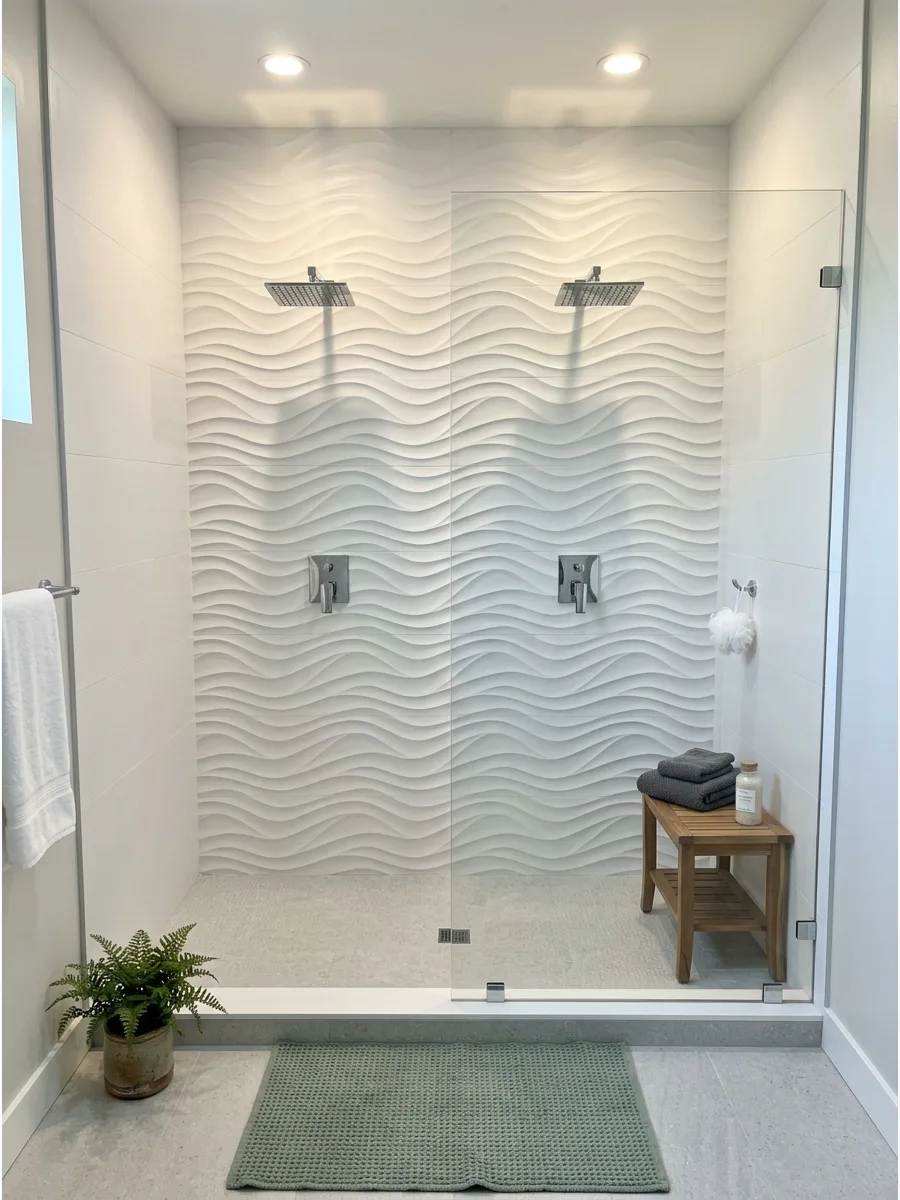
Adding a textured tile on the wall behind the shower heads creates a focal point without needing bold colors. The texture catches the light and the water, adding a dynamic element to the shared space.
Limit the textured tile to one wall to keep the room from feeling too busy or overwhelming. This works best when the other three walls are kept simple with a flat, matching tile.
- $12 – $25 per square foot for specialty textured tiles.
- Side-light the wall with recessed lights to highlight the texture.
- Use a non-sanded grout to achieve tight joints on uneven surfaces.
Quick win: Place your lighting directly above the textured wall to create shadows that make the pattern pop.
Small and Medium Two Person Shower Ideas
41. Medium Bathroom Double Shower
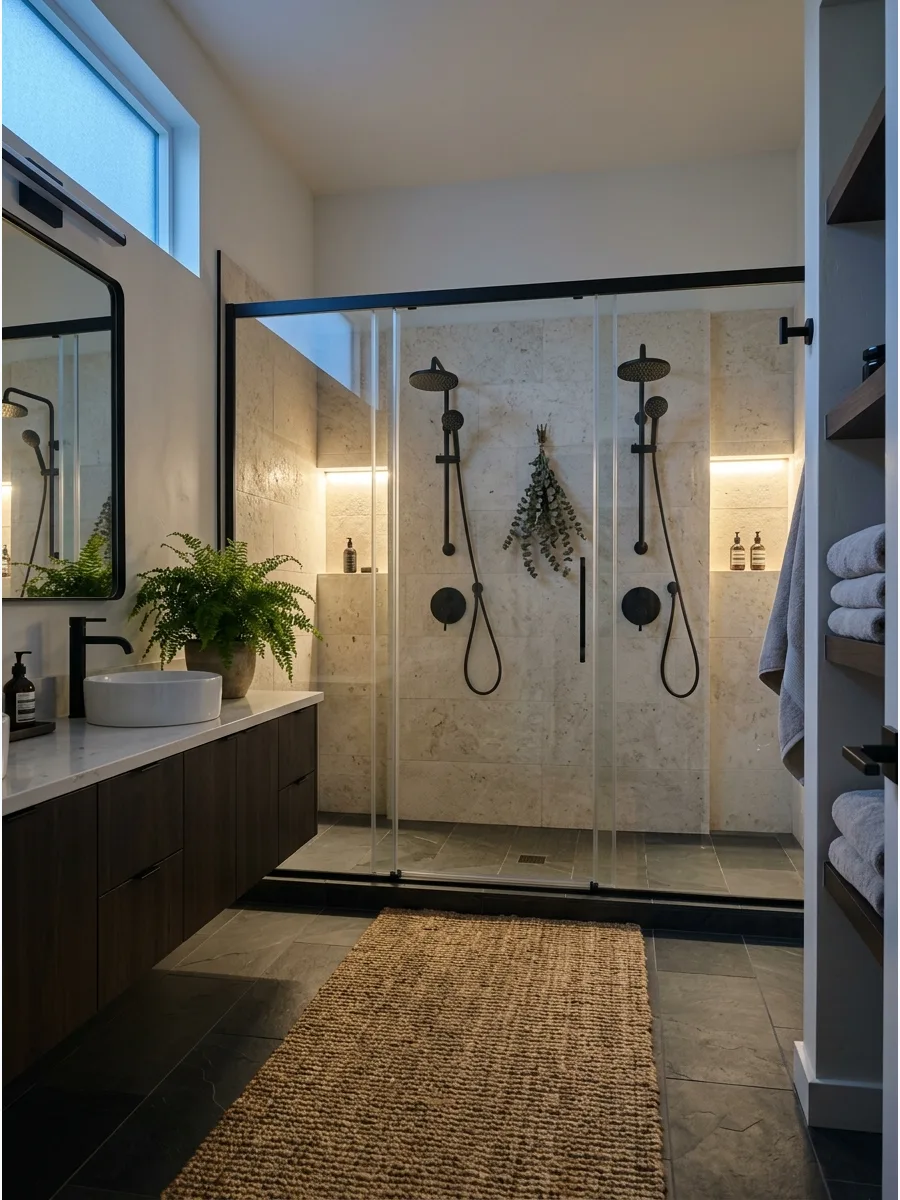
You don't need a massive room to fit two people if you place both shower heads on one long wall. This configuration saves floor space while still allowing two people to use the shower simultaneously.
Ensure there is at least 36 inches of width between the two shower heads so both users have enough elbow room. This layout often allows for a standard rectangular shower footprint found in many homes.
- $1,500 – $3,000 for plumbing upgrades.
- Space shower heads 3 to 4 feet apart for comfort.
- Use a single long linear drain to handle the double water flow.
Most people skip this: Place the controls for both heads near the entrance so you can turn the water on without getting wet.
42. Corner Two Person Shower
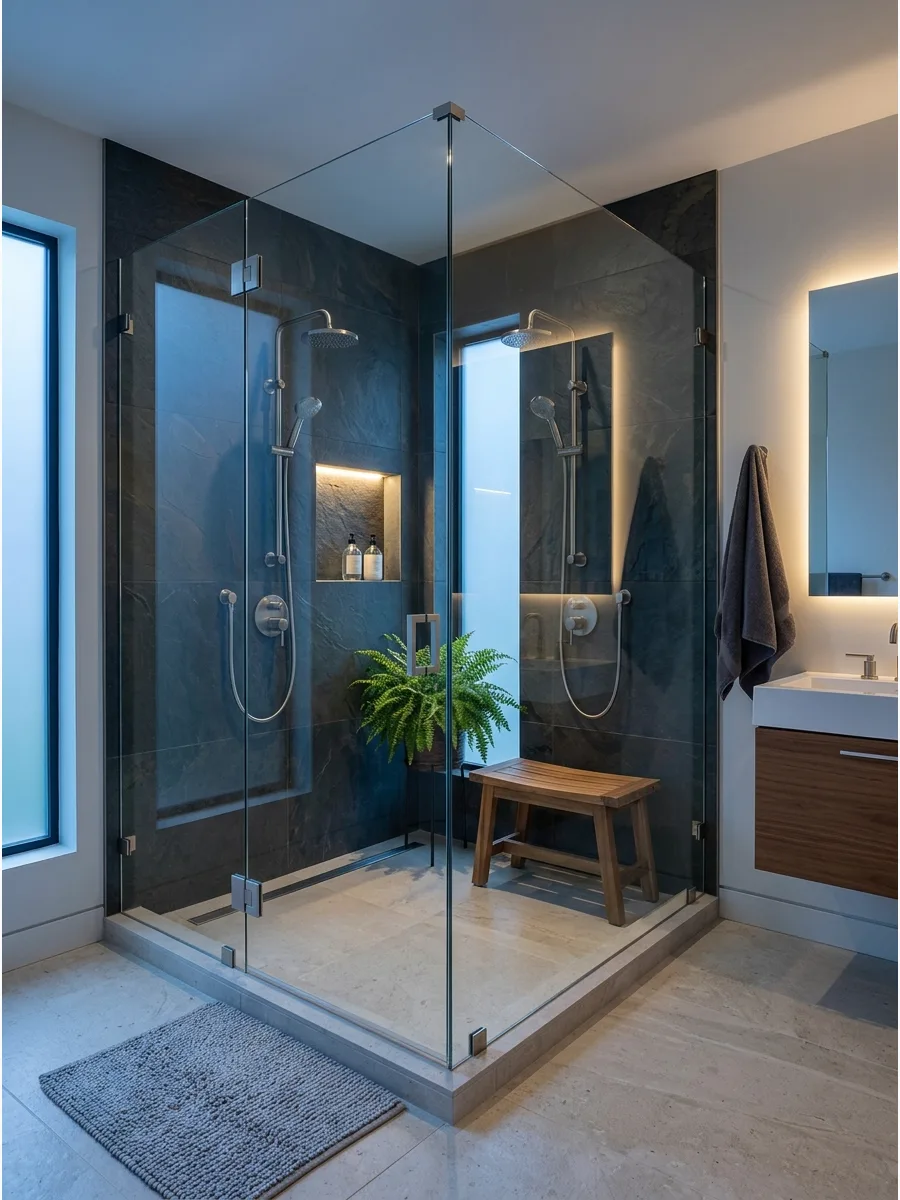
Tucking a double shower into a corner uses the room's layout efficiently by leaving more space for the vanity and toilet. Using glass on two sides keeps the corner from feeling cramped or dark.
Install the shower heads on the two perpendicular tile walls to maximize the available floor area. This L-shaped plumbing setup allows each person to have their own dedicated corner.
- $2,500 – $5,000 including glass and tile.
- Use a corner-mounted drain for efficient water removal.
- Choose frameless glass for a completely open and airy look.
Best shortcut: Use a neo-angle glass enclosure to save even more floor space in the rest of the bathroom without sacrificing shower room.
43. Narrow Double Shower Layout
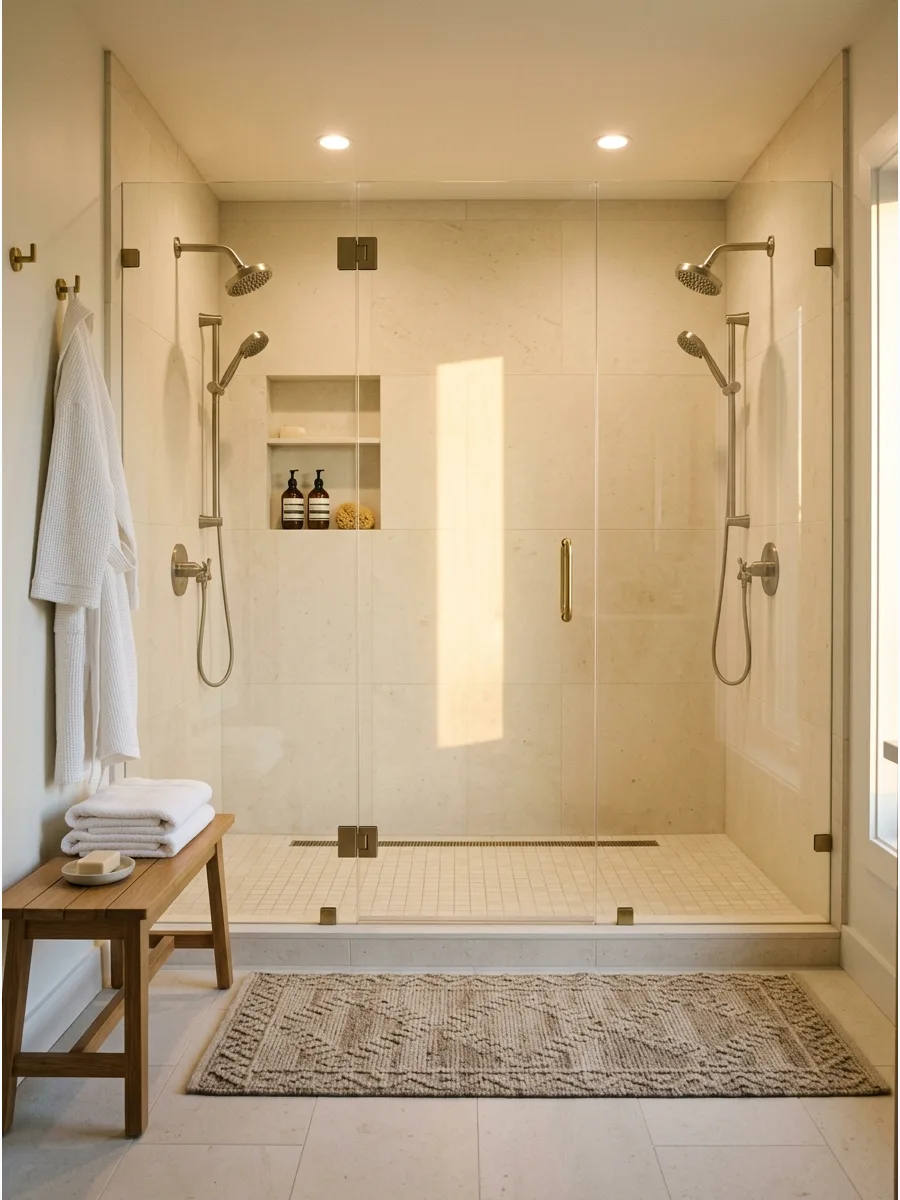
A long, narrow shower works perfectly when you place one shower head at each end of the rectangle. This gives each person plenty of personal space and prevents water from splashing onto each other.
Aim for a minimum length of 60 to 72 inches to ensure the two spray zones don't overlap uncomfortably. A central entry point makes it easy for both people to enter and exit without crossing paths.
- $2,000 – $4,500 for construction and plumbing.
- Use two separate drains or one high-capacity center drain.
- Install independent temperature controls at each end of the shower.
Quick win: Put a small recessed niche at each end so each person has their own dedicated spot for soap and shampoo.
44. Small Wet Room Double Shower
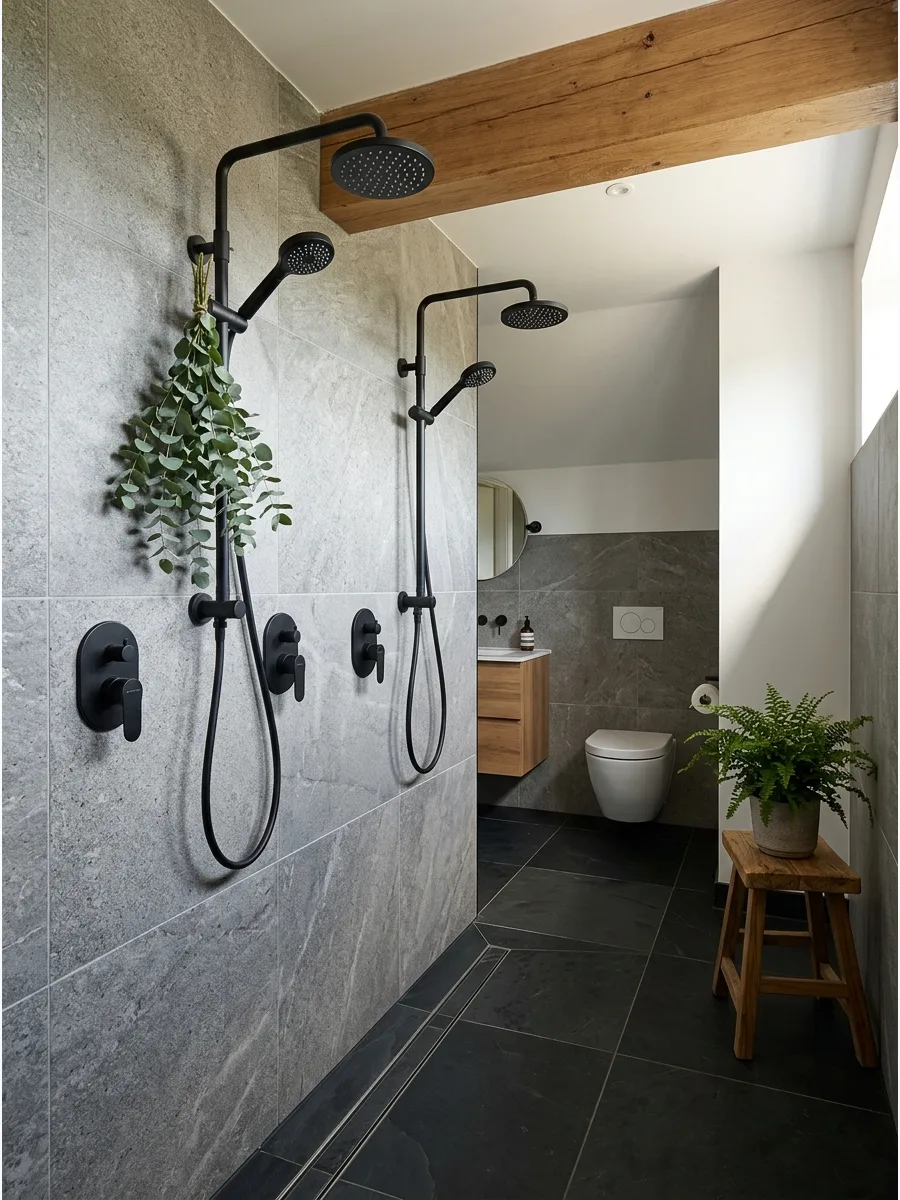
In a small bathroom, turning the entire room into a wet room eliminates the need for bulky shower walls. This open layout makes the bathroom feel twice as big and allows for two shower heads even in tight quarters.
Waterproof the entire floor and walls up to the ceiling to prevent any moisture damage to the rest of the room. A wall-mounted sink and toilet further enhance the open, airy feel of a wet room.
- $5,000 – $10,000 for full room waterproofing.
- Use a tanking membrane system behind all wall tiles.
- Ensure the entire floor slopes gently toward the main drain.
Most people skip this: Install a high-powered exhaust fan to handle the increased steam from two shower heads in a smaller room.
45. Half Wall Double Shower
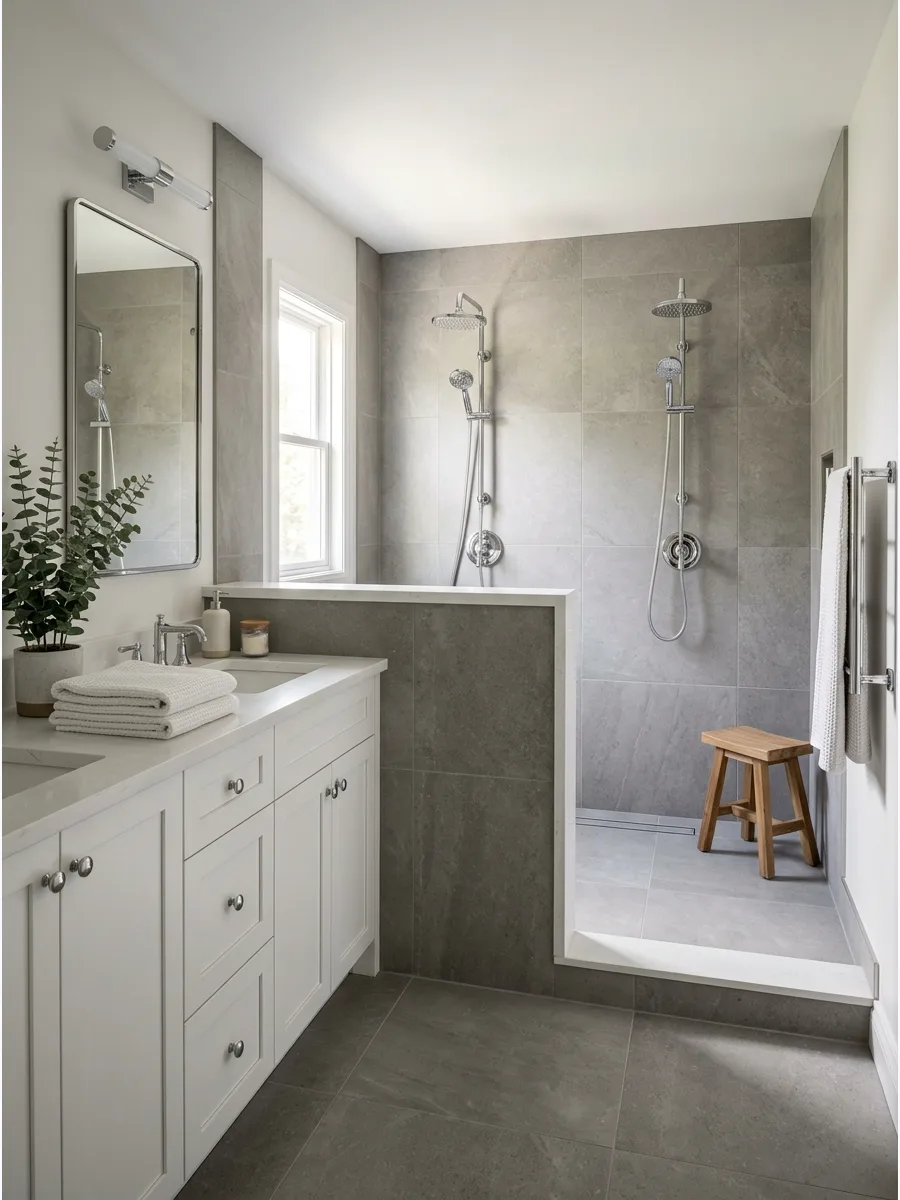
A half wall, or pony wall, provides privacy and a place to mount plumbing while keeping the top half of the shower open. This allows light to flow through the space and makes the shower feel connected to the rest of the bathroom.
Top the half wall with a piece of quartz or stone that matches the vanity for a high-end, custom look. The solid base of the wall also does a great job of hiding messy shampoo bottles from view.
- $800 – $1,500 for wall construction and tiling.
- Cap the wall with a waterproof slab to prevent water damage.
- Use glass panels above the wall if extra splash protection is needed.
Best shortcut: Build a niche into the shower-side of the half wall to keep toiletries organized and out of sight from the rest of the room.
46. Glass Panel Two Person Shower
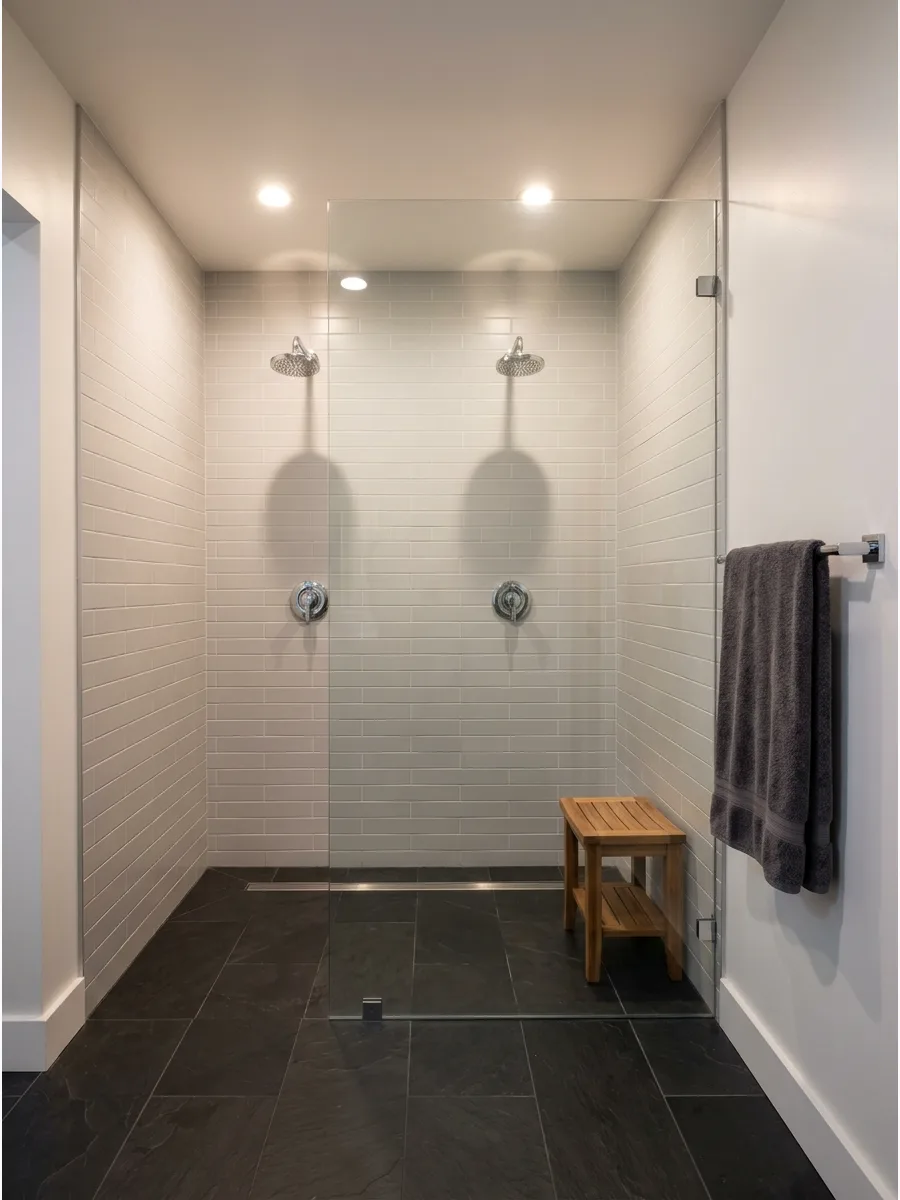
A single fixed glass panel is the best way to keep a bathroom feeling open while containing water spray. This setup works perfectly for mid-sized rooms where a full swinging door would hit the vanity or toilet.
Install the panel at least 36 inches wide to ensure the splash zone stays inside the shower area. Glass creates a seamless look that highlights the tile work behind the shower heads.
- Budget: $300 to $800 for custom glass panels
- Placement: Center the panel between the two shower zones for best spray control
- Adaptation: Use frosted or fluted glass for added privacy in shared bathrooms
Most people skip this: Measure the distance from the shower head to the edge of the glass to prevent water from bouncing onto the bathroom floor.
Stylish Two Person Shower Details
47. Double Shower With Two Niches
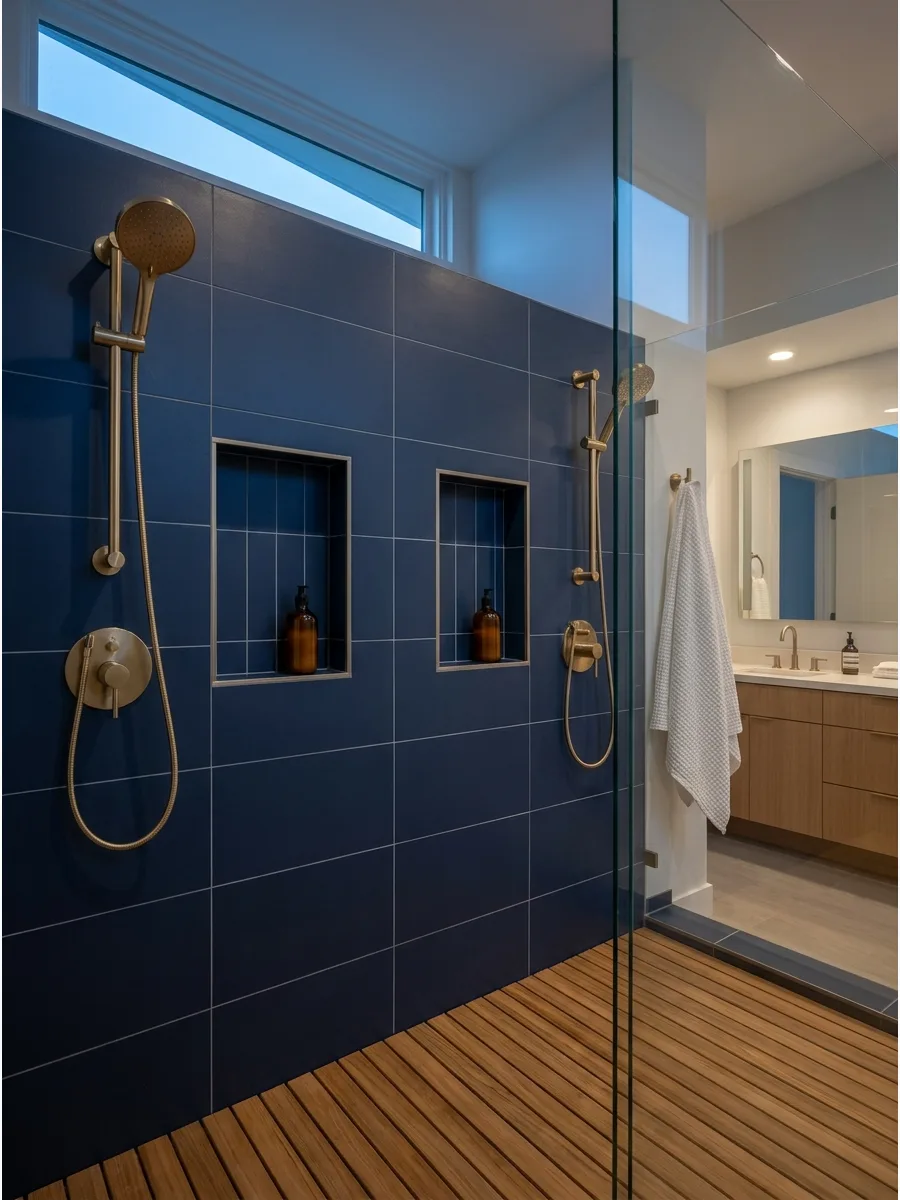
Symmetry makes a shared shower feel like a custom spa rather than a crowded stall. Installing two identical niches ensures each person has a dedicated spot for their own soaps and shampoos without cluttering a single shelf.
Position the niches at elbow height on the side walls to keep products within easy reach of each shower head. This layout prevents reaching across each other and keeps the floor space clear.
- Budget: $50 to $100 for prefabricated niche inserts
- Setup: Align the niches horizontally for a balanced visual look across the space
- Adaptation: Use contrasting tile inside the niche for a decorative pop of color
Quick win: Slope the bottom shelf of the niche slightly toward the shower to prevent water from pooling and causing mold.
48. LED-Lit Shower Niche
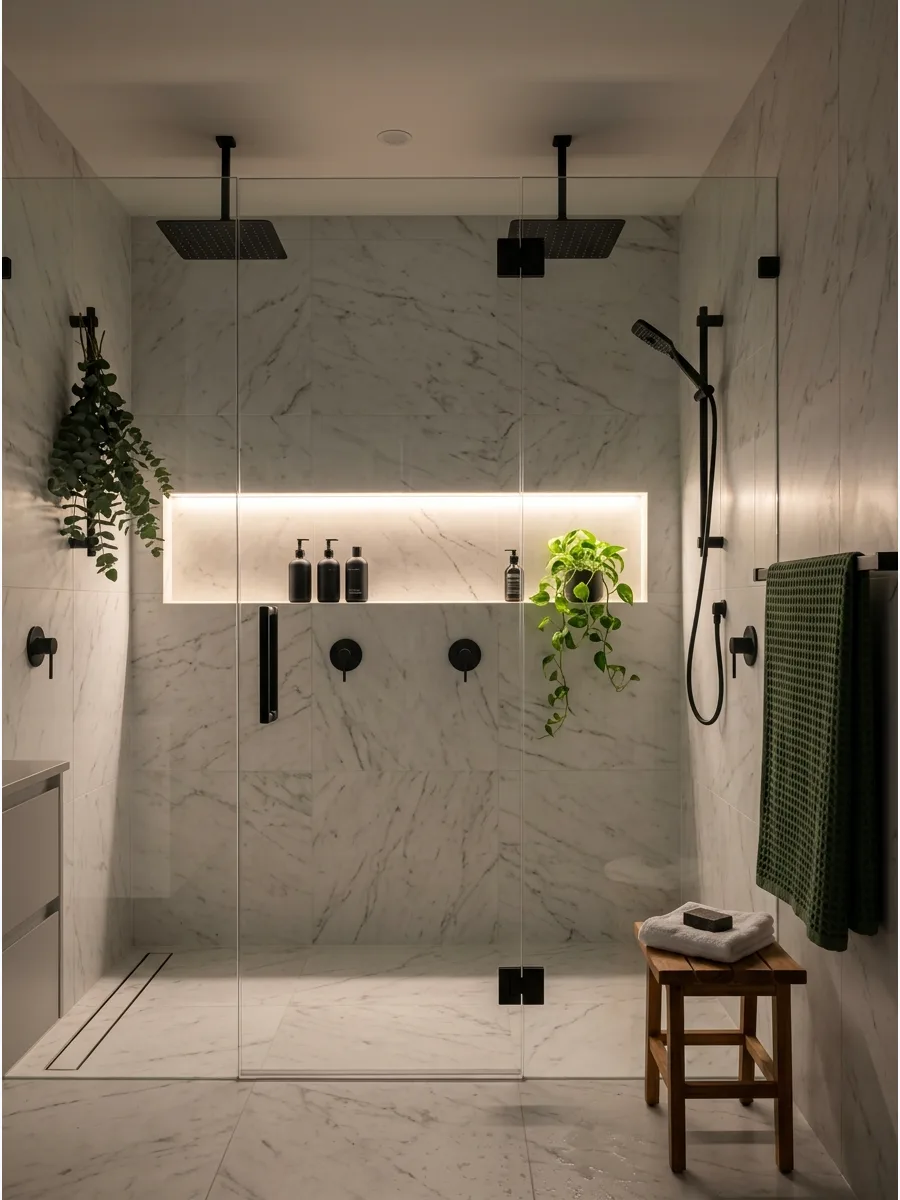
Soft lighting inside a shower niche adds an immediate high-end feel that standard overhead lights cannot match. It provides just enough glow for a relaxing evening rinse without the harshness of main bathroom lights.
Use waterproof LED strips rated for wet zones to ensure the installation lasts through years of humidity. This detail turns a functional storage spot into a focal point of the entire room.
- Budget: $100 to $300 for waterproof LED kits and electrical wiring
- Logistics: Hire an electrician to run low-voltage wire before the tile is installed
- Adaptation: Choose a dimmable driver to adjust the light levels for late-night use
Best shortcut: Place the light strip at the front top edge of the niche so the source is hidden but the light washes the back wall.
49. Arched Entry Double Shower
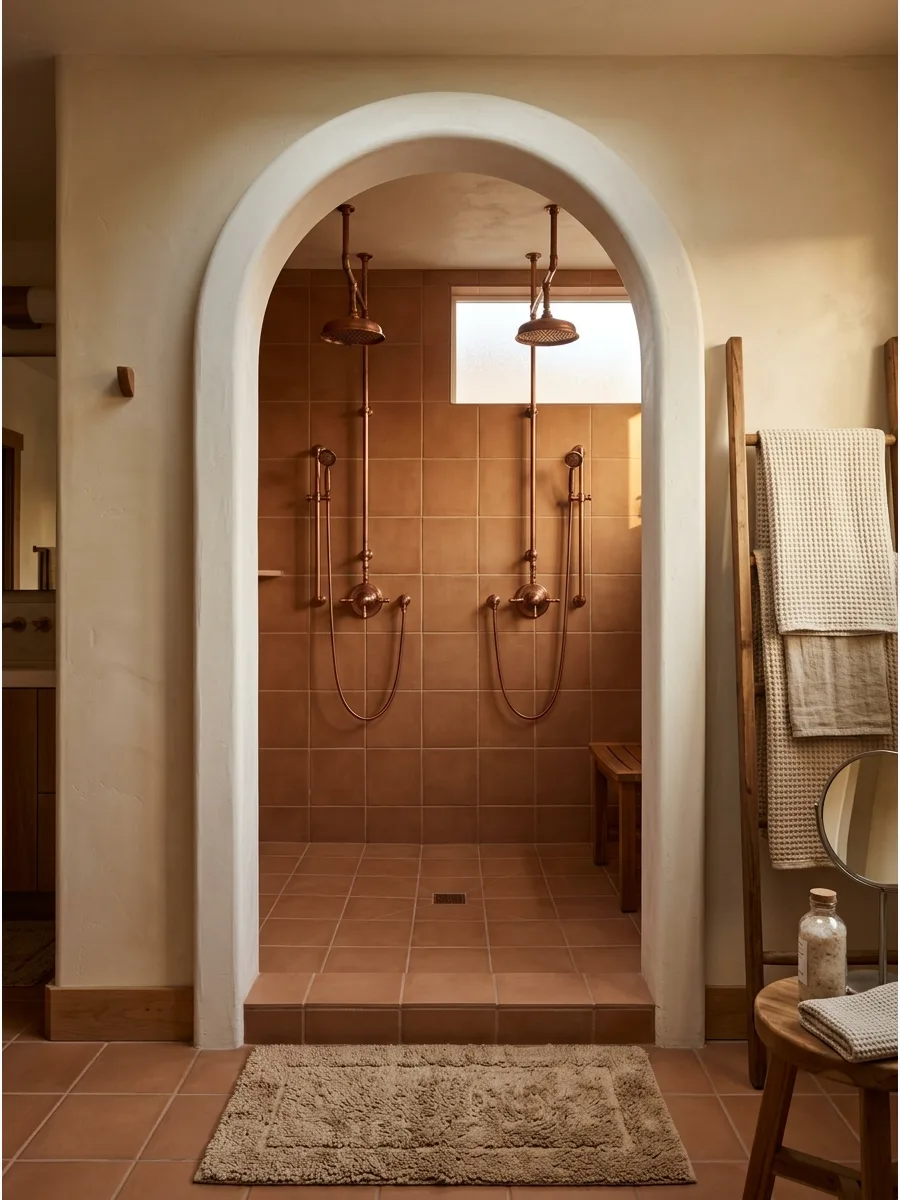
An arched doorway softens the hard lines of a tiled bathroom and creates a cozy atmosphere. This architectural detail makes the shower feel like its own separate room while maintaining a doorless, walk-in flow.
Keep the arch high enough to allow steam to escape easily and prevent the shower from feeling cave-like. It is a simple framing change that adds significant character to a primary suite.
- Budget: $200 to $500 for framing and drywall work during a remodel
- Placement: Align the arch with the center of the bathroom walkway for symmetry
- Adaptation: Finish with waterproof plaster for a seamless, grout-free look
Most people skip this: Use flexible corner bead during the framing phase to get a perfectly smooth curve for the arch.
50. Statement Stone Double Shower Wall
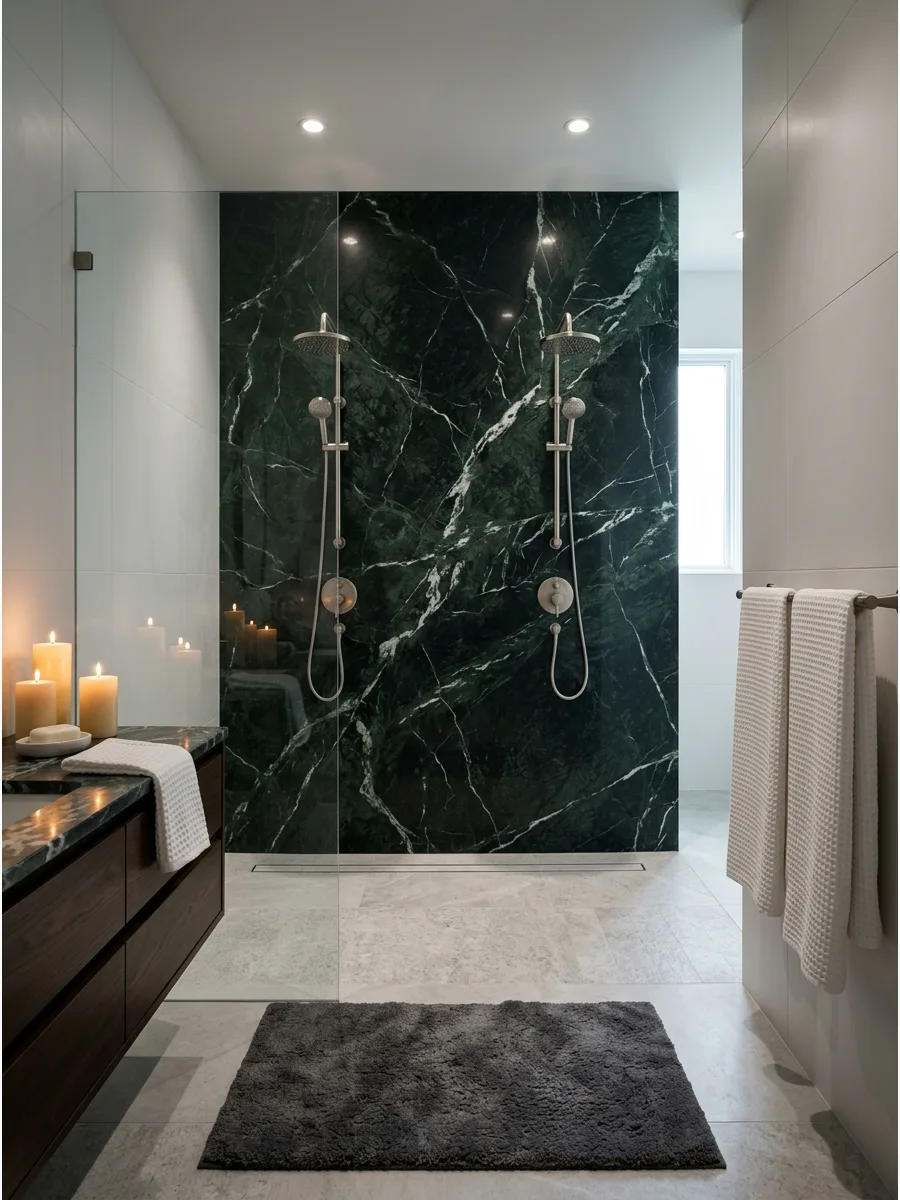
Using one large-scale stone or slab on the main wall creates a dramatic backdrop for dual plumbing fixtures. This focal point draws the eye and makes the shower feel more like a piece of art than a utility space.
Choose a stone with bold veining to add movement and contrast against simpler side walls or floors. It provides a luxury finish that elevates the entire bathroom design without needing expensive materials on every surface.
- Budget: $1,500 to $4,000 for a natural stone slab and installation
- Setup: Use book-matched slabs to make the stone grain flow across the wall
- Adaptation: Use large-format porcelain slabs for a similar look at a lower cost
Quick win: Seal natural stone once a year to keep the colors vibrant and prevent water stains from the shower heads.
Frequently Asked Questions
What is the minimum size for a two-person walk-in shower?
While a 3×5 foot space is the functional minimum, aiming for at least 4×6 feet ensures you both have plenty of elbow room. This extra square footage allows for comfortable movement and prevents the area from feeling cramped during shared use.
Do I need two separate drains for a double shower?
You typically don't need two separate drains, but you must ensure your plumbing can handle the increased water volume from two showerheads. Installing a high-capacity linear drain is often the most efficient way to manage heavy flow while maintaining a sleek, modern look.
Should showerheads be placed on the same wall or opposite walls?
Placing showerheads on opposite walls creates a luxurious 'car wash' experience with water hitting you from both sides, while side-by-side placement fosters a shared-space feel. Consider your layout and privacy preferences, as opposite walls often require more extensive plumbing work.
Will my water heater be able to handle two people showering at once?
A standard water heater might struggle with the demand, potentially leading to a chilly surprise mid-shower. To avoid the 'cold shoulder' effect, consider upgrading to a high-capacity tank or a tankless unit that provides endless hot water for both users.
How do I keep a large walk-in shower from feeling drafty?
To prevent chills, use floor-to-ceiling glass panels or a transom window to trap steam and warmth inside the enclosure. Installing radiant heated floors and ensuring proper ventilation placement will also help maintain a cozy, comfortable temperature.