60 Vintage Christmas Tree Decoration Ideas

This post may contain affiliate links: full affiliate disclosure.
Creating an authentic holiday look requires a focus on texture and history. These traditional glass ornaments bring a sense of warmth and character that modern mass-produced sets often lack.
VINTAGE GLASS CHRISTMAS ORNAMENTS
1. Colorful Shiny Brite-Style Glass Ornaments
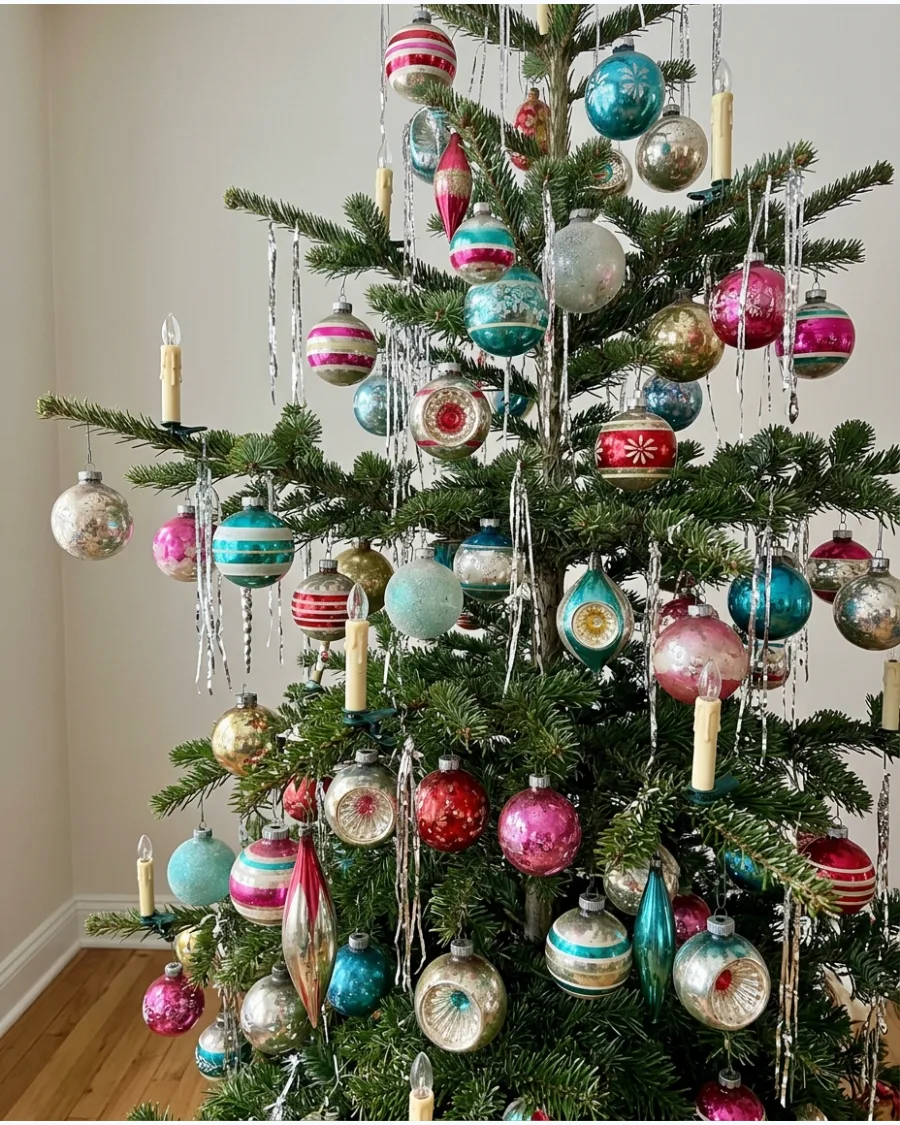
Recreating the mid-century look requires a mix of saturated colors and varied finishes. Group these ornaments in clusters of three to mimic the way families used to decorate with limited supplies. This technique prevents the tree from looking too sparse or overly curated.
A true retro tree thrives on the contrast between bright turquoise, hot pink, and traditional red.
- Buy reproduction sets in bulk to save money compared to true antiques.
- Space these evenly across the tree before adding specialty items.
- Store them in original-style cardboard dividers to prevent paint chipping.
Quick win: Check the metal caps; true vintage caps are often thinner and have simpler wire loops than modern ones.
2. Vintage Mercury Glass Ball Ornaments
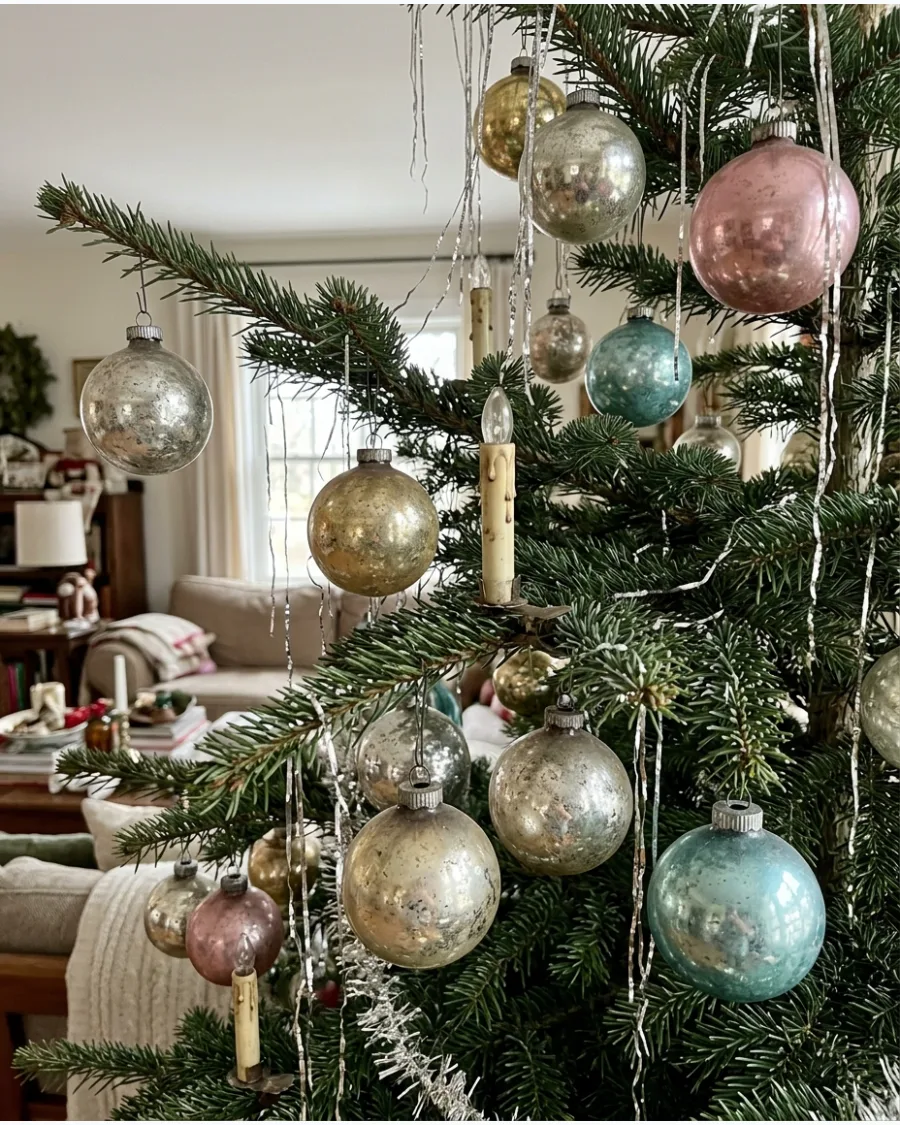
Mercury glass offers a soft, diffused glow that modern plastic baubles cannot replicate. Tuck these ornaments deeper into the branches to catch and reflect the inner glow of the tree lights. The slightly distressed finish hides dust and minor imperfections perfectly.
Mixing silver and champagne tones creates a sophisticated base for a nostalgic theme.
- Look for mercury glass at thrift stores or flea markets during the off-season.
- Use sturdy wire hangers instead of flimsy string for these heavier glass pieces.
- Wipe gently with a dry microfiber cloth to avoid removing the delicate metallic finish.
Most people skip this: Place these ornaments near the trunk to fill empty gaps and add depth to the tree silhouette.
3. Vintage Indented Reflector Ornaments
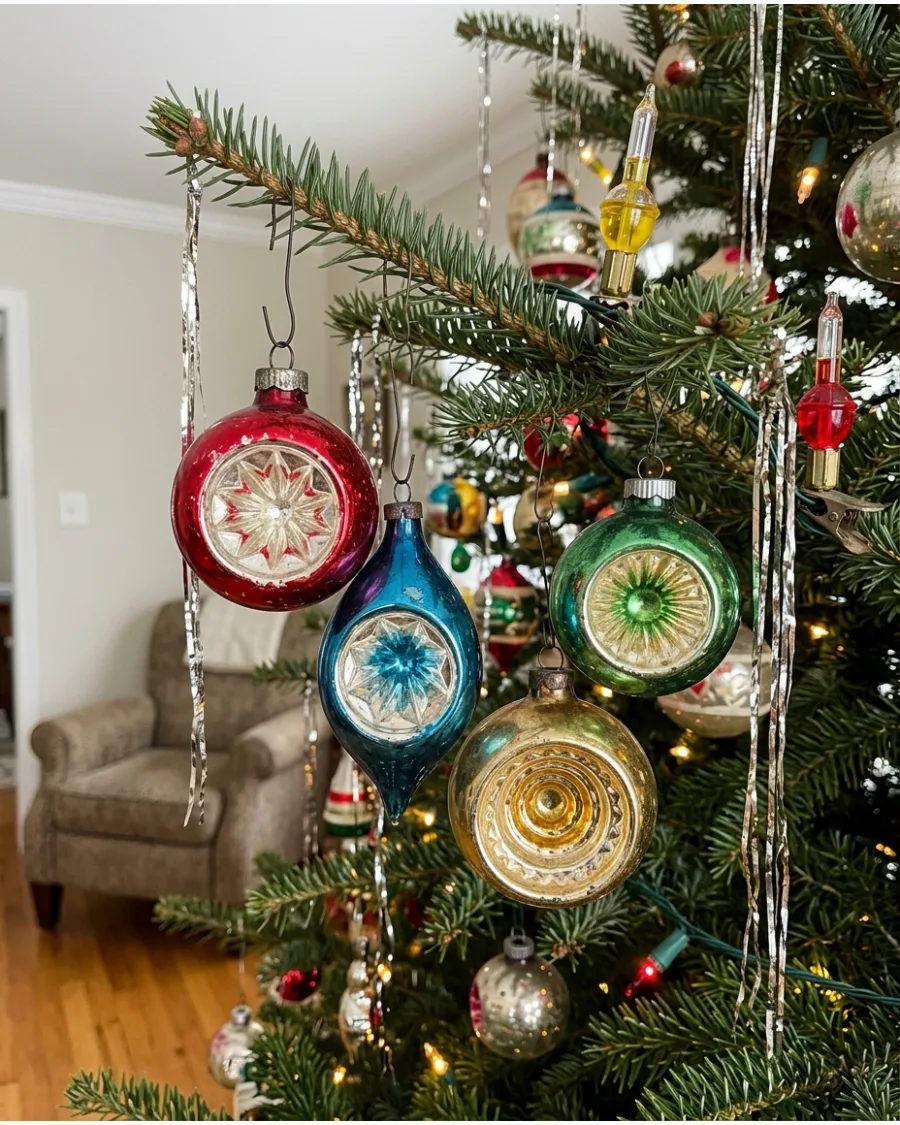
These indented ornaments were designed specifically to maximize the light from old-fashioned bulbs. Point the indented center directly toward a light bulb to create a bright shimmering focal point. They work best on trees with some interior space between branches.
The multi-colored reflections add a layer of complexity that flat ornaments lack.
- Search for reflector ornaments or indent ornaments on auction sites.
- Position these at eye level where the light-catching effect is most noticeable.
- Handle with care as the glass around the indentation is often thinner and more fragile.
Best shortcut: If the silvering inside the indent has faded, a tiny dot of silver craft paint can restore the sparkle.
4. Vintage Glass Finial Ornaments
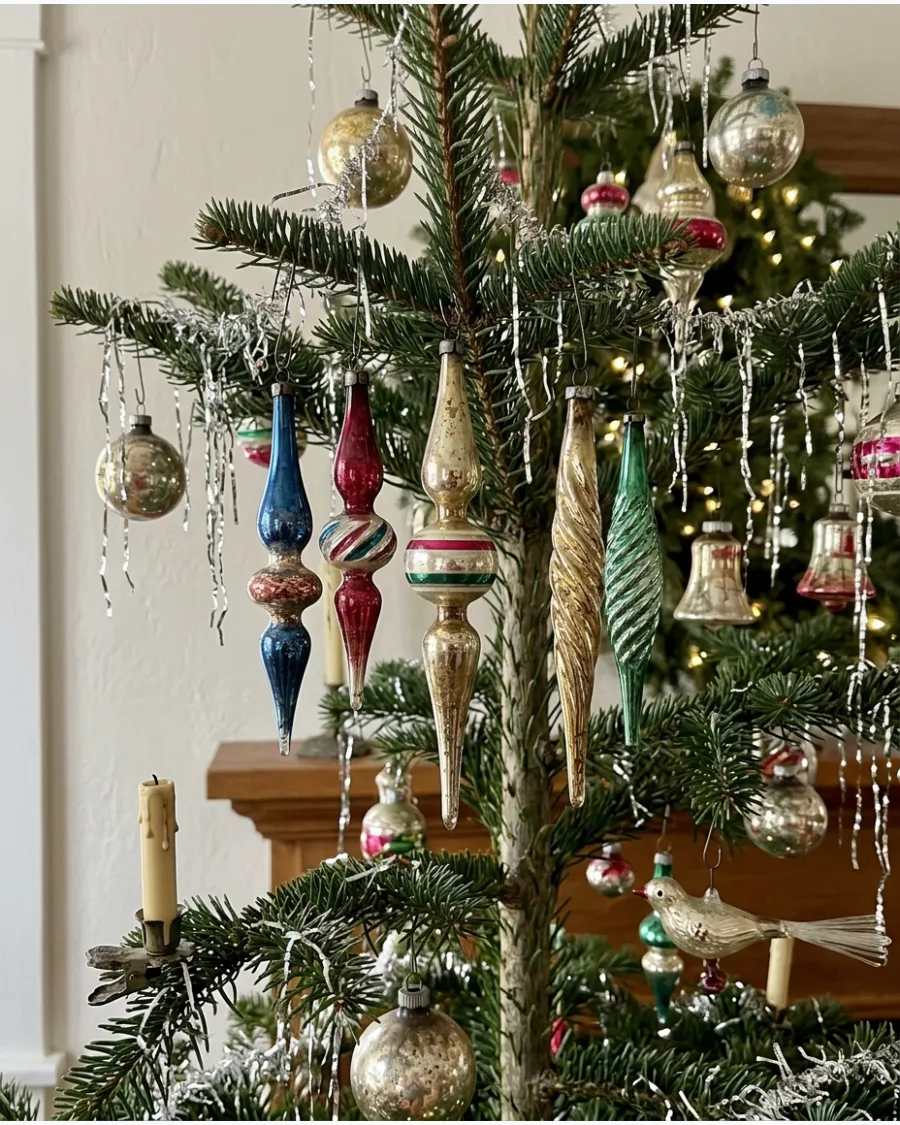
Long pointed finials break up the monotony of round baubles and add vertical interest. Hang these on the tips of sturdy lower branches where their length will not be obstructed by other ornaments. They provide a Victorian or early 20th-century feel to the overall design.
Choosing finials with different textures like frosted or glittered bands adds tactile variety.
- Check for cracks near the neck where the metal cap meets the glass.
- Use these to fill the holes in the natural shape of the tree.
- Wrap each finial individually in acid-free tissue paper for safe storage.
Quick win: Use a finial as a mini-topper for a smaller secondary tree in a bedroom or hallway.
5. Vintage Teardrop Glass Ornaments
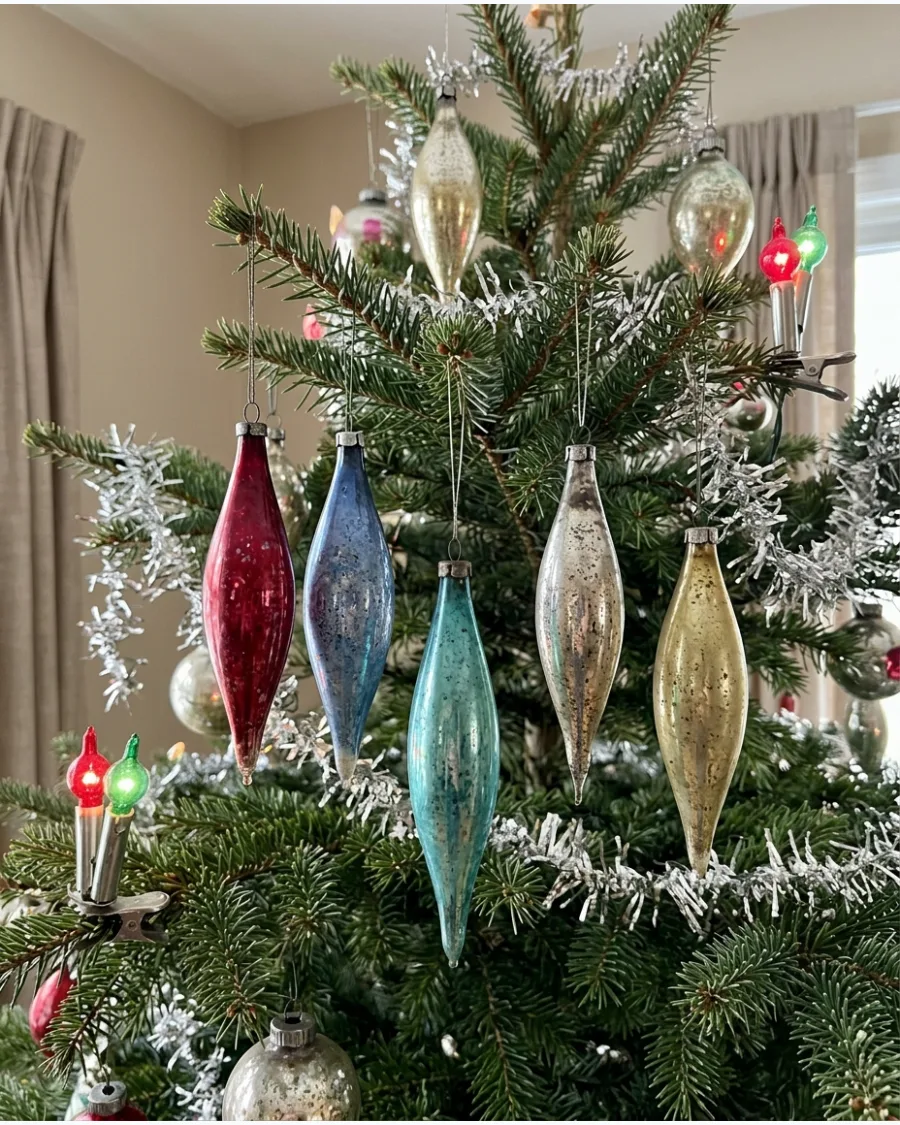
Teardrop shapes offer a graceful flowing look that balances out heavy garlands. Place teardrop ornaments on the outer edges of the tree so they can sway slightly and catch the light. Jewel-toned glass in this shape looks particularly elegant against dark green needles.
They are essential for achieving a balanced and professional-looking vintage aesthetic.
- Mix different sizes of teardrops to keep the tree from looking too uniform.
- Ensure the branch is strong enough to hold the weight without sagging too low.
- Group them near the bottom of the tree to add visual weight.
Most people skip this: Hang teardrops at varying heights to lead the eye up and down the tree.
6. Vintage Striped Glass Christmas Ornaments
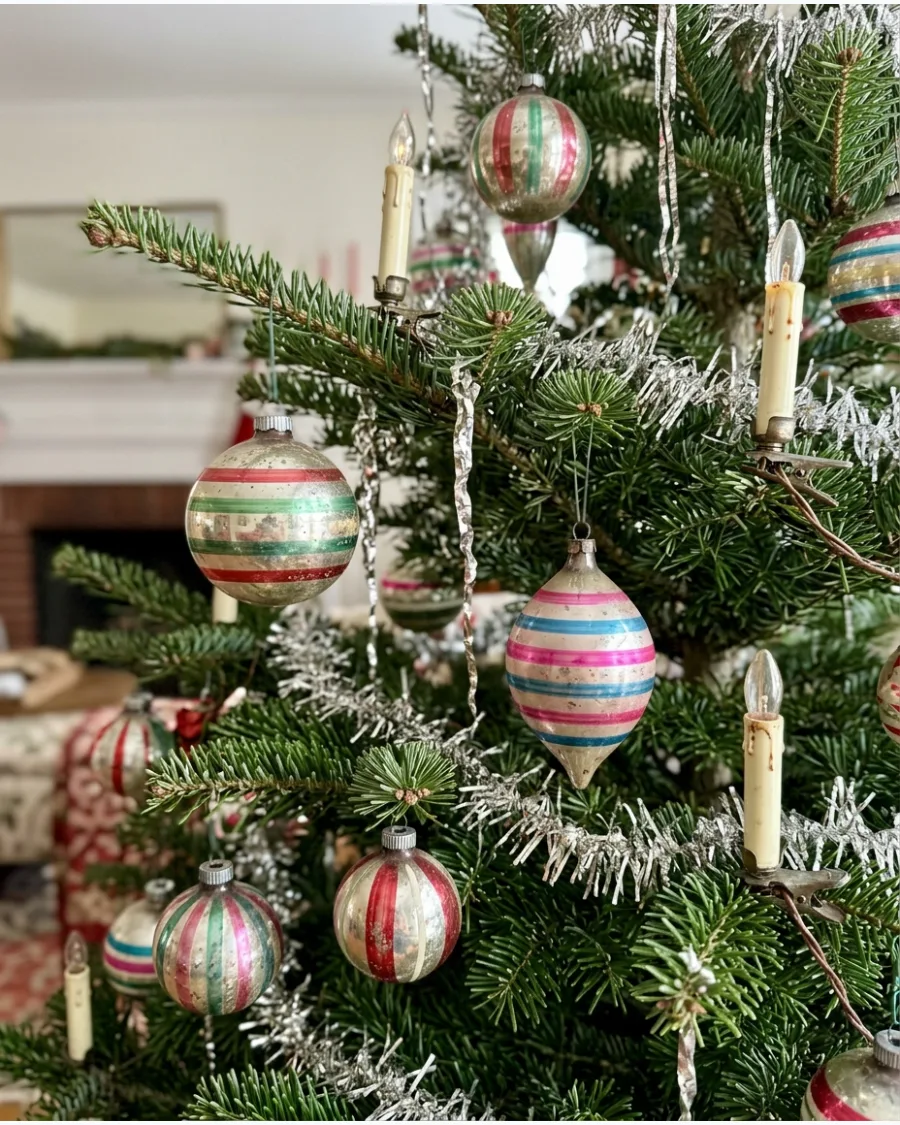
Hand-painted stripes give a tree a whimsical candy-shop feel that is quintessentially retro. Alternate between horizontal and vertical stripes to keep the pattern from looking repetitive. These ornaments often feature a mix of matte and metallic finishes which adds visual texture.
They pair perfectly with simple tinsel or popcorn garlands.
- Look for hand-painted labels to ensure an authentic vintage appearance.
- Use these as the primary filler ornaments for a 1950s themed tree.
- Avoid cleaning with water as old paint can flake off easily.
Best shortcut: If you cannot find vintage ones, use a paint pen to add simple stripes to plain glass baubles.
7. Vintage Hand-Painted Floral Ornaments
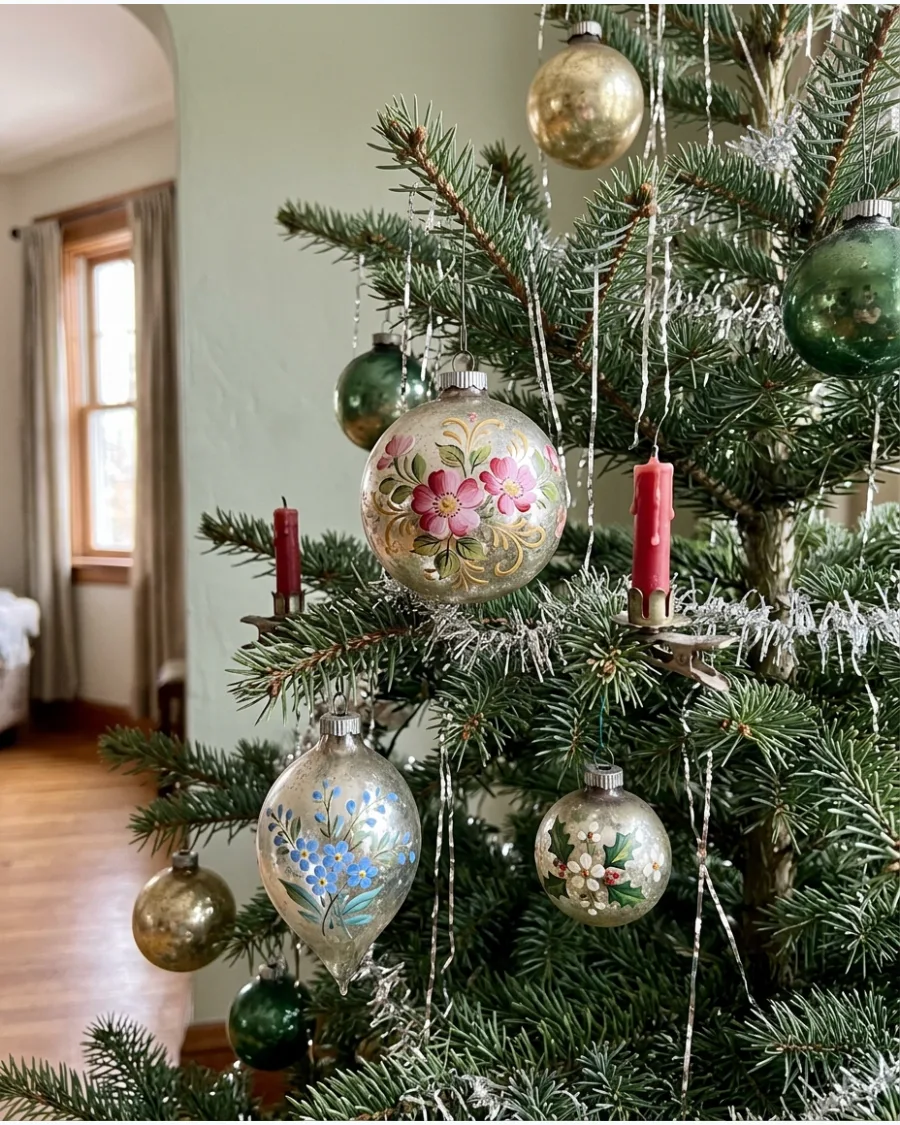
Floral motifs add a delicate touch that softens the bright colors of a retro tree. Feature these hand-painted pieces on the most visible front branches to highlight their intricate details. Small flourishes like glittered leaves or snowy accents make each piece feel like a work of art.
They help bridge the gap between a rustic cottage style and a classic vintage look.
- Prioritize ornaments with intact paint and minimal cracking.
- Keep these away from high-traffic areas where they might get bumped.
- Display them in a bowl on a coffee table if the tree gets too crowded.
Quick win: Use a magnifying glass when shopping to check for the artist signature or brand marks on the cap.
8. Vintage Jewel-Tone Glass Ornaments
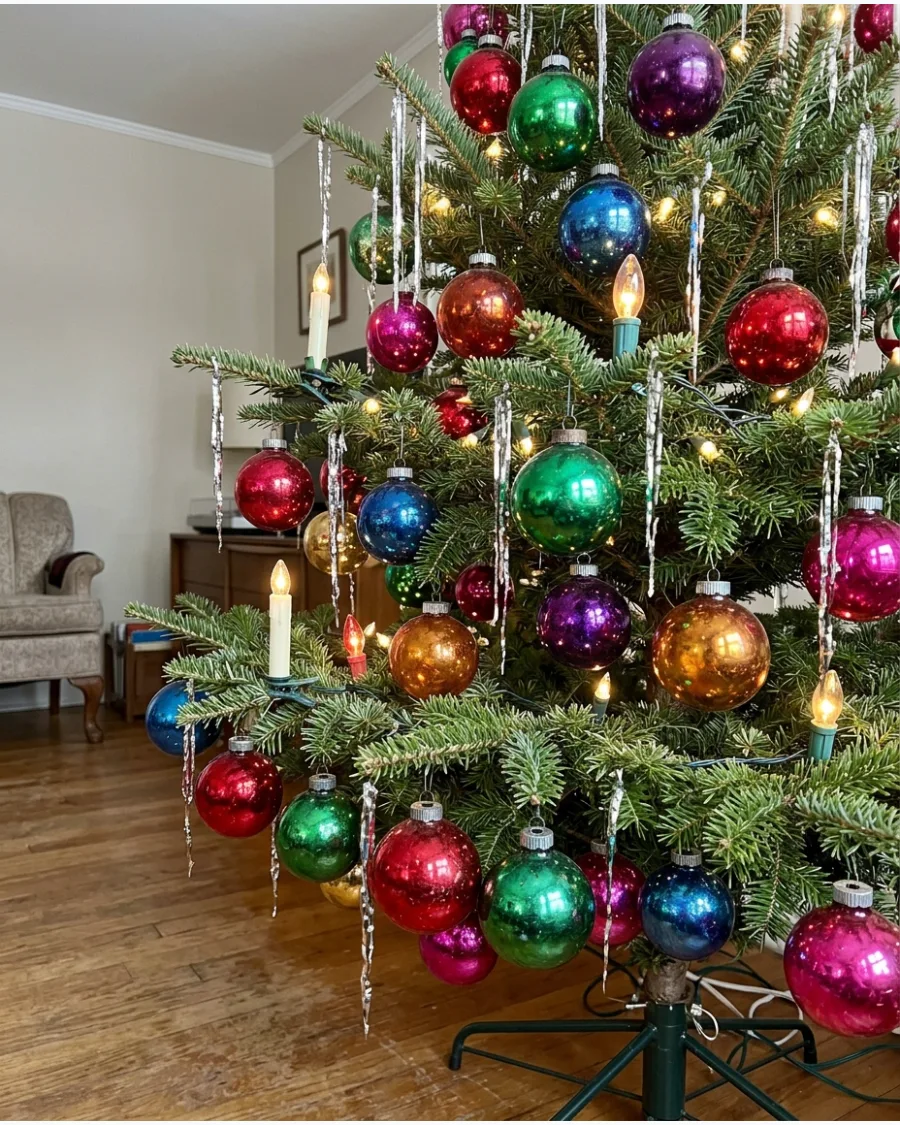
Rich colors like emerald, ruby, and amethyst create a moody and sophisticated holiday atmosphere. Pair jewel-toned ornaments with warm white or ceramic multi-colored lights for a traditional glow. These saturated hues look best on a dense dark green tree.
The glossy finish reflects the light in a way that feels expensive and timeless.
- Combine at least three different jewel tones for the most authentic look.
- Use gold hooks to complement the warmth of the deep colors.
- Store them in a climate-controlled area to prevent the glass from becoming brittle.
Most people skip this: Use larger jewel-tone ornaments at the base of the tree to ground the design.
9. Pastel Vintage Glass Ornaments
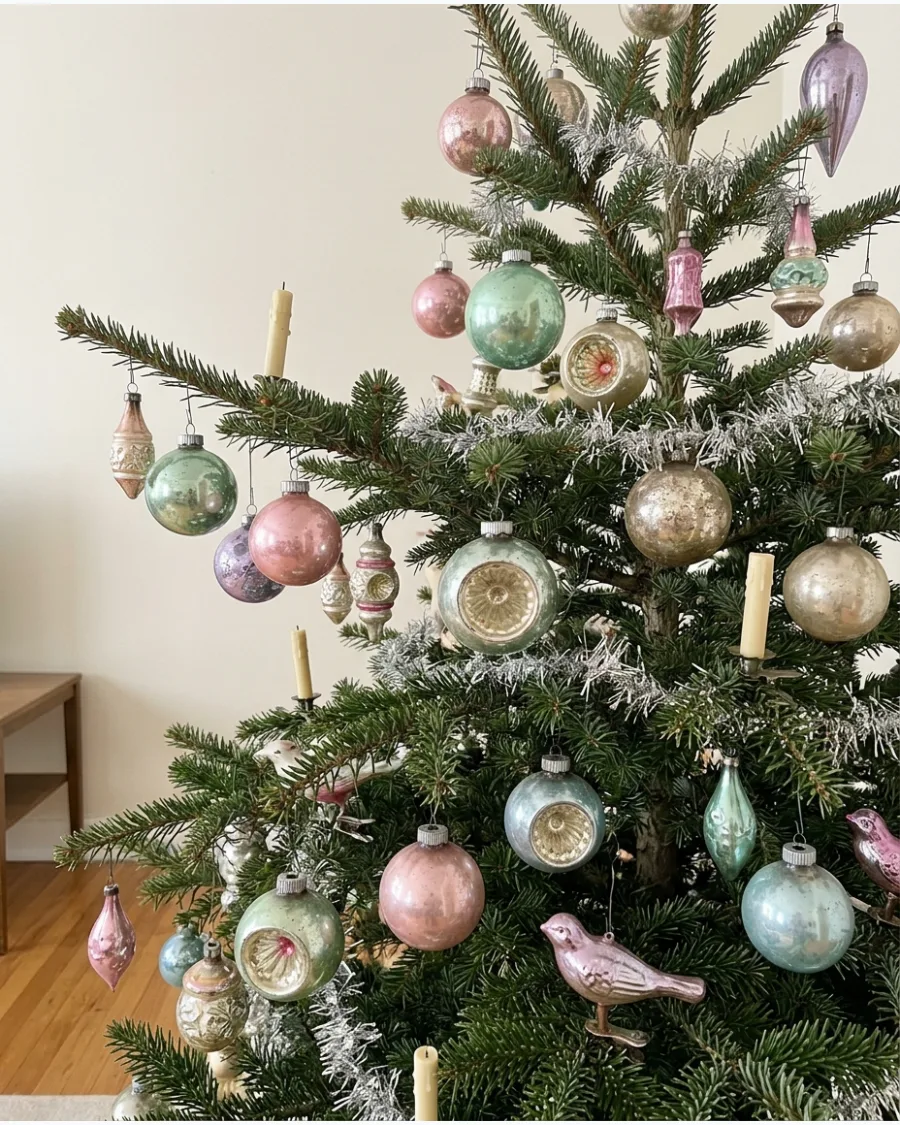
For a softer early mid-century vibe, pastel ornaments are the perfect choice. Mix mint green, pale pink, and lavender ornaments with silver tinsel for a frosty nostalgic appearance. These colors work exceptionally well on white or flocked trees.
The lighter palette makes a small room feel less overwhelmed by holiday decor.
- Choose a silver or white tree skirt to enhance the light pastel colors.
- Avoid using dark or heavy garlands that might overpower the delicate shades.
- Look for frosted versions of these colors for extra texture.
Best shortcut: Spray a light dusting of artificial snow on the branches to make pastel ornaments pop.
10. Mismatched Heirloom Glass Ornament Collection
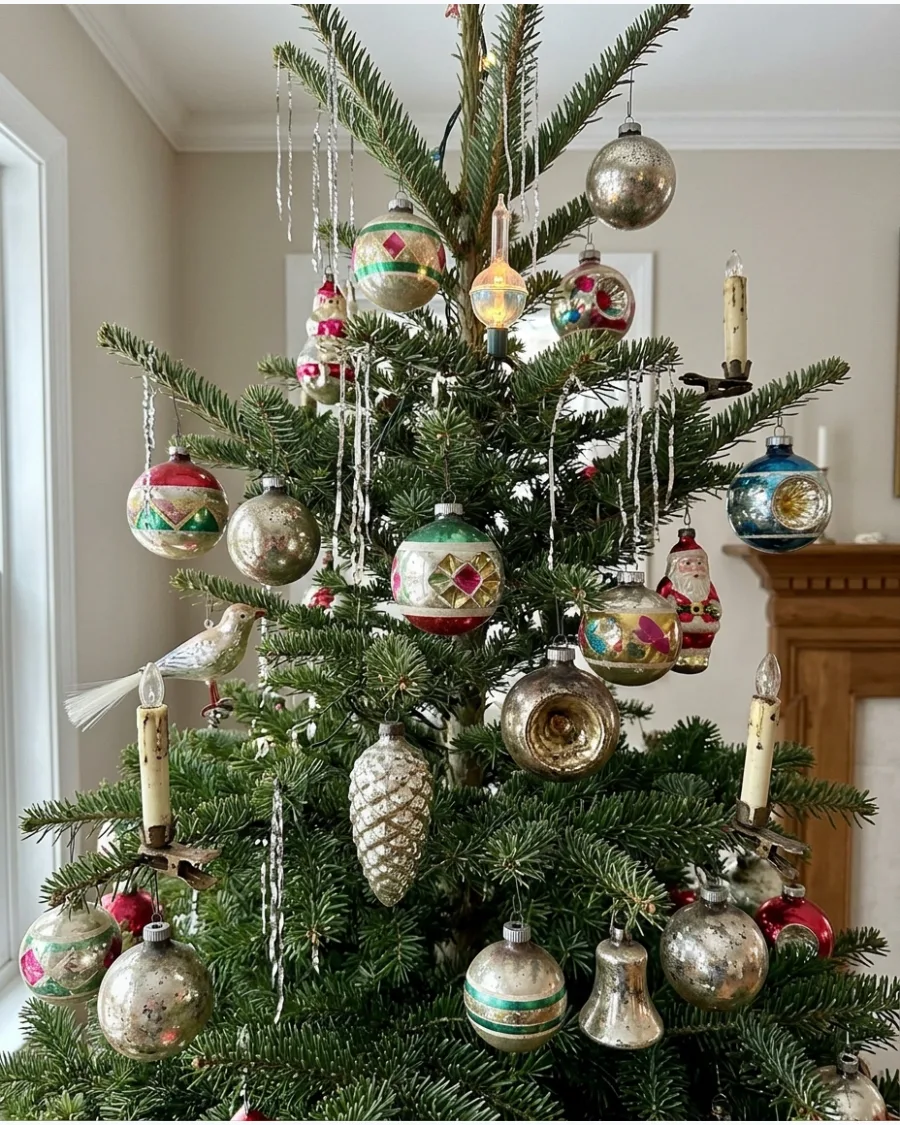
A truly authentic vintage tree looks like it was built over decades rather than bought in a single afternoon. Combine ornaments of different sizes, ages, and materials to create a story-rich display. Do not worry about matching colors perfectly because the variety provides the charm.
This approach allows every piece to stand out as a unique conversation starter.
- Start with the largest ornaments first and fill in the gaps with smaller pieces.
- Use a mix of traditional wire hooks and velvet ribbons for hanging.
- Keep a list of where each special ornament came from to share with guests.
Quick win: If a collection feels too chaotic, add a single type of garland to tie everything together.
HANDMADE AND OLD-FASHIONED TREE DECORATIONS
11. Vintage Popcorn Christmas Garland
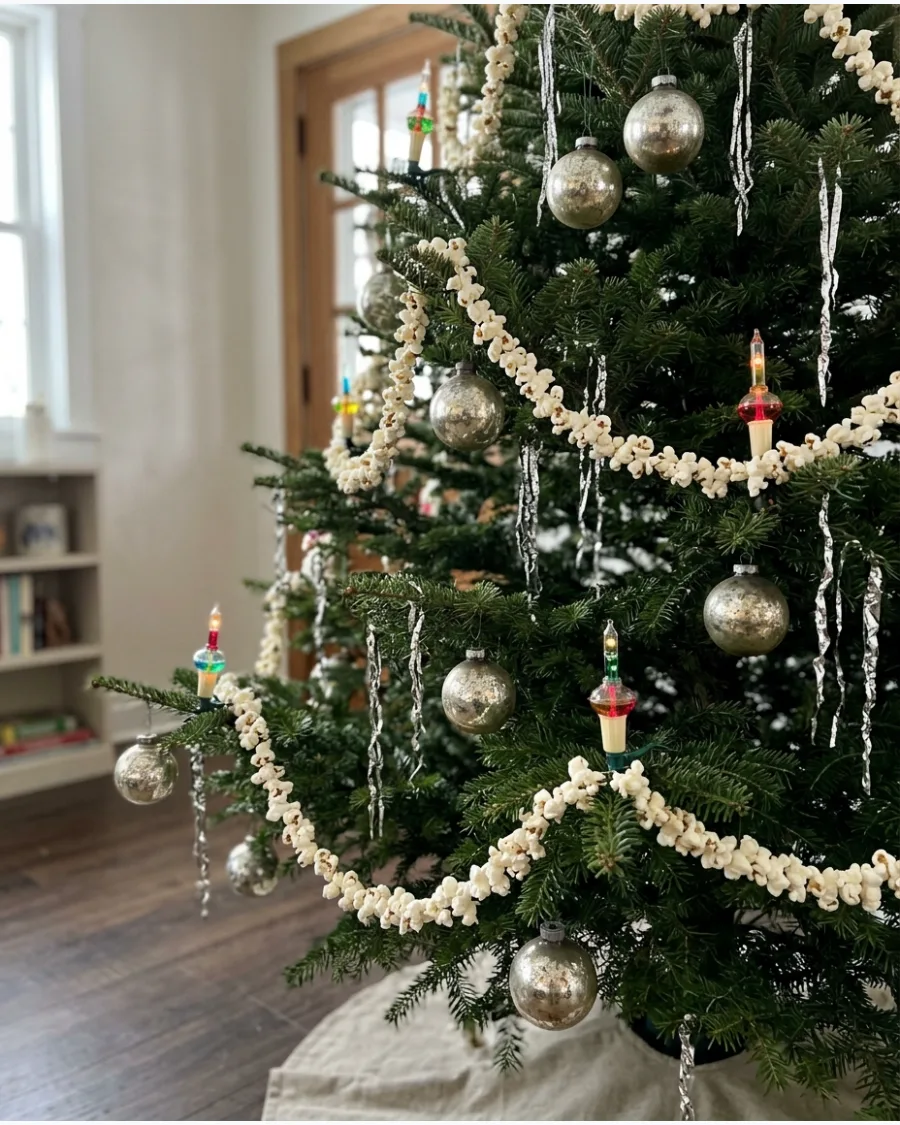
String plain popcorn onto strong thread and drape the garland loosely around the tree. Keep the strands slightly irregular rather than perfectly spaced to recreate the homespun Christmas trees of earlier generations. Popcorn is a classic choice because it adds a bright white texture that lights alone cannot provide.
- Sourcing: Buy plain, unbuttered kernels and pop them at home for the best results.
- Setup: Use a thin fishing line or upholstery thread so the strand does not break under its own weight.
- Adaptation: If you have pets, hang these higher up to keep them away from curious mouths.
Quick win: Use day-old popcorn because it is less likely to shatter when you push the needle through.
12. Cranberry and Popcorn Tree Garland
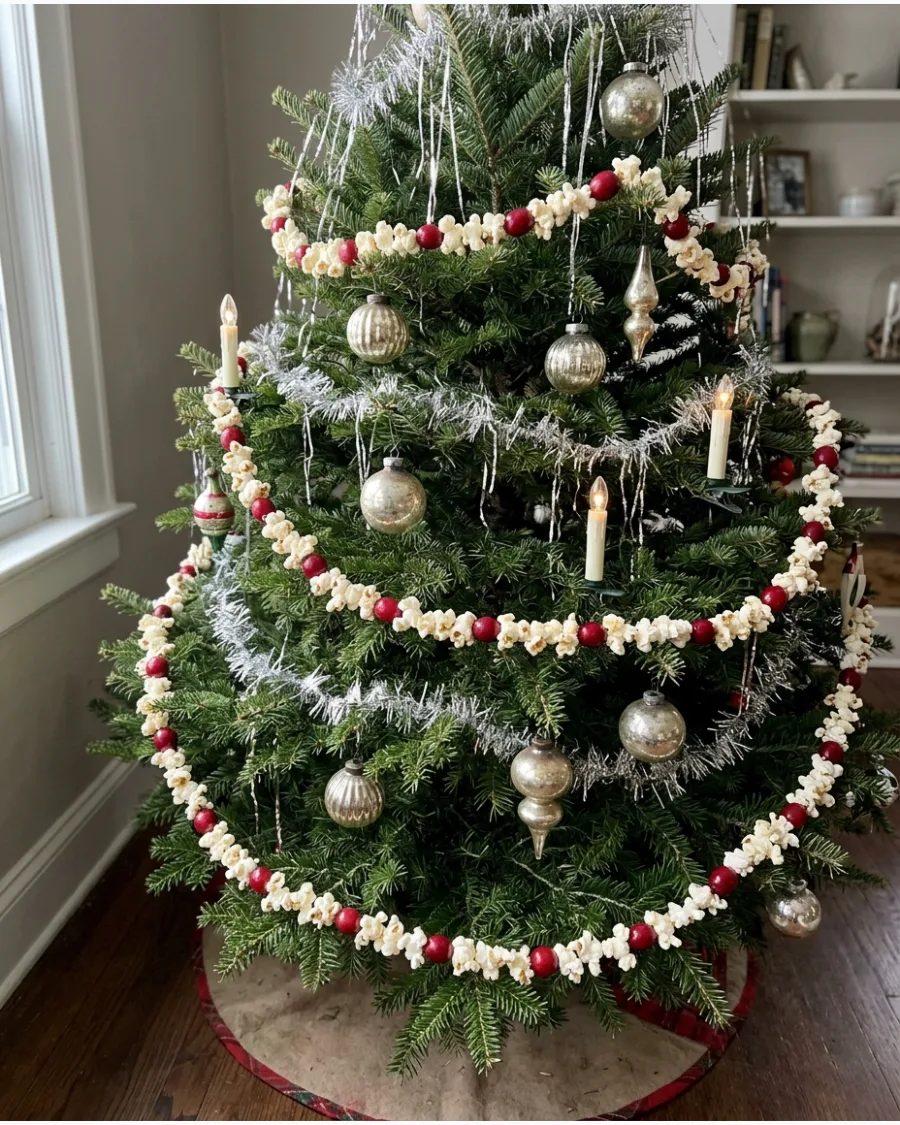
Alternate popcorn and bright red cranberries along handmade garland strands. Wrap them naturally around a traditional green tree and pair them with simple ornaments for a classic old-fashioned Christmas look. The combination of red and white creates a visual rhythm that guides the eye across the tree.
- Budget: Fresh cranberries are usually less than three dollars a bag during the holiday season.
- Setup: Wipe each cranberry with a dry cloth to remove moisture before stringing them.
- Adaptation: Use deep red wood beads instead of real fruit if you want a garland that lasts for years.
Most people skip this: Spray the finished garland with a clear sealant to prevent the cranberries from leaking juice on your floor.
13. Handmade Paper Chain Garland
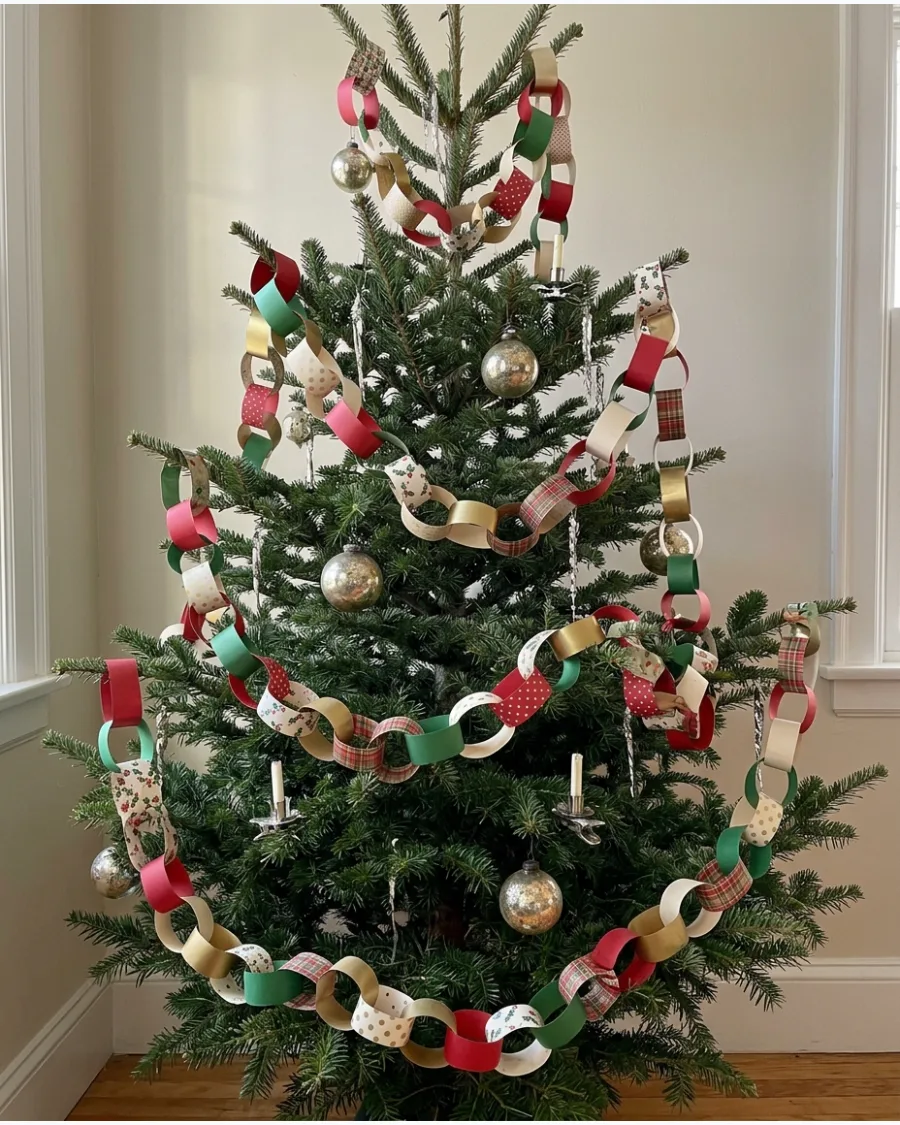
Create interconnected paper loops using red, green, cream, metallic, or vintage-patterned paper. Make several long chains and drape them between branches for an inexpensive decoration inspired by family Christmas crafts. Paper chains are the best way to add a lot of volume to a tree without adding heavy weight.
- Timing: This project takes about an hour and is a great way to involve the whole family.
- Setup: Use double-sided tape or a heavy-duty glue stick for a cleaner look than liquid glue.
- Adaptation: Use pages from an old, damaged book for a more sophisticated and aged appearance.
Best shortcut: Use a paper trimmer to cut all your strips at once so the loops are the exact same width.
14. Vintage Paper Fan Ornaments
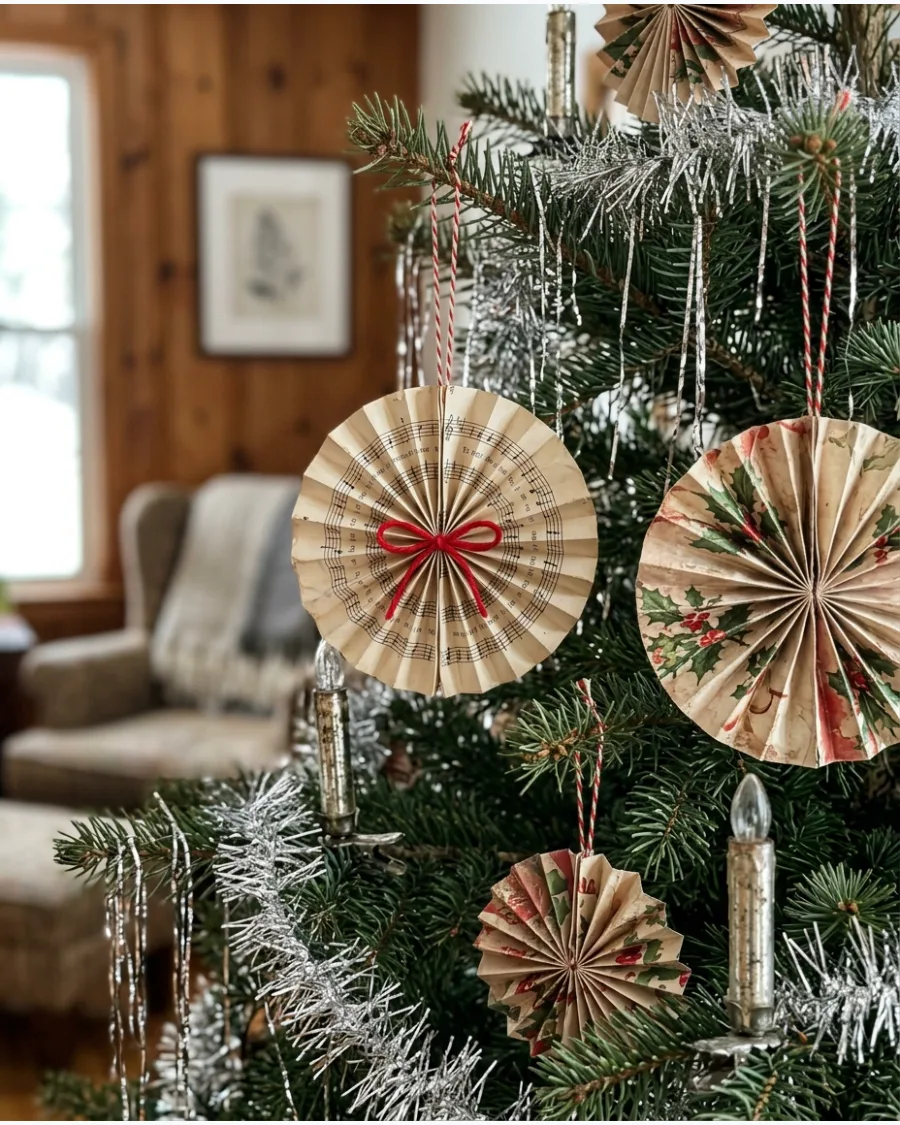
Fold decorative paper into small accordion fans or rosettes and hang them from ribbon or thread. Use traditional Christmas prints, sheet music, or muted vintage colors to make the ornaments feel aged and handmade. Texture is more important than color when you want a tree to look authentically old-fashioned.
- Sourcing: Use heavy cardstock instead of thin paper so the folds stay crisp all season.
- Setup: Use a bone folder or the edge of a credit card to make sharp, professional creases.
- Adaptation: Vary the sizes of the fans to help fill small gaps between larger ornaments.
- ProTip: "Quick win: Scallop the edges of the paper with craft scissors before folding to give the fans a more delicate, lace-like look.
Quick win: Scallop the edges of the paper with craft scissors before folding to give the fans a more delicate, lace-like look.
15. Old Christmas Card Ornaments
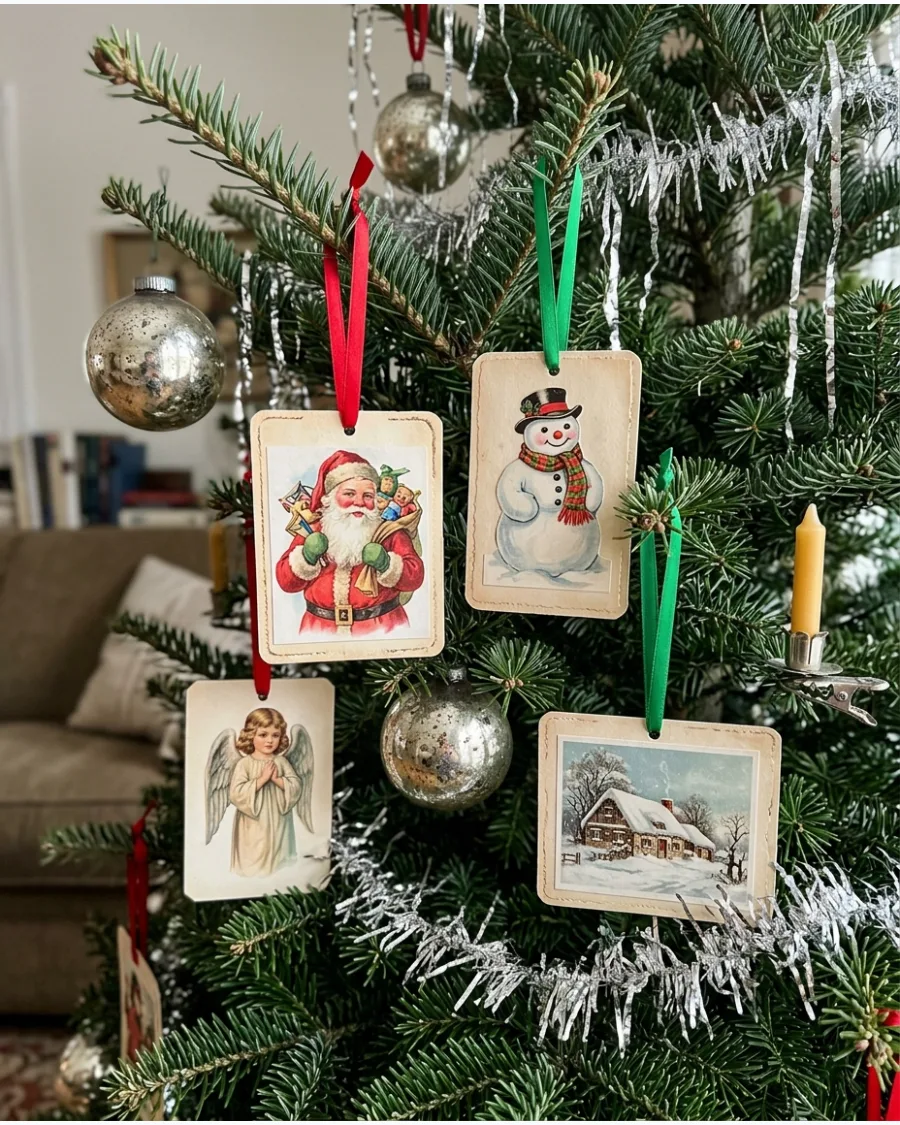
Cut attractive illustrations from reproduction vintage Christmas cards and mount them on sturdy cardstock. Add ribbon hangers so nostalgic Santa, snowman, angel, and winter scenes can become lightweight tree ornaments. Using cards is a smart way to fill large gaps in the branches with meaningful imagery.
- Sourcing: Look for reproduction card packs at craft stores to avoid damaging actual antiques.
- Setup: Apply a thin layer of glue to the back of the card to prevent the edges from curling.
- Adaptation: Use a hole punch and some thin velvet ribbon for a high-end finish.
Most people skip this: Paint the edges of the cardstock with a gold metallic marker to hide the white paper core.
16. Vintage Sheet Music Ornaments
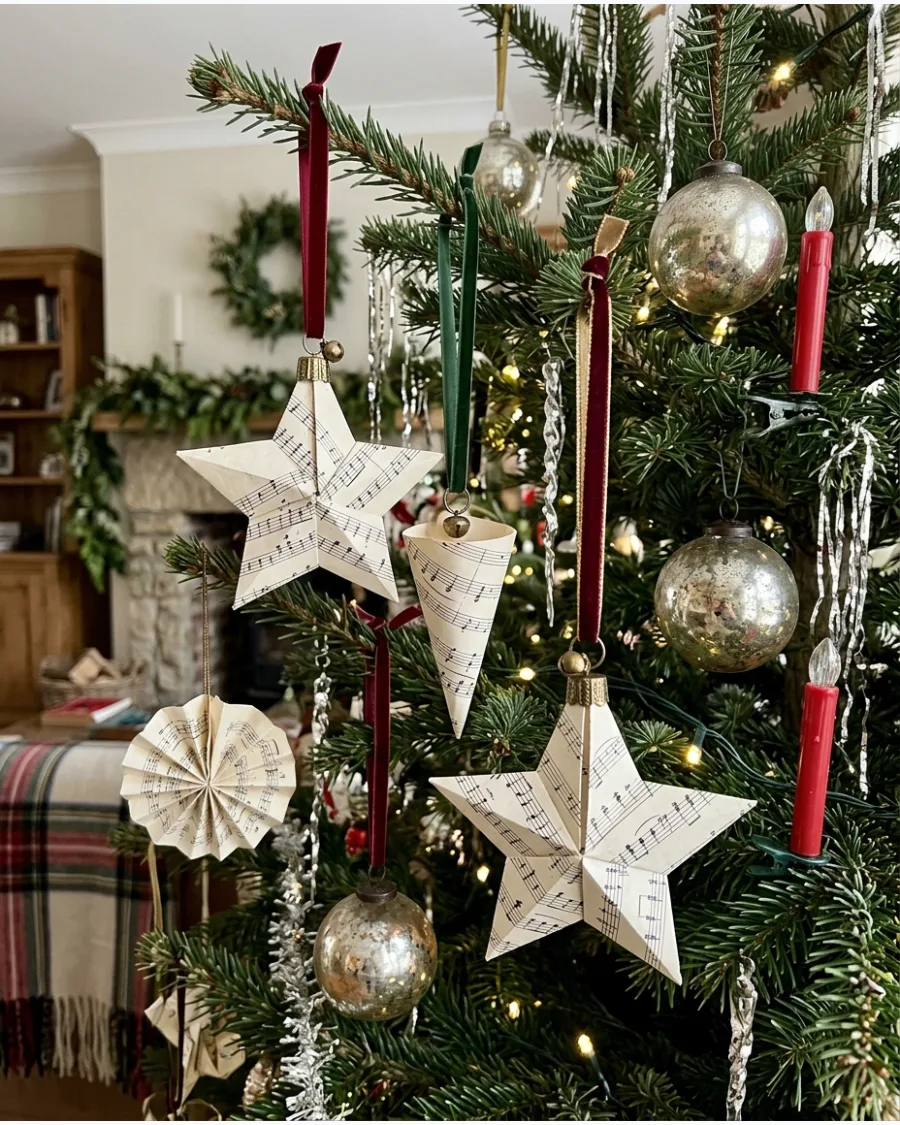
Turn copies of old Christmas sheet music into folded stars, cones, hearts, or medallions. Allow the printed musical notes to remain visible and pair the ornaments with velvet ribbon and antique-gold accents. Paper ornaments provide a quiet, matte finish that balances out the glare from glass bulbs.
- Budget: Print free public domain Christmas music onto cream-colored paper for a cheap alternative.
- Setup: Stuff paper cones with a single cotton ball to help them keep their shape on the branch.
- Adaptation: Add a single pearl bead to the bottom of each ornament to provide a little extra weight.
Best shortcut: Dip the edges of the paper in tea or coffee to give new printer paper an authentic century-old look.
17. Salt Dough Christmas Ornaments
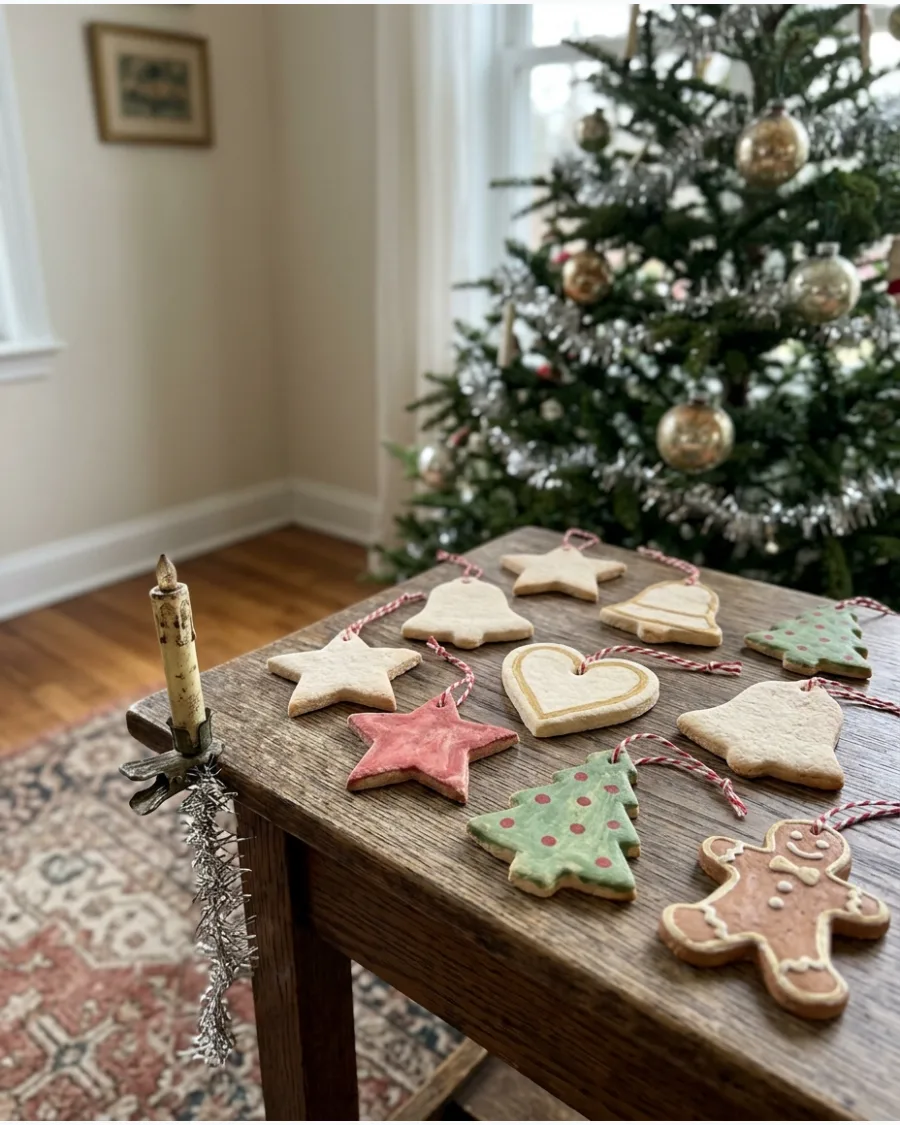
Create handmade stars, bells, hearts, gingerbread people, and trees from salt dough. Leave some natural and paint others in faded red, green, cream, and gold for an ornament collection reminiscent of family Christmas crafts. The slightly uneven, organic surface of salt dough is exactly what makes the tree feel lived-in.
- Sourcing: You only need flour, salt, and water to make a large batch of dough.
- Setup: Bake the shapes at a very low temperature for several hours to prevent them from puffing up.
- Adaptation: Press a small evergreen sprig into the wet dough before baking to create a natural fossil effect.
Quick win: Use a clear matte sealant on both sides of the dough to prevent the ornaments from softening over time.
18. Crocheted Snowflake Ornaments
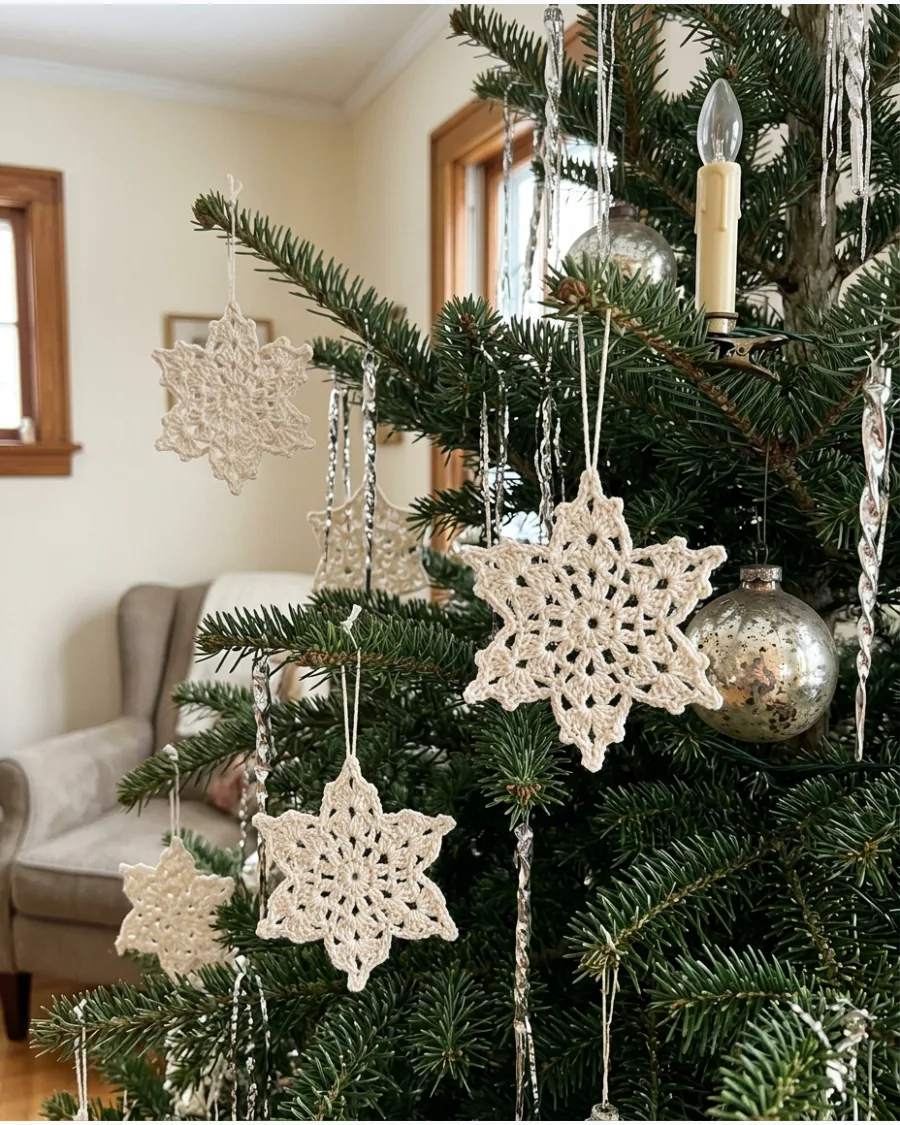
Hang handmade or vintage-inspired crocheted snowflakes throughout the tree. Use cream or white thread and lightly starch the ornaments so each delicate snowflake maintains its shape against the evergreen branches. White lace stands out against dark green needles better than almost any other material.
- Sourcing: Antique malls and online marketplaces are great spots to find authentic vintage sets.
- Setup: Use a heavy-duty fabric stiffener spray every few years to keep the points from drooping.
- Adaptation: If the tree is too full, hang these in a window to catch the natural winter light.
Most people skip this: Use transparent fishing line to hang these so the snowflakes look like they are floating in the branches.
19. Embroidered Felt Christmas Ornaments
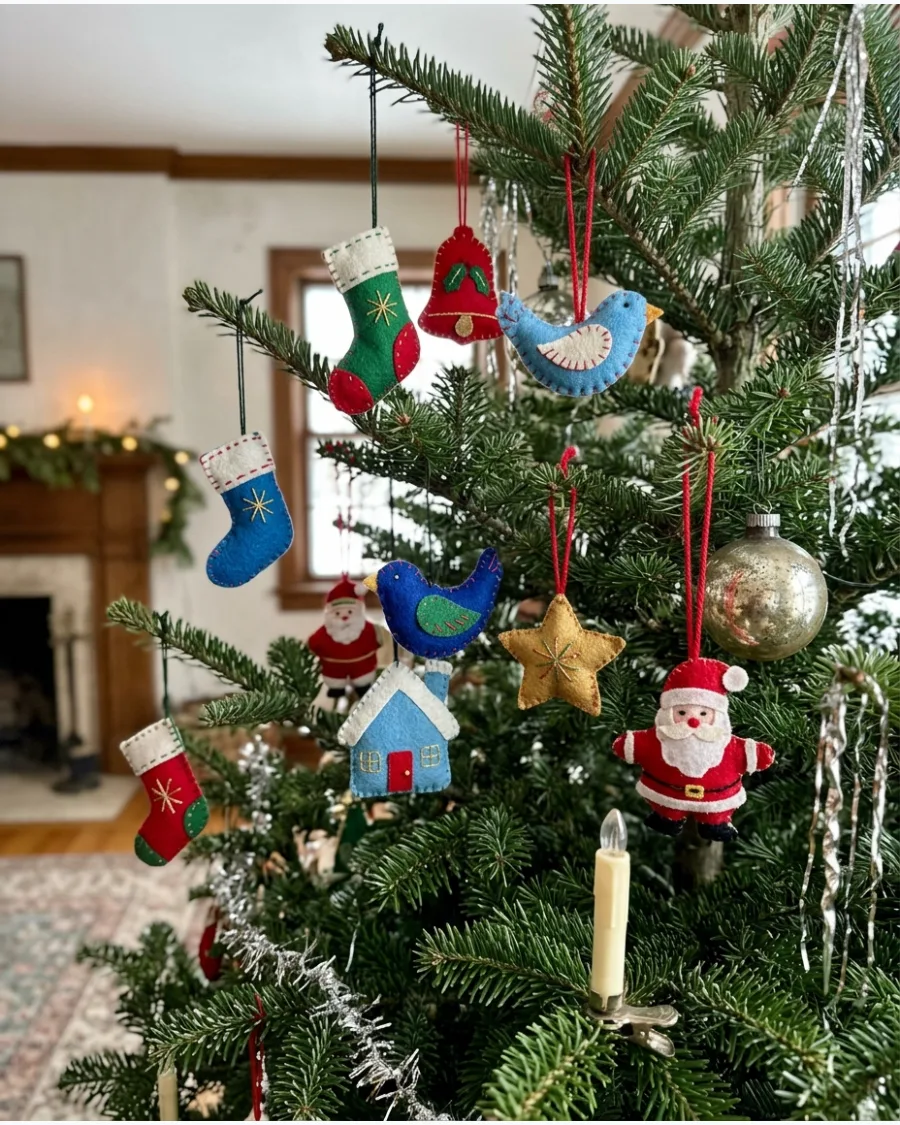
Create small stockings, bells, birds, stars, houses, and Santa figures from felt with simple embroidered details. Choose traditional colors and slightly imperfect handmade stitching to strengthen the nostalgic effect. Hand-stitched felt adds a soft, cozy element that helps the tree look more approachable and less stiff.
- Timing: These small projects can be finished in about 30 minutes while you relax in the evening.
- Setup: Use six-strand embroidery floss rather than regular sewing thread for better visibility.
- Adaptation: Fill the ornaments with dried lavender or balsam for a tree that smells like the woods.
Quick win: Trace your shapes onto the felt with a disappearing ink pen to ensure your stitches stay perfectly on track.
20. Quilted Fabric Christmas Ornaments
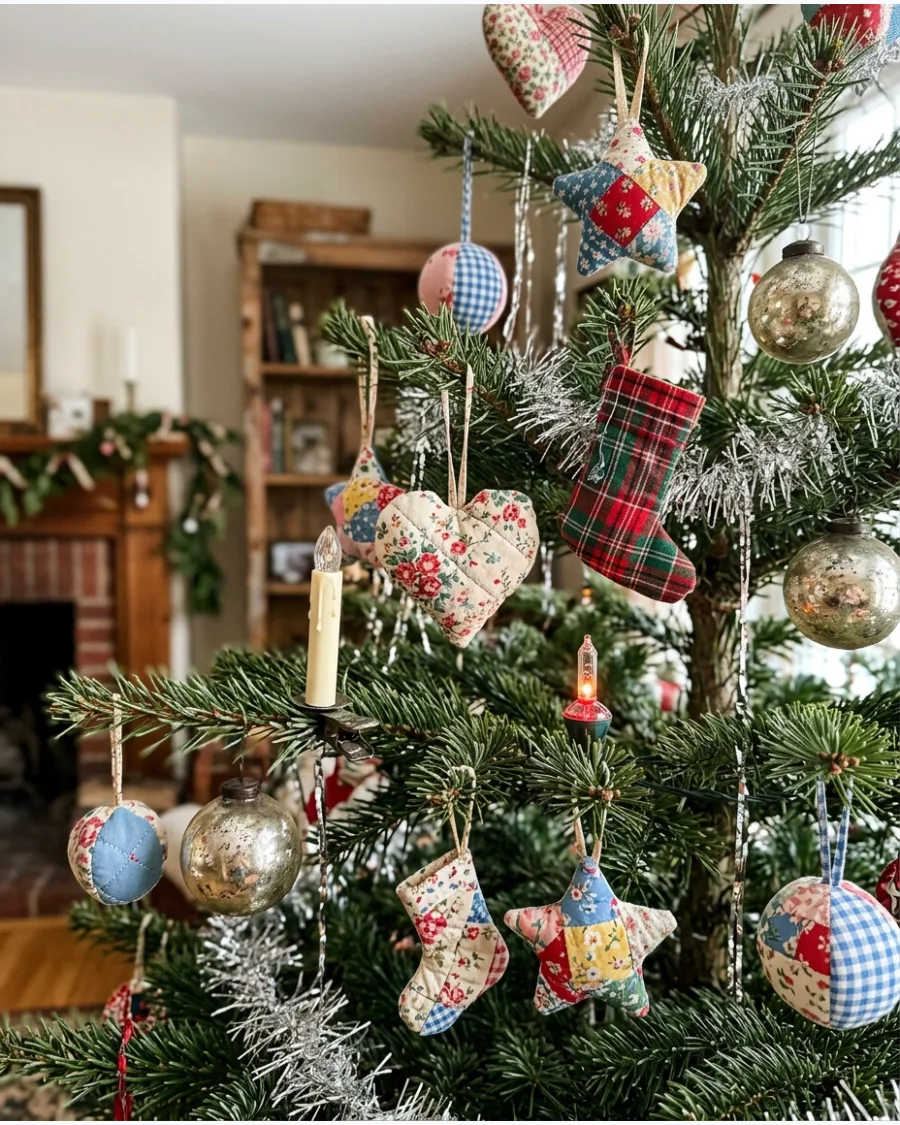
Make small padded ornaments from vintage-style floral, plaid, gingham, or patchwork fabrics. Use hearts, stars, balls, and miniature stocking shapes to introduce cozy textile details throughout the tree. Mixing different patterns in the same color family keeps the tree looking cohesive rather than messy.
- Sourcing: This is the perfect way to use up small fabric scraps or old cloth napkins.
- Setup: Use pinking shears on the fabric edges to prevent fraying and add a rustic finish.
- Adaptation: Tie a small brass bell to the bottom of the ornament to add sound when the tree is touched.
Best shortcut: If you cannot sew, use iron-on hem tape to seal the edges of your fabric shapes before stuffing.
VINTAGE GARLAND, TINSEL, AND TREE TRIM
21. Classic Silver Tinsel Christmas Tree
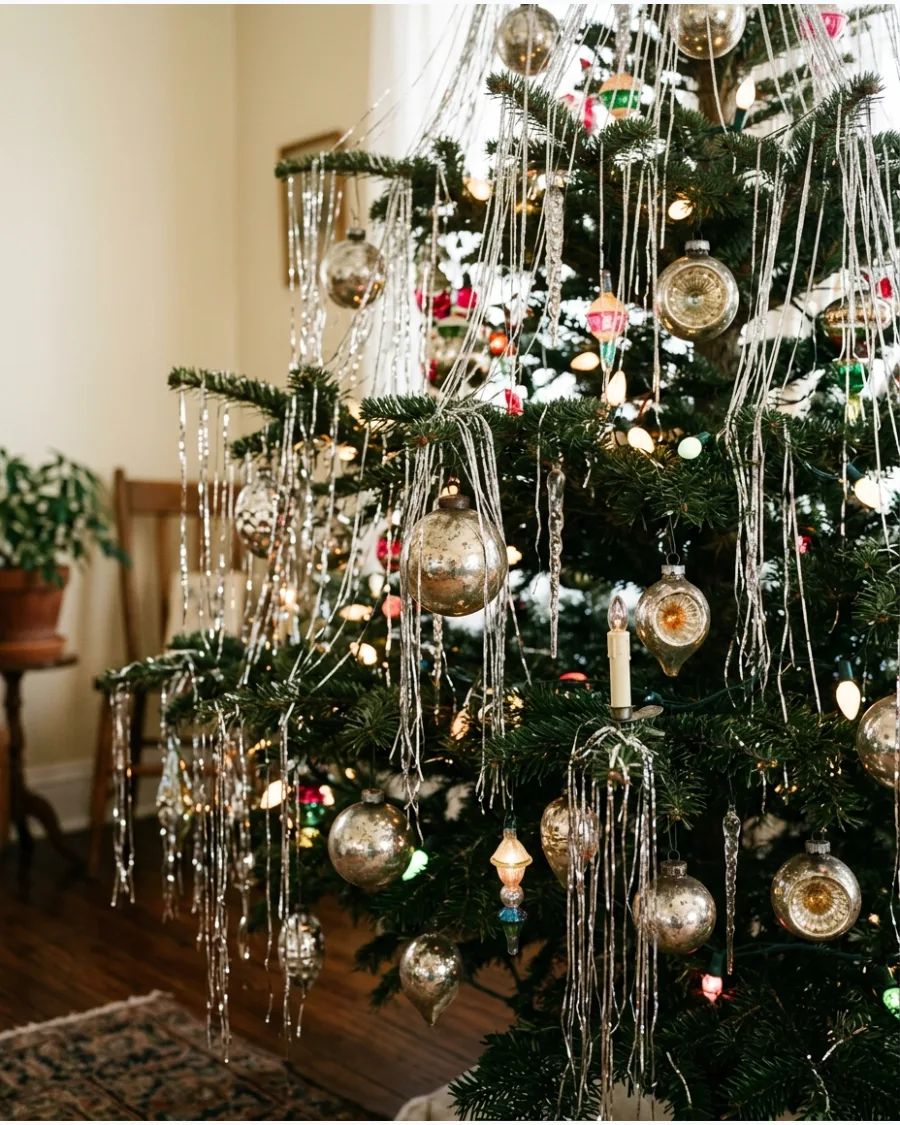
Hanging individual silver tinsel strands vertically creates a shimmering waterfall effect that mimics icicles. This technique dates back decades and instantly makes a modern tree look like a cherished heirloom.
Place strands one by one on the branch tips for a clean look that does not overwhelm the ornaments. A heavy hand with tinsel is better than a light one if the goal is that authentic mid-century glow.
- Buy tinsel in bulk packs early in the season to ensure color consistency across the whole tree.
- Apply tinsel starting from the bottom branches and work upward to prevent tangling with lower strands.
- For small trees or tabletop versions, cut the tinsel strands in half to maintain a proper scale.
Most people skip this: Remove tinsel strands individually at the end of the season and store them flat to reuse them next year without tangles.
22. Multicolored Retro Tinsel Garland
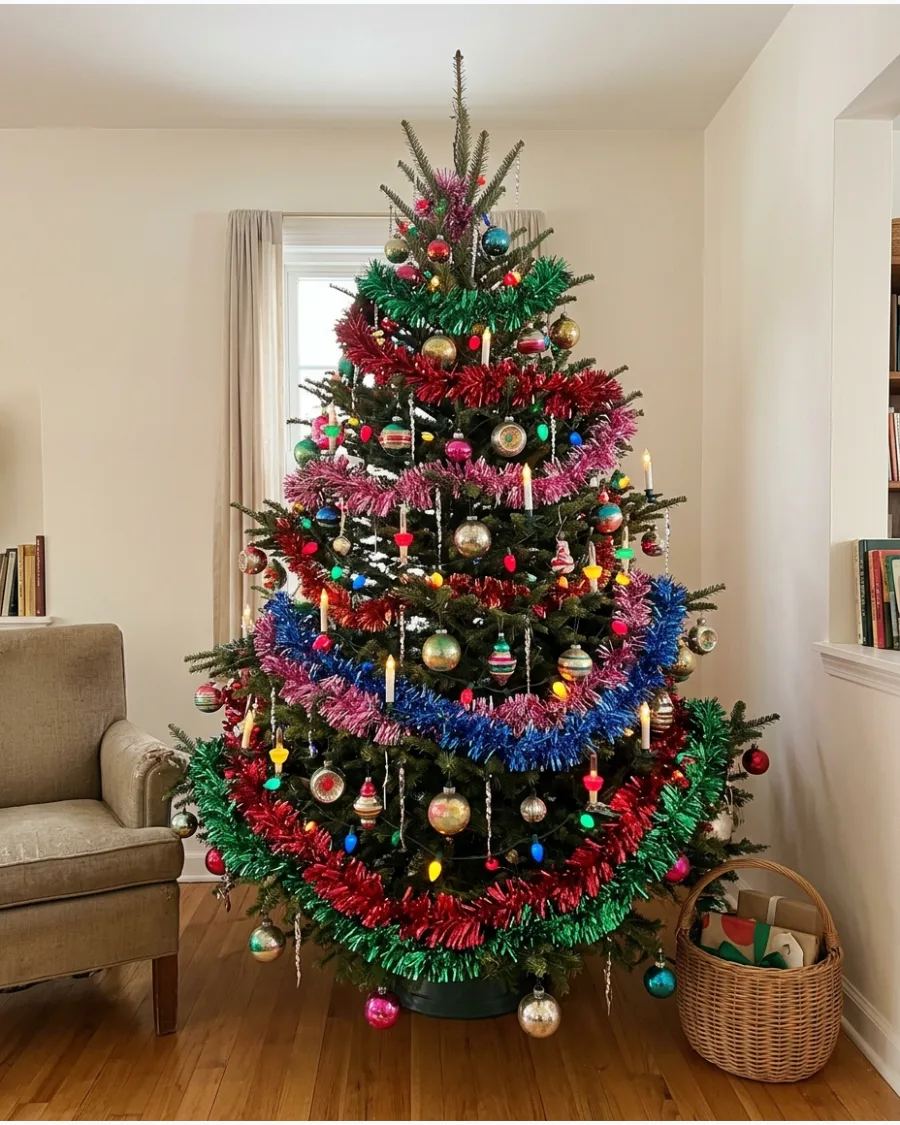
Chunky tinsel in vibrant colors like fuchsia, blue, and gold brings a high-energy 1960s vibe to any living room. It effectively fills in gaps between branches and adds a layer of texture that modern minimalist trees often lack.
Wrap the garland loosely to allow the branches to peek through and prevent a matted appearance. Mixing bright colors is the best way to lean into a kitschy, fun holiday theme that feels genuinely retro.
- Look for 'old stock' style tinsel which often has a higher shine and stiffer texture than modern varieties.
- Loop the garland over the branches rather than pulling it tight to maintain the fluffy volume.
- Pair multicolored tinsel with white lights to make the different metallic shades pop against the dark needles.
Quick win: Use a pipe cleaner in a matching color to secure the ends of the garland to the tree trunk so it stays in place all season.
23. Vintage Glass Bead Garland
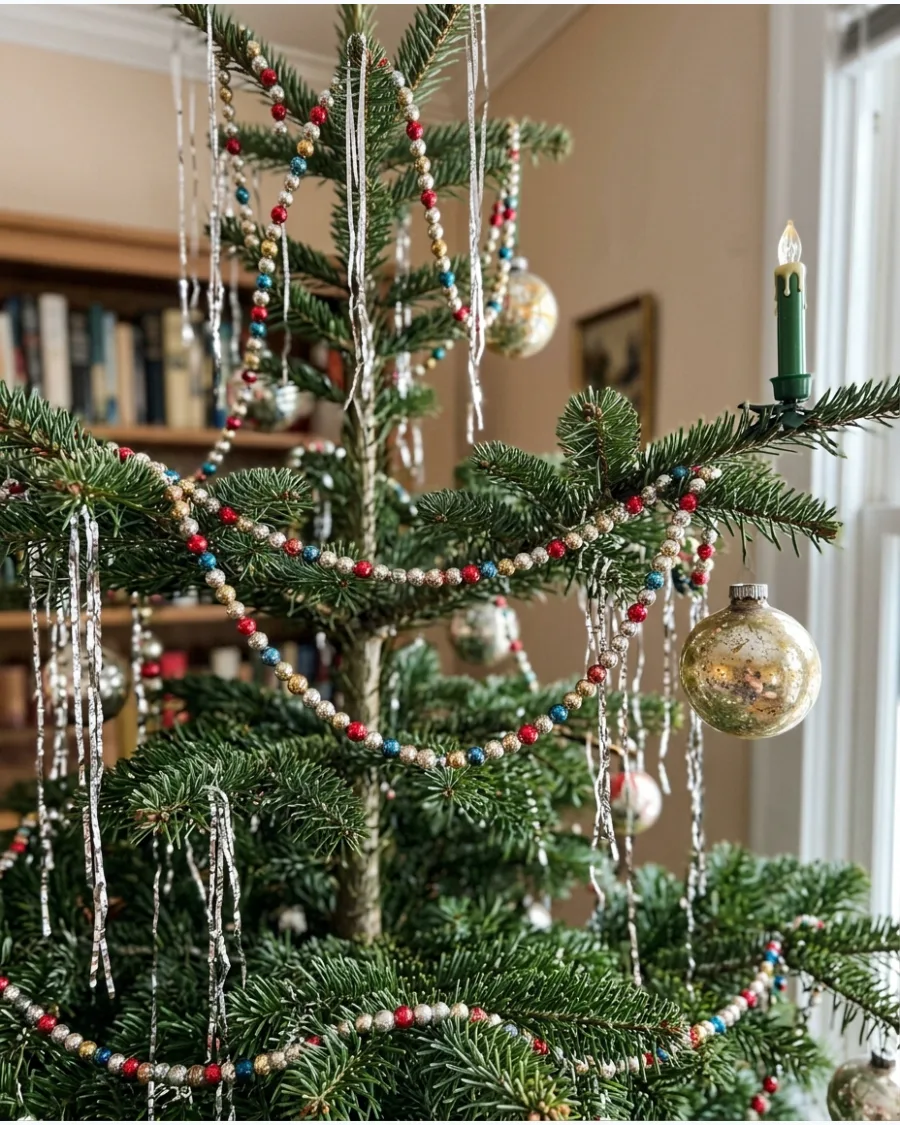
Glass bead garlands offer a delicate, sophisticated sparkle that plastic versions simply cannot replicate. These strands are often made of mercury glass or colored glass beads that catch and reflect the light beautifully.
Drape the beads in deep swags to create a sense of movement and elegance across the tree. Avoid cheap plastic beads because they lack the weight and luster needed for a true vintage aesthetic.
- Source vintage glass beads at estate sales or antique malls for unique shapes like bugles or faceted rounds.
- Check the string strength before hanging, as old thread can become brittle and break under the weight of glass.
- Mix different metallic tones like copper and silver for a more collected, antique feel.
Best shortcut: If a glass strand breaks, save the individual beads to use as spacers for handmade ornaments or small bowl fillers.
24. Wooden Bead Christmas Garland
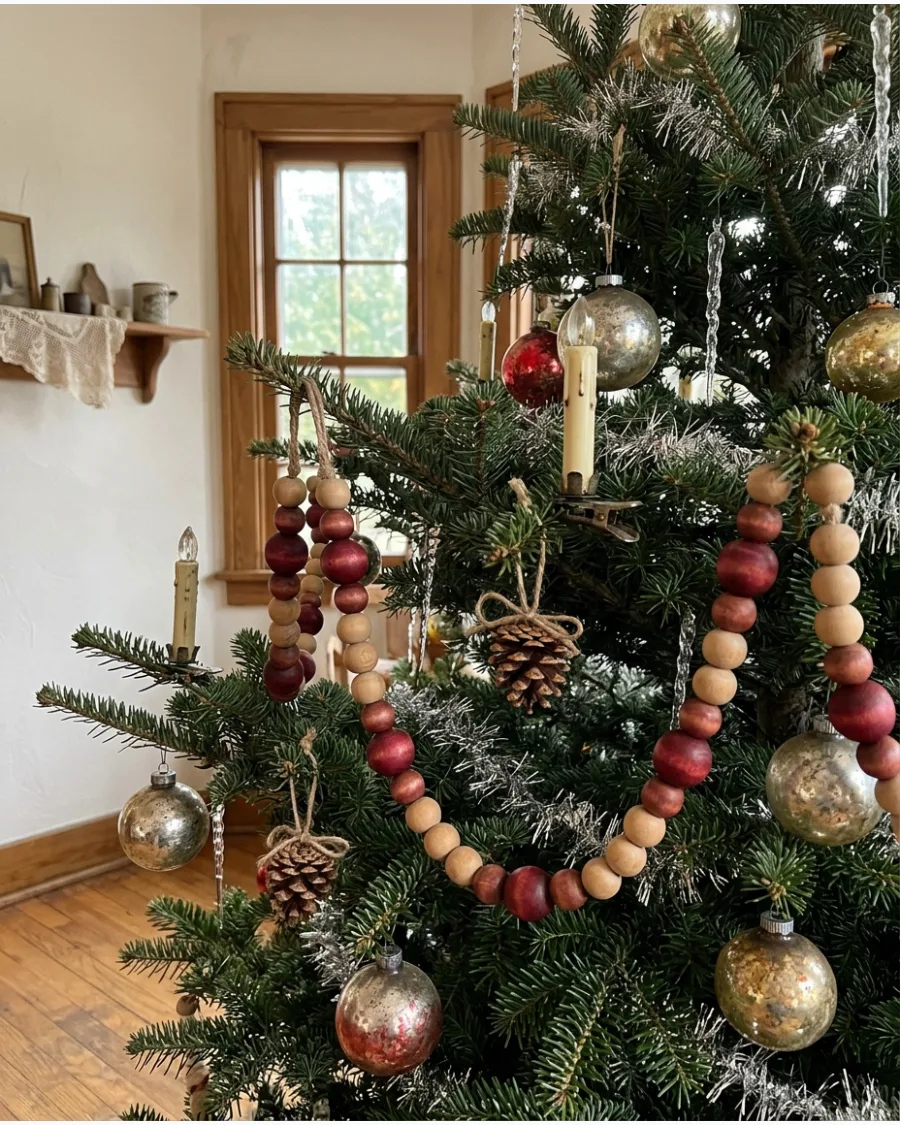
Natural or stained wooden beads provide a grounded, rustic feel that balances out the shine of glass ornaments. This style works perfectly for a farmhouse or cottage-themed Christmas tree that needs a bit of warmth.
Choose beads of varying sizes to add visual interest and a handmade quality to the display. Mixing different wood tones makes the tree feel more curated and less like a store-bought set.
- Unfinished wooden beads can be stained with coffee or tea for a quick, low-cost aged appearance.
- Ensure the cord used for stringing is thick enough to support the weight of larger wooden beads.
- Incorporate a wooden bead garland into a neutral color palette for a sophisticated, old-fashioned look.
Most people skip this: Sand the beads lightly before hanging to remove any rough edges that might snag on delicate ornaments.
25. Vintage Gold Bead Garland
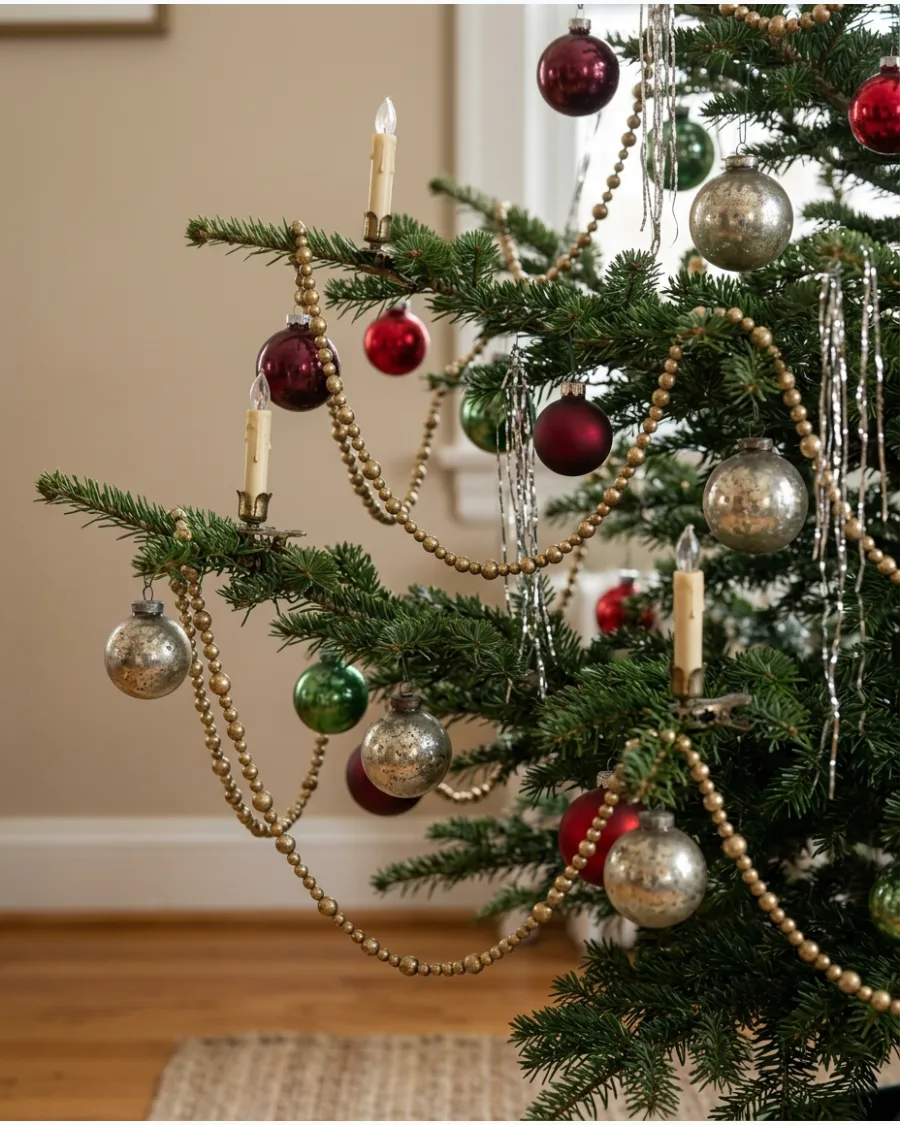
Gold bead garlands add a touch of formal elegance and warmth to a traditional Christmas tree. The antique gold finish pairs exceptionally well with deep red velvet ribbons and mercury glass ornaments.
Layer the gold beads near the interior of the tree to create depth and reflect light from the center outward. A matte or brushed gold finish always looks more expensive and authentic than a bright, shiny yellow-gold.
- Standard six-foot strands are easier to manage than extra-long ones that tend to tangle during installation.
- Store gold beads in individual zip-top bags to prevent the finish from scratching against other decorations.
- Drape these beads over the top of other garlands to add a subtle metallic highlight.
Quick win: Use gold floral wire to discreetly attach the garland to branches, ensuring the swags remain perfectly symmetrical.
26. Paper Flag Christmas Garland
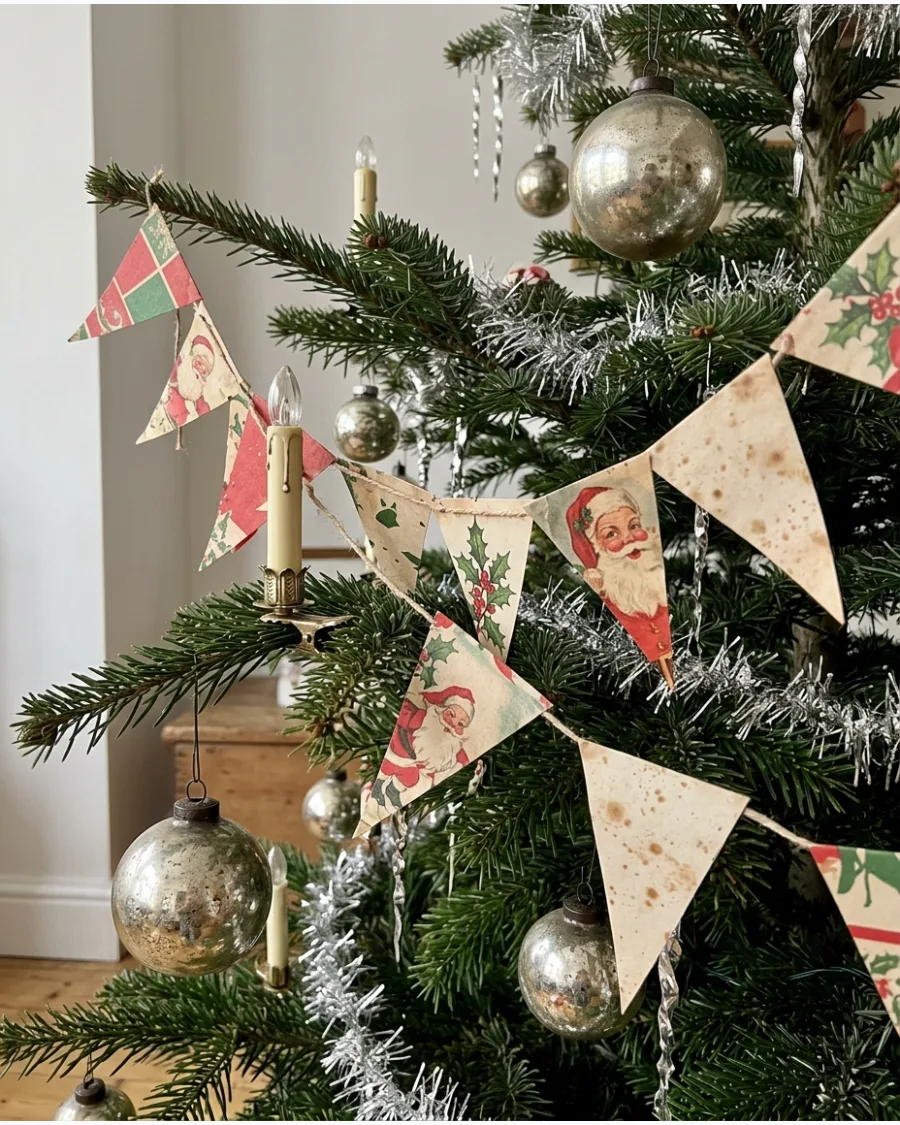
Small triangular flags made from old-fashioned paper prints bring a charming, storybook feel to the holiday decor. This is an excellent way to use leftover wrapping paper or vintage book pages for a custom look.
Space the flags evenly along a thin jute twine to keep the garland from looking cluttered or messy. Paper decorations are the best shortcut for adding a personal, handmade touch without spending a fortune.
- Use a paper punch or template to ensure every flag is the exact same size for a professional finish.
- Glue two pieces of paper back-to-back so the flags look finished from every angle on the tree.
- Choose patterns like ticking stripes or small florals to reinforce the vintage cottage aesthetic.
Most people skip this: Lightly ink the edges of the paper flags with a brown stamp pad to give them an instantly aged, antique look.
27. Dried Orange Slice Garland
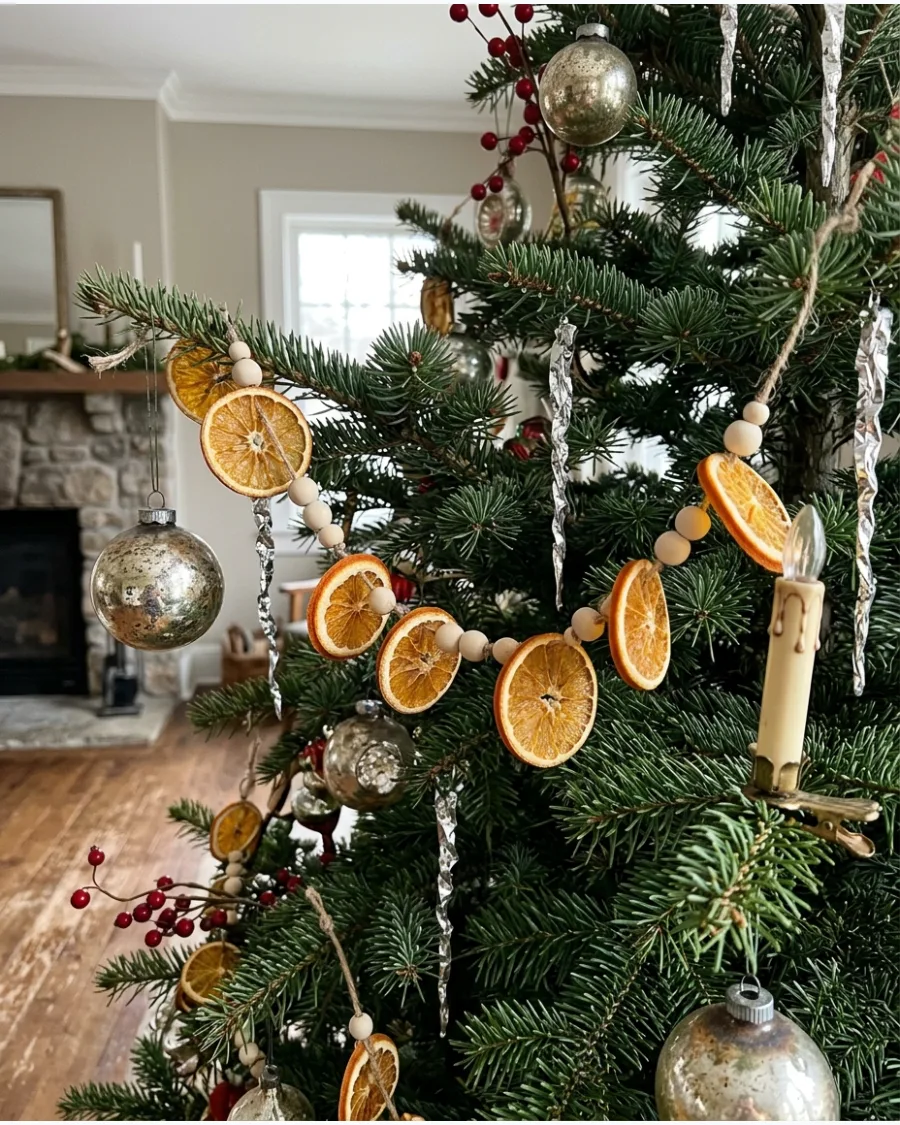
Dried citrus adds a pop of natural color and a faint, pleasant scent to the room during the holidays. The translucent quality of the orange slices looks stunning when placed directly in front of warm Christmas lights.
Use a thick needle and sturdy twine to ensure the fruit stays secure throughout the entire season. Natural elements are essential for breaking up the shine of glass and metal on a vintage-style tree.
- Dry slices in a low-temperature oven for several hours until they are completely firm to prevent mold.
- Space the slices about three inches apart on the twine to allow the evergreen branches to show through.
- Add whole cloves or cinnamon sticks between the orange slices for extra texture and a better scent.
Best shortcut: Buy pre-dried citrus slices if you want the look without the time-consuming drying process at home.
28. Pinecone Christmas Tree Garland
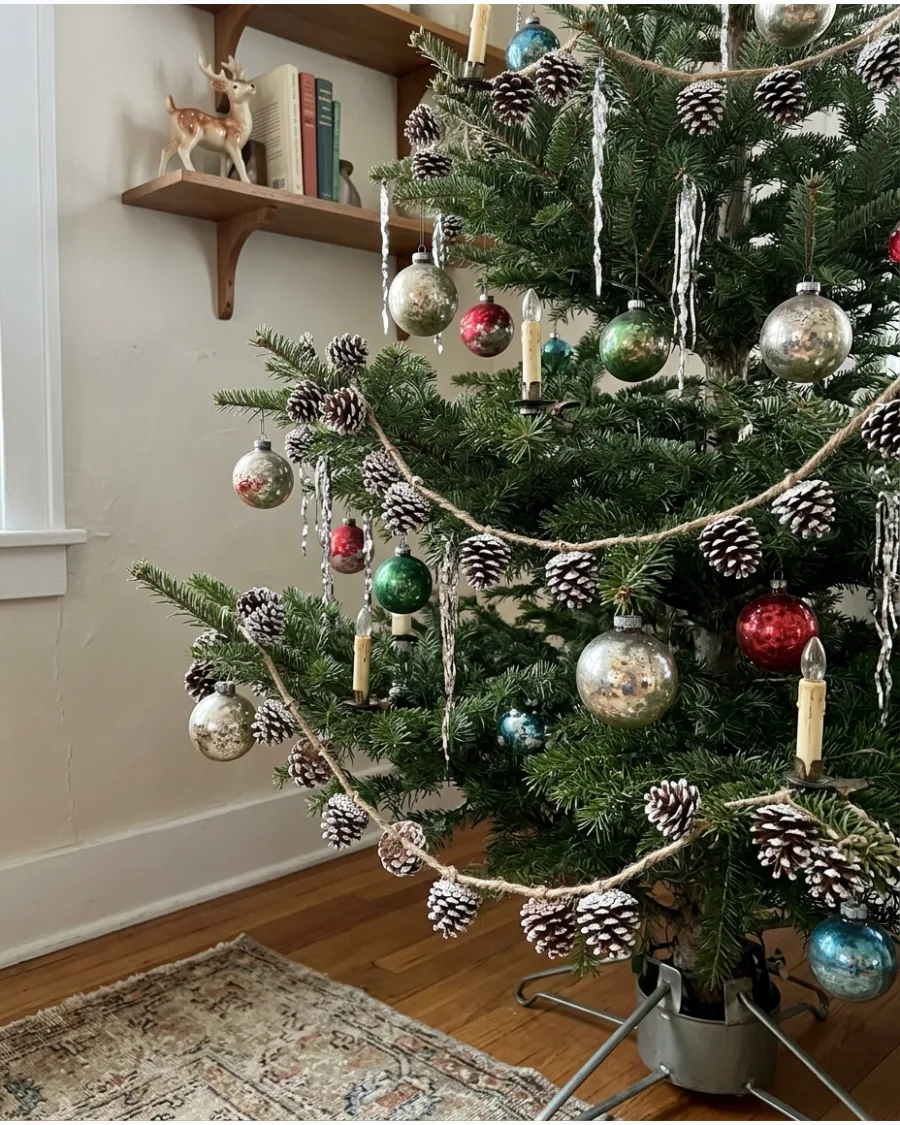
Pinecones are a classic winter staple that provides great texture and a forest-inspired look to any tree. You can leave them natural for a woodland feel or add a bit of white paint to the tips to mimic fallen snow.
Secure the pinecones to the twine using thin floral wire so they do not slide or bunch up over time. Real pinecones are always better than plastic ones because the slight imperfections add to the vintage charm.
- Bake foraged pinecones at 200 degrees for 30 minutes to kill any bugs and melt away sticky sap.
- Vary the types of pinecones, such as spruce or hemlock, to create a more natural and interesting garland.
- For a smaller tree, use miniature larch cones to keep the decorations proportional to the branch size.
Quick win: Spray the finished garland with a light coat of clear glitter sealer for a subtle frosty shimmer that catches the lights.
29. Vintage Ribbon Scrap Garland
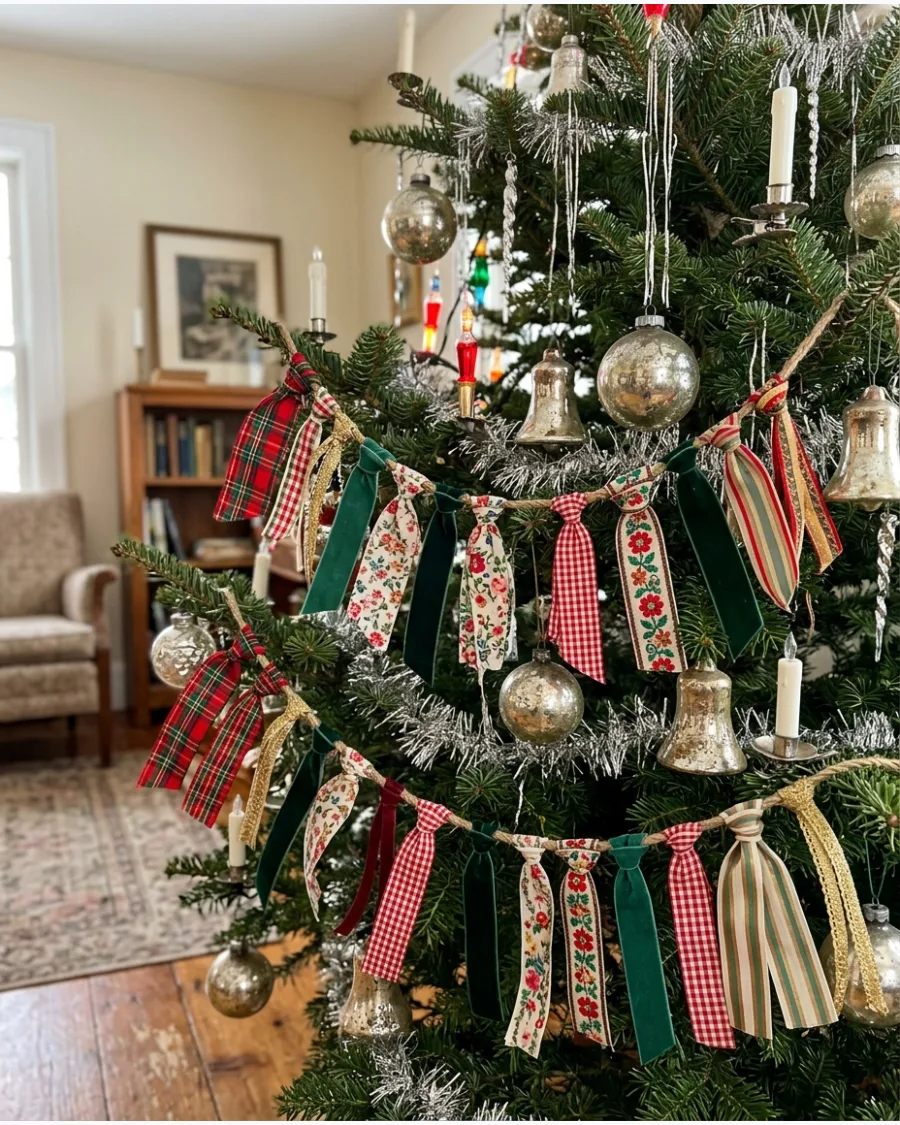
A garland made from mismatched ribbon scraps looks like a cherished family project passed down through several generations. Using different textures like velvet, grosgrain, and satin adds a rich, layered look to the tree branches.
Tie the ribbons in simple overhand knots every few inches for a relaxed and casual appearance. Don't worry about matching the colors perfectly; a varied palette makes the tree feel more authentic and collected.
- Cut ribbon ends at an angle or in a V-shape to prevent fraying and give the garland a polished look.
- Use scraps at least six inches long to ensure the knots are secure and the 'tails' are visible.
- Mix in lace or embroidered trims for an extra layer of Victorian-inspired detail.
Most people skip this: Use a mix of wired and non-wired ribbons to give the garland some structure while still allowing it to drape naturally.
30. Old-Fashioned Candy Garland
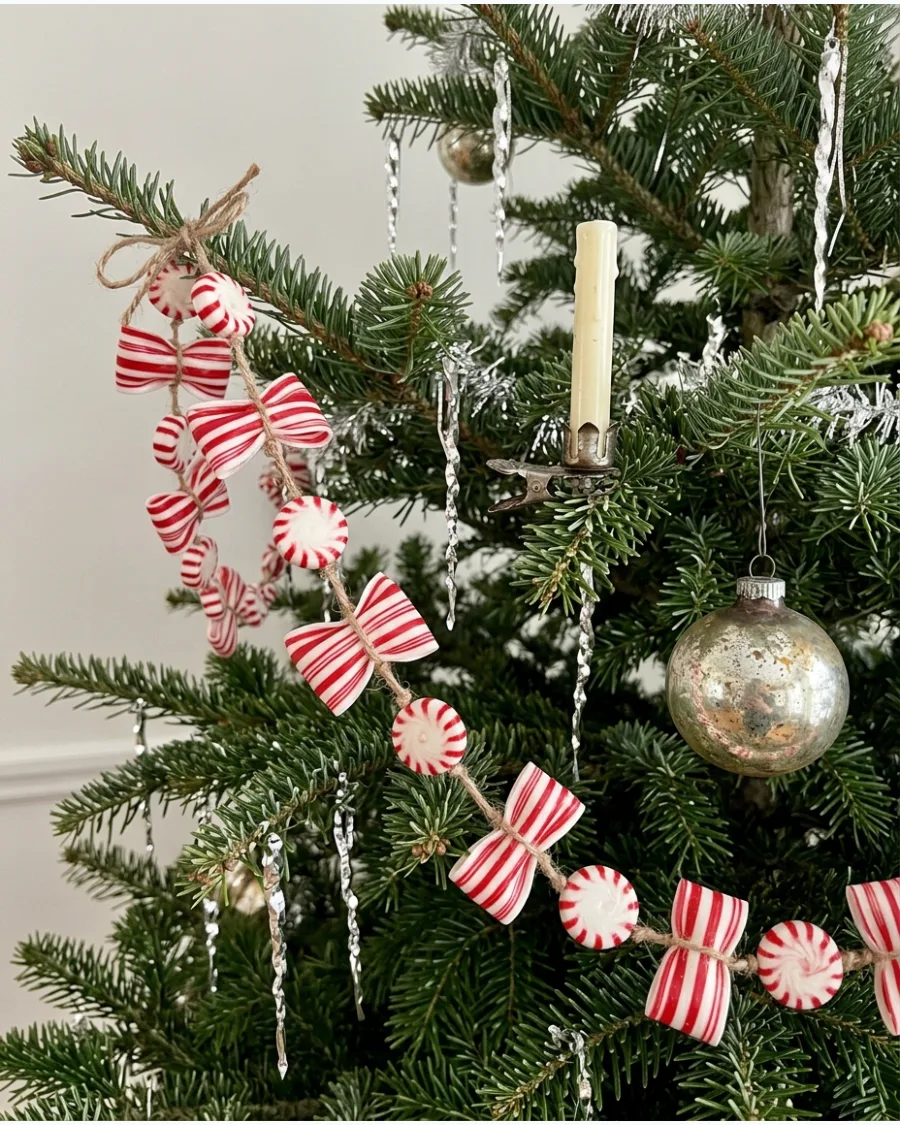
Candy garlands evoke the sweet nostalgia of childhood holidays and add a playful, colorful element to the tree. Traditional hard candies or peppermint rounds are the classic choice for achieving this vintage look.
Seal the candy with a clear acrylic spray if you plan to use real sweets to prevent them from getting sticky in humid weather. This is a high-impact decoration that fills the tree with color and a sense of whimsy.
- Use a sharp needle to pierce the cellophane wrappers rather than the candy itself to keep the garland intact.
- Alternate candy shapes, like ribbon candy and round peppermints, for a more dynamic visual pattern.
- Keep real candy garlands out of reach of pets and small children to avoid accidental ingestion.
Best shortcut: Look for realistic resin or plastic candy decorations that provide the same look as the real thing but last for many years.
VINTAGE BOWS, LIGHTS, AND TREE TOPPERS
31. Red Velvet Bow Tree Decorations
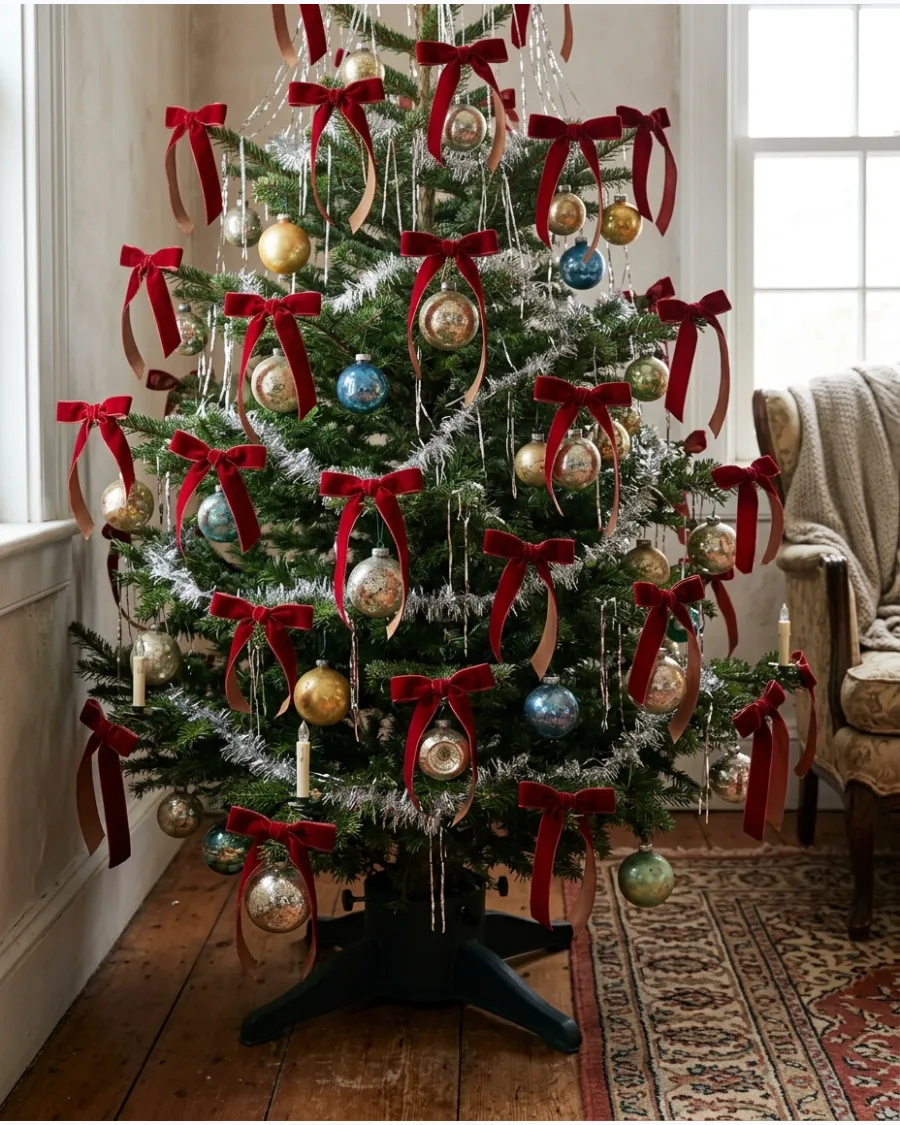
Tie small deep-red velvet bows throughout the Christmas tree and mix them with glass ornaments and tinsel. Cut the ribbon tails slightly longer than the bow width to create a graceful, drooping effect on the branches. Use slightly long ribbon tails so the bows feel traditional and handmade instead of looking like modern packaged ornaments.
- Buy velvet ribbon by the spool for a custom look.
- Tie directly to the branch tips for better visibility.
- Use on a narrow tree to add visual volume.
Quick win: Use a tiny bit of clear nail polish on the cut ends of the ribbon to prevent fraying over time.
32. Burgundy Velvet Bow Decorations
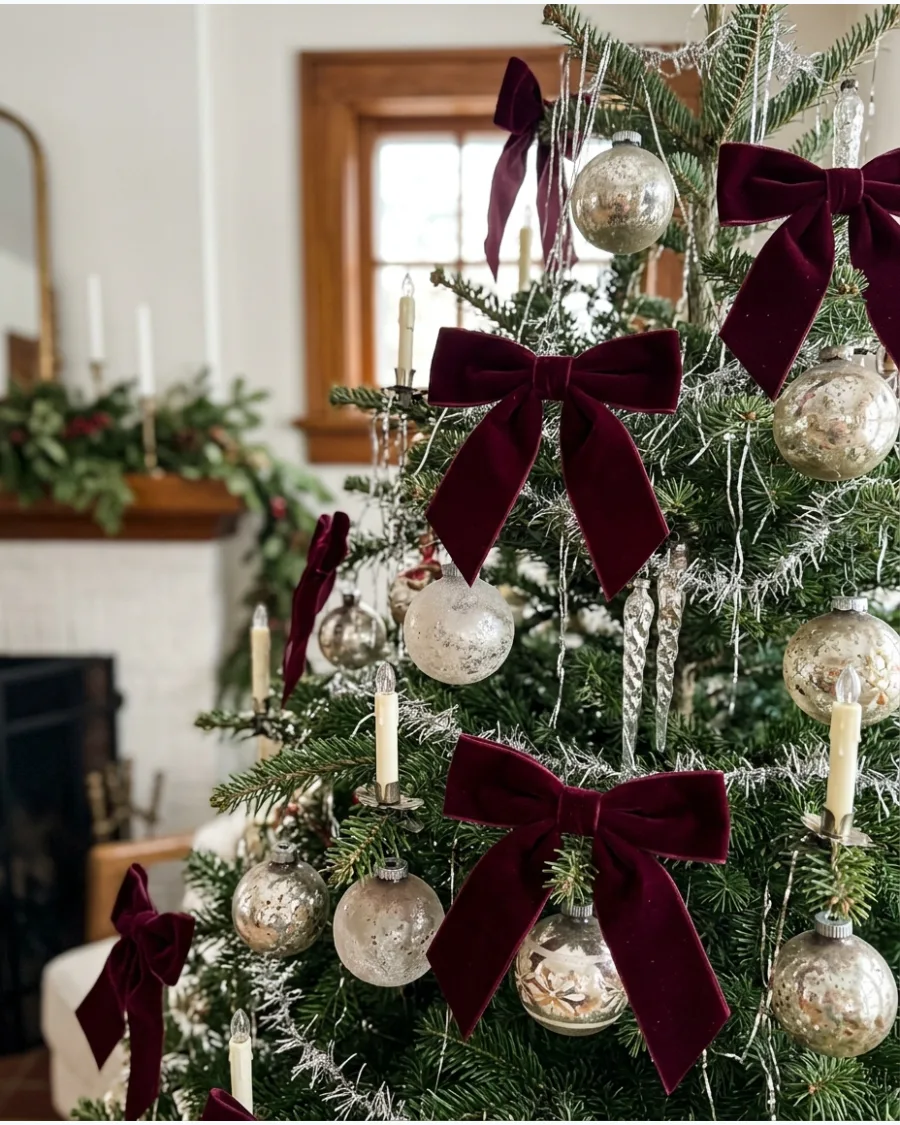
Use rich burgundy bows between antique-gold and mercury-glass ornaments. Place these deeper into the branches to add layers of color and texture without cluttering the outer tips. The deeper color gives vintage tree decorating a sophisticated look while preserving the nostalgic ribbon-focused style.
- Choose 1-inch wide ribbon for a delicate appearance.
- Space them evenly every 12 inches for balance.
- Swap for navy ribbon for a moody, Victorian look.
Most people skip this: Pinch the center of the bow while tying to ensure the loops stay plump and symmetrical.
33. Tartan Plaid Christmas Tree Bows
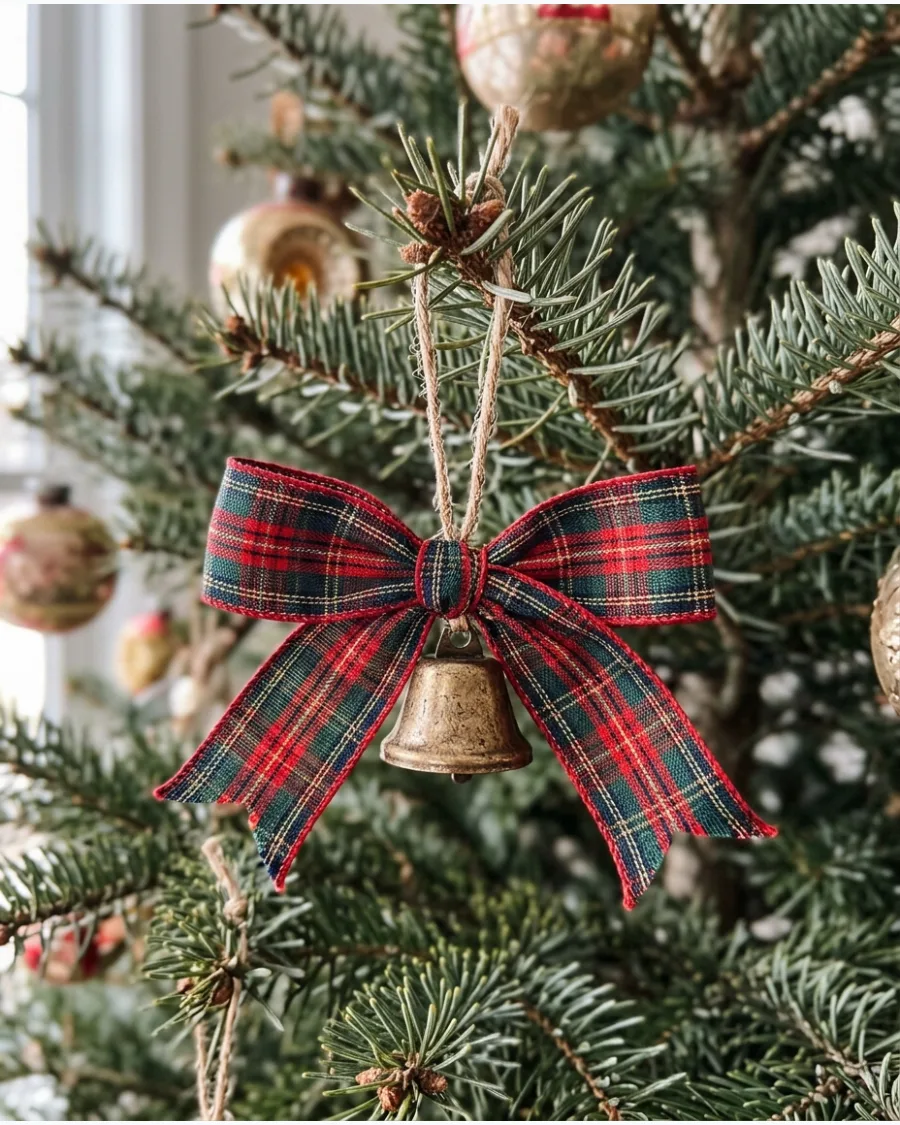
Make bows from classic red, green, navy, and gold tartan ribbon and attach them throughout the tree. Loop the ribbon through the hanging wire of a bell or wooden ornament to anchor the bow firmly to the branch. Pair them with bells, wooden ornaments, and red glass balls for an old-fashioned family Christmas aesthetic.
- Look for wire-edged ribbon for easier shaping and posing.
- Group with natural pinecones for a rustic touch.
- Works well on large 7-foot trees that need bigger accents.
Best shortcut: Use green floral wire to attach the bows instead of tying them directly to avoid crushing needles.
34. Vintage Floral Ribbon Bows
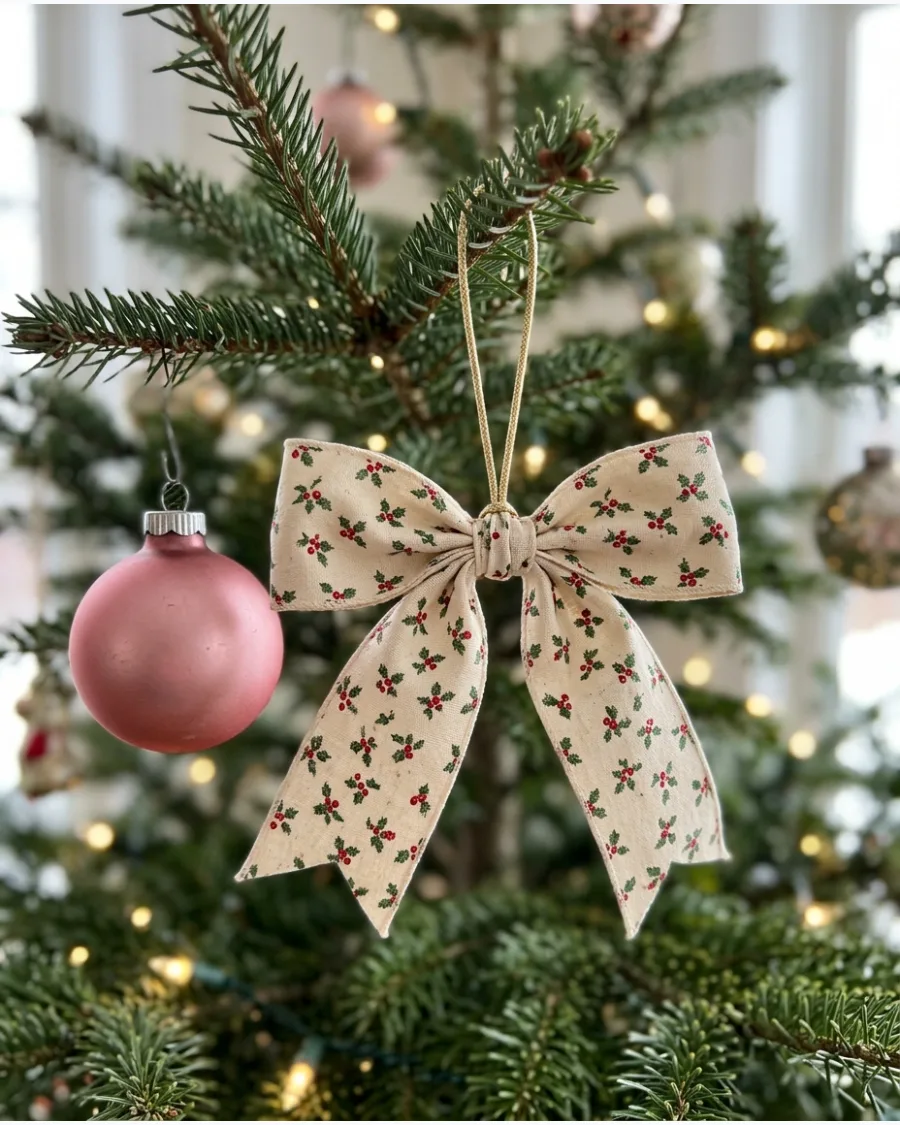
Create tree bows using ribbon printed with tiny roses, holly, berries, or other traditional floral motifs. Mix these with faded or frosted glass baubles to maintain a soft, aged appearance throughout the tree. Combine them with handmade ornaments and faded glass baubles for a softer cottage-style vintage tree.
- Find vintage-style floral prints at craft stores or online.
- Use as a filler for gaps in the inner branches.
- Best for cream or white-themed trees for a romantic look.
Quick win: Iron the ribbon on a low setting before tying to remove any creases from storage.
35. Classic Multicolored Christmas Lights
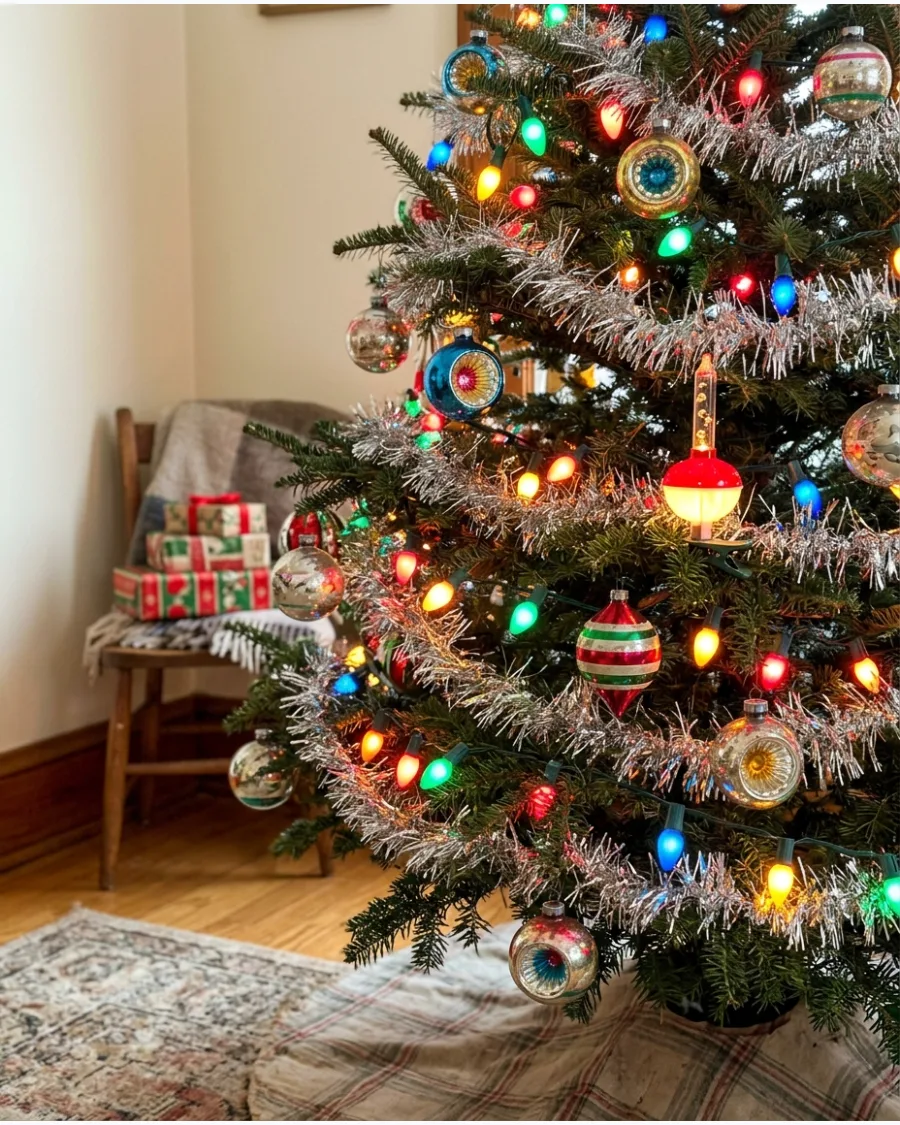
Use strands of red, green, blue, yellow, and orange lights rather than modern all-white illumination. Twist the light cord around the inner trunk first before working toward the branch tips to hide the green wiring. Combine them with colorful glass ornaments and tinsel to capture the cheerful appearance of retro family Christmas trees.
- Look for ceramic-look bulbs for a matte, authentic finish.
- Use 50-light strands for better control over placement.
- Perfect for mid-century modern living rooms.
Most people skip this: Test every strand before putting them on the tree to avoid the frustration of a dead bulb in the middle.
36. Bubble Light Christmas Tree Decorations
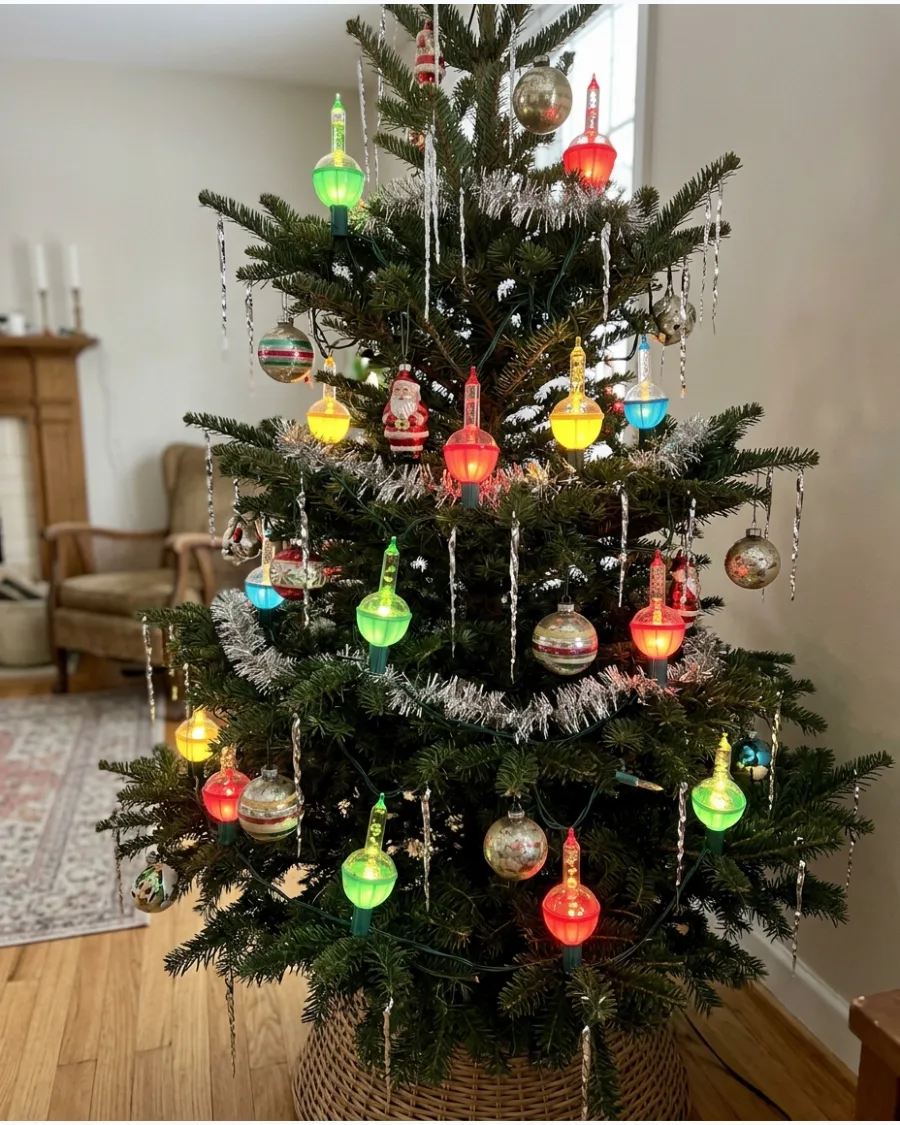
Add reproduction bubble-style Christmas lights that mimic the distinctive colorful lamps popular on mid-century trees. Stand the bubble tubes upright on the sturdiest branches to ensure the liquid stays vertical and bubbles properly. Use modern safety-certified versions while keeping the rest of the tree decorations strongly retro.
- Check for UL-listed safety ratings on all reproductions.
- Space them every two feet for maximum visual impact.
- Store in original boxes to prevent the glass tubes from breaking.
Best shortcut: Give the bulbs a gentle tap if they don't start bubbling within a few minutes of being turned on.
37. Clip-On LED Candle Tree Lights
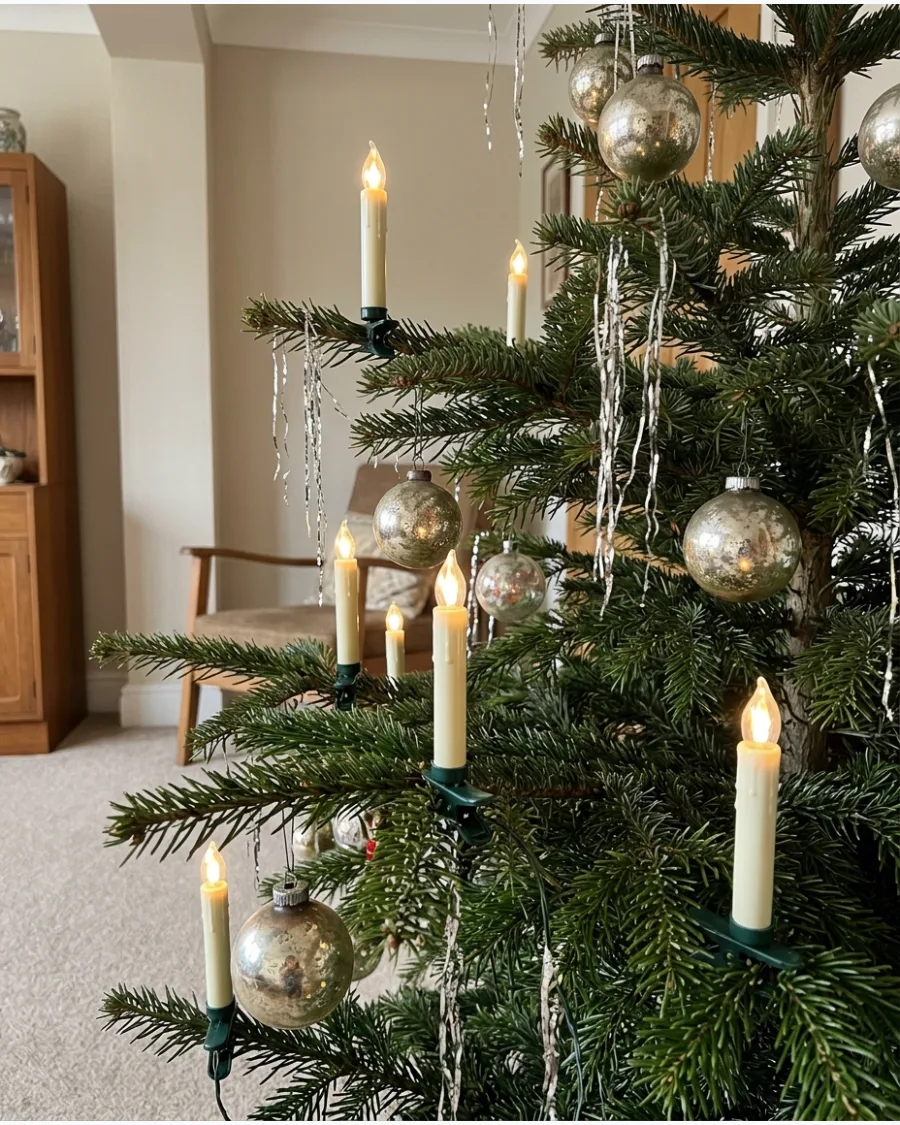
Attach safe battery-operated or electric clip-on candle lights to individual branches to recreate the appearance of old candlelit Christmas trees. Angle the candles so they sit perfectly vertical, even if the branch itself is sloping downward. Space them carefully around the outer branches and never substitute real flames.
- Use a remote control for easy daily operation.
- Clip to the outer three inches of the branch for a traditional look.
- Safe for both real and artificial trees.
Quick win: Mix candle lights with standard string lights to get both the glow and the vintage candle silhouette.
38. Vintage Mercury Glass Tree Topper
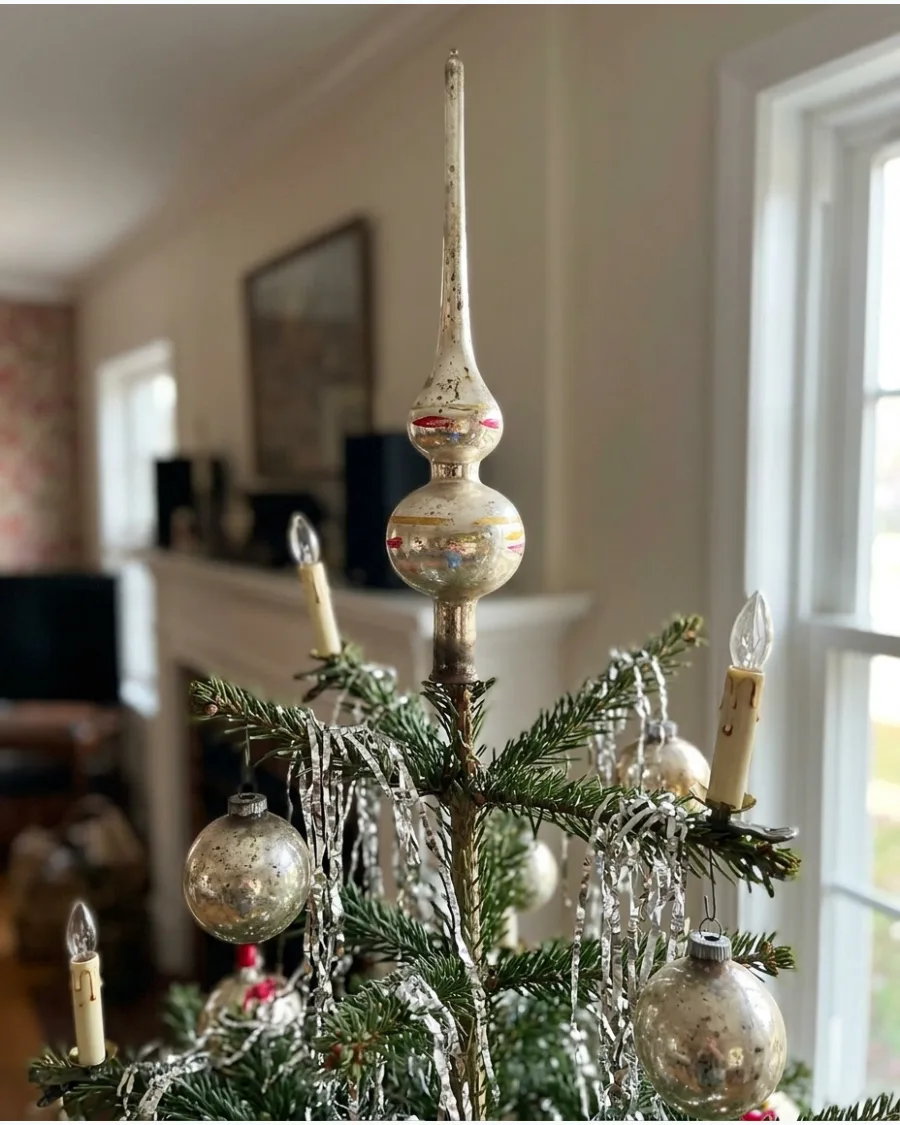
Finish the tree with a tall silvered-glass finial topper featuring faded silver, gold, or colorful painted details. Secure the tree’s top vertical branch with a small dowel or stiff wire if the glass topper feels too heavy. Coordinate the topper with similar mercury-glass ornaments lower on the tree.
- Find authentic pieces at antique malls or estate sales.
- Clean gently with a dry microfiber cloth to protect the paint.
- Coordinates perfectly with silver tinsel and mercury glass balls.
Most people skip this: Wrap the top branch in a bit of floral tape to create a non-slip surface for the topper's base.
39. Vintage Lighted Star Tree Topper
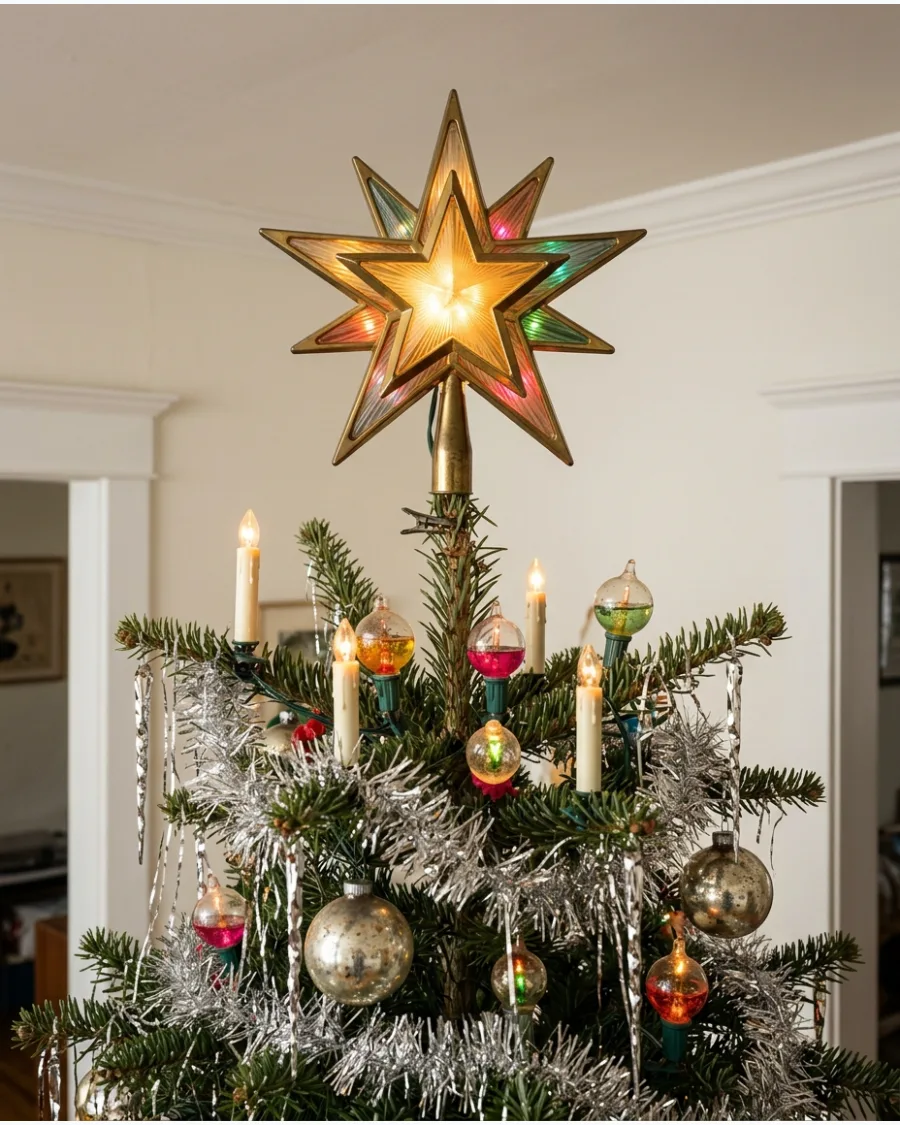
Choose a retro-inspired star topper with a glowing center, layered points, or colorful lights. Hide the power cord by running it straight down the back of the trunk and securing it with green floral wire. Let the topper be slightly bold and decorative so it matches the playful appearance of a mid-century Christmas tree.
- Look for multi-layered plastic or metal stars for depth.
- Use a star with at least five points for a classic look.
- Best for trees under 6 feet to maintain proper scale.
Best shortcut: Plug the topper into the same power strip as the tree lights so they all turn on with one switch.
40. Large Vintage Velvet Bow Tree Topper
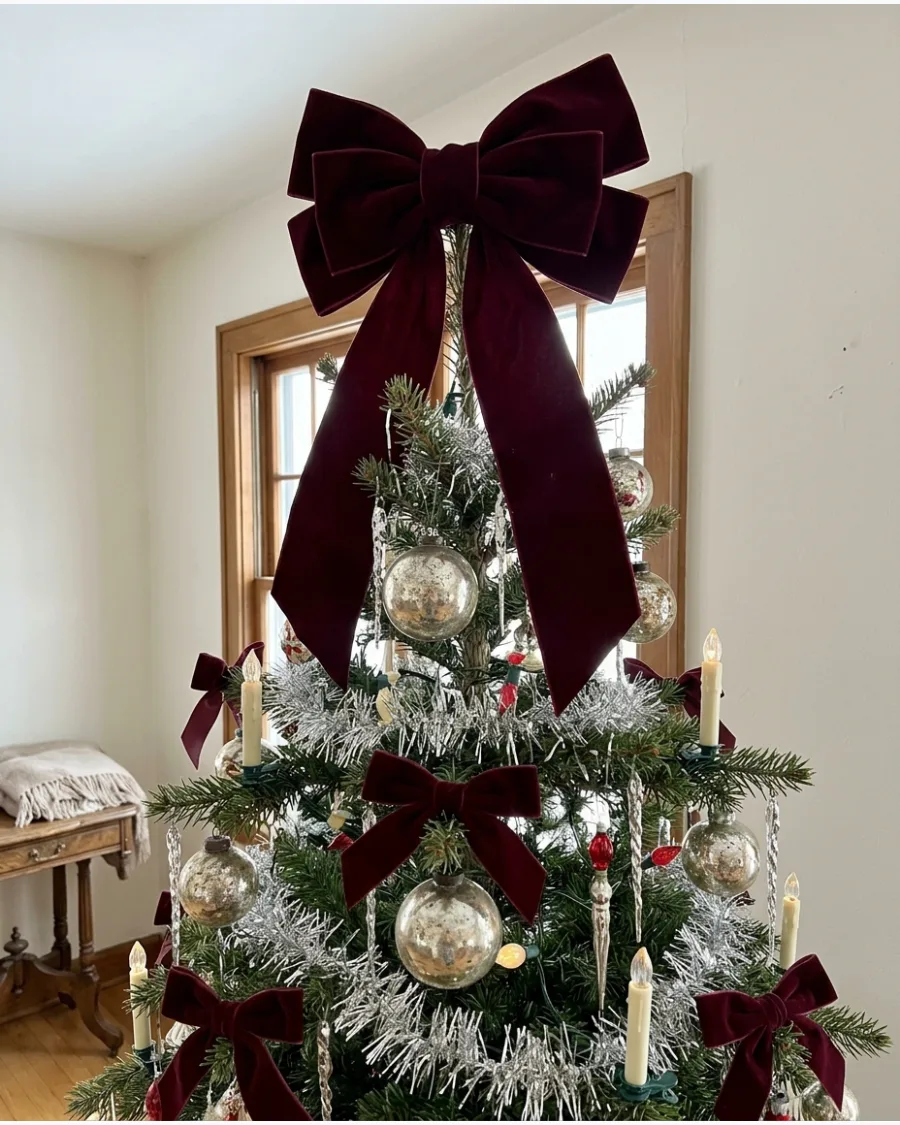
Replace a modern star with one oversized red, burgundy, plaid, or dark-green velvet bow. Let the ribbon tails cascade down the top third of the tree to draw the eye upward and unify the design. Allow the tails to fall into the upper branches and repeat smaller matching bows elsewhere on the tree.
- Use 4-inch wide velvet ribbon for enough presence.
- Secure the bow with a long pipe cleaner for stability.
- Choose a contrasting color like dark green or gold for impact.
Quick win: Stuff the loops of the bow with a little tissue paper while in storage to keep them from flattening.
1950S, 1960S, 1970S, AND 1990S TREE DECORATIONS
41. 1950s Shiny Brite Christmas Tree Decorations
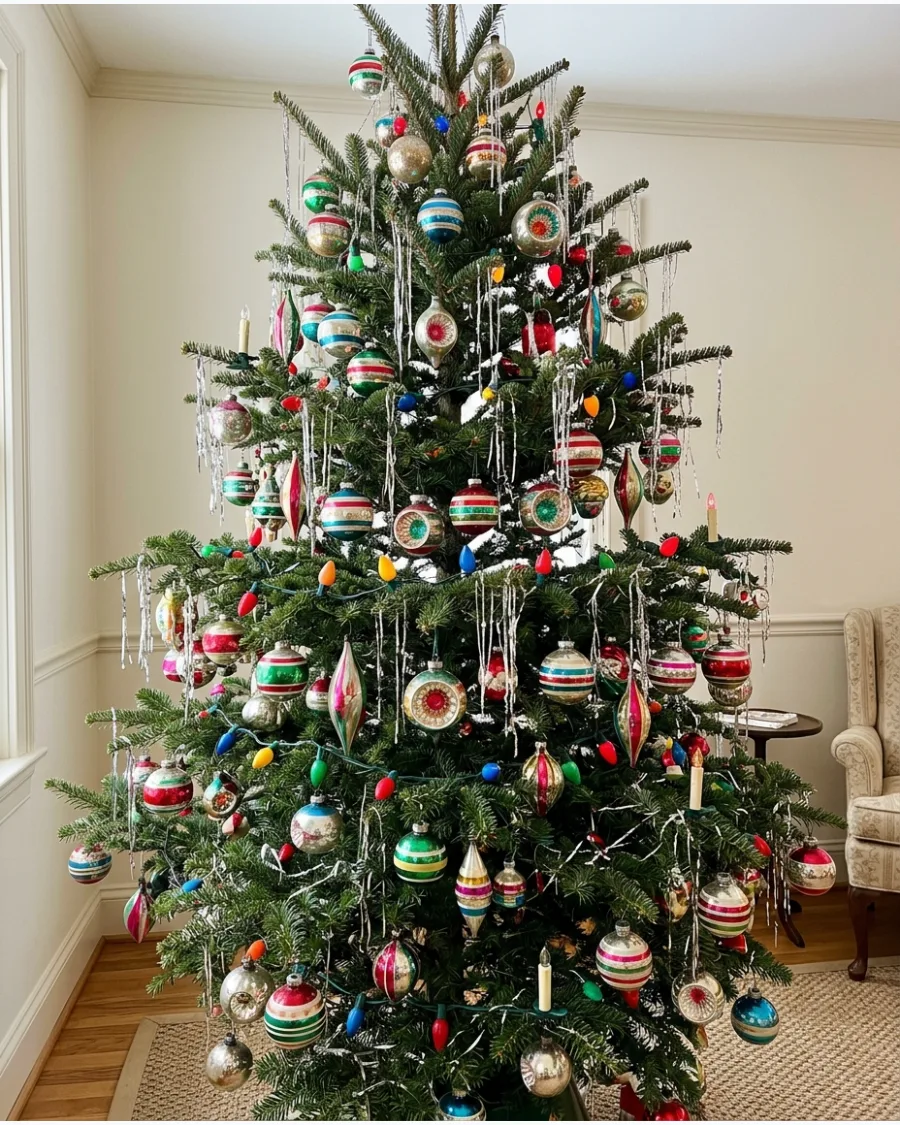
Recreate the mid-century look with a mix of striped baubles and reflector indents. Spread silver tinsel strands individually to catch the light from ceramic bulbs.
Layer different shapes like teardrops and spheres to give the tree a collected-over-time appearance. Don't worry about a perfect color scheme; the 1950s were all about a cheerful, abundant mix.
- Shop antique malls or estate sales for original boxes to find authentic color sets.
- Hang heavier glass ornaments closer to the trunk for better branch support.
- Use individual tinsel strands rather than clumps for a more refined and intentional shimmer.
Most people skip this: Hand-placing tinsel strand by strand takes longer but prevents the matted fur look of clumped tinsel.
42. 1950s Pink and Turquoise Tree Decorations
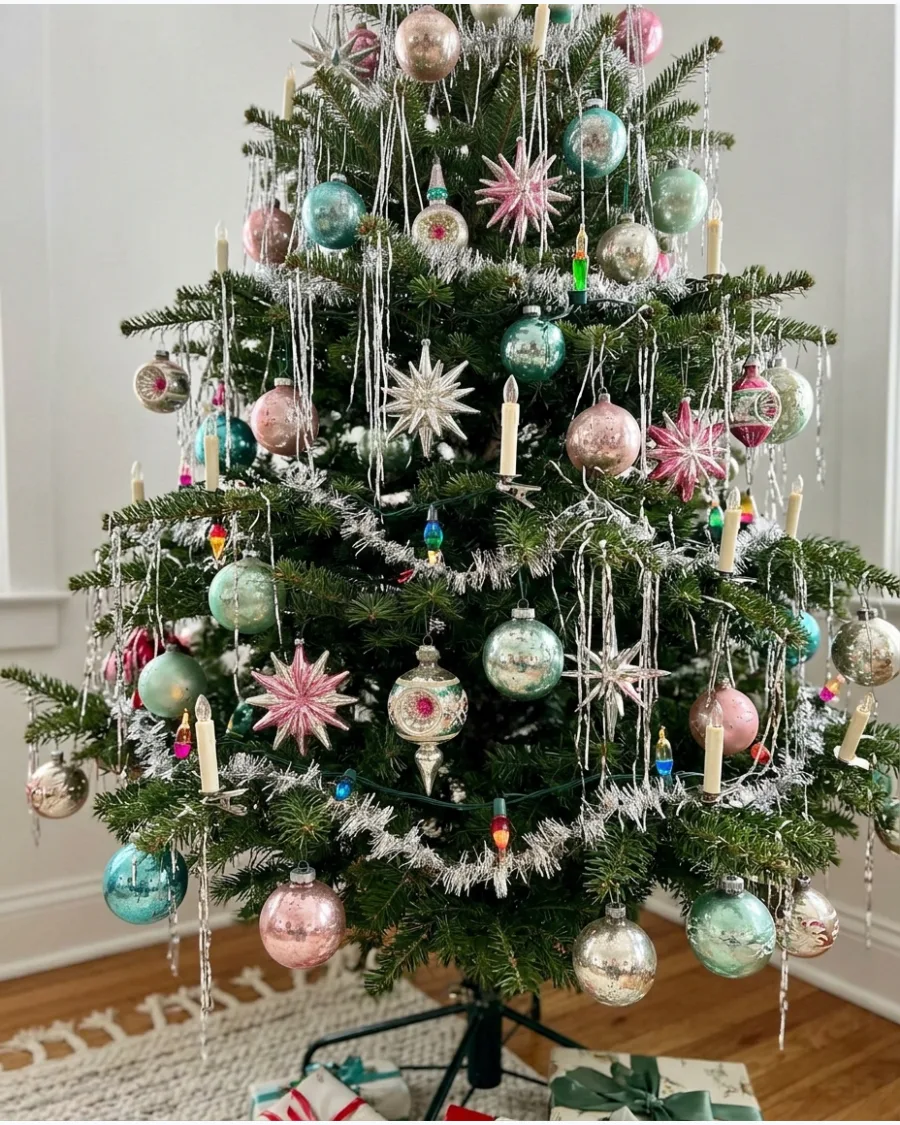
This palette captures the playful side of mid-century modern design. Use mint green and silver accents to bridge the gap between the bold pink and turquoise ornaments.
Stick to white or silver metallic garlands to make the pastel glass colors pop against the green needles. Finish the look with a glass finial topper that echoes the atomic shapes of the era.
- Look for atomic or mid-century reproduction sets if vintage glass is too fragile for your home.
- Pair these colors with a white artificial tree for a high-contrast retro look.
- Use silver wire hooks to keep the hardware invisible against metallic garlands.
Quick win: Swap standard green ornament hooks for silver ones to match the metallic theme and keep the look clean.
43. 1960s Rainbow Christmas Tree Decorations
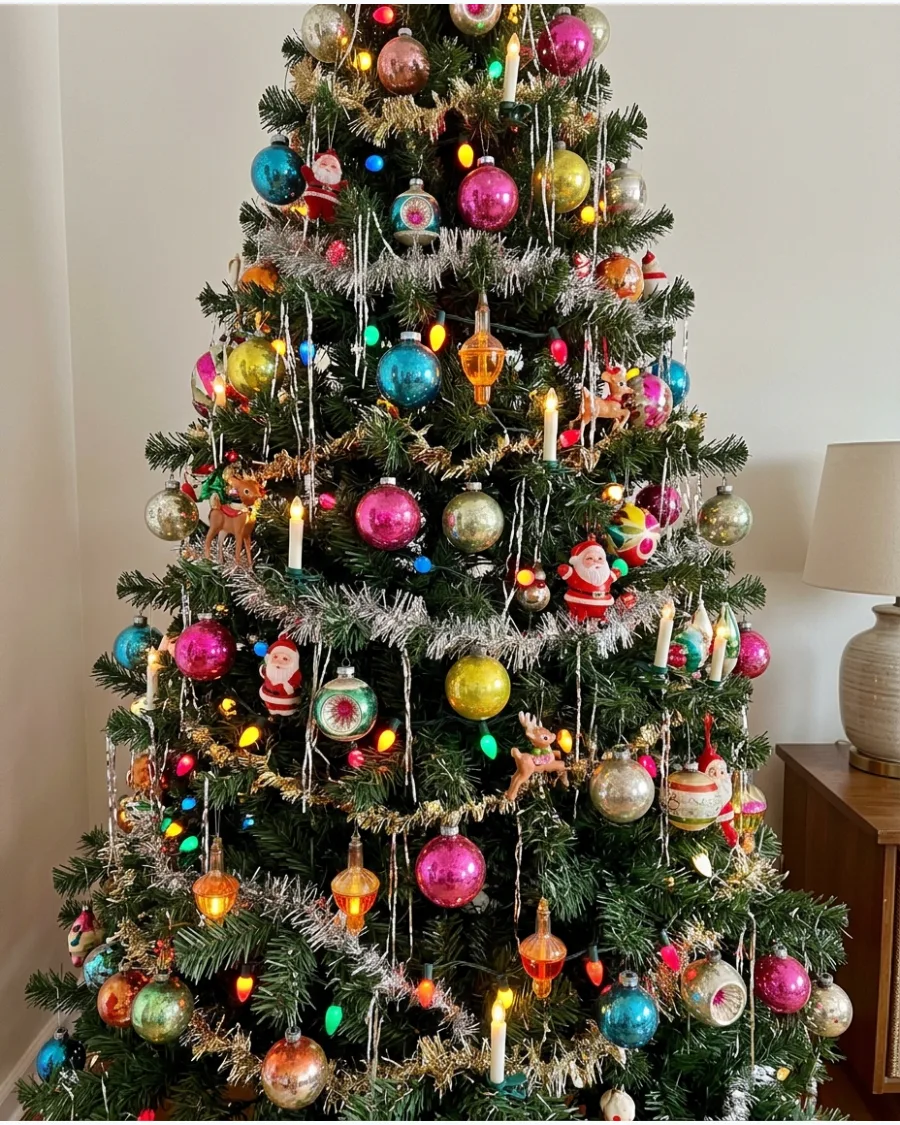
Move away from the coordinated themes of today and embrace a random explosion of color. Use every shade of the rainbow with multicolored ceramic bulbs and metallic garlands.
Distribute ornaments randomly rather than in clusters to ensure the tree looks lively from every angle. This style works best when novelty ornaments like Santas or reindeer are mixed in with standard rounds.
- Collect ornaments in every primary and secondary color for maximum visual impact.
- Use multicolored C9 bulbs for that authentic oversized retro glow.
- Drape metallic gold garland in deep loops to create horizontal movement across the tree.
Best shortcut: Use a mix of matte and shiny finishes in the same colors to add depth without adding more clutter.
44. 1960s Atomic Starburst Ornaments
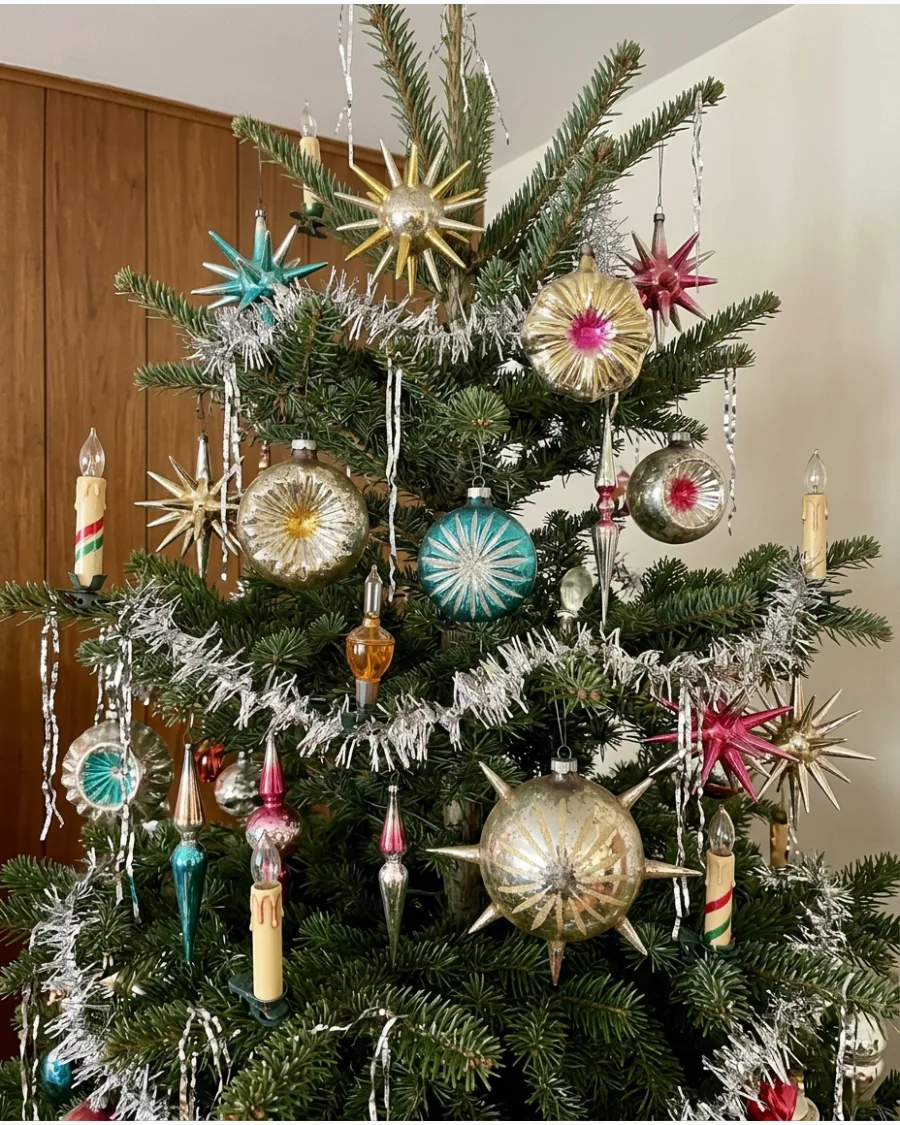
Focus on the space-age aesthetic with sharp, geometric shapes and metallic finishes. Incorporate Sputnik-style ornaments and pointed glass finials to reference 1960s architecture.
Mix gold and silver starbursts with pops of turquoise and red for a sophisticated retro vibe. These shapes add a dynamic texture that breaks up the roundness of traditional baubles.
- Search for starburst or sunburst ornaments to find these specific geometric shapes.
- Place these ornaments on the outer tips of branches so the points are clearly visible.
- Keep the lighting simple with clear white bulbs to let the metallic shapes shine.
Quick win: Use these pointed ornaments to fill gaps where branches are sparse, as the spikes draw the eye outward.
45. 1970s Handmade Christmas Tree Decorations
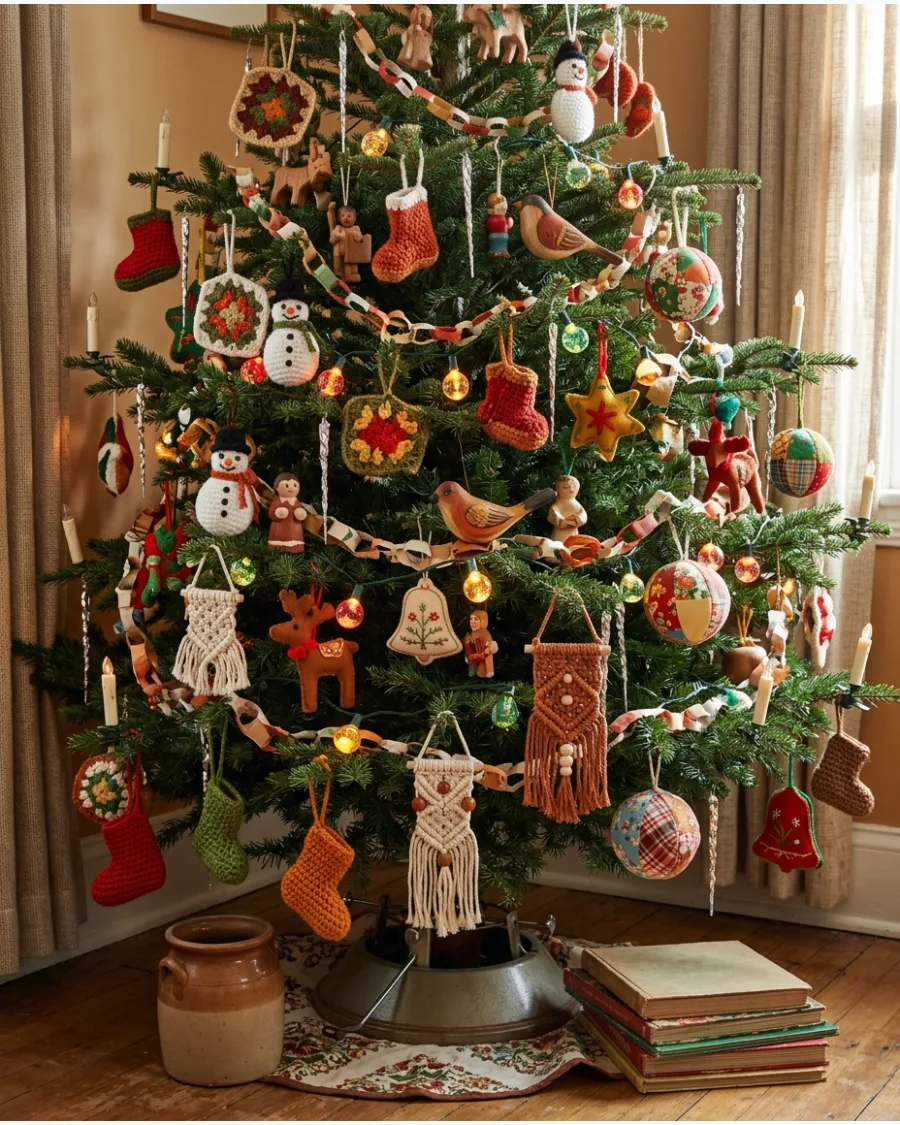
Embrace the earthy, back-to-the-land feel of the 1970s with natural materials. Mix crocheted snowflakes, wooden figures, and macramé stars for a textured, tactile tree.
Incorporate warm tones like mustard yellow and rust alongside traditional red and green to ground the look. This style is incredibly forgiving and perfect for a cozy, lived-in family room.
- Look for vintage patterns online to DIY your own crochet or felt pieces.
- Use twine or jute instead of metal hooks for a more natural and rustic appearance.
- Store these in a cedar chest or airtight bin to prevent moth damage to the fibers.
Most people skip this: Using various textures like wool, wood, and paper makes the tree feel more authentic than using one material.
46. 1970s Gold and Amber Christmas Decorations
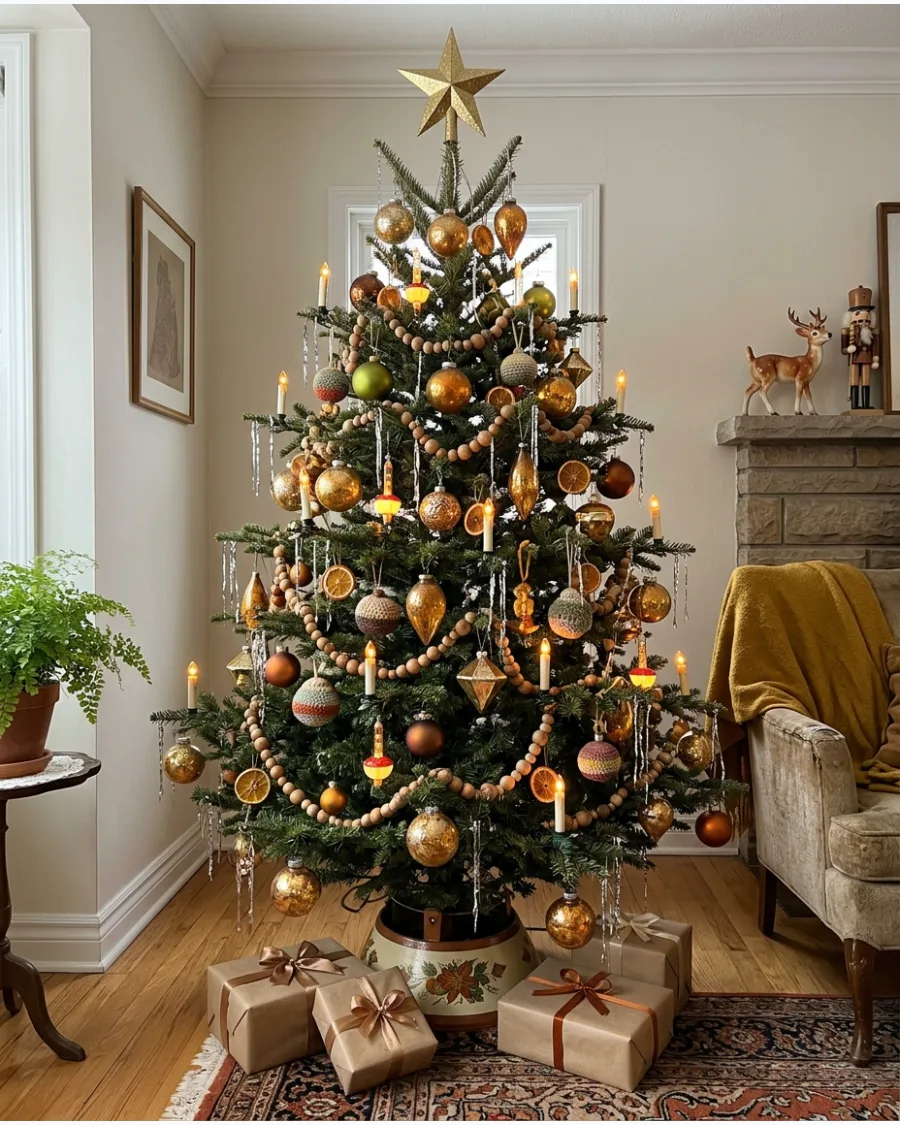
This palette highlights the iconic warm tones of the 1970s interior design. Combine amber glass, burnt orange ribbons, and avocado green ornaments for a sophisticated retro glow.
Thread a wooden bead garland through the branches to add a matte element to the shiny glass. The result is a tree that feels warm and inviting, especially when lit with soft white bulbs.
- Source amber glass from vintage shops to get that specific 70s tea-stain color.
- Use matte gold ornaments to bridge the gap between the orange and green tones.
- Wrap the base in a burlap or woven basket instead of a traditional fabric skirt.
Best shortcut: If you cannot find avocado green ornaments, use matte olive green for a similar earth-tone effect.
47. 1980s Traditional Red Christmas Tree Decorations
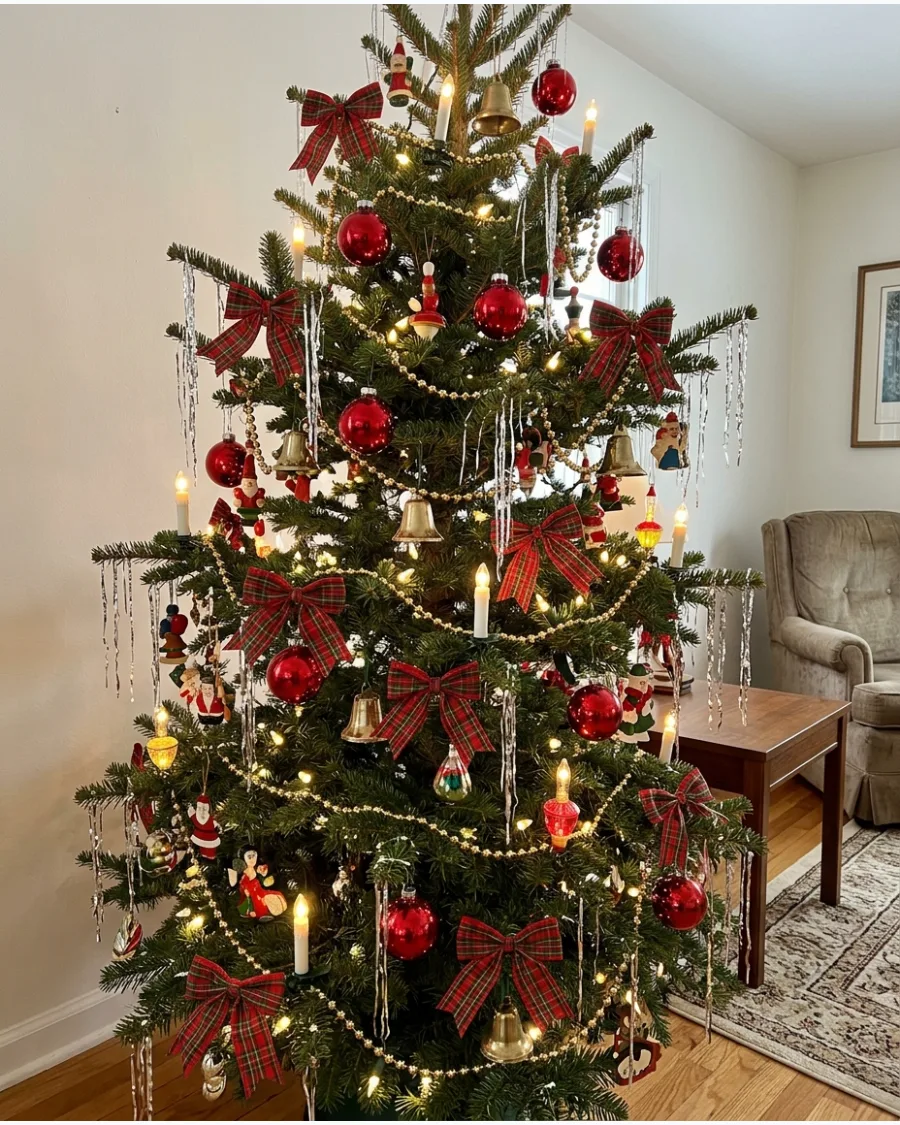
Recreate the classic family Christmas with a heavy emphasis on red and gold. Use glossy red baubles and plaid bows to build a thick, layered look.
Drape gold bead garlands in tight loops to create a sense of abundance and luxury. This style relies on filling every gap, so do not be afraid to add plenty of warm-toned lights.
- Buy red ornaments in bulk packs to ensure a consistent color base for the tree.
- Use pre-tied plaid bows with wire centers for easy attachment to branch tips.
- Group smaller bells or wooden ornaments in threes for a larger visual impact.
Quick win: Tuck extra red bows deep into the tree's interior to hide the trunk and add color depth.
48. 1980s Victorian Revival Tree Decorations
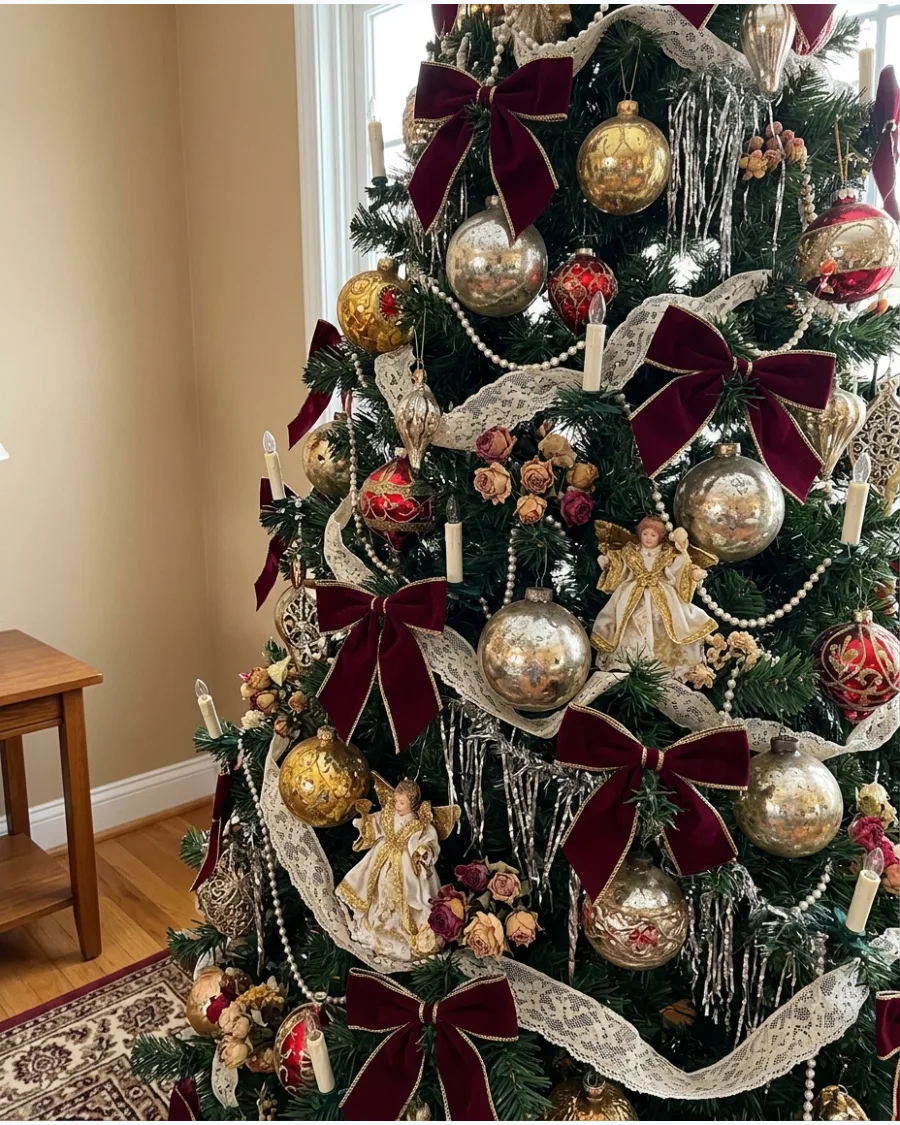
This look is all about romantic textures like lace, pearls, and velvet. Layer burgundy bows with delicate white lace fans or doily-inspired ornaments.
Incorporate dried flowers or miniature angels to lean into the ornate, feminine aesthetic of the era. It is a maximalist style that works best when the tree is very full and the decorations are tightly packed.
- Look for Victorian style ornaments that feature faux pearls or floral patterns.
- Use burgundy or dusty rose as your primary ribbon color for a romantic feel.
- Clip small silk roses or dried hydrangeas onto branches for a soft floral touch.
Most people skip this: Faux pearl garlands should be draped loosely so they do not get lost in the heavy velvet and lace.
49. 1990s Colorful Family Christmas Tree Decorations
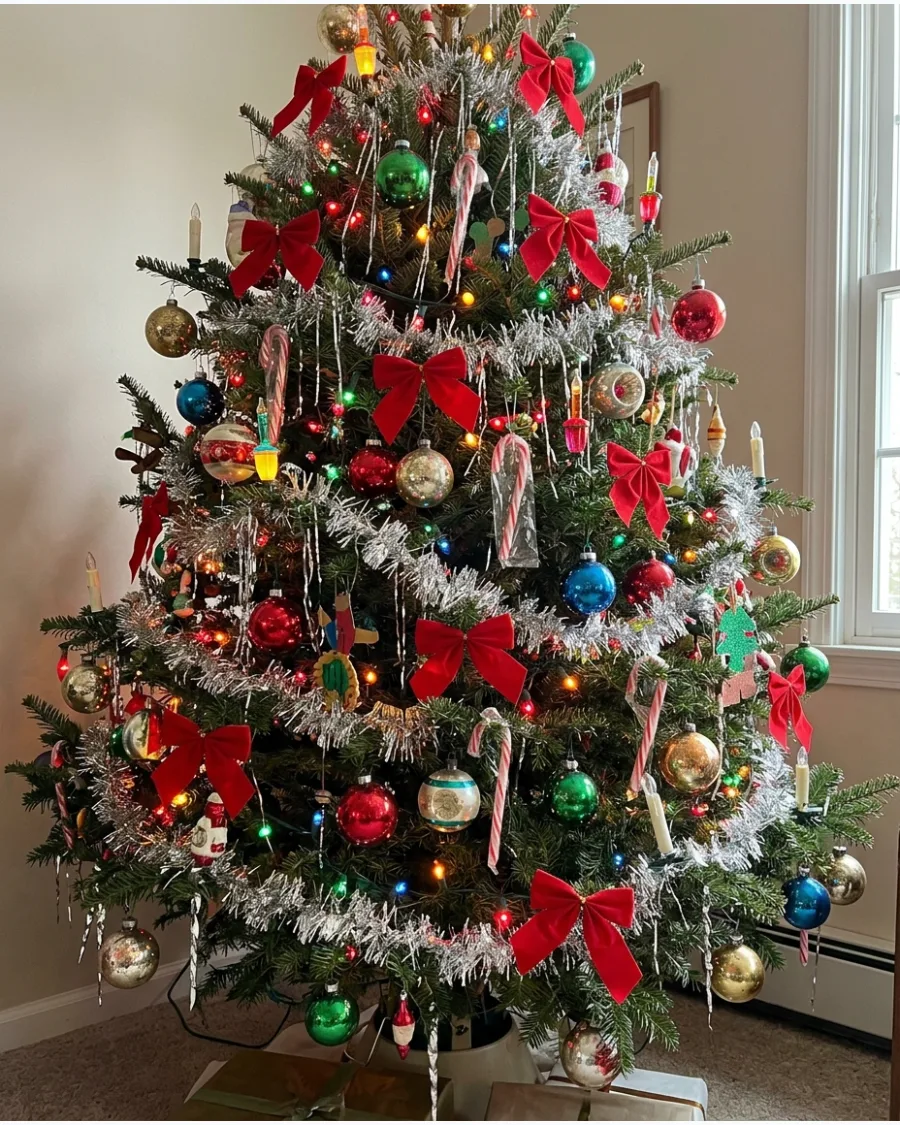
The 90s were about sentiment and a cheerful, slightly chaotic mix of old and new. Combine multicolored lights with red velvet bows and a variety of school project style ornaments.
Place candy canes on the outer branches for an easy, edible decoration that kids will love. This tree does not need a strict theme; it just needs to feel like a collection of memories.
- Mix your high-end glass balls with homemade or sentimental ornaments.
- Use standard 50-count multicolored light strands for a classic nostalgic glow.
- Hang candy canes near the bottom branches so they are accessible for snacking.
Best shortcut: If your handmade ornaments are fragile, hang them higher up to keep them safe from pets and toddlers.
50. 1990s Gold Ribbon and Burgundy Ornament Tree
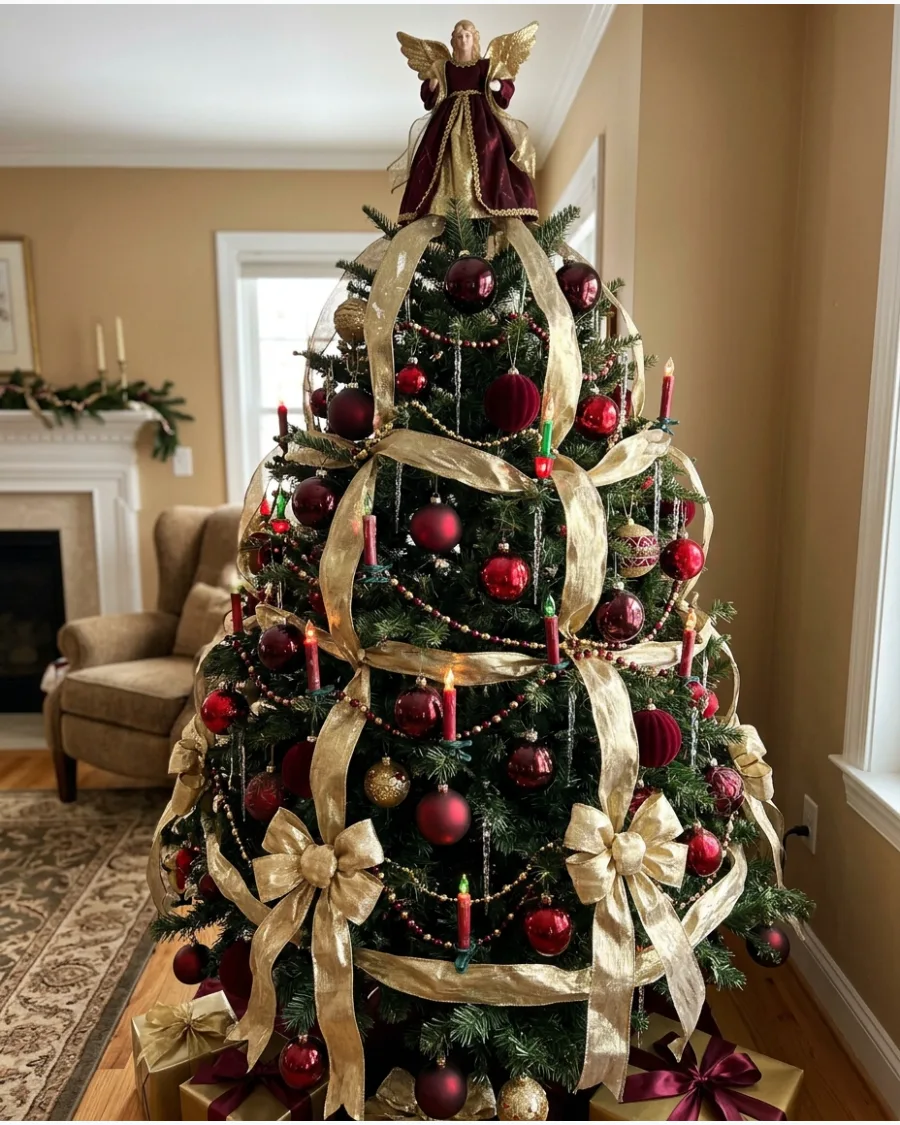
For a more formal 90s look, choose a rich burgundy and gold color scheme. Use wide gold mesh or satin ribbon to spiral down the tree, creating a structured foundation.
Fill the gaps with deep red ornaments and gold bead garlands to create a dense, regal appearance. This style is finished perfectly with an angel topper in a matching gold gown.
- Use 2.5-inch wide wired ribbon to make the spirals hold their shape properly.
- Layer gold and burgundy ornaments of different sizes for a designer feel.
- Choose an angel topper with a fabric dress to match the formal ribbon work.
Quick win: Anchor your ribbon by tucking it into the branches every 12 inches to create a professional-looking wave.
VINTAGE NOVELTY AND COLLECTIBLE TREE ORNAMENTS
51. Vintage Santa Claus Ornaments
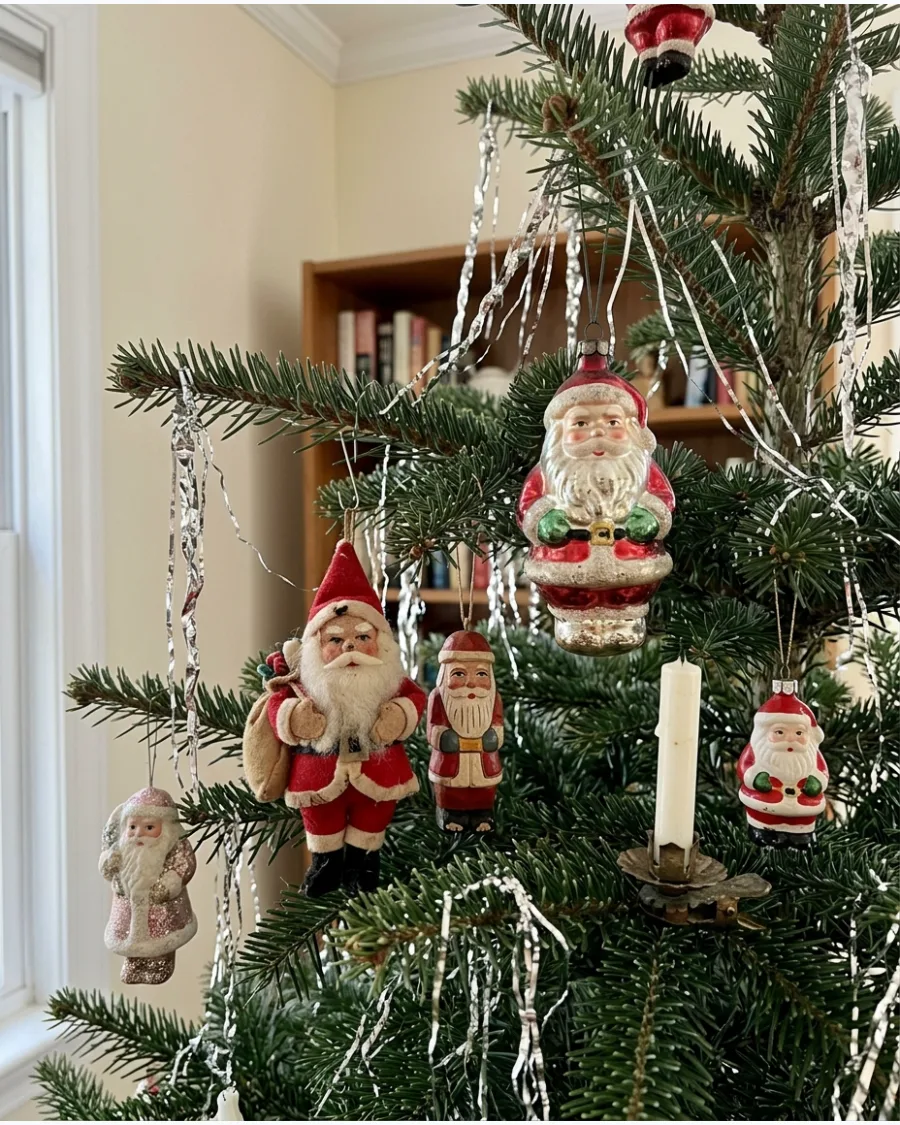
Collect Santas in glass, wood, and felt to build a diverse collection. Mix mid-century jolly faces with more austere Victorian-style figures for a balanced look.
Vary the scale of the Santas to keep the eye moving across the tree. A mix of textures prevents the tree from looking like a store display.
- Look for these at estate sales or antique malls during the off-season for the best prices.
- Space the largest Santas first to anchor the visual weight of the tree branches.
- Works well for small tabletop trees or as a sub-theme on a large family tree.
Quick win: Check the 'made in' stamps on the bottom of figures to verify age and origin.
52. Vintage Snowman Christmas Ornaments
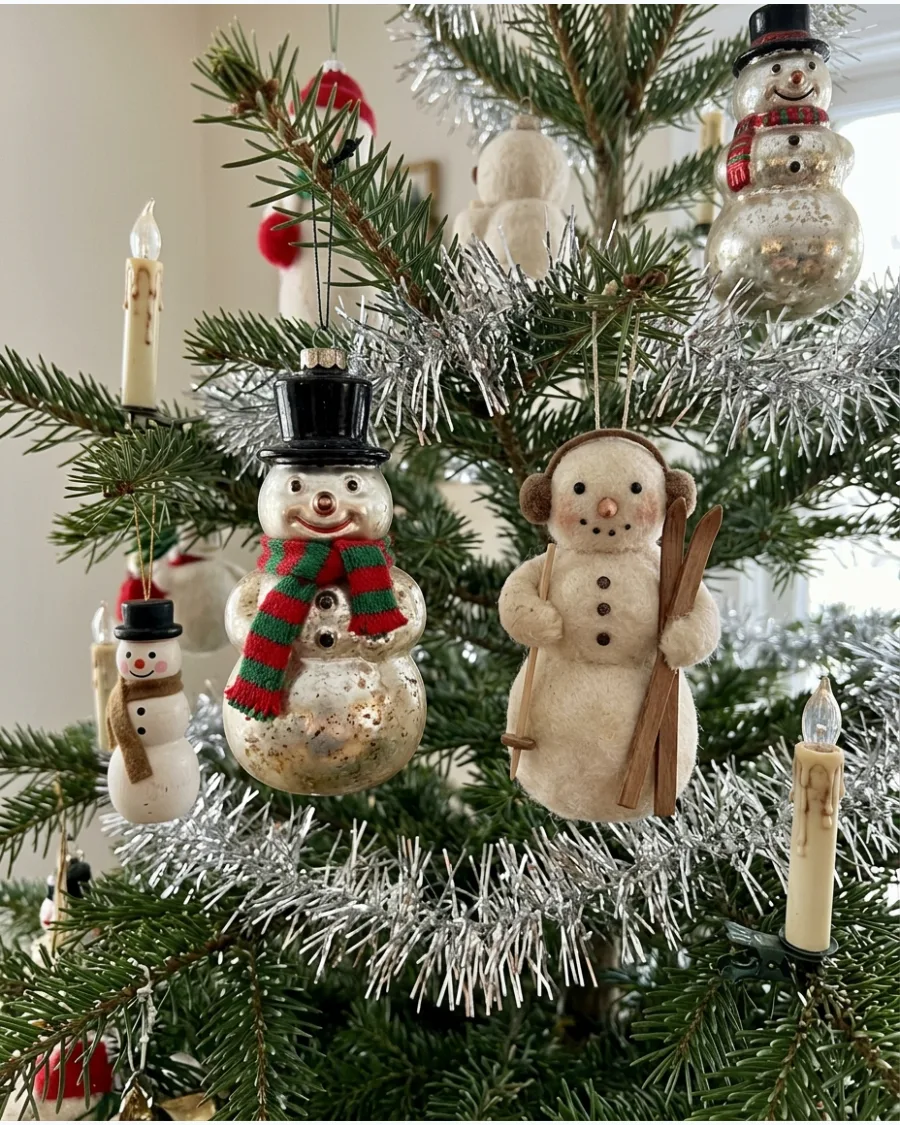
Use snowmen wearing top hats and scarves to add a playful winter touch to the greenery. Mixing spun-cotton versions with glass ornaments adds a nice matte-versus-shiny contrast.
Tuck these deeper into the branches to create a sense of discovery for anyone looking closely. They bring a friendly, approachable vibe to a formal tree.
- Thrift stores often have bags of mixed vintage snowmen for a few dollars in December.
- Group three different snowmen together for a more impactful visual cluster on one branch.
- Use white pipe cleaners to securely attach heavier wooden snowmen to the inner branches.
Most people skip this: Use a dusting of faux snow on the branches near the snowmen to enhance the winter theme.
53. Vintage Angel Christmas Ornaments
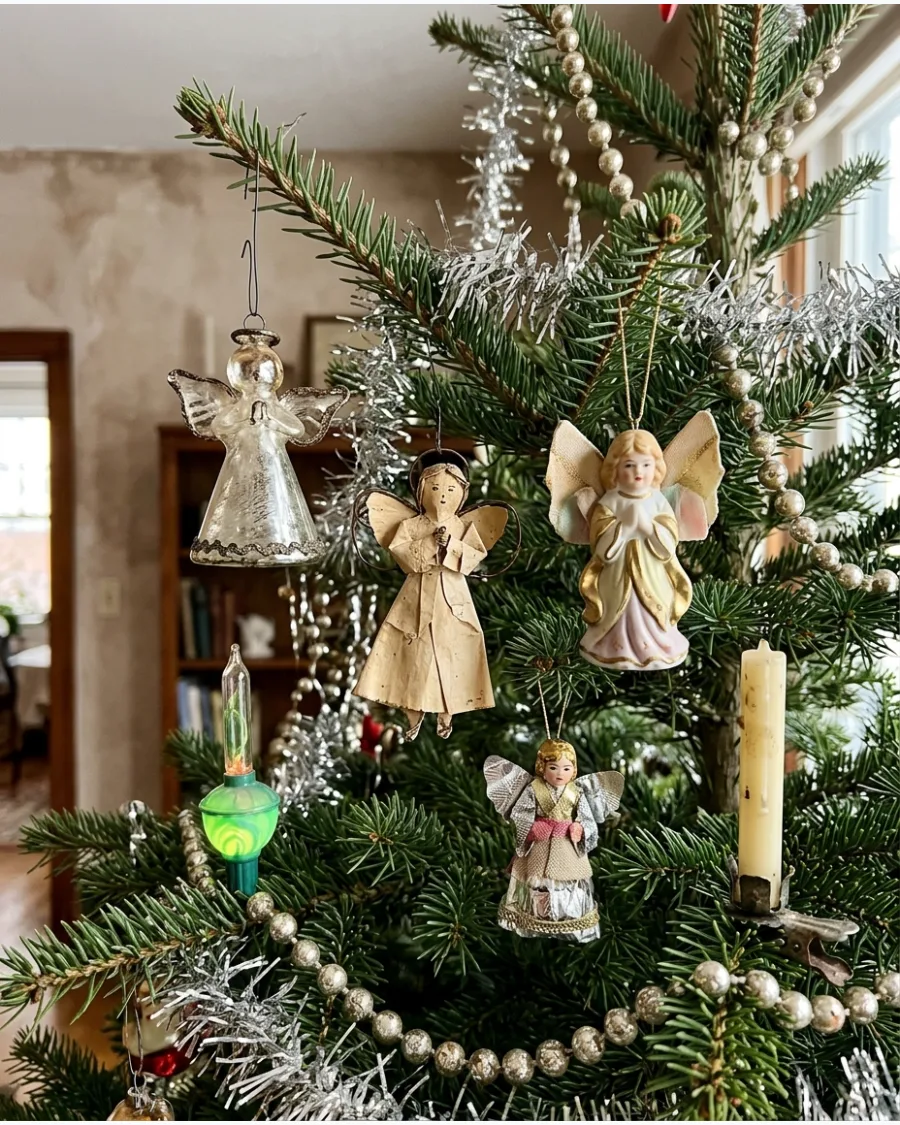
Incorporate angels made from paper, lace, or porcelain to soften the look of the tree. Use a palette of cream and gold to keep the aesthetic cohesive without being matchy-matchy.
Hang these near the tree lights so their wings or halos catch the glow. These ornaments add a layer of traditional sentimentality that modern plastic stars often lack.
- Search for 'paper scrap' angels which were popular in the early 1900s for an authentic look.
- Place angels at eye level where the intricate lace or paper details can be easily appreciated.
- If an angel is too heavy, wire it directly to the trunk-side of a branch for stability.
Best shortcut: Use thin gold wire instead of green plastic hooks to make the angels look like they are floating.
54. Vintage Bird Clip-On Ornaments
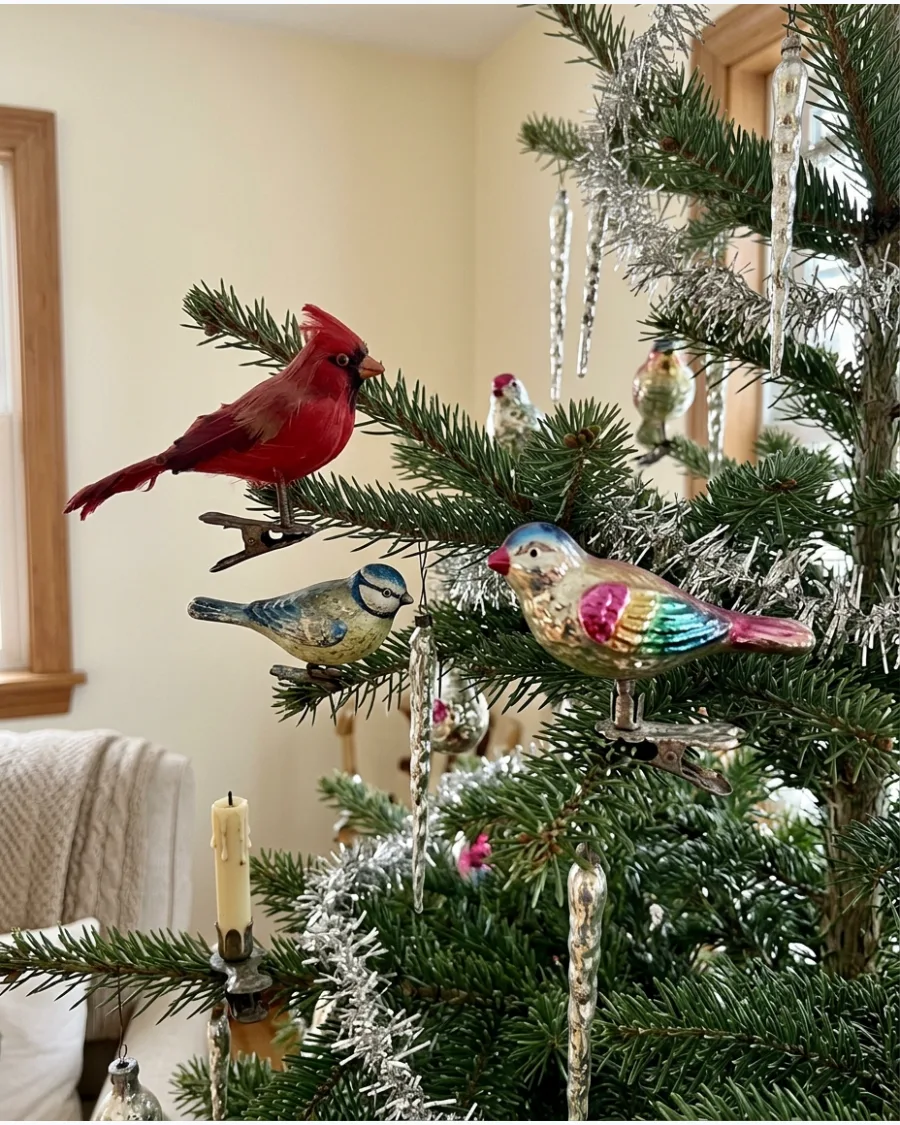
Clip glass or feathered birds directly onto the tips of branches for a realistic woodland look. Traditional birds like cardinals and doves provide classic red and white pops of color.
Point the birds toward the center of the tree to lead the viewer’s eye inward. These are much easier to position than hanging ornaments because they do not swing.
- Look for German glass birds with spun-glass tails for the most authentic vintage look.
- Space birds evenly around the tree to mimic how they would land in nature.
- Use these to fill holes in the tree where a hanging ornament might look awkward.
Quick win: Angle the birds slightly upward to give the tree a more dynamic, lifelike appearance.
55. Spun Cotton Christmas Ornaments
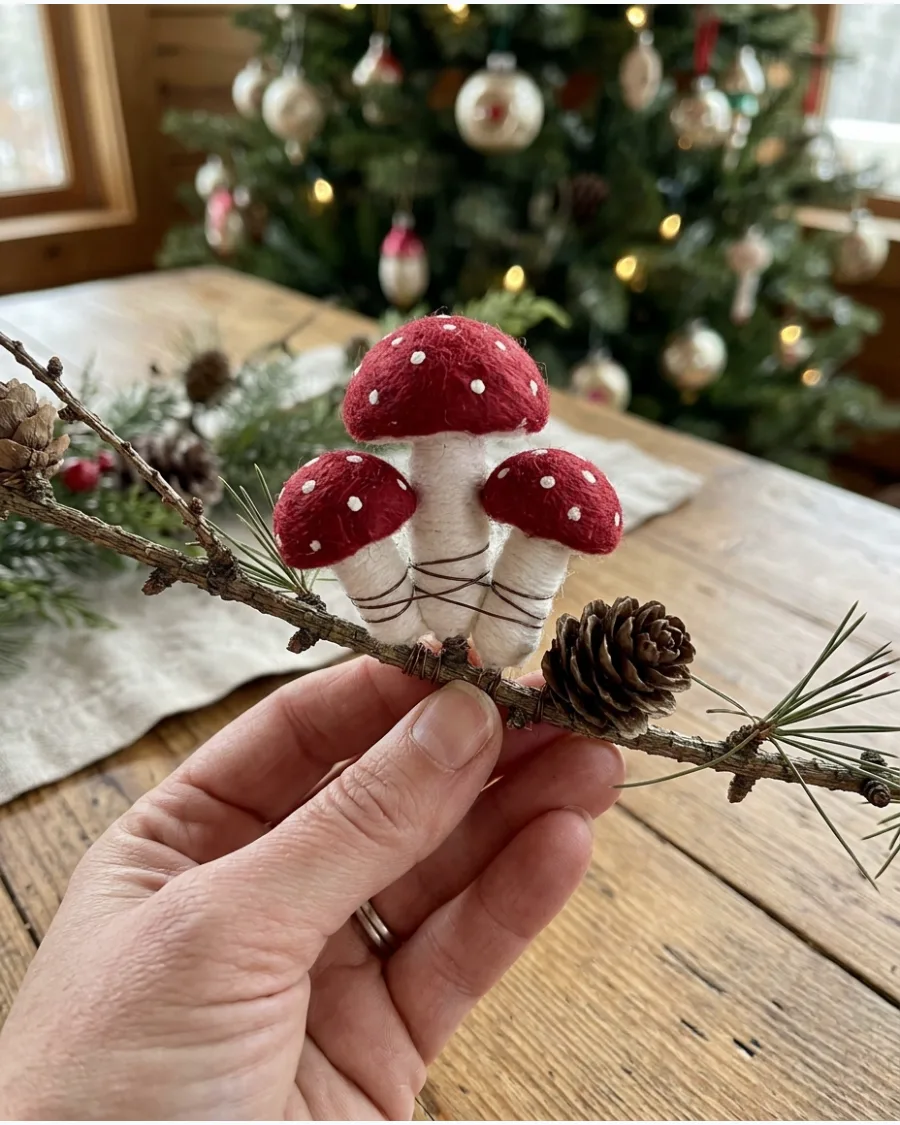
Spun-cotton figures like mushrooms or fruit offer a unique matte texture that absorbs light beautifully. These lightweight pieces are perfect for the smaller, more delicate branches at the top of the tree.
Pair these with shiny mercury glass to create a sophisticated balance of finishes. They have a handmade charm that feels more authentic than mass-produced resin.
- These are highly collectible, so look for 'West Germany' markings for authentic mid-century pieces.
- Store them in acid-free tissue paper to prevent the cotton from yellowing over time.
- Mix them with real dried elements like cinnamon sticks for a natural, rustic look.
Most people skip this: Check for wire armatures inside older figures to gently adjust their pose.
56. Vintage Wooden Toy Ornaments
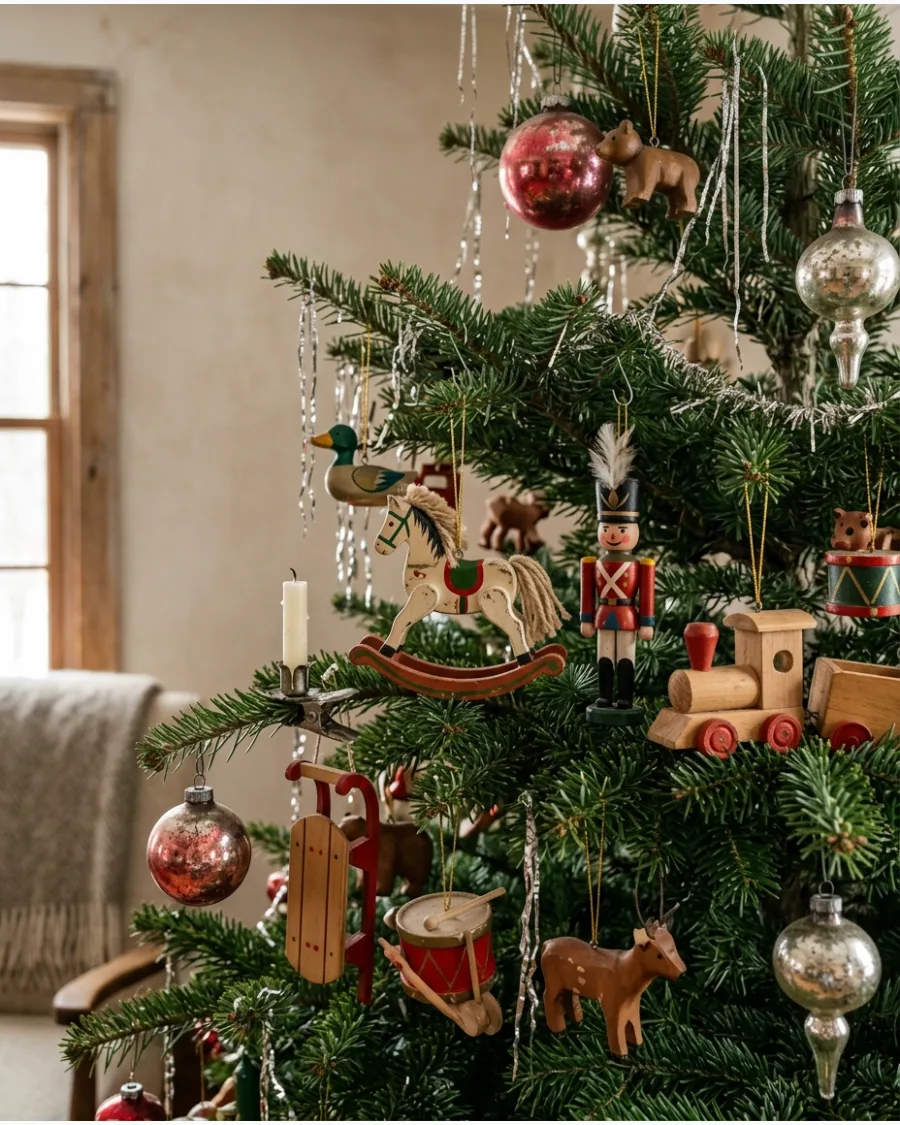
Miniature rocking horses and toy soldiers bring a sense of childhood nostalgia to the branches. Naturally aged wood provides a warm, organic feel that contrasts well with metallic tinsel.
Scatter these toys near the base of the tree to reference the tradition of gifts under the tree. They are durable enough for homes with pets or small children.
- Check local craft fairs for handmade wooden toys that mimic the vintage style.
- Use red or green baker's twine as a hanging loop to add a rustic, handmade touch.
- Group toys by theme, like a little train set, on a single large branch for impact.
Best shortcut: Rub a bit of dark wax into new wooden ornaments to give them an antique patina instantly.
57. Vintage Bell Christmas Ornaments
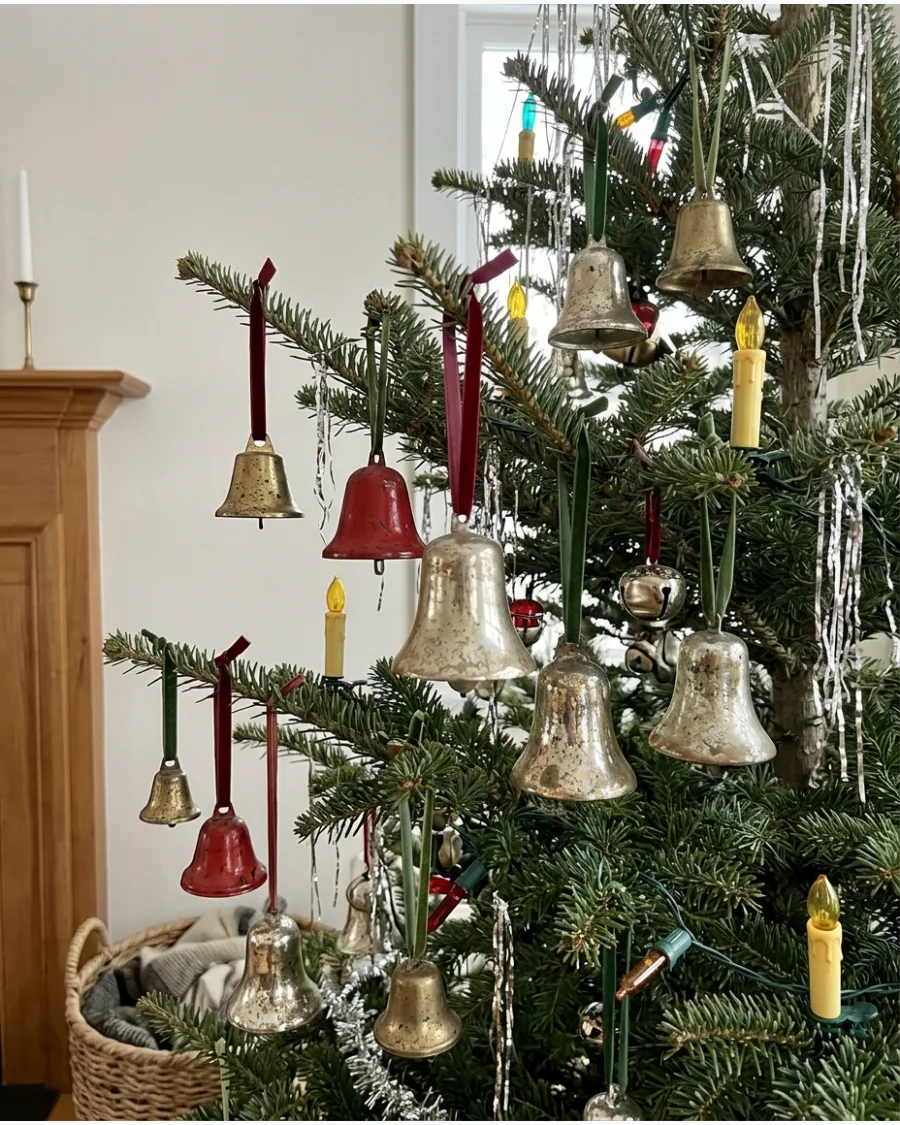
Mix brass, glass, and metal bells to add an auditory element to your tree. Different sizes and finishes create a layered look that feels gathered over many years.
Tie bells to the branches with narrow velvet ribbons to hide the metal hooks. The weight of metal bells helps pull down springy branches for a more natural shape.
- Sourcing old sleigh bells from antique shops provides the best sound and authentic weight.
- Hang bells on the outer tips of branches where they are more likely to move and chime.
- Use different ribbon colors for the bells to match your overall holiday color palette.
Quick win: Use a cluster of three small bells as a DIY ornament for a more substantial look.
58. Vintage Mushroom Christmas Ornaments
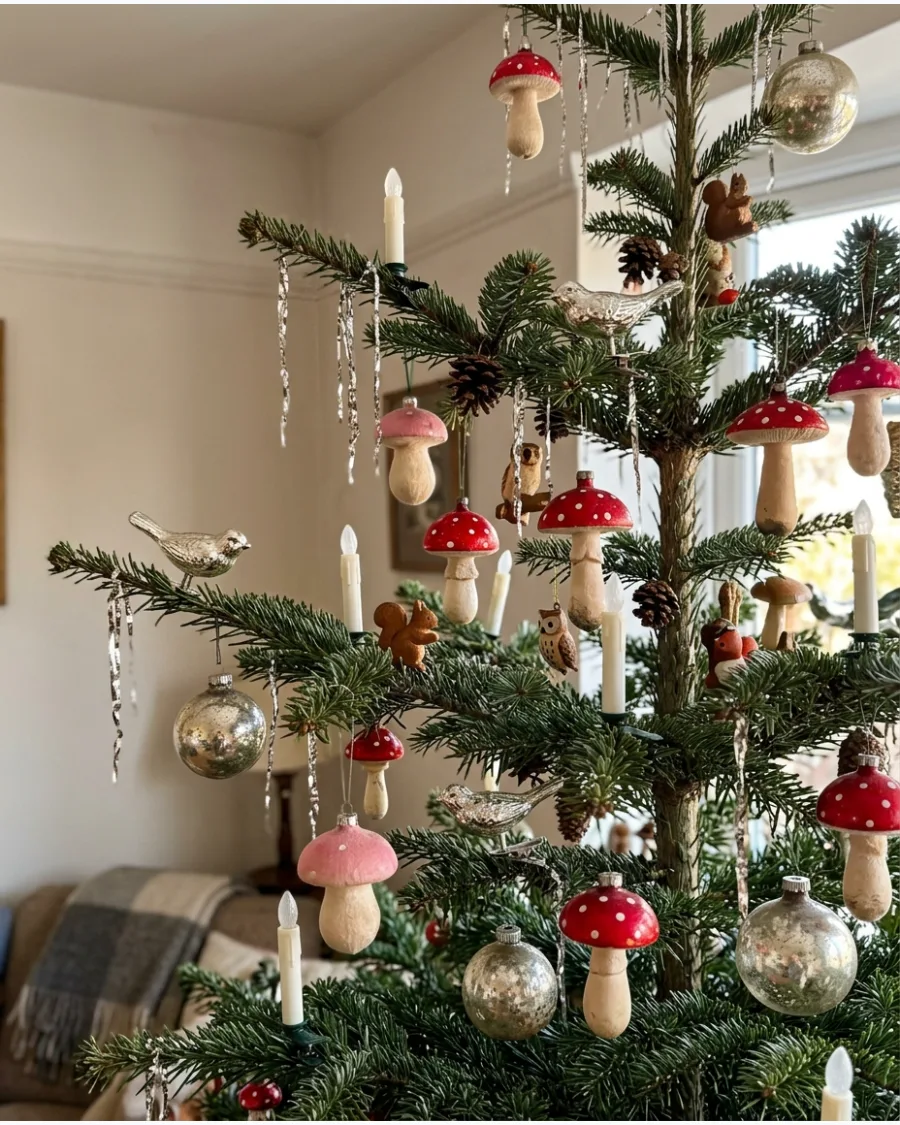
Mushroom ornaments in red and white are a staple of old-world European tree decorating. They represent good luck and add a whimsical, woodland vibe to the greenery.
Nestle mushrooms near the trunk or in the crooks of branches for a more realistic placement. They look especially striking when paired with clip-on birds and pinecones.
- Glass mushrooms with indented stems are often more valuable and visually interesting.
- Use them to bridge the gap between a nature-themed tree and a traditional glass one.
- Look for clip-on versions to make placement near the main trunk much easier.
Most people skip this: Cluster different sizes of mushrooms together to mimic how they grow in the wild.
59. Vintage Fruit and Nut Christmas Ornaments
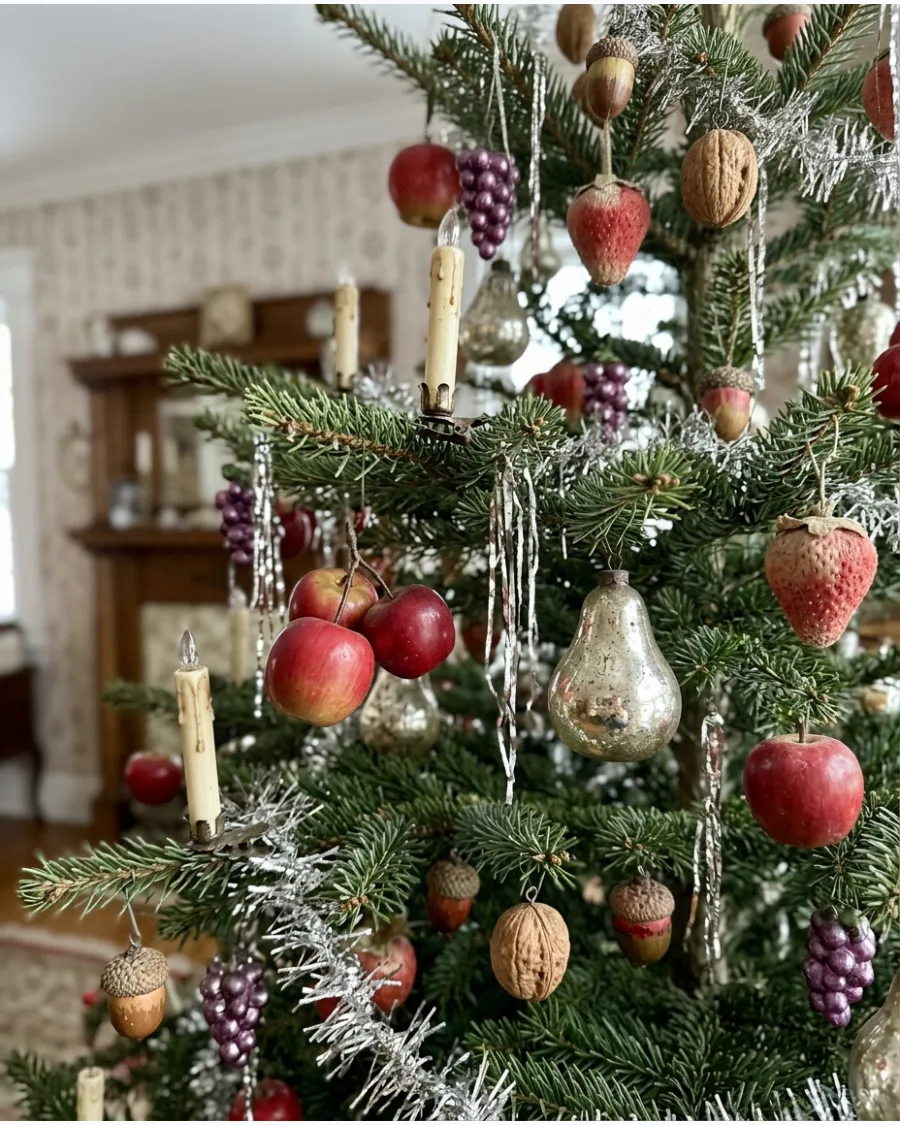
Miniature apples, pears, and walnuts give the tree an abundant, harvest-like appearance. These ornaments reference a time when real food was used to decorate holiday trees.
Use wax-finished or glass fruit to add a subtle sheen without the high gloss of standard balls. They are excellent for filling large gaps between branches.
- Search for 'sugared' fruit ornaments for a frosty, vintage-inspired texture.
- Mix these with dried orange slices for a fully organic, old-fashioned aesthetic.
- Store these in a cool, dry place as wax ornaments can soften in high heat.
Best shortcut: Hot glue a small loop of twine to real walnuts to create instant, zero-cost vintage ornaments.
60. Collected-Over-Time Vintage Ornament Tree
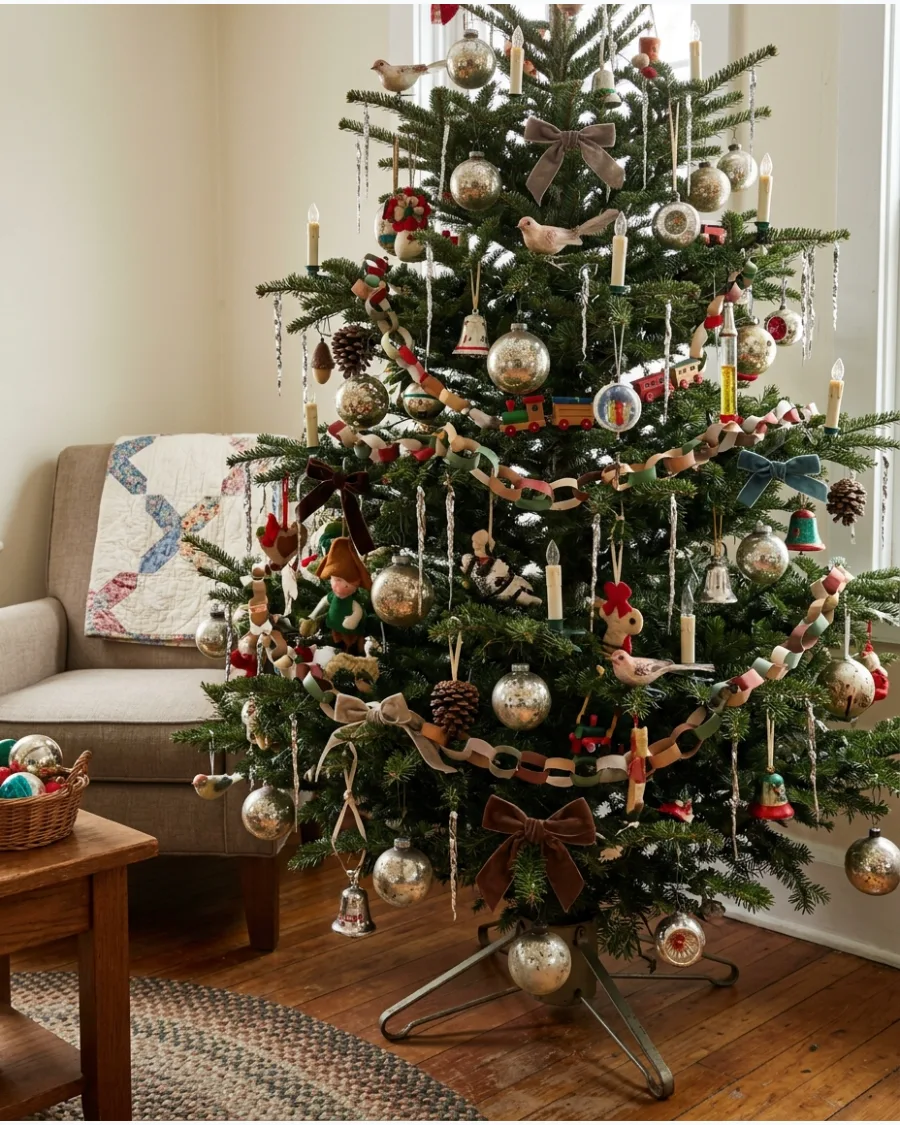
A tree that looks gathered over decades is far more interesting than one that comes out of a single box. Combine glass balls, handmade items, and sentimental pieces to tell a family story.
Layer your decorations starting with lights, then garlands, then the largest ornaments to create depth. The beauty of this style is that it never goes out of fashion.
- Don't worry about a strict color scheme; the variety of textures provides its own cohesion.
- Add one or two new vintage finds each year to keep the collection growing naturally.
- Use a mix of tinsel and beaded garlands to add even more visual layers to the tree.
Quick win: Take a photo of the tree each year to remember which ornaments have the most sentimental value.
Frequently Asked Questions
What are the most iconic types of vintage Christmas ornaments?
The most iconic styles include colorful Shiny Brite glass balls, delicate hand-blown mercury glass, and Victorian-era scrap ornaments made from paper or tinsel. Each era offers a distinct look, from the shimmering elegance of the 19th century to the bold, mass-produced charm of the mid-20th century.
How do I style tinsel so it looks classic, not messy?
To achieve a classic mid-century look, hang individual strands one by one over the tips of the branches rather than tossing them in clumps. This 'icicle' technique creates a shimmering, uniform curtain of light that highlights your ornaments without overwhelming the tree.
Where can I find authentic vintage Christmas decorations?
You can find authentic treasures by scouting local estate sales and thrift stores, especially during the off-season when demand is lower. For specific pieces, online marketplaces like Etsy and eBay are excellent resources for connecting with specialized vintage collectors and dealers.
How can I tell if an ornament is a real antique or a reproduction?
Check the metal cap; authentic vintage pieces usually have simple, thin metal caps, while modern reproductions often feel heavier or have ornate markings. Additionally, look for signs of hand-painted details and thin, delicate glass that feels much lighter than today's sturdier alternatives.
What color palettes were most popular in mid-century Christmas decor?
While traditional red and green remained staples, the mid-century era introduced a vibrant shift toward pastel pinks, teals, and shimmering silvers. These "atomic age" palettes often featured metallic finishes that perfectly complemented the popular aluminum trees of the 1950s and 60s.