50 Narrow Toilet Room Ideas for Style, Storage, and Better Use of Space

This post may contain affiliate links: full affiliate disclosure.
A narrow toilet room can look unfinished even when the rest of your bathroom feels settled. The useful question is which surface should carry the design.
Start with one strong feature: patterned walls, a tiled floor, useful storage, or better light. Then choose supporting details that leave room to move comfortably.
These ideas focus on separate toilet compartments, with a few options for narrow half baths. Compare the looks first, then check measurements before changing fixtures.
As an Amazon Associate I earn from qualifying purchases.
Wall Looks That Give a Narrow Room a Clear Identity
Paint, wallpaper, and art can give an existing toilet room a finished look without moving plumbing. Choose the wall treatment before adding smaller decorations or storage.
1. Make the Back Wall a Botanical Focal Point
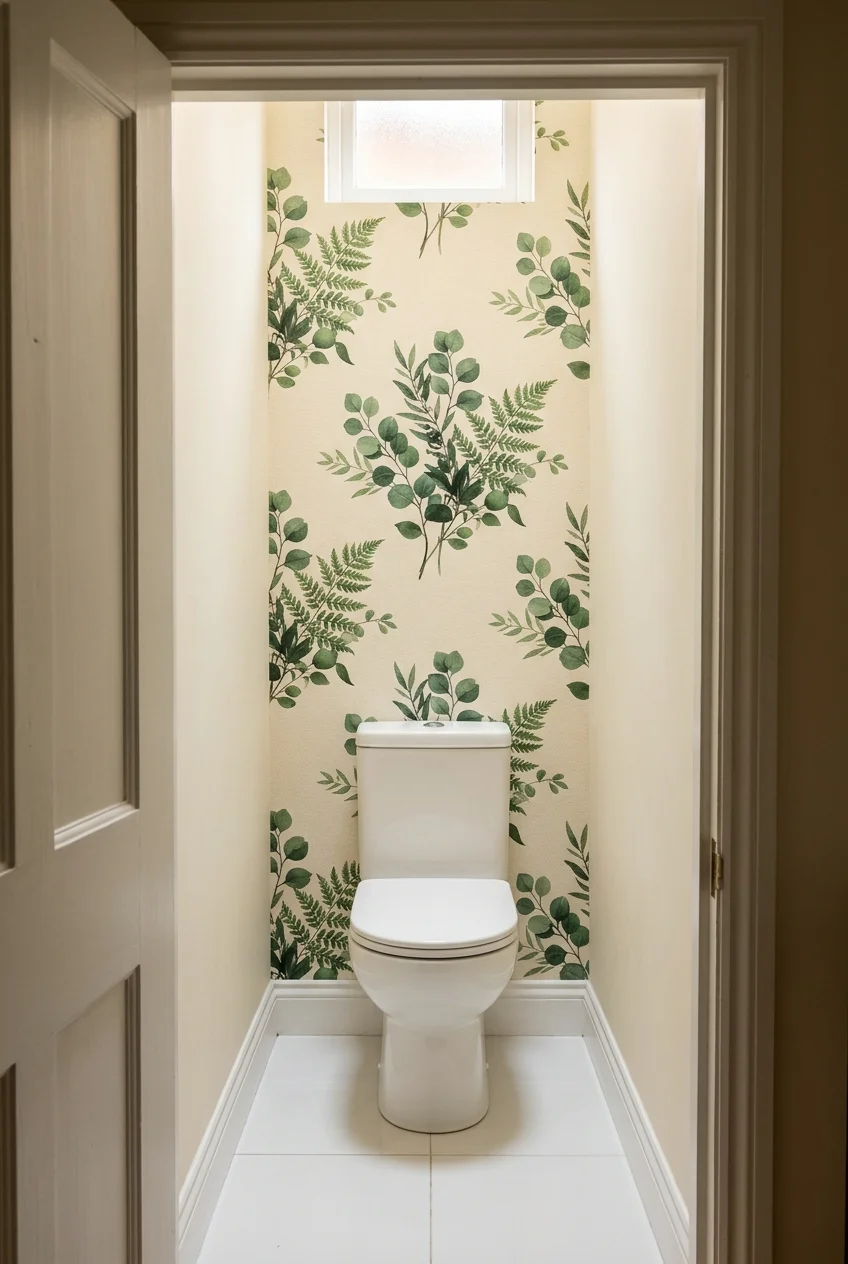
Large leafy shapes behind the toilet give your eye somewhere to land from the doorway. Keep the long side walls plain so the pattern stays readable.
Choose a background color that relates to the floor you already have. A cream background usually sits more comfortably beside warm tile than a stark white.
Order a sample large enough to show the repeat. Position a recognizable branch above the tank instead of letting the main motif disappear behind it.
If you want to compare other motifs, these bathroom wallpaper ideas offer different scales and color combinations before you commit to a full roll.
2. Wrap the Walls and Trim in One Deep Color
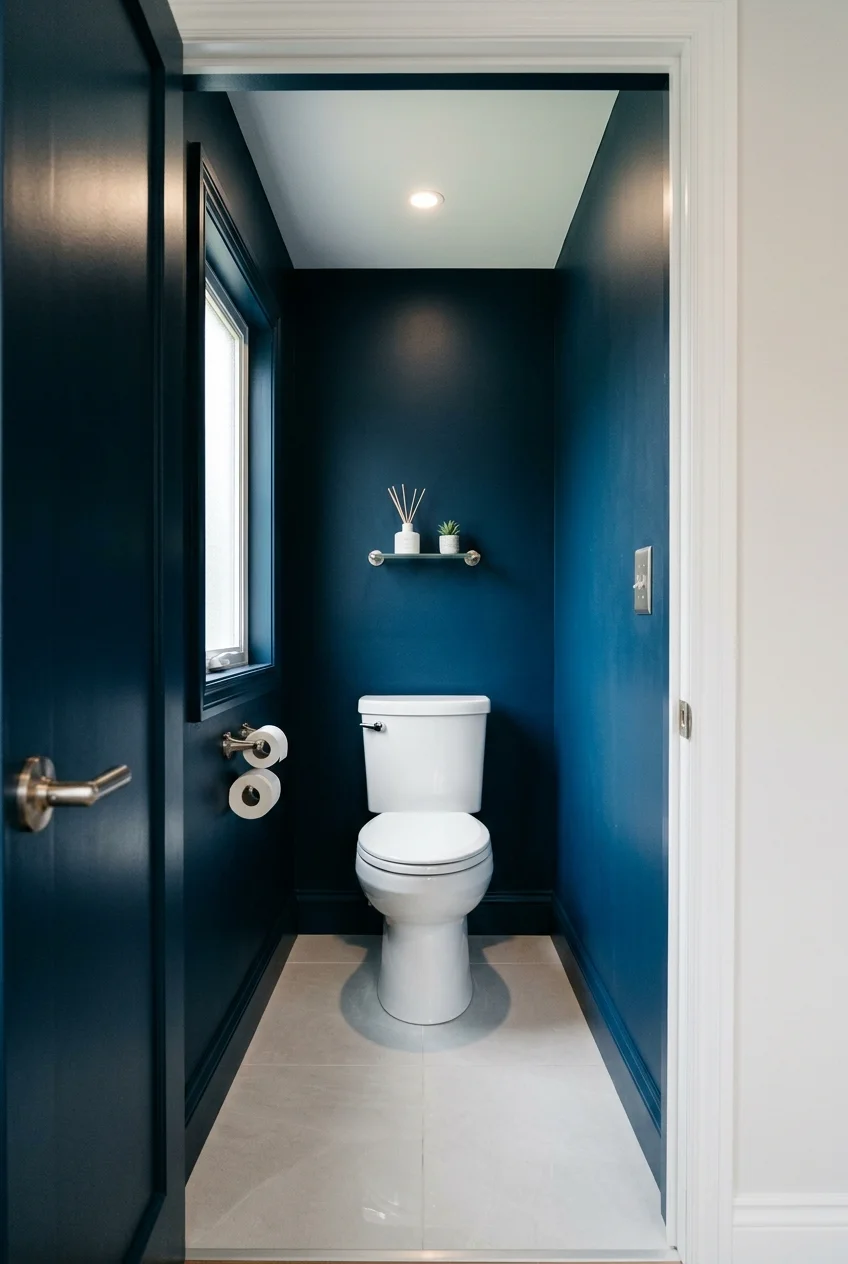
A dark, unified envelope can make a small toilet room feel deliberately enclosed. Use the same color on walls and trim to reduce competing outlines.
Deep blue with white porcelain and brushed nickel is one clear combination. Keep the ceiling lighter if you want more separation above the room.
Test the paint with your actual light switched on. A color that looks rich beside a window may turn nearly black inside a windowless compartment.
3. Pair Wallpaper With Painted Wainscoting
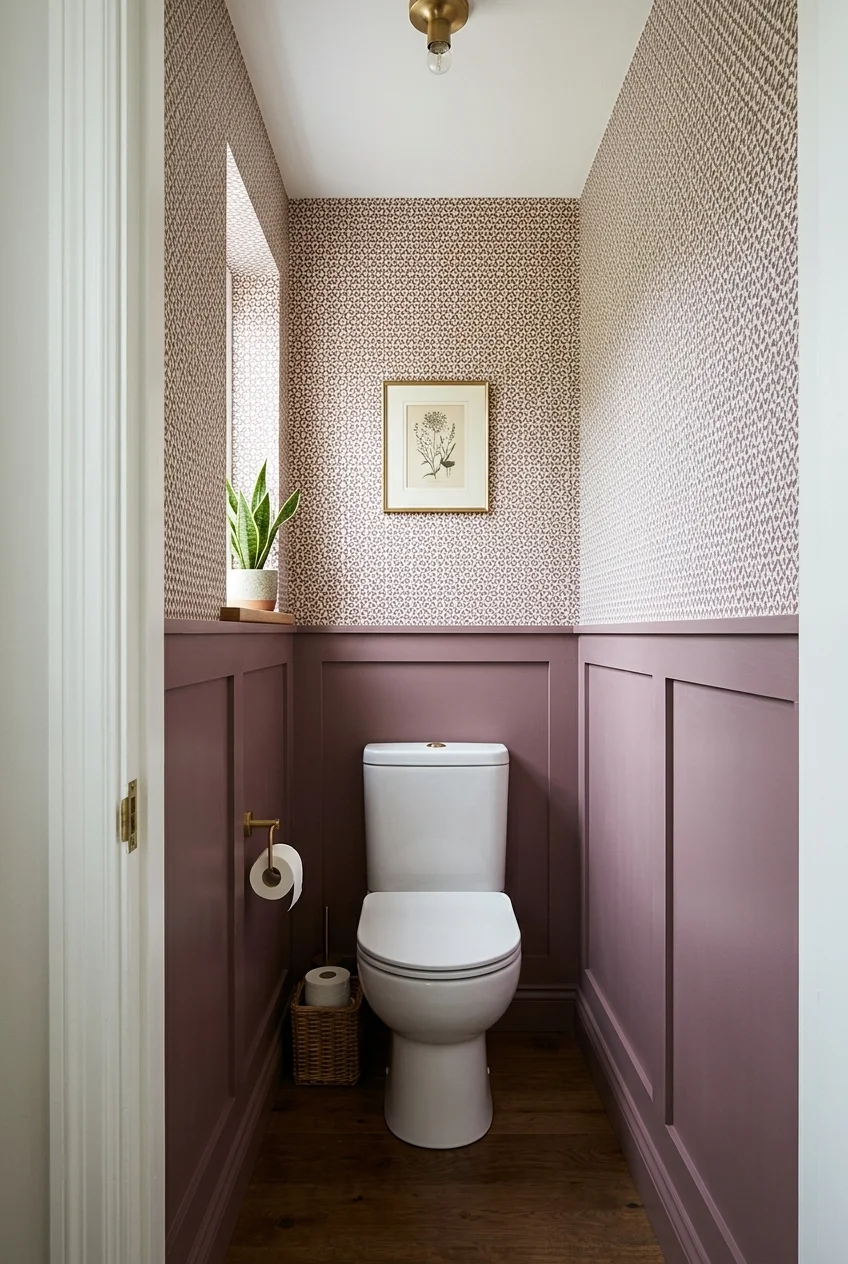
A painted lower wall gives busy wallpaper a defined starting point. Repeat one quieter color from the paper in the paneling for a connected scheme.
Set the dividing line around existing features rather than automatically splitting the wall in half. Check how it meets the tank, switch plate, and window trim.
Choose shallow profiles that suit the room width. Thick battens and projecting caps can make a narrow compartment feel more crowded when viewed from the doorway.
Setup note Wallpaper belongs away from direct splashes and on a suitable dry surface. Follow the paper manufacturer’s preparation guidance and keep the room properly ventilated.
4. Run Soft Stripes Up the Long Side Walls
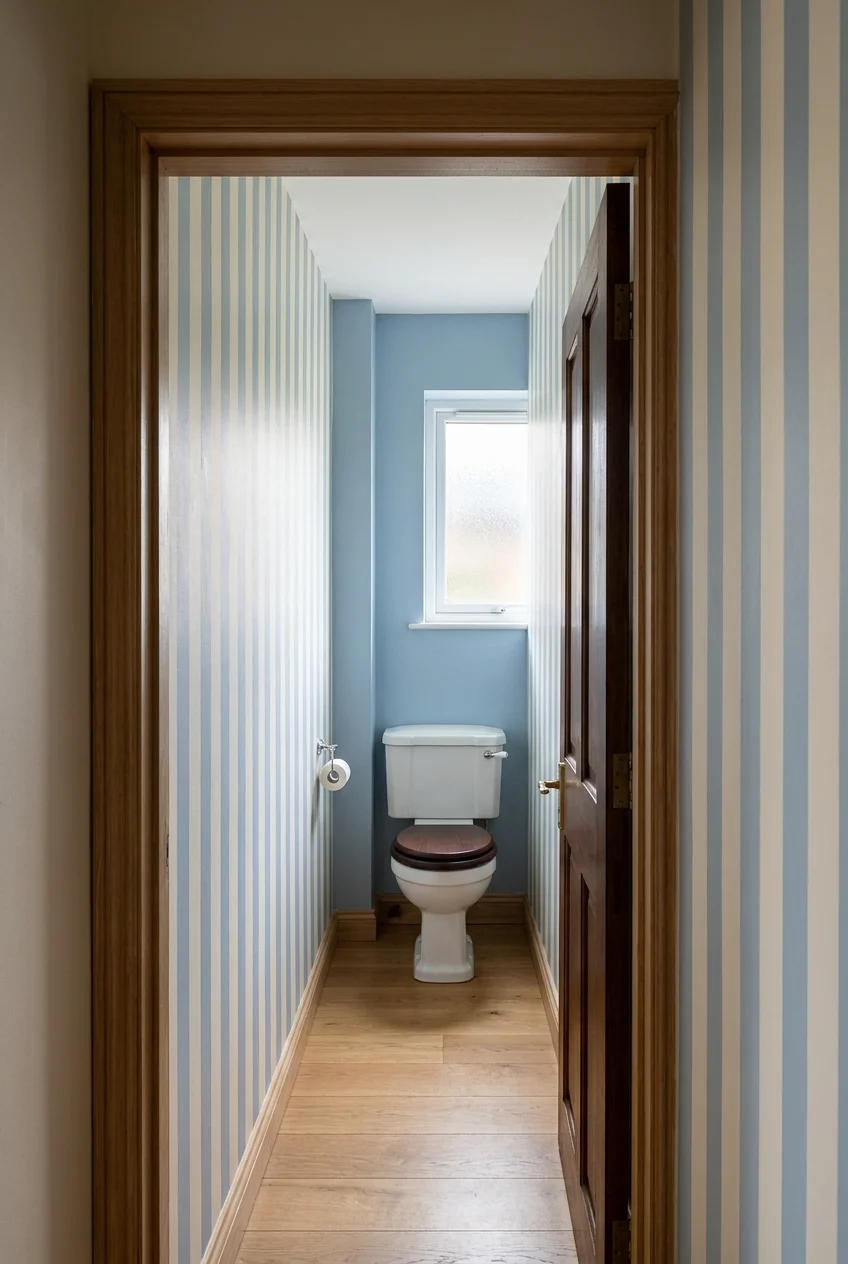
Fine vertical stripes give long walls a rhythm without adding physical depth. Keep their contrast gentle so the repeated lines do not dominate at close range.
Use a solid back wall to interrupt the striped corridor effect. Pull its color from the darker stripe and leave the ceiling simple and light.
Check a sample beside your trim before ordering. Slightly crooked corners can make strict stripes look uneven, so careful alignment matters more than elaborate accessories.
5. Use a Landscape Mural Instead of a Small Repeat
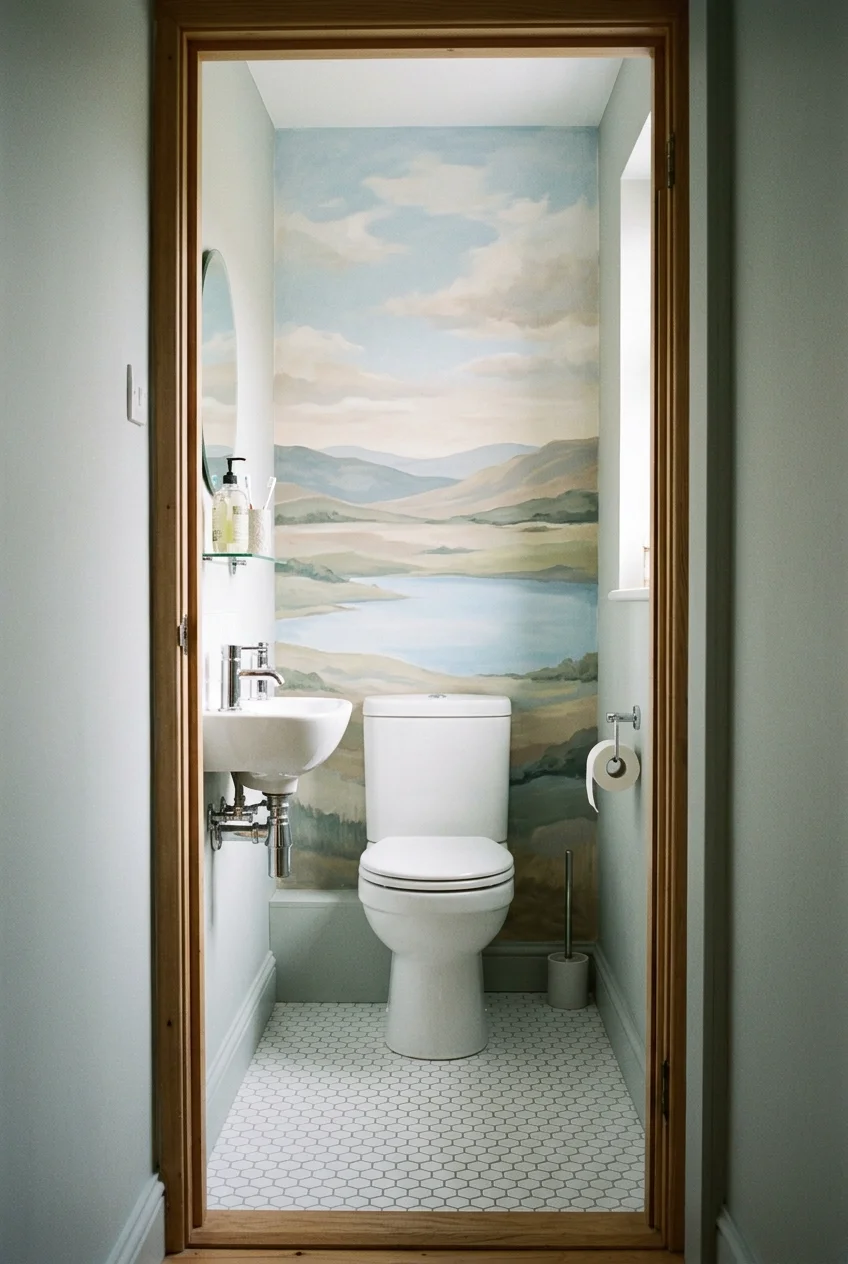
A single landscape scene changes the back wall into a picture rather than a repeated pattern. A distant horizon works particularly well above a low tank.
Ask for a crop showing your wall dimensions before buying. Trees, buildings, or the focal horizon should remain visible after the toilet and trim are considered.
Leave the adjoining walls quiet and skip extra pictures. This idea depends on one uninterrupted scene, so a large storage cabinet would cover its strongest feature.
6. Put the Accent Color on the Ceiling
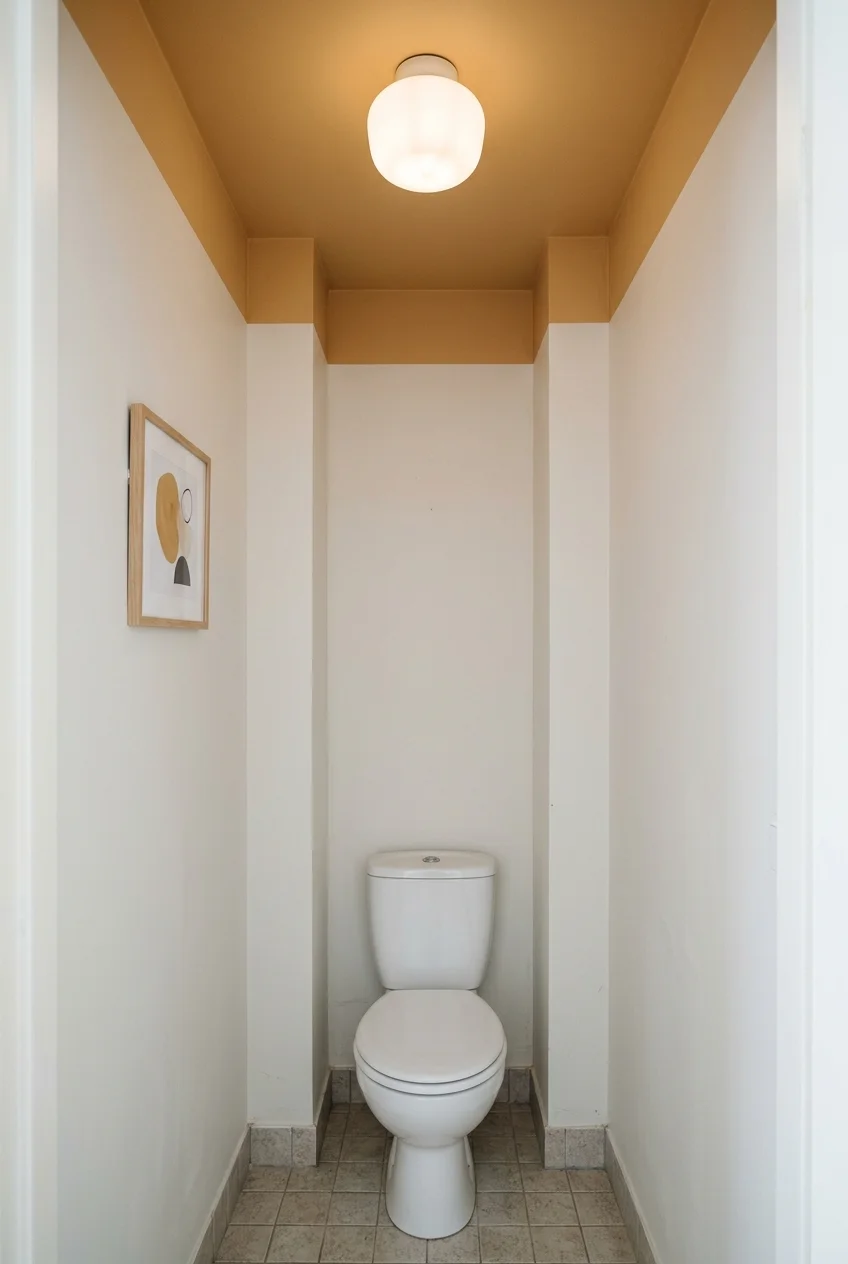
A colored ceiling adds personality when wall space is interrupted by a door, cabinet, or window. Keep the walls simple so the overhead plane reads clearly.
Try a muted ocher ceiling above off-white walls and dark metal hardware. Carry the color into one small artwork rather than adding several yellow accessories.
Paint a large sample overhead and check it after dark. Ceiling color can influence the room’s light, especially when the fixture throws illumination upward.
7. Paint an Arch Behind the Toilet
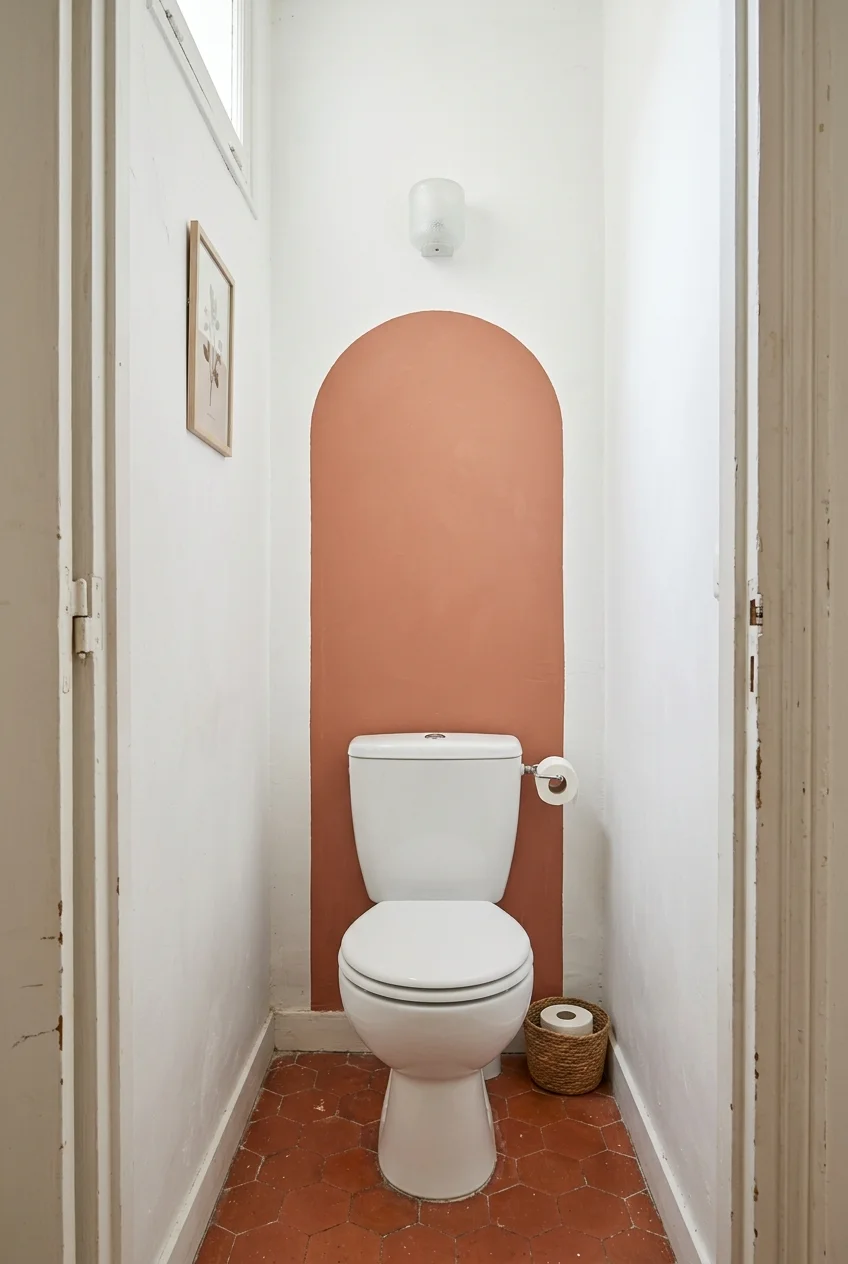
A painted arch creates a focal shape without adding trim or shelves. Center it on the toilet and give it enough width to frame the tank.
Use a dusty terracotta arch against warm white walls for a distinct outline. Keep its sides straight and its curve symmetrical so the finish looks intentional.
Make a paper template before painting the curve. If the wall is too interrupted for a full arch, a simple rectangular color panel is easier to resolve.
8. Hang One Oversized Framed Print
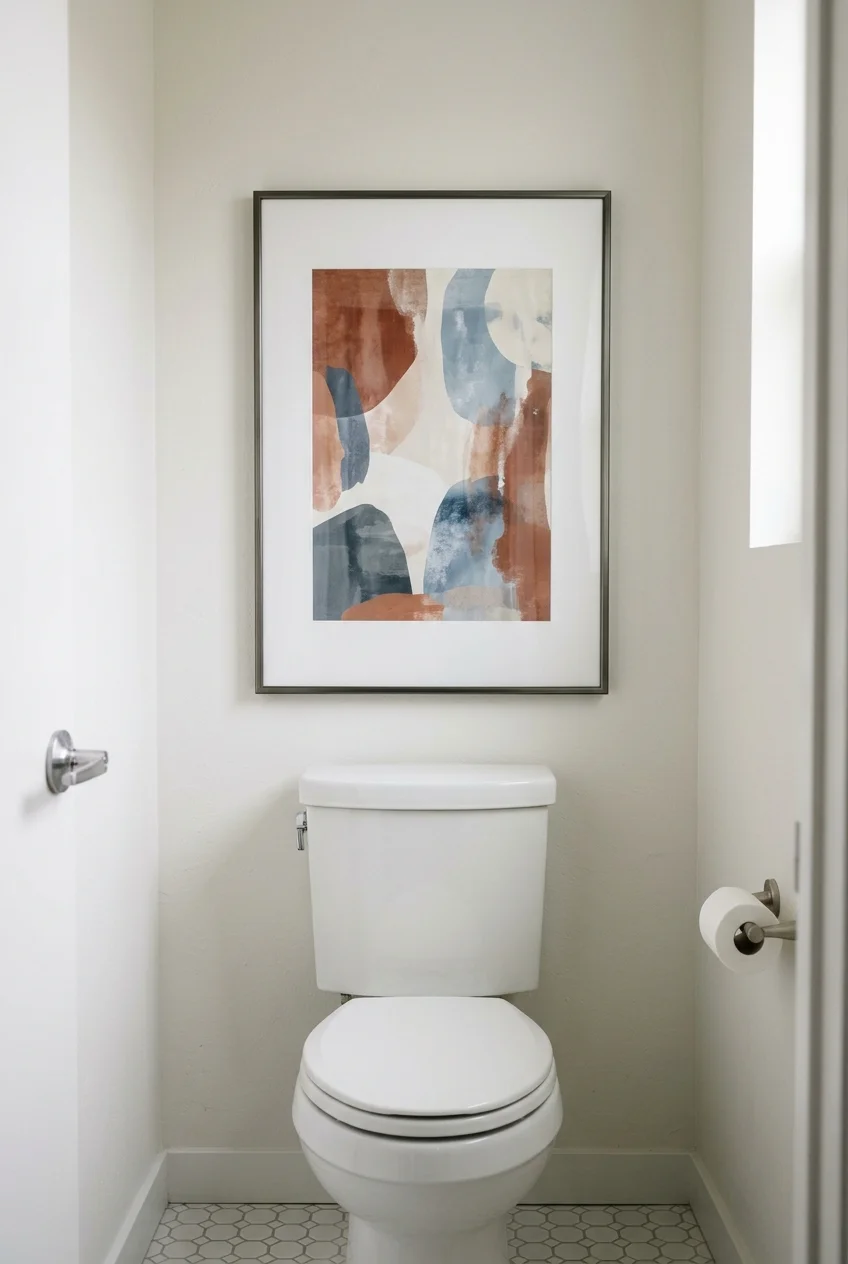
One substantial print can finish a toilet room with fewer decisions than a collection of small accessories. Choose artwork that remains legible from the doorway.
A narrow frame and generous mat give the picture a clear edge. Leave visible wall around it rather than wedging the frame between adjoining corners.
Keep it clear of tank maintenance and mount it securely. An abstract composition avoids the awkwardness of a portrait staring directly at someone using the room.
9. Frame the Back Wall With Shallow Molding
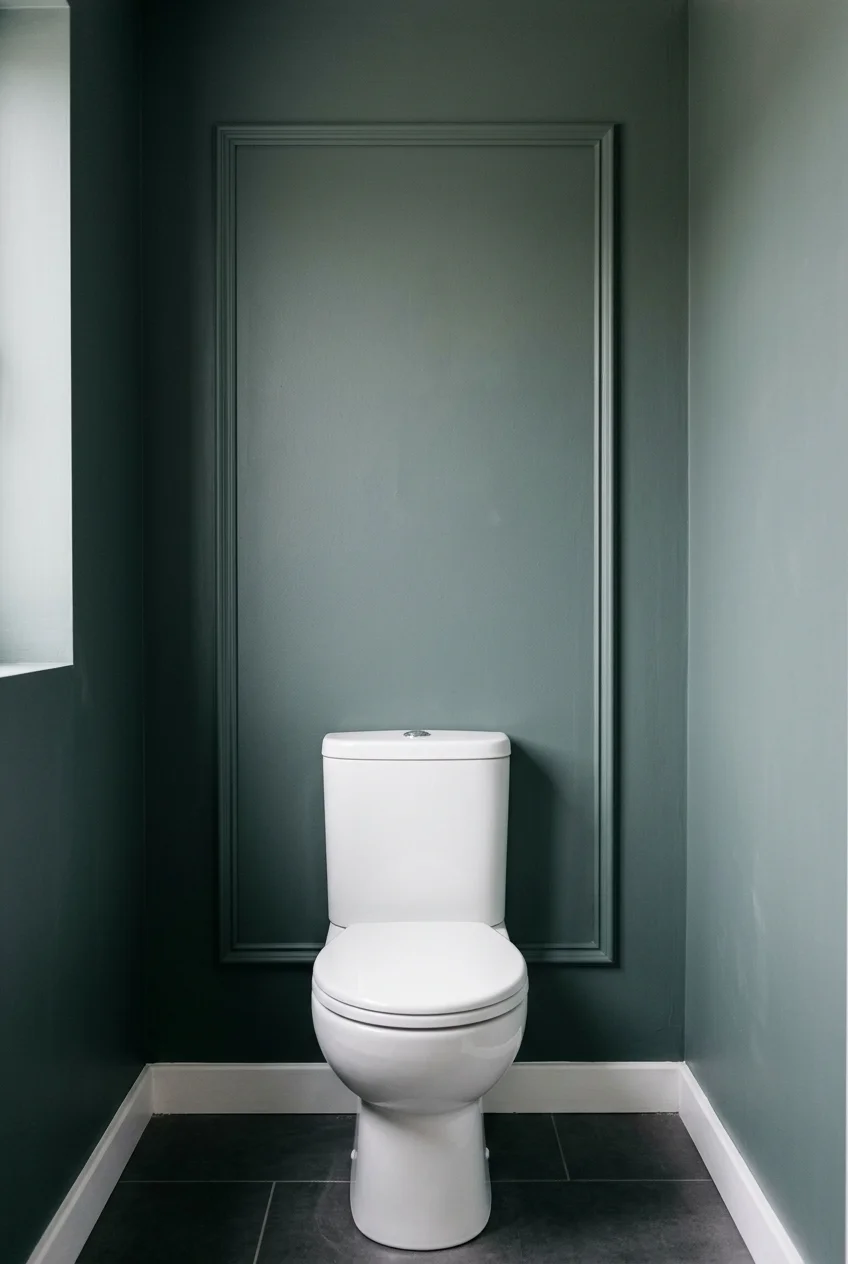
A single molded rectangle gives a plain wall architectural detail without filling it with objects. Paint the molding and wall together for a quieter result.
Lay out the rectangle around the toilet’s centerline, then check the margins. Equal visual breathing room matters more than copying dimensions from a much wider room.
Keep the lower rail accessible for cleaning and away from the tank lid. Use a simple profile rather than several nested rectangles in this small area.
Before attaching trim, identify concealed services and choose a fixing method suitable for the wall. Fill joints and finish the paint before installing nearby accessories.
10. Choose a Soft Plaster-Look Painted Finish
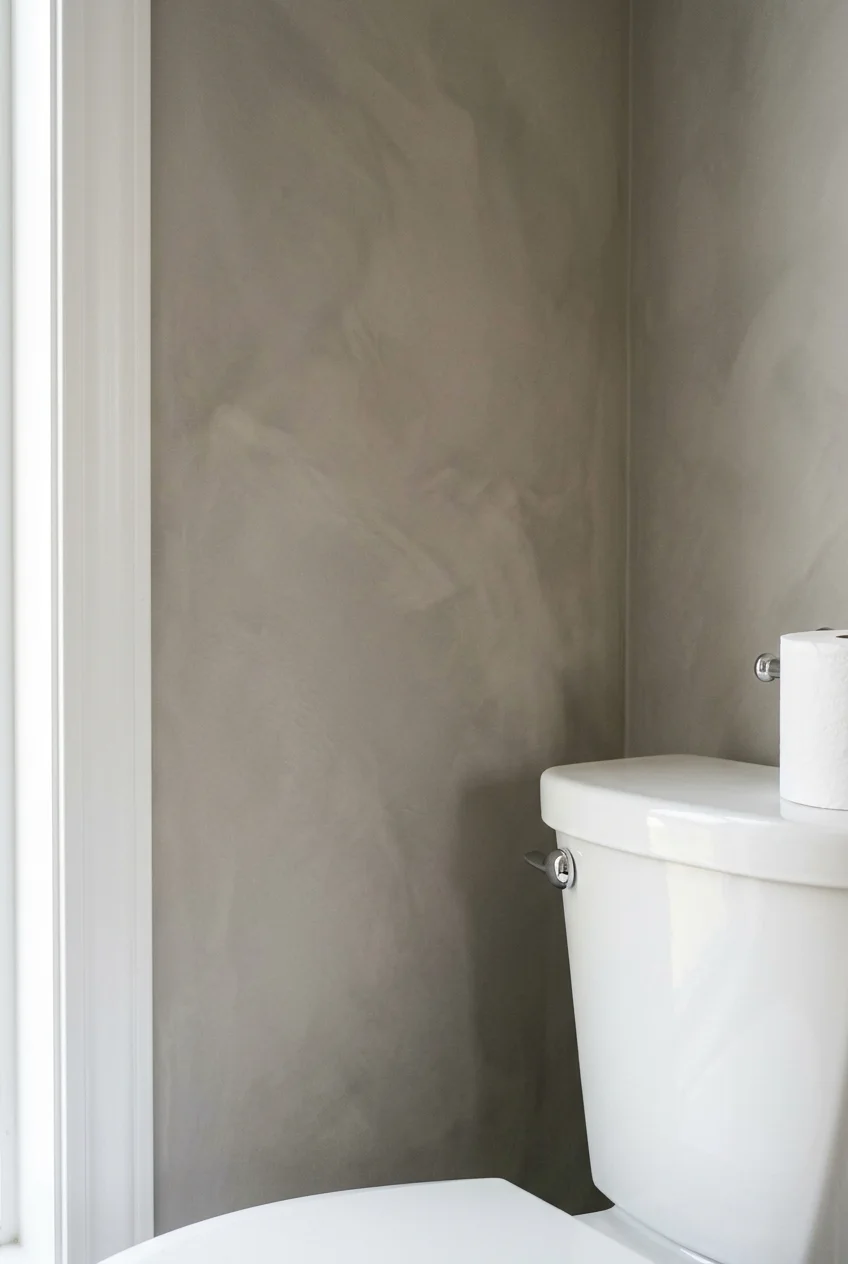
A clouded paint effect adds movement when you want texture without another pattern. Keep the variation subtle enough that the wall still reads as one color.
Look for a decorative coating suitable for the room and its cleaning needs. A plaster-like appearance does not mean an unsealed porous finish is practical here.
Sample the application on a board before tackling the narrow wall. Leave the other surfaces smooth so the effect looks deliberate rather than like unfinished repairs.
Tile, Flooring, and Trim With a Distinct Visual Job
Tile can carry the whole design in a small compartment. Decide whether the wall or floor should be the feature, then simplify the surrounding finishes.
11. Stack Slim Tiles Vertically on the End Wall
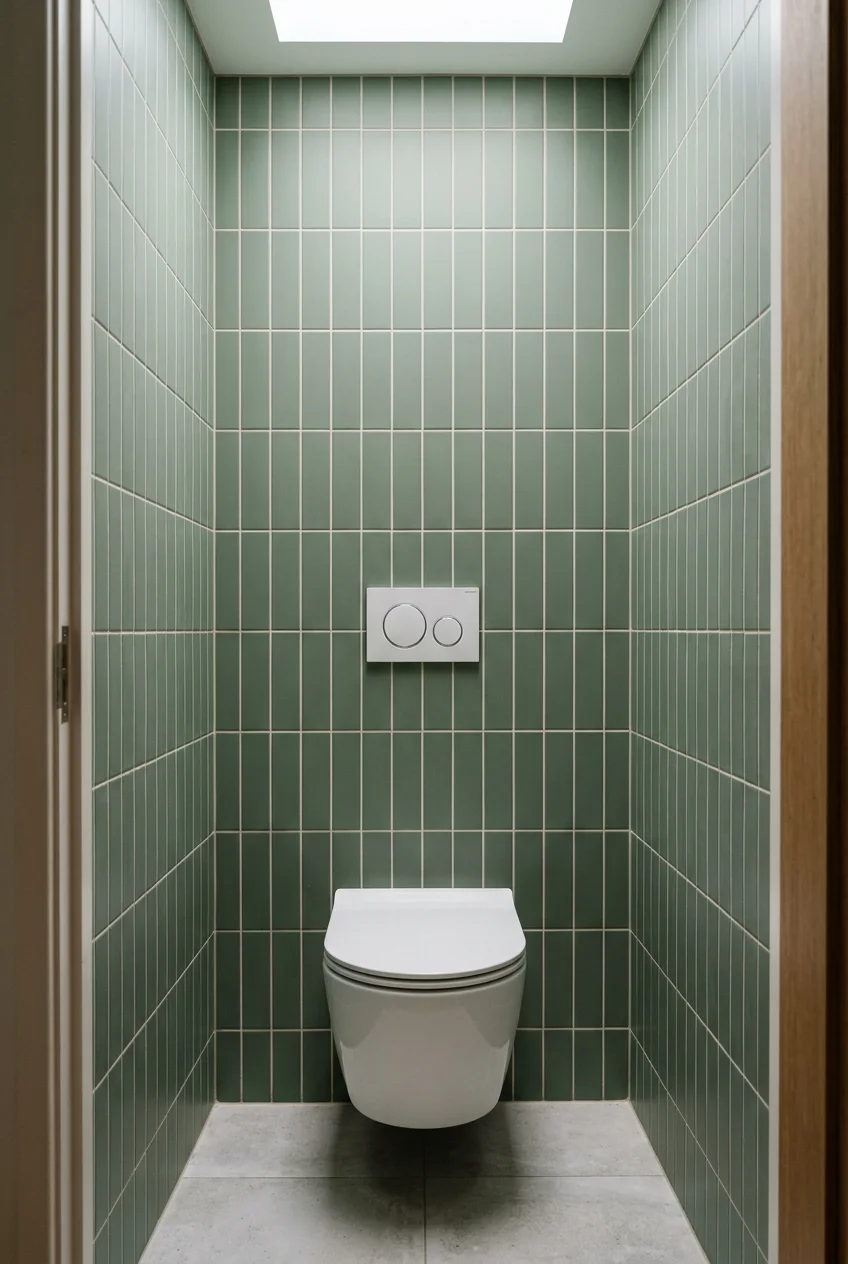
Upright rectangular tiles create a different rhythm from ordinary brickwork. Run them behind the toilet to make the end wall the room’s main material feature.
A grout close to the tile color softens the grid. Contrast grout makes every joint visible, which can feel busy when the wall is viewed closely.
Plan cuts before installation so the outer edges look balanced. Finish exposed sides with suitable trim and keep tile joints consistent around the flush plate.
12. Wrap a Tile Wainscot Around the Room
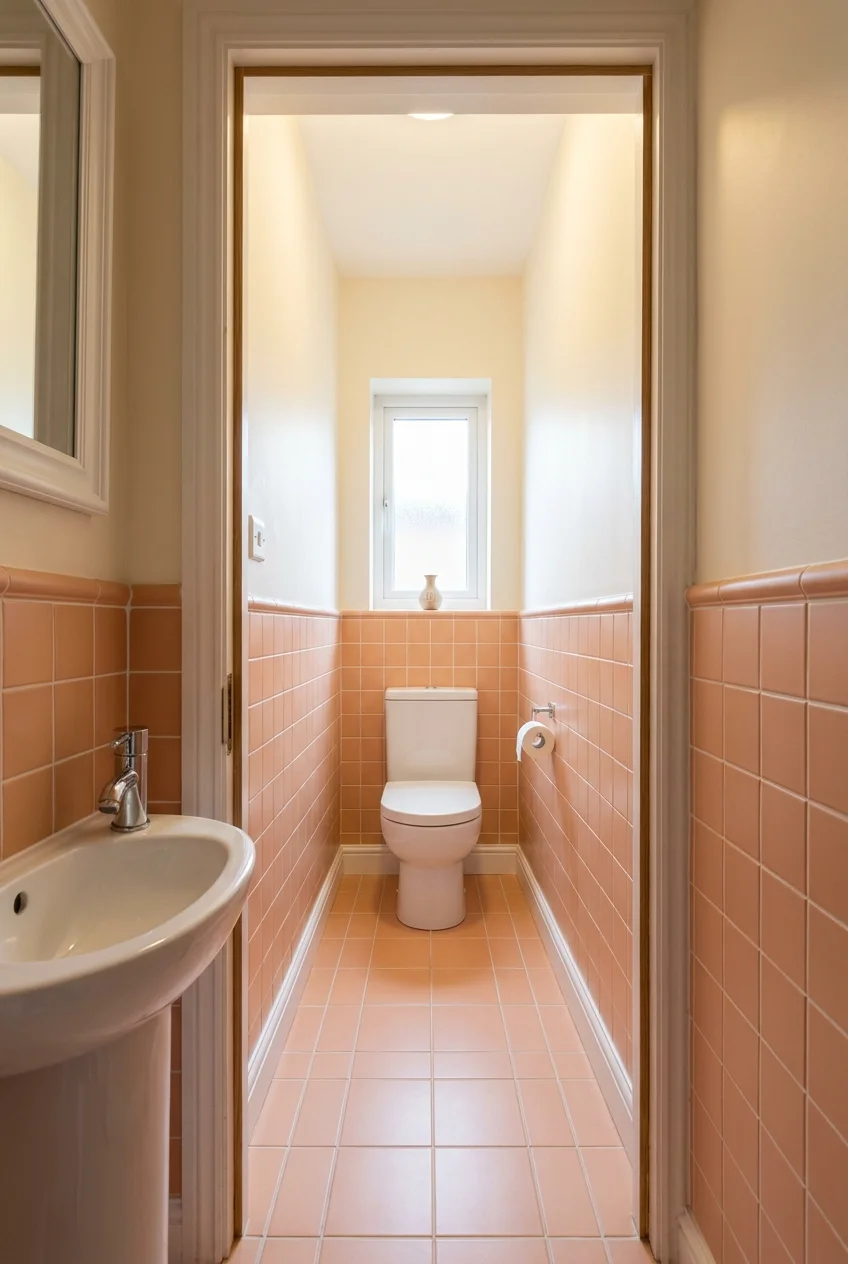
A tiled lower wall gives the compartment a continuous band of color and a wipeable surface. The painted upper wall keeps the room from feeling overfilled.
Square tiles in a warm peach tone work well with pale upper walls. Use a matching cap or a deliberate finished edge instead of an exposed tile top.
Carry the height around all adjoining walls and resolve the doorway neatly. Check the wall buildup near fixtures before assuming an existing holder will still fit.
If a sink shares the room, extend suitable protection through its splash area. Wallpaper above the tile should stay outside direct splashes and follow product guidance.
13. Lay Broad Horizontal Tile Courses Behind the Tank
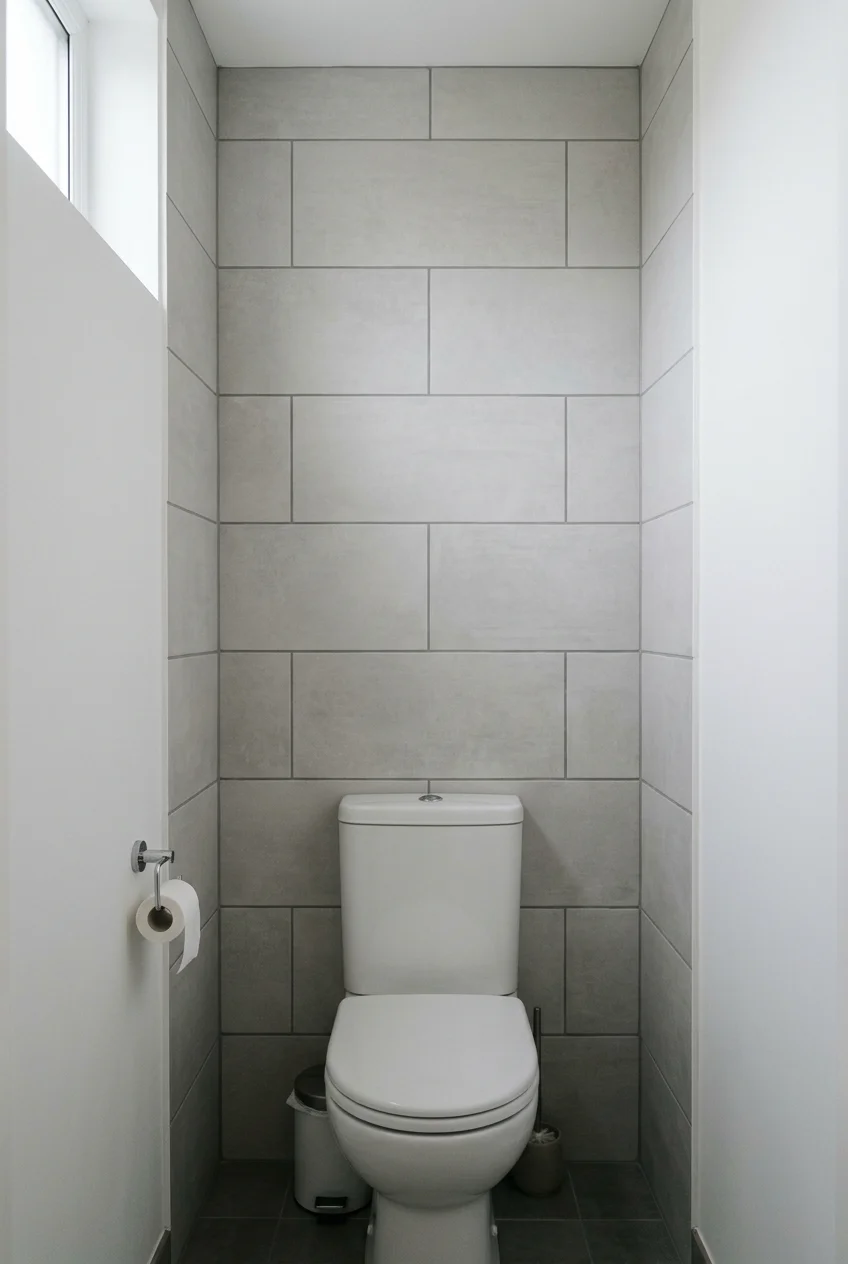
Long horizontal tiles give the back wall a broad, calm pattern. Let the courses span the wall rather than surrounding the toilet with a small decorative rectangle.
A pale tile and restrained grout keep attention on the proportions. This creates a horizontal emphasis, but it cannot add physical clearance beside the toilet.
Dry lay a row to avoid tiny strips at both ends. Choose an installation pattern permitted for the specific tile, especially with longer pieces.
14. Keep the Floor Calm With Large-Format Tile
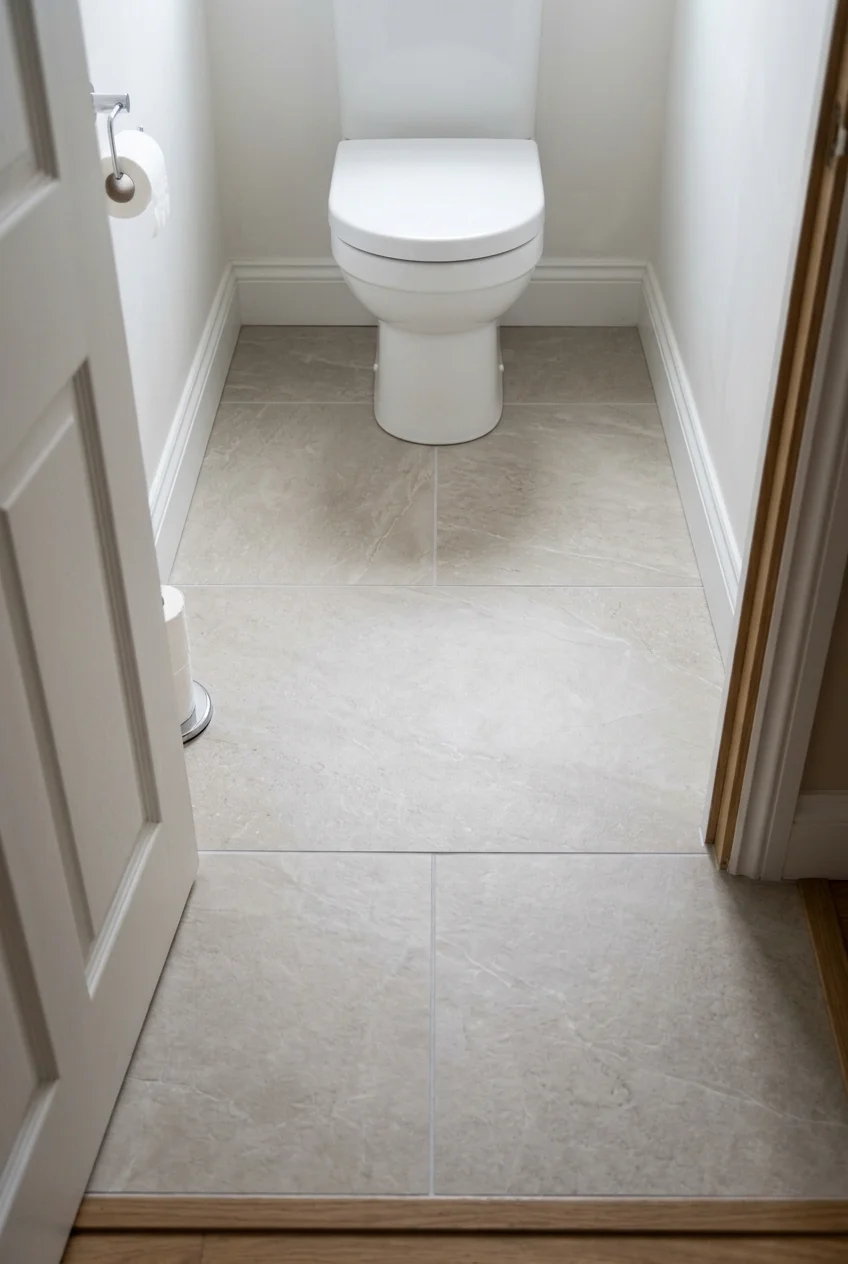
Large floor tiles can reduce the number of visible joints in a compact room. Choose a quiet surface when your wallpaper or painted walls already have detail.
Check the proposed layout before choosing the largest tile available. A narrow room can turn oversized pieces into awkward cuts rather than a simple continuous floor.
Use a floor-rated product suitable for bathroom conditions and check the manufacturer’s slip-resistance guidance. A matte appearance alone does not establish how slippery a tile is.
For more surface comparisons, these bathroom flooring ideas can help you choose a direction before checking the exact product’s technical information and installation requirements.
15. Make a Small Checkerboard Floor the Main Pattern
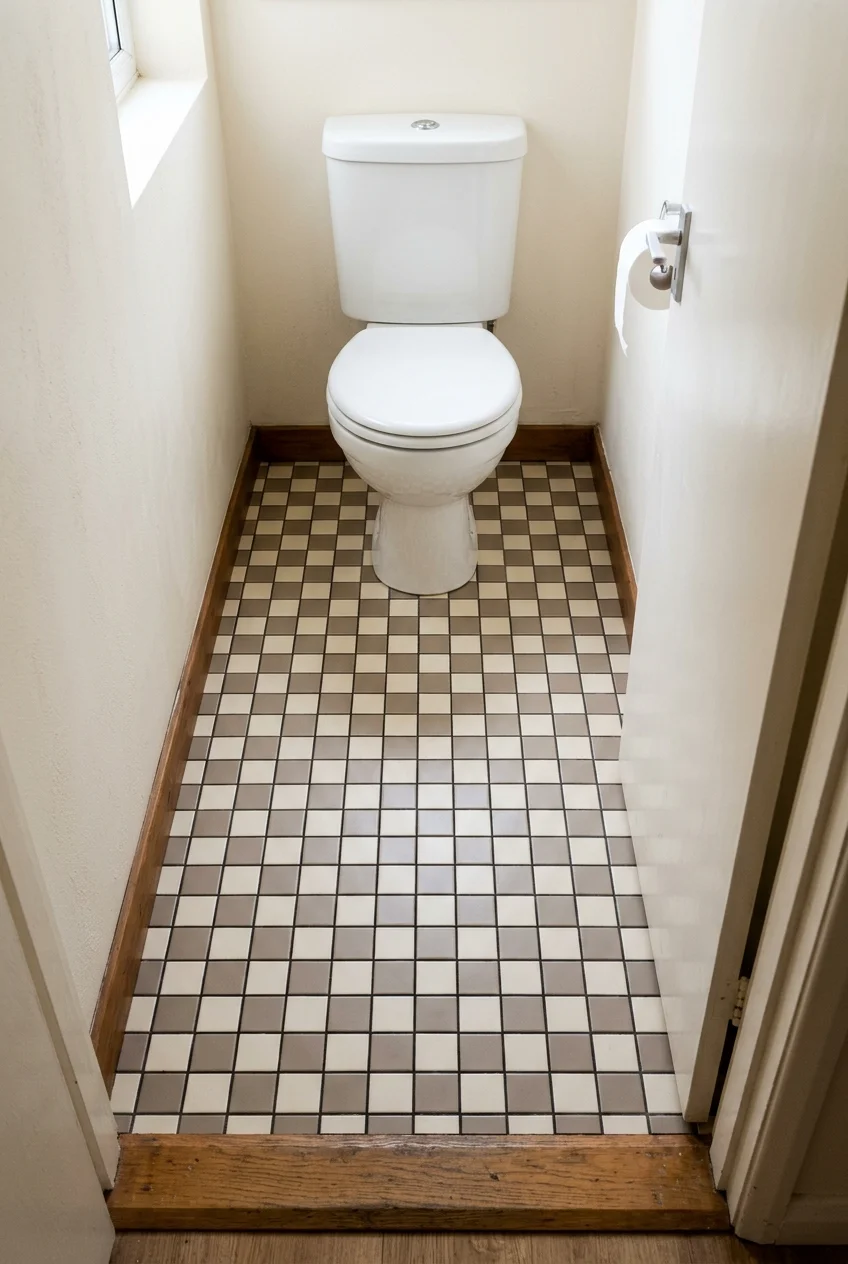
A checkerboard gives a plain room a strong graphic base without adding furniture. Softer cream and taupe squares offer a gentler version of black and white.
Choose a square size that leaves several readable repeats across the room. Test the layout at the doorway, where an uneven sliver can become surprisingly noticeable.
Keep wall finishes relatively simple and use the same two colors elsewhere sparingly. The floor already provides enough repetition without striped walls or competing patterned accessories.
16. Outline a Penny-Tile Floor With a Slim Border
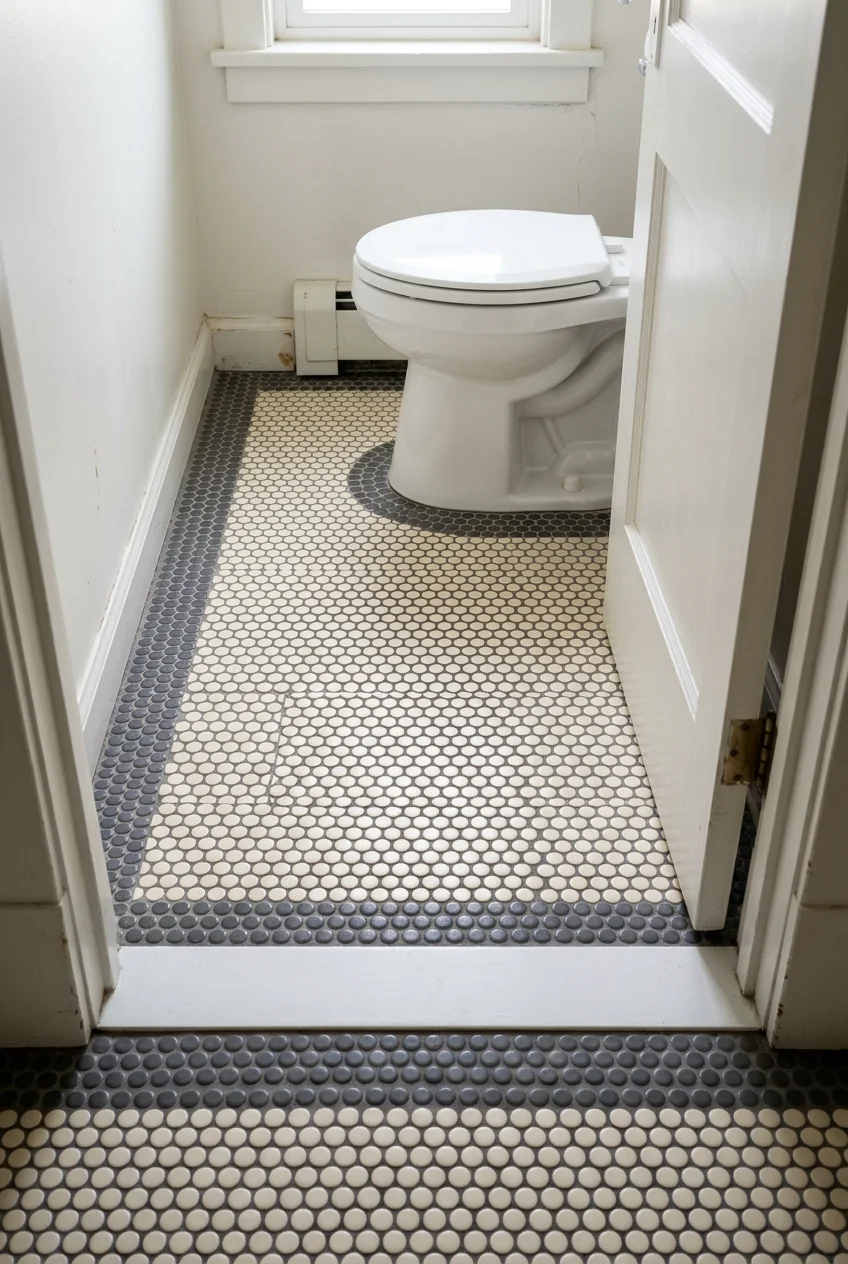
Small round mosaics create a fine textured field, while a contrasting perimeter border makes the room’s outline visible. Keep the rest of the scheme uncomplicated.
Map the border around the actual room before installation. Small irregularities near the doorway matter because the contrasting line draws attention to every change in width.
Ask the installer to review sheet alignment and grout choices. More joints mean more visible grout, and decorative mosaic is not automatically suitable for every bathroom floor.
17. Run a Herringbone Floor Toward the Toilet Wall
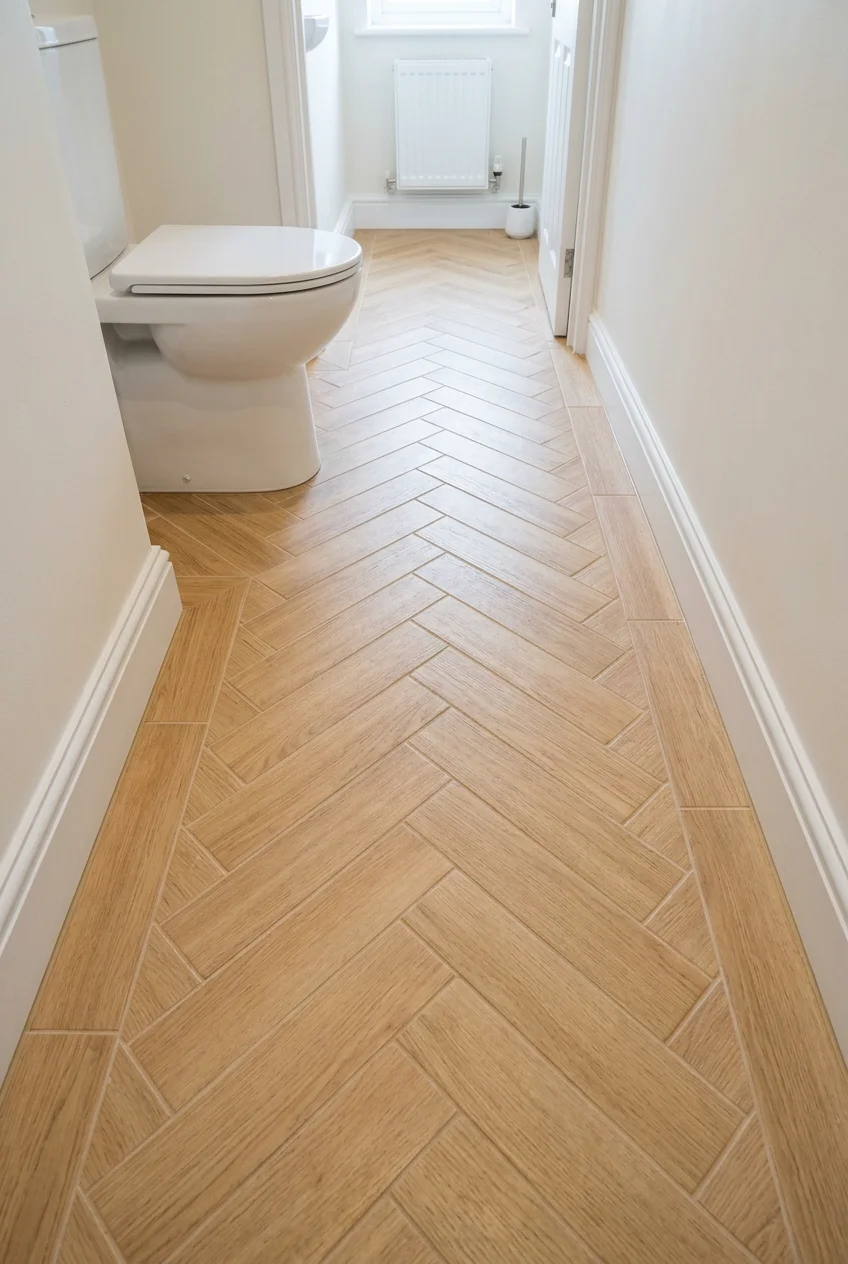
A herringbone layout adds movement when the room has plain walls and little decorative space. Use one restrained tile color so the arrangement remains the feature.
Set the centerline from the doorway and review the cuts around the toilet base. Uneven edge pieces are more apparent in a narrow, strongly directional pattern.
Porcelain planks can give the pattern a wood-like appearance without using real wood flooring. Confirm floor suitability and follow the chosen tile’s installation requirements.
18. Use Fine-Speckled Terrazzo-Look Flooring
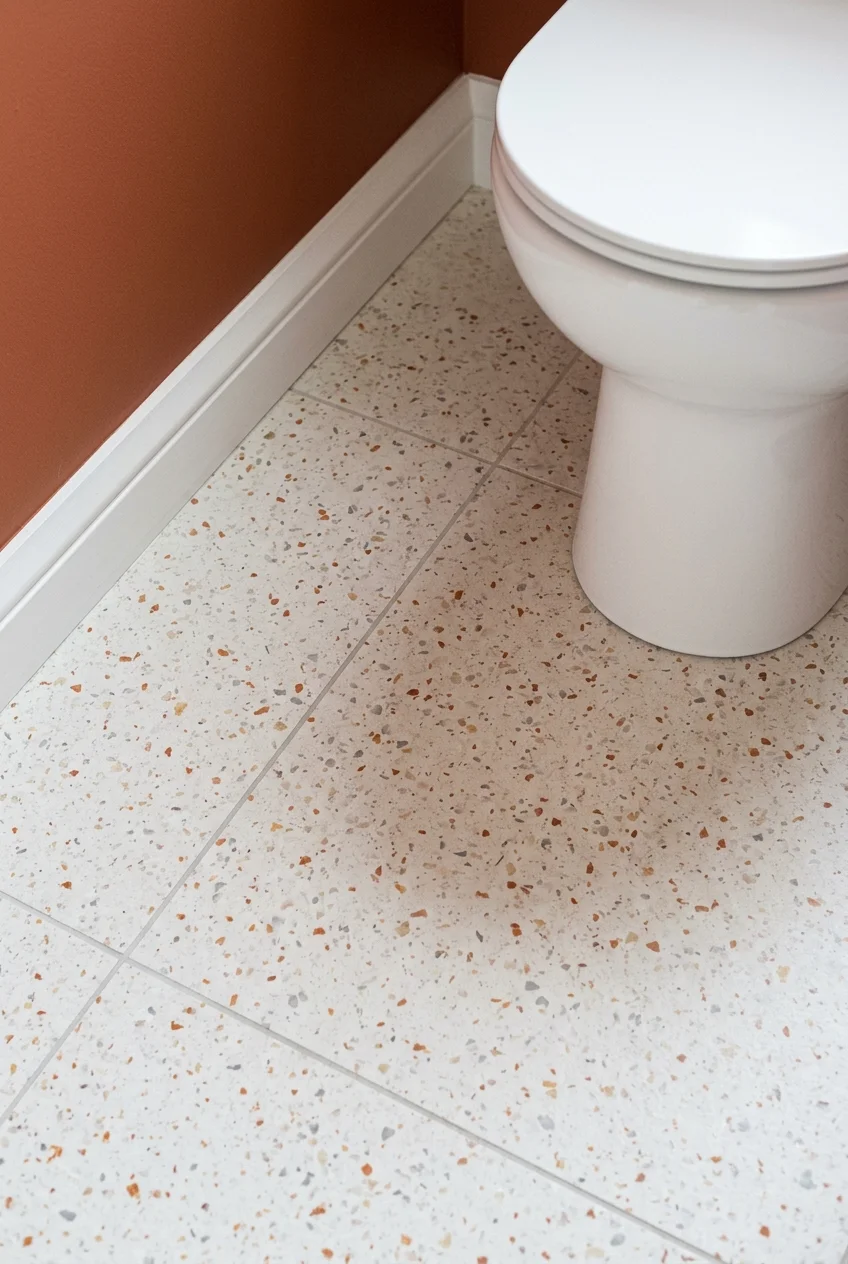
A small-chip terrazzo pattern gives the floor interest without a directional stripe or strong grid. Choose flecks that connect with your wall and hardware colors.
Compare the sample at floor level, where a tiny chip pattern reads differently than it does on a showroom board. Avoid adding several other mottled finishes nearby.
Terrazzo-look porcelain and poured terrazzo have different installation and care requirements. Decide which material you are actually buying before planning the floor height and maintenance.
19. Finish the Floor With a Neat Tile Baseboard
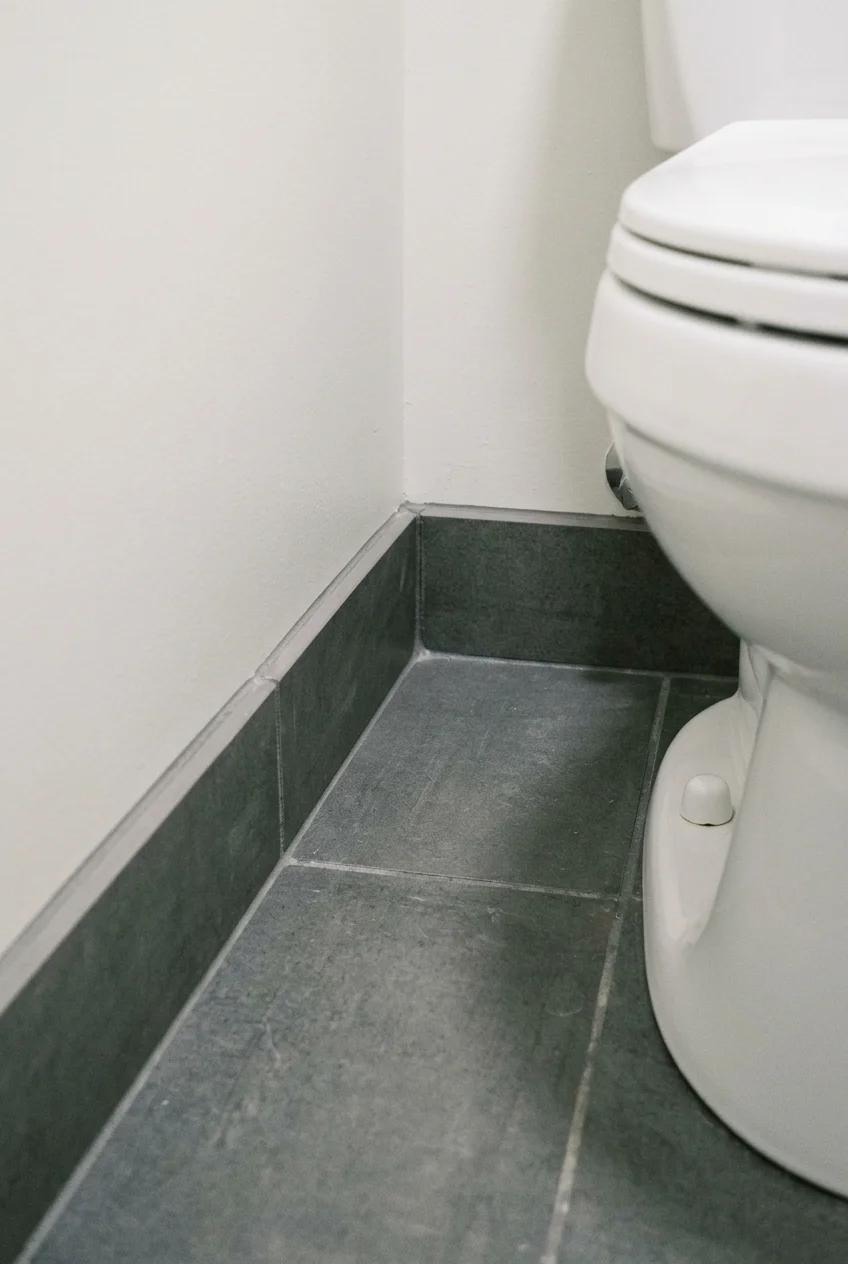
A short tile baseboard gives the wall-to-floor edge a defined, wipeable finish. It is useful when painted trim has become the awkward part of an otherwise simple room.
Use matching floor tile or a compatible trim piece with a finished upper edge. Keep the height consistent around corners and terminate neatly beside the doorway.
Have the installer detail changes of plane and movement joints for the chosen system. Tile at the base does not make the entire room waterproof.
20. Give the Inside of the Door Its Own Color
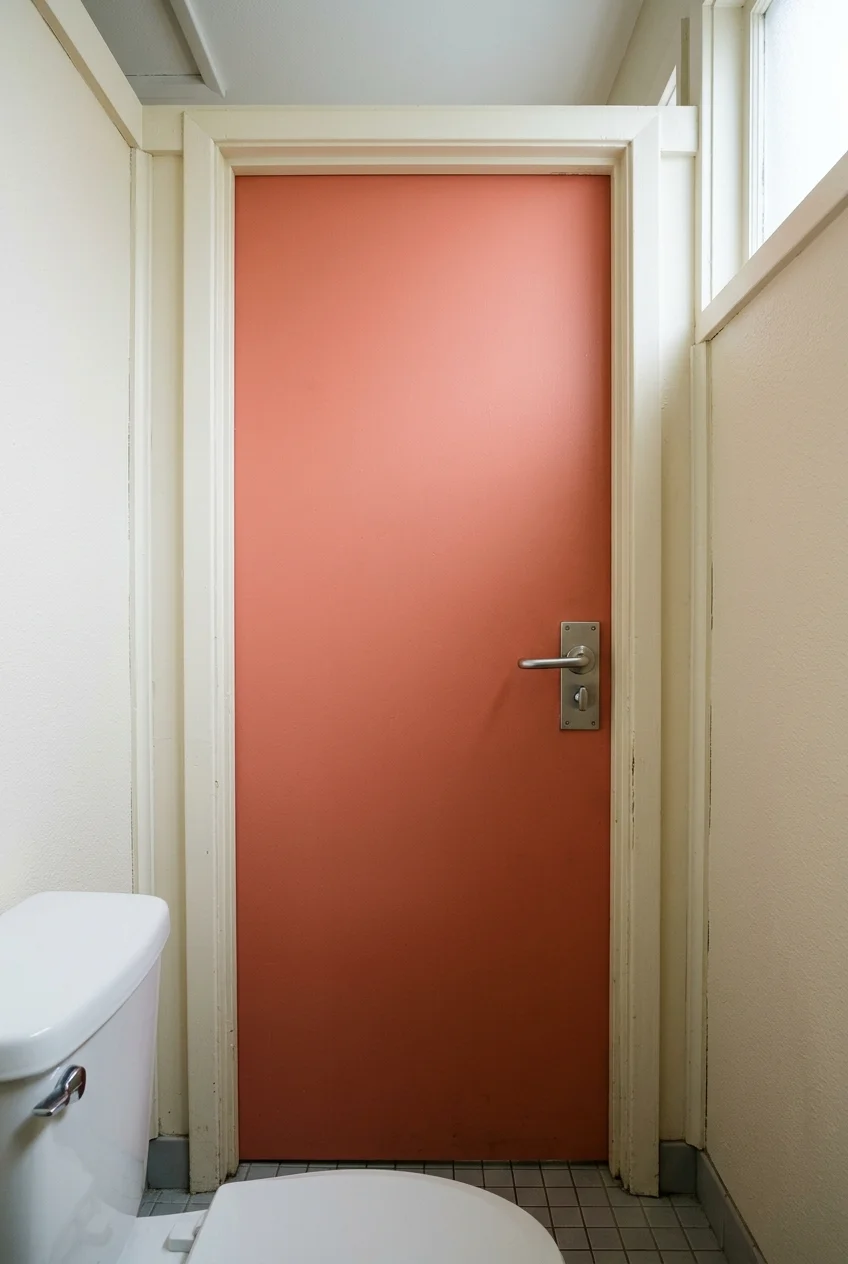
The closed door becomes a large visible surface from inside a tiny room. Painting its inner face gives the space a feature without occupying any usable width.
Choose a color already present in the floor or artwork. Keep the outer face coordinated with the adjoining bathroom if you want a quieter view outside.
Use a coating suitable for the door material and keep hardware working freely. Do not paint over hinges, latch components, or labels that must remain readable.
Storage That Earns Its Place in a Tight Footprint
Keep only useful reserves inside the compartment, then choose storage around their real dimensions. A cabinet that fits the wall can still interfere with someone standing up.
21. Hide Reserve Supplies in a Shallow Wall Cabinet
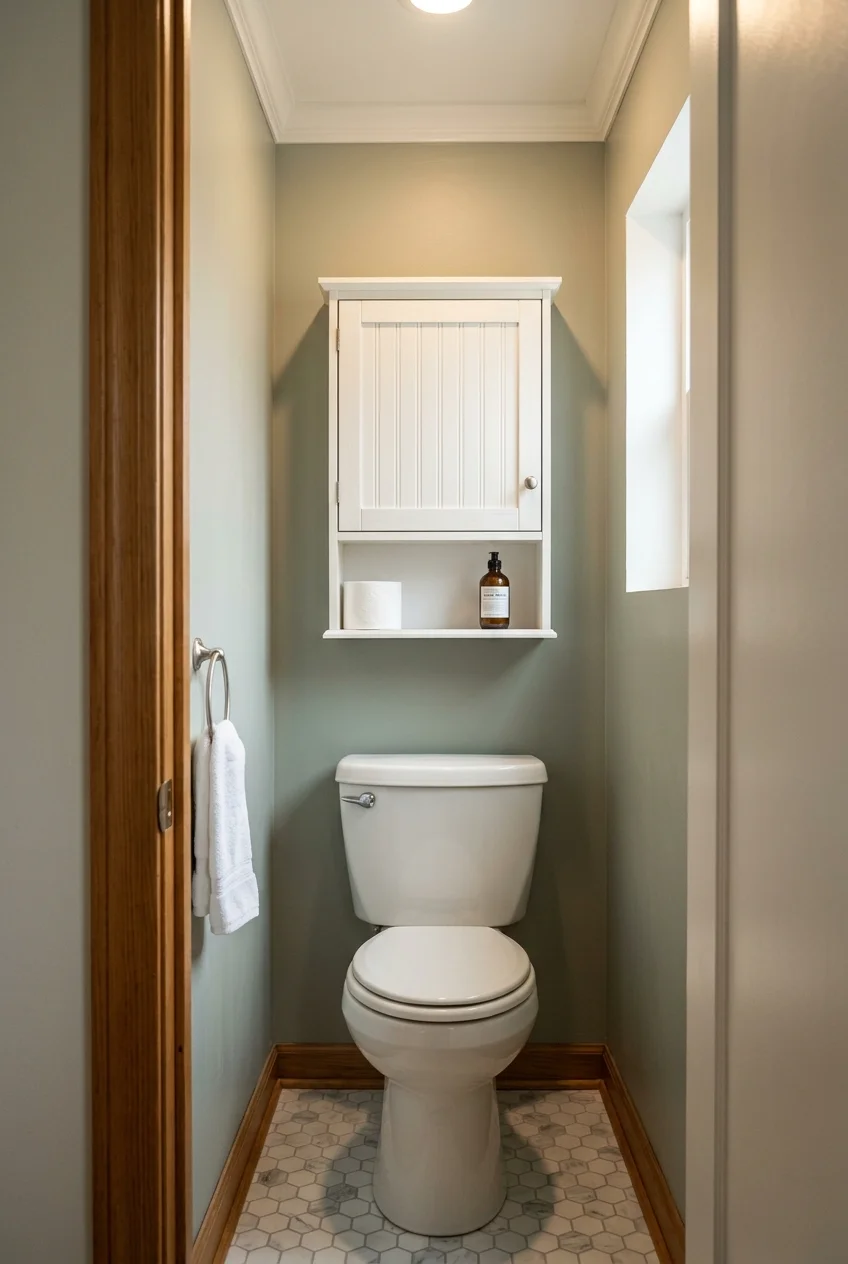
A closed cabinet above the tank makes the room visually quieter when spare rolls and personal supplies have nowhere else to go. Choose depth before decorative details.
Tape the cabinet outline onto the wall and mock up its projection. Check headroom when standing, the door opening, and space to remove the toilet tank lid.
The Spirich single-door wall cabinet (paid link) is listed at 16.54 inches wide and 7.09 inches deep; check those dimensions against your actual room.
Its adjustable shelf can separate smaller supplies from spare paper. The listed overall height is 20.47 inches, so allow for that above the tank too.
- Confirm suitable wall structure and the specified mounting method.
- Check the cabinet door’s full opening arc.
- Keep the toilet’s flush controls and service access clear.
Store cleaning chemicals elsewhere if children could access this cabinet. Closed doors make contents less visible, but an ordinary cabinet is not automatically child-resistant storage.
22. Install One Useful Shelf Above the Tank
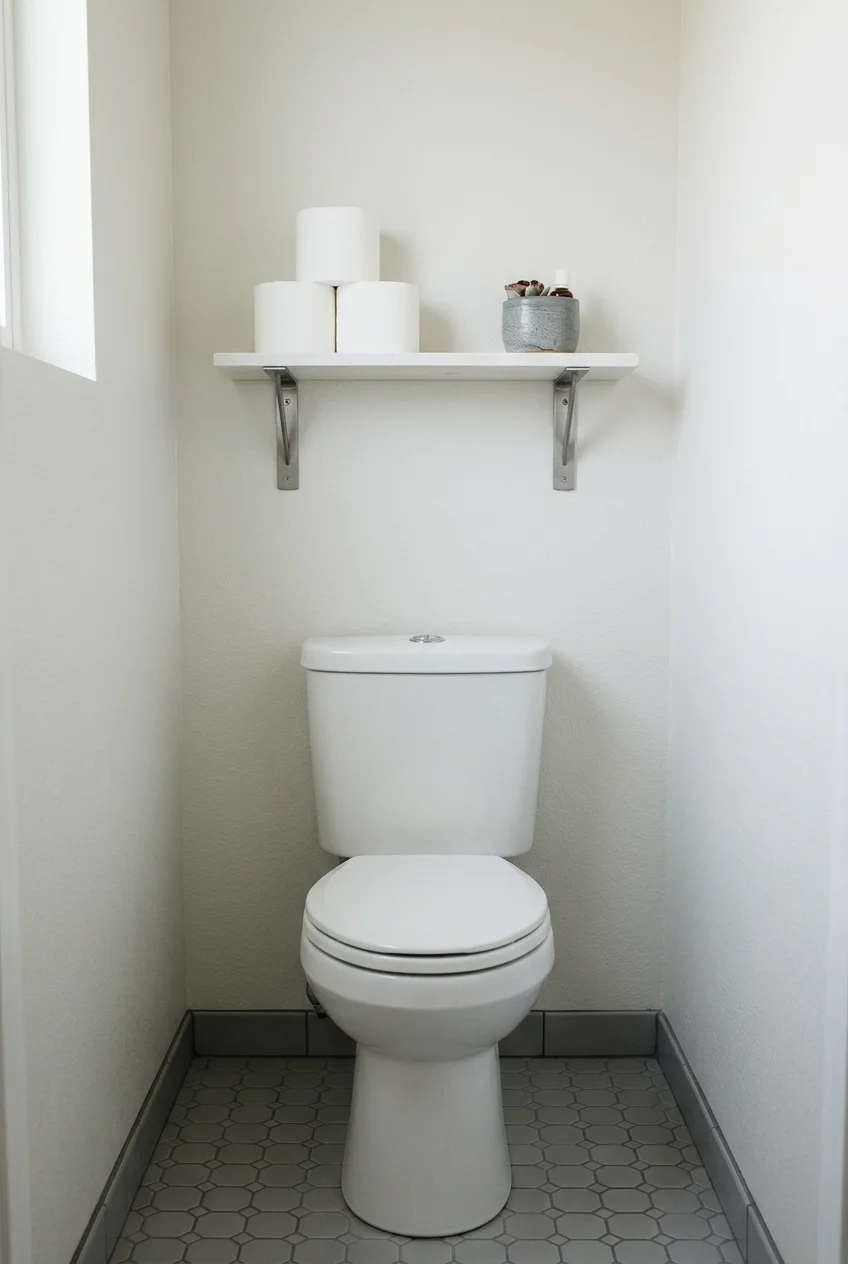
A single shelf can hold spare paper and one small object without turning the wall into a display unit. Keep its contents low enough to read clearly.
Choose a depth around the objects you need to store, then verify headroom and tank access. Visible brackets can look intentional when their finish matches the holder.
If you need more than a few reserves, these small bathroom storage ideas offer other locations to consider before adding deeper shelves inside this narrow compartment.
23. Recess a Small Supply Cabinet Into a Suitable Wall
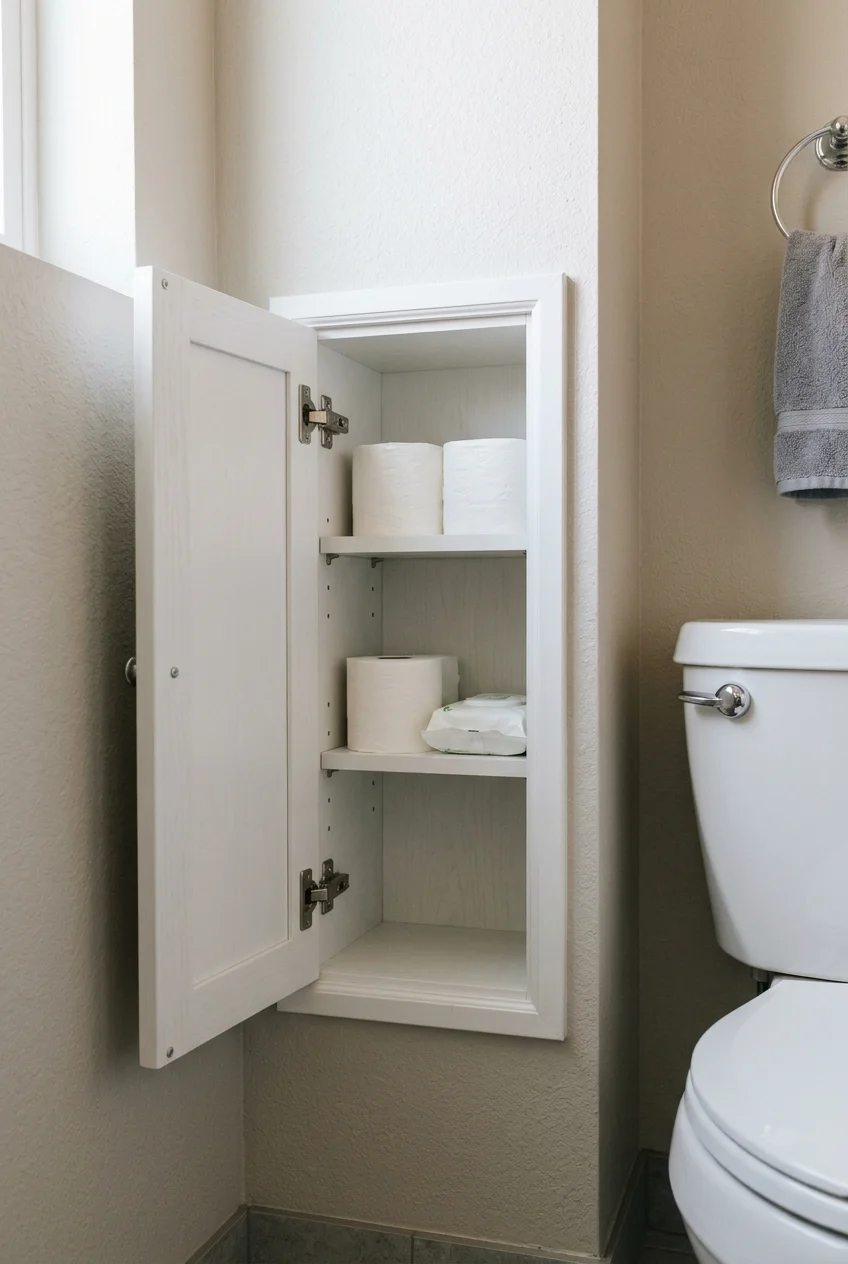
A recessed cabinet can hold reserves without projecting like a surface-mounted box. The visible result is a small flush door instead of another bulky furniture piece.
This is a wall alteration, so investigate the cavity before choosing a cabinet. Plumbing, wiring, structure, and required wall assemblies can rule out the proposed location.
Ask a qualified installer to confirm the usable opening and depth. Measure your actual paper rolls and supplies, including enough room to lift them out.
- Clear internal cavity width and depth.
- Required mounting and wall reinforcement.
- Door opening and seated reach.
- Any restrictions on the wall assembly.
An adjustable interior is more forgiving than tightly spaced fixed shelves. Keep the cabinet away from the concealed tank’s service opening and any plumbing shutoff.
If the cavity is unsuitable, a shallow surface cabinet is the simpler alternative. Do not cut structural members just to reproduce an attractive inspiration photo.
24. Use a Recessed Toilet Paper Holder
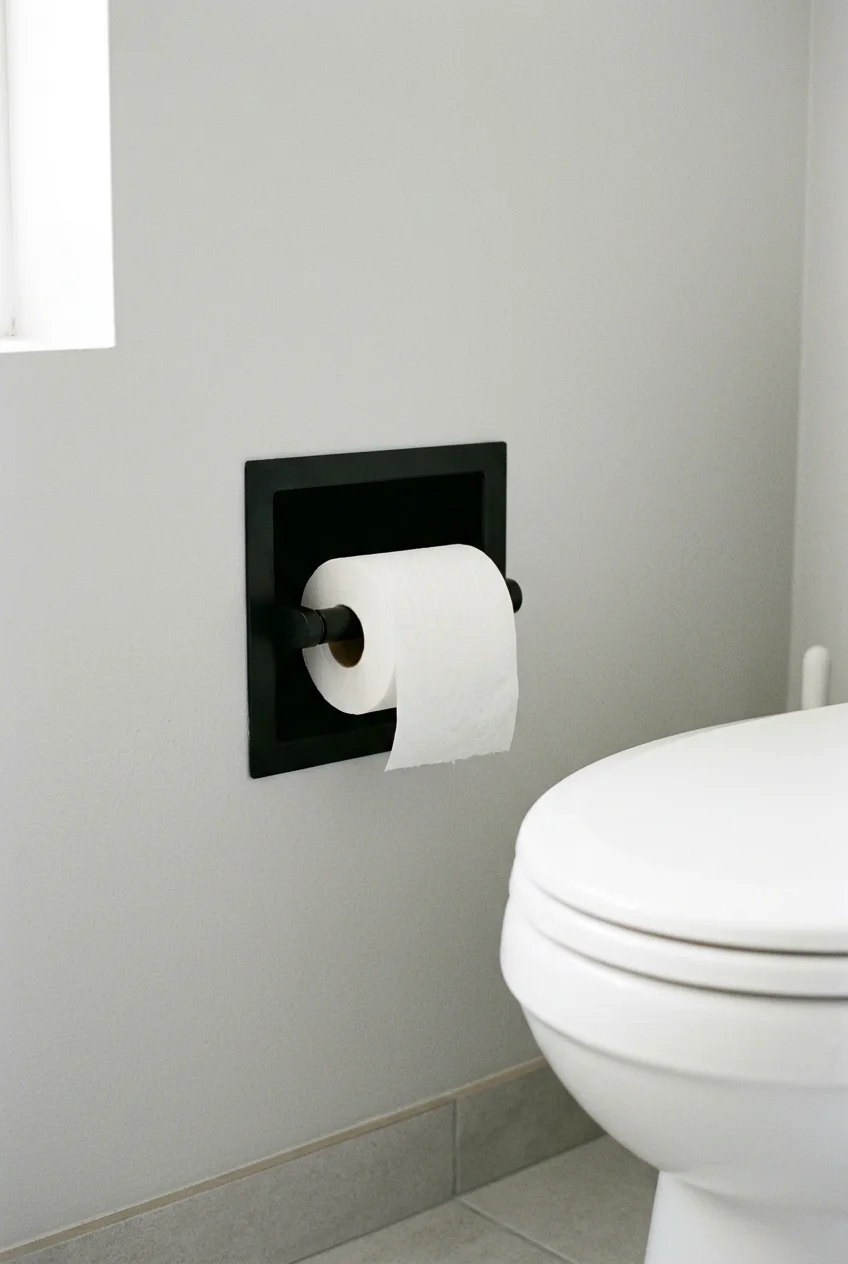
An inset holder reduces the projecting hardware beside the toilet. It can help where an ordinary arm catches clothing or makes an already tight wall feel busier.
Check comfortable reach while seated before choosing its position. The roll itself still projects, so compare the complete loaded holder rather than the empty metal recess.
Compare the holder’s cutout, recess depth, and supported wall thickness against the installation instructions. These measurements describe different parts of the fit and are not interchangeable.
Check the largest roll you buy against the spindle width and recess opening. A bulky roll may rub against the surround even when the holder fits.
Have concealed services and the wall assembly checked by an appropriate installer. An existing solid wall or pocket-door cavity may make a surface-mounted holder more sensible.
25. Tuck Spare Rolls Into a Covered Floor Canister
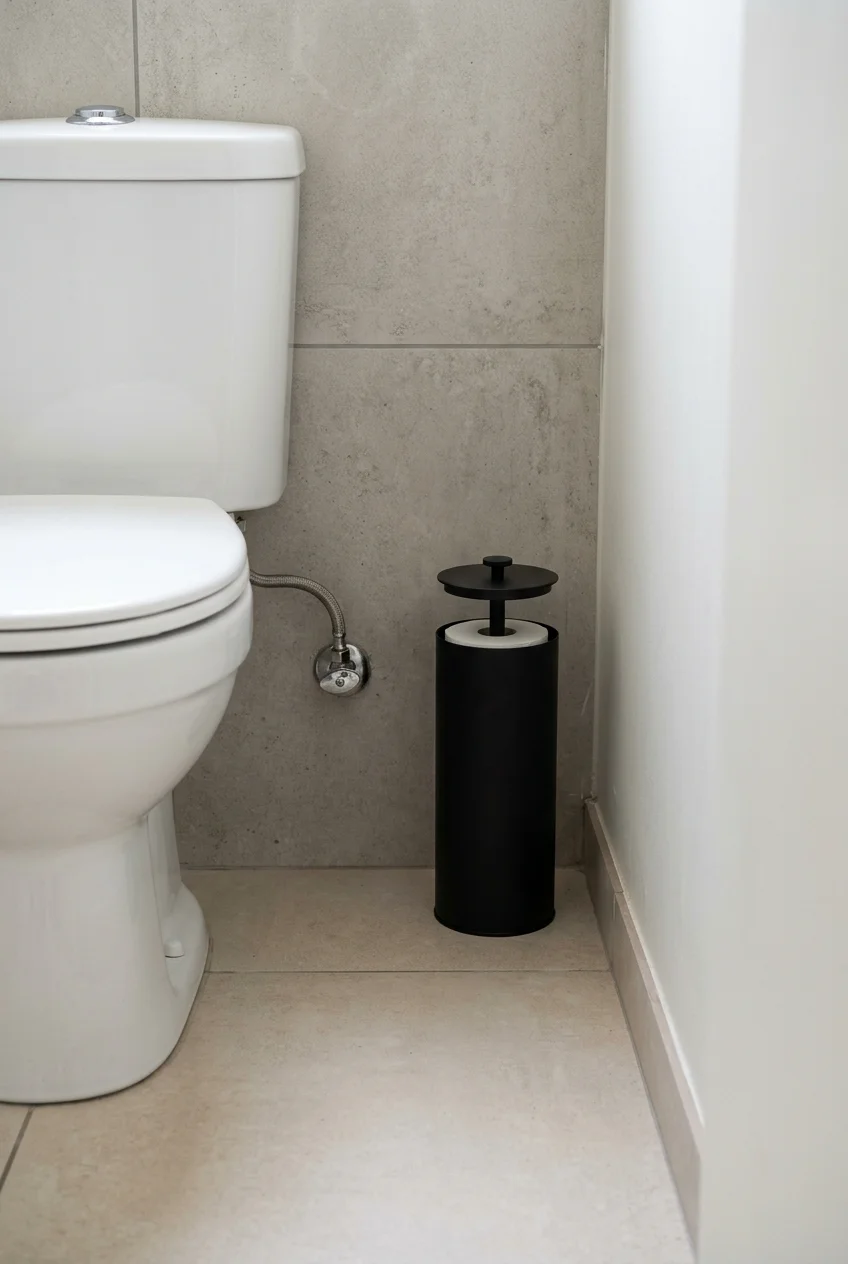
A lidded reserve holder keeps paper together without drilling into a rental wall. Place it in a genuine spare corner rather than wedging it into your legroom.
The iDesign Kent covered roll holder (paid link) is listed at 6.22 inches in diameter and 15.37 inches tall; measure the intended floor space before buying.
The listing describes storage for three extra rolls. Its stated internal width narrows to 5.2 inches, so compare that with the rolls your household actually uses.
Leave space to lift the lid and move the canister for cleaning. Keep it clear of the supply valve, door swing, and any floor vent.
26. Slide a Narrow Cart Into a Real Side Gap
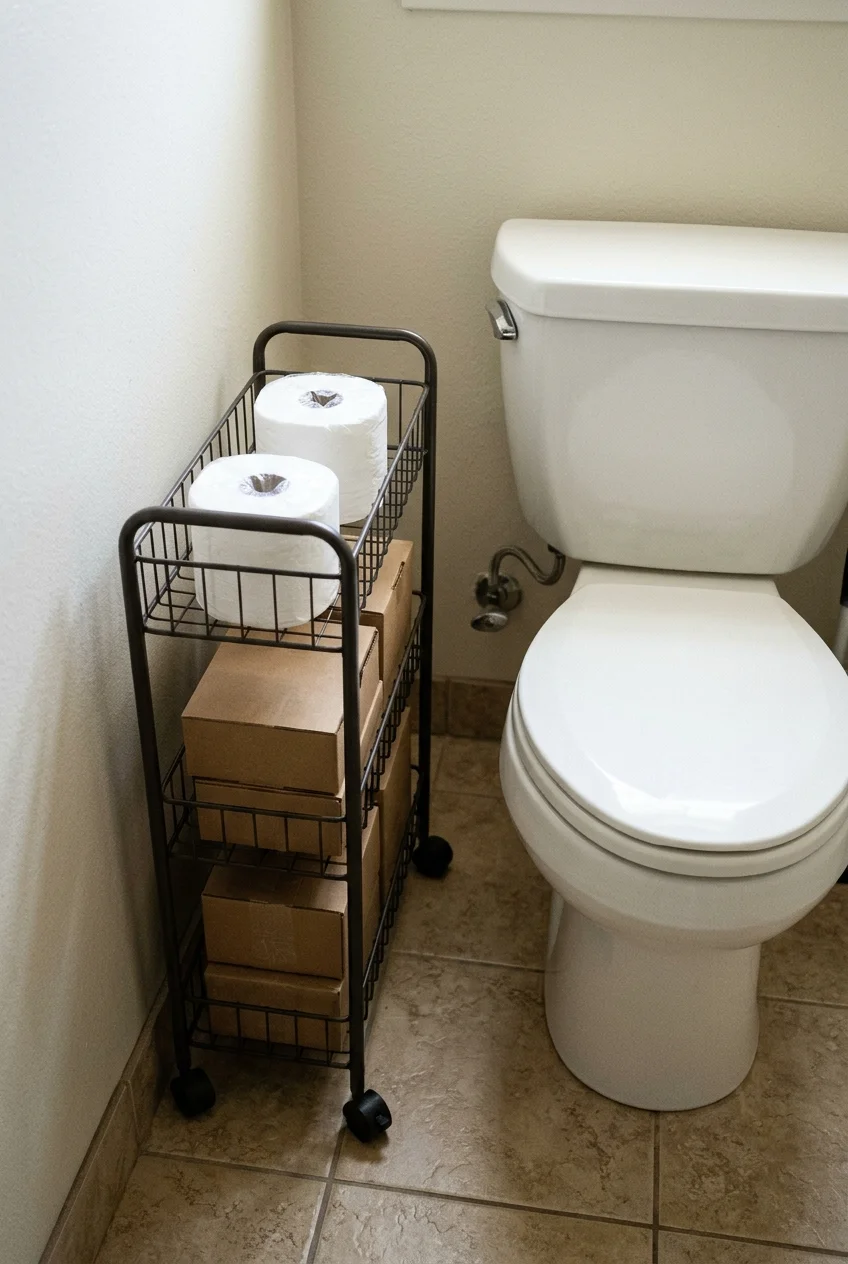
A rolling cart turns a sufficiently wide side gap into storage that can move for cleaning. It works only when the cart can actually pull out.
Measure the tightest point, including baseboards, wheels, handles, and plumbing. Then check the entire route out of the gap instead of measuring its resting position alone.
- Overall cart width, including projecting hardware.
- Clear pull-out route past the toilet.
- Wheel clearance over the floor and threshold.
- Access to the water supply valve.
Keep lightweight reserves in stable containers and avoid overloading upper shelves. Open bottles and loose stacks are awkward when the cart must move through a confined space.
Fit check Build a cardboard footprint and slide it through the proposed route first. If it cannot pass the bowl, a narrow fixed shelf may work better.
27. Mount a Basket for Daily Reserve Paper
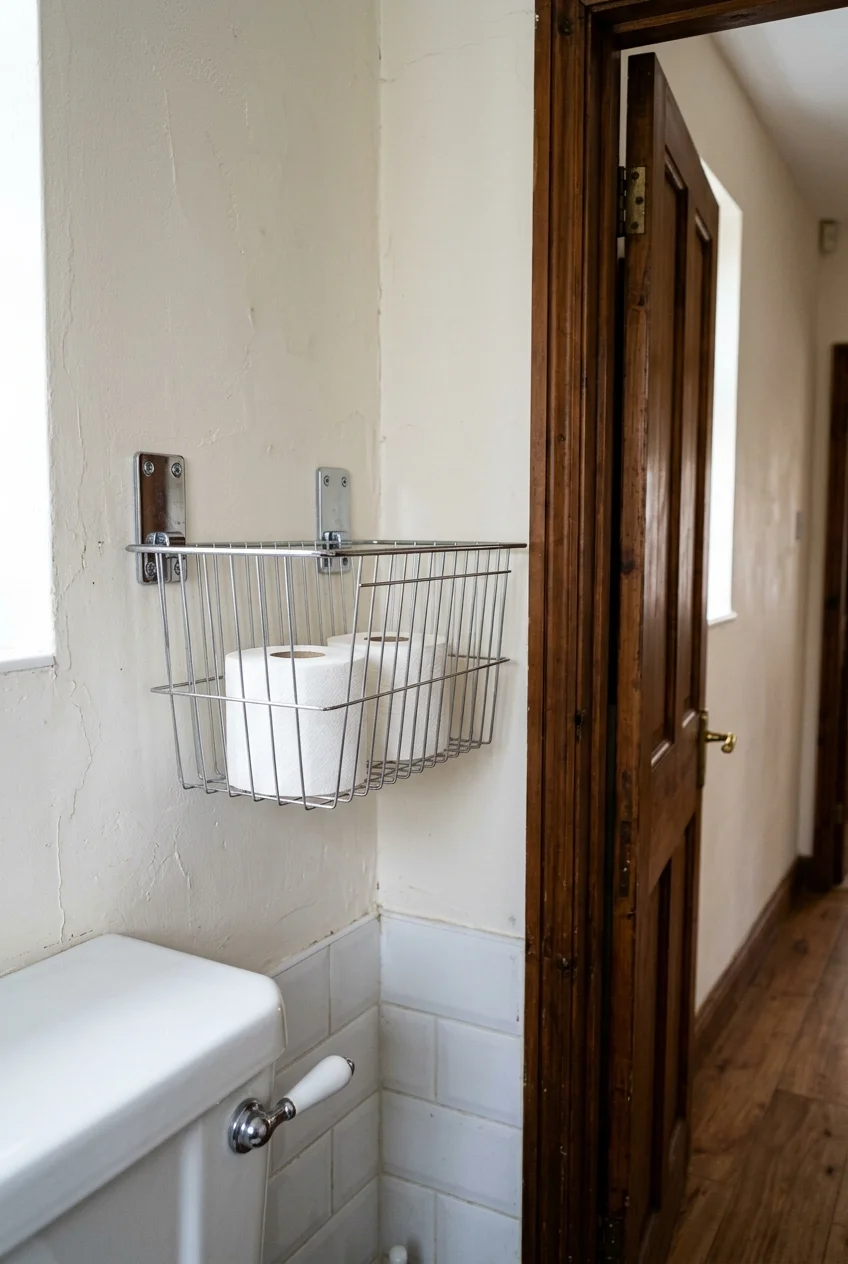
A shallow wall basket makes spare rolls visible without a cabinet door. Use it for a small working supply rather than trying to store a bulk pack.
Mount the basket where someone can reach it without twisting behind the tank. Check that its outer edge stays away from shoulders and the moving door.
A fine metal basket reads lighter than a deep solid box. Choose openings that support the rolls, and use the mounting system specified for the wall.
28. Use the Ledge on an Existing Cistern Enclosure
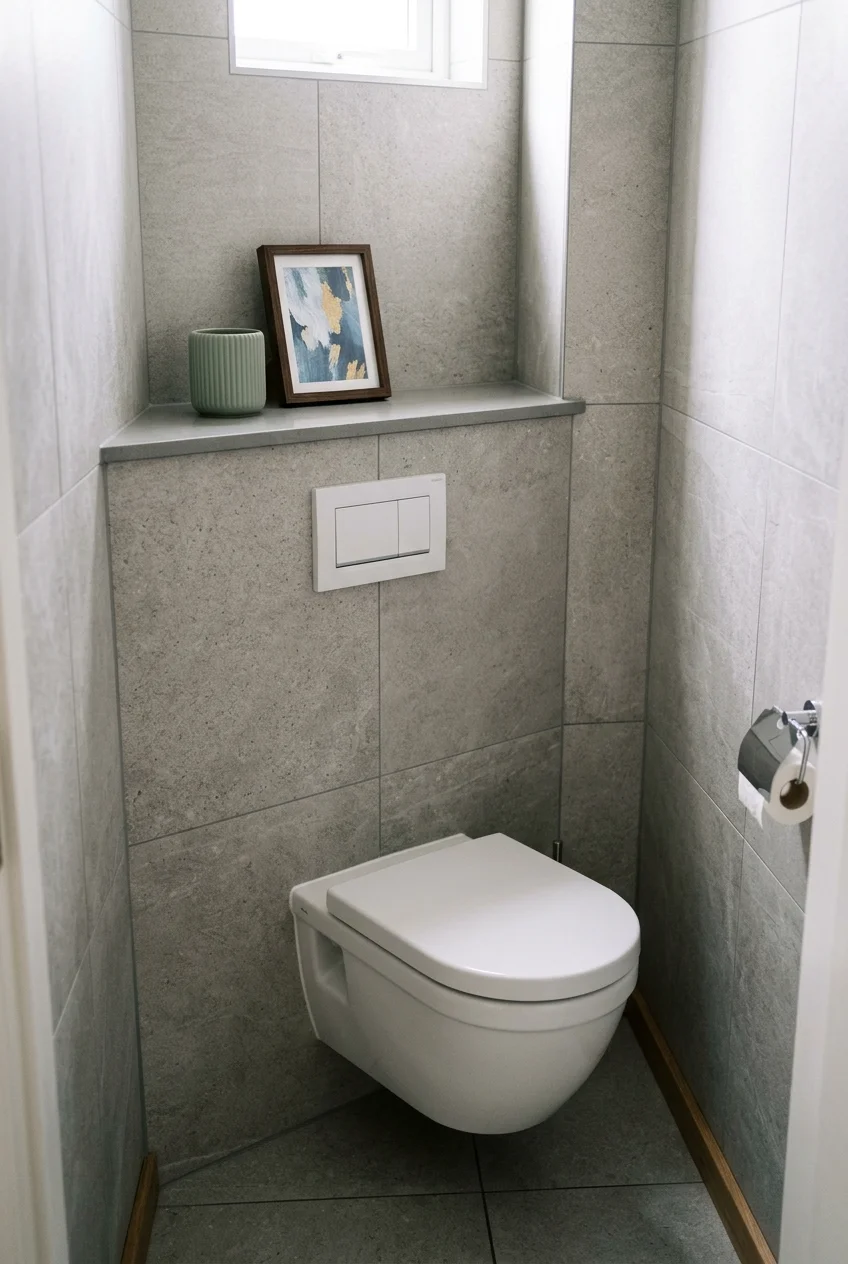
A concealed cistern enclosure may already provide a shallow top ledge. Treat it as a limited landing surface rather than building another shelf above it.
One low container and a small picture can be enough. Keep anything placed there removable so the flush plate and any specified maintenance panels remain accessible.
Check how the system is serviced before styling it. A photo of a finished enclosure cannot tell you which surfaces must lift off for repairs.
29. Store Infrequent Reserves Above the Door
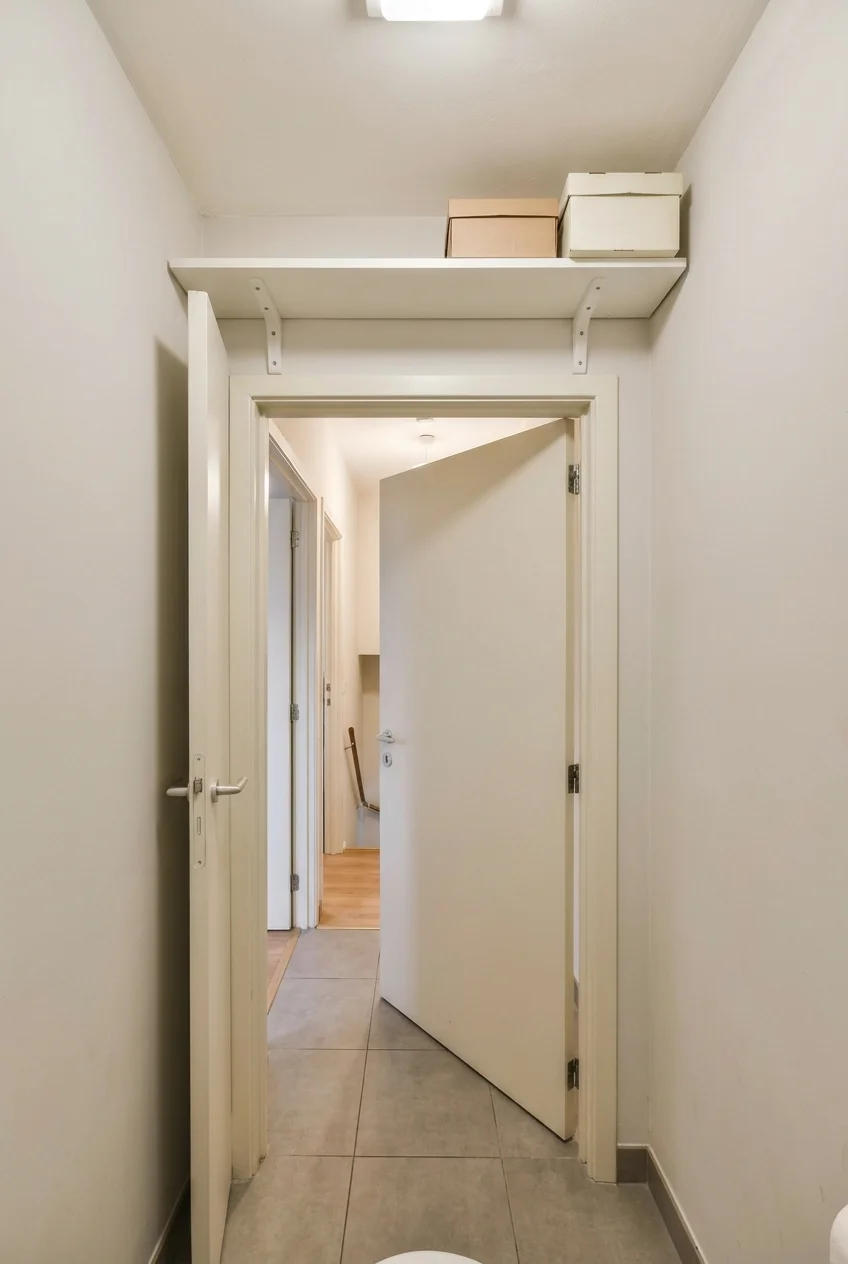
The space above the entrance can hold lightweight backup supplies when other walls are full. Keep the shelf visually quiet because it sits close to the ceiling.
Use this location only when the ceiling height, door trim, and mounting structure allow safe headroom. Everyday paper belongs somewhere easier to reach while seated.
Store supplies in small handled containers that can be lifted safely from a stable step stool. Never use the toilet as a step or climbing platform.
Plan where the step stool can stand before installing the shelf. If reaching it requires balancing in the compartment, keep those reserves in another room instead.
30. Fit Small Shelves Into a Rear Corner
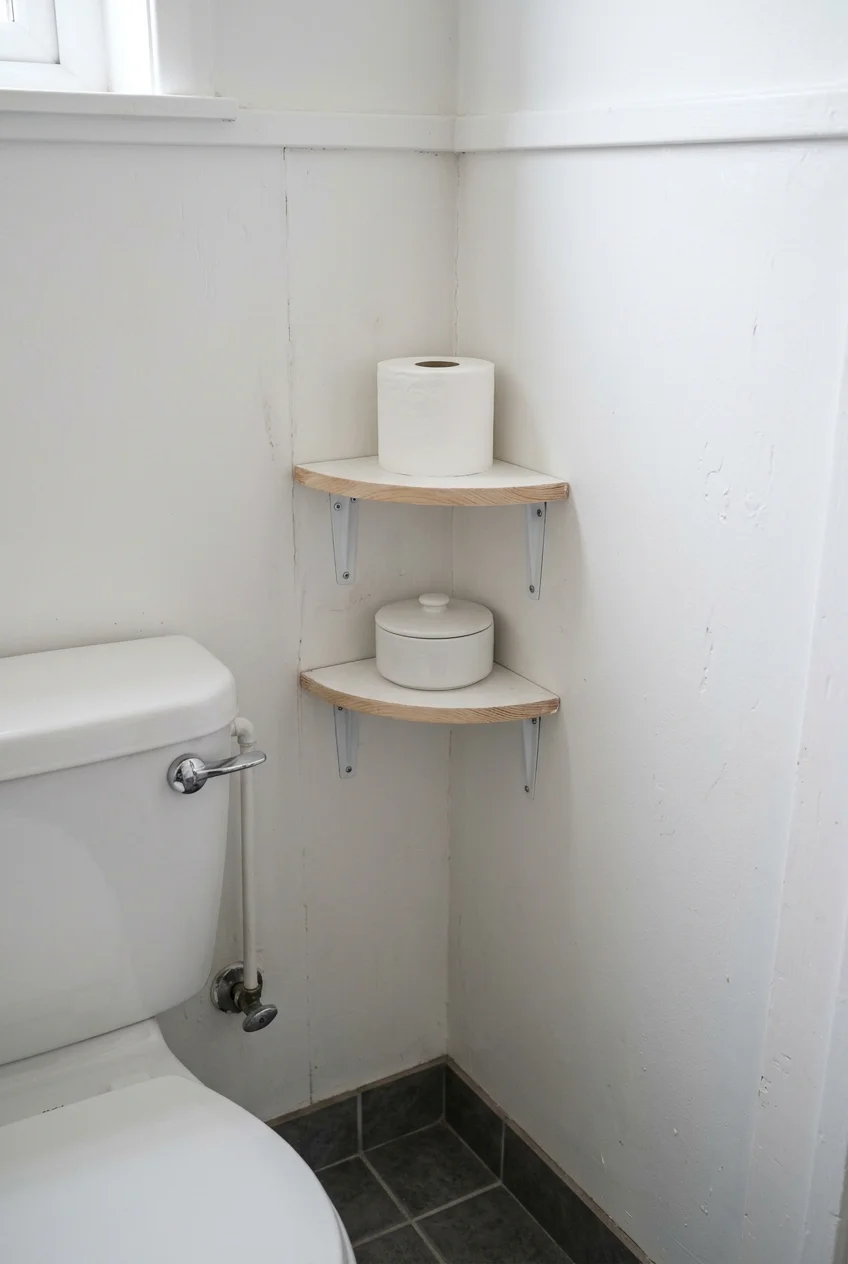
Corner shelves can collect a few supplies where a full-width shelf would cover a window or artwork. Their usefulness depends on the room’s actual rear corners.
Choose rounded or clipped front edges and keep the shelves outside head movement. A corner that looks empty from the doorway may still be close to someone standing.
Use fewer objects than the shelves could technically hold. Two supported shelves with visible wall between them usually look clearer than a dense tower around the toilet.
Light, Windows, and Reflection That Change the Experience
Lighting should reveal your chosen finishes and make the compartment comfortable to use. Windows and mirrors need privacy and placement decisions as well as attractive proportions.
31. Replace a Bulky Pendant With an Opal Flush Mount
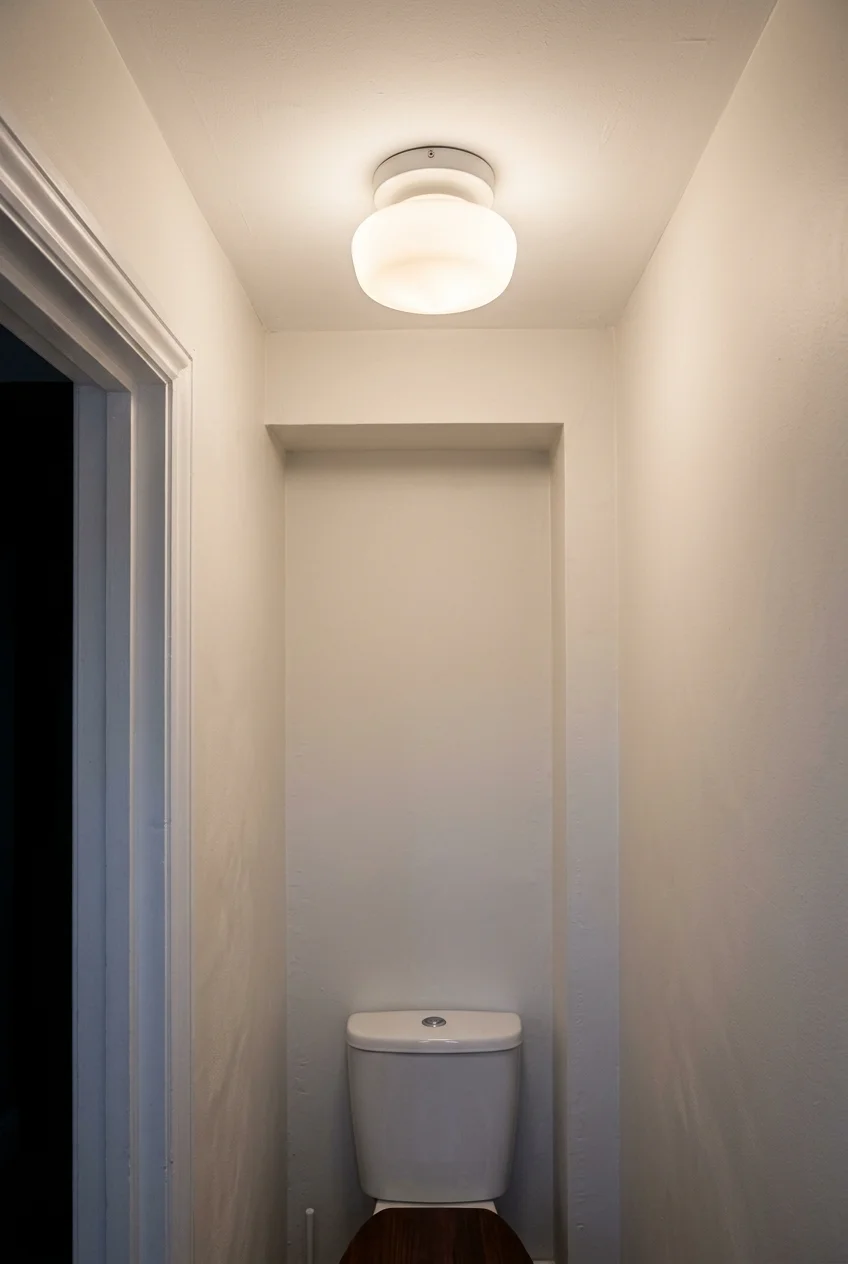
A compact opal fixture keeps the ceiling visually simple while diffusing the lamp. It suits a low or narrow room where a hanging shade feels intrusive.
Compare the fixture’s actual light output and controls, not just its diameter. An attractive diffuser can still leave the corners dim if the lamp is underpowered.
Have an electrician confirm the mounting, wiring, and suitability for the location. Keep a dimmer only when the fixture, lamp, and control are designed to work together.
32. Wash a Textured Back Wall With a Small Sconce
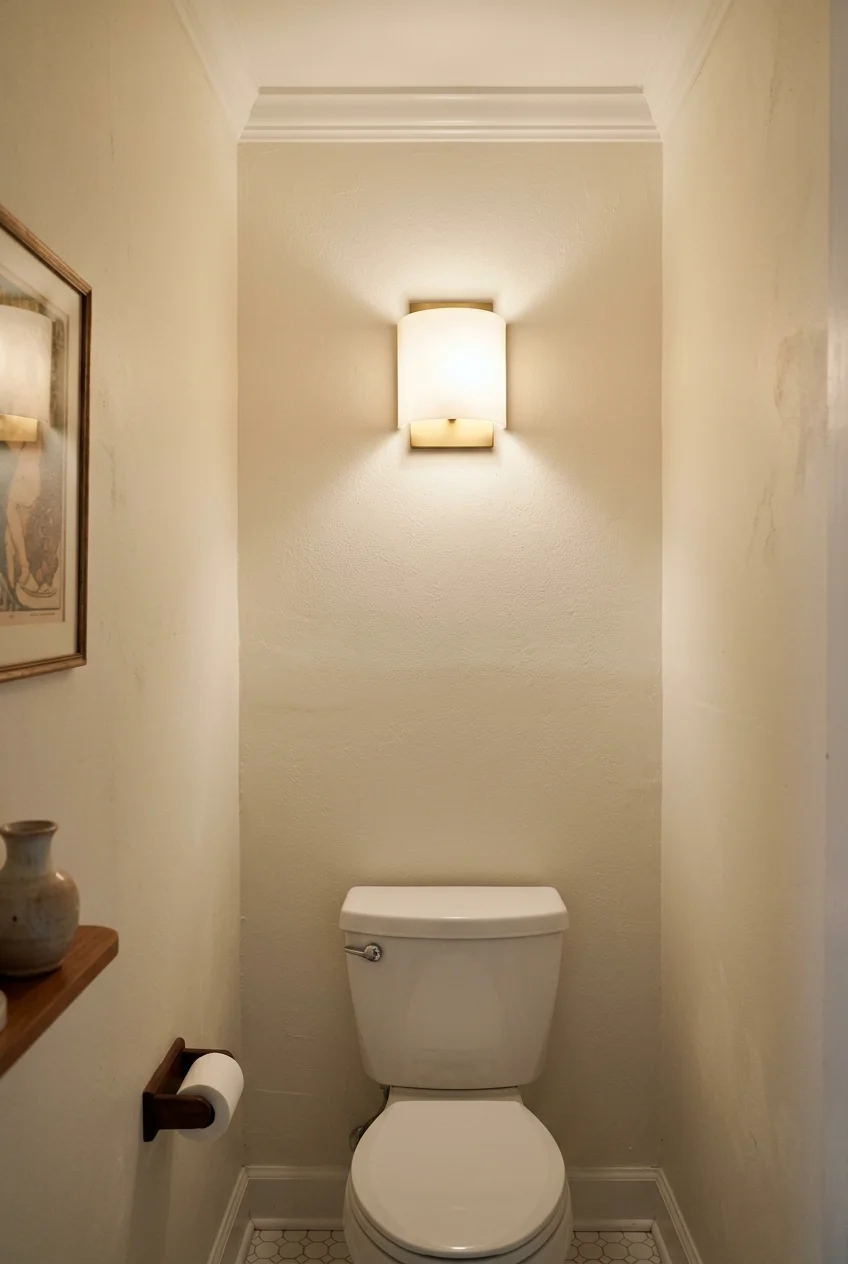
A wall light can reveal tile or textured paint more clearly than a single central ceiling lamp. Aim the illumination at the feature you want to notice.
Keep the fitting’s projection modest and away from head movement. A sconce that looks delicate in a catalog may be surprisingly deep inside a narrow compartment.
Hardwired lights need suitable wiring and installation, so plan their positions before finishing the wall. A decorative wall light should supplement whatever general illumination the room needs.
33. Hide a Light Strip Beneath a Supported Shelf
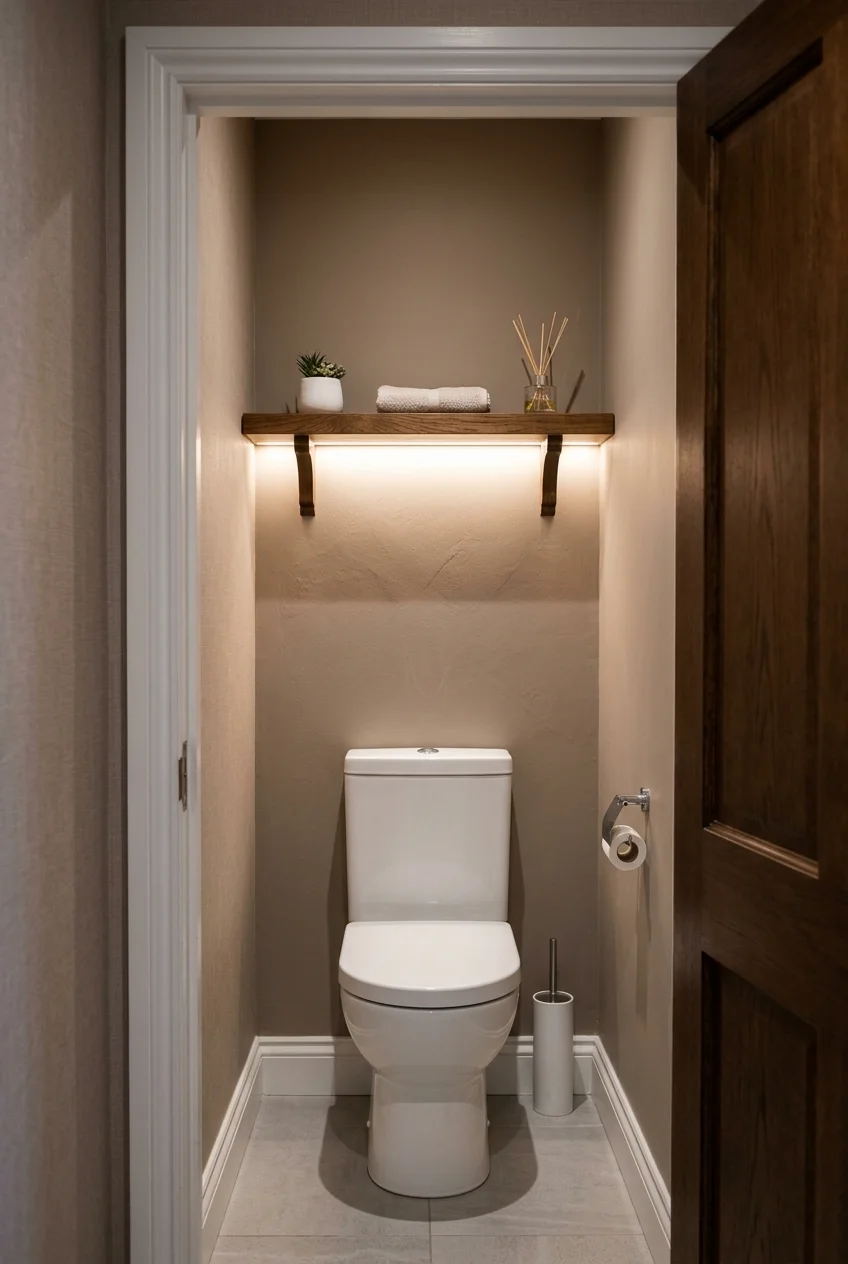
A concealed light beneath an existing shelf can make the toilet wall feel less flat. Hide the source so the result is a soft wash rather than visible dots.
Choose a complete lighting system with suitable mounting, diffusion, and power components. Plan a proper cable route before the shelf goes up instead of trailing a cord.
Have the electrical arrangement checked for the location. Keep the strip and wiring separate from tank access, and do not confuse decorative glow with sufficient general lighting.
Lighting check View a sample strip from the doorway and from seated height. A diffuser that looks smooth standing up may still expose glare from below.
34. Add Low-Level Light for Nighttime Visits
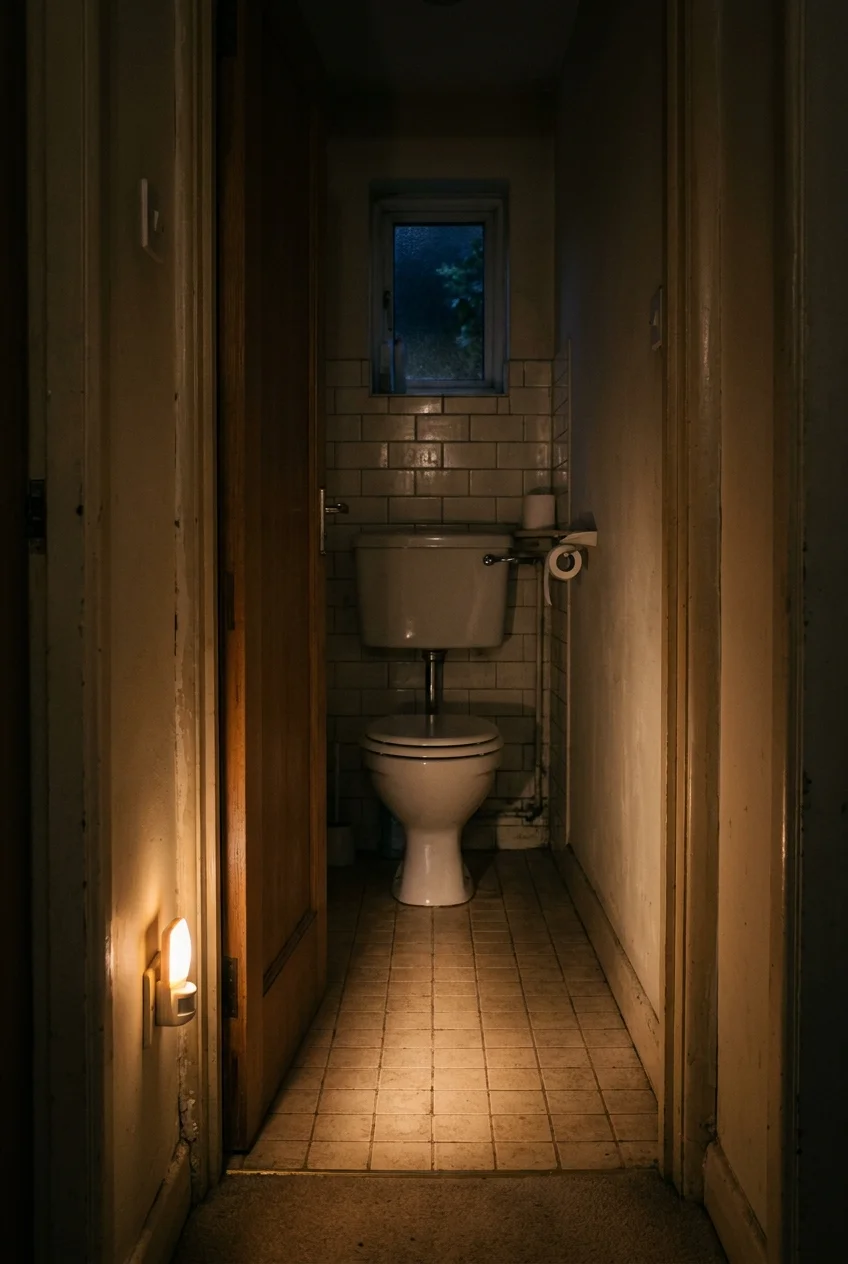
A small low-level light can make the route easier to see without switching on the brightest fixture. Keep it positioned where the toilet will not block it.
A battery-powered motion light may suit a room without a conveniently placed outlet. Check activation from the entrance and choose a mounting method appropriate for the surface.
Test it with the door both open and closed. The sensor should notice someone entering without relying on movement behind the toilet or inside a cabinet.
35. Frost an Existing Window While Keeping Daylight
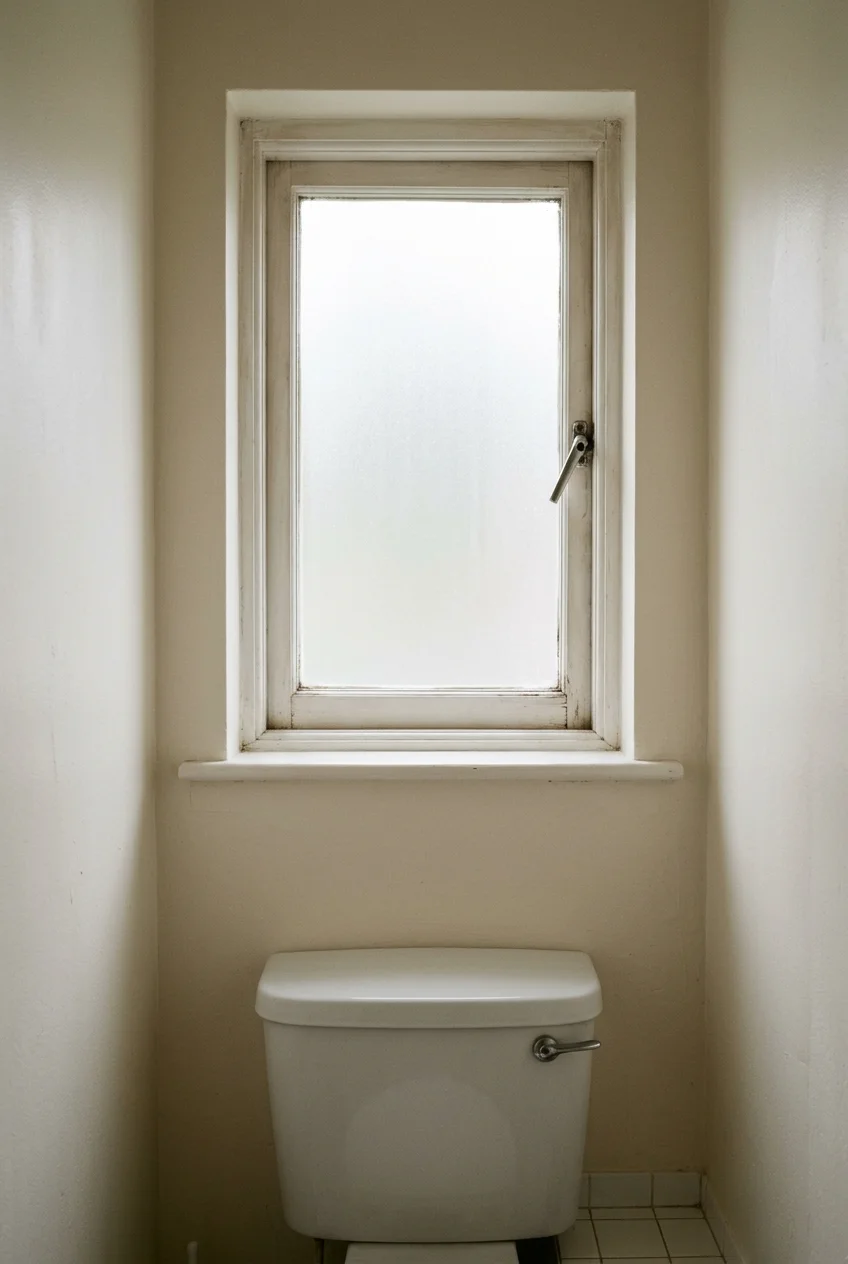
A privacy film can soften the view through an existing window without adding a curtain inside the room. Choose an obscuring finish rather than assuming reflective film ensures privacy.
Check the film’s compatibility with your particular glass and window warranty before applying it. Keep edges neat and avoid covering operating hardware or required ventilation openings.
Assess privacy from outside under evening lighting as well as during the day. Some finishes blur details while still allowing silhouettes, so choose the opacity you need.
36. Use a Cordless Roman Shade for Adjustable Privacy
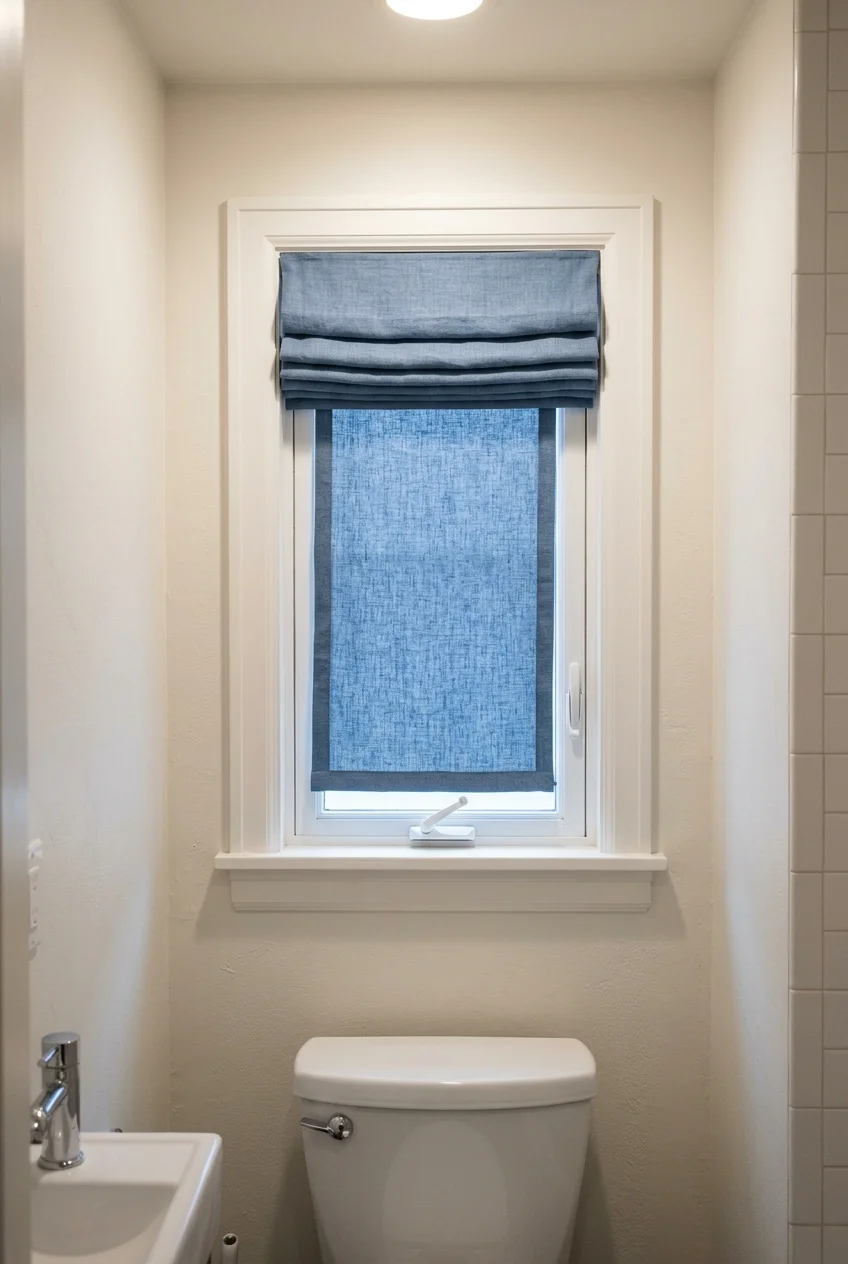
A simple fabric shade adds softness when the room already has a window. Unlike a permanent obscuring treatment, it lets you adjust the view and daylight.
Choose a cordless design with a practical washable or cleanable fabric. Keep the fabric clear of the tank and any nearby sink splashes when it is lowered.
Check the shade’s stack height and the window handle before ordering. In a shallow recess, an outside mount may fit better than crowding the operating sash.
37. Reflect the Doorway With a Slim Side-Wall Mirror
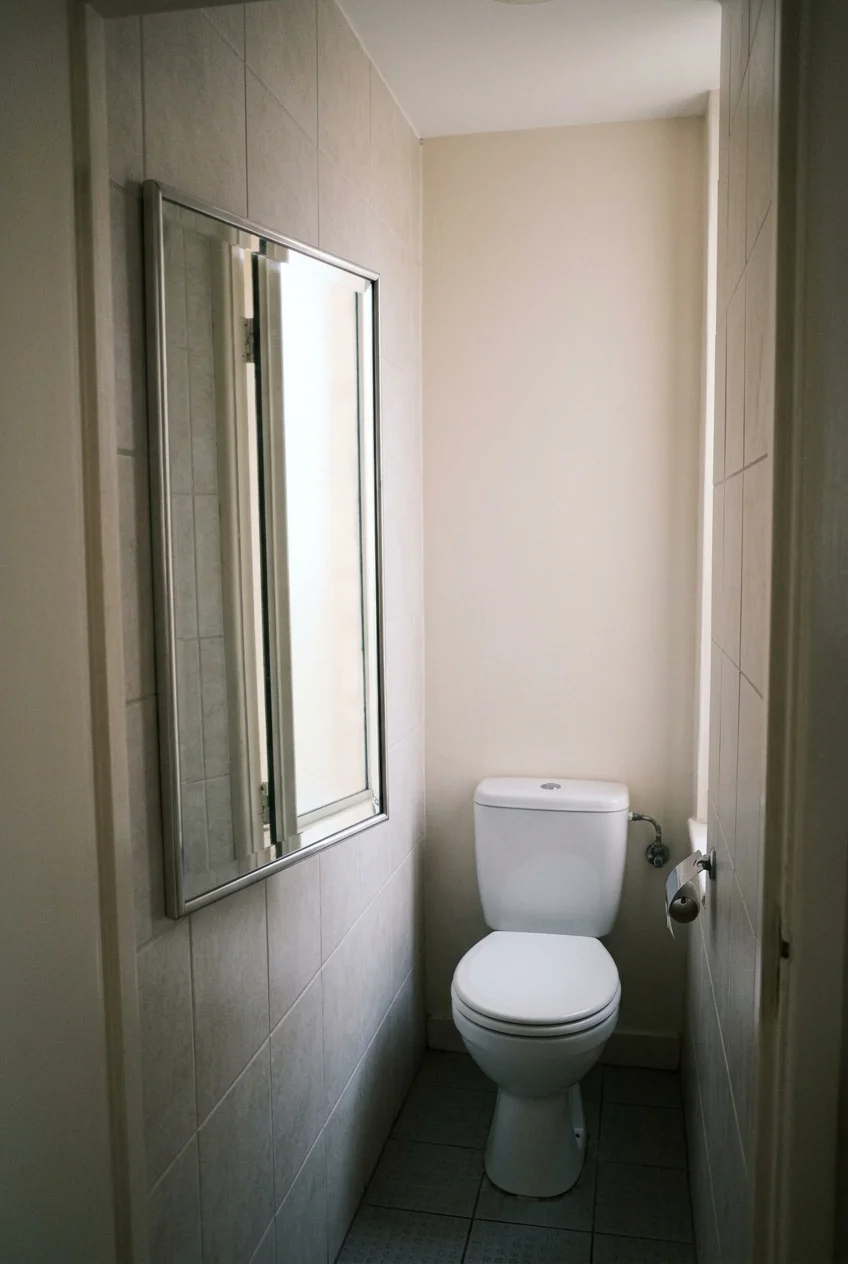
A mirror on the long wall can reflect the brighter adjoining bathroom instead of pointing straight at the toilet. Test the reflection before choosing the mounting point.
Hold a small mirror at the proposed position and look from the entrance and seated height. Avoid creating a direct sightline into the compartment from another room.
Keep the frame thin and the mirror securely mounted for its weight. It changes reflected views and light, but it does not create additional usable width.
38. Bring Daylight Through a Tubular Skylight
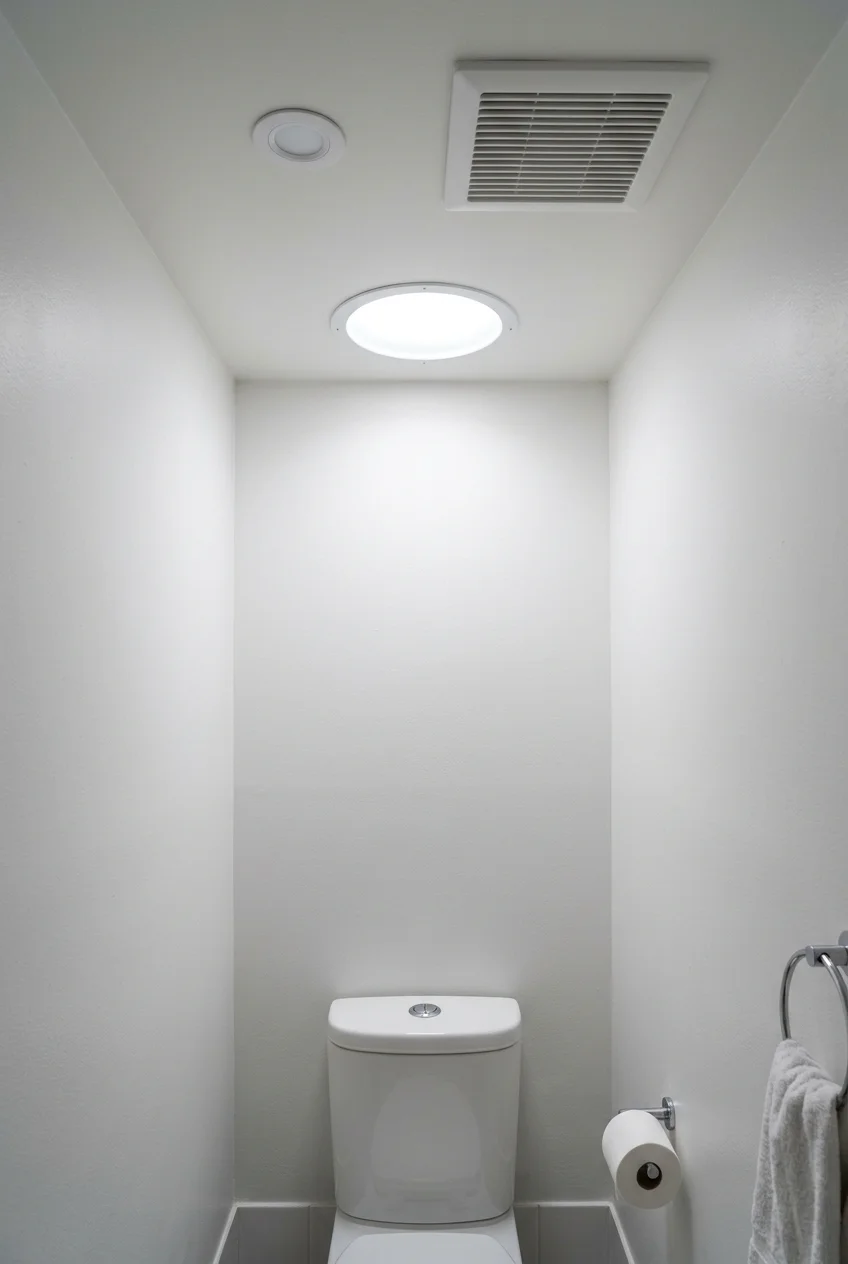
A tubular skylight can bring daylight to a windowless compartment when the building allows a route to the roof. The ceiling diffuser becomes a compact visible feature.
Have an installer assess the roof, tube route, ceiling structure, and local requirements. An upper-story floor or complicated roof path can make this unsuitable for the room.
Compare diffuser options and daylight control before installation. A daylight tube is not automatically an exhaust fan, and the room still needs appropriate ventilation and nighttime illumination.
A top-floor compartment with an accessible roof route is a different project from a ground-floor room beneath another story. Establish the route before choosing finishes.
Daylight levels change with the sky outside, so keep the electric light for reliable evening use. Choose the diffuser appearance alongside the other visible ceiling fittings.
Treat it as a building project rather than a decorative swap. The completed room photograph shows the diffuser, but cannot verify roof flashing or concealed installation quality.
Fixture and Door Options for a More Substantial Update
These changes affect how the room works, so compare complete product dimensions and installation needs. A compact-looking fixture is not proof that the proposed layout fits.
39. Compare Shorter-Projection Floor-Mounted Toilets
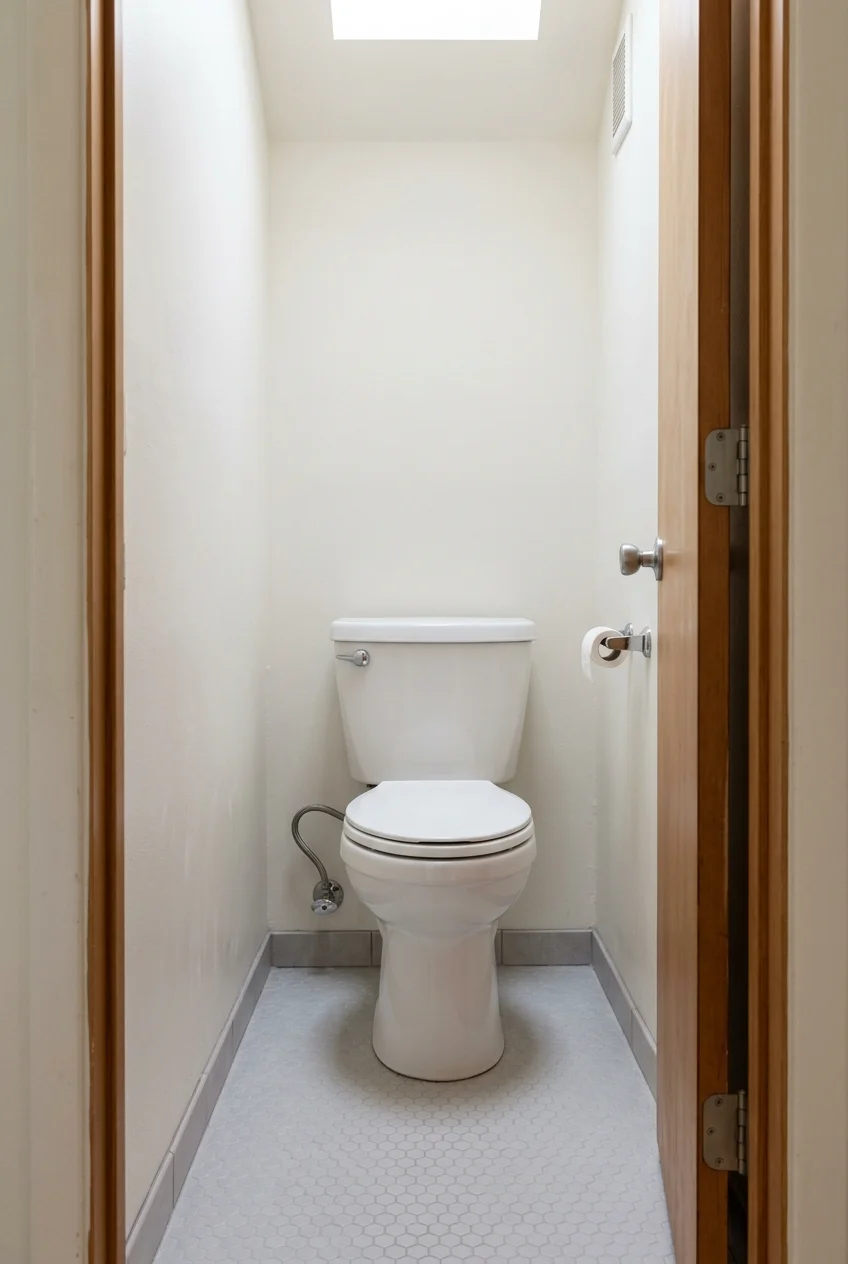
A shorter toilet can leave more space in front of the bowl without moving the doorway. Compare complete front-to-back dimensions rather than shopping by bowl label alone.
Round-front models and compact elongated designs can have different overall footprints. American Standard notes that some compact elongated models fit within a round-front footprint.
The rough-in must match the existing installation or an approved alteration. Measure from the finished wall as instructed for the model, accounting for baseboard interference.
- Record the existing rough-in and toilet footprint.
- Compare each model’s full specification drawing.
- Mock up the proposed bowl outline on the floor.
- Have a plumber confirm the installation and required clearances.
Also consider the seat height and who will use the room. Choosing the shortest possible projection is not helpful if the toilet becomes uncomfortable for your household.
A new toilet does not solve an inadequate room width. Keep side clearance, front space, door operation, and local requirements in the decision alongside overall projection.
40. Open the Floor Visually With a Wall-Hung Toilet
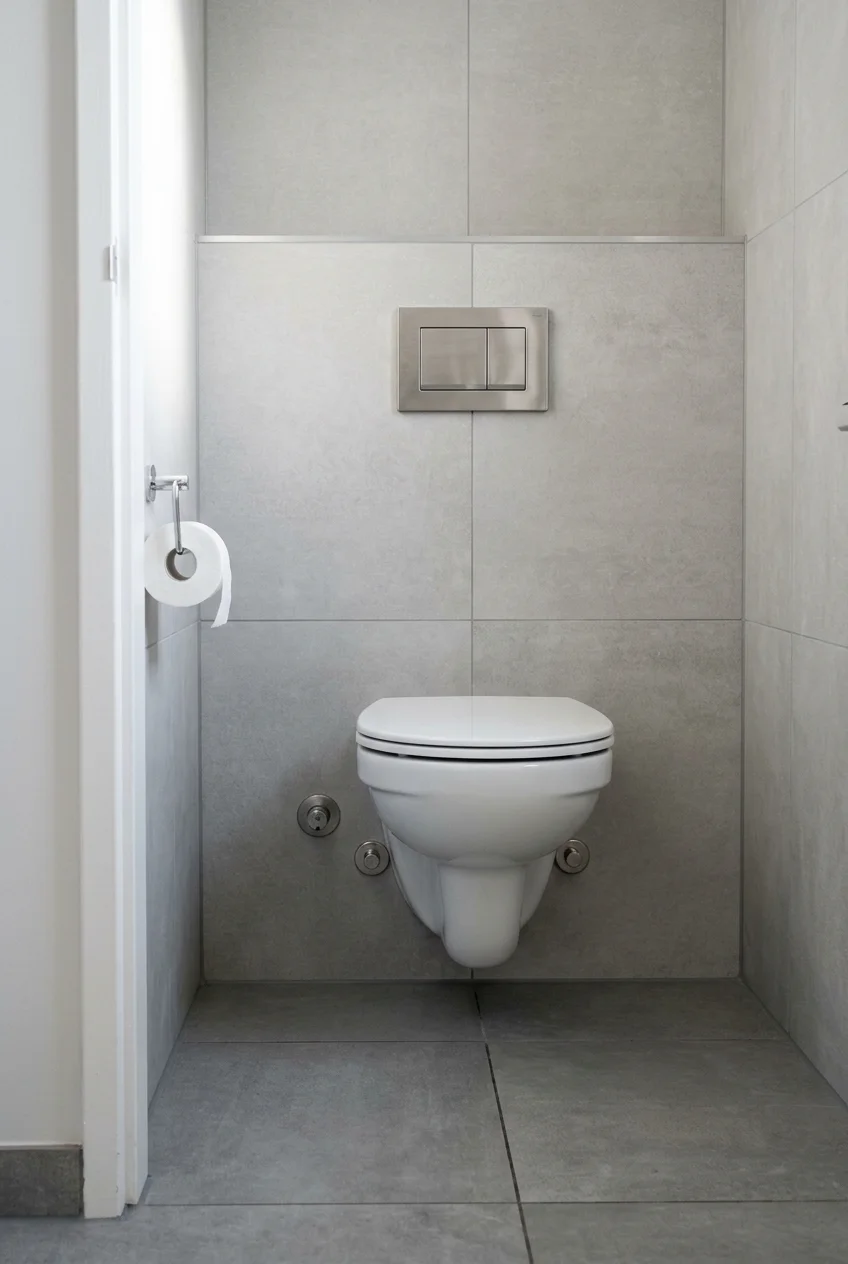
A wall-hung bowl leaves floor visible underneath and removes the exposed tank from the room. It gives the back wall a cleaner outline in a substantial renovation.
The concealed carrier and tank still require space and suitable support. A new enclosure can project into the room, so compare the finished assembly rather than the bowl alone.
Geberit identifies carrier compatibility, bowl choice, and maintenance access as key planning decisions. Choose a complete compatible system instead of combining unrelated components because they look similar.
- Carrier and bowl compatibility.
- Required wall construction and finished depth.
- Drain and supply arrangement.
- Chosen installation height and future service access.
Ask the installer to show how the tank is serviced through the intended opening. Do not cover the flush plate with a permanent shelf, artwork, or fixed panel.
Confirm the final bowl position before closing the wall, including seat height and user needs. A floating appearance does not establish accessibility or code compliance.
If the room only needs cosmetic work, keep the existing floor-mounted toilet and update the wall. Concealing a tank is a larger commitment than changing paint.
41. Choose a Skirted Toilet for a Simpler Base
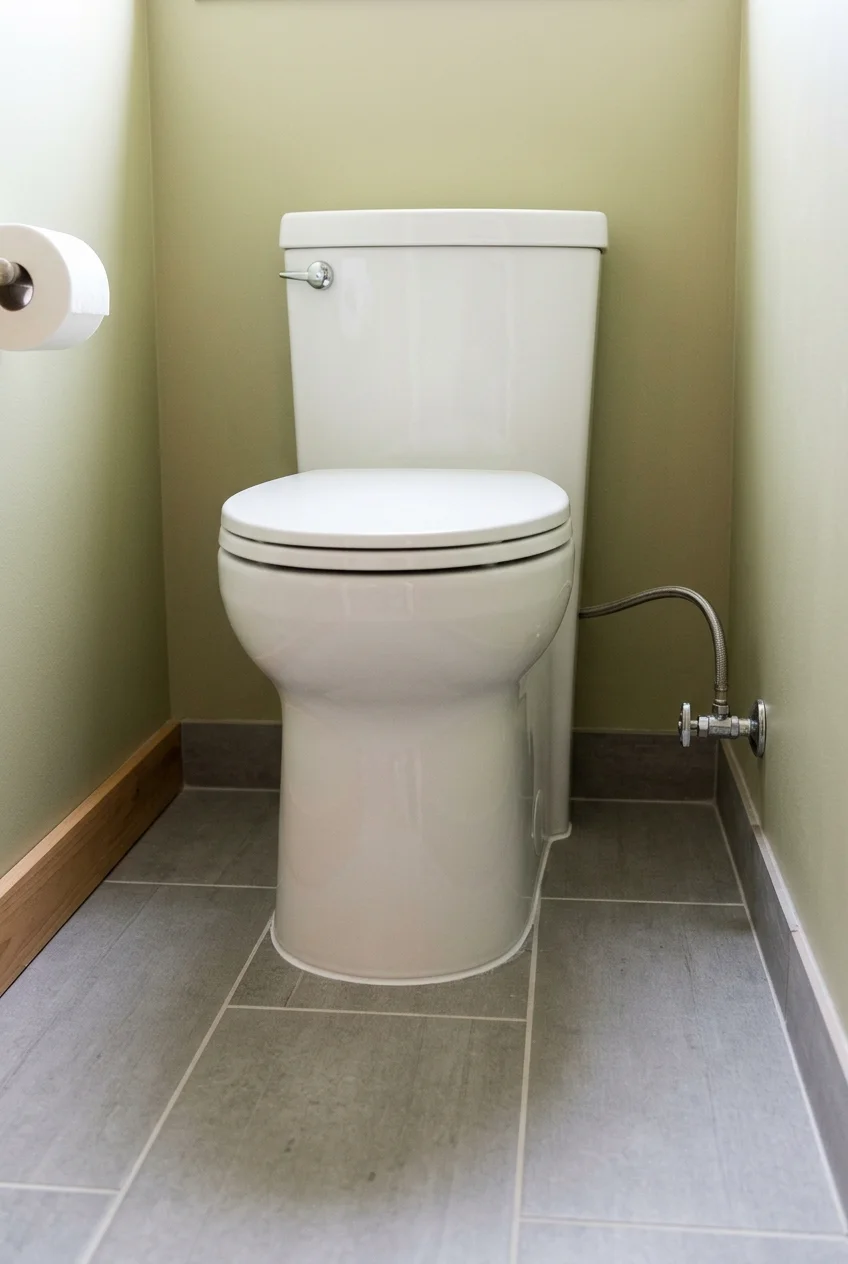
A skirted toilet replaces the exposed trapway outline with a smoother outer profile. It can make a narrow room look less visually complicated at floor level.
Compare the full width near the wall and the position of the supply valve. A smooth skirt can still be bulky, and some designs need particular installation access.
Read the model’s instructions before buying and ask how the seat and fixings are serviced. Easier-looking surfaces do not mean every part is easier to reach.
Keep enough room to clean both sides without wedging supplies beside the base. This idea improves the outline and cleaning approach rather than automatically saving floor space.
42. Replace a Swinging Door With a Proper Pocket Door
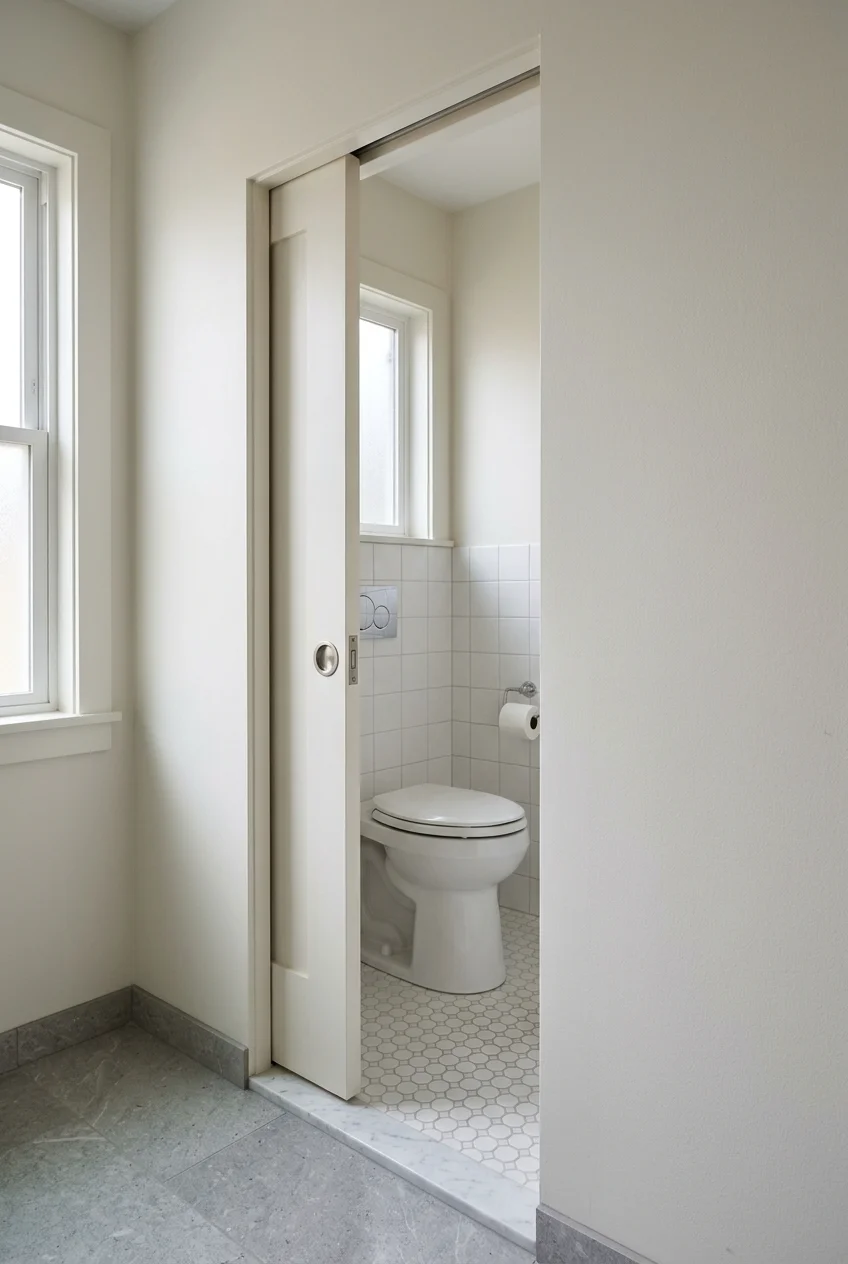
A pocket door removes the inward swing from the compartment. The visible result is a clear entrance and a door leaf that disappears into the adjoining wall.
The receiving wall must have room for the complete frame and door. Have its structure and concealed plumbing, wiring, or ducts assessed before committing to the idea.
Choose the frame around the actual door thickness, weight, and opening requirements. Pocket-door hardware specifications vary, so an attractive door slab is only part of the system.
- Usable wall length beside the entrance.
- Structural and service conflicts within the pocket.
- Compatible frame, track, guides, and door weight.
- Privacy latch, edge pull, and emergency-release provisions.
Plan privacy as carefully as the open position. A recessed pull and suitable latch should work comfortably, and the closed door should meet the household’s expectations.
Discuss wall-mounted accessories near the pocket with the installer. Ordinary long fixing screws can intrude into the cavity where the door needs to travel.
Keep an inward or outward hinged door if the receiving wall cannot accommodate a pocket. The goal is reliable movement, not forcing a sliding solution everywhere.
43. Move the Door Swing Into a Suitable Adjoining Space
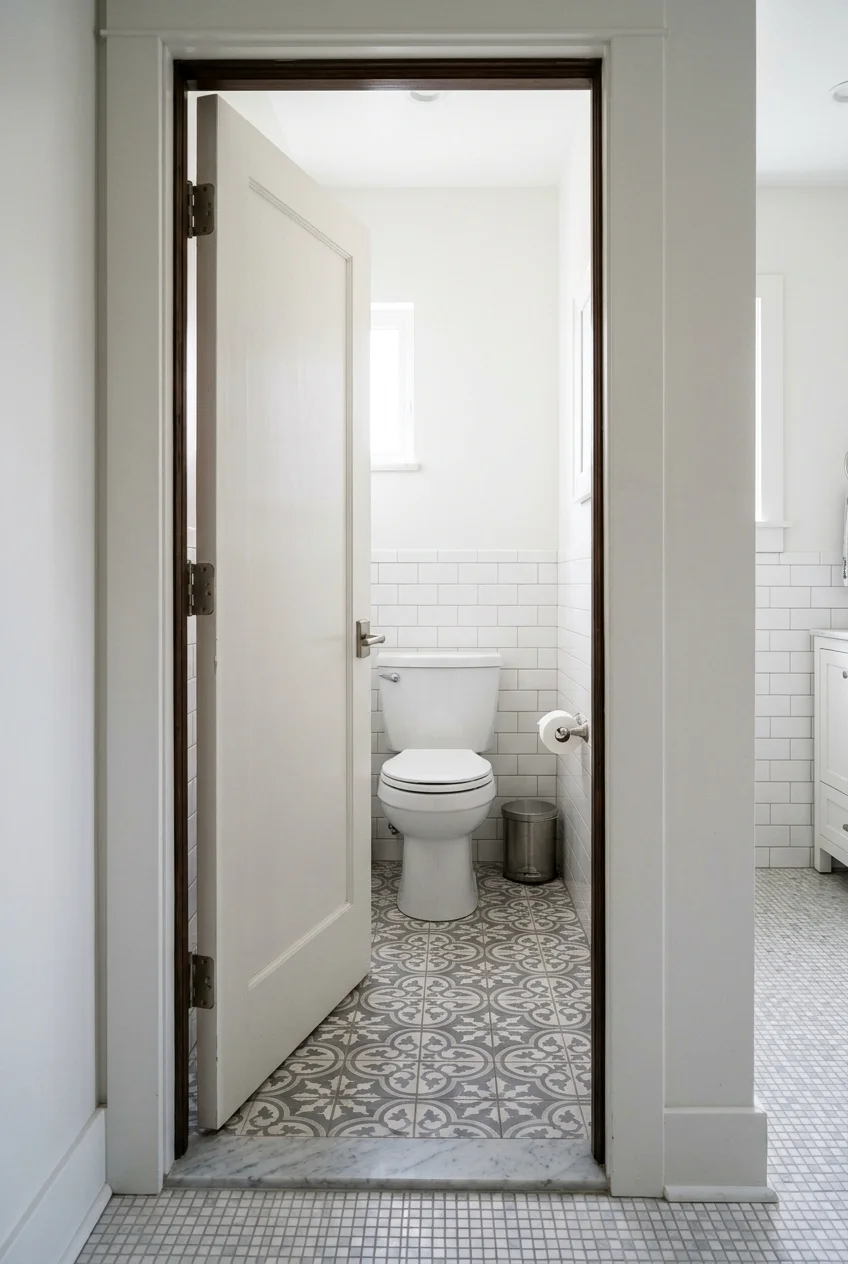
An outward-opening hinged door can free the compartment’s interior when the adjoining bathroom has enough room. It retains a familiar lever and a full door leaf.
Check the entire outside swing before changing hinges or the frame. The door must not create a new collision with another door, vanity, or circulation route.
Have the installer review the opening, required access, and local rules. Reversing a door is not always a simple hardware change, particularly with an existing shaped frame.
Mock up the open position with tape in the adjoining room. Test morning routines and access to storage while the proposed door is fully open.
Watch for If the door would strike someone using the vanity, keep evaluating the layout. Recovering space inside the compartment should not create an awkward outside pinch point.
44. Use a Solid Door for a More Private Enclosure
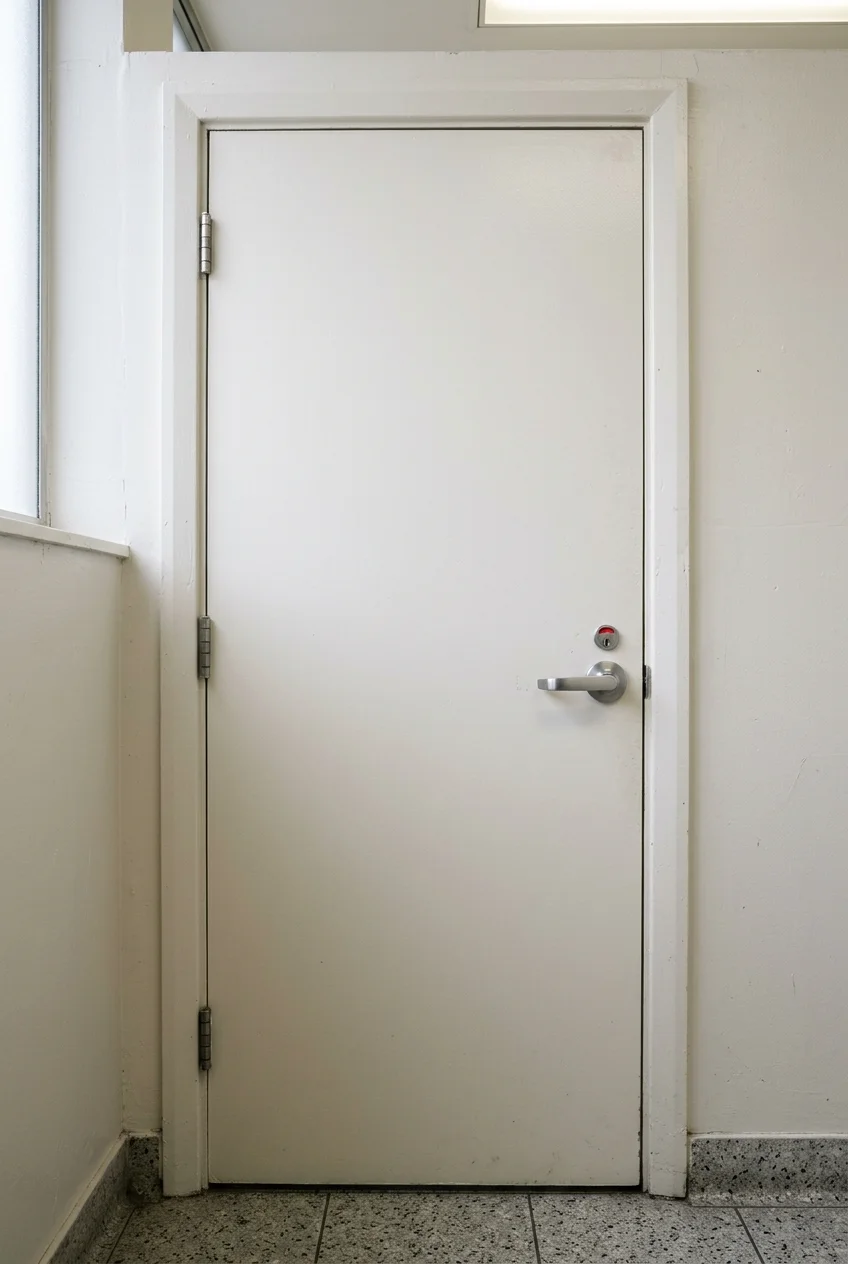
A solid-core door can be worth considering when a toilet compartment opens directly into a shared bathroom. It makes privacy part of the design rather than an afterthought.
Compare the complete door assembly, including frame fit, hardware, and gaps. The slab alone cannot promise a particular level of sound isolation inside the finished room.
Ask the installer to check hinge capacity and any required transfer-air provision. Do not seal a door gap that the room’s ventilation design depends on.
Choose a lever and privacy function that everyone can operate comfortably. A simple painted slab can coordinate with the room without needing glass inserts or decorative openings.
45. Use a Shallow Wall-Mounted Handwashing Basin
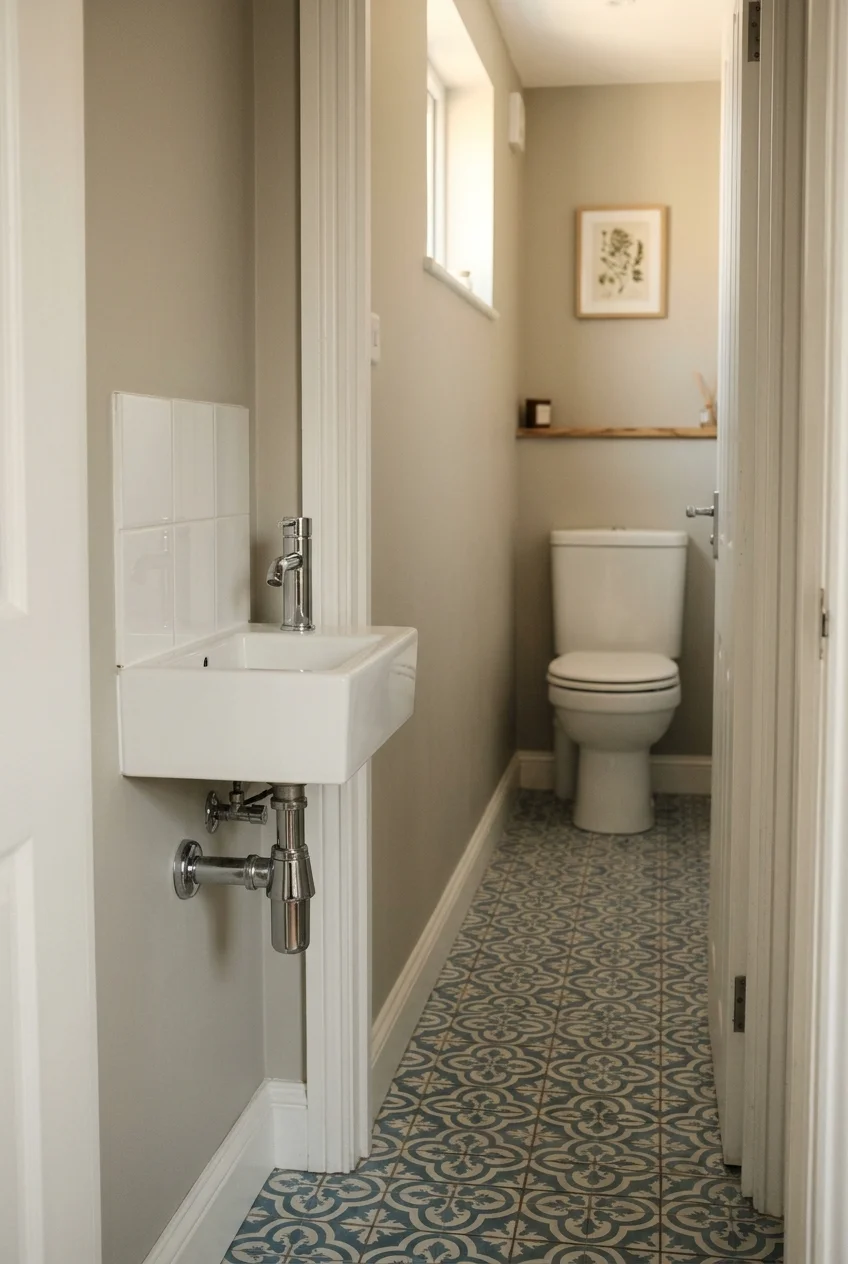
In a narrow half bath, a shallow wall-mounted basin can remove a bulky vanity from the entrance. Choose usable bowl space as well as a slim outer profile.
Trace the basin outline at its intended height and test the standing position. The faucet must discharge into the bowl without forcing hands against the back edge.
Check faucet reach, mounting height, and valve requirements together, as Kohler advises for wall-mounted faucets. A basin and faucet chosen separately may make a splash-prone pairing.
- Basin projection and usable bowl depth.
- Faucet reach and control position.
- Wall support and drain arrangement.
- Soap, towel, and standing space.
A wall-mounted basin needs appropriate support and a plumber’s installation plan. Exposed plumbing can look deliberate, but it should remain serviceable and suitable for the setting.
Use this only where a half bath has room for handwashing. Do not squeeze a sink beside the toilet at the expense of required clearances.
46. Turn an Awkward Entrance Corner Into a Basin Location
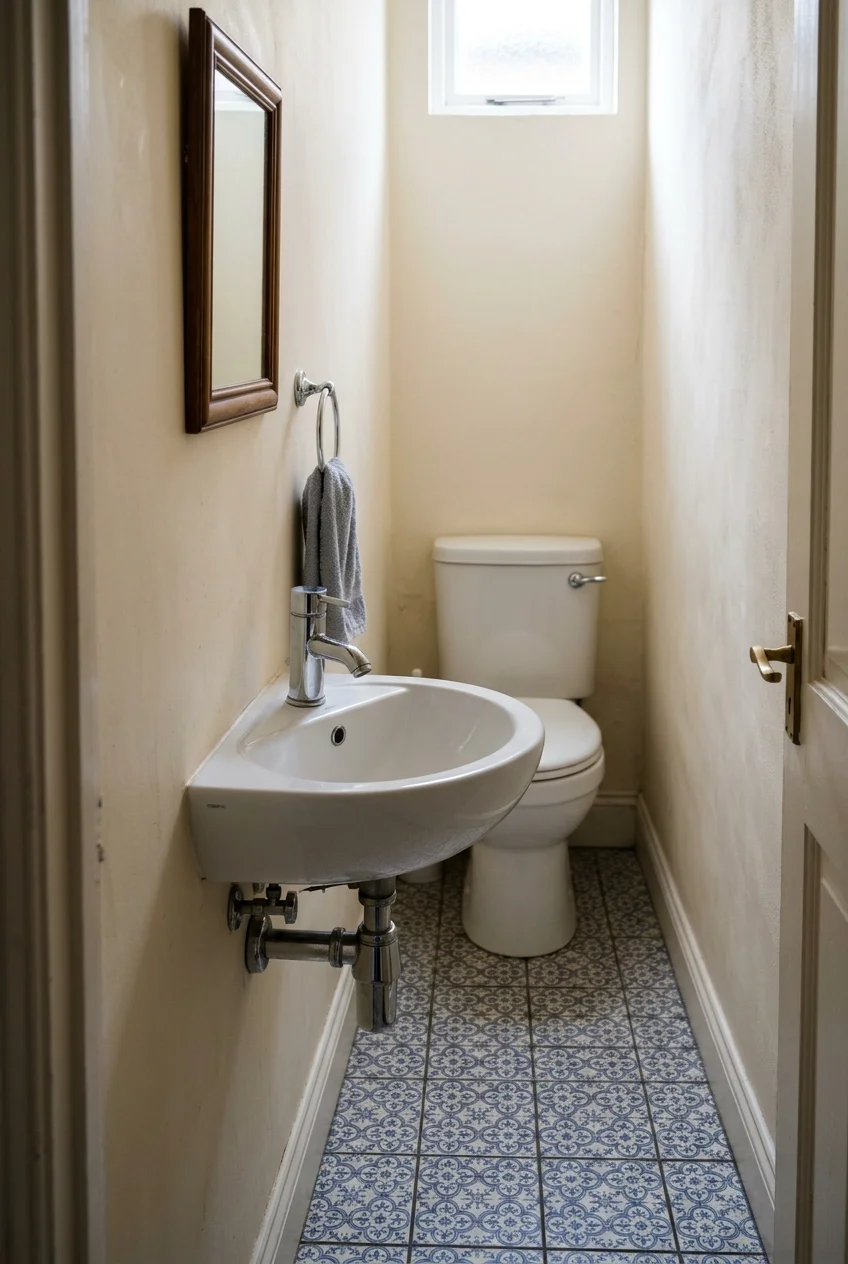
A corner basin can use a spot that a straight rectangular sink would crowd differently. Its value comes from the actual approach, not simply from a small catalog width.
Check the diagonal projection from the corner into the room. Mock up the bowl shape and stand in front of it before deciding the space feels comfortable.
Choose a basin designed for corner mounting and confirm wall support on the specified surfaces. A normal sink should not be balanced across two walls improvisationally.
Plan the faucet, trap, soap, and towel together with a plumber. If the corner is too tight for washing hands comfortably, use a shallow straight basin elsewhere.
47. Float a Shallow Vanity Where You Need Hidden Storage
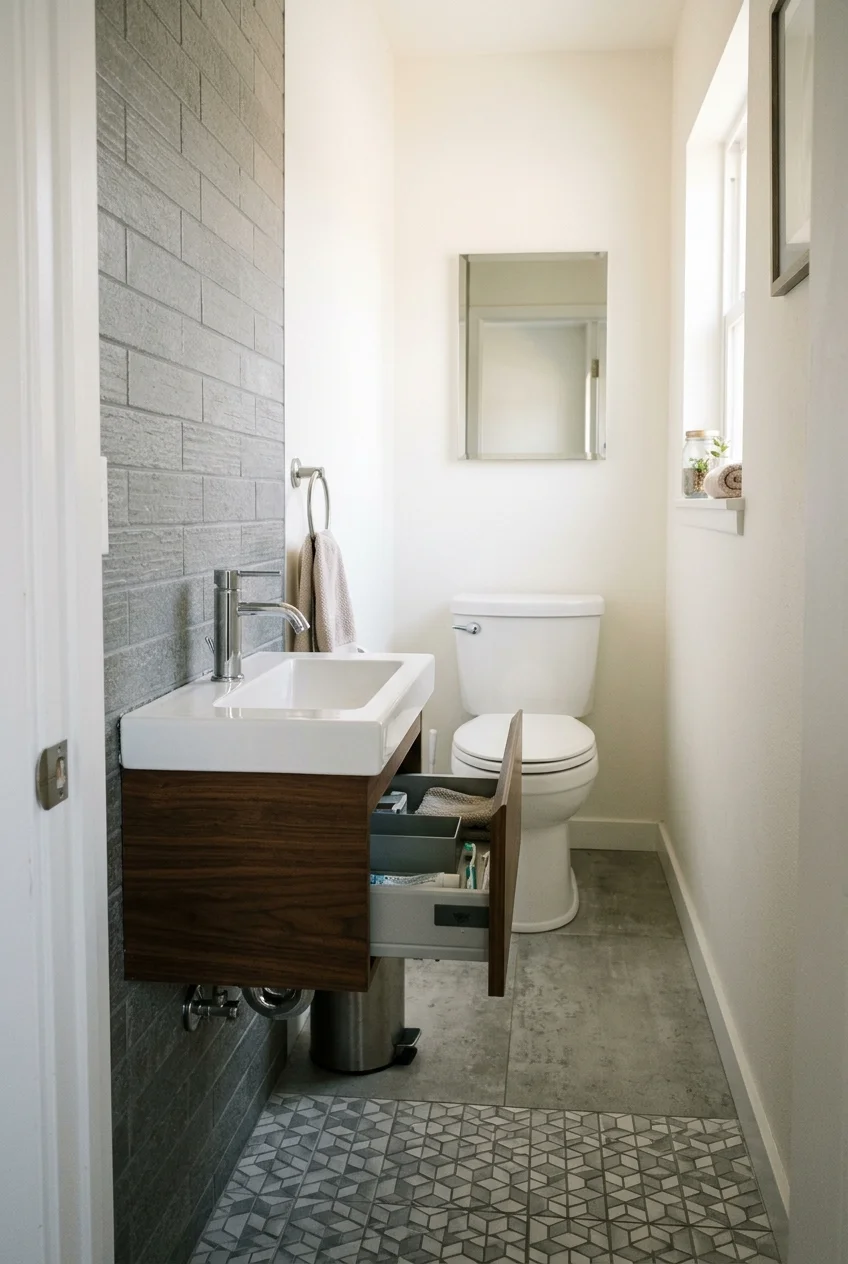
A floating vanity can combine a handwashing basin with closed storage in a narrow half bath. The visible floor underneath keeps the base from becoming another solid block.
Choose the depth around the basin and standing room, then compare the drawer layout. Shallow cabinets may hold fewer supplies than their front width suggests.
A drawer must fit around the trap and open without hitting the opposite wall or door. Check the actual plumbing position against the manufacturer’s internal layout.
- Mock up the cabinet and fully open drawer.
- Confirm basin and faucet compatibility.
- Review wall support and fixing requirements.
- Check service access to the trap and shutoffs.
Keep the floor underneath easy to reach instead of filling it with baskets. Otherwise the floating profile loses much of its practical cleaning benefit.
If the room lacks depth for drawers, choose a wall-mounted basin and separate storage outside the compartment. Closed storage is useful only when its doors can work.
Small Finishing Touches That Keep the Room Usable
After choosing the main look, add only the small items the room needs. Their positions should make everyday use easier without filling the remaining floor space.
48. Lift the Toilet Brush Off the Floor
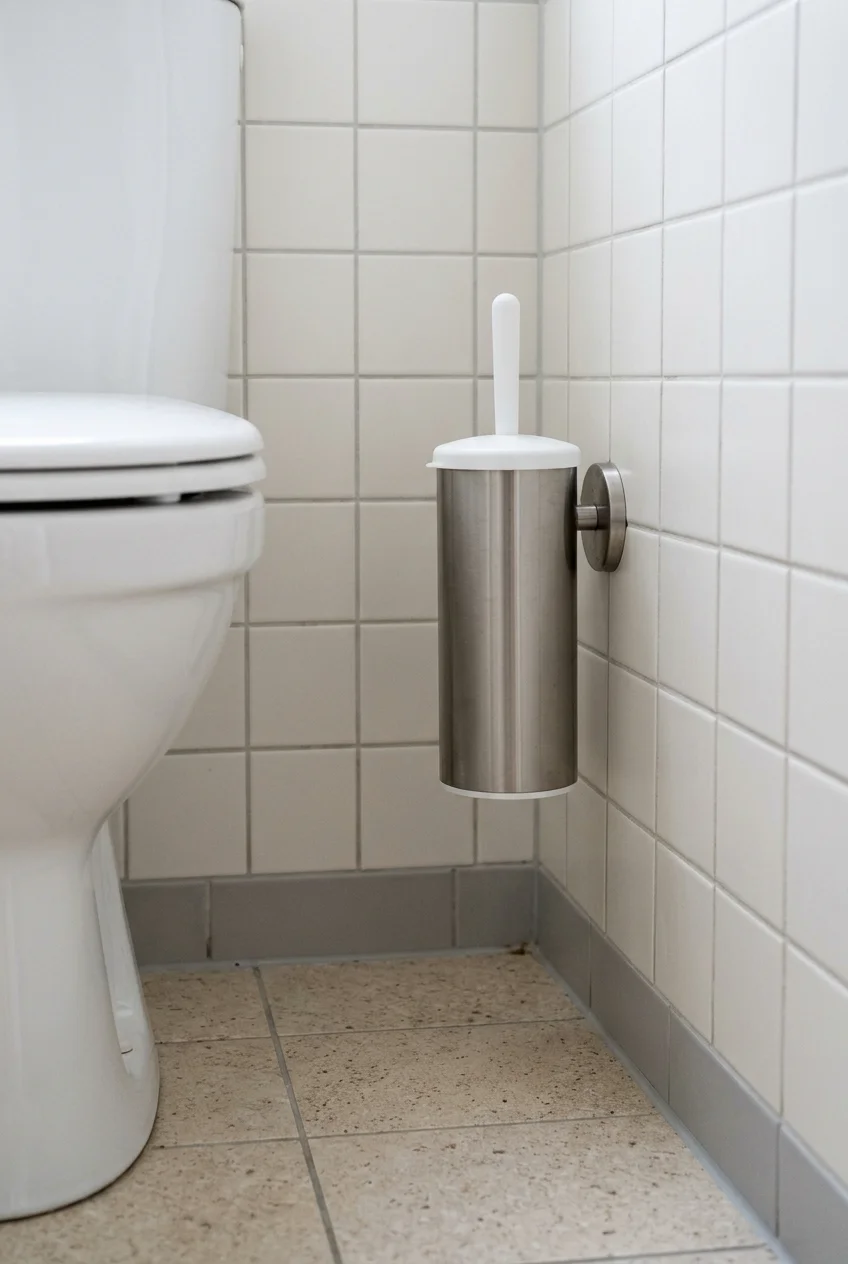
A wall-mounted brush holder frees a small patch of floor and makes that corner easier to wipe. Choose a removable inner container that you can clean separately.
Position it where the brush can lift out without hitting a shelf or the tank. Keep it separate from paper storage and clear of the supply valve.
Use the mounting method specified for the wall and product. A smooth-tile adhesive installation and a screwed drywall fitting require different preparation and support.
49. Choose a Small Lidded Wastebasket With a Usable Opening
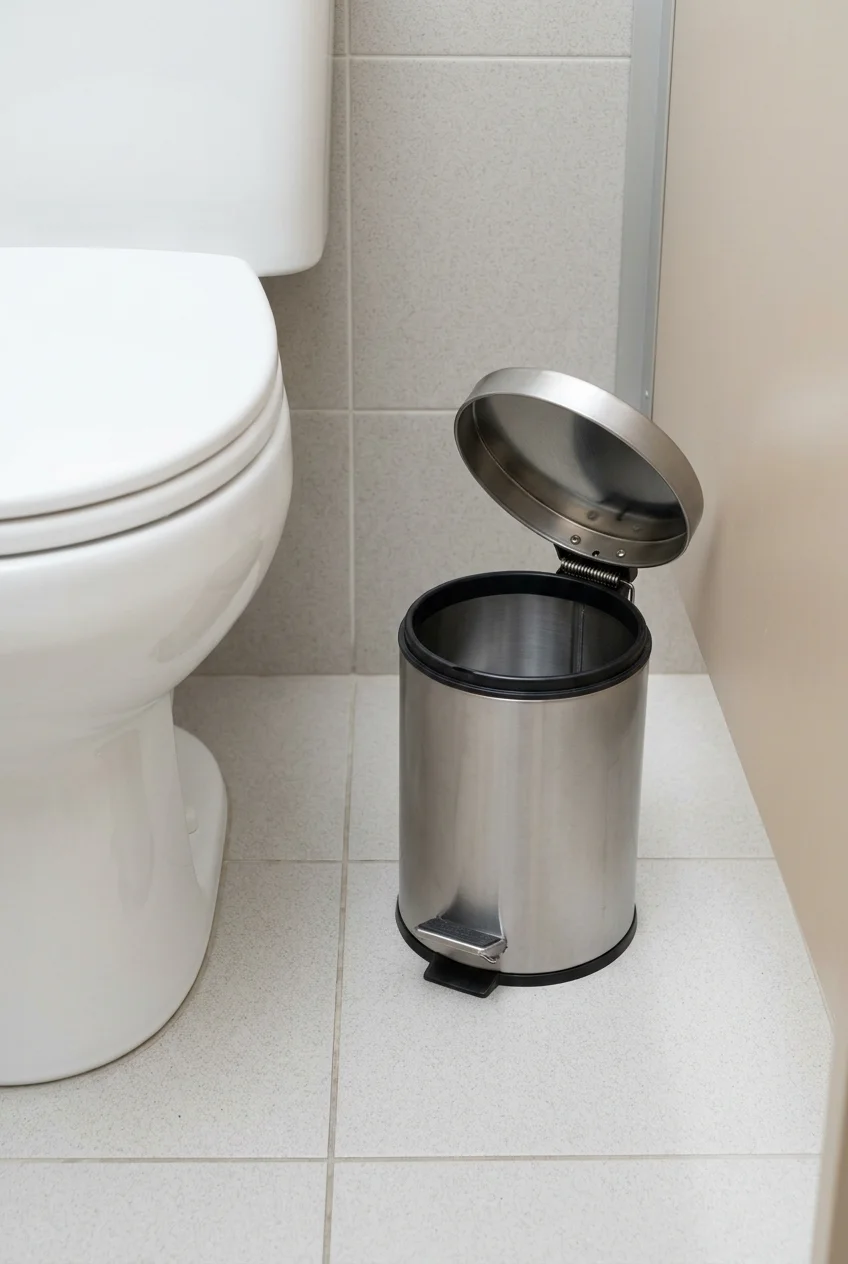
A compact wastebasket gives personal care waste a proper place in a guest toilet room. A narrow shape is useful only if its lid can open fully.
Check the pedal position and clearance beside the toilet. In a very tight gap, a pedal bin can be harder to use than a small lift-top design.
Choose a removable liner or inner bucket and keep the bin easy to pull out. Guests should not need to move stored paper to reach it.
Guest-ready detail Put personal care waste in the trash rather than flushing it. Keep the container visible enough that guests can find it without opening unrelated storage.
50. Keep Soap and a Hand Towel Off a Tiny Basin Rim
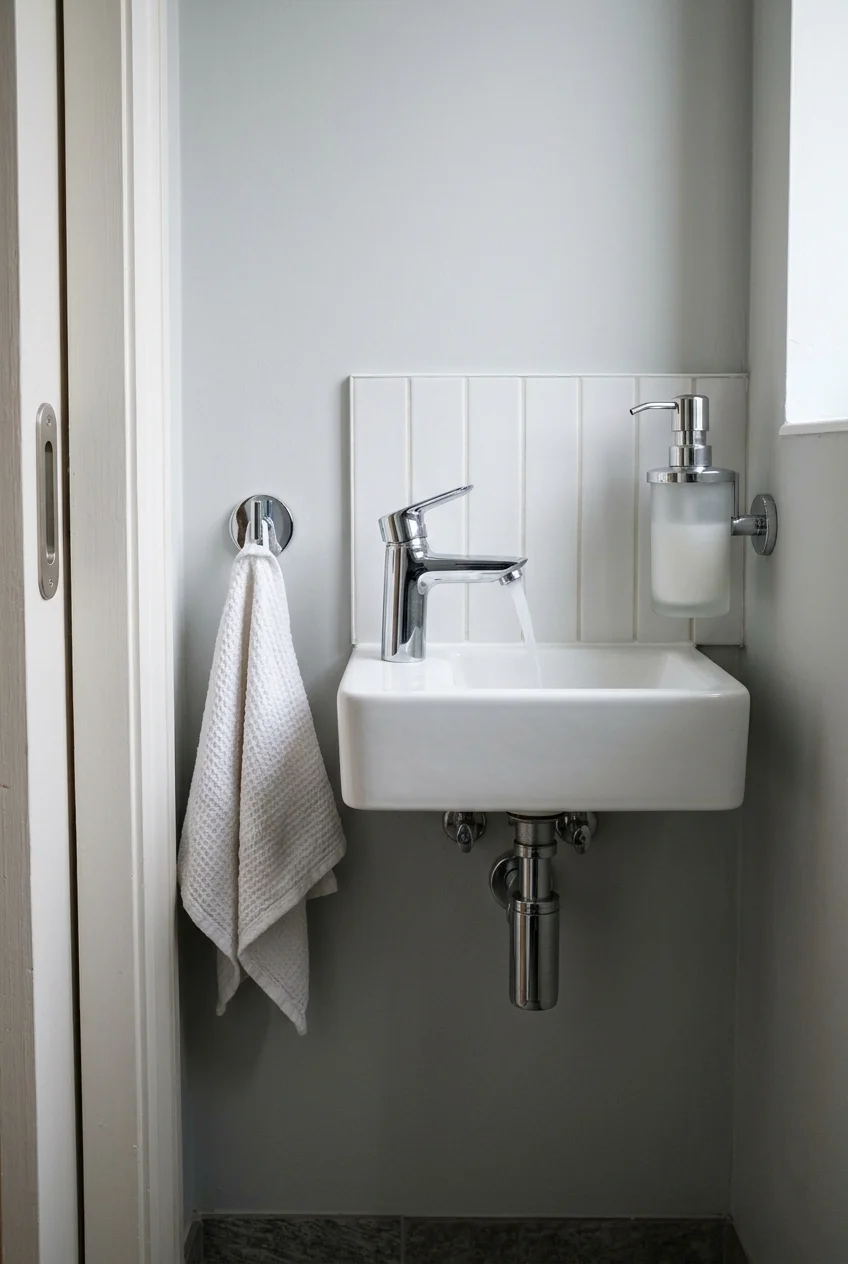
In a narrow half bath, wall-mounted soap and a small towel hook can keep the basin edge usable. Place them where water will not drip across the entrance.
Test the reach from the basin before drilling. A towel that hangs over the toilet or blocks the faucet creates a new problem in a small room.
Choose a refillable dispenser with a removable reservoir and enough clearance above it for refilling. Keep its pump outlet over the basin area rather than the floor.
A short hand towel on one hook usually needs less wall length than a full towel bar. Check the hanging towel’s actual width against the nearby doorway.
Frequently Asked Questions
How should I choose among these ideas without crowding the room?
Choose one main visual feature and one practical improvement first. A patterned wall plus useful paper storage may finish the room without extra shelves or floor accessories.
Save photos with a similar doorway, window, and toilet position to yours. Compare the fixtures and movement space before assuming a look will translate directly.
What should I measure before changing a narrow toilet room?
Record the finished room width and depth, doorway opening, swing, toilet projection, and plumbing positions. Include the space used by trim and proposed storage.
Ask your installer to check local clearance and access requirements for the actual project. A photograph or compact fixture label cannot confirm a compliant layout.
Can I use peel-and-stick wallpaper in a rented toilet room?
Check the lease and obtain any required permission first. Removable wallpaper can still damage paint, especially when the surface or paint finish is incompatible.
Follow the chosen manufacturer’s surface and curing instructions, then test a sample. Tempaper recommends allowing at least 30 days after painting before installing its products.
Keep wallpaper away from direct splashes and address dampness before decorating. A separate toilet room may have little steam, but its ventilation still needs to work.