50 DIY Painted Light Switch Cover Ideas

This post may contain affiliate links: full affiliate disclosure.
Standard plastic switch plates often disrupt a room's design, but a custom paint job integrates them perfectly. These projects use simple techniques to turn basic hardware into cohesive decor elements that match any wall color or pattern.
Neutral and Earthy Painted Switch Covers
1. Wall-Matching Light Switch Cover
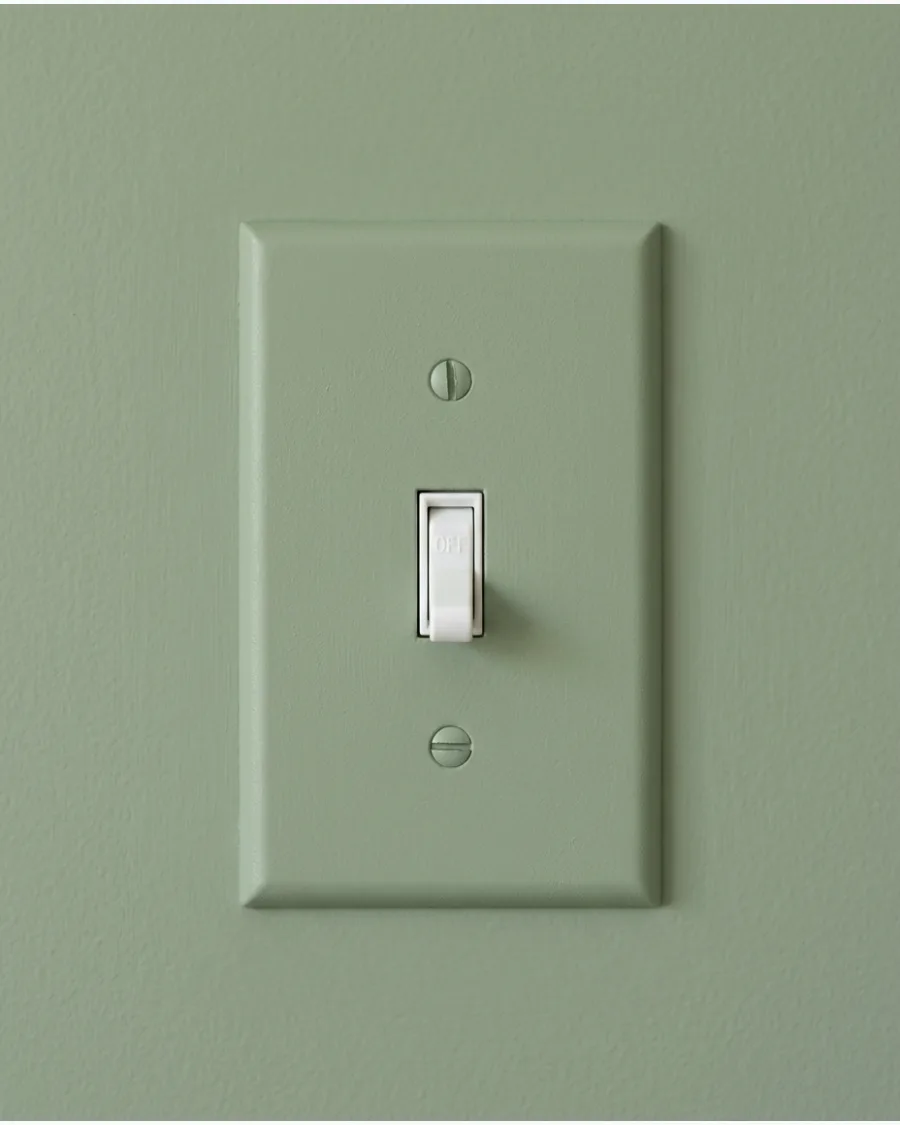
Painting the plate the exact same color as the wall creates a high-end, custom look. Use the leftover wall paint for a perfect match that hides the hardware in plain sight.
Sand the plastic surface first to ensure the paint sticks without peeling over time. The result is a clean, seamless finish that minimizes visual clutter.
- Sourcing: Uses leftover wall paint and fine-grit sandpaper.
- Setup: Remove the plate and lay it flat on a drop cloth before painting.
- Adaptation: Use a satin finish if the wall is flat to make the plate easier to wipe clean.
Best shortcut: Use a small foam roller instead of a brush to avoid leaving visible stroke marks.
2. Warm Khaki Switch Plate
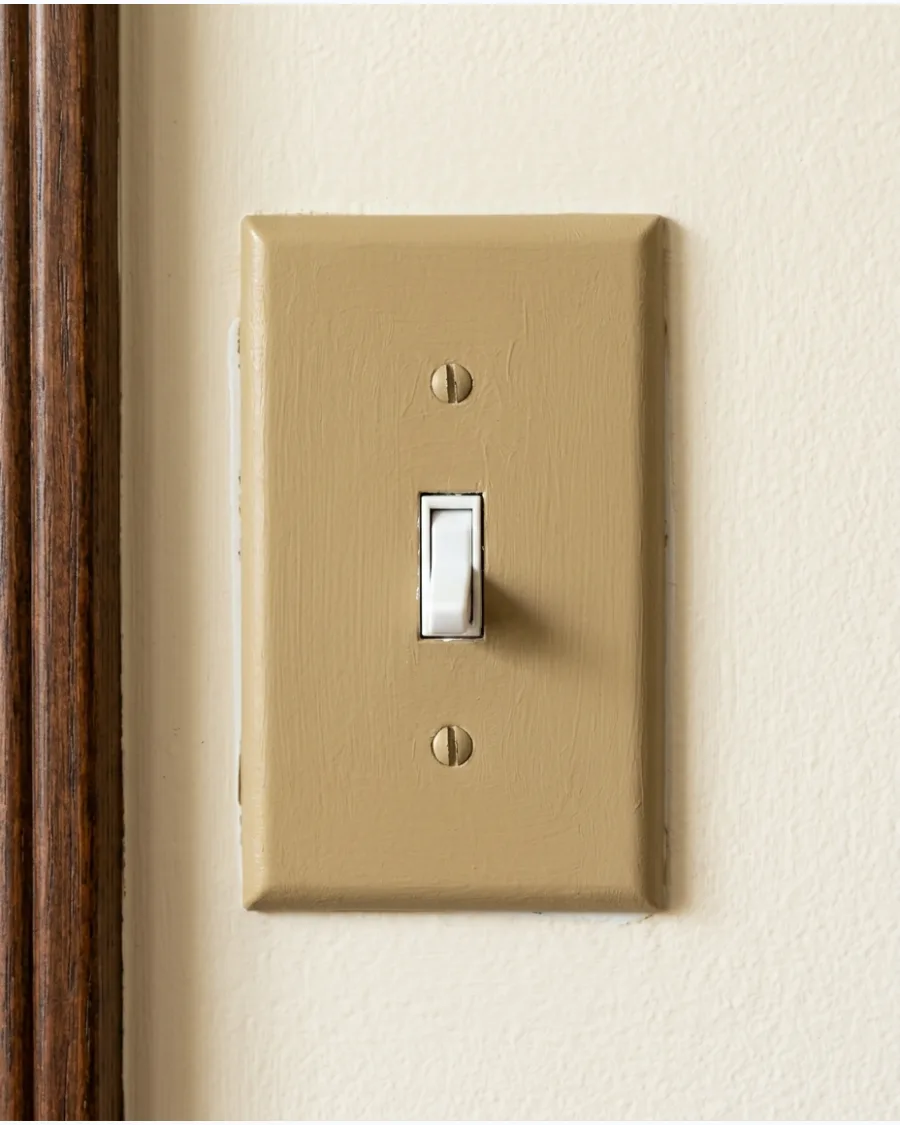
A warm khaki shade offers a sophisticated alternative to basic white or almond plates. This earthy tone grounds the space and pairs beautifully with natural materials like oak or linen.
Apply two thin coats of acrylic paint to achieve a solid, professional depth of color. It provides a subtle contrast that feels intentional rather than accidental.
- Sourcing: Acrylic craft paint or a small sample pot of interior latex.
- Setup: Clean the plate with rubbing alcohol to remove oils before applying the base coat.
- Adaptation: Add a clear matte sealer to prevent fingerprints on the earthy finish.
Quick win: Paint the screw heads while they are still in the plate to ensure the colors match perfectly.
3. Smoky Jade Light Switch Cover
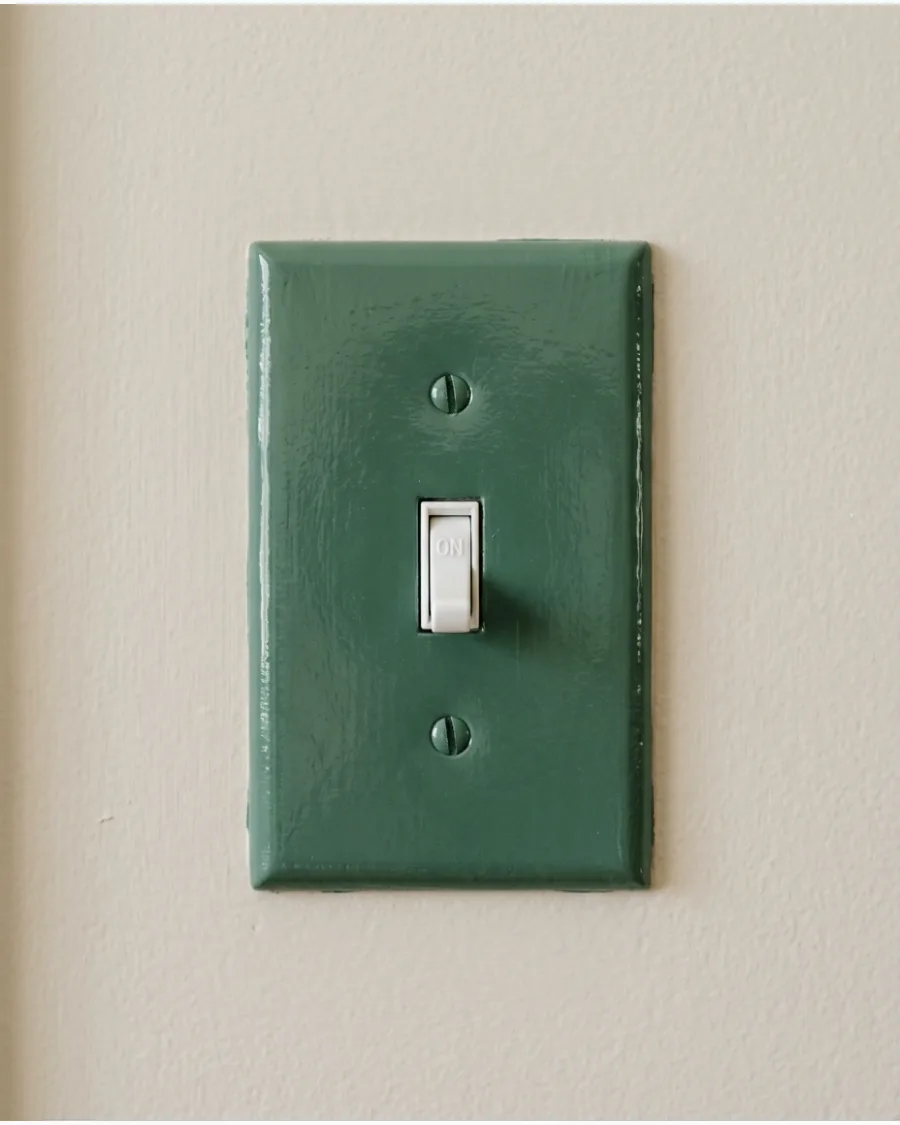
Deep smoky jade adds a moody, jewel-toned element to a neutral wall. This color works well because it feels like a natural stone or high-end ceramic piece once dried.
Finish the plate with a high-gloss topcoat to mimic the look of glazed tile. It is a fast way to add a pop of color without committing to a full accent wall.
- Sourcing: Requires jade green paint and a glossy spray or brush-on sealer.
- Setup: Allow the paint to cure for 24 hours before reattaching it to the wall.
- Adaptation: Use a metallic gold paint on the screw heads for a luxury touch.
Most people skip this: Sanding the edges of the plate prevents the paint from chipping when the switch is flipped frequently.
4. Espresso Brown Switch Plate
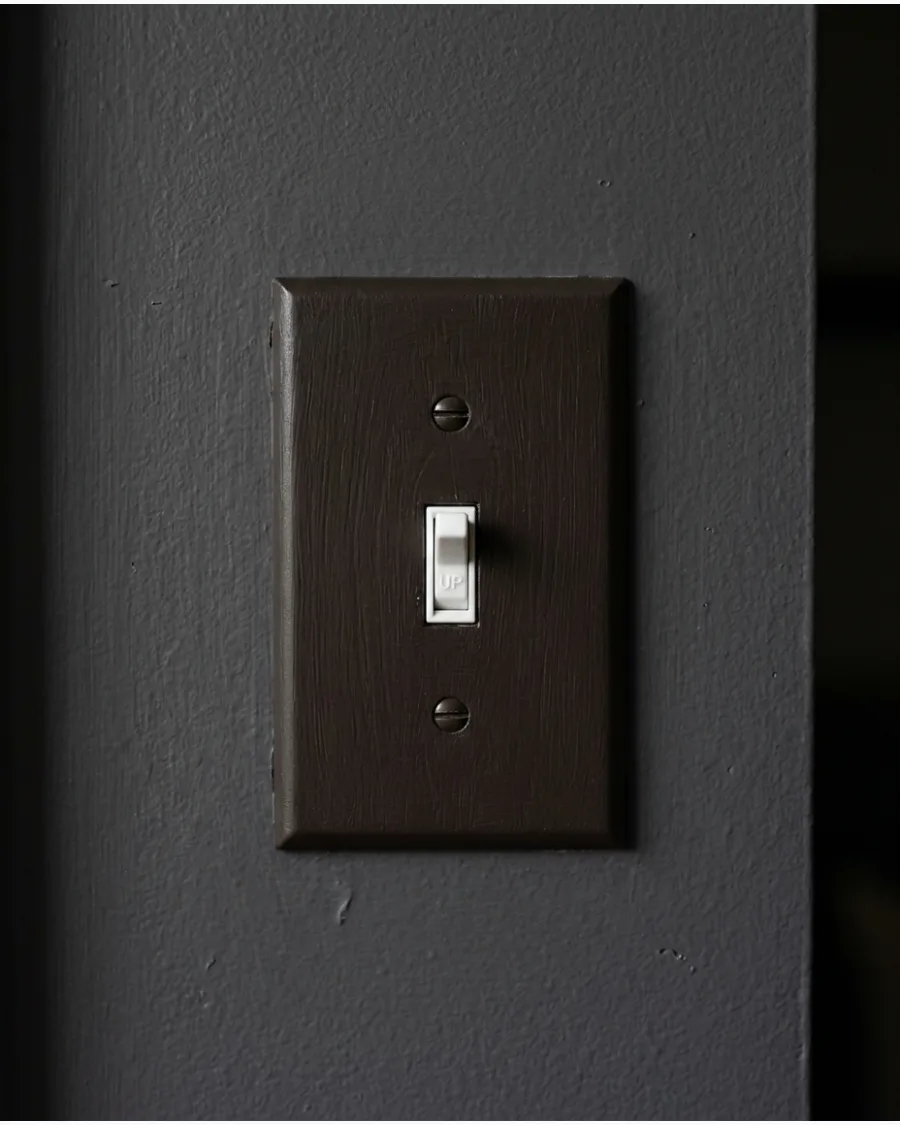
Rich espresso brown provides a heavy, grounded look that mimics dark metal or stained wood. This choice is excellent for rooms with dark furniture or moody lighting.
Use a stiff brush to create very faint horizontal lines that look like a natural wood grain. It hides dirt and fingerprints better than lighter colors in high-traffic areas.
- Sourcing: Dark brown acrylic paint and a small detail brush.
- Setup: Work in a well-lit area to ensure the dark pigment covers the white plastic completely.
- Adaptation: Mix in a drop of black paint to create a more charcoal-toned espresso.
Best shortcut: A sponge dabbed in a slightly lighter brown can create a faux-stone mottled effect.
5. Soft Butter-Yellow Cover
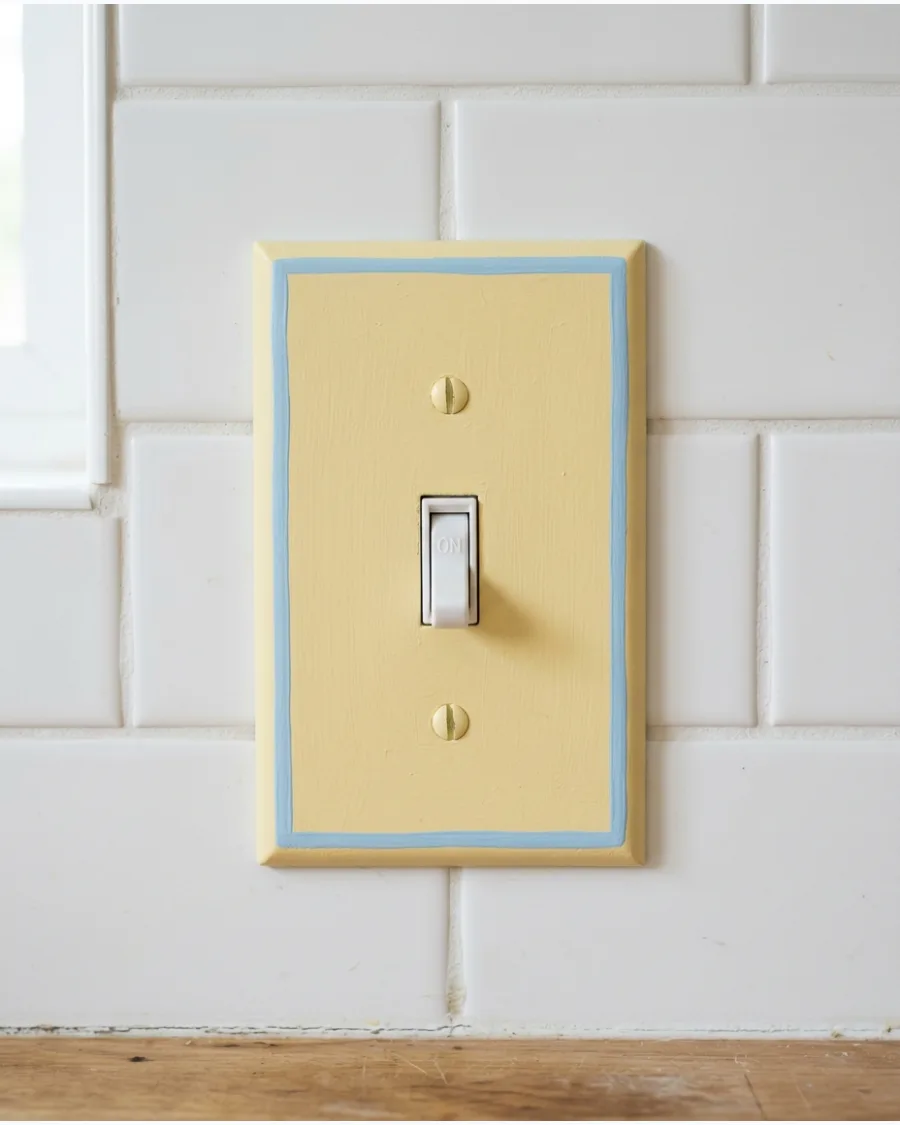
Muted butter-yellow adds a soft, sunny feel to a kitchen or laundry room. It brings a vintage charm that feels cheerful without being overwhelming.
Paint the very edge of the plate in a contrasting color like light blue to define the shape. This creates a cozy, cottage-inspired look that brightens up dark corners.
- Sourcing: Pastel yellow paint and a fine-tip liner brush for the border.
- Setup: Use painter's tape to get a perfectly straight line for the colored edge.
- Adaptation: Leave the border off for a more modern, solid-color look.
Quick win: Use a toothpick to clean out any paint that drips into the screw holes before it dries.
6. Muted Olive-Green Cover
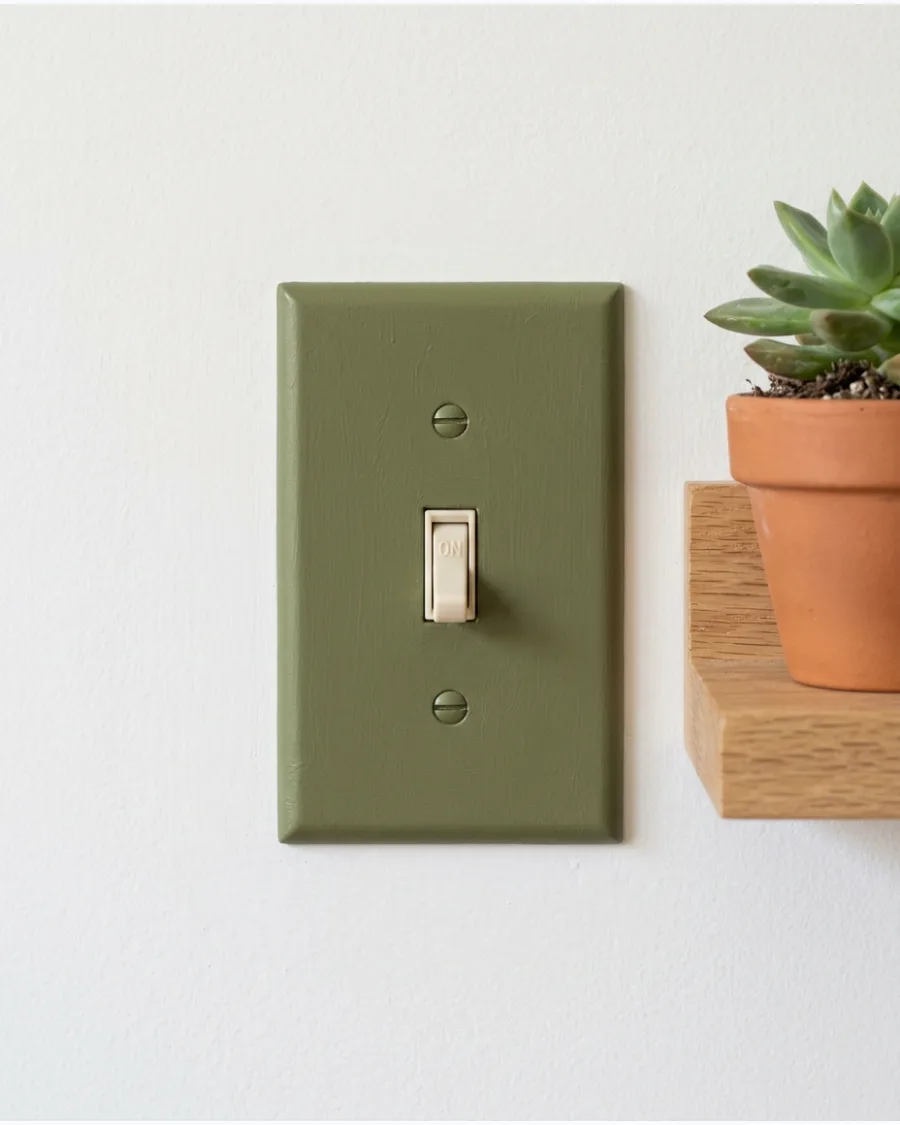
Olive green is a versatile neutral that brings an organic feel to any room. It looks best when paired with other natural elements like wood trim or indoor plants.
Apply a matte spray sealer to give the plate a soft, velvety texture. This color is especially effective at making standard plastic plates look like expensive custom hardware.
- Sourcing: Olive green spray paint or acrylic paint.
- Setup: Ensure the plate is completely dry before handling to avoid leaving permanent fingerprints.
- Adaptation: Add tiny white dots in the corners for a simple folk-art aesthetic.
Most people skip this: Priming the plastic first with a plastic-specific primer prevents the olive paint from scratching off.
7. Terracotta Switch Plate
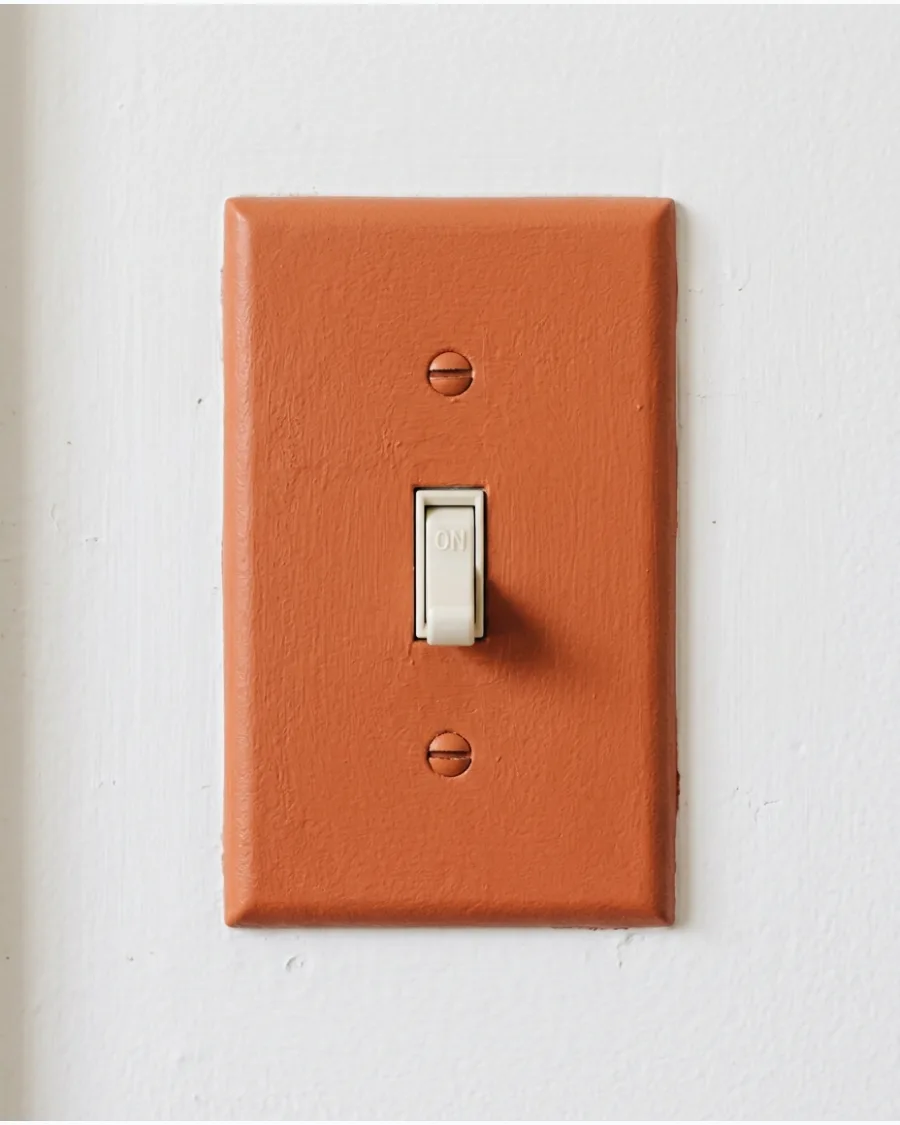
Terracotta paint gives a plastic plate the appearance of baked clay. This warm, earthy tone adds a Mediterranean or Southwestern vibe to the space.
Stipple the paint with a dry sponge to create a slightly gritty, authentic clay texture. It is a great way to add warmth to a room with lots of white or cool tones.
- Sourcing: Terracotta-colored acrylic paint and a small sea sponge.
- Setup: Mix a tiny bit of baking soda into the paint to increase the clay texture.
- Adaptation: Paint thin white geometric lines for a modern boho look.
Best shortcut: Use a flat brush to paint the switch itself when the power is disconnected for a monochromatic look.
8. Clay-Pink Light Switch Cover
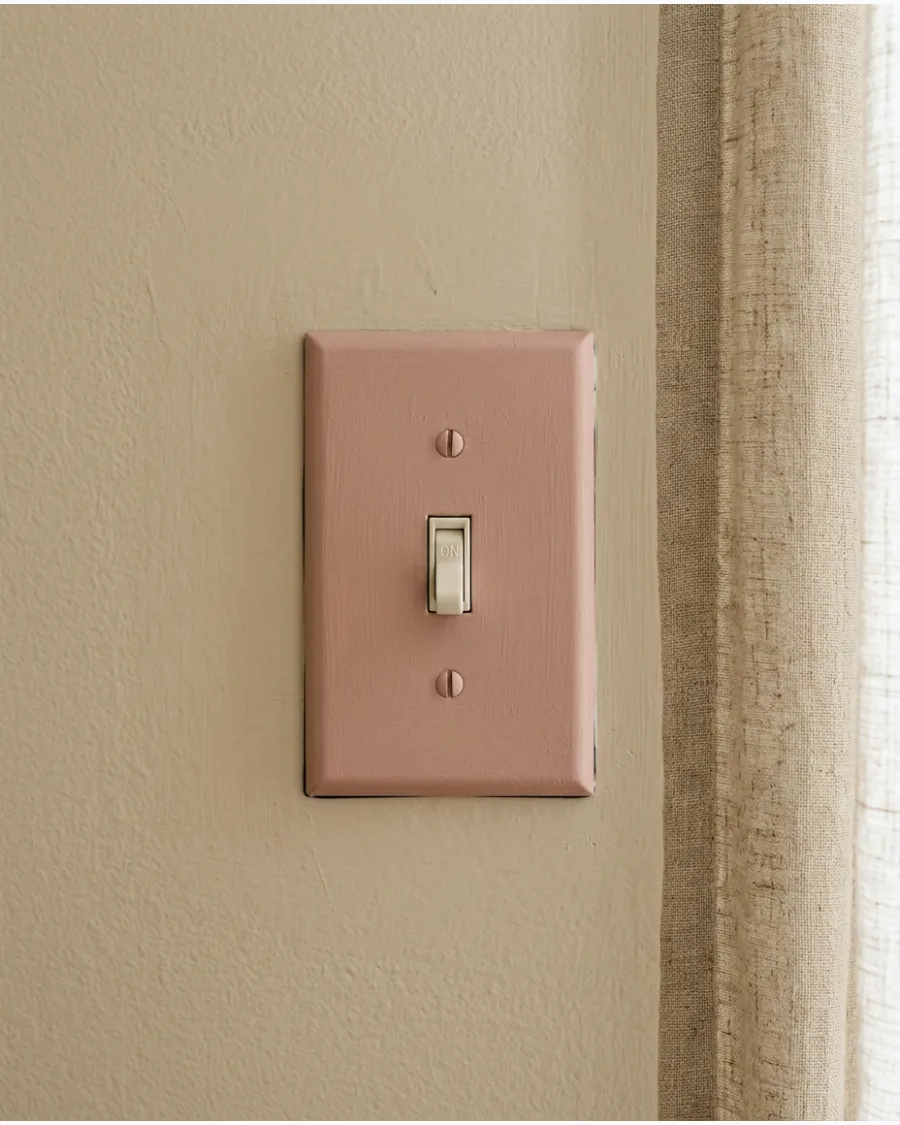
Clay-pink is a sophisticated, grown-up version of pink that feels earthy and calm. It pairs well with other warm neutrals like beige and tan.
Use a soft round brush to apply the paint in circular motions for a smooth, cloud-like finish. This color adds a subtle feminine touch without being too bright or distracting.
- Sourcing: Clay or dusty rose acrylic paint.
- Setup: Remove any existing dust from the wall before remounting the painted plate.
- Adaptation: This shade looks excellent in a bedroom or nursery with sage green accents.
Quick win: Keep a damp cloth nearby to wipe the switch handle if you accidentally get paint on it during installation.
9. Cream-on-Cream Design
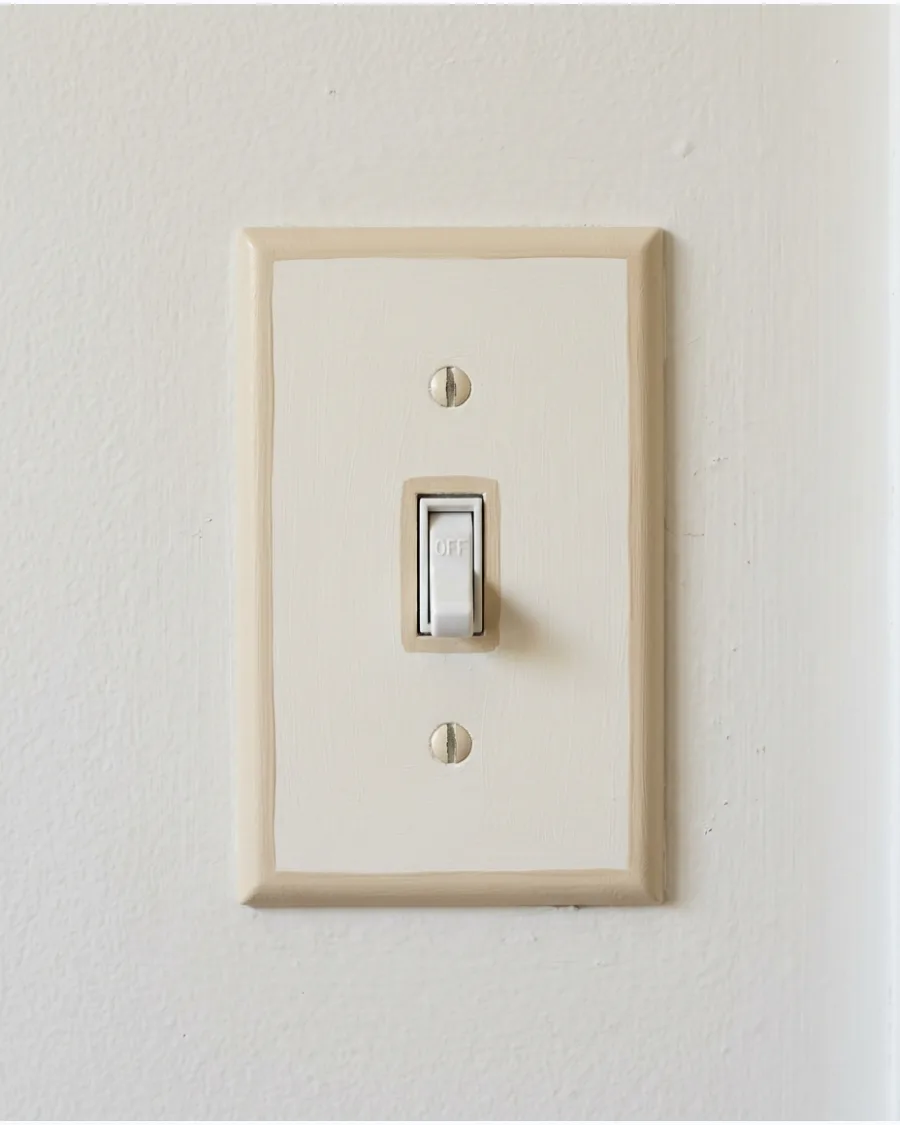
A cream base with a slightly darker cream border adds depth through subtle contrast. This tone-on-tone approach looks expensive and architectural.
Paint the main body first, let it dry, then use a steady hand to add the darker border. It is the perfect choice for traditional homes where you want a custom look that isn't loud.
- Sourcing: Two shades of cream paint—one light and one medium.
- Setup: Use a ruler to mark where the border should go for a symmetrical look.
- Adaptation: Swap the colors so the darker cream is the base for a more dramatic frame effect.
Most people skip this: Align the screw slots vertically for a professional, decorator finish.
10. Earth-Tone Color-Block Cover
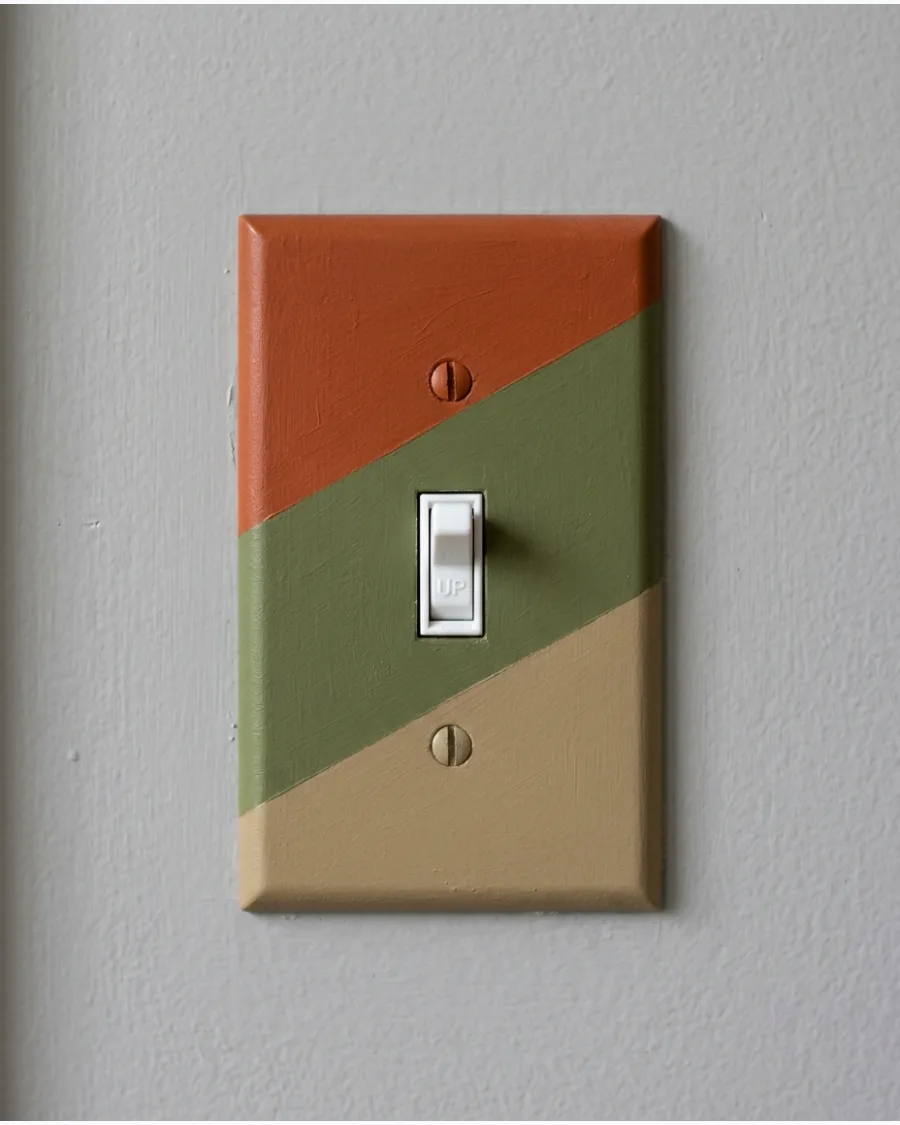
Color-blocking with earth tones creates a modern, artistic focal point on the wall. Use a mix of khaki, rust, and olive for a nature-inspired palette.
Use high-quality painter's tape to get sharp, clean lines between the different colors. This design makes a small switch plate feel like a tiny piece of abstract art.
- Sourcing: Small tubes of rust, olive, and khaki acrylic paint.
- Setup: Tape off one section at a time and let it dry completely before moving the tape.
- Adaptation: Use curved lines instead of straight ones for a more organic, 1970s-inspired look.
Best shortcut: A paint pen is much easier for drawing the dividing lines between colors than a brush.
Floral and Botanical Light Switch Covers
11. Tiny Wildflower Switch Plate
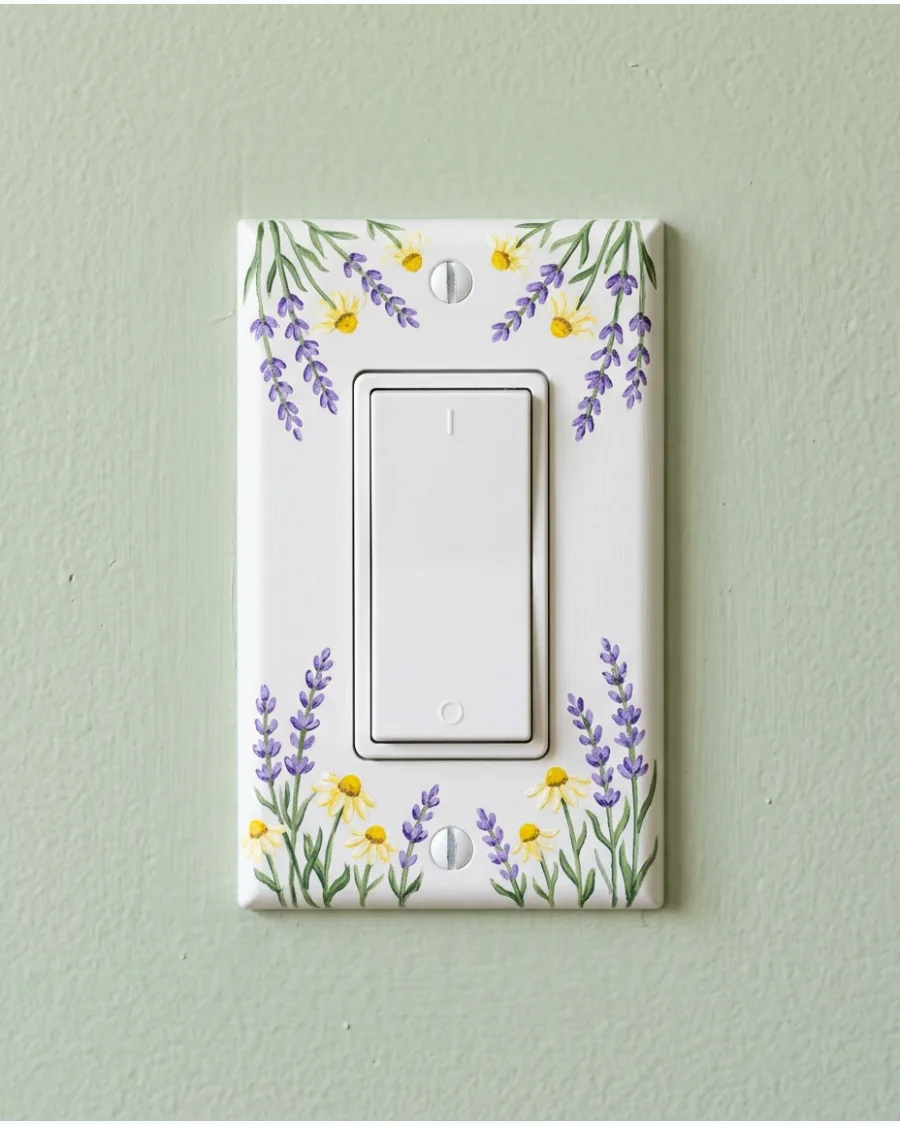
Painting delicate wildflowers around the edges adds a whimsical, hand-crafted feel to any room. Focus the detail on the corners to keep the design from looking cluttered.
Use the tip of a toothpick to create tiny white daisy centers for a professional level of detail. This style is perfect for a bathroom or a child's bedroom.
- Sourcing: Multi-color acrylic paint set and a set of detail brushes.
- Setup: Sketch your flower placement lightly with a pencil before painting.
- Adaptation: Paint only green leaves for a more minimalist botanical look.
Quick win: Seal the flowers with a clear spray to prevent the delicate petals from wearing off with use.
12. Blue Floral Light Switch Cover
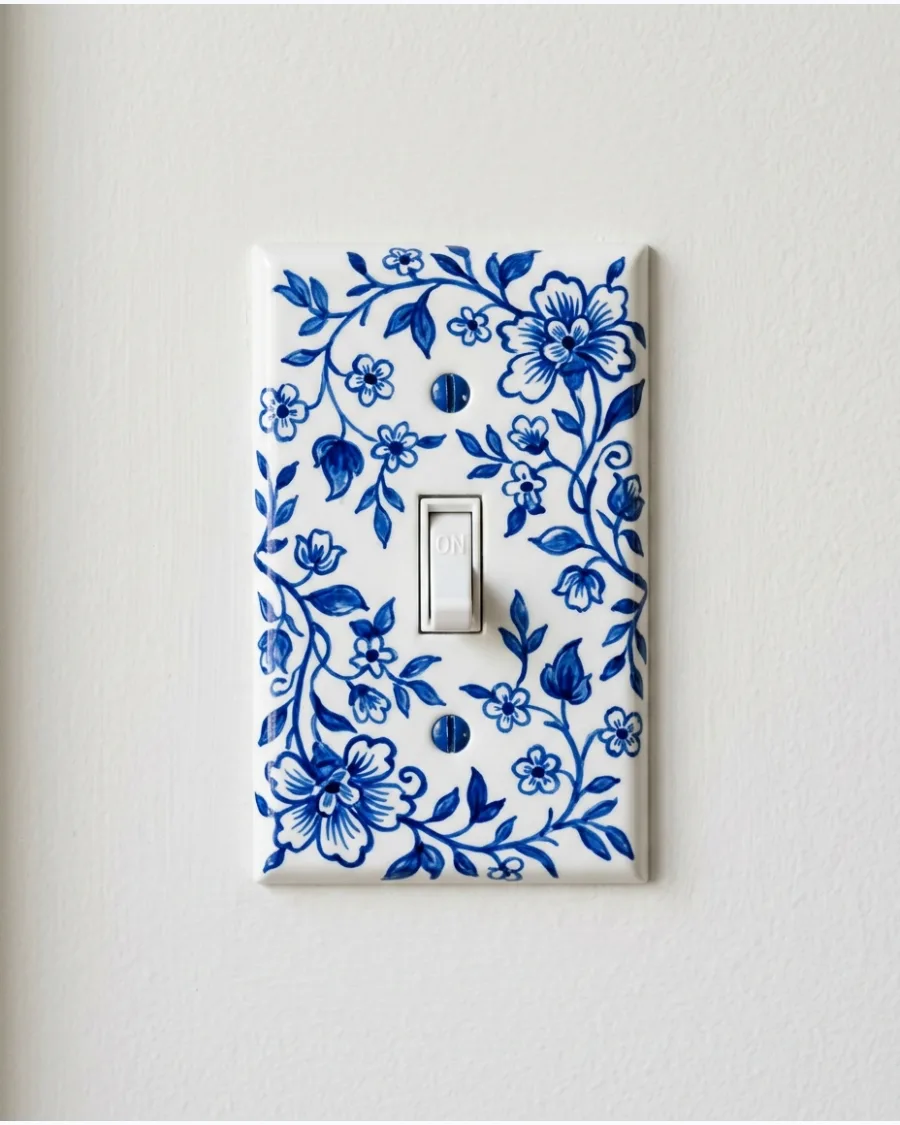
Cobalt blue flowers on a white background mimic the classic look of fine china or Chinoiserie pottery. This timeless design adds a touch of elegance to a traditional kitchen or dining room.
Vary the pressure on your brush to create petals with different shades of blue in one stroke. It creates a high-end look using only two colors of paint.
- Sourcing: White and cobalt blue gloss acrylic paint.
- Setup: Start with a solid white base coat even if the plate is already white for a smoother finish.
- Adaptation: Use a pale yellow base for a sunny, French-country feel.
Most people skip this: Using a gloss sealer over the blue flowers helps them look like real fired ceramic.
13. Daisy-Covered Switch Plate
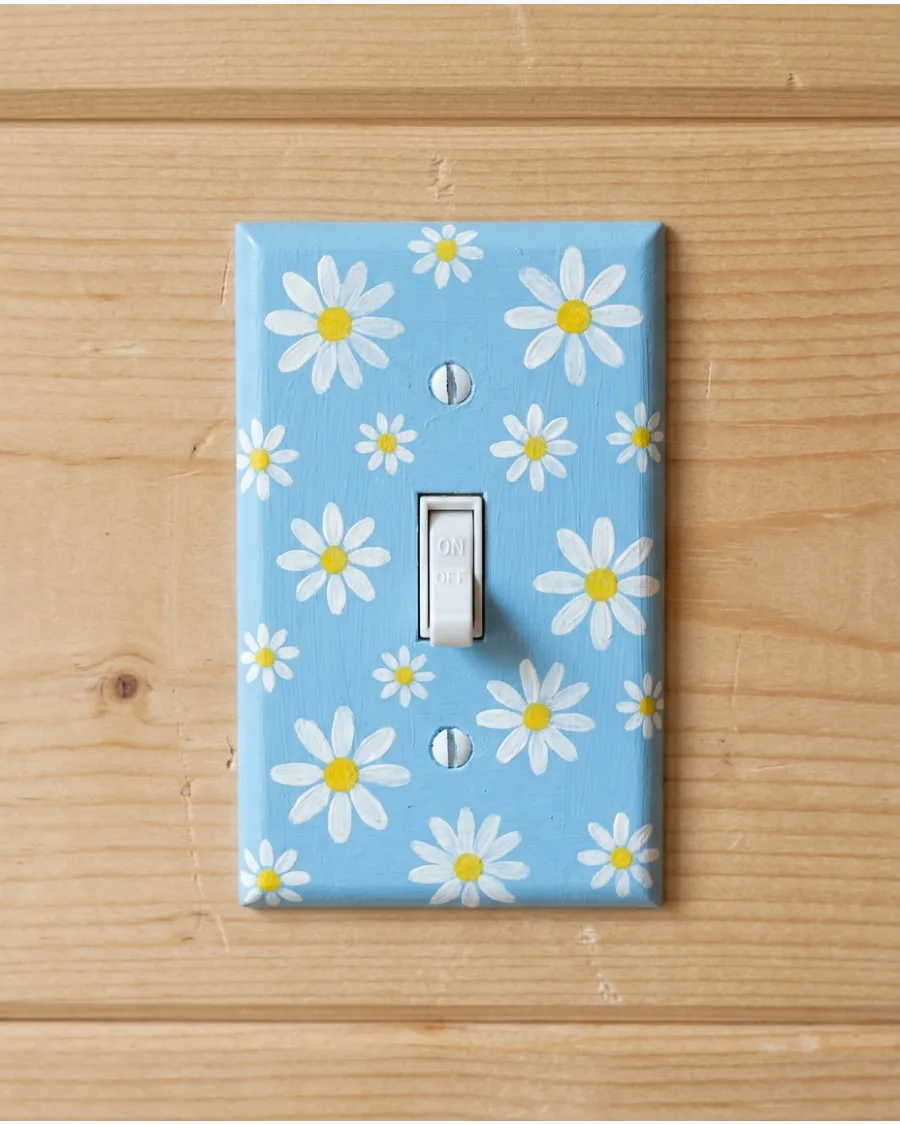
Cheerful daisies are one of the easiest patterns for beginners to master. Simply paint a yellow dot and surround it with white oval petals.
Space the daisies unevenly across the plate for a more natural, field-like appearance. This design works beautifully against soft pastel wall colors like sage or sky blue.
- Sourcing: White, yellow, and light blue acrylic paint.
- Setup: Use the back of a paintbrush to dot the yellow centers for perfectly round shapes.
- Adaptation: Use different sized daisies to create a sense of depth and variety.
Best shortcut: If you aren't confident painting, use small floral stickers and seal them with a clear topcoat.
14. Moody Botanical Cover
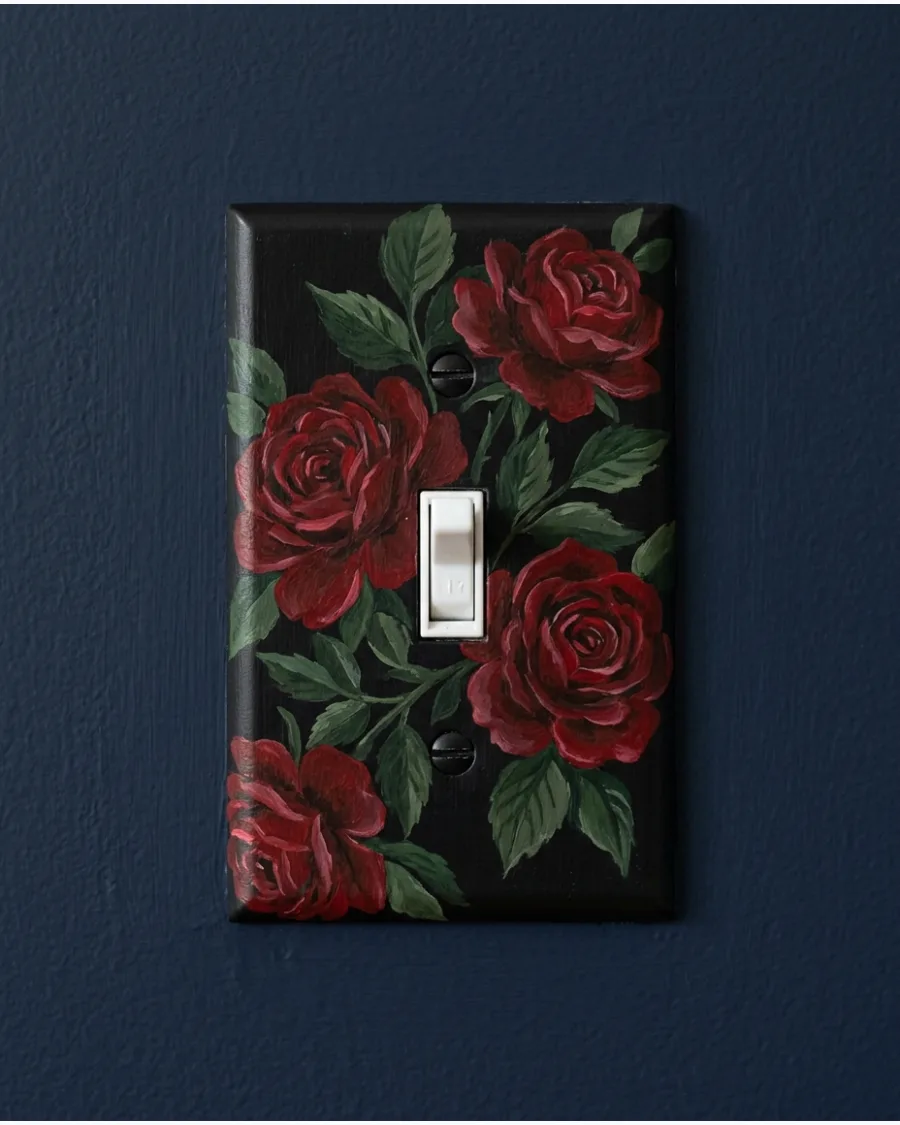
A dark base color like navy or black makes botanical paintings pop with a dramatic, vintage feel. This style fits perfectly in rooms with dark furniture or dark academia decor.
Layer deep green leaves behind brighter flowers to create a sense of lushness and depth. It turns a functional item into a sophisticated piece of art.
- Sourcing: Black, dark green, and deep red acrylic paints.
- Setup: Paint the base black first and let it dry for several hours before adding the flowers.
- Adaptation: Use gold metallic paint for the leaf veins to add a bit of shimmer.
Quick win: Use a matte finish for the base and a satin finish for the flowers to make the design stand out.
15. Trailing Vine Switch Cover
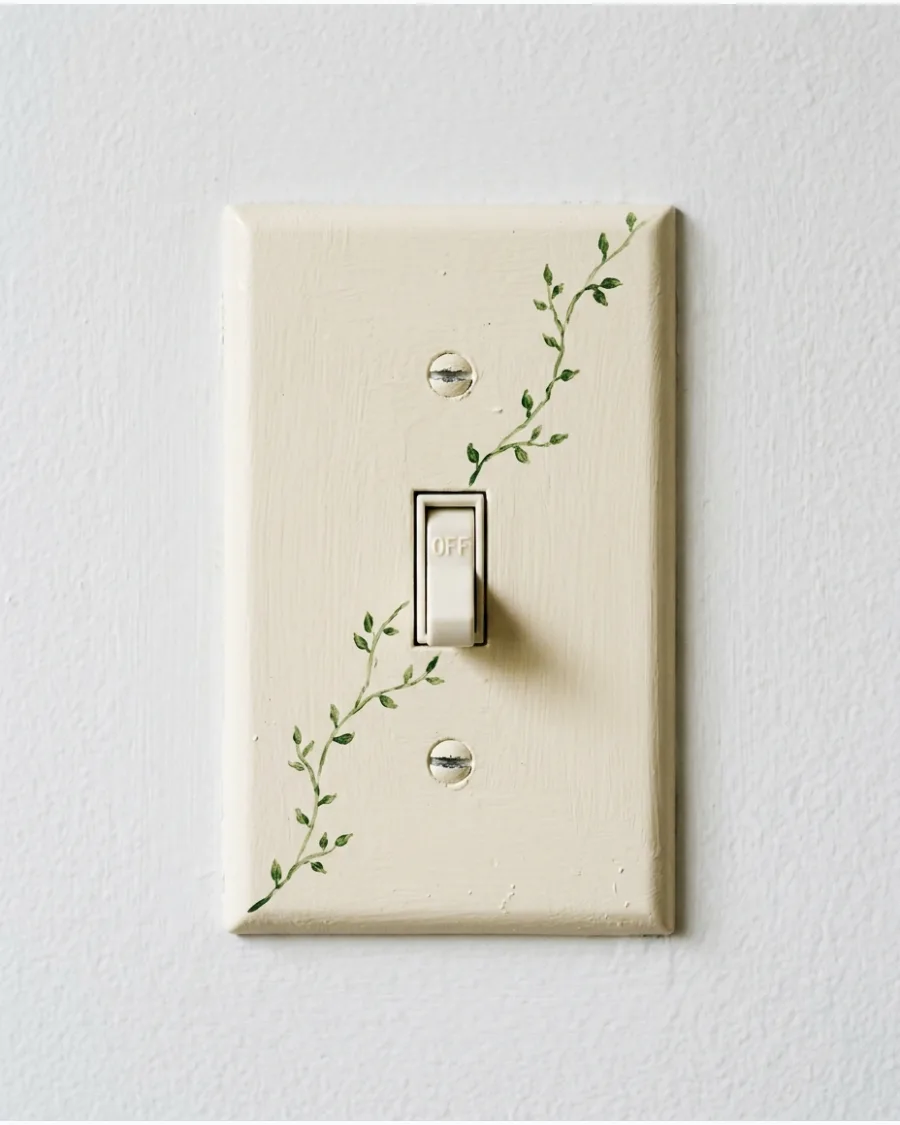
A delicate trailing vine adds movement and elegance without covering the entire plate. Paint the vine so it appears to grow from the bottom corner and wrap around the switch.
Add tiny green leaves of varying sizes to make the vine look realistic and light. This subtle design is ideal for those who want a custom touch that isn't too busy.
- Sourcing: Green acrylic paint and a very fine liner brush.
- Setup: Practice your vine curves on a piece of paper before painting the actual plate.
- Adaptation: Add tiny red berries to the vine for a festive, seasonal update.
Most people skip this: Painting the vine slightly onto the screw heads helps them disappear into the design.
16. Colorful Tulip Switch Plate
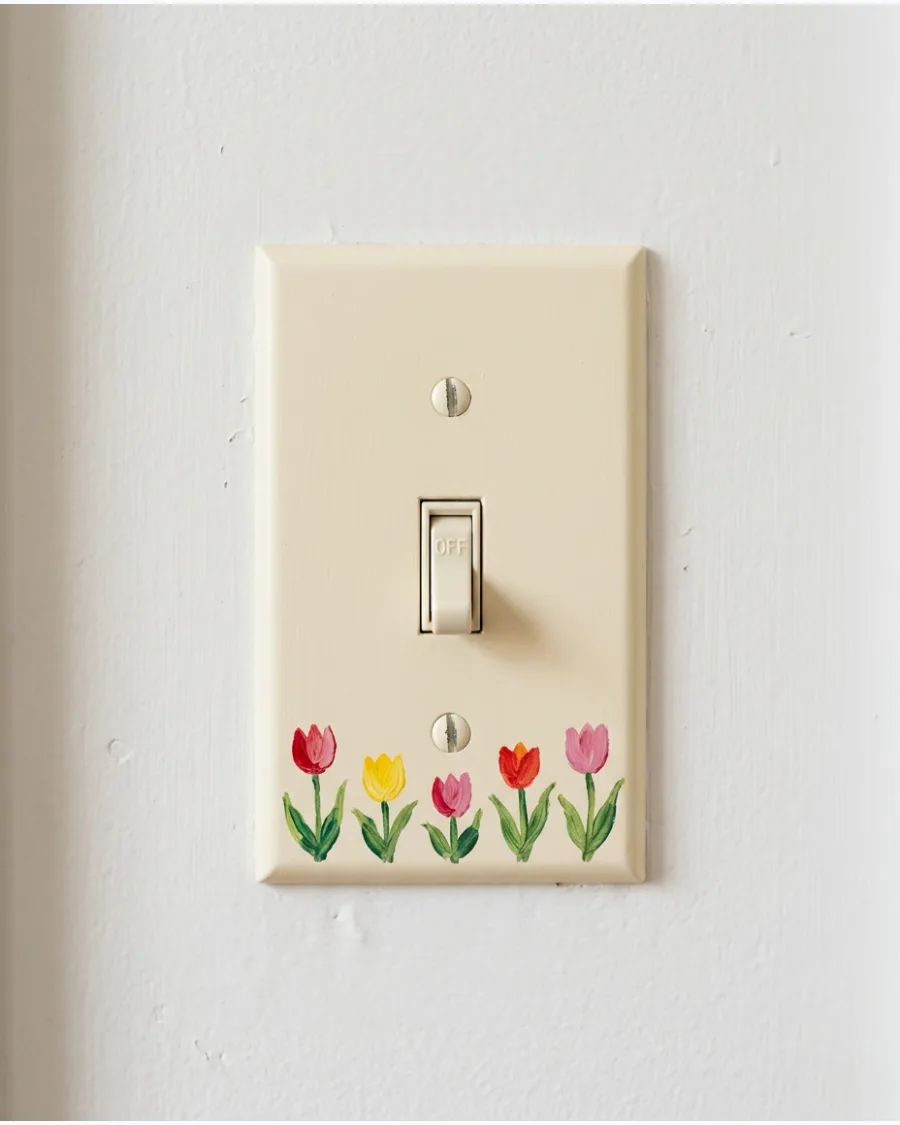
Add rows of simple red, yellow, pink, and orange tulips to a light background. This cheerful pattern brings a playful spring feeling to the room year-round.
Paint the stems first in a light green to establish the spacing before adding the colorful petals. Tulips are forgiving shapes for beginners because they only require a few teardrop strokes.
- Budget: $5 paint set
- Time: 30 minutes
- Use a fine-tip brush for the thin stems
Quick win: Use the back of a paintbrush to dot on the flower centers for perfect circles.
17. Sunflower Light Switch Cover
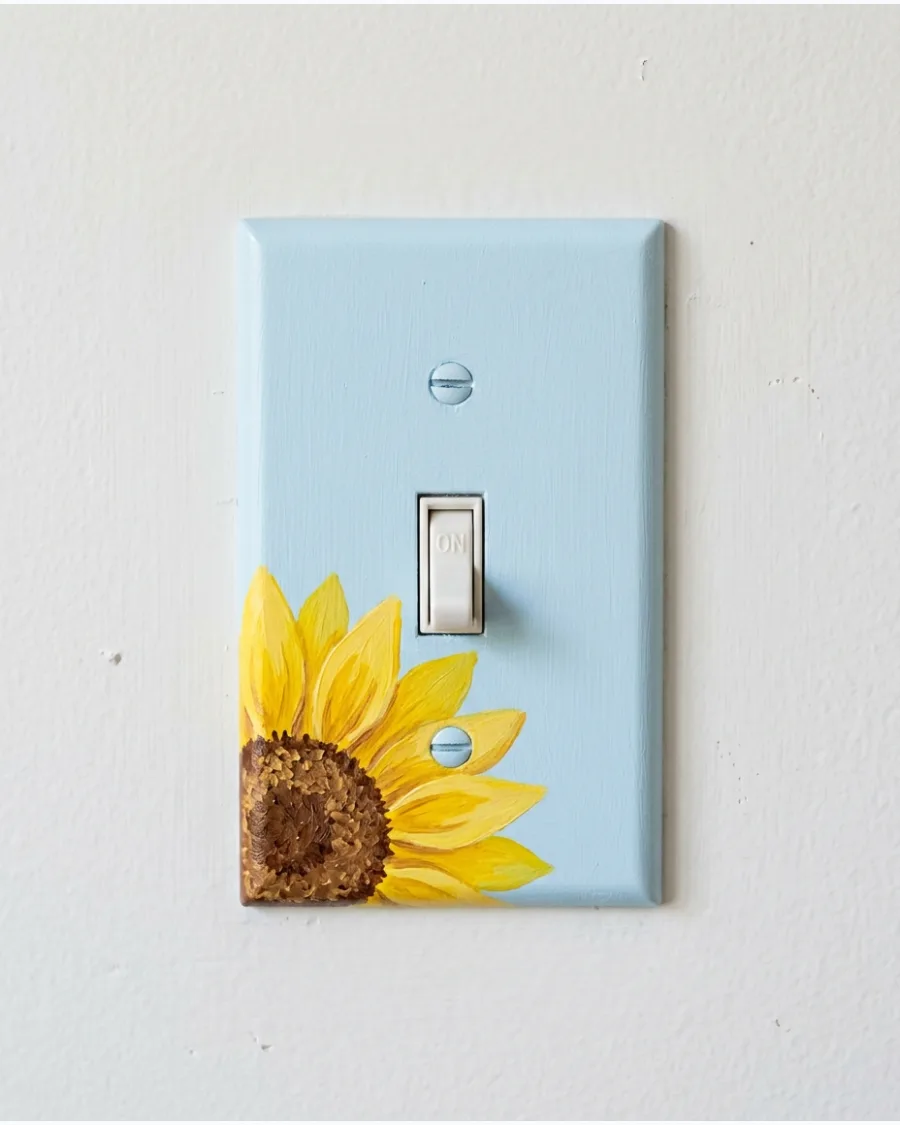
Paint one large sunflower in a corner or several miniature sunflowers around the border. A soft blue or cream background keeps the design bright and welcoming.
Layer a darker brown in the center of the flower and tap it with a dry brush to create a seed-like texture. This adds depth to the plate without needing advanced art skills.
- Budget: $10 materials
- Time: 45 minutes
- Use acrylic paint for vibrant yellow hues
Most people skip this: Sand the plastic plate lightly before painting so the acrylic grips the surface better.
18. Lavender Sprig Switch Plate
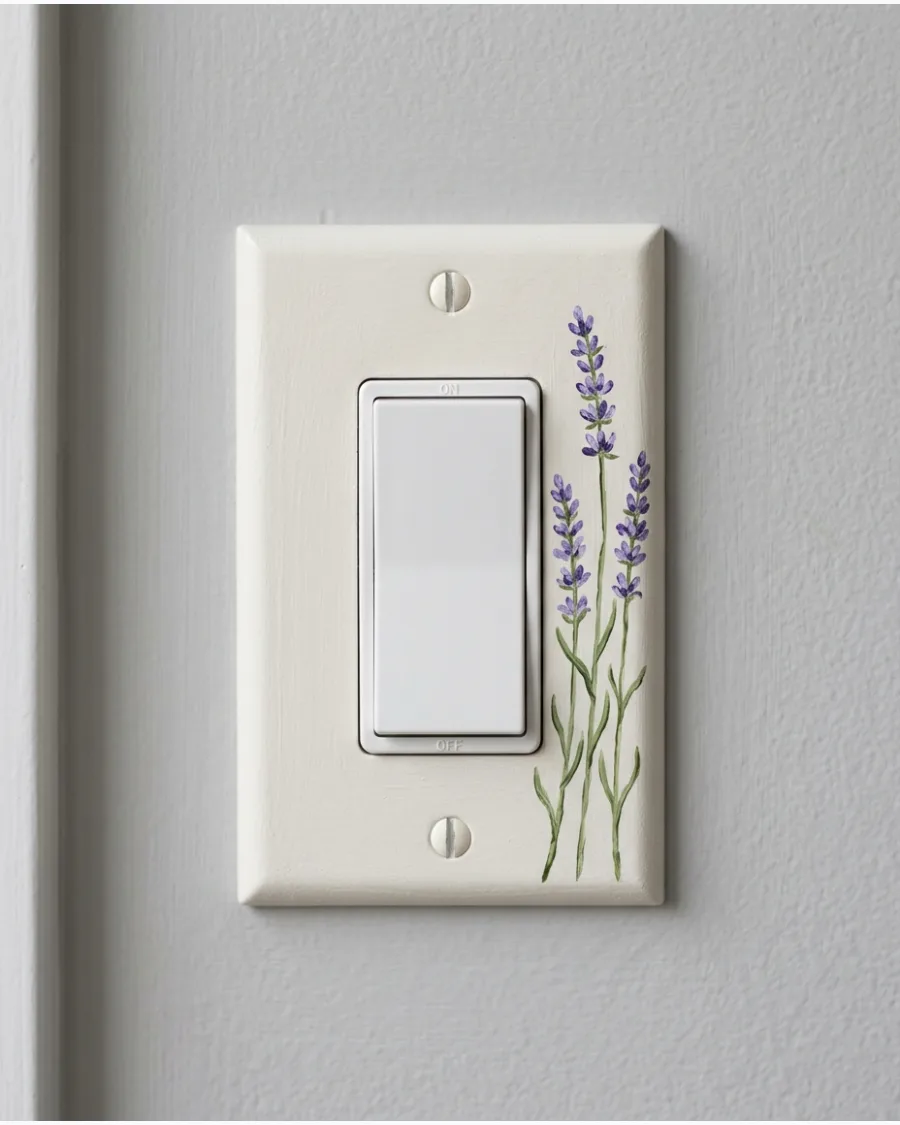
Decorate a warm white plate with thin green stems and purple lavender buds. The understated design works especially well in bedrooms and bathrooms.
Apply the purple buds using small, staggered dots to mimic the look of real lavender stalks. This minimalist approach feels sophisticated and doesn't overwhelm a small space.
- Budget: Under $5
- Time: 20 minutes
- Works best on smooth plastic or metal plates
Best shortcut: Use a toothpick to place the tiny purple dots if your smallest brush is too thick.
19. Monstera Leaf Cover
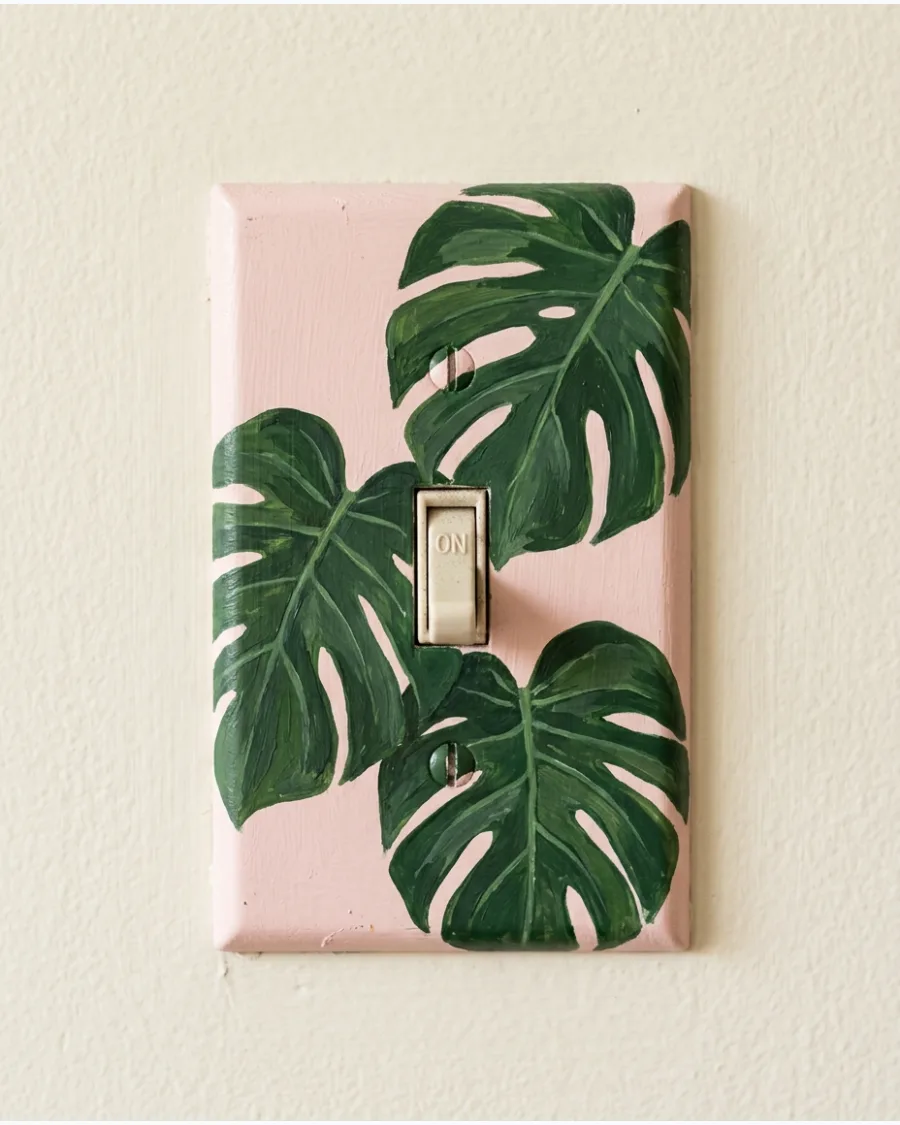
Paint overlapping monstera leaves in several green shades. Use a cream or pale-pink base to create a fresh tropical look without making it too bold.
Outline the leaf cutouts with a darker green to make the iconic shapes pop against the background. Mixing different shades of green keeps the pattern from looking flat or cartoonish.
- Budget: $8 paint and plates
- Time: 1 hour
- Use a matte sealer to protect the green pigment
Quick win: Paint the screw heads the same green as the leaves to make them disappear into the design.
20. Folk-Art Floral Switch Plate
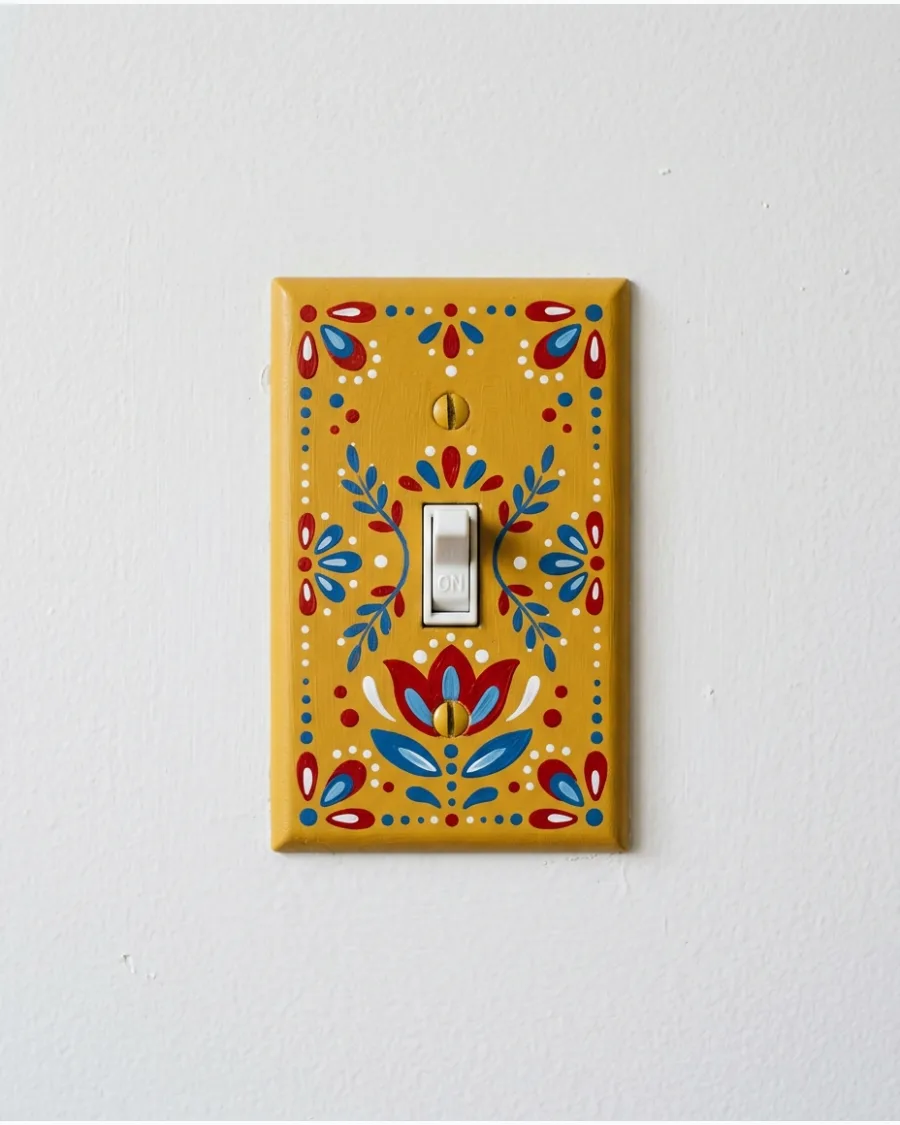
Combine symmetrical flowers, leaves, dots, and curved stems in a colorful folk-art pattern. Red, blue, mustard, green, and cream make the design feel warm and handcrafted.
Keep the design balanced by painting the same shapes on the top and bottom of the plate. This style is perfect for adding a cozy, traditional touch to a kitchen or entryway.
- Budget: $12 for multi-color set
- Time: 1.5 hours
- Sketch the pattern with a pencil first
Most people skip this: Seal the finished plate with a spray varnish to prevent the paint from chipping during daily use.
Cottagecore and Woodland Designs
21. Mushroom Forest Switch Cover
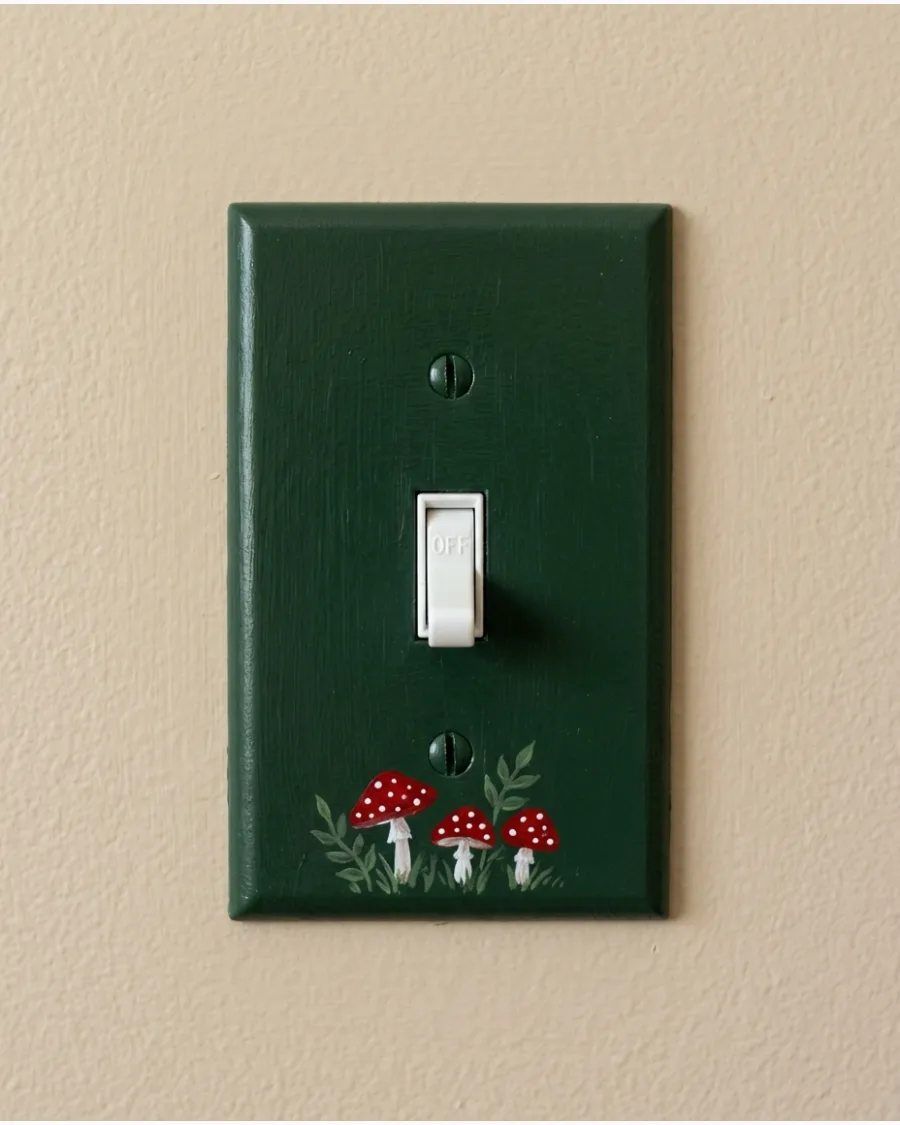
Paint red, brown, and cream mushrooms surrounded by tiny leaves and stars. A dark green base can give the design a cozy woodland atmosphere.
Use a bright white paint for the mushroom spots to make them stand out against the darker background colors. This design adds a whimsical, storybook feel to a child's room or a reading nook.
- Budget: $10 materials
- Time: 45 minutes
- Best for a bedroom or hallway
Best shortcut: Use the flat end of a pencil eraser to stamp the larger mushroom caps.
22. Miniature Cottage Scene
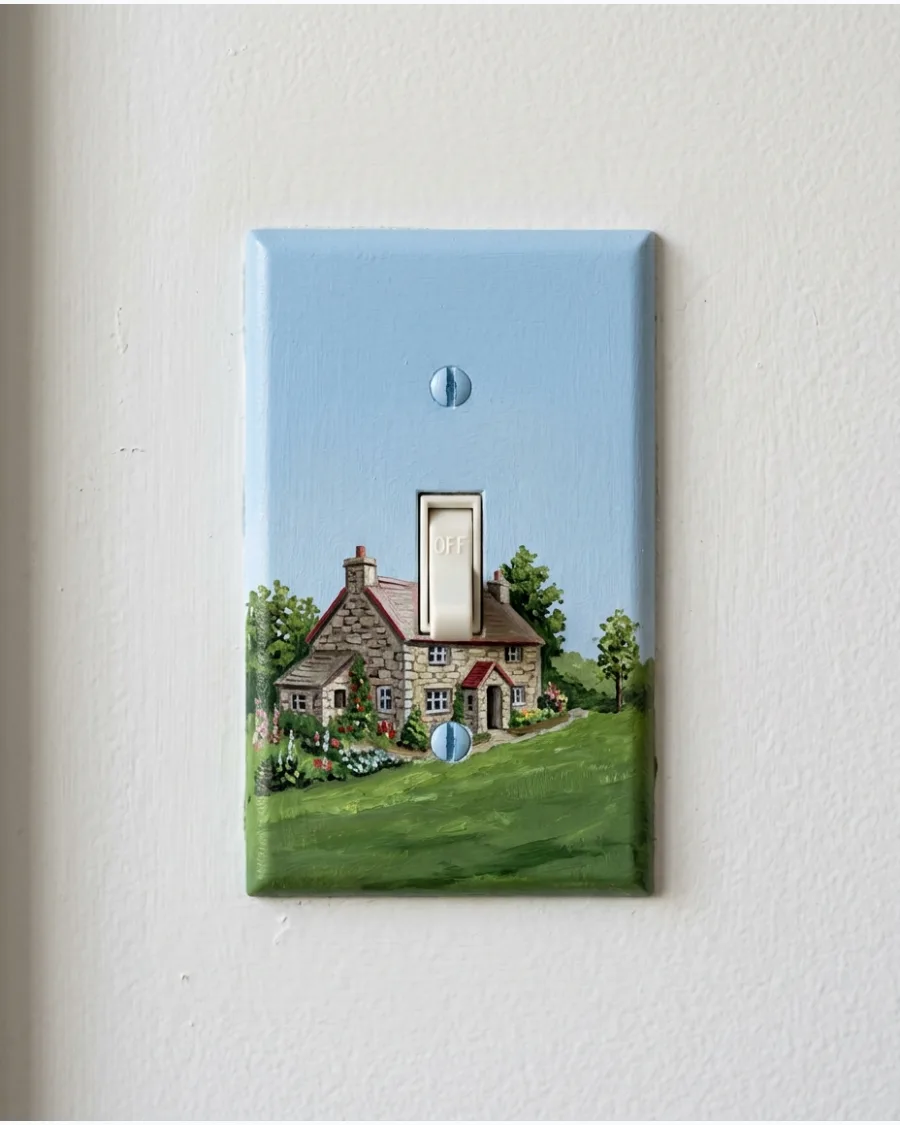
Turn the bottom of the switch plate into a tiny countryside scene with a cottage, grass, flowers, and a winding path. Keep the upper background pale blue to represent the sky.
Blend the blue sky into a lighter shade near the horizon line to give the tiny scene more depth. Small details like a chimney or a fence add a lot of character to this miniature mural.
- Budget: $15 for detailed paint
- Time: 2 hours
- Use a magnifying glass for tiny details
Quick win: Paint the toggle switch the same pale blue as the sky to help it blend in.
23. Fern and Firefly Cover
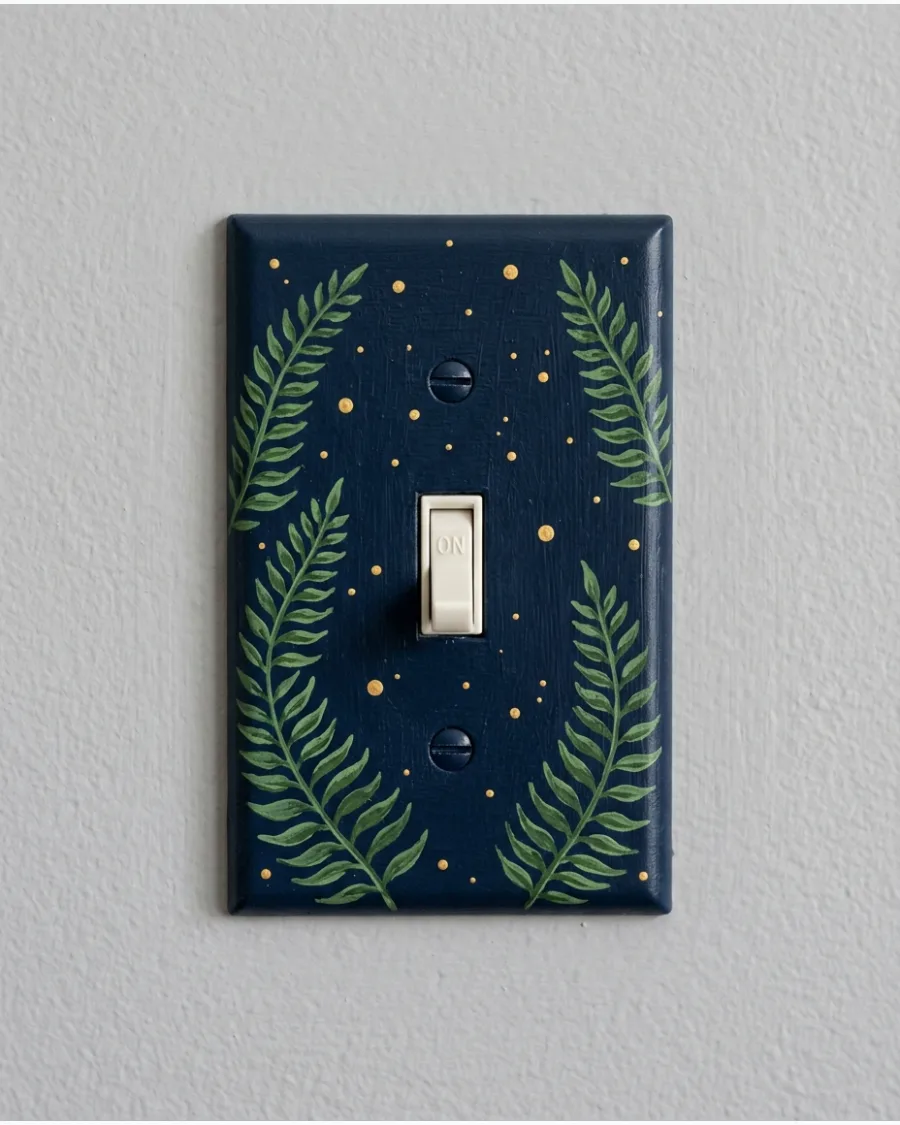
Paint delicate green ferns around the edges and add small golden dots as glowing fireflies. A dark navy or forest-green background makes the lights stand out.
Dab a tiny bit of white in the center of each gold dot to create a realistic glowing effect. This moody, magical design is perfect for a bedroom where you want a calm vibe.
- Budget: $10 materials
- Time: 1 hour
- Use metallic gold paint for the fireflies
Most people skip this: Paint the edges of the plate navy blue as well so no white plastic shows from the side.
24. Strawberry Vine Switch Plate
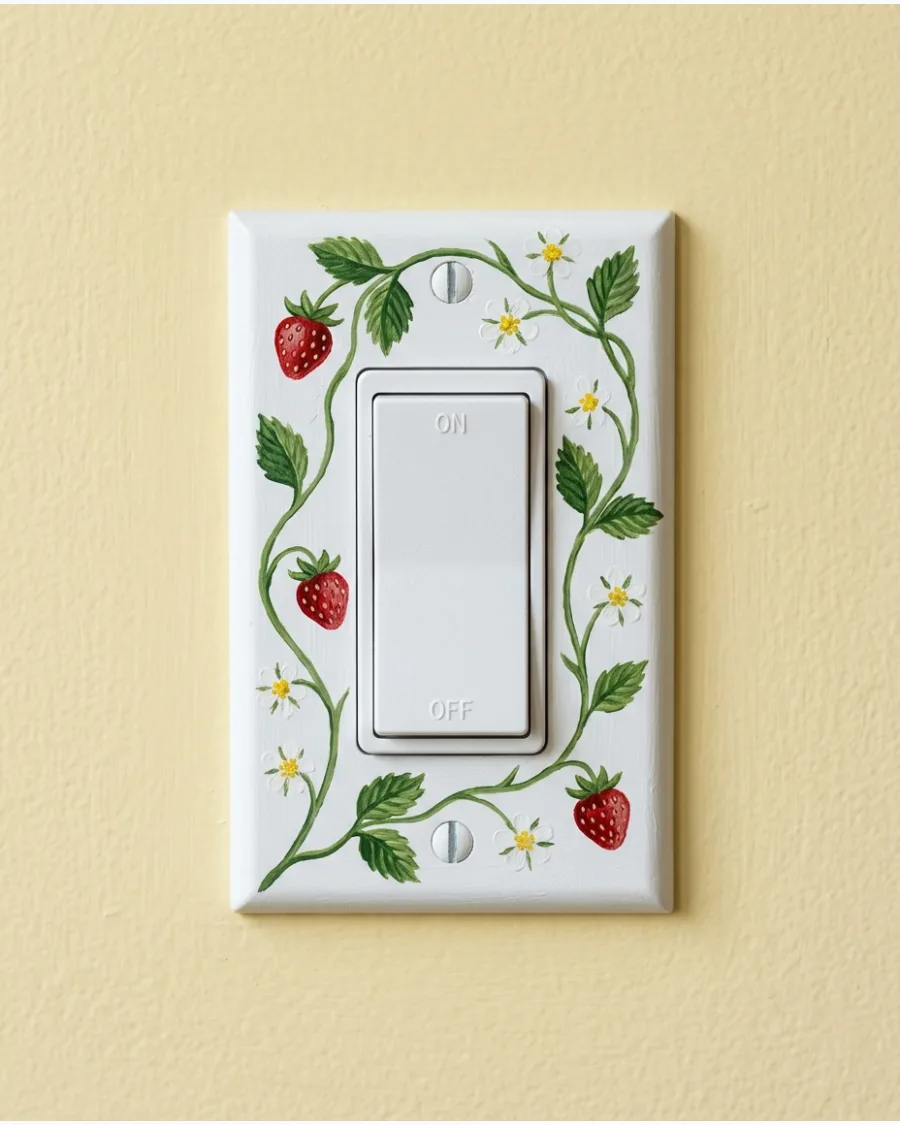
Decorate the cover with small strawberries, green leaves, and white blossoms. This sweet pattern suits cottage kitchens, nurseries, and colorful bedrooms.
Paint the red berries in a teardrop shape and add tiny yellow dots for seeds once the red is dry. The combination of red, green, and white creates a classic, cheerful look.
- Budget: $7 materials
- Time: 45 minutes
- Great for a vintage kitchen aesthetic
Best shortcut: A yellow gel pen is easier than a brush for adding tiny strawberry seeds.
25. Woodland Animal Cover
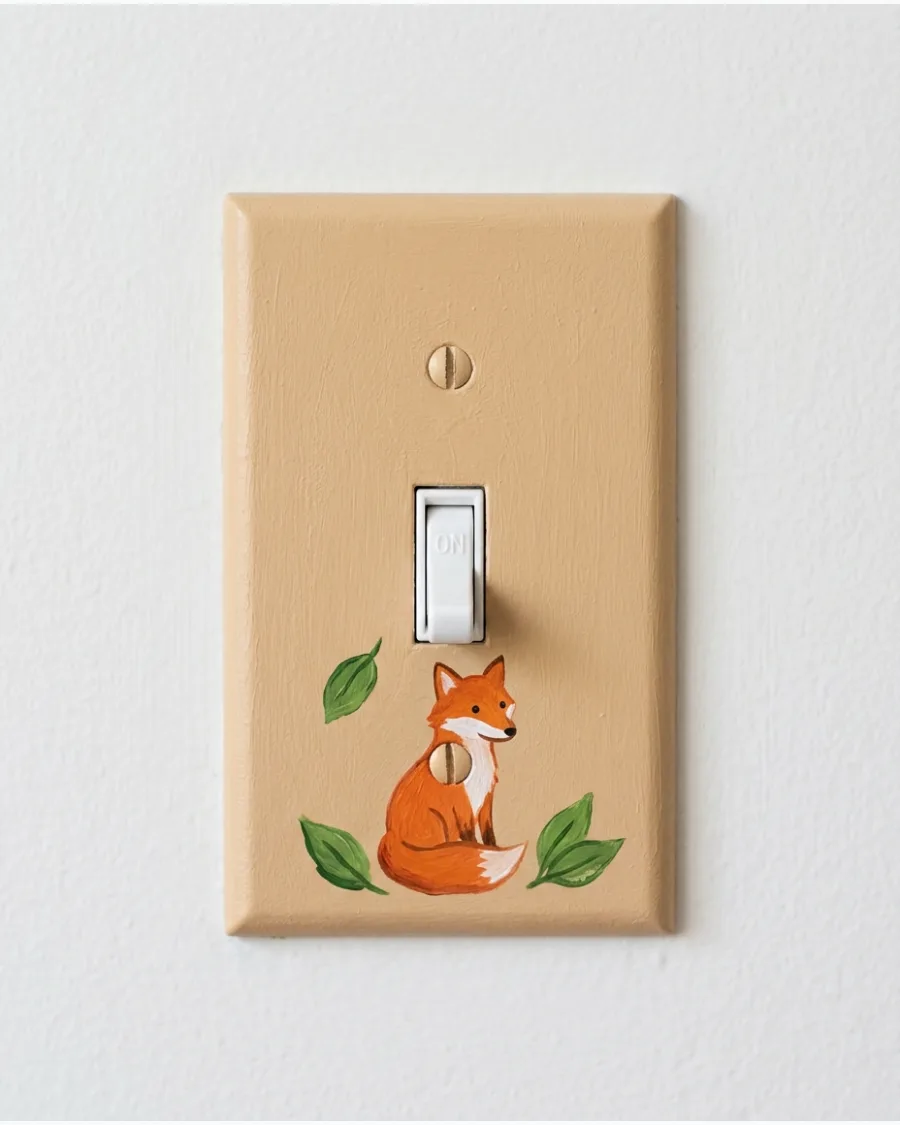
Paint a small fox, rabbit, hedgehog, or deer near the bottom of the switch plate. Add leaves and mushrooms to complete the woodland theme.
Position the animal so it looks like it is sitting on the bottom edge of the plate for a grounded look. This adds a touch of nature and personality to a nursery or mudroom.
- Budget: $10 materials
- Time: 1 hour
- Use a fine liner for the animal's facial features
Quick win: Use a matte finish spray so the animal looks more like an illustration and less like plastic.
26. Bee and Wildflower Plate
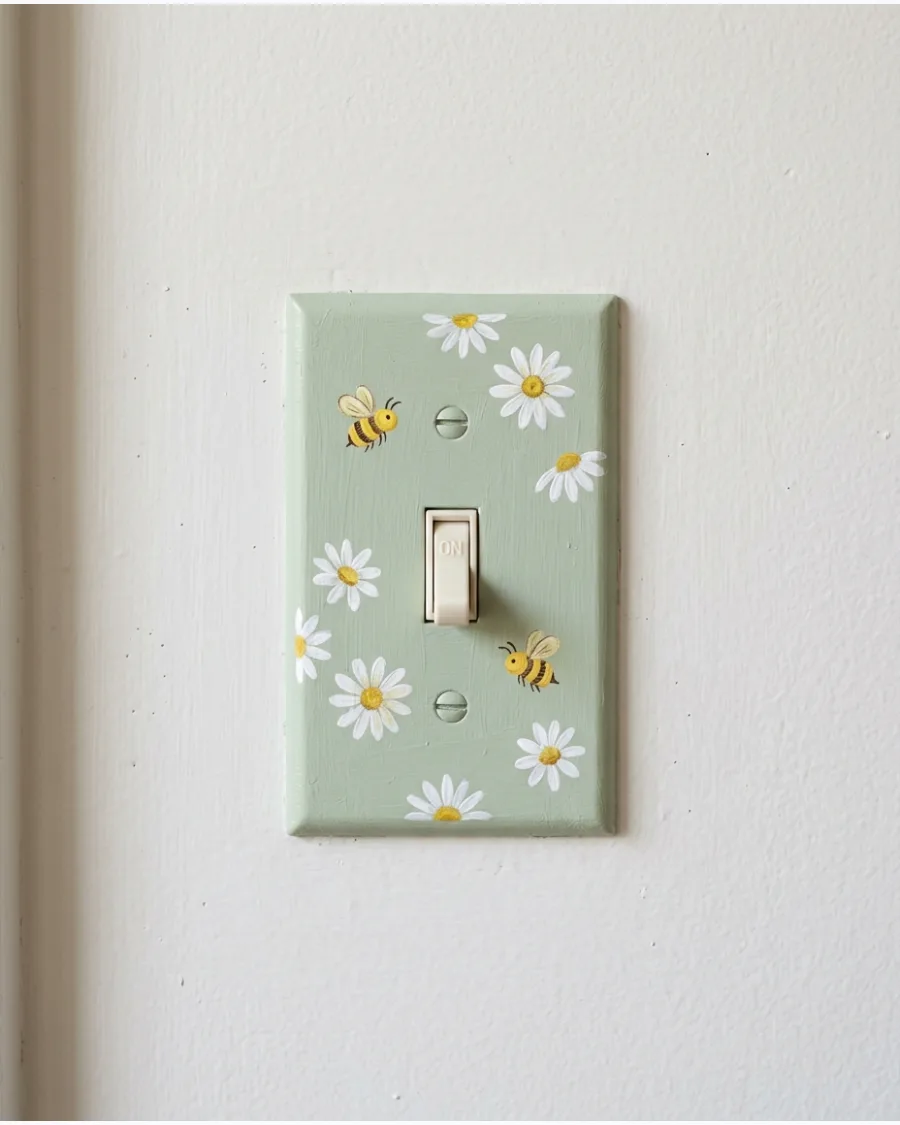
Combine tiny bees with yellow, blue, and white flowers. A pale sage or cream background gives the design a soft garden-inspired appearance.
Paint the bee wings with a very thin, watered-down white to make them look translucent. This design is bright and airy, making it a great fit for a sunroom or laundry room.
- Budget: $8 materials
- Time: 45 minutes
- Use a permanent marker for the bee's black stripes
Most people skip this: Let the background paint dry for 24 hours before adding the detailed bees to prevent smudging.
27. Vintage Rose Switch Cover
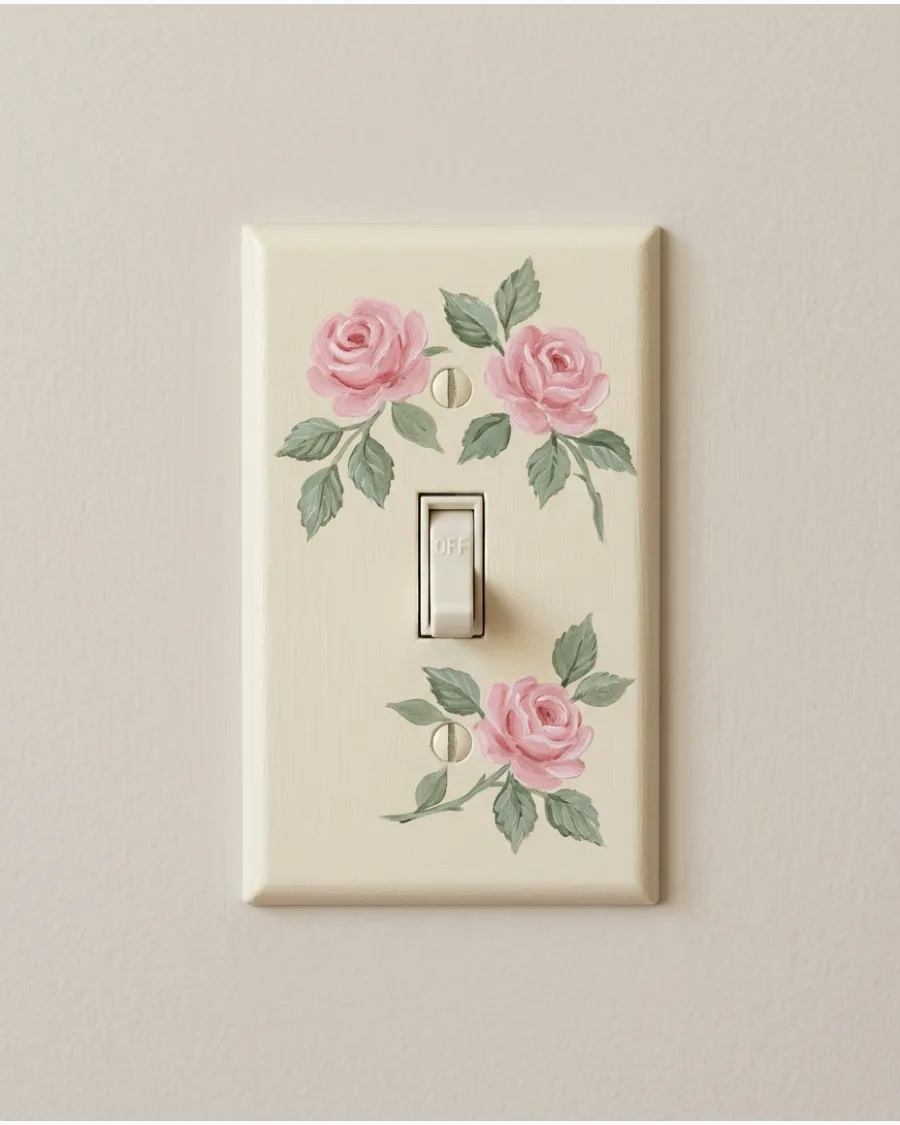
Paint faded pink roses and muted green leaves over an antique cream base. Lightly distress the edges with brown paint for a timeworn effect.
Use a dry brush with a tiny amount of dark pink to swirl the rose petals and create a sense of movement. This style perfectly complements shabby-chic or traditional home decor.
- Budget: $12 materials
- Time: 1 hour
- Sand the edges for a distressed vintage look
Best shortcut: Use a damp sponge to lightly blur the edges of the leaves for a softer, aged appearance.
28. Acorn and Oak Leaf Design
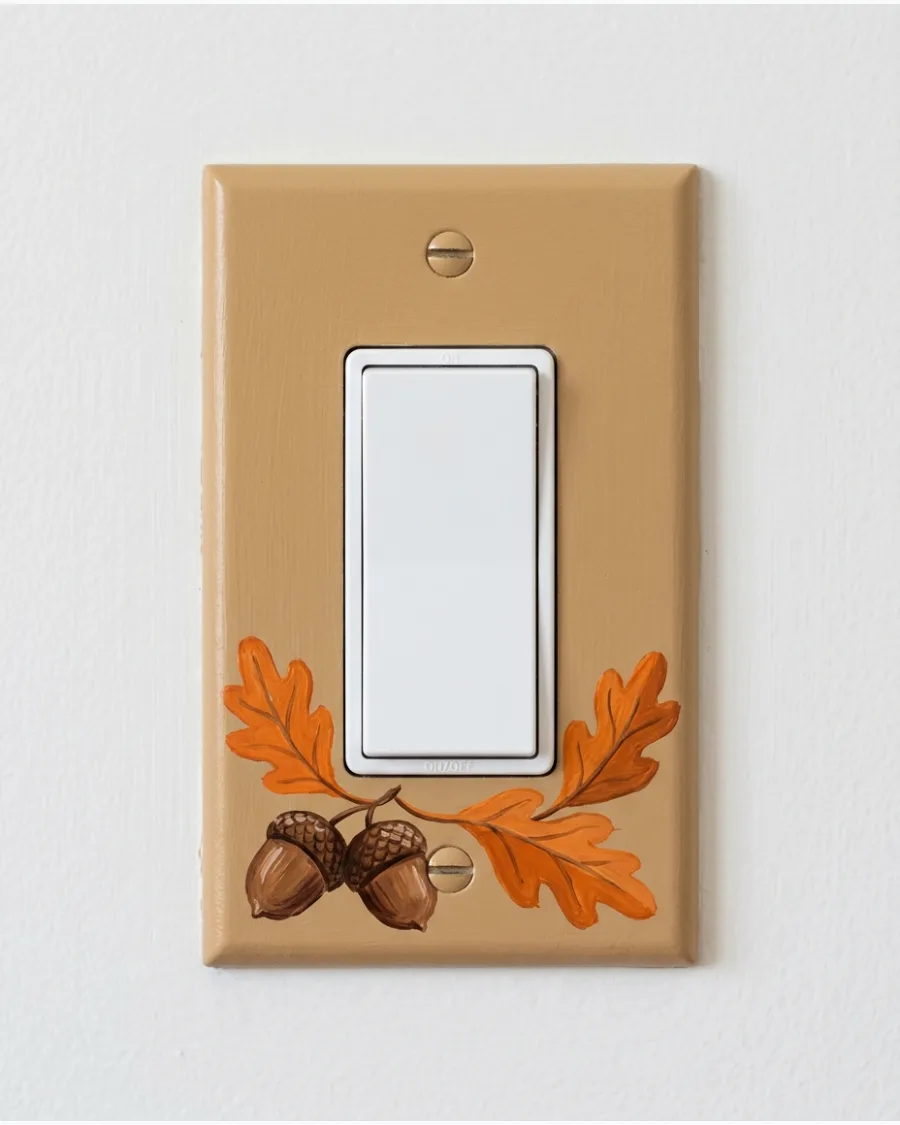
Decorate the cover with miniature acorns and warm-toned oak leaves. This nature-inspired design looks beautiful in a cozy fall bedroom or rustic entryway.
Mix shades of orange, gold, and brown on the leaves to mimic the changing colors of autumn. It is a simple way to bring the outdoors inside without using bright, neon colors.
- Budget: $8 materials
- Time: 40 minutes
- Use a copper metallic paint for an extra glow
Quick win: Use a cross-hatch pattern on the acorn caps to give them a realistic, textured look.
29. Blueberry Branch Switch Plate
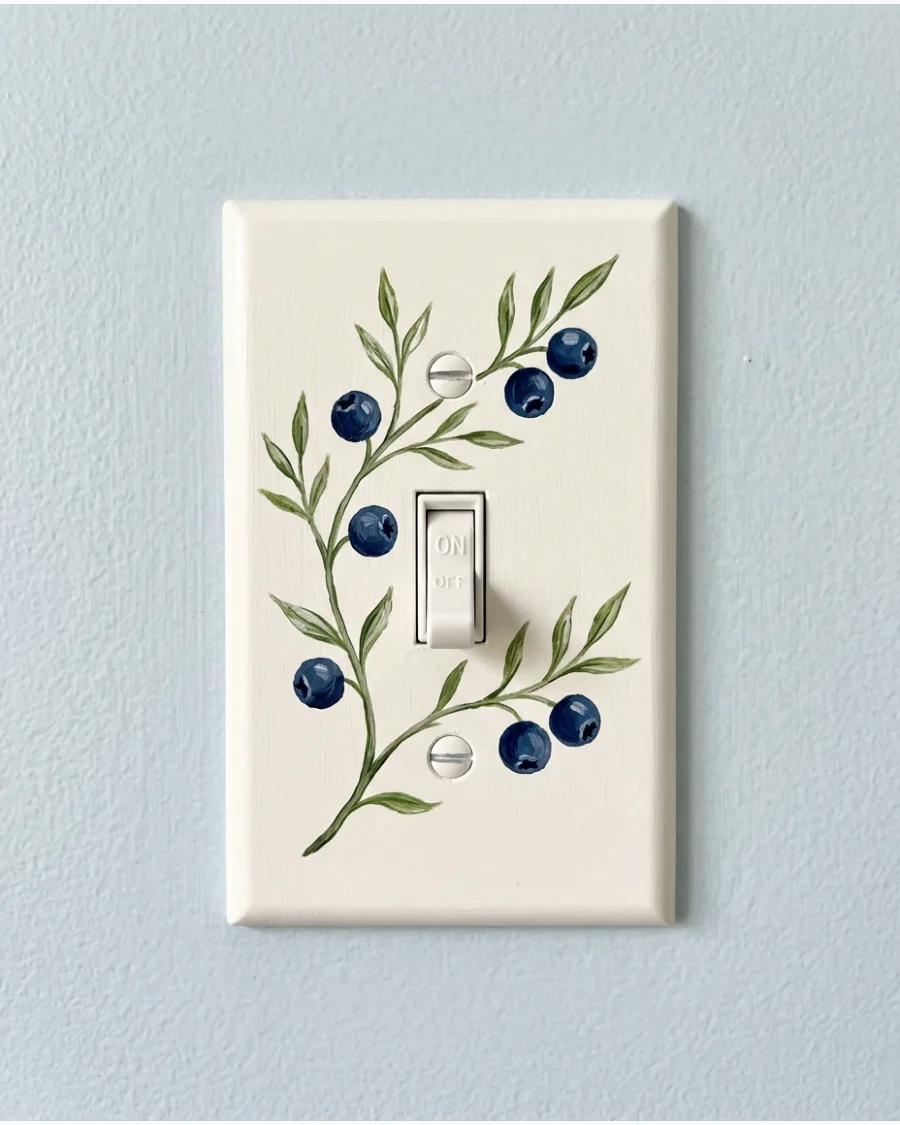
Paint small navy-blue berries along thin branches with green leaves. Use a warm white base for a clean design inspired by vintage botanical illustrations.
Add a tiny white 'bloom' or dot on the end of each berry to give them a realistic, 3D appearance. The deep blue against a white background creates a crisp, classic look that fits any room.
- Budget: $10 materials
- Time: 45 minutes
- Use a very thin brush for the branches
Most people skip this: Use a satin sealer instead of matte to give the blueberries a slight, natural-looking sheen.
30. Enchanted Garden Cover
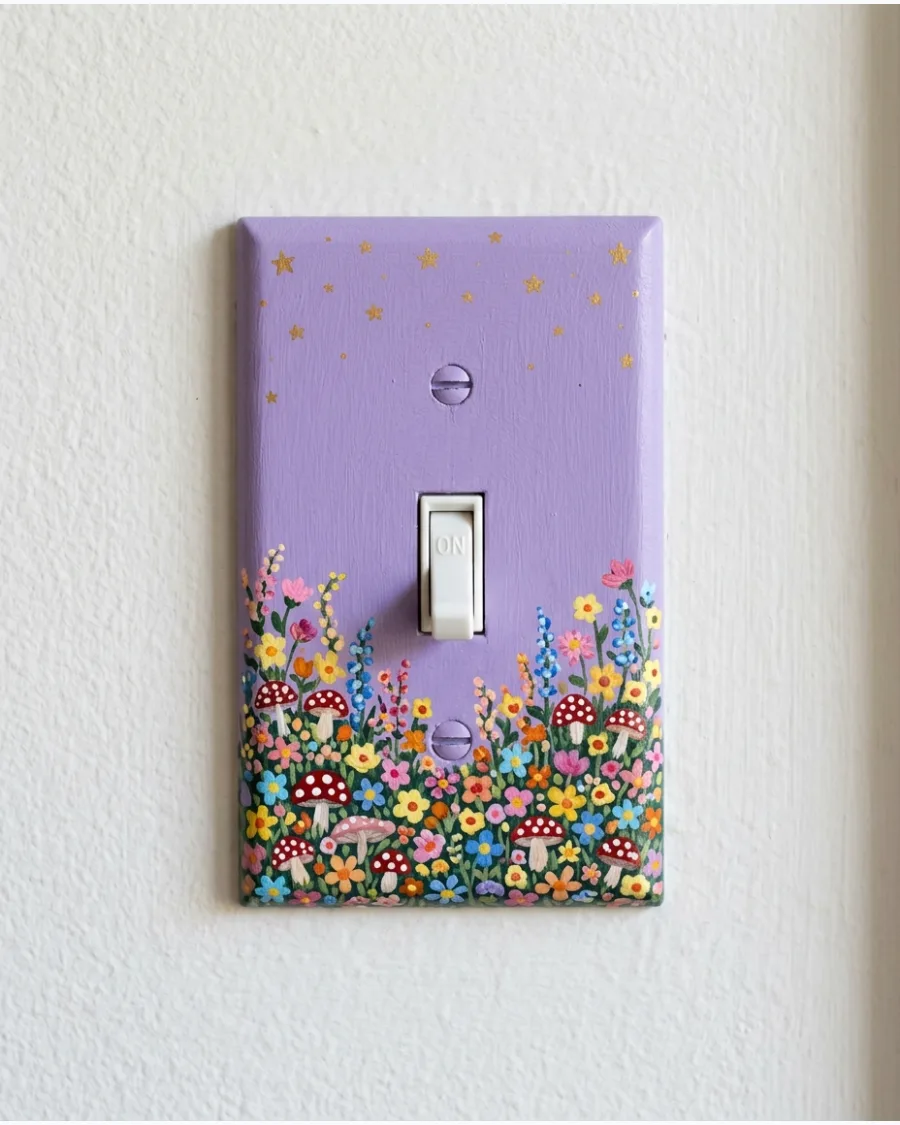
Create a whimsical garden filled with flowers, mushrooms, butterflies, and tiny stars. Limit the palette to four or five colors to prevent the design from looking overcrowded.
Cluster the larger elements like flowers and mushrooms at the bottom and let the smaller stars drift toward the top. This layout creates a sense of growth and movement across the plate.
- Budget: $15 for varied colors
- Time: 1.5 hours
- Sketch the layout with a pencil before painting
Best shortcut: Use a gold paint pen for the stars to keep the lines sharp and consistent.
Celestial and Whimsical Painted Covers
31. Moon-and-Stars Switch Plate
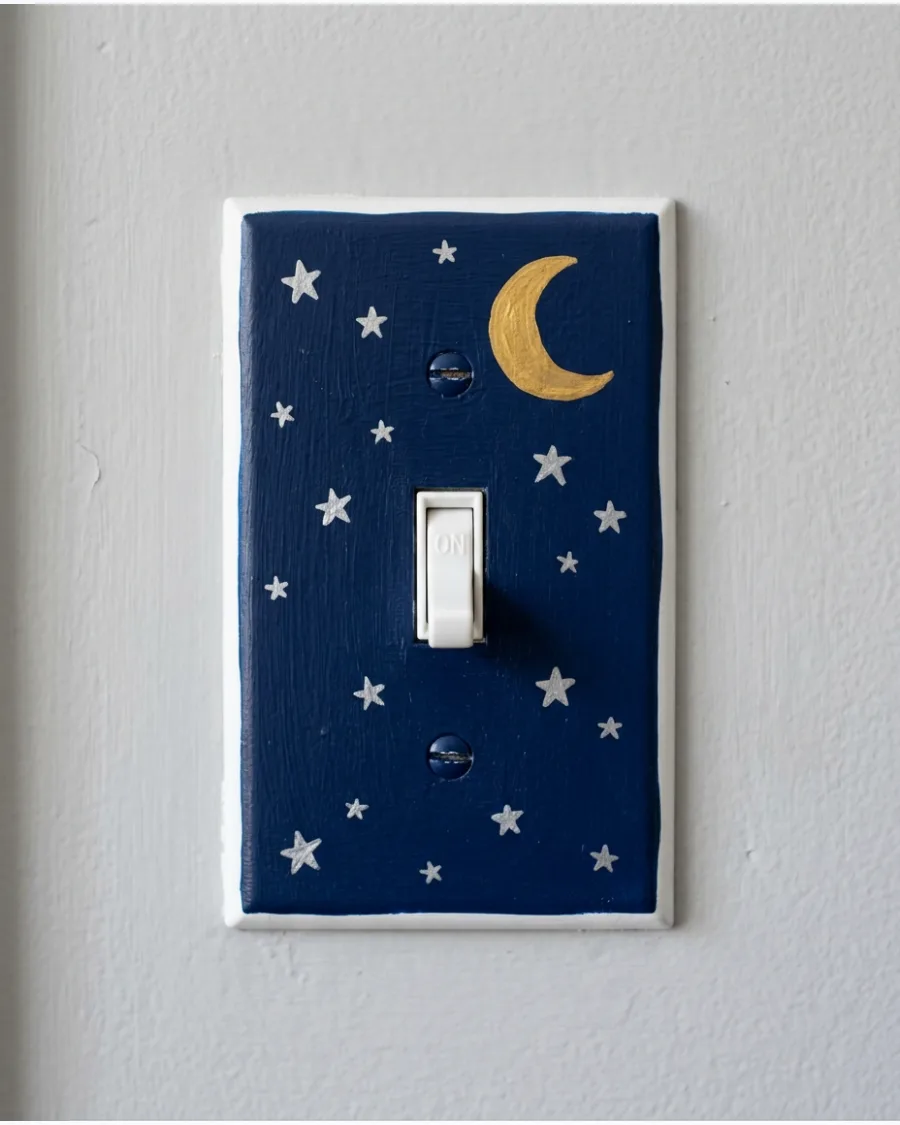
A deep navy or purple base creates the perfect backdrop for a glowing night sky design. Use a fine-tip brush to add a crescent moon and tiny scattered stars in metallic gold.
Lightly sand the plastic surface before painting to ensure the acrylic layers bond without peeling. This look works best in bedrooms or nurseries where a touch of magic feels appropriate.
- Sourcing: Use leftover navy wall paint or small acrylic craft paint tubes.
- Setup: Remove the plate from the wall and place it on a flat, protected surface for painting.
- Adaptation: Swap the navy for black and use silver paint for a more modern, high-contrast look.
Quick win: Use the tip of a toothpick to create perfectly round, tiny stars without the mess of a brush.
32. Sunburst Light Switch Cover
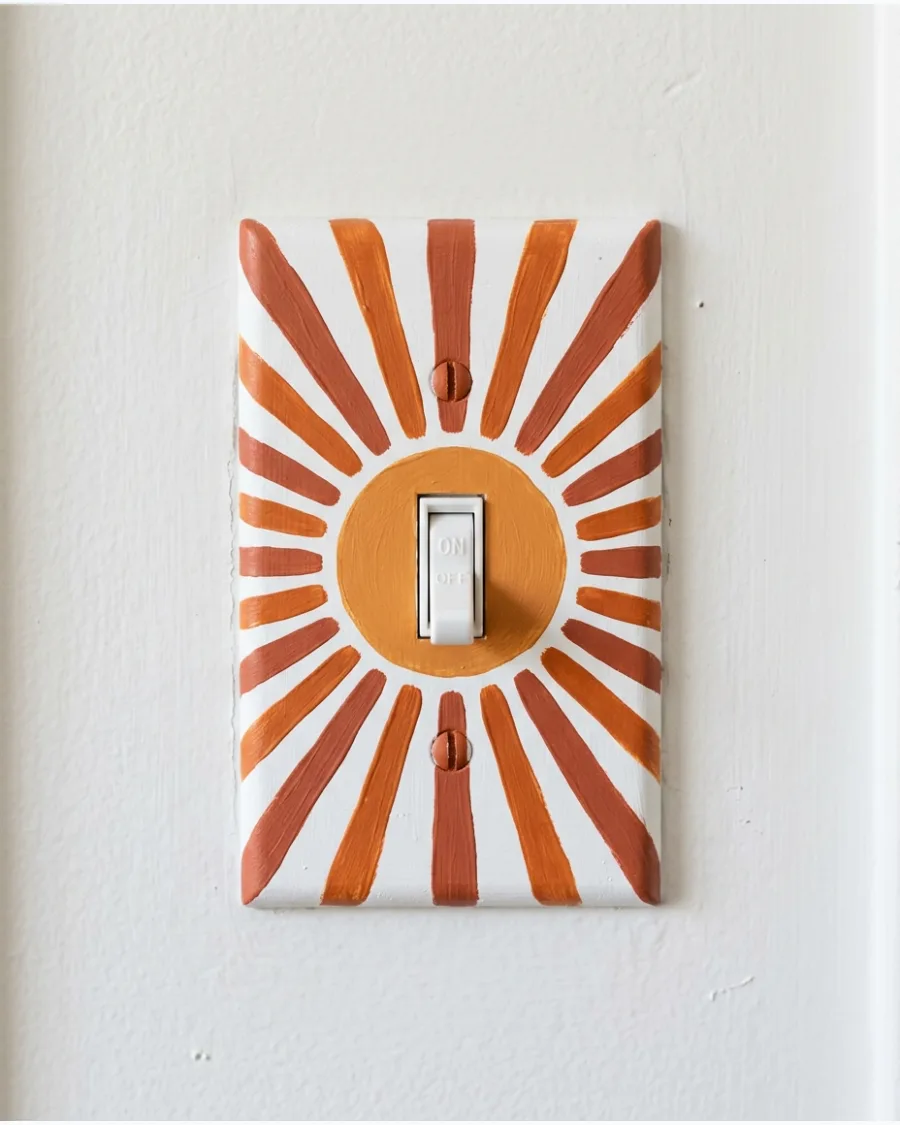
Center the design around the toggle switch to make the hardware part of the art. Use warm tones like ocher and terracotta to paint rays extending outward toward the edges of the plate.
Apply a clear matte sealant over the finished rays to prevent the paint from wearing down due to daily use. The retro vibe of this pattern adds instant energy to a kitchen or home office.
- Sourcing: Gather three shades of warm-toned acrylic paint for a layered sunburst effect.
- Setup: Use a ruler and a pencil to lightly mark the ray lines before starting with paint.
- Adaptation: Use neon colors for a 1980s pop-art style or muted pastels for a softer look.
Most people skip this: Paint the screw heads to match the rays so they disappear into the design.
33. Cloudy-Sky Switch Plate
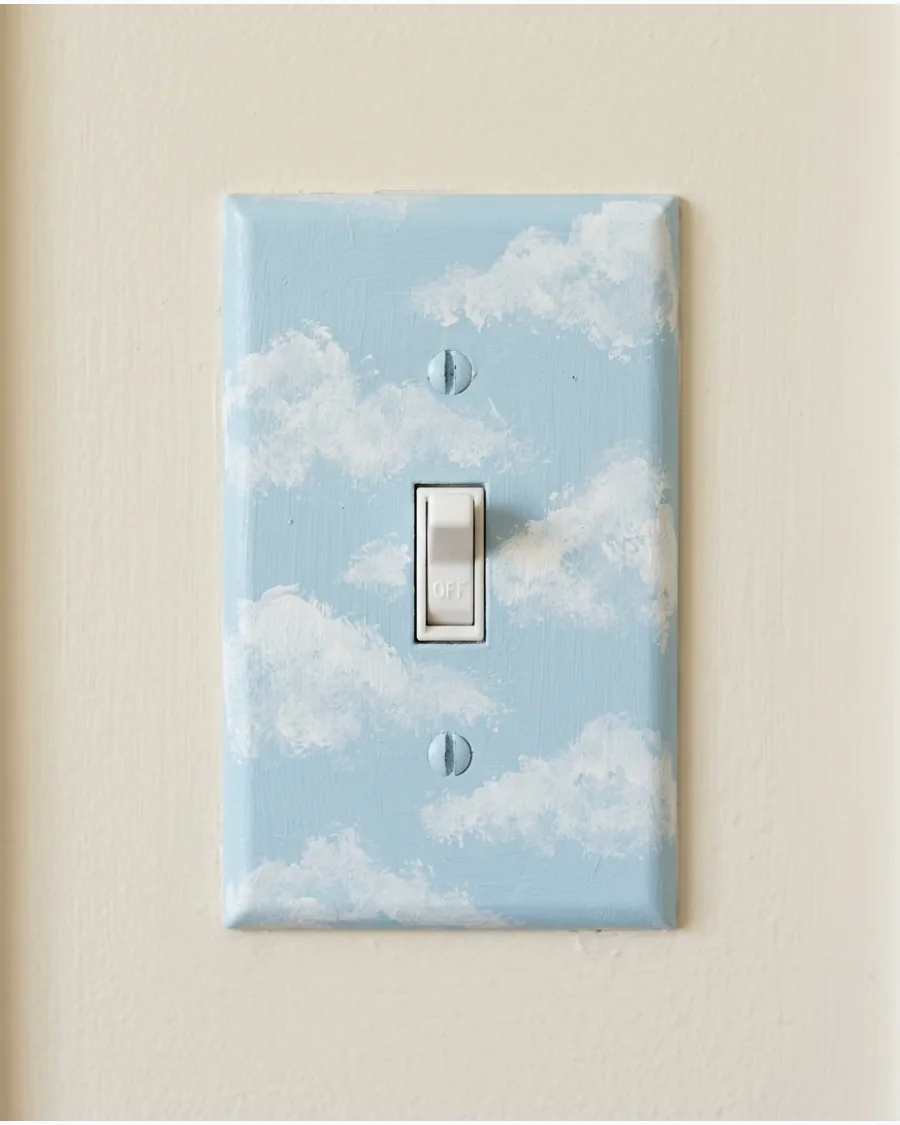
Capture a soft, airy feeling by sponging white paint onto a pale-blue background. The uneven texture of a sea sponge creates realistic, fluffy cloud edges that look better than flat brushstrokes.
Dab the sponge on a paper towel first to remove excess paint before touching the switch plate. This design helps the hardware blend into rooms with light-colored walls.
- Sourcing: A small natural sea sponge provides the most realistic cloud texture.
- Setup: Paint the entire plate solid blue and let it dry completely before adding clouds.
- Adaptation: Add tiny gold raindrops for a whimsical touch in a laundry room or bathroom.
Best shortcut: Use a makeup sponge if you don't have a sea sponge to get similar soft edges.
34. Celestial Zodiac Cover
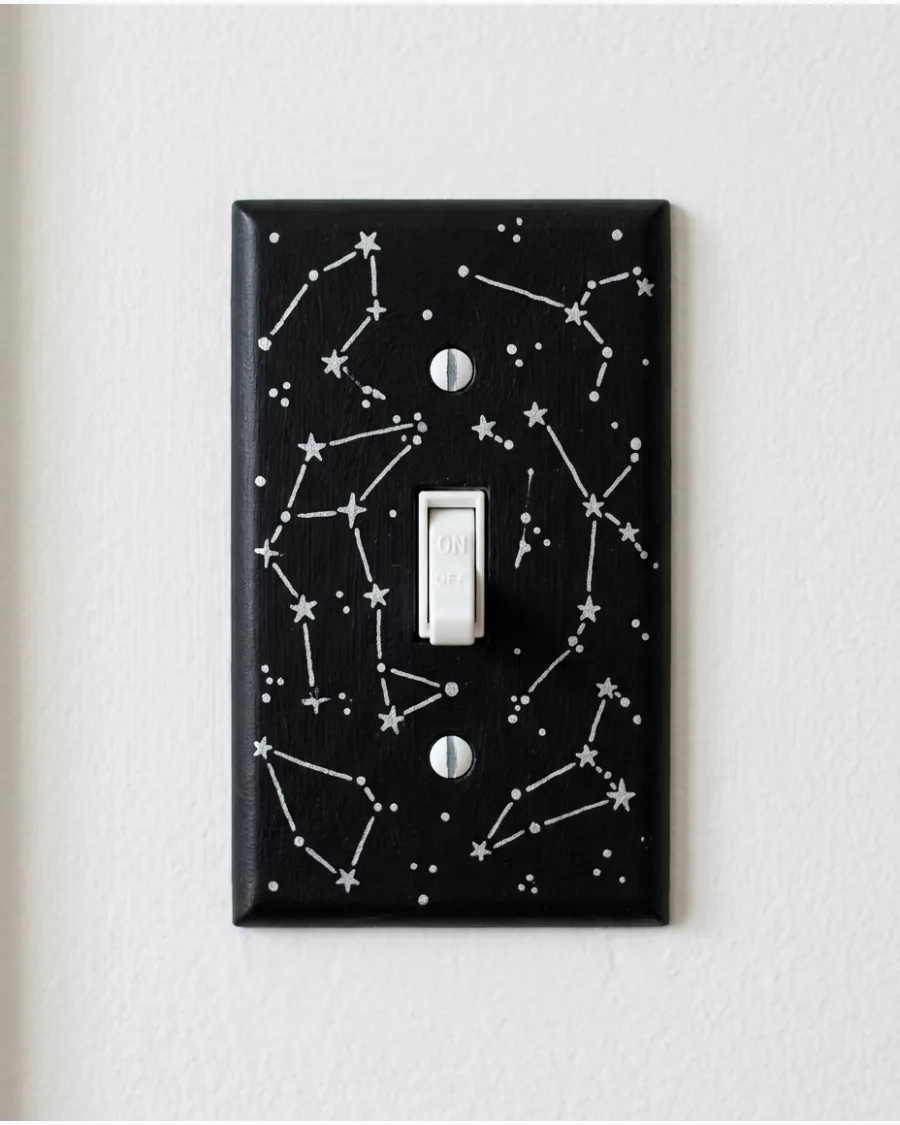
Personalize a room by painting a specific zodiac constellation on a dark matte background. Connect small dots with thin metallic lines to mimic a star chart.
Keep the lines extremely thin to maintain a sophisticated and clean appearance. This is a great way to add a subtle, custom detail to a teenager's bedroom or a library.
- Sourcing: A metallic paint pen is much easier to control for thin lines than a brush.
- Setup: Print out a small image of the constellation to use as a reference while painting.
- Adaptation: Paint your sun sign on one switch and your moon sign on another for a matched set.
Quick win: Use a white charcoal pencil to sketch the stars before committing with permanent paint.
35. Whimsigoth Sun-and-Moon Plate
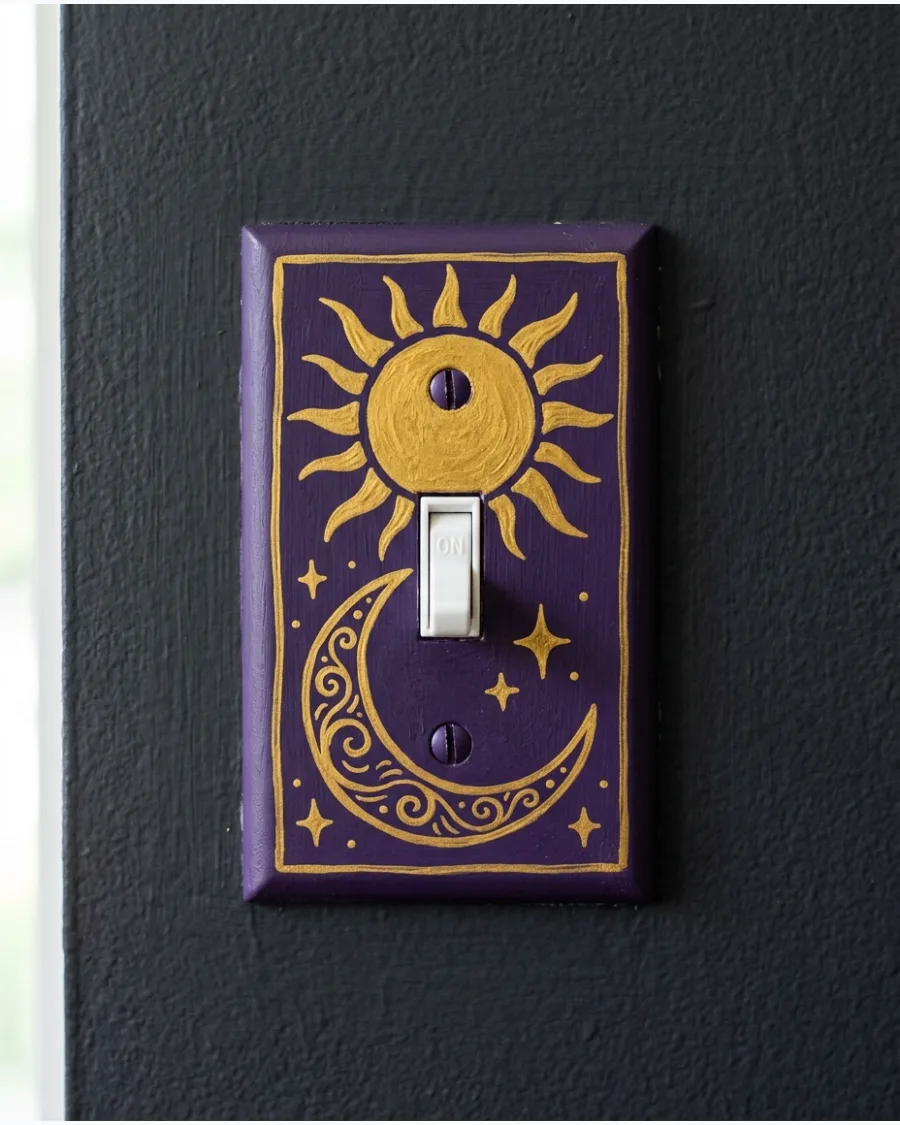
Lean into the moody 90s aesthetic with a combination of celestial shapes and swirling lines. Use a palette of deep purple, black, and antique gold to create a rich, layered look.
Layer the gold paint last to make the celestial symbols pop against the dark background. It is a bold choice that turns a functional item into a focal point.
- Sourcing: Look for 'Antique Gold' paint for a more muted, vintage metallic finish.
- Setup: Work in a well-lit area to ensure the dark colors don't overlap messy edges.
- Adaptation: Add small purple rhinestones for extra texture if the plate is in a low-traffic area.
Most people skip this: Clean the plate with rubbing alcohol first to remove finger oils that block paint adhesion.
36. Pastel Rainbow Cover
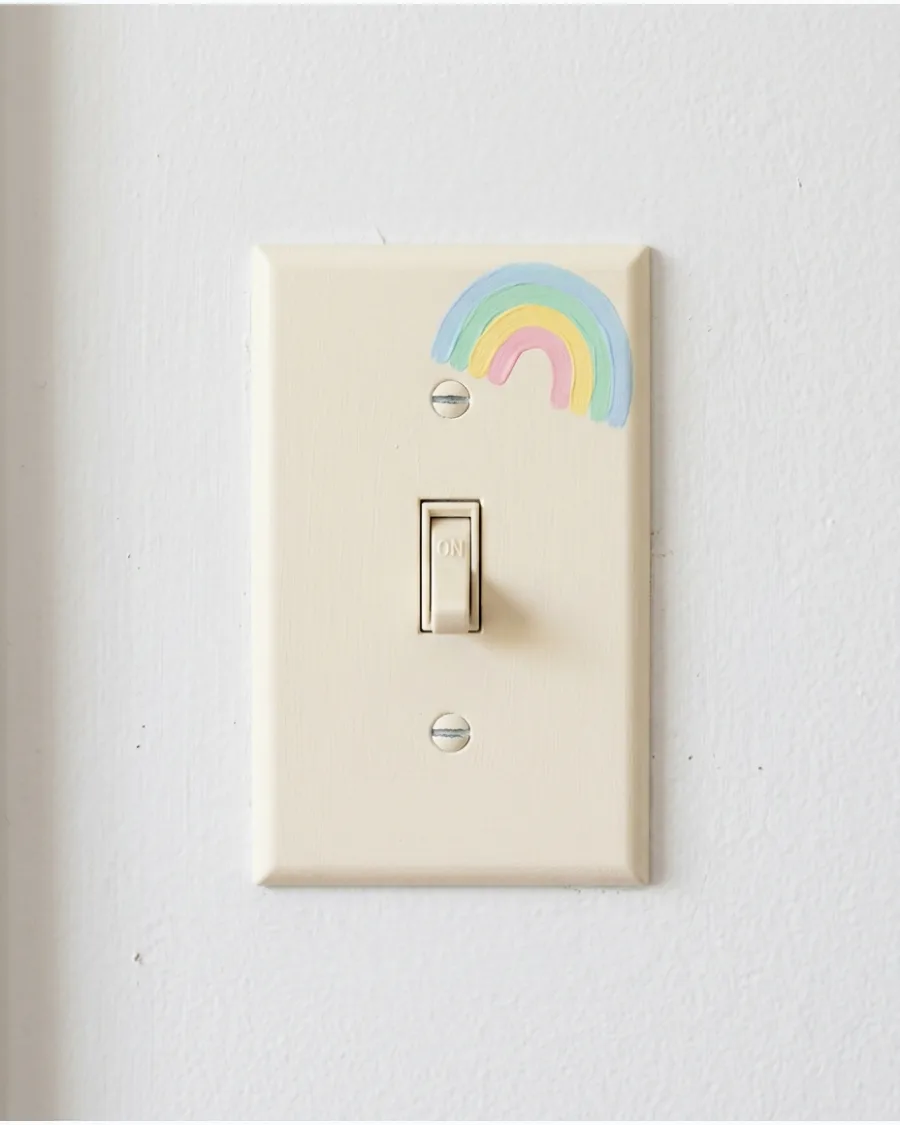
A muted rainbow design brings a soft, modern feel to a playroom or nursery. Use shades like sage green, dusty blue, and peach on a cream-colored base.
Paint the rainbow off-center or in a corner to keep the design from feeling too traditional. The matte finish keeps the colors looking sophisticated rather than childish.
- Sourcing: Buy a multi-pack of pastel acrylics to avoid the hassle of custom mixing colors.
- Setup: Use a small round object like a coin to trace perfectly curved rainbow arcs.
- Adaptation: Paint the rainbow in vertical stripes instead of arcs for a more geometric look.
Best shortcut: Use painters tape to mask off each arc for perfectly clean, sharp lines.
37. Starry-Night Gradient Cover
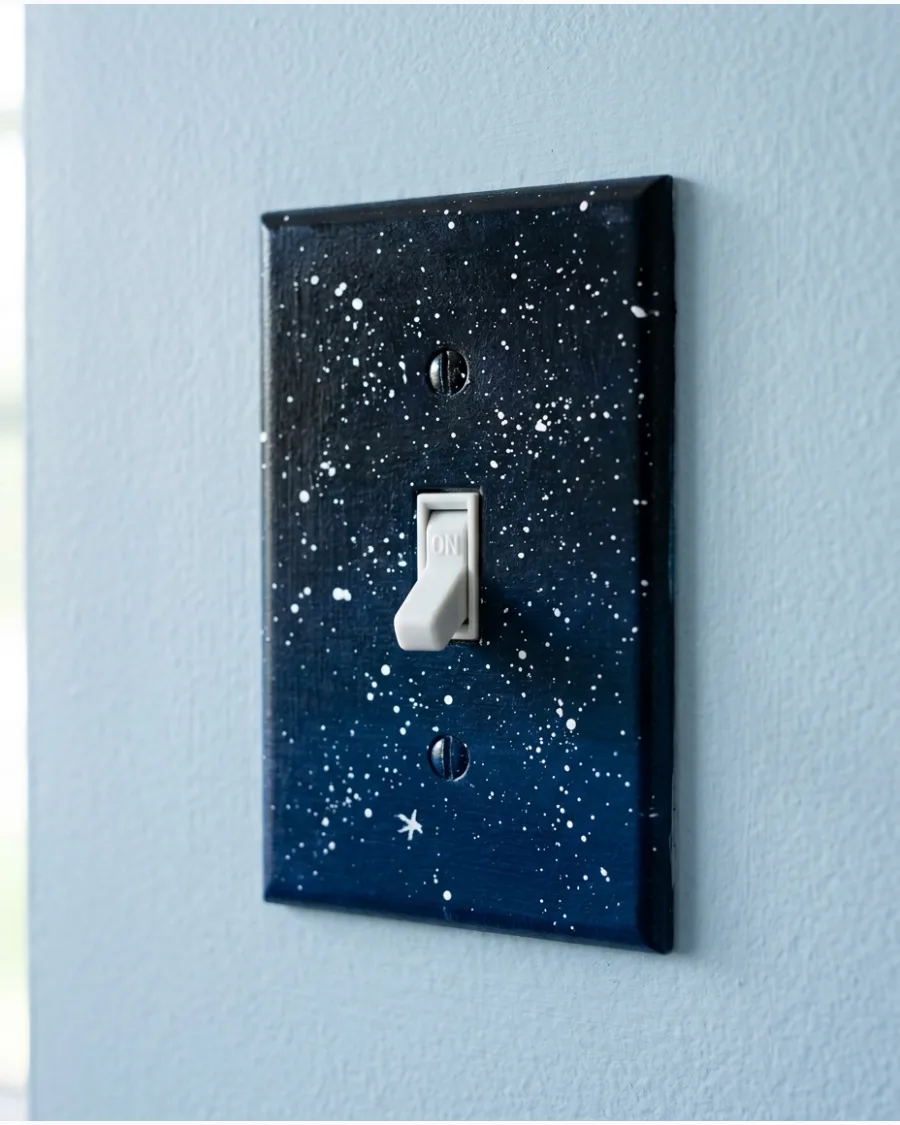
Create depth by blending dark blue at the bottom into a deep black at the top. While the paint is still wet, use a dry brush to soften the transition between colors.
Flick a stiff brush dipped in white paint over the plate to create a realistic 'milky way' of stars. This technique provides a professional, artistic look with very little effort.
- Sourcing: A flat blending brush is essential for getting a smooth color transition.
- Setup: Practice the paint-flicking technique on a piece of cardboard before trying it on the plate.
- Adaptation: Use purple and pink for a 'nebula' effect instead of standard blue and black.
Quick win: Keep the toggle switch clean by covering it with a small piece of tape during the splatter step.
38. Tiny Fairy-Garden Switch Plate
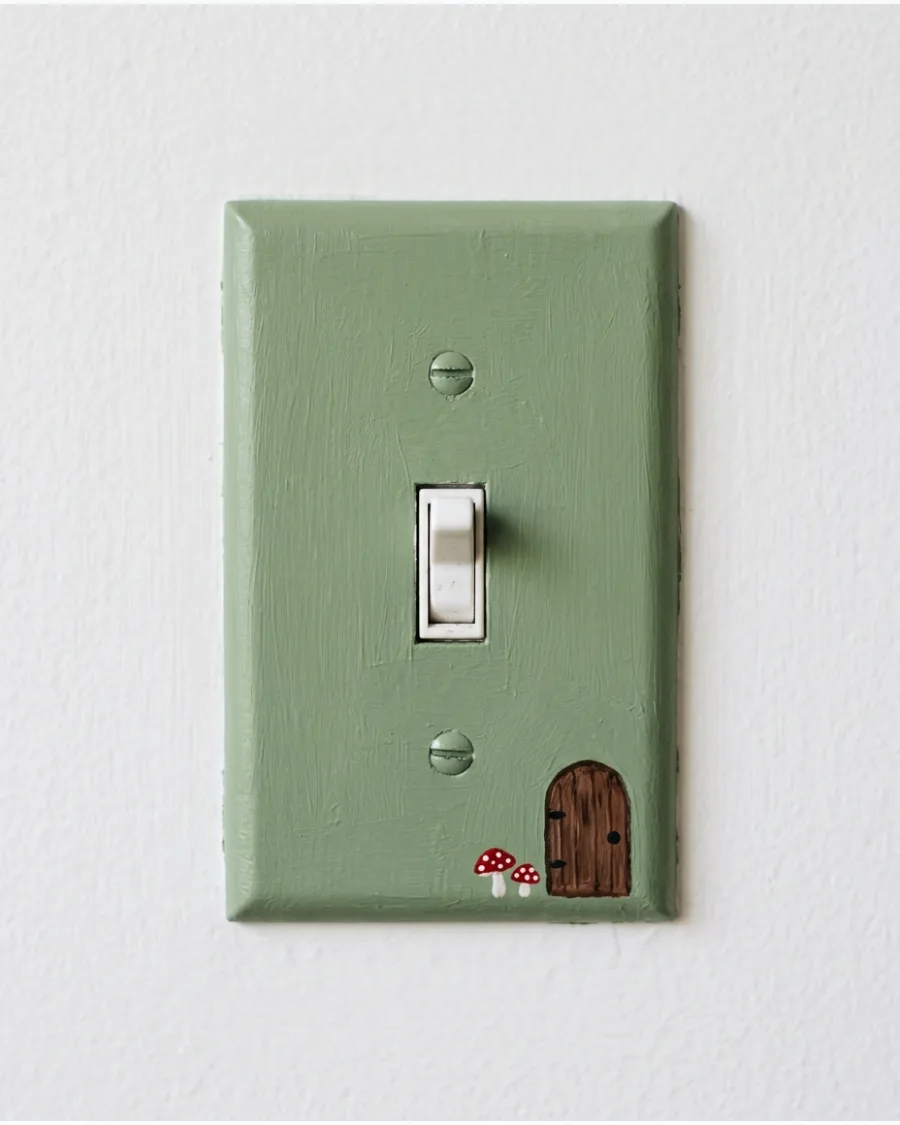
Turn the bottom of the switch plate into a miniature landscape with a tiny fairy door and mushrooms. Use bright colors for the mushrooms to make them stand out against a green or tan base.
Concentrate the detail on the lower half of the plate so the toggle switch doesn't interfere with the art. This is a charming addition to a child's room or a creative nook.
- Sourcing: Tiny detail brushes are required for the intricate door and mushroom spots.
- Setup: Sketch the door shape with a pencil to ensure it is centered at the bottom edge.
- Adaptation: Add tiny painted vines climbing up the sides of the plate to frame the switch.
Most people skip this: Use a toothpick to add the tiny white dots on the mushroom caps for precision.
39. Smiling Sun Cover
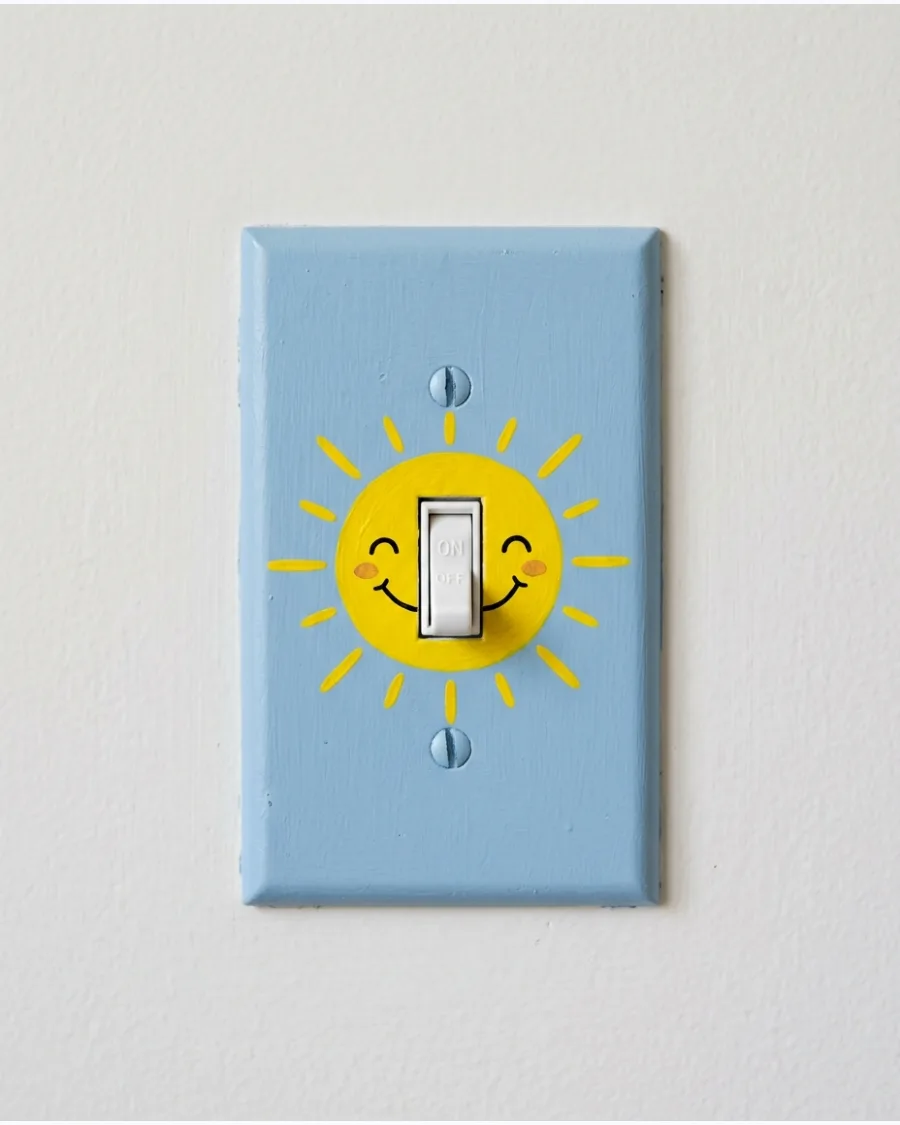
A friendly sun design adds a cheerful, handmade touch to any bright room. Paint a large yellow circle and add a simple face with a thin black marker or paint pen.
Surround the sun with small white clouds to fill the empty space on the plate. It is a simple project that provides a big boost of personality for very little cost.
- Sourcing: Use a high-quality yellow paint that is opaque enough to cover in two coats.
- Setup: Let the yellow sun dry for at least an hour before drawing the face on top.
- Adaptation: Paint the sun in a corner so the rays stretch across the entire plate.
Best shortcut: Use a yellow paint pen for the sun's rays to keep the lines consistent and sharp.
40. Cosmic Swirl Switch Plate
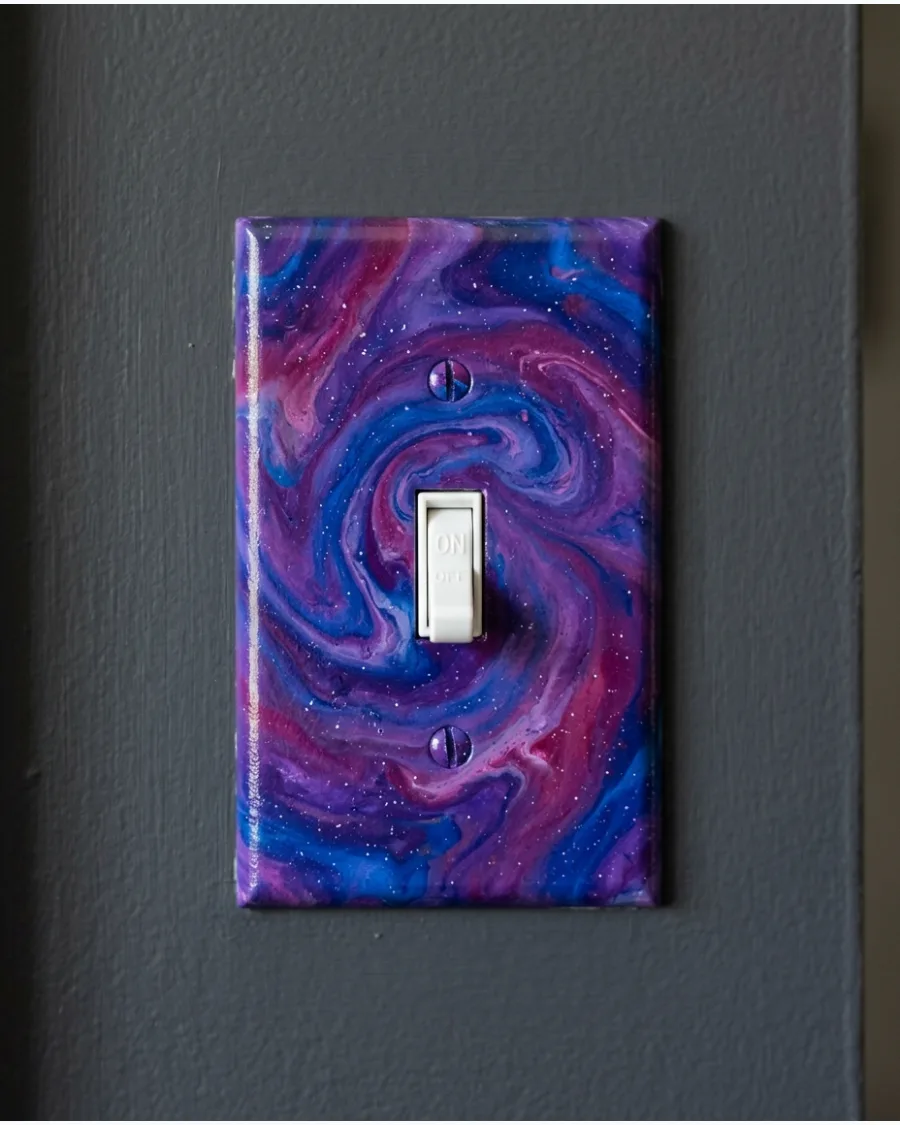
Swirl together blue, purple, and pink to create a galaxy effect that looks different from every angle. Use a damp brush to pull the colors into each other for a fluid, gaseous look.
Add a few dots of gold or silver paint to represent distant stars within the swirls. This abstract approach is forgiving because there is no right or wrong way to place the colors.
- Sourcing: Glossy acrylic paints help mimic the look of a deep-space photograph.
- Setup: Pour small drops of each color directly onto the plate and swirl them with a toothpick.
- Adaptation: Use only shades of blue and white for a more serene, watery swirl effect.
Quick win: A drop of rubbing alcohol on the wet paint can create cool 'cell' effects in the galaxy.
Modern and Geometric Switch Covers
41. Retro Checkerboard Plate
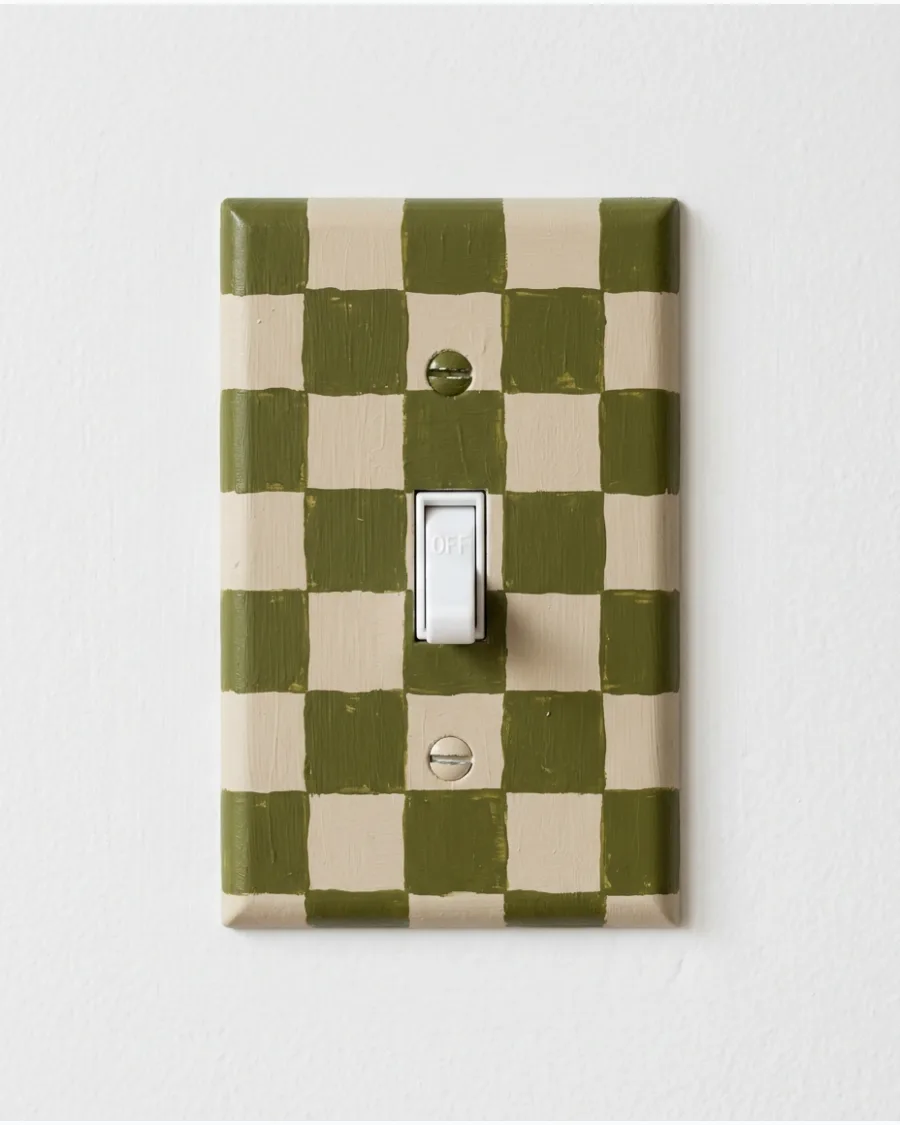
Checkerboard patterns are a classic way to add a graphic, modern element to a room. Choose two contrasting colors like olive and beige or pink and red for a bold look.
Embrace slightly uneven squares to give the plate a trendy, artisanal feel. This design works exceptionally well in kitchens or bathrooms with tiled surfaces.
- Sourcing: Use a flat, square-headed brush that matches the width of the squares you want.
- Setup: Lightly grid the plate with a pencil to keep your rows straight.
- Adaptation: Use black and white for a classic 'diner' look that never goes out of style.
Most people skip this: Paint the edges of the plate the same color as one of the squares for a finished look.
42. Wavy-Line Switch Cover
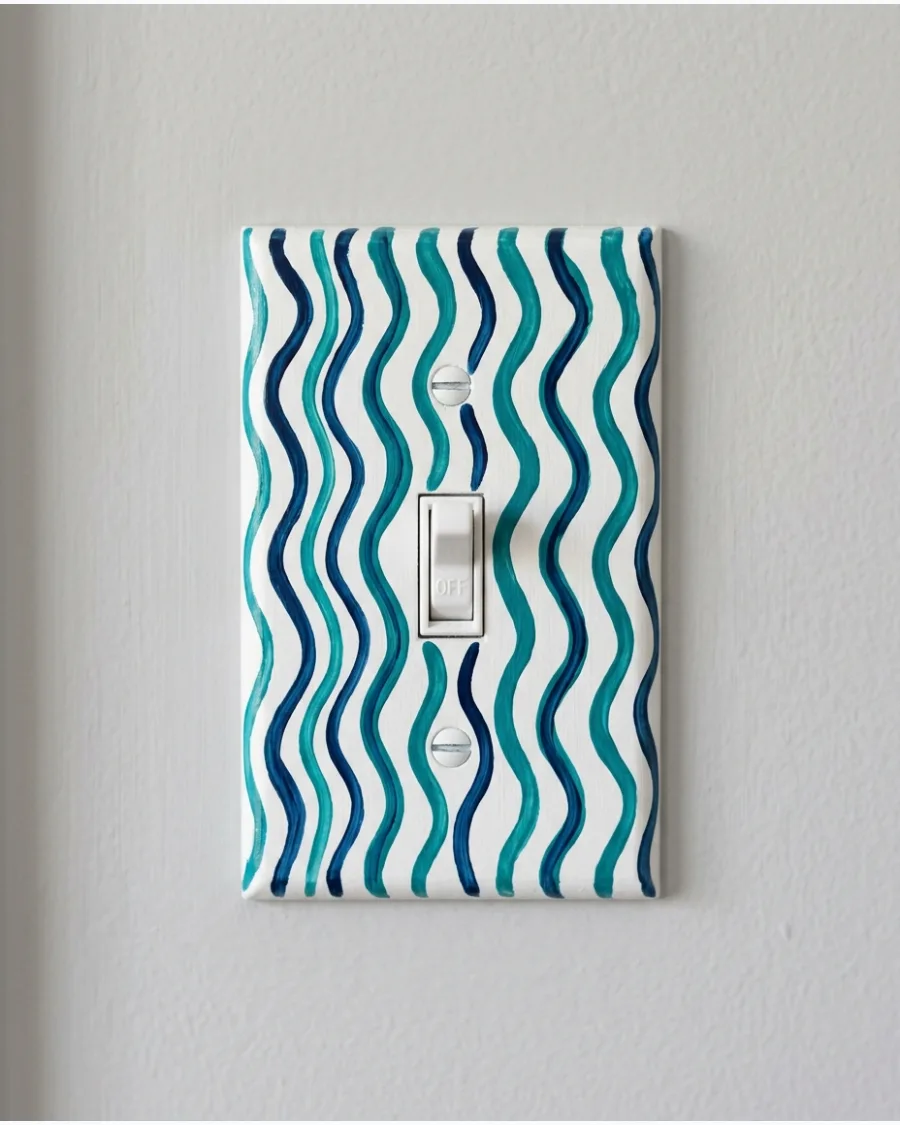
Add movement to a flat wall with flowing wavy lines in coordinating shades. Vertical waves can make a small space feel taller, while horizontal waves add a sense of calm.
Overlap the lines slightly to create new colors where the paints meet. This modern style is perfect for minimalist homes that need a small pop of color.
- Sourcing: Select 3 colors from the same color family for a cohesive, ombre-style look.
- Setup: Start with the lightest color first to ensure the darker lines cover properly.
- Adaptation: Use metallic copper and black lines for a sophisticated, industrial aesthetic.
Best shortcut: Use a 'liner' brush with long bristles to help you pull long, smooth curves.
43. Scalloped Border Switch Plate
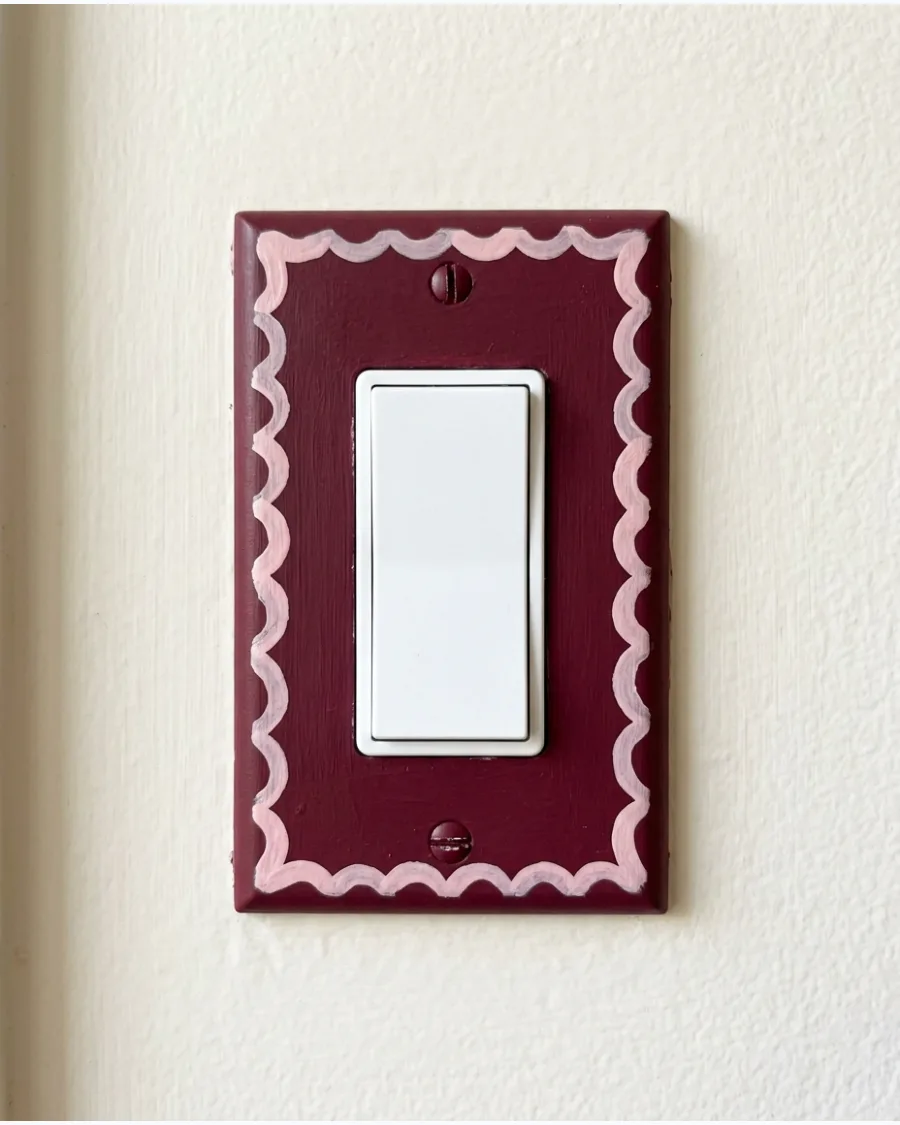
A scalloped border adds a decorative, feminine touch without being overly complicated. Paint the center a solid color and use a darker shade for the repeating half-circles around the edge.
Use the end of a large dowel or a circular sponge to stamp the scallops for perfect uniformity. This detail frames the switch and makes it feel like an intentional piece of decor.
- Sourcing: A small circular foam pounce brush is the best tool for stamping scallops.
- Setup: Mark the center of each side of the plate to ensure your scallops align correctly.
- Adaptation: Paint the scallops in multiple colors for a playful, 'confetti' border look.
Quick win: If you don't have a stamp, trace around a bottle cap for consistent circle shapes.
44. Modern Arch Design
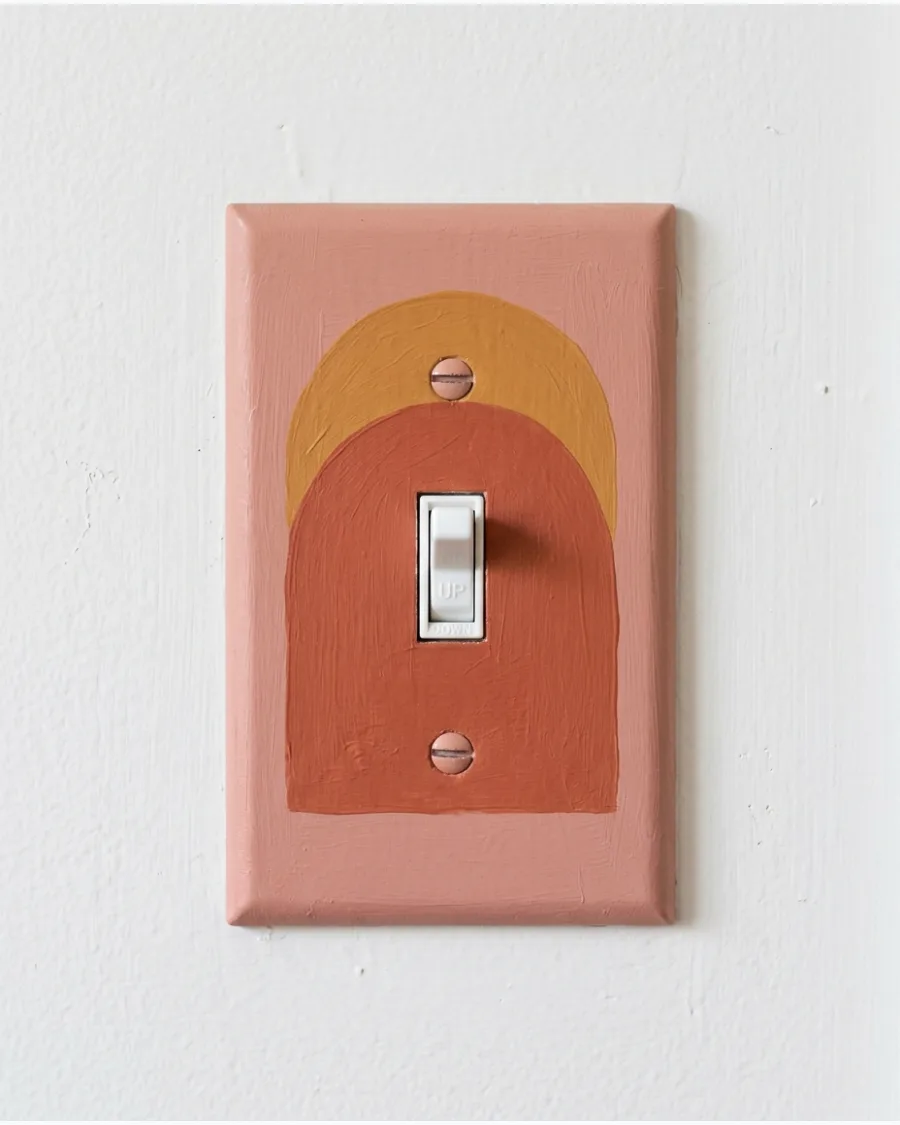
Create a contemporary look with overlapping arches in earthy, muted tones like terracotta and sage. Position the largest arch so it frames the toggle switch, integrating the hardware into the art.
Thin your acrylic paint with a drop of water to get a smooth, professional finish without visible brush marks. This style complements boho or mid-century modern interior design.
- Sourcing: Earth-tone acrylic sets provide the perfect pre-mixed colors for this look.
- Setup: Use a compass or a round lid to trace the arches before you start painting.
- Adaptation: Flip the arches upside down for a 'u-shape' design that feels more avant-garde.
Most people skip this: Sand the plate with high-grit sandpaper (400+) for a buttery smooth paint surface.
45. Minimalist Line-Art Cover
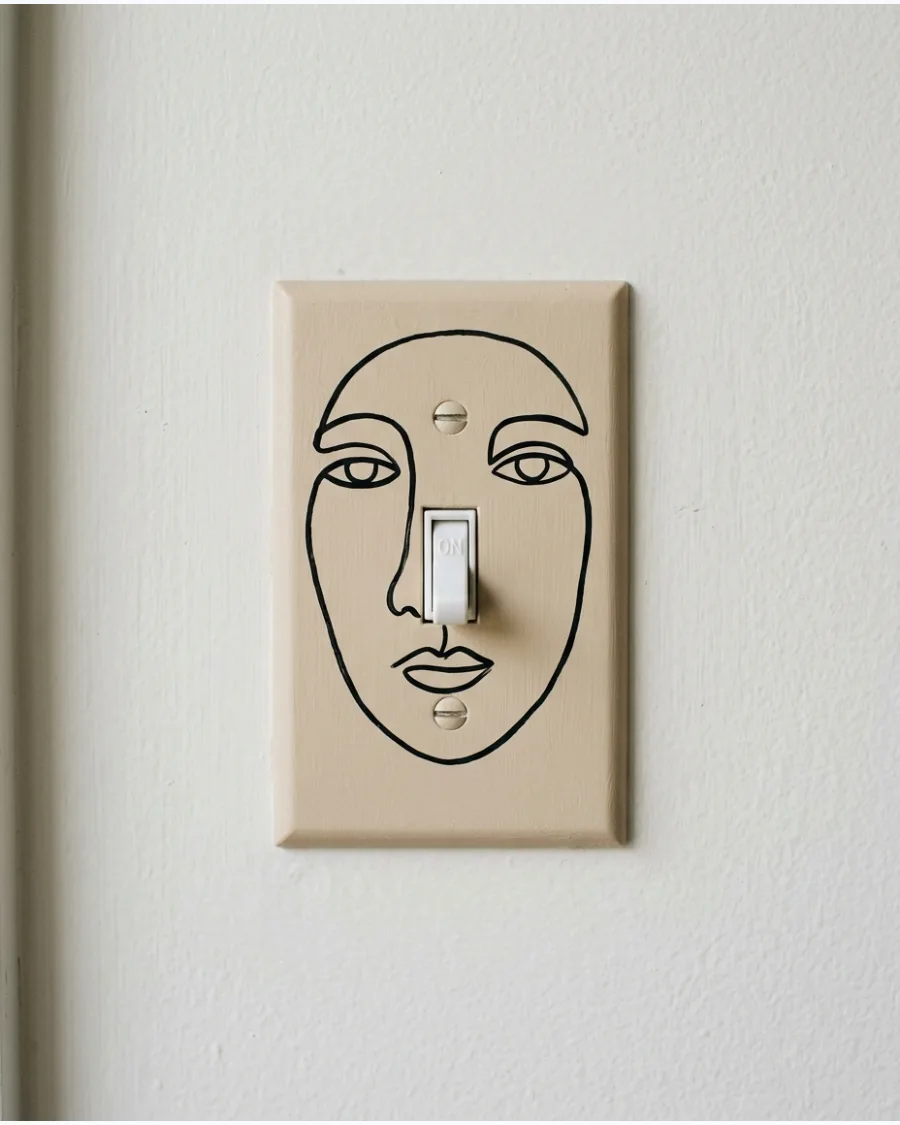
For a sophisticated and subtle look, paint a single continuous line that forms an abstract figure or face. A neutral background like beige or off-white keeps the focus on the dark, fluid line.
Use a steady hand and a very thin liner brush to maintain a consistent line weight throughout. This high-end look mimics expensive designer hardware for just a few dollars.
- Sourcing: A black acrylic paint pen with a fine tip offers the best control for line art.
- Setup: Practice the continuous line on paper several times to get the flow right.
- Adaptation: Use a gold line on a navy background for a more luxurious, 'art deco' feel.
Best shortcut: If you make a mistake, wait for the line to dry and simply paint over it with the background color.
46. Abstract Organic Shapes
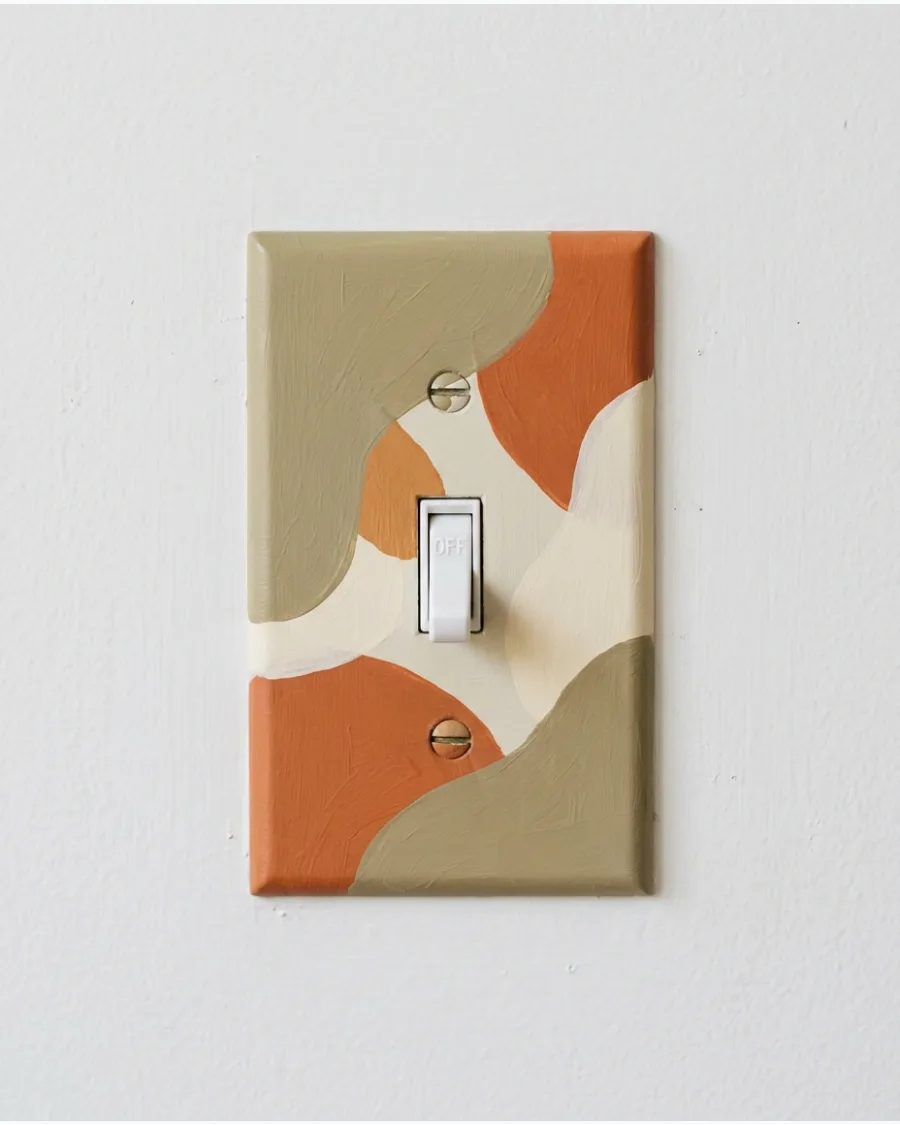
Layer rounded blobs and curved shapes in complementary colors like khaki and burnt orange for a contemporary look. This style works because it feels intentional and artistic rather than messy.
Use a small sponge or a soft round brush to build up the layers of color for a smooth finish. It is best to let each shape dry completely before overlapping the next color to prevent muddying the design.
- $5-$10 for acrylic paint and a small brush set.
- Remove the plate from the wall and lay it flat on a protected surface before painting.
- Swap the earthy tones for neon shades to fit a vibrant office or a modern playroom.
Quick win: Lightly sand the plastic plate with high-grit sandpaper first so the paint sticks without peeling later.
47. Terrazzo-Inspired Switch Plate
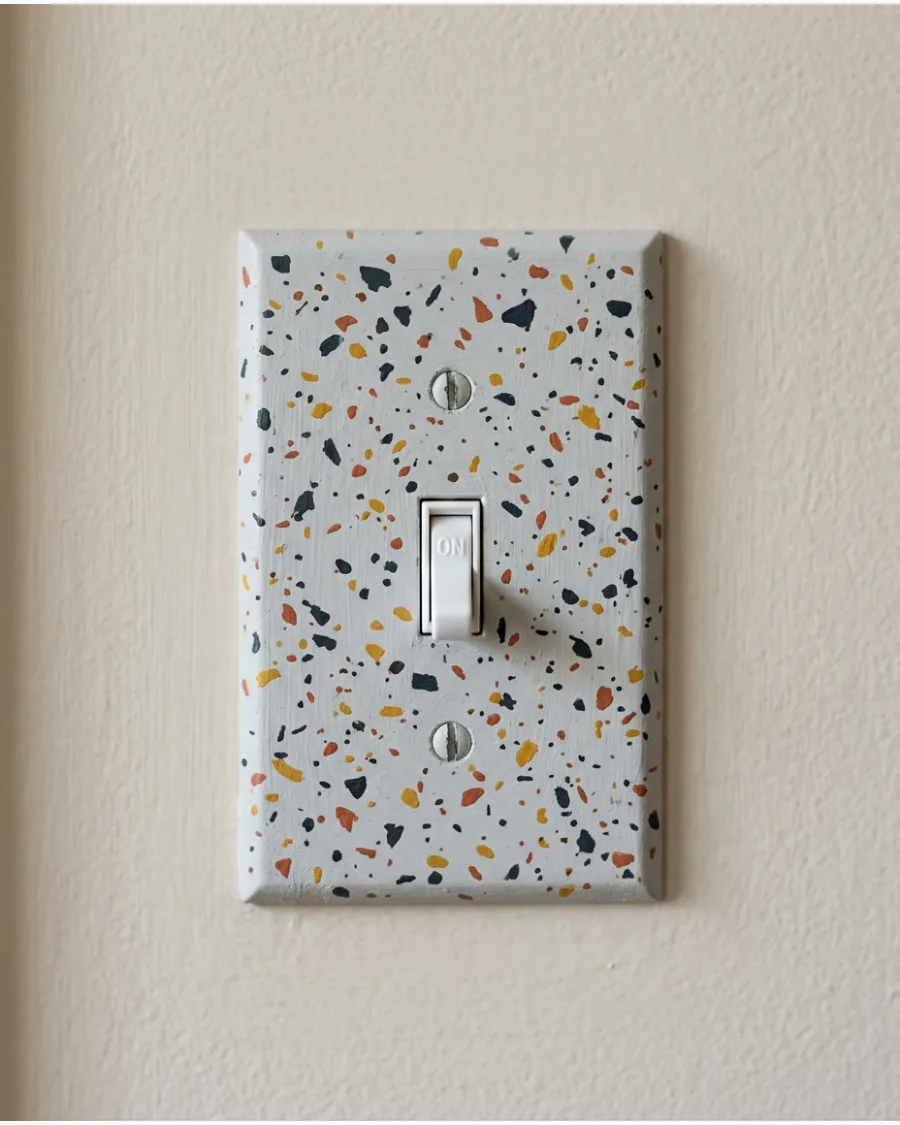
Paint small irregular chips in several colors over a neutral base to mimic the look of real stone. This technique adds texture and visual interest to a plain wall without being overwhelming.
Flick a stiff-bristled brush or use a fine-tip detail brush to create different sizes of faux stone fragments. A matte topcoat will make the finished project look like expensive unpolished stone.
- Under $15 for multiple paint colors and a clear sealer.
- Keep the flecks smaller near the toggle opening to ensure the switch moves freely without catching.
- Use metallic gold flecks on a black base for a formal and high-end aesthetic.
Best shortcut: Use a paint pen for the smallest flecks to get better control than a traditional brush.
48. Colorful Striped Cover
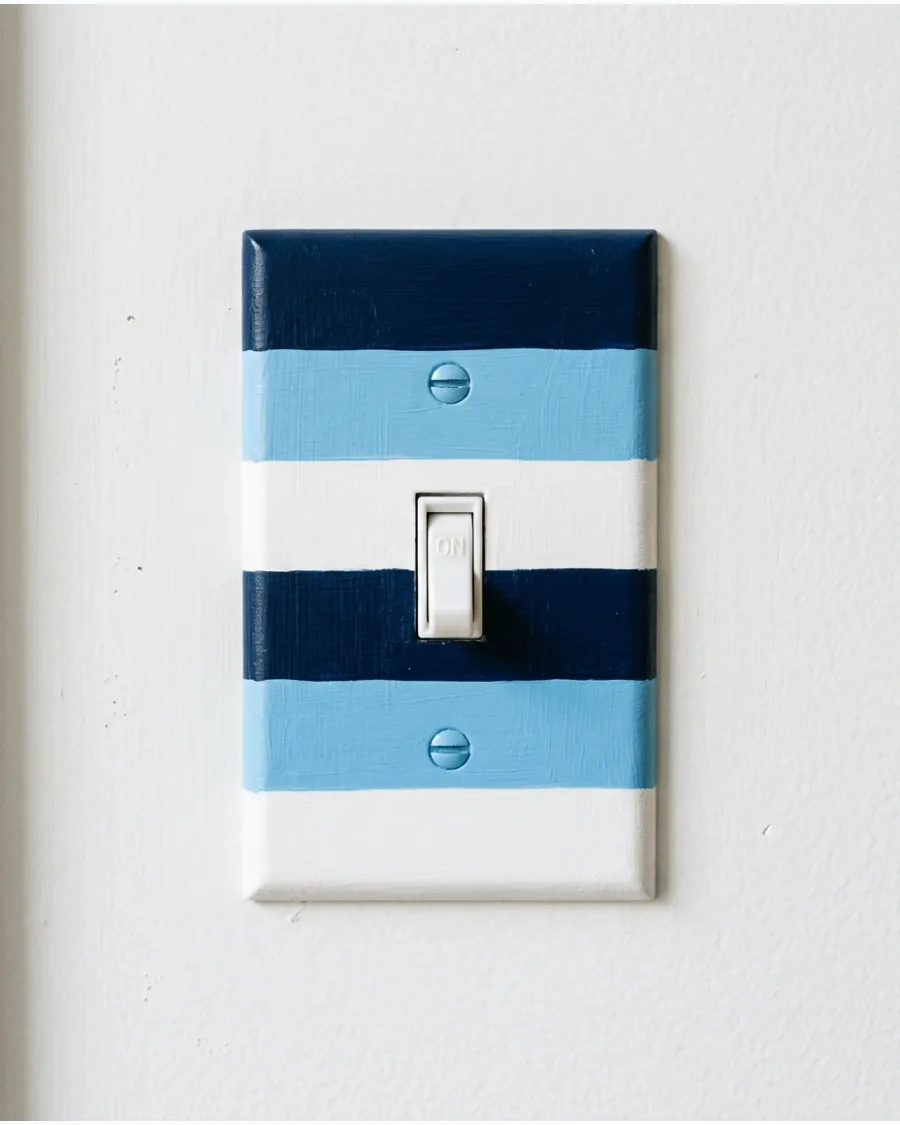
Add vertical or horizontal stripes in three to five coordinated shades for a clean and graphic appearance. The straight lines create a sense of order and can make a small room feel taller or wider.
Apply thin strips of painter’s tape to the plate to ensure your lines are perfectly crisp and professional. Removing the tape while the paint is still slightly damp prevents the edges from chipping.
- 1-2 hours of active work plus drying time.
- Ensure the tape is pressed down firmly at the edges of the plate to avoid paint bleed.
- Try varying the widths of the stripes for a more modern and asymmetrical appearance.
Most people skip this: Painting the sides of the plate makes the stripes look continuous when viewed from an angle.
49. Bauhaus-Inspired Switch Plate
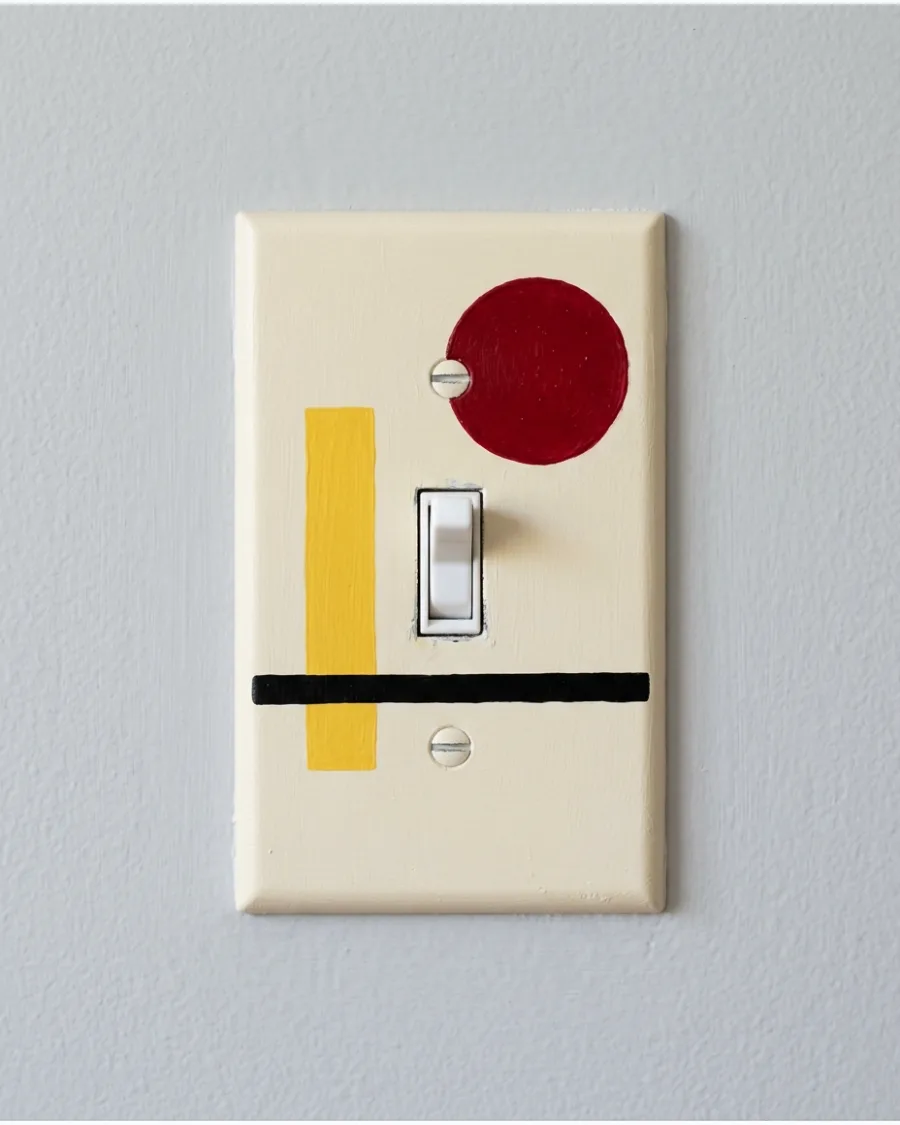
Combine circles, rectangles, and bold lines in a structured layout using primary colors. This style turns a functional hardware piece into a miniature piece of modern art.
Sketch your geometric layout with a pencil before applying paint to ensure the proportions look balanced. Using high-pigment paints ensures the red, yellow, and blue stay vibrant against the wall.
- Budget-friendly project using leftover craft paints.
- Work in thin layers to avoid paint buildup that could interfere with the switch toggle.
- Substitute primary colors for pastels to create a Bauhaus look that fits a softer room palette.
Quick win: Use the cap of a small bottle as a stencil to get a perfectly round circle every time.
50. Hand-Painted Wallpaper Match
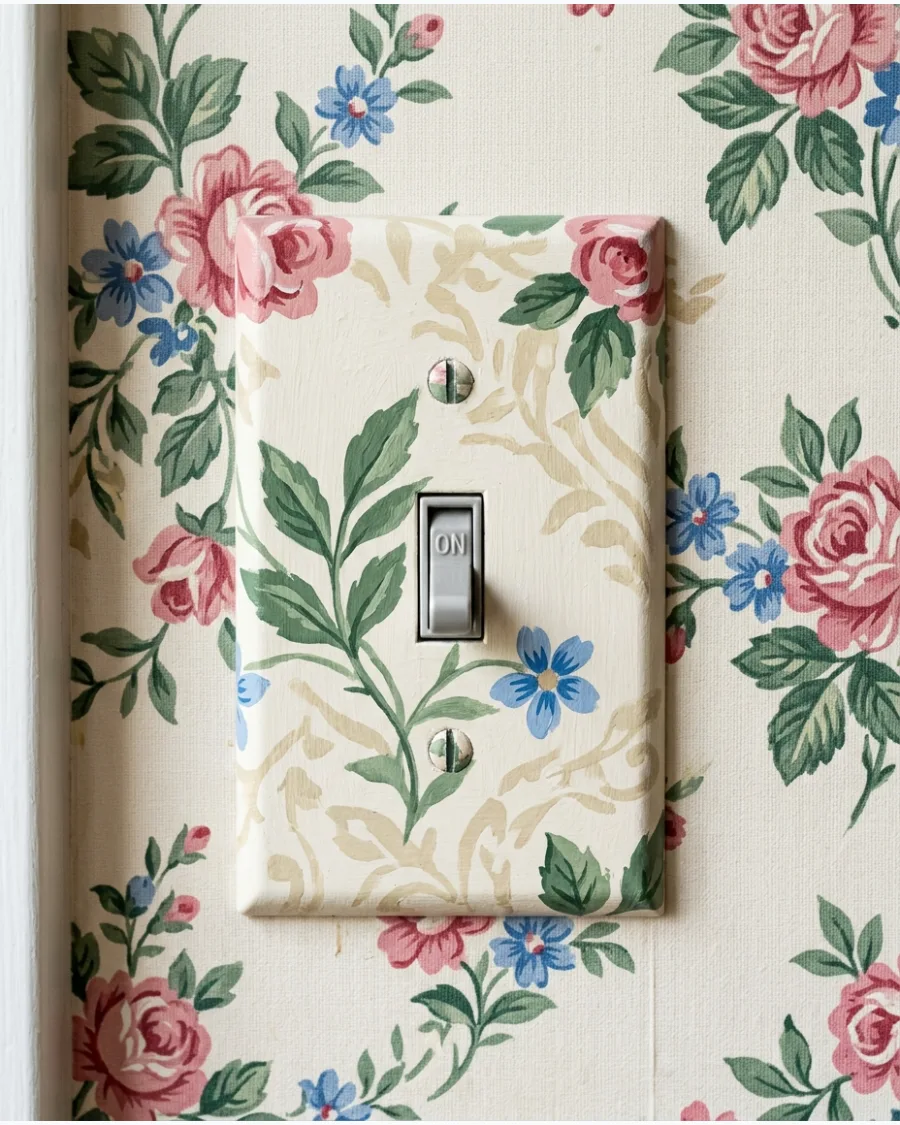
Re-create motifs from the surrounding wallpaper directly on the switch plate to make it disappear into the wall. This trick provides a high-end custom finish that usually requires expensive fabric-wrapped plates.
Trace the main shapes of the wallpaper onto the plate using a piece of transfer paper for exact alignment. This method is particularly effective in small bathrooms where every detail counts.
- Cost of a few small paint tubes that match your wallpaper colors.
- Align the plate with the wall pattern before you start painting to mark where the designs should meet.
- Apply a non-yellowing clear coat to protect the hand-painted design from finger oils.
Most people skip this: Paint the screw heads to match the pattern so they do not break the visual flow of the wallpaper.
Frequently Asked Questions
What is the best type of paint to use on plastic light switch covers?
For the best results, use multi-surface acrylic paints or spray paints specifically labeled for use on plastic surfaces. These formulas are designed to bond to slick materials, ensuring your colorful designs adhere properly and don't flake off over time.
Do I need to sand the light switch cover before painting?
Yes, lightly scuffing the surface with fine-grit sandpaper is a crucial step for successful paint adhesion. This creates a necessary 'tooth' on the smooth plastic, which prevents your paint from peeling or sliding off during the application process.
How do I prevent the paint from chipping around the screws?
To keep your finish intact, paint the screw heads separately by sticking them into a piece of cardboard before you begin. Once dry, apply a durable clear sealant to the entire plate to protect the edges from chipping when you use a screwdriver for installation.
Can I paint the actual switch (the part you flip) as well?
It is generally best to avoid painting the actual moving switch to ensure it functions safely and doesn't stick. Focus your creativity on the cover plate itself, as paint buildup on the toggle can interfere with the internal electrical components or become a fire hazard.
How do I seal a painted light switch cover so it stays clean?
Protect your artwork with a few thin coats of a non-yellowing acrylic sealer or clear spray finish. This creates a durable, wipeable surface that can withstand frequent touching and makes it easy to clean with a damp cloth without damaging your design.