50 Creative DIY Clay Fridge Magnet Ideas

This post may contain affiliate links: full affiliate disclosure.
Kitchens often feel clinical with all that stainless steel, but handmade clay magnets add a punch of personality and warmth to the fridge.
Using air-dry or polymer clay allows for custom shapes that look high-end without the boutique price tag. These tiny food-themed projects are easy to scale and strong enough to hold up grocery lists or photos.
Cute Food Clay Fridge Magnets
1. Mini Croissant Clay Magnet
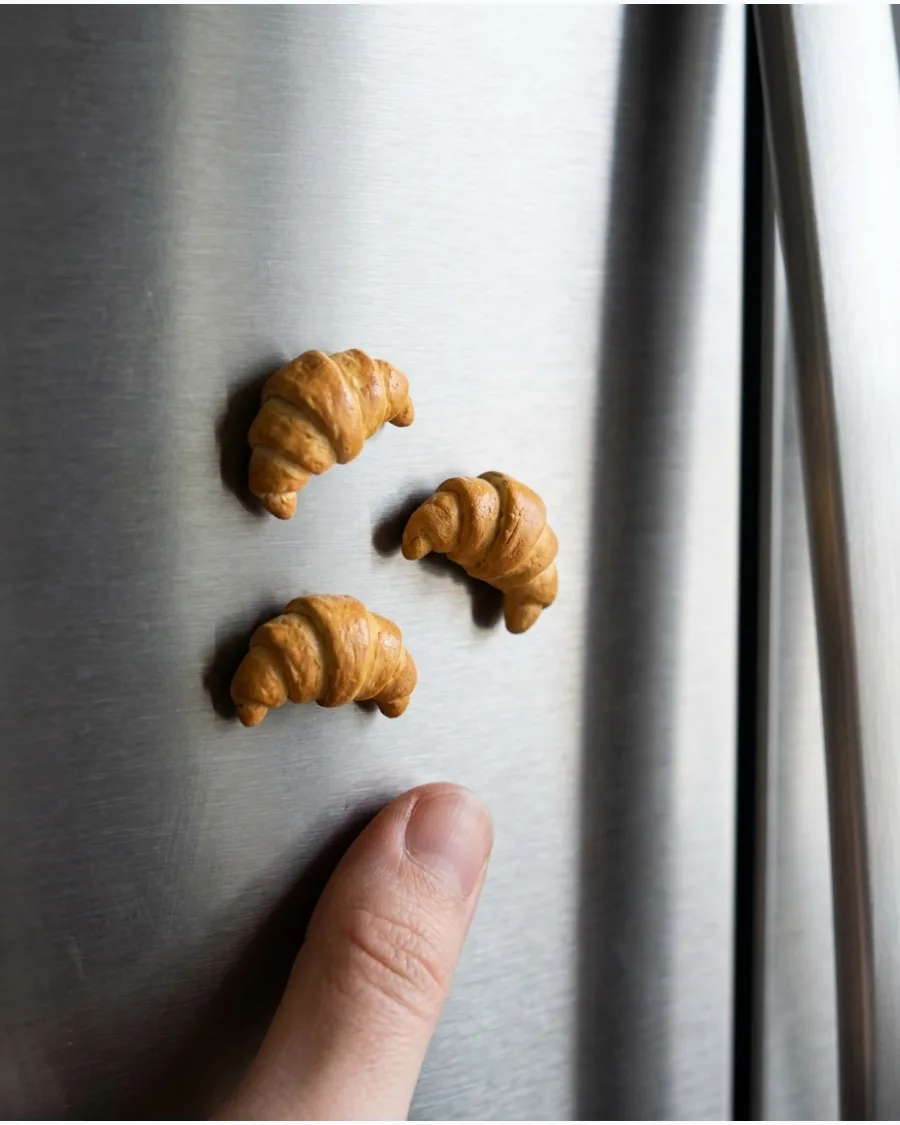
Shape golden-brown clay into a tiny curved croissant with delicate layered lines. Add slightly darker shading along the edges to create a realistic baked finish.
Use a needle tool or a toothpick to press deep horizontal lines into the clay to mimic the flaky layers of real pastry. This texture helps the paint settle naturally for a professional look.
- Polymer clay and brown chalk pastels cost under ten dollars and bake in fifteen minutes.
- Roll a long triangle of clay and roll it from the wide end to the tip for a natural shape.
- Use white clay and paint it with a matte varnish for a powdered sugar effect.
Quick win: Dust the clay with a little cocoa powder before baking to get a matte, realistic flour-dusted finish.
2. Fried Egg Fridge Magnet
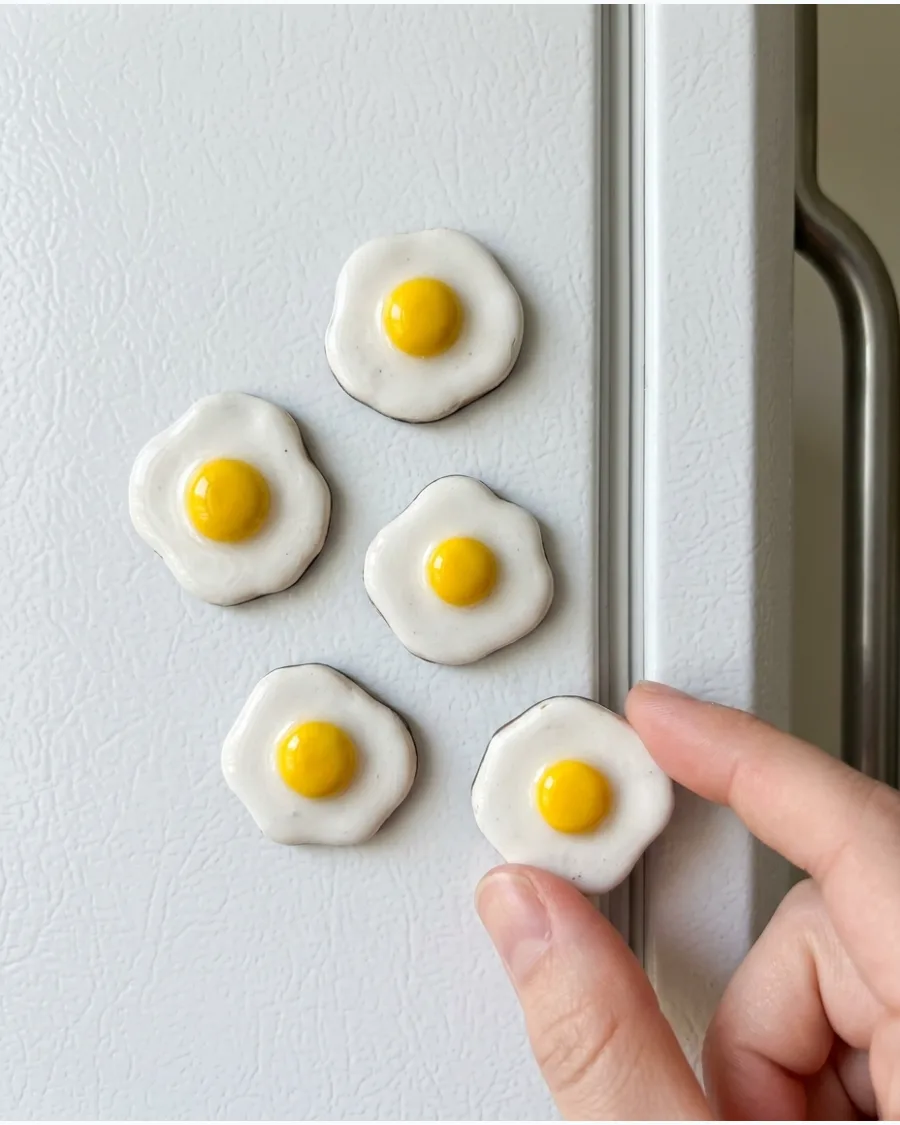
Create a playful fried egg using an irregular white clay base and a raised yellow center. A glossy finish can make the yolk look bright and dimensional.
Keep the white edges slightly wavy and uneven so the egg looks like it was just cracked onto a griddle. This organic shape prevents the magnet from looking too manufactured or stiff.
- Air-dry clay works well here and dries within twenty-four hours without an oven.
- Press a small ball of yellow clay into the center of a flattened white circle.
- Add a tiny sprinkle of black pepper or herbs using fine-tipped markers.
Most people skip this: Apply a thick layer of clear UV resin or glossy glaze only to the yolk to make it look sunny side up.
3. Mini Pizza Slice Magnet
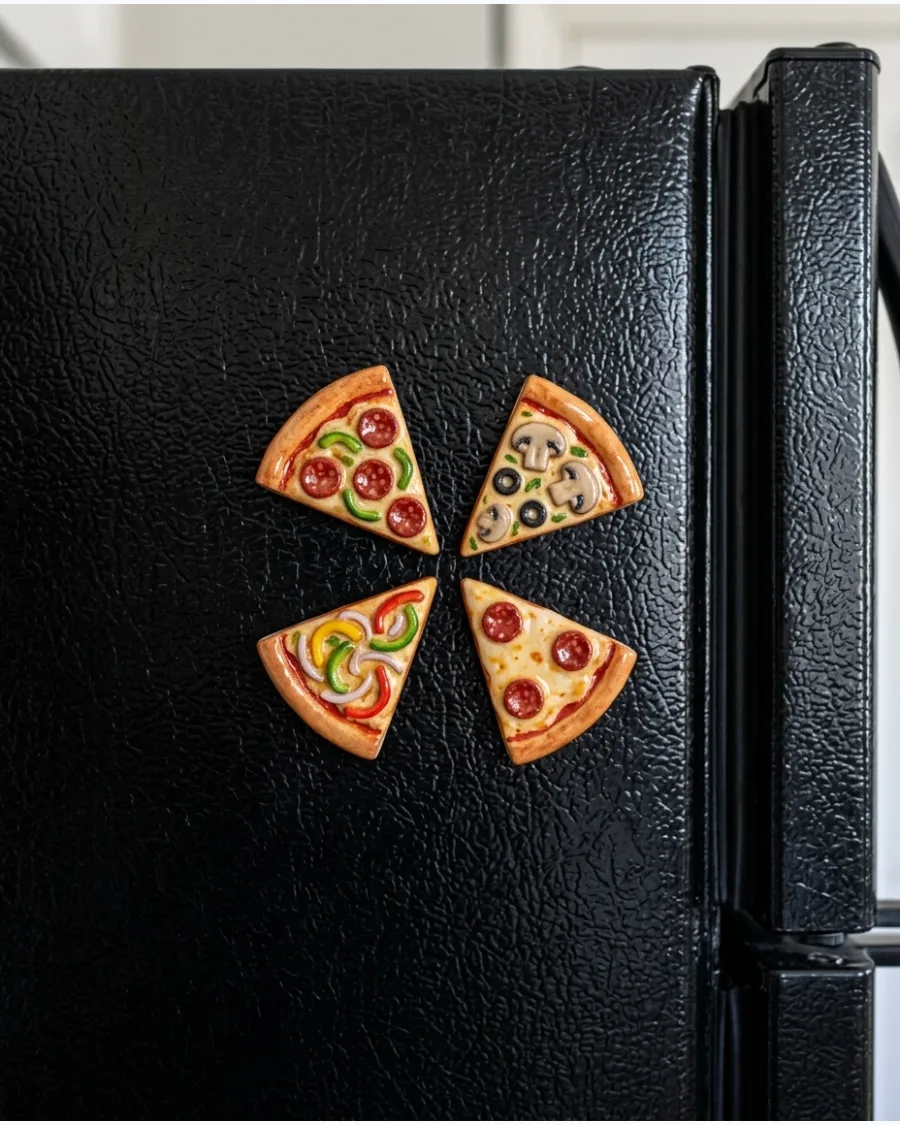
Make a triangular pizza slice topped with tiny clay cheese, pepperoni, mushrooms, or vegetables. Customize each magnet with a different combination of toppings.
Roll tiny red clay balls and flatten them to create realistic pepperoni slices that sit flush against the cheese layer. This attention to detail makes the tiny food look more convincing from a distance.
- Small packs of multi-colored polymer clay are perfect for diverse toppings.
- Use a craft knife to cut a circle of clay into eight even wedges.
- Create a supreme version by adding tiny bits of green and black clay for peppers and olives.
Best shortcut: Use a crumpled piece of aluminum foil to texture the crust edge before baking to give it a realistic bread-like surface.
4. Strawberry Cake Magnet
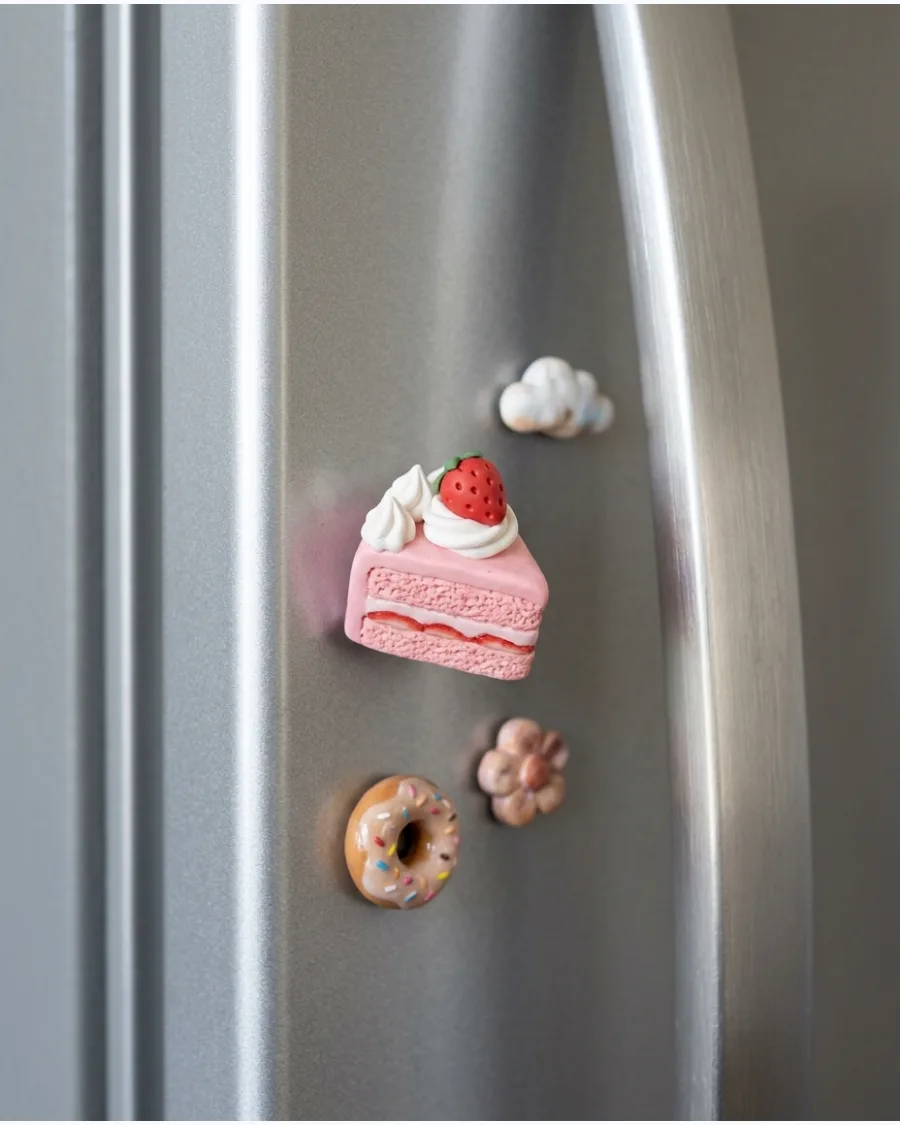
Design a miniature slice of pink or vanilla cake with white frosting and tiny strawberries. Add visible layers to make the clay cake look more realistic.
Score the sides of the cake slice with a stiff-bristled brush to give the clay a spongy, cake-like texture. This simple step transforms smooth clay into something that looks edible and high-quality.
- Use liquid clay mixed with white paint to create a realistic frosting drip.
- Stack three thin circles of clay, then cut out a single wedge to ensure even layers.
- Swap strawberries for tiny clay blueberries or chocolate shavings for variety.
Quick win: Use a headpin or wire to attach the strawberry so it does not pop off if the magnet falls.
5. Avocado Toast Magnet
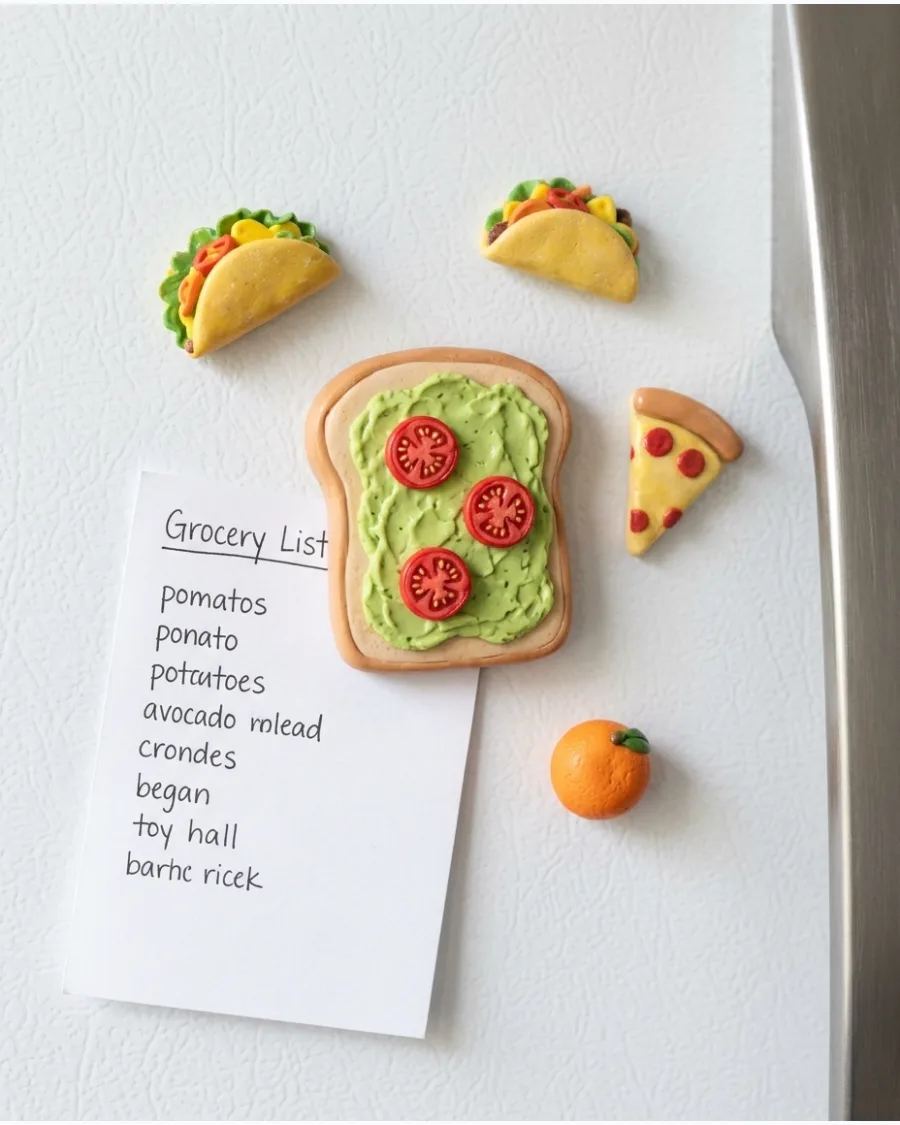
Create a small piece of toast topped with textured green avocado. Add miniature tomato slices, seeds, or a tiny clay egg for extra detail.
Use a stiff toothbrush to stipple the green clay, creating the mashed effect that defines real avocado toast. The contrast between the rough toast and the textured green topping adds great visual interest.
- Brown and lime green clay are the primary colors needed for this project.
- Cut a thick square of tan clay and round the top corners for a bread shape.
- Add everything bagel seasoning by pressing black and white sand into the clay.
Most people skip this: Paint the edges of the toast a darker brown to simulate a toasted crust.
6. Cinnamon Roll Clay Magnet
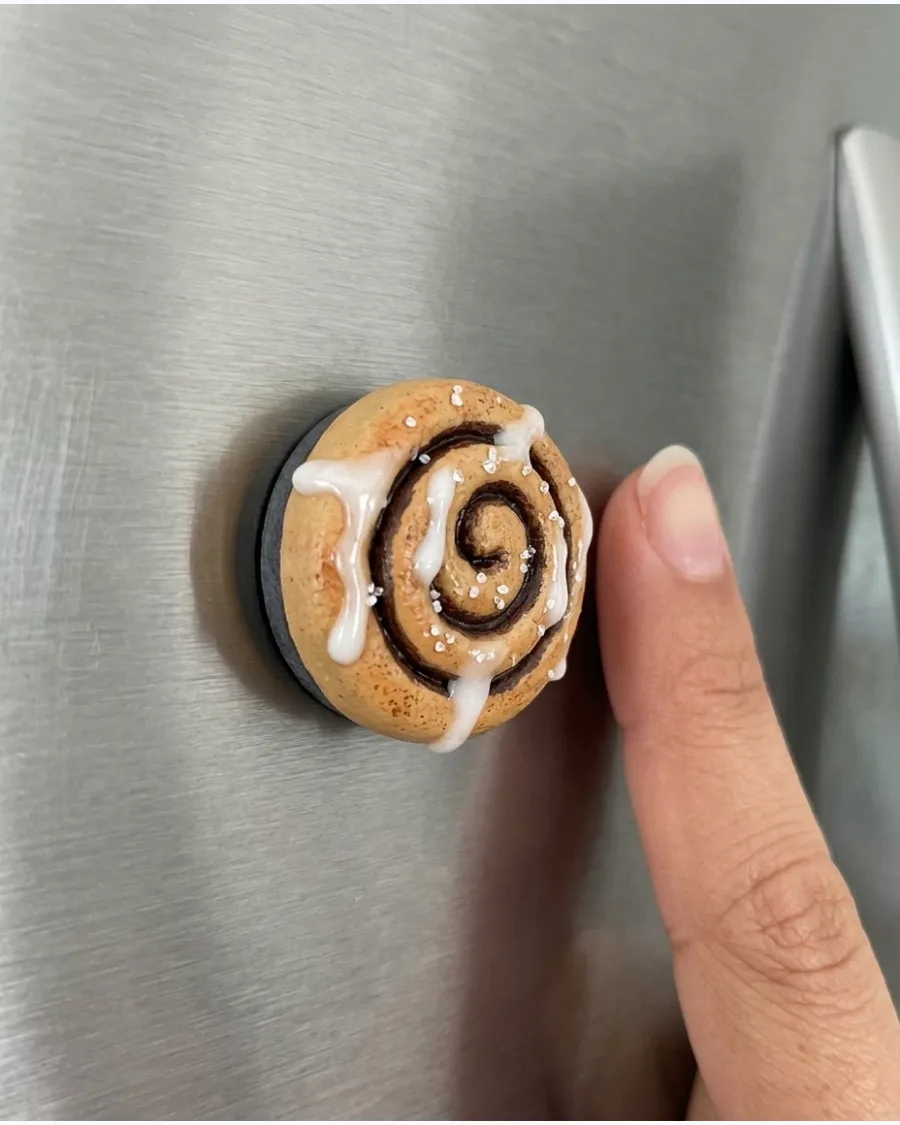
Roll a thin strip of tan clay into a spiral to resemble a cinnamon roll. Finish it with white clay icing drizzled across the top.
Press a small amount of brown chalk or paint into the crevices of the spiral to mimic the cinnamon sugar filling. This depth makes the roll look like it was freshly pulled from the oven.
- Chalk pastels are cheap and great for adding baked shadows to clay.
- Roll the clay into a long snake, flatten it slightly, and coil it tightly.
- Make a tray of three tiny rolls on one magnet for a more substantial piece.
Best shortcut: Mix a drop of water with white acrylic paint to create a glaze that flows naturally over the rolls.
7. Colorful Donut Magnet
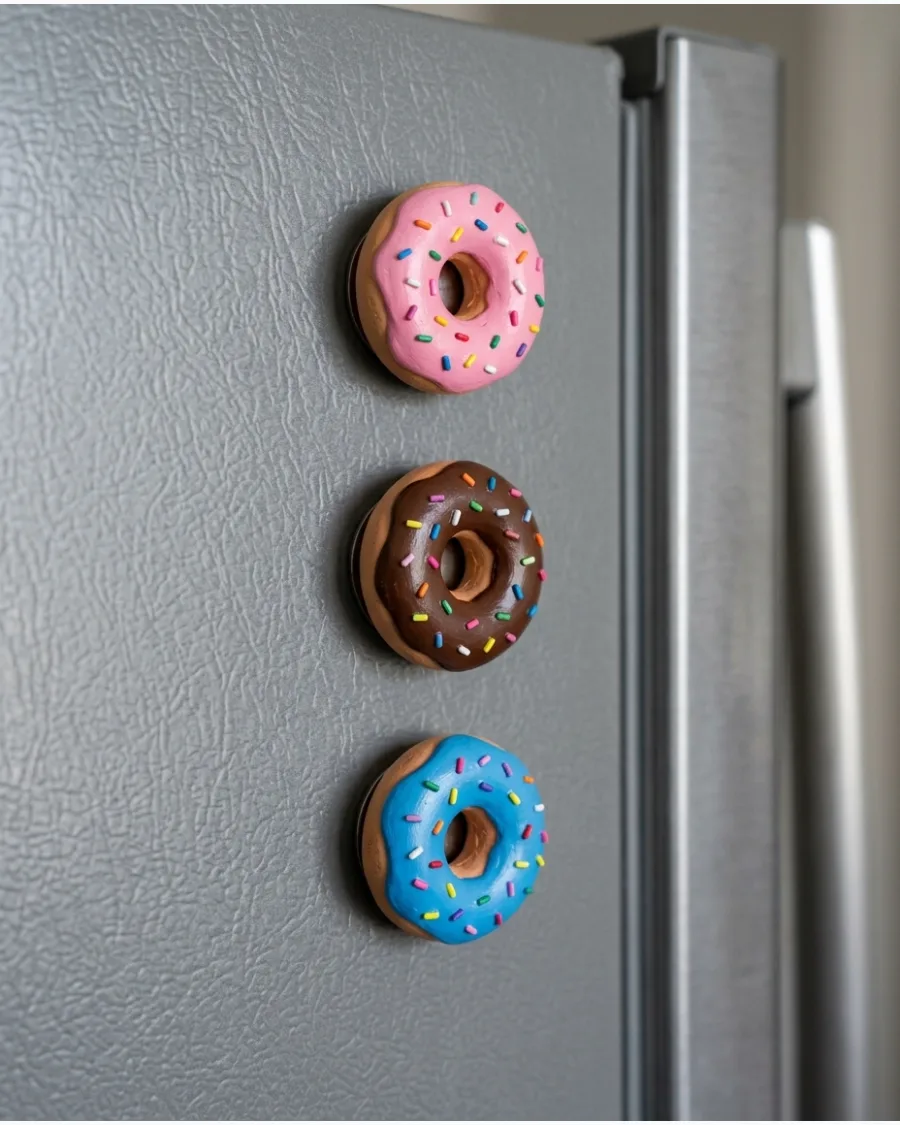
Shape a small clay donut and decorate it with pink, chocolate, or pastel frosting. Add tiny sprinkles for a cheerful, kitschy refrigerator accessory.
Cut extremely short lengths of colored embroidery thread or thin clay snakes to use as realistic sprinkles. These tiny pops of color make the magnets stand out against a plain appliance.
- Use a standard drinking straw to punch a perfect hole in the center of the donut.
- Roll a ball of clay, flatten it into a disc, and remove the center.
- Use puffy paint for the frosting to give it a 3D, glossy look without mixing clay.
Quick win: Use a ball-ended clay tool to smooth the edges of the frosting so it looks like it is melting over the sides.
8. Baguette Fridge Magnet
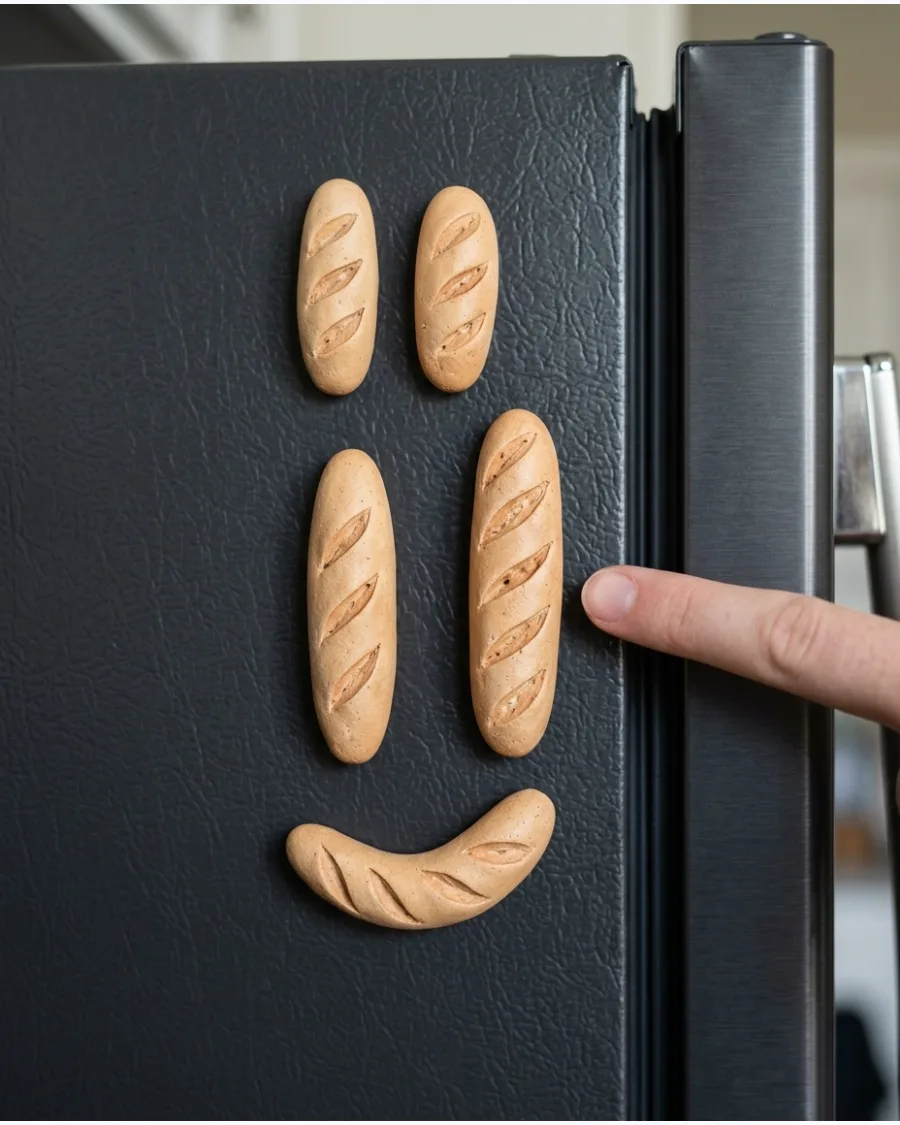
Form a miniature baguette with pointed ends and several diagonal lines across the top. Use warm tan and brown paint to recreate a freshly baked appearance.
Slice the diagonal lines deep enough so they stay visible after the clay expands or contracts during the drying process. A light dusting of white clay powder adds a rustic, artisanal touch.
- A single two-ounce block of tan clay can make over a dozen baguettes.
- Taper the ends of a clay cylinder by rolling it between your palms.
- Paint the cuts a lighter cream color to show the inside of the bread.
Most people skip this: Sand the back of the baguette flat after it dries so the magnet sits flush against the refrigerator.
9. Pancake Stack Magnet
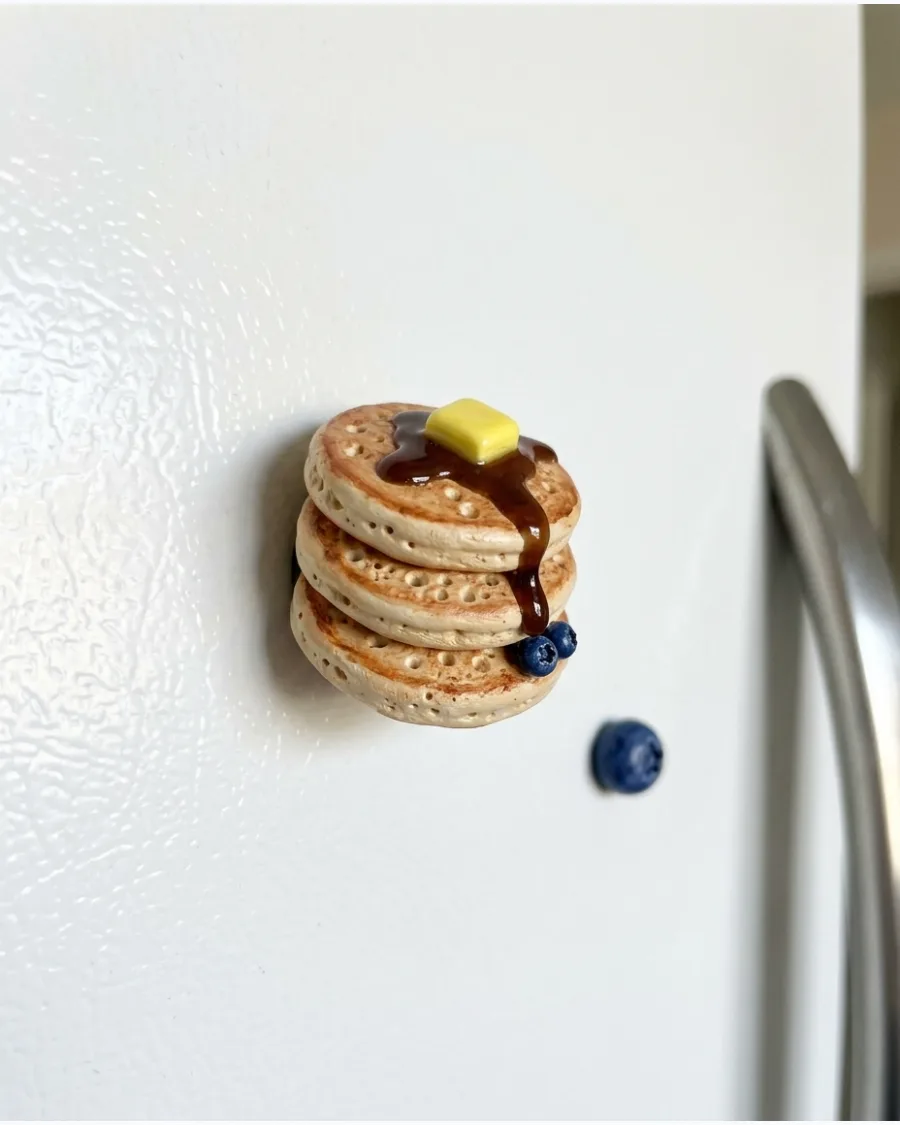
Stack several small clay circles and top them with butter, syrup, and berries. Slightly uneven pancakes will give the magnet a charming handmade look.
Drip a mixture of clear glue and brown paint over the stack to create a realistic syrup that pools at the bottom. This liquid effect adds a level of realism that solid clay cannot achieve alone.
- Clear-drying craft glue is essential for the syrup effect.
- Make three flat discs of slightly different sizes and stack them unevenly.
- Add a tiny clay blueberry or strawberry on top for a pop of color.
Best shortcut: Use a yellow clay scrap for the butter and do not blend it perfectly to keep the sharp pat shape.
10. Cup of Coffee Clay Magnet
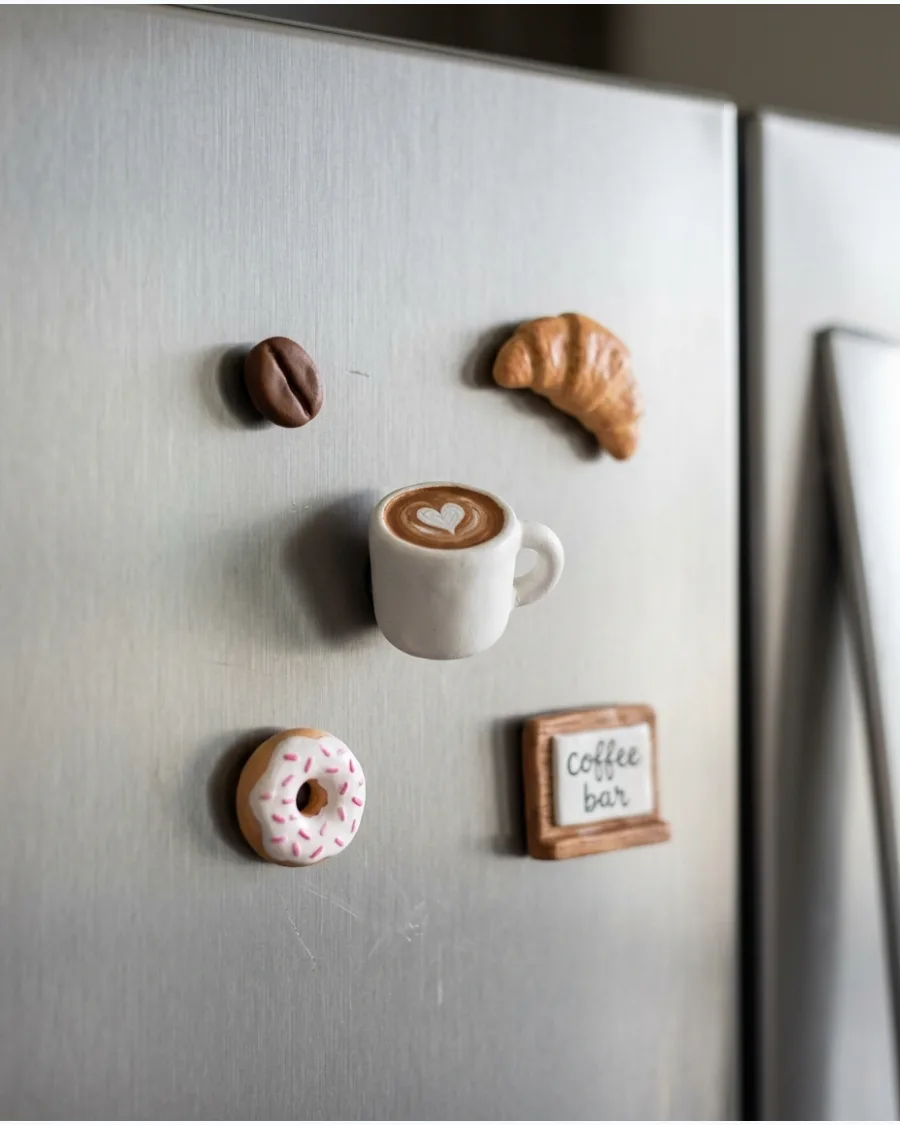
Create a tiny coffee cup with a raised handle and painted foam art. Personalize it with a heart, flower, or miniature initial on the front.
Use a toothpick to swirl white and light brown paint on the liquid surface to mimic a barista-style latte heart. This small detail makes the magnet feel like a custom piece of art.
- White air-dry clay is the easiest base for painting custom mug colors.
- Roll a thick cylinder for the cup and a tiny thin loop for the handle.
- Write a tiny name or Coffee on the side using a fine-liner pen.
Quick win: Attach the magnet to the back of the cup before adding the handle to ensure it remains balanced and level.
Fruit and Vegetable Clay Magnets
11. Strawberry Clay Magnet
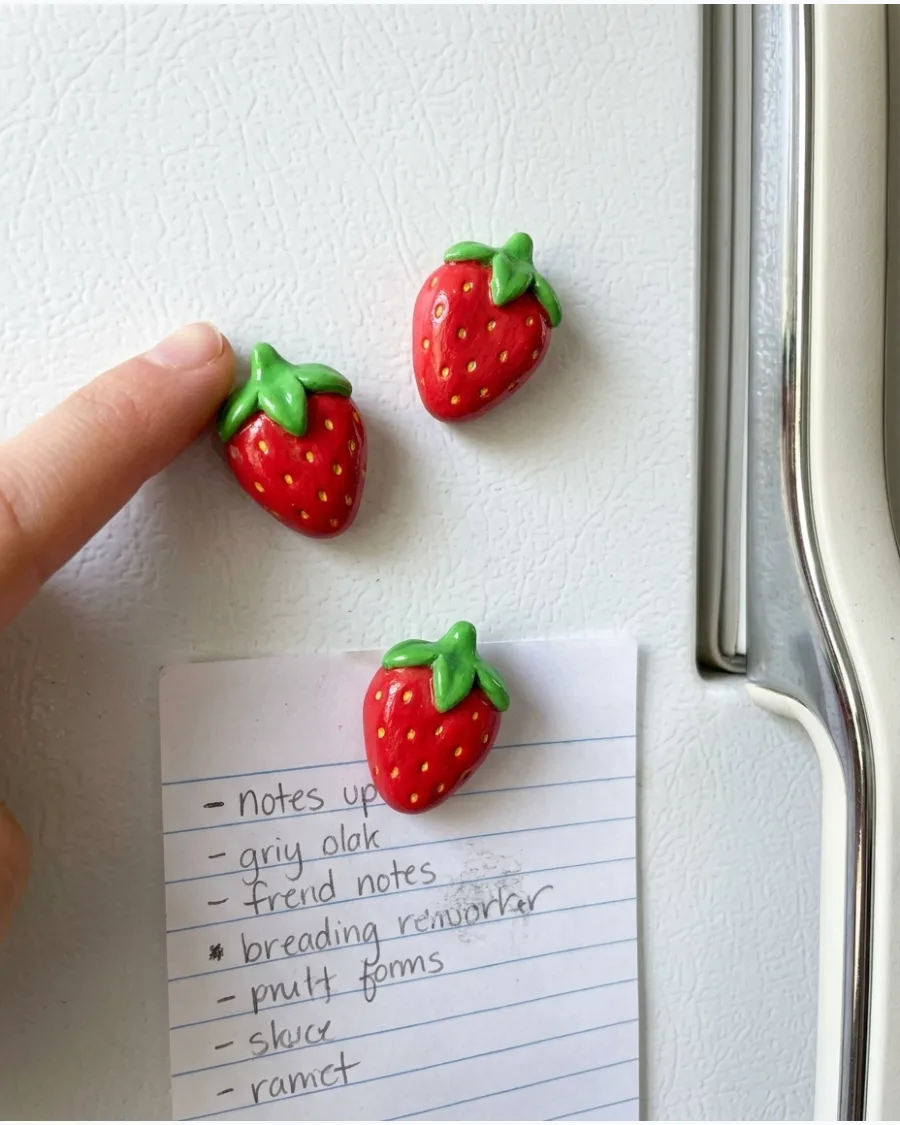
Shape a bright red strawberry with a leafy green top and small seed details. Press a toothpick into the red surface to create realistic seed indentations before baking. Make several strawberries in different sizes to create a matching magnet set.
A matte finish looks more natural than high gloss for these garden berries.
- Oven-bake polymer clay in red and green ($10-$15)
- 30 minutes assembly time for a set of four
- Scale the fruit to roughly one inch for the best visual balance
Quick win: Use a tiny bit of yellow paint in the seed holes to make the texture pop.
12. Lemon Slice Magnet
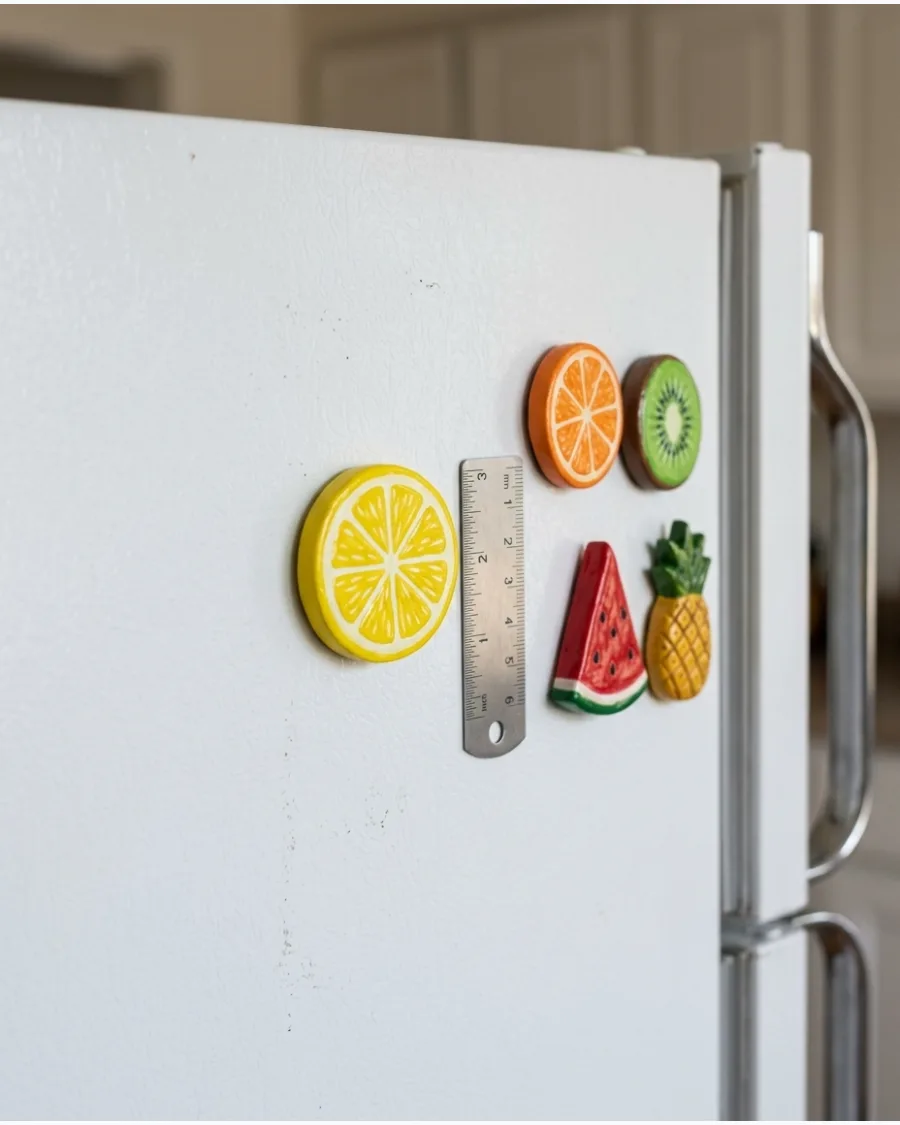
Create a round yellow lemon slice with white sections and textured fruit segments. Use a needle tool to drag lines from the center to the edge for a pulp-like appearance.
Mix a small amount of translucent clay with yellow to mimic the look of real citrus juice. The fresh citrus design works especially well in a colorful kitchen.
- Translucent and yellow polymer clay ($5-$8)
- 20 minutes prep time for a single slice
- Score the back of the clay before gluing the magnet for better adhesion
Best shortcut: Roll a thin white snake of clay to create the segments quickly and evenly.
13. Cherry Pair Fridge Magnet
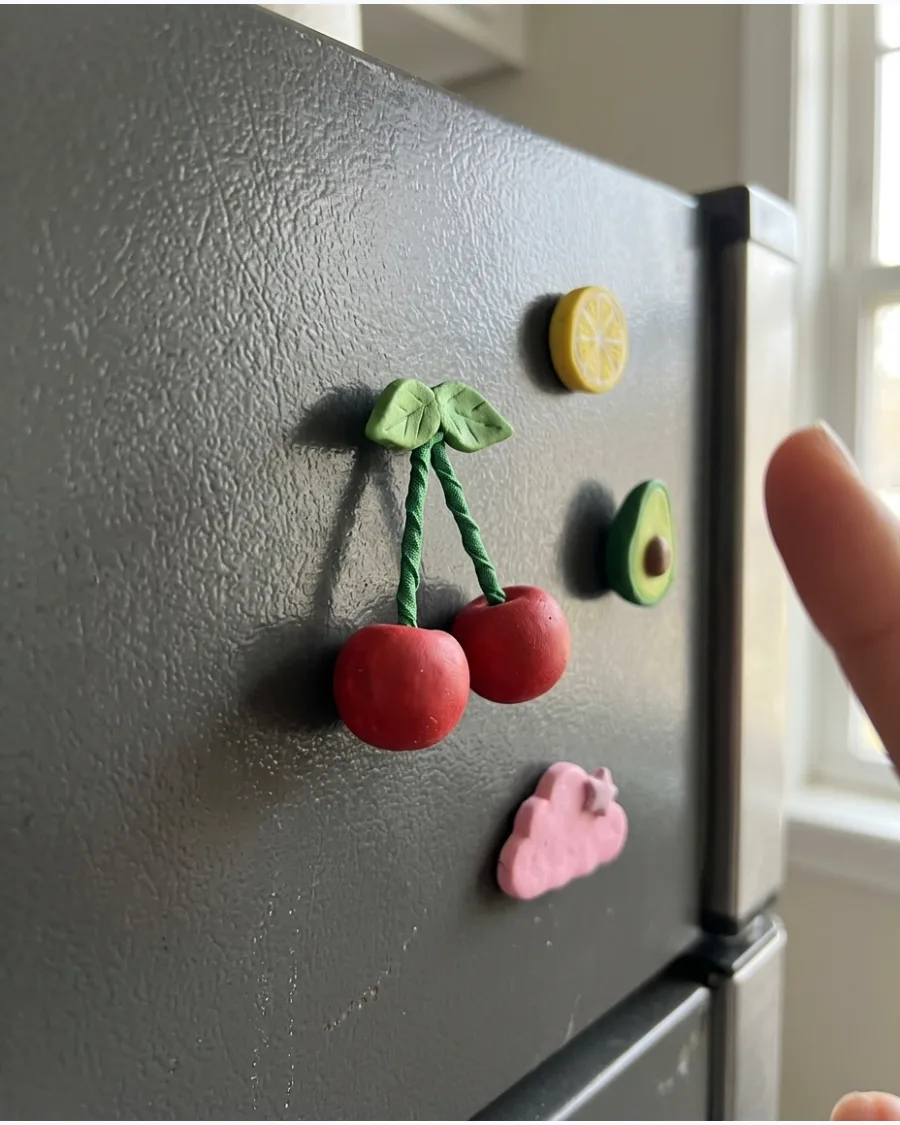
Make two small red cherries connected by curved green stems. Add tiny white paint highlights to give the cherries a glossy, dimensional appearance after they cool.
Reinforce the thin green stems by embedding a small piece of wire inside the clay. This prevents the delicate parts from snapping off when the magnet is pulled from the fridge.
- 20-gauge floral wire and red clay ($4-$10)
- 15 minutes assembly time per pair
- Use a high-gloss glaze only on the red fruit parts to contrast with matte stems
Most people skip this: Sand the bottom of the cherries flat so they sit flush against the appliance surface.
14. Mini Tomato Magnet
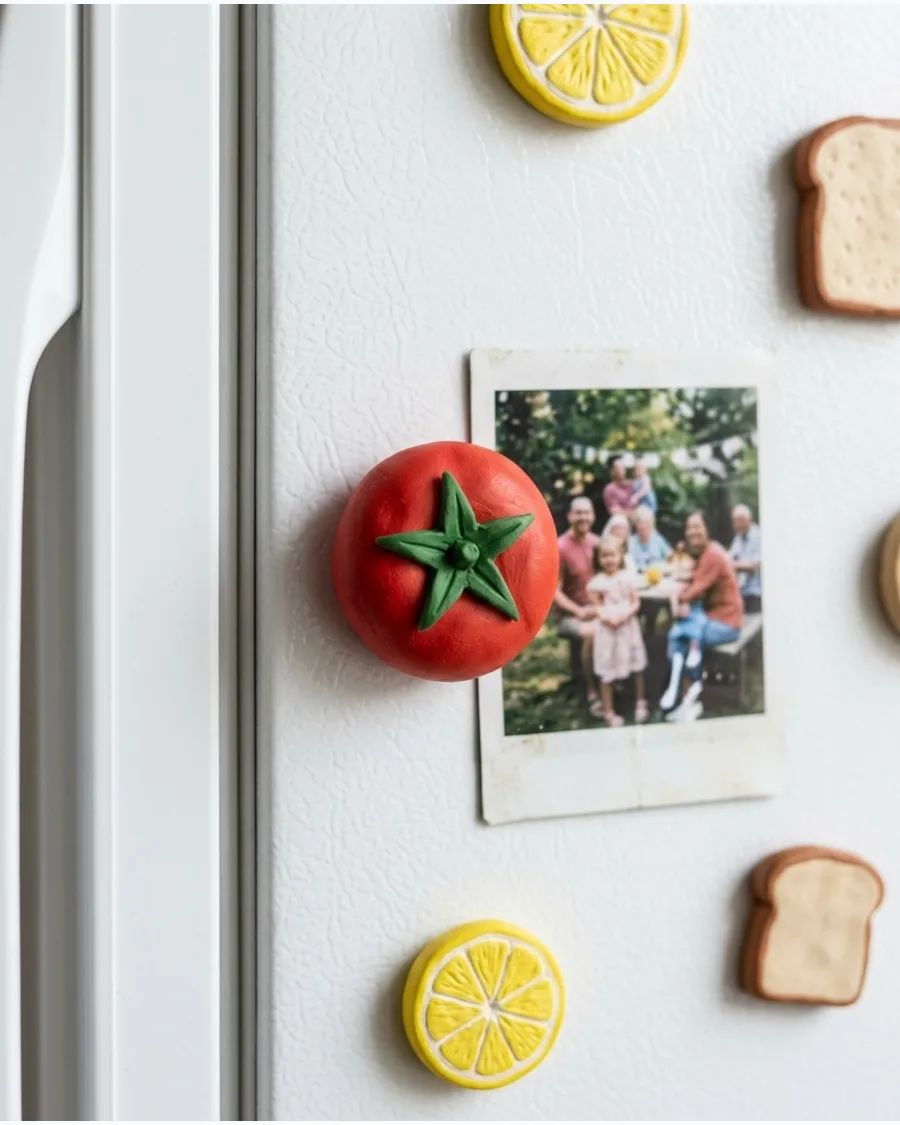
Shape a round tomato with a leafy top and subtle natural indentations near the stem. Use several shades of red to give it a realistic garden-inspired finish.
Roll five tiny green teardrop shapes and press them together to form the star-shaped leaf top. A satin finish provides a believable skin texture that isn't too shiny.
- Red and forest green polymer clay ($6-$8)
- 15 minutes assembly time for one tomato
- Use a ball stylus tool to create a small dip where the stem attaches
Quick win: Add a tiny brown speck at the very center of the green leaves for botanical accuracy.
15. Orange Slice Clay Magnet
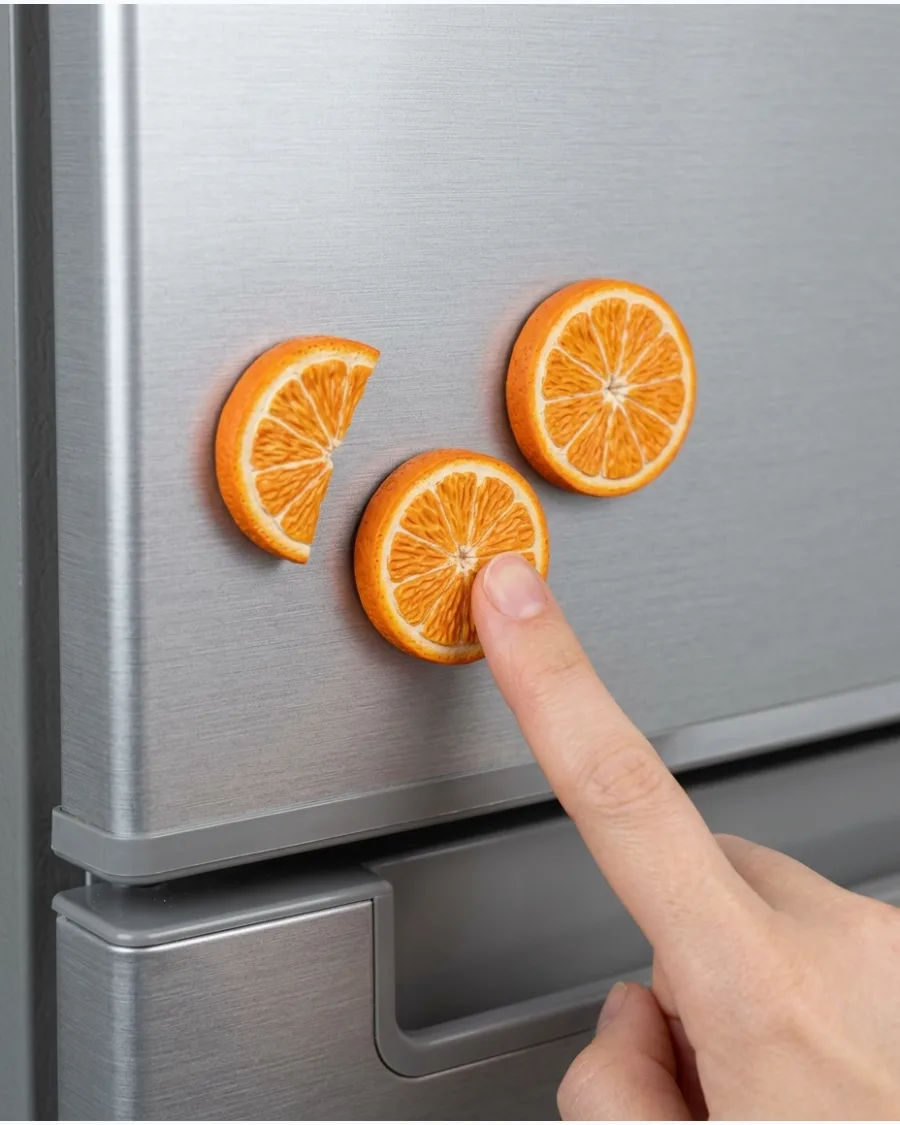
Create a bright orange circle with individually shaped citrus sections. A glossy seal can help recreate the juicy appearance of fresh fruit.
Texturize the outer orange rim with a stiff-bristled brush to mimic the bumpy surface of an orange peel. This small detail elevates the craft from a toy to a high-end decor piece.
- Orange and white polymer clay ($5-$10)
- 25 minutes prep time for a pair
- Bake at the exact temperature on the packaging to avoid browning
Best shortcut: Use a toothbrush to add the peel texture in seconds.
16. Watermelon Wedge Magnet
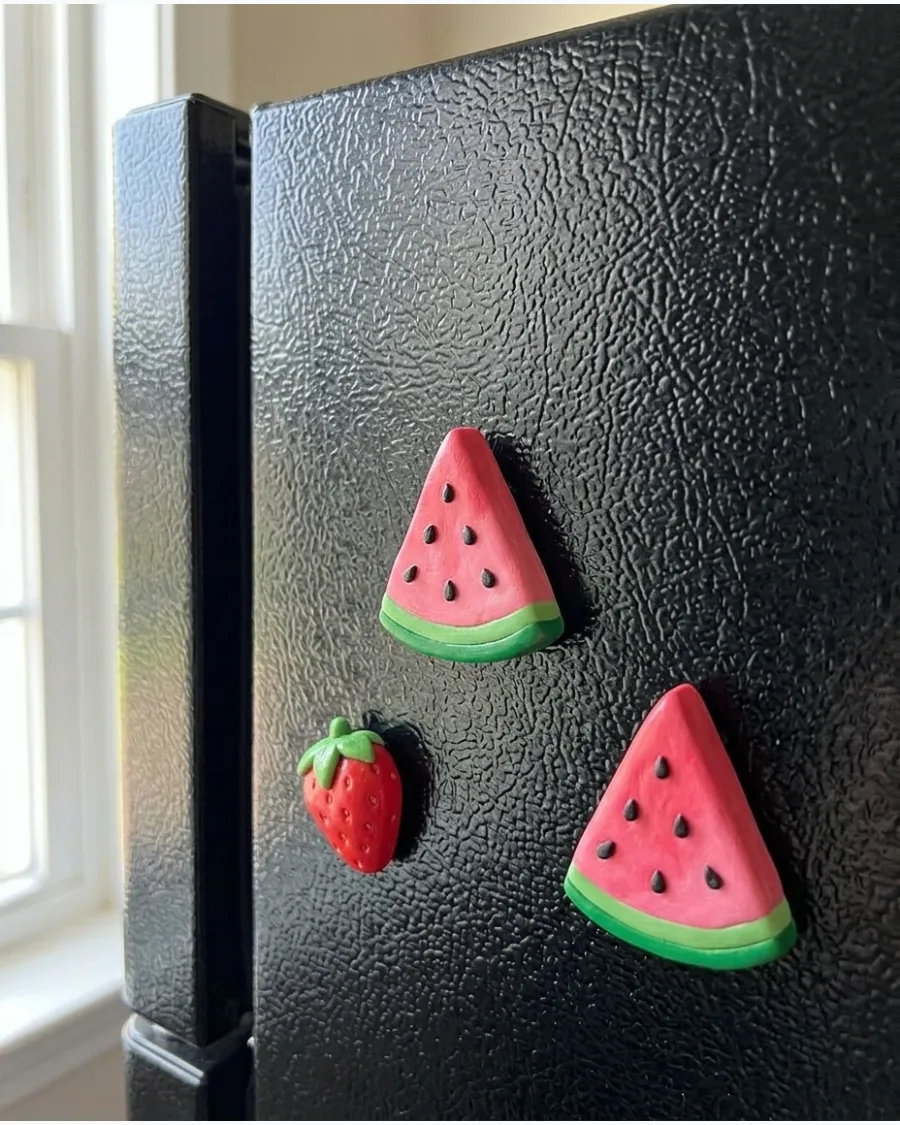
Make a triangular watermelon slice using green, white, and pink clay layers. Taper the edges of the pink clay slightly so it blends smoothly into the white rind layer. Add miniature black seeds across the center for contrast using tiny rolls of black clay.
This classic summer shape adds a playful touch to any vertical metal surface.
- Pink, green, and black clay ($8-$12)
- 20 minutes assembly time per wedge
- Apply a thin layer of liquid clay between colors to ensure they fuse perfectly
Quick win: Use a craft knife to cut the wedge after layering to get clean, crisp edges.
17. Blueberry Cluster Magnet
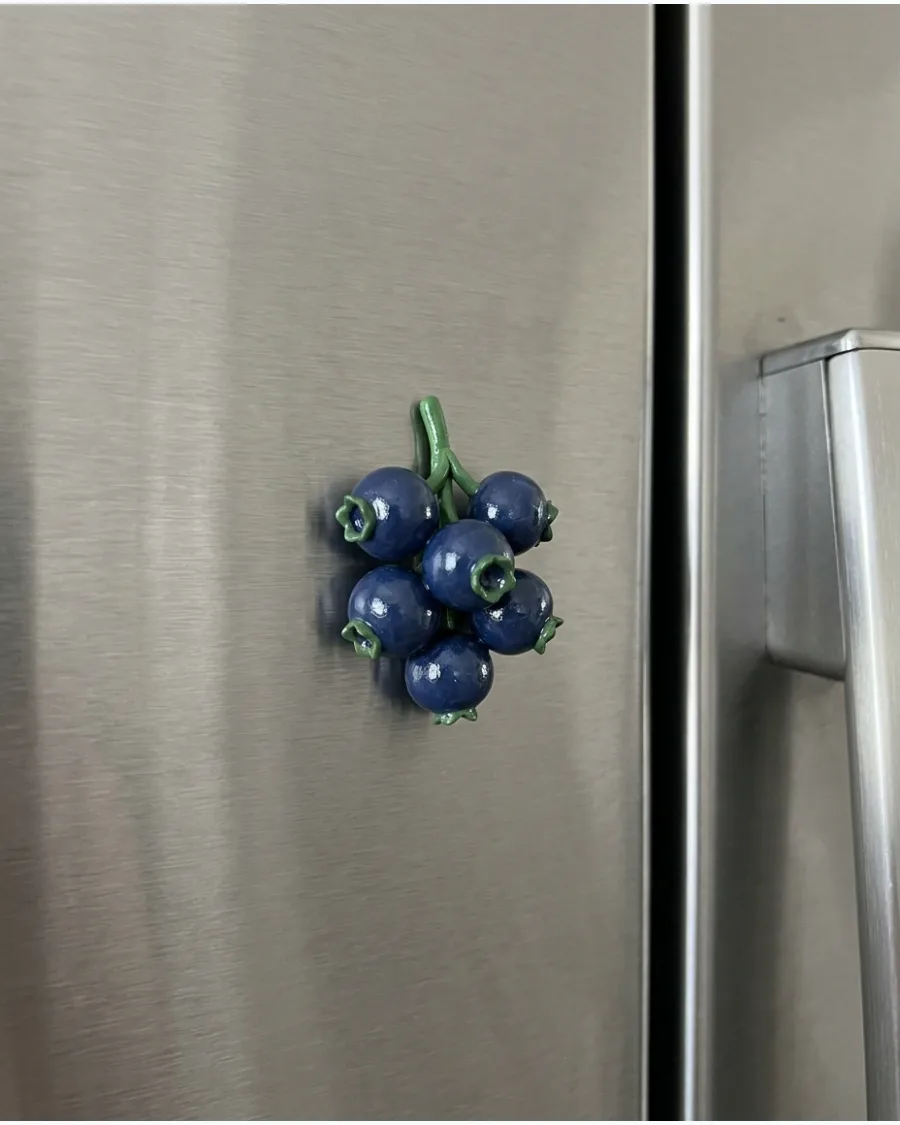
Group several tiny blue clay berries together with a few green leaves. Use different shades of blue to make the cluster look more natural.
Press the berries together firmly before baking so they fuse into a single solid unit. This cluster design provides more surface area for the magnet on the back.
- Navy and royal blue polymer clay ($6-$9)
- 30 minutes assembly for a realistic cluster
- Dust the berries with cornstarch before baking to mimic a natural fruit bloom
Most people skip this: Use a star-shaped tool to indent the bottom of each berry for a realistic look.
18. Mushroom Clay Magnet
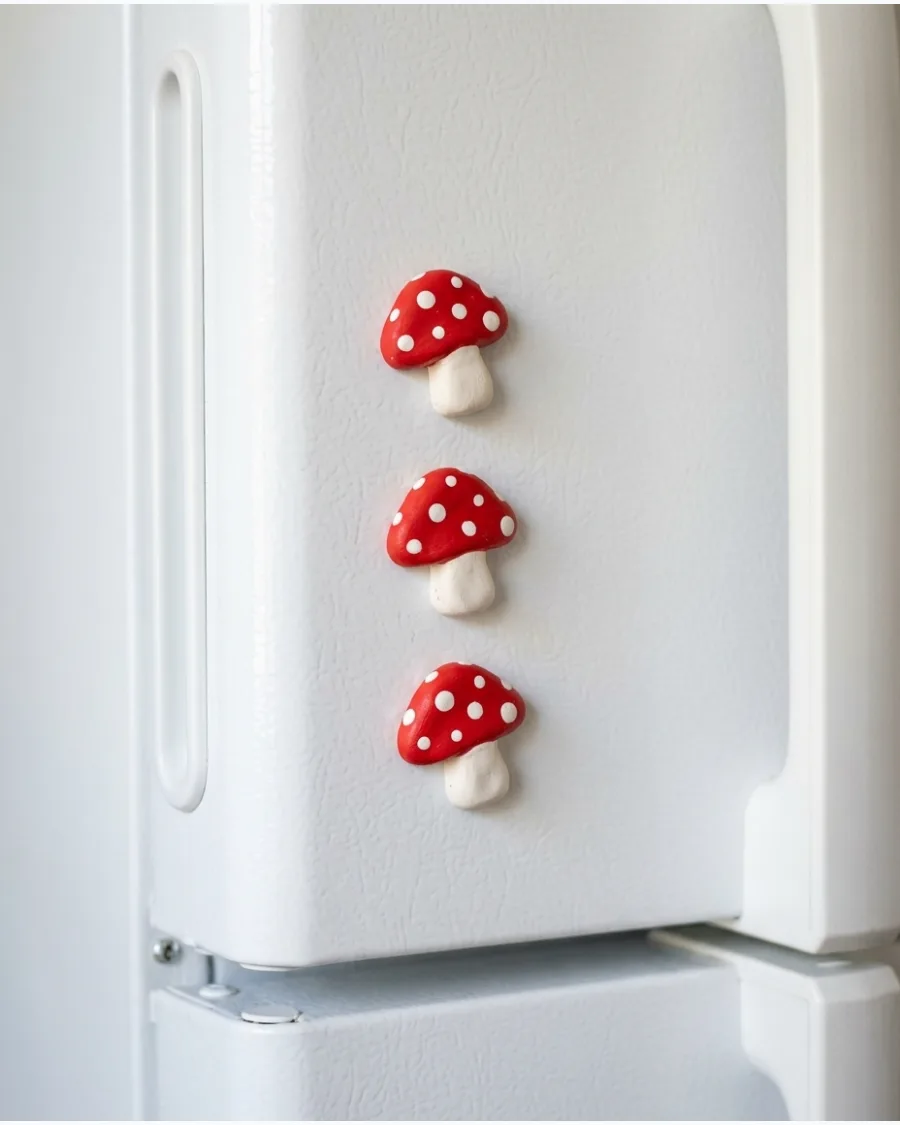
Create a whimsical mushroom with a curved stem and colorful spotted cap. Try red, pink, orange, or pastel colors for a playful cottagecore look.
Flatten tiny white clay discs and press them onto the cap for a textured polka-dot effect. These look best when grouped in odd numbers like three or five on the fridge door.
- Assorted polymer clay colors ($12-$15)
- 20 minutes assembly time per mushroom
- Use a toothpick to score gills on the underside of the mushroom cap
Quick win: Mix a tiny bit of brown clay into the white stem for a more organic, earthy appearance.
19. Chili Pepper Fridge Magnet
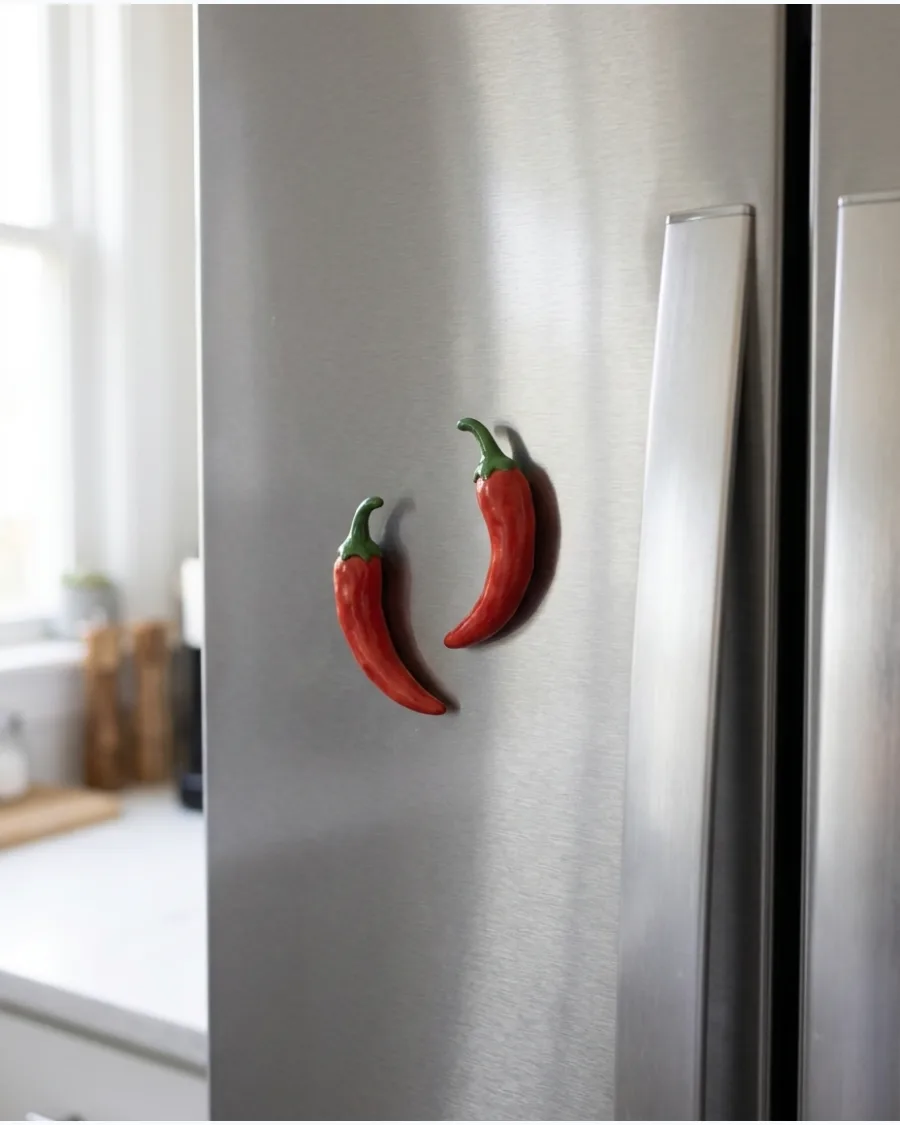
Shape a curved red or green chili pepper with a small leafy stem. This simple design is ideal for beginners because it requires very few details.
Roll the clay into a long cone shape and gently curve the tip to create a natural movement. A high-gloss varnish makes the peppers look like they were just picked from a garden.
- Red and green polymer clay ($5-$8)
- 10 minutes assembly time for one pepper
- Use a thin magnet strip along the back to support the long shape
Best shortcut: Use a rubber color shaper tool to smooth out any fingerprints before baking.
20. Mini Corn-on-the-Cob Magnet
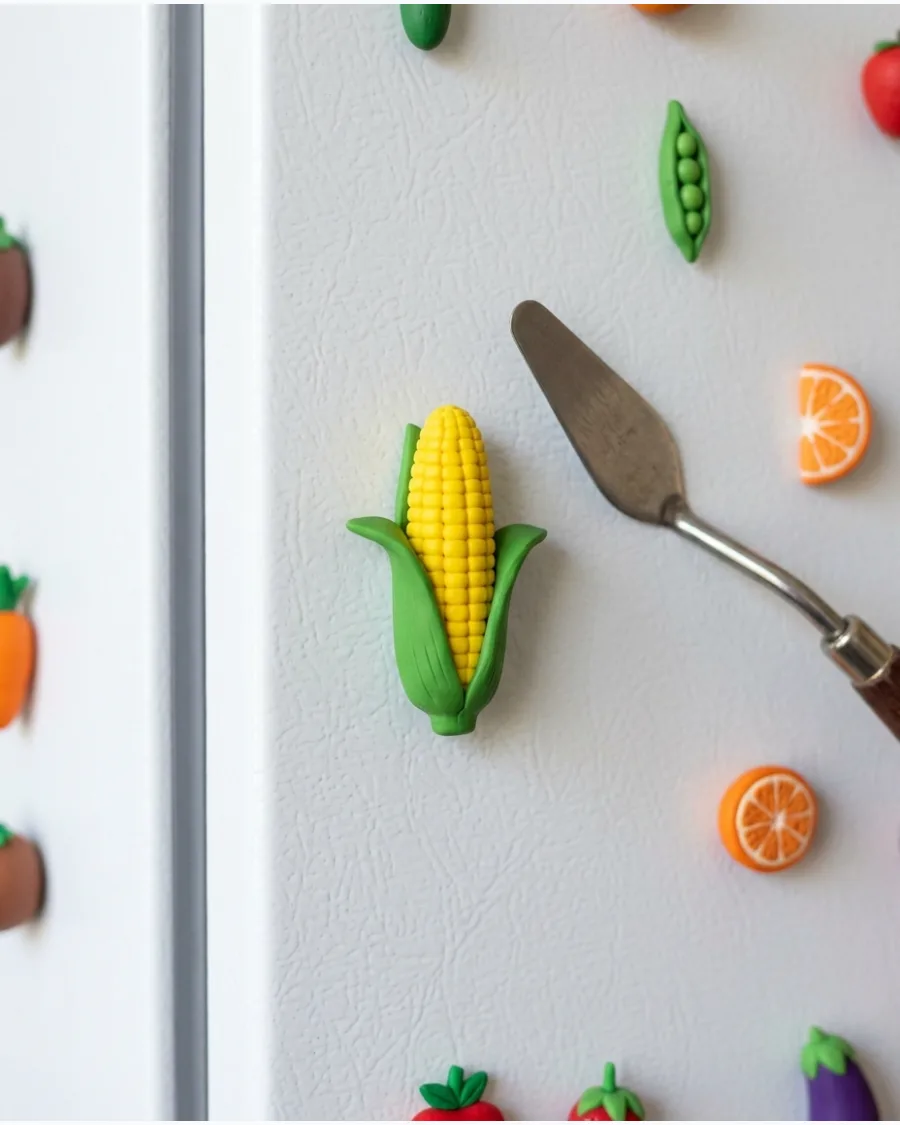
Form a small yellow corn cob covered with rows of tiny kernels. Add green clay leaves that partially wrap around the sides.
Use a mesh screen or a textured fabric to press kernel patterns into the yellow clay quickly. This creates a uniform look without the need to roll dozens of individual tiny balls.
- Yellow and light green polymer clay ($6-$10)
- 25 minutes assembly for a textured cob
- Thin the green clay husks at the edges so they look delicate and realistic
Most people skip this: Add a few strands of tan thread at the top to mimic corn silk.
Floral and Nature-Inspired Magnets
21. Pressed-Flower Clay Magnet
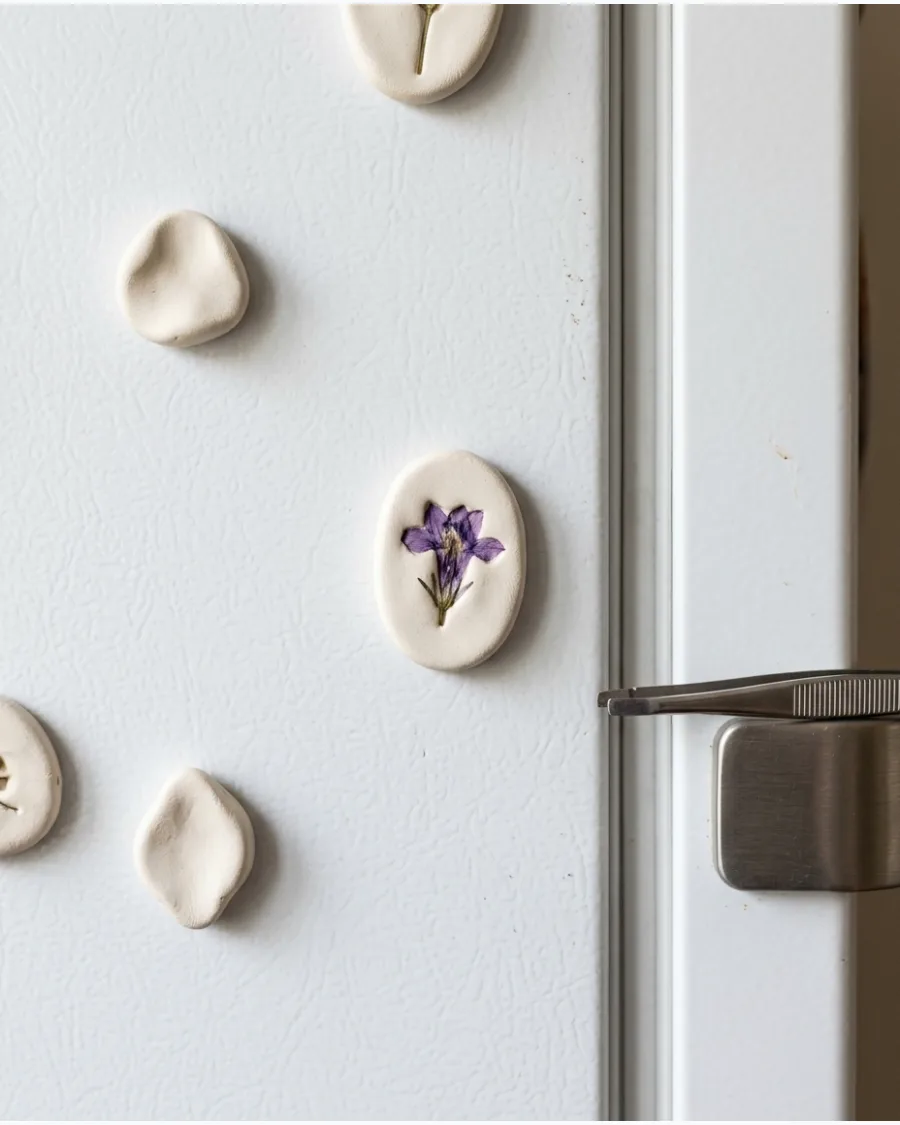
Use air-dry clay to capture the delicate texture of local flora for a botanical look. Roll the clay into a small organic oval before pressing a dried bloom firmly into the center. A coat of clear matte sealant prevents the organic material from flaking off over time.
These look best when the clay is left in its natural off-white state to mimic stone.
- $5 for a pack of clay; 15 minutes plus drying time.
- Stick the magnet to the back using high-strength jewelry glue.
- Use herbs like rosemary or thyme for a kitchen-themed set.
Quick win: Use a rolling pin to ensure the clay surface is perfectly flat before pressing the flower.
22. Colorful Daisy Magnet
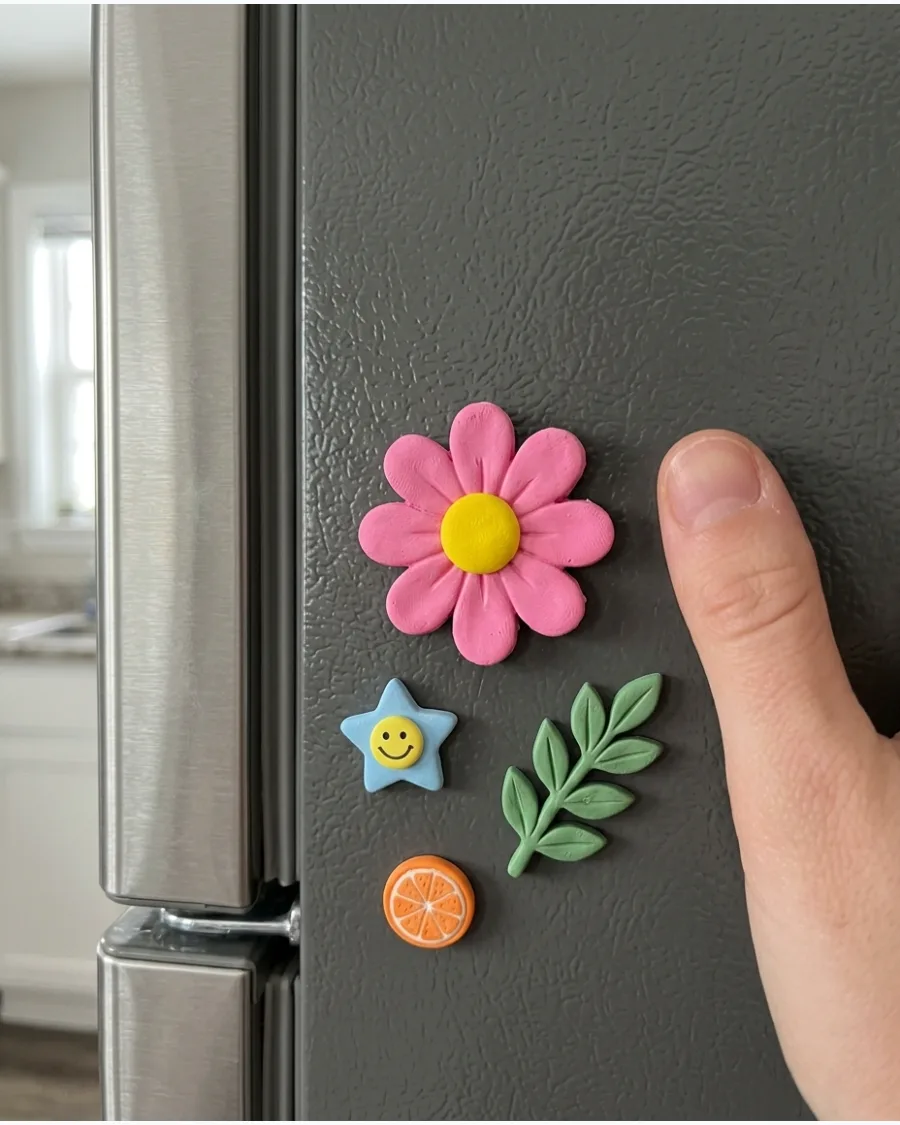
Daisies bring a cheerful energy to a busy kitchen command center or message board. Roll tiny balls of white clay for petals and flatten them around a textured yellow center. Use a toothpick to drag lines through the petals for a more realistic look.
Vibrant colors work well here to help the small shapes stand out against dark appliance finishes.
- $10 for multi-colored clay sets.
- Keep the petals slightly thick to prevent them from snapping off during use.
- Try pastel shades for a softer, vintage cottage look.
Best shortcut: Use the end of a paintbrush to create a dimpled texture on the yellow center.
23. Tiny Tulip Fridge Magnet
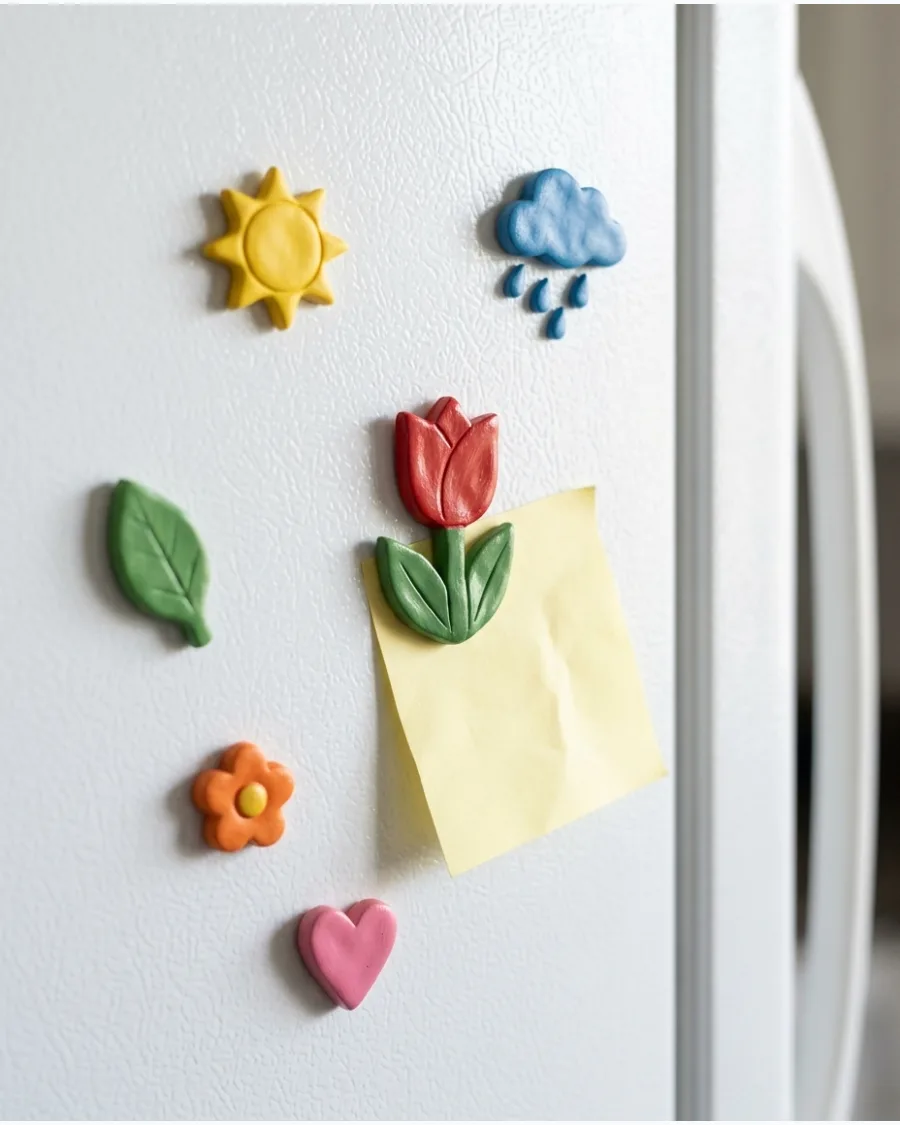
These slender magnets add a vertical element to your refrigerator decor and save space. Shape a small bell-like bloom and attach two thin green leaves to the base of a short stem. Because they are narrow, they are perfect for holding up coupons or small receipts.
Grouping three different colors together creates the look of a miniature garden bed.
- $15 for clay and magnets; 20 minutes per flower.
- Ensure the stem is thick enough to support the weight of the flower head.
- Paint the tips with a lighter shade to add a realistic gradient.
Most people skip this: Reinforce the junction where the leaf meets the stem with a tiny drop of liquid clay.
24. Monstera Leaf Magnet
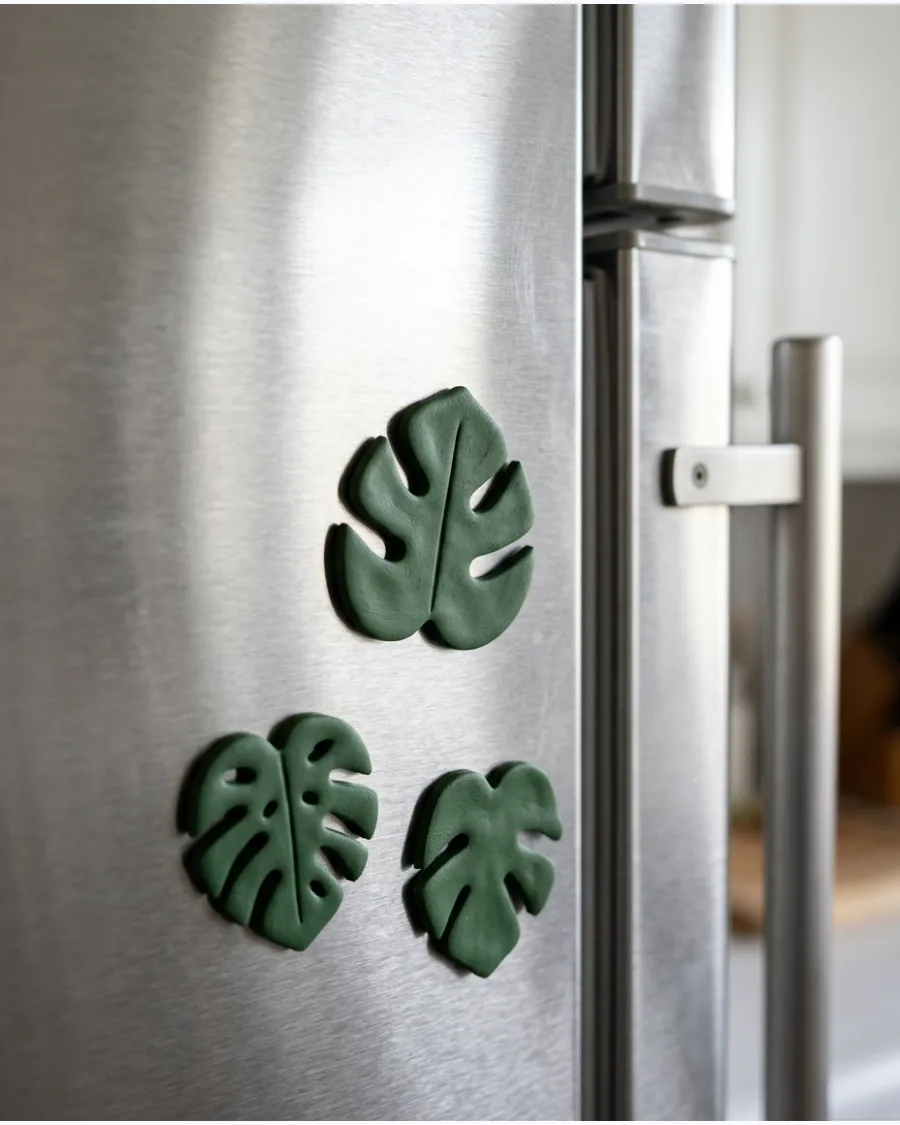
Bring a tropical vibe to the kitchen without the maintenance of a real plant. Cut a heart-shaped piece of green clay and use a craft knife to carve out the signature leaf slits. Mixing two shades of green creates a marbled effect that mimics natural variegation.
These larger leaves have enough surface area to hide a strong ceramic magnet underneath.
- Under $10 for clay; 10 minutes to sculpt.
- Sand the edges with fine-grit sandpaper after the clay dries for a professional finish.
- Use gold paint on the edges for a high-end glam look.
Quick win: Use a real leaf as a template to get the proportions exactly right.
25. Sunflower Clay Magnet
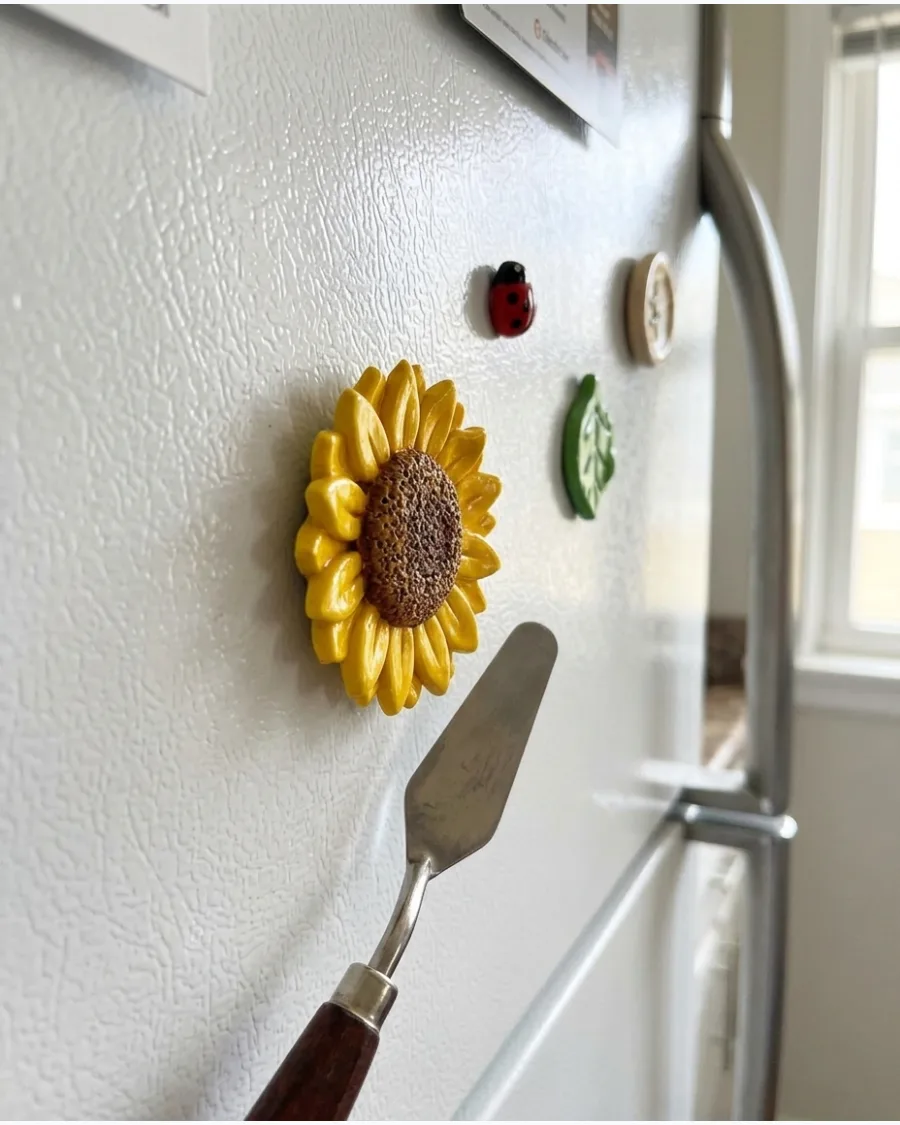
Sunflowers offer a bold focal point for any magnetic surface in the home. Press a cross-hatch pattern into a brown clay disk to create the seed head before adding bright yellow petals. The high contrast between the center and the petals makes these visible from across the room.
They feel sturdy and substantial, making them great for holding up heavier cardstock.
- $12 for materials; 30 minutes for a set of four.
- Use a round cookie cutter to ensure the base stays perfectly circular.
- Swap yellow for deep orange for a fall-inspired kitchen theme.
Most people skip this: Varnish only the yellow petals to make them pop against the matte brown center.
26. Wildflower Bouquet Magnet
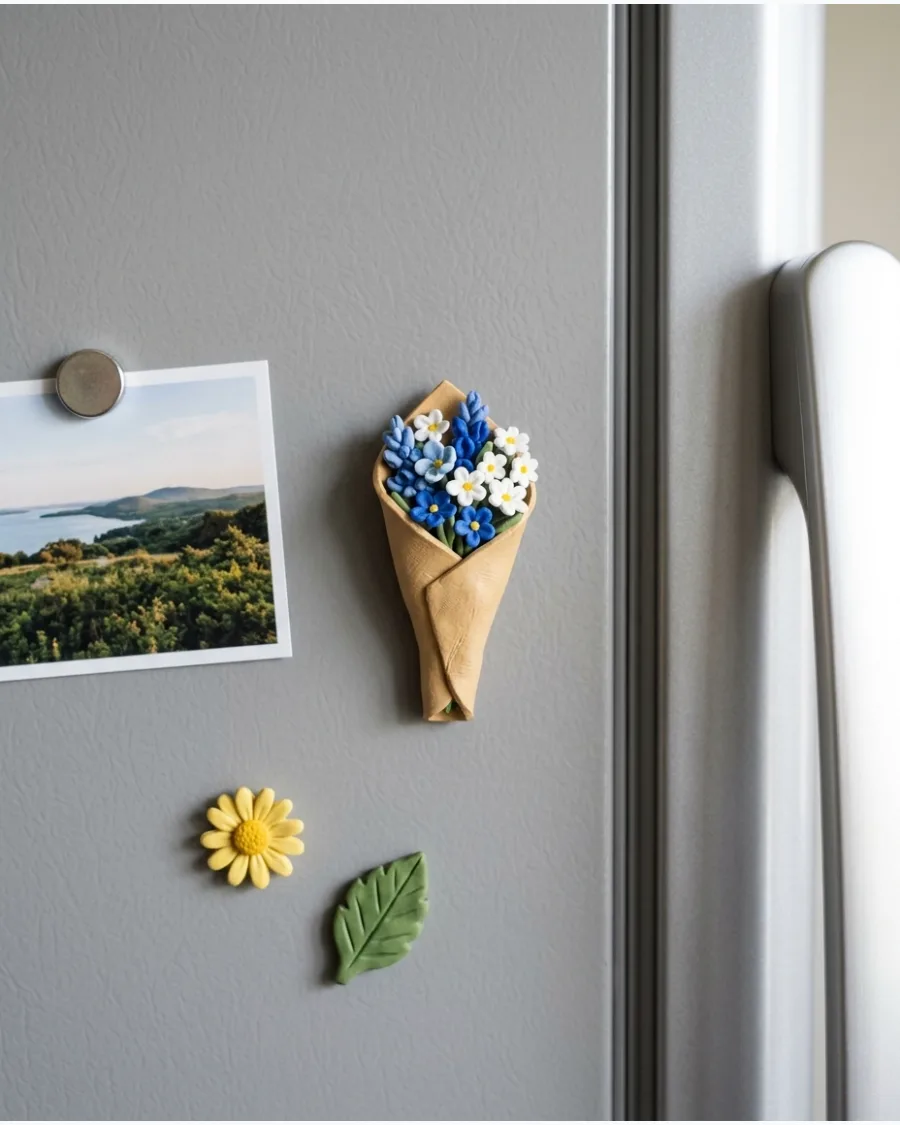
This design packs a lot of detail into a very small, giftable space. Bundle three tiny clay stems together and wrap the base in a thin sheet of tan clay to look like butcher paper. Vary the heights of the flower heads to create a natural, organic silhouette.
It is a sophisticated way to display a child's artwork or school photos.
- $15 for clay and floral wire; 45 minutes of work.
- Use a strong neodymium magnet to handle the slightly heavier weight of the bundle.
- Leave some stems longer for a more rustic, hand-picked appearance.
Best shortcut: Use a needle to poke tiny holes in the flower centers for instant texture.
27. Crescent Moon and Flowers Magnet
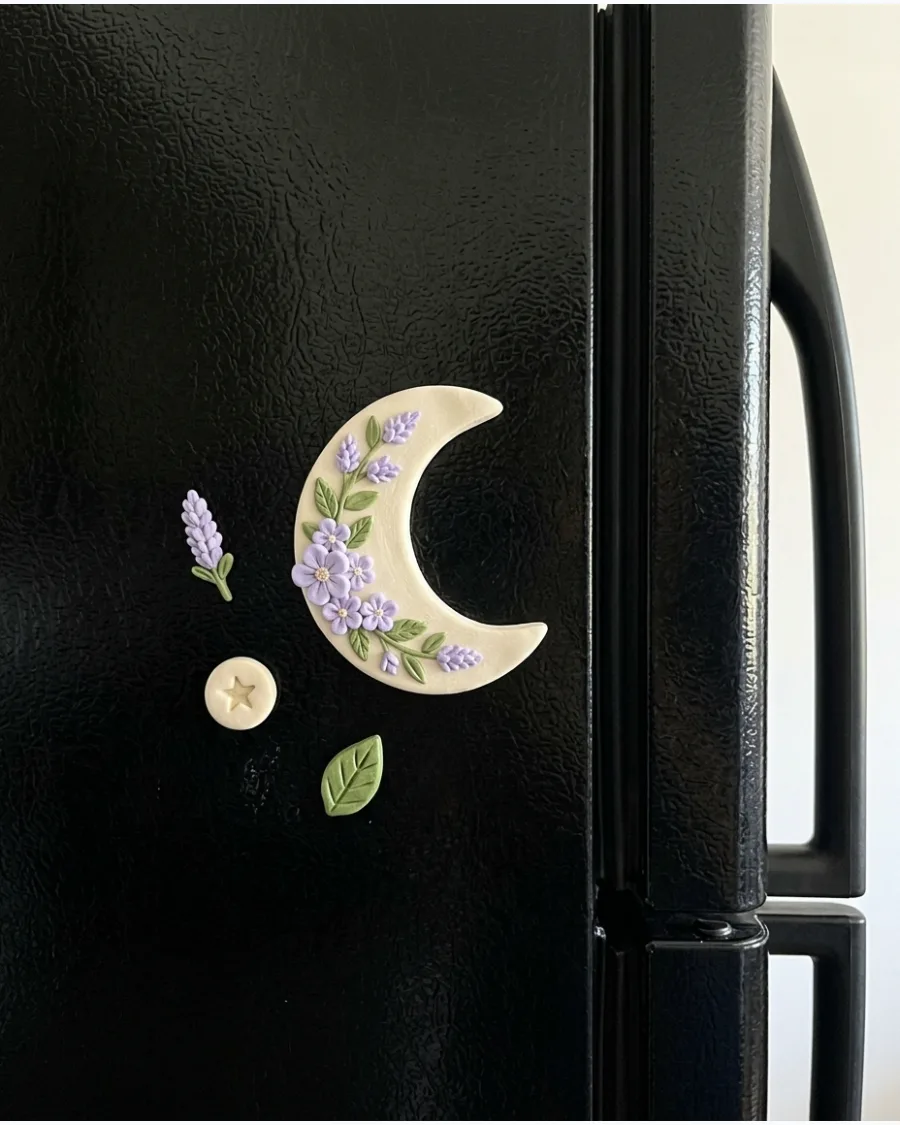
This dreamy design works well in kitchens with a more whimsical or boho style. Cut a crescent shape from cream-colored clay and attach tiny flattened flowers along the inner curve. Soft colors like lavender or sage green keep the look sophisticated rather than craft-like.
The curved shape provides a nice visual break from standard square or round magnets.
- $10 for clay; 20 minutes of assembly.
- Smooth the edges with a damp finger before the clay sets.
- Add a tiny dot of silver paint to mimic distant stars.
Quick win: Use a glass jar lid to trace a perfect circle before cutting out the crescent.
28. Mini Potted Plant Magnet
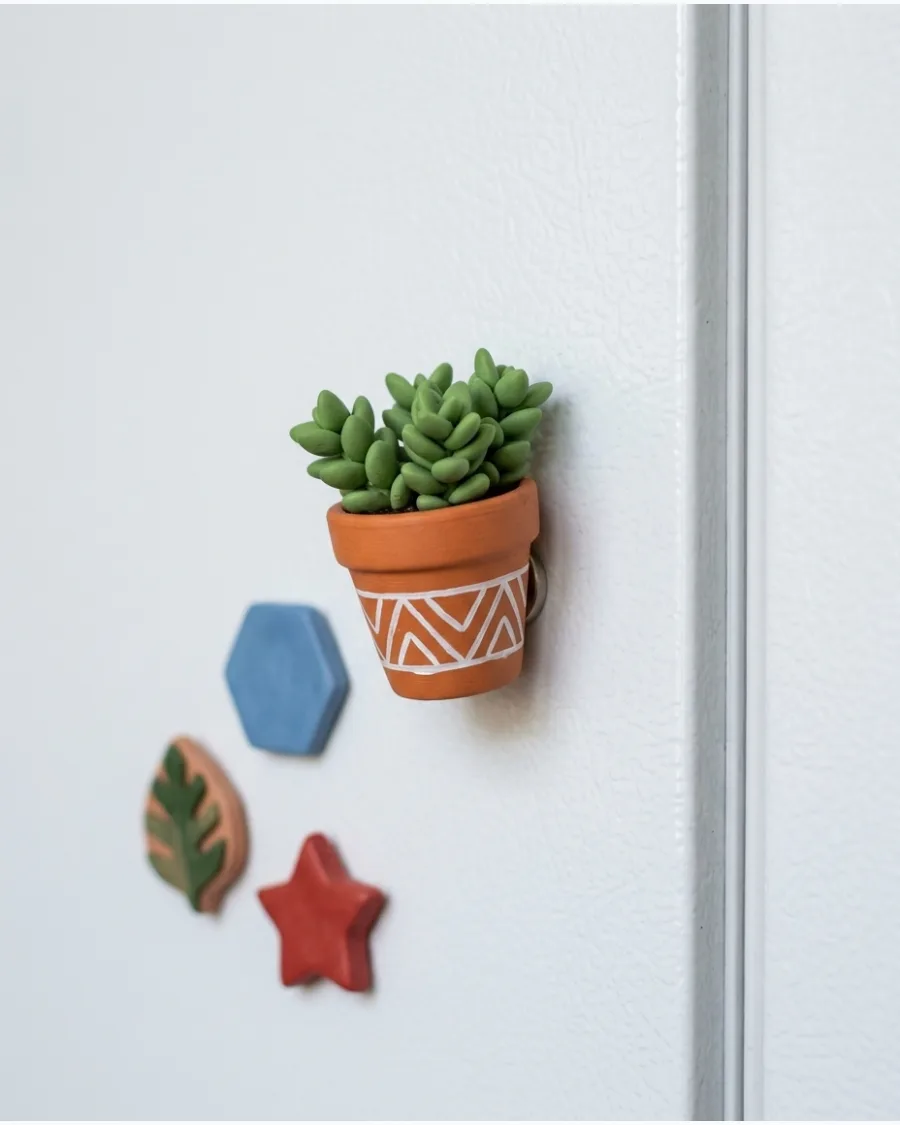
Miniature terracotta pots made of clay look incredibly realistic on a fridge door. Sculpt a small cylinder with a flared rim and fill the top with tiny green clay beads to represent succulents. These 3D shapes cast beautiful shadows and add depth to a flat appliance.
They are heavy enough to require a thick, high-quality magnet for a secure hold.
- $15 for materials; 30 minutes to complete.
- Hollow out the back of the pot slightly to reduce weight.
- Paint the pot white or blue for a modern ceramic look.
Most people skip this: Use a small piece of crumpled aluminum foil to add soil texture to the top.
29. Rainbow Clay Magnet
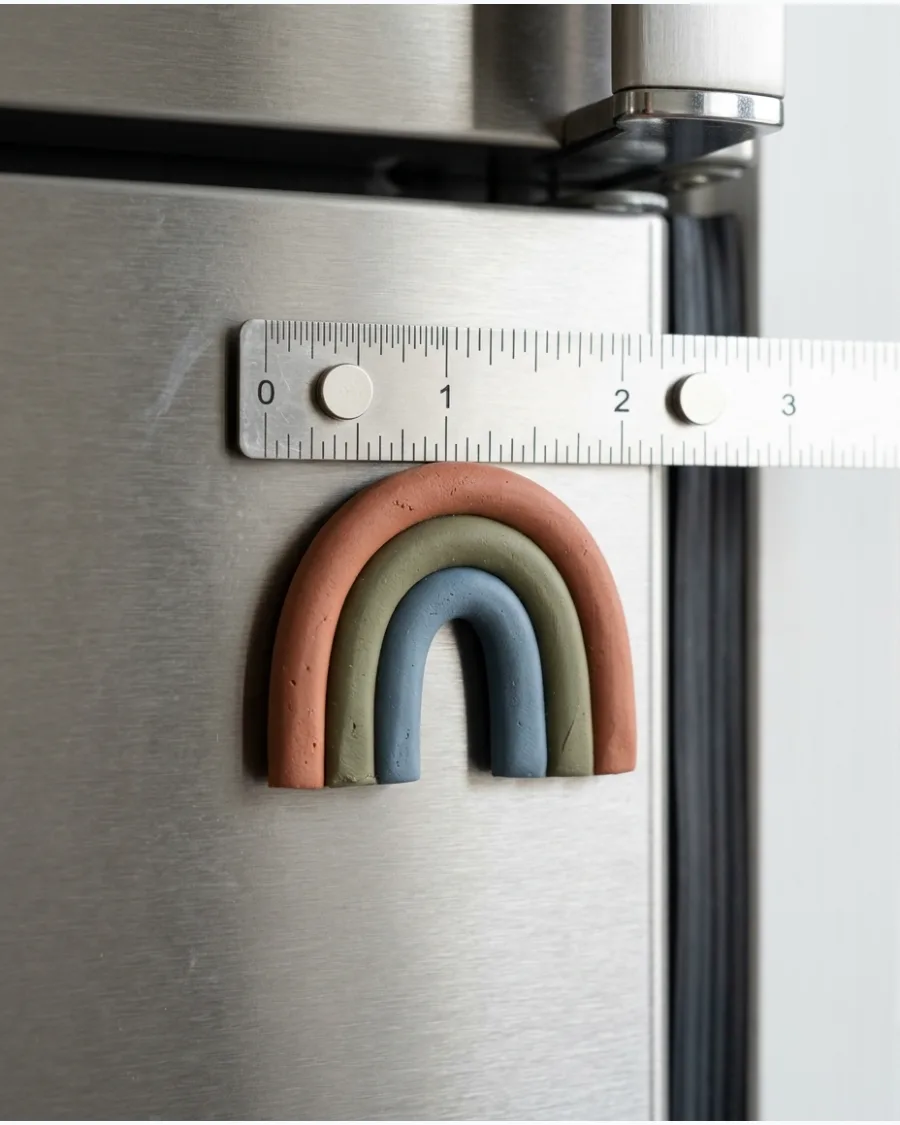
Multi-layered arches are a modern staple that adds a pop of color to the kitchen. Roll three thin snakes of clay in different colors and press them together into a U-shape. Earthy tones like terracotta, mustard, and sage look more grown-up than primary colors.
These are very durable because the thick arches provide a lot of structural support.
- $10 for clay; 15 minutes of work.
- Trim the bottom of the arches with a straight blade for a clean, professional look.
- Use glitter clay for one of the arches to add a bit of sparkle.
Best shortcut: Chill the clay for ten minutes before cutting to prevent the colors from smearing.
30. Smiling Cloud Magnet
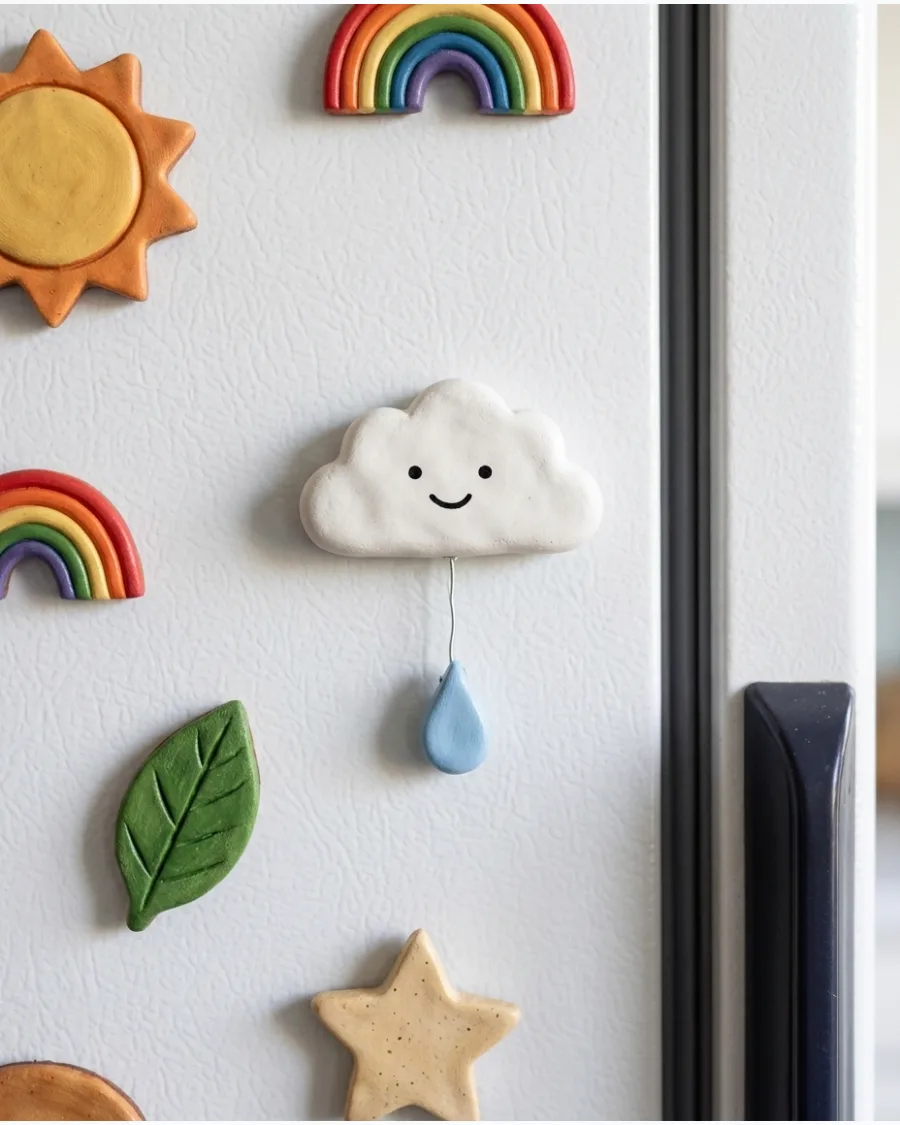
A simple cloud shape is a great project for beginners or for making with family. Flatten a piece of white clay into a soft, puffy shape and use a fine-tip marker to add a tiny face after it dries. Adding a small wire with a clay raindrop hanging below gives the piece movement.
It brings a lighthearted, playful feel to a functional space.
- $8 for clay and wire; 15 minutes of crafting.
- Use a gloss varnish to give the cloud a clean, porcelain-like finish.
- Change the raindrop to a tiny yellow star for a nighttime theme.
Quick win: Use a cotton swab dipped in rubbing alcohol to smooth out any fingerprints on the white clay.
Animal and Character Clay Magnets
31. Cute Frog Fridge Magnet
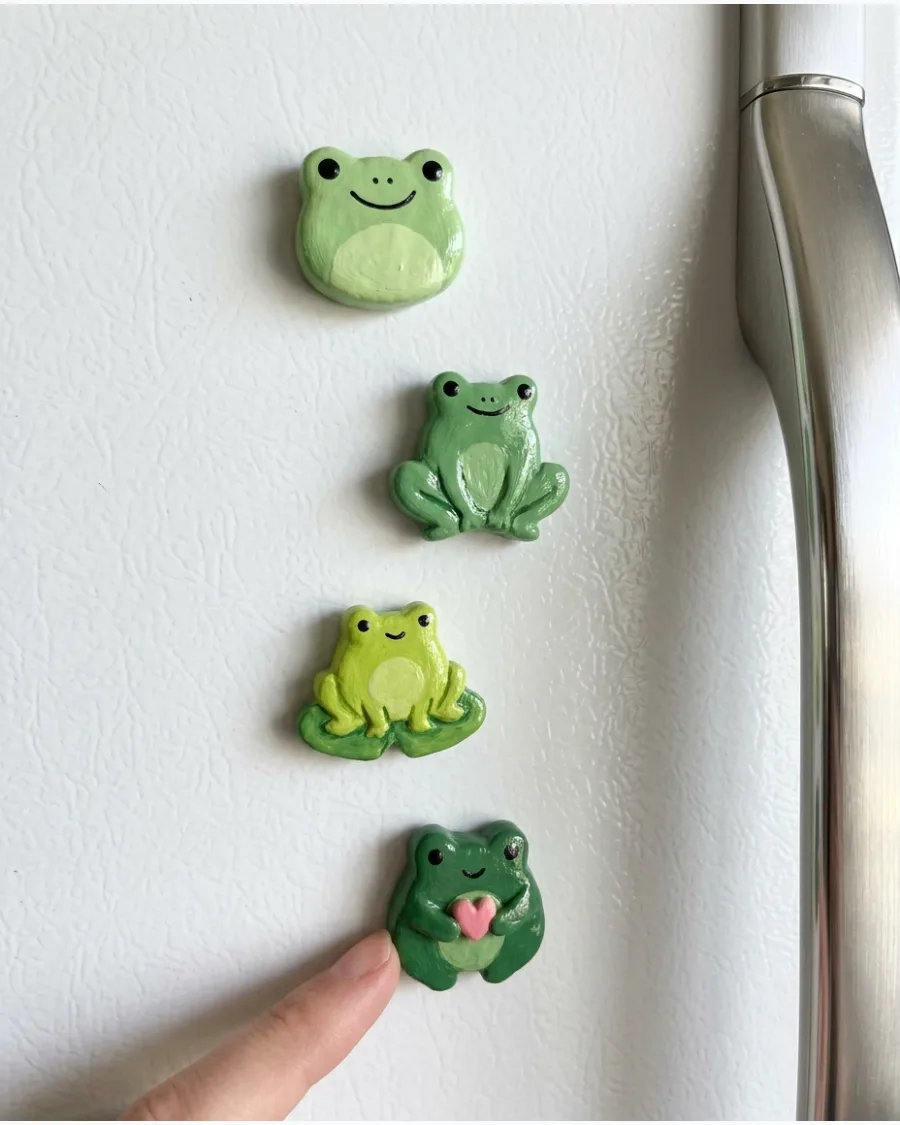
This project turns a simple ball of green clay into a charming kitchen companion. Large eyes and a wide smile create a friendly look that brightens up a white or stainless steel appliance.
Roll two tiny balls for eyes and press them firmly onto the top of the head for a classic cartoon look. A matte finish makes these look more sophisticated than high-gloss options.
- $10 for a variety pack of clay
- 30 minutes to sculpt and set
- Use strong craft glue for the magnet attachment
Quick win: Use a toothpick to press a small dimple at the corners of the mouth for a more expressive face.
32. Sleepy Cat Clay Magnet
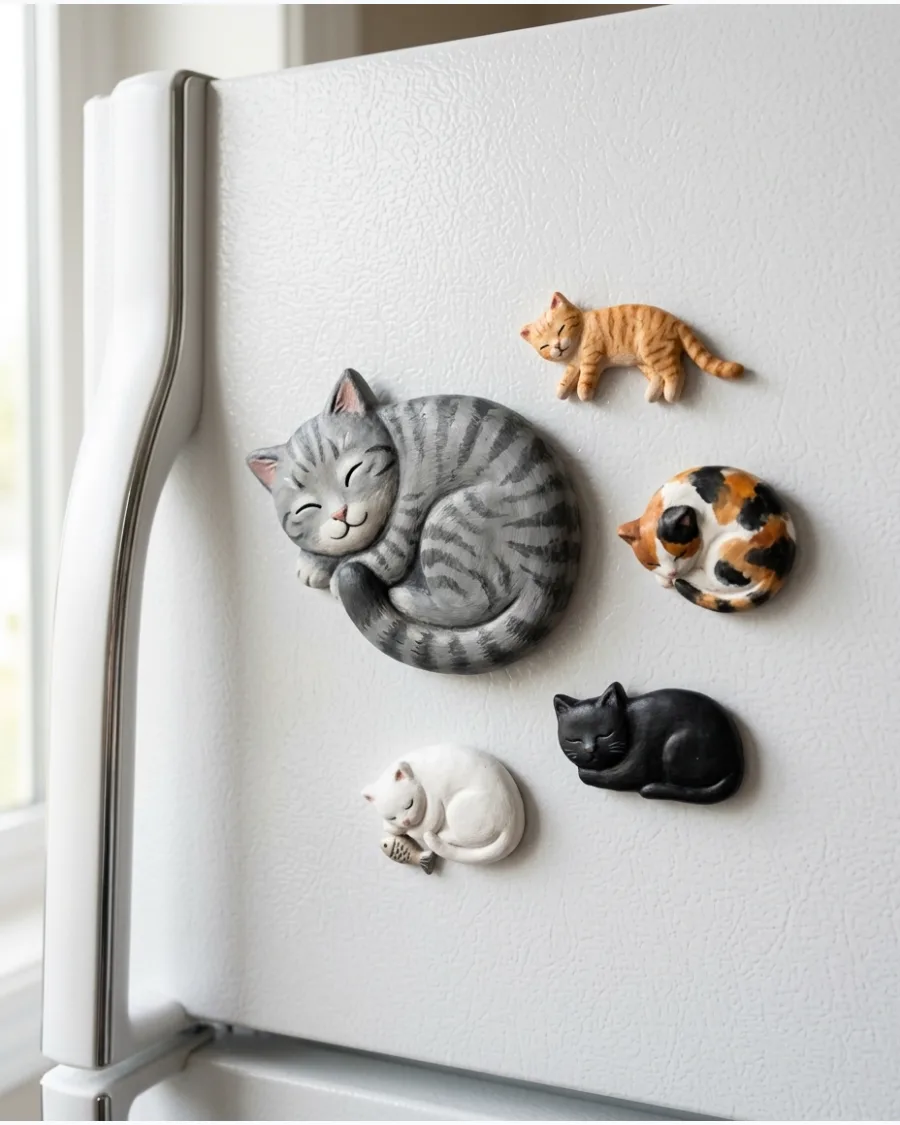
A curled sleeping cat captures a cozy vibe for the heart of the home. It is easy to customize the patches and colors to match a specific pet or a kitchen color scheme.
Use a needle tool or toothpick to etch thin whiskers and closed eyelids into the clay before baking. These work best when made in a set of three different neutral colors.
- $5 for neutral clay colors
- 45 minutes for a set of three
- Store in a cool place before baking to maintain shape
Most people skip this: Sand the back of the clay once it is dry so the magnet sits perfectly flat against the fridge.
33. Mini Dachshund Magnet
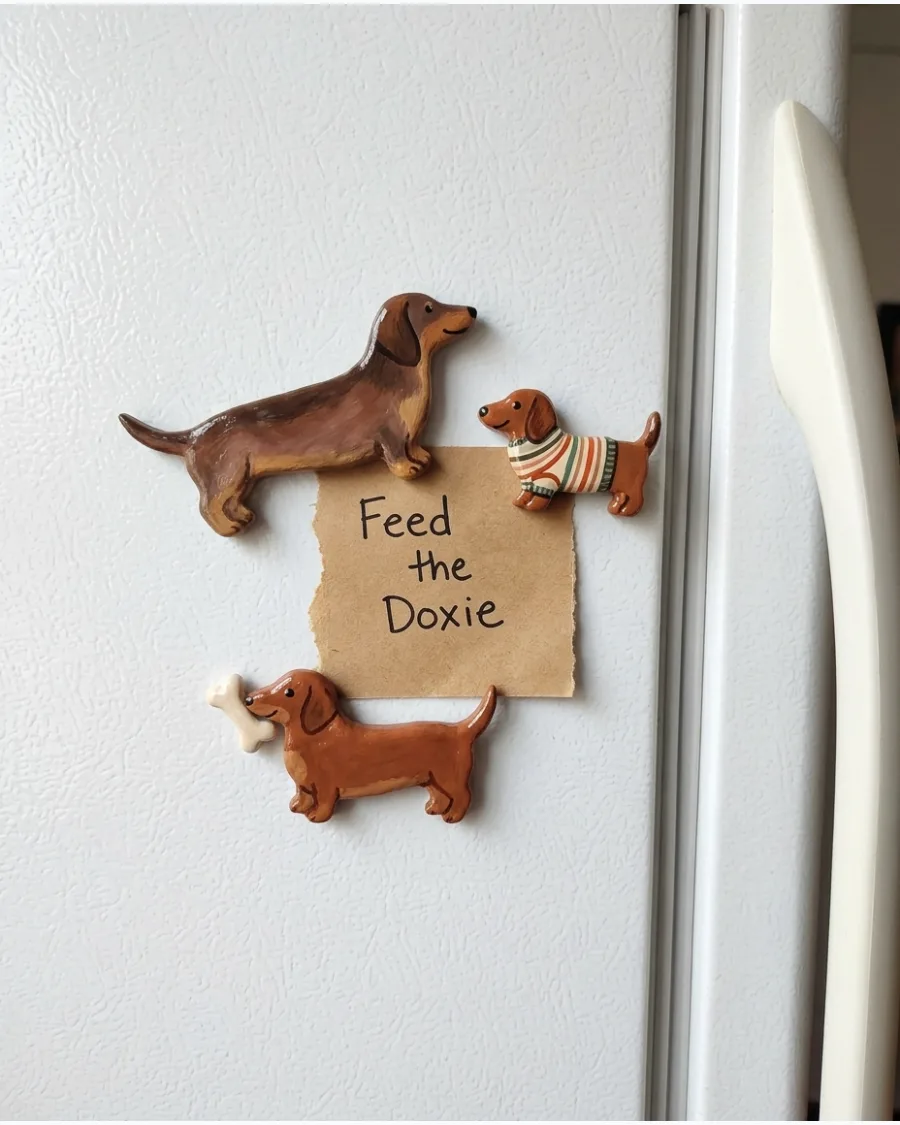
The long silhouette of a dachshund makes for a striking and recognizable magnet shape. Because the body is thin, it is important to handle the clay carefully before it sets to avoid any warping.
Reinforce the long body by embedding a small segment of wire or a toothpick inside the clay to prevent snapping. Clay dogs always look better when you focus on a clean silhouette rather than painting tiny eyes.
- $8 for brown and black clay
- 20 minutes per dog
- Fits well on narrow fridge side panels
Best shortcut: Use a small oval cutter to get a consistent body shape for every dog in the pack.
34. Penguin Fridge Magnet
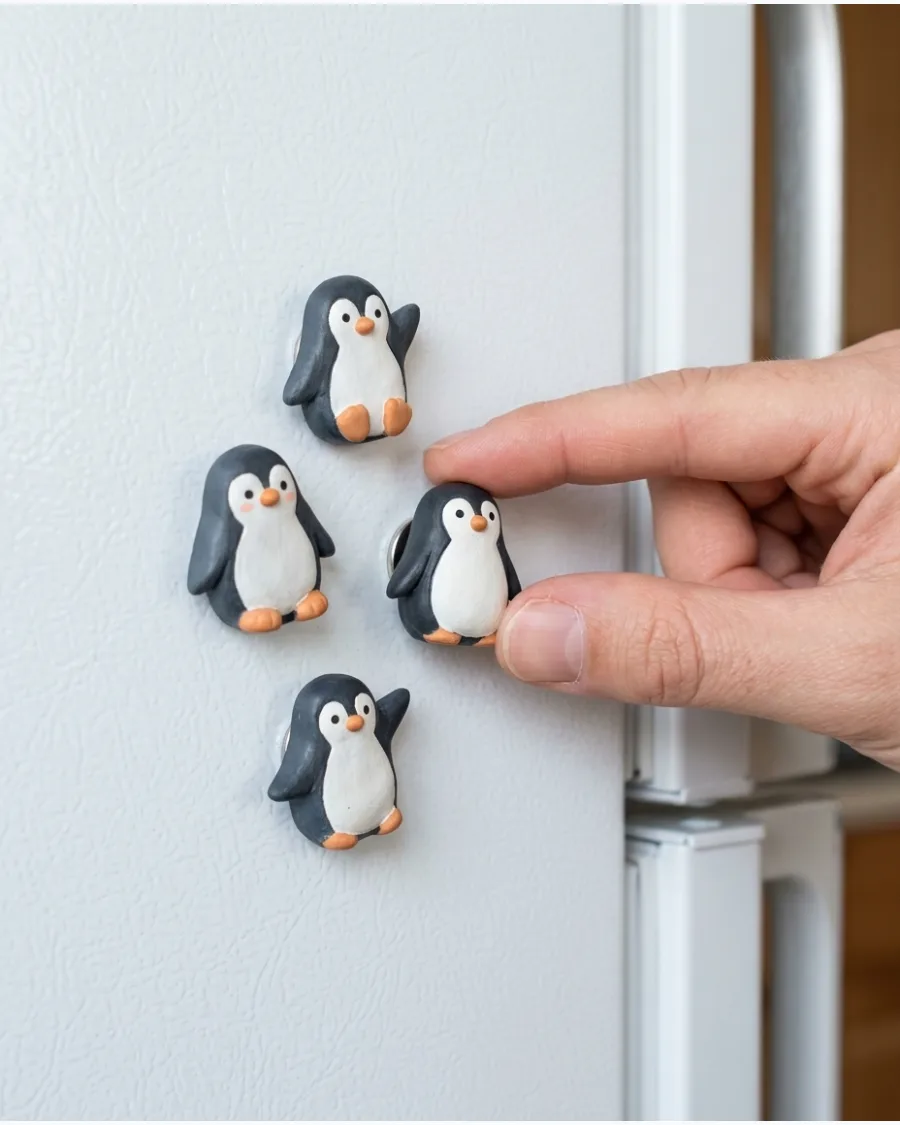
These black-and-white birds are a fun way to add personality to a cold appliance door. The simple color block design is very forgiving for beginners who are just learning to work with polymer clay.
Press a small triangle of orange clay firmly into the center of the white belly section to create a sturdy beak. These are excellent for seasonal winter decorating because they pop against stainless steel.
- $12 for primary color clay set
- 15 minutes to assemble
- Keep white clay clean by washing hands between colors
Quick win: Use a damp cotton swab to remove any black clay fingerprints from the white sections before baking.
35. Colorful Fish Clay Magnet
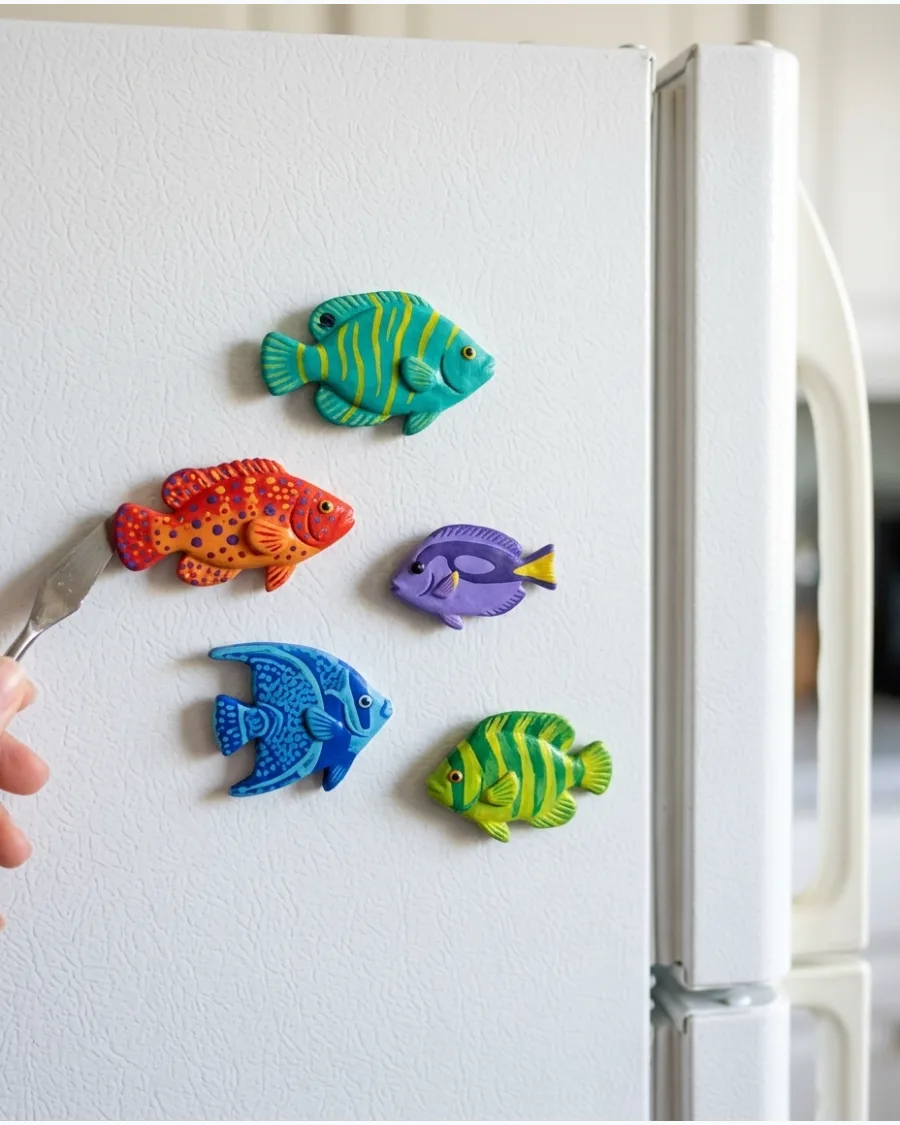
Playful fish magnets offer a chance to experiment with textures and folk-art patterns. You can use stamps or everyday items to create unique scale textures on the clay body.
Use the end of a plastic straw to stamp perfect scale patterns into the clay surface before it hardens. Mixing bright colors with a little bit of white clay creates a high-end marble effect.
- $15 for bright clay multipack
- 1 hour for a school of fish
- Strong enough for holding up thick cardstock
Most people skip this: Apply a thin layer of UV resin over the finished fish to give it an underwater wet look.
36. Tiny Ladybug Magnet
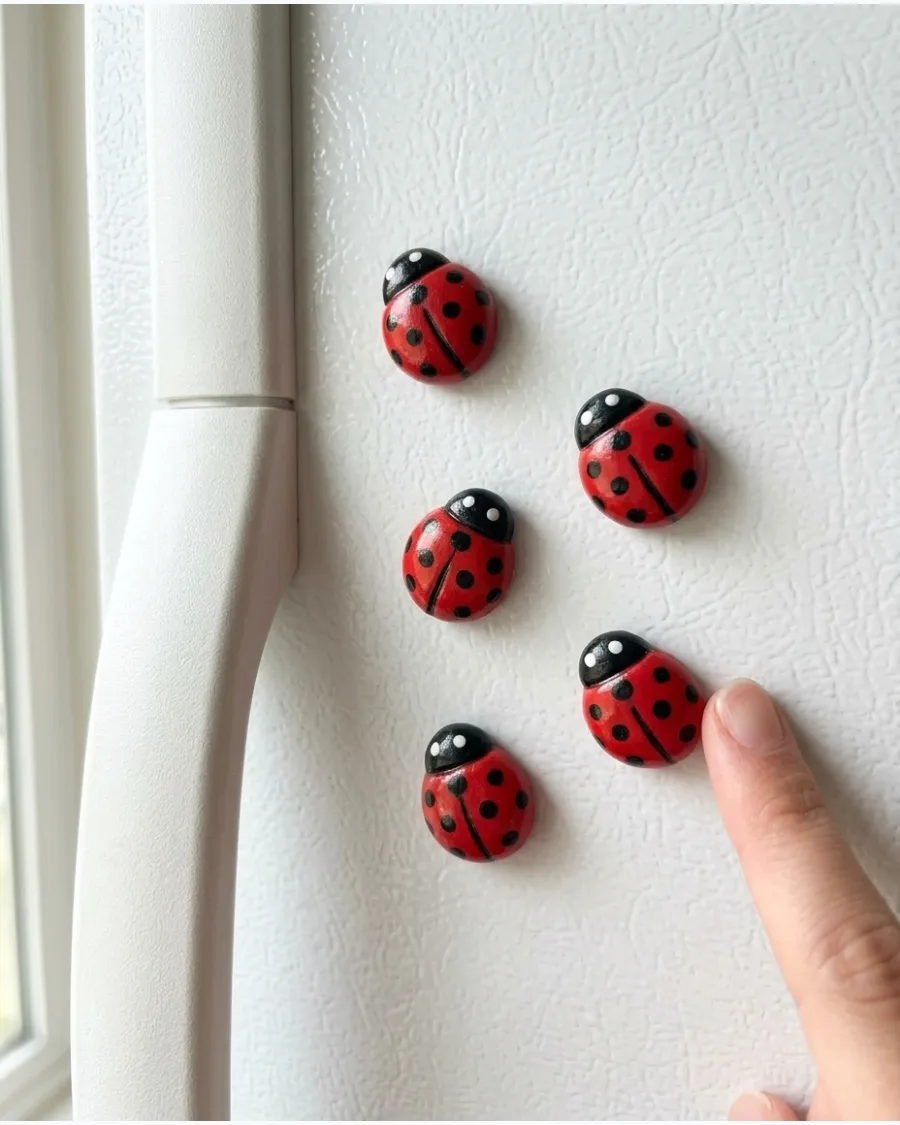
Ladybugs are a classic choice because their round shape is incredibly durable on a vertical surface. The bright red color draws the eye and makes it easy to find notes or reminders on the door.
Bake the red body first, then add the black dots with a fine-point permanent marker to avoid smearing wet clay. These are the best shapes for beginners because they require very little structural detail.
- $5 for red clay
- 10 minutes to sculpt
- Use 10mm ceramic magnets for a strong hold
Best shortcut: Use the rounded end of a paintbrush dipped in black paint to get perfectly circular spots.
37. Honeybee Clay Magnet
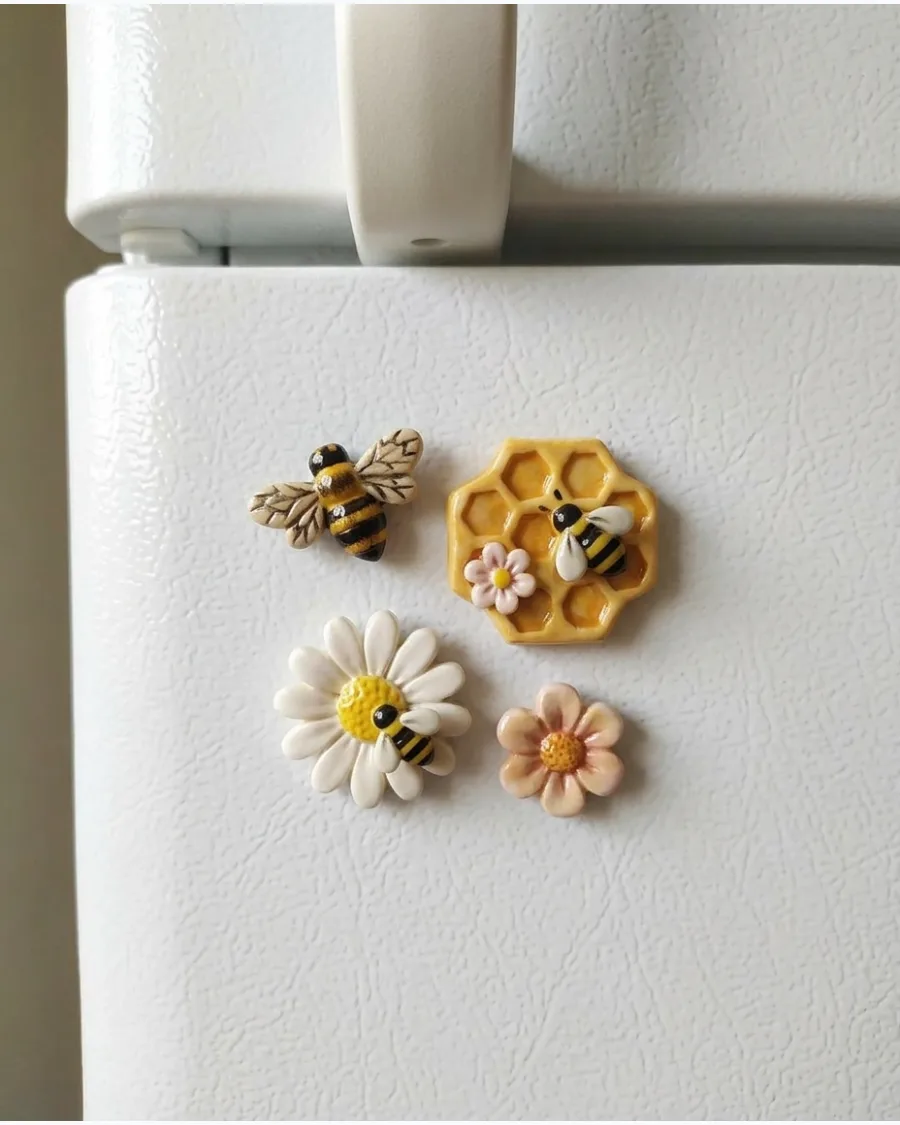
Bring a bit of the garden inside with a cheerful yellow-and-black honeybee. The addition of small white wings gives the piece a delicate, three-dimensional quality that looks great from any angle.
Attach translucent white clay wings at a slight upward angle to give the bee a sense of realistic movement. Bees look most effective when they are grouped near floral magnets for a curated theme.
- $9 for yellow and black clay
- 25 minutes to build
- Light enough for small, inexpensive magnets
Quick win: Use a very thin wire for antennae to add a professional, high-detail finish.
38. Woodland Fox Magnet
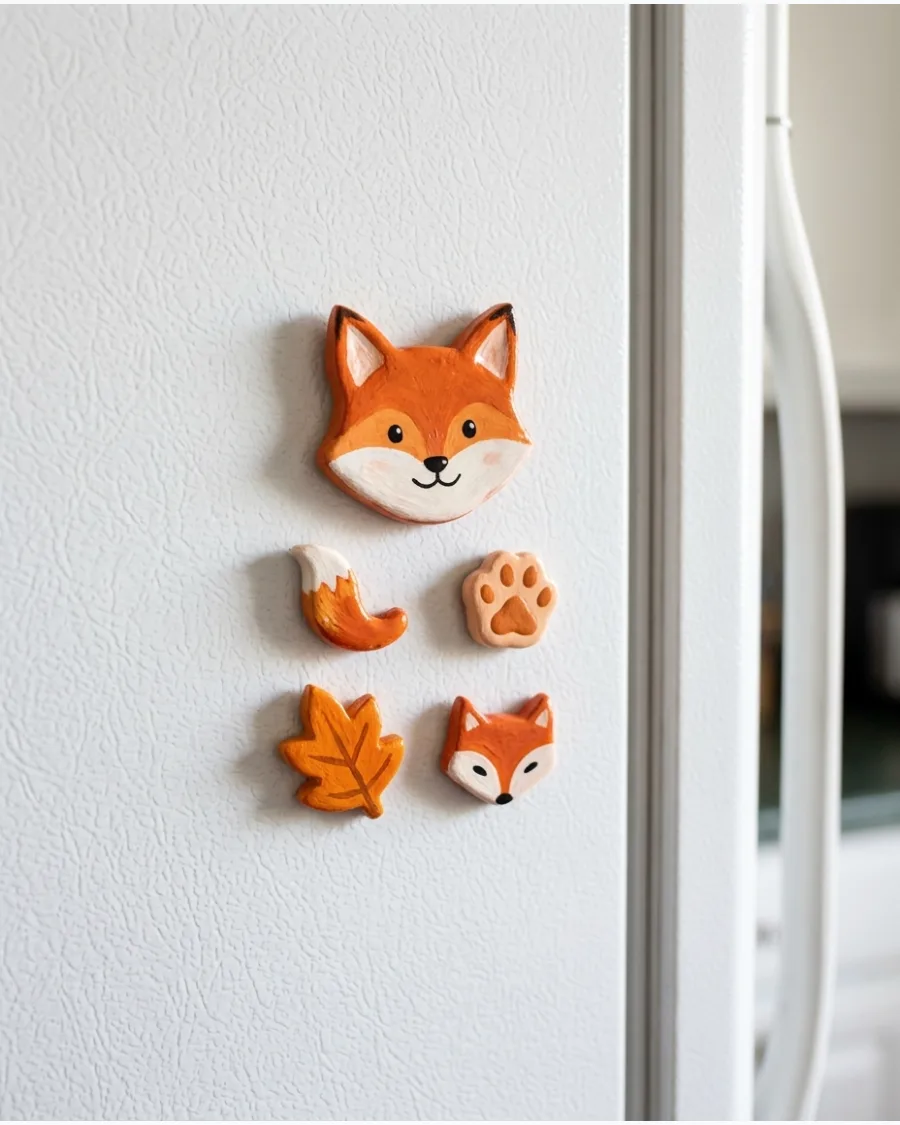
A woodland fox adds a warm, rustic touch to a kitchen with its bright orange and white tones. The pointed ears and white cheek patches create a distinct look that feels very artisanal and handmade.
Blend the white clay into the orange face using a damp fingertip for a seamless and professional color transition. A fox magnet works exceptionally well in kitchens with wood accents or warm lighting.
- $10 for orange clay
- 30 minutes to sculpt
- Use a matte sealer for a soft finish
Most people skip this: Score the back of the clay in a cross-hatch pattern before gluing the magnet for a much stronger bond.
39. Teddy Bear Fridge Magnet
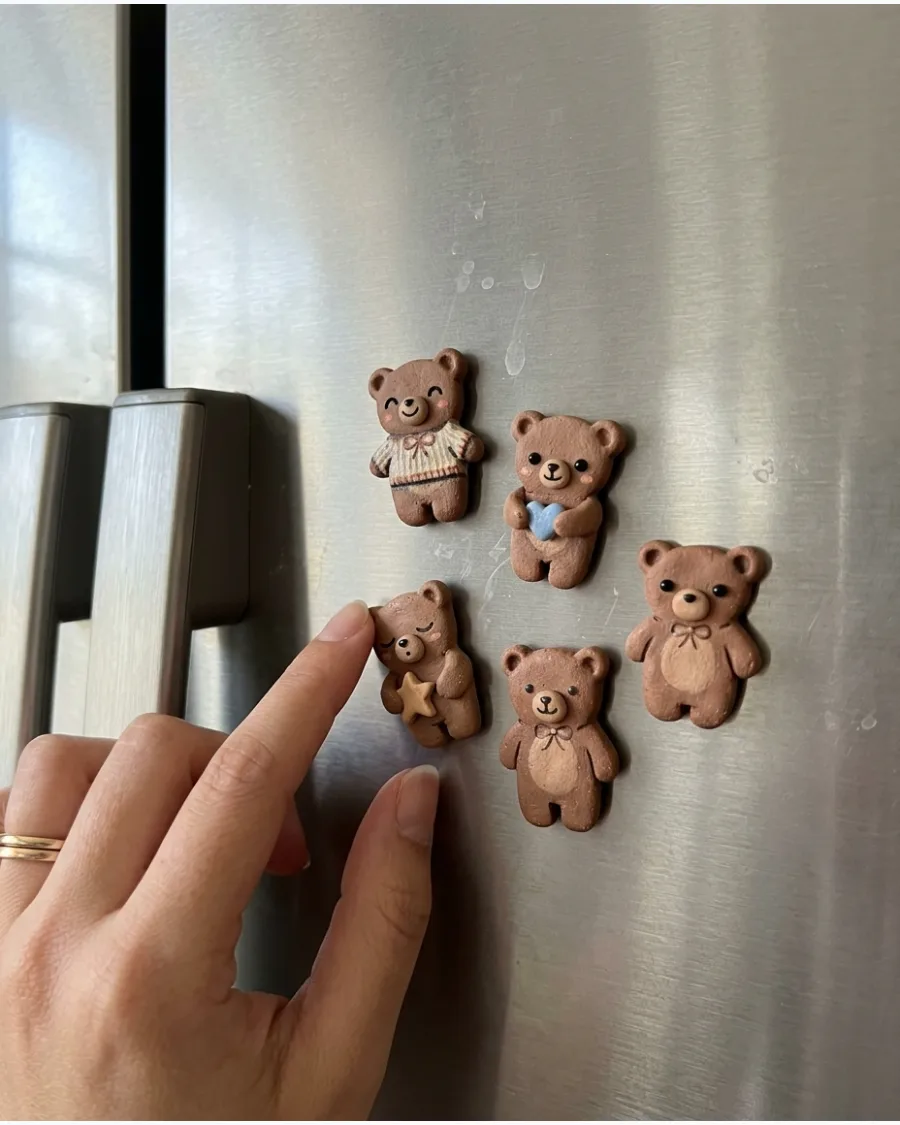
Teddy bears are a timeless motif that adds a sense of comfort and nostalgia to the room. Using warm brown tones keeps the look classic and coordinates with most kitchen color schemes.
Texture the clay with an old toothbrush to mimic the look of fuzzy stuffed animal fur before baking. Adding a tiny clay bow or a heart makes these feel like custom, thoughtful gifts.
- $7 for chocolate brown clay
- 20 minutes to shape
- Fits perfectly in palm-sized gift boxes
Best shortcut: Use two tiny black beads for eyes instead of clay to give the bear a glossy, lifelike expression.
40. Kawaii Dinosaur Magnet
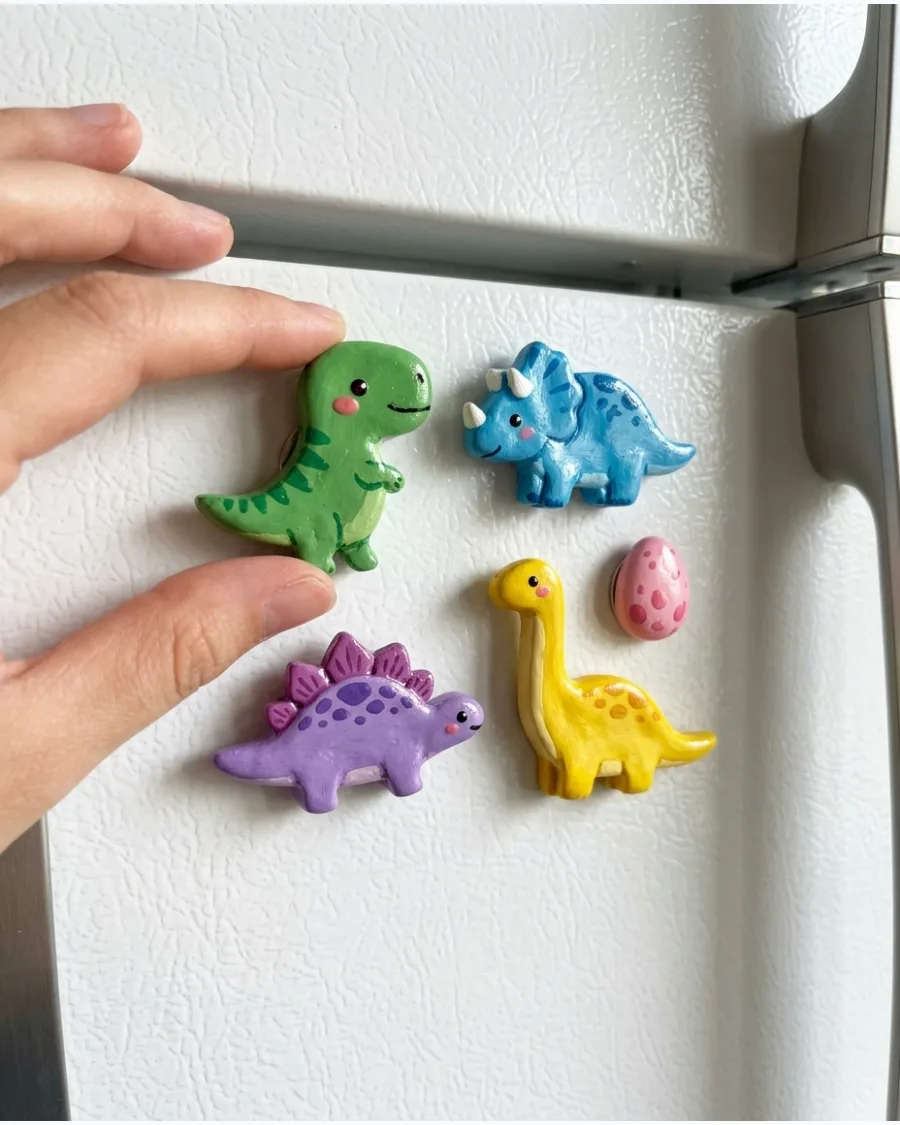
These kawaii style dinosaurs use soft colors and rounded edges to create a modern, trendy aesthetic. They are a great way to add a pop of color without looking like a traditional child's toy.
Choose soft mint or lavender clay to keep the look sophisticated and avoid a primary-color palette. Because these shapes are often thicker, they require stronger neodymium magnets to stay securely on the door.
- $15 for pastel clay set
- 35 minutes to sculpt
- Requires heavy-duty craft glue
Quick win: Flatten the bottom edge of the dinosaur slightly so it sits flush against the refrigerator surface.
Trendy and Personalized Clay Magnets
41. Personalized Initial Magnet
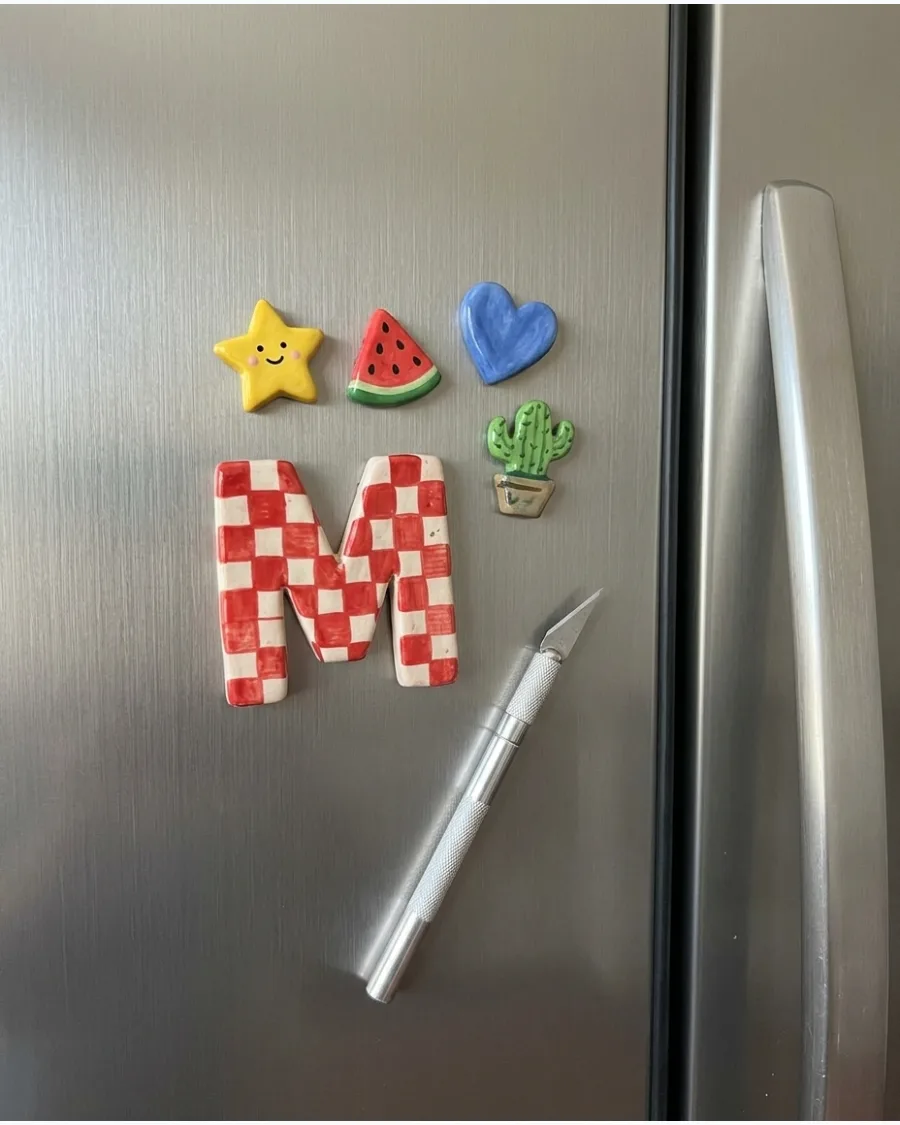
Use a cookie cutter or a steady hand to carve a thick letter from air-dry clay. Press a small floral stamp or paint a checkerboard pattern onto the surface to give the letter more character than a plain store-bought version. Since these are top-heavy, glue a strong neodymium magnet to the back rather than a weak flexible strip to prevent it from sliding down the door.
- Air-dry clay dries in 24 to 48 hours and costs under $10 for a large block.
- Use a high-strength glue like E6000 to bond the magnet to the clay once it is fully cured.
- Paint the initials in colors that match your kitchen backsplash for a more cohesive look.
Best shortcut: Use a letter-shaped cookie cutter to get perfectly straight edges without the struggle of hand-carving.
42. Mini Framed Portrait Magnet
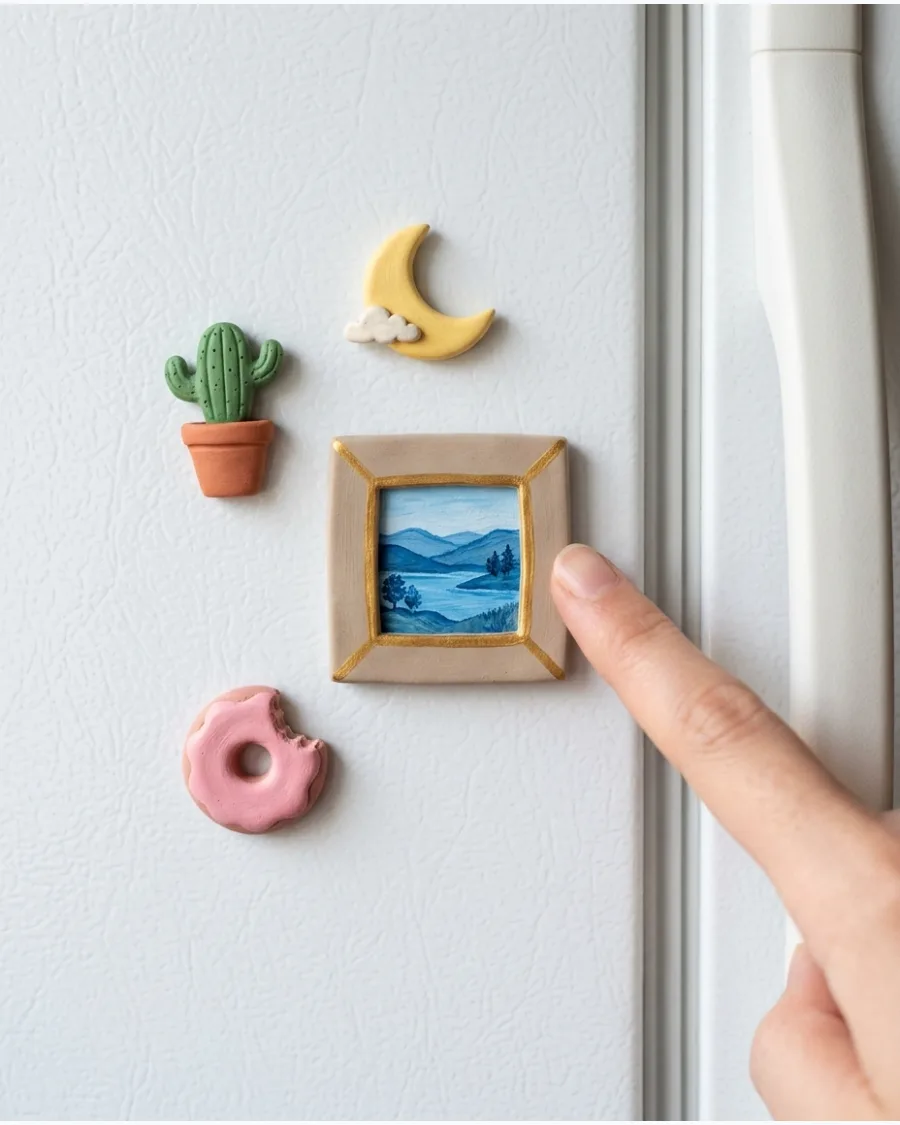
Roll out a thin slab of clay and cut a small rectangle to act as the canvas. Add a raised border around the edge to mimic a vintage gold frame and paint a simple silhouette or a tiny landscape inside. It turns a boring appliance into a miniature art gallery that feels much more intentional than random magnets.
- Acrylic paint pens work best for adding the fine details inside these tiny frames.
- Sand the back of the clay once dry to ensure the magnet sits perfectly flat against the fridge.
- Use a photo transfer technique to put a real tiny family picture inside the clay frame for a personalized touch.
Quick win: Use a toothpick to texture the frame portion before the clay dries to give it an ornate, antique look.
43. Retro Checkerboard Magnet
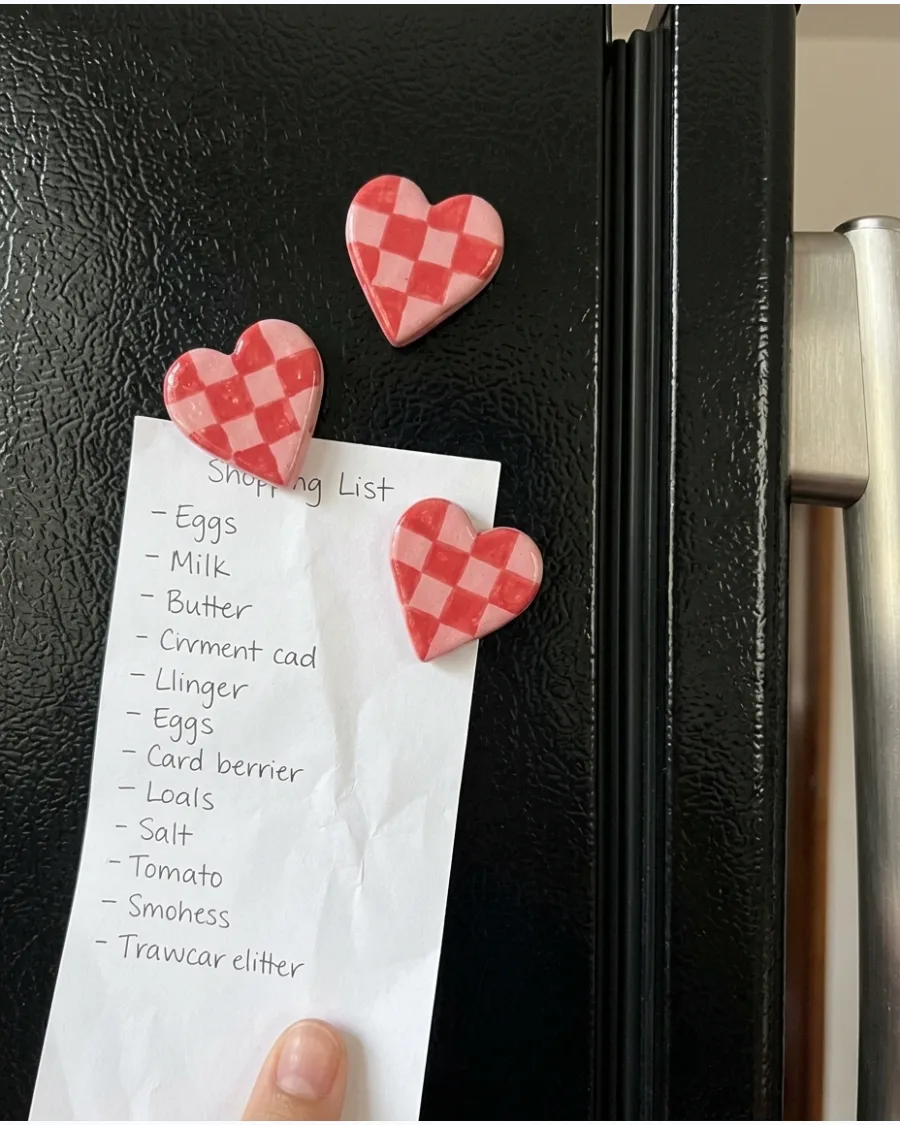
Geometric shapes like hearts or circles look instantly modern when finished with a classic grid. Paint the squares in contrasting colors like butter yellow and cream to lean into the retro aesthetic without it feeling dated. These work best when grouped in odd numbers to create a strong visual focal point on the fridge.
- Polymer clay is ideal for this project because it won't shrink or warp during the drying process.
- Use thin masking tape to create crisp lines for the checkerboard pattern if you do not have a steady hand.
- Experiment with wavy or melted checkerboard patterns for a more psychedelic 70s vibe.
Most people skip this: Seal the finished magnet with a glossy varnish to make the colors pop and protect the paint from kitchen grease.
44. Sardine Tin Clay Magnet
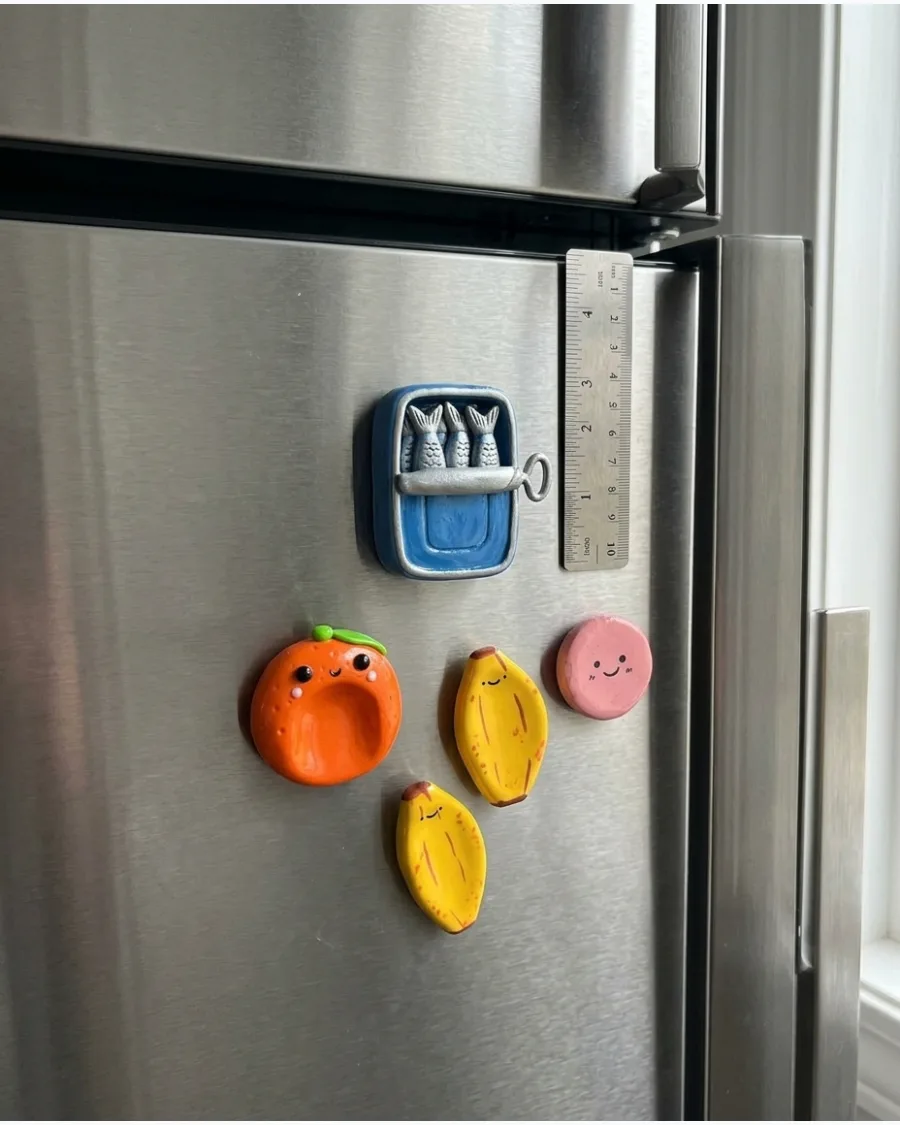
Sculpt a shallow rectangular box and fill it with three or four tiny silver clay fish. Paint the tin a bright Mediterranean blue and add a hand-lettered label for a kitschy, high-end look. This design is a conversation starter that adds a playful pop of color to a stainless steel appliance.
- Use silver mica powder or metallic paint to give the clay fish a realistic shimmer.
- Ensure the tin walls are thick enough to support the weight of the clay fish inside without cracking.
- Swap sardines for tiny clay anchovies or a tin of colorful fancy olives for variety.
Quick win: Use a piece of aluminum foil to texture the tin surface before painting to give it a realistic metallic crinkle.
45. Bow-Shaped Clay Magnet
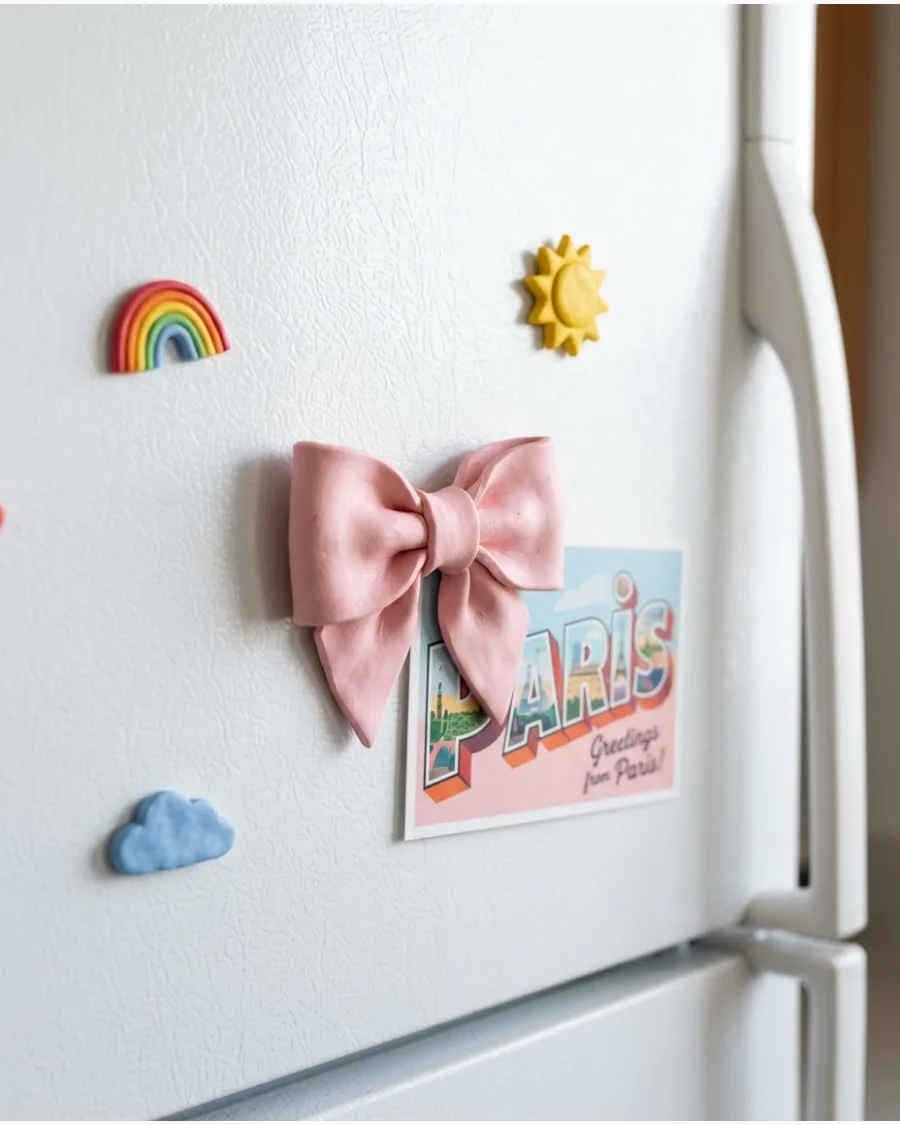
Create two loops and two tails from flat strips of clay to assemble a realistic ribbon bow. Add small indentations where the fabric would naturally bunch to give the magnet a three-dimensional, high-quality feel. Pastel colors like soft mint or lavender make these look like expensive boutique finds rather than DIY projects.
- Soft polymer clay is easier to fold into bow shapes without cracking than air-dry clay.
- Support the loops with crumpled paper while baking or drying so they do not collapse under their own weight.
- Paint tiny red cherries or blue stripes onto the bow for a patterned fabric effect.
Best shortcut: Use a rolling pin to get the clay strips to a uniform thickness before folding them into the bow shape.
46. Mini Book Fridge Magnet
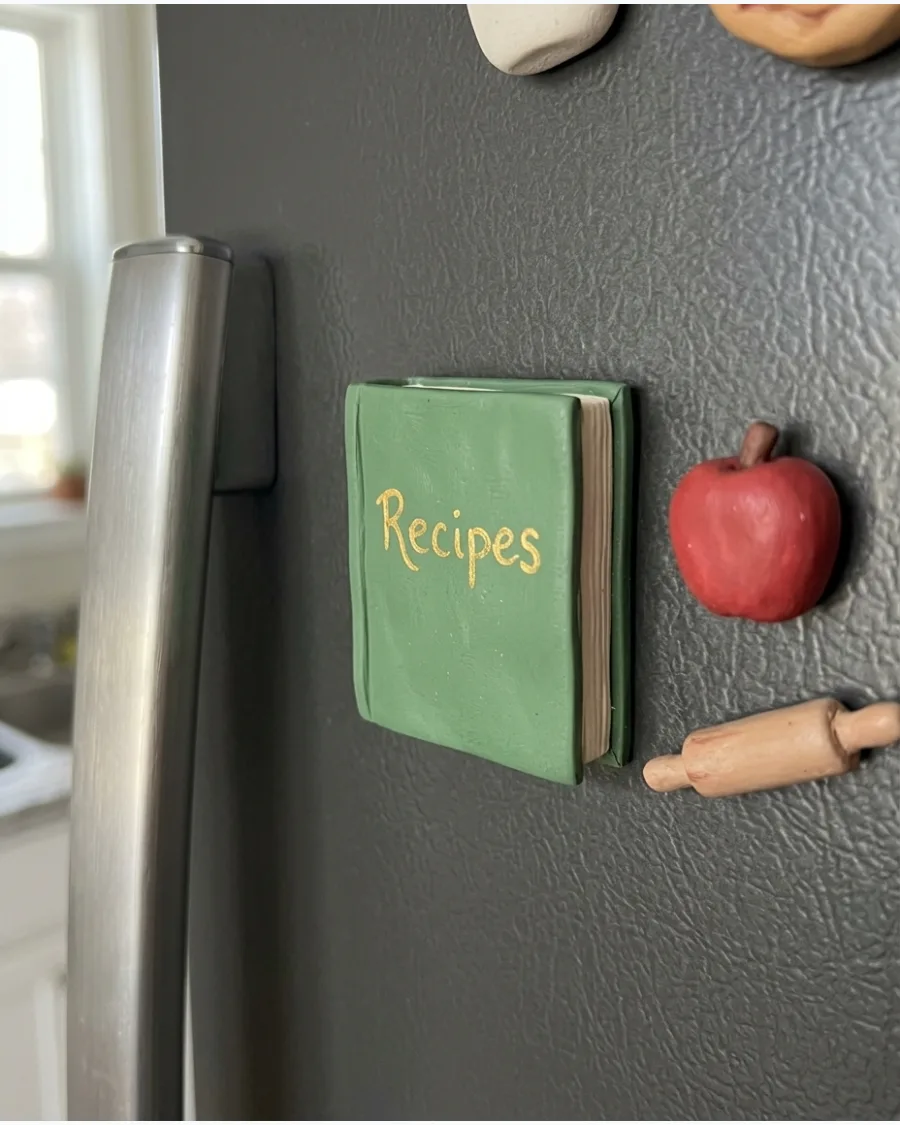
Stack several thin white rectangles of clay inside a slightly larger colored cover to create a miniature book. Etch horizontal lines into the edges of the white clay to realistically mimic the look of paper pages. These are great for holding up recipe cards or library reminders in the kitchen.
- Fine-tip permanent markers are better than brushes for writing titles on the tiny book spines.
- Press the pages and cover together firmly before drying to avoid separation over time.
- Create an open book by folding the clay in half and painting tiny text on the inside pages.
Most people skip this: Use a textured sponge to lightly tap the cover clay to give it the appearance of a leather-bound book.
47. Wavy Smiley-Face Magnet
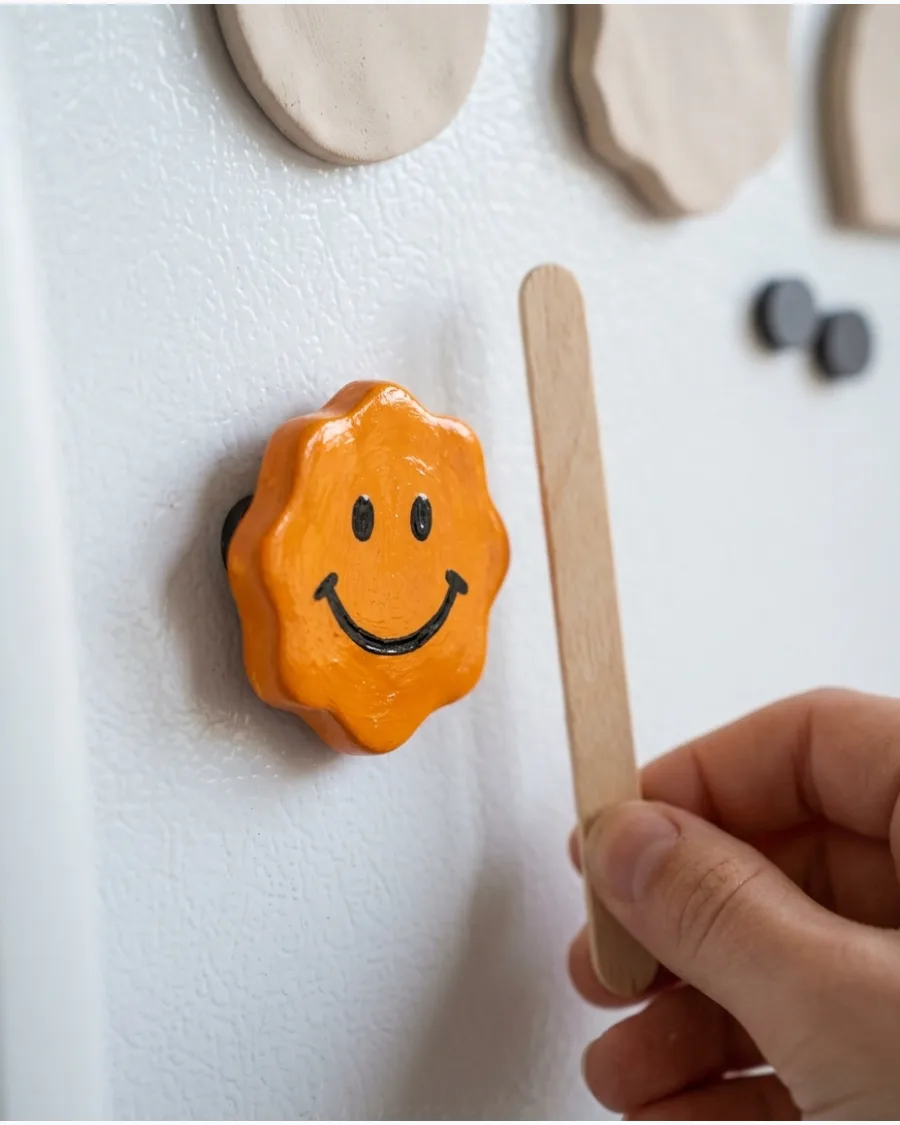
Cut an irregular, blob-like shape from clay and paint it a vibrant shade like electric blue or neon orange. Add a simple black smiley face with two dots and a curve to create a piece of dopamine decor for your kitchen. The wavy edges make it feel more artistic and less like a standard yellow emoji.
- Bright neon acrylic paints provide the best coverage for this playful, modern style.
- Keep the clay at least 1/4 inch thick so the wavy edges do not become brittle and snap.
- Make a set of three in different sizes to create a dripping or melting effect on the fridge.
Quick win: Use a round object like a bottle cap to trace the initial shape if you want a more uniform wavy circle.
48. Postage-Stamp Clay Magnet
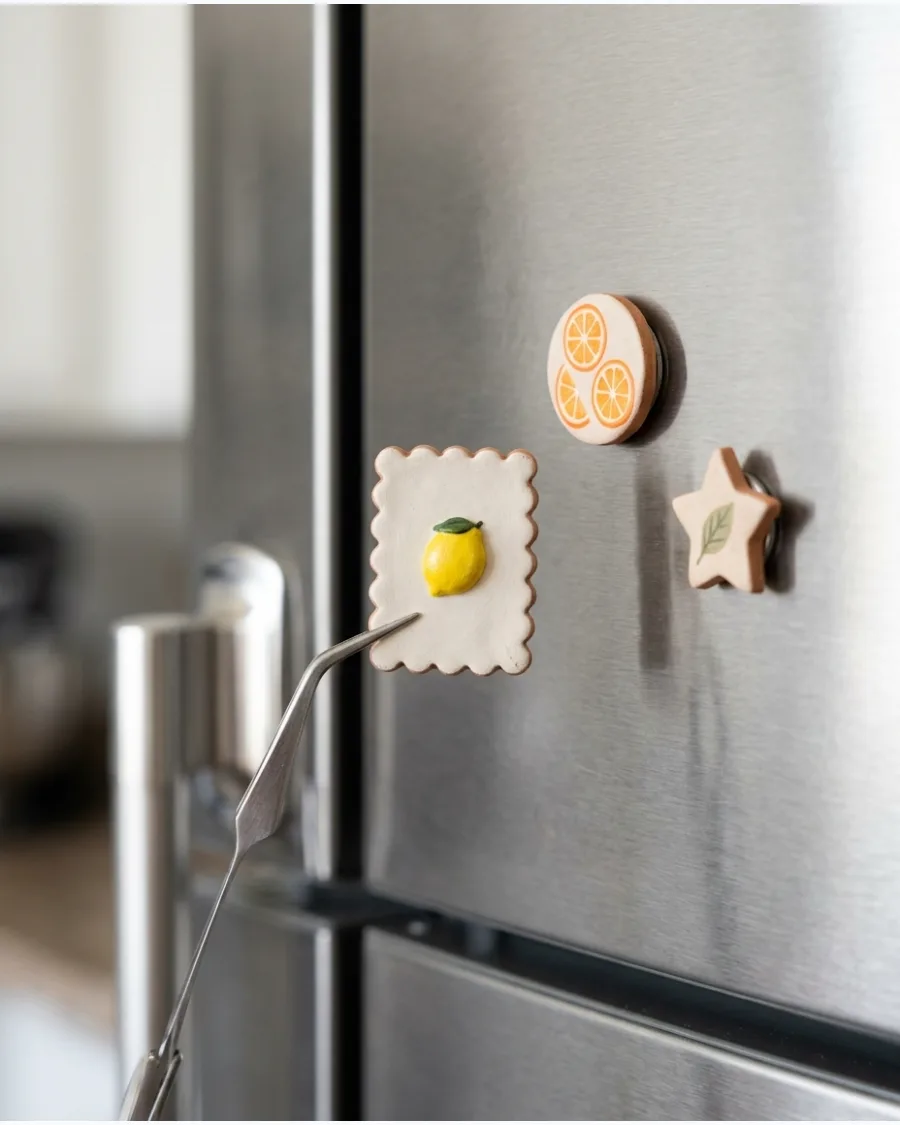
Use a small rectangular cutter and then use the end of a straw or a tiny round tool to punch half-circles out of the edges. Paint a tiny botanical illustration or a vintage-style fruit in the center to complete the postage stamp look. This adds a sophisticated, worldly touch to a standard kitchen appliance.
- A standard drinking straw is the perfect size for punching out the scalloped stamp edges.
- Paint the background color first and let it dry completely before adding the center illustration.
- Use a date stamp to add a postmark over the corner of the finished design for extra realism.
Best shortcut: Print a tiny image and use decoupage glue to attach it to the clay stamp instead of hand-painting the center.
49. Tiny Kitchen Tile Magnet
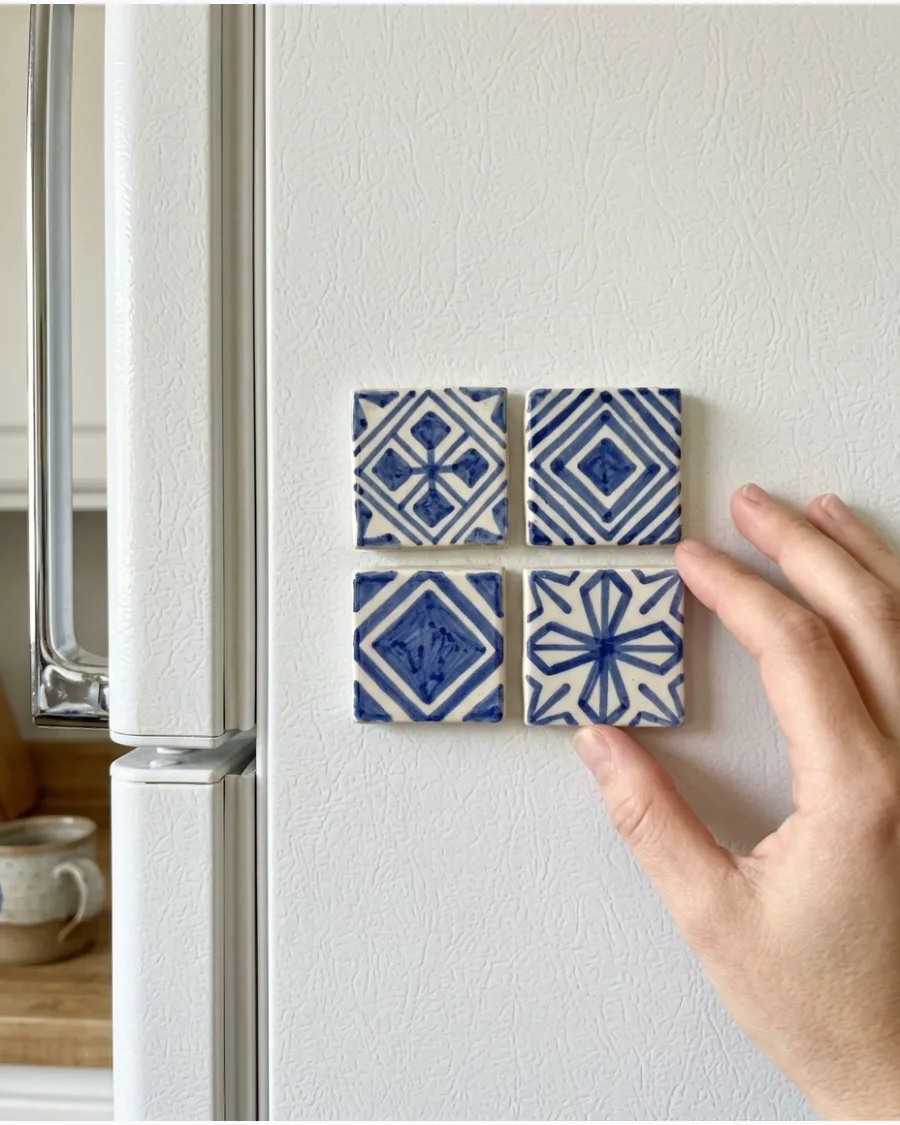
Cut clay into perfect 2-inch squares and use a stamp or a thin brush to add intricate patterns. Choose traditional Mediterranean colors like cobalt blue and white to mimic the look of expensive handmade ceramic tiles. These look best when arranged in a grid of four or six to create a backsplash effect on the fridge.
- Use a square cookie cutter to ensure all your tiles are exactly the same size for a clean grid.
- Apply a thick coat of high-gloss resin to give the clay a true ceramic tile finish.
- Paint each tile a different solid color for a more modern, color-blocked look.
Most people skip this: Lightly sand the corners of the squares after they dry to give them a slightly rounded, tumbled stone appearance.
50. Personalized Family Magnet Set
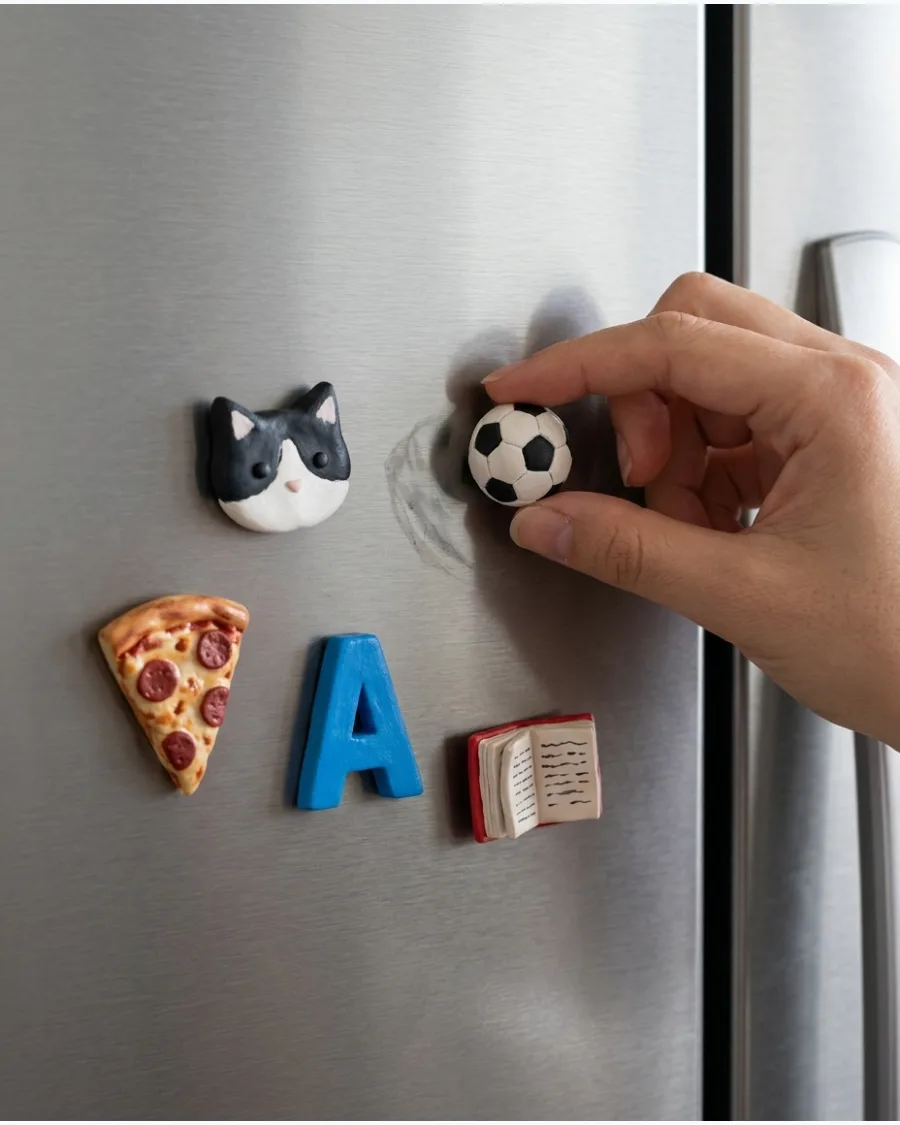
Create a unique shape for every person in the house, such as a favorite animal, a sports ball, or a tiny slice of their favorite food. Add a small initial to each piece so the magnets can be used to organize chores or hold up individual school papers. It is a practical way to clear the clutter while adding a personal touch to the heart of the home.
- Buy a multi-color pack of polymer clay to avoid having to mix custom paint colors for every family member.
- Use the same size magnet for every piece so they all have the same holding power on the fridge door.
- For pets, create a small clay bone or a fish shape with their name on it to include them in the set.
Quick win: Store the set in a small jar near the fridge when they are not in use to prevent the smaller pieces from getting lost.
Frequently Asked Questions
What is the best type of clay for fridge magnets?
Polymer clay is the top choice for durability and vibrant colors, though it requires baking in a home oven to set. Air-dry clay is a fantastic, lightweight alternative that is easy to work with, provided you seal it properly to prevent moisture damage.
How do I stop my clay magnets from sliding down the fridge?
To prevent sliding, ensure your magnet is strong enough for the clay's weight by using high-strength rare-earth or neodymium magnets. If your design is particularly heavy, try using a thinner clay slab or attaching multiple magnets to the back for better grip.
Do I need to seal air-dry clay magnets?
Yes, sealing is essential to protect air-dry clay from kitchen humidity and prevent it from becoming brittle over time. You can apply a clear acrylic spray or brush-on varnish to achieve your choice of a modern matte or high-shine glossy finish.
What glue is strong enough to hold the magnet to the clay?
For a permanent, reliable bond, use a heavy-duty industrial adhesive like E6000 or a high-quality super glue. Avoid standard white craft glues, as they often lack the strength needed to keep the magnet attached during frequent use.
How can I make my DIY magnets look professional and not 'childish'?
Focus on a sophisticated color palette featuring neutrals or earth tones and stick to clean, minimalist geometric shapes. You can also use rubber stamps or botanical clippings to add elegant textures that give your pieces an artisanal, high-end feel.