50 Indoor Christmas Window Light Ideas

This post may contain affiliate links: full affiliate disclosure.
Hanging lights inside your windows is the fastest way to make a home feel festive and warm during the holidays. These indoor displays look beautiful from the couch and add instant curb appeal to your house.
Focus on clean lines and hidden wires to create a professional look that lasts all season.
CLASSIC CHRISTMAS LIGHTS INSIDE WINDOW IDEAS
1. Warm White Lights Outlining the Window Frame
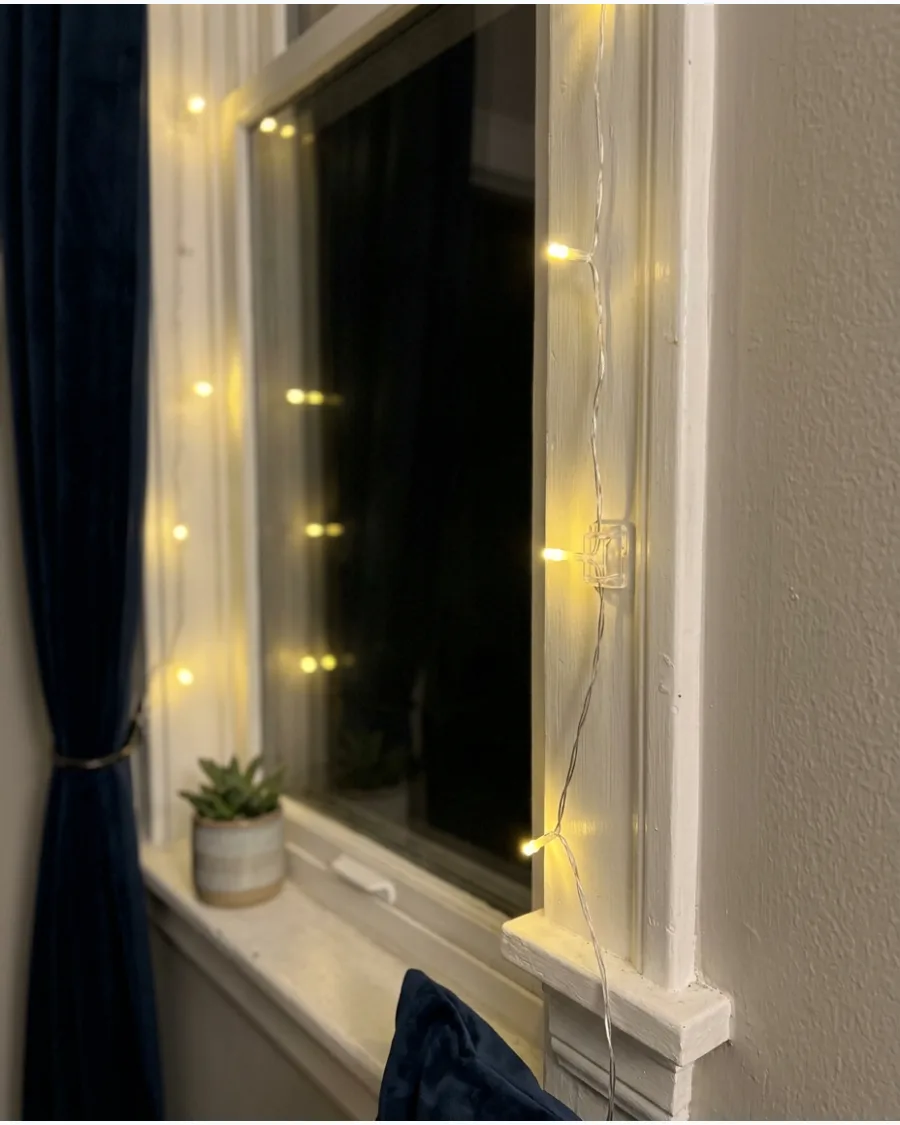
Run warm white string lights neatly around the inside edge of the entire window frame. Keep the wire close to the trim so the window has a clean glowing outline that looks beautiful from both inside and outside.
Use clear adhesive clips spaced every six inches to keep the wire perfectly straight and tight against the wood. Small clips disappear against white trim and keep the focus on the glow.
- $10-$20 for lights and clips.
- Measure the perimeter of the window before buying to avoid having too much extra cord.
- Use battery-powered strands if a wall outlet is more than three feet away.
Quick win: Use a ruler to space your clips so the line of light looks professional from the sidewalk.
2. Soft White Fairy Lights Around Each Window Pane
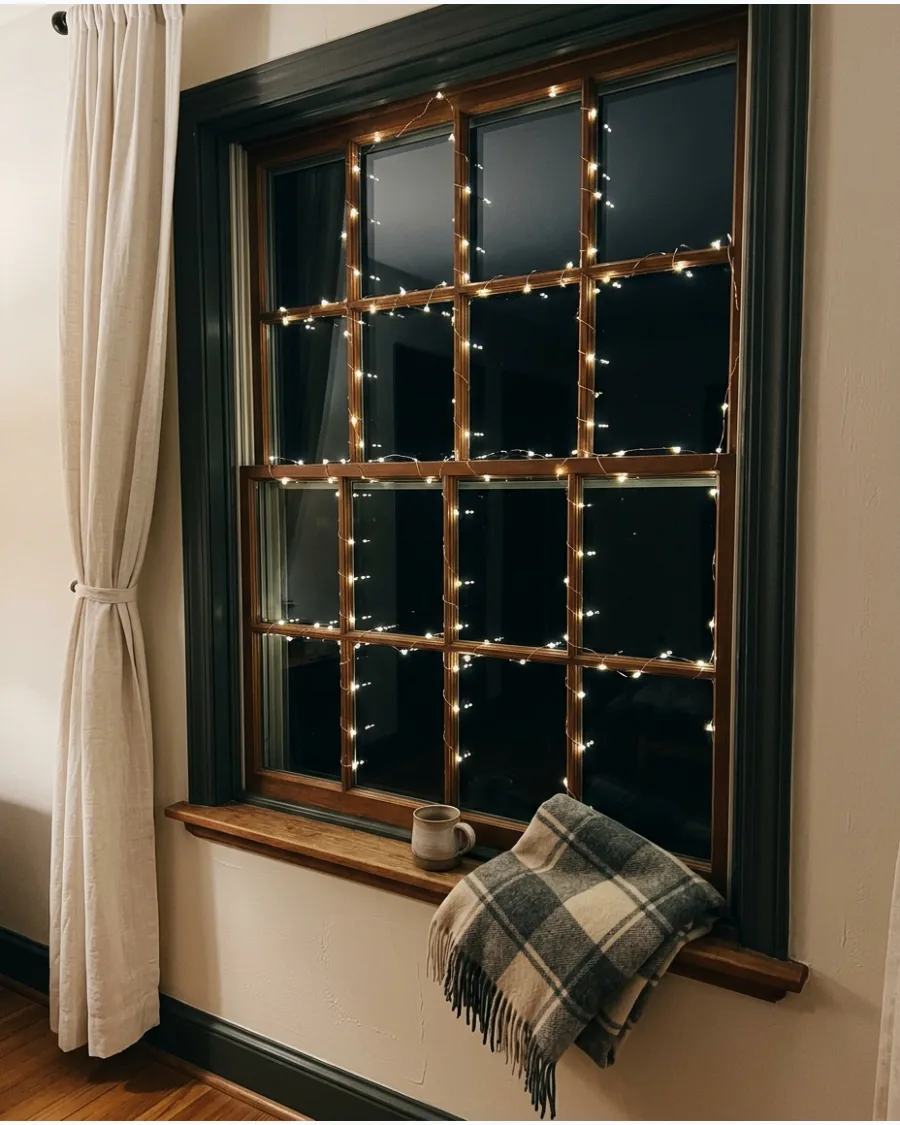
Trace individual window panes with delicate micro fairy lights instead of outlining only the outside frame.
This creates a detailed architectural glow that works especially well on divided-pane windows. Wrap the thin copper wire tightly around the muntins to hide the hardware and highlight the window's shape. These lights are so light that they rarely sag over time.
- $15 per window.
- Use thin copper or silver wire lights that can be bent into sharp 90-degree angles.
- This method is best for permanent wood windows rather than sliding vinyl ones.
Most people skip this: Clean the window dividers with rubbing alcohol before applying any adhesive to ensure the lights stay up all season.
3. Simple Warm Lights Across the Top of the Window
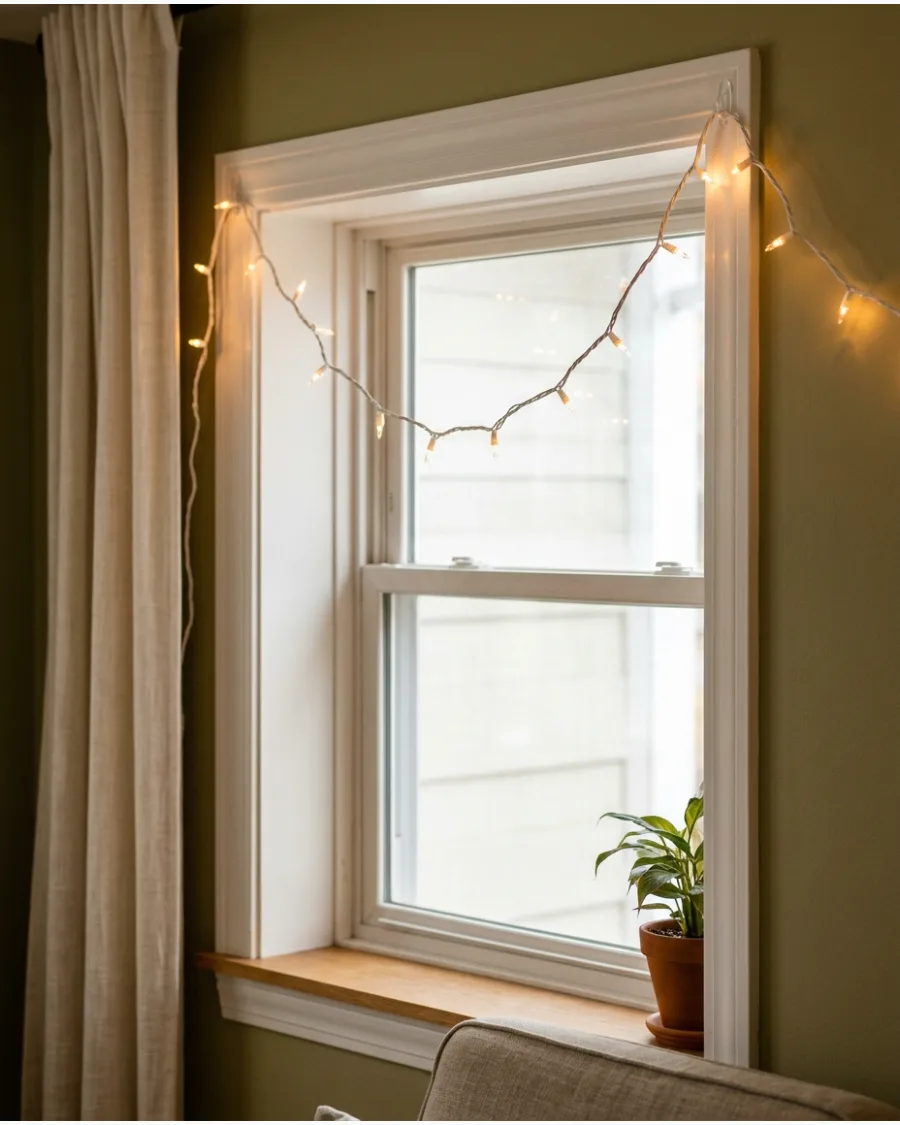
Hang one relaxed strand of warm white lights across the inside top of the window. Let the strand dip slightly between attachment points for an easy, understated Christmas look.
Place the hooks on the very top edge of the window casing so they are completely hidden from view. This creates a soft wash of light that does not block your view of the outdoors.
- Under $15 total.
- Takes less than five minutes to install with two or three small hooks.
- Ideal for kitchens or small bathrooms where space is limited.
Best shortcut: Use tension rods inside the window frame to hang lights if you are not allowed to put holes in the trim.
4. Double-Strand Christmas Window Lights
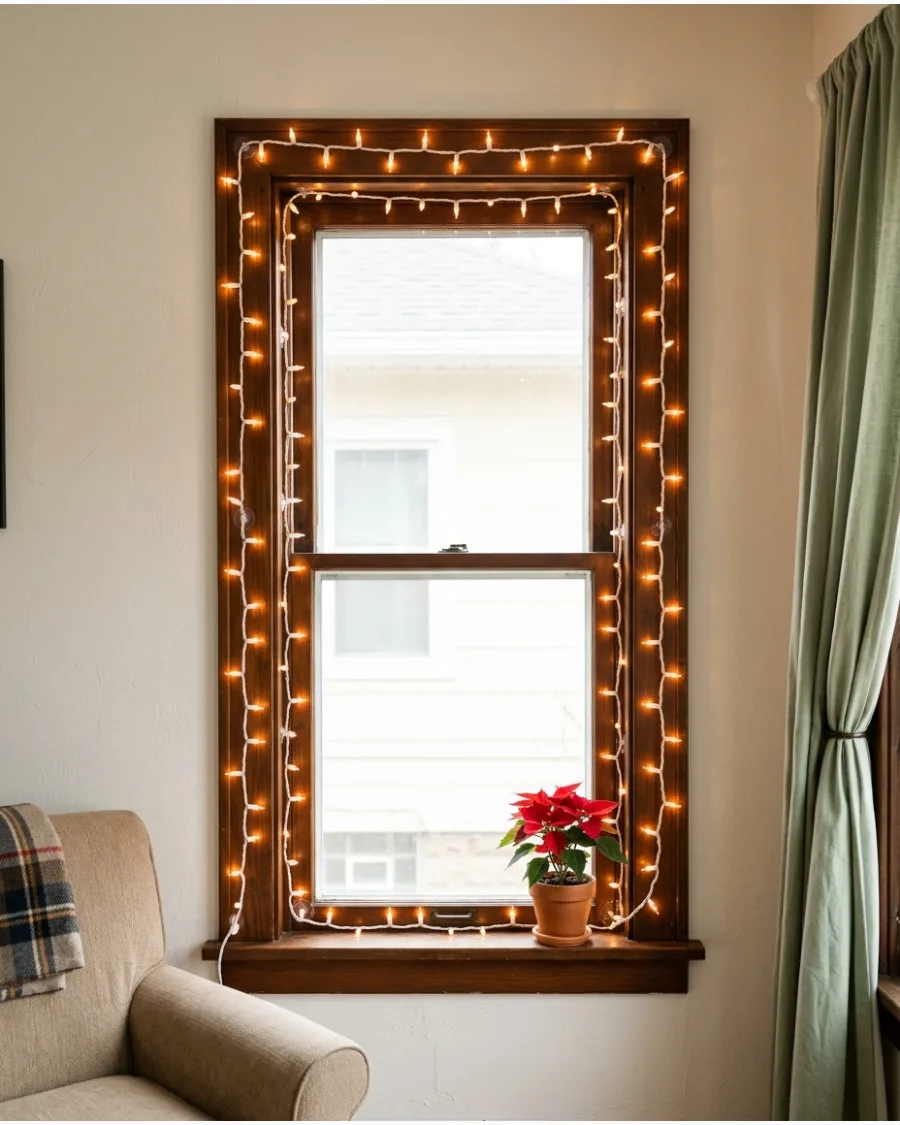
Use two parallel strands of warm white lights around the inside window frame to create a fuller, brighter border. Keep the spacing even so the result looks intentional rather than tangled.
Secure the two strands together with small clear zip ties before hanging them to keep the lines perfectly parallel. This extra layer of light makes the window stand out much more than a single strand.
- $20-$30 for materials.
- Requires two matching sets of lights with end-to-end connectors.
- Use this for front-facing windows to increase curb appeal.
Quick win: Plug both strands into a single timer so they always turn on and off at the same time.
5. Twinkling White Lights Around a Large Picture Window
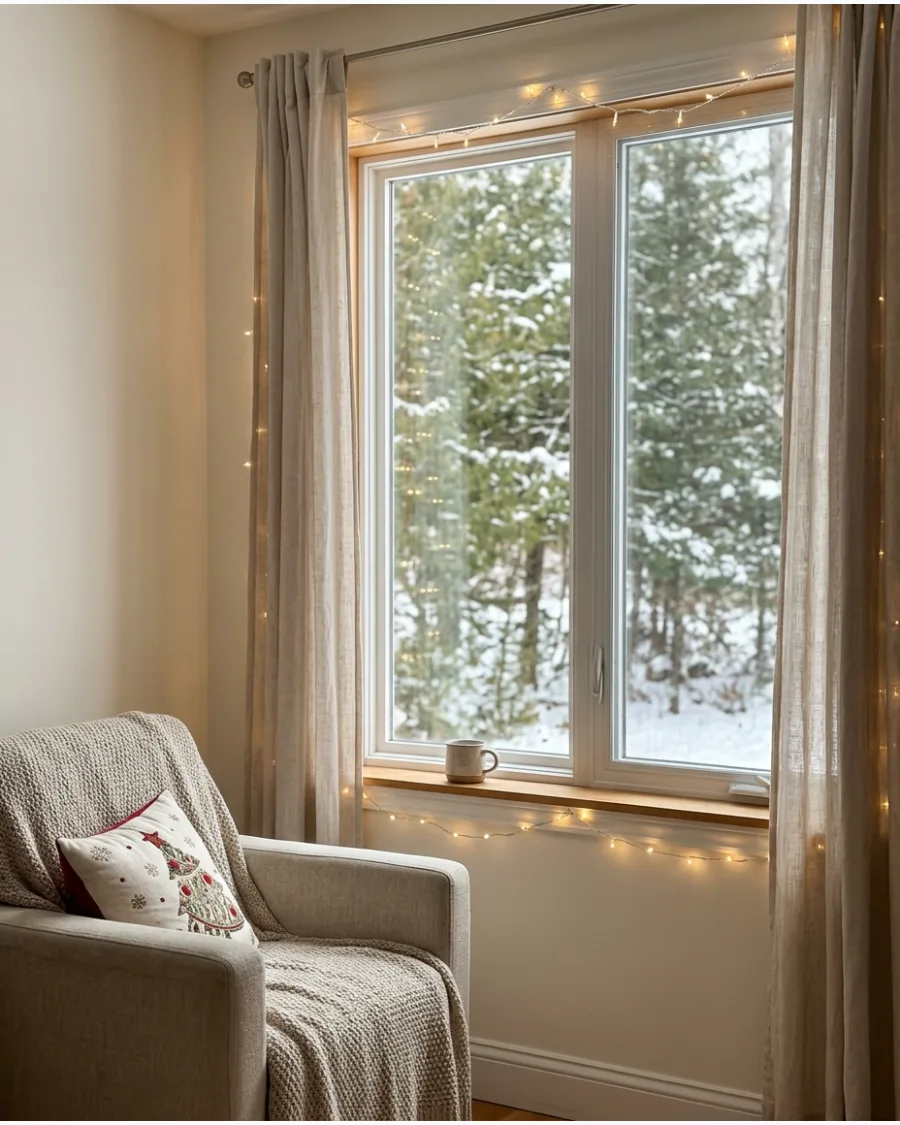
Frame a large living room picture window with subtle twinkle lights. Choose a gentle sparkling mode rather than fast flashing lights for a cozy Christmas atmosphere.
Mount the controller box in a bottom corner where it is easy to reach but hidden by a curtain or furniture. A slow fade or soft twinkle feels much more sophisticated than a rapid blink.
- $25-$40 depending on window size.
- Look for 'twinkle' lights rather than 'flashing' lights for a calmer effect.
- Use heavy-duty adhesive clips for long, heavy strands on large windows.
Most people skip this: Check the light settings from the street to make sure the twinkle speed is not distracting to drivers.
6. Classic Red and Warm White Window Lights
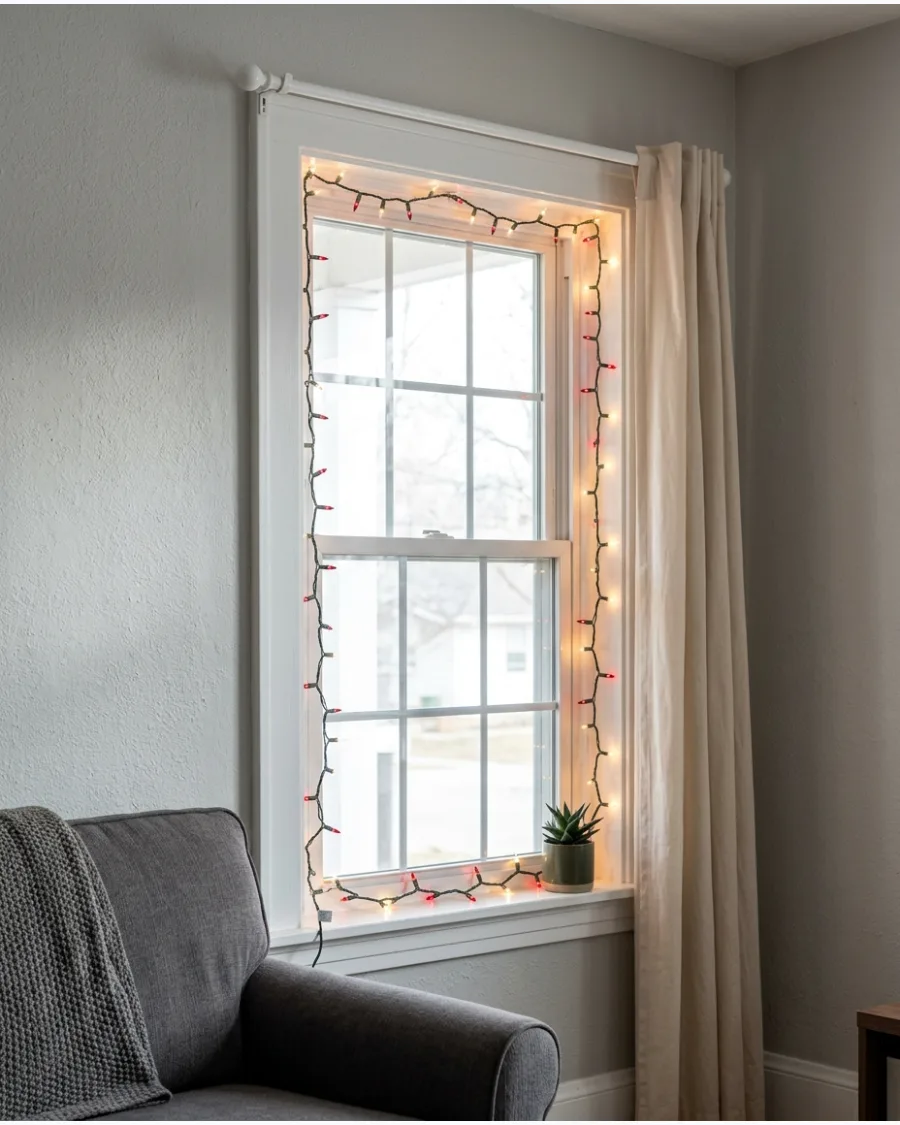
Combine small red bulbs with warm white lights around the inside perimeter of the window. The traditional Christmas colors are especially effective when the lights are visible from the street.
Alternating the colors every few inches creates a candy-cane effect that feels instantly festive. Using LED bulbs ensures the red stays vibrant and does not wash out.
- $15-$25 for the set.
- Buy pre-mixed strands to save time and ensure even color distribution.
- This look pairs perfectly with a simple green wreath in the center of the window.
Best shortcut: If you cannot find a mixed strand, twist one red and one white strand together before hanging.
7. Multicolor Retro Christmas Window Lights
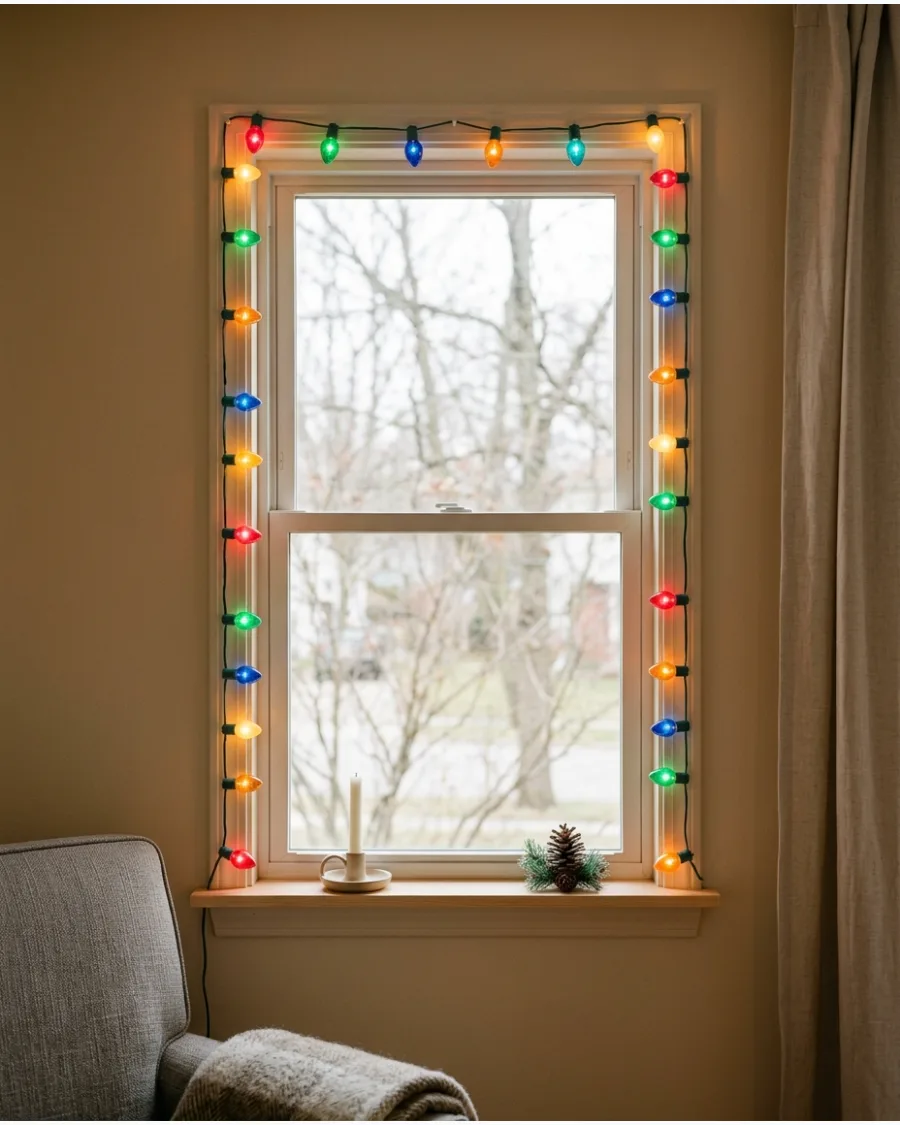
Outline the inside of the window with old-fashioned multicolor bulbs in red, green, blue, yellow, and orange. Pair them with minimal additional decorations to create a nostalgic Christmas look.
Use lights with a green wire to mimic the look of classic tree lights from decades ago. The variety of colors adds a cheerful, high-energy feel to any room.
- $10-$20 per strand.
- Choose 'ceramic' style bulbs if you want a matte, vintage look.
- Great for kids' bedrooms or playrooms.
Quick win: Use these lights in windows that face a dark backyard to add a pop of color to the view.
8. Vintage Large-Bulb Window Lights
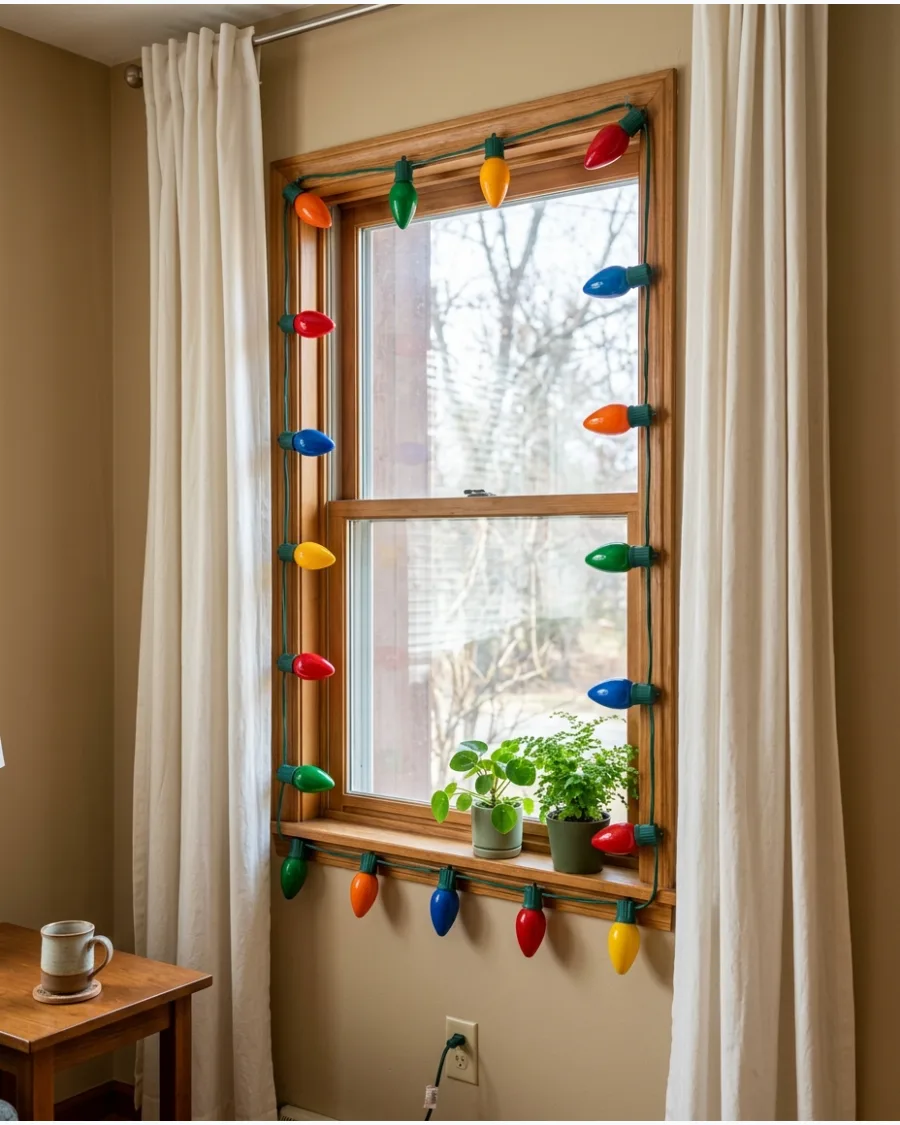
Use larger vintage-inspired Christmas bulbs around the interior window trim instead of tiny fairy lights.
The oversized bulbs create a bold retro display reminiscent of traditional family Christmas decorations. Space the larger bulbs about 12 inches apart to prevent the display from looking too crowded on the glass. These bulbs provide enough light to act as the primary mood lighting for the room.
- $20-$35 for the strand.
- Look for LED C7 or C9 bulbs which stay cool to the touch and will not damage wood trim.
- Use screw-in hooks for these heavier strands.
Most people skip this: Make sure the bulbs are tightened fully into their sockets before hanging, as one loose bulb can sometimes kill the whole strand.
CHRISTMAS CURTAIN LIGHT IDEAS
9. Full Warm White Curtain Lights Across the Window
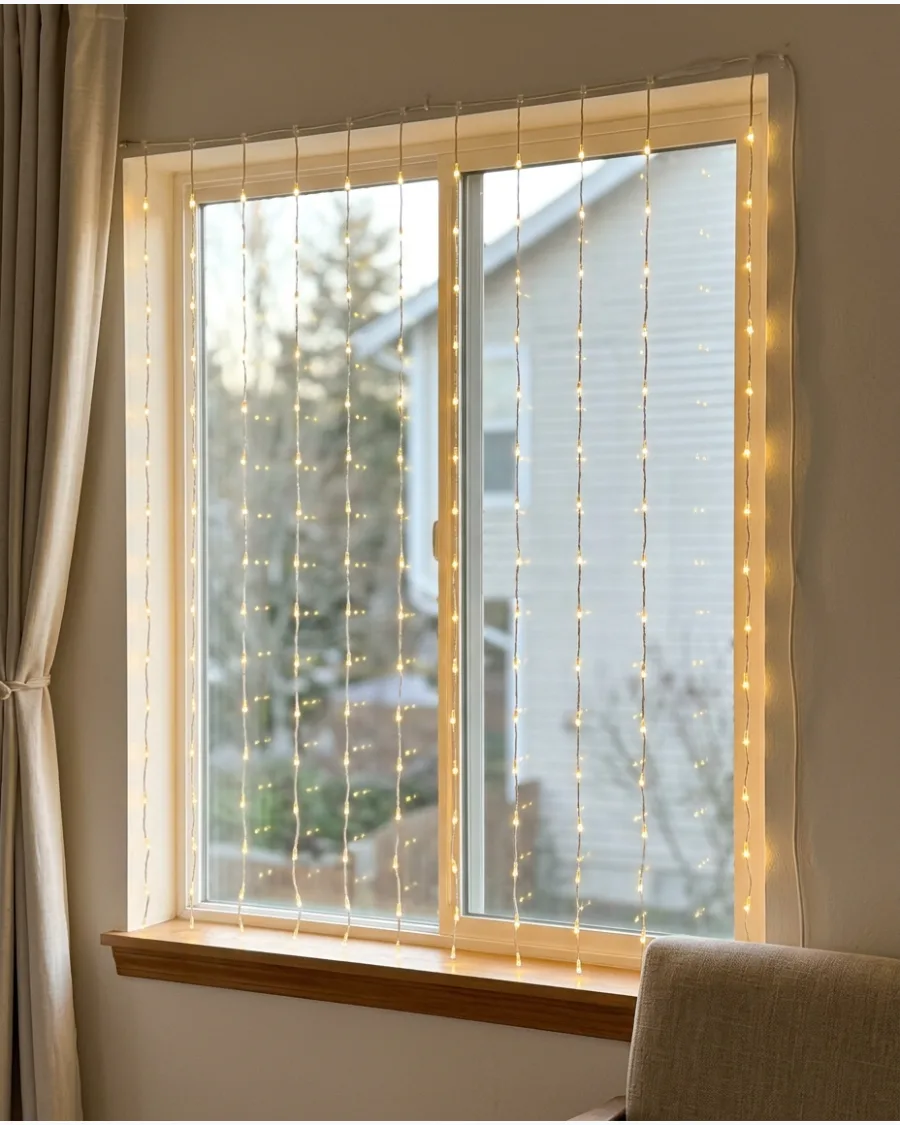
Hang vertical strands of warm white lights from the top of the window so they cascade down across the glass. Keep the strands evenly spaced for a polished glowing curtain effect.
Use a tension rod at the very top of the window frame to hang the main horizontal cord without using any nails or tape. This creates a wall of light that looks spectacular through sheer curtains.
- $25-$45 per window.
- Measure the height of your window to ensure the strands do not bunch up on the sill.
- These lights look best when the room lights are dimmed.
Best shortcut: Use a small piece of clear tape at the bottom of each vertical strand to keep them from tangling when the window is opened.
10. Short Curtain Lights Across the Upper Half of the Window
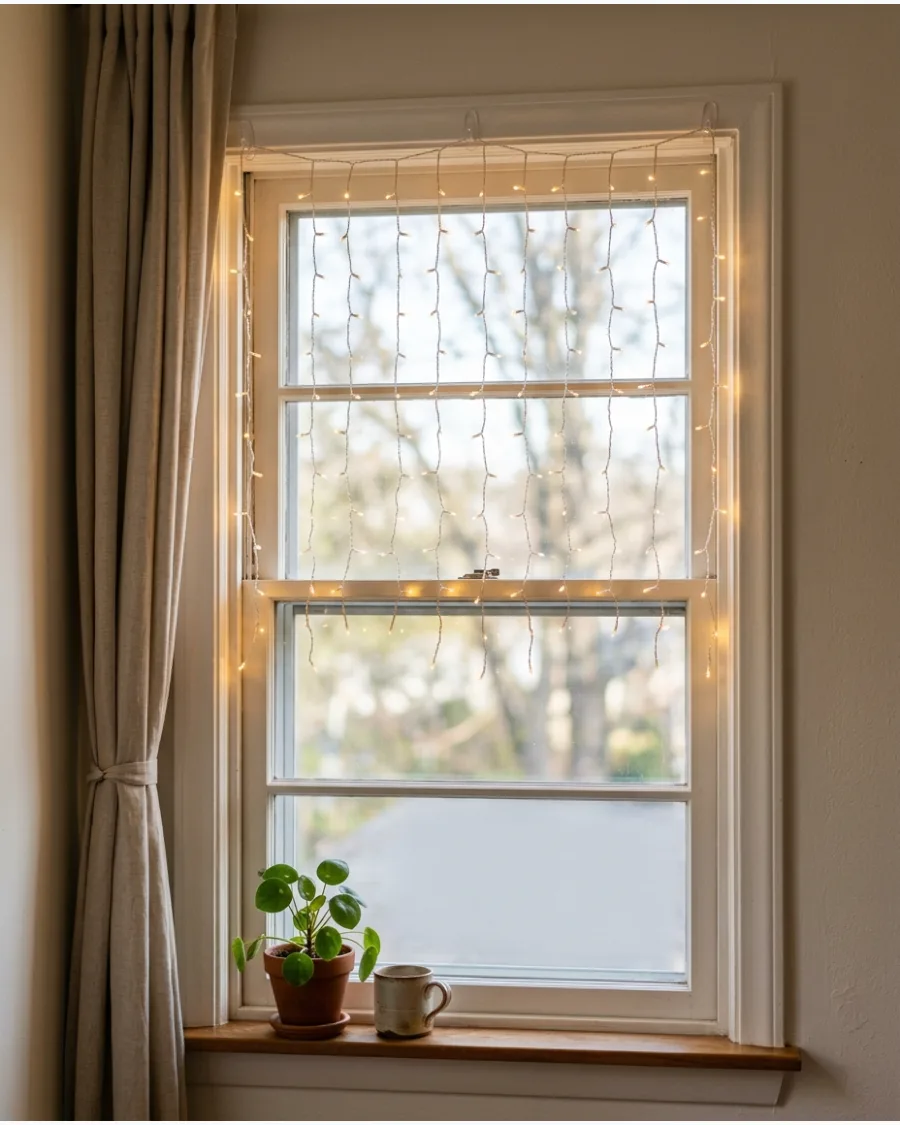
Use curtain lights that stop halfway down the glass instead of covering the entire window.
This creates plenty of Christmas sparkle while keeping the lower part of the window open. Tuck the excess length of the vertical strands behind the main header cord if you cannot find a short enough set. This valance of light adds a decorative touch without blocking the view of the street.
- $20-$30 for the set.
- Ideal for windows with deep sills or built-in benches.
- Use battery-operated sets to avoid running a long cord down the side of the window.
Quick win: Place a few small gold ornaments on the windowsill to catch the light from the curtain above.
11. Cascading Fairy Lights at Different Lengths
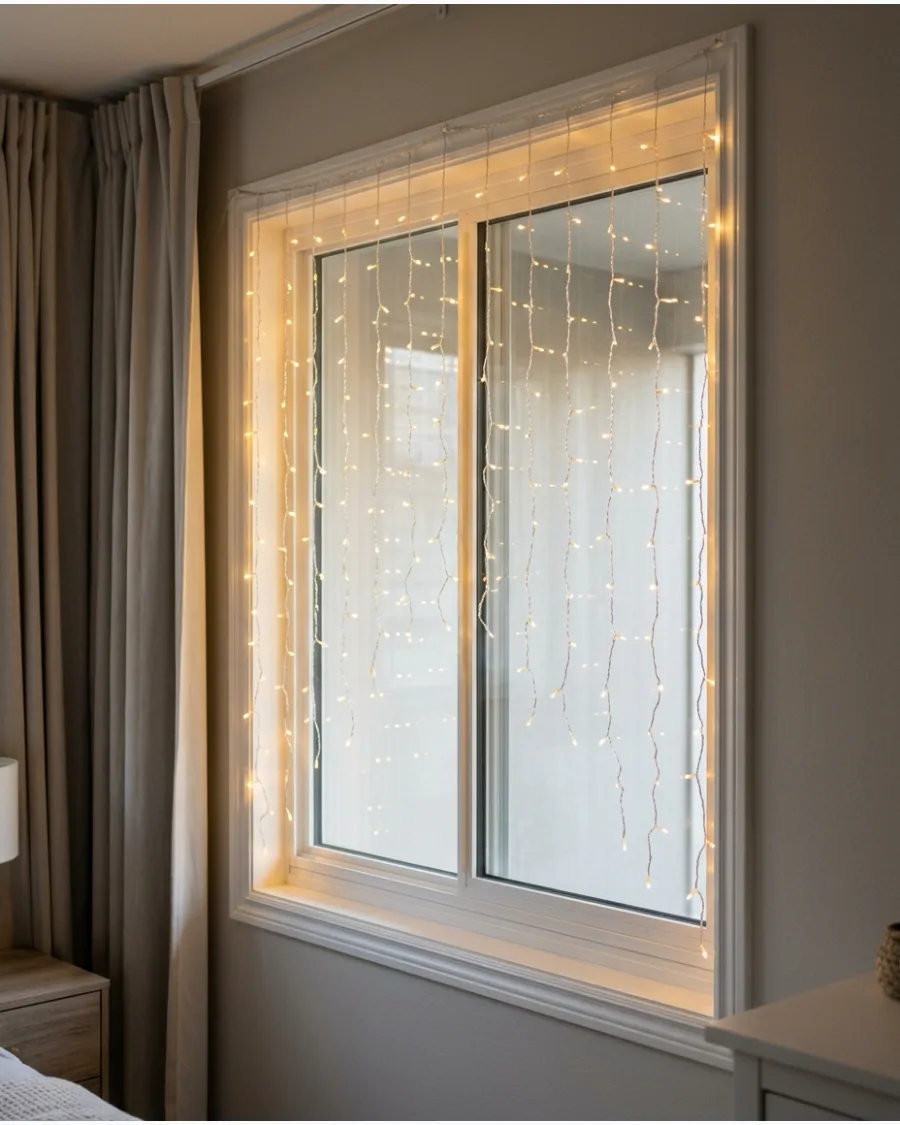
Hanging individual strands at varying lengths creates a relaxed and organic look compared to a uniform curtain. This staggered approach draws the eye across the entire window and softens the sharp lines of the frame.
Trim the excess wire on battery-operated strands once you find the perfect staggered heights for your specific window size. It feels less like a store-bought kit and more like a custom installation.
- Expect to spend $15 to $25 for a set of high-quality copper or silver wire fairy lights.
- Use clear adhesive mini-hooks on the top interior trim to hold each strand at its specific height.
- This look works well for renters because the lightweight wires require very small, removable hooks.
Most people skip this: Use small pieces of clear tape to secure the very bottom of each strand to the glass so they don't tangle when the window is opened.
12. Icicle Lights Inside the Window
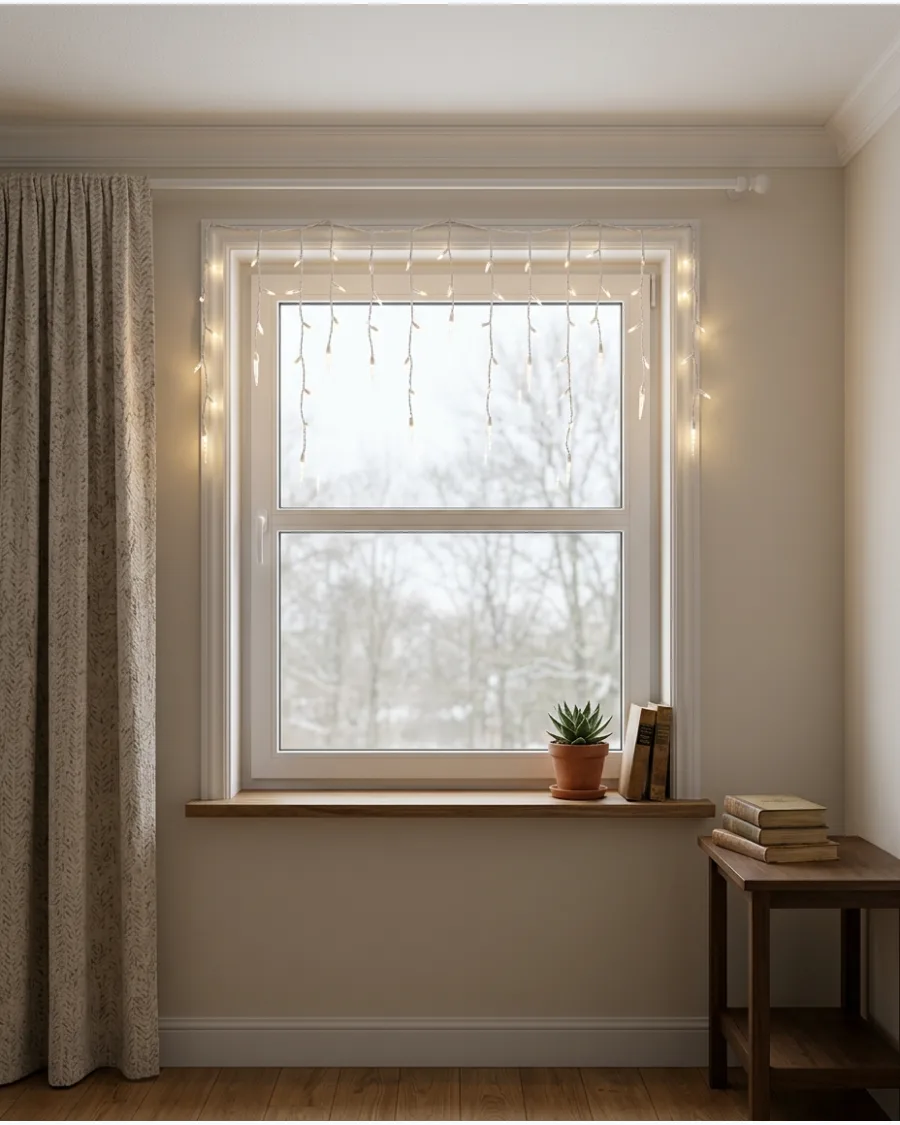
Bringing icicle lights indoors adds a wintery layer to the room without the hassle of a ladder outside. The varying drop lengths of the strands mimic natural ice formations while providing a bright glow at the top of the glass.
Mount the main horizontal cord directly behind the top window trim to hide the bulky wiring from view. This setup works best when the lights are visible from the street but do not block the view of the backyard.
- Budget about $20 for a standard 10-foot strand of indoor-rated LED icicle lights.
- Secure the main cable every 6 inches with white cord clips to prevent sagging in the middle of the window.
- Choose cool white bulbs to lean into the icy theme or warm white for a traditional cozy feel.
Quick win: Use white cord covers or adhesive clips that match your trim color to keep the heavy main wire perfectly straight along the top.
13. Waterfall Christmas Lights on a Tall Window
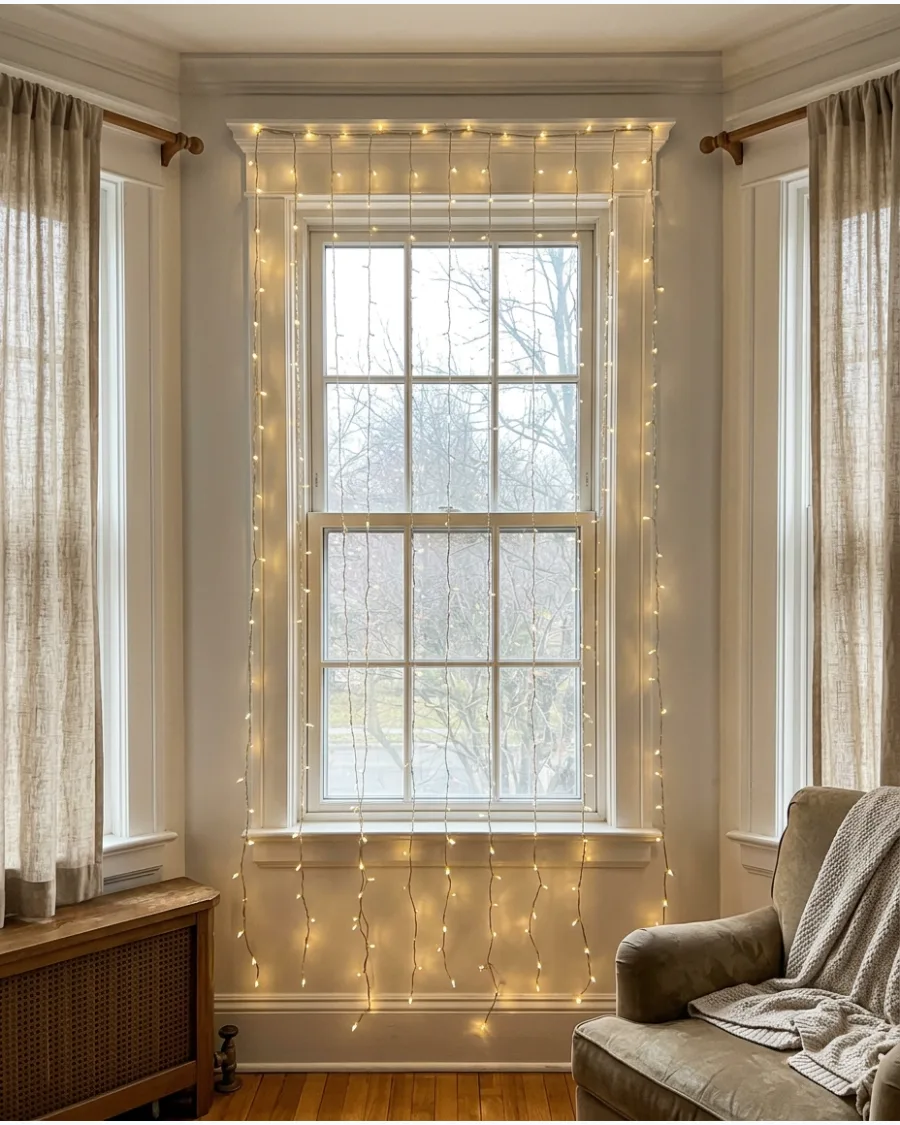
Tall windows or sliding glass doors benefit from long, sweeping strands that emphasize the vertical space. Starting the lights high at the ceiling line makes the room feel taller and more dramatic.
Gravity does most of the work here, so ensure the top anchor points are strong enough to support the weight of the full-length strands. It creates a high-end look that fills a large architectural gap with light.
- Long 9-foot waterfall sets typically cost between $30 and $50 depending on the bulb density.
- Mount the top controller box on the wall above the trim so it doesn't pull on the vertical strands.
- For very wide windows, connect two sets together but ensure the vertical strands stay perfectly parallel.
Best shortcut: Use a tension rod across the top of the window frame to hang the lights if you want to avoid drilling holes or using adhesive.
14. Dense Micro-Light Window Curtain
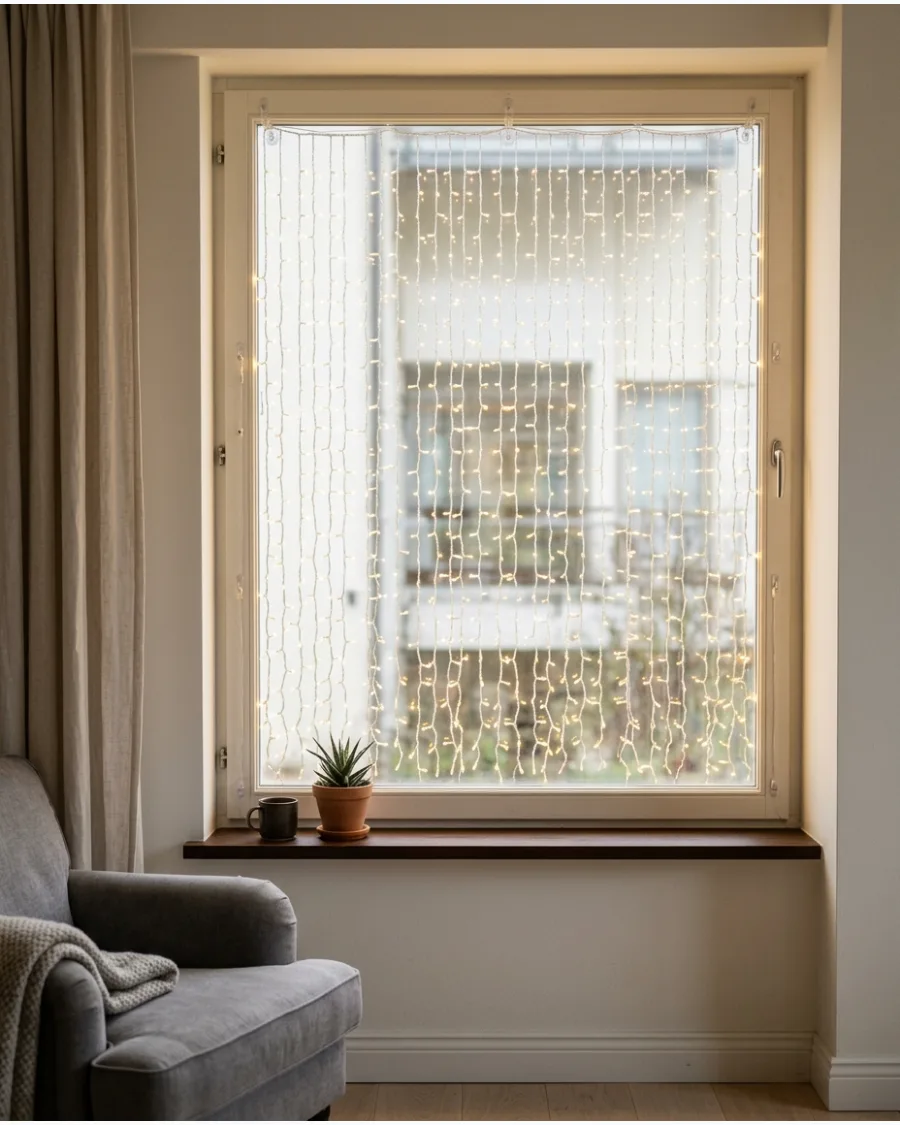
Filling a window with hundreds of tiny micro LEDs creates a solid wall of sparkle that acts like a glowing privacy screen. The warm white tone keeps the intense light from feeling clinical or overwhelming.
Choose a curtain set with at least 300 bulbs for a standard window to ensure there are no dark gaps in the display. This is an excellent way to add a festive backdrop to a dining room or living area.
- High-density micro-light curtains are available for $25 to $40 at most home decor retailers.
- Unravel each vertical strand only after the main horizontal wire is securely mounted to avoid massive tangles.
- This style is perfect for large windows that face the street to create a 'glow' effect for passersby.
Quick win: Plug these into a smart outlet so you can set a schedule and avoid reaching behind furniture every night to turn them on.
15. Sparse Minimalist Fairy Light Curtain
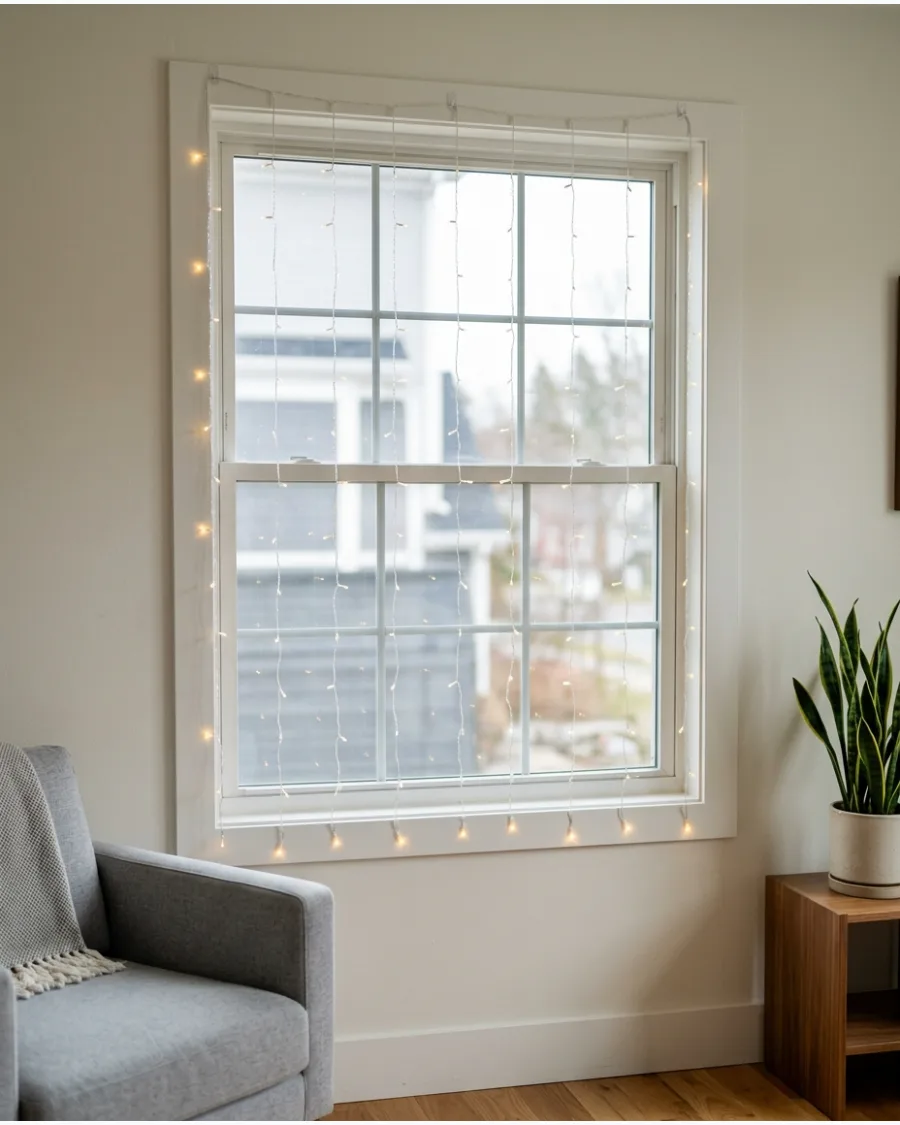
A restrained arrangement with wide spacing between strands fits perfectly in modern or Scandinavian-style homes. This look focuses on the delicate beauty of individual bulbs rather than a wall of light.
Space the vertical strands about six to eight inches apart to maintain a clean and airy feel. It provides just enough cheer without cluttering the view of the outdoors.
- A basic fairy light string can be modified for this look for under $15.
- Use a measuring tape to ensure each vertical drop is perfectly equidistant from the next.
- Copper or silver wire is ideal here because the wire itself becomes a decorative element.
Most people skip this: Use a ruler to mark your clip placement so the spacing is mathematically perfect for that high-end minimalist look.
16. Twinkling Snowfall Window Curtain
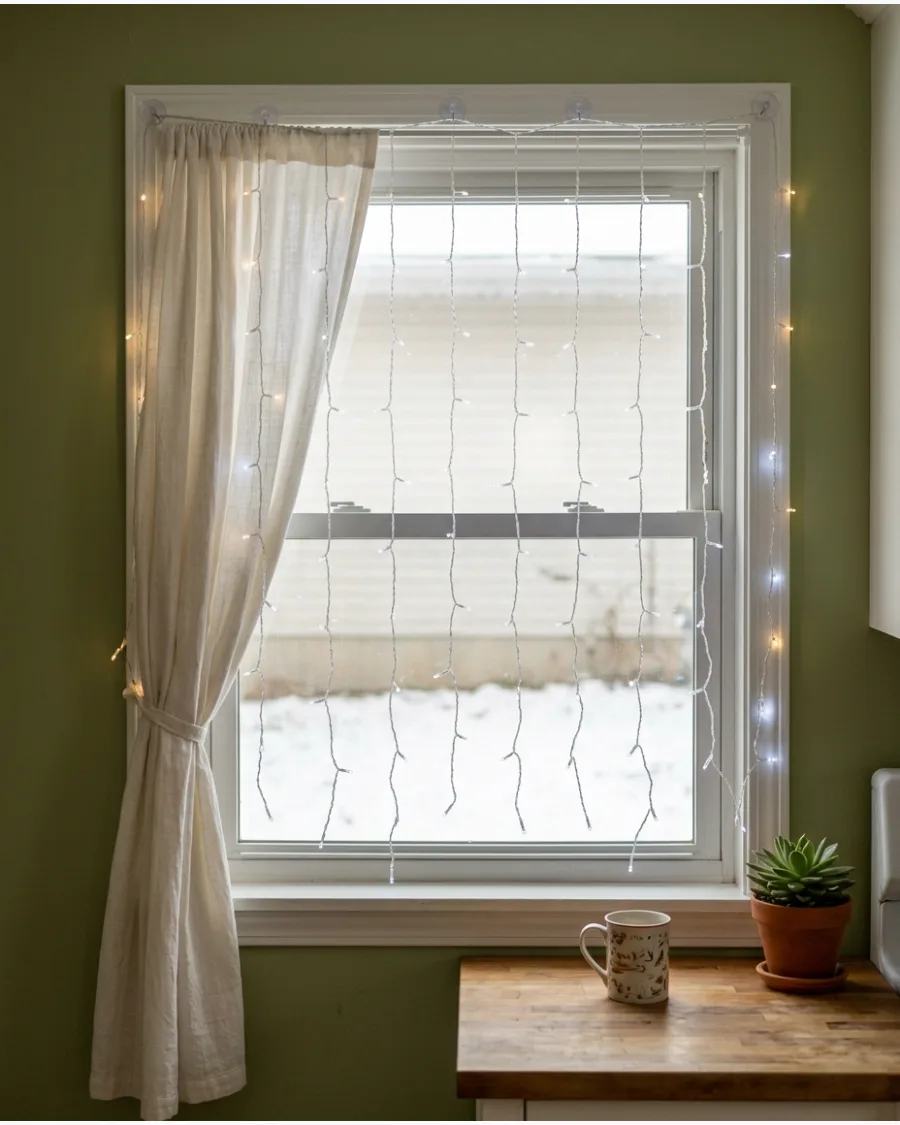
Lights with a slow, sequential fading pattern mimic the look of gently falling snow against the glass. Using cool white or soft white bulbs enhances the wintery theme and stands out against warm indoor lamps.
Look for a controller that allows you to slow down the speed so the effect remains calming rather than frantic. It adds a sense of motion to the room that static lights cannot match.
- Expect to pay $20 to $35 for sets with multi-function controllers.
- Hang these in windows without curtains or blinds to allow the light to reflect off the glass clearly.
- Cool white LEDs look best when paired with silver or blue indoor holiday decor.
Best shortcut: If your lights don't have a 'snowfall' setting, a 'slow glow' mode usually provides the most realistic movement.
STAR CHRISTMAS WINDOW LIGHTS
17. Large Illuminated Star Centered in the Window
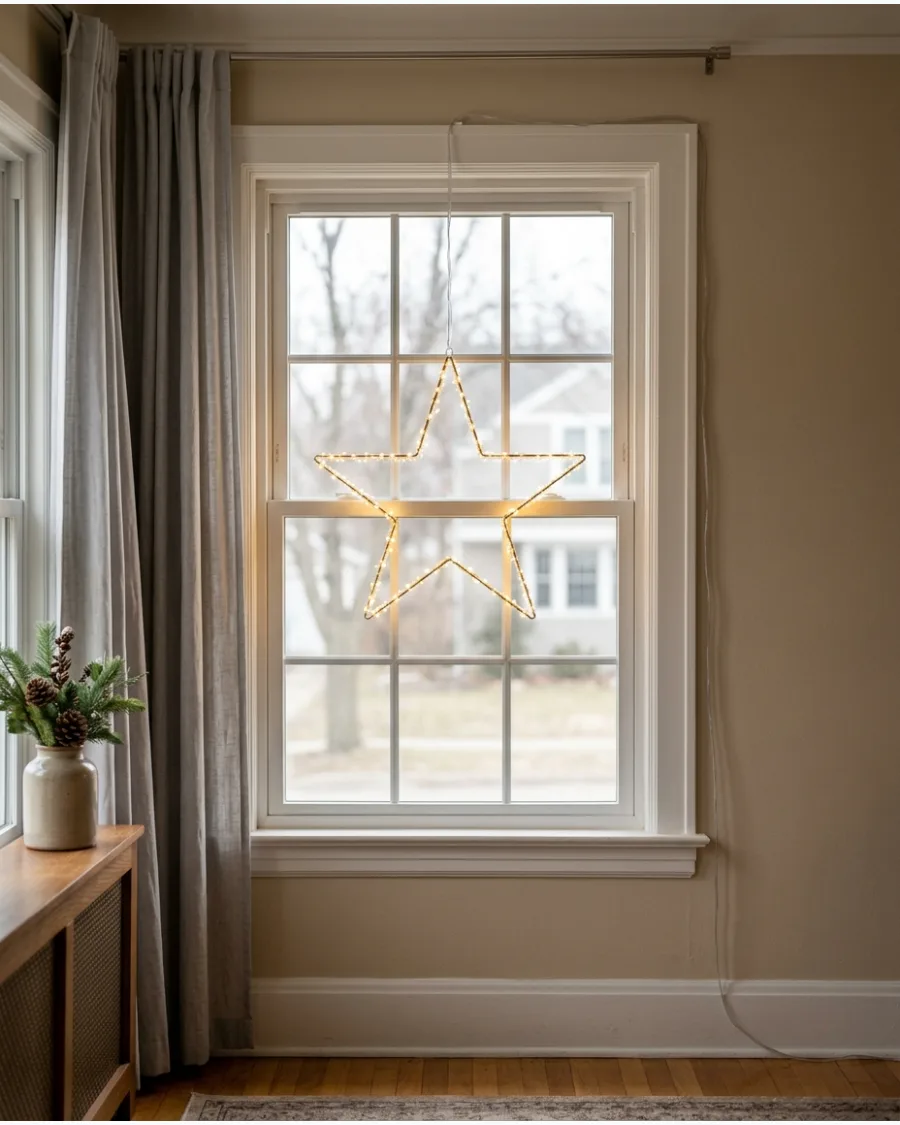
A single oversized star creates a powerful focal point that looks professional from the sidewalk. Keeping the rest of the window clear allows the geometric shape to stand out clearly.
Use a heavy-duty suction cup with a built-in hook to ensure the star stays perfectly centered on the glass all season. It is a simple, high-impact solution for those who prefer a less cluttered holiday style.
- Large window stars range from $20 for plastic versions to $60 for metal-framed ones.
- Measure the exact center point of the window glass before applying the suction cup for perfect symmetry.
- Battery-powered stars with timers are the easiest to manage since they don't require cords running to an outlet.
Quick win: Hide the power cord by running it along the vertical muntin or sash of the window and securing it with clear clips.
18. Three Glowing Stars at Different Heights
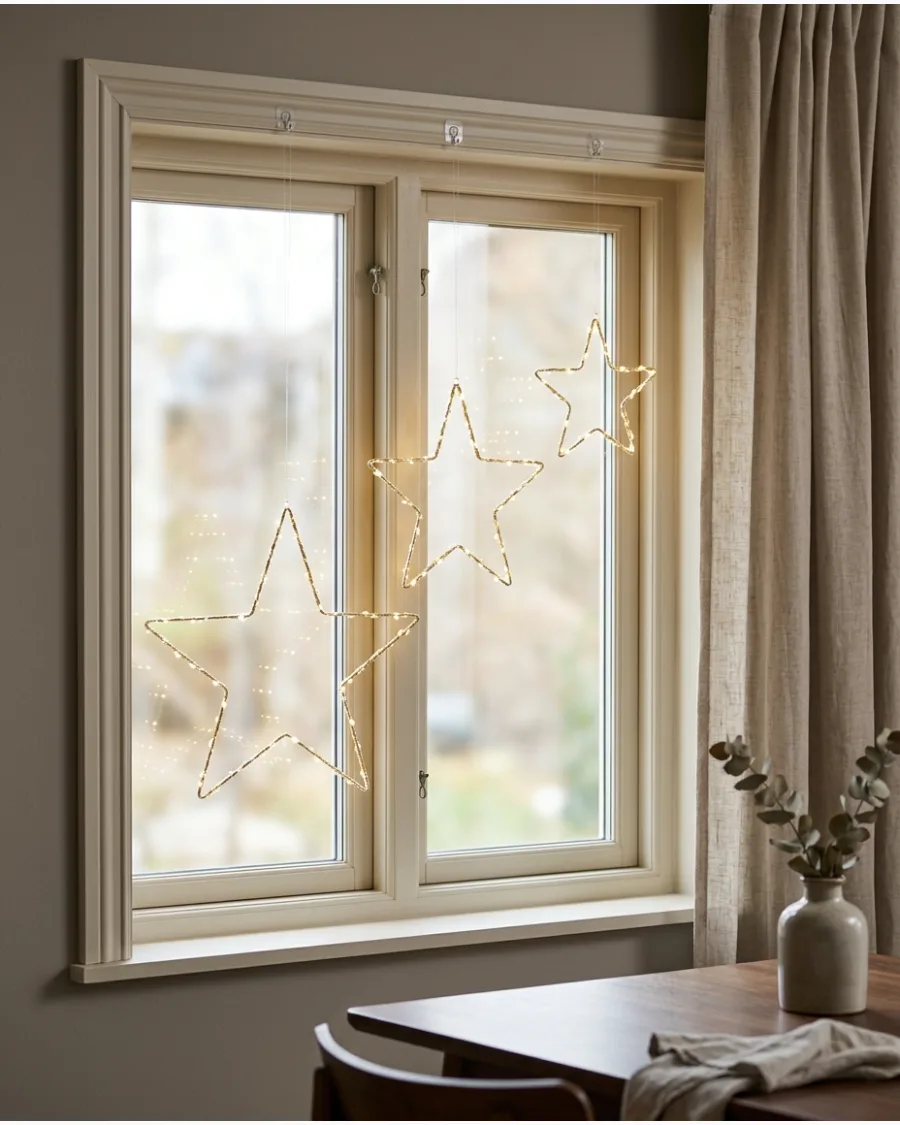
Suspending three stars at varying heights creates a balanced and artistic composition. Using graduated sizes adds depth and visual interest compared to three identical stars.
Hang the largest star slightly lower than the two smaller ones to create a classic triangular focal point. This arrangement fills the vertical space of the window beautifully.
- Sets of three stars are often sold together for $30 to $45.
- Use clear fishing line to adjust the heights if the attached cords are all the same length.
- This setup works best in tall, narrow windows where vertical layering is possible.
Best shortcut: Use fishing line to hang the stars if the included power cords are too thick or distracting.
19. Paper Star Lamps in the Window
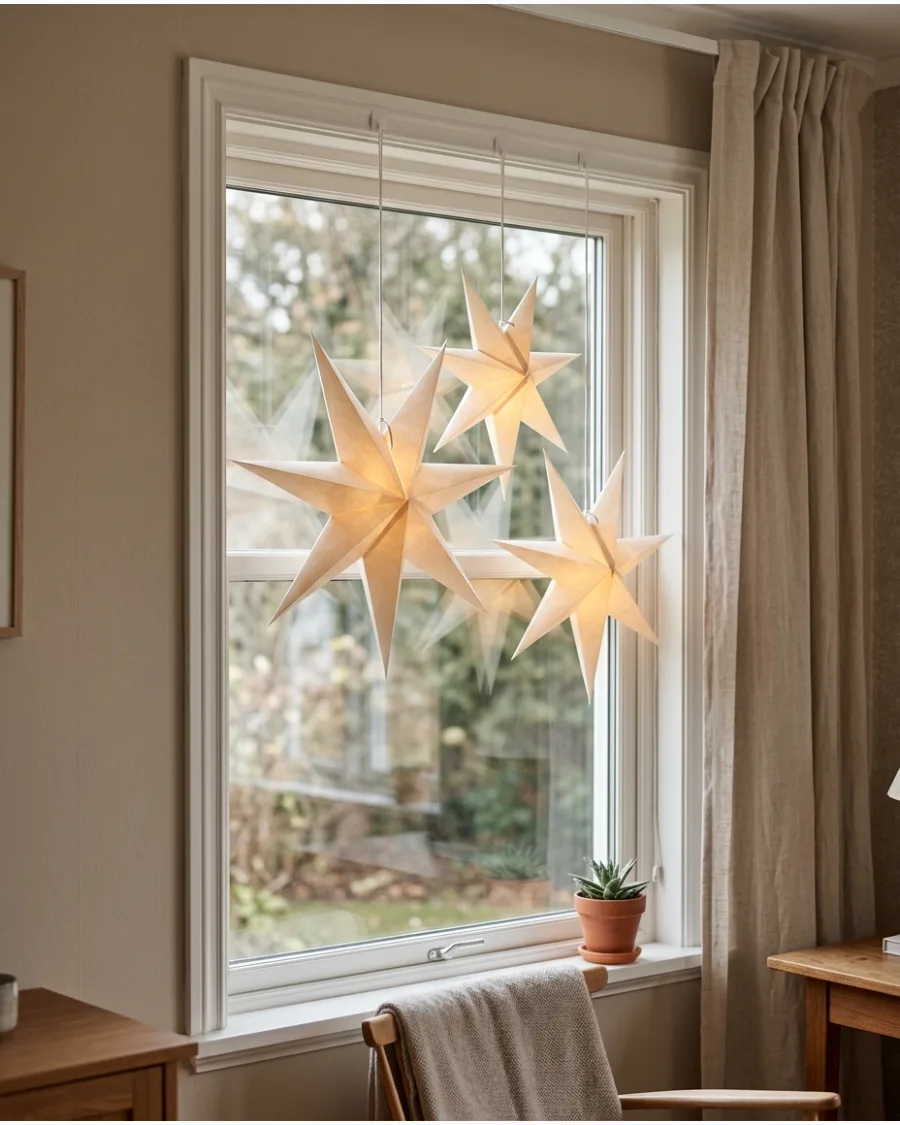
Folded paper stars provide a soft, diffused glow that feels warm and inviting from both sides of the glass. These Scandinavian-inspired lanterns work well in neutral rooms where bright, bare LEDs might feel too harsh.
Choose stars with intricate laser-cut patterns to cast beautiful shadows on the walls and ceiling. They are lightweight and easy to store flat once the season is over.
- Paper stars are budget-friendly, usually costing $10 to $20 each without the light kit.
- Ensure you use a 'cool-to-the-touch' LED bulb specifically designed for paper lanterns to ensure safety.
- White or cream paper provides the most light, while red or patterned paper creates a moody, festive accent.
Most people skip this: Use low-wattage LED bulbs inside paper stars to prevent the paper from getting too warm during long evenings.
20. Cluster of Small Star Lights
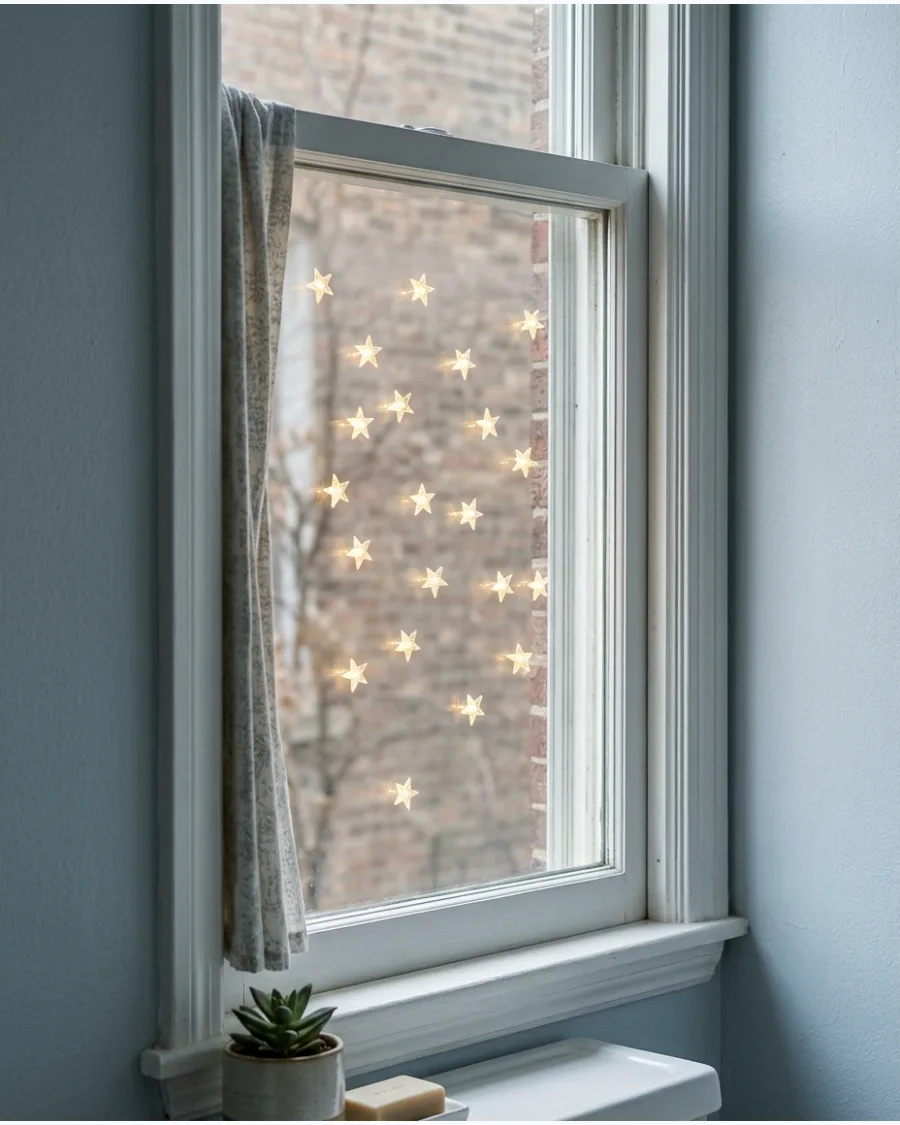
Instead of one large piece, a collection of smaller stars scattered across the window creates the look of a glowing night sky.
Irregular heights and spacing make the display feel more whimsical and less formal. Mix battery-operated stars with corded ones to reach the center of the glass without visible wires stretching across the frame. This is a great way to decorate smaller windows or nursery spaces.
- Small stars are often sold in packs of 5 or 10 for around $25.
- Use tiny clear command hooks scattered across the window frame to vary the depth and height of each star.
- This idea is very effective for small windows where one large star would be overwhelming.
Quick win: Use a branch or a decorative rod across the top of the window to hang all the stars from at once for a cohesive look.
21. Star Fairy-Light Curtain
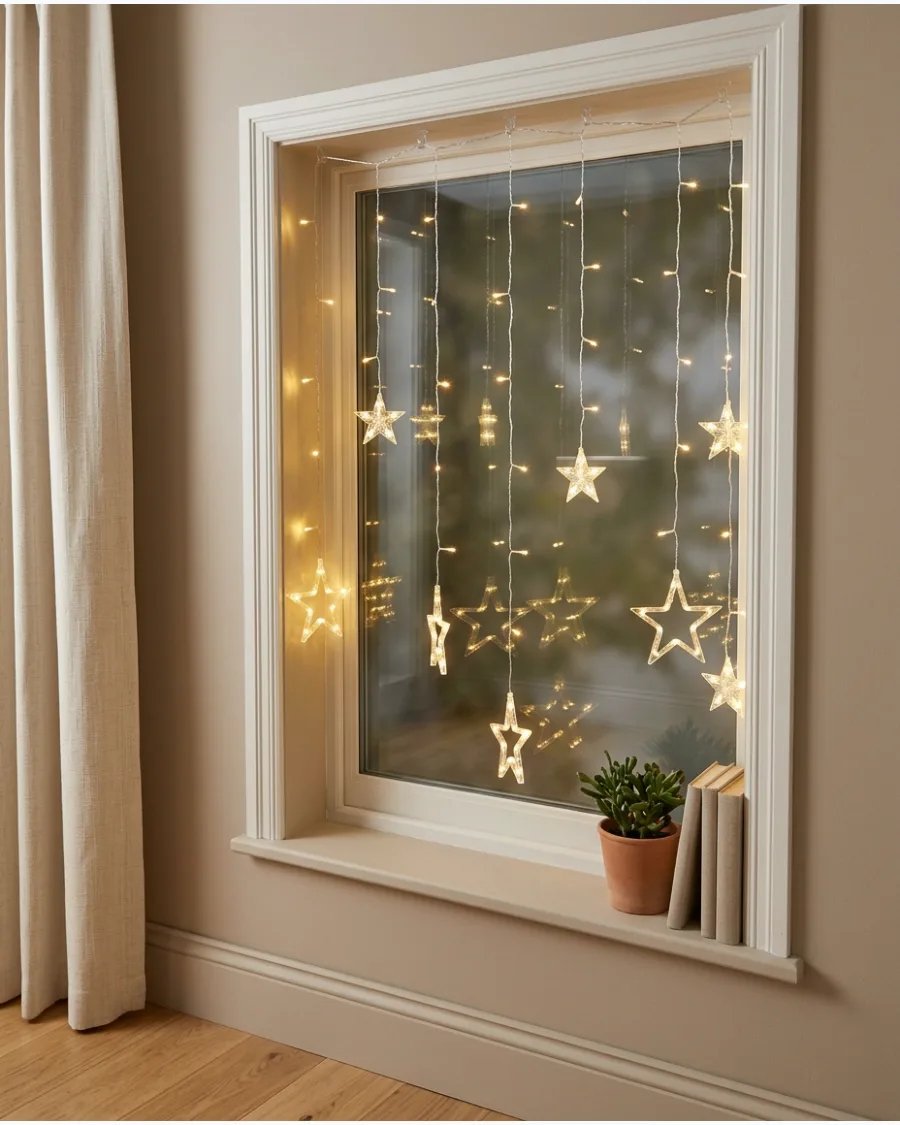
Star curtain lights mix small bulbs with larger star shapes to fill the window space. They create a tiered effect that works well as a standalone decoration.
Secure the main horizontal strand to the top of the window frame using small clear adhesive hooks. The different sizes look professional from the street and the sidewalk. These lights provide enough glow to act as the only light source in a cozy room.
- Sourcing: Affordable LED star sets are available at most big-box stores.
- Setup: Hook the top wire every 12 inches to prevent the strand from sagging.
- Adaptation: Use battery-powered versions for windows that are far from wall outlets.
Quick win: Untangle the vertical strands after hanging the main top wire to avoid a mess.
22. Oversized Bethlehem Star Window Light
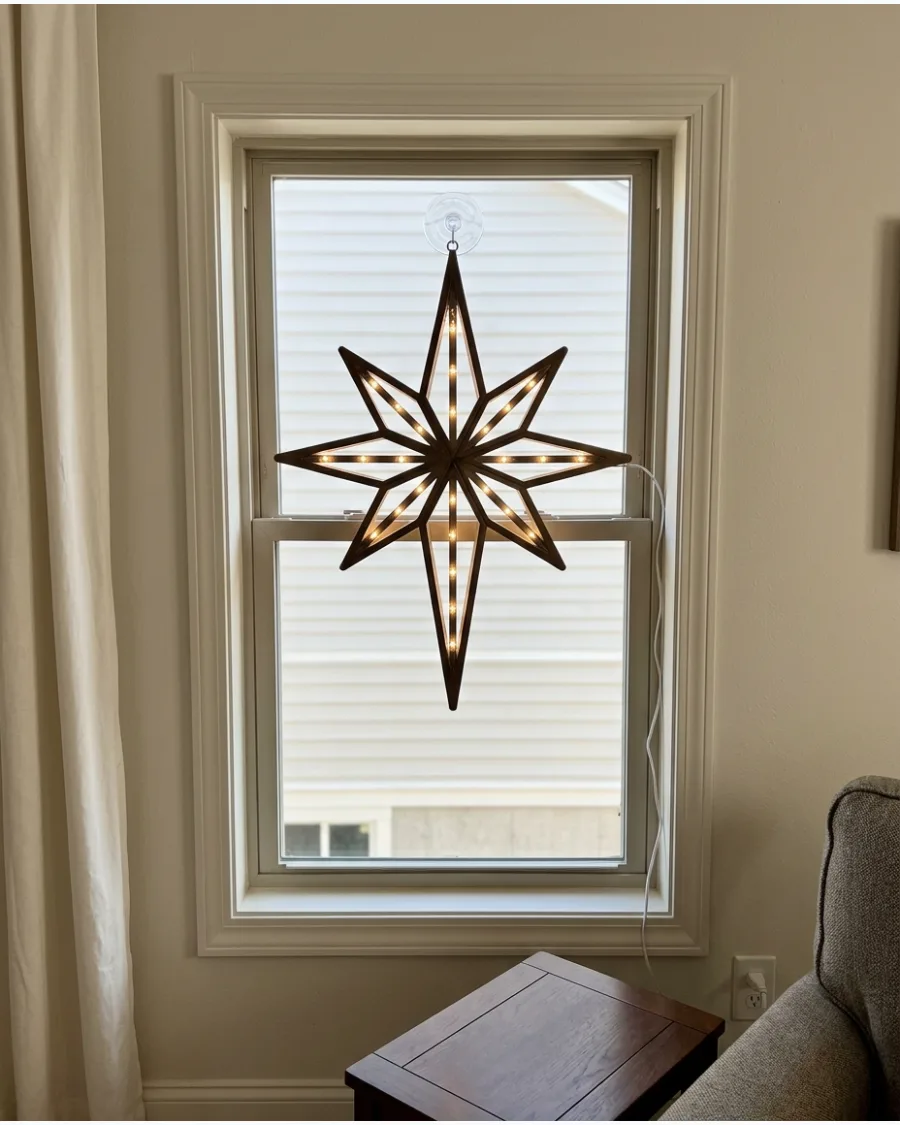
A large multi-point star serves as a bold focal point for a big picture window. It works best when centered to create a clean and symmetrical look.
Use a suction cup hook with a swivel head to hang the star directly on the glass. This minimalist approach is high-impact and takes only minutes to install. A single large light looks much more intentional than several small, mismatched ones.
- Sourcing: Look for folding plastic stars for easy storage during the off-season.
- Setup: Clean the window glass with rubbing alcohol before applying the suction cup.
- Adaptation: Choose a battery-operated star to hide unsightly hanging power cords.
Most people skip this: Check the star's orientation from the sidewalk to ensure it is perfectly straight.
23. Warm Gold Star Window Display
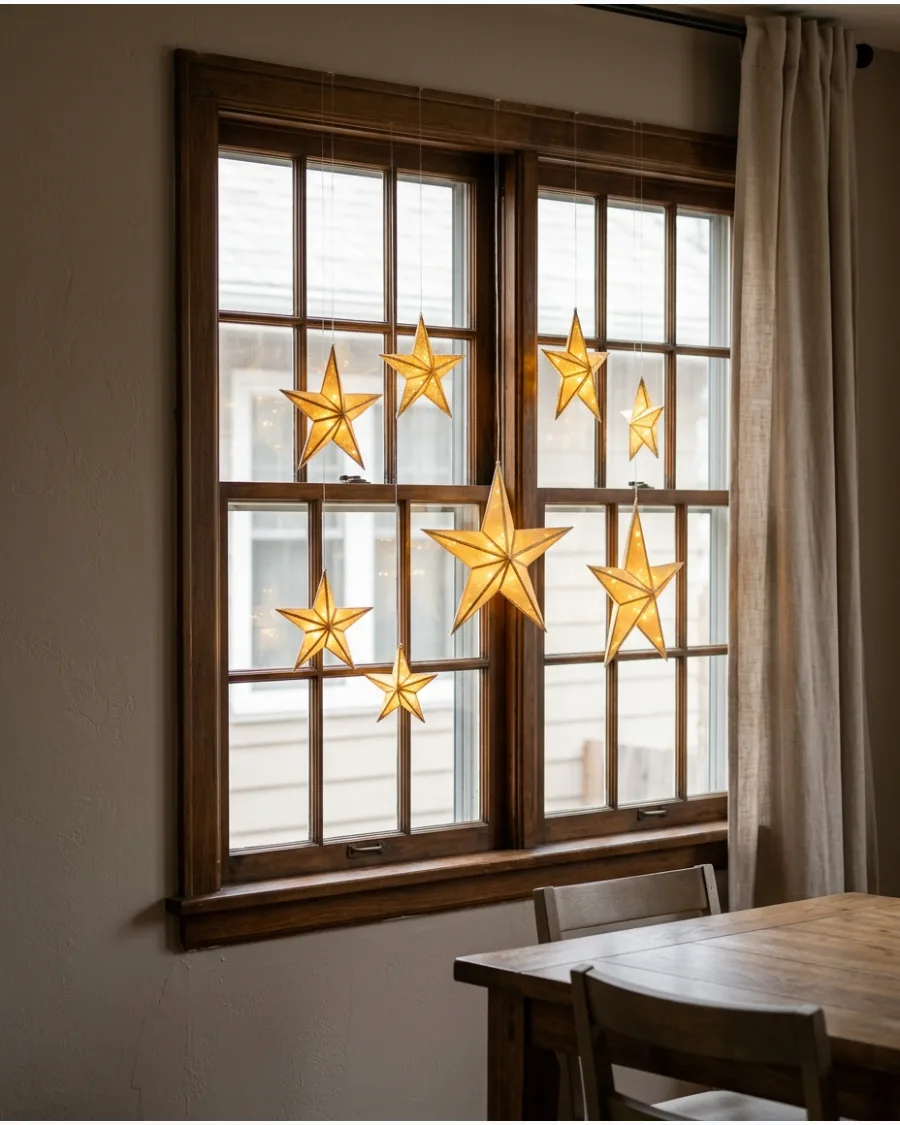
Mixing different sizes of gold-toned stars adds depth and visual interest to a standard window. The metallic finish looks attractive during the day even when the lights are turned off.
Vary the hanging heights of the stars to create a balanced but unsymmetrical layout. Stick to one light color to keep the display looking sophisticated. Gold light feels warmer and more inviting than standard cool white bulbs.
- Sourcing: Find gold-toned light sets during early seasonal sales at craft stores.
- Setup: Use clear fishing line to hang the stars at custom, staggered lengths.
- Adaptation: Group smaller stars in narrow windows and larger ones in wide windows.
Best shortcut: Use a tension rod inside the window frame to hang multiple stars without drilling holes.
24. Star Lights With a Christmas Village Below
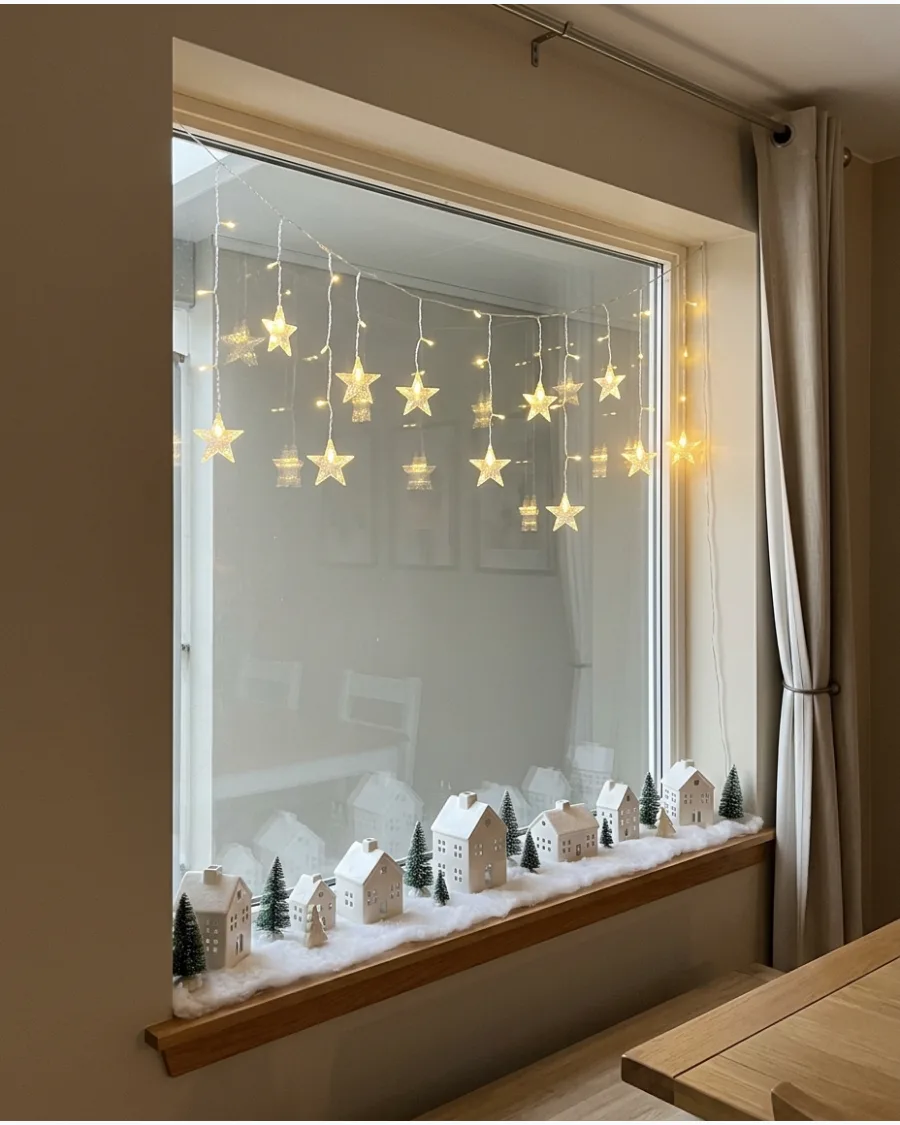
This setup uses light to tell a story by placing stars above a miniature scene on the sill.
The stars act as a glowing night sky for the houses and trees below. Position the star lights so they only hang down to the top of the tallest village building. This creates a clear visual gap between the sky and the ground elements.
Elevating the lights prevents the display from looking like a cluttered pile of decorations.
- Sourcing: Collect ceramic houses from thrift stores or local craft shops.
- Setup: Place a small power strip behind the village to plug in all components.
- Adaptation: Use a white runner on the sill to hide the house power cords.
Quick win: Use warm white lights for both the stars and the houses for a unified glow.
CHRISTMAS SHAPE AND SILHOUETTE LIGHTS
25. Light-Up Christmas Tree in the Window
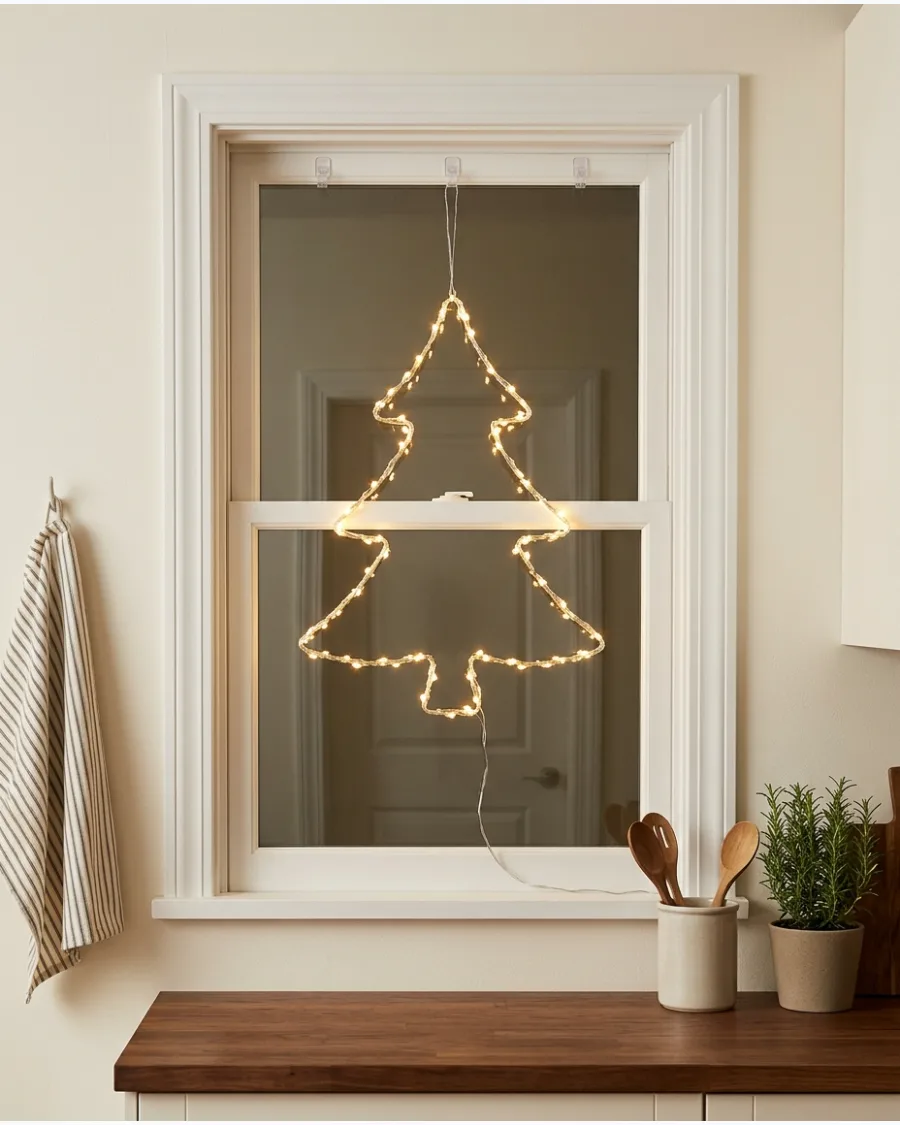
A simple tree silhouette provides a classic holiday shape that is instantly recognizable from the street. It fills the center of the window without blocking your view of the outdoors.
Mount the tree silhouette using clear adhesive clips at the top and bottom to keep it flush against the glass. This prevents the shape from swinging when people move nearby. Simple outlines are easier for people to see from a distance than complex designs.
- Sourcing: Available as pre-lit wire frames at hardware and home improvement stores.
- Setup: Measure the window width to ensure the tree frame fits inside the trim.
- Adaptation: Use two smaller tree silhouettes side-by-side in a double-hung window.
Most people skip this: Test the silhouette from outside to make sure no window bars cut through the design.
26. Glowing Snowflake Window Lights
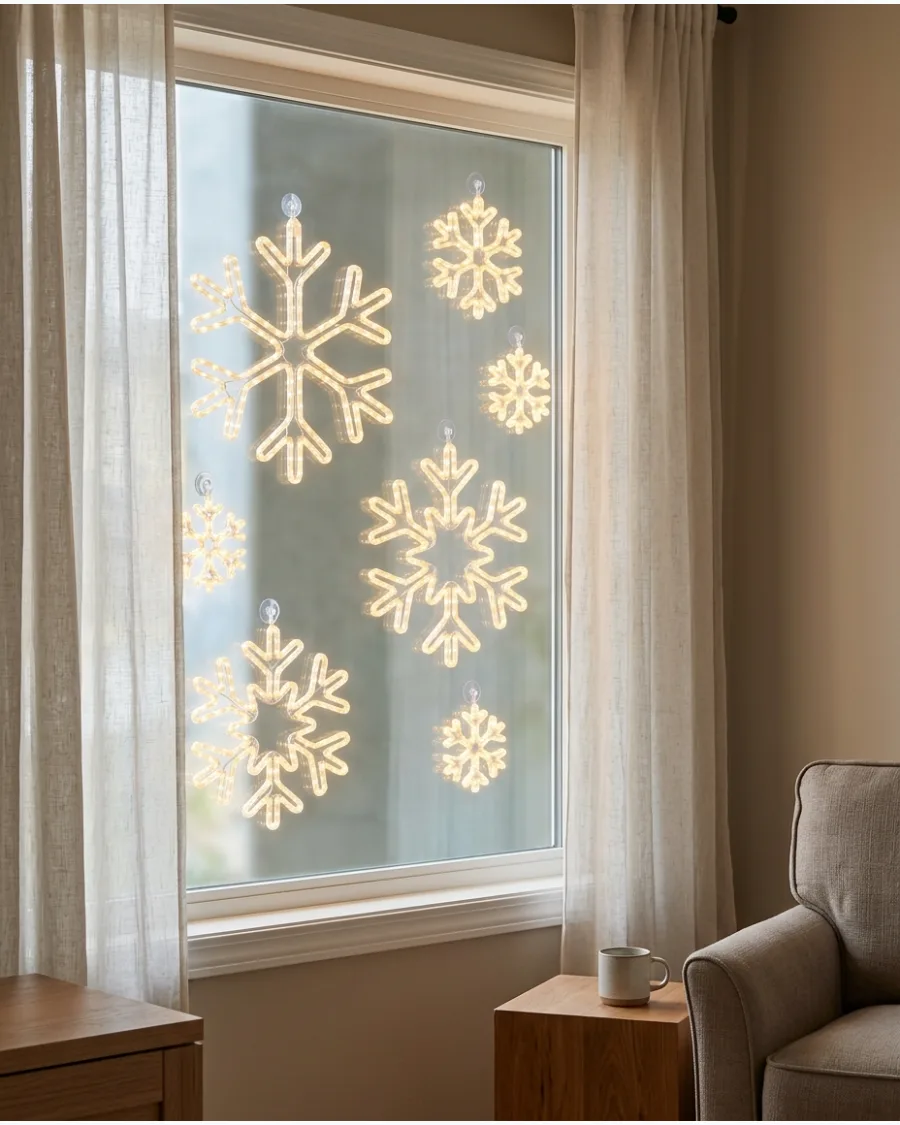
Snowflakes are a great choice because they stay relevant through the entire winter season. Mixing different sizes creates a more natural falling look across the glass surface.
Cluster the snowflakes in one corner or spread them out depending on the size of the window. Cool white LEDs often look more like real ice, but warm white is better for a cozy interior.
Using different sizes makes the display feel more like a real snowfall.
- Sourcing: Buy multi-packs of snowflake lights to save money on larger displays.
- Setup: Space the snowflakes at least 6 inches apart to keep the shapes distinct.
- Adaptation: Use battery-operated snowflakes for a cord-free look on high windows.
Quick win: Use a level to make sure the snowflakes aren't tilted, which can ruin the falling effect.
27. Large Light-Up Snowflake Centerpiece
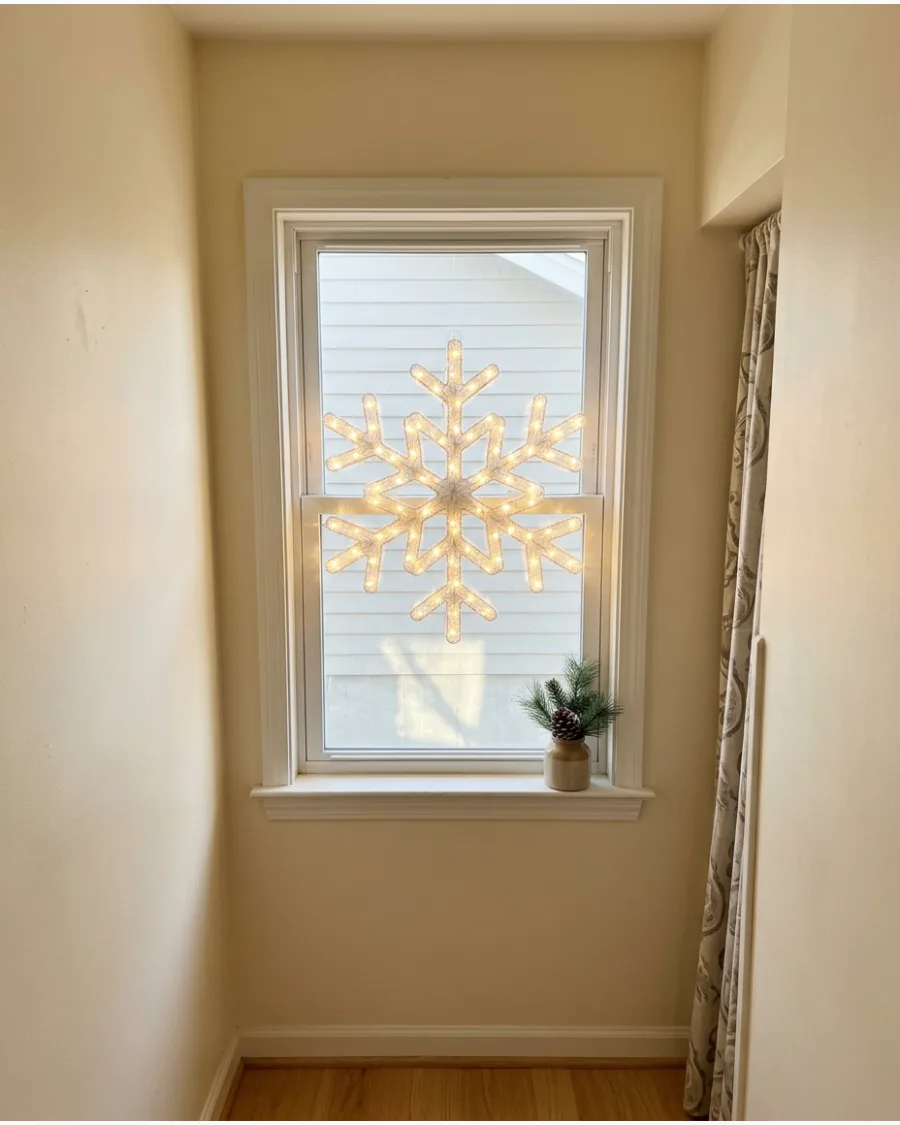
One large and intricate snowflake makes a bold statement in a smaller or narrow window. It provides a clean, modern look that doesn't feel over-decorated or busy.
Choose a snowflake with a high bulb count to ensure it is bright enough to see from the road. This is a perfect solution for renters who want a big impact with a quick setup.
A single large piece often looks more expensive than a dozen small ones.
- Sourcing: Look for commercial-grade silhouettes for the brightest possible light output.
- Setup: Hang the snowflake using a heavy-duty suction cup rated for five pounds.
- Adaptation: Pick a snowflake with a built-in timer to save energy and effort.
Best shortcut: Use an extension cord with a built-in foot switch to turn the light on and off easily.
28. Light-Up Reindeer Window Silhouette
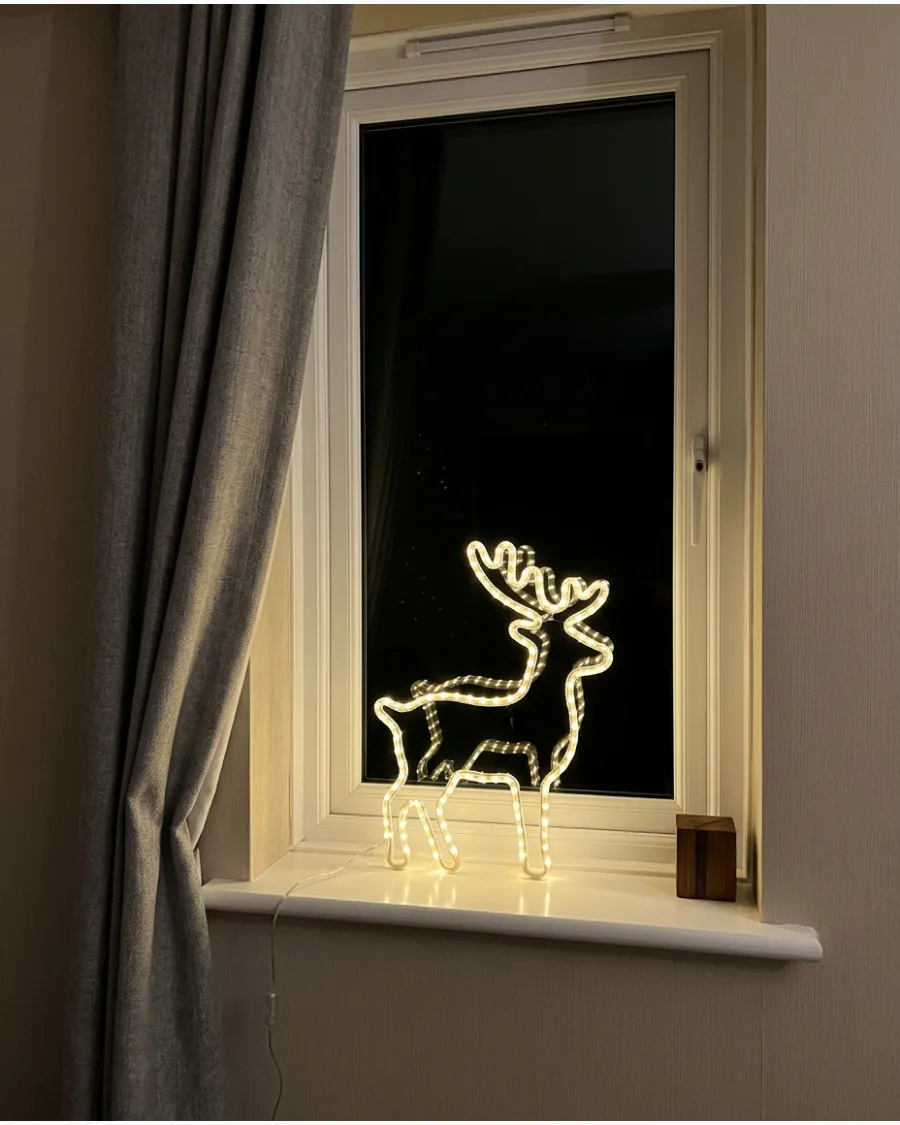
A reindeer silhouette adds a playful and festive touch to any front-facing room in the house. Warm white bulbs keep the look sophisticated while still being fun for kids to see.
Secure the power cord along the side of the window trim with clear clips to keep it hidden. This ensures the focus stays on the glowing animal shape rather than the wires. Hiding the cord is the difference between a DIY project and a professional display.
- Sourcing: Wire-frame reindeer silhouettes are common in seasonal decor aisles.
- Setup: Ensure the reindeer is facing toward the center of the house for better appeal.
- Adaptation: Pair the reindeer with a small lighted sleigh for a larger window.
Quick win: Use a smart plug to schedule the light to turn on at sunset automatically.
29. Glowing Christmas Bell Window Lights
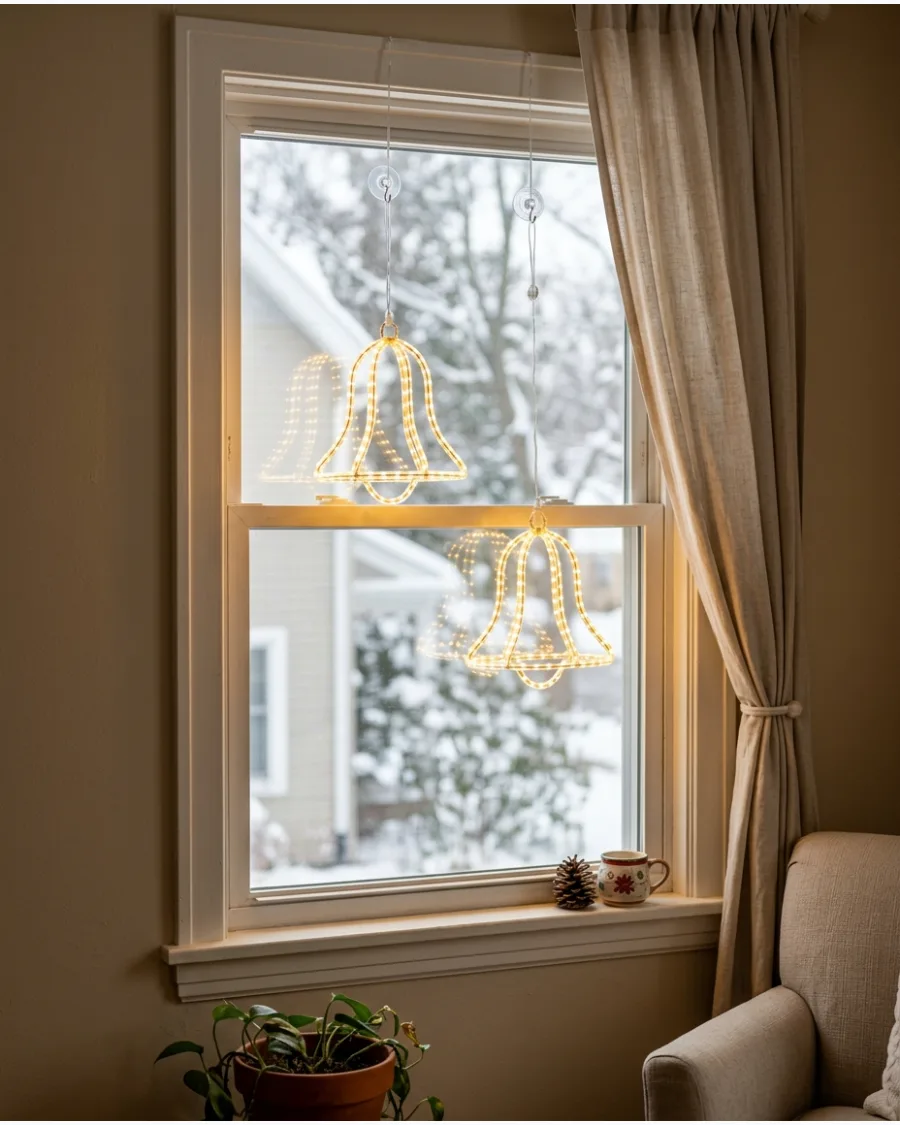
Bells are a traditional symbol that brings a classic holiday feel to any window. Hanging two bells at slightly different heights adds visual interest and a sense of movement.
Tie a piece of red ribbon around the top of the hanging wire to hide the plastic hardware. This small detail makes the light look like a finished decoration rather than just a bulb. Ribbon adds a texture that softens the look of the glowing shapes.
- Sourcing: Bell lights are often sold in pairs or as part of a set.
- Setup: Use a small cup hook screwed into the top of the wooden window casing.
- Adaptation: Choose multicolor bells for a more nostalgic and vintage holiday look.
Most people skip this: Check the length of the lead cord before buying to make sure it reaches your outlet.
30. Candy Cane Window Lights
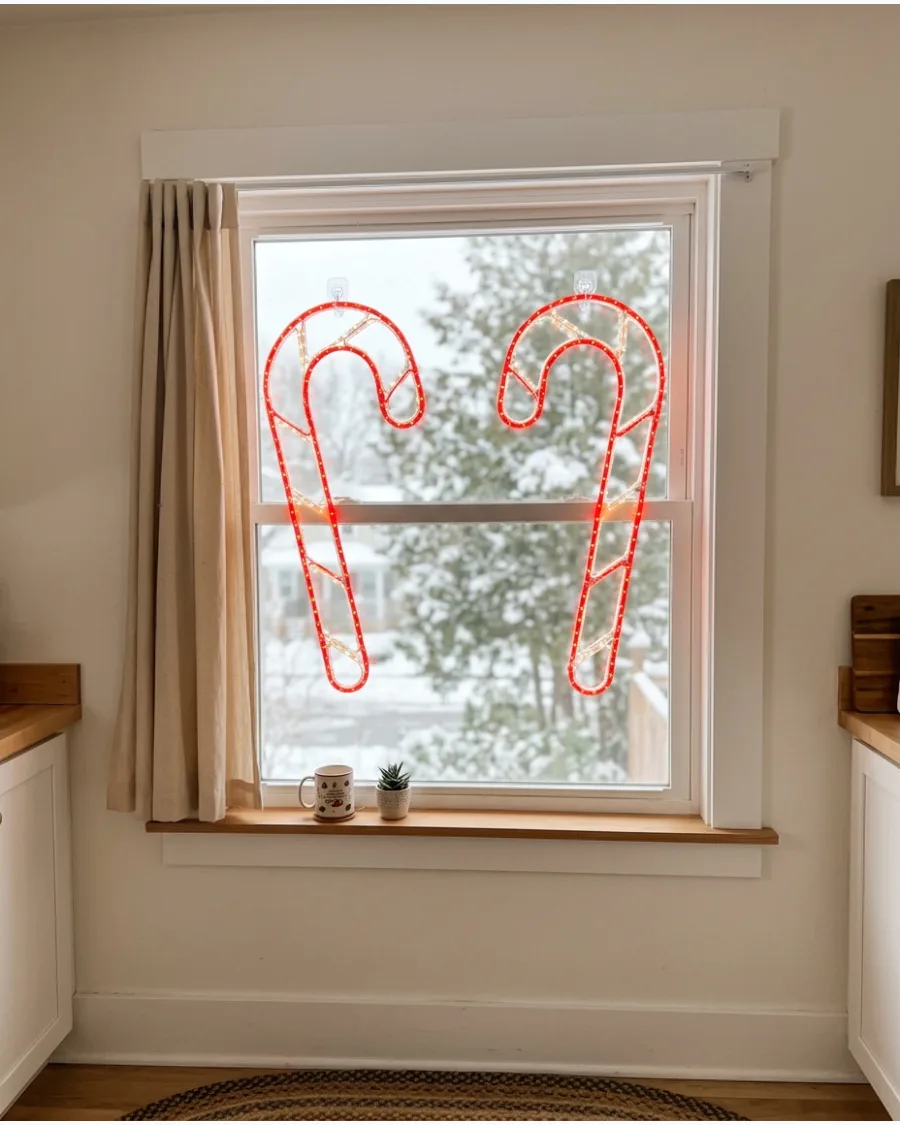
These red and white lights are perfect for adding a cheery vibe to a kitchen or a playroom. Placing one on each side of the window frames the view outside perfectly.
Use clear double-sided tape to keep the candy canes perfectly vertical on the glass panes. The bright colors stand out well against both light and dark interior walls. Symmetry is the easiest way to make simple lights look like a planned design.
- Sourcing: Found at most discount stores or holiday specialty shops during December.
- Setup: Position the lights exactly 2 inches from the side trim for balance.
- Adaptation: Use a single candy cane in a small bathroom window for festive cheer.
Best shortcut: If the window is too narrow, hang the candy canes at a slight diagonal criss-cross in the center.
31. Glowing Ornament-Shaped Window Lights
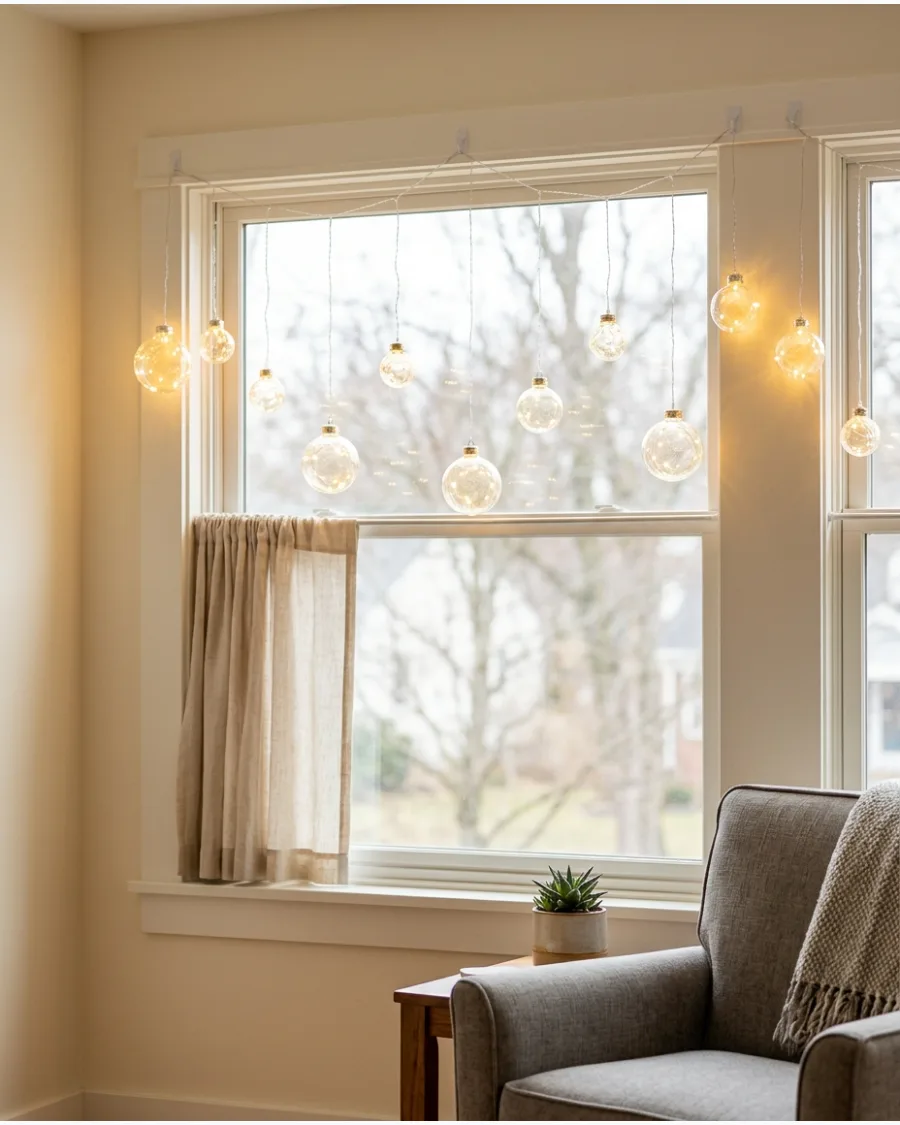
Hang several illuminated bauble shapes across a wide window. Use different sizes but repeat the same light color to keep the arrangement sophisticated.
Space the ornaments evenly to ensure the window looks balanced from the street.
- Expect to spend $20 to $40 for a set of three to five lighted ornaments.
- Use clear suction cups with hooks to secure the cords to the top of the window frame.
- Choose battery-operated versions to avoid long cords hanging down the wall.
Quick win: Use fishing line to hang the ornaments if the provided cords are too short.
32. Christmas Tree and Star Light Combination
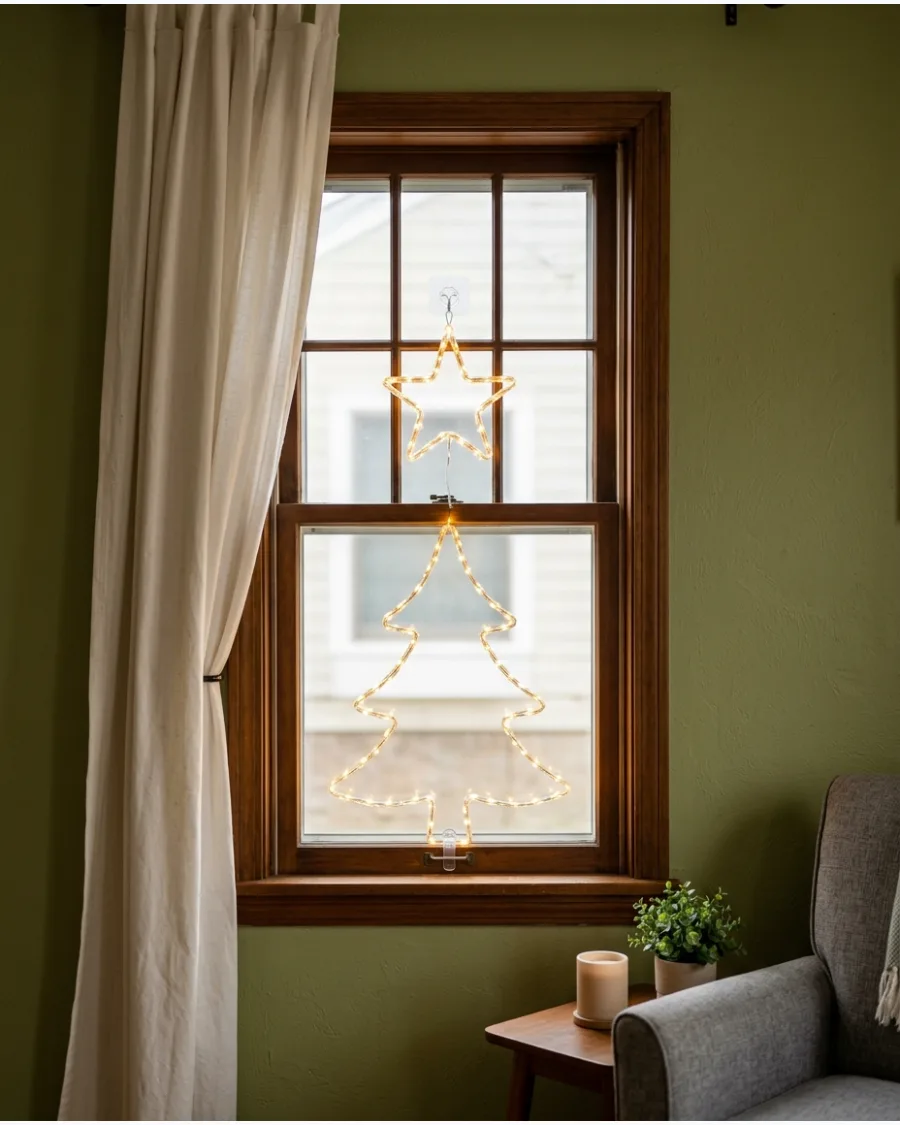
Place a glowing Christmas tree silhouette in the lower center of the window with an illuminated star positioned above it. Keep the composition vertically aligned to resemble a complete Christmas tree scene.
Use clear adhesive hooks on the glass to keep the shapes perfectly straight.
- High-quality LED silhouettes usually cost around $15 per shape.
- Wipe the glass with rubbing alcohol before applying hooks to ensure a strong hold.
- Match the light temperature of both shapes for a cohesive look.
Most people skip this: Clean the glass with rubbing alcohol before applying adhesive hooks to prevent the lights from falling.
WINDOWSILL CHRISTMAS LIGHTING IDEAS
33. Flameless Candles Across the Windowsill
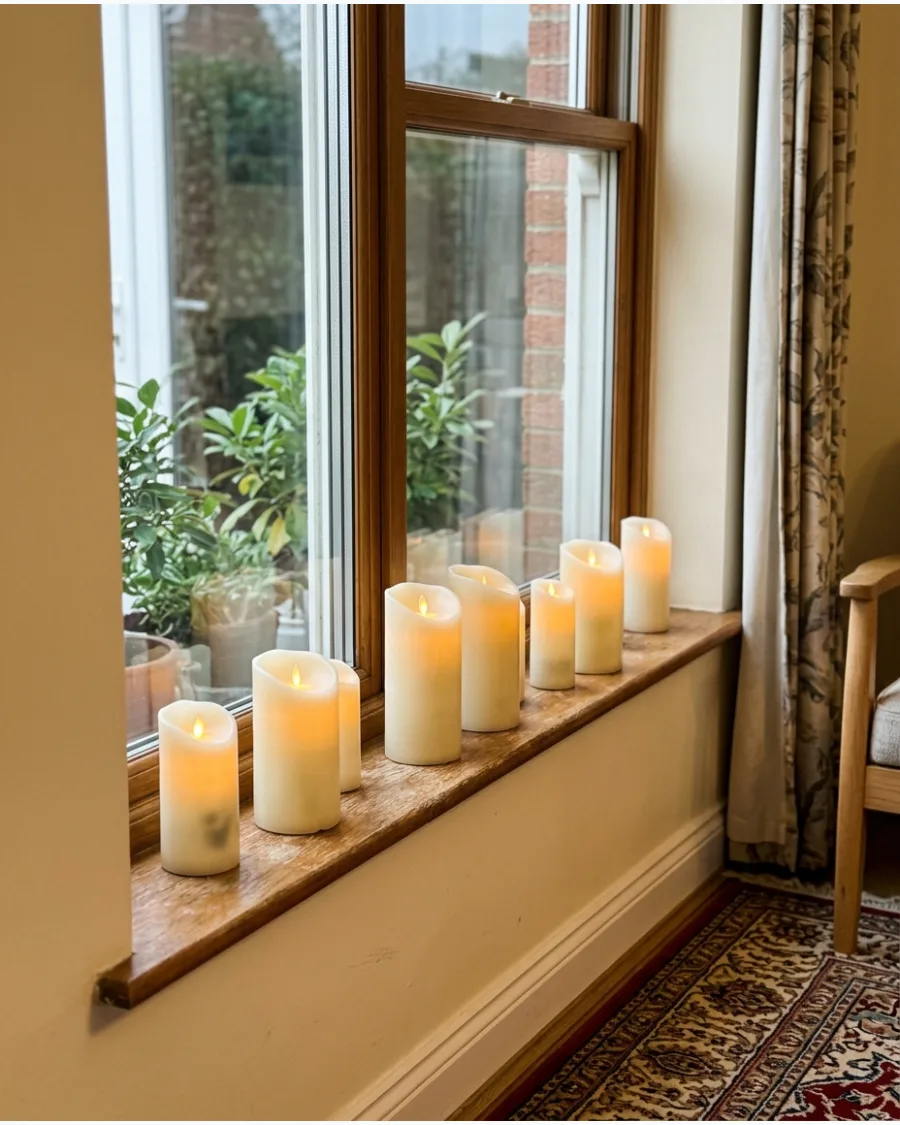
Line the inside windowsill with battery-operated candles in several heights. Use warm flickering bulbs to create the appearance of traditional candlelight without using open flames.
Choose candles with built-in timers so they turn on automatically at sunset.
- A set of five to nine flameless candles typically costs $25 to $50.
- Space the candles about 4 inches apart for a balanced glow across the glass.
- Opt for real wax coatings to make the display look high-end from inside the room.
Best shortcut: Use remote-controlled candles to turn the entire window display on with one click.
34. One Candle in Every Front Window
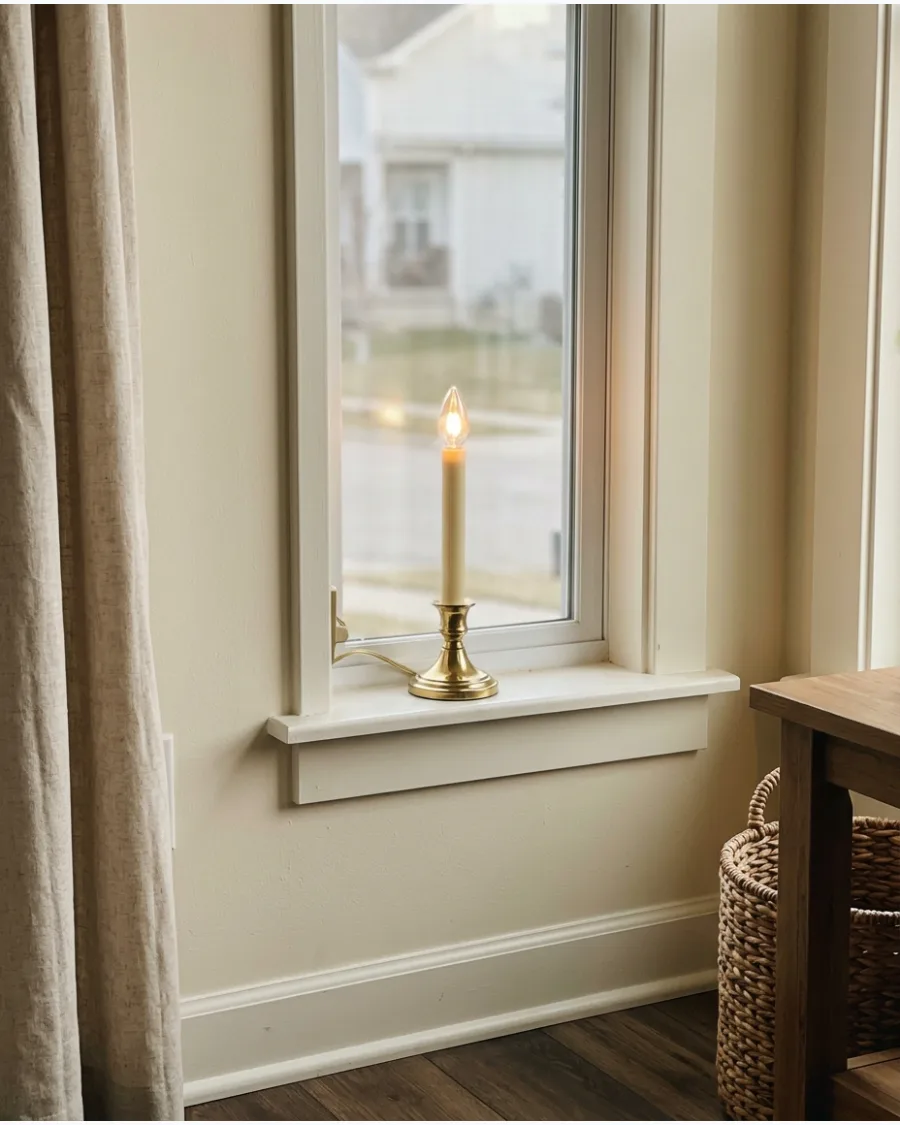
Place one matching electric or battery-operated candle in the center of each street-facing window. Repeating the same simple light throughout the home creates a timeless Christmas exterior.
Select a heavy base for each candle to prevent them from tipping over on narrow sills.
- Single window candles are very affordable, often costing less than $10 each.
- Check that the light is centered in the window pane for the best curb appeal.
- Look for 'sensor' models that automatically turn on when it gets dark outside.
Quick win: Use a small piece of museum putty under the base to keep the candle perfectly centered.
35. Candlelight With Evergreen Along the Sill
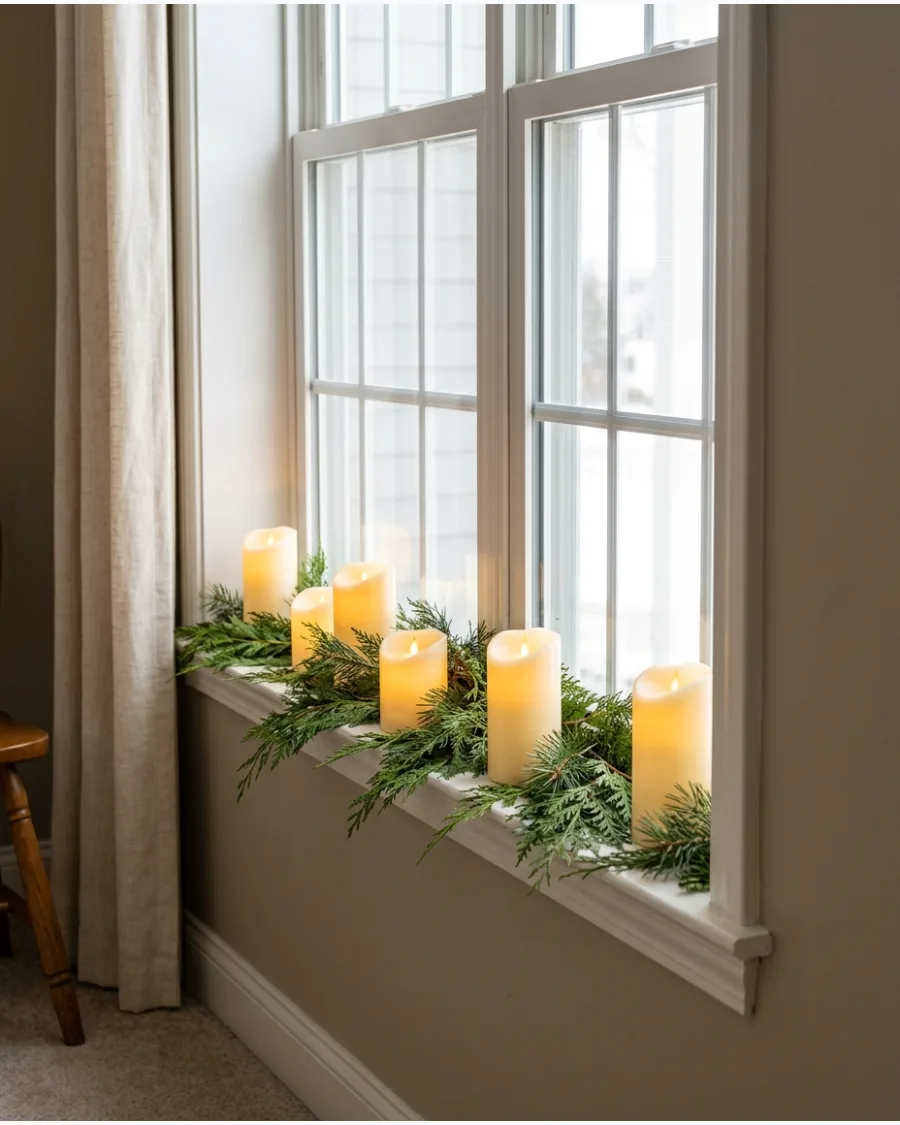
Arrange warm flameless candles among loose pine or cedar branches on the inside windowsill. Keep the greenery low so the candlelight remains visible through the glass.
Tuck the candle bases deep into the branches to hide the plastic components.
- Budget $15 for fresh greenery and $20 for a set of taper candles.
- Layer the branches first before nestling the candles into stable spots.
- Use artificial greenery if you have pets or want a display that lasts all season.
Most people skip this: Mist real greenery with water daily to keep it fresh and prevent it from becoming a fire hazard near electric lights.
36. Lighted Mini Christmas Trees on the Windowsill
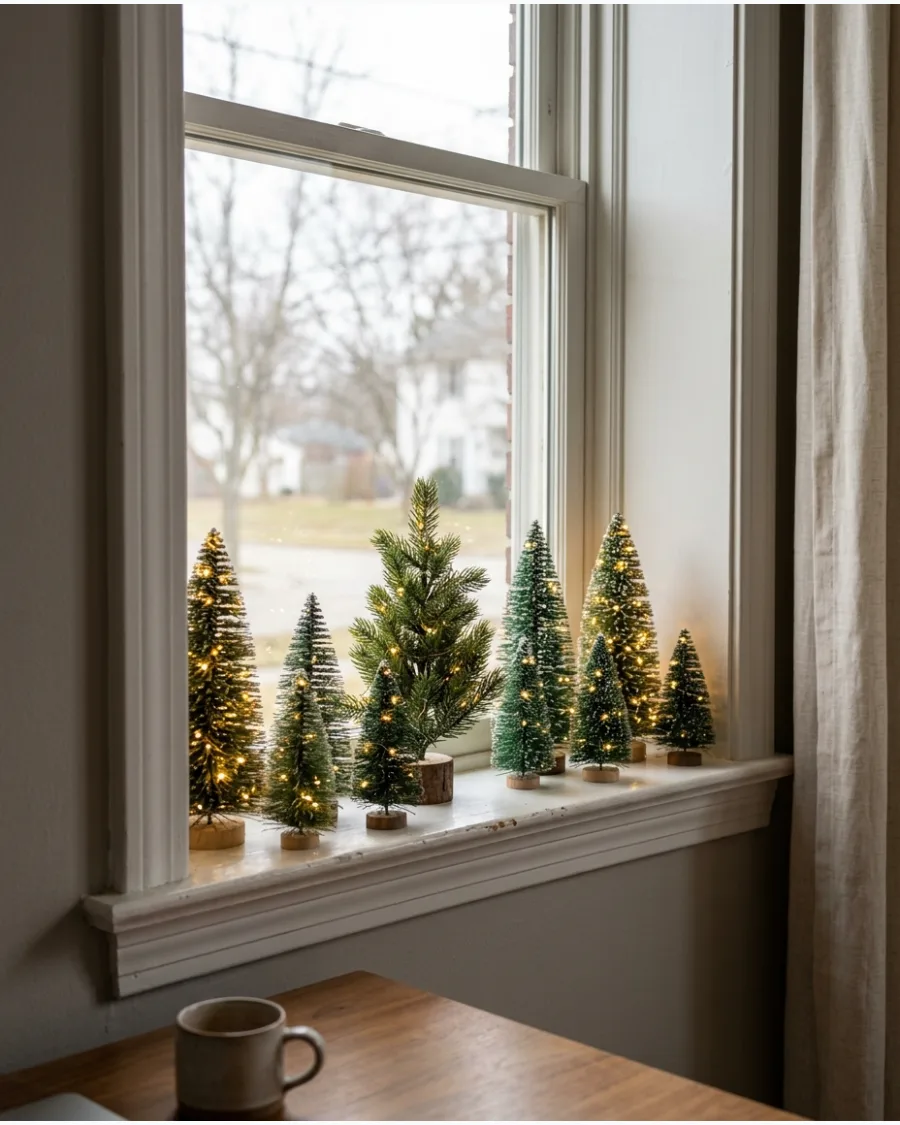
Place several miniature trees with tiny lights across a deep windowsill. Vary their heights slightly to create a glowing Christmas forest inside the window.
Mix different textures like tinsel and flocked trees to add visual interest.
- Mini trees range from $5 to $15 each depending on the height and detail.
- Group the trees in odd numbers like three or five for a more natural look.
- Conceal the battery packs behind the trees or under a small piece of white fabric.
Best shortcut: Buy trees with built-in battery packs to avoid messy extension cords running across the floor.
37. Glowing Ceramic Houses Across the Window
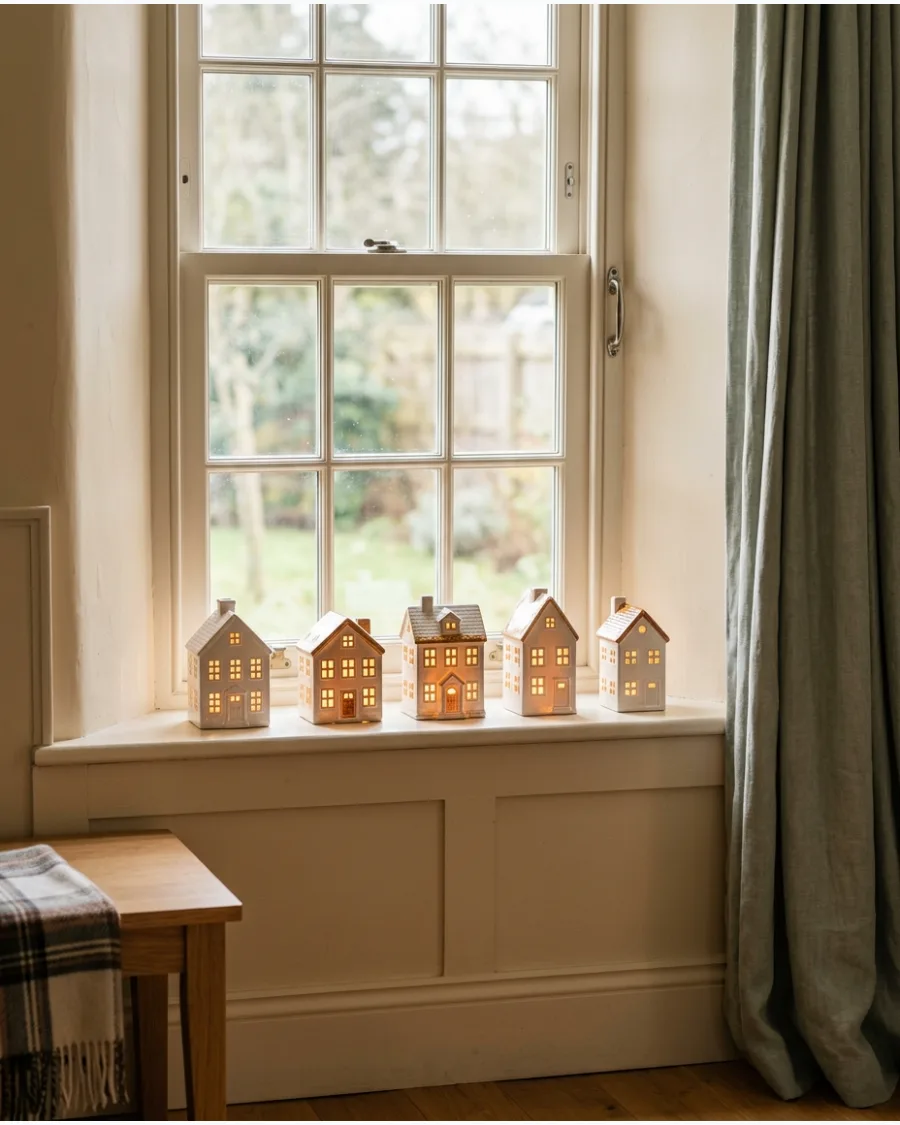
Arrange illuminated ceramic houses along the sill to create a miniature Christmas neighborhood. Leave small gaps between the houses so each warm glowing window remains visible.
Position the houses close to the glass so the light reflects off the pane.
- Ceramic houses cost between $10 and $30 each depending on the size.
- Line the houses in a straight row for a clean, modern look.
- Use battery-operated tea lights inside the houses to keep the display cordless.
Quick win: Place a few small mirrors behind the houses to double the amount of light visible from the street.
38. Lighted Christmas Village With Mini Street Lamps
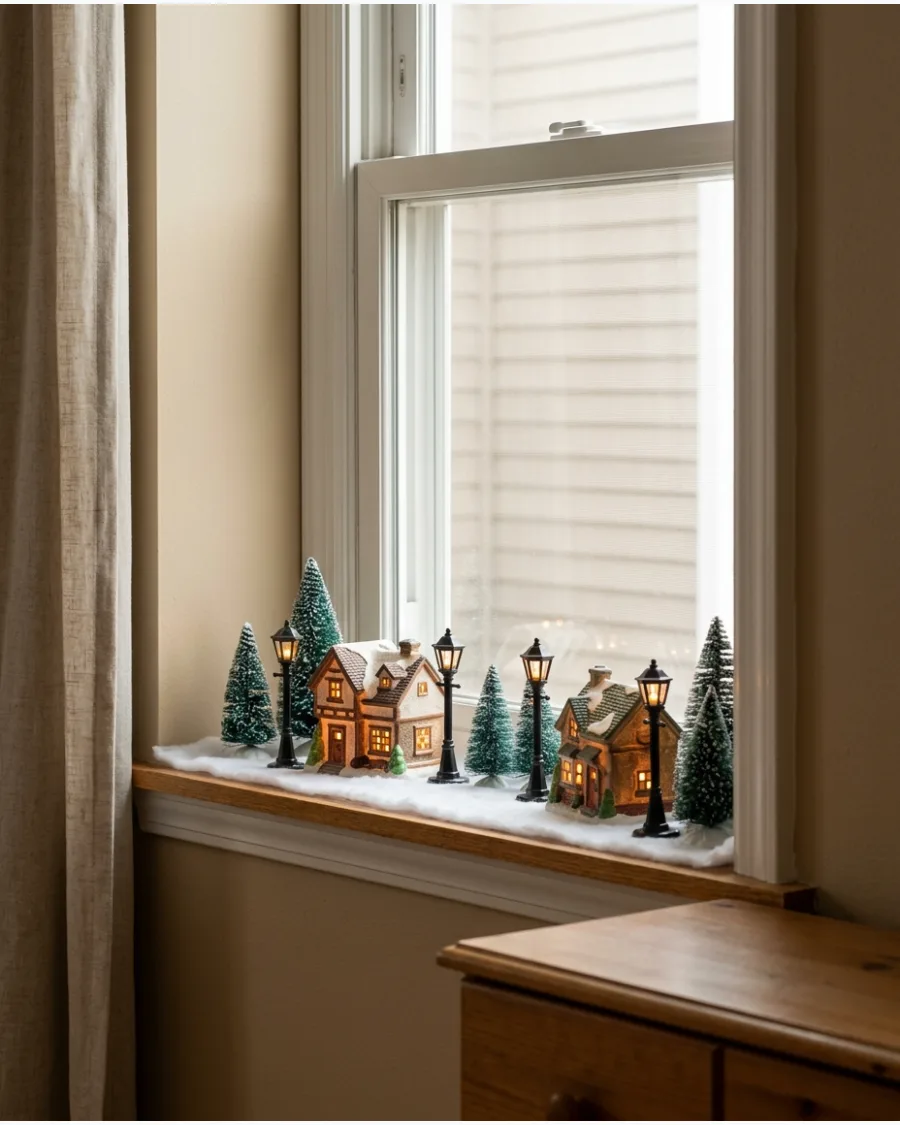
Build a detailed miniature village across the sill using glowing houses, tiny street lamps, and bottle-brush trees. Position the lights so the whole scene can be appreciated from outside at night.
Use a white felt runner underneath the village to mimic a blanket of snow.
- A full village set can range from $50 to over $150.
- Secure small accessories like street lamps with a tiny dot of hot glue or putty.
- Place the tallest houses at the ends of the windowsill to frame the display.
Most people skip this: Vary the heights of the houses using small wooden blocks hidden under the snow runner for a more dynamic look.
39. Fairy Lights Woven Through Windowsill Greenery
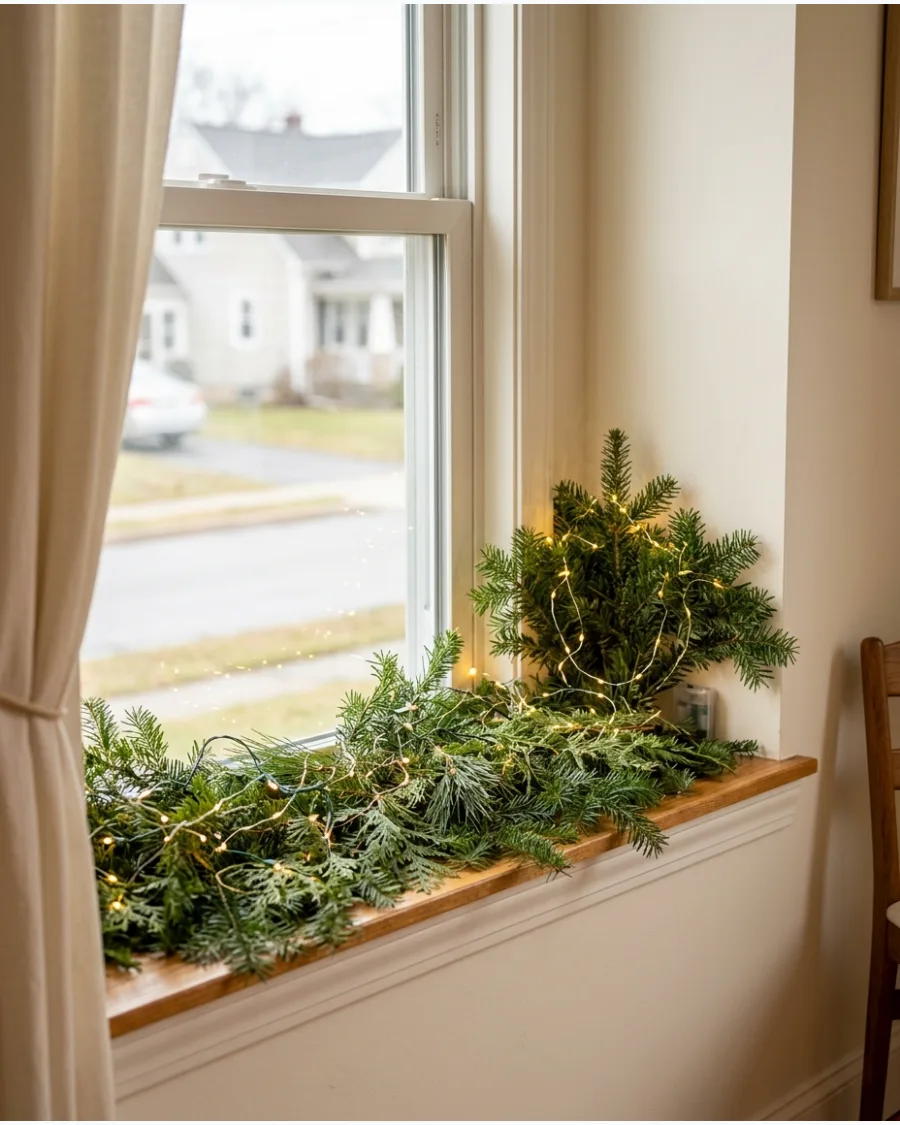
Lay evergreen branches across the inside windowsill and weave delicate battery-operated micro lights throughout them. Keep most of the wire hidden beneath the foliage.
Fluff the branches after adding the lights to give the display more volume.
- Micro fairy lights are very budget-friendly at $5 to $10 per strand.
- Wrap the lights around the branches before placing the greenery on the sill.
- Choose copper or green wire to help the strands blend into the needles.
Best shortcut: Use fairy light strands with green wires to blend perfectly into the evergreen needles.
40. Mason Jars Filled With Fairy Lights
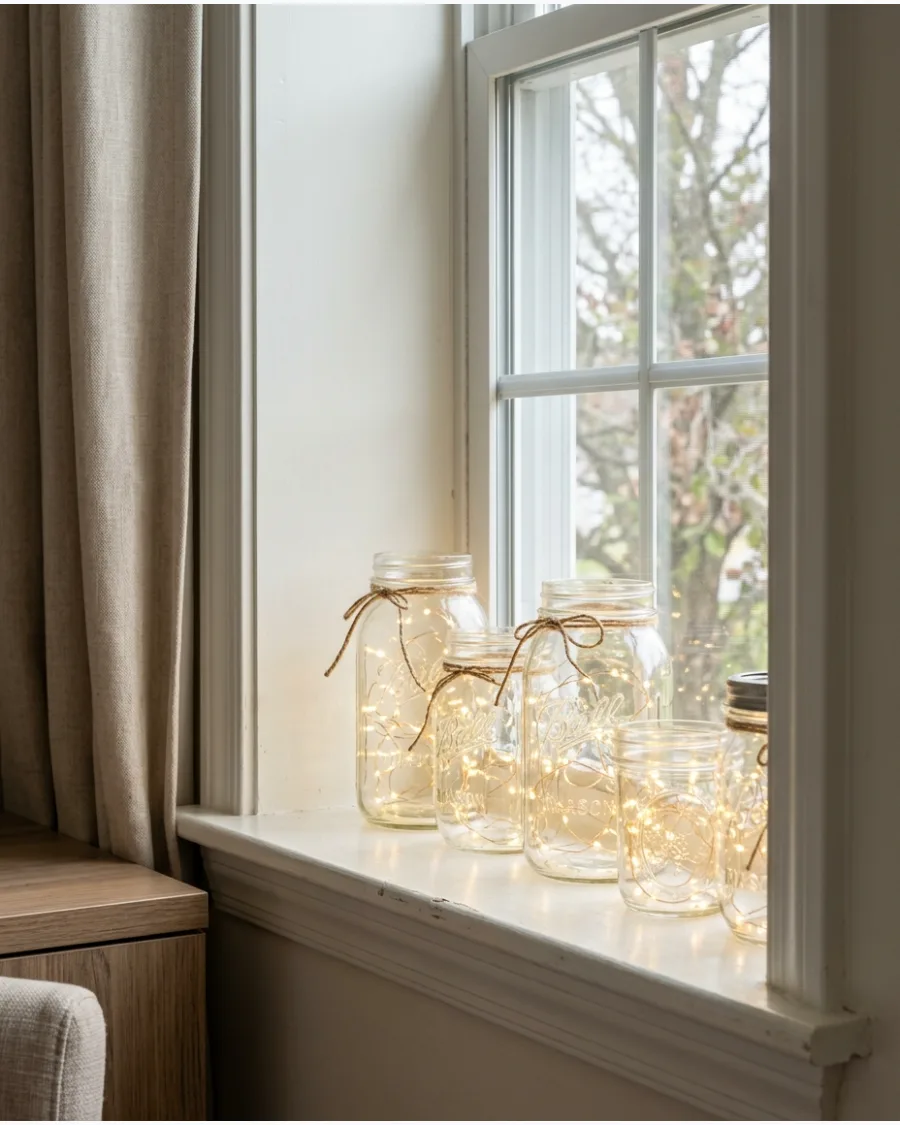
Fill several clear glass jars with tiny warm white lights and arrange them along the windowsill. Use jars in different heights for an inexpensive glowing Christmas display.
Opt for battery packs with thin wires that can be easily hidden behind the jars.
- Repurpose jars from the kitchen or buy a set for under $15.
- Loosely coil the lights inside the jar to fill the space without tangling.
- Add a small handful of faux snow or silver glitter to the bottom of the jars for extra sparkle.
Quick win: Use frosted glass jars if the direct light from the fairy lights feels too harsh or bright.
COZY AND DECORATIVE WINDOW LIGHT COMBINATIONS
41. Fairy Lights With Hanging Christmas Ornaments
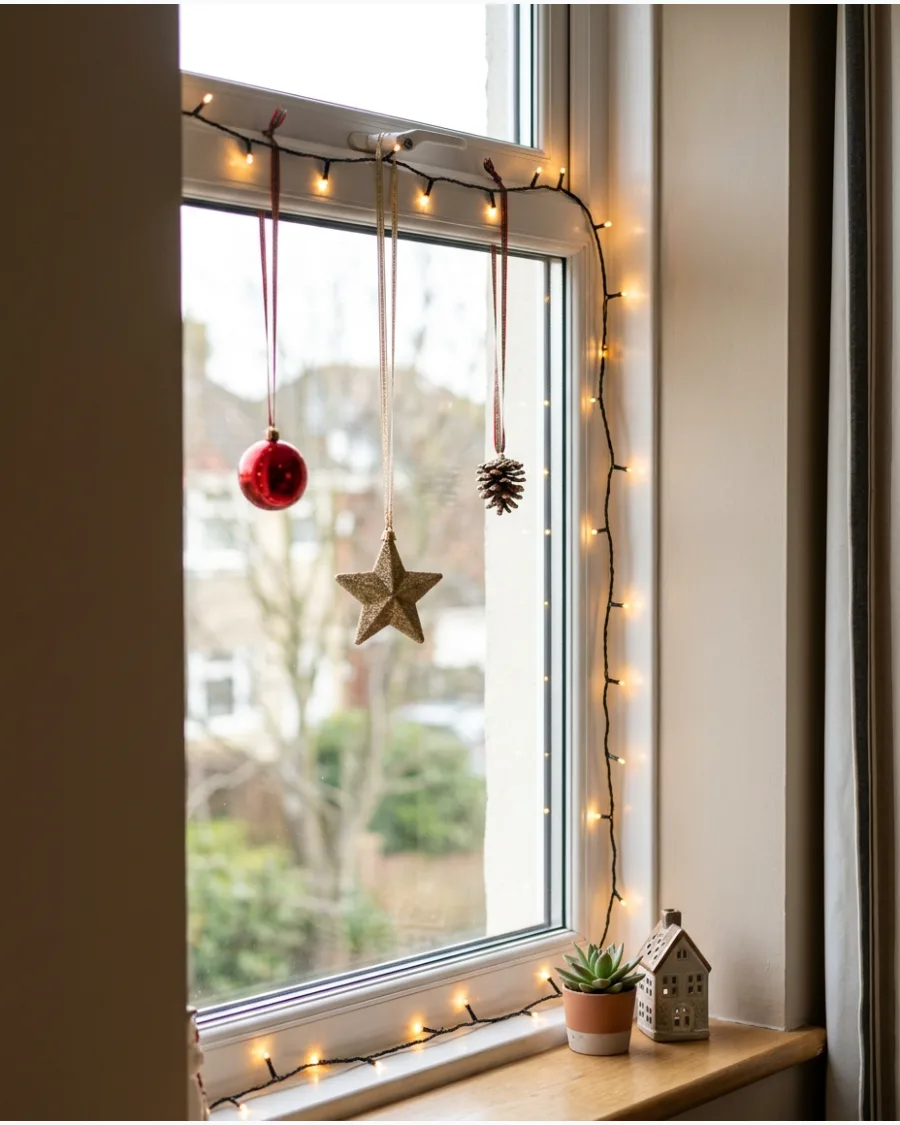
Frame the inside window with warm fairy lights and suspend a few ornaments from ribbons in front of the glass. Keep the ornaments spaced apart so they catch and reflect the surrounding light.
Space the ornaments at least six inches apart to avoid a cluttered look. The ornaments add a layer of color that makes the lights look more intentional than a simple string.
- Sourcing: Pick up a mix of matte and shiny ornaments from a craft store or Amazon.
- Setup: Use clear suction hooks on the glass to hang ornaments at varying heights.
- Adapt: Swap glass for plastic ornaments if you have pets or small children in the house.
Quick win: Use fishing line instead of ribbon for a floating ornament effect.
42. Christmas Window Lights With Velvet Bows
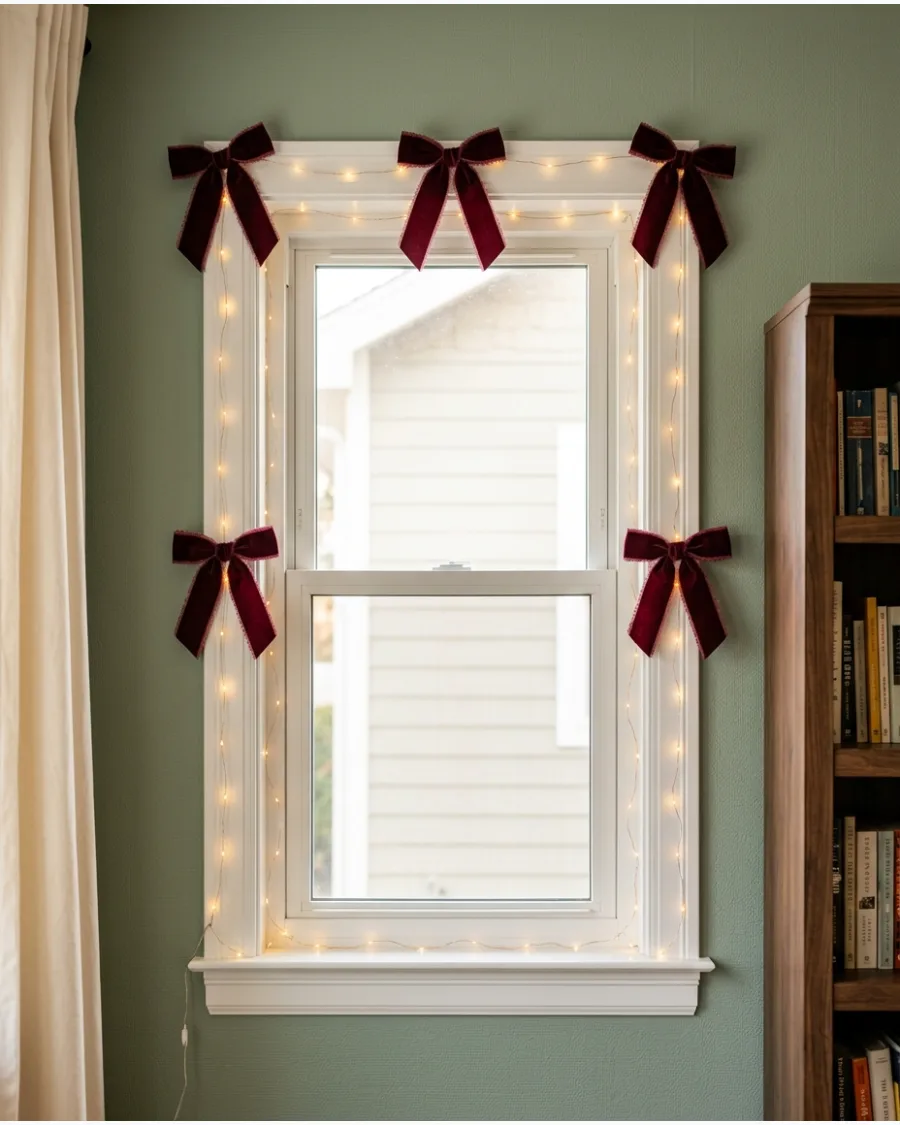
Outline the window with warm white lights and add several velvet bows to the trim. The rich ribbon introduces one of the strongest Christmas styling directions for 2026.
Choose burgundy or emerald velvet to provide a heavy, high-end contrast to the delicate light glow. This combination feels more sophisticated than lights alone.
- Sourcing: Buy velvet ribbon by the spool to save money on multiple windows.
- Setup: Secure the bows using small safety pins or thin floral wire.
- Adapt: Use smaller bows for windows with multiple small panes to keep the scale right.
Most people skip this: Steam the ribbons before hanging to remove any packing creases.
43. Fairy Lights With Evergreen Garland
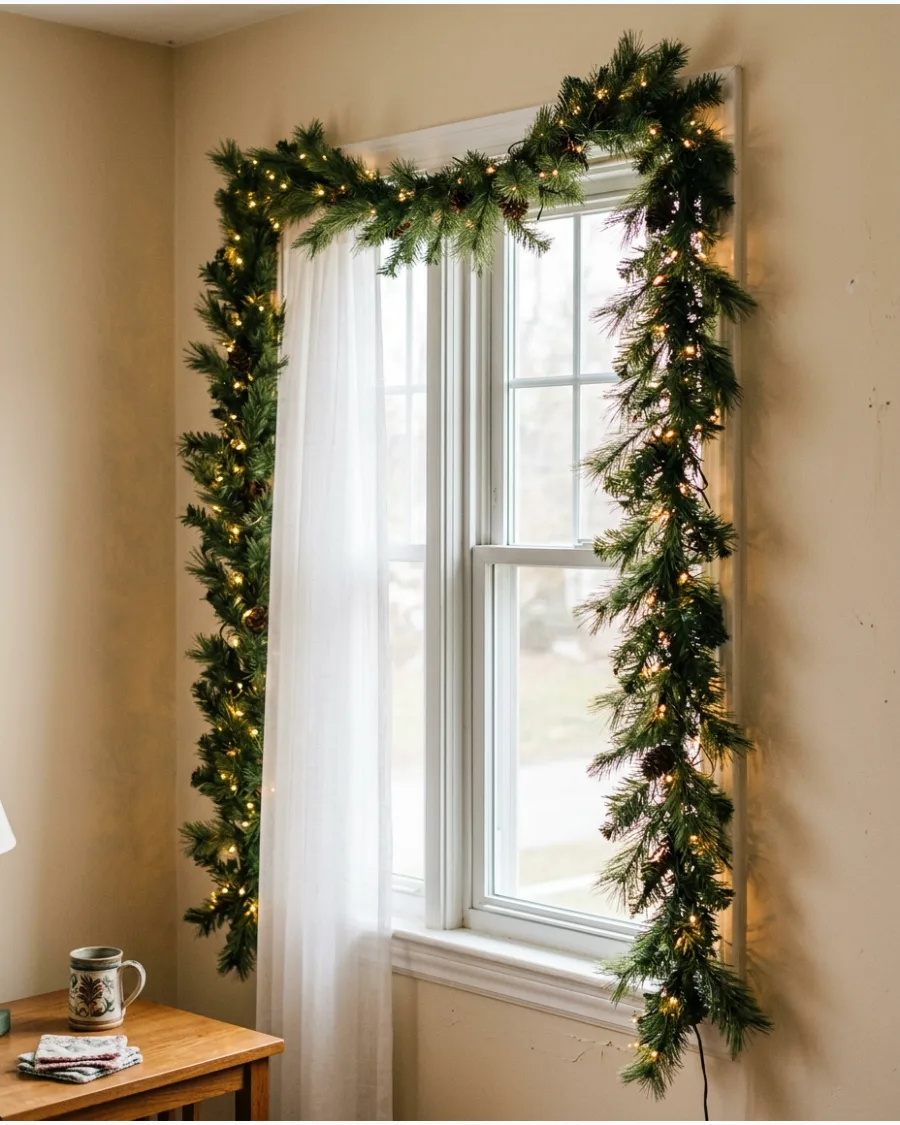
Wrap warm micro lights through an evergreen garland and attach the garland around the inside top and sides of the window. Hide the wire within the branches for a naturally glowing effect.
Secure the garland to the top of the window trim with small command hooks to prevent sagging. The greenery adds a classic organic texture that softens the look of the window frame.
- Sourcing: Use fresh cedar for scent or high-quality faux garland for longevity.
- Setup: Wrap the lights around the garland before you lift it to the window.
- Adapt: Use eucalyptus or olive branches for a more modern, minimal look.
Best shortcut: Use battery-operated lights with a built-in timer to avoid dangling cords.
44. Lighted Garland With Pinecones and Berries
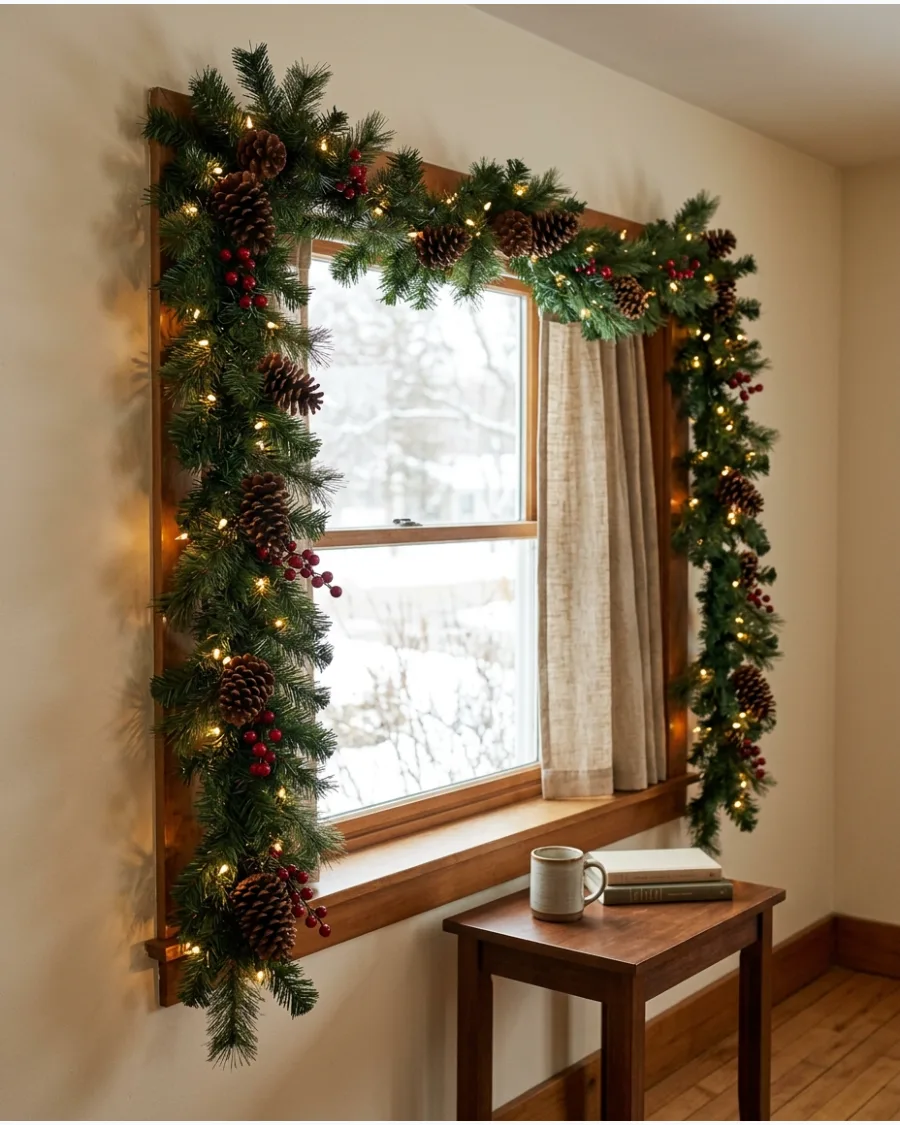
Combine illuminated greenery with pinecones and clusters of berries around the interior window frame. Use small warm bulbs so the natural decorations remain the main visual feature.
Keep the berry clusters small so they do not weigh down the light strand or the garland. The brown and red tones create a traditional palette that feels very grounded.
- Sourcing: Find pinecones in your yard or buy pre-wired ones at a garden center.
- Setup: Wire the pinecones directly to the garland frame for a secure hold.
- Adapt: Spray the pinecones gold or silver for a touch of glam.
Quick win: Dust the pinecones with a little faux snow to help them catch more light.
45. Dried Orange Garland With Warm Window Lights
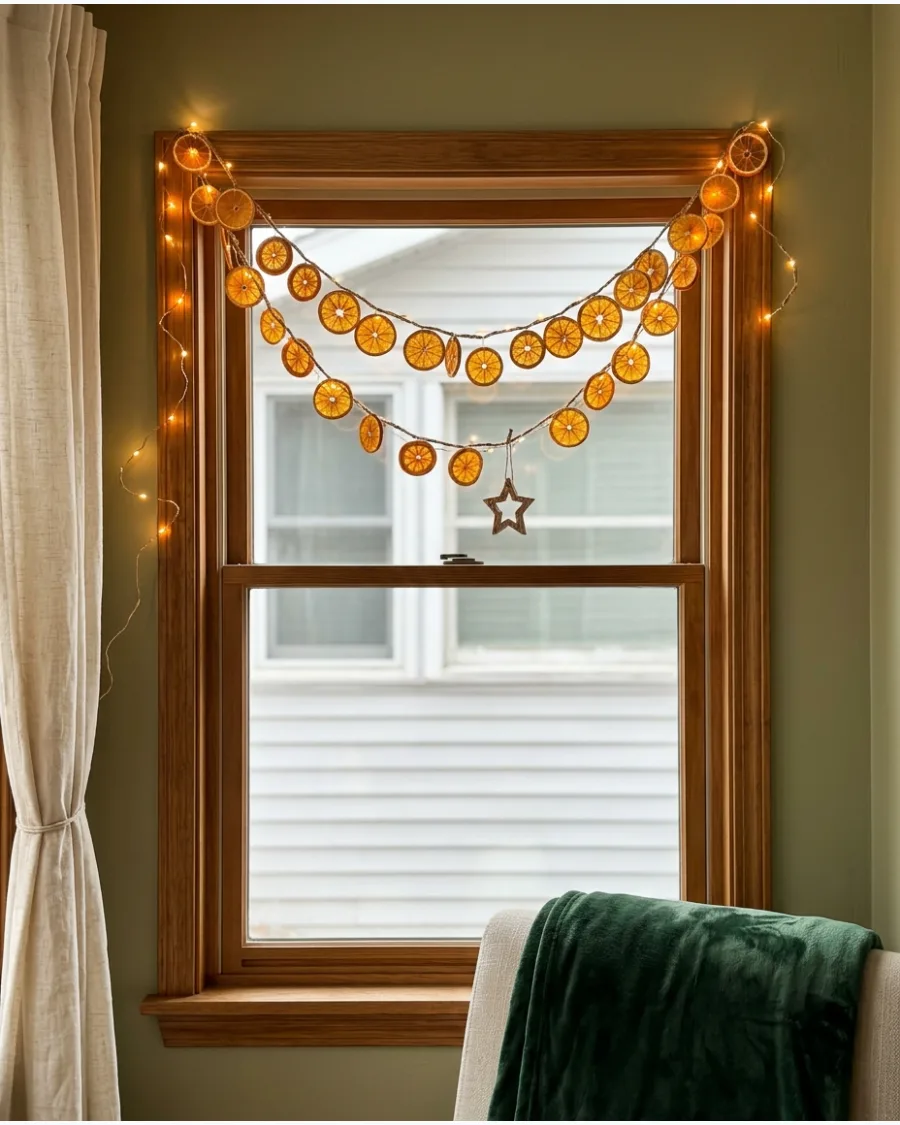
Drape dried orange garland across the top of the window and surround it with warm micro lights. The amber lighting emphasizes the translucent orange slices and creates a handmade natural Christmas look.
Use a thin copper wire light strand to stay hidden against the orange skins. This look is perfect for a kitchen or a cozy dining nook.
- Sourcing: Dry your own slices in the oven or buy them pre-dried on Etsy.
- Setup: Drape the strand loosely over the curtain rod for a relaxed feel.
- Adapt: Add cinnamon sticks to the twine for a spicy holiday scent.
Most people skip this: Make sure the orange slices are fully dried to prevent them from sticking to the glass.
46. Vintage Ornament Window With Multicolor Lights
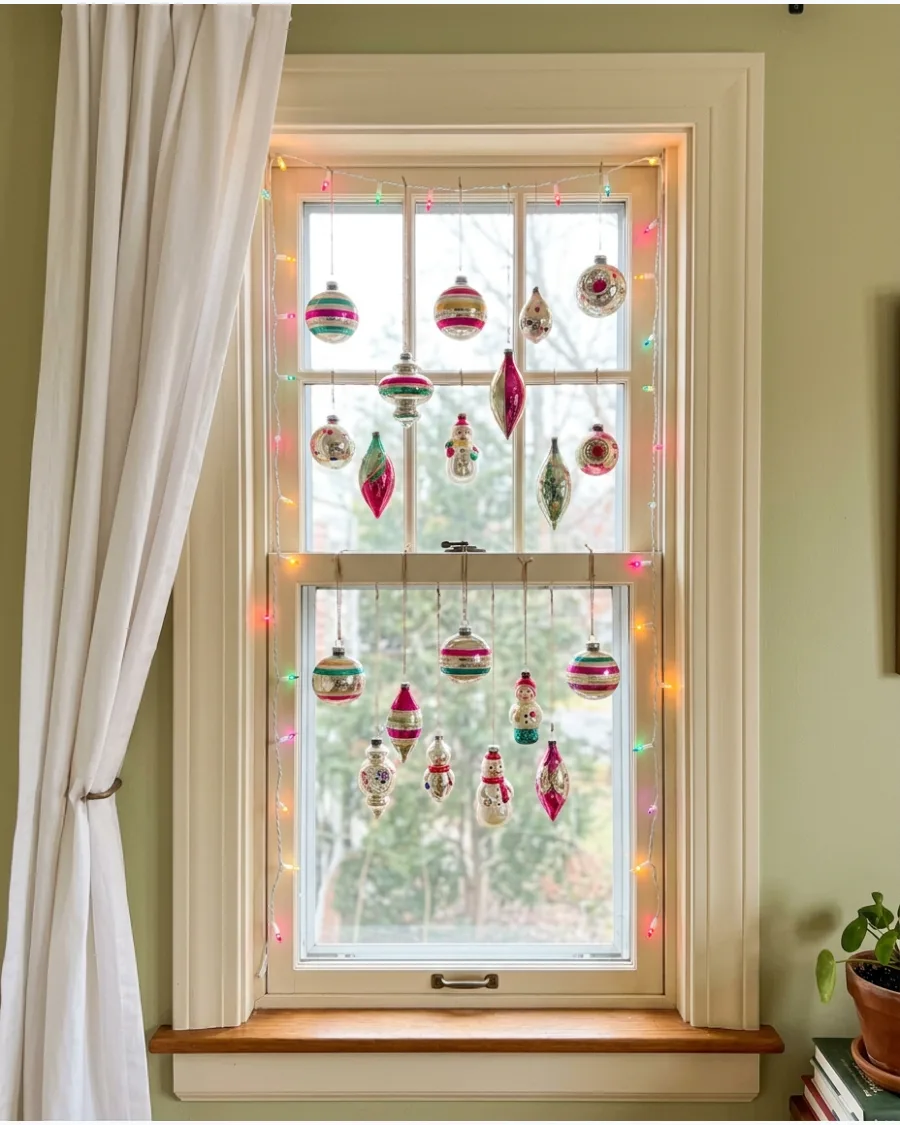
Hang a curated collection of nostalgic ornaments in front of the glass and surround them with softly glowing multicolor lights. Use vintage-inspired shapes rather than identical modern ornament sets.
Mix different shapes like reflectors and teardrops to create a playful, nostalgic energy. This colorful approach looks especially cheerful from the street.
- Sourcing: Look for authentic vintage ornaments at thrift stores or antique malls.
- Setup: Use varying ribbon lengths so the ornaments don't all sit in one line.
- Adapt: Stick to one color family, like all blues, for a slightly more modern twist.
Quick win: Use green light strands to help the wires blend into dark window trim.
47. Jewel-Tone Christmas Window With Warm Lights
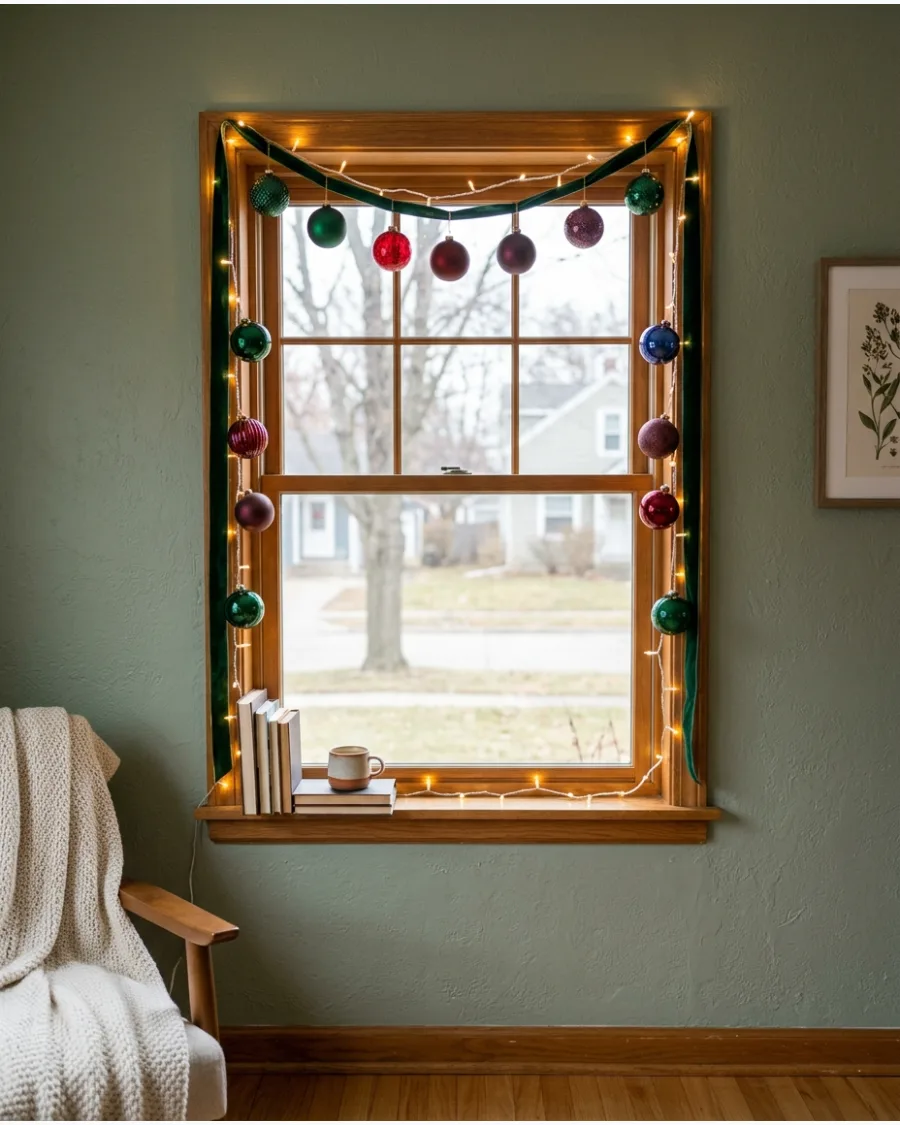
Combine warm white lights with emerald, ruby, burgundy, plum, or sapphire ornaments and ribbons around the window. The rich jewel-tone palette gives the indoor lighting display a more luxurious 2026 look.
Use velvet ribbons in these deep tones to hang your ornaments for extra texture. This style works best in rooms with neutral walls to let the colors pop.
- Sourcing: Buy a multi-pack of ornaments and spray paint half of them a matte jewel tone.
- Setup: Cluster colors in groups of three for a professional-looking balance.
- Adapt: This palette is particularly striking in formal dining rooms or offices.
Best shortcut: Look for jewel-tone ornaments with a metallic finish to maximize light reflection.
WINDOW-SPECIFIC CHRISTMAS LIGHT IDEAS
48. Bay Window Filled With Layered Christmas Lights
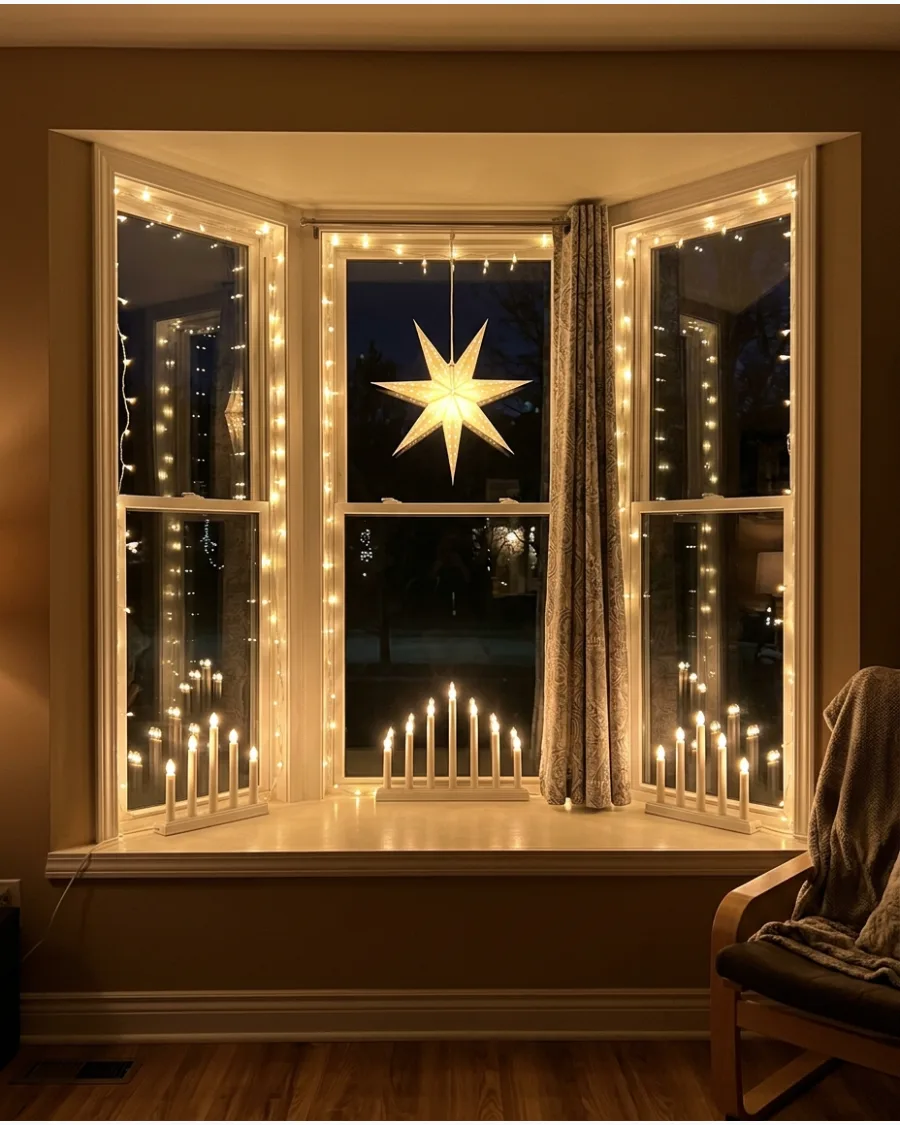
Use the depth of a bay window to create several layers of light: frame each window section with fairy lights, add candles along the sill, and place one illuminated star in the center. Keep the brightest light source in the center to draw the eye toward the middle of the window. This creates a dimensional nighttime display that looks great from both inside and outside.
- Sourcing: Use a mix of items you already have, like pillar candles and stars.
- Setup: Run extension cords along the floor and hide them with a decorative rug.
- Adapt: If you have a deep ledge, add a small basket of greens for more texture.
Most people skip this: Use a light sensor so the whole display turns on automatically at dusk.
49. Kitchen Window With Simple Christmas Fairy Lights
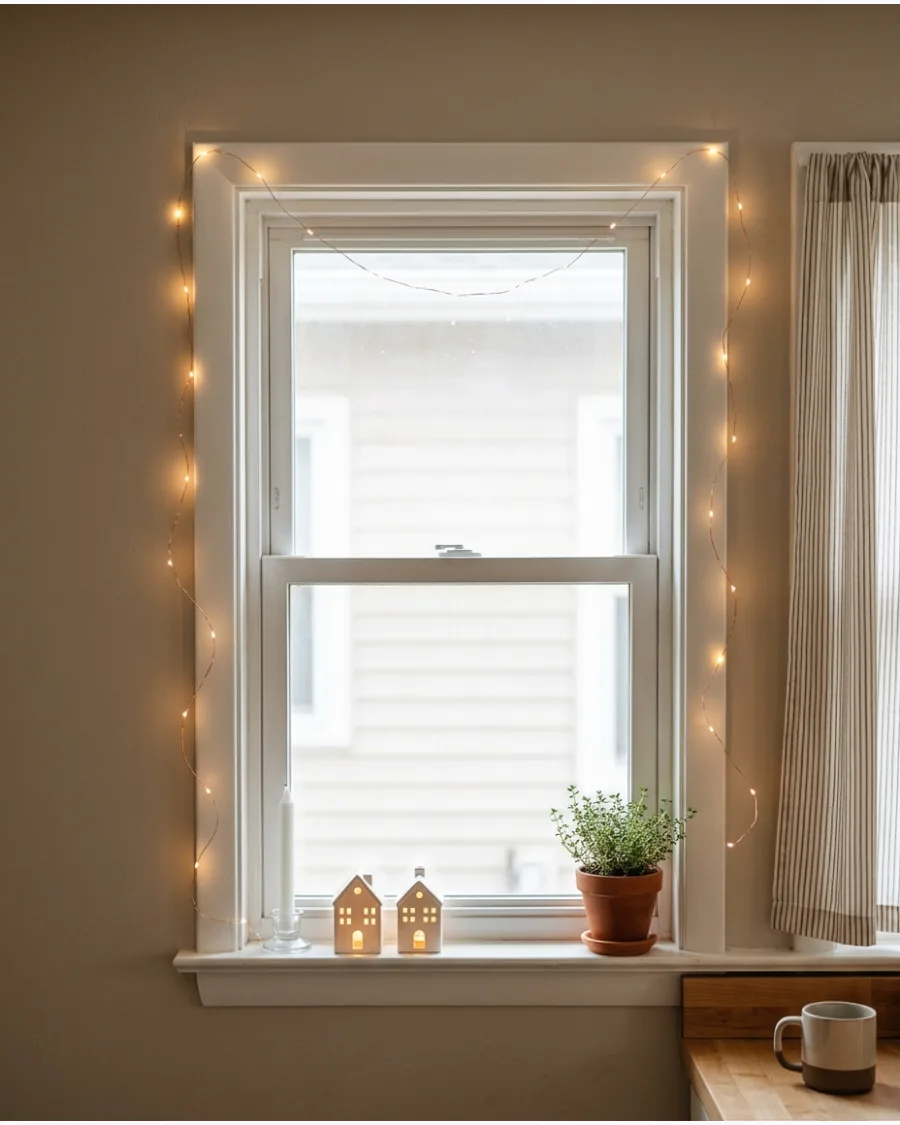
Frame a kitchen window with a slim strand of warm micro lights and add a few small illuminated houses or candles on the sill. Keep the arrangement compact so it does not interfere with the functional kitchen space.
Make sure the battery pack is tucked behind a plant or dish soap bottle to keep it hidden. This adds a touch of cheer to a high-traffic area.
- Sourcing: Find small ceramic houses at discount stores or holiday markets.
- Setup: Use waterproof adhesive hooks if you are mounting lights near the sink.
- Adapt: Use a single small wreath with lights if you have very little sill space.
Quick win: Use battery-operated lights to avoid having cords near water sources.
50. Front Living Room Window Christmas Light Display
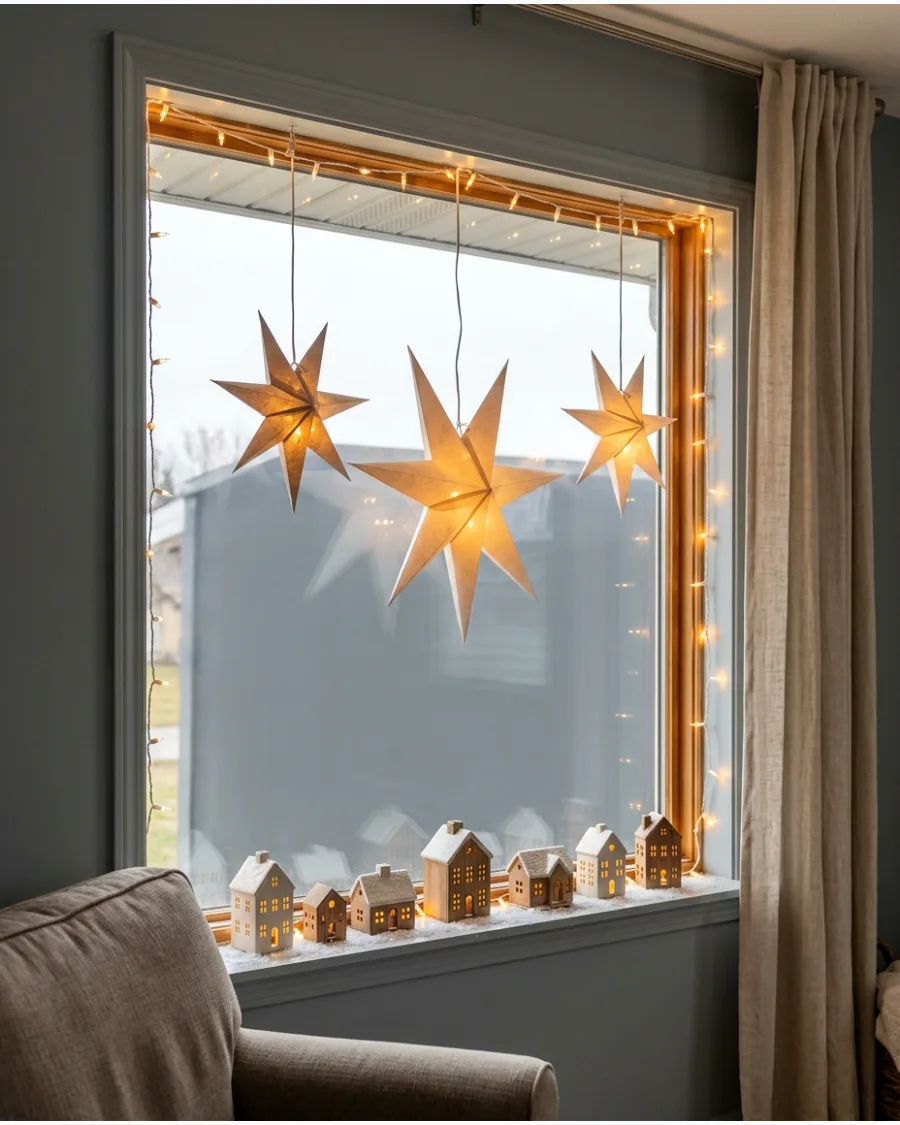
Turn the main street-facing window into a complete indoor Christmas light focal point using a warm white border, hanging stars, and a softly illuminated village along the sill.
Keep all three lighting layers coordinated so the display looks impressive from outside without becoming visually cluttered. Coordinate all lights to the same warm color temperature for a professional finish.
- Sourcing: Buy all lights at once to ensure the color temperature matches exactly.
- Setup: Map out the layout on the floor before you start sticking hooks to the window.
- Adapt: Scale the number of stars down for smaller street-facing windows.
Best shortcut: Use one multi-outlet power strip with a remote to turn the whole window on at once.
Frequently Asked Questions
How do you hang Christmas lights on the inside of a window without nails?
You can easily avoid damage by using suction cups with integrated hooks or clear adhesive clips designed for glass and trim. For a quick setup, a tension rod placed inside the window frame is a great way to drape lights without leaving any marks behind.
How do I hide the power cords for my window lights?
Keep your display tidy by routing cords along the edge of the window trim and using white extension cords that blend into your baseboards. If you want to avoid wires entirely, battery-operated LED strands are a practical choice for a clean, professional look.
Will interior window lights be visible from the street?
Yes, interior lights create a beautiful glow that is clearly visible from the street, especially when placed close to the glass. To maximize curb appeal, choose high-brightness LEDs and ensure they are positioned to minimize reflections from your indoor lighting.
Are curtain lights or fairy lights better for windows?
Curtain lights are perfect if you want a dramatic 'waterfall' effect that covers the entire pane in a wall of light. For a more delicate and subtle look, fairy lights on thin copper wires provide a magical, starry twinkle that doesn't overwhelm the space.
Is it safe to leave window lights on all night?
It is safe to leave your lights on if you use LEDs, which produce very little heat compared to traditional incandescent bulbs. For the best safety and energy efficiency, use a plug-in timer to ensure your display automatically shuts off during the late-night hours.