50 Christmas Ceiling Decoration Ideas

This post may contain affiliate links: full affiliate disclosure.
Elevating holiday decor to the ceiling maximizes floor space and adds a professional, immersive feel to any room. These ideas range from elegant ornament clouds and lush greenery canopies to minimalist paper stars and sparkling light displays.
Whether you are a renter looking for temporary solutions or a homeowner creating a permanent focal point, these vertical accents help transform your home into a winter wonderland.
HANGING ORNAMENT CHRISTMAS CEILING DECORATIONS
1. Christmas Ornament Cloud Above the Dining Table
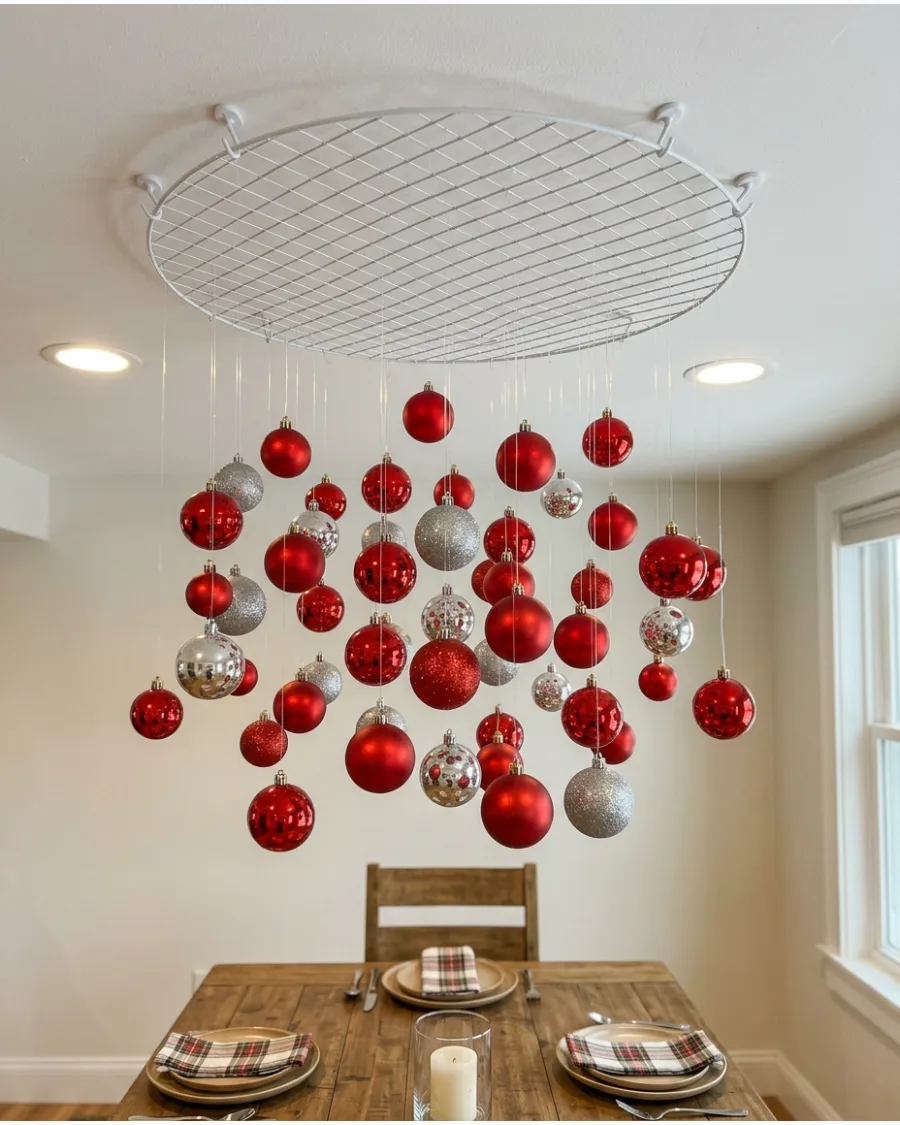
Transform the space above your feast by suspending a dense cluster of holiday baubles to create a floating focal point. Use a lightweight wire mesh or a sturdy decorative branch as a central anchor to tie and hang your baubles at staggered intervals. This technique ensures the ornaments stay grouped together rather than drifting apart across the ceiling.
- Vary ornament diameters from one to four inches for visual volume
- Use transparent monofilament to create a floating effect
- Maintain a 30-inch clearance from the tabletop to keep sightlines clear for guests
Cluster the smallest ornaments toward the center of the mesh to create a denser 'cloud' core that looks professionally styled.
2. Red and Gold Hanging Ornament Ceiling
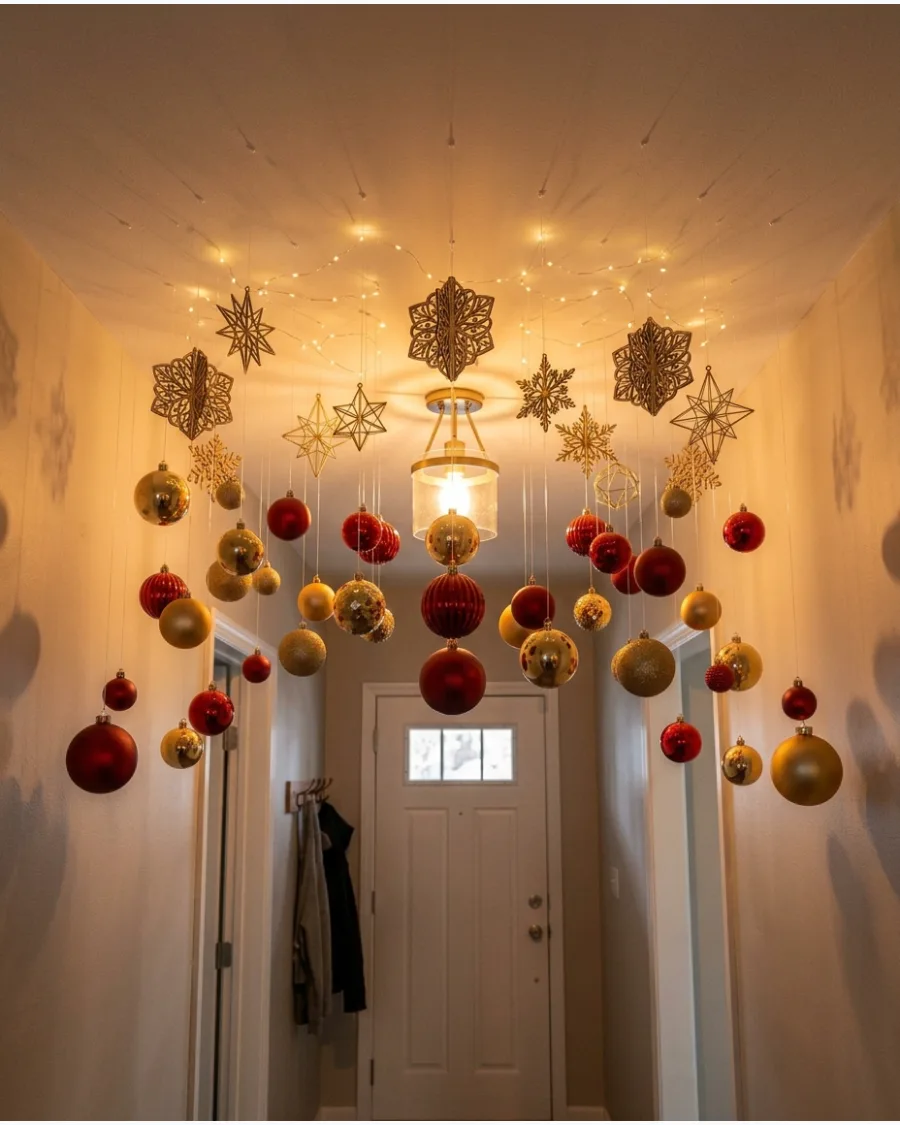
A classic palette of red and gold brings traditional warmth to high-traffic areas without taking up floor space. Map out a specific zone, such as a three-foot section of an entryway ceiling, to concentrate the color pop for maximum impact. By varying the lengths of the clear threads, you create a three-dimensional landscape that guides the eye through the room.
- Stagger thread lengths between 6 and 24 inches for depth
- Mix matte red baubles with high-shine gold finishes
- Concentrate the display near a light source to enhance the metallic glow
Use painter's tape to mark your layout on the floor first so you can visualize the density before climbing the ladder.
3. Burgundy Christmas Ornament Ceiling
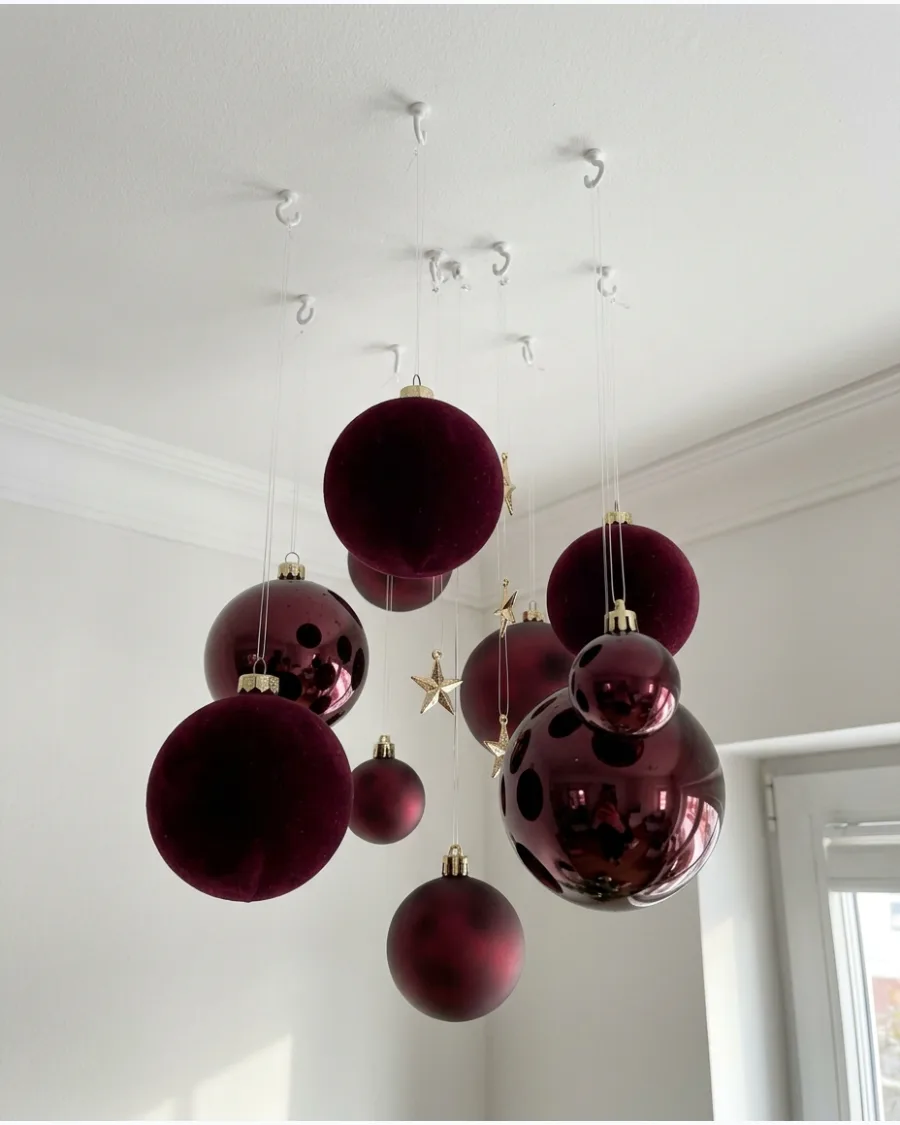
For a sophisticated 2026 aesthetic, replace bright primary reds with deep, moody burgundy tones. Incorporate velvet-flocked ornaments alongside matte and glossy finishes to create a tactile, luxury look that absorbs and reflects light differently. Small gold stars added to the arrangement provide a sharp contrast that makes the dark wine colors pop.
- Combine velvet, matte, and glossy burgundy textures
- Add 1-inch gold star accents for high-contrast highlights
- Use dark brown or black thread if your ceiling is a dark color, otherwise use clear
Velvet ornaments are heavier than standard plastic; always double-check that your adhesive hooks are rated for the extra weight.
4. Green and Gold Ornament Ceiling Display
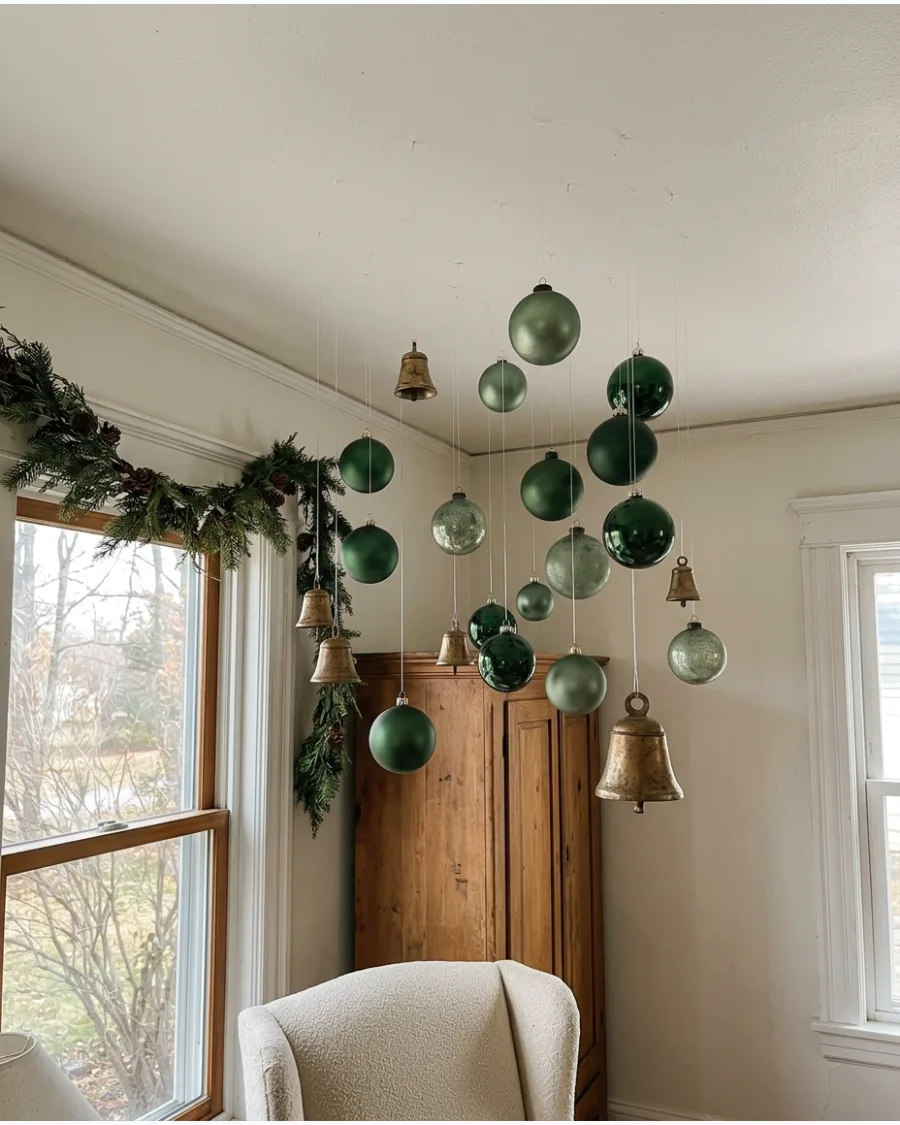
Evoke the feel of a forest canopy by using various shades of green accented by metallic gold. Thread small brass bells among forest-green ornaments to add a subtle auditory element and a vintage aesthetic to the display. This organic, loose arrangement works perfectly in homes that feature traditional evergreen garlands and wreaths.
- Mix hunter green, sage, and forest green for an organic feel
- Include functional small brass bells that ring slightly with air movement
- Vary the grouping density to make it look like a natural branch-like cluster
Place this display near a heating vent so the gentle airflow causes the ornaments and bells to move subtly throughout the day.
5. White and Champagne Ornament Ceiling
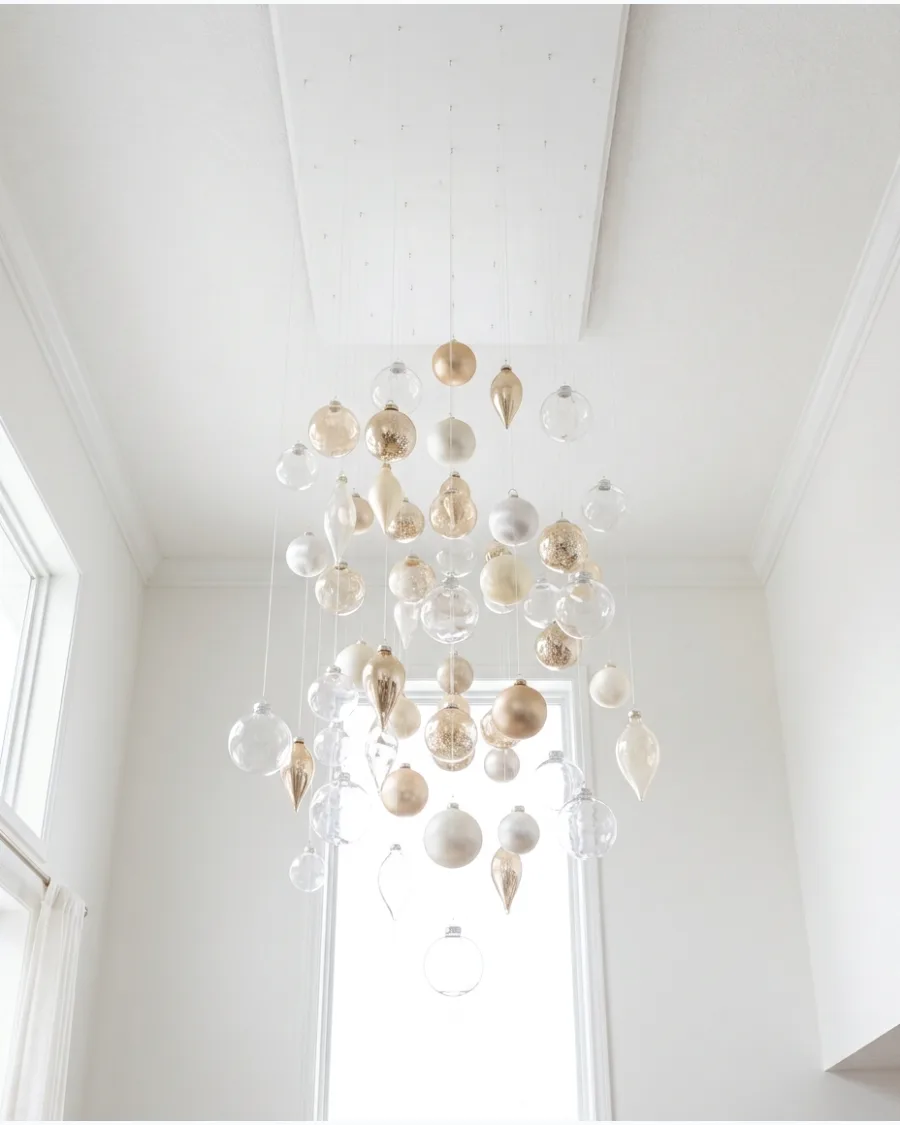
Create a luxury 'champagne bubble' effect by mixing white, ivory, and clear ornaments. Combine clear glass-look baubles with champagne-gold ornaments to mimic the appearance of effervescent bubbles rising toward the ceiling. The use of transparent thread is essential here to maintain the illusion of weightlessness and light.
- Use a mix of spherical and teardrop-shaped ornaments
- Include 'frosted' white baubles to add a snowy texture
- Keep the concentration highest in the center of the room for a chandelier effect
Wipe every ornament with a dry microfiber cloth before hanging to remove fingerprints, as the clear and shiny surfaces will show every smudge under ceiling lights.
6. Silver Winter Wonderland Ornament Ceiling
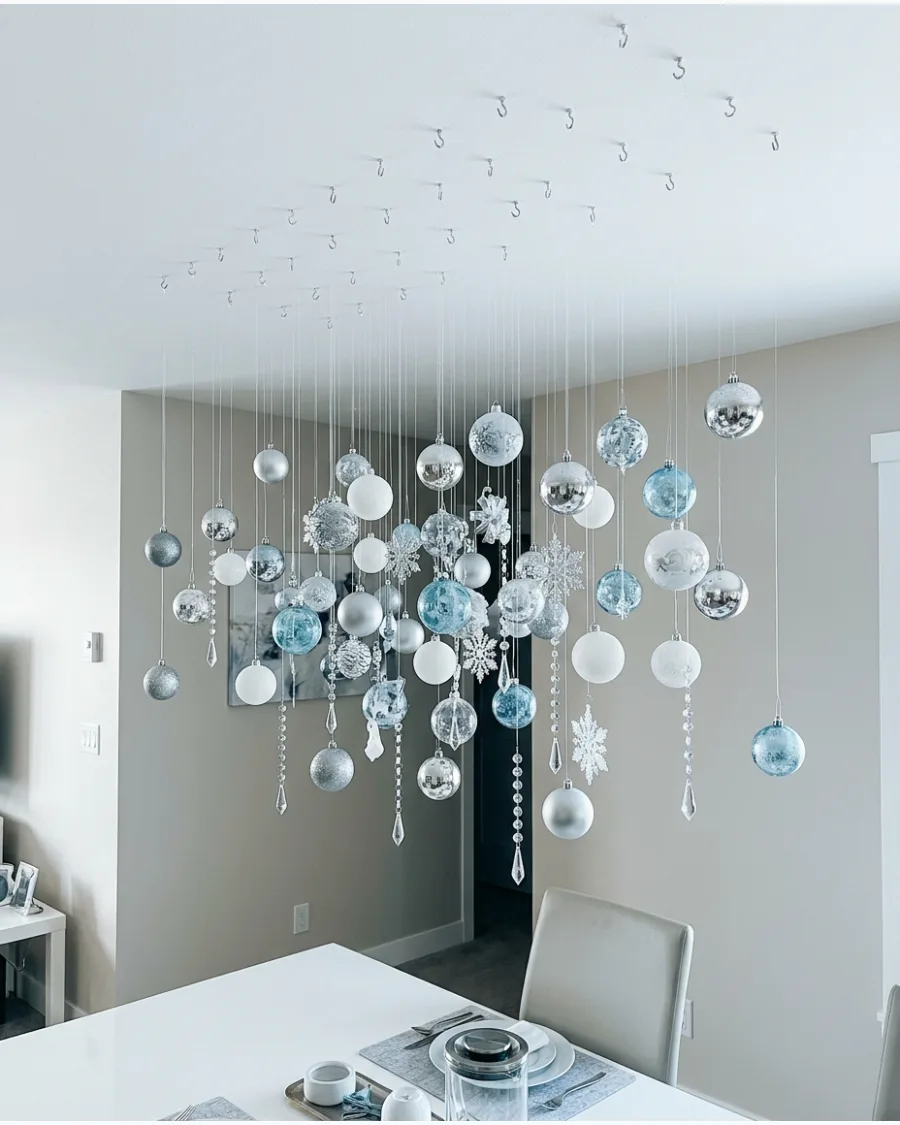
Transform a dining area into a frozen landscape by suspending ornaments in cool, metallic tones. Use a mix of metallic silver, matte white, and translucent blue spheres to mimic the look of frost and ice.
Attach clear monofilament to individual ornaments and secure them to a lightweight grid or ceiling hooks at varying heights to create a layered, multi-dimensional effect. This approach provides a professional, high-end look that feels both festive and sophisticated.
- Incorporate acrylic crystal drops to simulate hanging icicles.
- Mix snowflake-shaped ornaments with traditional baubles for added texture.
- Ensure the lowest point is at least 30 inches above the tabletop to prevent interference with sightlines.
Use white or silver-colored adhesive hooks that match your ceiling paint to make the attachment points virtually invisible.
7. Clear Glass Ornament Ceiling
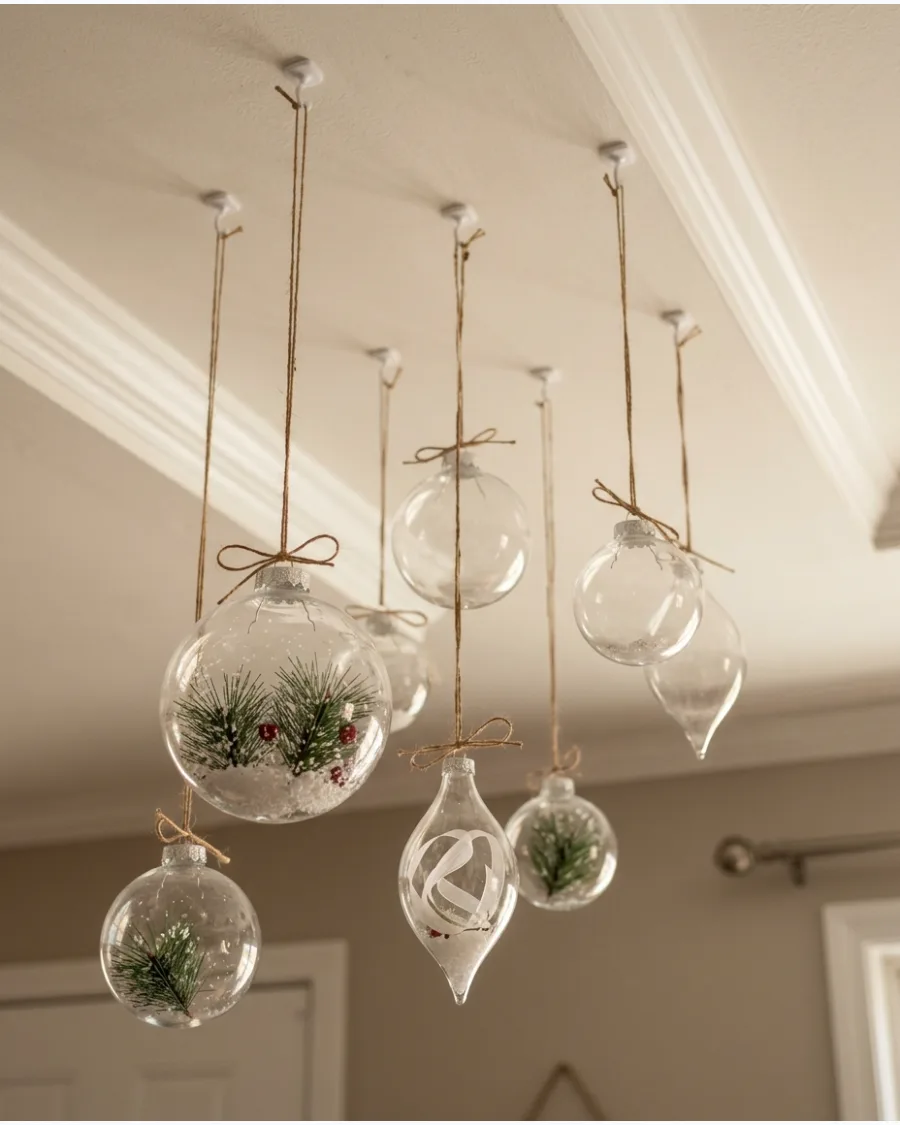
For a sophisticated and airy look, use clear glass or acrylic ornaments that allow light to pass through. You can customize these vessels by adding small sprigs of pine, faux snow, or delicate ribbons inside the globes.
Vary the lengths of the hanging strings to create a staggered, cloud-like effect that feels intentional rather than cluttered. This style works exceptionally well in rooms with neutral color palettes where you want a subtle holiday touch.
- Fill every third ornament with a sprig of greenery for a pop of natural color.
- Use iridescent glass ornaments to catch and reflect indoor lighting beautifully.
- Select high-quality acrylic options for high-traffic areas where glass breakage is a concern.
Clean each ornament with a microfiber cloth before hanging to remove fingerprints that become highly visible under direct overhead light.
8. Mixed-Size Christmas Bauble Ceiling
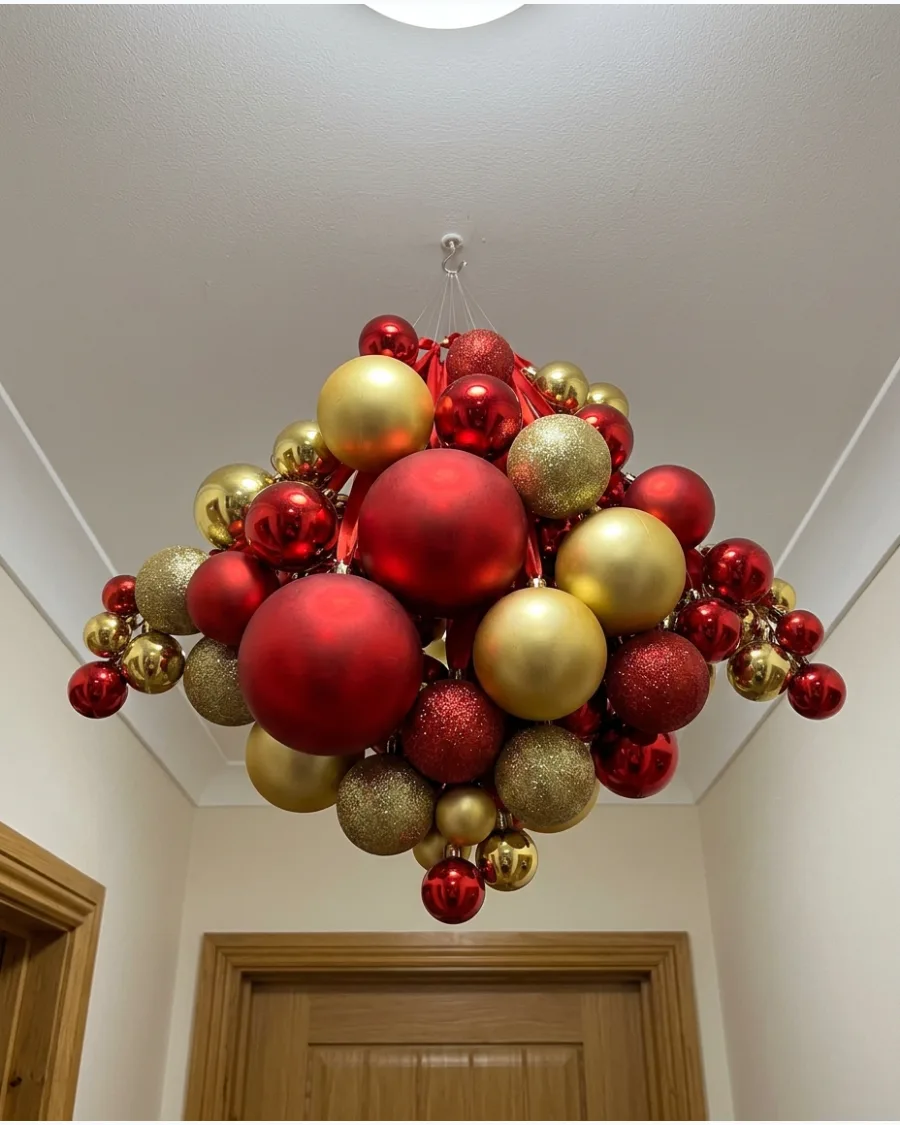
Create a sense of movement and scale by mixing baubles of significantly different diameters rather than using uniform sizes. Start with oversized pieces as anchor points and fill the gaps with medium and miniature ornaments to build volume.
Group your largest baubles toward the center of the installation to establish a clear focal point, then taper out with smaller sizes for a balanced look. This technique ensures the arrangement looks professionally designed and structurally sound.
- Combine matte, glossy, and glitter finishes within the same color family for visual variety.
- Use a consistent color palette, such as red and gold, to unify the different sizes.
- Check the weight of oversized ornaments to ensure your mounting hardware can support them safely.
For the fastest installation, use 'S' hooks on a suspended wire mesh panel; this allows you to adjust the density of ornaments easily.
9. Floating Christmas Ornaments Above a Kitchen Island
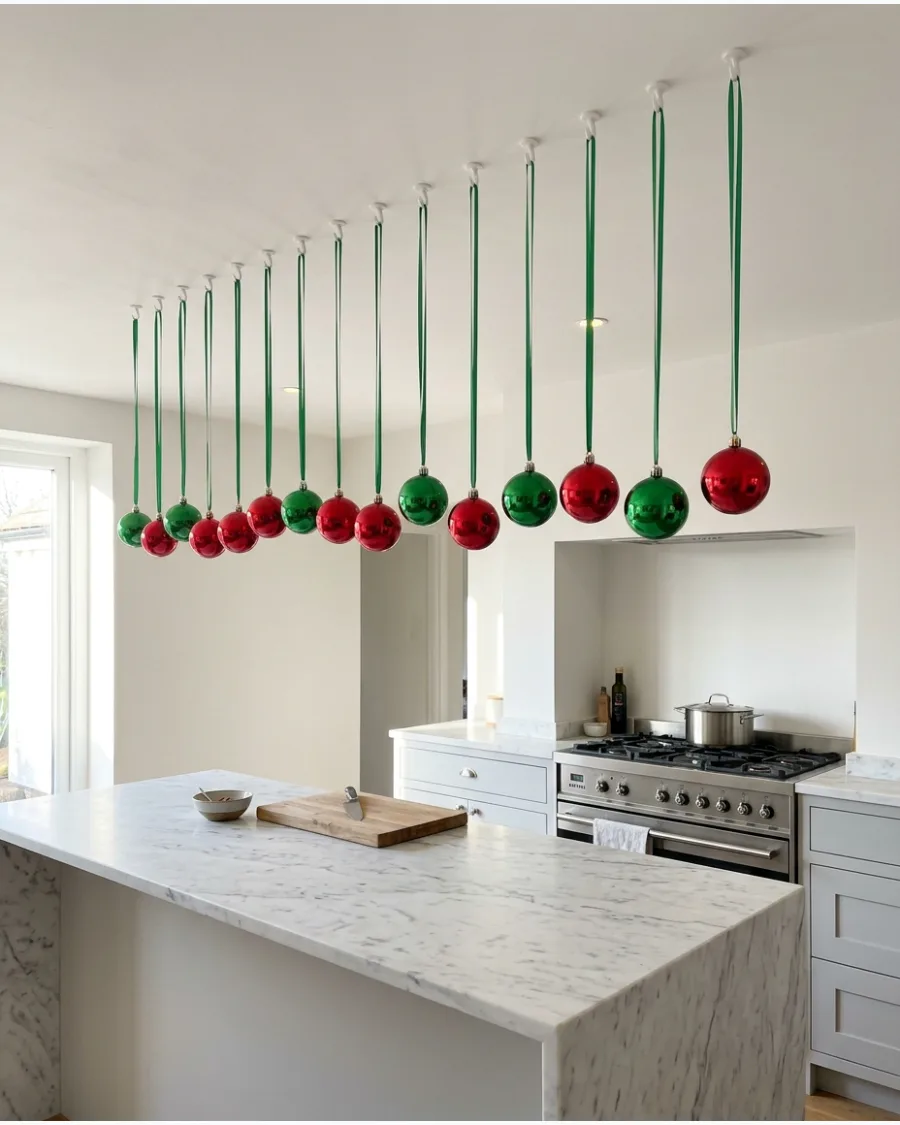
Bring the holiday spirit into the heart of the home without sacrificing valuable prep space on your countertops. Lightweight plastic ornaments are ideal for this high-activity zone as they are durable and easy to wipe clean if needed.
Secure ornaments to the ceiling at a height that clears the eye level of anyone working at the island while still remaining visible from the adjacent rooms. This adds a festive layer to the kitchen without interfering with daily meal preparation or chores.
- Align the ornaments in a straight line with the length of the island for a structured, modern look.
- Use adhesive hooks for a damage-free installation on smooth ceiling surfaces.
- Choose colors that complement your existing kitchen cabinetry or backsplash for a cohesive design.
Avoid hanging ornaments directly over a stovetop where rising steam and heat can damage the finish or cause adhesives to fail.
10. Christmas Ornament Chandelier
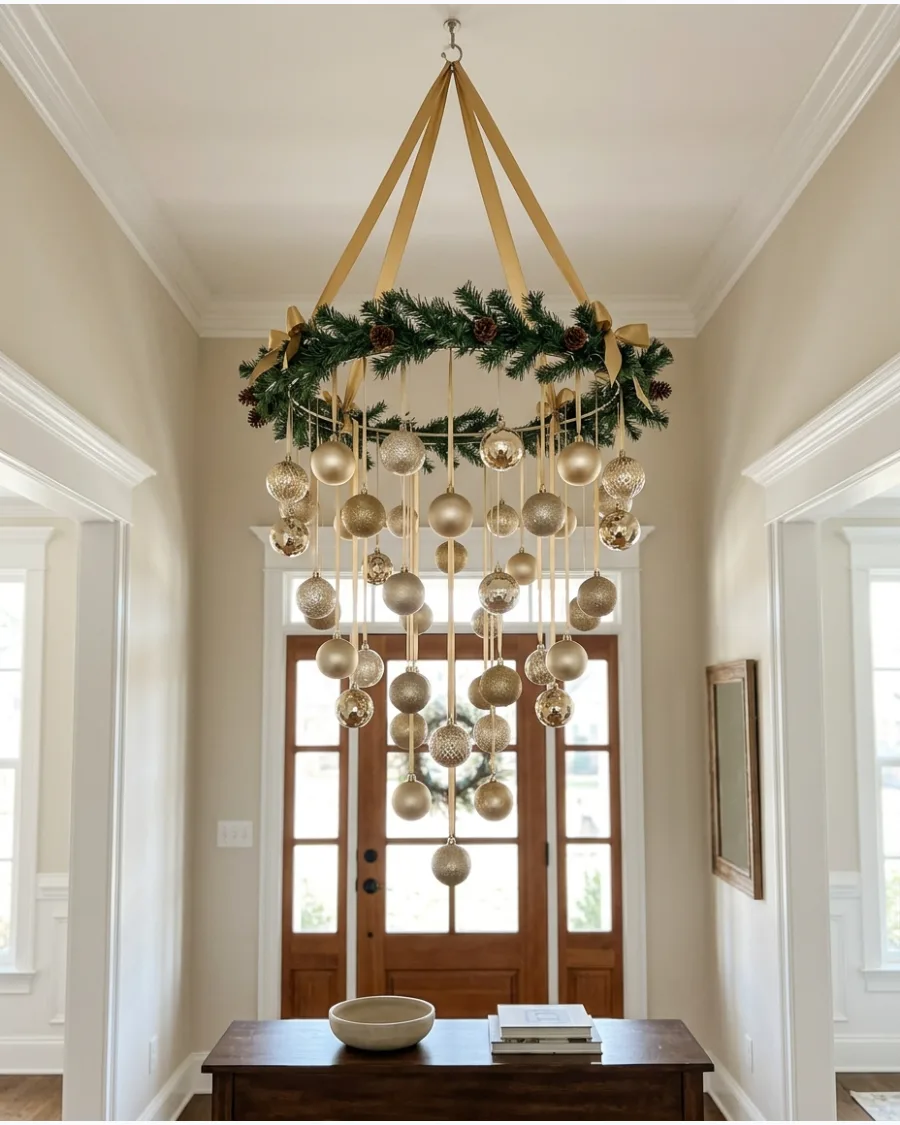
Construct a temporary holiday fixture by using a circular hoop as a mounting frame for your favorite ornaments. Hang the ornaments at graduated lengths, with the longest strands in the middle, to create a cone or tiered chandelier shape.
Position the completed ornament chandelier directly above a central feature like an entryway table or dining centerpiece for maximum visual impact. This project provides the look of a custom-designed light fixture with minimal permanent hardware required.
- Use a metal floral ring or a lightweight hula hoop as the primary structural base.
- Wrap the hoop in evergreen garland or velvet ribbon to hide the frame and add texture.
- Select a monochromatic or two-tone ornament set for a modern, high-end appearance.
Assemble the entire chandelier on a temporary hook at eye level before hoisting it to its final ceiling position to prevent arm fatigue.
SNOWFLAKE AND WINTER CHRISTMAS CEILING DECORATIONS
11. Hanging Paper Snowflake Ceiling
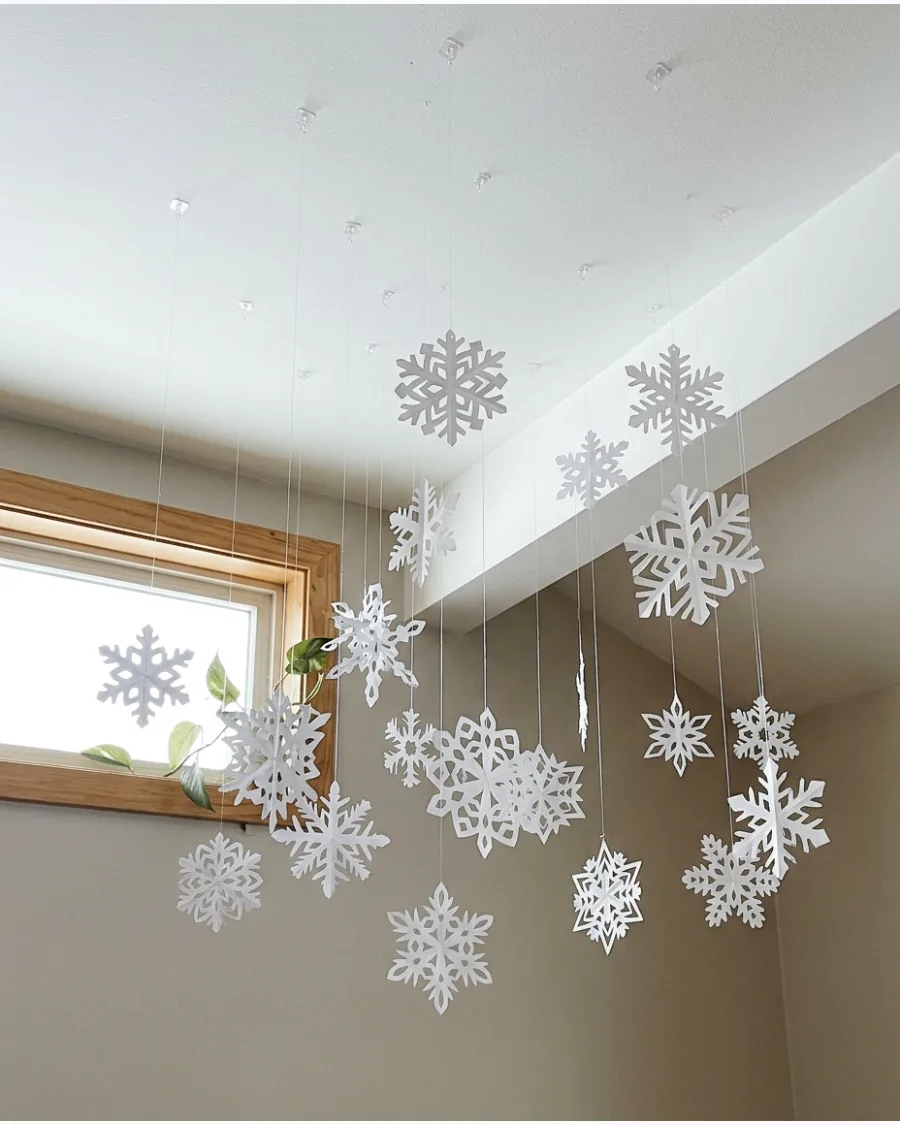
Transform your living space into a winter scene by suspending delicate white paper cutouts from above. Vary the lengths of your fishing line or clear monofilament to create a multi-dimensional effect that looks like active snowfall. This lightweight approach is renter-friendly since it requires only tiny clear adhesive hooks or temporary mounting tape to secure the lines.
- Use various weights of white paper to mimic different snow densities
- Attach the lines at different distances from the ceiling for visual depth
- Combine classic six-point patterns with simpler star shapes
Flatten handmade paper snowflakes under a heavy book overnight before hanging to ensure they don't curl at the edges.
12. Giant Paper Snowflake Ceiling
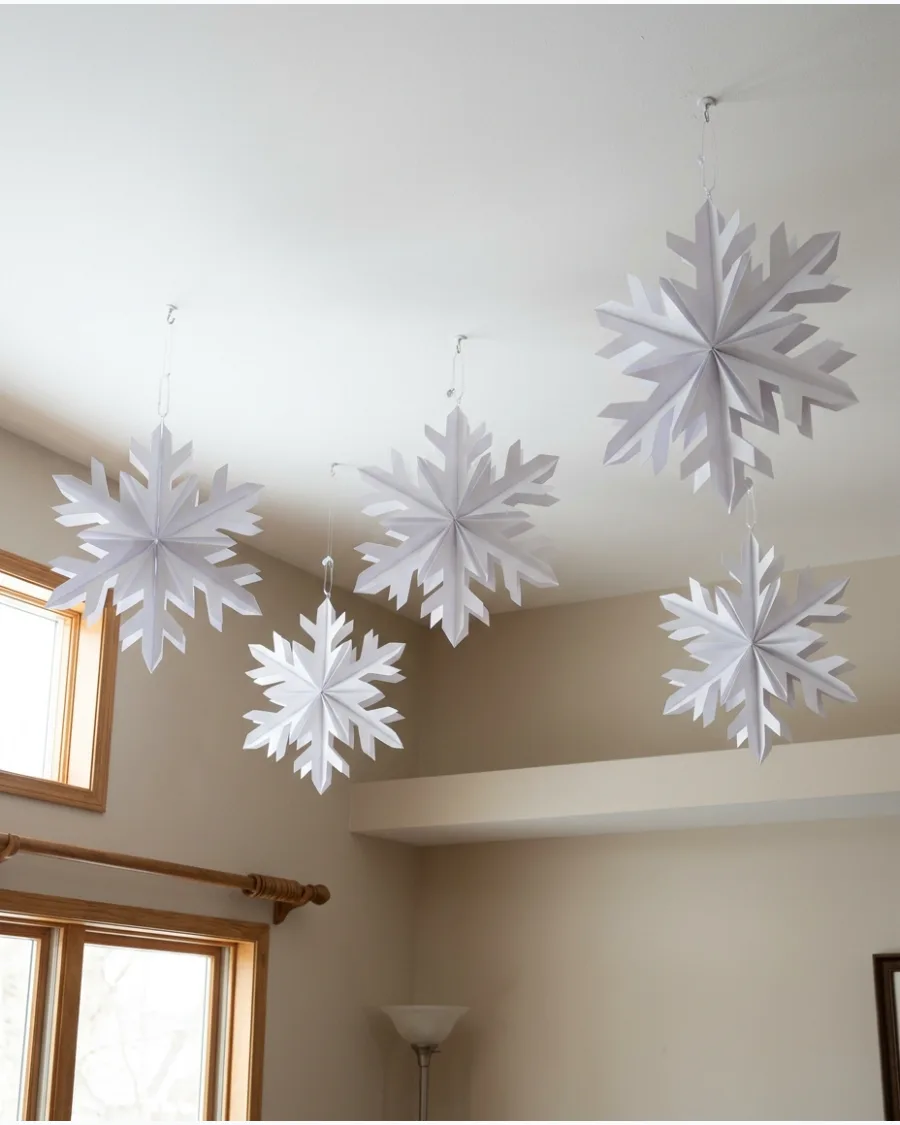
Make a bold statement by opting for oversized three-dimensional paper stars and snowflakes instead of small cutouts. Space these large-scale pieces at least two feet apart to fill the vertical space without making the room feel cluttered. Their hollow, 3D structure provides architectural interest and remains light enough for easy installation using small command hooks.
- Select 3D paper snowflakes with accordion folds for added texture
- Focus placement on high-traffic areas like the center of the family room
- Check that the lowest point of the largest snowflake clears standard head height
Use white or silver binder clips to hold the 3D folds open so you can easily collapse them for flat storage after the holidays.
13. Snowstorm Christmas Ceiling
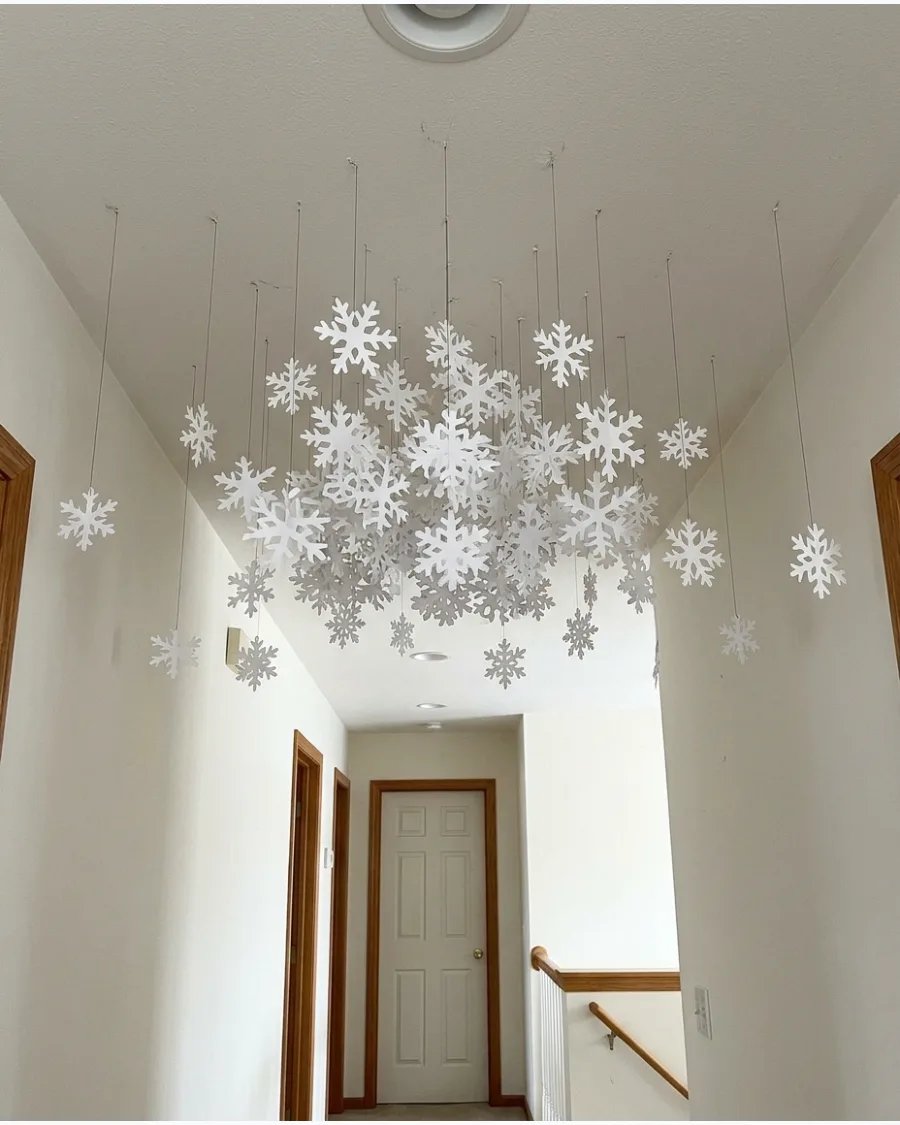
Create a localized weather event by clustering dozens of white snowflakes in one specific zone of your home. Position the highest density of snowflakes directly in the center of the display and gradually thin them out toward the perimeter to simulate a drifting snowstorm. This concentration draws the eye and creates a powerful focal point over a hallway or a cozy seating area.
- Mix small and medium sizes to simulate the variety found in natural snowfall
- Vary the vertical drop by 3 to 10 inches between neighboring pieces
- Use matte finish white paper to keep the cluster looking soft and organic
Tape a paper guide to the floor first to plan the 'storm' footprint before you start hanging pieces from the ceiling.
14. White and Silver Snowflake Ceiling
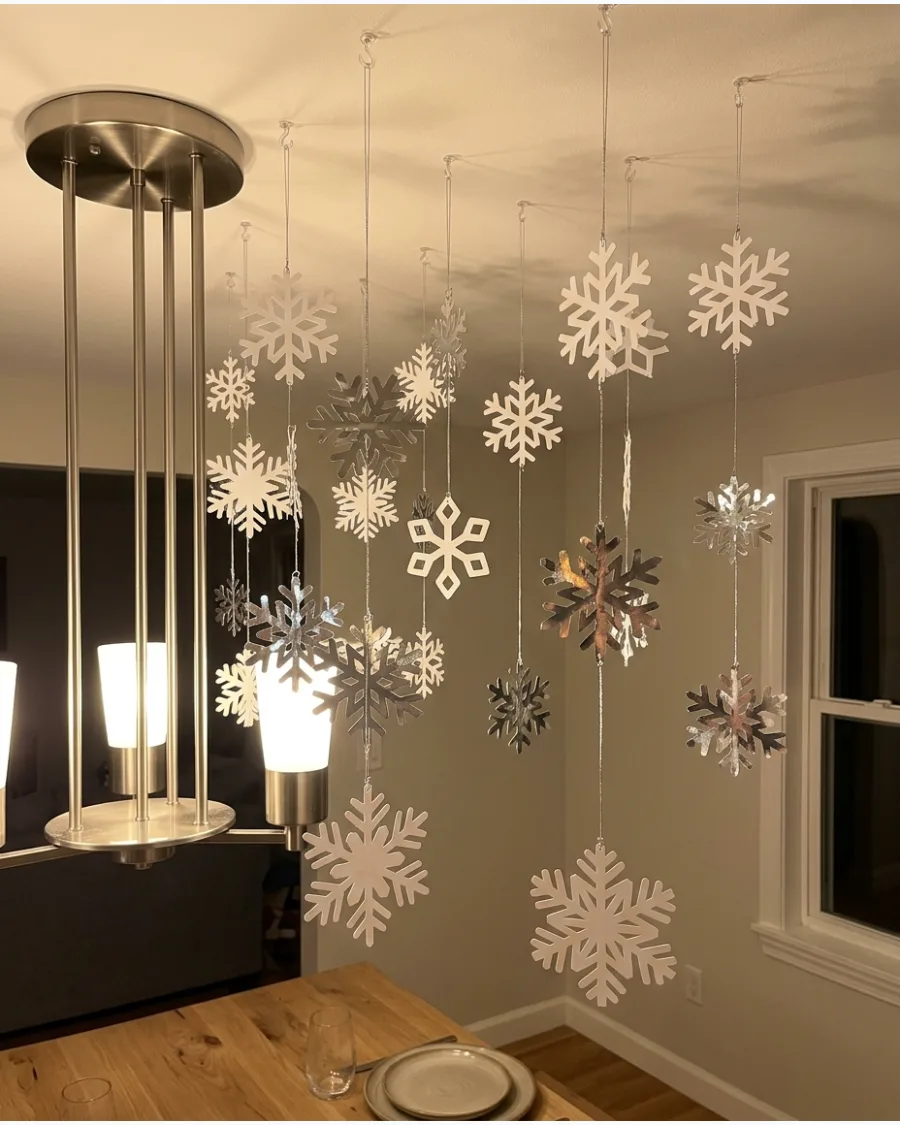
Enhance the depth of your winter decor by mixing matte white paper with shiny silver metallic snowflakes. Place the silver pieces near existing light fixtures or lamps so they can reflect the glow throughout the room during the evening. The contrast between the flat white and the mirrored silver surfaces prevents the display from looking one-dimensional.
- Interleave metallic silver foil flakes with classic white cardstock versions
- Keep the white snowflakes as the base color for a traditional winter feel
- Ensure silver pieces are oriented at various angles to catch light from multiple directions
Use silver metallic thread for the silver snowflakes to add an extra bit of sparkle to the suspension lines.
15. Gold Snowflake Christmas Ceiling
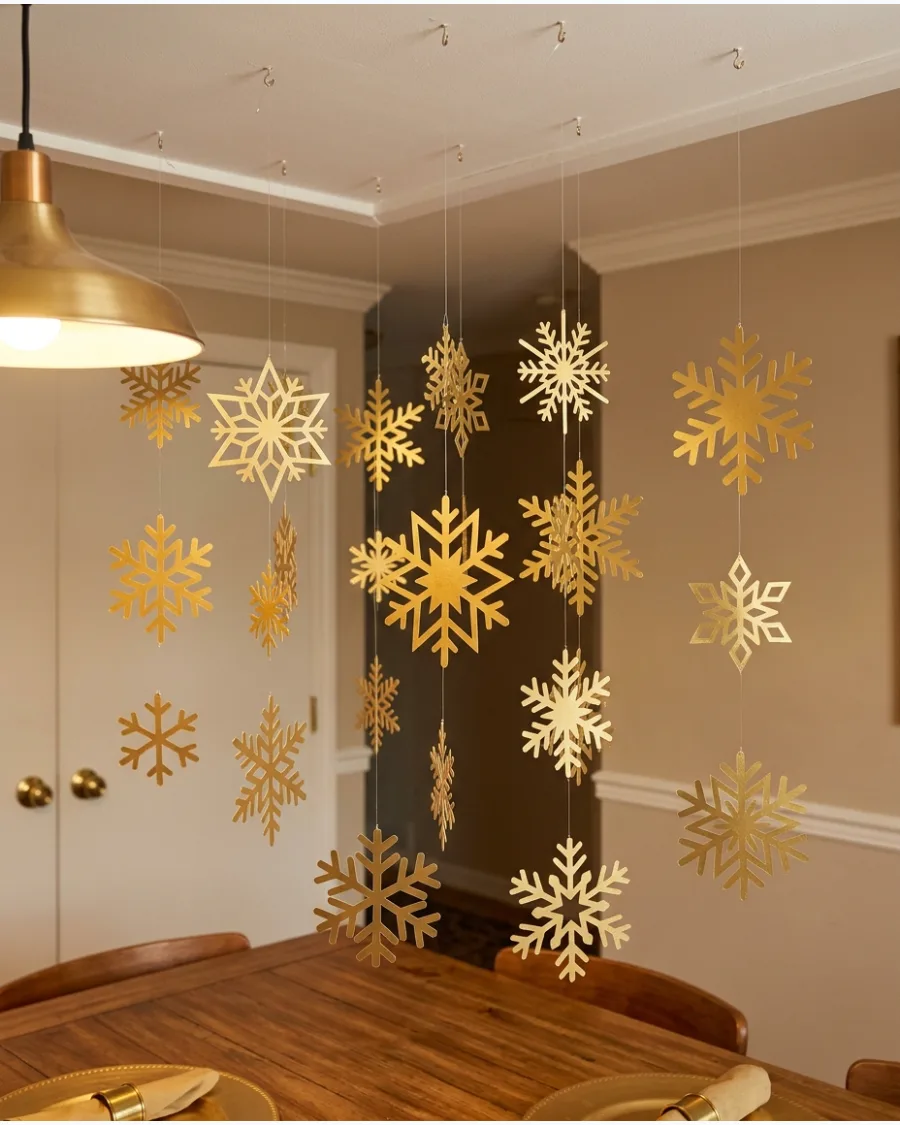
Bring a sense of warmth and luxury to your holiday ceiling by using metallic gold snowflakes. Mix different geometric patterns and sizes to give the arrangement a curated, collected appearance rather than a uniform factory look. This warmer tone works exceptionally well above a wooden dining table or in an entryway with existing gold hardware or accents.
- Choose varied gold finishes like brushed gold, satin, and high-shine brass
- Suspend the flakes at heights that complement the room's permanent light fixtures
- Select thicker cardstock or plastic materials for larger gold pieces to prevent sagging
Pair gold snowflakes with warm white LED fairy lights on the ceiling for a sophisticated 'Golden Hour' glow in the evening.
16. Crystal Snowflake Ceiling Decorations
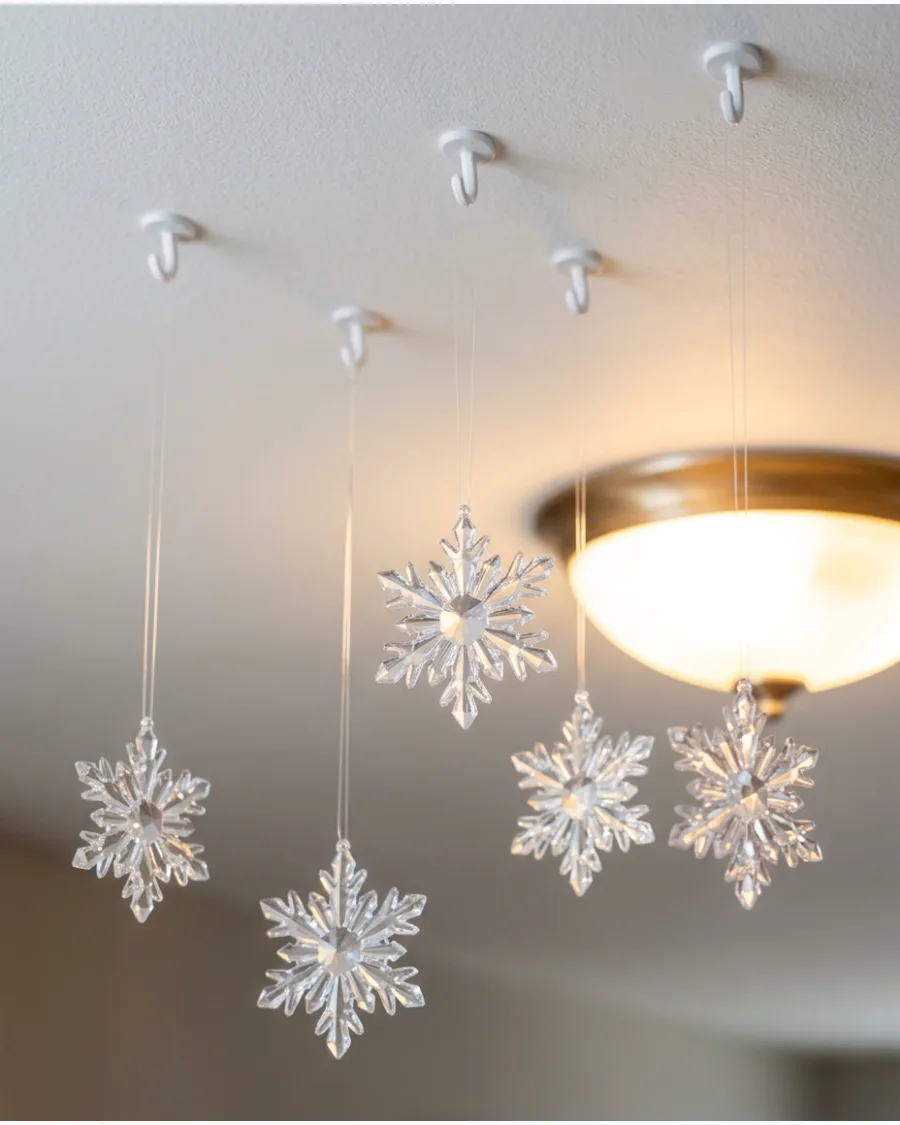
Use clear acrylic or glass-style snowflakes to catch and refract ambient light for a shimmering winter effect. Suspend the snowflakes at varying heights using transparent monofilament line to create the illusion of floating ice crystals throughout the room. This setup is most effective when positioned near a warm light source to maximize light scatter.
- Faceted acrylic material for better light refraction
- Varying snowflake diameters from 3 to 6 inches
- Transparent monofilament line for a clean look
Use faceted crystals rather than flat plastic to create a prism effect when the room lights are on.
17. Snowflake Garland Across the Ceiling
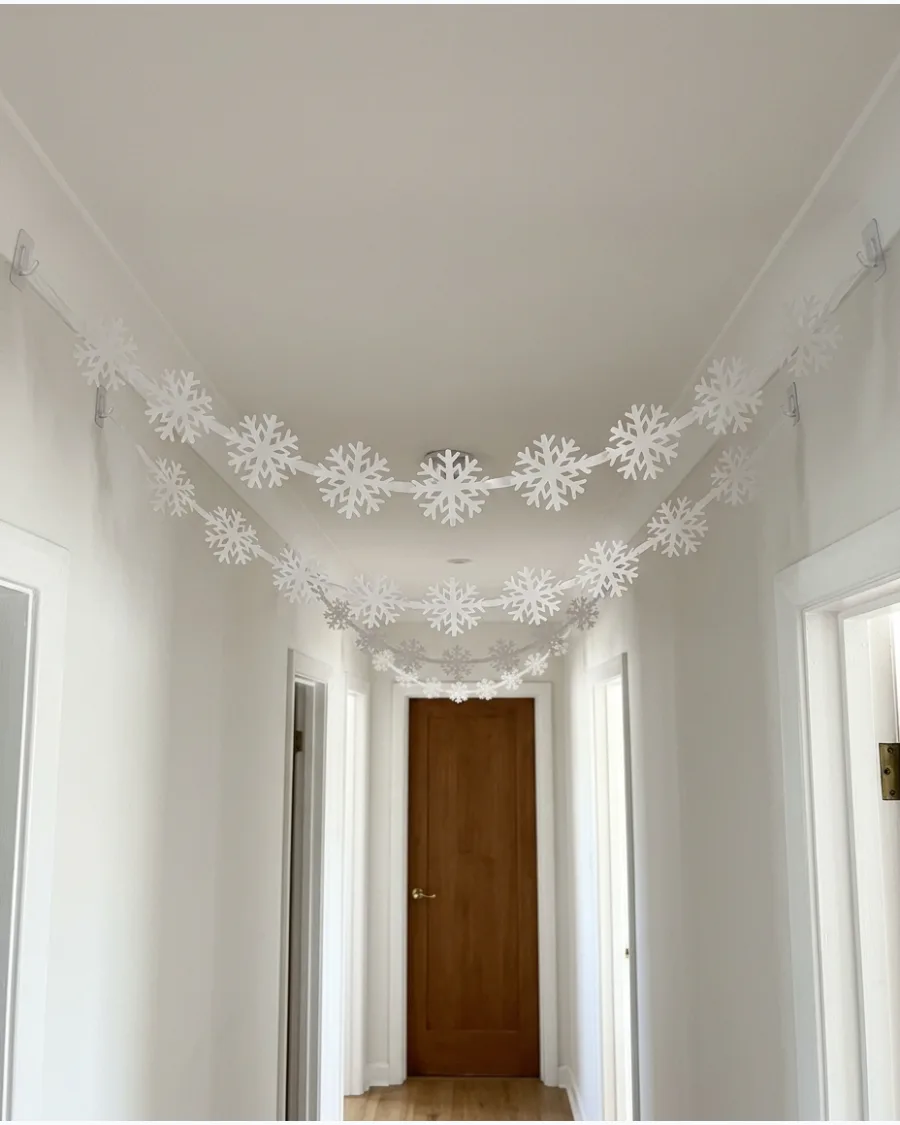
Create a rhythmic overhead display by stretching lightweight snowflake garlands from wall to wall. Mount the garland ends with removable adhesive hooks and allow for a natural 6-inch sag in the center of each strand to prevent a rigid, industrial appearance. This adds festive movement and visual interest to hallways or tall living room ceilings.
- Spacing strands 18-24 inches apart for even coverage
- Die-cut paper or lightweight felt snowflakes
- Renter-friendly installation using clear adhesive clips
Ensure the lowest point of the sag remains at least 7 feet above the floor to avoid interfering with guest movement.
18. Snowflakes Over the Christmas Dining Table
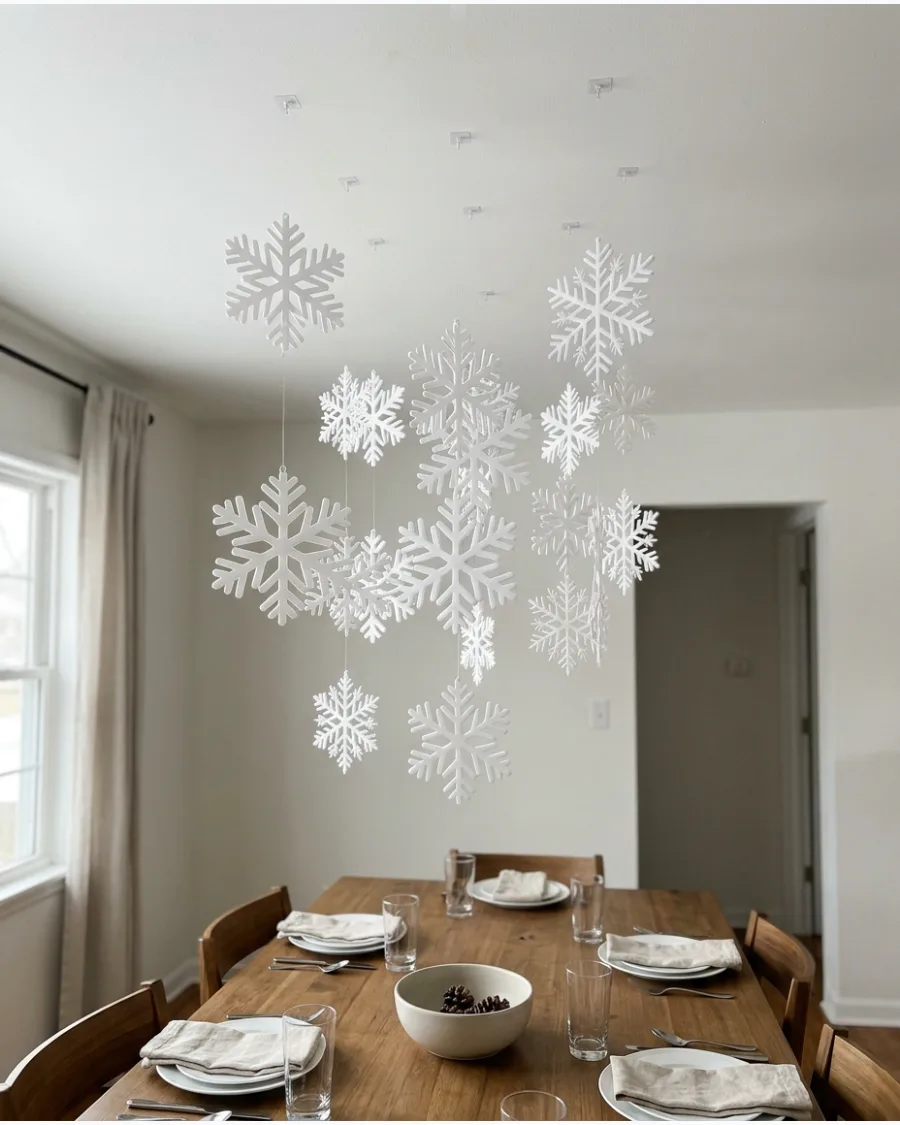
Focus your holiday decor by creating a dense cluster of snowflakes directly above the center of the dining table. Attach snowflakes of various sizes to the ceiling with clear thread, ensuring the lowest hanging pieces sit at least 18 inches above the tabletop to avoid obstructing conversation. This concentrated canopy acts as a temporary, festive chandelier for holiday meals.
- Staggered heights for a three-dimensional effect
- Centralized focal point for the dining room
- Clear thread for a minimal visual footprint
Use different weights of thread based on the snowflake size to prevent larger pieces from stretching the line unevenly.
19. Snowflake Ceiling With Fairy Lights
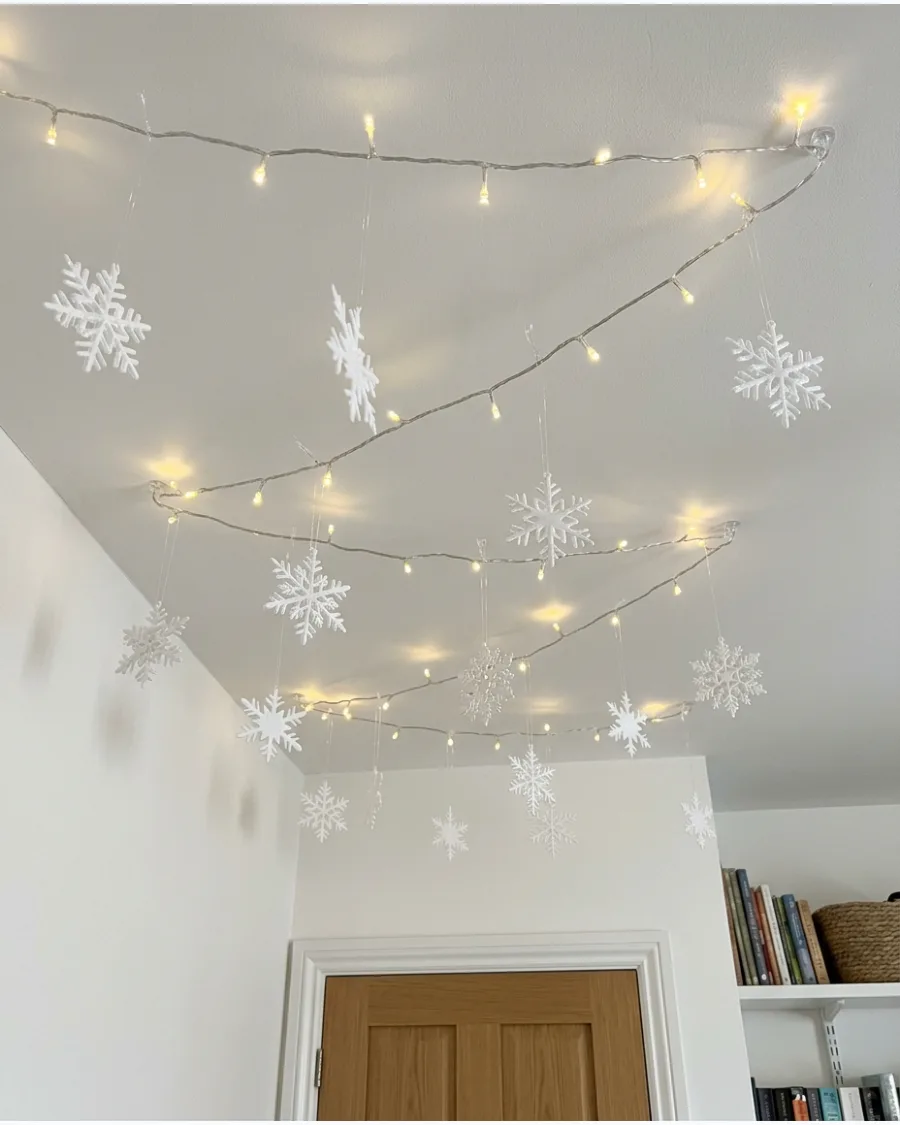
Combine the crisp look of white snowflakes with the soft glow of warm white fairy lights for a cozy winter ceiling. Intertwine the light strings with the snowflake hangers so the glow reflects off the edges of the ornaments, creating a secondary ambient light source. This combination is ideal for bedrooms or dens where a gentle, festive atmosphere is desired.
- Battery-operated LED strands for easier ceiling installation
- Matte white snowflakes to diffuse the light glow
- Layered arrangement to give the ceiling depth
Choose 'warm white' LEDs (2700K) to keep the room feeling cozy rather than clinical or blue-toned.
20. Scandinavian Paper Snowflake Ceiling
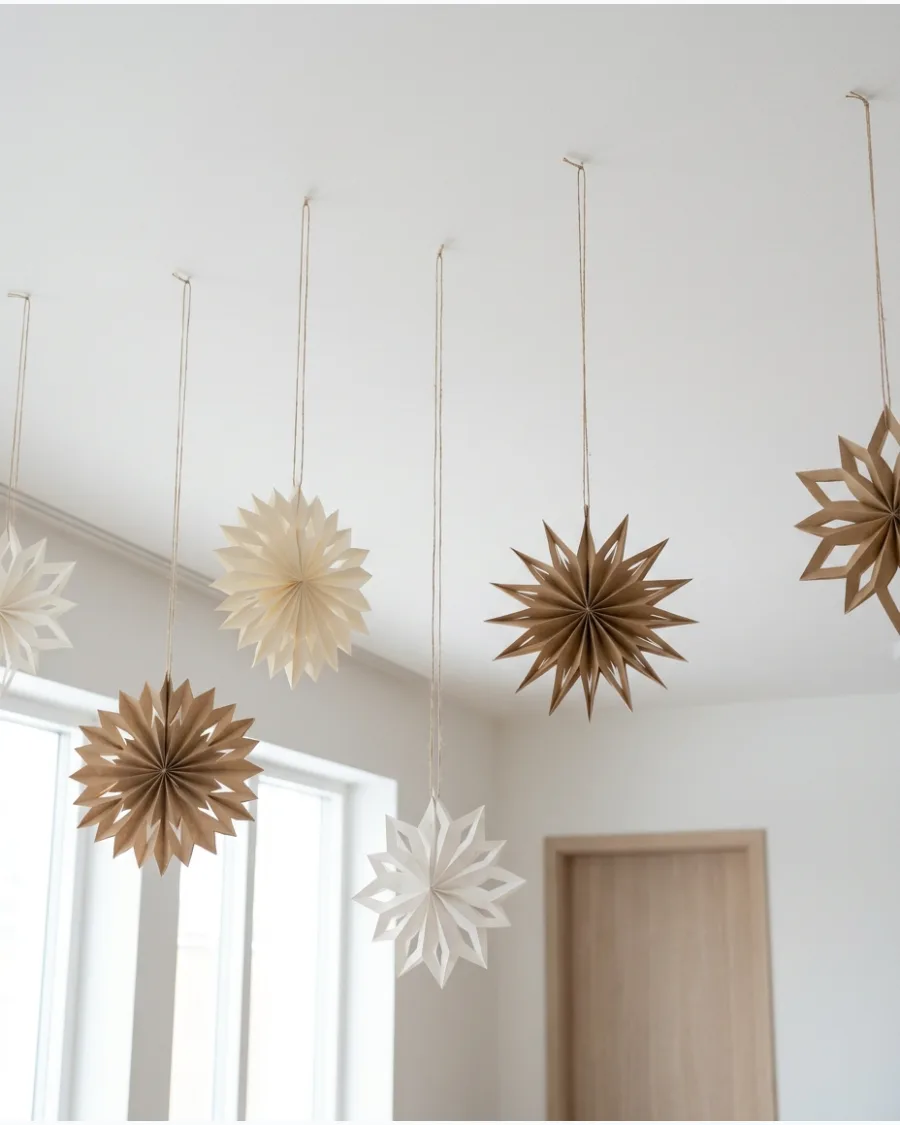
Achieve a minimalist aesthetic by using paper snowflakes in a neutral palette of cream, white, and natural kraft brown. Space the snowflakes sparsely across the ceiling to maintain an open, airy feel that aligns with Scandi-modern design principles. This approach emphasizes the geometric shapes of the paper folds without overwhelming the room's visual space.
- 3D accordion-style paper stars and snowflakes
- Kraft-paper accents for organic warmth
- Sparse, intentional placement to prevent clutter
Mix different paper textures, such as cardstock and vellum, to add subtle variety within the limited color scheme.
STAR CHRISTMAS CEILING DECORATIONS
21. Hanging Paper Star Christmas Ceiling
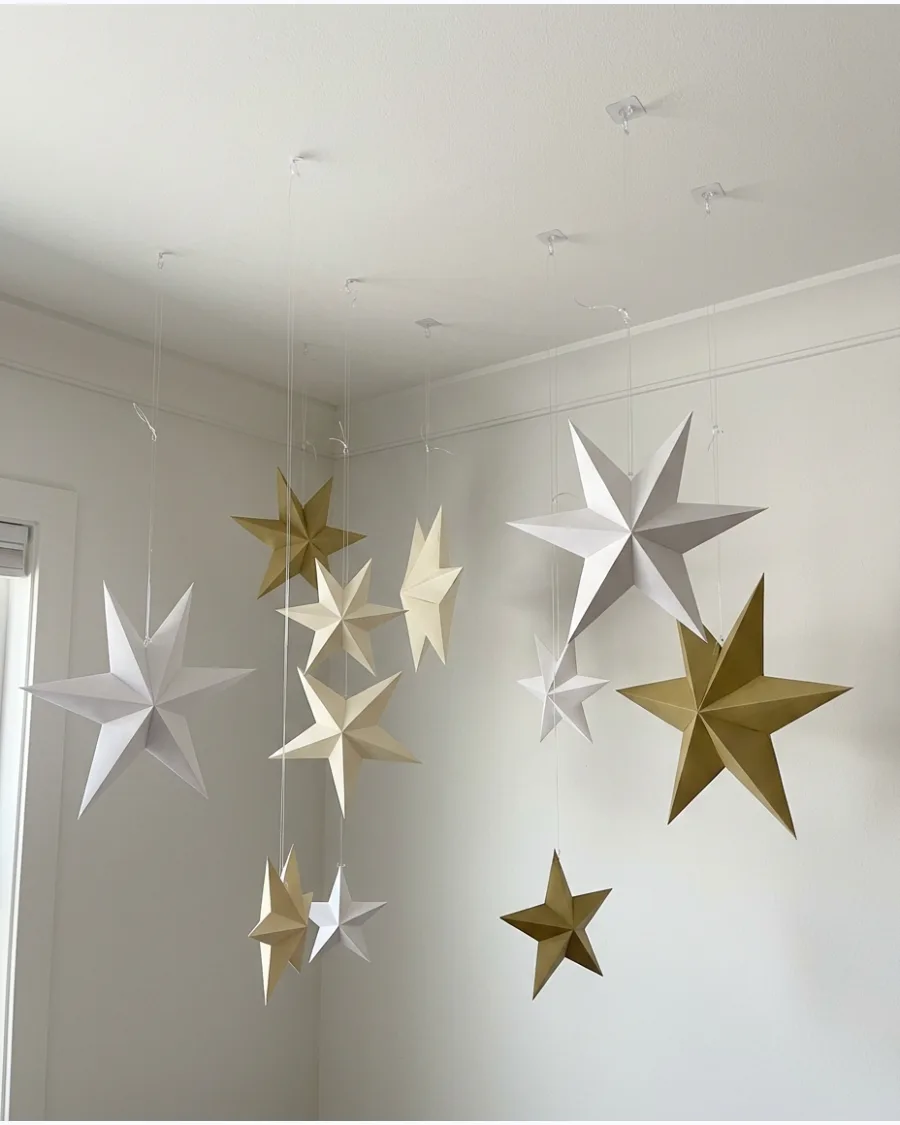
Transform your space with a delicate installation of folded paper stars in varying sizes and heights. Using a palette of white, cream, and muted gold creates a sophisticated, dimensional look that doesn't overwhelm the room.
Secure each star individually to the ceiling using clear monofilament and lightweight adhesive hooks for a floating effect. This arrangement works well in hallways or living areas where the ceiling height allows for varying lengths of suspension.
- Mix 5-inch and 10-inch stars to create visual depth and a layered look
- Use heavy-weight cardstock for the stars to ensure they keep their crisp folds throughout the season
- Space stars at least 12 inches apart to prevent tangling in natural indoor air currents
Check the weight limit of your adhesive hooks to ensure they can support the larger paper stars without peeling the paint.
22. Large Christmas Star Ceiling Cluster
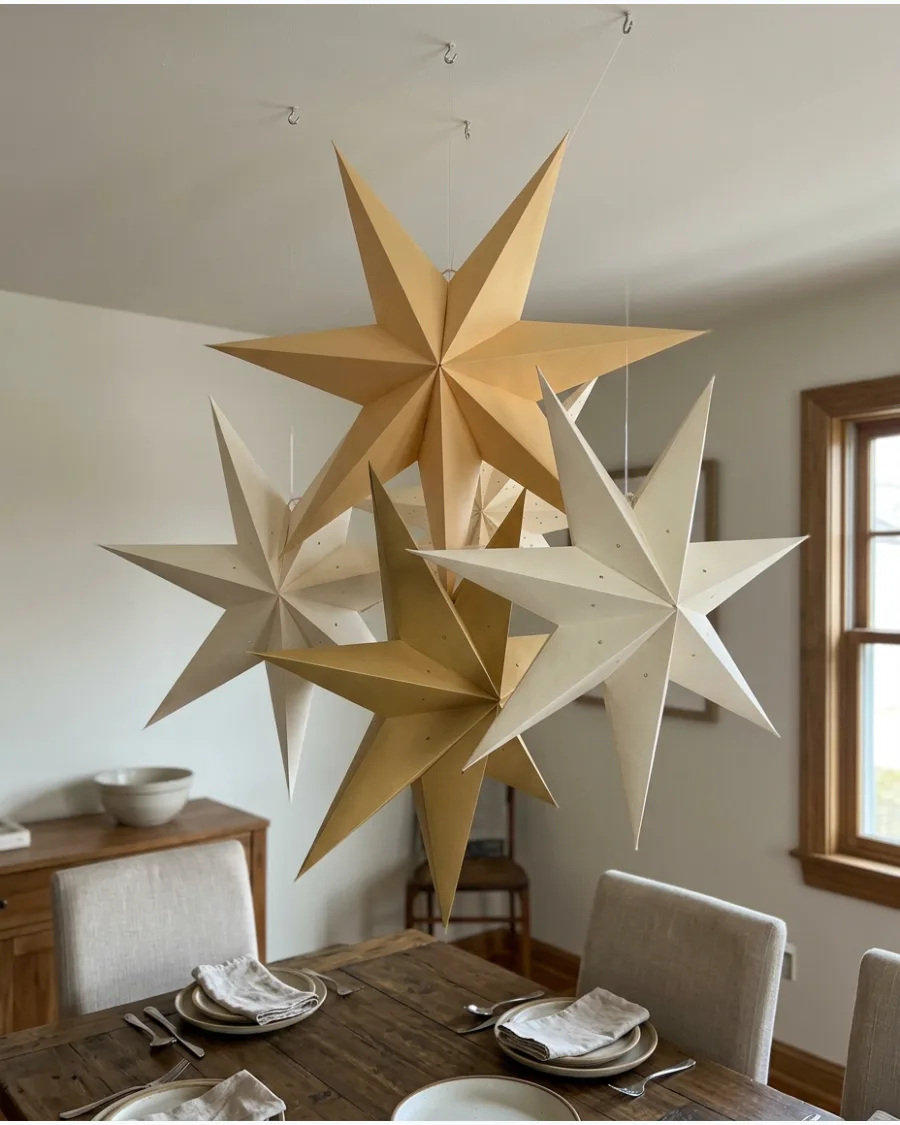
Focus your holiday decor by grouping several oversized three-dimensional stars into a tight cluster above a dining table or seating area. Choosing two or three coordinating colors, such as cream and gold, keeps the arrangement intentional rather than cluttered.
Anchor the tallest star in the center of the cluster and overlap the edges of surrounding stars to create a singular, impactful centerpiece. This method provides a festive alternative to a traditional chandelier without requiring electrical work.
- Choose stars with a diameter of at least 18 inches for a dramatic focal point
- Vary the suspension height slightly so the stars appear as a cohesive 3D cloud rather than a flat line
- Secure the cluster directly above the center of your table to maintain room symmetry
Use battery-operated LED puck lights hidden within the cluster to make the stars glow from the inside without visible cords.
23. Gold Star Christmas Ceiling
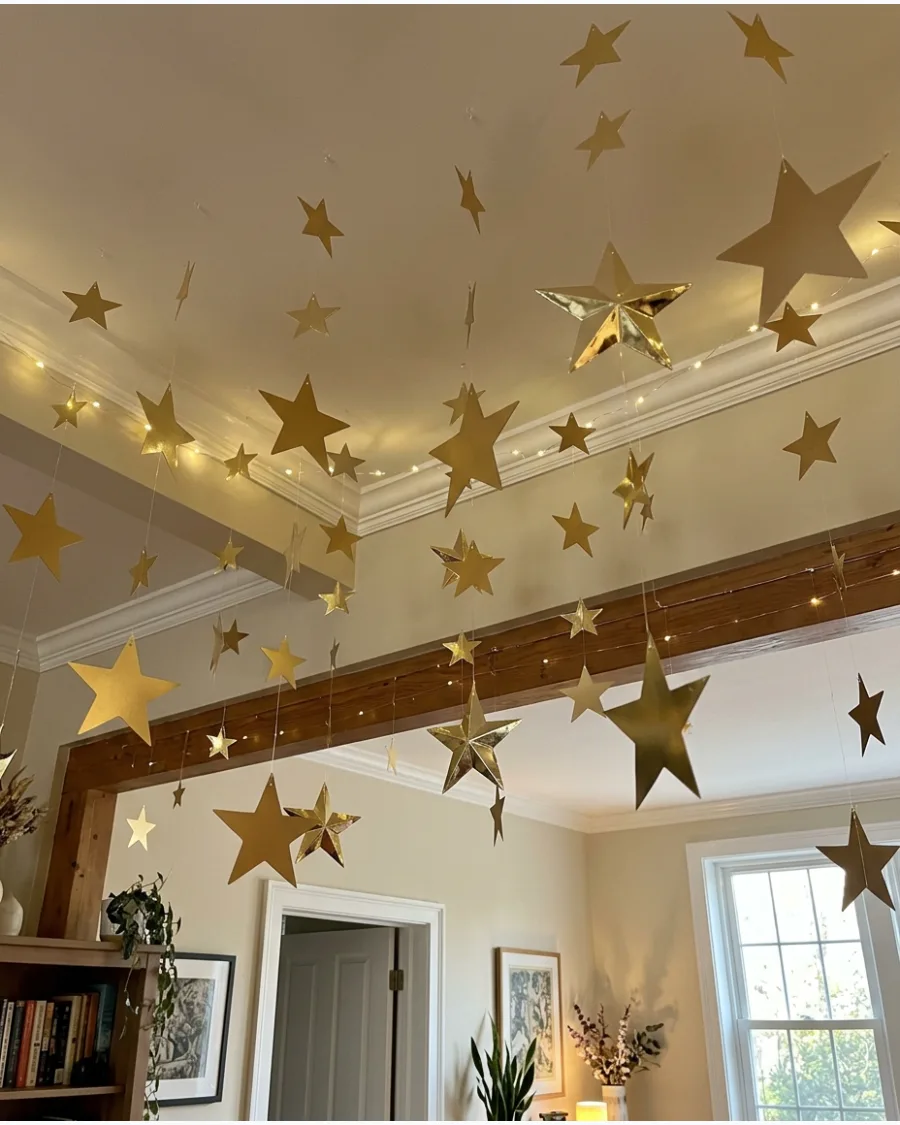
Elevate your holiday atmosphere with a glamorous array of metallic gold stars suspended by clear thread. Mixing matte and reflective finishes ensures that the stars catch the light differently as you move through the room, adding a dynamic sparkle.
Hang the stars at varying heights to create a shimmering 'ceiling' that defines the party space. This luxury look pairs beautifully with warm white fairy lights or a central gold fixture.
- Incorporate both five-pointed and eight-pointed star shapes for architectural variety
- Use invisible monofilament line to make the stars appear as if they are hovering mid-air
- Clean reflective stars with a microfiber cloth before hanging to remove fingerprints
Position some stars near existing wall sconces or lamps to maximize the reflective 'glint' effect in the evening.
24. Champagne Gold Star Garland Ceiling
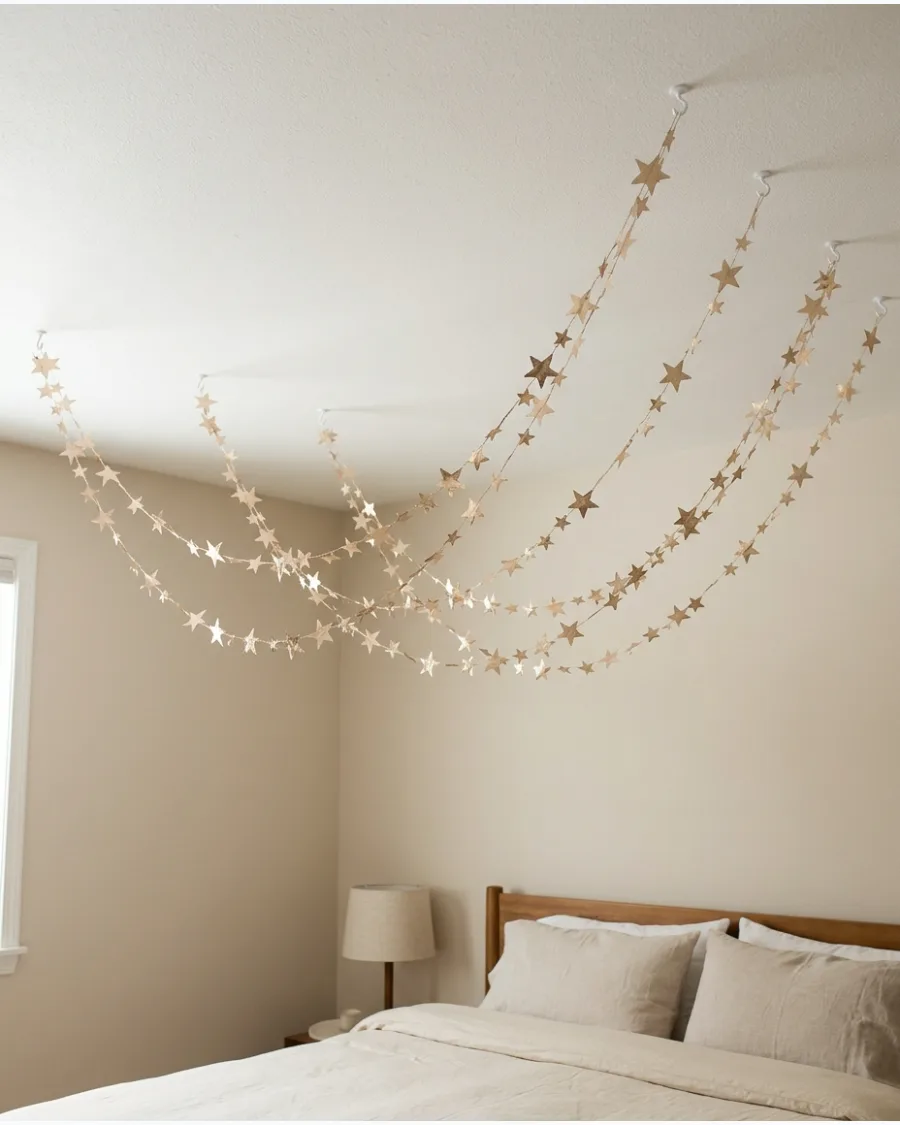
Drape strands of champagne-colored star garlands loosely across your ceiling for a soft, romantic holiday feel. The champagne tone offers a more subtle metallic finish than bright gold, making it ideal for neutral or burgundy-themed interiors.
Swag the garlands between multiple attachment points to create gentle curves that mimic the drape of a fabric canopy. This approach is particularly renter-friendly as it requires fewer mounting points than individual stars.
- Loop the garlands over existing ceiling beams or hooks for a layered, three-dimensional effect
- Keep the 'drip' of the swag consistent across the room for a balanced look
- Pair with cream or white paper decorations to enhance the soft metallic palette
If using pre-made garlands, gently stretch the string before hanging to remove any kinks from the packaging.
25. Red Christmas Star Ceiling
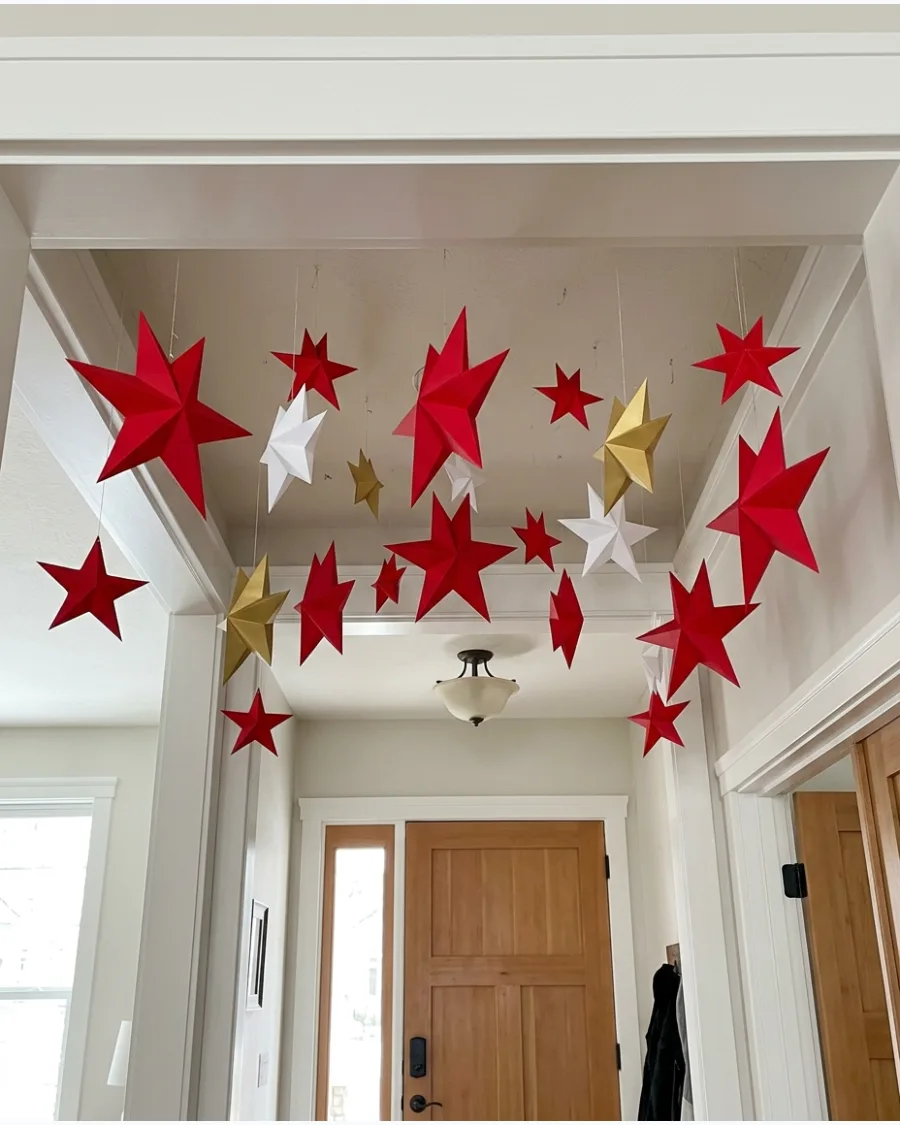
Create a classic and vibrant holiday display by suspending red stars in various sizes across your ceiling. Introducing a few gold or white stars into the mix breaks up the saturated color and adds necessary visual depth to the installation.
Distribute the largest red stars first to establish a foundation, then fill the gaps with smaller stars in contrasting colors. This bold choice works exceptionally well in high-traffic areas like entryways to set a festive tone immediately.
- Use deep crimson or burgundy stars to ground the brighter red tones
- Ensure the stars are double-sided so they look finished from every angle in the room
- Hang smaller white stars at the lowest heights to create a 'snowfall' effect against the red backdrop
For a more modern look, use geometric cardstock stars rather than traditional five-pointed shapes.
26. Paper Star Canopy
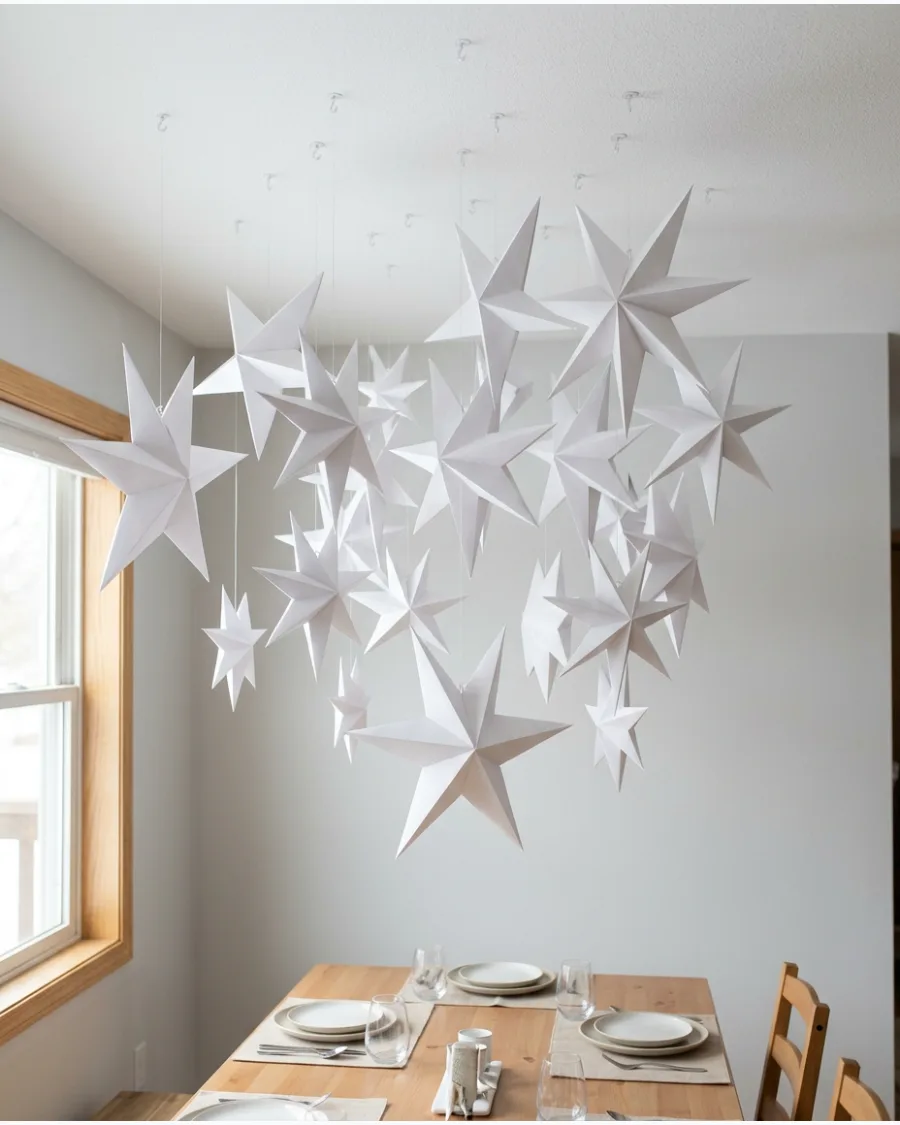
Create a dense cluster of paper stars at varying heights to define a specific zone in your home, such as a breakfast nook or a cozy reading corner. This installation works best when the stars are concentrated in a single area rather than spread thinly across a whole room.
Vary the lengths of your hanging strings between 12 and 36 inches to create a layered, volumetric effect that feels like a physical canopy overhead.
- Use clear adhesive hooks or a tension rod if working in a hallway or recessed area to avoid permanent ceiling damage.
- Incorporate 3D fold-out stars to add depth and catch the light from different angles.
- Stick to a monochrome or tonal color palette to ensure the dense arrangement looks intentional rather than cluttered.
Use clear monofilament (fishing line) instead of ribbon to make the stars appear as though they are floating independently in space.
27. Illuminated Christmas Star Ceiling
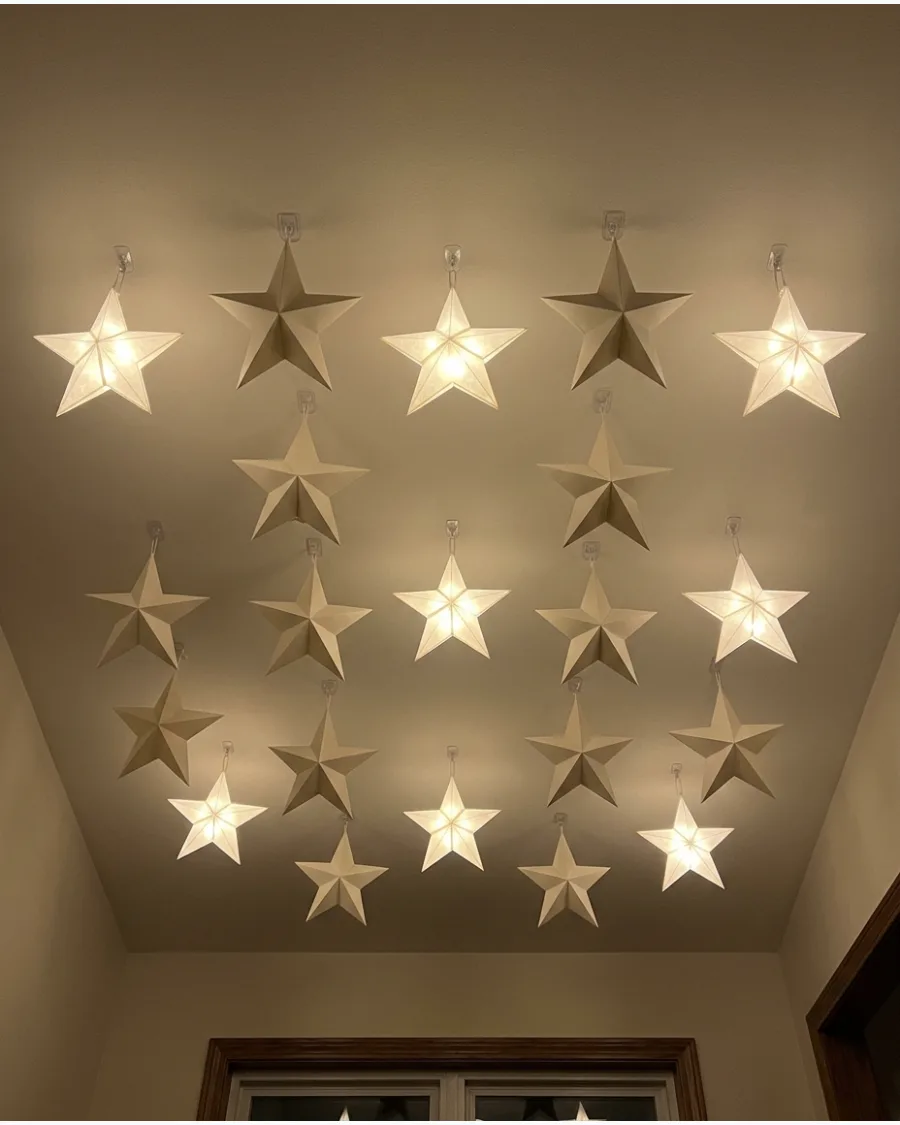
Integrate light into your overhead display by mixing battery-operated LED stars with standard paper stars. This prevents the display from becoming a singular, blinding light source and creates a rhythmic pattern of glowing and matte surfaces.
Interspersed the illuminated stars every two to three unlit stars to maintain a balanced, soft ambient glow across the room.
- Select stars with warm white LEDs rather than cool blue-toned lights to keep the atmosphere cozy.
- Opt for battery-powered stars with remote controls so you don't have to climb a ladder to turn them on each evening.
- Hide battery packs within the folds of larger paper stars or use command strips to secure them discreetly to the ceiling.
Look for LED stars with a flicker effect to mimic the natural twinkling of distant stars.
28. Celestial Christmas Ceiling
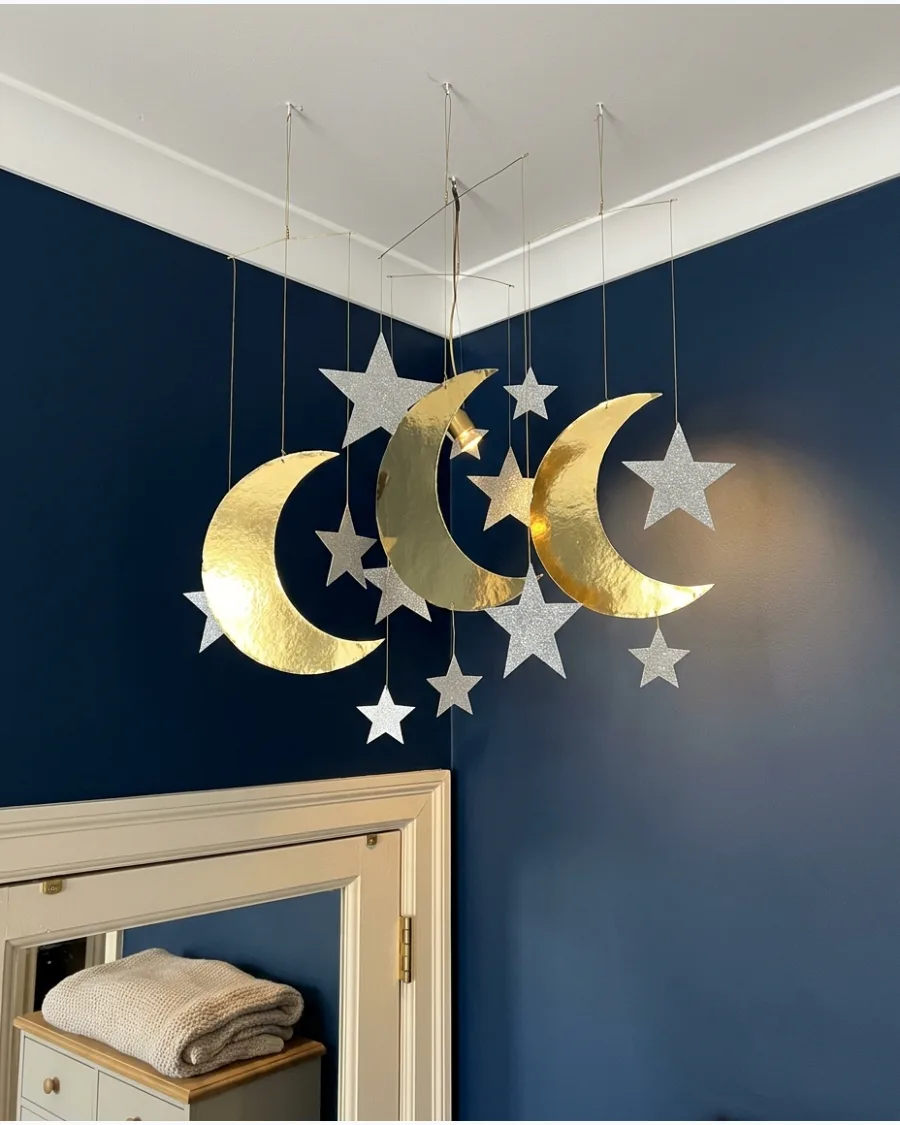
Broaden your holiday theme by incorporating crescent moons and metallic spheres alongside traditional star shapes. A palette of deep navy blue, silver, and gold creates a sophisticated, night-sky aesthetic that deviates from standard red-and-green decor.
Hang moon shapes as central anchors in the arrangement and surround them with smaller, shimmering stars to create a celestial narrative.
- Use metallic spray paint on cardboard moon cutouts to get a custom finish that matches your specific gold or silver tones.
- Mix different finishes, such as high-shine foil, glitter, and matte paint, to catch light differently as people move through the room.
- Incorporate tiny metallic beads on the hanging lines to represent distant 'star dust' between the larger objects.
Layer deep blue velvet ribbons for hanging the larger moons to add a tactile, luxurious texture to the display.
29. Rustic Wooden Star Ceiling
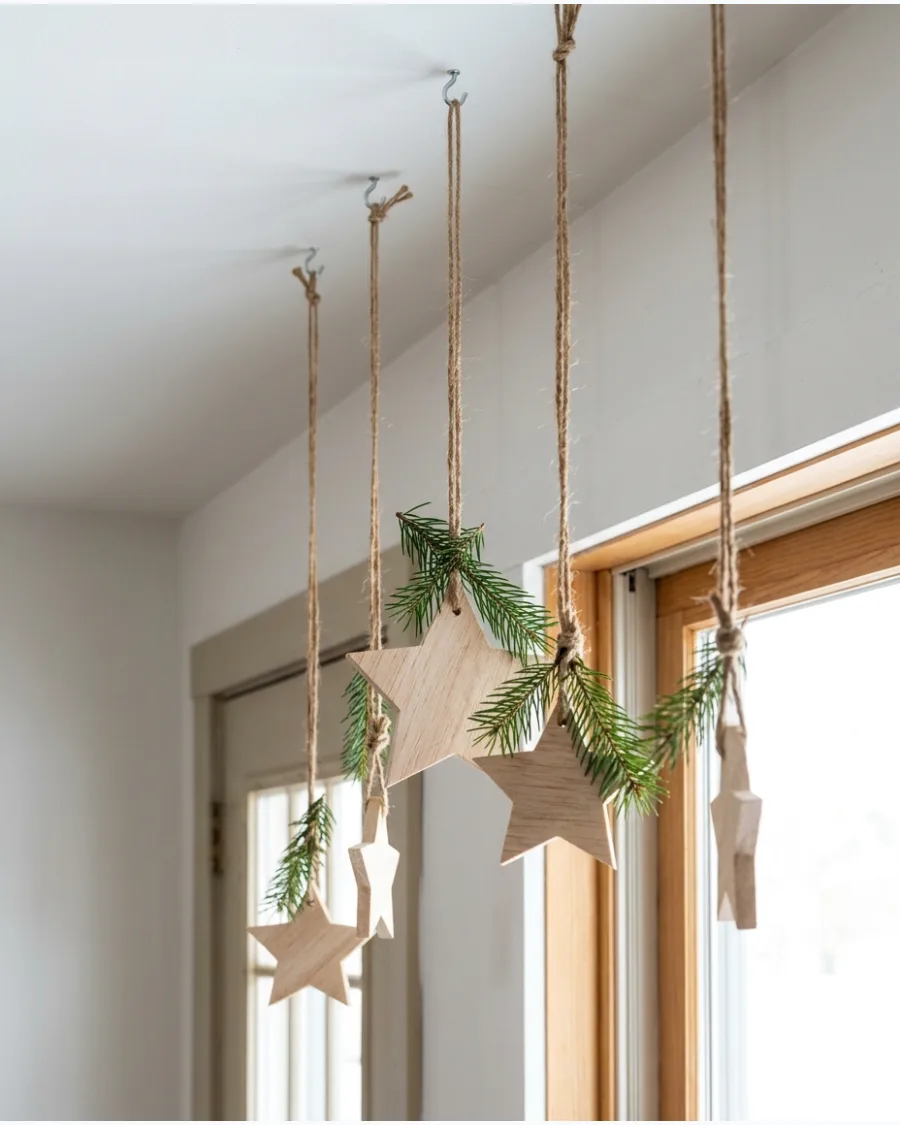
Embrace a natural, farmhouse-inspired look by suspending lightweight wooden stars from exposed beams or flat ceilings. Pairing the hard texture of the wood with soft pine greenery and warm micro-lights softens the overall appearance.
Use natural jute twine or frayed linen ribbons to hang the stars, ensuring the mounting hardware is visible as part of the rustic design.
- Select balsa wood or thin plywood stars to minimize weight and reduce the risk of them falling.
- Wrap thin wire-based pine garlands around the suspension points to hide hooks while adding a fresh evergreen scent.
- Sand the edges of the wooden stars lightly to reveal the natural grain and create a more authentic, handcrafted feel.
Add a few drops of pine or cedar essential oil to the wooden stars to make the decoration double as a natural air freshener.
30. Starry Night Christmas Ceiling
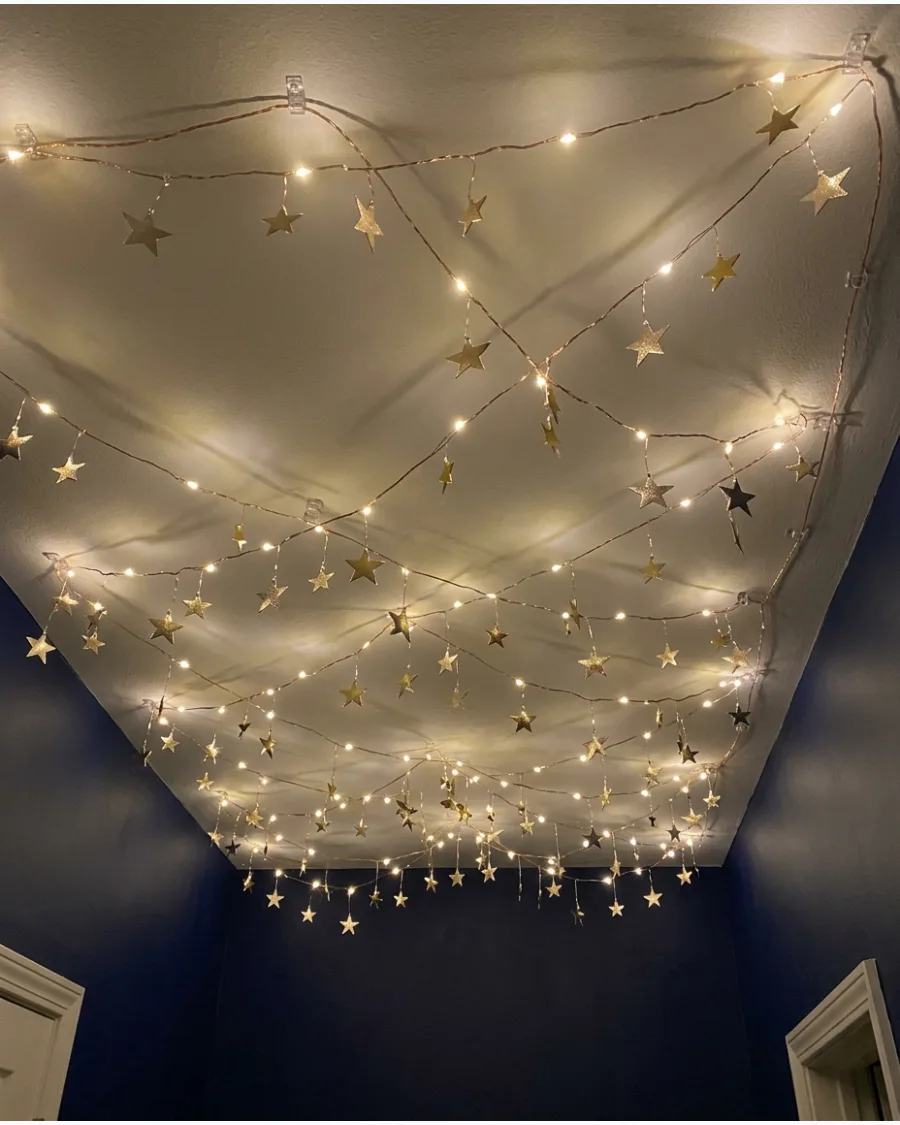
Transform your ceiling into a miniature night sky by draping micro-LED fairy lights in a random, sprawling pattern across the surface. Supplement the lights with tiny metallic stars in gold and champagne to reflect the pinpricks of light.
Secure the light strings in a 'zig-zag' or 'stardust' pattern across the ceiling using clear clips to cover the area evenly without sagging.
- Use 'extra-warm' white LEDs (2700K or lower) to mimic the soft, distant glow of real stars.
- Mix sizes of stars, placing the smallest ones closest to the lights to create a shimmering depth of field.
- Consider using a dark blue or black temporary paper backdrop on the ceiling to make the lights and stars pop dramatically.
Use copper-wire fairy lights because the wire is thin enough to disappear against the ceiling while holding its shape better than traditional plastic cords.
GREENERY AND GARLAND CHRISTMAS CEILING DECORATIONS
31. Evergreen Garland Draped Across the Ceiling
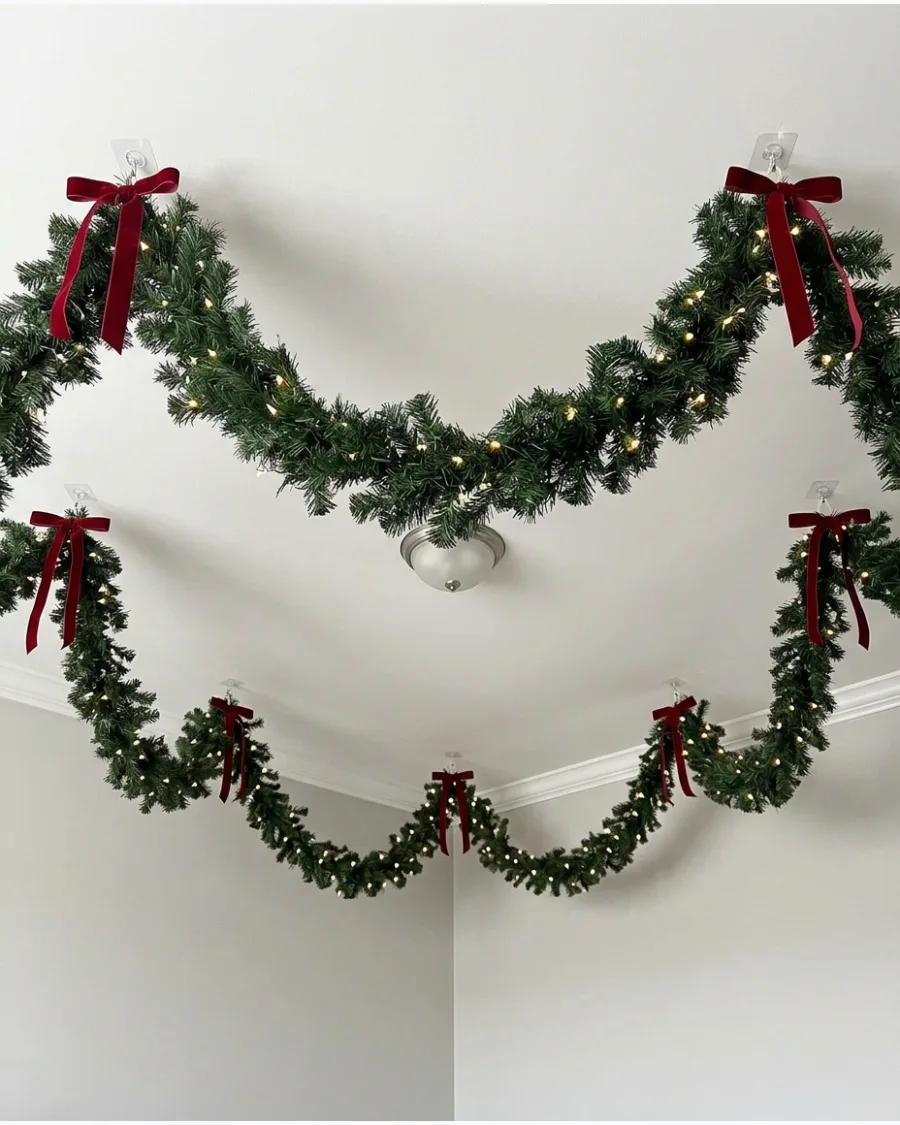
Draping lightweight faux greenery overhead brings a lush, woodland atmosphere to a room without occupying floor space. Secure the garland at multiple anchor points across the ceiling to create deep, graceful swags rather than a single tight line. This immersive look works particularly well in living rooms where the greenery can frame the seating area.
- Use clear adhesive hooks for a renter-friendly installation that leaves no holes
- Weave battery-operated LED fairy lights through the needles for a soft overhead glow
- Finish each anchor point with a velvet ribbon bow to hide the attachment hardware
Use thin floral wire to bundle multiple thin garlands together for a fuller look without adding excessive weight to the hooks.
32. Christmas Greenery Ceiling Canopy
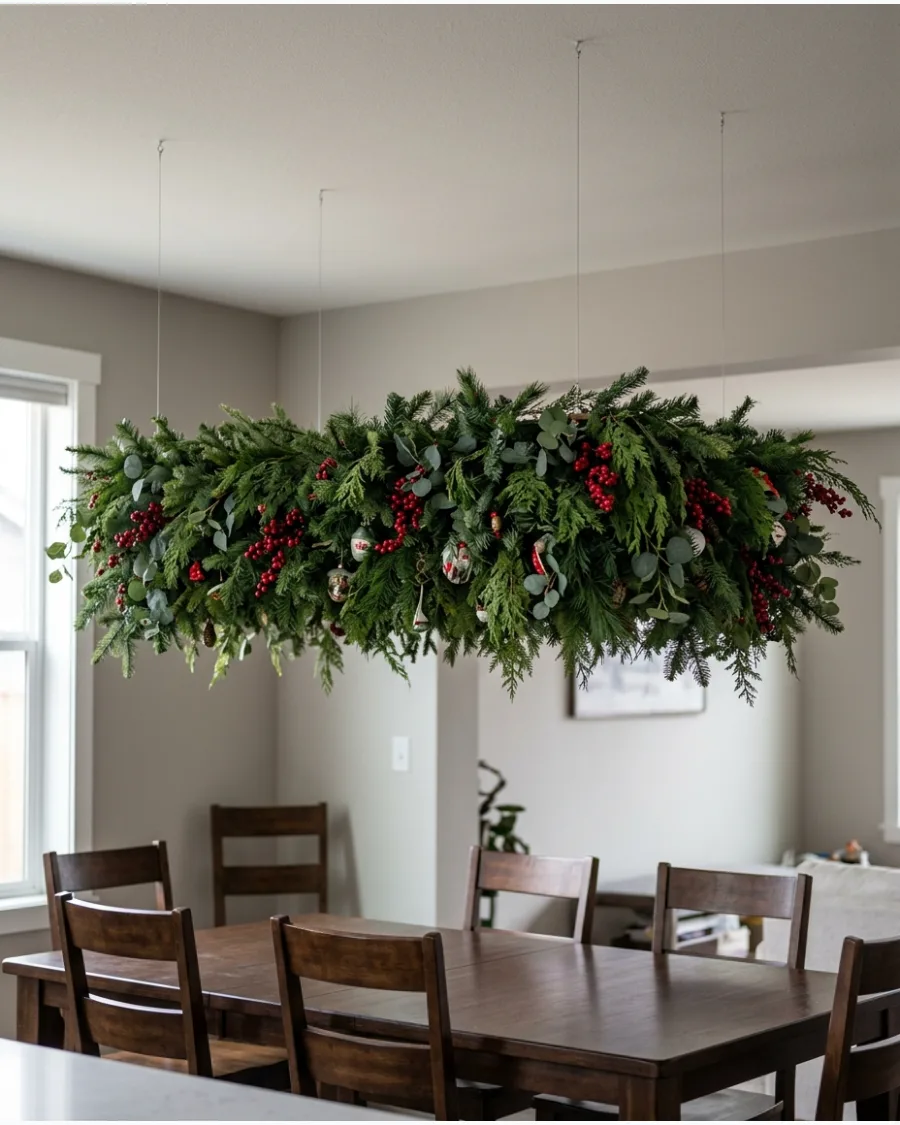
A greenery canopy creates an intimate, framed experience specifically for dining or seating zones. Arrange a mix of faux pine, cedar, and eucalyptus branches horizontally to form a textured rectangular 'roof' that floats above the table. Integrating red berries and small ornaments adds layers of color and visual interest to the dense foliage.
- Layer different needle textures like wispy cedar and stiff pine for a realistic depth
- Incorporate frosted eucalyptus sprigs to provide a cool-toned wintry contrast
- Suspend the canopy slightly lower than the main ceiling to define the dining zone
Ensure the canopy is mounted at least 30 inches above the tabletop to maintain clear sightlines for guests and prevent interference with table decor.
33. Hanging Christmas Greenery Chandelier
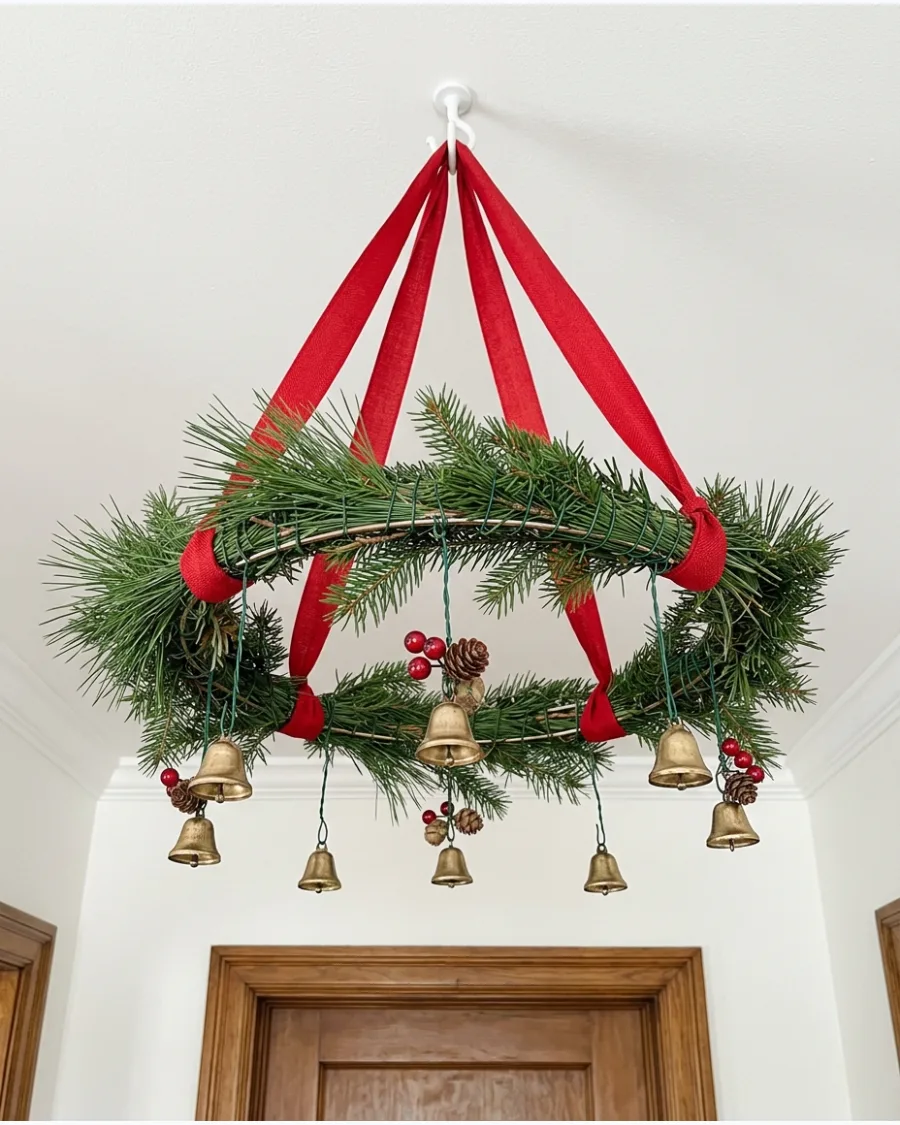
A greenery chandelier serves as a festive focal point that can be customized with various hanging trinkets. Bind mixed evergreen stems to a lightweight metal or wooden hoop using green floral wire before suspending the assembly with decorative wide ribbons. The addition of small brass bells or glass ornaments hanging beneath the hoop adds movement and a touch of classic Christmas charm.
- Use a hula hoop or heavy-gauge wire as a rigid, lightweight base frame
- Attach ornaments at varying lengths using fishing line for a tiered visual effect
- Conceal the main hanging hardware with satin or velvet ribbons that match your room's decor
If hanging this above an existing light fixture, keep all greenery and ornaments at least 6 inches away from bulbs to avoid heat issues.
34. Christmas Wreath Hanging From the Ceiling
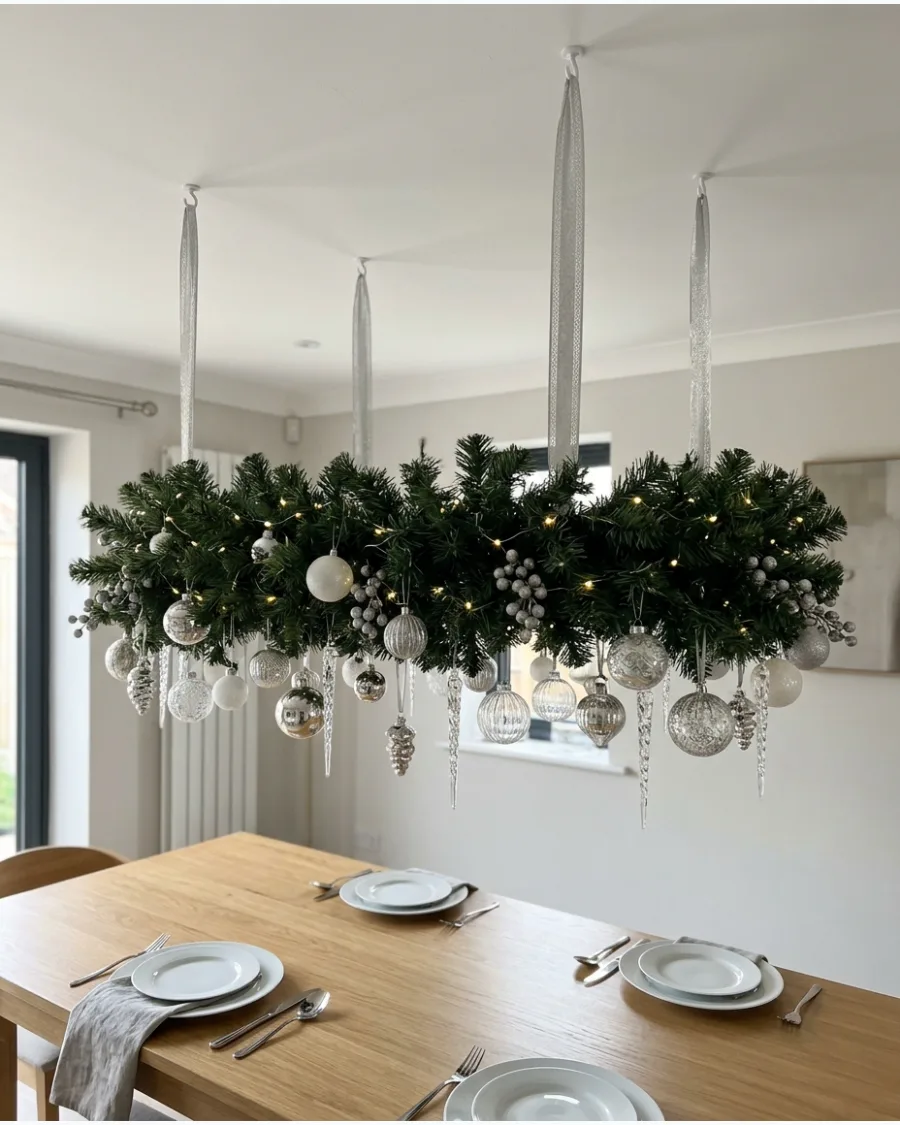
Standard wreaths provide a fresh perspective when mounted horizontally to the ceiling. Select a large, sturdy wreath and attach three or four equal lengths of ribbon to the internal frame to ensure it hangs level over a dining table or entryway. Because the underside is the primary view, concentrate your ornaments, icicles, and lights on the bottom surface of the greenery.
- Use transparent fishing line if you want the wreath to appear as if it is floating
- Choose a wreath with a rigid wire frame to prevent it from sagging or losing its shape
- Integrate a battery-powered light string within the needles to avoid visible trailing power cords
Distribute ornaments evenly around the circumference of the wreath to maintain its balance and prevent it from tilting to one side.
35. Double Christmas Wreath Ceiling Installation
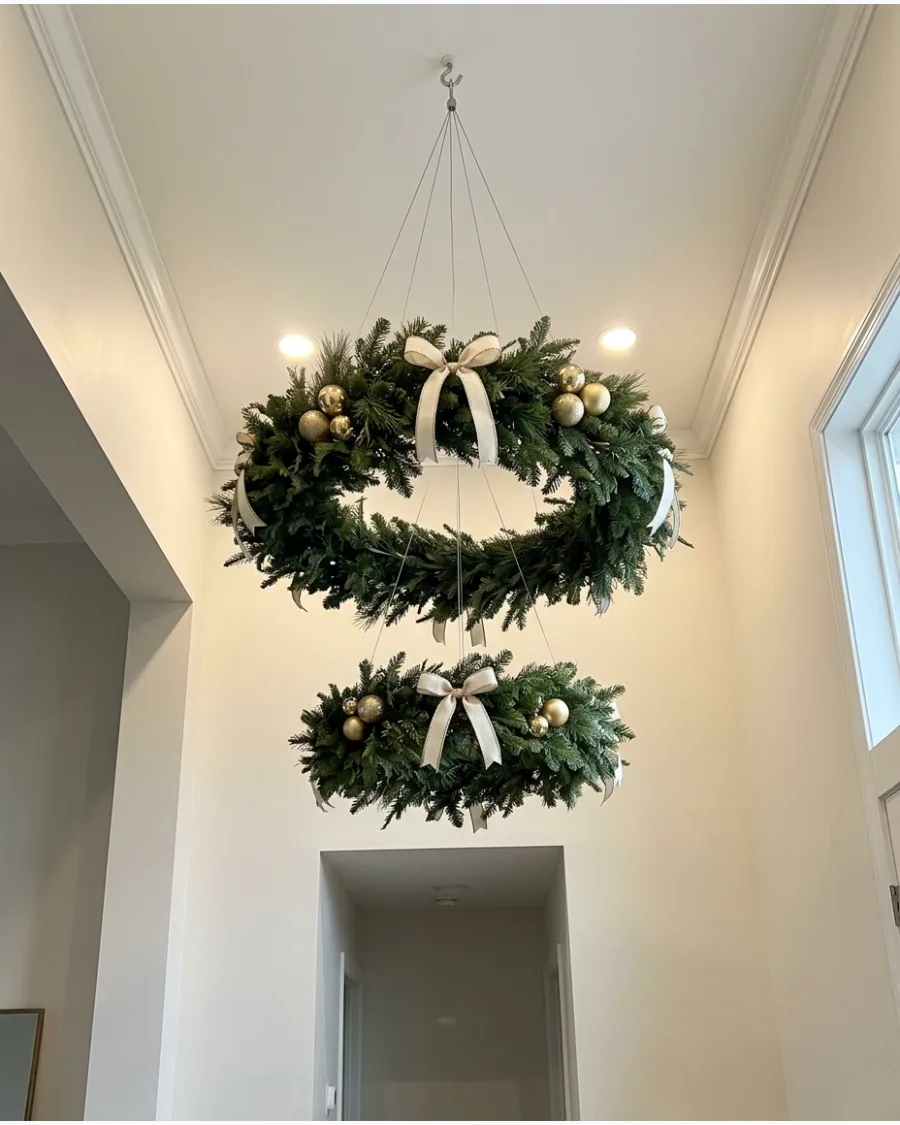
Layering two horizontal wreaths at different heights creates a sophisticated, tiered installation. Hang one large wreath slightly higher than a smaller matching wreath to create a tiered, chandelier-like effect that adds vertical depth to the room. This coordinated feature works exceptionally well in foyers or rooms with high ceilings where a single wreath might look undersized.
- Use the same ribbon color for both wreaths to unify the layered design
- Position the smaller wreath directly in the center of the larger one's footprint
- Coordinate the ornament styles on both levels to create one cohesive overhead focal point
Check that your ceiling anchor or hook is rated for the combined weight of both wreaths before completing the installation.
36. Greenery and Burgundy Ribbon Ceiling
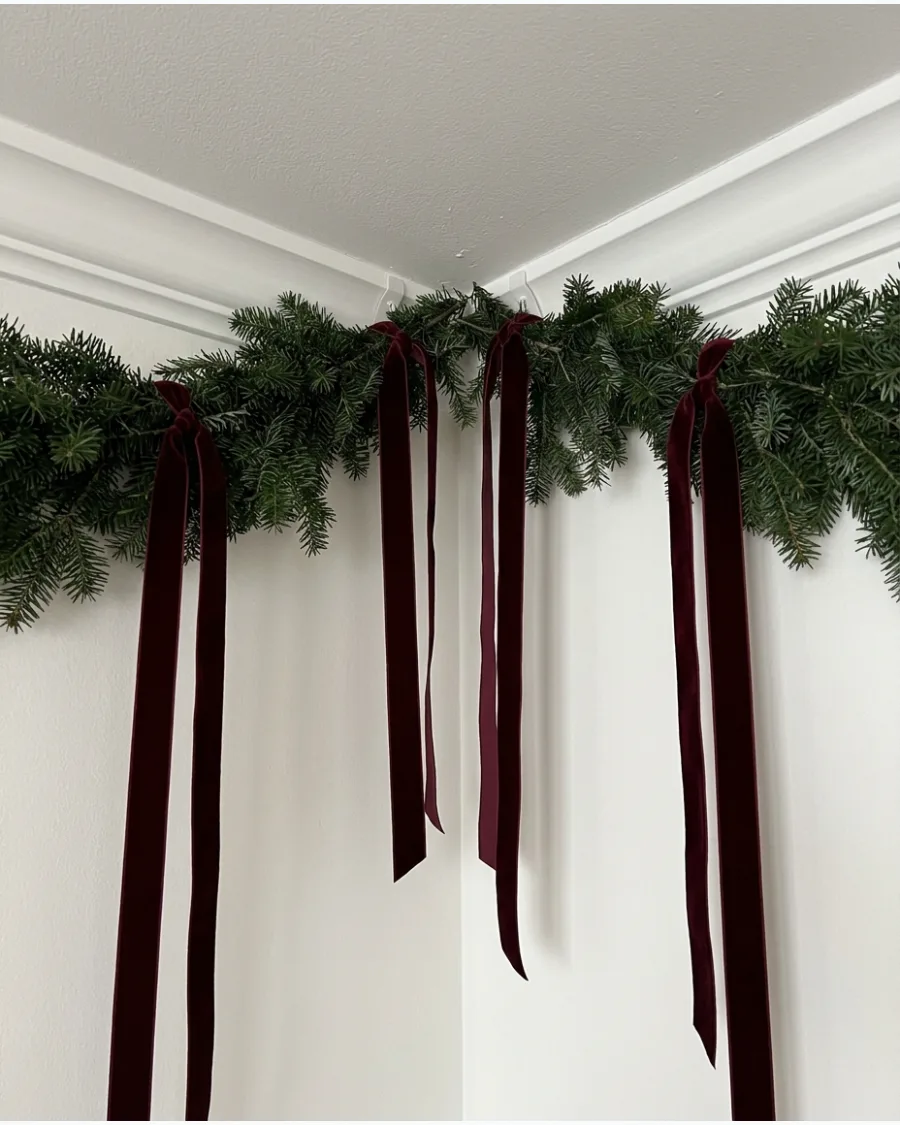
Elevate a standard evergreen garland by integrating long, flowing burgundy velvet ribbons for a sophisticated contrast. This approach works well for moody, elegant holiday themes that move away from bright primary colors.
Secure the garland to the ceiling using heavy-duty adhesive hooks or staples along the joists, then tie the ribbons so they trail down at varying lengths. The velvet texture absorbs light beautifully, adding depth to the greenery.
- Use wire to pinch the ribbon into crisp bows at the attachment points.
- Opt for double-sided velvet to ensure the rich color shows from every angle.
- Space the ribbons at irregular intervals for a more natural, organic flow.
Steam the ribbons before hanging to remove creases from storage, ensuring they hang perfectly straight.
37. Greenery and Brass Bell Ceiling Decor
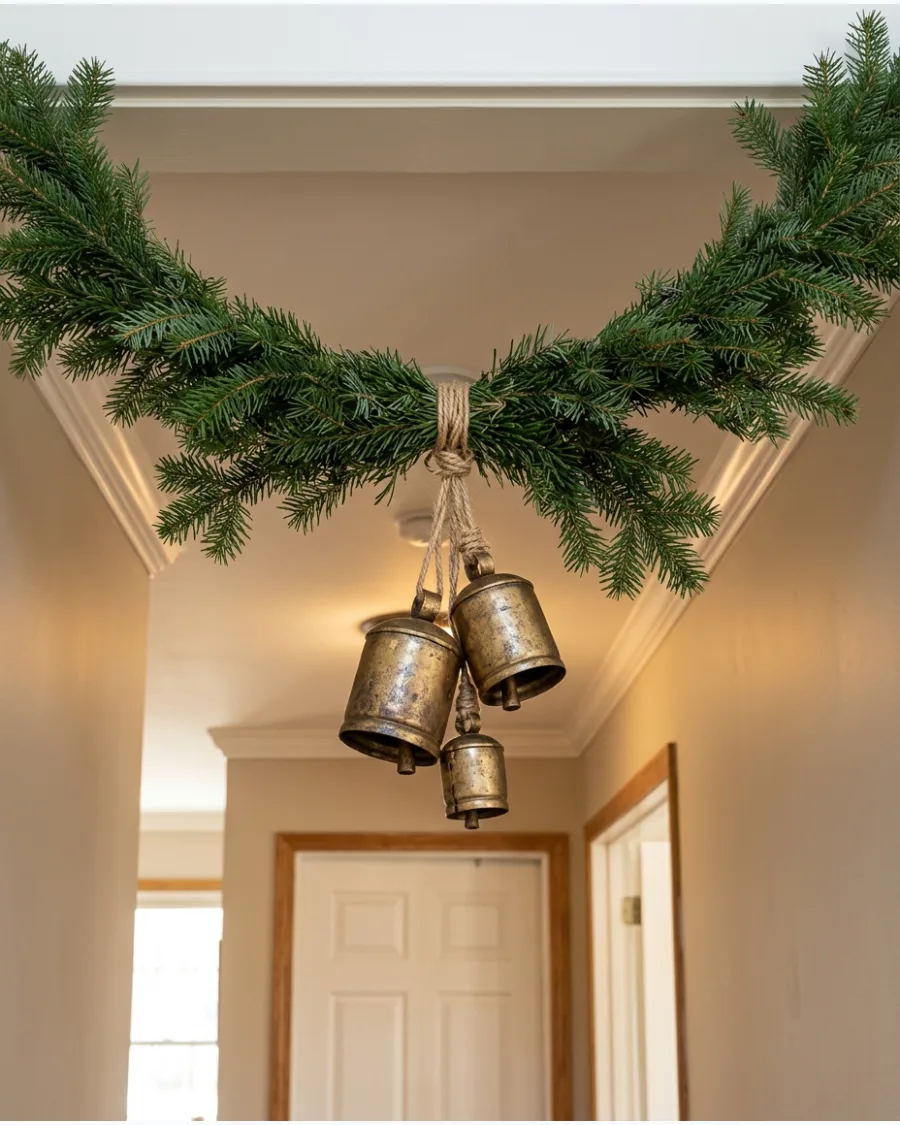
Metallic accents bring a sense of history and warmth to traditional evergreen decorations. Clusters of antique-style brass bells add a rhythmic visual element and a subtle jingling sound when air moves through the room.
Concentrate the bell clusters at the lowest points of the garland swoops to create visual weight and a clear focal point. The muted gold of the brass pairs perfectly with the deep greens of fir or spruce.
- Use varying bell sizes within each cluster for a vintage appearance.
- Attach bells with thin floral wire hidden behind the greenery needles.
- Mix matte and polished brass finishes to add extra dimension.
If using real metal bells, ensure your ceiling hooks are rated for the cumulative weight of the greenery and the metal.
38. Mistletoe Ceiling Installation
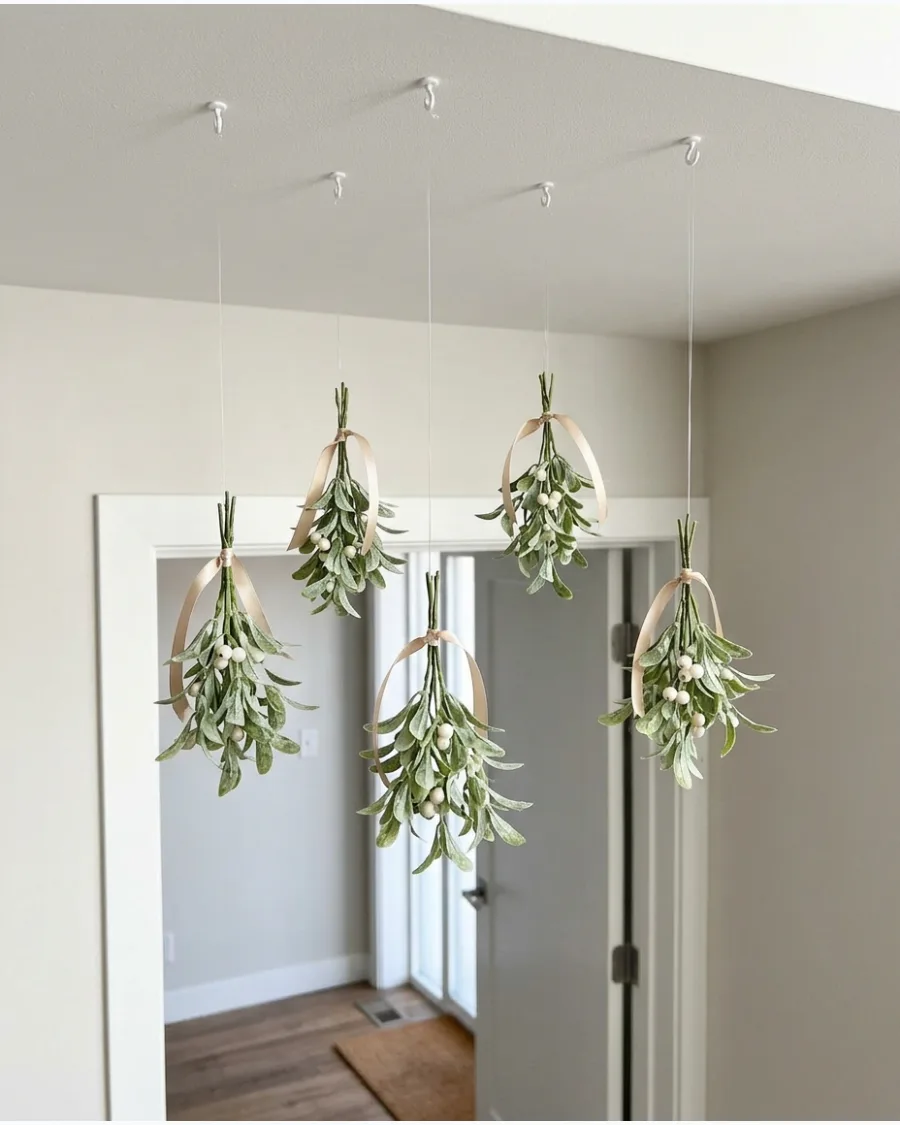
Mistletoe is a classic holiday staple that often feels lost when used as a single small bunch. By creating an installation of several small clusters suspended at different heights, you can transform a simple doorway or dining area into a romantic holiday zone.
Tie each mistletoe bundle with a coordinating thin ribbon and hang them from the ceiling using clear monofilament for a floating effect. This distributed look feels more modern and intentional than a single oversized sprig.
- Mix fresh-looking silk mistletoe with real cedar bits for realistic texture.
- Use 1/4-inch velvet or satin ribbon to match your room’s color scheme.
- Focus the installation over a high-traffic threshold or the center of a dining table.
If using fresh mistletoe, mist it lightly with water once a day to keep the white berries from shriveling.
39. Hanging Pine Branch Christmas Ceiling
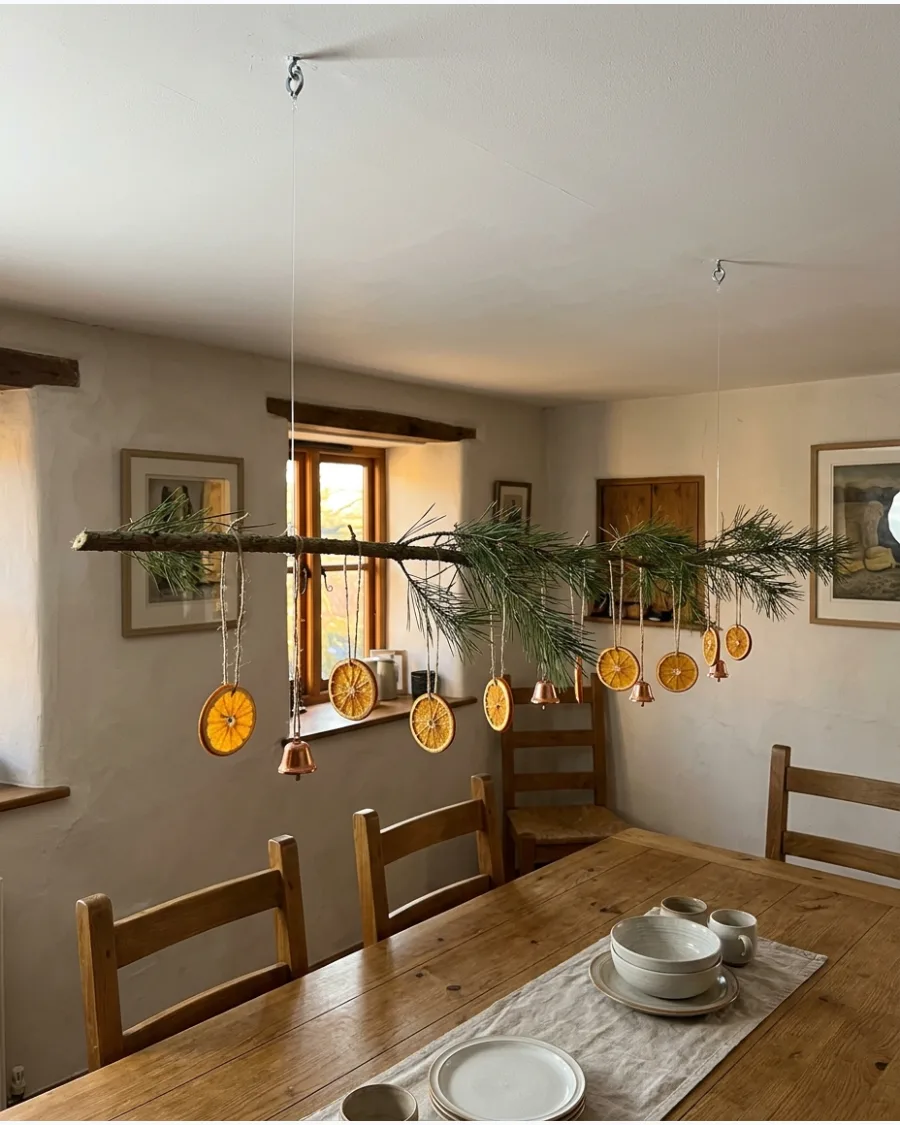
A horizontal branch installation brings a piece of the winter forest directly into your home without needing floor space. This design uses long pine or cedar limbs suspended parallel to the ceiling to serve as a natural rack for ornaments.
Hang the main branch using sturdy eye hooks and high-test fishing line, ensuring it is level and high enough to clear heads. Decorate the branch with lightweight items like dried orange slices or small bells to maintain its balance.
- Strip excess needles from the center of the branch to create more hanging space.
- Use twine or leather cord for a more rustic, visible hanging method.
- Ensure the branch is dry and treated to prevent sap from dripping onto furniture.
Balance the weight by hanging your heaviest ornaments closest to the points where the branch is supported by the ceiling hooks.
40. Woodland Christmas Ceiling
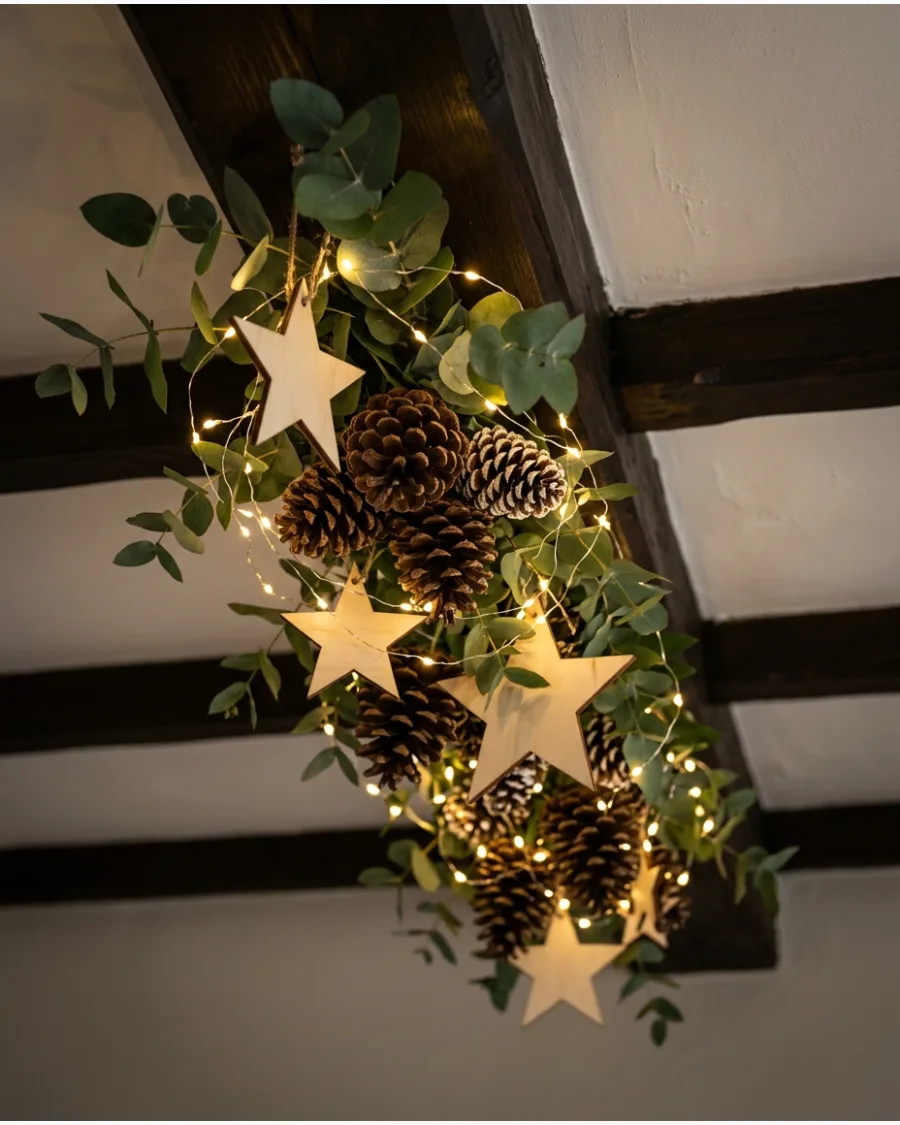
Create a rich, earthy atmosphere by layering different natural materials across the ceiling plane. This woodland theme relies on a mix of textures—rough pinecones, smooth wooden stars, and soft greenery—to feel cozy and established.
Intertwine battery-operated fairy lights with the branches before hanging them to provide a warm, starlit glow from above. The combination of forest green, brown, and cream tones keeps the display grounded and sophisticated.
- Use different species of greenery, like eucalyptus and pine, for varied leaf shapes.
- Add oversized pinecones for structural interest against the delicate stars.
- Secure battery packs within the greenery using zip ties for a clean finish.
Use warm-white LEDs (2700K) to maintain the earthy feel; cool-white lights can make the natural wood look grey and cold.
BOW, RIBBON AND FABRIC CHRISTMAS CEILING DECORATIONS
41. Oversized Velvet Bows Hanging From the Ceiling
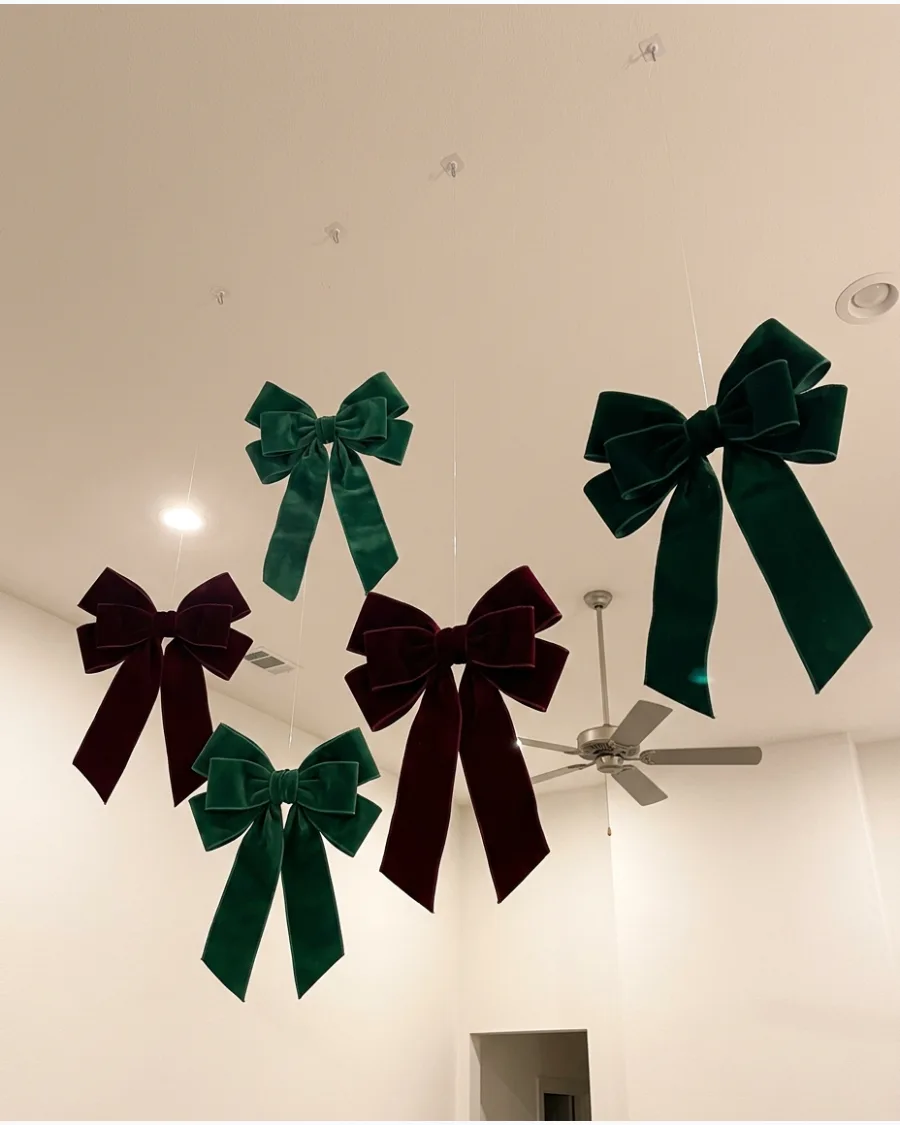
Create a bold focal point by hanging massive velvet bows in rich tones like burgundy or forest green. The heavy texture of velvet adds a sense of luxury and warmth that thinner ribbons cannot achieve.
Use wire-edged ribbon to ensure the oversized loops hold their voluminous shape rather than sagging under their own weight. These dramatic pieces work best when hung at varying heights to fill the vertical space of a high-ceilinged room.
- Select ribbon at least 4 inches wide to maintain the 'oversized' scale against the ceiling
- Attach the bows using heavy-duty clear monofilament to create a floating appearance
- Incorporate deep chocolate brown or dark green for a modern 2026-inspired color palette
Steam the ribbon tails after hanging to remove any fold lines or creases from storage for a professional finish.
42. Red Bow Christmas Ceiling
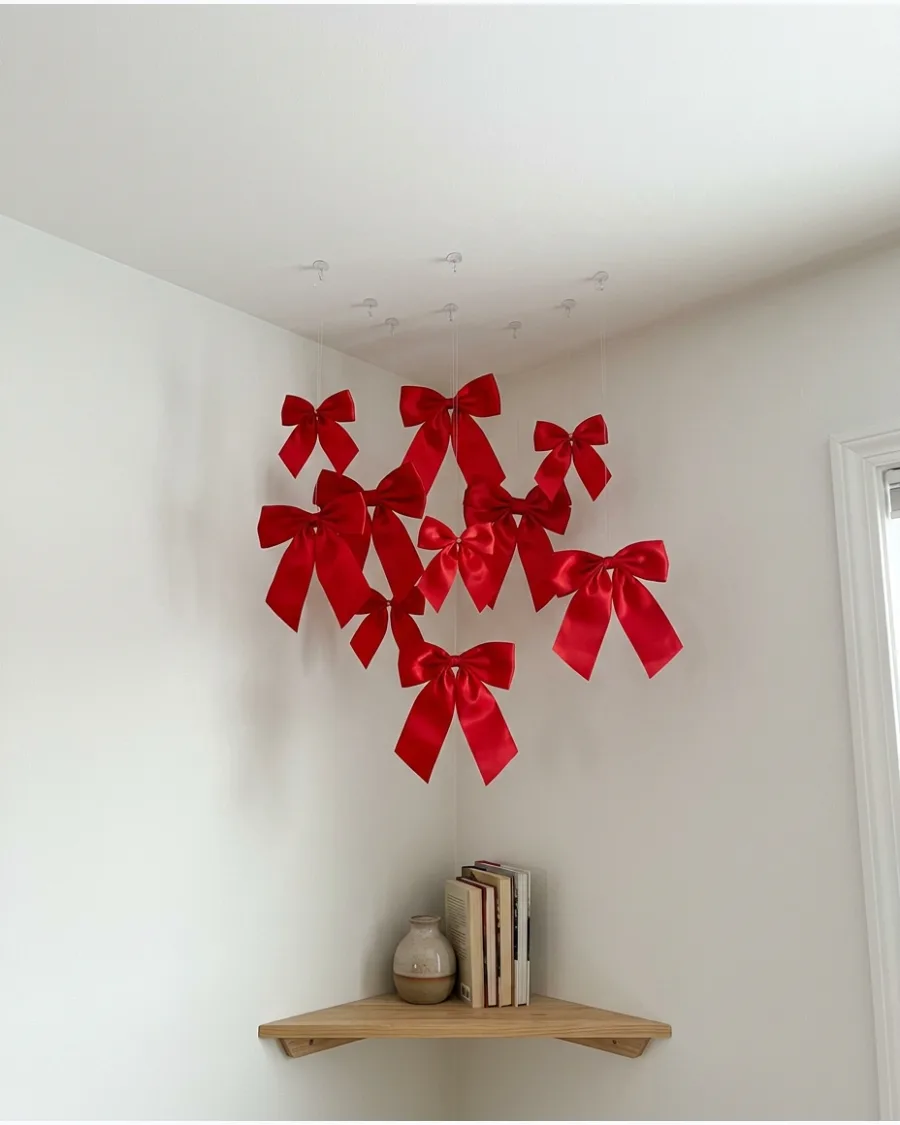
A classic red bow display provides a timeless holiday atmosphere that works in almost any interior style. By mixing various sizes of bows, you create a sense of depth and dimension that keeps the ceiling from looking flat.
Group the bows in a specific section of the room, such as over a coffee table or in a corner, to define a cozy holiday zone. Clear adhesive hooks allow for easy removal without damaging your ceiling paint once the season ends.
- Combine 12-inch wide bows with 6-inch accent bows for visual variety
- Use classic red satin or grosgrain for a traditional, bright holiday look
- Concentrate the arrangement in one area to avoid overwhelming the entire room
Measure the distance from the floor to ensure the lowest bow tail sits at least 7 feet high to prevent guests from walking into them.
43. Burgundy Velvet Bow Ceiling
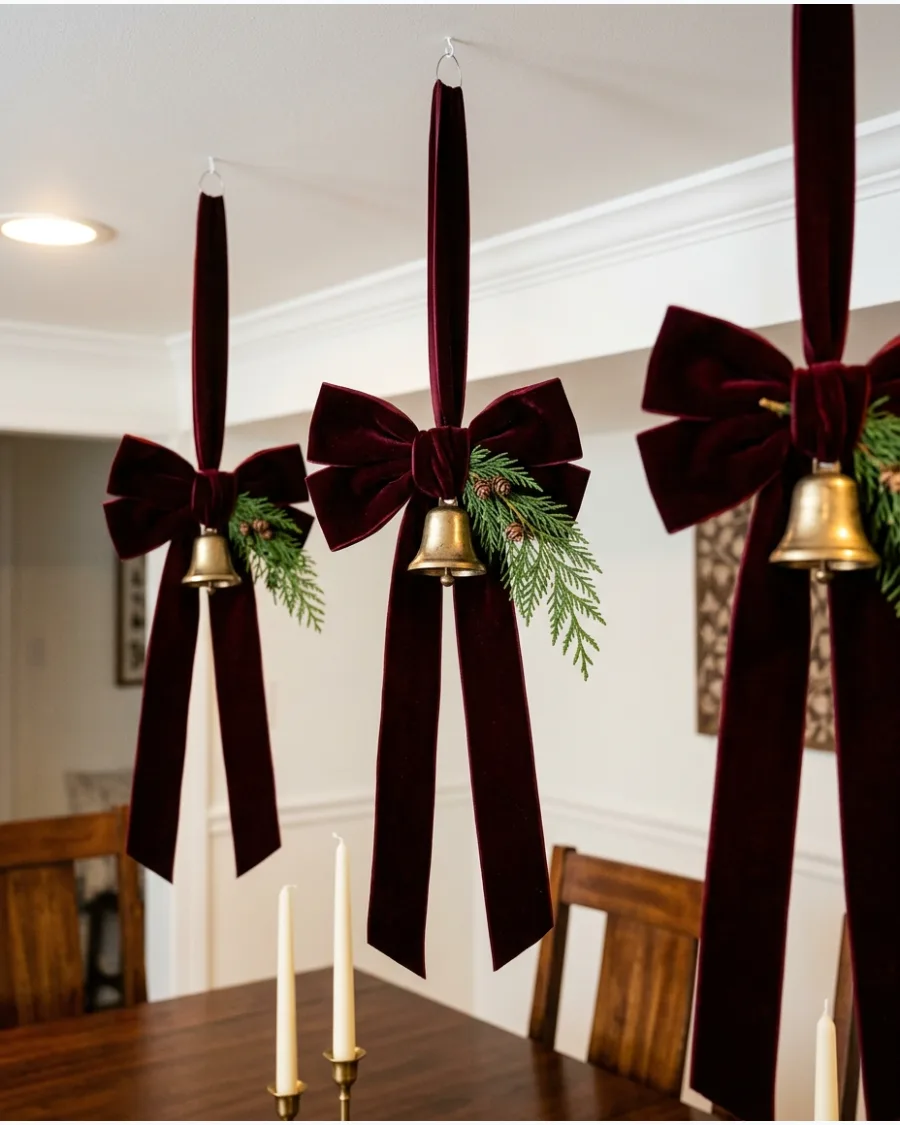
Elevate your ceiling decor by using burgundy velvet bows paired with long, elegant ribbon tails that draw the eye upward. This sophisticated palette works beautifully when accented with organic elements like evergreen sprigs or small metallic details.
Secure a small brass bell to the center of each bow to add a vintage aesthetic and a gentle sound whenever there is a breeze. The combination of deep red and brass creates a high-end, traditional feel that is perfect for formal dining rooms.
- Cut the ribbon tails at a sharp angle or 'V' shape to prevent fraying and add detail
- Incorporate sprigs of cedar or pine at the knot of the bow for a natural contrast
- Choose bells with a matte or antiqued finish to complement the velvet texture
Apply a small drop of clear nail polish or fabric glue to the cut ends of the ribbon tails to stop them from unravelling over time.
44. Gingham Bow Christmas Ceiling
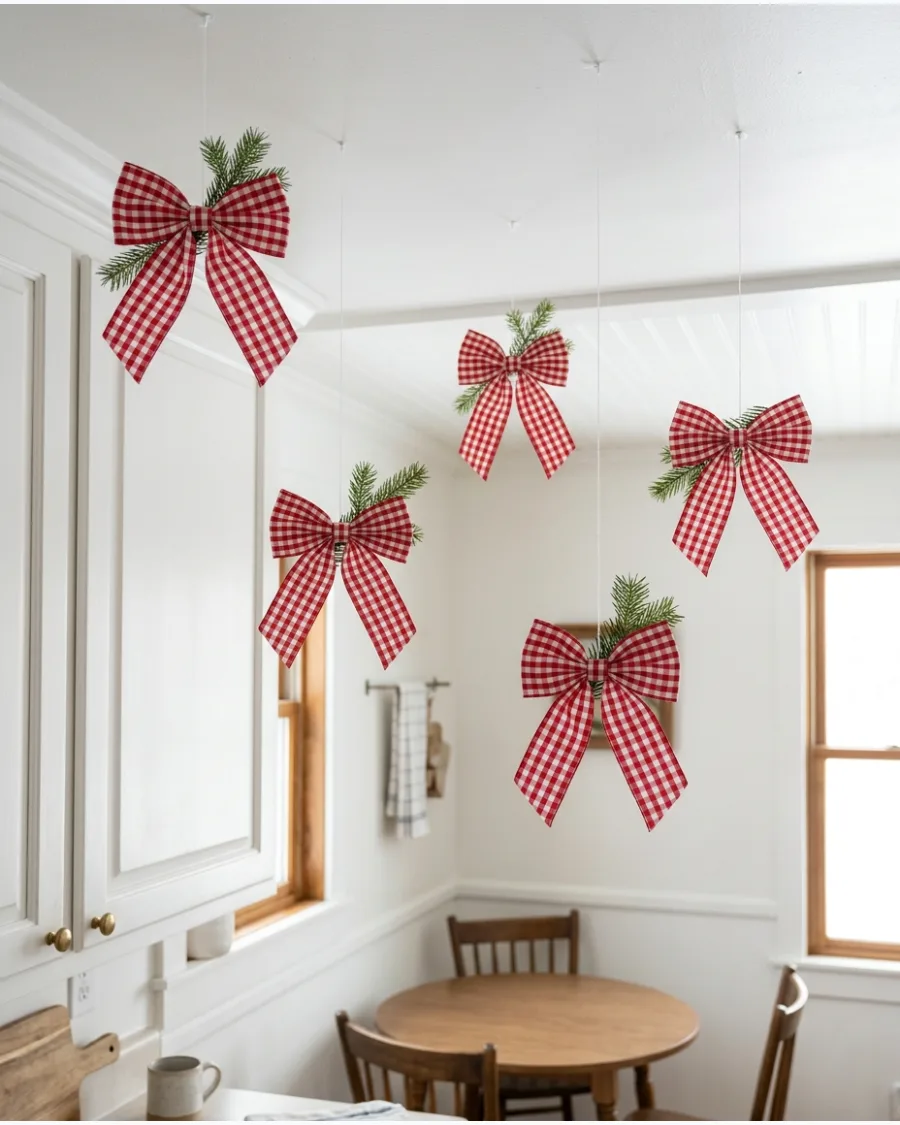
Gingham bows offer a playful, nostalgic touch that is ideal for farmhouse or cottage-style holiday decor. The checkered pattern provides a graphic element that stands out clearly against a plain ceiling.
Tuck small pieces of fresh or faux greenery into the back of the bow loops to ground the pattern in a natural setting. This approach keeps the display light and whimsical while maintaining a cohesive Christmas theme through the use of traditional red and green.
- Use red and white gingham for a classic look, or green and white for a more subtle finish
- Hang the bows at different levels to create a 'falling' effect across the ceiling
- Keep the greenery simple—single pine needles or eucalyptus leaves work best
If using fabric ribbon without wire, spray the finished bows with heavy starch to help them keep their shape while hanging.
45. Plaid Ribbon Ceiling Swags
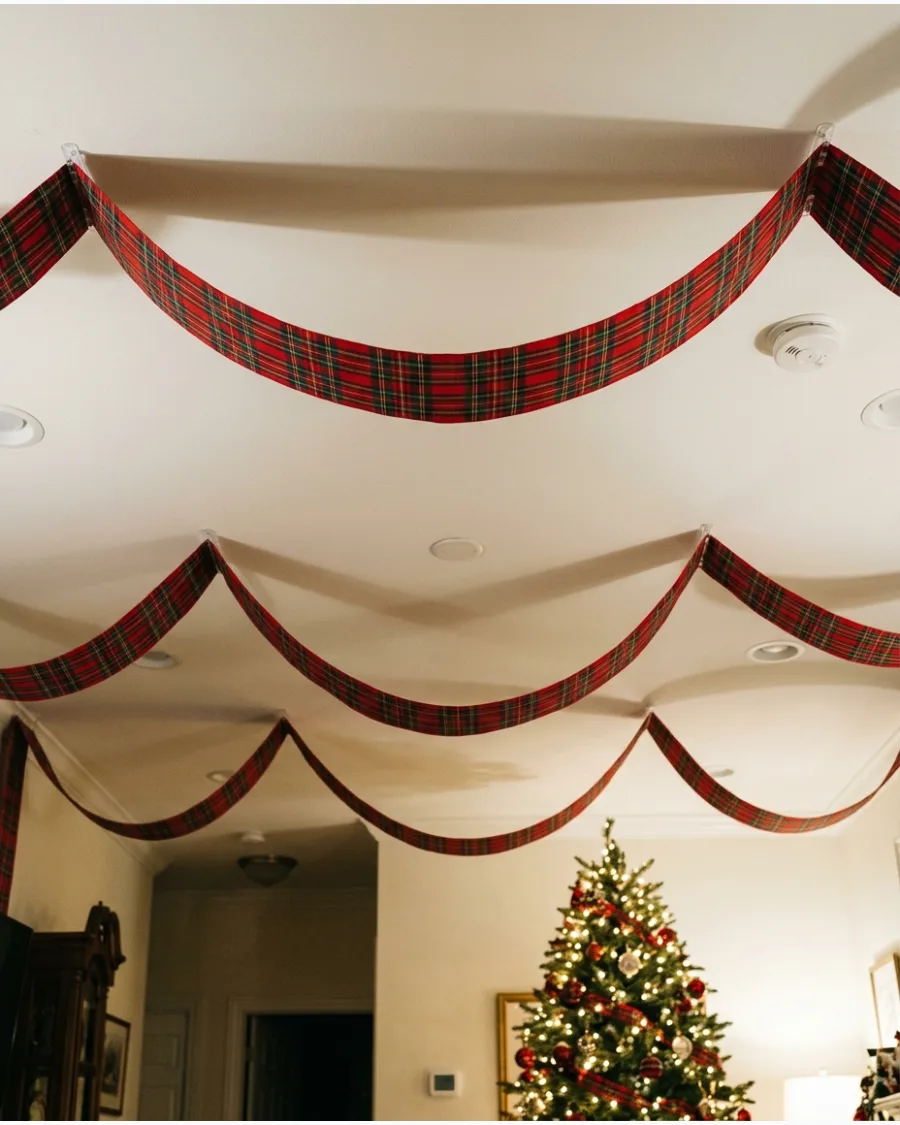
For a traditional and cozy atmosphere, drape long lengths of tartan or plaid ribbon across the ceiling in graceful swags. This method creates a canopy-like effect that makes large rooms feel more intimate and festive.
Coordinate the specific plaid pattern with your Christmas tree ornaments or stockings to unify the entire room's design. By using swags instead of individual bows, you can cover a larger surface area with less hardware and assembly time.
- Allow the ribbon to dip naturally between anchor points for a relaxed, high-end look
- Use high-quality tartan ribbon with a substantial weight to ensure the swags hang evenly
- Anchor the ribbon every 3 to 4 feet using clear clips or small decorative hooks
Avoid pulling the ribbon tight; the beauty of this decoration lies in the soft, curved drape of the fabric.
46. Ribbon Cascade From the Ceiling
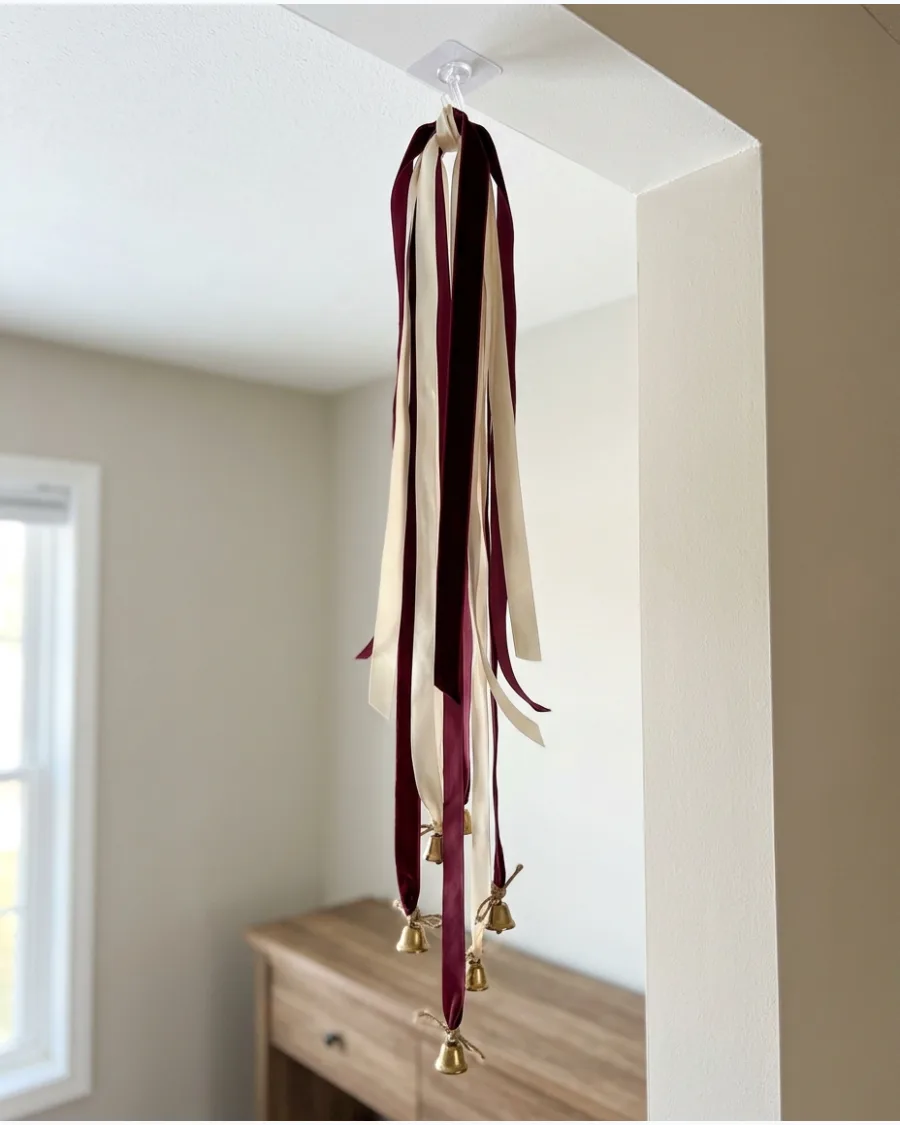
This vertical decoration creates a striking visual impact by gathering long strands of fabric at a single high point. Using a mix of velvet and satin ribbons adds texture, while varying the lengths ensures the cascade feels organic rather than stiff.
Secure the ribbon cluster at a central focal point, such as above a side table or in a corner, using a clear adhesive hook to ensure the fabric hangs vertically without obstructing foot traffic. To finish the look, tie lightweight trinkets like brass bells or wooden stars to the ends of the longest ribbons.
- Use ribbons in widths of 1 to 2 inches for the best visual weight.
- Weight the bottom of lighter ribbons with small ornaments to keep them straight.
- Incorporate at least three different lengths to create a tiered, fountain-like effect.
Angle the ends of the ribbons with a 'V' cut to prevent fraying and give the installation a professional, tailored finish.
LIGHTED AND IMMERSIVE CHRISTMAS CEILING DECORATIONS
47. Warm Fairy Light Christmas Ceiling Canopy
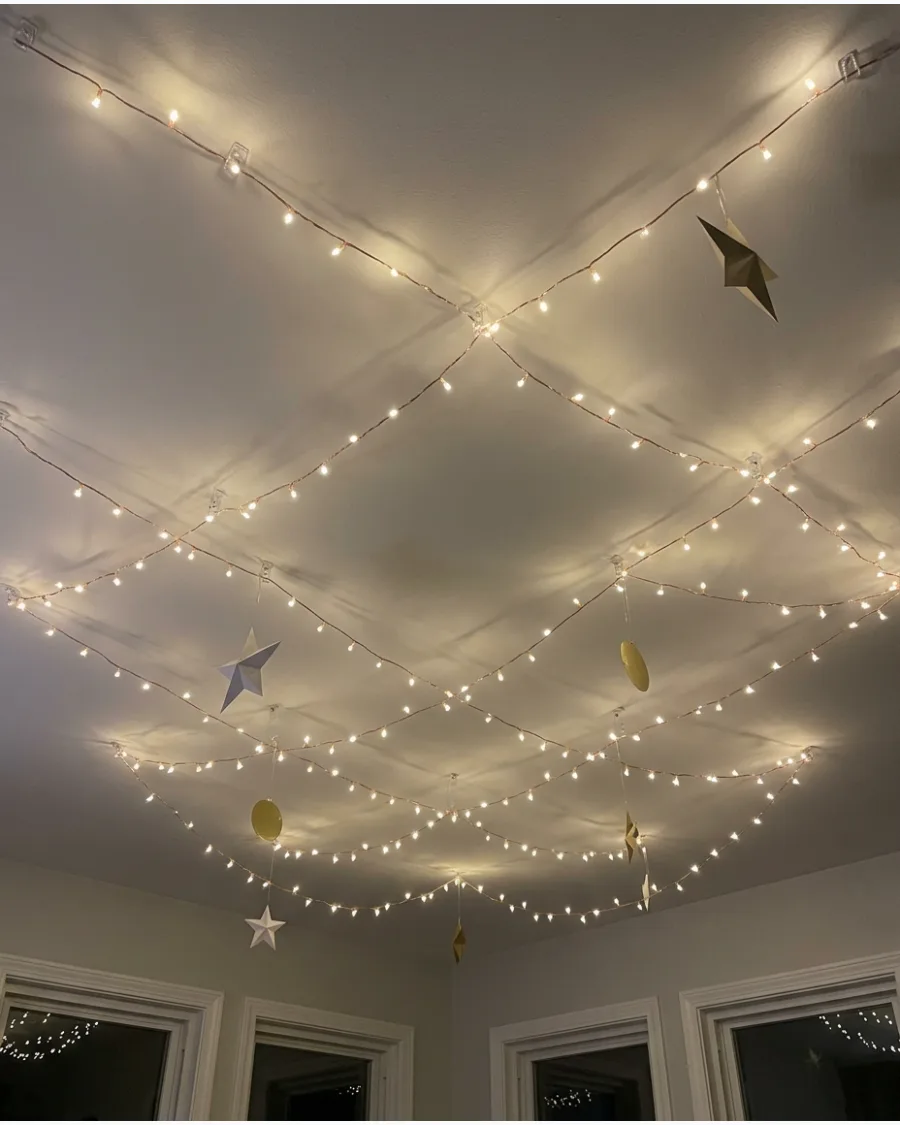
A light canopy transforms a room into a cozy, immersive space by distributing a soft glow overhead. By allowing the strands to dip slightly, you avoid the harsh lines of a tight grid and create a more romantic, starlit atmosphere.
Map out a grid pattern using small, transparent command clips to guide the light strands across the room, allowing for a gentle sag in the wire to create a relaxed, draped effect. Adding a few scattered stars or flat ornaments between the lights breaks up the repetition of the bulbs.
- Space the parallel strands roughly 18 inches apart for even coverage.
- Choose 'warm white' LEDs to ensure the room feels cozy rather than clinical.
- Use ultra-thin copper wire lights for a nearly invisible support structure.
Plug the lights into a smart outlet or a dimmer switch so you can adjust the brightness to suit different times of the evening.
48. Christmas Light Tunnel Ceiling
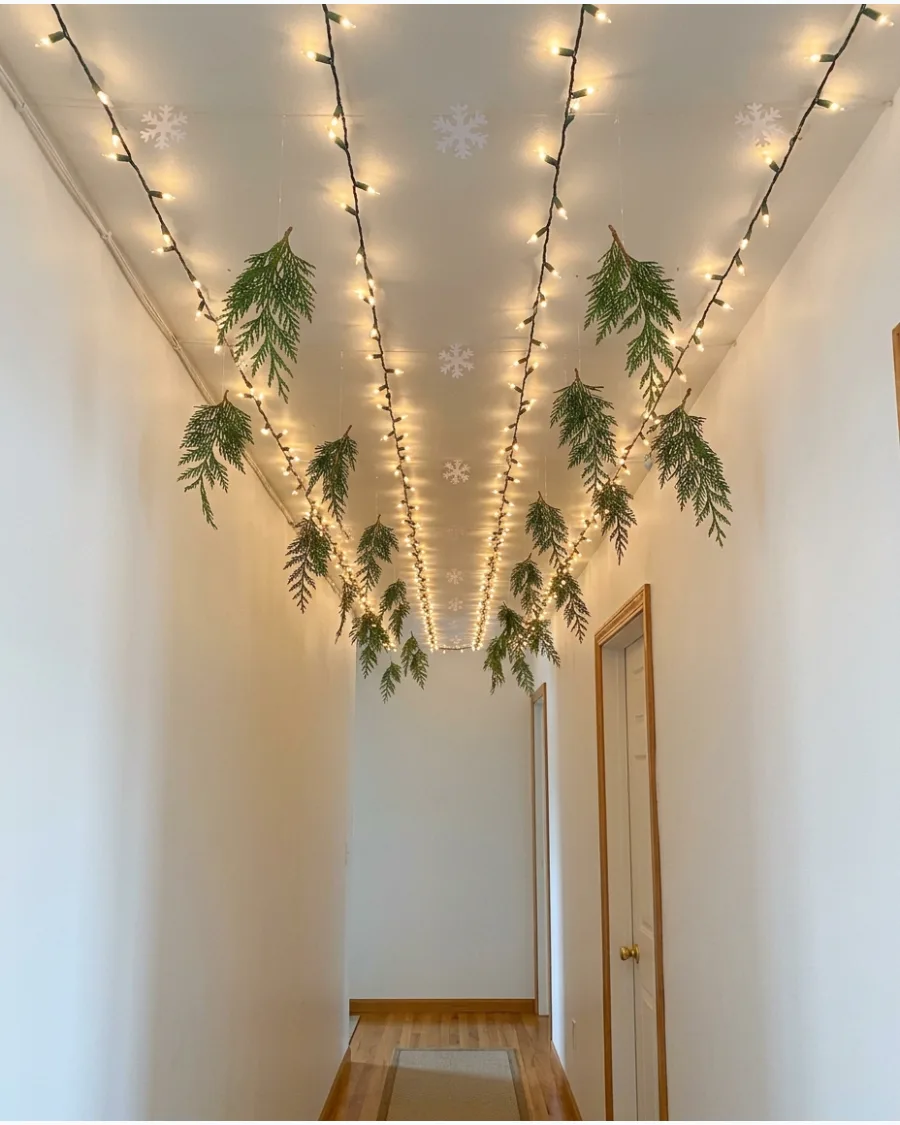
Turning a hallway into a light tunnel creates a magical transition between rooms that delights guests as they move through the home. This setup works best with parallel lines that follow the architectural length of the space, emphasizing its shape.
Run parallel rows of warm white string lights down the length of your hallway ceiling, spacing them roughly 12 inches apart to simulate a continuous tunnel of light. Intersperse flat paper snowflakes or sprigs of faux greenery between the rows to add texture and depth to the overhead view.
- Ensure the lights are high enough to clear the tallest person in the household.
- Use battery-powered strands if no ceiling-height outlet is available near the door.
- Match the wire color to your ceiling color (white on white) to hide the hardware.
Start your installation from the power source and work outward to ensure you don't end up with an unreachable plug at the end.
49. Christmas Ceiling With Hanging Lighted Stars
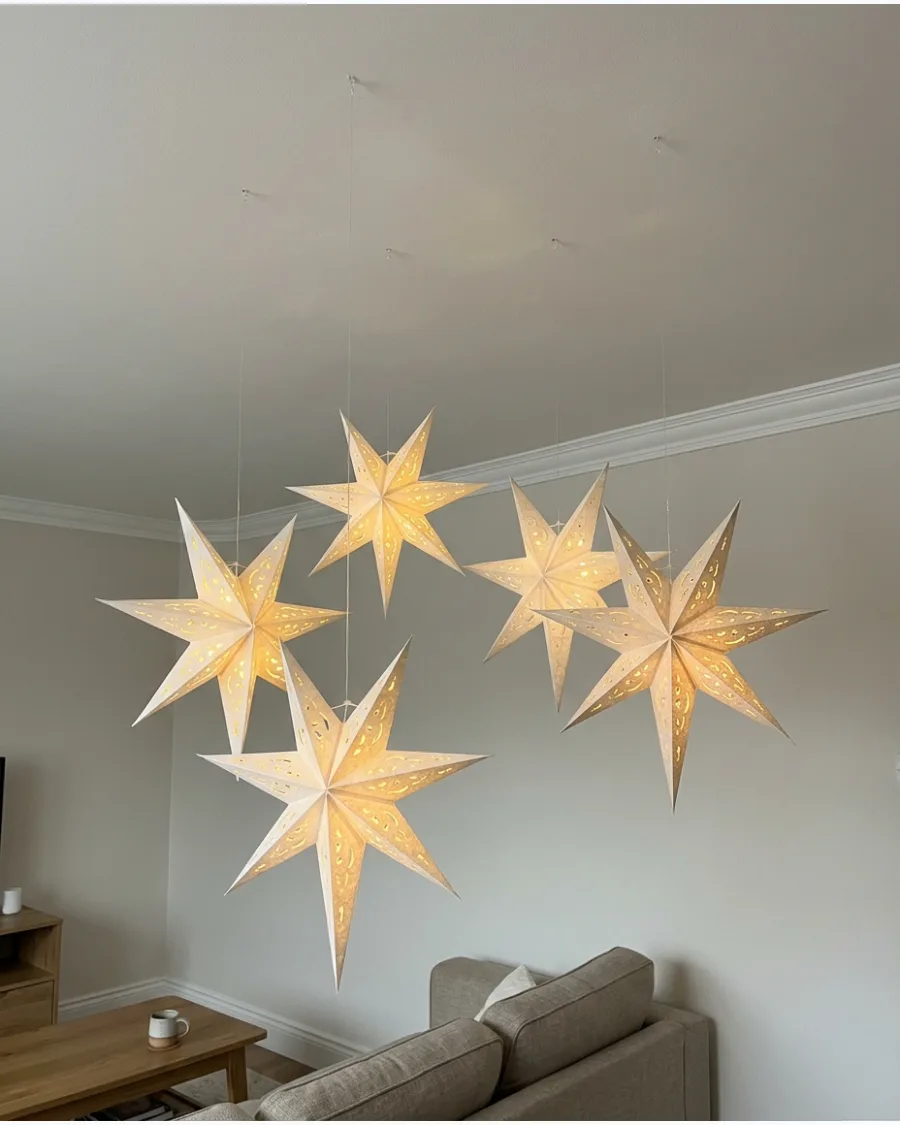
Hanging illuminated stars provides a focal point that feels both celestial and festive without the need for complex draping. By suspending them at different heights, you create a sense of three-dimensional space that makes the ceiling feel higher.
Use vary-length clear fishing line to hang battery-operated paper star lanterns from the ceiling, ensuring the battery packs are tucked neatly inside the star frames for a wireless look. Keeping the rest of the room’s decor minimal allows these glowing shapes to dominate the visual landscape.
- Mix 12-inch and 18-inch stars for a more dynamic, staggered arrangement.
- Use cool-burning LED bulbs inside the paper lanterns to prevent heat buildup.
- Concentrate a larger cluster of stars over a seating area for a cozy 'nook' feel.
Use remote-controlled LED puck lights inside the stars so you can turn the entire display on and off with one click.
50. Christmas Dining Room Ceiling Installation
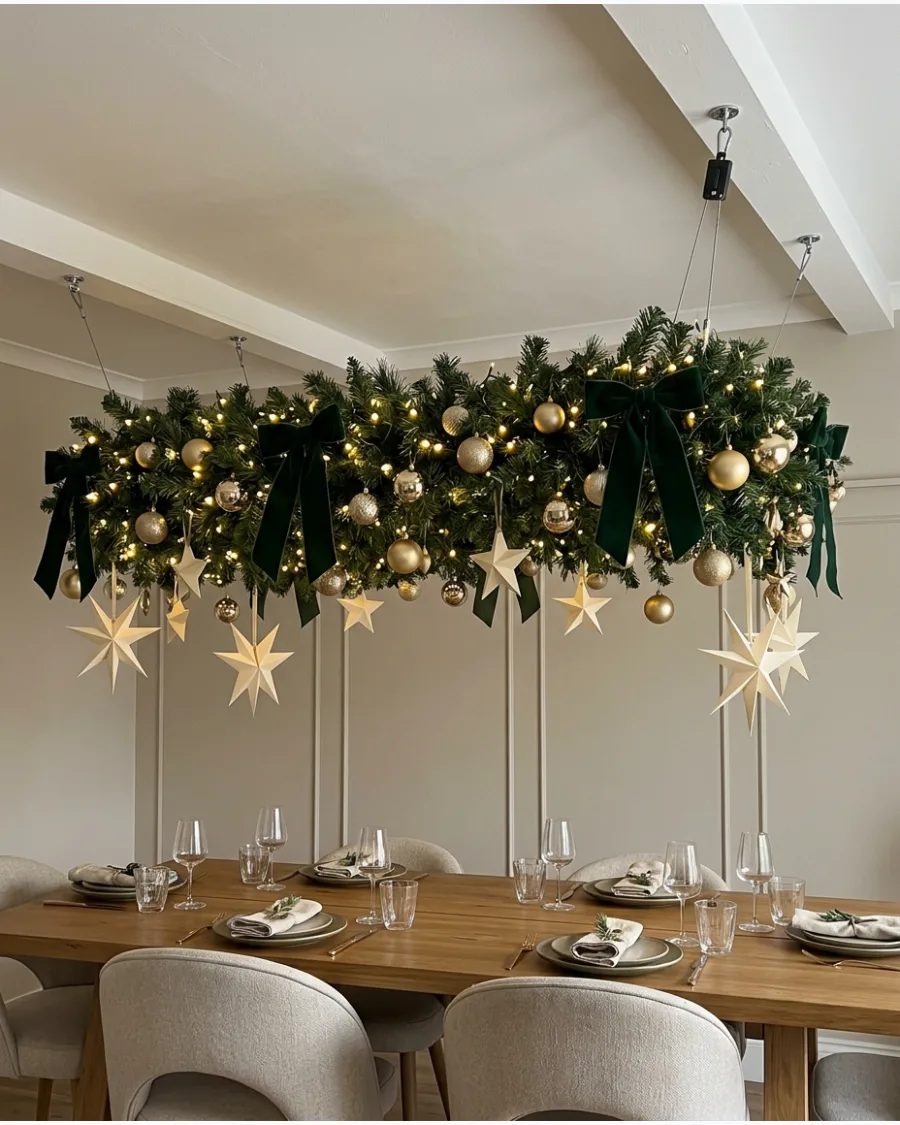
A full ceiling installation above the dining table serves as a stunning alternative to a traditional centerpiece, freeing up table space for food and place settings. This coordinated look combines greenery, stars, and bows into one cohesive unit that feels like a custom architectural feature.
Anchor a lightweight structural frame or a series of tension rods above the dining table to support the weight of the greenery and ornaments without putting stress on individual light fixtures. To maintain a luxurious feel, stick to a limited color palette like evergreen, gold, and cream.
- Layer faux pine and eucalyptus for a lush, professional greenery base.
- Attach velvet bows at the corners of the installation to define the shape.
- Incorporate tiny battery-operated fairy lights to add sparkle within the foliage.
Ensure the lowest point of the installation is at least 30 inches above the table surface to prevent it from obstructing conversation or views.
Frequently Asked Questions
How do I hang decorations without damaging my ceiling?
Use clear adhesive hooks or removable mounting strips designed for smooth surfaces to avoid peeling paint or leaving holes. For heavier items like wooden branches or large wreaths, locate ceiling joists and use small screw-in eye hooks for a secure, permanent hold if your housing situation allows.
What is the best way to hide battery packs for lighted ceiling stars?
Most paper star lanterns feature internal pockets or frames where you can tuck a small battery pack. If the pack is external, use clear fishing line to secure it to the top of the star or camouflage it within a cluster of greenery or ribbons to keep it out of view.
How low should ceiling decorations hang over a dining table?
To ensure guests can see each other and converse comfortably, keep the lowest point of your installation at least 18 to 24 inches above the tabletop. It is helpful to test the height while seated to ensure there is no obstruction to sightlines or food service.
Can I use real greenery for ceiling installations?
While real greenery offers a fresh scent, it can become heavy and brittle as it dries, posing a potential mess or fire hazard. If you use fresh boughs, ensure they are securely anchored to joists and misted regularly, or opt for high-quality faux greenery for a lightweight and durable alternative.
How can I create a sense of depth in a flat ceiling display?
Vary the lengths of your hanging strings or wires to stagger ornaments at different heights rather than hanging them in a single plane. Using a mix of finishes—such as matte, glossy, and glittered textures—will also help the decorations catch light differently, creating a more dynamic three-dimensional effect.