50 Bathroom Feature Wall Ideas Worth Saving

This post may contain affiliate links: full affiliate disclosure.
A bathroom feature wall should do more than add pattern; it needs the right location, material, scale, edges, and moisture strategy for the room.
Use these ideas to compare tile, slabs, paneling, paint, wallpaper, murals, and lighting, then test the strongest option beside your existing finishes.
Tile and Slab Feature Walls
1. Stack Glossy Green Tile Behind the Vanity
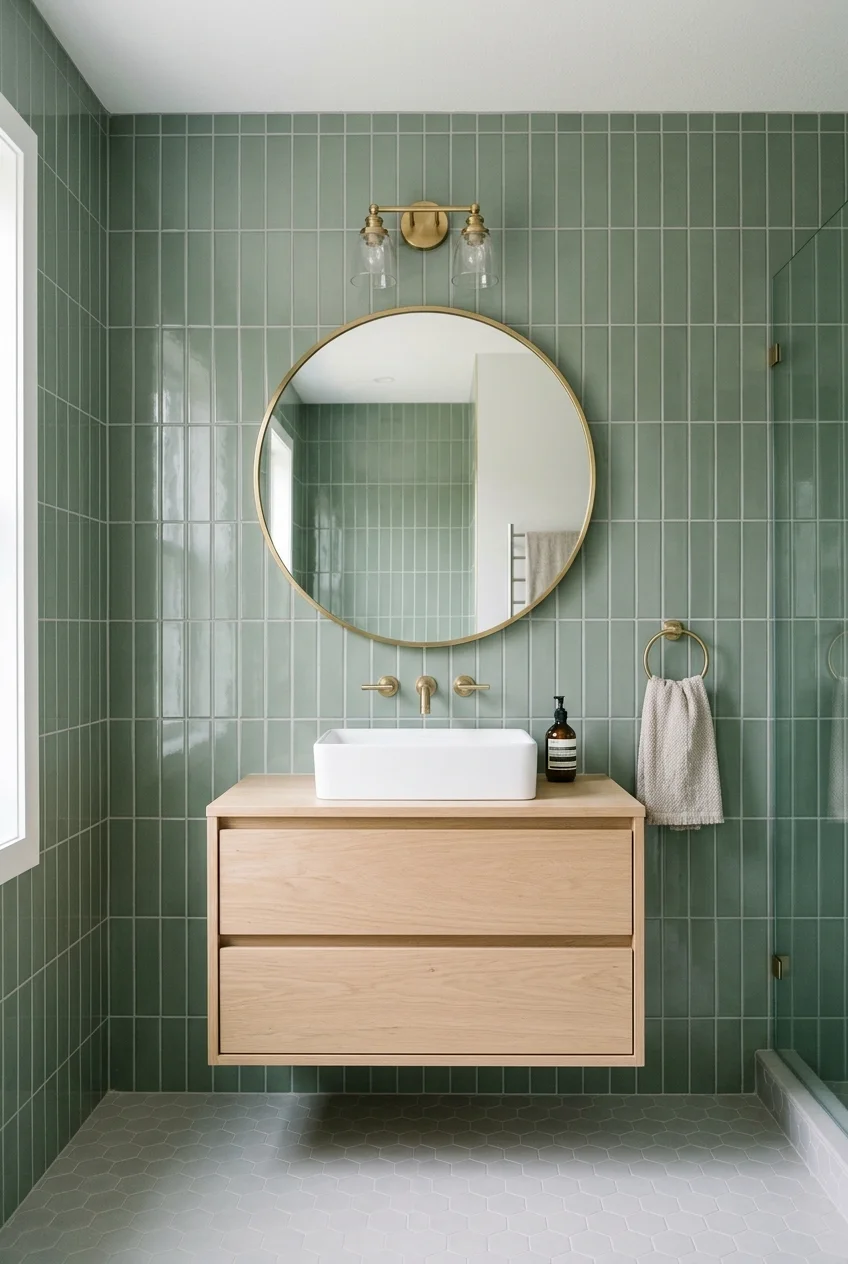
Glossy green tile gives a vanity wall shifting color and reflection, while a straight vertical stack keeps the surface orderly around mirrors and lights.
Center the layout on the sink or mirror, then preview cuts at both corners. A close grout color lets the glaze variation lead.
2. Warm the Sink Wall With Terracotta-Look Tile
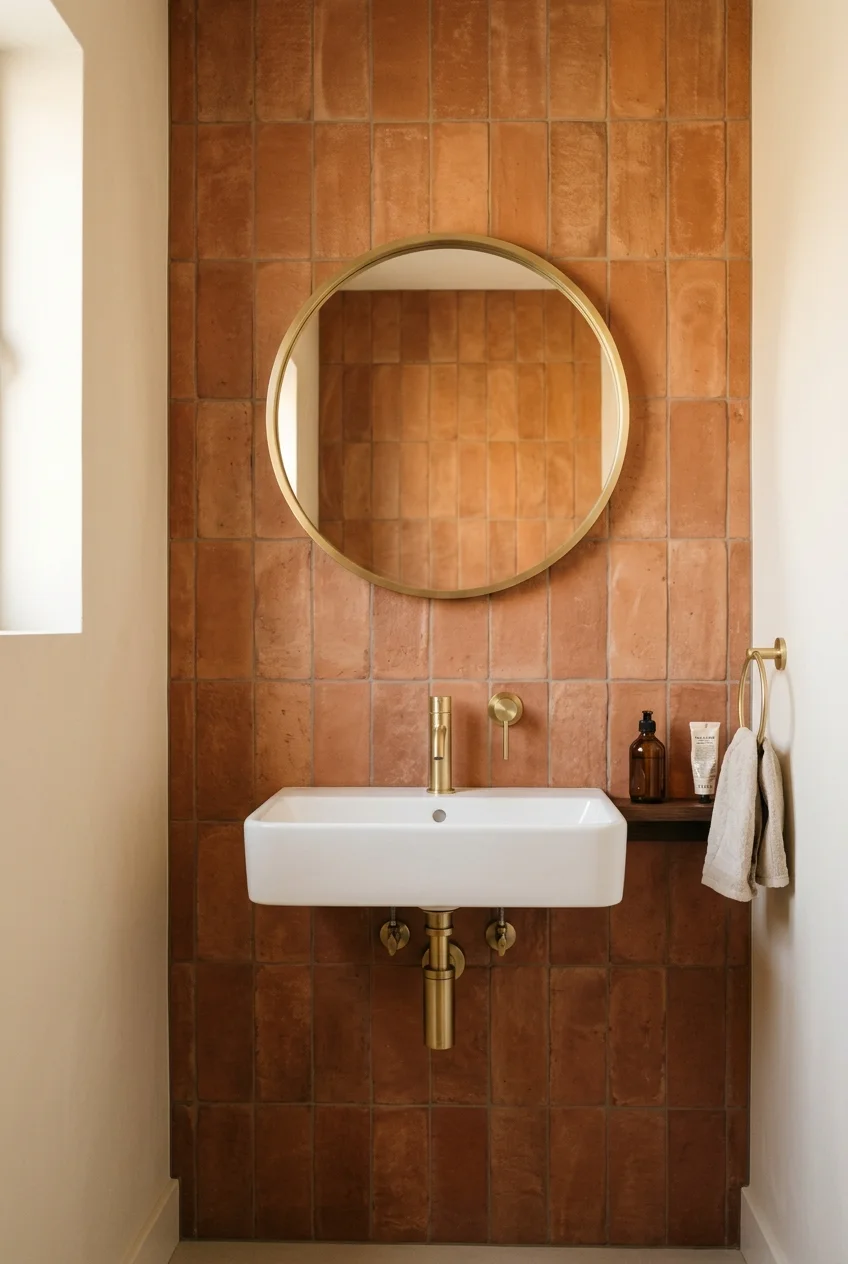
Terracotta-look tile can warm a white sink and cool metal fixtures without exposing an absorbent handmade surface to an unsuitable bathroom location.
Compare several tiles together because printed variation matters across a full wall. Keep the floor quieter so the warm field remains legible.
3. Run Herringbone Tile Behind the Tub
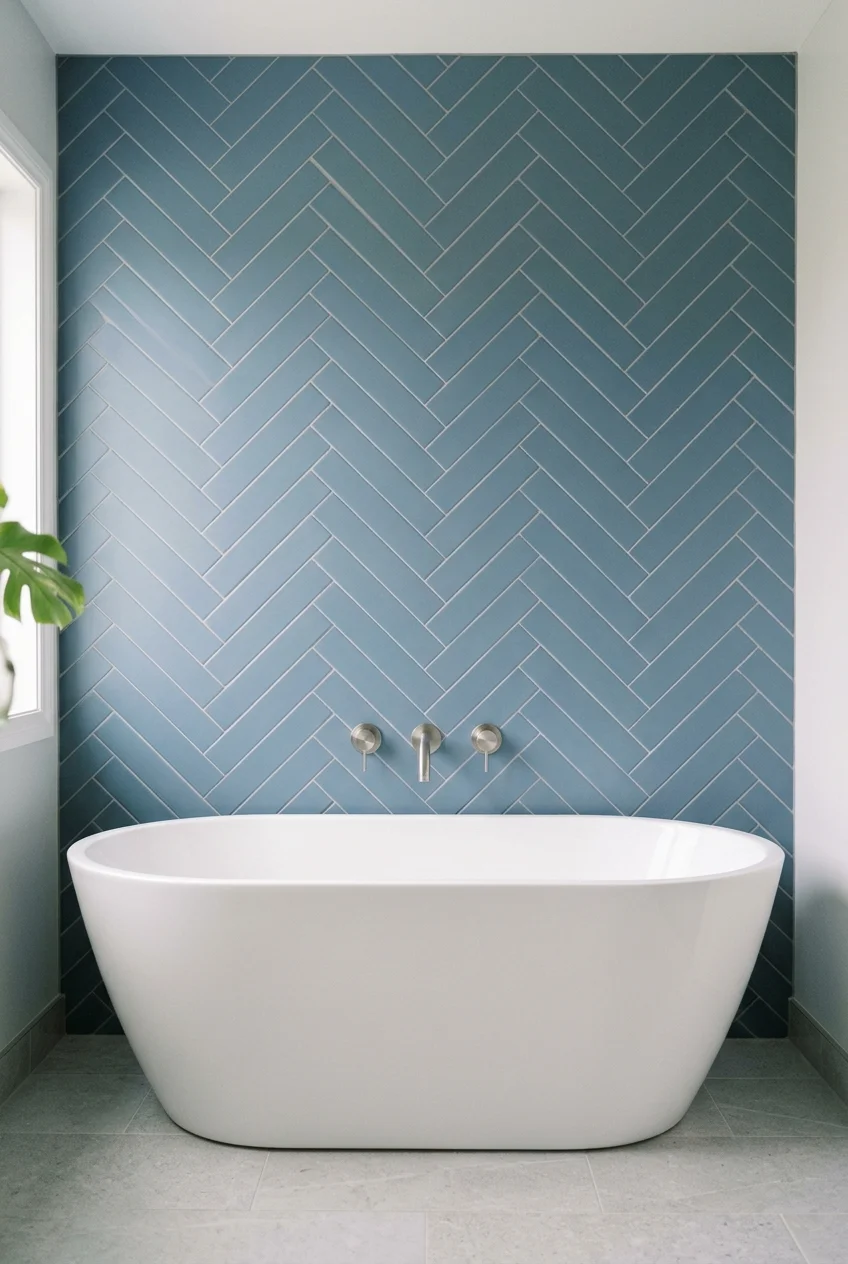
A herringbone wall adds diagonal movement behind a simple tub, making the bathing zone feel finished without introducing extra shelves or decorative objects.
Set a clear centerline before installation and avoid tiny triangles at visible edges. The pattern needs deliberate cuts around valves, windows, and niches.
Layout note Dry-lay several rows on a template first; small angle errors become increasingly obvious as the pattern climbs farther up the wall.
4. Use One Large Marble-Look Slab Behind the Vanity
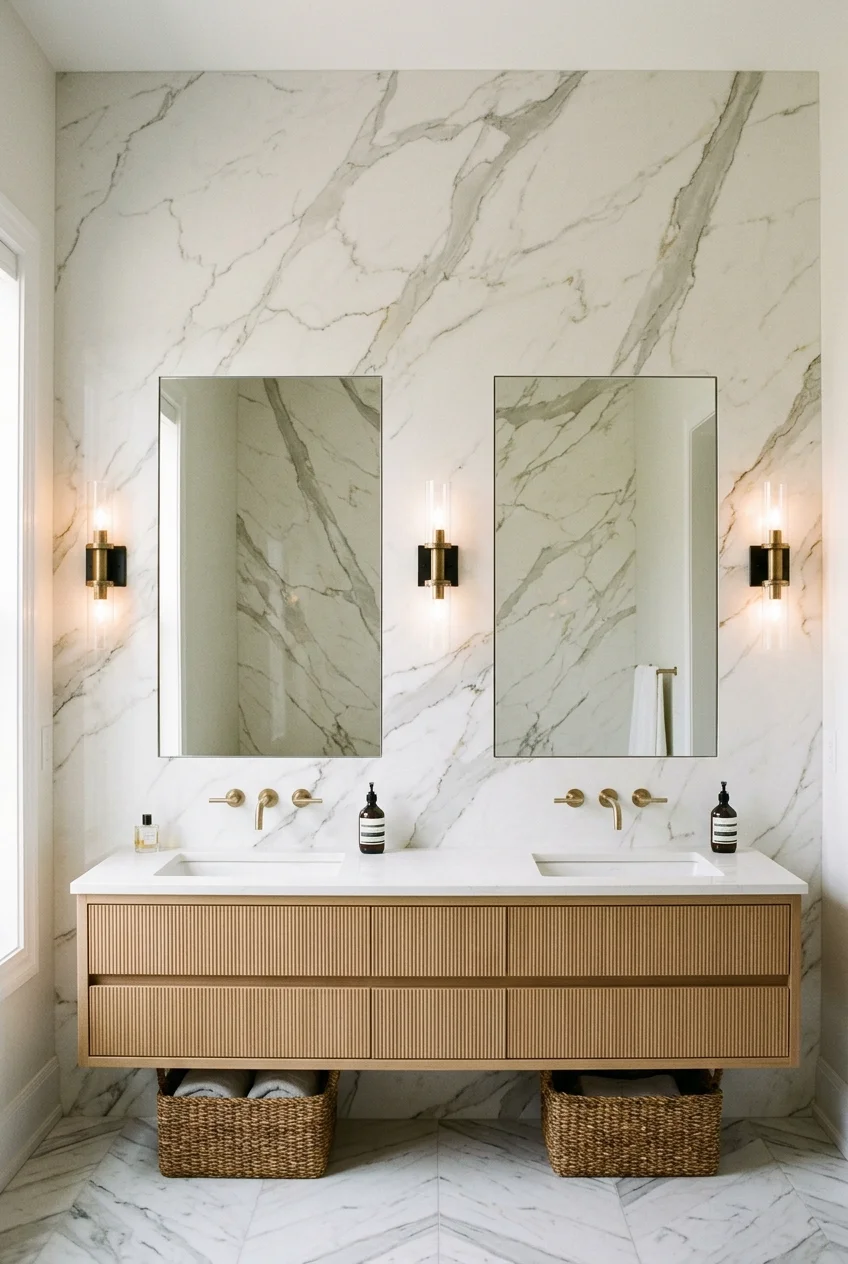
A large porcelain slab can turn the vanity wall into one broad veined surface with fewer joints than conventional tile and less visual interruption.
Choose the exact slab section, not only a small sample. Coordinate seams, outlets, mirrors, and faucet penetrations before fabrication begins.
Large panels demand flat backing, safe handling, suitable setting materials, and experienced installation. Treat their scale as a construction decision, not wallpaper.
5. Bookmatch Two Slabs Behind a Soaking Tub
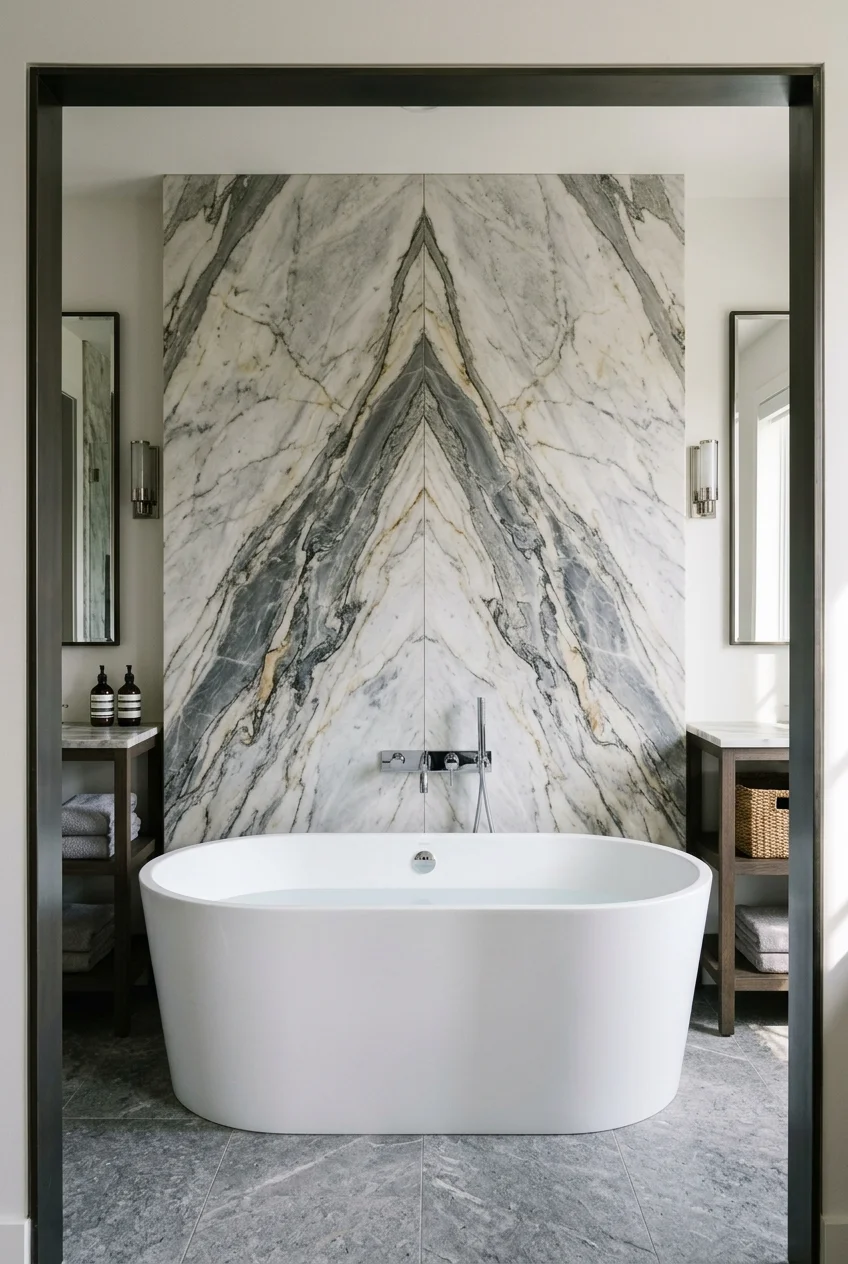
Mirrored slab veining creates a symmetrical focal point behind a centered soaking tub, giving the room drama through material movement rather than added decoration.
Approve the digital or physical slab layout before cutting. The center seam, tub axis, and strongest veins should agree from the doorway view.
- Confirm the visible slab faces.
- Mark the tub and filler centerlines.
- Plan seam and edge profiles.
- Review penetrations before fabrication.
6. Cover the Shower End Wall in Black Hex Tile
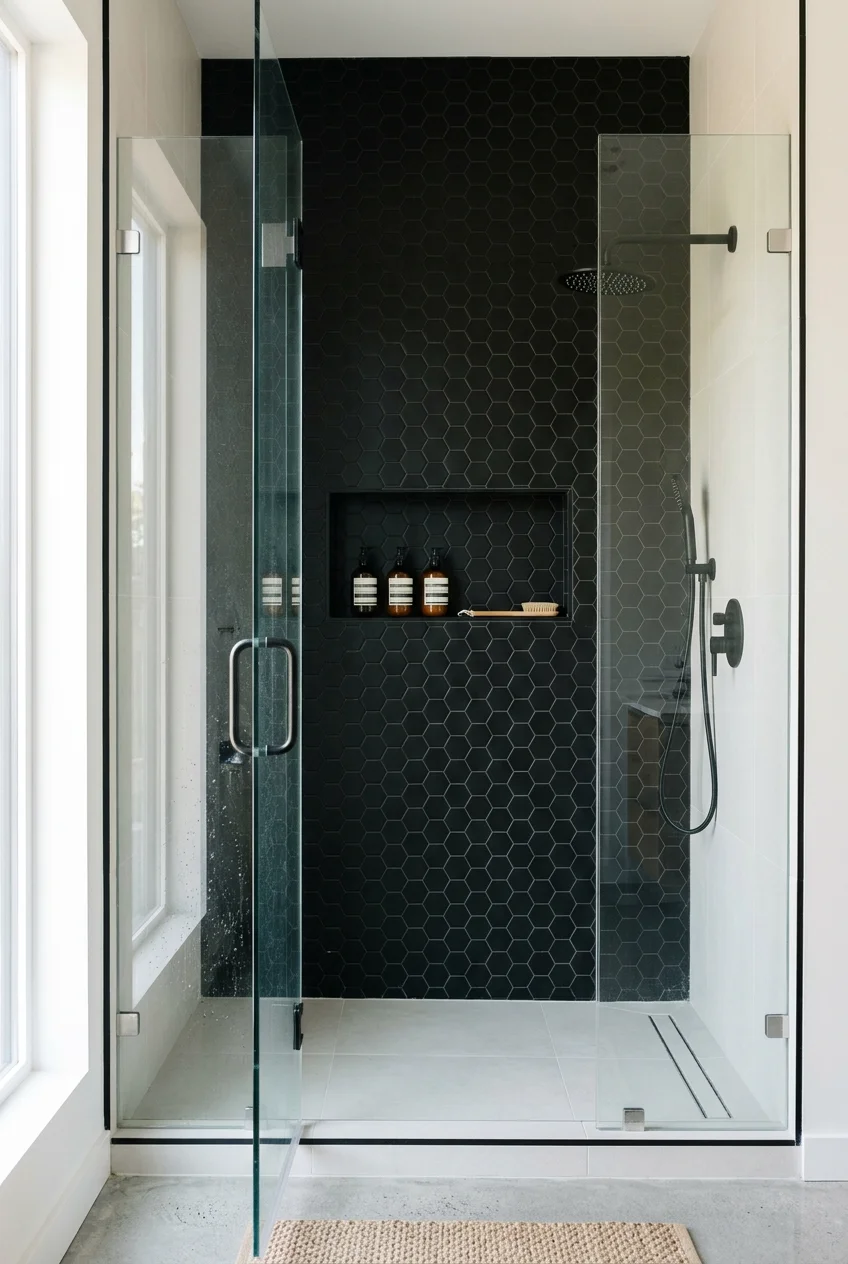
Black hex tile on the shower’s far wall creates depth through clear glass while keeping the side walls lighter and visually more open.
Use a grout value that preserves the hexagon shape without turning every joint into a harsh outline. Coordinate waterproofing behind the complete tiled surface.
Continue shelves or a niche in the same field when possible. Random contrasting inserts can break the strong, simple end-wall effect.
7. Make Penny-Round Tile Feel Graphic
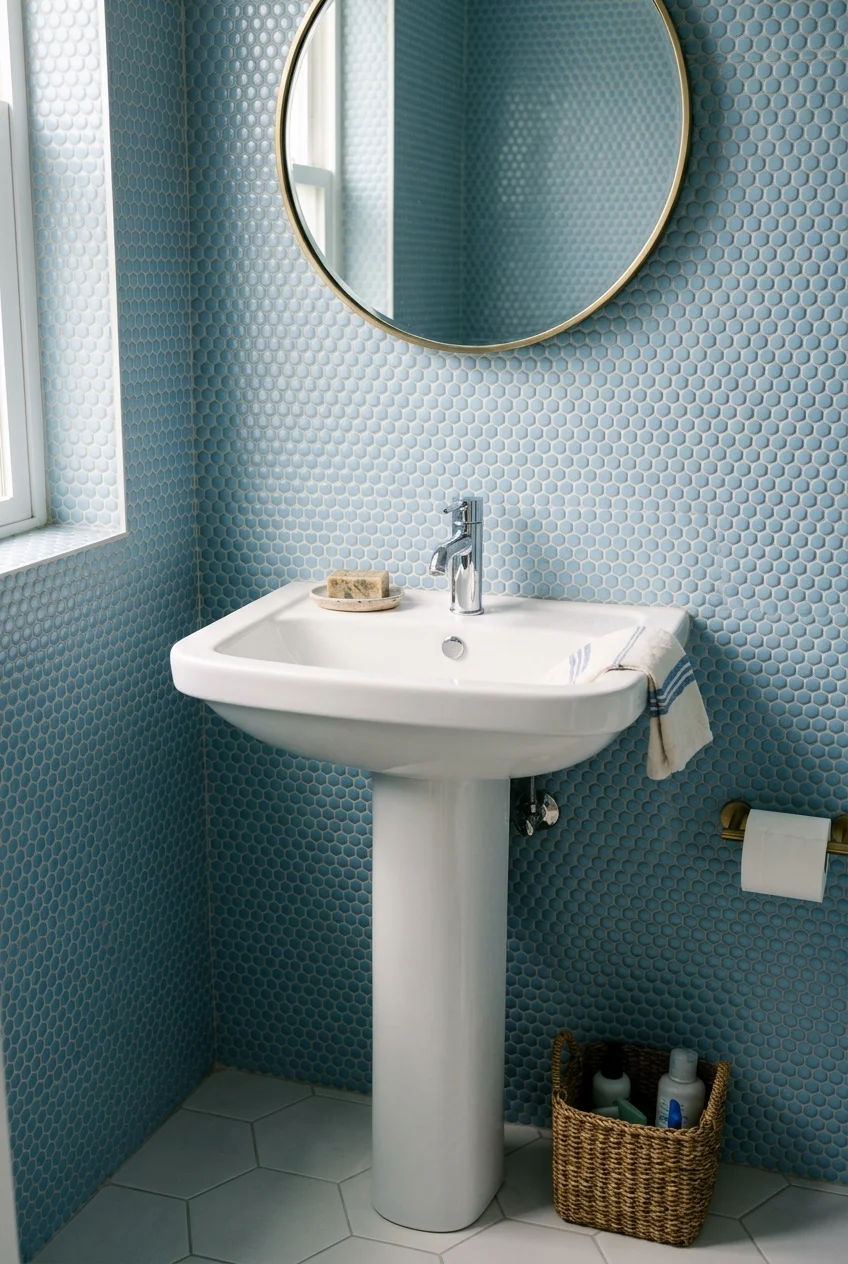
A single-color penny-round wall gains interest from its dense circular rhythm, especially behind a plain pedestal sink or compact floating vanity.
Sheet boundaries must disappear in the finished layout. Check spacing under strong side light before grouting, because uneven seams become surprisingly visible.
8. Add Fine Rhythm With Finger Tile
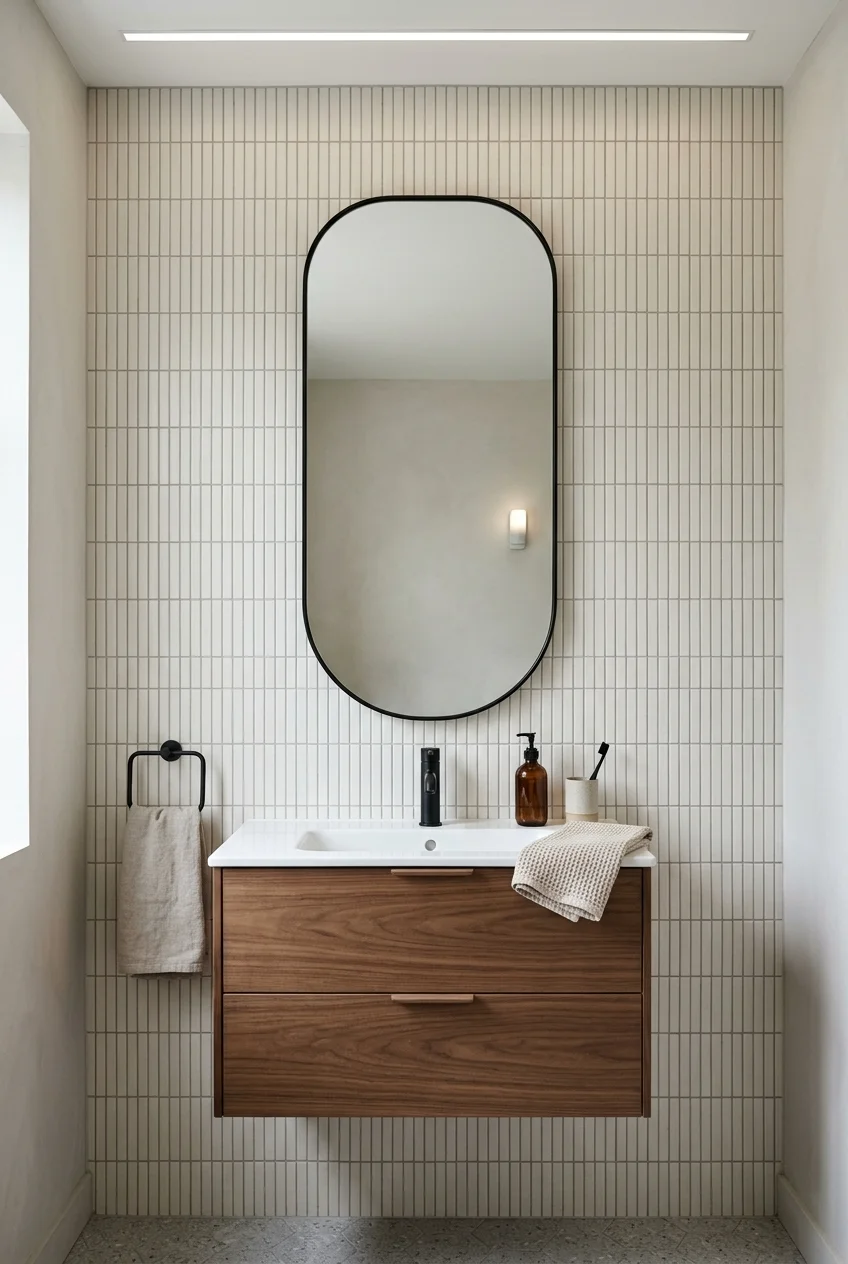
Narrow finger tile creates a fine vertical rhythm that suits a small vanity wall, where larger patterns may lose their shape around a mirror.
Keep accessories restrained and align the tile direction with the mirror. Numerous grout joints make color choice and ongoing cleaning especially important.
9. Choose Fluted Ceramic Tile for Sculptural Shadow
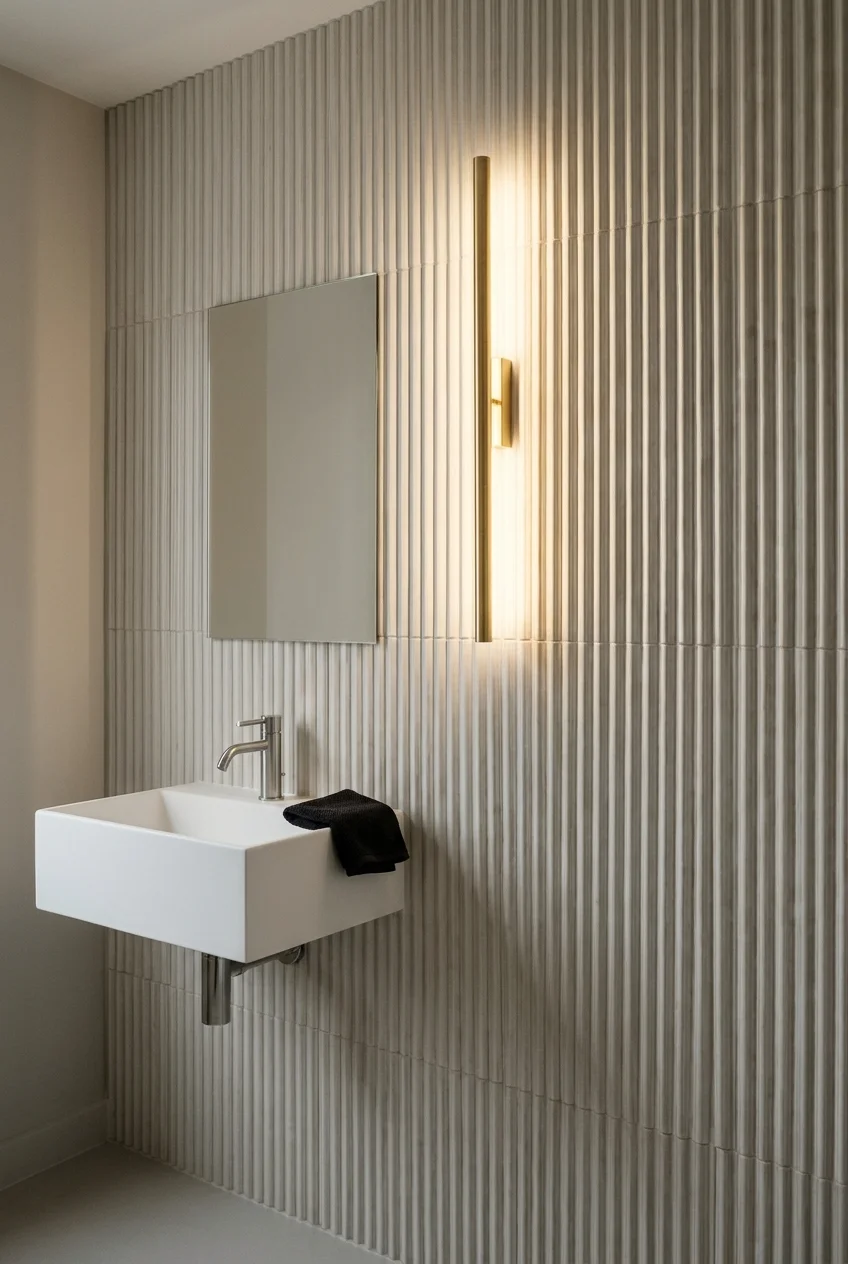
Three-dimensional fluted tile catches light across raised ribs, turning a neutral wall into a tactile focal point without relying on bold color.
Use it where ridges can be cleaned comfortably and keep faucet splash under control. A grazing sconce will emphasize every alignment error.
Sample first View several installed pieces under the planned lighting, because a small handheld sample cannot reveal repeating shadows or uneven joints.
10. Soften a Powder Room With Scalloped Tile
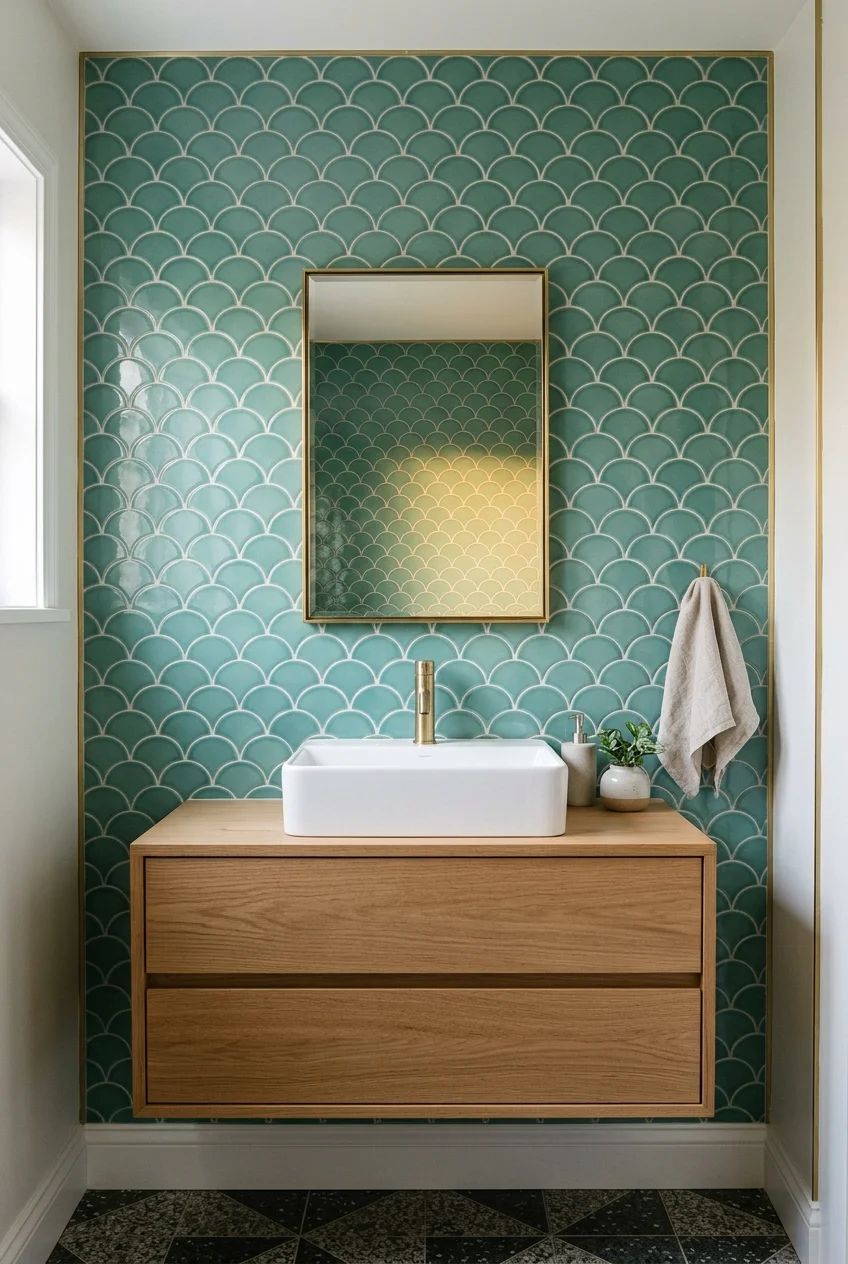
Scalloped tile introduces overlapping curves behind a compact sink, softening the straight edges of cabinetry, mirrors, and rectangular floor tile.
Choose one orientation before ordering because upward and downward scales read differently. Finish exposed edges cleanly rather than stopping the curves abruptly.
11. Build a Checkerboard Wall in Two Quiet Tones
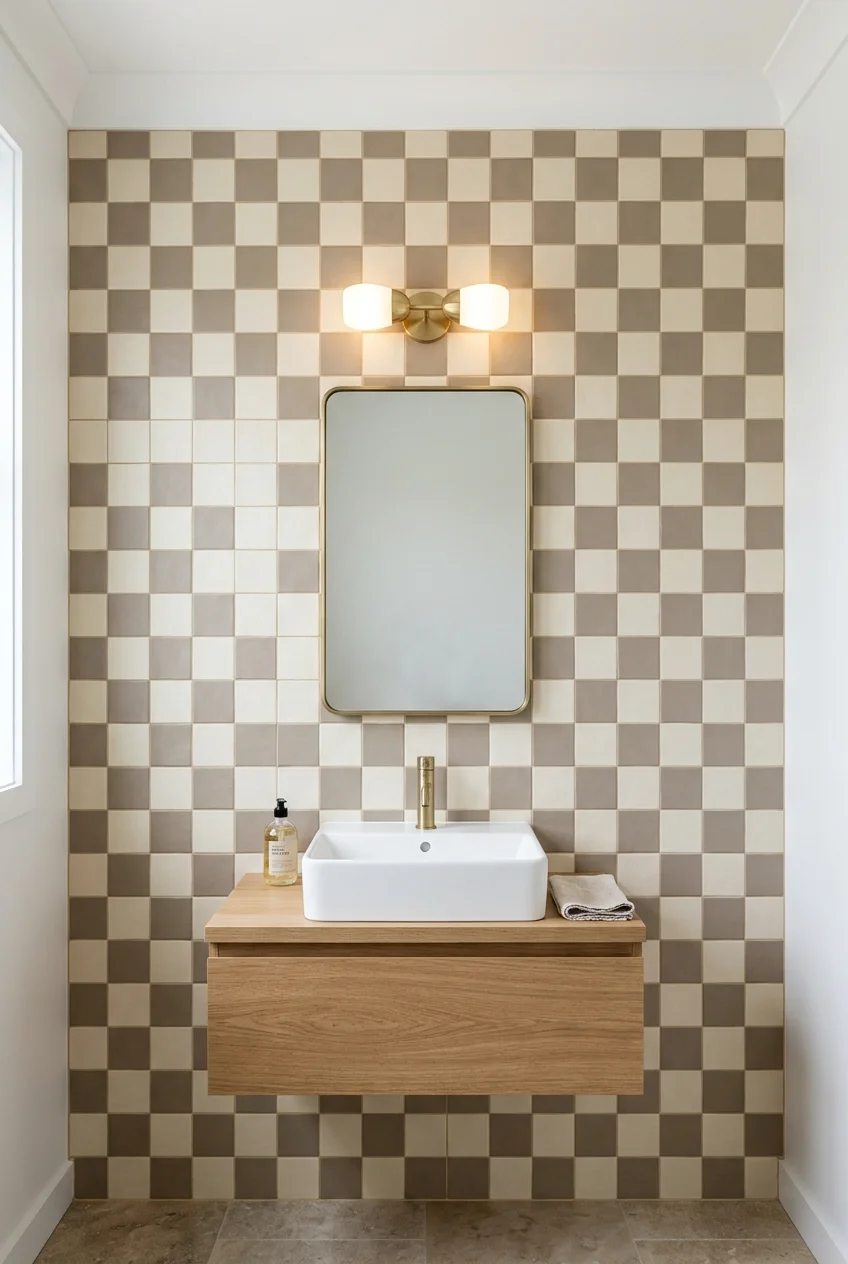
A low-contrast checkerboard gives the vanity wall recognizable geometry without the visual intensity of stark black-and-white squares across a small room.
Lay out full repeats around the mirror and sink, then choose grout that belongs to both colors. Crooked fixture placement becomes obvious against the grid.
12. Frame Patterned Tile as a Deliberate Panel
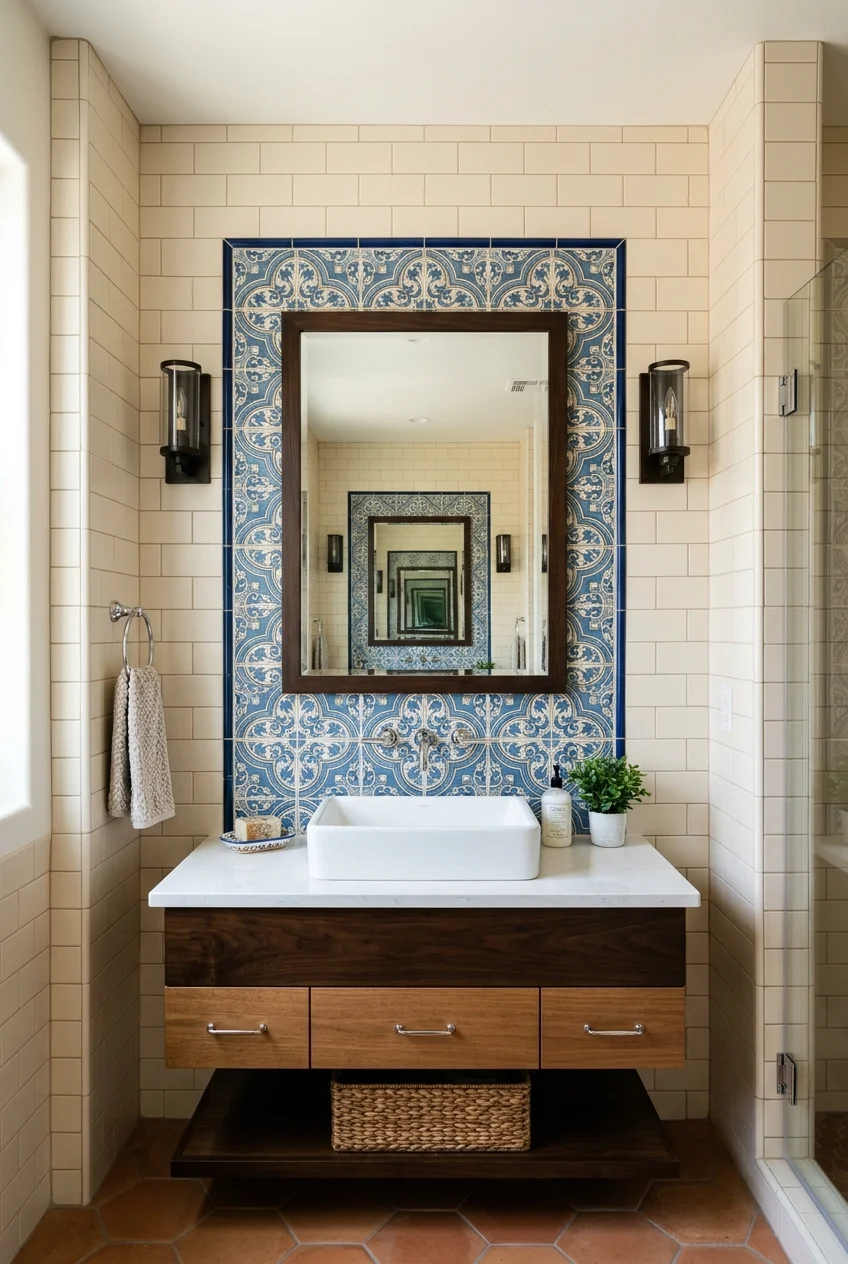
Patterned tile does not need to cover the whole wall. A centered panel can frame the vanity while quieter field tile handles the surrounding surface.
Give the panel a precise border and align it with the fixture below. The composition should look planned, not like leftover patterned tile.
- Mark the vanity and mirror centerline.
- Set the finished panel width.
- Resolve border corners and tile repeats.
- Extend the quiet field tile to the room edges.
13. Use Terrazzo-Look Porcelain for Confetti Color
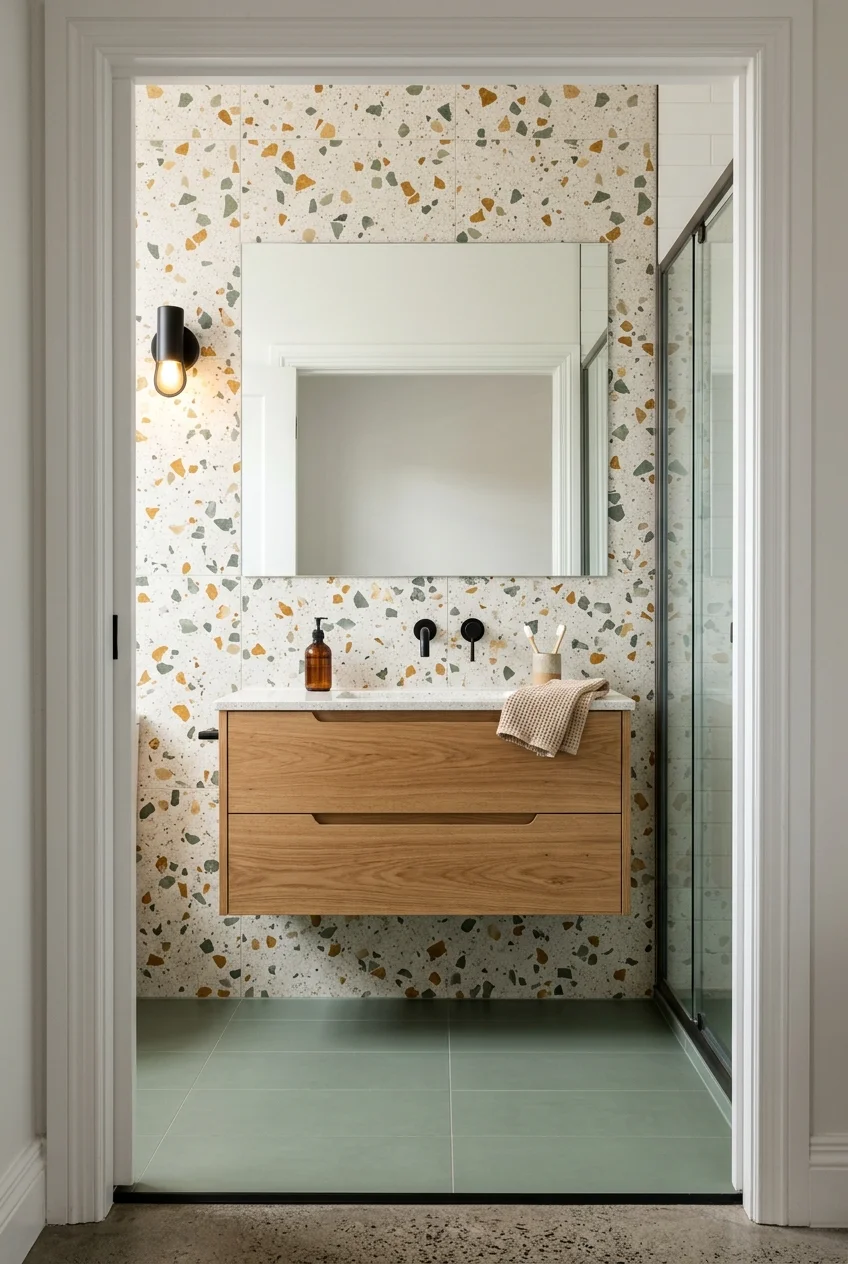
Terrazzo-look porcelain can gather several bathroom colors into one wall, linking the vanity, floor, and fixtures through scattered chips rather than exact matching.
Select a chip scale that remains clear from the doorway. Oversized fragments need a broad wall, while tiny speckles can read as visual noise.
14. Install Wood-Look Porcelain Planks Vertically
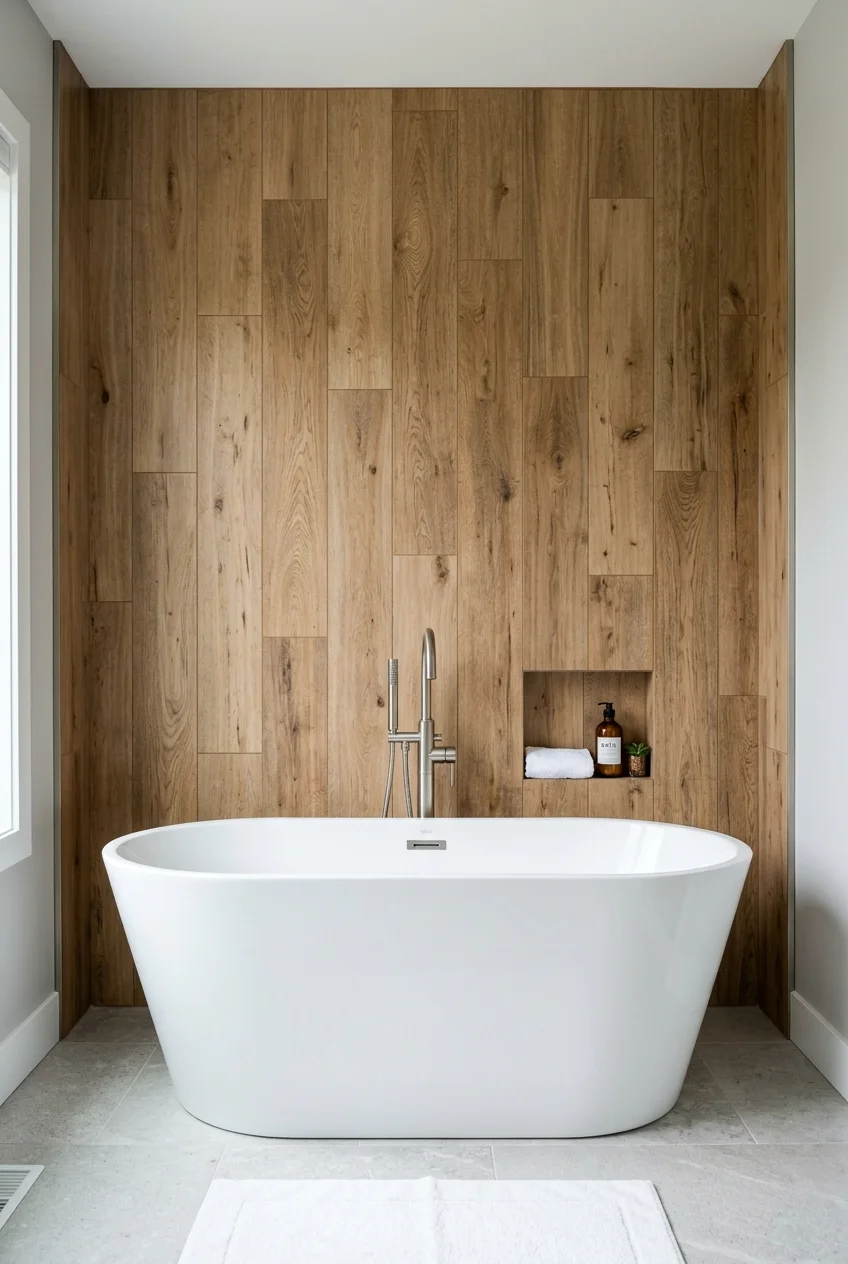
Vertical wood-look porcelain adds warmth and height near a tub or vanity while keeping the splash surface within a tile-based installation system.
Blend plank variations before setting and avoid repeating identical prints together. Narrow matching grout helps the wall read as one warm field.
15. Give Brick Texture a Cleaner Bathroom Finish
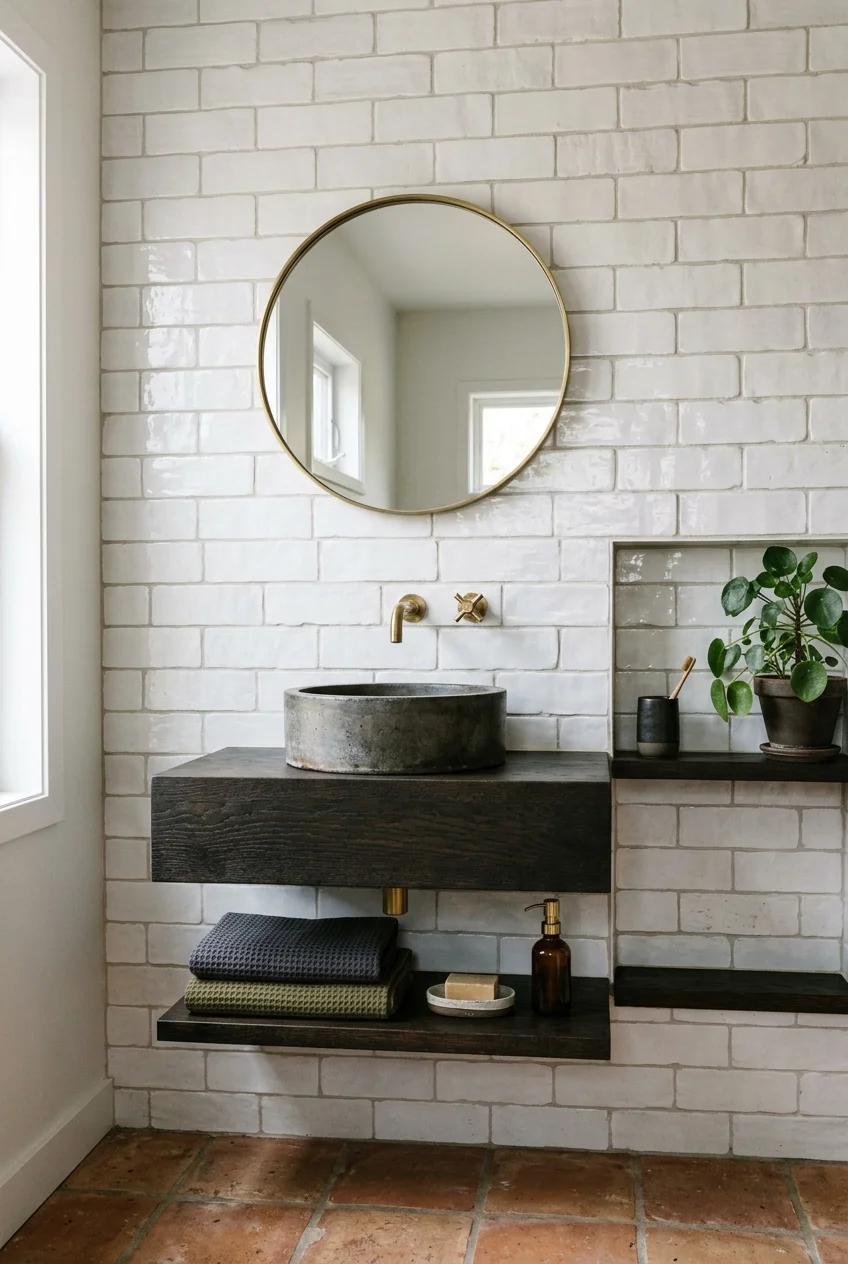
Glazed brick-look tile adds irregular edges and shadow without exposing porous reclaimed masonry to a humid room that needs routine wipe-downs.
Use it on one dry or properly prepared splash wall, then pair it with simple fixtures. Heavy shelves can obscure the texture you selected.
16. Create a Thin Mosaic Border Around the Mirror
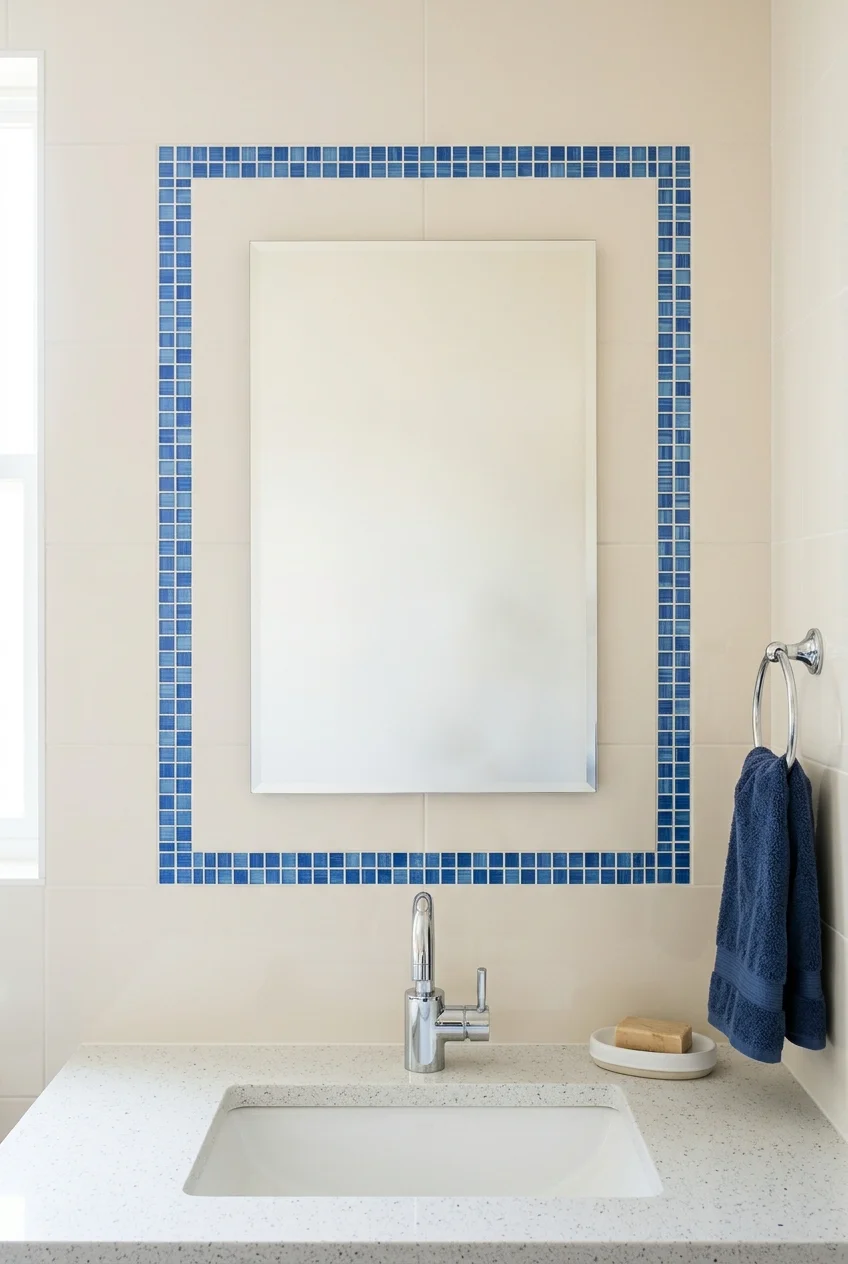
A narrow mosaic frame can turn the mirror area into a precise focal panel without committing the entire vanity wall to small tile.
Set the border dimensions from the mirror outward and coordinate mounting hardware first. Uneven side widths will be noticeable at eye level.
Paneling and Textured Feature Walls
17. Paint Board-and-Batten Deep Olive
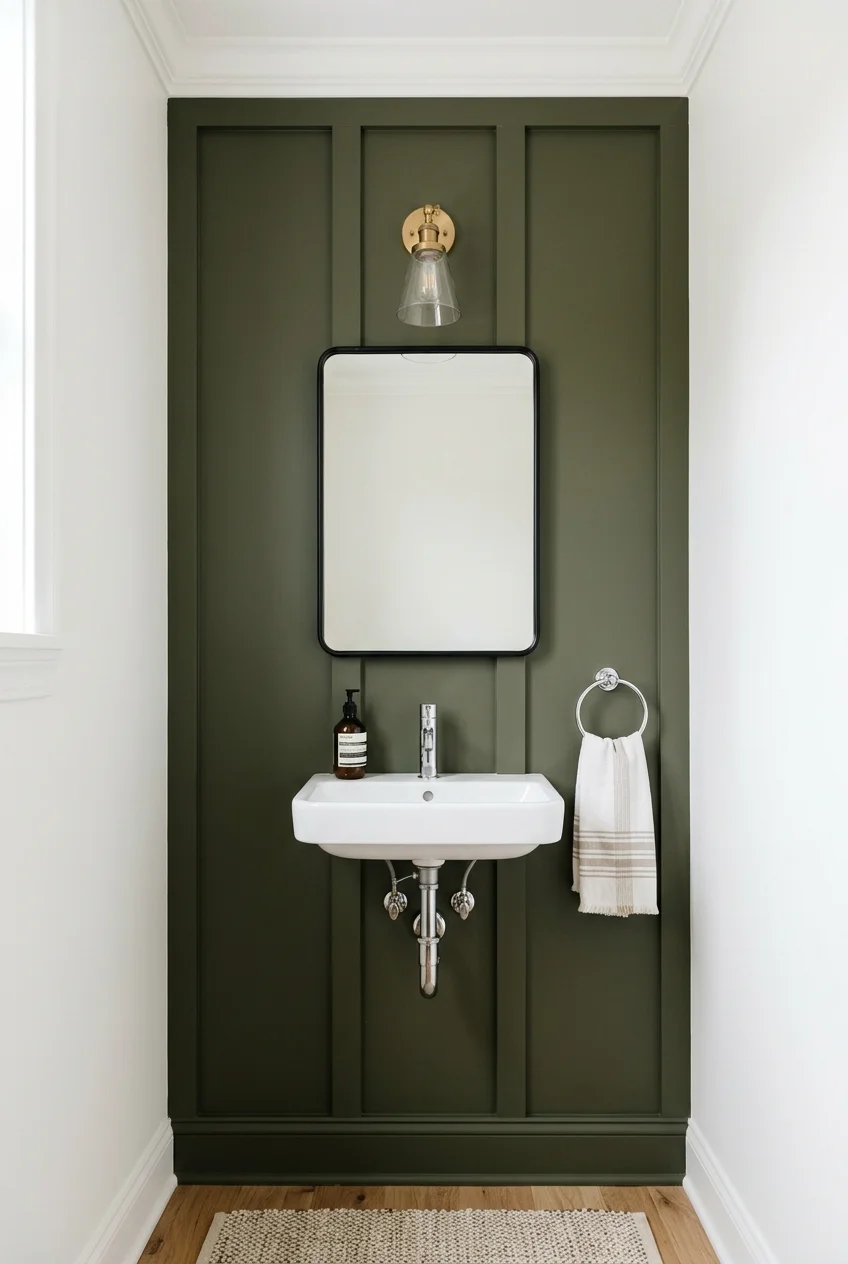
Deep olive board-and-batten gives a narrow wall structure and color, making it effective behind a toilet or pedestal sink in a powder room.
Align battens around fixtures rather than letting pipes or outlets land awkwardly on raised strips. Use materials and coatings appropriate for bathroom humidity.
18. Run Beadboard From Floor to Ceiling
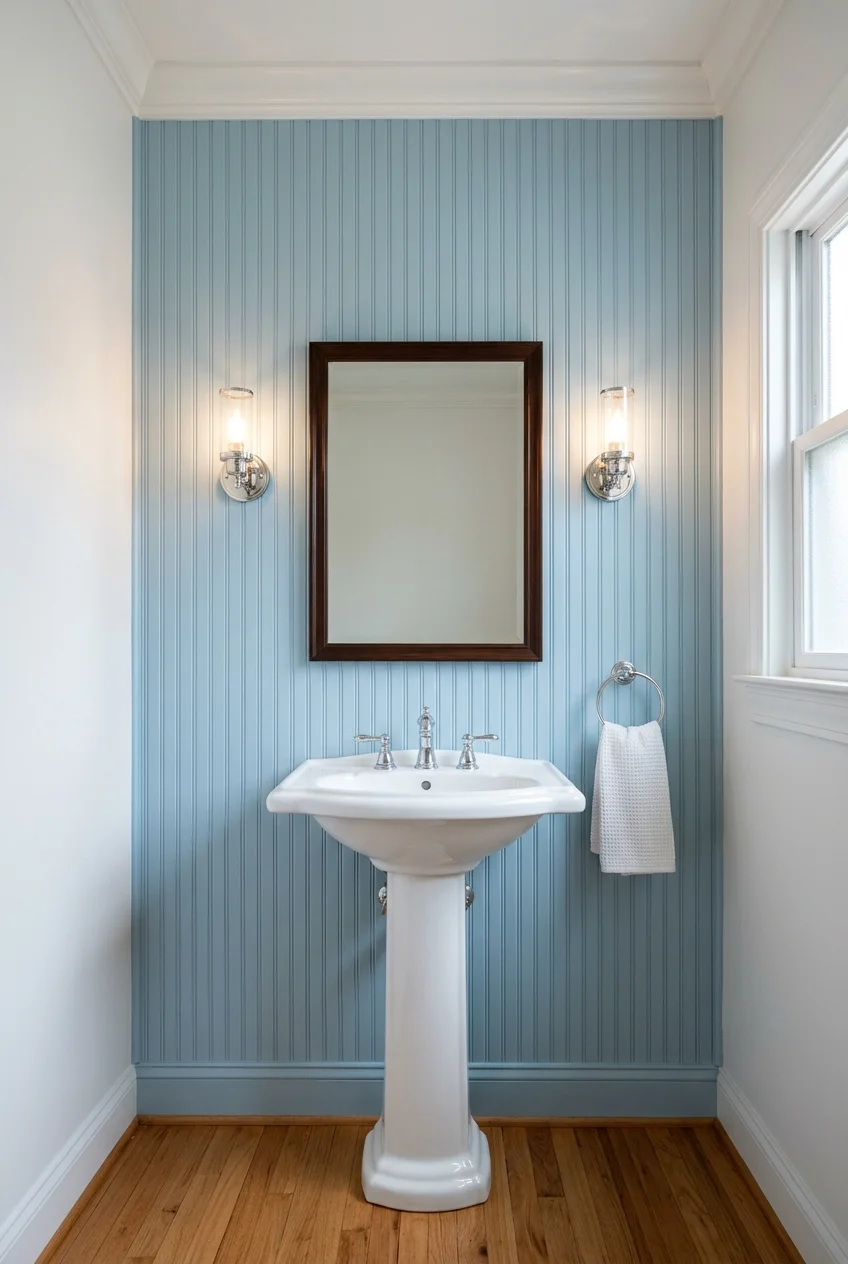
Full-height beadboard creates continuous vertical texture that can visually lift a compact bathroom while remaining quieter than a large printed wallpaper.
Keep grooves straight, seal edges carefully, and choose bathroom-suitable material. Full-height installation clearly magnifies uneven ceilings, corners, and panel seams.
Compare heights, colors, and trim treatments in these bathroom beadboard ideas before deciding whether one wall or the whole room needs paneling.
19. Use Picture-Frame Molding for Quiet Architecture
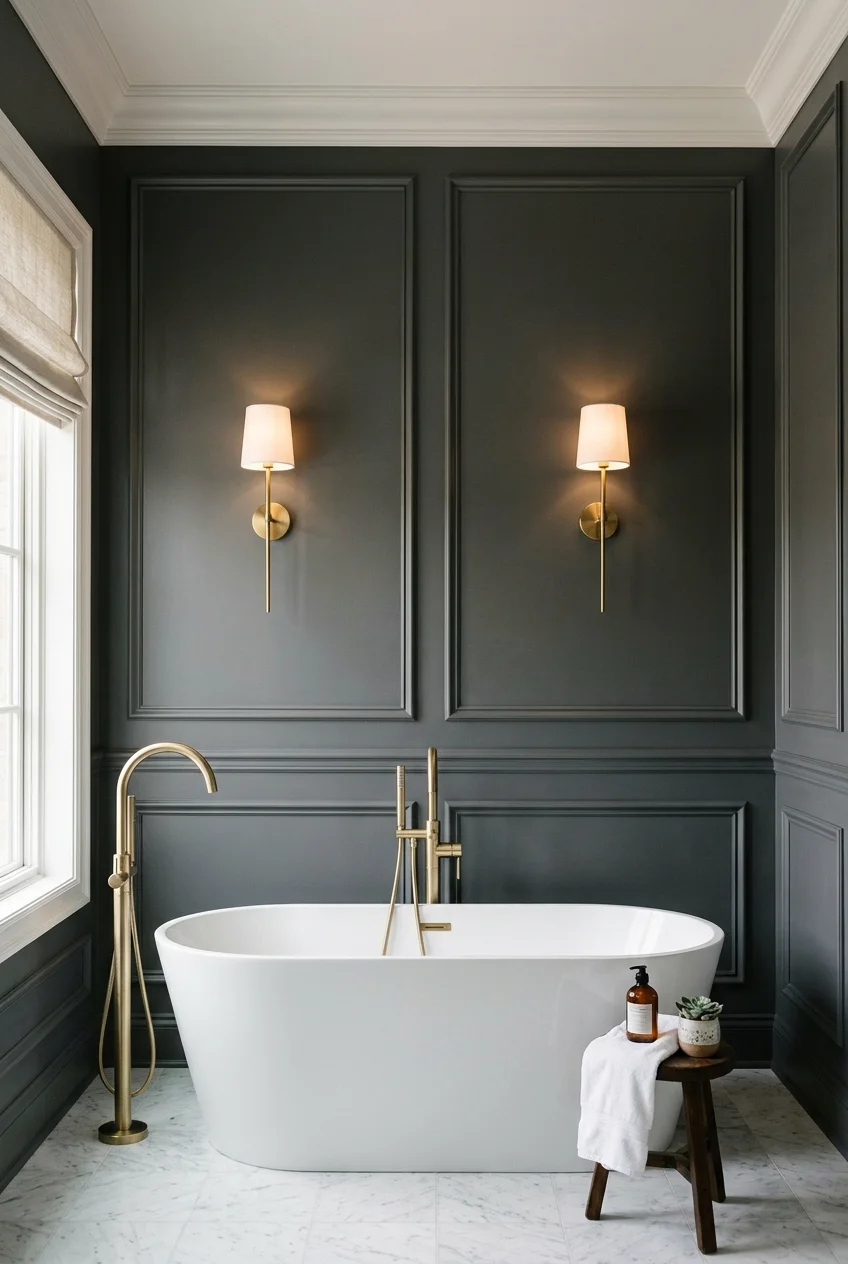
Large picture-frame molding adds depth through proportion and shadow, allowing one painted color to carry a formal vanity or freestanding-tub wall.
Design the rectangles around mirrors, sconces, and furniture before cutting trim. Tiny leftover panels at corners make the installation feel improvised.
20. Turn Narrow Vertical Paneling Into a Modern Backdrop
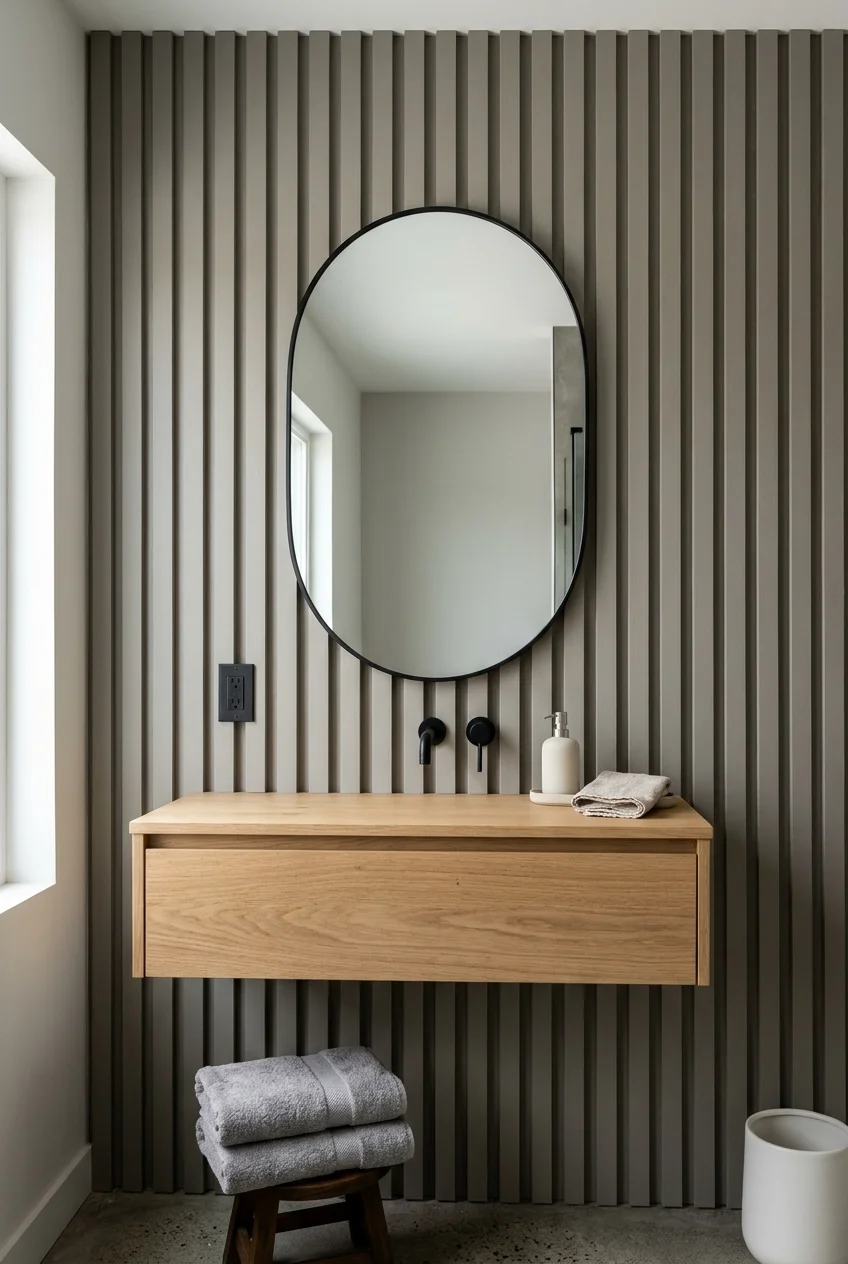
Narrow flat battens create a crisp vertical rhythm behind a vanity, offering more shadow than paint while staying simpler than ornate traditional molding.
Space every strip consistently and resolve the mirror mounts before installation. Use a moisture-suitable assembly and keep projecting ledges easy to clean.
21. Choose Wide Tongue-and-Groove Boards for a Calmer Scale
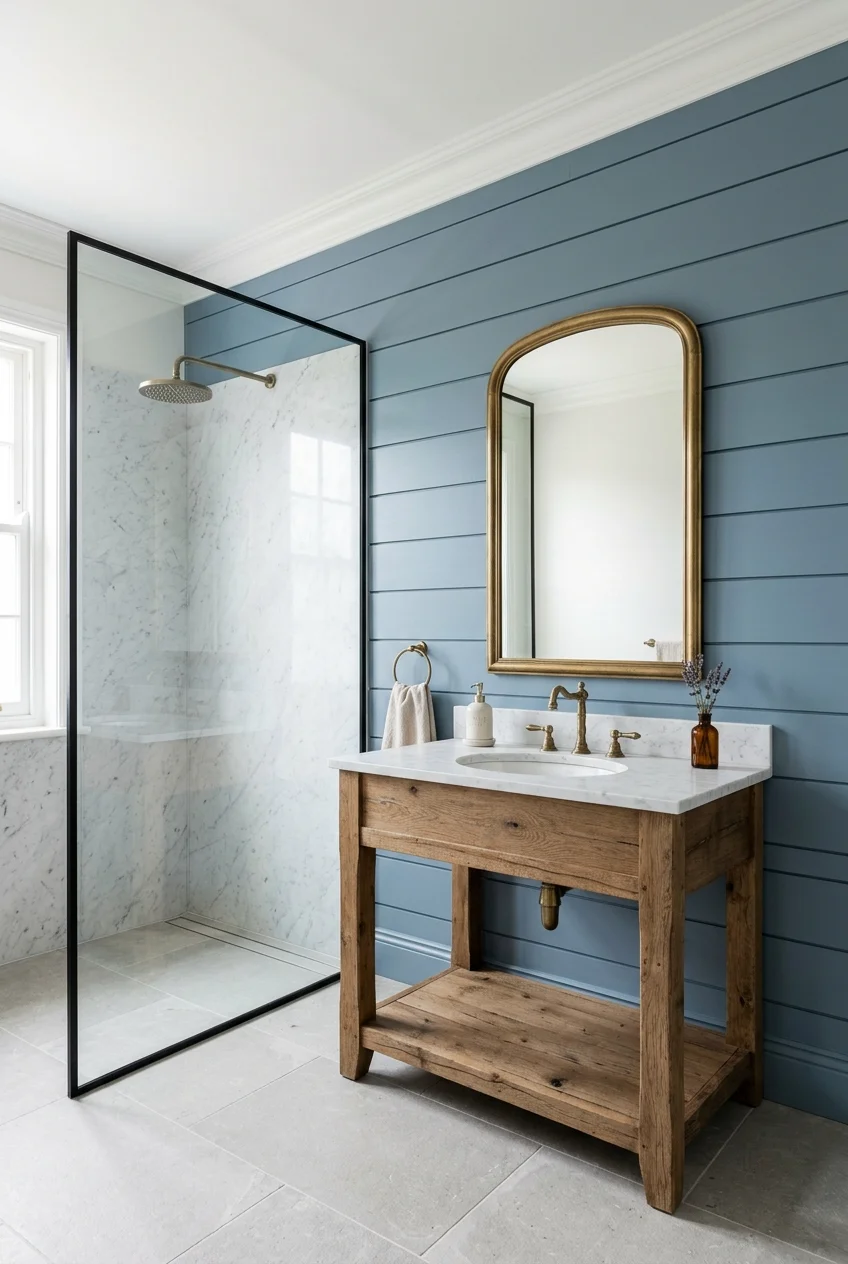
Wide tongue-and-groove boards create fewer lines than beadboard, giving a larger bathroom a relaxed architectural backdrop rather than a finely striped surface.
Paint the joints and faces together for one field, then use a narrow cap or full-height termination. Keep wood-based products outside direct wet zones.
22. Use Waterproof Wall Panels Inside the Shower
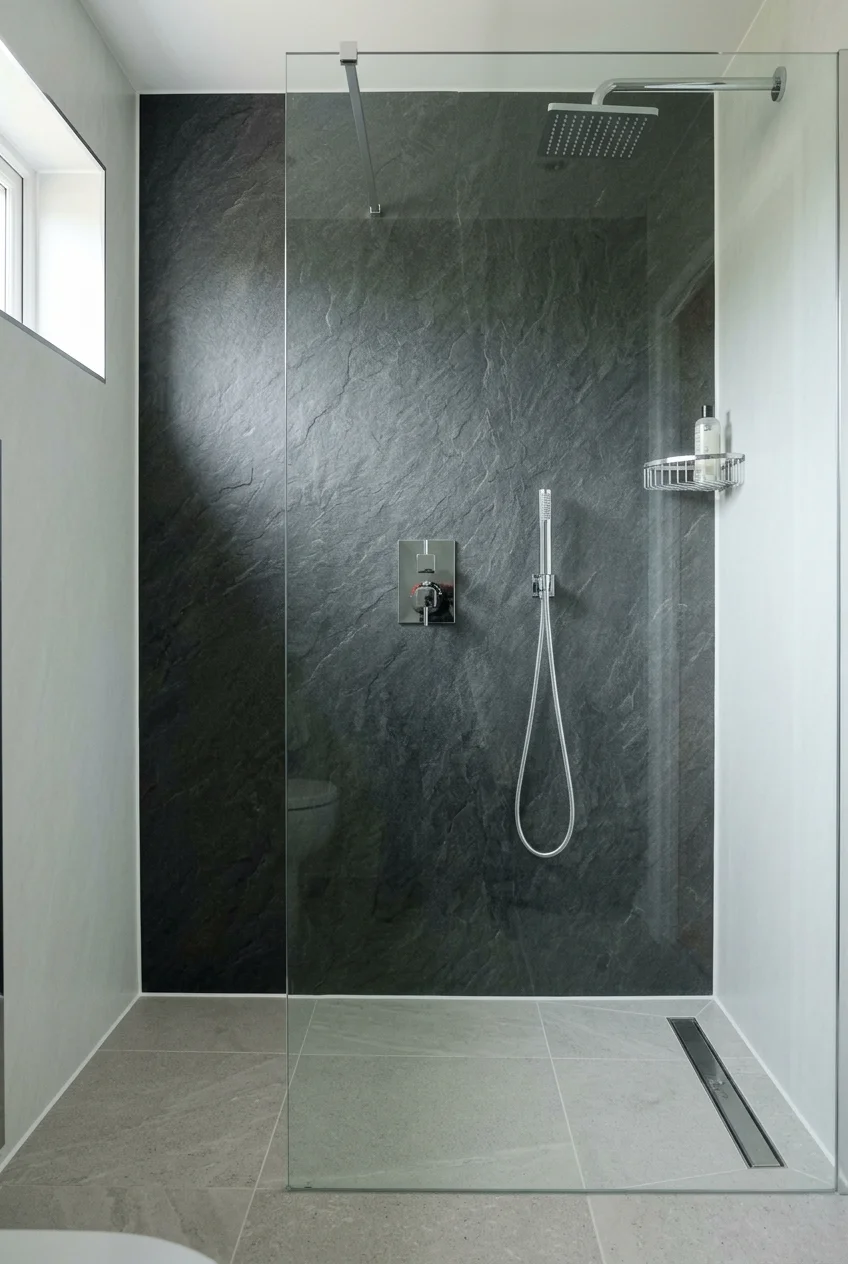
Large waterproof shower panels can create a feature wall with fewer joints, especially when a stone, concrete, or tile effect suits the room.
Follow the complete panel system for substrate, seams, corners, penetrations, and sealants. A decorative sheet alone does not create a watertight enclosure.
- Confirm panel suitability for the exact wet area.
- Use compatible trims and sealants.
- Preserve valve and plumbing access.
- Inspect every finished seam.
23. Add Fluted Waterproof Panels Behind the Vanity
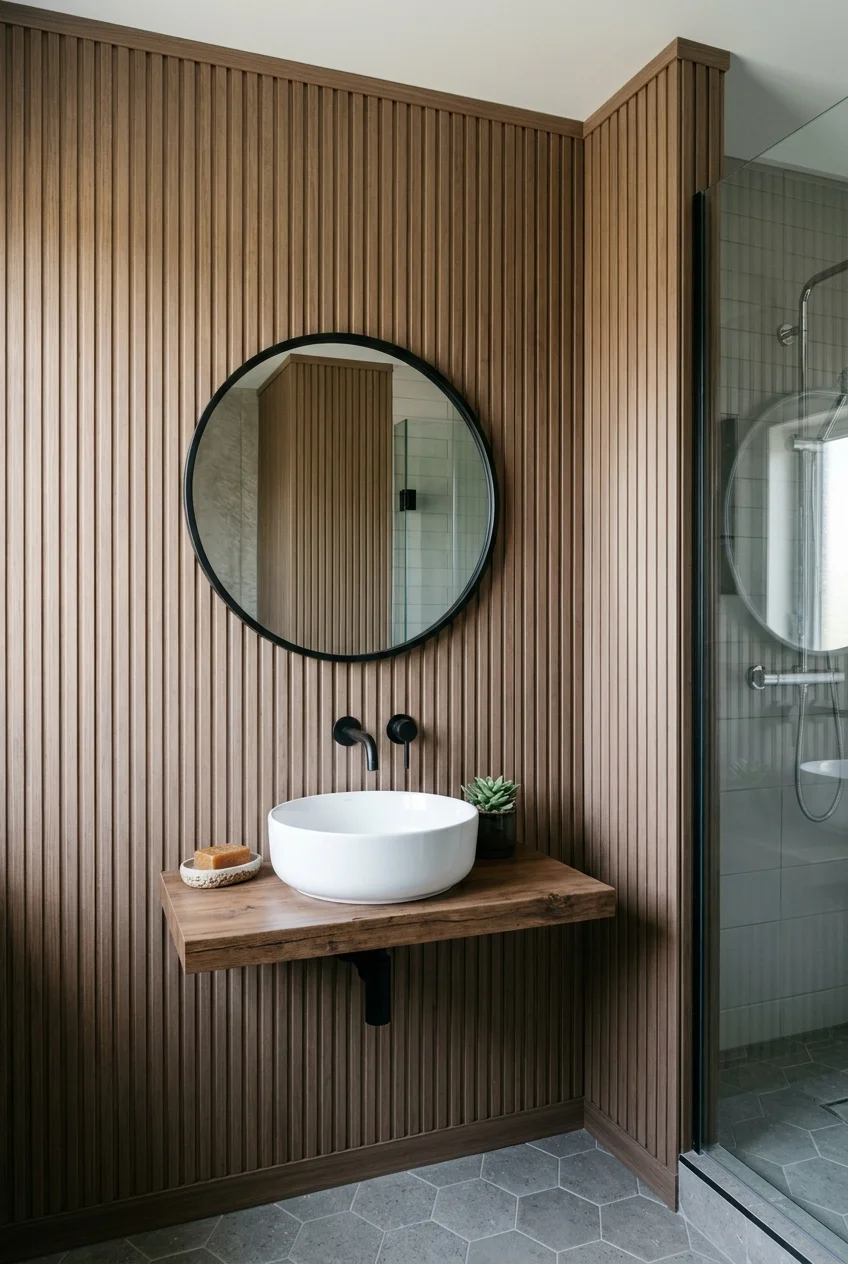
Fluted composite panels can bring deep shadow to a vanity wall without individual tile joints, provided the selected product suits bathroom humidity and splash.
Keep the flutes vertical and finish outside corners deliberately. Test whether the grooves are practical to wipe near soap and toothpaste splatter.
24. Shape a Rounded Plaster Niche Around the Tub
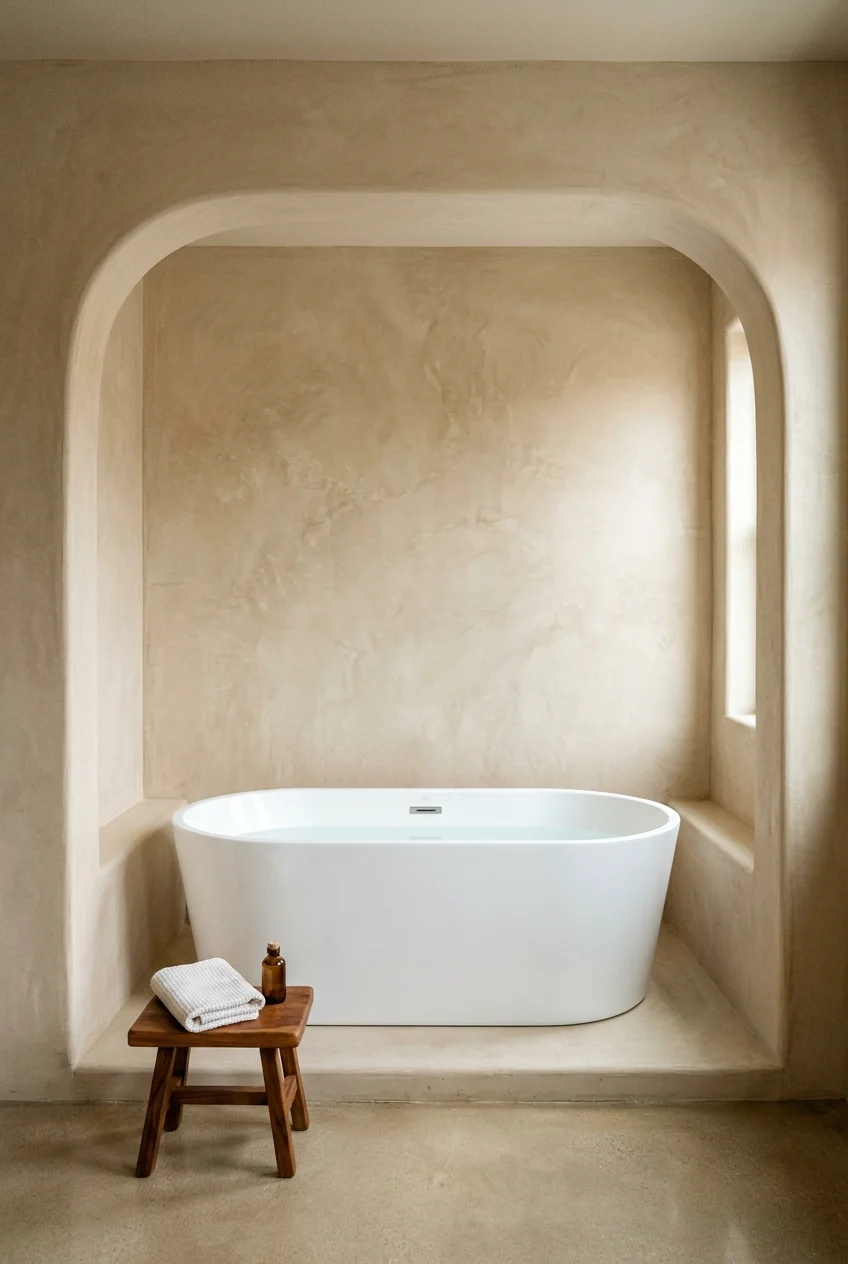
A broad rounded niche can frame a tub through architecture, using soft corners and continuous color instead of a patterned surface or separate wall art.
Build the curve wide enough for access and cleaning, then specify the substrate, waterproofing, and finish for the niche’s actual splash exposure.
Keep the tub centered within the opening and leave the recess mostly empty. Too many small objects weaken the simple sculptural effect.
25. Reserve Rough Stone for a Dry Focal Wall
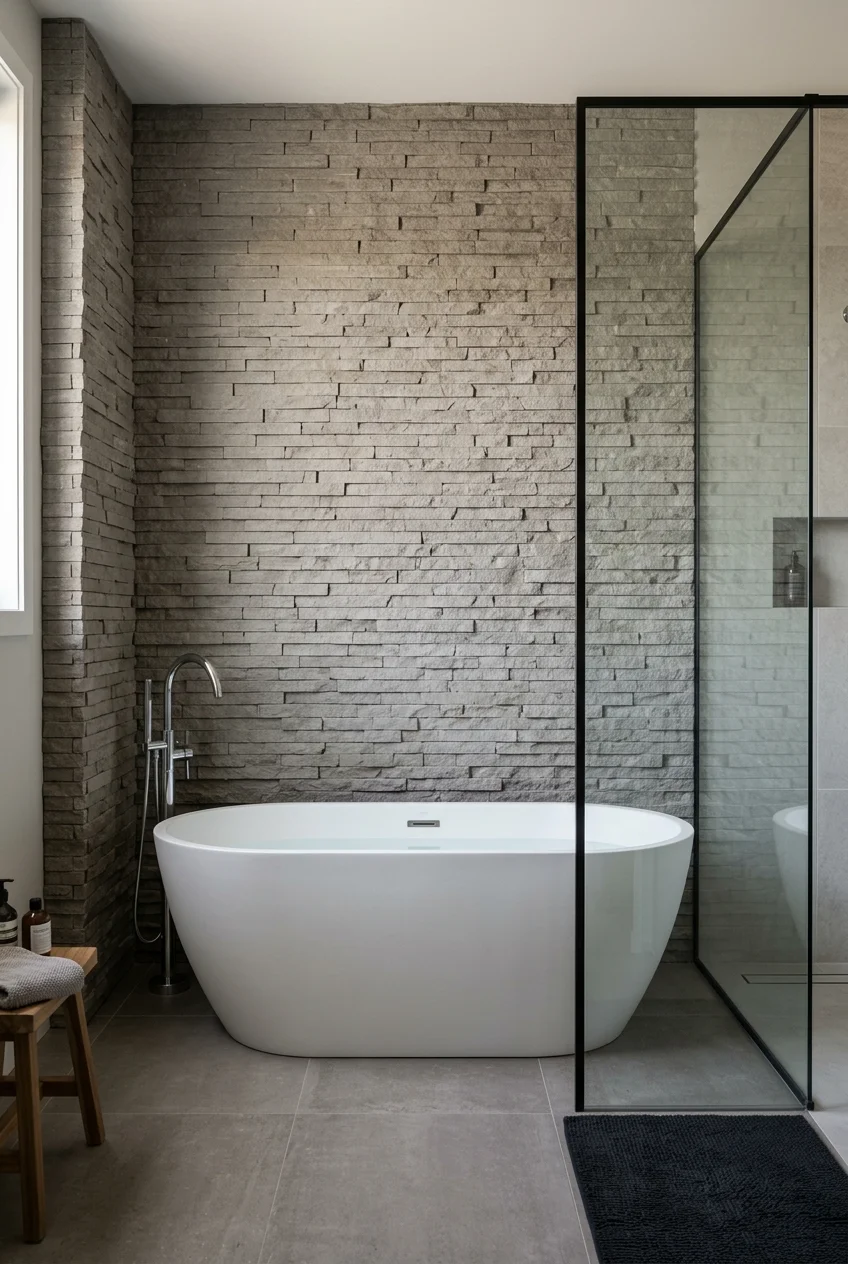
Thin stone veneer can add strong natural texture behind a vanity or tub, but its ledges and joints need realistic dust and splash maintenance.
Keep it outside direct spray unless the complete assembly is approved for that location. Use smoother materials where frequent wiping matters most.
26. Use Limewash for Cloudy Color Movement
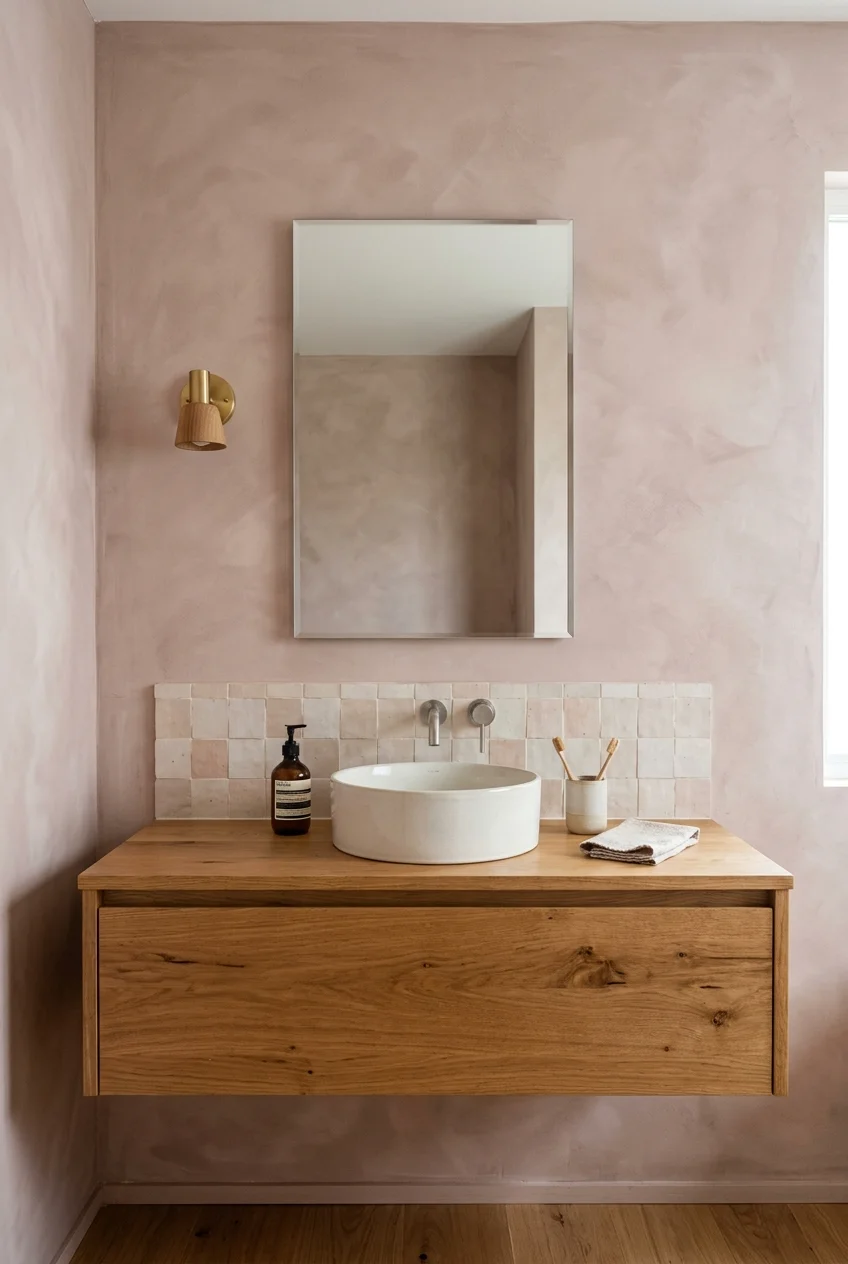
Limewash-style color variation can make a dry bathroom wall feel layered and soft, especially behind a plain vanity with restrained fixtures.
Confirm substrate preparation, sealer, cleaning method, and bathroom suitability with the finish manufacturer. Do not assume every decorative wash tolerates repeated splashing.
27. Wrap a Tub Wall in Seamless Waterproof Plaster
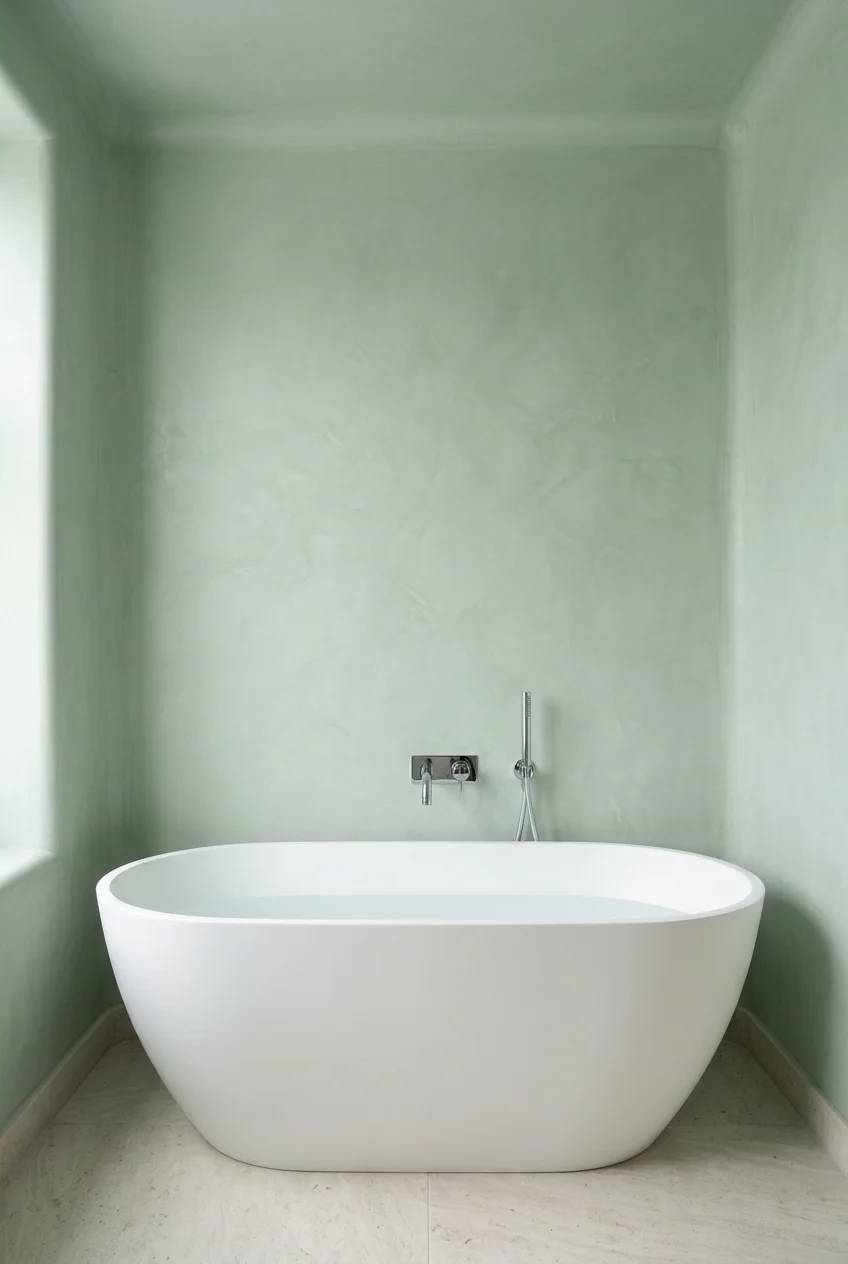
A properly specified waterproof plaster system can give the tub wall broad tonal movement without grout lines, creating a quiet but visibly crafted surface.
Treat substrate, corners, penetrations, sealer, and maintenance as one tested system. Decorative topcoat language alone does not establish wet-area performance.
Specification note Ask for written confirmation covering the exact installation zone, because bathroom humidity and direct splash create distinctly different material demands.
Paint, Wallpaper, and Mural Feature Walls
28. Paint the Vanity Wall Forest Green
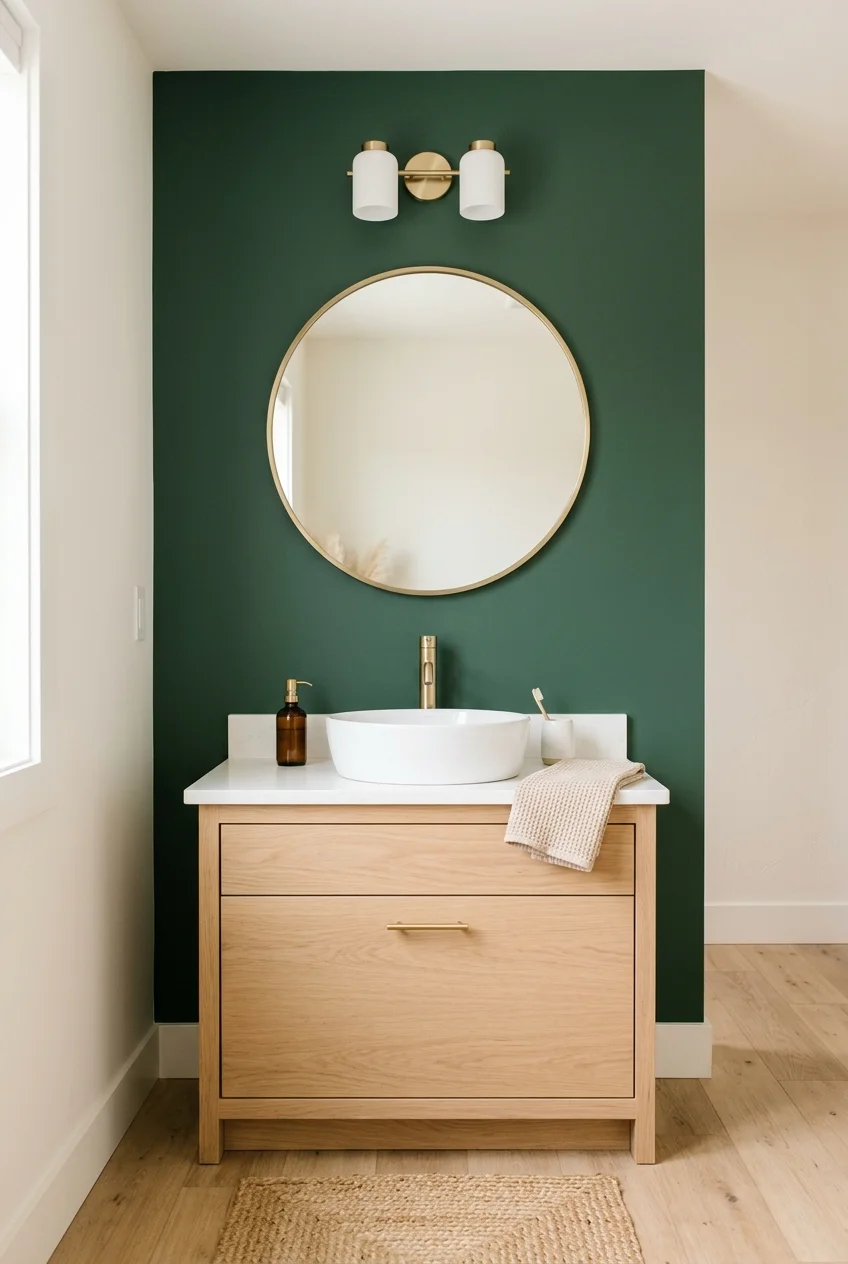
Forest green gives a light vanity and mirror a clear background, making one painted wall feel intentional without adding another permanent surface material.
Repair and prime the wall first, use bathroom-suitable paint, and support moisture control. Dark color will reveal uneven patches under side lighting.
29. Use Inky Navy Behind a White Tub
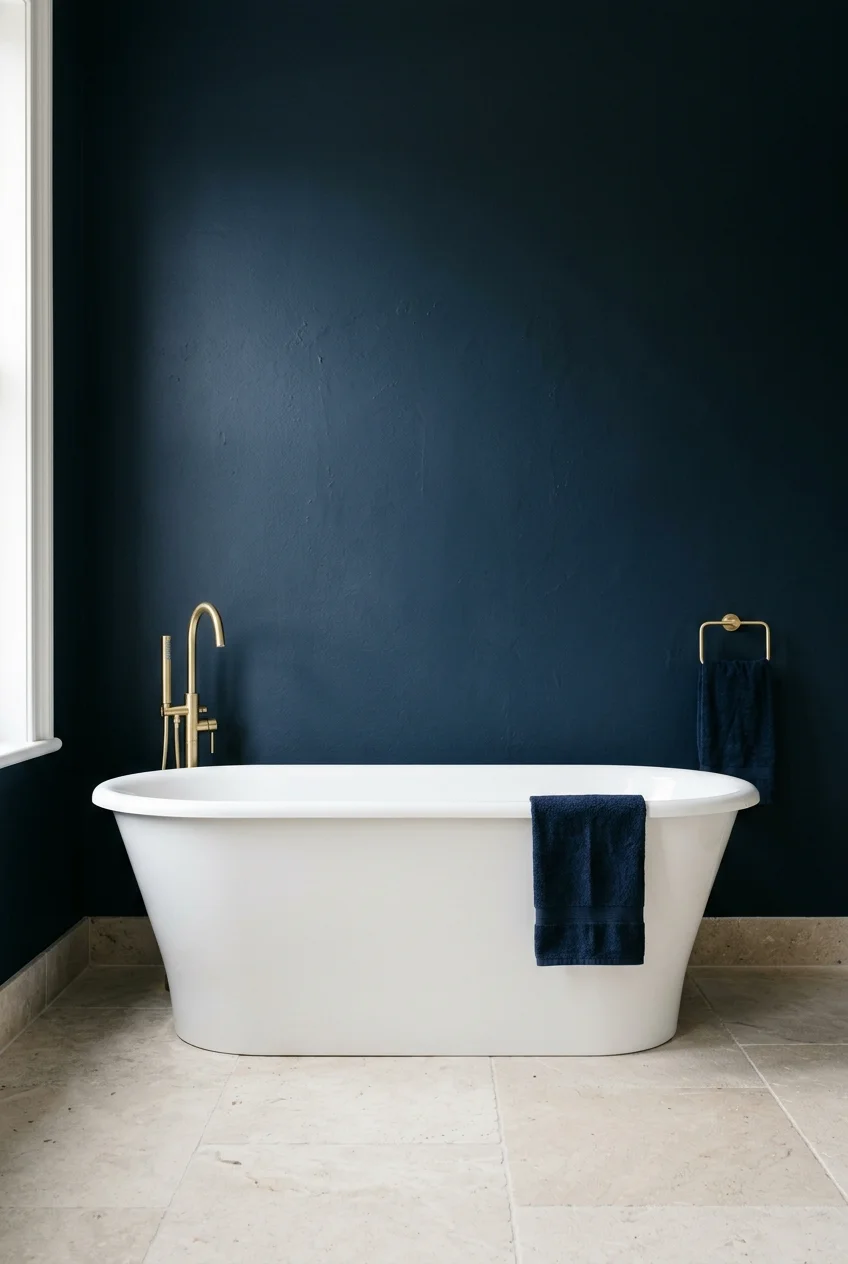
Inky navy creates a crisp silhouette around a white tub, especially when the floor and nearby walls remain light enough to balance the depth.
Repeat navy once in a small textile or cabinet detail. Too many dark additions can make the tub disappear into a generally shadowed room.
30. Paint an Arch to Frame the Mirror
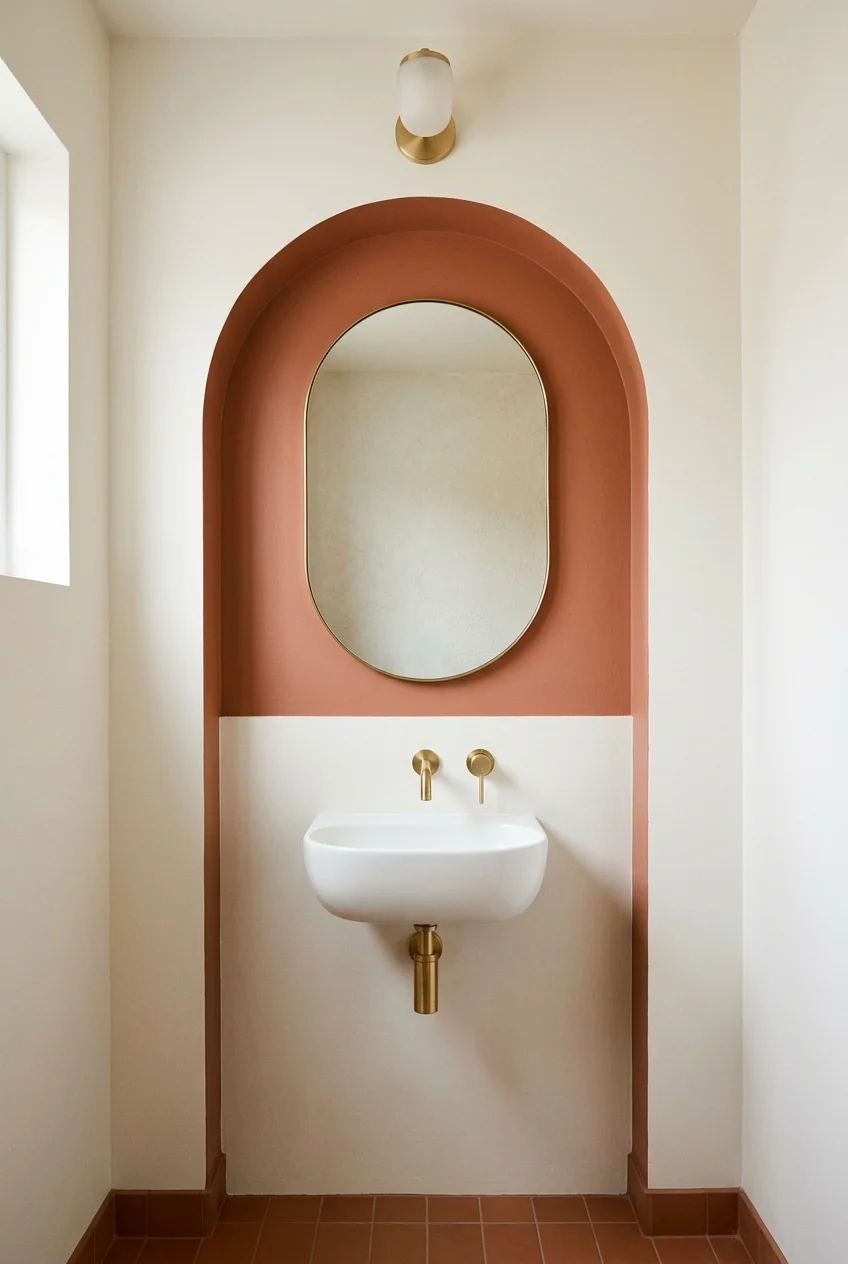
A painted arch can visually frame a plain mirror and sink without adding trim, making it a useful low-material feature for a compact dry wall.
Set the arch width from the vanity and keep its curve symmetrical. Stop the color at a clear baseline rather than fading into random edges.
31. Use One Broad Horizontal Color Band
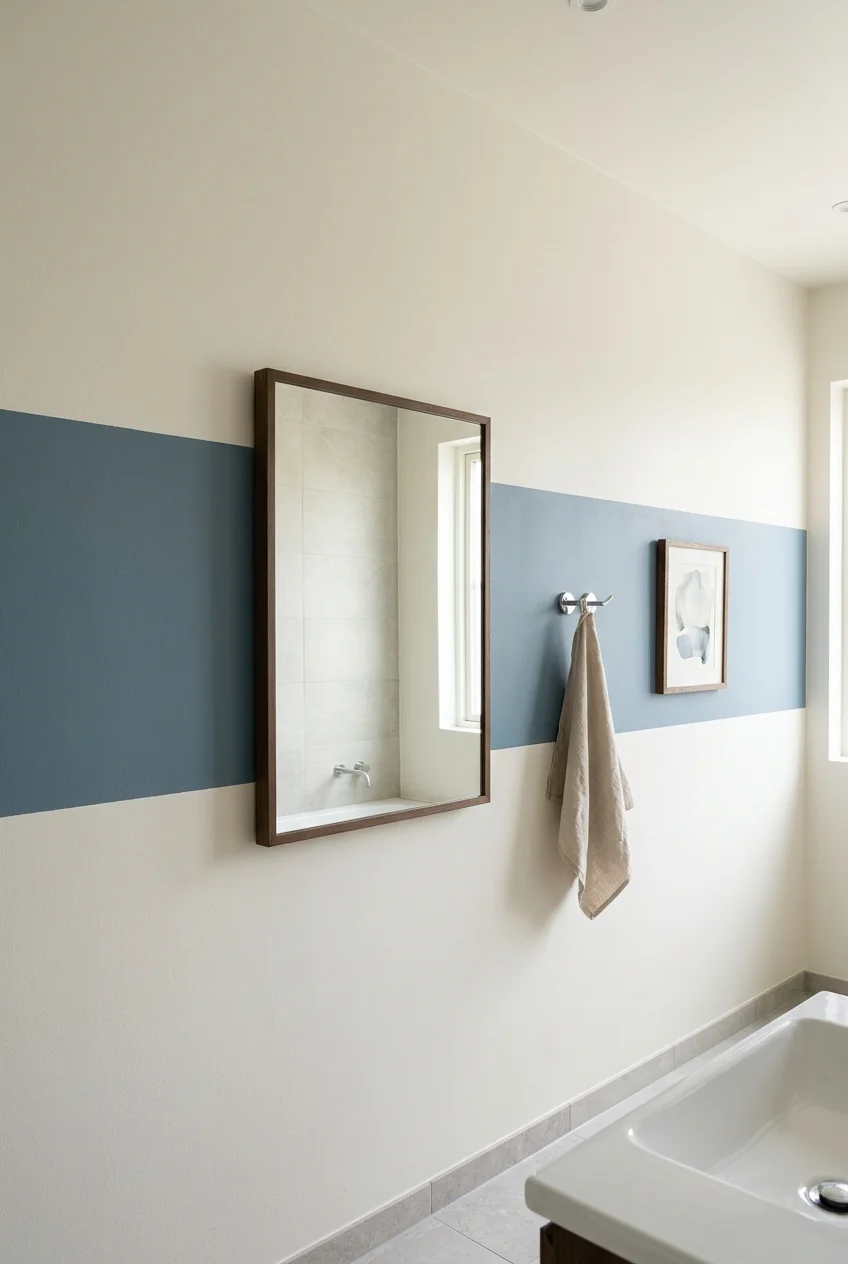
A broad painted band can connect the mirror, towel hook, and art across a long bathroom wall while leaving the upper and lower surfaces quieter.
Choose the band height from actual fixtures, not an arbitrary midpoint. Crisp level edges matter because every door and tile line offers comparison.
32. Paint Narrow Stripes in Closely Related Colors
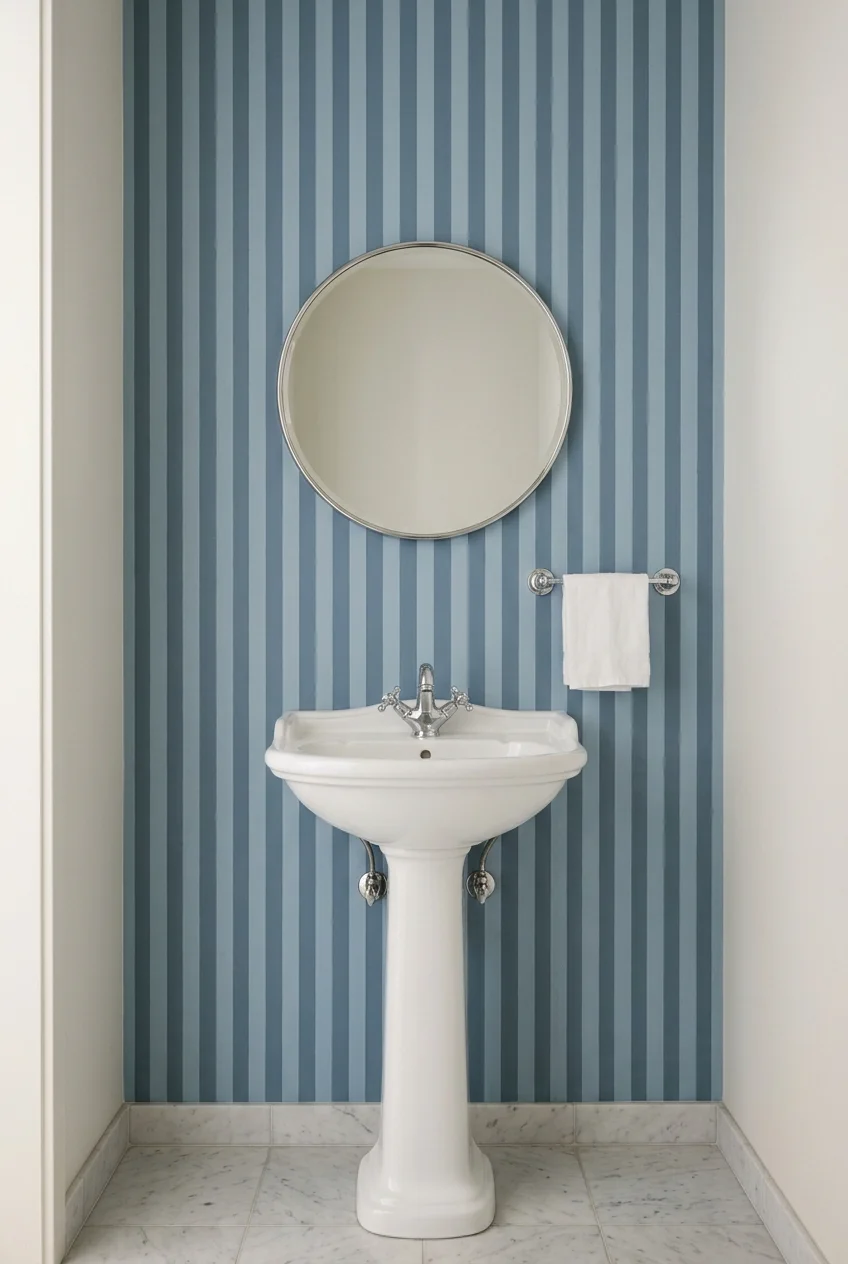
Tone-on-tone vertical stripes add rhythm without the contrast of wallpaper, giving a small powder room height and a tailored, slightly playful character.
Use colors close in value and measure every stripe from one reference line. Uneven widths become obvious around corners, doors, and mirrors.
33. Split the Wall With Two Paint Colors
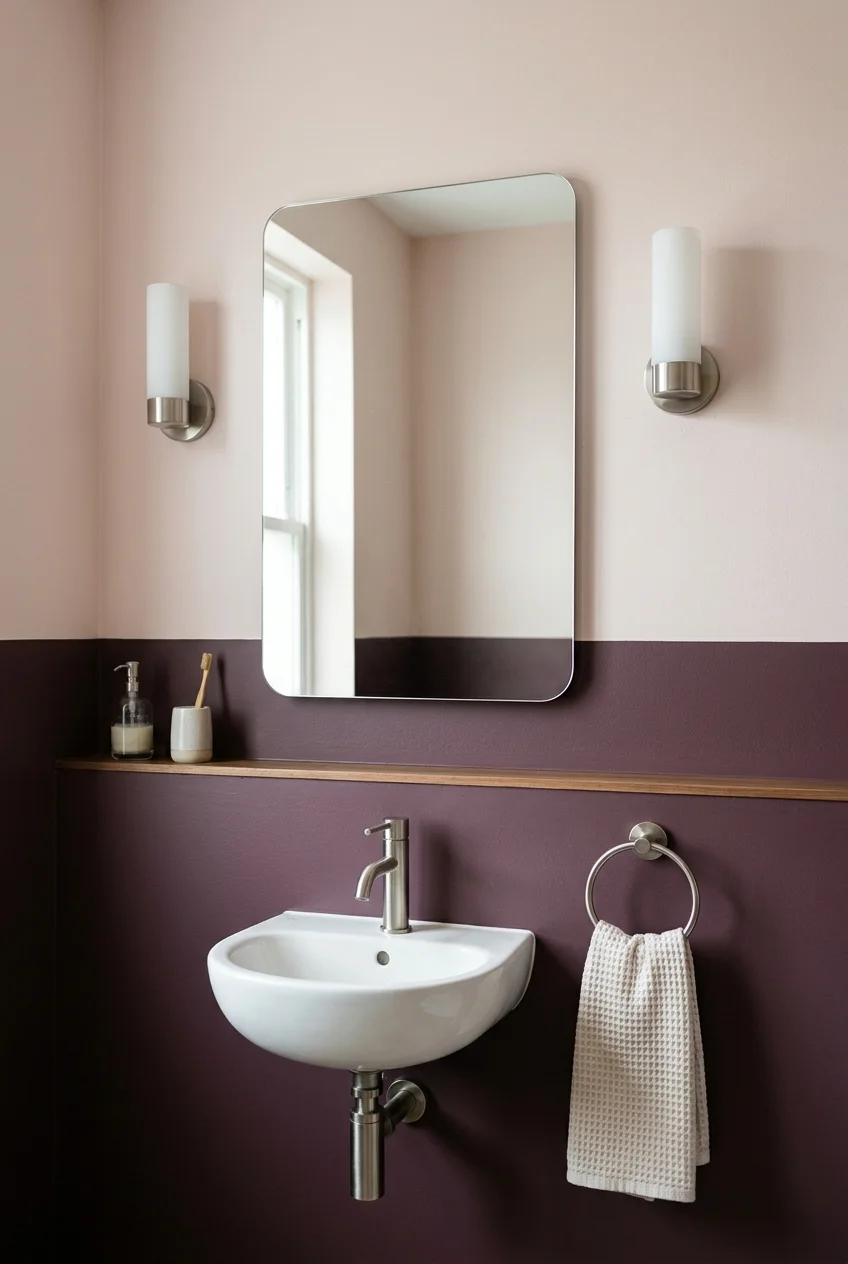
A darker lower color grounds the vanity while a lighter upper wall preserves brightness, creating a feature through proportion rather than pattern or paneling.
Align the break with a mirror edge, window sill, or deliberate trim line. An unrelated height can make the division feel accidental.
34. Commission a Simple Botanical Mural
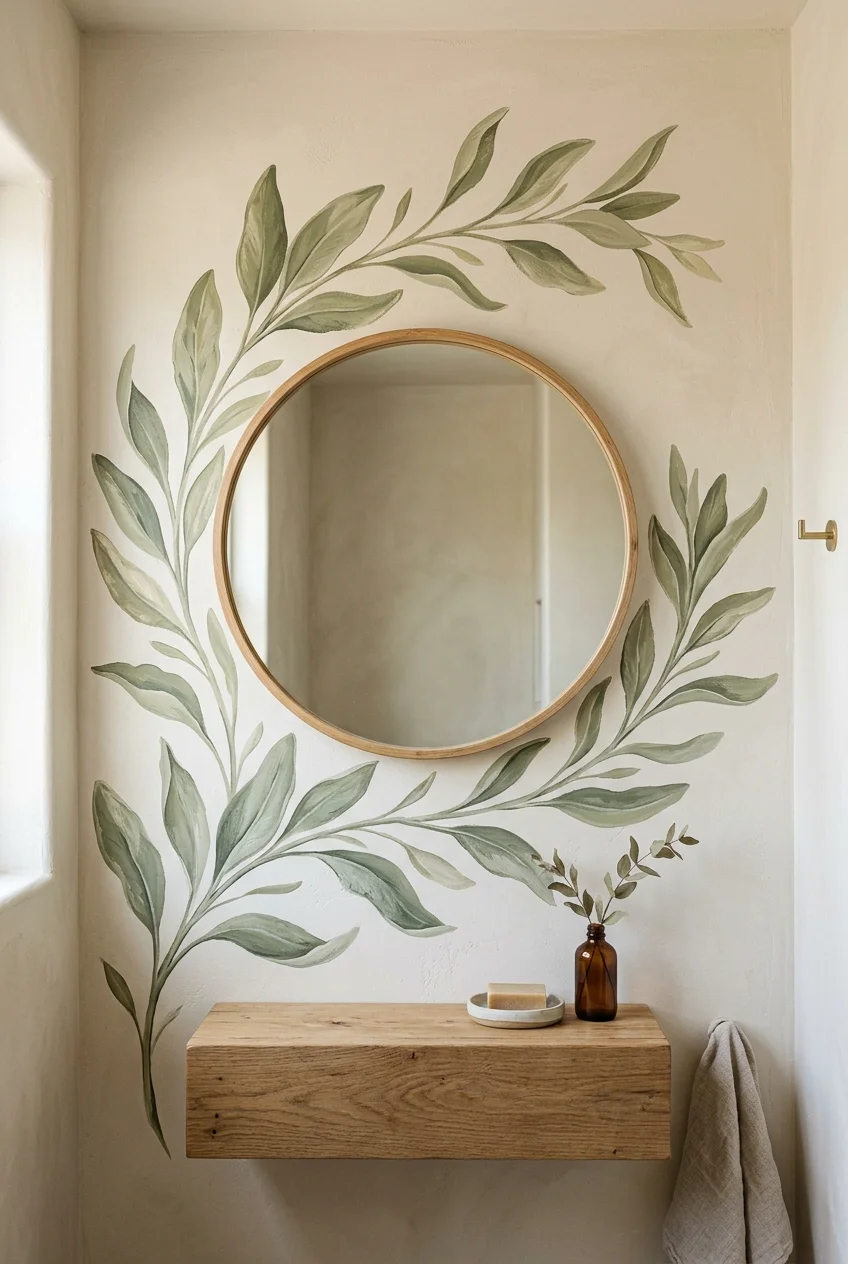
A hand-painted botanical mural can tailor scale and color to the exact wall, avoiding awkward wallpaper repeats around a window, mirror, or sloped ceiling.
Keep detailed leaves away from the busiest fixture edges and protect the finished surface appropriately. Request a full sketch before paint reaches the wall.
- Photograph and measure the wall.
- Mark every permanent fixture.
- Approve the scaled composition.
- Test colors beside tile and cabinetry.
- Protect the completed artwork as specified.
35. Choose Oversized Botanical Wallpaper
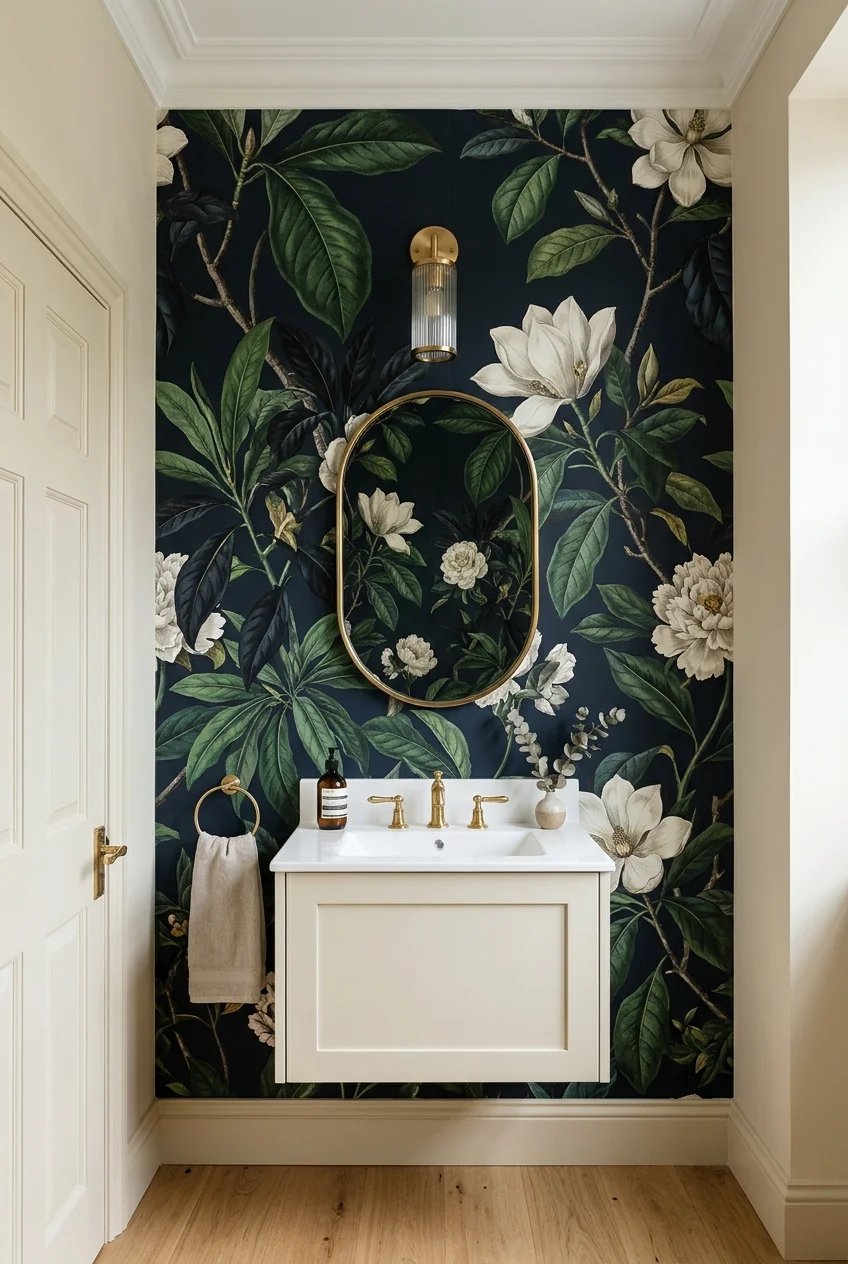
Large leaves or flowers can give a powder room immediate scale, particularly when the vanity and floor stay simple enough to support the pattern.
View the complete repeat before ordering and map its strongest motifs around the mirror. Ventilation, wall preparation, adhesive, and splash exposure still matter.
For more small-room combinations, browse these powder room ideas and compare how bold walls interact with fixtures, mirrors, and lighting.
36. Use a Small Vintage Print for Layered Detail
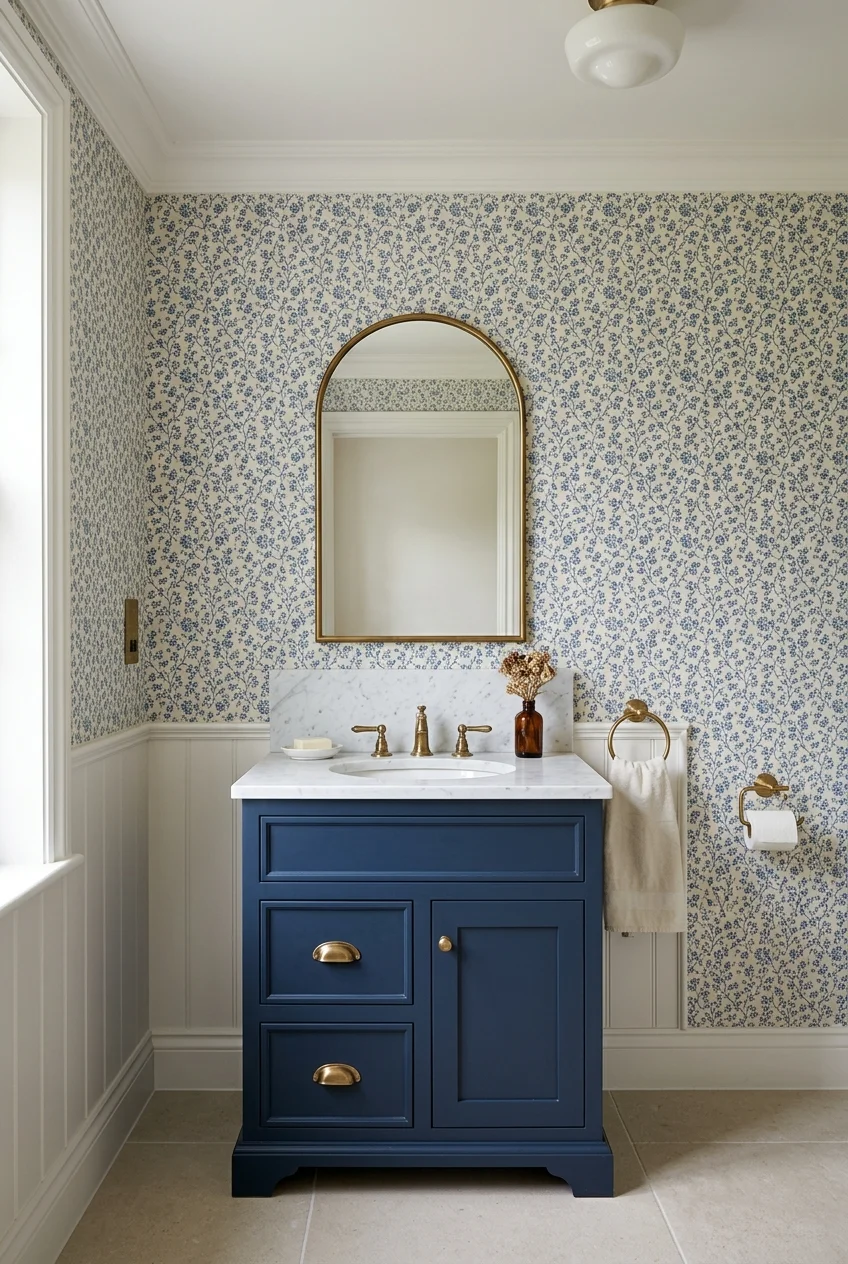
A small repeating print brings close-up detail to a traditional powder room, where viewers encounter the wall from only a few feet away.
Pair it with one quiet paint color and simple trim. Several competing small patterns can make the compact room feel visually unsettled.
37. Pick Geometric Wallpaper With a Clear Repeat
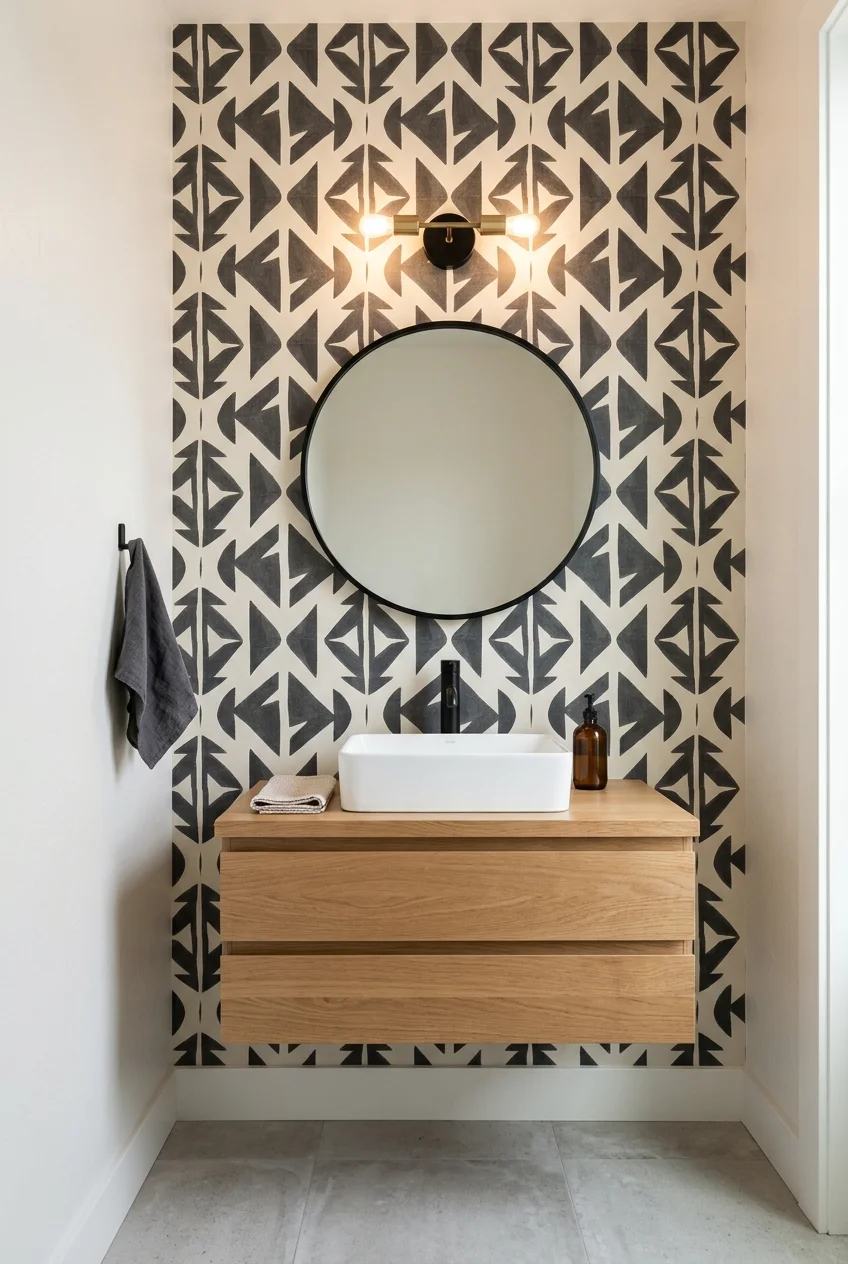
Geometric wallpaper can sharpen a plain vanity wall, but the repeat needs enough uninterrupted area to remain recognizable around mirrors and sconces.
Center a complete motif on the main fixture, then inspect corners and ceiling lines. Precise pattern matching matters more than adding extra accessories.
38. Install a Scenic Mural Behind a Freestanding Tub
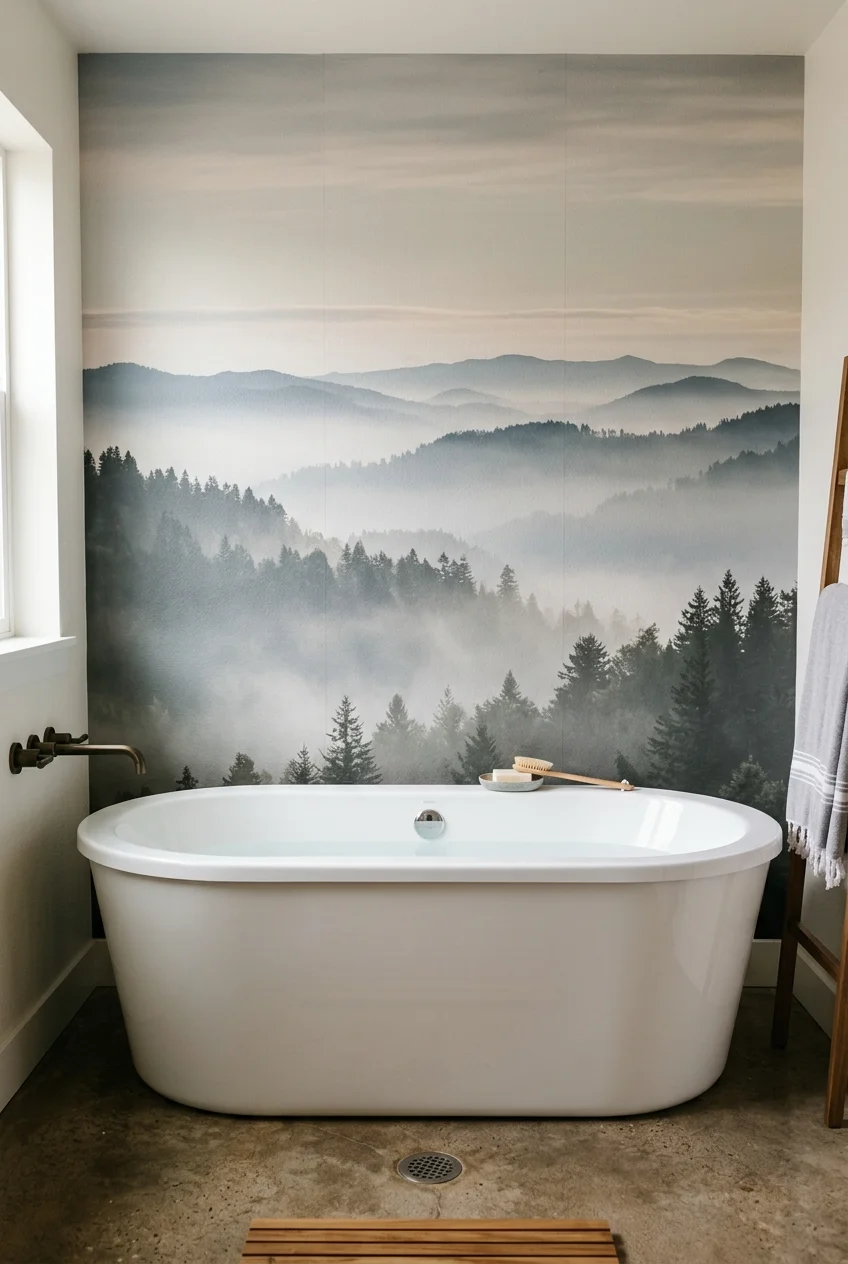
A scenic wall mural can give a tub wall a distant landscape or abstract horizon, turning an otherwise blank bathing area into one large image.
Use it only where the product and installation suit the moisture exposure. Keep the filler and tub from hiding the mural’s main focal point.
Scale the artwork from the doorway view and verify panel seams before ordering. A dramatic crop can change the entire composition.
39. Test Removable Wallpaper on a Dry Rental Wall
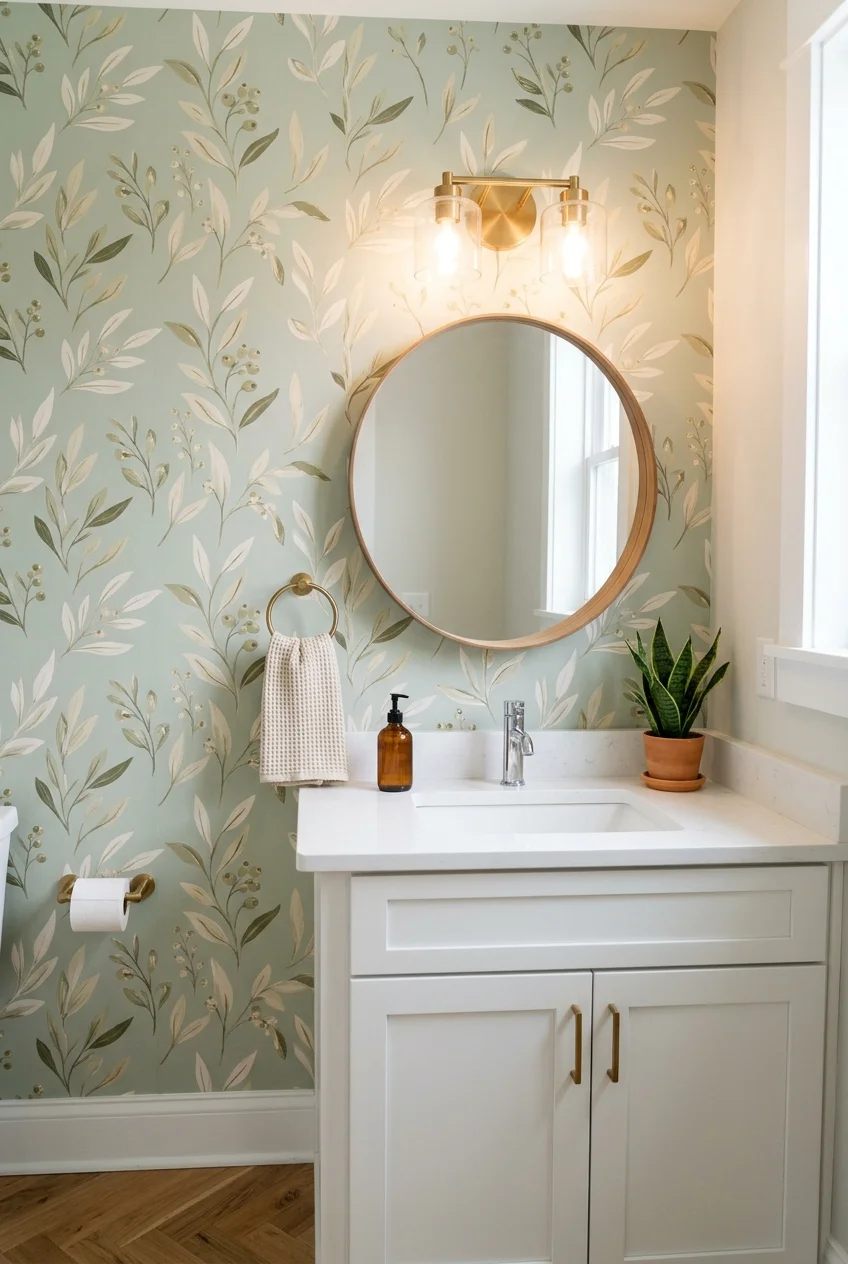
Peel-and-stick wallpaper offers a reversible feature in a dry bathroom zone, but adhesion and removal depend on the actual paint, texture, and humidity.
Test a sample for the manufacturer’s recommended period, read the lease, and avoid loose paint, fresh coatings, direct spray, and persistently damp drywall.
This post may contain affiliate links. See our full affiliate disclosure.
This sage botanical peel-and-stick wallpaper is specified for clean, dry, smooth surfaces; calculate the repeat and test your bathroom wall before ordering every roll.
40. Pair Wallpaper With Tiled Wainscoting
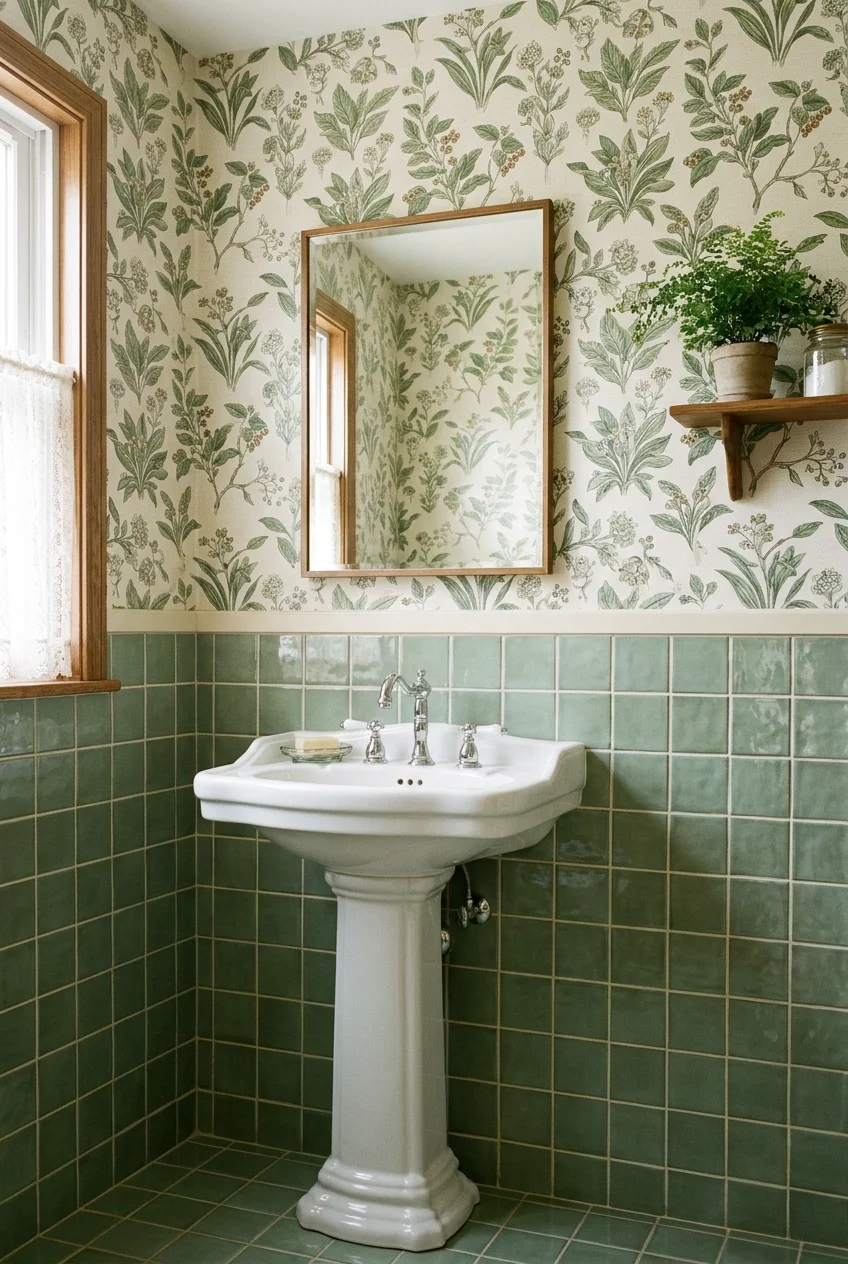
Tile on the lower wall protects the splash-prone zone, while wallpaper above supplies pattern at eye level without reaching the wettest surfaces.
Align the tile cap across the room and start the wallpaper with a full motif above it. The transition should look architectural and continuous.
Planning note Choose the paper, tile, grout, and cap together, because separate attractive samples can produce competing undertones when installed side by side.
Where to Put the Feature Wall and How to Finish It
41. Make the Vanity Wall the First View
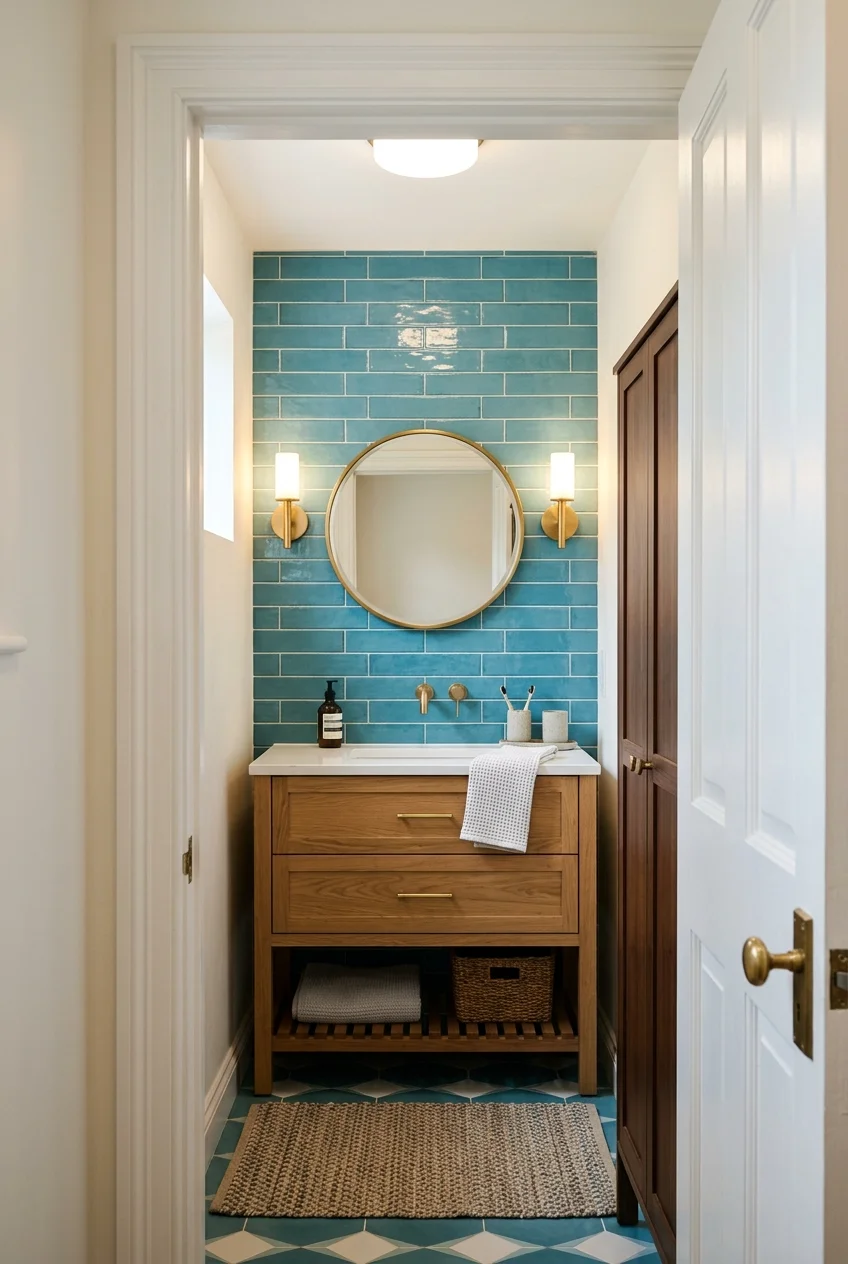
The wall facing the bathroom door usually offers the strongest feature location because the mirror, sink, and lighting already create a natural composition.
Photograph the doorway view before choosing material. The best close-up sample may lose impact when partially hidden by an open door or tall cabinet.
If the room still feels generic, these builder-grade bathroom makeover ideas can help separate cosmetic wall changes from larger renovation work.
42. Turn the Wall Behind the Toilet Into a Narrow Focal Point
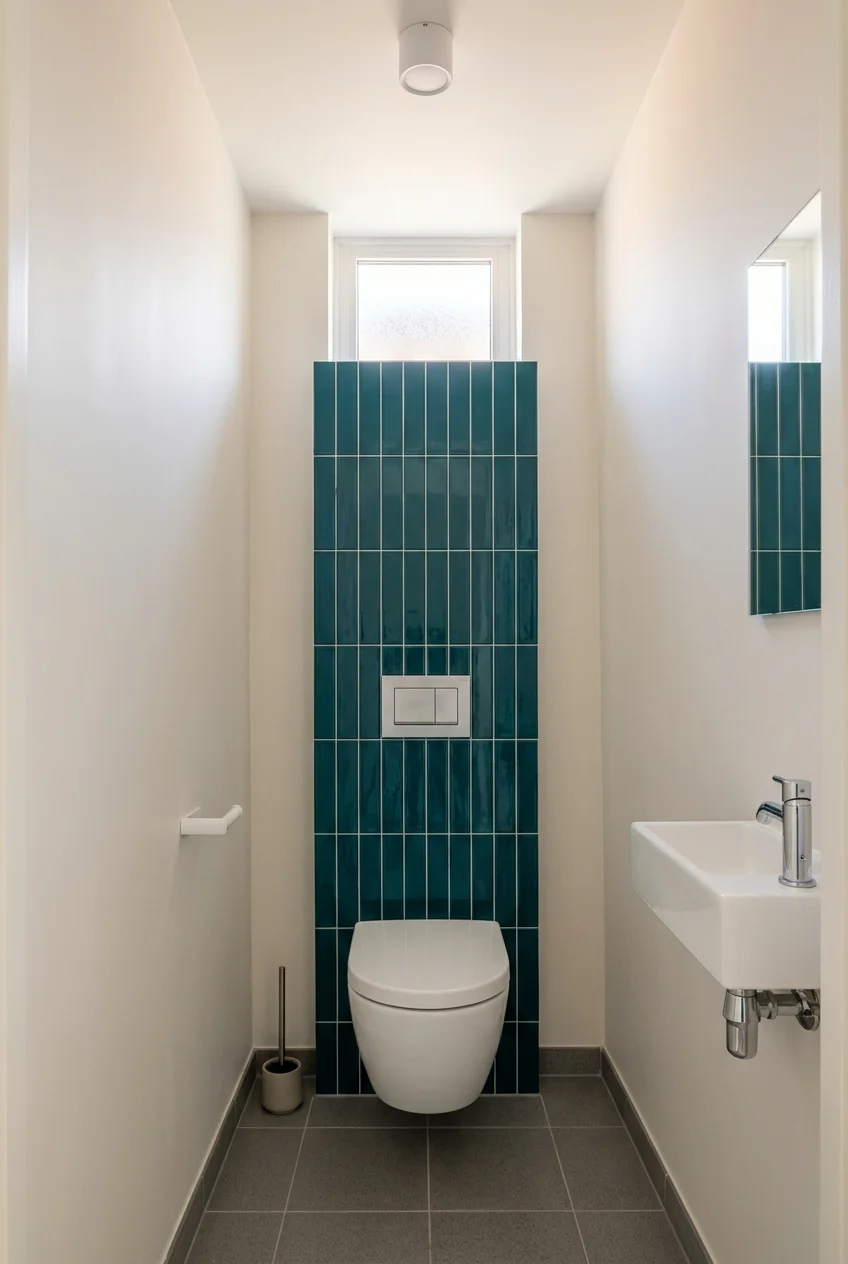
A narrow wall behind the toilet can carry bold tile, wallpaper, or paneling without competing with a larger vanity surface elsewhere in the room.
Center the pattern on the fixture and preserve access to the tank, flush plate, shutoff, and service panels. Avoid shelves that crowd head space.
Continue the treatment to a clear corner or ceiling line. Stopping at an arbitrary width can make the feature resemble an unfinished strip.
43. Highlight Only the Shower’s Far Wall
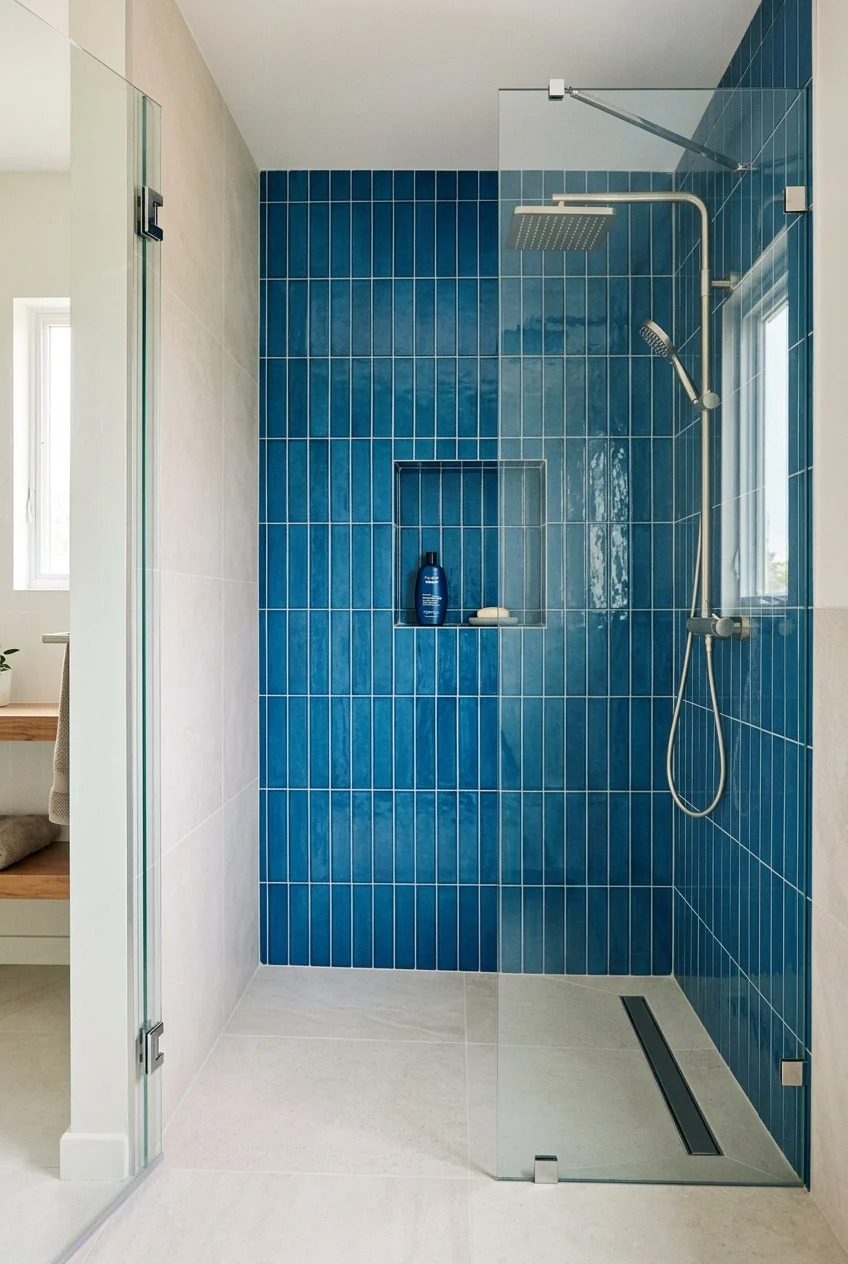
Treating the shower’s far wall creates a framed view through clear glass, while quieter side walls keep the enclosure from becoming visually dense.
Carry the full waterproofing assembly behind every tiled surface, including the plain walls. Feature placement changes appearance, not wet-area construction requirements.
Align the niche with the feature pattern or keep it on a side wall. A misplaced recess can interrupt the strongest part of the composition.
Wet-area rule Tile and grout are finish layers, so the approved waterproofing system behind them must safely handle the actual shower exposure.
44. Center the Feature Wall Behind the Tub
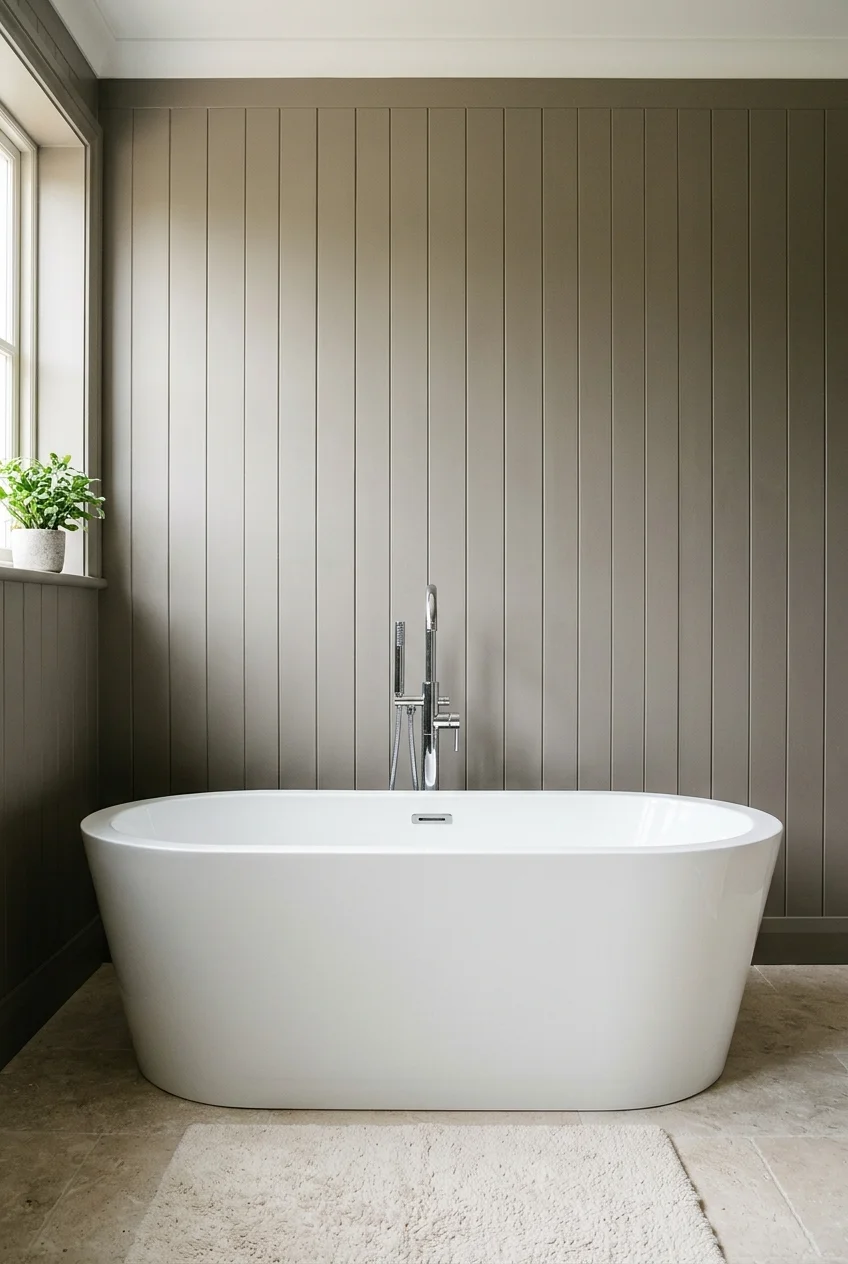
A tub wall works best when its pattern or panels relate clearly to the basin, creating one composed bathing scene from the bathroom entrance.
Set the centerline from the tub, then account for the filler, window, and wall edges. Keep the lower area practical for cleaning and splash.
45. Wrap Tile Around a Bathroom Window
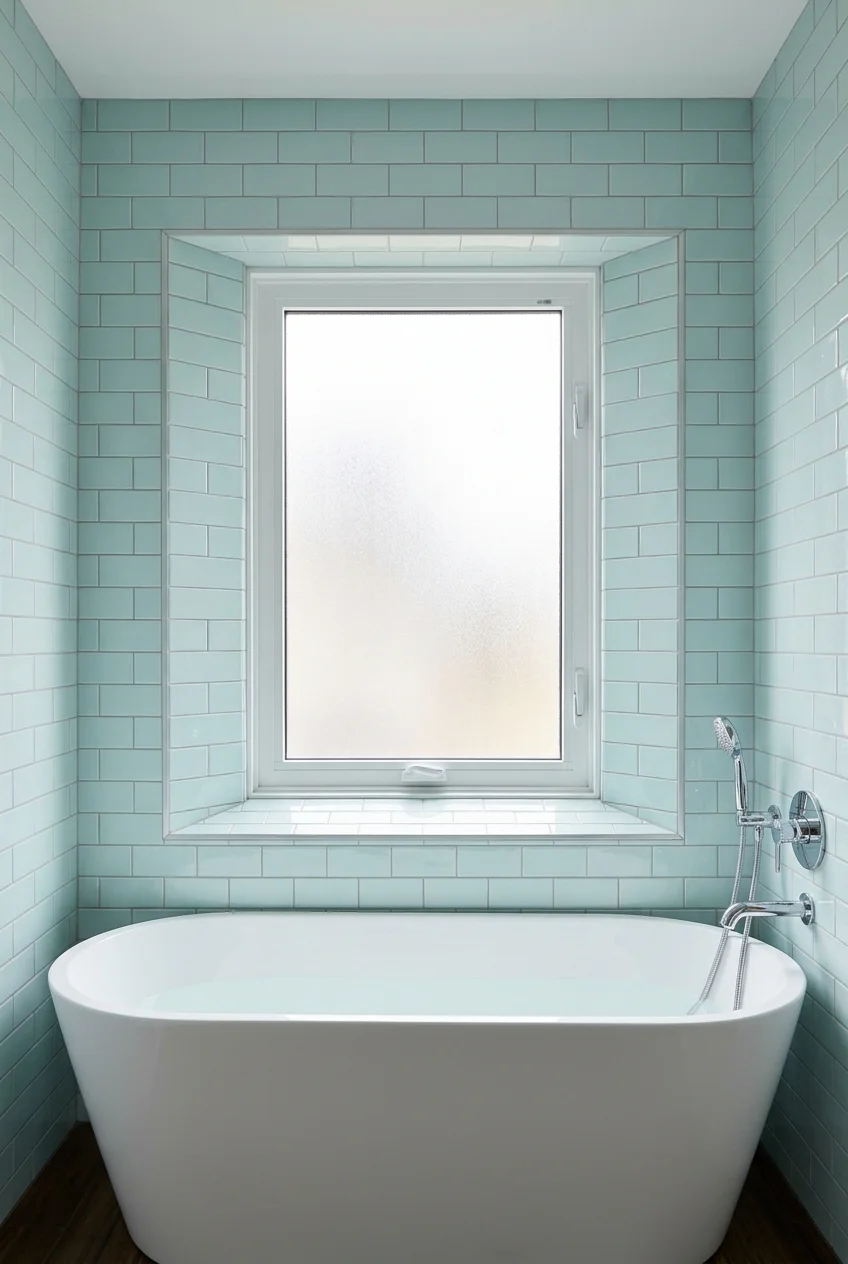
Tiling the window wall can integrate an awkward opening into the feature rather than treating it as an interruption surrounded by narrow painted strips.
Plan balanced cuts at jambs and corners, and detail the sill, waterproofing, trim, and window suitability for the wall’s actual moisture exposure.
- Confirm the window belongs in the wet-zone assembly.
- Slope and finish the sill correctly.
- Center tile joints or units deliberately.
- Keep hardware and drainage paths clear.
46. Tile Both Faces of a Shower Partition
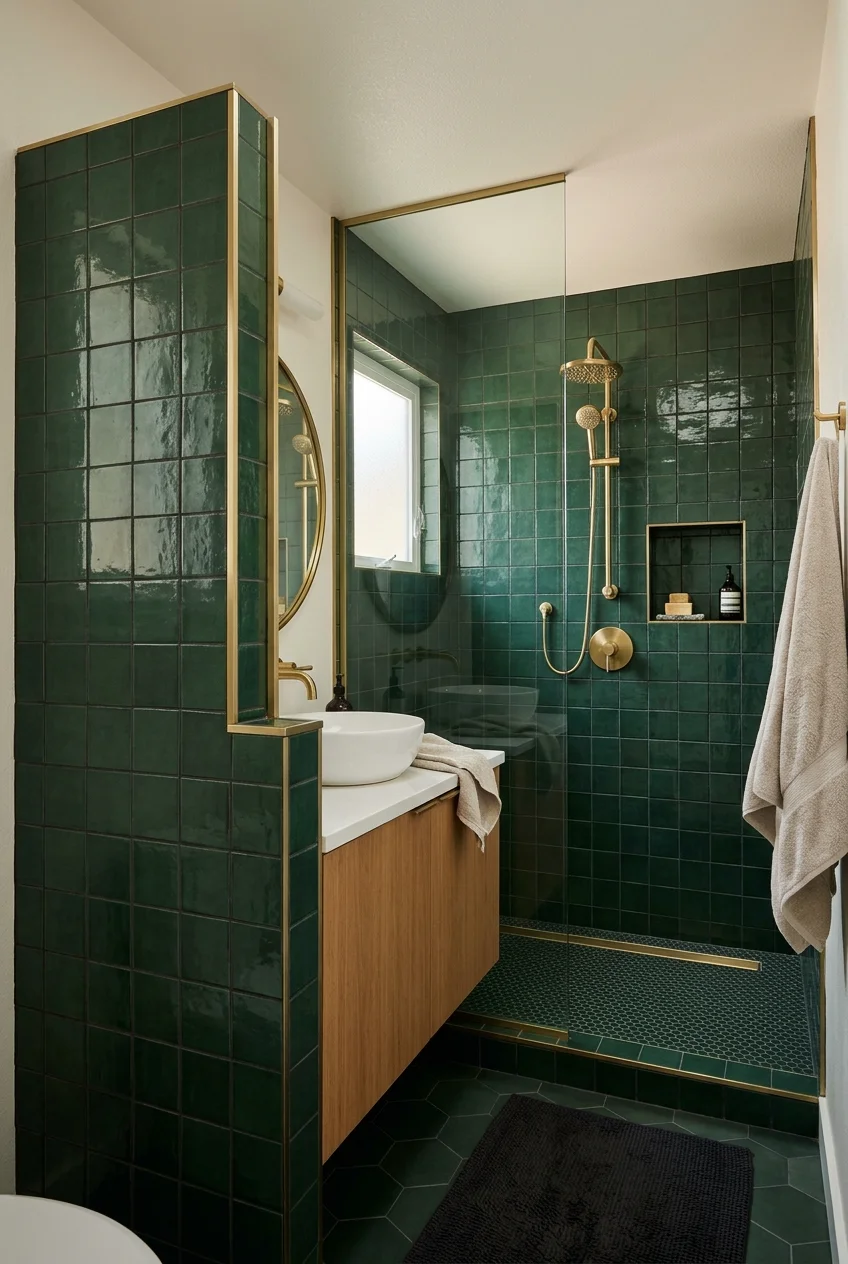
A solid shower partition can become a two-sided feature, presenting one finished tile plane to the vanity and another inside the wet enclosure.
Coordinate wall thickness, edge profiles, niches, glass channels, and waterproofing before framing. The exposed end needs a deliberate finish from every viewpoint.
Use the same tile on both faces for a monolithic look, or change only texture while keeping color related across the narrow edge.
47. Turn a Recessed Niche Into the Feature
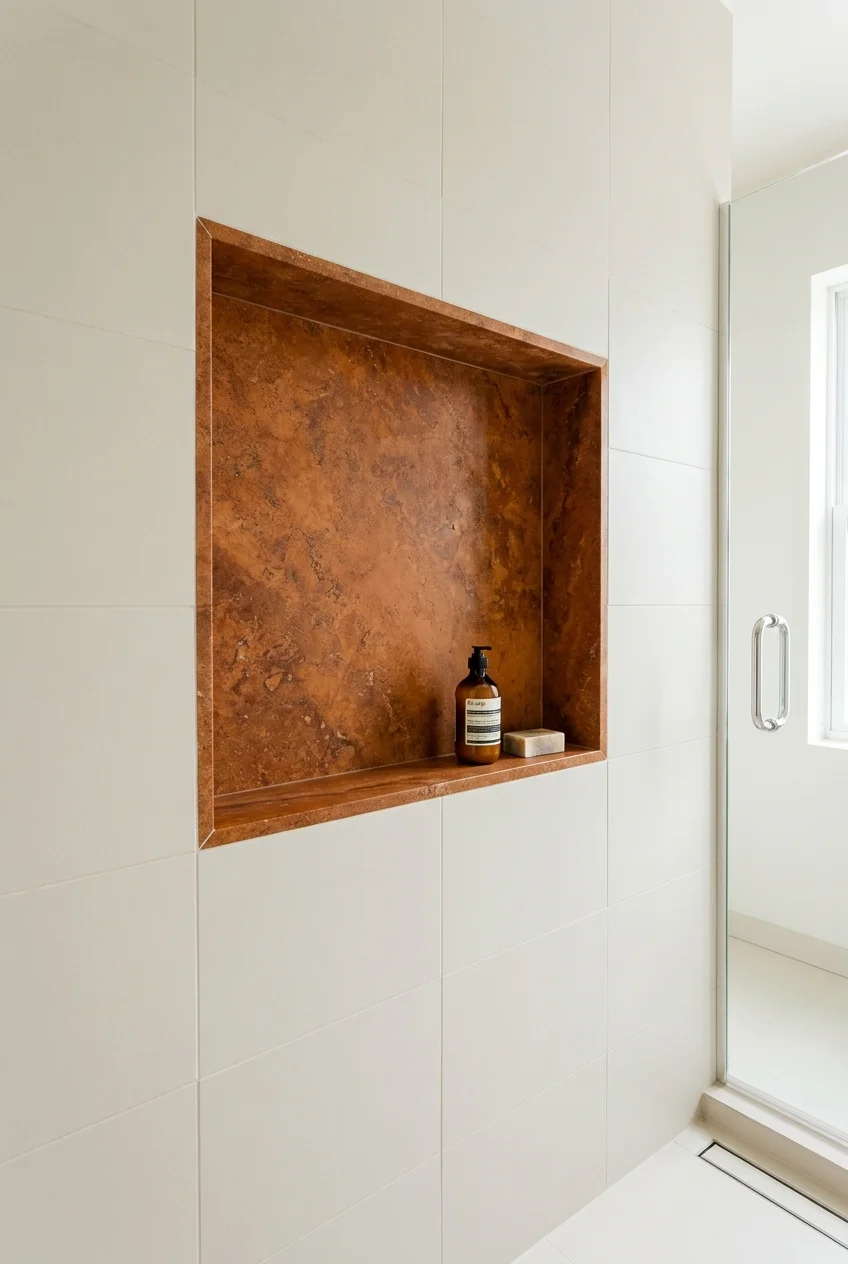
A large recessed niche can become the focal wall through contrasting tile or slab, while the surrounding field remains quiet and practical.
Size it around useful bottles or display objects, then coordinate framing, waterproofing, shelf slope, lighting, and edge fabrication before construction.
Limit the contrast to the niche interior so its depth remains visible. Additional patterned bands nearby can flatten the intended focal point.
48. Backlight a Floating Stone-Look Panel
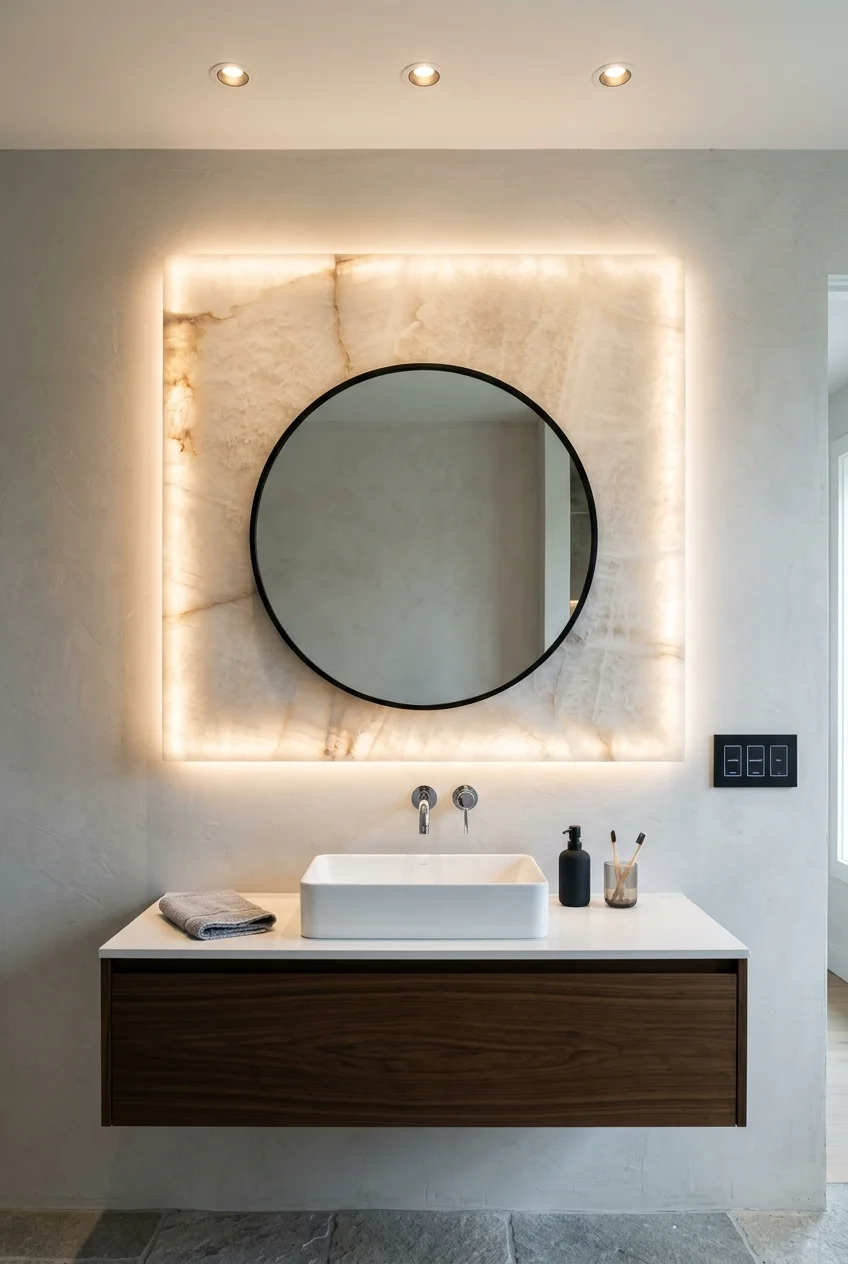
A floating stone-look panel with concealed perimeter light can turn a toilet or vanity wall into a sculptural plane with a clear shadow gap.
The panel support, electrical rating, driver access, ventilation, and service openings need professional coordination. Light should be even rather than revealing every bracket.
Lighting note Install independent practical lighting as well; a glowing feature panel should not carry the bathroom’s cleaning or grooming tasks alone.
49. Build a Changeable Picture-Ledge Gallery Wall
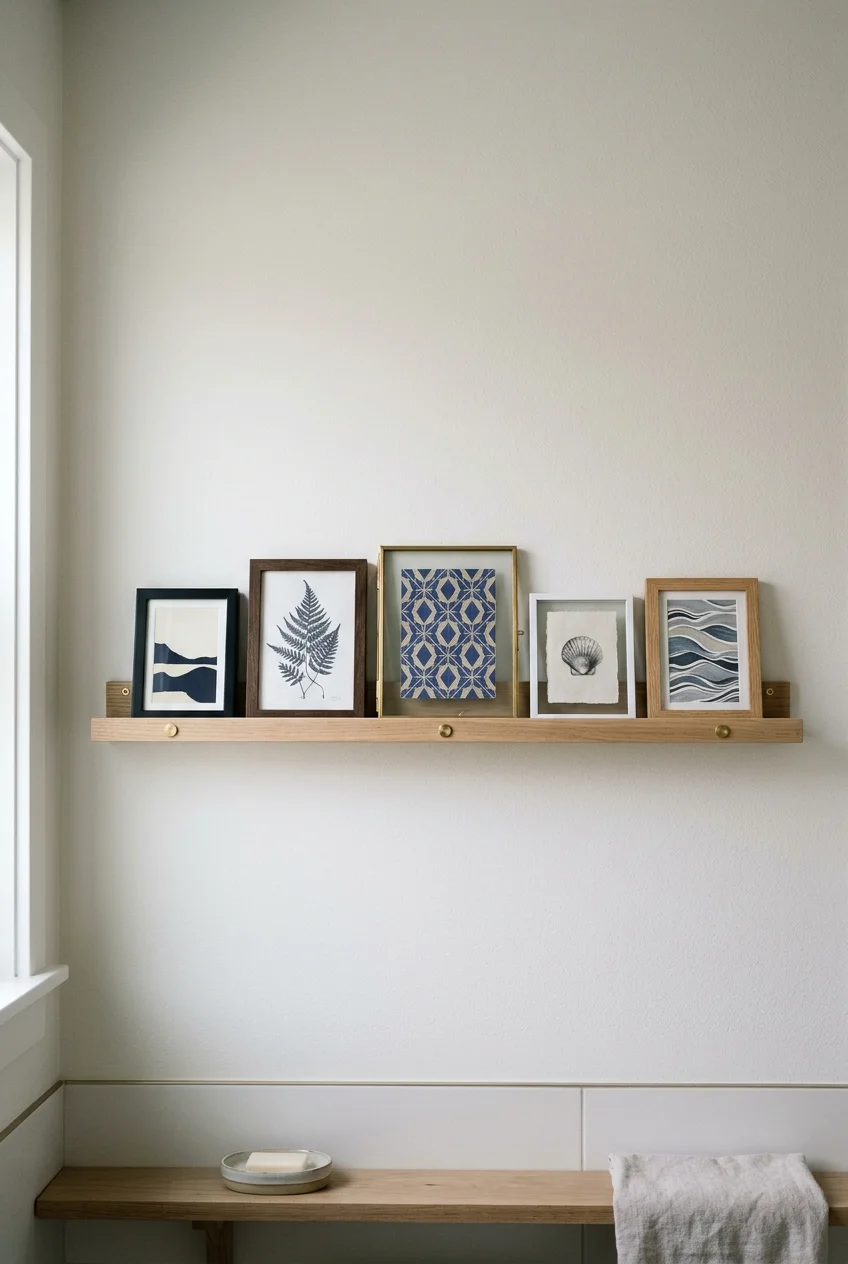
A shallow picture ledge can create a flexible feature wall with layered framed art, letting renters or frequent redecorators change the composition easily.
Use moisture-suitable frames, secure the ledge properly, and keep it outside direct splash. Limit the palette so many frames still read as one group.
For more ways to balance art with mirrors and storage, review these bathroom wall decor ideas before filling every open surface.
50. Use a Full Sample Board Before Committing
Image pending: No image is attached to this draft for idea 50 (image-50).
A feature wall succeeds through its relationship with the room, so compare the wall material, grout, paint, counter, cabinet, and metal finishes together.
View the board upright beside the actual wall in morning, evening, and vanity light. Flat tabletop comparisons miss reflections and vertical color shifts.
- Add the exact wall material and full pattern repeat.
- Include grout or seam color.
- Place cabinet and counter samples together.
- Compare every metal finish.
- Remove one element if everything competes.
Photograph the board from the doorway and close range. Those views reveal whether the feature reads as one room decision or isolated decoration.
Frequently Asked Questions
Which bathroom wall should become the feature wall?
Start with the wall visible from the doorway, usually behind the vanity, tub, toilet, or far end of a clear-glass shower.
Choose the surface with a complete view and natural fixture alignment. Avoid a wall fragmented by doors, tall cabinets, or unrelated service panels.
Can wallpaper work on a bathroom feature wall?
Wallpaper can work in a well-ventilated dry zone when the product, adhesive, wall preparation, and manufacturer guidance suit the bathroom conditions.
Keep ordinary paper away from direct spray, persistent dampness, and failing paint. Test removable products on the actual surface before committing.
Does feature-wall tile make a shower waterproof?
No. Tile and grout are finish layers, not the complete waterproof enclosure. Wet-area performance depends on the approved assembly behind them.
Follow the selected membrane, backer, drain, seam, penetration, and sealant instructions together, plus applicable local requirements and inspections carefully on site.
How do I stop a bathroom feature wall from looking too busy?
Let one element lead: color, pattern, texture, or lighting. Keep nearby flooring, counters, fixtures, and accessories quieter instead of repeating every effect.
Compare full-size samples from the doorway and vanity positions. Remove one competing finish whenever several surfaces demand attention at the same distance.