50 Soaker Tub Bathroom Ideas for a Beautiful, Usable Retreat

This post may contain affiliate links: full affiliate disclosure.
A soaker tub can anchor the whole bathroom, but the best choice depends on placement, bathing posture, privacy, cleaning access, and surrounding materials.
Use these ideas to compare distinctive looks, then measure the room and verify every tub, filler, drain, and installation requirement before ordering.
Soaker Tub Layouts Worth Saving
1. Center an Oval Tub Beneath a Wide Window
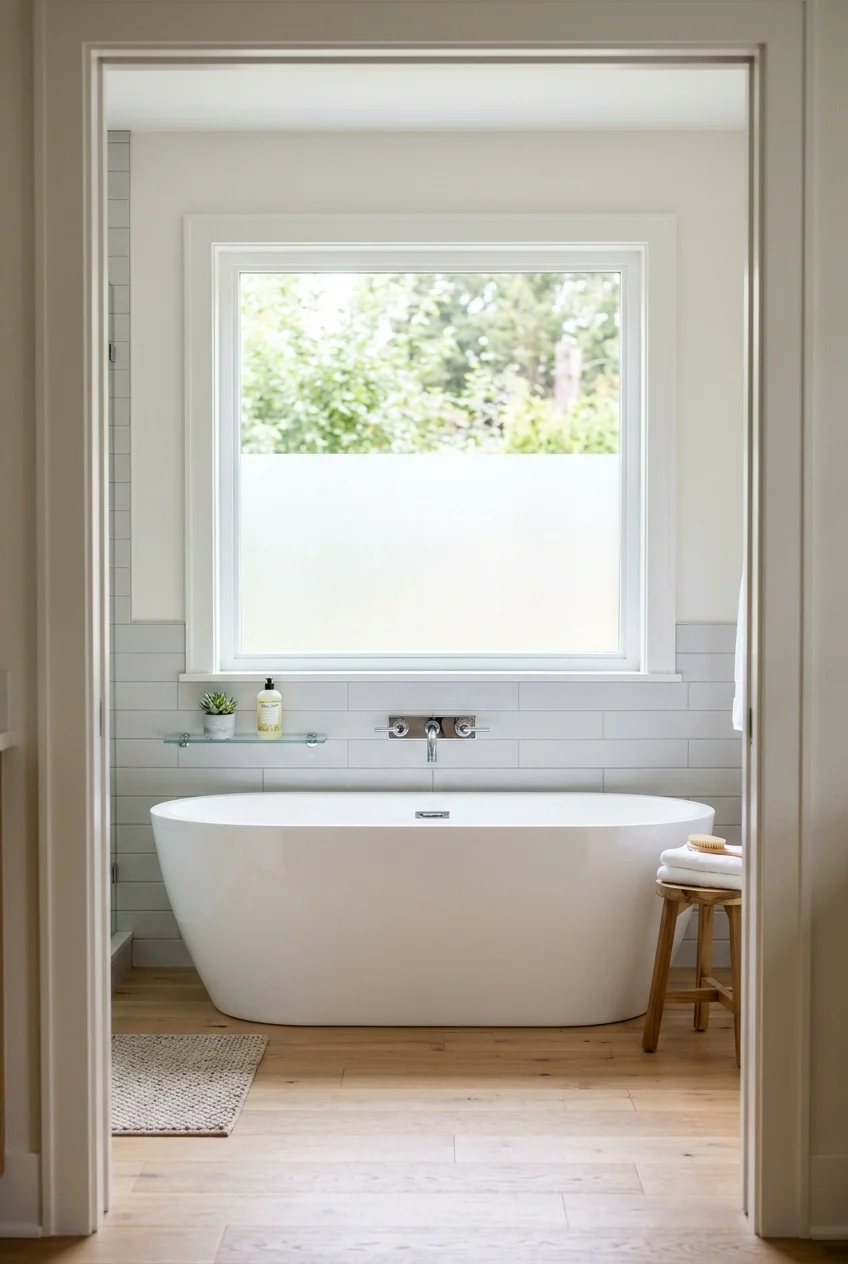
A wide window gives a simple oval tub a clear focal point while making the bathing area feel connected to the landscape beyond.
Choose privacy glass, a bottom-up shade, or an exterior view screen before finalizing placement. The solution should protect privacy without erasing daylight.
Planning note Confirm the tub height against the window sill so the rim, filler, and shade can operate without colliding during everyday use.
2. Turn an Empty Corner Into a Curved Tub Nook
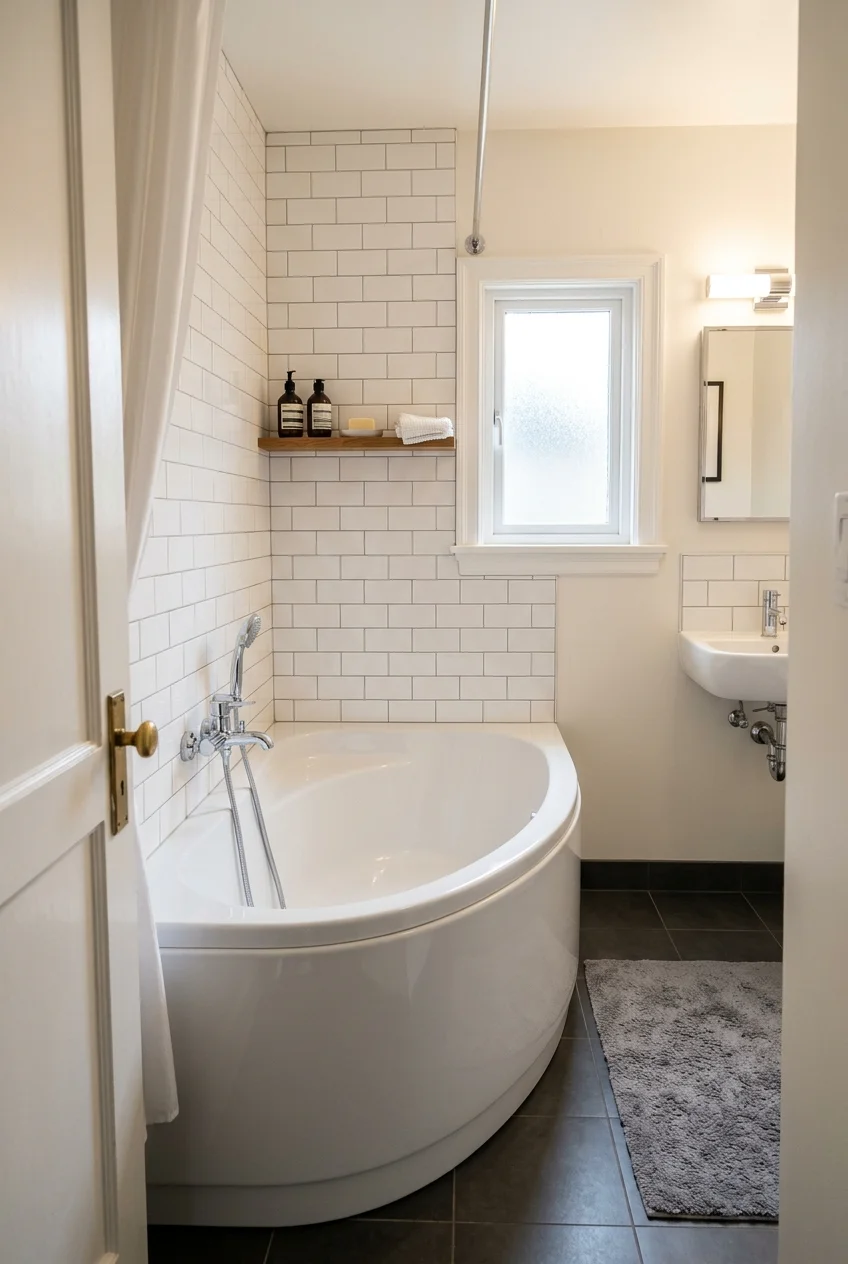
A compact oval or softly squared tub can use a corner that would otherwise become awkward open floor without making the room feel crowded.
Keep the tub parallel to one wall rather than forcing a diagonal position. Straight alignment usually preserves a cleaner path and simpler plumbing access.
- Check the bathroom door swing.
- Protect access to the drain and filler.
- Leave a practical cleaning route around the tub.
3. Place the Tub Beside a Glass Walk-In Shower
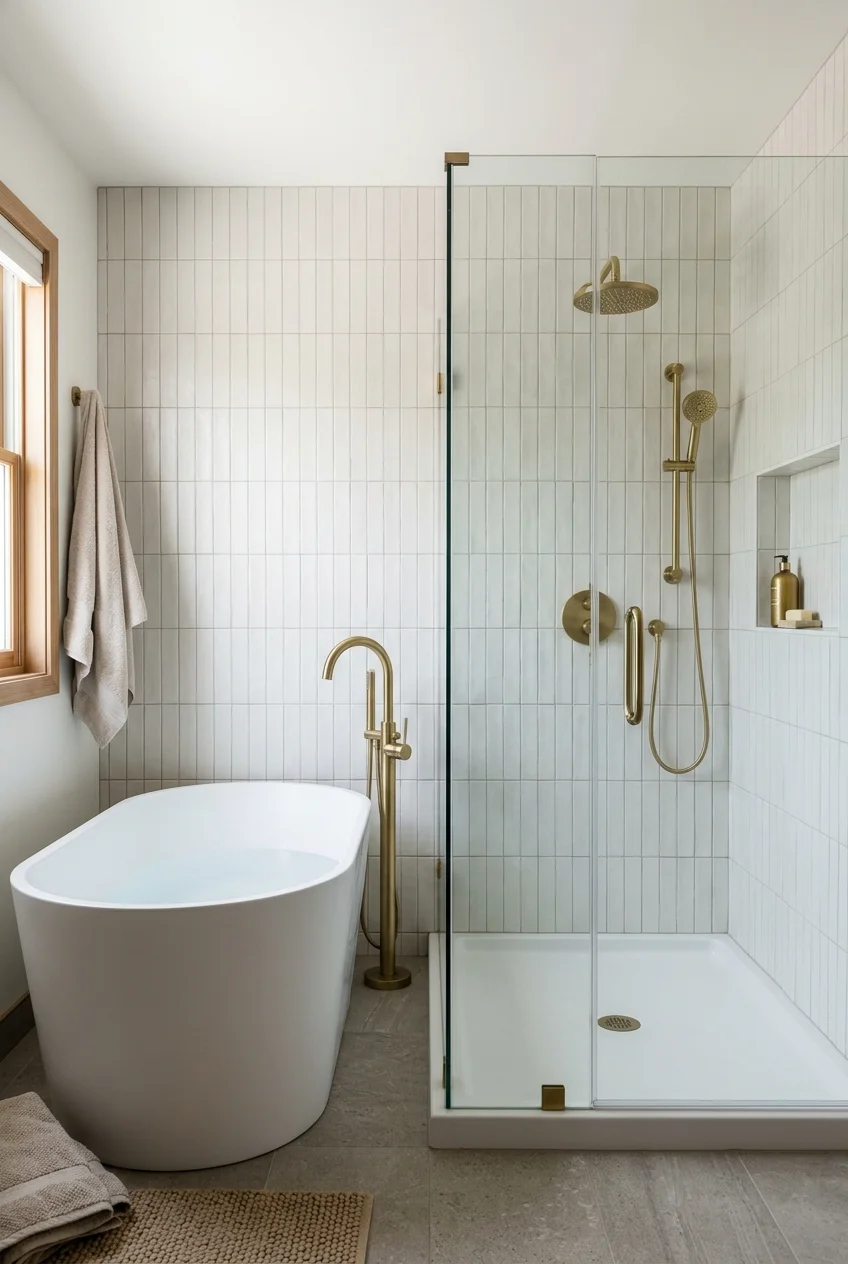
Placing the tub and shower side by side creates one organized bathing wall while letting their different shapes read as a balanced pair.
Align tile, fixture finishes, or a shared ledge across both zones. The repeated detail connects them without pretending they serve the same function.
If bottles and towels compete for space, borrow a solution from these shower storage ideas and keep the tub edge visually quiet.
4. Create a True Tub-and-Shower Wet Room
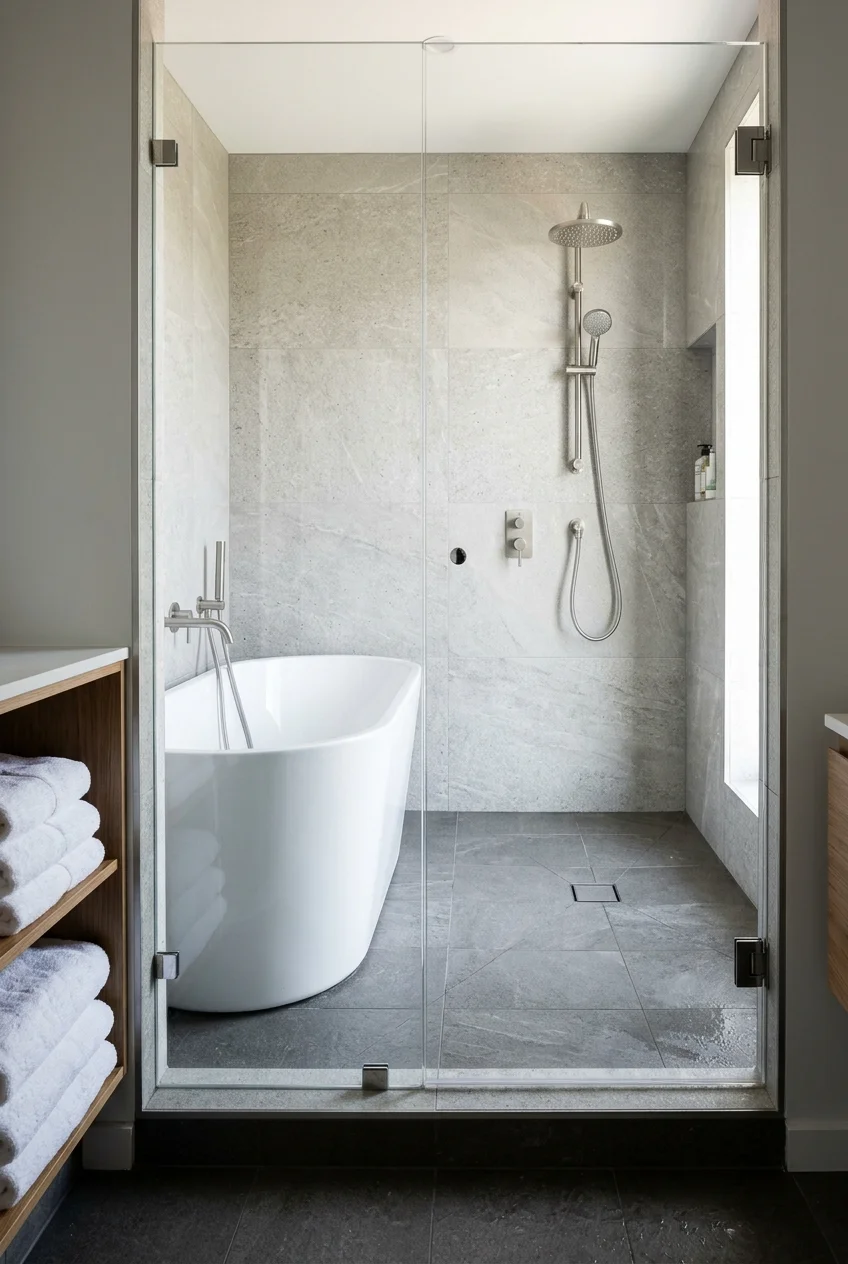
A wet room can fit a soaker and open shower behind one glass panel, giving a compact bathroom a single spacious, visually continuous zone.
This layout depends on waterproofing, drainage, ventilation, and splash control that suit the whole enclosure, not simply tile installed behind the tub.
- Test the layout with full-size fixture outlines.
- Coordinate slopes, drains, and waterproofing professionally.
- Plan a dry towel location outside the wet zone.
Watch for Allow an easy route to clean behind the tub, because a narrow wet gap becomes difficult to reach and slow to dry.
5. Choose a Deep Alcove Tub for Familiar Function
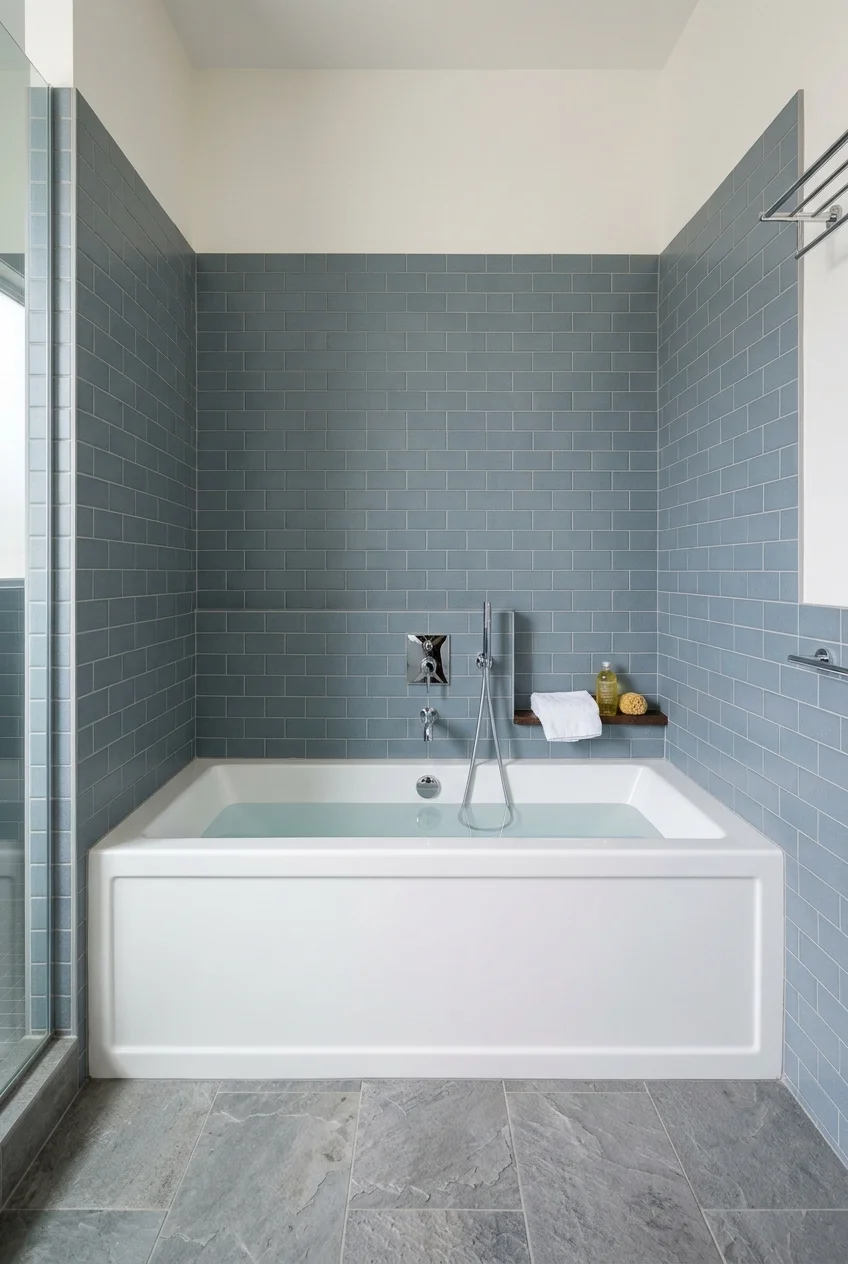
A deep alcove tub keeps three enclosed sides, making it practical where the existing plumbing and room width already favor a built-in fixture.
Use a clean front apron and one continuous wall material to make the deeper basin feel intentional rather than like a standard tub squeezed in.
Compare actual water depth, interior length, overflow position, and step-over height. Exterior dimensions alone do not explain how the tub will feel.
6. Use a Compact Japanese-Style Soaking Tub
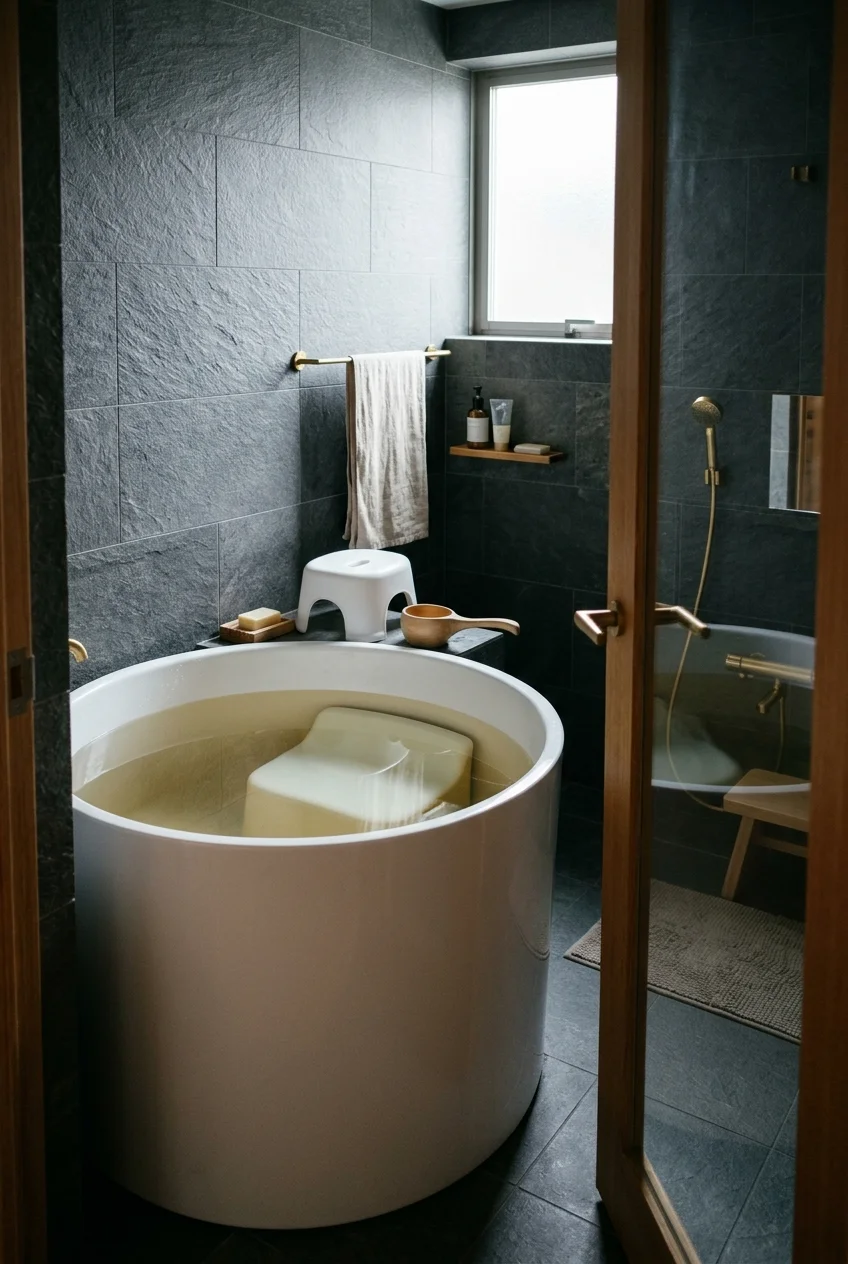
A short, deep soaking tub can preserve floor space while offering an upright bathing posture, especially where a long reclining tub will not fit.
Check the exact seat, interior depth, entry height, overflow, and preferred posture before buying. A compact footprint does not guarantee comfortable access.
Pair the vertical form with restrained wall tile or waterproof plaster so the distinctive tub shape remains the main visual feature.
Setup note Plan a stable entry strategy and discuss support options early; tall tub walls can make stepping in and out more demanding.
7. Float a Sculptural Tub in a Large Bathroom
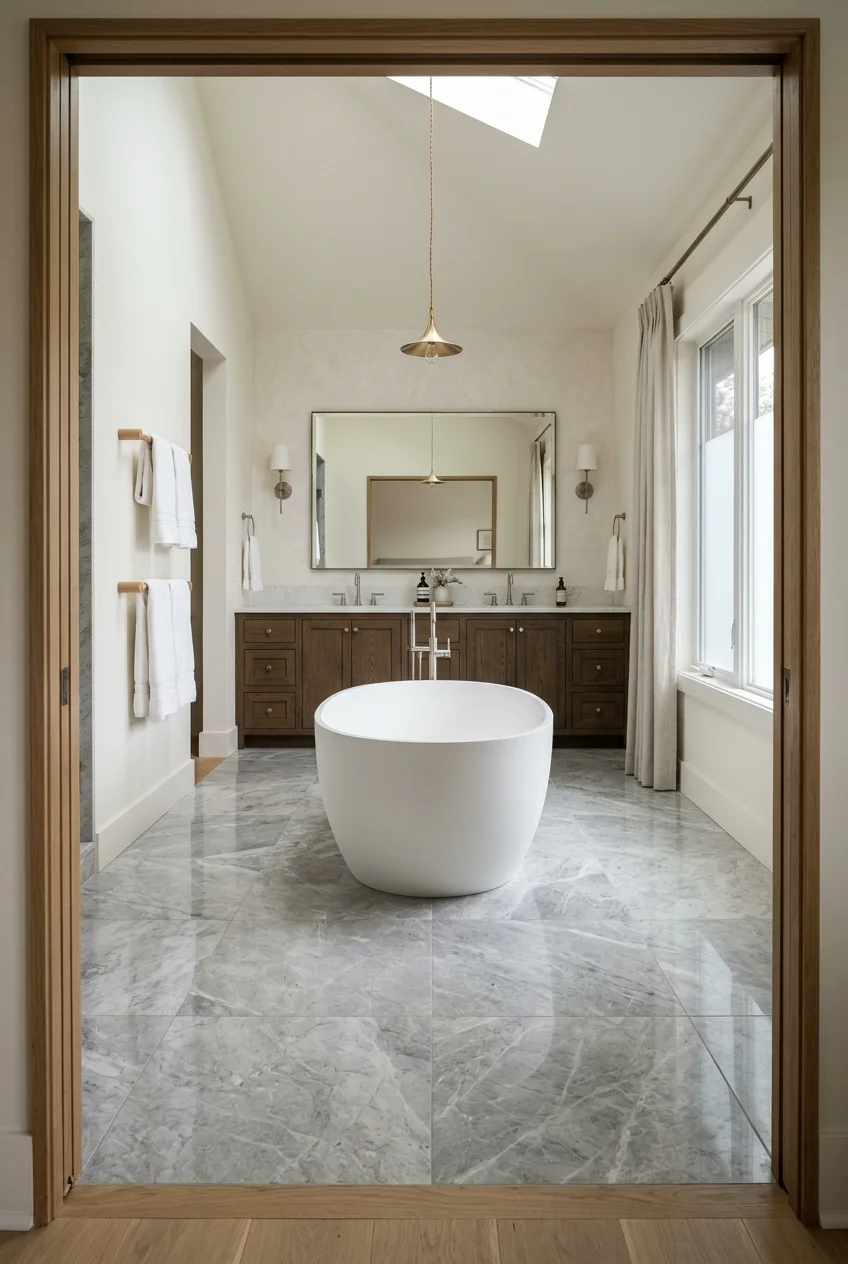
In a generously sized room, a tub can sit away from every wall and act as the visual center rather than leftover perimeter equipment.
Centering does not require mathematical symmetry. Align the tub with a window, ceiling feature, or vanity axis so the position feels deliberate.
Map walking paths and floor-mounted plumbing before choosing the location. A beautiful island tub still needs practical access for filling, cleaning, and maintenance.
8. Try a Back-to-Wall Soaker With a Freestanding Look
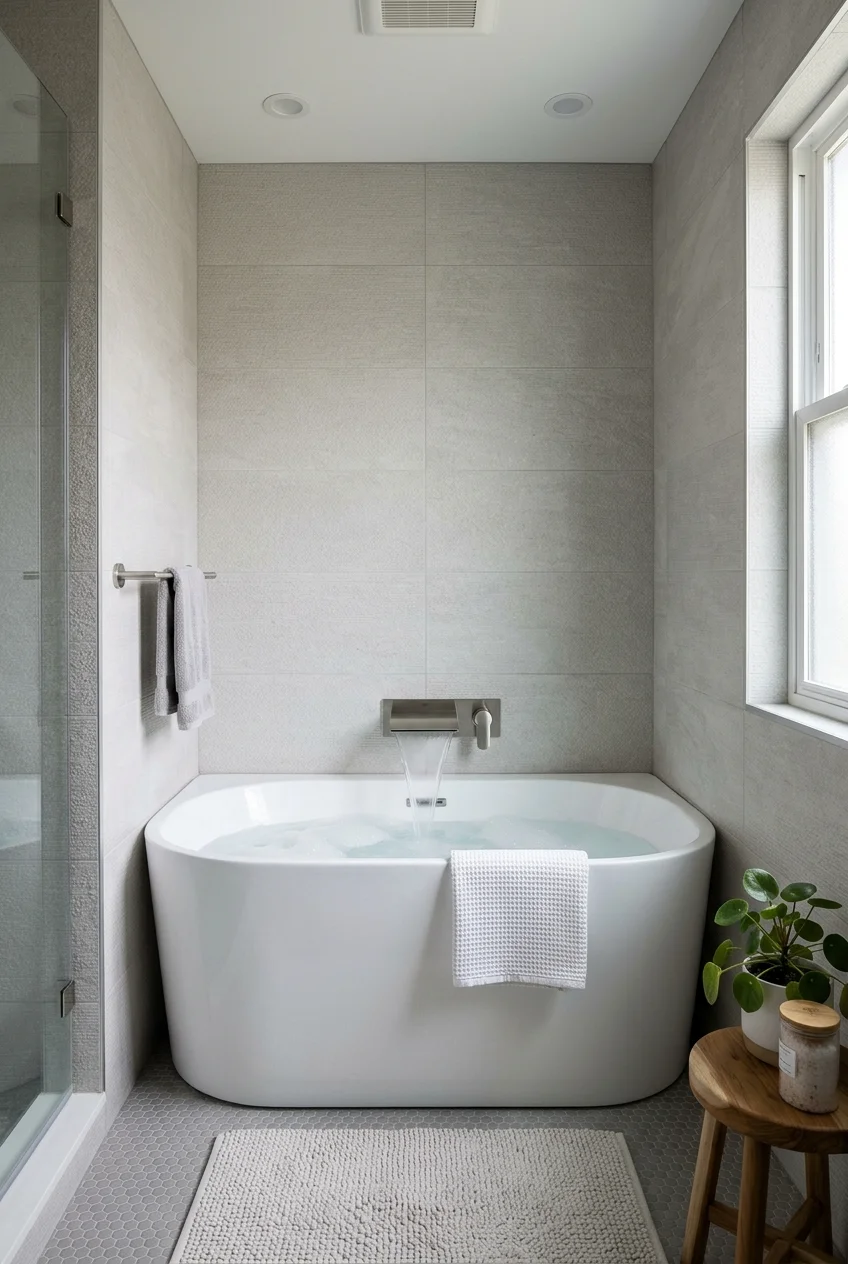
A back-to-wall tub keeps the smooth front of a freestanding model while closing the hard-to-clean gap along its rear edge.
It works well when plumbing belongs in the wall and floor space is limited. Confirm that the selected model is designed for this installation.
- Verify the finished wall is straight.
- Match the filler reach to the tub rim.
- Keep drain service access in the plan.
9. Fit a Tub Beneath a Sloped Ceiling
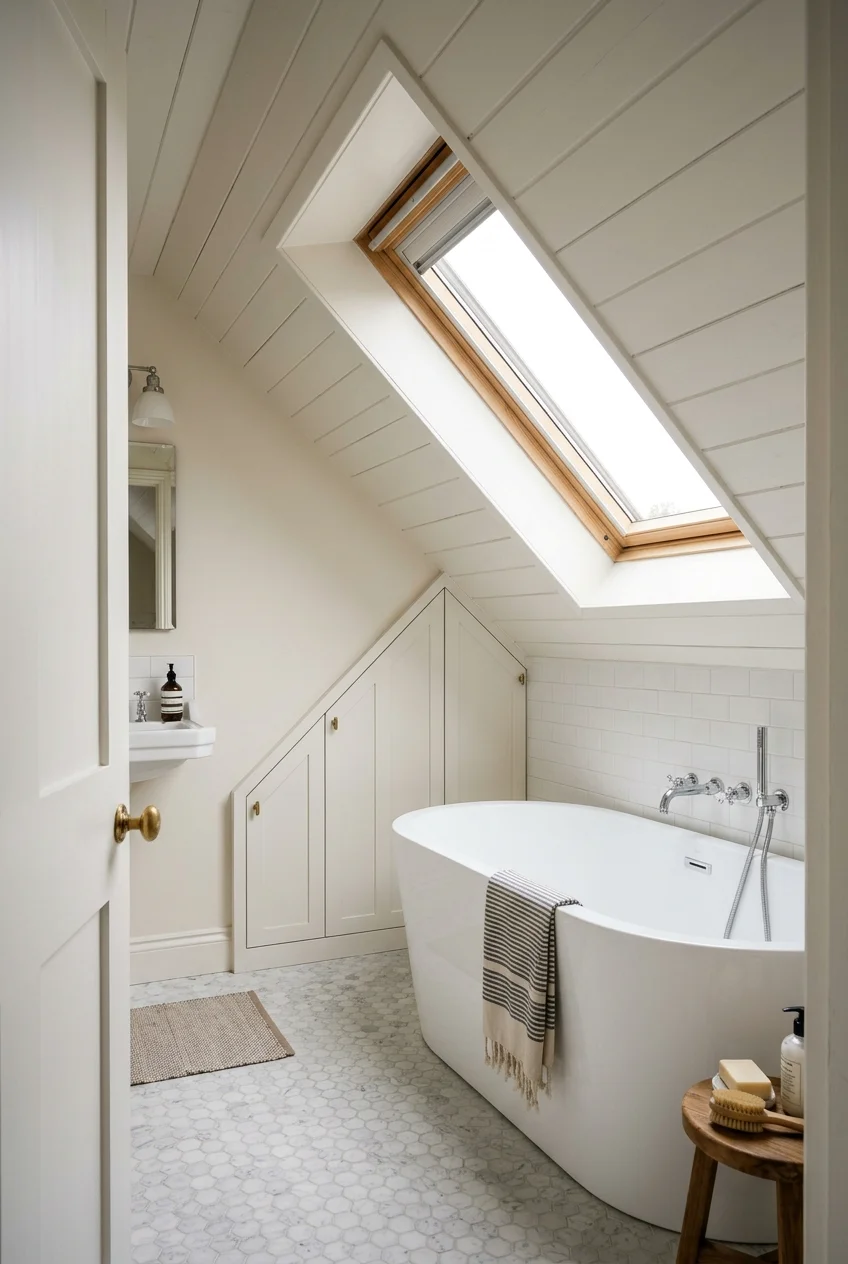
A soaking tub can use the low side of an attic bathroom because bathing requires less standing height than a shower or busy circulation route.
Place the entry side where headroom is greatest and keep the filler reachable. The roof structure, insulation, and ventilation still need professional coordination.
Use nearby eaves carefully; these small bathroom storage ideas can help keep the low tub zone from collecting loose supplies.
10. Frame a Private Garden View From the Tub
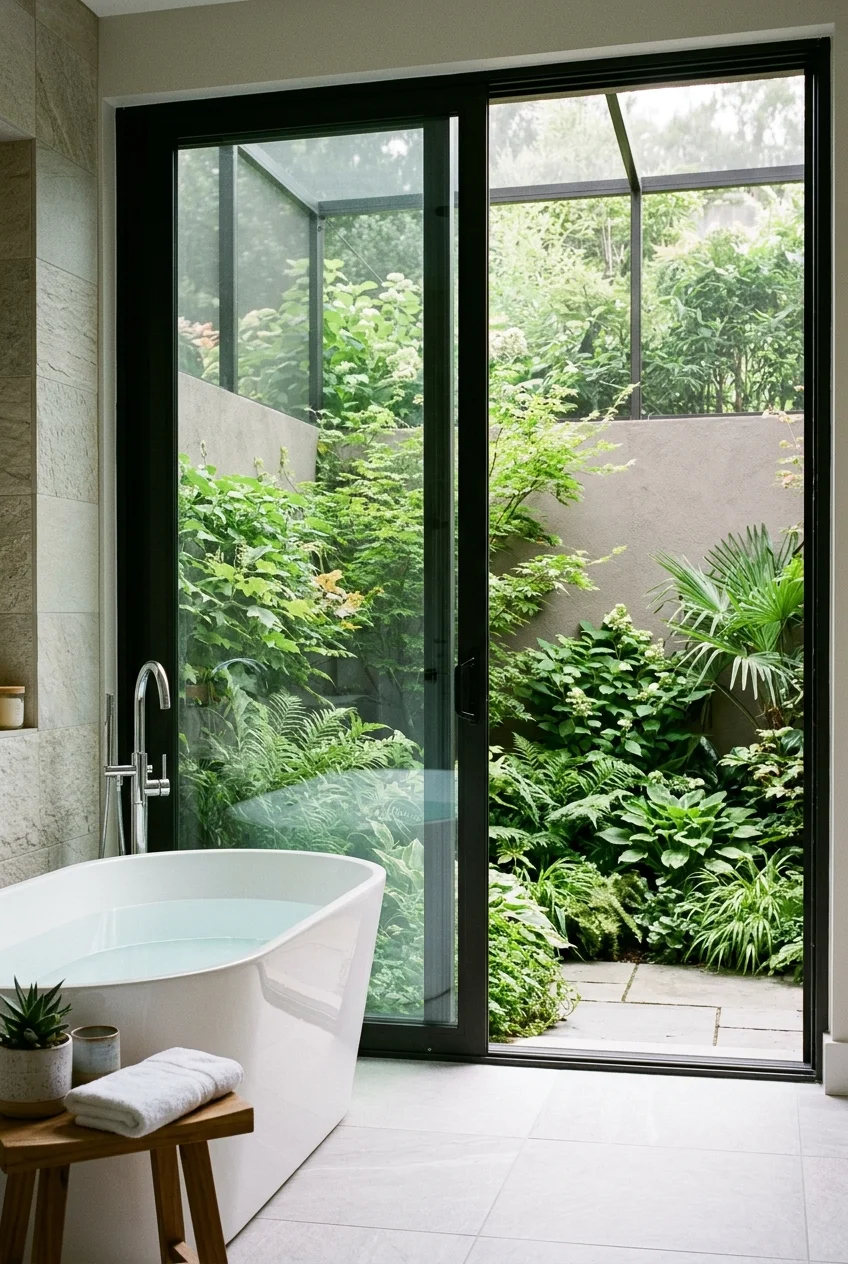
A low garden wall, planted courtyard, or screened patio can give the tub an outward view without exposing the bather to neighboring sightlines.
Treat the exterior screening as part of the bathroom design. Layer vegetation with a solid barrier instead of relying on leaves for dependable privacy.
Keep operable doors and windows away from direct splash unless their materials and detailing suit the location. Plan drainage on both sides of the opening.
Tub Shapes and Finishes That Change the Mood
11. Keep the Room Quiet With a Matte White Oval
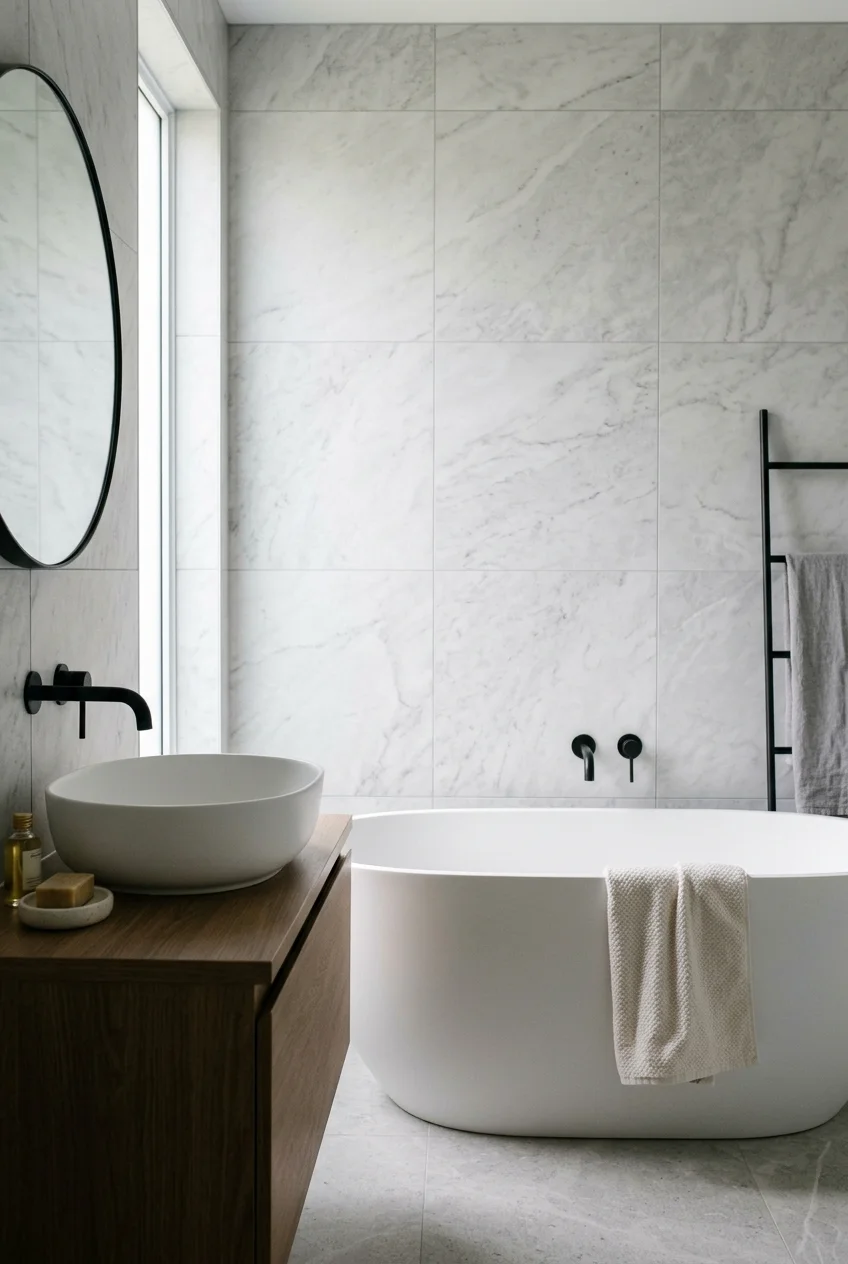
A matte white oval reads softly against both warm and cool surfaces, making it useful when tile or cabinetry already carries strong visual detail.
Repeat the tub white once in the room through a sink or trim detail, then let surrounding materials supply the contrast.
12. Add Shadow With a Fluted Tub Exterior
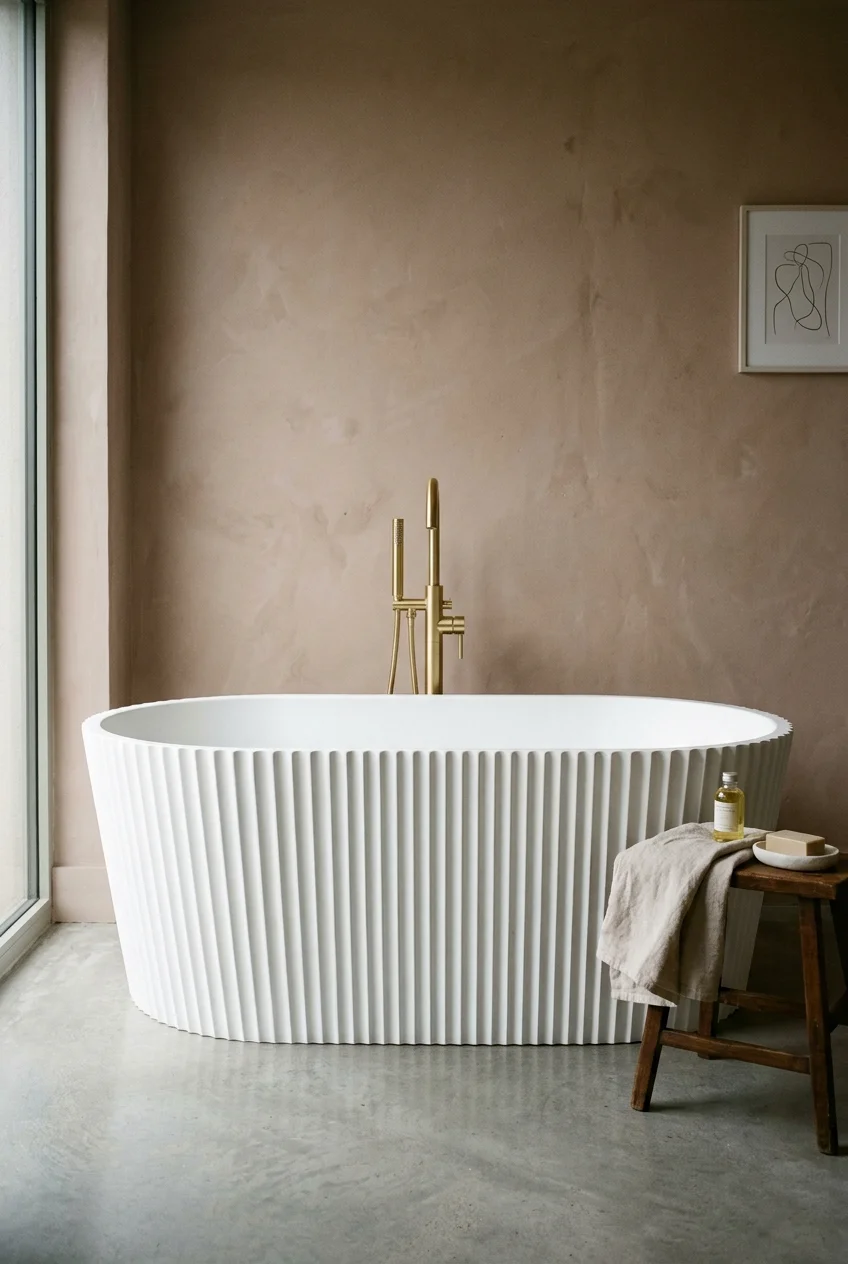
Vertical fluting gives a simple tub changing bands of light and shadow, creating texture without introducing another color or decorative pattern.
Keep the wall behind it comparatively plain so the ribbed surface remains legible. Fine grooves also deserve a realistic cleaning plan.
13. Ground Pale Tile With a Charcoal Tub
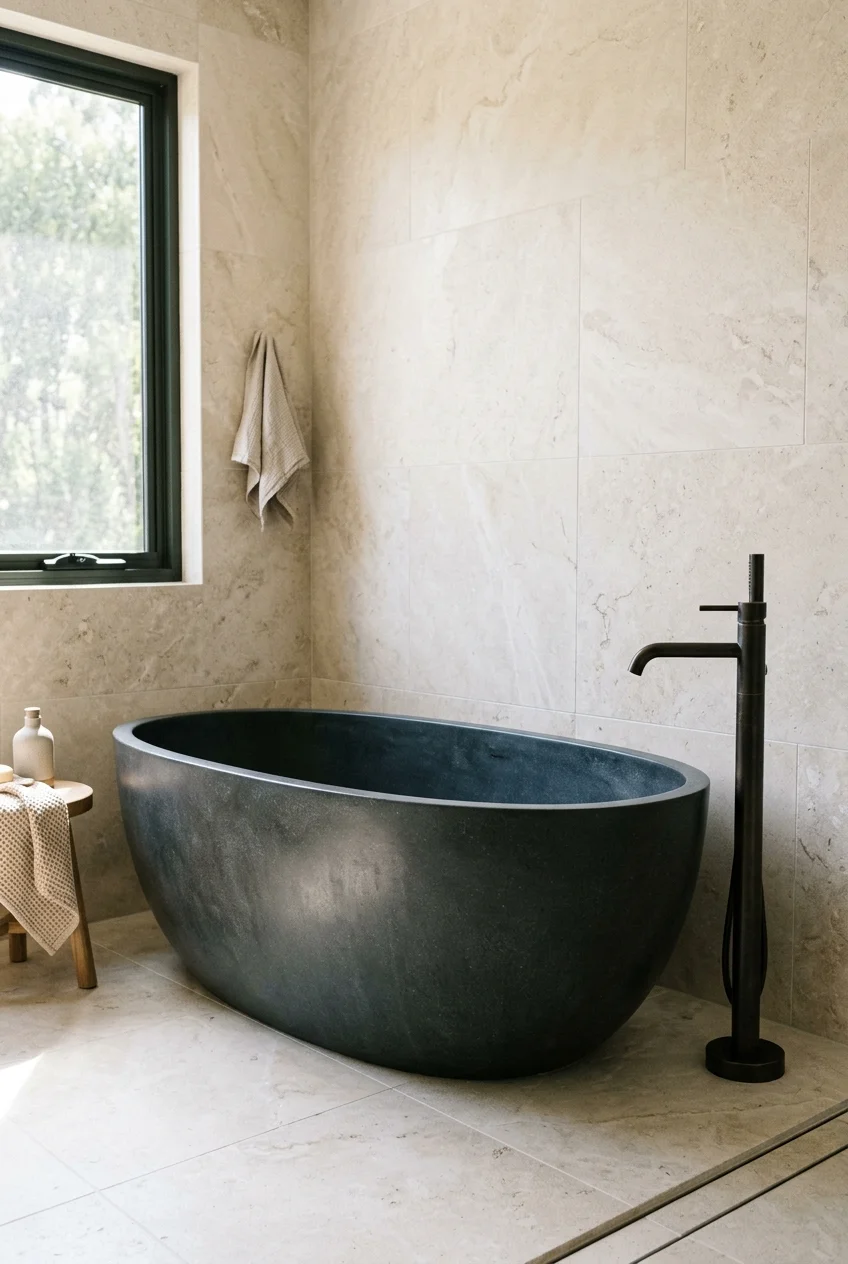
A charcoal or near-black tub can anchor a pale bathroom, especially when the room has enough light to preserve detail around its silhouette.
Repeat the dark color sparingly in the window frame or faucet. Too many heavy black elements can flatten the contrast that made the tub effective.
14. Choose a Warm Stone-Look Tub for Tonal Depth
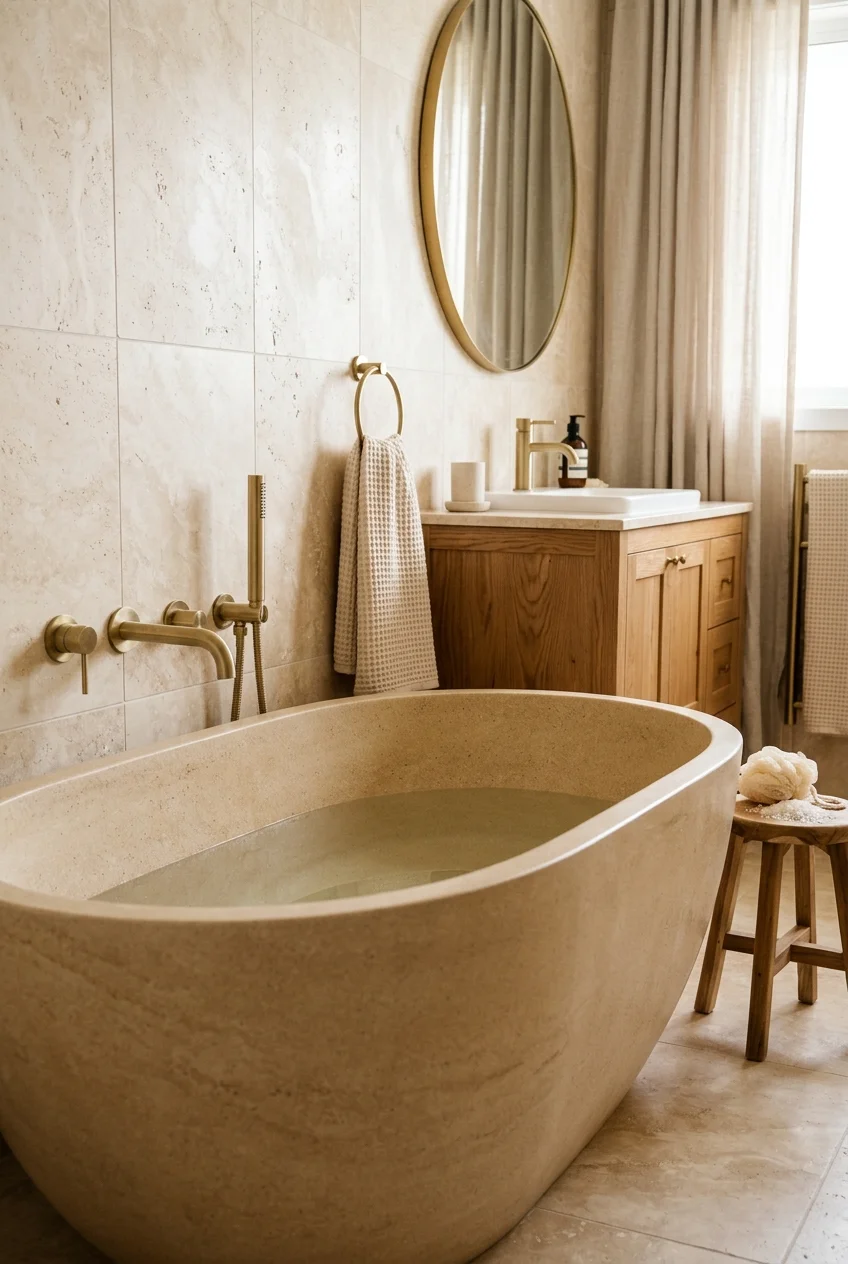
A beige, taupe, or sand-colored tub creates a warmer focal point than bright white while staying calm beside natural-looking tile and wood cabinetry.
Compare samples under the bathroom lighting. Two warm neutrals can clash when one turns pink, yellow, or gray beside the other.
15. Let a Copper Tub Carry the Character
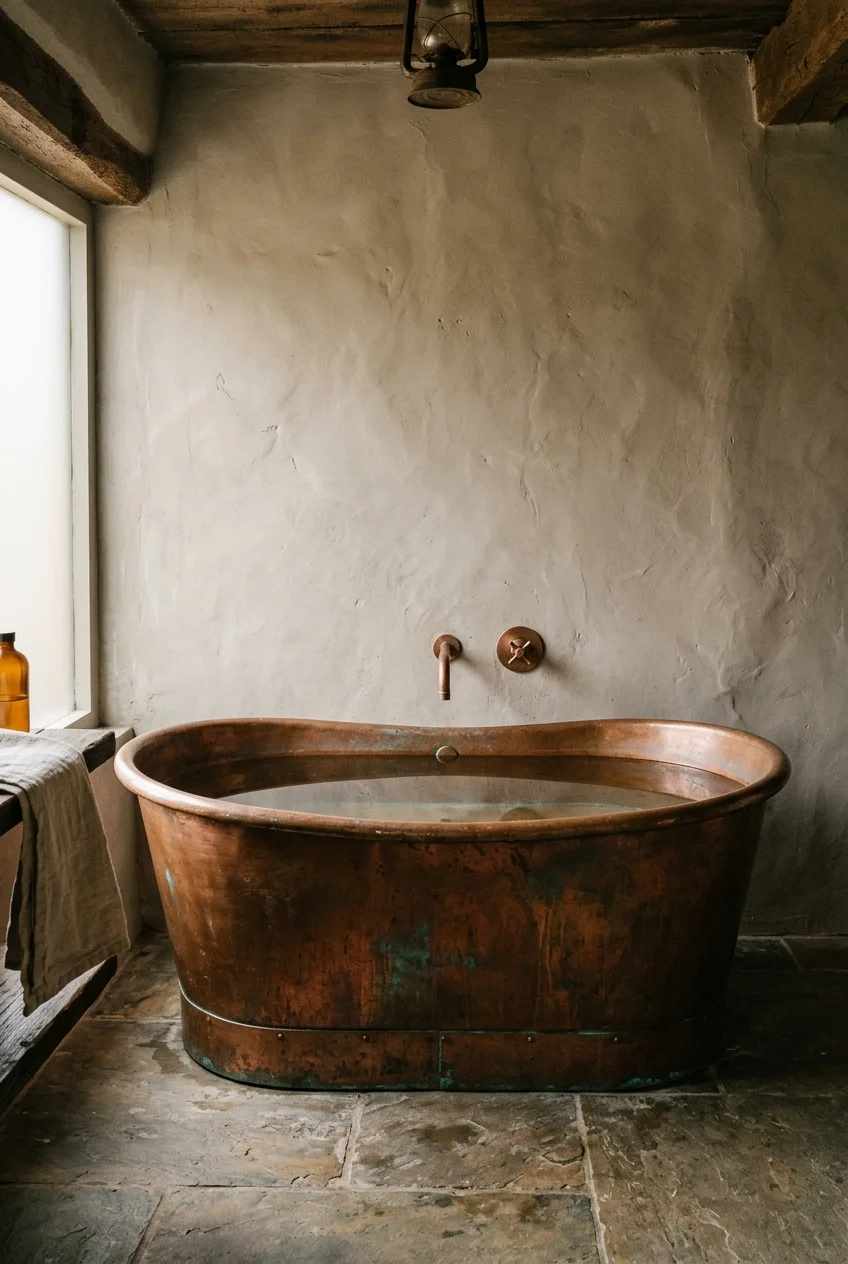
A copper tub brings color, reflection, and visible material variation, so it needs fewer competing finishes than an ordinary white basin.
Confirm care instructions and expected surface changes with the manufacturer. Patina is a material characteristic, but cleaners and bath products can affect it.
Set it against restrained plaster or tile, then repeat the metal in only one or two small details rather than matching every fixture.
16. Choose a High-Back Slipper Tub for Reclining
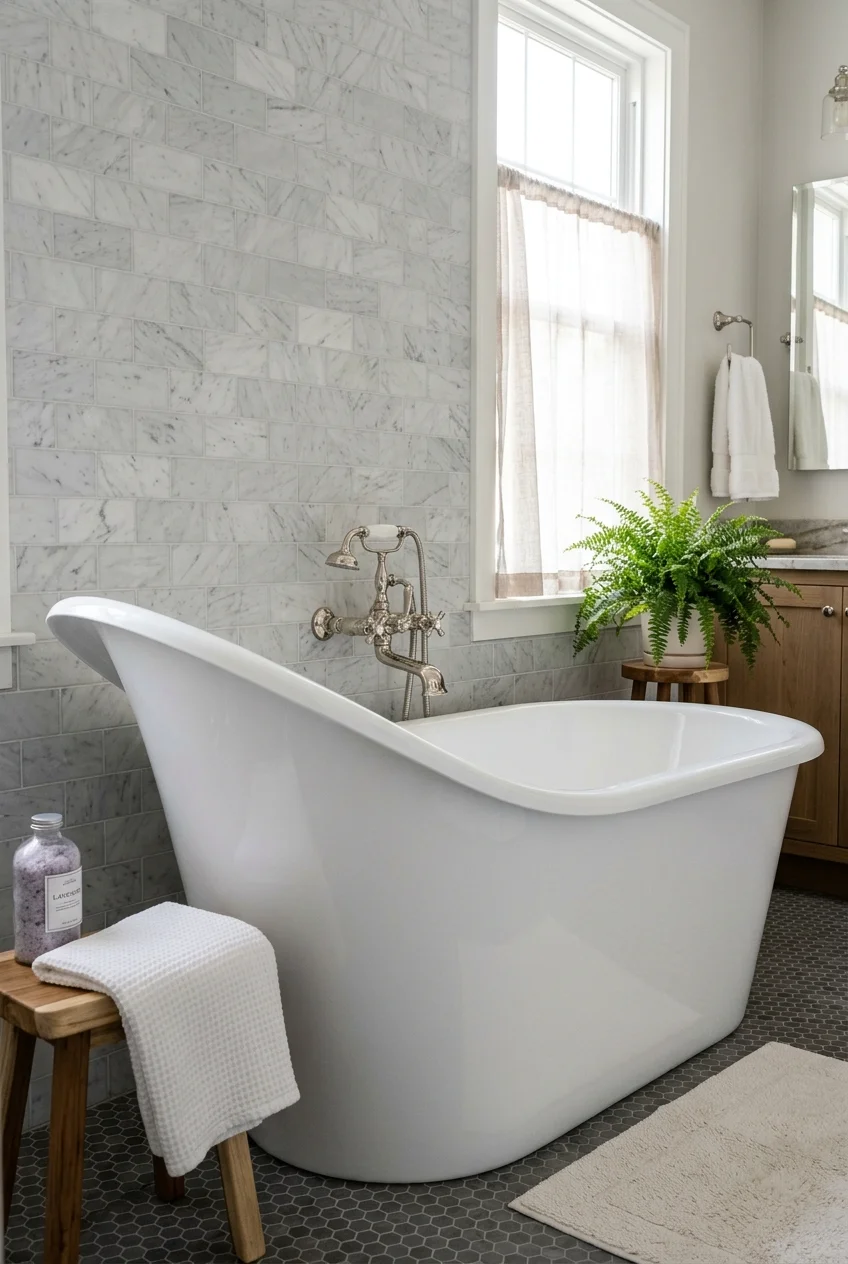
A slipper tub raises one end to support a more reclined posture, and its asymmetrical profile gives a traditional or transitional room movement.
Confirm which end is comfortable, where the drain sits, and how the filler reaches the basin before orienting the tall back.
17. Use a Double-Slipper Shape for Balanced Symmetry
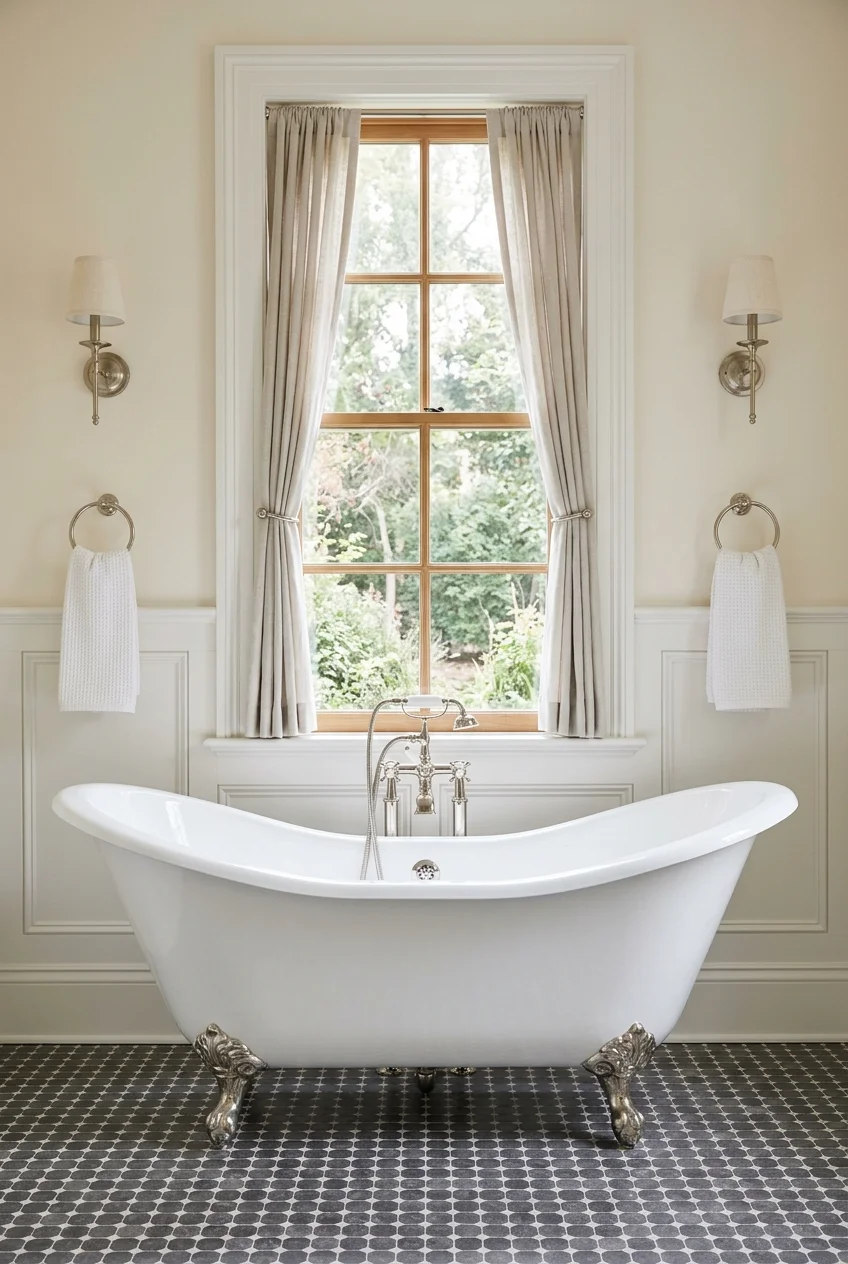
A double-slipper tub rises at both ends and dips through the center, creating a symmetrical silhouette that suits a centered window or paneled wall.
The central drain and two high backs affect usable interior space. Sit in a showroom model when possible rather than choosing by exterior profile alone.
18. Pick a Crisp Rectangular Tub for Modern Lines
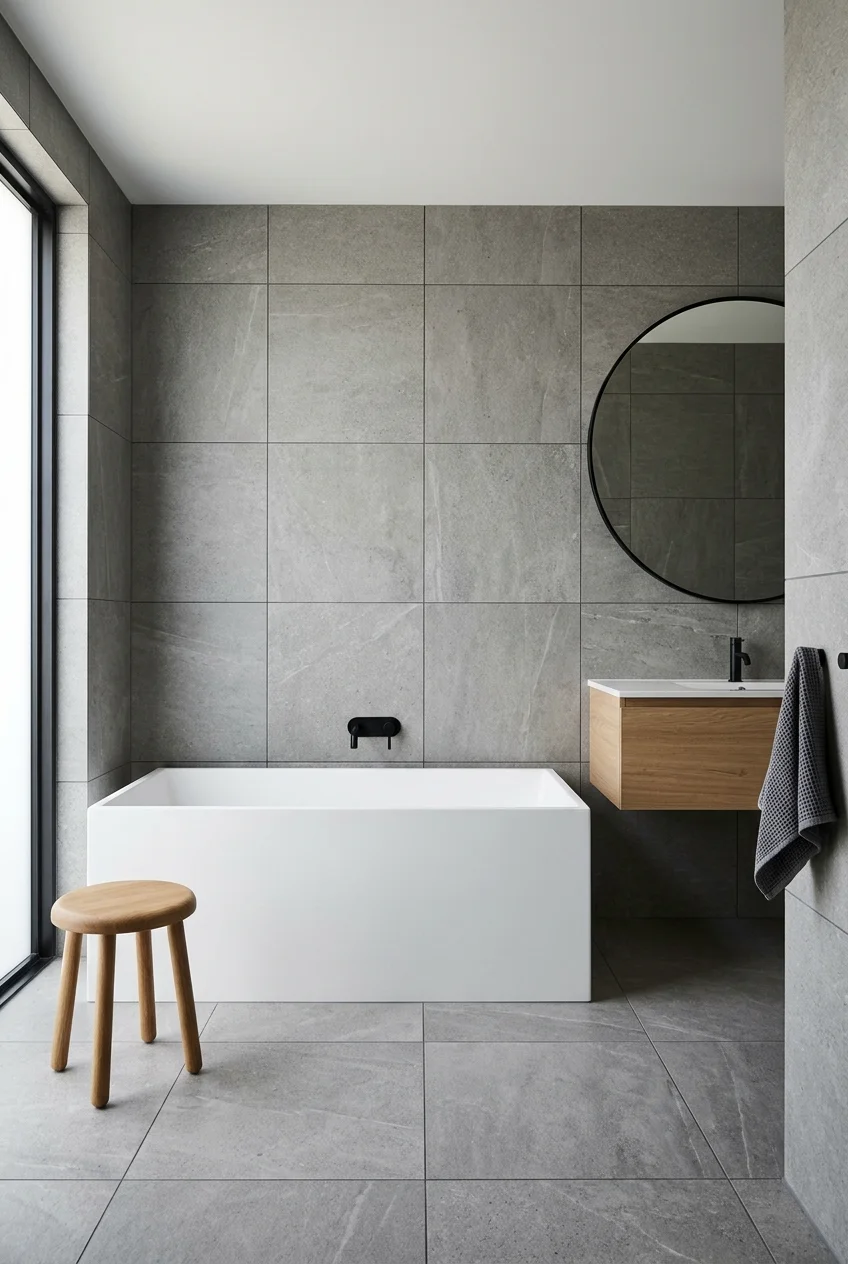
A rectangular freestanding tub echoes large-format tile, slab vanities, and straight architectural openings, giving a modern bathroom a clear geometric rhythm.
Soften the composition with towels, a rounded stool, or gently veined material. One curved counterpoint keeps the room from feeling visually rigid.
19. Make a Round Soaking Tub the Compact Focal Point
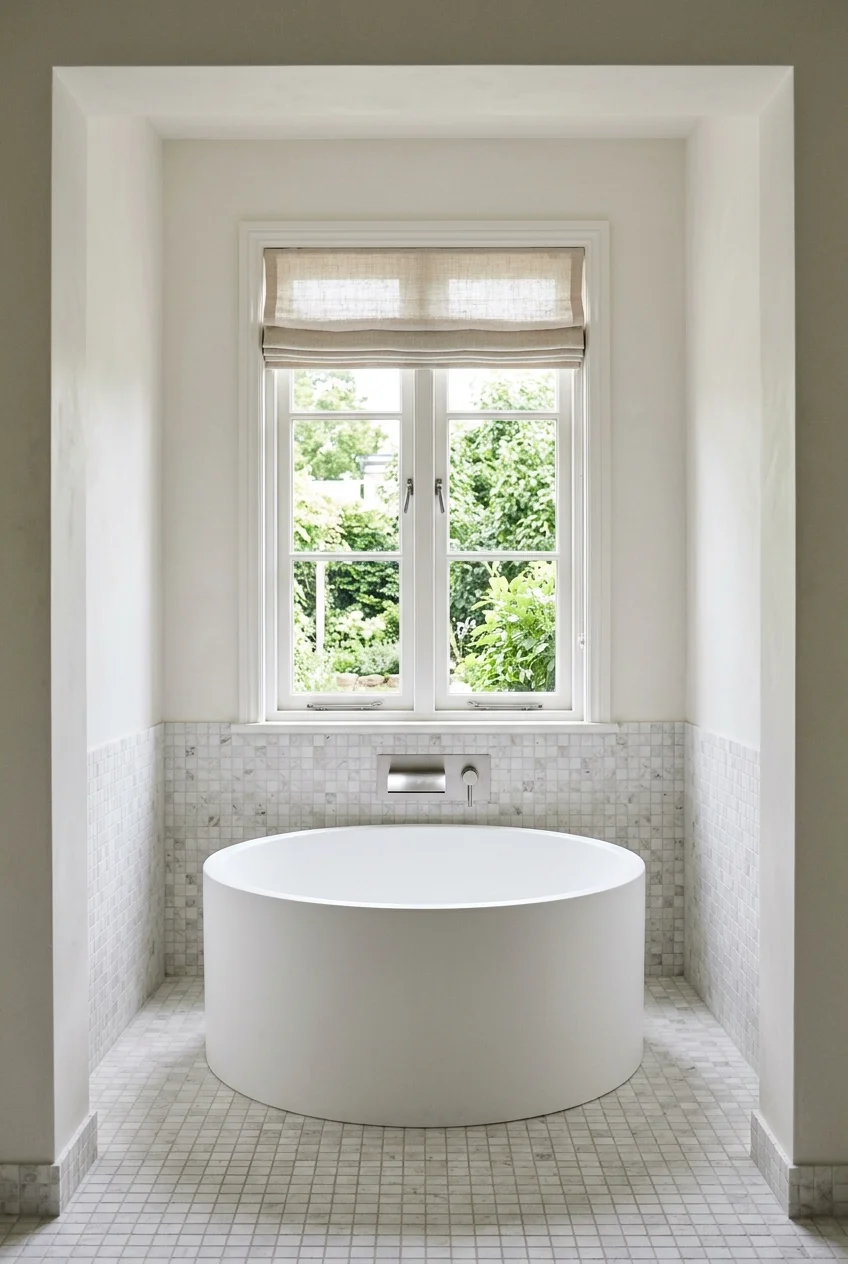
A round tub feels intentionally different from standard bathroom fixtures and can fit a square corner or centered bay with balanced clearance around it.
Round does not automatically mean small. Measure its widest diameter, entry route, and bathing well because the footprint can exceed an oval model.
20. Build a Slim Deck Around a Drop-In Soaker
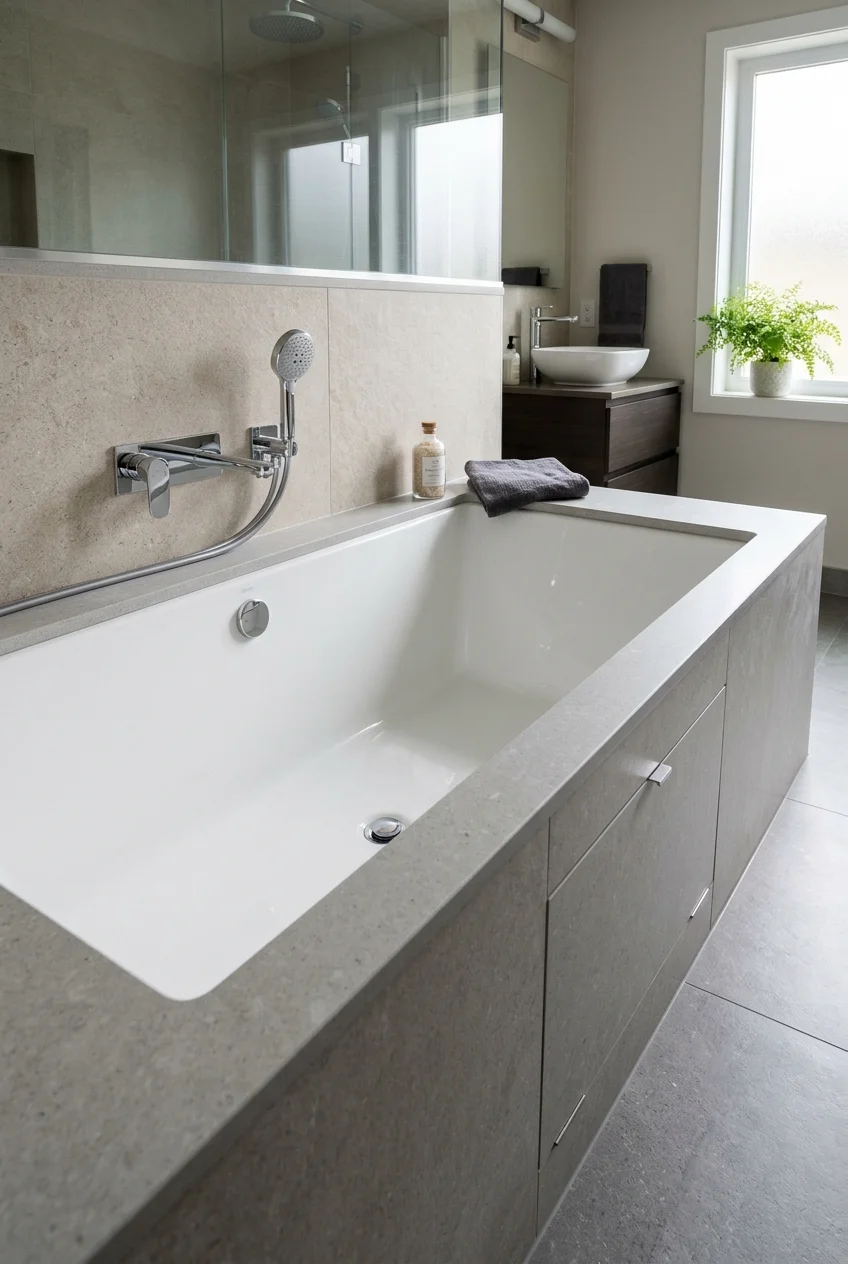
A narrow deck gives a drop-in tub a tailored frame without consuming the broad platform associated with older corner installations.
Use the same slab or tile across the rim and adjacent ledge for continuity, while keeping joints, access panels, and waterproofing properly detailed.
- Confirm rim support with the tub instructions.
- Preserve access to serviceable plumbing.
- Keep the deck narrow enough to reach the basin comfortably.
Walls, Tile, and Color Around the Tub
21. Wrap the Tub Wall in Glossy Zellige-Style Tile
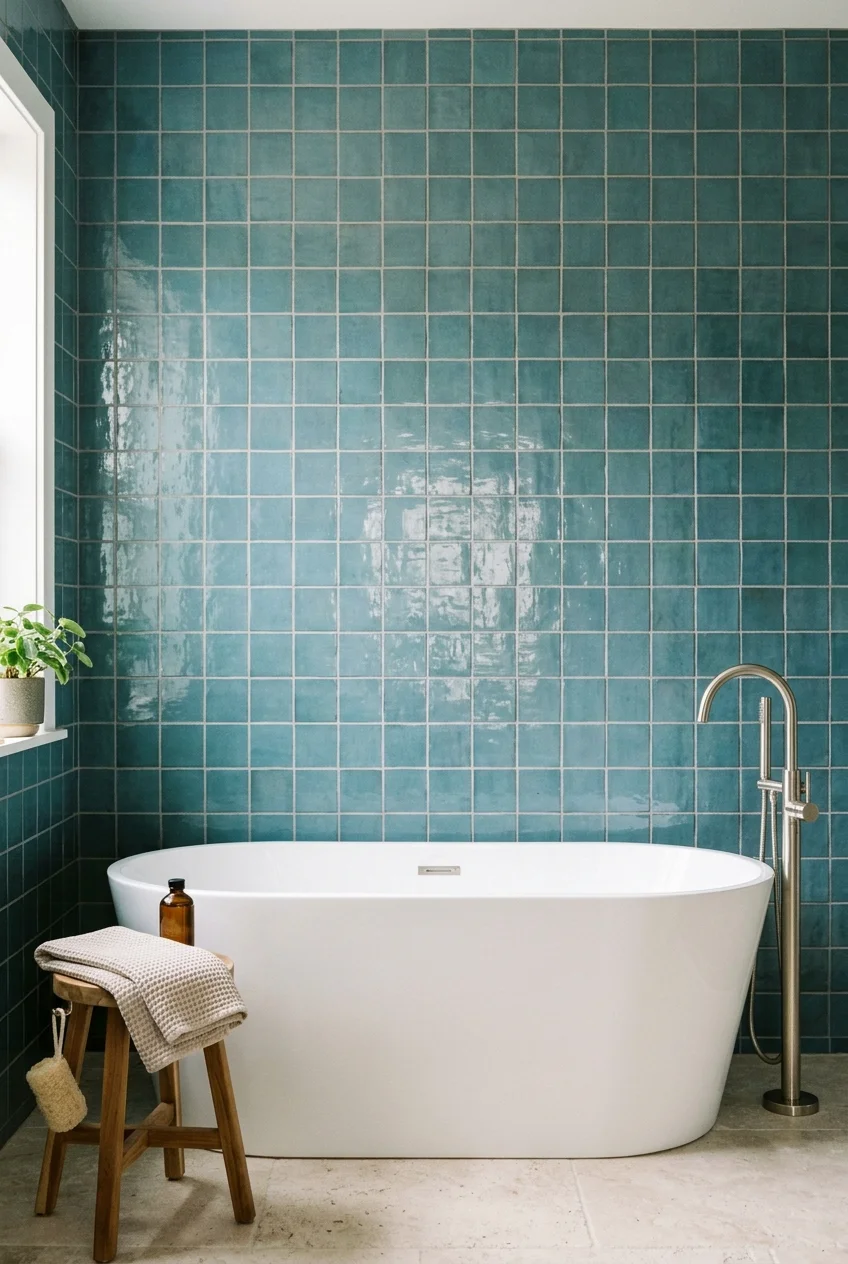
Glossy, irregular tile catches light behind a simple tub, making one material feel layered without requiring a busy mural or complicated color scheme.
Use controlled variation rather than random contrast. The uneven edges and glaze already create movement, so quiet grout usually keeps the surface coherent.
22. Stack Narrow Tile Vertically to Lift the Wall
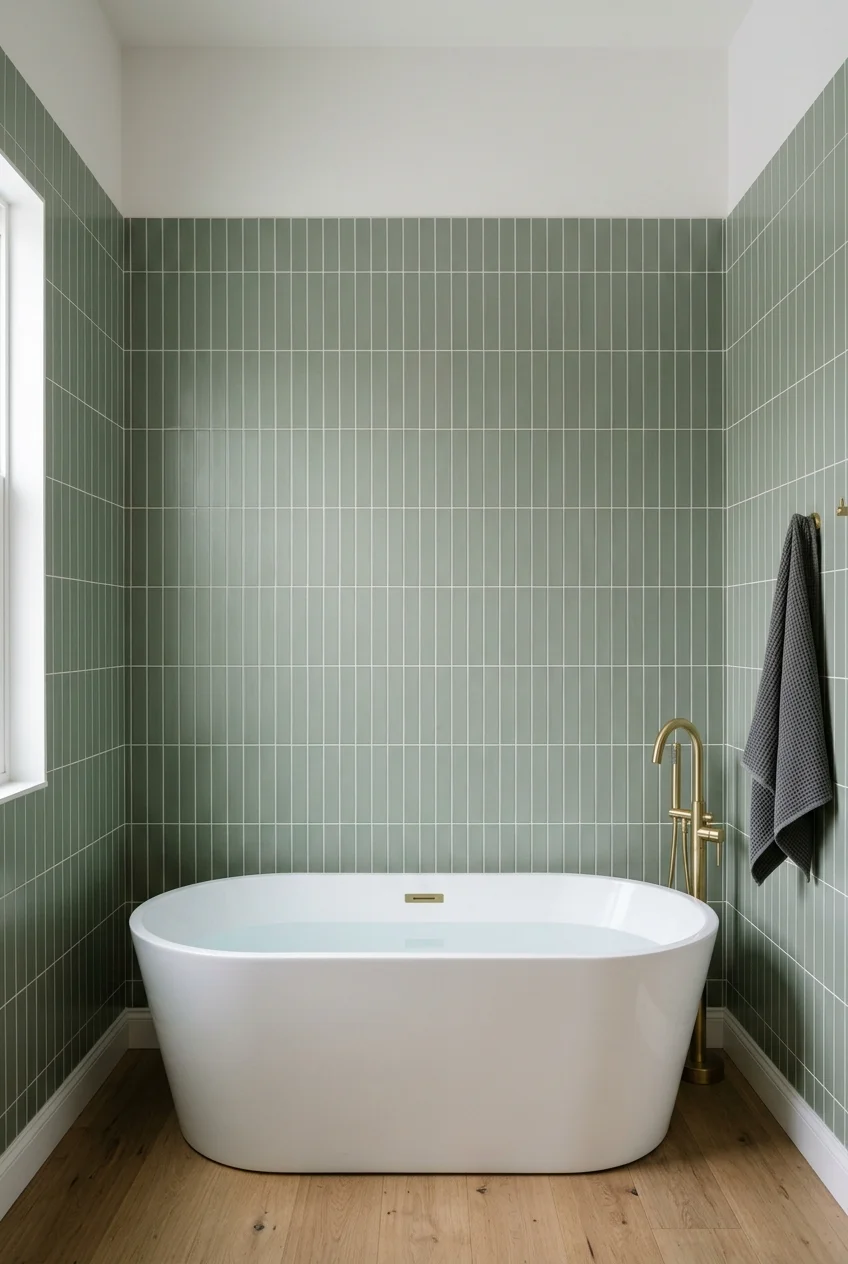
Vertical tile emphasizes height behind a low tub, making the wall feel taller while giving an otherwise simple surface a deliberate direction.
Carry the vertical layout through corners with consistent joints, and stop it cleanly at trim, ceiling, or an intentional paint line.
23. Use Large Slabs for a Calm Stone Backdrop
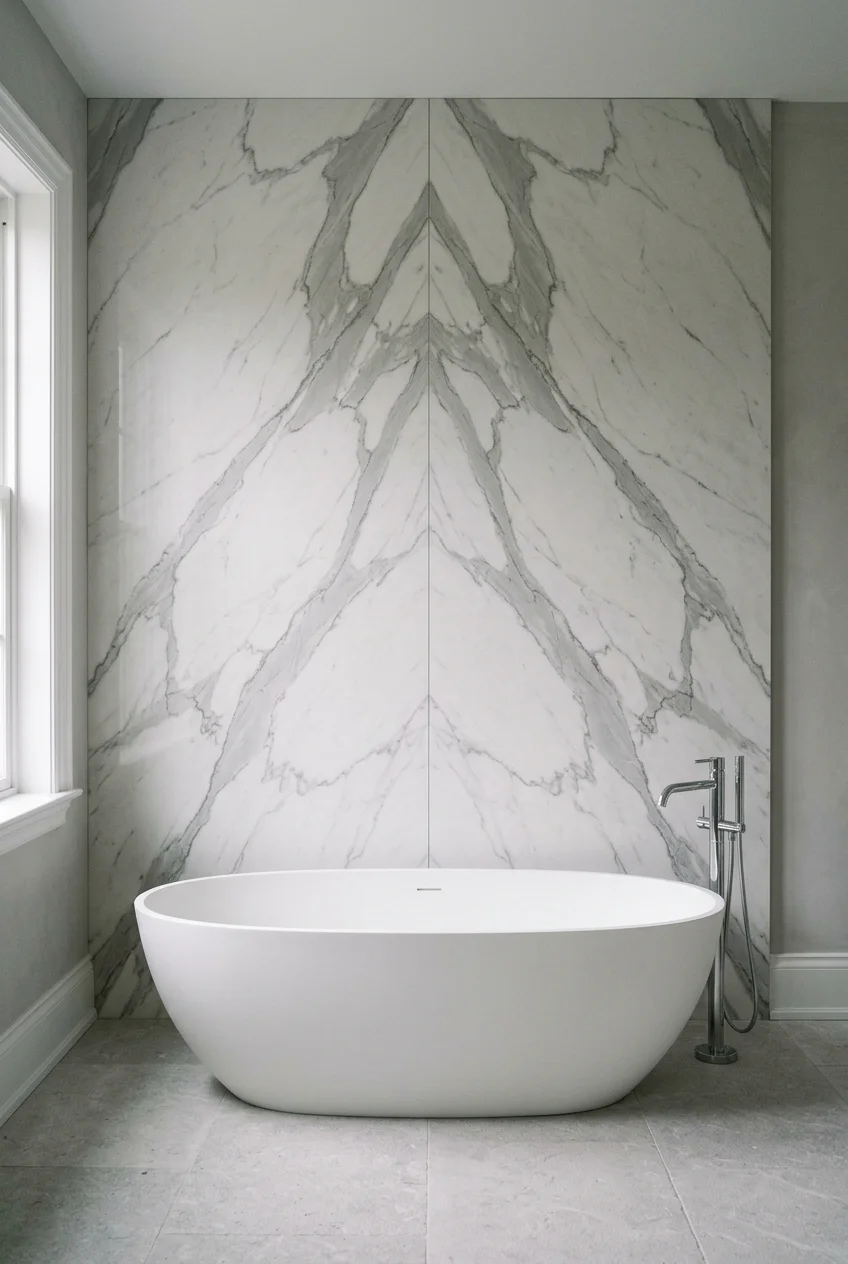
Large stone or porcelain slabs reduce grout lines behind the tub, allowing veining and broad color movement to read as the background artwork.
Plan seam locations before ordering so veins do not break awkwardly behind the focal point. Material handling and substrate preparation require experienced installers.
Design note Ask for a slab layout drawing when dramatic veining matters; a small sample cannot show how the finished wall will read.
24. Give the Tub Niche a Mosaic Interior
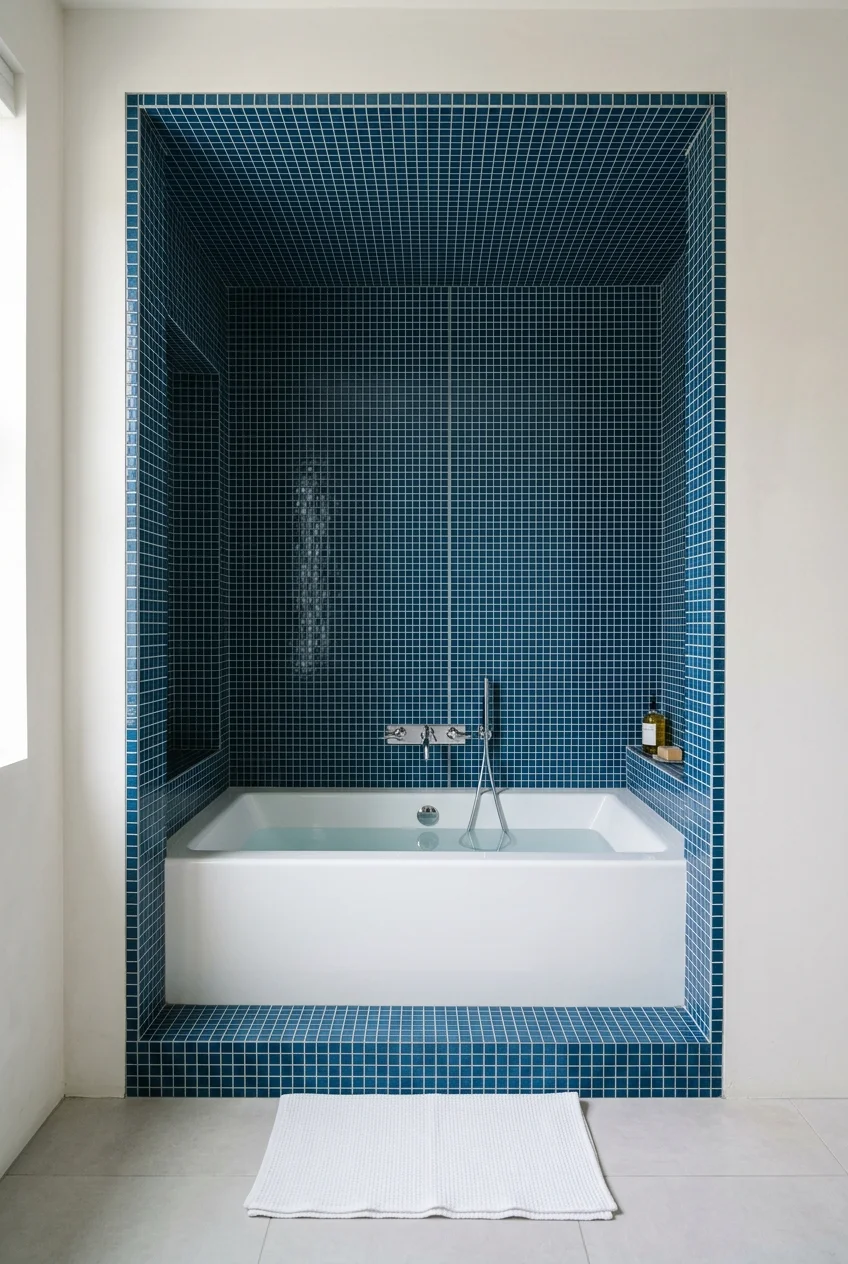
A mosaic lining can define a recessed tub alcove without covering every bathroom wall, concentrating pattern where it frames the soaking area.
Choose a scale that follows curves and corners cleanly, then use a quieter floor so the small repeated pattern does not compete everywhere.
25. Use Waterproof Plaster for a Soft Continuous Envelope
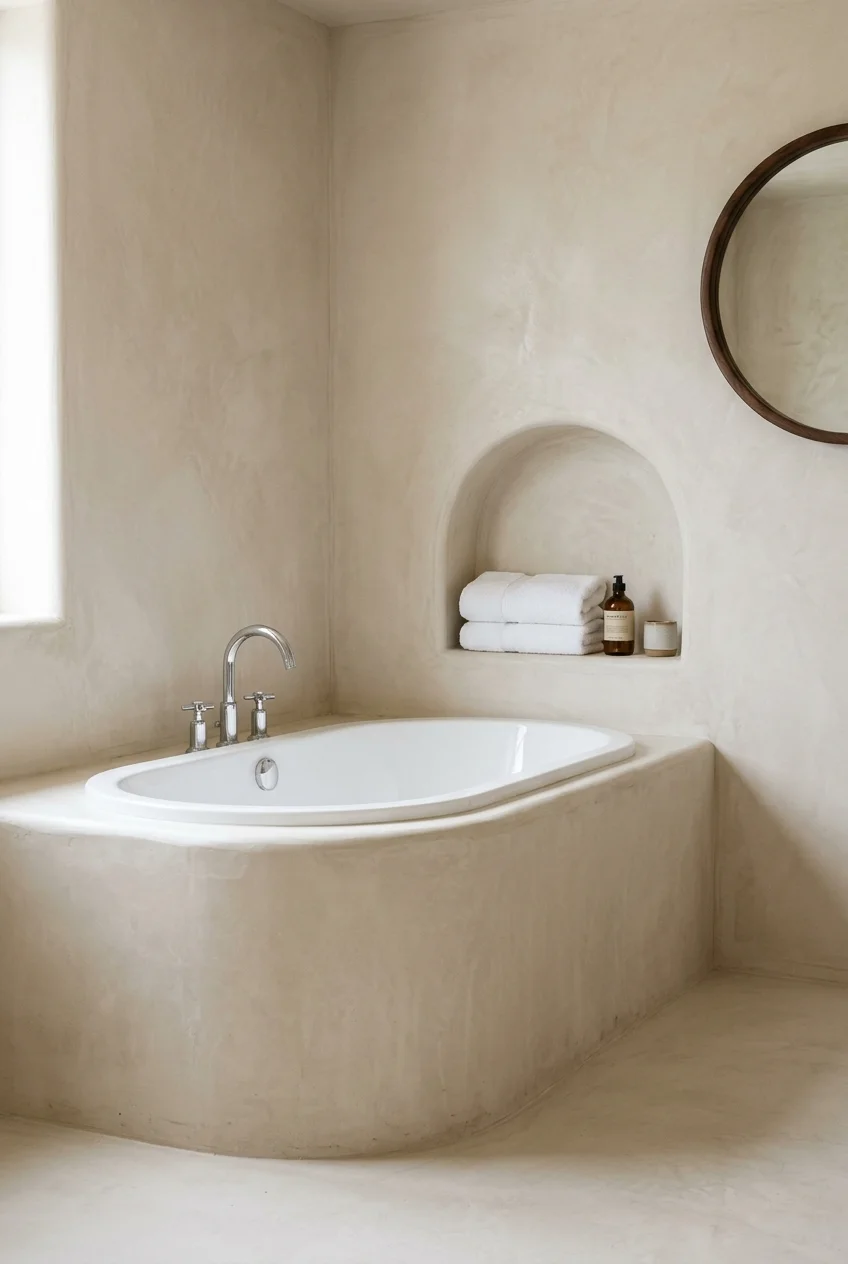
A properly specified bathroom plaster can create broad, softly varied walls around the tub, avoiding the visual grid of tile in a dry-looking retreat.
The product, substrate, sealer, and wet-area suitability must work as a complete system. Decorative plaster alone is not a waterproofing plan.
26. Pair Paneled Walls With a Tiled Splash Zone
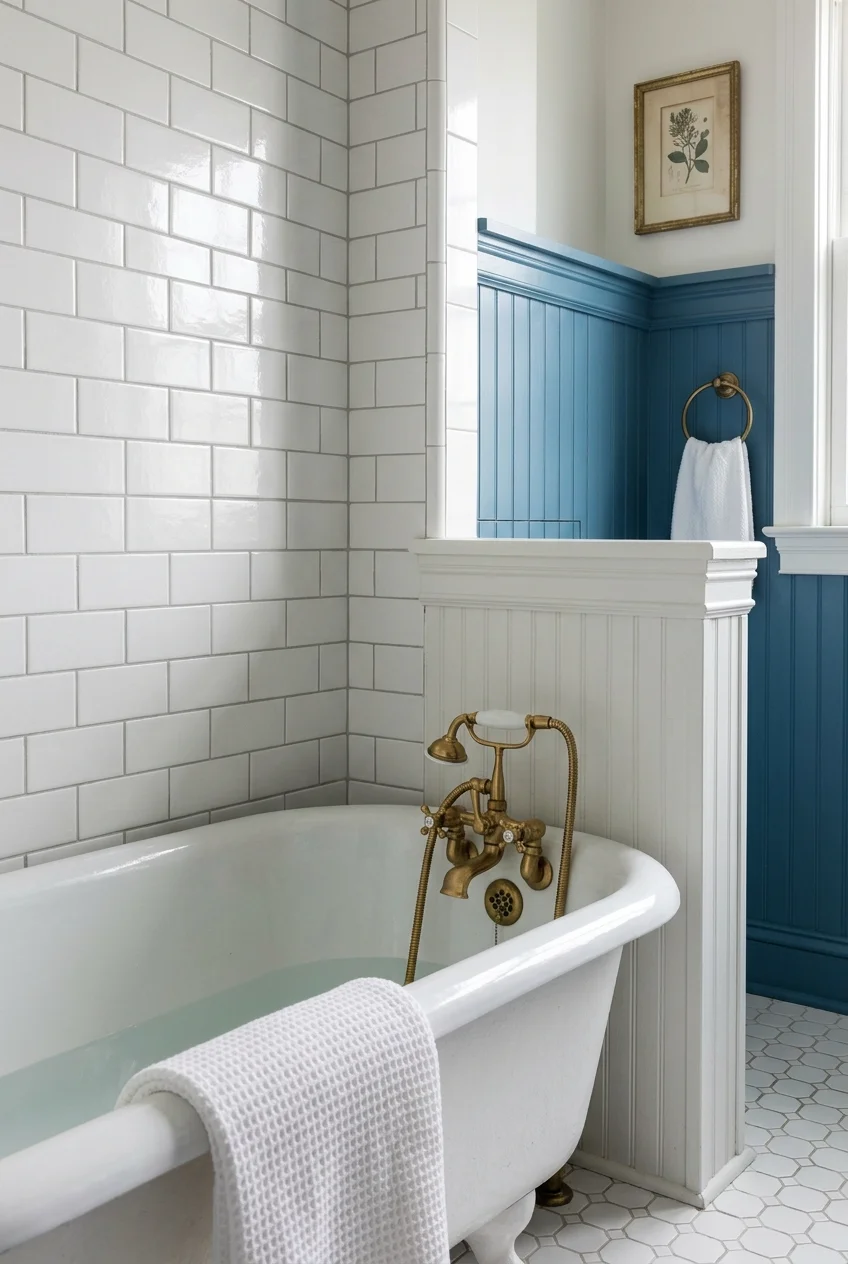
Painted wall paneling can bring traditional scale to the dry side of a tub nook, while tile protects the area most likely to receive water.
Let the materials meet at an intentional trim line. Keep wood-based paneling outside direct splash and use coatings suitable for bathroom humidity.
27. Bring Warmth With Wood-Look Porcelain
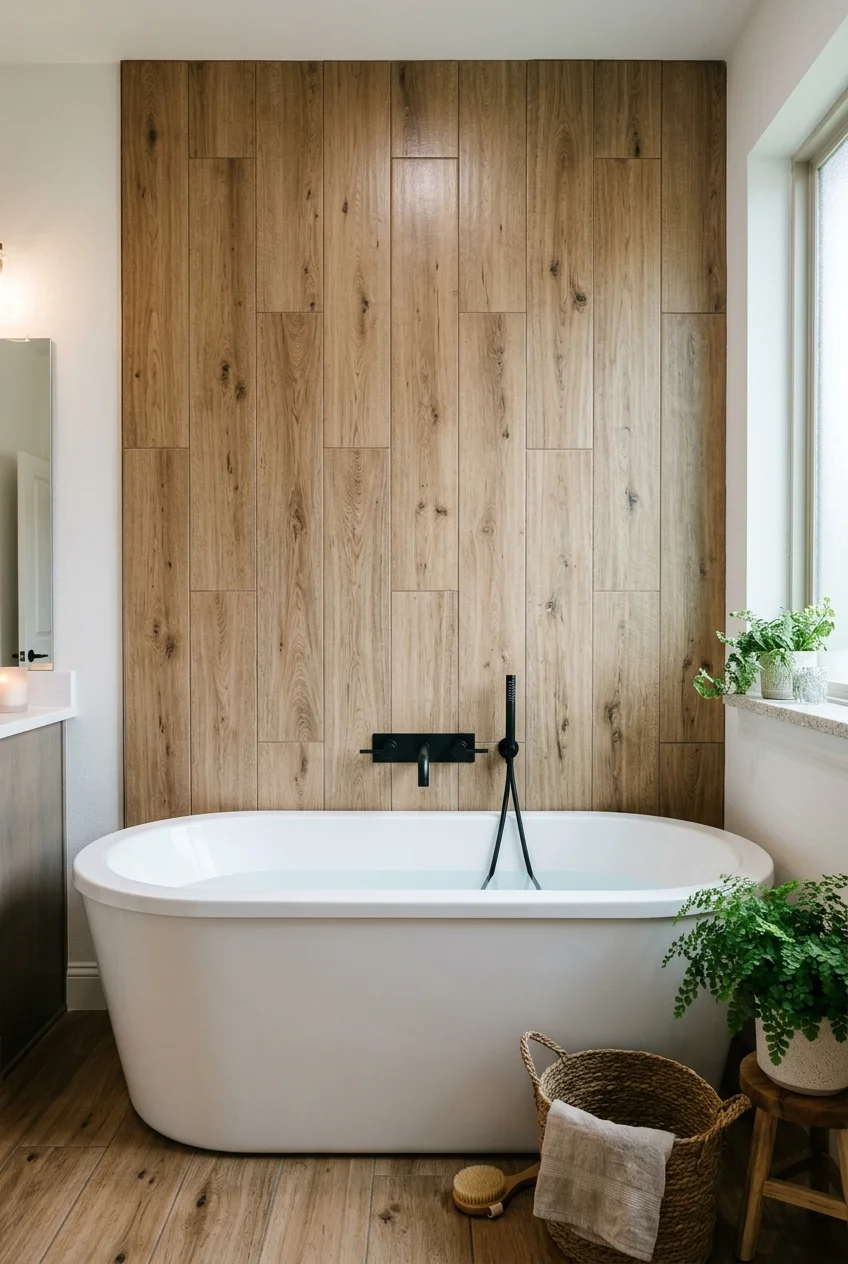
Wood-look porcelain can introduce warm grain near the tub while tolerating water better than decorative wood surfaces placed in a splash-prone zone.
Choose plank variation and grout color carefully so the wall reads as one calm field rather than a repeated printed pattern.
28. Let a Patterned Floor Lead to a Simple Tub
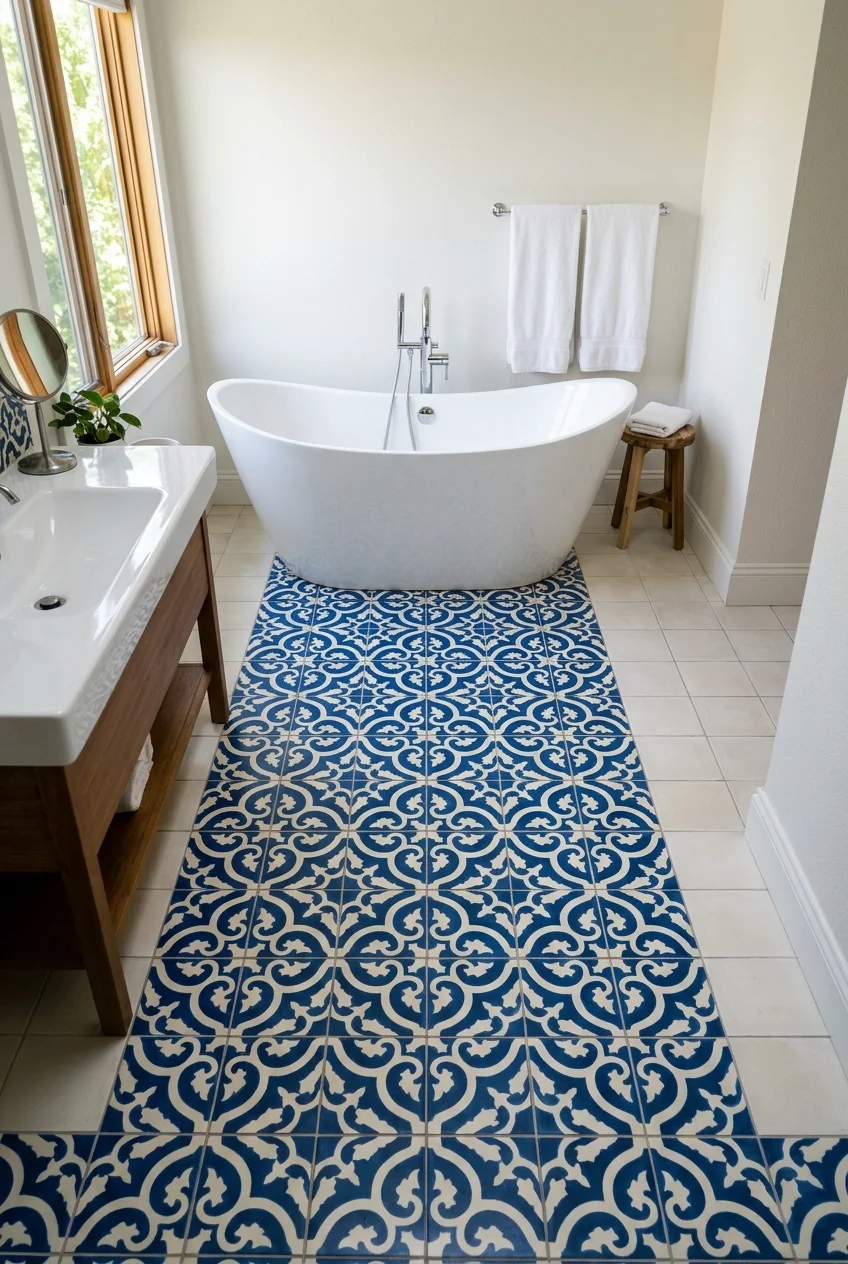
A patterned floor can guide the eye toward a plain tub, supplying energy below while the walls and basin remain visually restful.
Test the repeat across the whole room, including cuts around the tub and vanity. Small samples hide awkward pattern breaks and dominant motifs.
29. Color-Drench the Room in Deep Blue-Green
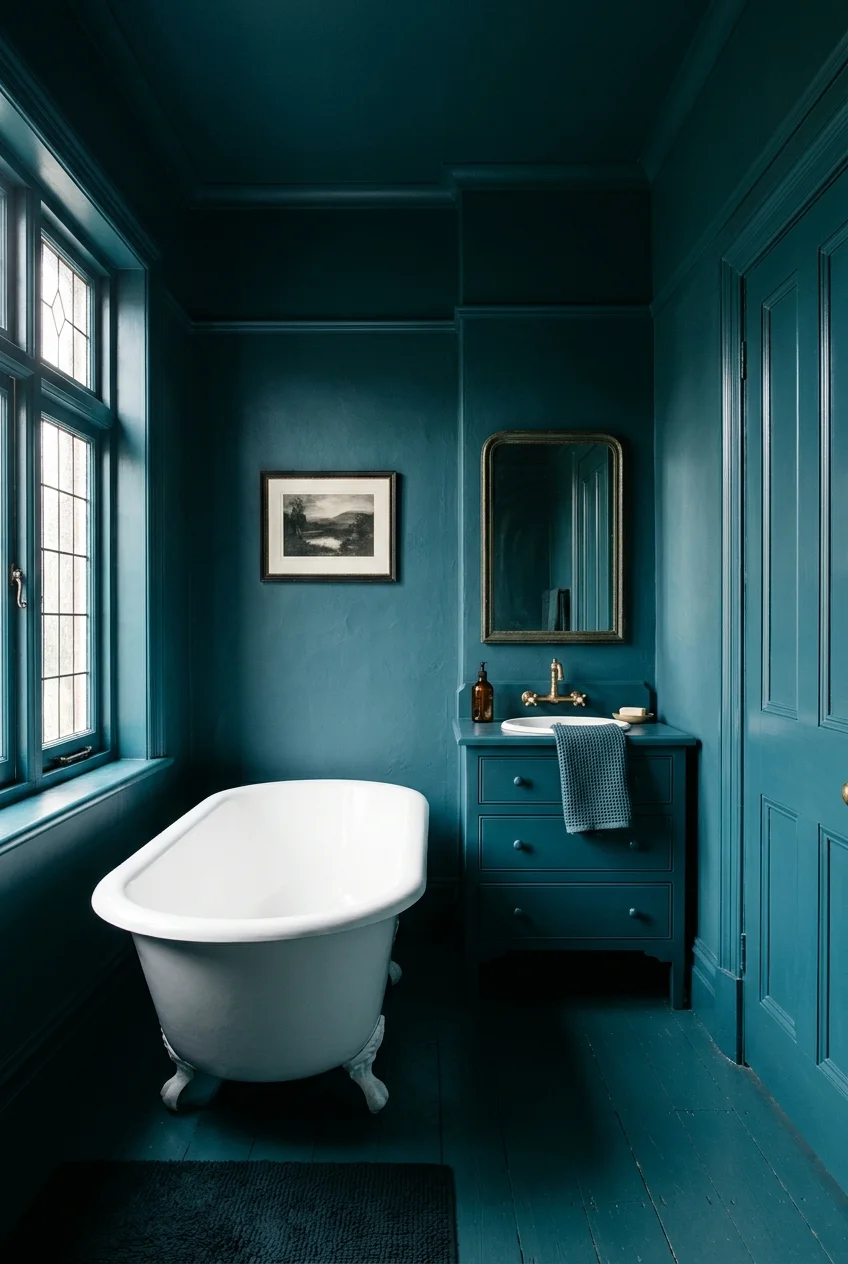
Painting walls, trim, and cabinetry one deep blue-green can make a white tub appear brighter while giving the room a contained, restful atmosphere.
Vary sheen where durability requires it, but keep the color consistent. Strong daylight or layered lighting helps the darker surfaces retain dimension.
30. Frame the Tub With a Broad Arch
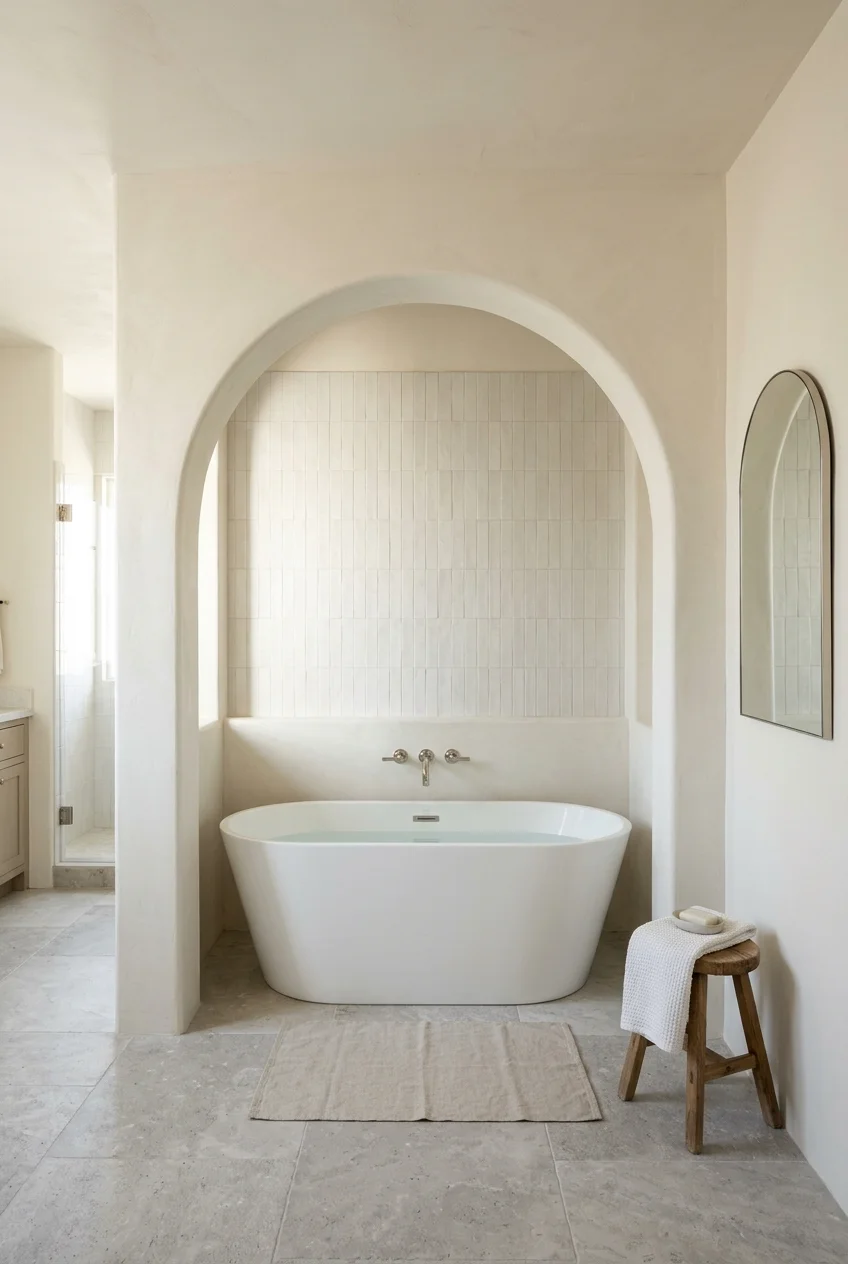
A broad arched opening can turn a recessed tub into a distinct destination while preserving a generous entrance and clear view of the basin.
Keep the arch wider than the tub and avoid a low spring line that complicates entry. Its curve should frame, not visually trap, the fixture.
Repeat the curve once through a mirror or doorway, then stop. Too many arches weaken the architectural emphasis around the bathing zone.
Fixtures, Light, and Privacy Details
31. Keep the Floor Clear With a Wall-Mounted Filler
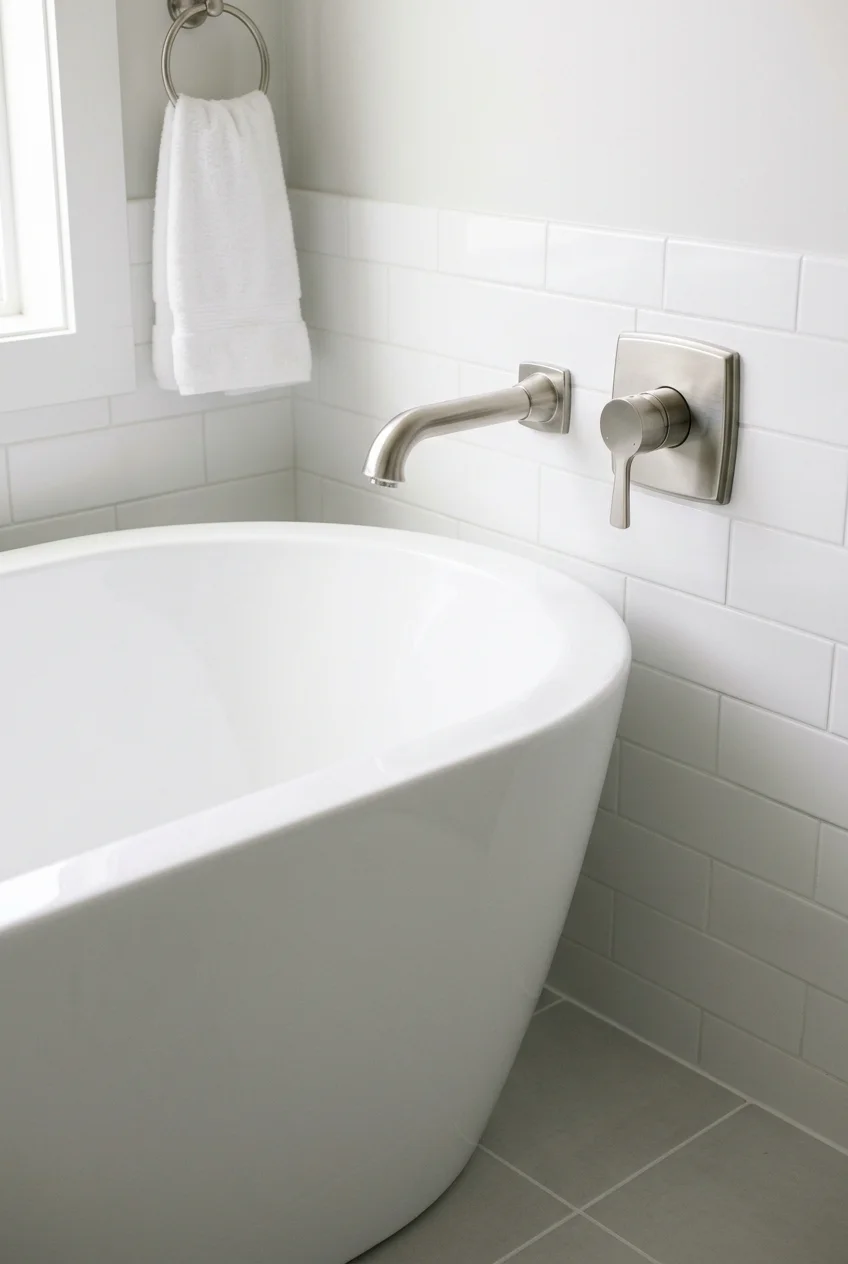
A wall-mounted filler removes a freestanding pipe from the floor and can make a narrow tub zone feel calmer and easier to navigate.
Confirm spout reach, tub rim height, valve position, and service access together. The water stream must land inside the basin without striking the rim.
32. Use a Floor-Mounted Filler as a Vertical Accent
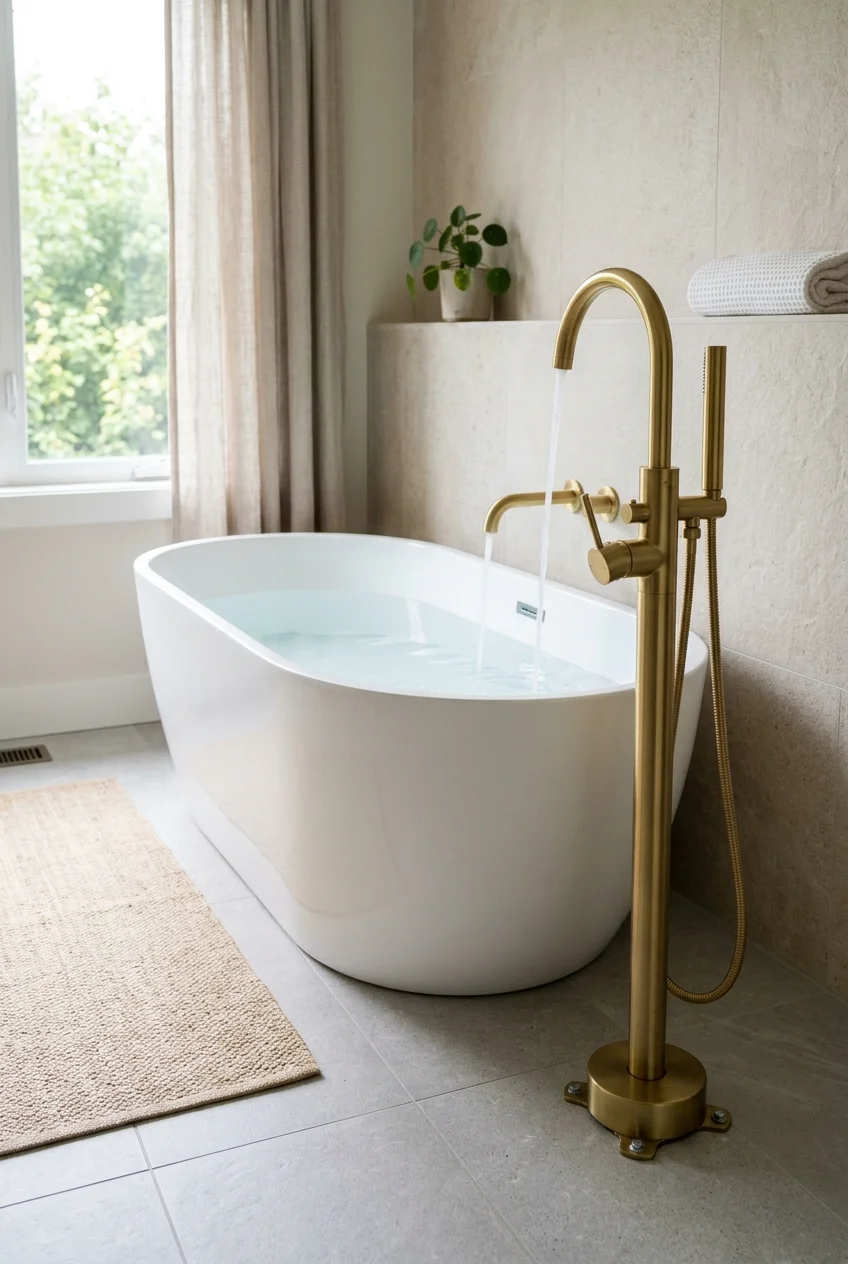
A floor-mounted filler can balance a low sculptural tub with one slim vertical line, especially when no suitable plumbing wall sits nearby.
Locate it where the user can reach controls without walking behind the tub. Coordinate floor structure, supply routing, anchoring, and service access early.
- Check the tub manufacturer’s filler guidance.
- Verify spout reach and water landing point.
- Protect the filler from doorway and cleaning traffic.
33. Match a Deck-Mounted Filler to a Built-In Tub
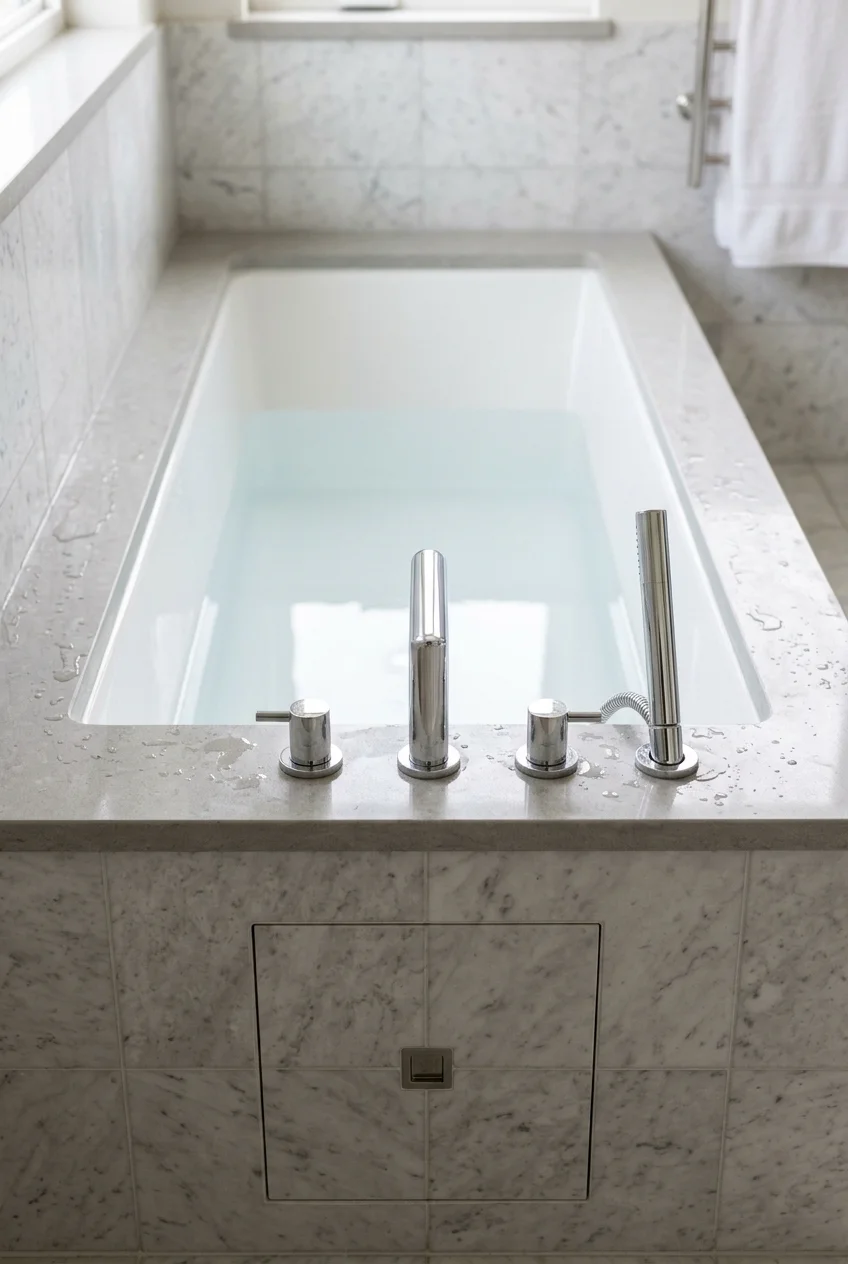
A deck-mounted filler suits a drop-in or undermount tub when the surrounding platform has enough depth for the fixture and its concealed connections.
Arrange the spout, controls, and hand shower as one compact group. Leave an access route below rather than sealing serviceable parts behind finished stone.
34. Warm Cool Tile With Brushed Brass
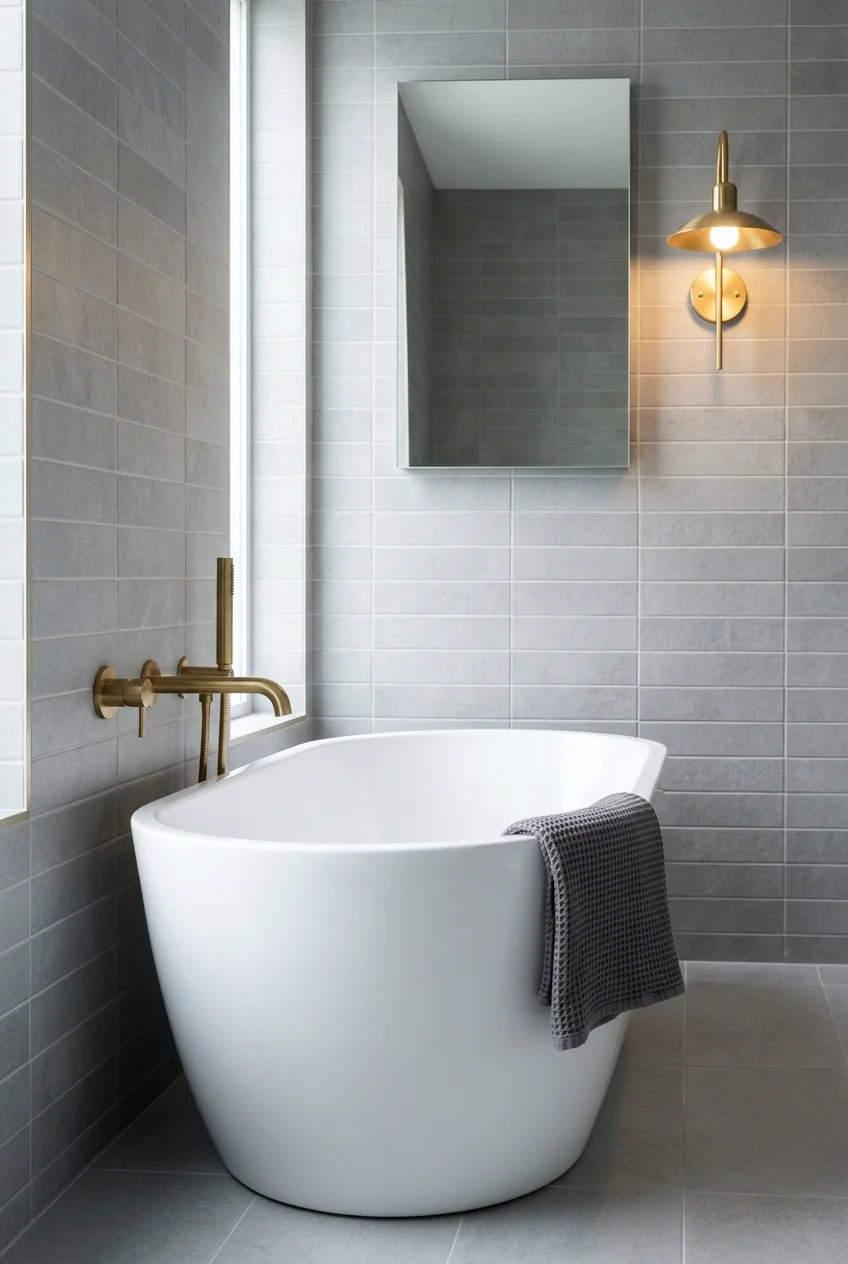
Brushed brass can warm gray, blue, or white tile without making the tub itself ornate, especially when used for the filler and one nearby light.
Compare finish samples from each manufacturer. Brass tones vary noticeably, and a coordinated pair often looks calmer than several almost-matching metals.
35. Outline a Pale Tub Zone With Black Fixtures
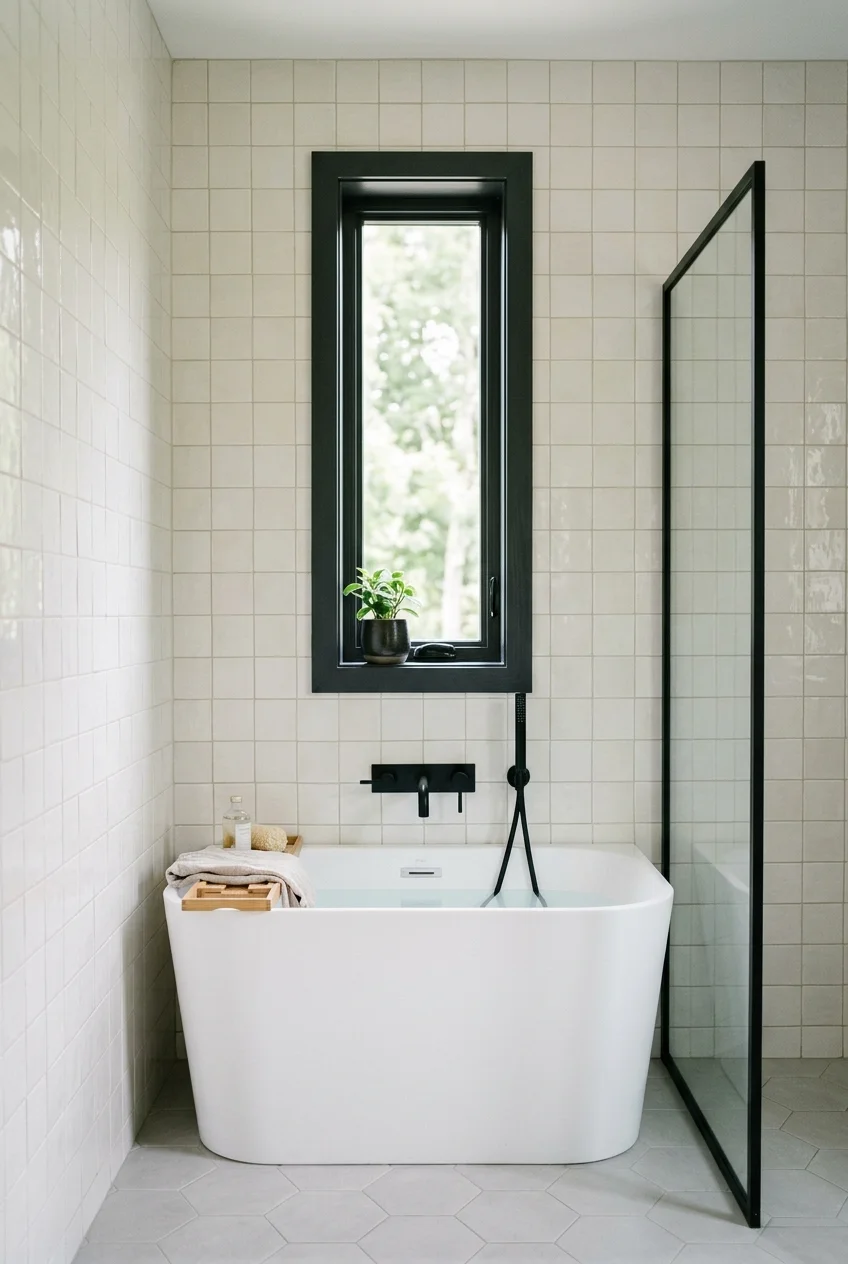
Matte black fixtures create crisp outlines against pale tile and a white tub, clarifying the filler, shower screen, and small architectural edges.
Use black where the line matters, then leave larger surfaces light. Repeating it on every accessory can make the room feel diagrammed rather than relaxed.
36. Add One Damp-Rated Sconce Beyond the Splash Zone
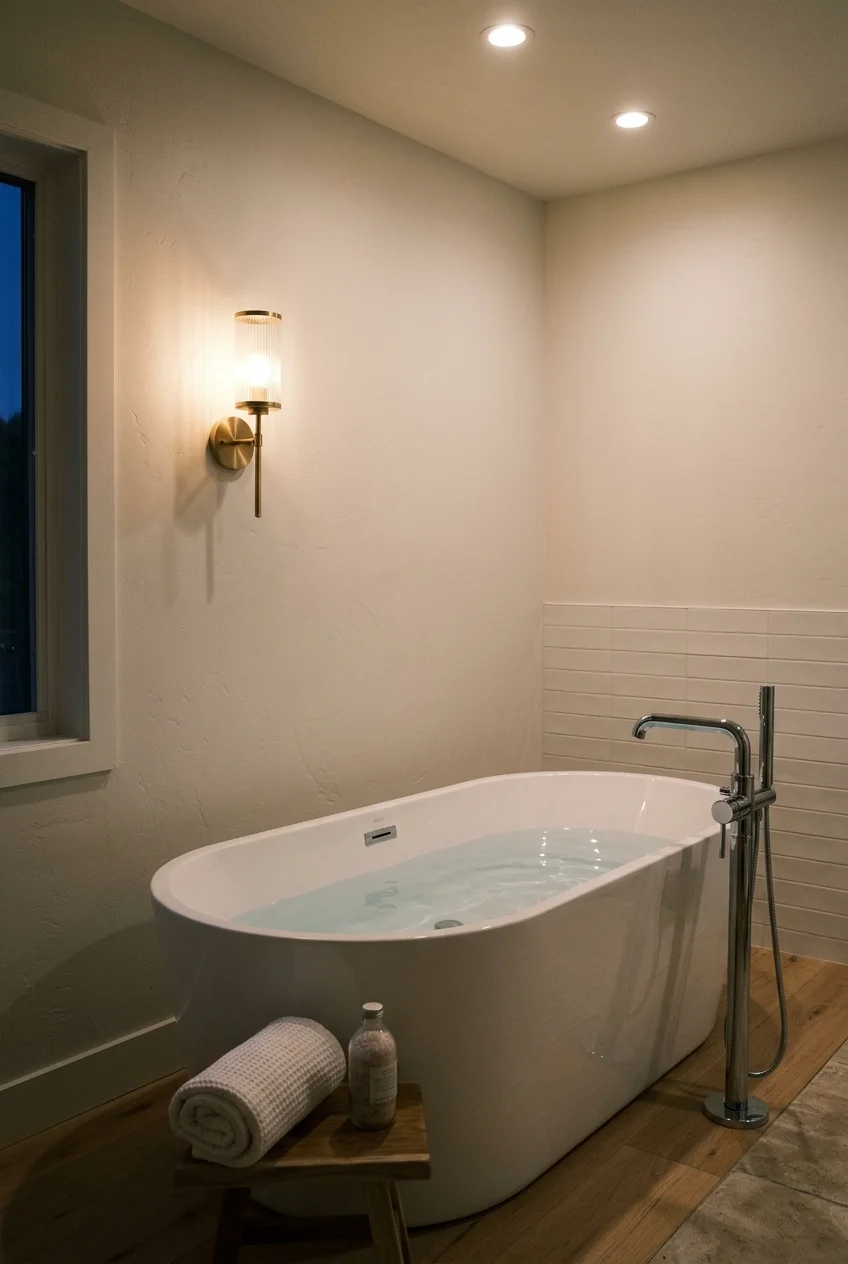
A single decorative sconce can soften evening light near the tub while giving a plain wall a useful focal point above eye level.
Fixture rating, electrical zones, mounting height, and local requirements determine safe placement. Have the lighting position and controls planned professionally.
Lighting note Put practical cleaning light on a separate control so the decorative source does not have to illuminate every task safely and efficiently.
37. Use Full-Length Curtains for Flexible Window Privacy
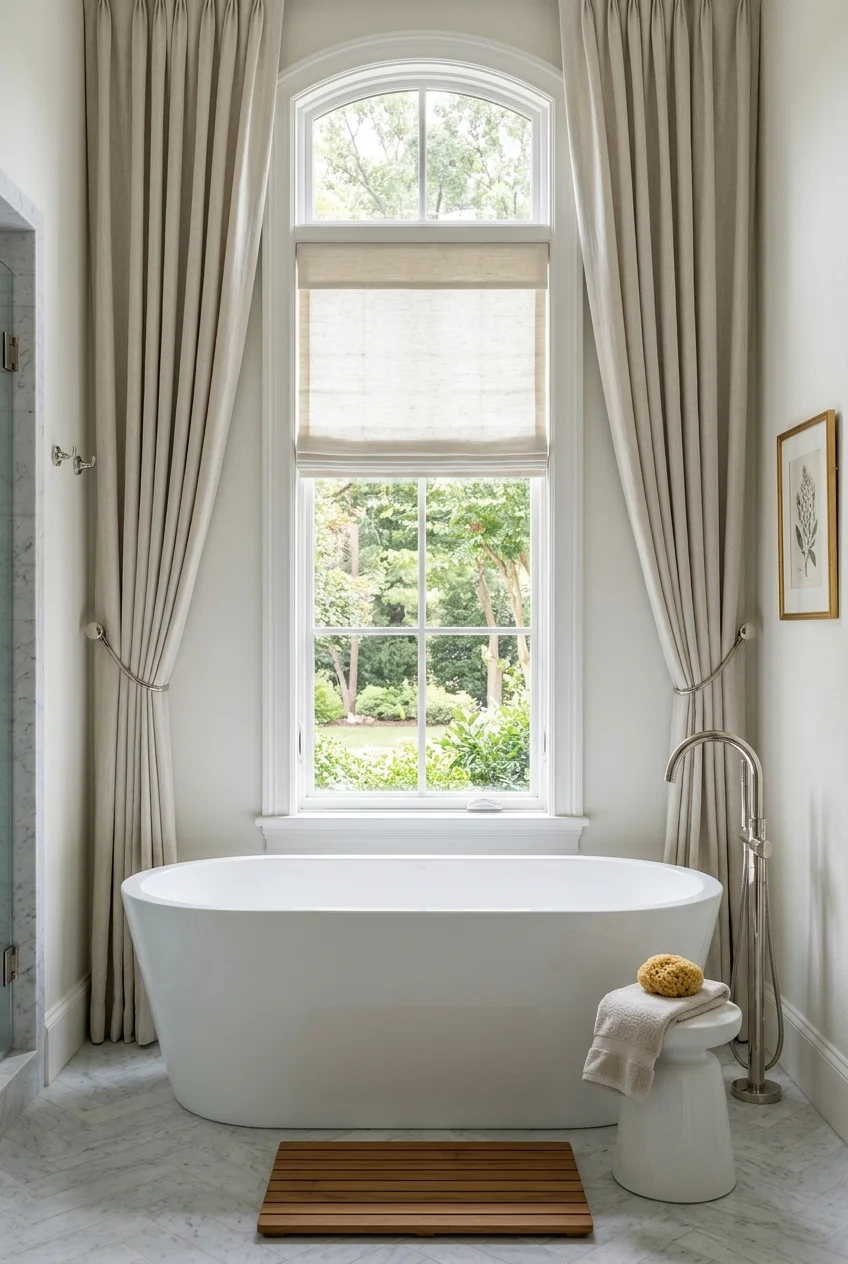
Full-length curtains can soften a tub beneath a tall window and provide flexible privacy, especially when paired with a separate moisture-resistant shade.
Keep fabric clear of the tub rim and damp floor. Choose washable panels, ventilate the room well, and avoid trapping them behind the basin.
38. Separate the Shower With Fluted Glass
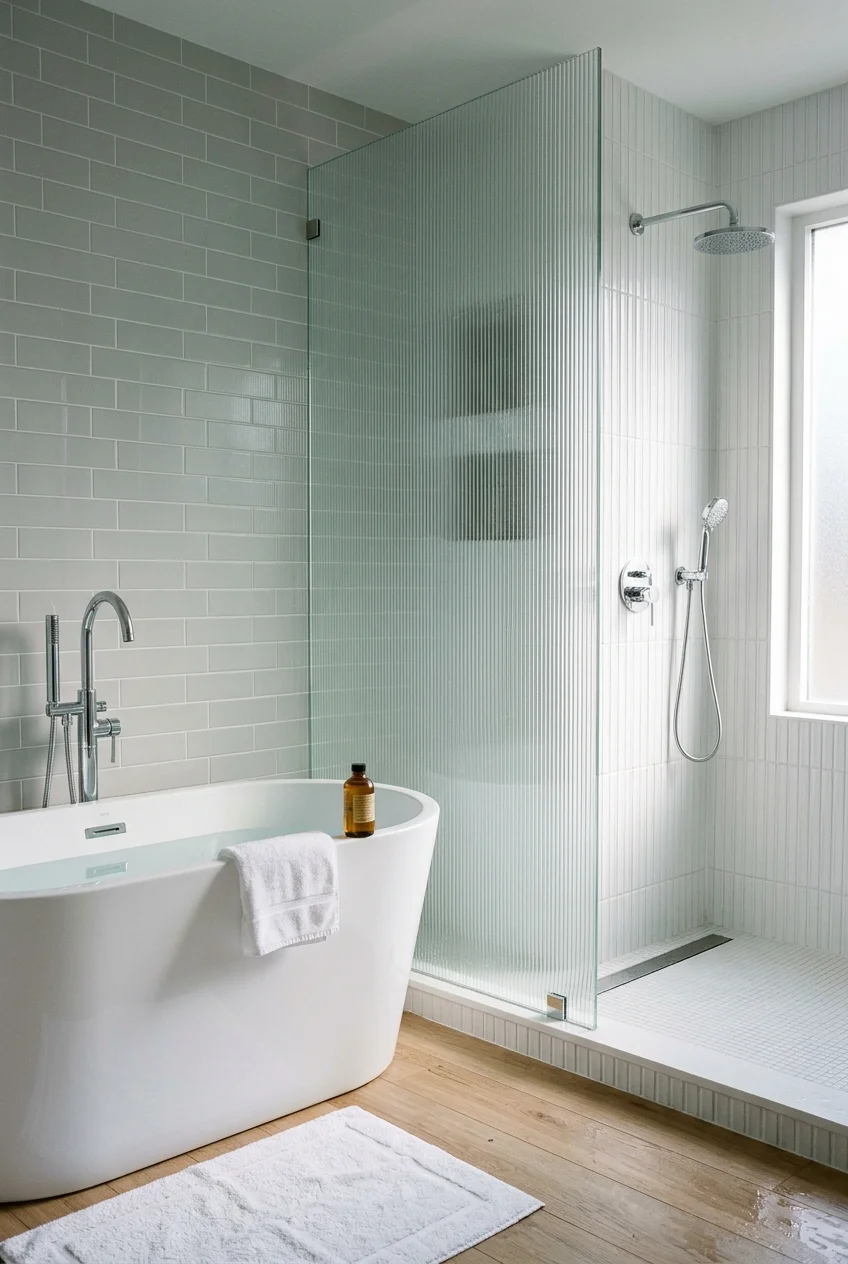
Fluted glass can blur shower activity beside the tub while still borrowing light across the bathing wall and adding a subtle vertical texture.
Use clear glass at critical sightlines when visibility matters, and keep the panel edge outside the tub entry path. Confirm safety glazing requirements.
For the bottles inside that enclosure, choose a practical option from these shower storage ideas instead of crowding the tub ledge.
39. Wash the Tub Wall With Concealed Cove Light
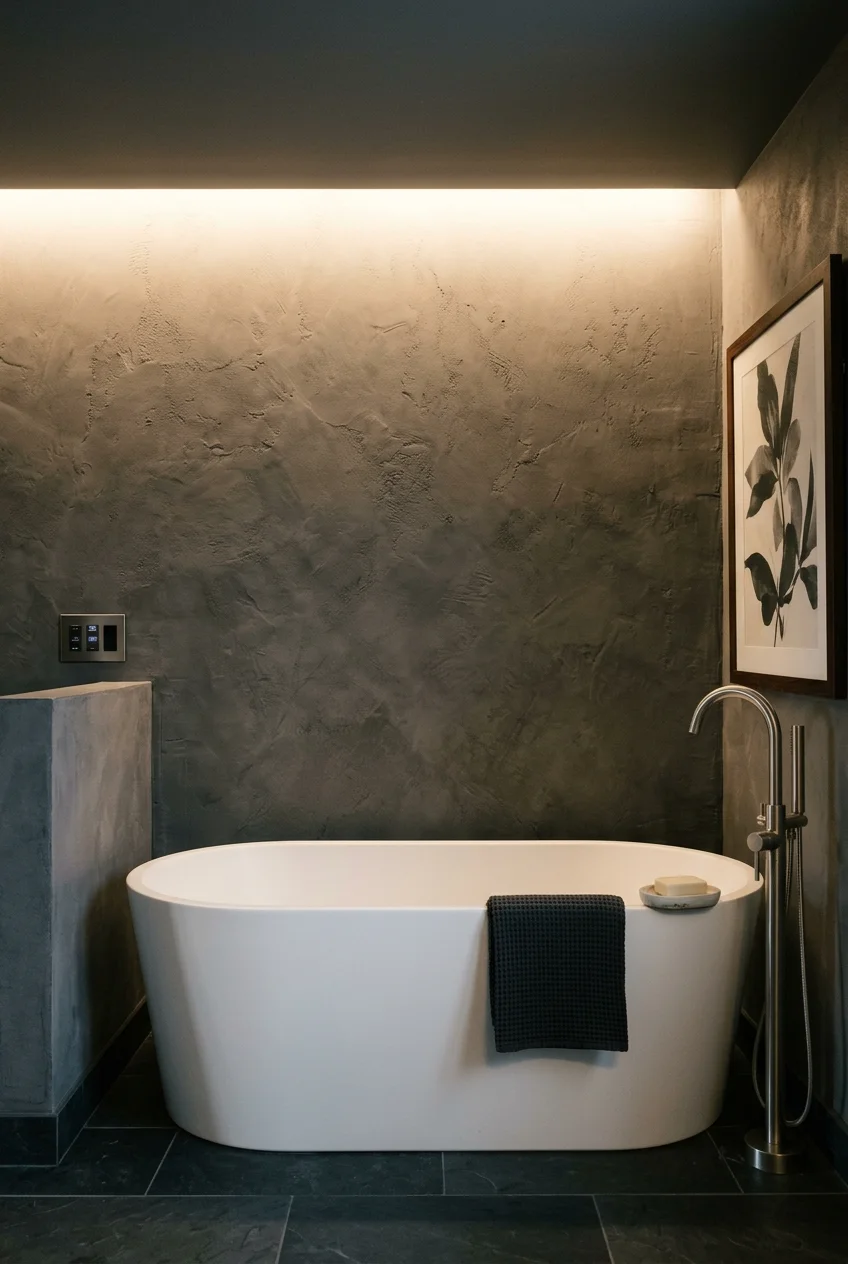
A concealed cove can graze textured tile or plaster behind the tub, creating an evening layer without placing a visible fixture over the basin.
Coordinate the recess, rated components, driver access, and dimming before walls close. The light should reveal texture without producing harsh glare.
40. Put a Skylight Over the Soaking Zone
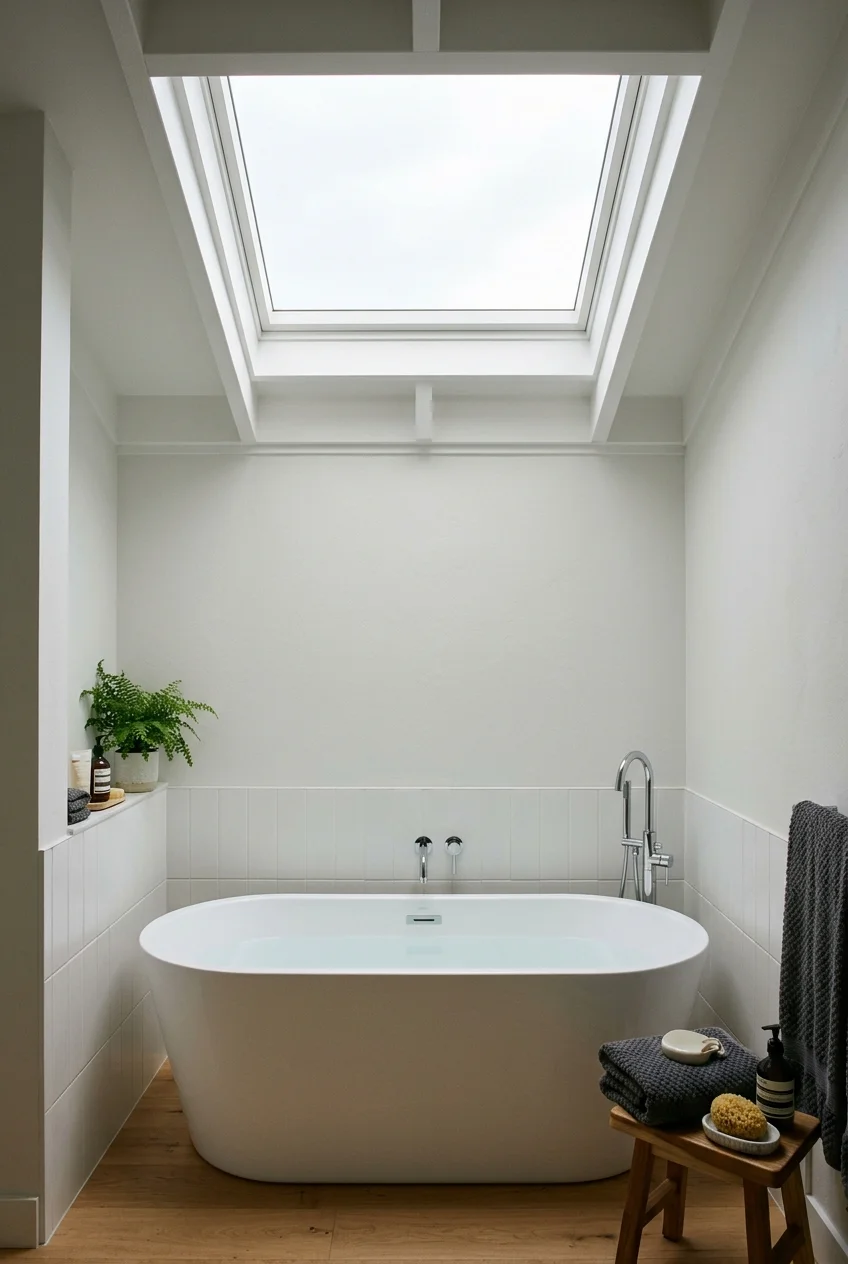
A skylight can bring daylight to an interior bathroom and draw attention upward, giving the tub a strong focal relationship without sacrificing wall privacy.
Plan glazing, shading, condensation control, roof drainage, and maintenance access as one system. Position the opening to avoid uncomfortable direct glare.
Comfort, Storage, and Finishing Touches
41. Span the Tub With a Measured Bath Tray
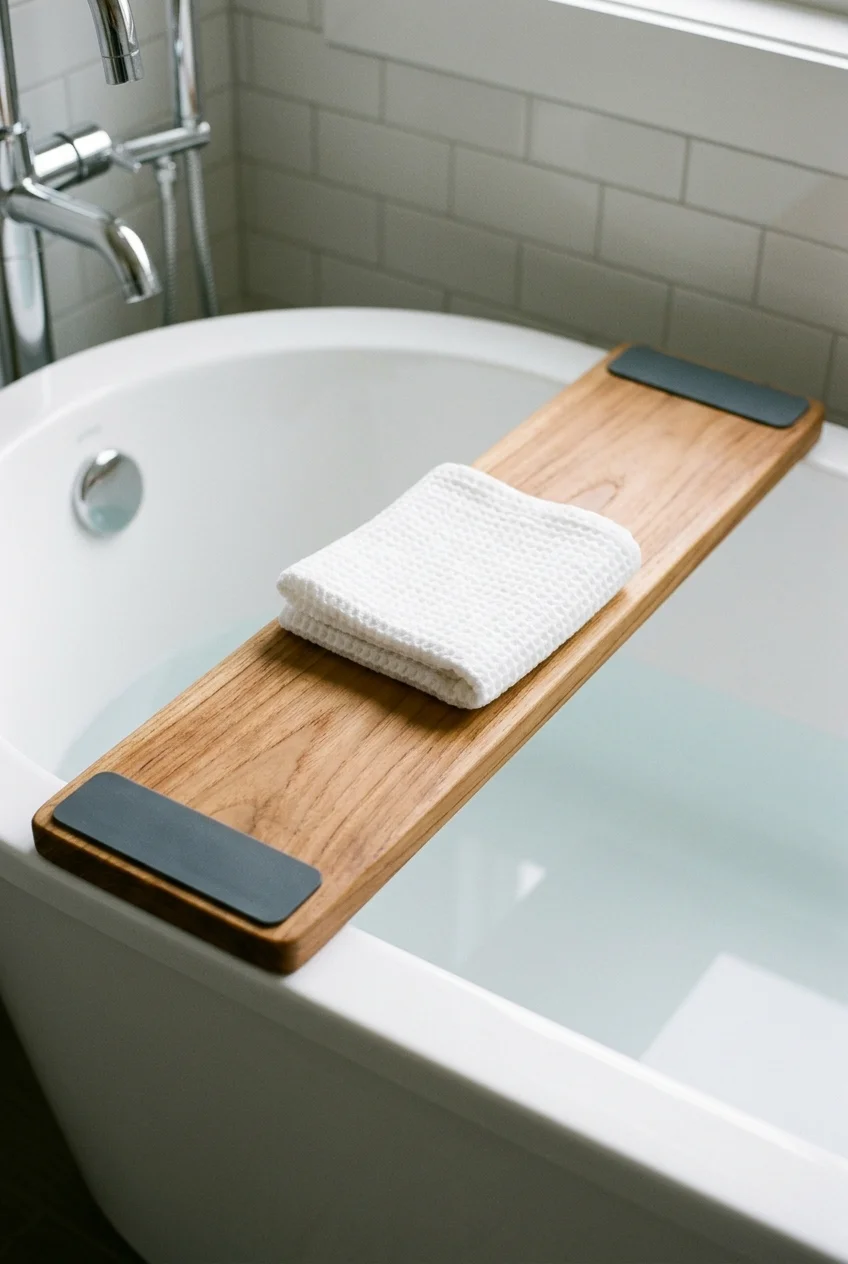
A bath tray adds a temporary landing place without building a permanent ledge, but it must sit securely across the actual rim shape and width.
Keep electronics and breakable objects away from bathwater. Use the tray lightly, remove it before entering or exiting, and dry it after use.
This post may contain affiliate links. See our full affiliate disclosure.
A foldable adjustable teak bathtub tray can store compactly after use; measure the tub, verify grip, and follow the listing’s care and load instructions.
42. Set a Small Stool Outside the Splash Line
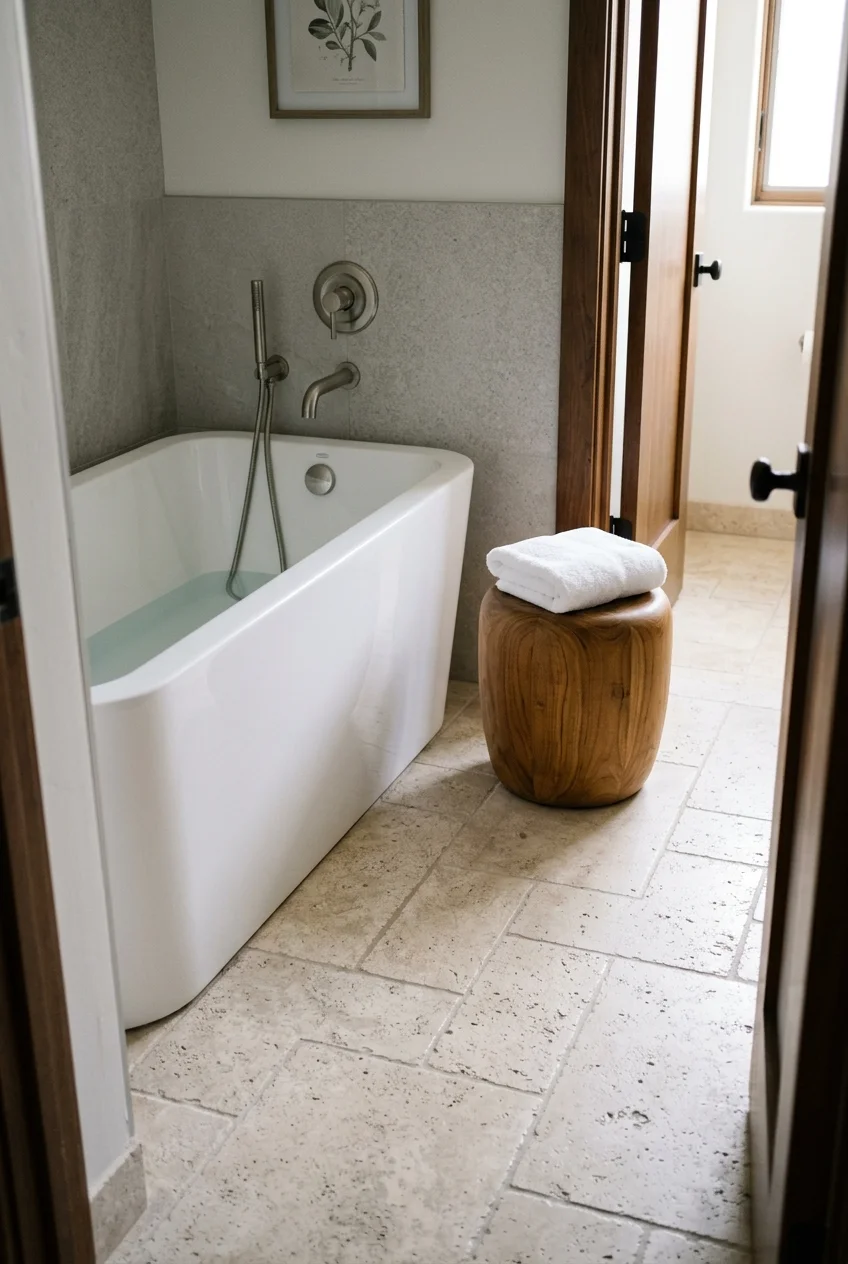
A small stool can hold a towel or robe beside the tub without committing to built-in furniture, and it can move when cleaning.
Choose a stable footprint and moisture-suitable finish, then keep the stool outside the step-in path so it never becomes a tripping obstacle.
43. Build a Recessed Ledge Behind the Tub
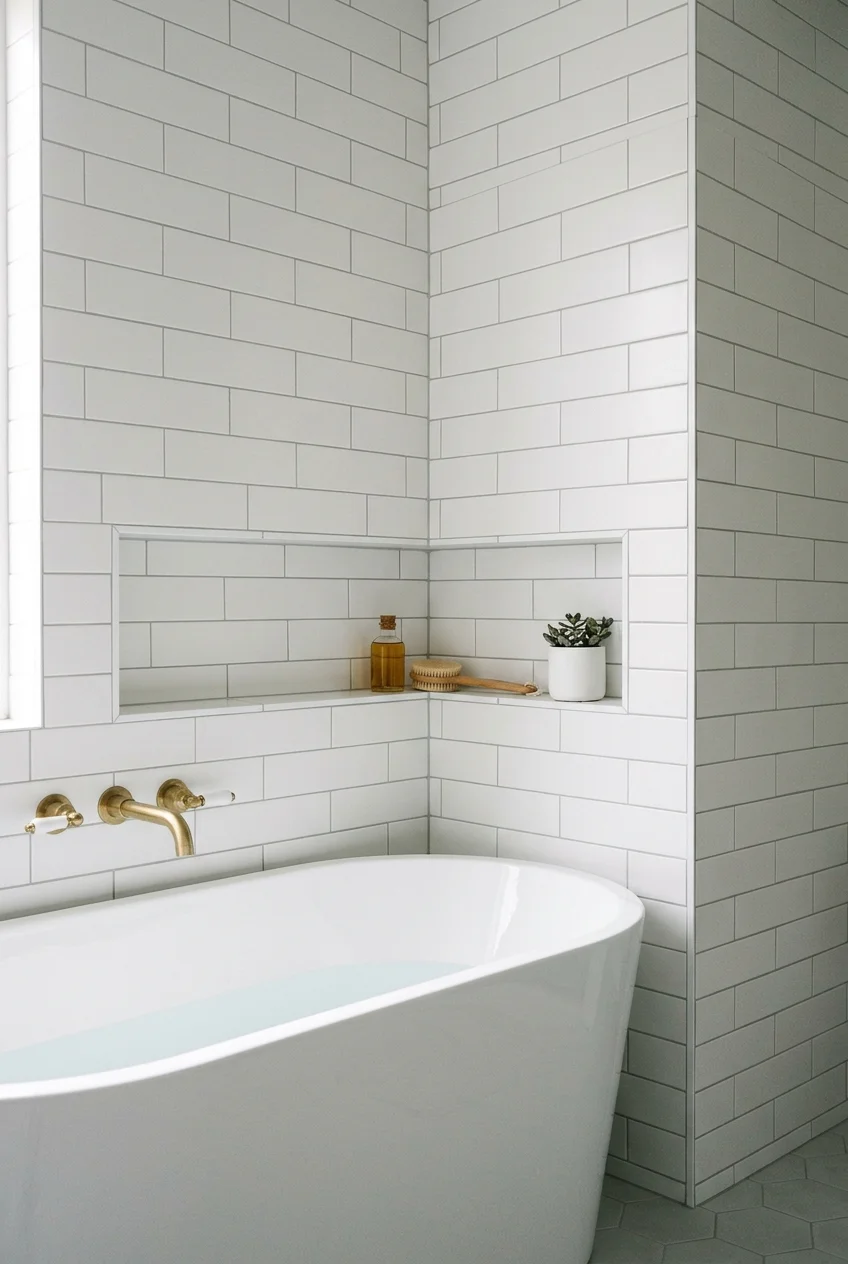
A long shallow recess can hold a few bathing essentials while keeping objects off the tub rim and preserving the clean silhouette of the basin.
Slope the shelf subtly toward the tub or room as specified, waterproof every junction, and size the recess around items you actually use.
- Keep bottles below the recess height.
- Avoid placing the niche behind hard-to-reach plumbing.
- Use a washable, water-tolerant finish.
44. Place Towels Within Reach, Not Over the Tub
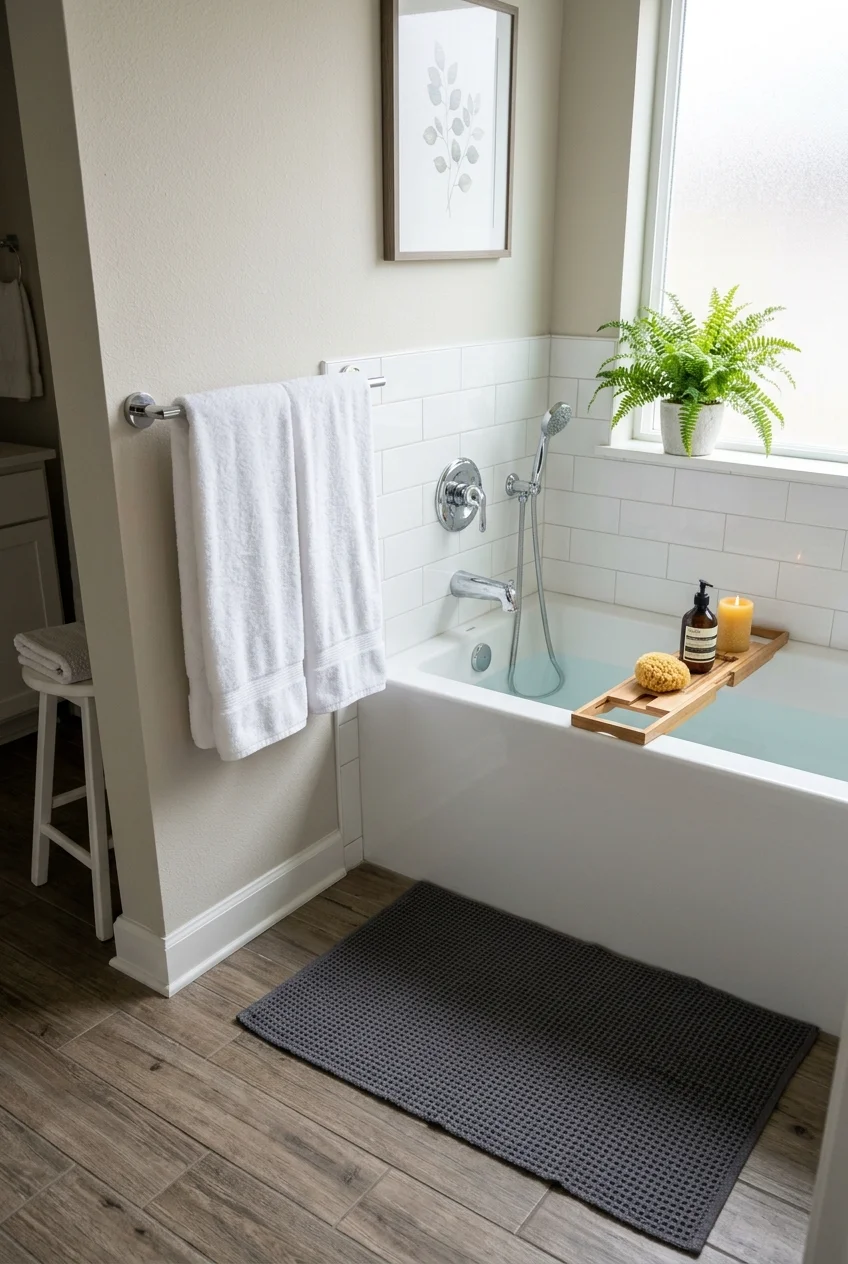
A towel bar or hook on the dry-side wall lets a bather reach a towel without standing and crossing wet flooring first.
Test the reach from the tub edge while preserving entry clearance. Avoid hanging heavy shelves or framed objects where they could fall into the basin.
45. Hide Bath Supplies in a Shallow Side Cabinet
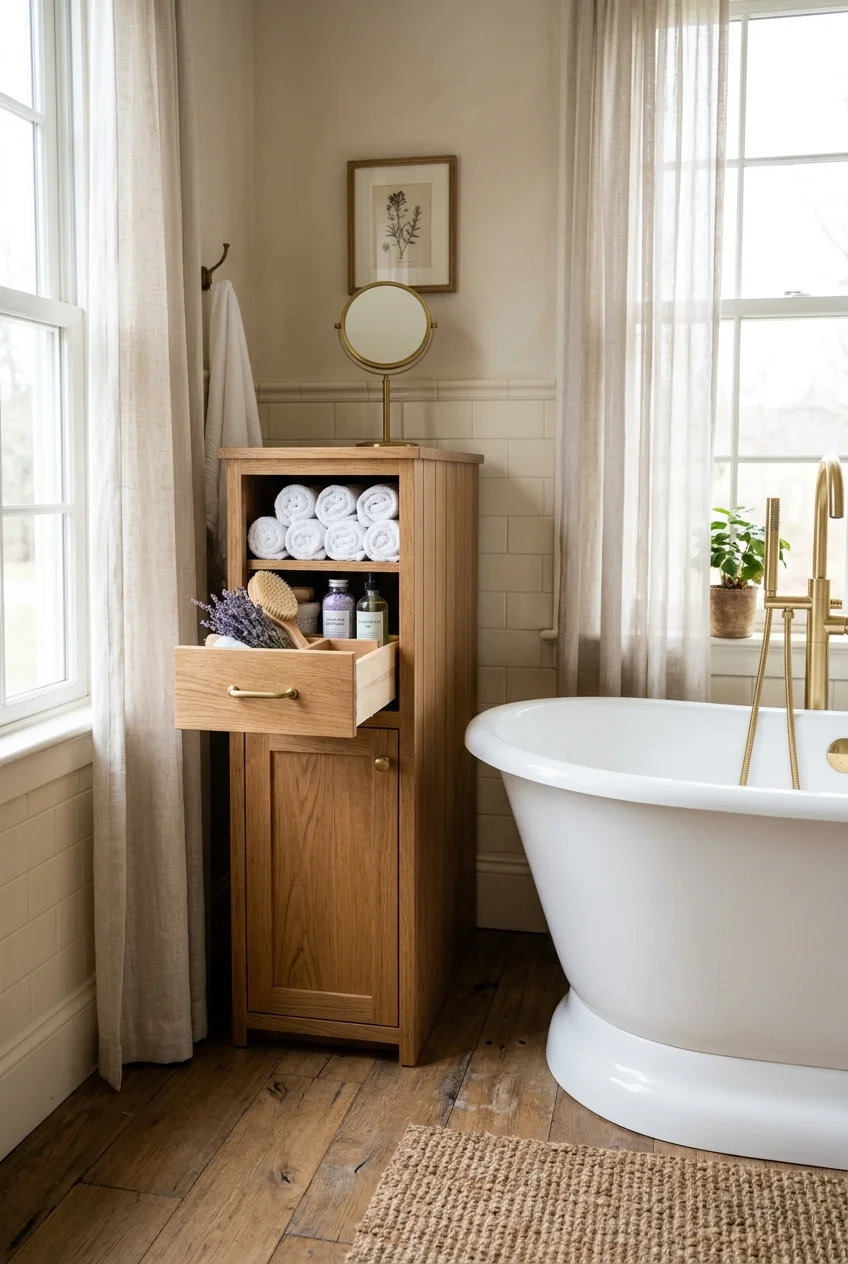
A shallow cabinet beside the tub can store salts, towels, and cleaning supplies while keeping the ledge and floor free of visual clutter.
Use drawers or short shelves so items do not disappear at the back. Keep the door swing and hardware outside the tub entry route.
Separate cleaning products from personal items, and choose a cabinet interior that can be wiped after humidity or occasional drips.
46. Add One Humidity-Tolerant Plant Group
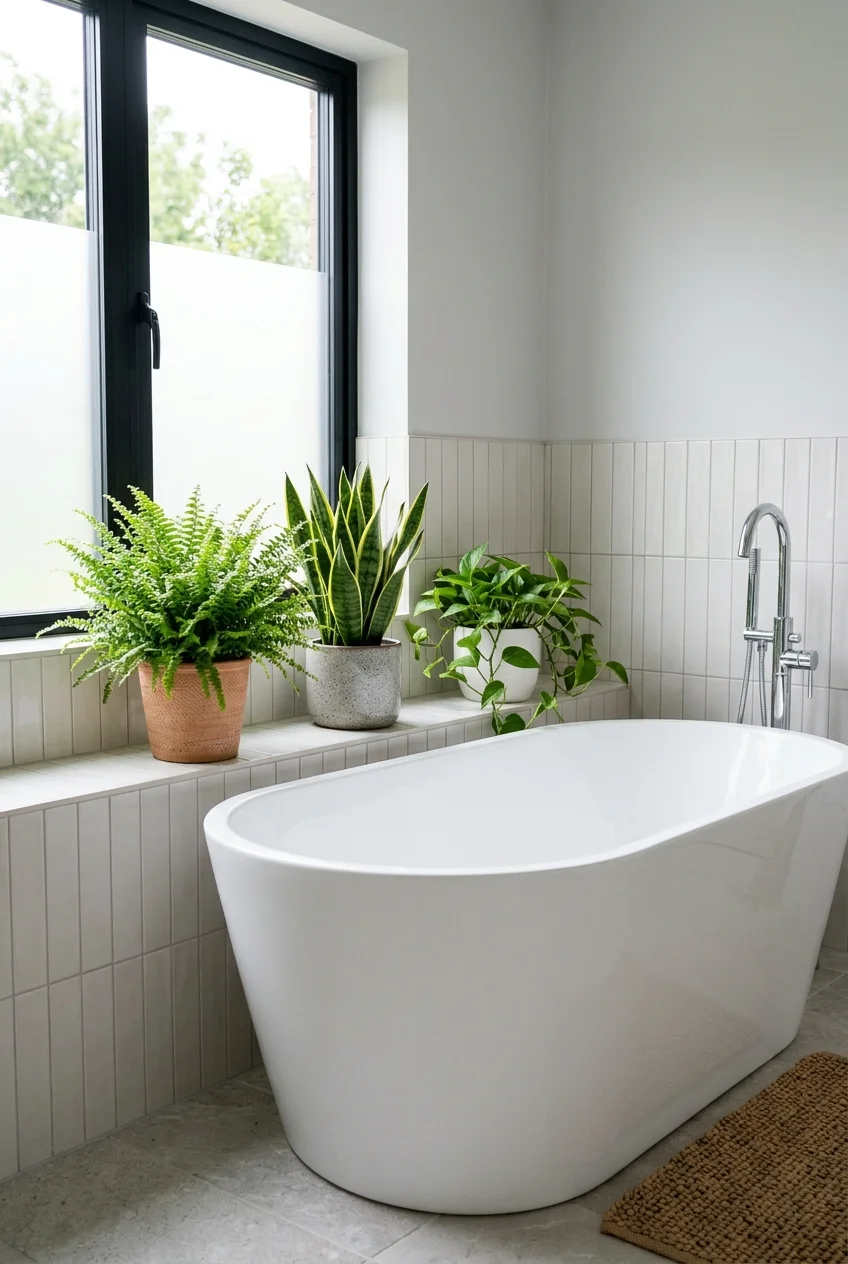
A small group of plants can soften hard bathroom surfaces when the available daylight, temperature, and humidity genuinely suit the selected species.
Place pots on a stable waterproof surface away from the tub entry. Faux greenery is a reasonable alternative in a windowless or low-light room.
47. Display One Large Moisture-Suitable Artwork
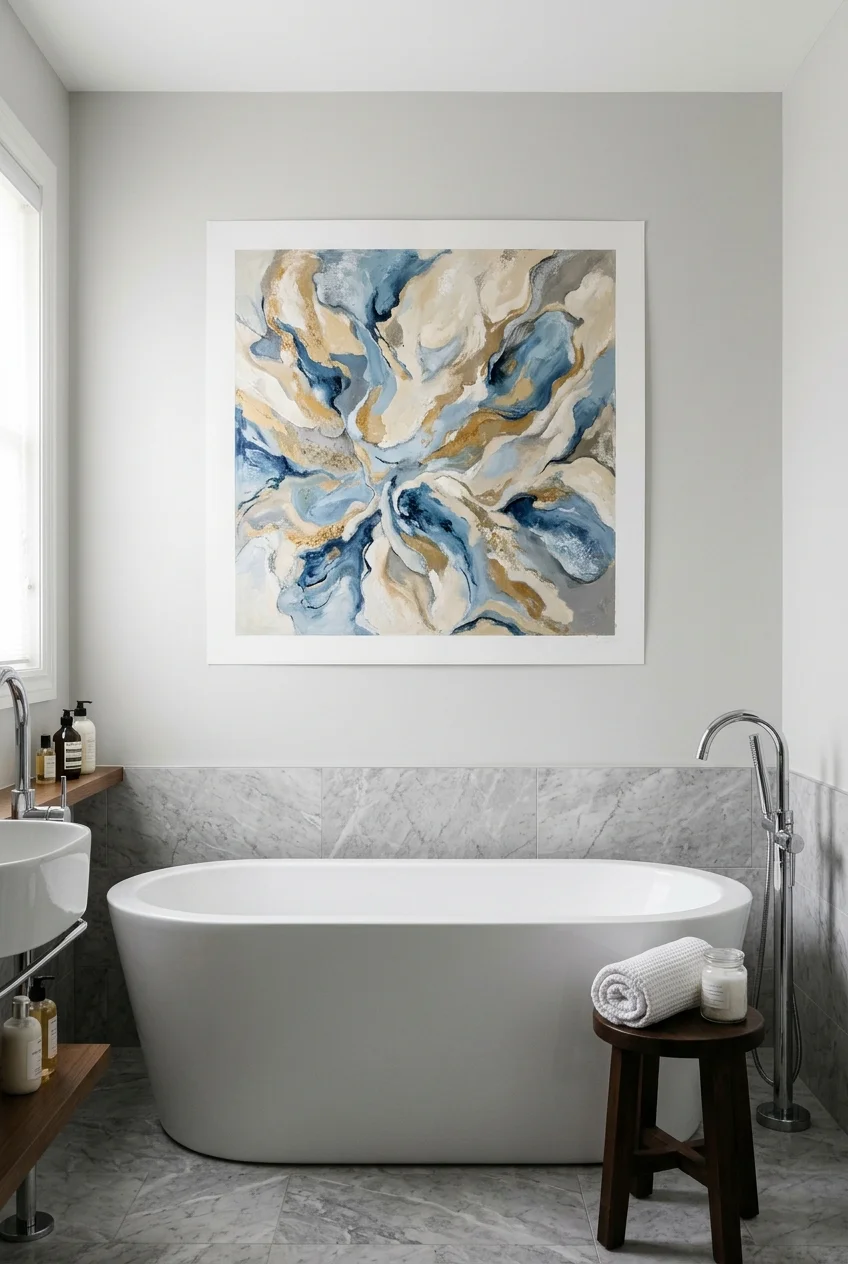
One large artwork can give a plain tub wall scale and personality more effectively than several tiny frames scattered around the room.
Choose a moisture-suitable presentation, secure it properly, and keep it beyond direct splash. Valuable or delicate originals belong elsewhere in this humid room.
48. Use Flameless Candles for a Soft Evening Layer
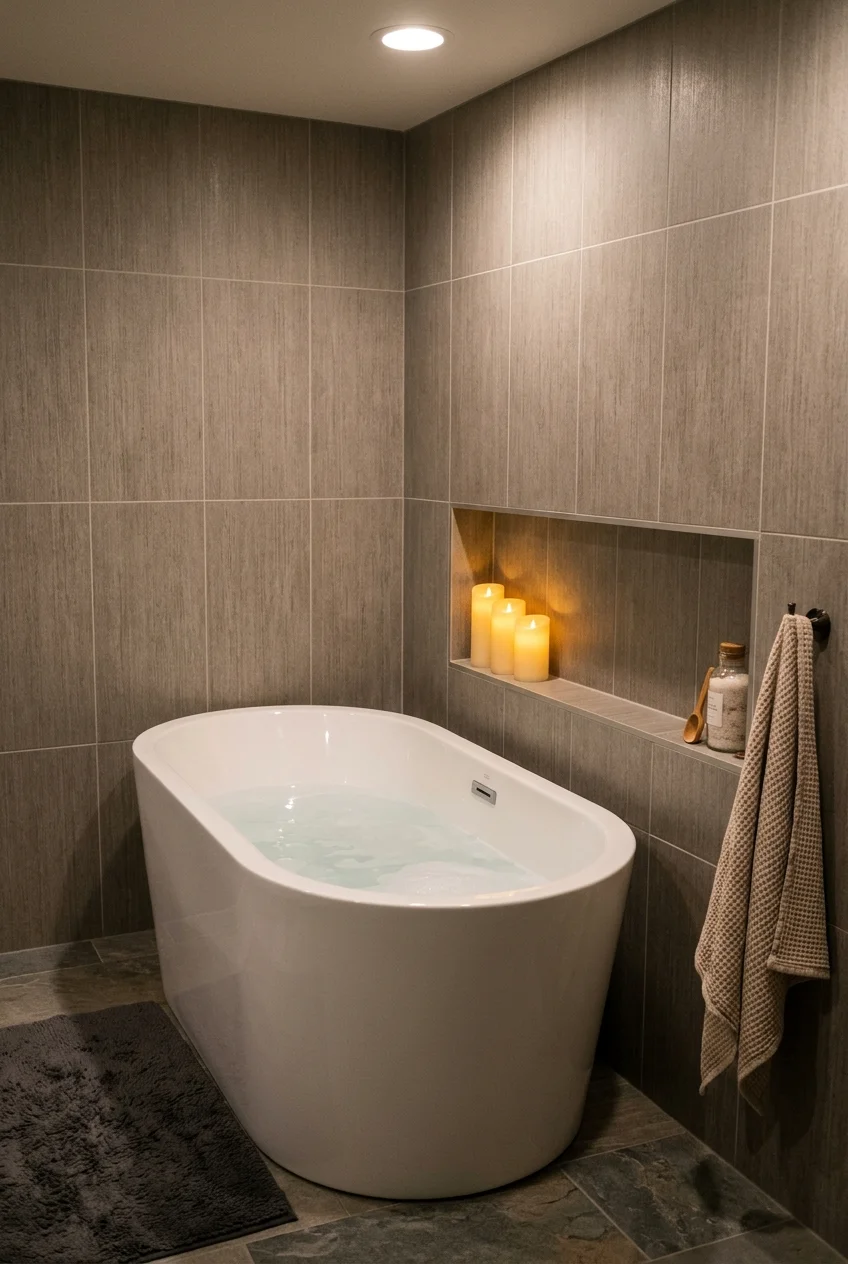
Warm flameless candles can create low evening light around the tub without introducing an open flame near towels, curtains, or bath products.
Group only a few on a dry ledge and keep them out of the entry route. Use permanent lighting for safe movement and cleaning.
49. Plan a Wide Transfer Ledge Beside the Tub
Image pending: No image is attached to this draft for idea 49 (image-49).
A broad, stable ledge beside the tub can support sitting, bathing supplies, or assisted entry when it is deliberately integrated with the layout.
Dimensions, structure, grab-bar support, surface friction, and individual needs require professional planning. Do not assume the finished appearance alone guarantees accessible use.
Keep the ledge clear of decorative objects and pair it with a reachable filler. A useful support surface should remain available whenever needed.
Planning note Discuss present and future bathing needs before construction, because reinforcement and clear floor space are difficult to add after finishes are installed.
50. Finish With a Restrained Three-Material Palette
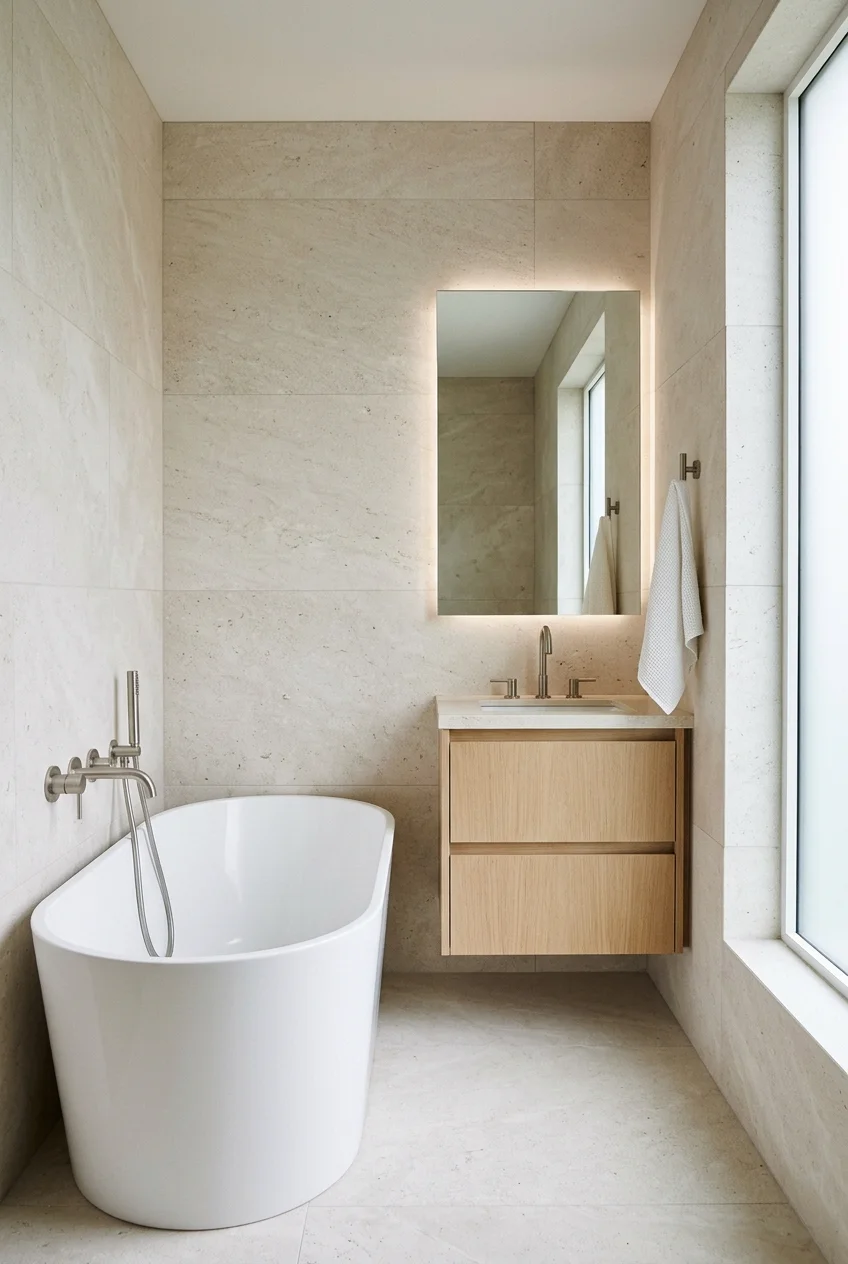
Limiting the tub zone to three principal materials can make a detailed bathroom feel settled: one tub finish, one field surface, and one warm accent.
Repeat each material at least once, but vary its scale. For example, use pale stone broadly, oak narrowly, and brushed metal only at touchpoints.
- Choose the tub finish first.
- Compare wall and floor samples together.
- Add metal after the large surfaces agree.
- Remove accessories that introduce an unrelated finish.
Frequently Asked Questions
What should I measure before choosing a soaking tub?
Measure the room, doorways, turning path, finished floor area, drain location, filler position, and clear space needed for entry, cleaning, and service.
Compare those numbers carefully with the manufacturer’s exterior dimensions, bathing-well measurements, water depth, filled weight, overflow, drain, and installation instructions.
Can a soaker tub work in a small bathroom?
Yes, but prioritize a compact deep basin, back-to-wall model, alcove soaker, or carefully planned wet room instead of shrinking every surrounding clearance.
Mock up the footprint and entry height with tape and boxes, then confirm plumbing, door movement, cleaning access, ventilation, and floor support.
Is a freestanding tub harder to clean around?
It can be when narrow gaps trap dust and moisture. Choose enough clearance for a hand or cleaning tool, or consider a back-to-wall model.
Placement should also preserve access to the drain and filler. Follow the specific tub instructions because maintenance arrangements differ among models.
Which tub filler works best with a soaker tub?
The best filler matches the tub configuration and available plumbing: wall-mounted, floor-mounted, or deck-mounted options each need different reach, support, and access.
Verify the water landing point, valve reach, flow requirements, mounting surface, and manufacturer compatibility carefully before rough plumbing is finalized.