50 Bathroom Update Ideas for a Fresh Look and Better Everyday Use

This post may contain affiliate links: full affiliate disclosure.
A bathroom can work perfectly well and still feel overdue for a change. Start with the surface or fixture you notice first from the doorway.
Keep the finishes you like, then choose an update that solves a real annoyance: flat lighting, crowded drawers, a tired vanity, or nowhere to hang towels.
These 50 ideas range from washable textiles to planned fixture replacements. Compare the finished looks, then use the fit checks to choose what suits your bathroom.
As an Amazon Associate I earn from qualifying purchases.
Start With the Changes You See First
Give one prominent feature a clear new direction before adding accessories. These updates work around existing fixtures and help you decide what can stay.
1. Make a striped shower curtain the main pattern
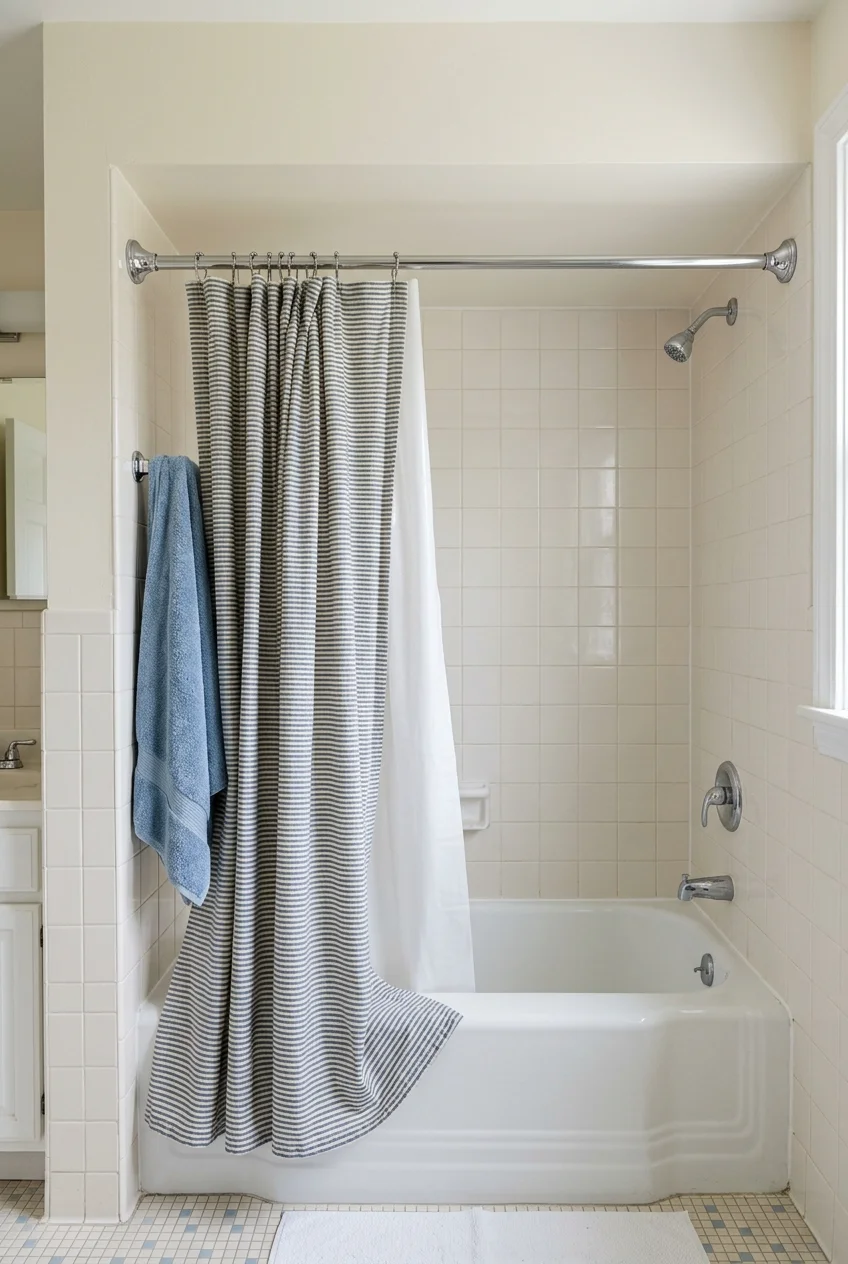
A striped curtain gives a plain tub alcove a clear focal point without changing its tile. Pull one stripe color into a nearby towel.
Measure from the installed rod to the tub before choosing length. Keep the functional liner inside the tub and the decorative fabric outside it.
For a blue option, consider the CasaTena striped fabric curtain (paid link). Its listing excludes hooks and a liner, so plan those separately.
Spread both layers after showering so they can dry. A washable outer curtain is especially useful when the tub also handles children’s baths or pets.
2. Paint a sound vanity a saturated color
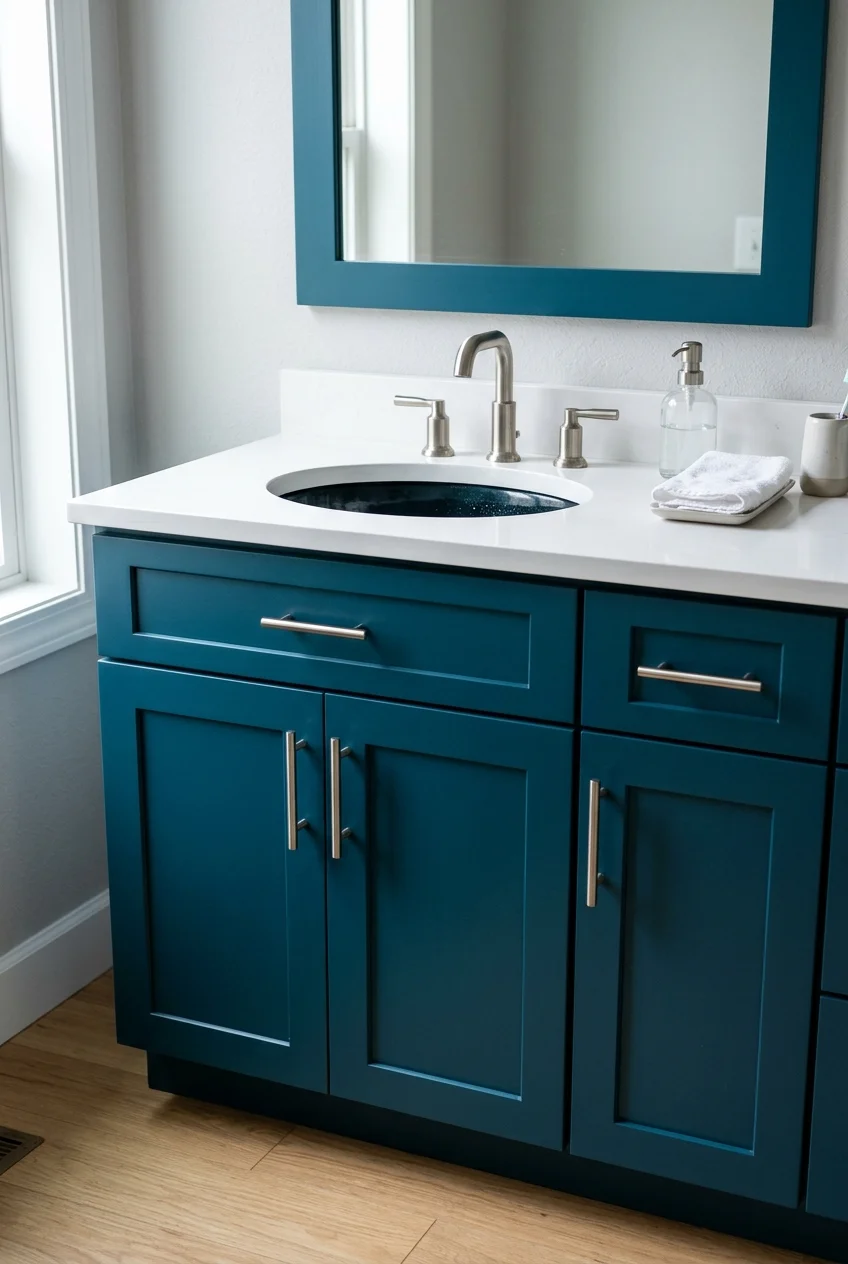
A deep teal vanity can carry the room when the countertop and tile are staying. Test the color beside both before committing to it.
Paint makes sense for a sturdy cabinet with intact panels. Swollen particleboard, soft corners, or recurring leaks need repair or replacement before a cosmetic finish.
- Remove and label doors, drawers, and hardware.
- Clean, prepare, and prime for the actual cabinet material.
- Apply cabinet paint according to its instructions.
- Allow the specified cure time before reassembly.
Use a coating system intended for cabinetry, rather than leftover wall paint. Laminate, previously painted wood, and bare wood may require different preparation and primers.
Keep the sink and counter if they still suit the room. Painting only the cabinet lets you spend effort on a smooth, durable finish.
Watch for Dry to the touch does not mean ready for daily use. Follow the paint manufacturer’s cure instructions before closing doors or loading drawers.
3. Frame an existing wall mirror
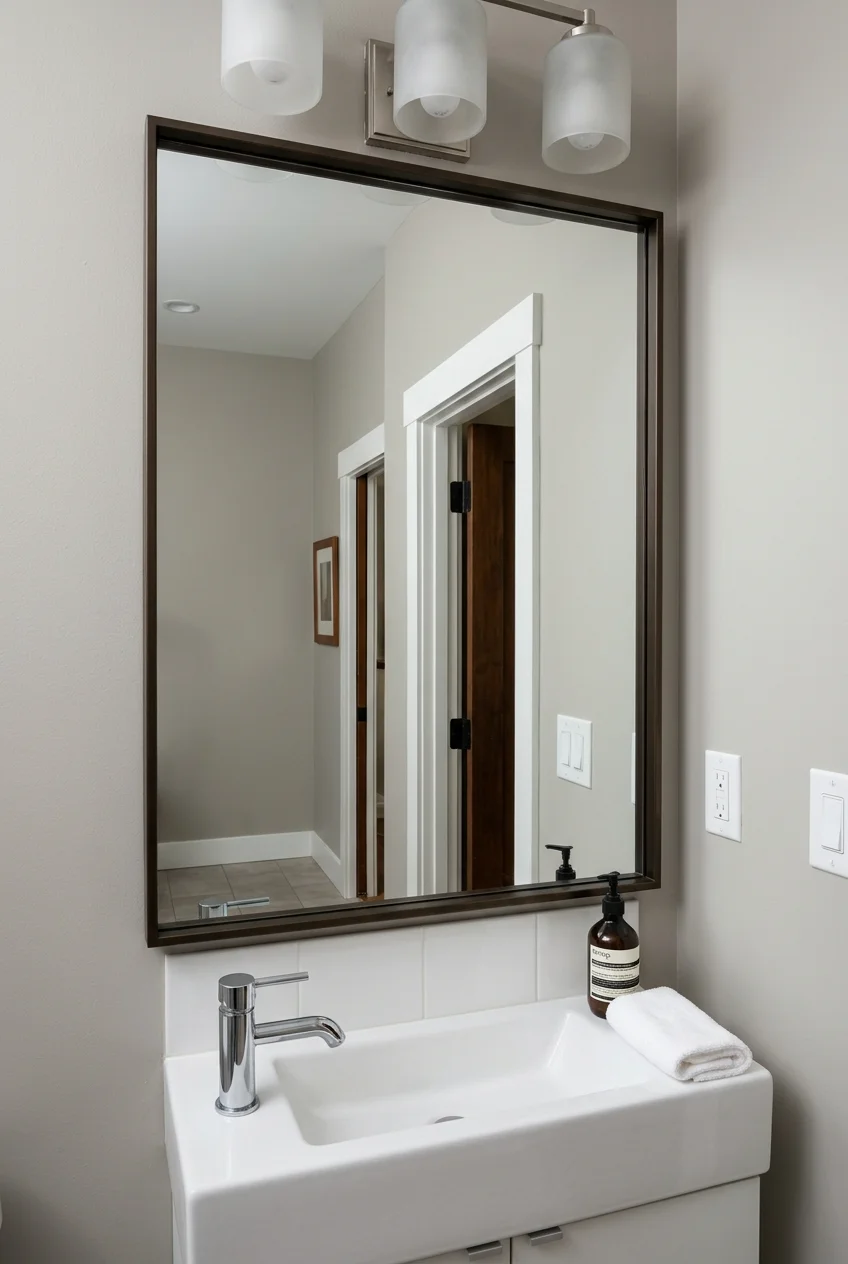
A slim frame gives a plain sheet mirror a finished edge while keeping its generous reflection. Match the frame’s weight to the vanity below.
Check clips, edge condition, nearby outlets, and the light fixture before ordering a frame kit. The frame must accommodate the mirror’s existing mounting system.
Use a kit and adhesive specified for that installation. Do not remove supporting clips or assume a decorative frame can hold a heavy mirror.
Practical tip Look at the back of frame samples against the mirror. An unfinished inner edge can appear in the reflection even when the front looks good.
4. Swap cabinet pulls using the existing holes
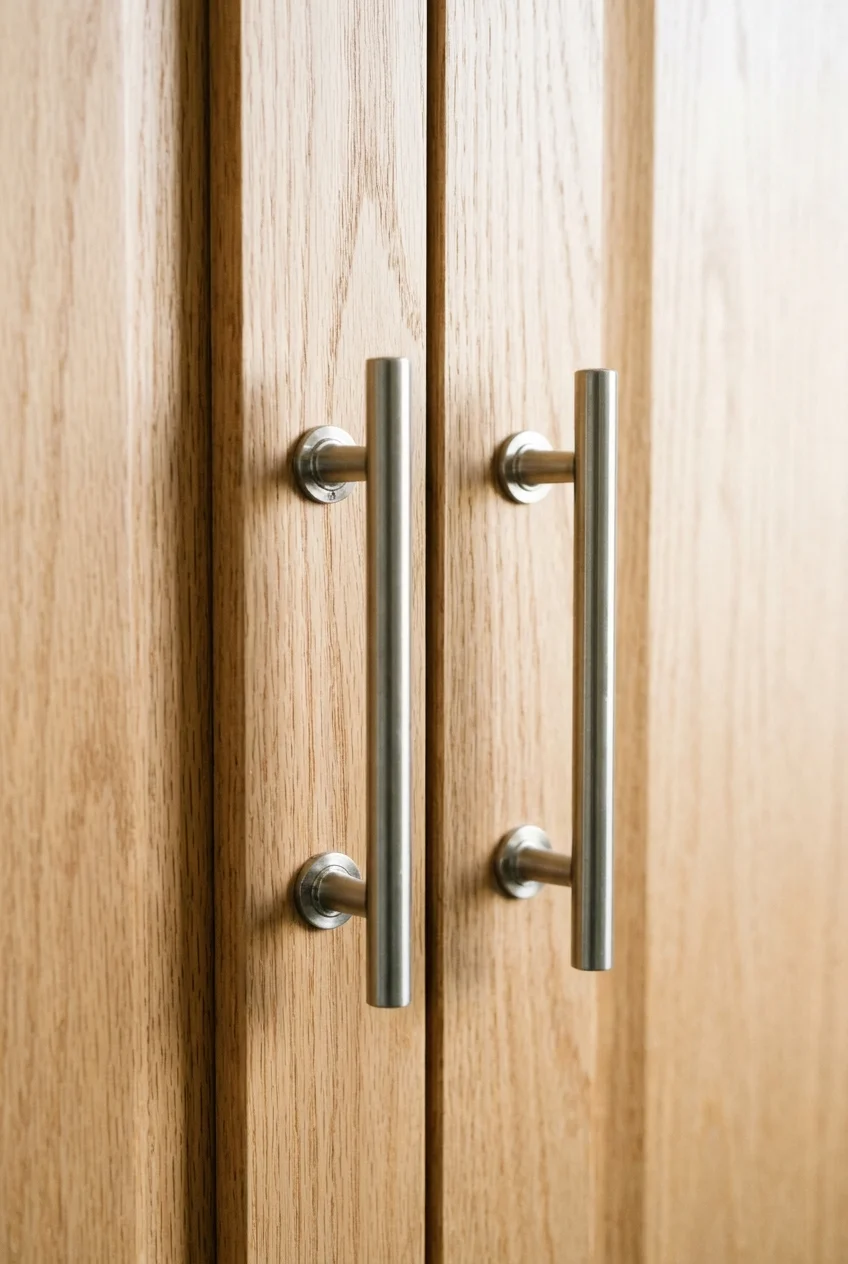
Straight bar pulls can sharpen the look of curved cabinet fronts without changing their finish. Choose a shape that feels comfortable with wet hands.
Measure screw holes center to center, then compare screw length and door thickness. Try one pull first, checking nearby drawers and walls for collisions.
Repeat the same finish across the vanity, even if its shapes vary between knobs and pulls. Keep removed hardware together if you rent the home.
5. Choose wall paint that works with the tile
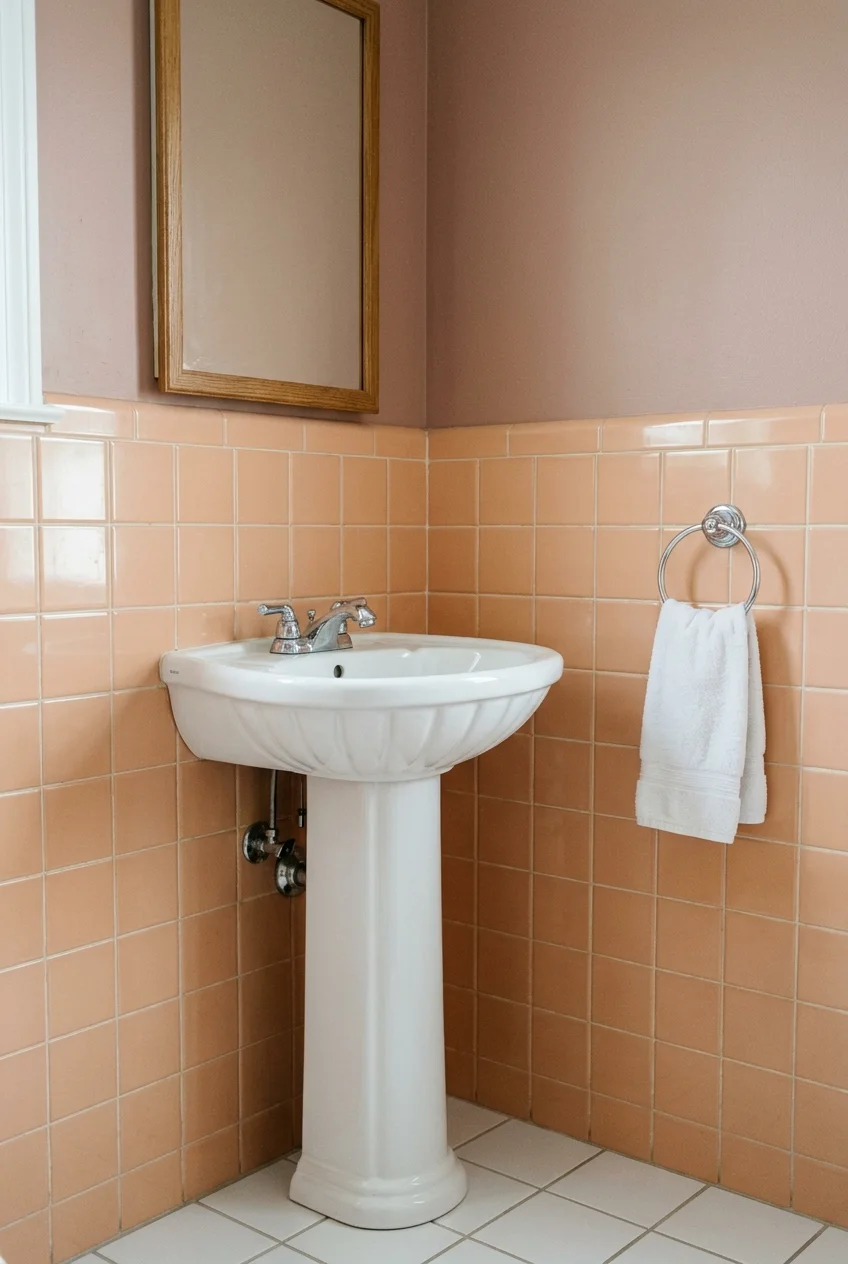
Existing cream or peach tile can look more intentional beside a related wall color. Start with its undertone instead of choosing white automatically.
Place large paint samples beside the tile, countertop, and tub. Check them with your bathroom lights on, since their color affects the whole combination.
- Warm tile: compare muted clay, warm white, and soft olive.
- Cool tile: compare blue-gray, chalky white, and softened navy.
- Multicolor tile: borrow one quieter color already in the pattern.
These are starting points, not guaranteed matches. Select paint appropriate for bathroom walls and address condensation problems so a fresh coat stays in good condition.
6. Use a graphic bath mat to change the floor’s mood
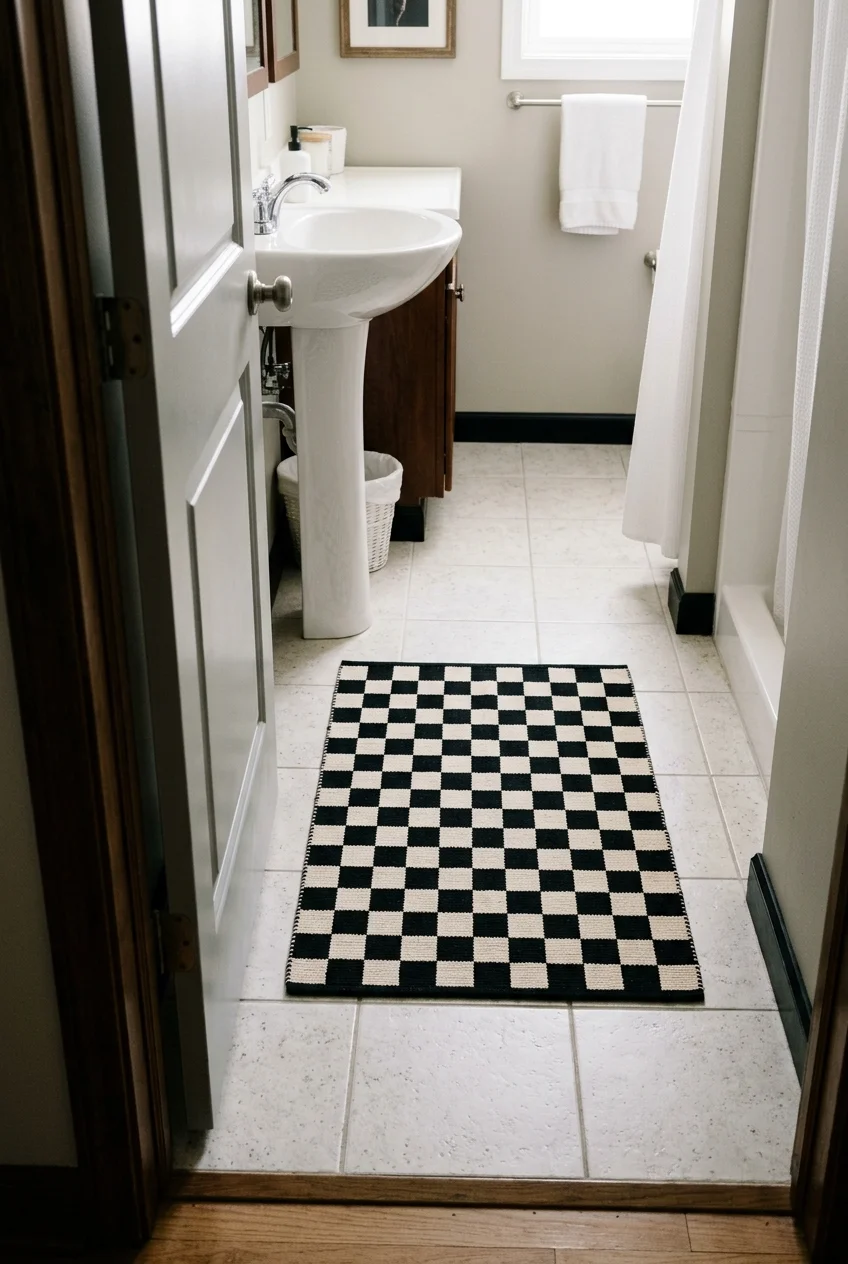
A bold checkerboard bath mat can bring contrast to a plain floor without covering every tile. Leave visible flooring around it so the pattern reads clearly.
Choose a washable mat with suitable slip resistance for your floor. Check door clearance, keep it flat, and dry the floor beneath it regularly.
7. Build a towel palette from one existing finish
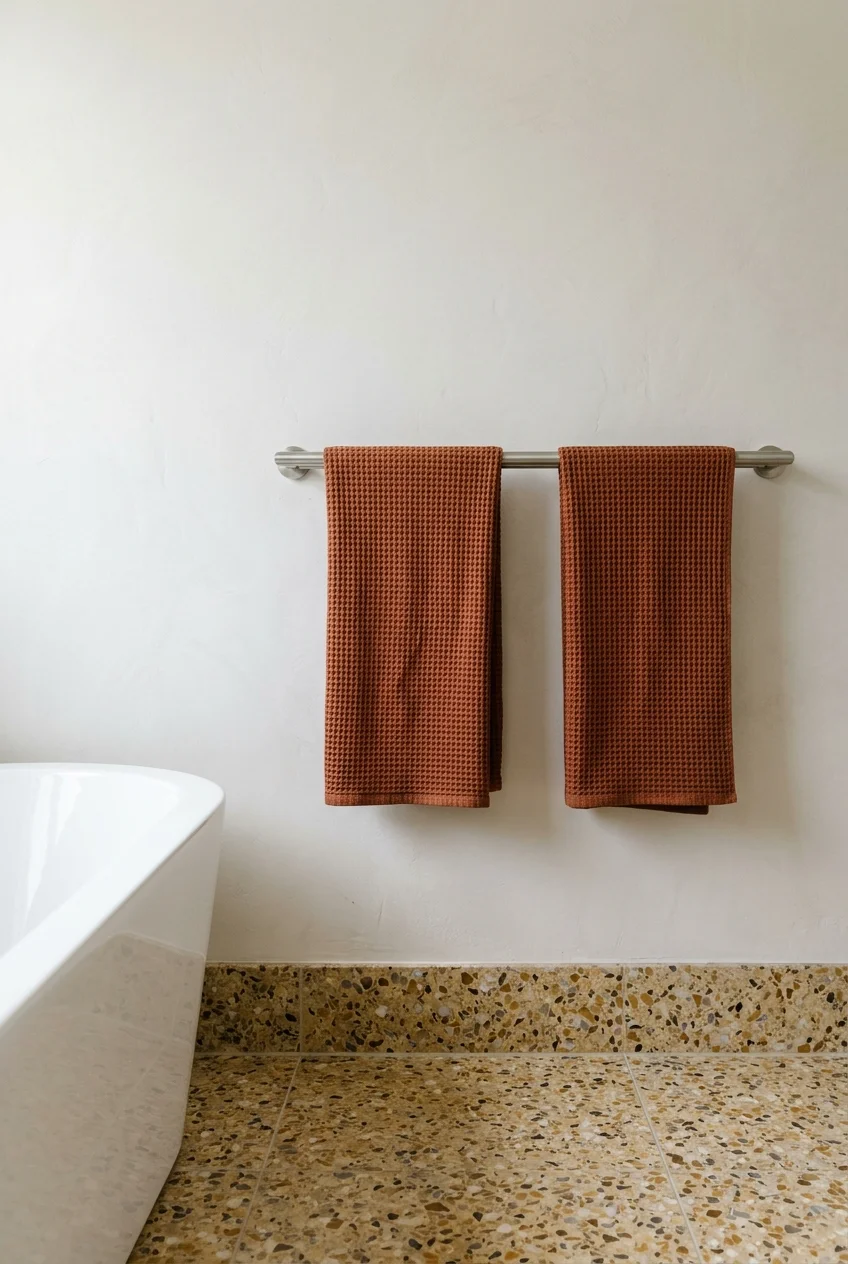
Repeat a color from the floor or wall tile in everyday towels. A rust towel against pale terrazzo, for example, makes its warmer chips more noticeable.
Choose the number of towels your household actually uses and can dry properly. A few coordinated pieces are easier to maintain than crowded decorative stacks.
8. Give soap and lotion one washable landing spot
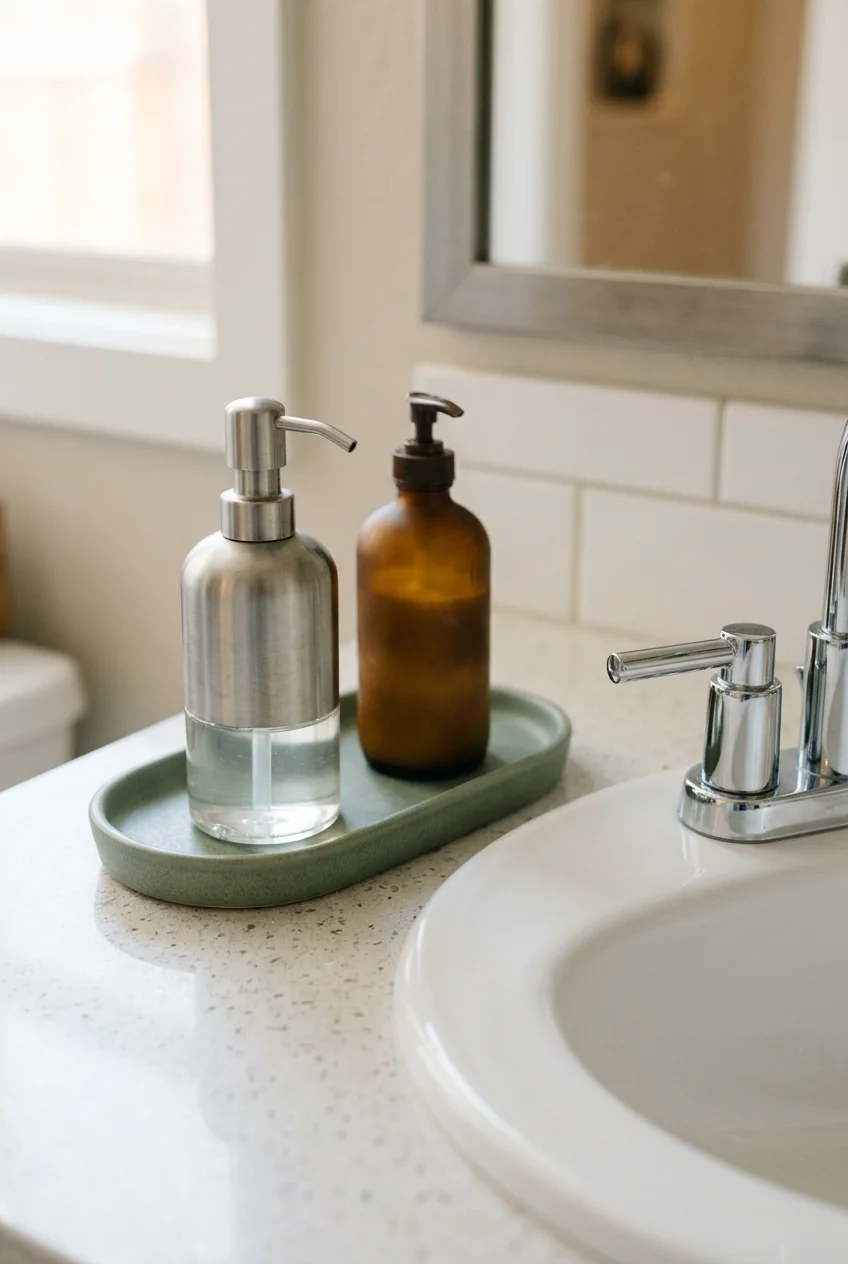
A small tray can keep daily bottles from spreading across the counter. Choose one that leaves enough clear space to wash your hands comfortably.
A refillable OXO stainless steel soap dispenser (paid link) suits a metal-accented sink area. Check its footprint against the tray before buying both.
Keep original product information available when refilling containers, and avoid mixing different formulas. Lift the tray during cleaning so water does not linger underneath it.
9. Move the hand towel beside the sink
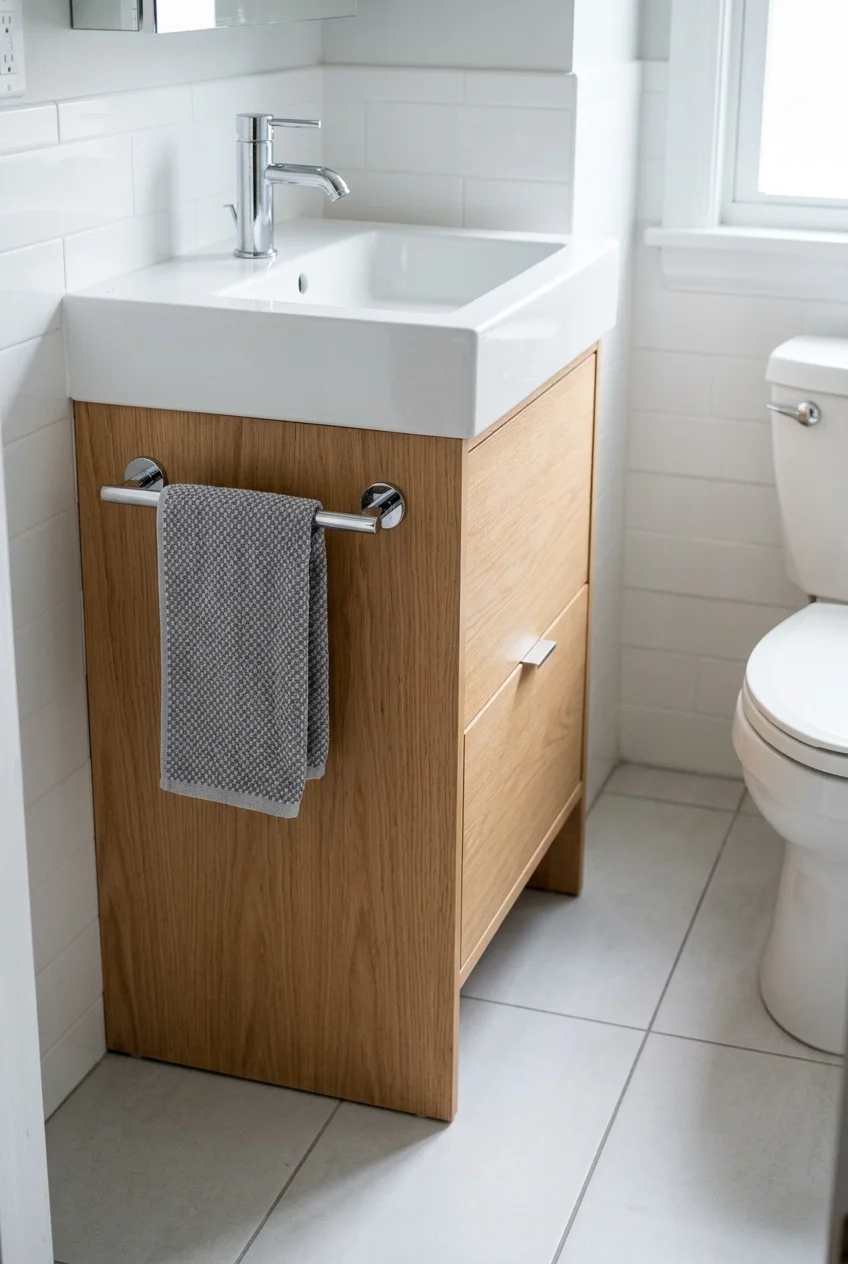
A hand towel placed on the vanity’s outer side keeps drips near the basin. It also frees the wall above for a mirror or artwork.
Check the cabinet panel thickness and mounting instructions before adding a ring or short bar. Fasteners must stay clear of drawers, hinges, and plumbing.
Test the reach from the sink and the clearance beside the toilet. If the side panel is unsuitable, use a properly mounted nearby wall ring.
10. Hang one substantial print on a dry wall
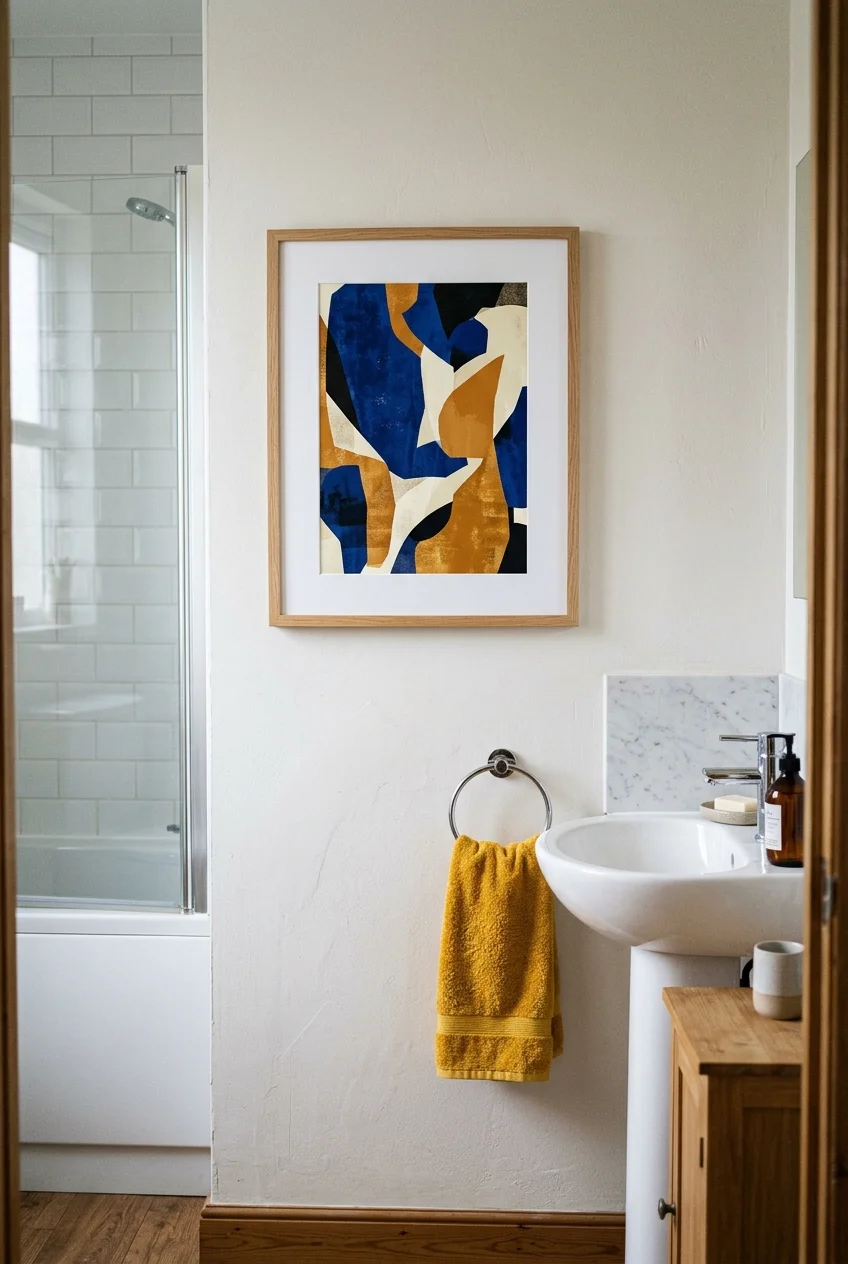
One larger framed print can give a small bathroom more direction than several tiny signs. Borrow a color from it for a towel or mat.
For more arrangements, browse these bathroom wall decor ideas and choose a layout that leaves your practical storage and towel space intact.
Keep artwork away from direct spray and persistent condensation. An inexpensive replaceable print is a better choice here than an irreplaceable original or delicate photograph.
Change the Backdrop Without Losing the Room’s Character
Walls and floors occupy much of the view, so their edges matter. Choose a treatment suited to its location rather than relying on appearance alone.
11. Use wallpaper as the powder room’s main feature
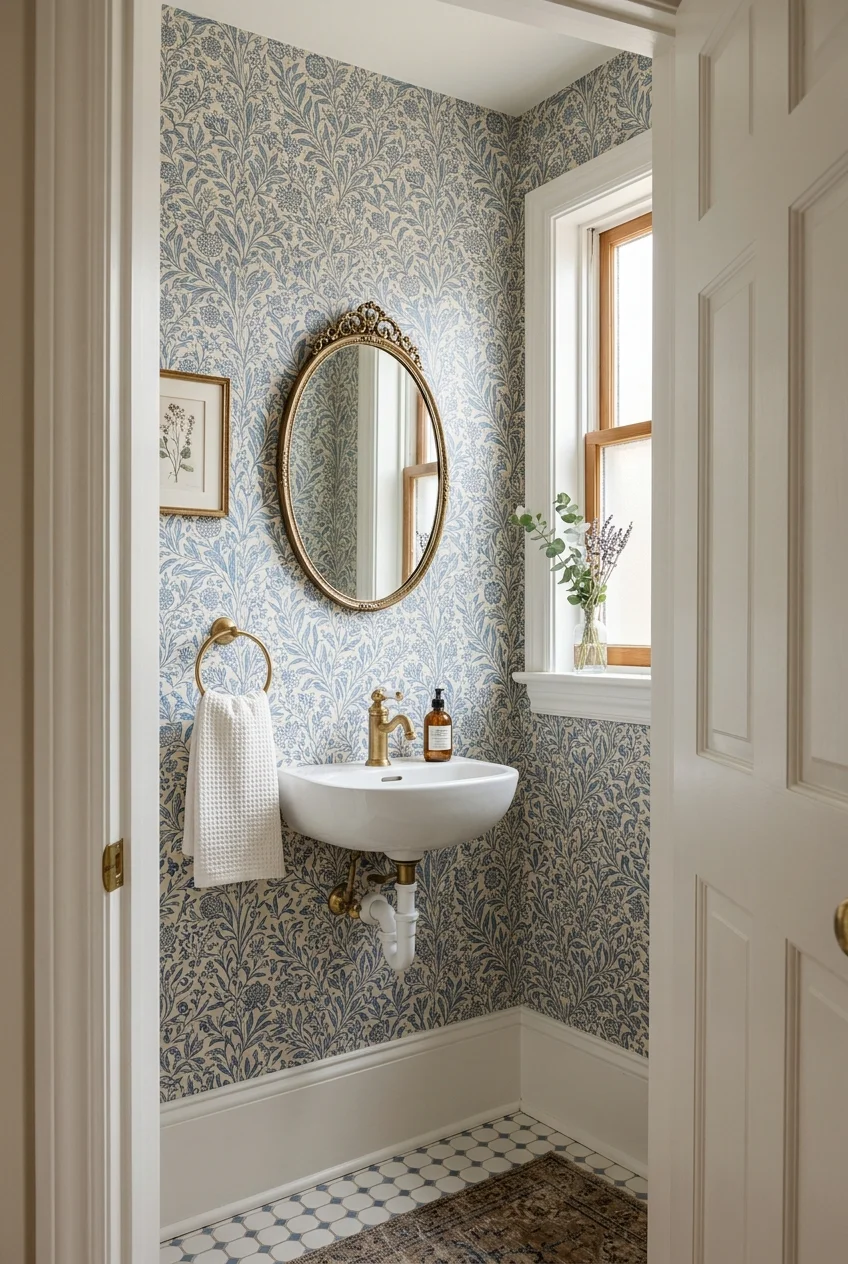
A small-scale botanical paper gives a powder room a complete look while its sink and toilet stay put. Keep neighboring trim simple and deliberate.
Check the paper’s approved surfaces, humidity limits, and installation instructions. Smooth walls and adequate ventilation matter; removable wallpaper is not automatically suitable for every bathroom.
Order with pattern matching in mind, including corners and the space above the door. A sample helps reveal whether the repeat overwhelms the room.
Rental note For a rental, get permission and test the specified removal method in an inconspicuous spot. Removable products can still lift weak paint or damage finishes.
12. Add painted paneling below a plain upper wall
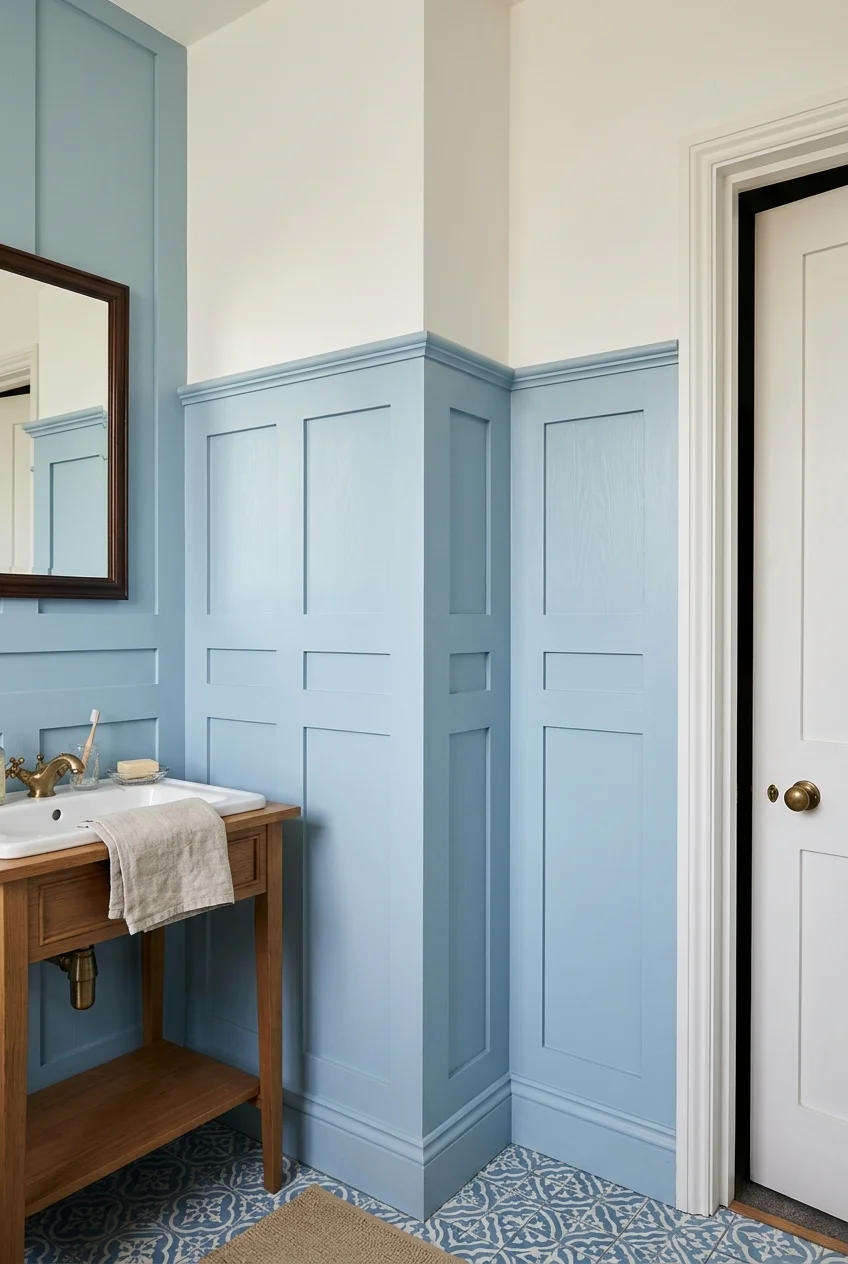
A paneled lower wall adds definition when a bathroom feels like an empty box. Keep the top rail level and align panels thoughtfully around fixtures.
Use materials and finishes approved for humid interiors, with sealed cut edges. Ordinary moisture-sensitive trim is a poor choice where regular splashing reaches it.
- Map outlets, plumbing access, and existing trim before setting panel widths.
- Keep the cap clear of faucet handles and towel hardware.
- Finish edges neatly where the paneling meets door casing.
Leave shower and tub waterproofing systems separate from this decorative work. If the room frequently stays damp, solve its ventilation problem before installing additional trim.
13. Carry a quiet wall color onto the ceiling
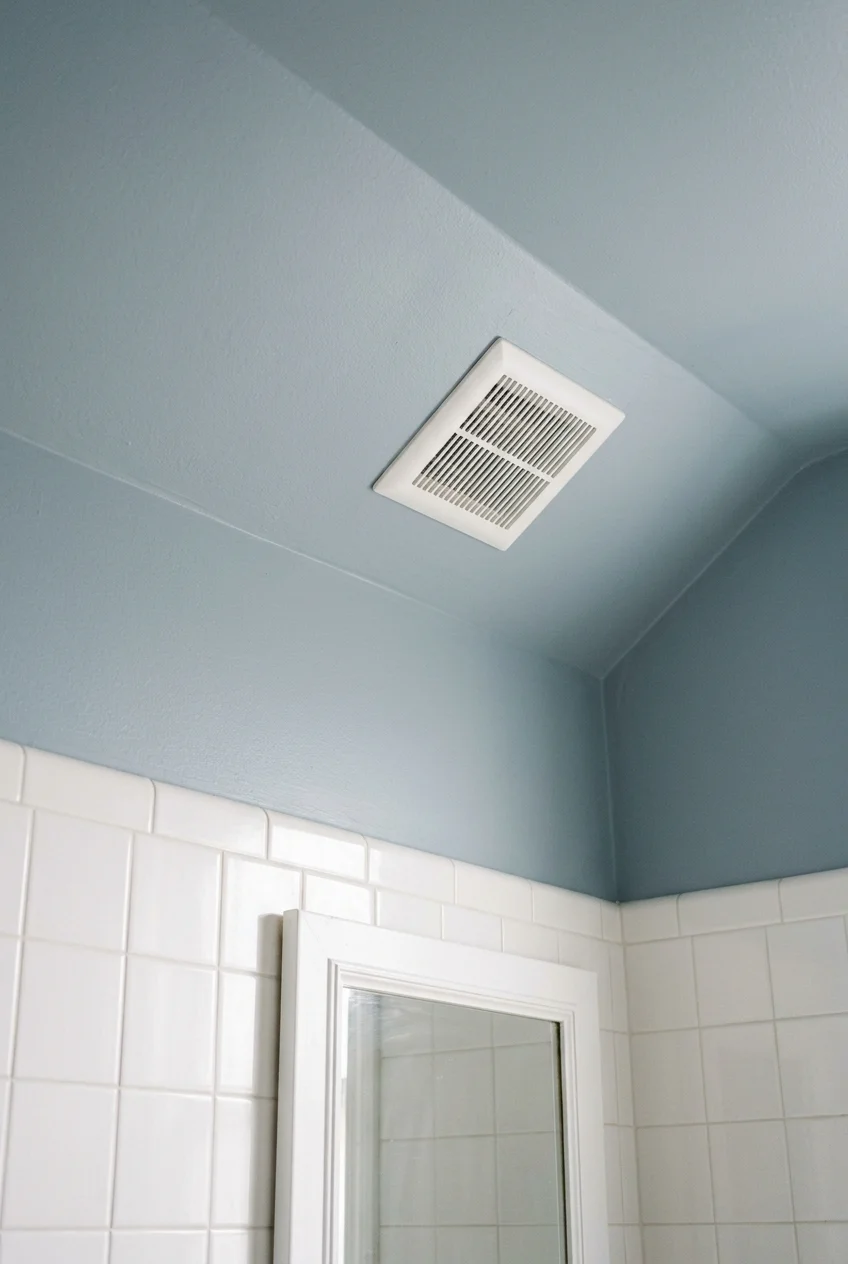
Painting the ceiling in the same soft color as the walls reduces a sharp visual break. It works especially well around an awkward sloped ceiling.
Keep ventilation grilles clear and use an appropriate coating for each surface. Sample the color overhead, where it may appear darker than on the wall.
A pale blue-gray ceiling above white tile offers color without adding another pattern. Keep the trim contrasting if you want the room’s outline to remain visible.
14. Create a compact tiled backsplash behind the sink
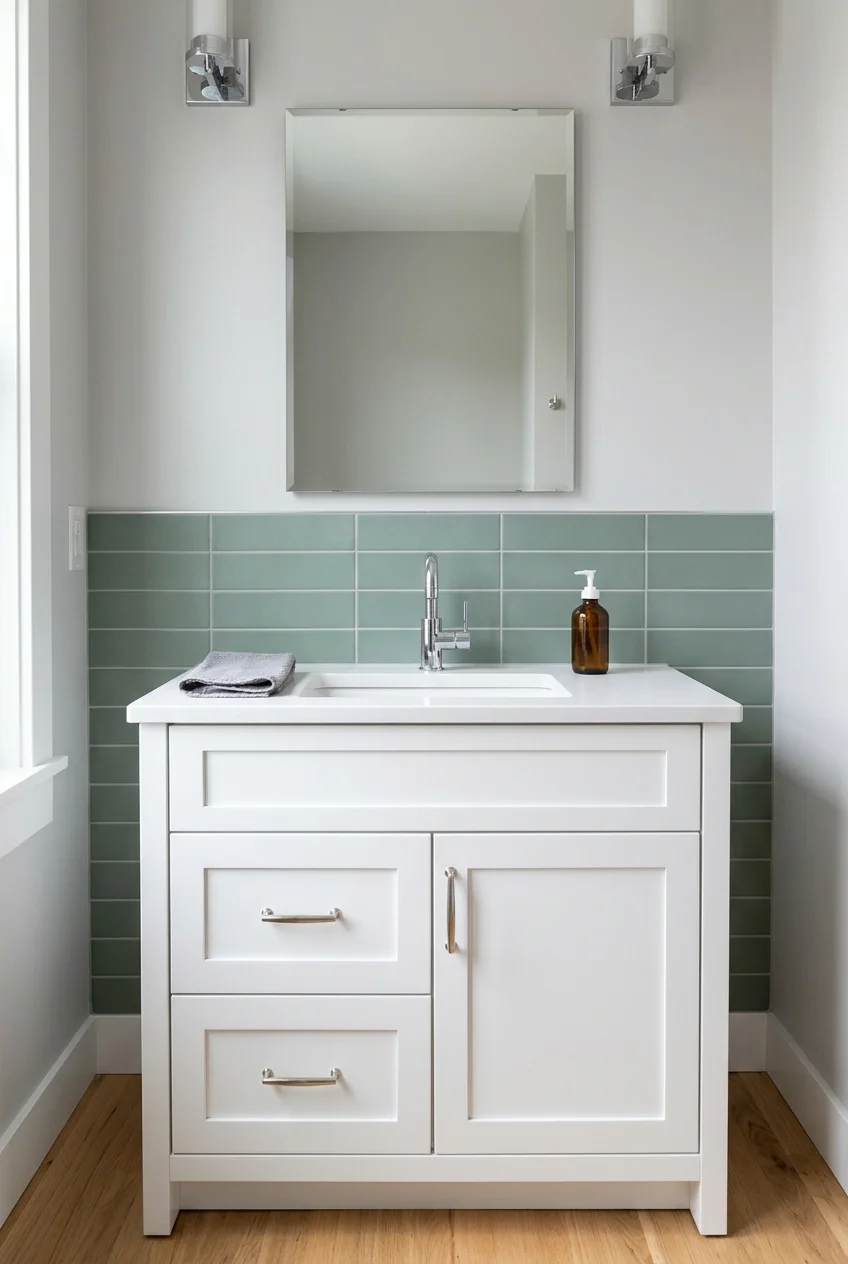
A contained backsplash gives the vanity a focal point without retiling the whole bathroom. Let its width relate to the cabinet rather than surrounding furniture.
Choose a tile layout that resolves cleanly at the counter, mirror, and side walls. Plan edge trim before buying tile so exposed cuts look finished.
Use a substrate, setting materials, and sealant joints appropriate to the splash exposure. Decorative tile does not repair a leaking countertop joint or damaged wall.
A simple stacked rectangle works well behind a busy counter. If the counter is plain, a small mosaic can supply the detail without adding countertop accessories.
15. Recolor sound grout to calm a busy tile pattern
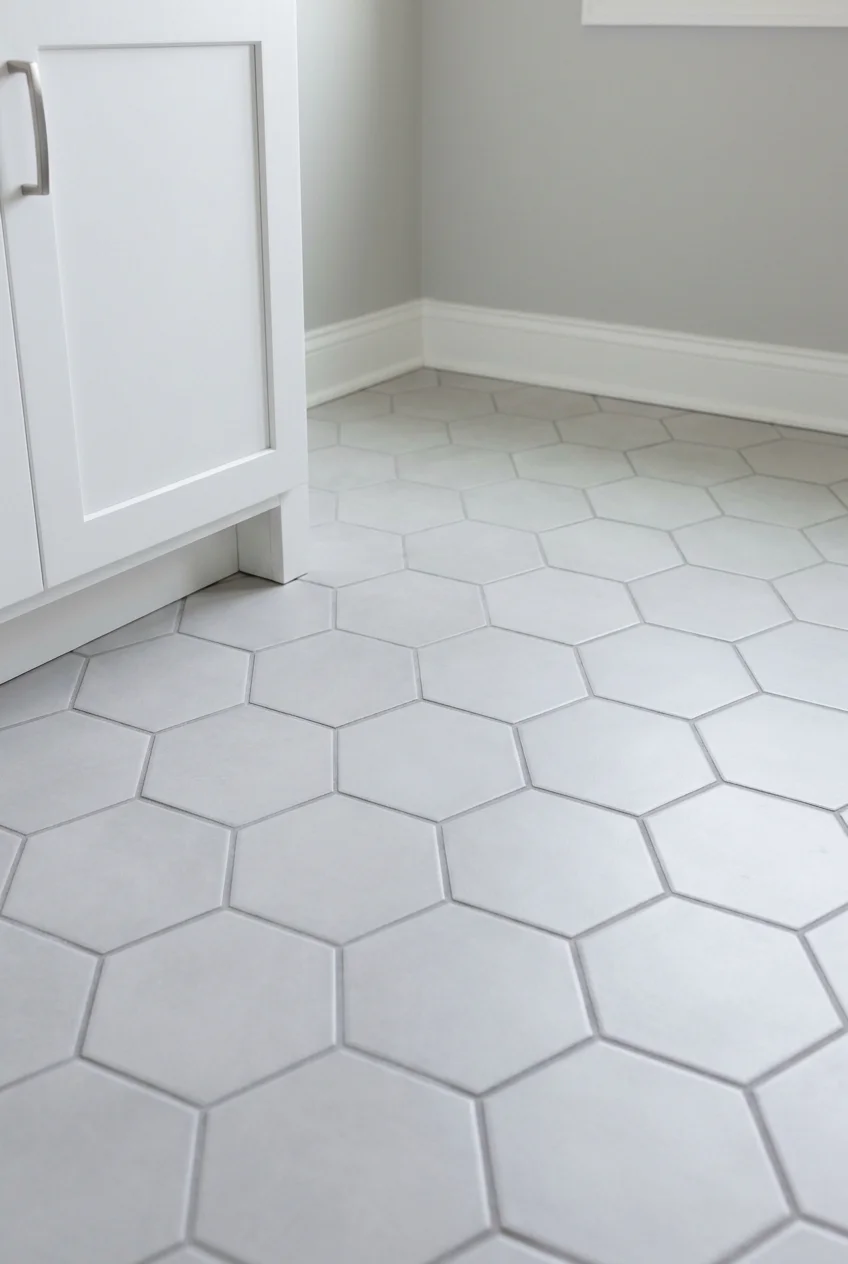
Closer grout and tile colors make an existing surface read more continuously. This can quiet a high-contrast floor without hiding the tile’s shape or texture.
First identify the grout and tile materials, then check the colorant’s approved uses. A product for cement grout may not suit epoxy grout or silicone.
- Clean according to the colorant instructions and let the joints dry.
- Test an inconspicuous area for color and surface staining.
- Apply carefully and follow cleanup and cure directions.
Repair loose tiles, cracking, and moisture problems before considering color. A fresh-looking joint is a cosmetic result, not evidence that the assembly beneath it is waterproof.
16. Renew the sealant line around a sound tub
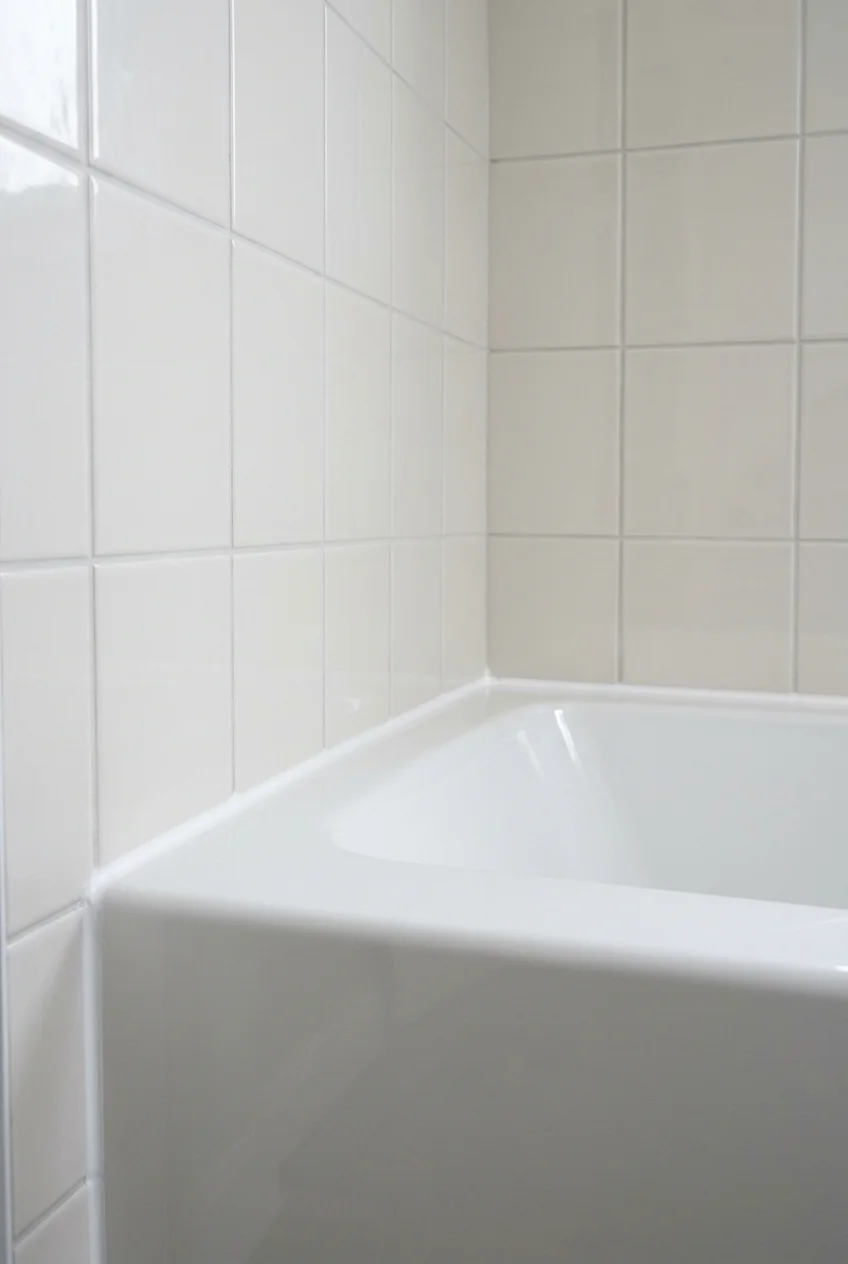
A clean, even sealant joint makes the tub edge look cared for without changing its tile. Choose a color that suits both adjoining surfaces.
Investigate recurring staining, soft walls, movement, or leaks before resealing. Covering the symptom can leave an underlying water problem unresolved behind an attractive new line.
Remove failed material and prepare the joint as the chosen sealant requires. Use a product approved for the materials and wet location, then respect its cure time.
Watch for Keep flexible movement joints separate from grouted joints. Replacing flexible sealant with rigid grout can create cracking where adjoining surfaces move differently.
17. Lay bathroom-approved vinyl tile over a suitable dry floor
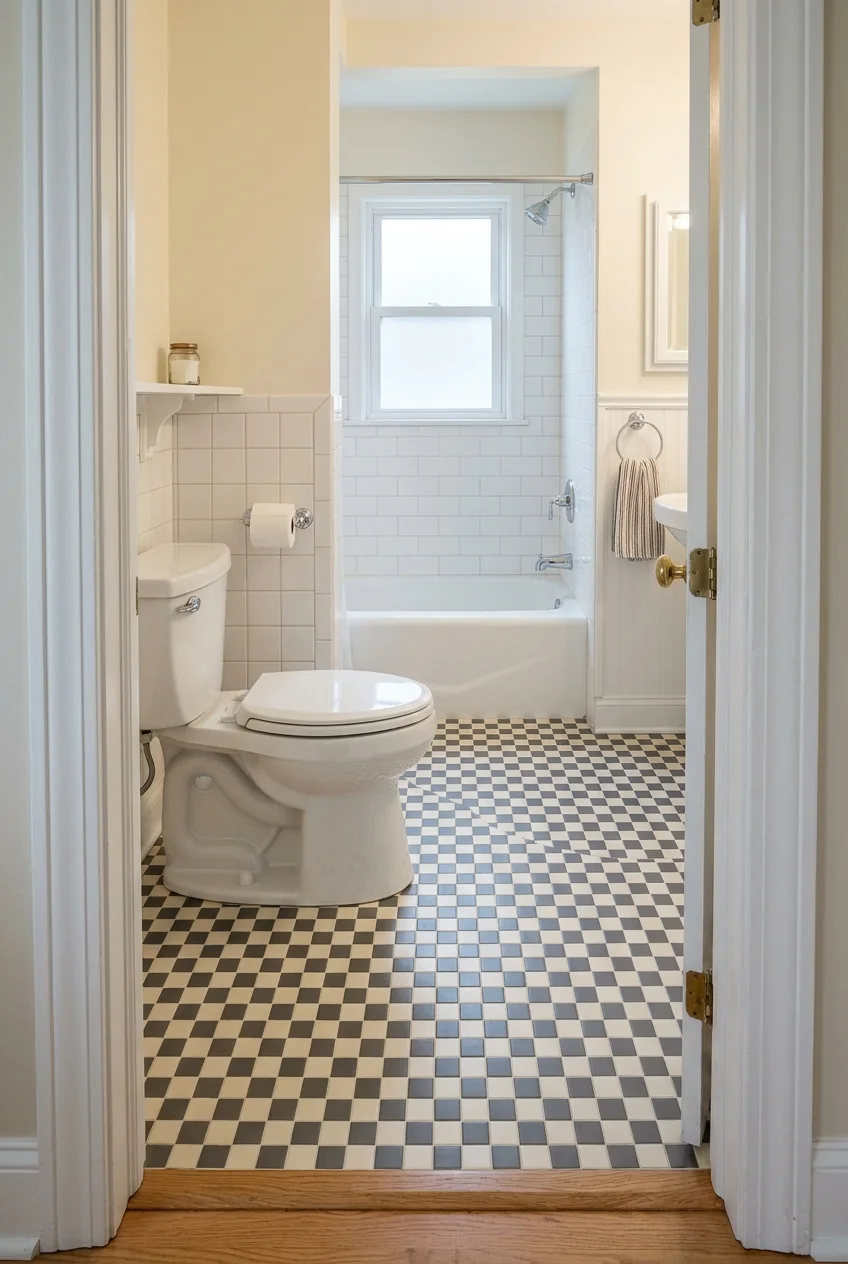
A checkerboard vinyl floor can change the room’s character while leaving the fixtures in place. Suitability depends on the exact product and existing floor.
Read the manufacturer’s substrate requirements before planning an overlay. Loose flooring, uneven joints, dampness, or incompatible coatings can prevent a reliable bond beneath the new pattern.
- Confirm the flooring is approved for the intended bathroom location.
- Check added height at the door, threshold, and toilet.
- Plan balanced cuts before installing the first tile.
- Follow acclimation, installation, and cleaning instructions.
For example, FloorPops requires a clean, smooth, flat, dry surface and excludes radiant-heated floors. Those instructions apply to that product, not every vinyl tile.
Water-resistant tiles are not a replacement for shower waterproofing. Keep this idea on the bathroom floor outside the enclosure, and resolve leaks before covering anything.
Removal may disturb the original finish or leave adhesive behind. Renters should get permission rather than assuming peel-and-stick flooring guarantees a damage-free return to the original.
Installation note Do not cut around plumbing fixtures merely to avoid proper installation work. Have toilet removal and resetting handled correctly when the flooring system requires it.
18. Replace a worn floor with understated porcelain tile
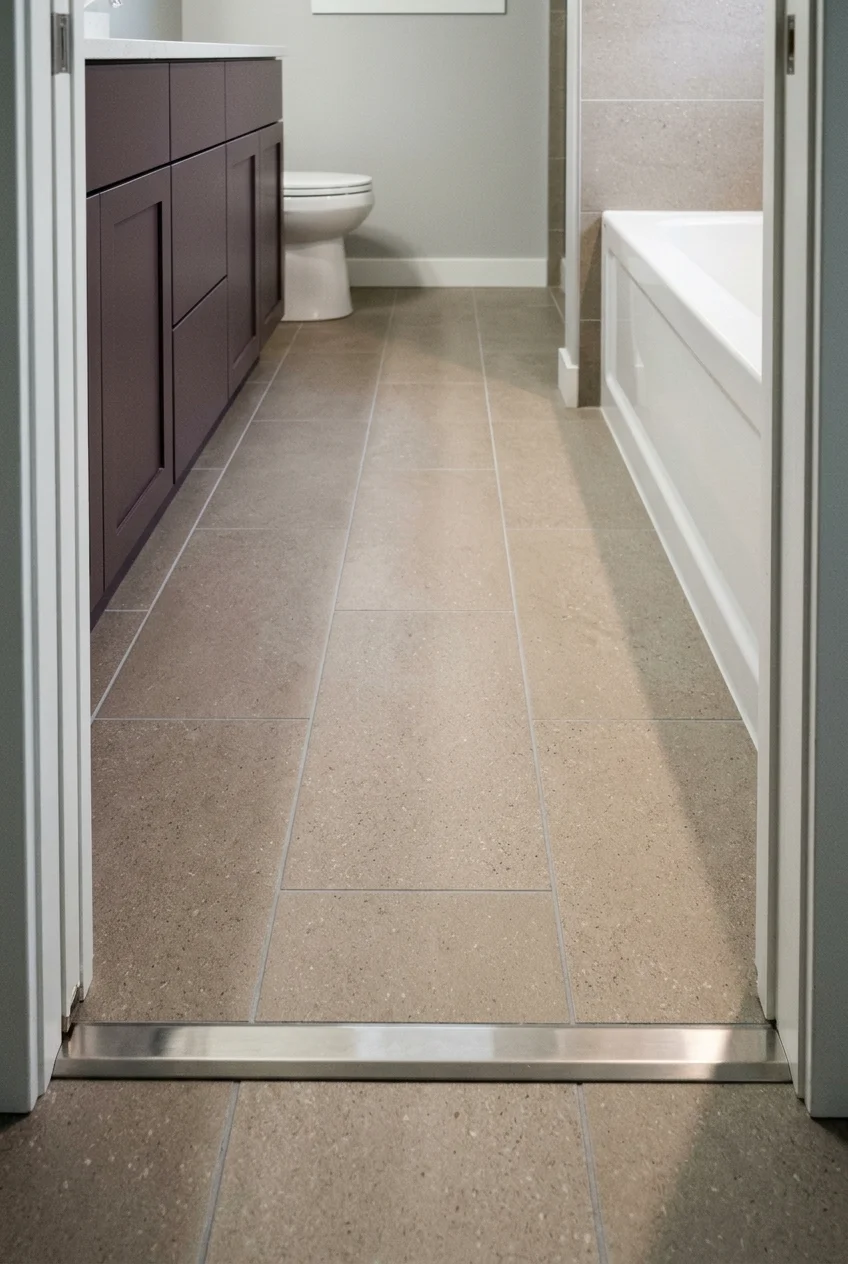
A porcelain floor with a quiet stone-like pattern can support colorful walls or cabinetry. Select tile approved for floors rather than choosing by appearance alone.
Compare actual samples under the room’s lighting and ask about suitability for wet barefoot conditions. Texture, cleaning needs, and installation details all affect everyday use.
Have the installer assess the subfloor, transitions, and appropriate underlayment. A larger tile needs a properly prepared surface; fewer joints do not excuse uneven installation.
Plan the pattern from the doorway and check cuts beside the tub and vanity. Small slivers at a prominent edge can undermine an otherwise simple floor.
Keep shower flooring a separate specification when necessary. A tile that suits the main bathroom floor may not suit a sloped shower base or its drainage layout.
19. Apply privacy film to a suitable bathroom window
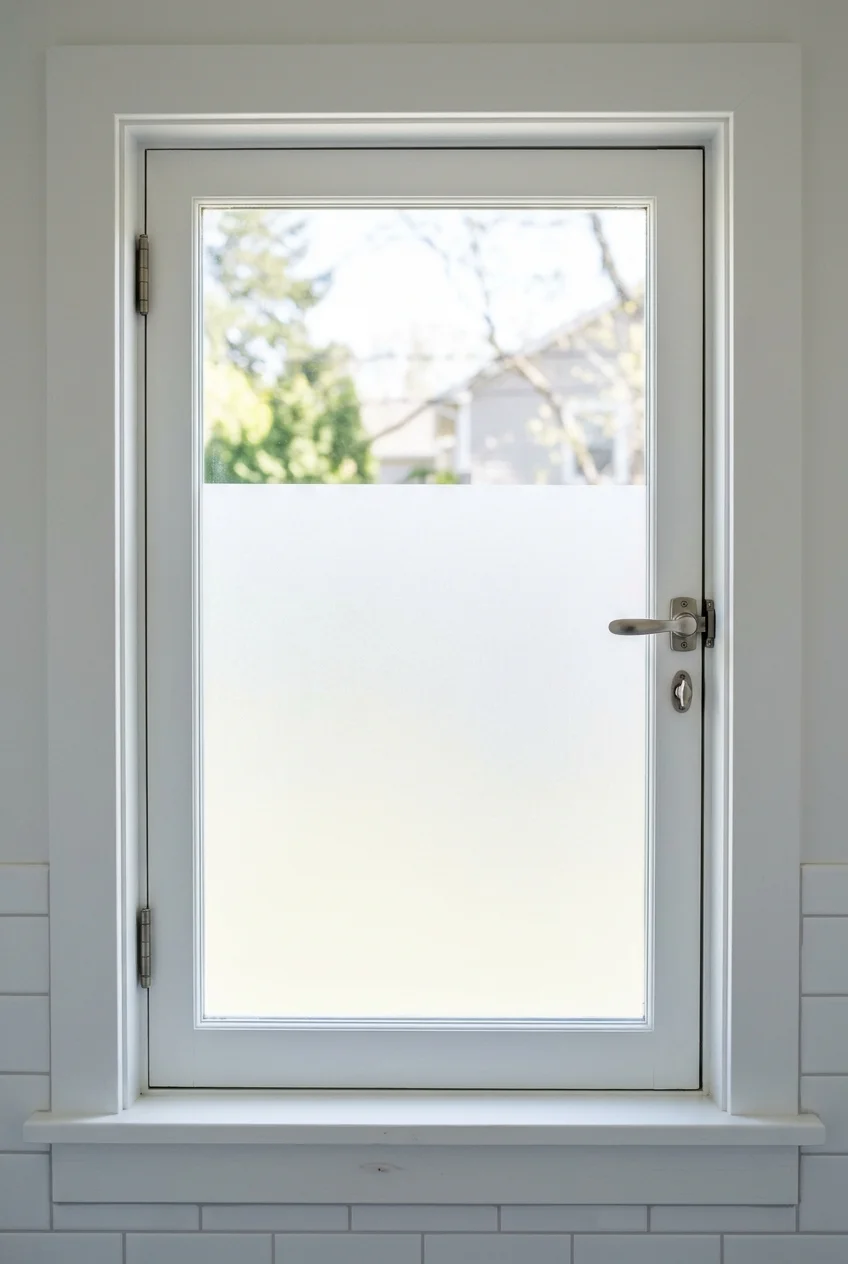
Frosted film can soften the view through a bathroom window without introducing fabric near splashes. Keep the frame visible so the result feels deliberate.
Check film compatibility with the glass type and manufacturer’s instructions. Privacy changes with lighting and viewing distance, so test the effect from outside as well.
Keep window hardware and drainage paths clear. If the window sits inside a shower, film does not solve vulnerable frame details or waterproofing defects.
20. Fit a cordless shade to control glare
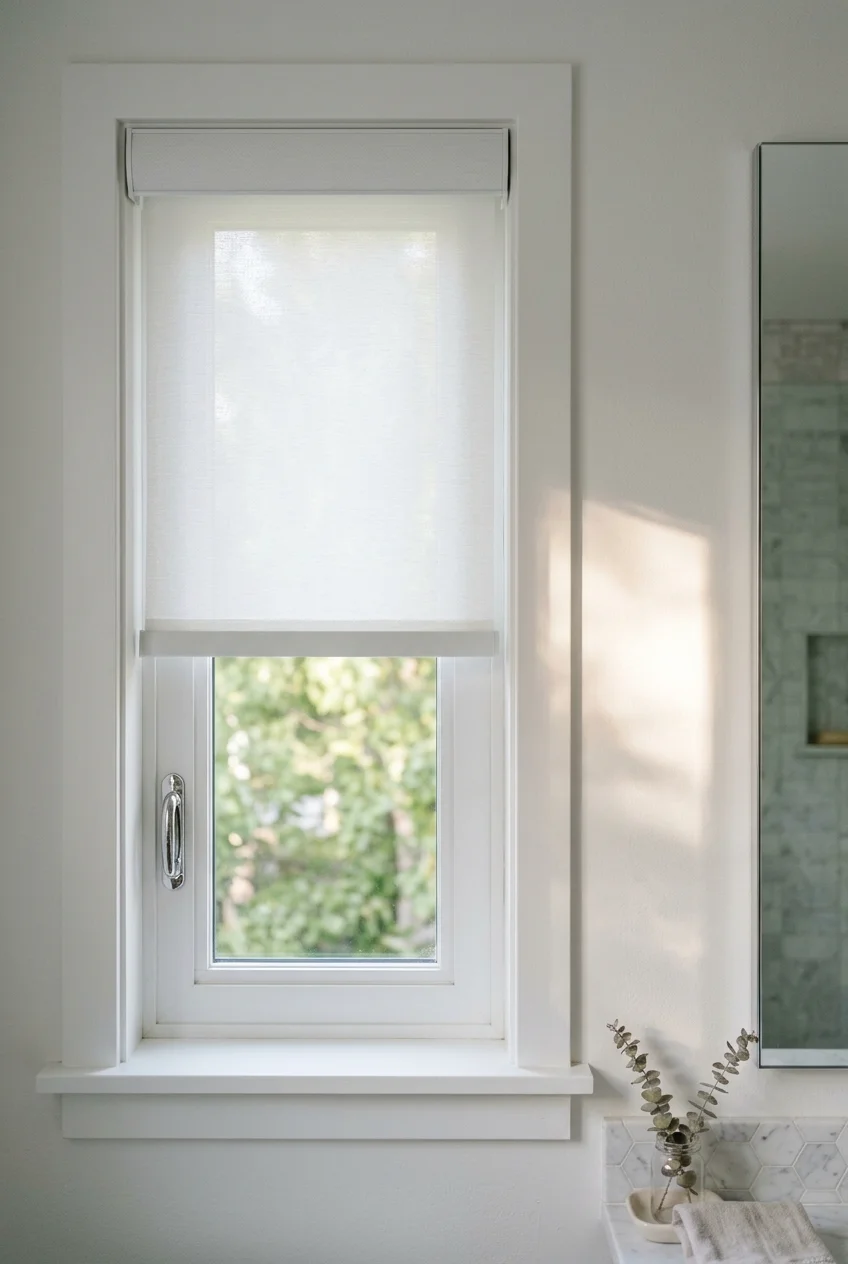
A simple roller shade helps when afternoon sun makes the mirror uncomfortable to use. Its clean outline suits bathrooms that already have patterned tile.
Choose a material approved for the room’s humidity and measure the actual mounting location. Leave handles, ventilation openings, and the window’s operation fully accessible.
Use a cordless design and follow its mounting directions. In a frequently splashed location, consider a suitable glass treatment instead of fabric that stays damp.
Improve the Light and Everyday Fixtures
Lighting and fittings change both the appearance and feel of daily routines. Choose their positions and compatibility before settling on decorative shapes or metal finishes.
21. Light the mirror from both sides
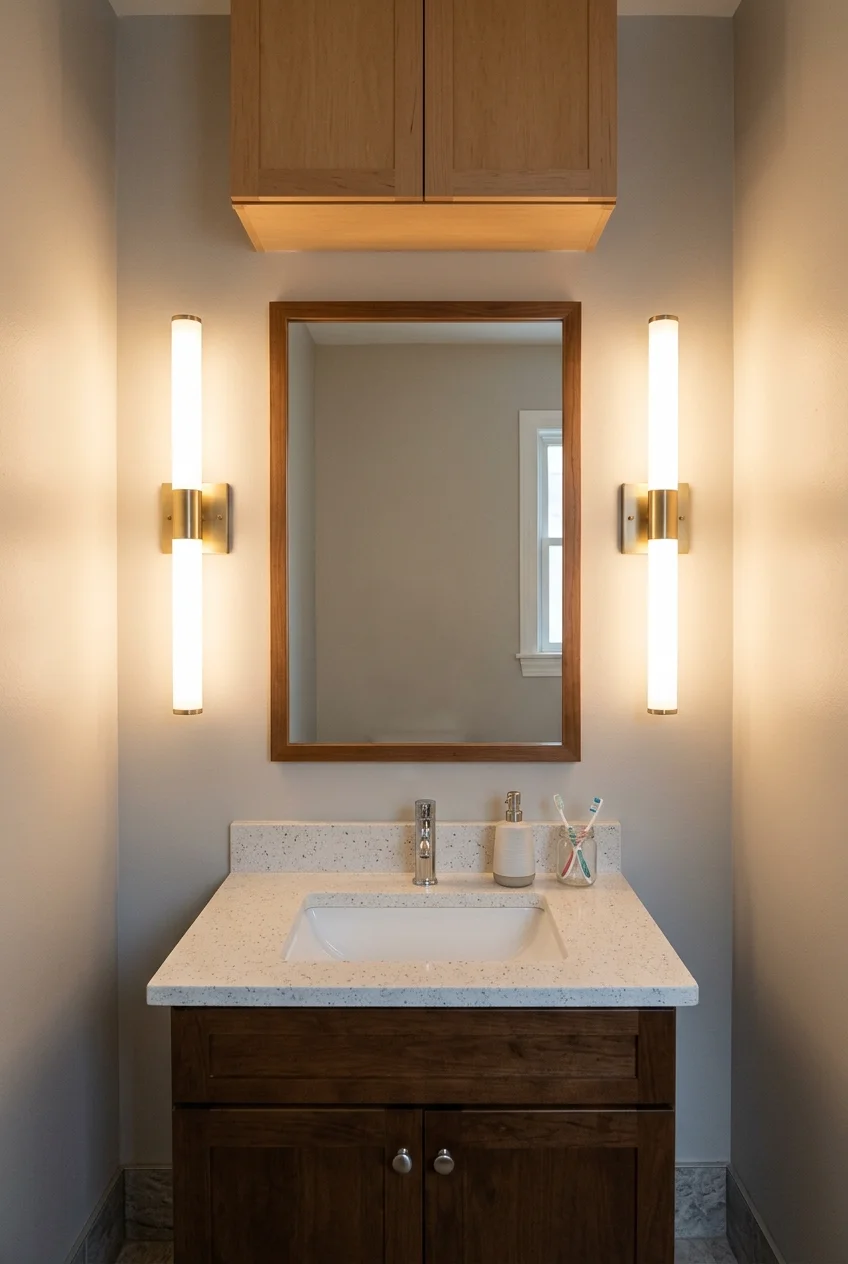
Two slim sconces beside the mirror bring light toward the face instead of relying entirely on a ceiling fixture. They also give the vanity a clear outline.
Check mirror width, wall space, door swings, and existing electrical boxes together. A crowded pair of sconces can be less useful than one well-positioned overhead fixture.
Choose fixtures rated for their actual location and have electrical work completed appropriately. Bathroom zones and local requirements affect placement, especially near showers and tubs.
Test the proposed arrangement with the people who use the room. Mounting height should support their reflection and tasks, rather than copying a photograph’s proportions.
22. Use a shallow light bar where side space is tight
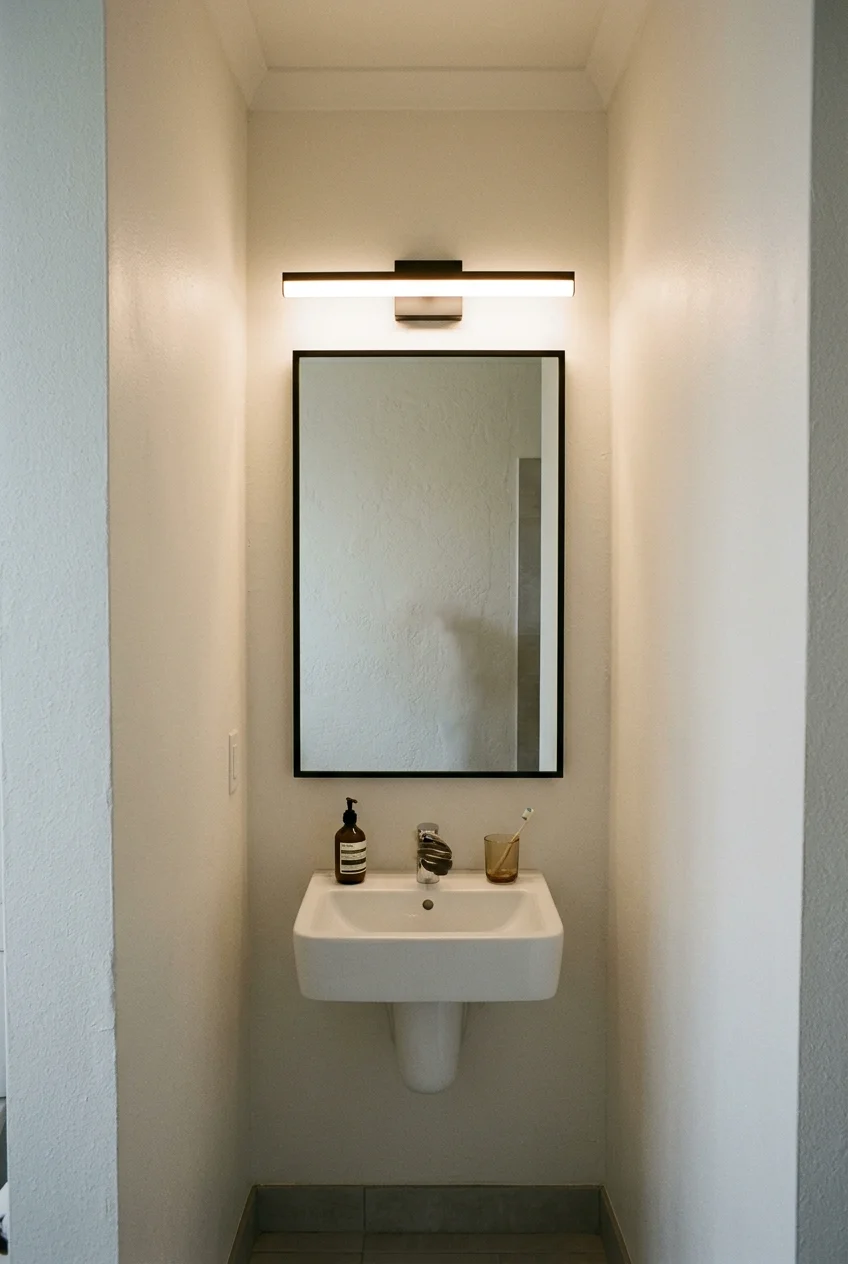
An over-mirror light bar keeps a narrow vanity wall usable when sconces will not fit. Choose a projection that clears the mirror or medicine cabinet.
Compare the fixture’s width with the mirror, not only the cabinet below. A small sample or taped outline helps you judge the proportions before installation.
Look for diffused illumination rather than exposed glare at eye level. Confirm the fixture’s location rating, electrical compatibility, and mounting requirements with the installer.
23. Make the room’s light color consistent
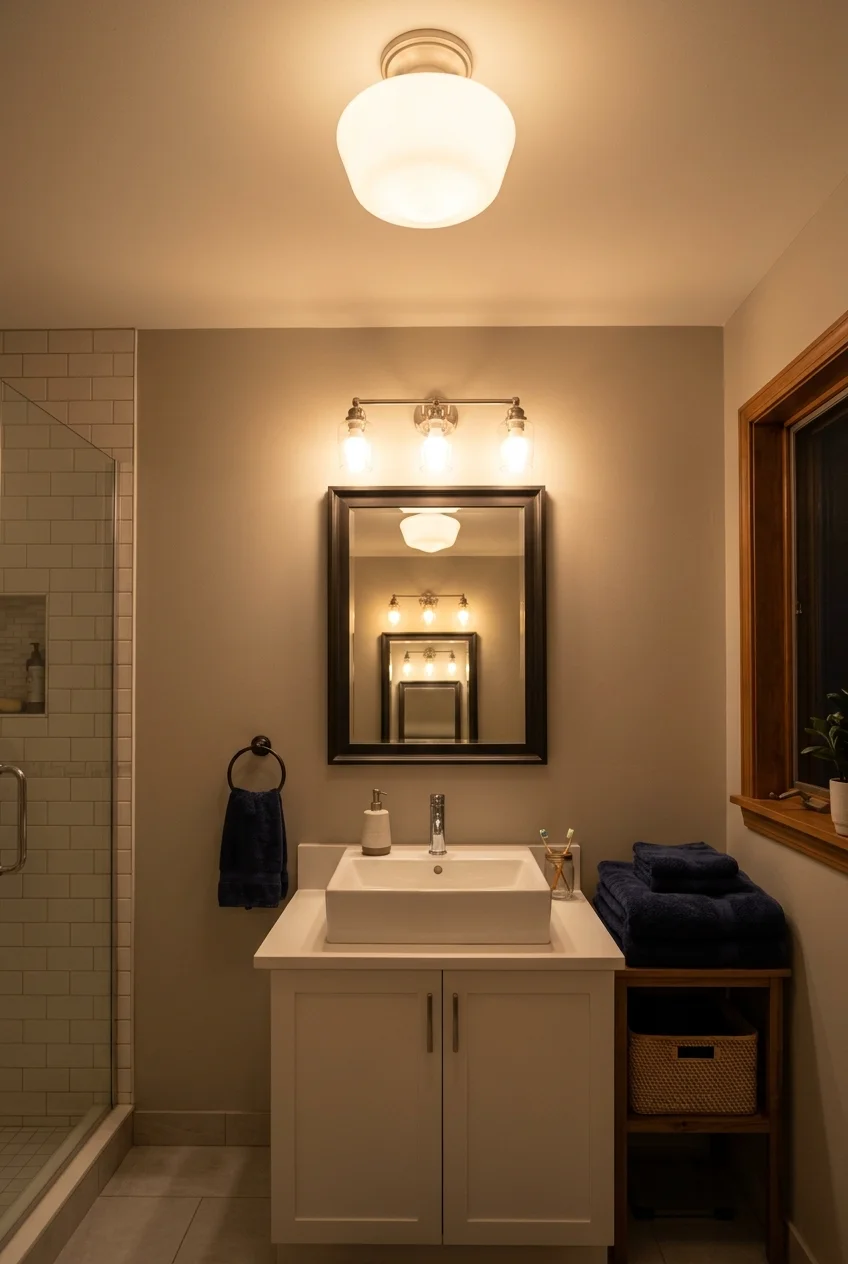
Mismatched bulbs can make one wall look blue and another yellow. A consistent color temperature helps you judge paint, towels, and skin tones more comfortably.
Compare bulb specifications across visible fixtures, including color rendering, brightness, base type, and dimmer compatibility. Stay within each fixture’s stated limits and required lamp type.
Try your chosen bulbs before repainting the room. A wall color that seemed wrong under mixed lighting may work once the light is more consistent.
24. Choose an illuminated mirror when wall space is limited
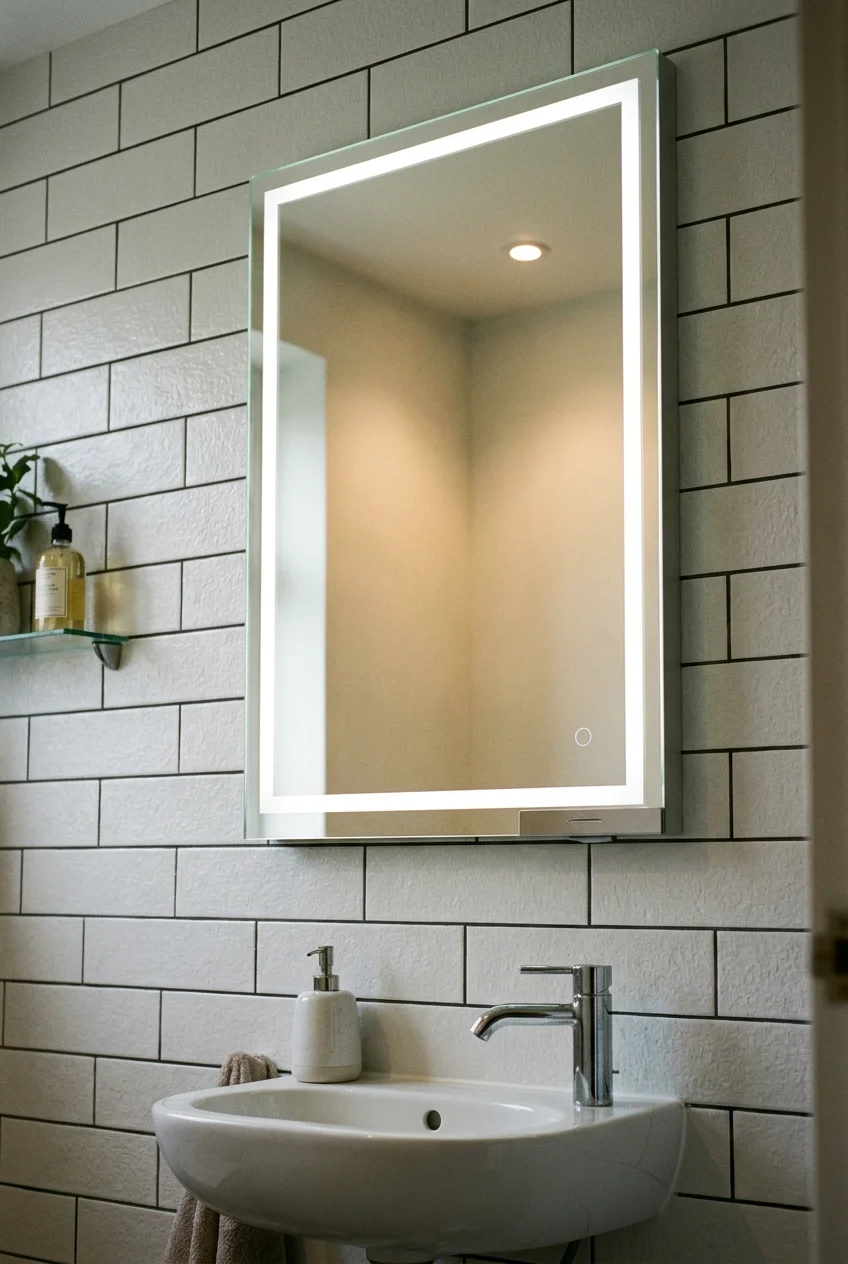
An illuminated mirror combines reflection and a light source in one outline. It can simplify a compact vanity wall with little space around the sink.
Distinguish a decorative backlit glow from forward lighting useful for grooming. Read the specifications and compare the mirror’s light output with your remaining room lighting.
Compare shapes in these bathroom vanity mirror ideas before choosing a size that works with the sink, faucet, and available wall space.
Check power requirements, controls, mounting, and location suitability before purchase. An integrated light does not remove the need for appropriate bathroom electrical installation or other lighting.
25. Add a compatible fan timer for an easier moisture routine
Image pending: No image is attached to this draft for idea 25 (image-25).
A delay-off timer lets ventilation continue after you leave the bathroom. It is a useful companion to fresh paint, wallpaper, and other moisture-sensitive finishes.
Have the installer check the fan, wiring, control type, and electrical ratings before choosing a switch. A control must be compatible with the actual equipment.
Also check that the fan exhausts outdoors and its ductwork functions properly. A new timer cannot correct a blocked duct or an incorrectly terminated exhaust.
Use the fan and control manufacturer’s guidance to choose settings. A finished photograph can show the new control, but cannot demonstrate airflow or hidden duct condition.
26. Replace the faucet with one that fits the basin
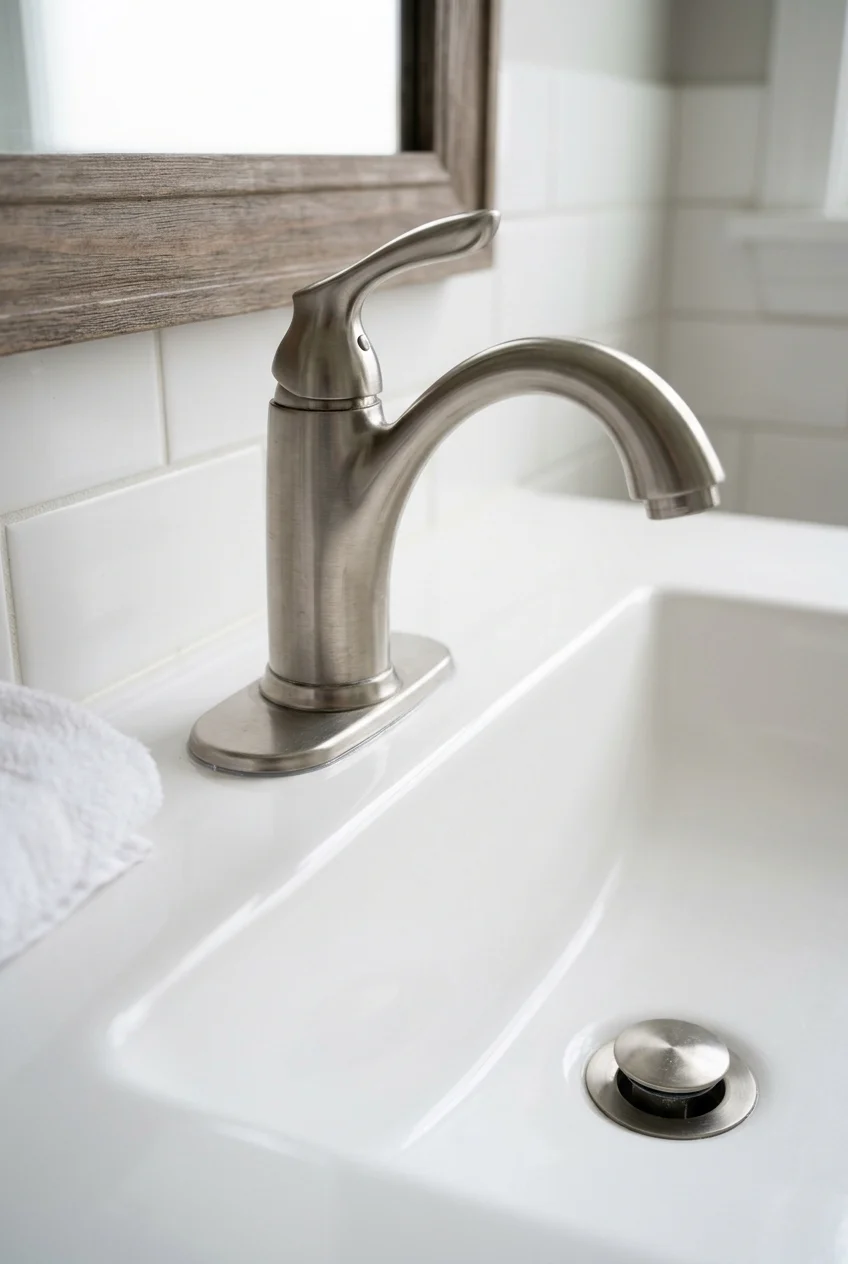
A compact curved faucet can make an existing sink feel newer without replacing the vanity. Its spout should send water comfortably into the basin.
Record the sink’s hole count and spacing, deck thickness, and available handle clearance. Also check the drain assembly, overflow arrangement, supply connections, and access beneath.
- Single-hole sink: choose a compatible single-hole fixture.
- Multiple holes: verify the faucet spread or approved cover plate.
- Vessel sink: check both spout height and reach against the actual bowl.
Look for a verified WaterSense-labeled bathroom faucet when comparing replacements. The label addresses efficiency and performance; the fixture must still fit your sink and plumbing.
Use a plumber when shutoffs are unreliable or connections need alteration. Keep the old fixture until the new one is installed and checked for leaks.
27. Switch to a handheld showerhead for flexible rinsing
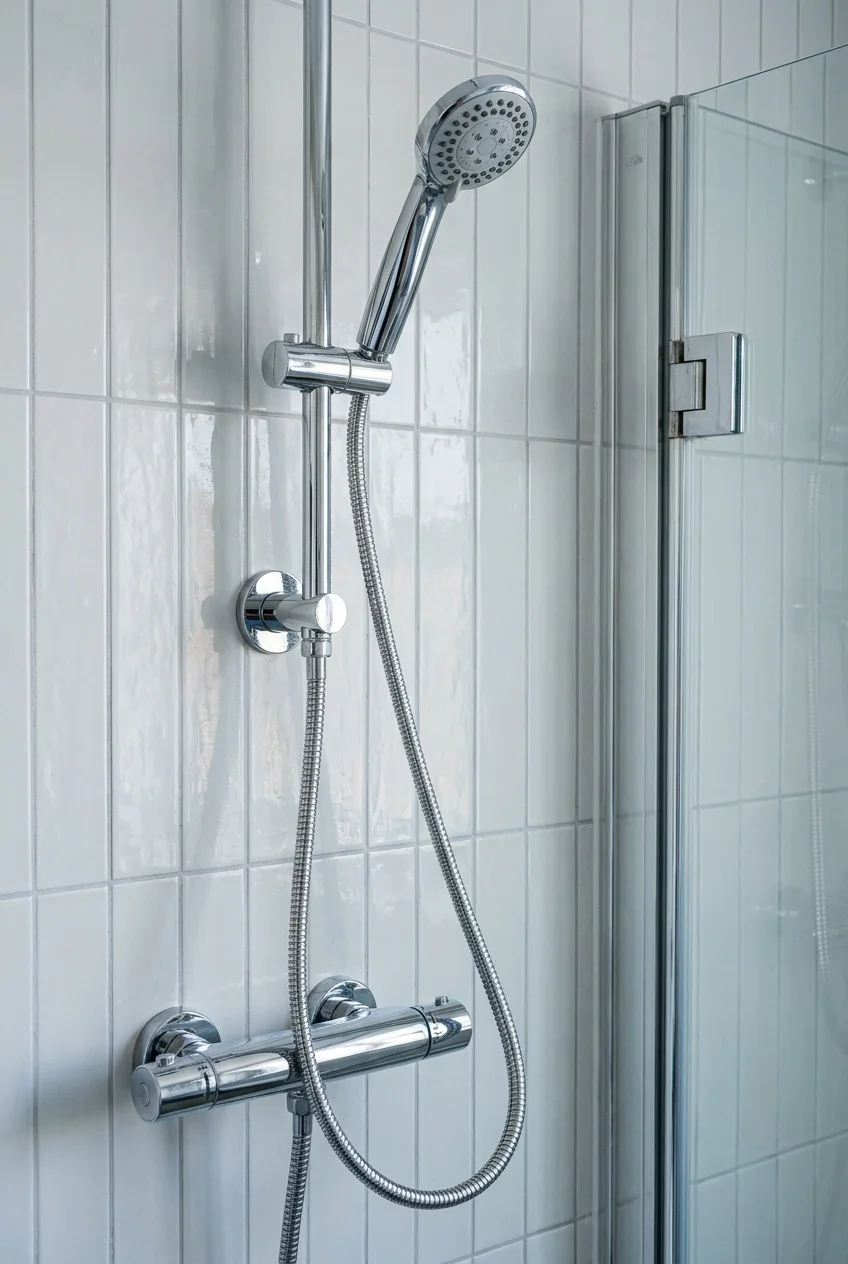
A handheld showerhead makes it easier to rinse the enclosure and direct the spray. Choose a cradle position that the intended users can comfortably reach.
Check the existing connection, hose reach, and mounting method before purchase. Keep the hose away from door hinges and choose a model suited to local requirements.
Compare certified options through the WaterSense showerhead guide rather than assuming a larger head improves pressure. Spray coverage and usable controls matter as much as appearance.
Follow the product’s installation instructions and check connections for leaks. A handheld attachment does not change a shower valve’s temperature-control features or repair underlying pressure problems.
28. Refresh shower trim while keeping a compatible valve
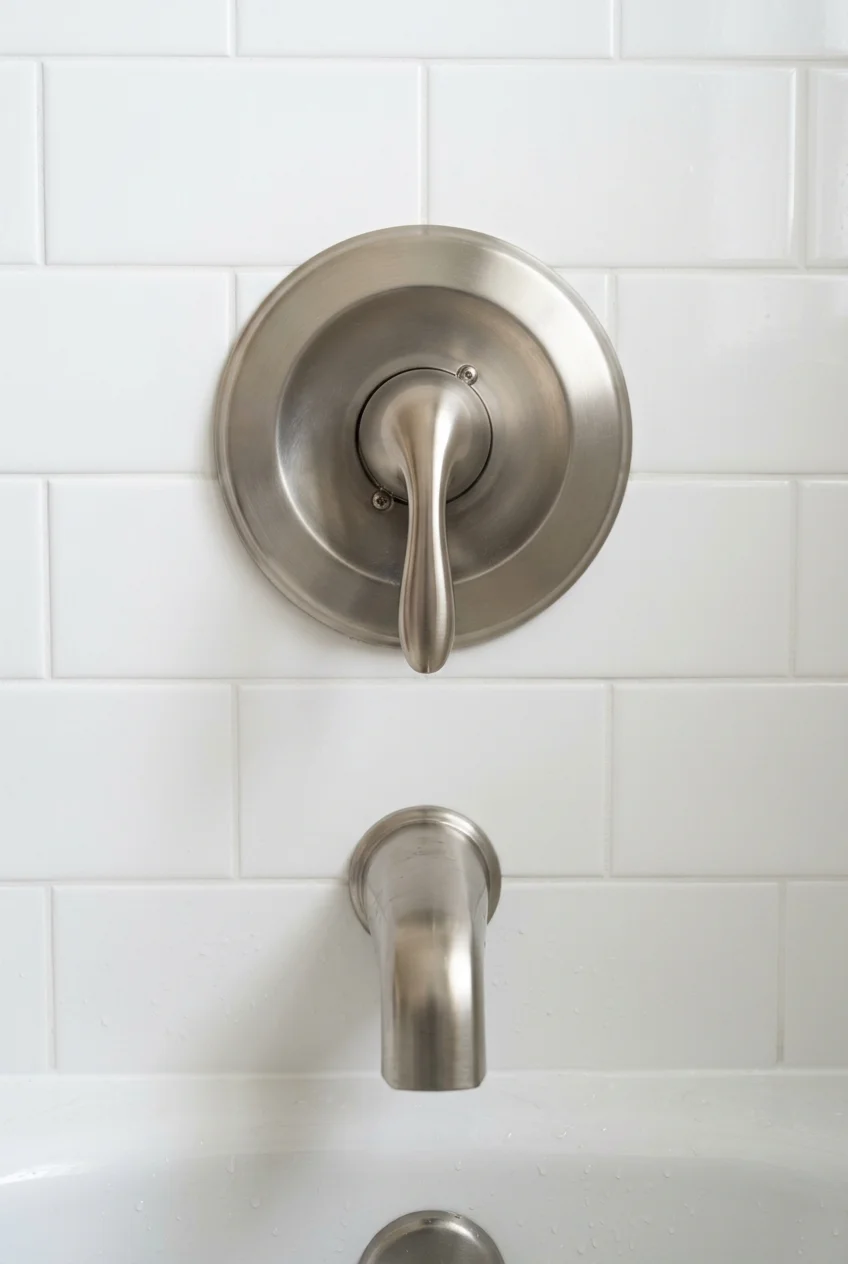
A new handle and escutcheon can update a shower without changing its wall tile. The essential question is which trim fits the valve already installed.
Identify the valve’s manufacturer and model before shopping. Similar-looking trim is not necessarily interchangeable, even within one brand or across different generations of its products.
Some valve systems support specific trim upgrades, but that flexibility is product-specific. Ask the manufacturer or a plumber to confirm the exact proposed combination.
Keep temperature limits and control functions correctly set after installation. If the valve leaks or lacks needed features, trim alone may not be the right update.
Buying tip Photograph identifying parts and retain documentation before ordering. A finish sample helps match other fixtures, but it cannot establish mechanical compatibility with a hidden valve.
29. Gain curtain clearance with a curved shower rod
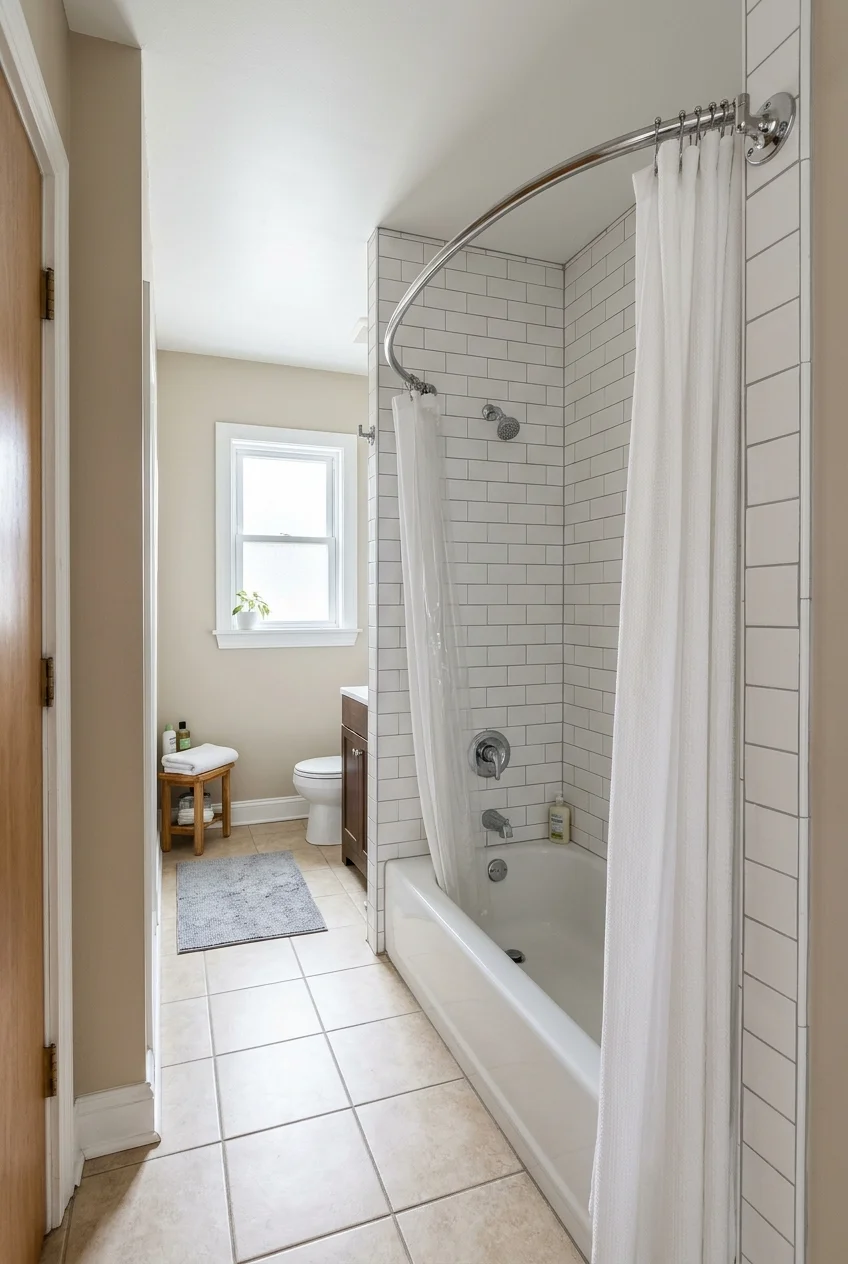
A curved rod moves the curtain outward around the tub, giving the enclosure a different silhouette. It can help when a straight curtain feels close.
Check how far the curve projects into the room. Leave circulation, the toilet, nearby cabinets, and the bathroom door clear before deciding the extra space is worthwhile.
Follow the rod’s mounting requirements for your wall construction. A tension rod and a permanently fixed rod need different support; neither should serve as a grab bar.
30. Replace a tired tub enclosure with a properly fitted screen
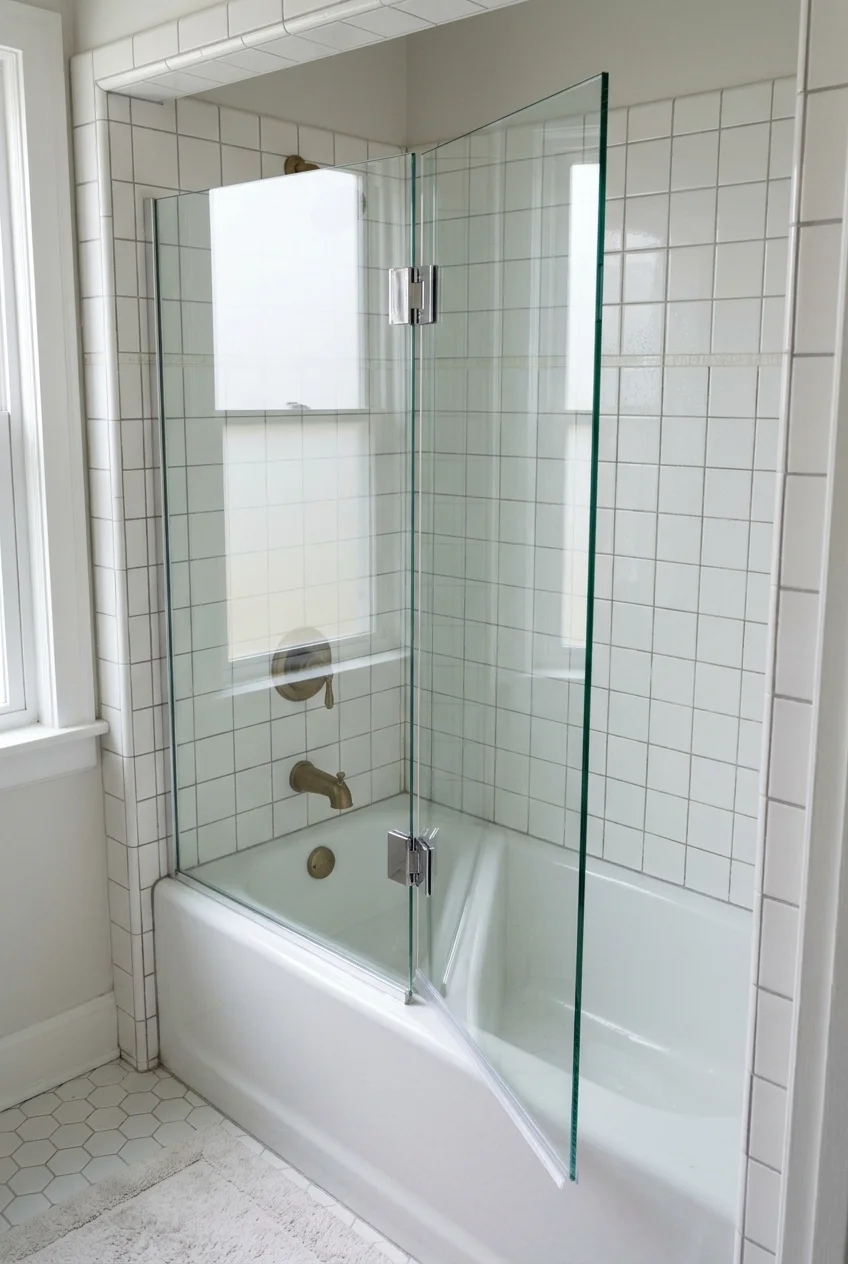
A clear glass tub screen can open the view to attractive tile that a bulky enclosure hides. It suits some bathing routines better than others.
Discuss splash containment with the installer before choosing a short panel. Showerhead position, water direction, tub shape, and the people using it affect how much coverage works.
- Confirm tub ledge suitability and wall construction.
- Check panel or door movement against nearby fixtures.
- Specify appropriate safety glass and manufacturer-approved hardware.
- Resolve old mounting holes and seals as part of the work.
Glass changes the cleaning routine and may provide less privacy than a curtain. If full containment matters most, a properly sized complete enclosure may be more practical.
Have the screen installed as a complete system rather than mixing unrelated clamps and glass. A clean finished edge does not reveal whether its hidden anchorage is correct.
Make Storage Easier to Reach and Keep Tidy
Useful storage begins with the items you actually keep. Match each addition to its contents, and check access before bringing another cabinet into the room.
31. Build a shower niche into a planned wall renovation
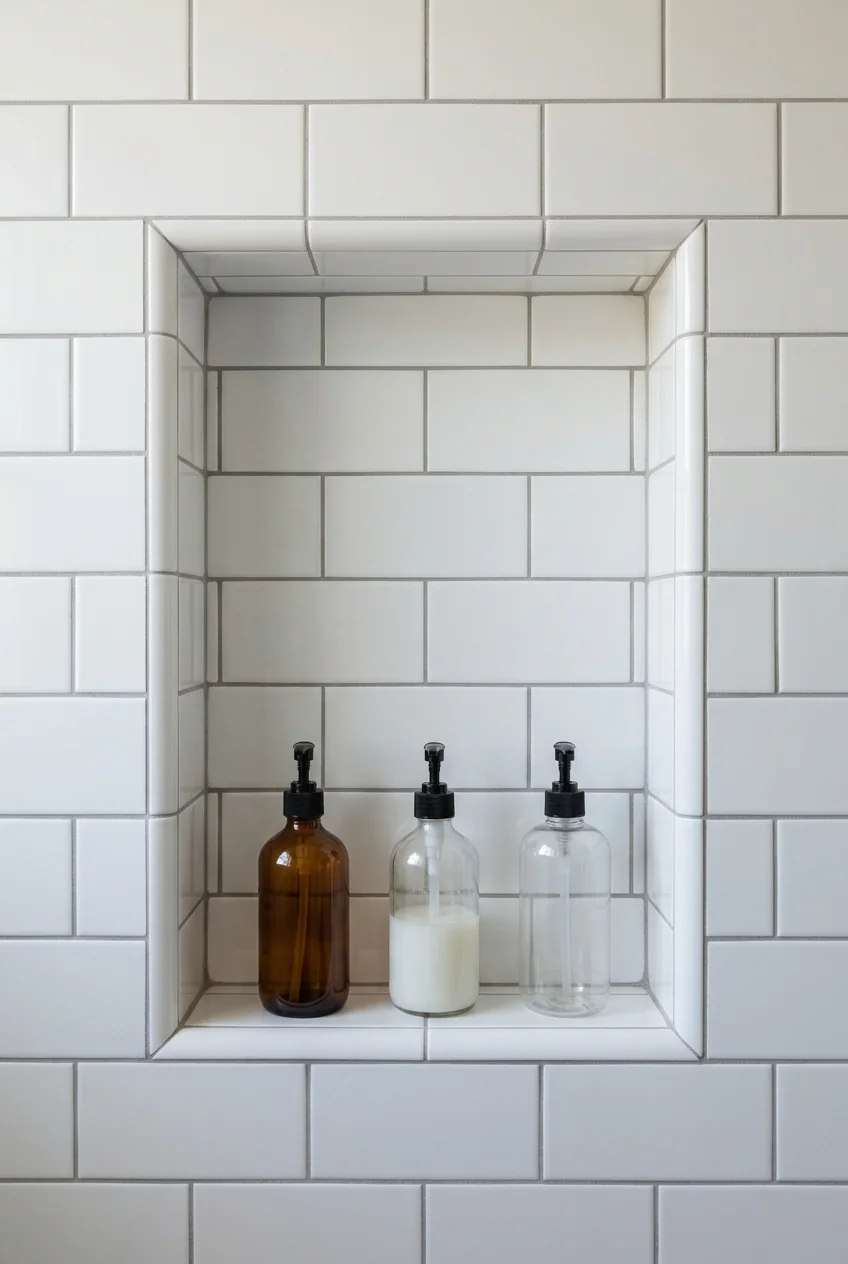
A tiled niche keeps bottles off the shower floor and makes storage part of the wall. Size it around the containers your household actually uses.
This belongs in planned shower work, not a casual cut into finished tile. The wall must accommodate the opening without compromising structure, services, insulation, or waterproofing.
Have the installer coordinate the niche with the tile layout and complete waterproofing system. Its joints and penetrations need the system manufacturer’s specified treatment.
- Check bottle heights, including pump clearance.
- Choose a reachable position outside the main spray where practical.
- Coordinate shelf drainage and finished edges with the installation system.
Use a plain niche interior if the surrounding tile already has a pattern. A contrasting back panel is optional; useful shelf space is the real improvement.
If the shower walls are staying intact, choose an approved surface-mounted shelf instead. It can provide useful storage without presenting a niche as a simple retrofit.
32. Add a corner shelf without cutting a niche
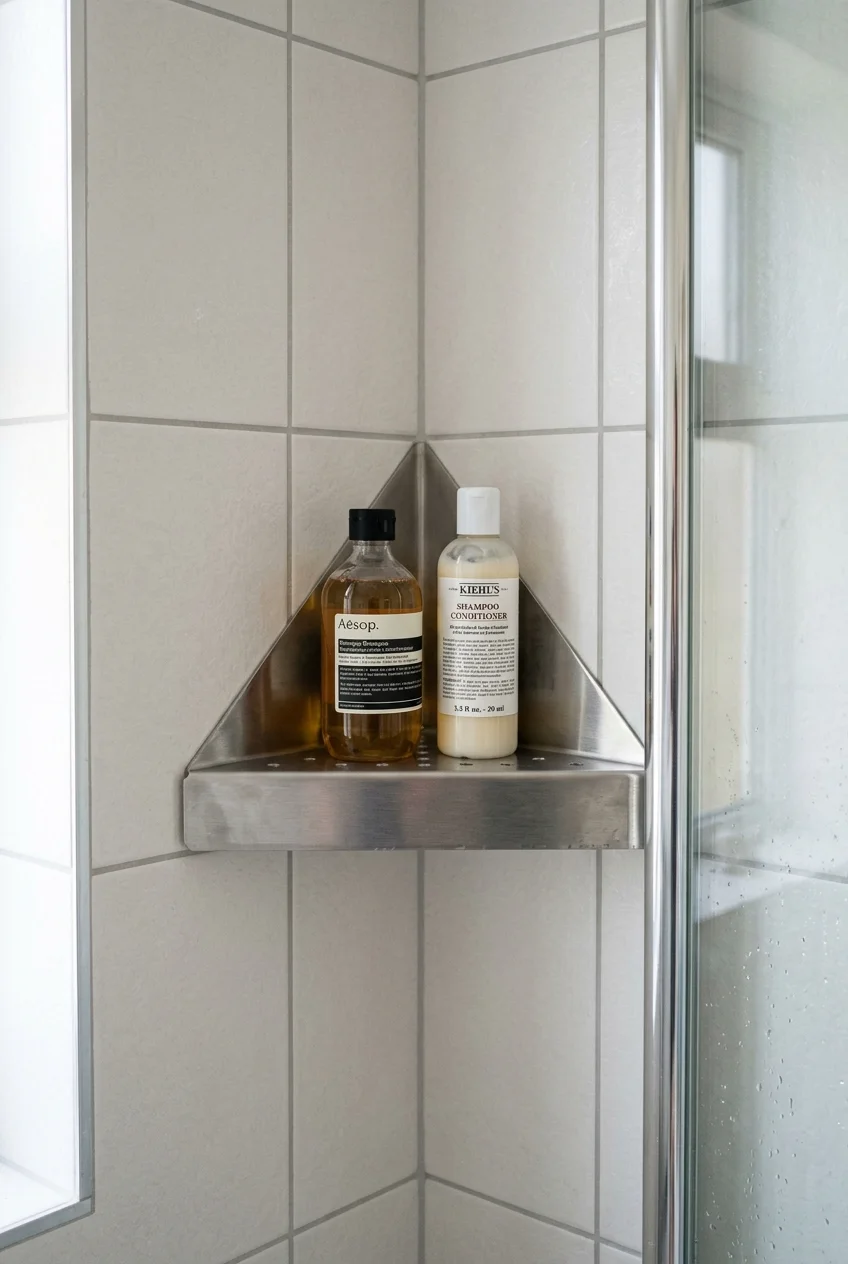
A compact corner shelf gives bottles a home when the shower wall is staying. Pick a draining design with enough usable depth for your containers.
Choose a mounting system approved for the exact tile, wall, and wet location. Suction needs suitable smooth contact; adhesive and drilled systems have different requirements.
Keep the shelf clear of elbows, controls, and the shower door. Follow load limits and inspect the mounting periodically instead of stacking every spare bottle there.
Installation note Do not drill into a shower casually. Penetrations must be detailed correctly for its waterproofing system; ask the installer when the wall construction is unknown.
33. Give bath towels a bar wide enough to spread out
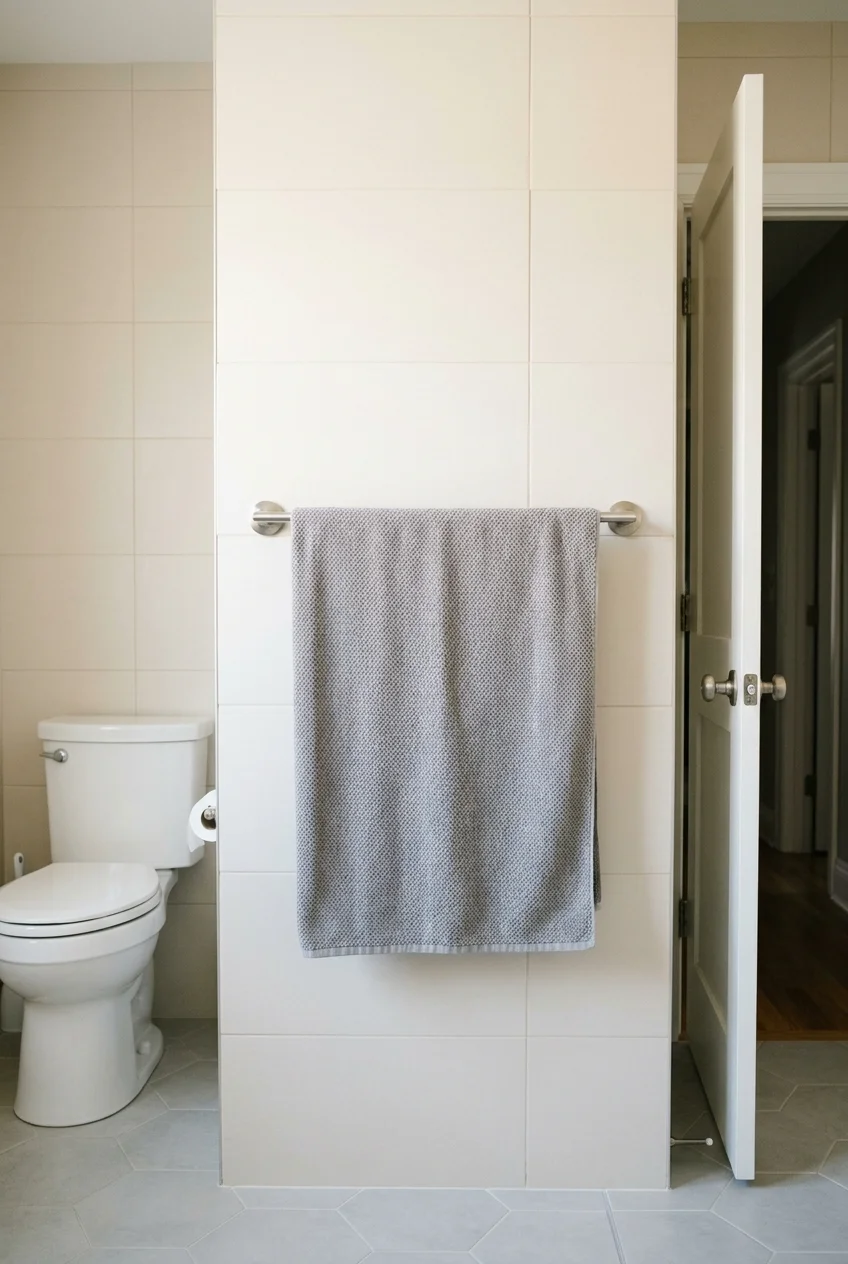
A longer towel bar can be more useful than another decorative shelf. Choose enough clear hanging width for the towels to spread rather than stay bunched.
Test the location with a towel before drilling. Keep its hem off the floor and clear of heaters, toilets, door swings, and surfaces that stay wet.
Match mounting hardware to the wall and expected load. A towel bar is designed to hold towels, so add a purpose-built grab bar separately if needed.
34. Use separate robe hooks behind the door
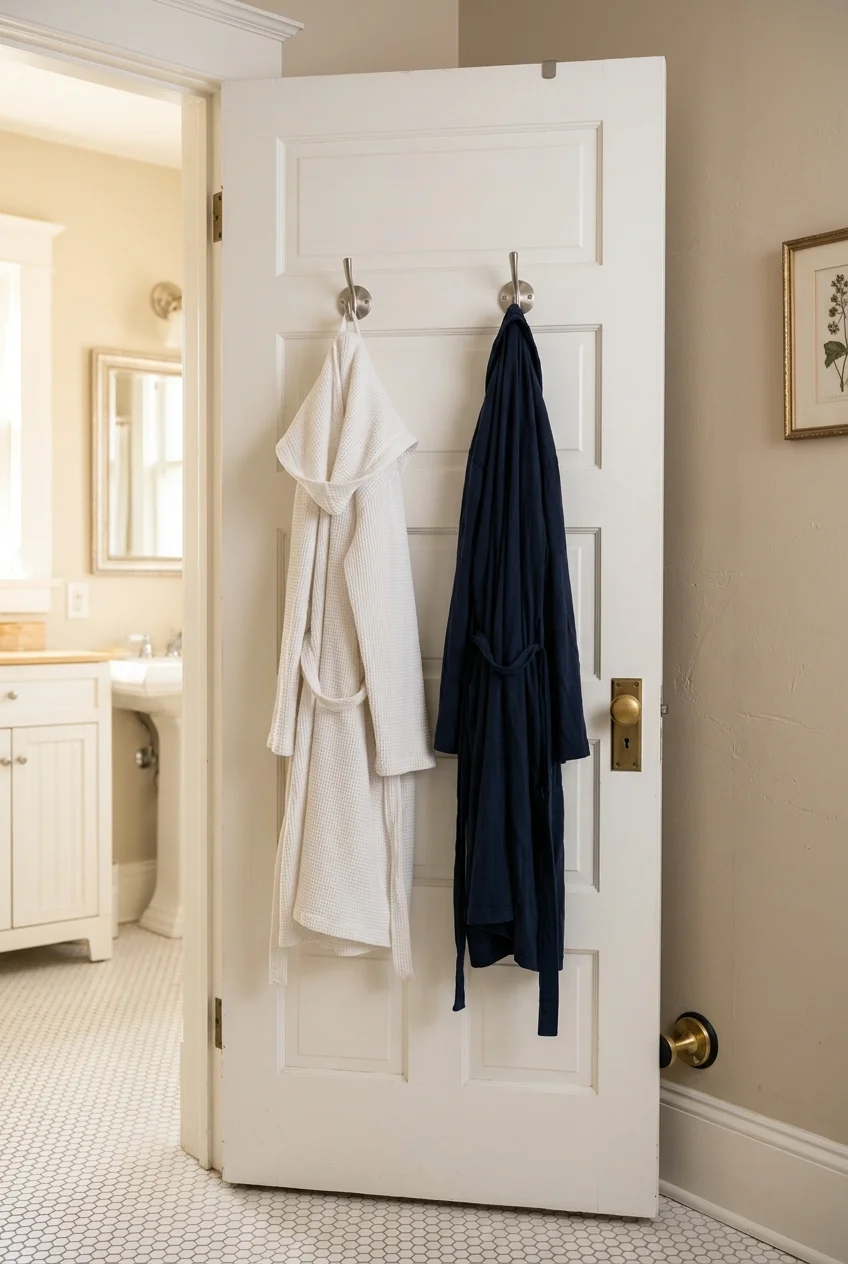
Individual hooks give robes a defined place when wall space is limited. Stagger them only if each hanging item still has enough room to clear its neighbor.
Check the door’s construction, fastener requirements, and full swing before mounting. Hooks and hanging robes must not strike the wall, mirror, or adjacent cabinetry.
Avoid loading one hook with several damp towels. If fabrics stay wet between uses, a ventilated bar elsewhere is a better drying arrangement for the room.
35. Fit drawer trays around your actual morning routine
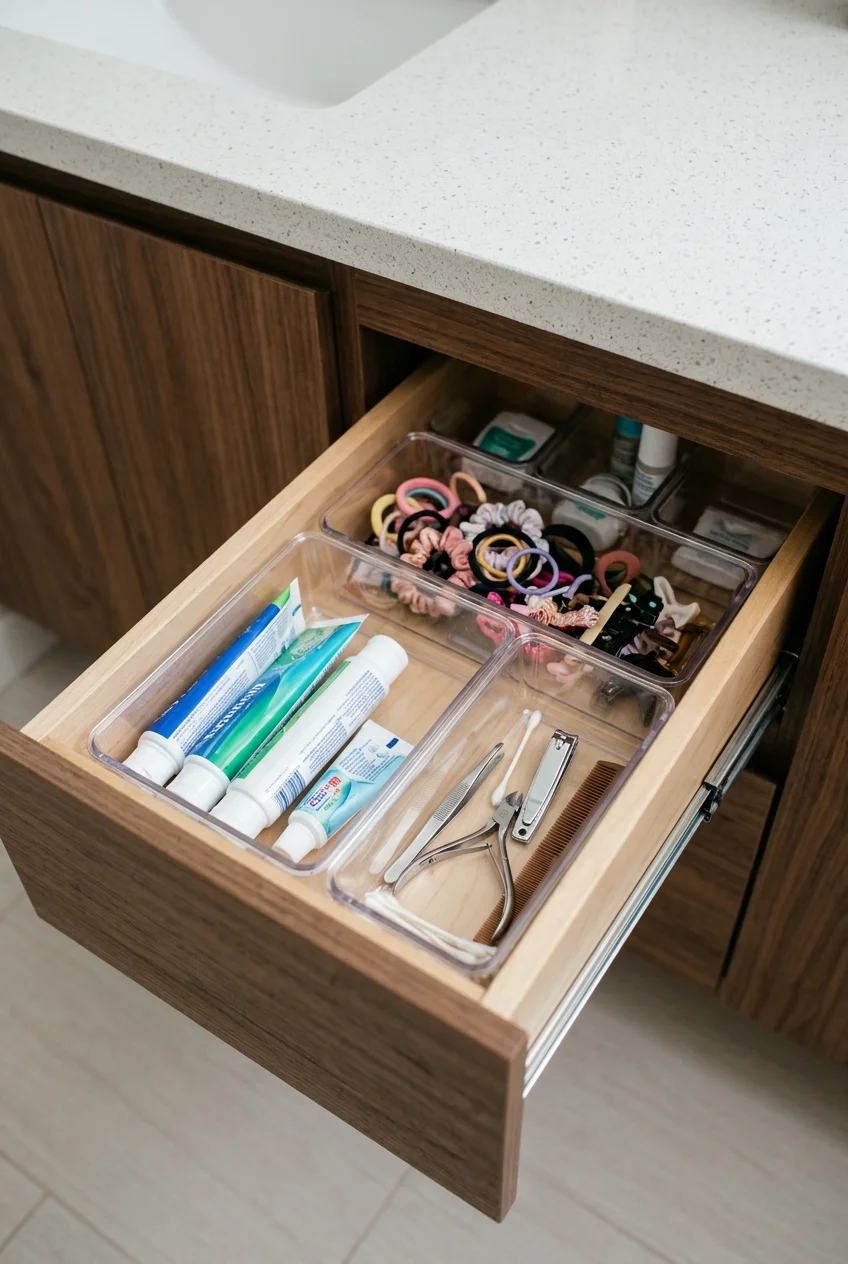
Separate toothpaste, small grooming tools, and hair ties into shallow trays so the drawer opens onto useful groups. Leave bulky bottles in a taller storage area.
The Masirs modular drawer trays (paid link) offer separate containers to arrange by category. Check each tray’s dimensions against your drawer before committing to a layout.
- Measure usable internal width, depth, and height.
- Allow clearance below the counter and around drawer hardware.
- Keep the most-used group nearest the front.
Try the layout with existing containers before buying a full set. Leave a little spare space so one extra tube does not send everything back into a pile.
36. Arrange removable bins around the sink plumbing
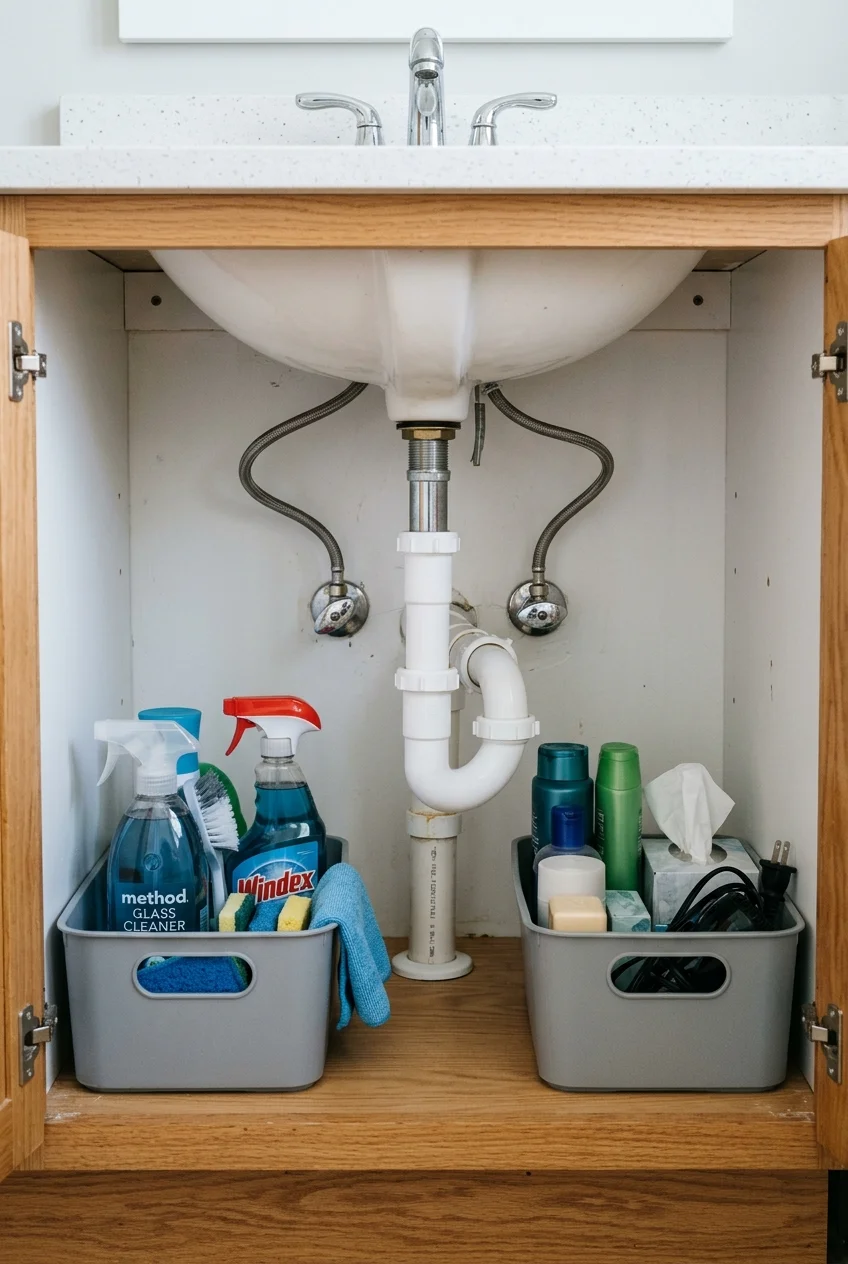
Two small lift-out bins can make an awkward sink cabinet easier to use than one large organizer. Place them on either side of the drain.
Measure the actual interior with pipes, hinges, shutoff valves, and door movement included. Leave connections accessible and avoid leaning containers against supply hoses or drain fittings.
Keep each bin light enough to remove without disturbing plumbing. Group backup toiletries separately from cleaning products, following labels and appropriate child-safety storage precautions.
If this cabinet remains crowded, compare these small bathroom storage ideas for ways to move towels or spare supplies onto more suitable wall storage.
Use the empty center space to spot drips and reach the shutoffs. Concealing every inch can make a small leak harder to notice or repair.
37. Replace a flat mirror with a shallow medicine cabinet
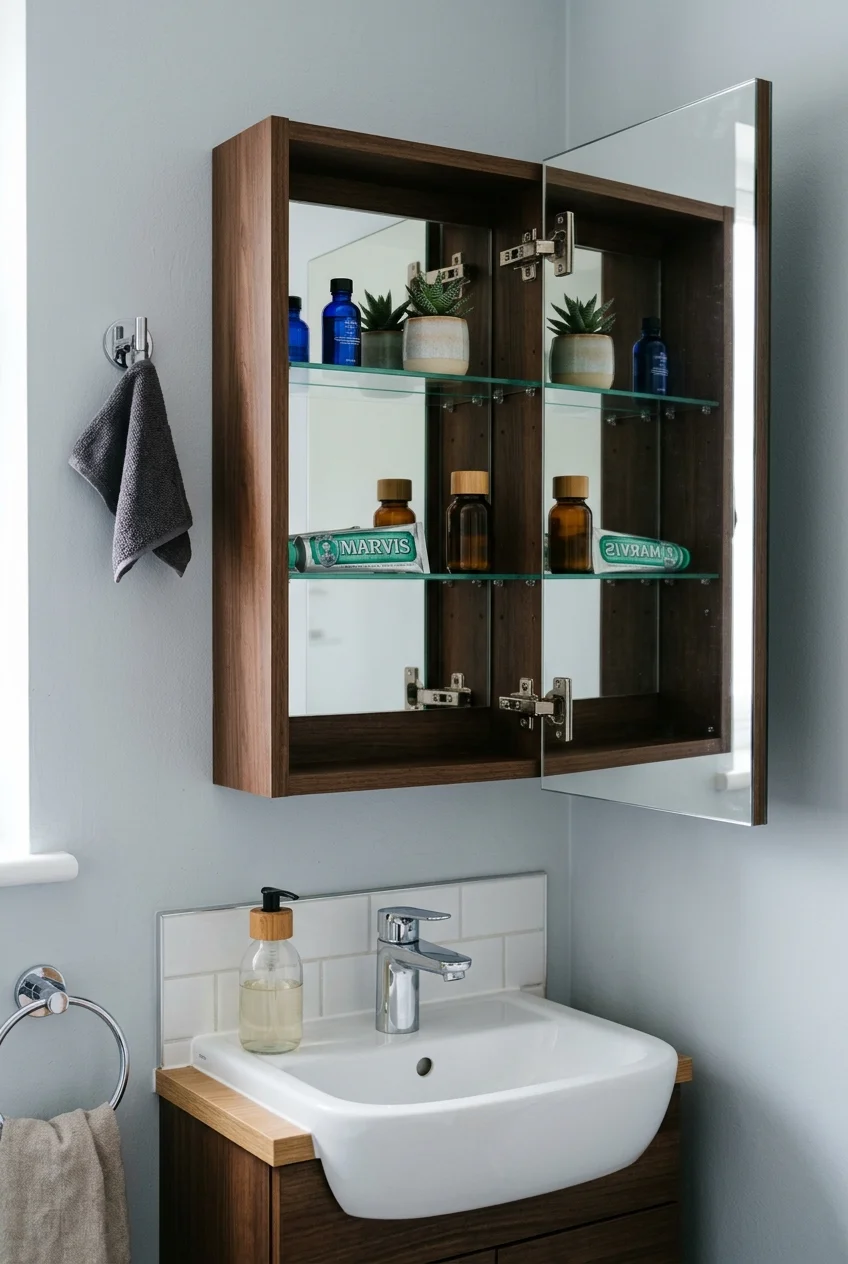
A mirrored cabinet puts small daily essentials at eye level while preserving a familiar vanity outline. Choose its depth around the room’s available head and elbow space.
Surface mounting avoids a wall opening but projects farther into the room. Recessed installation needs a suitable cavity and investigation of framing, plumbing, and wiring.
- Check door swing against lights, faucets, and adjacent walls.
- Compare shelf spacing with the bottles you intend to store.
- Use the cabinet’s specified mounting method and support.
Have a professional assess obstructions before cutting a recess. Do not move a vent pipe, modify structural framing, or reroute electrical wiring merely to match a photograph.
Store products according to their labels; a humid bathroom is unsuitable for some medicines. The cabinet can hold grooming supplies without becoming the default medicine location.
Practical tip Mock up the cabinet’s depth with a cardboard box. Stand at the sink and open the proposed door to check whether the projection feels intrusive.
38. Use a closed cabinet above the toilet for spare supplies
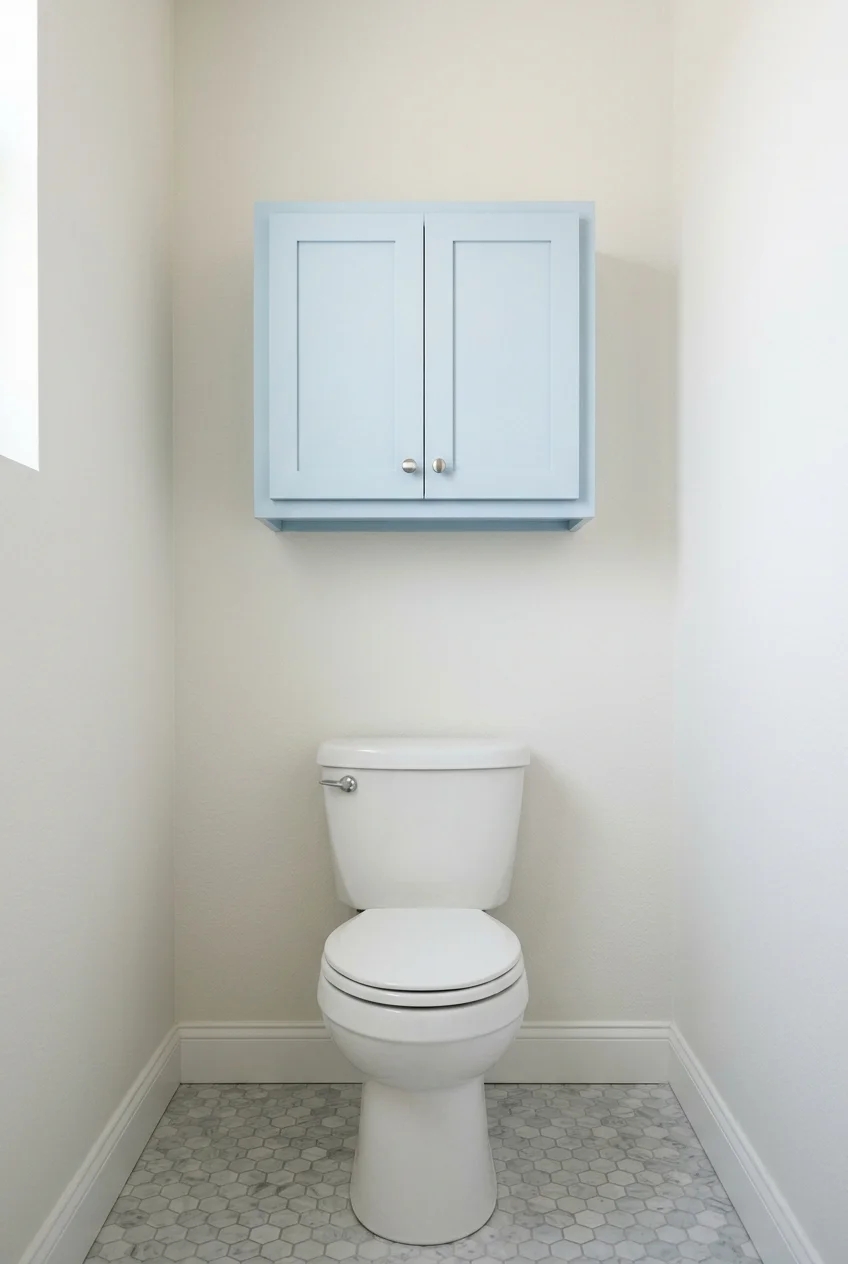
A shallow wall cabinet keeps backup toiletries out of sight without adding legs around the toilet. Its depth matters as much as its storage capacity.
Check head clearance, door swing, tank-lid removal, and access to controls before mounting. Keep the cabinet secure with hardware specified for the wall and expected load.
Store light backup items here and keep daily essentials closer to their point of use. Avoid a cabinet so low that it crowds someone standing up.
39. Add a narrow linen tower where a full cabinet will not fit
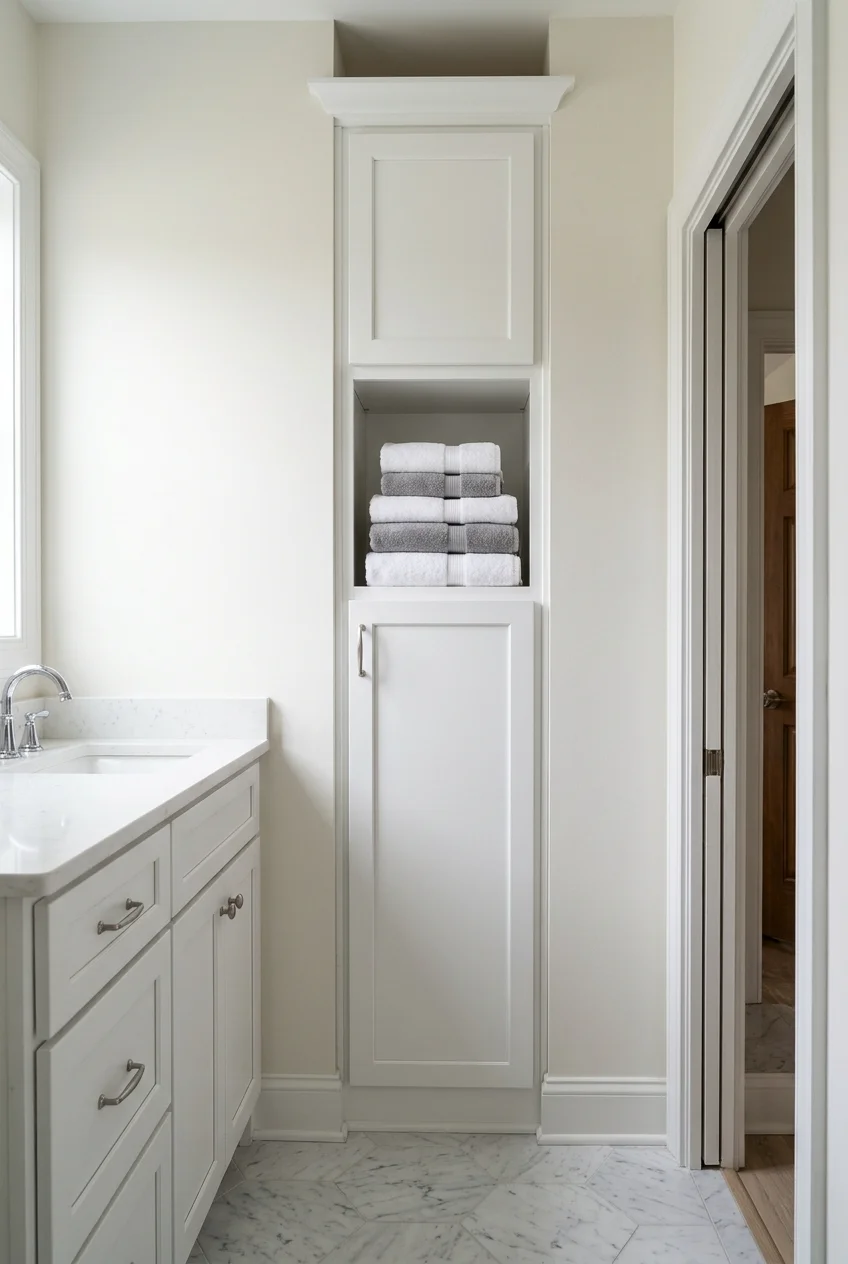
A tall narrow tower can hold folded towels on a small footprint. Choose adjustable shelves so the interior works with your towels rather than decorative stacks.
Measure the space with all nearby doors and drawers open. Leave access for cleaning and plumbing, and secure the unit against tipping according to its instructions.
- Shallow shelves keep smaller items from disappearing at the back.
- Closed lower storage hides backups and bulky packages.
- A limited open shelf can keep one daily-use category visible.
If the tower would narrow the route to the shower or toilet, use wall storage elsewhere. Extra capacity is only useful when it preserves comfortable access.
40. Park a slim cart in a genuinely unused gap
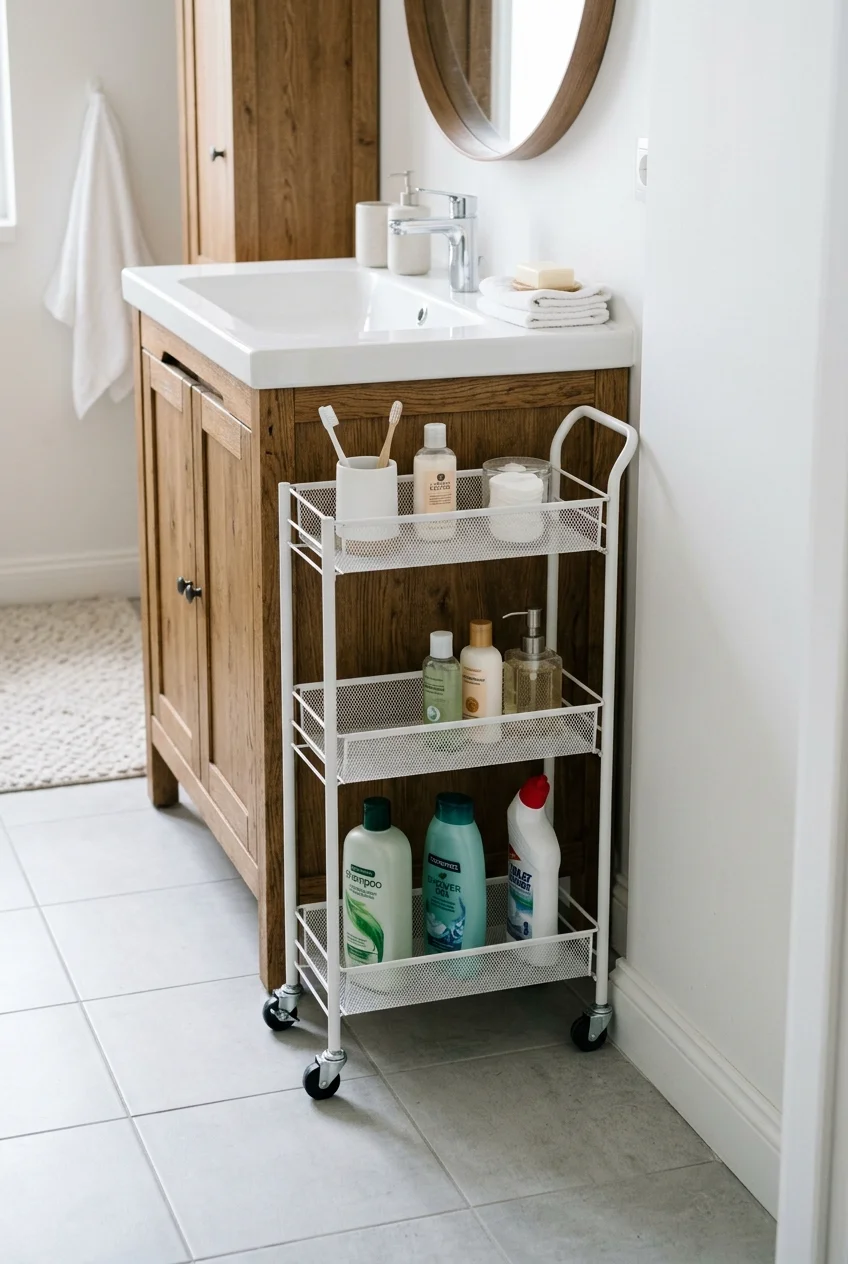
A narrow rolling cart works for spare toiletries when it can pull out completely. Treat the gap as a parking spot, not permanent hidden storage.
Measure the cart’s full width, including wheels and handles, then test its pull-out route. Avoid wedging it against plumbing, a heater, or the toilet’s working space.
Choose washable surfaces and keep heavier items low. If the floor slopes or the cart rolls too freely, use appropriate wheel locks or a stationary alternative.
41. Give laundry a ventilated hamper that fits the routine
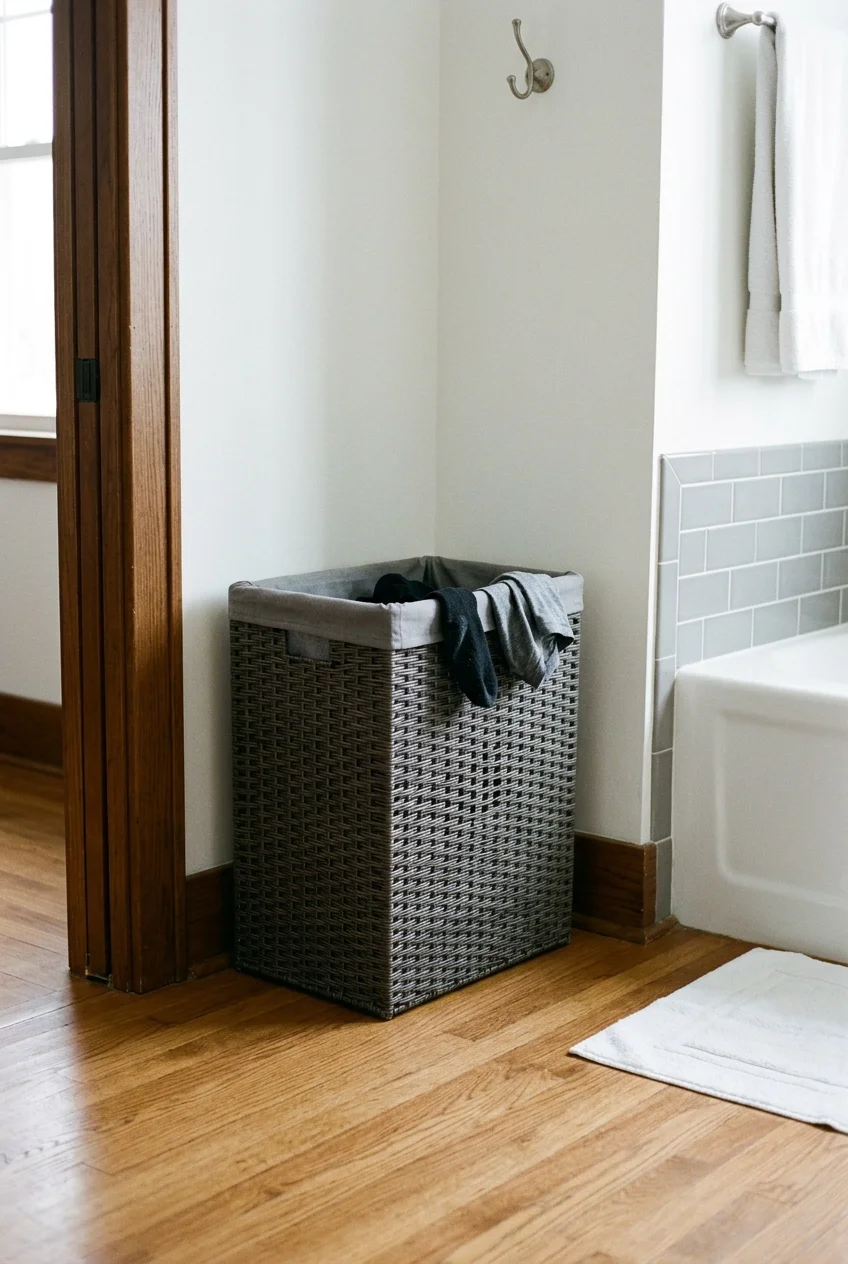
A dedicated hamper stops worn clothes from collecting beside the tub. Choose a size you can carry comfortably and empty before the room feels crowded.
Ventilation and washable surfaces matter more than a decorative lid. Let wet towels dry before adding them, and leave the hamper clear of the door swing.
42. Mount a shallow organizer inside a vanity door
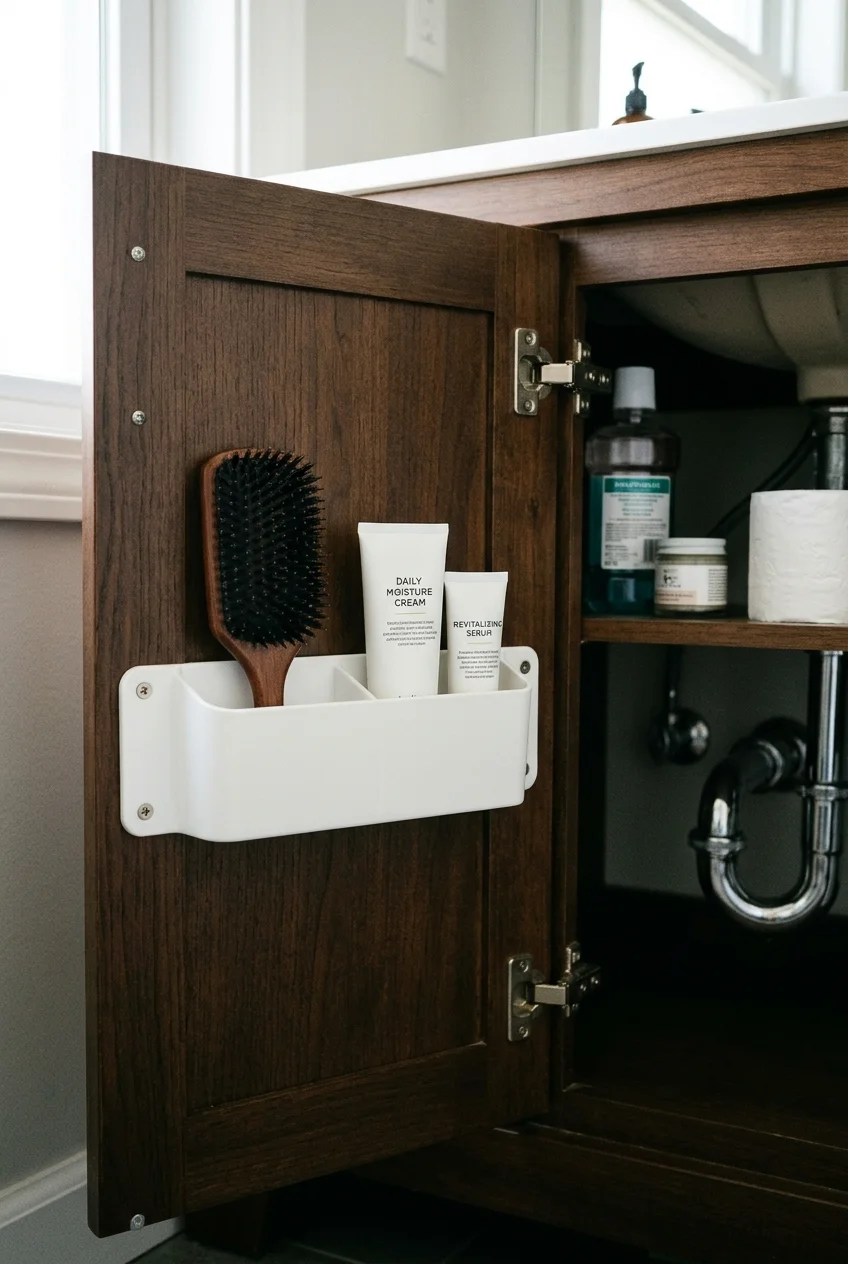
The back of a cabinet door can hold lightweight grooming supplies that otherwise disappear behind bottles. Use a shallow rack with a defined job.
Check panel construction and fastener length before mounting, then close the door slowly. The rack must clear the frame, pipes, shelves, and anything stored inside.
Choose containers that retain small items when the door moves. Keep heavy bottles elsewhere, and store heated tools only when fully cool and according to their instructions.
Practical tip Tape a cardboard outline inside the door first. Open and close it through its full travel before choosing a rack or drilling mounting holes.
Choose Targeted Replacements When a Refresh Is Not Enough
Some improvements need installation work because size, condition, or support is the real problem. Keep the change focused and compare the proposed result with what already functions.
43. Choose a shallower vanity to relieve a tight walkway
Image pending: No image is attached to this draft for idea 43 (image-43).
A shallower cabinet can make a narrow bathroom easier to move through while keeping a conventional sink. Compare the complete basin depth, not just the cabinet box.
Mark the proposed outline on the floor and test the route to the toilet and shower. Open the bathroom door and all nearby storage during the check.
- Check plumbing positions against the new cabinet interior.
- Confirm usable basin size and faucet reach.
- Plan wall and floor repairs revealed by the smaller footprint.
- Verify required fixture clearances with the installer and local rules.
Choose drawers or shelves that hold your essential supplies without forcing everything onto the counter. More walking room is less useful if the storage becomes unusable.
Do not assume a compact product creates an accessible bathroom by itself. Reach, approach space, doors, and the rest of the layout still need individual assessment.
44. Replace the vanity top and basin while keeping a sound cabinet
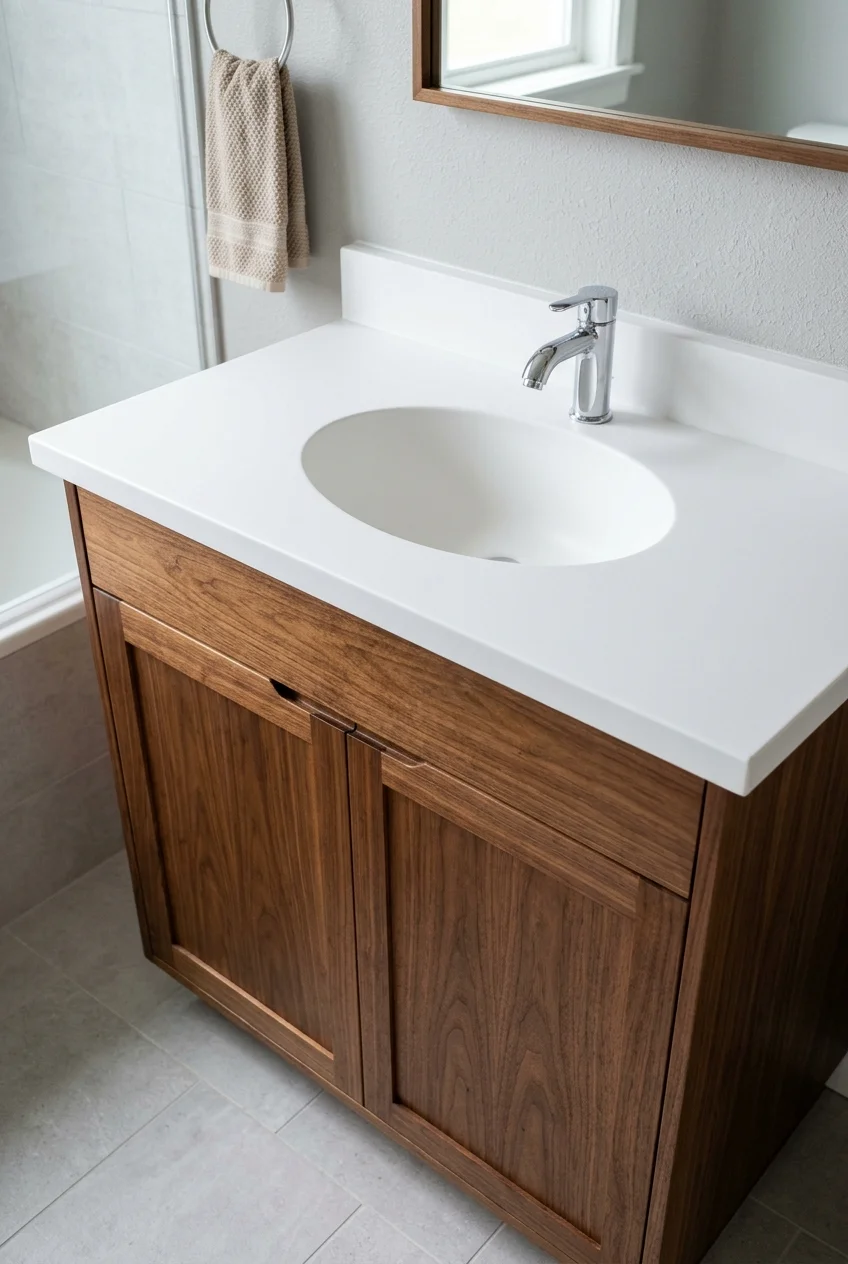
A new top can change the most visible part of a vanity while preserving useful storage below. Start by checking the cabinet’s condition and level.
Compare the complete top dimensions, overhangs, backsplash arrangement, and sink position. The basin must clear drawer boxes and plumbing without cutting away essential cabinet structure.
Choose a surface around your cleaning habits and the manufacturer’s care instructions. A pale solid color may suit a busy wall better than another pronounced pattern.
- Confirm sink mounting and faucet holes before ordering.
- Check drain, overflow, and supply compatibility.
- Plan wall repair where the old backsplash comes away.
- Have connections and the fitted assembly checked for leaks.
An integrated basin reduces the number of visible material transitions, but its size and shape still matter. Test whether the bowl leaves enough practical landing space.
Keep plumbing and heavy lifting within appropriate professional help. A cabinet worth keeping should not be compromised by forcing an incompatible sink or oversized new top onto it.
45. Reface the vanity with new doors and drawer fronts
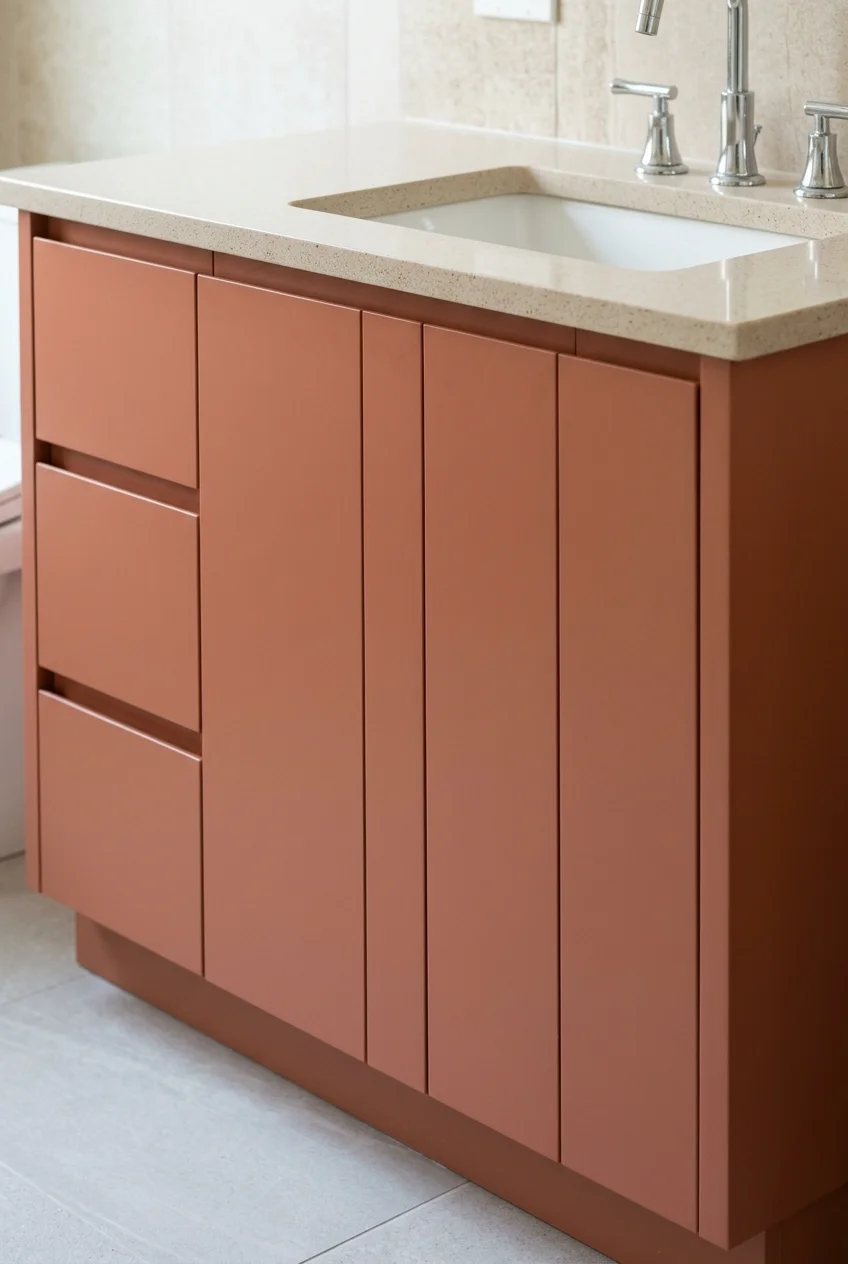
New fronts can change a vanity’s style when its cabinet box and storage layout still work. Flat panels give a different result from repainting ornate existing doors.
Measure each opening, overlay, hinge position, and drawer-front attachment carefully. The new fronts need to operate correctly, not merely cover the same area in a photograph.
Check the condition of hinges, runners, and the cabinet box before ordering. A refacing project makes little sense if the internal structure is failing from moisture.
- Match edge details and visible cabinet surfaces to the new fronts.
- Confirm hinge compatibility and required drilling with the supplier.
- Test door and drawer movement before final adjustment.
Choose factory-finished fronts or a complete finishing plan suited to bathroom use. Plain fronts still need sealed edges and a finish that tolerates ordinary cleaning.
Budget tip Price the full project, including hinges, side panels, finishing, and installation. If the interior layout is also wrong, a replacement vanity may offer better value.
46. Install a wall-hung vanity with properly planned support
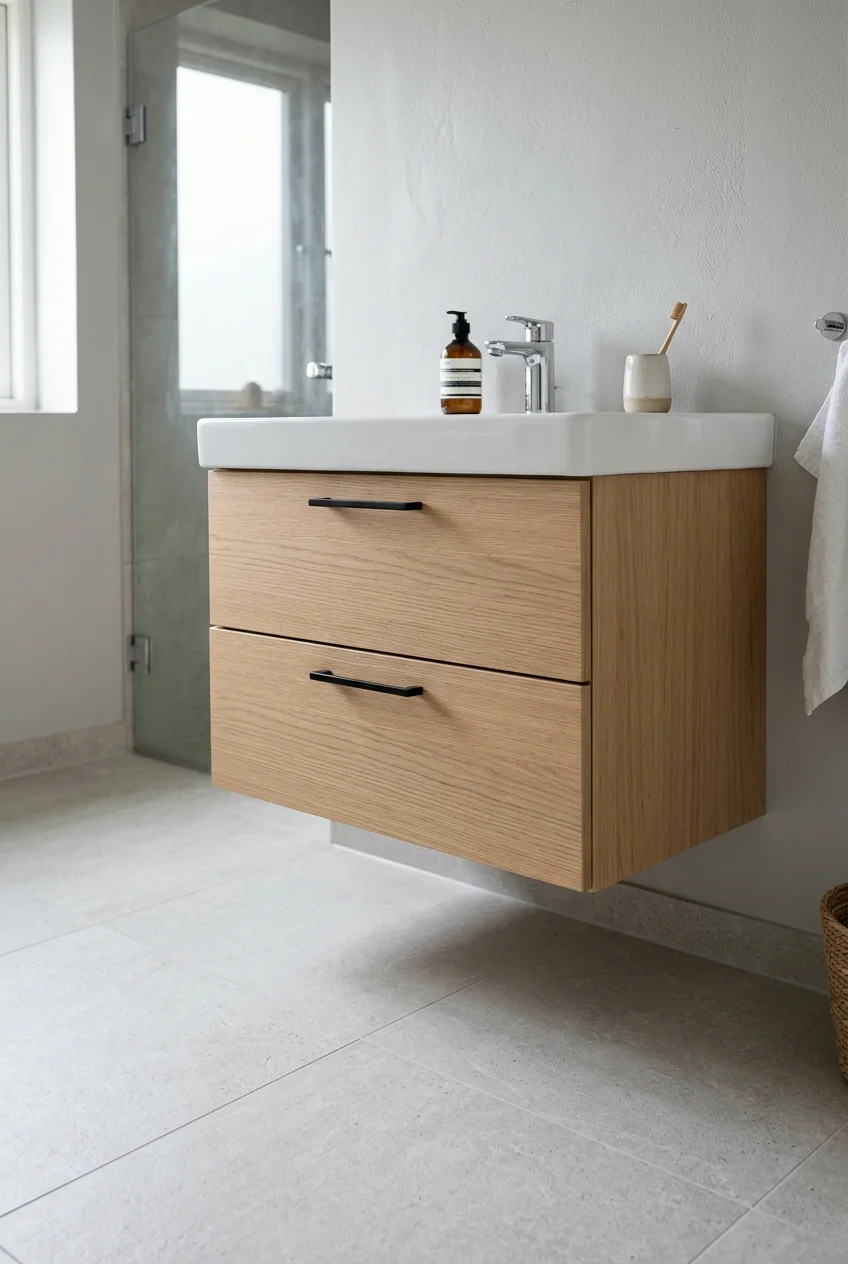
A wall-hung cabinet reveals more floor and makes cleaning beneath the vanity easier. Choose it when the wall, plumbing, and storage plan can support the change.
The cabinet requires the manufacturer’s specified structural support and fixings. Tile and drywall alone are not a substitute, and existing wall conditions may require opening and repair.
Coordinate the basin, cabinet, drain, and supply positions before installation. A shallow drawer cannot share the same space as a drain trap without a compatible design.
Have mounting height chosen for the intended users and the complete basin arrangement. A raised bowl changes the working height, even when the cabinet itself looks low.
Keep the space underneath clear if easier cleaning is the goal. Filling it with baskets gives away the benefit and can hide leaks or access points.
Ask the installer to verify support and plumbing rather than judging them from the finished appearance. This is a targeted renovation, not a decorative shelf installation.
47. Refit an existing linen cupboard with adjustable shelves
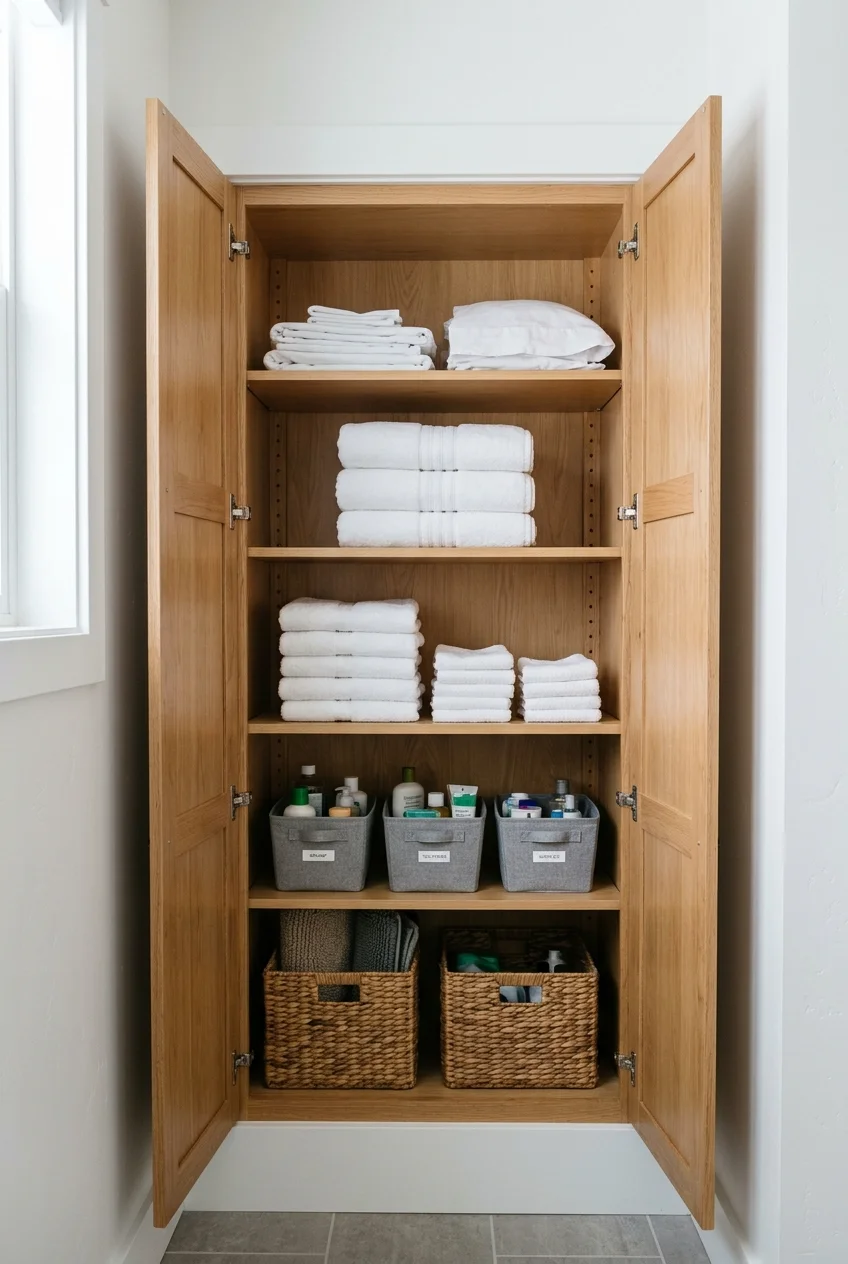
An existing cupboard can become more useful without expanding its footprint. Refit the interior around folded towels, spare toiletries, and the height of your larger containers.
Measure the usable depth with the door closed and include hinge clearance. Deep shelves often work better with removable bins than with loose items stacked behind each other.
- Put daily towels on the easiest shelf to reach.
- Group backups in small removable containers.
- Keep heavy supplies low and light infrequently used items higher.
- Leave shelf supports and the door’s movement unobstructed.
Choose shelving and supports appropriate to the expected load and room conditions. If dampness is present, investigate it before fitting liners or closing the cupboard again.
Leave some open space so you can return laundry without rebuilding a stack. The goal is a cupboard that stays usable after the first neatly arranged day.
48. Refresh the toilet with a correctly fitted new seat
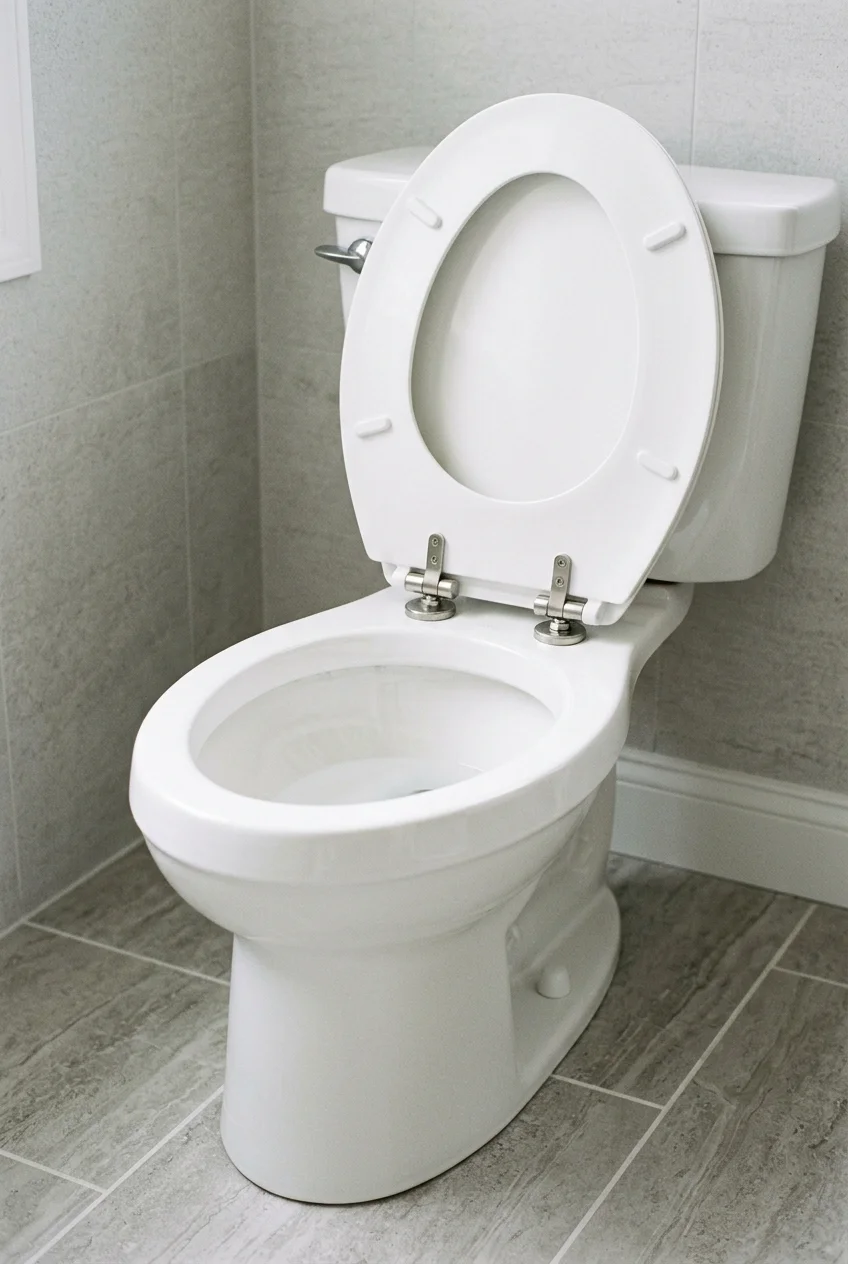
A new seat gives a sound toilet a cleaner, more finished appearance without replacing the fixture. Match the bowl shape and mounting arrangement before choosing a style.
Measure according to the seat maker’s guide and check hinge access. Slow-close models can be convenient, but their fit and cleaning access matter more than the feature name.
Keep the toilet’s original cleaning instructions in mind when choosing materials. A new seat will not fix a loose toilet, leak, crack, or flushing problem.
49. Choose a decorative grab bar with the right structural mounting
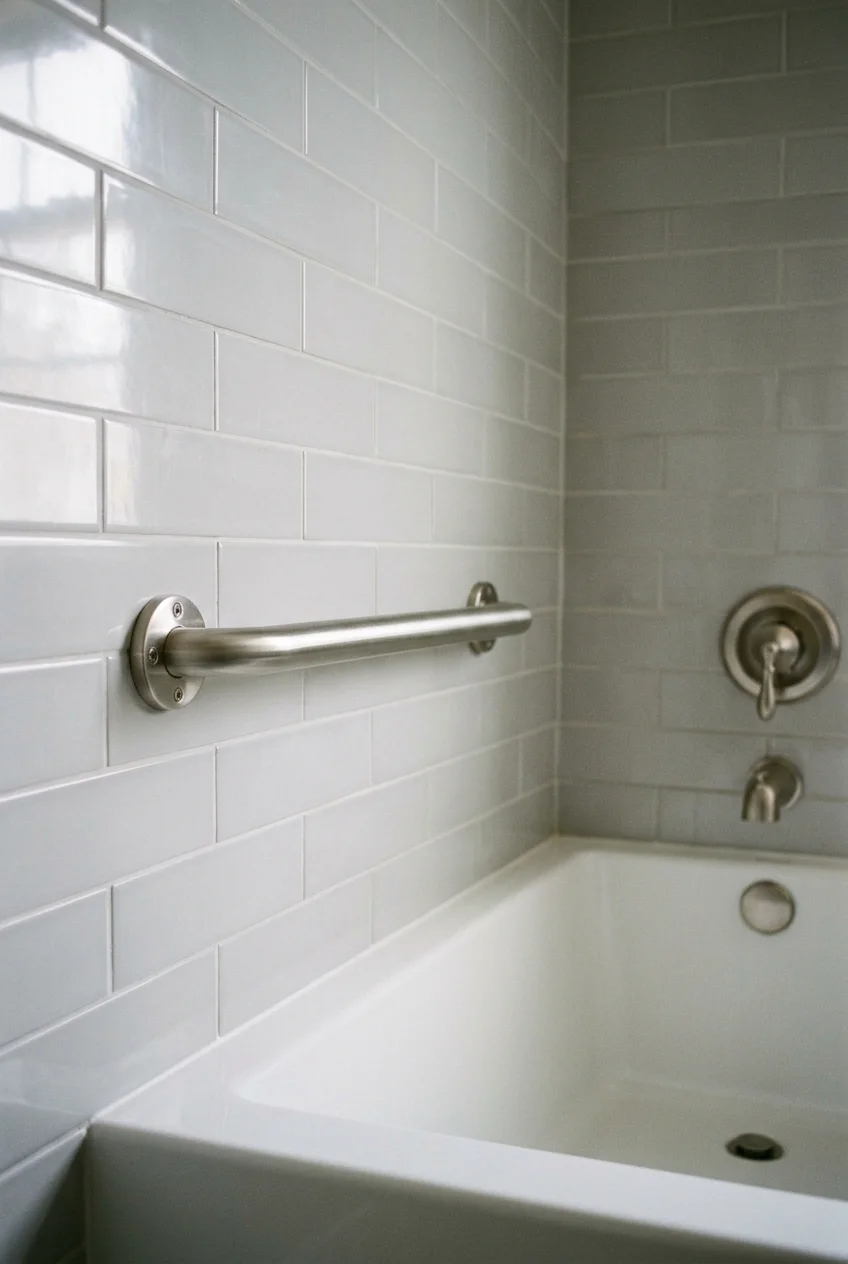
A purpose-built grab bar can coordinate with the room’s metal finishes while providing support in a carefully chosen location. A towel bar cannot substitute for it.
Plan placement around the actual user’s movement and the fixture layout. If accessibility is the goal, get individual guidance rather than copying a position from an inspiration image.
Follow the grab bar’s required wall construction and mounting system. Suitable studs, backing, or specifically approved anchors must support it; ordinary decorative hardware anchors are not interchangeable.
In wet areas, penetrations also need correct sealing within the wall system. Have installation and secure attachment checked appropriately before anyone relies on the bar for support.
Choose a finish you can grip comfortably and maintain according to its instructions. Coordinated hardware can make the addition feel considered without disguising its practical function.
50. Add a removable bath caddy for a contained soaking setup
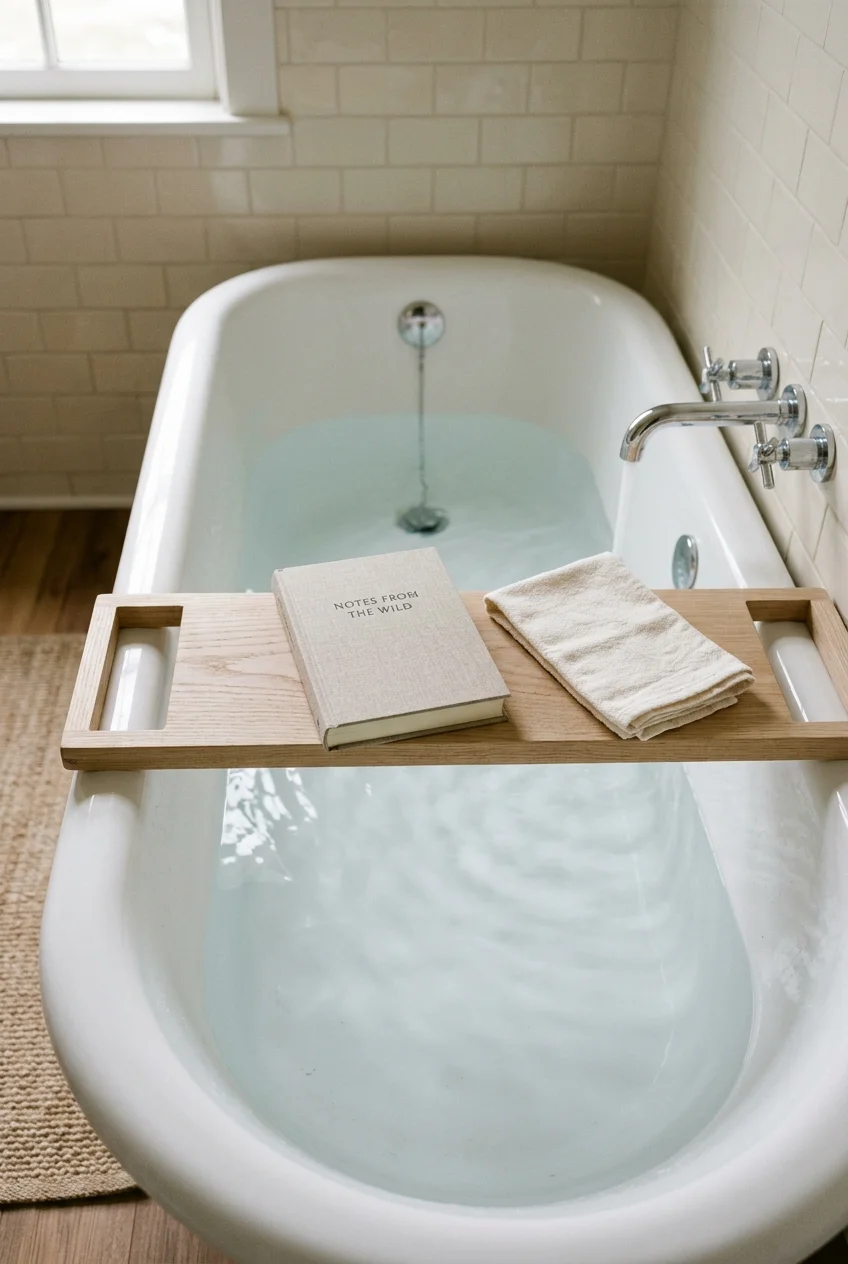
A fitted bath caddy gives a book or washcloth a landing spot without lining the tub rim with objects. Choose a simple design that is easy to remove.
Measure the tub’s outer width and bearing surfaces before buying. Both ends need stable contact, and the caddy must not obstruct entry, controls, or shower use.
Keep plugged-in devices and candles away from the bath. Dry the caddy according to its material instructions, and store it elsewhere when it would get in the way.
Frequently Asked Questions
Which bathroom update should I choose first?
Identify one visual problem and one daily inconvenience, then look for a change that helps both. A mirrored cabinet, for example, can replace an undersized mirror while adding storage.
Keep a photograph of the existing room beside proposed samples. Choose one main update first, then repeat a related color or finish in smaller details.
Can I update a bathroom without changing its tile?
Yes, if the tile and surrounding assembly are sound. Paint, textiles, mirrors, storage, lighting, and compatible fixtures can change the room while its tile stays.
Investigate loose tiles, recurring cracks, soft surfaces, and leaks before cosmetic work. Keeping tile is sensible only when doing so does not conceal an unresolved problem.
Which updates are easiest to take with me from a rental?
Freestanding storage, towels, a shower curtain, a hamper, and a removable bath caddy are practical starting points. Check fit so none blocks the room’s normal use.
Ask permission for attached fixtures or surface coverings, even when labeled removable. Keep original parts and understand the required removal method before making a change.