50 Kitchen Peninsula Ideas

This post may contain affiliate links: full affiliate disclosure.
A kitchen peninsula can add useful counter space without demanding clearance on all four sides. The right version also improves storage, seating, or room definition.
Start with the shape your floor plan can support, then choose one primary job. These ideas show distinct ways to make that decision visible and practical.
As an Amazon Associate I earn from qualifying purchases.
Peninsula Layouts That Improve Flow
A successful peninsula makes movement easier before it adds features. Map open doors, busy routes, and turning points before deciding where the attached end belongs.
1. Use a Compact Square Peninsula to Mark the Kitchen Edge
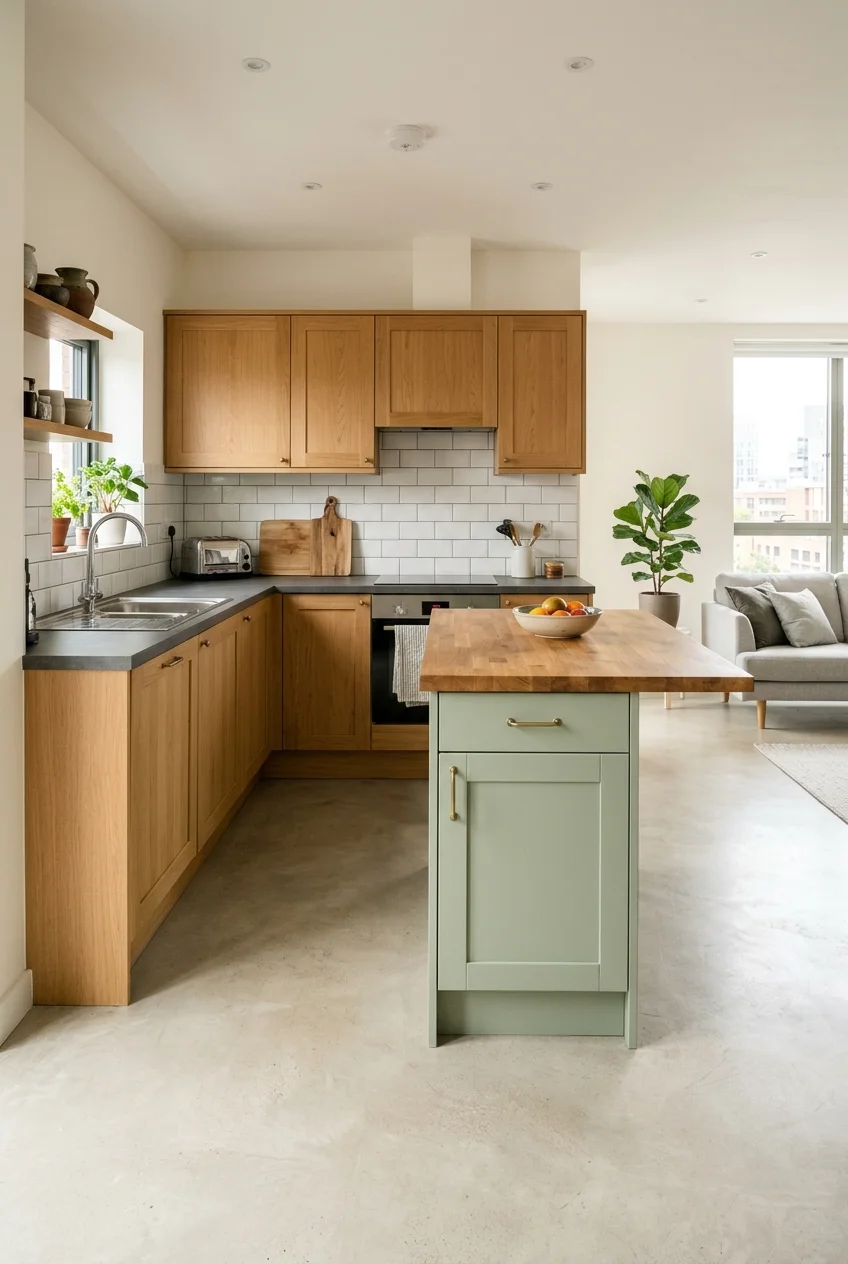
A short, nearly square peninsula can define a small kitchen without stretching deep into the adjoining room. Keep its outer face simple so the boundary feels calm.
This shape works best as an extra landing or chopping surface. Limiting the interior to one cabinet prevents the small footprint from becoming awkwardly divided.
2. Turn a One-Wall Kitchen Into an L
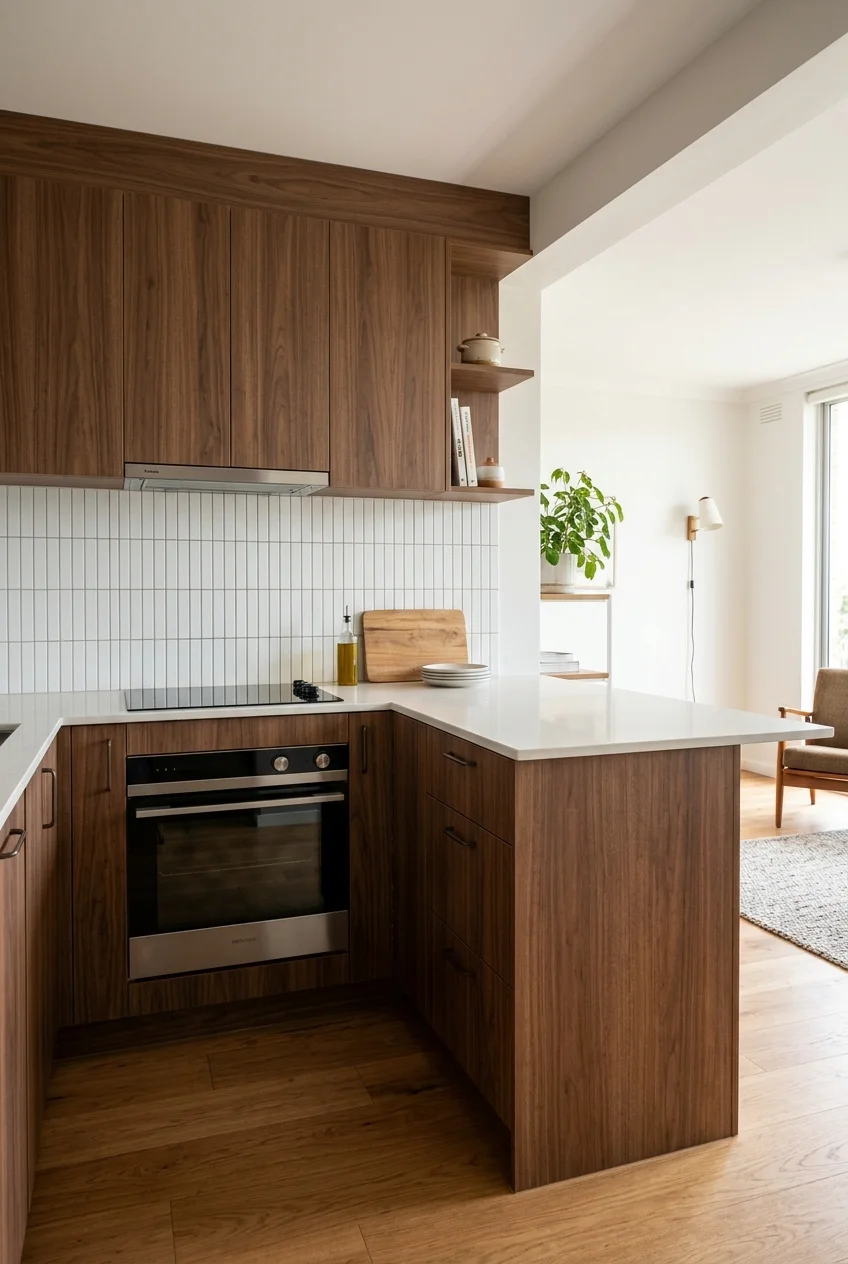
Extend the end of a one-wall kitchen at a right angle to create a protected prep zone. Face drawers inward so tools stay beside the cook.
Leave the living-room side flat or lightly paneled. The quiet outer face reads like furniture while the working side completes a useful L-shaped counter run.
If an attached return still crowds the room, compare these narrow kitchen island ideas before choosing a movable alternative with clearer circulation.
3. Close One End of a Galley Without Blocking the Exit
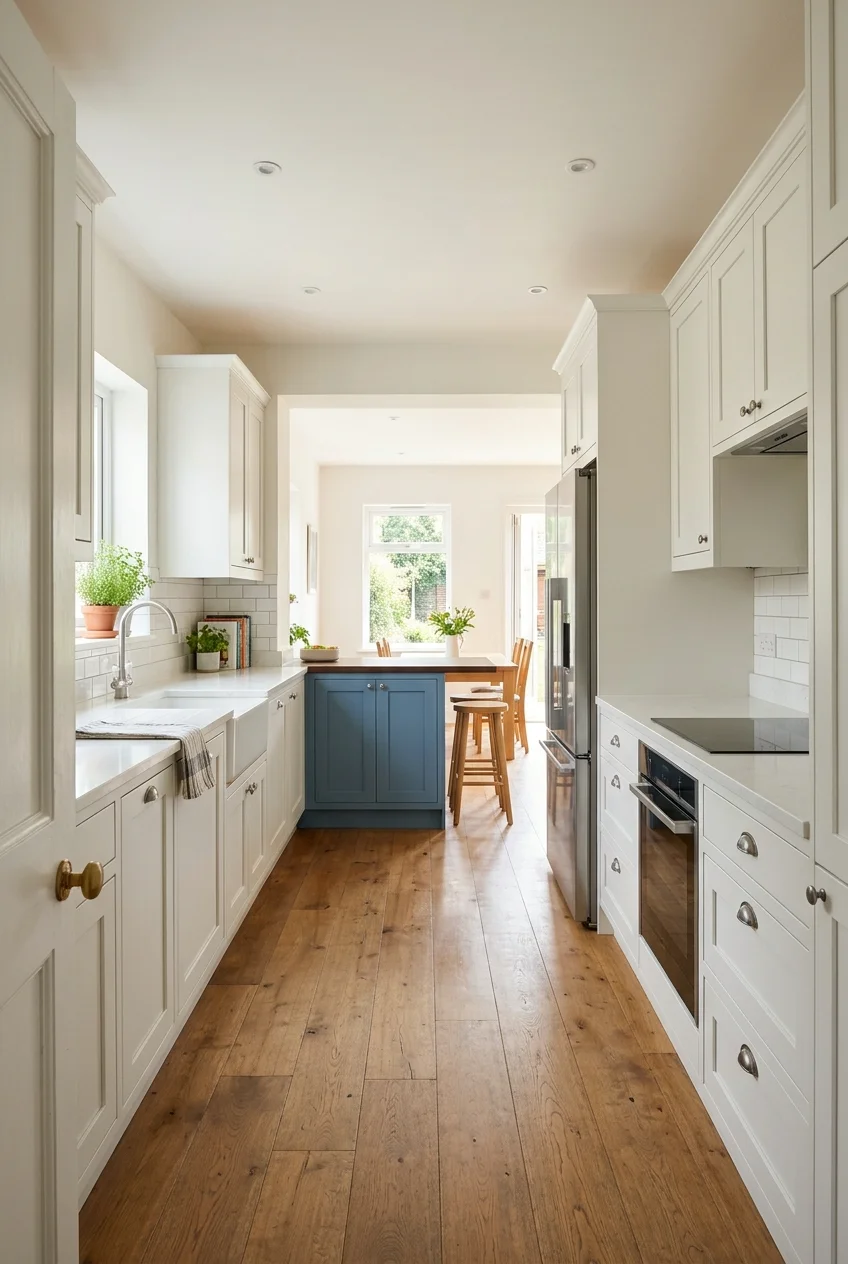
A peninsula across one end of a galley can add counter space and stop through-traffic from crossing the work zone. Preserve another unobstructed exit.
Set the open end far enough from the opposite cabinet run for appliance access. A shallow return is often more useful than a deep, feature-packed block.
- Open the refrigerator, oven, and dishwasher on the plan.
- Trace the main route to adjacent rooms.
- Keep stool backs out of the remaining passage.
4. Open a U-Shaped Kitchen With a Short Return
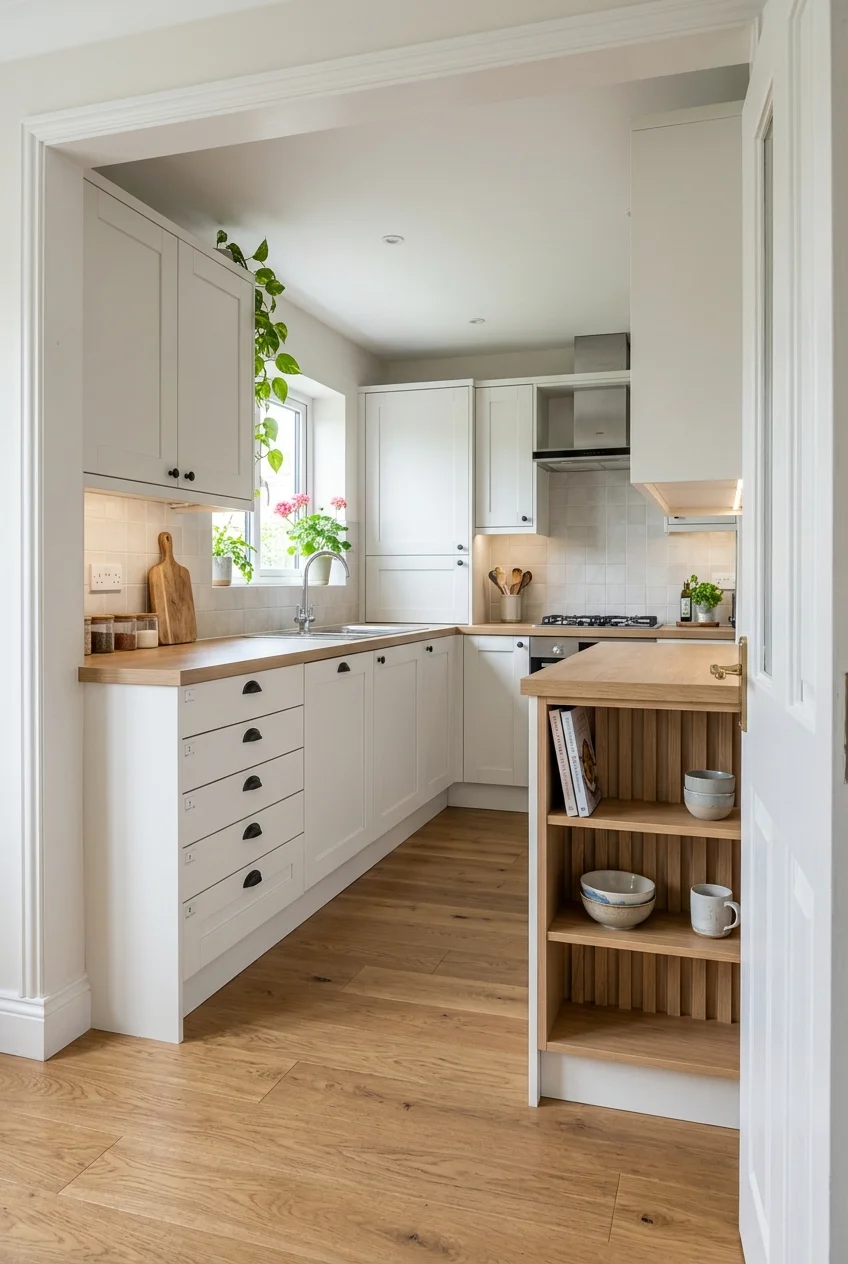
Replace one long arm of a cramped U with a shorter peninsula that ends before the doorway. The kitchen retains three work sides without feeling enclosed.
Use drawers near the attached end and keep the exposed tip visually light. A modest overhang can soften the transition, but seating should remain optional.
Setup note Tape the proposed tip on the floor, then carry a laundry basket through the opening. That simple test reveals turns a floor plan can hide.
5. Angle the Peninsula Toward the Room Entry
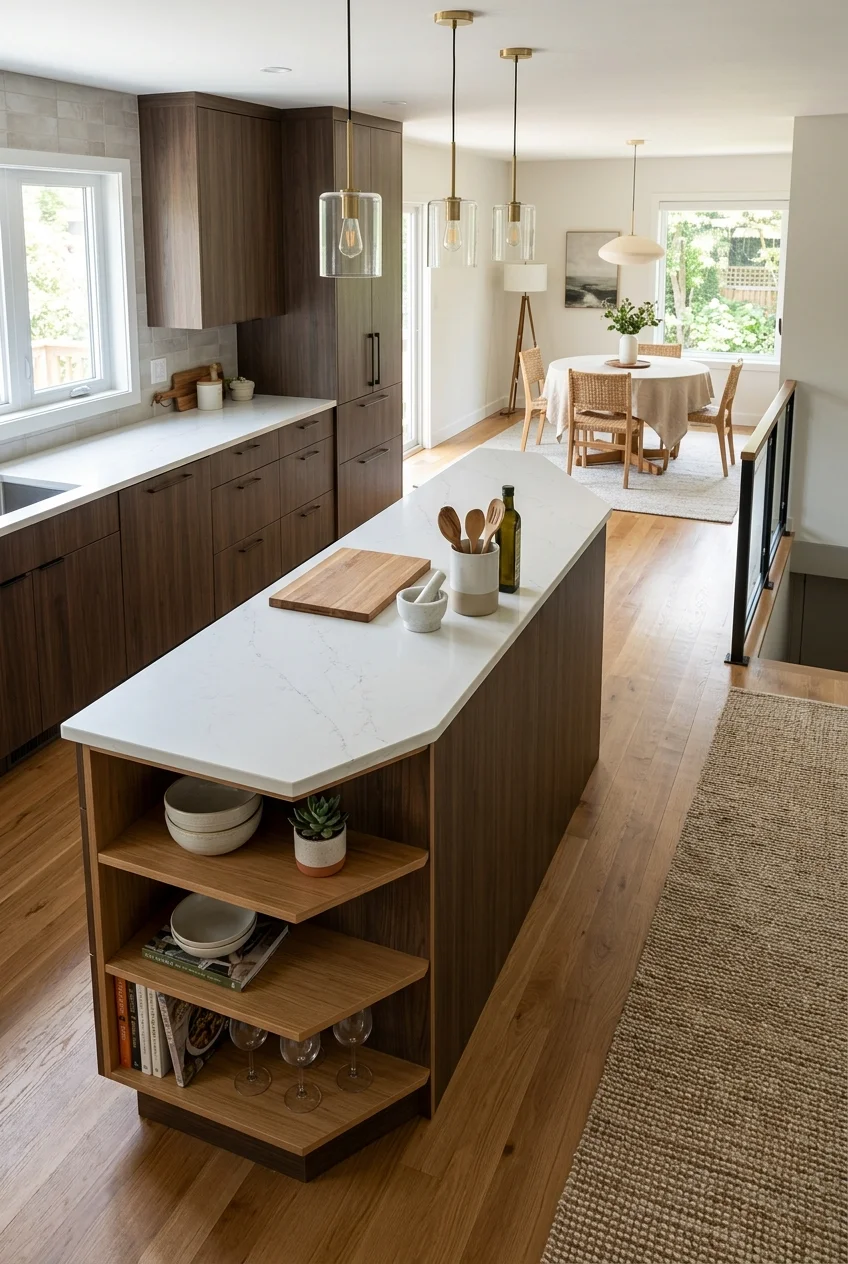
An angled peninsula can guide movement when a square corner would pinch a diagonal route. Keep the angle deliberate and align the cabinetry beneath the countertop.
This layout deserves a measured drawing because angled cabinets create unusual interior corners. Use the skewed section for drawers or open shelving instead of complex appliances.
Repeat the angle in one nearby line, such as flooring direction or a ceiling beam. A single echo makes the geometry feel intentional without overdesigning it.
6. Round the Outer Corner at a Busy Turn
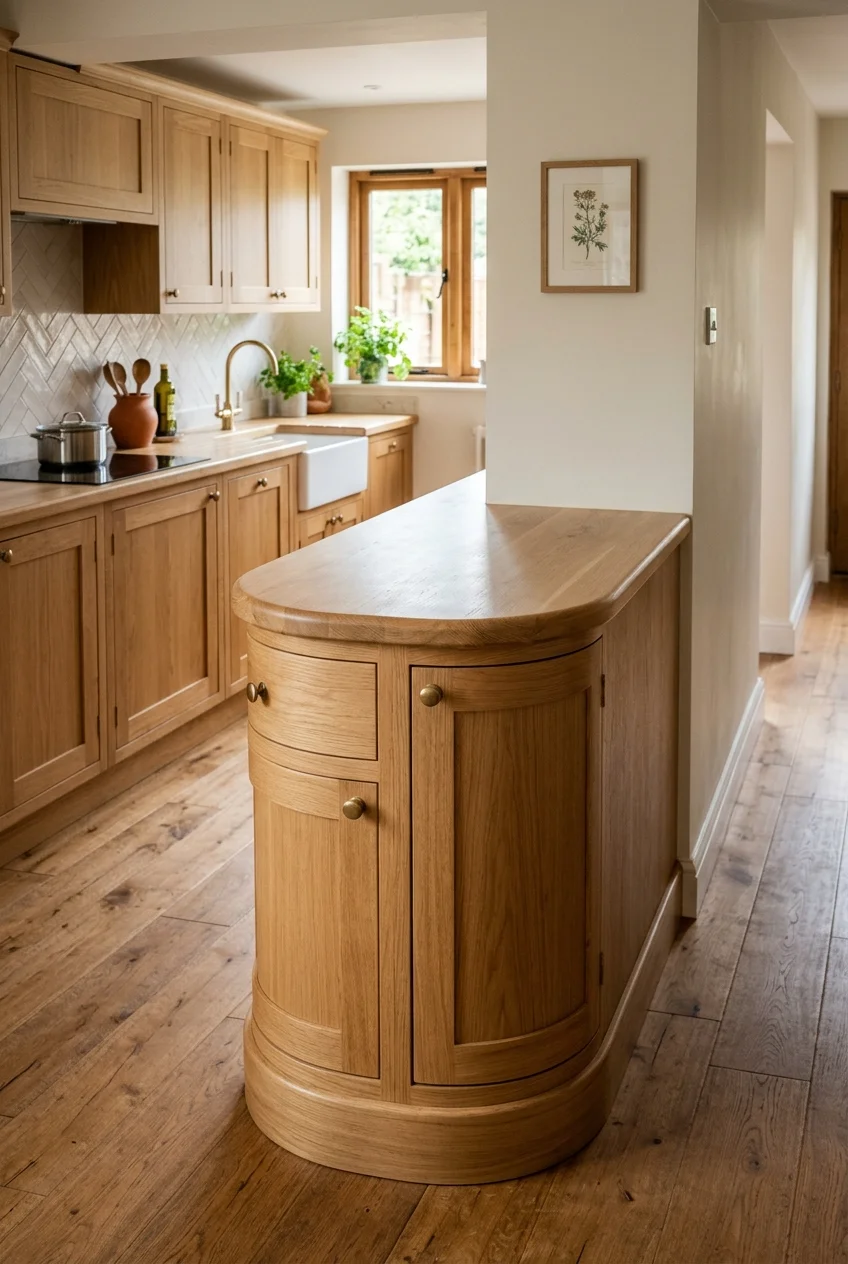
A rounded outer corner removes a sharp point where the kitchen meets a hallway or dining route. Curve the cabinet end and countertop together for coherence.
Keep the radius shallow enough to preserve the work surface. The curve should improve the turning point, not swell into the walking path or steal cabinet access.
A continuous curved end panel looks cleaner than a rounded slab over a square cabinet. Ask the fabricator and cabinetmaker to coordinate the finished profiles.
7. Keep a Narrow Peninsula Prep-Only
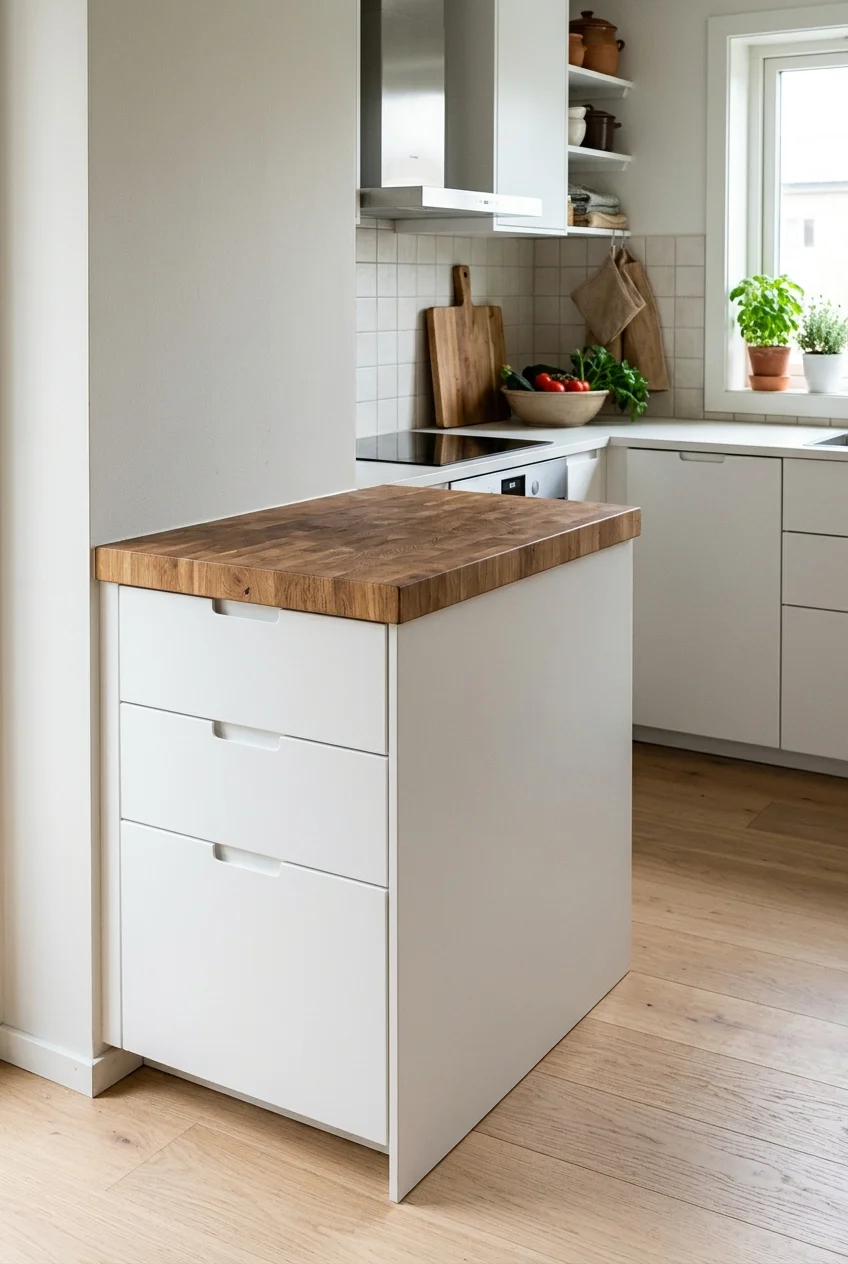
A shallow prep-only peninsula can fit where seating, plumbing, and appliances would make the room too tight. Prioritize one clear surface and accessible drawers.
Place cutting boards, knives, and mixing tools on the kitchen side. Keep the room-facing panel handle-free so clothing and bags do not catch in the passage.
The restrained design also leaves flexibility for future routines. A peninsula does not need every possible feature to justify the space it occupies.
8. Cap an Existing Half-Wall With a Wider Counter
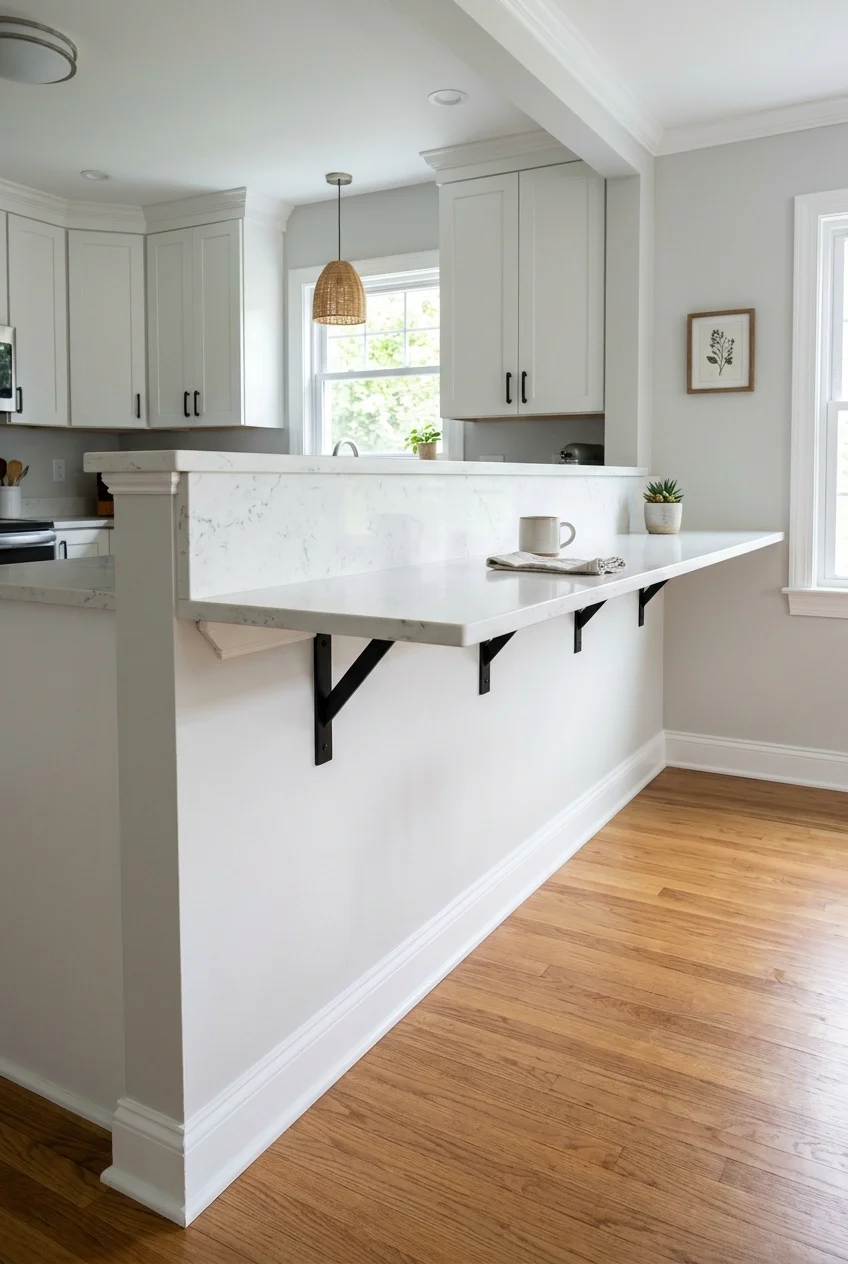
An existing half-wall can become a peninsula base when its location already suits the room. A wider counter adds a useful landing surface with limited demolition.
Confirm the wall is stable, level, and free of unresolved electrical or structural issues. The new top needs suitable support beyond the wall thickness.
- Verify the wall and concealed services.
- Choose the finished counter depth and edge.
- Plan brackets or concealed support with the fabricator.
- Patch adjoining finishes after installation.
9. Use an Open-Frame Peninsula in a Period Kitchen
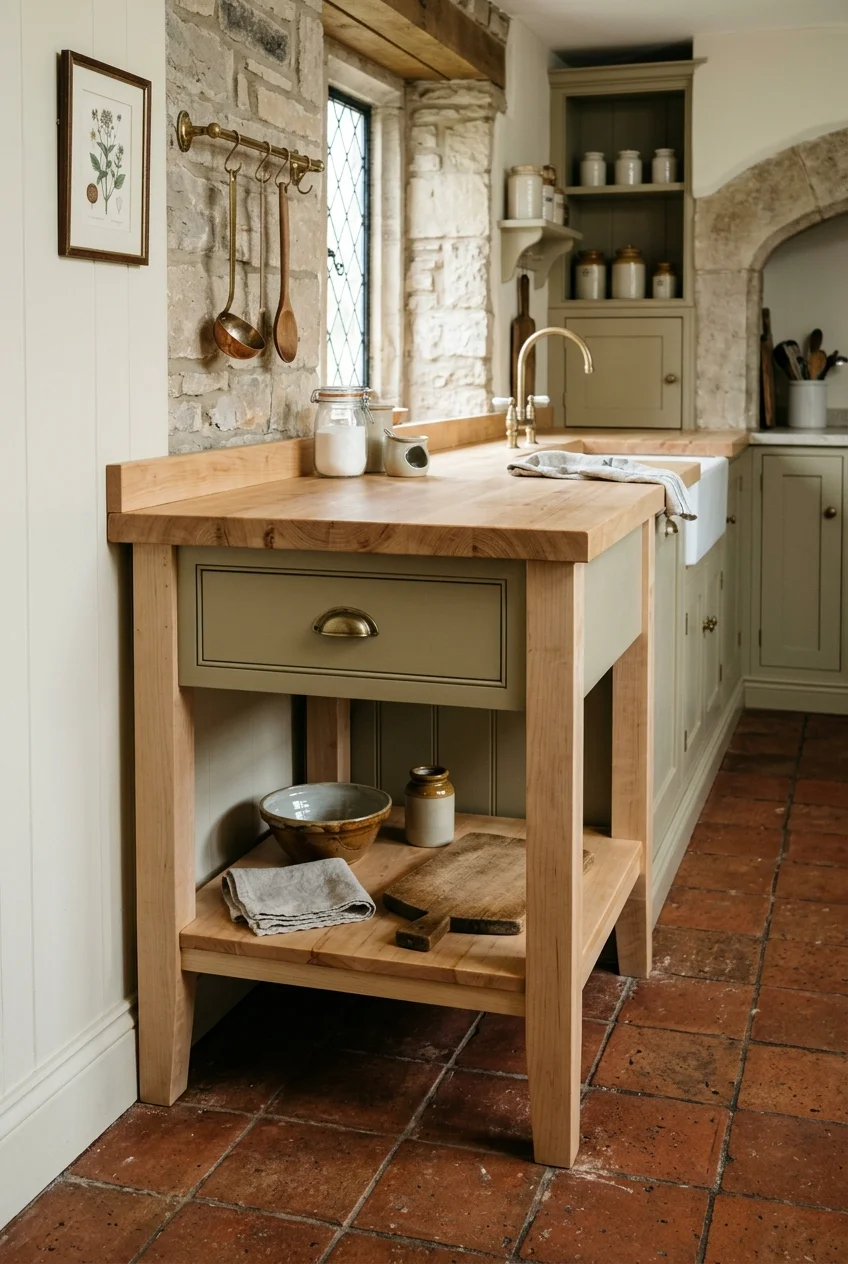
An open-frame peninsula can provide work space while preserving more visible floor. Turned legs or simple square posts give older kitchens a furniture-like alternative to cabinetry.
Add one shallow drawer and a low shelf only if both remain easy to reach. Too many rails and baskets can make the airy base feel crowded.
Anchor the attached end securely and choose a top suited to regular food preparation. The light appearance should not come at the expense of stability.
10. Stop the Peninsula Before a Back-Door Route
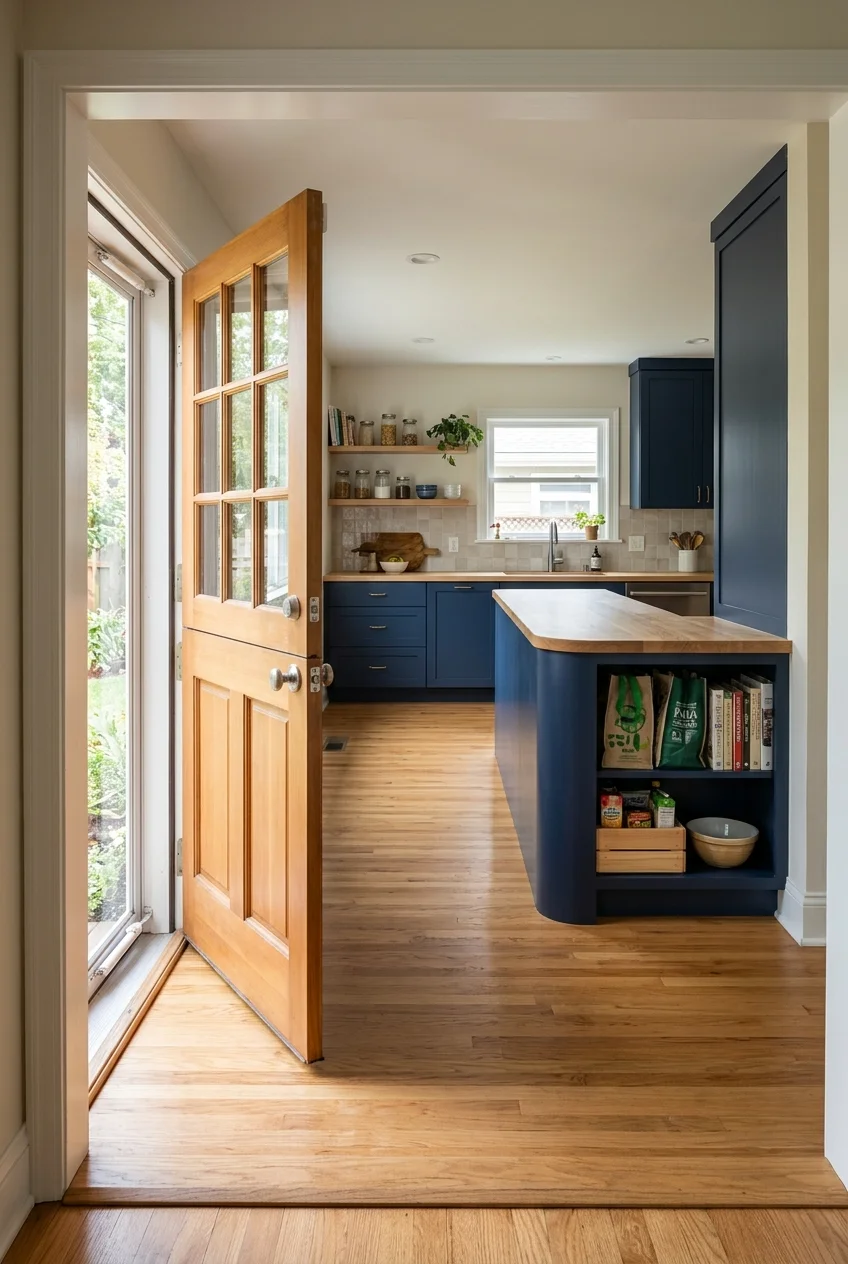
A peninsula beside a back entrance should end before groceries, pets, or garden traffic reach the work zone. Shortening it can improve daily use more than perfect symmetry.
Shift storage toward the attached end and finish the exposed tip carefully. A rounded edge or narrow display panel can make the shorter length look deliberate.
Practical tip Mark the door swing and walking route with painter’s tape, including the space occupied by bags. Test the path during a busy household moment.
Seating and Dining Ideas
Peninsula seating works when chairs occupy the social side rather than the active work aisle. Choose the seating pattern before finalizing overhangs, supports, and lighting.
11. Tuck Backless Stools Completely Under the Overhang
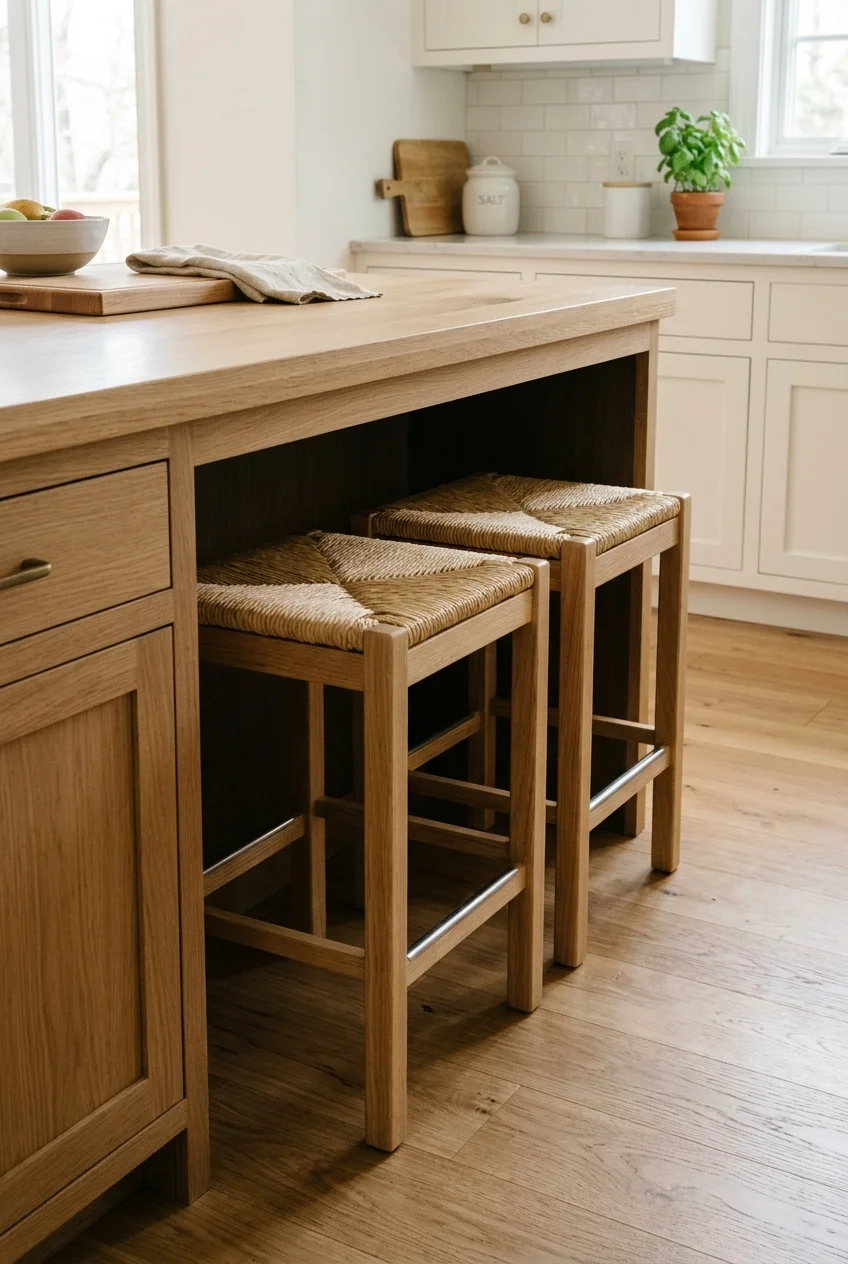
Backless stools can disappear beneath a peninsula and keep the adjacent route clearer. Measure their full depth and leg spread, not only the seat width.
A backless counter-height rush-seat stool (paid link) offers a compact profile; verify its dimensions against your overhang, counter height, and available knee space.
Place the stools on the room-facing side, away from ovens and dishwashers. A recessed bay helps keep legs contained when nobody is seated.
12. Put Two Seats at the Open End
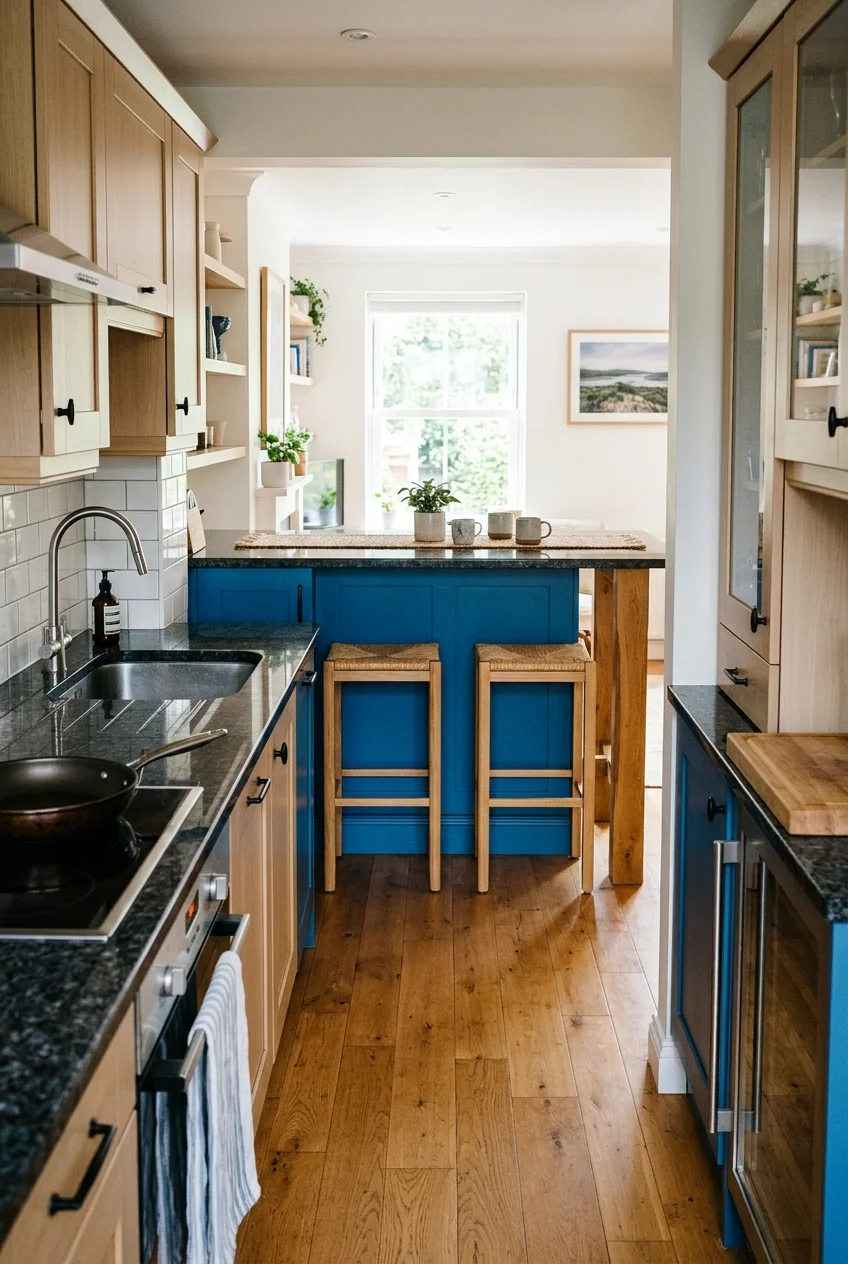
End seating keeps people away from the main working side and suits a peninsula beside a narrow aisle. Extend only the tip instead of the entire length.
Two stools can face the kitchen or angle slightly toward each other. Check that occupied seats do not block a doorway, refrigerator, or dining route.
Support the extended end according to the countertop material and projection. Decorative legs can add structure, but their placement must leave knees and feet comfortable.
13. Wrap Seating Around One Outer Corner
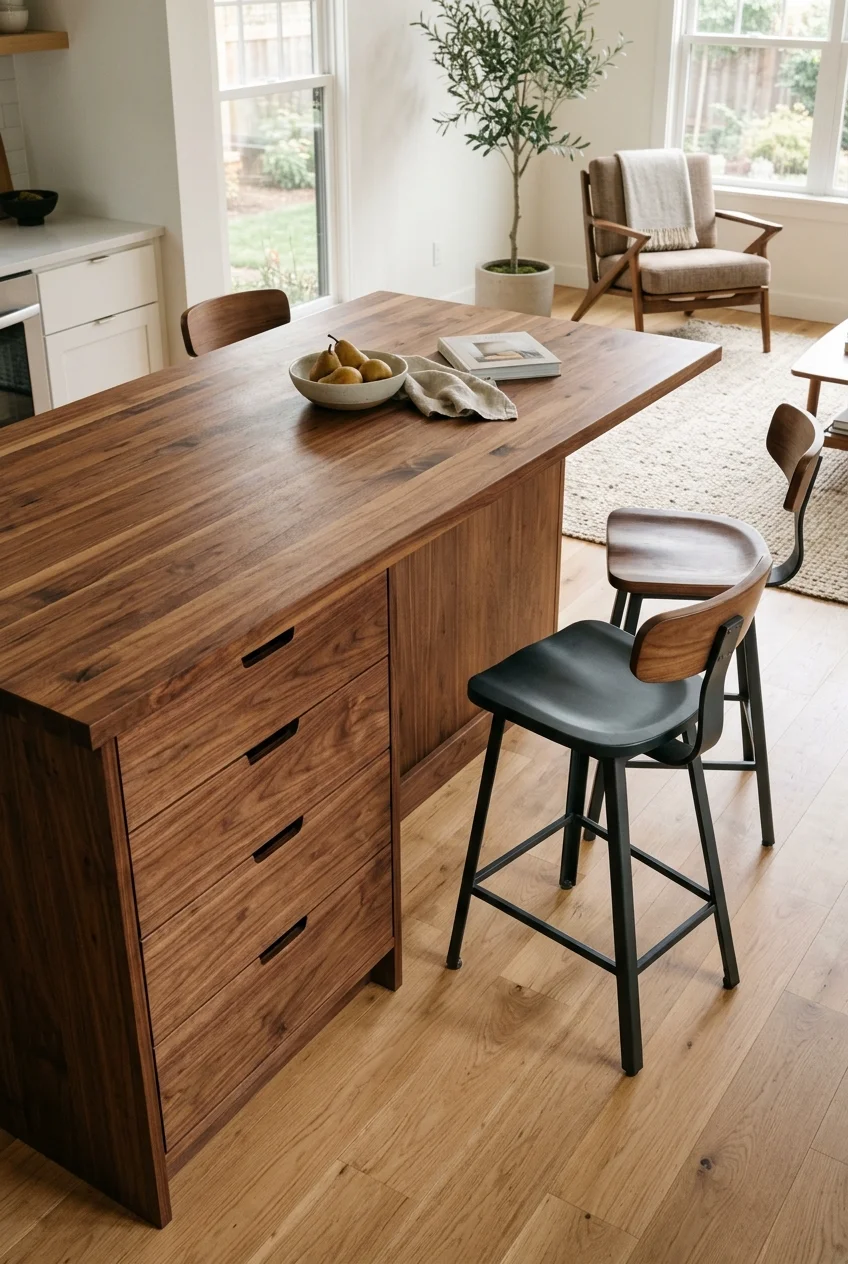
An L-shaped seating edge lets people face each other instead of sitting in one long row. Reserve the inside face for kitchen storage and work.
Keep the corner seat clear of bulky brackets and cabinet handles. The open room must have enough depth for both pulled-out stools and passing traffic.
- One stool along the long outer face
- One stool at the open end
- Uninterrupted drawers on the kitchen side
- Clear passage behind both occupied seats
14. Attach a Dining-Height Table to the End
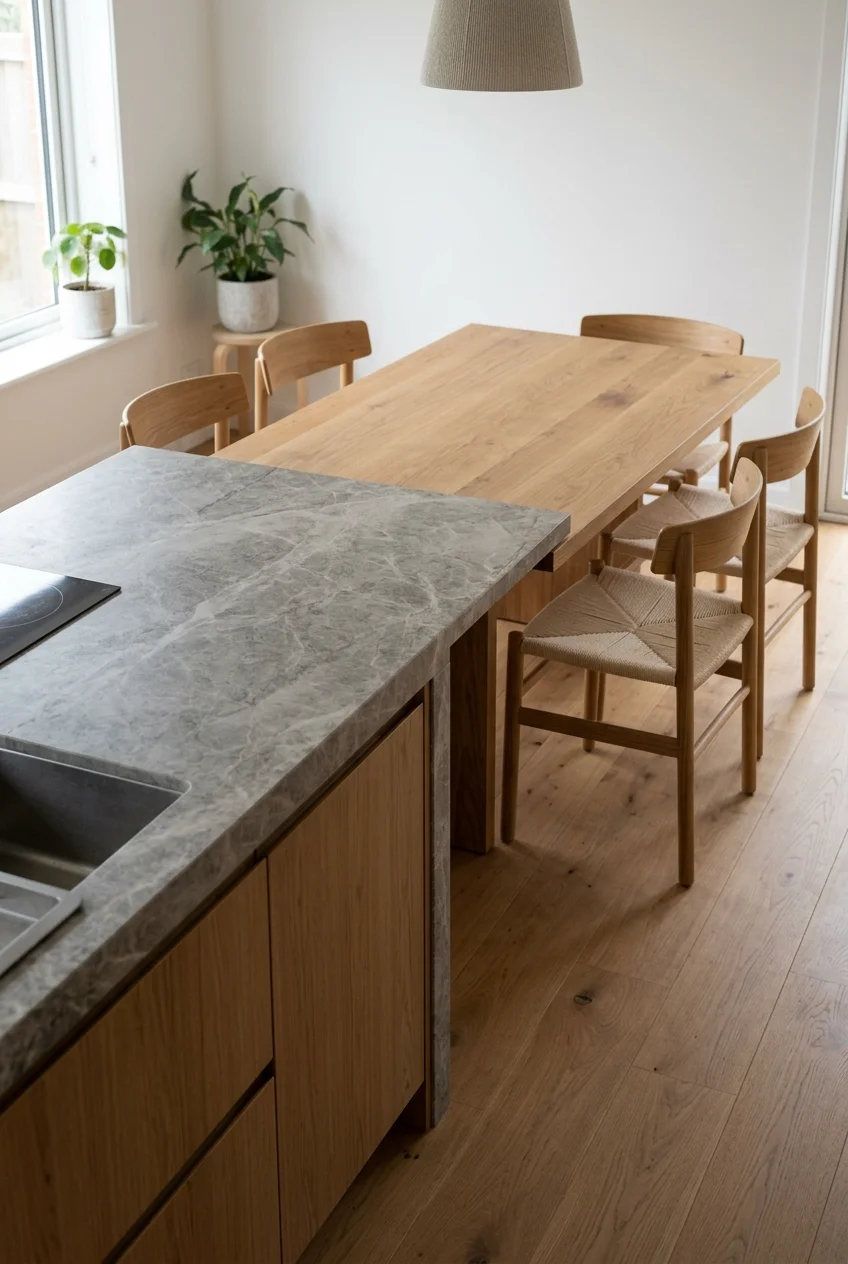
A table-height extension is more comfortable for longer meals than counter stools. Attach it beyond the prep zone so dining does not interrupt cooking.
Use a distinct material or thickness to clarify the change in function. A wood table joined to a stone peninsula can feel intentional and warmer.
Plan proper support and enough chair clearance on all occupied sides. The connection should read as one composition while allowing each surface to do its job.
15. Build a Banquette Beside the Peninsula
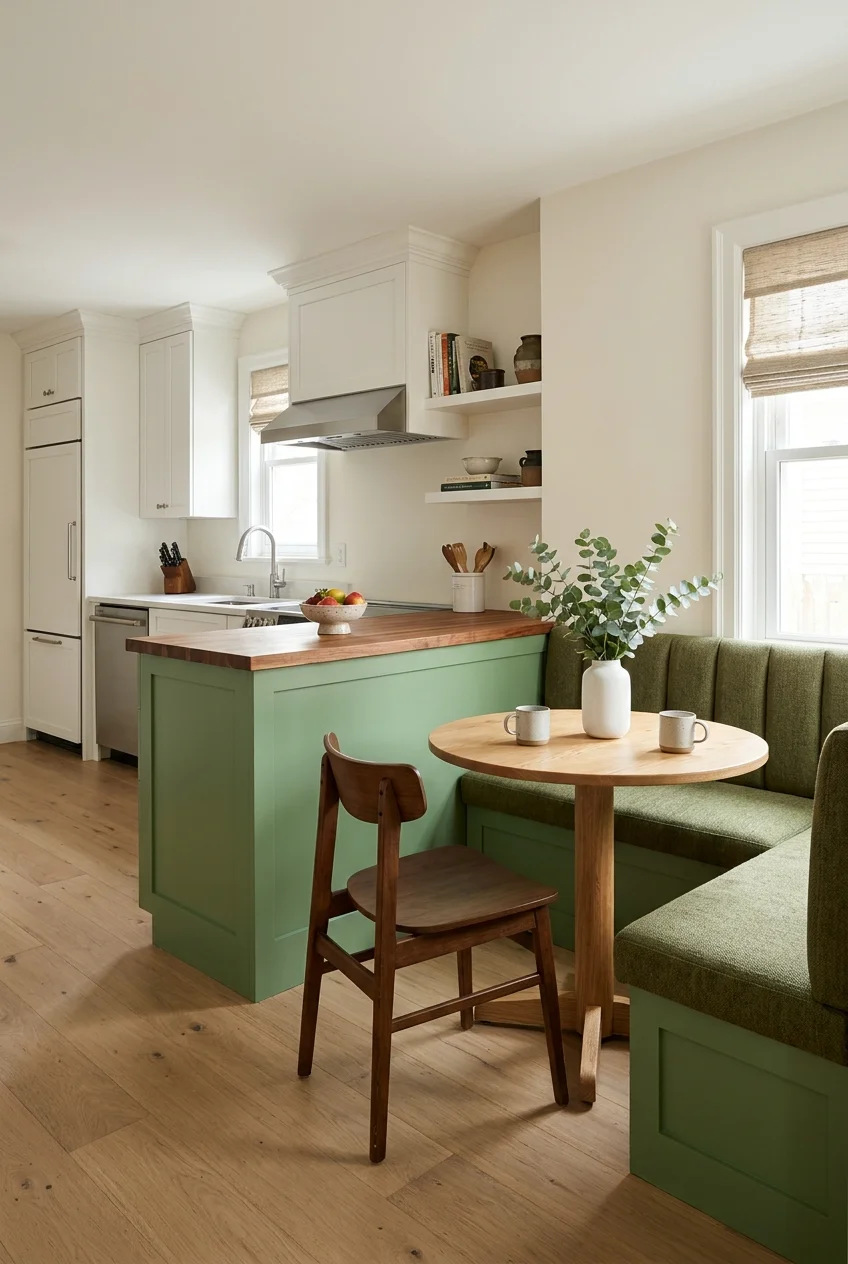
A banquette can turn the peninsula end into a compact breakfast nook without lining the work aisle with stools. Position the bench beyond the cooking zone.
Pair the bench with a small pedestal table so legs do not crowd the floor. Washable upholstery and a firm seat make everyday meals easier to manage.
Keep the peninsula counter separate from the tabletop. That distinction preserves a durable prep surface while giving the nook a more relaxed dining height.
Watch for Avoid trapping the bench behind an open dishwasher or oven door. Draw every appliance swing before fixing the table, seating, and peninsula dimensions.
16. Curve the Seating Edge for Conversation
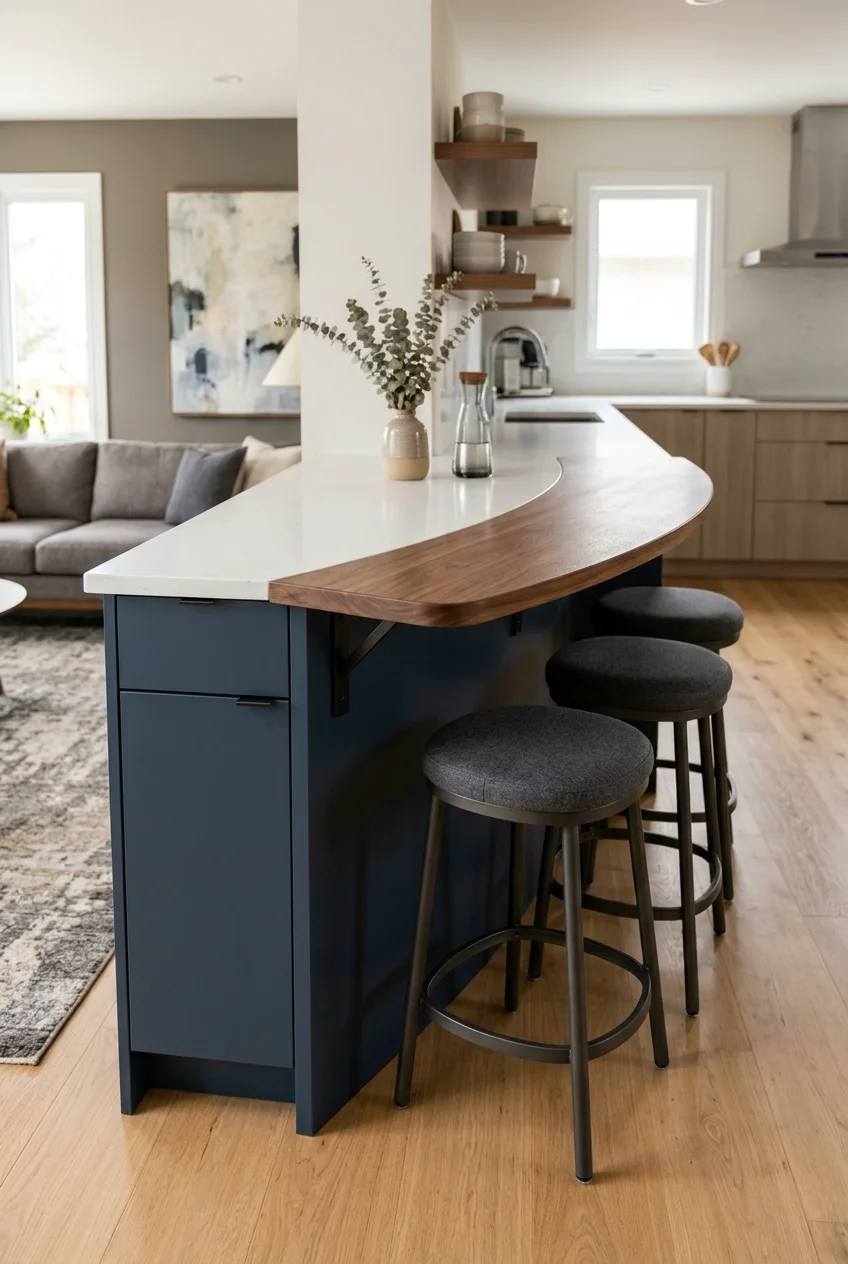
A shallow curved overhang lets two or three seats angle toward each other. Keep the working side straight so drawers and preparation space remain efficient.
The curve needs coordinated support beneath the slab and enough room behind occupied stools. It works best when the peninsula faces an open dining or living area.
Choose compact seats with narrow backs if the curve is modest. Oversized chairs can erase the circulation benefit and make the shape feel crowded.
17. Create One Quiet Perch at the Tip
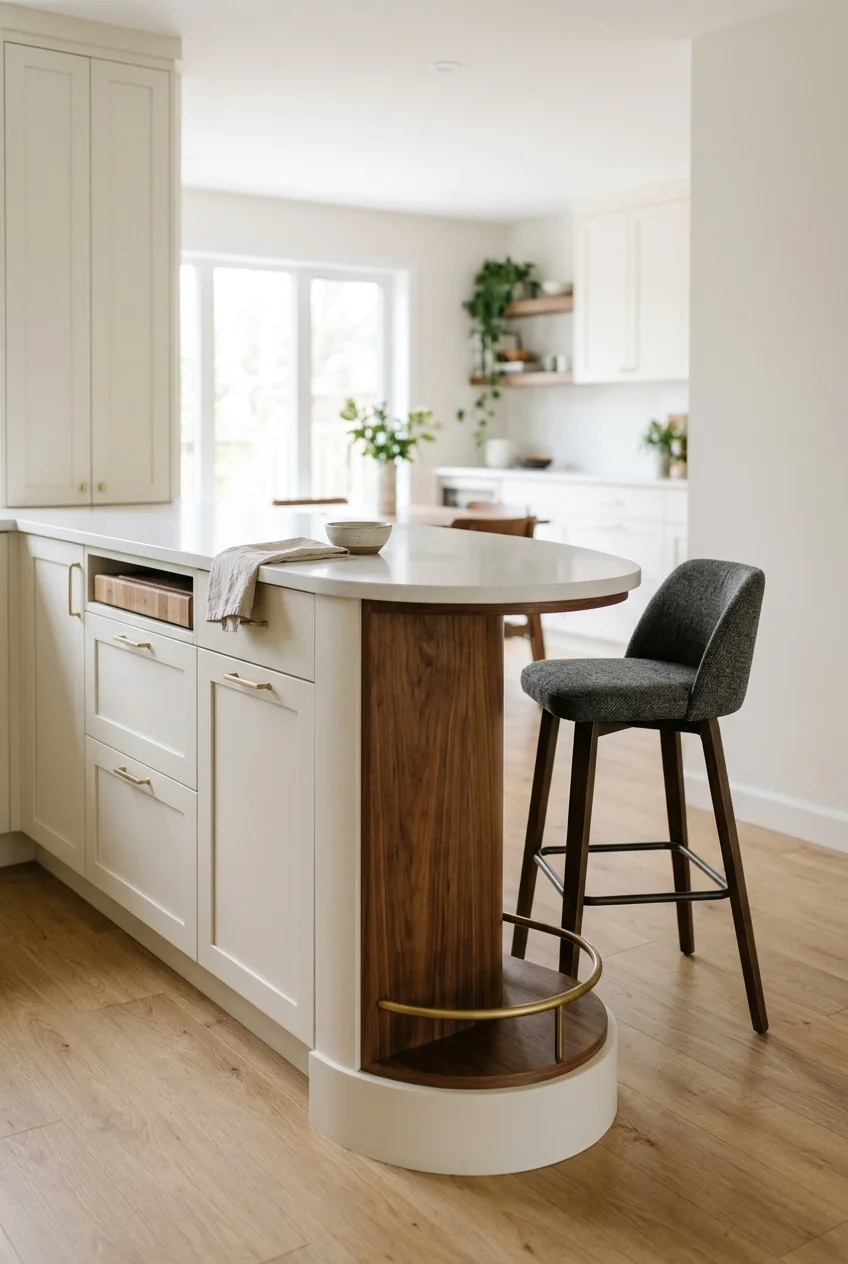
One seat at the open tip can support coffee, homework, or conversation without turning the peninsula into a dining bar. Keep the remaining sides work-focused.
A single open knee bay also preserves more cabinet space. Place it where the sitter can look into the room without blocking the busiest route.
18. Use a Raised Ledge to Screen Prep Clutter
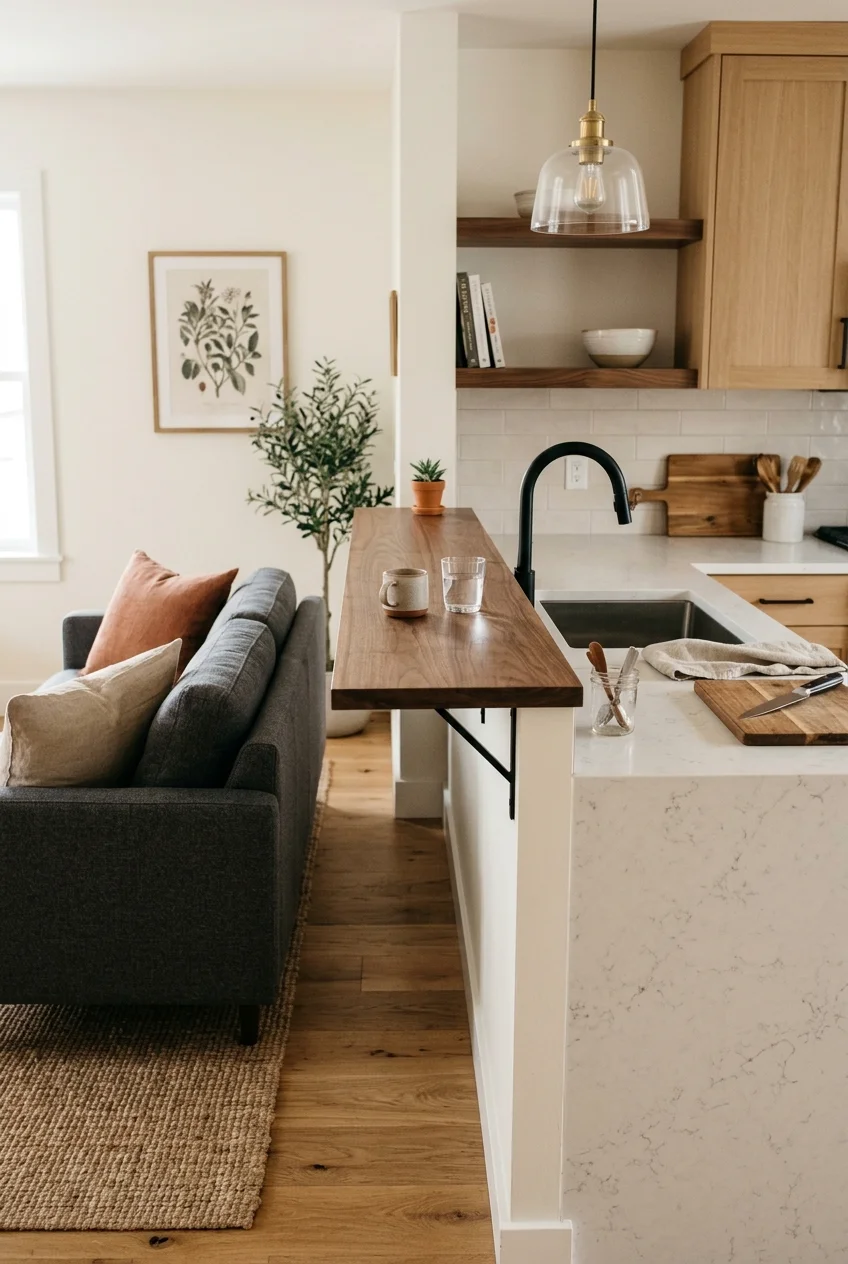
A narrow raised ledge can hide the sink edge or active prep surface from an adjoining room. Keep it shallow so the peninsula does not become bulky.
Use the ledge for drinks or brief conversation, not deep meal seating. The lower kitchen counter should remain the primary workspace with uninterrupted elbow room.
19. Choose One Continuous Counter Height
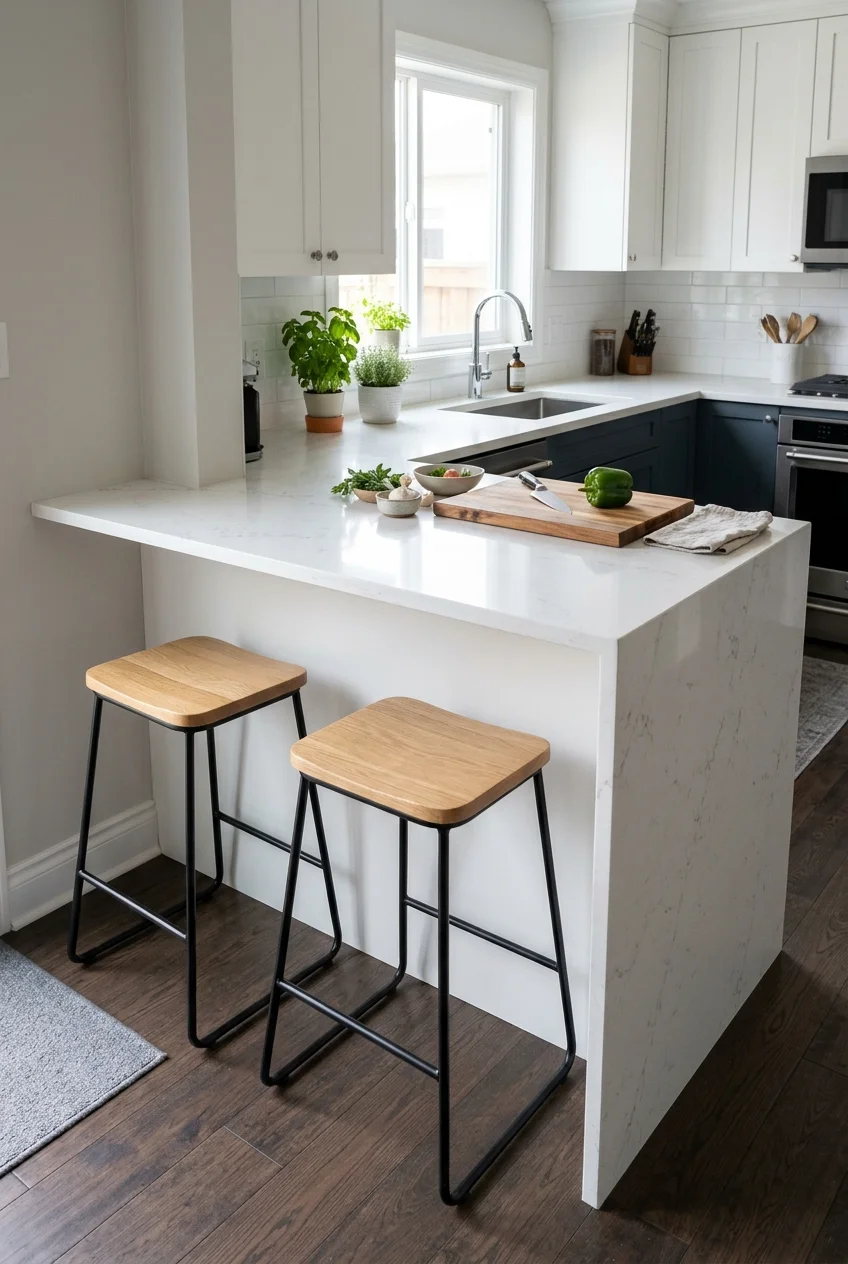
A single-level peninsula offers more flexible space for prep, serving, and casual seating than a bulky raised bar. The uninterrupted plane also looks calmer.
Separate activities through placement instead of height. Keep stools on the outer half, then reserve the kitchen half for chopping and landing hot cookware safely.
20. Add a Brass Foot Rail Beneath the Seating Side
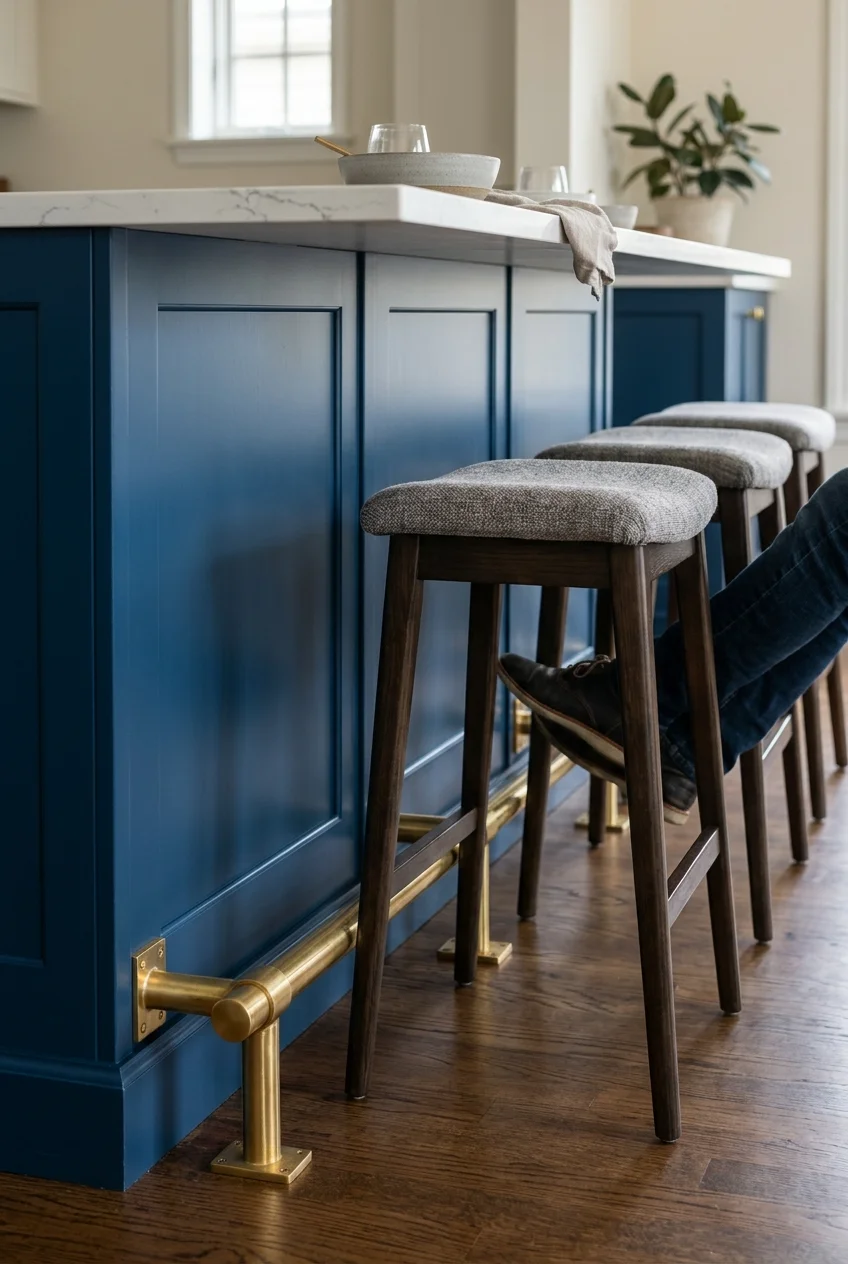
A foot rail gives counter-height seating a comfortable resting point and protects the finished panel from shoes. Mount it where seated feet naturally reach.
The rail and brackets need solid attachment behind the decorative face. Choose a finish that relates to existing hardware without requiring an exact match.
Storage and Organization Ideas
Peninsula storage should open toward the person who uses it and stay out of traffic. Mix deep working storage with selective shallow compartments instead of filling every face.
21. Use Wide Drawers on the Cooking Side
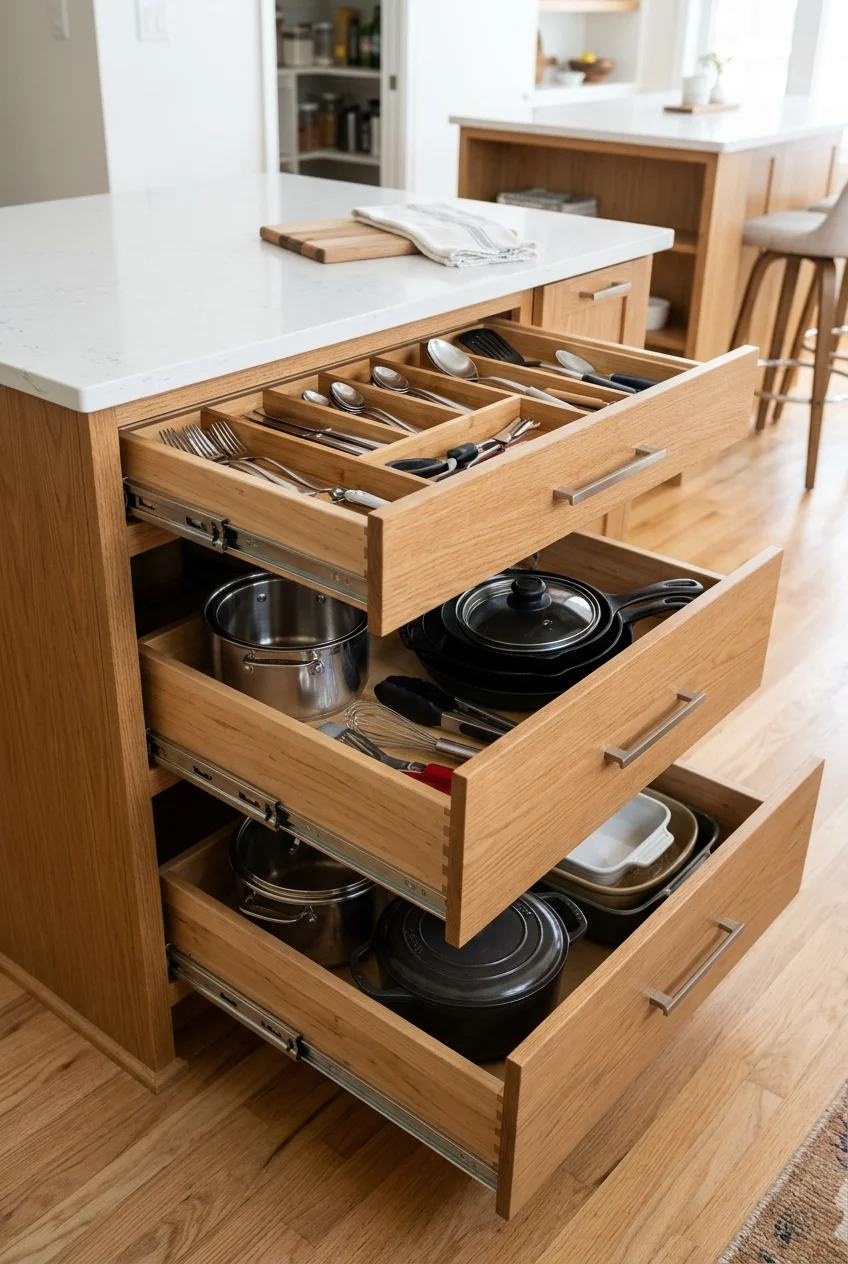
Wide drawers keep pans, bowls, and prep tools visible from above. Position them toward the cook so opening a drawer does not interrupt the social side.
Divide the top drawer for small utensils and reserve deeper drawers for cookware. Full-extension hardware is useful, but confirm load limits with the cabinet system.
Keep handles within the cabinet face or choose low-profile pulls near a narrow aisle. Projecting hardware can catch clothing at the busiest point.
22. Add Shallow Cabinets on the Room Side
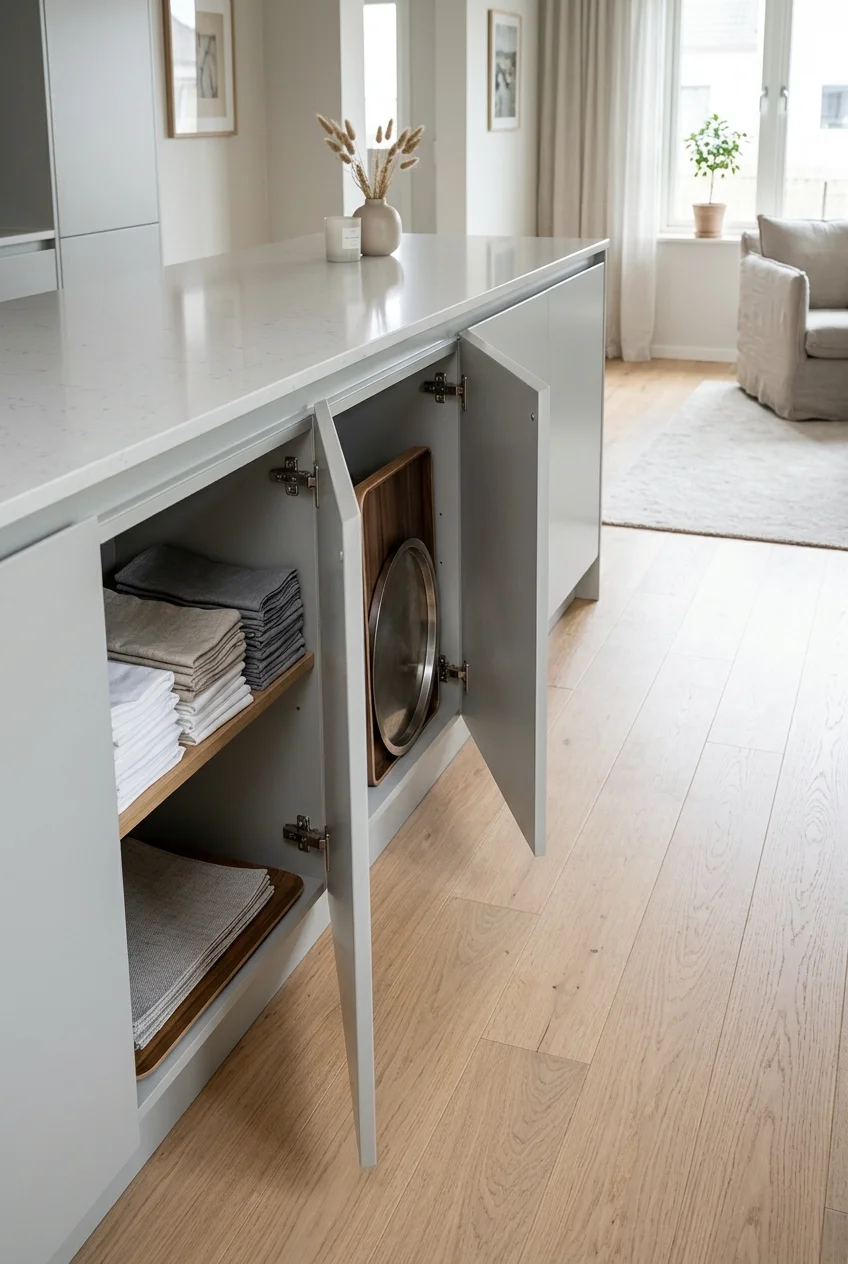
Shallow room-side cabinets can hold linens, serving trays, or occasional dishes without consuming the full peninsula depth. Use them only where circulation still works.
Touch latches or slim pulls keep the outer face smooth. Divide the interior by actual item height so shelves do not waste limited depth.
This storage is best for objects used outside active cooking. Frequently handled pots and tools should remain in deeper drawers facing the kitchen.
23. Recess a Cookbook Shelf Into the End
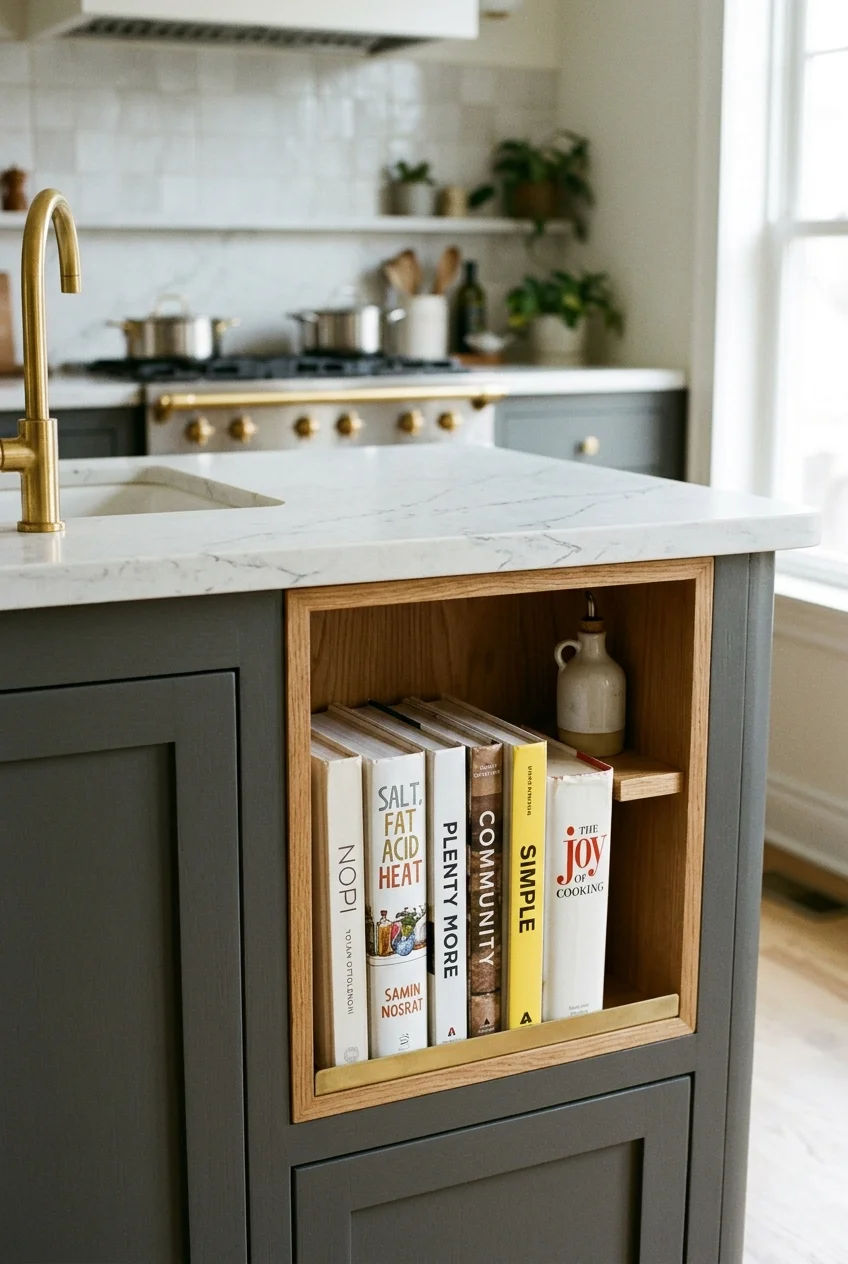
A recessed end shelf stores cookbooks without adding doors to a traffic path. Keep the opening shallow and size each shelf around the books you own.
Add a low retaining lip if the shelf faces a busy route. Keep paper away from splashing sinks, high heat, and packed visual clutter.
24. Stand Trays and Cutting Boards Upright
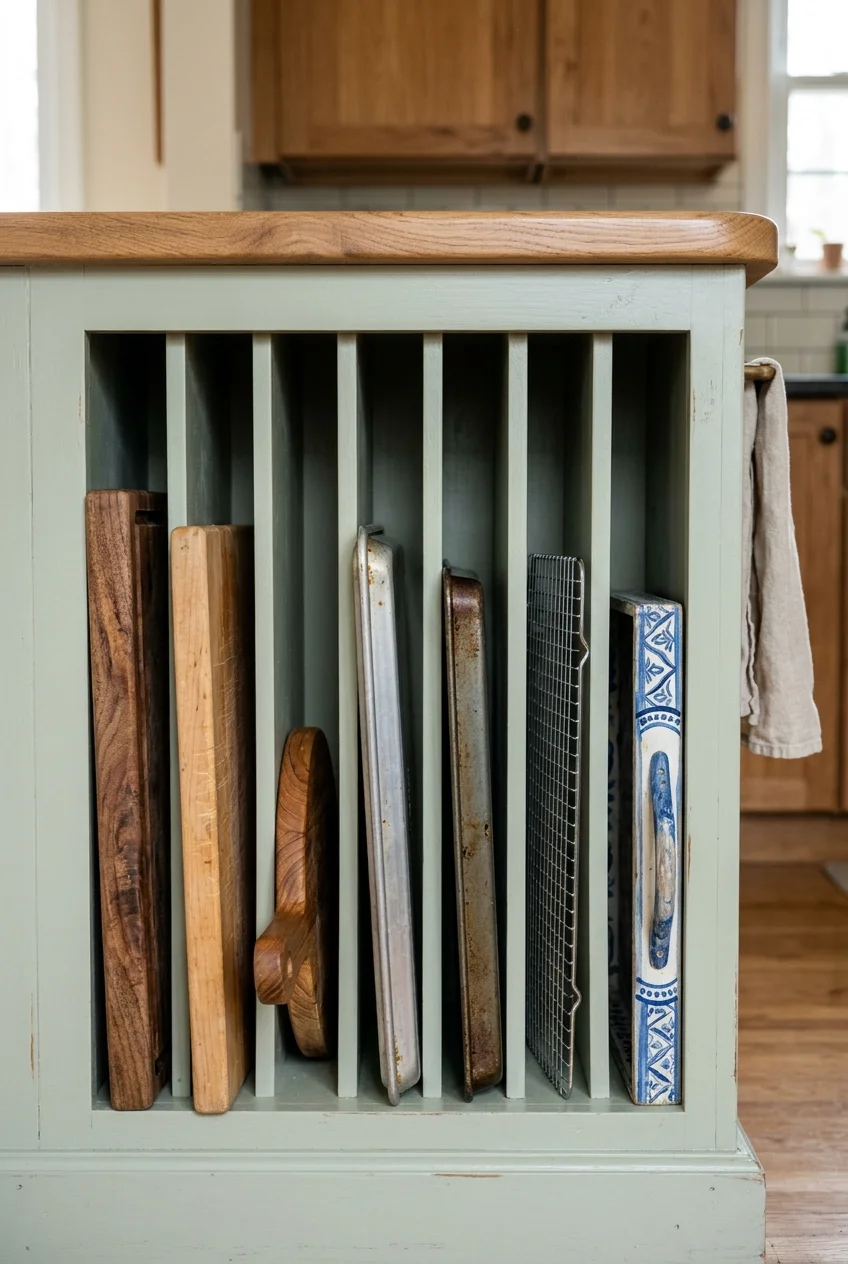
Vertical dividers keep trays, cutting boards, and cooling racks accessible without heavy stacks. Place the slots near the prep surface where those pieces are used.
Measure the tallest and widest items before setting divider spacing. Several useful bays beat many narrow slots that cannot accommodate a roasting pan.
- Everyday cutting boards
- Sheet pans and cooling racks
- Serving trays
- Muffin tins or pizza screens
25. Open One End for Everyday Bowls
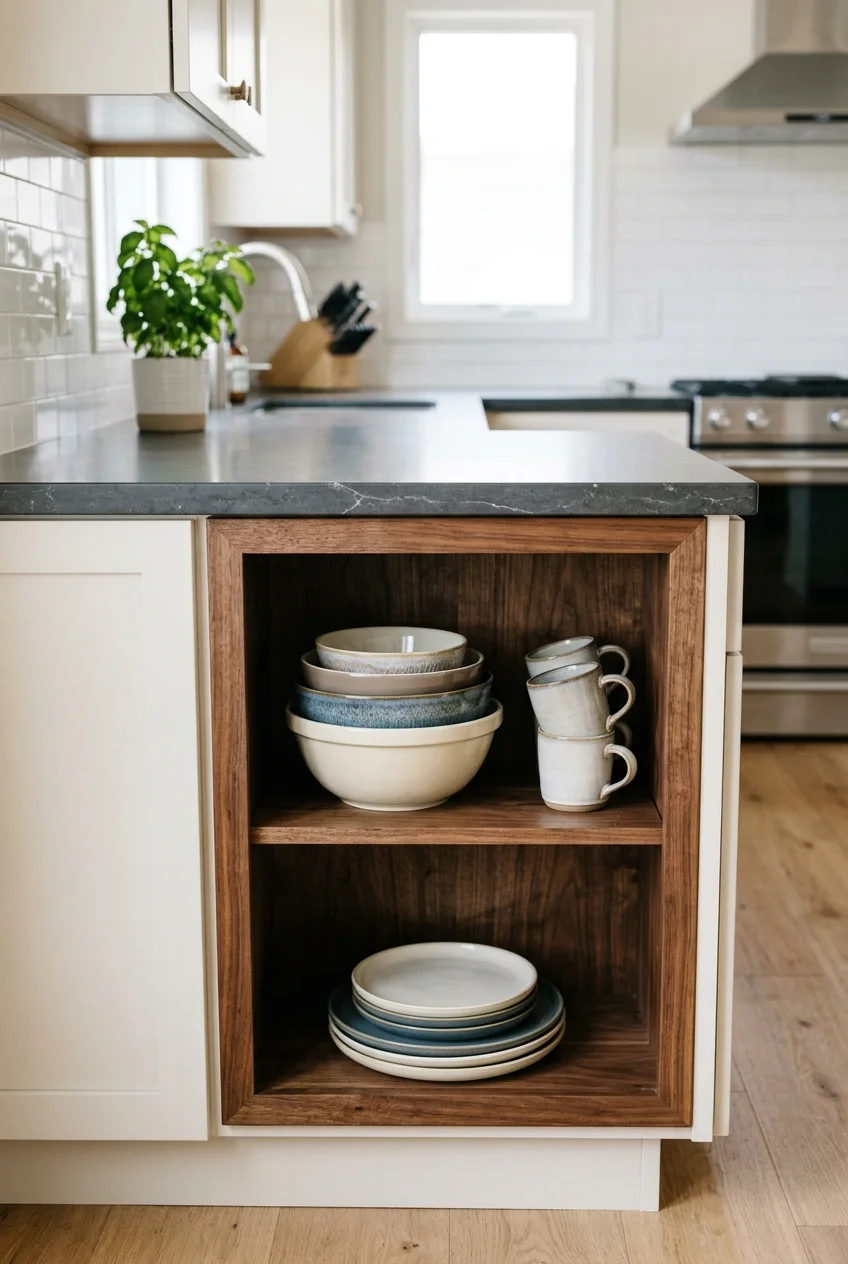
Open shelves at the peninsula tip keep mixing bowls or breakfast dishes close without adding another door swing. Limit the display to durable, frequently used pieces.
Carry the shelf material around the opening for a finished furniture-like frame. Keep it near the dining area rather than beside a greasy cooktop.
26. Build in a Trash and Recycling Pullout
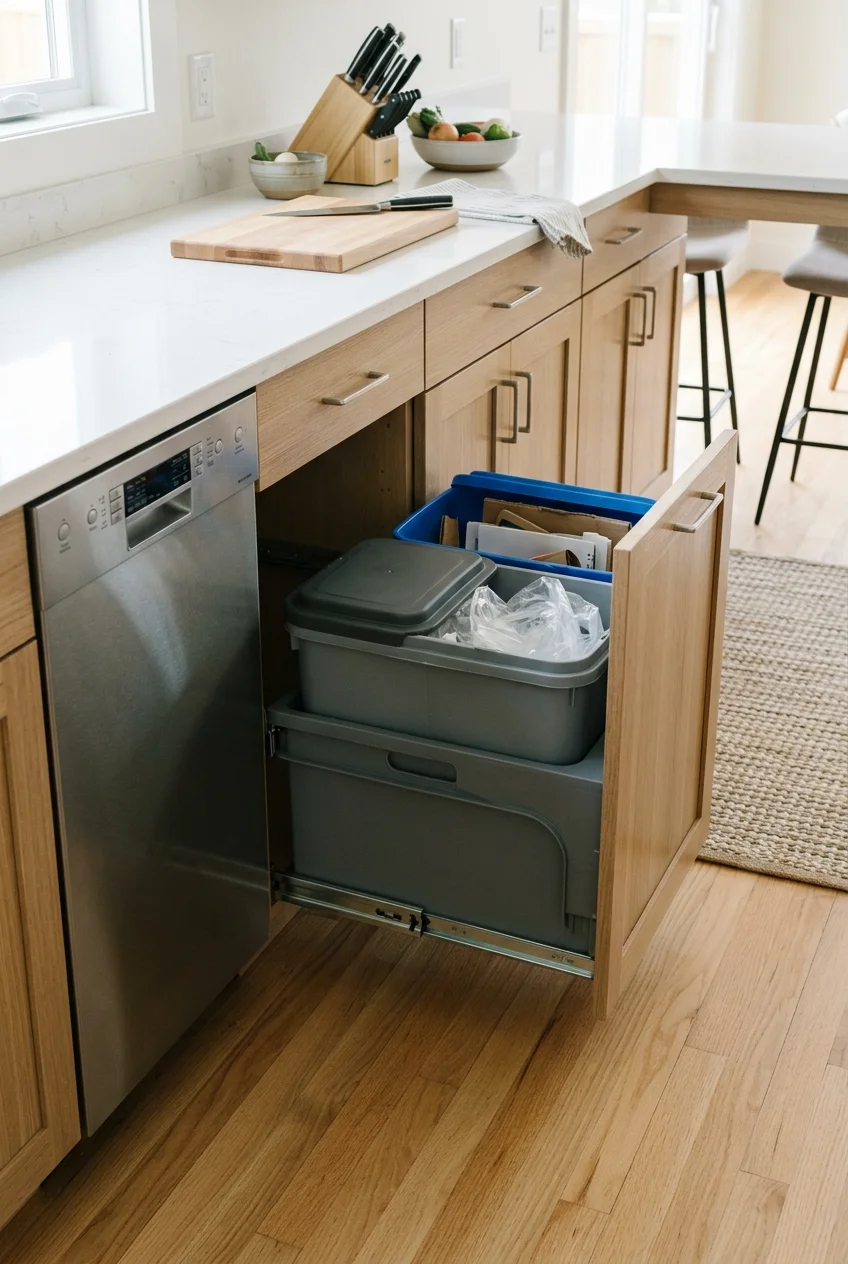
A pullout beside the main prep area lets scraps move directly from board to bin. Use separate containers only if the cabinet width supports easy removal.
Position the handle where it can be reached without crossing an open dishwasher. The drawer must clear adjacent doors, stool legs, and the peninsula end.
Choose washable interior surfaces and leave room to lift each bin vertically. An overly tight cabinet makes liner changes frustrating and encourages spills.
27. Create a Recessed Pet-Feeding Niche
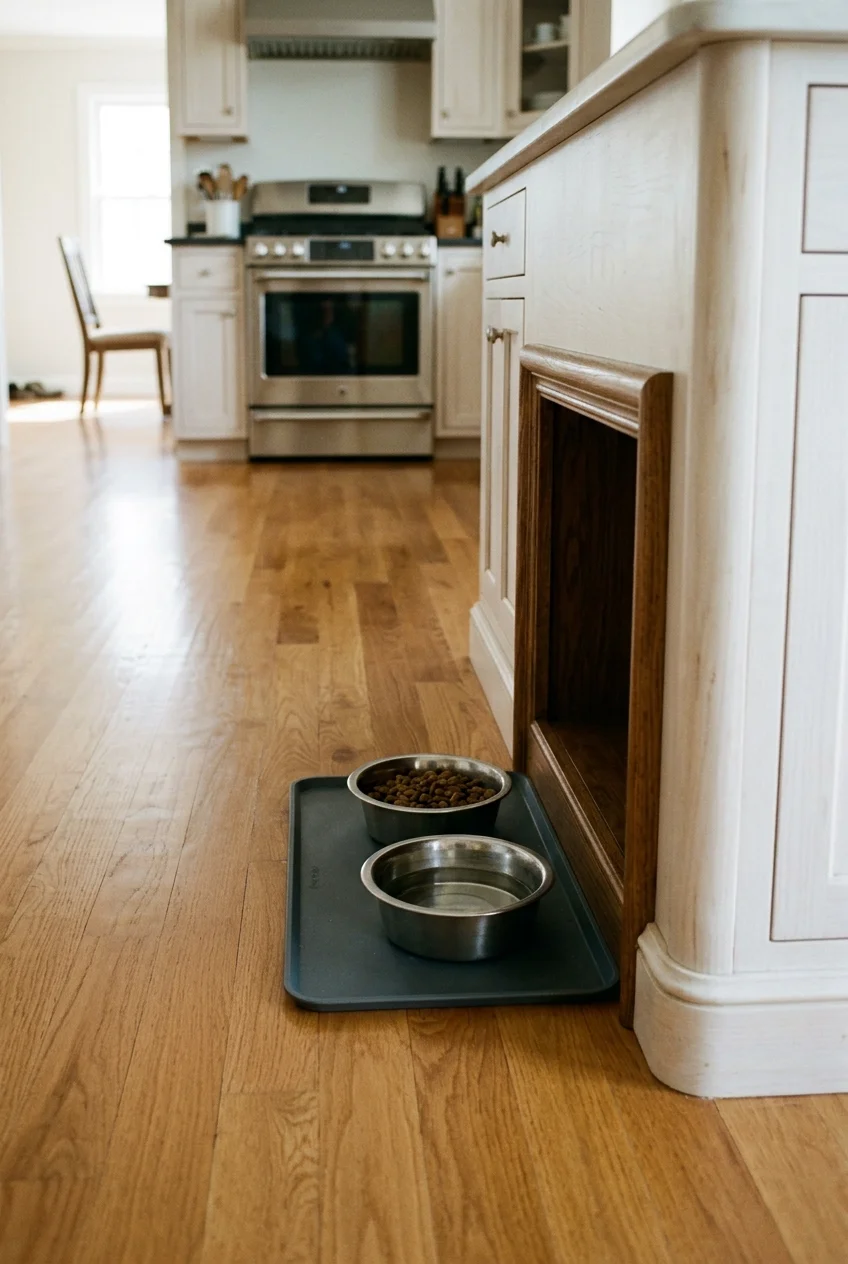
A low niche can keep pet bowls from drifting into the main walkway. Locate it at the quiet end, away from hot appliances and food preparation.
Use a removable waterproof tray and bowls that lift out for washing. Rounded trim around the opening avoids sharp edges near collars and shoulders.
The niche should suit the animal’s comfortable posture and surrounding floor space. Skip it if feeding would place the pet in a busy turning zone.
28. Hide Charging Inside a Shallow Drawer
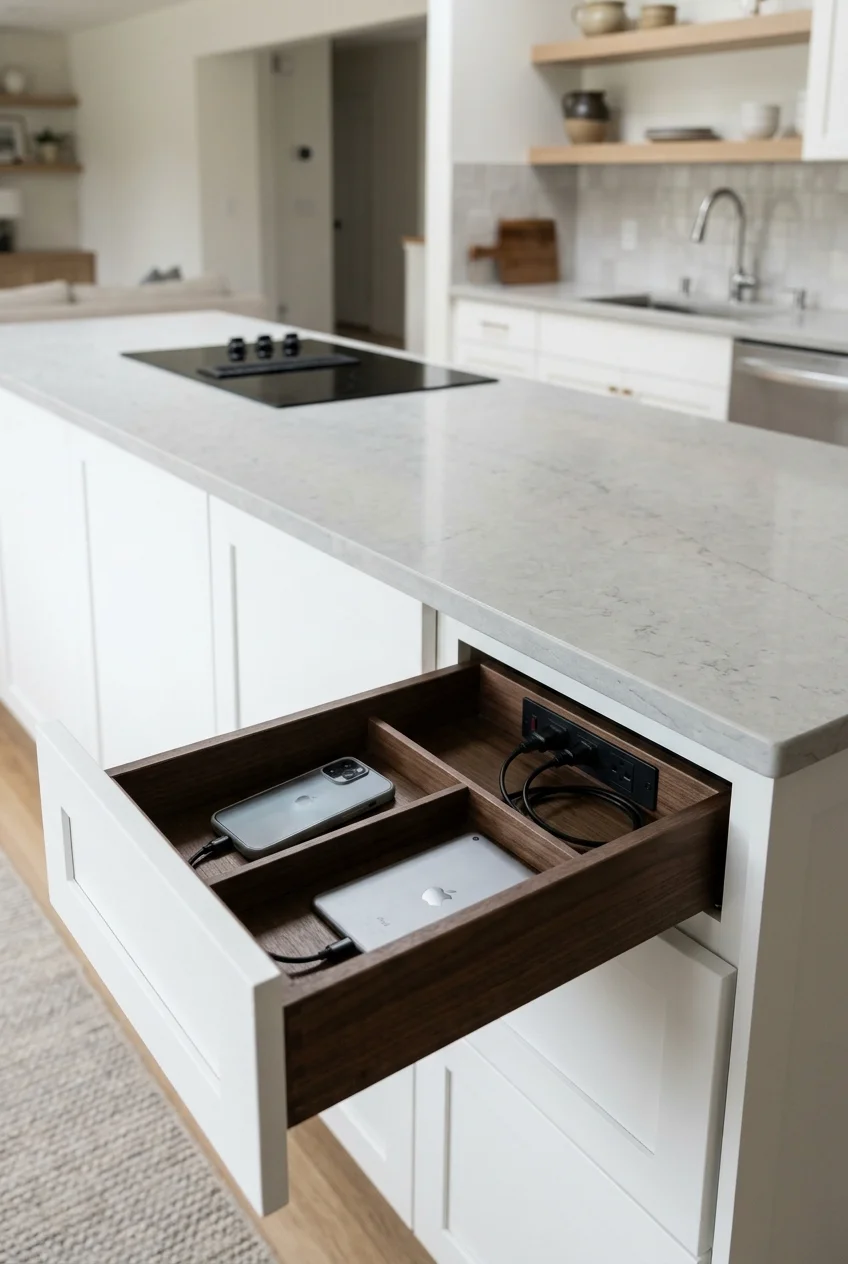
A shallow drawer can keep phones and tablets off the food-preparation surface. Place it on the room side where charging does not compete with cooking tools.
Use only a listed in-drawer charging system installed according to its instructions. A qualified electrician should address power routing, ventilation, and local requirements.
Add dividers so cords stay separated and devices lie flat. Keep the drawer dry and away from sinks, spills, and heat-producing appliances.
29. Double a Cabinet Shelf Without Remodeling
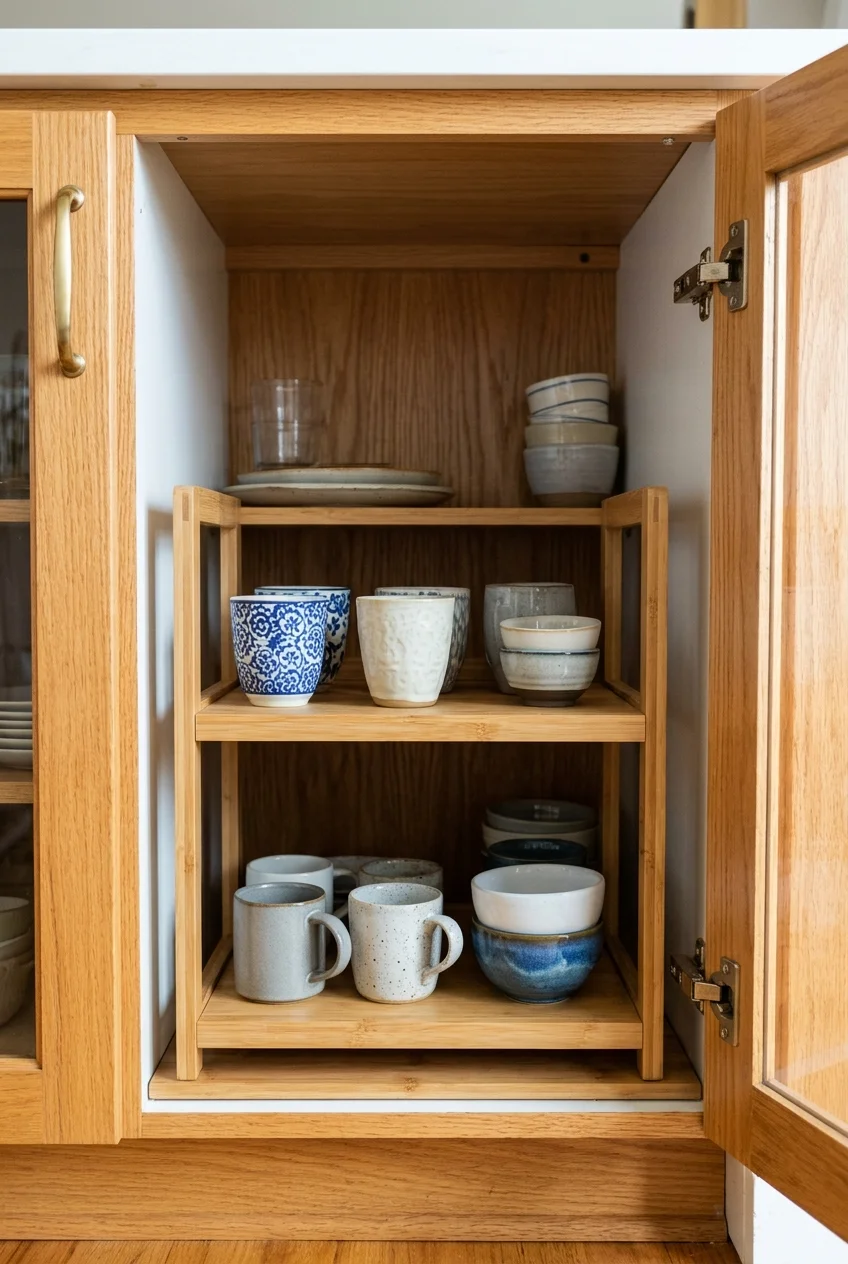
A freestanding shelf insert can make a tall peninsula cabinet easier to use without changing the cabinet box. It suits cups, small bowls, or short pantry containers.
This stackable bamboo cabinet shelf (paid link) measures 15 5/8 by 10 by 6 1/4 inches; verify the opening, hinges, and stored items before ordering.
Place heavier pieces on the cabinet floor and lighter items above. The insert should sit level, remain stable, and leave door hardware unobstructed.
30. Show Favorite Dishes Behind Ribbed Glass
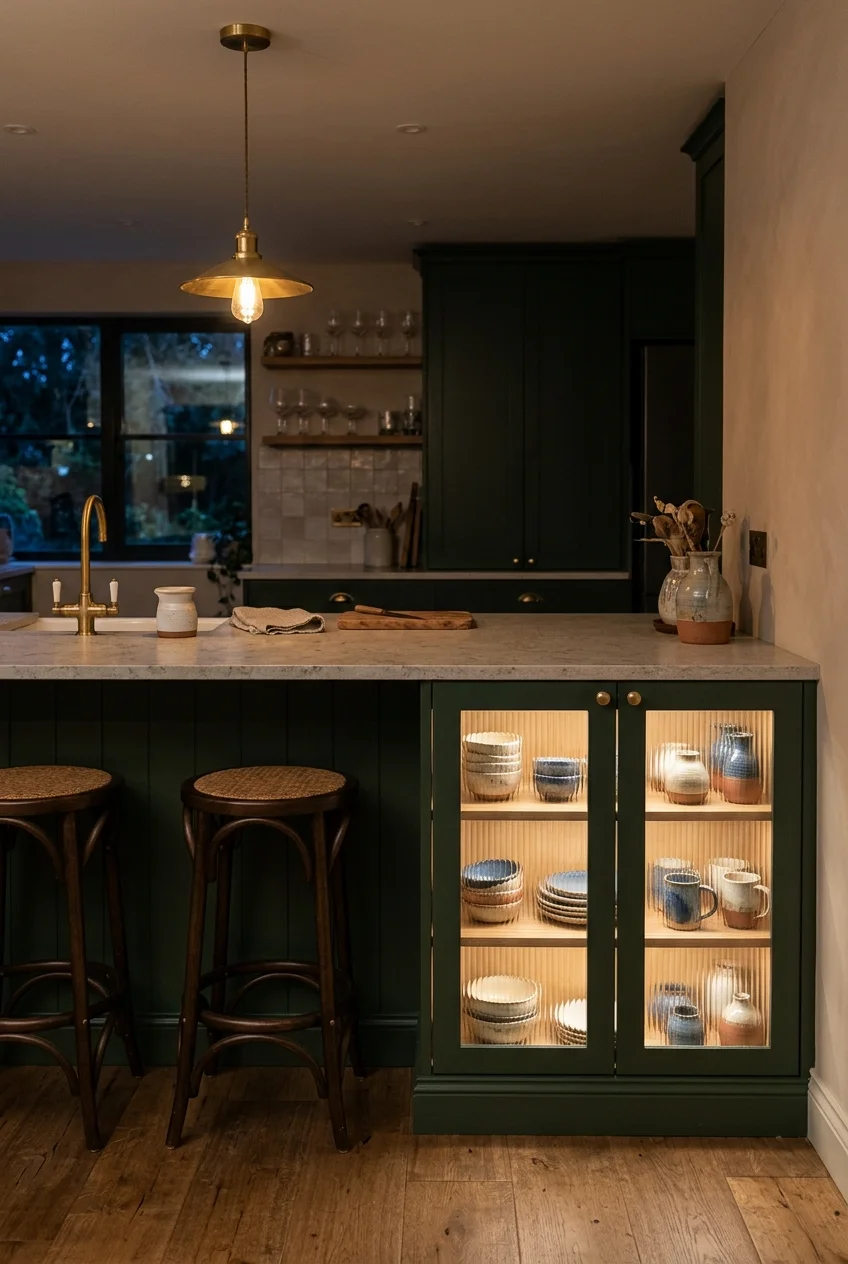
Ribbed-glass doors can lighten the room-facing side while softening visual clutter. Use them for attractive dishes, not miscellaneous pantry overflow.
Choose shelves deep enough for the displayed pieces and keep transparent doors away from kicking feet. An unobstructed end bay works better than the seating zone.
Work Zones and Appliance Ideas
Plumbing and appliances can make a peninsula hardworking, but they also add clearances, utilities, and maintenance. Include them only when the resulting workflow genuinely improves.
31. Place the Main Sink Slightly Off Center
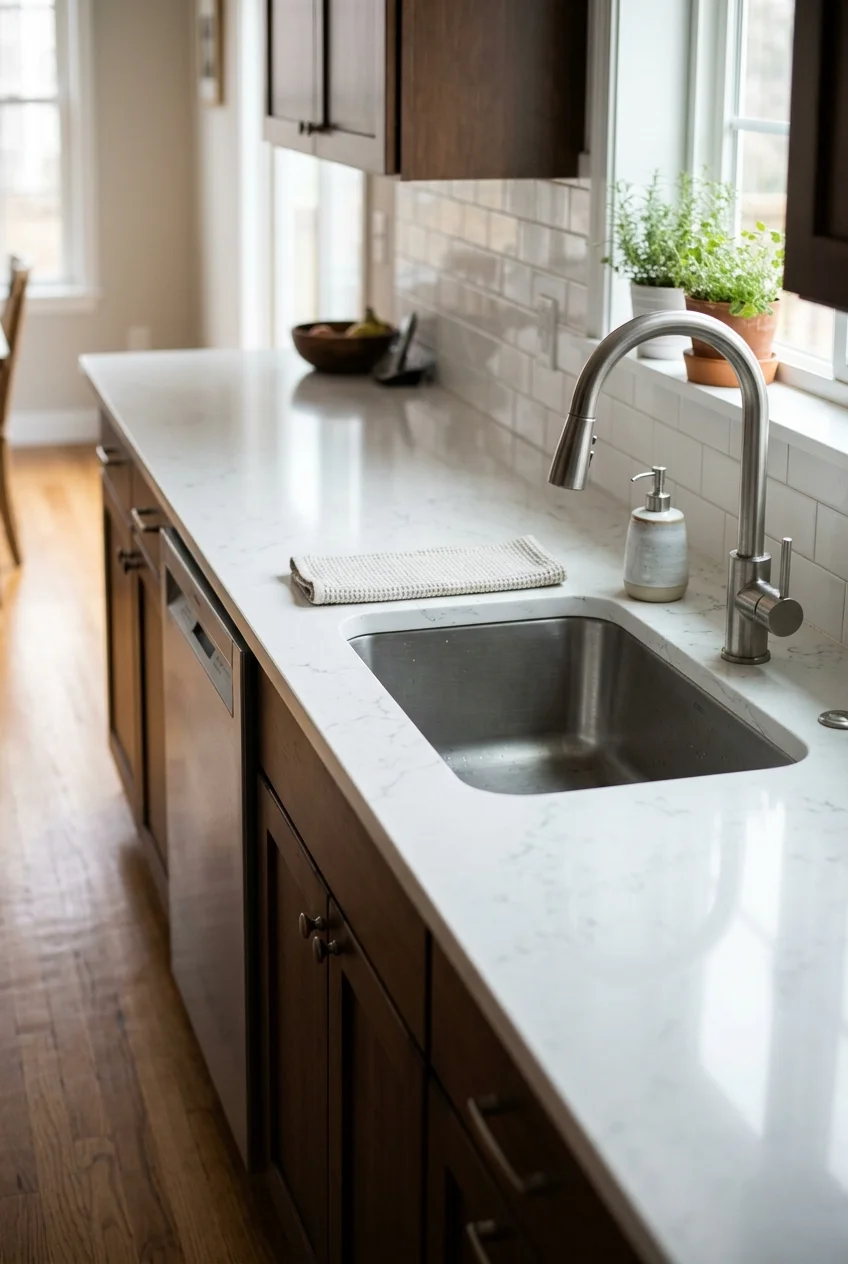
An off-center sink preserves a longer uninterrupted landing and prep area on one side. Choose the side that best connects the refrigerator, range, and cleanup storage.
Keep the faucet, basin, and dishwasher within a coherent cleanup zone. The counter must stop cleanly at the sink opening, with usable landing space nearby.
Avoid seating directly behind a busy cleanup sink unless the peninsula is deep enough to separate splashes, dishes, and comfortable knee room.
Plan soap, towels, waste, and dish storage within one turn of the basin. A beautiful sink placement still fails when cleanup tools live across the aisle.
Planning note Confirm plumbing routes, cabinet width, faucet reach, and dishwasher position before ordering stone. Moving a cutout later is rarely a simple correction.
32. Use a Small Prep Sink at the Far End
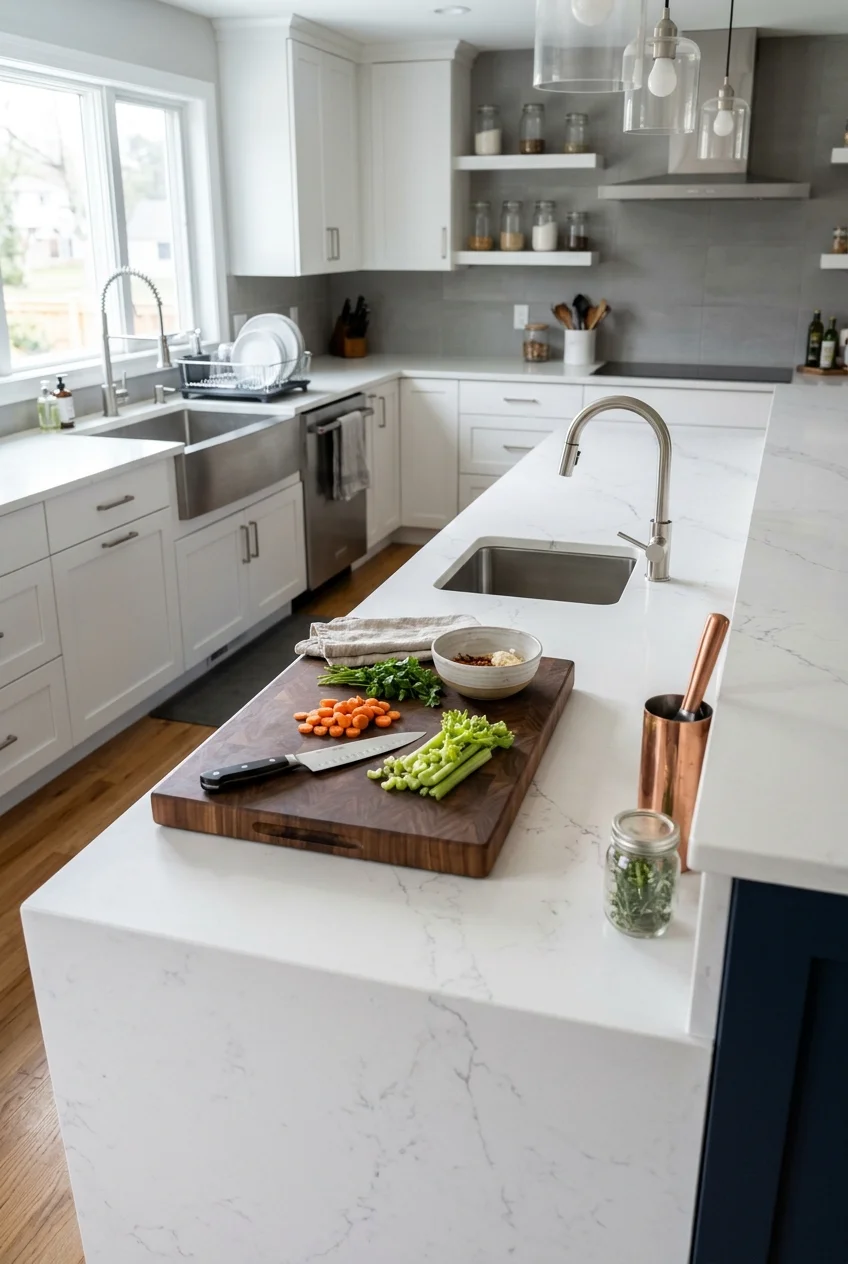
A compact prep sink can support produce washing or baking when the main cleanup sink is elsewhere. Place it near one end to protect continuous workspace.
This addition makes sense only when plumbing and work patterns justify it. A second sink that collects dishes can reduce rather than improve useful counter area.
Specify a faucet scaled to the basin and leave a landing zone beside it. Keep electrical outlets and seating appropriately separated under local requirements.
33. Keep the Dishwasher Beside the Sink, Not Across the Aisle
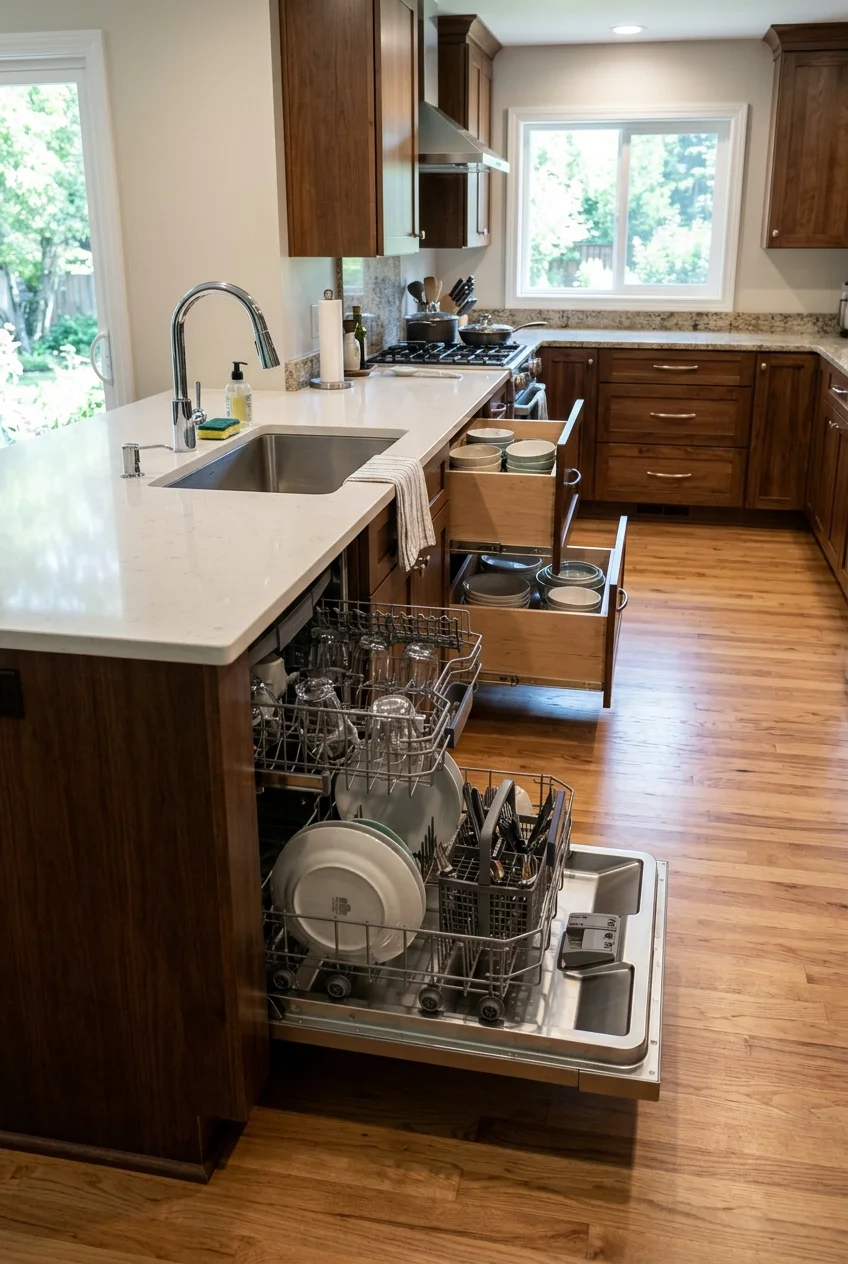
A dishwasher beside the peninsula sink keeps plumbing and cleanup in one zone. The open door should not trap the cook or block the only route.
Store everyday dishes in nearby drawers or cabinets so unloading requires fewer steps. Avoid placing stool legs directly in front of the dishwasher opening.
- Draw the dishwasher door fully open.
- Mark the standing space used while loading.
- Check the opposite cabinet and main walkway.
- Locate dish storage within an easy turn.
Panel-ready fronts can reduce visual interruption on the room side, but service access still matters. Follow the appliance manufacturer’s installation and ventilation instructions.
A handle or recessed pull must remain reachable beside the sink. Check that adjacent drawer hardware cannot collide with the open dishwasher door.
34. Center an Induction Cooktop Only in a Generous Peninsula
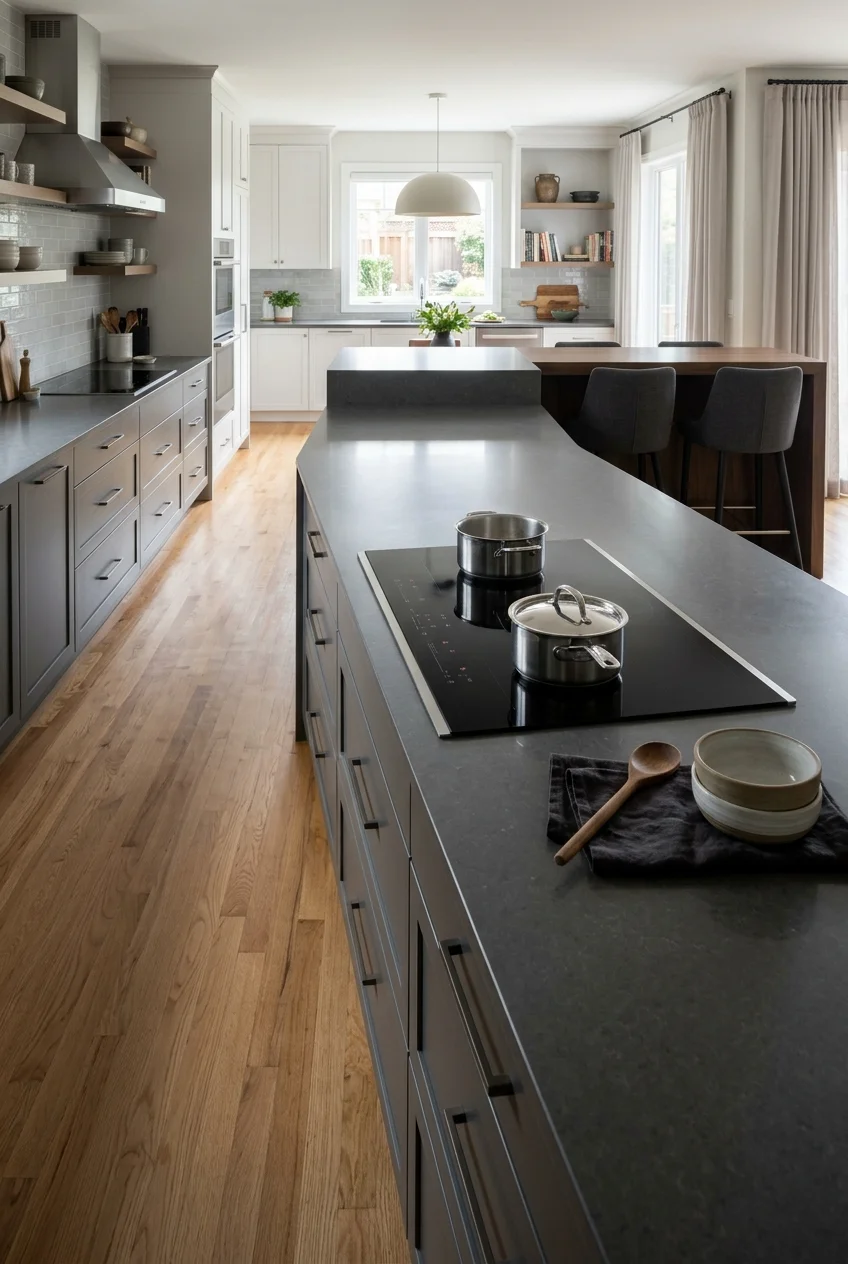
A peninsula cooktop can face the room, but it needs landing space, ventilation, safe circulation, and separation from seating. Do not force it into a narrow return.
Induction keeps the surface visually simple, yet the electrical circuit and manufacturer clearances remain renovation decisions. Coordinate cabinetry, equipment, and ventilation before ordering materials.
Deep drawers beneath can store compatible cookware when the appliance allows that configuration. Keep handles and frequently used tools away from the seating side.
Ventilation may involve a hood above or an approved downdraft system, depending on the equipment and room. Treat that choice as infrastructure, not decoration.
Provide a nearby landing zone for hot pans without crossing the circulation path. Decorative objects and pendant shades should stay outside the active cooking area.
- Manufacturer-required clearances and cabinet configuration
- Appropriate ventilation strategy
- Landing space on both sides
- Protected route behind the cook
- No seats beside the active cooking zone
Safety note Have the layout reviewed by qualified kitchen, electrical, and ventilation professionals. A styled photograph cannot establish code compliance or safe installation.
35. Put the Microwave at the Open End
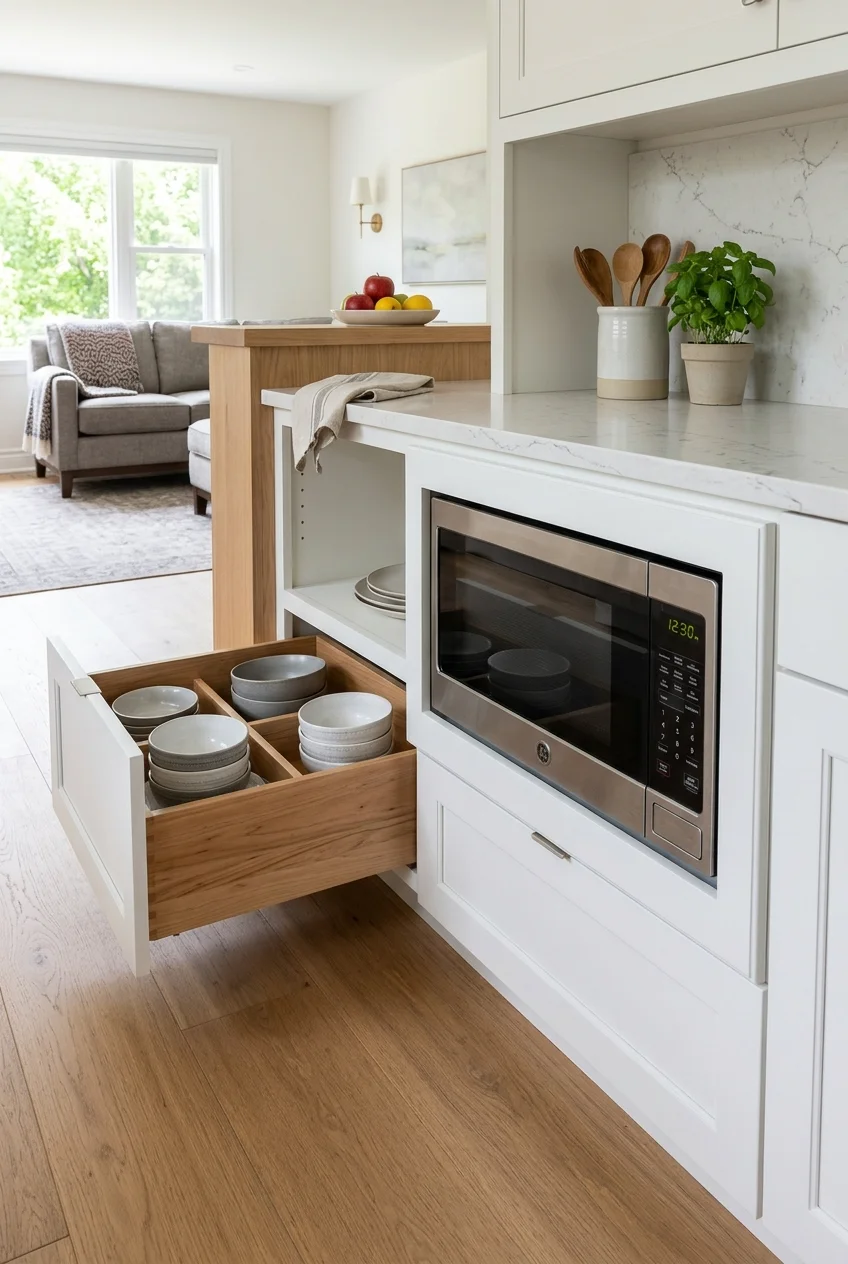
An end-facing microwave can free perimeter counter space and let someone reheat food without entering the main work aisle. Keep its door away from traffic.
Choose a model approved for the intended built-in configuration and follow its ventilation instructions. The shelf height should suit the people who regularly use it.
A surrounding trim frame can integrate the appliance, but preserve required air openings. Store microwave-safe bowls nearby so the zone works without crossing the kitchen.
Leave a stable landing surface close to the appliance for hot containers. The open door and a person standing there should not close the main passage.
36. Face a Beverage Refrigerator Toward the Living Room
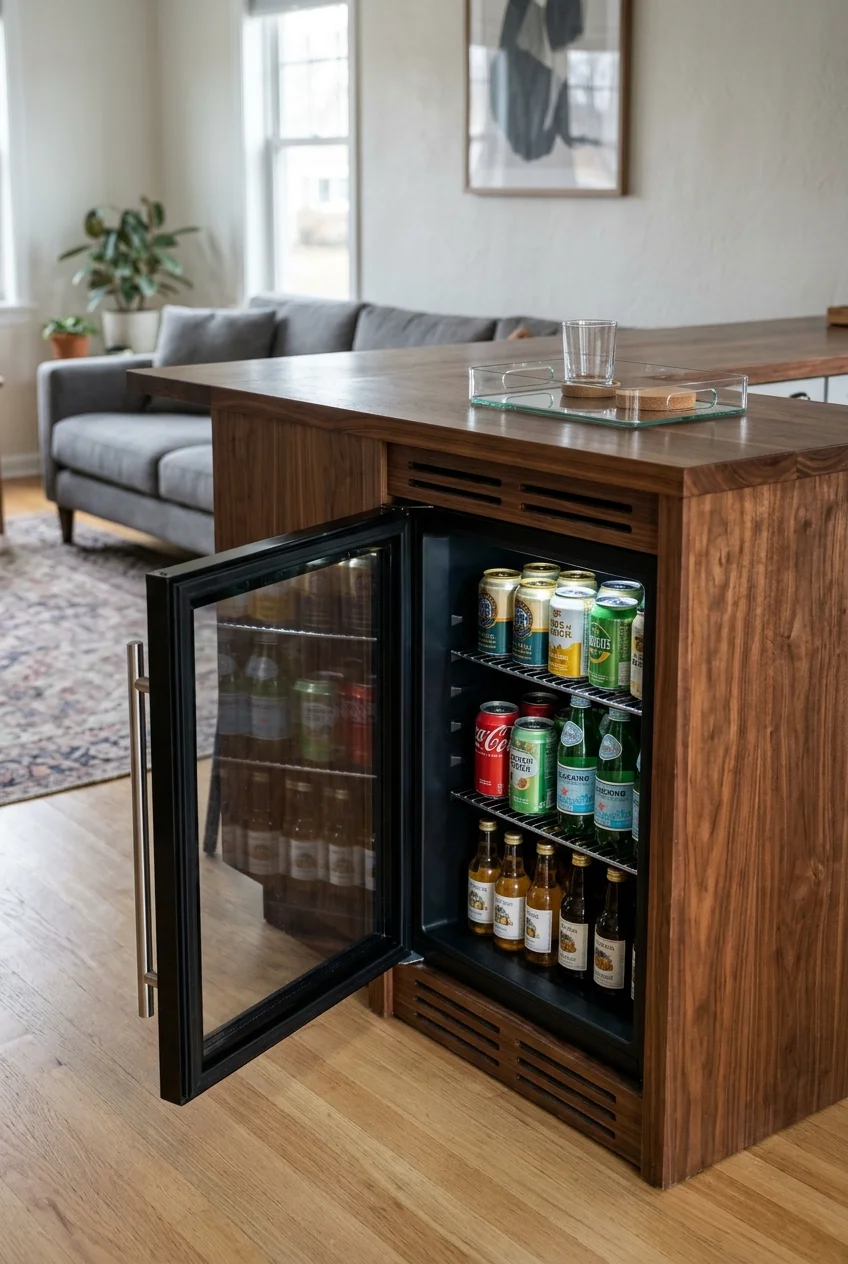
A beverage refrigerator on the outer end lets guests reach drinks without entering the cooking zone. Its door should open into clear room space.
Confirm ventilation, electrical, and door-swing requirements for the selected appliance. Avoid squeezing it into an unvented cabinet or beside heat-producing equipment.
Use the counter above as a simple serving station with room for glasses. Keep the main peninsula surface available for preparation rather than permanent bottle display.
Listen for compressor noise and check service access before choosing the living-room face. A quieter model and removable grille make an exposed location easier to live with.
37. Lower One Section for Baking
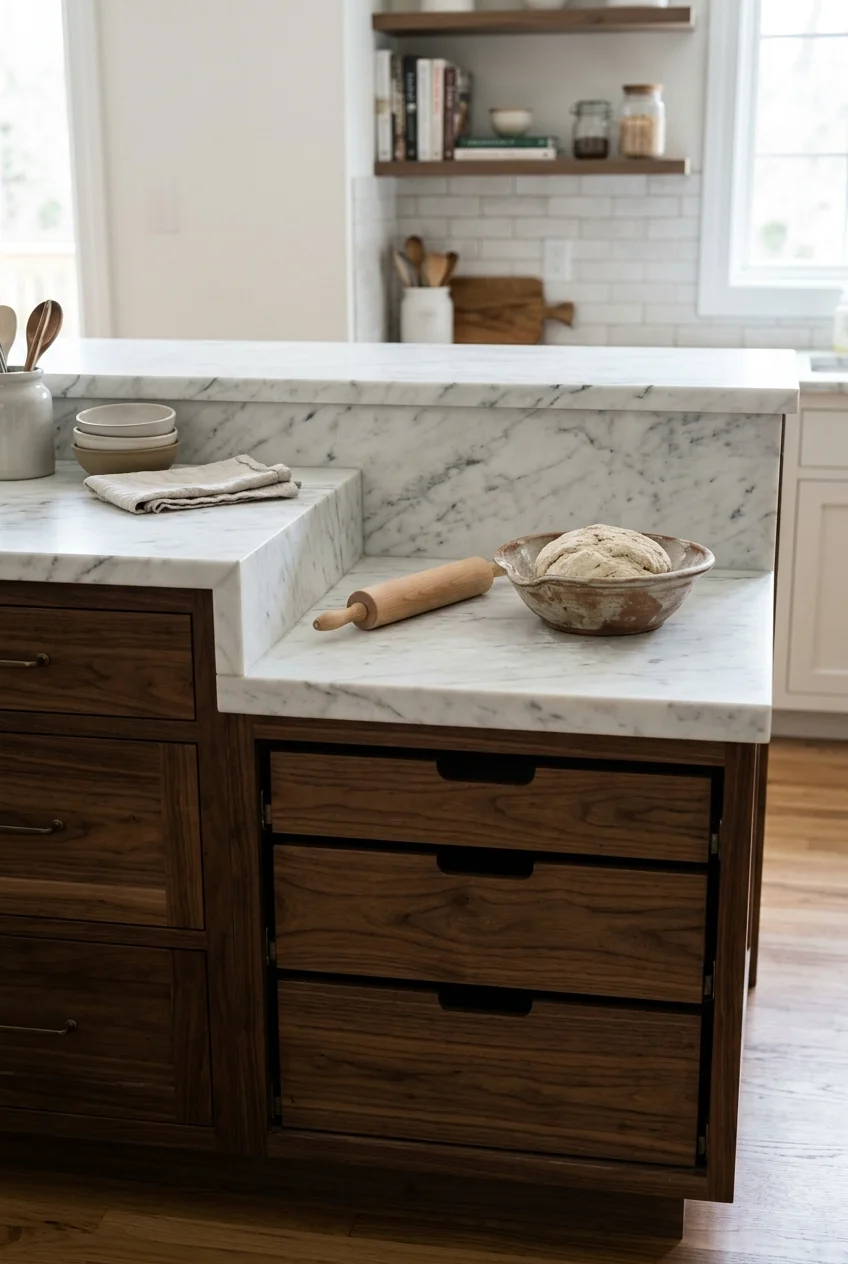
A lower work section can make kneading and rolling more comfortable while preserving standard-height counter elsewhere. Keep the lowered zone broad enough for real tasks.
Choose a smooth, maintainable surface and include nearby storage for rolling pins, mats, and heavy bowls. Avoid decorative seams across the active work area.
The height should fit the primary baker rather than follow a generic recipe. Mock it up temporarily before committing cabinetry and stone to the change.
Keep flour and heavy mixers close to the lowered surface, preferably in drawers below. Carrying bulky tools from an upper cabinet defeats the ergonomic benefit.
Try first Stack a sturdy temporary surface at different heights and practice a familiar dough task. The comfortable level often becomes obvious within several minutes.
38. Reserve the Outer Half as a Serving Buffet
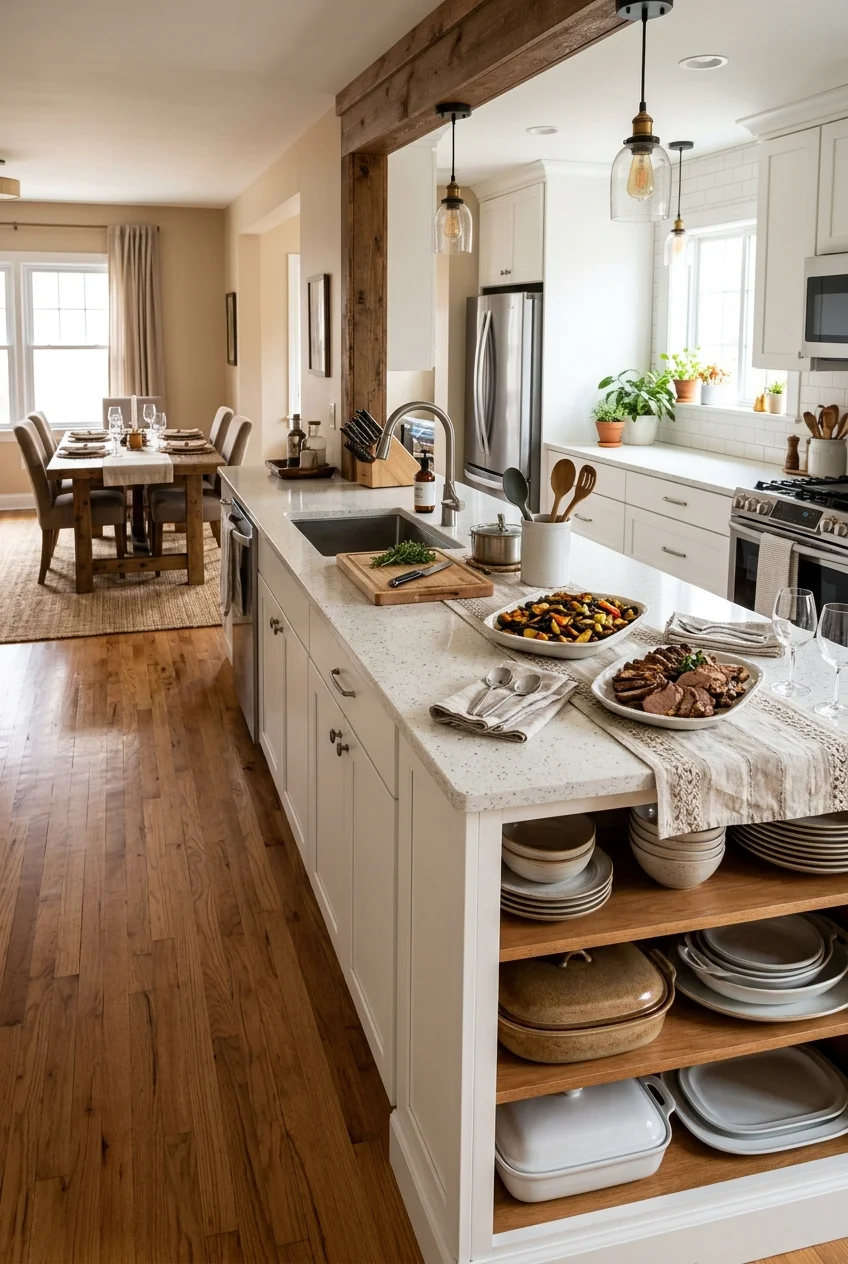
A long peninsula can divide into prep and serving zones without changing height. Keep the outer half clear for platters while cooking continues nearer the kitchen.
Store serving pieces below that end and position outlets away from likely spills. The arrangement works especially well between the kitchen and dining room.
During ordinary days, leave the buffet area mostly empty. A permanent decorative display reduces the flexible surface that makes this idea valuable.
39. Build a Coffee Station on the Quiet End
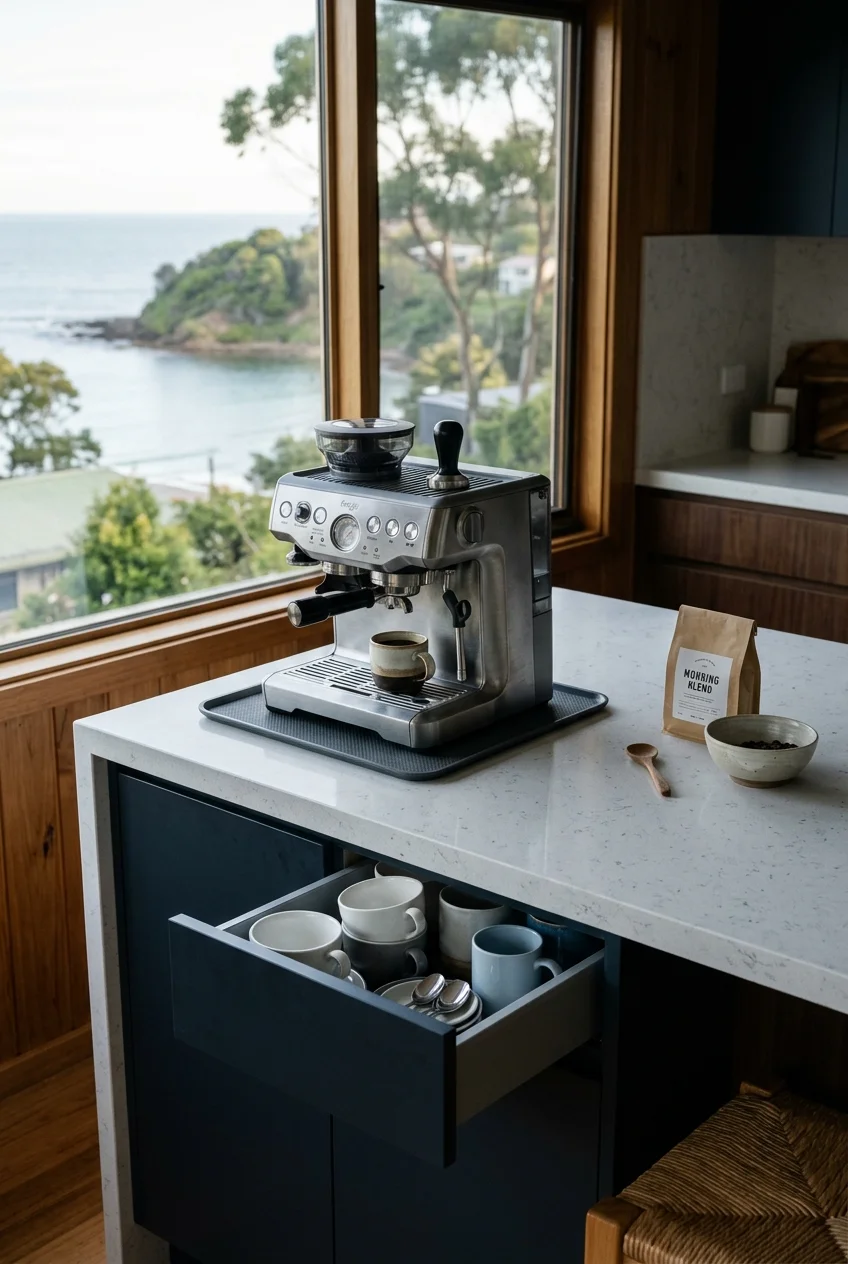
A coffee station at the quiet end keeps morning traffic away from the range and main sink. Provide nearby cup storage and an easy water route.
Use a washable tray beneath the machine and leave working room for filling, brewing, and cleanup. Avoid crowding the entire counter with canisters.
For ways to keep the remaining surface functional, browse these kitchen countertop styling ideas and choose only groupings that preserve daily prep space.
40. Add a Drop Leaf for Occasional Extra Surface
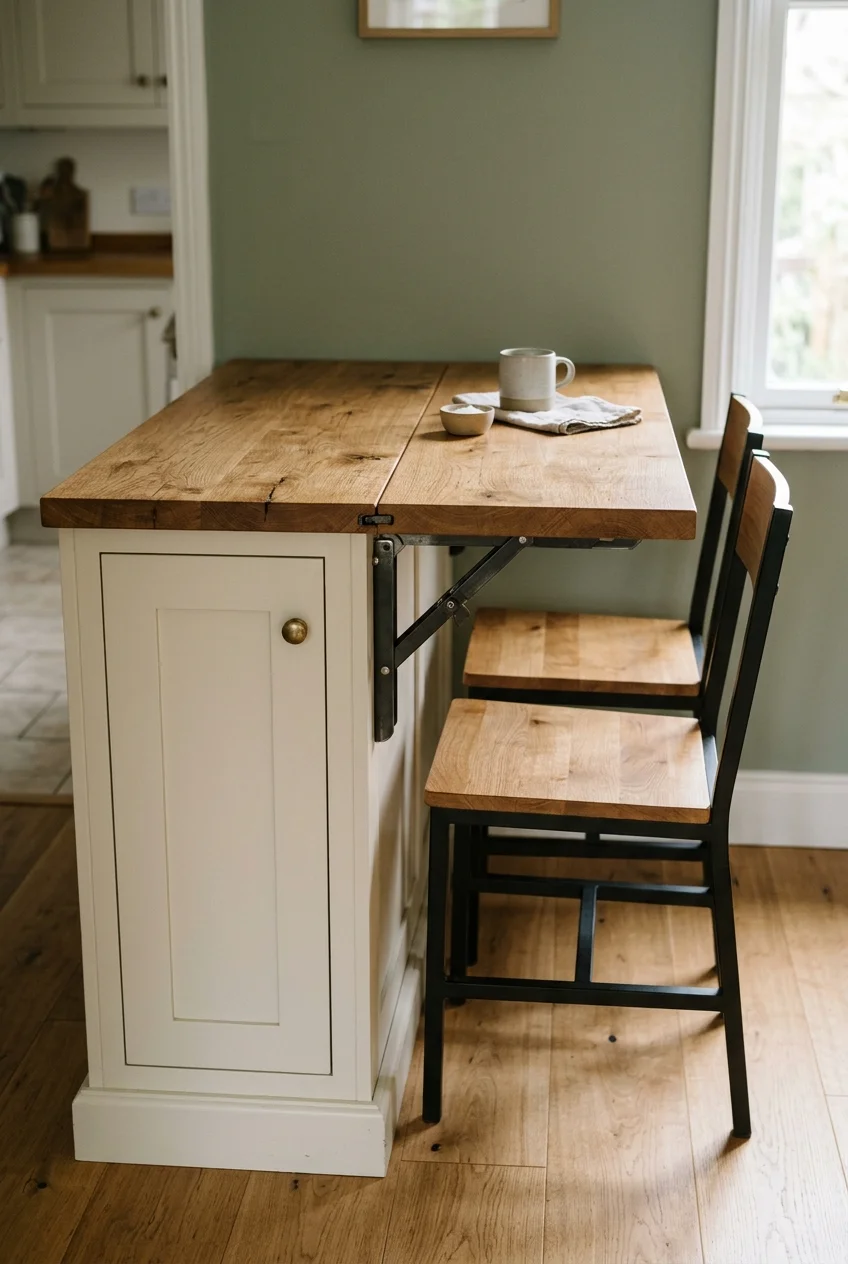
A drop leaf can provide temporary dining or project space while folding away for circulation. Place it on the open end rather than the working aisle.
Choose hardware rated for the top material and intended use, then secure it to substantial structure. The raised leaf should sit level with minimal movement.
- Confirm the folded leaf clears handles and baseboards.
- Locate structural mounting points inside the end panel.
- Test the raised surface with the intended chairs.
- Fold it down and recheck the main route.
A lightweight wood leaf is usually easier to support than stone. Match its tone to another element so the practical addition feels integrated.
Store folding chairs nearby only when they have a safe dedicated place. Leaning loose chairs against the peninsula creates the obstruction the leaf was meant to avoid.
Finishes and Lighting That Give a Peninsula Character
Because a peninsula exposes at least two faces, its finish matters from several rooms. Use color, texture, and light to clarify the form without sacrificing durability.
41. Paint the Peninsula a Grounding Contrast Color
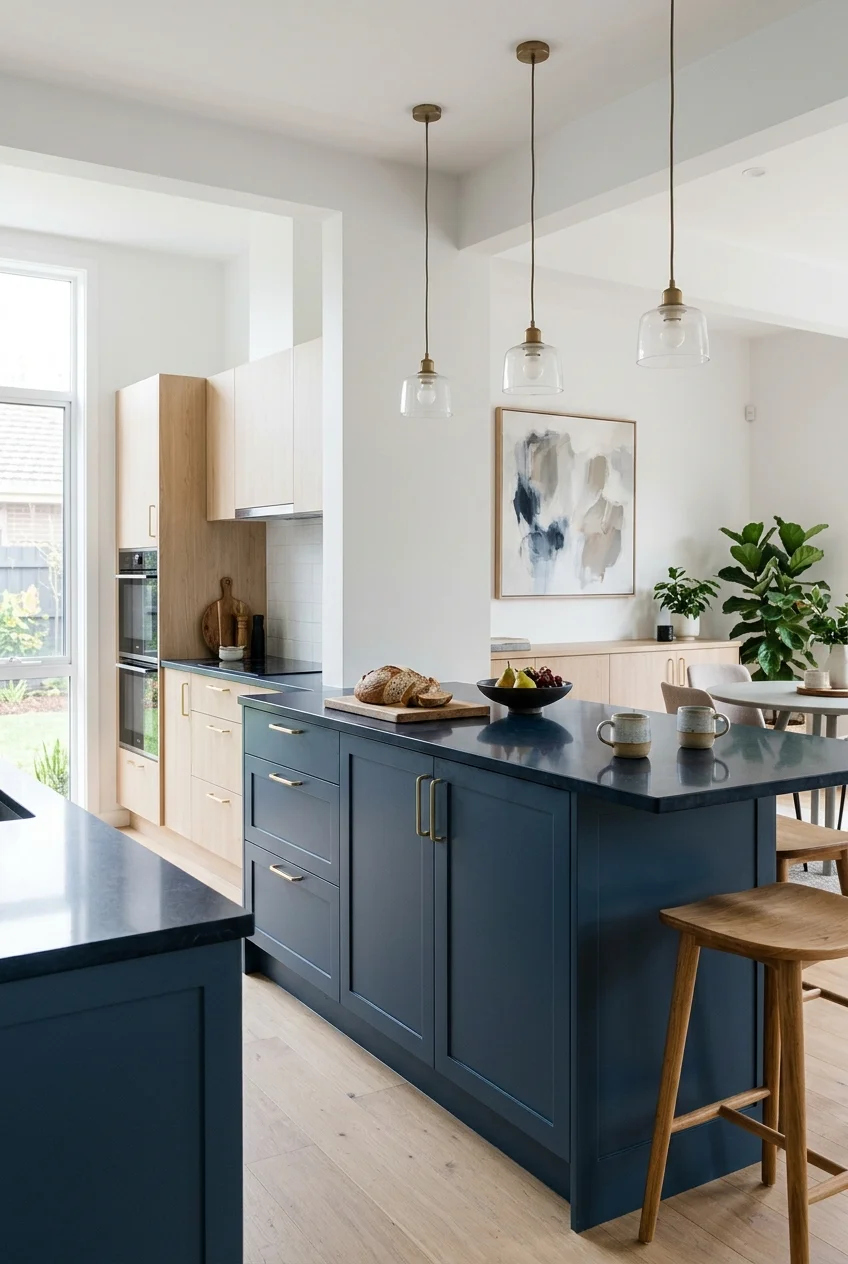
A contrasting peninsula can anchor pale perimeter cabinets and mark the room boundary. Choose a color already connected to flooring, tile, art, or upholstery.
Test a large sample on both kitchen and living-room faces. Colors often shift between task lighting, daylight, and the dimmer adjoining room.
If the existing base needs more than color, review these kitchen cabinet makeover ideas before deciding between repainting, refacing, or replacing damaged parts.
Use a durable cabinet coating system compatible with the existing finish. The exposed corners need careful preparation because bags, shoes, and stools reach them frequently.
42. Wrap the Outer Face in Fluted Oak
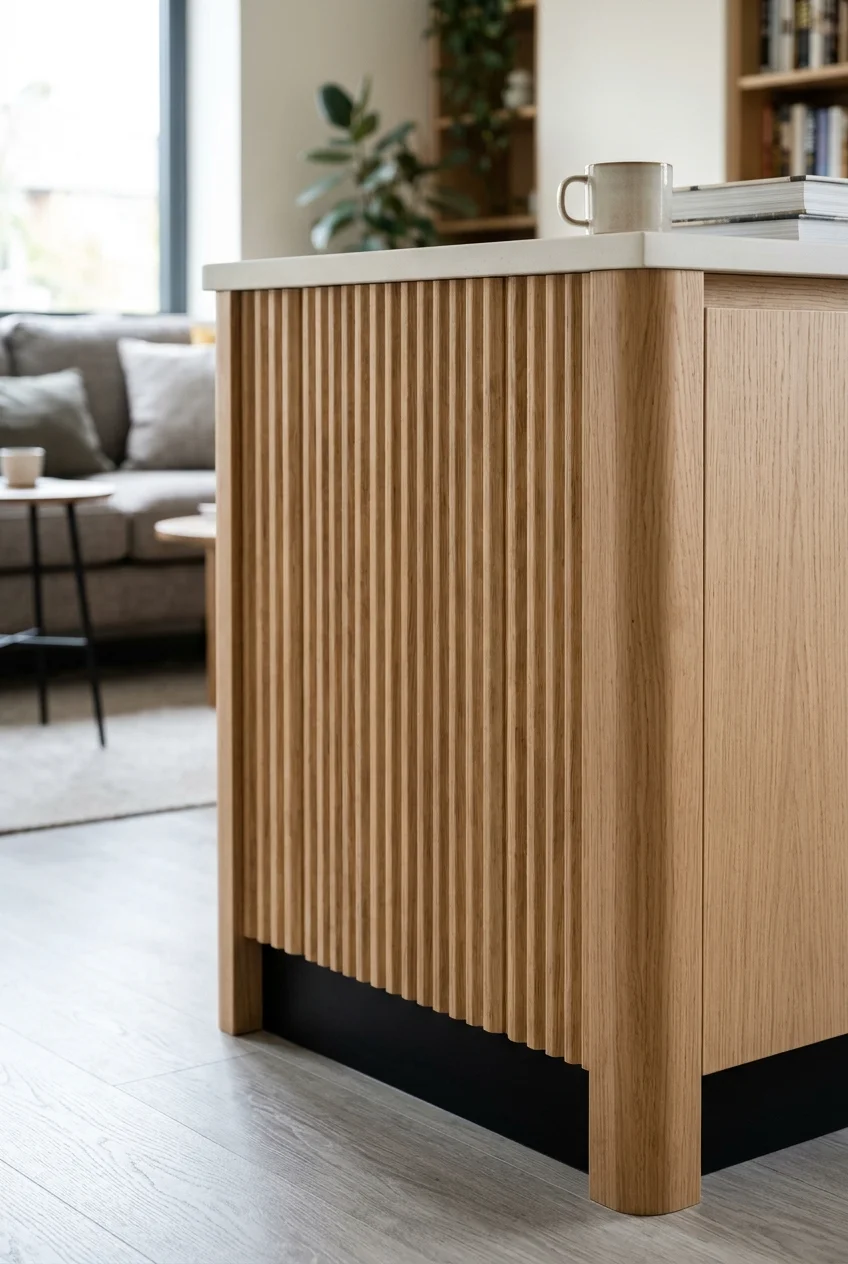
Vertical fluted oak adds texture to the living-room side while leaving the working cabinets simple. Use a finish that relates to nearby floors or furniture.
End the fluting neatly at corners, outlets, and seating bays. The profile should not continue across doors or create sharp ridges where knees meet the panel.
A smooth toe area makes cleaning easier beneath the texture. Keep the countertop restrained so the wood grain remains the visible feature.
43. Add Beadboard for a Simple Cottage Finish
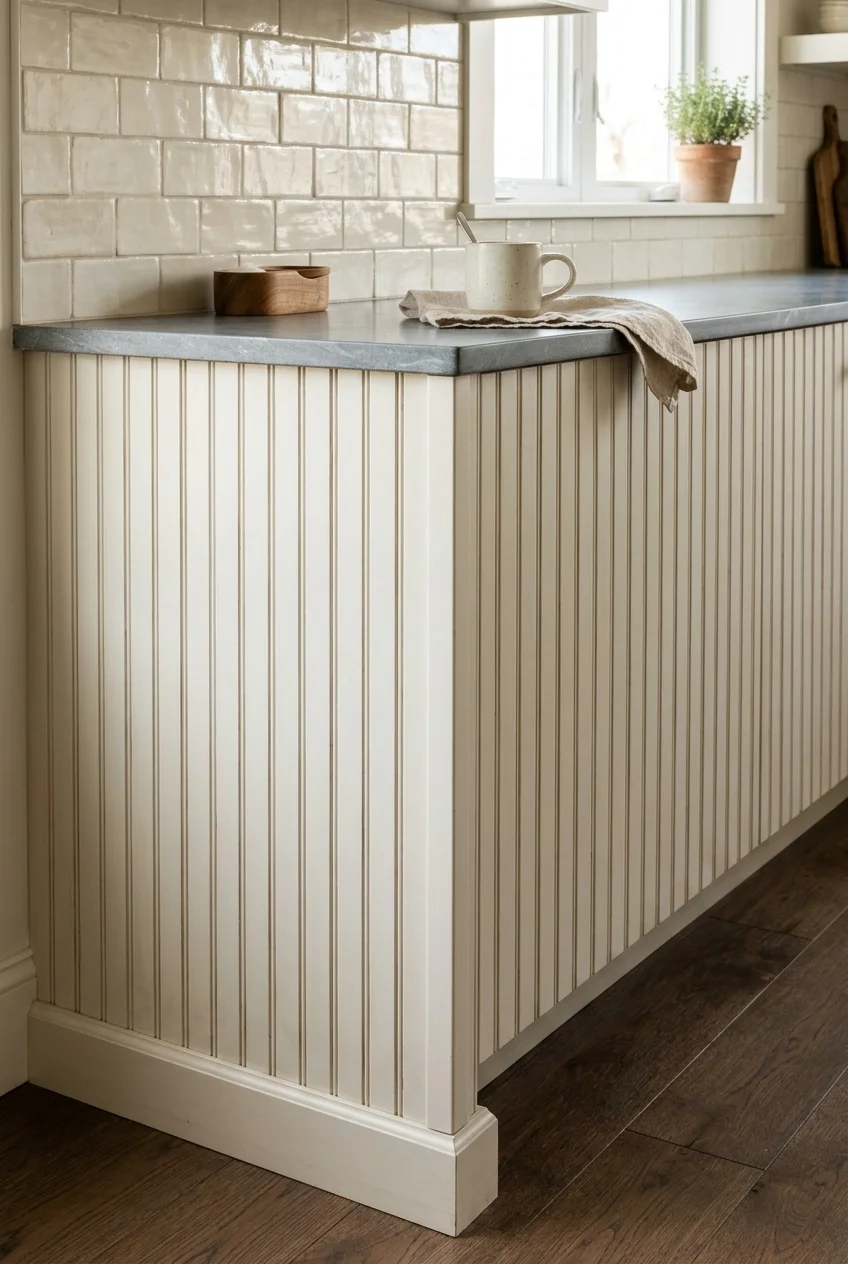
Beadboard gives a plain peninsula base recognizable cottage detail without changing the footprint. Keep the trim narrow so corners and seating openings remain uncluttered.
Use a washable finish and seal cut edges near the floor. Align the grooves across panels so the outer face reads as one continuous surface.
Pair the paneling with a restrained tile choice; these backsplash ideas for white cabinets show how pattern and cabinet color can share attention.
44. Tile the Outer Face as a Durable Accent
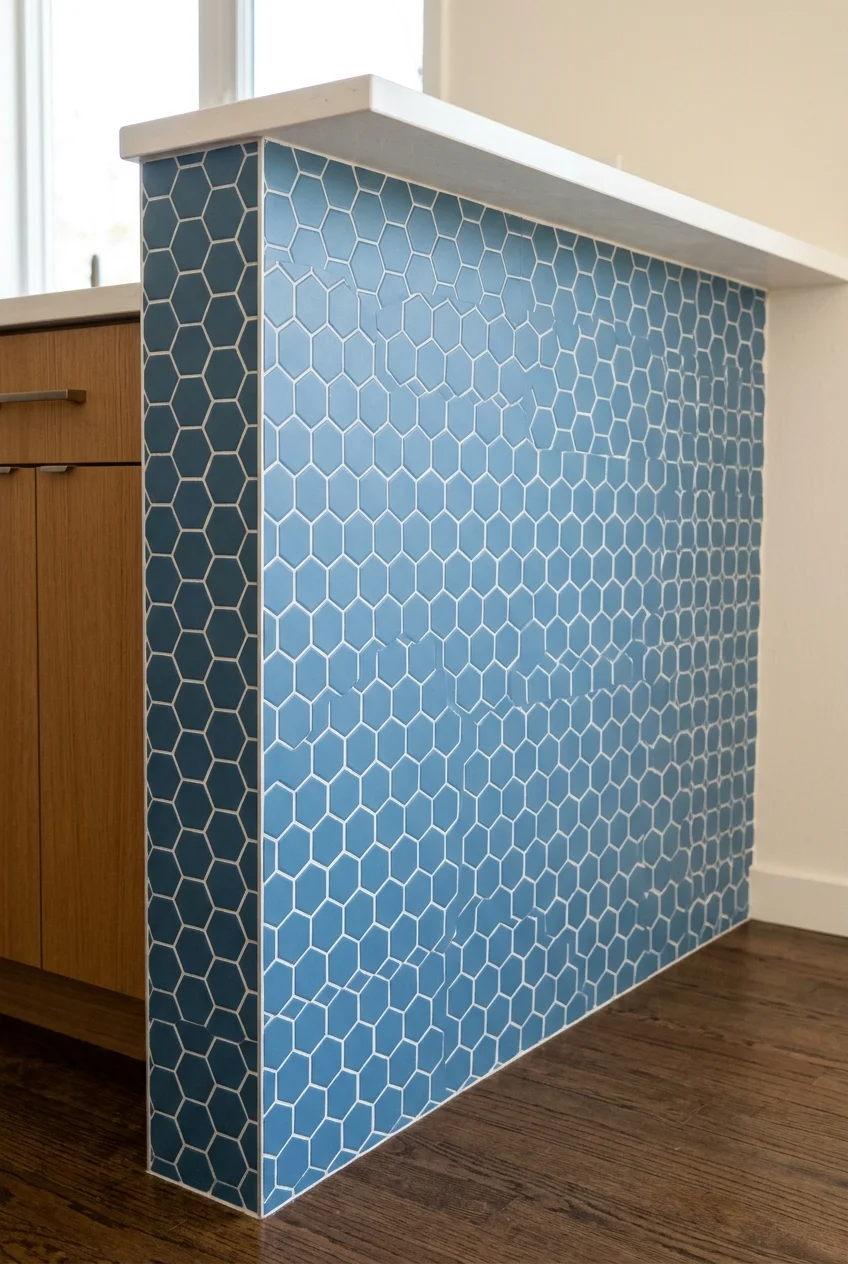
Small-format tile can protect the outer face while introducing color or pattern. Use it where shoes and chair legs touch, not across working doors and drawers.
Plan full tile courses, balanced cuts, and clean terminations at corners. Grout color changes how busy the surface appears and affects everyday maintenance.
Keep the countertop quieter when the tile is strongly patterned. One tiled face or end usually provides enough impact without making the peninsula visually heavy.
Choose edge trim and grout rated for the kitchen location, then follow their maintenance guidance. Chair feet and mops will reach the lowest courses regularly.
Detail check Ask the installer to lay out the visible corner before setting tile. A thoughtful wrap prevents thin slivers and broken pattern at the focal edge.
45. Use a Waterfall End to Conceal the Cabinet Box
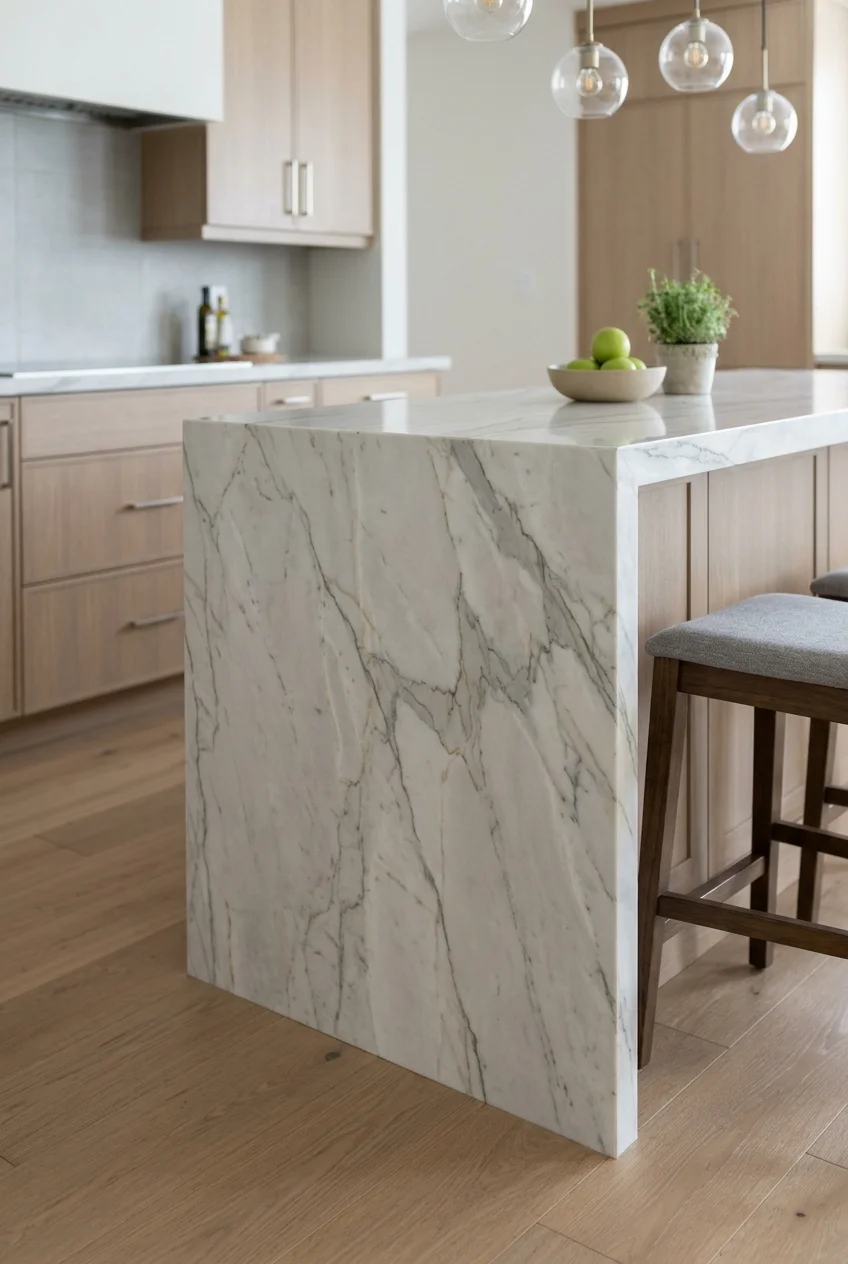
A waterfall panel carries the countertop material down the exposed end, hiding the cabinet box from the adjoining room. It creates a strong architectural boundary.
Coordinate vein direction, seam placement, edge thickness, and floor contact with the fabricator. A patterned slab needs deliberate layout to look continuous.
Reserve the waterfall for an end without doors or stool knees. Combining it with seating works only when the open bay remains comfortable and properly supported.
This treatment uses more material than a standard finished panel. Compare its visual value against a painted, wood, or tiled end before committing.
46. Join Wood to Stone for a Warmer Dining Extension
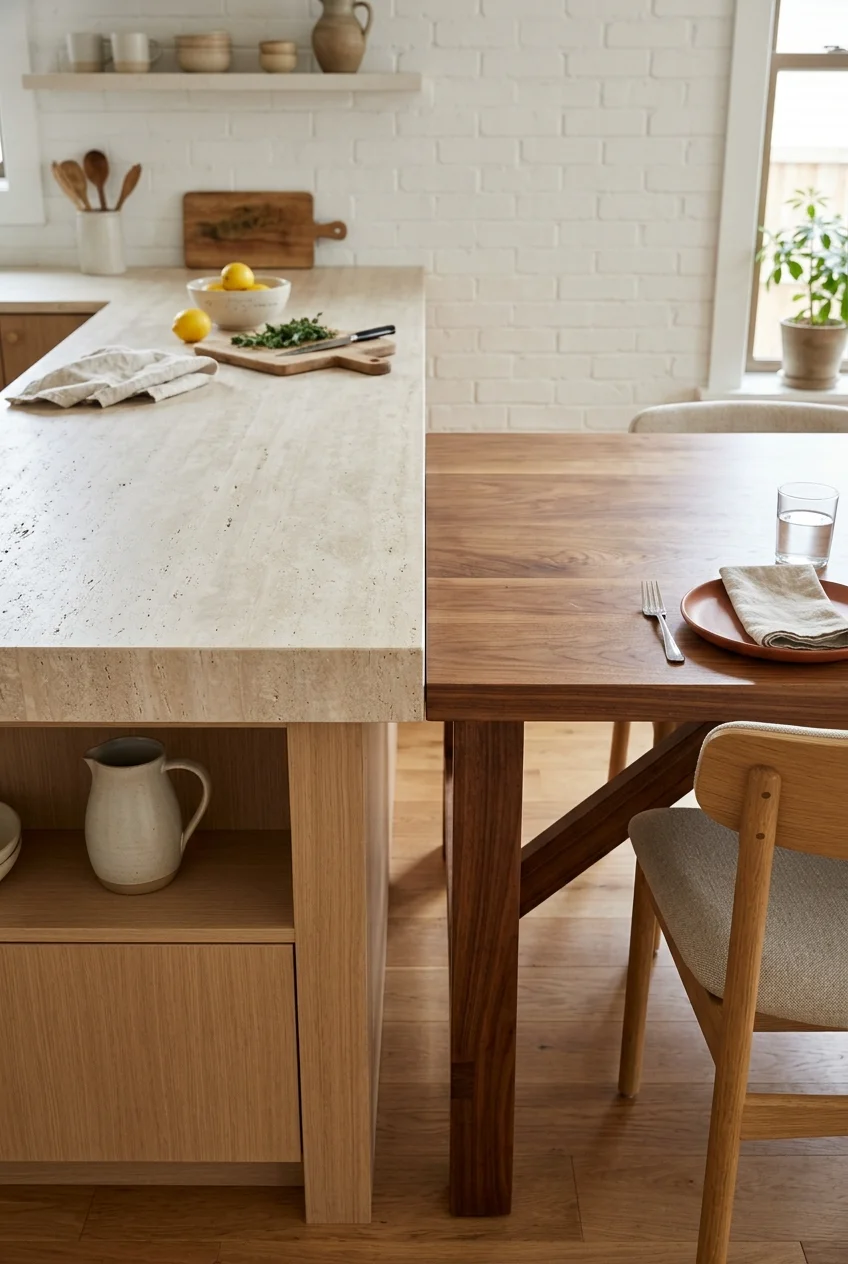
A wood extension can warm a stone worktop and clearly identify the dining portion. Use the material change at a logical support or height transition.
Match neither material too literally to the floor. A related undertone creates cohesion while allowing the table section to read as furniture.
Detail the joint so crumbs and moisture do not collect in an awkward gap. Wood movement, stone edges, and support all need professional coordination.
Finish the underside as carefully as the top because seated diners will see it. Concealed plates or rails should support the transition without crowding knees.
- Stone for wet or intensive preparation
- Wood for the lower dining surface
- A visible, clean material transition
- Support that leaves chair space usable
47. Soften the Slab With Rounded Countertop Corners
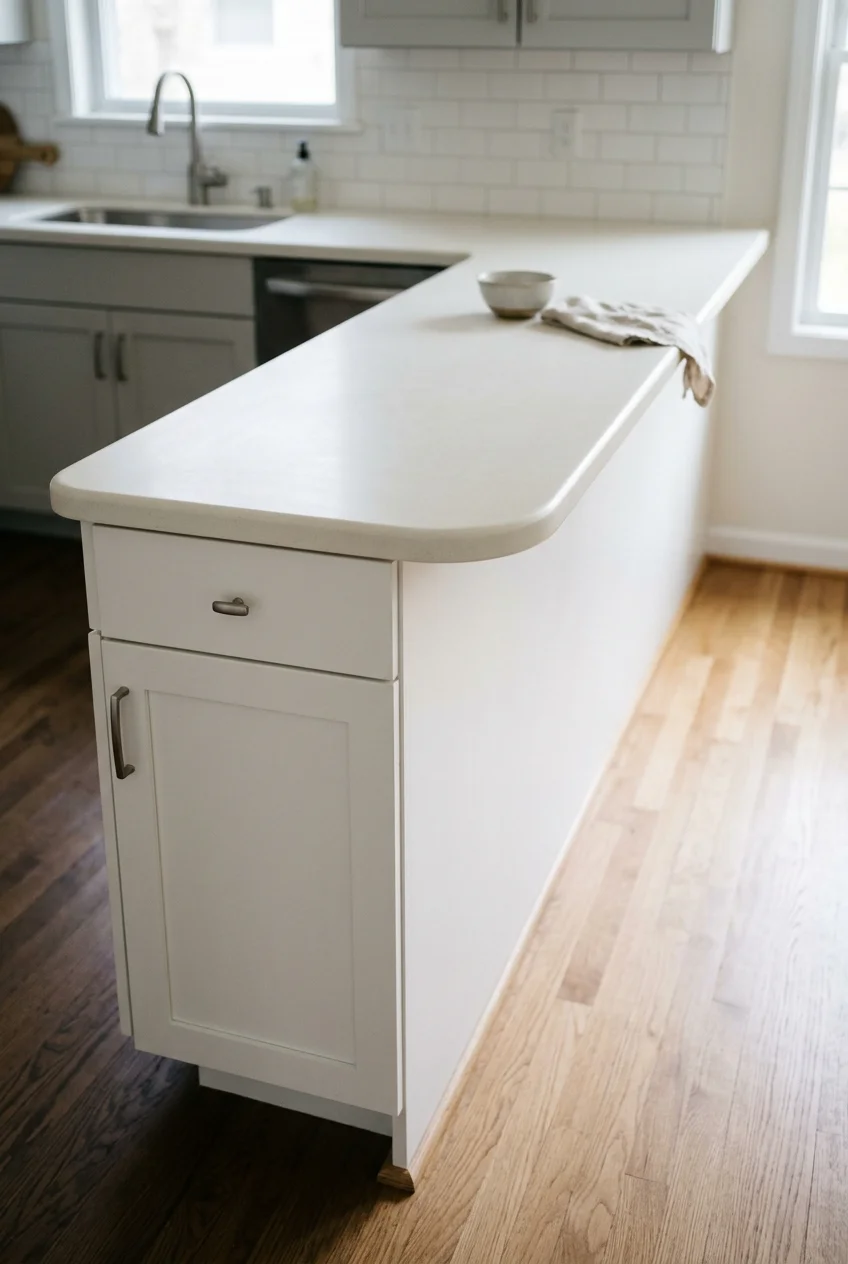
Rounded countertop corners can ease circulation and soften a blocky peninsula without requiring curved cabinetry. Repeat the same radius at both exposed corners for consistency.
Choose an edge profile that suits the material and household. A subtle curve looks contemporary, while a thicker rounded edge can feel more traditional.
The countertop should still cover and protect the cabinet end evenly. Avoid a dramatic projection that creates another obstacle below eye level.
48. Hang Two Slim Pendants Over the Long Axis
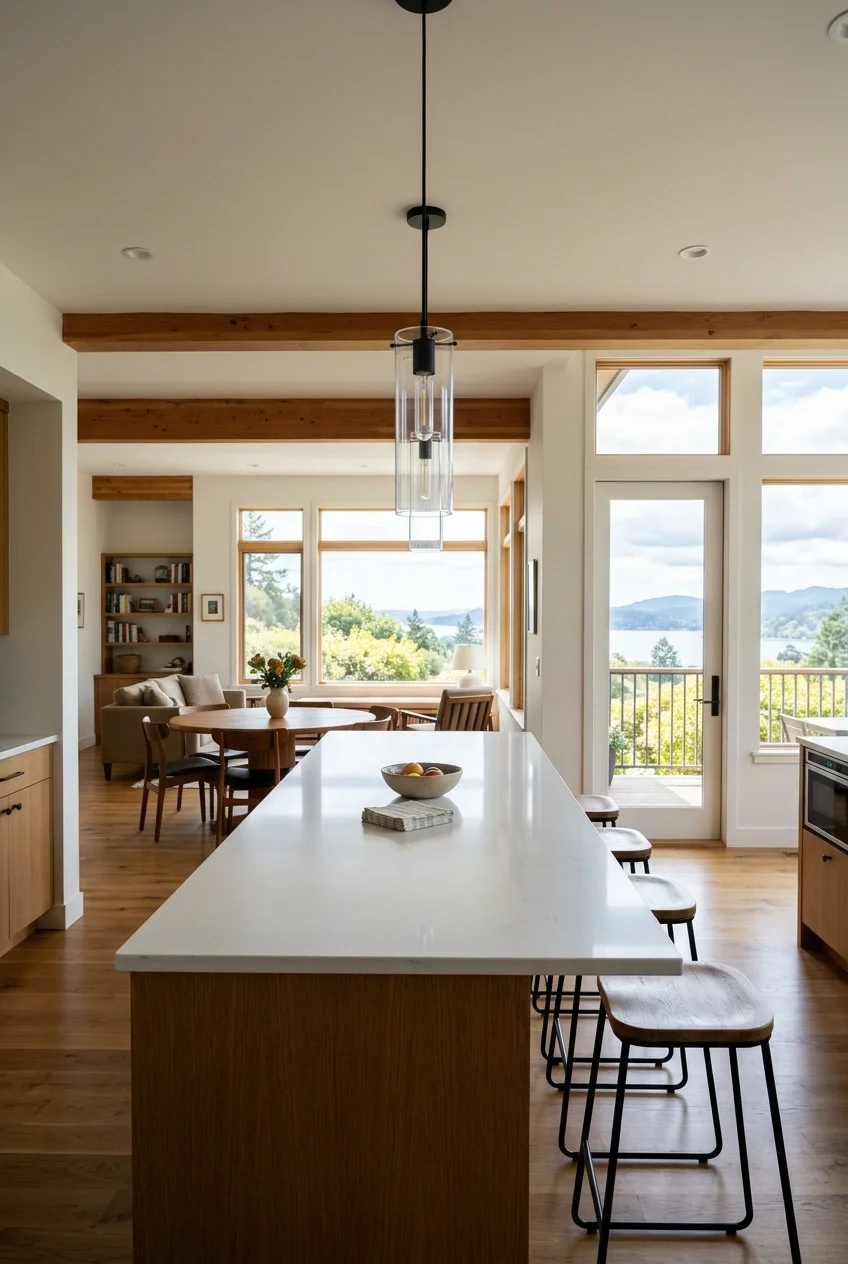
Two compact pendants can emphasize a peninsula’s length without crowding the view. Center them over the counter rather than the seating edge or walking route.
This two-pack of clear-glass mini pendants (paid link) has adjustable cords; confirm canopy, bulb, dimmer, spacing, and ceiling compatibility before installation.
Keep the glass easy to reach for cleaning and hang it high enough to preserve sightlines. A qualified electrician should handle new wiring.
49. Wash the Outer Panel With Concealed Light
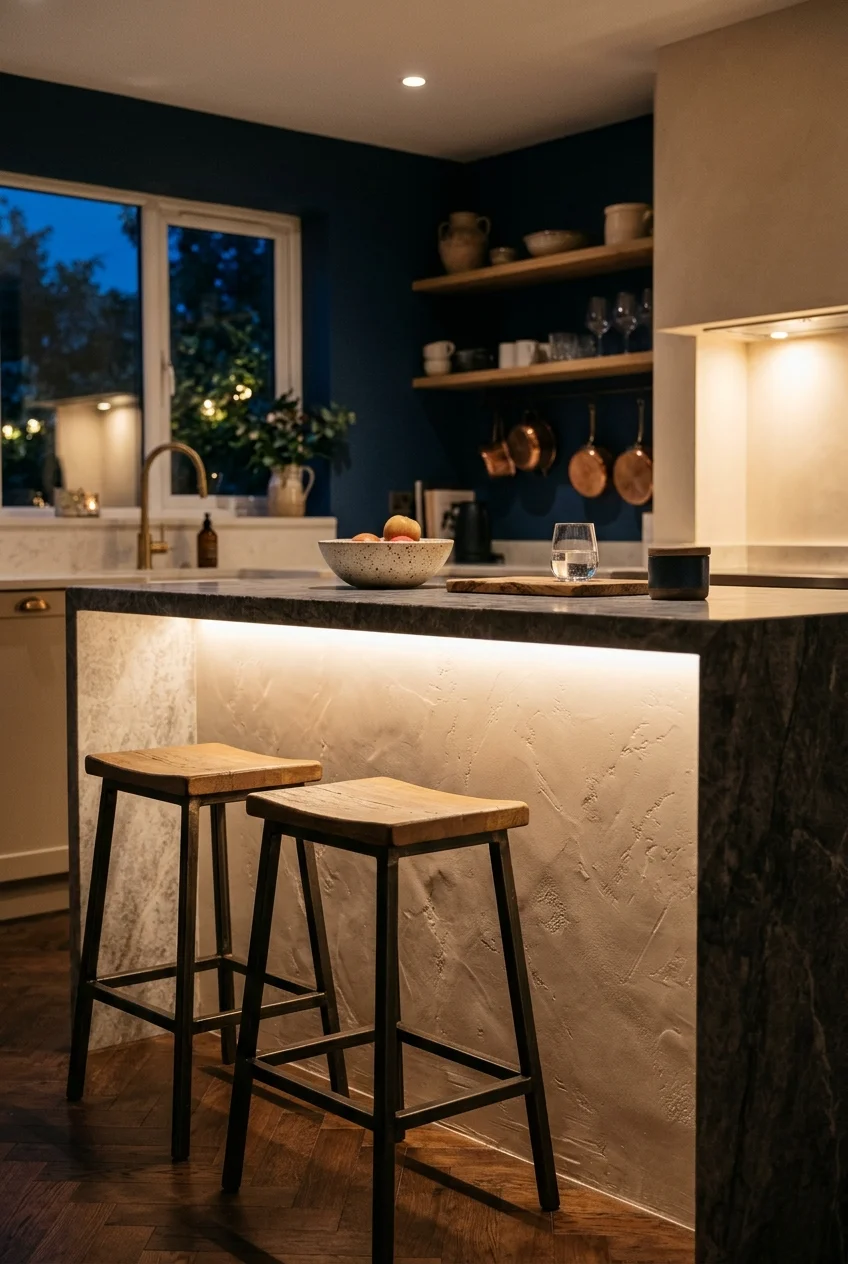
A concealed linear light beneath the outer overhang can graze a textured panel and provide gentle evening illumination. Keep the source itself out of direct view.
Choose a listed system suitable for the location and coordinate wiring before the counter is installed. The color temperature should relate to nearby kitchen lighting.
Use this effect on fluting, tile, or subtle plaster rather than a glossy surface that reveals every diode. Dimming prevents the panel from becoming a glare source.
Provide an accessible driver or transformer location for future service. Concealment should hide equipment during normal use without sealing replaceable parts permanently inside cabinetry.
Lighting note Test a sample strip against the finished panel after dark. Distance and angle determine whether texture looks dimensional, flat, or unevenly striped.
50. Frame the Seating Side With a Contrasting Toe-Kick
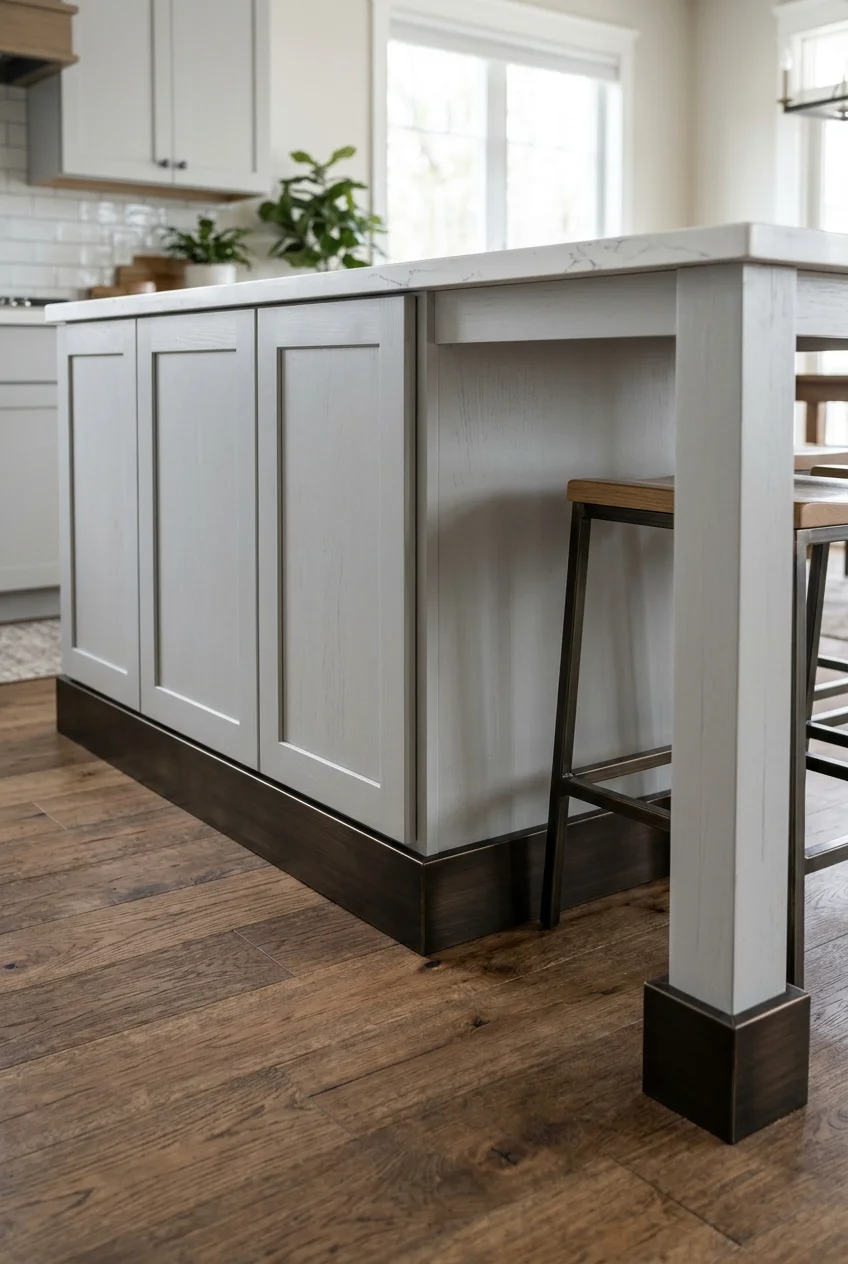
A contrasting toe-kick can outline the peninsula base without covering the entire cabinet in a second color. Dark metal creates a crisp shadow beneath pale cabinetry.
Continue the toe-kick around exposed ends where the geometry allows, then stop cleanly at seating bays. The recess should remain deep enough for comfortable standing.
Choose a finish that tolerates mopping, shoe contact, and minor scuffs. This small detail works best when the countertop and panels are otherwise restrained.
Use the contrast to clarify the base, not create a floating illusion where structural supports disappear. Visible legs and panels should still meet the floor convincingly.
Frequently Asked Questions
How do I know whether a peninsula will fit my kitchen?
Tape the proposed footprint on the floor, including countertop overhangs. Open every appliance, cabinet, and room door, then walk each normal household route.
Test occupied stools as well as tucked stools. If people must turn sideways or wait for doors to close, shorten, narrow, or remove the peninsula.
Is a kitchen peninsula better than an island in a small room?
A peninsula needs circulation on three exposed sides instead of four, so it can provide more counter and storage within some compact or narrow layouts.
An island may be better when several routes cross the room or flexibility matters. Compare both taped footprints rather than choosing by appearance alone.
Should a peninsula include seating?
Add seating only when pulled-out stools leave the main route and appliance access comfortable. Storage or uninterrupted prep space may be more valuable in tighter kitchens.
End seating, one quiet perch, or a dining-height extension can work better than lining the entire outer face with stools nobody can pass.
Can I add a sink or cooktop to an existing peninsula?
Possibly, but utilities, ventilation, cabinet structure, landing space, and local requirements may make the change extensive. Start with a measured professional layout, not appliance shopping.
A clear prep surface is often the more flexible choice. Add equipment only when it solves a repeated workflow problem without compromising circulation or seating safety.