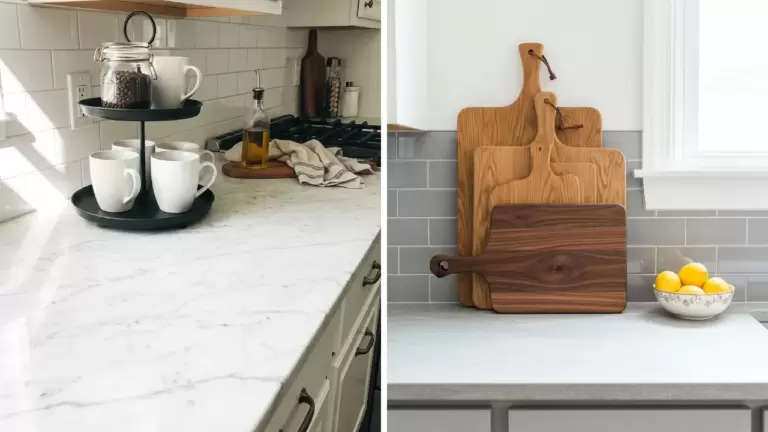
100 Kitchen Remodel Ideas on a Budget

This post may contain affiliate links: full affiliate disclosure.
You don't have to replace every surface to make a kitchen feel considered.
These 100 ideas are a menu of possible changes, from new pulls to targeted cabinet and countertop projects.
Compare the whole job, including preparation, fitting, and upkeep, before calling anything a bargain.
1. Swap dated pulls using the holes you already have
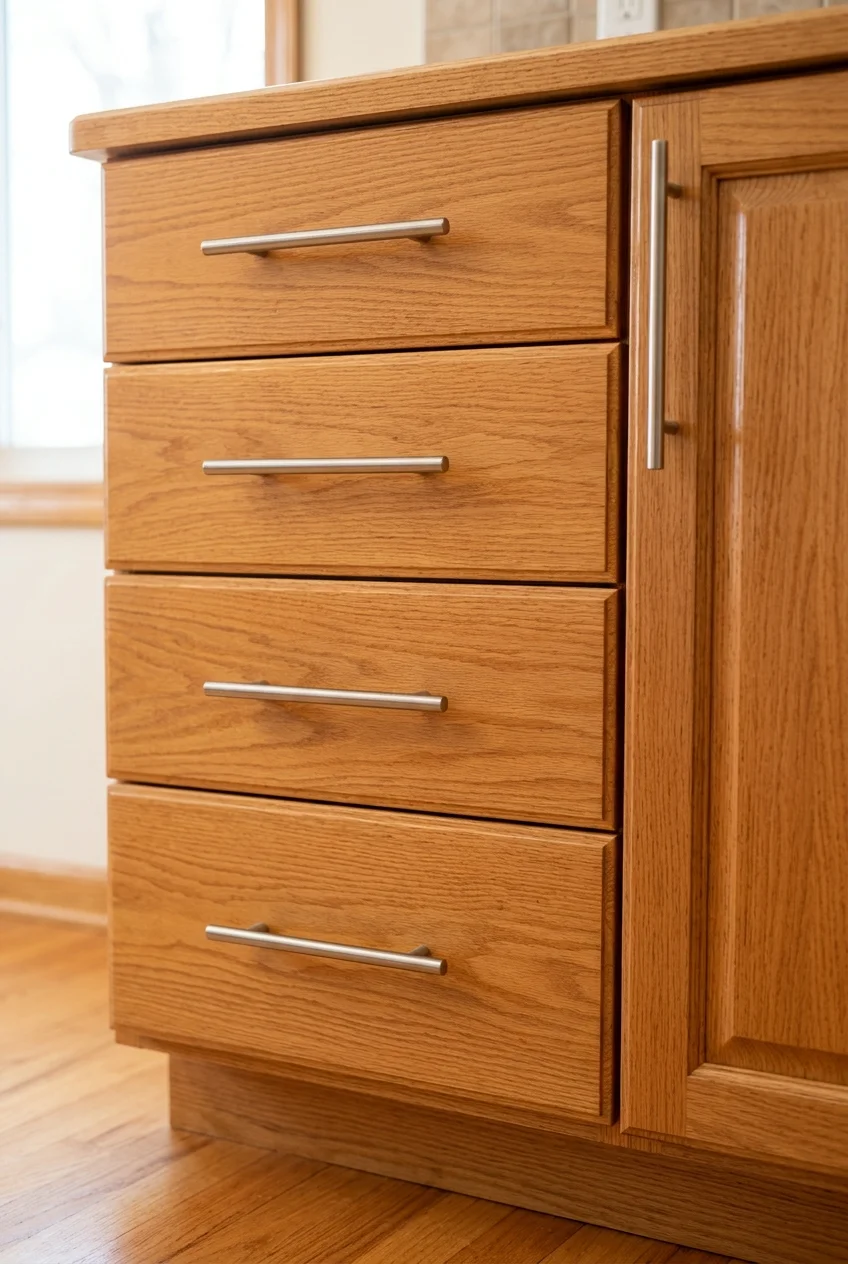
Reuse the existing mounting holes to give cabinet fronts a cleaner outline. A straightforward bar pull can update ornate doors without repainting their wood finish.
Measure between screw centers, rather than across the handle's full length. Order one sample first and check finger space, neighboring doors, and the screw length.
Count every handle before buying a pack, including pantry doors and false drawer fronts. Keep the original hardware together if you rent or might reverse the change.
2. Repaint sound cabinets instead of replacing their boxes
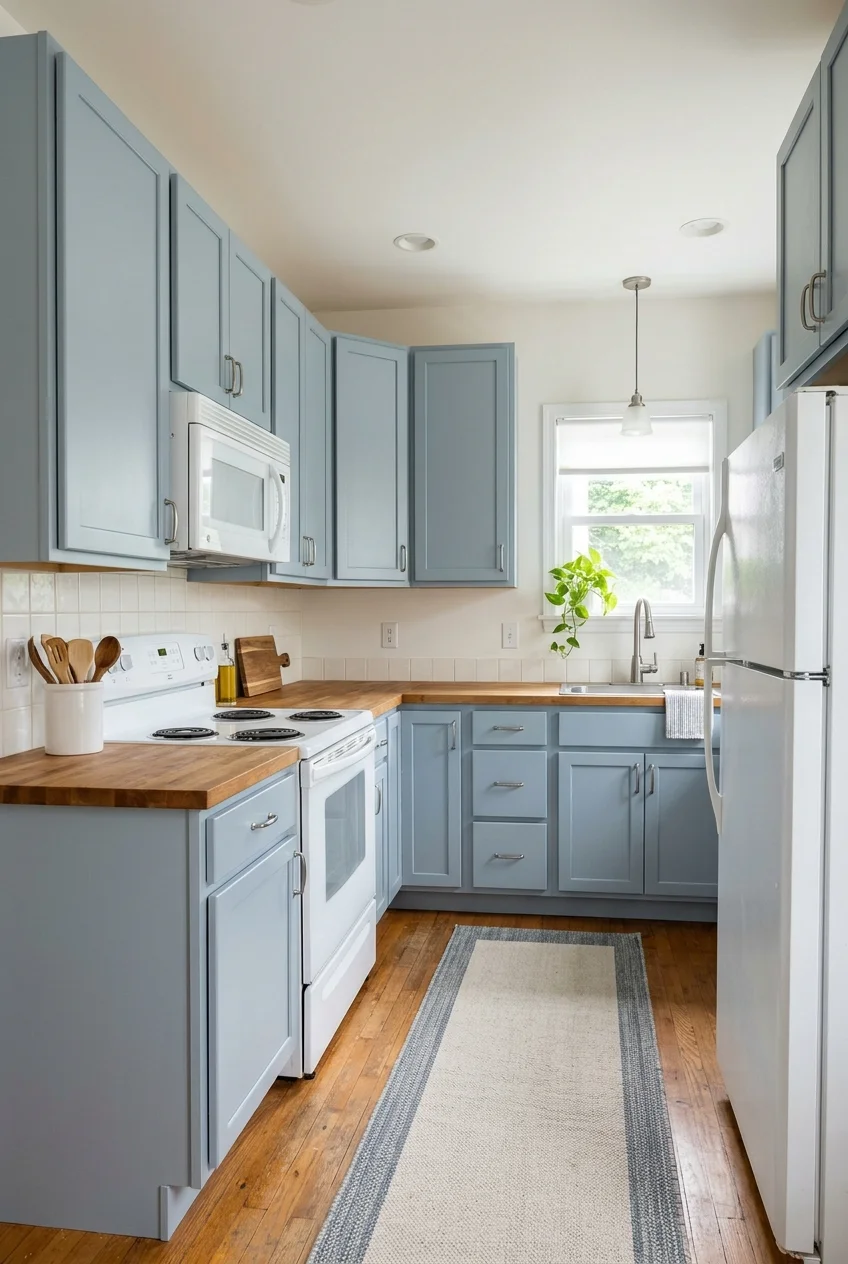
A continuous painted finish can quiet a kitchen with mismatched doors and visible frames. Start with structurally sound cabinets that still suit your storage needs.
Identify the surface before choosing products: solid wood, thin veneer, and laminate need different preparation. Paint cannot repair swollen particleboard, peeling layers, or loose joints.
- Remove and label doors, drawers, and hardware.
- Clean away grease and let surfaces dry.
- Prepare, repair, and prime as the coating system requires.
- Apply cabinet-rated paint, respecting recoat and cure instructions.
- Rehang carefully and adjust the doors after the finish permits handling.
Test the complete coating system on an inconspicuous area before committing. Include preparation supplies and drying space in the project, rather than budgeting for paint alone.
Keep one drawer and a few dishes accessible while work progresses. Cabinet painting can interrupt normal cooking even when the sink and appliances stay connected.
Choose satin or another manufacturer-approved sheen you like under your kitchen lights. An extremely reflective finish can emphasize surface flaws and demand more preparation.
Watch for Before disturbing old coatings in a pre-1978 home, address possible lead paint. Hire appropriate help or follow EPA lead-safe guidance rather than sanding first.
3. Keep oak cabinets and change the colors around them
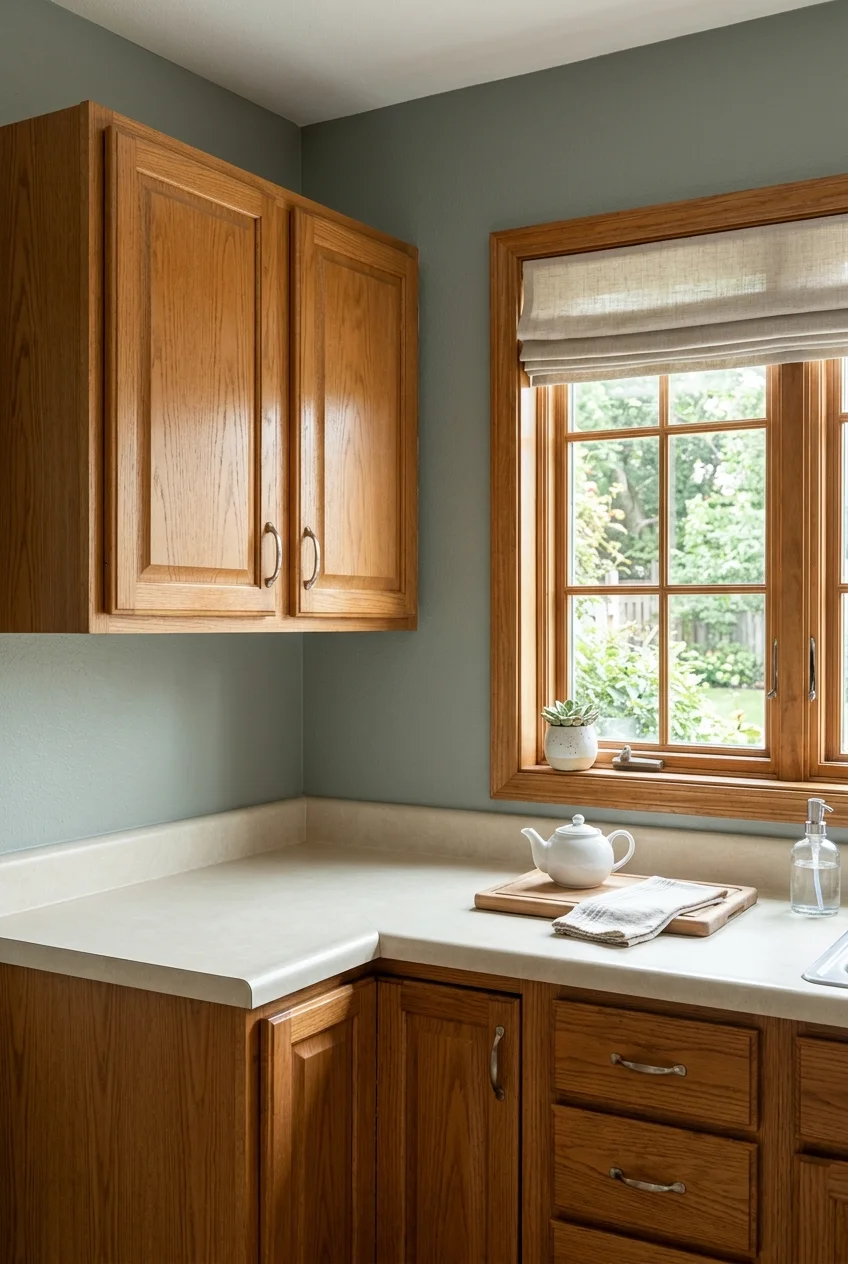
Warm wood can remain the main finish when the cabinets are sound. Replace a competing yellow wall color with a quieter shade sampled beside the oak.
Hold large samples against both the cabinet and countertop throughout the day. A white that looks neutral elsewhere can appear pink or gray beside existing surfaces.
Keep the surrounding palette quieter than the grain: a plain counter, restrained wall color, and simple window treatment let retained wood become the deliberate feature.
4. Paint only the lower run for a grounded two-tone kitchen
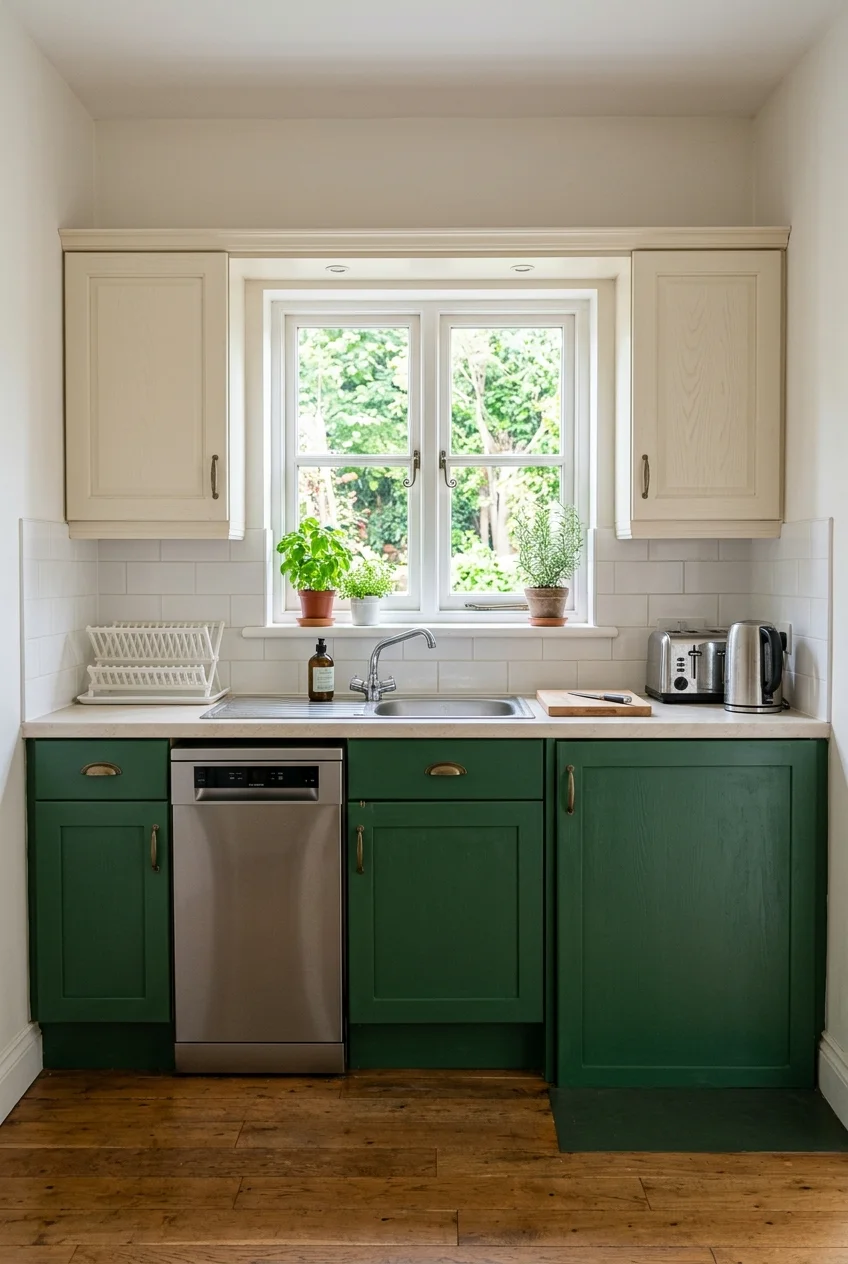
A darker lower run gives the room definition while existing light upper cabinets stay untouched. This reduces the painted area without breaking up every wall.
Use the counter as the dividing line, carrying the darker finish around exposed base-cabinet sides. Repeat that color once nearby so the two halves feel connected.
Check the upper finish first; badly yellowed or peeling doors may still need attention. Price the full preparation and coating system for the lower cabinets.
5. Replace one damaged door with a deliberate matching front
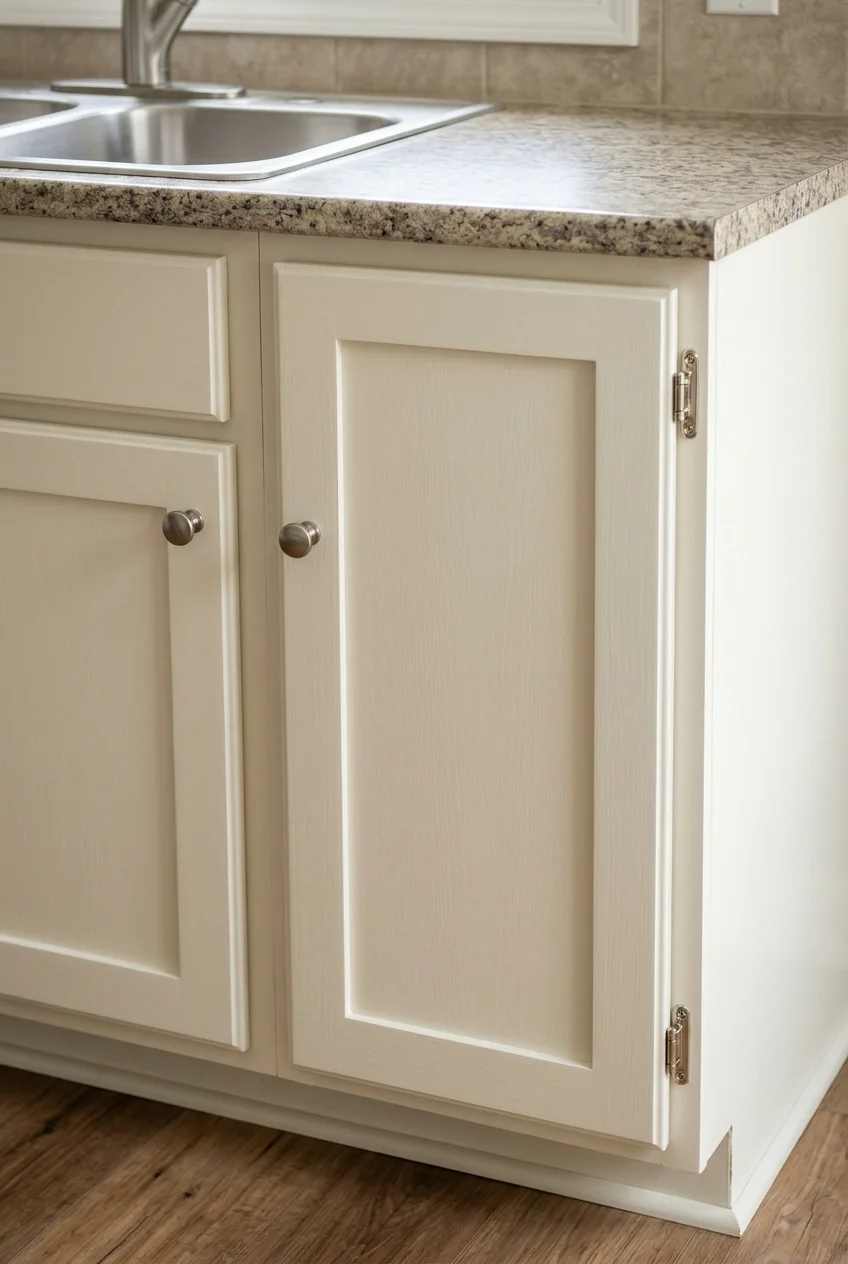
One split or swollen door doesn't automatically require a new kitchen. A replacement front can rescue a useful cabinet when its box remains dry and solid.
Photograph the door profile, measure carefully, and identify its hinge arrangement before ordering. Confirm the overlay, which is how far the door covers the cabinet opening.
- Match the door thickness and edge profile.
- Check hinge drilling and mounting positions.
- Allow clearance beside adjacent fronts.
- Compare a finish sample with the existing cabinets.
A near-match stain may stand out more than an intentional painted section. If an exact finish is unavailable, replace a coherent small group of fronts together.
Fix any leak or moisture source before installing the replacement. A new door over an unresolved damp cabinet repeats the expense and hides the underlying problem.
6. Give suitable flat doors a slim framed profile
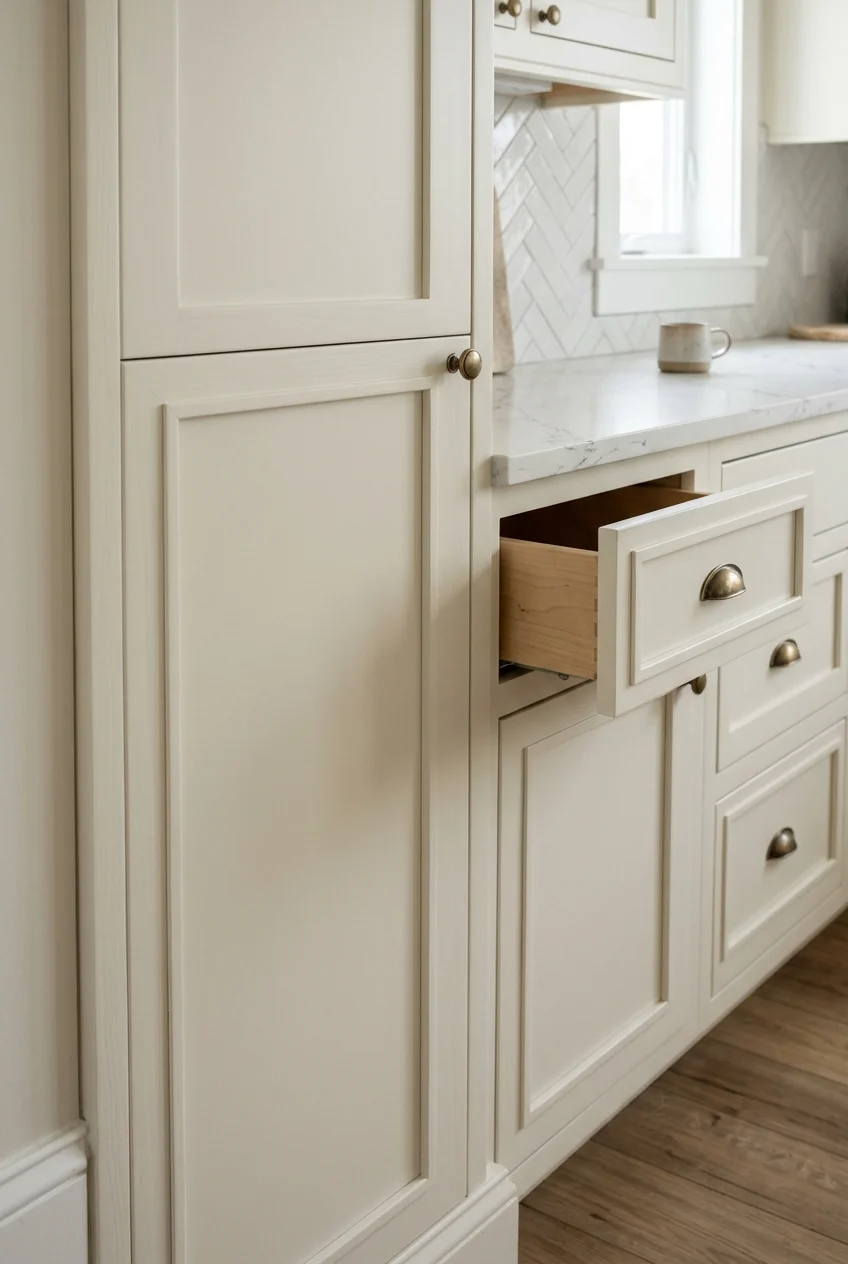
Narrow trim can turn suitable plain fronts into framed doors without buying a full replacement set. The effect depends on straight, stable doors and careful proportions.
Mock up the trim width before cutting every piece. Added thickness must clear hinges, neighboring drawers, and appliance handles when the doors open fully.
- Test adhesion on the existing door material.
- Cut and dry-fit a complete frame.
- Attach using a method suited to the substrate.
- Fill and prepare joints before applying the chosen finish.
Very thin doors and loose laminate are poor candidates for this shortcut. Compare the cost of trim, adhesive, filler, primer, and labor against unfinished replacement fronts.
Keep the profile shallow enough to wipe easily. Deep decorative grooves can collect cooking residue and turn a simple visual update into extra cleaning work.
For new mounting holes, the Amerock installation template (paid link) helps mark positions. Check its pattern against your pulls, and test placement on scrap before drilling.
7. Open one upper cabinet for everyday dishes
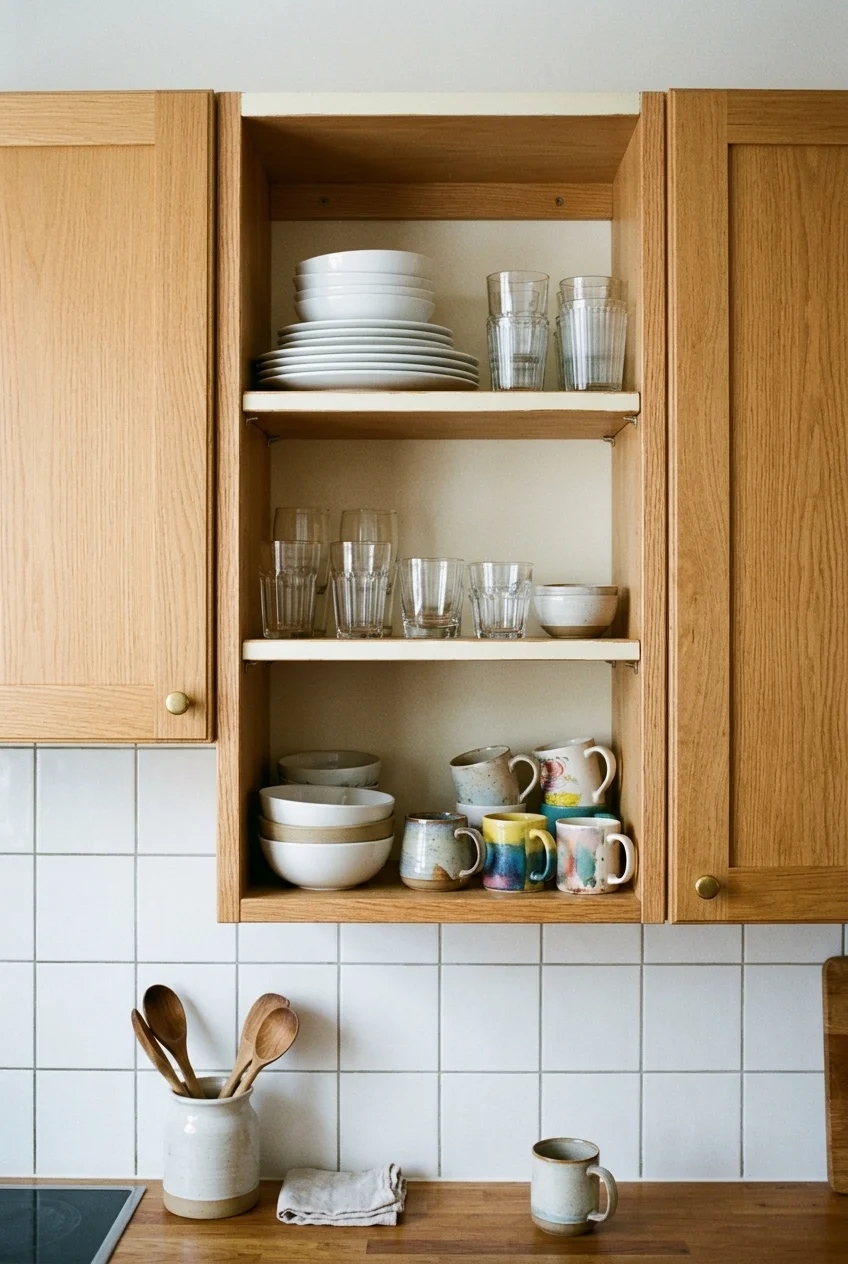
Removing a single pair of doors creates an open display without removing the cabinet box. Choose a convenient spot for dishes you actually use regularly.
Fill redundant hinge holes and finish the visible edges. Test the open arrangement before doing permanent work, since exposed shelves also reveal everything stored inside.
Group plates below glasses and leave a little space around each stack. Keep nearby closed storage for packaged food and pieces you prefer out of sight.
8. Paint the inside of an existing display cabinet
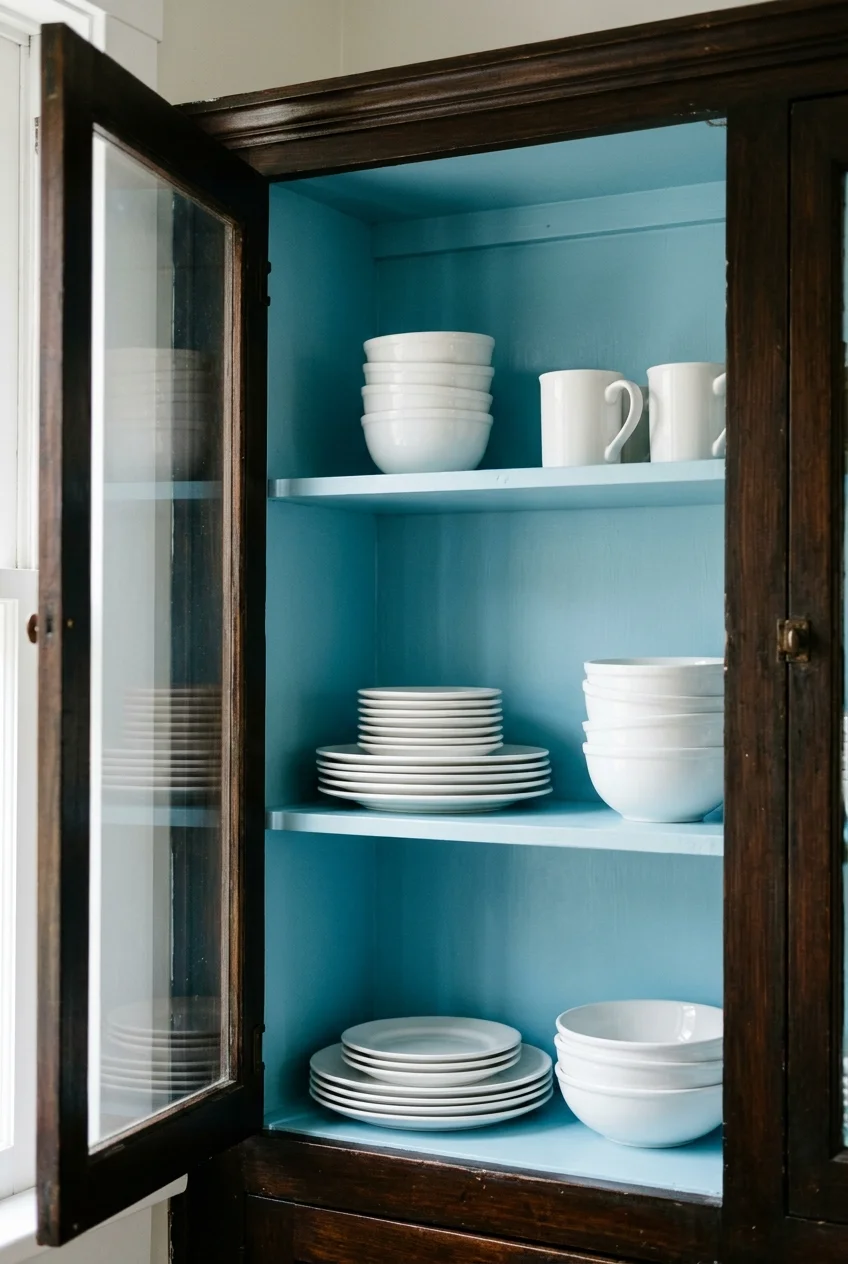
A finished interior makes a glass-front cabinet or open cupboard feel considered. Pale paint can distinguish stored dishes from a dark interior without replacing the front.
Remove shelves if possible and prepare every surface according to its material. Let the chosen coating cure before returning dishes so objects don't stick to it.
Keep the exterior unchanged when it already works with the kitchen. An interior-only project makes the biggest difference where those inner surfaces are regularly visible.
9. Replace a few solid inserts with textured glass
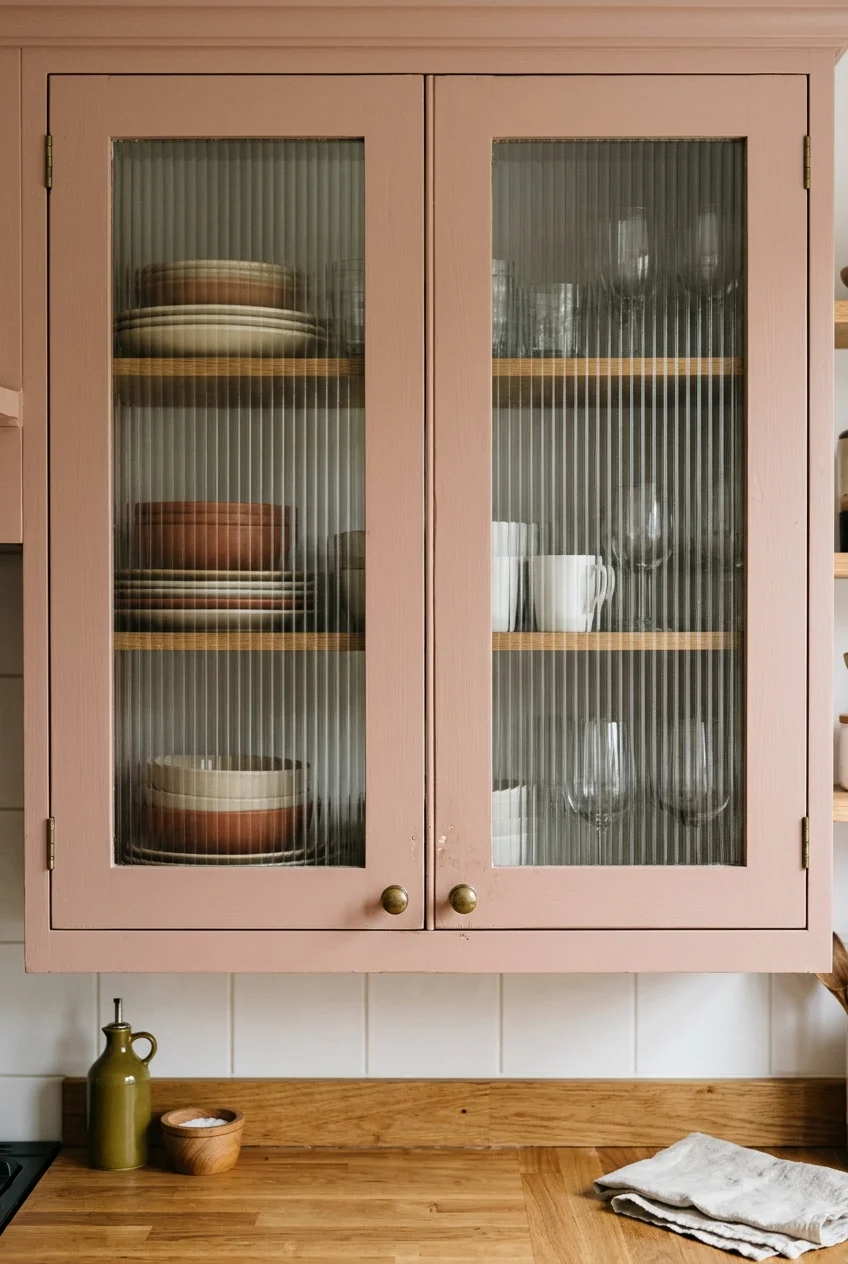
Textured glass softens the view of stored dishes while letting a cabinet front feel lighter. Use it selectively where you want display rather than hidden storage.
Ask a cabinetmaker whether the existing door construction can accept a replacement insert. A solid slab cannot necessarily be altered like a removable framed panel.
Have suitable glass cut and secured for the application, and confirm the hinges can handle the finished door. Don't rely on decorative adhesive alone for retention.
Vertical reeding makes the cabinet contents less distinct while adding a fine linear texture. Compare it with clear glass if you want the dishes themselves to be visible.
10. Reface the visible cabinet surfaces as one coordinated system
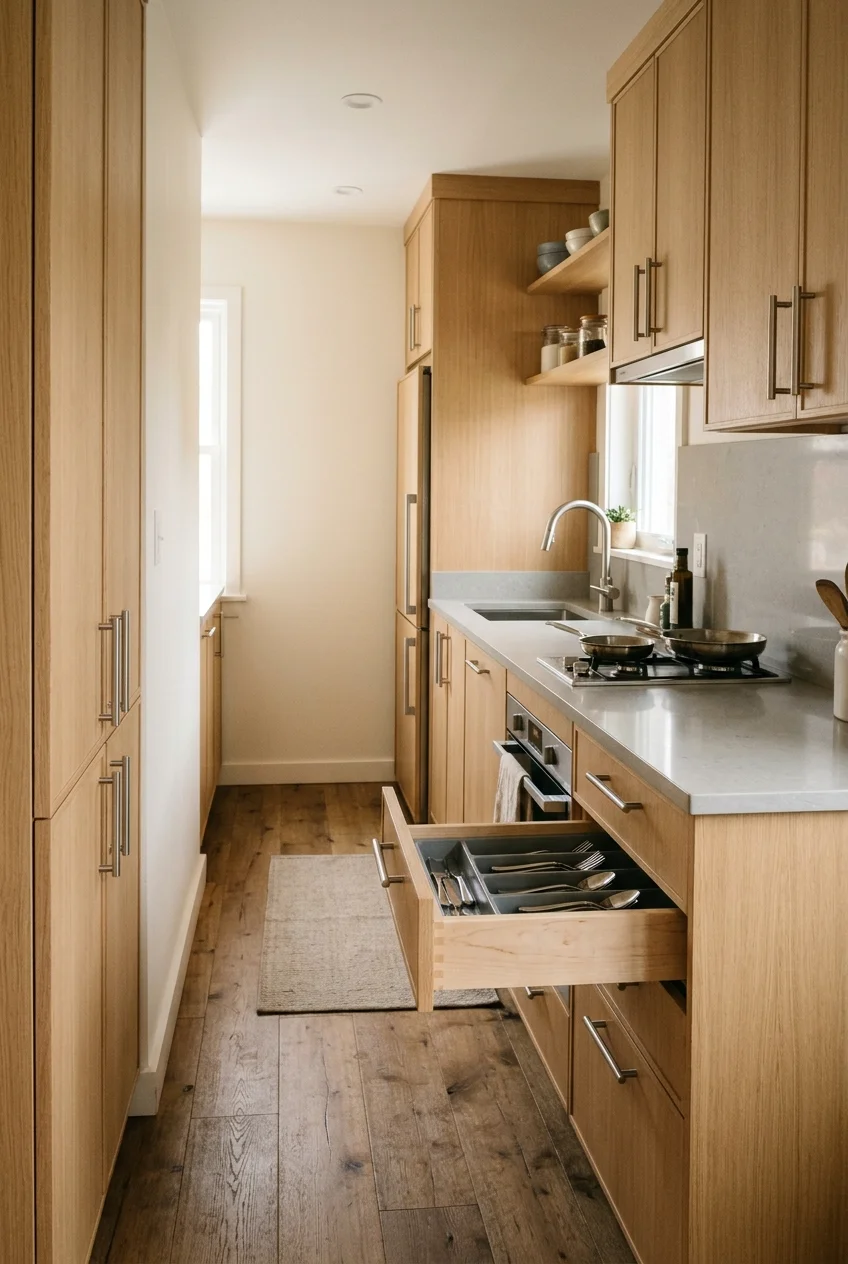
Refacing changes doors, drawer fronts, and visible cabinet surfaces while retaining usable boxes. It suits a layout that works but has finishes beyond a simple refresh.
Inspect the boxes, attachment points, and interior condition before paying for new fronts. Refacing won't create a better layout or repair cabinets weakened by water.
- Confirm frame construction and door overlay.
- Check hinge compatibility and required drilling.
- Include exposed ends, filler strips, and toe kicks.
- Compare a complete installed quote with other repair options.
View a door sample beside the proposed frame covering. Similar names don't guarantee matching color or sheen, particularly across real wood, veneer, and manufactured finishes.
Decide which interior improvements matter before the new fronts arrive. A rollout tray or repaired drawer can be easier to coordinate while hardware work is underway.
Ask how edges, corners, and seams will be finished, and what preparation the adhesive system requires. Those details affect the result more than a distant room photograph.
Keep the scope coherent: changing only fronts while leaving conspicuous mismatched end panels can undermine the update. Include all visible surfaces when comparing the total cost.
11. Close a cabinet-to-ceiling gap with proportionate top trim
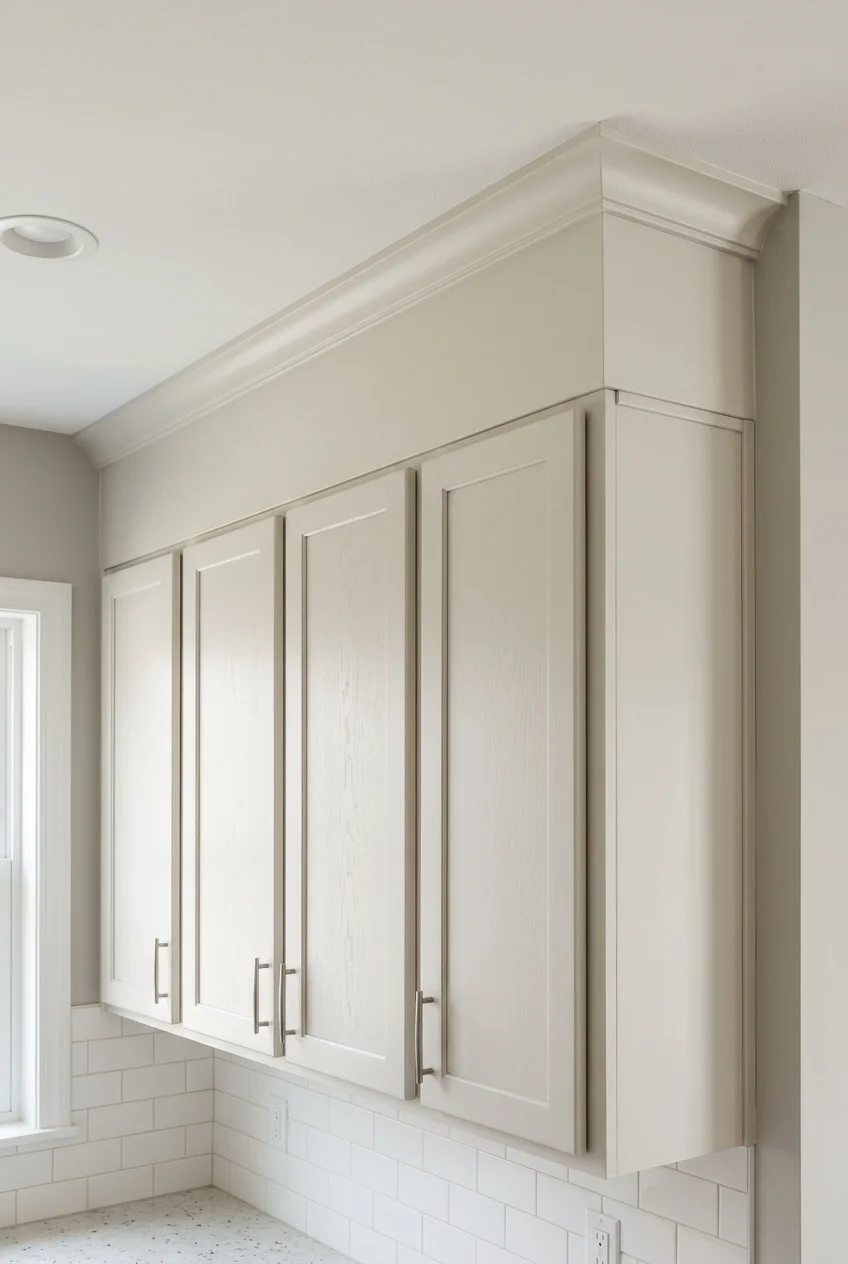
A modest top extension can give short upper cabinets a more finished outline. It works best when the ceiling and cabinet run allow a consistent treatment.
Measure the gap along the entire run before designing the trim. An uneven ceiling may need scribed pieces rather than identical boxes that expose crooked joints.
Secure added pieces to suitable framing or cabinet structure, and preserve ventilation or service access. Don't use decorative trim to conceal an unexplained duct or electrical connection.
Choose a shallow crown or plain band that matches the doors' scale. Oversized molding can crowd a low ceiling and cost more than the improvement warrants.
12. Finish an exposed cabinet end with a matching panel
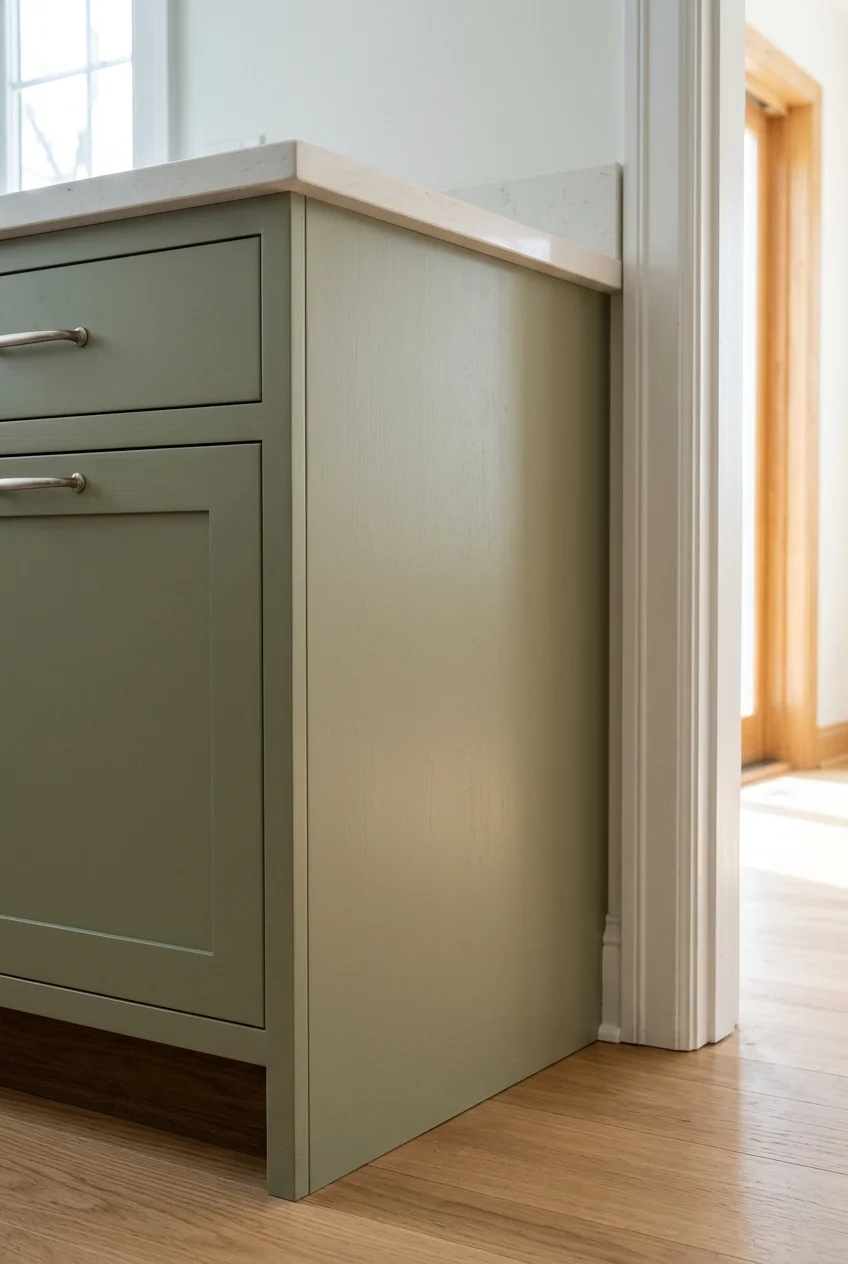
An exposed side panel can look unfinished even when the doors are attractive. A fitted cover panel gives that end the same visual weight as the fronts.
Check added thickness beside doorways and appliances before ordering. Finish the bottom and rear edges neatly, and keep any required appliance ventilation opening unobstructed.
13. Realign doors for straighter cabinet lines
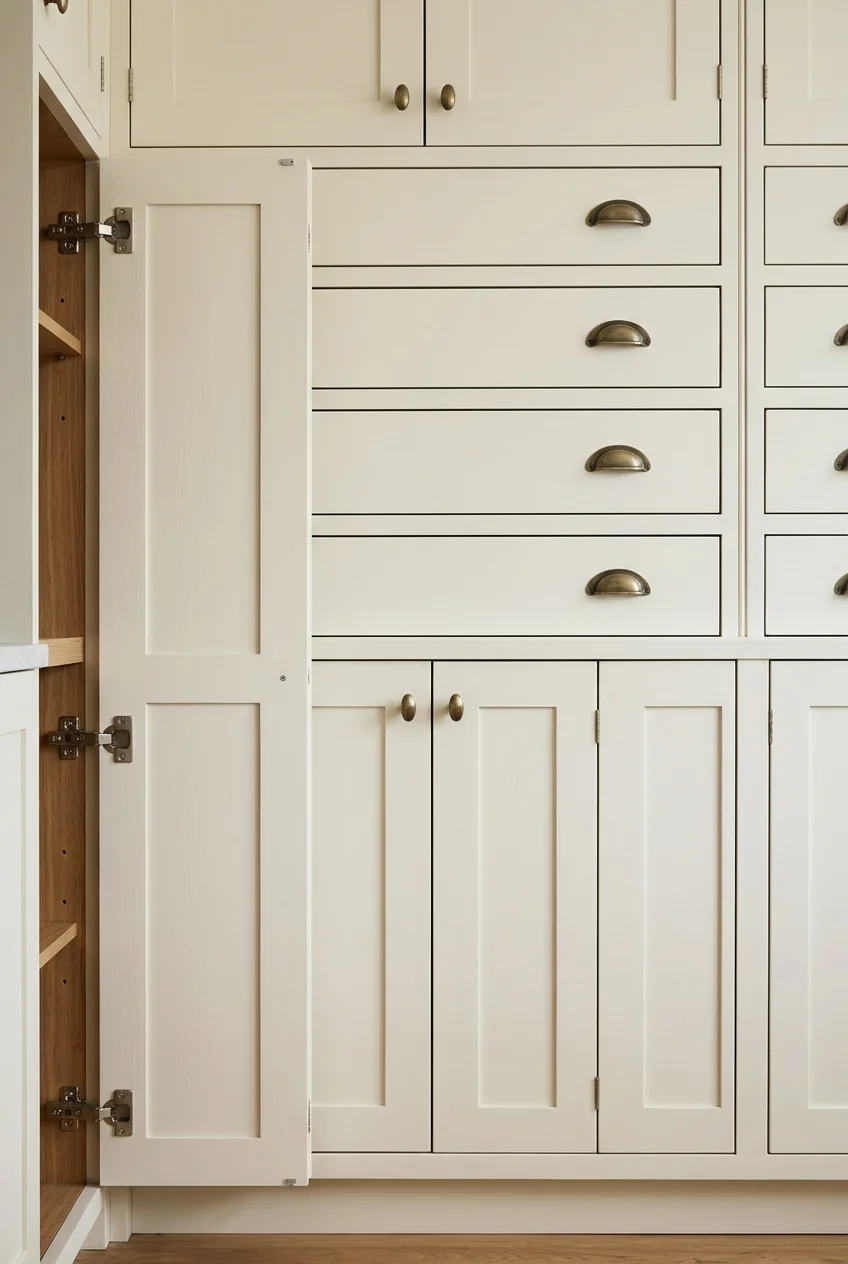
Uneven door gaps can make good cabinets look tired. Adjusting suitable hinges restores straighter lines without changing the finish, hardware style, or cabinet arrangement.
Identify the hinge and follow its adjustment instructions, making small changes with the door supported. Loose mounting material needs repair before adjustment will hold.
Check neighboring fronts after each change and open the doors fully. If a box has shifted or a door is warped, adjustment alone may not solve it.
14. Renew the toe-kick strip for a continuous base
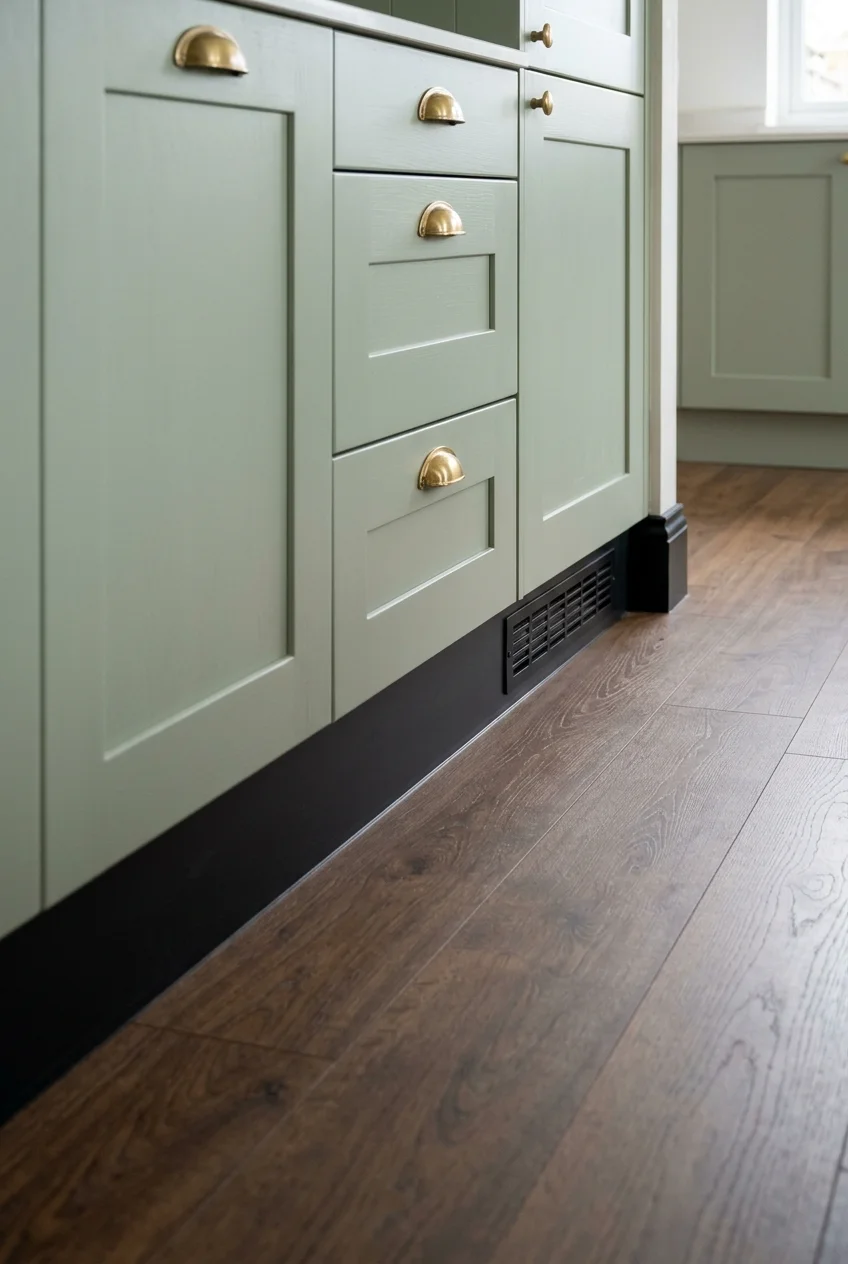
A clean, continuous toe-kick strip tidies the line beneath existing cabinets. Match the cabinet finish for a quiet base or use a deliberately recessed darker strip.
Keep the original foot recess and any ventilation grilles functional. Use material suited to the location, and make sections removable where maintenance access is needed.
Resolve leaks before covering water damage, especially beside a dishwasher. A decorative strip should finish a sound cabinet base rather than hide an ongoing moisture problem.
15. Use standard ceramic tile in a simple running bond
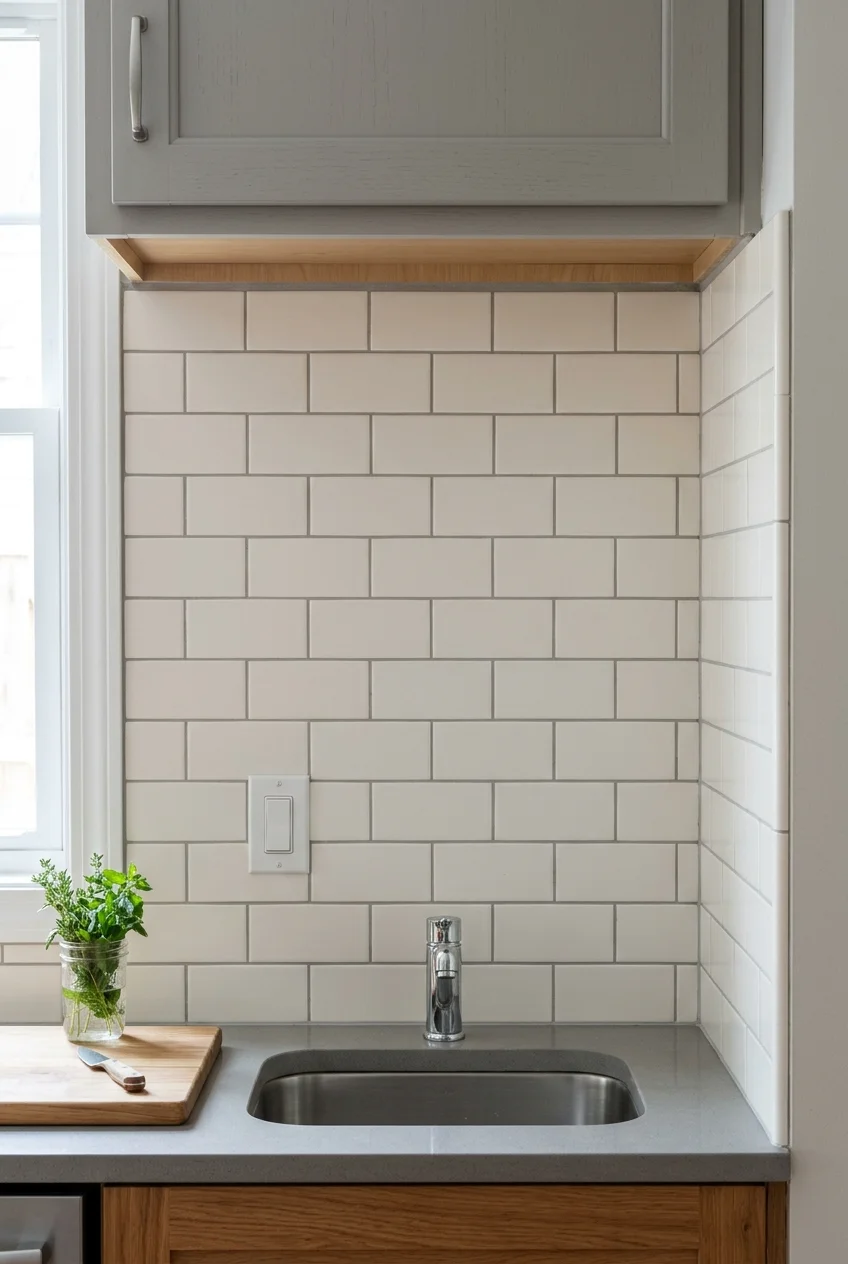
Ordinary rectangular ceramic tile can create a complete backsplash without a complicated pattern. Spend attention on the layout, edge treatment, and grout rather than elaborate shapes.
Dry-lay a sample row and check where cuts land beside windows and corners. Narrow slivers can make an otherwise straightforward installation look improvised.
Include setting materials, tools, trim, and wall preparation in the comparison. A low tile price doesn't describe the full cost of a finished backsplash.
- Choose grout compatible with the tile and joint width.
- Plan movement joints at changes of plane.
- Finish exposed edges with suitable trim.
- Keep outlets and their boxes properly accommodated.
For more visual combinations beside pale doors, browse these backsplash ideas for white cabinets and compare them with the countertop and finishes you plan to retain.
16. Turn rectangular tile vertically on a short wall
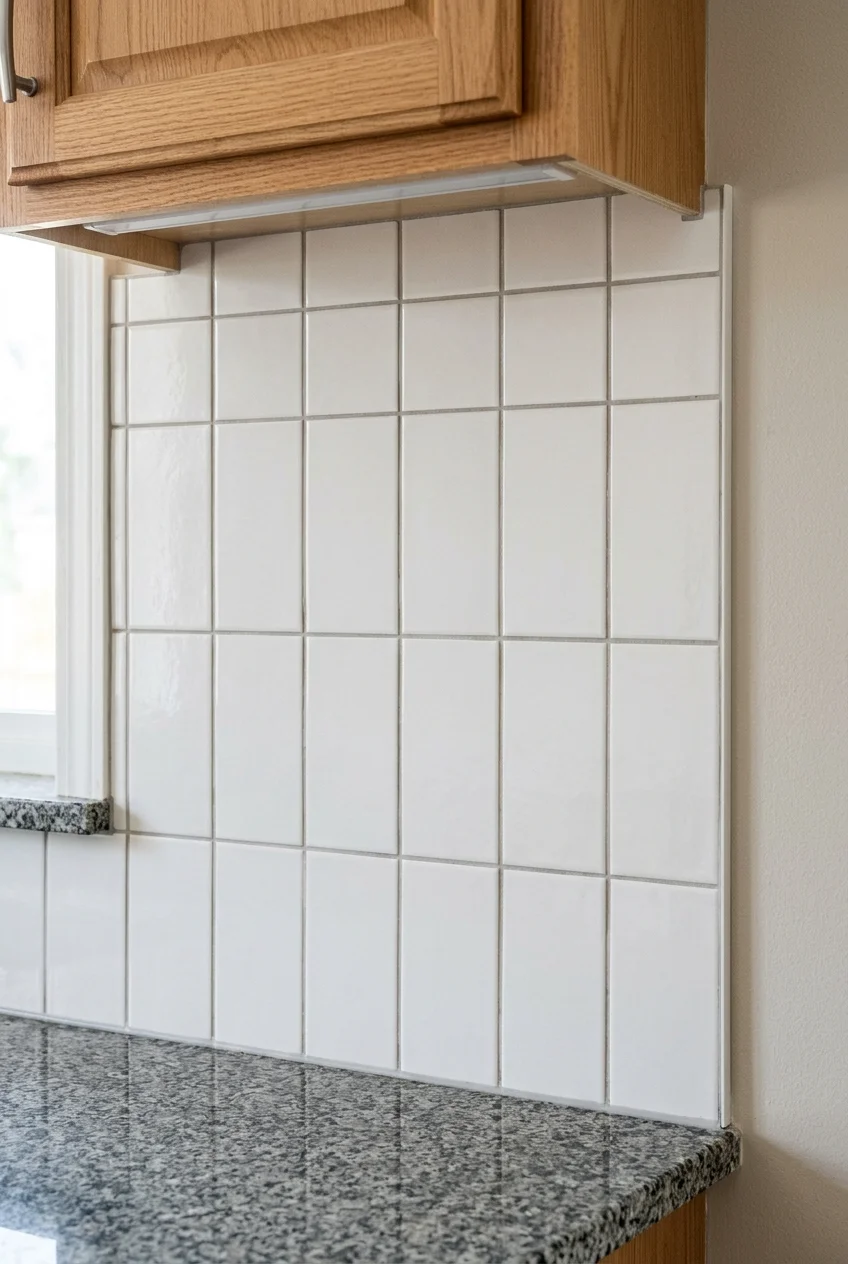
Vertical stacked tile changes the direction of a small backsplash without requiring decorative shapes. It creates a clear upright rhythm on a short, otherwise plain wall.
Map the full height before setting tile so the upper edge ends deliberately. Consistent joints matter more here because the stacked lines make misalignment obvious.
Use this as an alternative layout for a manageable area, rather than another material purchase. Compare cutting time and waste against the standard arrangement before choosing.
17. Give inexpensive square tile a restrained two-color pattern
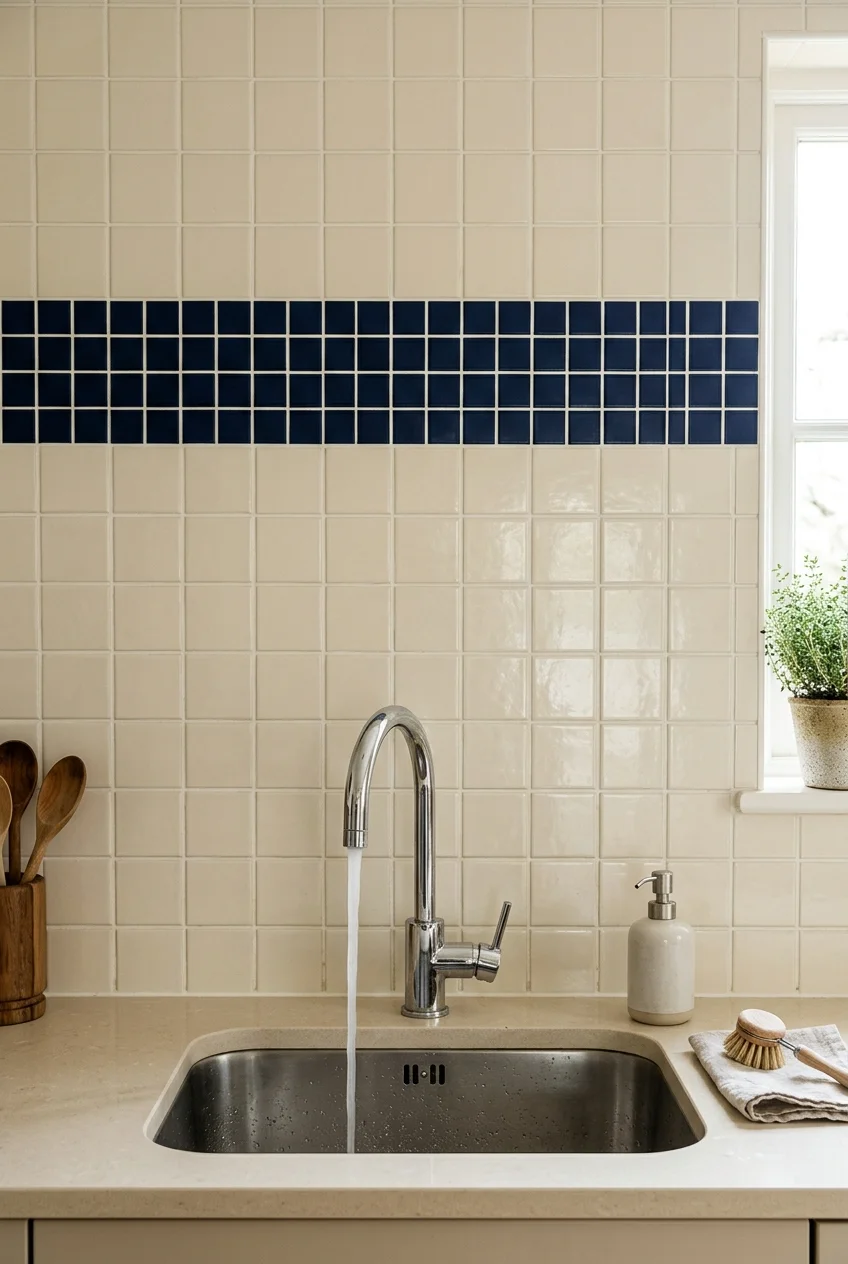
Two colors of plain square tile can make a graphic backsplash from simple stock. Keep the pattern limited so it doesn't compete with a busy countertop.
Lay out the exact repeat before buying quantities, including cuts at both ends. Tiles from different lines may differ in thickness even when their nominal sizes match.
Run one narrow contrasting band through a plain field if full checkerboard feels overwhelming. Align it with a deliberate wall feature rather than an arbitrary halfway point.
18. Try adhesive backsplash sheets on an approved smooth wall
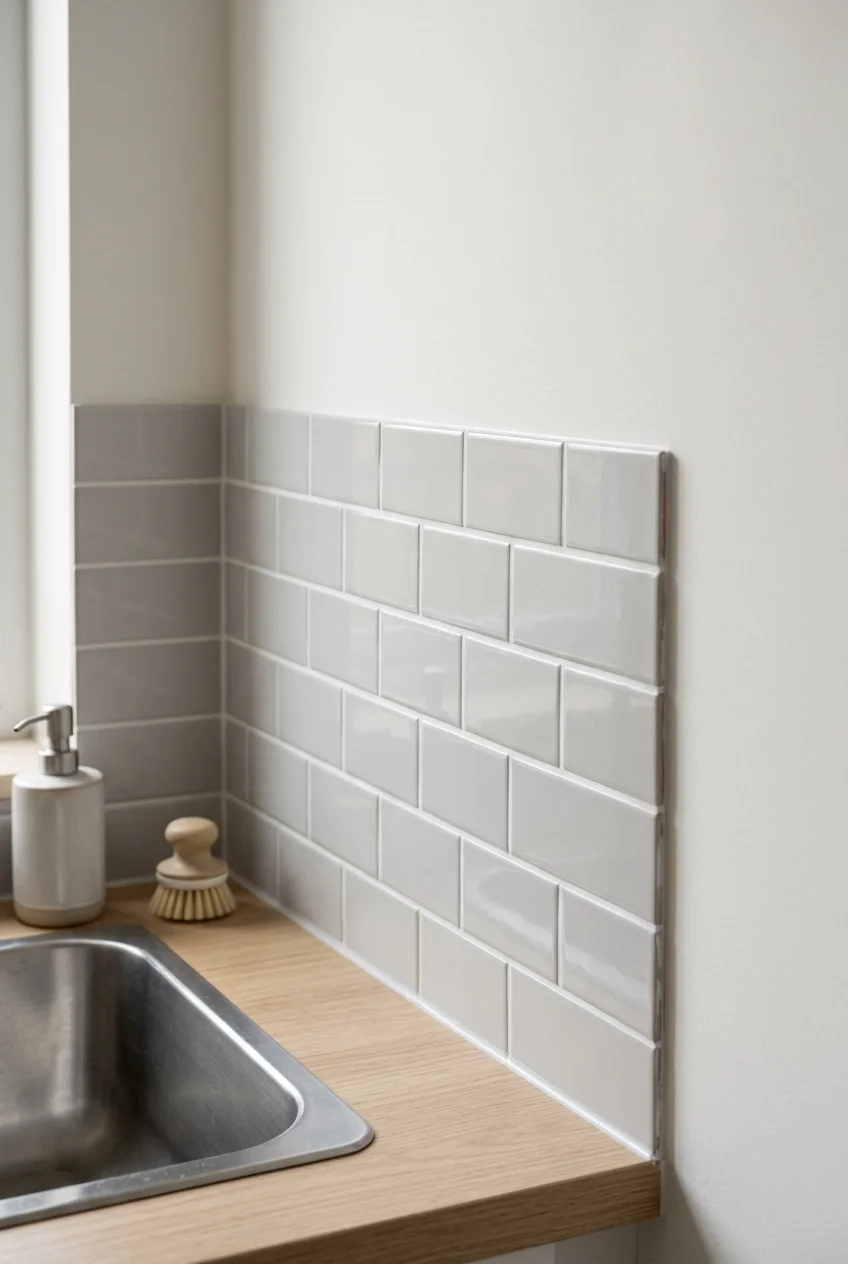
Adhesive tile sheets can refresh a small backsplash without mortar work when the wall and product are compatible. Start with a sample before covering the whole run.
Check the manufacturer's surface preparation, paint-curing requirements, and heat restrictions. Products differ, so a general peel-and-stick label doesn't establish suitability behind your particular stove.
- Confirm the substrate is approved, sound, clean, and dry.
- Plan overlaps and end cuts using the product instructions.
- Test a small area and inspect its edges.
- Apply the sheets in the specified sequence and finish junctions as directed.
Price the whole measured area, including waste and finishing accessories, against basic ceramic tile. Adhesive sheets aren't automatically the least expensive choice for a large backsplash.
Rental note Get permission before attaching adhesive finishes in a rental. A removable claim doesn't guarantee the underlying paint or wall will survive removal without repairs.
19. Refresh the grout while keeping good backsplash tile
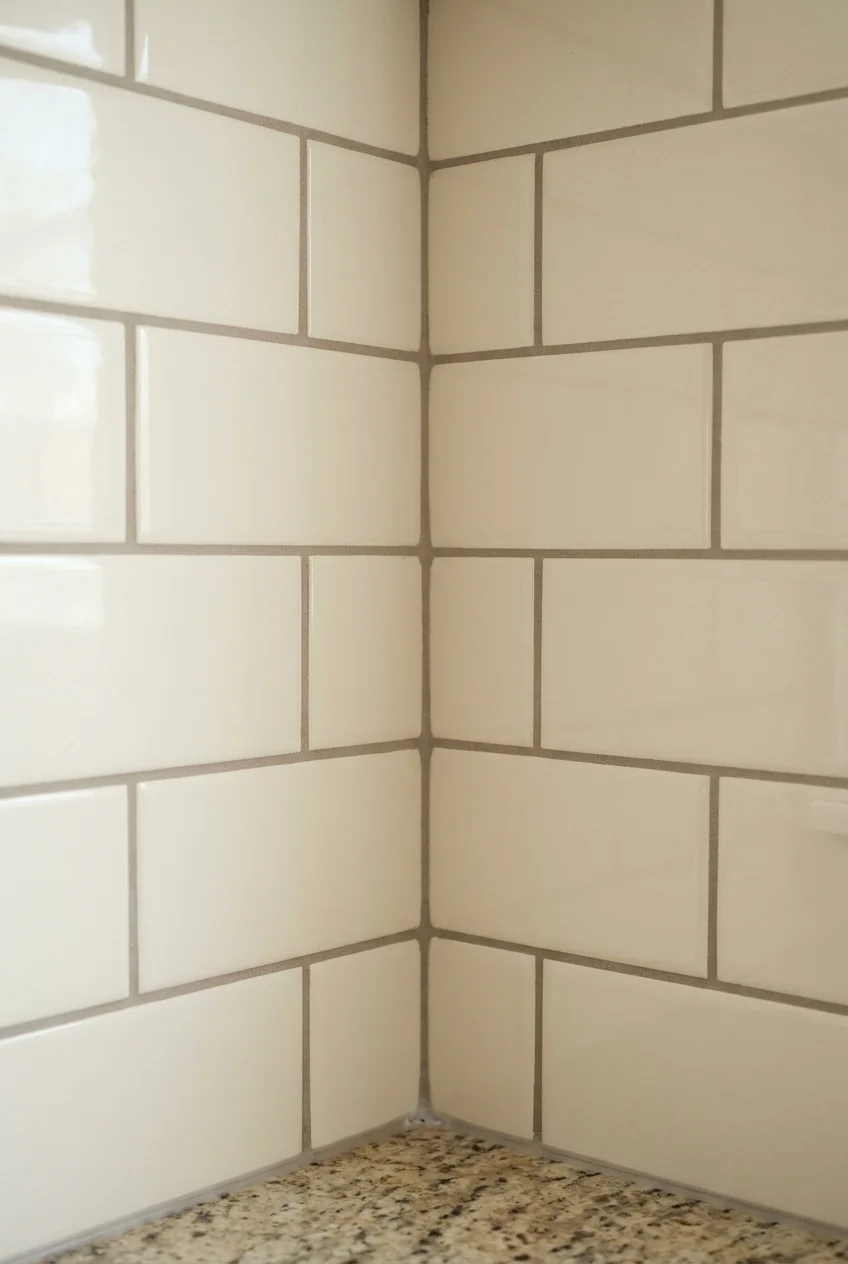
Sound tile can stay when dingy or unevenly colored grout is the main distraction. Cleaning or a compatible grout colorant can change the wall's overall appearance.
Check whether the joints need repair before recoloring them, and follow the product's preparation instructions. Colorant won't resolve loose tiles, moisture problems, or failed underlying work.
Test a small area against the tile surface, especially if it is porous or textured. Choose a quieter joint color when you want the tile pattern less prominent.
20. Use a purpose-made metal splash panel behind the range
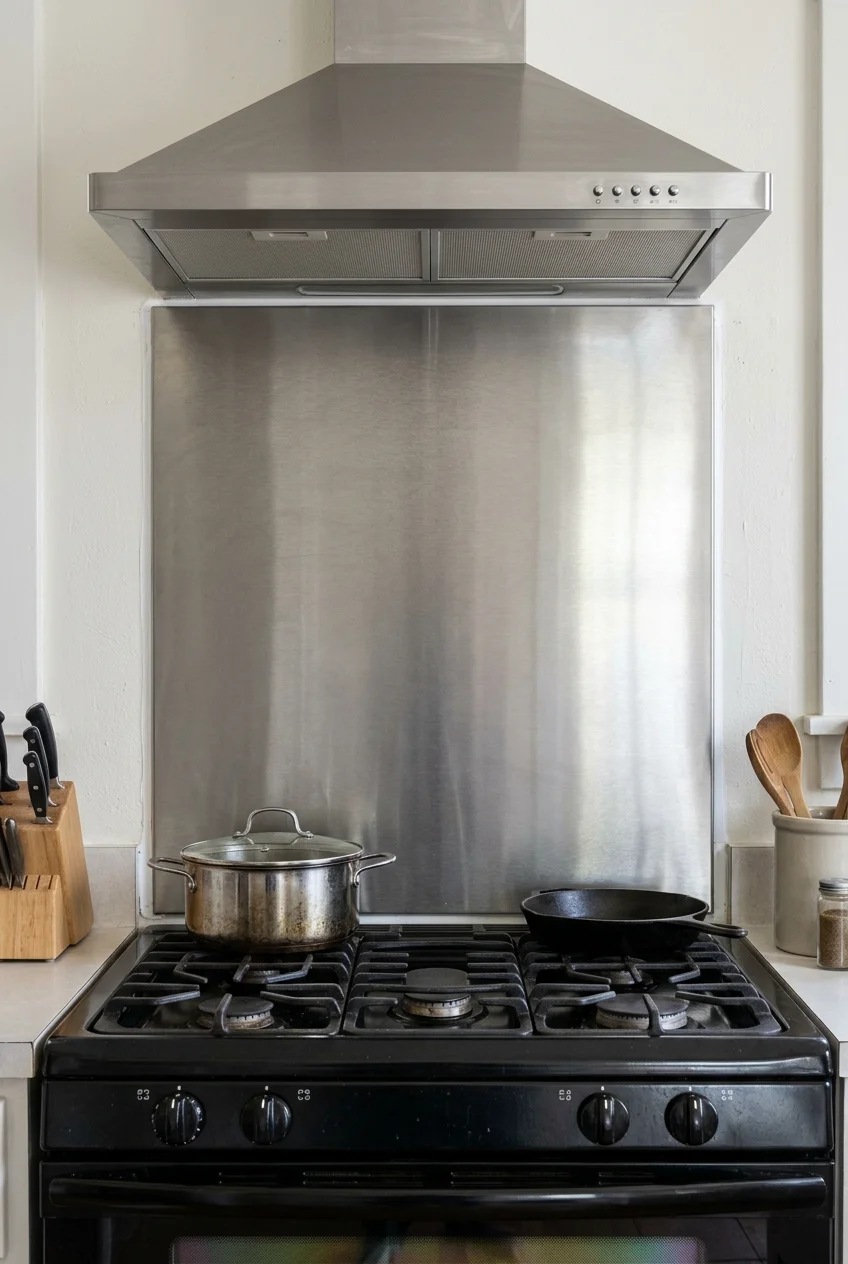
A single metal panel can give the cooking area a clear focal point with fewer grout lines. Choose a panel specifically suitable for the appliance location.
Confirm dimensions, installation method, edge finishing, and the range and hood requirements before ordering. A random sheet of metal doesn't establish a compliant heat-protection assembly.
Compare a brushed finish sample with nearby appliances, since reflections and fingerprints vary. Keep adjacent wall treatment simple so the practical panel looks deliberately integrated.
Use an installer when cutting, fastening, or appliance access exceeds your skills. Include that labor when comparing the panel with a small tiled cooking zone.
21. Choose a continuous laminate splashback for a prep zone
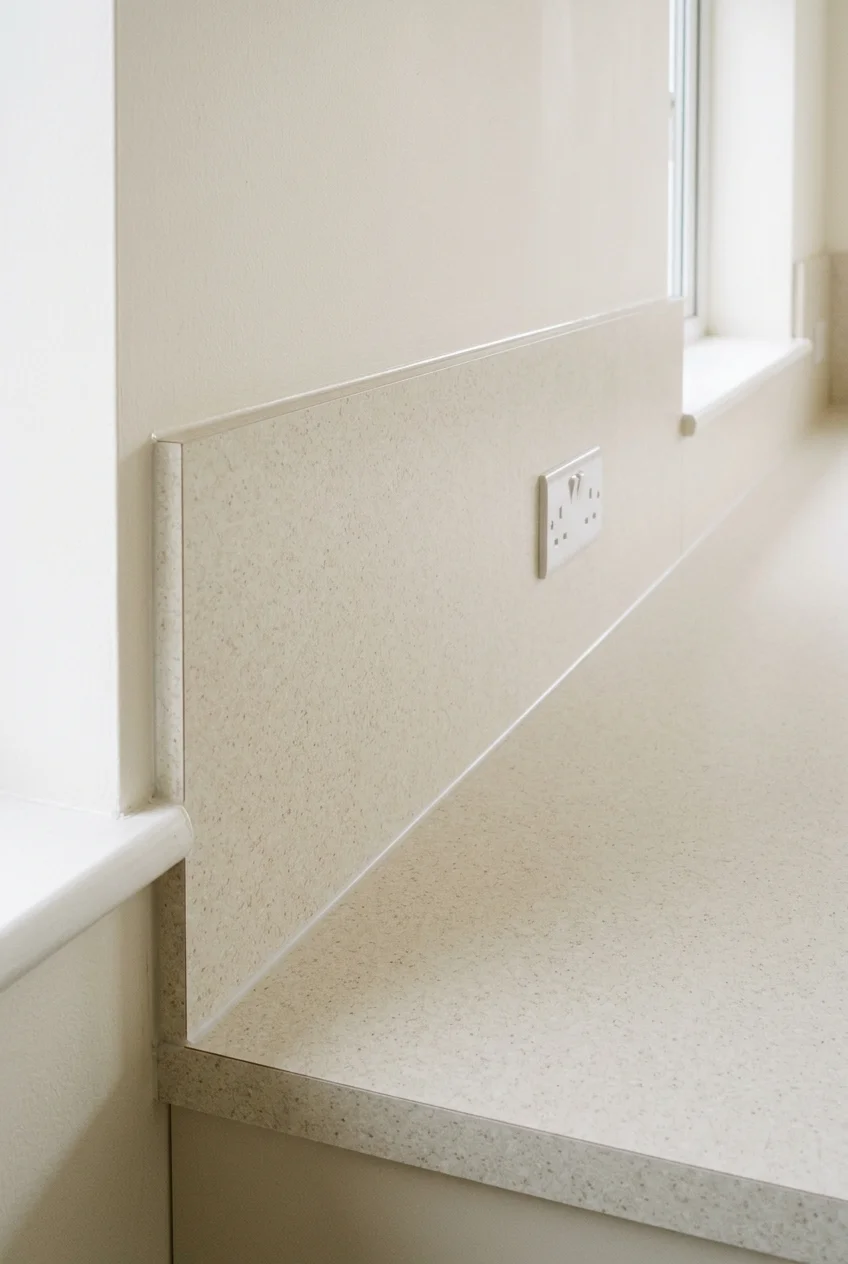
A laminate splashback can echo a new counter or provide a plain washable surface with few seams. Use a product approved for the intended wall application.
Ask the supplier about substrate preparation, sealing at junctions, and compatibility around outlets. Ordinary laminate isn't a universal substitute for heat-rated material behind a cooking appliance.
Keep the panel on a prep or serving run when that best fits its limits. Request a sample large enough to judge the pattern at wall height.
22. Add beadboard to a dry breakfast wall
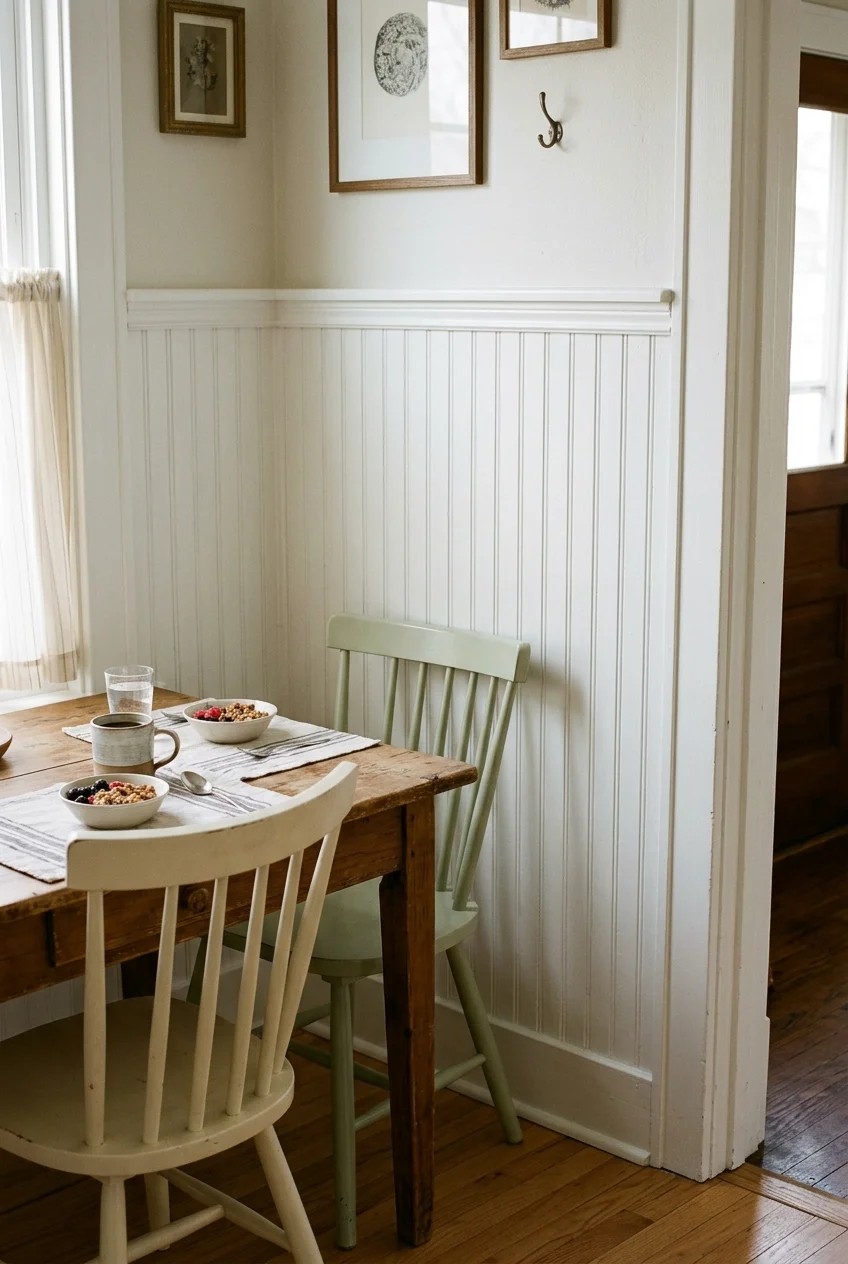
Painted beadboard can give an eating corner texture without replacing kitchen cabinets. Keep it on a dry wall where chair scuffs and daily cleaning are manageable.
Use a panel and finish suited to the room, with a neat cap and finished edges. It should complement the cabinetry without pretending to be a heat-rated backsplash.
Let the cap rail sit above chair backs, then check its position against switches and nearby trim. The horizontal line should belong to the whole corner.
23. Tile one full-height feature area instead of every wall
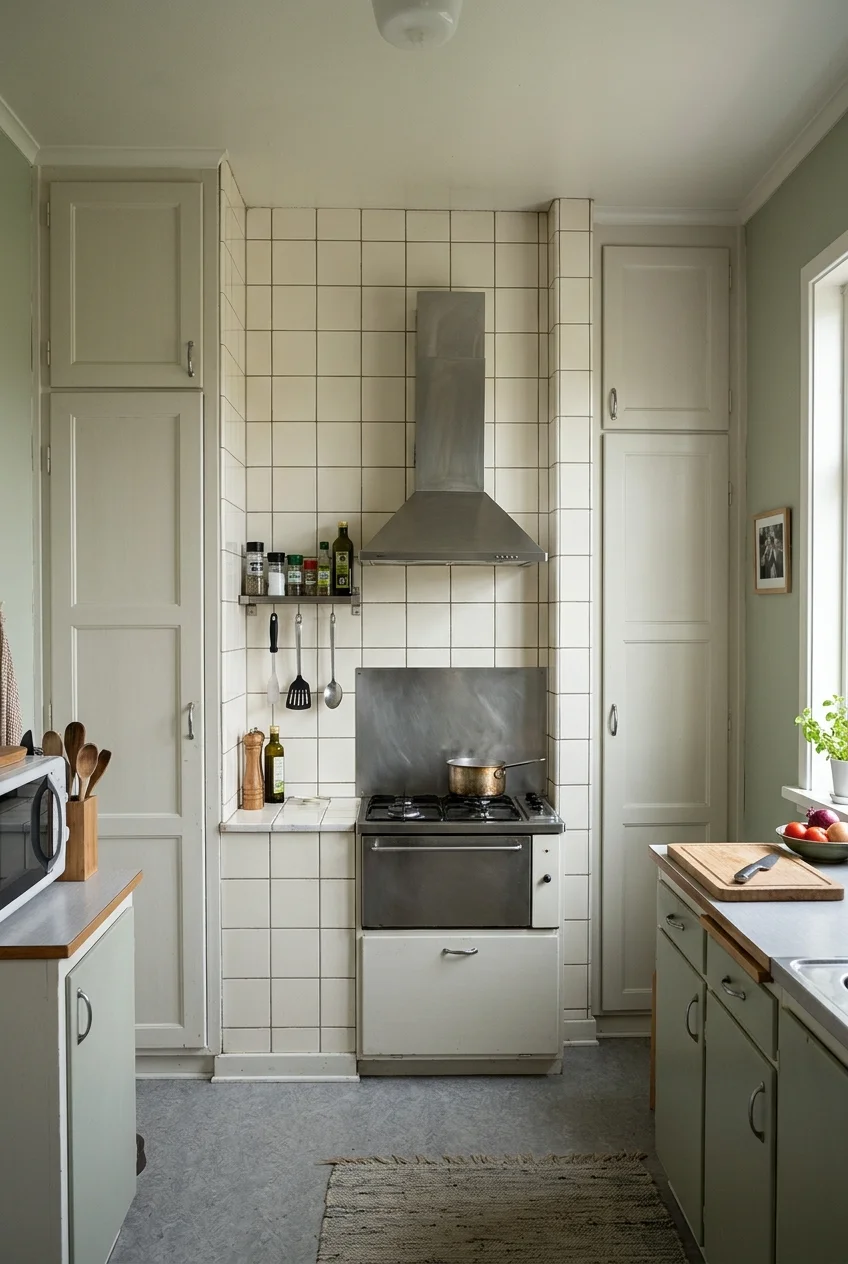
Concentrating tile on one visible wall can give the kitchen a stronger focal point. Keep nearby walls simpler so the finished area has a clear boundary.
Measure the entire feature, including cuts around the hood or window, before calling it a saving. Extra height can use more tile than several low backsplash runs.
Choose a location where the material can end cleanly at cabinetry or a corner. Avoid stopping an expensive accent randomly halfway across an otherwise continuous wall.
24. Keep a tiled splash band low and finish its top edge
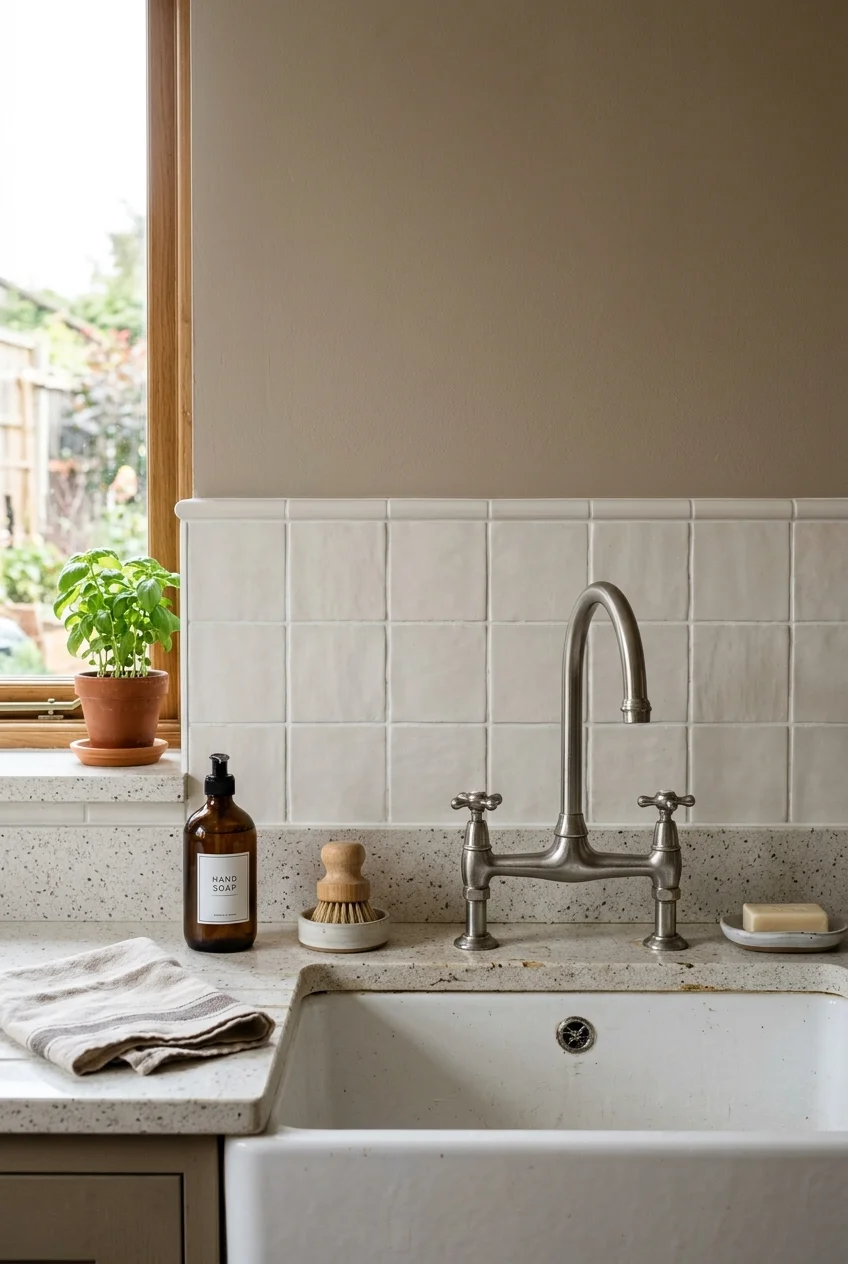
A low tiled band can protect a limited splash area while leaving more painted wall visible. It suits a restrained refresh when full-height coverage isn't necessary.
Plan the height around actual splashes, faucet placement, and nearby outlets. Include a suitable top trim and keep the counter junction detailed for movement and moisture.
Compare a complete sample with the wall color before committing. A narrow band needs a crisp stopping line because its exposed upper edge remains plainly visible.
25. Use a stock postformed countertop on a straight run
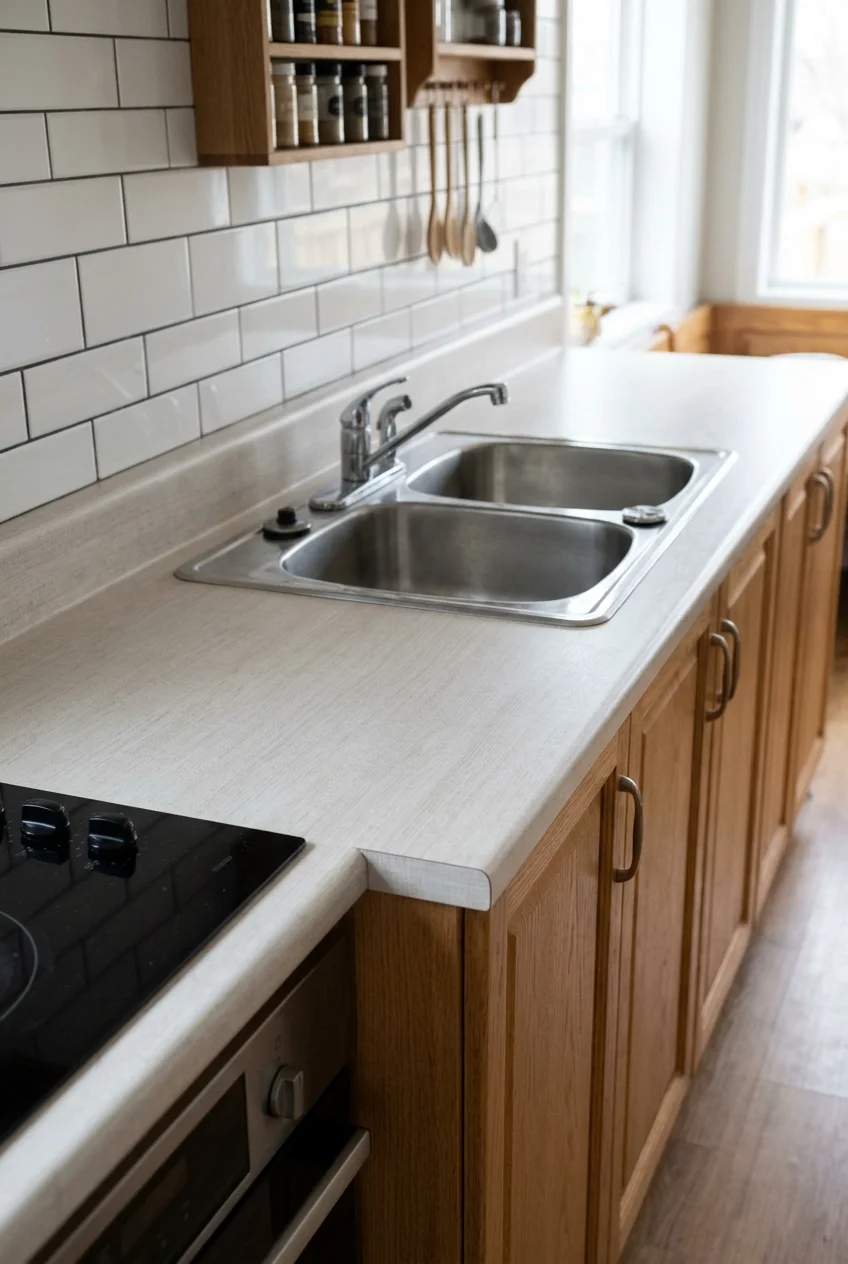
A stock laminate countertop can simplify a short, straight replacement, especially when its built-in backsplash and front edge suit the room's existing dimensions.
Measure the cabinets, overhang, wall irregularities, and sink location before ordering. Available lengths and end treatments matter more than the attractive price on one stock piece.
- Include finished end caps and any end splash.
- Check sink cutout and faucet requirements.
- Plan sealed edges around water exposure.
- Account for removal, delivery, fitting, and plumbing reconnection.
Corners and complicated joins may justify professional fabrication. A stock length stops being a shortcut if the room needs extensive modification to accommodate it.
Protect the finished laminate with cutting boards and trivets, and wipe spills around seams promptly. A new surface still needs ordinary care to stay useful.
26. Choose fabricated laminate when the room needs custom fitting
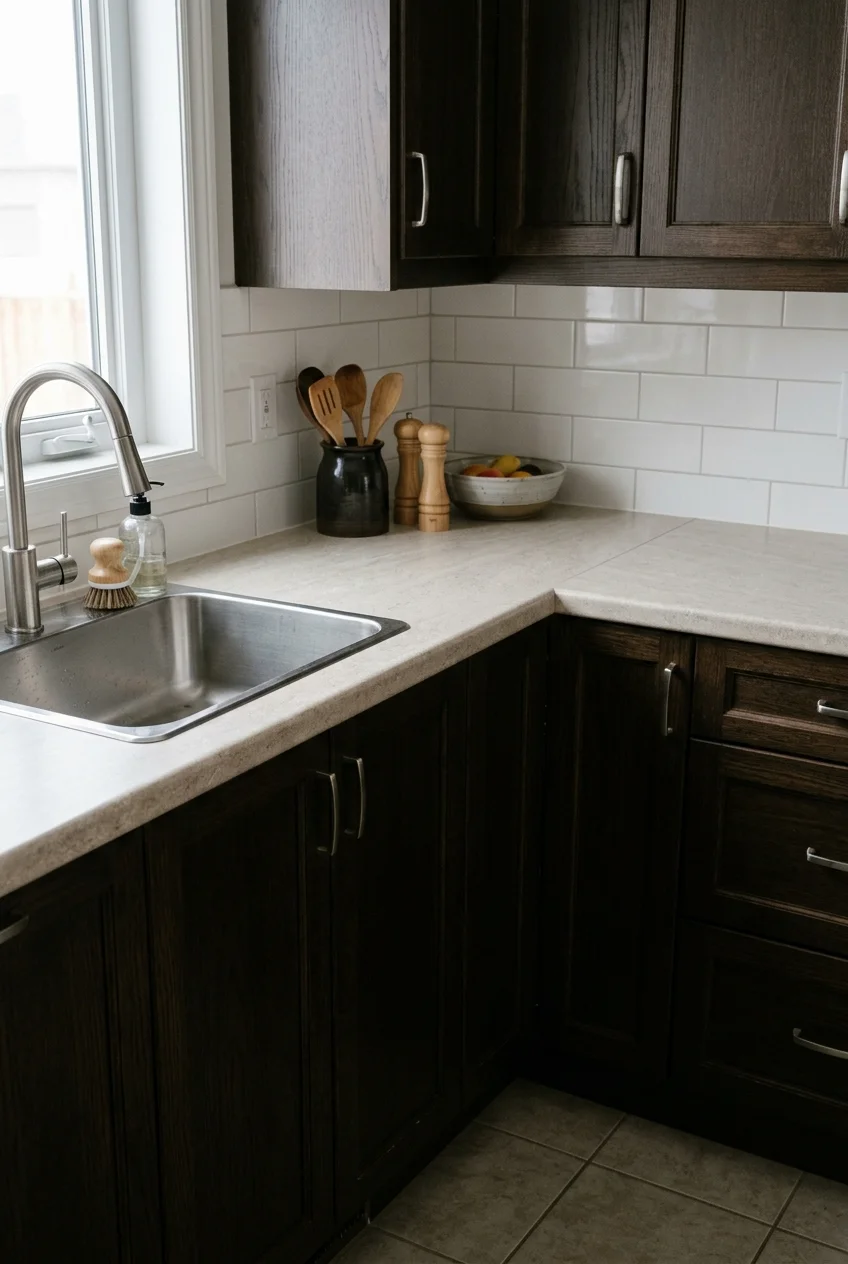
Custom-fabricated laminate lets you coordinate lengths, edges, and corners without buying stone. A quiet stone-look pattern can sit comfortably beside plain retained cabinet fronts.
Ask the fabricator where seams will fall and how sink openings will be protected. Bring cabinet measurements and appliance details instead of comparing material samples alone.
View the pattern at a larger scale before choosing pronounced veining. Small samples can hide a repeat that becomes obvious across a long countertop.
Compare complete installed quotes with the same sink, edge, and removal scope. The material choice alone doesn't determine which countertop project costs less.
27. Reserve butcher block for a dry peninsula
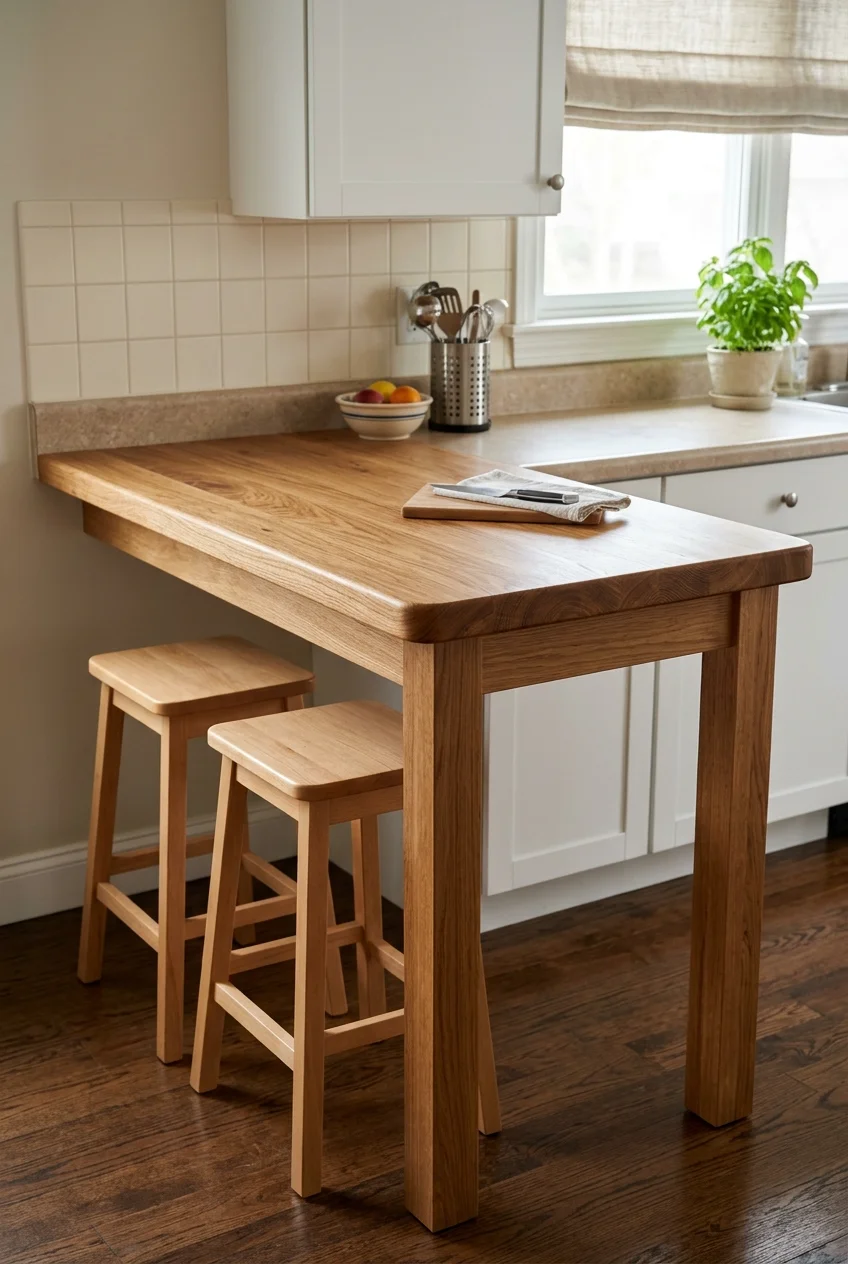
A wood top on a dry peninsula introduces warmth without requiring wood around the sink. Pair it with a simpler existing worktop elsewhere in the kitchen.
Choose a countertop product and finish appropriate to its intended use, then follow its installation requirements. Cutting boards, oiled tops, and film-finished surfaces aren't interchangeable systems.
Confirm support, fastening, and allowance for wood movement before fitting the top. Any seating overhang needs the support specified for that particular product and arrangement.
Read the maintenance instructions before buying. An oil-finished top may need recurring treatment, while some other finishes require a different cleaning and repair approach.
Keep a separate board for chopping unless the finished countertop is explicitly intended for direct cutting. A dry serving surface is the easier commitment for many households.
28. Refinish an existing wood worktop after checking its condition
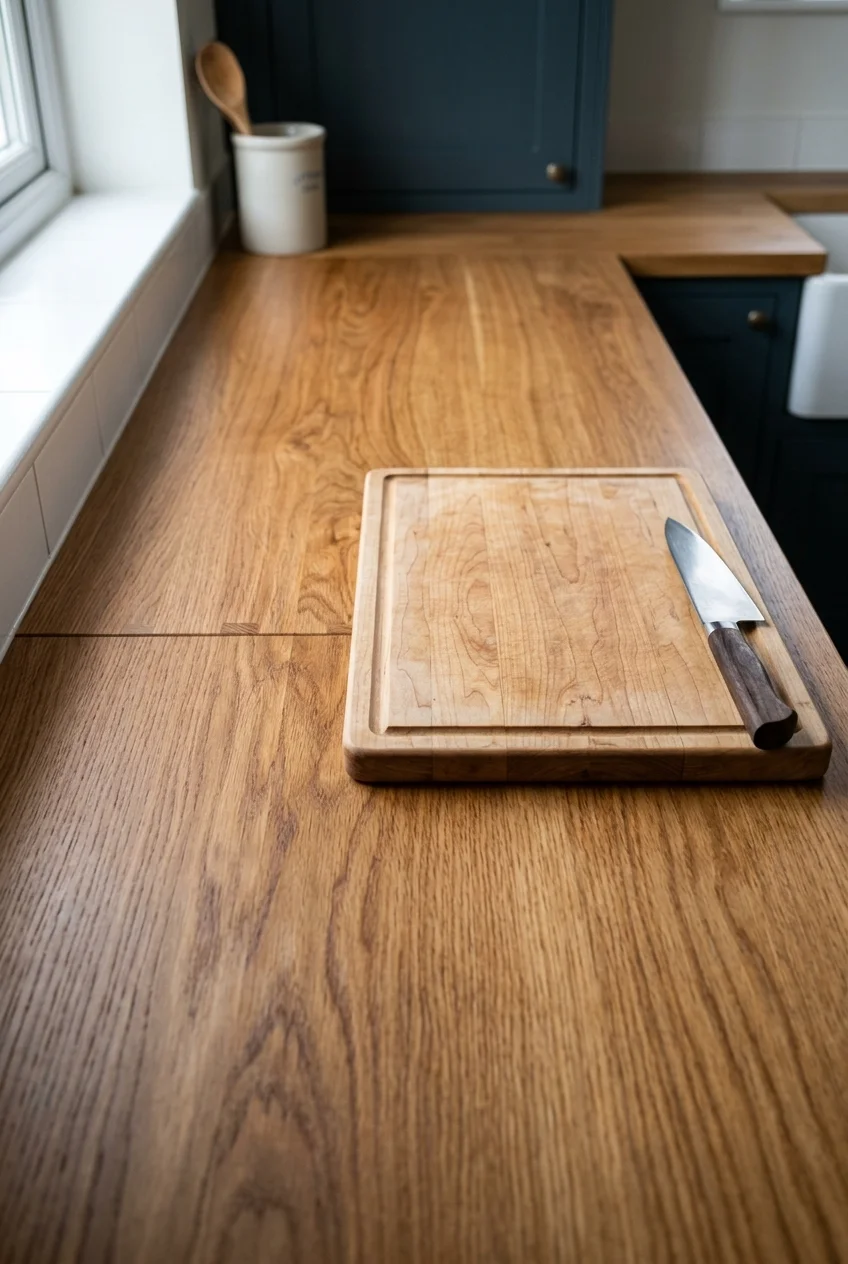
A sound wood countertop may need restoration rather than replacement. First identify whether it is solid wood, thin veneer, or another construction with a wood appearance.
Check for deep water damage, loose joints, and movement before planning a surface refresh. Sanding cannot resolve structural damage, and thin veneer offers little material to remove.
- Identify the existing finish and suitable restoration method.
- Repair problems that require a professional assessment.
- Prepare the surface without removing excessive material.
- Apply a compatible finish and respect its return-to-use instructions.
Try a concealed test area if the old treatment is uncertain. Mixing incompatible finishes can produce patchy results and make the next repair more difficult.
Schedule the work when the counter can remain out of service. Include downtime and ongoing care when deciding whether restoration is a practical budget choice.
29. Use a stone remnant on one small surface
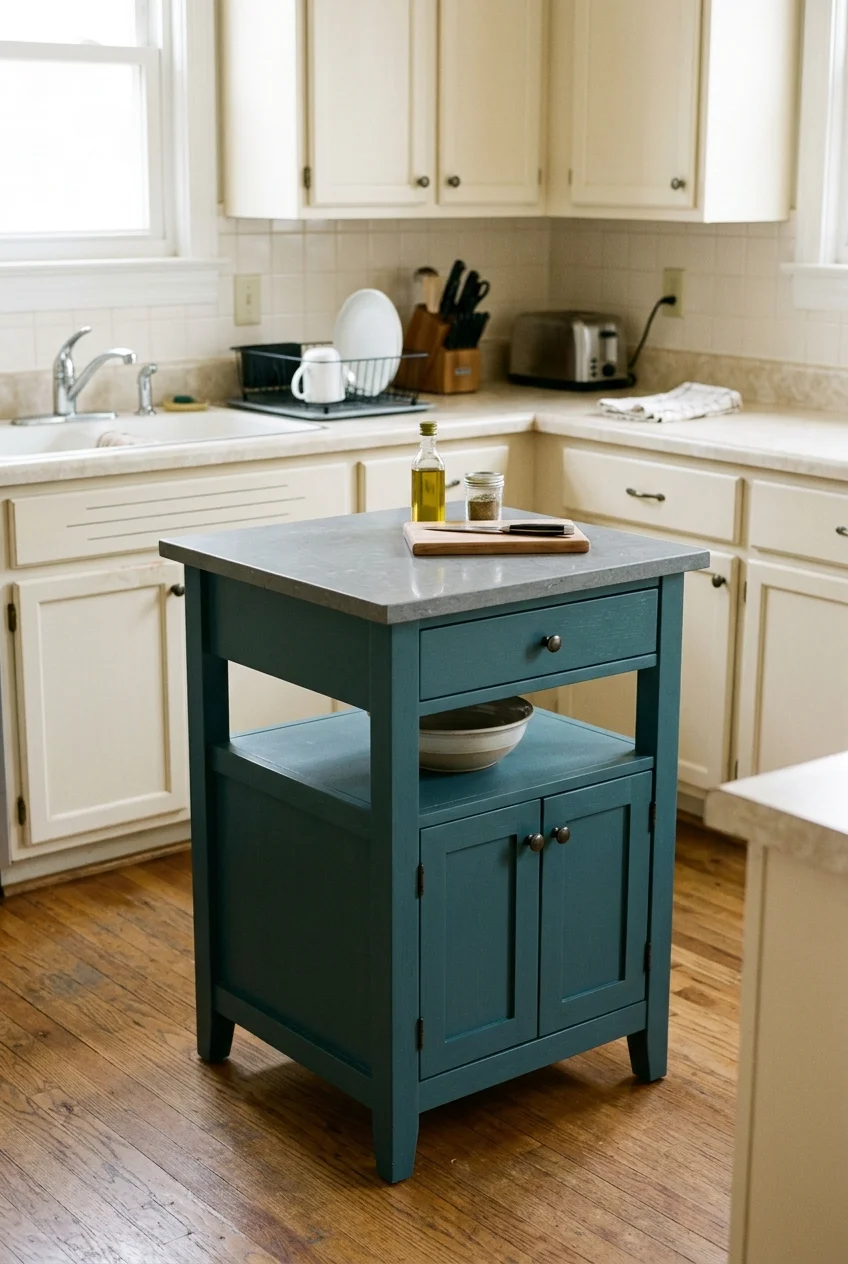
A remnant can make a small island or baking surface possible without ordering matching stone for the entire kitchen. Let the available piece guide a realistic scope.
Ask a fabricator to confirm dimensions, defects, cutouts, edge work, support, and installation. The leftover slab price is only one part of the finished cost.
Choose a piece that works with the counters staying in place. A deliberate material boundary at an island looks clearer than an awkward patch within one continuous run.
Compare the complete remnant quote with new material sized for the same surface. A bargain piece can lose its advantage after transport and extensive fabrication.
30. Replace damaged laminate edging without replacing the whole top
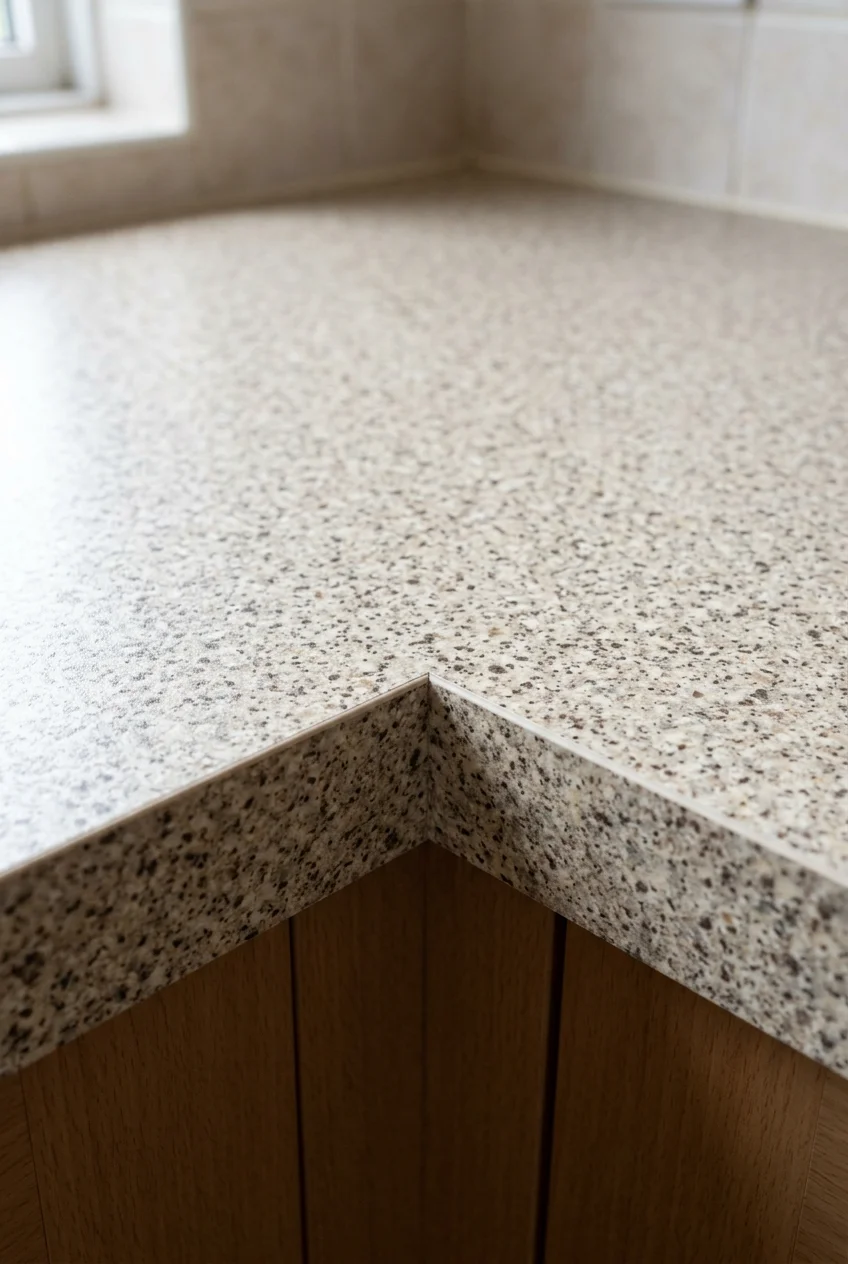
A localized edge repair can tidy an otherwise sound laminate counter. It makes sense when damage is limited and the core remains dry, stable, and intact.
Ask a countertop supplier about a compatible replacement strip and adhesive. A close pattern match and careful edge finishing matter more than covering the damage quickly.
Swollen substrate, widespread lifting, or a failed sink area needs a larger repair decision. New edging won't restore the strength of damaged material beneath it.
31. Have a solid-surface counter professionally renewed
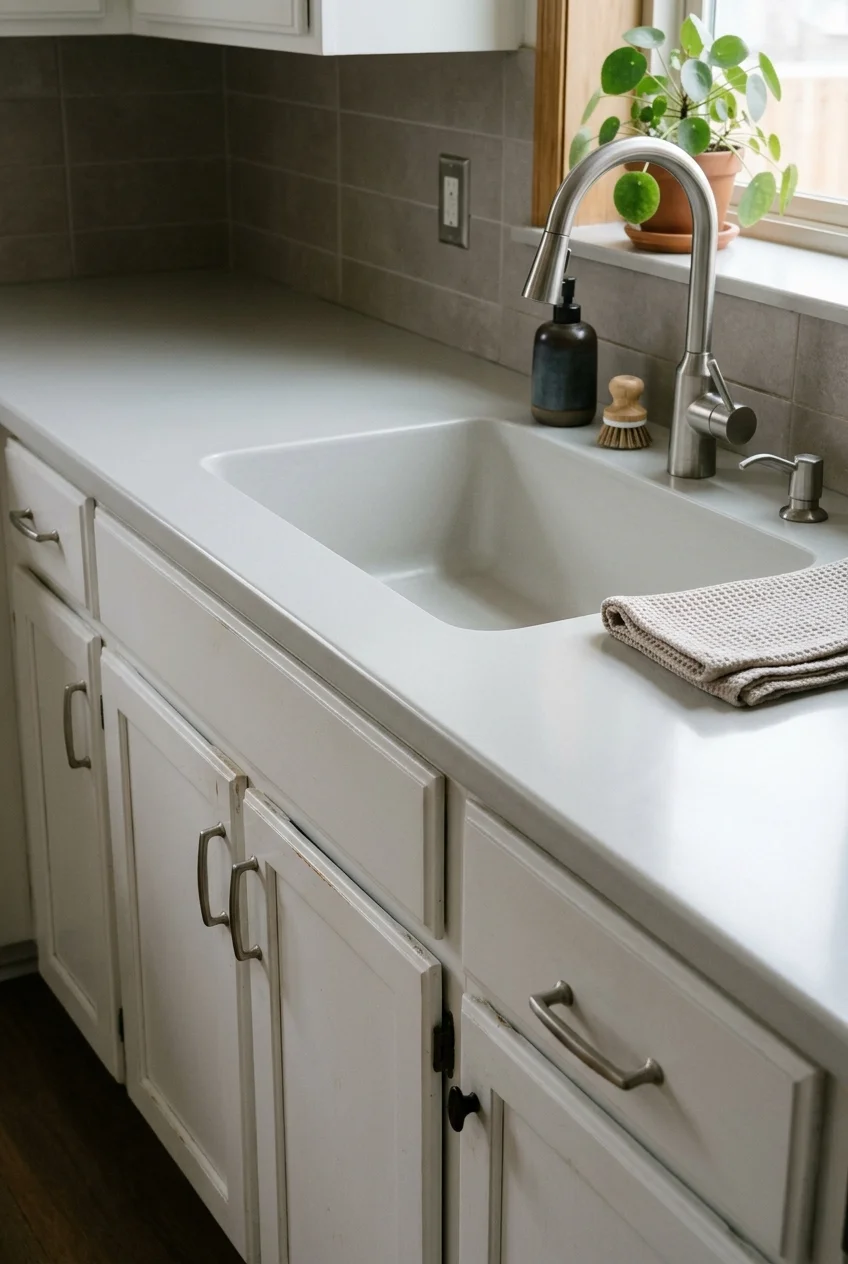
An existing solid-surface countertop may be renewable when scratches and an uneven finish are the main problems. Confirm the material before treating it like sandable solid surface.
Ask a qualified specialist to assess cracks, seams, integrated sinks, and the desired sheen. Deep repairs and uniform glossy finishes can require more than a small DIY kit.
Request a complete quote for the area you want renewed. Refinishing one obvious patch may leave a visible difference across a counter that catches strong light.
32. Create a dedicated prep spot with a removable cutting board
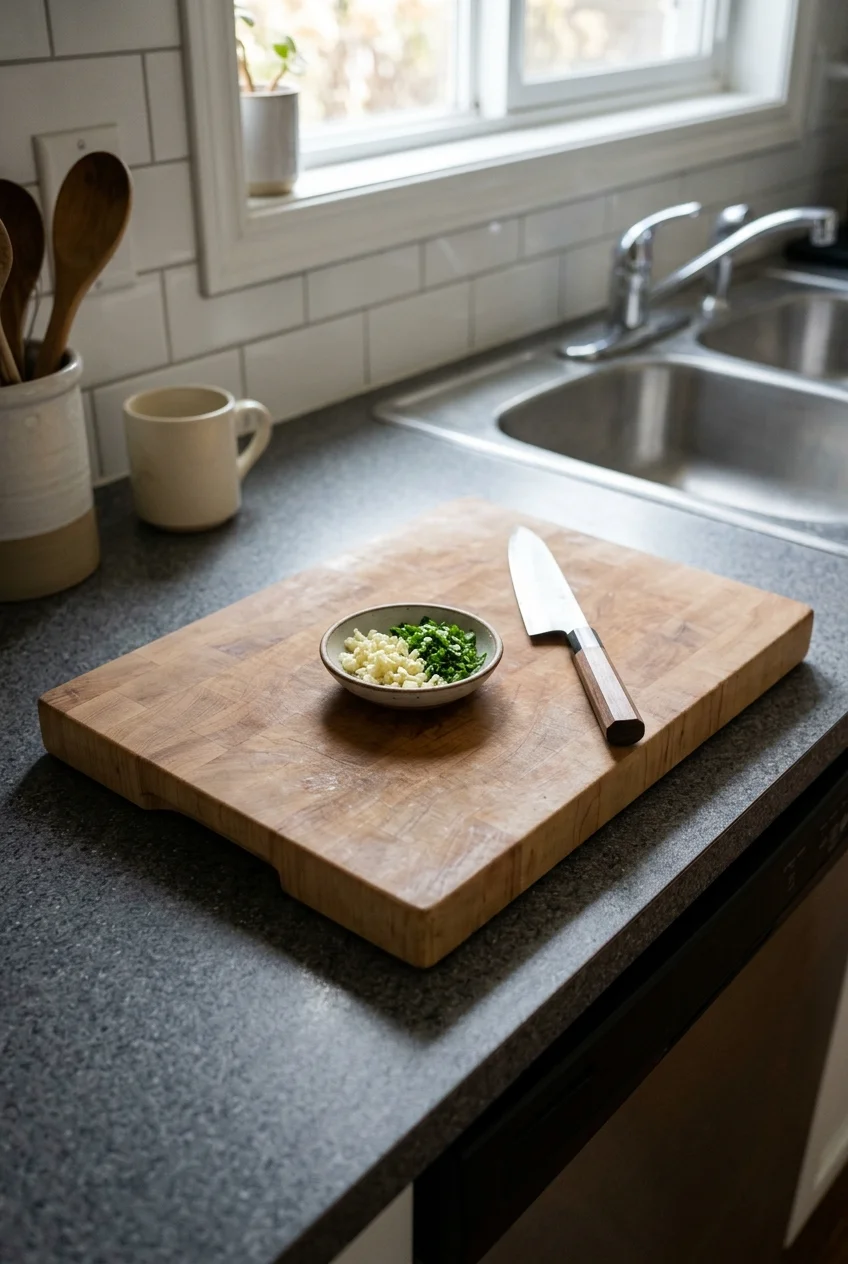
A substantial cutting board gives a sound but visually busy counter a defined working area. Choose a size that leaves the surrounding surface useful for landing dishes.
Make sure the board sits securely and can be lifted for cleaning and drying underneath. Don't use it to conceal a damp, damaged, or unstable countertop.
Store it upright when you need the full counter back. This is a reversible refresh for renters or anyone saving toward a later surface replacement.
33. Lower an awkward raised bar into one usable counter plane
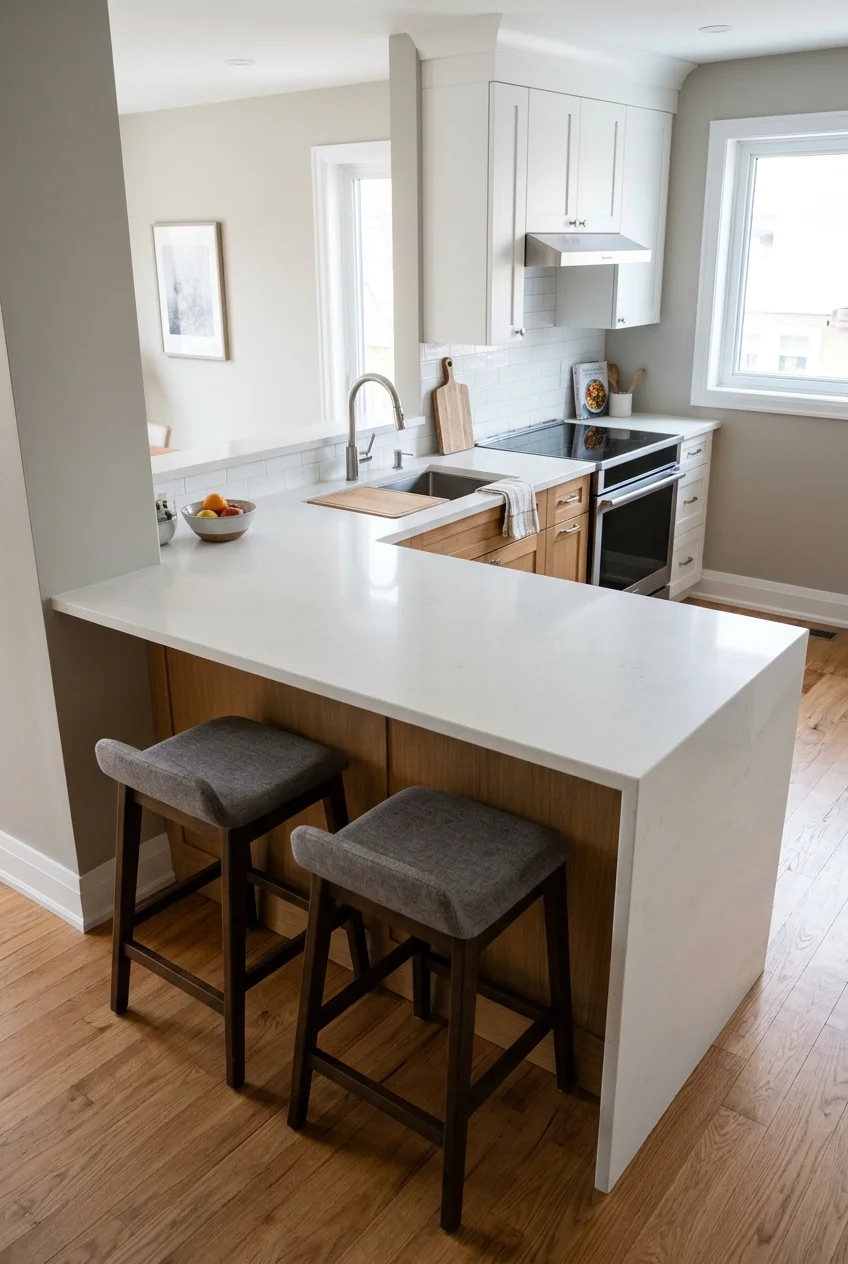
Replacing a split-height peninsula with one level surface can improve serving and sightlines. This is a targeted renovation to consider when the raised section genuinely gets in the way.
Have the existing structure inspected before demolition. A raised bar may contain outlets, wiring, plumbing, or framing that changes the cost and complexity of lowering it.
- Identify services inside the raised section.
- Confirm the replacement top's support needs.
- Check stool height and knee space.
- Include finishing, electrical work, and counter removal in the quote.
Keep the same peninsula footprint when circulation already works. Expanding the top simply because it is being replaced can create a new obstacle in a compact kitchen.
Compare the benefit with a simpler surface refresh. This idea belongs higher on the budget only when the added usable space solves a recurring problem.
34. Add rechargeable light beneath a shadowed upper cabinet
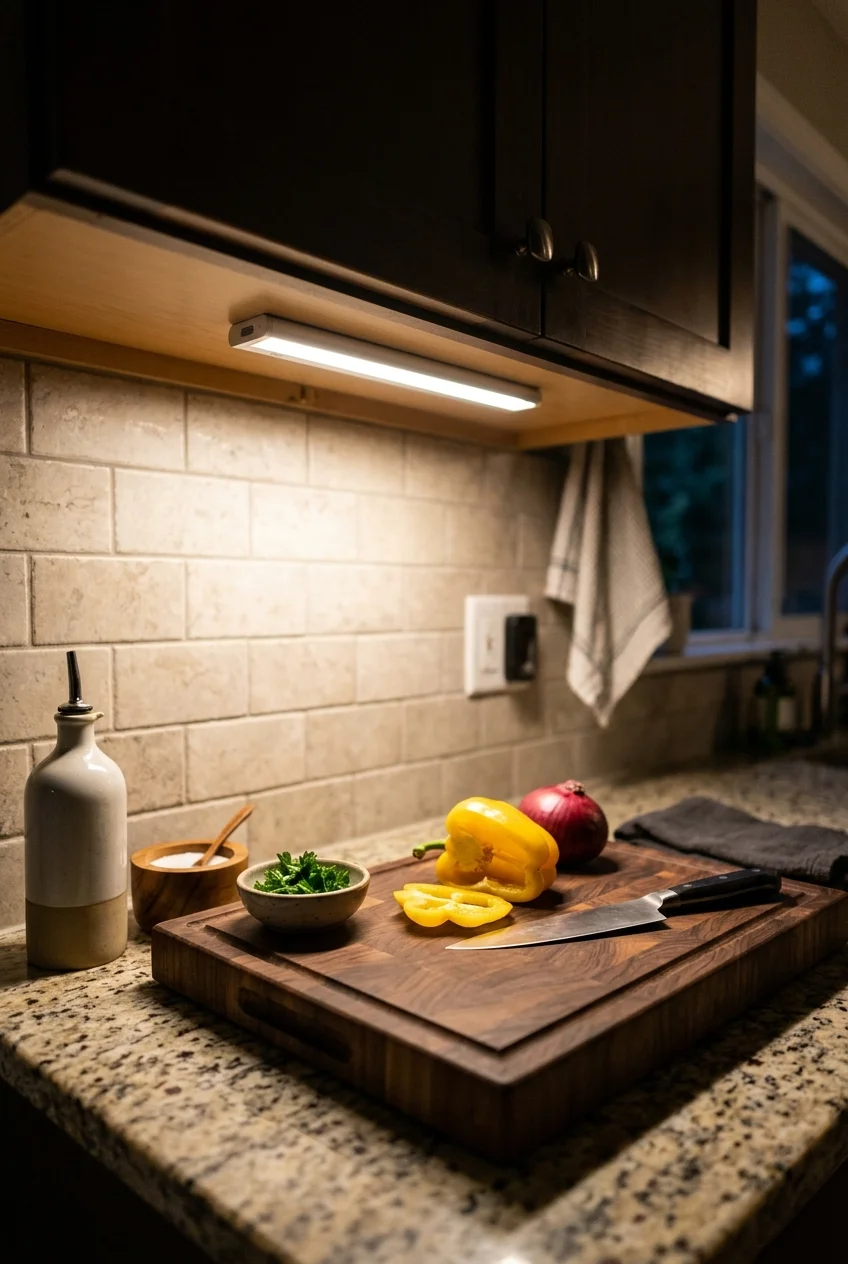
A rechargeable bar can brighten a small working area without a new wired connection. Position it where your body otherwise blocks light from the ceiling.
Check mounting suitability, charging access, light output, and the operating modes before buying. A motion sensor alone may not keep the light on during every task.
Test one light over the actual counter before buying a set. Battery care and charging become part of the routine, particularly where you cook frequently.
One option to compare is this rechargeable under-cabinet light (paid link). Check the current specifications for output, mounting, and operating modes before choosing it.
35. Run plug-in task lighting along a longer counter
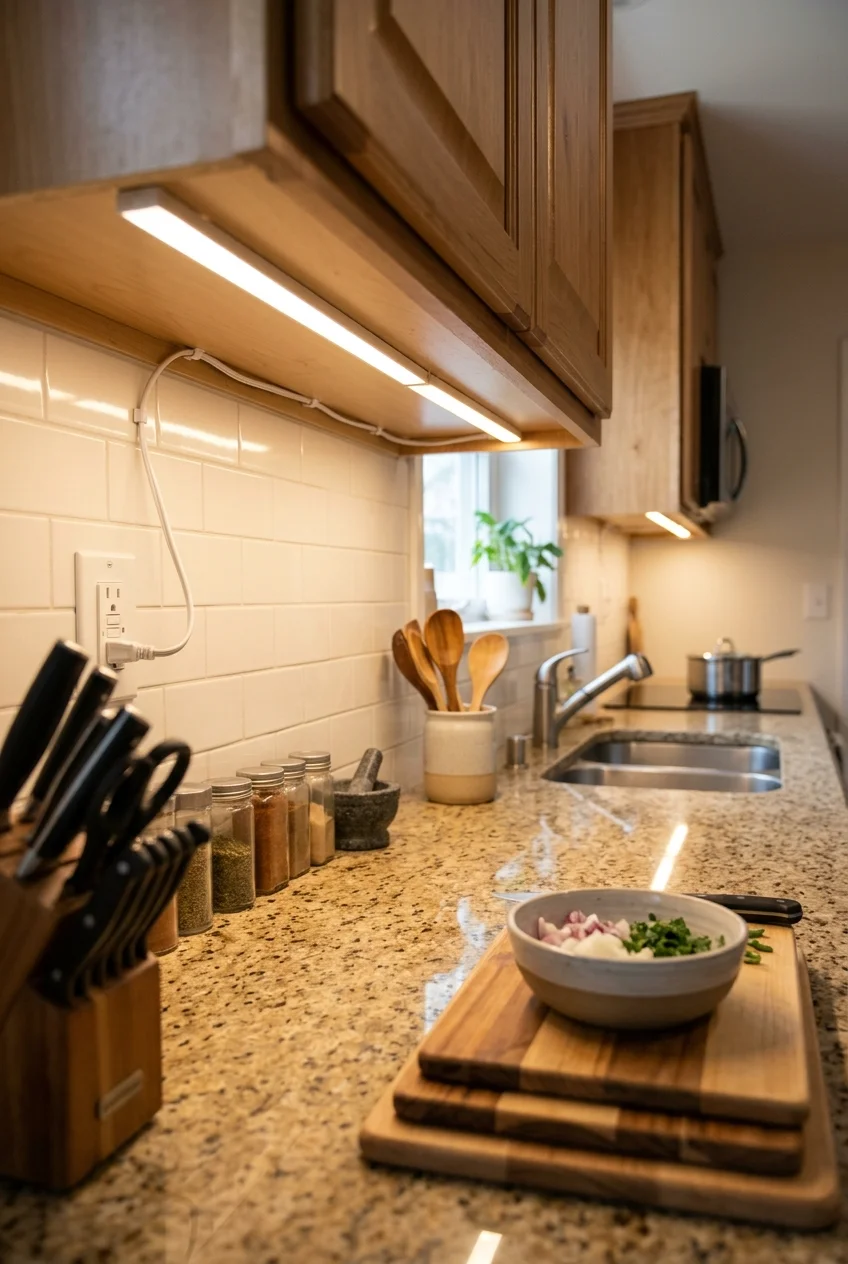
Linked plug-in lights can provide more continuous illumination than isolated spots. Plan the run around the counter where you actually chop, mix, and read recipes.
Choose a system with suitable connectors and mounting instructions, keeping the supply and switch accessible. Route cords away from water, heat, pinch points, and moving doors.
Don't hide an extension cord inside walls or drill through unknown cabinet areas to disguise wiring. Have an electrician handle any new outlet or permanent wiring.
Setup note Check the light from seated eye level before fixing it in place. A shallow cabinet lip or suitable diffuser can reduce glare across the room.
36. Replace a bulky ceiling fixture with a low-profile light
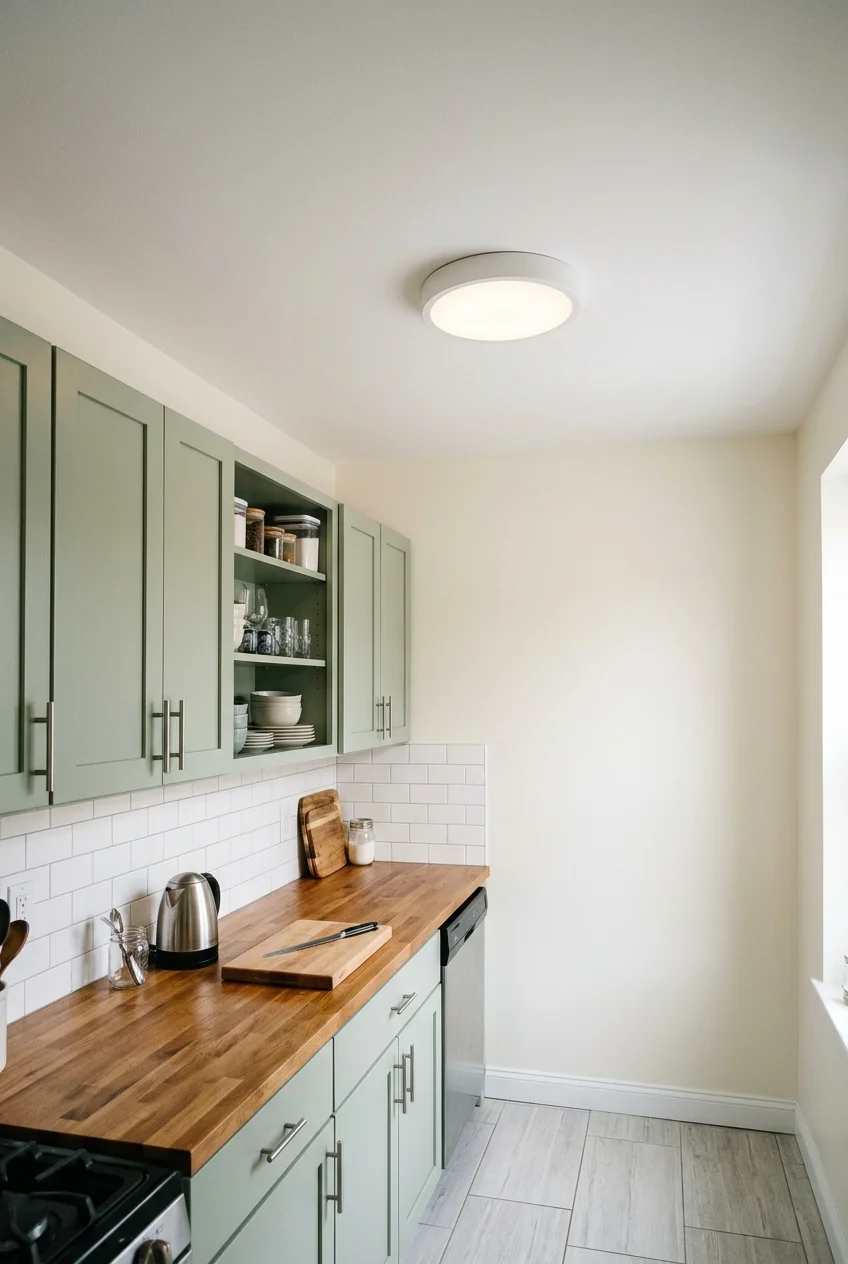
A low-profile ceiling fixture can make a modest kitchen feel less crowded overhead. Match its scale and light distribution to the room rather than choosing by diameter alone.
Look for a fixture suitable for the location, with an accessible way to replace bulbs or maintain the unit. Compare useful light output and glare as well as appearance.
Use qualified help for hardwired replacement, especially if the existing box or wiring needs attention. Keeping the same connection point can limit additional ceiling repair.
37. Use an existing ceiling point for adjustable track lighting
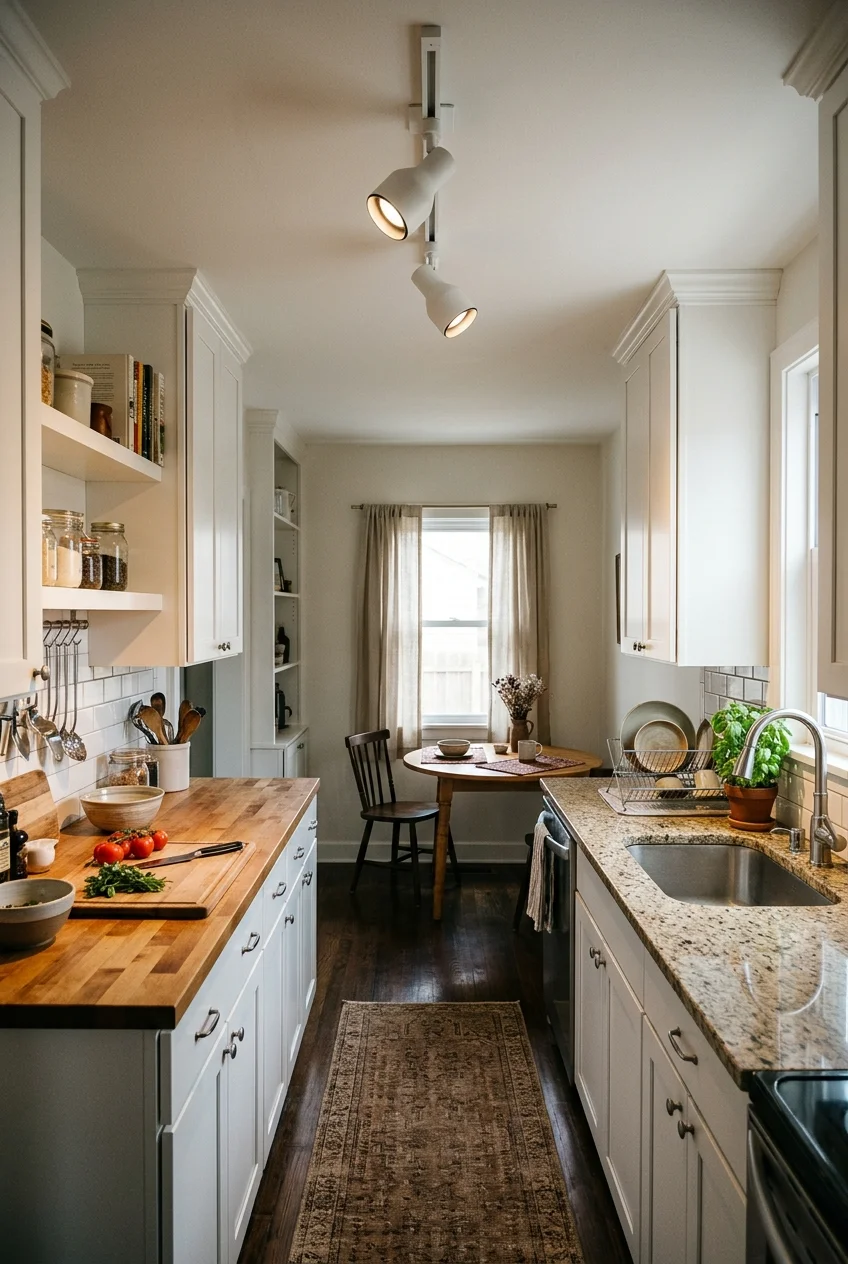
A short track can direct light toward several working areas from one suitable ceiling connection. It is useful when a single central shade leaves uneven shadows.
Choose a track system compatible with its intended installation and ceiling support. Have a qualified electrician assess the connection and any dimming or control requirements.
Aim the heads at useful surfaces without shining directly into seated eyes. Test the angles after dark, when daylight no longer disguises gaps in coverage.
38. Give the sink its own modest pendant
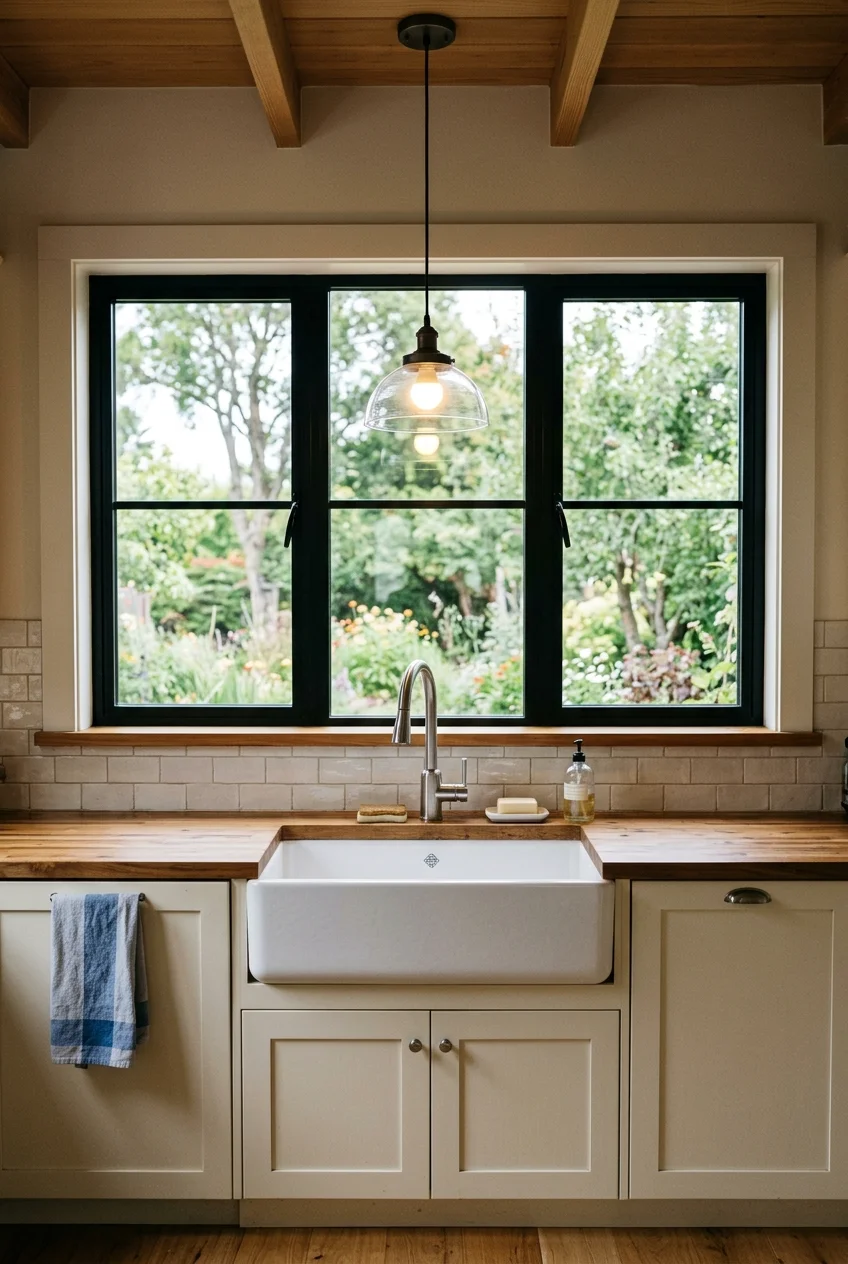
A small pendant can define the sink area when a suitable overhead connection already exists. Choose a restrained shade that doesn't overwhelm the window or neighboring cabinets.
Confirm location suitability, head clearance, and the fixture's installation requirements before purchase. A new connection and ceiling repair can change the budget considerably.
An opaque shade directs light downward; opal glass spreads it more broadly. Keep the shade modest beside the window so the view remains the main feature.
39. Replace only a compatible light shade
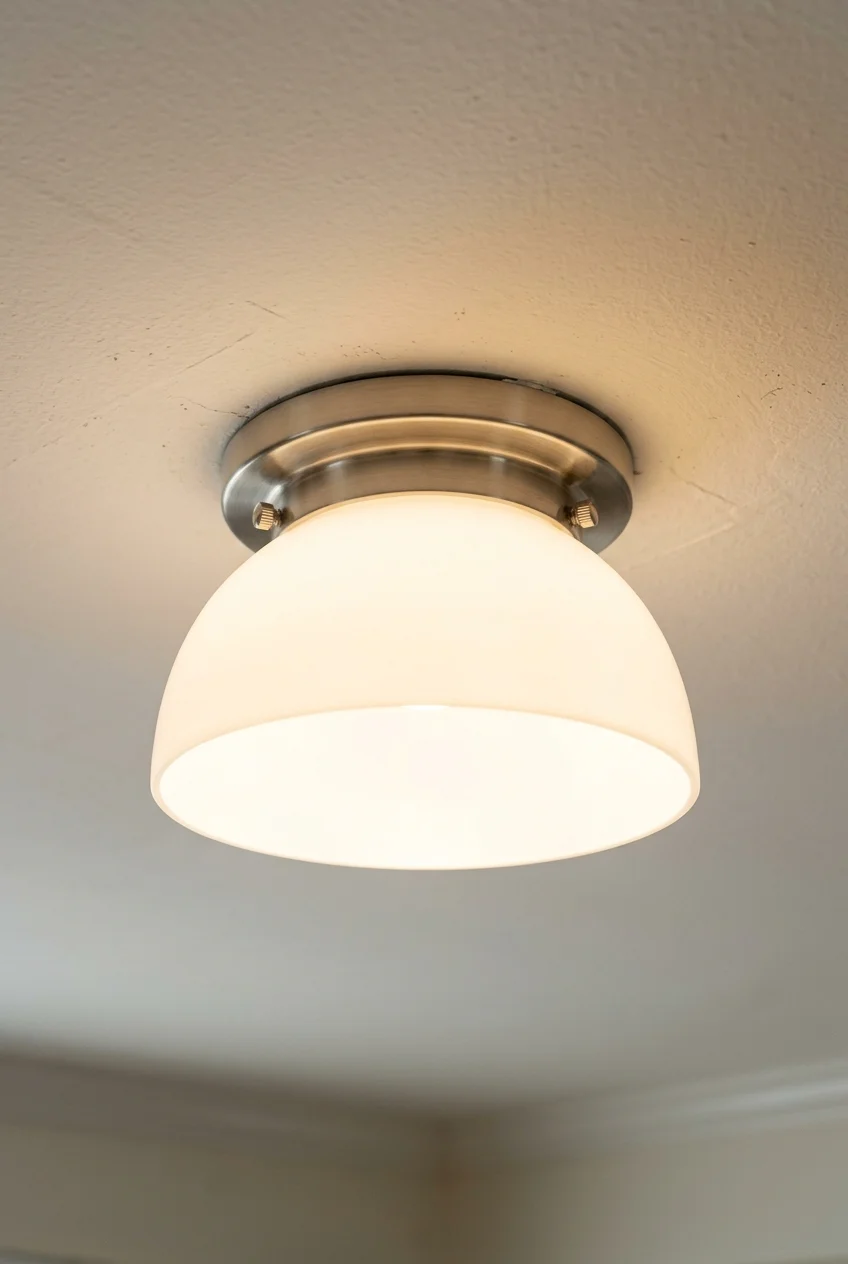
A new shade can change an existing fixture's outline while retaining a sound electrical fitting. Clear, opal, and opaque shades distribute light differently, so consider the task below.
Match the fitter dimensions, attachment method, weight, and bulb clearances required by the fixture. A visually similar shade isn't automatically a compatible replacement.
Inspect the fitting's condition before spending money on cosmetics. If its hardware is damaged or overheated, arrange proper repair rather than disguising the problem.
40. Make neighboring bulbs agree in color appearance
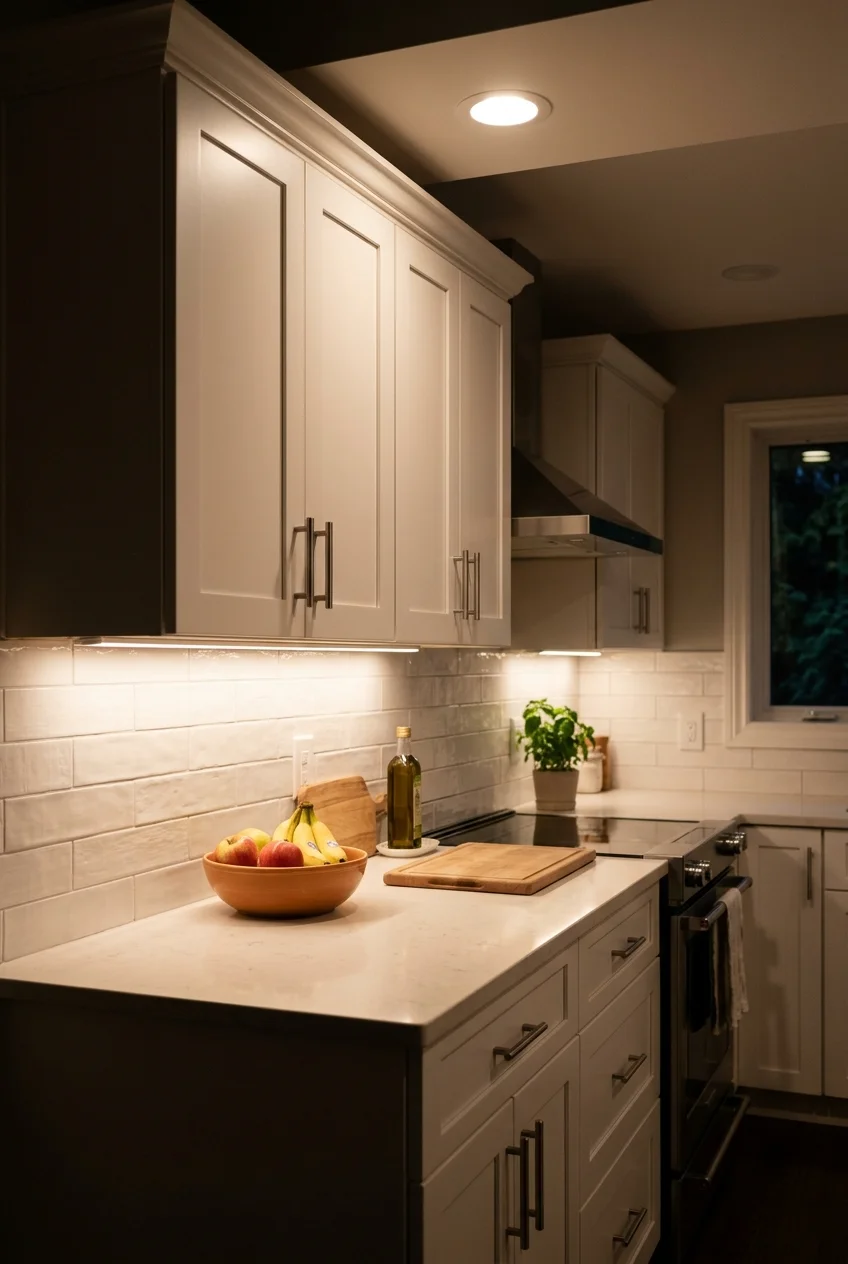
Similar-looking bulbs can give the kitchen a calmer overall appearance when one fixture looks blue and another yellow. Start with a small sample rather than replacing everything.
Check bulb base, fixture rating, enclosure suitability, and any dimmer requirements. Color temperature describes appearance, while brightness and beam distribution remain separate choices.
View the bulbs together against cabinet and counter samples at night. Even matching Kelvin numbers may look slightly different, so compare the actual result before buying more.
41. Add compatible dimming for the evening lighting layer
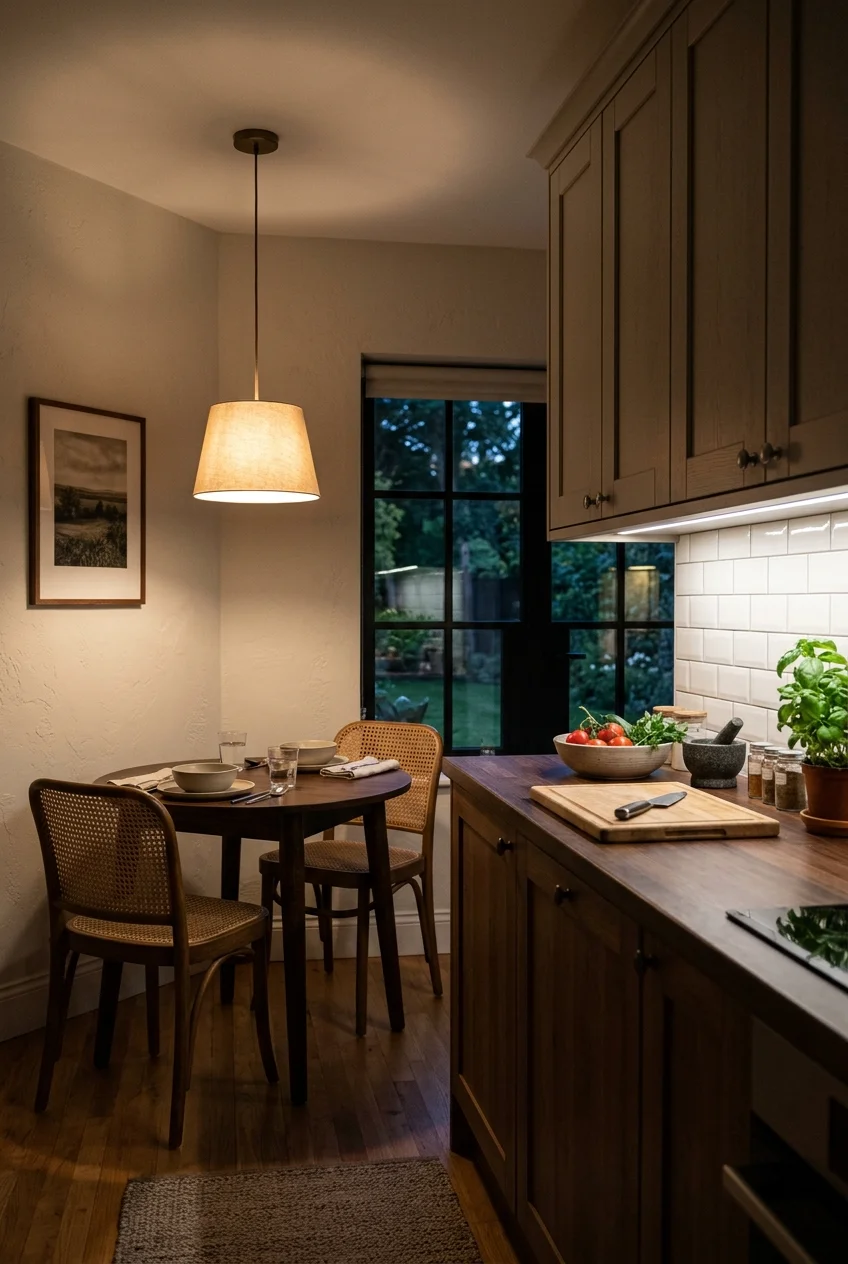
Dimming the room's ambient light can make an eating area more comfortable while separate task lights stay useful. Choose the circuit that benefits from adjustment first.
Check the exact lamp or driver against the dimmer manufacturer's compatibility guidance. A dimmable label doesn't guarantee that every combination will behave well.
Have an electrician fit the appropriate control and assess existing wiring. Include compatible bulbs in the cost so the switch isn't the only part budgeted.
Keep enough light for cooking and cleanup, with controls that are easy to understand. An attractive evening glow should not replace adequate illumination for detailed work.
42. Choose wall paint around the countertop you're keeping
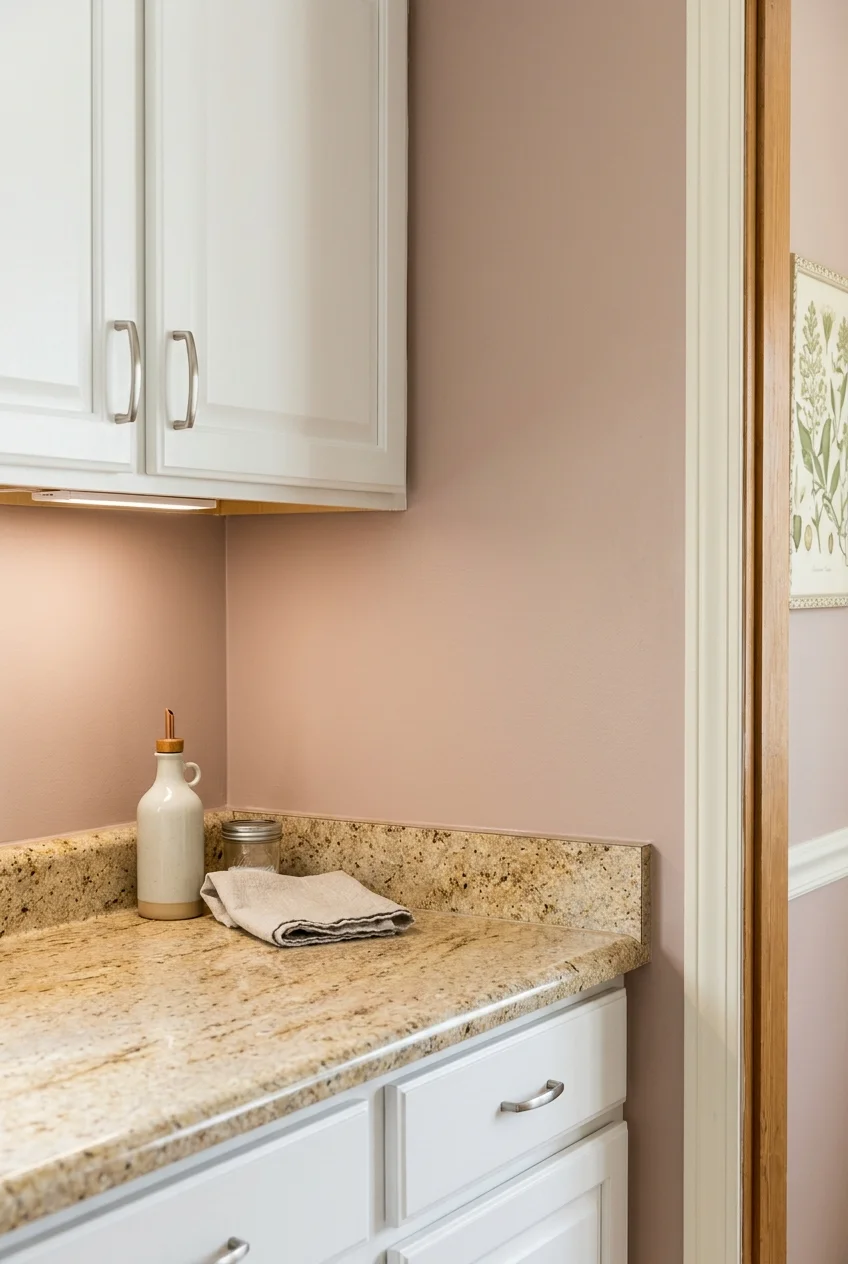
An existing counter often sets the kitchen's color direction more strongly than a tiny paint chip suggests. Sample wall colors beside its main tones before buying paint.
Use a finish suited to kitchen cleaning and the wall's condition. Repair damaged areas and address moisture first so the new color sits on a sound surface.
Extend the chosen color through connected wall areas when that makes the room feel coherent. Keep trim deliberately related rather than adding another nearly matching white.
43. Use wallpaper on the eating wall rather than the splash zone
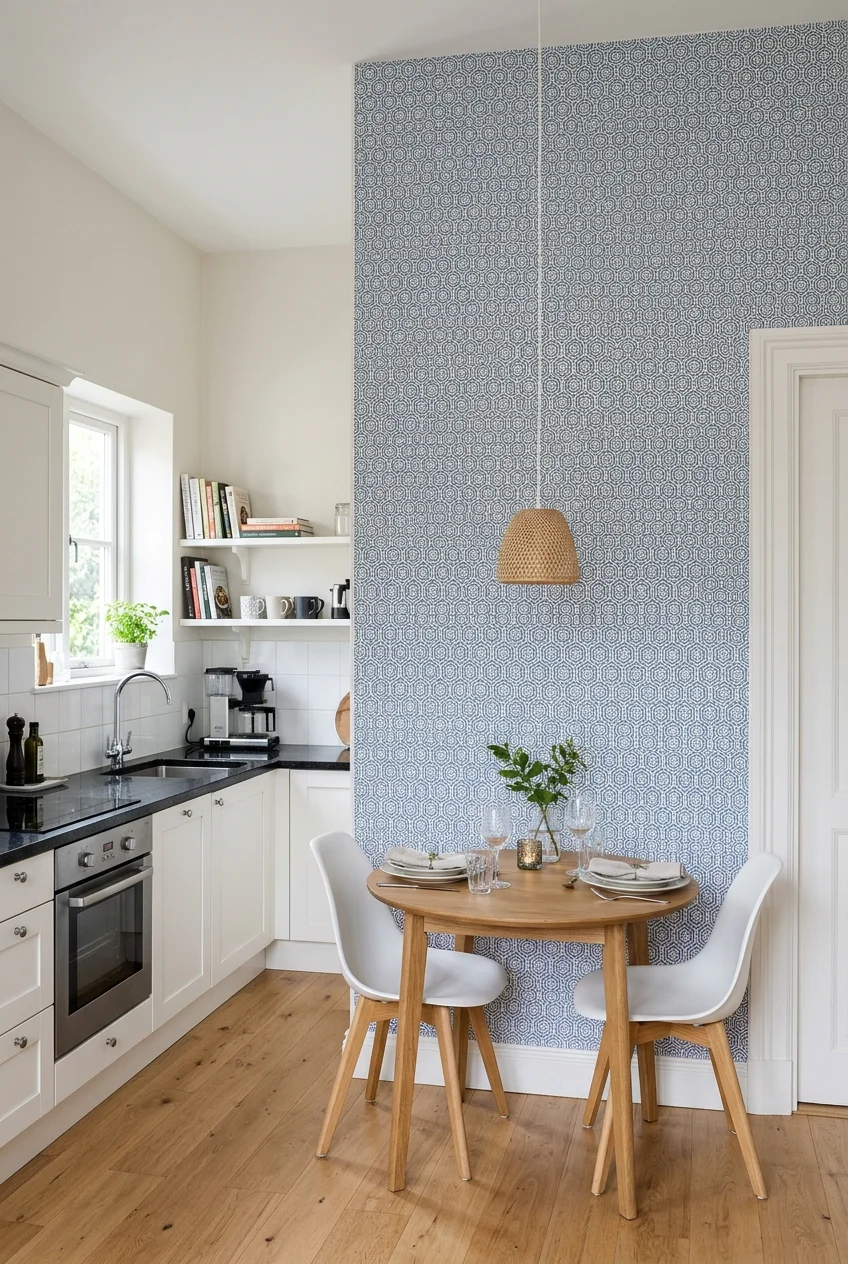
A single wallpapered eating wall gives the kitchen pattern without covering every surface. Keep the design away from direct cooking heat and recurring water splashes.
Choose a wallcovering suited to the location and follow its surface-preparation instructions. Removable products still need permission in rentals and a test on the existing finish.
A small geometric repeat adds pattern without a mural-sized focal point. Calculate usable roll coverage carefully, since matching the design can require more material than expected.
44. Panel the back of a plain peninsula
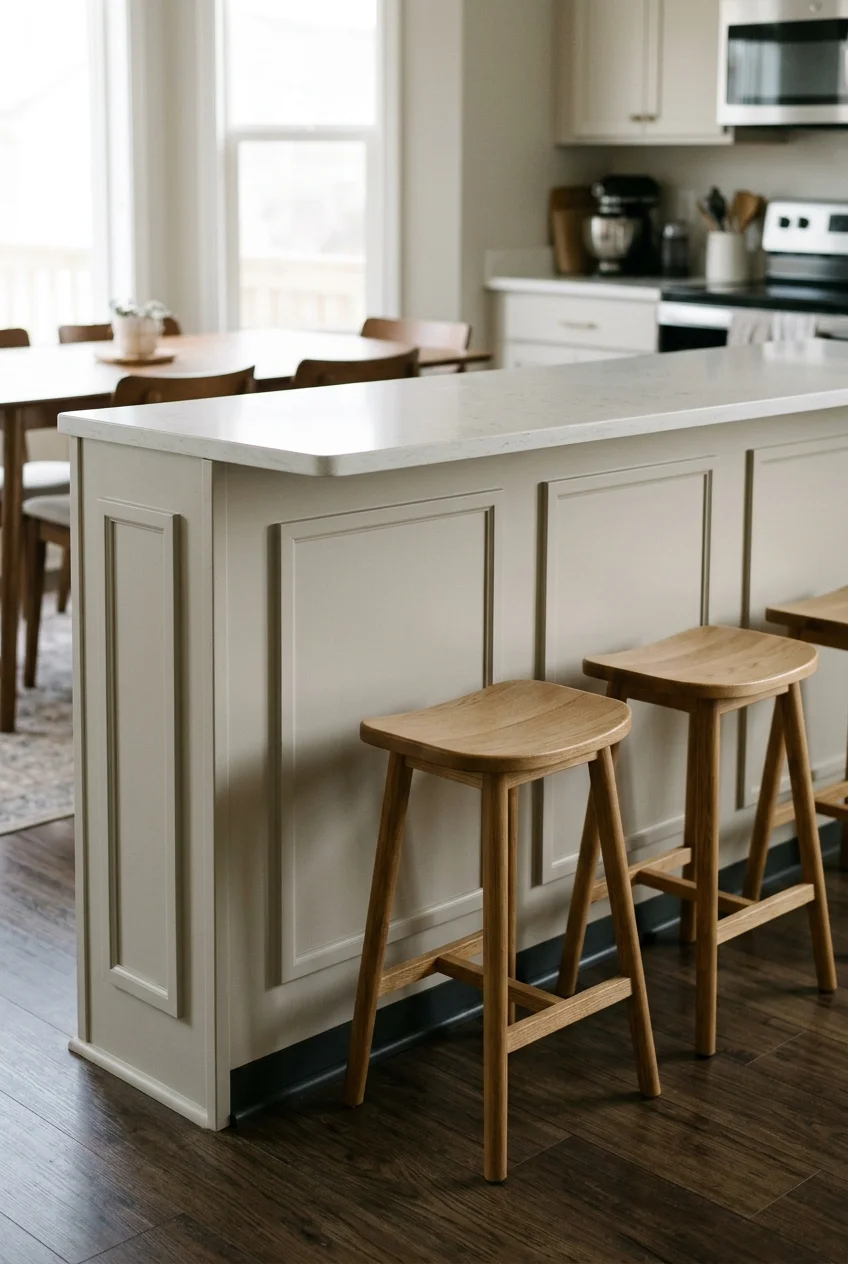
The dining-facing back of a peninsula can become a deliberate furniture surface. Simple painted battens or a flat framed panel give it structure without altering cabinet storage.
Map trim around outlets, toe space, and seating before attaching anything. Keep pieces shallow where knees or chair backs could hit the finished panel.
Echo the spacing of nearby cabinet doors with a few broad panels, rather than many narrow strips. A durable finish will help this chair-facing surface tolerate scuffs.
45. Fit a cordless shade within the window opening
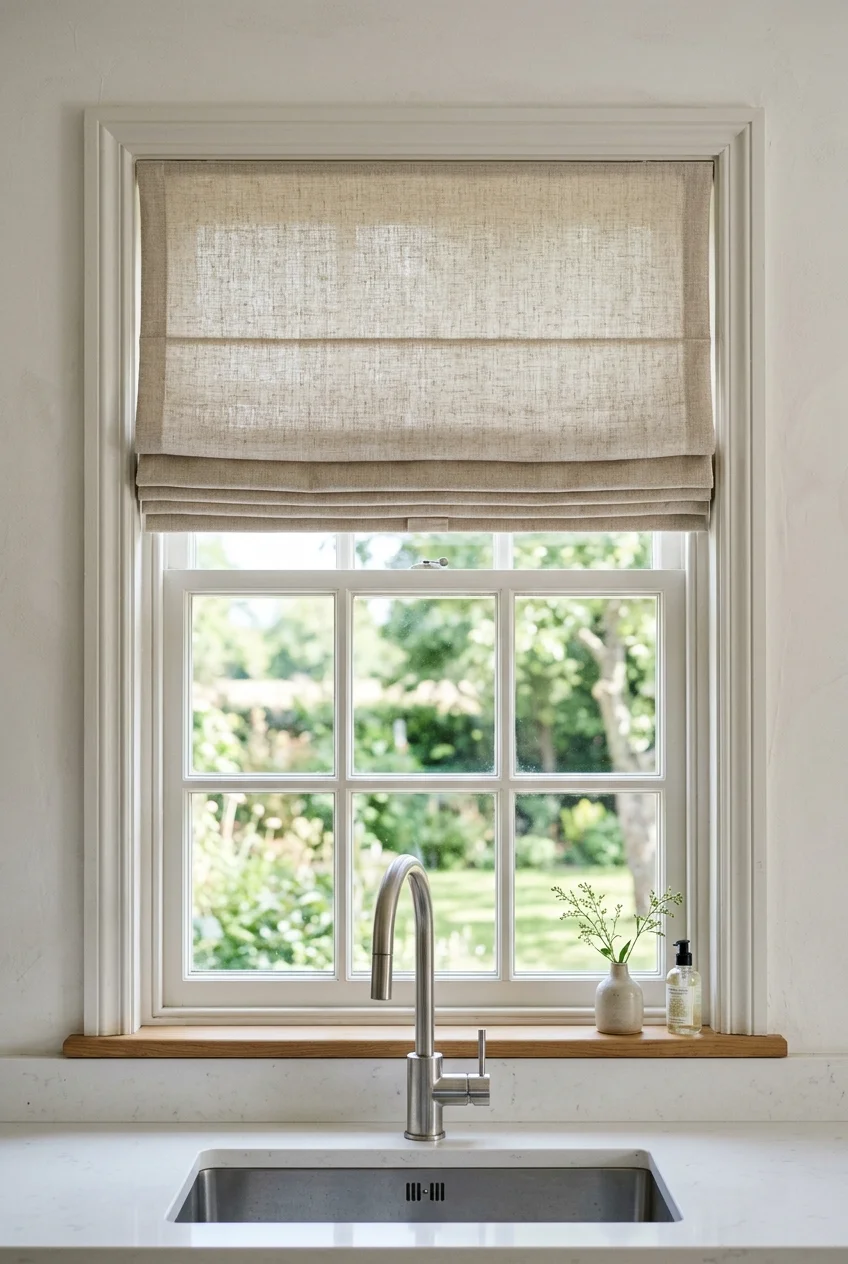
A simple cordless shade can make the window feel finished without fabric spreading across a small counter. Choose a material suitable for the kitchen's cleaning needs.
Measure the opening according to the shade maker's instructions, including obstructions and mounting depth. Inside mounting only works when the frame can accommodate the mechanism.
A plain woven fabric adds softness beside hard cabinet fronts without another busy pattern. Check operation above the faucet, especially if the window is difficult to reach.
46. Use café curtains for lower-window privacy
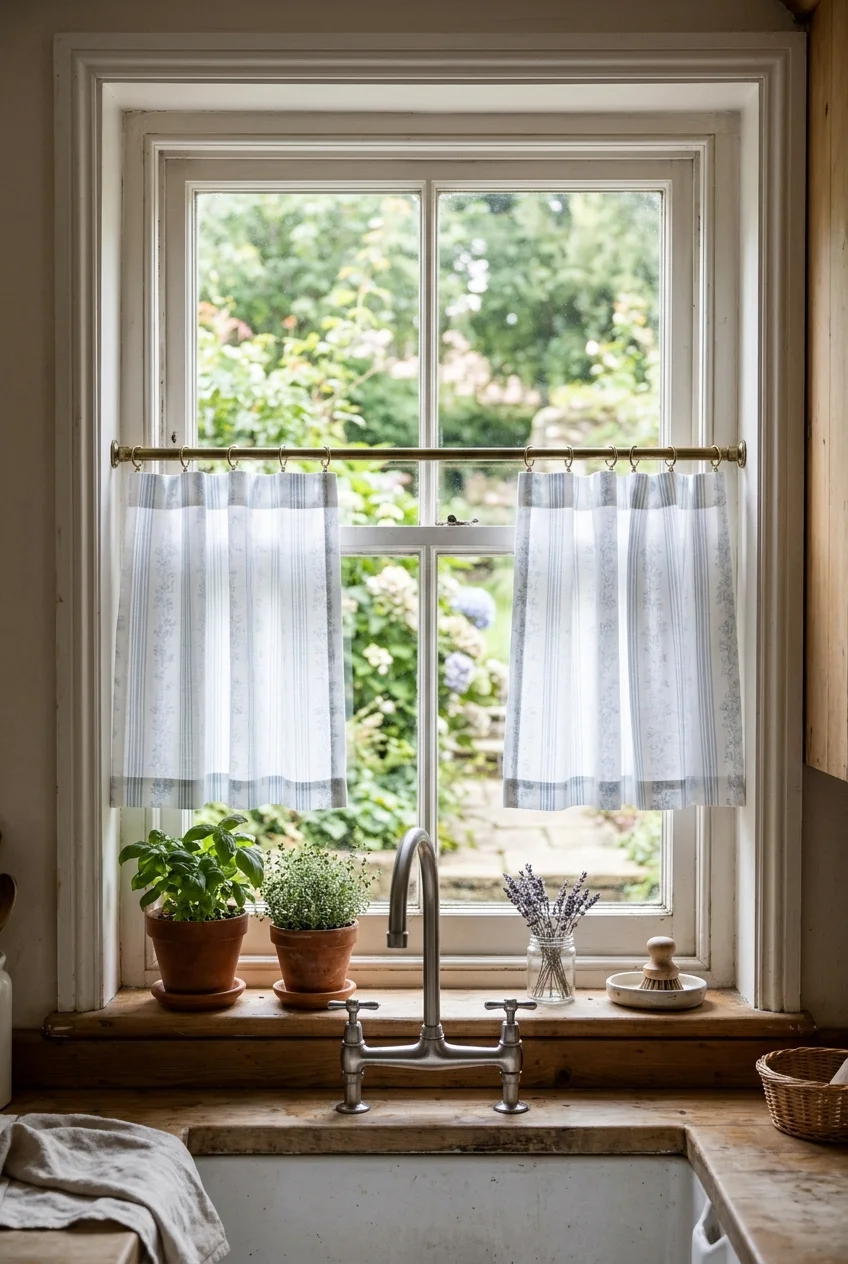
Café curtains cover the lower part of a window while leaving the top open to daylight. They suit a kitchen where privacy matters more than full darkening.
Choose washable fabric and keep the panels short enough to avoid the counter and faucet. Use mounting hardware appropriate to the frame, with permission where required.
Leave room for the window to operate and for nearby doors to swing. A narrow pair of panels usually needs less fabric than full-length curtains.
47. Apply privacy film to suitable lower window panes
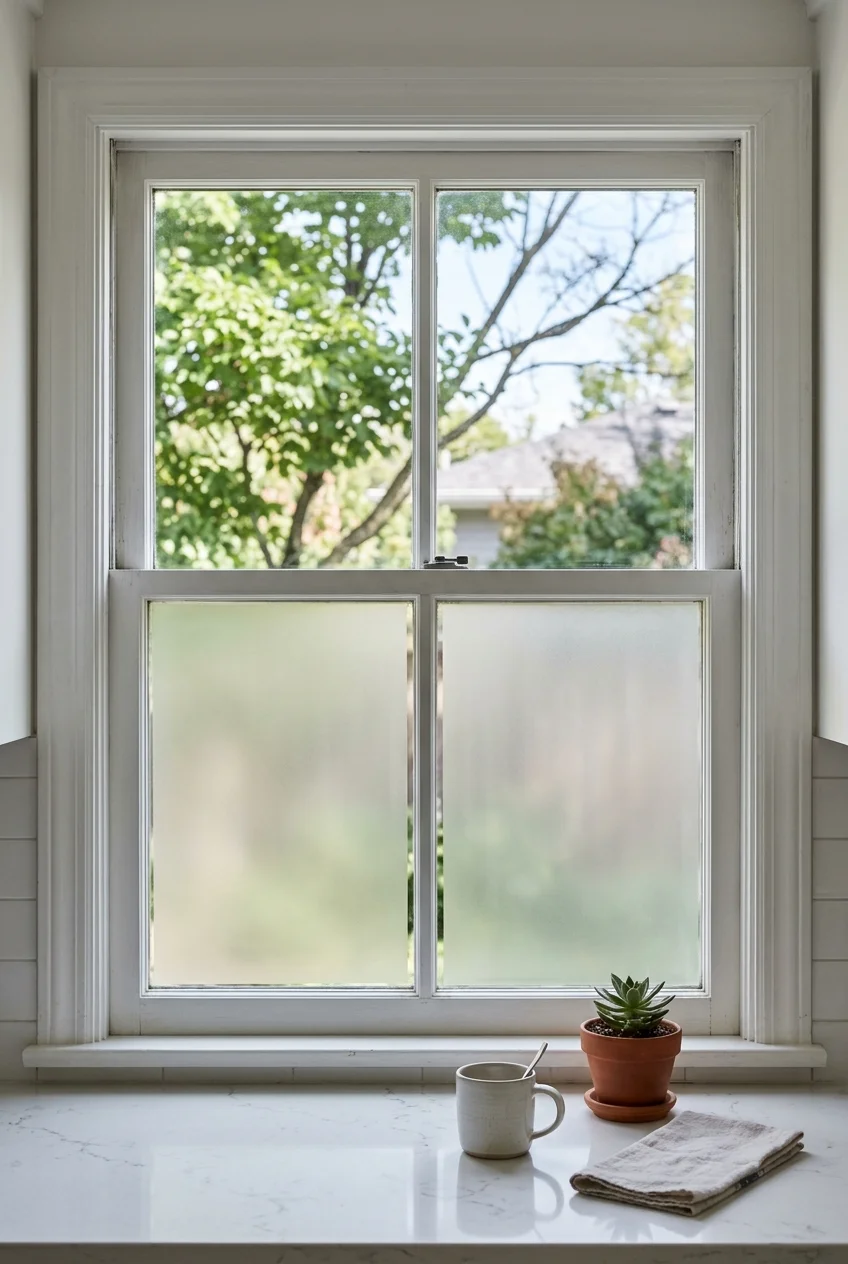
Frosted film can provide privacy without adding fabric beside a working counter. Limiting it to lower panes preserves a clear view through the upper part of the window.
Confirm the film is compatible with your glazing, coatings, and warranty before applying it. Different window constructions can have different film restrictions.
Test the privacy effect after dark with indoor lights on. A film that blurs daytime views may not provide the level of nighttime privacy you expect.
48. Refresh a discolored ceiling with an appropriate finish
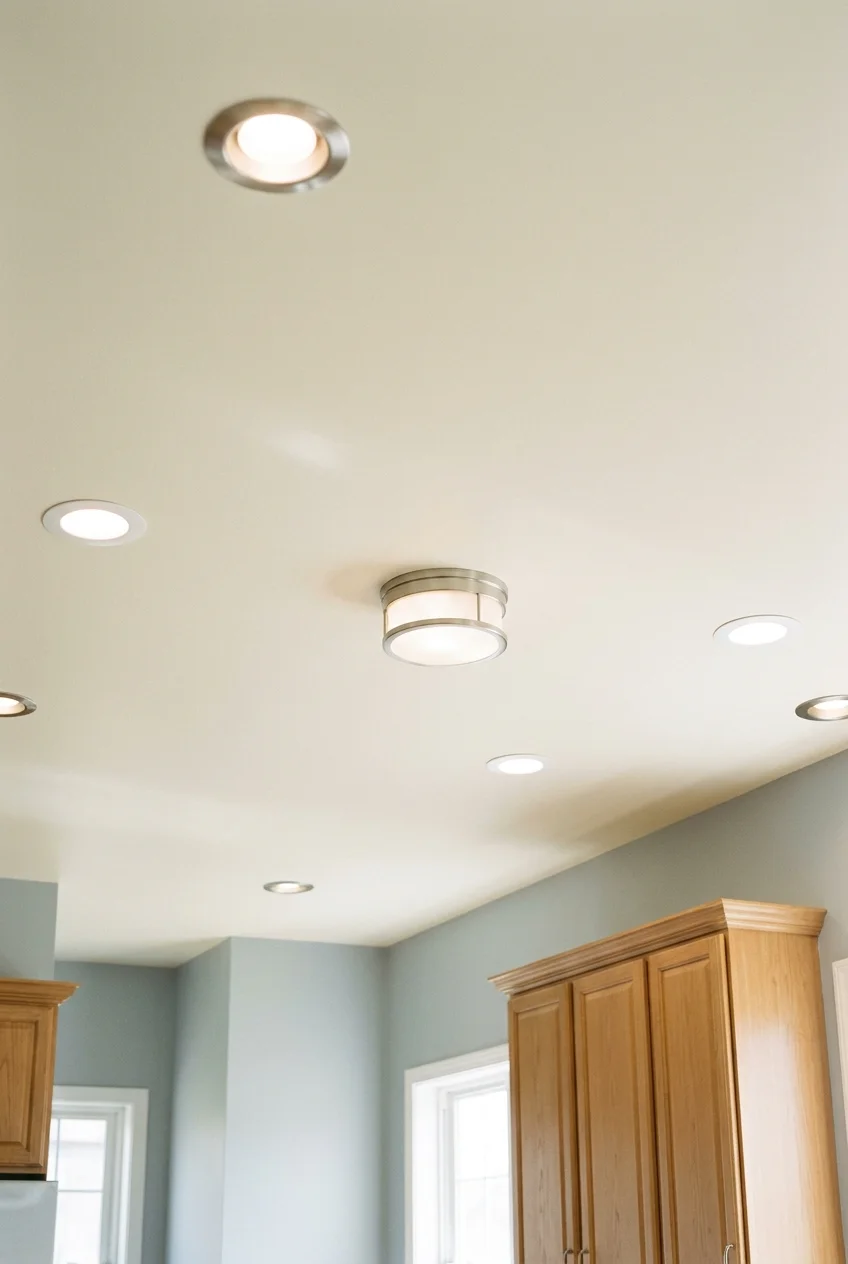
A clean ceiling can make retained cabinets and lighting look more considered. Choose a finish suitable for the room rather than leaving an uneven patchwork overhead.
Find and fix the cause of water marks or peeling before repainting. Persistent staining or dampness needs attention beyond a fresh decorative coating.
Protect the kitchen carefully and assess older coatings before disturbing them. Include preparation and access equipment in the project, particularly above cabinets or a stair opening.
49. Give a bare window opening simple finished casing
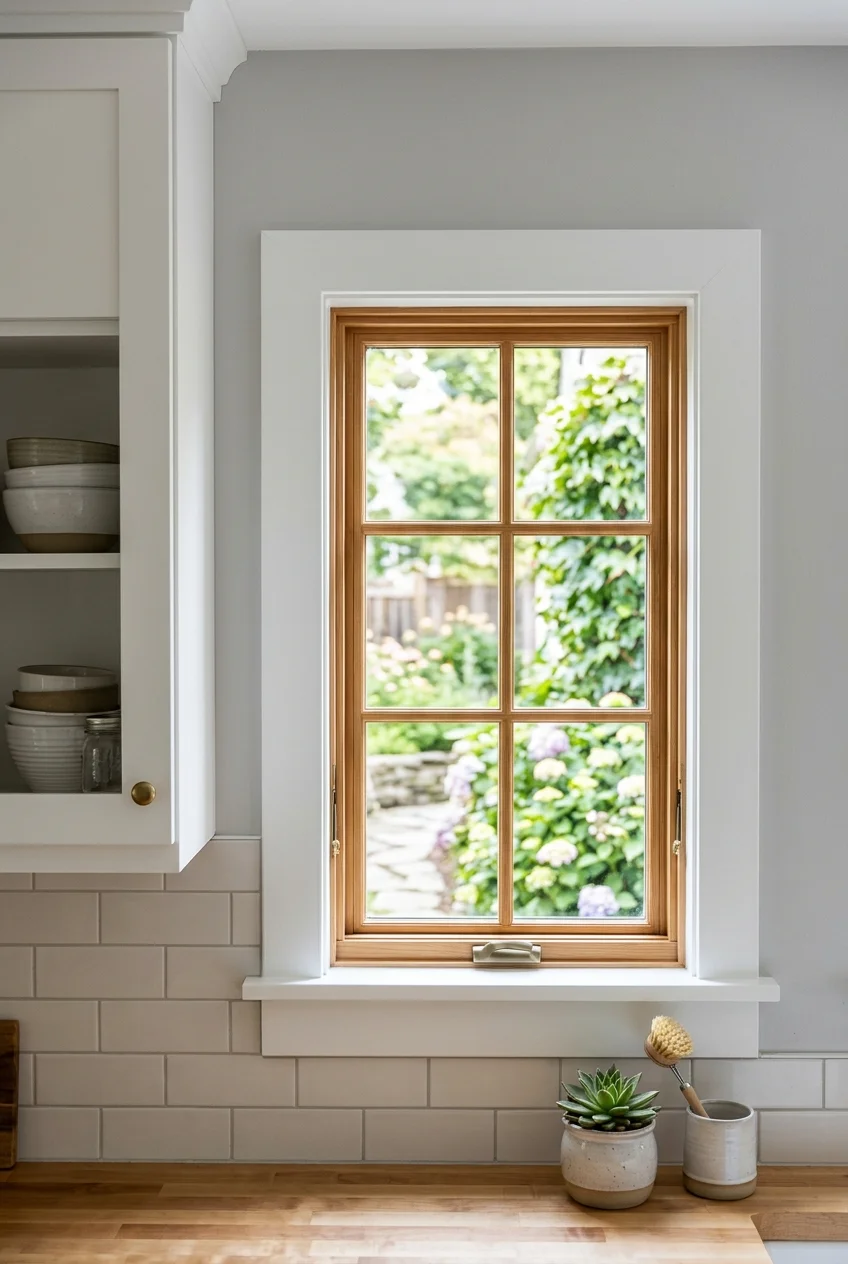
Plain casing can give a bare kitchen window a clearer outline and connect it with nearby door trim. Keep the profile proportionate to the room.
Check cabinet clearances, sill depth, and window operation before choosing trim width. A wider frame may interfere with an adjacent door or reduce usable counter space.
Use a suitable material and finish where condensation or splashes occur. Repair the underlying junction rather than trapping an unresolved moisture problem behind decorative trim.
50. Add a shallow picture ledge on a dry wall
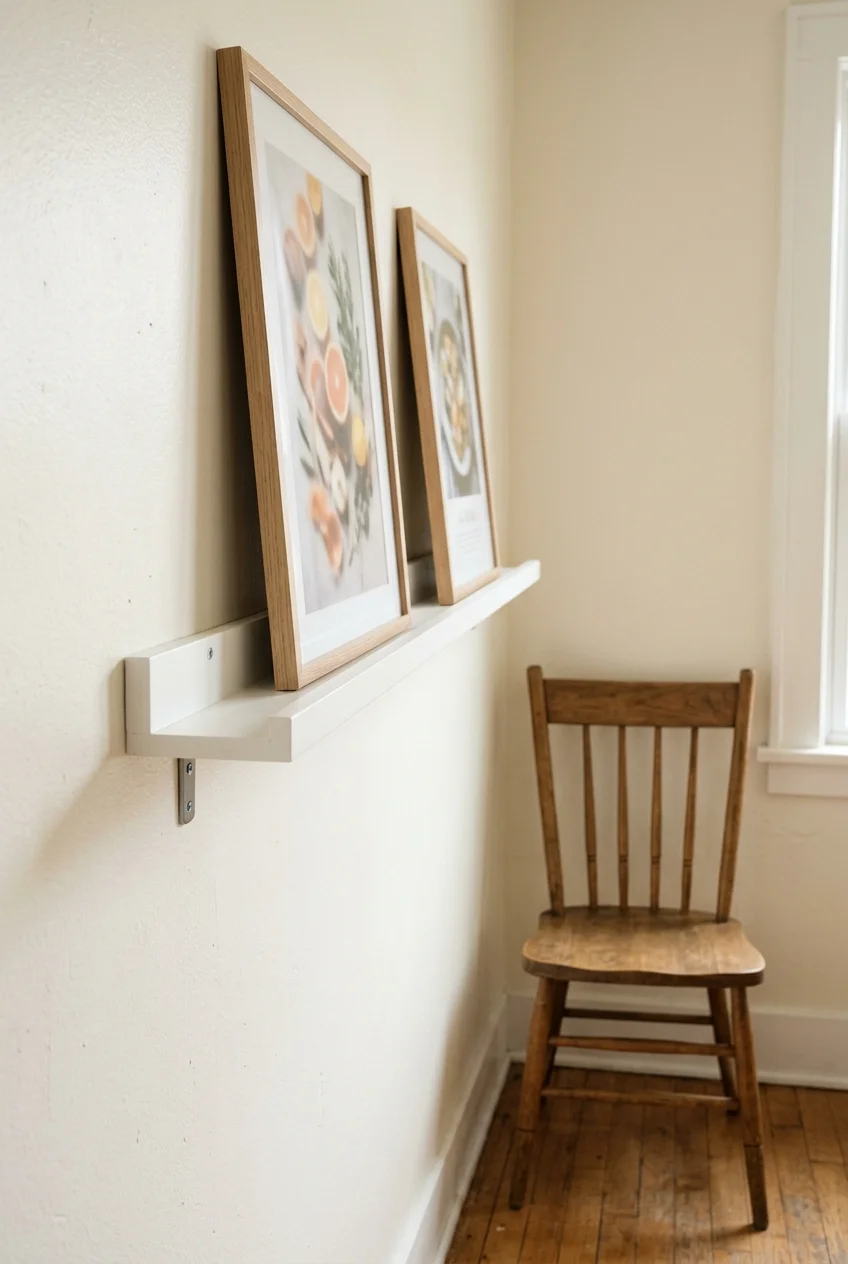
Two differently sized prints on a narrow ledge can give a breakfast wall a clear focal point. Choose a dry spot away from splashes and cooking grease.
Keep the ledge shallow enough for the walkway, secure it appropriately, and choose lightweight pieces that fit its retaining lip. Avoid balancing heavy glass over a busy seat.
51. Replace bulky shelf brackets with a slimmer supported design
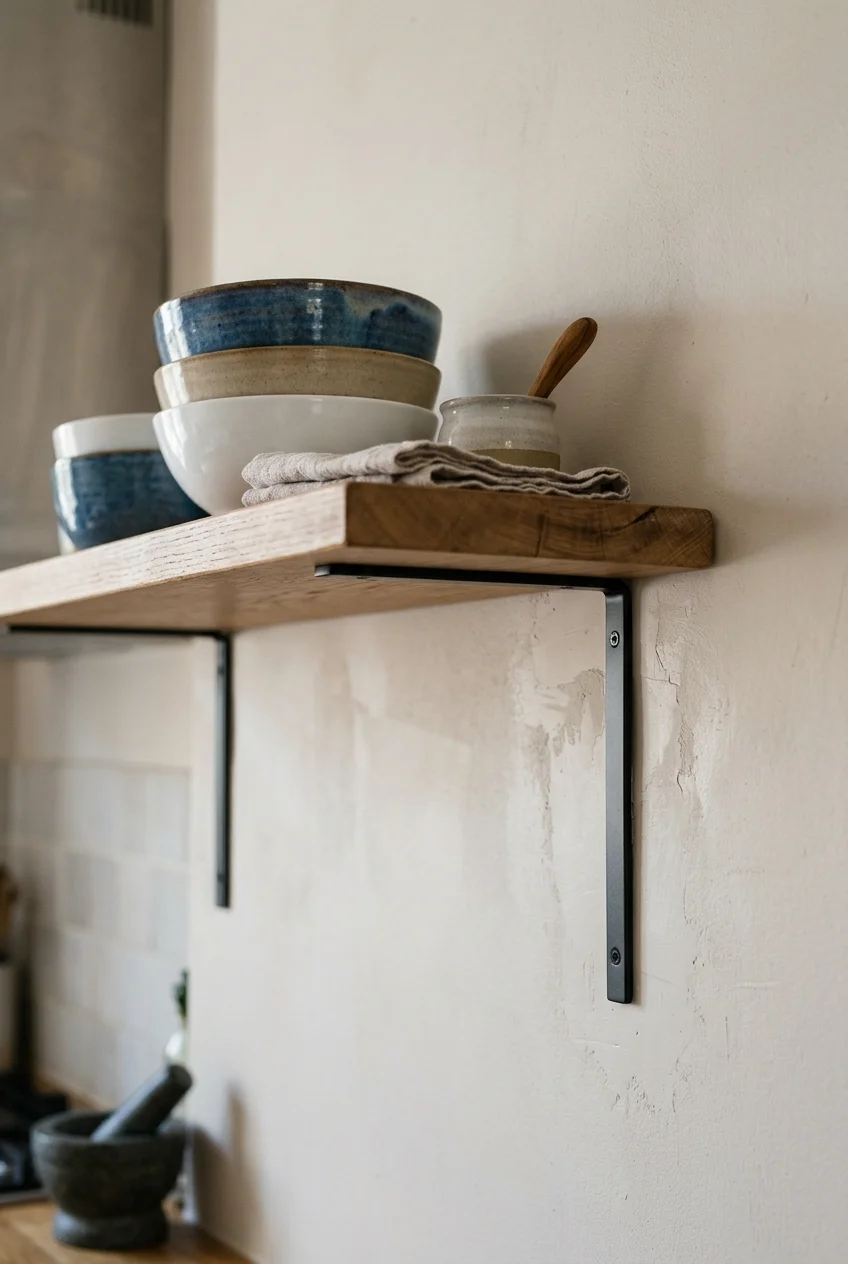
Slimmer brackets can make an existing open shelf look lighter while keeping its useful storage. The replacement must support the shelf and contents, not just suit the photo.
Check bracket projection, spacing, fastening requirements, and the wall structure before switching. Old holes may need repair, and a different bracket shape can leave exposed marks.
Finish those marks before reinstalling the shelf, then reload it within the system's limits. Keep everyday bowls near the front without crowding the shelf edge.
52. Lay a checkerboard adhesive floor over an approved surface
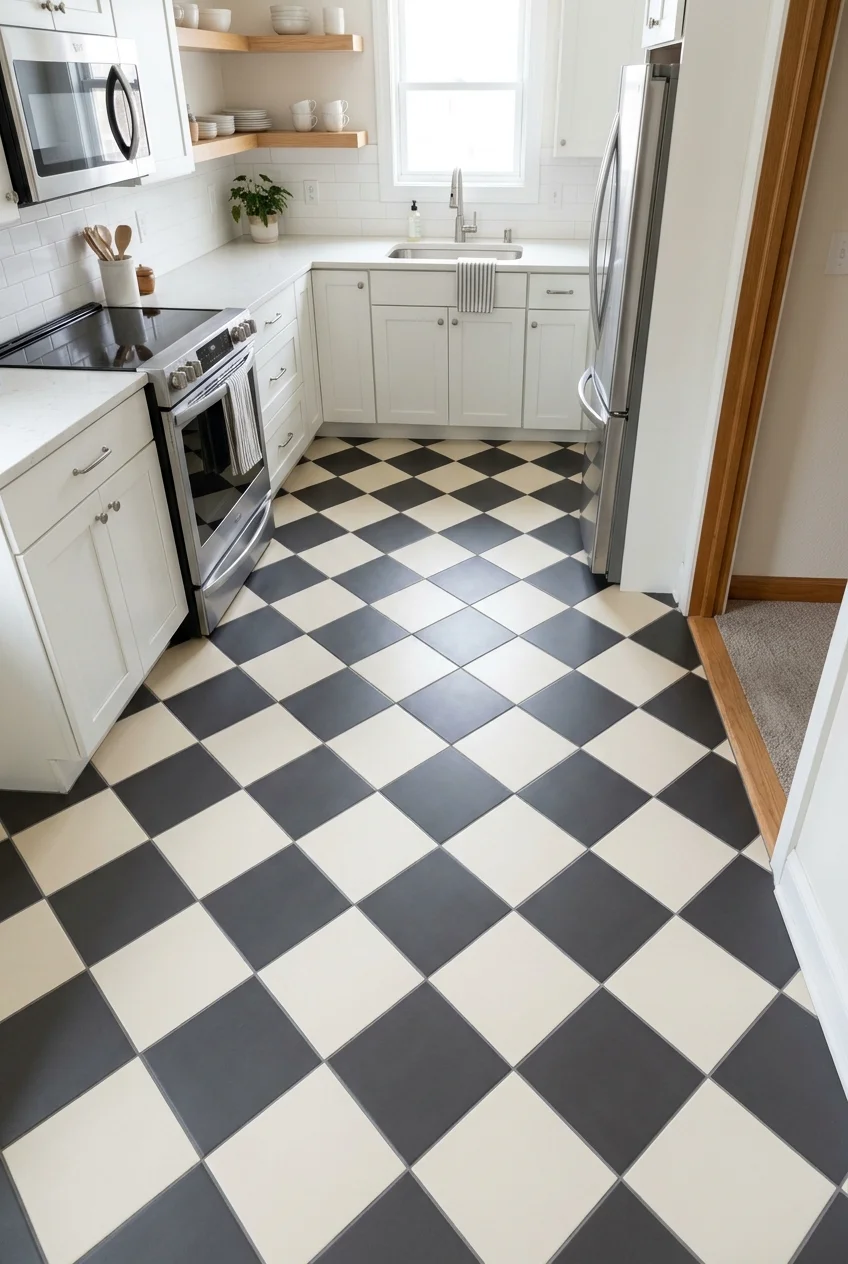
A two-tone checkerboard can give a modest kitchen a distinct floor without elaborate tile shapes. Choose a floor-rated adhesive product and a substrate it explicitly permits.
Check the existing floor before preparing it. Unknown older flooring or adhesive may need professional assessment for asbestos before any cutting, scraping, sanding, or removal.
- Read the product's substrate and acclimation requirements.
- Make the approved surface clean, dry, sound, and flat.
- Dry-lay the pattern to avoid tiny perimeter cuts.
- Install and finish edges following that product's instructions.
A diagonal arrangement changes the look but usually creates more edge cuts. Compare the layout on paper and include waste before deciding which orientation suits your budget.
Check finished height beside doors, appliances, and adjacent flooring. An attractive overlay isn't useful if the dishwasher becomes trapped under the counter or a doorway no longer clears.
Watch for Adhesive flooring is not automatically temporary. Removal can damage the floor beneath, so renters should get approval and budget for restoration before installing it.
53. Choose sheet vinyl for a continuous floor pattern
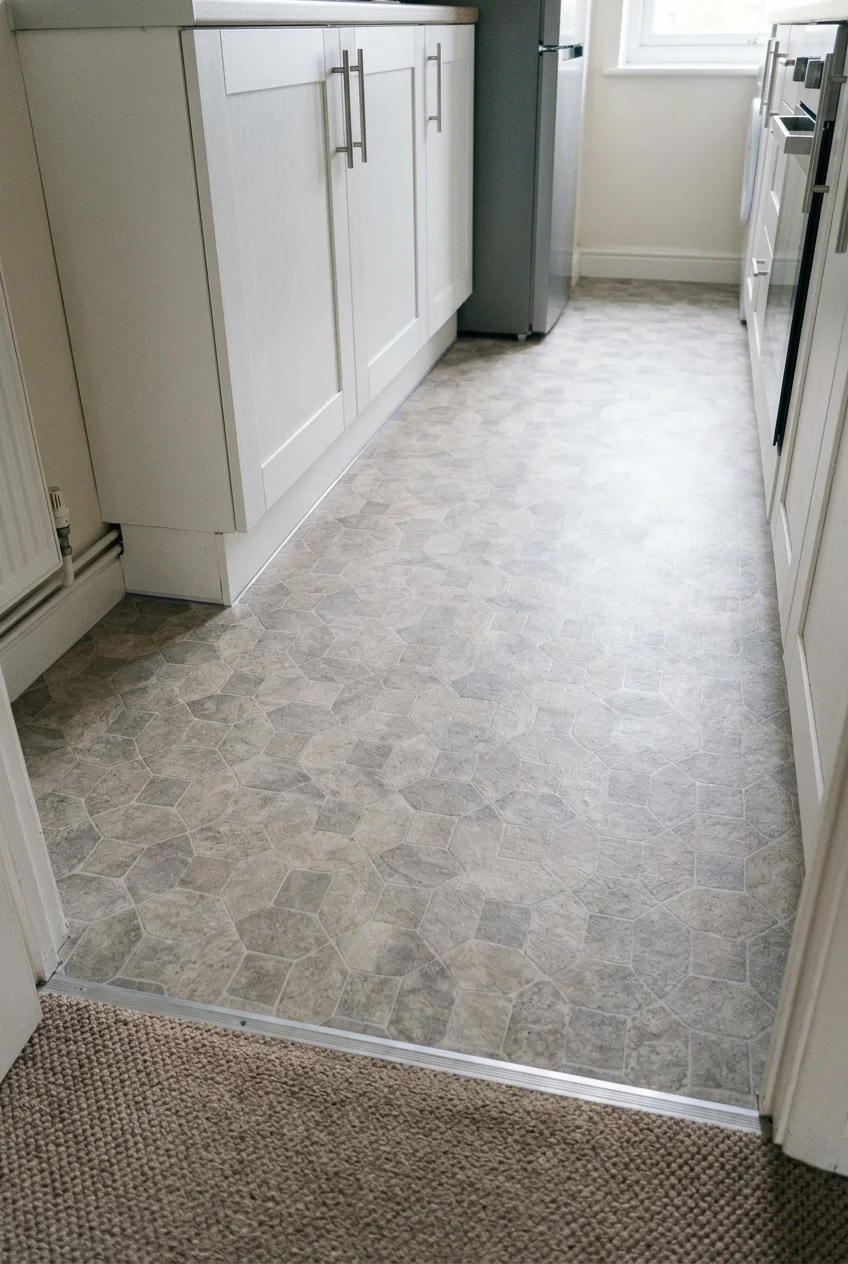
Sheet vinyl can provide a quieter floor surface with fewer visible joints in a small kitchen. Compare the roll width with the room before choosing a pattern.
Have the installer explain floor preparation, seam placement, and edge finishing. Irregular rooms and damaged substrates can make installation more involved than the material price suggests.
Check how appliances will be removed and returned without damaging the new floor. Include transitions and any required underlayment when comparing the finished project cost.
Bring a large sample home if the pattern imitates small tile or stone. Repeat scale can look very different across an entire room than in a hand sample.
54. Continue a quiet plank floor toward the dining area
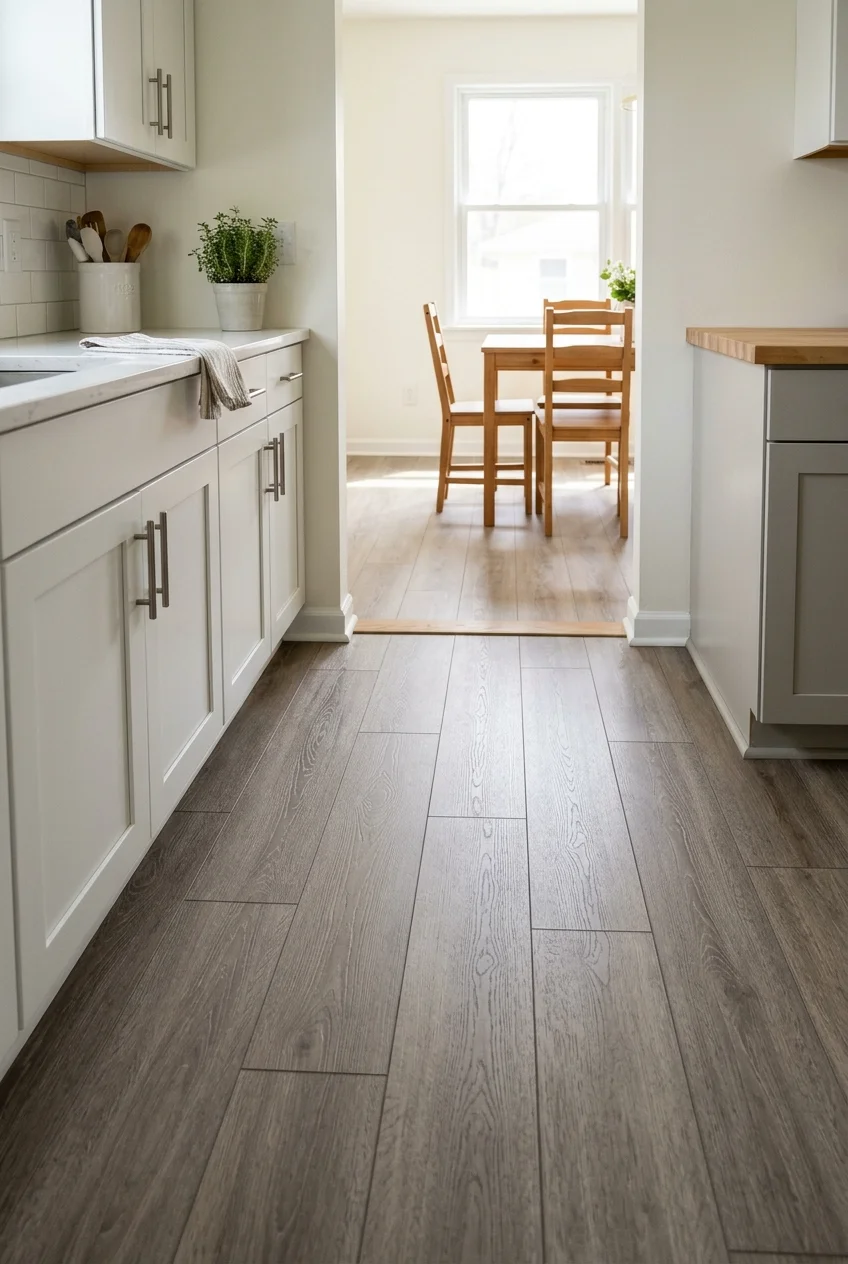
Click-lock vinyl can create a consistent floor across the kitchen and neighboring space. The benefit depends on a suitable substrate and room layout, not the locking label alone.
Read the exact product instructions for moisture conditions, flatness, movement gaps, and placement around fixed cabinets. Floating systems can be restricted from being pinned beneath heavy built-ins.
- Check door and appliance clearances after added floor height.
- Use the underlayment specified for that product.
- Plan expansion space and compatible perimeter trim.
- Confirm how wet areas and transitions are detailed.
Ask the supplier to resolve conflicting advice before installation. A general online flooring tip should not override the instructions for the particular floor you're buying.
Keep the plank color related to adjoining surfaces instead of forcing a wood match that almost works. A visibly different but compatible tone often looks more deliberate.
55. Renew floor grout before replacing sound tile
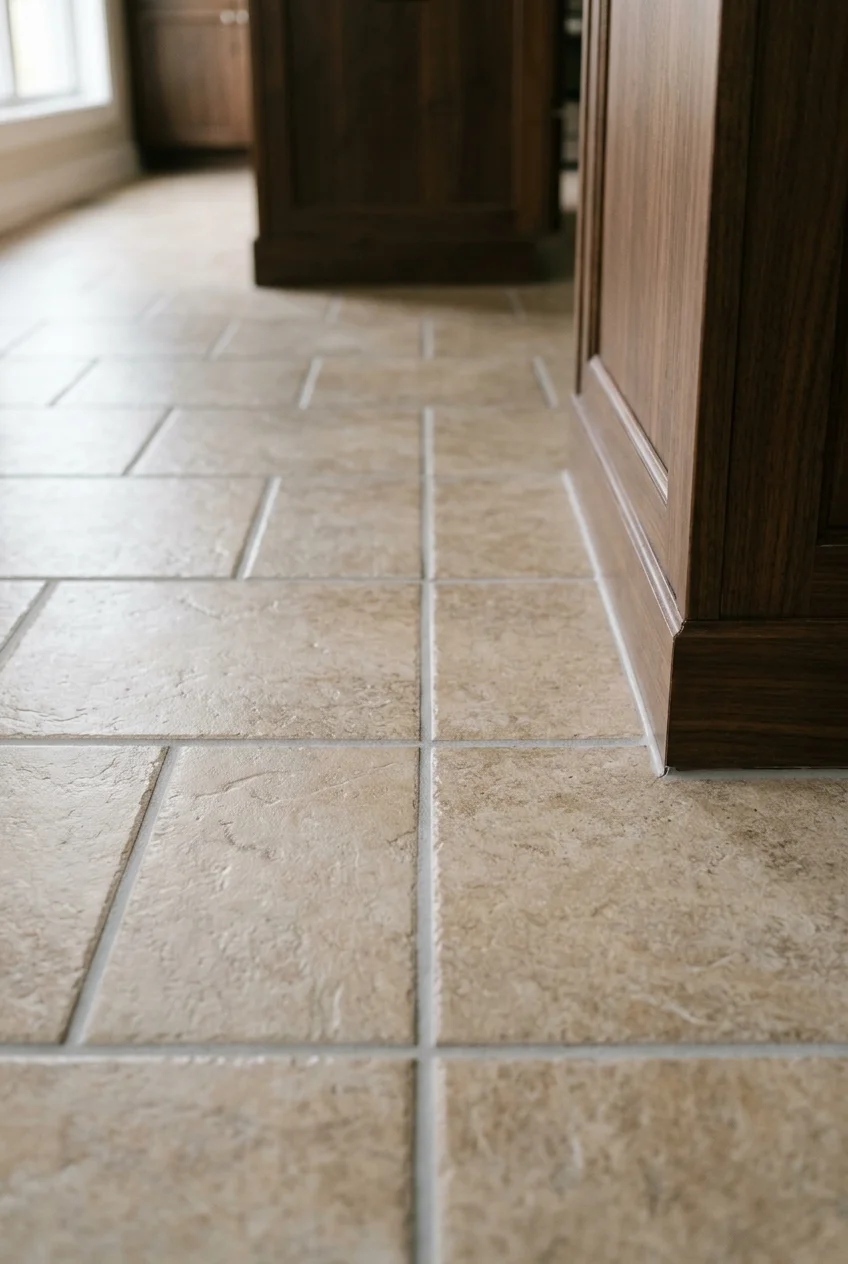
Cleaning and repairing appropriate grout can change how an existing tile floor reads. It is worth assessing when the tiles themselves are sound and still suit the room.
Look for loose tiles, cracked joints, or recurring dampness before starting. Recoloring the grout won't fix movement or a problem beneath the finished floor.
Test any cleaner or grout treatment on the actual materials and follow its instructions. Porous stone, glazed tile, and different grout types can need different care.
56. Patch a few broken tiles using matching spares
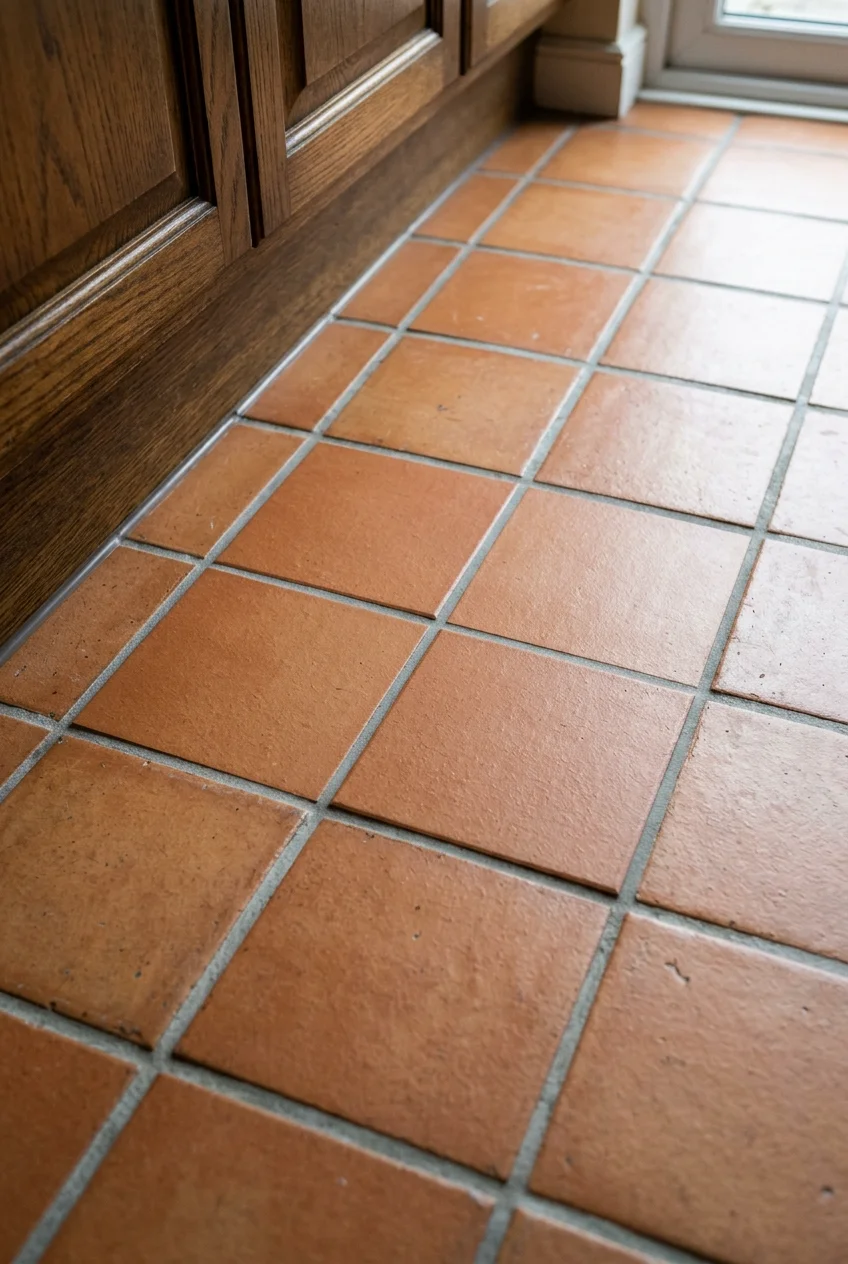
A localized tile repair can preserve an otherwise useful kitchen floor. Matching spare tiles make the result easier, particularly when the original product has been discontinued.
Have the reason for cracking checked before fitting replacements. A loose substrate or movement problem can break new tiles just as it damaged the originals.
Compare tile thickness, dimensions, and grout appearance before the repair begins. If an exact match is impossible, discuss a deliberate small border or inset with the installer.
57. Restore the wood floor that connects adjoining rooms
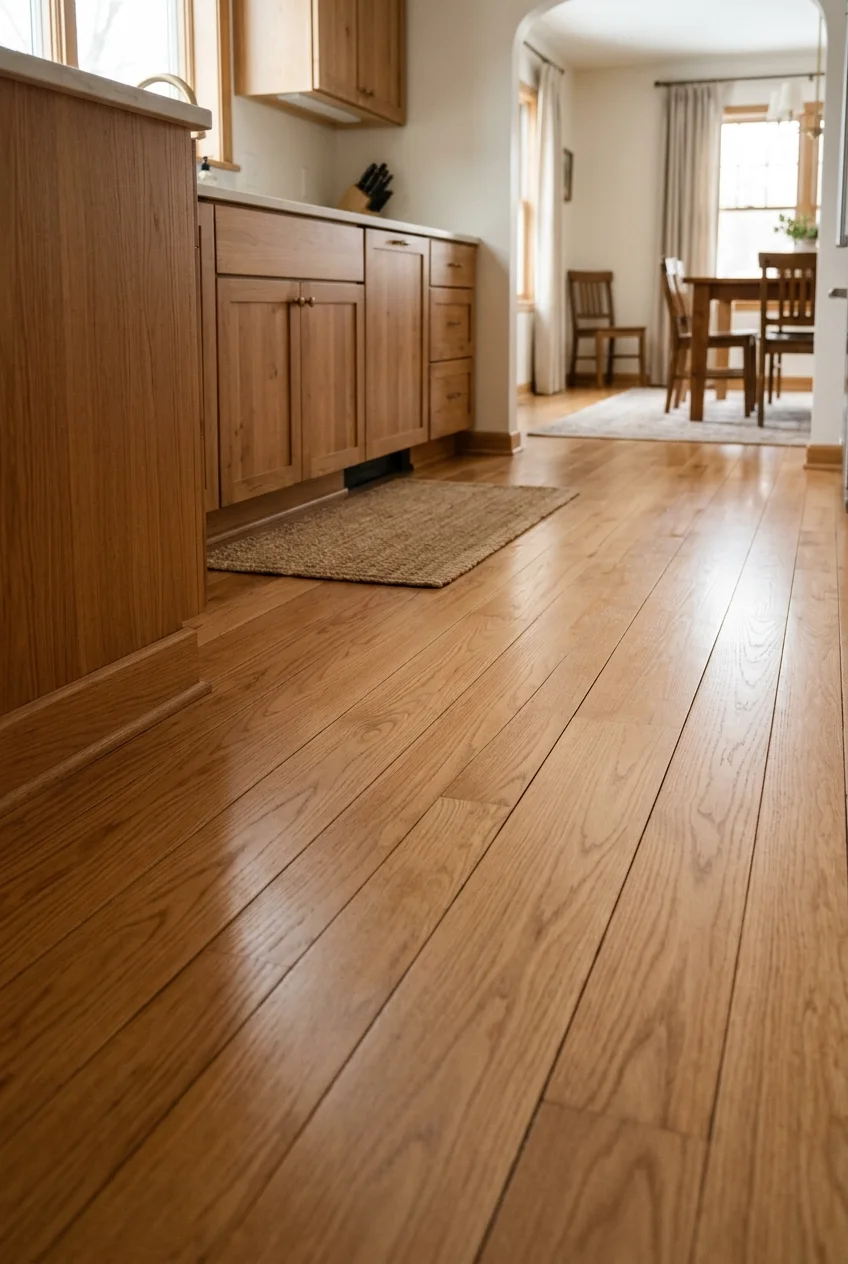
Existing wood flooring may be worth restoring if it connects the kitchen with nearby rooms. A professional assessment can establish whether the boards have enough material left.
Identify solid wood versus engineered construction and investigate dark water damage or movement. Not every wood-looking floor can tolerate sanding, and not every stain will disappear.
Ask about dust control, finish choice, kitchen downtime, and care before accepting a quote. Include appliance handling and adjoining-room transitions in the same scope.
Choose the sheen from a sample in your room. A restrained finish may relate better to retained cabinetry than chasing a perfectly matching wood color.
58. Replace an awkward floor transition with the right profile
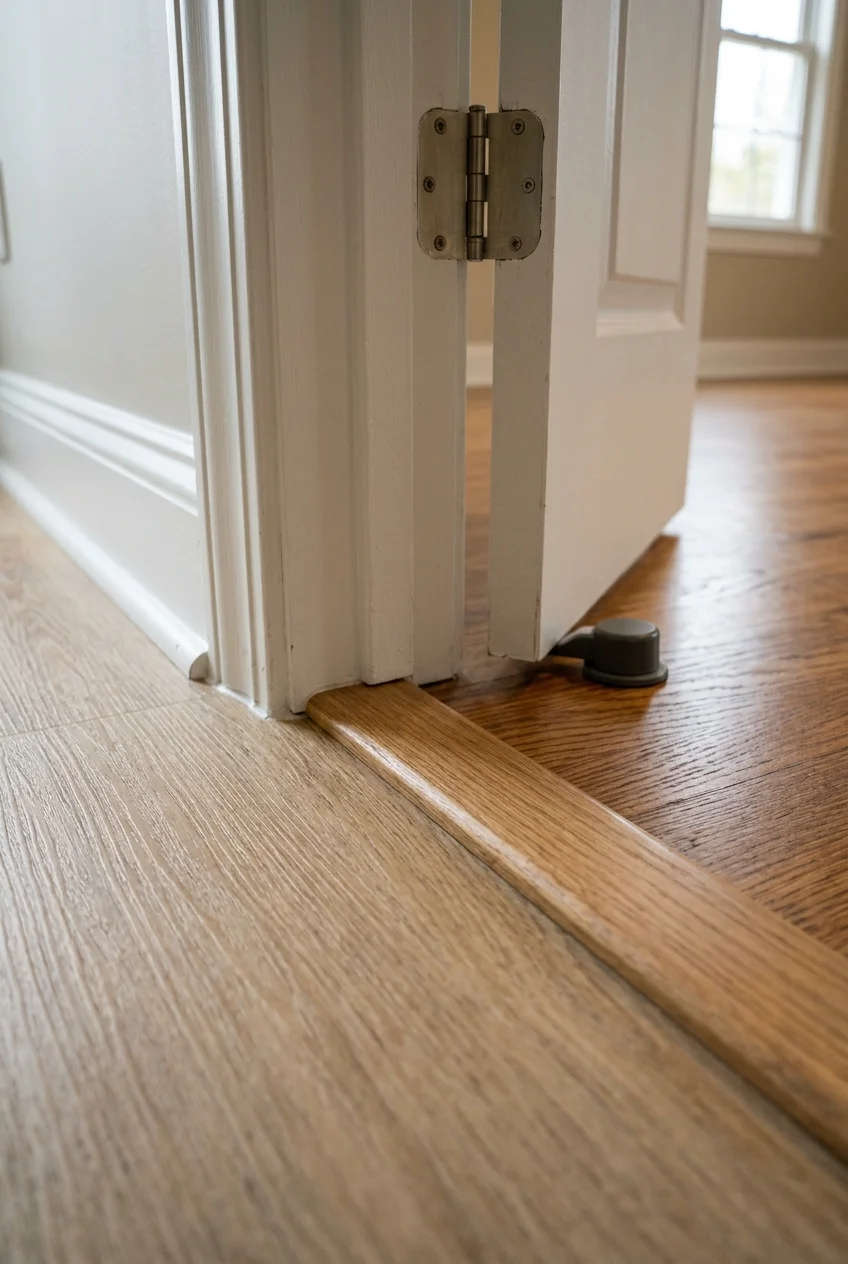
A tidy transition can make the edge of a kitchen refresh feel complete. Choose a profile suited to the actual height difference and flooring materials.
Ask the flooring supplier how the trim should attach, particularly beside a floating floor. It must not prevent movement that the floor system requires.
Check the finished shape underfoot and through the doorway before fixing it. A decorative strip should resolve the junction rather than create a taller obstacle.
59. Fit a rollout tray inside an existing base cabinet
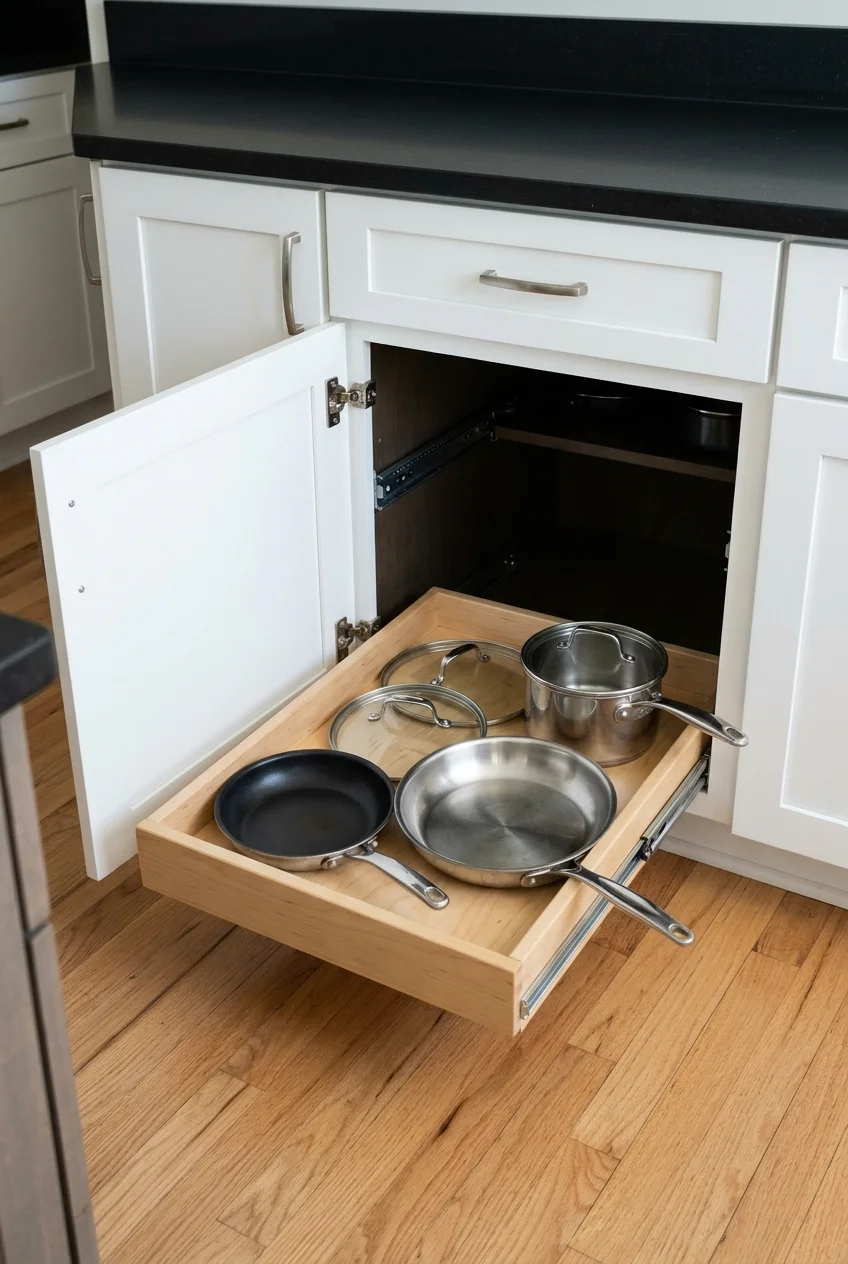
A rollout tray brings stored pans toward you without replacing the whole cabinet. Choose one problem cupboard first, especially where useful items disappear behind the front row.
Measure the clear opening with the door fully open, then the interior depth and height. Face frames, hinges, center stiles, and plumbing can reduce usable space.
- Check the tray's minimum opening requirements.
- Confirm mounting surfaces are sound and suitable.
- Allow the tray and stored items to pass the hinges.
- Compare the installed load limit with the intended contents.
Draw the tray's travel path before ordering. The surrounding floor and nearby appliance doors must let it extend far enough to be useful in daily cooking.
A removable bin is the simpler alternative if screw mounting isn't possible. It won't extend on runners, but it can organize a shallow cabinet without permanent changes.
Keep heavy pans low and avoid stacking beyond what the tray permits. Improving reach does not make an overloaded or poorly mounted system reliable.
If a rollout is more work than your cupboard needs, compare these kitchen storage ideas for simpler ways to rearrange the space you already have.
60. Hide the trash in a fitted pullout cabinet
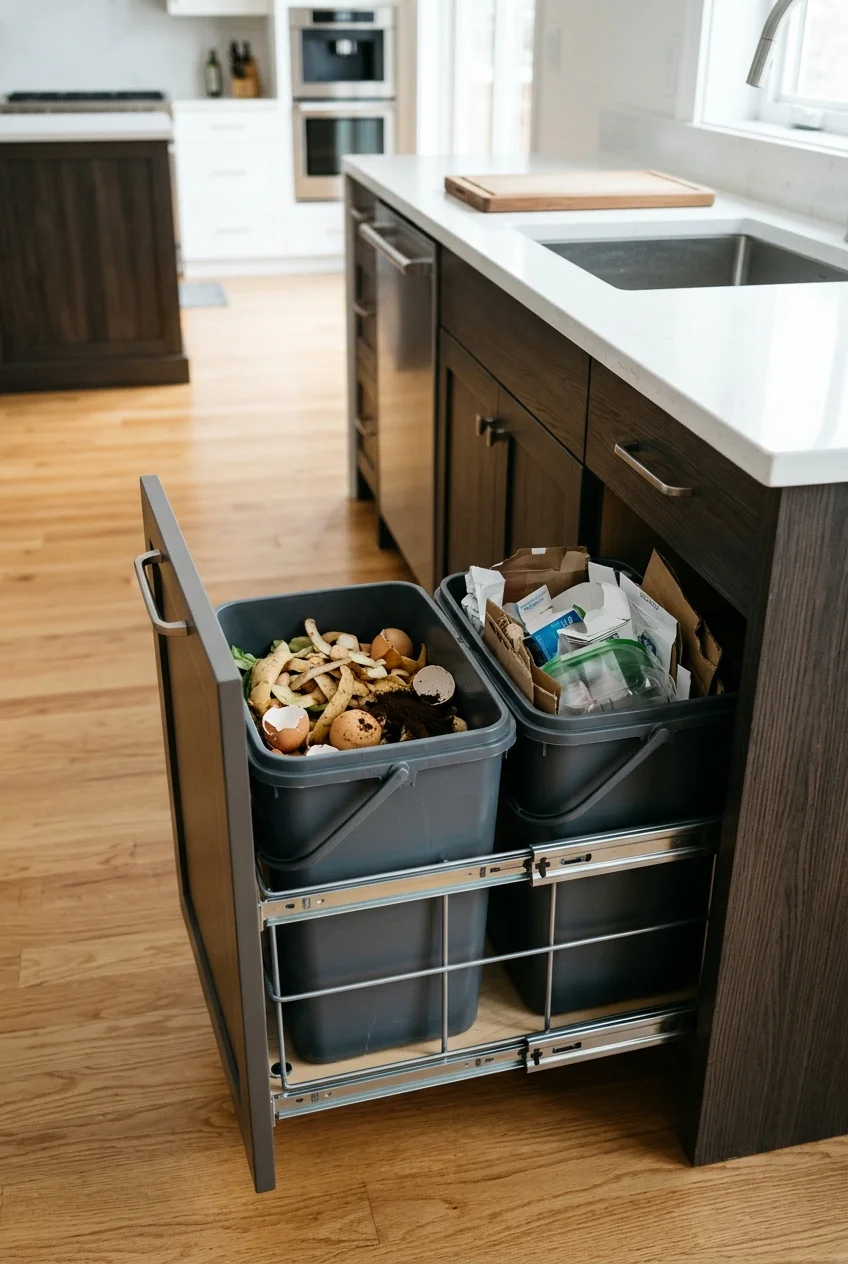
A fitted waste pullout clears a freestanding bin from the floor and gives trash a defined home. Use a cabinet near prep work without sacrificing essential storage blindly.
Measure the opening, interior depth, height, and nearby obstructions before choosing a system. The bin capacity and runner assembly both have to fit the available space.
Decide whether the existing door will stay hinged or mount to the mechanism. Door-mounted systems need the correct brackets and a front that can accept them.
- Leave room to lift each bin out.
- Keep plumbing and electrical equipment clear.
- Check the cabinet floor and mounting points.
- Allow full extension without blocking a busy doorway.
Include cleaning access in the decision. A smaller removable bin that you empty regularly may be more useful than maximum capacity squeezed tightly into the cabinet.
Budget tip Before buying a complete mechanism, test a removable lidded bin in the cabinet. This shows whether the location works while preserving the option to change it.
61. Store baking sheets upright with simple dividers
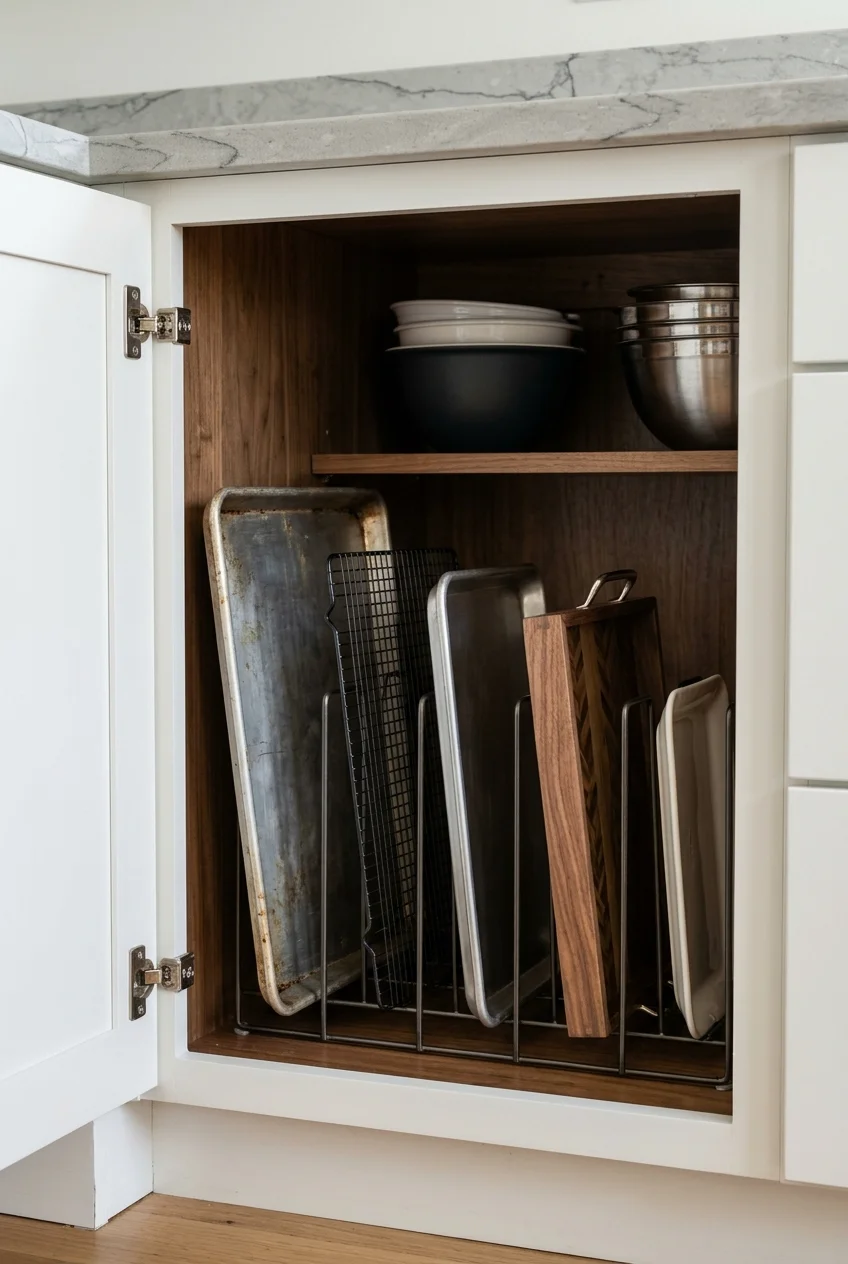
Upright dividers stop baking sheets and trays from becoming a heavy stack. Use a narrow cupboard or one side of a wider base cabinet near the preparation area.
Measure the tallest and deepest pieces before setting divider spacing. Leave enough room to grip one tray without scraping neighboring surfaces or pulling everything out together.
A freestanding rack keeps the change reversible; fixed dividers can feel more integrated. Either choice needs a stable base and clearance for the cabinet door.
62. Divide a deep drawer around the tools you own
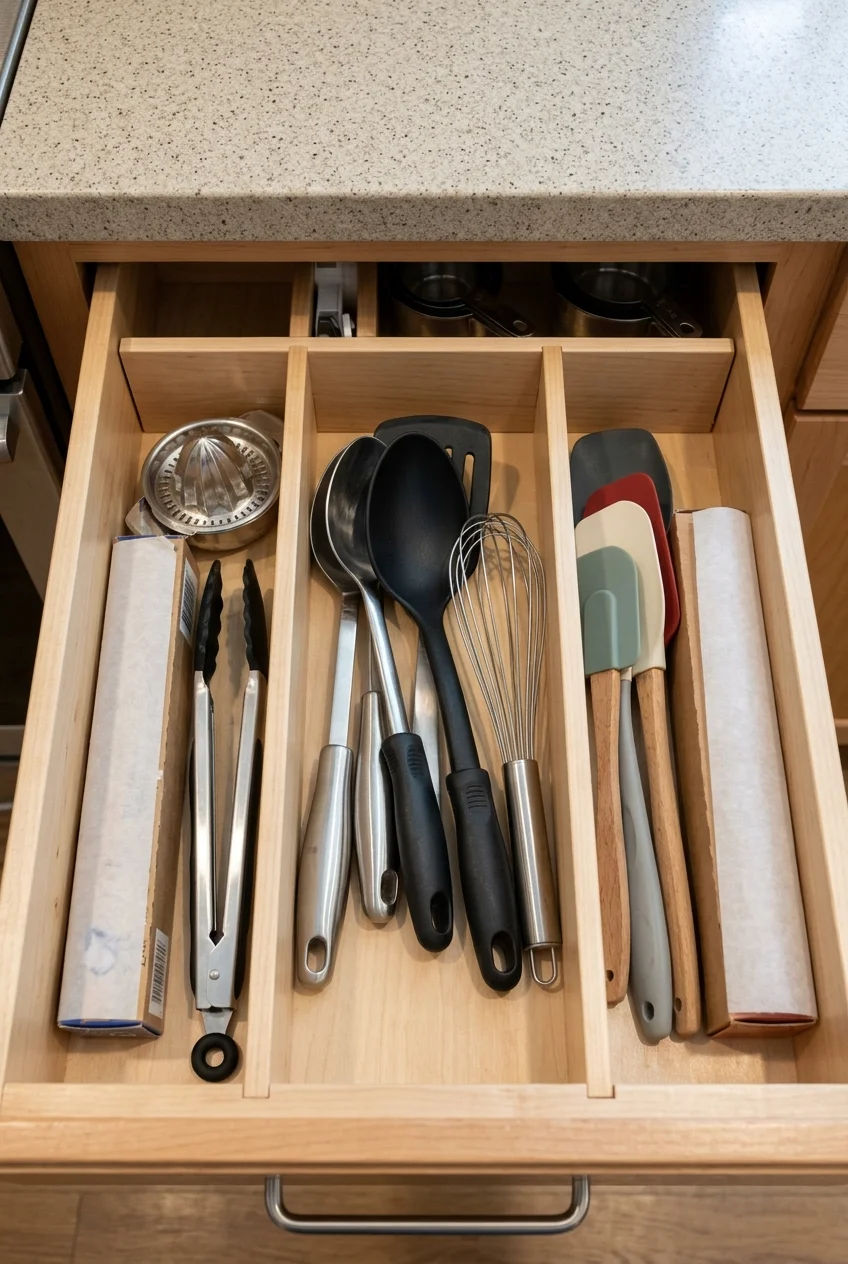
Adjustable dividers make a deep utility drawer easier to use without replacing its box. Arrange them around actual utensils instead of copying a perfectly empty organizer photograph.
Measure inside the drawer, including its usable height beneath the counter. Keep dividers below the closing path and check that their mounting pressure won't damage thin sides.
- Give long spatulas an uninterrupted channel.
- Separate sharp tools with appropriate protective storage.
- Leave room for your hand around bulky handles.
- Keep a small flexible space for awkward extras.
Test the arrangement with temporary cardboard strips before buying a full set. If one crowded category still overflows, move rarely used tools rather than adding more tiny compartments.
63. Organize the sink cabinet around the plumbing
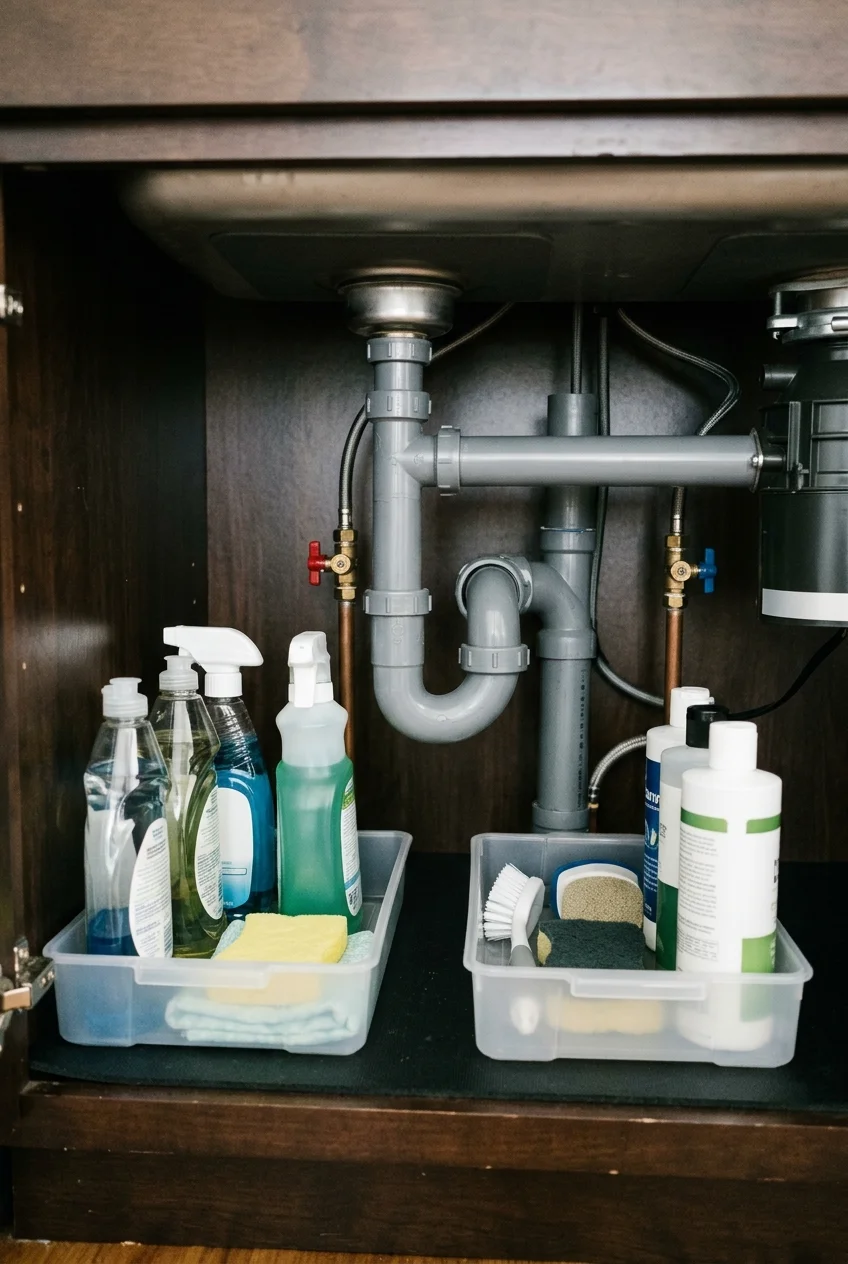
An under-sink organizer needs to fit the pipes before it fits the photograph. Choose a compact system that leaves shutoff valves and connections visible and reachable.
Measure the space on both sides of the plumbing, including any disposal and door hardware. A symmetrical two-tier rack often wastes space when the pipes aren't centered.
Use removable trays to group supplies and make inspections easier. They can contain minor drips during cleaning, but they aren't a repair for leaking plumbing.
Keep household chemicals in their original containers and secure them as your household requires. Don't sacrifice safety or valve access for a perfectly matching row of bottles.
64. Add a removable turntable to a reachable corner shelf
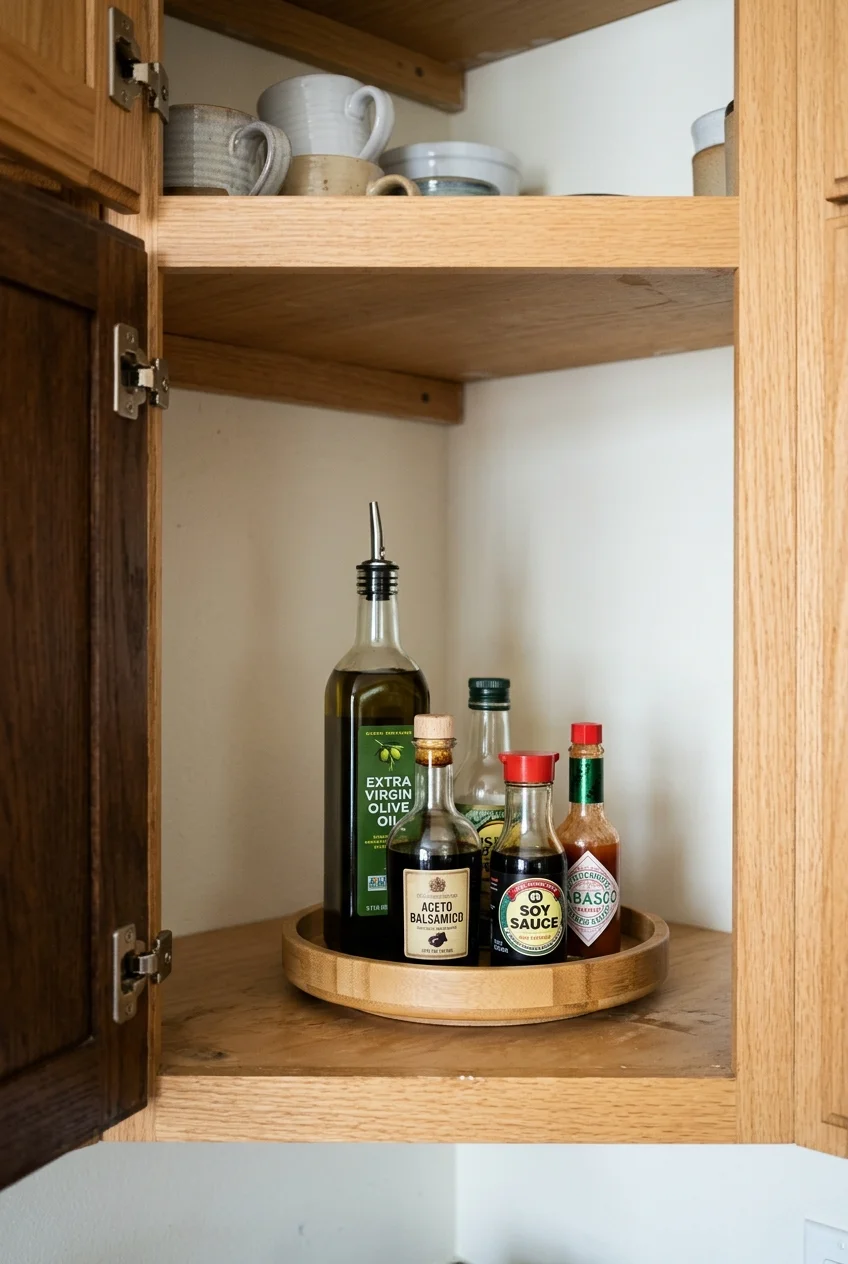
A turntable can bring small bottles toward the front of a reachable corner cabinet. It is a simple alternative when a full corner mechanism would exceed the budget.
Measure the circular footprint and the opening needed to load it. Test the rotation with the tallest bottles so they don't hit hinges or the shelf above.
Use a rimmed tray for items that might slide, and keep weight within its stated limit. Don't expect it to make every part of a deep blind corner accessible.
65. Use the back of a pantry door for shallow storage
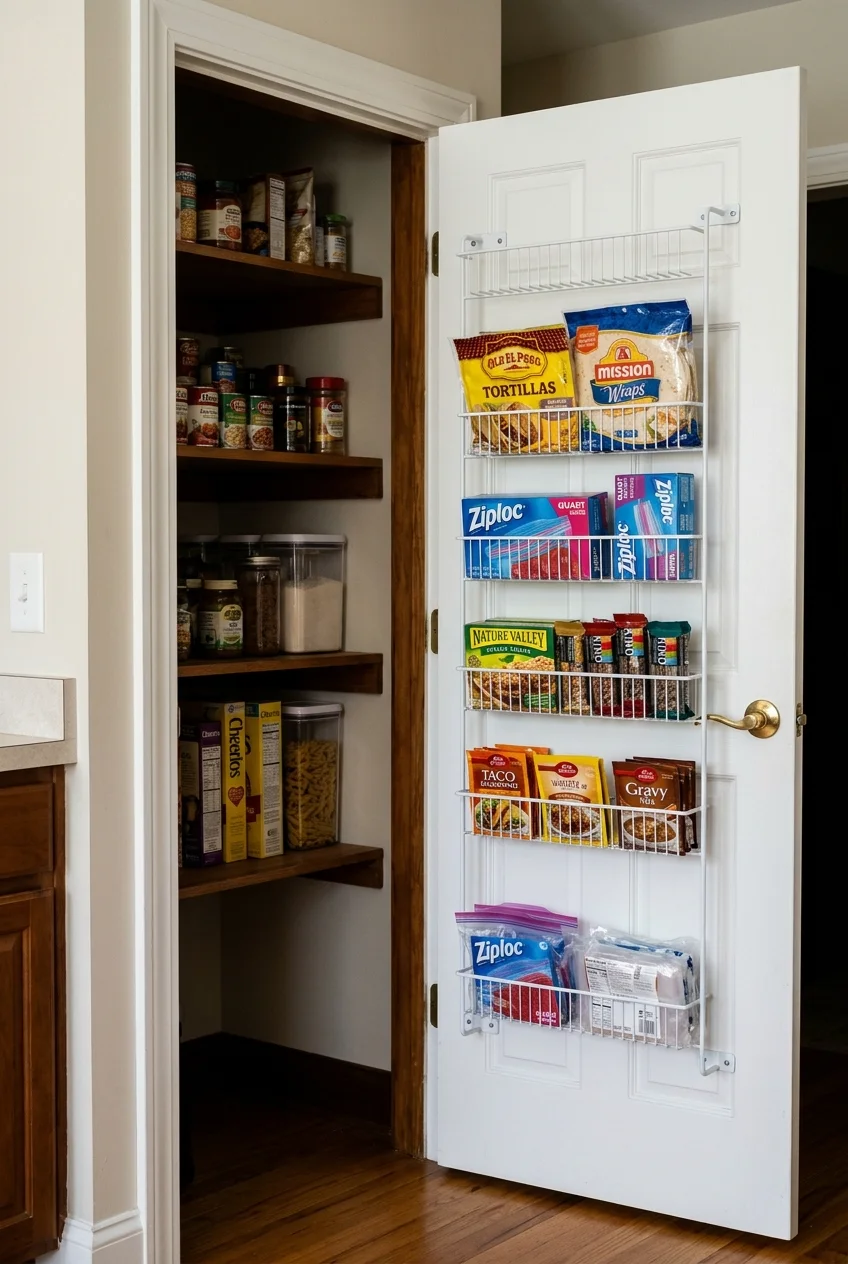
A shallow door rack can move packets and wraps off crowded shelves. It works only when the loaded rack clears both the shelves and the door frame.
Check the door's construction before fastening hardware, and follow the rack's mounting and weight instructions. Thin hollow panels may need a different system or professional advice.
Close the door slowly with a trial load before committing to the layout. Keep heavy goods on fixed shelves rather than loading the moving door unnecessarily.
66. Move spices into a shallow drawer insert

A drawer insert keeps spice jars visible without adding a new wall rack. Choose a drawer near the preparation area, away from direct heat where possible.
Measure the tallest jar while it sits in the proposed angled position, then check closing clearance. A jar that fits flat may catch when tilted upward.
Keep original containers if they already work; matching jars aren't required for an orderly drawer. Put frequently used seasonings near the front rather than arranging solely for color.
67. Add a shelf riser where plates leave unused height
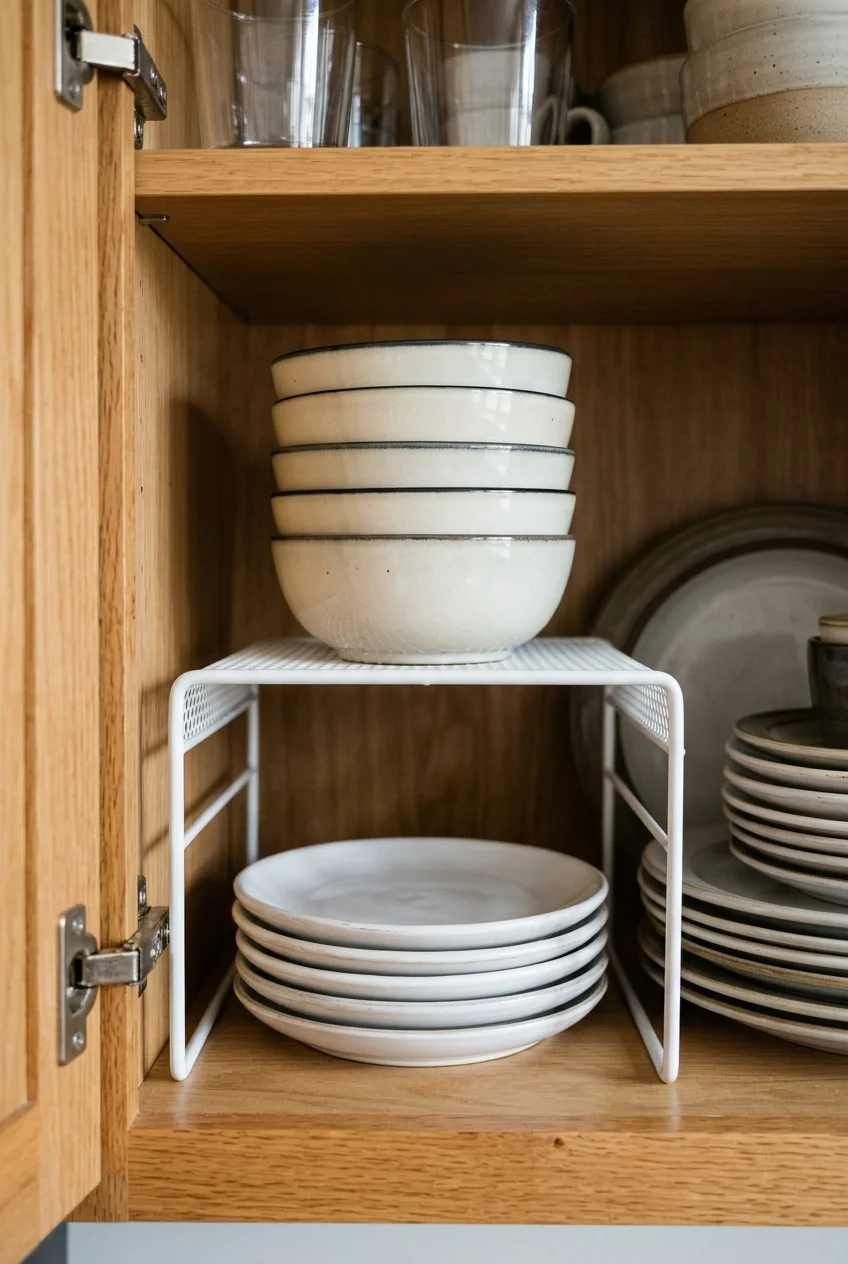
A simple riser creates a second level inside a tall cupboard without replacing shelving. Use it where small plate stacks leave genuinely unused space above them.
Check shelf depth, riser stability, load limits, and the height of dishes underneath. Don't solve wasted vertical space by making the front row difficult to remove.
68. Mount a short utensil rail beside the prep counter
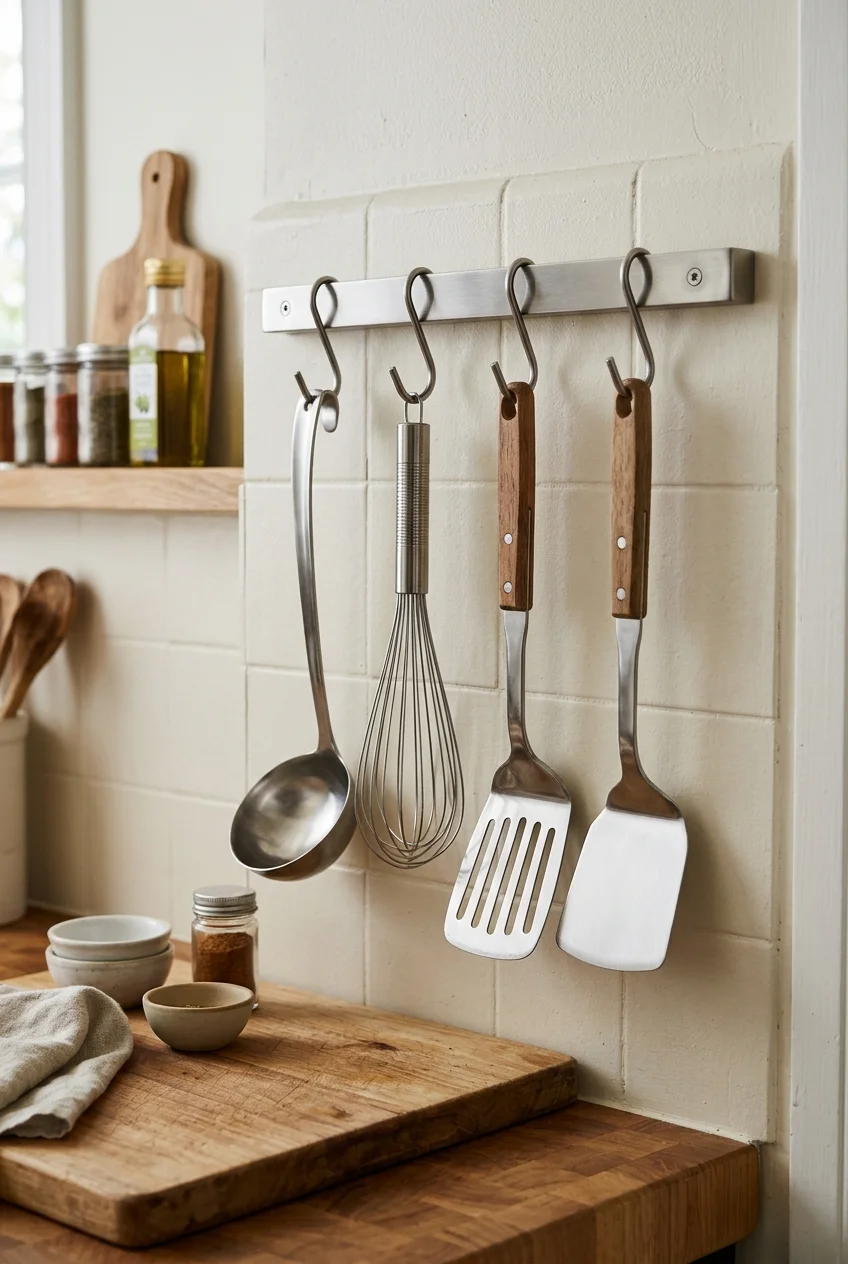
A short rail can free a crowded drawer while keeping a few frequently used tools visible. Place it beside preparation work rather than directly above active burners.
Space hooks so utensils hang separately and stop clear of the counter. Confirm the wall attachment can support the loaded rail, using the manufacturer's mounting guidance.
Hang only tools you reach for often so the wall remains useful rather than crowded. Long handles and projecting hooks should stay away from narrow walkways.
69. Add shallow shelves to a usable cabinet end
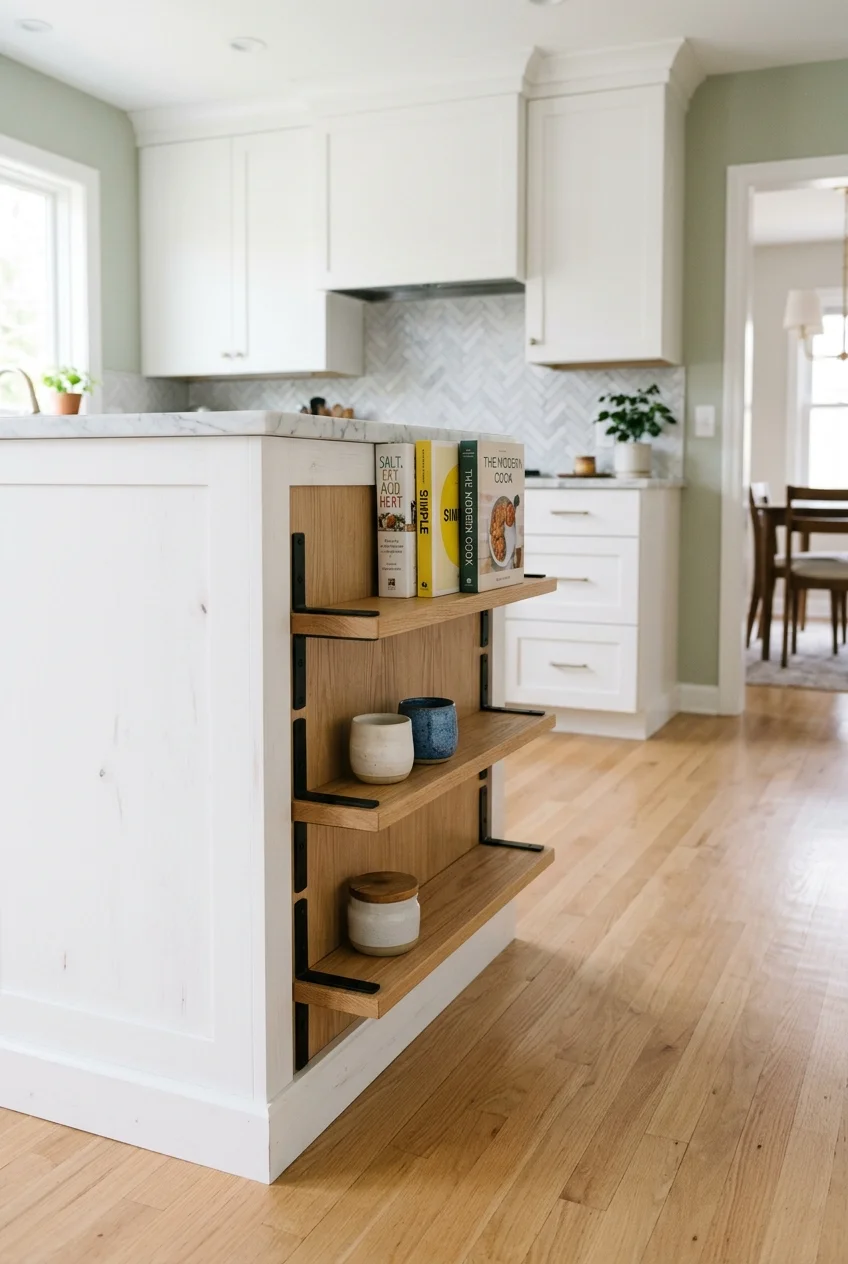
A small end-shelf unit can turn an exposed cabinet side into storage for cookbooks or everyday cups. Keep it shallow enough to preserve the adjacent route.
Check how the unit attaches and whether the cabinet can carry the added load. Don't fasten heavy shelving into a thin decorative skin without suitable support.
Choose objects that stay within the shelf depth and remain easy to retrieve. If the end faces a tight doorway, a plain finished panel is the better choice.
70. Reset pantry shelf heights around actual groceries

Adjustable pantry shelves can gain useful space simply by moving them. Measure what you store before adding containers or assuming the cabinet needs replacement.
Set one taller zone for cereal boxes and reserve shorter intervals for cans or jars. Leave enough space to lift items out without tipping them sideways.
Use compatible shelf supports and inspect the shelf condition before reloading. A sagging shelf needs a structural solution rather than another tightly packed row of groceries.
Once the shelf heights work, these pantry organization ideas can help you decide which categories need bins and which can stay in their original packages.
71. Replace one sagging shelf with a properly supported shelf
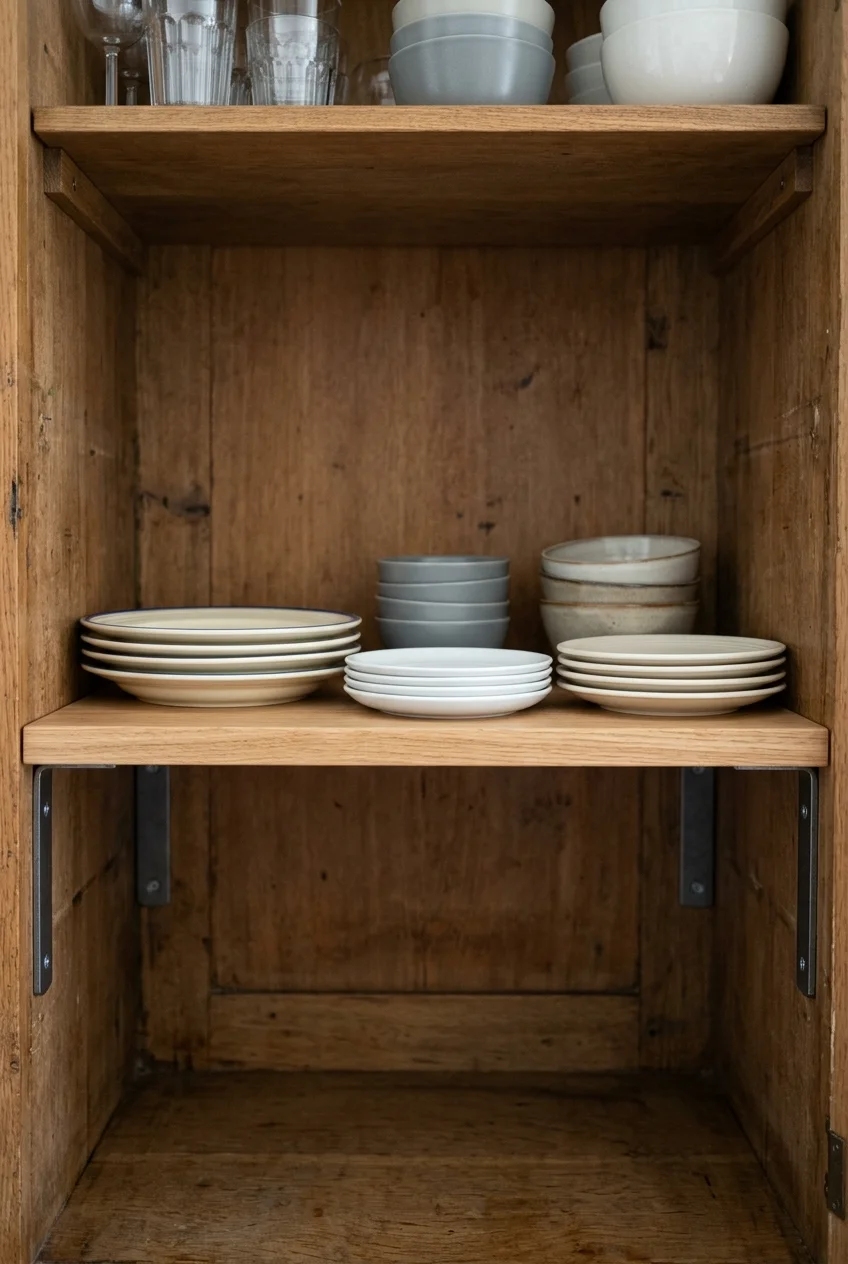
A straight replacement shelf can restore a cupboard's function without changing the whole cabinet. Match the shelf material and support arrangement to the span and intended contents.
Ask a cabinet supplier about thickness, edge treatment, and suitable support points. Simply cutting another thin board to the same dimensions may repeat the original problem.
Check the cabinet sides and shelf pins as well as the shelf itself. Redistribute heavy dishes if the cabinet system isn't designed to carry their combined weight.
72. Consider a toe-kick drawer for flat occasional-use items
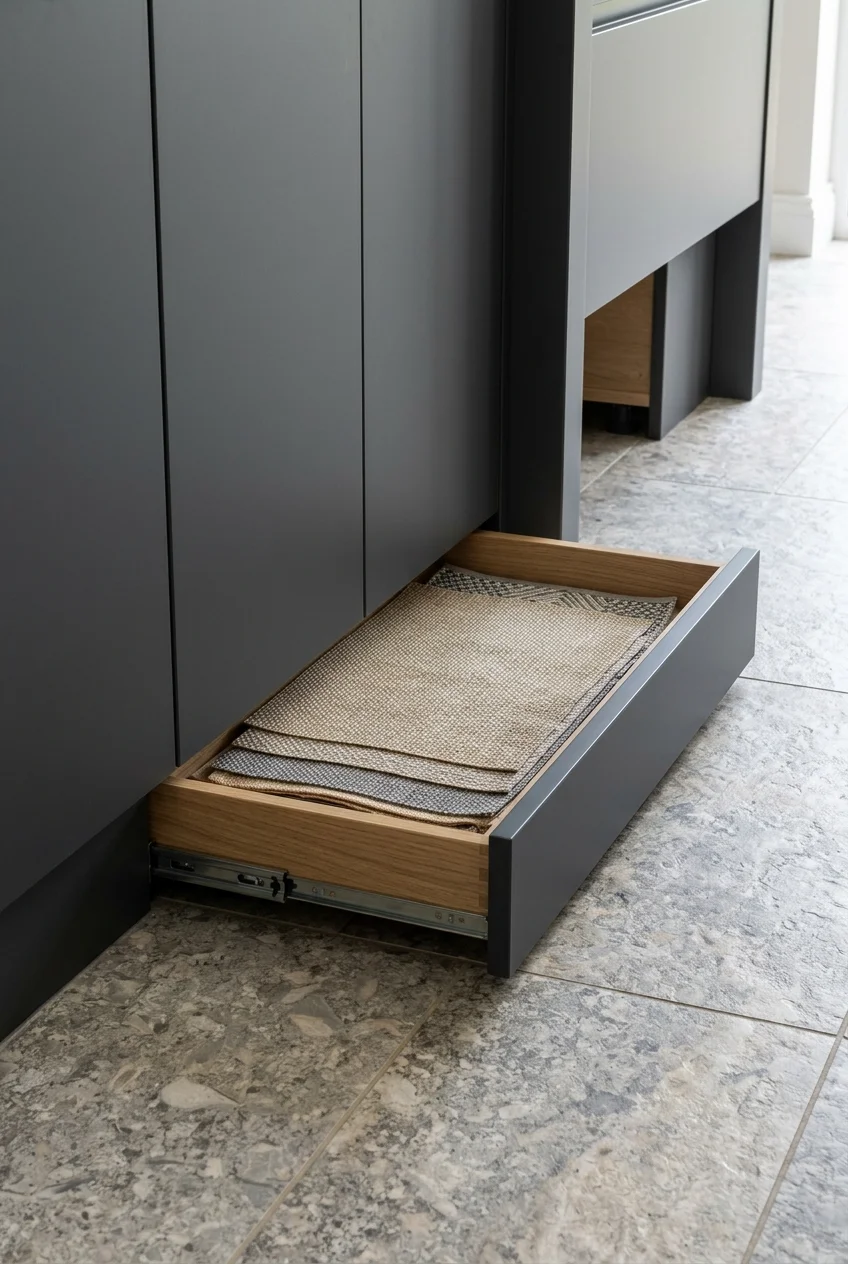
A toe-kick drawer can add shallow storage beneath a suitable cabinet run. It is a specialized retrofit, best reserved for flat items you don't need constantly.
Have the cabinet base checked before planning it. Supports, leveling legs, utilities, and ventilation may occupy the space that looks empty from the front.
- Confirm the base can accept the intended hardware.
- Keep necessary structural supports and air paths intact.
- Measure the full opening and travel path.
- Choose contents that tolerate storage close to the floor.
Include fabrication and installation in the quote, not just a drawer kit. A low drawer can be awkward to reach, so it isn't automatically the best storage upgrade.
If access or cost makes the retrofit impractical, move occasional-use trays to an ordinary cabinet divider. The useful goal is reachable storage rather than hidden complexity.
73. Give recycling its own narrow freestanding station
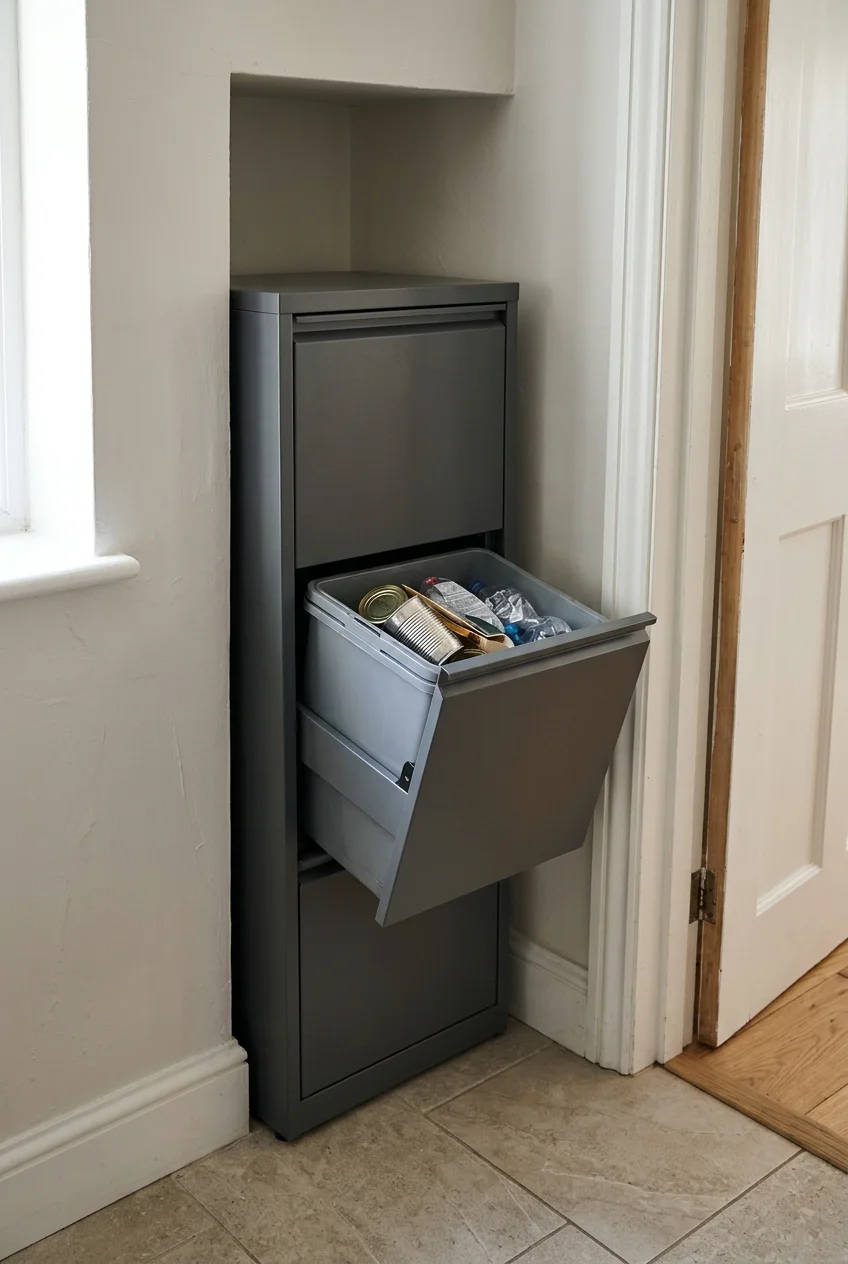
A narrow recycling station can reclaim a corner without consuming a full cabinet. Look for a stable unit that fits the actual containers your local collection accepts.
Measure the lid-opening or bin-removal path as well as the footprint. A slim cabinet is frustrating if it must be dragged away from the wall to empty it.
Keep it away from door swings and heat sources, and follow anchoring instructions where applicable. Washable removable bins make this furniture addition easier to maintain.
74. Bring blind-corner storage forward on fitted trays
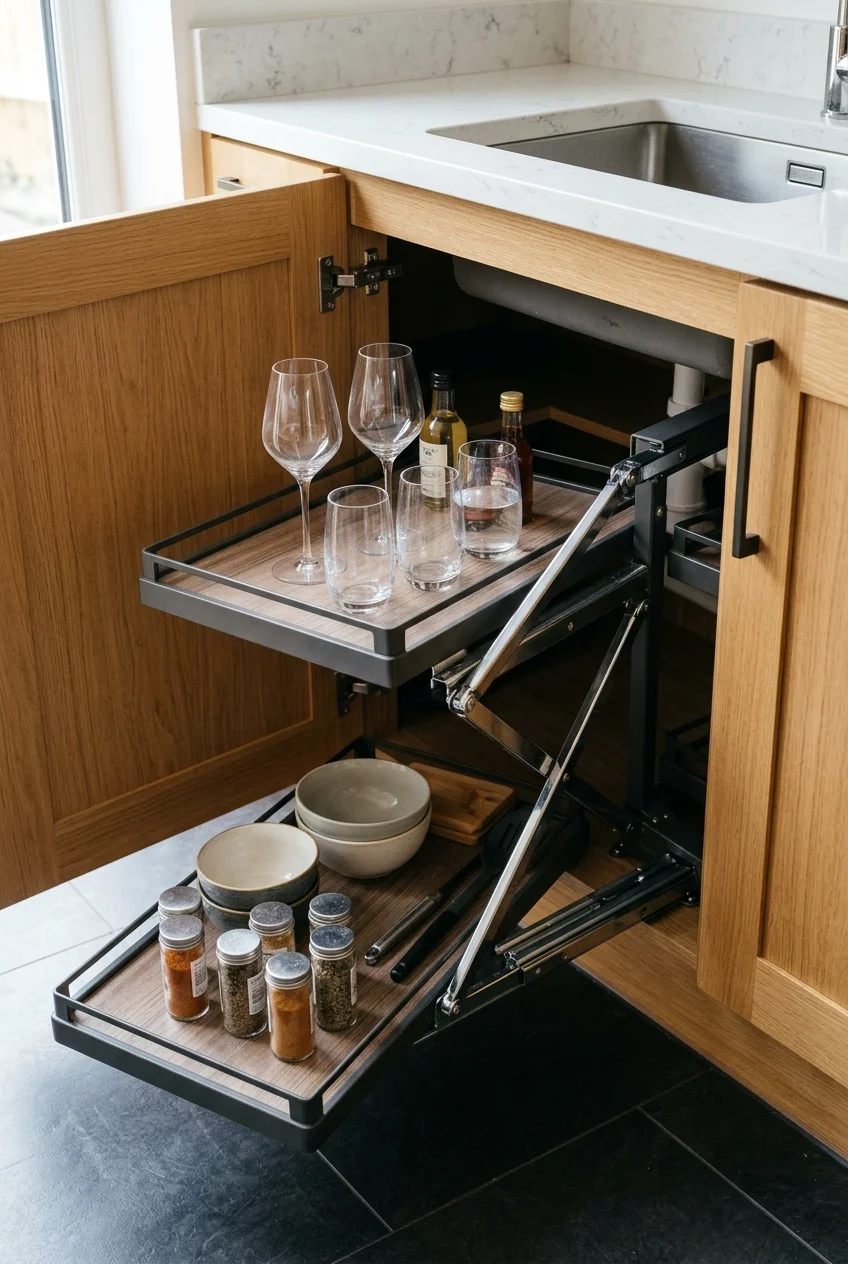
A fitted blind-corner pullout can bring otherwise awkward storage forward, but it is a more demanding retrofit. Measure and price it before assuming it is the budget answer.
Match the mechanism to cabinet construction, opening width, internal dimensions, hinge position, and left or right orientation. A broad cabinet-width description alone doesn't establish compatibility.
Check the full swing and extension path with adjacent drawers and appliances. The trays need room to move through the opening without striking the door or neighboring handles.
- Confirm installation drawings match the actual cabinet.
- Check mounting strength and rated contents.
- Measure tray travel outside the cabinet.
- Include professional fitting where the system requires it.
Compare the finished quote with removable bins or storing occasional-use items in the corner. A complex mechanism may be worthwhile, but it shouldn't consume money needed for basic repairs.
Prioritize the corner only if its improved access solves a real daily problem. Keeping the cabinet and spending elsewhere can be the stronger budget decision.
75. Use a sturdy secondhand worktable as an island
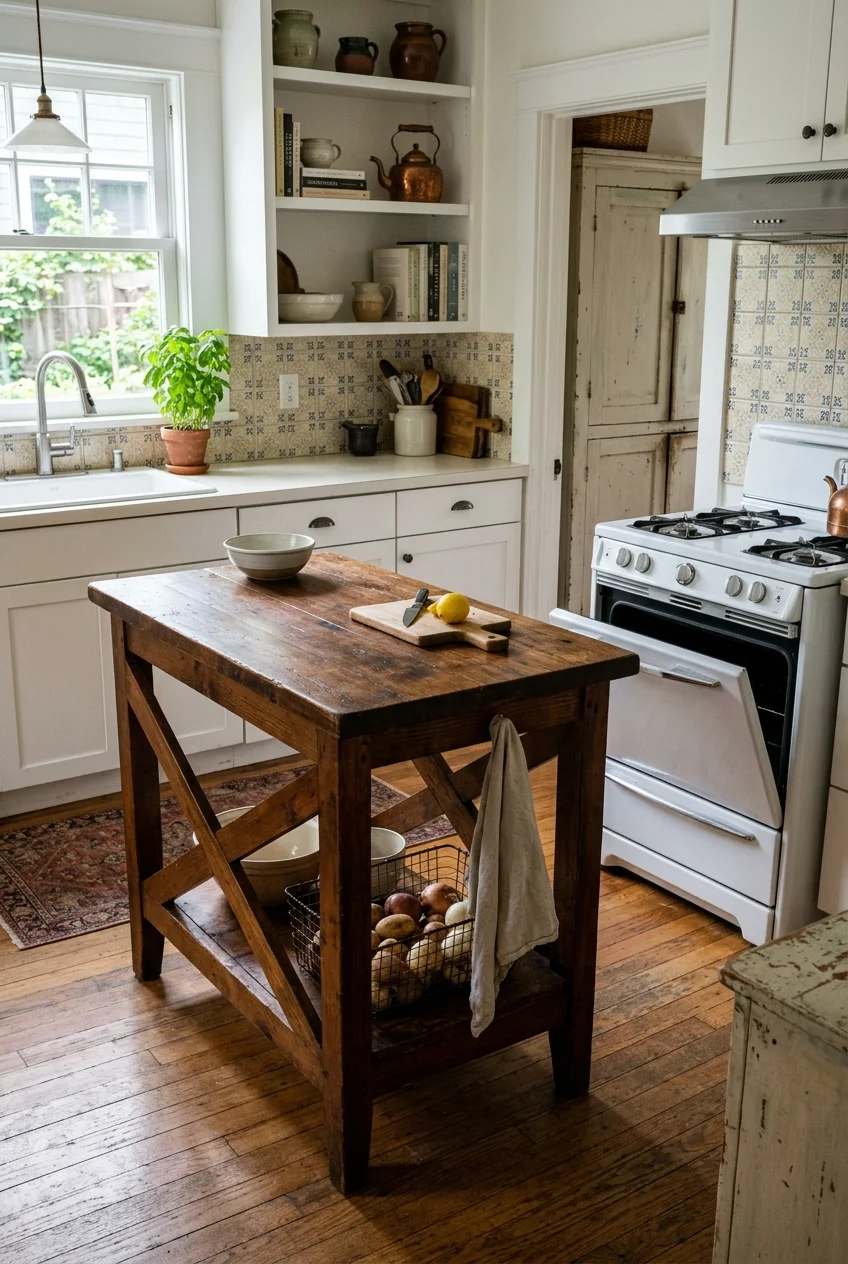
A secondhand worktable can add preparation space without custom cabinetry. Choose a stable piece with a useful working height and a top suited to its intended use.
Tape its footprint on the floor before buying, then test appliance doors and normal movement. Include projecting handles and chair space rather than measuring only the tabletop.
Inspect joints, legs, and the finish, and use a separate cutting board when appropriate. Unknown old coatings need assessment before you sand or refinish them.
An open underside keeps the table visually lighter than another solid cabinet block. Leave the leg space visible instead of filling every opening with bins.
76. Choose a locking cart that has a real parking space
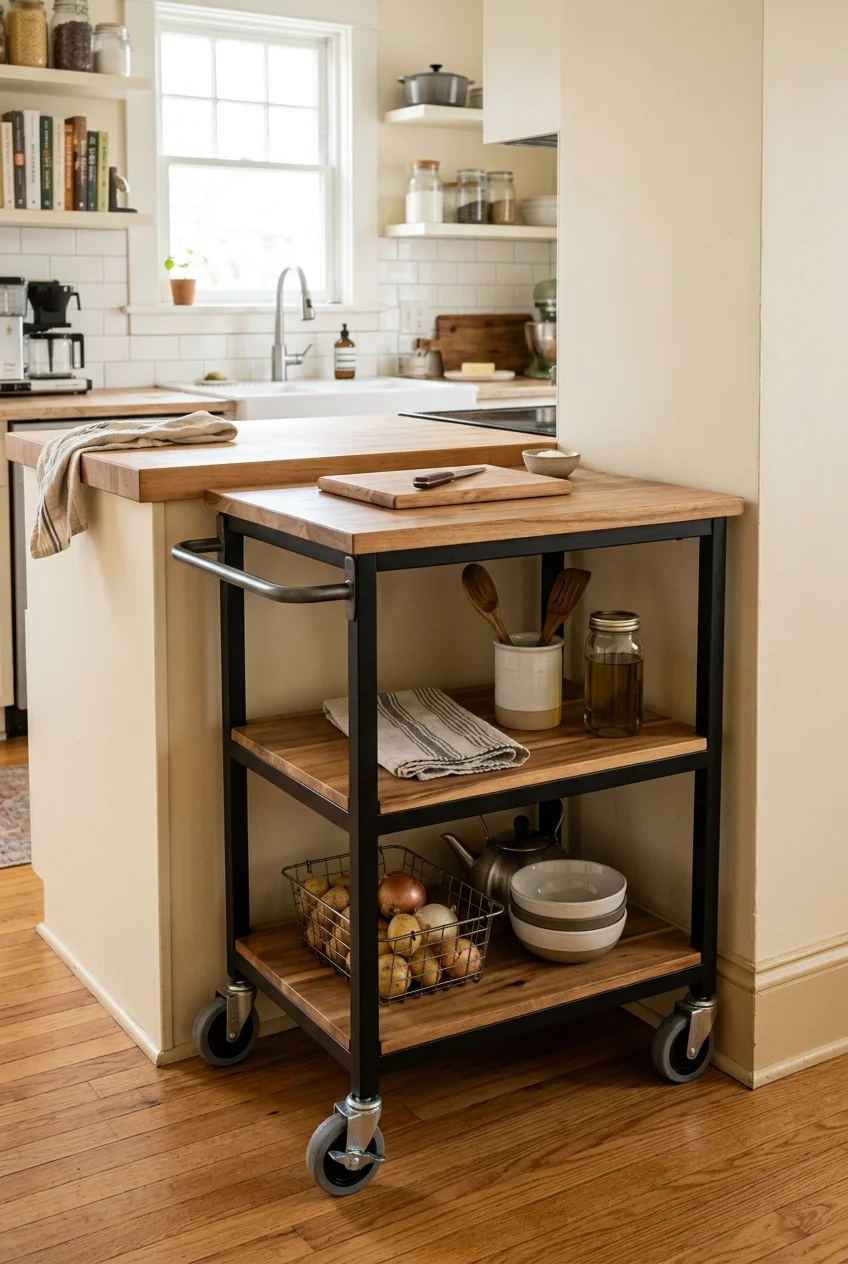
A rolling cart adds flexible work surface when it can move without blocking the kitchen. Decide where it will park before choosing its size or storage features.
Check overall width, wheel projection, handle clearance, and the manufacturer's load instructions. Locking casters help hold it in position but don't correct a flimsy or overloaded cart.
Keep frequently used supplies on its shelves and leave the top easy to clear. If you must constantly relocate it to open appliances, choose a smaller cart.
77. Build a small island from stock base cabinets
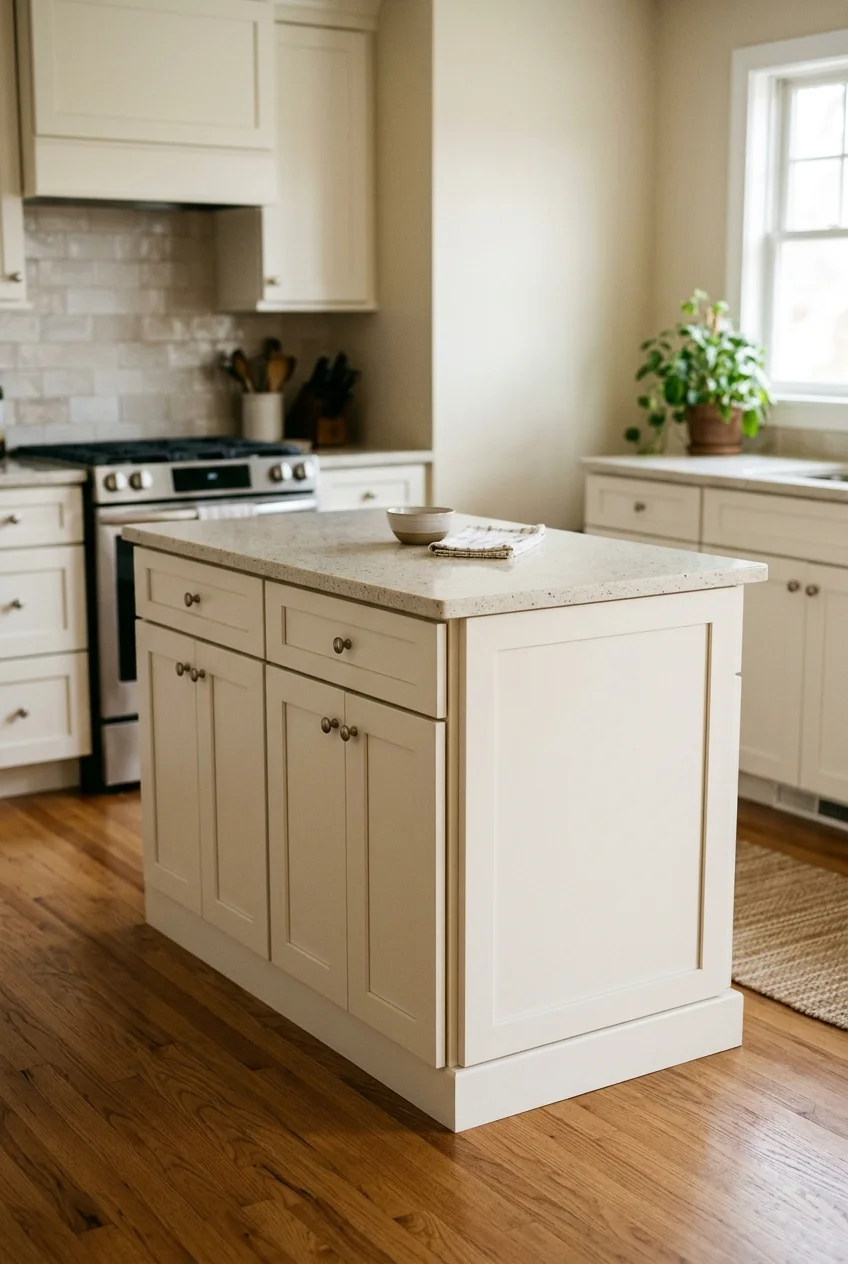
Stock base cabinets can form a compact island when custom joinery is beyond the budget. Their doors and dimensions should work together before you choose the countertop.
Plan finished back panels, end panels, counter support, and anchoring as part of the build. A cabinet placed in the room isn't automatically a stable freestanding island.
- Check every appliance and cabinet door in the proposed layout.
- Confirm anchoring won't conflict with a floating floor or hidden services.
- Follow counter support requirements for any overhang.
- Have required electrical provisions assessed for the intended installation.
Ask an installer to evaluate the floor and attachment method before ordering. Moving or adding services can change the price much more than the stock cabinet choice.
Keep the initial design small and useful rather than maximizing storage at every edge. A narrow cabinet with a plain top may solve the problem without additional seating.
Compare the complete build with a suitable freestanding worktable. Once panels, hardware, installation, and the counter are included, the cheaper starting component may not win.
78. Place a slim workbench against an unused wall
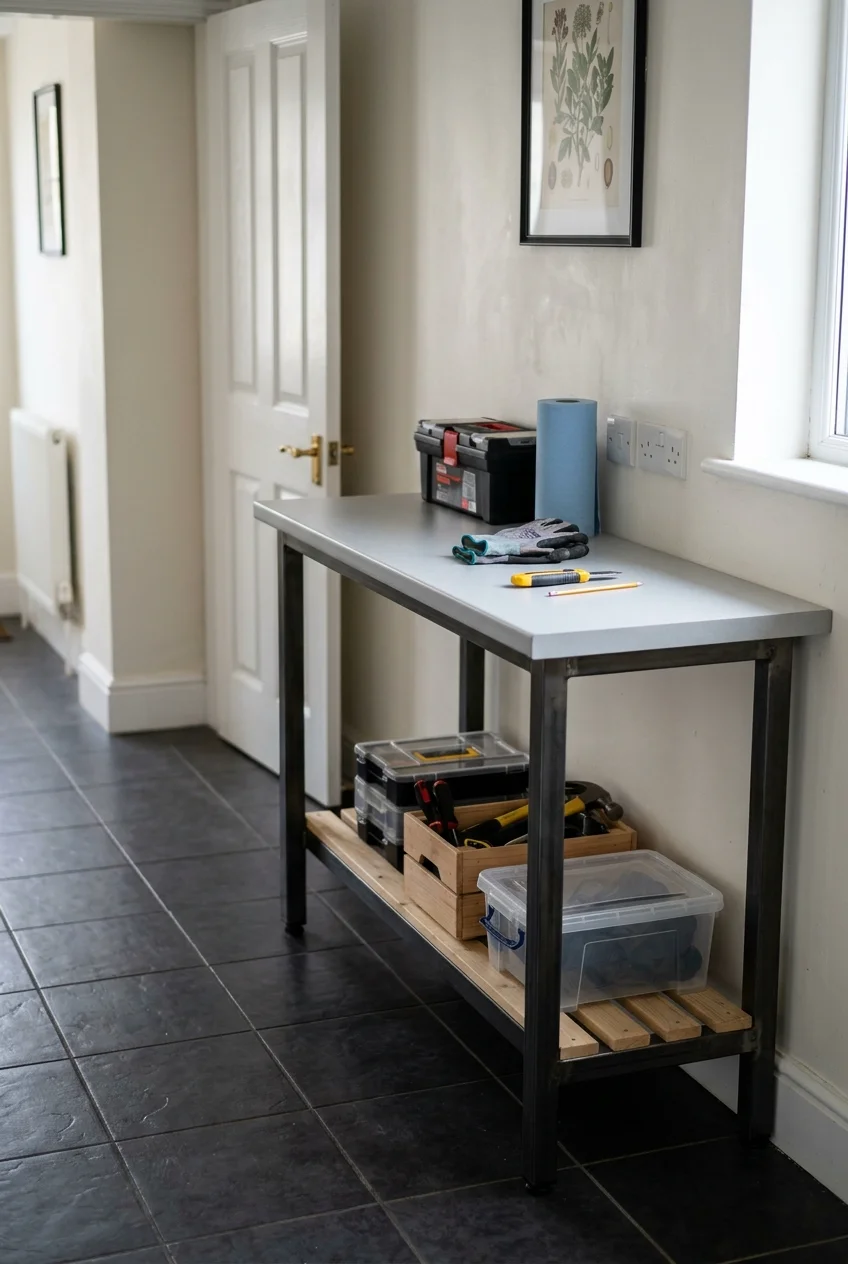
A shallow workbench against a blank wall can add useful landing space without an island. It suits kitchens where the center needs to stay open.
Match the height to the task and check depth against the walking route. A console designed for decoration may need a different top or construction for kitchen work.
Secure the piece as its design requires and protect the surface appropriately. Store a few practical supplies below rather than turning the new work area into overflow shelving.
79. Use a drop-leaf table that expands when needed
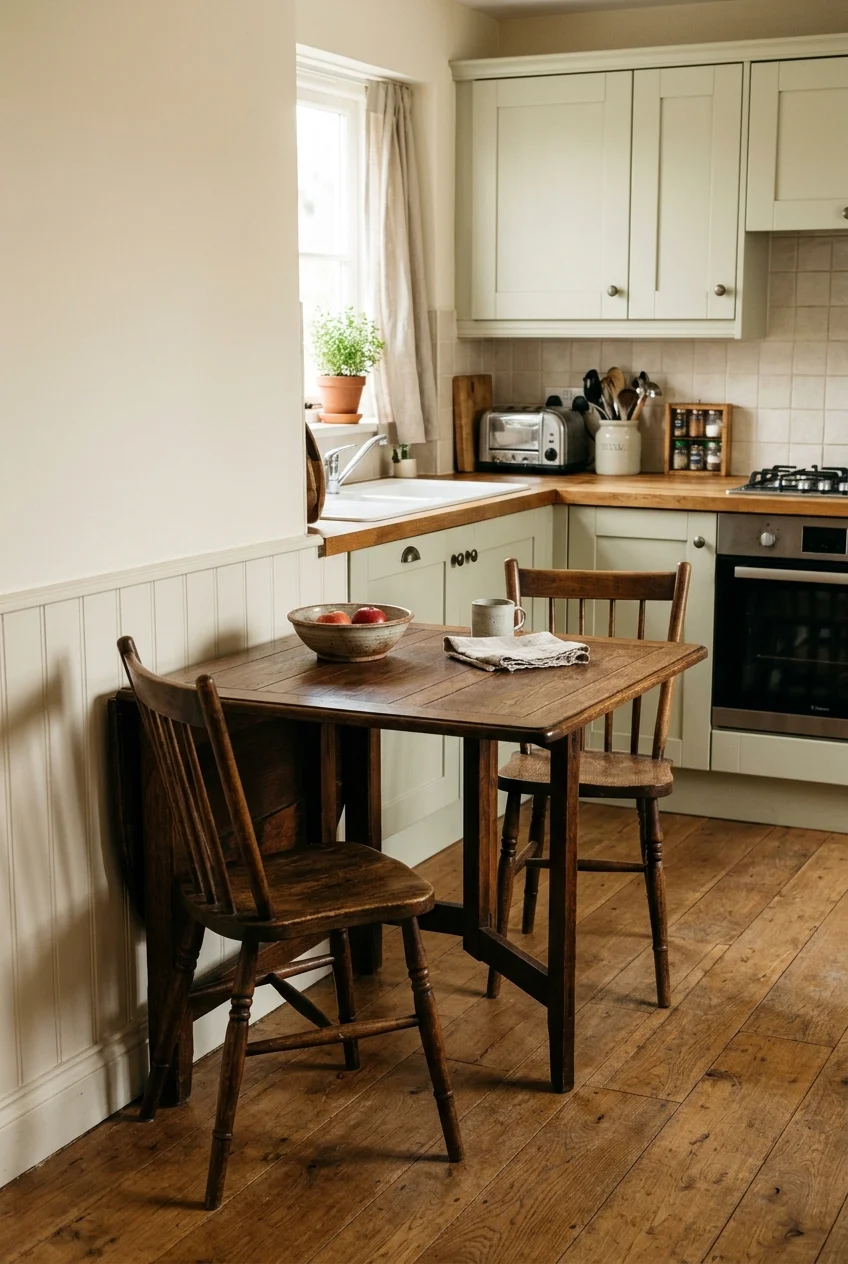
A drop-leaf table can provide everyday compactness and extra surface for occasional meals or preparation. Choose one whose support mechanism feels stable in each intended position.
Measure the footprint with both leaves up and down, including chair movement. A folded table still needs room for legs, supports, and people passing it.
Place the folded edge against the wall for a slim everyday arrangement, then open the free leaf for meals. Keep the expanded shape clear of appliances.
80. Fit a fold-down surface to a suitable wall
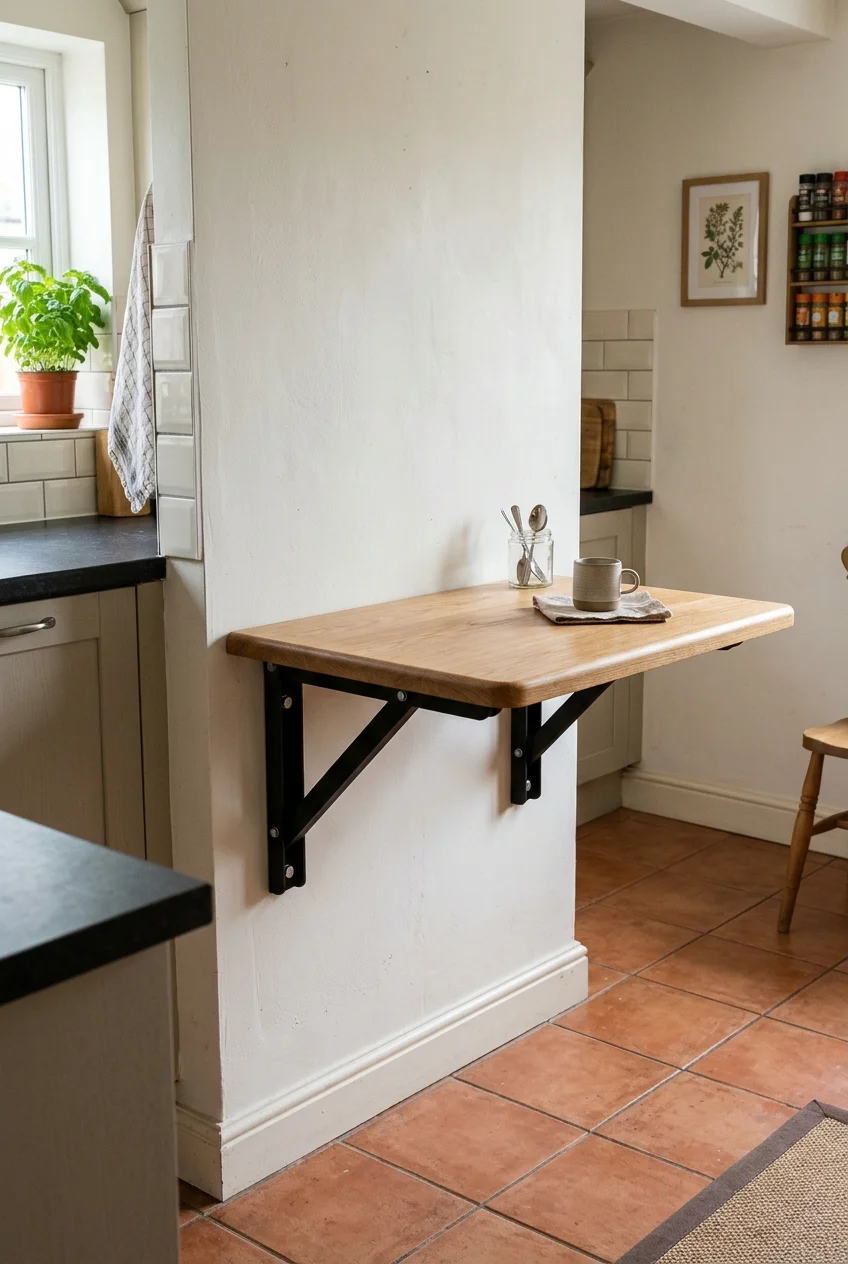
A wall-mounted folding surface can add occasional workspace without occupying the floor continuously. It needs a sound wall and a support system designed for the intended load.
Check the open and closed depths, bracket positions, mounting requirements, and hand clearance. Don't attach a heavy worktop to decorative wall panels or unknown lightweight fixings.
Keep the folded surface away from hot appliances and door swings. Test the layout with a cardboard outline before buying hardware or drilling into the wall.
Have an installer assess uncertain wall construction or hidden services. A narrow freestanding table is a simpler alternative when reliable wall support cannot be established.
81. Remove an island that makes the kitchen harder to use
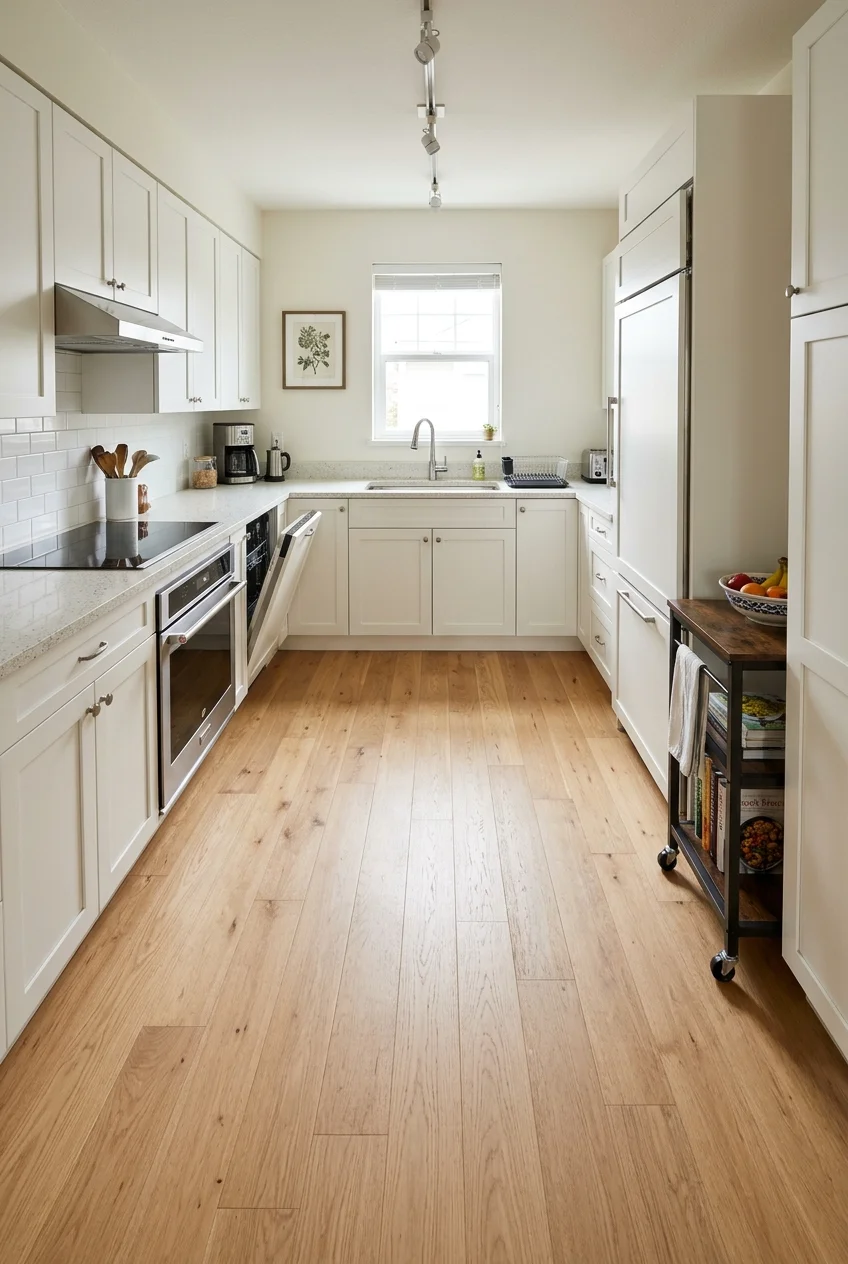
Sometimes the strongest layout update is gaining open floor rather than adding furniture. An unused island may be taking space needed for appliance doors and comfortable movement.
Establish whether the island contains wiring, plumbing, ventilation, or structural attachments before planning removal. A fixed unit can leave unfinished flooring and require professional work.
Test the kitchen without movable furniture first if possible. Keep a temporary landing surface nearby so you can judge the change during real meal preparation.
Include floor patching and any service changes in the comparison. A simple movable cart may replace the useful part of the island without returning the original obstruction.
82. Choose a narrow island without squeezing in stools
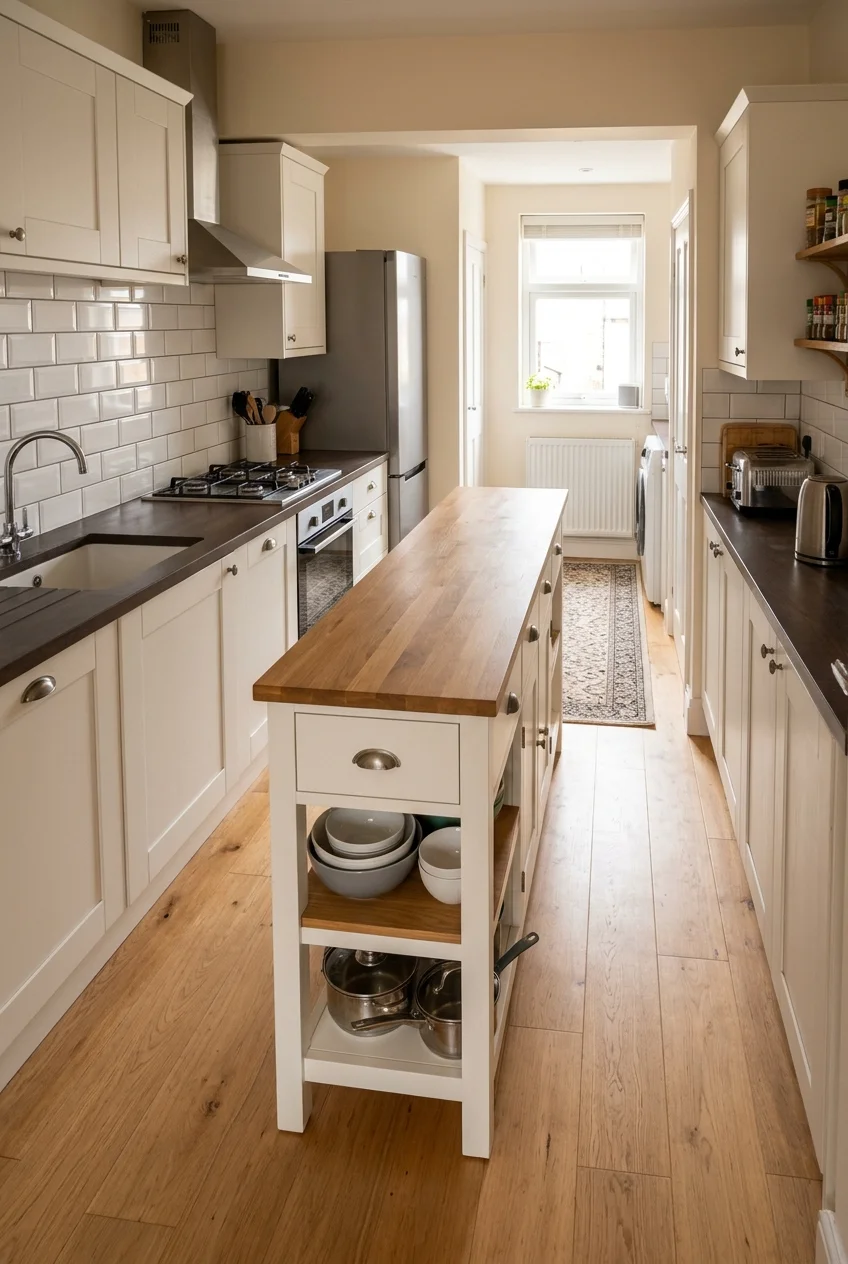
A slim preparation island can be useful even when seating won't fit. Leaving off the overhang and stools keeps its footprint focused on working space.
Test clearances with appliance doors open and two people moving through the room. Use a full-size mockup before committing to a fixed installation.
Give the island a specific job, such as chopping or holding mixing bowls. If it duplicates nearby counter space while narrowing the aisle, the room may work better without it.
83. Add supported peninsula seating where circulation allows it
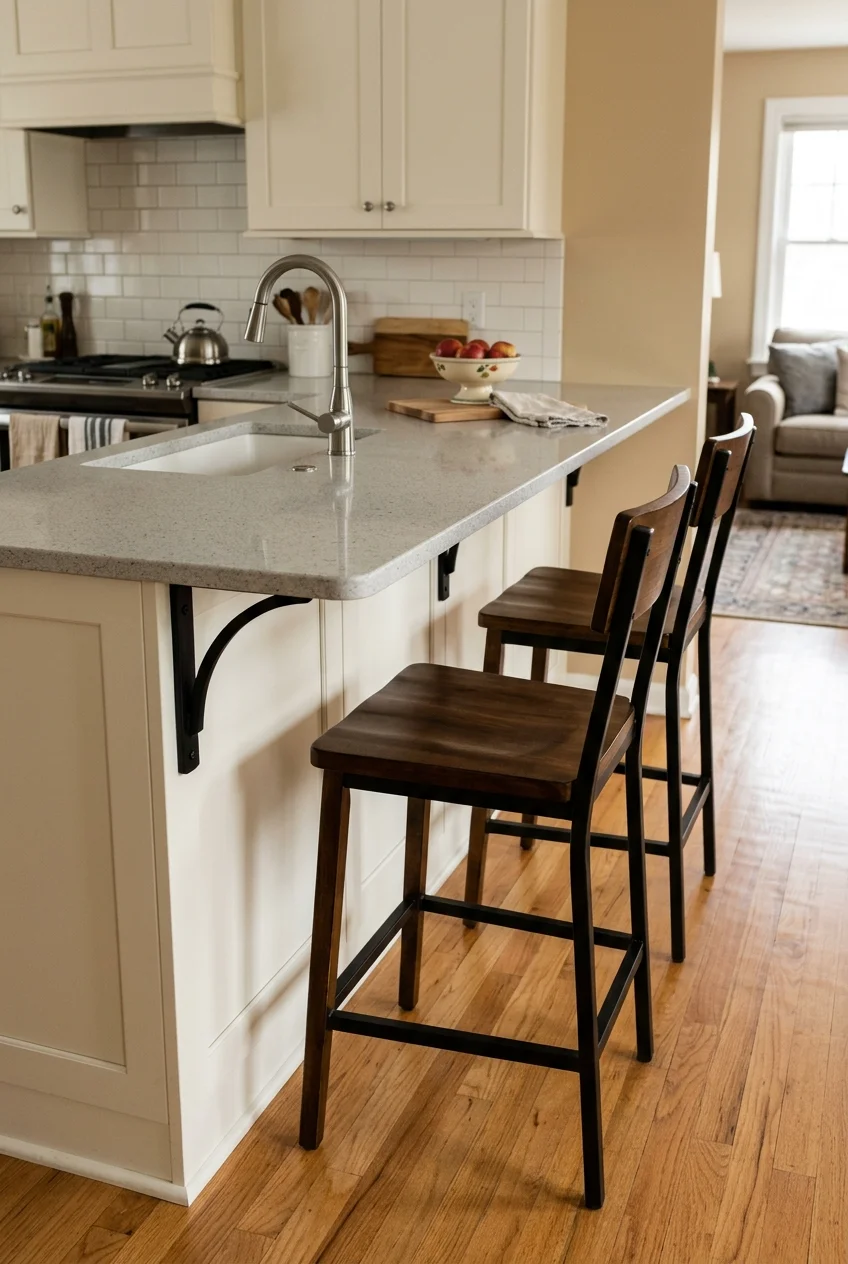
A modest counter extension can add a breakfast spot without a separate dining table. It works only when the peninsula and surrounding route can accommodate seated people.
Check support, counter material, knee room, and stool height with the supplier or installer. The amount of safe overhang depends on the specific surface and construction.
- Mock up the extended top and occupied stools.
- Keep the preparation route usable behind the seats.
- Check nearby appliance doors and handles.
- Include brackets, panels, and installation in the quote.
Use fewer seats if that preserves comfortable spacing. Two stools that can be used naturally are more useful than three arranged tightly for a photograph.
If the counter cannot extend safely or comfortably, keep it as a work surface. A small table elsewhere may solve seating without compromising the kitchen.
84. Try a small round pedestal table in an eating corner
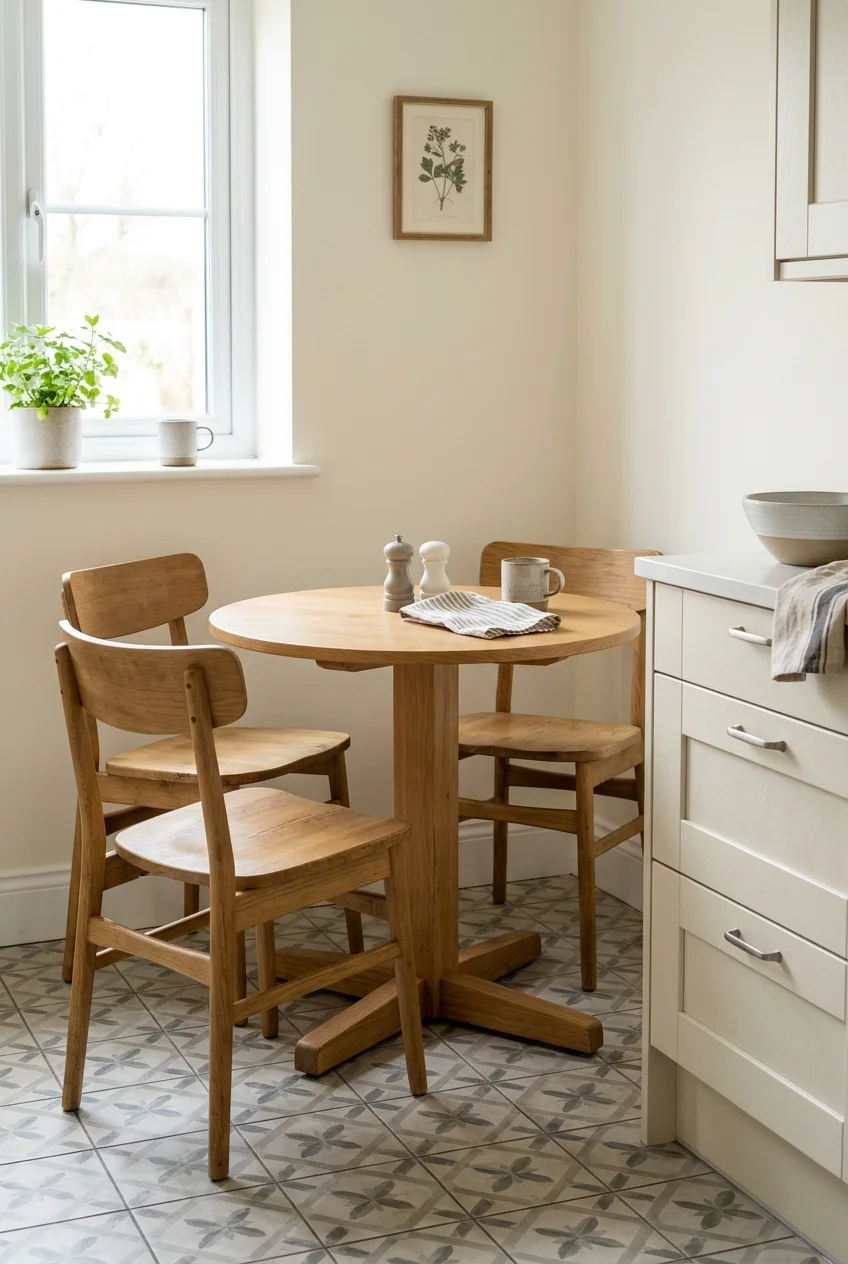
A round pedestal table can simplify chair placement in a compact eating area by removing corner legs. Its usefulness depends on the base size as well as the top.
Test the table with chairs pulled out and someone passing behind them. A small round top still needs more occupied space than its diameter suggests.
Choose chairs with open backs if you want the corner to feel less crowded. Check the pedestal footprint too, so the smaller table still leaves feet comfortable.
85. Use a bench along one wall to simplify breakfast seating
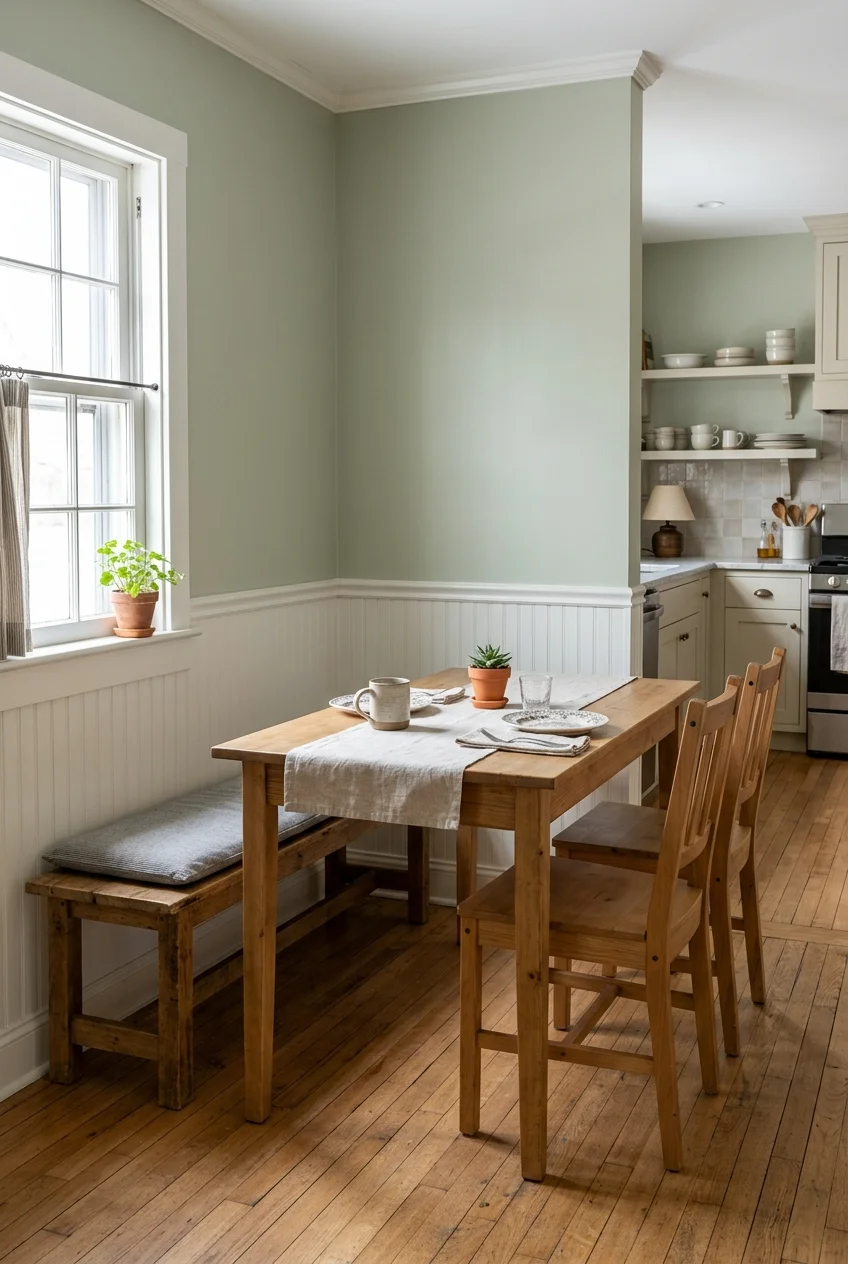
A wall-side bench can reduce the furniture needed around a small kitchen table. It suits a corner where people can enter and leave without disturbing the cook.
Check seat height, depth, table clearance, and how easily each person can get out. A long bench isn't helpful if the inner seat becomes trapped.
Choose a freestanding bench when you want flexibility, or price a properly built fixed seat. Storage under the seat is useful only if its access remains practical.
Keep upholstery washable or choose a wipeable finished surface. A thick cushion can change the effective seat height enough to make an otherwise suitable table uncomfortable.
86. Replace the faucet while retaining the existing sink
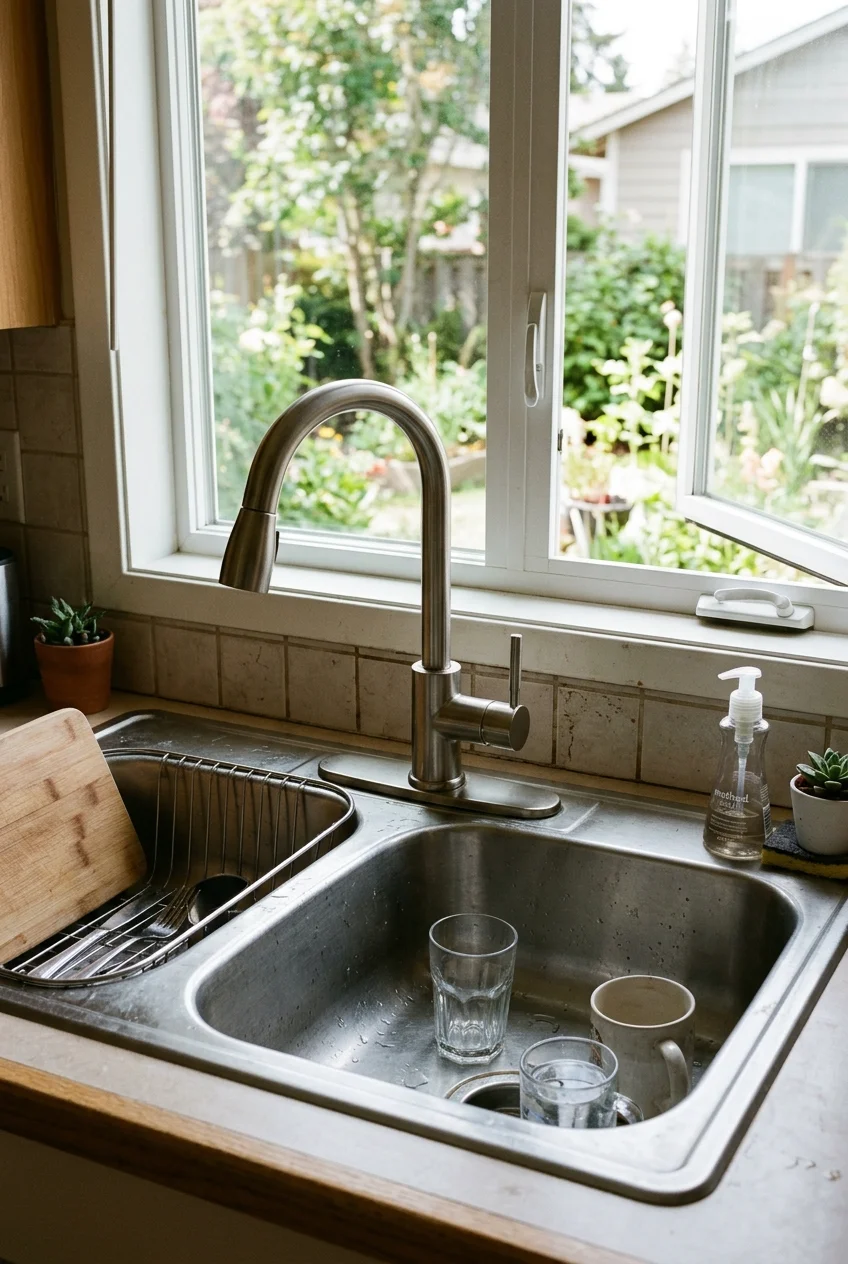
A better-fitting faucet can update the sink area without changing the bowl or counter. Start with reach and everyday use, then choose a finish that suits the room.
Count the existing mounting holes and check deck thickness, handle clearance, and space beneath the sink. A pull-down model also needs room for its hose to move.
- Match the faucet to the available mounting arrangement.
- Check spout reach over the bowl.
- Confirm operation beside the window or backsplash.
- Include supply connections and installation in the cost.
Ask a plumber to assess worn shutoffs or uncertain connections before the swap. Keep the chosen model's instructions available and check the finished installation for leaks.
Don't assume a taller faucet is an improvement. In a shallow sink or beside a low window, a more modest shape may be easier to live with.
87. Choose a drop-in sink that matches the existing opening
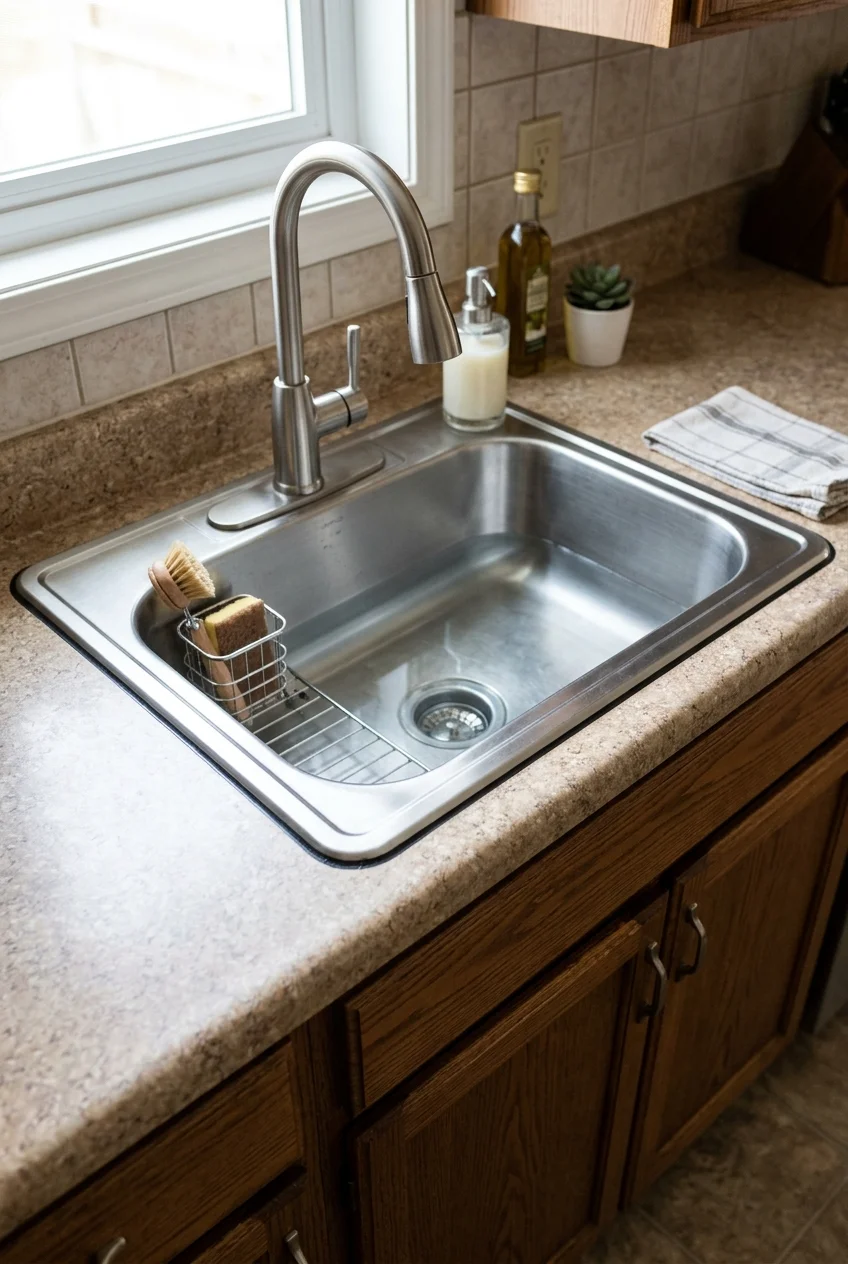
A replacement drop-in sink can refresh a damaged or impractical bowl while preserving a sound countertop. Compatibility involves the cutout and cabinet, not just the sink's outside dimensions.
Compare the manufacturer's template, rim coverage, bowl depth, mounting clips, and faucet arrangement with the existing setup. A deeper bowl can change drain and disposal clearances below.
Have the counter inspected around the opening before ordering. Swelling, cracks, or a failed edge may require countertop repair rather than a simple sink swap.
- Confirm the required base-cabinet size.
- Check the actual cutout against the new template.
- Allow mounting and plumbing access below.
- Include sealing, connections, and disposal compatibility where relevant.
Keep a plumber or installer involved when fit is uncertain. A superficially similar sink can lead to expensive cutting or plumbing changes after the old one is removed.
88. Renew a failed sink seal after fixing its cause
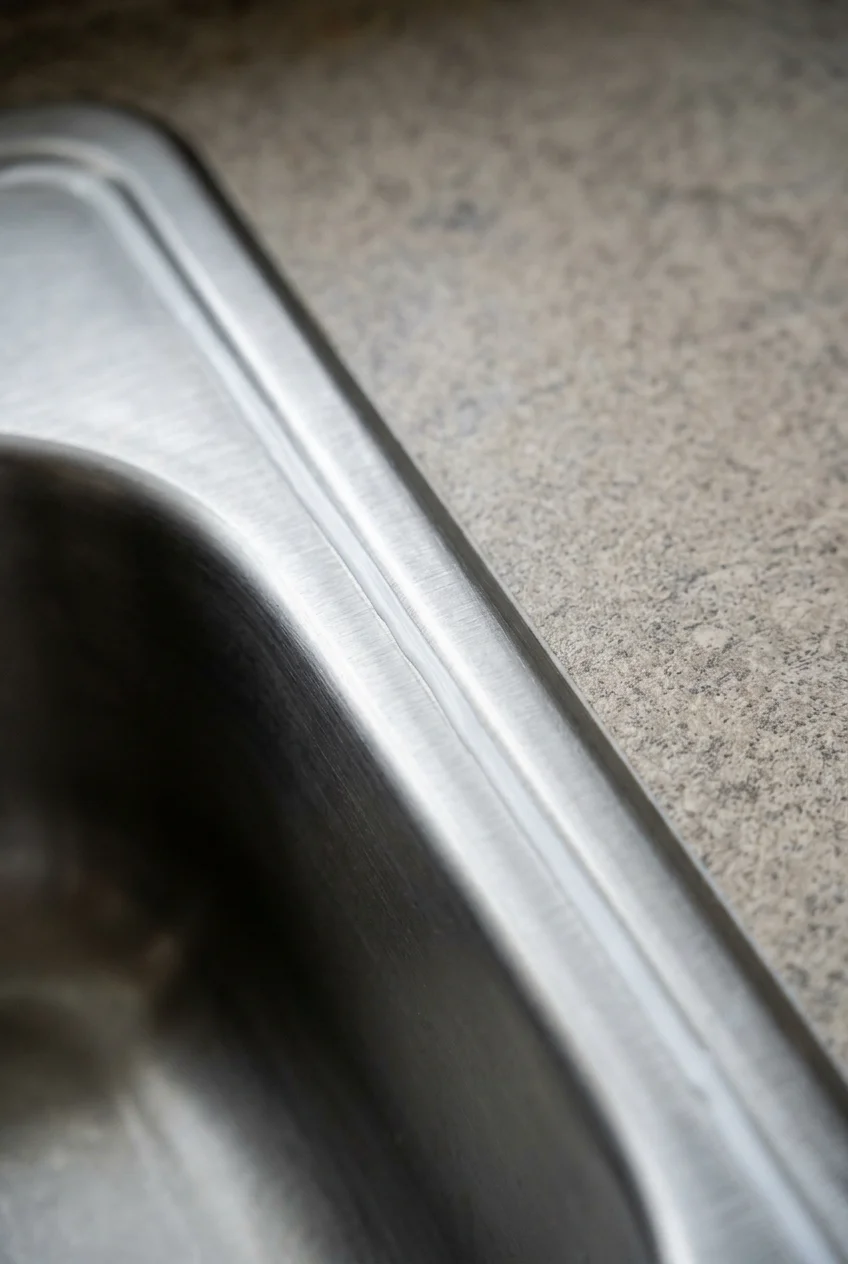
A clean sink-to-counter joint can improve the whole sink area when the bowl and counter are otherwise sound. Failed sealant needs proper removal and preparation before replacement.
Check for leaks, loose mounting, or damaged countertop material first. Sealing over dampness or movement can hide the issue without correcting why the joint failed.
Use the sink and counter manufacturers' compatible sealing method, and respect curing instructions before use. Have a professional handle uncertain mounting or persistent water damage.
89. Fit a simple hood into the existing cooking zone
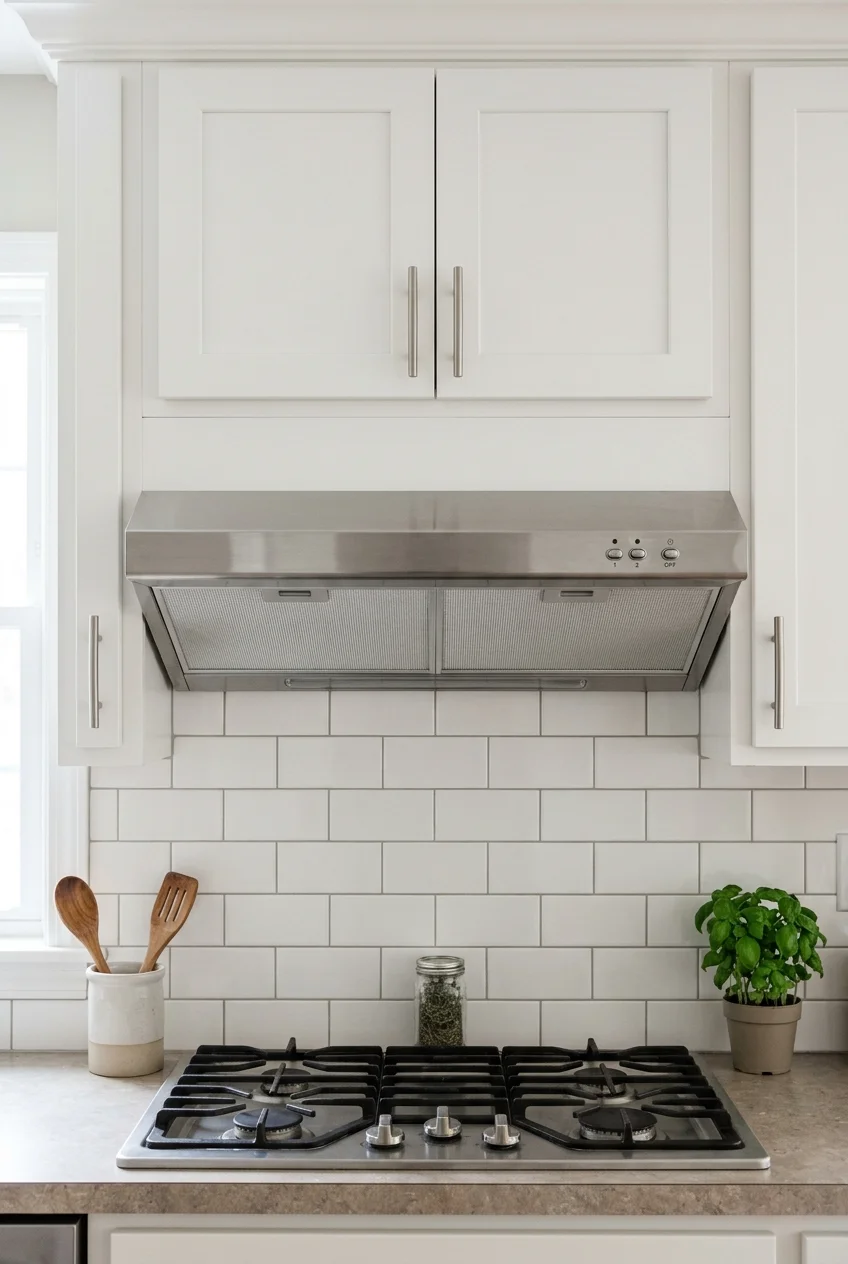
A plain functional range hood can improve the cooking area more meaningfully than a decorative cover. Start with the ventilation arrangement and appliance requirements already in place.
Have an installer check ducting, electrical supply, mounting height, clearances, and the hood's suitability. Recirculating and outdoor-vented arrangements aren't interchangeable simply because the units look similar.
Price any duct repair or other necessary work alongside the hood. A low purchase price may not represent a low-cost installation in your particular kitchen.
Choose accessible filters and controls you'll actually maintain. Keep decorative trim clear of required air paths, and don't box in the hood to imitate a photograph.
90. Make the refrigerator area look intentional without blocking airflow
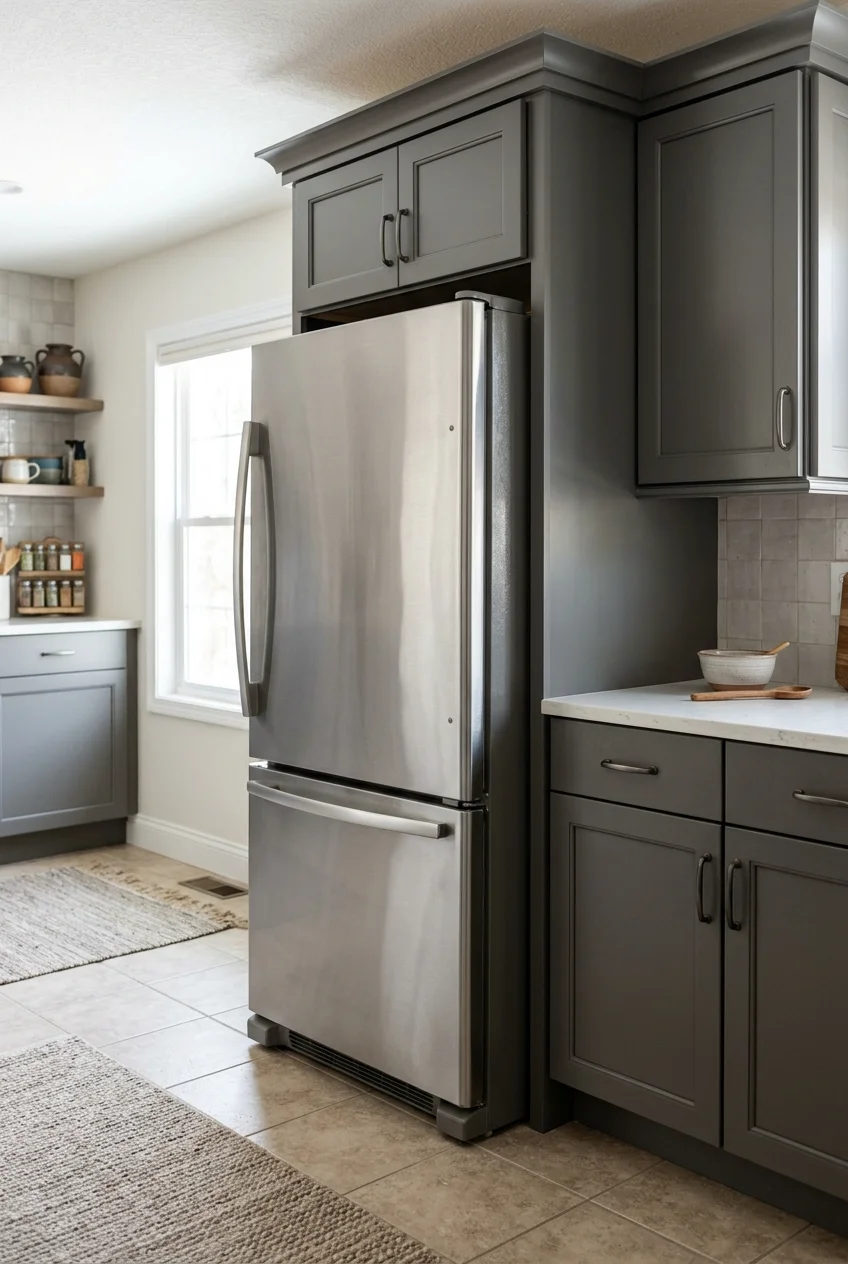
A fitted side panel or upper bridge cabinet can visually connect a freestanding refrigerator with nearby storage. The enclosure must be designed around the specific appliance's instructions.
Check ventilation gaps, rear connections, hinge swing, drawer removal, and service access before building. Generic refrigerator clearances aren't a substitute for the model's installation requirements.
- Measure the appliance with doors and handles included.
- Check full door opening beside walls or panels.
- Keep specified ventilation paths open.
- Plan how the appliance can move out for service.
Avoid pushing a refrigerator backward solely to align its doors with cabinet fronts. Its case depth, cooling arrangement, and plumbing may prevent the look you're imagining.
A single coordinated side panel may achieve enough visual order with less work than a full surround. Price the smaller intervention before committing to extra cabinetry.
91. Use a manufacturer-approved panel on a panel-ready appliance
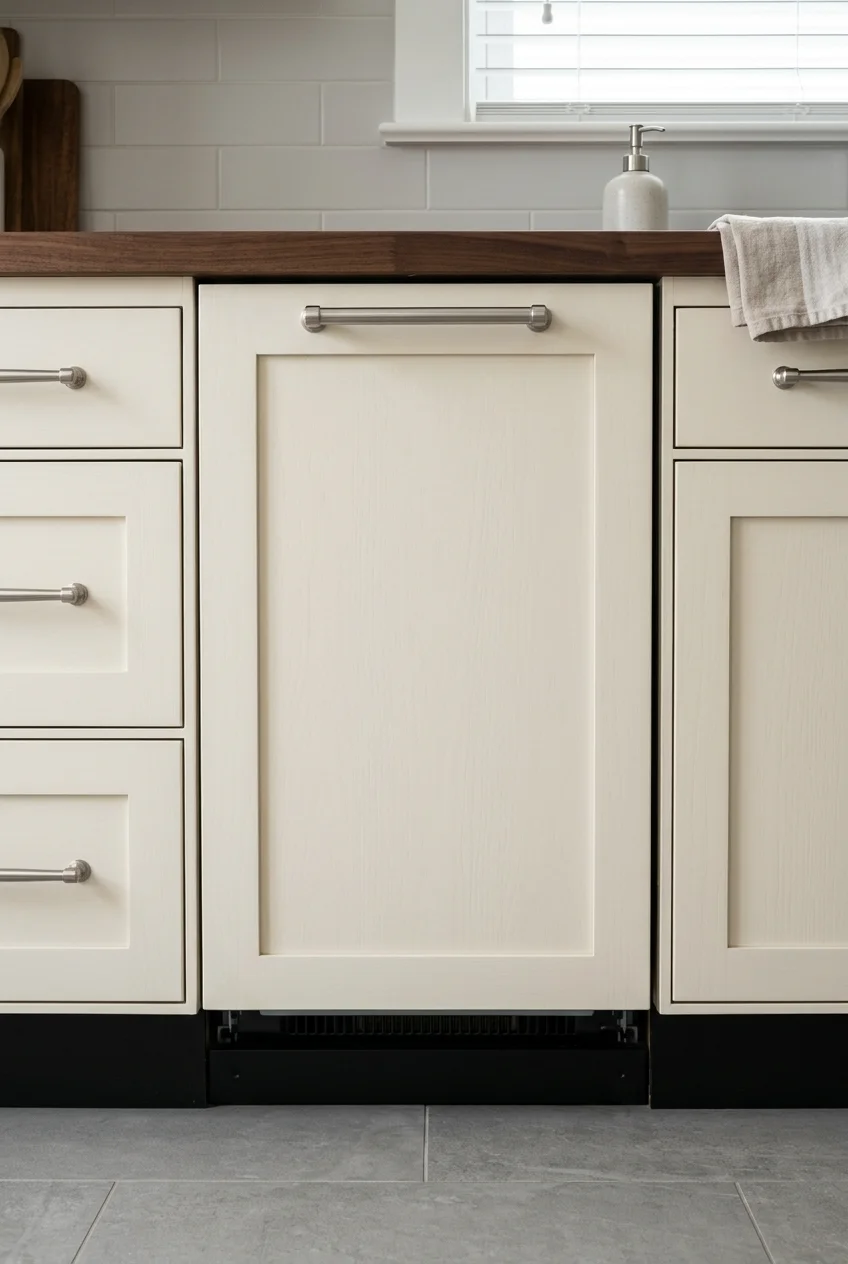
A panel-ready dishwasher can blend into retained cabinetry with a coordinated front. This option applies to appliances specifically designed to carry a decorative panel.
Check panel dimensions, weight, handle placement, mounting hardware, and clearances in the exact appliance instructions. An ordinary dishwasher front should not be treated as panel-ready.
Coordinate the panel finish with nearby doors and include fitting in the quote. Keep controls, ventilation, and service access functioning as the appliance manufacturer requires.
92. Store a small appliance on a pull-forward tray
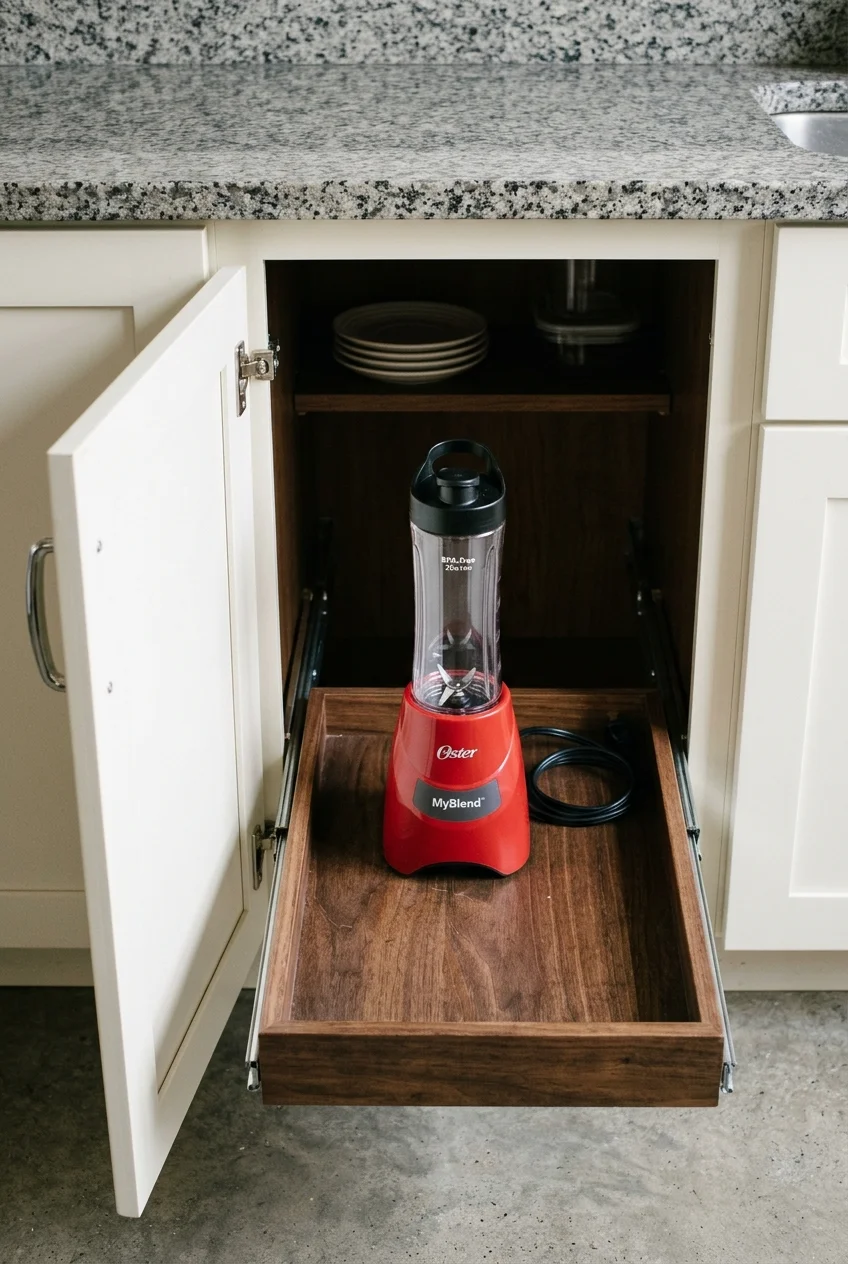
A pull-forward tray can make a stored appliance easier to retrieve from a suitable cabinet. Treat it as storage access rather than permission to operate equipment in an enclosure.
Measure the appliance, tray, handle, and full extension path, and check the mounting and load requirements. A heavy mixer needs a system intended for its weight and use.
Move the appliance to a suitable clear work surface before use unless a purpose-designed installation explicitly permits otherwise. Keep its ventilation and operating instructions in view.
If mounting isn't practical, a lower reachable shelf may be enough. The goal is easier retrieval without introducing an unstable lifting or operating arrangement.
93. Replace a failed dishwasher within its existing opening
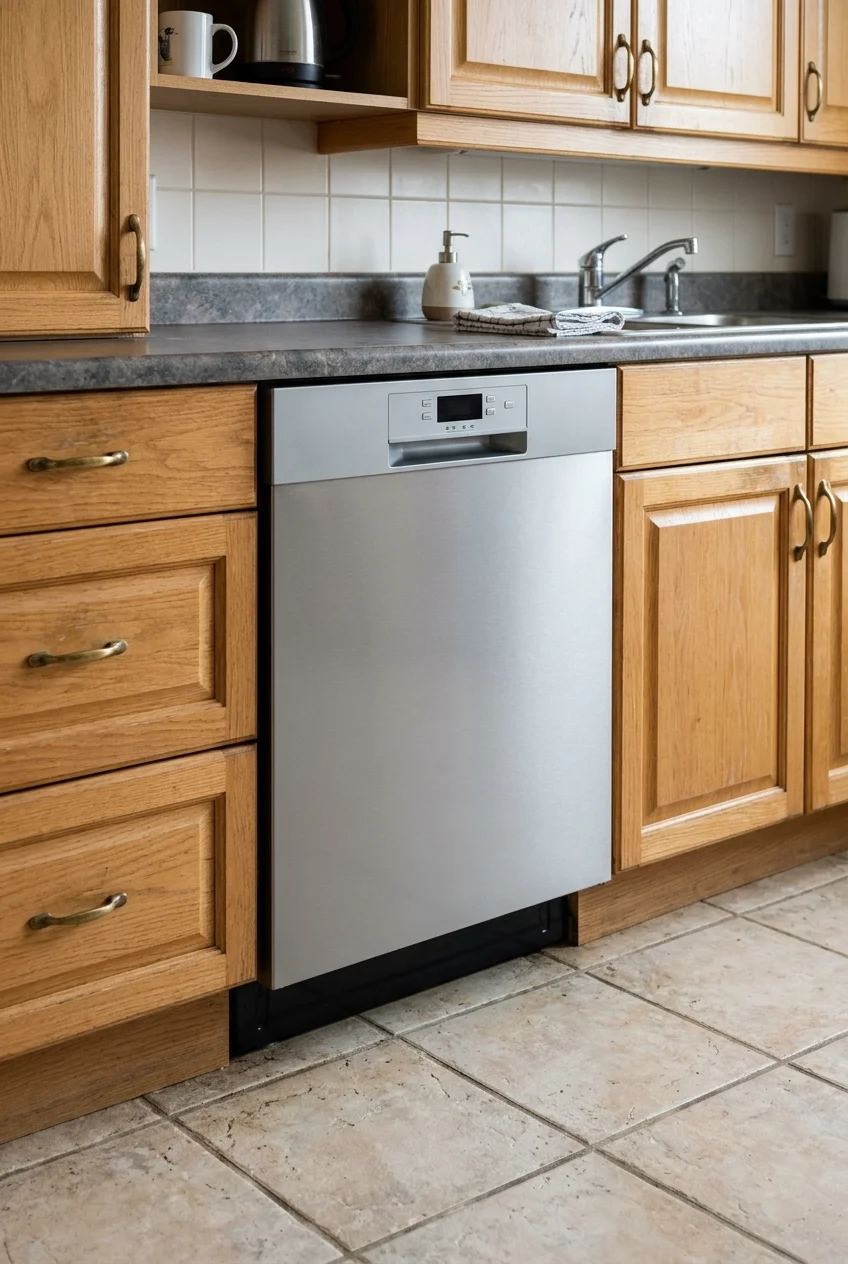
Keeping the existing dishwasher opening can limit changes when an appliance genuinely needs replacement. Choose by verified fit and useful functions rather than finish alone.
Measure the opening height from the finished floor, plus width, depth, and door clearance. New flooring can reduce usable height even when the old appliance originally fitted.
Have supply, drainage, electrical connection, and any required installation details assessed before delivery. Include removal and proper installation when comparing models or repair with replacement.
Coordinate the front with retained appliances if that matters to you, but avoid replacing working equipment just to match. A compatible mixed-finish kitchen can still look considered.
94. Turn a suitable nearby closet into a shallow pantry
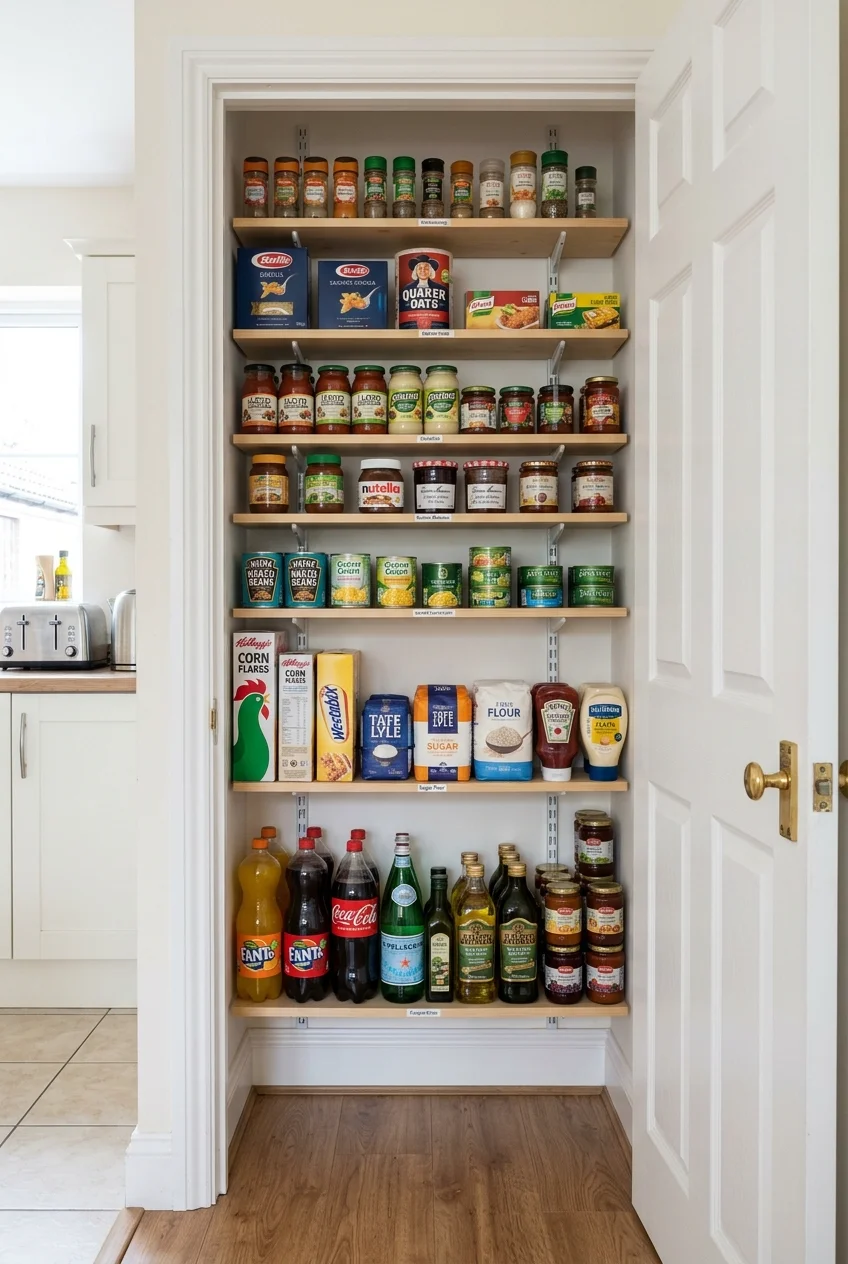
A nearby underused closet can provide pantry storage without adding a new cabinet bank. Start by confirming it contains no equipment, ventilation, or required access that must remain clear.
Shallow shelves often make contents easier to see than deep ones. Plan shelf spacing around your groceries and leave a clear door-closing path.
- Check wall construction and shelf support.
- Keep heavy goods on appropriately supported lower shelves.
- Leave lights and any service access unobstructed.
- Avoid blocking vents or enclosing heat-producing equipment.
Finish the interior before loading it, using materials suitable for the space. Don't add an operating appliance simply because the closet now feels like part of the kitchen.
Compare the project with a freestanding pantry cabinet if permanent changes aren't practical. An adjustable shelf system can make the closet easier to adapt later.
95. Create a coffee station on a suitable sideboard
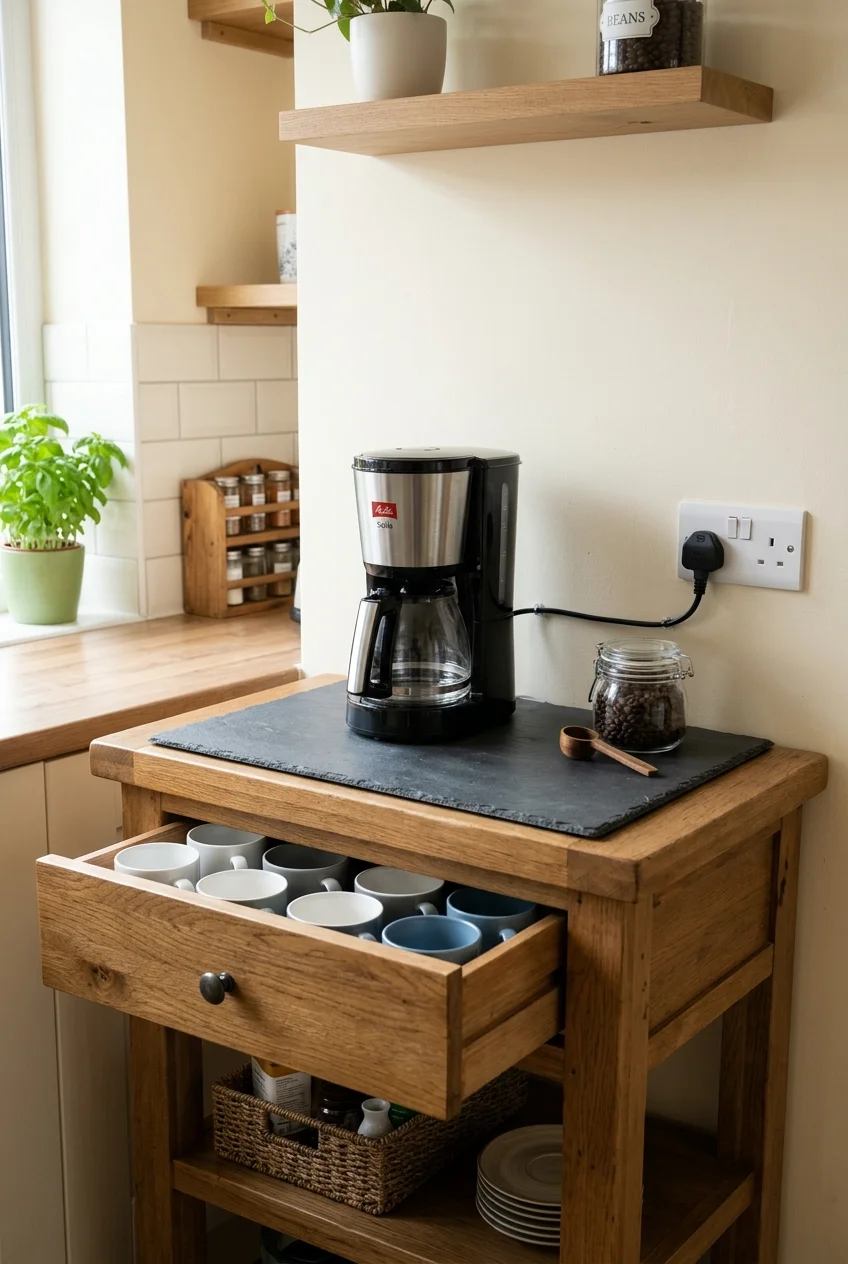
A sideboard near the kitchen can move coffee supplies off the main prep counter. Choose a stable piece with a surface suited to heat and moisture exposure.
Place it where the appliance can use an appropriate outlet without cords crossing a route. Follow the machine's clearances, especially where steam rises beneath shelves or cabinets.
Keep cups and supplies in the drawers or on one reachable shelf. Leave space to refill the reservoir and remove the drip tray without shifting everything around.
Reuse existing furniture only if its construction and finish suit the job. A decorative surface that stains immediately may cost more to protect than another arrangement.
96. Remove a decorative window valance that blocks the view
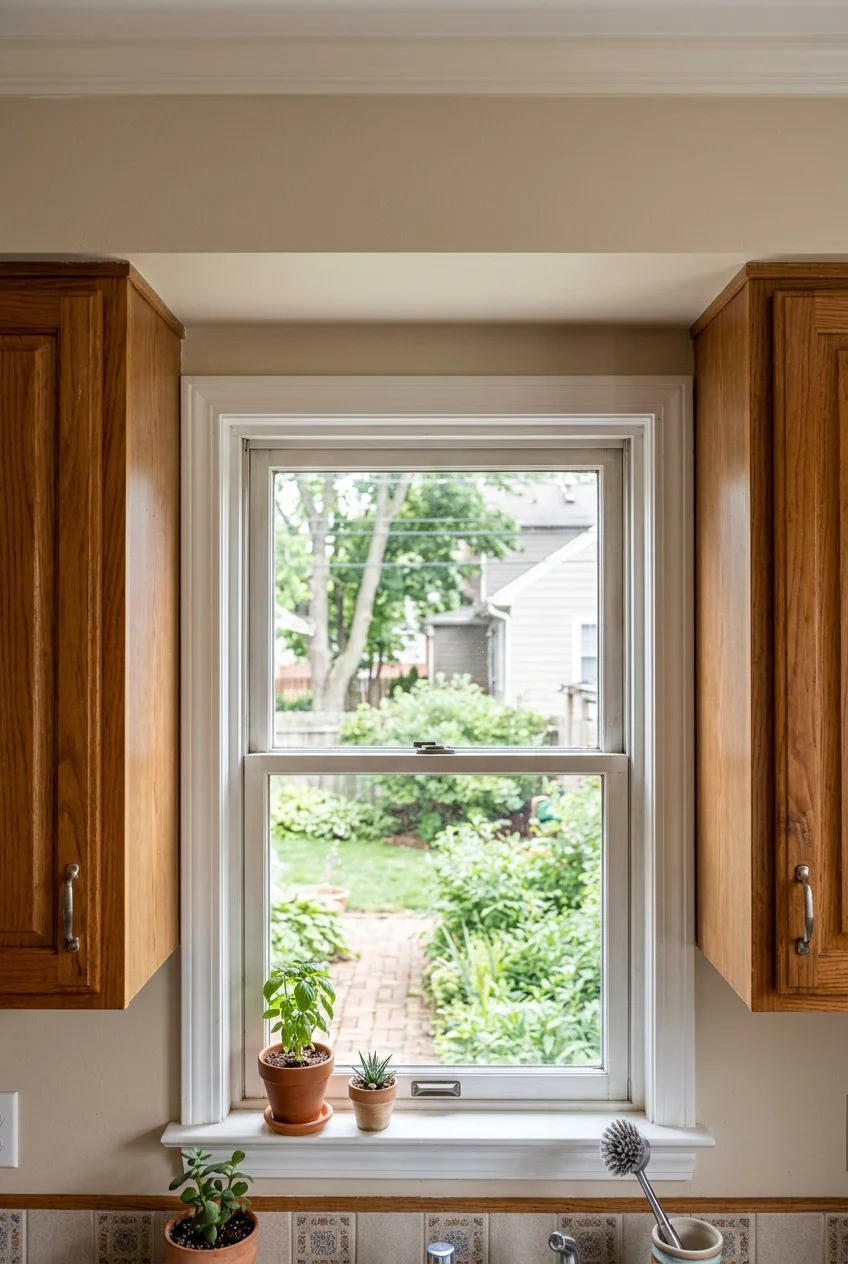
A bulky decorative valance between upper cabinets can make a window feel crowded. Removing a nonessential piece may reveal more of the opening without changing the cabinets.
Check how it is attached and whether it hides wiring, lighting, or other services before removal. Don't assume every board above a window is purely decorative.
Plan the exposed ends and wall repairs in advance so the result looks finished. Keeping the cabinet boxes intact makes this a smaller intervention than removing the entire run.
97. Replace a battered grille with a correctly sized cover
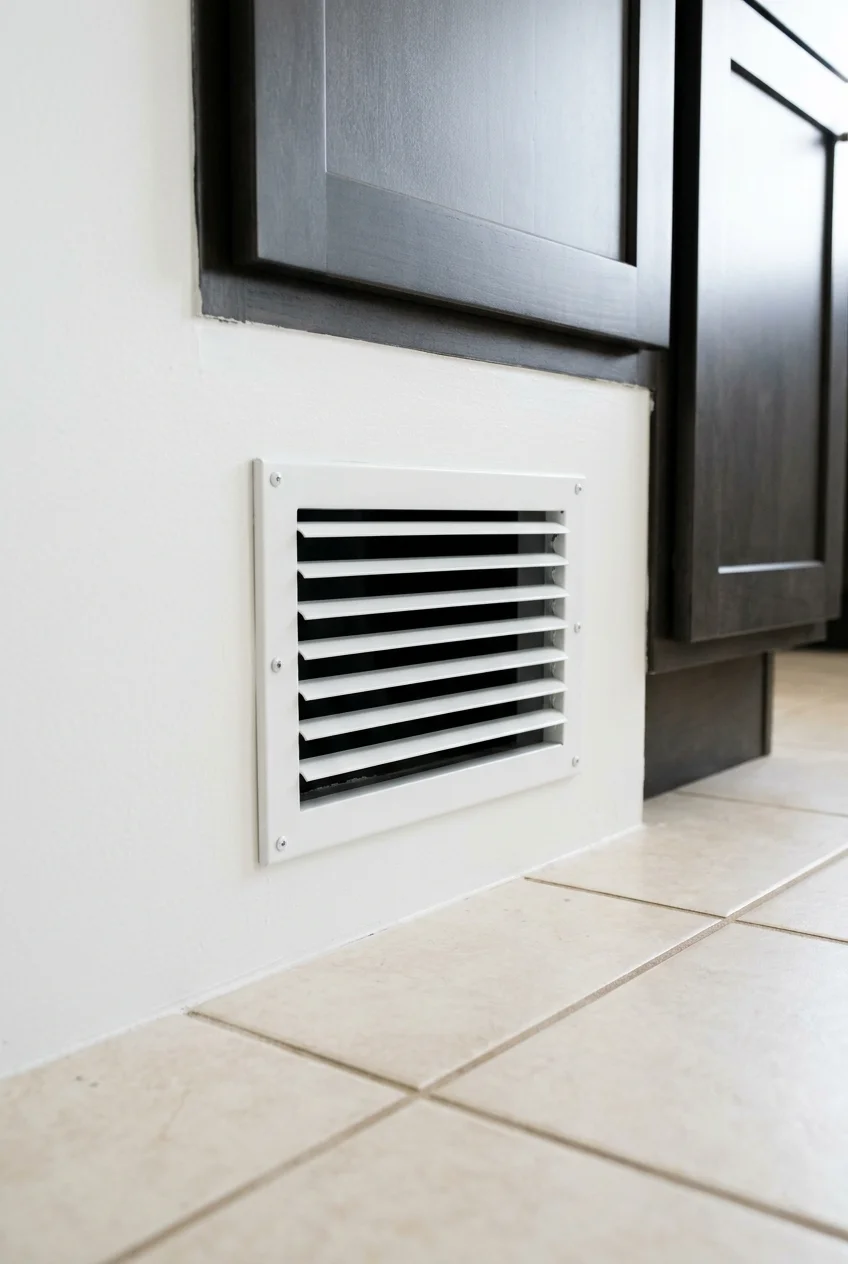
A clean ventilation grille can tidy a visible kitchen detail without altering the ventilation system. Match the opening and intended airflow function rather than choosing purely by appearance.
Keep the free area and any required access compatible with the system. Don't replace a functional grille with a solid decorative panel or paint moving parts shut.
98. Give visible switches and outlets neat matching wall plates
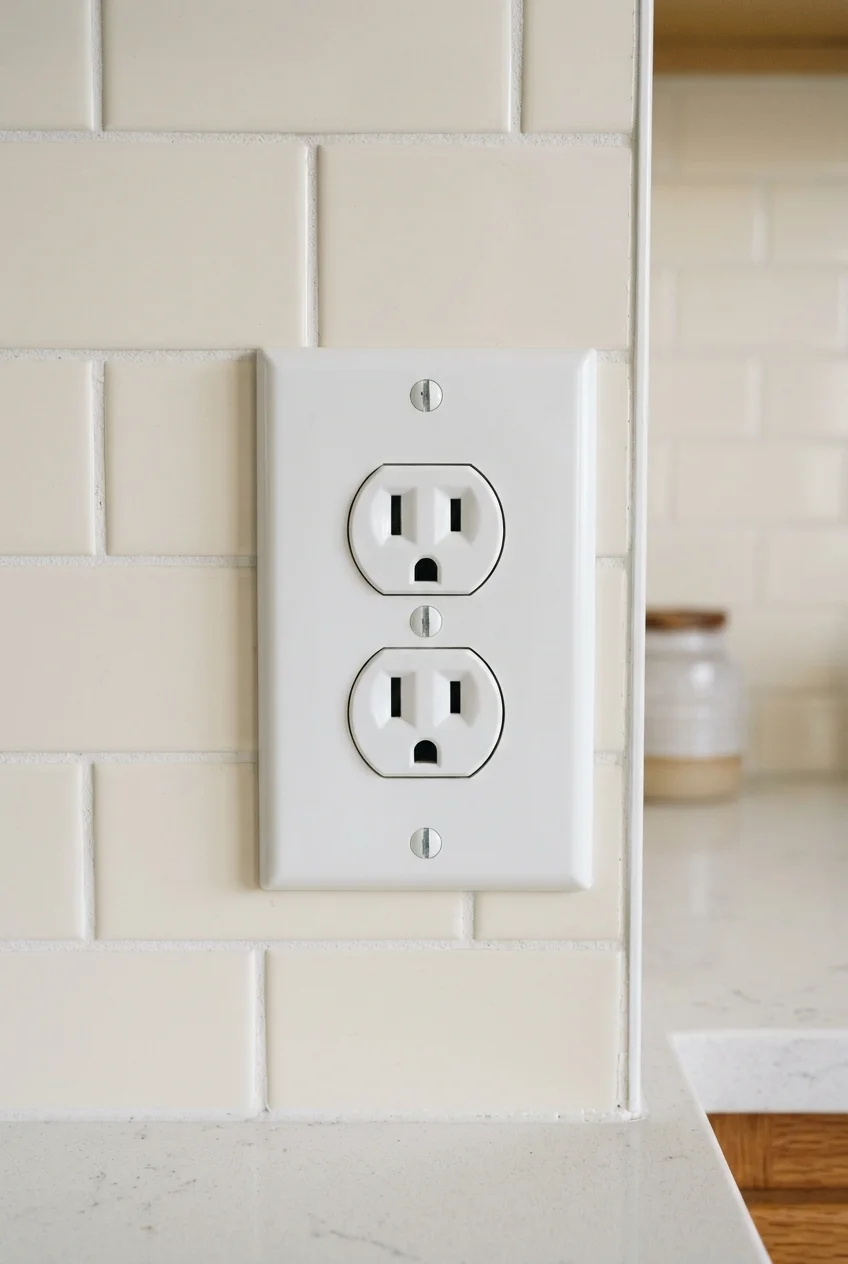
Matching clean wall plates can finish a freshly painted or retiled kitchen. Choose plates that fit the existing devices properly instead of hiding gaps with an oversized mismatch.
Isolate power before any plate removal, and use qualified help for damaged devices, uncertain wiring, or boxes affected by new tile thickness. Cosmetic updates aren't electrical repairs.
Keep outlets accessible and covers seated correctly without painting their openings. A tidy plate should complete the surrounding surface while leaving the device fully usable.
99. Close a cabinet-to-wall gap with a scribed filler
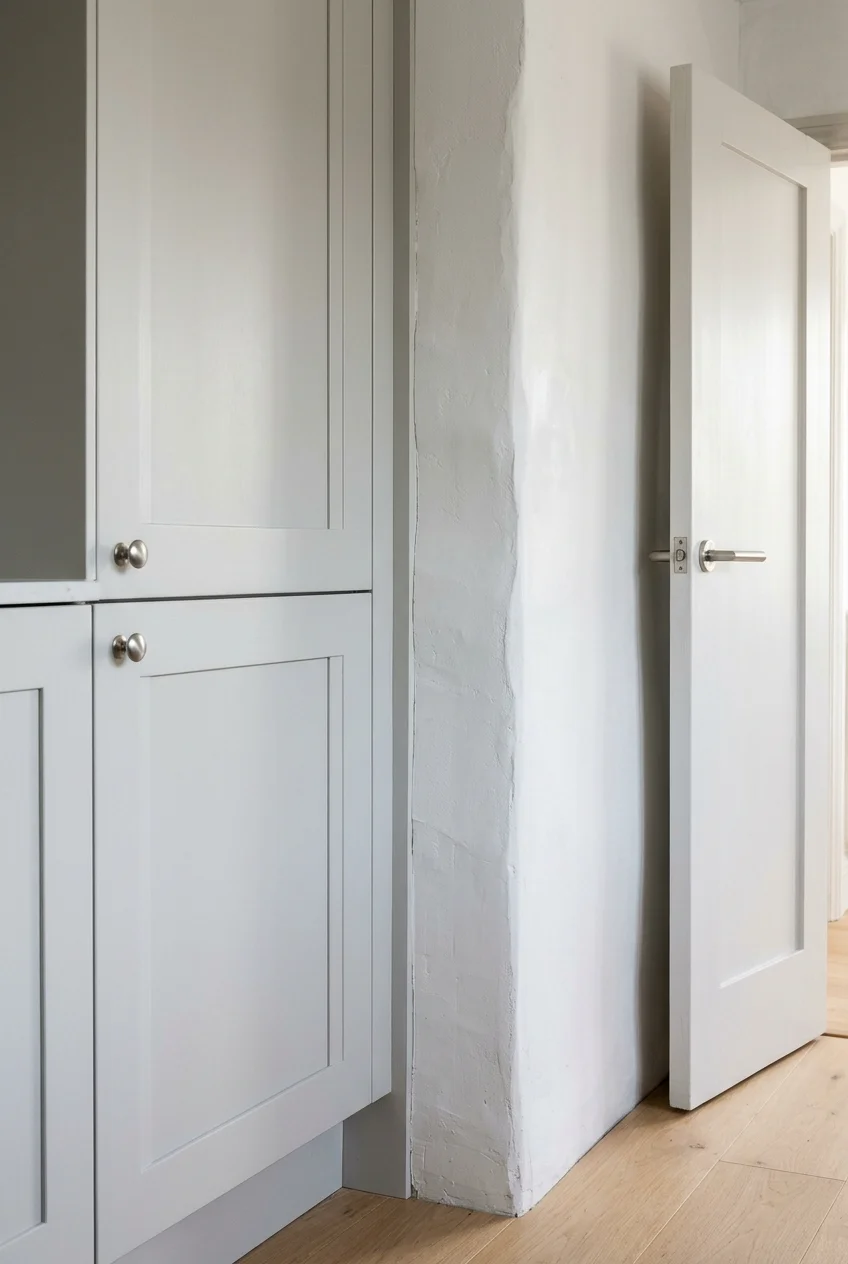
A fitted filler strip can make a cabinet run meet an uneven wall more neatly. It also gives doors room to open when their handles would otherwise hit the wall.
Check the door swing before determining filler width, then scribe the wall edge for a close fit. Keep any required ventilation and service openings separate from this finish detail.
Match the finish to the cabinet frame and fasten the strip appropriately. A flexible bead alone may disguise a gap but won't create the same finished cabinet edge.
100. Fit an open plate rack where daily dishes are easy to reach
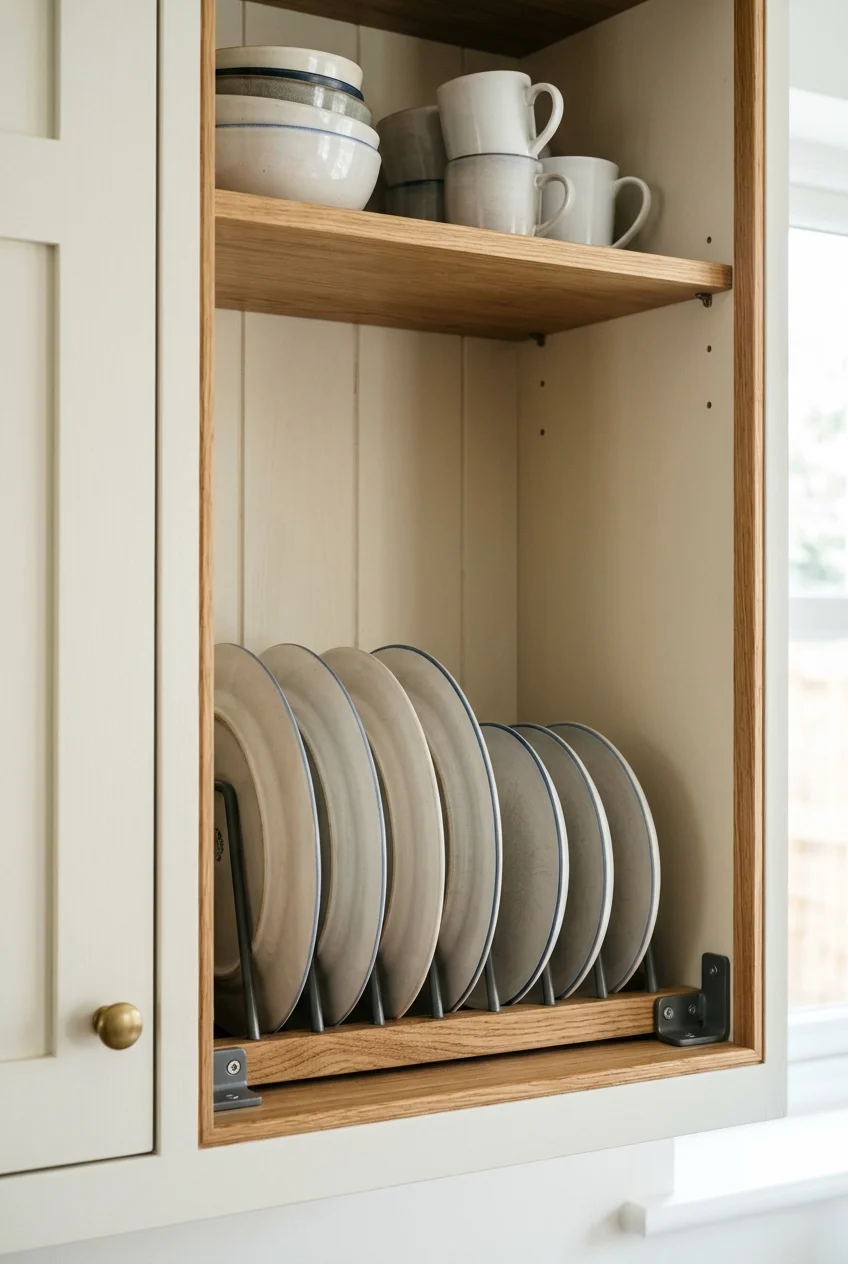
A fitted plate rack can turn one suitable shelf area into practical display storage. It works best for plates you use often, rather than an oversized decorative collection.
Measure the plate diameter, shelf depth, and available height before choosing the rack. Slots must hold the dishes securely while leaving room to grip and lift them.
Check mounting and load requirements, particularly when adapting an existing cabinet. Store only fully dry dishes unless the system is specifically designed for drainage and drying.
Keep the rack away from cooking splatter and place heavier dishes within comfortable reach. Closed storage nearby can hold the pieces that don't fit this arrangement.
Fix active damage or failing essentials first.
Test small samples or a temporary layout before committing.
Treat them as alternatives, not a cumulative checklist.
Choose one approach per surface, then price the complete work in your area.
Freestanding furniture, removable drawer organizers, and better use of existing shelves are easier to reverse.
Ask for written permission for paint, drilling, adhesives, or installation work.
Get appropriate help for uncertain wiring, plumbing, ventilation, structural support, or persistent moisture damage.
A photograph cannot establish installation safety or local requirements.