50 Vintage Bathroom Ideas

This post may contain affiliate links: full affiliate disclosure.
Vintage bathroom ideas work best when they combine character with modern performance. A pedestal sink, patterned floor, or old mirror can suggest an era, while current waterproofing, ventilation, and storage keep the room comfortable.
These 50 ideas cover fixtures, tile, color, windows, renter updates, small-space layouts, maintenance, and safety. The goal is not a museum set; it is a useful bathroom that feels collected over time.
Before buying a statement piece, measure the room, locate plumbing and electrical lines, and decide which features are sound enough to keep. That practical work protects the budget and the vintage details you love.
Choose the Fixtures That Set the Era
Start with the pieces that control plumbing, comfort, and scale. A few well-chosen fixtures create more authentic character than a room full of reproduction accessories.
1. Let a Pedestal Sink Set the Period Tone
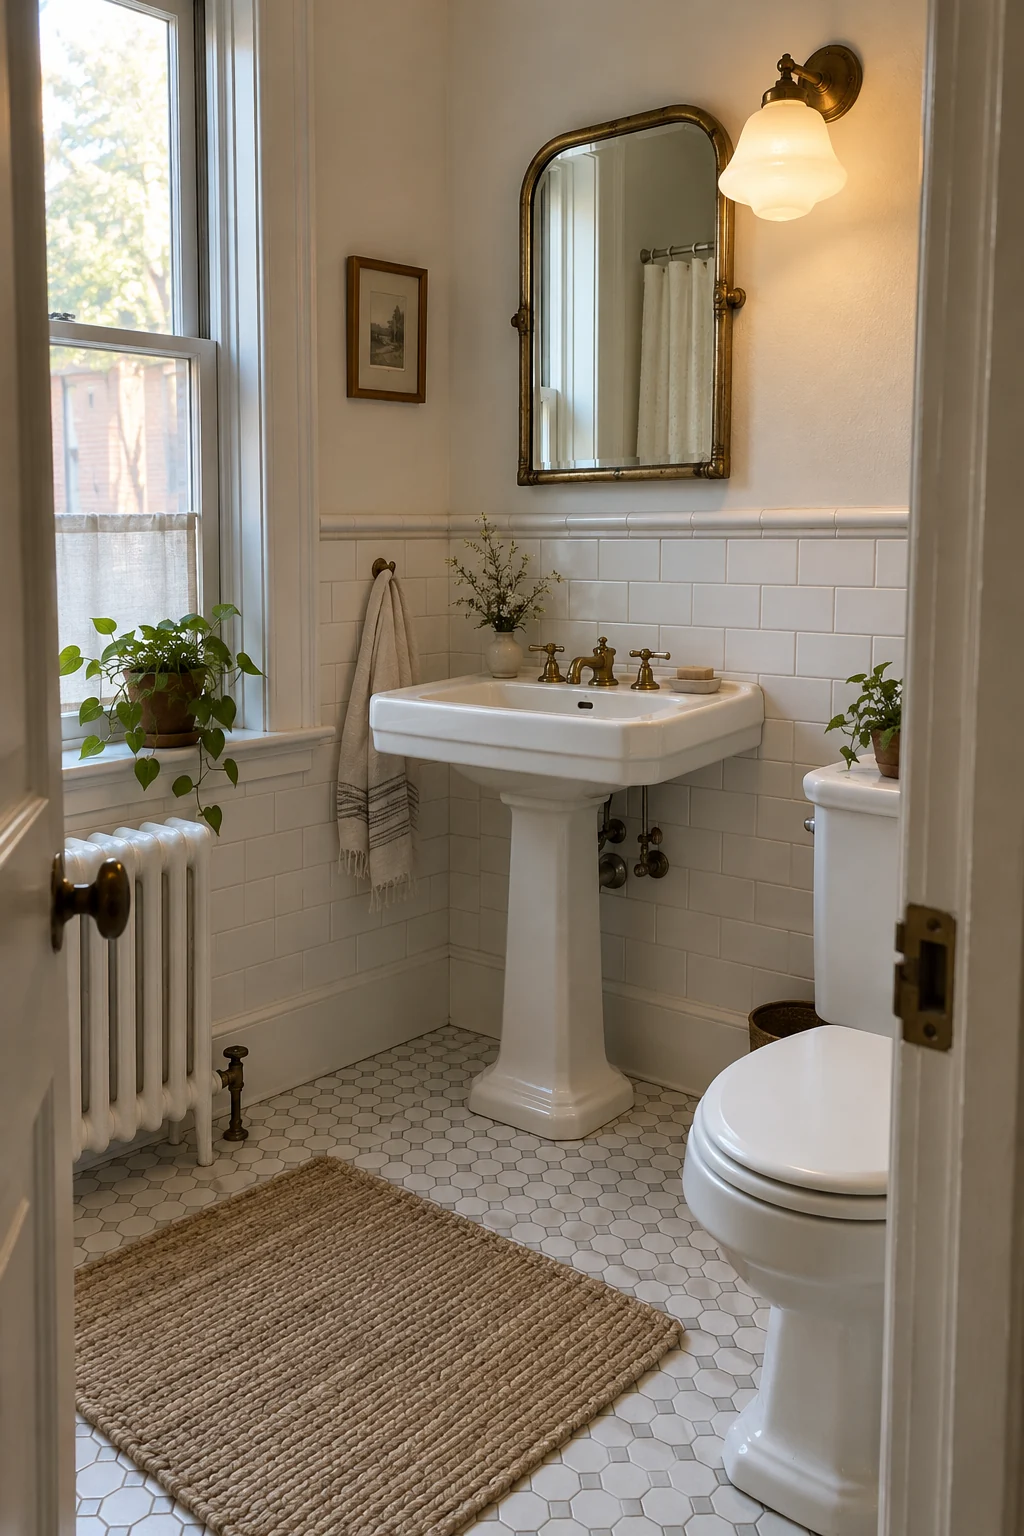
A white pedestal sink gives a small bathroom an immediate prewar outline without consuming the visual space of a cabinet. Pair it with simple subway wainscoting so the room reads as vintage, not themed.
Measure from the finished wall to the drain and supply lines before ordering. Many reproduction basins use different rough-ins, and a plumber can tell you whether the existing connections will remain neatly concealed.
A pedestal offers almost no storage, so reserve a recessed cabinet or nearby linen closet for daily supplies. Keep the floor around the base clear; extra baskets quickly erase the airy benefit.
Confirm the finished-wall rough-in, basin projection, and faucet drilling before purchasing a reproduction pedestal sink.
2. Restore a Clawfoot Tub Without Losing Comfort
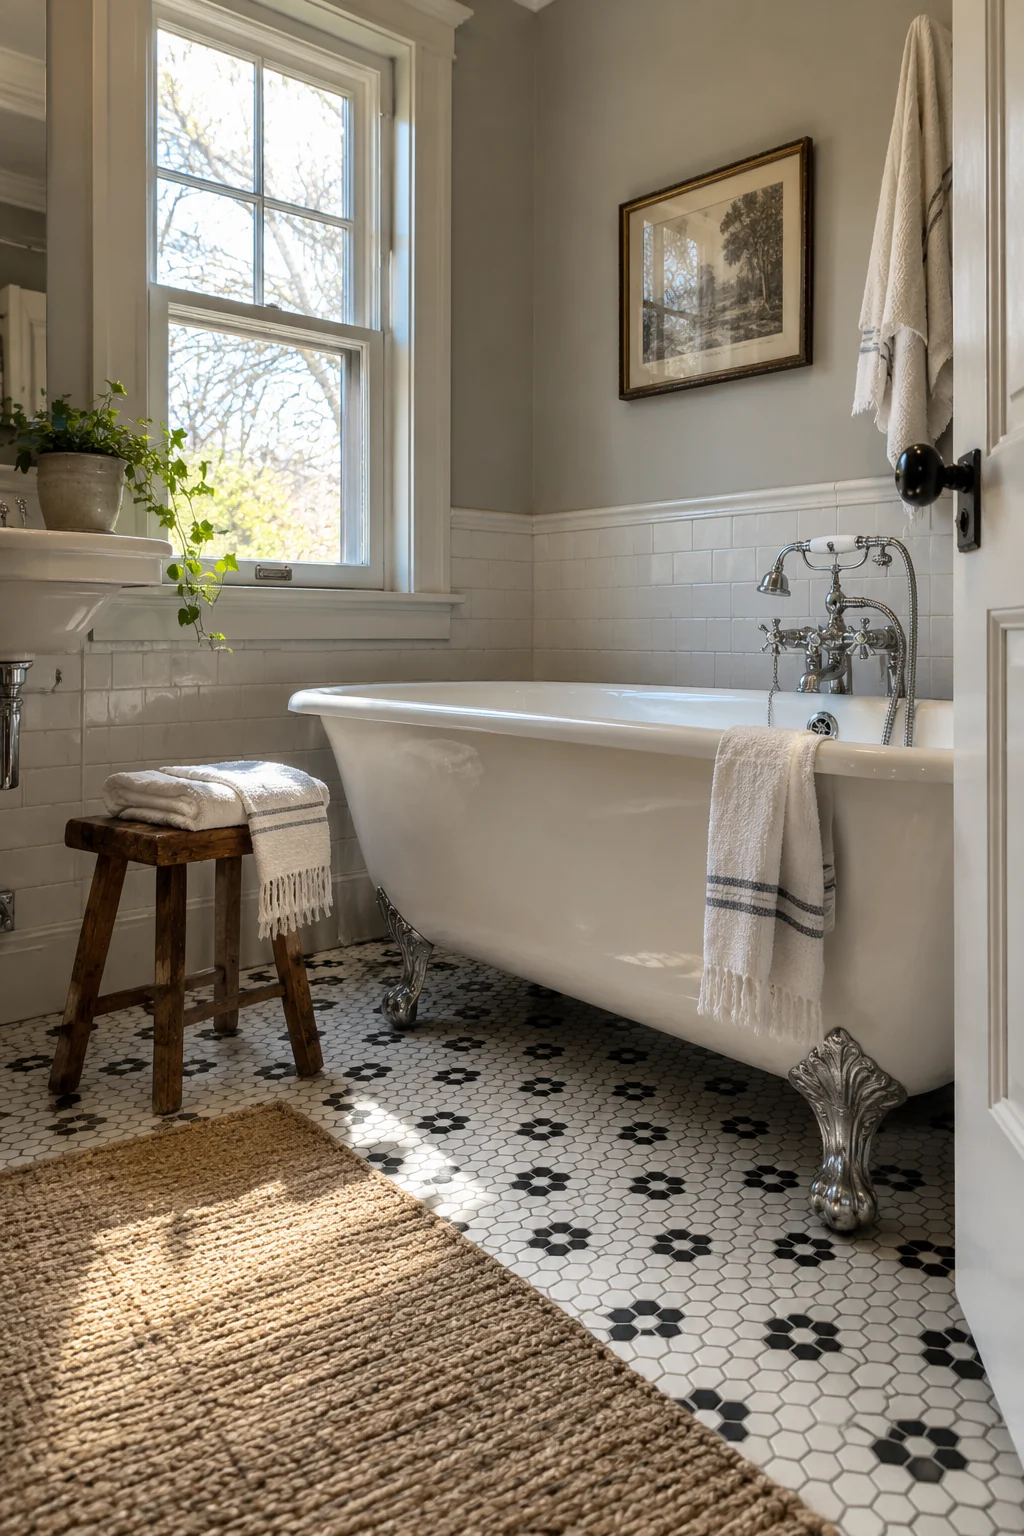
A refinished cast-iron clawfoot tub can be the anchor of a vintage bathroom. White enamel and polished chrome feel crisp, while a small wood stool adds warmth without competing with the sculptural feet.
Confirm the floor can support the filled tub and its bather, then check that the drain and supply locations suit the chosen filler. Old tubs vary, so measure the actual piece rather than a catalog sketch.
For safer use, add a rated grab bar to wall framing and a flat nonslip mat only when bathing. These bathroom flooring ideas can coordinate period style with modern traction.
3. Free the Floor With a Wall-Mounted Sink
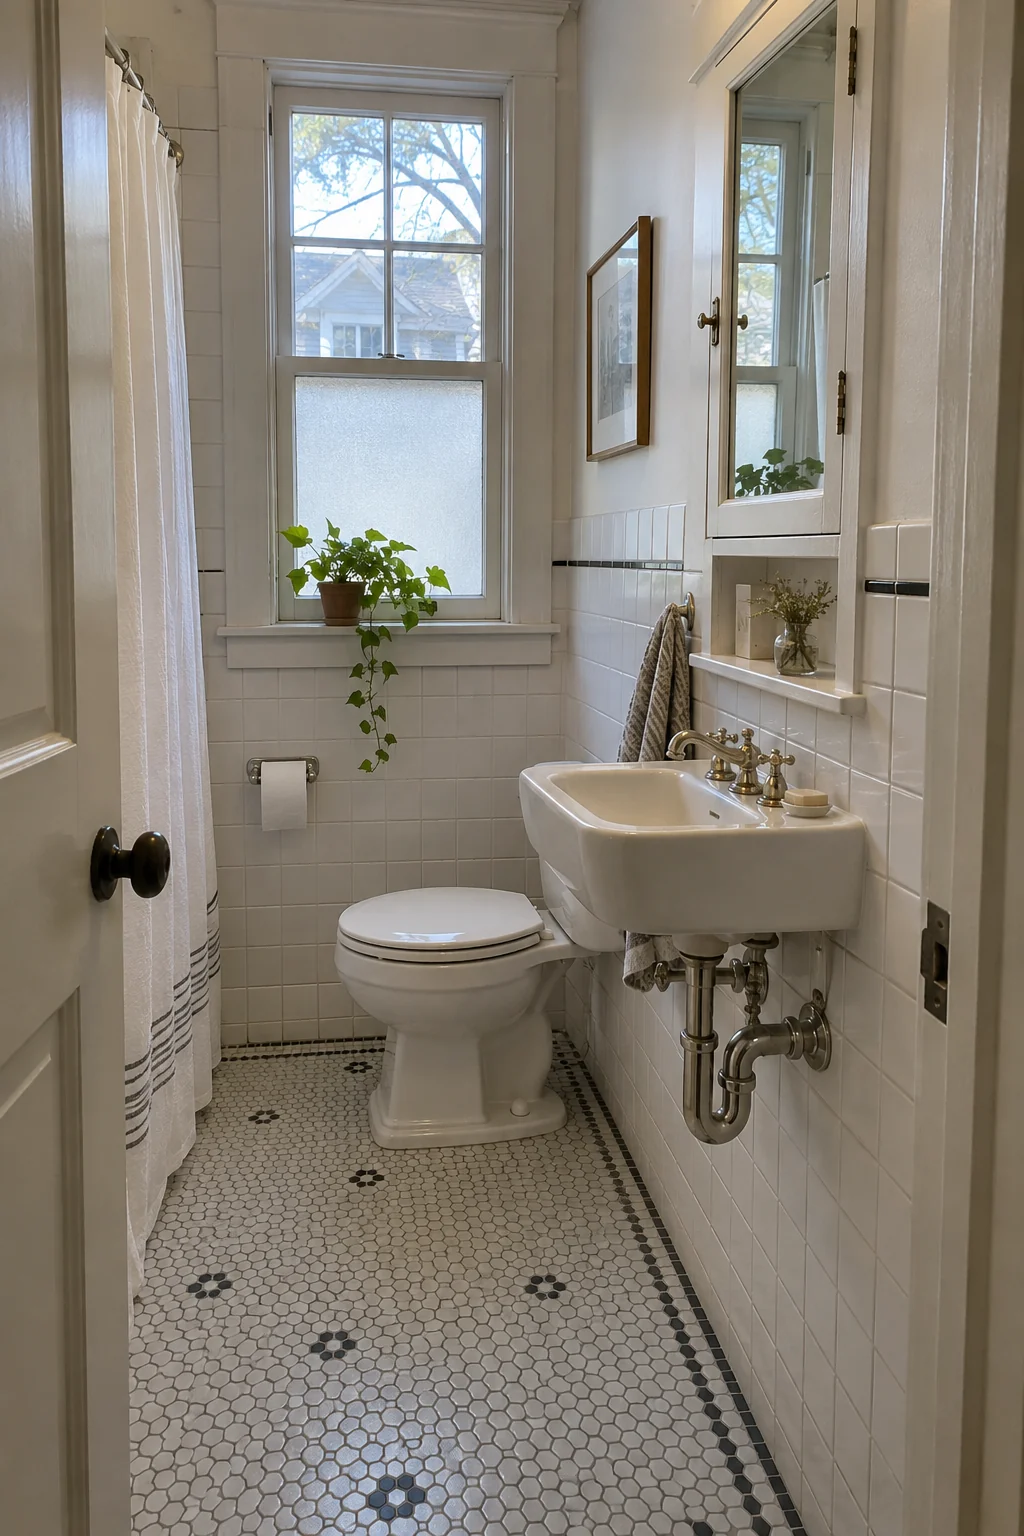
A compact wall-mounted sink suits a narrow vintage bath because the visible floor continues underneath. Choose a porcelain model with enough rim depth for soap, not an undersized basin that splashes the wall.
The exposed trap becomes part of the design, so specify a finished metal kit and keep shutoff valves accessible. Blocking inside the wall must carry the fixture; decorative brackets alone are not structural support.
Aim for comfortable circulation rather than squeezing in furniture. A shallow mirrored cabinet and one narrow shelf can handle essentials while preserving knee and door clearance.
- Confirm structural wall blocking.
- Choose a finished trap and shutoff valves.
- Protect a clear route to the door.
4. Choose a Console Sink for Airy Storage
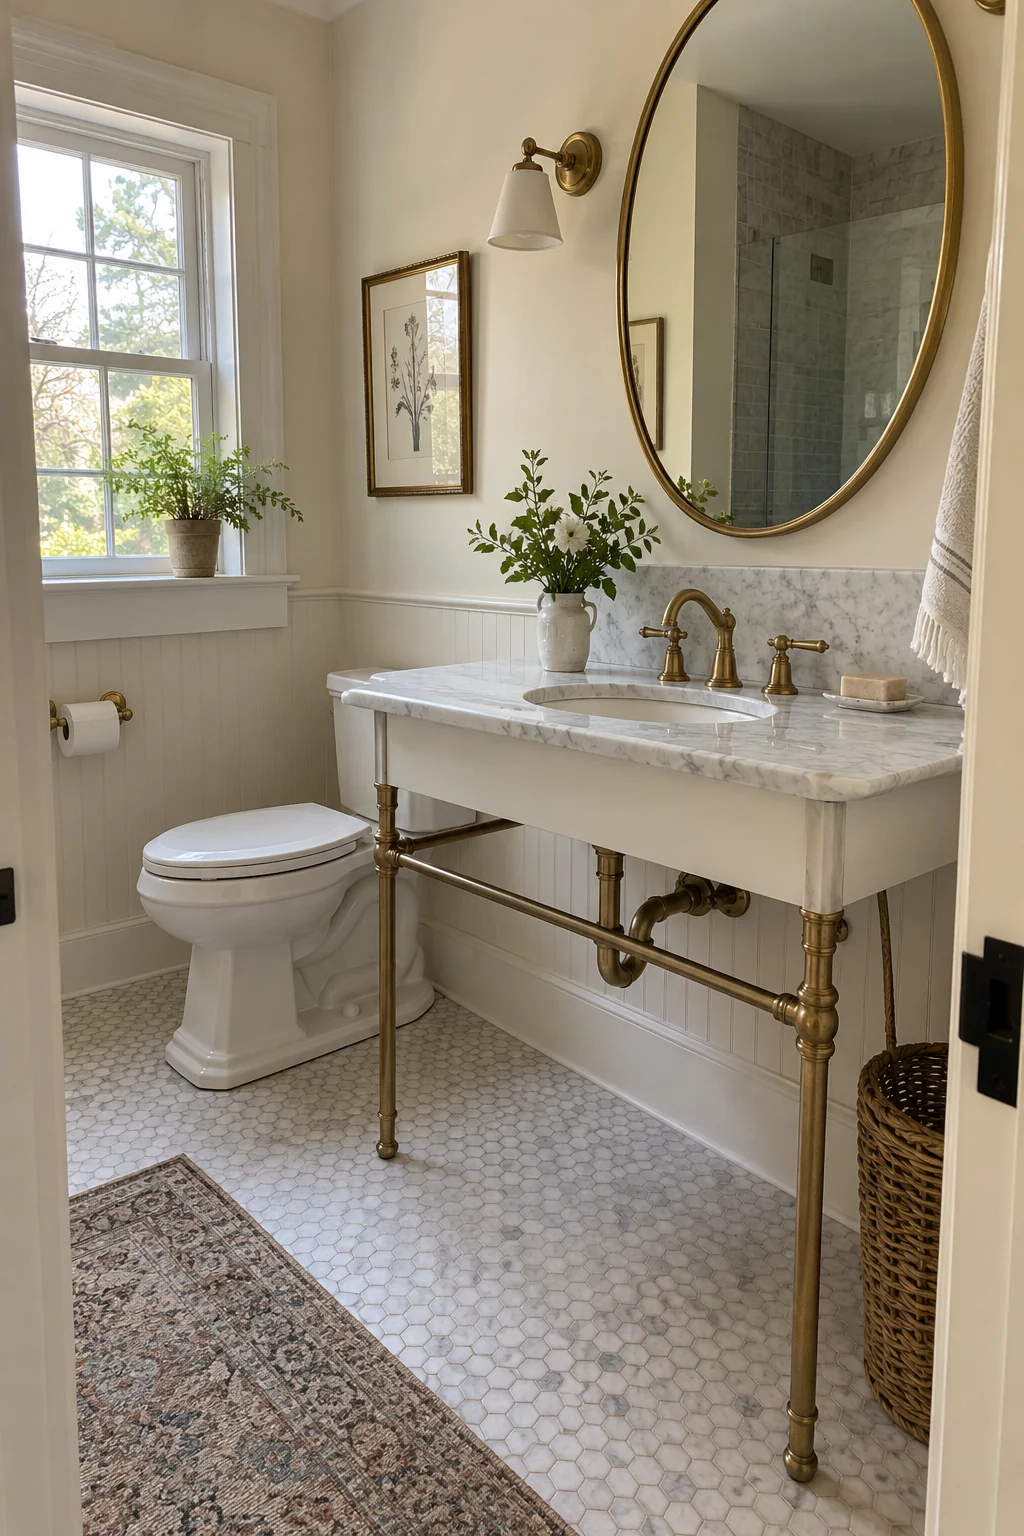
A marble-topped console sink bridges furniture and plumbing. Slim metal legs keep the room open, while the broad ledge gives two people enough landing space for toothbrushes and skincare.
Check the overall width against the toilet centerline and door swing. In a compact bath, a 30- to 36-inch console often feels generous without creating a bottleneck.
Use trays sparingly because water can sit around bottles and stain porous stone. Seal natural marble as directed, wipe splashes promptly, and choose honed stone if small etches will be less distracting.
5. Use a Reproduction High-Tank Toilet Carefully
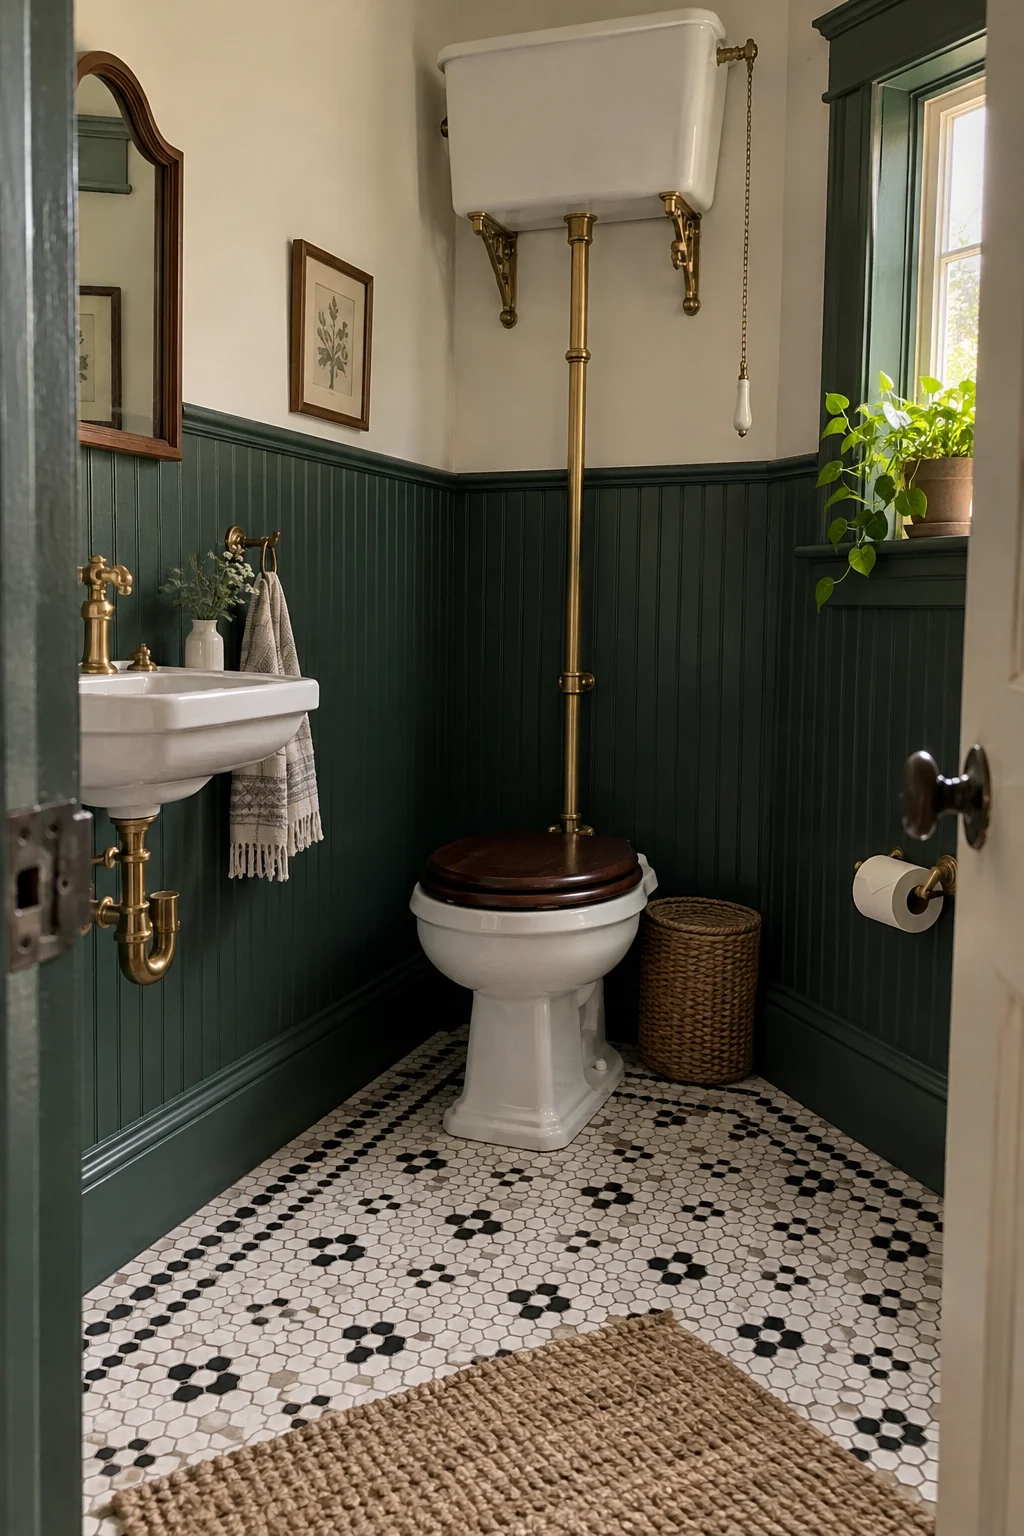
A high-tank toilet creates strong Victorian character in a powder room or period renovation. Dark green beadboard and a black-and-white floor give the tall white fixture an architectural backdrop.
This is not a casual swap. Verify ceiling height, secure the tank to appropriate wall structure, and use the manufacturer's compatible bowl, flush pipe, and fittings. Leave service access around every connection.
Keep artwork and shelves away from the pull chain and tank. The silhouette needs breathing room, and fewer objects make future leak checks much easier.
6. Bring Back the Bridge Faucet
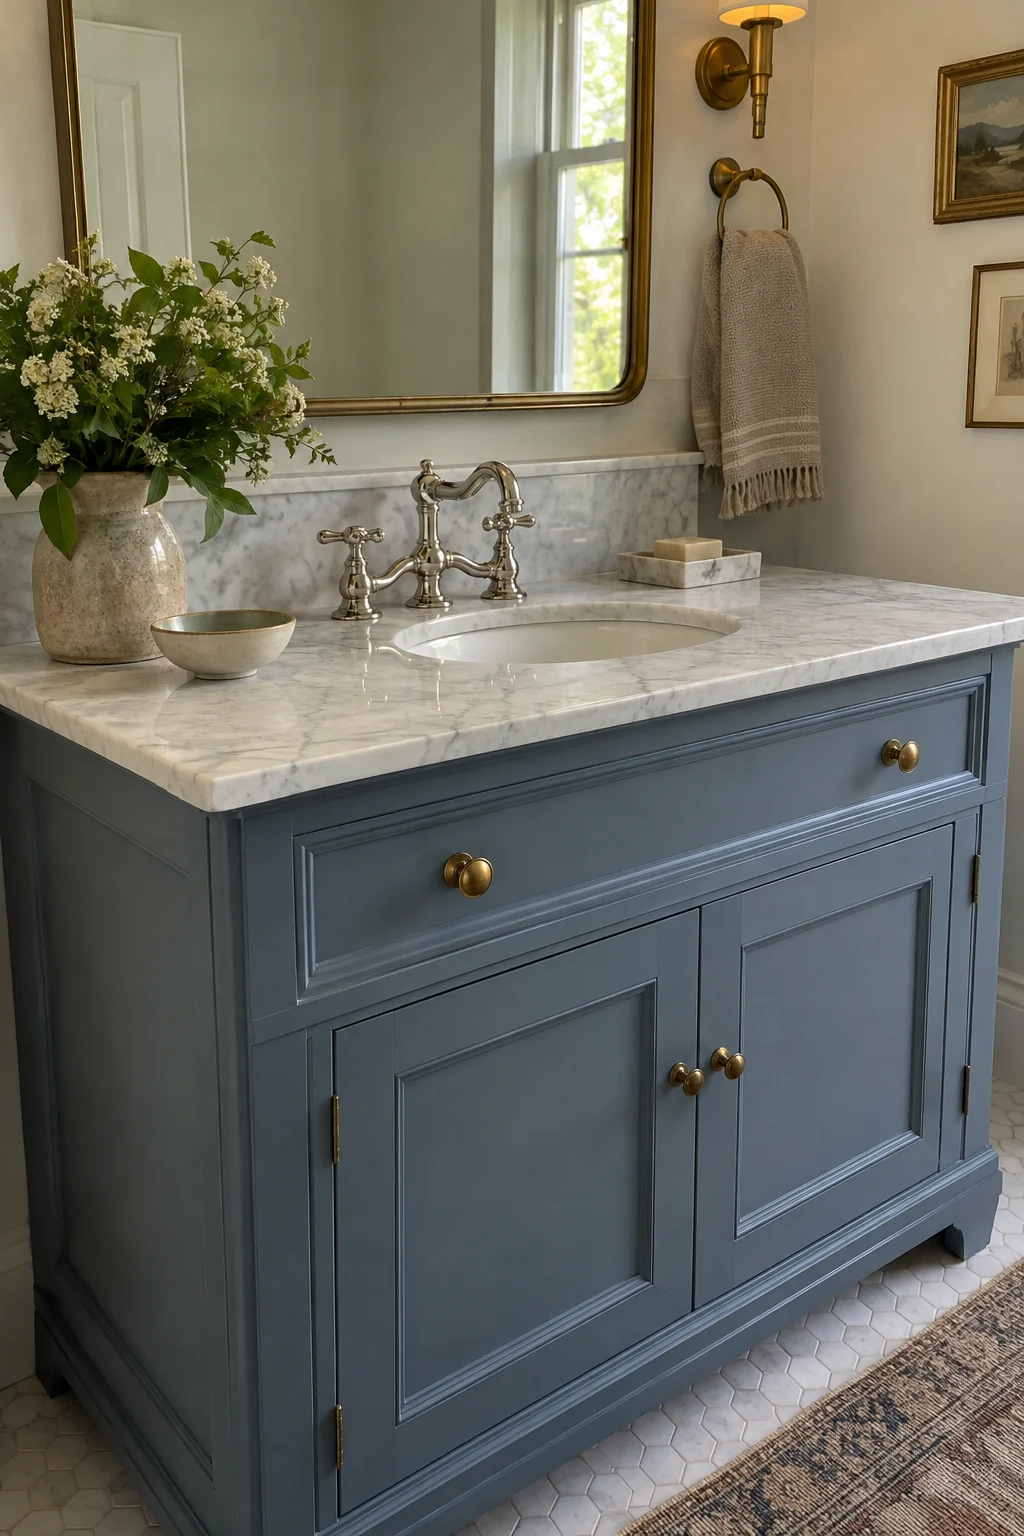
A bridge faucet gives a painted vanity an authentic early-twentieth-century detail. Cross handles and an exposed bridge look especially balanced above an undermount basin and short marble backsplash.
Match the faucet drilling to the countertop before fabrication; bridge sets are not all interchangeable. Confirm spout reach lands near the basin center so normal handwashing does not flood the back ledge.
Polished nickel feels bright and traditional, while aged brass is warmer. Choose one dominant finish for faucet, knobs, and mirror, then allow only a quiet secondary metal where replacement parts demand it.
7. Let Unlacquered Brass Develop Patina
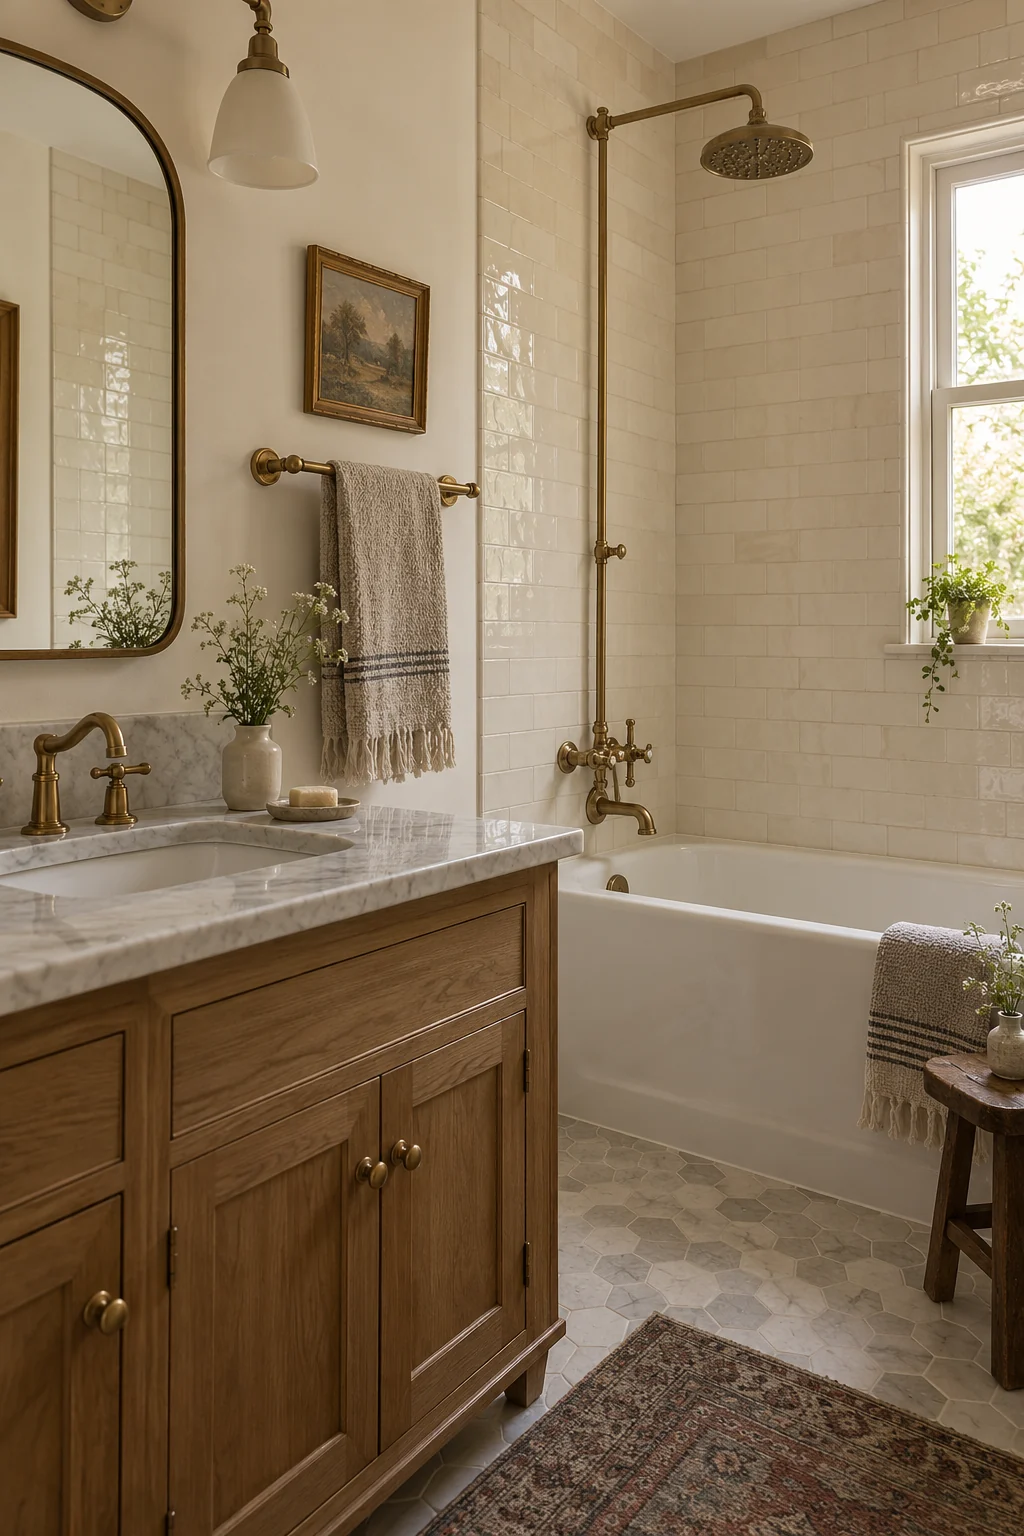
Unlacquered brass changes with water, air, and touch, which makes a new bathroom feel collected sooner. Cream tile and warm wood keep the evolving finish from appearing harsh.
Decide whether you truly want patina before buying. Lacquered brass stays more consistent, while living brass darkens unevenly and may show fingerprints or water marks.
Clean with the maker's recommended method and avoid mixing aggressive products near stone. If several fixtures come from different brands, compare physical samples because brass tones can vary widely.
8. Keep White Porcelain Crisp With Polished Nickel
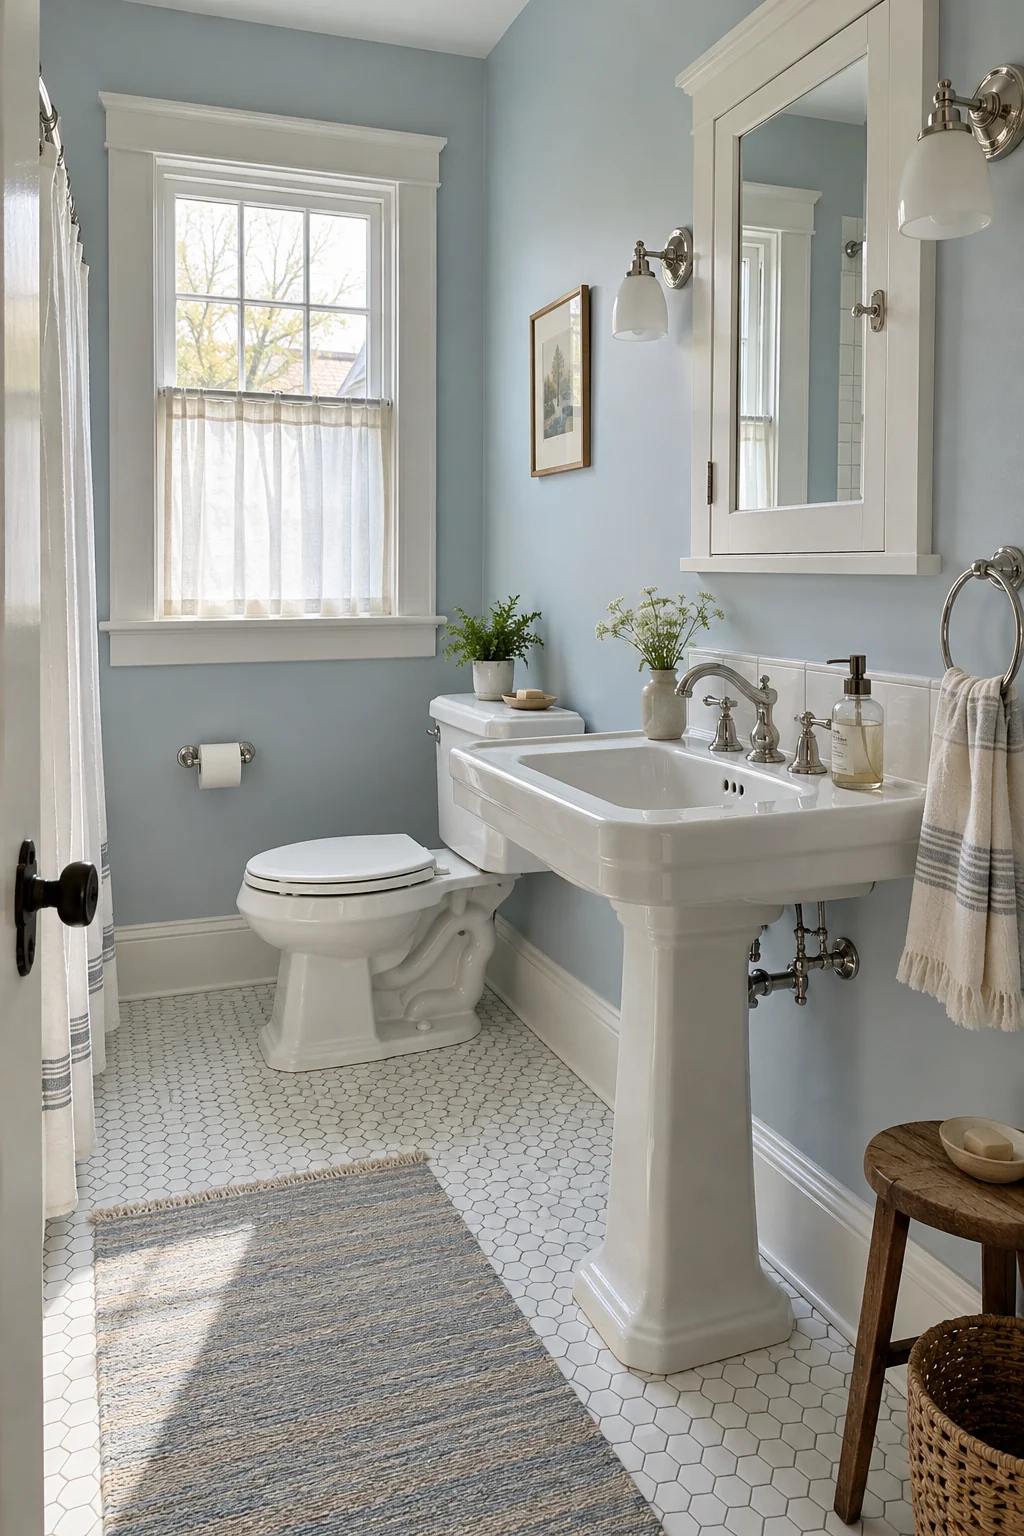
Polished nickel gives white porcelain a softer glow than chrome because its base tone is slightly warmer. It works well in a bright 1930s-inspired room with pale blue walls and small hex tile.
Repeat the finish on the faucet, towel ring, and cabinet latch, but do not force every tiny object to match. A consistent family of shapes matters more than a perfectly identical shine.
Wipe fixtures with a soft cloth after heavy splashing and skip abrasive pads. A small amount of routine care preserves the reflective surface and keeps mineral residue from becoming the most visible detail.
9. Make a Copper Tub the One Splurge
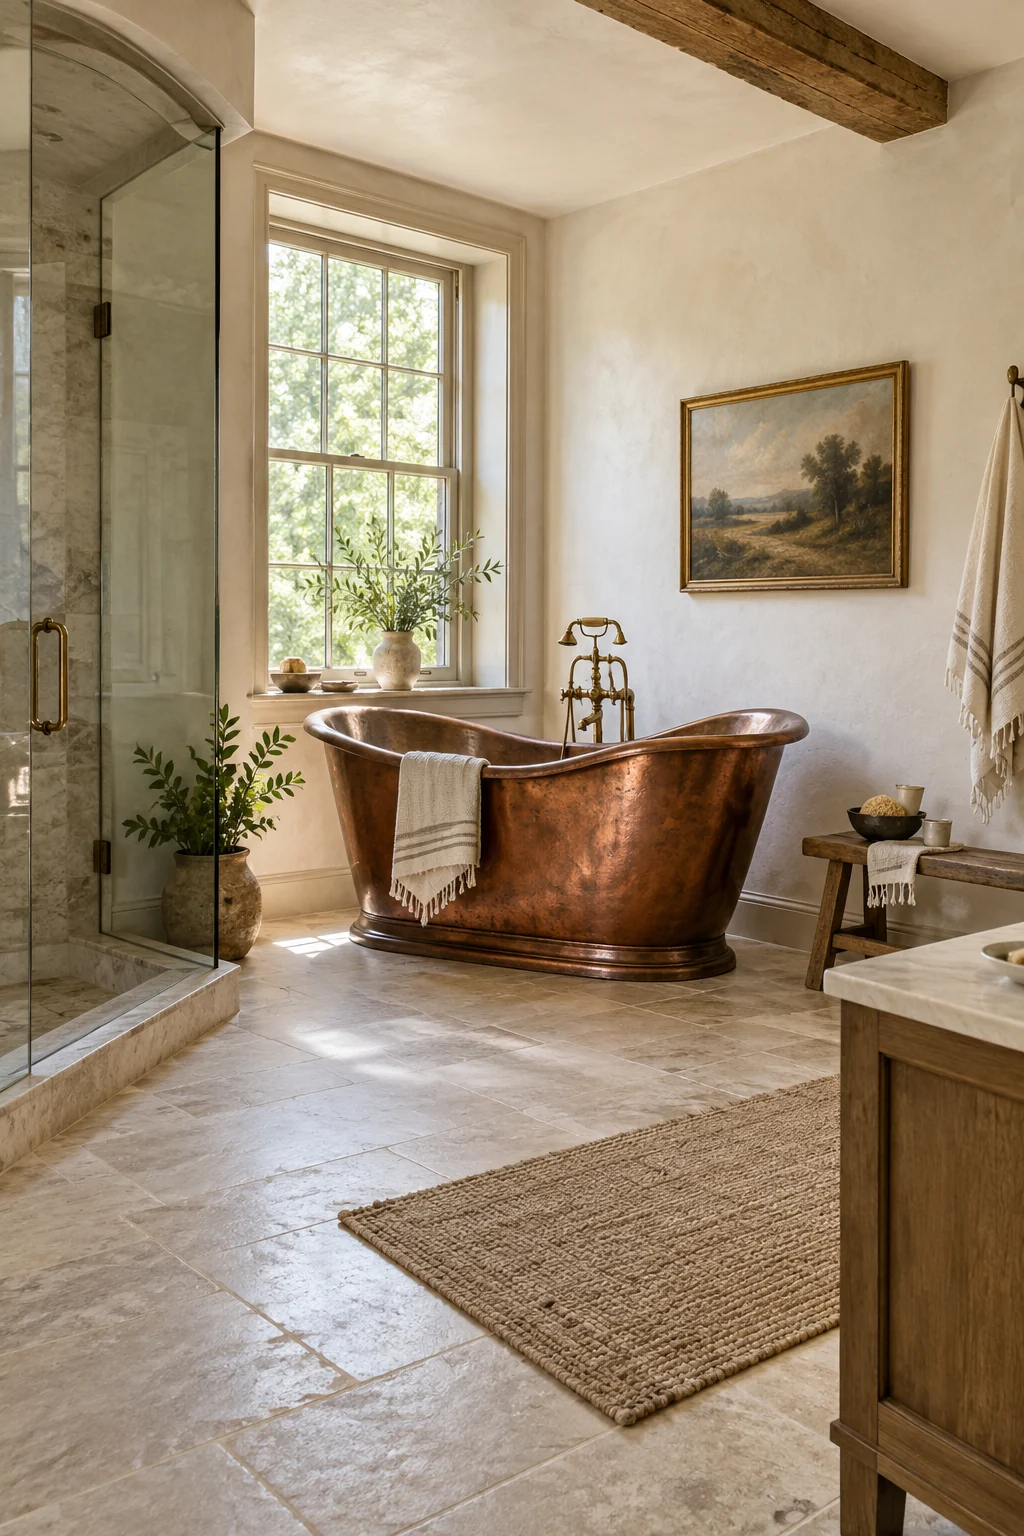
An aged copper tub adds warmth to a spacious heritage bathroom, especially against limewashed walls and a quiet stone-look floor. Let it be the only major copper element so the room stays calm.
Before purchasing, compare empty weight, filled weight, capacity, and doorway dimensions. A beautiful tub is useless if it cannot reach the room or if the floor needs unplanned structural work.
Copper finishes react differently to bath products and cleaners. Follow the manufacturer’s care instructions, avoid abrasive scrubbing, and accept that a living finish will shift rather than remain showroom-perfect.
Include delivery, floor review, faucet, drain, and installation when comparing a copper tub with a standard cast-iron option.
10. Preserve a Cast-Iron Radiator
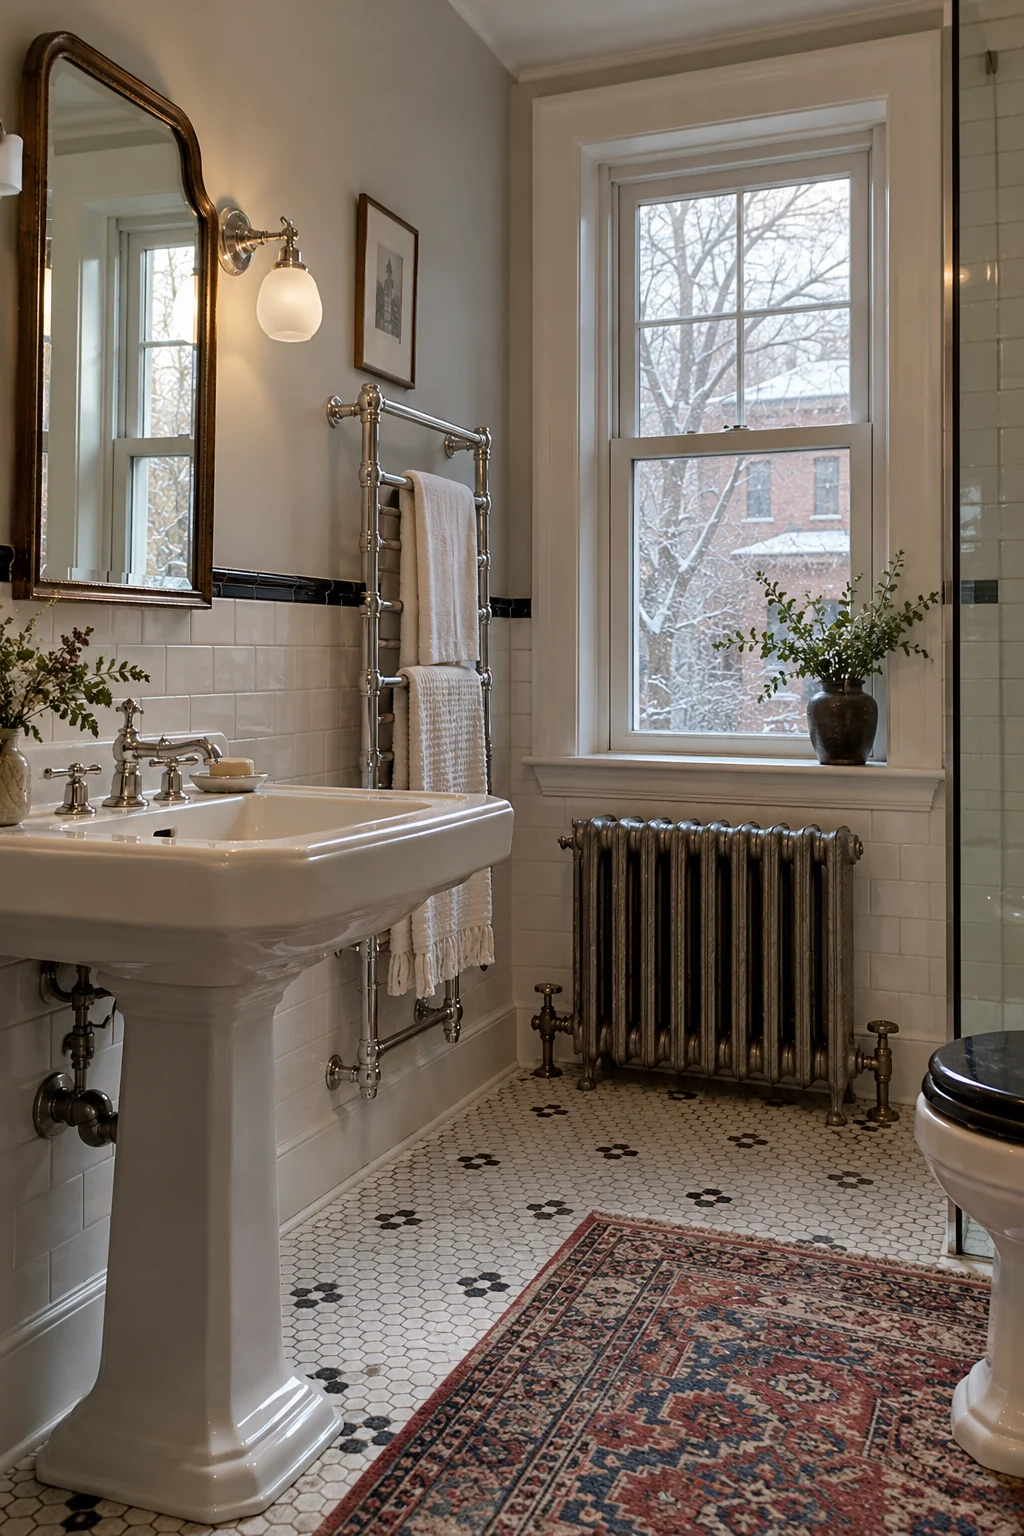
A restored cast-iron radiator can remain a useful period feature when it is correctly serviced and painted. It brings authentic weight to a room that otherwise uses simple white porcelain and tile.
Have a qualified professional check valves, pressure, clearances, and surface temperature. Do not drape towels over a radiator unless its design and operating instructions specifically allow that use.
If warm towels matter, install a separate rated towel warmer in an approved location. Keeping heating and storage functions distinct makes maintenance clearer and avoids blocking heat output.
Build the Vintage Look From Tile and Walls
Floors and wall finishes establish the room’s rhythm. Use period references as a guide, then choose modern assemblies that handle water, cleaning, and daily wear.
11. Lay a Basketweave Mosaic Floor
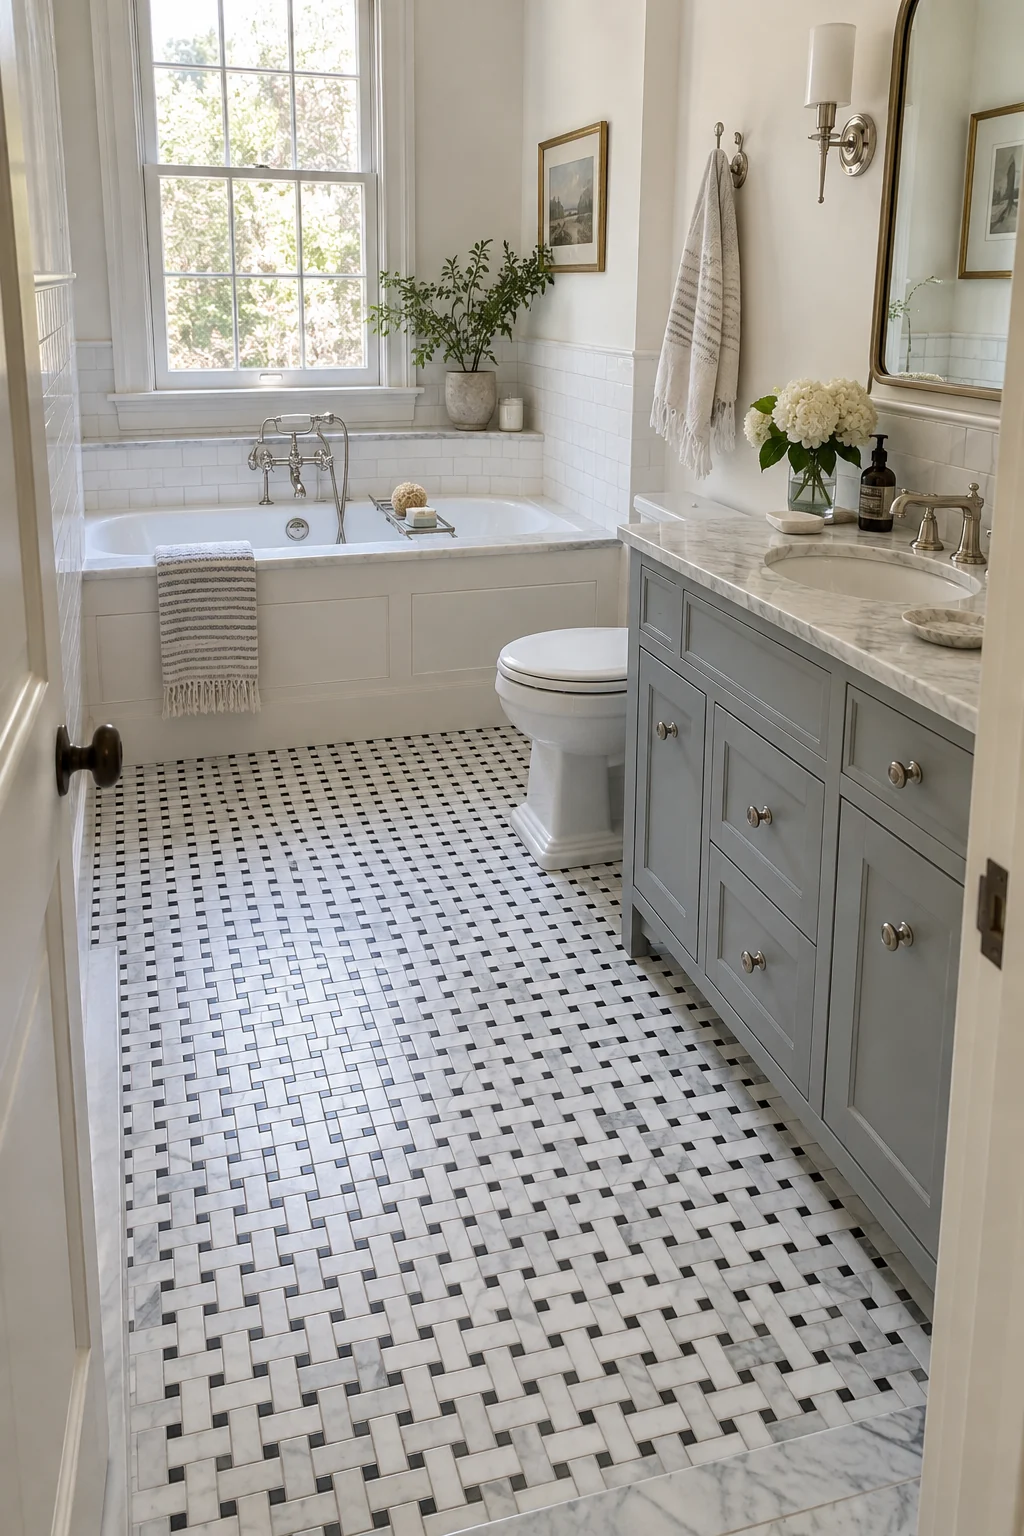
Basketweave mosaic brings period rhythm without overwhelming a small bathroom. Black dots on a white field pair naturally with a gray-blue vanity and polished nickel fixtures.
Dry-lay several sheets before setting them because seams between mesh sheets can become obvious. Shift individual pieces where necessary and maintain the pattern through doorways and around the toilet flange.
More grout means more cleaning, but it also provides useful traction. Choose a stain-resistant grout, seal it if required, and keep the color slightly off-white so everyday dust is less visible.
12. Outline Penny Tile With a Border
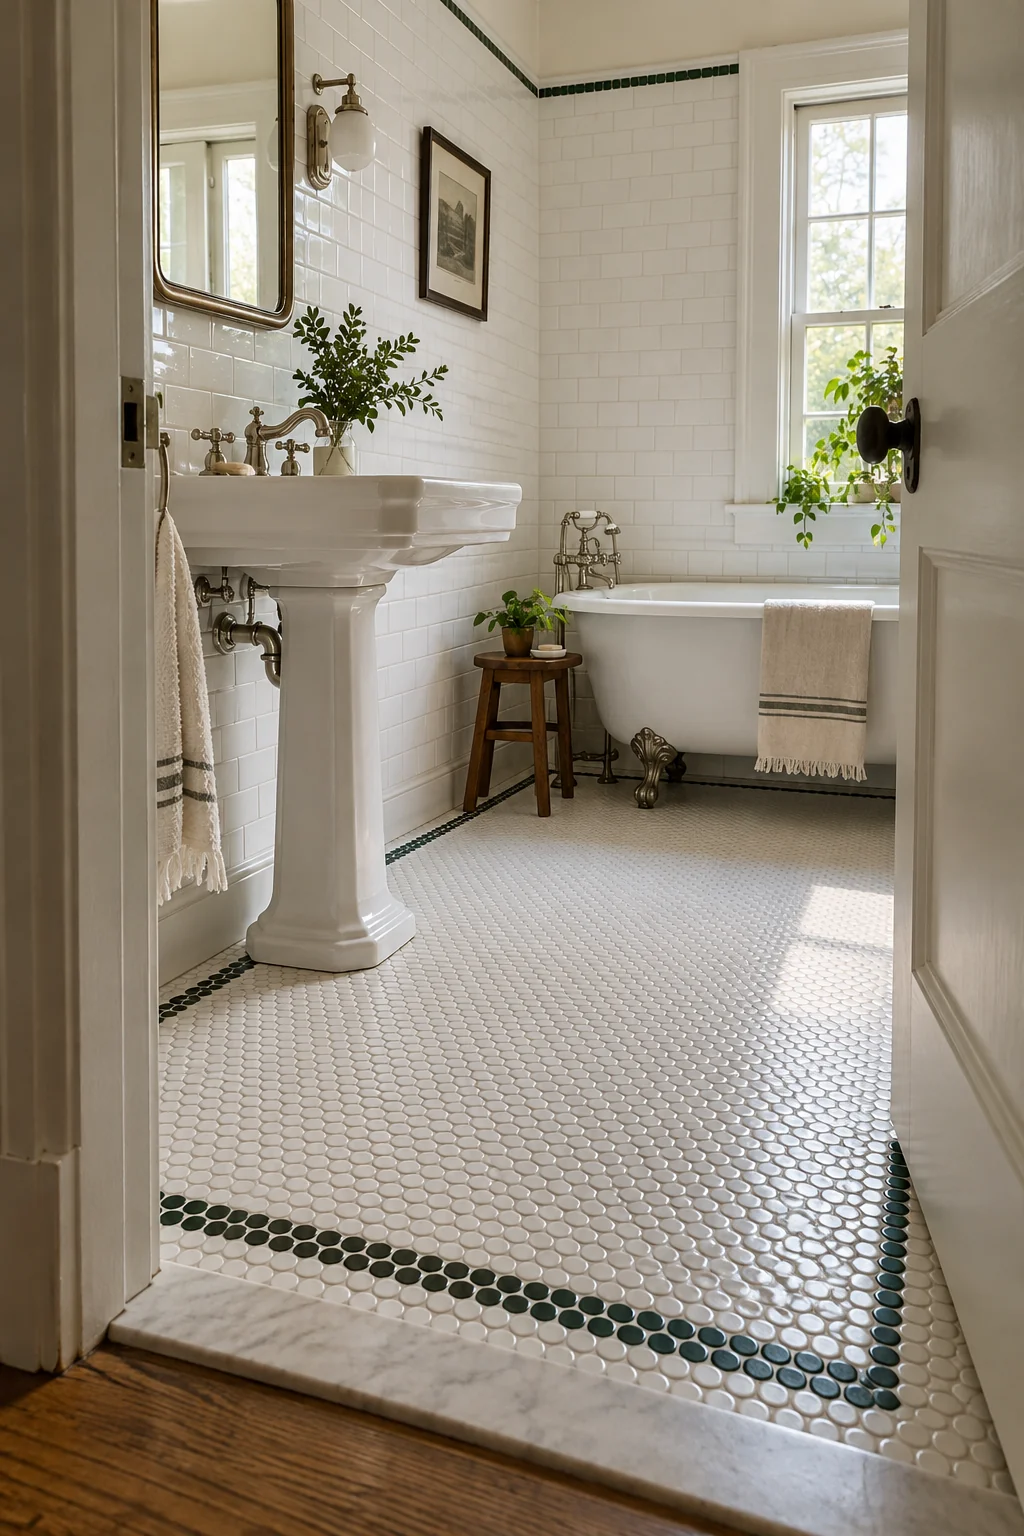
A slim mosaic border makes inexpensive penny tile feel tailored. Use the border to echo the room perimeter or mark a central field rather than weaving around every fixture.
Plan the layout from the most visible doorway and balance cuts on opposite walls. The border should meet corners cleanly; awkward slivers will attract more attention than the central field.
Select tile rated for floors and wet areas, then confirm grout choice with the installer. A darker outline is striking, but medium grout across the field usually shows less discoloration.
- Start the layout from the doorway.
- Balance cuts at opposite walls.
- Use floor-rated, slip-appropriate tile.
13. Try a Black-and-White Checkerboard
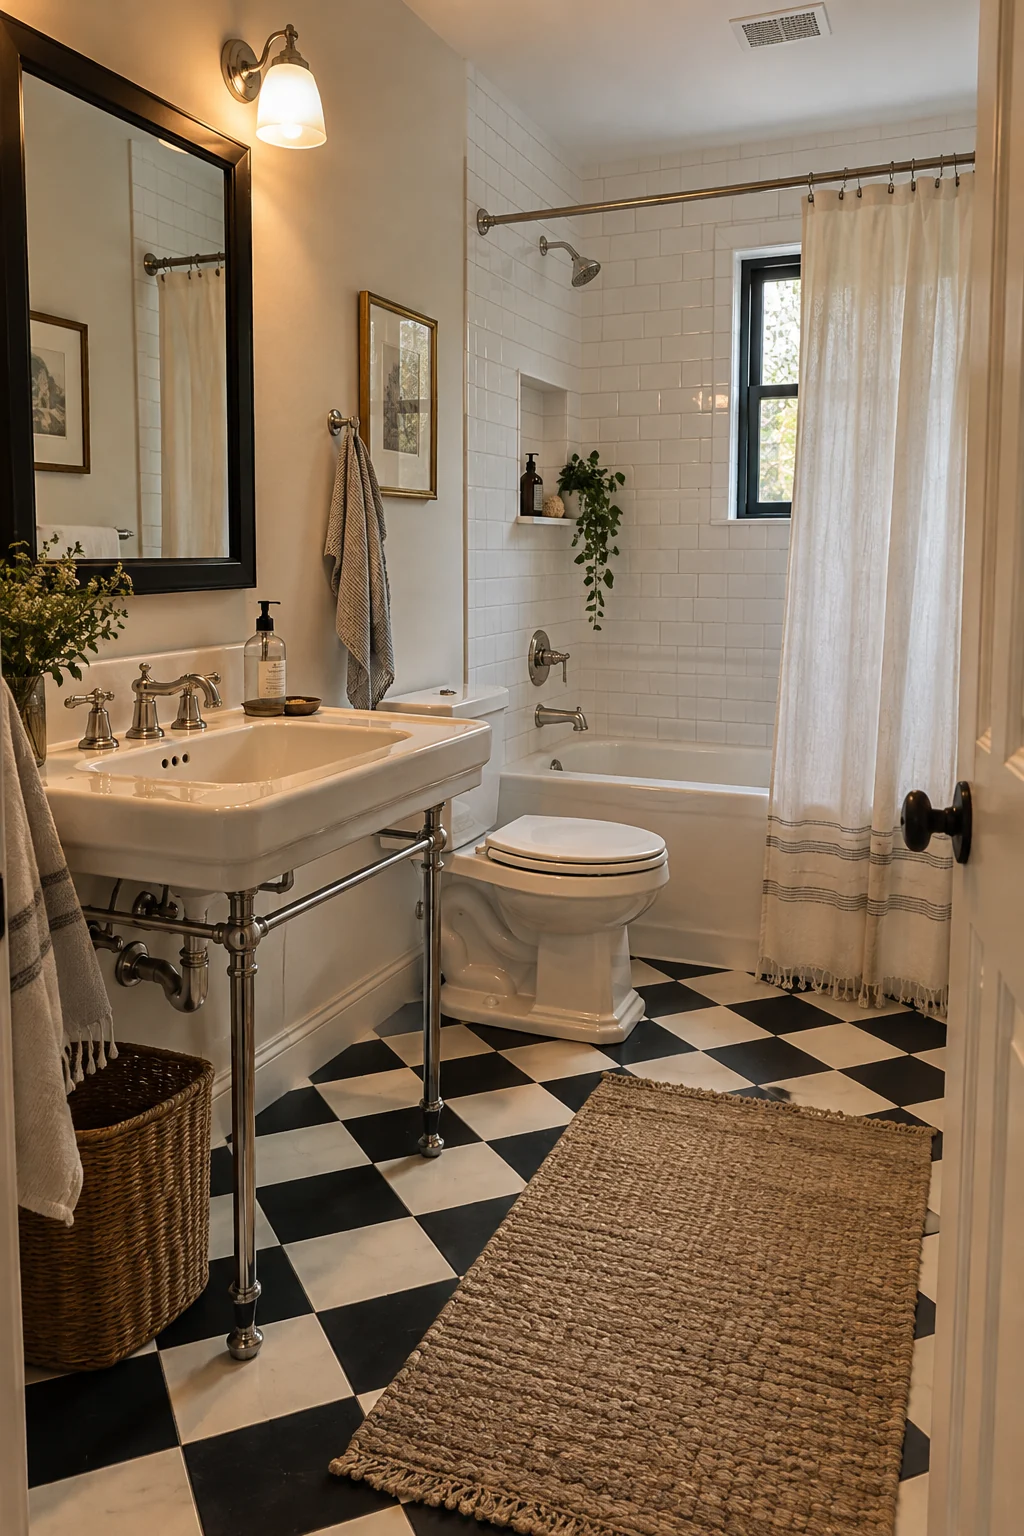
Checkerboard porcelain gives vintage energy with larger pieces and fewer grout joints than tiny mosaics. Warm white rather than bright white keeps the contrast from feeling like a diner set.
Rotate the layout 45 degrees only if the room can handle extra edge cuts. A straight grid is calmer, wastes less material, and is easier to align with a tub apron or vanity.
Use matte or slip-rated tile underfoot, not polished wall tile. These bathroom tile combinations offer more ways to balance a bold floor with quieter walls.
14. Use Encaustic-Look Porcelain for Easier Care
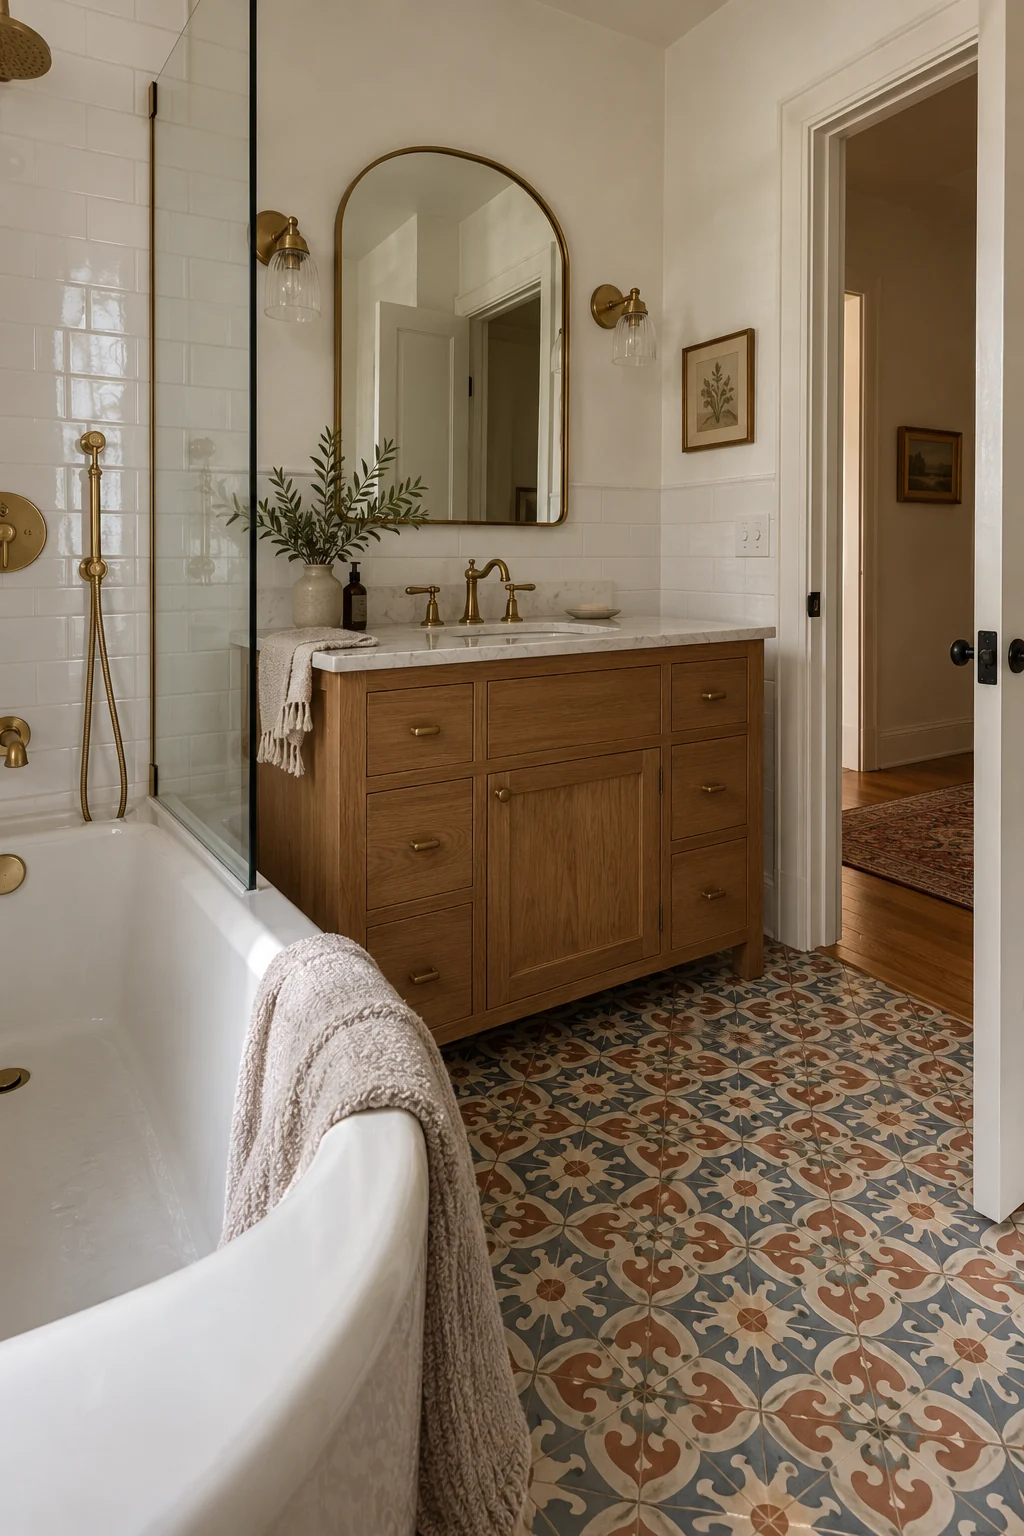
Patterned porcelain can deliver the color and worn-in feeling of encaustic cement with simpler maintenance. Muted terracotta, blue, and cream sit comfortably beside oak and aged brass.
Keep the wall tile plain so the floor remains the clear focal point. Order samples first; a motif that looks delicate online can become visually dense across a small room.
Porcelain care varies by surface texture, while cement tile often needs sealing. Confirm the exact material and cleaning guidance instead of treating every patterned tile as the same product.
15. Revisit Subway Tile With Charcoal Grout
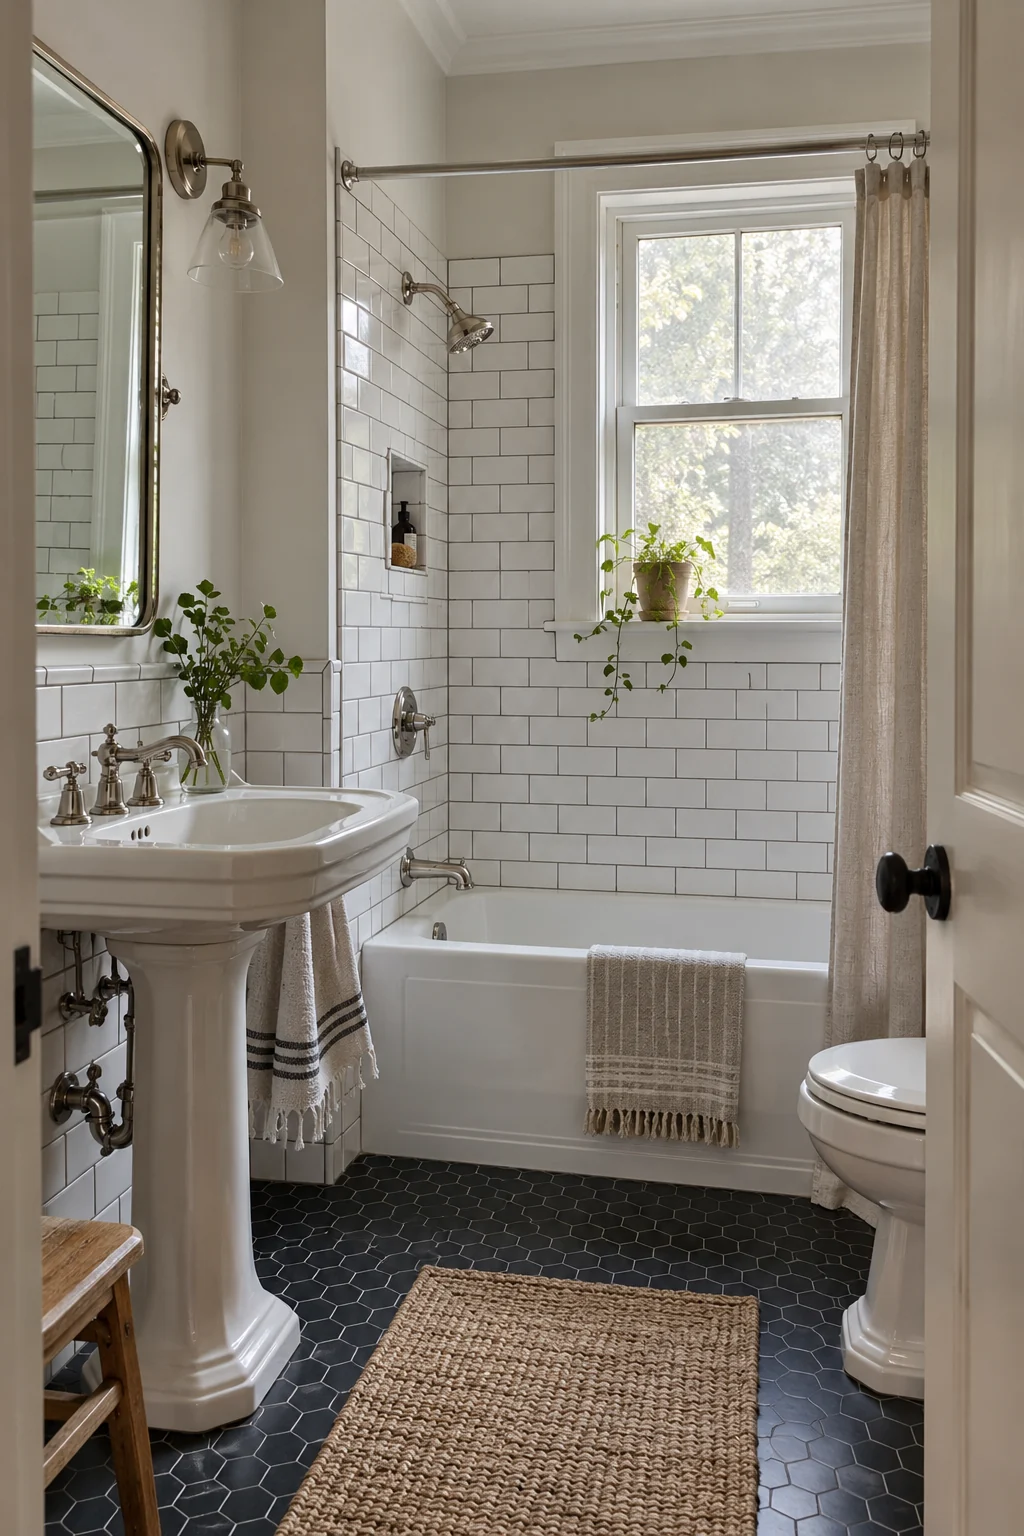
White subway tile becomes more graphic with charcoal grout, a useful choice when you want vintage structure without ornate materials. Restrict the contrast to the lower wall or wet zone so it does not overpower the room.
Choose a grout joint and edge trim before installation. Handmade-look tiles vary more, while machine-made tiles create a tighter, cleaner grid.
Dark grout can still show soap film and may lighten unevenly if harsh cleaners are used. Test maintenance products in an inconspicuous spot and keep silicone joints separate from grout joints.
16. Celebrate Original Four-Inch Tile
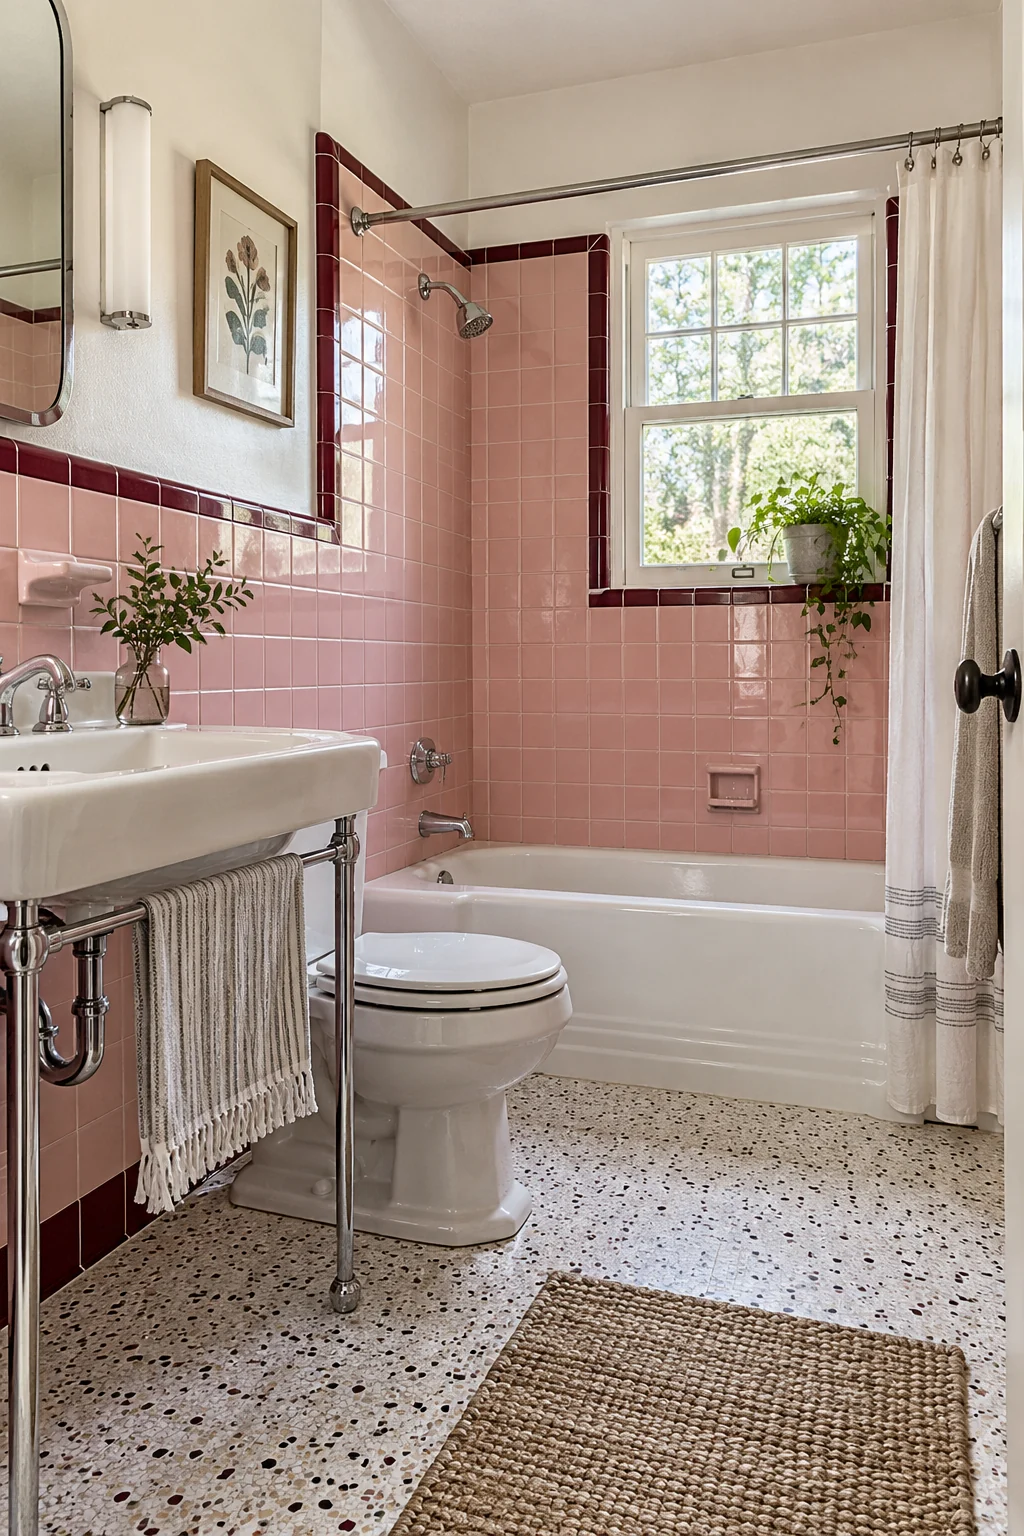
Original square tile can be an asset when it is sound. Blush pink with burgundy trim feels intentional beside white porcelain and a quiet terrazzo-look floor.
Repair missing pieces with salvaged or custom-color matches rather than replacing an entire wall automatically. Photograph the pattern and measure trim profiles before shopping for substitutes.
Have cracked areas checked for moisture problems, not merely filled cosmetically. Sound vintage tile deserves preservation; loose tile or a failed wet-zone assembly needs a proper repair plan.
If vintage tile is sound, a skilled repair and careful regrouting may cost less—and retain more character—than full demolition.
17. Protect Beadboard From Bathroom Moisture
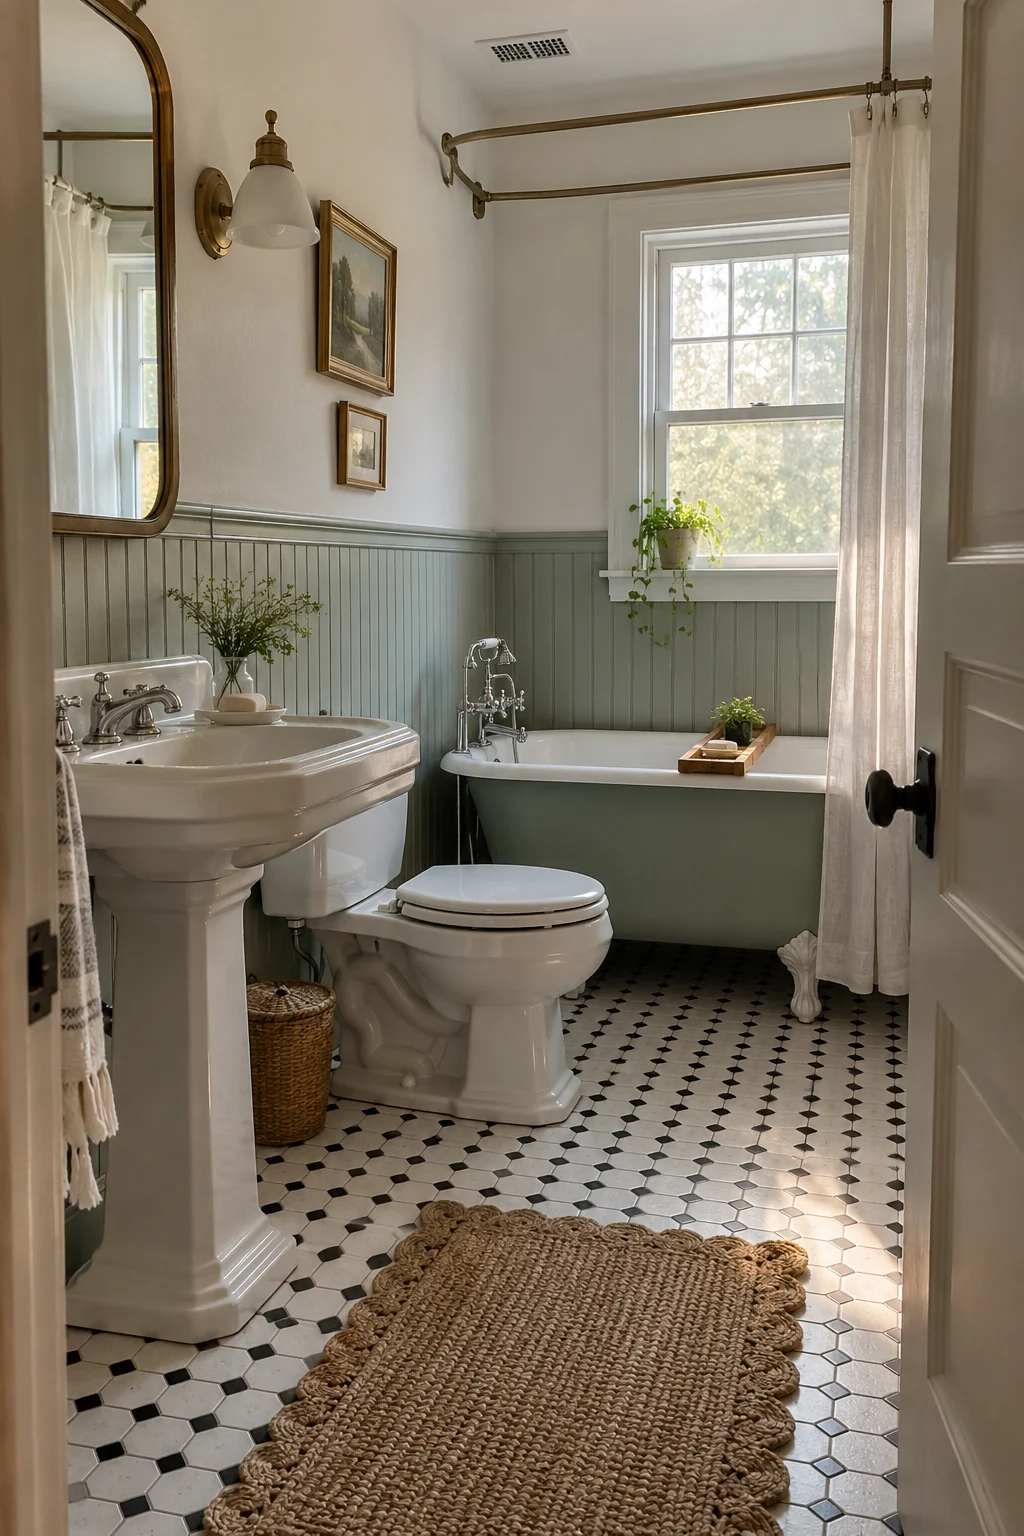
Painted beadboard gives a cottage bathroom texture without covering every wall in tile. Pale sage feels historic and works easily with white fixtures and a black-and-white mosaic floor.
Use moisture-appropriate material and finish, keep cut edges sealed, and stop paneling outside direct shower spray. A well-sized exhaust fan matters more than another decorative coat of paint.
For more panel proportions and trim treatments, explore these bathroom beadboard ideas. Keep the cap rail narrow enough that it does not become a clutter shelf.
18. Warm an Attic Bath With a Paneled Ceiling
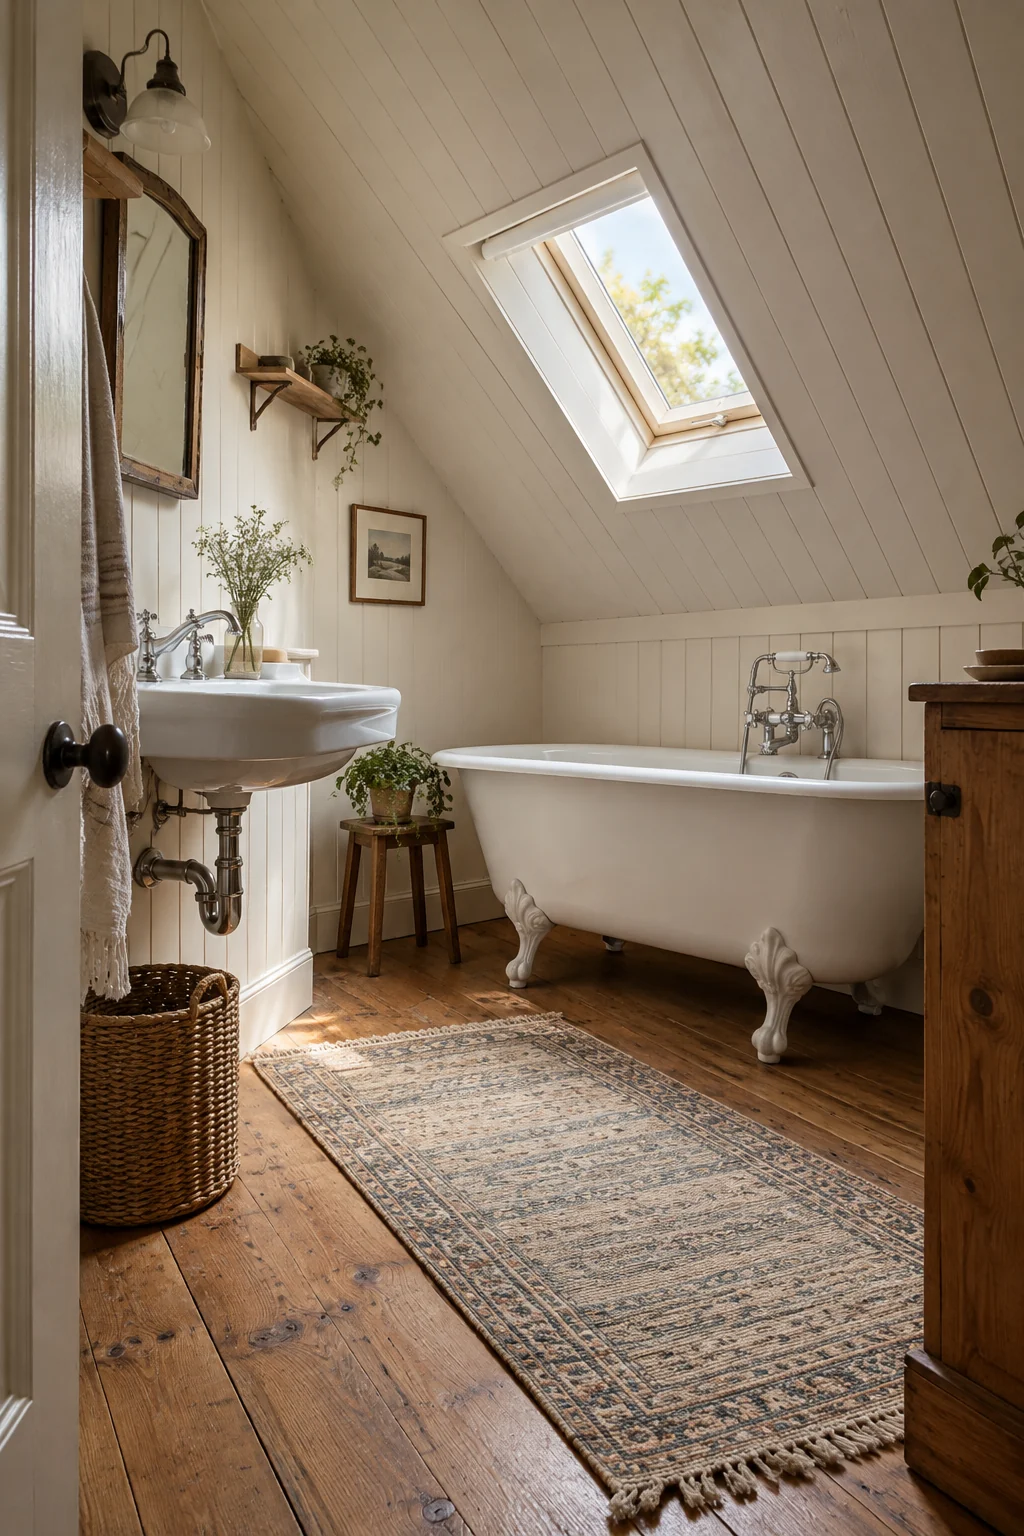
A cream tongue-and-groove ceiling can soften an attic bathroom and emphasize its sloped architecture. Pair it with a simple tub and restrained walls so the ceiling does not compete with too many patterns.
Check headroom where people step into the tub or stand at the sink. A charming slope should not create a daily bump hazard, and skylight placement must stay clear of shower spray and condensation paths.
Prime every face and cut edge when using wood, then maintain ventilation. A washable runner protects a dry wood floor, but wet zones still need a properly waterproofed surface.
- Check standing headroom.
- Seal panel edges before installation.
- Vent steam after every bath or shower.
19. Reserve Floral Wallpaper for a Powder Room
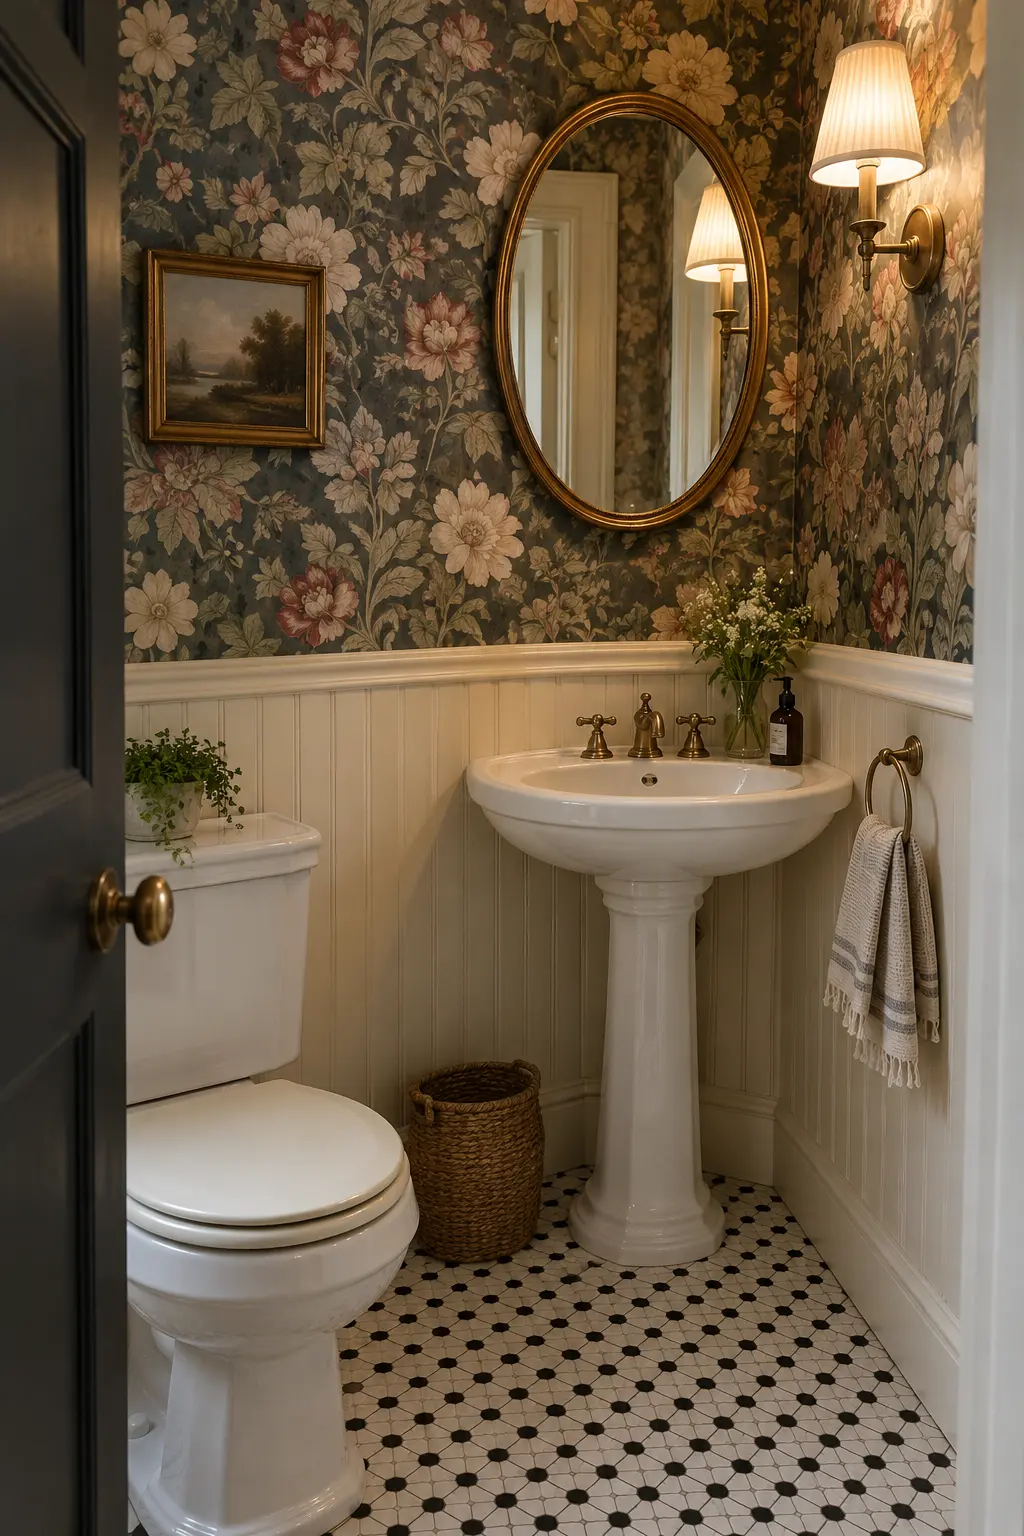
Floral wallpaper is easiest to enjoy in a powder room, where steam and direct spray are limited. Ivory beadboard gives the print a calm lower boundary and protects the busiest wall area.
Choose a washable, bathroom-suitable product and prepare the wall carefully. Small rooms magnify crooked repeats, so center the most visible motif over the sink before working toward corners.
If you are comparing scales and colors, these bathroom wallpaper ideas show how bold patterns behave in compact spaces. Keep art minimal once the walls carry the story.
20. Add One Art Deco Tile Moment
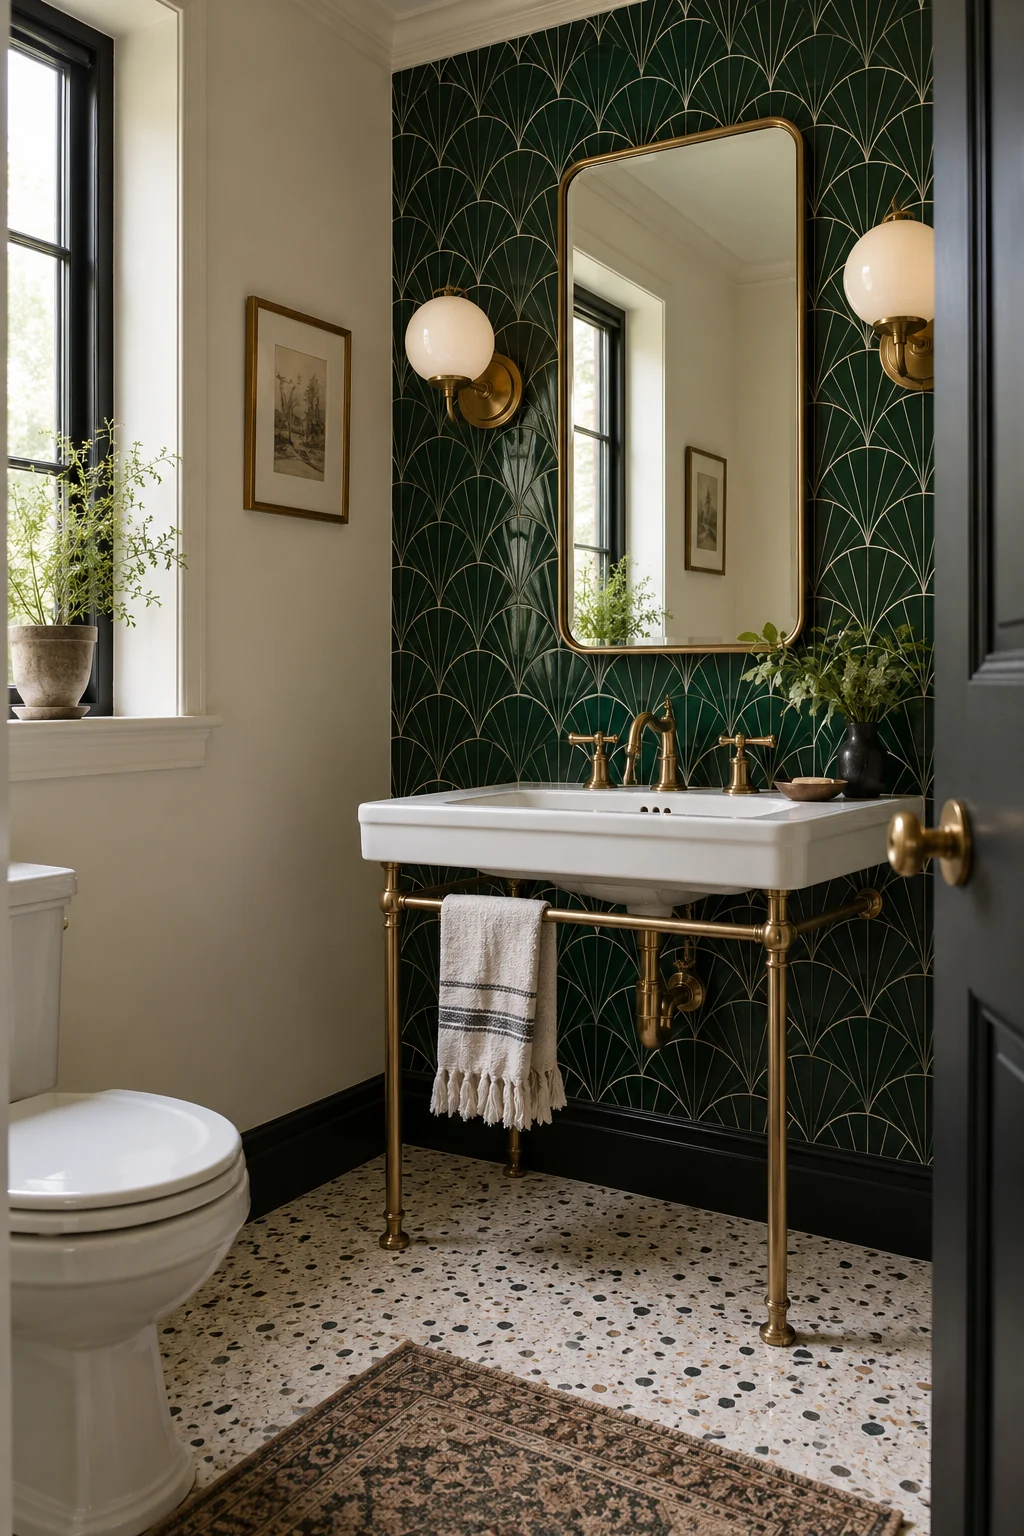
Deep green fan tile behind a console sink creates an Art Deco focal point without turning the whole bathroom into a set. Cream walls and terrazzo keep the surrounding surfaces quiet.
Lay out the fan motif so its centerlines relate to the sink and mirror. Use simple edge profiles, because an elaborate trim plus a directional pattern can become visually busy.
Two small globe sconces are enough to repeat the period curve. Keep modern requirements—GFCI protection, safe fixture placement, and ventilation—fully current behind the vintage look.
Add Storage That Looks Collected
Vintage bathrooms often have limited cabinetry, so every shelf and cabinet must earn its space. These ideas add useful storage without crowding fixtures or hiding maintenance access.
21. Convert an Antique Dresser Into a Vanity
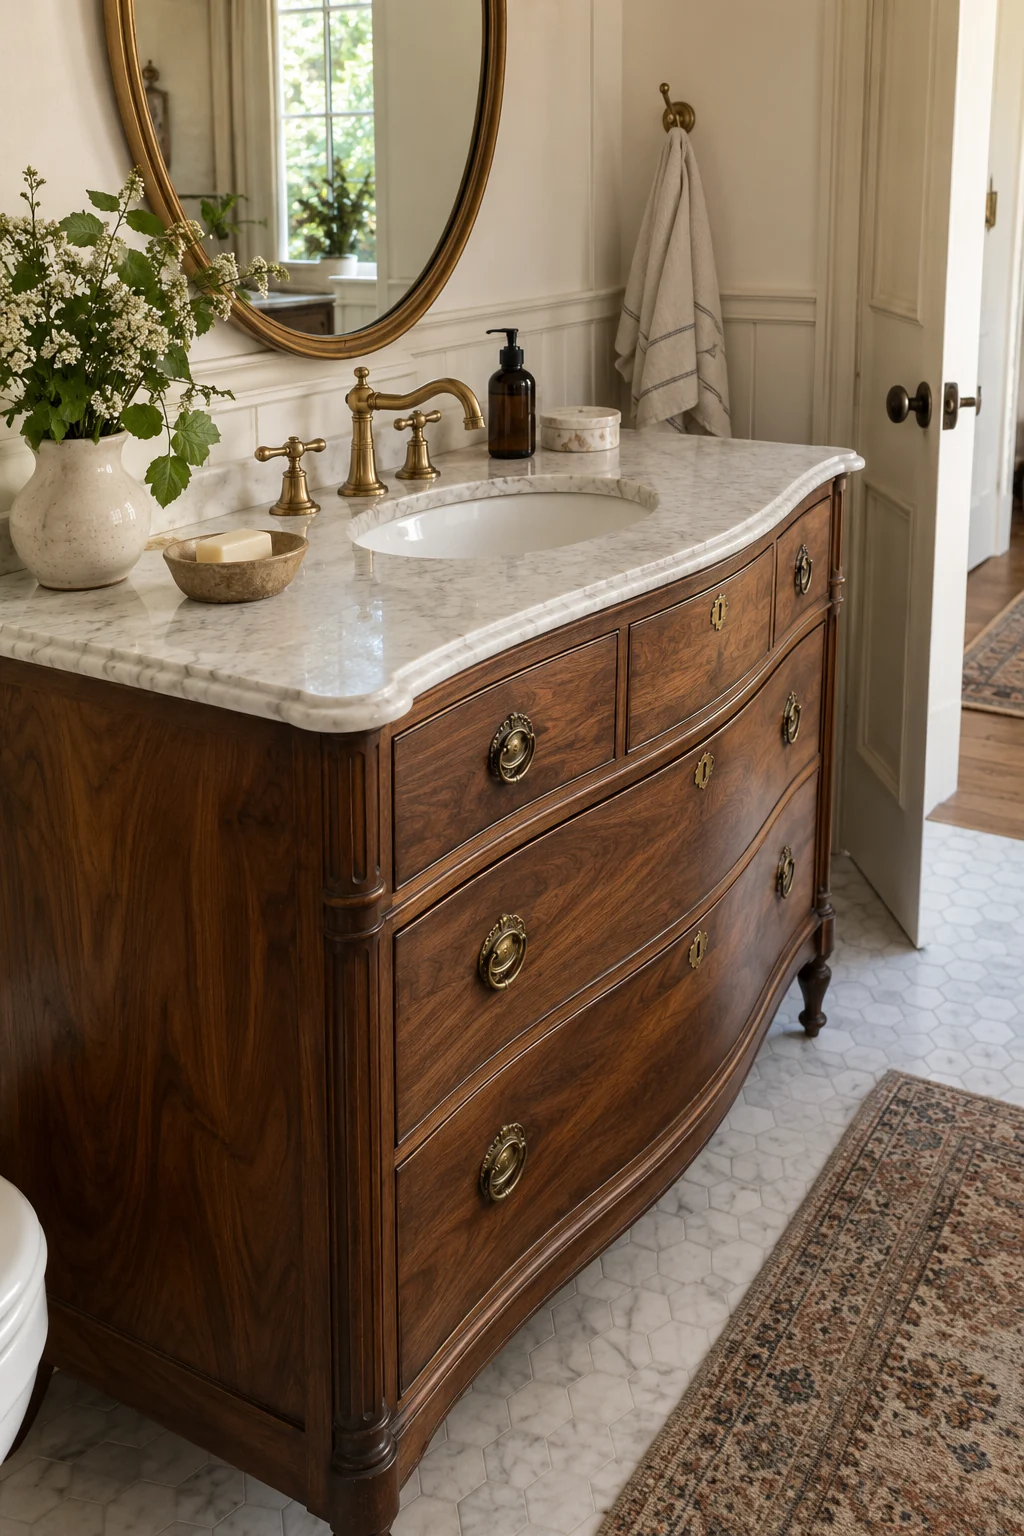
A walnut dresser can become a distinctive vanity when the piece is structurally sound and the plumbing plan respects its drawers. A stone top protects the wood from the wettest daily use.
Have the cabinetmaker modify only the drawers that intersect the basin and trap. False fronts are sometimes necessary, but remaining drawers should still open smoothly and clear shutoff valves.
Seal interior and exterior wood, add discreet ventilation if needed, and attach the unit securely. Antique furniture was not designed for bathroom humidity, so careful construction matters more than the reveal photo.
Ask for a drawing that shows the basin, trap, shutoffs, and every drawer before cutting an antique dresser.
22. Use a Washstand-Style Vanity in a Cottage Bath
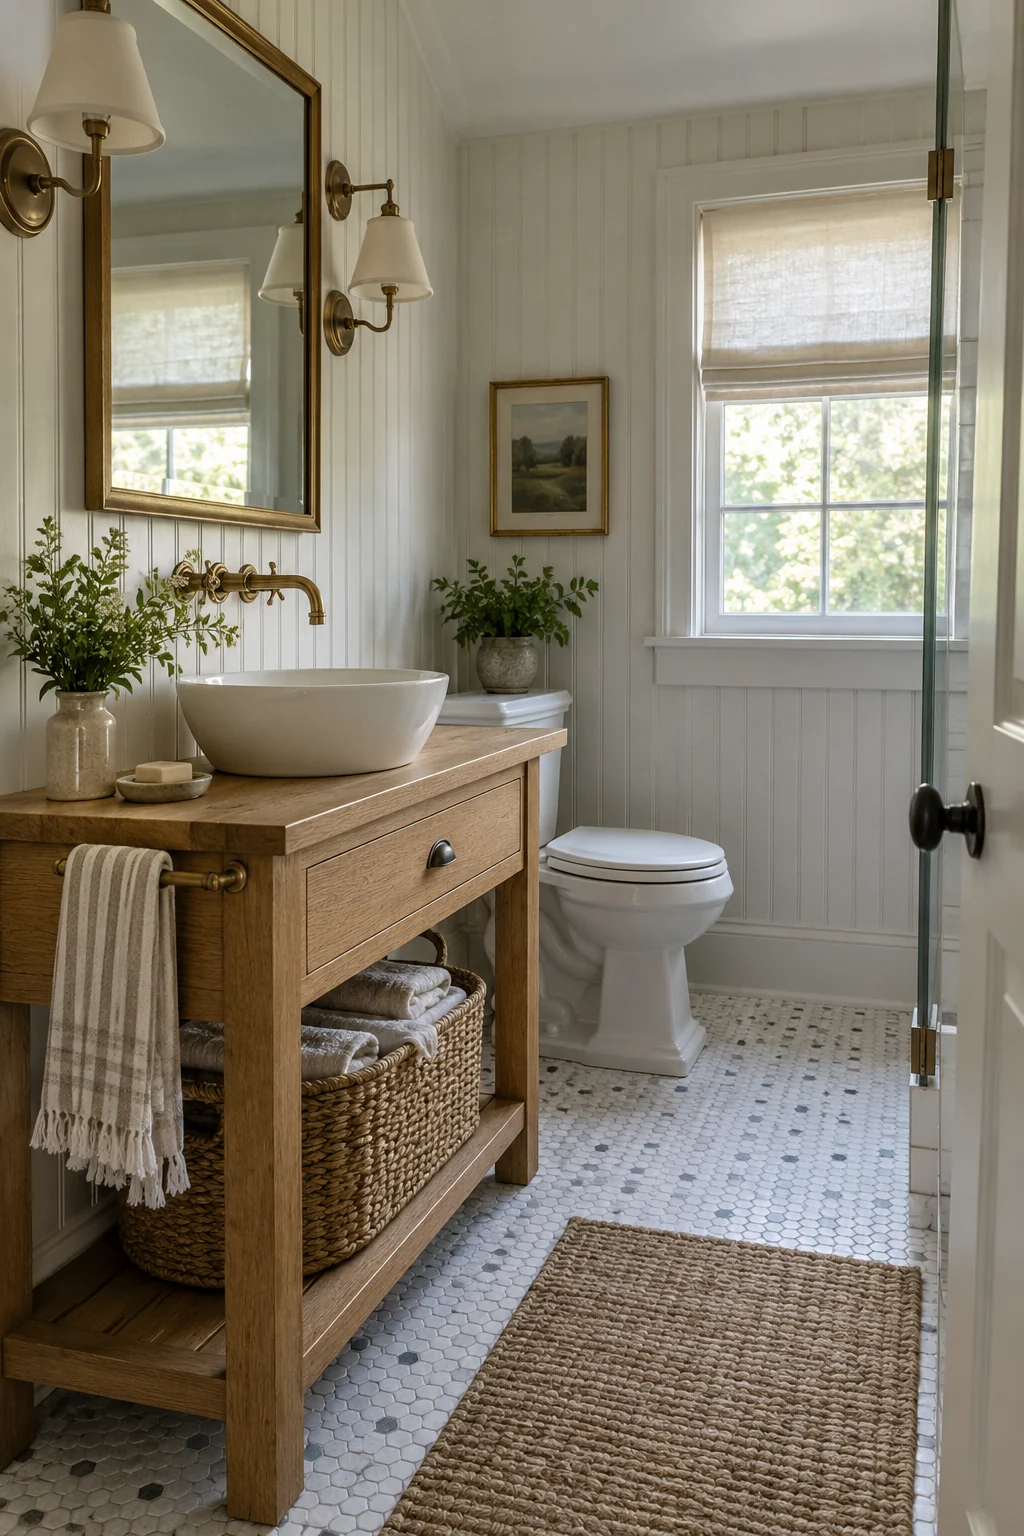
A freestanding oak washstand feels lighter than a full cabinet and supplies an open shelf for towels or baskets. It works best with one compact basin and a wall-mounted faucet.
Confirm the top is deep enough for the basin and that the faucet stream lands correctly. Leave space behind baskets so the drain, trap, and shutoffs remain visible for inspections.
Protect the wood with a bathroom-appropriate finish and wipe standing water immediately. Open storage looks relaxed only when it holds a limited, repeatable set of items.
23. Recess an Arched Medicine Cabinet
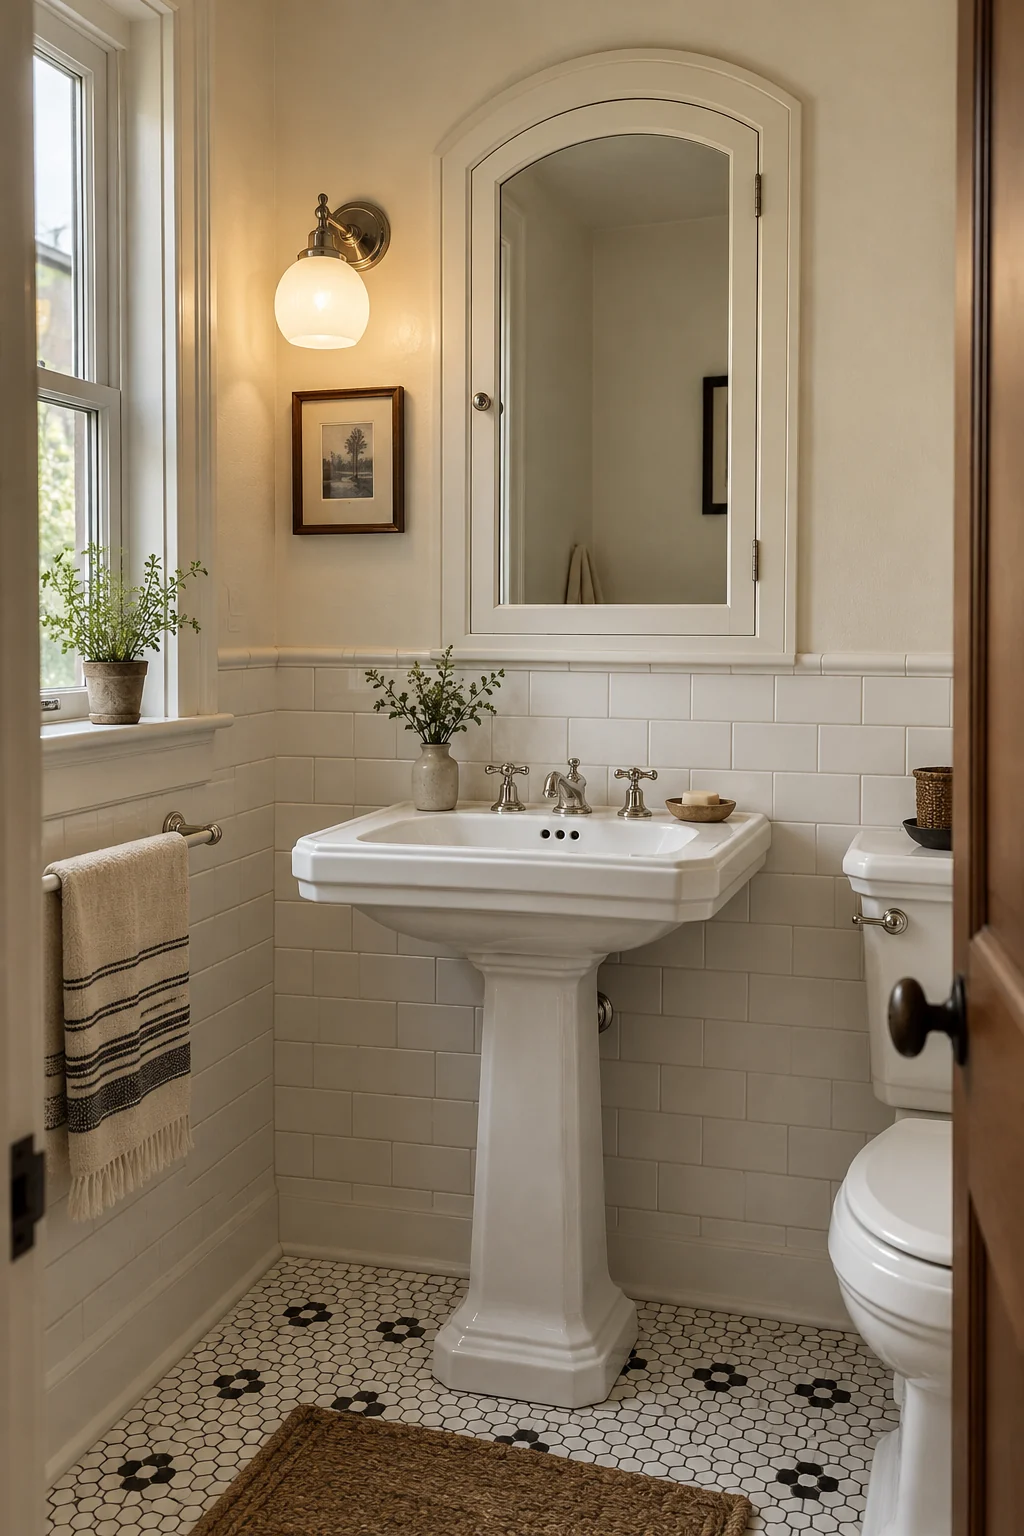
An arched medicine cabinet combines a vintage silhouette with storage hidden at eye level. It is especially useful above a pedestal sink, where every closed shelf matters.
Before cutting the wall, locate studs, wiring, plumbing, and vent lines. The cabinet depth and swing must suit the cavity, and the open door should not hit a nearby sconce.
Use adjustable shelves and reserve the lowest one for daily products. The surrounding trim should sit flat against the wall so steam and dust do not collect in deep decorative crevices.
24. Hang One Ornate Mirror Against Quiet Walls
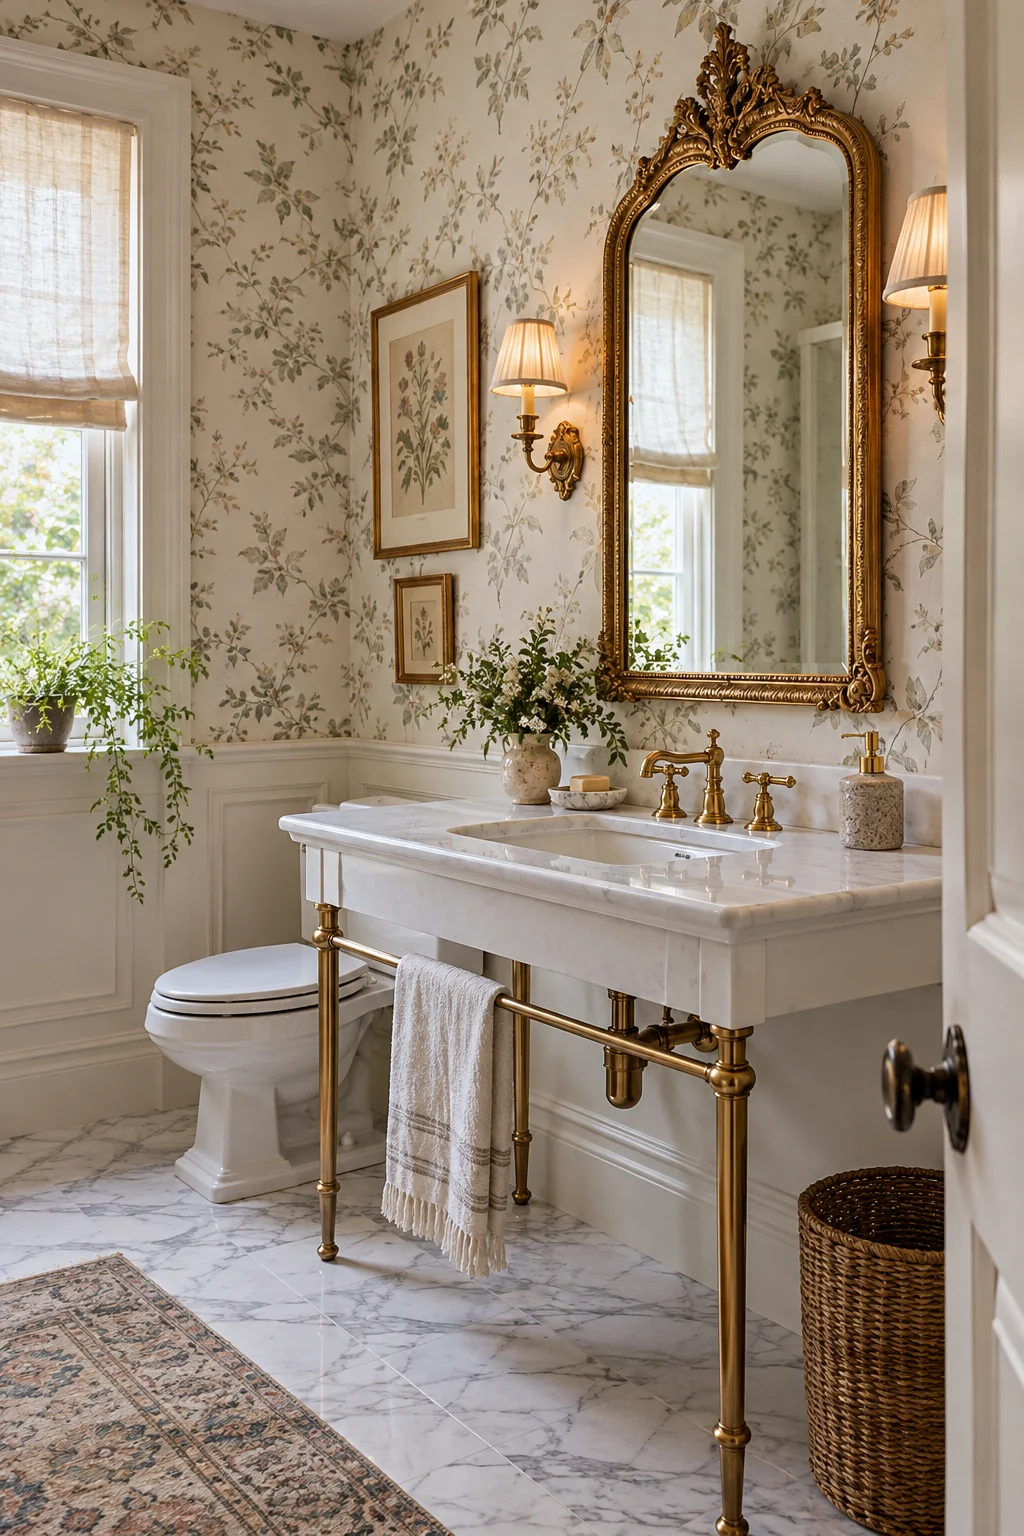
An ornate gold mirror can carry the romantic side of vintage style when the sink and surrounding finishes remain simple. Pale botanical wallpaper gives the frame context without requiring matching furniture.
Use hardware rated for the mirror’s weight and the wall construction. Hang it for the household’s actual sightlines, not just centered between sconces in a product photo.
More bathroom vanity mirror ideas can help compare arched, scalloped, and framed shapes. Keep only one highly detailed piece near the vanity.
25. Choose a Triptych Cabinet for Shared Routines
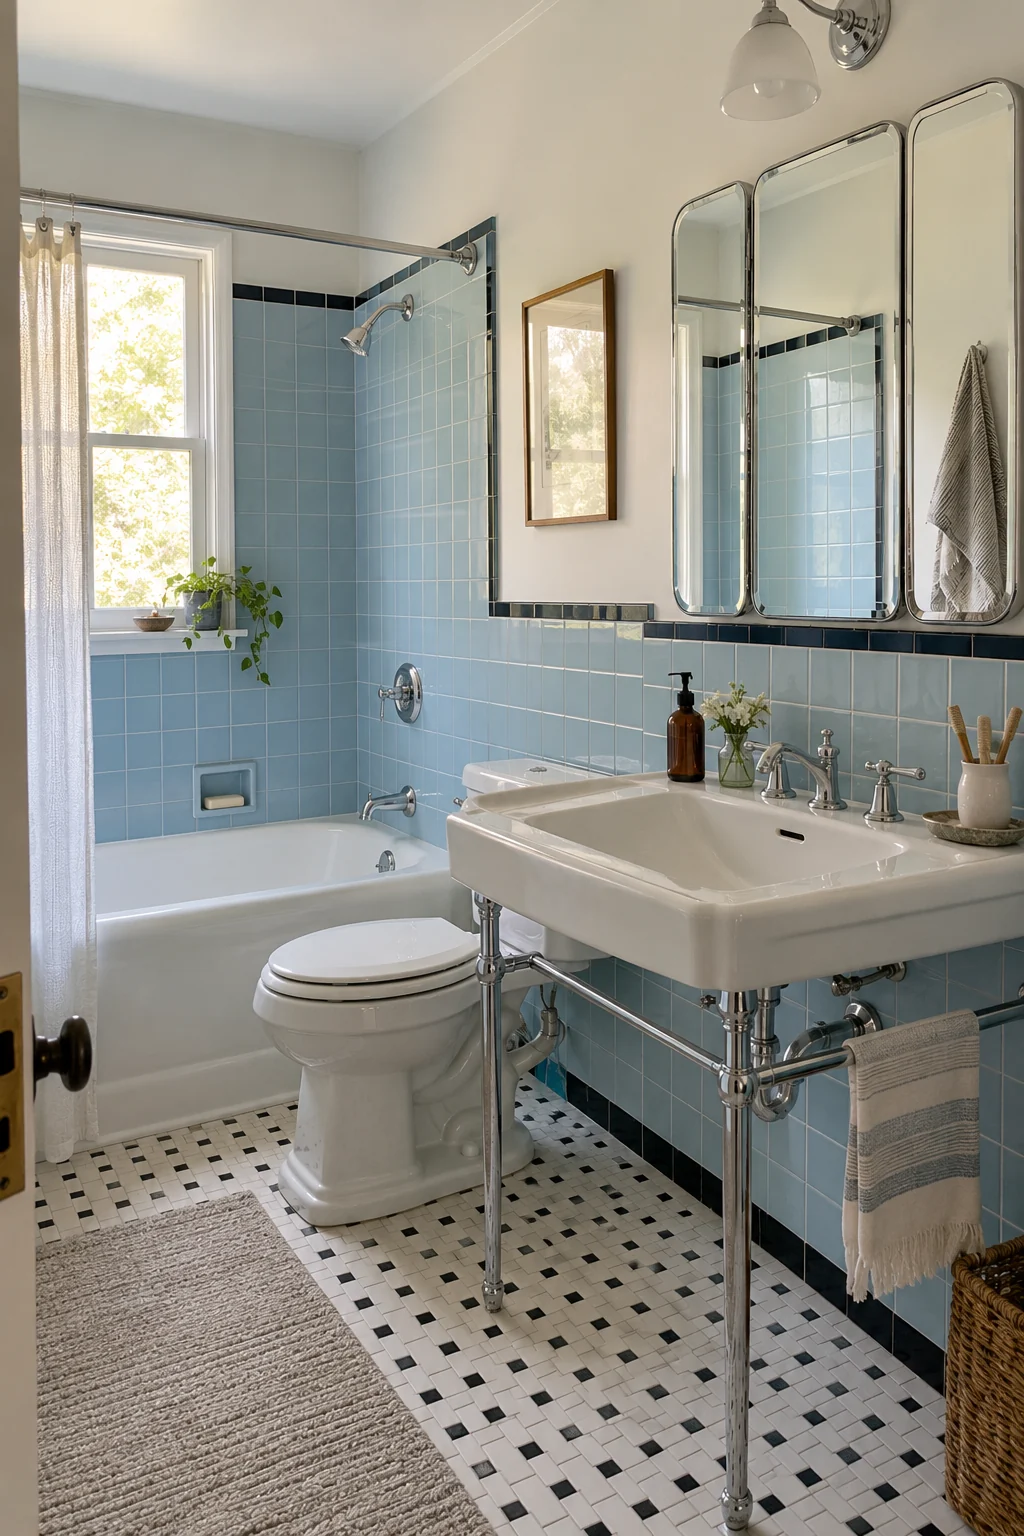
A three-panel mirrored cabinet nods to 1940s bathrooms and improves side views for grooming. It also offers more useful storage than a decorative mirror of the same width.
Check that both side panels open without hitting sconces or walls. Mount the cabinet so the center mirror serves the primary user while the doors remain comfortable to reach.
Keep electrical items away from water and follow local requirements for outlets. Divided trays inside the cabinet prevent small products from sliding when the mirrored doors move.
26. Mount a Glass Shelf With a Protective Rail
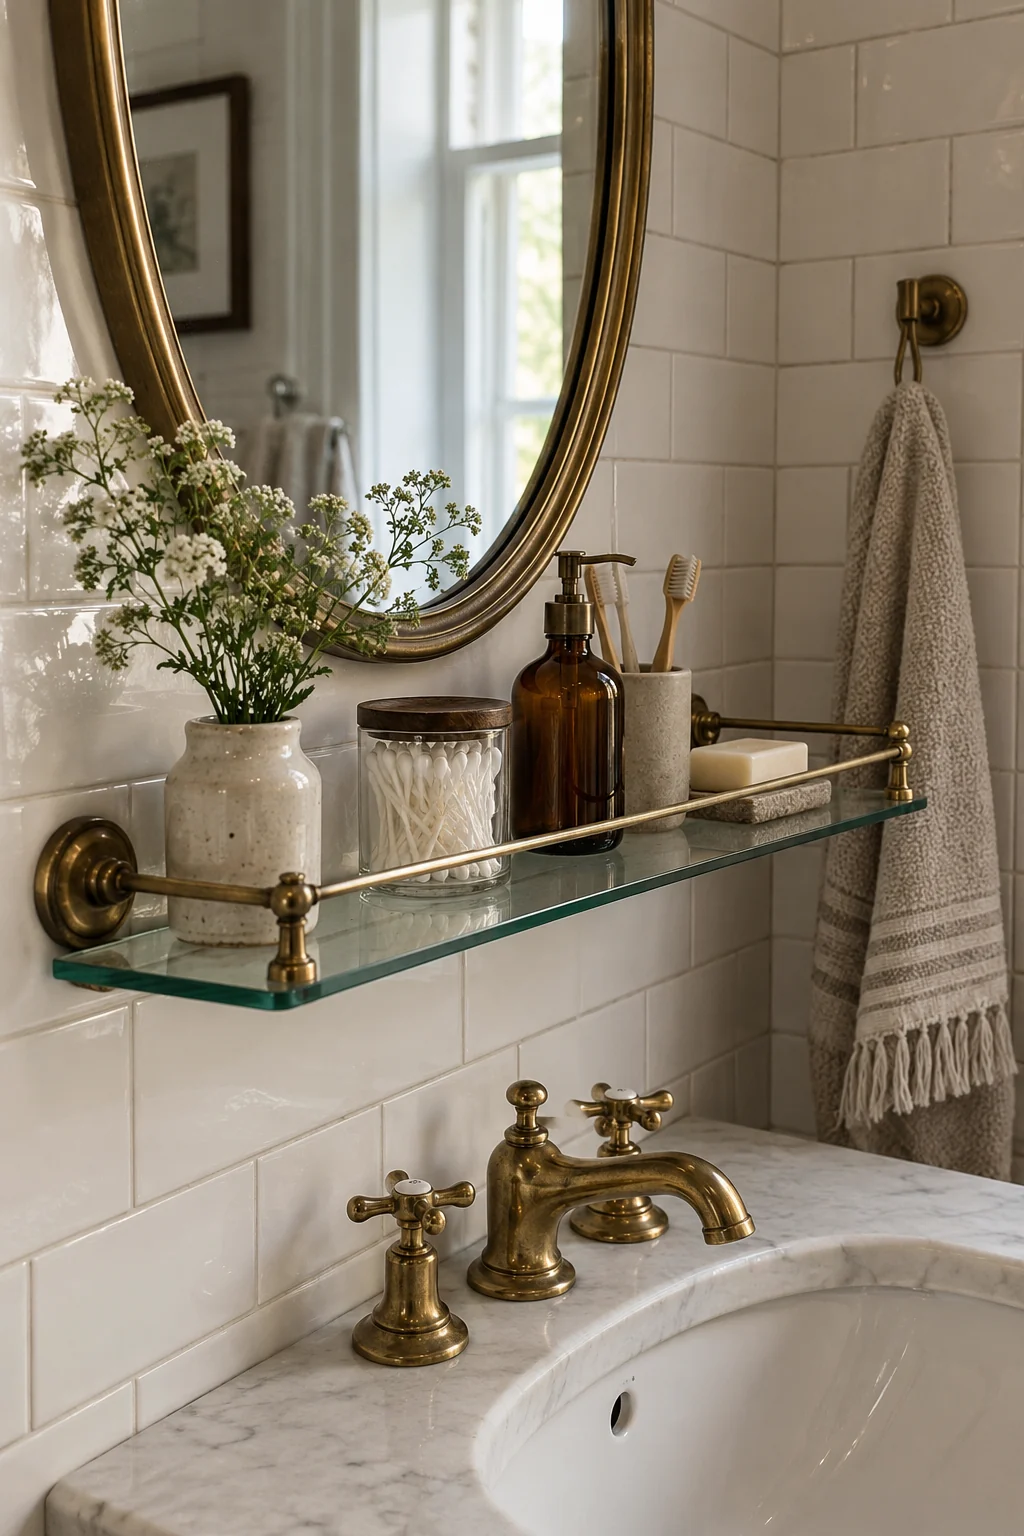
A tempered glass shelf with a brass rail adds vintage storage without visually closing a small wall. Place it near the sink for everyday soap and skincare, not over the toilet where objects can fall awkwardly.
Anchor the brackets to appropriate backing and follow the shelf’s rated load. Leave enough space above bottles to lift them out comfortably, and avoid crowding the mirror edge.
A few coordinated accessories can finish the area without filler. The options below were chosen for direct use at a vintage sink rather than as purely decorative props.
27. Build a Linen Cabinet Into an Empty Corner
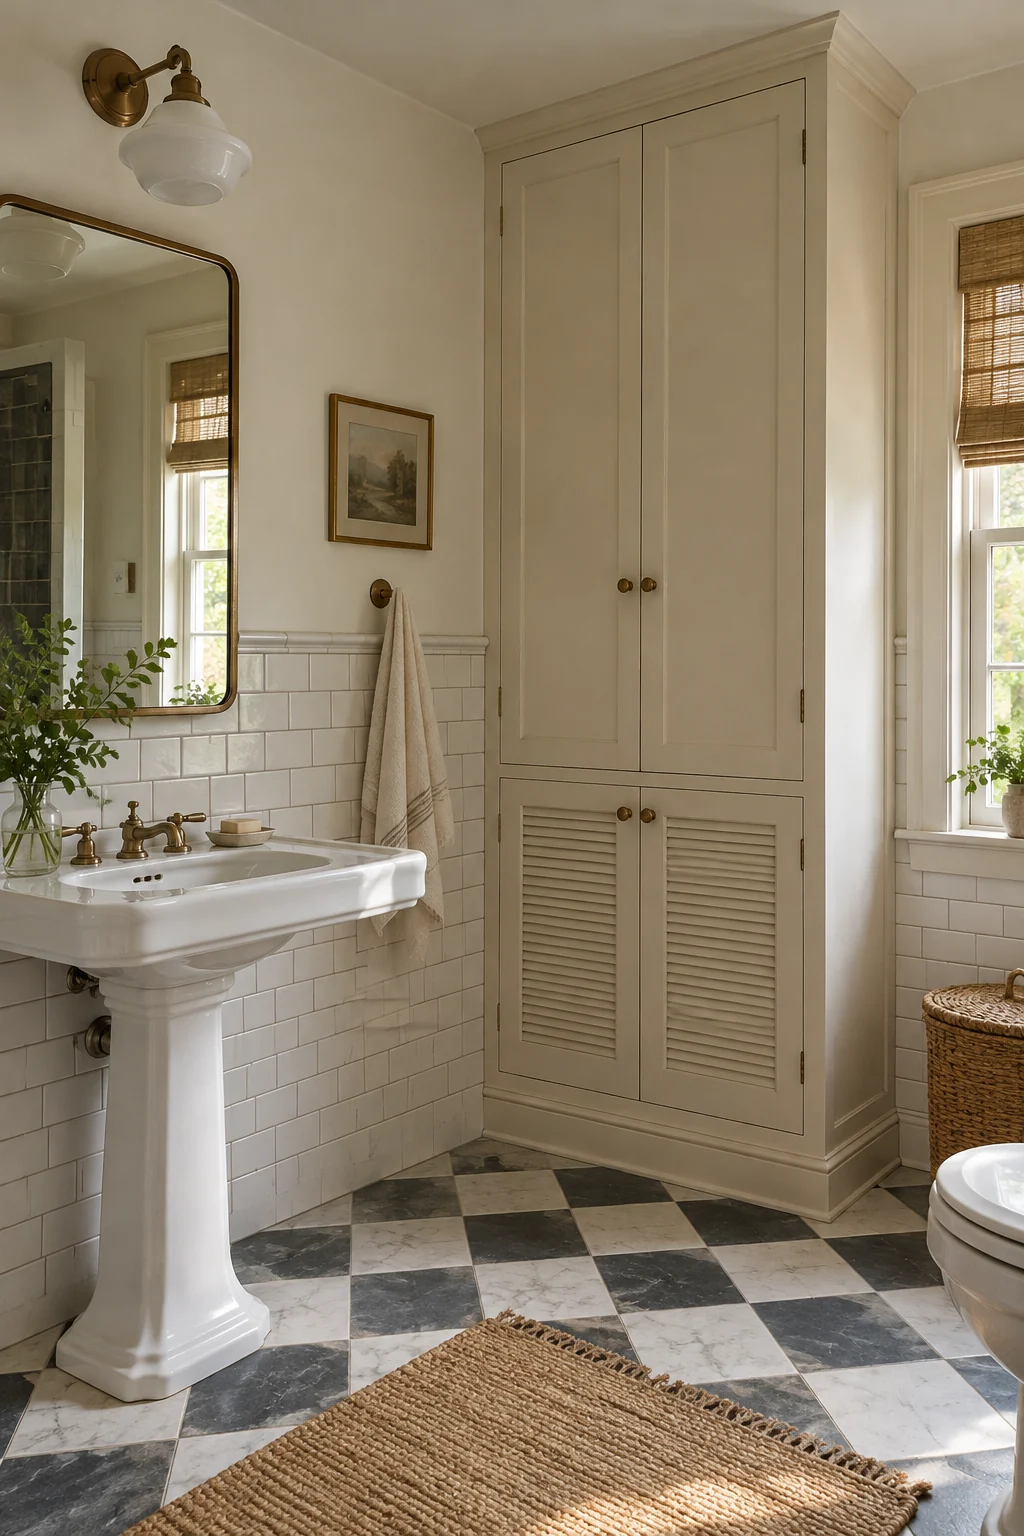
A floor-to-ceiling linen cabinet turns an awkward corner into closed storage while matching the permanence of a vintage room. Cream paint keeps the tall mass quieter than stained wood.
Use shallow shelves for toiletries and deeper lower storage for towels. Doors need enough swing to clear the sink, toilet, and trim, and vented panels help air circulate around textiles.
Store cleaning products separately from personal items and keep heavy backups low. More small bathroom storage ideas can help plan the interior before cabinet construction begins.
- Keep daily items on shallow upper shelves.
- Store heavy backups low.
- Leave door swings and service access clear.
28. Frame a Shower Niche Like Vintage Millwork
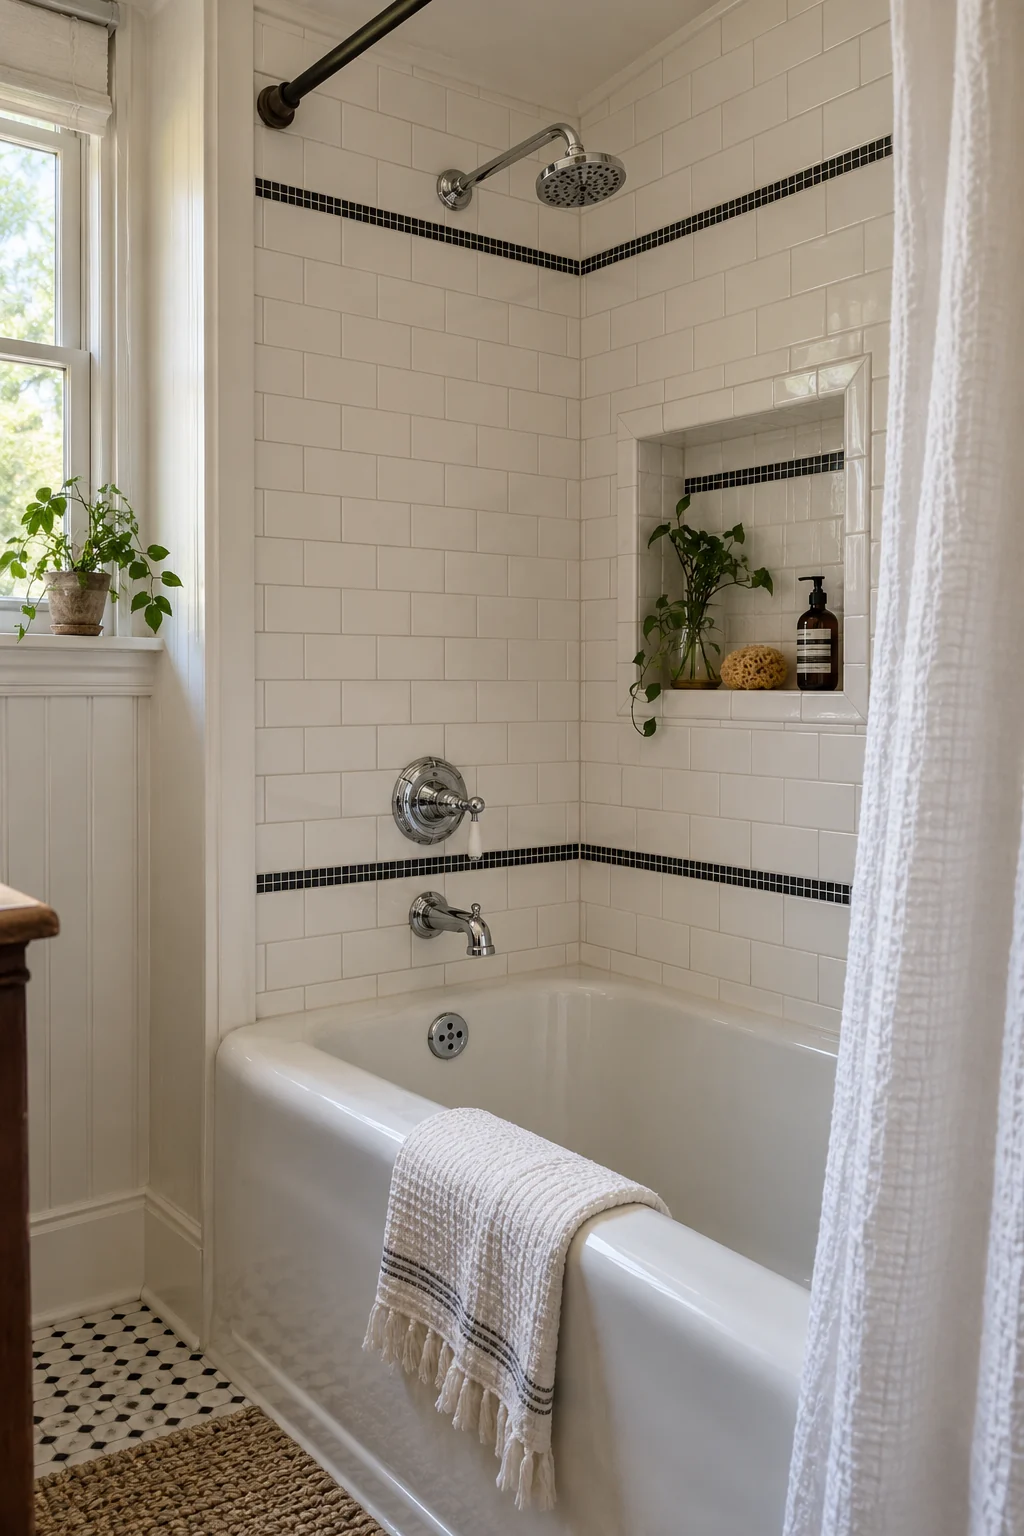
A recessed niche becomes part of the period design when bullnose tile and a narrow mosaic line frame it neatly. Keep the field tile simple so the trim reads clearly.
The niche must be integrated into the waterproofing system and its base should slope toward the shower. Position it around the products you use, but avoid cutting structural members without an approved framing plan.
Use one generous shelf instead of many tiny ledges. Fewer grout joints are easier to clean, and tall bottles will not look jammed beneath an overly low divider.
The trim is decorative; the continuous waterproof assembly behind the niche is what protects the wall.
29. Hide a Wall Sink With a Tailored Skirt
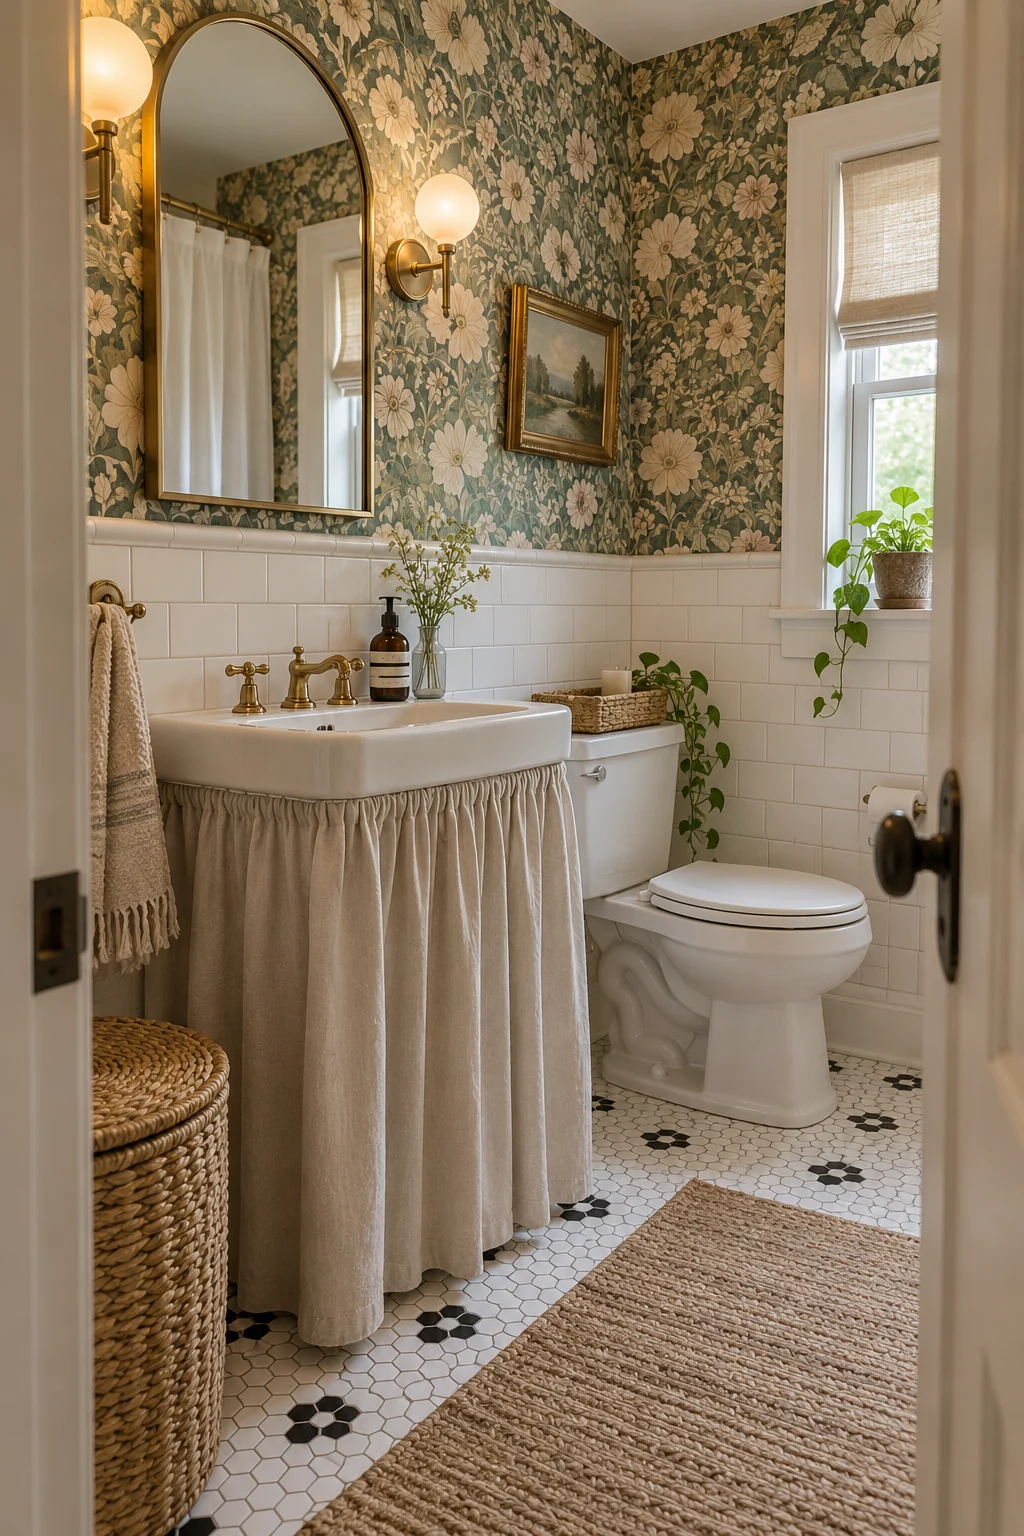
A washable sink skirt gives a renter-friendly bathroom softness and conceals modest storage beneath a wall basin. A tailored pleat looks cleaner than heavy gathering in a small room.
Use removable tension or hook-and-loop hardware only where it cannot interfere with plumbing or ventilation. The fabric should stop above the floor so it can dry and avoid collecting dust.
Keep leak-prone products out from under the sink and inspect the trap regularly. A skirt hides visual clutter, but it must never hide maintenance problems.
30. Add a Narrow Freestanding Étagère
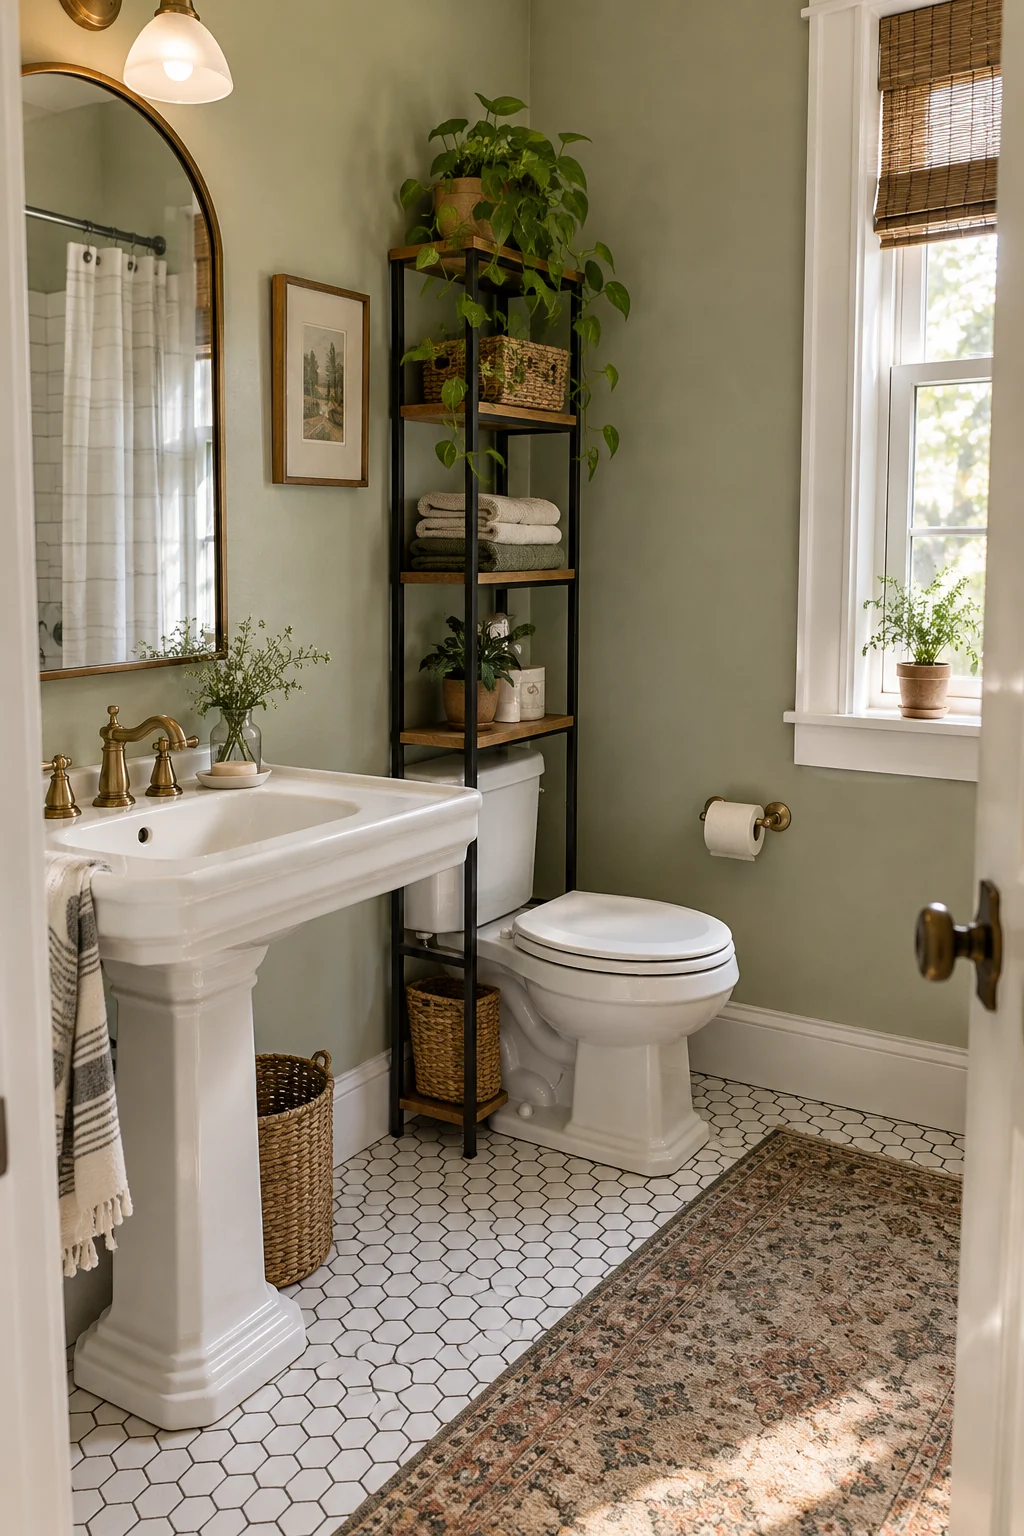
A slim metal-and-wood étagère supplies vertical storage without altering tile or cabinetry. It suits rentals and older bathrooms where built-ins would erase useful character.
Measure the toilet zone, door swing, and outlet locations before buying. A tall unit should be anchored with an approved anti-tip method, even when its footprint feels stable.
Use baskets for small products and leave the upper shelf mostly open. Too many decorative bottles make the fixture harder to dust and can turn useful storage into visual noise.
Layer Light, Windows, and Color
Good lighting and privacy make the decorative choices livable. Keep electrical and glazing requirements current while borrowing shapes, colors, and materials from older rooms.
31. Flank the Mirror With Milk-Glass Sconces
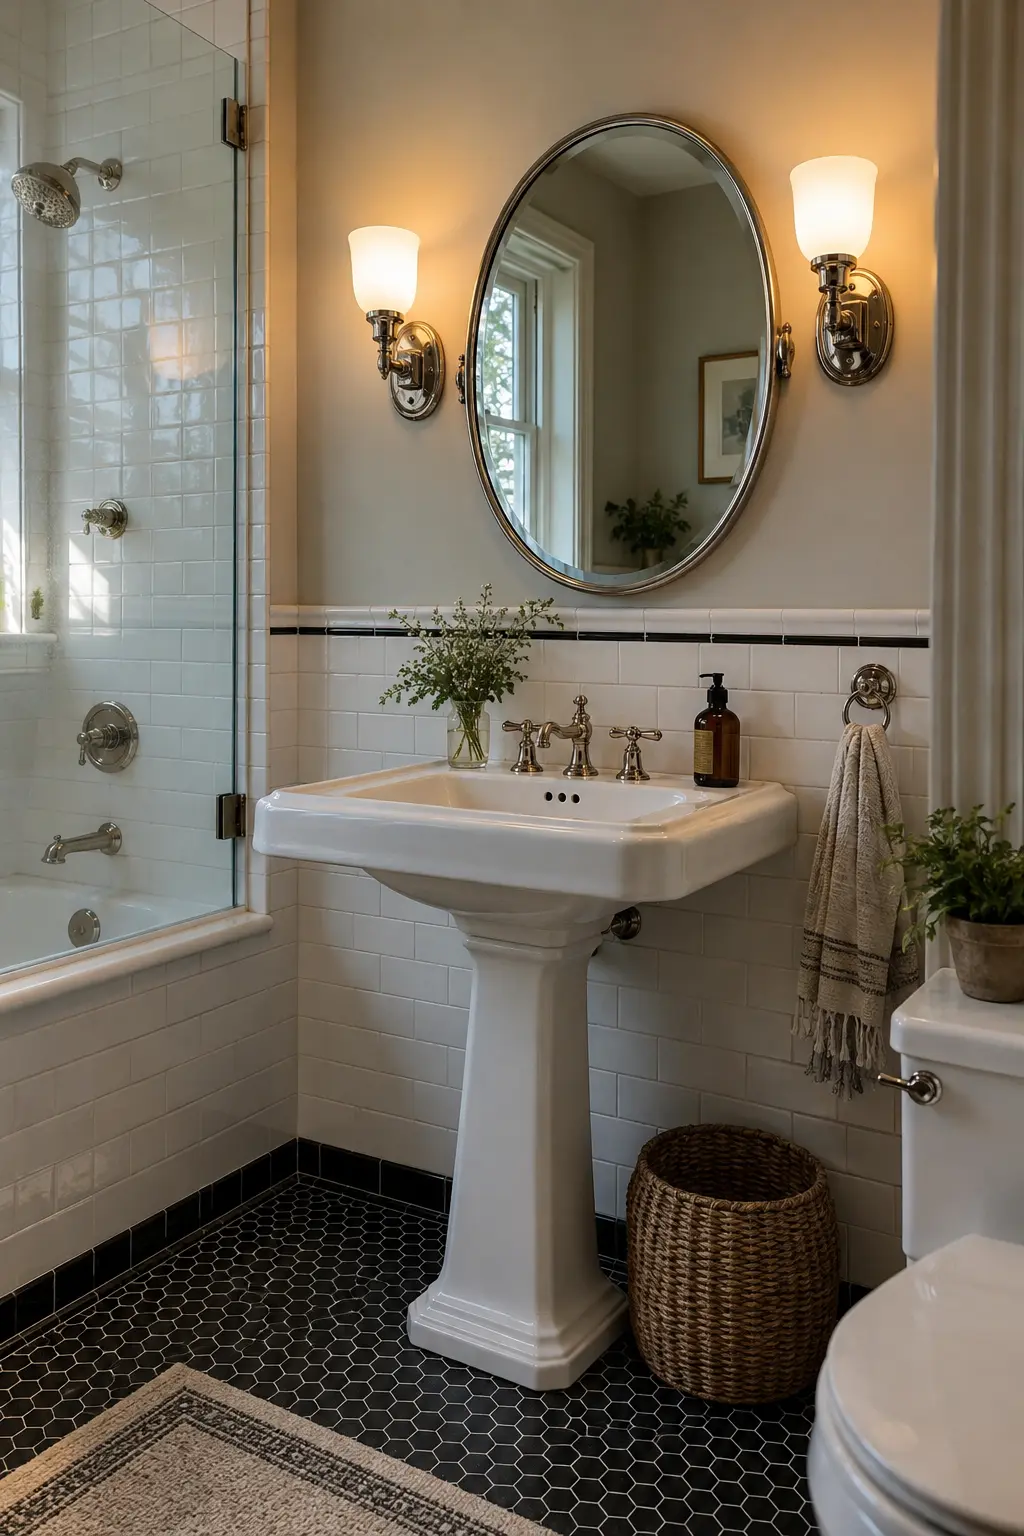
Milk-glass sconces soften light and bring a convincing period shape to a simple vanity. Placing one on each side of the mirror reduces shadows more effectively than a single fixture overhead.
Have an electrician confirm box locations, damp-location ratings, and safe distance from water. Mounting height should suit the users’ faces rather than following a universal number blindly.
Choose high color-rendering bulbs in the same temperature throughout the room. These guest bathroom ideas offer more ways to combine flattering task light with a welcoming, useful layout.
- Use damp-rated fixtures where required.
- Place light near face height.
- Match bulb color temperature across the room.
32. Use a Schoolhouse Light for General Illumination
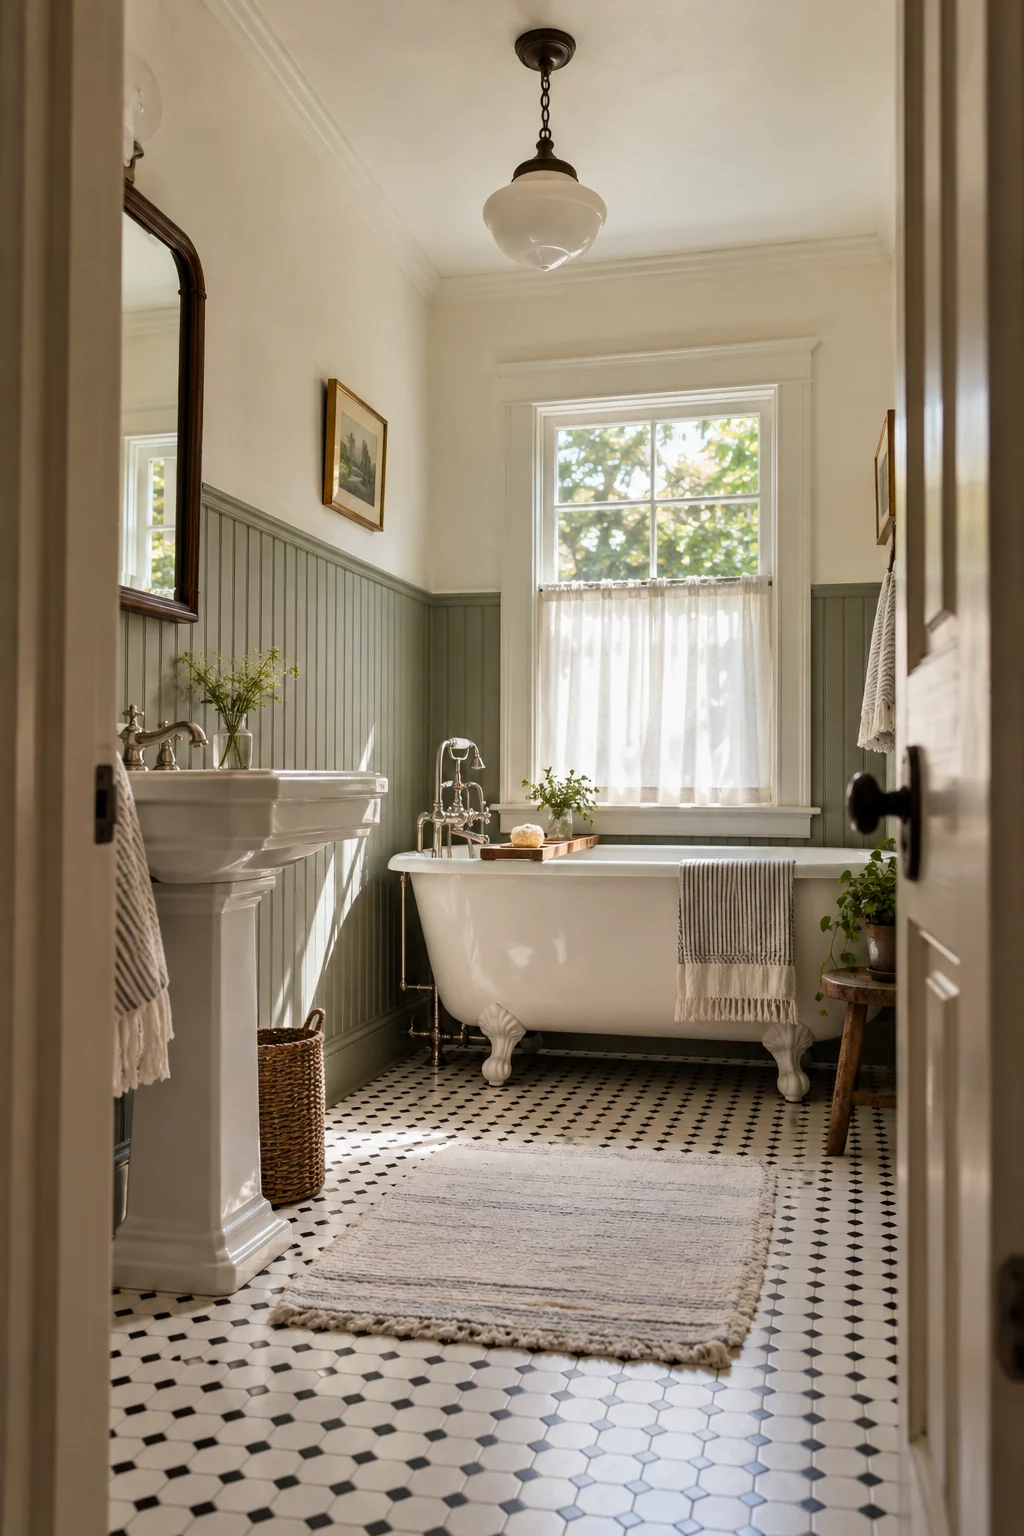
A schoolhouse globe gives the ceiling a familiar vintage profile and spreads soft general light. It works especially well with beadboard, a clawfoot tub, and black-and-white mosaics.
Select a fixture rated for the bathroom location and keep it outside restricted wet zones. Confirm ceiling height so the globe does not feel low above normal circulation.
Pair it with dedicated vanity lighting; one decorative ceiling light rarely gives enough facial illumination. A dimmer can soften the room at night when compatible lamps and controls are used.
33. Repeat Curves With Opal-Globe Sconces
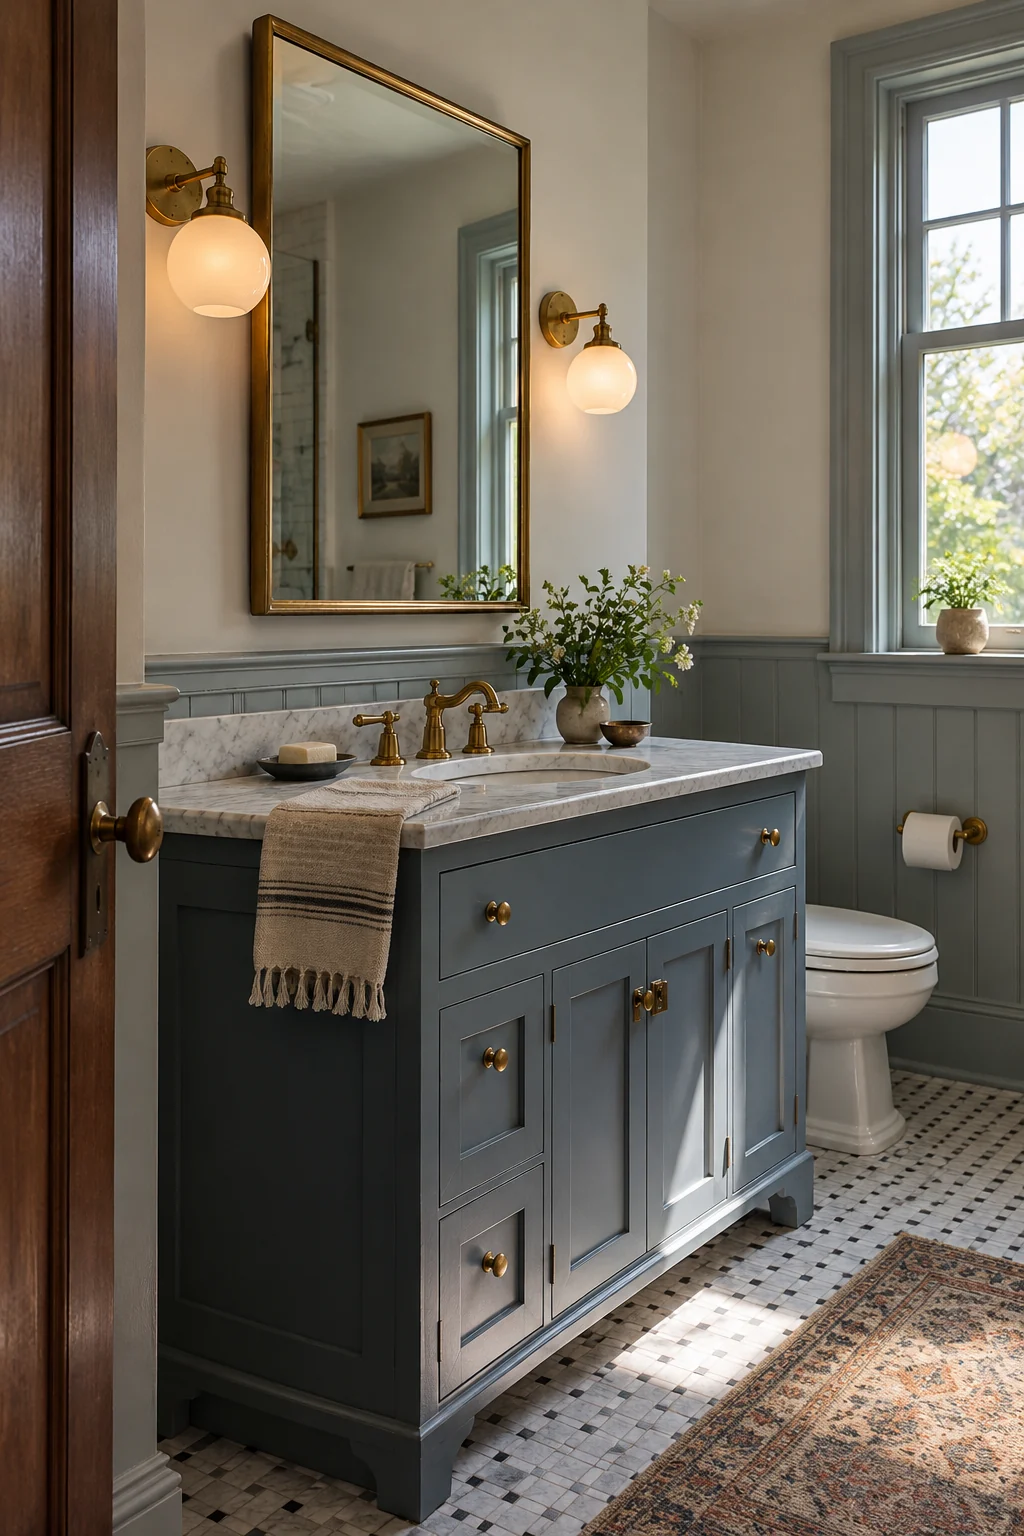
Small opal globes echo round mirrors, faucet arcs, and traditional cabinet knobs without copying them exactly. Against a muted blue vanity, the white glass keeps the room fresh.
Leave clear space between shade edges and mirror trim so cleaning remains easy. Side-mounted lights should illuminate the face evenly and avoid glare directly in the mirror.
Use restrained brass or nickel arms rather than highly ornate castings. The globes already provide a strong silhouette, and simpler hardware is easier to coordinate with replacement fixtures later.
34. Give Bathroom Art a Dedicated Picture Light
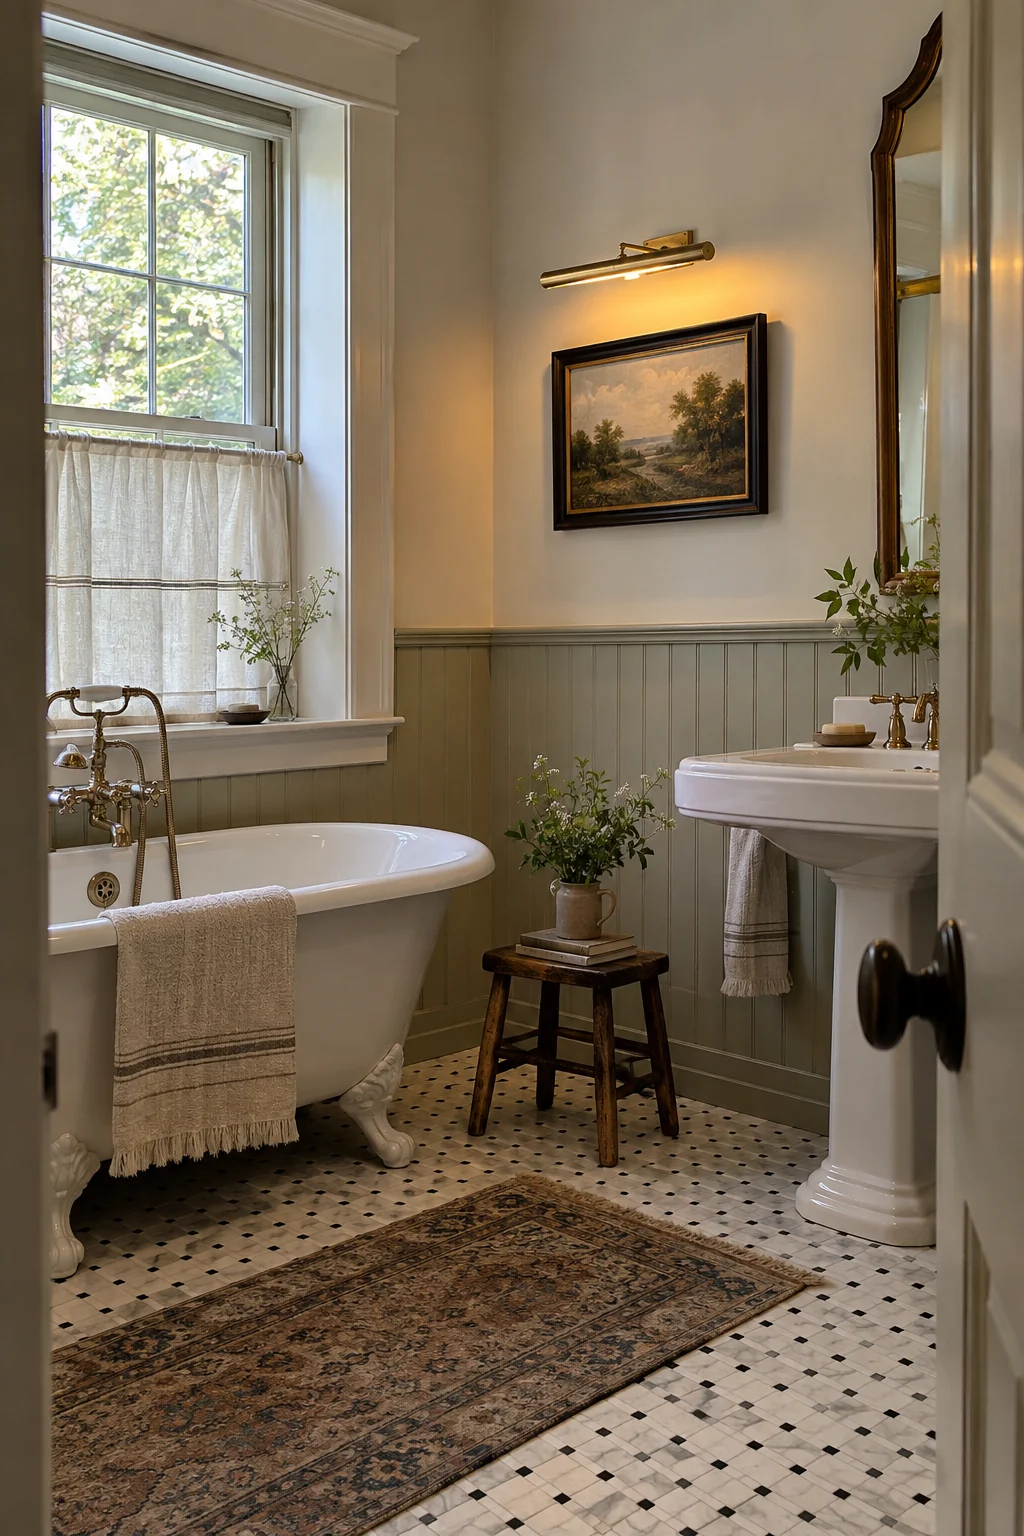
A slim picture light makes one small landscape feel intentional in a collected bathroom. Place the artwork on a dry wall beside the tub or vanity, never where direct spray or constant condensation can damage it.
Use a damp-appropriate fixture and professional wiring where required. The light should wash the art rather than produce a bright hotspot on glass.
Frame inexpensive prints behind suitable glazing if humidity is a concern. Valuable or irreplaceable paper belongs elsewhere, even when the wall seems protected.
35. Keep an Original Leaded-Glass Window
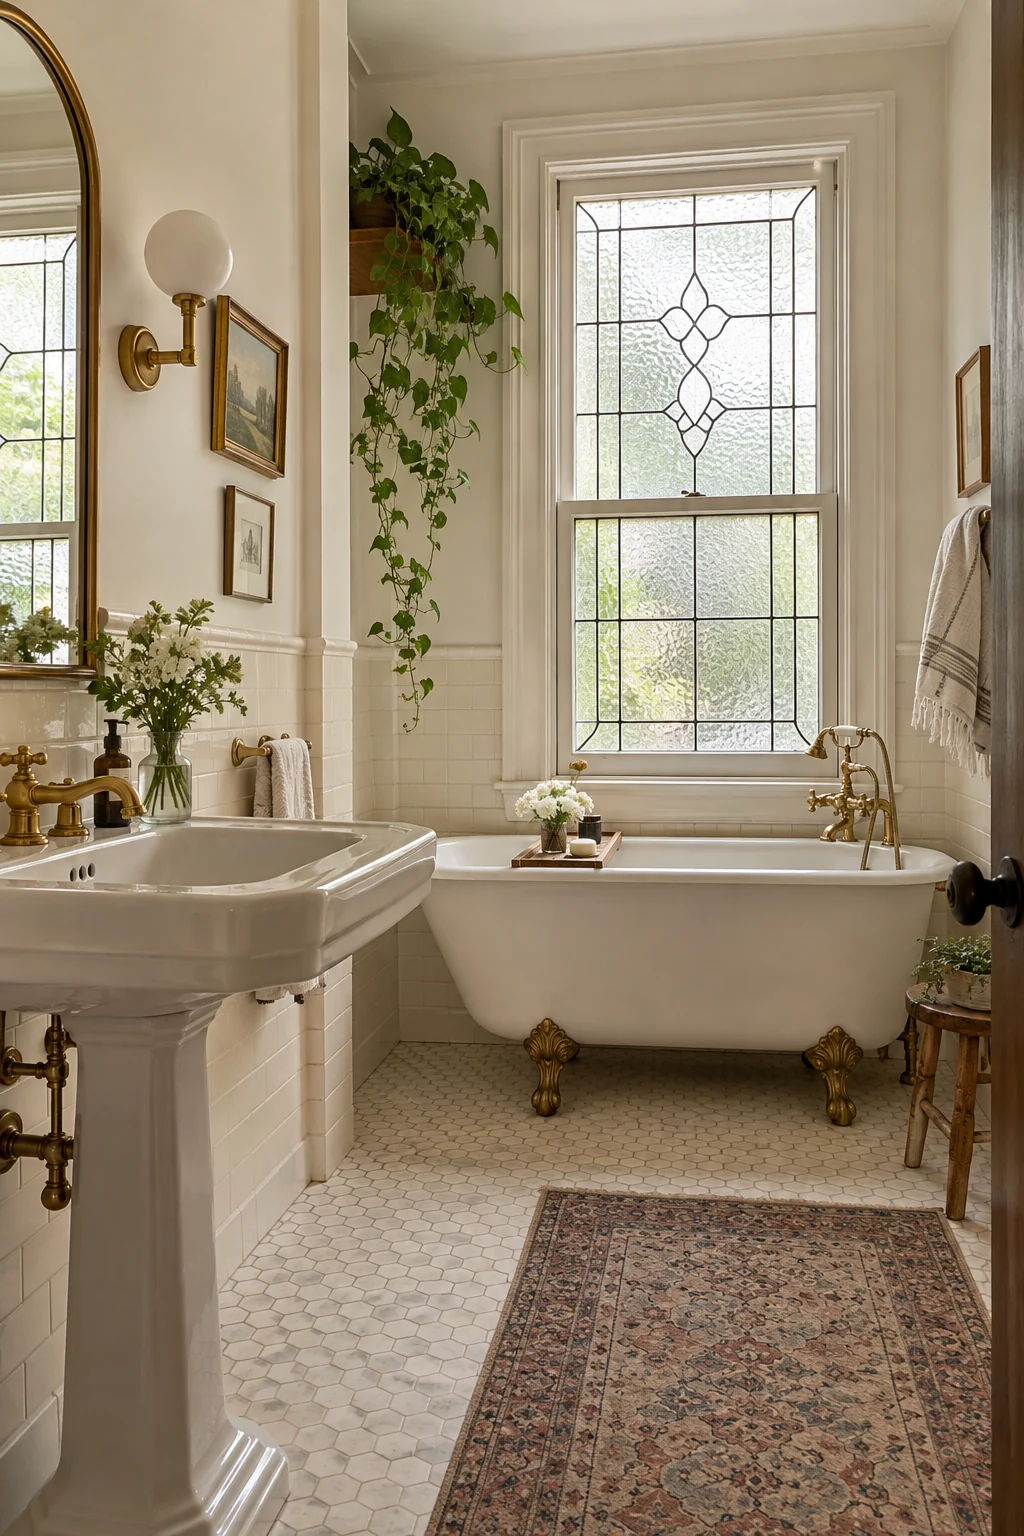
Leaded privacy glass brings pattern and daylight at the same time, making it valuable in a vintage bathroom. A simple tub and white tile let the window remain the main decorative element.
Have old glazing, sash condition, and lead safety assessed before repair. Add a discreet interior storm panel or secondary privacy layer only if it preserves ventilation and access.
If the window sits near water, confirm local safety-glazing requirements and protect the frame. Historic appearance never overrides safe glass, sound seals, or correct wet-zone detailing.
Historic glass near a tub or shower may need a code-compliant protective solution even when it appears intact.
36. Use Linen Café Curtains in a Dry Zone
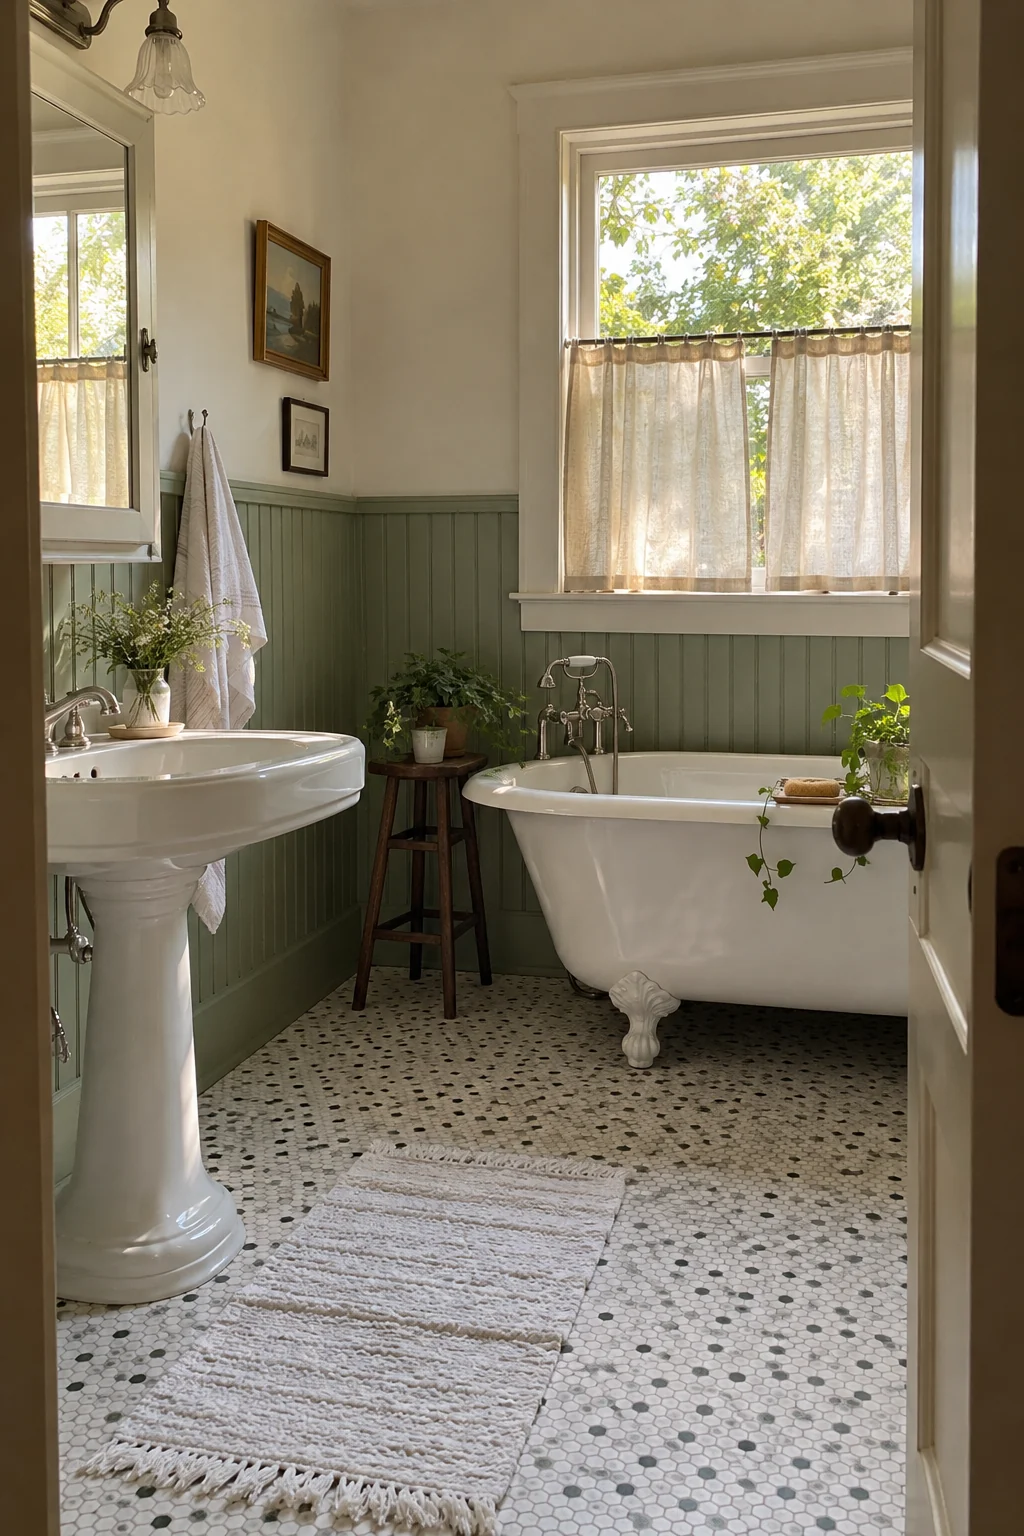
Café curtains cover the lower sash for privacy while leaving the upper glass open to daylight. Natural linen looks relaxed beside a clawfoot tub and painted beadboard.
Keep fabric outside direct spray and choose a washable, quick-drying blend if humidity is high. Test privacy after dark with the bathroom lights on, not only in daytime.
These bathroom window curtain ideas include more moisture-aware treatments. A tension rod can be renter-friendly when the frame is sturdy and the fit is secure.
- Test privacy at night.
- Keep fabric out of direct spray.
- Wash and dry panels regularly.
37. Color the Room With a Stained-Glass Transom
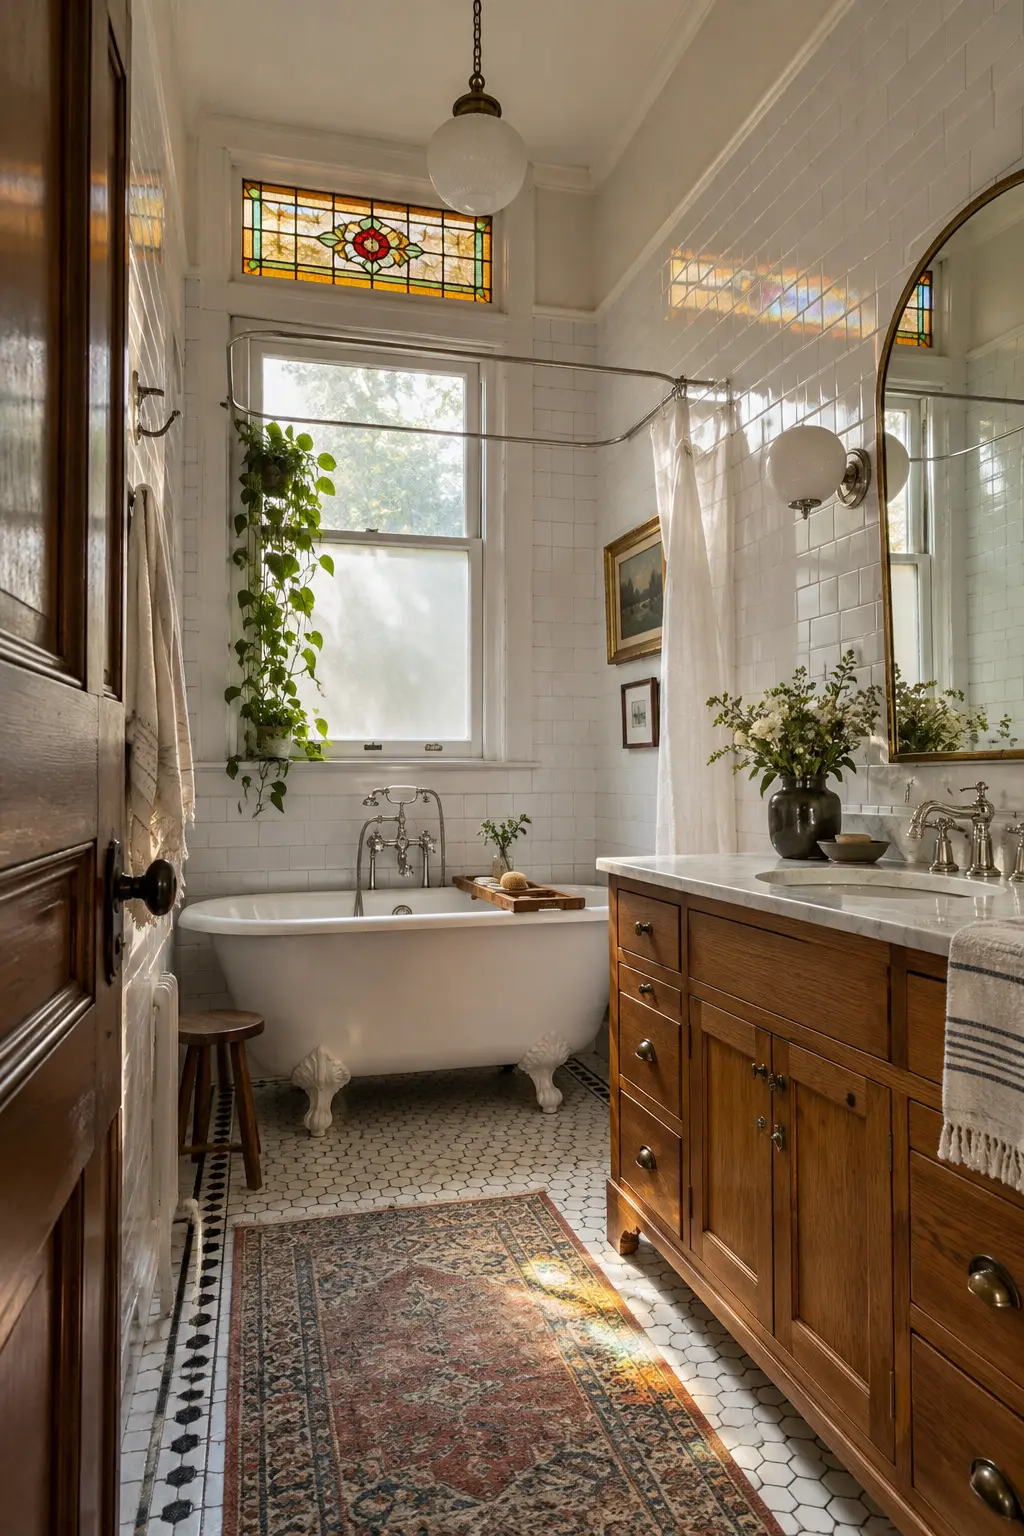
A small stained-glass transom above the door introduces vintage color without sacrificing wall space. Daylight borrowed from the adjoining hall can make a windowless bath feel less enclosed.
Use safety-appropriate glass and a frame designed for the opening. A transom should not interfere with exhaust, privacy, door hardware, or required fire separation.
Pull only one or two colors from the glass into towels or art. Repeating every jewel tone makes the room feel themed rather than collected.
38. Paint the Ceiling a Soft Blush
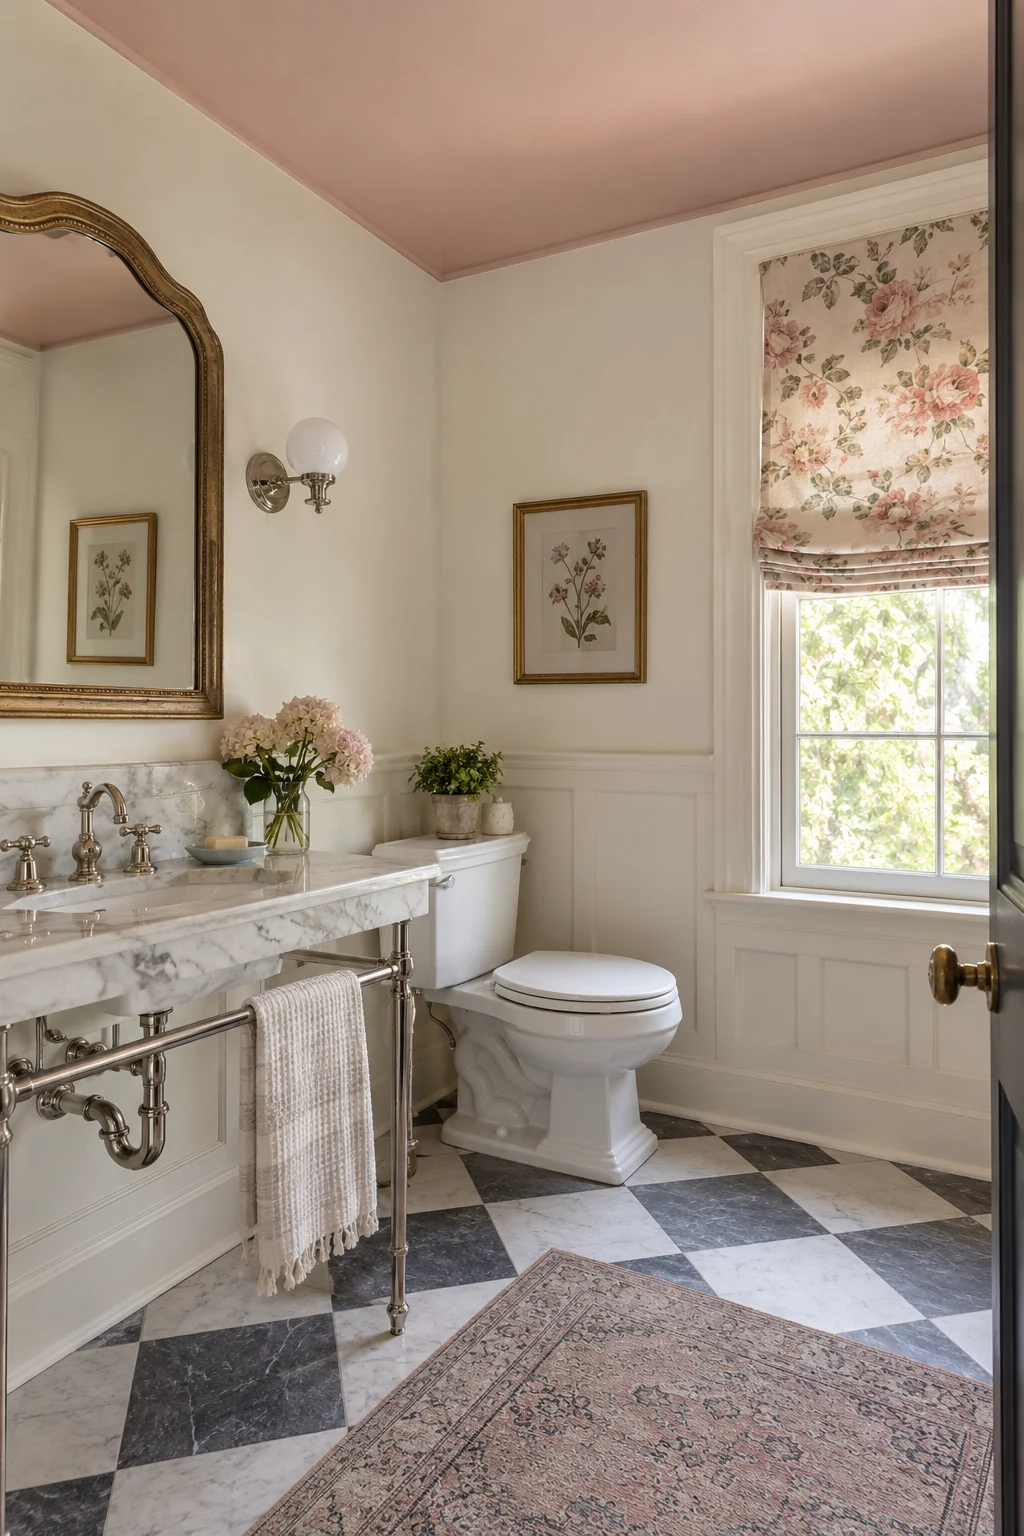
A pale blush ceiling warms a white vintage bathroom and draws attention to molding without darkening the walls. It works beautifully with polished nickel, marble, and a restrained floral shade.
Test the color beside the installed lighting; pink can intensify under warm bulbs. Use a bathroom-rated finish and prepare any peeling areas before adding paint.
Keep the floor pattern simple so the colored ceiling has room to register. This is a high-impact budget update because it changes the atmosphere without replacing fixed materials.
39. Go Moody With Aubergine Walls
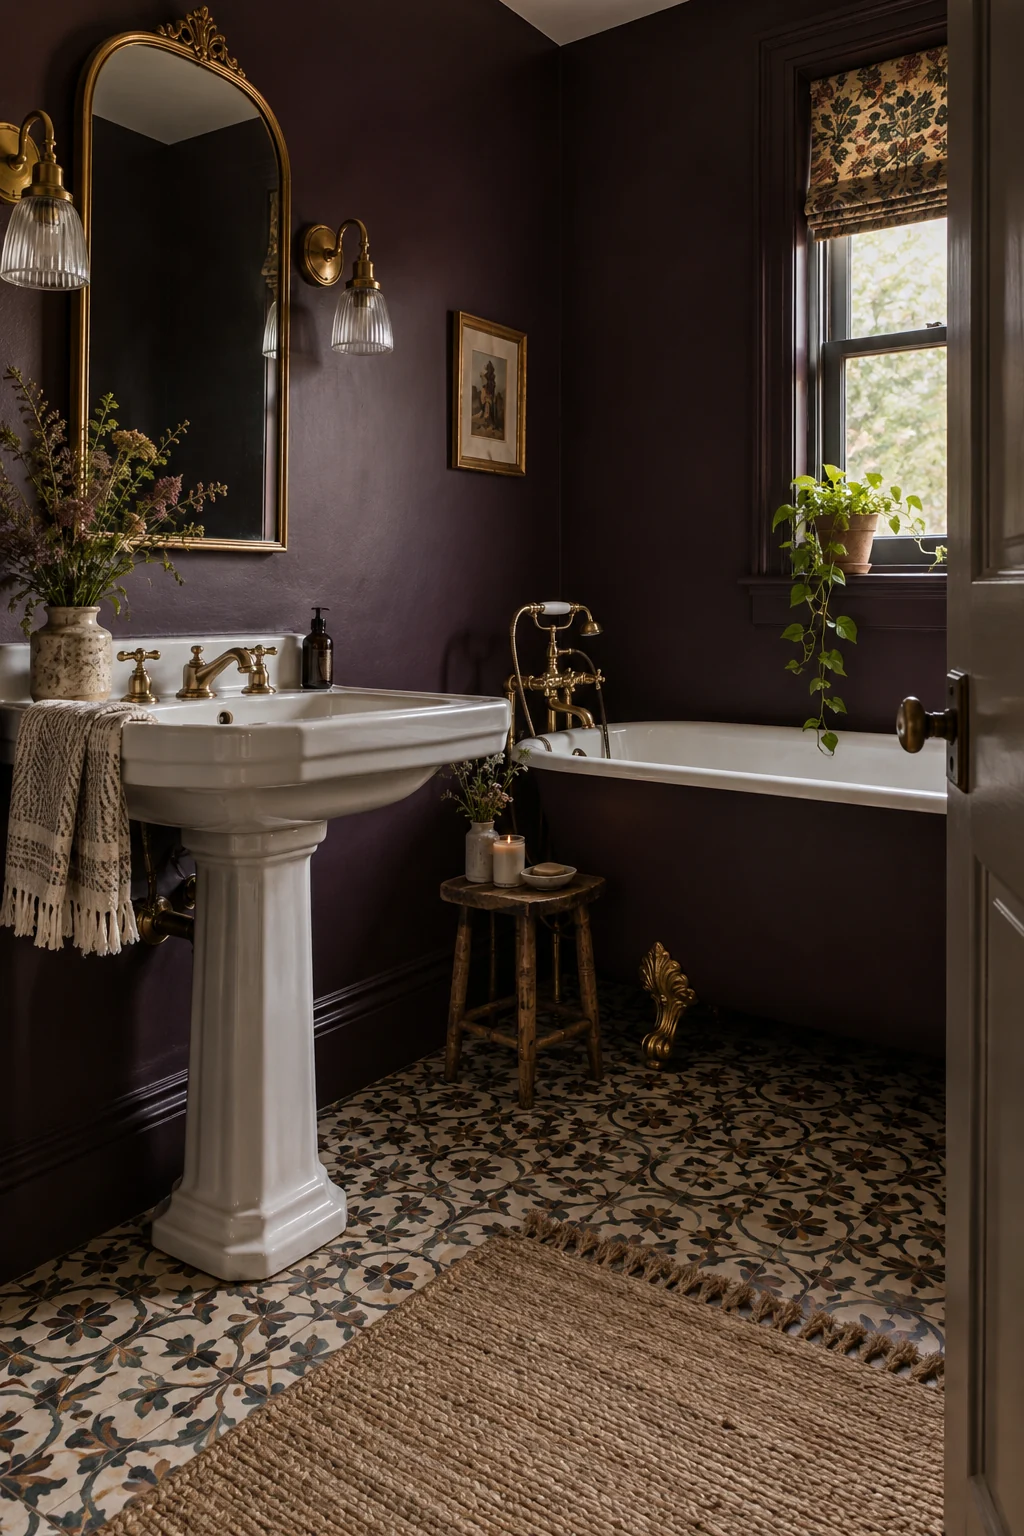
Deep aubergine walls make white porcelain and aged brass glow in a Victorian-inspired bathroom. The color feels more layered than black while still delivering drama.
Use the shade above tile or in a well-ventilated powder room, and keep the ceiling lighter. Sample it in the darkest corner to ensure the undertone remains rich rather than muddy.
Add several useful light sources and choose washable paint. Dark walls reveal lint and water spotting, so the room needs realistic maintenance rather than a purely photographic plan.
40. Choose Pale Sage for Cottage Calm
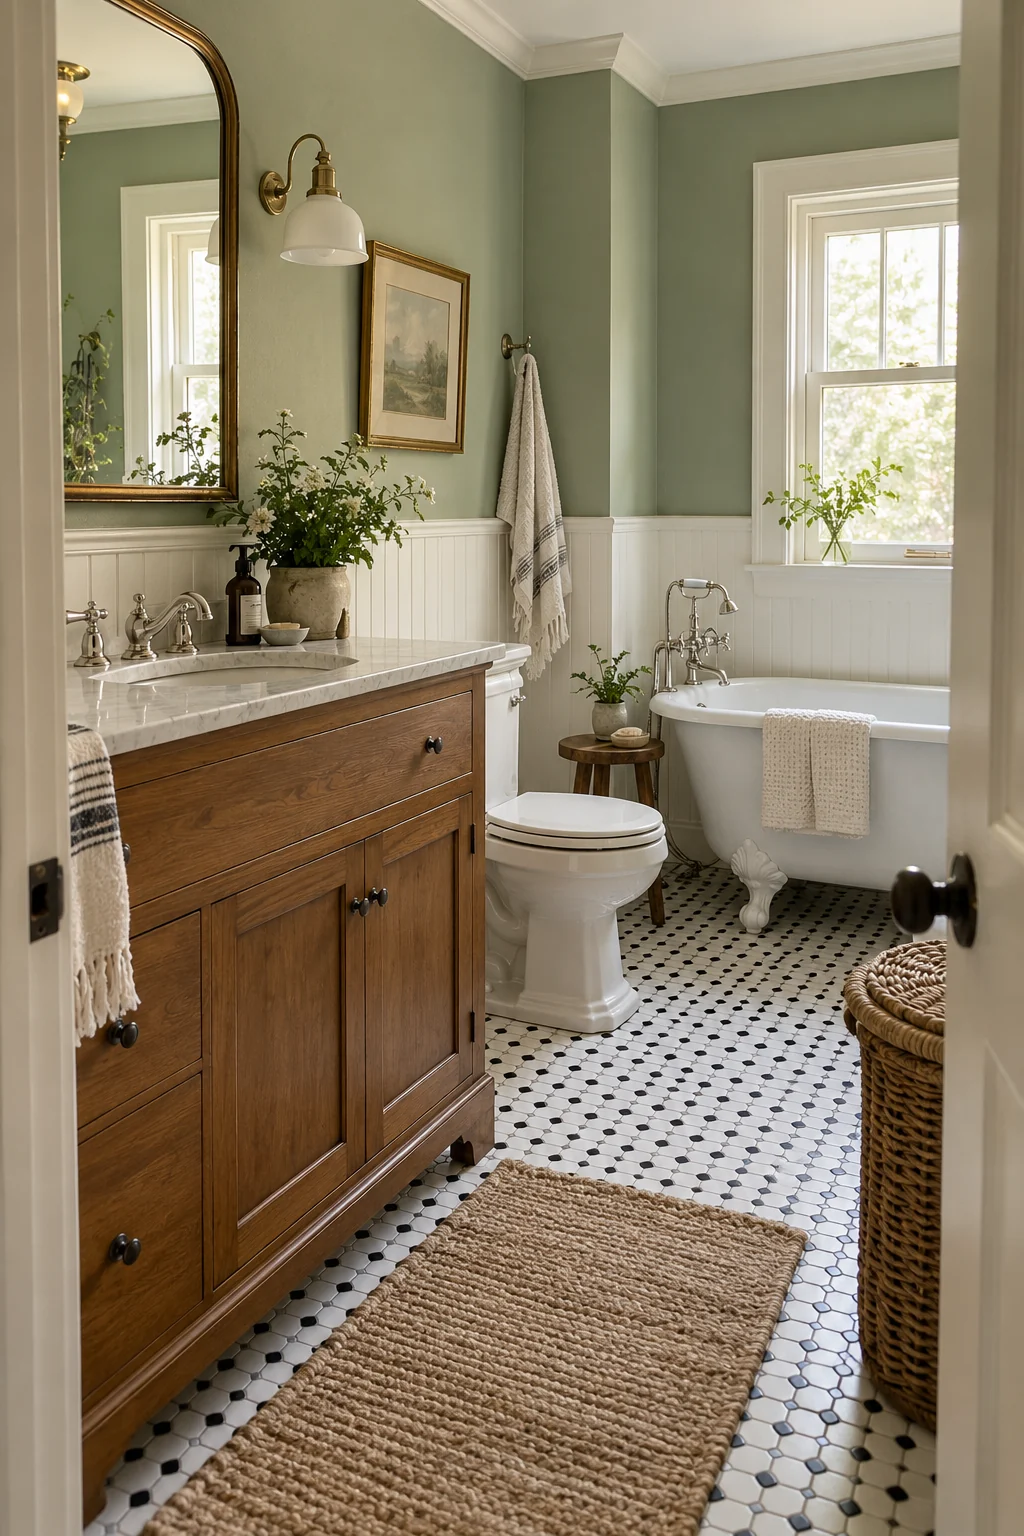
Pale sage connects white beadboard, warm wood, and nickel fixtures without forcing a strict theme. It is forgiving in older rooms where trim and porcelain are not identical shades of white.
Compare samples beside the floor and vanity during morning and evening. A gray-green usually feels quieter than a bright botanical green in a small bath.
Repeat the color only once in a towel or botanical print. Too much coordinated sage can flatten the mix of old finishes that gives a vintage room its character.
Finish With Practical Vintage Details
Small objects can complete the story, but function still comes first. Choose details that are washable, stable, moisture-aware, and easy to remove when needs change.
41. Arrange a Small Botanical Gallery
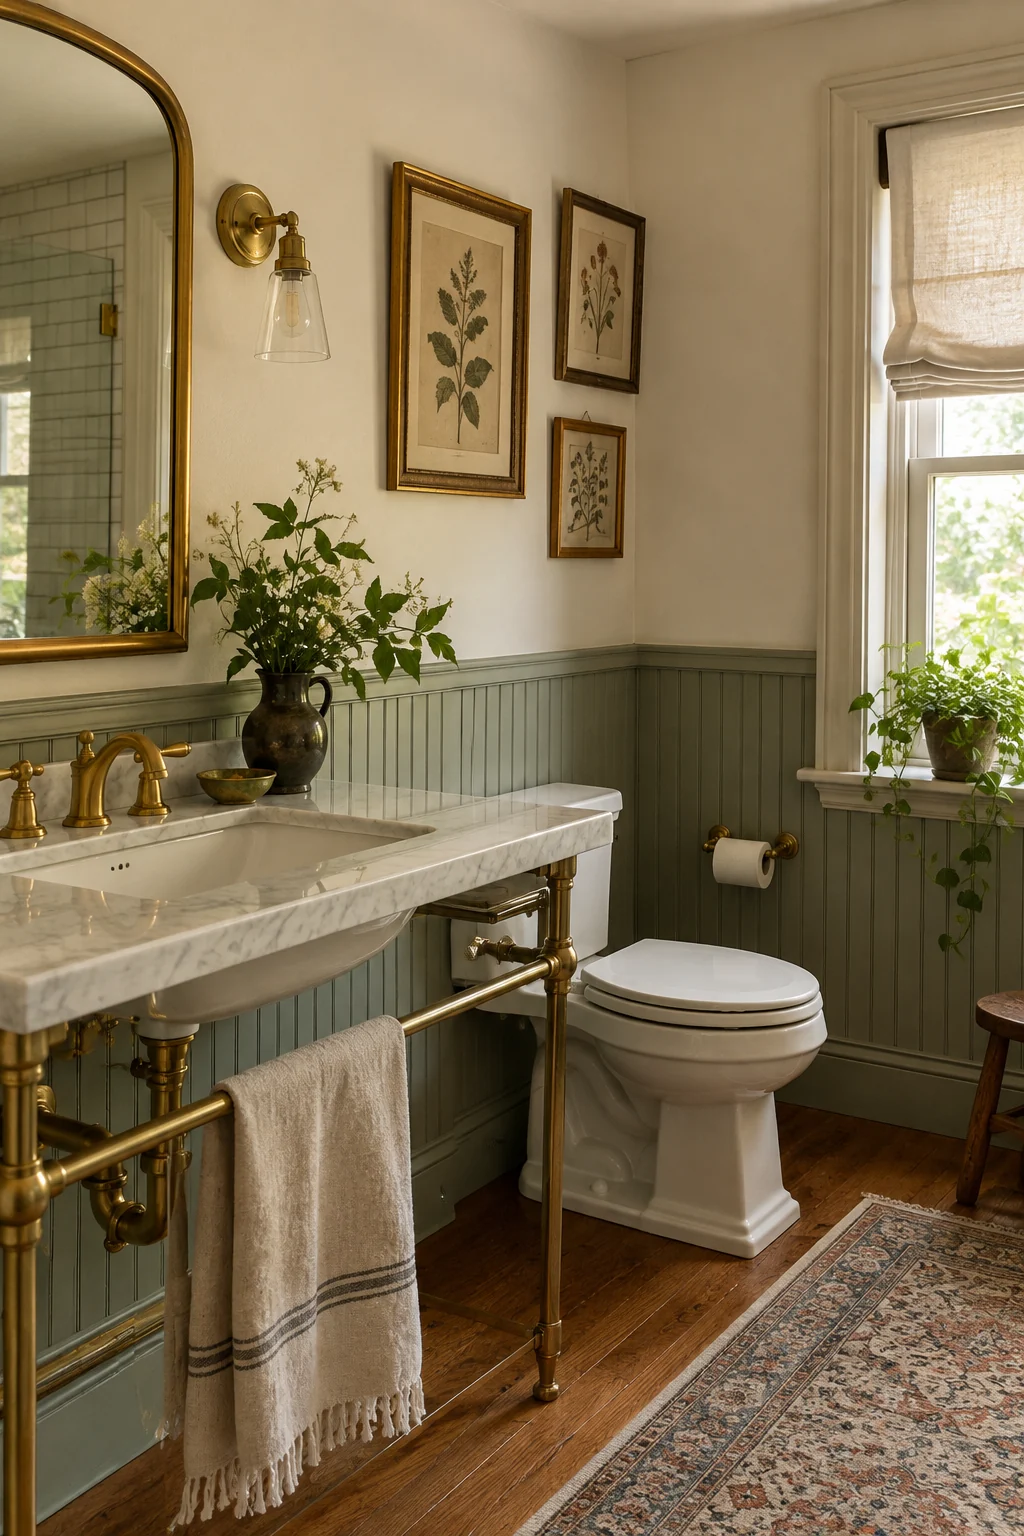
Three modest botanical prints can add history to a dry bathroom wall without overwhelming it. Mismatched wood and brass frames feel collected when the mats share a related warm tone.
Keep the group above beadboard and away from splash zones. Use secure hanging hardware and leave enough room to remove each frame for cleaning.
Choose reproduction or replaceable art in humid rooms. Valuable paper, photographs, and unstable pigments should not be exposed to repeated steam.
- Use replaceable prints.
- Keep frames outside splash zones.
- Hang every piece securely.
42. Use Apothecary Jars Only for Everyday Items
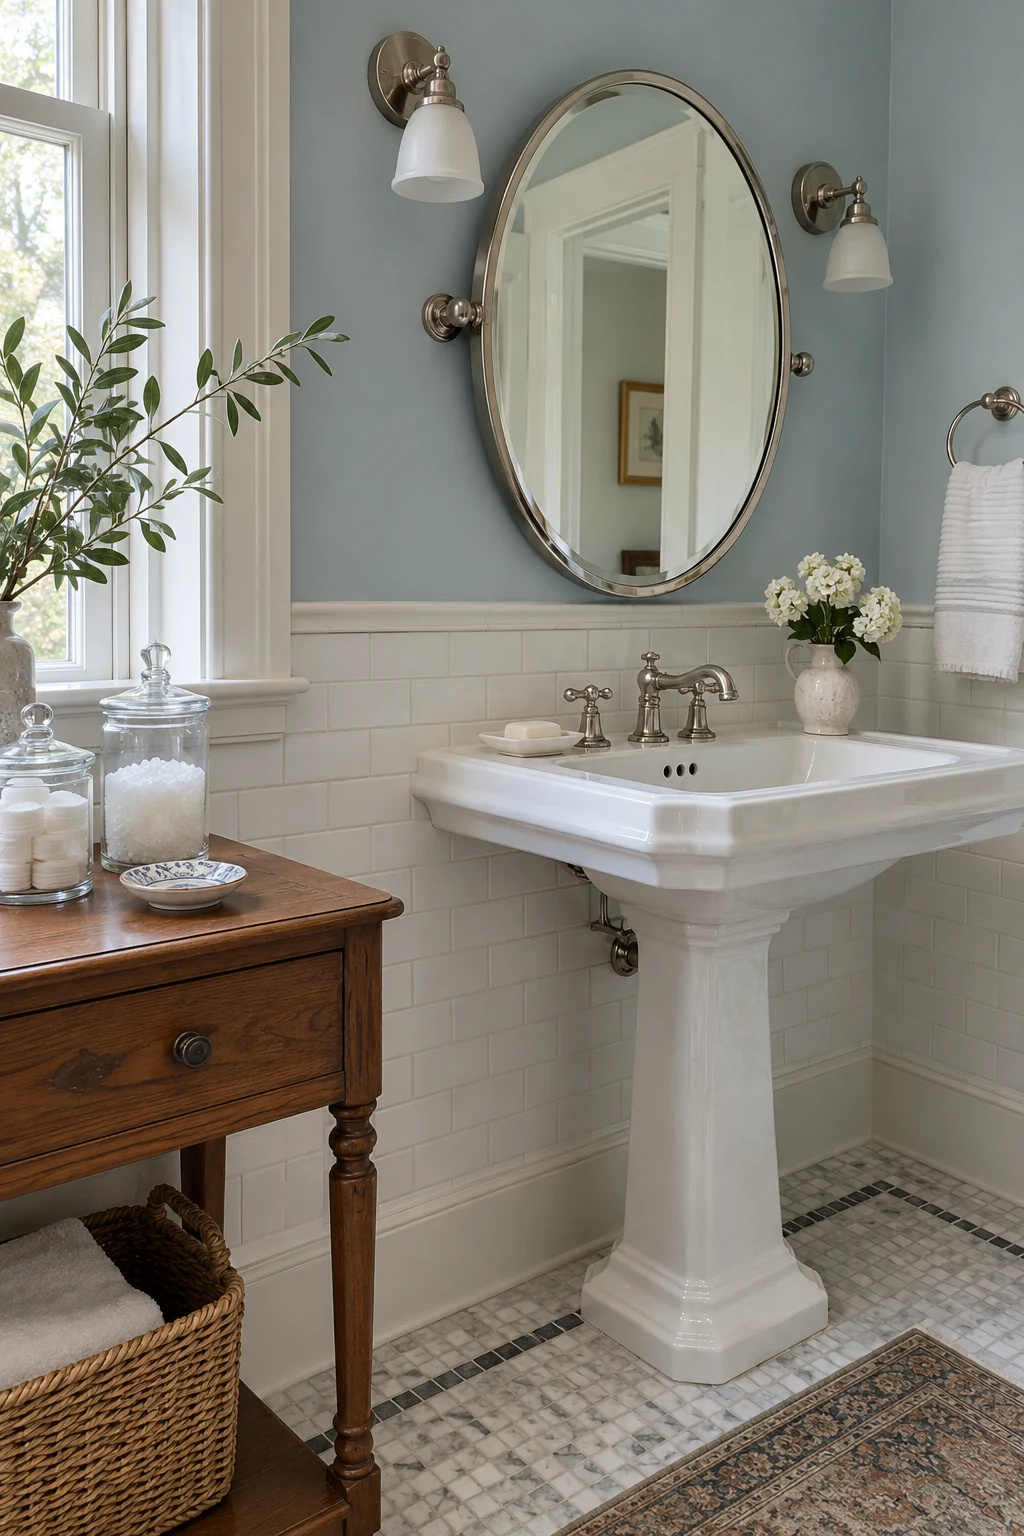
Two clear apothecary jars can make cotton rounds and bath salts easy to see beside a vintage sink. Limiting the display prevents the counter from resembling a shop shelf.
Choose stable jars with wide openings and keep breakable glass away from tub edges or children’s reach. Never transfer medicines or products that need their original safety labels.
A ceramic soap dish and small tray are usually enough beside the jars. Leave open counter space for daily routines and wipe underneath every container during cleaning.
Shop the classic brass soap dish on Amazon
43. Anchor a Vintage Runner With a Nonslip Pad
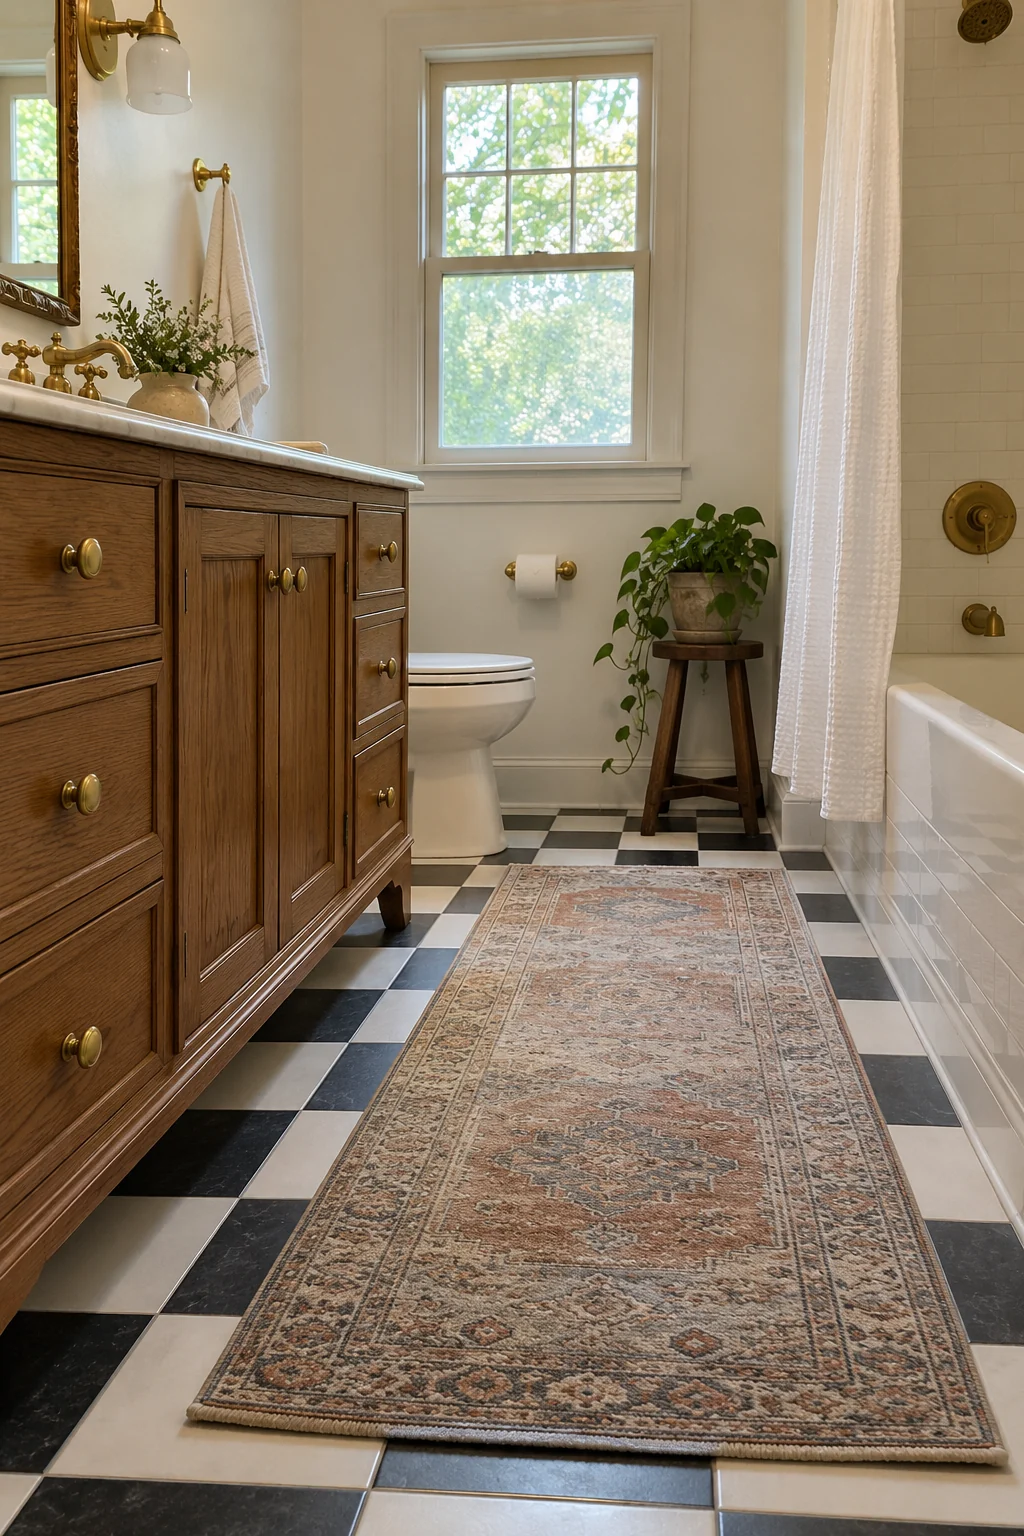
A faded-pattern runner softens tile and adds color without altering the room. It is most useful in a dry circulation zone between the vanity and door, not beside a shower threshold.
Choose a washable low-pile rug and trim a nonslip pad so it remains hidden and flat. Test door clearance and remove any curled edge immediately.
Let some floor remain visible around the rug so the pattern does not swallow a small room. Dry damp textiles promptly to prevent odors and floor damage.
Remove any runner that shifts, curls, or blocks a door. Vintage style is never worth an unstable walking surface.
44. Place a Sturdy Stool Beside the Tub
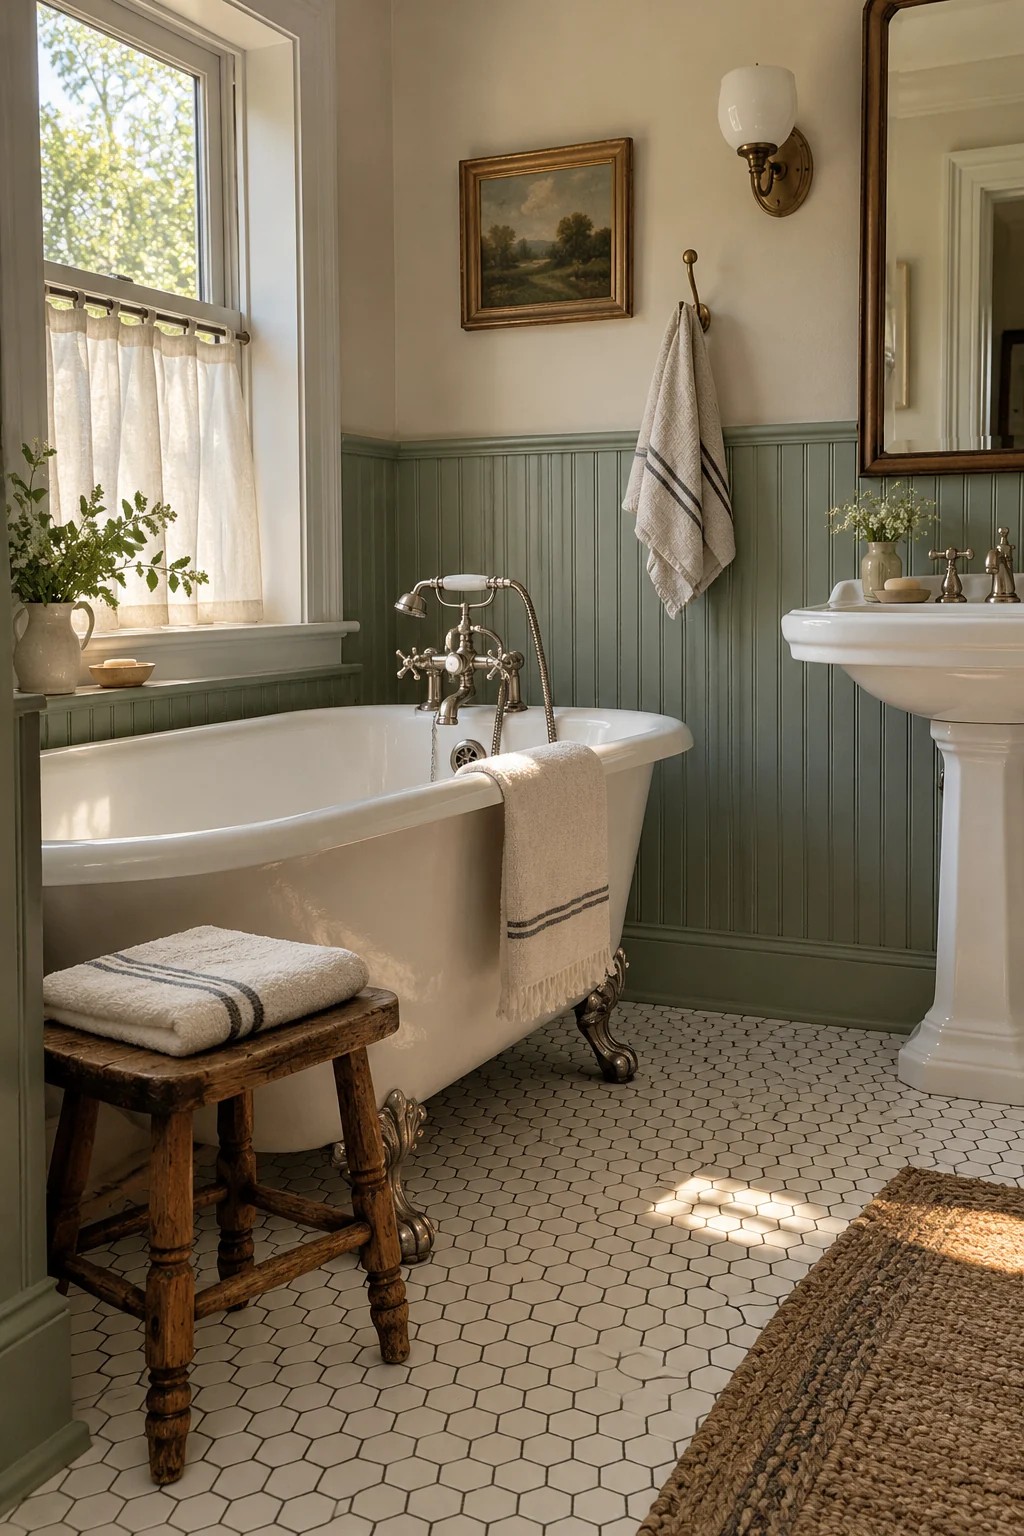
A compact oak stool gives a clawfoot tub a convenient landing place for a towel or book. One useful piece feels more authentic than several tiny decorative stands.
Keep it outside the path used to enter and exit the tub. The legs should sit level, the joints should be tight, and the finish should tolerate occasional splashes.
Do not treat the stool as a step or grab support unless it is specifically designed for that purpose. Store it away when more floor clearance is needed.
45. Frame the Mirror in Reclaimed Wood
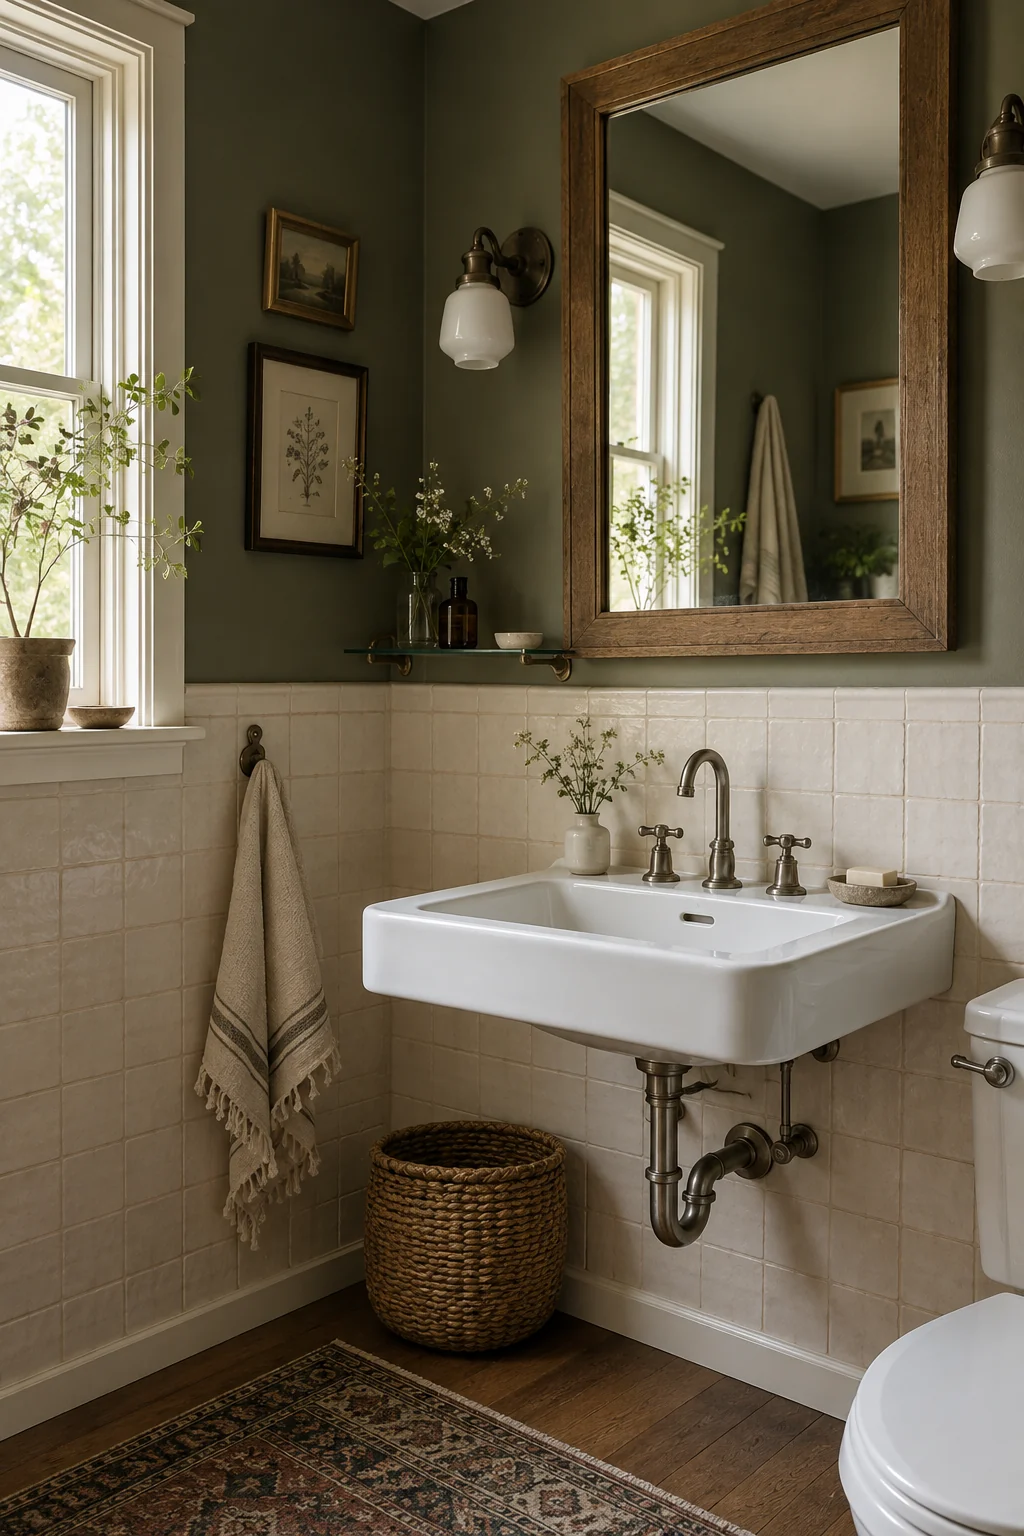
A simple reclaimed-oak frame warms a white wall sink and aged nickel faucet. Straight edges keep the wood from pushing the bathroom too far into rustic style.
Seal every side of the frame, especially the back and cut ends, before installation. Use a mirror-safe adhesive or mechanical hanging system that supports the full weight.
Inspect old wood for pests, loose splinters, and unknown coatings. Salvaged material needs careful preparation before it belongs above a wet, frequently touched surface.
46. Hang a Full Curtain From a Ceiling Track
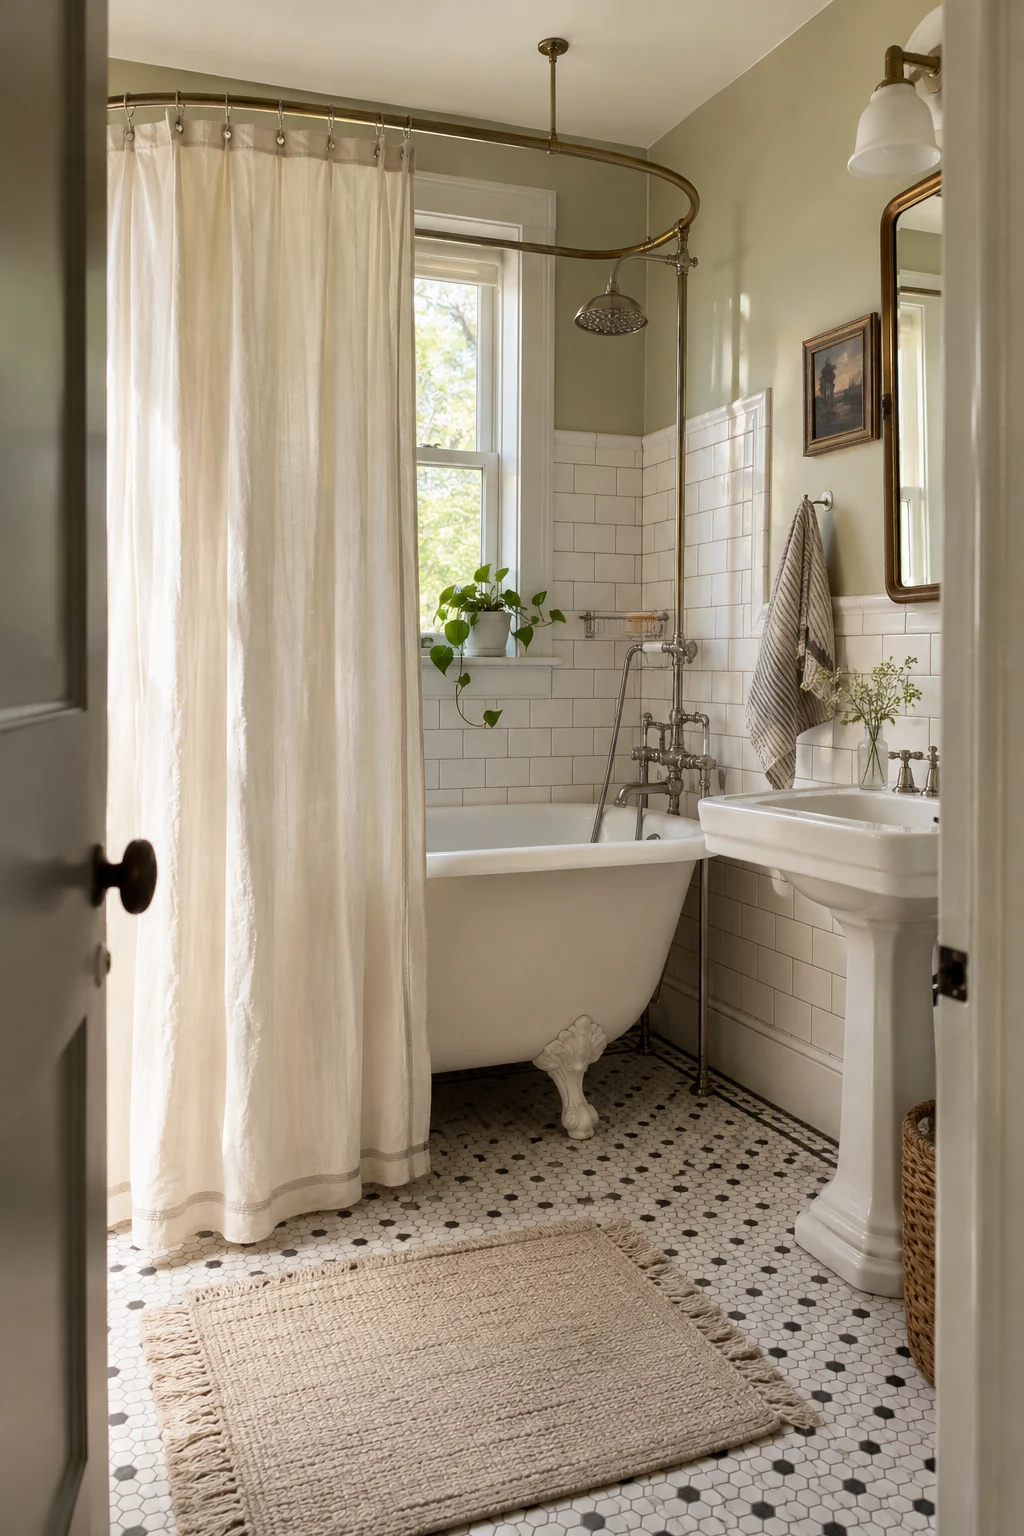
A ceiling-mounted oval track lets a clawfoot tub function as a shower while preserving its open shape. A full-length cream curtain keeps the room light and contains spray better than short decorative panels.
Secure the track into suitable structure and stabilize the shower riser according to its instructions. The curtain should fall inside the tub with enough overlap to avoid gaps.
Choose a washable liner, spread it open to dry, and monitor splash at the wall and floor. A vintage silhouette still needs modern water control.
47. Layer Vintage Style in a Rental
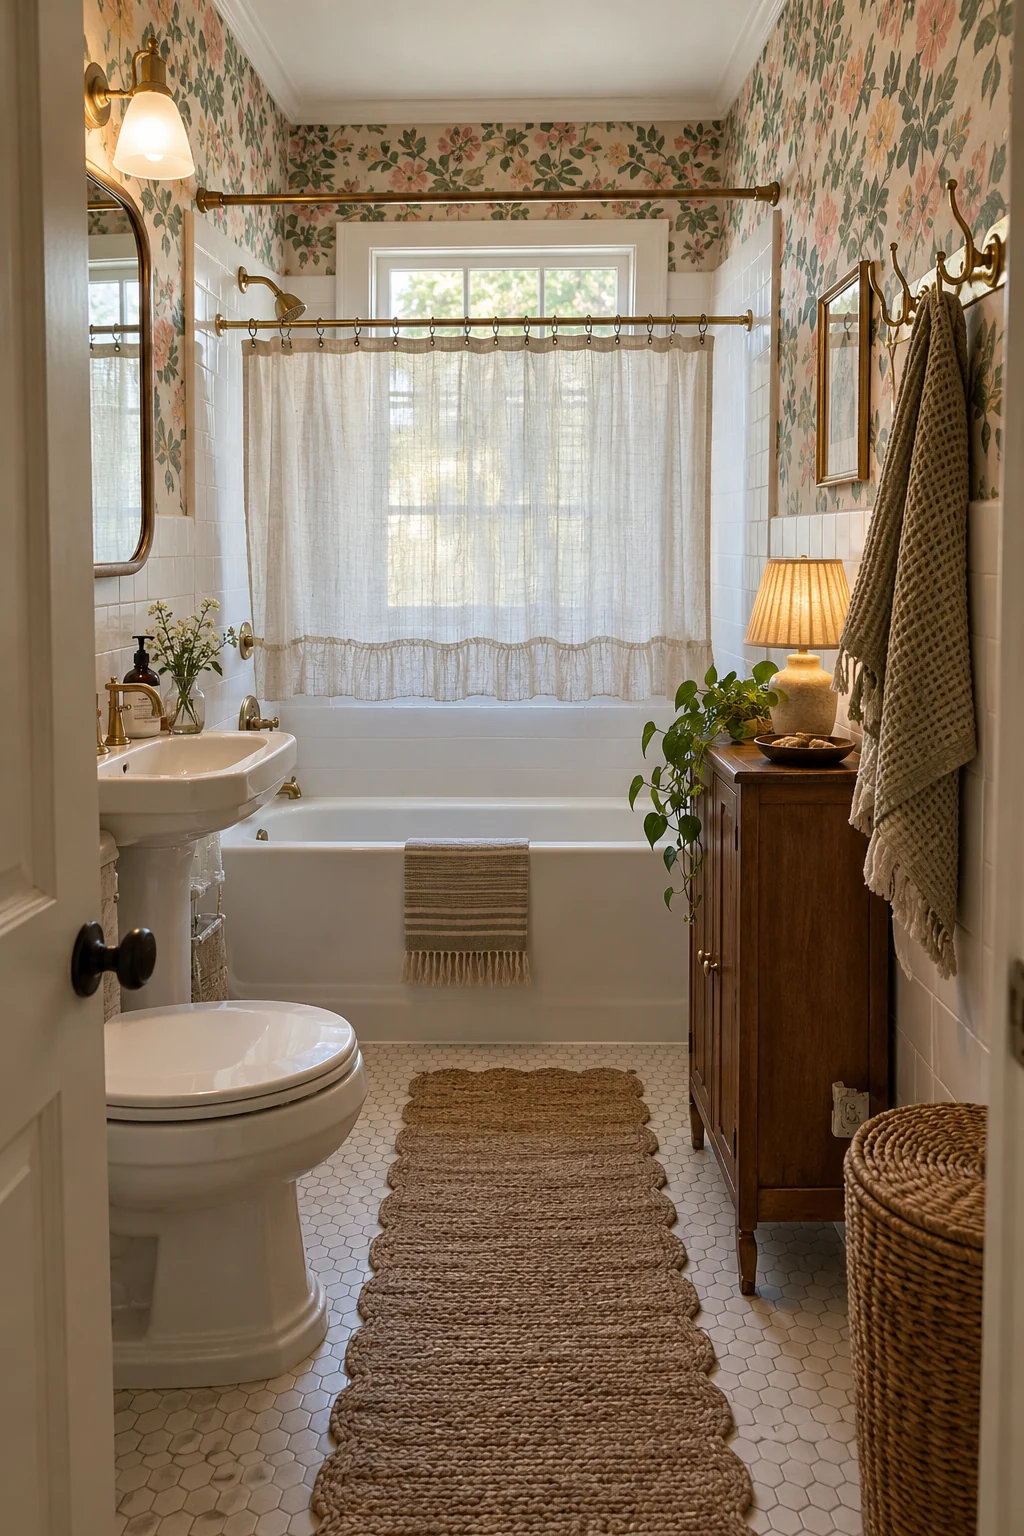
Removable floral wallpaper, a freestanding cabinet, and a tension-mounted café curtain can change a plain rental bathroom without replacing fixtures. Repeat one muted color so the temporary layers feel planned.
Test every adhesive in a hidden spot and obtain written permission where required. Avoid placing peel-and-stick materials in direct spray or over failing paint.
Save packaging and photograph the original room before installation. Choose pieces that can move with you instead of custom items that fit only one awkward wall.
- Test removable materials in a hidden spot.
- Save the original hardware.
- Document the room before changes.
48. Protect Floor Space in a Tiny Bath
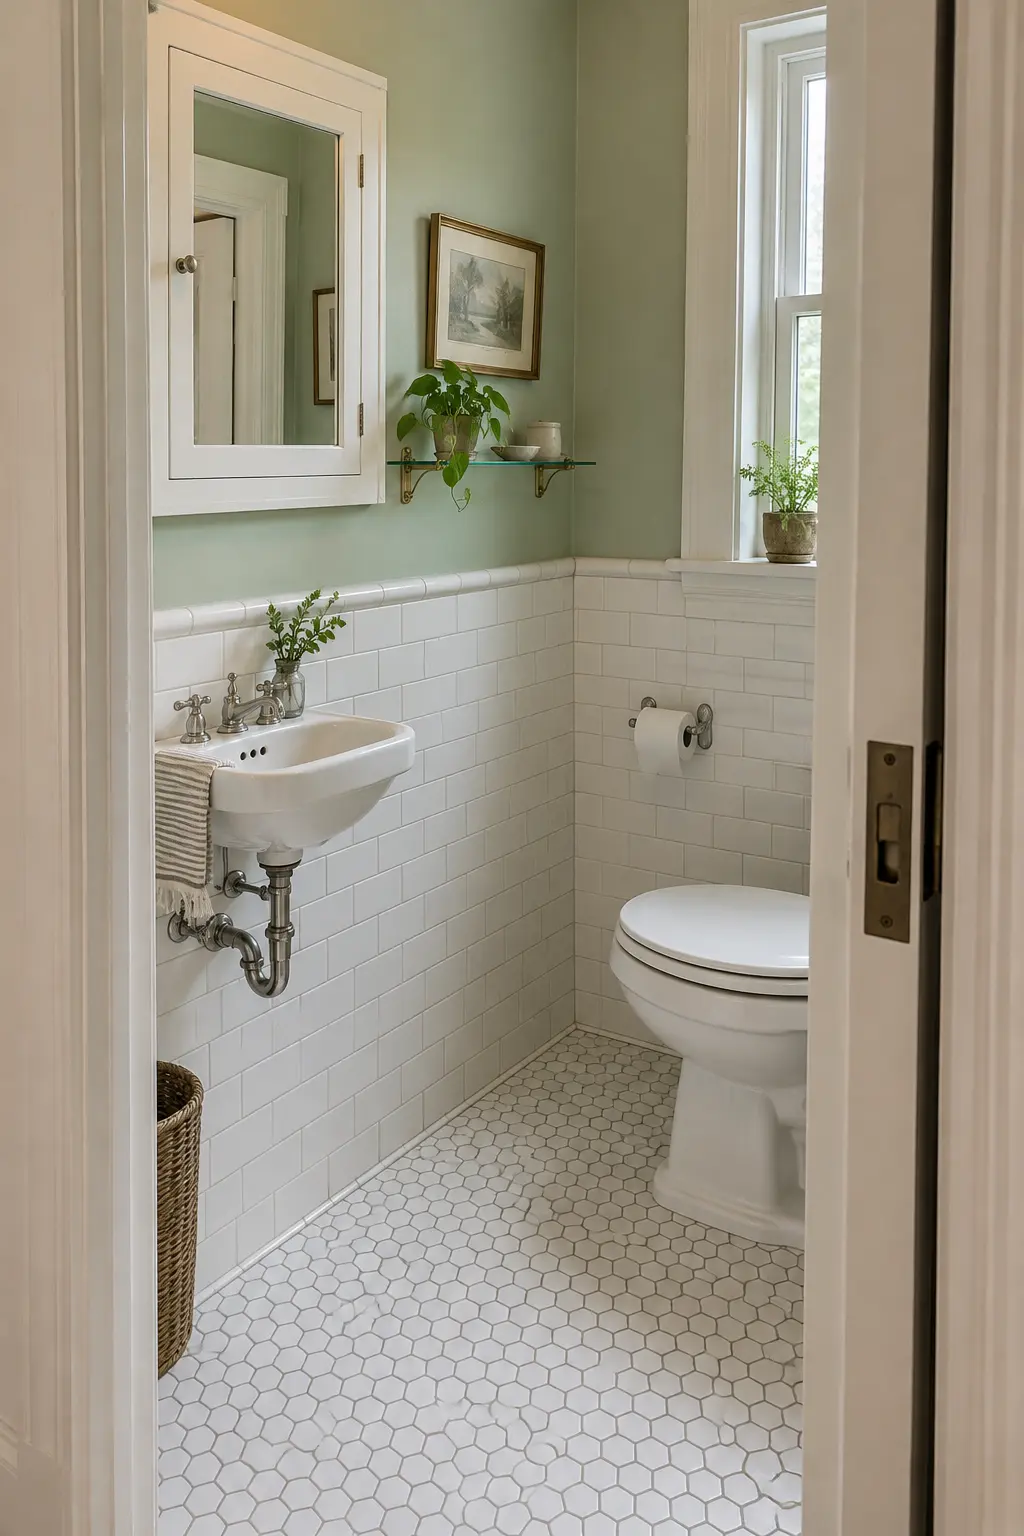
Wall-mounted fixtures make a tiny vintage bathroom feel less crowded because more floor remains visible. A compact sink, shallow medicine cabinet, and narrow shelf can replace a bulky vanity.
Map the door swing, toilet clearance, towel reach, and the space needed to stand at the sink. Pocket doors are useful only when the wall cavity is free of plumbing and wiring.
Keep daily storage at eye level and backups elsewhere. Small rooms function better when every ledge has one clear job instead of carrying decorative overflow.
49. Specify Vintage-Looking Accessibility Features
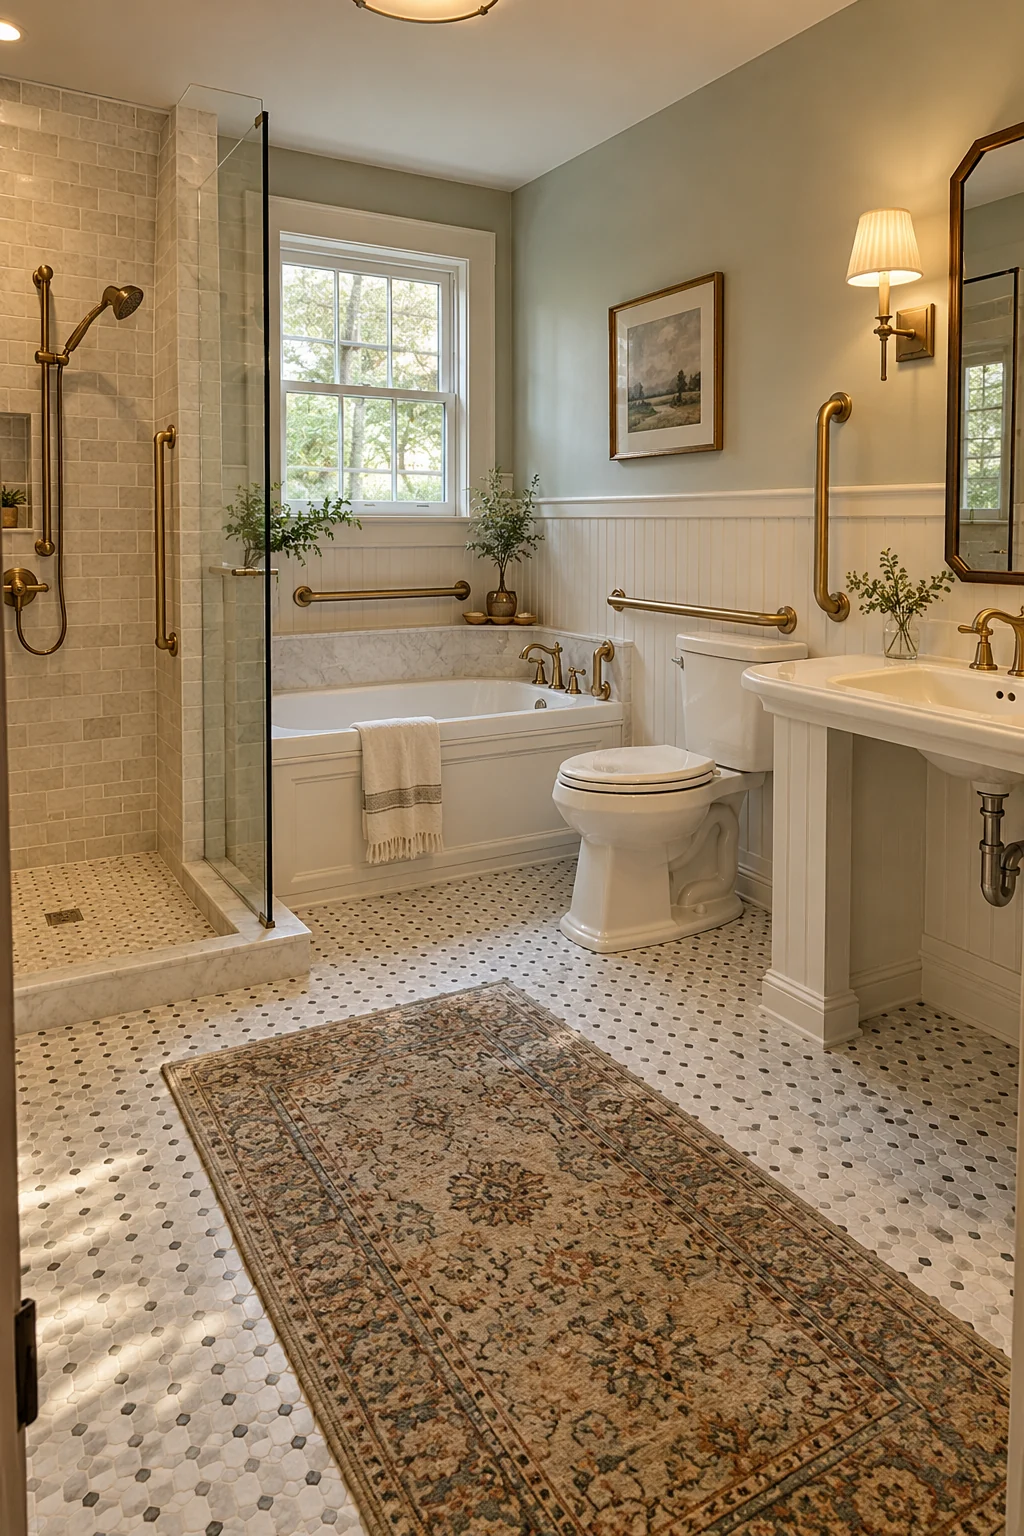
Aged-brass grab bars and lever handles can support a vintage scheme while improving everyday usability. Choose rated safety products, not towel bars that merely resemble supports.
Blocking, placement, and load requirements should be planned with the installer and the intended user. A low threshold, slip-resistant mosaic, and clear approach space matter as much as the finish.
An accessible sink can use a traditional profile while preserving knee clearance and protected pipes. Beauty and safety work together when performance decisions come first.
Only rated grab bars installed into suitable structure should be used for body support.
50. Balance Restored Pieces With Quiet Modern Features
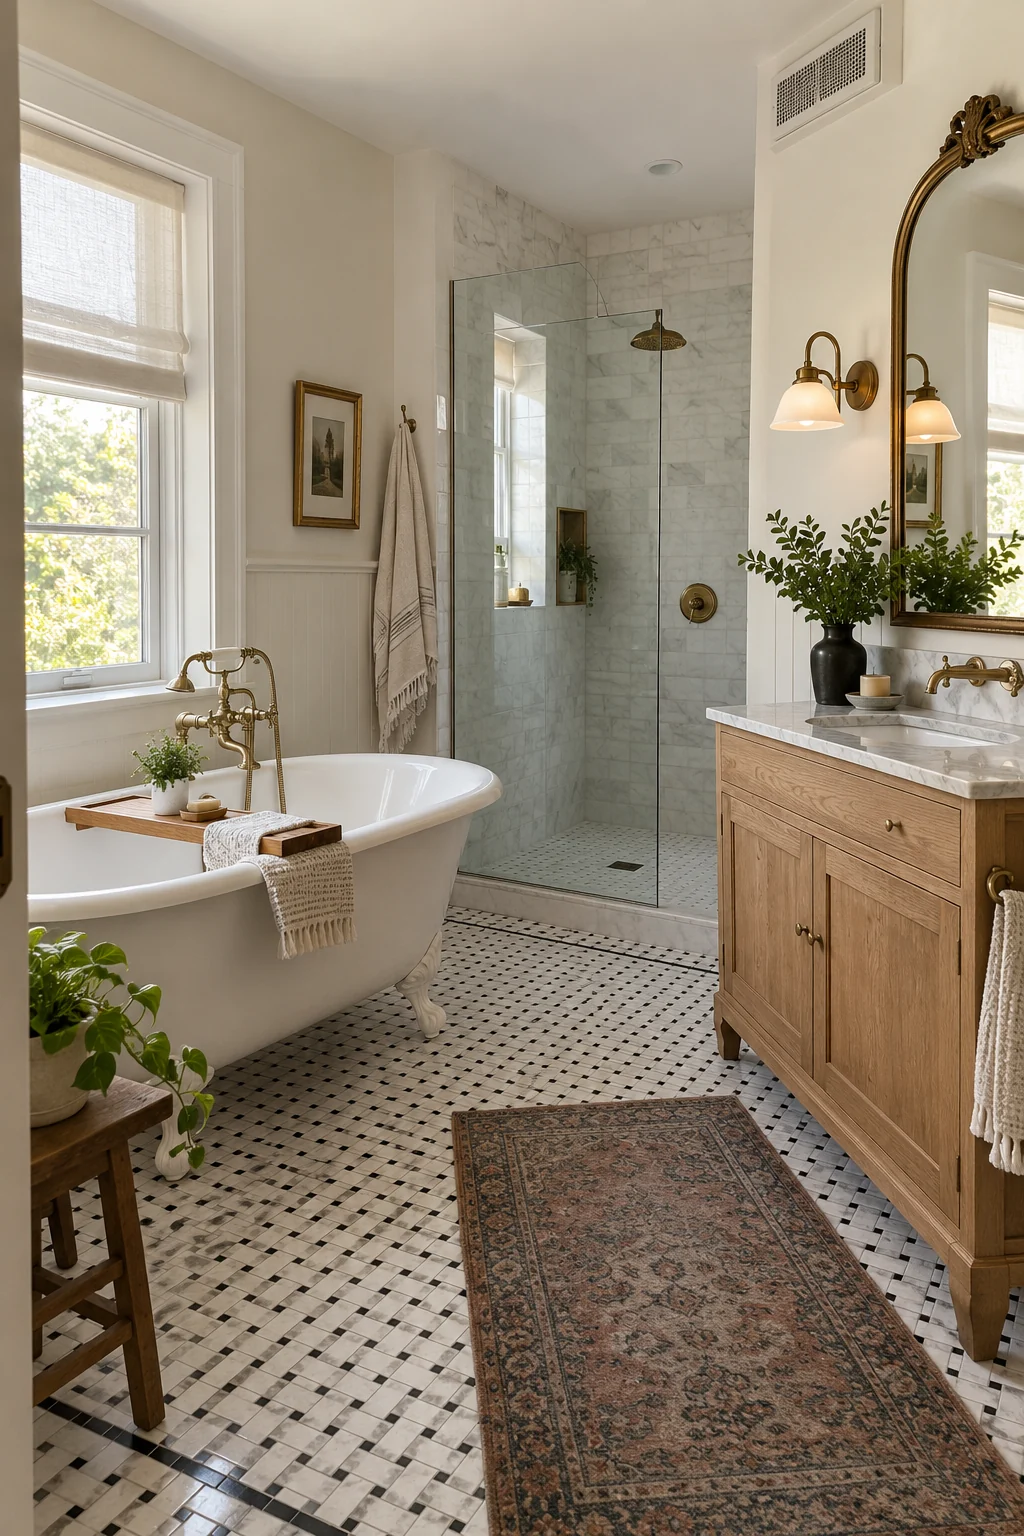
A restored clawfoot tub, mosaic floor, and brass mirror can live comfortably beside a frameless shower and white-oak vanity. The room feels enduring when new elements stay simple rather than imitating every old detail.
Use consistent proportions and one metal family to connect the eras. Modern waterproofing, ventilation, lighting, and storage should be discreet but fully functional.
Preserve the pieces that give the room identity, then spend renovation money on the systems behind them. A convincing vintage bathroom is not a museum; it is an old-and-new room that works every day.
Creating a Vintage Bathroom That Still Works Today
A convincing vintage bathroom begins with one or two strong period cues, then supports them with quiet, durable choices. Keep the pedestal sink, patterned floor, or ornate mirror as the focus and let storage, lighting, and ventilation do their jobs without demanding attention.
Measure before ordering, preserve sound original materials, and use qualified professionals for plumbing, electrical, glazing, waterproofing, and structural work. The best result will feel old in the right ways—warm, individual, and layered—while working like a carefully planned modern bathroom.