100 Christmas Shelf Decor Ideas

This post may contain affiliate links: full affiliate disclosure.
Shelving offers a versatile canvas for holiday decorating, whether you have deep built-ins, kitchen ledges, or narrow floating shelves. By mixing everyday items with seasonal greenery, metallic accents, and traditional figurines, you can create a balanced display that fits your existing style.
These ideas provide practical ways to transform any shelf in your home into a festive focal point.
SECTION 1: CLASSIC CHRISTMAS SHELF DECOR
1. Classic Red and Green Christmas Shelf
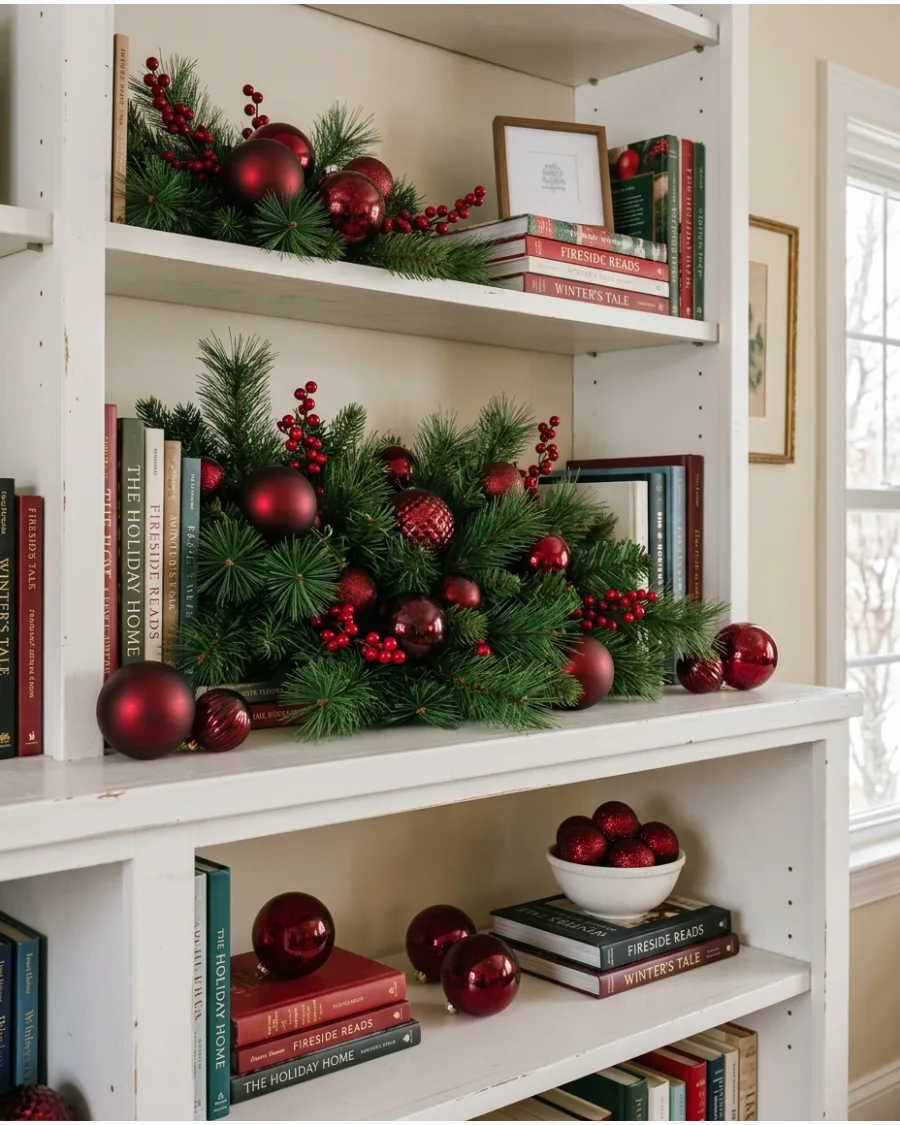
Use artificial evergreen stems and deep red ornaments to create a traditional holiday vignette on your shelving. Place the tallest evergreen branches at the back of the shelf to establish a lush foundation before layering in smaller accents. Incorporate varying heights by nesting round baubles in bowls or standing wooden nutcrackers beside the greenery.
This method ensures the display looks intentional and balanced rather than like a flat row of items.
- Select artificial pine or cedar picks with wired stems to easily shape them around existing books or decor items.
- Mix matte, shiny, and glitter-finished red ornaments to add texture without deviating from the two-tone color palette.
- Position small bundles of faux red berries toward the front of the shelf to pull the eye through the greenery.
Use small adhesive clips or clear putty to secure lightweight ornaments if your shelving is in a high-traffic area.
2. Red Velvet Bow Christmas Shelf
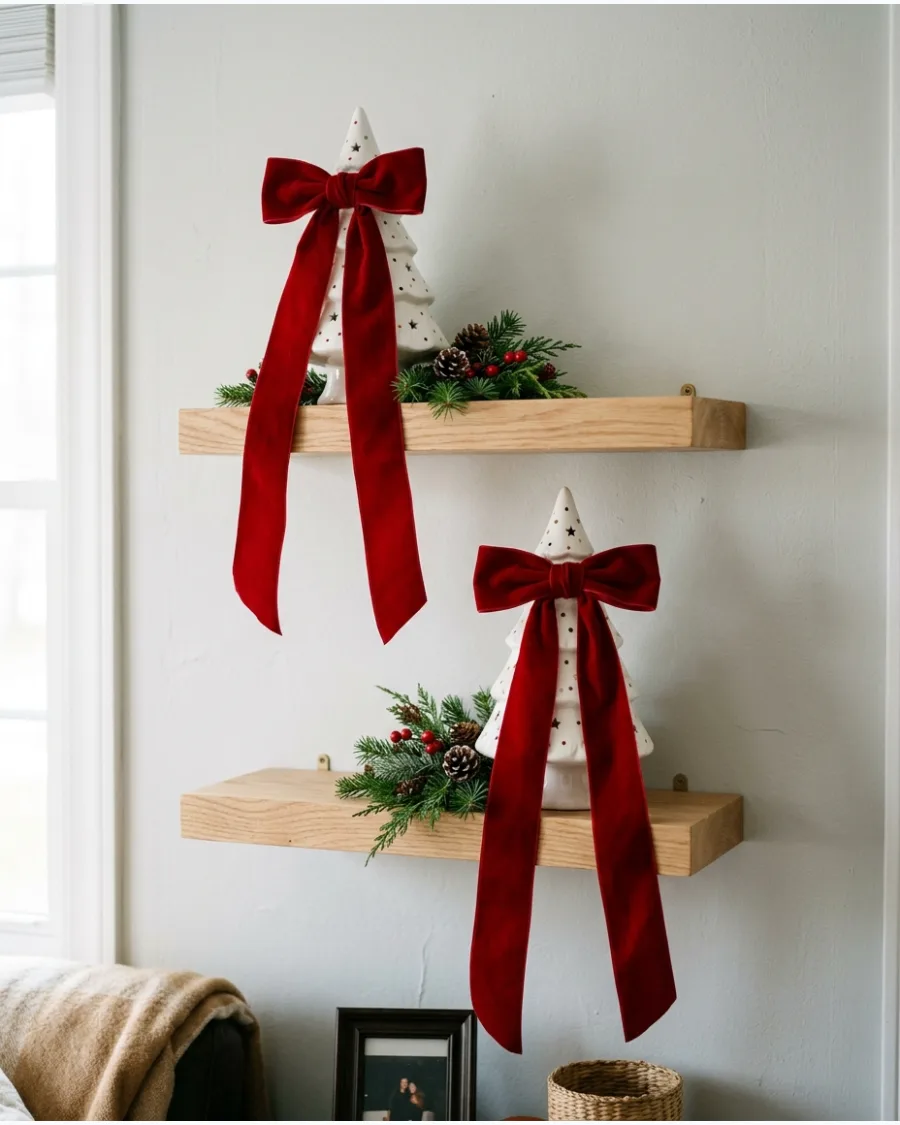
Red velvet bows serve as a soft, traditional focal point for your shelving. You can attach these bows to the centers of small wreaths, the tops of ceramic trees, or the corners of decorative boxes.
Ensure the tails of the bows drape naturally over the edge of the shelf to create vertical lines that draw the eye downward.
- Choose a ribbon width between two and three inches so the bows are large enough to be noticed from across the room.
- Secure bows to objects using thin floral wire or clear adhesive hooks that can be removed without damaging the shelf surface.
- Pair the velvet with smooth materials like white ceramic or glass to create a contrast between the fabric and the hard surfaces.
Run a handheld steamer over the ribbon tails once they are hung to remove any creases from storage.
3. Plaid and Tartan Christmas Shelf
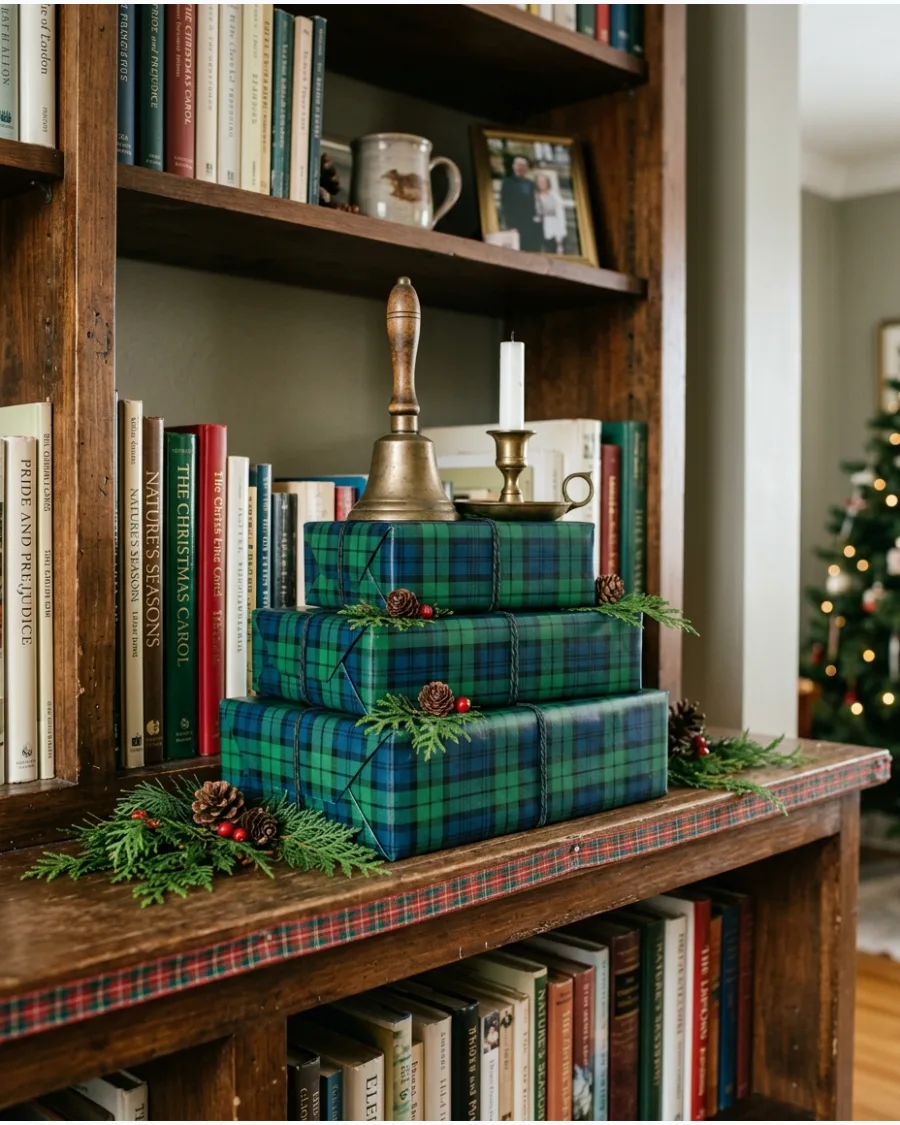
Build a heritage-inspired vignette by layering classic patterns with reflective metallic elements. Stack two or three plaid gift boxes in varying sizes to create a tiered base for your brass accents and evergreen sprigs. This technique uses the patterns as structural levels rather than just flat color.
Mixing in greenery softens the hard lines of the boxes while highlighting the warm gold tones of the brass.
- Choose brass items with a weathered or matte finish to better complement the traditional textures of wool or paper tartan.
- Secure lengths of tartan ribbon flat against the front edges of the shelves using removable adhesive putty for a clean border.
- Tuck short evergreen clippings behind the brass objects so the needles peek out without obscuring the metallic shine or the plaid patterns.
Use wire-edged ribbon if you want to create stiff, structural bows that hold their shape when tucked into the greenery.
4. Traditional Nutcracker Christmas Shelf
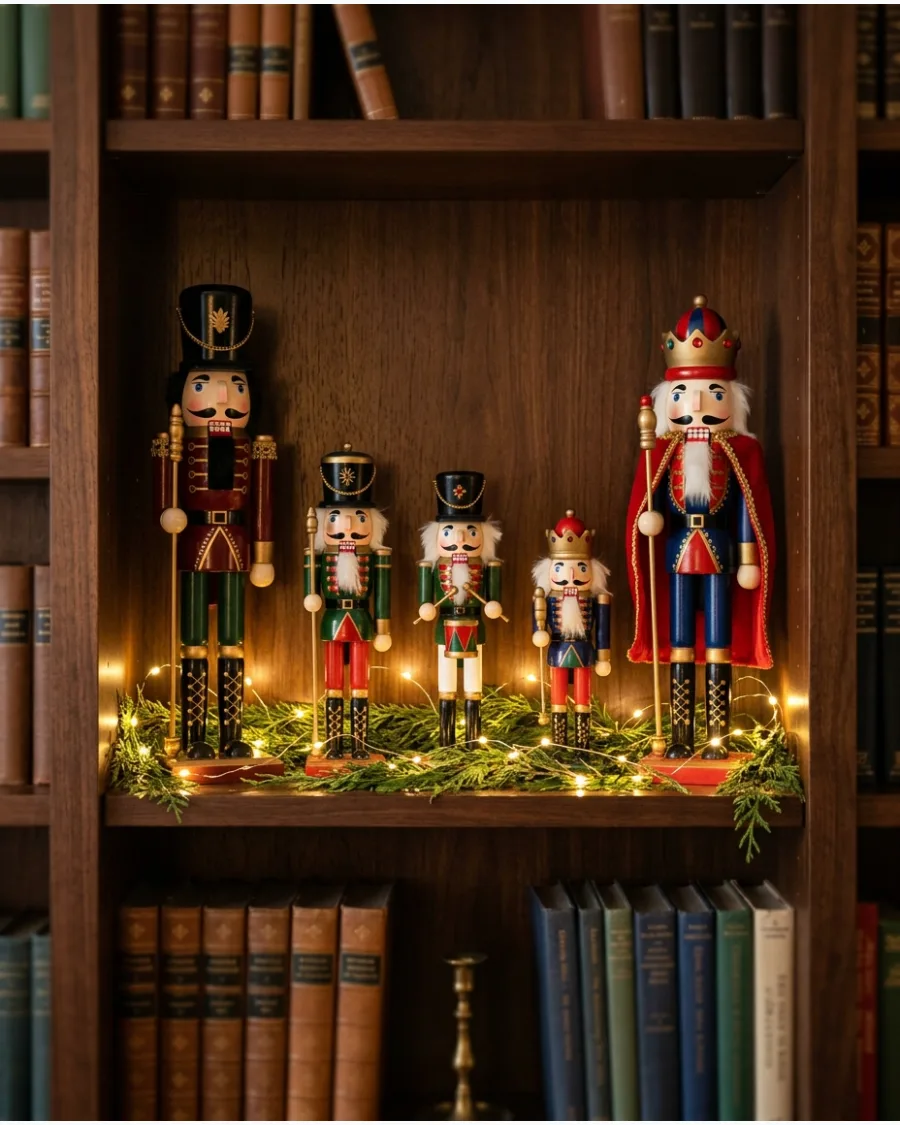
Grouping nutcrackers of different heights creates a more significant visual impact than spreading them individually across a room. Tuck battery-operated fairy lights around the bases of the figures to highlight their intricate painted details.
Place the tallest nutcrackers at the outer ends of the display to frame the smaller figurines and greenery in the center.
- Select nutcrackers with a consistent color theme, such as all metallic, all traditional red and blue, or all white, for a cohesive look.
- Use a thin, flat garland as a base layer so the nutcrackers have a level surface to stand on without tipping.
- Hide the battery packs for your lights behind the larger figurines or inside a small decorative box placed on the shelf.
If the nutcrackers feel unstable on the greenery, place a small piece of cardboard or a flat coaster under their feet to give them a firm base.
5. Classic Santa Collection Shelf
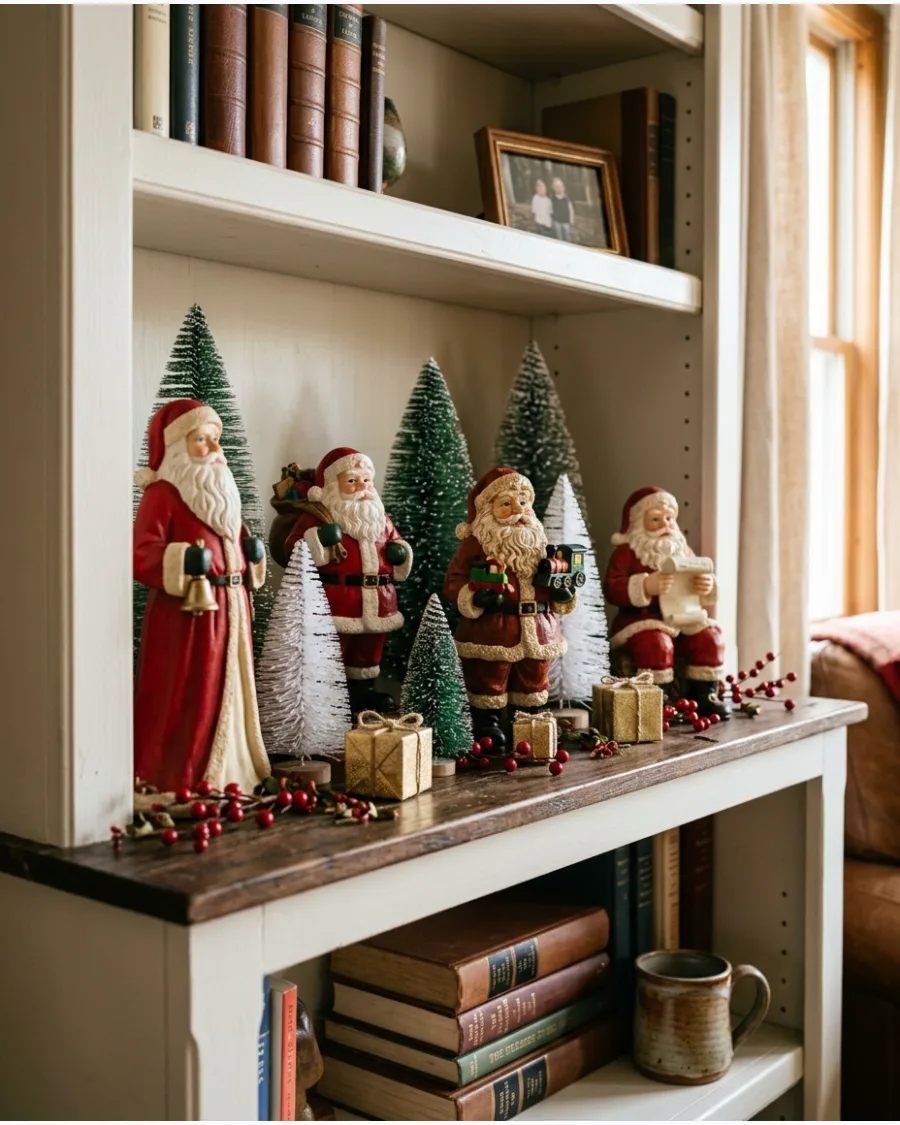
Showcase your Santa figures as a deliberate collection by arranging them in a curated scene on a single shelf. Fill the gaps between the figures with small bottle brush trees, tiny wrapped presents, and sprigs of red berries.
Arrange the Santas in a slightly staggered line rather than a straight row to give the display a sense of depth.
- Vary the scale of the accessory trees to mimic a natural forest landscape around the Santa figures.
- Use small jewelry boxes wrapped in holiday paper to act as miniature gifts that help fill lower-level gaps between the Santas.
- Ensure all figures share a similar style, such as 'old world' or 'whimsical,' so the collection feels like a unified set.
Place the smallest Santa figures on top of a stack of two or three horizontal books to give them enough height to be seen behind taller items.
6. Red Berry and Evergreen Shelf
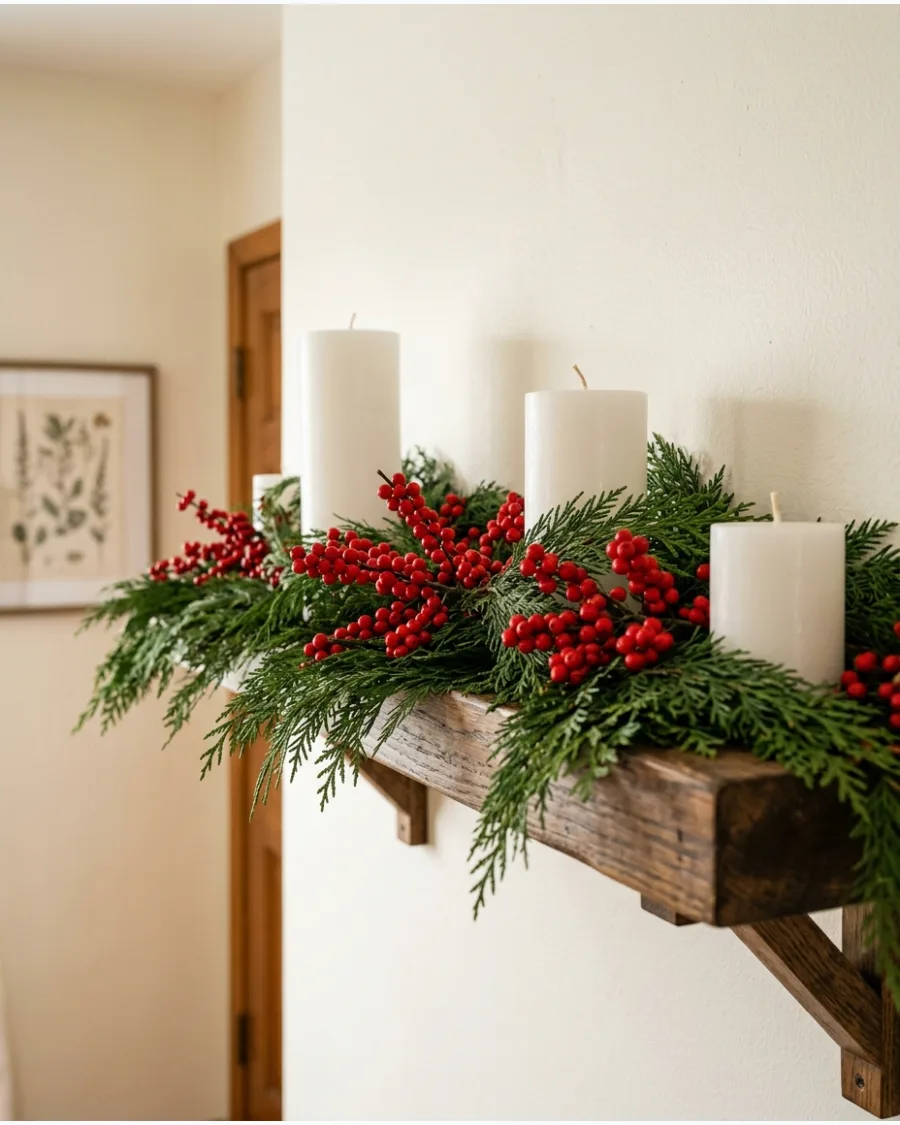
Layer thick cedar or pine branches along the length of a shelf to create a lush, natural foundation for your display. Intersperse clusters of bright red berries to create pops of color against the deep green needles.
Space out a few simple white candles or metallic bells among the greenery to ensure the texture of the branches remains visible.
- Select faux or preserved cedar to prevent sap from sticking to the shelf surface.
- Drape the ends of the branches slightly over the shelf edge for a more relaxed, organic silhouette.
- Group three small ornaments in a single color to create focal points without overcrowding the greenery.
Use battery-operated LED candles to avoid heat damage to the greenery or the shelf above.
7. Brass Bells and Christmas Greenery Shelf
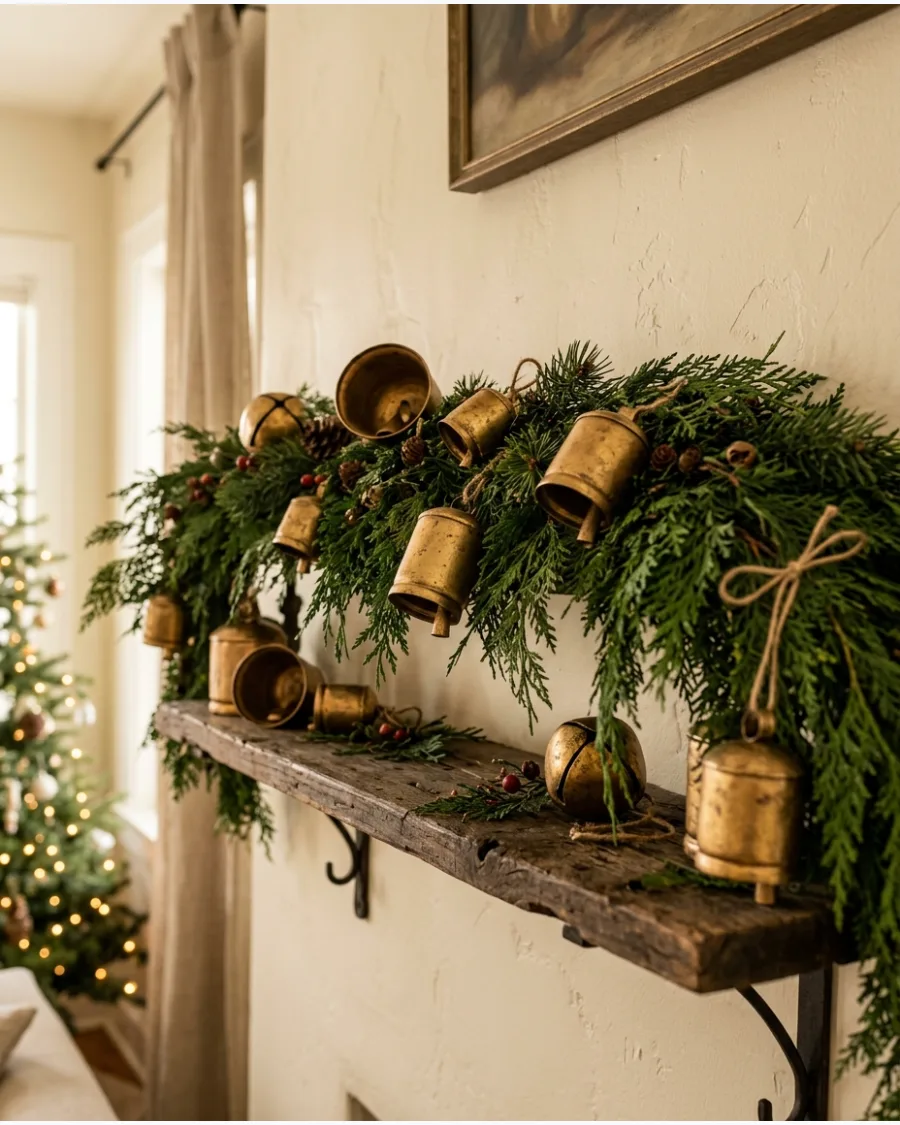
Use the warm tone of aged brass to contrast with the cool, dark greens of a cedar garland on your shelf. Position bells of varying sizes directly on the shelf or hang them from the greenery using twine.
Arrange the bells in small clusters of two or three to give the display a sense of weight and purpose.
- Select bells with a matte or antique finish to complement natural wood shelving.
- Tuck extra pine branches behind the brass to fill in gaps and add depth to the arrangement.
- Ensure the bells are stable or tied down if the shelf is near a high-traffic doorway to prevent them from sliding.
Tie a thin piece of floral wire to the top of the bells to anchor them securely to the garland.
8. Red Christmas Bookshelf Styling
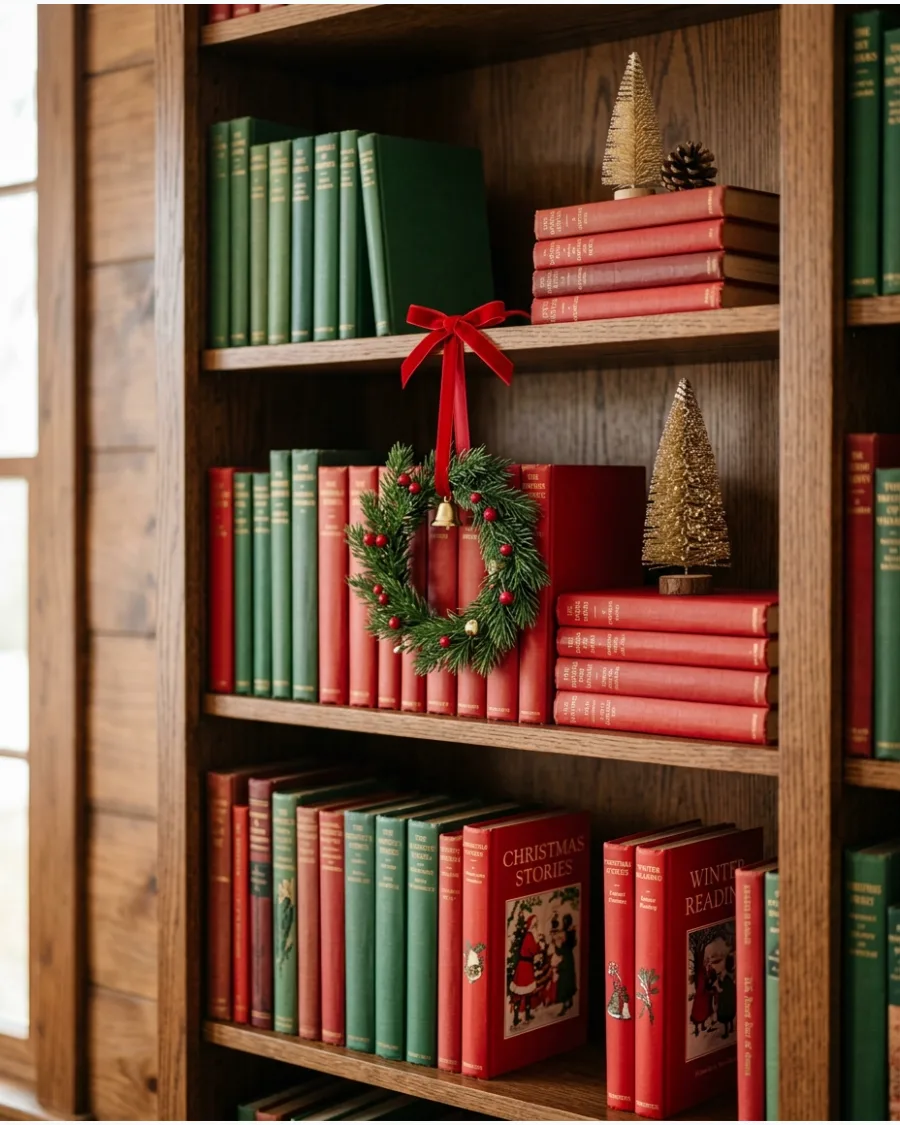
Reorganize your library by pulling forward books with holiday-appropriate spine colors like deep red, forest green, and gold. Turn several books outward to display their covers and use them as backdrops for mini evergreen wreaths or small bottle brush trees. Mix in silk ribbons or a few loose ornaments to bridge the gap between the books and the holiday decor.
- Check that the book covers are in good condition before choosing to face them outward.
- Place small decorative trees on top of horizontal stacks of books to create varying heights across the shelf.
- Leave at least one-third of the shelf showing standard book spines to maintain a balanced library feel.
Use a small piece of removable museum wax on the bottom of ornaments to keep them from rolling off book stacks.
9. Traditional Gold Christmas Shelf
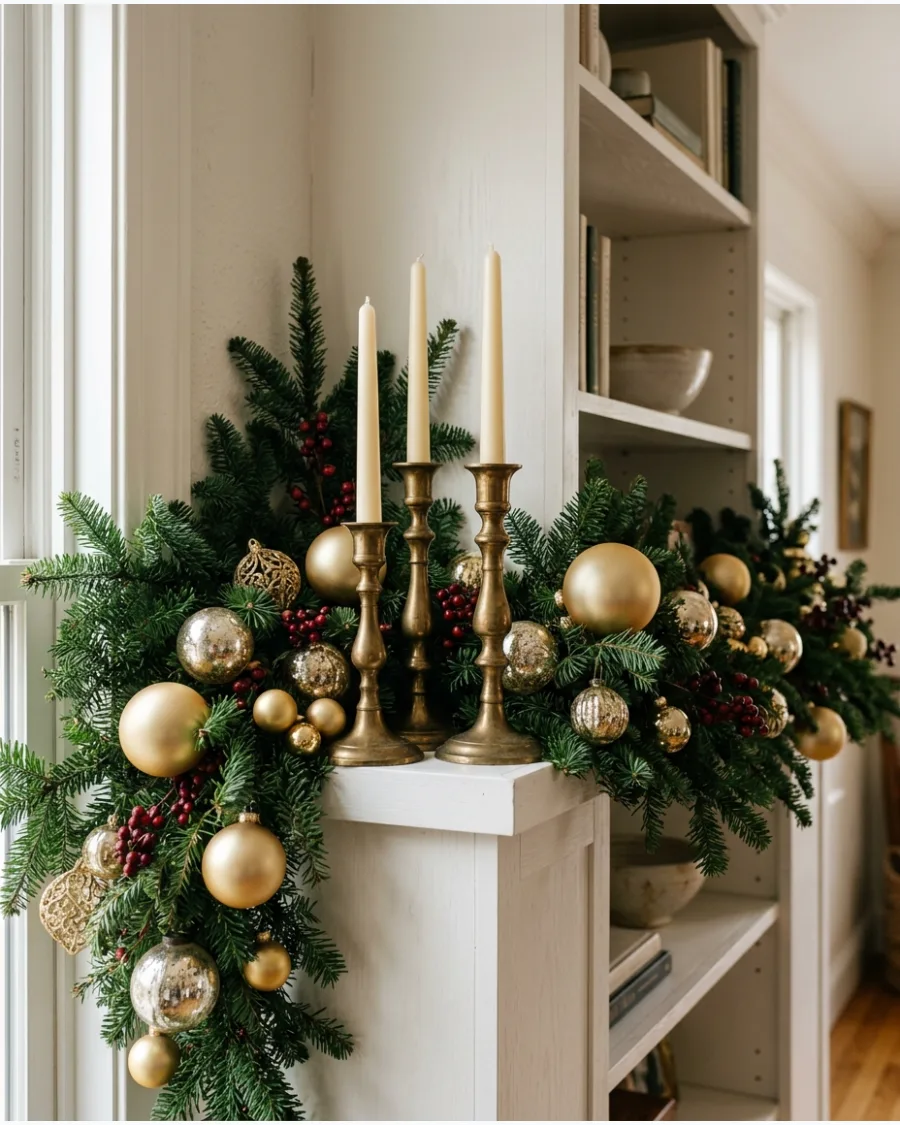
Create a classic holiday look by layering various gold textures, from polished brass candlesticks to matte gold ornaments. Nestled among evergreen branches, these metallic elements reflect light and brighten darker corners of the room.
Incorporate a few deep red ornaments or berries to ground the gold palette and keep the display from looking too monochromatic.
- Mix different heights of candlesticks to create a rhythmic flow across the shelf length.
- Use gold bells as functional bookends or accents at the very ends of the greenery.
- Wipe metallic surfaces with a microfiber cloth before placing them to remove fingerprints or dust.
Place the brightest gold items toward the front of the shelf to catch the most ambient room light.
10. Ralph Lauren-Inspired Christmas Shelf
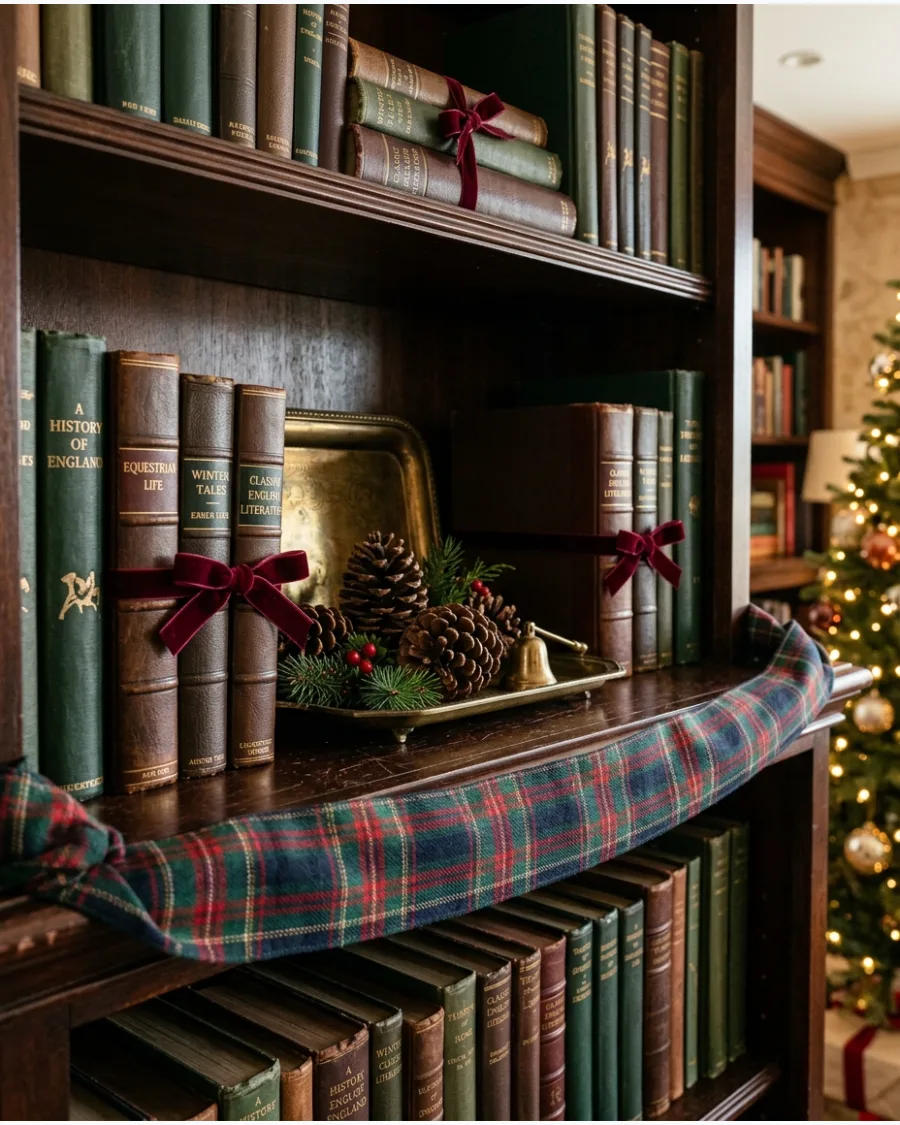
Build a heritage-style display by combining rich textures like leather-bound books and velvet ribbons with traditional patterns. Use a palette of burgundy and hunter green against dark wood shelving to establish a sophisticated, collected atmosphere.
Drape a length of tartan plaid ribbon over the edge of the shelf to introduce a classic holiday motif.
- Look for brass accents like magnifying glasses or small trays to add a vintage, curated feel.
- Tie simple velvet bows around the spines of a few books for a subtle festive touch.
- Group leather-bound volumes with gold-tooled lettering to enhance the premium aesthetic of the shelf.
Use a dark green or navy velvet ribbon to tie small bunches of greenery together for a tailored look.
SECTION 2: NATURAL AND WOODLAND CHRISTMAS SHELVES
11. Bottle Brush Christmas Tree Forest
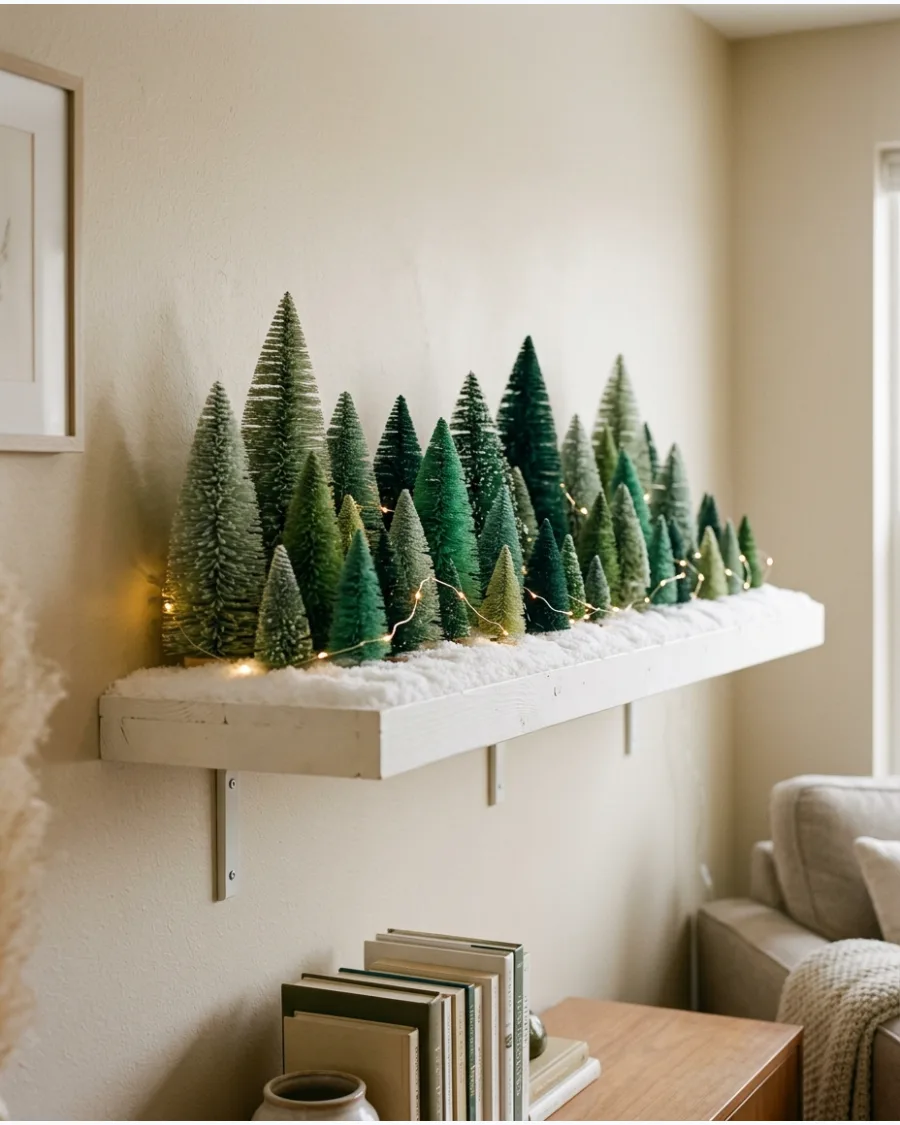
Create a miniature forest by grouping bottle brush trees of different heights and green shades along your shelving. This technique works well on narrow floating shelves where larger decor might not fit easily.
Place taller trees toward the back and smaller ones in front to create depth across the shelf.
- Choose trees with various textures, such as flocked, glittered, or plain sisal, to keep the arrangement from looking flat.
- Wind a thin strand of battery-operated fairy lights around the base of the trees to illuminate the forest floor without bulky wires.
- Sprinkle a light dusting of faux snow or white felt strips underneath the trees to hide the plastic or wood bases.
Use a small piece of removable museum wax on the bottom of thinner trees to prevent them from tipping over if the shelf is bumped.
12. Cedar and Pinecone Christmas Shelf
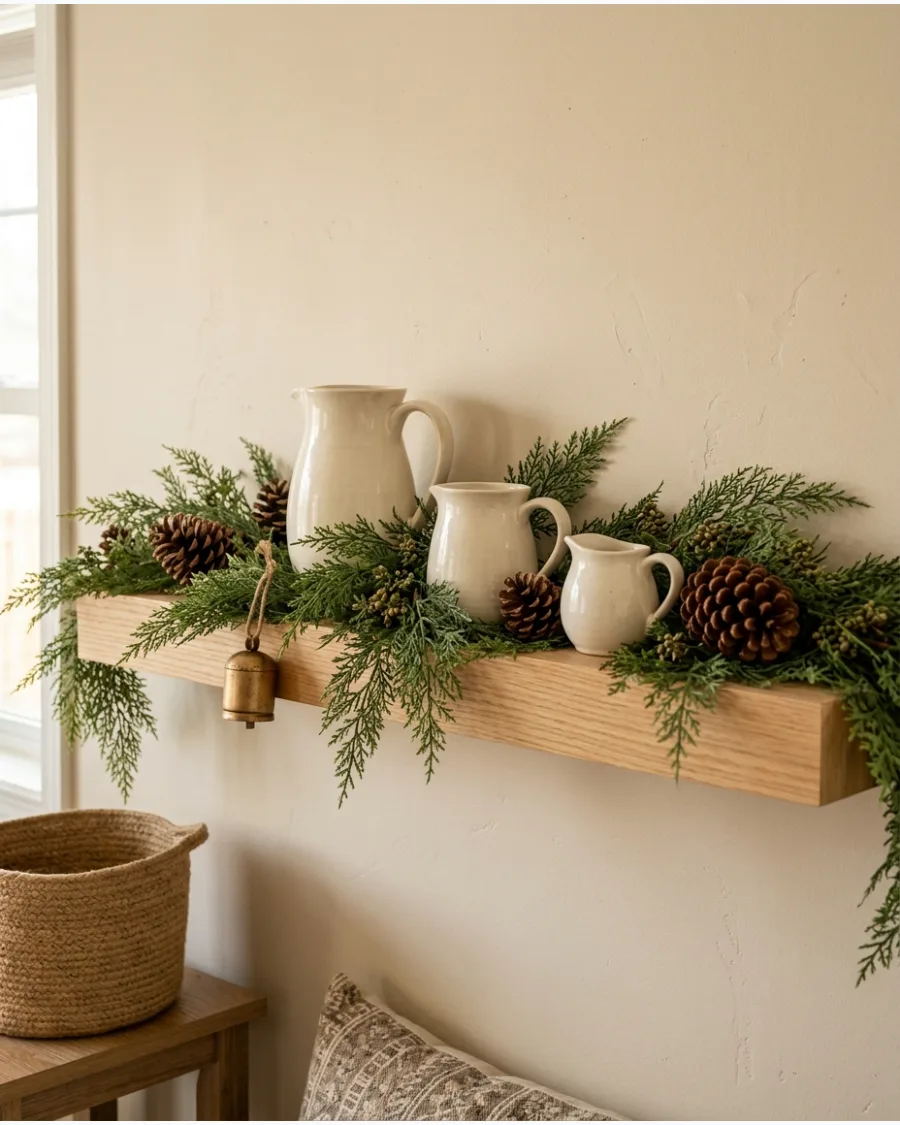
Layer realistic artificial cedar branches along the length of a wooden shelf to create a soft, draped base for your holiday accents. Tuck dried pinecones into the greenery gaps alongside cream-colored ceramic vases and small brass figurines to maintain an earthy look. This combination of textures grounds the display and integrates easily with your existing everyday decor.
- Choose faux cedar with a soft texture to ensure the needles drape naturally over the shelf edge rather than sticking straight out.
- Place the largest ceramic pieces first to anchor the arrangement, then weave the greenery around them before adding the smaller pinecones.
- Verify that the greenery is kept away from heat sources like nearby lamps or wall vents to prevent damage to the synthetic needles.
Use small clear adhesive clips hidden behind the branches to prevent the cedar from sliding off shallow floating shelves.
13. Dried Orange Christmas Shelf
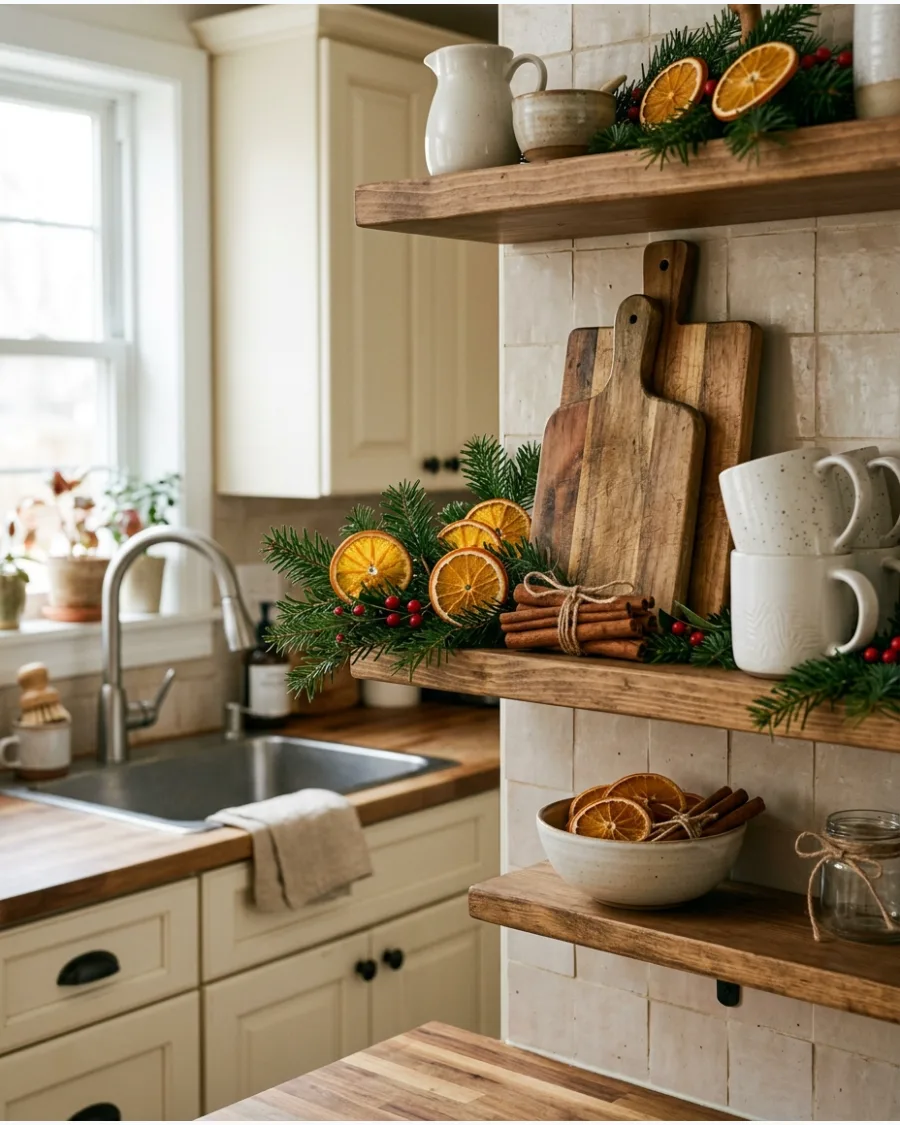
Use dried orange slices and cinnamon sticks to introduce warm, earthy tones to your kitchen or dining room shelving. These natural elements pair well with evergreen sprigs and wood accents to create a cozy, organic look.
Thread the orange slices onto a simple twine string or lean them individually against small white bowls for a pop of color.
- Choose oranges that are sliced thin and dried completely to ensure they stay vibrant and do not attract moisture.
- Tuck bundles of cinnamon sticks tied with twine near the orange slices to add texture and a subtle natural scent.
- Swap out bright red ribbons for jute or brown twine to maintain the rustic, natural palette of the shelf.
Check the slices for any signs of darkening over time and replace them if they lose their translucency.
14. Woodland Animal Christmas Shelf
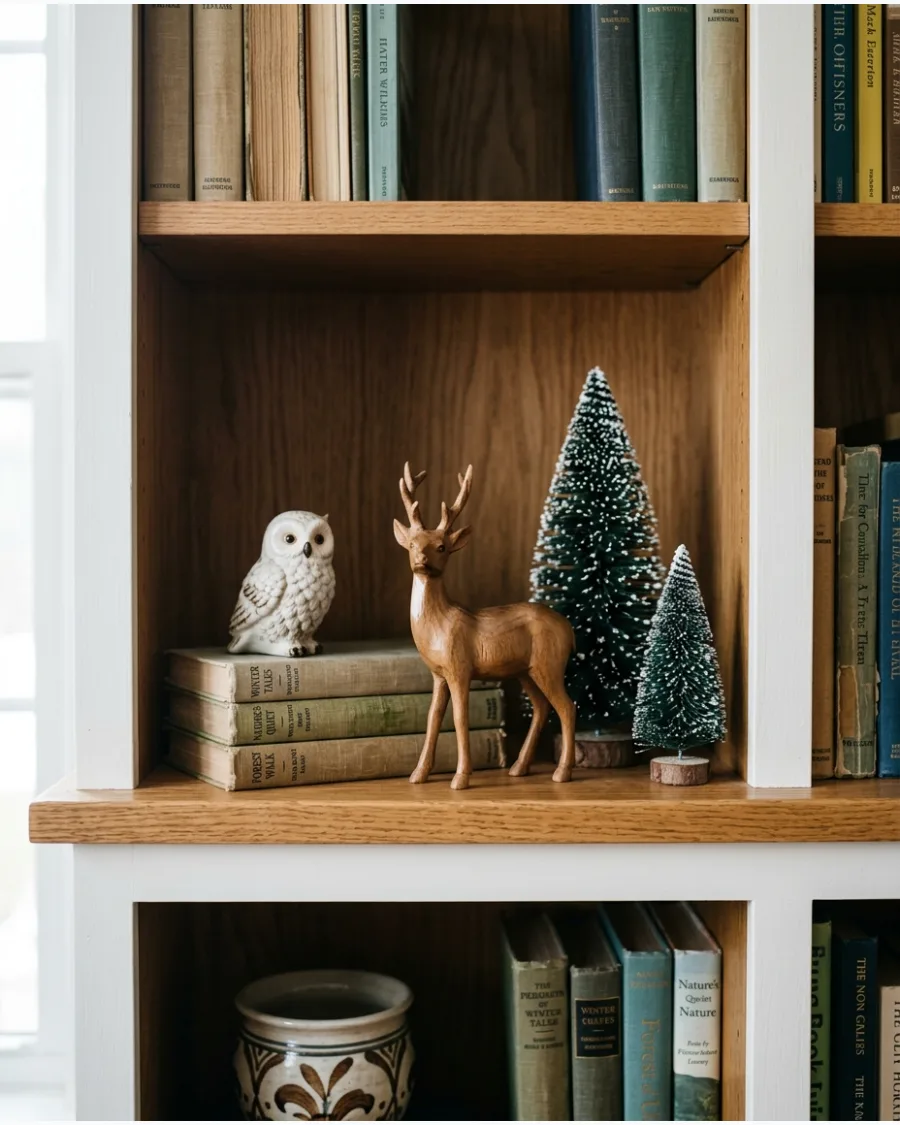
Build a winter forest scene by placing small animal figurines like deer, foxes, or owls among miniature evergreen trees. Use figurines made of wood, felt, or ceramic to keep the display feeling grounded and cohesive.
Position the animals at different angles so they appear to be moving through the woods on your shelf.
- Stick to a consistent material or color family for the animals, such as all white ceramic or all carved wood, to avoid a cluttered look.
- Use different heights of trees, from small bottlebrush to cone-shaped wood, to create a varied skyline for the animals.
- Add a few small white stones or bits of moss to the shelf to ground the figurines and finish the forest floor look.
Place the largest animal figurine toward one end of the shelf to act as a focal point for the entire vignette.
15. Birch Branch Winter Shelf
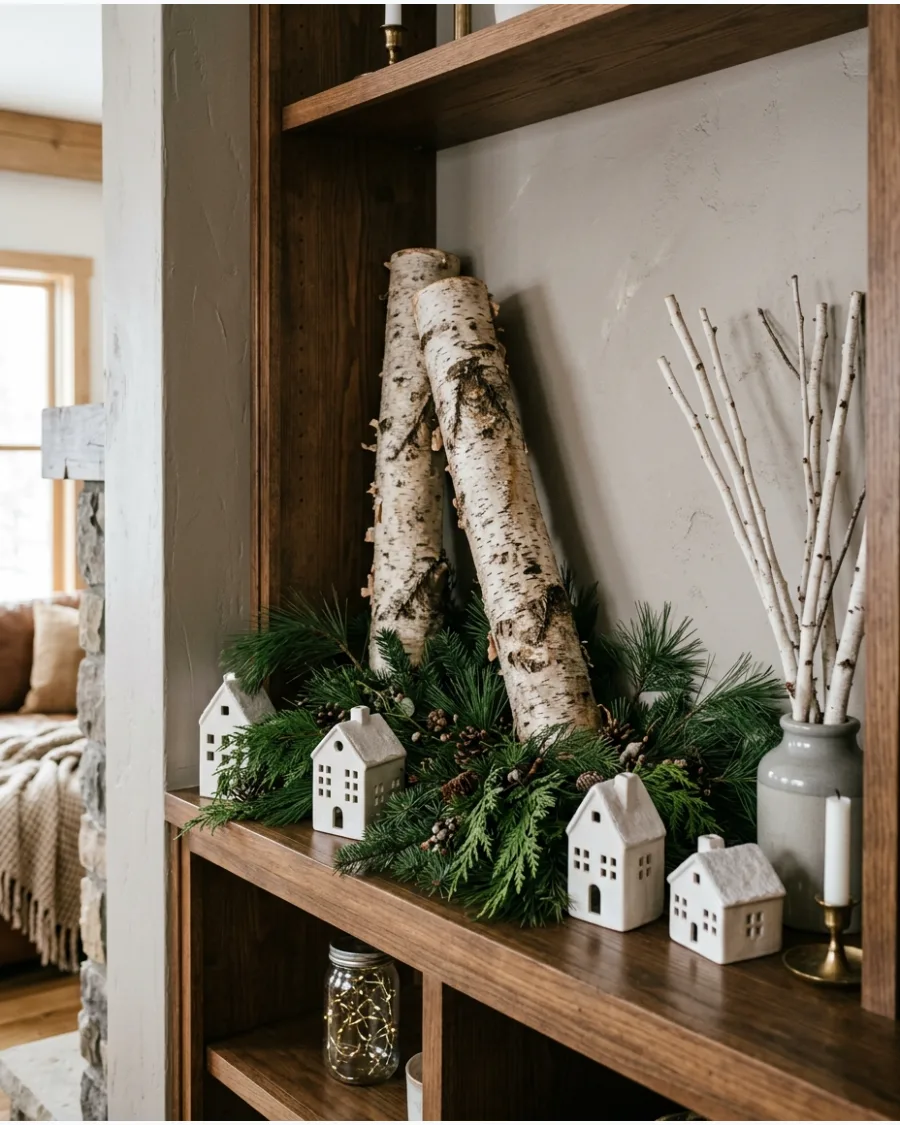
Integrate small birch logs or white bark branches as architectural elements to provide height and texture behind your holiday greenery. The white bark acts as a natural neutral that complements both snowy decorations and warm wood interiors.
Lean a few birch poles vertically in the corner of a deep shelf or lay them horizontally to act as a platform for smaller figurines.
- Select branches that are clean and free of loose debris to protect your shelving surfaces and books.
- Pair the birch with dark green pine or cedar to create a high-contrast look that mimics a winter forest.
- Wrap a small strand of white lights around the logs to highlight the unique texture of the peeling bark.
Use small clear adhesive bumpers on the ends of the logs to prevent them from sliding or scratching the shelf surface.
16. Natural Wood Bead Garland Shelf
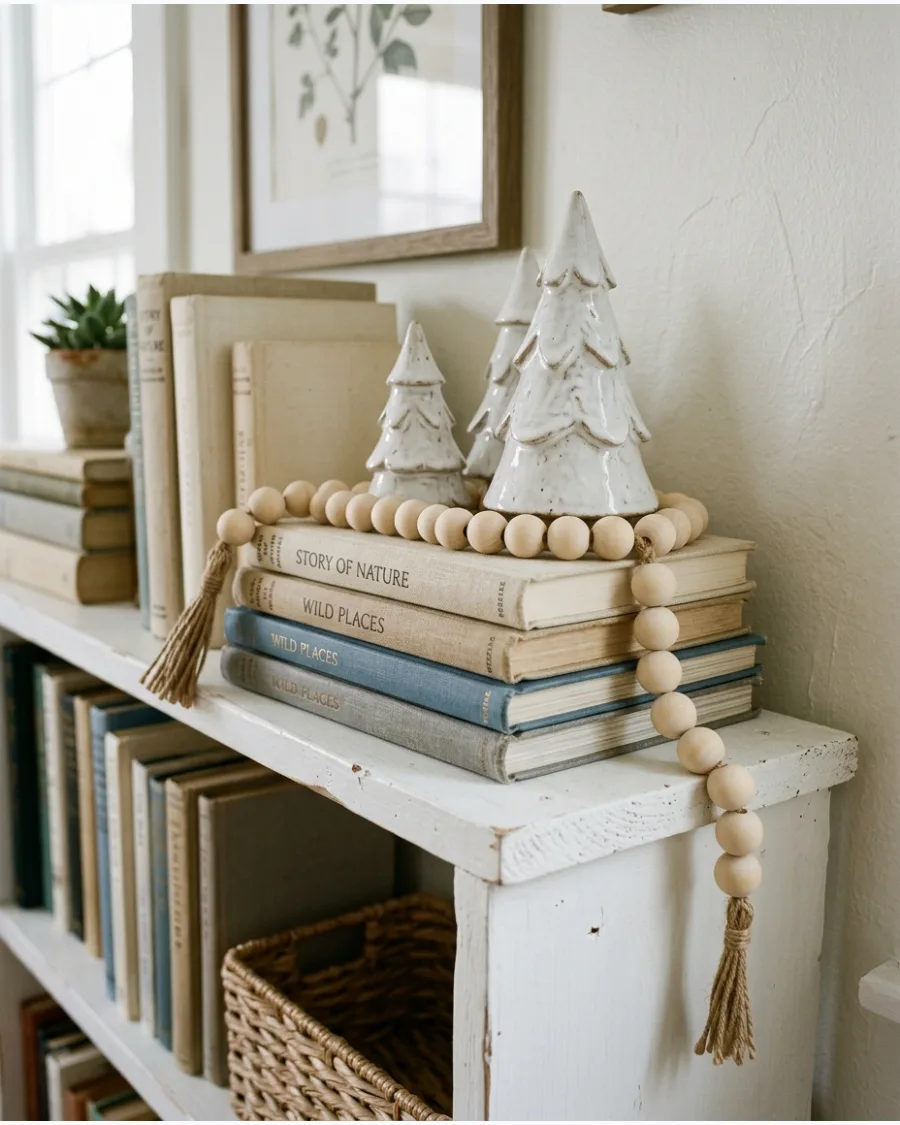
Use unfinished wood beads to introduce an organic texture that breaks up the rigid lines of a bookshelf. Drape the bead garland casually across stacked books, sprigs of greenery, and ceramic Christmas trees to connect disparate items. Ensure the garland follows a loose, winding path rather than a straight line.
- Choose beads in varying sizes or a mix of light wood tones to add depth without using bright colors.
- Allow the end of the garland to hang three to five inches over the front edge of the shelf to create a relaxed, layered look.
- Verify the garland is securely anchored by tucking it under a heavy book or ceramic tree to prevent it from sliding off the shelf.
Loop the garland around the neck of a ceramic tree twice to make it look like a custom ornament.
17. Kraft Paper Christmas Gift Shelf
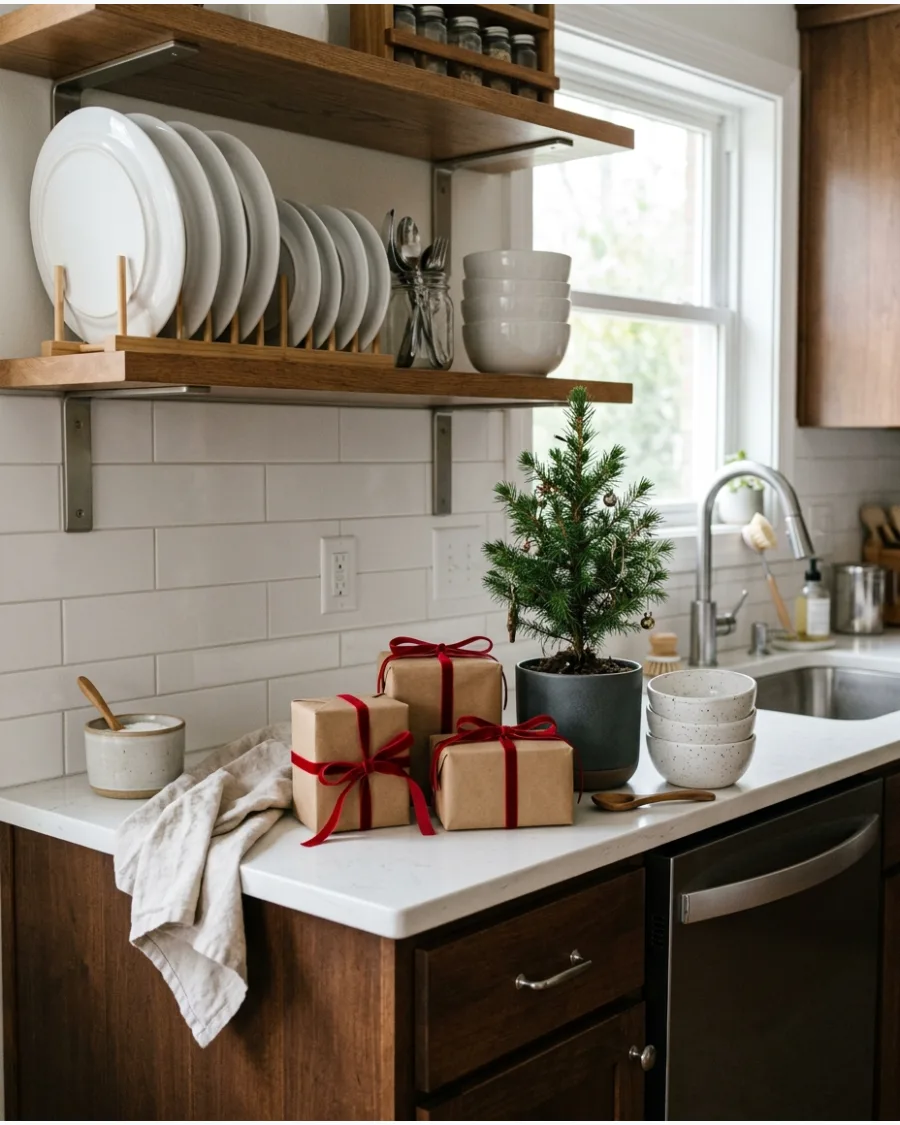
Tiny wrapped boxes serve as effective and inexpensive fillers for open shelving or kitchen nooks. Wrap small cardboard boxes in plain brown kraft paper and finish them with velvet, gingham, or twine bows. Position these parcels alongside mini trees or evergreen sprigs to fill gaps between everyday kitchenware.
- Select ribbon colors like deep forest green, burgundy, or black-and-white gingham to match your existing holiday palette.
- Stack two or three smaller boxes on top of each other to vary the height of the display.
- Use double-sided tape for a clean finish on the kraft paper, ensuring the boxes look like intentional decor rather than shipping packages.
Use jewelry boxes or empty tea tins as the base to keep the gifts small enough for shallow kitchen shelving.
18. Eucalyptus and Evergreen Christmas Shelf
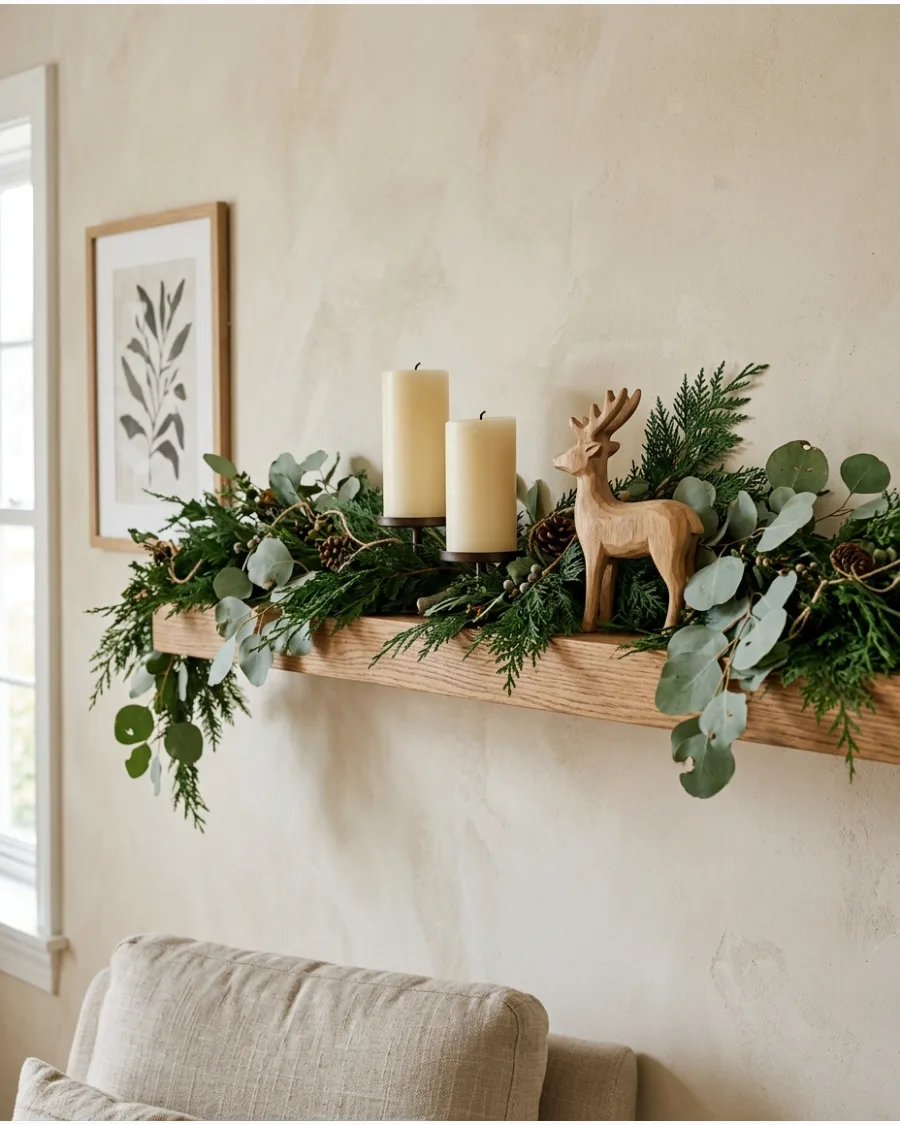
Avoid a monochromatic green look by combining different leaf shapes and tones. Mix soft, silver-toned eucalyptus leaves with darker pine or cedar branches to create a textured base on the shelf. This combination provides a more organic feel than traditional evergreen alone.
- Incorporate cream-colored candles or light wood decorations to provide a high-contrast backdrop for the greenery.
- Lay the eucalyptus on top of the evergreen so the larger, round leaves are fully visible against the needle textures.
- Check for shed needles or dry leaves every few days if using fresh branches, or opt for high-quality silk stems for a permanent display.
Use seeded eucalyptus specifically to add small, berry-like clusters that add texture without introducing red.
19. Mossy Woodland Christmas Shelf
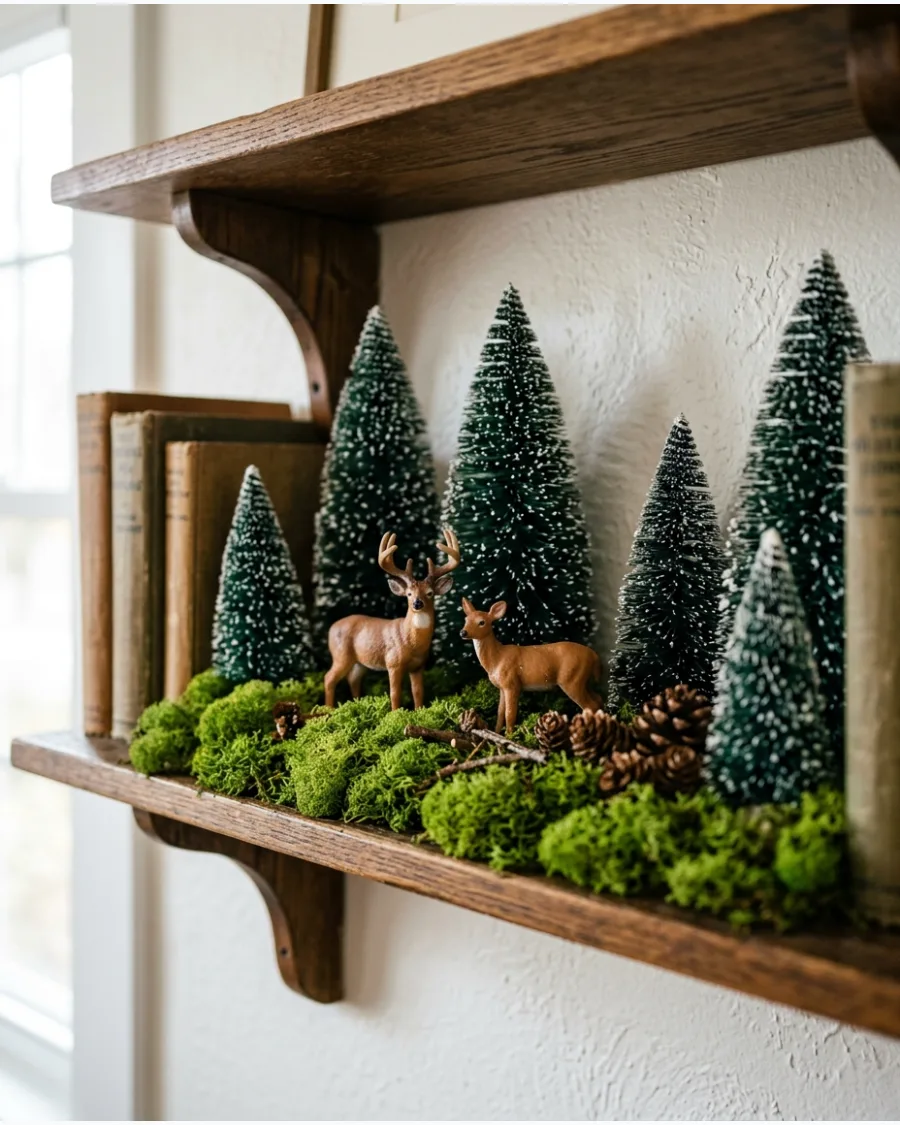
Transform a shelf into a miniature forest floor using earthy elements and low-profile textures. Layer preserved moss, miniature evergreen trees, pinecones, and small woodland animal figures to build a cohesive natural scene. Keep any artificial snow to a minimum so the focus remains on the rich greens and browns of the materials.
- Place small pieces of sheet moss directly on the shelf surface to act as a base for trees and figurines.
- Group woodland animals like deer or foxes in pairs to create small narrative clusters within the display.
- Clean the shelf surface thoroughly before laying down moss to ensure no dust is trapped underneath the natural fibers.
Use a variety of pinecone sizes—from tiny hemlock cones to standard pine—to mimic the random scattering of a real forest floor.
20. Mini Christmas Cabin Shelf Scene
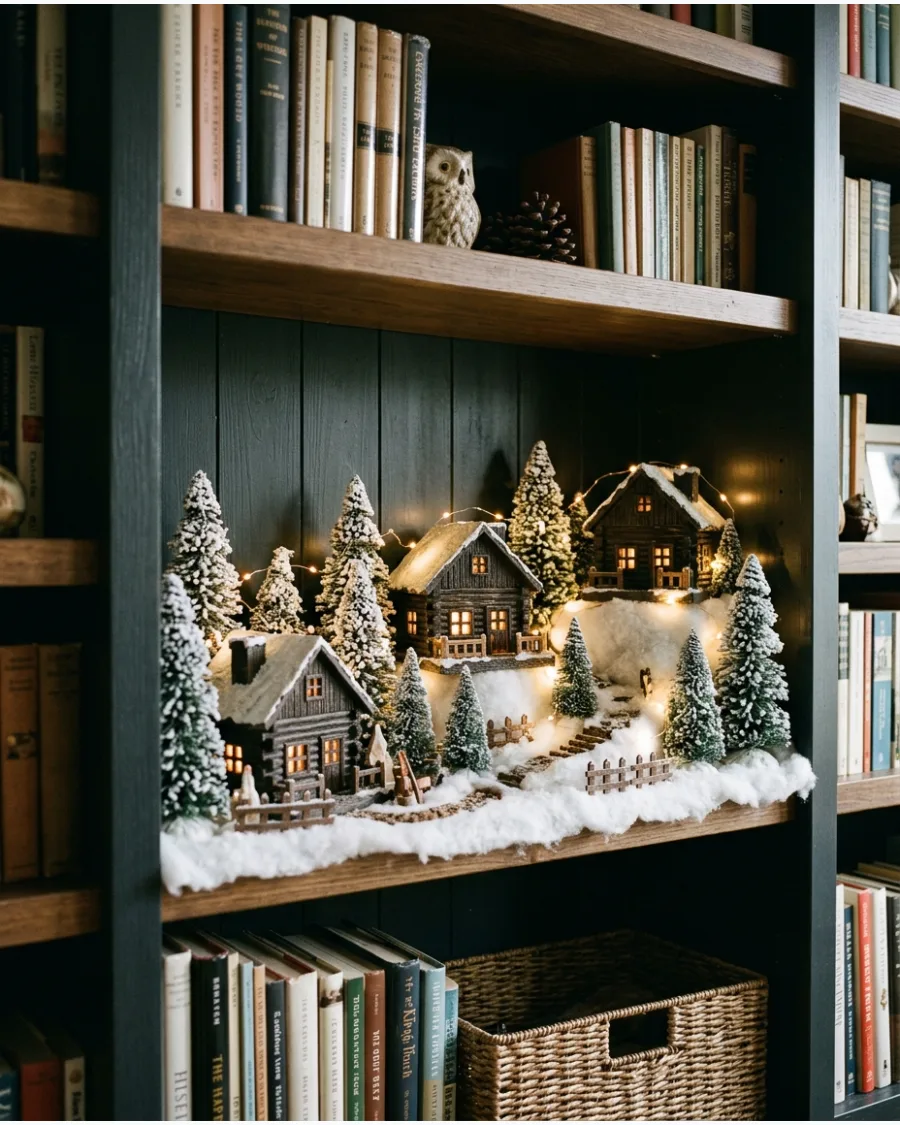
Use the depth of a shelf to build a three-dimensional winter village. Arrange miniature wooden or ceramic cabins at different depths and heights, surrounding them with small fir trees and warm lights. This layered approach makes the shelf look like a distant snowy mountain retreat rather than a flat line of houses.
- Place some houses on small wood blocks or overturned bowls hidden under a white cloth to create varying elevations.
- Use battery-operated LED fairy lights tucked behind the houses to provide a warm glow without visible cords.
- Add small logs or twigs near the cabins to represent firewood and enhance the rustic woodland theme.
Place a small mirror behind the houses to reflect the lights and make the village feel twice as deep.
SECTION 3: VINTAGE AND NOSTALGIC CHRISTMAS SHELF DECOR
21. Vintage Ceramic Christmas Tree Shelf
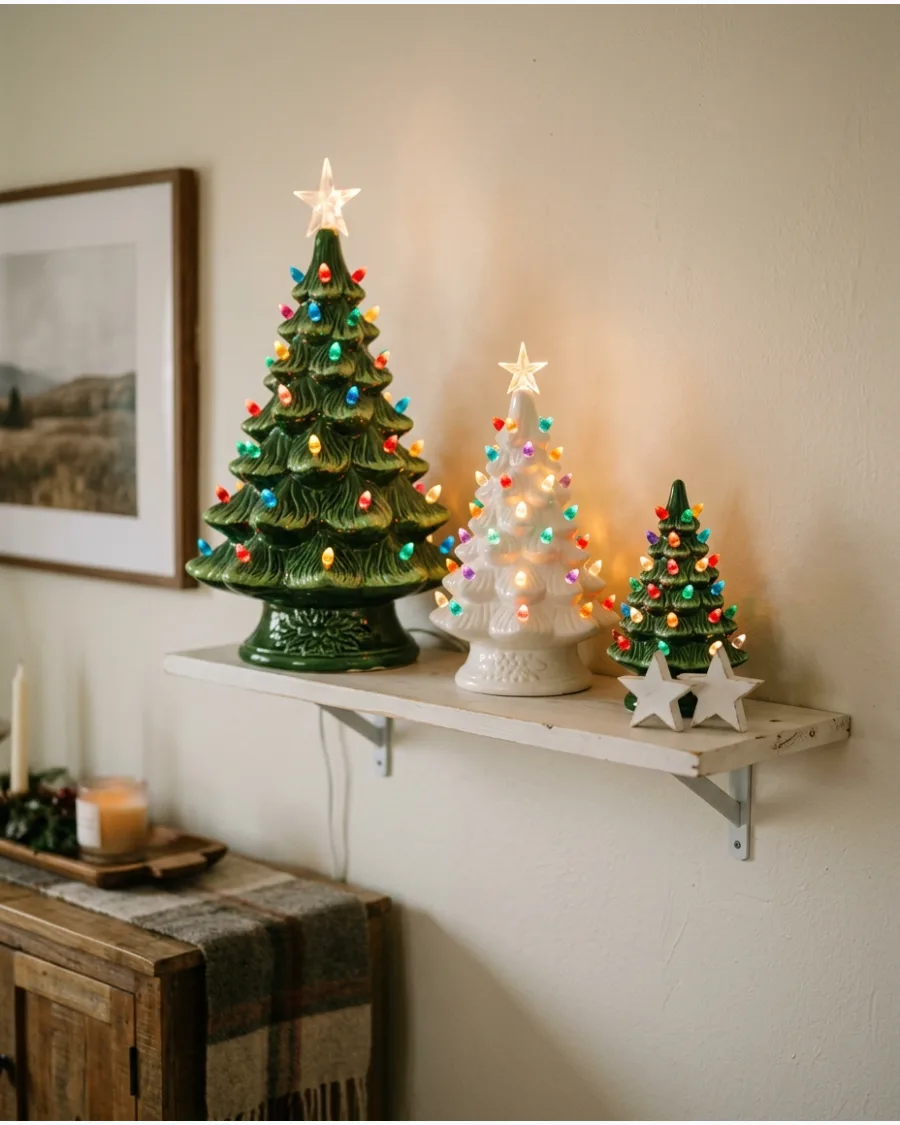
Create a nostalgic focal point by arranging ceramic Christmas trees of various heights on a single shelf. These classic pieces often feature built-in lights that provide a warm, low glow to the room.
Place the tallest tree toward the center-back and stagger the smaller ones in front to create depth. Keep the rest of the shelf simple to ensure the iconic silhouettes remain the primary focus.
- Choose trees in traditional forest green or mid-century white with multi-colored plastic bulbs.
- Group trees in odd numbers, such as clusters of three or five, for a balanced composition.
- Check that each tree has access to a nearby power outlet or use battery-operated versions to avoid visible cords.
Use adhesive cable clips along the back of the shelf to hide power cords behind the shelf supports.
22. Mercury Glass Christmas Shelf
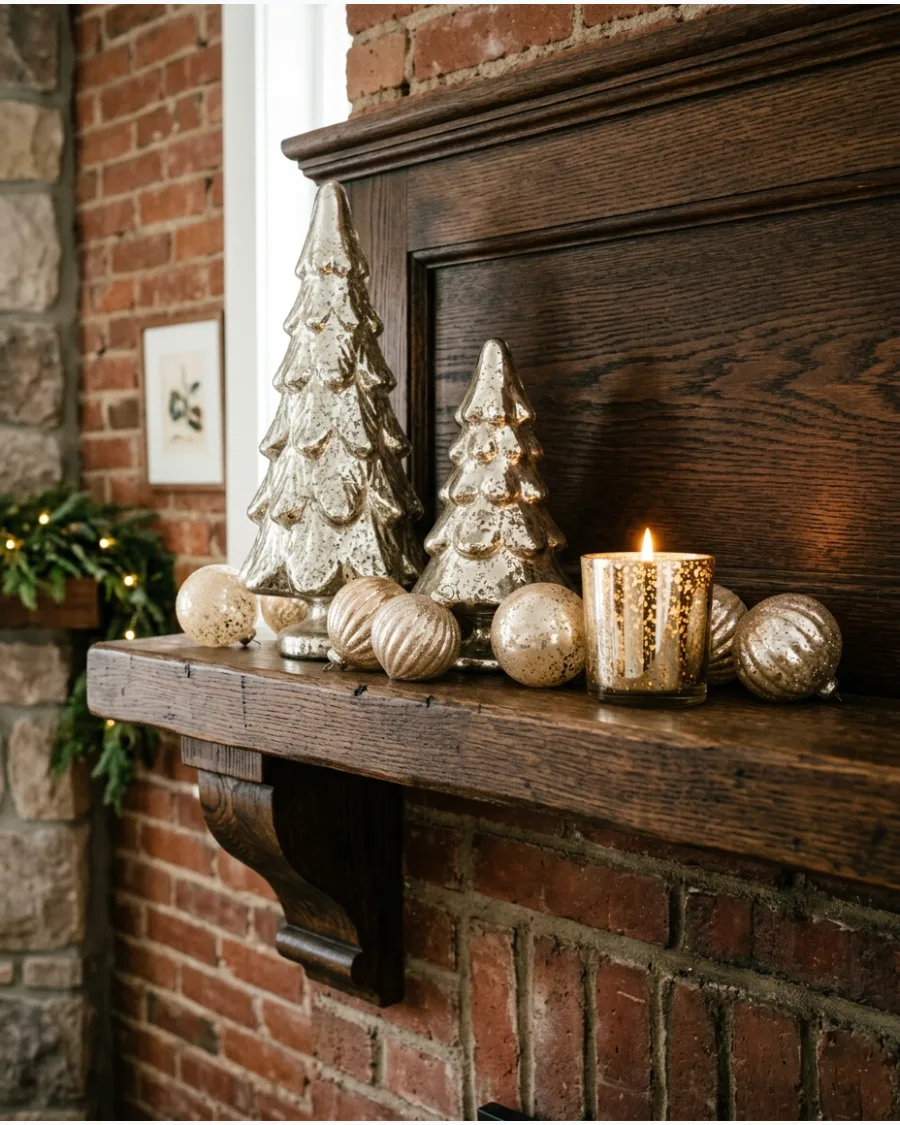
Mercury glass adds a soft, reflective quality to holiday displays without the harshness of polished chrome. Collect a variety of shapes like glass trees, speckled ornaments, and tall candleholders in metallic finishes.
Mix aged gold, silver, and champagne tones to create a curated, heirloom-style vignette on a mantel or bookshelf. The variety in height and shape prevents the metallic look from feeling too flat.
- Select items with a mottled or antiqued finish to better catch and soften ambient light.
- Incorporate different textures, such as ribbed glass trees alongside smooth spherical ornaments.
- Place tea lights or battery-operated candles inside mercury glass vessels to emphasize the speckled glass pattern.
Group these items on a mirror-topped tray to double the reflective effect and keep the arrangement contained.
23. Retro Tinsel Christmas Shelf
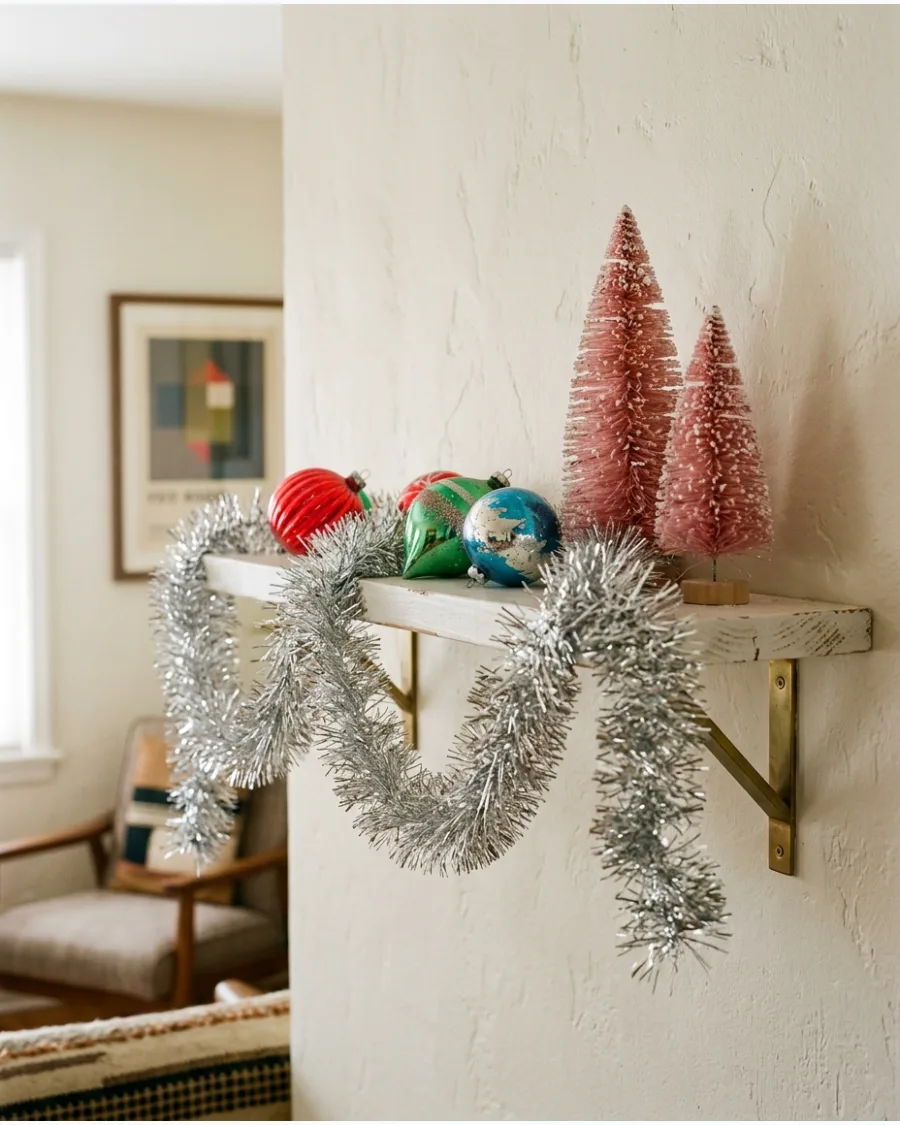
Celebrate mid-century holiday style by incorporating tinsel as a subtle accent rather than a heavy cover. Pair shiny tinsel garland with colorful glass ornaments and retro figurines like bottle brush trees or vintage Santas.
Drape a thin strand of silver tinsel along the front edge of the shelf to frame the colorful items behind it. This approach captures the sparkle of the era while maintaining a clean, modern shelf layout.
- Use classic silver or gold tinsel for a traditional look, or try icicle tinsel for a more delicate texture.
- Select ornaments in vibrant shades like turquoise, pink, and chartreuse to match the 1950s aesthetic.
- Secure the tinsel with clear removable hooks or small pieces of tape hidden on the underside of the shelf.
Use a hair dryer on a low, cool setting to gently fluff flattened tinsel after taking it out of storage.
24. Cozy 1990s Christmas Shelf
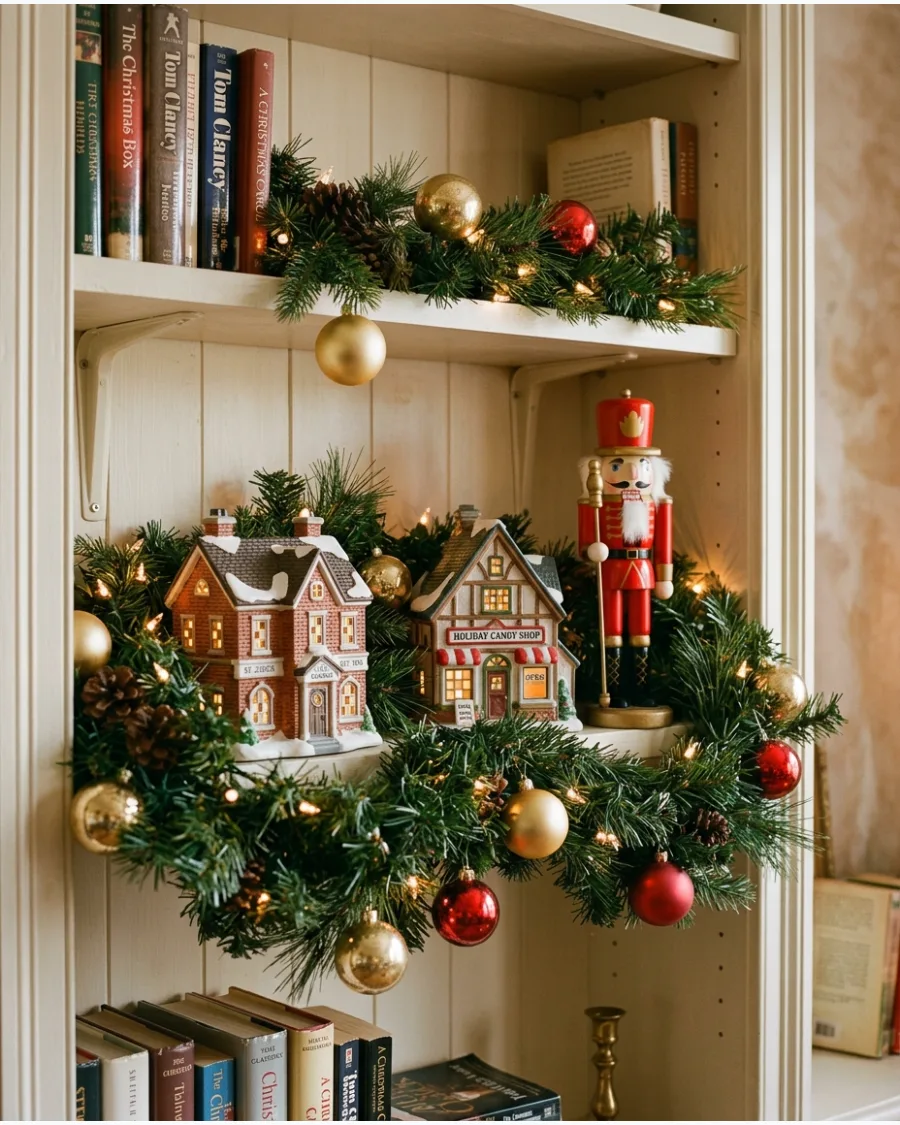
This style relies on the abundance and warmth often found in 1990s holiday home decor. Combine traditional red and green elements with thick evergreen garland and plenty of textured ornaments.
Layer several ceramic village houses or Nutcrackers among the greenery to create a dense, lived-in holiday scene. The goal is a look that feels full of family memories and classic color palettes.
- Choose a faux pine or cedar garland with a high needle count to act as a thick base for other decorations.
- Incorporate plaid ribbons or fabric elements to add soft textures between the harder ceramic pieces.
- Tuck small warm-white LED string lights into the garland to illuminate the layers from within.
Overlap items slightly rather than spacing them out evenly to achieve the characteristic full look of this era.
25. Antique Book Christmas Shelf
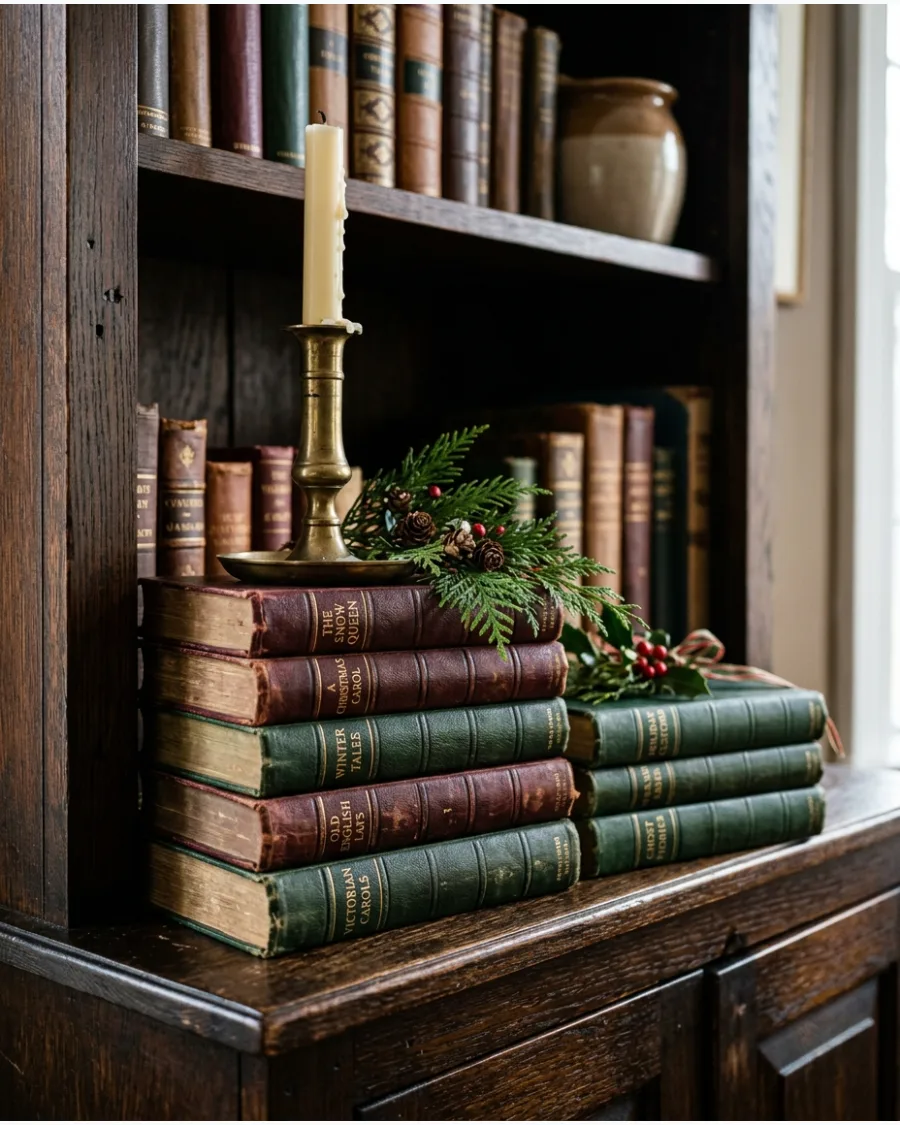
For a library-inspired look, use books as pedestals for your holiday accents. Stack vintage or leather-bound books in shades of burgundy, brown, and deep green to provide varied heights.
Set brass candlesticks and sprigs of fresh greenery on top of the book stacks to create a sophisticated, old-fashioned display. This technique works perfectly for deep bookshelves where you can layer items from front to back.
- Look for books with gold-leaf lettering on the spine to coordinate with brass or gold holiday accents.
- Incorporate natural elements like pinecones or dried berries to soften the transition between books and metal.
- Check the stability of the book stacks before placing heavy candlesticks or fragile ornaments on top.
If you do not have vintage books, wrap modern hardbacks in brown craft paper or dark fabric to unify the color scheme.
26. Vintage Christmas Postcard Shelf
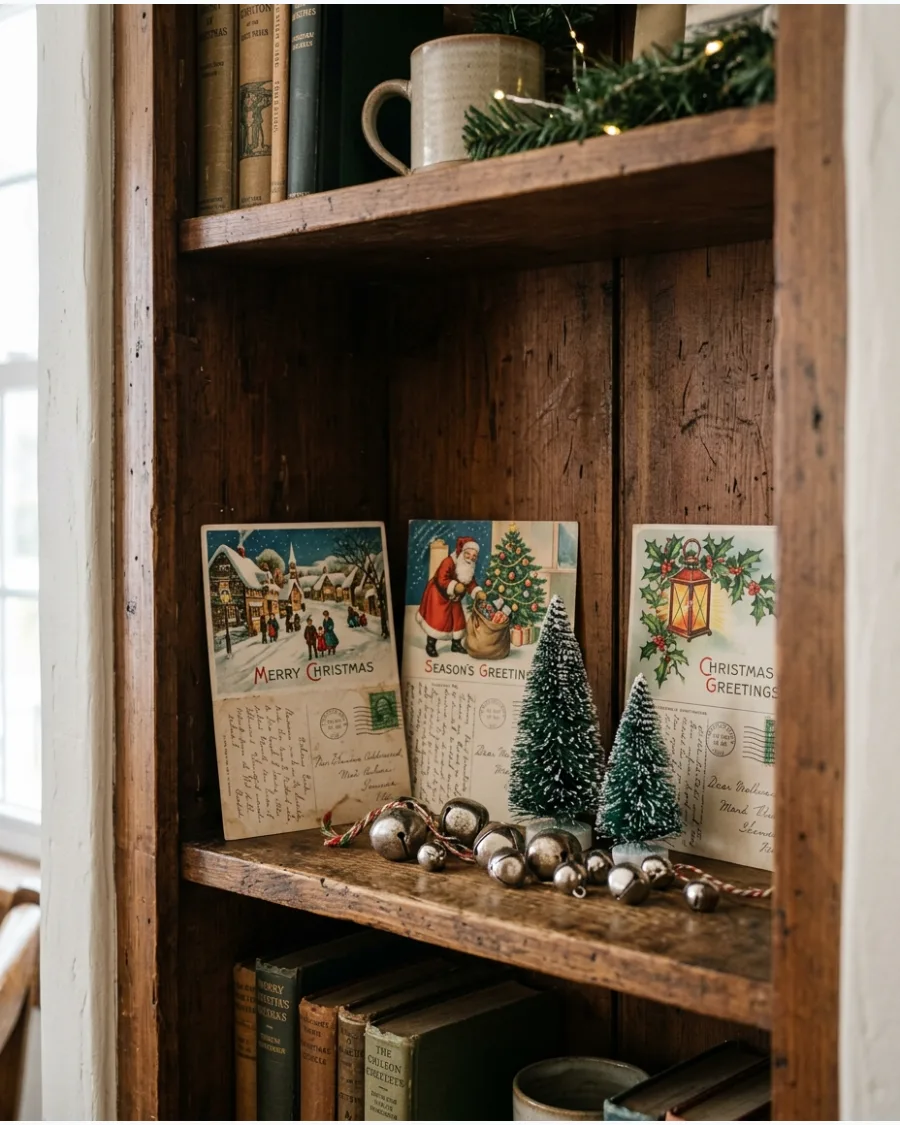
Create a nostalgic backdrop by using paper ephemera to fill the vertical space between shelves. Lean the largest postcards or vintage prints against the back wall of the shelf to establish a themed foundation for the rest of your decor. Once the art is in place, layer in smaller accents like silver bells or miniature trees that do not block the central images.
- Select cards with a consistent art style, such as Victorian-era illustrations or mid-century winter scenes, to keep the shelf looking organized.
- Use a small amount of museum putty on the bottom edges of the cards to keep them from sliding forward on smooth wood or glass surfaces.
- Group three cards of varying heights together in one section for a balanced look rather than spreading them out in a single line.
If you want a postcard to stand perfectly upright without leaning, use a small acrylic block or a clear plate stand as a hidden support.
27. Old-Fashioned Santa Shelf
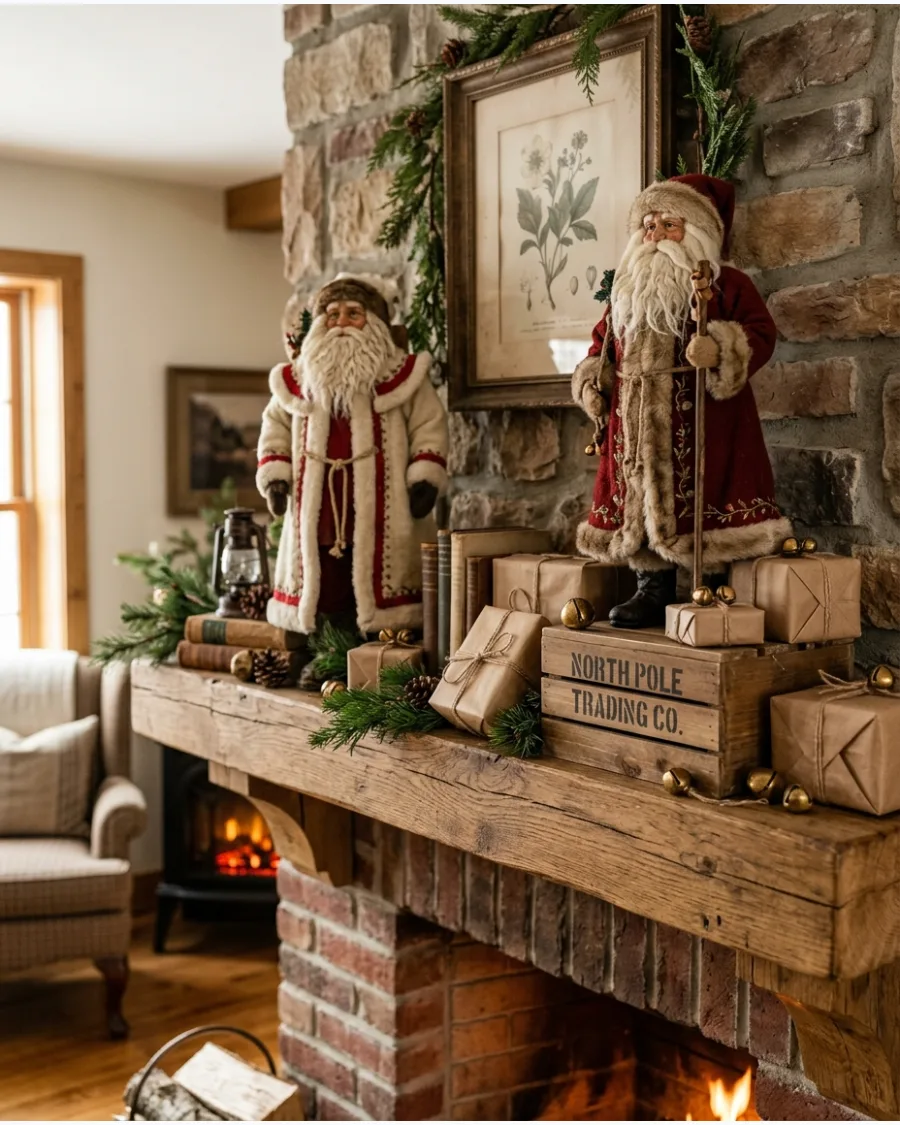
Focus on a specific style of holiday figure by choosing Santas inspired by early 20th-century illustrations. Arrange two or three Santa figurines at different heights using stacks of vintage-style books or small wooden crates to create a tiered display. Surround the figures with muted red and cream accents, like simple ornaments or small wrapped packages, to maintain an aged look.
- Choose Santas made from materials like resin, paper mâché, or fabric that mimic the texture and finish of older collectibles.
- Incorporate tarnished silver or dull brass bells to complement the muted color palette and add a metallic element.
- Center the largest figurine on the shelf and place smaller toys or gifts around it to create a classic pyramidal shape.
If your Santa figurines have delicate or uneven bases, place them on a small fabric doily to protect the shelf surface and add a soft texture.
28. Vintage Brass Bell Collection
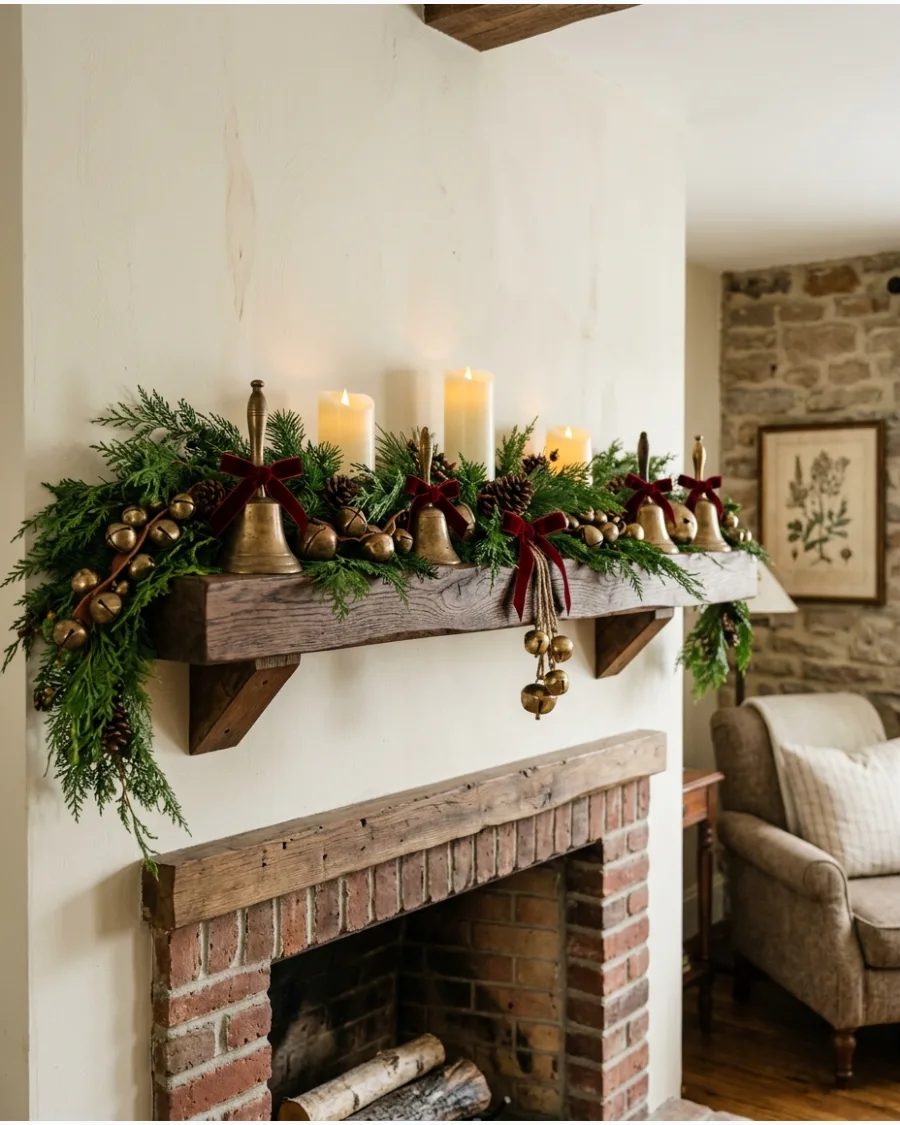
Combine various styles of brass bells to create a textured metal collection that feels gathered over time. Nestle the bells into a dense runner of faux cedar or pine greenery to provide a dark, natural contrast to the warm metallic finish. Add deep navy or black velvet ribbons to the bell handles to tie the look together and suggest an old-world atmosphere.
- Check that the bells share a similar brass finish, whether polished or antiqued, to ensure the collection looks cohesive.
- Drape the greenery slightly over the front edge of the shelf to soften the hard lines and make the display feel more integrated.
- Place battery-operated flameless taper candles nearby to safely highlight the shine of the brass in the evening.
Vary the sizes of the bells significantly to create a sense of scale, placing the largest handbells toward the back of the shelf.
29. Vintage Toy Christmas Shelf
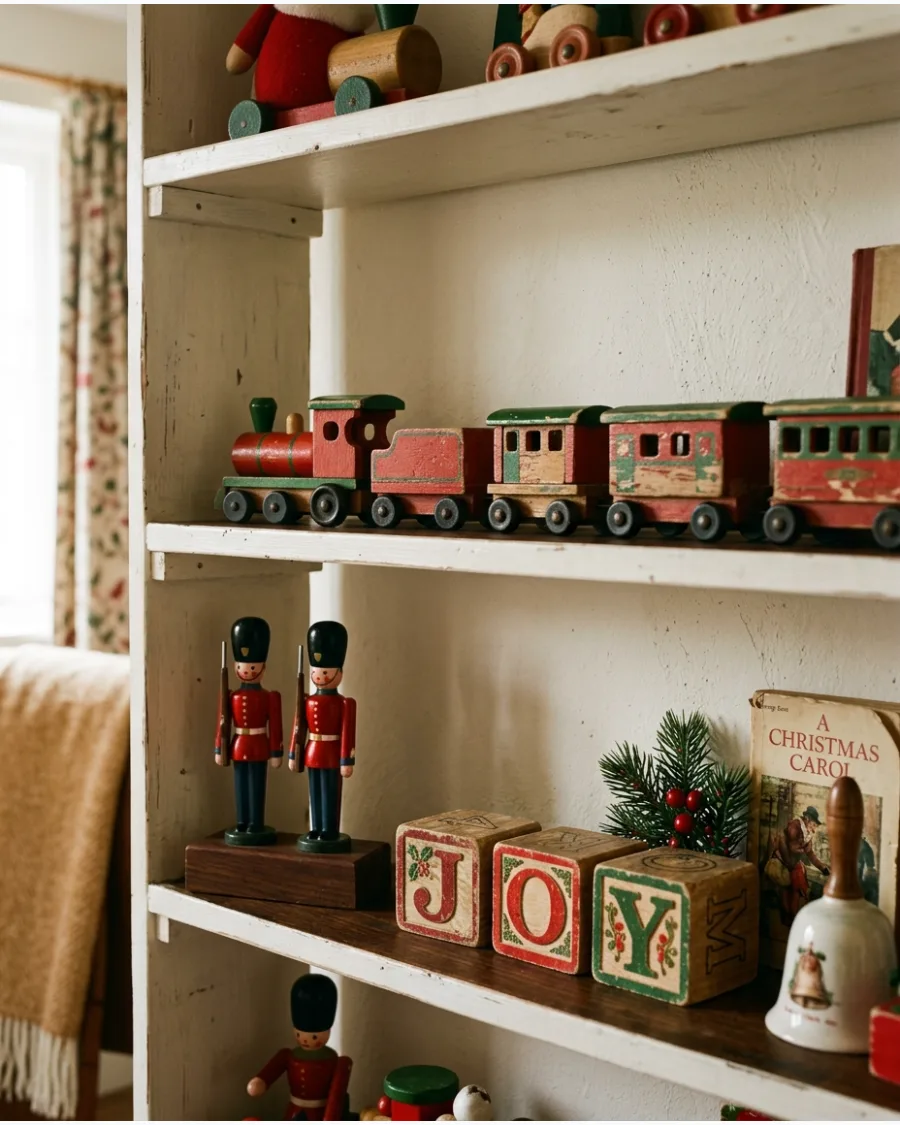
Use classic wooden toys to evoke the feeling of a nostalgic holiday workshop on your shelves. Position a wooden toy train or a set of painted toy soldiers along the middle of the shelf to create a sense of movement and play. Repeat a consistent color palette of hunter green, cherry red, and natural wood across the toys to keep the assortment looking like a curated set.
- Look for toys made from solid wood or painted tin to ensure they have enough weight to stay upright on the shelf.
- Group smaller items like spinning tops or wooden blocks in a low-sided tray to prevent them from looking disorganized.
- Measure the height between your shelves before choosing taller items like rocking horses or nutcrackers to ensure they fit properly.
If toy wheels make an item unstable, use a tiny piece of clear double-sided tape or museum wax on the bottom of the wheels to keep it from rolling.
30. Heirloom Ornament Christmas Shelf
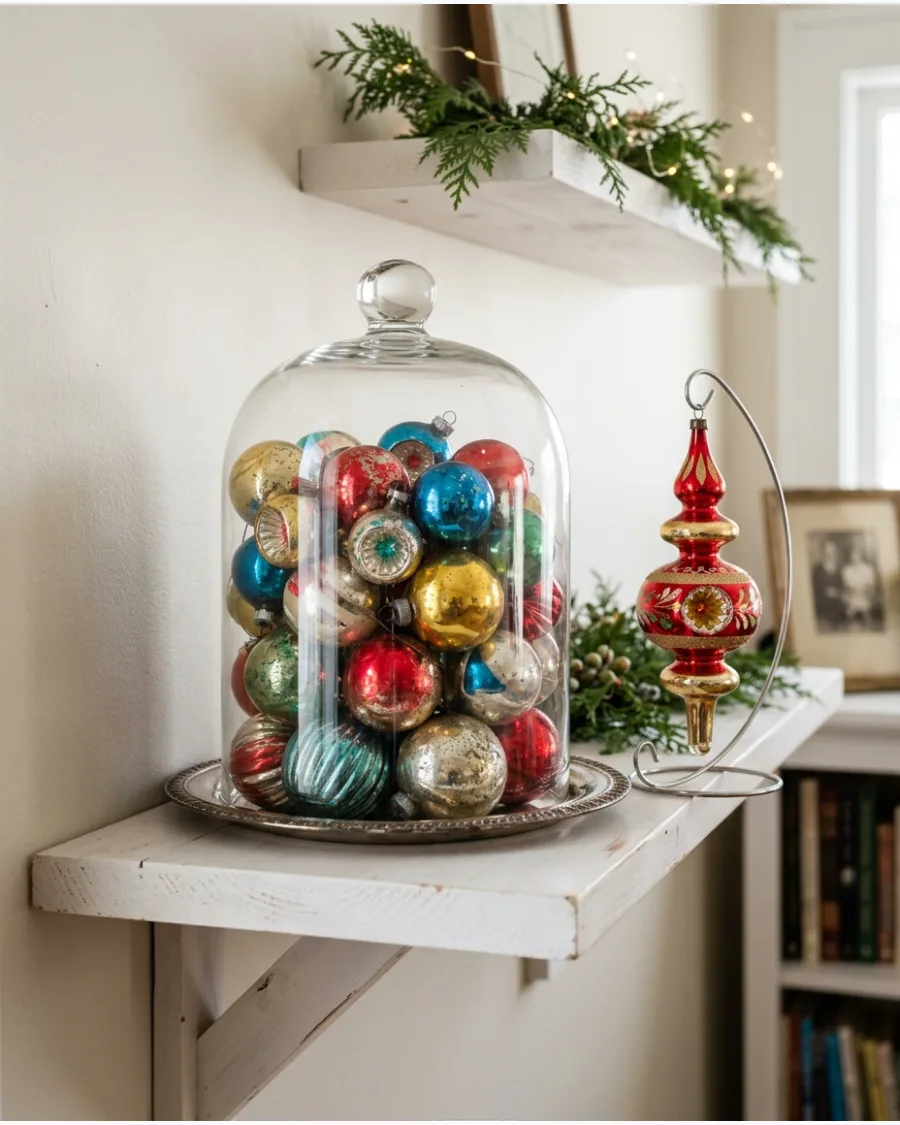
Protect and highlight fragile family ornaments by displaying them on shelving rather than the high-traffic tree. Place your most delicate glass ornaments inside a glass cloche or a shallow silver tray to keep them safe while keeping them fully visible. Mix different shapes and ages to showcase the history of your collection and emphasize a personal, lived-in holiday style.
- Select a container that allows light to pass through, such as a clear glass bowl, to enhance the shimmer of the vintage glass.
- Line the bottom of metal trays or glass bowls with a thin layer of white cotton batting or silk fabric to provide a soft cushion for the ornaments.
- Place the largest or heaviest ornaments at the bottom of the container to create a stable base for the smaller pieces on top.
Use a soft microfiber cloth to gently remove fingerprints or dust from glass ornaments before placing them inside a display cloche.
SECTION 4: GINGERBREAD AND CANDY CHRISTMAS SHELVES
31. Gingerbread Christmas Village Shelf
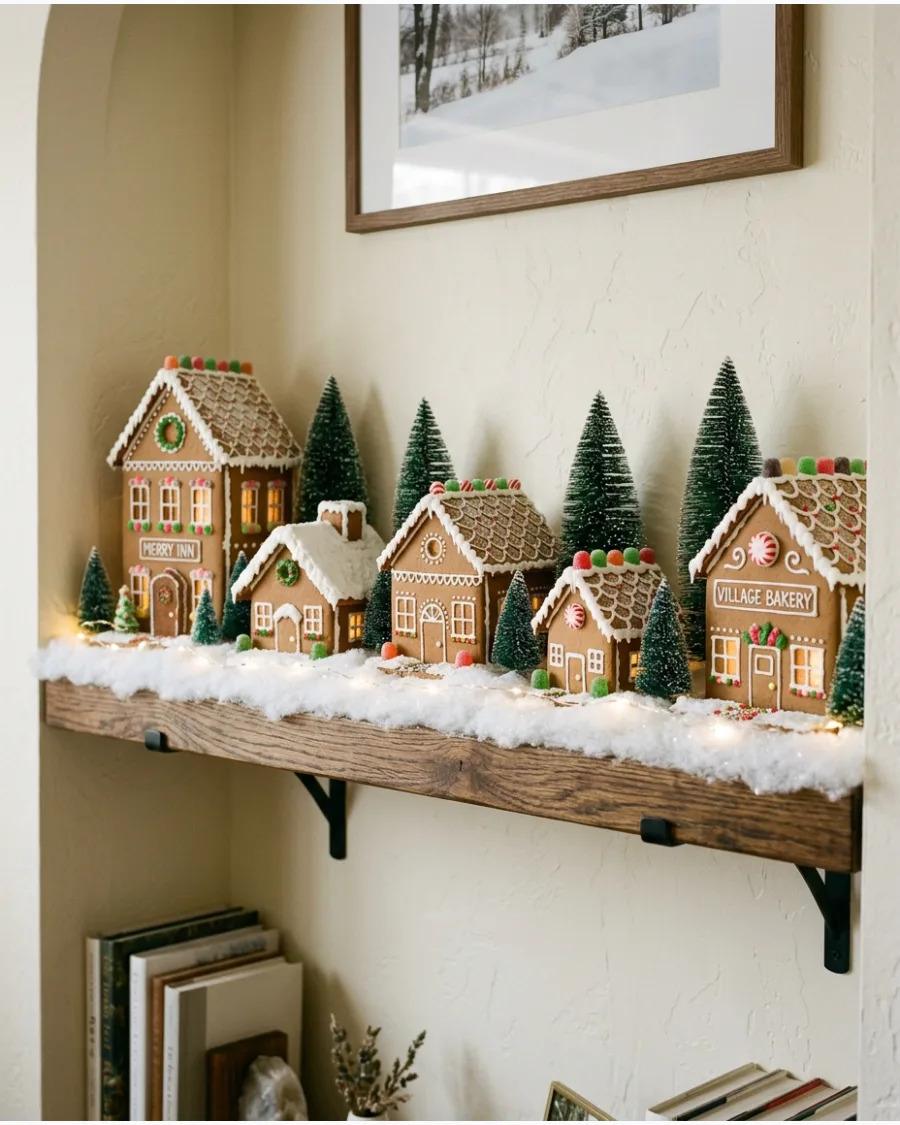
Arrange a collection of gingerbread houses along a single shelf to create a miniature winter town. Set the houses at different depths and use small risers or stacks of books to vary their heights for a more dimensional streetscape. Intersperse the buildings with bottle brush trees, candy canes, and a string of warm fairy lights to mimic a glowing neighborhood.
- Choose a mix of large and small gingerbread structures to prevent the display from looking flat or repetitive.
- Snake battery-powered lights behind the houses so the glow peeks through the windows without visible wires.
- Place tiny bottle brush trees in clusters of three or five to anchor the streets between the buildings.
Use loose faux snow or white felt at the base of the houses to hide the battery packs for the lights.
32. Neutral Gingerbread Christmas Shelf
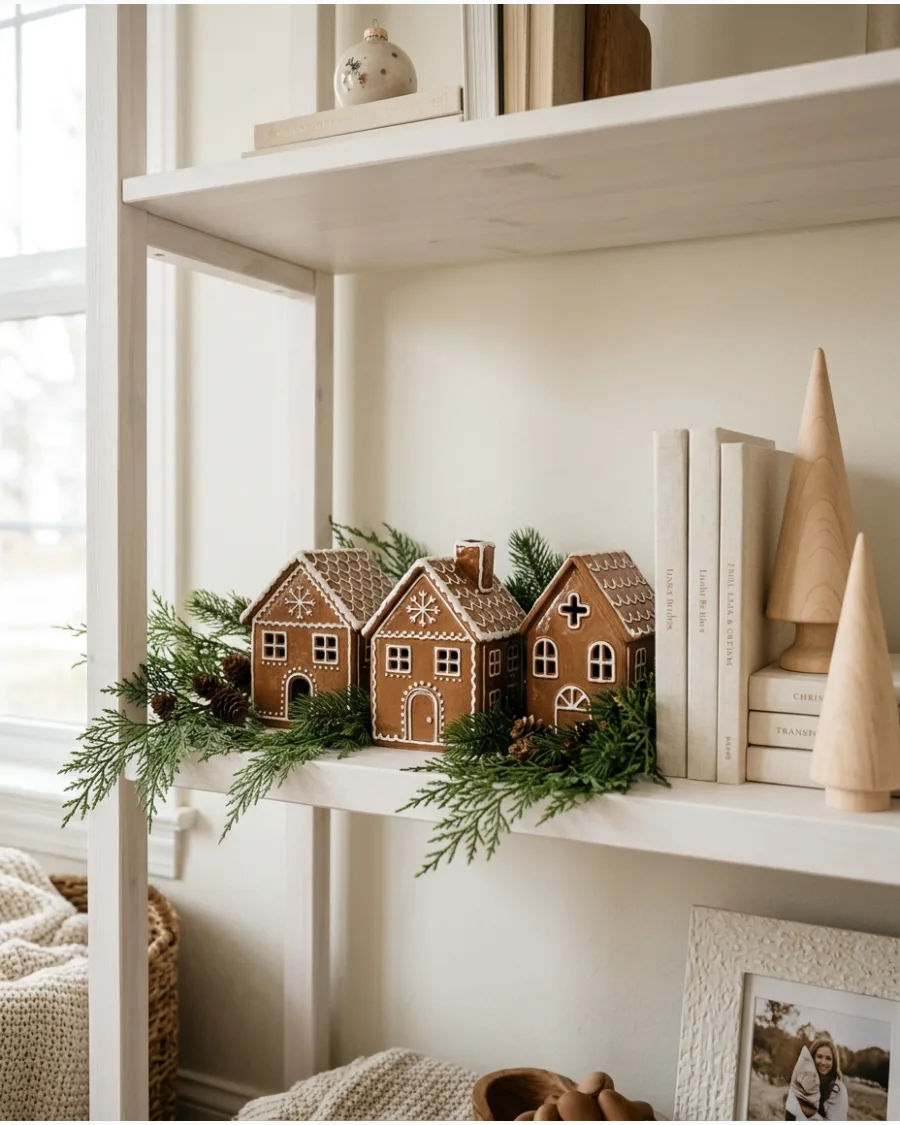
Style a cohesive holiday scene by using brown ceramic or resin gingerbread houses featuring simple white icing details. This approach softens the traditional gingerbread theme, making it a better fit for homes with a muted or modern aesthetic.
Place the largest gingerbread house in the center of the shelf and flank it with smaller versions or wood trees to establish a clear focal point. Layering in artificial greenery provides a dark backdrop that helps the light brown tones of the houses stand out.
- Select houses with a matte finish and minimal embellishments to maintain a sophisticated, earthy color palette.
- Tuck sprigs of faux cedar or pine around the base of each house to hide battery packs for any internal lights.
- Incorporate cream-colored accessories like ceramic vases or stacked neutral books to add height and bridge the gap between the brown and green elements.
Use battery-operated tea lights inside the houses to create a warm glow without the mess of melting wax or real flames.
33. Candy Cane Christmas Shelf
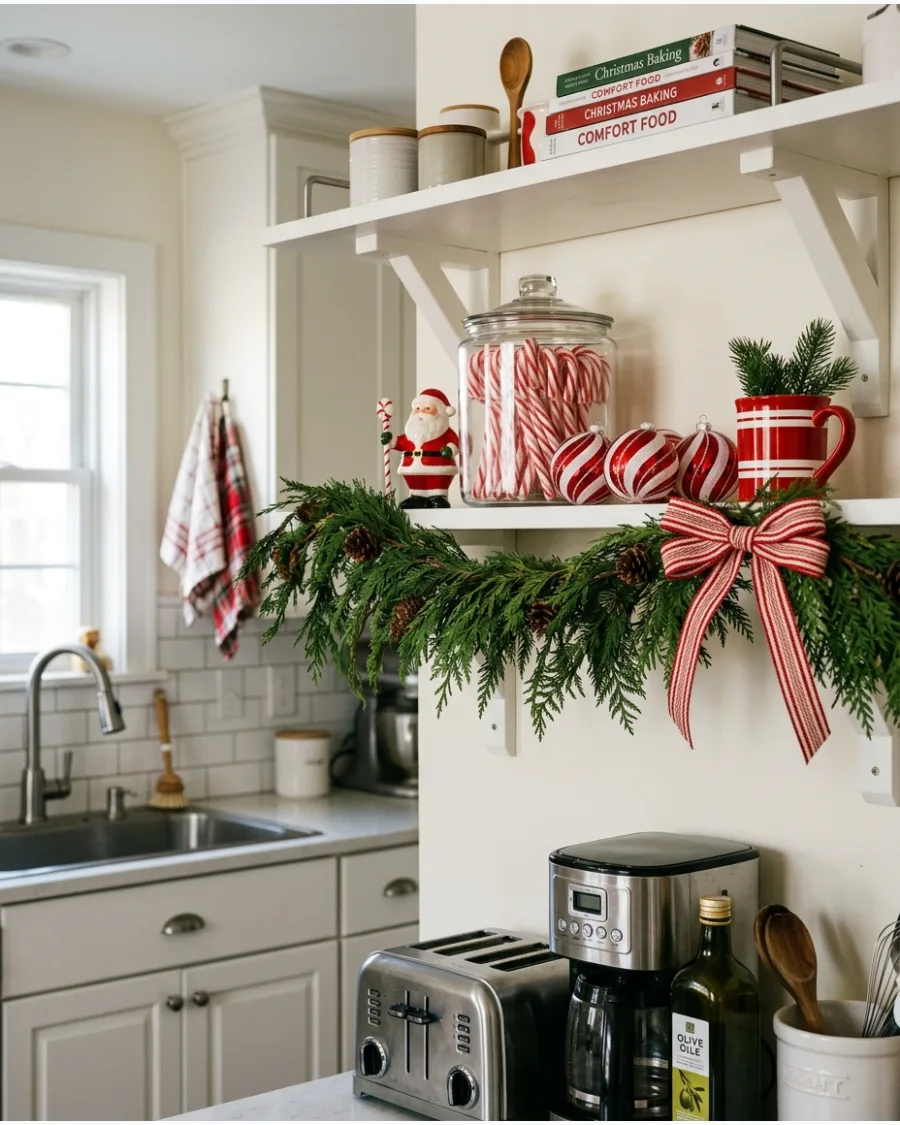
Create a bold, high-contrast display by sticking to a strict red-and-white striped color palette. Thread striped ribbons through your existing shelf items and lean bundles of oversized candy canes against the back wall of the unit. To keep the look from becoming overwhelming, tuck evergreen branches into the gaps to provide a natural resting spot for the eye.
- Check that the red tones of your ornaments and ribbons match to maintain a unified color scheme across the shelf.
- Group round peppermint-patterned ornaments in clear glass jars to add height and a clean glass texture.
- Secure heavy striped bows to the corners of the shelf using removable adhesive hooks or floral wire.
Use real candy canes for fragrance, but keep them in their wrappers if you live in a humid climate to prevent sticking.
34. Peppermint Christmas Shelf
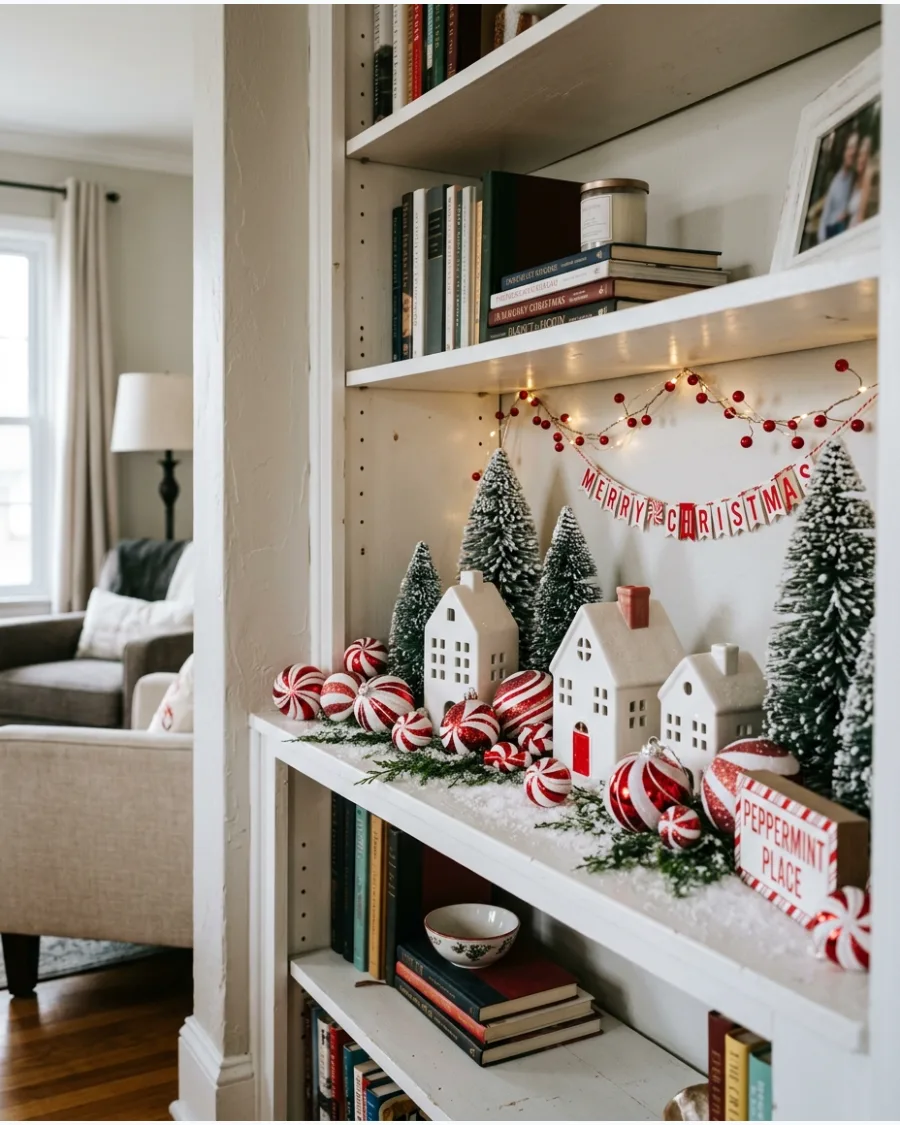
Focus on the whimsical side of the holidays with a display centered on peppermint swirls and snowy white textures. Pair red-and-white candy-shaped ornaments with stark white ceramic houses and frosted snowy bottle brush trees. This theme relies on a bright, airy feel, so leave enough space between items to let the white elements stand out.
- Select white ceramic houses with matte finishes to contrast against the glossy sheen of peppermint candy decor.
- Place round peppermint-swirl discs at the back of the shelf to act as a graphic backdrop for smaller figurines.
- Use snow-flocked greenery instead of plain green to maintain the cool, wintry color temperature of the palette.
Use white museum wax to steady top-heavy candy ornaments on flat shelf surfaces.
35. Gingerbread Bakery Shelf
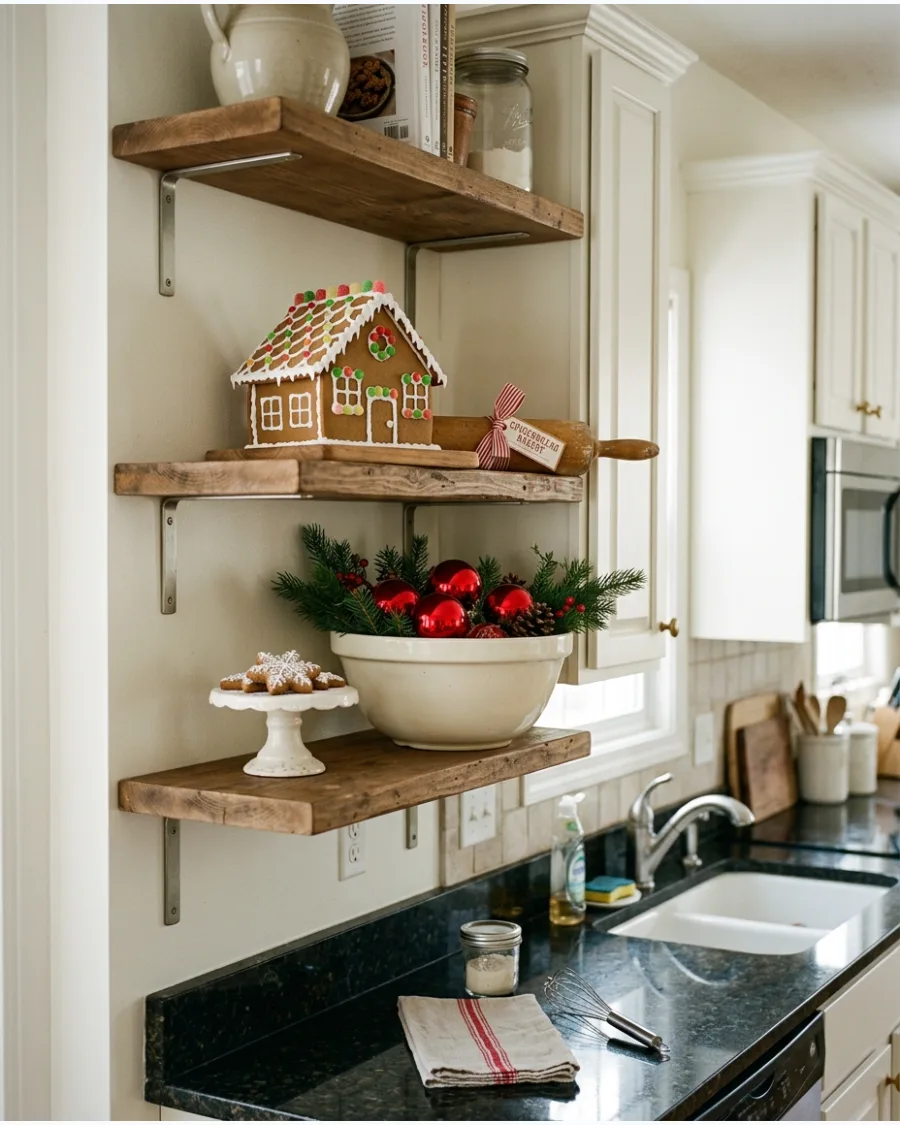
Transform your kitchen or dining area shelving into a charming miniature holiday bakery scene. Combine gingerbread houses with functional kitchen items like wooden rolling pins, white ceramic mixing bowls, and small tiered cake stands. Adding miniature cookie signs or jars helps define the bakery theme while making use of vertical shelf space.
- Select vintage-style rolling pins or flour sifters to give the display a nostalgic, lived-in feel.
- Arrange miniature faux cakes or stacks of real gingerbread cookies on small pedestals to vary the height of the scene.
- Place items in logical workstation clusters, such as a bowl next to a rolling pin, to tell a visual story.
Tie red-and-white baker's twine around wooden spoons or rolling pins to tie them into the holiday color scheme.
36. Christmas Cocoa Bar Shelf
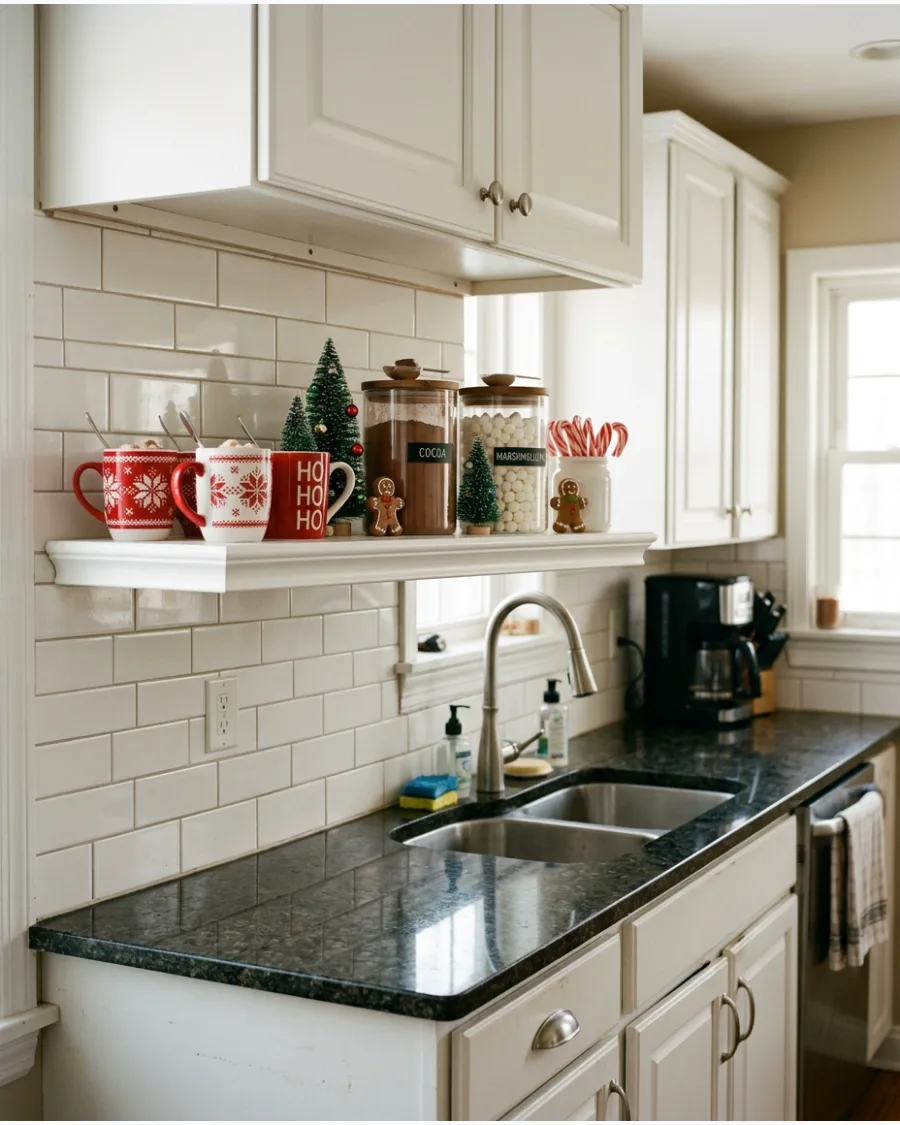
Convert an open kitchen shelf into a functional drink station by blending your daily beverage supplies with seasonal accents. Place your holiday-themed mugs at one end and center two or three glass canisters filled with cocoa powder and marshmallows for easy reach. Weave in small gingerbread man figures and mini bottle brush trees to fill the empty spaces between the jars.
This arrangement keeps your counters clear while keeping festive treats ready for guests.
- Choose clear glass jars with rubber gaskets to keep dry ingredients fresh and visible for a clean look.
- Stand candy canes upright in a heavy ceramic cup or small pitcher to prevent them from sliding or rolling off the shelf edge.
- Check that any decorative gingerbread figures or trees are made of non-porous materials if they will be sitting near steam from a kettle or coffee maker.
Measure the vertical space between your shelves before buying jars to ensure there is enough clearance to remove the lids without tilting the containers.
37. Pink Gingerbread Christmas Shelf
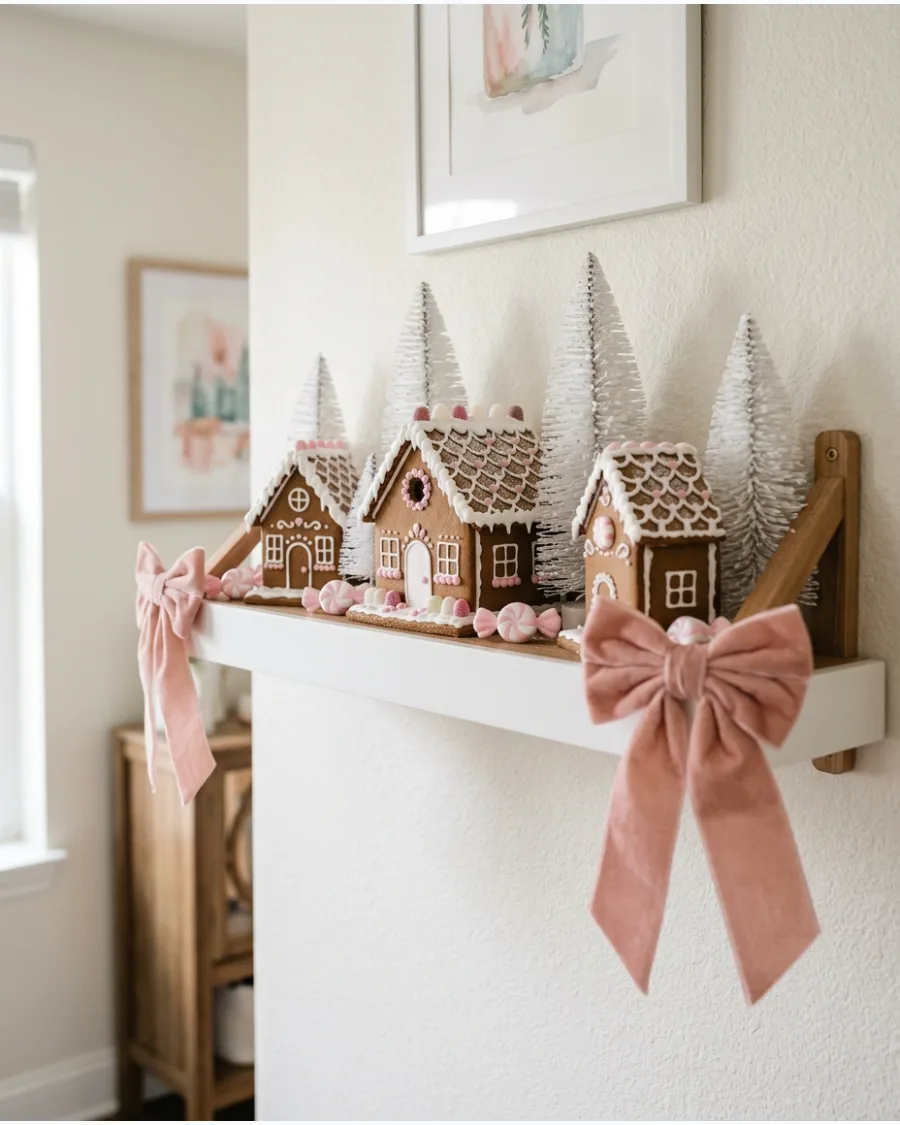
Create a soft, whimsical display by pairing traditional brown gingerbread houses with a pastel color palette. Drape blush pink velvet bows over the corners of the shelf and nestle snowy white bottle brush trees around the gingerbread structures. This combination prevents the pink from feeling too bright while highlighting the warm tones of the cookies.
- Select gingerbread houses with white frosting details to coordinate with pastel peppermint ornaments.
- Vary the heights of the white trees to create a sense of depth behind the smaller candy-themed accents.
- Check the weight of any hanging candy ornaments to ensure they do not pull on the pink ribbons or bows.
Use a matte pink spray paint on inexpensive plastic candy ornaments to achieve a custom pastel look that matches your ribbons.
38. Red and White Candy Christmas Shelf
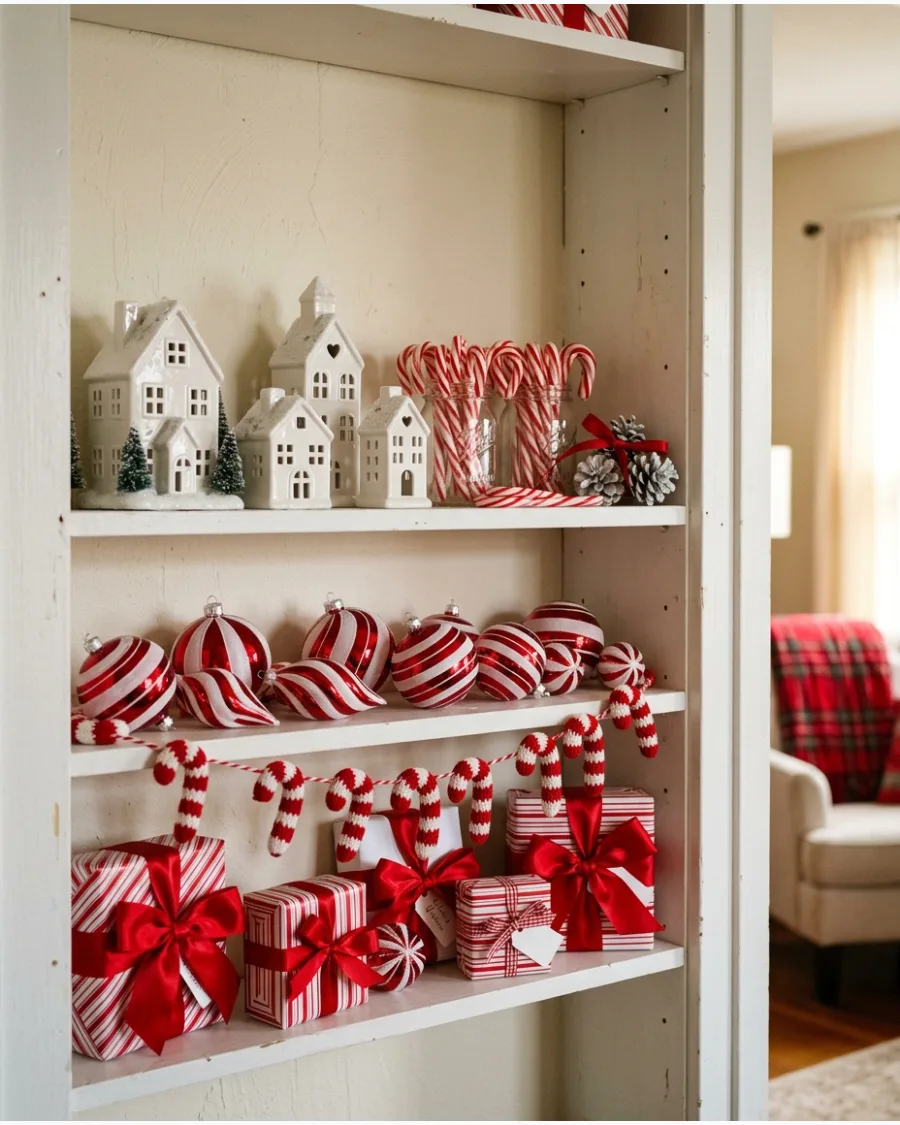
Build a high-contrast display by strictly adhering to a two-tone red and white color scheme. Line the back of the shelf with simple white ceramic houses and place bundles of candy canes tied with red ribbon in front of them. Repeating these specific shades across every level of a shelving unit creates a unified look that feels intentional rather than cluttered.
- Look for peppermint-themed signs or striped ornaments that feature a true primary red to keep the colors consistent.
- Stack mini presents wrapped in red and white striped paper to add vertical interest and fill larger shelf gaps.
- Use removable adhesive putty to secure lightweight peppermint signs so they stay upright against the back wall.
Alternate the direction of striped items, like candy canes and ribbons, to keep the eye moving across the shelf.
39. Gingerbread Christmas Kitchen Shelves
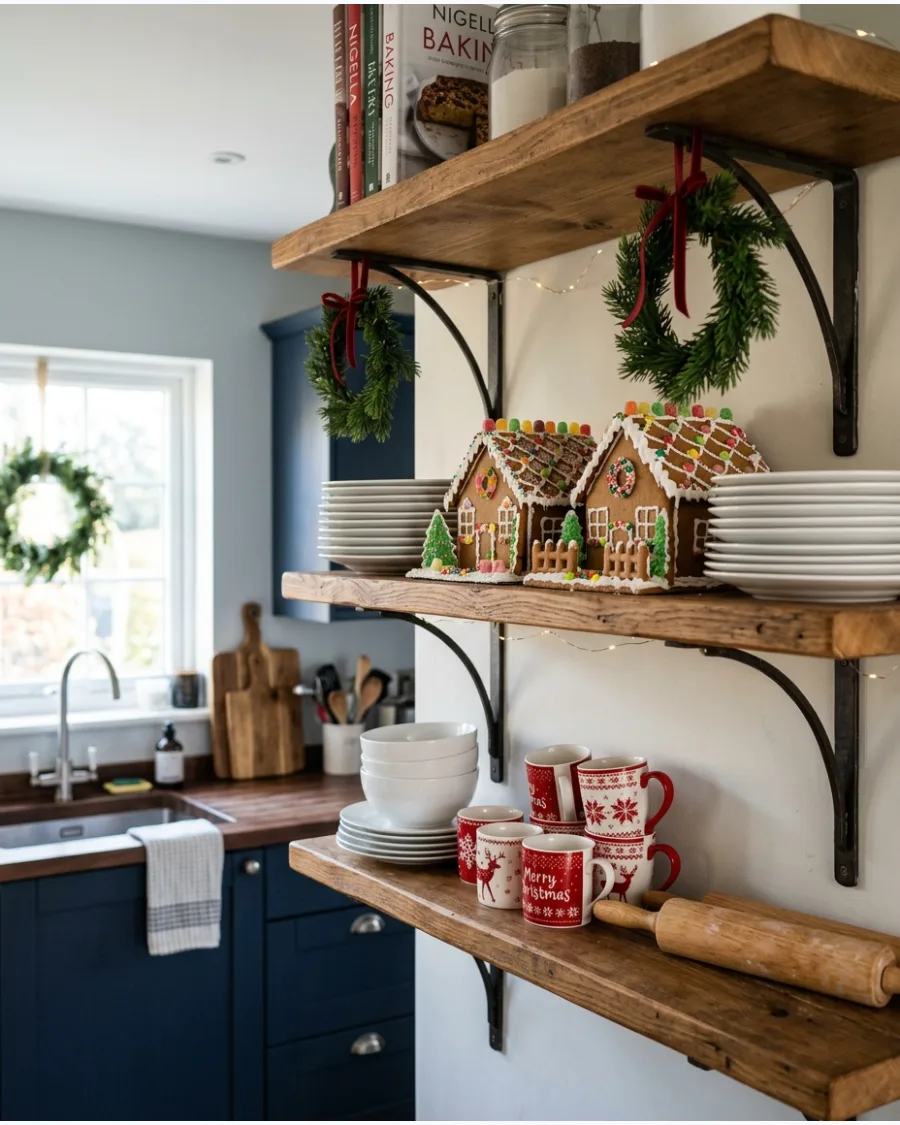
Integrate holiday cheer into a functional kitchen by scattering festive elements among your daily-use plates and bowls. Tie small red ribbons onto the handles of your white ceramic pitchers and tuck mini gingerbread houses between stacks of plates. Adding mini wreaths to the front of the shelves brings a touch of greenery that complements the warm brown of the gingerbread.
- Select gingerbread-themed cookie jars that match the scale of your existing canisters for a balanced look.
- Hang mini wreaths using small suction cups or temporary hooks on the edge of the shelf to avoid blocking access to dishes.
- Position frequently used baking accessories like rolling pins or measuring cups near the holiday mugs for a baking-ready feel.
Use faux gingerbread houses made of resin or wood for kitchen shelves to avoid attracting pests or dealing with crumbling icing.
40. Maximalist Candyland Christmas Shelf
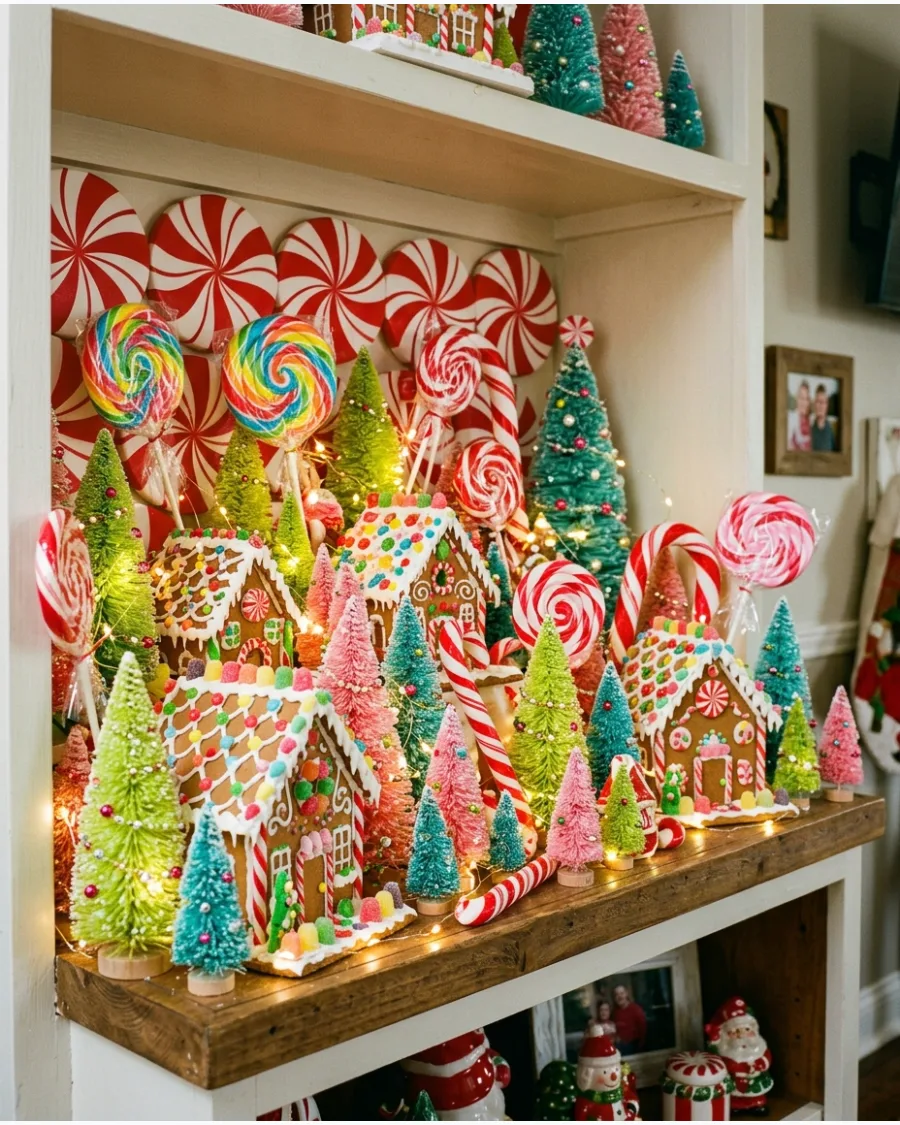
Embrace a playful, busy aesthetic by filling every inch of the shelf with oversized candy-themed decorations. Layer large peppermint swirls and lollipops behind gingerbread houses to create a backdrop of bright patterns. Use a string of sparkling LED lights to weave through the various elements, ensuring the Candyland theme feels vibrant and energetic.
- Choose a palette of three to four repeating colors, like turquoise, pink, and lime green, to keep the maximalist style cohesive.
- Place the largest items, such as oversized lollipops or tall trees, toward the back and corners to maintain visibility for smaller pieces.
- Check that battery packs for lights are tucked behind larger houses or containers to keep the focus on the colorful decor.
Use clear acrylic risers to lift smaller gingerbread houses so they aren't hidden by larger foreground candy pieces.
SECTION 5: ELEGANT AND LUXURY CHRISTMAS SHELF DECOR
41. Burgundy and Hunter Green Christmas Shelf
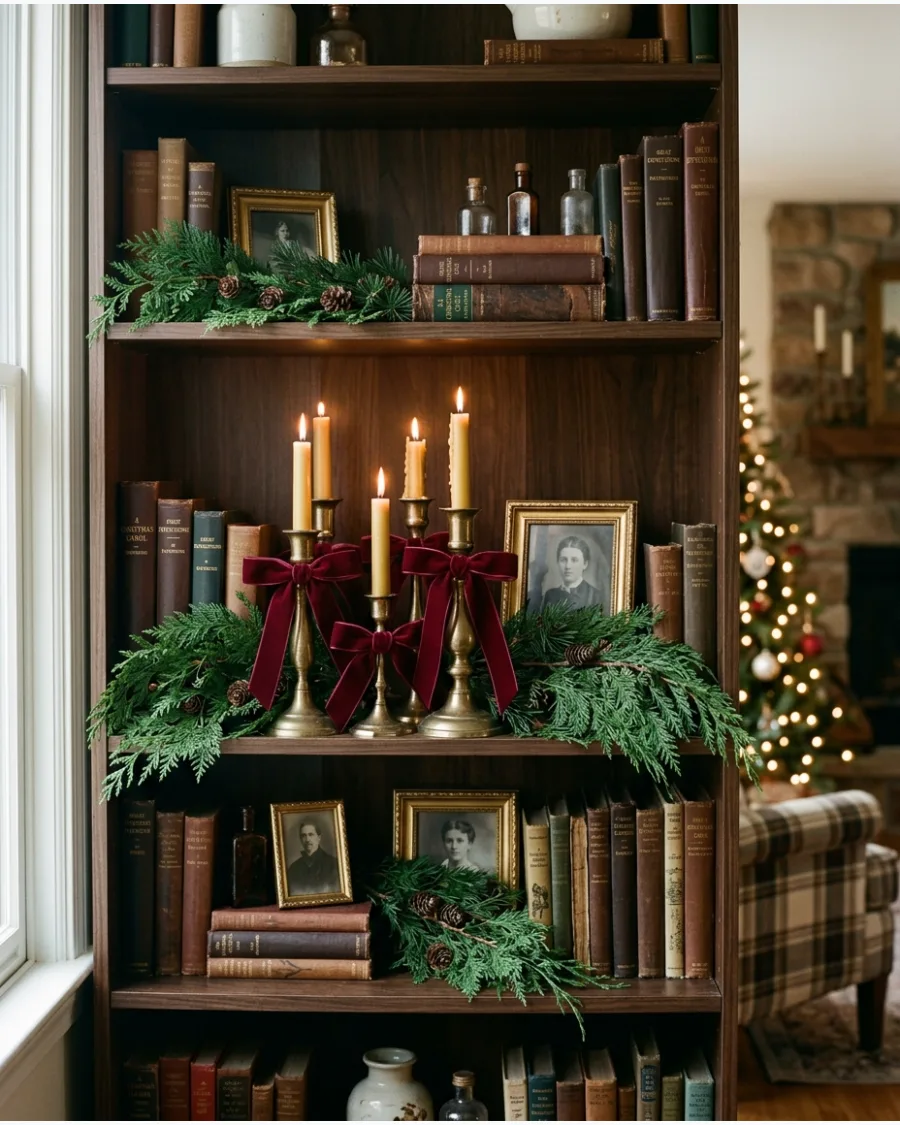
This palette creates a rich heritage look by pairing deep jewel tones with traditional textures. Tuck dark green cedar or pine sprigs behind antique gold frames and weathered book spines to ground the arrangement. Use burgundy velvet ribbons to tie small bows around candlestick stems or the necks of glass vases.
The combination of dark wood and brass accents provides a warm, moody foundation for the holiday season.
- Select vintage books with dark leather or cloth bindings to complement the deep hunter green and burgundy tones.
- Place brass candlesticks of varying heights at the ends of the shelf to frame the central greenery.
- Drape velvet ribbon loosely over the edge of the shelf or weave it through the foliage for a soft, layered appearance.
Use museum wax or putty to secure slender brass candlesticks to the shelf to prevent them from tipping when you reach for nearby items.
42. Emerald Green and Gold Christmas Shelf
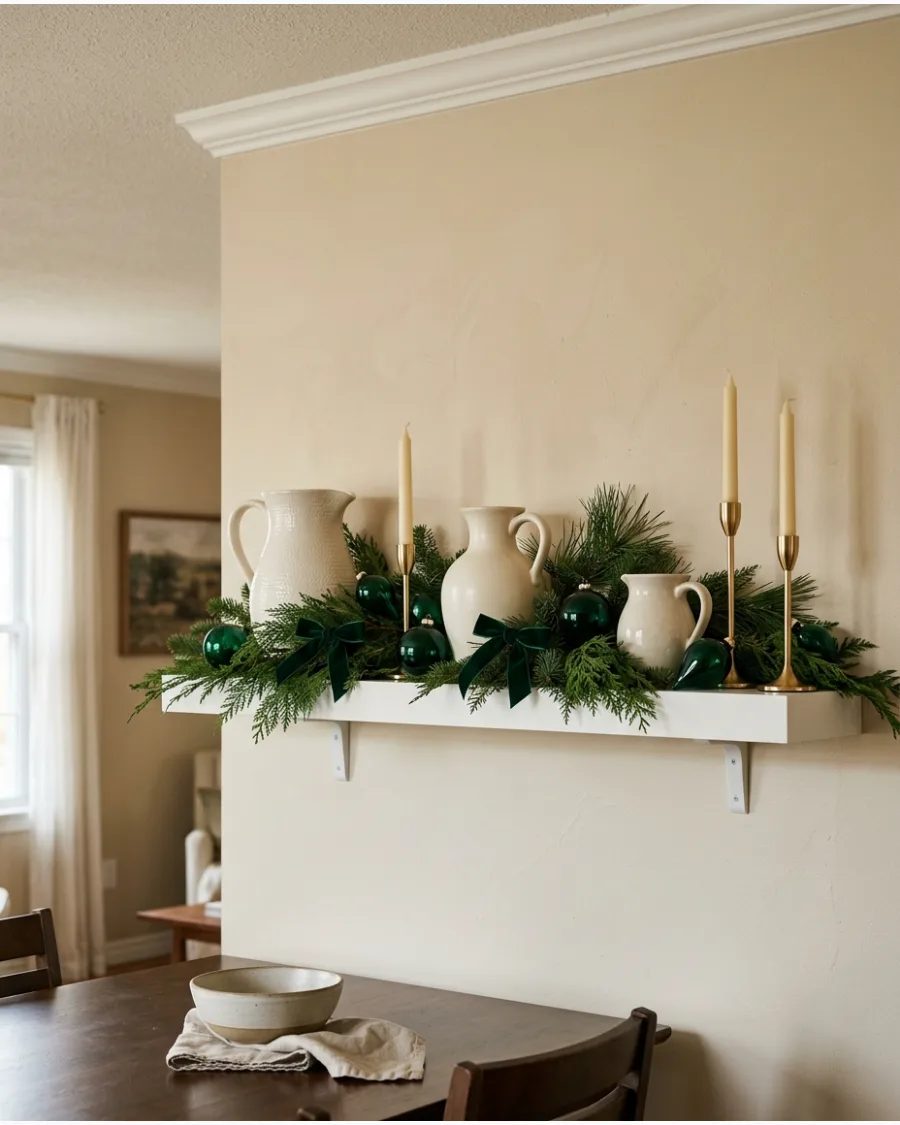
An emerald and gold theme offers a luxurious aesthetic that feels both modern and timeless. Intersperse cream-colored ceramic vases or bowls between clusters of emerald glass ornaments to ensure the dark tones do not blend into the shadows of the shelf. Gold candlesticks add a metallic shine that reflects the deep green of the velvet bows and evergreen branches.
This balance of light and dark materials prevents the display from looking heavy.
- Group emerald glass baubles in clear glass bowls or on small gold pedestals to give them height and visibility.
- Choose cream ceramics with matte or crackle finishes to provide a neutral backdrop for the shiny gold and velvet textures.
- Lay fresh or high-quality faux evergreen boughs along the length of the shelf, allowing some tips to hang slightly over the edge.
Point a nearby floor lamp or adjust a picture light to hit the emerald glass ornaments, highlighting their color and depth.
43. Navy, Burgundy, and Gold Christmas Shelf
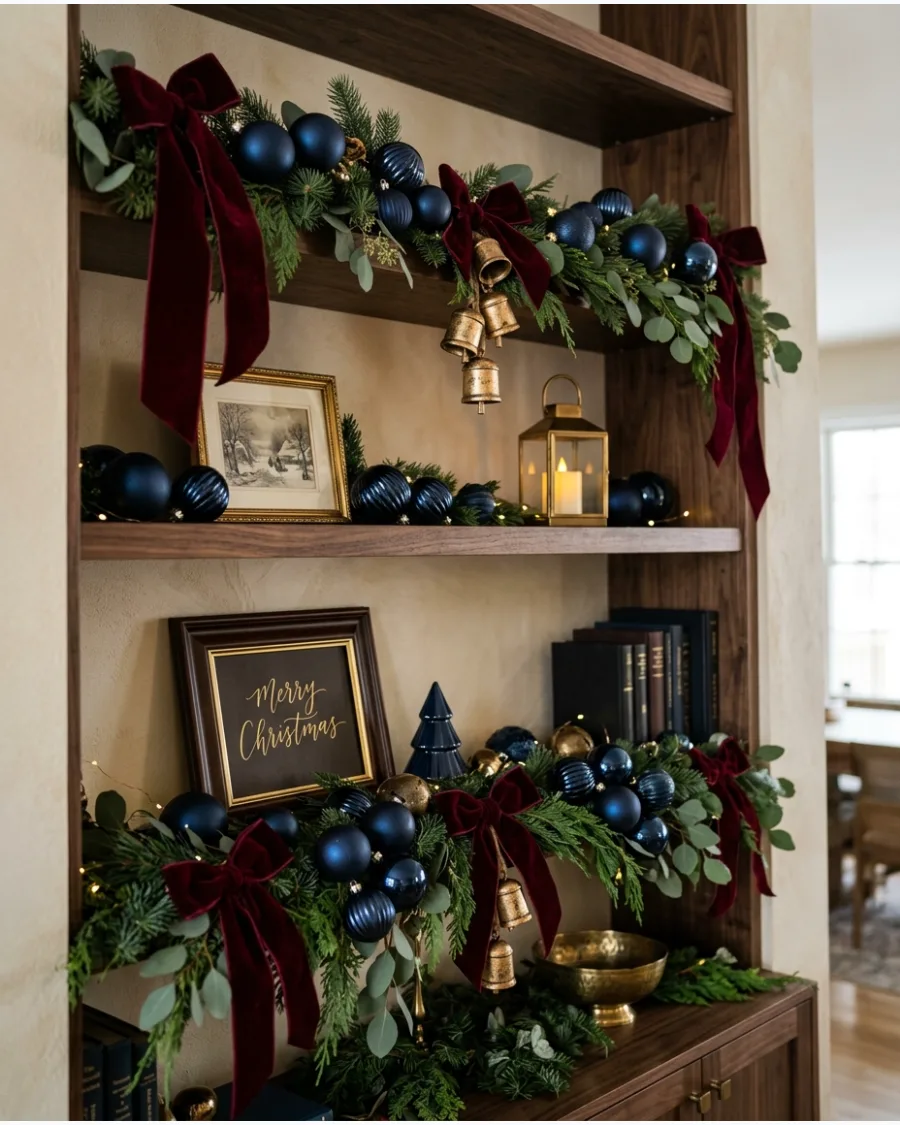
This sophisticated trio of colors provides a dramatic alternative to the standard red and green holiday palette. Layer navy blue ornaments against a dark wood backdrop and weave in burgundy velvet ribbons to add a warm, contrasting texture. Antique gold accents, such as small frames or decorative bells, serve as highlights that pull the darker tones together.
The result is a moody, high-contrast look that suits a formal living room or library.
- Verify that your navy ornaments have different finishes, such as matte and high-gloss, to create depth on dark shelving.
- Secure burgundy ribbons to the shelf's edge or around existing decor using small bits of clear adhesive.
- Distribute antique gold objects evenly across the shelves to guide the eye through the entire display.
Use dark-colored wire or floral tape when attaching ornaments to greenery so the mechanics stay hidden within the navy and burgundy palette.
44. Plum and Copper Christmas Shelf
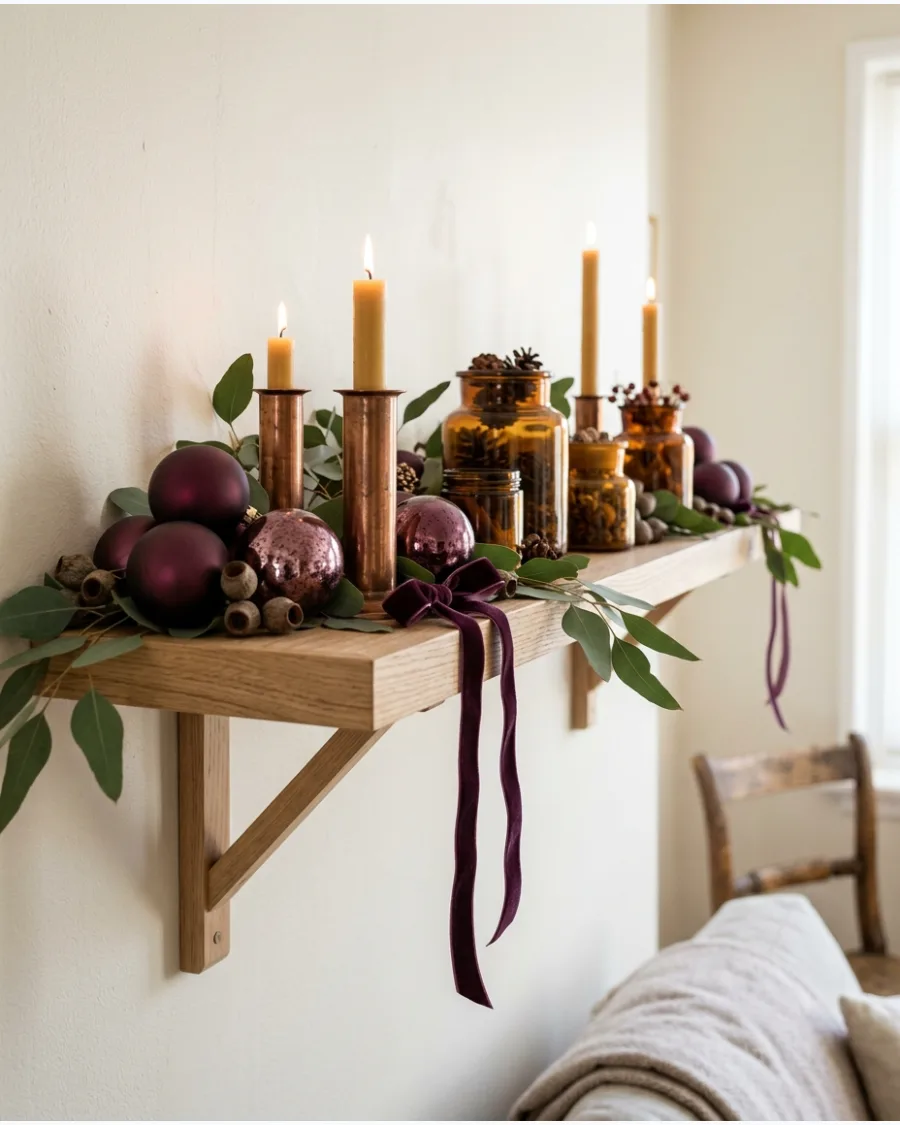
Plum and copper create an unexpected but warm holiday display that feels contemporary and rich.
Pair deep plum ornaments with amber glass vessels to catch the light and emphasize the metallic copper candleholders. Use warm-toned greenery, like cypress or eucalyptus, to bridge the gap between the purple and orange-tinted metals. This palette works particularly well in spaces with warm wood tones or neutral walls.
- Look for copper candleholders with a polished or hammered finish to maximize the reflection of warm holiday lights.
- Mix plum-colored velvet ribbons with satin versions to add variety to the textures on the shelf.
- Check that amber glass pieces are placed near the front of the shelf where they can catch natural light or the glow of nearby candles.
Use copper-wired LED fairy lights hidden within the greenery to subtly enhance the copper accents throughout the display.
45. Champagne and Ivory Christmas Shelf
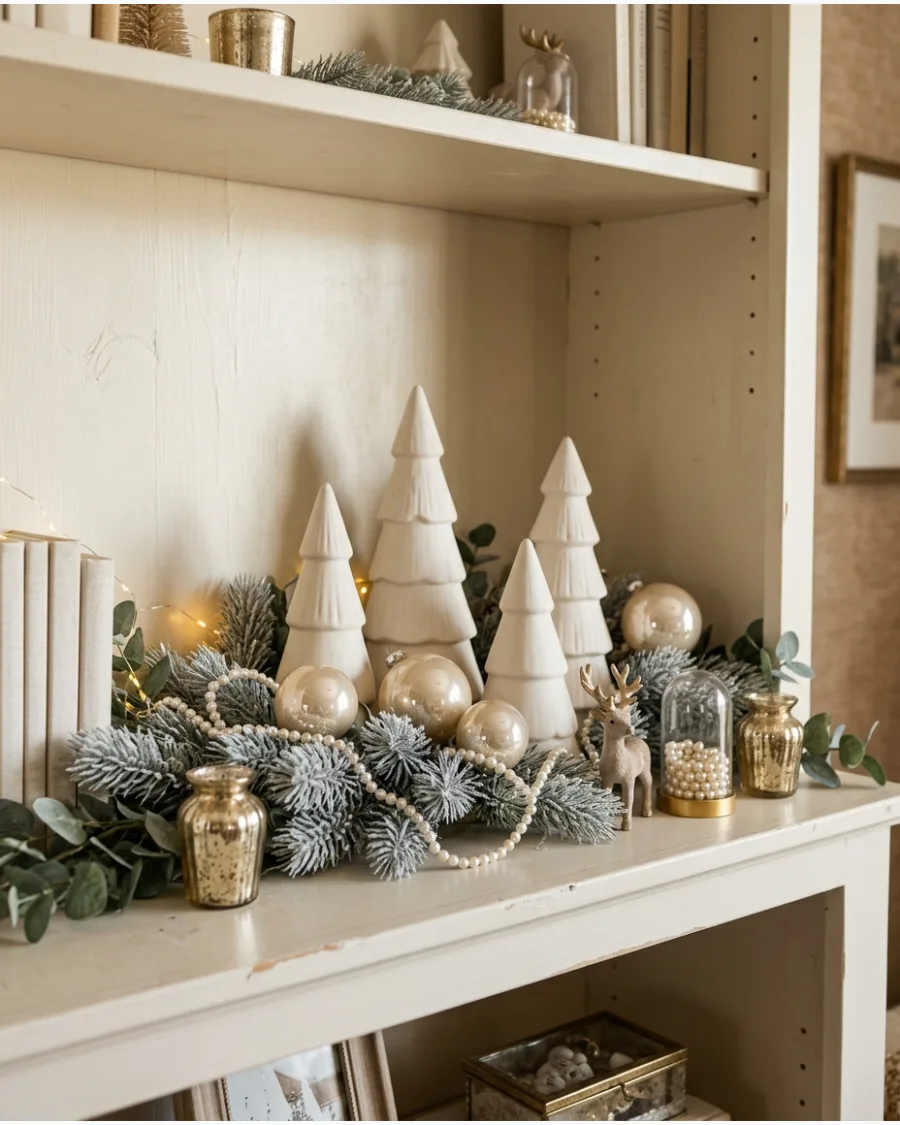
A champagne and ivory palette relies on varying textures and finishes to create a layered, elegant holiday scene. Arrange ivory ceramic trees of different heights alongside champagne-toned ornaments to build a monochromatic display that does not look flat. Soft greenery, like frosted pine or silver dollar eucalyptus, provides a gentle natural element that complements the pearls and gold details.
Mixing matte, satin, and metallic surfaces ensures the neutral colors remain distinct and interesting.
- Combine matte ivory ceramics with high-shine champagne ornaments to create a contrast in light reflection.
- Drape faux pearl garlands loosely across the shelves or coil them around the base of the ceramic trees.
- Use soft, pale greenery with a frosted or silvery finish to stay within the light and airy color scheme.
Place a few champagne-colored ornaments inside an ivory bowl to create an easy, textured focal point without much effort.
46. Black and Gold Modern Christmas Shelf
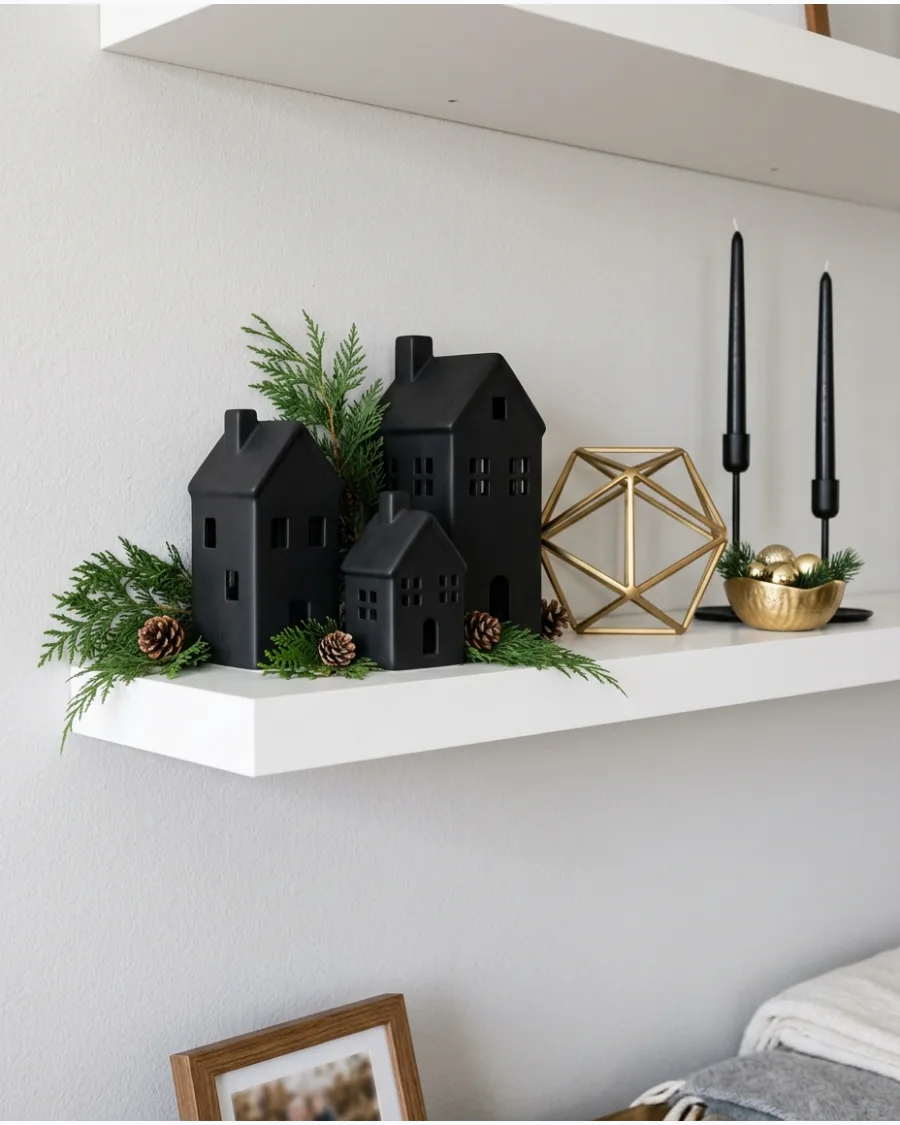
Style a contemporary display using matte black ceramic houses and brushed gold decorative objects. Place a few sprigs of real or faux evergreen greenery between the dark and metallic pieces to soften the high-contrast look. The limited color palette creates a moody, sophisticated feel that works well on minimalist floating shelves.
- Choose matte finishes for the black items to prevent harsh light reflections from distracting from the gold accents.
- Group three black houses of different heights on one side and balance them with a single tall gold candlestick or sculpture on the other.
- Ensure any black taper candles are secured in heavy holders to keep the lines of the display straight and intentional.
Use a small amount of museum putty under lightweight ceramic houses to keep them perfectly aligned on the shelf surface.
47. Pearl and Crystal Winter Shelf
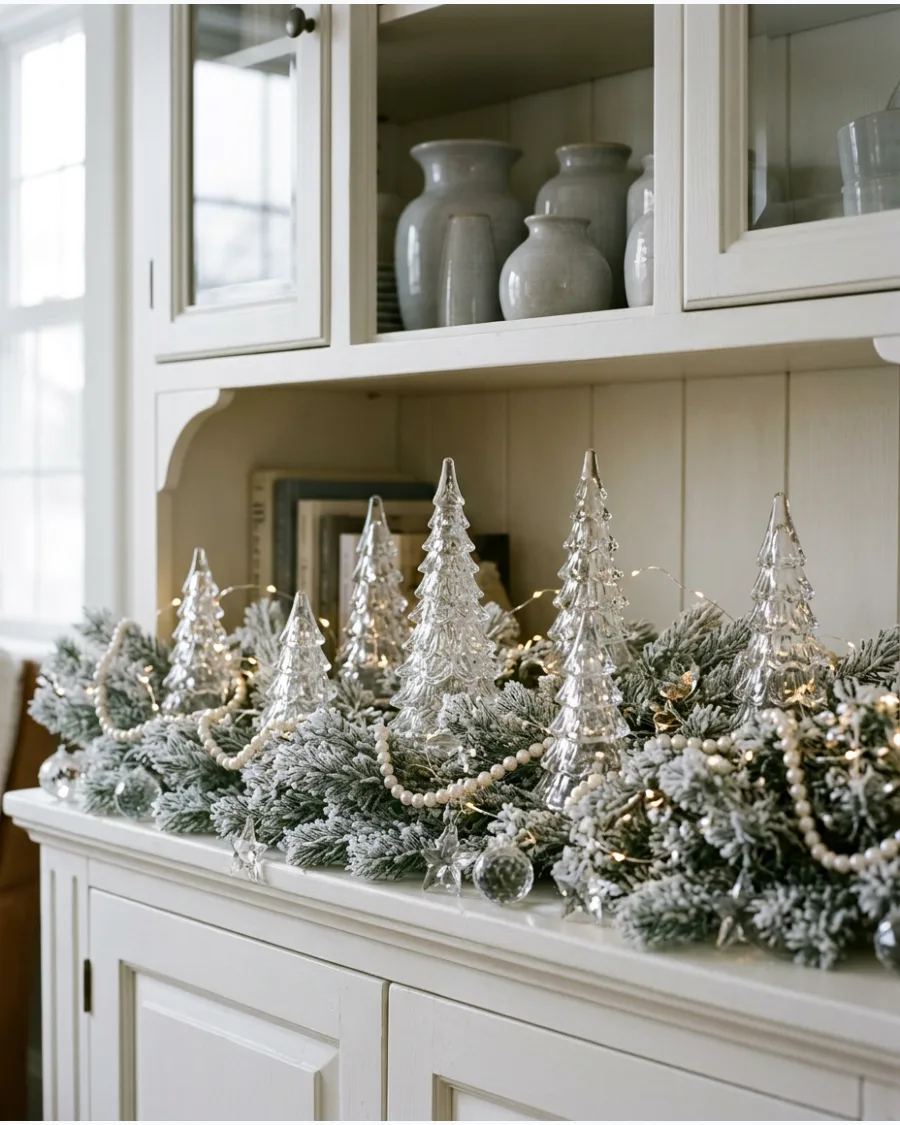
Layer pearl garlands over clear glass trees and crystal-style ornaments for a frosty appearance. Position ivory or pale gray vases in the background to provide a solid base for the translucent and reflective decorations. This setup relies on soft battery-powered lights to create a subtle glow across the icy landscape.
- Select glass trees with different textures, such as ribbed or etched surfaces, to add variety without introducing new colors.
- Drape the pearl garland loosely across the front edge of the shelf, allowing some loops to hang slightly lower than the shelf line.
- Check that battery packs for mini lights are tucked behind the opaque ivory background pieces to keep the shelf looking tidy.
Use cool-white LEDs rather than warm-yellow lights to maintain the crisp, frosty aesthetic of the crystal and glass.
48. Oversized Velvet Bow Shelf
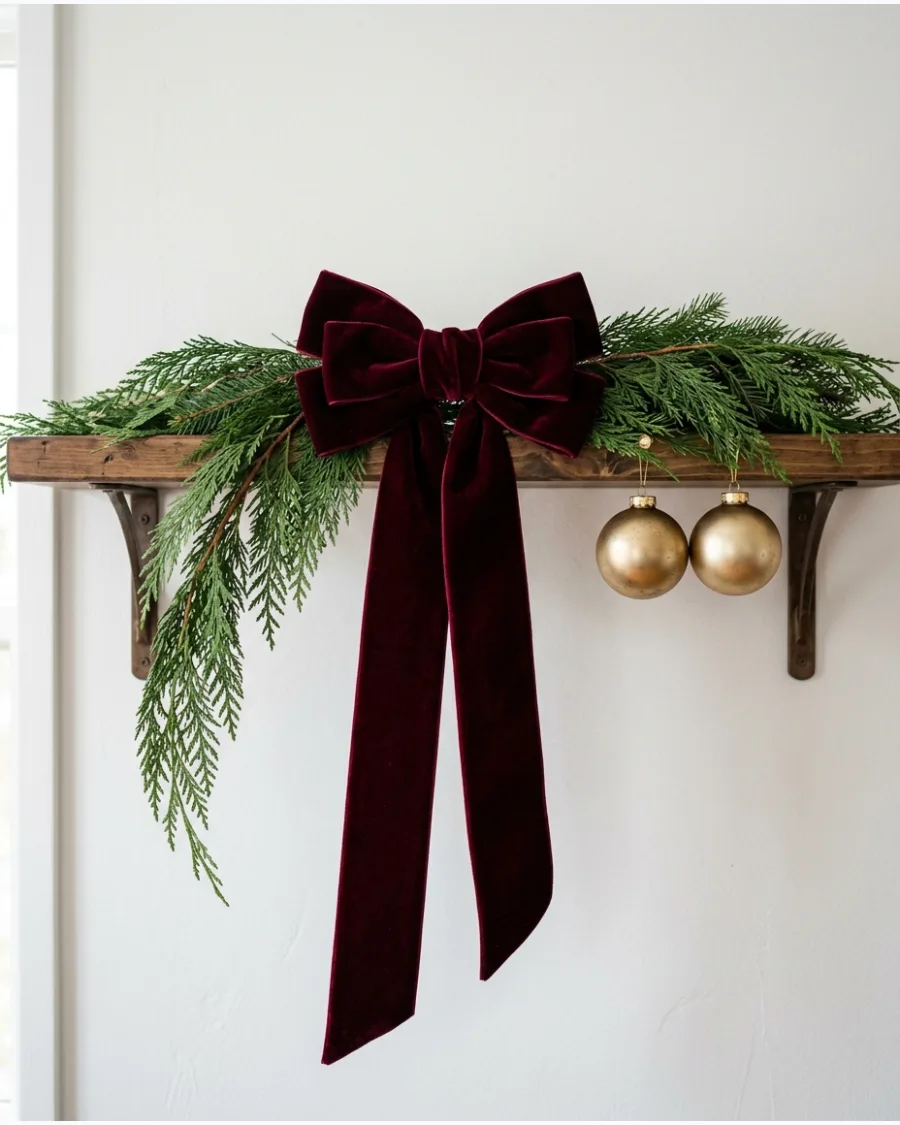
Anchor a single shelf with one large, wired velvet bow instead of spreading many small items across the surface. Secure the bow to the center of a cascading evergreen branch so the long ribbons trail down toward the shelf below. Support this focal point with a pair of simple ornaments or candlesticks in a matching color palette.
- Opt for wired ribbon so you can shape the loops and tails to stay in place against the greenery and shelf edge.
- Use a small adhesive hook or floral wire to attach the bow to the shelf edge or a heavy book hidden behind the greenery.
- Leave at least one-third of the shelf space empty on either side to keep the focus entirely on the singular statement piece.
Steam the velvet ribbon tails before hanging to remove any creases or folds from storage.
49. Antique Brass Candlestick Christmas Shelf
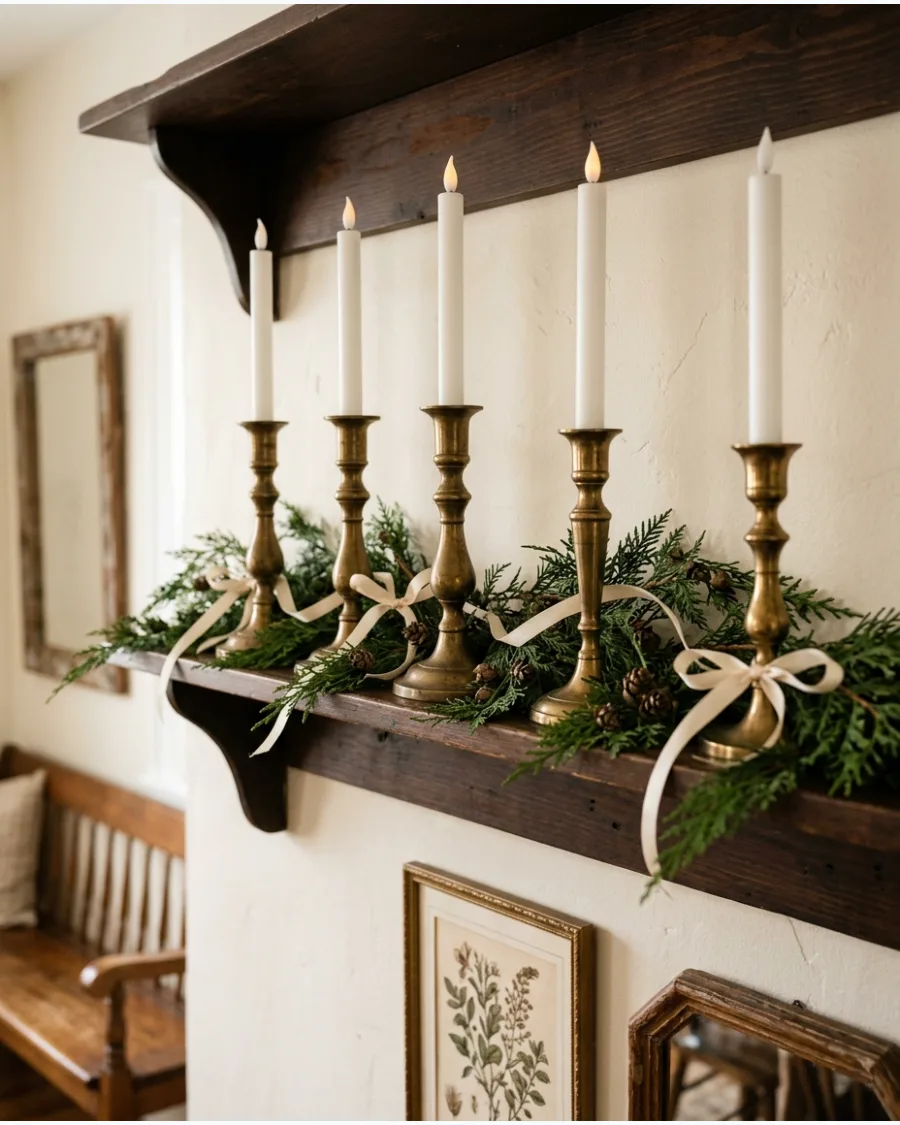
Arrange brass candlesticks of varying heights to create vertical movement across a shelf. Tuck fresh cedar clippings and thin silk ribbons around the bases of the holders to integrate the metal with softer textures. Use flameless taper candles to achieve a classic look safely on narrow or high shelving.
- Verify that the brass finishes are similar, though slight variations in patina can add more character to the grouping.
- Place the tallest candlesticks at the back or outer ends of the shelf and step the heights down toward the center.
- Use removable adhesive dots inside the candle cups if the flameless tapers feel loose or tilt to the side.
Mix in a few brass ornaments or small bells to echo the candlestick material elsewhere on the shelf.
50. Dark Academia Christmas Bookshelf
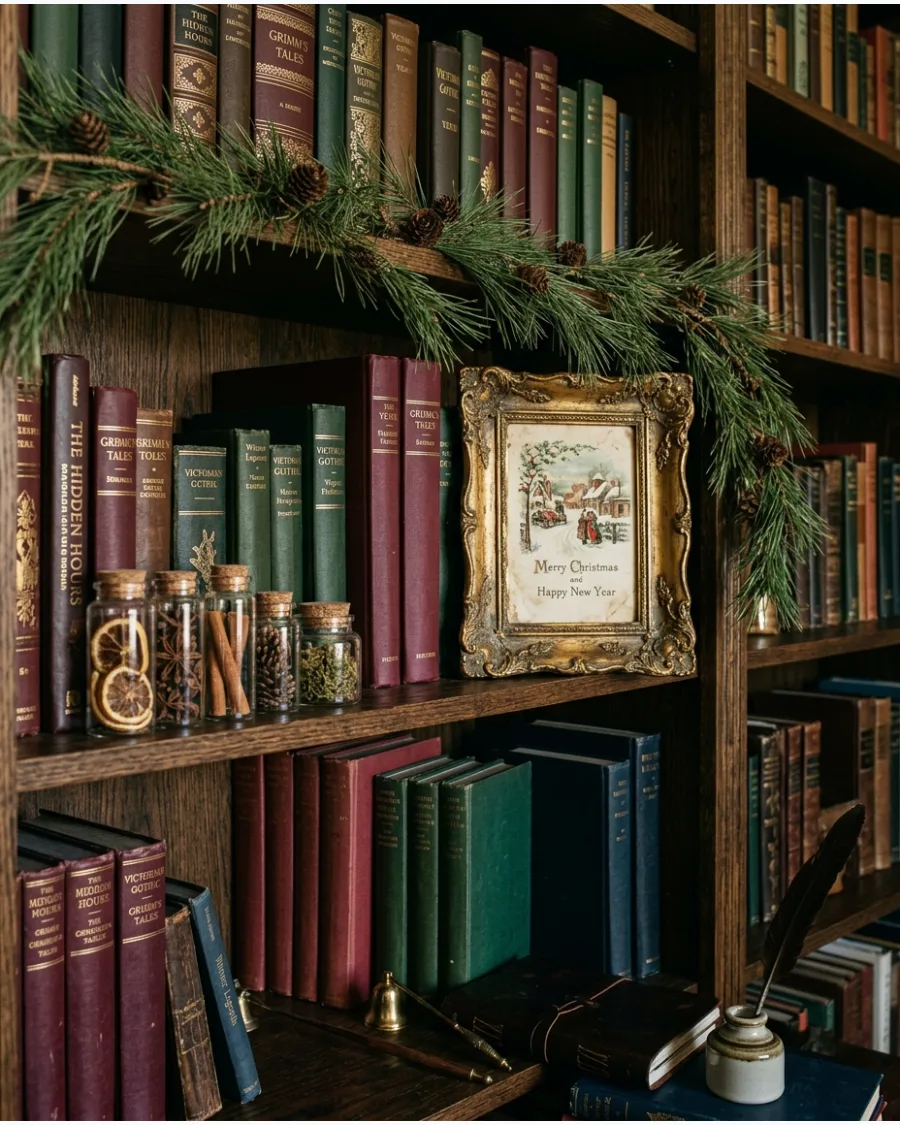
Blend deep green and burgundy book spines with vintage frames and pine greenery for a scholarly feel. Place dried botanicals or pressed flowers inside small glass jars to enhance the old-world library mood. Keep the lighting warm and low to emphasize the moody tones of the decor items.
- Search for vintage ornaments with a matte or antiqued finish rather than bright, shiny surfaces that can break the moody aesthetic.
- Lean a few antique frames against the back of the shelf to create depth behind the books and holiday greenery.
- Keep fresh greenery sprigs away from the edges of paper books to avoid any moisture damage or staining.
Turn books with bright modern covers around so the neutral page edges face outward to maintain the color palette.
SECTION 6: NEUTRAL, SCANDINAVIAN, AND MODERN CHRISTMAS SHELVES
51. White Winter Wonderland Shelf
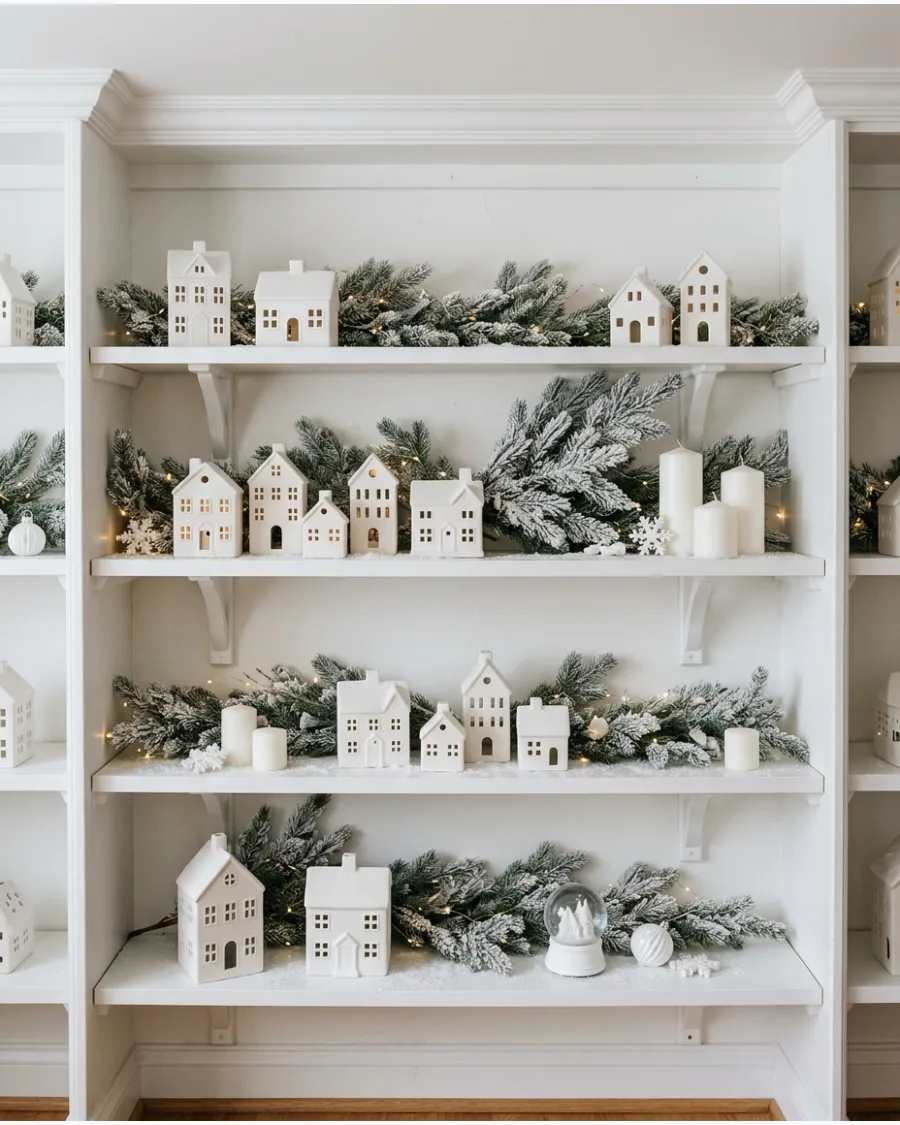
Transform your shelving into a snowy scene by using a monochromatic palette of matte white and frosted textures. Arrange matte white ceramic houses in small clusters across the shelf to create a mini village effect. Mix in frosted greenery and white candles to provide different heights while maintaining the clean color scheme.
- Select frosted pine or cedar sprigs with a heavy 'snow' coating to soften the edges of the white ceramic items.
- Weave a string of warm white micro-LED fairy lights around the houses to keep the display from looking flat or cold.
- Check that white candles are placed safely away from any synthetic frosted greenery to prevent melting or scorching.
Use battery-operated puck lights hidden behind the ceramic houses for a soft, back-lit glow that highlights their silhouettes.
52. Beige and Natural Wood Christmas Shelf
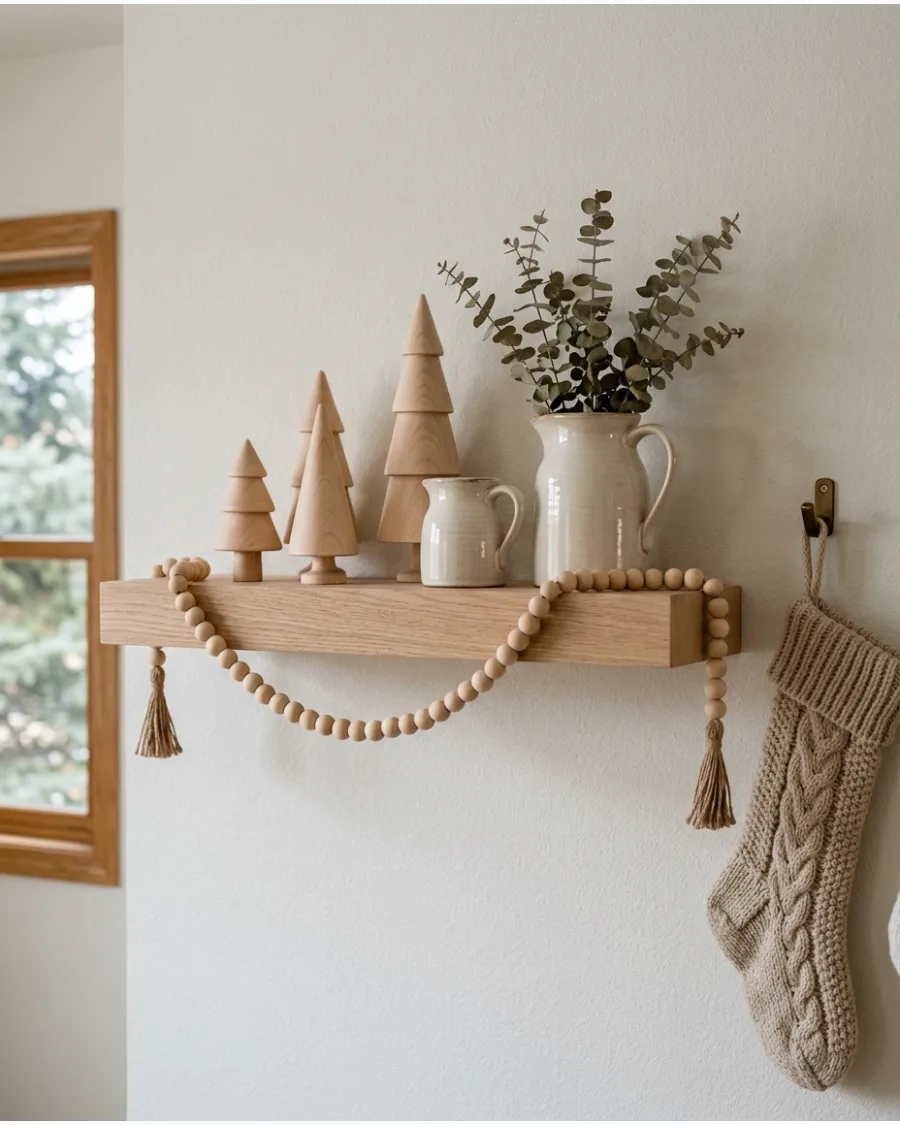
This approach uses organic materials and muted tones to bring a festive feel to neutral interiors. Drape a strand of natural wood beads along the front edge of the shelf to connect various heights of cream ceramics and wood trees. The combination of unfinished wood and soft beige textiles keeps the display warm and understated.
- Mix light-toned unfinished wood trees with cream-colored stoneware to create a varied but cohesive texture.
- Hang beige knit or linen stockings from the shelf edge using low-profile hooks for a soft vertical element.
- Incorporate muted, silver-toned greenery like eucalyptus or dusty miller instead of bright forest green to match the palette.
Layer different sizes of wood beads to add depth without introducing new colors to the display.
53. Scandinavian Paper Tree Shelf
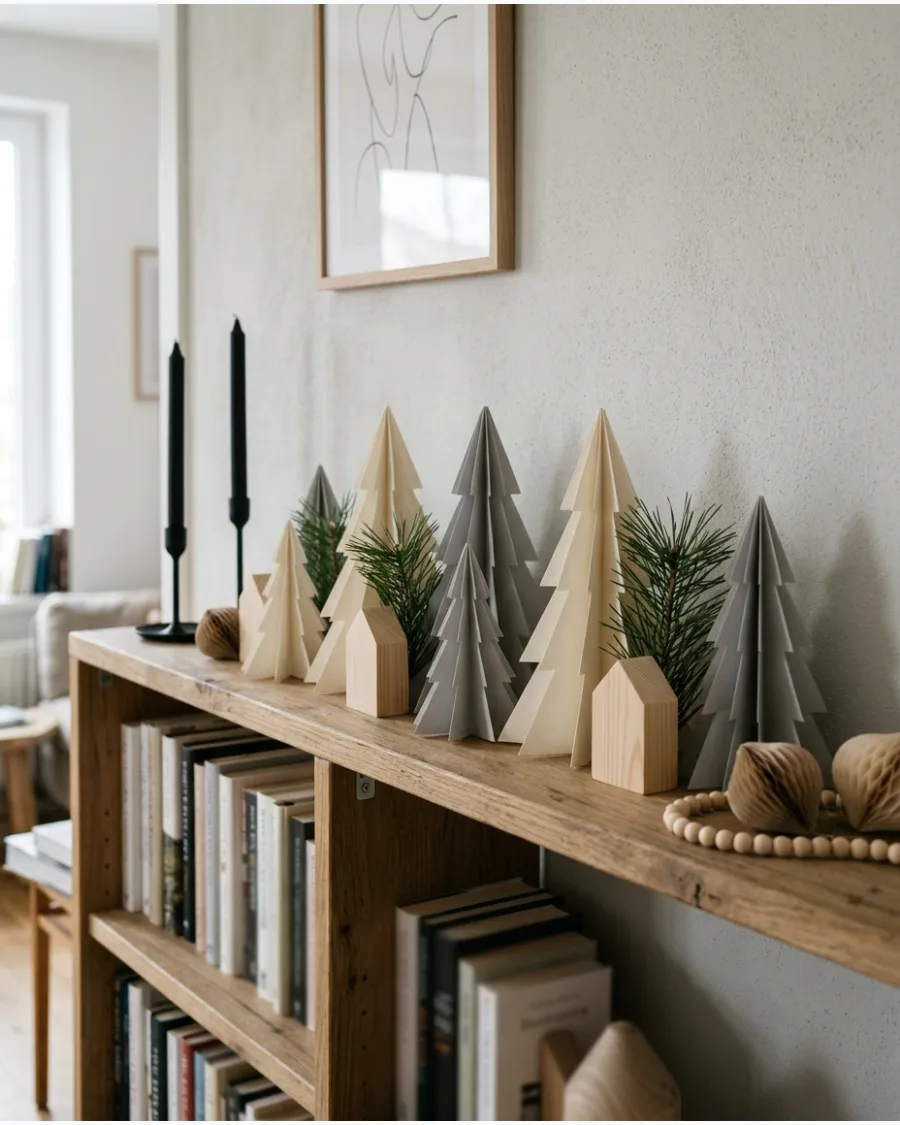
Embrace minimalist design by focusing on the repetition of simple, clean shapes like folded paper and honeycombs. Repeat the same style of folded paper trees in varying heights to create a clean, rhythmic look across the shelving. Simple wood houses and evergreen sprigs provide just enough contrast to anchor the lighter paper elements.
- Select paper trees and honeycomb ornaments in off-white or charcoal grey for a sophisticated Scandi color palette.
- Tuck small sprigs of real or faux evergreen behind the wood houses to give the paper items a natural background.
- Use slim, battery-operated taper candles in simple holders to maintain the minimalist vertical lines of the trees.
Secure lightweight paper honeycomb ornaments with a tiny dot of clear adhesive putty to keep them from rolling out of place.
54. Scandinavian Red and White Shelf
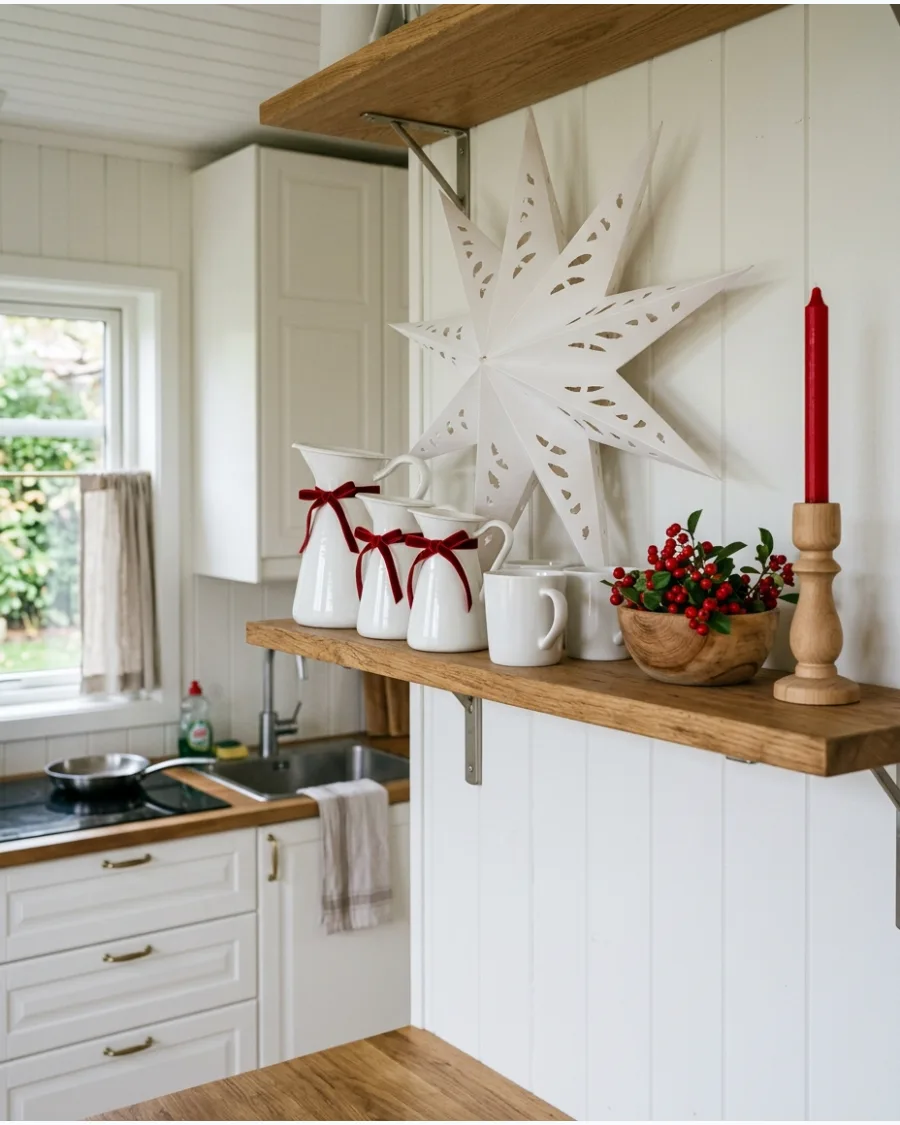
Bring a pop of traditional color to a modern shelf by pairing bright red accents with crisp white and natural wood. Tie thin red velvet bows around white ceramic pitchers or vases to introduce color selectively without overwhelming the space. Large paper stars and restrained greenery keep the overall look light and airy.
- Choose a single shade of red, such as a deep crimson or cherry, to ensure all accents look intentional and matched.
- Leaning large white paper stars against the back of the shelf provides a bold backdrop for smaller wood figurines.
- Incorporate red sparingly through items like a single red candle or a few red berries rather than covering every surface.
Stick to natural wood and white for 80% of the items, using the red only for small, high-impact details.
55. Frosted Neutral Christmas Shelf
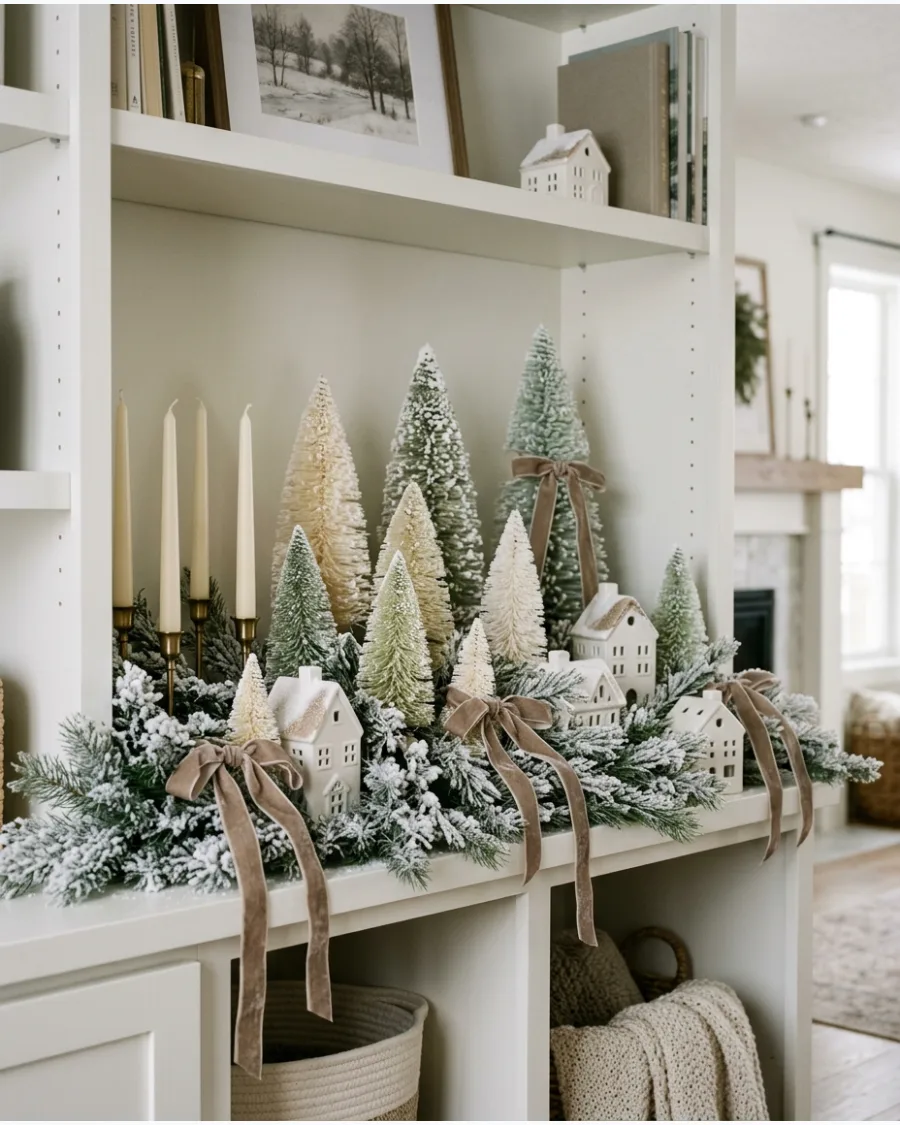
Mix various frosted textures and neutral shades like taupe and cream to create a calm, dimensional display. Nestle snowy bottle brush trees of different sizes inside a base layer of frosted pine branches for a layered forest look. Use taupe ribbons and cream candles to soften the transition between the white houses and green branches.
- Select taupe ribbons in velvet or grosgrain to add a sophisticated, non-traditional color to the neutral palette.
- Place white ceramic houses at different depths within the frosted greenery to create a sense of perspective.
- Check that the 'snow' on bottle brush trees is securely attached; give them a gentle shake before placement to remove loose bits.
Spritz plain faux greenery with a light dusting of flocking spray to customize the level of 'frost' for your specific shelf.
56. Monochrome Ceramic House Shelf
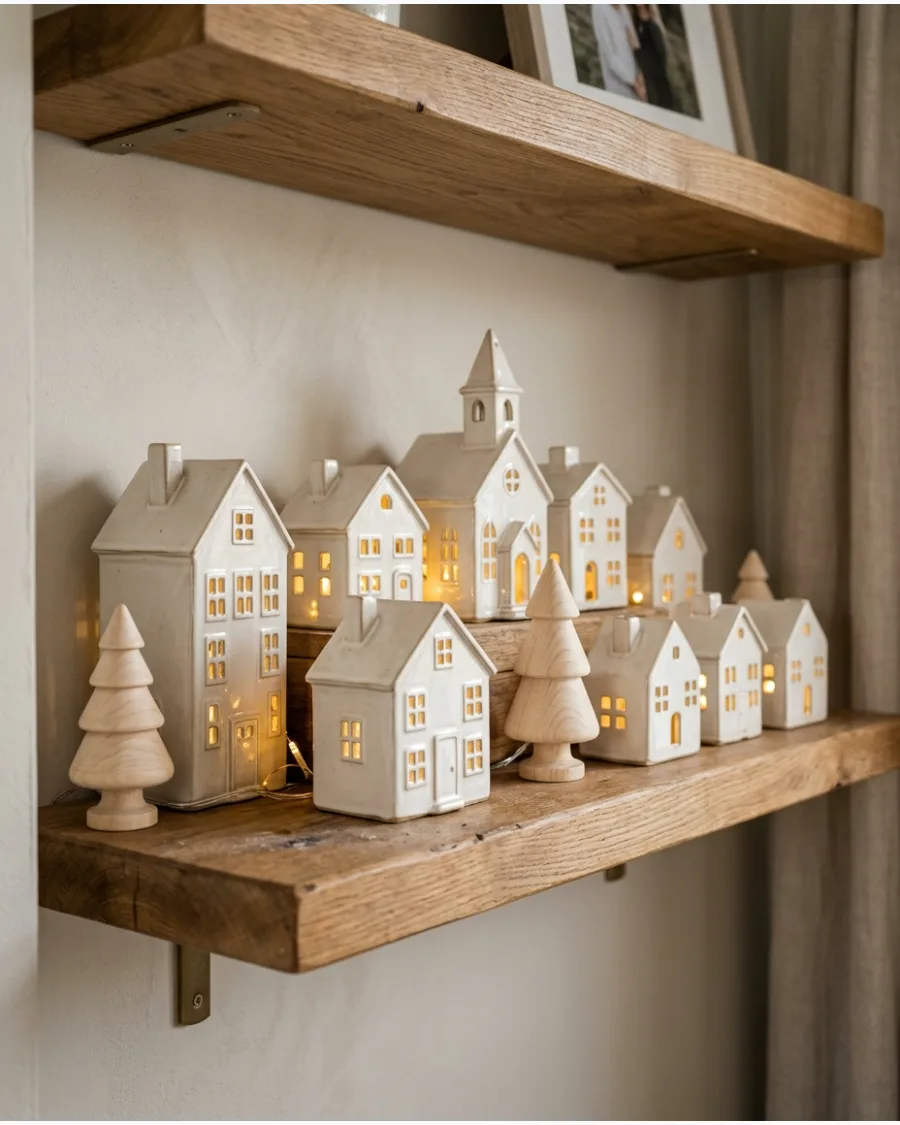
Build a serene winter scene by grouping ceramic houses in a single pale shade like cream or white. Place battery-operated fairy lights inside or tucked behind the buildings to make the windows glow without visible wires. Adding a few neutral bottle brush or wooden trees emphasizes the clean lines of the architecture.
- Choose houses with varying heights but matching finishes to maintain a clean look.
- Position the larger buildings at the back and smaller ones in front for depth.
- Use warm-white LEDs rather than cool-white to prevent the display from looking clinical.
Use a small piece of poster putty under lighter ceramic houses to prevent them from tipping if the shelf is bumped.
57. White Oak and Cream Christmas Shelf
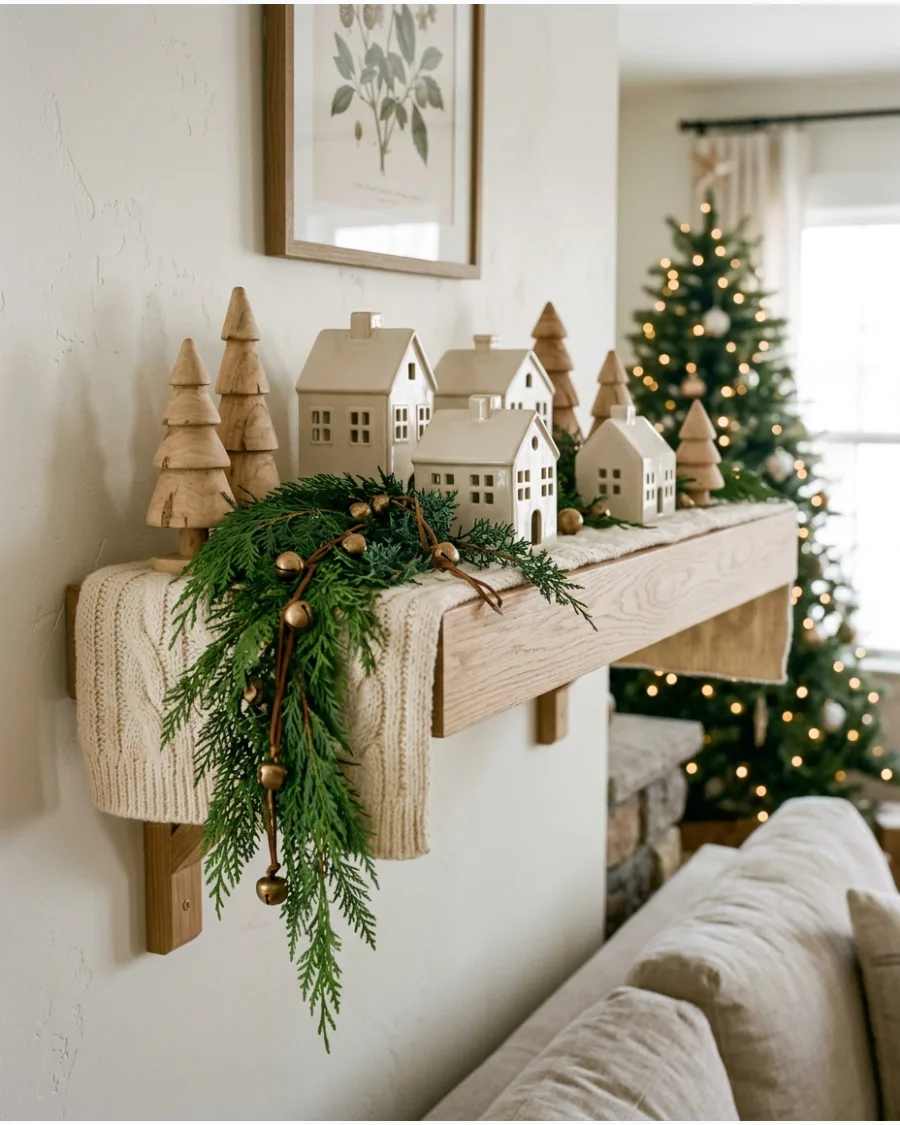
This setup uses organic materials and soft textures to complement light wood shelving. Layer a chunky cream knit runner or small textile under ivory houses and wooden tree figurines to soften the hard surfaces. Intersperse antique brass bells and sprigs of soft cedar to ground the palette with a bit of metallic shine and natural greenery.
- Check that the brass bells have a matte or brushed finish to match the organic modern aesthetic.
- Drape the cedar over the front edge of the shelf to add movement and break up straight lines.
- Ensure any knit fabrics are tucked neatly behind objects so they do not hang irregularly.
Lightly mist fresh cedar sprigs every few days to keep them from drying out and shedding on the wood.
58. Black and White Christmas Picture Ledge
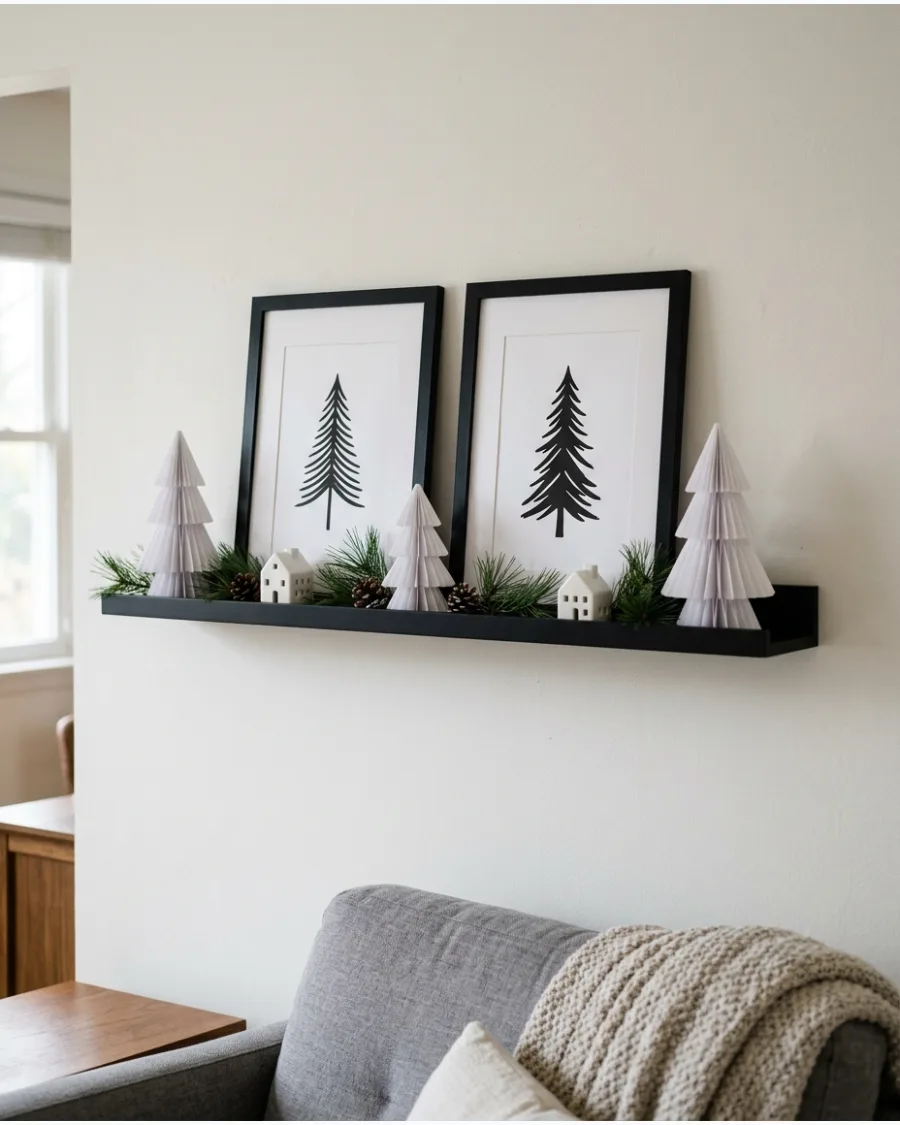
Shallow ledges require slim decor that does not overhang the front edge. Lean black-framed holiday prints against the wall and tuck graphic paper trees and tiny white ceramic houses in front of the glass. A few small evergreen branches add a touch of life to the monochrome color scheme without crowding the narrow space.
- Select prints with simple typography or line art to keep the display looking intentional.
- Measure the depth of the ledge before purchasing houses or trees to ensure they fit within the groove.
- Use paper trees that fold flat for easy storage after the season ends.
Secure the bottom of picture frames with a bit of museum wax to keep them from sliding forward on the narrow ledge.
59. Minimalist Christmas Floating Shelf
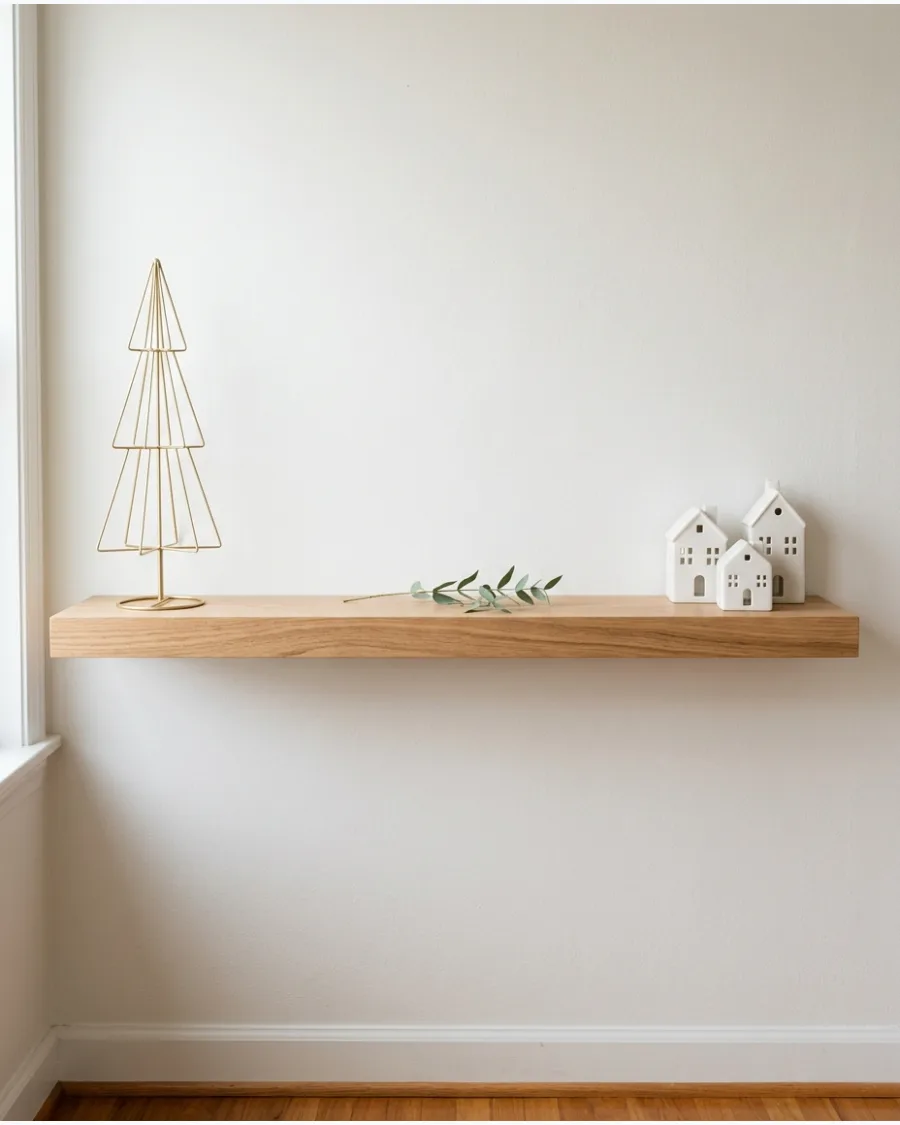
Avoid overcrowding by treating negative space as a deliberate part of the shelf design. Display just one tall decorative tree on one side and a single grouping of two or three small houses on the opposite end. A short run of greenery and a subtle light source, like a flameless candle, provides warmth without needing extra filler.
- Select a tree with a distinct silhouette, such as a metal or glass cone, to act as a focal point.
- Place the light source behind the houses to create a silhouette effect rather than lighting them from the front.
- Keep the middle of the shelf clear or use a very low-profile item to maintain the open feel.
Use an odd number of items in your groupings, such as three houses or one tree, to make the minimalist layout look balanced.
60. Asymmetrical Modern Christmas Shelf
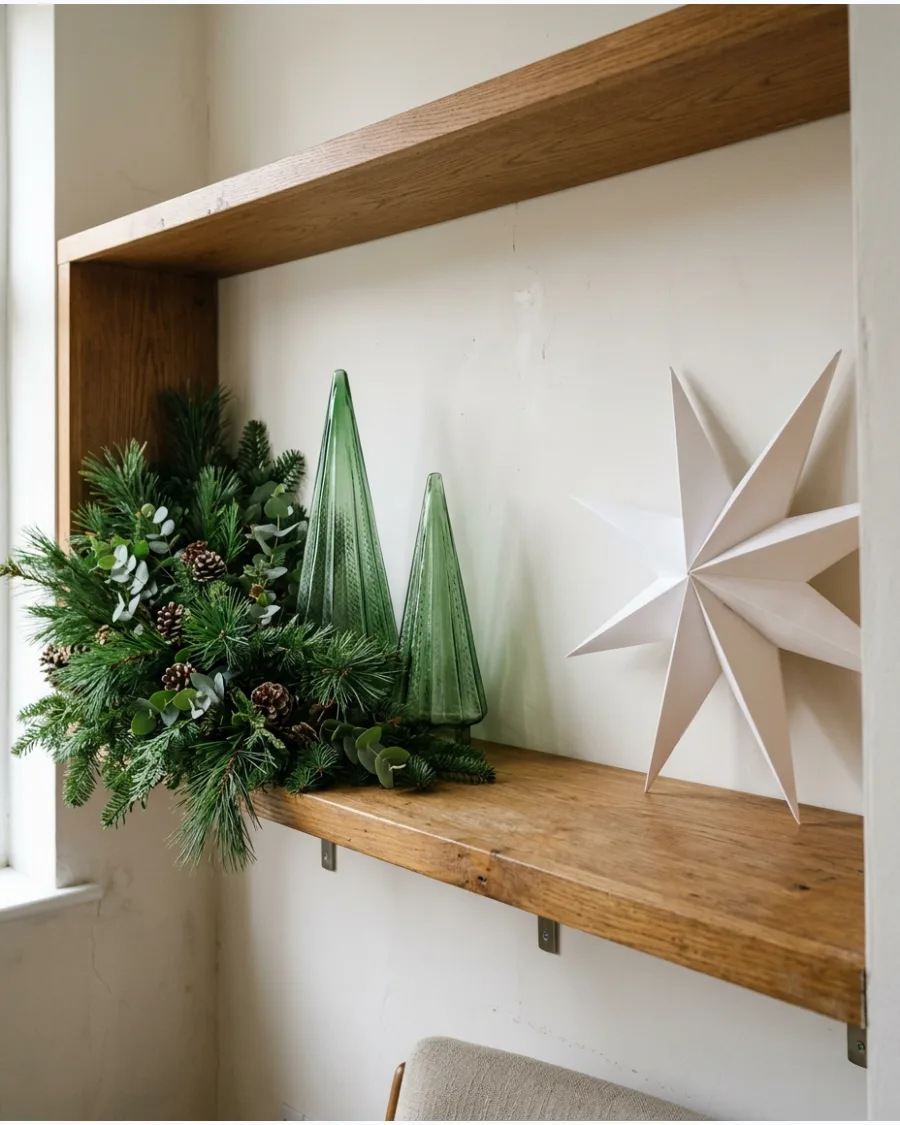
Modern styling often favors a weighted look where one side of the shelf holds more volume than the other. Cluster tall evergreens and oversized ornaments on one side of the shelf while leaving the opposite side largely open. Place one medium-sized object, such as a single large star or a textured bowl, on the lighter side to create balance without matching the height.
- Use greenery that has a natural, slightly wild shape to emphasize the informal, asymmetrical layout.
- Check that the tallest items do not touch the shelf above, leaving a few inches of breathing room.
- Choose a medium object with a contrasting texture, like a matte ceramic piece, to stand out against the greenery.
Stand back and squint at the shelf; the visual weight should feel even across the board even if the items are not centered.
SECTION 7: FARMHOUSE, COTTAGE, AND RUSTIC CHRISTMAS SHELVES
61. Farmhouse Christmas Open Shelf
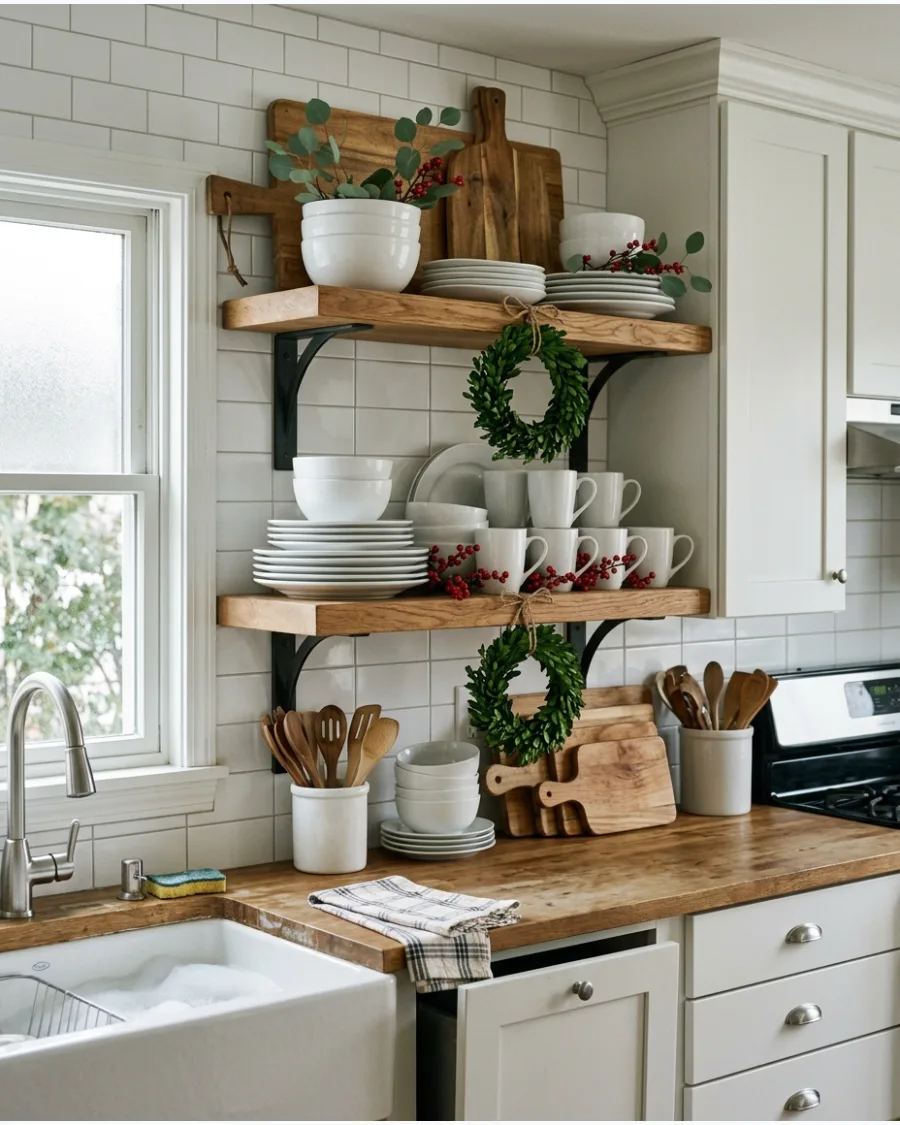
Use the vertical height of open kitchen shelving to display a mix of seasonal and functional items. Layer white ceramic plates and wooden cutting boards against the back wall to create a neutral foundation for festive accents. Hang small wreaths from the shelf edges or place them in front of stacked bowls.
Intersperse sprigs of red berries and fresh greenery between your everyday mugs to ground the look in nature.
- Select cutting boards in different wood tones and heights to add depth behind your standard dinnerware.
- Secure small proportionally sized wreaths to the front of the shelf using clear removable hooks or thin twine.
- Swap out standard kitchen linens for red or green tea towels tucked neatly under stacks of bowls.
Use small bundles of dried eucalyptus alongside the pine to keep the shelves smelling fresh without the mess of needles in your dishes.
62. Red Gingham Christmas Shelf
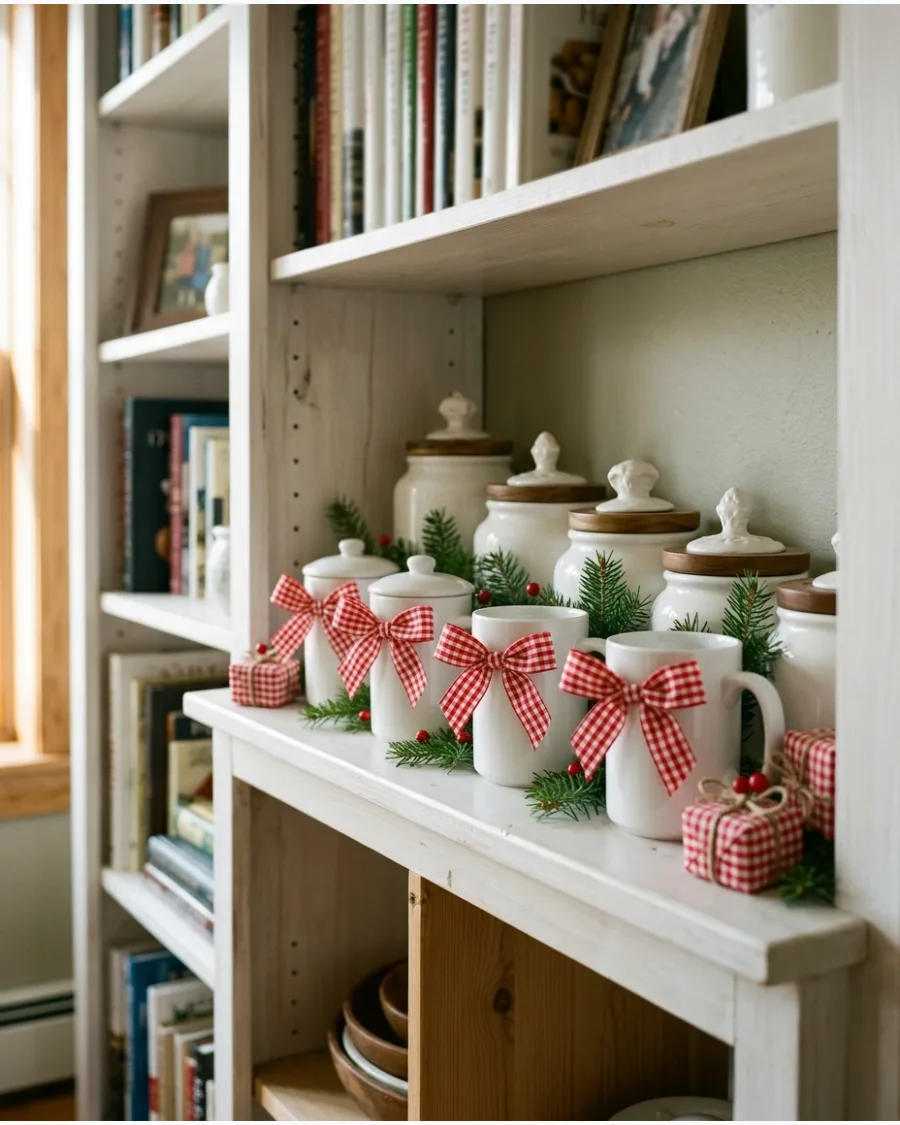
Incorporate classic patterns into your shelving display to evoke a traditional country feel. Tie red gingham ribbons onto the handles of white ceramic mugs and around the necks of glass jars. Group small, wrapped gift boxes in matching paper to fill gaps between larger decorative items.
Keep the rest of the shelf simple with plain white ceramics and bits of evergreen to ensure the pattern doesn't feel overwhelming.
- Choose gingham ribbons in varying widths, using wider ribbon for bows and thinner strands for tying around ornament hooks.
- Use empty jewelry boxes or small cardboard shipping boxes as the base for the tiny gift box accents.
- Place one or two solid red mugs near the patterned bows to bridge the color gap between the white ceramics and the gingham.
Iron the ribbon before tying to ensure the bows hold a crisp, upright shape instead of drooping.
63. Rustic Wood Christmas Tree Shelf
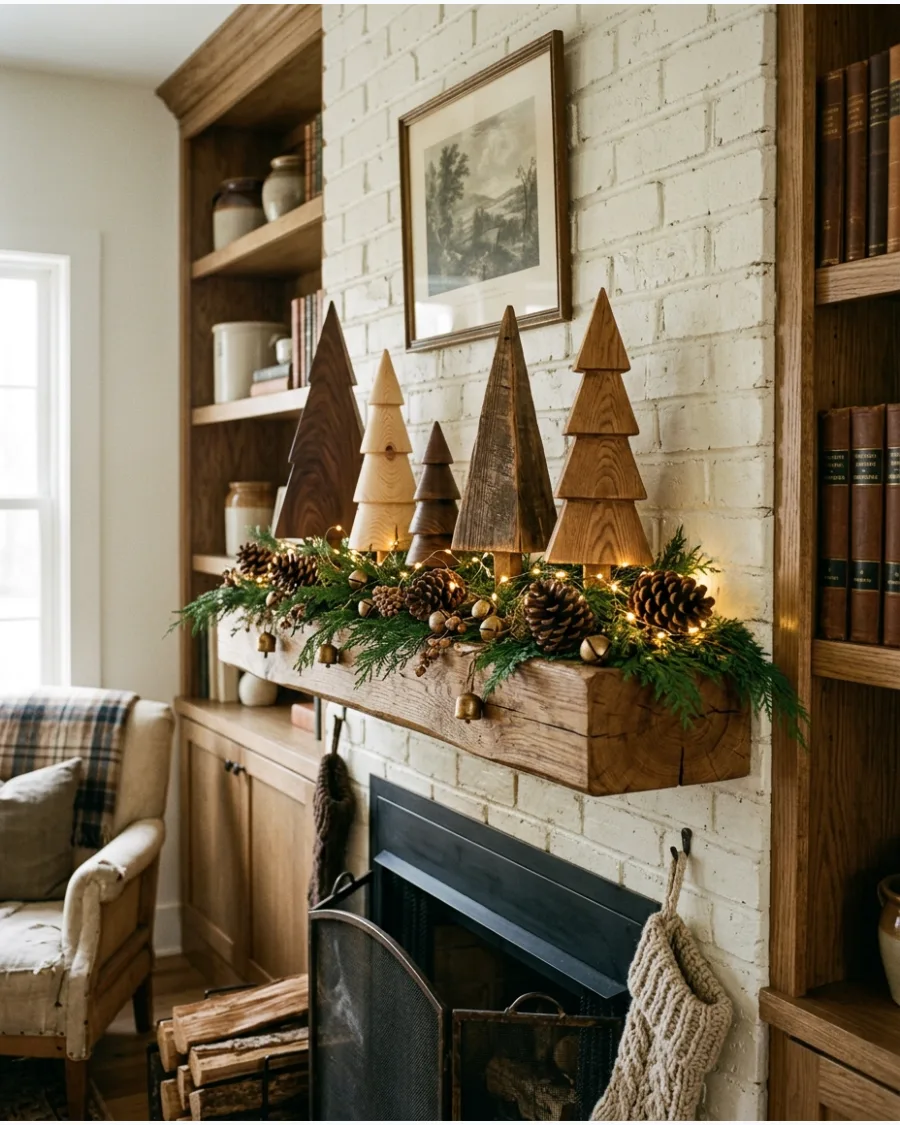
Create a natural forest scene on a living room shelf using a variety of wood textures. Arrange handmade-looking wooden trees of different heights and finishes in small clusters across the shelf. Fill the spaces around the tree bases with large pinecones and loose evergreen branches for a grounded, earthy look.
Finish the display by weaving in a string of warm white fairy lights and a few brass bells for a hint of light and shine.
- Check the stability of the wooden trees; if they are top-heavy, use a small amount of removable museum wax on the base.
- Place the largest trees toward the back and smaller ones in front to create a sense of perspective.
- Wedge the brass bells into the evergreen branches so they appear as if they are hanging from the forest canopy.
Mix stained wood trees with raw, unfinished ones to provide visual contrast without introducing new colors.
64. White Pitcher and Evergreen Shelf
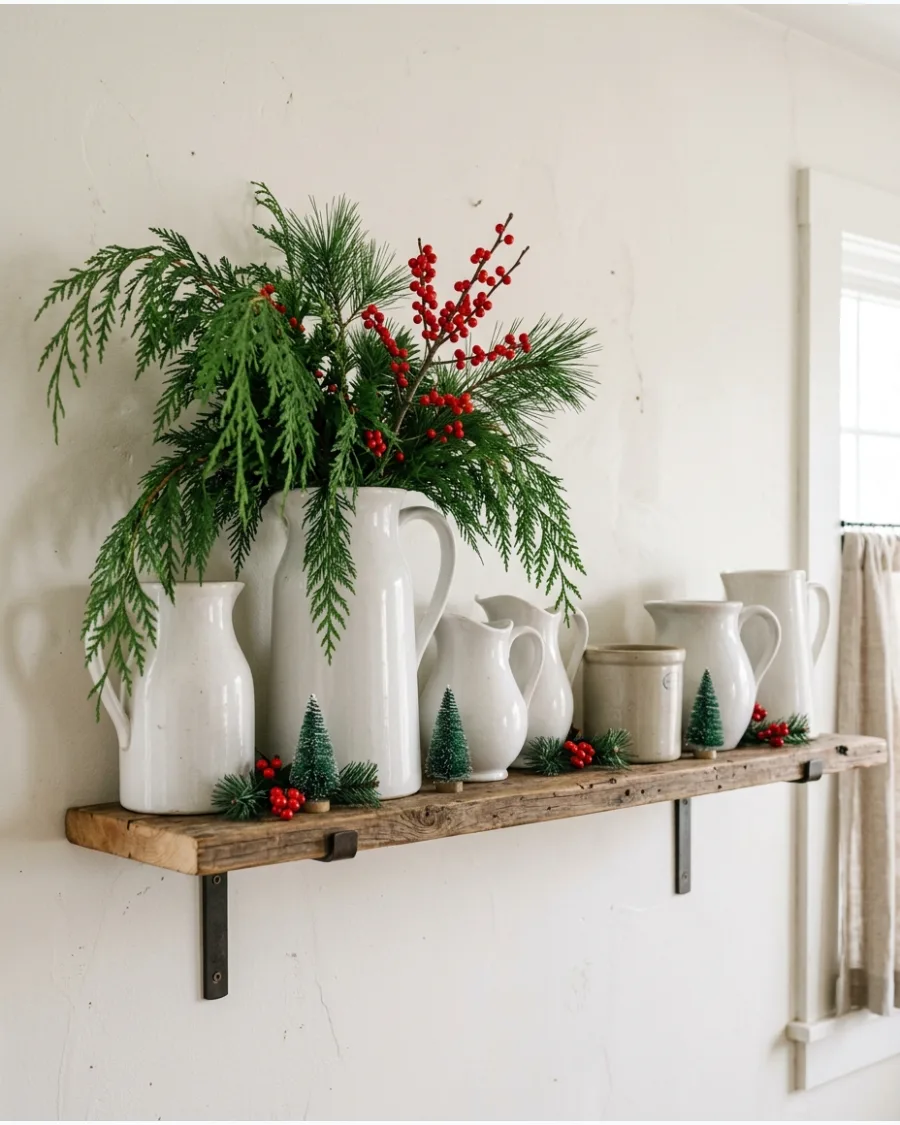
Transform plain kitchen or dining shelves by utilizing white ceramic vessels as rustic vases for seasonal greenery. Tuck fresh or faux cedar branches into stoneware jugs and pitchers to establish a textured, vertical focal point on the shelf. Anchor the display by clustering small tabletop trees and sprigs of red berries around the base of each vessel.
This grouping creates a classic holiday scene that integrates easily with everyday neutral dishware.
- Mix different finishes by pairing a matte white crock with a glossy glazed pitcher to create subtle contrast within the monochrome palette.
- Stagger the vessels in a triangular formation, placing the tallest pitcher in the back and smaller jugs toward the front to ensure every element is visible.
- Layer loose berry stems or a short strand of beaded garland along the shelf edge to bridge the gaps between the larger pitchers and the mini trees.
Place a few small river stones or marbles at the bottom of lightweight pitchers to prevent them from tipping once the heavy evergreen branches are inserted.
65. Rustic Christmas Sign Shelf
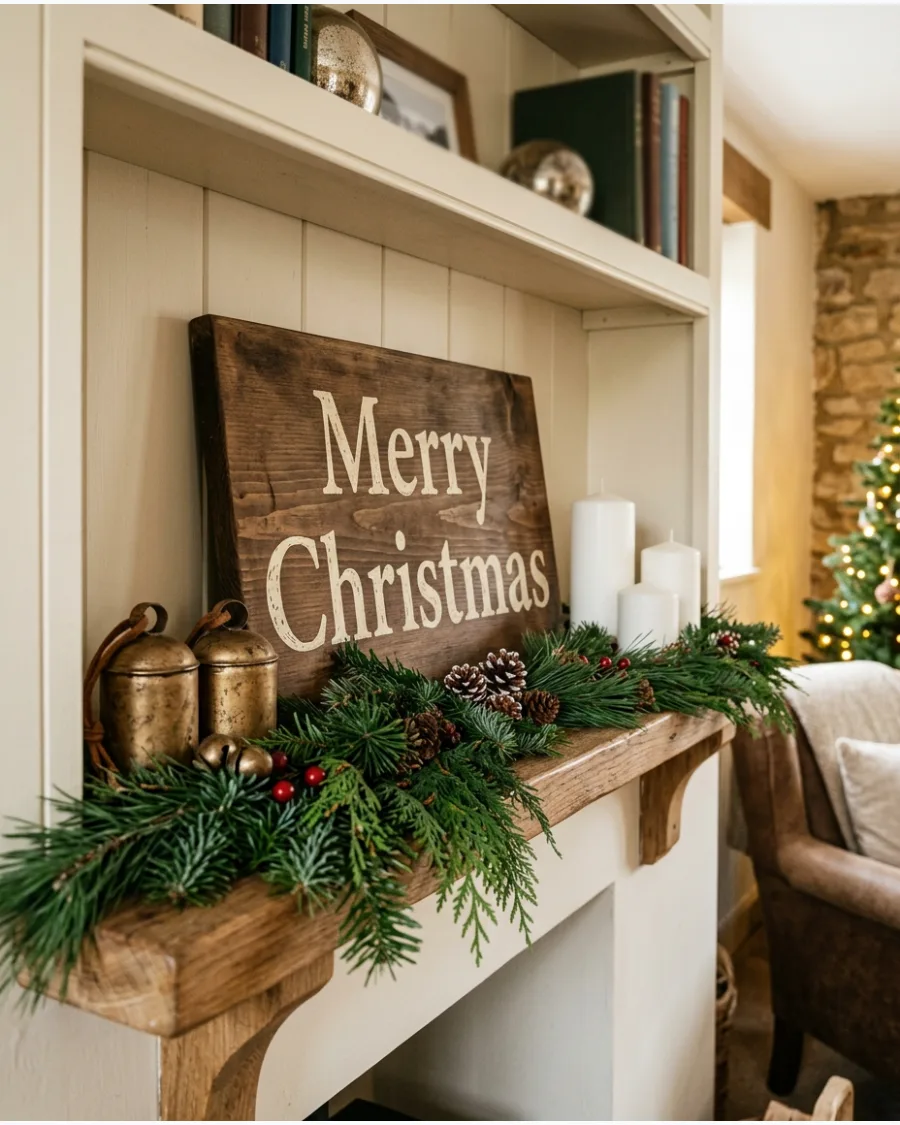
Focus your shelf design around a single meaningful piece of wall art or a wooden sign. Lean one medium-sized wood Christmas sign against the back wall and build a layered vignette of greenery and candles in front of it. Use the sign as an anchor, placing taller mini trees on one side and a cluster of brass bells on the other to balance the weight.
This approach avoids a cluttered look by keeping the messaging simple and the focal point clear.
- Verify that the sign has a flat bottom edge so it can lean securely without sliding forward on smooth shelf surfaces.
- Layer battery-operated pillar candles of different heights in front of the sign to illuminate the text during the evening.
- Drape a single strand of wooden beads or a small garland across the top corner of the sign to soften the straight lines.
Use a small piece of non-slip shelf liner under the base of the sign to keep it from shifting when the shelf is bumped.
66. French Country Christmas Shelf
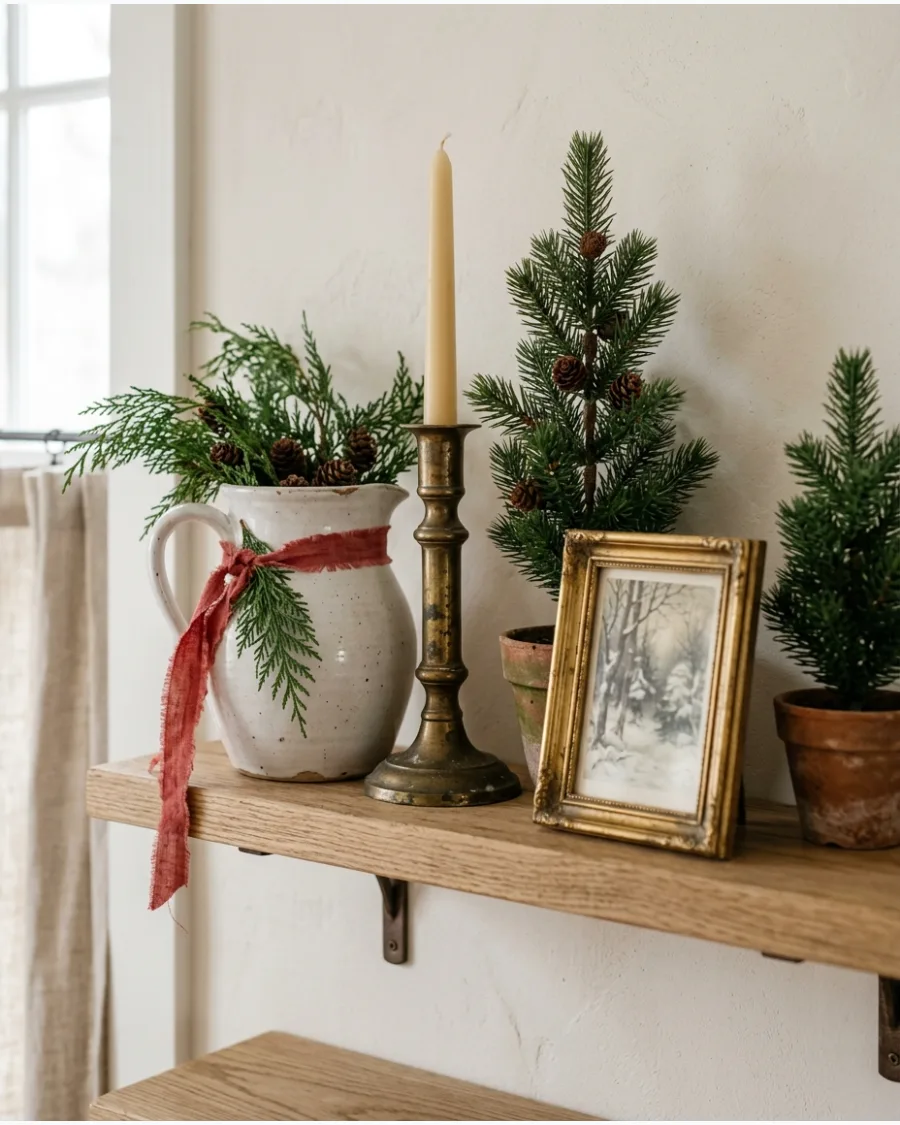
This display focuses on a soft, lived-in aesthetic rather than high-contrast rustic elements. By mixing white ceramics with aged brass, you create a look that feels historic and sophisticated.
Thread a faded red linen ribbon through the handles of white ceramic pitchers or around the necks of aged brass candlesticks to add a subtle pop of color. This approach works best when you keep the greenery light and wispy rather than dense.
- Select miniature trees with slender trunks and sparse needles to maintain the elegant, understated theme.
- Incorporate small antique frames with black-and-white holiday sketches to break up the greenery.
- Choose brass items with a visible patina or matte finish to avoid a modern, shiny appearance.
Use a light dusting of faux snow on the white ceramics to blend them into a winter-inspired background.
67. English Cottage Christmas Shelf
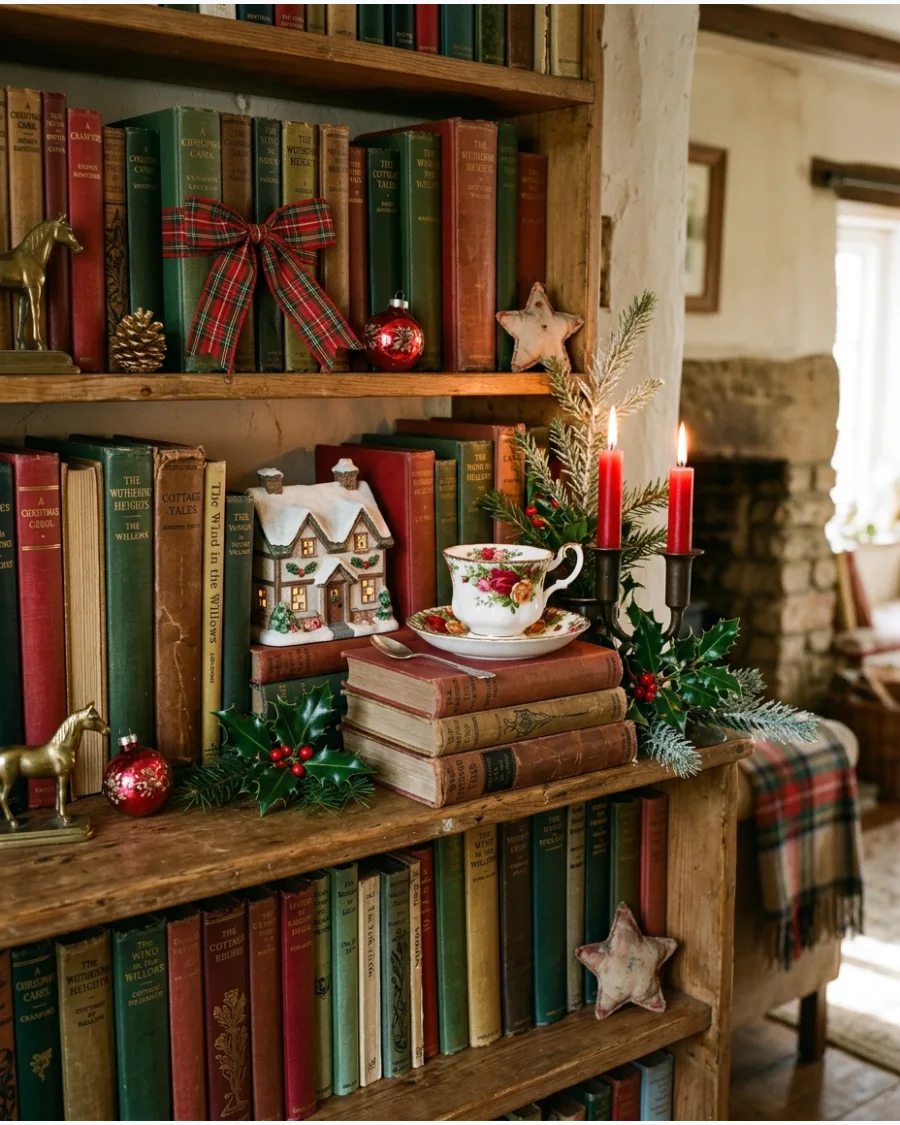
The English cottage style thrives on a collected, slightly eclectic look that emphasizes warmth. Layering everyday items like vintage books and floral china with holiday-specific pieces makes the shelf feel personal.
Tuck sprigs of fresh holly or cedar behind a stack of vintage hardcover books to provide a green backdrop for red candles or floral tea cups. The goal is a dense, cozy arrangement that looks like it has been gathered over many years.
- Group floral china patterns with red and green accents to tie into the traditional Christmas palette.
- Drape a small tartan ribbon or fabric scrap over the edge of a shelf to introduce a classic textile element.
- Place miniature ceramic houses near the books to create a small village scene within the layers.
Check the spines of your existing books for deep reds, greens, and golds to use as a free base for your display.
68. Primitive Country Christmas Shelf
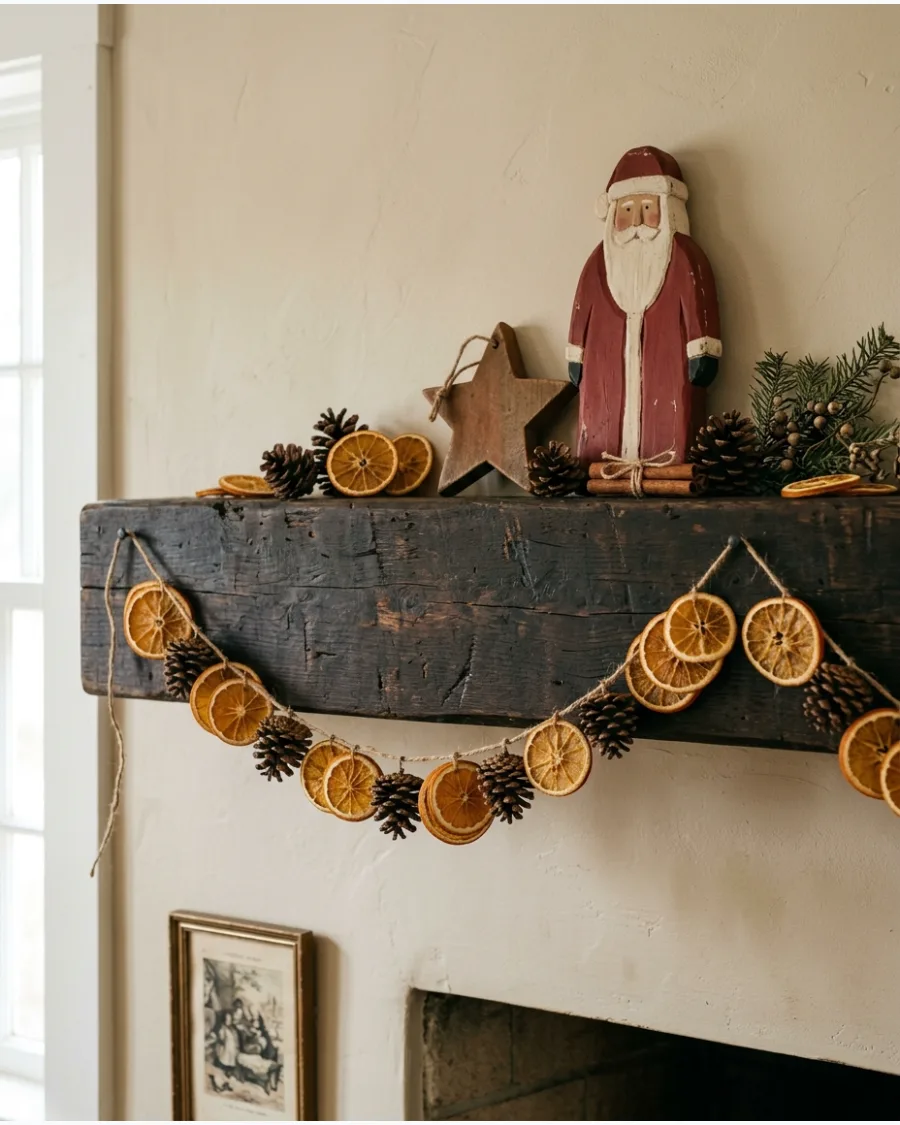
This style celebrates handcrafted simplicity and avoids any shiny or glittery finishes. Use materials like aged wood, jute, and dried botanicals to create a grounded, historical holiday feel.
String dried orange slices and pinecones onto a thick jute twine to create a matte garland that drapes naturally across the shelf edge. Muted red textiles and simple wooden figures reinforce the primitive, old-world charm.
- Look for wooden Santas or stars with a flat, matte paint finish to avoid a commercial look.
- Use large, open pinecones and rough-textured wood pieces as anchors for the corners of the shelf.
- Substitute bright ribbons with strips of torn burgundy or brick-red cotton fabric.
Lightly sand the edges of new wooden decor to give it the weathered look required for primitive styling.
69. Farmhouse Christmas Mug Shelf
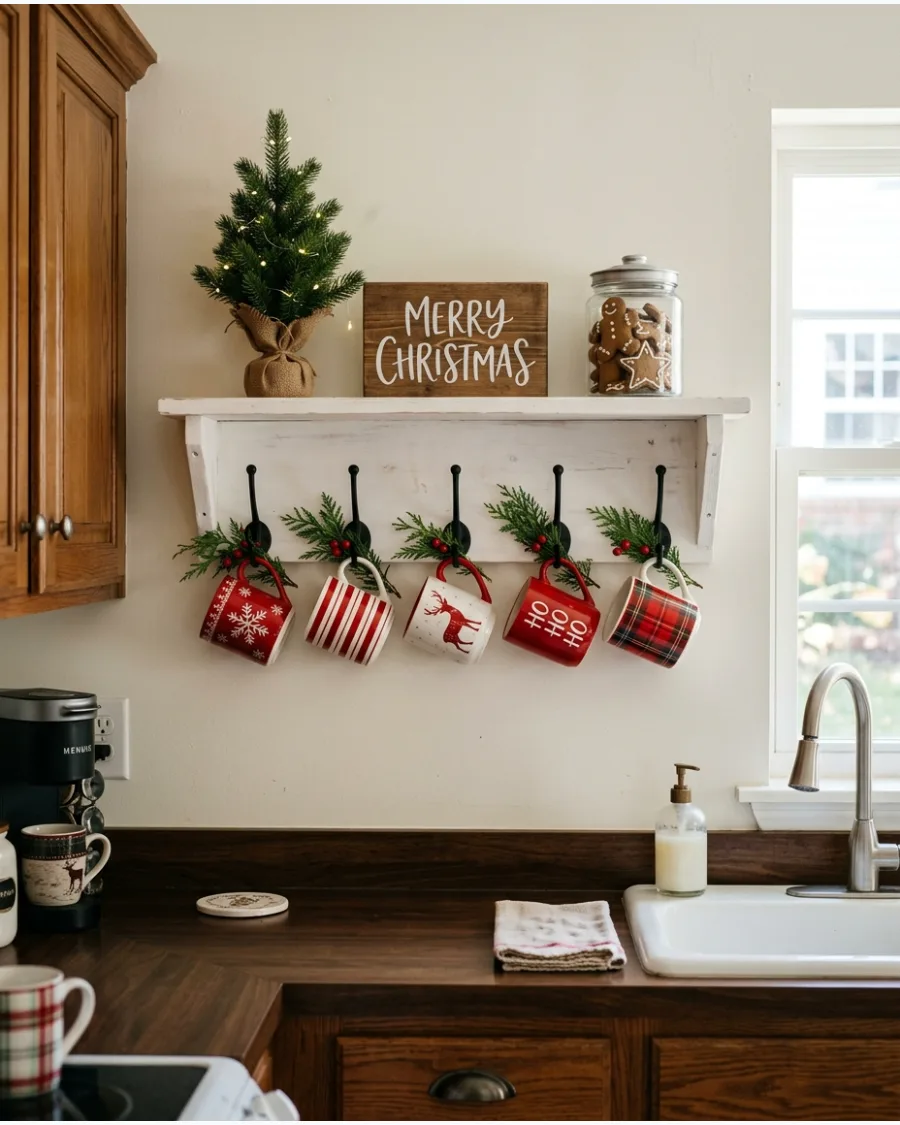
Transform a functional kitchen shelf or coffee bar by showcasing a collection of holiday-themed mugs. This setup allows you to integrate your daily-use items into the seasonal decor for a practical yet festive display.
Hang a row of white and red holiday mugs on under-shelf hooks and intersperse them with small sprigs of faux cedar to soften the look. Small gingerbread accessories and mini trees help fill the gaps between the mugs.
- Coordinate mug colors to a specific palette, like red and white, to keep the shelf looking intentional.
- Place a few gingerbread-themed ornaments or real cookies in a jar nearby to enhance the kitchen theme.
- Lean a small, simple wooden holiday sign against the back wall to provide a focal point for the grouping.
Space the mugs evenly on hooks, leaving enough room for the handles to be easily grabbed without knocking over other decor.
70. Cozy Christmas Cabin Shelf
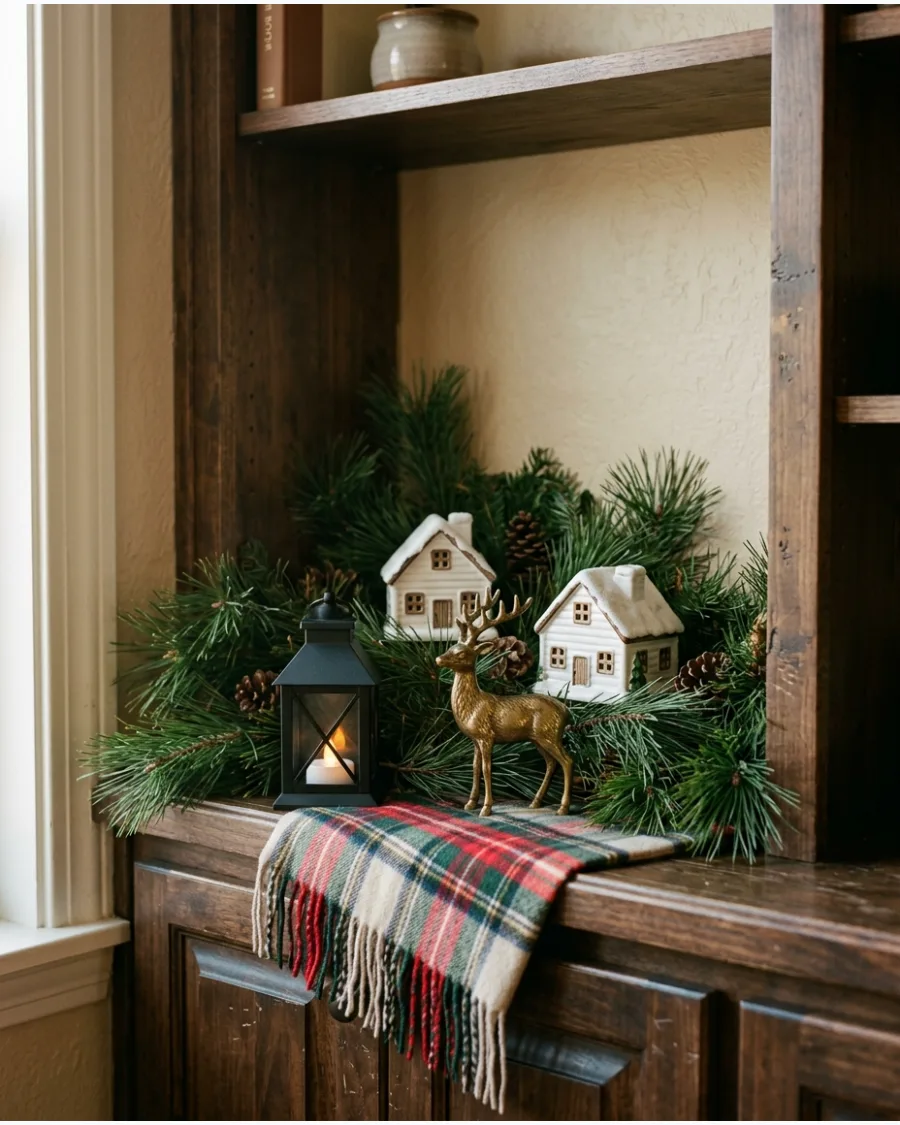
This arrangement uses deep tones and tactile materials to replicate the look of a mountain retreat. Start with a foundation of dark wood shelving or a dark-stained wooden tray to anchor the display.
Layer faux pine greenery behind small ceramic cabins and miniature deer figures to create a sense of depth. Use red and green plaid accents to tie the traditional color palette together.
- Choose cabins with battery-operated internal lights or place tiny LED puck lights behind them to create a warm glow from the windows.
- Tuck a small piece of plaid fabric or a folded tartan scarf under a rustic lantern to introduce texture and pattern.
- Intersperse natural pinecones or a chunky knit garland to fill gaps and reinforce the cabin theme's handmade feel.
Use different heights of deer figurines and cabins to keep the eye moving across the shelf instead of lining objects up at the same level.
SECTION 8: CHRISTMAS DECOR FOR DIFFERENT TYPES OF SHELVES
71. Christmas Living Room Built-In Shelves
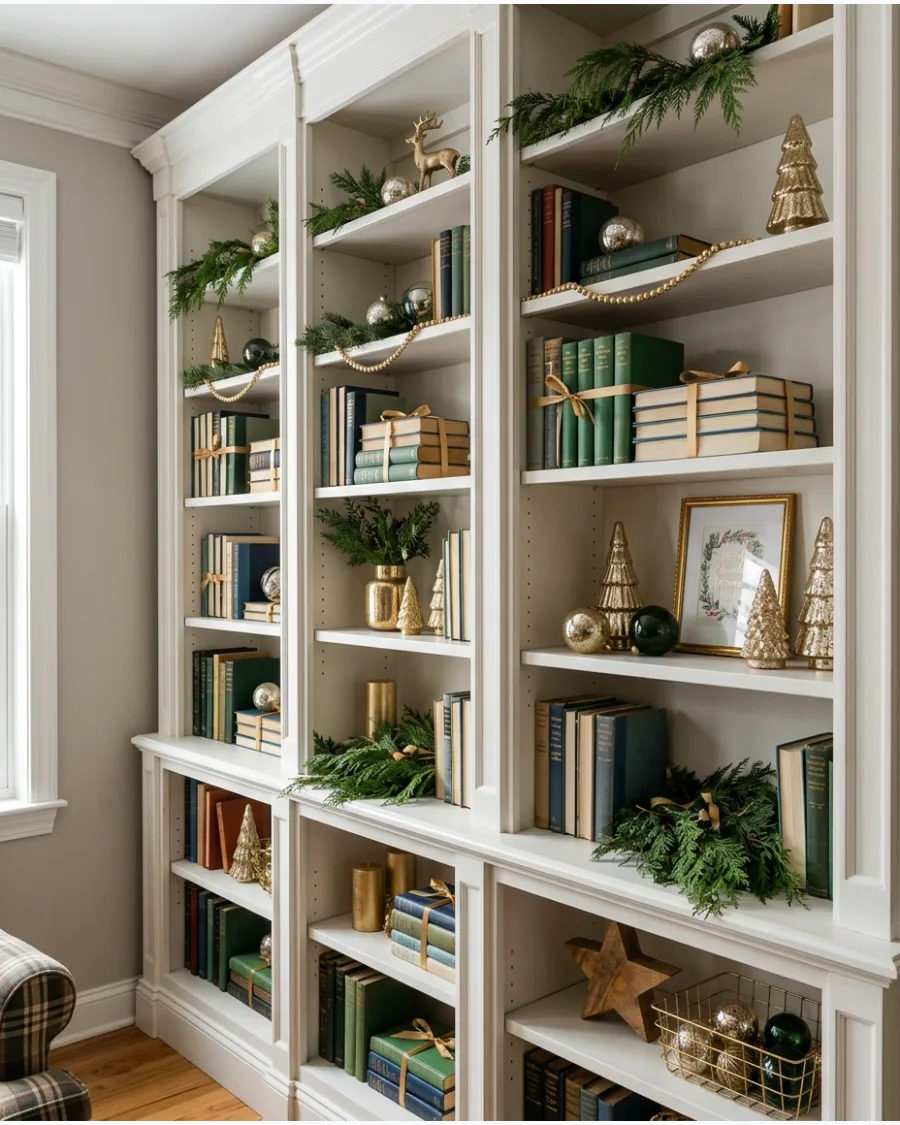
Use a consistent color scheme like gold and green to tie large built-in units together across multiple cubbies. Instead of changing themes for every compartment, repeat key elements like cedar sprigs and metallic ornaments throughout the entire wall.
Arrange holiday accents alongside your existing book collection to maintain a balanced, lived-in look. This approach ensures the shelves feel part of the room rather than a temporary retail display.
- Check shelf heights before choosing miniature trees or figurines to ensure they fit comfortably without touching the shelf above.
- Place larger anchor items like ceramic houses or bowls of ornaments first, then fill gaps with small evergreen clippings.
- Use wired ribbon to create uniform bows that hold their shape consistently across different shelf levels.
Use museum putty on the bottom of delicate ornaments to prevent them from rolling or falling if the built-in unit is bumped.
72. Christmas Floating Shelf Display
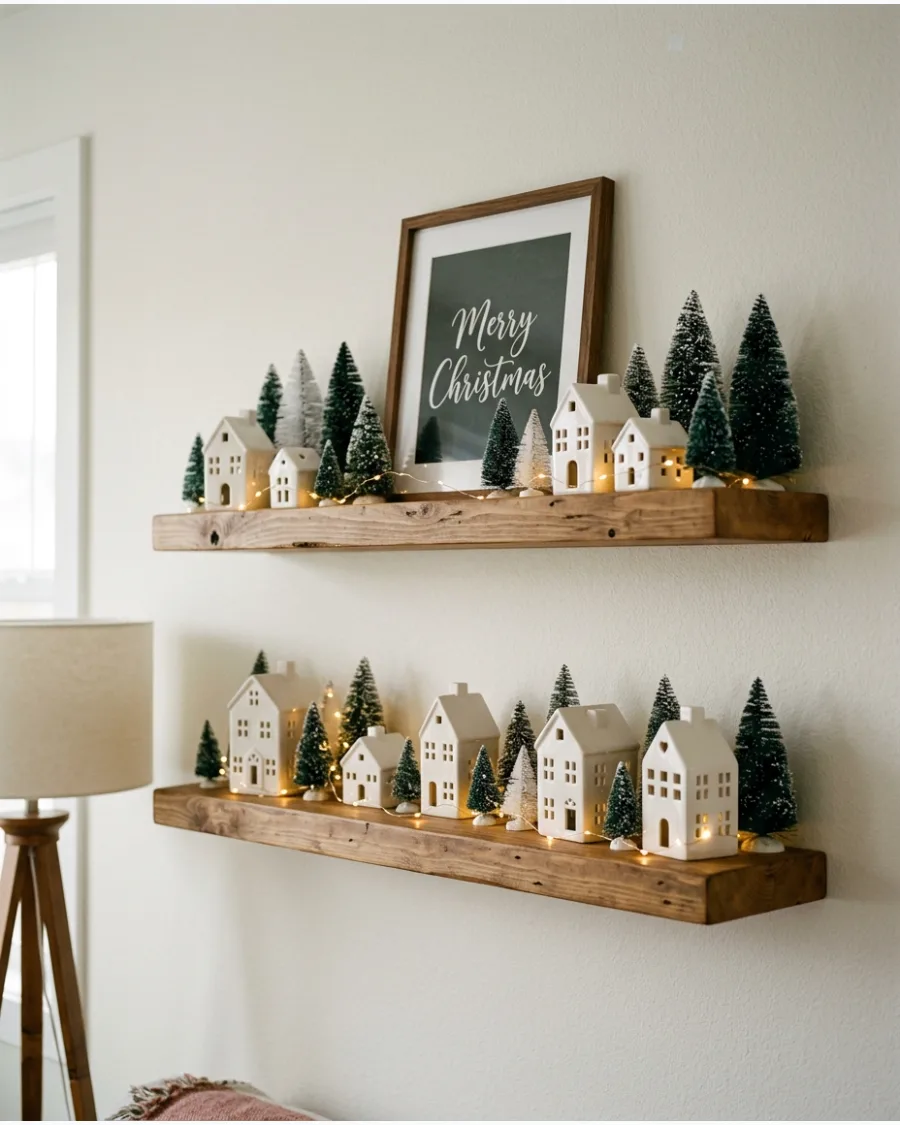
Focus on depth and weight when styling thin floating shelves to avoid straining the wall mounting brackets. Lean framed holiday art against the wall to create a sturdy backdrop for smaller houses and bottle brush trees.
Weave a thin strand of battery-operated fairy lights through the display to illuminate the arrangement without visible cords. This layering technique adds dimension to narrow surfaces without creating clutter.
- Verify the weight limit of your floating shelves before adding heavy ceramic or glass pieces to the center of the span.
- Tuck the battery pack for lights behind a picture frame or inside a small decorative box to keep it hidden.
- Use flat greenery like eucalyptus or cypress to add texture without pushing items too far forward on the shallow shelf.
Choose 'warm white' LEDs for the fairy lights to provide a soft glow that doesn't wash out the colors of your miniature display.
73. Christmas Bookshelf Makeover
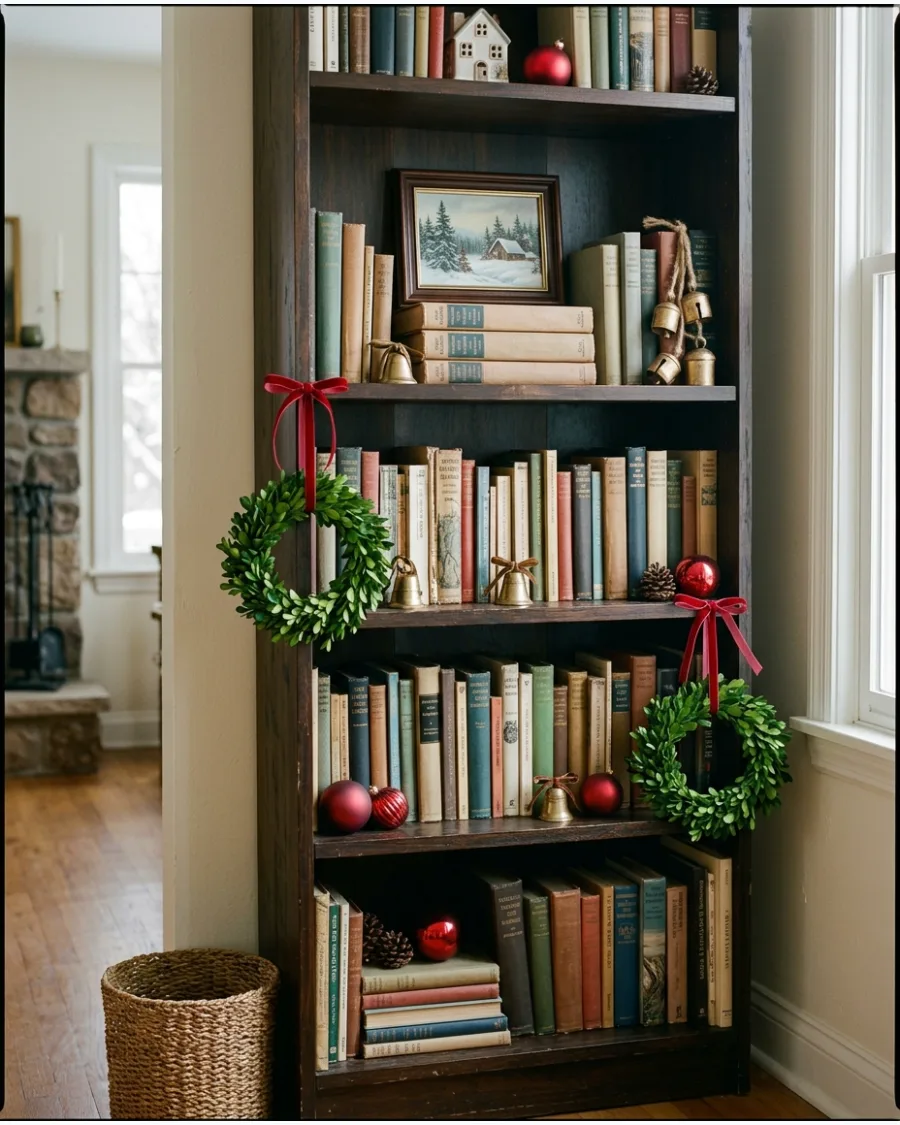
Give your library a seasonal update by nestling holiday accents directly into existing rows of books. Clear small sections of a shelf to make room for a mini wreath or a cluster of glass ornaments.
Hang small wreaths from the shelf fronts using thin ribbon or removable hooks to add a vertical layer of greenery. This method allows you to celebrate the season without packing away your entire book collection.
- Group books by spine color to create a cleaner, more intentional background for colorful holiday objects.
- Lay a few books horizontally to act as a pedestal for a small Christmas tree or a framed seasonal print.
- Intersperse metallic accents like brass bells to reflect light in the deeper, darker areas of the bookshelf.
Use clear fishing line to hang lightweight ornaments from the underside of the shelf above for a floating effect among the books.
74. Christmas Cube Shelf Decor
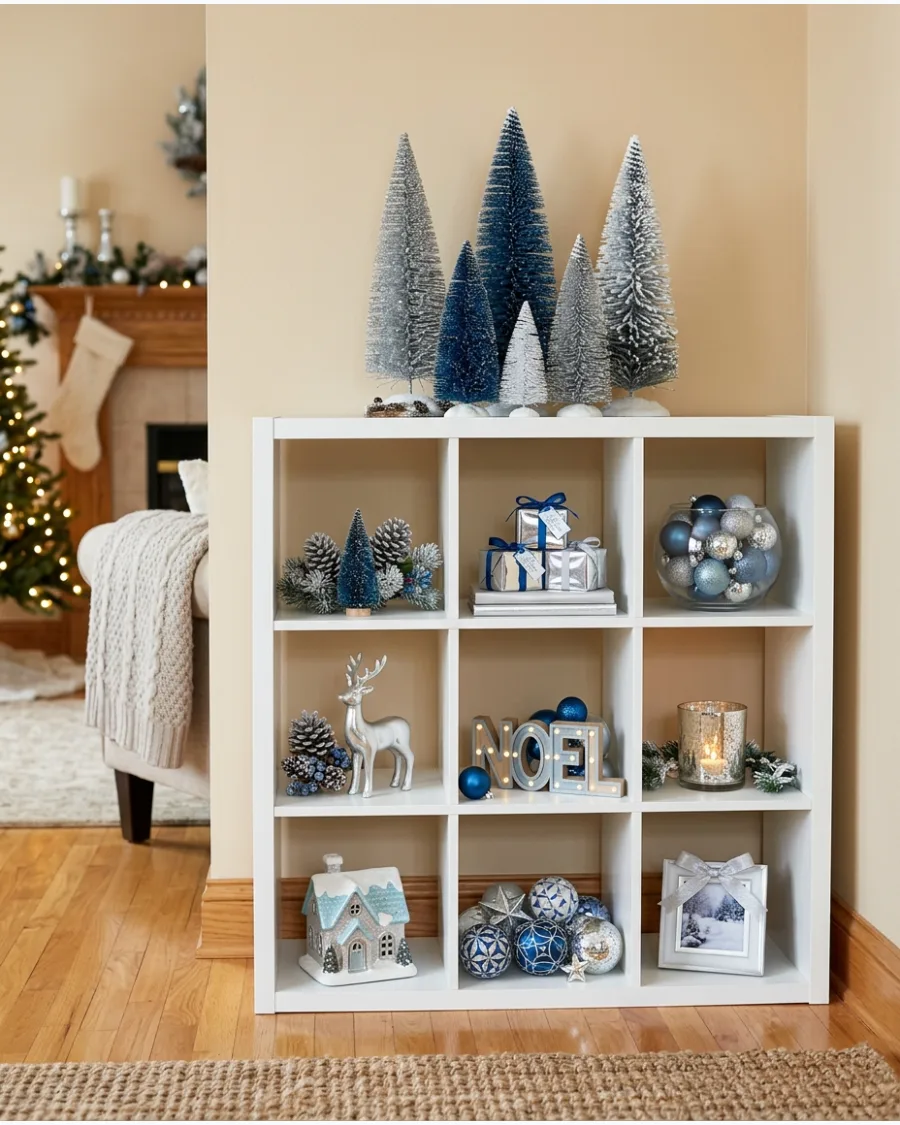
Transform a standard cube organizer into a curated holiday display by giving each square its own specific focus. Dedicate one cube to a dense forest of bottle brush trees and another to a collection of wrapped gift boxes in matching paper.
Repeat a singular color palette, such as silver and blue, across every cube to ensure the unit feels like one cohesive installation. This approach makes the most of the grid structure to tell a holiday story.
- Measure the interior dimensions of the cubes to ensure your tallest trees or houses don't touch the top edge of the compartment.
- Place items in the front third of the cube to keep them visible and avoid heavy shadows in the back.
- Use fabric liners or wrapping paper backdrops in a few cubes to add pops of color without adding physical clutter.
If using a cube shelf as a room divider, decorate both sides of the open cubes so the display looks finished from any angle.
75. Christmas Corner Shelf Decor
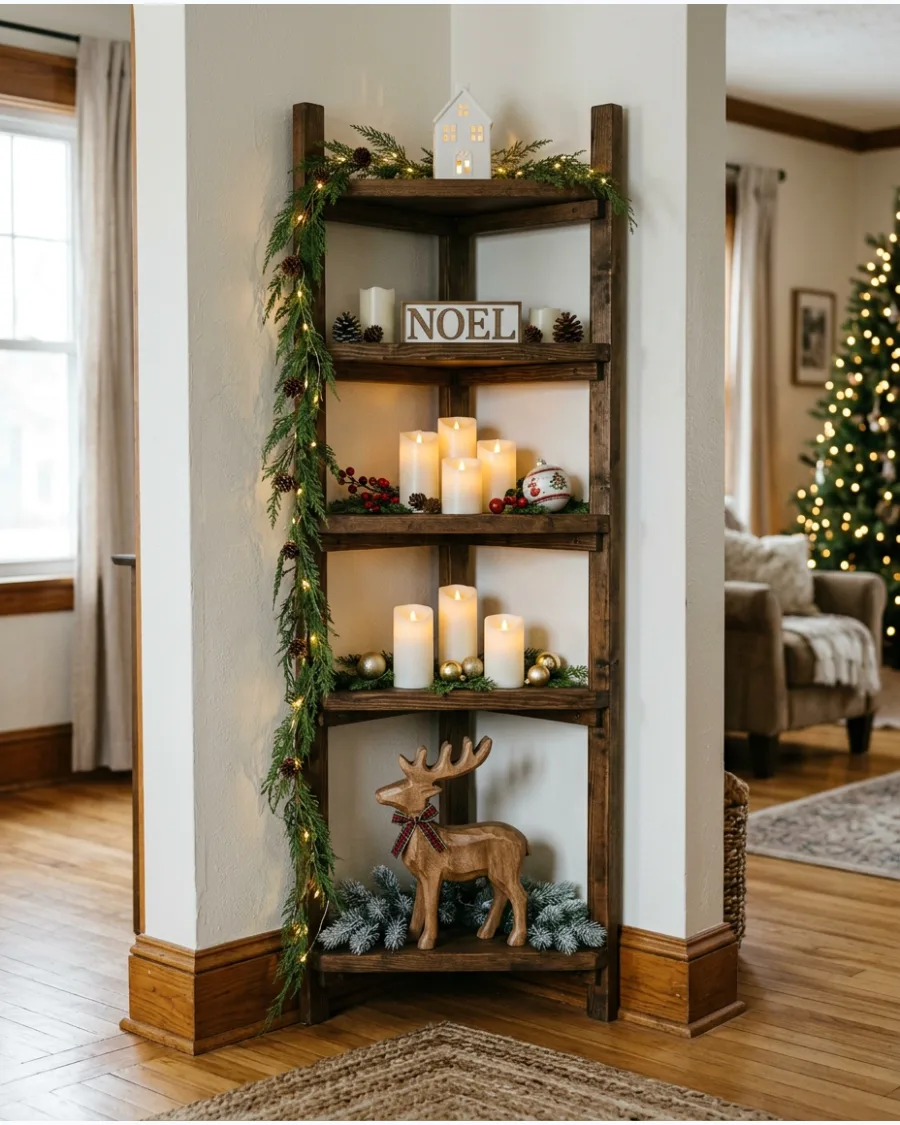
Maximize the unique shape of a corner shelf by placing larger, sturdier decorations on the wider bottom tiers. Use the top shelves for delicate items like tea lights or small porcelain houses that won't feel cramped in the narrower top space.
Drape a single strand of evergreen garland vertically down the side of the unit to visually link the different levels. This vertical element draws the eye upward and makes the separate shelves feel like a single display.
- Select a garland with a thin wire core so you can bend it to follow the specific angles of the corner unit.
- Match the color of your ornaments on the top shelf to the larger accents below to maintain visual balance.
- Place battery-operated candles on different levels to ensure the recessed corner remains well-lit and festive.
Use small clear adhesive hooks on the hidden interior side of the corner post to secure the vertical greenery without damaging the shelf finish.
76. Christmas Kitchen Open Shelf Decor
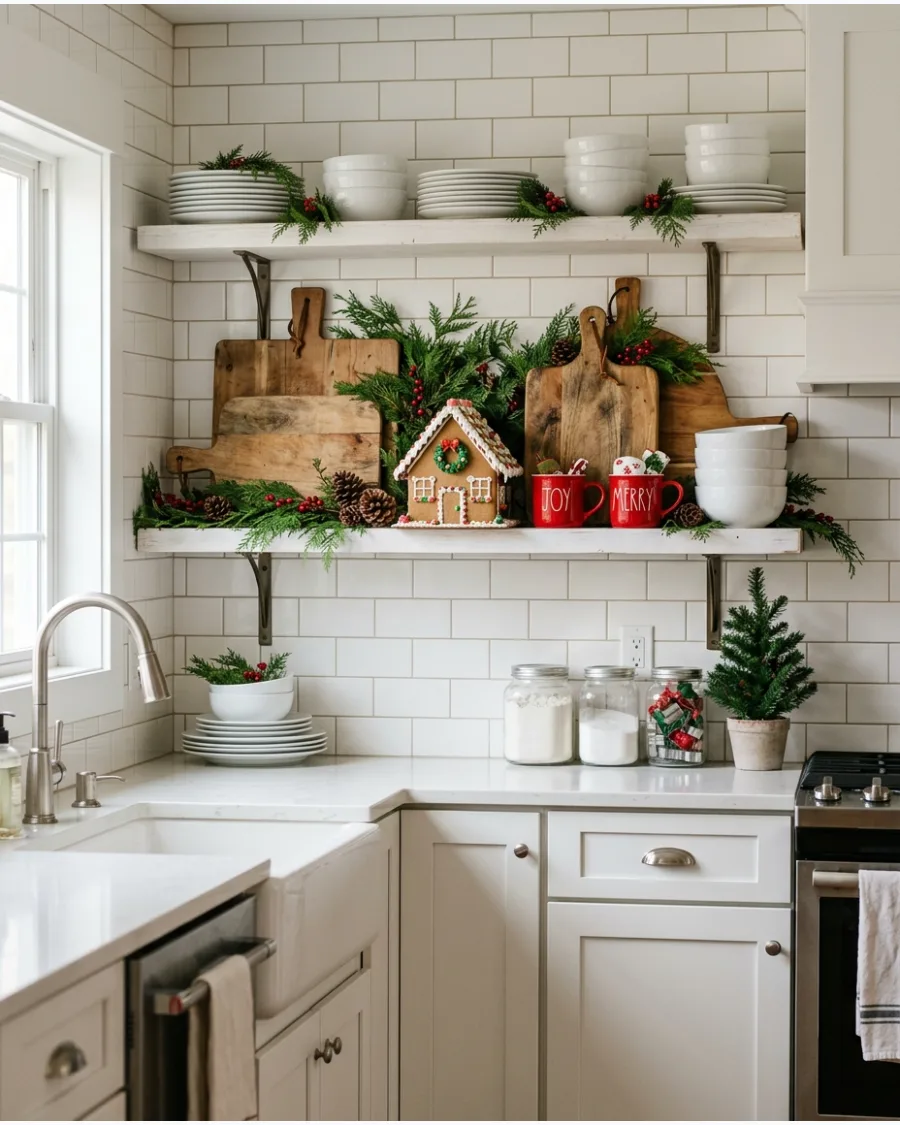
Maintain the function of your kitchen by integrating holiday items among everyday essentials rather than replacing them. Layer fresh or faux cedar sprigs behind stacks of daily-use white plates and wooden cutting boards for a natural backdrop. Intersperse festive mugs and a small gingerbread house to provide a focal point while keeping bowls and glassware within reach.
- Choose food-safe cedar or pine stems that do not drop excessive needles onto dishes.
- Lean larger cutting boards at the back to create height and hide shelf brackets or wall outlets.
- Tie a thin velvet ribbon around the handle of a stack of mugs or a glass jar to add color without taking up extra space.
Use a small adhesive hook on the underside of the shelf above to hang a lightweight wreath without drilling into the cabinetry.
77. Christmas Coffee Bar Shelf
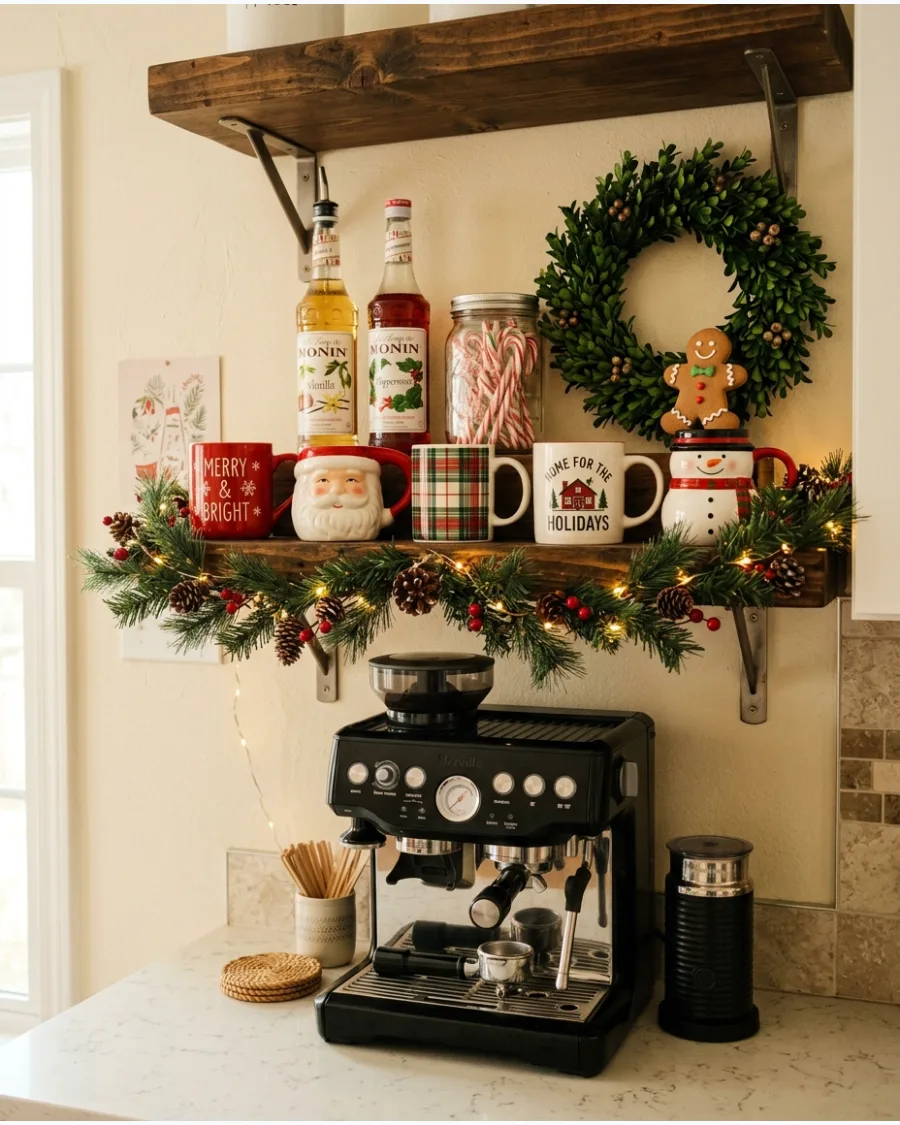
Transform a single shelf above your coffee station into a festive morning retreat using seasonal beverage accessories. Arrange festive mugs and syrup bottles alongside small jars of cocoa and candy canes to keep ingredients organized. Incorporate mini wreaths or gingerbread accents to fill gaps between the functional containers.
- Check that all syrup bottles and cocoa containers are tightly sealed to prevent attracting pests to the decorative display.
- Place frequently used items like spoons or sugar bowls at the front of the shelf for easy access during the morning rush.
- Nestle mini wreaths against the back wall or lean them behind the taller syrup bottles to provide a textured background.
Use a tiered tray on the shelf to double the vertical storage space for mugs and small gingerbread pieces.
78. Christmas Dining Room Hutch Shelves
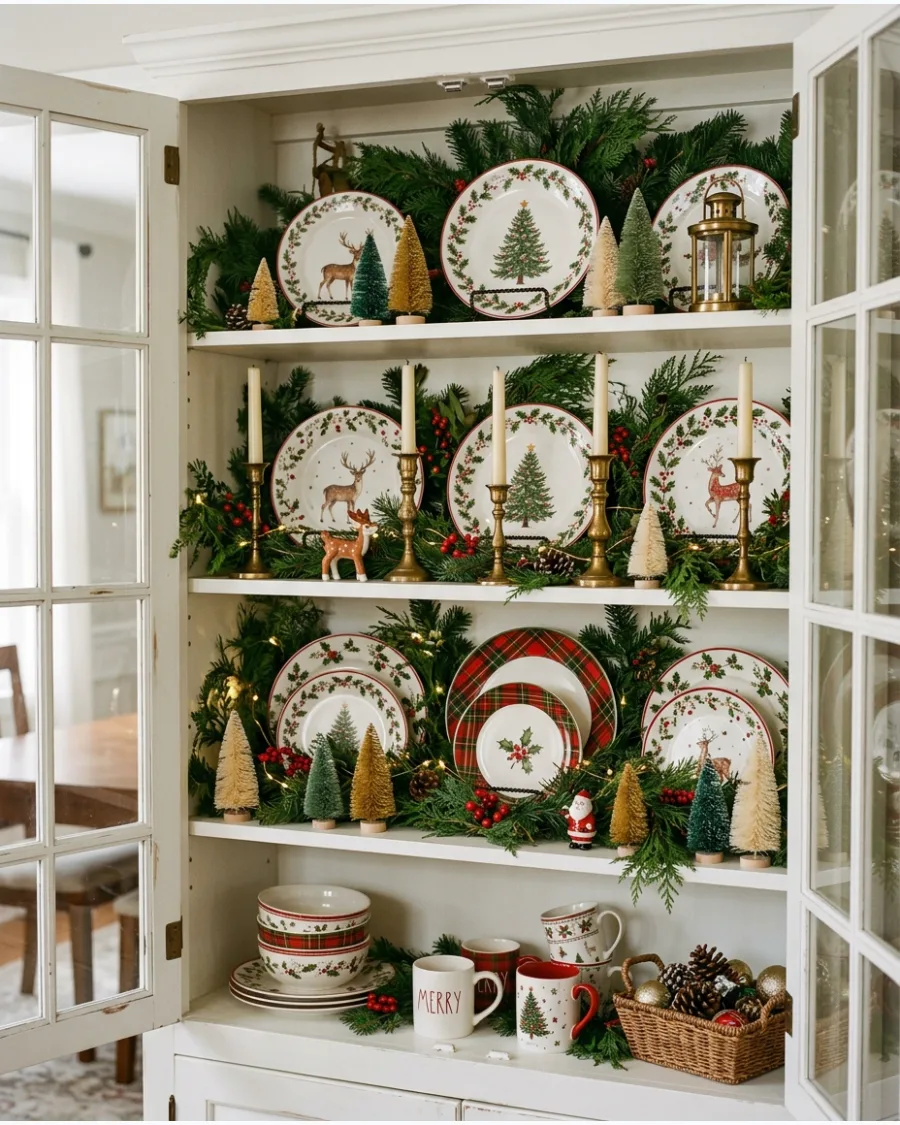
Give a dining room hutch a cohesive look by mixing holiday china with greenery and brass accents. Style the shelves by placing holiday dishes in plate stands and surrounding them with loose greenery and brass candleholders. Add mini trees and small ornaments to the corners to ensure the entire cabinet feels filled and balanced.
- Verify the weight capacity of glass shelves before adding heavy stacks of plates or brass candleholders.
- Position mini trees of varying heights to create a visual staircase effect across the middle shelf.
- Thread small ornaments onto the greenery stems to keep them from rolling off the shelf when doors are opened.
Use battery-operated flameless tapers in the brass candleholders to avoid heat damage to the hutch's interior finish.
79. Christmas Entryway Shelf
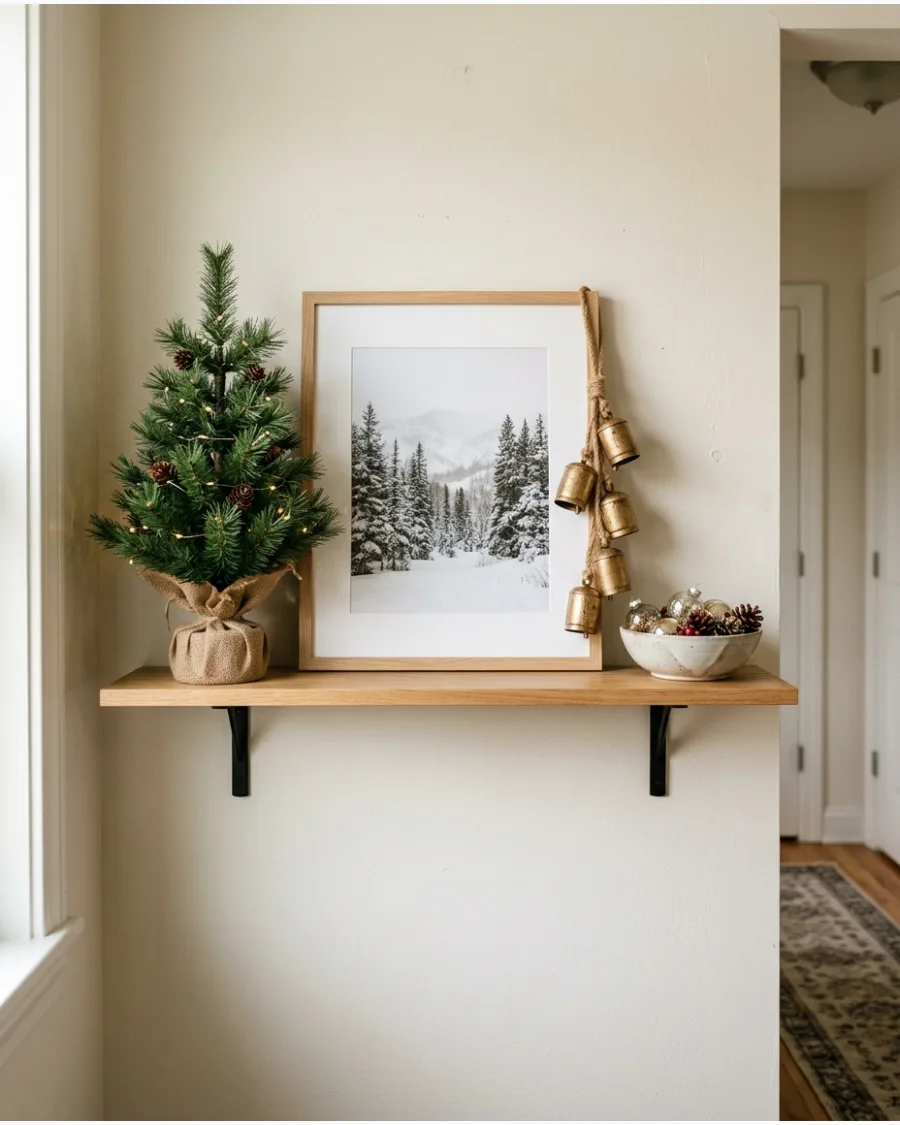
Set the tone for your home with a compact holiday display on an entryway shelf or console ledge. Lean framed Christmas artwork against the wall and place a small tree and a set of bells next to it for varying heights. Include a decorative bowl to hold keys or mail so the shelf remains a practical part of your daily routine.
- Select a mini tree with a weighted base to ensure it stays upright when the front door opens and creates a draft.
- Drape a small strand of bells over the corner of the frame to add a metallic element and a traditional feel.
- Measure the depth of the shelf to ensure the bowl and artwork leave enough room for a small wreath to be hung nearby.
Command hooks are ideal for hanging a mini wreath on the wall behind the shelf without causing permanent damage.
80. Simple Christmas Bathroom Shelf
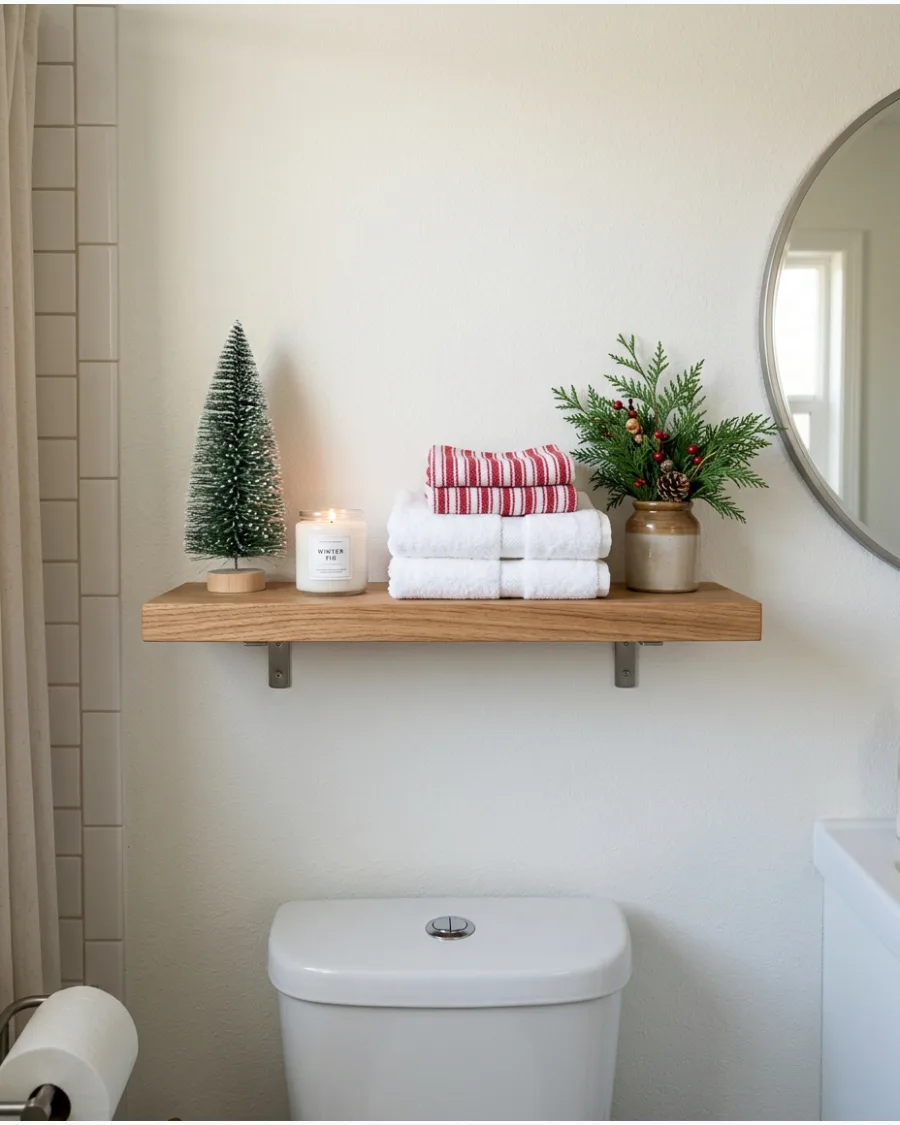
Bring a touch of the holidays into the bathroom with a few carefully chosen, moisture-resistant accents. Place a miniature cedar arrangement and a small bottle brush tree next to a winter-scented candle on the shelf. Add a folded holiday hand towel to the stack to provide a soft texture that complements the greenery.
- Use bottle brush trees with plastic or wire bases rather than wood to prevent rot from bathroom humidity.
- Switch to a flameless candle if the shelf is located near towels or in a tight space with poor ventilation.
- Keep the arrangement restricted to one side of the shelf so there is still plenty of room for daily toiletries.
Place the miniature cedar arrangement in a heavy ceramic pot to prevent it from tipping over on a slick bathroom surface.
SECTION 9: EASY, DIY, AND BUDGET CHRISTMAS SHELF DECOR
81. Dollar Store Christmas Village Shelf
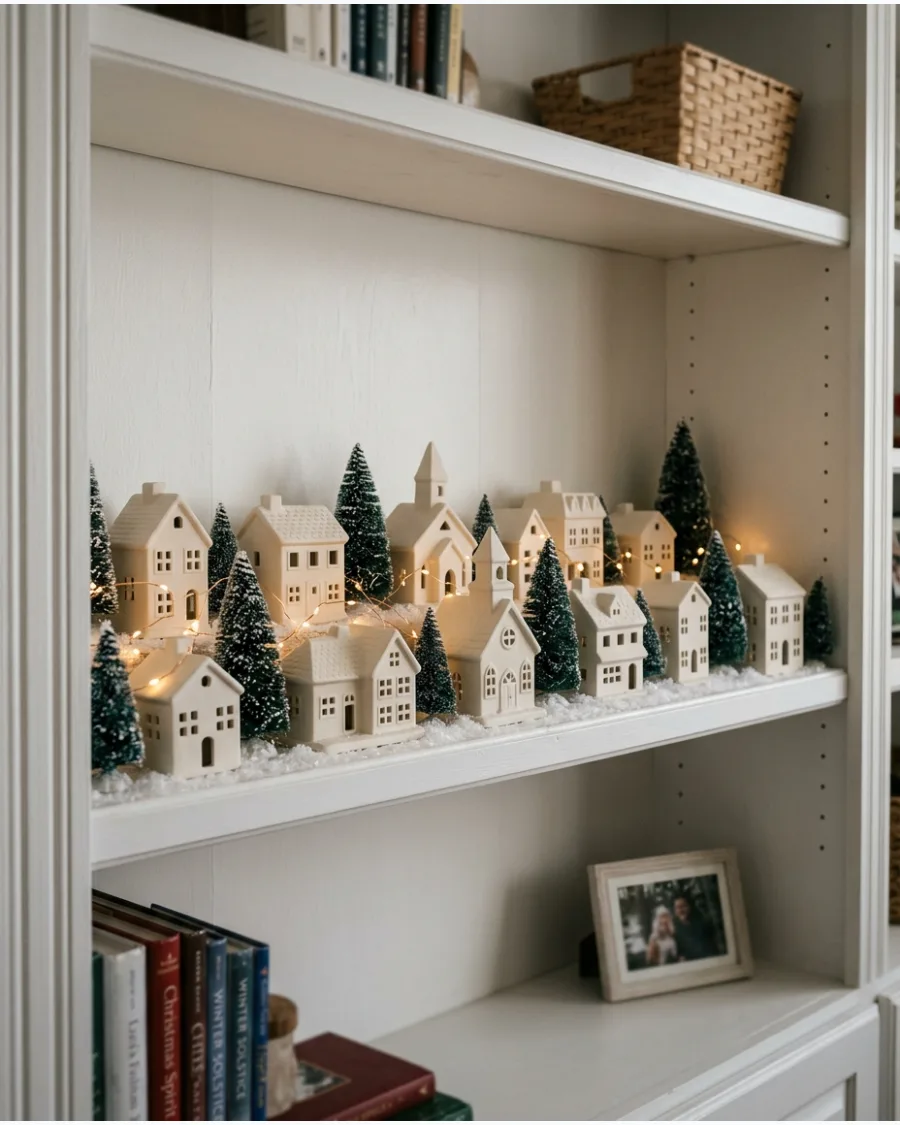
Transform budget-friendly ceramic or plastic miniature houses by applying a single, uniform paint color. This creates a high-end look from mismatched pieces while making the collection feel like a purposeful set.
Paint each building and its roof in a monochromatic shade like matte white or soft charcoal to unify different architectural styles.
- Choose spray paint specifically formulated for plastic or ceramic to ensure an even coat without the need for a separate primer.
- Position the buildings in a staggered line and weave a thin strand of warm LED fairy lights between them to simulate a glowing street.
- Check that the paint is fully cured according to the label instructions before placing the houses on sensitive shelf finishes like wood or lacquer.
Use a small amount of adhesive putty on the bottom of lopsided houses to keep them perfectly level on the shelf.
82. DIY Paper Christmas House Shelf
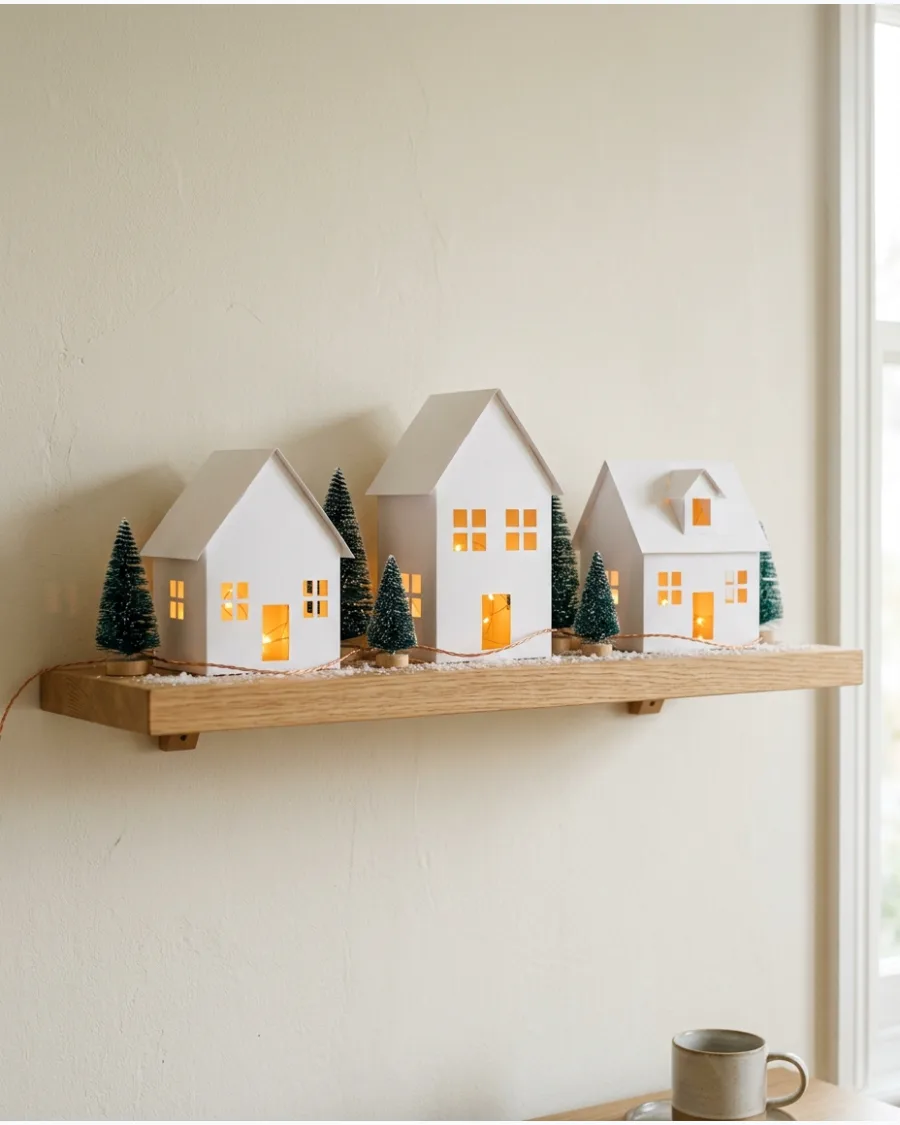
Build a lightweight winter scene using simple cardstock or heavy paper cut into various house shapes. These structures are ideal for floating shelves where weight capacity might be a concern.
Place a battery-operated tea light or LED puck behind each house to make the windows glow from within.
- Download or draw simple templates with clean lines to keep the village looking modern and uncluttered on the shelf.
- Arrange the paper houses at different depths to create a sense of scale and town planning within the narrow shelf space.
- Mix in different sizes of cream or white bottle brush trees to soften the sharp edges of the paper structures.
Use white cardstock with a subtle glitter finish to catch the light and mimic the look of fresh snow.
83. DIY Dried Orange Garland Shelf
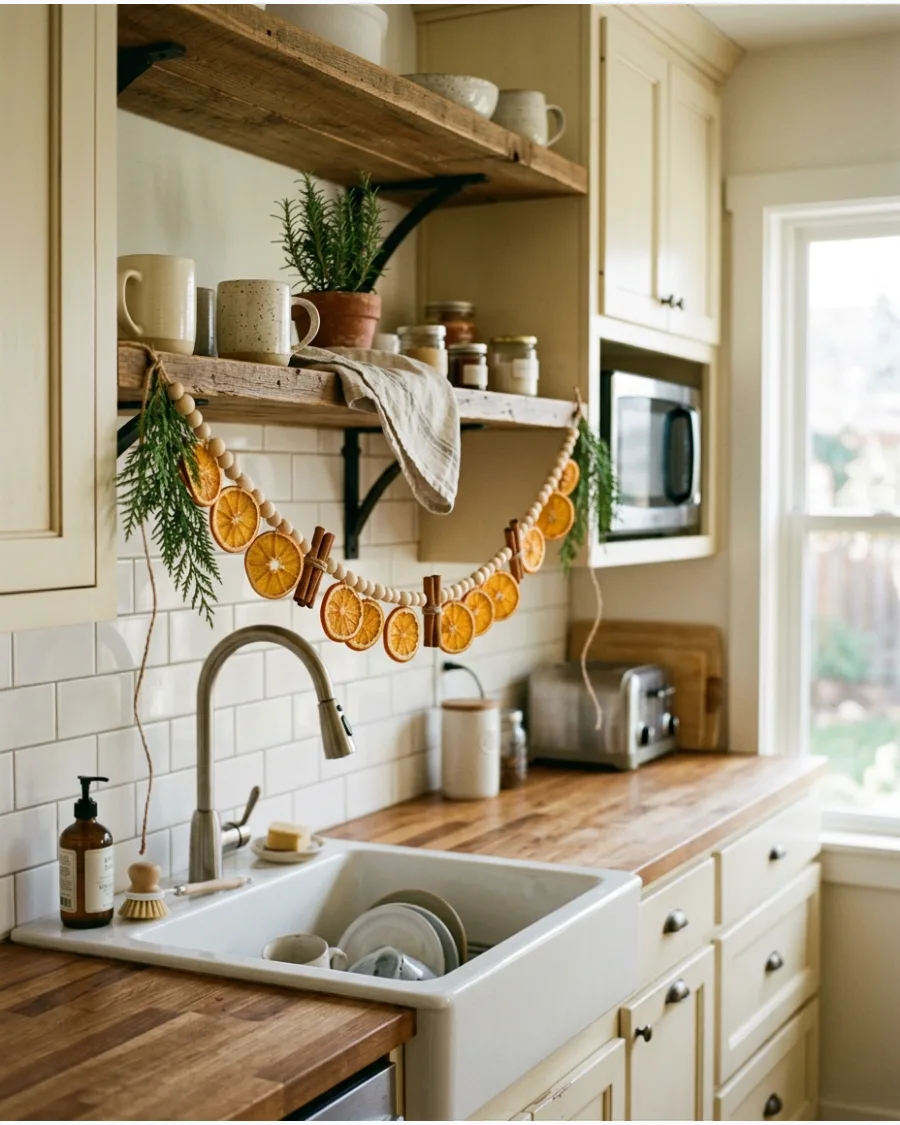
Craft a natural, aromatic display by stringing dried citrus slices along the front edge of your shelving. This handmade touch brings a warm, organic feel to a kitchen or dining room hutch.
Combine the orange slices with wooden beads and cinnamon sticks on a length of jute twine for a textured finish.
- Select oranges that are sliced thin and fully dried to prevent any moisture from damaging the shelf surface or the twine.
- Drape the garland so it sags slightly in the middle of the shelf span, securing the ends with clear removable hooks or small nails.
- Tuck fresh or faux cedar sprigs and medium pinecones behind the garland to fill the gaps between the orange slices.
Add a few drops of clove or cinnamon essential oil to the wooden beads to boost the natural scent of the display.
84. Wrapped Book Christmas Shelf
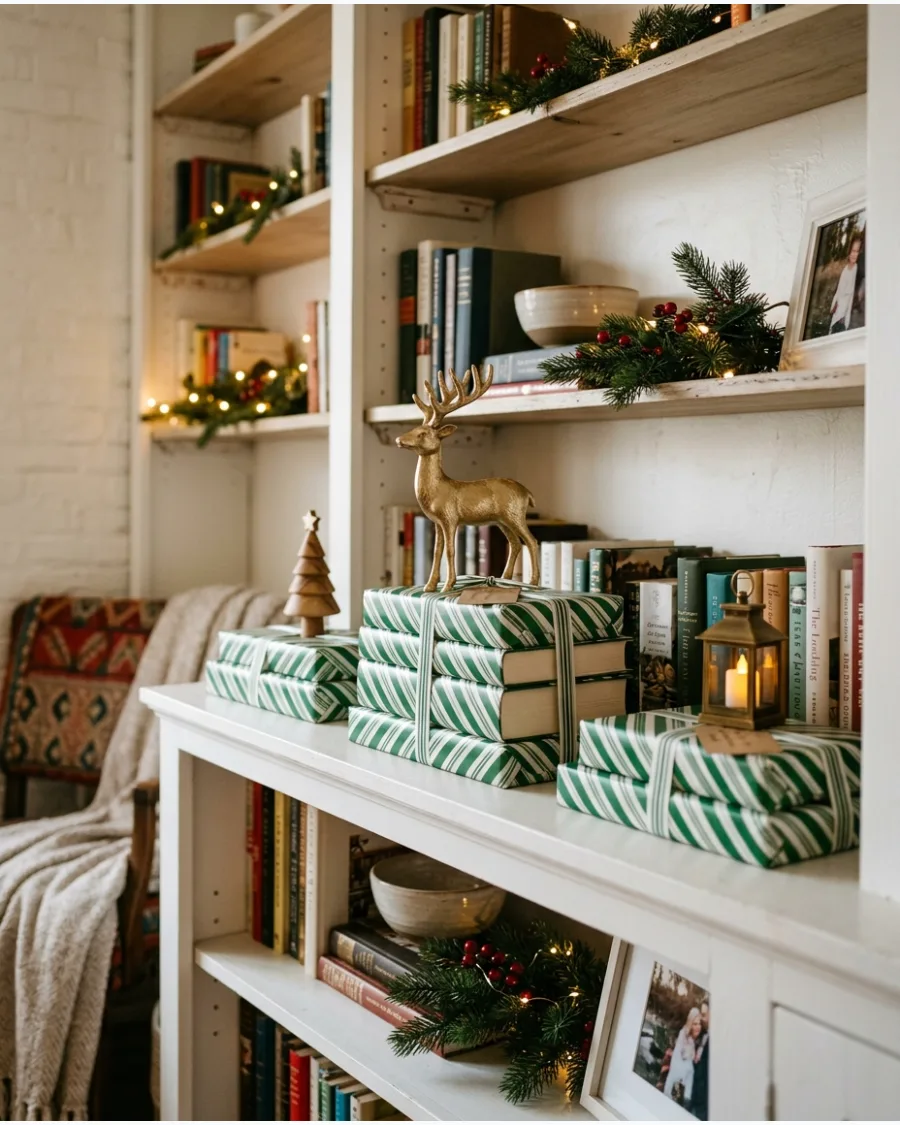
Use items you already own to create custom pedestals for your holiday figurines and trees. Wrapping books or small boxes in holiday-themed paper allows you to control the color palette of the entire shelf.
Wrap several books in the same paper and stack them horizontally to lift a specific item above the rest of the display.
- Pick wrapping paper that coordinates with your existing room decor, such as simple brown kraft paper or a classic pinstripe.
- Place the heaviest stacks toward the back of the shelf to provide a sturdy base for taller trees or heavy ceramic figurines.
- Use empty shipping boxes or small jewelry boxes if you prefer not to wrap your actual book collection.
Tie a thin ribbon or piece of baker's twine around the book stacks to make them look like tiny presents.
85. Mason Jar Christmas Shelf
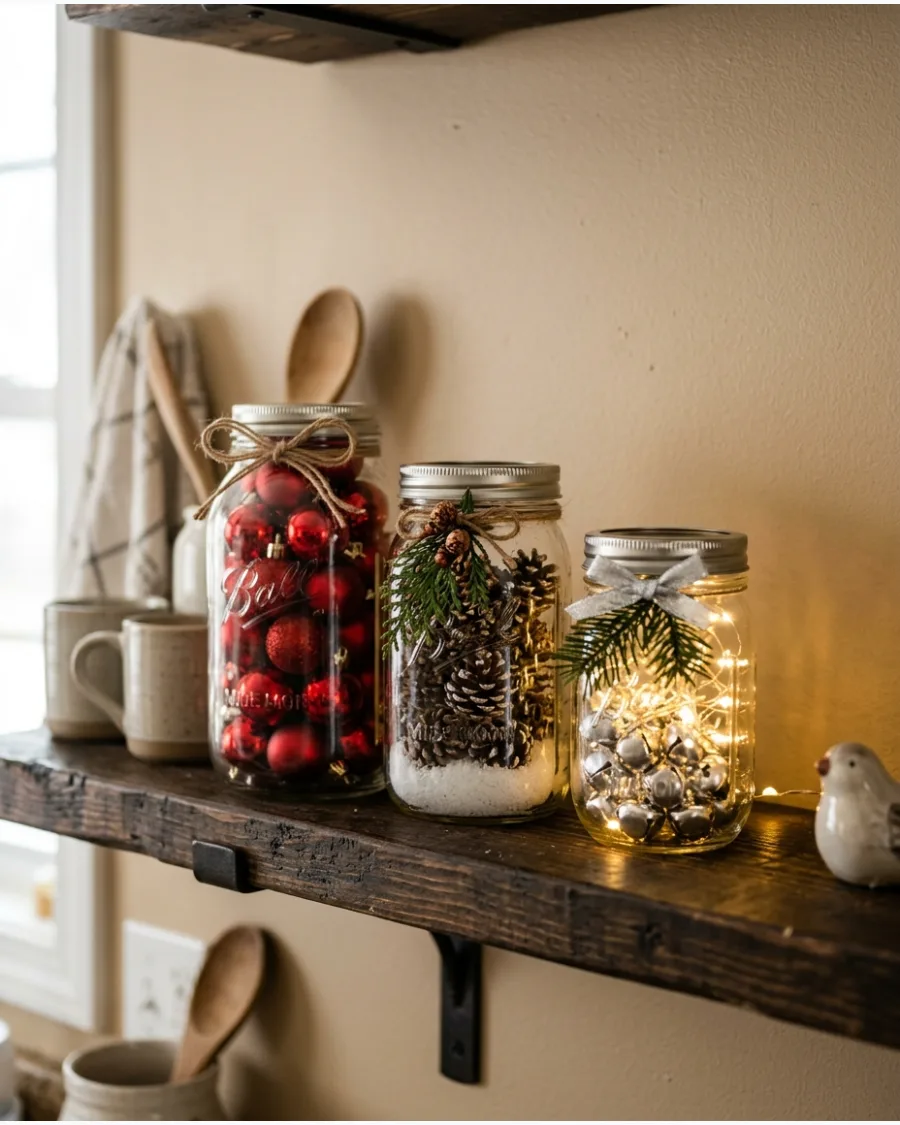
Clear glass jars serve as versatile vessels for showing off small holiday accents that might otherwise get lost. By grouping jars of varying heights, you create a dynamic arrangement that feels intentional rather than cluttered.
Fill the jars with a mix of colorful ornaments, pinecones, and loose faux snow to build miniature scenes.
- Verify the mouth width of the jar before choosing ornaments to ensure the largest pieces can fit inside comfortably.
- Place the tallest jars at the back or ends of the shelf and cluster smaller jars in front to create visual depth.
- Tuck a small string of battery-operated fairy lights into one jar to act as a localized light source for the grouping.
Use a layer of Epsom salt at the bottom of the jar to mimic the look of sparkly snow without the mess of plastic flakes.
86. Ornament Bowl Christmas Shelf
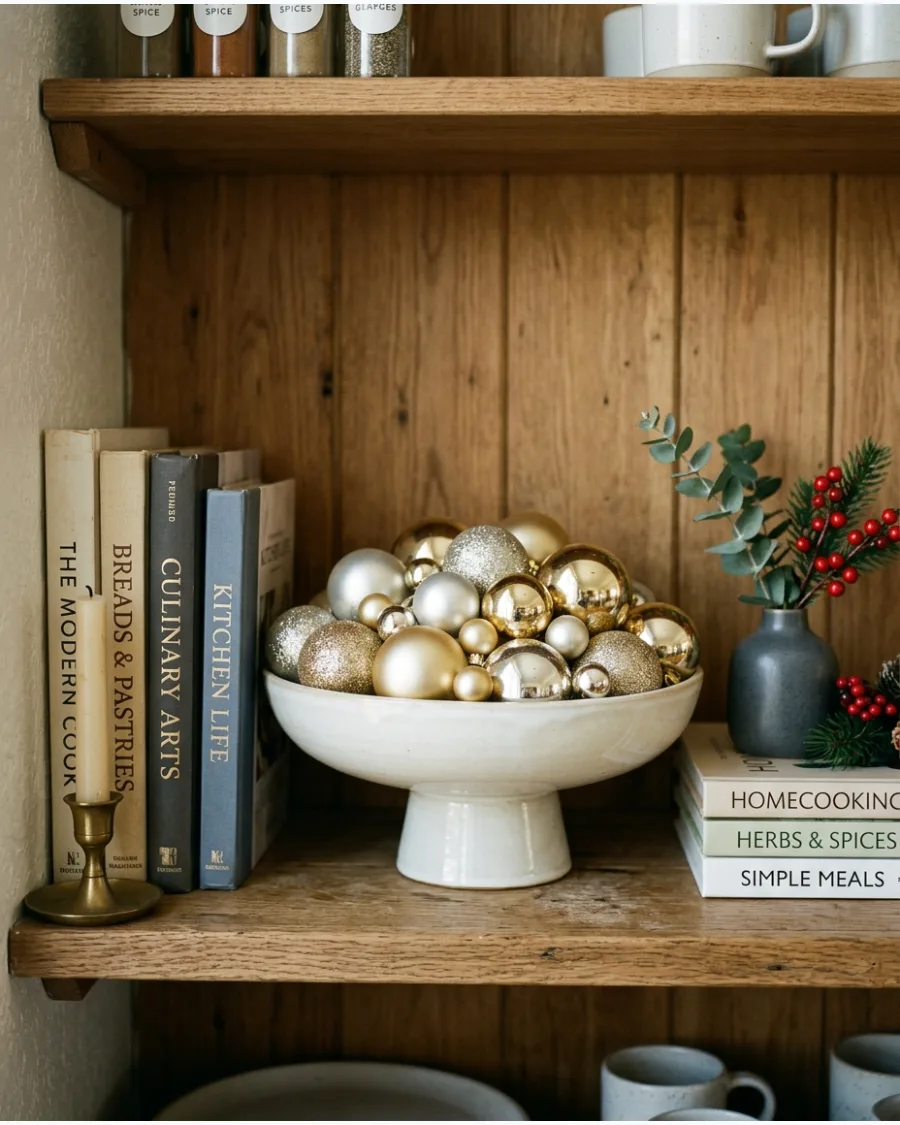
Transform leftover ornaments into a textured centerpiece by grouping them in a single vessel. Using a mix of matte, shiny, and glittered finishes prevents the arrangement from looking flat.
Place a variety of coordinating ornaments into a shallow decorative bowl or pedestal dish to create a quick focal point on a middle shelf. This method works well for filling wide, open spaces on a bookshelf or kitchen ledge.
- Select ornaments in different sizes and shapes to ensure the bowl looks full without being cluttered.
- Position the bowl at eye level so the different textures and light-reflecting surfaces are visible from across the room.
- Store the ornaments in their original divided containers or egg cartons after the holidays to prevent scratches.
Place a crumpled piece of tissue paper or paper towel at the bottom of deep bowls to help the ornaments sit higher and appear more abundant.
87. Mini Wrapped Present Shelf Fillers
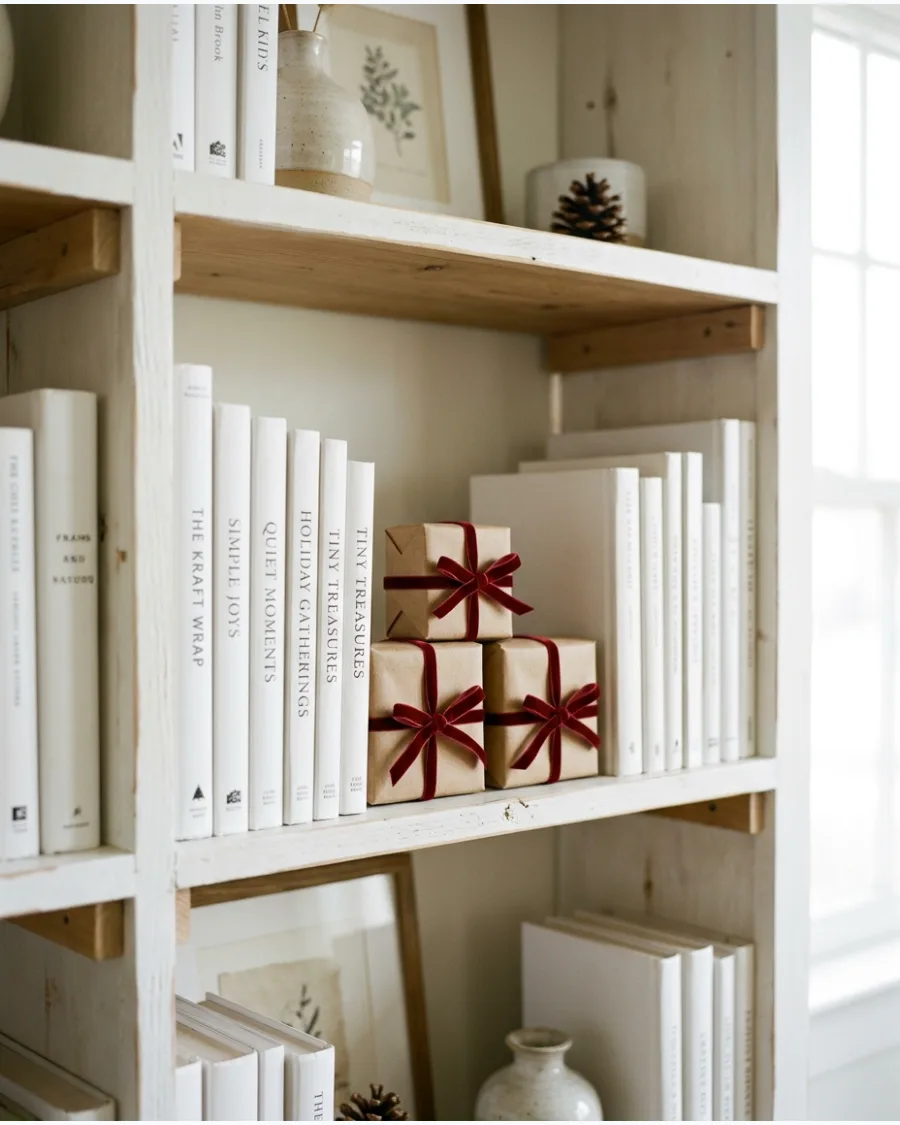
Small gaps between books or decor items can be difficult to style during the holidays. Using tiny wrapped boxes allows you to fill these voids while reinforcing your color palette.
Wrap small jewelry boxes or scrap cardboard in paper that matches your room's holiday theme to act as seasonal spacers on your shelves. Varying the sizes and stacking a few together helps create a more natural, tiered look.
- Choose a ribbon width that is proportional to the small box size so the bow does not overwhelm the package.
- Tuck one or two small boxes into narrow vertical gaps between book ends or leaning frames.
- Use double-sided tape for a clean, professional finish on small boxes where traditional tape might look bulky.
If you don't have small boxes, wrap bars of soap or tea light boxes for a uniform shape that is easy to stack.
88. Thrifted Frame Christmas Art Shelf
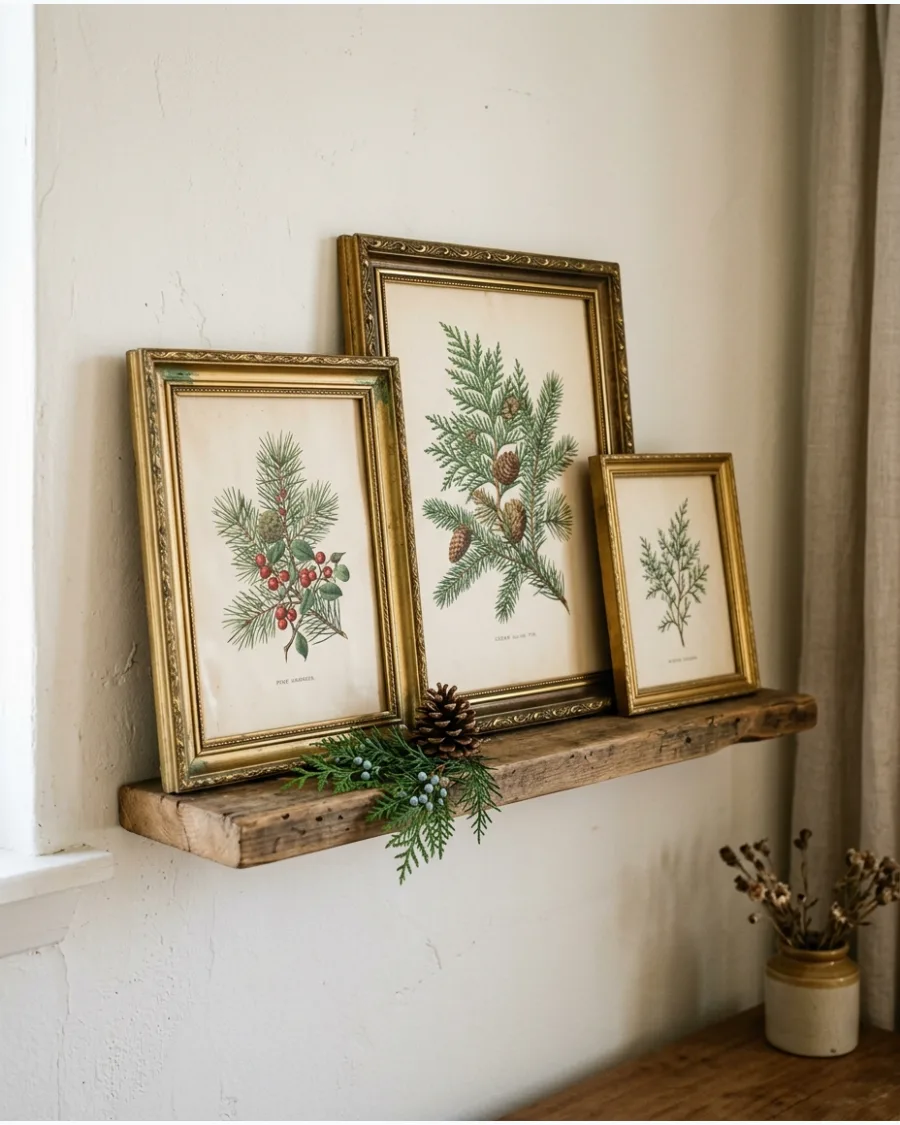
Empty frames from thrift stores are an affordable way to add height and structure to a shelf display. By inserting vintage-style holiday prints or simple printables, you can create a gallery feel without permanent wall changes.
Lean three frames of varying heights in overlapping layers and place a small evergreen sprig or figurine at the base to ground the arrangement. This layering technique adds depth to a shallow shelf or mantle.
- Check that the frames have a sturdy backing or easel stand if they are not leaning directly against a wall.
- Overlap the frames slightly, placing the tallest frame in the back and the smallest in the front to create a visual hierarchy.
- Use matte photo paper for your prints to avoid glint or reflection from nearby overhead lights.
Remove the glass from the frames to eliminate glare and make it easier to lean them at steeper angles.
89. DIY Paper Snowflake Shelf
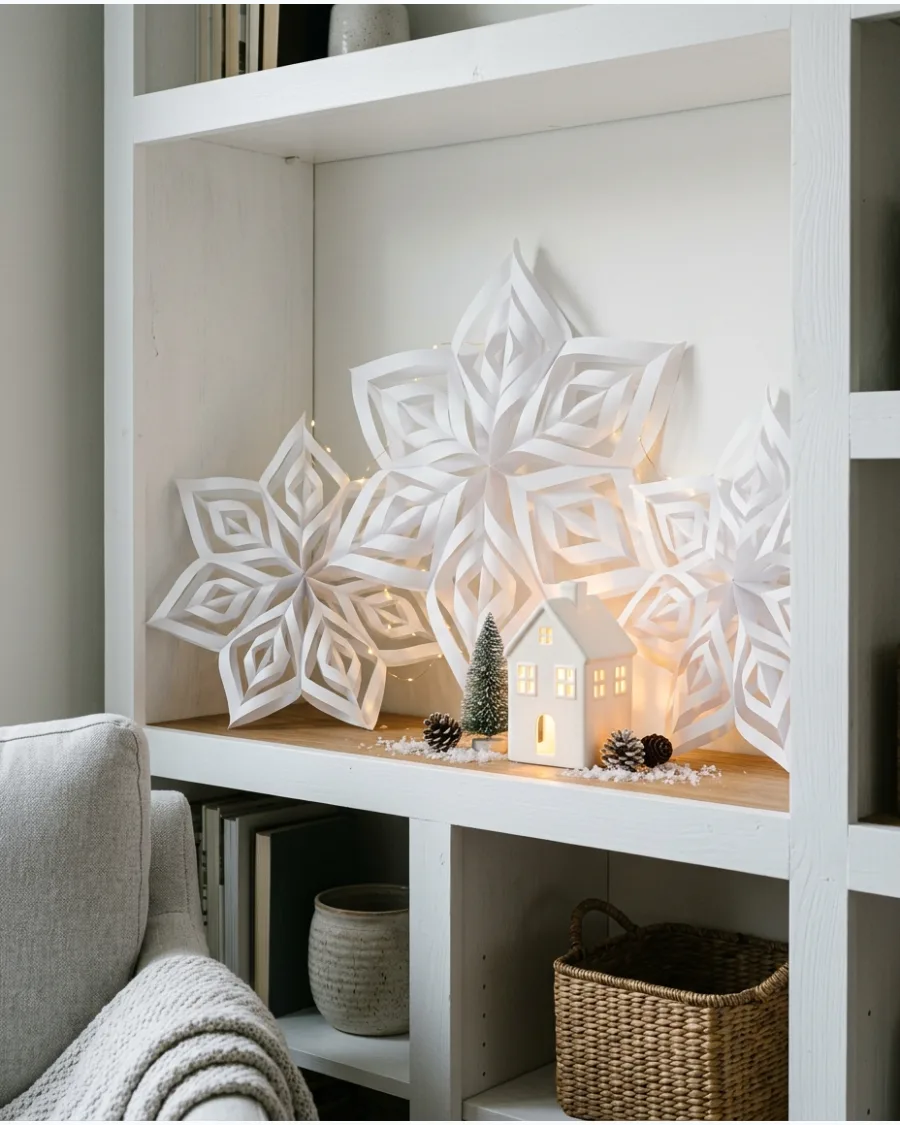
Dimensional paper snowflakes provide a crisp, white background that complements traditional winter decor. These lightweight elements are easy to move and won't damage delicate shelf surfaces.
Lean large paper snowflakes against the back of the shelf to act as a backdrop for white ceramic houses or bottle brush trees. This monochromatic approach creates a clean, winter-focused display that transitions well into January.
- Use heavy-weight cardstock for larger snowflakes to ensure they remain upright and do not curl over time.
- Vary the sizes and patterns of the snowflakes to mimic the look of a natural snowfall.
- Pair the white display with warm-toned LED tea lights placed inside ceramic houses for a soft glow.
Use a small dot of removable adhesive putty on the back of the snowflake to secure it to the shelf or wall without leaving marks.
90. DIY Christmas Bow Garland Shelf
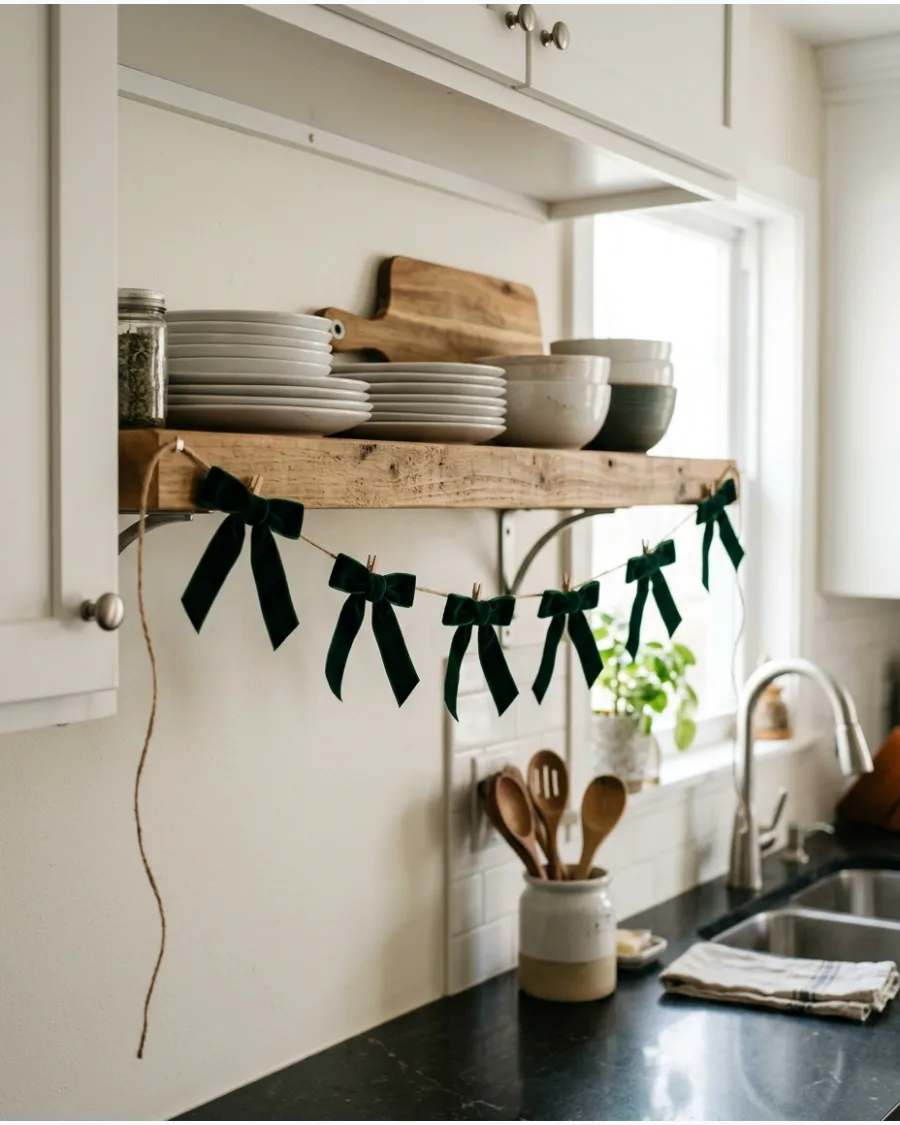
A bow garland is a simple way to add color and softness to the hard lines of a shelf. By repeating a single bow style, you create a look that feels intentional and high-end.
Tie matching velvet or satin bows at proportionally sized intervals along a thin piece of twine and drape the garland across the front edge of a shelf. This technique adds holiday flair without taking up any actual shelf space, leaving room for your everyday items.
- Choose a ribbon with a wired edge if you want the bows to maintain a specific, voluminous shape.
- Secure the ends of the twine to the underside or top of the shelf using small, clear adhesive hooks.
- Limit your palette to one or two colors to ensure the repeated pattern looks organized rather than cluttered.
To keep the bows from sliding on the twine, tie the ribbon around the twine itself rather than just hooking it over.
SECTION 10: WHIMSICAL AND COLLECTION-STYLE CHRISTMAS SHELVES
91. Mini Christmas Train Shelf
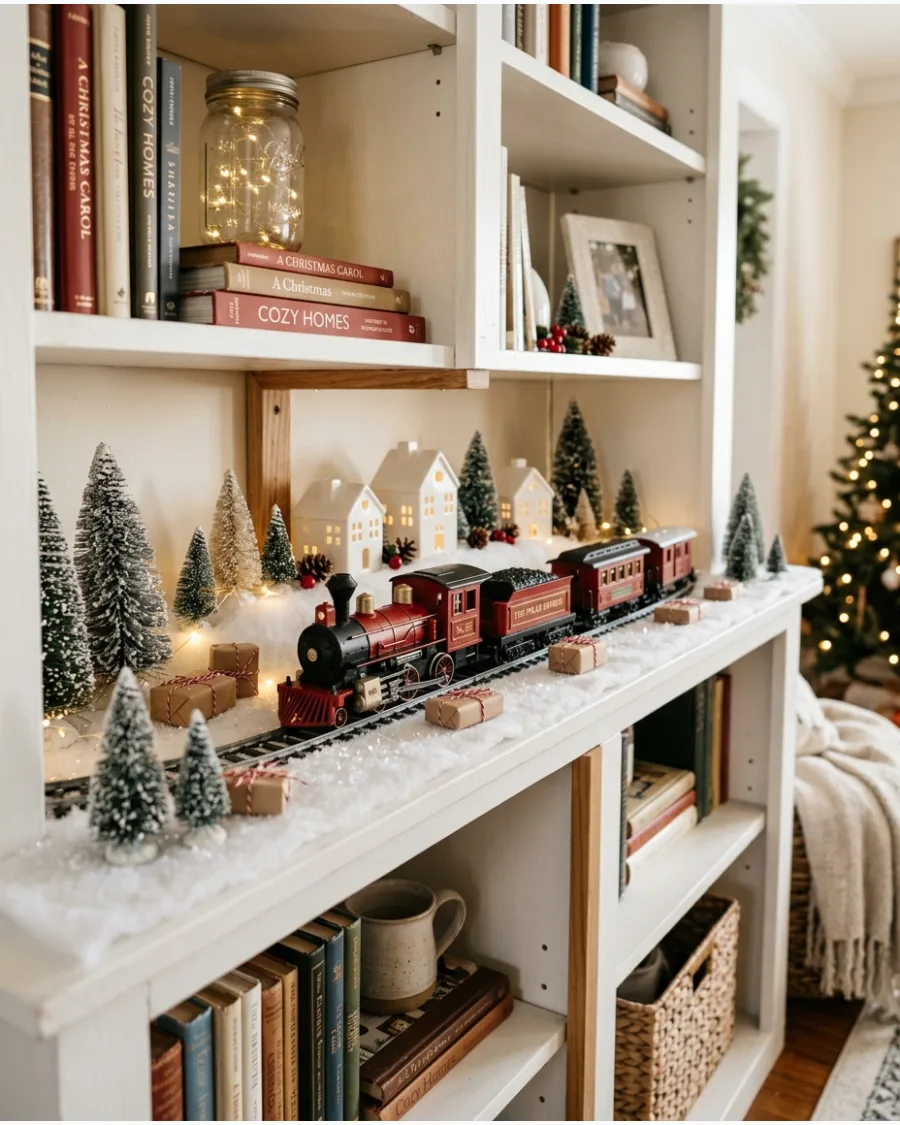
Set up a miniature train track that spans the entire length of a long bookshelf or built-in ledge. Space the engine and individual cars out across the shelf to create a sense of movement through a winter landscape. Add clumps of faux snow and tiny bottlebrush trees around the track to ground the scene and hide the base of the locomotive.
- Check that the scale of the locomotive matches the height of the shelf space so it does not look cramped or hit the shelf above.
- Layer small wrapped boxes and ceramic houses behind the track to give the train a village-like backdrop.
- Place battery-powered models near the center of the run for easy access to the power switch without moving the whole display.
Use a white felt runner or a thin layer of quilt batting under the train to mimic snow without the mess of loose powder.
92. Christmas Nativity Shelf
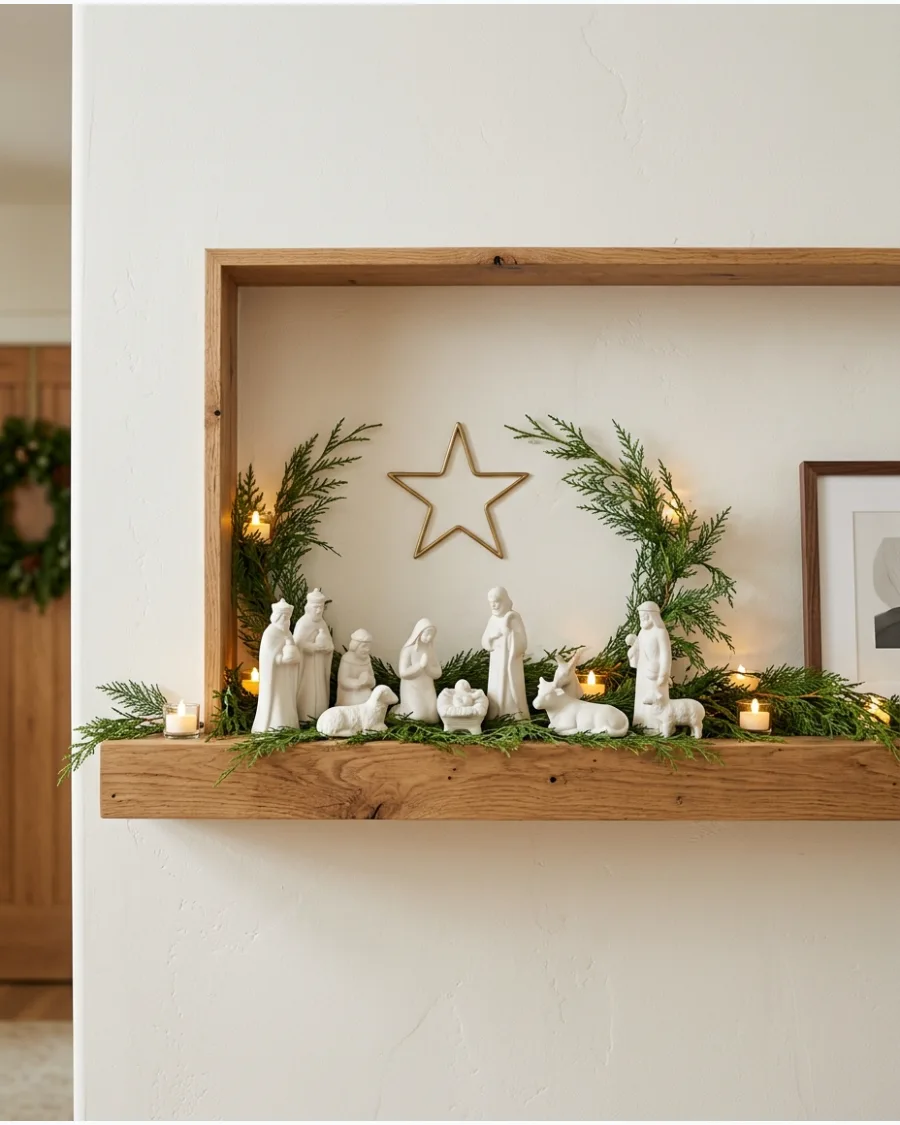
Dedicate a single, eye-level shelf to a nativity set to ensure it remains a quiet focal point of the room. Arrange the figures in the center and frame them with a sparse strand of cedar or eucalyptus garland. Use warm battery-operated tea lights or small candles to cast a soft glow on the scene without introducing the heat of a real flame near the shelf above.
- Choose a simple wooden or ceramic set to maintain a clean look against the shelf background.
- Hang a single large star or several small gold stars on the back wall of the shelf directly above the main figures.
- Leave the surrounding shelves in the unit more minimally decorated to draw the eye specifically toward this display.
Elevate the main figures slightly using a small wooden block or a neutral book hidden under the greenery to give them more presence.
93. North Pole Mail Station Shelf
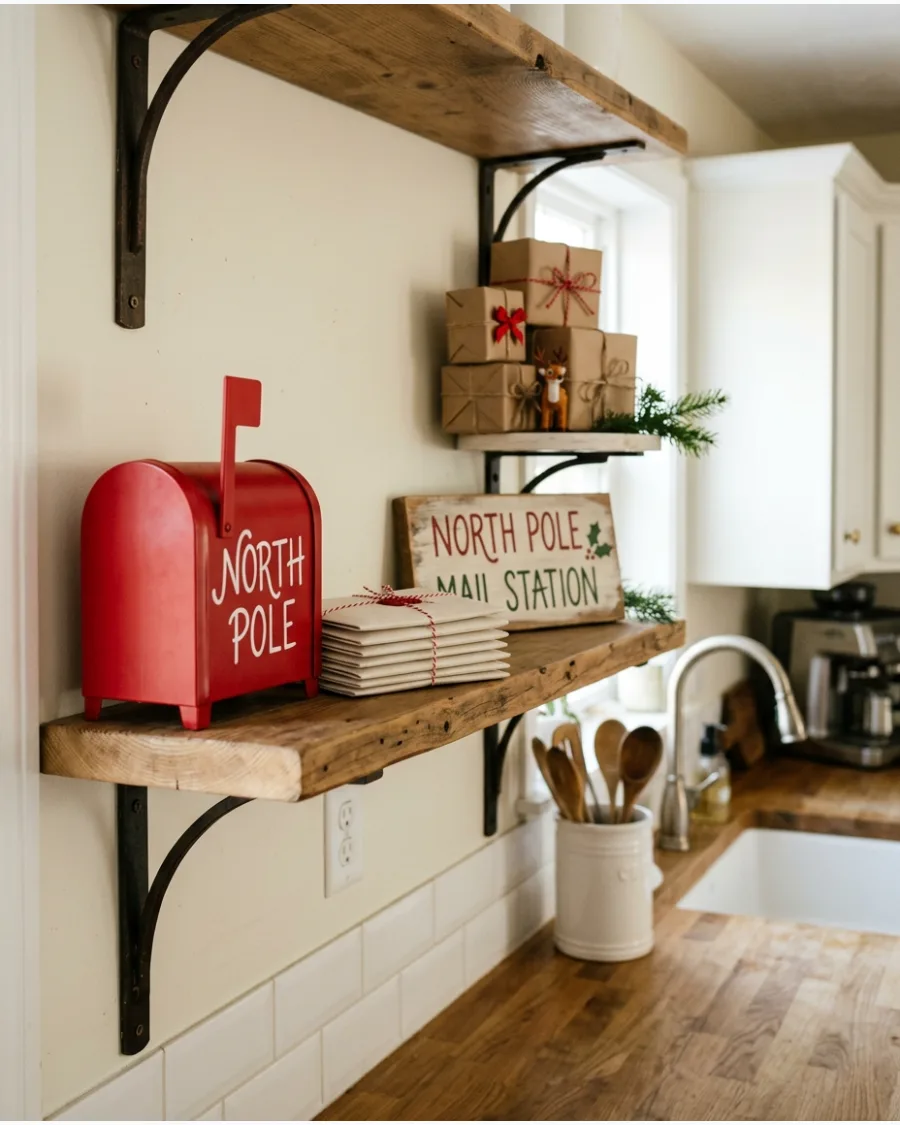
Transform a kitchen or kids' room shelf into a busy North Pole sorting station using miniature red mailboxes and stacks of tiny envelopes. Tie bundles of small letters with red baker's twine and lean them against a North Pole wooden sign. Incorporate small details like faux postage stamps and a bowl of red and white striped ribbon to enhance the mailroom theme.
- Mix in small brown paper parcels tied with string to vary the shapes and colors on the shelf.
- Use a child-sized metal mailbox as the centerpiece and fill it with letters addressed to Santa.
- Place a few small elf figurines or green felt hats among the mail to suggest the station is currently in use.
Scuff the edges of the envelopes with a bit of tea or light brown ink to give the letters a vintage, well-traveled appearance.
94. Advent Calendar Christmas Shelf
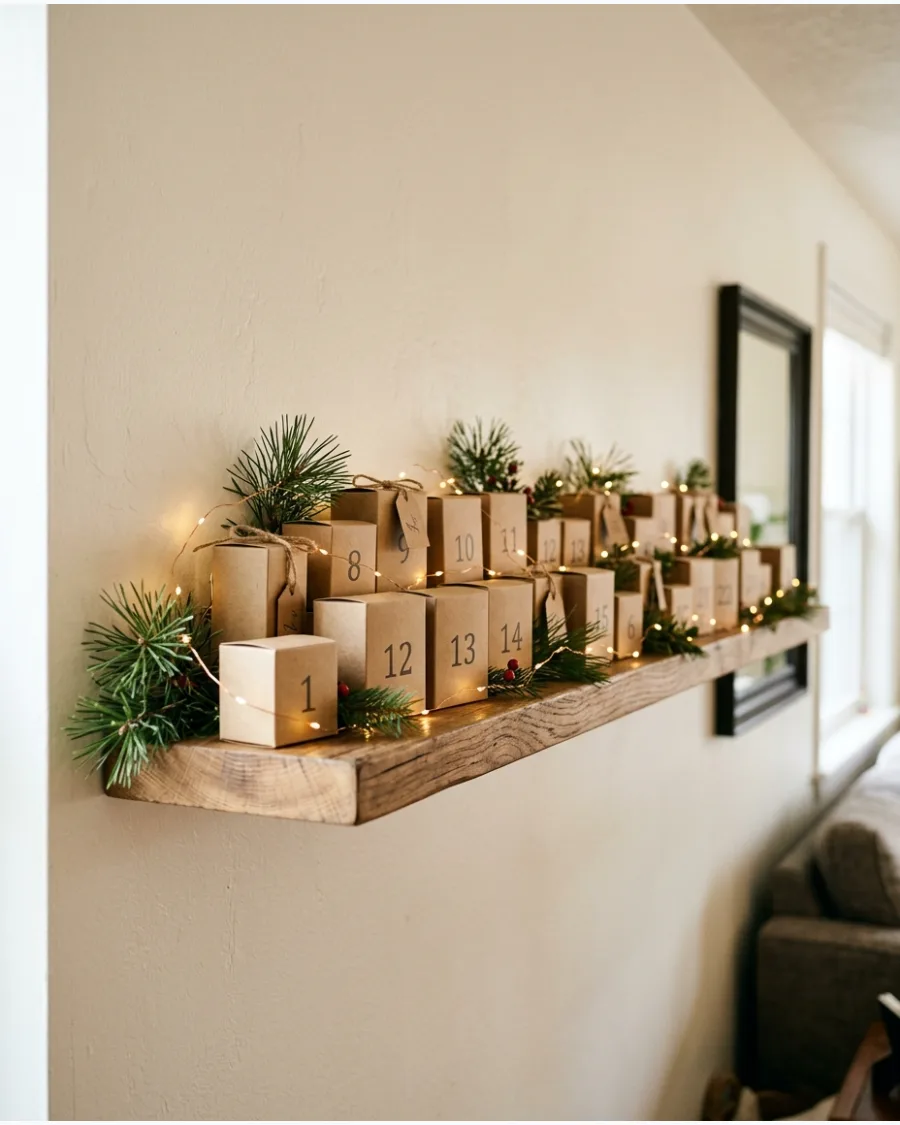
Use the linear space of a floating shelf or mantel to display a functional Advent calendar made of 24 small numbered containers. Stagger the heights of the numbered boxes or bags to keep the arrangement from looking like a flat, uniform row. Interweave a thin wire of fairy lights and sprigs of fresh pine between the containers to tie the countdown into your holiday decor.
- Select containers that fit the depth of your shelf so they sit securely without overhanging the edge.
- Ensure there is enough clearance above each box or bag to easily open it and retrieve the daily surprise.
- Use a consistent color palette, such as kraft paper and white, to maintain a cohesive look across the entire display.
Place the boxes for the current week toward the front of the shelf for easier daily access.
95. Christmas Storybook Shelf
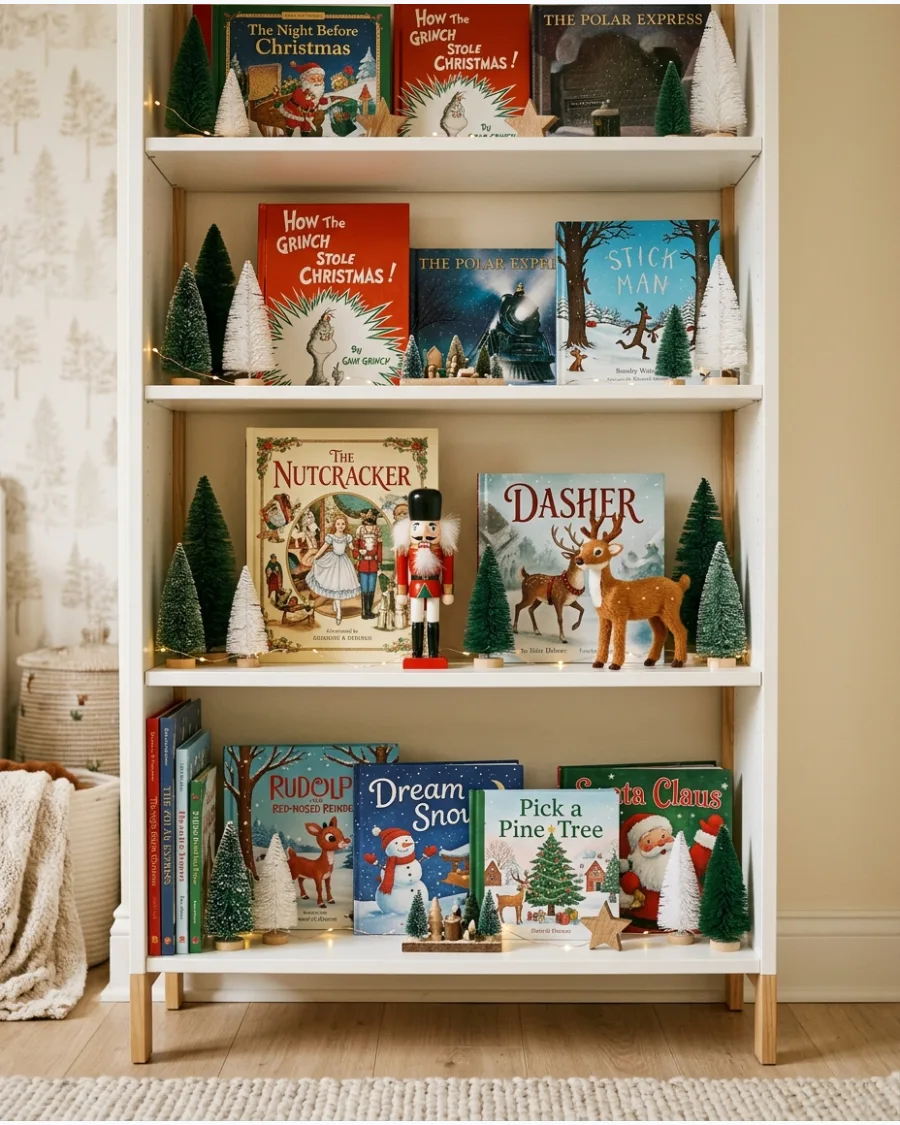
Turn a bookshelf into a tribute to holiday literature by displaying colorful book covers forward-facing on picture ledges or shallow shelves. Tuck a miniature reindeer or a small Santa figure next to the books they represent to bring the stories to life. Add small bottlebrush trees of varying heights between the books to fill in gaps and add a vertical element to the display.
- Use clear acrylic book stands to keep the books upright if the shelf lacks a front lip.
- Coordinate the colors of the ornaments and figurines with the primary colors found on the book jackets.
- Group books by theme, such as The Nutcracker or The Night Before Christmas, to create distinct storytelling zones.
If you have old, damaged holiday books, use a few loose pages as a backdrop or wallpaper for the shelf behind the figurines.
96. Snow Globe Collection Shelf
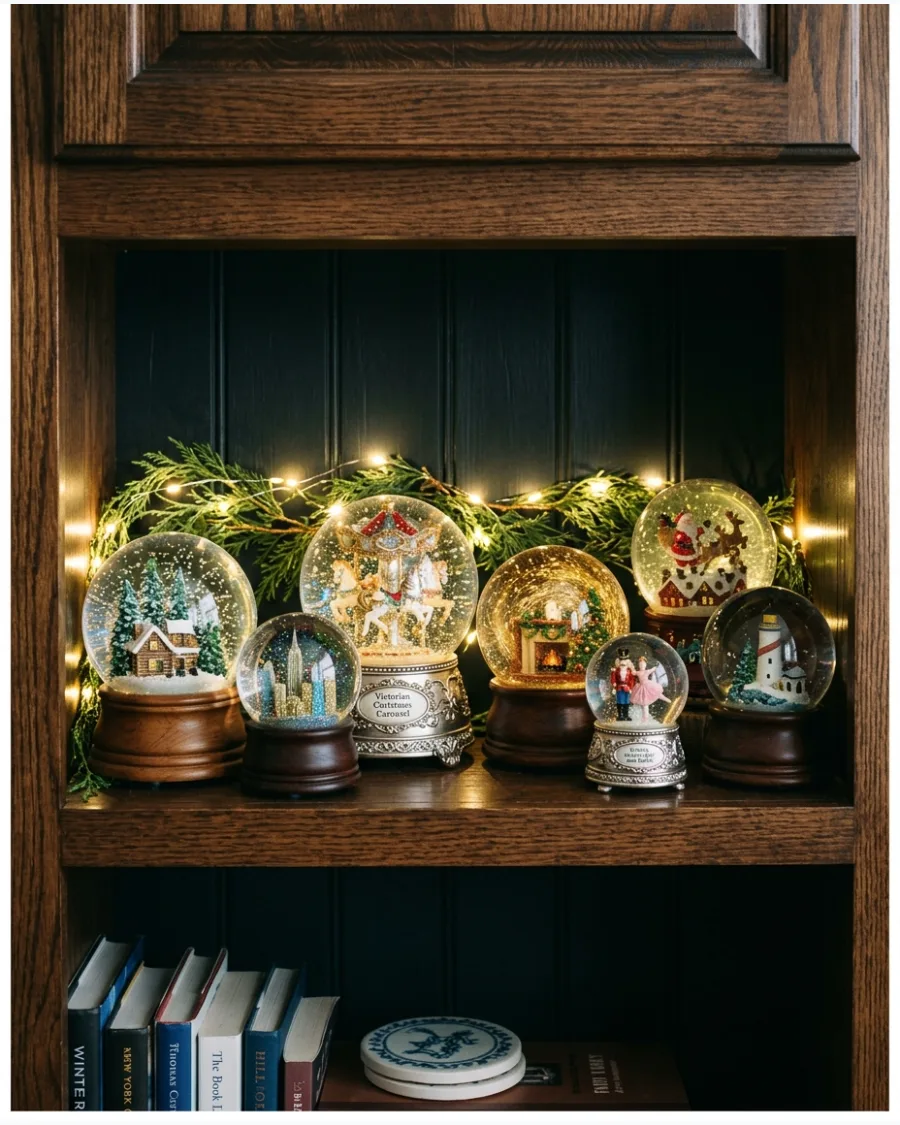
Bringing all your snow globes together on one shelf creates a high-impact focal point rather than letting them get lost throughout the room. By varying the heights of the globes, you ensure every scene inside the glass is visible from the front.
Tuck a thin strand of micro LED fairy lights and a flat cedar garland behind the globes to illuminate the glass from the rear. This backlighting makes the snow inside sparkle without creating glare on the front of the globes.
- Choose globes with different base styles and internal scenes to create a varied skyline along the shelf.
- Place the tallest globes at the back or ends of the row and smaller ones toward the center to maintain clear sightlines.
- Dust the shelf and the glass domes thoroughly before setting the display, as lights will highlight any fingerprints or debris.
Use a battery-operated light strand with a built-in timer so the collection glows automatically every evening.
97. Wooden Toy Workshop Shelf
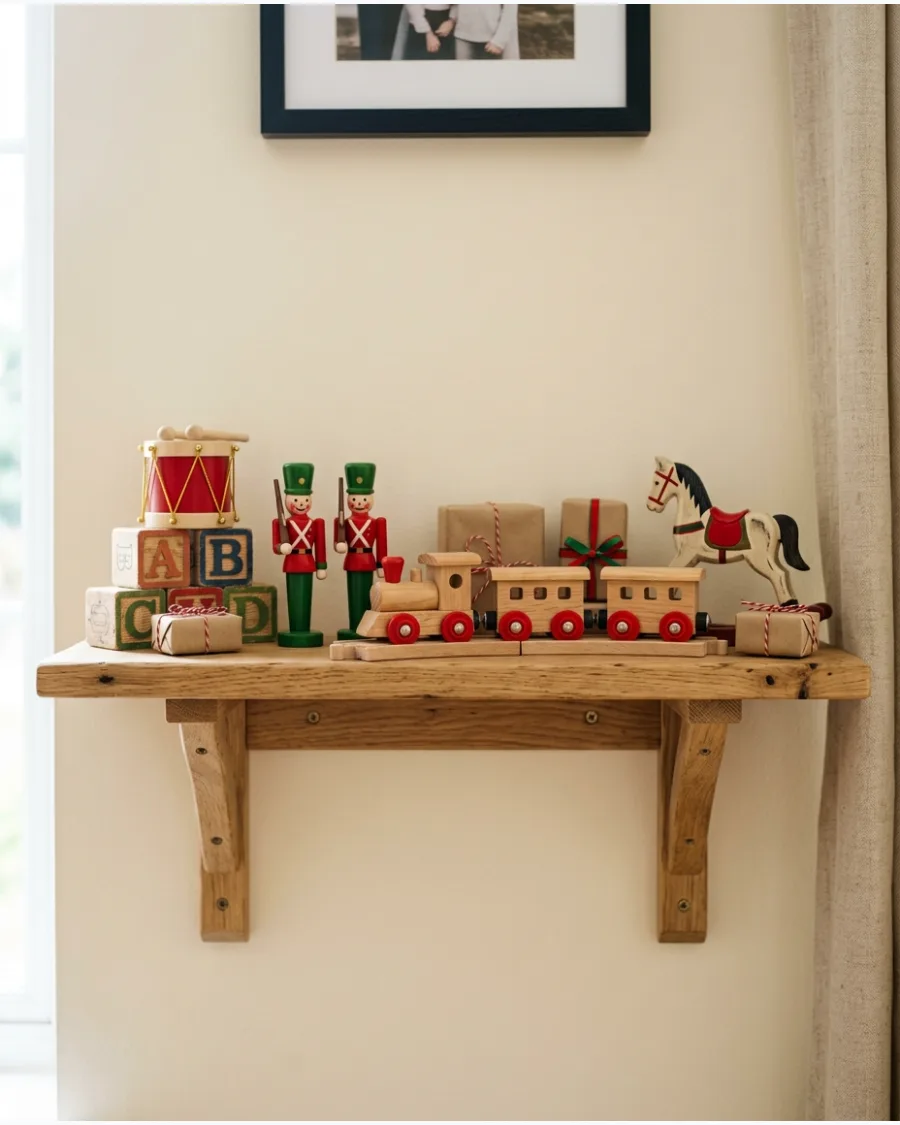
This shelf arrangement uses traditional wooden toys to mimic the look of a classic Santa’s workshop. Combining raw wood textures with pops of crimson and hunter green keeps the display grounded and nostalgic.
Incorporate a mix of wooden trains, small drums, and toy soldiers alongside tiny wrapped boxes to fill the gaps between the larger items. The result is a playful scene that feels more like a curated story than a random toy pile.
- Select toys made from similar wood tones, like pine or beech, to ensure the different shapes feel like a matched set.
- Stack wooden blocks or small gift boxes to create different levels for a rocking horse or toy soldier to stand on.
- Wipe down vintage wooden toys with a dry microfiber cloth to remove dust without damaging old paint or finishes.
Tie small sprigs of fresh rosemary to the toy train cars to add a subtle evergreen scent to the display.
98. Snowman Family Christmas Shelf
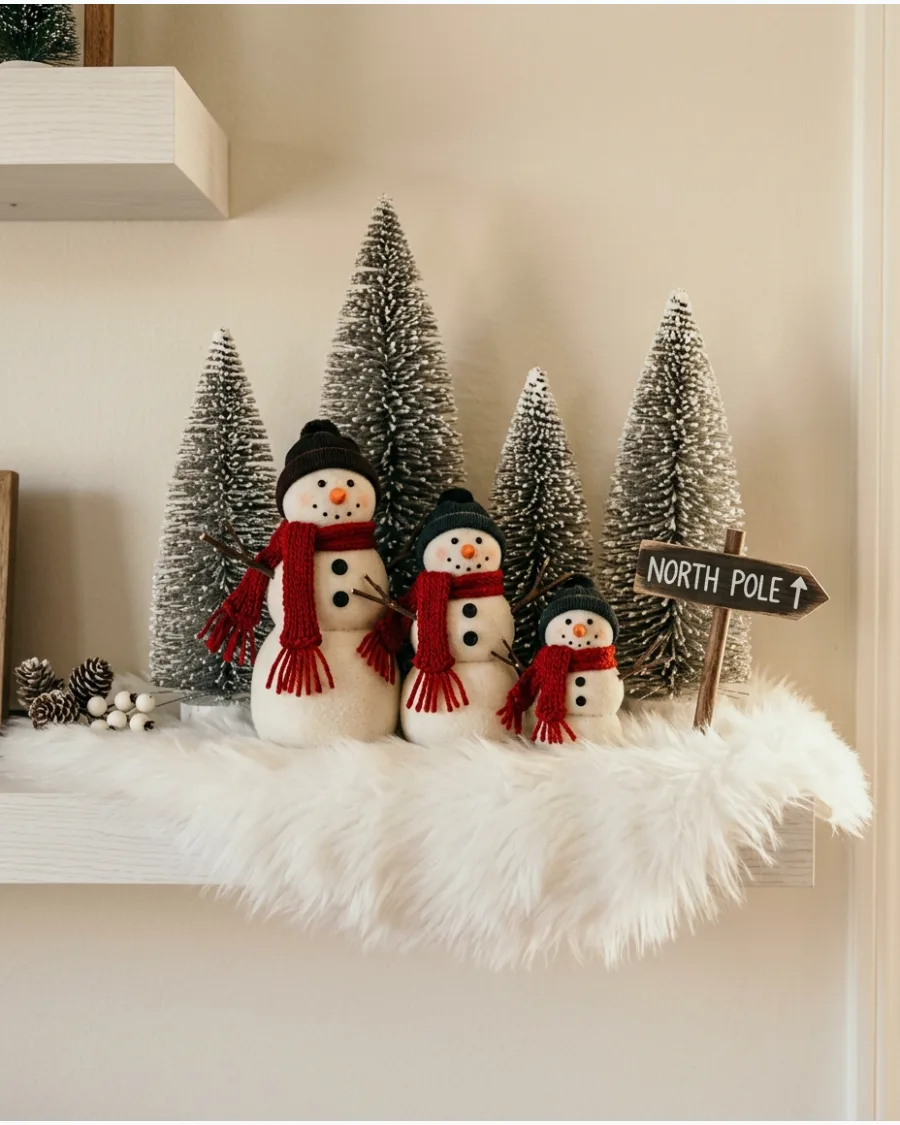
Creating a family of snowmen on a shelf provides a charming narrative that works well in kitchens or family rooms. Surround the figures with snowy elements like white felt, miniature trees, and small winter signs to build out the environment.
Limit the color palette to white, silver, and one accent color like blue or red to keep the white snowmen from disappearing into a busy background. This restricted color scheme ensures the character figures remain the primary focus of the shelf.
- Check that the snowmen vary in height and width to look like a group of individuals rather than identical copies.
- Lay a white faux-fur runner or a layer of batting across the shelf surface to act as the ground for the scene.
- Position small bottle brush trees slightly behind the snowmen to give the arrangement a sense of depth.
Use a white paint pen to write North Pole on a small scrap of wood to create a custom miniature sign.
99. Reindeer Forest Christmas Shelf
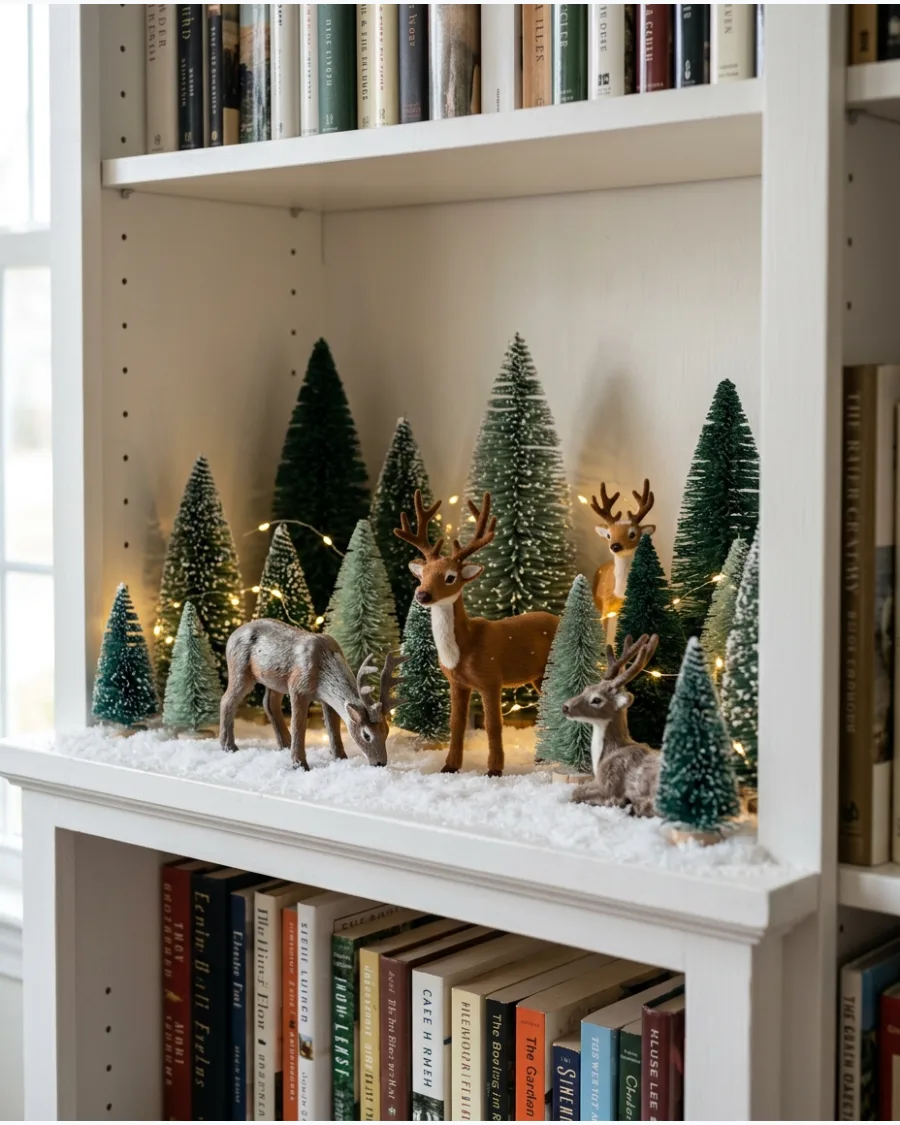
A reindeer forest scene uses animal figures and varying tree heights to create a miniature winter landscape on a bookshelf. By mixing textures like fuzzy reindeer hides, metallic antlers, and bristly bottle brush trees, you add dimension to the display.
Stagger the reindeer between clusters of faux-snow-covered greenery to make the animals look like they are moving through a real woods. Warm white lights hidden in the foliage can simulate sunlight filtering through the trees.
- Verify that the reindeer figures are proportional to the trees so the scale of the forest feels somewhat realistic.
- Sprinkle a small amount of faux snow or white glitter over the ground and tree branches to unify the different materials.
- Arrange the tallest trees toward the back of the shelf and the smaller deer toward the front to maximize the visible depth.
Use a bit of museum wax on the bottom of thin-legged reindeer statues to prevent them from tipping over on uneven surfaces.
100. Collected Christmas Maximalist Shelf
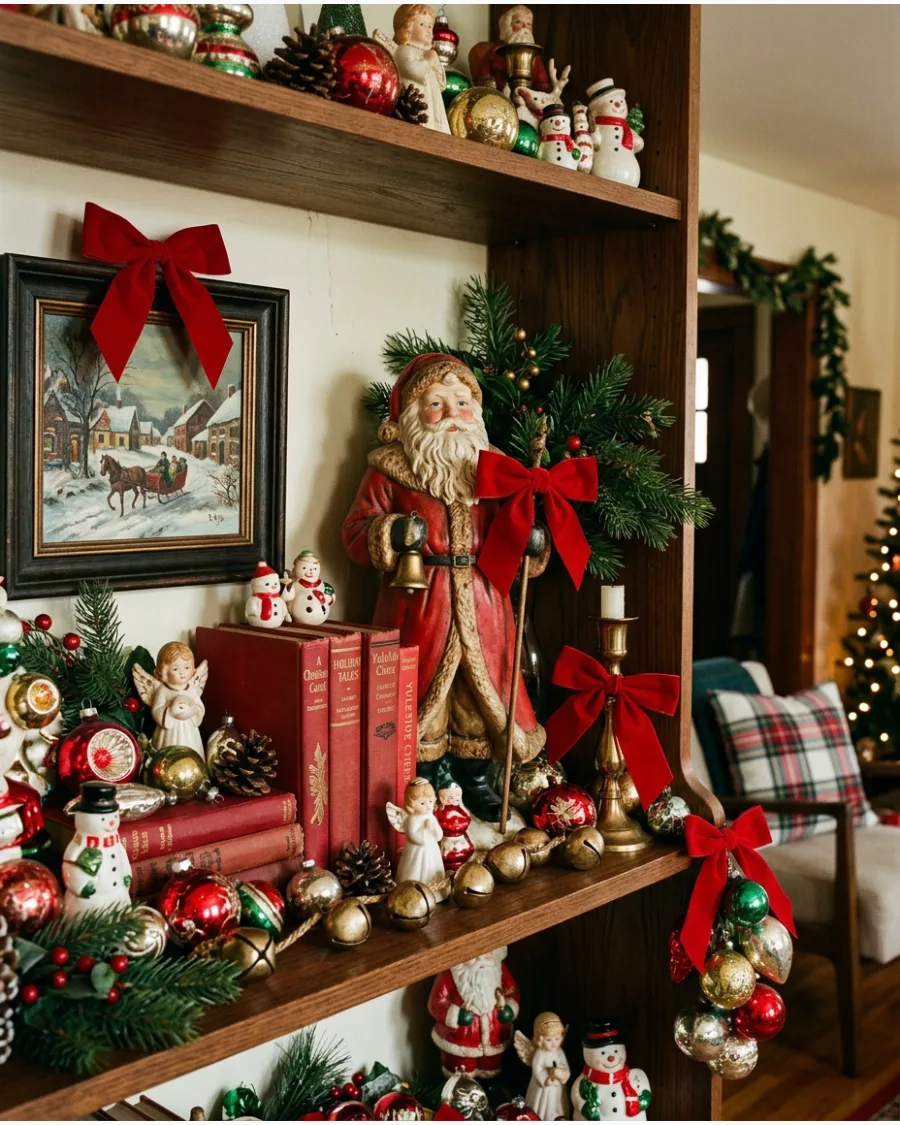
Maximalist styling allows you to display a wide variety of holiday treasures, from heirloom ornaments to vintage Santas, all in one place. The key to making a dense collection look intentional is to repeat a few specific colors, such as gold and red, throughout the entire arrangement.
Layer the shelf by placing large items like books and art in the back, then filling the middle and front with greenery, ribbons, and smaller figurines. This approach celebrates a more is more aesthetic while keeping the shelf organized.
- Group items by color or material rather than type to create clusters that guide the eye across the shelf.
- Incorporate everyday items like brass candlesticks or favorite books as pedestals to lift smaller holiday accents.
- Leave small gaps between the most intricate items so the eye has a place to rest within the busy display.
Use wired ribbon for any bows on the shelf so you can easily fluff and shape them to fill empty gaps.
Frequently Asked Questions
How do I know if my shelf can handle heavy Christmas decor?
Always check the weight capacity of your floating shelves or glass ledges before adding heavy items like ceramic houses or thick stoneware pitchers. For shelves with lower weight limits, use lightweight materials like paper trees, dried greenery, or hollow plastic ornaments to achieve the same festive look without the risk.
Do I need to remove my books to decorate a bookshelf for Christmas?
You do not have to pack away your library; instead, integrate decor by turning books with festive spine colors outward or using horizontal stacks as pedestals for figurines. Adding a small wreath to the front of a bookshelf or tucking sprigs of greenery between volumes allows your collection to remain part of the holiday display.
How can I hide messy cords from lighted shelf decor?
Use battery-operated fairy lights or LED pucks to avoid trailing cords across your shelves. If you must use plug-in lights, tuck the wires behind books or larger decor pieces and use clear adhesive clips to guide the cord discreetly down the side of the shelf frame.
How do I stop my shelf display from looking flat or crowded?
Create depth by layering items from front to back, placing taller elements like framed art or large branches in the rear and smaller figurines in the foreground. Using small risers or stacks of books to vary the heights of your items prevents the decor from looking like a single, uniform row.
Will fresh greenery or metal bells scratch my shelves?
Place a thin runner, felt pads, or a layer of faux snow underneath heavy or metallic items to prevent scratches on wood and glass. If you are using fresh cedar or pine, verify that the needles or sap will not stain the surface by placing a protective barrier or tray beneath the greenery.