50 Christmas Bay Window Decorating Ideas

This post may contain affiliate links: full affiliate disclosure.
Bay windows provide a stunning focal point that bridges the gap between indoor comfort and outdoor scenery. Decorating these angled spaces requires a balance of scale and light to ensure the room feels festive without becoming dark or cluttered.
GARLAND AND GREENERY BAY WINDOW IDEAS
1. Full Evergreen Garland Around the Bay Window
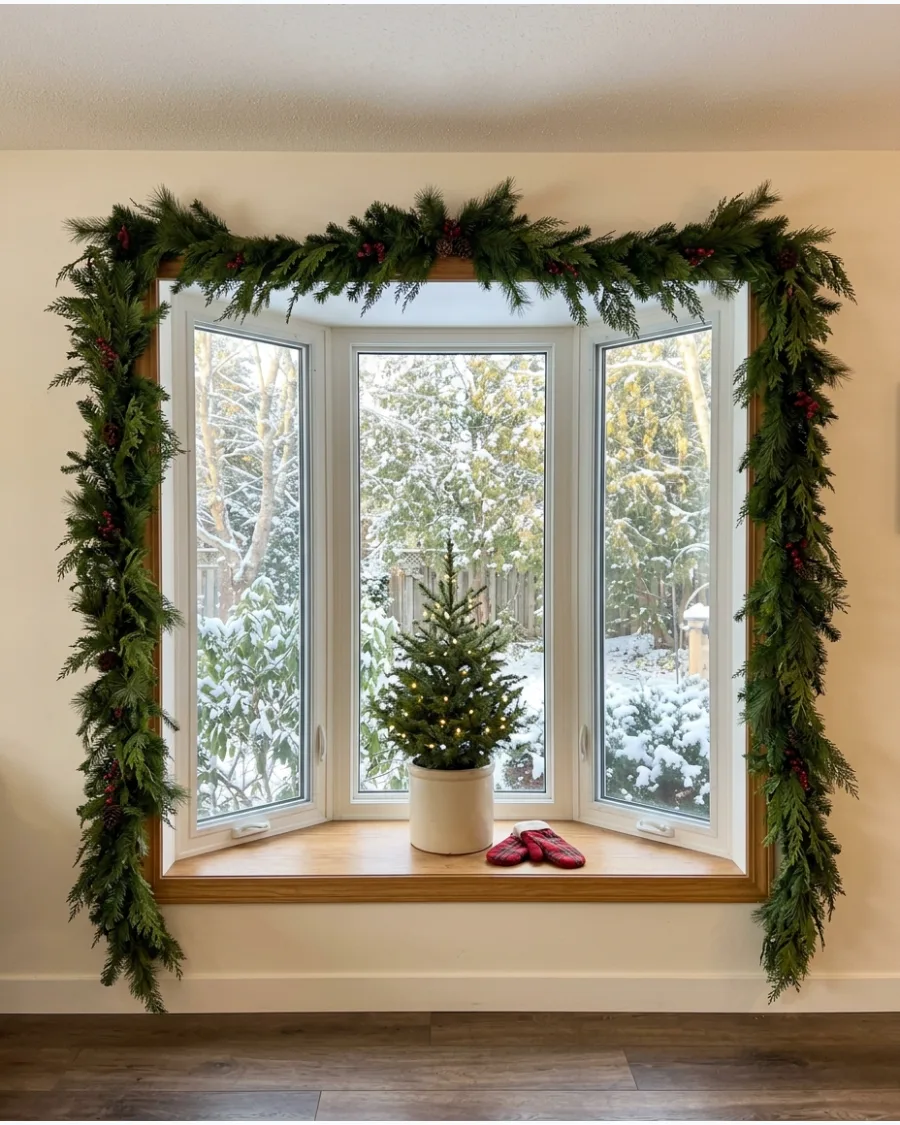
Framing the entire bay window with thick evergreen garland highlights the architectural shape of the house. This method works best when the greenery follows the exact seams of the window trim to maintain a clean look.
Secure the garland with adhesive hooks hidden behind the needles to keep the lines sharp and prevent sagging. Real cedar or pine smells great, but high-quality faux greenery lasts all season without dropping needles on the floor.
- Buy 9-foot lengths of garland to ensure enough coverage for the side angles.
- Use floral wire to join multiple strands together for a seamless appearance.
- Switch to frosted greenery if the room has a cooler color palette.
Quick win: Use zip ties to attach the garland to curtain rods if the trim is too narrow for hooks.
2. Cedar Garland Across the Top of the Bay Window
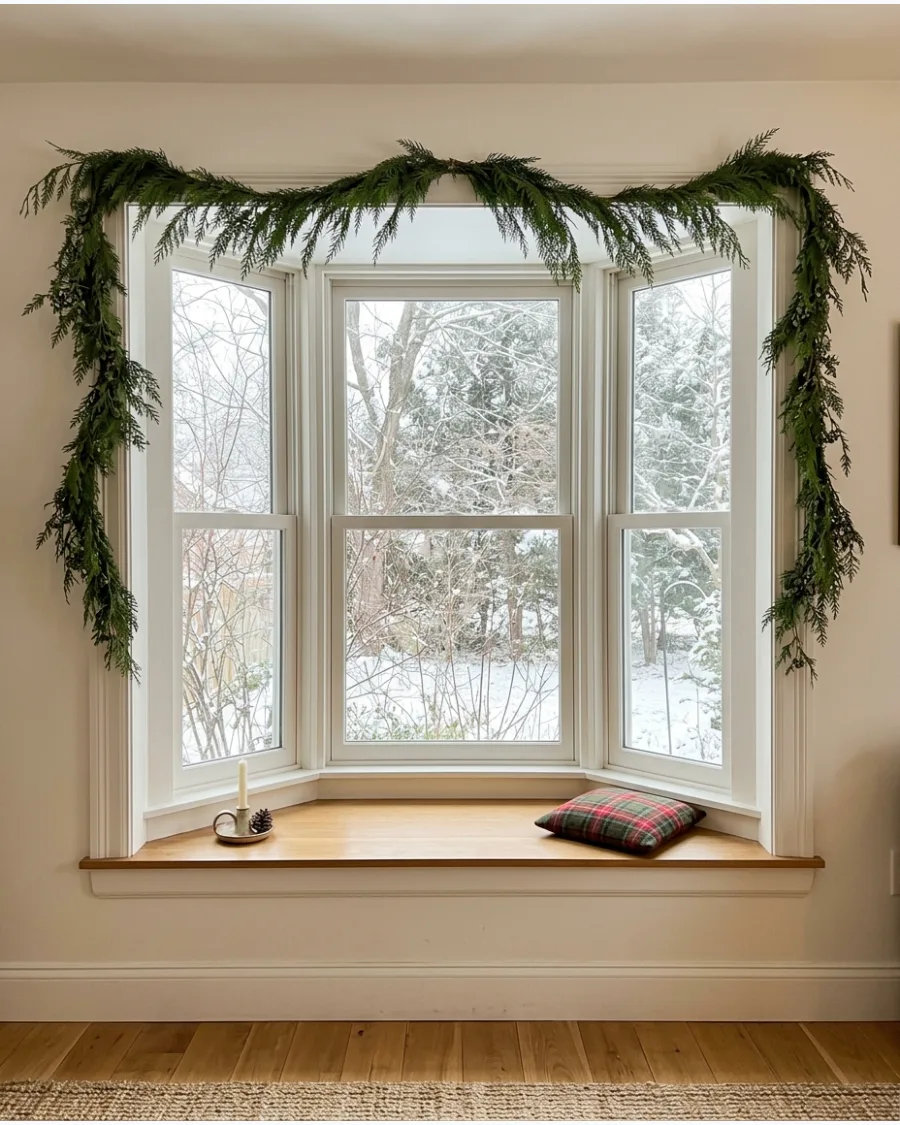
Draping cedar across the top of the window provides a lighter touch that won't block natural light. The wispy, flat needles of cedar create a relaxed look that feels less formal than traditional spruce or fir.
Allow the ends of the garland to hang down about twelve inches on each side to create a natural frame for the view. This style works particularly well in smaller rooms where a full garland might feel overwhelming.
- Select preserved cedar for a real look that won't dry out and turn brown.
- Drape the garland loosely in the center to create a soft curve rather than a stiff straight line.
- Add a single strand of thin copper wire lights for a subtle evening shimmer.
Most people skip this: Clean the top of the window trim thoroughly before applying hooks so they don't pop off mid-season.
3. Lighted Garland Around the Bay Window
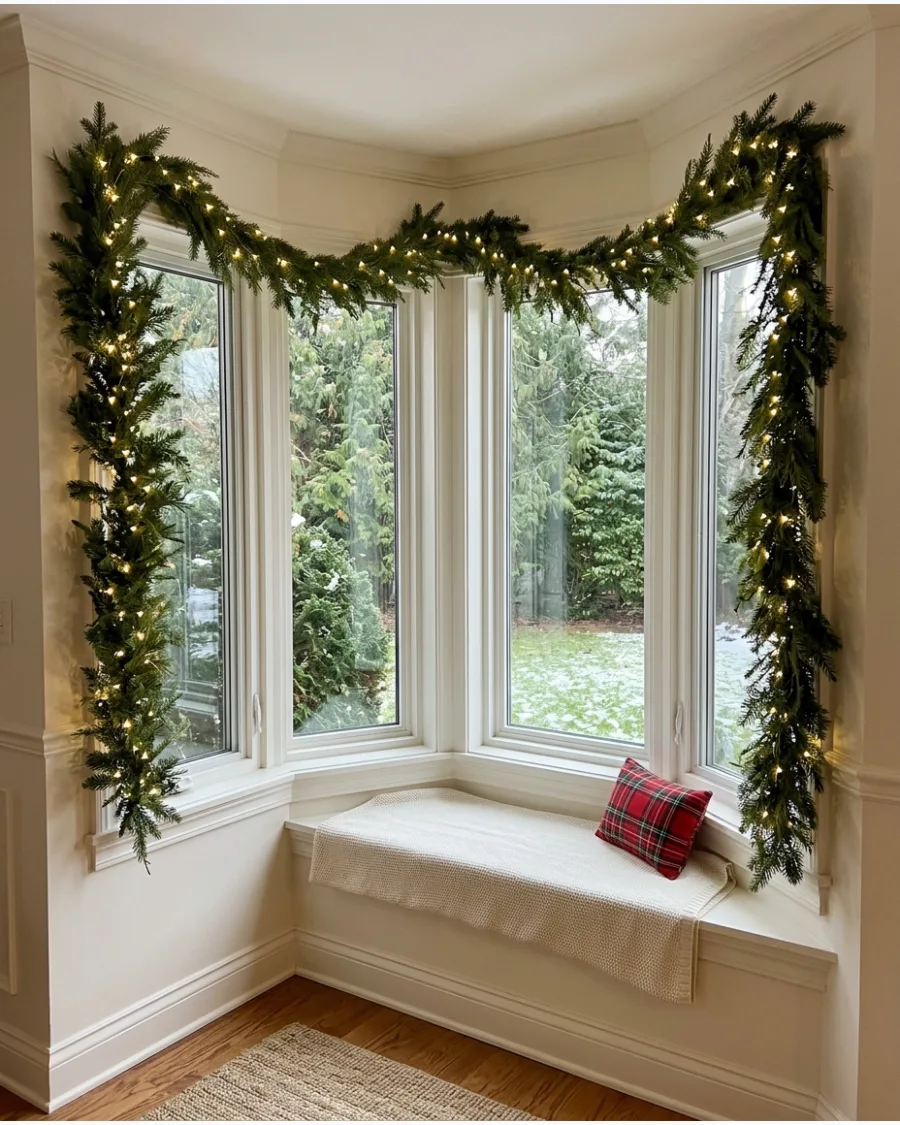
Integrating lights into the window greenery ensures the display looks just as good at night as it does during the day. Warm white bulbs reflect off the glass, doubling the light and making the entire nook feel warmer.
Wrap the light strand tightly around the garland core before hanging to keep the wires hidden and the glow even. This creates a welcoming beacon for anyone looking at the house from the street.
- Use battery-operated lights with timers to avoid running ugly extension cords across the floor.
- Choose lights with green wire to help them blend into the foliage.
- Look for 'wide angle' LED bulbs for a more traditional look that isn't too piercing.
Best shortcut: Buy pre-lit garland to save time and ensure the light distribution is perfectly even.
4. Pinecone and Berry Bay Window Garland
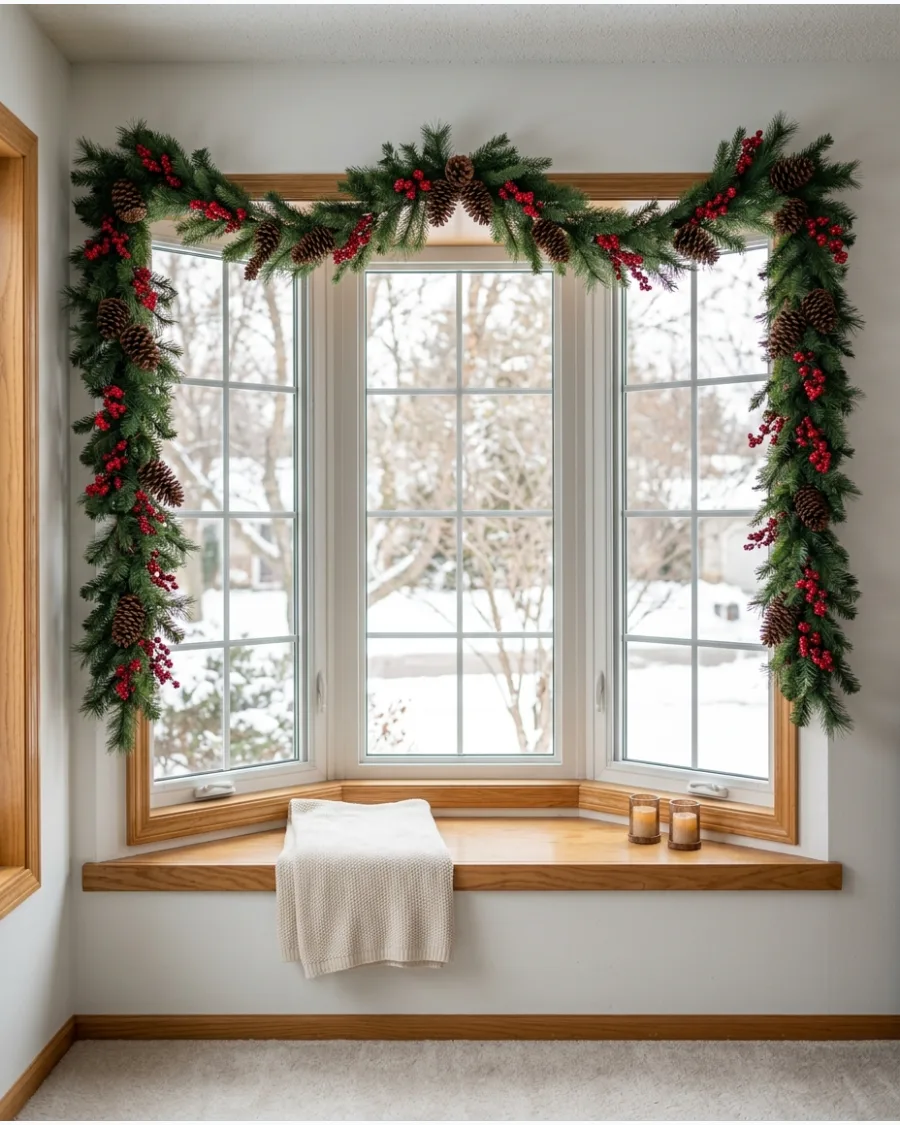
Natural accents like pinecones and red berries add depth and a pop of color to standard green garland. These elements help the window stand out against neutral walls and white trim.
Cluster the berries in groups of three to mimic how they grow in nature for a more realistic appearance. The varying textures of the wood and the smooth berries make the display feel more high-end.
- Gather real pinecones from the yard and bake them at low heat to kill any bugs before bringing them inside.
- Use red floral tape to secure berry stems so they don't fall out when the window is opened.
- Mix in some oversized pinecones at the corners of the window to ground the design.
Quick win: Spray the pinecones with a light dusting of faux snow to add a wintry touch.
5. Burgundy Velvet Bow Garland
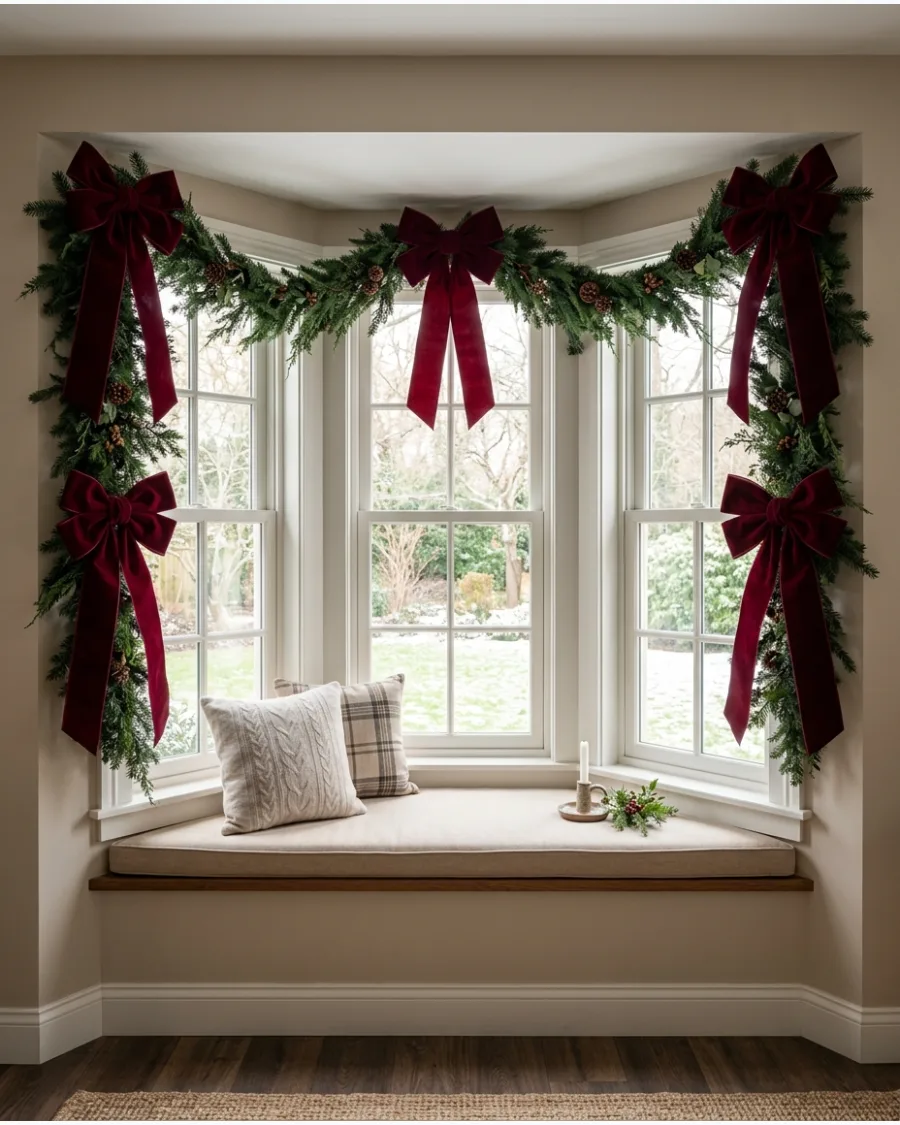
Deep burgundy velvet bows provide a sophisticated and moody update to traditional holiday red. The heavy fabric adds a sense of luxury and weight to the greenery.
Select wide velvet ribbon with wired edges to ensure the bows hold their shape against the weight of the greenery. This color pairs beautifully with dark wood trim or navy blue walls.
- Use 4-inch wide ribbon for the best visual impact from across the room.
- Leave long tails on the bows to let the velvet drape naturally down the sides of the window.
- Secure the bows with green pipe cleaners so they are easy to remove and store.
Most people skip this: Iron the ribbon on a low setting before tying the bows to remove any creases from storage.
6. Classic Red Bow Bay Window Garland
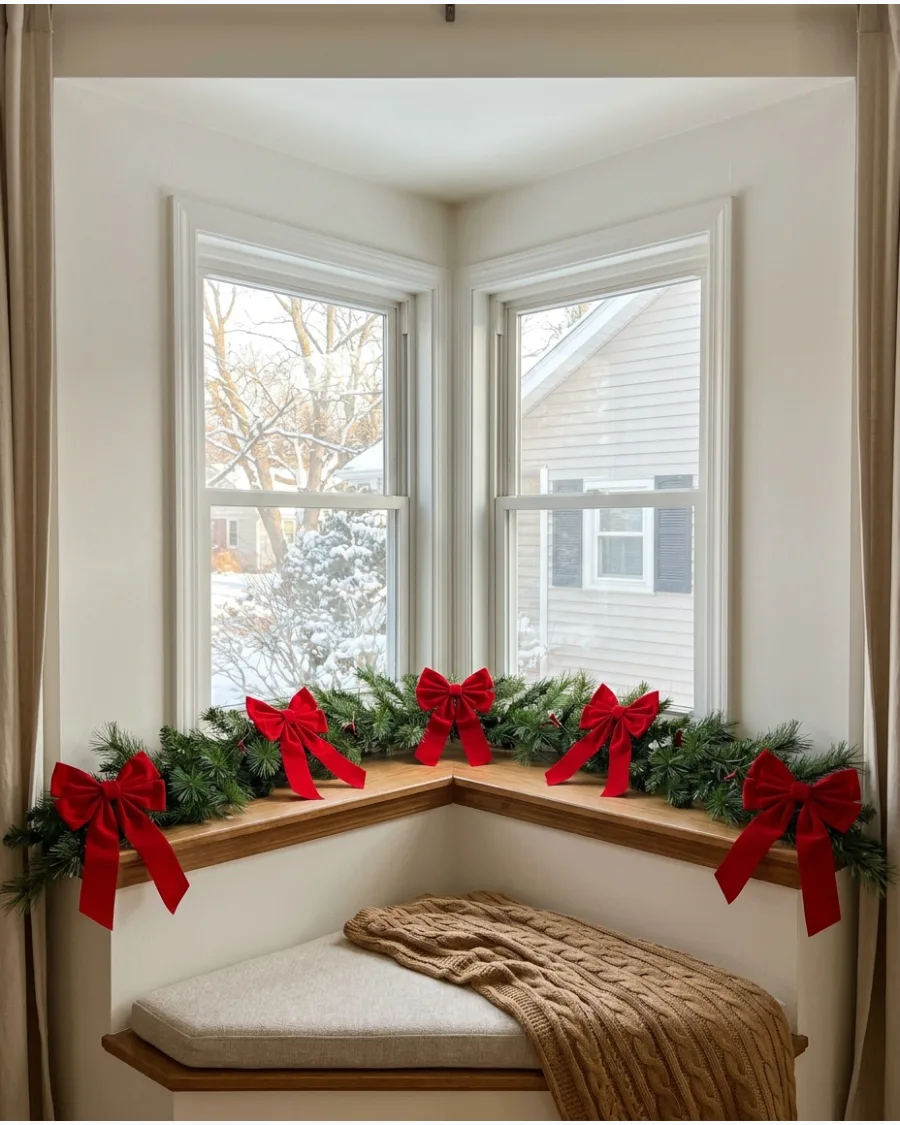
Bright red bows are the hallmark of traditional Christmas decor and offer high contrast against green needles. Spacing them evenly across the bay window creates a rhythmic, orderly look.
Place one bow at every point where the window angles change to emphasize the architectural lines. This style is a foolproof way to make a home look festive and classic.
- Choose satin or grosgrain ribbon for a crisp, shiny look that catches the light.
- Make sure all bows are the same size to maintain a professional, balanced appearance.
- Add small red ornaments to the garland to tie the color scheme together.
Best shortcut: Use pre-made florist bows if you struggle to tie symmetrical loops by hand.
7. Dried Orange and Evergreen Garland
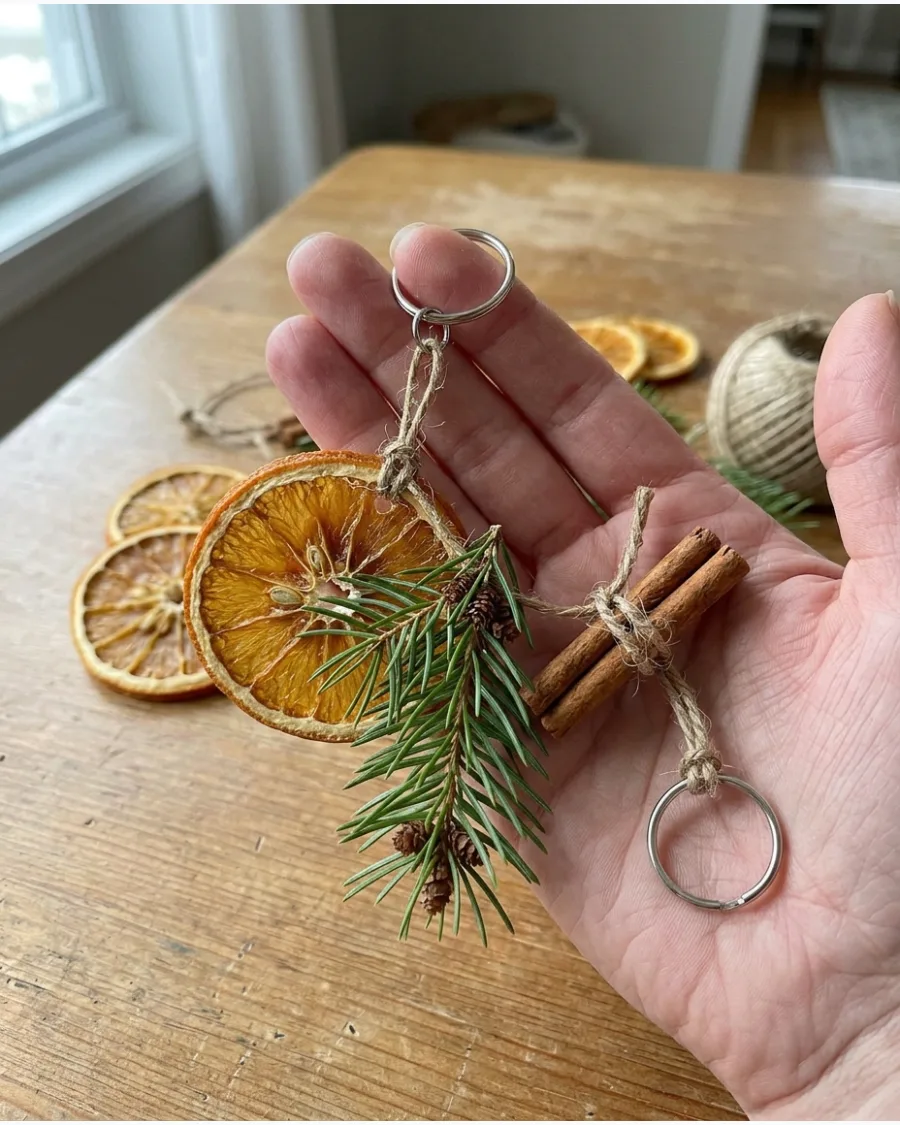
Dried citrus slices add a rustic, handmade charm and a subtle scent to the bay window. When the sun shines through the window, the orange slices glow like stained glass.
String the orange slices on clear fishing line before weaving them into the garland to keep them secure and invisible. This look is perfect for those who prefer a more organic or nostalgic holiday aesthetic.
- Slice oranges thin and dry them in a low oven for several hours until they are completely dehydrated.
- Add cinnamon sticks tied with twine for an extra layer of texture and scent.
- Pair this with unlit garland to keep the focus on the natural colors.
Quick win: Wipe the orange slices with a tiny bit of vegetable oil to make them more translucent and vibrant.
8. Magnolia and Pine Bay Window Garland
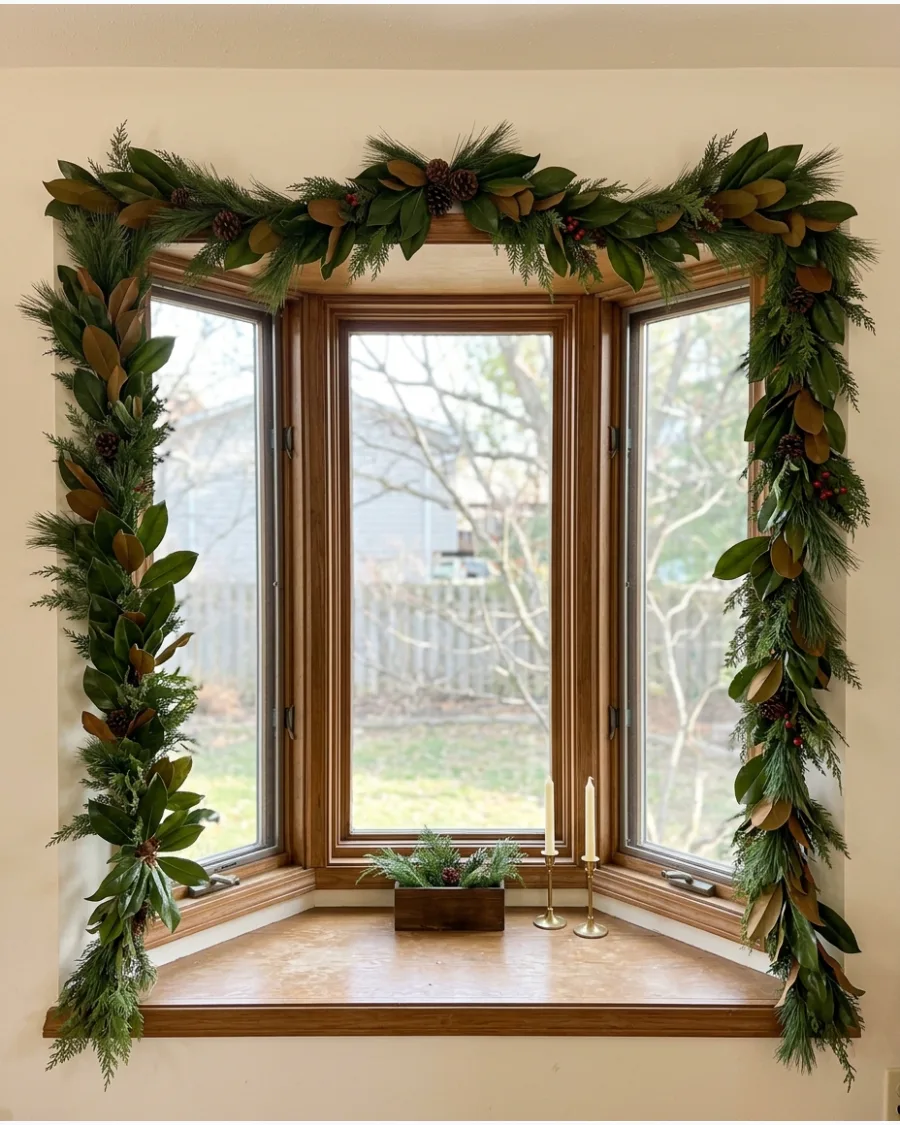
Mixing the broad, glossy leaves of magnolia with fine pine needles creates a lush and full garland. The contrast between the waxy brown undersides of the magnolia and the green pine adds immediate visual interest.
Tuck individual magnolia leaves into a standard pine garland to bulk it up without buying an entirely new strand. This is a great way to make a budget-friendly garland look like a custom floral arrangement.
- Use fresh magnolia leaves for a week-long event or high-quality silk leaves for the whole season.
- Angle the leaves in different directions to mimic a natural growing pattern.
- Add gold-sprayed leaves for a touch of holiday shimmer.
Most people skip this: If using real leaves, spray them with an anti-desiccant to keep them from curling and turning brown too quickly.
COZY CHRISTMAS BAY WINDOW SEAT IDEAS
9. Plaid Christmas Bay Window Seat
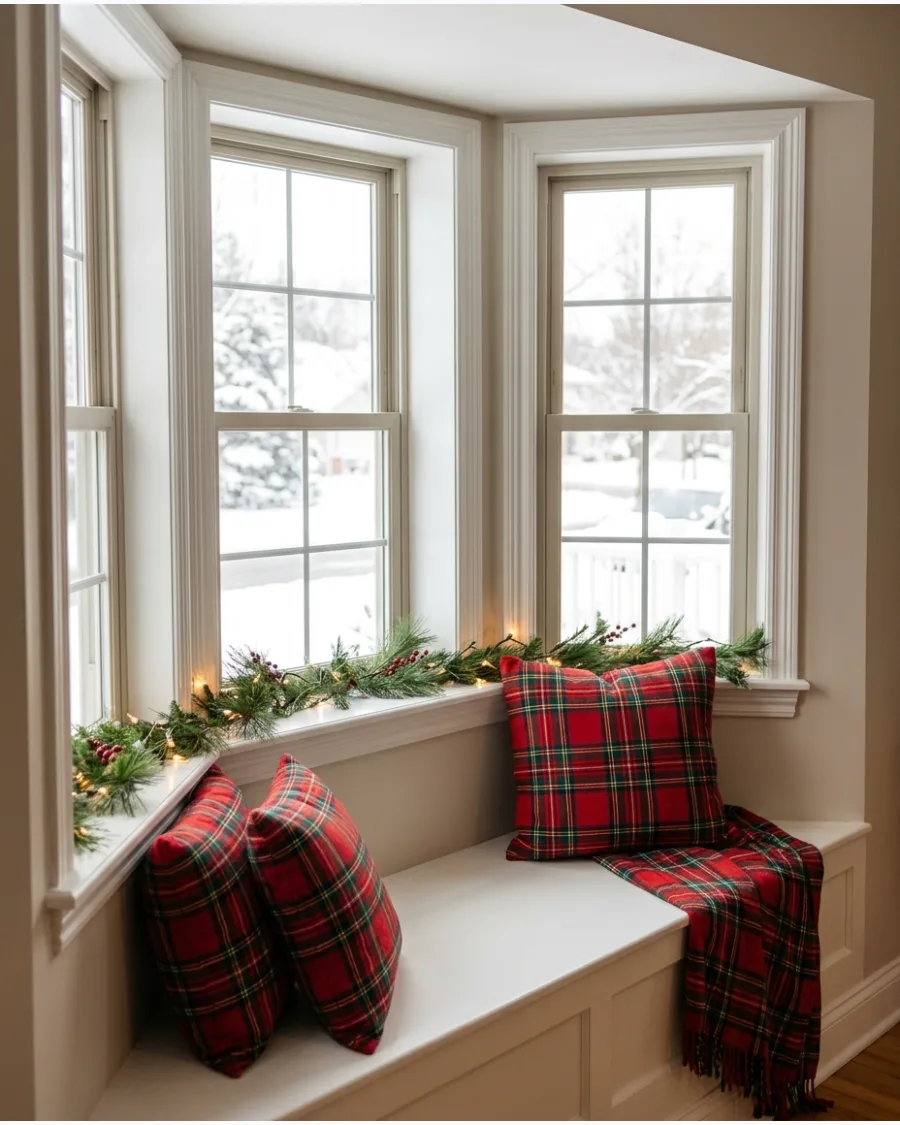
A bay window seat is the perfect spot to lean into a cozy, traditional theme with plaid textiles. Mixing different scales of buffalo check and tartan creates a layered look that feels intentional rather than matched.
Layer a thick wool throw over the seat cushion to add warmth and protect the upholstery from holiday traffic. Red and green patterns instantly signal the season without requiring extra wall decor.
- Shop for outdoor-rated plaid pillows if the window gets direct, harsh sunlight to prevent fading.
- Arrange pillows in the corners of the bay to keep the center view clear.
- Swap for blue and white plaid for a winter theme that lasts through January.
Most people skip this: Measure the seat depth before buying pillows to ensure there is still room to actually sit down.
10. Burgundy Velvet Window Seat
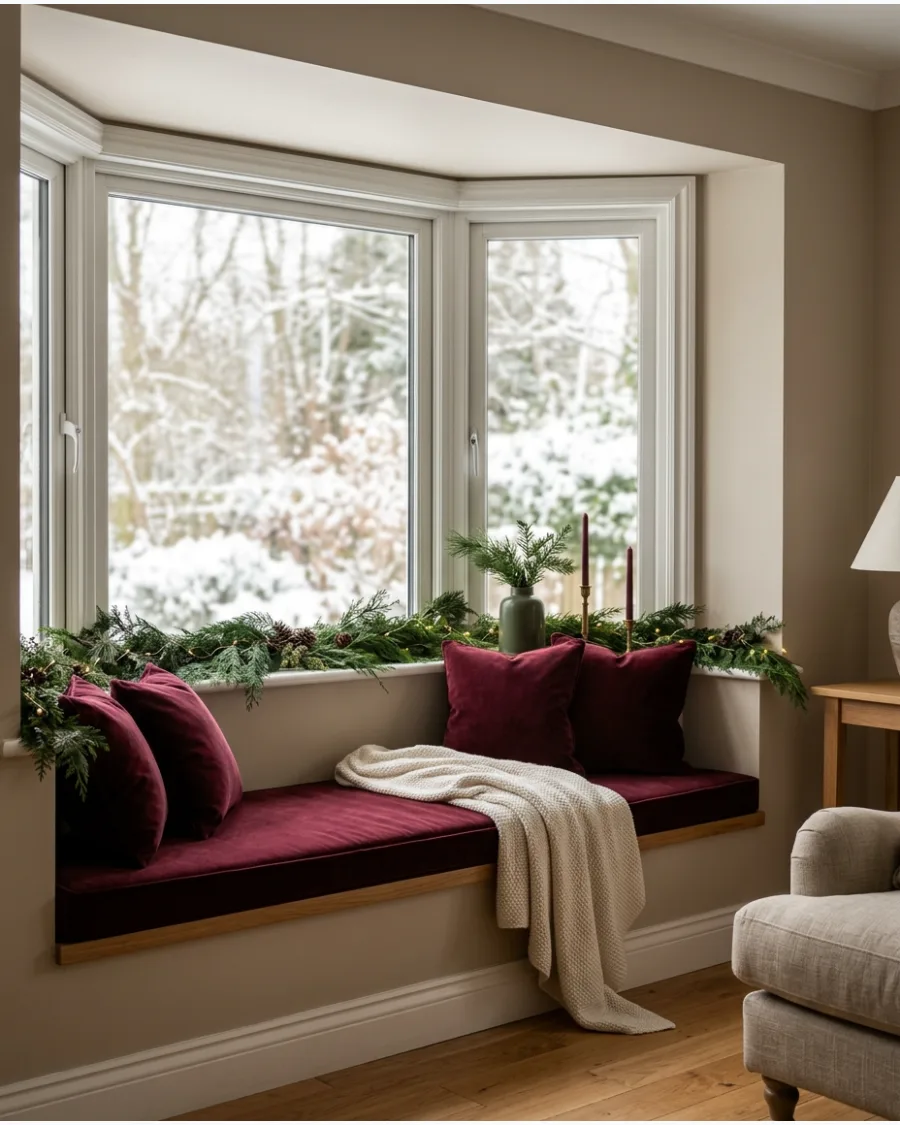
Burgundy velvet brings an elegant and high-end feel to a window seat without being overly flashy. The fabric catches the natural light beautifully, showing off its rich texture and deep color.
Pair the velvet pillows with a cream-colored faux fur throw to create a high-contrast, luxurious nook. This setup feels sophisticated enough for a formal living room while still being comfortable for daily use.
- Select pillow covers with zippers so they can be easily swapped out after the holidays.
- Use feather inserts to give the velvet pillows a more expensive, lived-in look.
- Place a small wooden tray on the seat for a mug of cocoa to finish the scene.
Quick win: Use a lint roller on velvet regularly, as the dark fabric shows pet hair and dust more easily than other materials.
11. Neutral Christmas Bay Window Nook
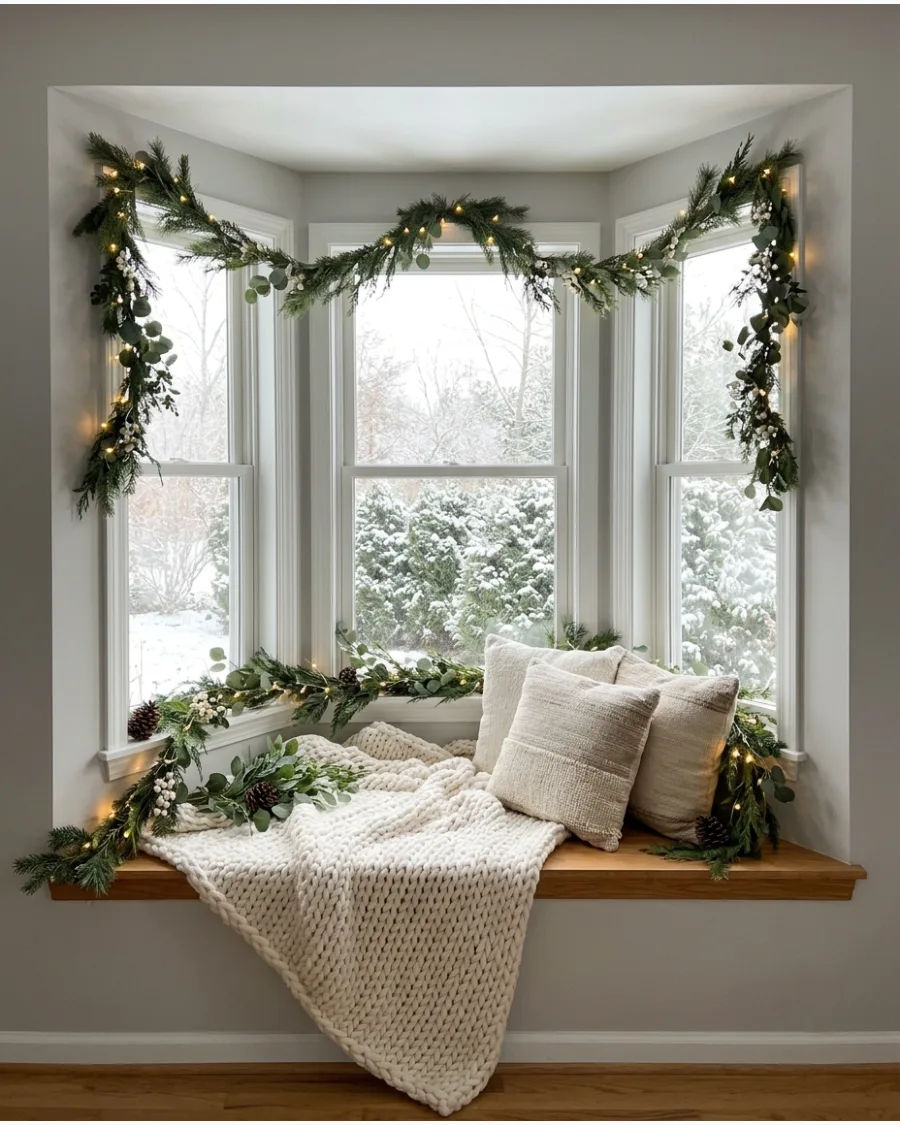
Create a calming retreat by layering cream-colored pillows and a chunky knit blanket across the window seat. Natural greenery tucked into the corners adds a fresh scent and a pop of color without overwhelming the space.
Layering different textures like wool, linen, and faux fur prevents a neutral space from feeling flat or boring. This approach makes the architectural lines of the bay window the main star.
- Find high-quality knit throws at home goods stores for under fifty dollars.
- Arrange pillows in the corners of the bay window to create a cozy, framed look.
- Swap bright red accents for soft taupe or champagne tones for a modern feel.
Quick win: Use battery-operated fairy lights with a clear wire to add a glow that disappears into the neutral fabrics during the day.
12. Scandinavian Christmas Window Seat
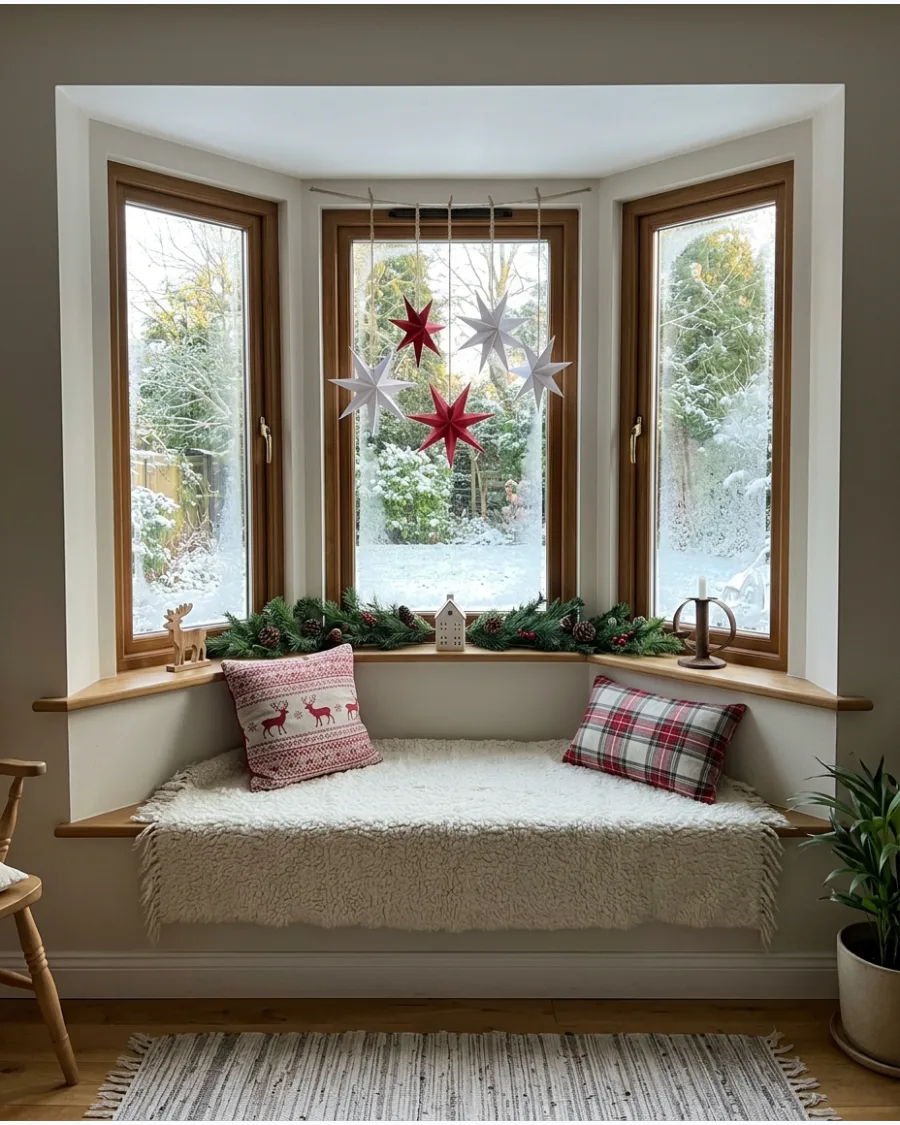
Capture a Nordic vibe by using simple red-and-white textiles and natural light wood accents. Hang large paper stars in each window pane to draw the eye upward and add height to the display.
Hanging a single large paper star in each window section creates a strong focal point that looks great from both inside and outside. Keep the seat clutter-free with just one or two high-quality wool blankets.
- Buy paper stars that fold flat for easy storage after the holidays.
- Use clear suction cups or tension rods to hang ornaments without damaging the window trim.
- Focus on natural materials like unfinished wood and 100% wool for an authentic look.
Best shortcut: Use a red and white striped ribbon to hang stars at slightly different heights for a more playful, custom look.
13. Vintage Christmas Bay Window Seat
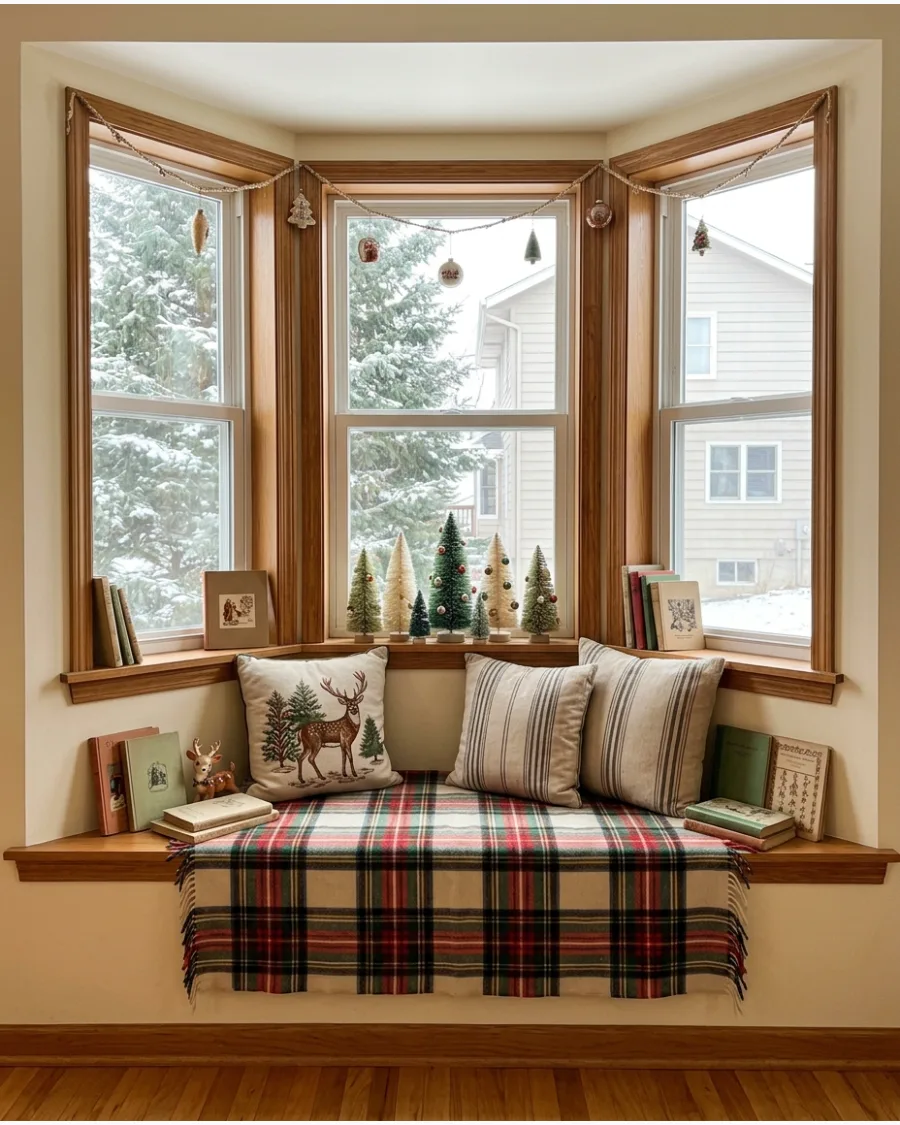
Nostalgic charm comes easily with classic plaid blankets and vintage-style velvet cushions. Place a few bottle-brush trees on the corners of the seat to add a whimsical, old-fashioned touch.
Mixing different plaid patterns in the same color family makes the window seat feel curated rather than messy. This style works best when you lean into traditional holiday colors like forest green and deep navy.
- Check thrift stores for vintage holiday books to stack on the window bench.
- Place heavier pillows at the ends of the bench to provide support for leaning.
- Add a small brass bell or vintage ornament to the zipper of a cushion for a subtle detail.
Most people skip this: Iron your plaid blankets before draping them to ensure the lines of the pattern stay straight and look professional.
14. Christmas Reading Nook Bay Window
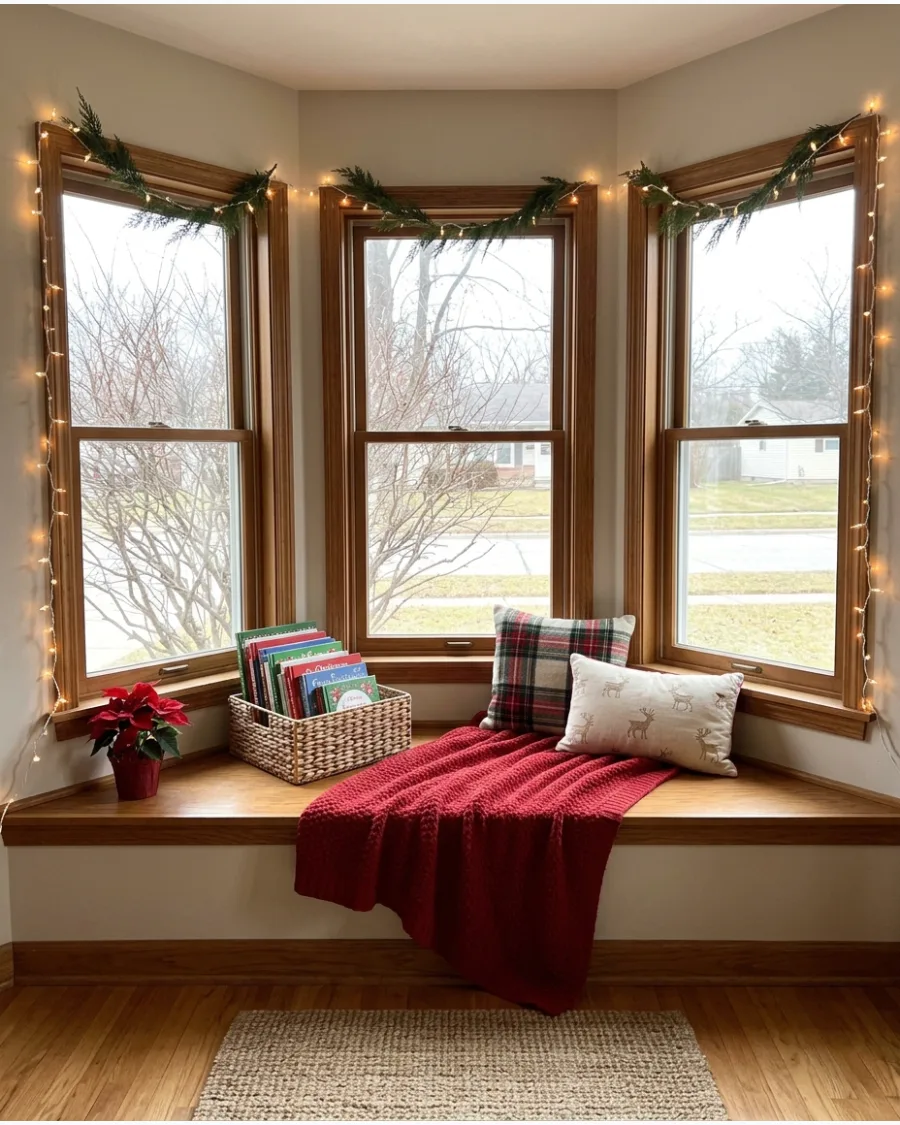
Turn your bay window into a functional escape by adding a basket filled with holiday books and a soft reading light. Drape a warm throw over the edge so it is ready for a long afternoon of relaxing.
Adding a small battery-operated lamp to the window seat provides focused light for reading without needing an outlet nearby. Soft, oversized pillows are essential for making this a space where people actually want to sit.
- Choose a basket with a low profile so it does not block the view through the glass.
- Select a throw blanket with a soft underside, like sherpa or fleece, for maximum comfort.
- Position the basket on the side of the window that gets the least foot traffic.
Quick win: Include a small lumbar pillow to provide back support against the hard angles of the window frame.
15. Christmas Morning Bay Window Seat
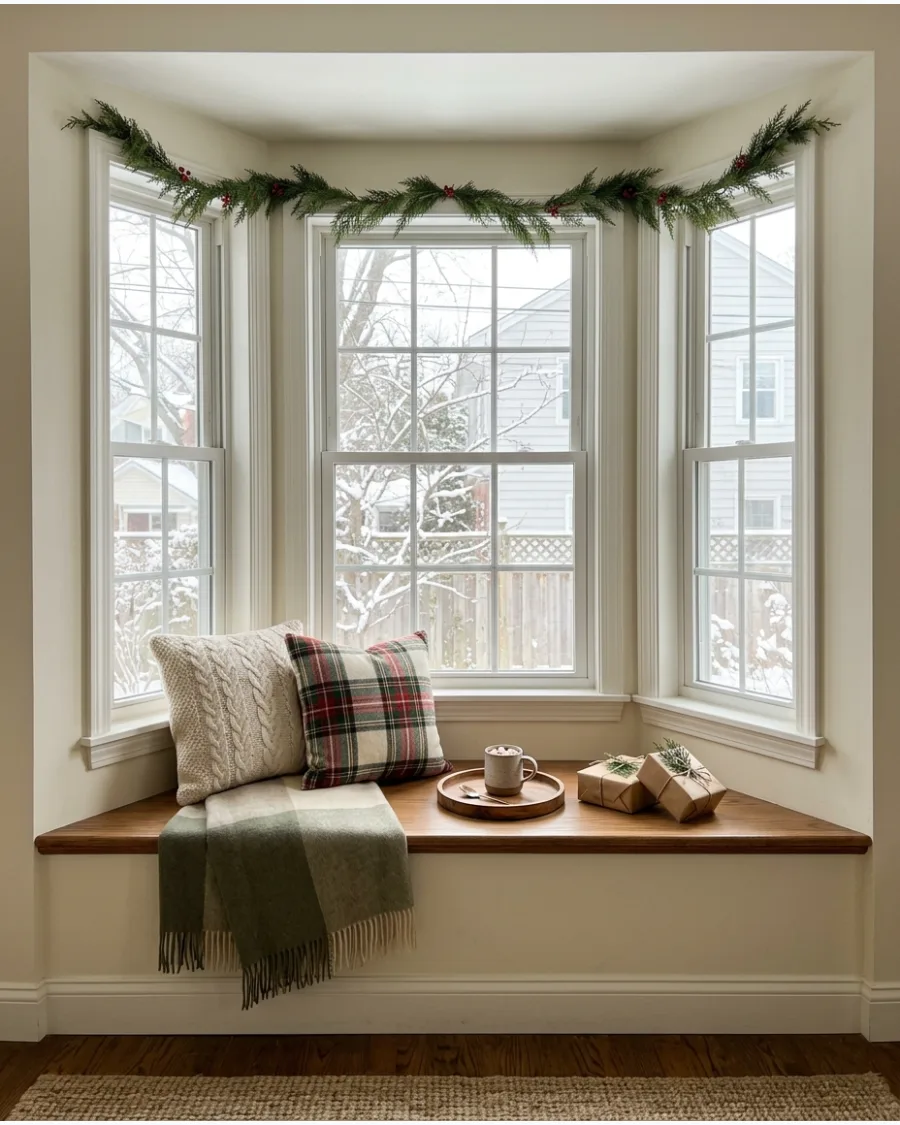
Style the area to look ready for the big day with a wooden tray for cocoa and a few beautifully wrapped gifts. This makes the window seat feel like an extension of the tree area and a perfect spot for photos.
Placing a few wrapped boxes on the window seat makes the architectural feature feel like part of the main celebration area. Use ribbons that match your room's color palette to tie the whole look together.
- Use empty boxes for the display so you can set it up weeks before Christmas morning.
- Select a tray with high sides to prevent mugs or decorations from sliding off the cushion.
- Add a small bowl of candy canes to the tray for a quick and easy pop of red.
Best shortcut: Use double-sided tape on your gift wrap for a seamless, high-end look that stands up to close inspection.
16. Woodland Christmas Bay Window Seat
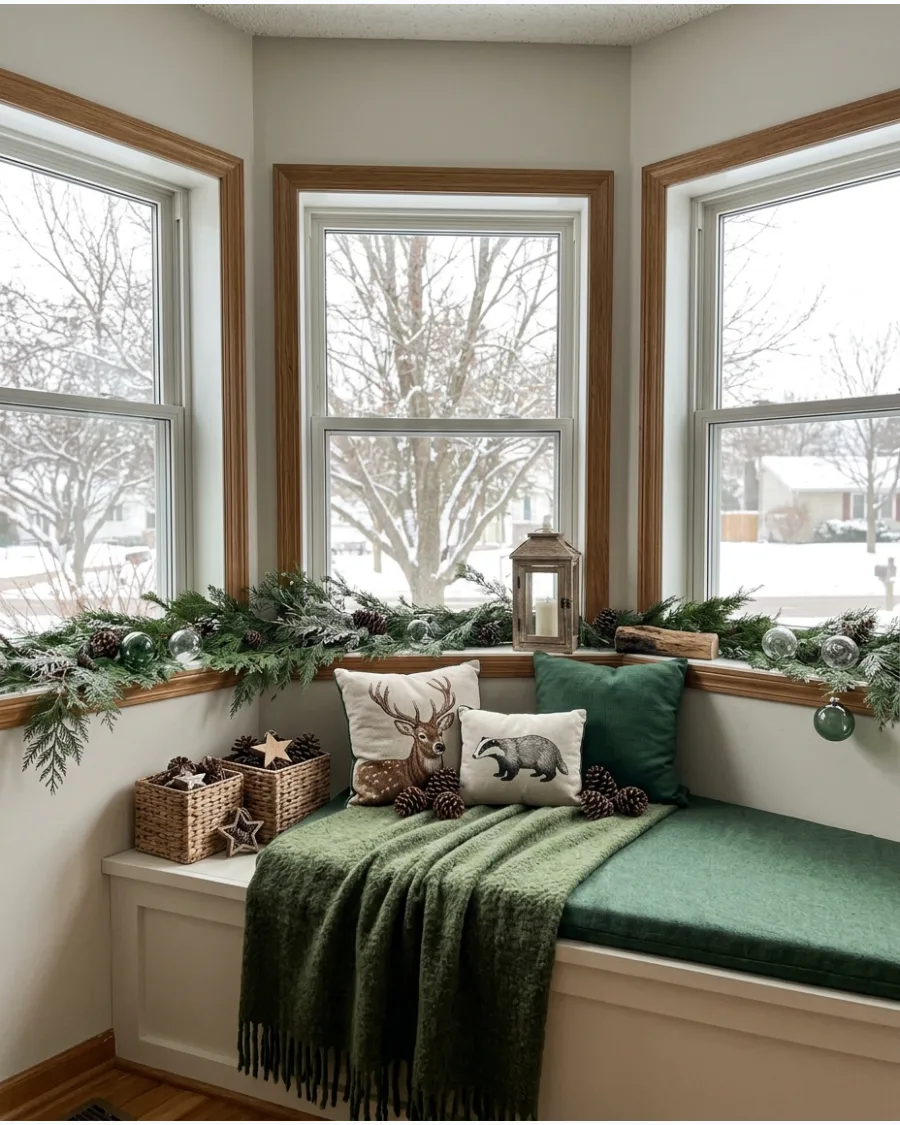
Bring the outdoors in with forest-green textiles and natural pinecone accents. Use pillows featuring woodland animals like deer or owls to create a nature-inspired theme that feels grounded and cozy.
Tucking small pinecones into the folds of a throw blanket adds a subtle touch of nature to the seating area. This look is most effective when you use varied shades of green and brown.
- Gather pinecones from the yard and bake them at a low temperature to clean them before use.
- Look for pillow covers with realistic embroidered animals rather than cartoonish prints.
- Add a branch of real cedar or pine to the corner for a natural evergreen scent.
Most people skip this: Use different sizes of pinecones to create a more natural, less staged appearance on the window ledge.
CHRISTMAS BAY WINDOW SILL AND LEDGE IDEAS
17. Mini Christmas Tree Trio on the Window Ledge
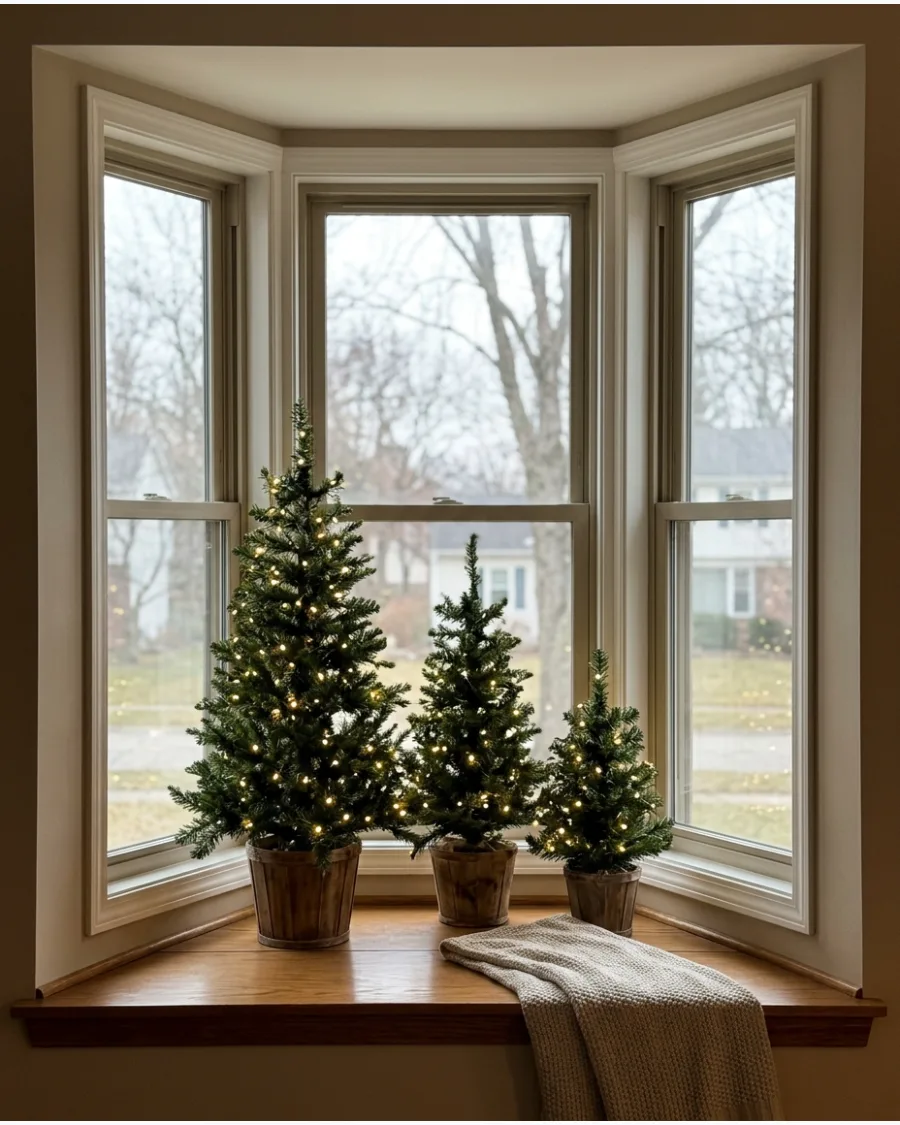
If your bay window has a wide ledge, use it to display a trio of miniature evergreen trees. Choose three different heights to create a sense of movement and visual interest across the glass.
Choosing trees with different heights creates a more dynamic and professional look than using three identical ones. Simple micro-lights are all you need to make these trees shine at night.
- Measure the depth of your window sill before buying pots to ensure they fit securely.
- Wrap the base of the pots in burlap or fabric to hide plastic nursery containers.
- Use trees with weighted bases so they do not tip over if the window is bumped.
Quick win: Place the tallest tree in the center pane and the shorter ones in the side panes to follow the window's natural shape.
18. Bottle-Brush Tree Forest
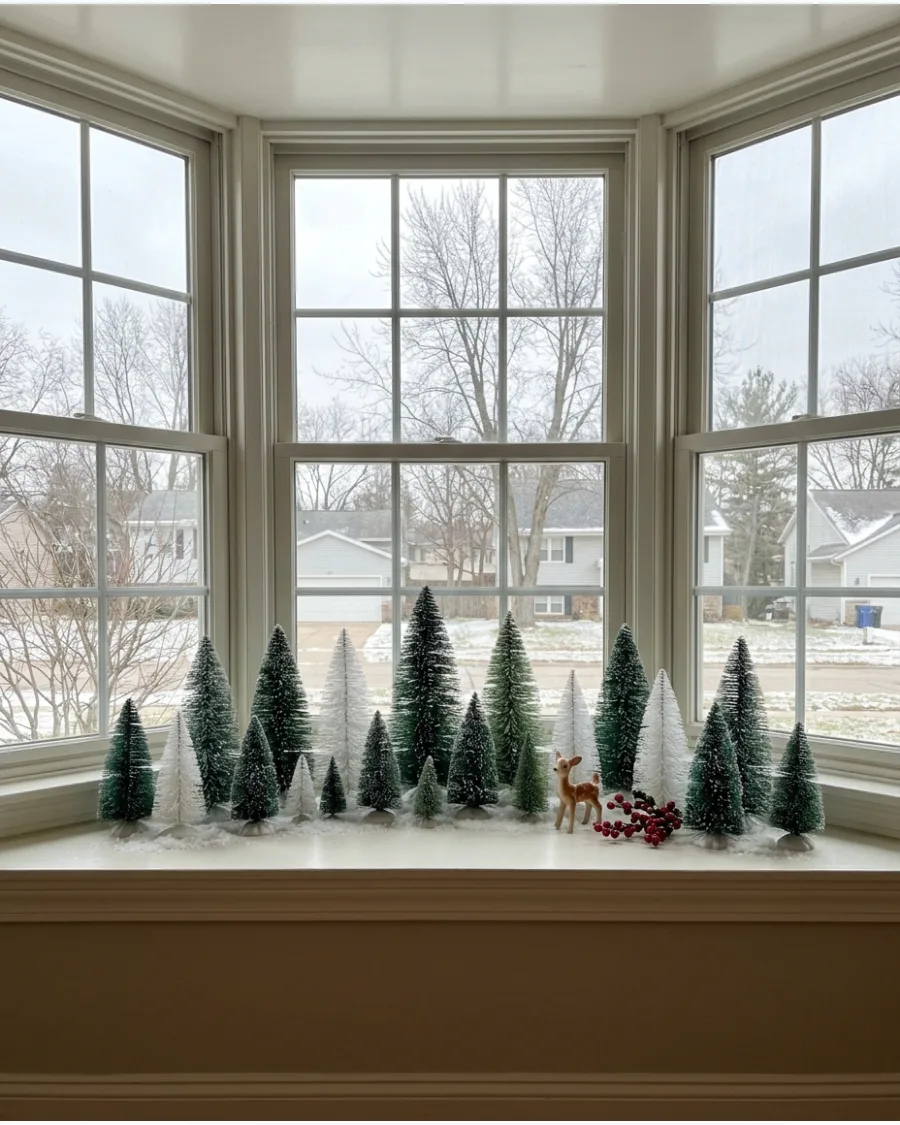
Create a colorful or snowy forest by grouping bottle-brush trees of various sizes along the entire length of the sill. This idea is perfect for narrow ledges where larger decor won't fit.
Staggering the trees from front to back on the sill adds depth to the display and makes it look more substantial. It provides a festive view without blocking the natural light coming into the room.
- Stick to a specific color palette, like all metallics or all greens, for a cohesive look.
- Use a small amount of museum wax on the bottom of each tree to keep them from falling.
- Group trees in odd numbers, like three or five, for the most pleasing arrangement.
Best shortcut: Buy a multi-pack of trees in various sizes to get an instant 'forest' look without hunting for individual pieces.
19. White Ceramic House Display
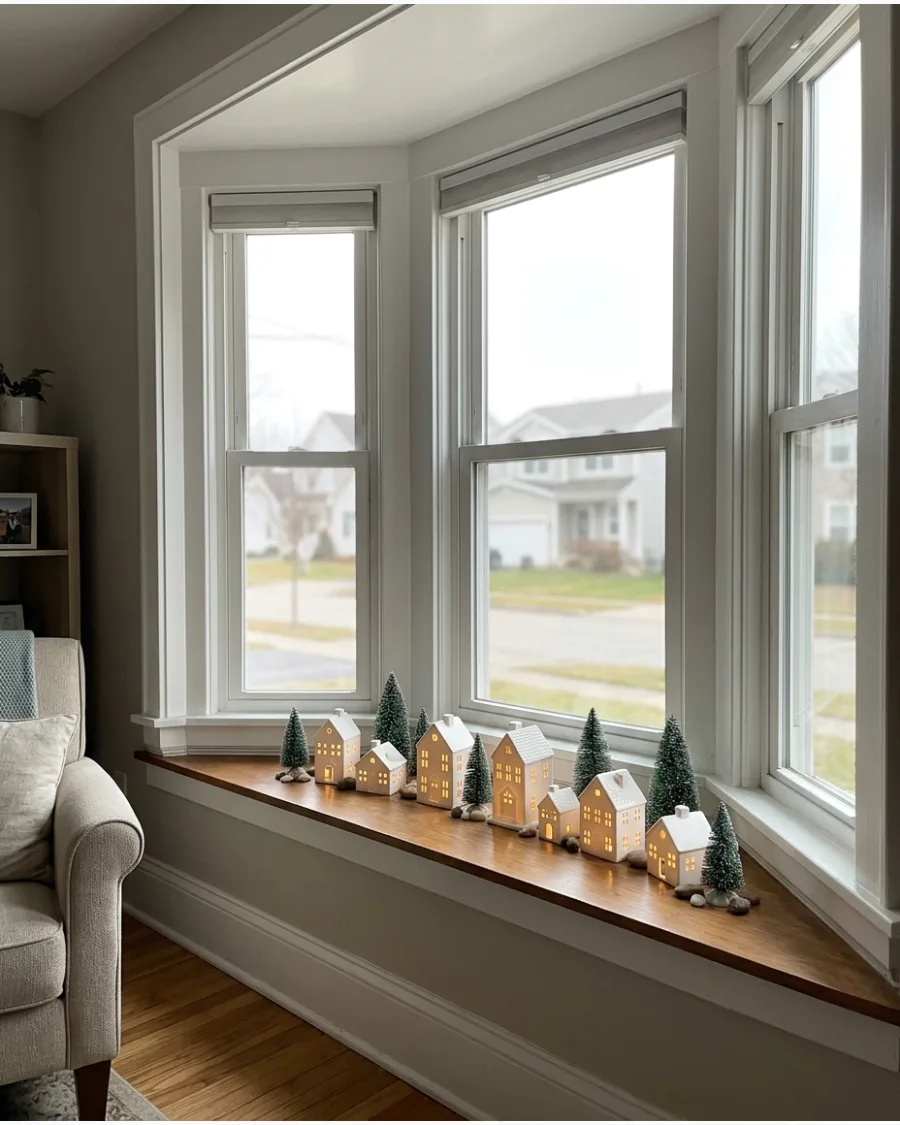
Line your window ledge with a row of glowing white ceramic houses for a clean, minimalist village. The white surfaces reflect the light, making the window area look bright even on cloudy days.
Using battery-operated tea lights inside the houses avoids the clutter of tangled power cords along the window sill. This display looks sophisticated and works well with any existing home decor style.
- Choose houses with different roof lines and heights to keep the display interesting.
- Set the tea lights on a timer so the village glows automatically every evening.
- Dust the window sill thoroughly before setting up the houses to keep the white ceramic looking sharp.
Most people skip this: Place the houses slightly away from the glass to prevent condensation from affecting the ceramic or the electronics.
20. Vintage Christmas Village in the Bay Window
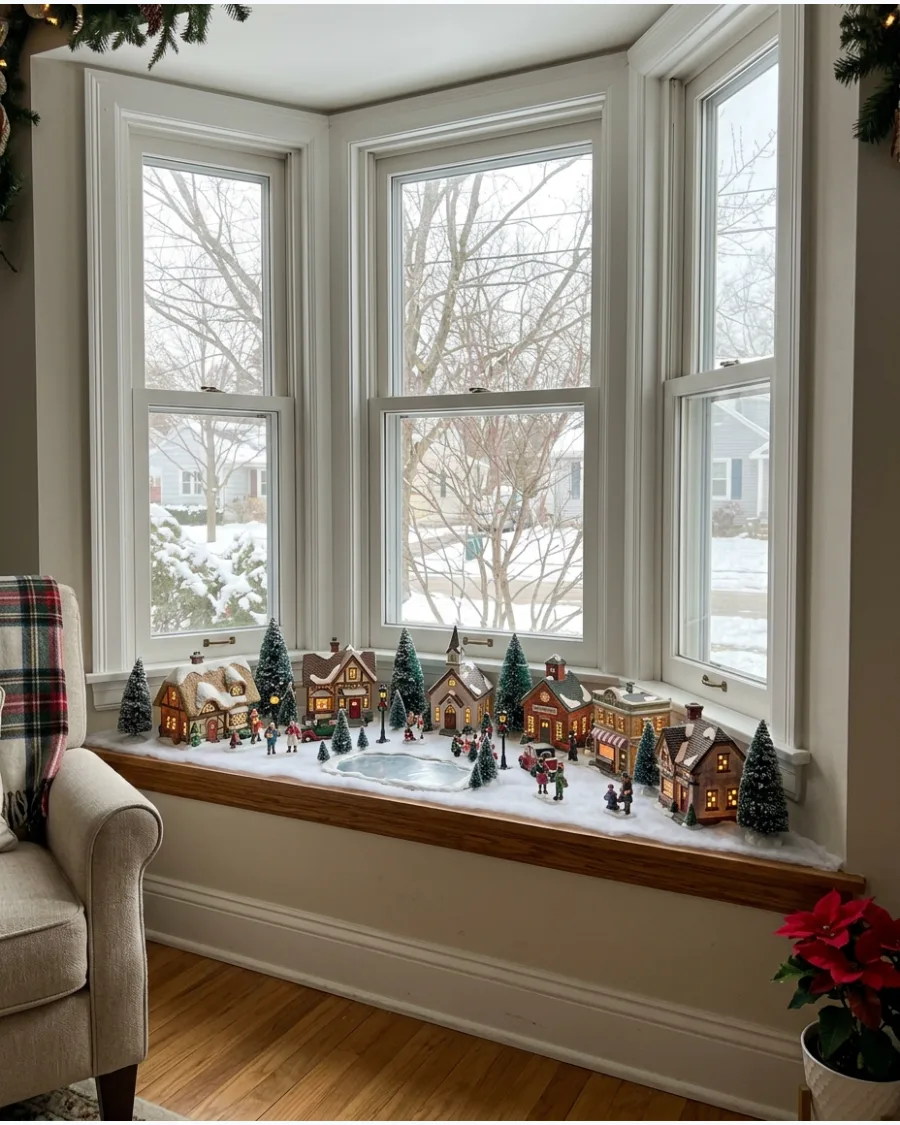
A traditional miniature village looks stunning when spread across the deep sill of a bay window. Incorporate tiny people, streetlights, and bottle-brush trees to bring the scene to life.
Creating a continuous base of faux snow or white felt helps unify the different village pieces into a single scene. This is a great way to display a collection where it can be seen from every angle in the room.
- Use a power strip hidden behind a curtain or piece of furniture to manage multiple plug-in pieces.
- Vary the height of the houses by placing small blocks or books under the faux snow base.
- Keep the most detailed pieces in the center of the bay window where they are easiest to see.
Quick win: Use a small handheld vacuum to easily clean up any loose faux snow at the end of the season.
21. Snowy Christmas Village Scene
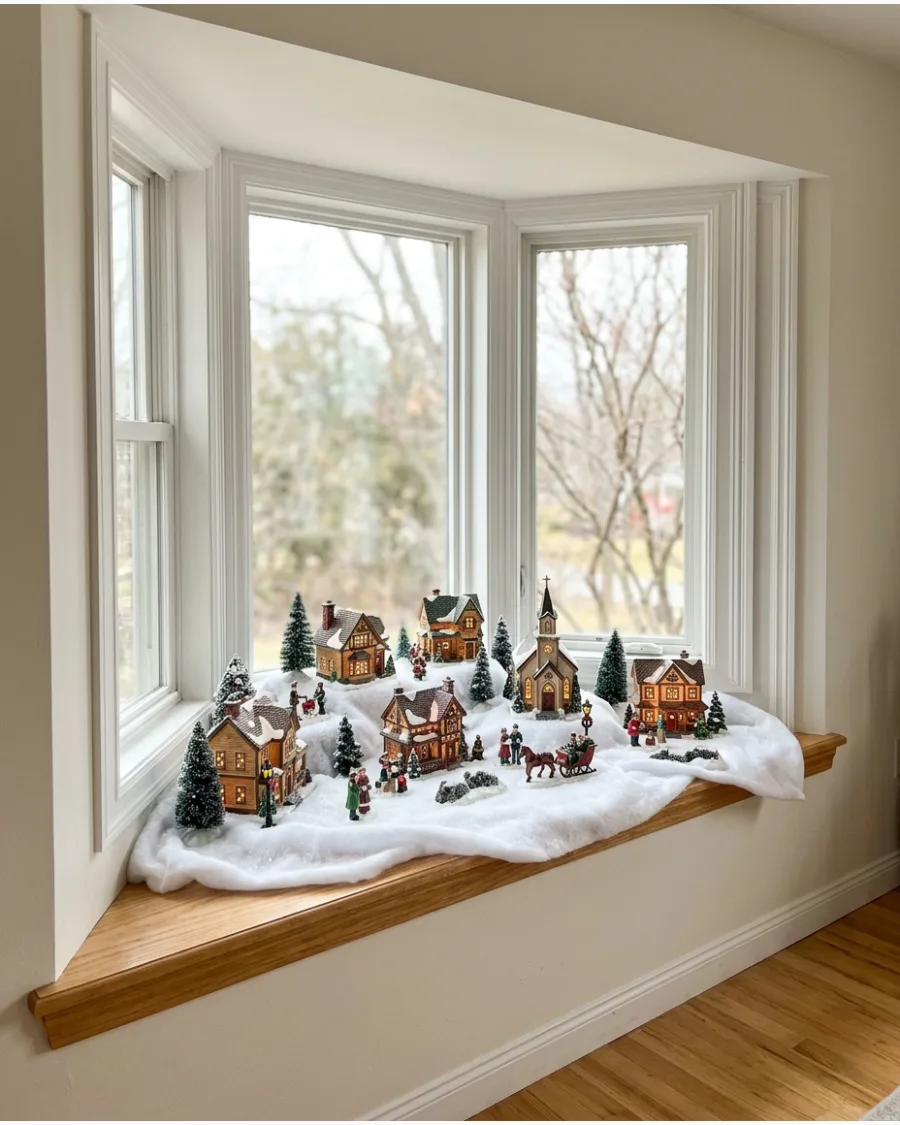
Transform a deep window ledge into a miniature winter wonderland using a base of white felt or cotton batting. Arrange small ceramic houses and tiny figurines to tell a story across the different angles of the window.
Layer different heights of faux snow to create realistic hills for the houses to sit on. This display works well because the glass panes act as a natural frame for the tiny town. It looks just as magical from the sidewalk as it does from your sofa.
- Budget-friendly felt and battery-operated village sets.
- Secure houses with small bits of poster tack to prevent sliding.
- Fits any window size by adding or removing village pieces.
Quick win: Hide the battery packs for the houses under the folds of the snow fabric.
22. Mini Christmas Market Window Display
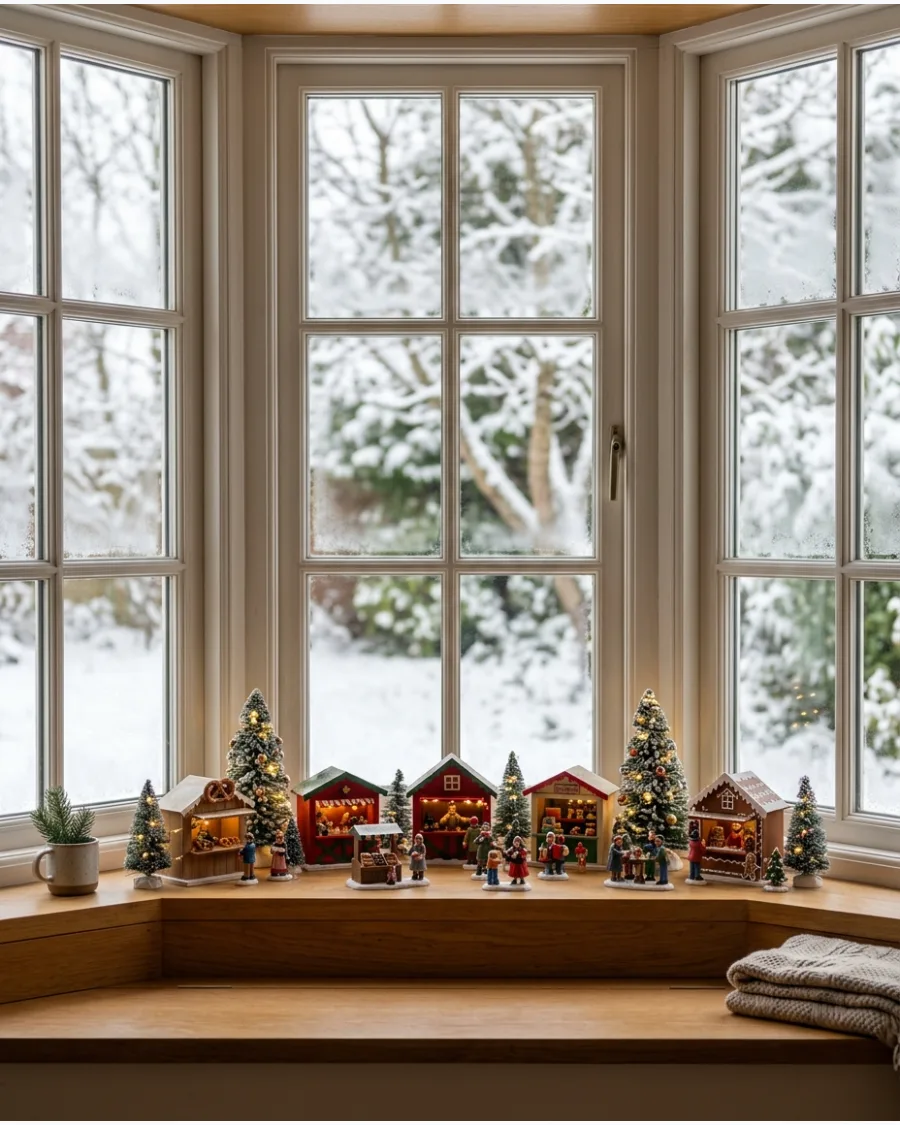
Bring the charm of a European holiday market to your home with small wooden stalls and shopkeeper figurines. Place these across the bay window sill to create a sense of movement and depth.
Place tiny warm LED strings inside the market stalls to make the windows glow at night. This setup is more interactive than a standard village and offers plenty of small details for guests to discover.
It makes the most of a long, narrow ledge.
- Available in various price points from wood to resin.
- Line the stalls up along the glass to maximize sill space.
- Swap figurines to change the theme from year to year.
Best shortcut: Use a strand of fairy lights to connect all the stalls with one power source.
23. Lantern and Greenery Bay Window Ledge
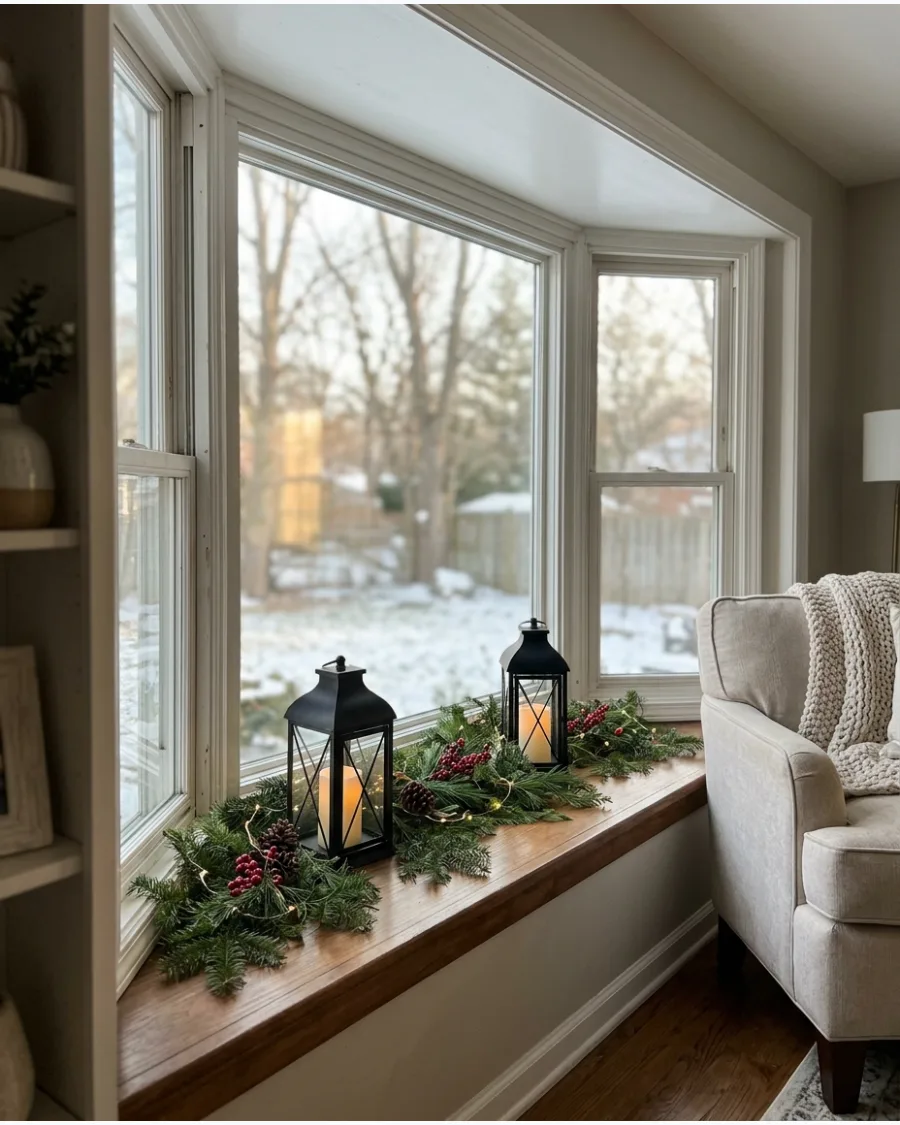
Combine the classic look of metal lanterns with the organic texture of fresh or faux evergreens. Tuck cedar or pine branches around the base of the lanterns to soften the lines of the window frame.
Stagger three different sizes of lanterns to create a balanced visual triangle on the sill. Flameless candles are the only safe way to light a window sill where curtains or drafts might be an issue. This look is timeless and works with almost any interior style.
- Metal lanterns are a one-time investment for year-round use.
- Center the largest lantern in the middle pane of the bay.
- Use battery-powered candles with timers for easy operation.
Most people skip this: Clean the glass on the lanterns and the window for maximum sparkle.
24. Pinecone and Candle Window Display
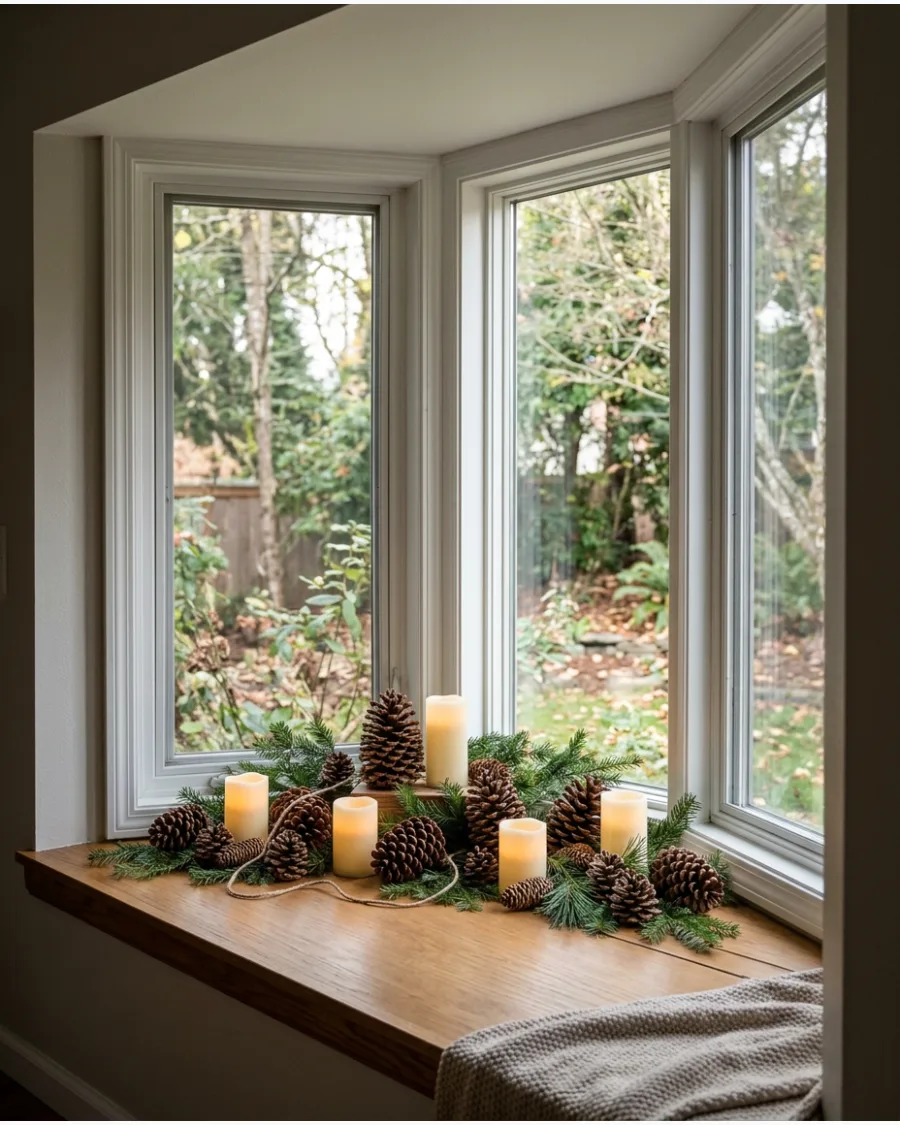
Create a woodland-inspired scene using natural elements found in your backyard or a craft store. Group large pinecones with battery-operated pillar candles to fill the depth of the bay window.
Mix varying sizes of pinecones with slim pillar candles to keep the display from looking flat. Keeping the colors neutral with brown and green allows the architectural lines of the window to shine. It is a simple way to add warmth without using bright, distracting colors.
- Low-cost or free if you collect your own pinecones.
- Distribute items evenly across all three window sections.
- Add a few sprigs of holly for a pop of traditional color.
Quick win: Use scented pinecones to make the entire room smell like cinnamon or pine.
HANGING BAY WINDOW CHRISTMAS DECOR
25. Hanging Ornament Curtain
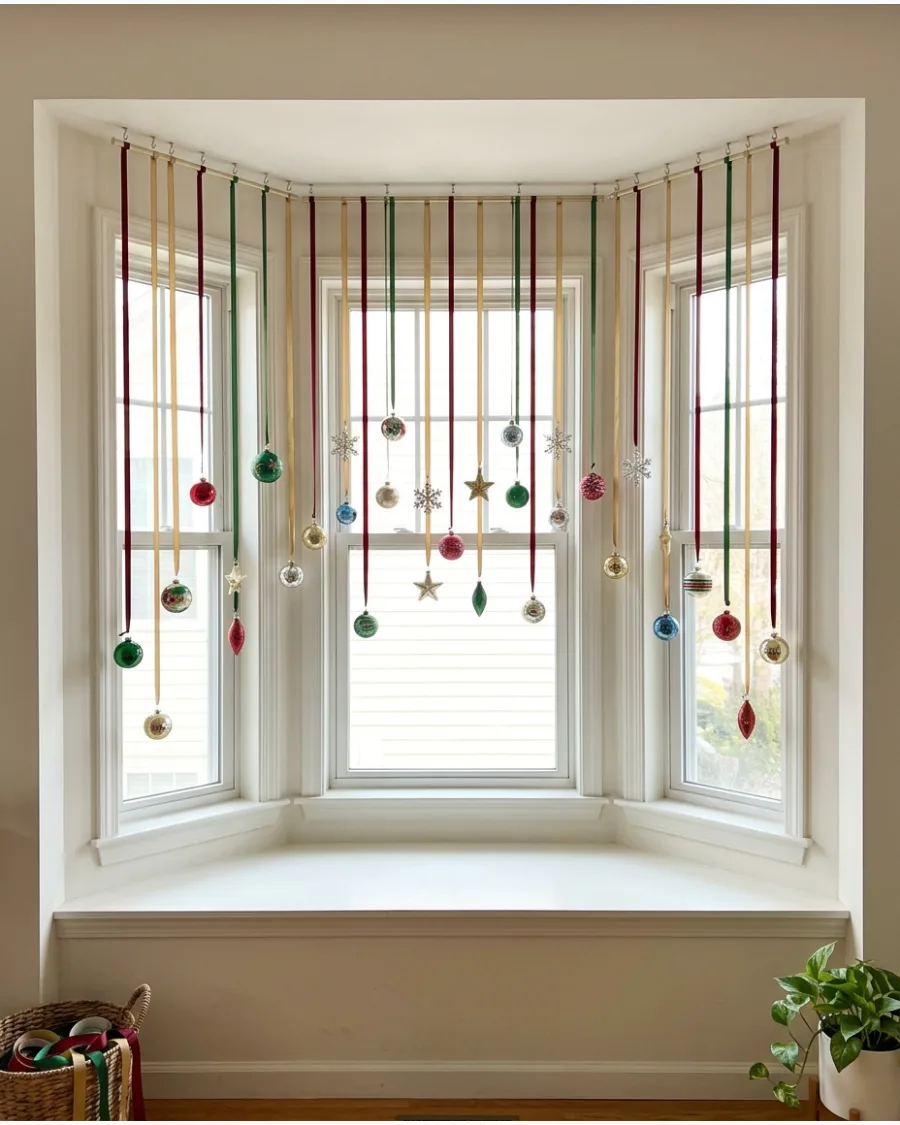
Use the vertical space of your bay window by suspending ornaments from the top of the frame. This creates a festive look that does not take up any space on the window seat or ledge.
Use thin fishing line instead of ribbon if you want the ornaments to look like they are floating. This technique works exceptionally well for tall windows that feel empty during the holidays. It adds a layer of sparkle that catches the light from both sides of the glass.
- Use lightweight plastic ornaments to avoid straining the trim.
- Hang ornaments at least six inches apart to prevent tangling.
- Try different ribbon colors to match your existing room decor.
Best shortcut: Use small clear adhesive hooks to avoid putting holes in your window trim.
26. Oversized Bauble Clusters
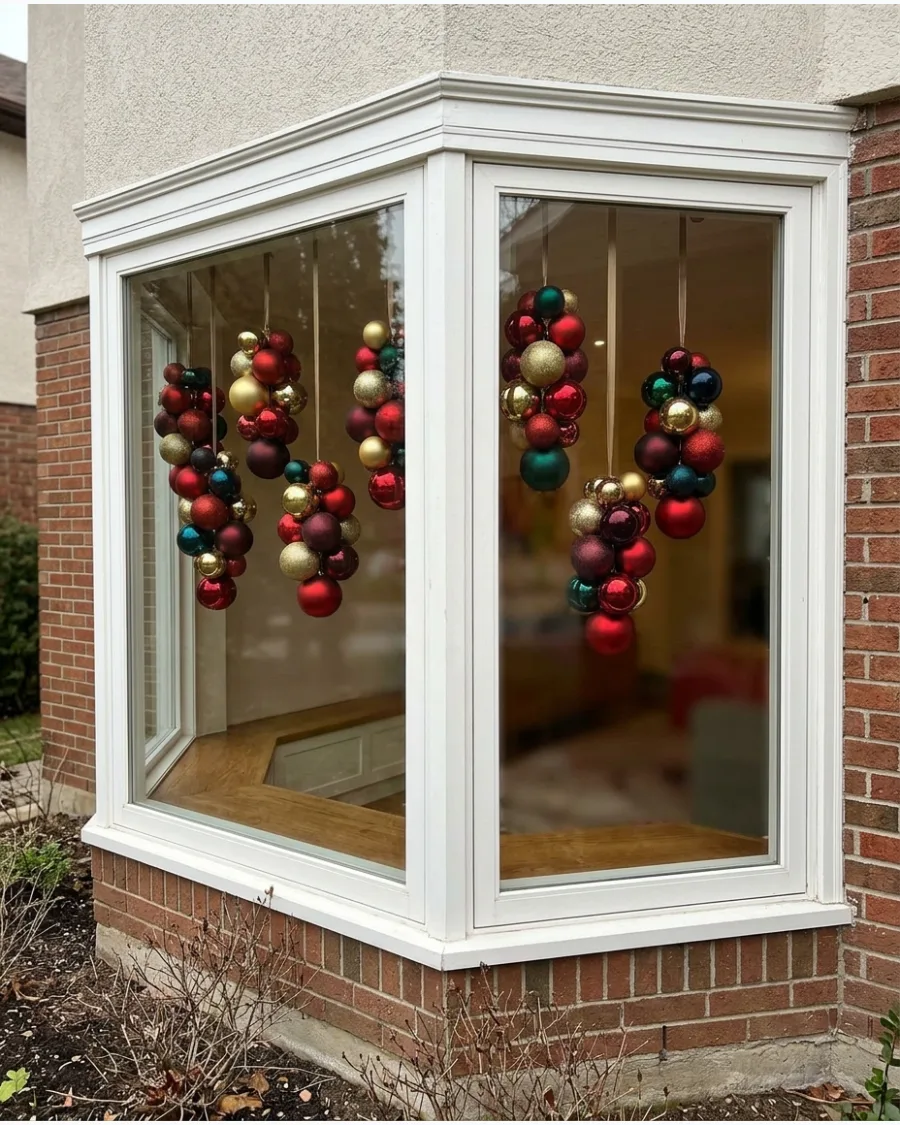
Make a bold statement by grouping large-scale ornaments together in the corners of your bay window. These clusters draw the eye upward and emphasize the height of the ceiling.
Tie three ornaments together at slightly different lengths to create one cohesive cluster. Large-scale decor is much easier to see from the street, which gives your home great curb appeal. It is a high-impact look that requires very little assembly time.
- Focus on high-quality glass or mercury-finish baubles.
- Hang one cluster in each of the three window sections.
- Use thick velvet or satin ribbon for a more luxurious feel.
Most people skip this: Ensure the ribbon color contrasts with your wall or trim color so it stands out.
27. Hanging Paper Star Collection
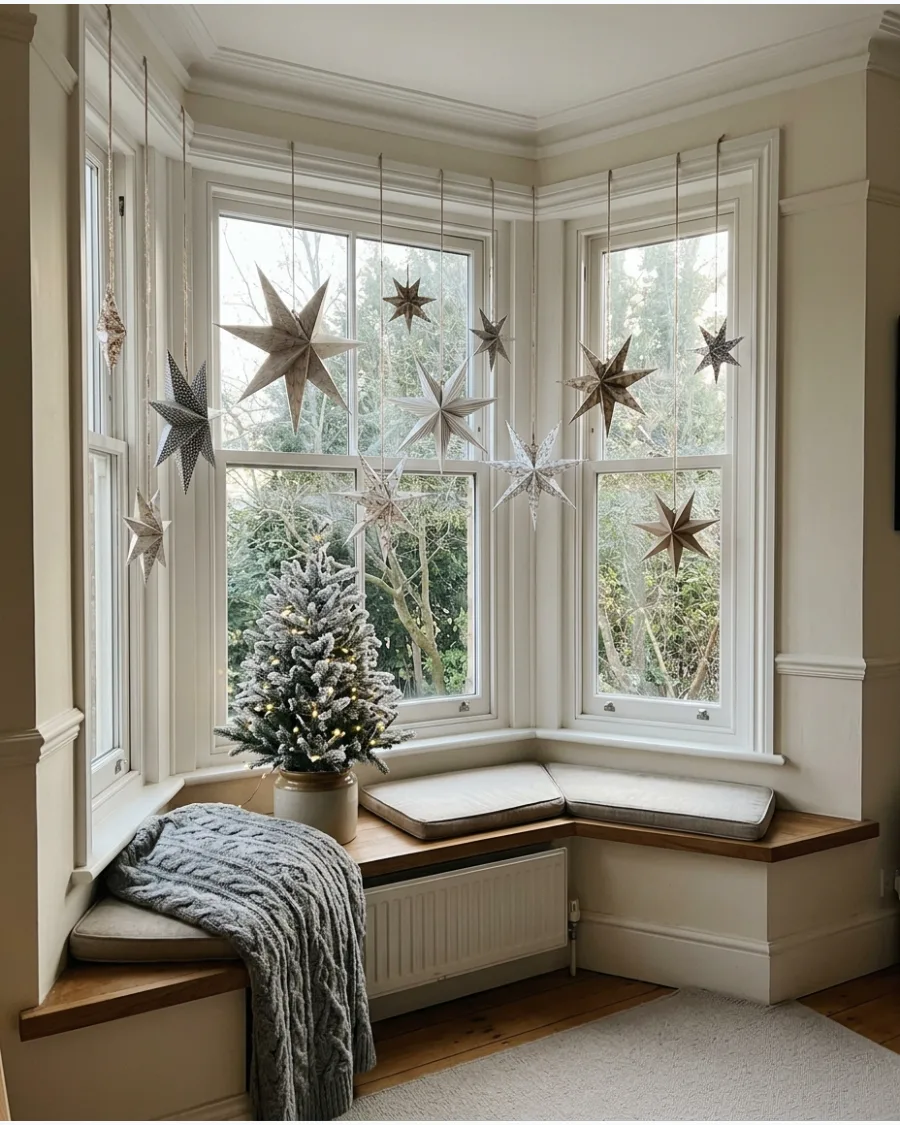
Embrace a clean Scandinavian aesthetic by hanging paper stars in various sizes across the glass. These lightweight decorations add architectural interest without blocking the natural light.
Choose white or cream stars to keep the look clean and airy against the daylight. They are easy to fold down and store, making them a practical choice for small homes. The geometric shapes provide a modern contrast to traditional evergreen decor.
- Very affordable and easy to find in many patterns.
- Vary the heights so the stars do not overlap too much.
- Works perfectly for renters who cannot use heavy hardware.
Quick win: Use a needle and thread to hang them if you want the hanging point to be invisible.
28. Illuminated Paper Stars
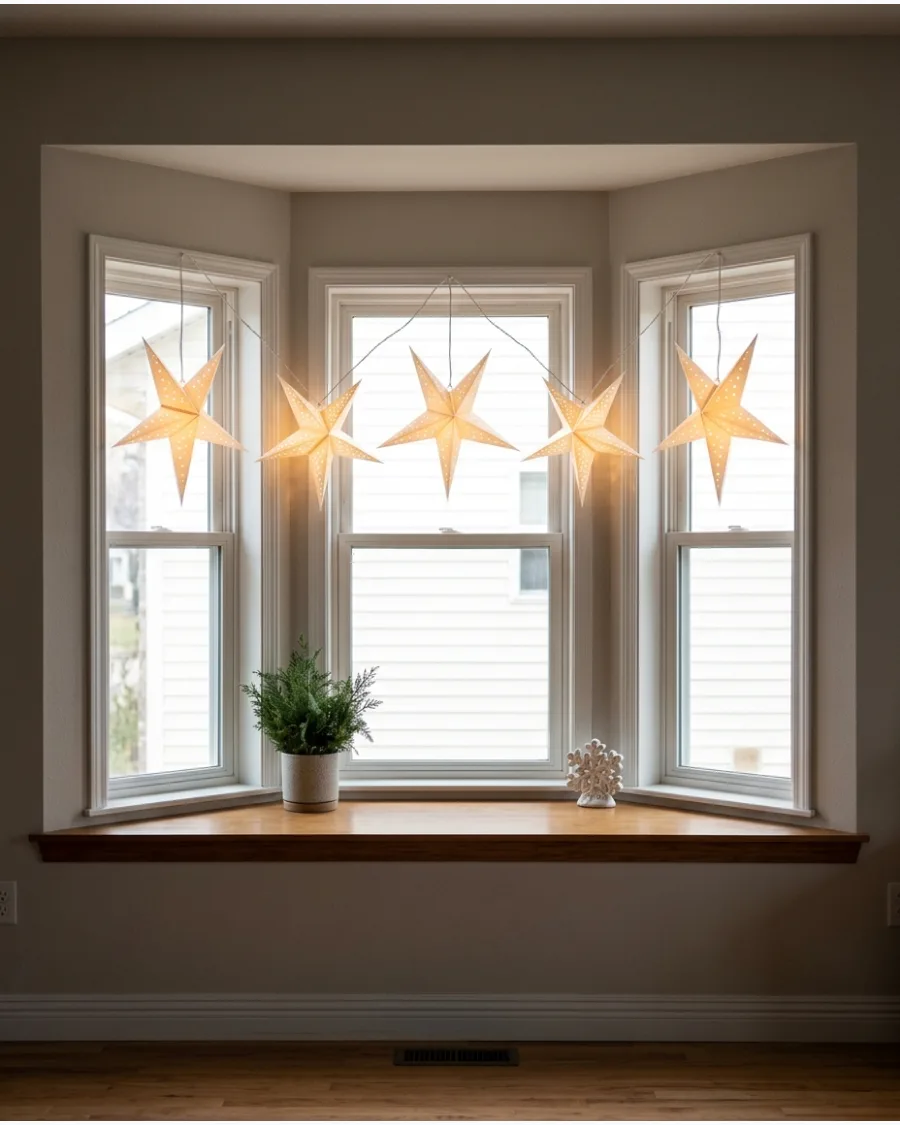
Take the paper star look a step further by choosing versions that hold internal lights. These glowing lanterns turn your bay window into a warm focal point as soon as the sun sets.
Run a corded light kit or use battery-powered puck lights inside the stars for a warm glow. These stars act as secondary lighting, making the room feel cozy and inviting. They are particularly effective in windows that face the front of the house.
- Available in plug-in or battery-operated versions.
- Hang one large star in the center pane for a focal point.
- Choose perforated stars to cast beautiful patterns on the walls.
Best shortcut: Look for stars with built-in timers to save battery life every night.
29. Hanging Snowflake Window Display
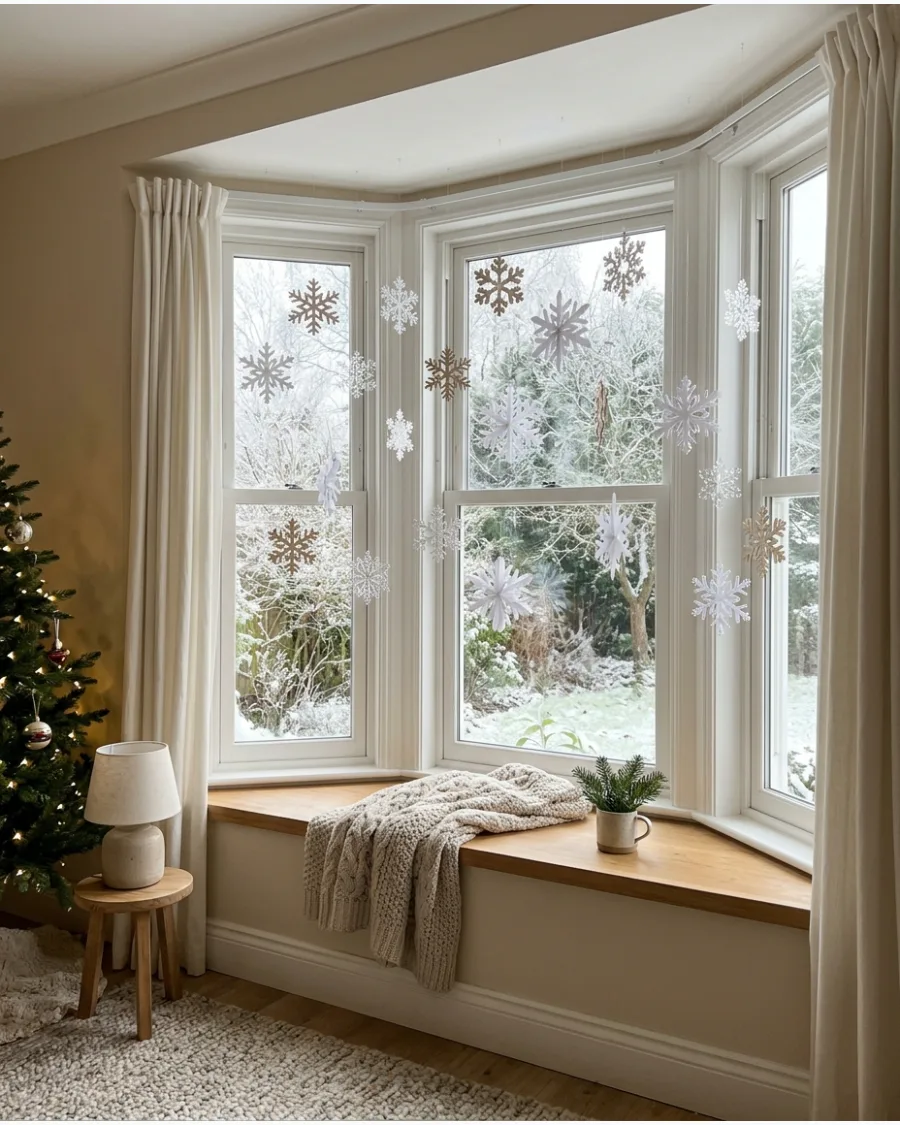
Create the illusion of a gentle snowfall by hanging dozens of small snowflakes at different heights. This looks best when you use a mix of sizes to mimic the variety found in nature.
Vary the sizes of the snowflakes to mimic the natural look of a real snowfall. White snowflakes pop beautifully against the dark view of the outdoors at night. It is a whimsical approach that appeals to both children and adults.
- Acrylic or wooden snowflakes are more durable than paper.
- Space them randomly to avoid a stiff, grid-like appearance.
- Use clear fishing line so the snowflakes appear to float.
Most people skip this: Hang some snowflakes closer to the glass and others further back for a 3D effect.
30. Velvet Bow Window Display
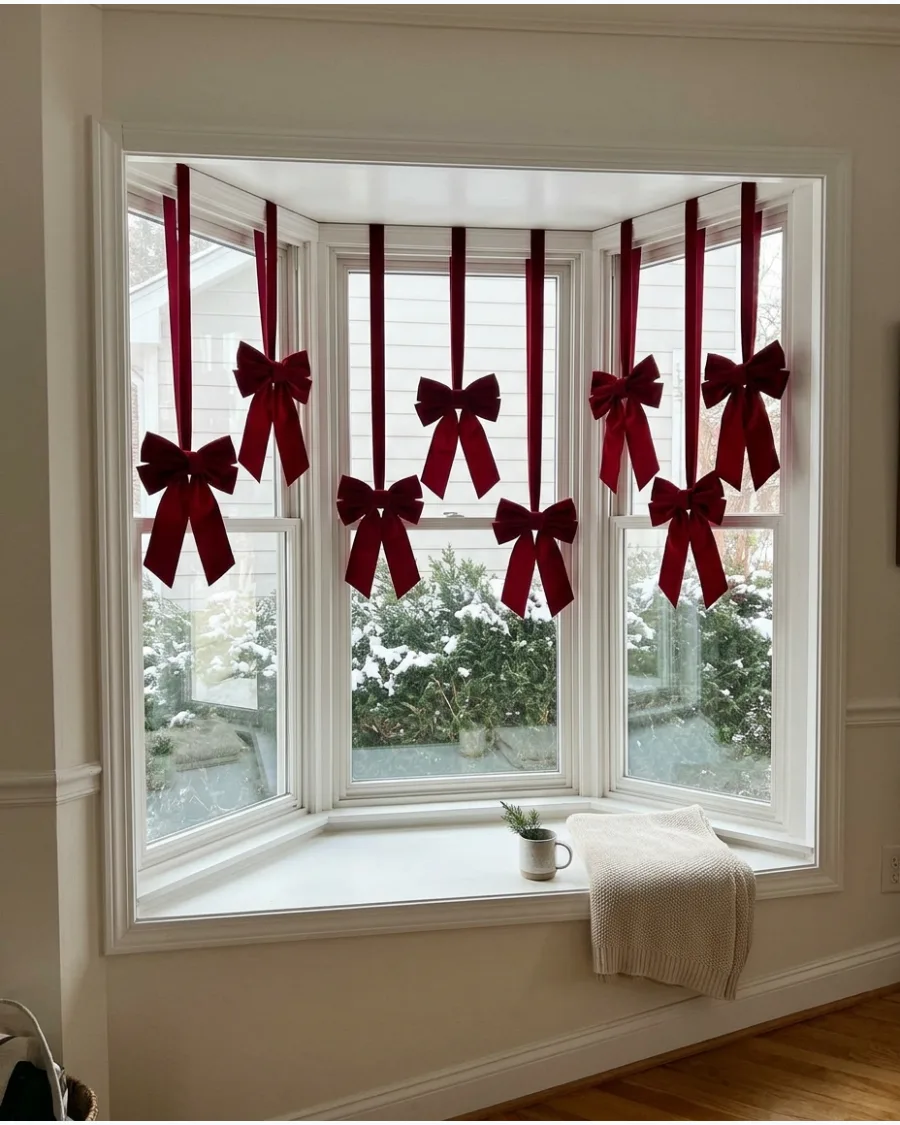
Add a touch of classic elegance by hanging large velvet bows from the top of your window panes. This is a fast way to decorate a large area without needing many supplies.
Iron the ribbon tails before hanging so they drape smoothly without any creases. Velvet adds a high-end texture that balances the hard glass and wood surfaces of a bay window. It is a sophisticated look that never goes out of style.
- Rich colors like burgundy or forest green work best.
- Secure the center of the bow with a small wire or hook.
- Let the tails hang long to emphasize the height of the window.
Quick win: Use wired ribbon if you want the bow loops to stay perfectly full all season.
31. Hanging Brass Bell Decorations
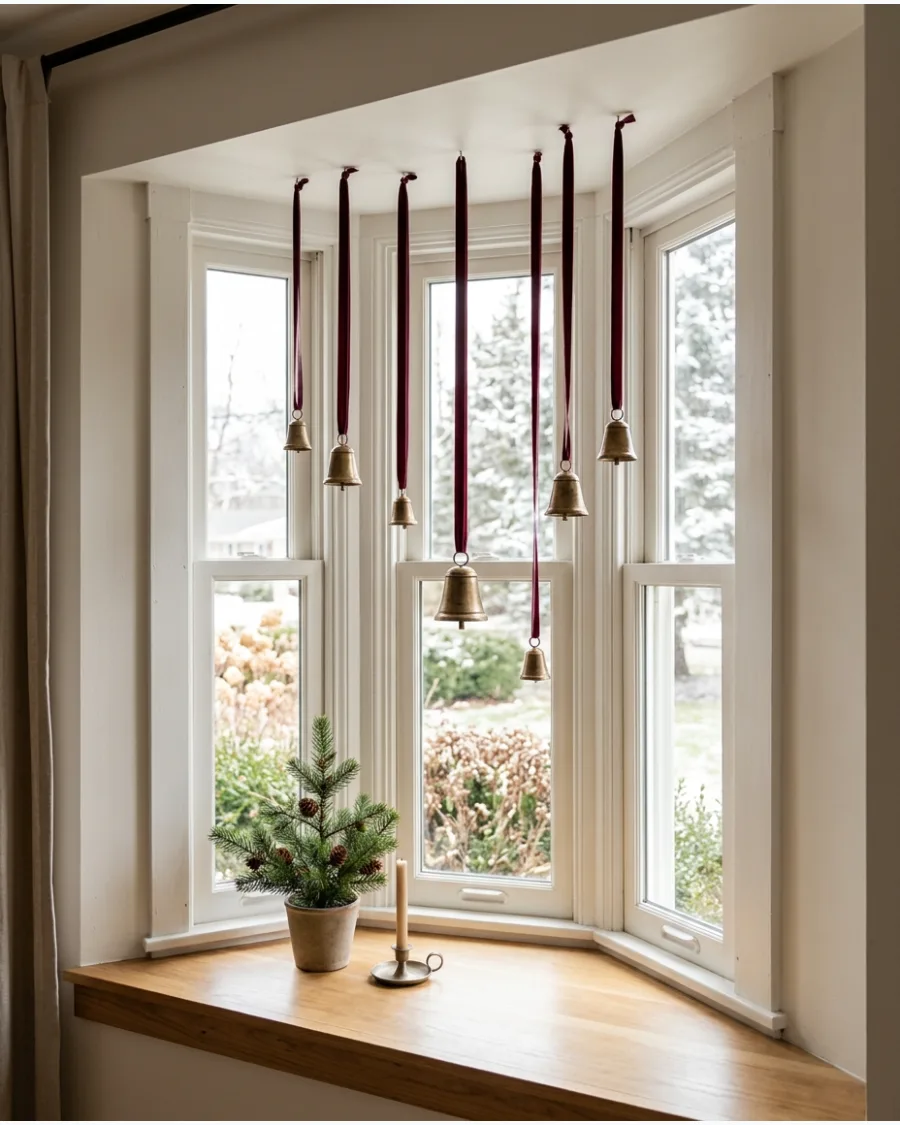
Suspend small antique-style brass bells from velvet ribbon to add a vintage touch to the window. Use varied lengths for the ribbons to create a more dynamic visual flow across the glass. These bells catch the natural daylight and offer a subtle, sophisticated shimmer without the need for electricity.
They provide a refined look that feels collected over time.
- Sourced from craft stores or antique markets.
- Hang from the top window trim using small tacks or adhesive hooks.
- Use heavy velvet ribbon to prevent the bells from spinning excessively.
Quick win: Use mismatched bell sizes to make the arrangement feel more organic and less like a store-bought set.
32. Christmas Ornament Branch Display
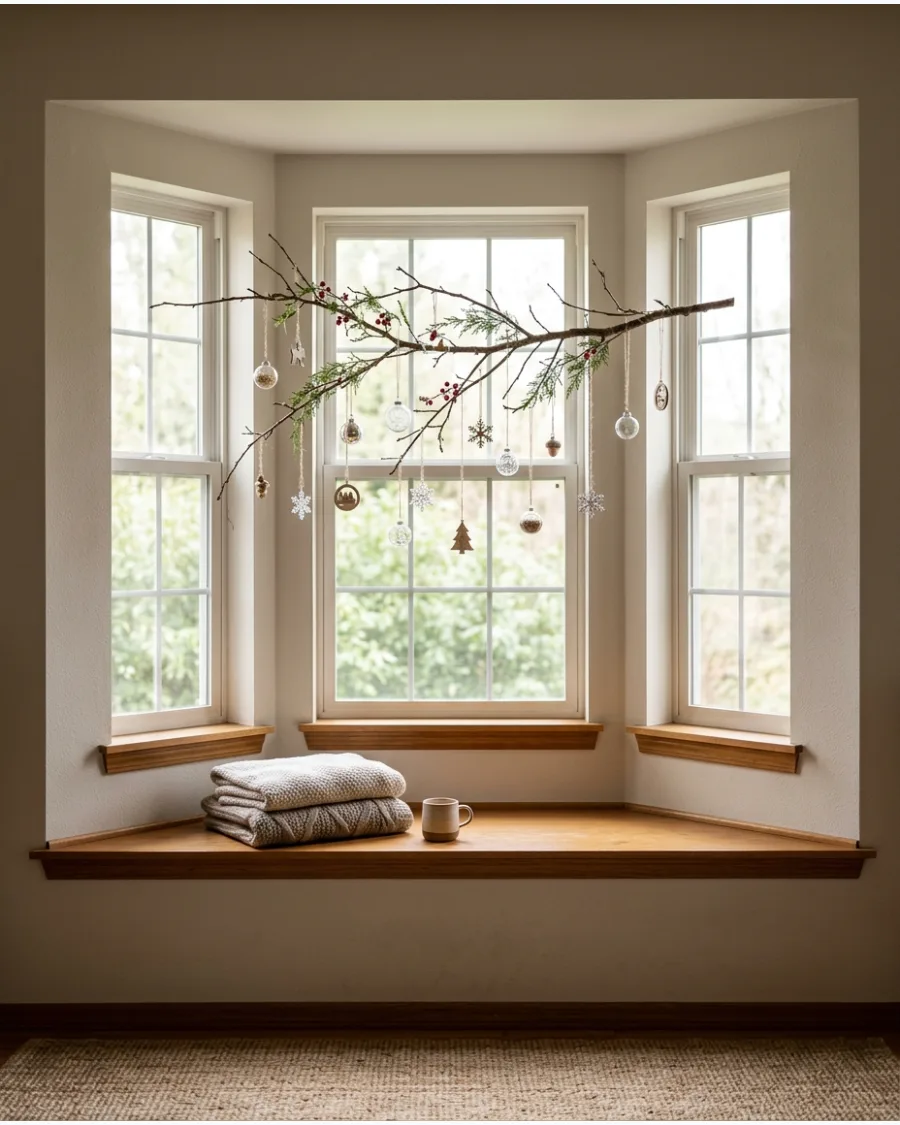
Position a bare branch across the upper bay window and hang lightweight ornaments from it for an organic look. Secure the branch to the window frame with clear heavy-duty hooks to ensure it stays level and safe. This brings a bit of nature inside without the needle mess of a traditional garland.
It is an excellent way to display special heirloom ornaments where they can be seen clearly.
- Use foraged birch or manzanita branches for the best texture.
- Mount with clear adhesive hooks rated for the branch's weight.
- Works best with shatterproof or very lightweight glass ornaments.
Best shortcut: Spray paint the branch white or silver for a frosty appearance that pops against dark-colored window frames.
WREATH IDEAS FOR BAY WINDOWS
33. Large Centered Bay Window Wreath
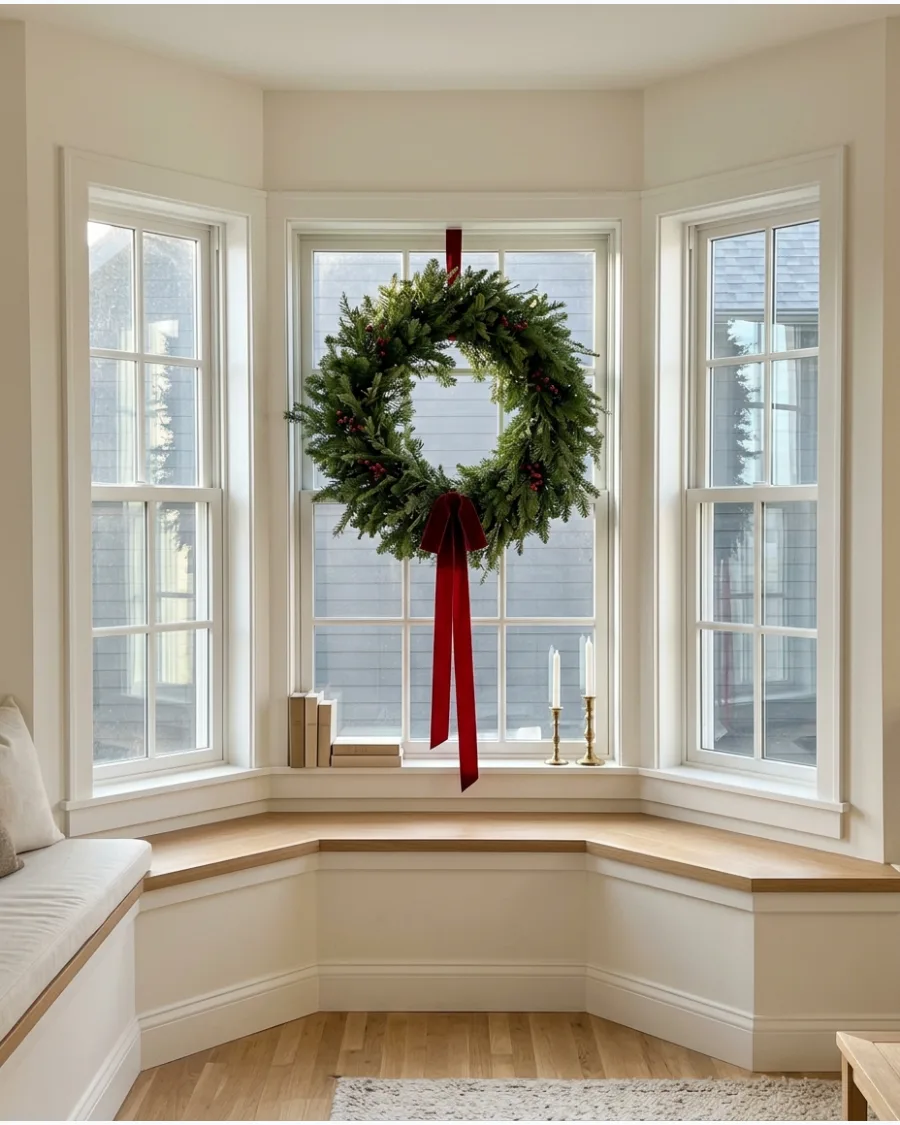
Hang one oversized evergreen wreath in front of the center window panel to create a singular focal point. Choose a wreath that is at least two-thirds the width of the center pane to maintain proper scale. Finishing it with a long velvet bow adds height and elegance.
This approach keeps the side windows clear for natural light while still making a big holiday statement.
- Select a 30-inch or larger wreath for standard bay windows.
- Use an over-the-door hanger or a heavy-duty suction hook.
- Best for large windows where multiple decorations might look too busy.
Most people skip this: Fluff every single branch of the wreath before hanging to ensure there are no flat spots visible from the street.
34. Three Matching Bay Window Wreaths
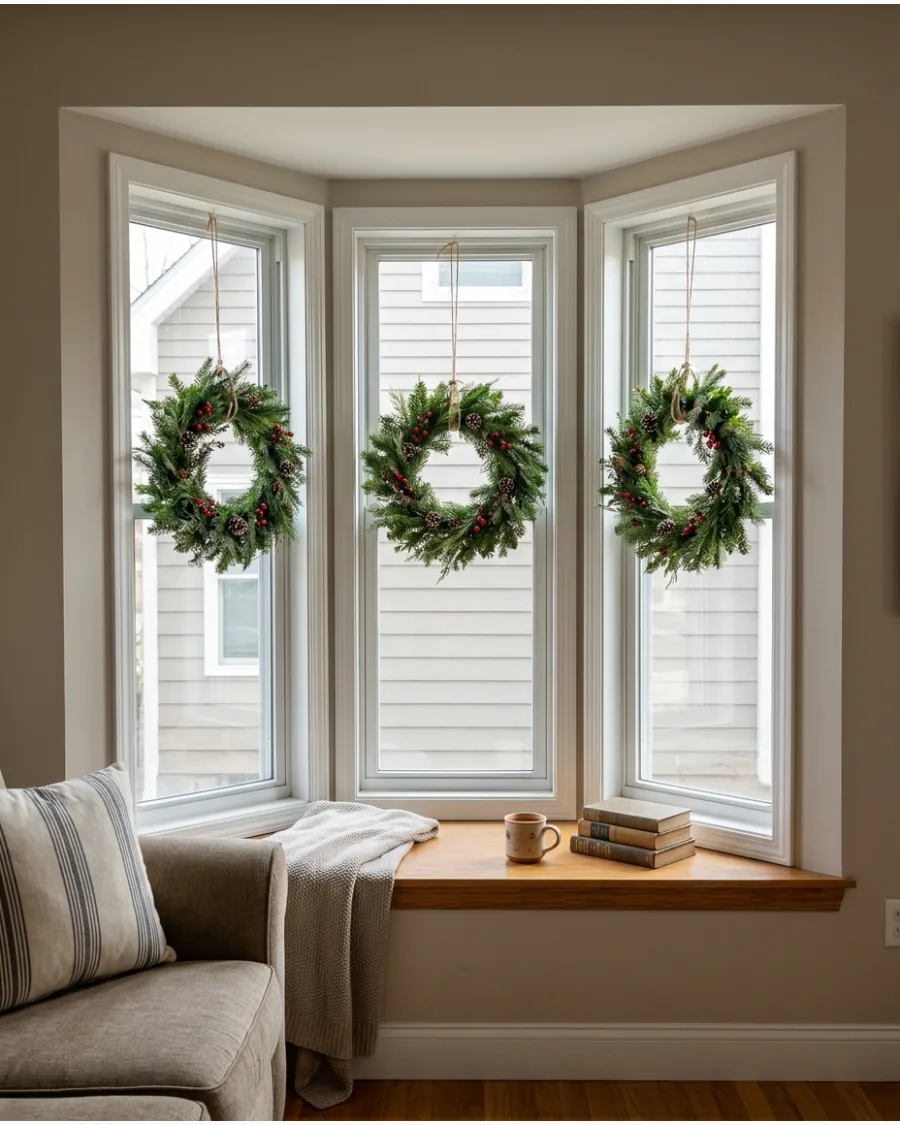
Hang one matching wreath in each major window section to emphasize the architecture of the bay. Use identical ribbon lengths for all three wreaths to keep the look symmetrical and professional. This creates a rhythmic, cohesive display that looks just as good from the sidewalk as it does from the sofa.
It is a classic choice for traditional homes.
- Buy wreaths in sets of three to ensure color and texture match.
- Measure from the top of the frame to the center of the wreath for consistency.
- Use thin florist wire or decorative ribbon for a secure hang.
Quick win: Connect the three wreaths with a thin strand of battery-operated fairy lights to make the entire window glow as one unit.
35. Mini Wreaths on Individual Windowpanes
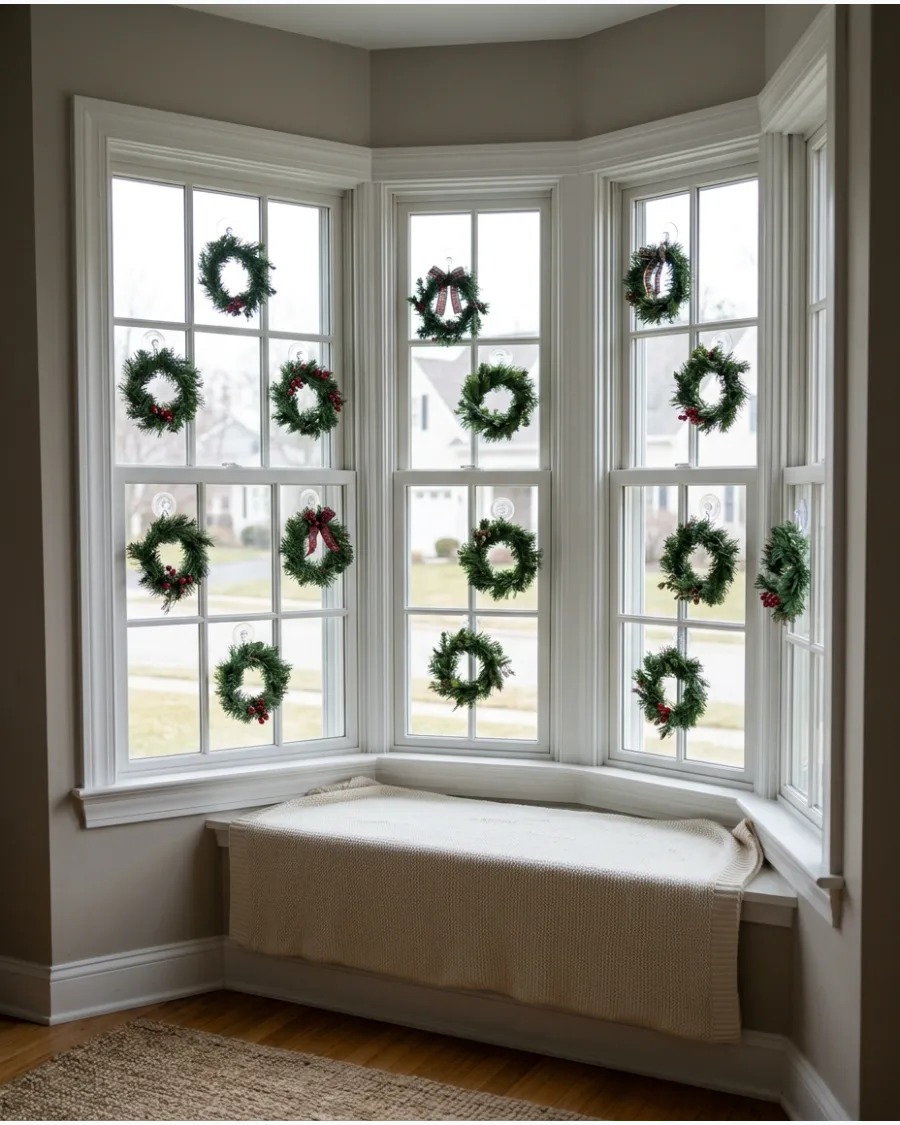
Attach small lightweight wreaths to selected panes using removable hooks for a detailed, orderly look. Space the wreaths evenly across the grid of the window to avoid a cluttered or messy appearance. This style works beautifully on windows with many small divided panes.
It adds a touch of greenery without blocking the entire view.
- Look for 6-inch to 8-inch mini wreaths for the best fit.
- Use clear suction cups with integrated hooks for easy removal.
- Ideal for renters because this method requires no nails or screws.
Best shortcut: Buy a pack of plain mini wreaths and add your own berries or ribbon to customize them to your room's specific color palette.
36. Burgundy Bow Christmas Wreath
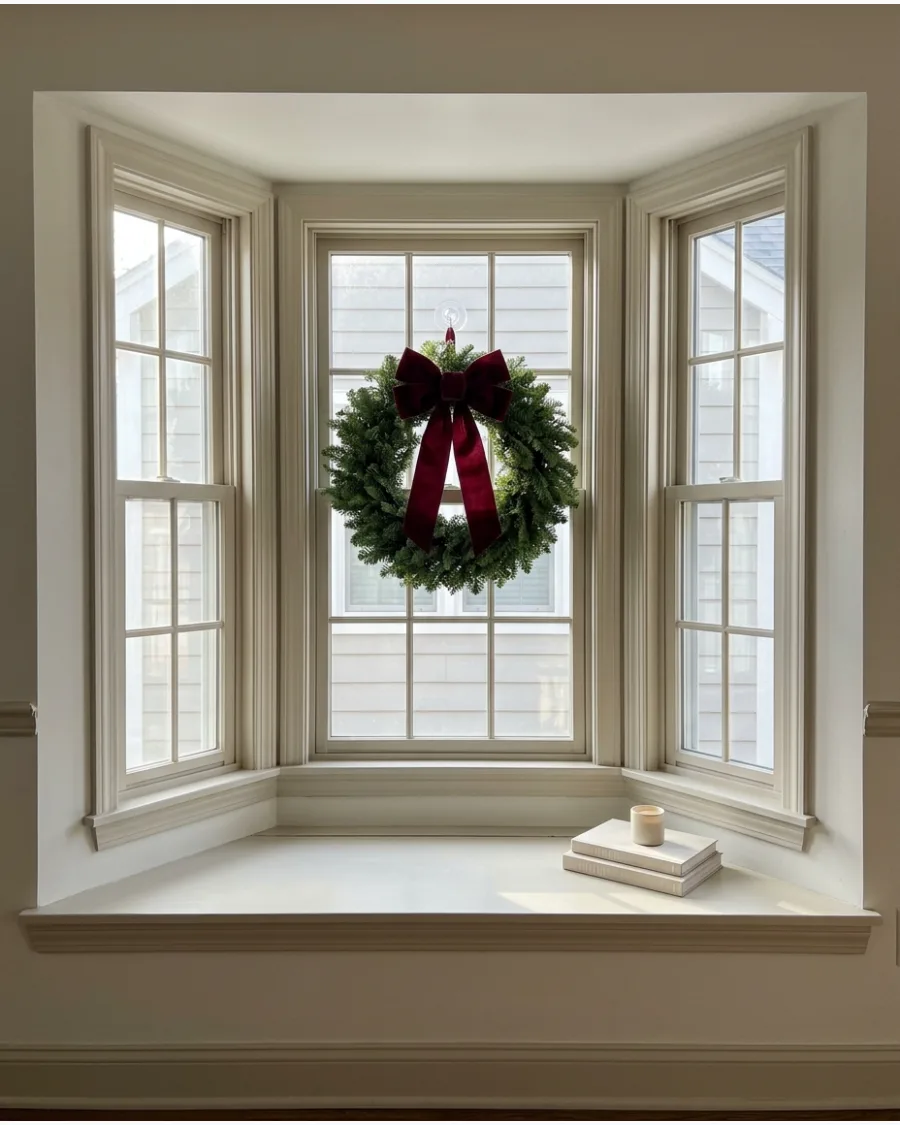
Decorate a simple green wreath with one large burgundy velvet bow for an updated traditional look. Position the bow at the very bottom of the wreath for a modern, elongated silhouette. The deep red adds warmth and sophistication to the green foliage.
It is a simple but high-impact way to refresh a basic wreath.
- Use 3-inch or 4-inch wide velvet ribbon for the best scale.
- Works well with both faux and real cedar or pine wreaths.
- A classic color choice that pairs well with gold or silver accents.
Quick win: Use wire-edged ribbon for the bow so you can shape the loops and tails to look full and wind-swept.
37. Natural Botanical Bay Window Wreath
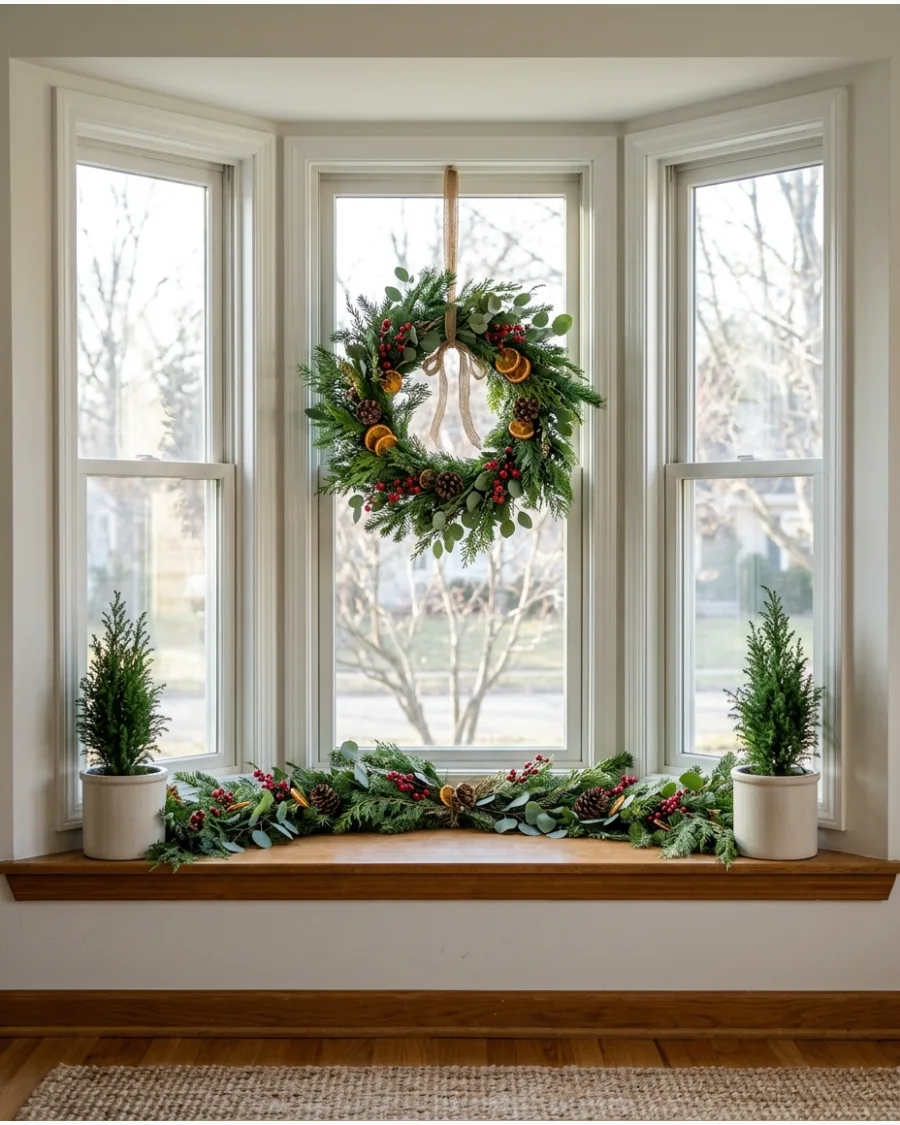
Create a natural wreath using pine, cedar, eucalyptus, and dried fruit for an organic feel. Mix different textures like soft pine and stiff eucalyptus to give the wreath professional-looking depth. This style coordinates perfectly with loose greenery arranged along the window ledge.
It feels fresh, earthy, and less formal than traditional ornaments.
- Use dried orange slices, pinecones, and cinnamon sticks.
- Secure elements with green floral wire to keep them hidden.
- Coordinates well with neutral or 'earthy' holiday themes.
Most people skip this: Lightly mist the fresh greenery every few days to keep the wreath looking vibrant and prevent premature needle drop.
38. Simple Bare Evergreen Wreath
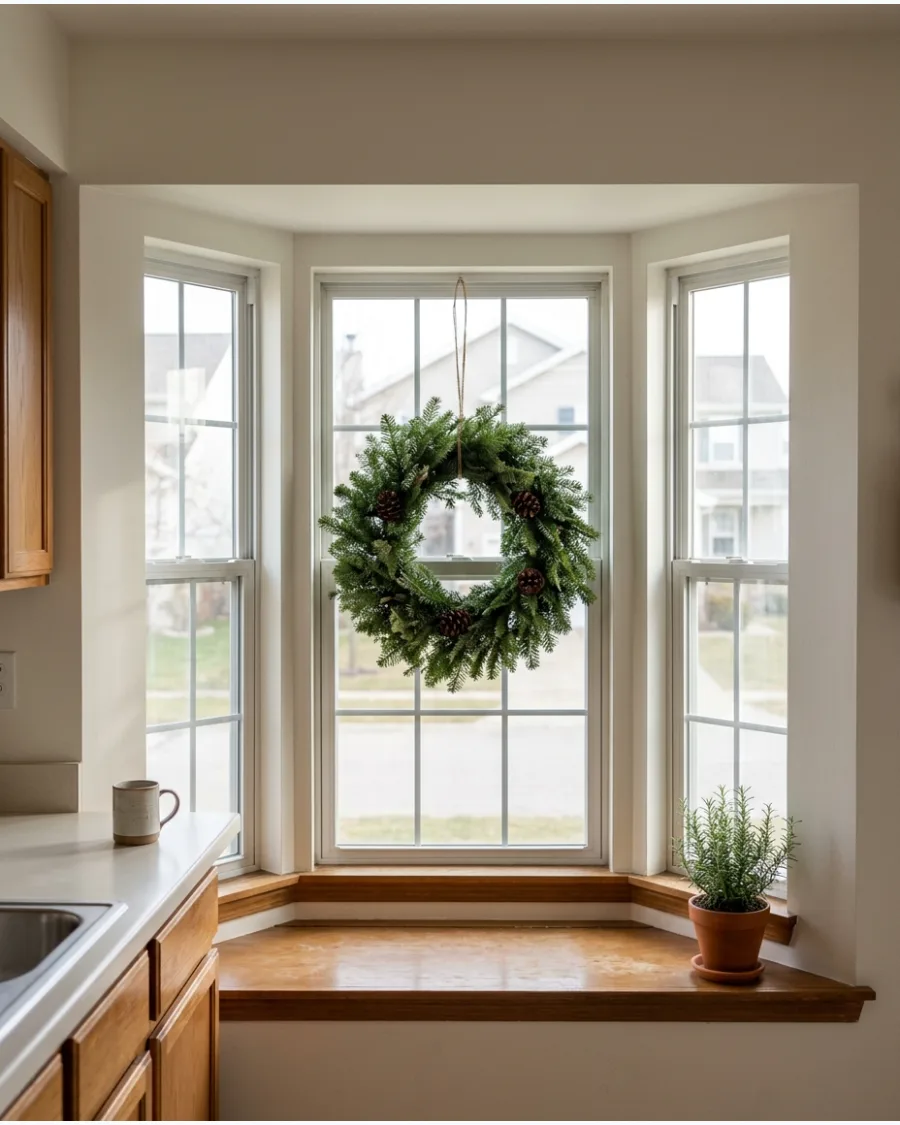
Hang an undecorated evergreen wreath in the center of the bay window for a minimalist Christmas style. Opt for a high-quality faux wreath with 'real-feel' tips to ensure it looks convincing up close. This allows the architectural lines of the window to remain the star of the show.
It is a clean look that works in any room from the kitchen to the office.
- Choose a high-quality faux or fresh balsam fir wreath.
- Use a simple black or bronze wreath hanger for a modern finish.
- Best for minimalist or contemporary interior styles.
Best shortcut: If a faux wreath looks too thin, zip-tie extra sprigs of greenery into the wire frame to increase the density and 'expensive' look.
CHRISTMAS LIGHTING FOR BAY WINDOWS
39. Warm White Curtain Lights
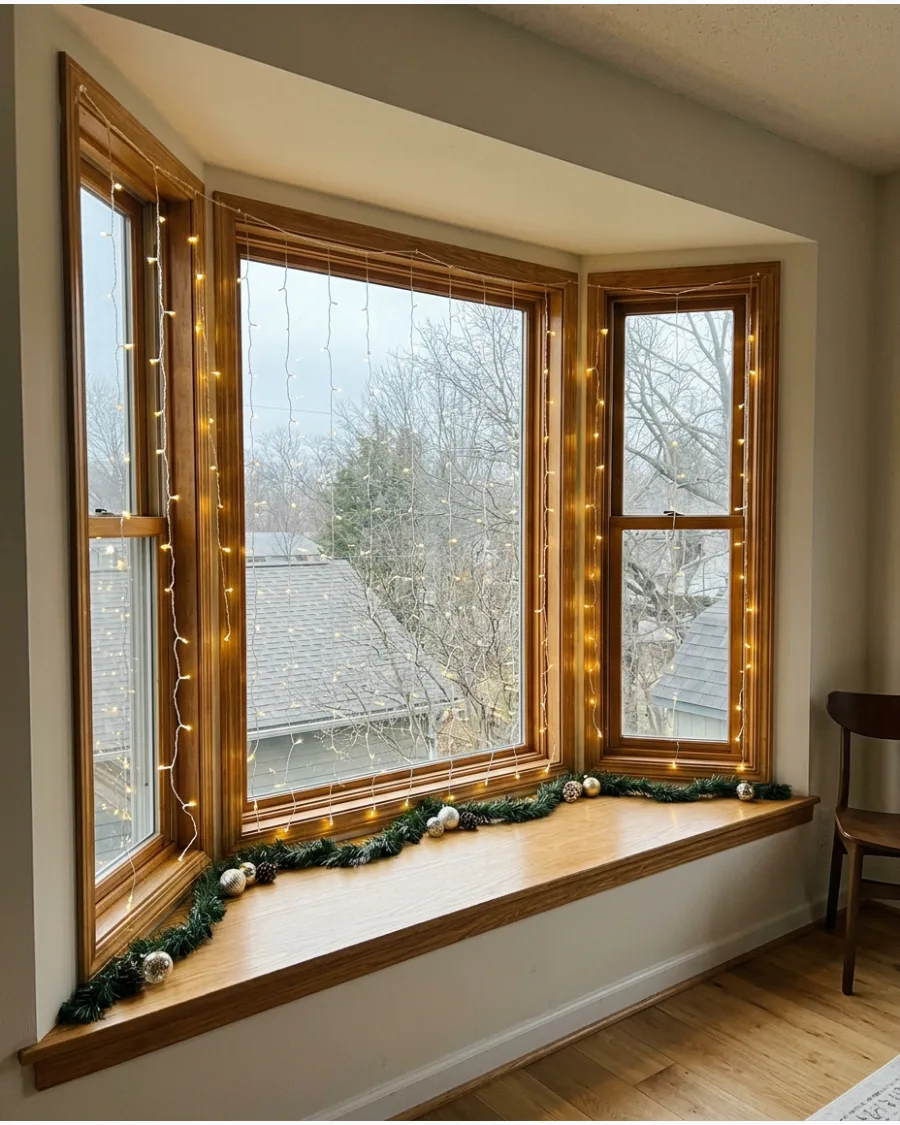
Hang warm white curtain lights across the entire bay window to create a glowing backdrop. Tuck the vertical strands behind your existing sheer curtains for a soft, diffused glow that isn't too harsh. This fills the large glass area with light without requiring many physical decorations.
It creates a cozy atmosphere that is perfect for winter evenings.
- Purchase LED curtain light sets with multiple vertical strands.
- Use a tension rod or adhesive clips for easy mounting.
- Provides a high-impact look for a relatively low price point.
Most people skip this: Use a plug-in timer for the lights so they automatically turn on at sunset and off before bed to save energy.
40. Fairy Lights Around Each Window Section
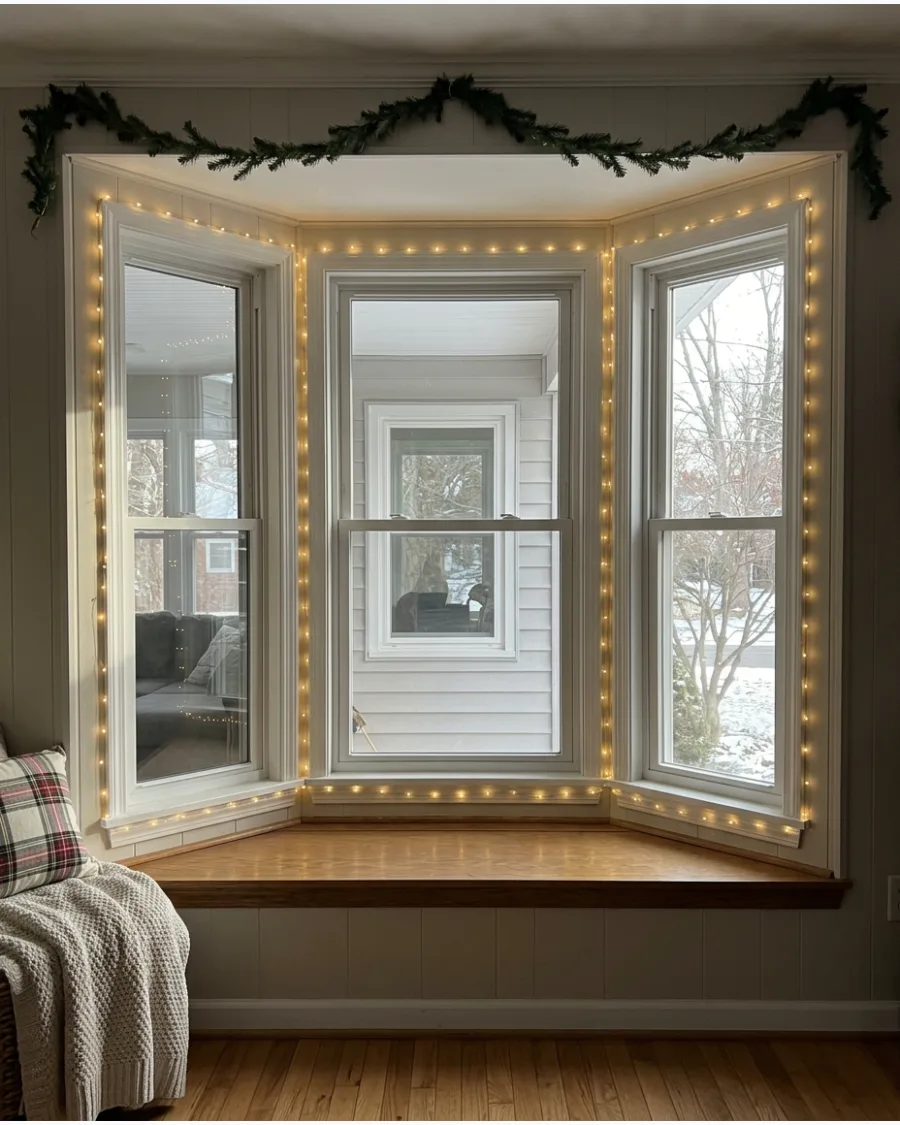
Outline the individual center and side windows with delicate fairy lights to emphasize the bay's shape. Use thin copper wire fairy lights because the wire is nearly invisible against the window frames during the day. This highlights the architectural lines of your home with a subtle sparkle.
It is a more understated alternative to heavy garlands or bulky light strands.
- Choose battery-operated or plug-in fairy lights with a remote.
- Secure the wire using clear tape or tiny adhesive clips.
- Works best on windows with clean, well-defined molding.
Quick win: Hide the battery packs behind a small potted plant or a decorative book on the window sill to keep the display looking clean.
41. Flameless Candle Row on the Sill
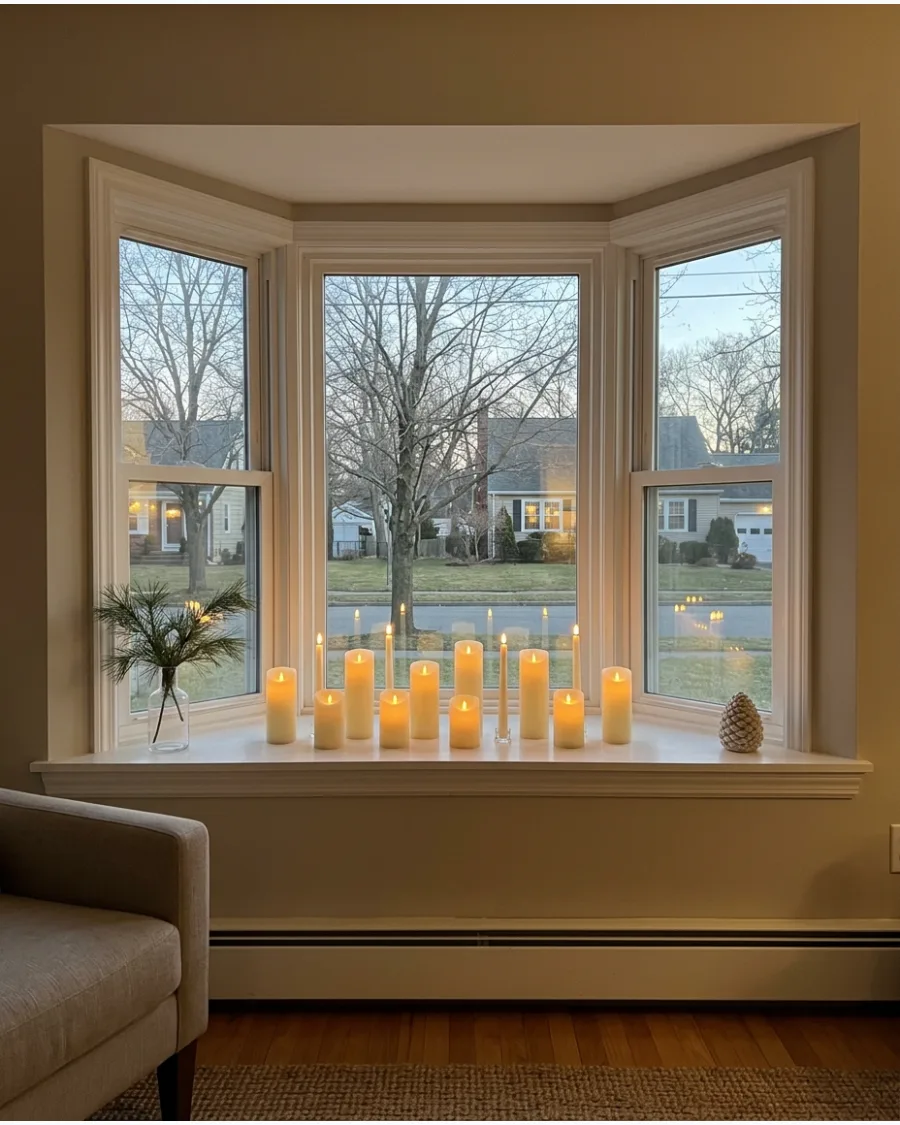
Line the bay window ledge with battery-operated taper or pillar candles at different heights to produce a traditional welcoming glow visible from the street. Using candles with varying heights prevents the display from looking like a flat, boring line of lights. Most people forget that the view from the outside is just as important as the view from the inside.
Use candles with built-in timers so they turn on automatically at dusk.
- Purchase battery-operated candles in sets of three or five for easy height variety.
- Set the candles at least three inches away from the glass to avoid condensation issues.
- Use white or ivory candles for a clean look that matches any interior paint color.
Most people skip this: Use a small piece of museum wax on the bottom of each candle to keep them perfectly upright on the sill.
42. Window Candle and Evergreen Arrangement
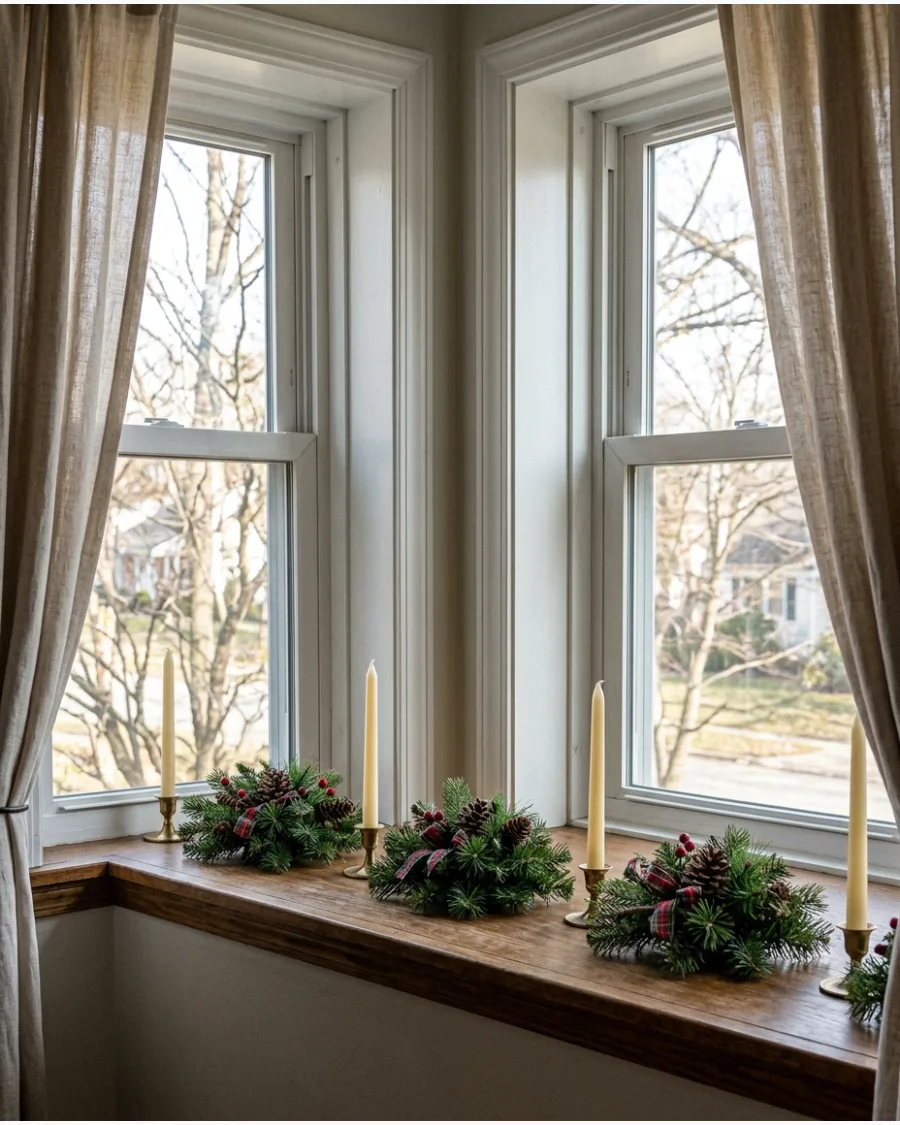
Alternate flameless candles with small evergreen arrangements along the window ledge for a more layered version of the classic candle-in-the-window look. Spacing the candles every twelve inches allows the greenery to breathe without making the window ledge look cluttered. Fresh cedar or pine adds a natural scent to the nook.
This method works well for deep sills that can accommodate both the candle base and the foliage.
- Source fresh greens from local garden centers or use high-quality faux cedar stems.
- Place the candle bases first to ensure even spacing before tucking in the greenery.
- Renter tip: Use battery tapers to avoid the need for nearby electrical outlets or messy cords.
Quick win: Spritz fresh greenery with an anti-transpirant spray to keep the needles from drying out in the sun.
43. Star Light in the Center Window
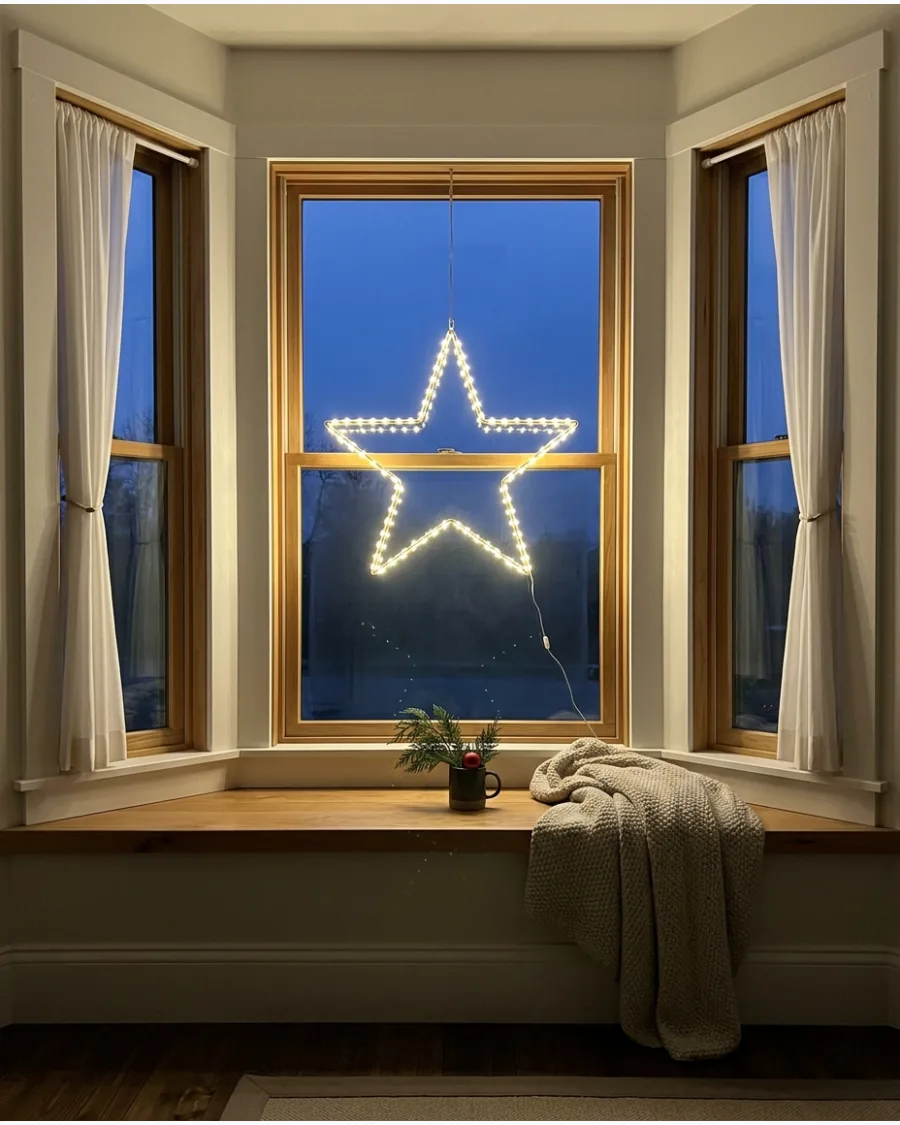
Hang one large illuminated star in the central pane and keep the side windows mostly undecorated so the display has a clear nighttime focal point. Centering the star in the widest pane creates a balanced anchor for the entire architectural feature. This minimalist approach highlights the window's shape without blocking the natural light during the day.
It is an effective way to decorate if you have a beautiful view you don't want to hide.
- Budget win: Paper stars are inexpensive, lightweight, and fold flat for easy off-season storage.
- Use a clear suction cup hook rated for the weight of the light to avoid drilling into the trim.
- Choose a warm white bulb to ensure the glow feels cozy rather than clinical or blue.
Best shortcut: Use a thin white extension cord and run it along the edge of the window trim using clear command clips to hide the power source.
44. Fairy Lights Hidden Among Greenery
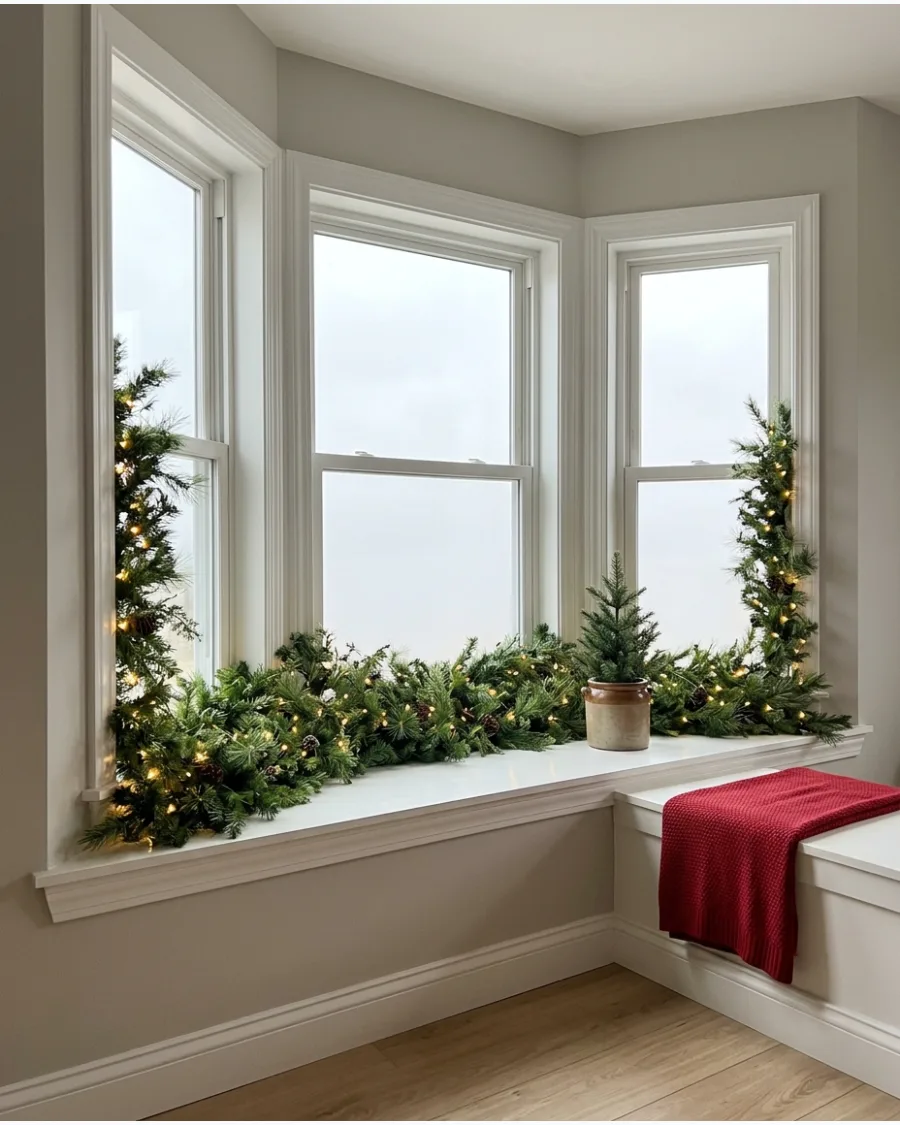
Tuck tiny warm lights beneath greenery across the sill and window frame so the foliage appears to glow naturally. Wrapping thin copper wire lights deep into the branches ensures only the glow is visible rather than the hardware. This creates a magical, soft effect that is less harsh than standard string lights.
It works best with thick garlands that provide enough cover for the battery packs.
- Look for 'fairy lights' or 'micro LEDs' on thin copper or green wire to blend in.
- Hide battery packs inside small decorative boxes or behind the thickest part of the garland.
- Ensure the lights are LED so they do not produce heat against the greenery or the glass.
Quick win: Use lights with a 'twinkle' setting on a slow fade to give the window a subtle, living movement.
CHRISTMAS TREE BAY WINDOW IDEAS
45. Full Christmas Tree Centered in the Bay Window
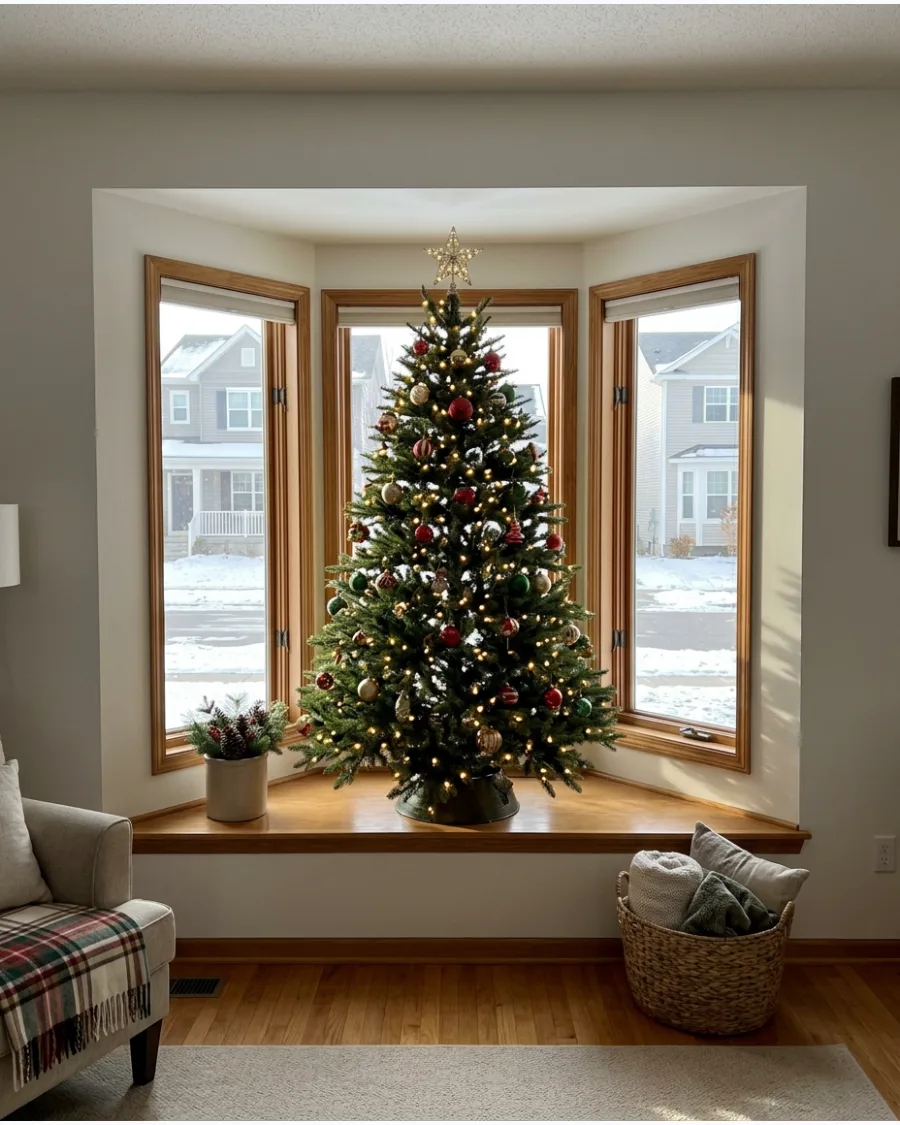
Position the main Christmas tree inside the bay window recess so its lights and ornaments can be enjoyed from the room while creating a dramatic display visible from outdoors.
Placing the tree inside the bay window frame frees up valuable floor space in the rest of the living room. This location acts as a natural stage for the tree. It is the most classic way to utilize a bay window during the holidays.
- Measure the width and depth of the bay before buying a tree to ensure it doesn't touch the glass.
- Decorate the back of the tree with lights and ornaments since it will be seen from the street.
- Use a heavy-duty tree mat under the stand to protect the floor or window seat from scratches.
Most people skip this: Turn the tree slightly every few days if it is real, as the side facing the window will get more light and heat.
46. Slim Christmas Tree in a Bay Window
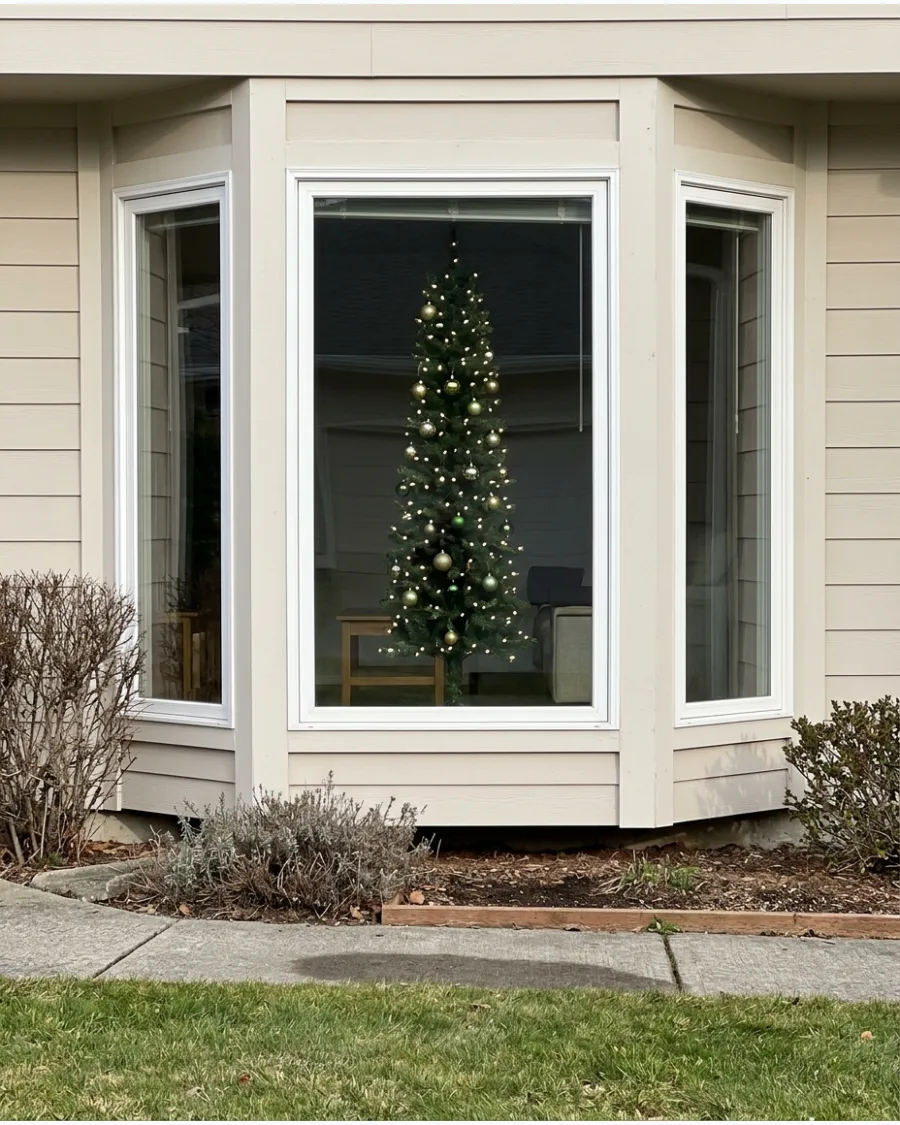
Use a narrow pencil tree when the bay window recess is shallow, allowing the tree to fit comfortably without blocking the surrounding walkway. A narrow tree profile keeps the window view open while still providing that classic holiday height. This is the best solution for smaller homes or breakfast nooks where a full-sized tree would be too bulky.
It allows for festive decor without sacrificing the functionality of the space.
- Choose a flocked tree to add a snowy texture that contrasts well with the glass background.
- If the tree feels too short, place it on a sturdy wooden crate to give it more presence in the window.
- Keep the ornaments small and lightweight to maintain the proportions of the slim tree.
Best shortcut: Buy a pre-lit slim tree to save time and avoid the struggle of wrapping lights around a narrow diameter.
47. Three Mini Christmas Trees Across the Bay
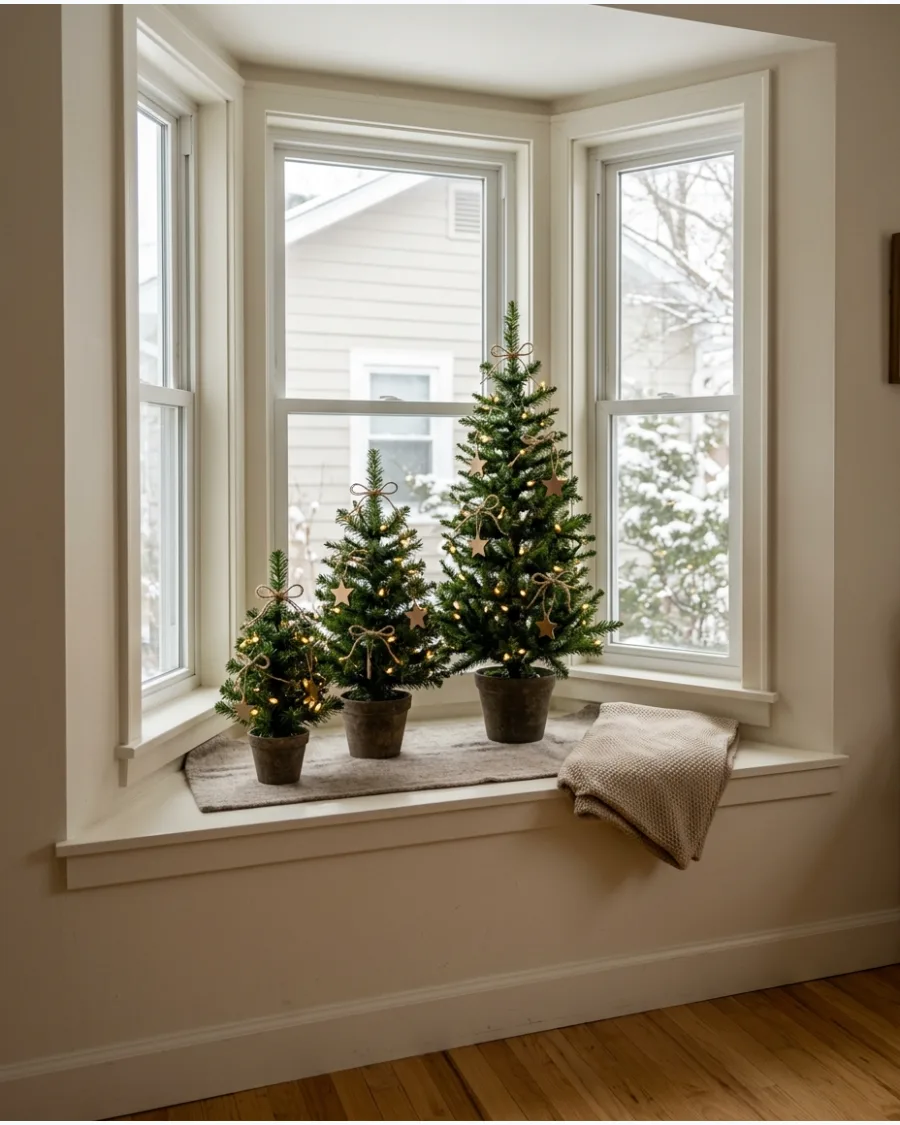
Arrange three coordinated trees in different heights across the window area instead of one large tree.
Grouping three different heights of tabletop trees mirrors the three-window architecture of the bay. This creates a layered forest effect that feels intentional and modern. It is an excellent alternative for those who don't want a massive tree taking over the room.
- Source trees in three distinct sizes, such as 24-inch, 36-inch, and 48-inch heights.
- Use matching pots or baskets to make the trio feel like a curated set.
- Decorate them with the same color of lights to tie the look together across all three panes.
Quick win: Use trees with different needle textures, like one pine and two firs, to add visual interest to the group.
48. Vintage Christmas Tree in the Bay Window
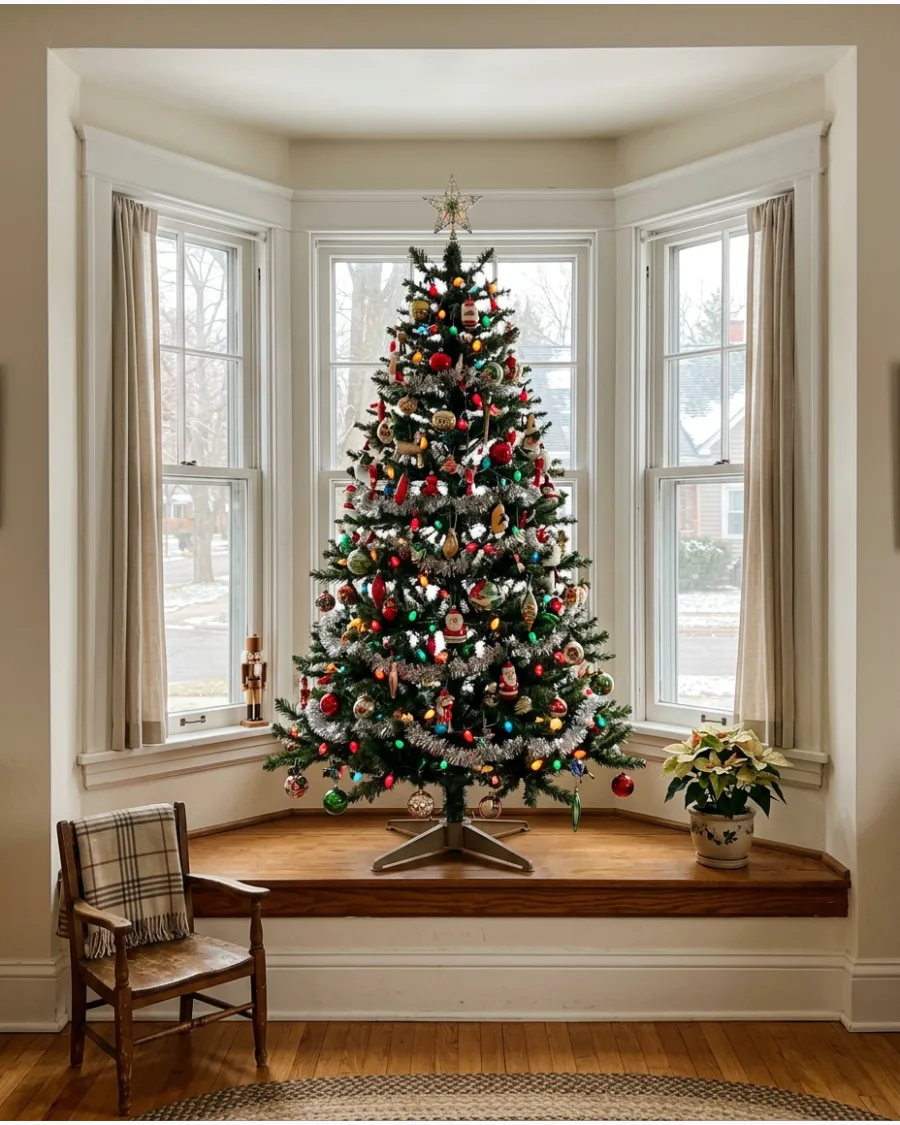
Decorate a tree positioned in the bay window with colorful vintage-style ornaments, nostalgic lights, and tinsel accents. Layering silver tinsel over colorful glass ornaments creates a shimmering effect that catches the natural daylight coming through the windows. This look feels personal and collected rather than store-bought.
It is a great way to display family heirlooms in a prominent location.
- Search local thrift stores or antique malls for authentic mid-century glass ornaments.
- Apply tinsel strand by strand for a professional look rather than throwing it on in clumps.
- Use multi-colored 'ceramic' style LED bulbs to mimic the look of old-fashioned incandescent lights.
Most people skip this: Place the largest, brightest ornaments near the window glass so they reflect the most light back into the room.
2026 BAY WINDOW CHRISTMAS STYLE IDEAS
49. Burgundy and Gold Bay Window
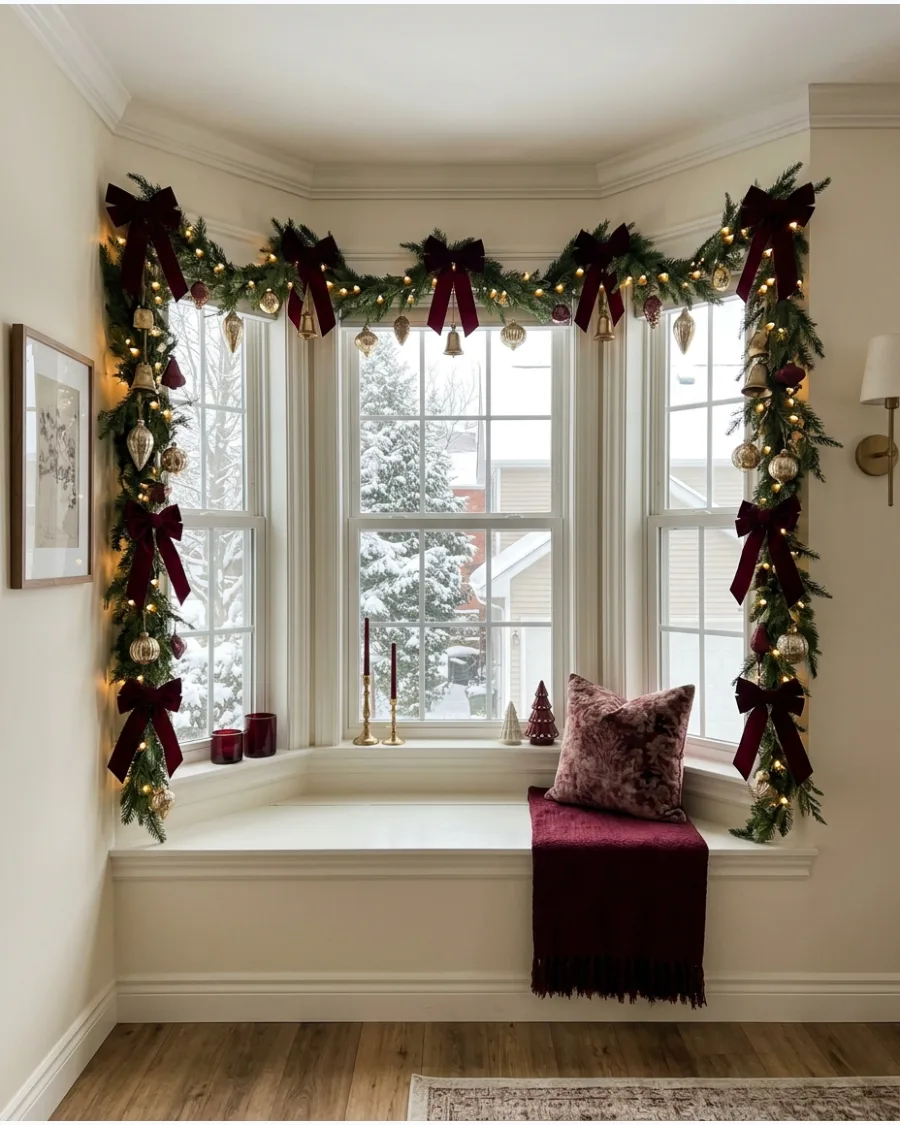
Combine deep burgundy bows, evergreen greenery, and antique-gold ornaments throughout the window for a rich 2026 palette. Tying oversized burgundy ribbons to the top of the window frame adds a vertical element that draws the eye upward. This color combination feels sophisticated and timeless.
The gold elements reflect the warm glow of Christmas lights beautifully against the dark red fabric.
- Use high-quality velvet ribbon with wired edges so the bows hold their shape all season.
- Mix matte, shiny, and glitter-finish gold ornaments to add depth to the display.
- Drape a burgundy throw blanket on the window seat to carry the color throughout the nook.
Quick win: Use matte gold ornaments instead of shiny ones for a more modern and high-end appearance.
50. Collected Nostalgic Bay Window
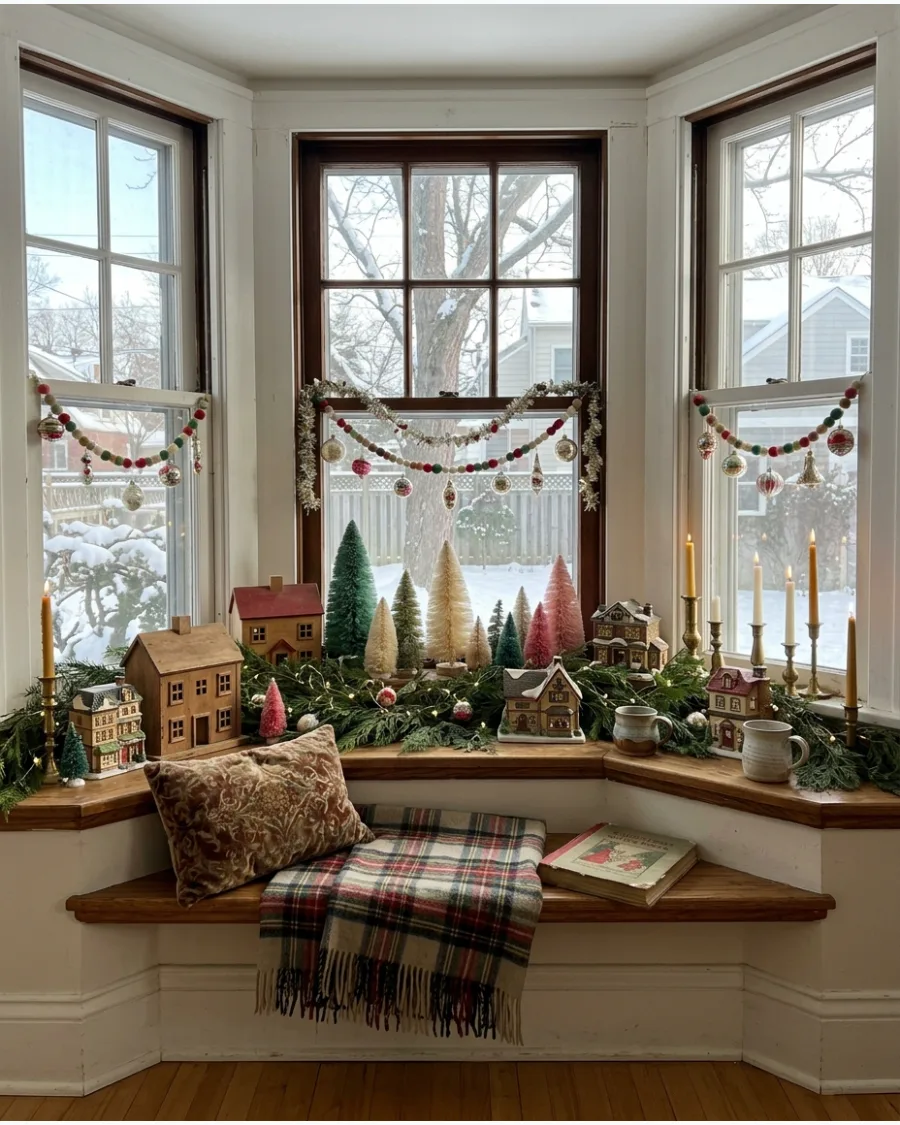
Mix a vintage village, inherited ornaments, and natural greenery to create a personal bay window display. Mixing ceramic houses with handmade paper ornaments creates a lived-in look that feels cozy rather than staged. This style celebrates the history of your holiday celebrations.
It is perfect for families who enjoy a more relaxed, eclectic aesthetic over a perfectly matched theme.
- Layer different textures like wool, wood, ceramic, and fresh greenery to build the 'collected' feel.
- Keep the village pieces at the front of the sill so the details are visible to people sitting nearby.
- Use a cohesive color family, like reds and greens, to keep the variety from feeling messy.
Best shortcut: Use different heights of small wooden blocks hidden under a white cloth to create 'hills' for a window sill village.
Frequently Asked Questions
Should I put my Christmas tree in the center of the bay window?
Placing a tree in the center creates a stunning focal point from both inside and outside the home. However, if you prefer to keep your seating area functional or maximize natural light, consider a smaller tree or keeping the space clear for festive greenery instead.
How do I hang a garland across the angles of a bay window?
To navigate the unique angles, use small Command hooks at each 'elbow' or corner of the window frame to support the garland's weight. Alternatively, tension rods placed within each individual window pane allow you to drape greenery seamlessly without damaging the woodwork.
What are the best bay window decor ideas that don't block the light?
Opt for transparent glass ornaments and delicate fairy lights that catch the sun without obscuring your view. Minimalist wire wreaths or thin silk ribbons also add festive charm while allowing plenty of natural light to filter into the room.
How can I style a bay window seat for the holidays?
Transform your window seat into a cozy nook by layering plush velvet pillows and chunky knit throws in seasonal colors. Adding a small wooden tray with a candle and a festive book makes the space feel inviting and functional for winter relaxation.
How do I make my bay window Christmas decor look good from the outside?
Ensure your decorations are double-sided so they look just as finished from the street as they do from your living room. Position warm white lights close to the glass to create a welcoming glow that enhances your home's curb appeal after dark.