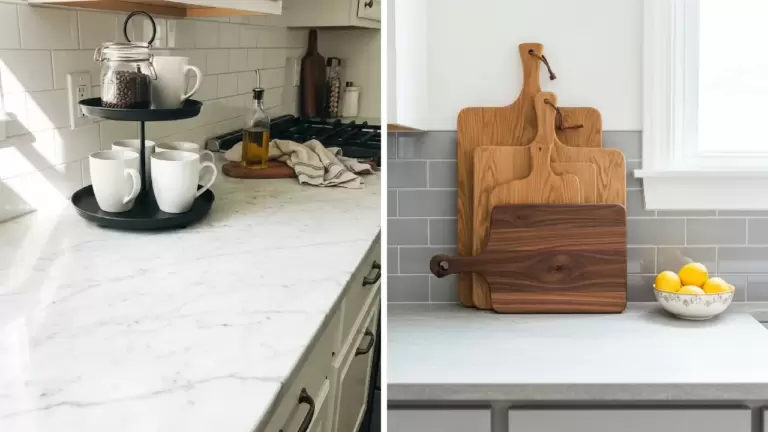
60 Christmas Countertop Decorating Ideas

This post may contain affiliate links: full affiliate disclosure.
Decorating a kitchen for the holidays requires a balance between festive style and actual workspace. The best countertop displays use trays and vertical layers to keep the area organized and easy to clean.
Focus on high-impact items that can be moved quickly when it is time to cook a big holiday meal.
CHRISTMAS COUNTERTOP TRAY AND VIGNETTE IDEAS
1. Mini Christmas Tree Countertop Tray
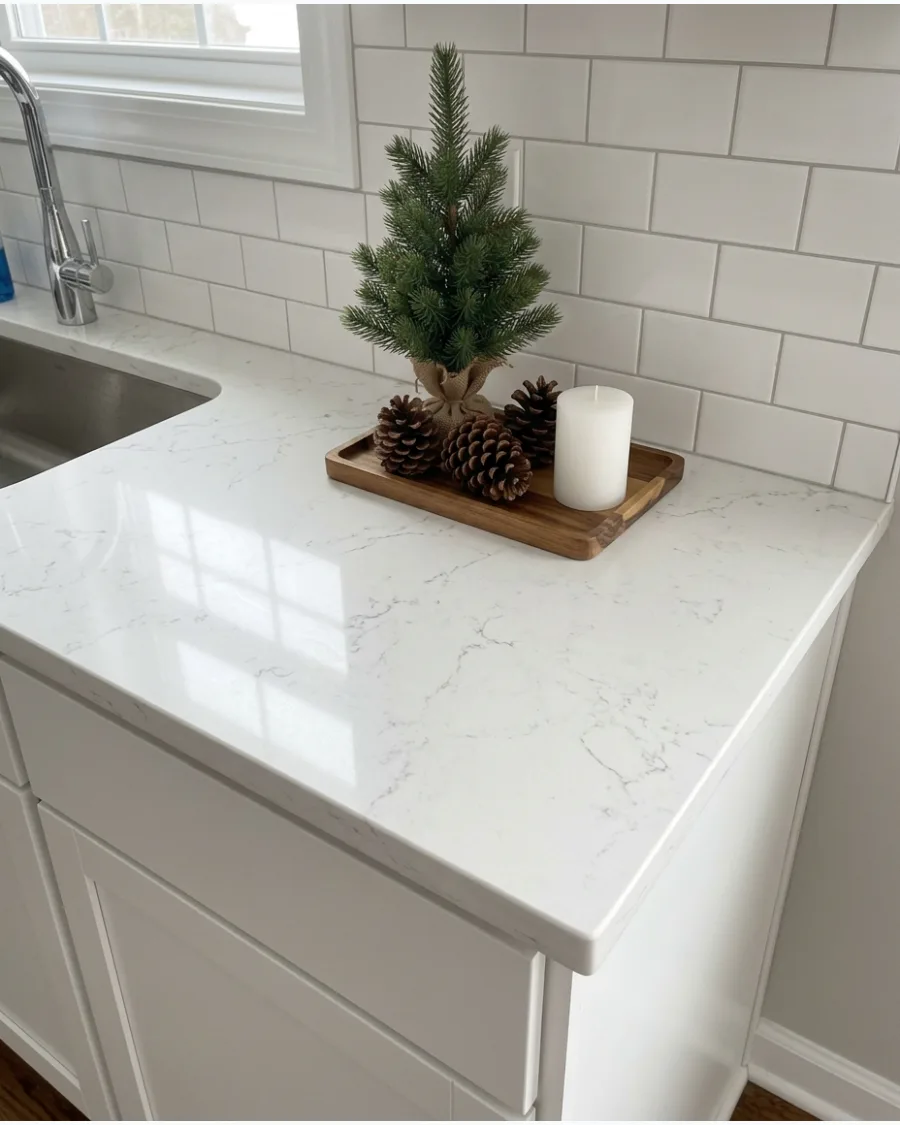
Use a sturdy tray to corral a small tree and loose decor items. This setup keeps everything in one spot so the whole display slides out of the way for meal prep.
Place the largest items like the tree first and tuck pinecones into the gaps to hide the base. Trays prevent small bits of greenery from scattering across the entire kitchen.
- Buy a pre-potted mini tree and a flat wooden tray for under forty dollars.
- Set the tree in the center of the tray and arrange smaller ornaments and pinecones around the perimeter.
- Use a plastic tray for high-moisture areas near the sink to prevent water damage to the counter.
Quick win: Use a tray with handles so you can lift the entire display at once when you need to deep-clean the counters.
2. Ceramic Christmas Tree Collection
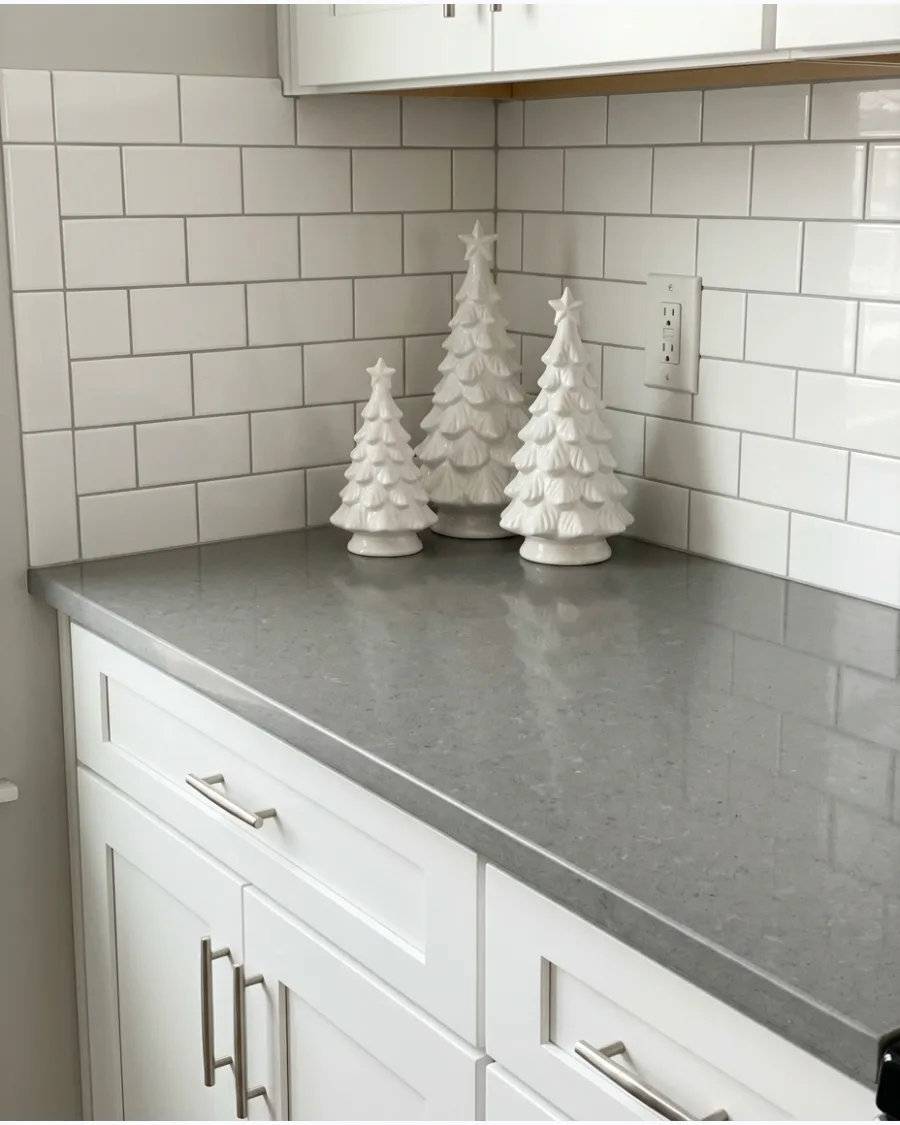
Ceramic trees bring a nostalgic feel without the mess of real needles. Choose a single color palette like all-white or traditional green to make the grouping look like a curated collection.
Vary the heights of the trees to create visual interest and prevent the display from looking flat. This works best in a corner where the trees won't get knocked over during daily use.
- Look for ceramic sets at craft stores or discount home retailers during early November.
- Group three trees together in a triangle shape with the tallest one at the back.
- Choose battery-powered versions to avoid seeing wires in your kitchen workspace.
Most people skip this: Place the trees on a small mirror or glass riser to reflect light and make the corner feel brighter.
3. Christmas House Countertop Vignette
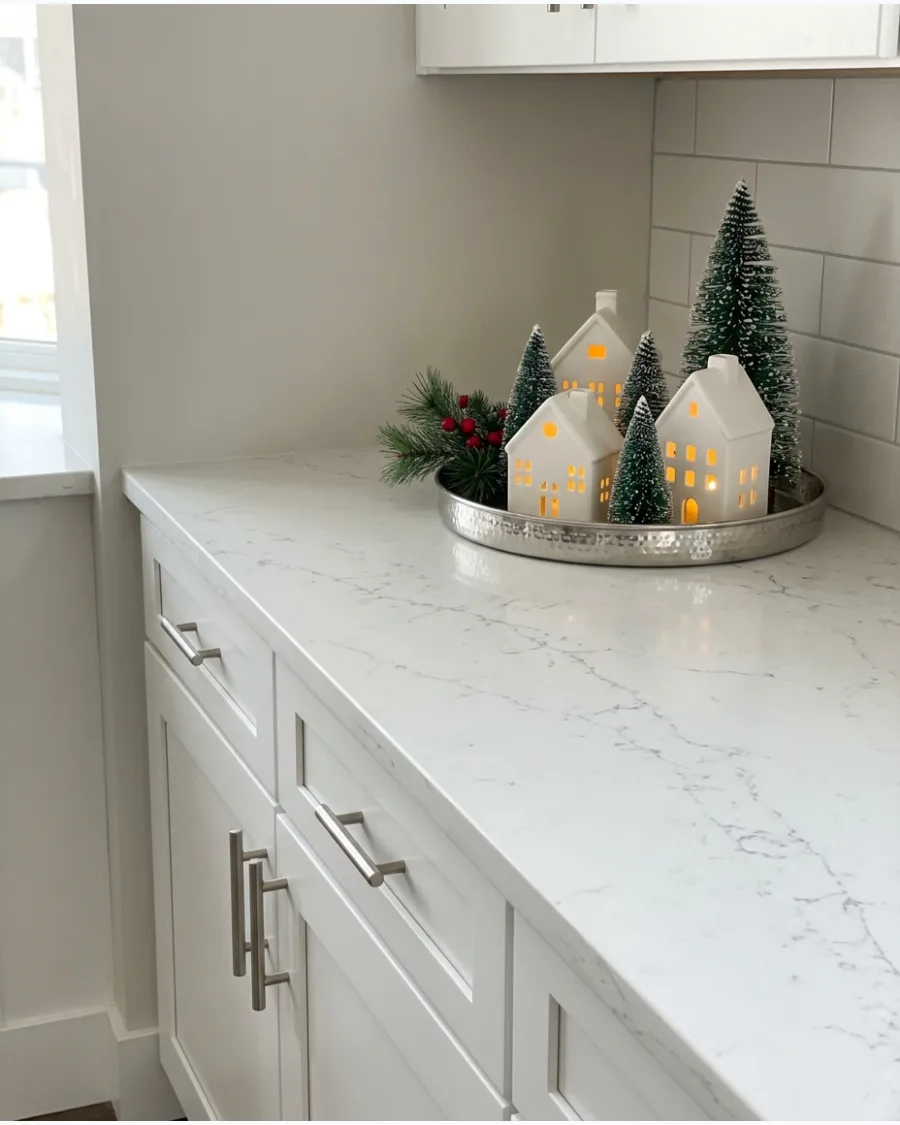
Small lit houses create a warm glow that makes the kitchen feel cozy at night. Set them on a marble or metal tray to catch any faux snow and keep the mess off the food prep area.
Use battery-operated tea lights inside the houses to avoid messy cords trailing across the counter. A few bottle-brush trees around the edges finish the scene perfectly.
- Pick up ceramic house sets for a low-cost village look that fits on a single tray.
- Fill the base of the tray with a thin layer of faux snow or white felt for a winter look.
- Place this vignette away from the stove to keep grease and heat from damaging the houses.
Best shortcut: Use a remote-controlled tea light set so you can turn on the whole village with one click.
4. Evergreen and Candle Countertop Tray
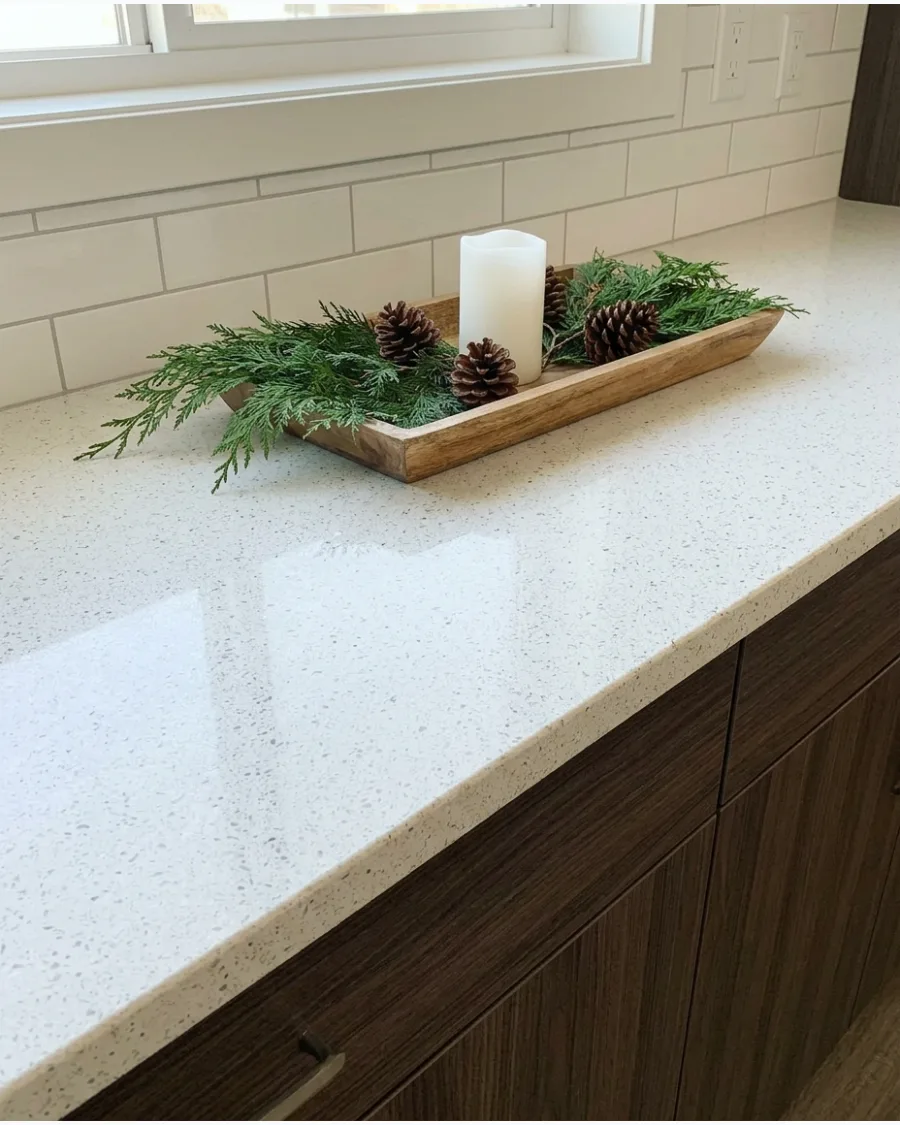
Real cedar or pine branches provide a natural scent that beats any synthetic spray. A shallow tray keeps the needles contained and makes the arrangement feel like a deliberate centerpiece.
Choose a flameless pillar candle to avoid any fire hazards near cabinets or low-hanging holiday greens. This low-profile look stays below eye level so it does not block the view across the room.
- Snip branches from your own backyard or buy a bundle of scraps from a local tree lot.
- Lay the branches flat in a circle and nestle the candle in the center.
- Mist the greenery with water every few days to keep it looking fresh and green.
Most people skip this: Use a tray that matches your cabinet hardware color to make the decor look built into the room design.
5. Brass Bell Christmas Counter Display
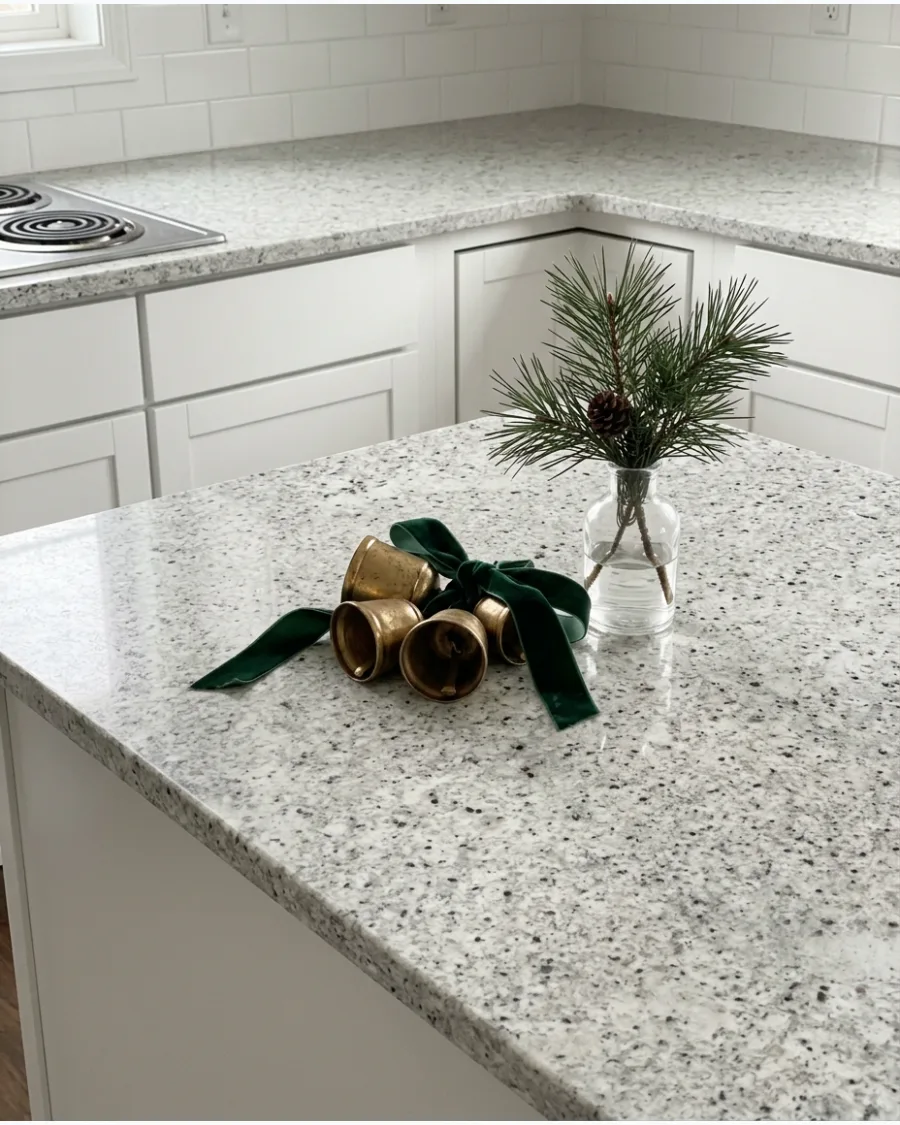
Brass bells add a vintage metallic shine that pairs well with modern or traditional kitchens. Tie them together with a thick velvet ribbon to give the display some weight and texture.
Drape the bells over a small stack of books or a wood pedestal to give them some height next to your greenery. The gold tones pop beautifully against dark countertops.
- Find brass bells at antique shops or online retailers for a classic holiday look.
- Knot the ribbon around the top of the bells and let the ends drape naturally onto the counter.
- Use this on a side counter or coffee station where it will not interfere with heavy chopping or mixing.
Quick win: Choose bells with a matte or brushed finish to hide fingerprints and kitchen steam marks.
6. Bowl of Christmas Ornaments
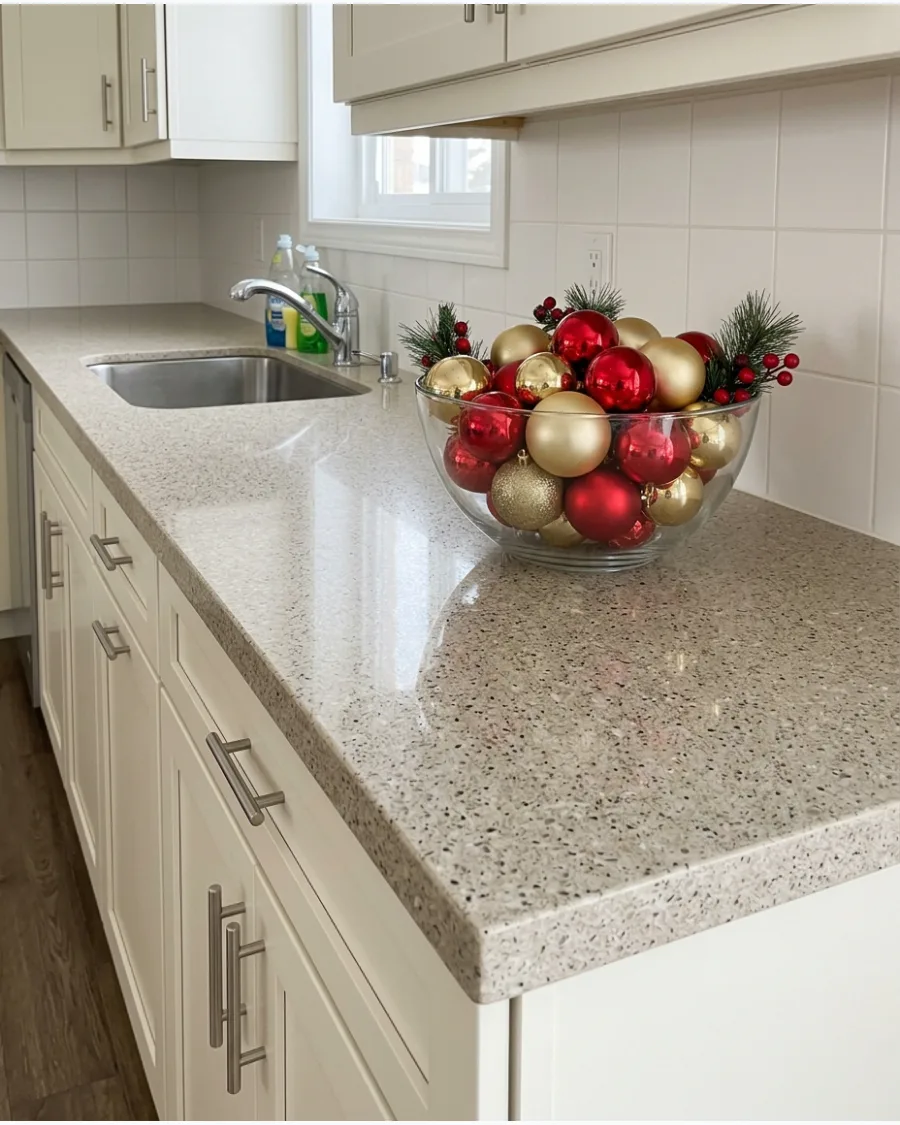
This is the fastest way to add color to a kitchen with zero assembly required. Use a large dough bowl or a glass fruit bowl and fill it to the brim with shatterproof ornaments.
Mix different finishes like matte, shiny, and glitter in the same color family for a high-end look. Tucking in a few sprigs of eucalyptus makes the bowl feel fresh and intentional.
- Use leftover ornaments from your tree or buy a bulk pack of shatterproof balls.
- Layer the largest ornaments at the bottom and place the smallest ones on top to fill gaps.
- Switch to a wooden bowl for a warmer look if you have white or marble countertops.
Best shortcut: Add a few battery-operated fairy lights into the bowl to make the ornaments sparkle at night.
7. Christmas Cutting Board Vignette
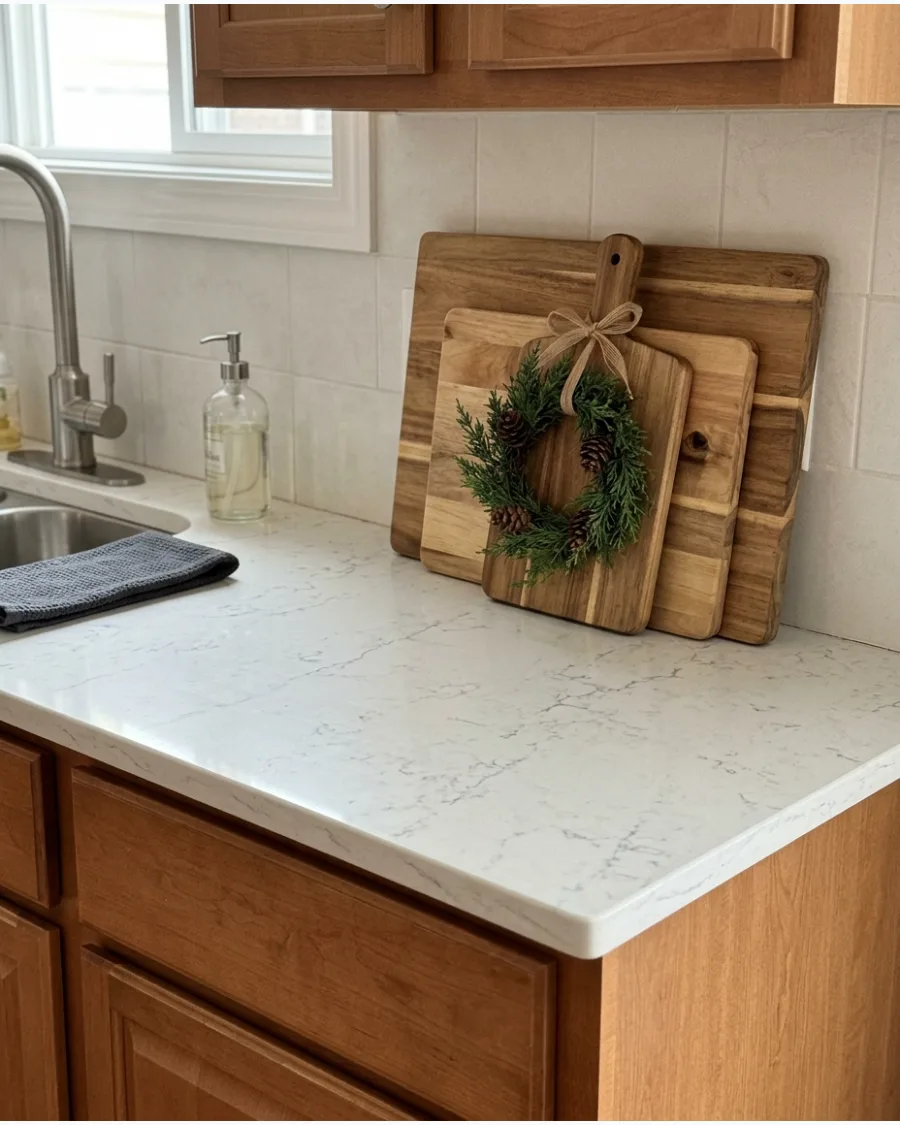
Layering cutting boards against the backsplash uses vertical space instead of valuable counter depth.
Add a small wreath or a sprig of greenery to the front board to make it festive. Select boards with different wood grains and shapes to create a textured backdrop for a small holiday sign or tree. This keeps the workspace clear while still looking decorated.
- Use the cutting boards you already own and simply rearrange them for the season.
- Secure the wreath with a small command hook on the back of the board or a piece of twine.
- This is an ideal solution for small kitchens with very little open counter space.
Quick win: Use boards with different heights to lead the eye upward and make your ceilings feel taller.
8. Tiered Christmas Countertop Tray
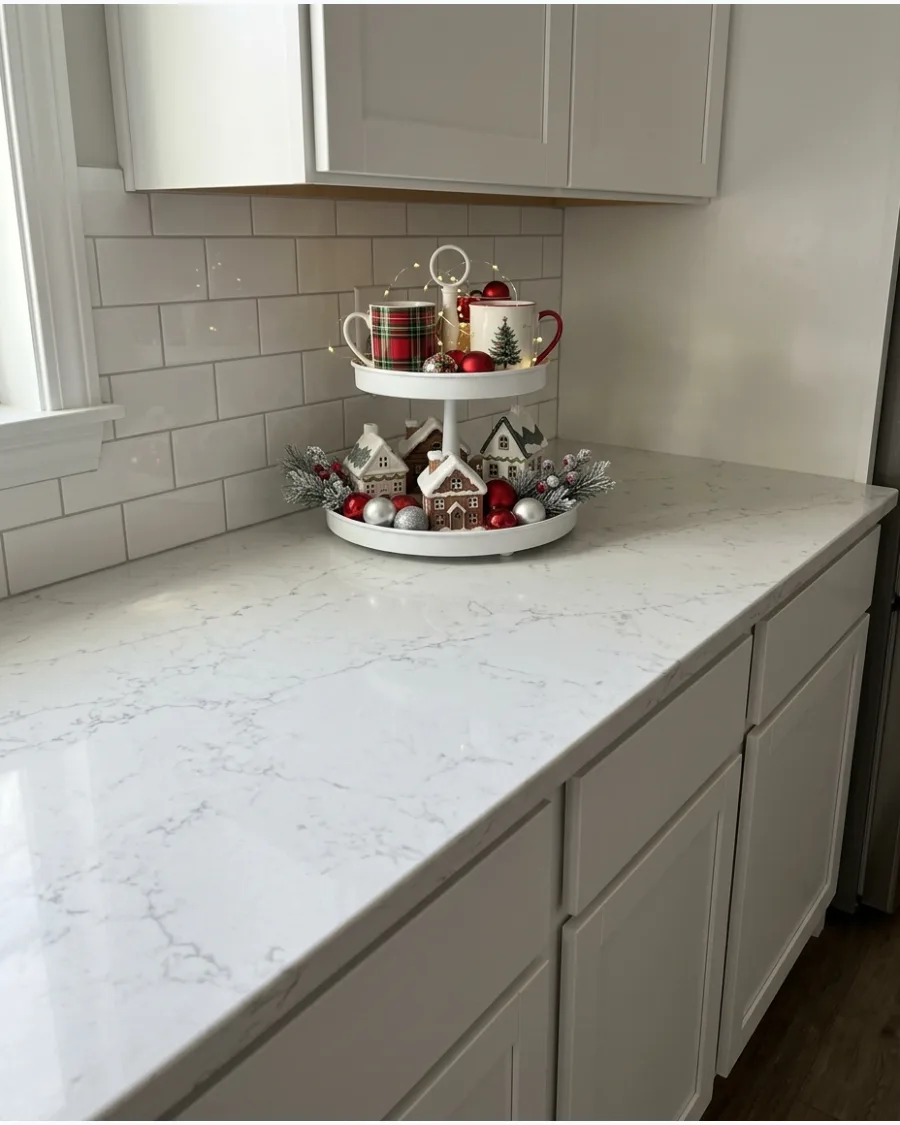
Tiered trays are the ultimate space-savers for small kitchens. Fill the bottom level with larger items like mugs or houses and save the top for tiny accents like bottle-brush trees or ornaments.
Position the tray near a wall or under a cabinet to keep the center of the counter open for cooking. It provides a lot of holiday impact without a large footprint.
- Purchase a two or three-tier tray that can be repurposed for every season of the year.
- Start decorating from the bottom up to ensure the tray stays balanced and stable.
- Use small amounts of museum wax on the bottom of delicate items to keep them from sliding.
Most people skip this: Leave some white space on the tray levels so the display doesn't look cluttered or messy.
CHRISTMAS COFFEE AND HOT COCOA COUNTER IDEAS
9. Christmas Coffee Bar Countertop
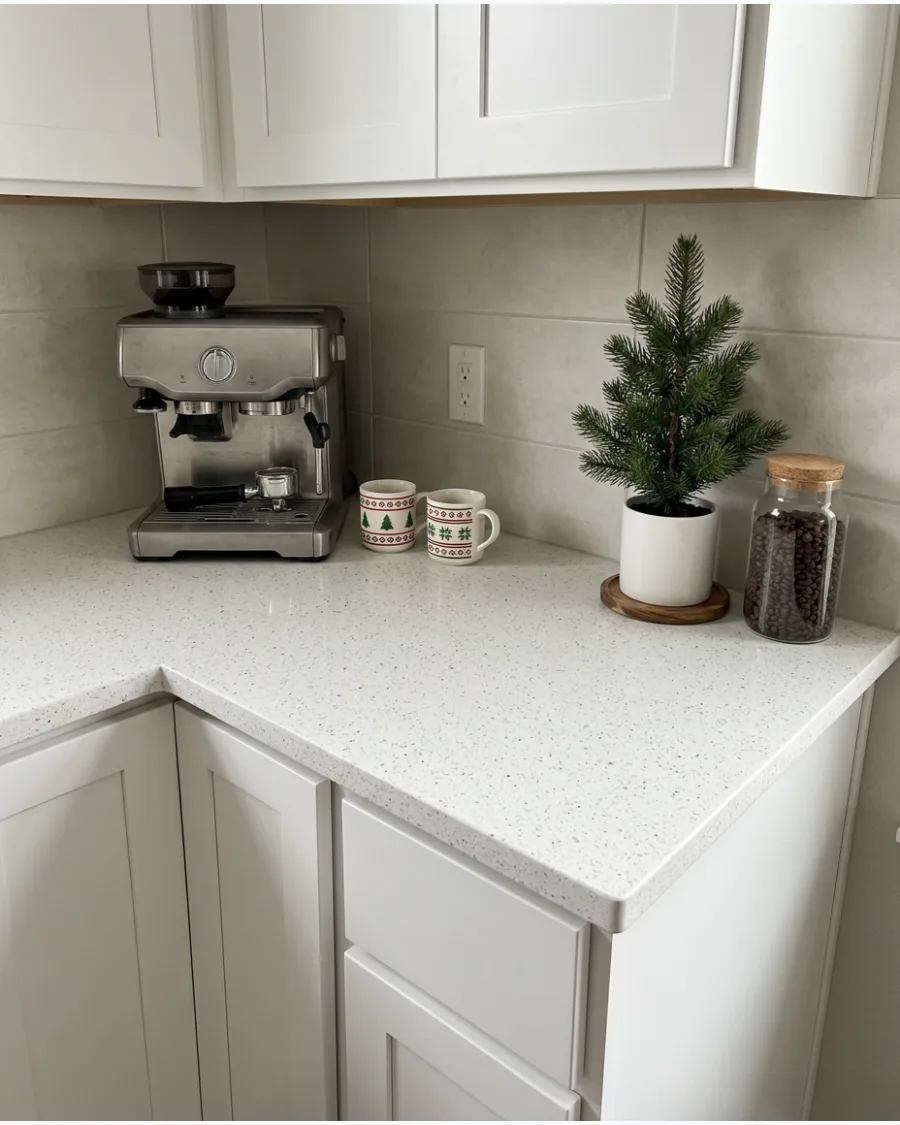
Transform the area around the coffee maker into a festive morning destination. Swap regular mugs for holiday versions and store spoons in a small festive jar.
Keep the essentials like coffee pods and sugar within reach so the decor does not hinder the morning routine. A small sprig of pine behind the machine adds a seasonal touch without taking up extra space.
- Dedicate one corner of the counter to this station to keep the rest of the kitchen clear.
- Use a small tray to hold sugar bowls and creamers to prevent rings on the countertop.
- Add a festive kitchen towel over the handle of a nearby drawer to complete the look.
Best shortcut: Buy a set of holiday-themed coffee syrups to act as both a treat and a decorative element.
10. Hot Cocoa Bar With Christmas Mugs
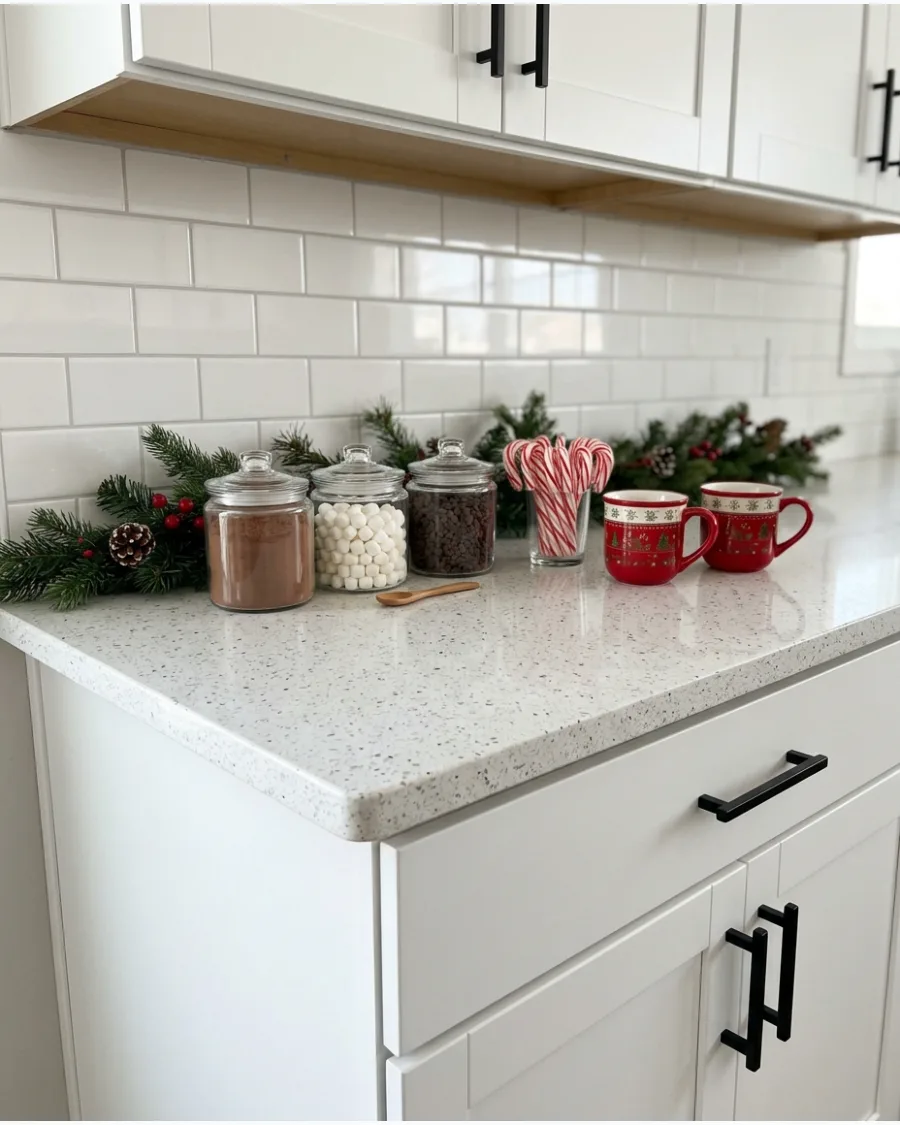
A dedicated cocoa station is a hit for holiday hosting and family movie nights. Use clear jars for marshmallows and candy canes so the ingredients themselves act as the decoration.
Place a small tray under the jars to catch any cocoa powder spills and keep the counter clean. Adding a striped ribbon to the handles of the mugs makes the whole setup feel special.
- Use mason jars or glass canisters you already have and add festive labels.
- Group the station near the microwave or stove for easy access to hot water or milk.
- Include a small bowl of peppermint sticks for a pop of traditional red and white color.
Quick win: Use a chalkboard sign to label the toppings and give the station a professional, finished look.
11. Vintage Christmas Mug Display
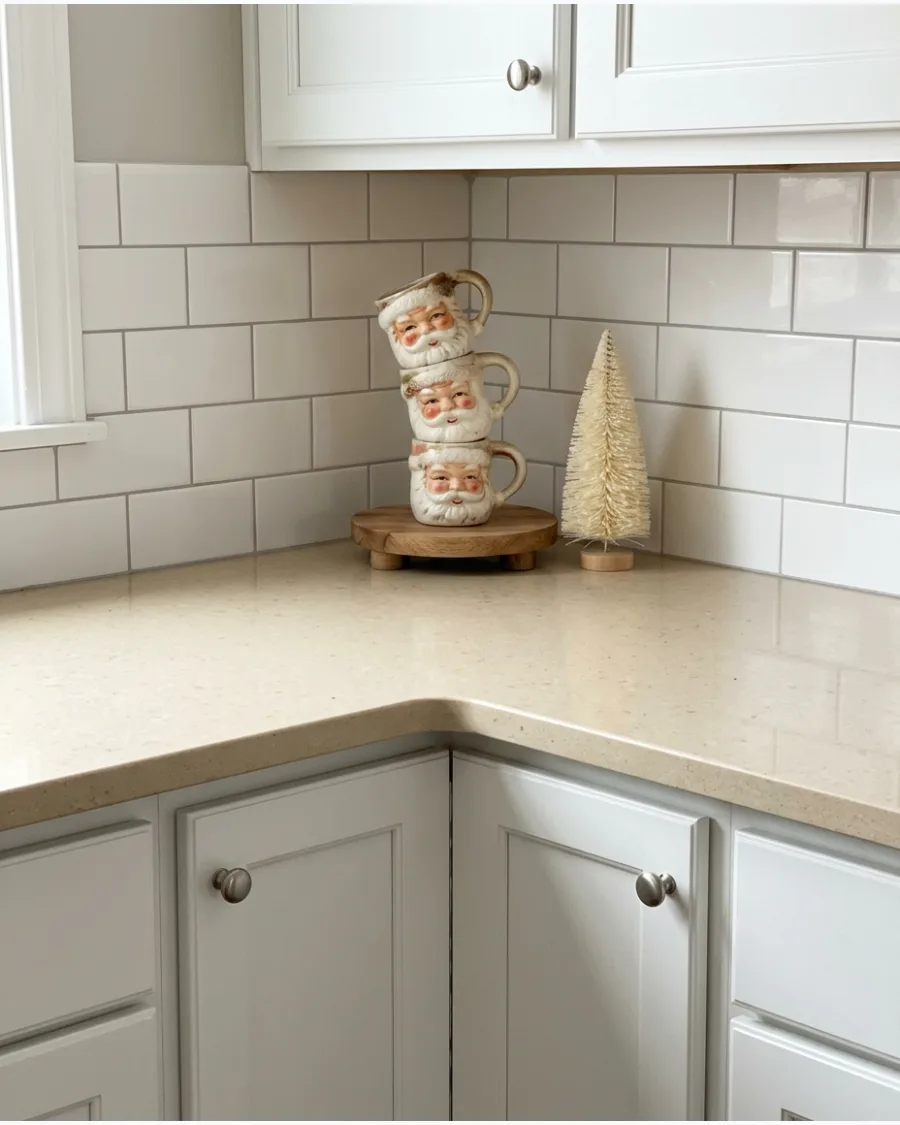
Grouping vintage-style mugs creates a nostalgic focal point without taking up extra workspace. Place a small bottle-brush tree nearby to add height and a pop of color.
Stack the mugs on a small wooden riser to keep them organized and easy to reach for morning coffee. Old-fashioned designs bring a sense of history that modern sets often lack.
- Budget: $15-$30 for mugs at thrift or discount stores.
- Setup: Place the riser in an unused corner to keep it out of the splash zone.
- Adaptation: Use clear glass mugs with festive stickers for a more modern look.
Most people skip this: Use a riser to double your vertical space and prevent the mugs from looking like random clutter.
12. Christmas Mug Tree Counter Display
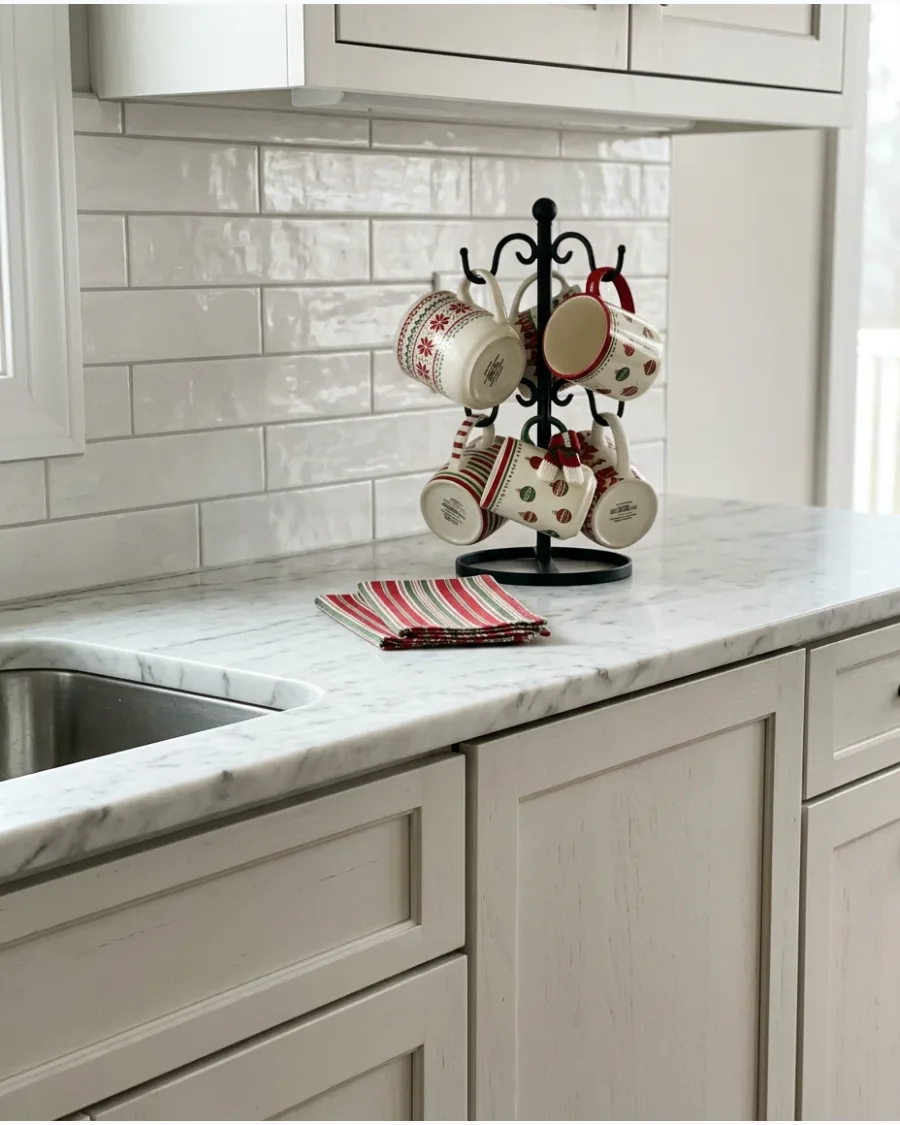
A vertical mug tree is a smart space-saver for busy countertops. Hanging holiday mugs keeps them off the flat surface, leaving plenty of room for food prep.
Select a mix of solid red and patterned mugs to create a balanced visual pattern on the tree. Using a sturdy metal tree prevents tipping and keeps the display looking intentional.
- Sourcing: Metal mug trees are available at most kitchen supply stores for under $20.
- Setup: Place the tree near the coffee maker for maximum morning efficiency.
- Adaptation: Swap the mugs for ornaments if you prefer a purely decorative look.
Quick win: Place the heaviest mugs on the bottom hooks to ensure the stand remains stable.
13. Gingerbread Coffee Bar
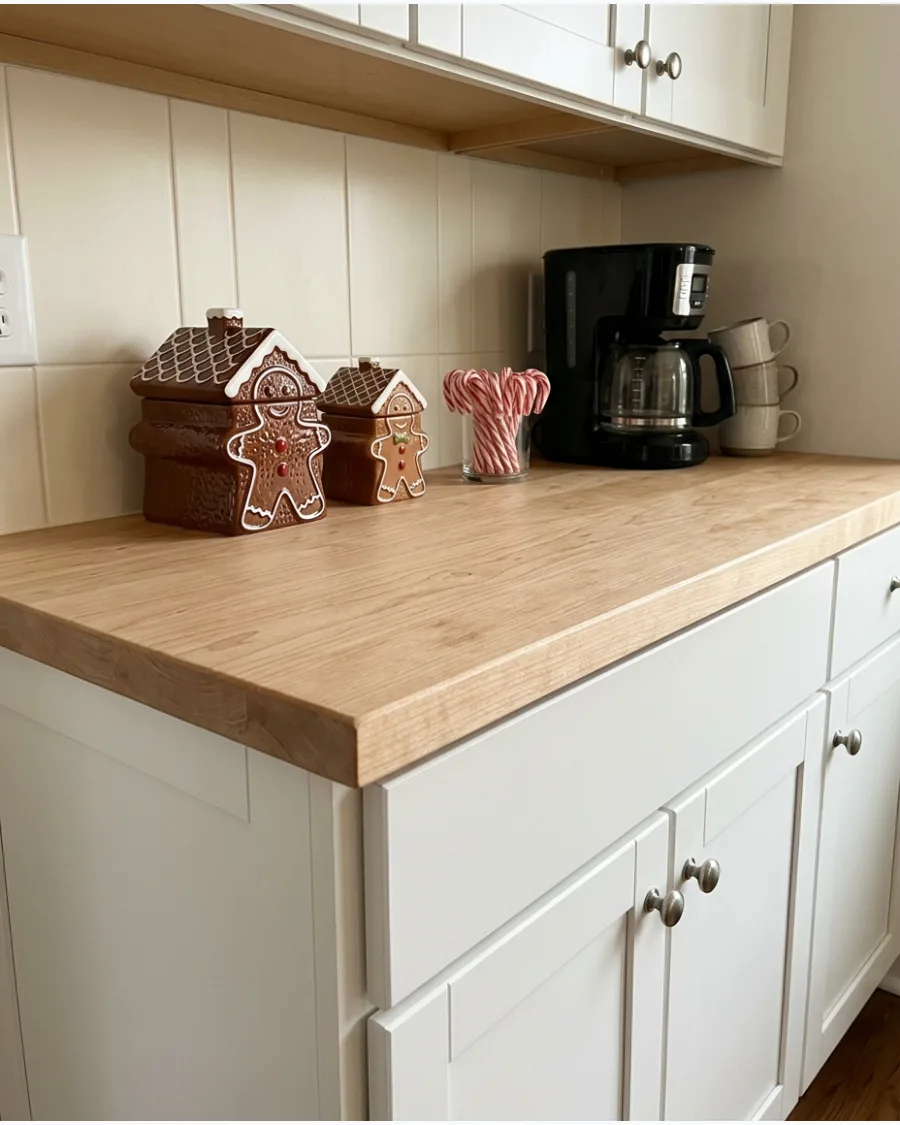
This theme uses warm brown tones and candy accents to create a playful kitchen corner. Add a few gingerbread-shaped items like a cookie jar or small figurines to set the scene.
Tie brown-and-white striped ribbons around your coffee canisters to match the gingerbread aesthetic. This look is effective because it feels festive without relying on traditional bright reds.
- Sourcing: Look for gingerbread-themed ceramics in seasonal home decor aisles.
- Setup: Group items on a small tray to define the coffee bar area.
- Adaptation: Use real gingerbread cookies in a glass jar for a functional and edible display.
Best shortcut: Use brown twine or ribbon to instantly coordinate your existing jars with the gingerbread theme.
14. Neutral Christmas Coffee Station
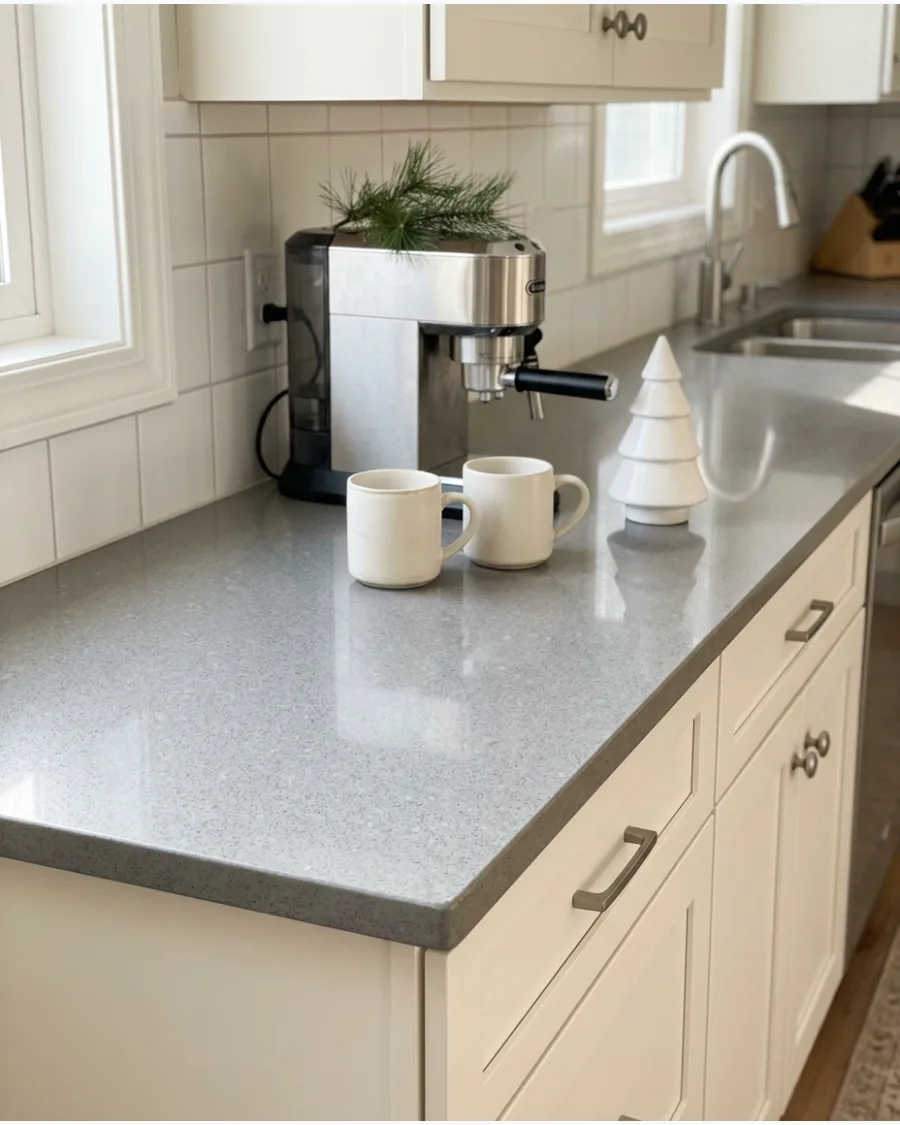
Neutral decor relies on texture rather than color to feel cozy and festive. Combine cream-colored mugs with natural wood elements and soft white ceramic trees.
Tuck a few real evergreen sprigs behind the coffee machine for a subtle scent and a touch of organic green. This approach works well in modern kitchens where bright colors might feel overwhelming.
- Budget: $0 if using existing white mugs and yard clippings.
- Setup: Keep the arrangement asymmetrical for a more relaxed and natural feel.
- Adaptation: Add a strand of warm white battery-operated fairy lights for extra glow.
Most people skip this: Neutral displays need different heights to look interesting, so use a stack of books or a small box under one item.
15. Red and White Christmas Coffee Bar
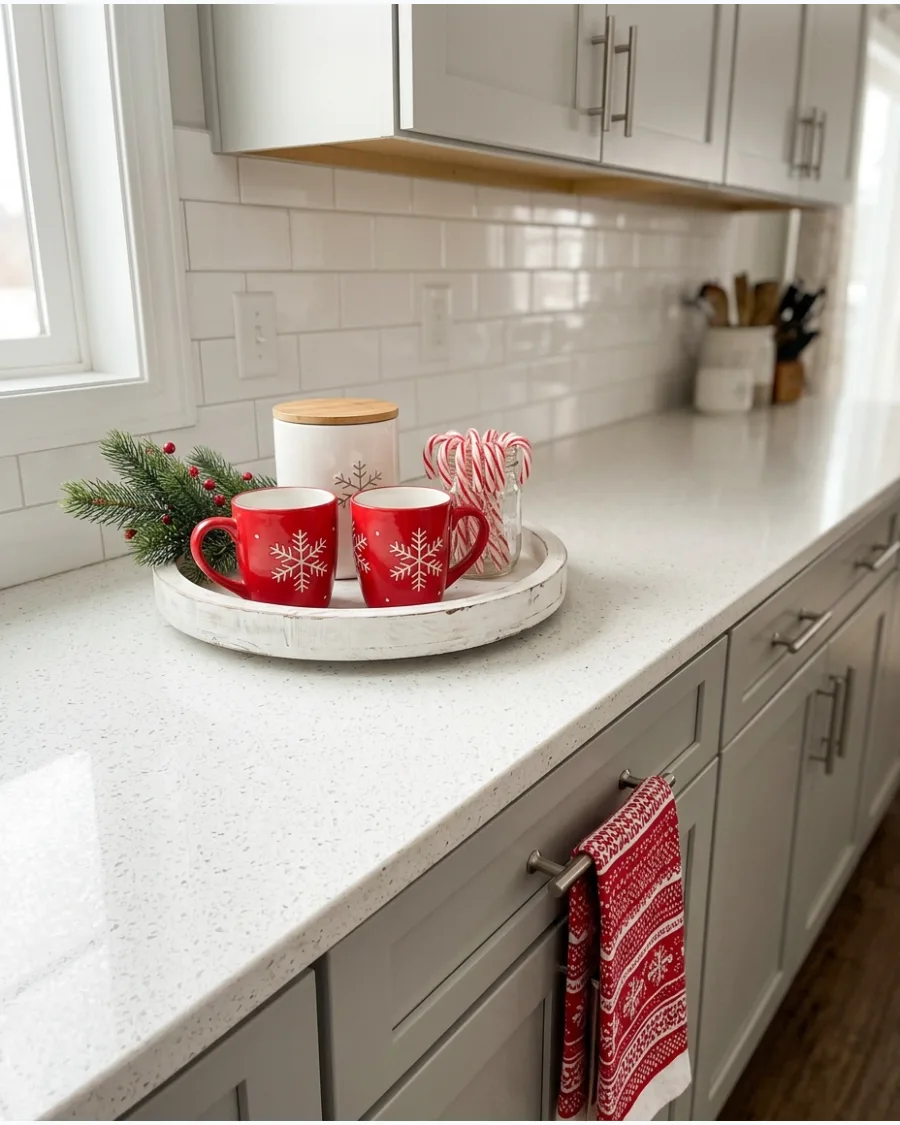
The classic red and white palette instantly signals the holiday season and looks crisp against most backsplashes. Use white ceramic containers for sugar and cocoa to provide a clean backdrop for bright red mugs.
Add a small red bow to the handle of your coffee scoop for a tiny but thoughtful detail. Keeping the color palette limited makes the display feel curated rather than cluttered.
- Sourcing: Red mugs are easy to find at dollar stores or large retailers.
- Setup: Use a tray to protect your countertop from cocoa powder and coffee drips.
- Adaptation: Include a jar of marshmallows to add more white to the color balance.
Quick win: Use candy canes as stir sticks to add color and flavor to the station simultaneously.
16. Vintage Café Christmas Counter
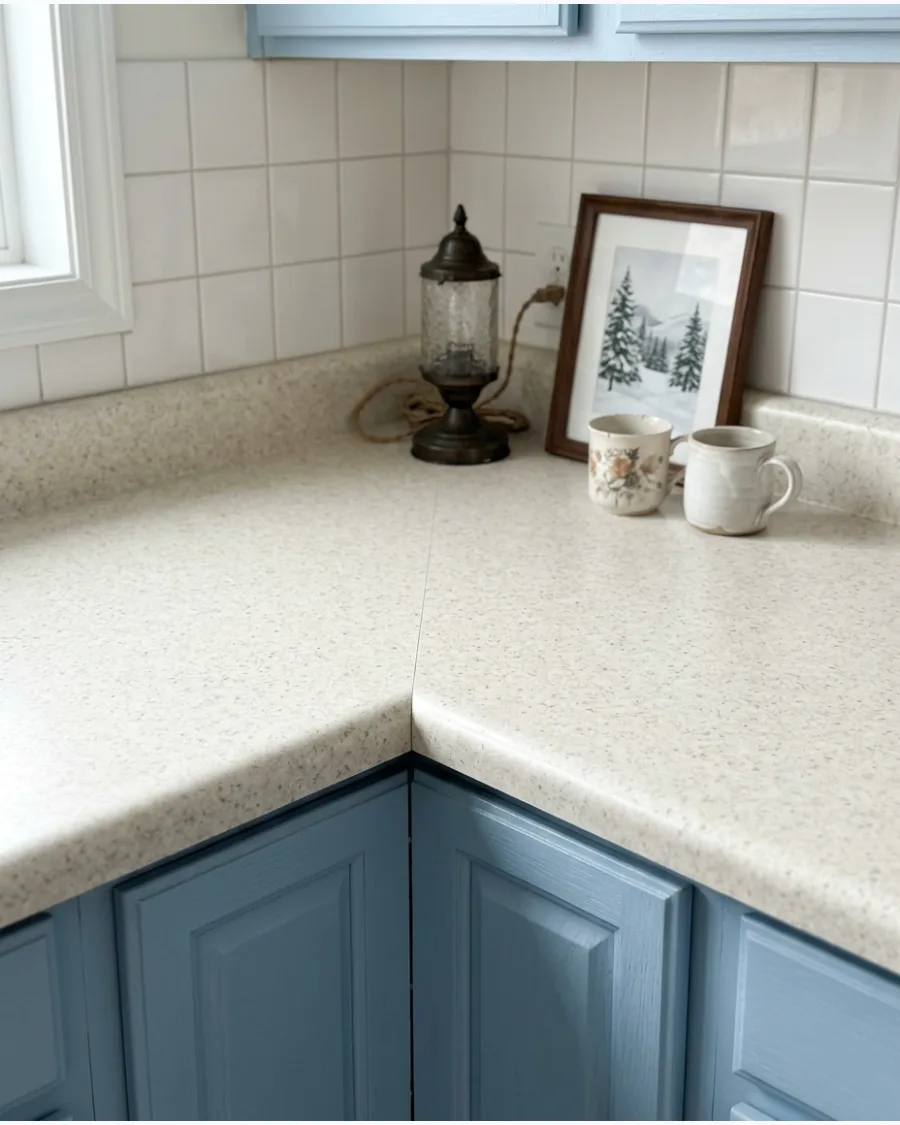
Transform a small corner into a cozy café by mixing thrifted finds with seasonal greenery. A small battery-operated lamp provides warm lighting that overhead kitchen lights cannot replicate.
Lean a small piece of vintage-style holiday artwork against the backsplash to serve as a backdrop for your coffee gear. This style thrives on a collected look that feels personal and lived-in.
- Sourcing: Check antique malls or online marketplaces for small framed winter prints.
- Setup: Ensure the lamp cord is tucked away or use a cordless LED version.
- Adaptation: Switch the artwork to a festive chalkboard menu for a more interactive café feel.
Best shortcut: A small lamp on the counter makes the kitchen feel like a living space rather than just a utility room.
GREENERY AND NATURAL CHRISTMAS COUNTERTOP IDEAS
17. Evergreen Branches in a Ceramic Pitcher
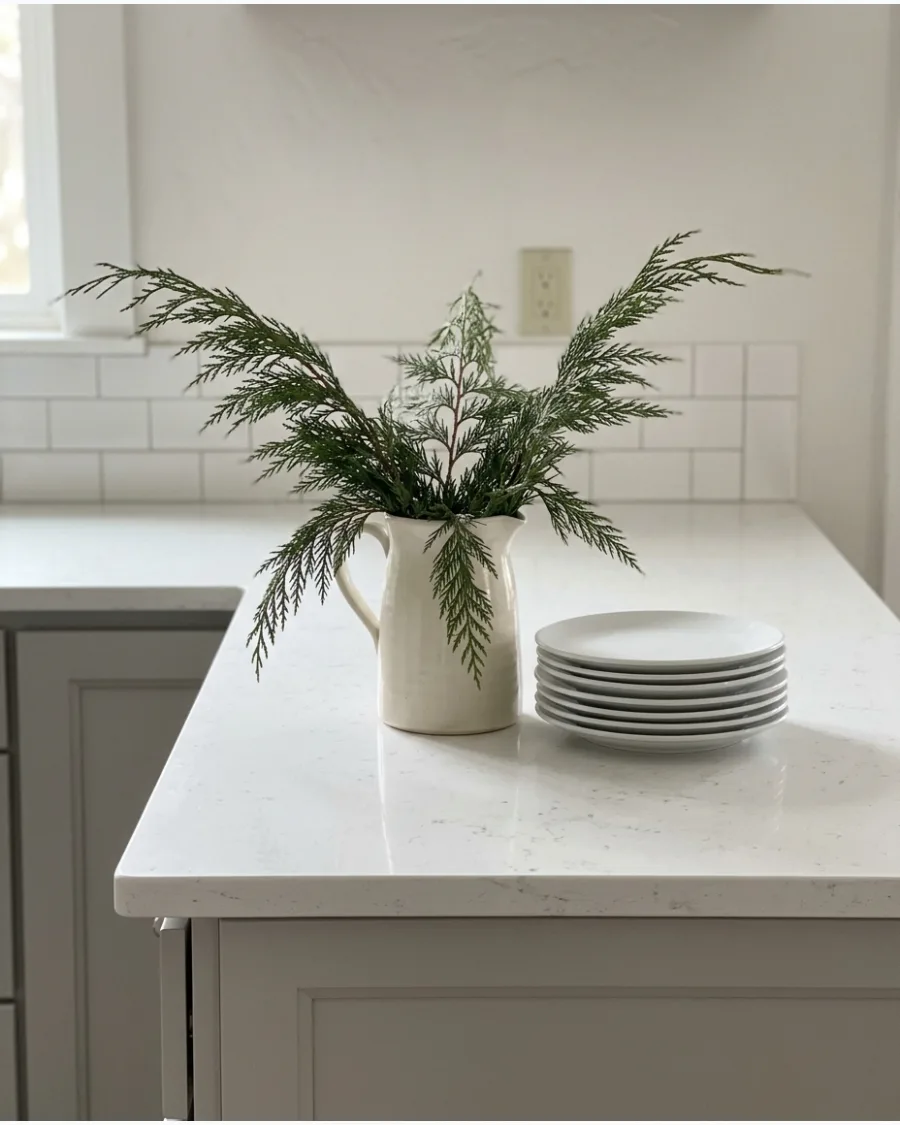
A simple white or vintage pitcher filled with fresh greenery is the fastest way to decorate a kitchen corner. Use cedar or pine branches for a natural look that lasts for weeks with a little water.
Trim the bottom of the branches at an angle to help them absorb water and stay green longer. This is a high-impact move that costs almost nothing if you have trees nearby.
- Budget: Free if you forage branches; $5-$10 at a garden center.
- Setup: Change the water every few days to keep the branches from drying out.
- Adaptation: Add a few sprigs of red berries for a pop of traditional holiday color.
Most people skip this: Smashing the ends of woody stems with a hammer helps them drink more water than a clean cut alone.
18. Mini Pine Tree Beside the Kitchen Sink
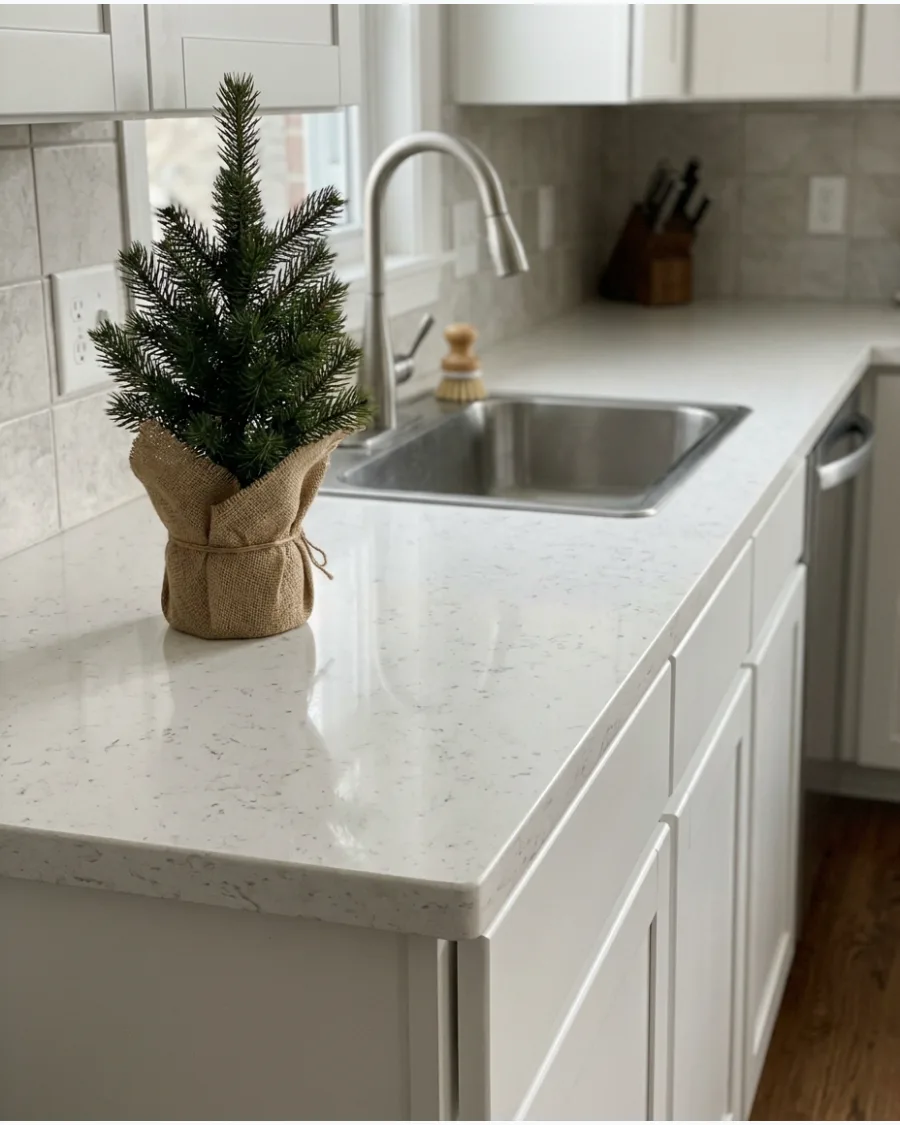
The area around the sink is often neglected, but a tiny tree makes daily chores feel much more festive.
Choose a small potted evergreen that can handle the humidity of the sink area. Wrap the base of the pot in a small piece of burlap or a festive cloth to hide the plastic container. A small tree provides a vertical element that draws the eye upward without blocking the window.
- Sourcing: Find mini pines at grocery stores or nurseries starting in late November.
- Setup: Place the tree on a small saucer to prevent water from damaging the countertop.
- Adaptation: Use a faux mini tree if you want to avoid needles near the drain.
Quick win: Use a rubber band to secure burlap around the pot before tying a decorative ribbon over it.
19. Cedar Garland Along the Backsplash
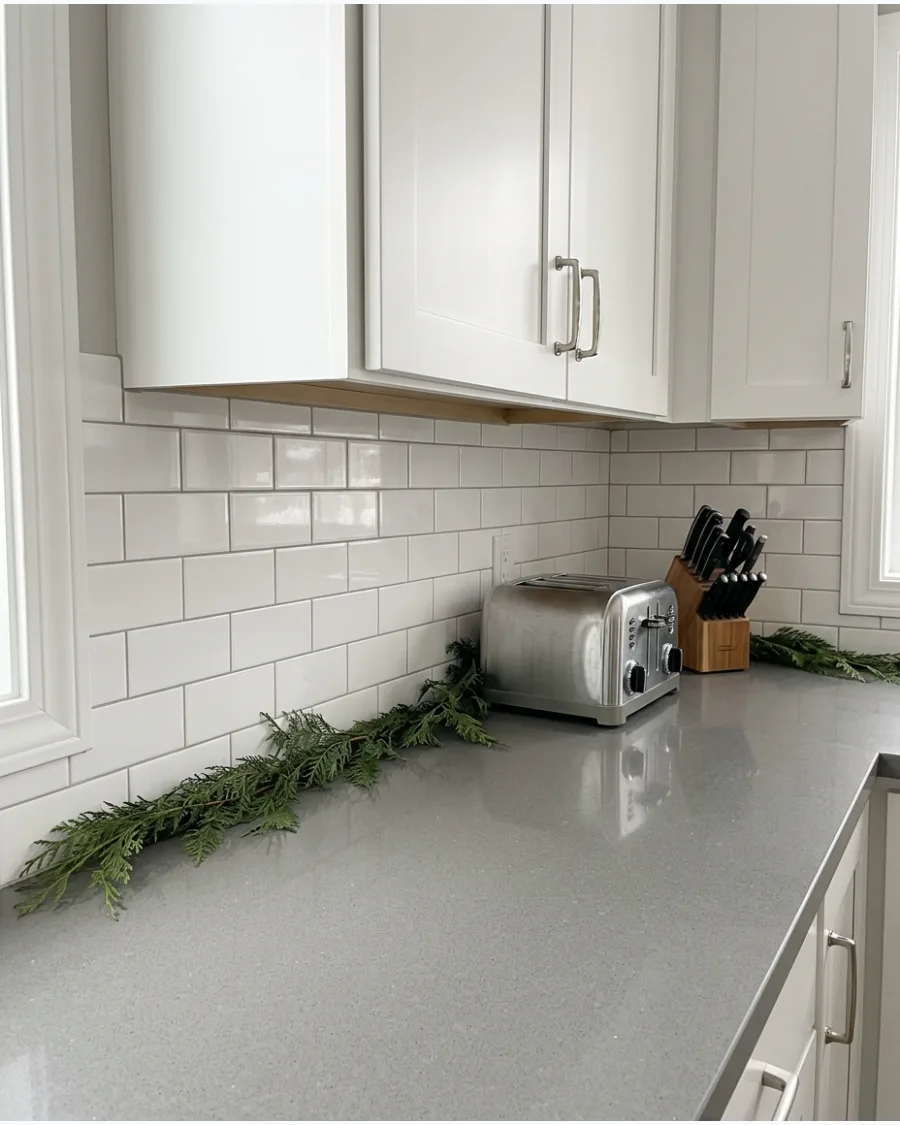
Running a thin garland along the base of the backsplash adds a continuous line of holiday cheer without taking up prep space. Opt for a lightweight faux cedar that won't shed needles into your food.
Secure the garland with small, clear adhesive hooks to keep it from sliding forward onto the counter. This is an excellent way to frame your countertop accessories and make them feel unified.
- Sourcing: Look for 'real touch' faux cedar for the most realistic appearance.
- Setup: Keep the garland at least 12 inches away from the stove for safety.
- Adaptation: Intertwine a thin copper wire light string for a subtle evening glow.
Best shortcut: Drape the garland loosely rather than pulling it tight for a more natural and high-end look.
20. Pinecones and Greenery in a Wooden Bowl
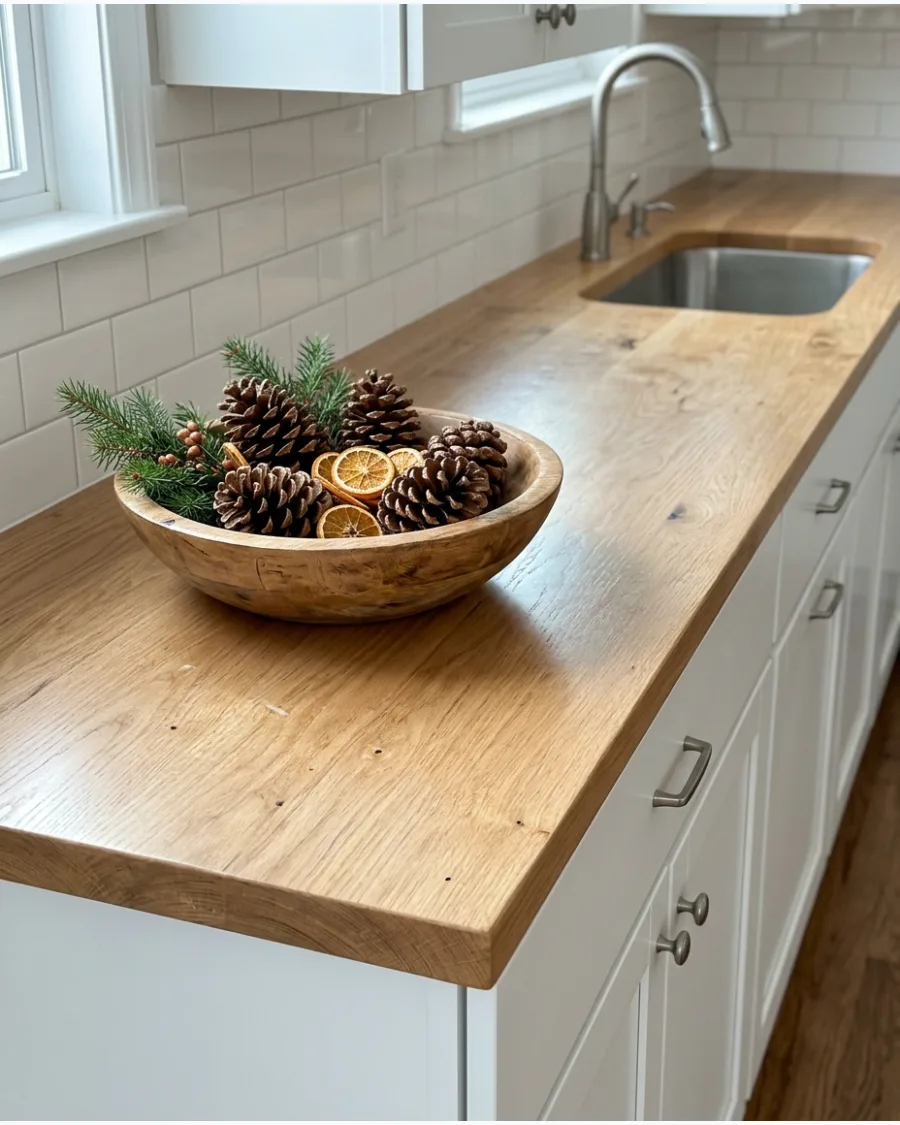
A large wooden bowl filled with natural elements creates a substantial centerpiece that is easy to move when you need the counter space. Mix textures by including rough pinecones, smooth dried oranges, and soft evergreen clippings.
Place the largest pinecones at the bottom of the bowl to act as a base for smaller ornaments and greenery. This look is classic, low-maintenance, and fits into almost any kitchen style.
- Budget: Mostly free if you collect pinecones and dry your own orange slices.
- Setup: Use a bowl with a flat bottom to ensure it stays stable on the island.
- Adaptation: Add a few cinnamon sticks to provide a natural holiday scent.
Most people skip this: Bake foraged pinecones at 200 degrees for 30 minutes to kill any bugs before bringing them inside.
21. Dried Orange Christmas Countertop Display
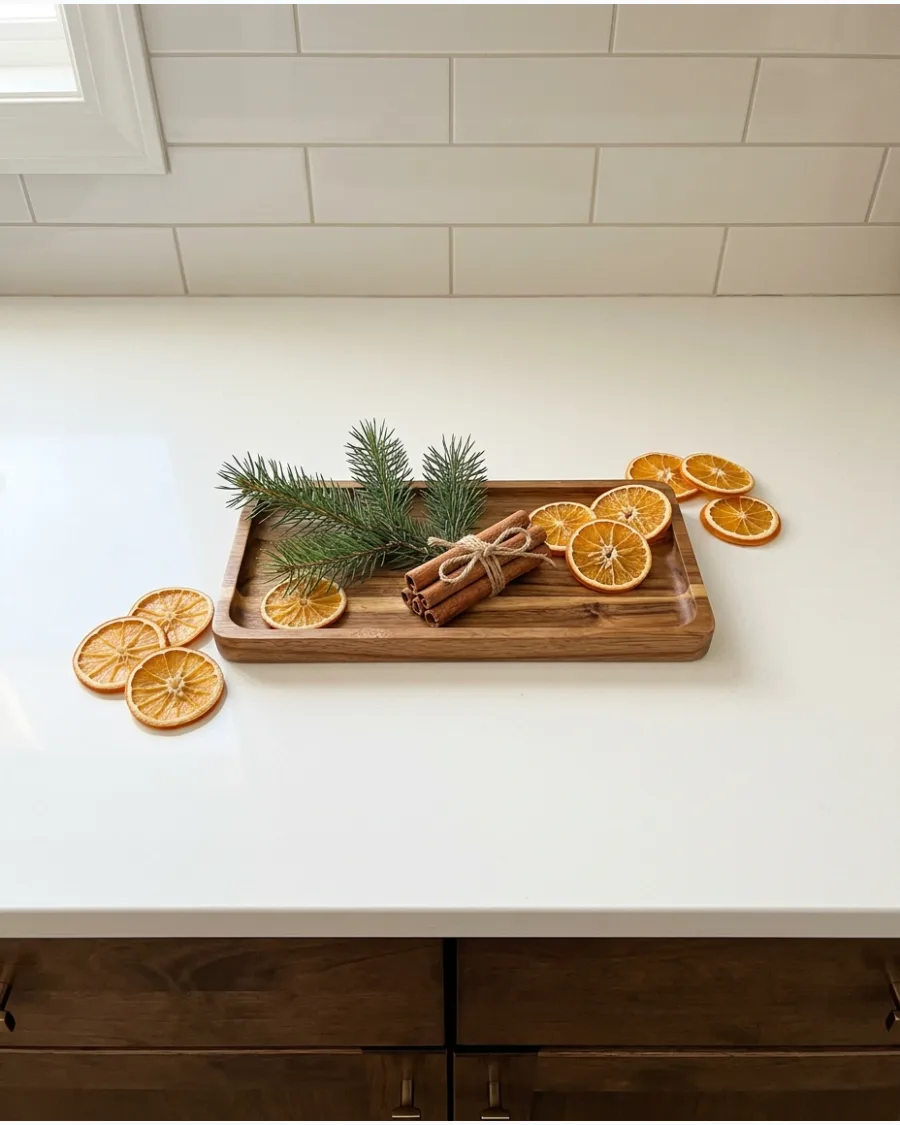
Dried citrus adds a pop of color and a light scent to the kitchen during the holidays. Mix the slices with cinnamon sticks and fresh pine in a low wooden bowl to keep the profile low under upper cabinets.
Layer the orange slices on top of the greenery to make sure the bright orange pops against the dark needles. This natural look fits perfectly next to a fruit bowl or bread box.
- Oranges and cinnamon are available at any grocery store.
- Takes 15 minutes to arrange in a bowl or on a tray.
- Swap oranges for dried lemons or limes for a different citrus color palette.
Quick win: Blot the orange slices with a paper towel before displaying to prevent any sticky residue on your tray.
22. Rosemary Christmas Tree Countertop Pots
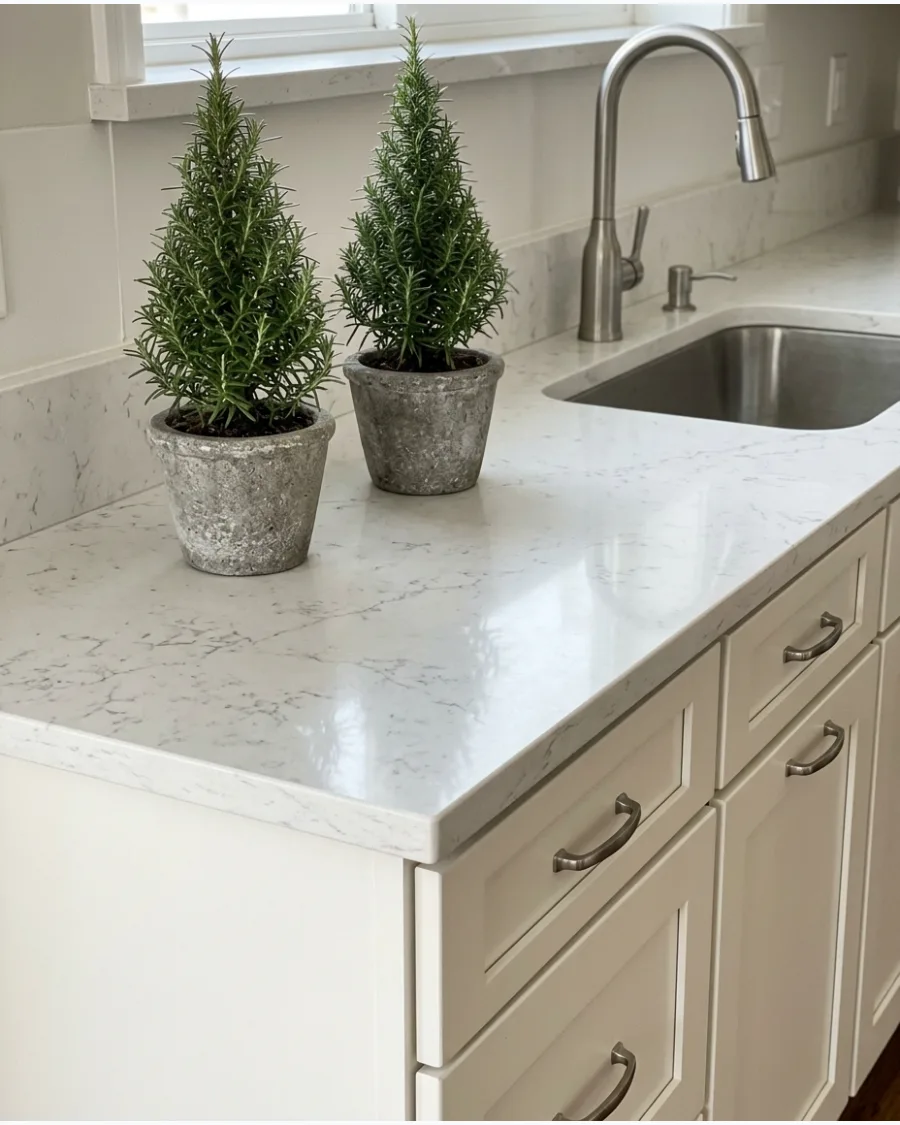
Rosemary plants are often pruned into cone shapes during the winter to look like mini evergreens. Place one or two in simple terracotta or stone pots near a window or the kitchen sink.
Snip off small pieces from the back of the plant to use for holiday cooking while keeping the front looking full. They provide a fresh, herbal scent every time the sink is used.
- Find these for $10-$15 at most garden centers or grocery stores.
- Place in a sunny spot to keep the plant healthy through December.
- Use a saucer underneath the pot to protect the countertop from water.
Most people skip this: Rotate the pots every few days so the rosemary gets even sunlight and does not lean toward the window.
23. Evergreen Branches With Burgundy Ribbon
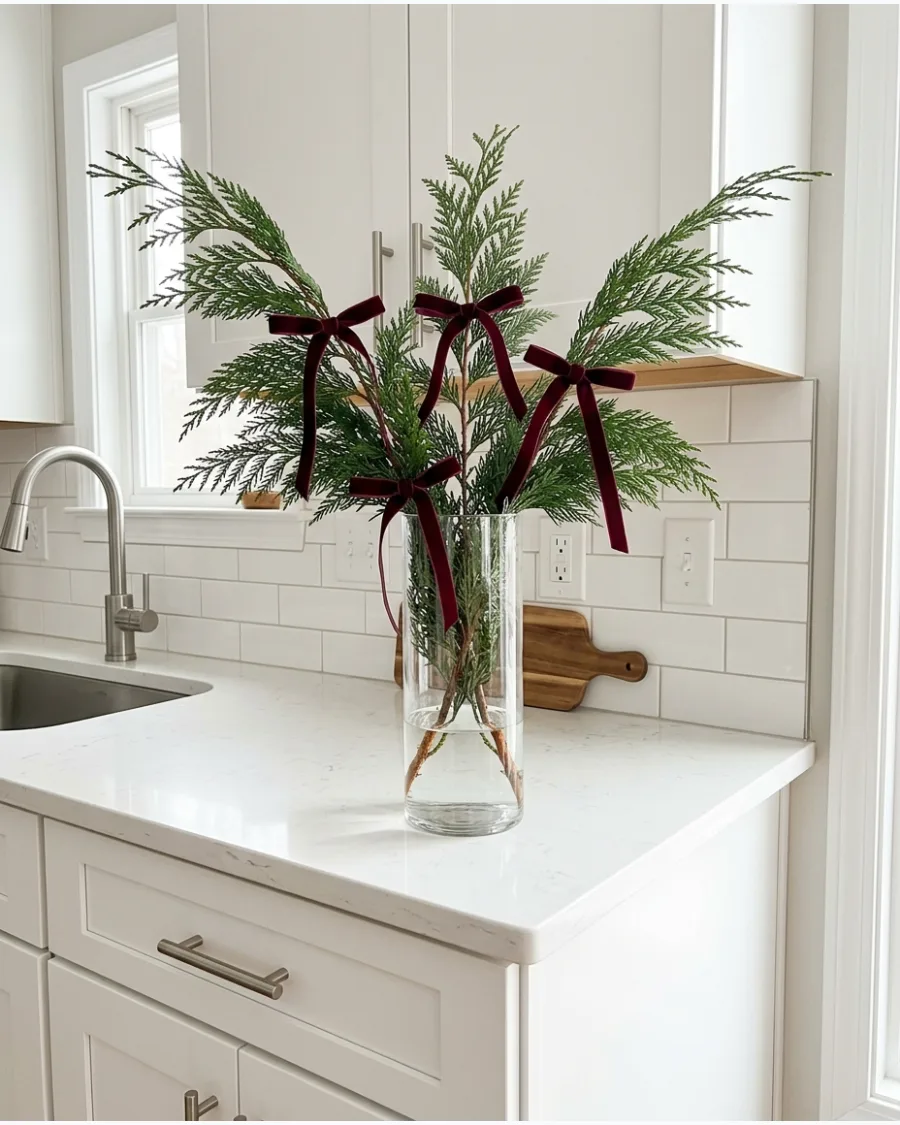
A simple vase of greenery gets an instant style upgrade with the right trim. Choose a deep burgundy velvet ribbon to tie small, floppy bows onto individual branches.
Cut the ribbon tails at an angle or into a V-shape to give the bows a professional and finished look. This adds a sophisticated touch of color without requiring extra counter space for bulky decor.
- Velvet ribbon is available in various widths at craft stores.
- Simple 5-minute setup for an instant color update.
- Use navy or forest green ribbon for a different traditional mood.
Best shortcut: Use thin floral wire to secure the bows to the branches so they do not slide down as the greenery dries.
24. Woodland Christmas Countertop Arrangement
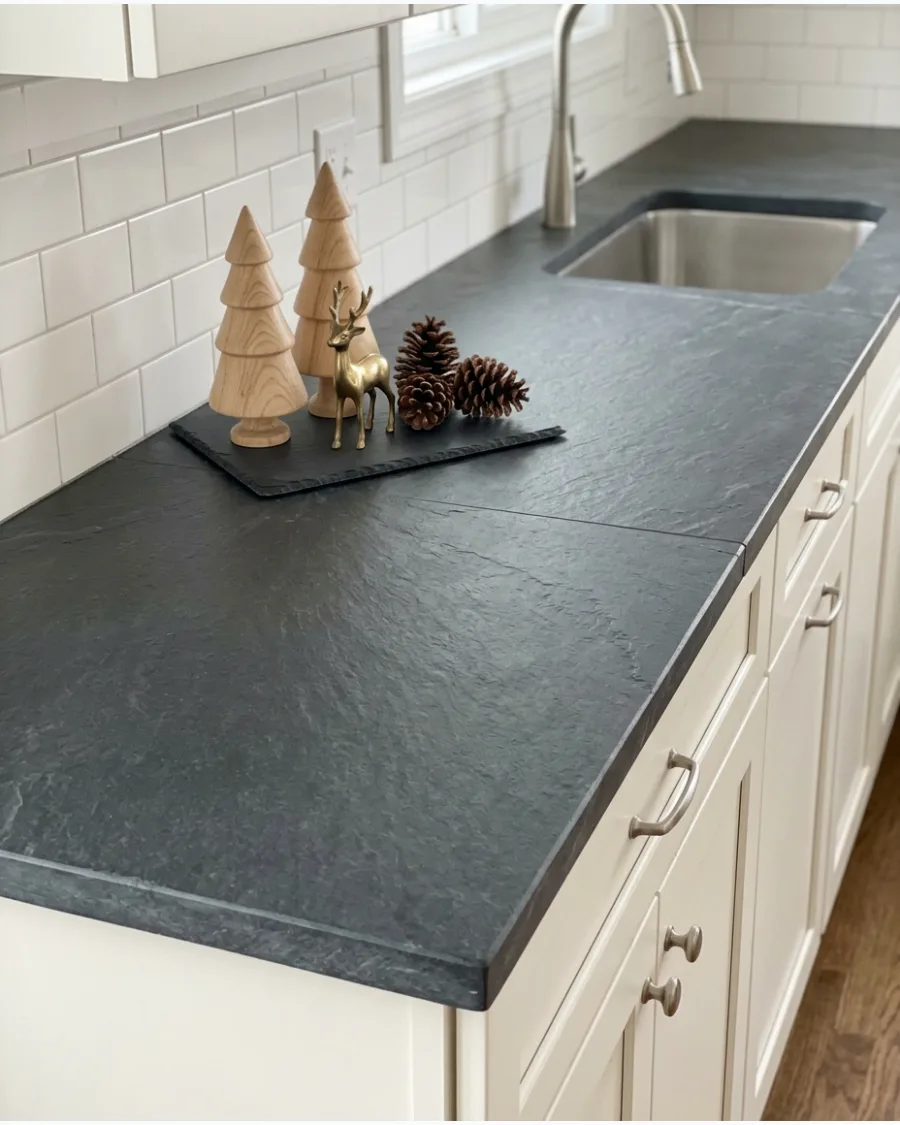
Create a small scene that feels like a winter forest floor in a kitchen corner. Use a mix of textures like rough pinecones, smooth wooden trees, and fuzzy moss or felt mushrooms.
Group the tallest wooden trees at the back and place the smaller deer or mushrooms in the front to create depth. This works well in a corner that does not get much heavy daily kitchen use.
- Gather natural items like pinecones and acorns from outdoors.
- Arrange in a tight cluster to keep the counter looking tidy.
- Add a small battery-operated fairy light string for an evening glow.
Quick win: Use a small tray or a piece of slate as a base to make it easy to move the whole display when it is time to deep-clean the counters.
MINI TREES AND CHRISTMAS VILLAGE COUNTERTOP IDEAS
25. Bottle-Brush Tree Forest
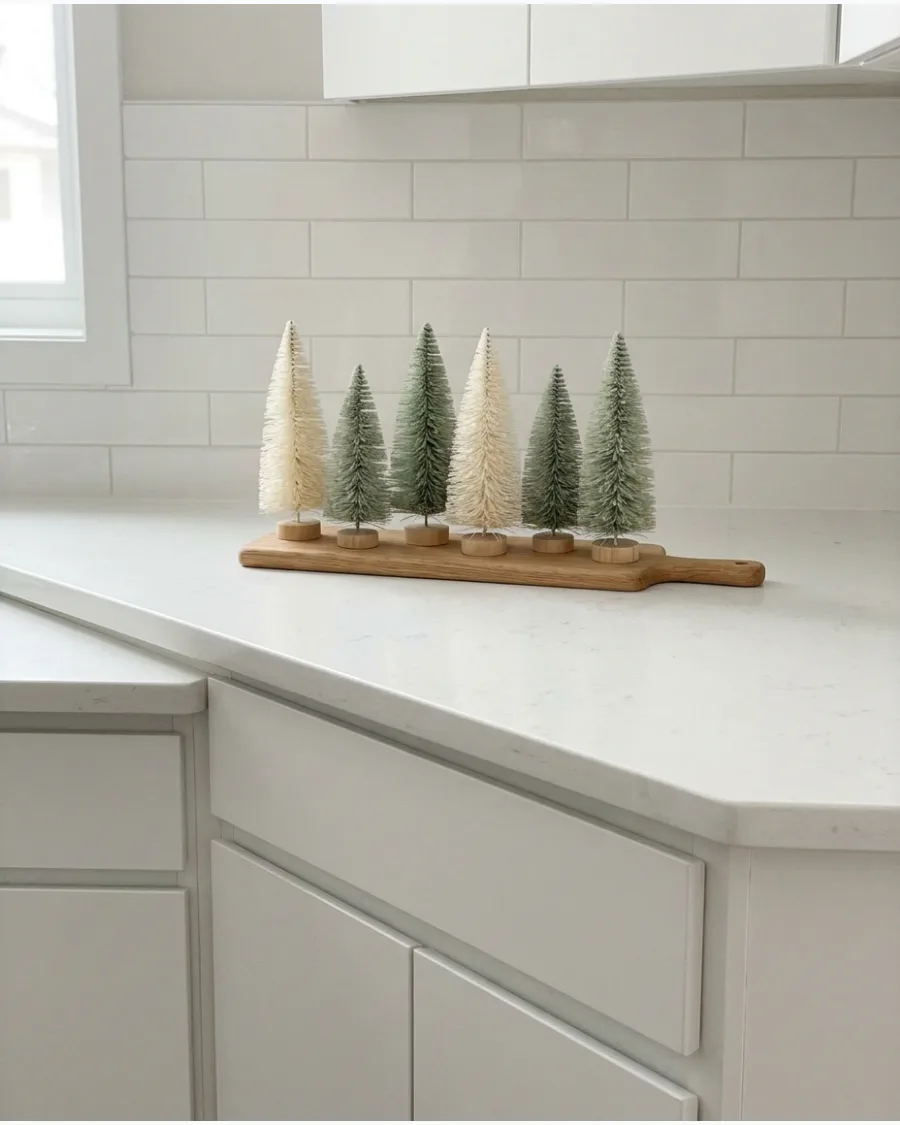
Bottle-brush trees come in endless colors and sizes, making them easy to fit into any kitchen style. Set them up on a long wooden board to give them a cohesive home on the counter.
Vary the heights and shades of green or white to make the forest look more natural and interesting. The thin wire stems allow you to tuck them into tight spaces between small appliances.
- Sets are often available for under $20 at most home stores.
- 5-minute arrangement that is easy to customize.
- Use all white trees for a clean and minimalist winter look.
Most people skip this: Stick a tiny bit of museum wax on the bottom of the tree bases so they do not tip over when you bump the counter.
26. Small Flocked Christmas Tree
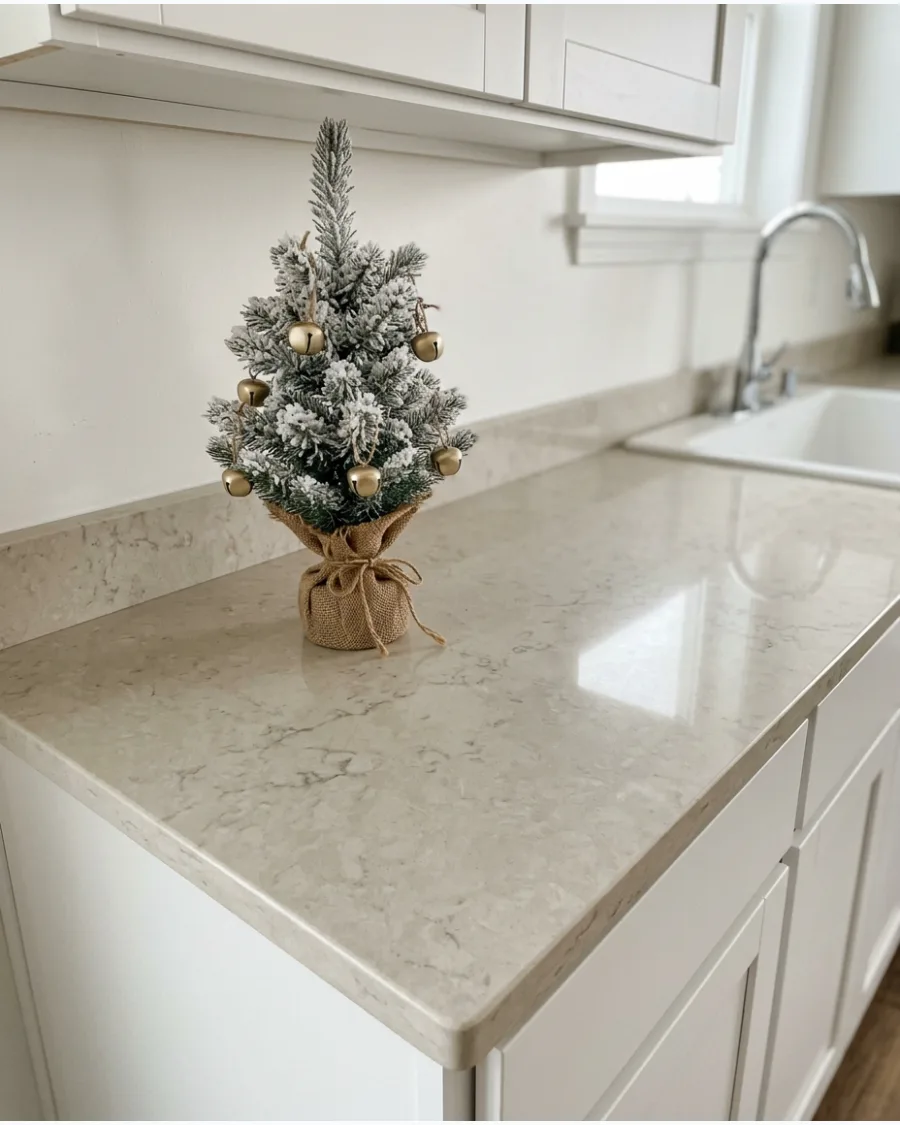
A flocked tree brings the look of fresh snow into the kitchen. Choose a version that is lightly dusted so it does not shed too much on your food prep surfaces.
Keep the decorations limited to one type of item, like tiny gold bells or simple red berries, to keep the look clean. A 12-inch tree is usually the perfect height to sit under standard upper cabinets.
- Pre-flocked trees are best to minimize mess in the kitchen.
- Place the tree away from the stove to avoid grease buildup.
- Use a small plate or coaster under the base to catch any stray flocking.
Best shortcut: If the tree looks flat after storage, use a hair dryer on a cool setting to quickly fluff the branches.
27. Mini Christmas Tree in a Crock
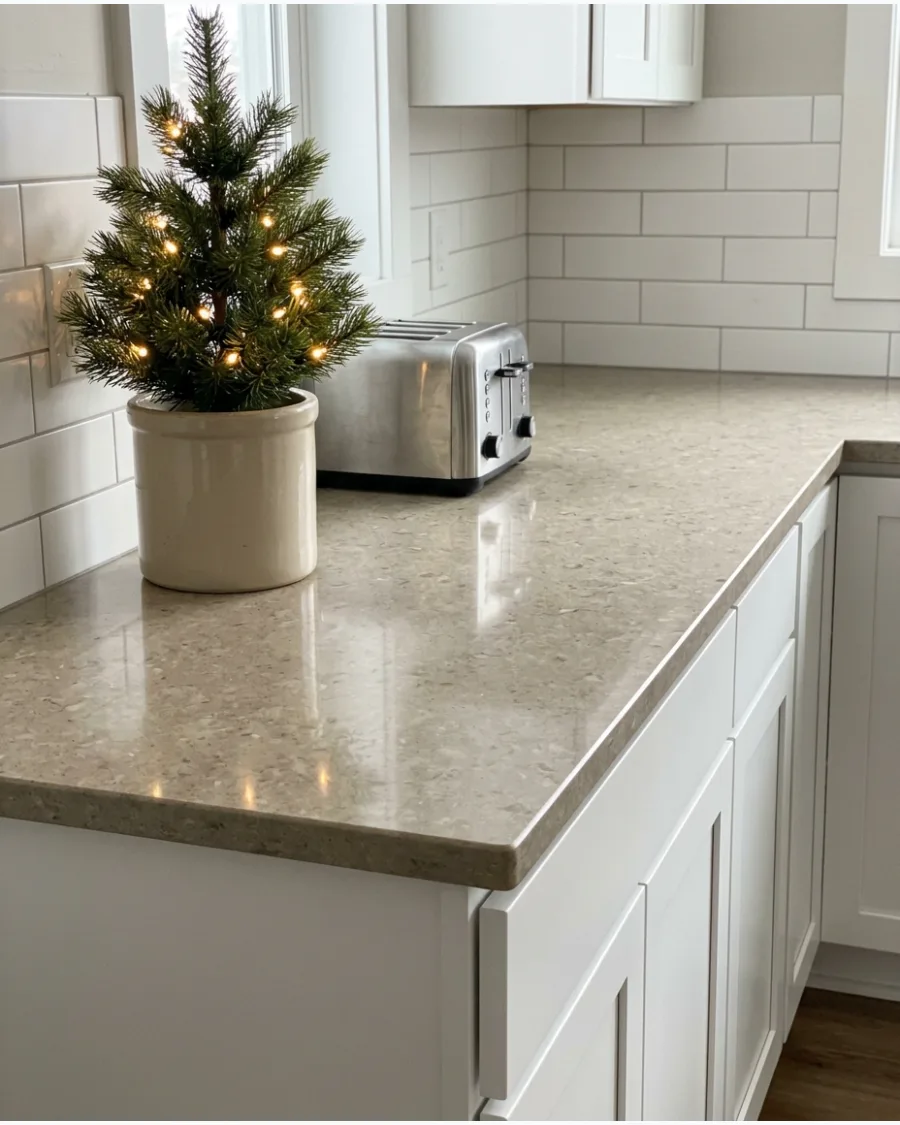
Using a kitchen crock as a tree stand makes the decor feel like it naturally belongs in the room. This is a great way to repurpose a utensil holder or an antique stoneware jar.
Fill the bottom of the crock with newspaper or bubble wrap so the tree sits at the perfect height above the rim. Add a small strand of battery-powered lights to make it glow in the evening.
- Use an existing kitchen crock or buy a vintage-style one.
- Simple 10-minute setup using basic packing materials.
- Hide the battery pack for the lights inside the crock behind the tree trunk.
Quick win: If the tree is wobbly, wedge a few pinecones around the base inside the crock to hold the trunk steady.
28. Mini Tree in a Woven Basket
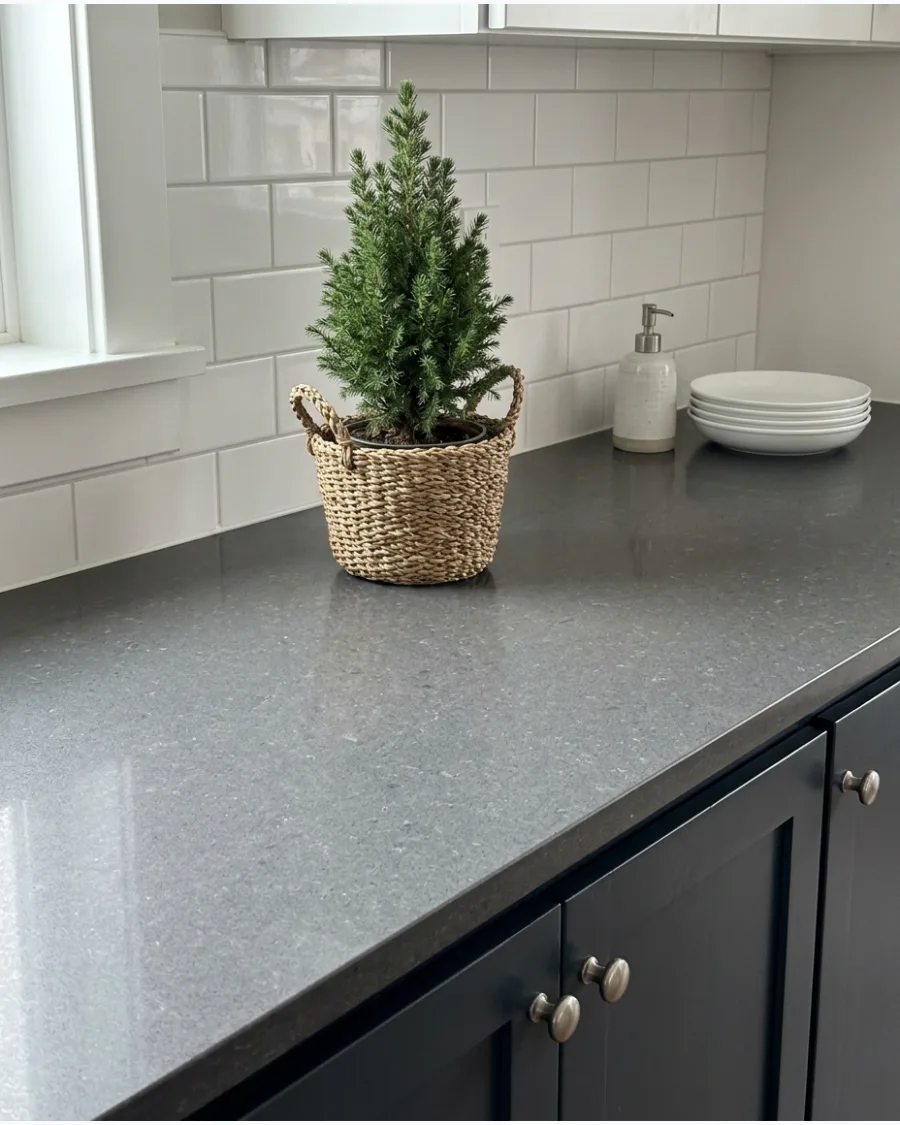
A woven basket adds warmth and texture to a cold stone or laminate countertop. This look works well for a modern organic style that relies on natural materials.
Choose a basket with a tight weave so the tree trunk stays upright without needing extra support. Keeping the ornaments to a minimum allows the texture of the basket and the greenery to be the focus.
- Small baskets are budget-friendly and easy to find.
- Quick 5-minute setup that adds immediate texture.
- Use a plastic liner inside the basket if using a real tree that needs water.
Most people skip this: Use a basket with handles to make it easy to move the tree when you need more space for holiday baking.
29. Three Mini Christmas Trees in Different Heights
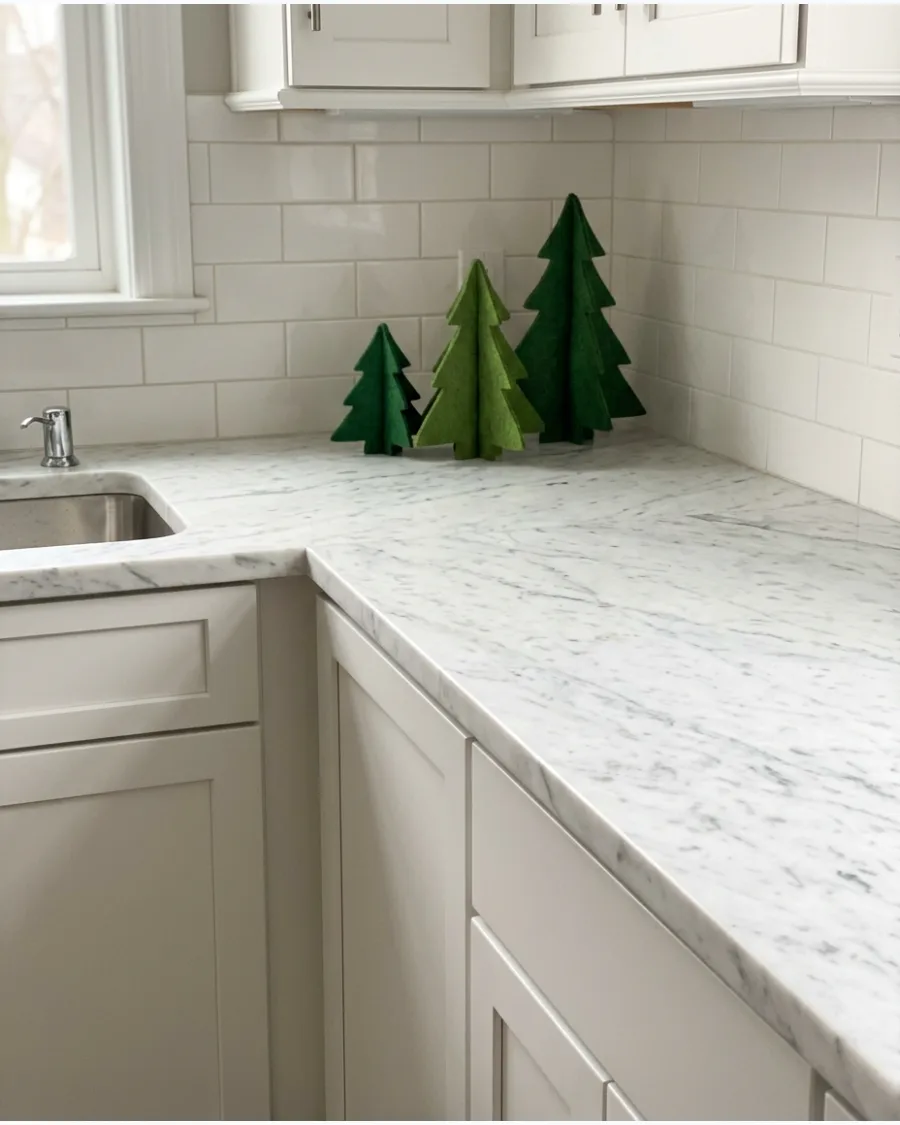
Groups of three are naturally pleasing to the eye and create a strong focal point in a kitchen corner. Select three trees in the same style but at different heights to create a staircase effect.
Position the tallest tree in the back corner and the shorter ones slightly forward to create a sense of depth. This fills an empty corner effectively without taking up the middle of the workspace.
- Buy trees as a set or mix and match similar styles.
- 5-minute setup that works in any corner or on an island.
- Use different shades of the same color for a cohesive and layered look.
Best shortcut: Stick to trees with the same base material, like all wood or all metal, to make the trio look like a matched set.
30. White Ceramic House Village
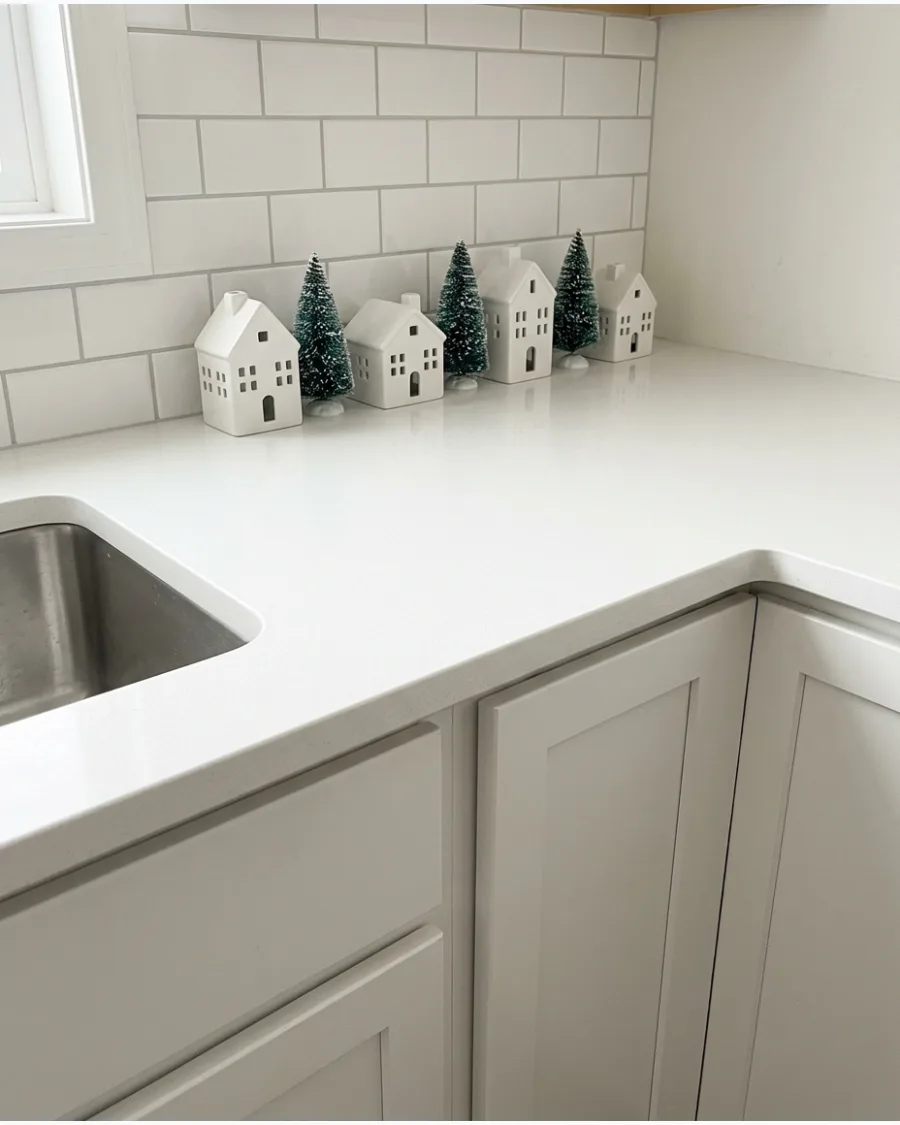
A village of white ceramic houses looks modern and stays out of the way when lined up against the backsplash. These houses often have holes for tea lights or LED bulbs to provide a soft glow at night.
Space the houses about an inch apart and tuck a few small bottle-brush trees between them to break up the white shapes. This setup is narrow enough to leave plenty of room for daily tasks.
- Houses range from $5-$15 depending on the size.
- 10-minute setup along any straight run of countertop.
- Use battery-operated tea lights for safety and convenience.
Quick win: Use a remote-controlled LED tea light set so you can turn the whole village on at once without moving the houses.
31. Vintage Christmas Village Countertop
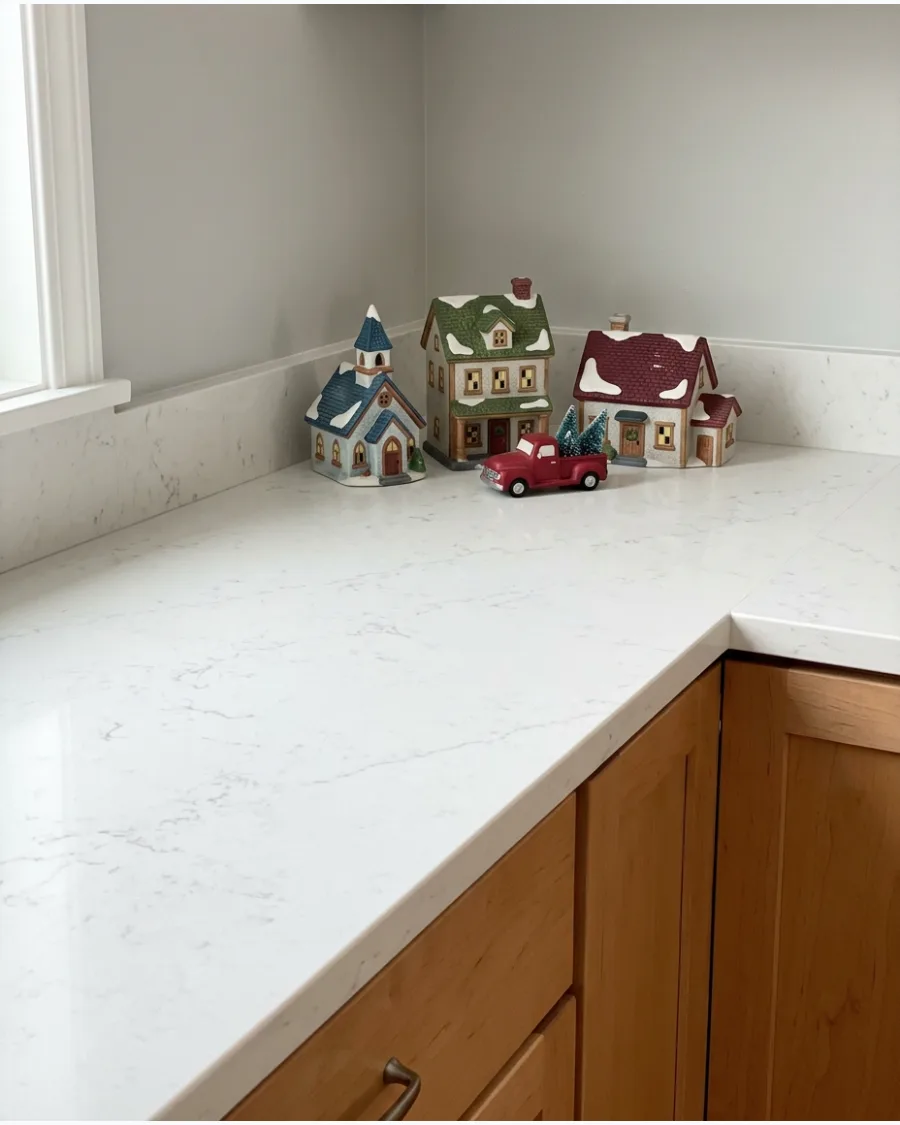
Arrange nostalgic miniature houses and vintage-style cars in a small cluster to bring a sense of history to the kitchen. This setup creates a collected look without needing much space for a full-scale village.
Tuck a strand of battery-operated fairy lights behind the buildings to create a warm glow against the backsplash. It feels like a tiny, festive world tucked away from the prep work.
- Find vintage-style ceramic houses at local thrift stores or holiday markets for an authentic feel.
- Cluster the buildings in a corner of the counter to keep the main workspace clear.
- Switch to battery-powered LED tea lights inside the houses to avoid messy cords across the counter.
Quick win: Use white felt or a thin layer of batting under the houses to hide the wires from the lights.
32. Mini Gingerbread Village Countertop
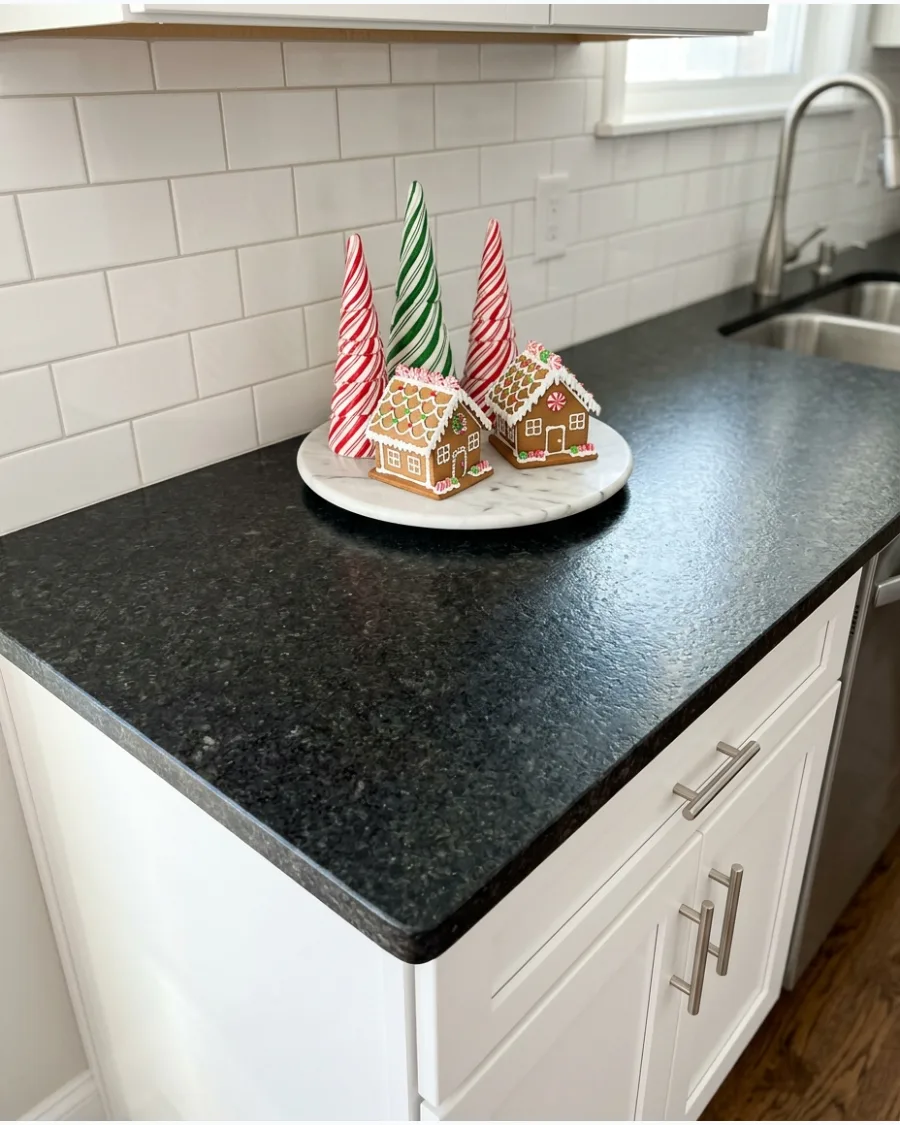
Set up a sweet scene using gingerbread houses and candy-themed trees on a dedicated surface. Using a wooden board or marble tray keeps all the small pieces together so they are easy to move when you need to wipe the counters.
Scatter a handful of coarse sugar or faux snow around the base of the houses for a realistic wintry effect. This turns a baking project into a charming focal point.
- Buy pre-made gingerbread kits to save time or use sturdy faux gingerbread houses for multi-year use.
- Keep the village on a lipped tray to prevent faux snow or sugar from spreading across the kitchen.
- Add a small strand of warm white wire lights to make the village look inhabited at night.
Most people skip this: Use a hair dryer on the lowest, coolest setting to gently blow away any dust that settles on the village.
CHRISTMAS BAKING AND FOOD-INSPIRED COUNTER DECOR
33. Christmas Cookie Jar Display
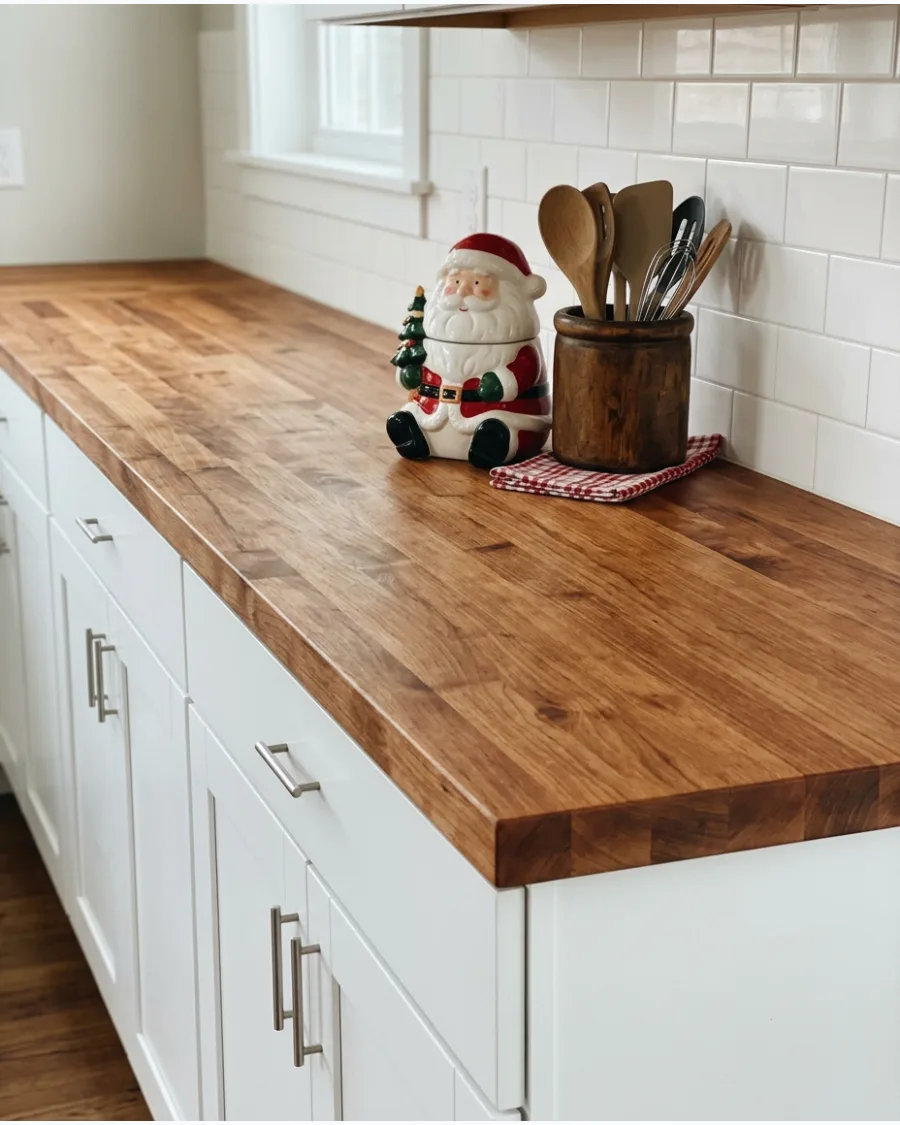
Choose a decorative cookie jar that stands out and place it in a high-traffic corner of the kitchen. Surround it with a few wooden spoons and a small sprig of cedar to ground the look and add texture.
Position the jar near your coffee maker or toaster to create a dedicated holiday snack zone. It is a functional way to add holiday cheer without adding any extra clutter.
- Look for jars with rubber seals to keep your holiday treats fresh for several weeks.
- Place the jar on a small pedestal or riser to make it feel more like a deliberate decoration.
- Choose a neutral holiday shape like a white pine tree if you want the jar to stay out through January.
Best shortcut: If you don't bake, fill the jar with store-bought peppermint bark or colorful wrapped chocolates.
34. Glass Jar Filled With Christmas Cookies
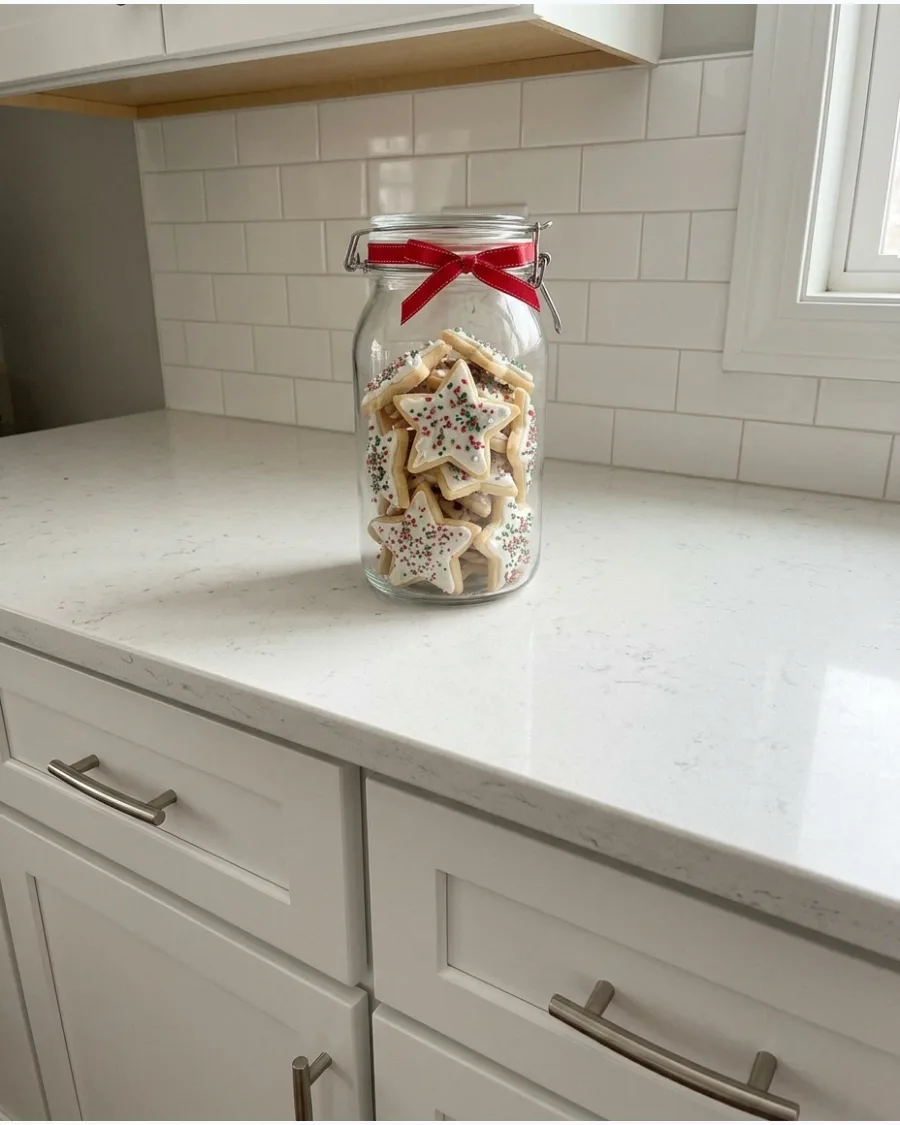
Fill a large glass apothecary jar with colorful iced cookies or classic gingerbread men to let the treats act as the primary decoration. The transparent glass allows the seasonal shapes and colors to pop against your kitchen surfaces.
Tie a thick velvet ribbon around the neck of the jar to coordinate with your kitchen color palette. This simple method uses your actual holiday baking as the main decor element.
- Select a jar with a wide mouth to make it easy to reach in without breaking the decorated cookies.
- Layer different types of cookies by color to create a striped or patterned look through the glass.
- Use airtight glass jars to ensure the cookies stay crisp while they are on display.
Quick win: Place a small piece of parchment paper at the bottom of the jar to absorb any excess oils from the cookies.
35. Gingerbread Baking Counter Display
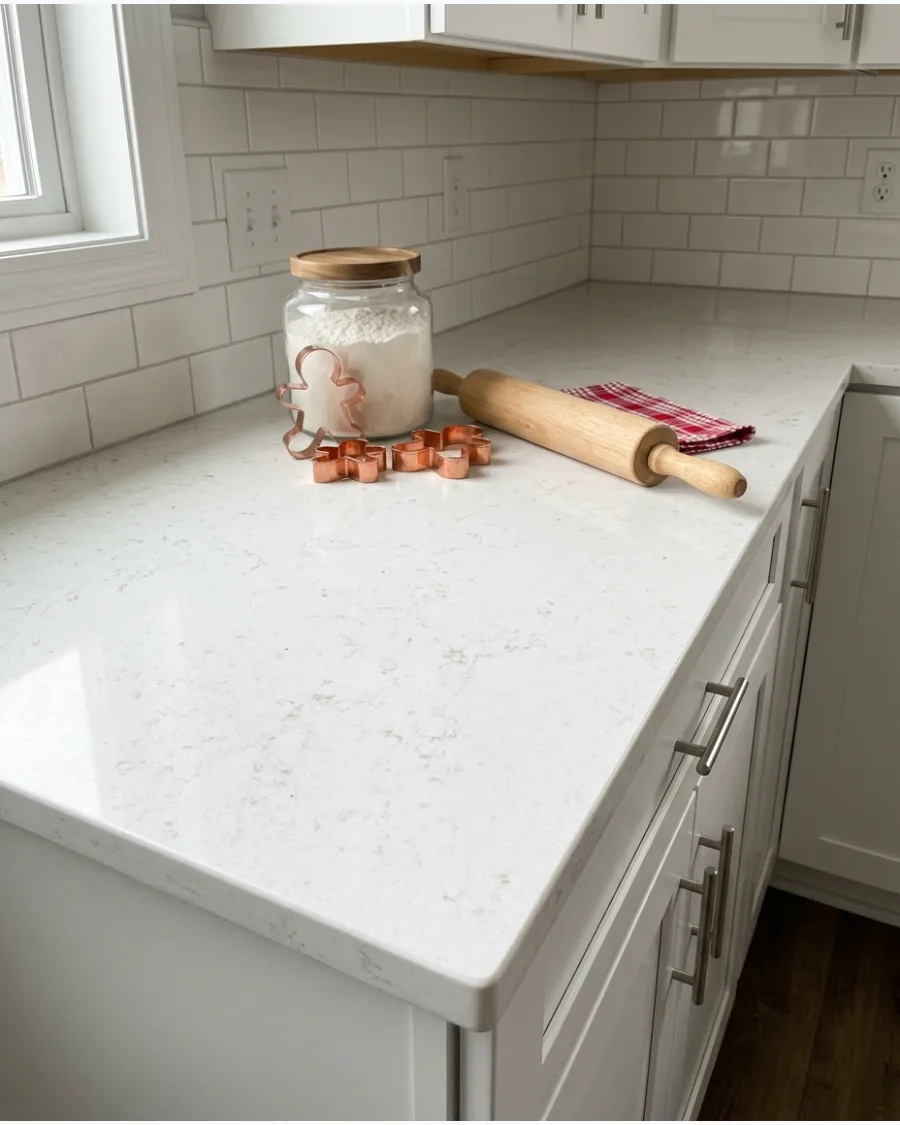
Group your baking essentials like rolling pins and cookie cutters into a charming vignette on the counter. This style highlights the tools of the season while keeping them within reach for actual weekend projects.
Place a small jar of flour and a few gingerbread ornaments together to signal that the kitchen is ready for holiday baking. It makes the room feel busy and cozy at the same time.
- Use a small tray or a clean kitchen towel as a base to define the baking station area.
- Display copper or brass cookie cutters for a warm, metallic look that feels more festive than plastic.
- Keep a small dish of cinnamon sticks nearby to add a natural holiday scent to the station.
Most people skip this: Tie a small sprig of rosemary to the handle of the rolling pin for a fresh, herbal aroma.
36. Christmas Cookie Cutter Jar
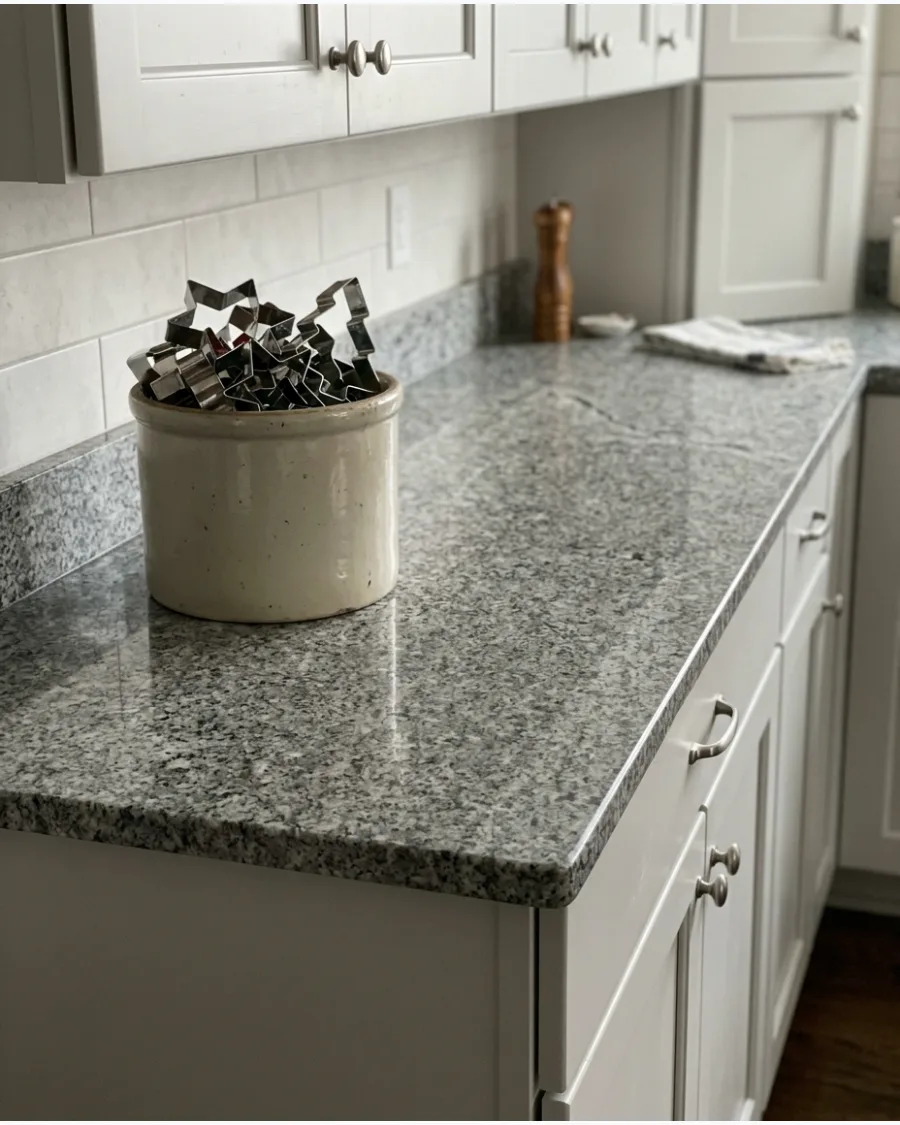
Fill an old-fashioned stoneware crock or a clear jar with metal Christmas cookie cutters for a nostalgic look. This uses items you already own to create a display that feels both organized and decorative.
Set the jar next to a small potted evergreen to add a pop of natural color to the metal textures. It is a clever way to organize holiday tools while showing them off as part of the theme.
- Mix different metals like silver, copper, and gold cutters for a more varied and interesting display.
- Choose a jar or crock that is tall enough to hold the cutters without them spilling over too much.
- Clean the cutters thoroughly before and after the season to prevent any rust from forming.
Best shortcut: If your cutters look dull, give them a quick polish with a bit of lemon juice and baking soda.
37. Holiday Rolling Pin Display
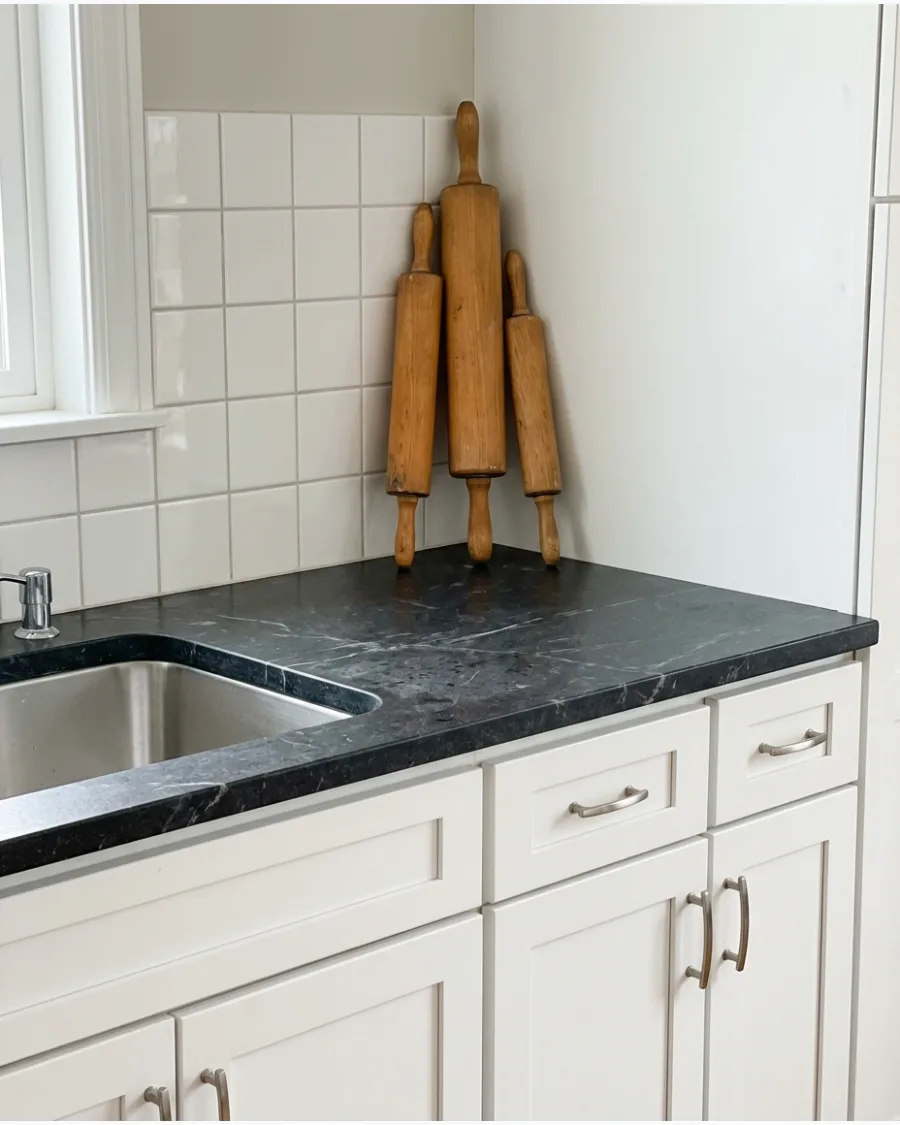
Lean a few vintage or patterned rolling pins against the backsplash for an instant vertical display. This takes up almost no counter depth, which leaves plenty of room for your daily meal prep.
Wrap a piece of festive twine or a thin ribbon around the handles to tie the group together. It adds height and texture to an otherwise flat area of the kitchen without being in the way.
- Use rolling pins of varying heights and wood tones to create a more dynamic visual arrangement.
- Secure the bottom of the pins with a small piece of museum gel to prevent them from sliding on the counter.
- Look for pins with engraved holiday patterns to add an extra layer of detail to the display.
Quick win: Place the pins behind your fruit bowl or utensil holder to add layers of depth to the counter.
38. Bowl of Seasonal Fruit and Greenery
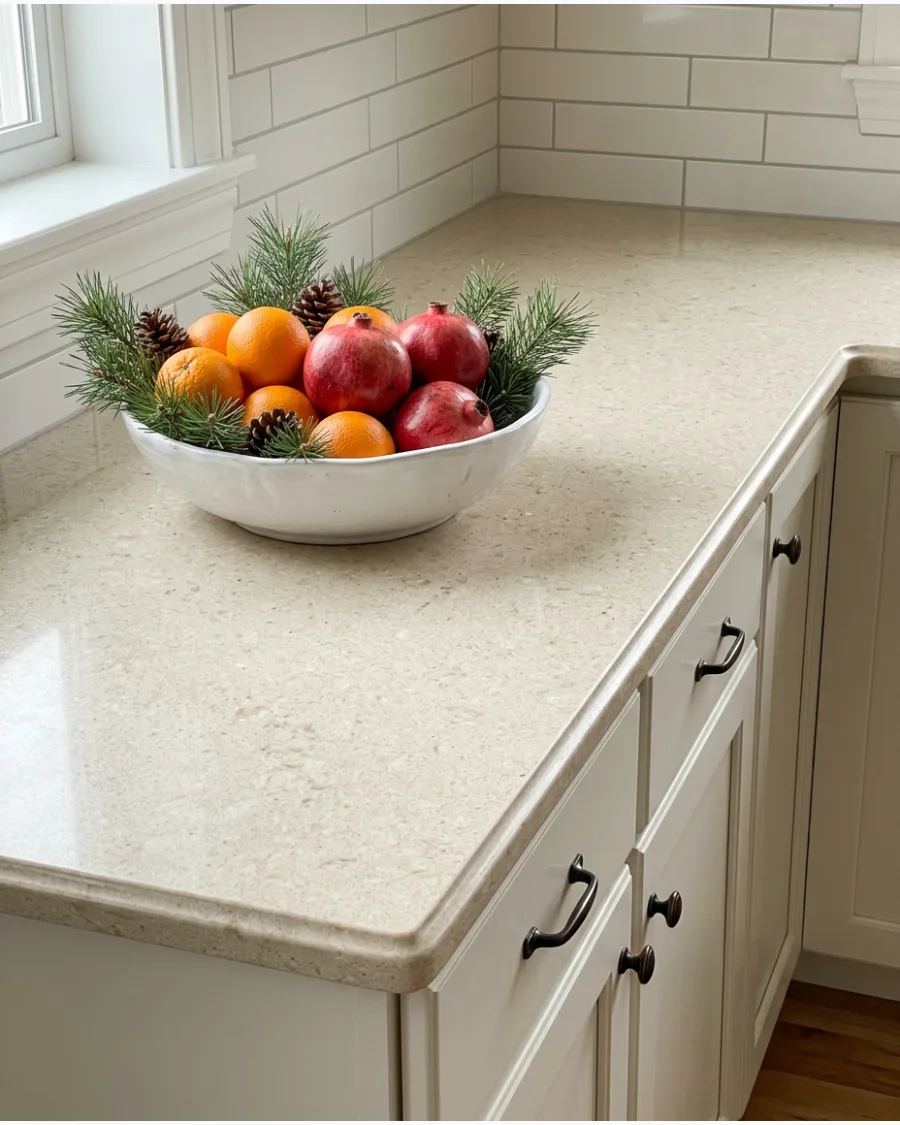
Combine bright oranges, deep red pomegranates, and fresh evergreen sprigs in a large ceramic bowl. This natural arrangement smells amazing and brings organic shapes to the straight lines of the kitchen cabinets.
Nestle a few cinnamon sticks between the fruit to add a warm, spicy scent to the kitchen air. It is a classic look that works perfectly in any style of home.
- Use real evergreens like cedar or pine, but ensure they are washed and dried before touching the fruit.
- Replace the fruit as it gets eaten to keep the bowl looking full and fresh throughout December.
- Add a few walnuts or pecans in their shells to fill in small gaps and add more texture.
Most people skip this: Poke a few whole cloves into the oranges to create a traditional pomander that smells incredible.
39. Christmas Cake Stand Display
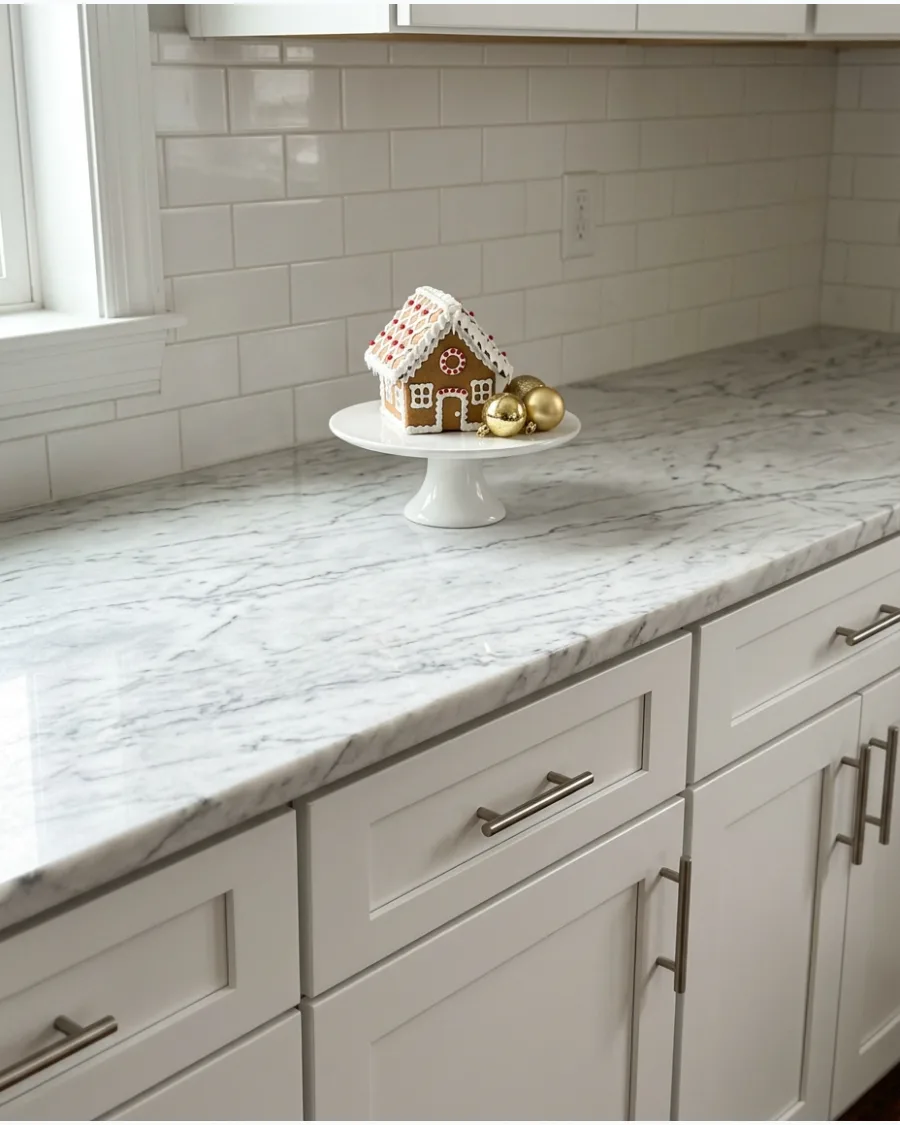
Use a pedestal cake stand to lift your holiday decorations off the counter surface and create a clear boundary. This makes the items feel more intentional and keeps the footprint of the decor very small.
Arrange a small gingerbread house or a cluster of ornaments on the stand to give them a place of honor. Elevating the items also makes it much easier to wipe down the counter underneath.
- Choose a cake stand with a glass dome if you want to protect edible decor from dust or pets.
- Mix different heights by using a stack of two cake stands for a more dramatic kitchen centerpiece.
- Use a marble or wooden stand to match the existing materials in your kitchen for a seamless look.
Best shortcut: Place a small wreath around the base of the cake stand to soften the transition to the countertop.
40. Christmas Baking Board Vignette
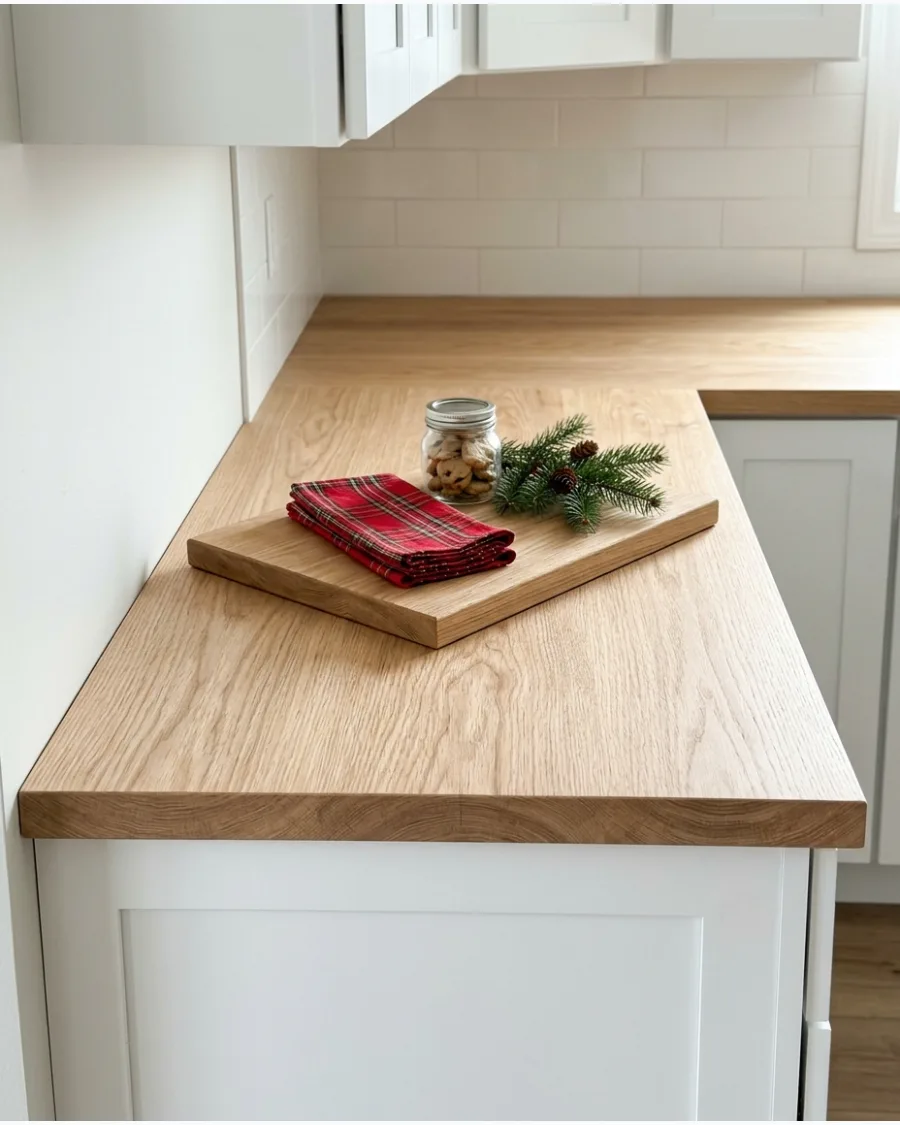
Arrange a collection of festive napkins, a jar of cookies, and a small rolling pin on a large wooden cutting board. Keeping everything on a single board means you can slide the entire display out of the way when you need more space for cooking.
Incorporate a small sprig of greenery to add a touch of life to the wooden and fabric textures. It keeps the kitchen looking organized and curated.
- Choose a board with a handle to make it even easier to move around the kitchen as needed.
- Layer a festive tea towel under the items on the board to add a pop of holiday color or pattern.
- Use the board to group functional items like salt and pepper shakers with your holiday decor.
Quick win: Use a board that is slightly larger than you think you need so the items don't look cramped or cluttered.
FUNCTIONAL CHRISTMAS KITCHEN COUNTER DECOR
41. Christmas Utensil Crock
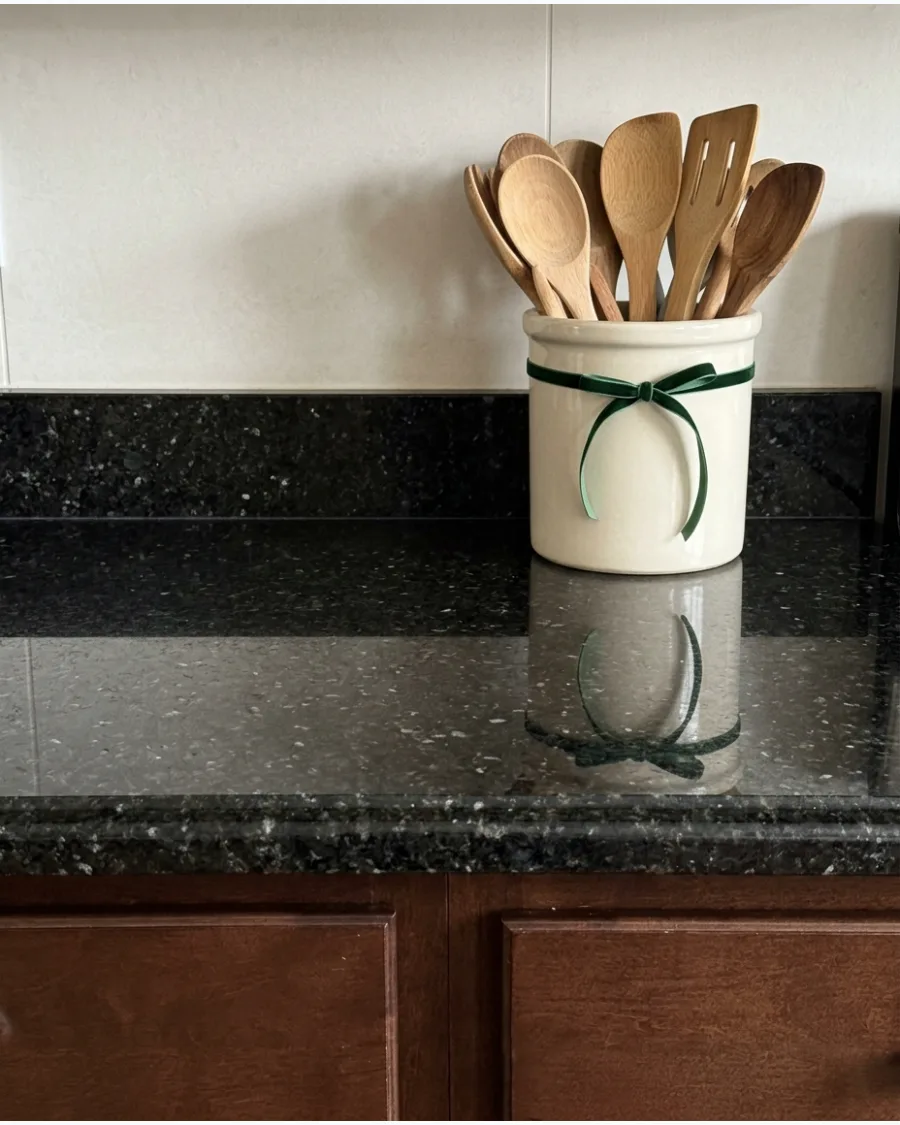
Use a heavy ceramic crock to hold wooden spoons and spatulas within easy reach. Tie a thin velvet ribbon around the neck of the crock to add seasonal color without taking up extra workspace. This simple touch signals the holidays while keeping your most-used tools organized.
- Buy a spool of velvet ribbon from a craft store for under $5.
- Tie the bow tightly or use a dot of hot glue to prevent it from slipping.
- Swap the ribbon color to match your kitchen towels or holiday theme.
Quick win: Use a rubber band under the ribbon to keep it from sliding down a tapered or smooth ceramic crock.
42. Cutting Boards With Christmas Greenery
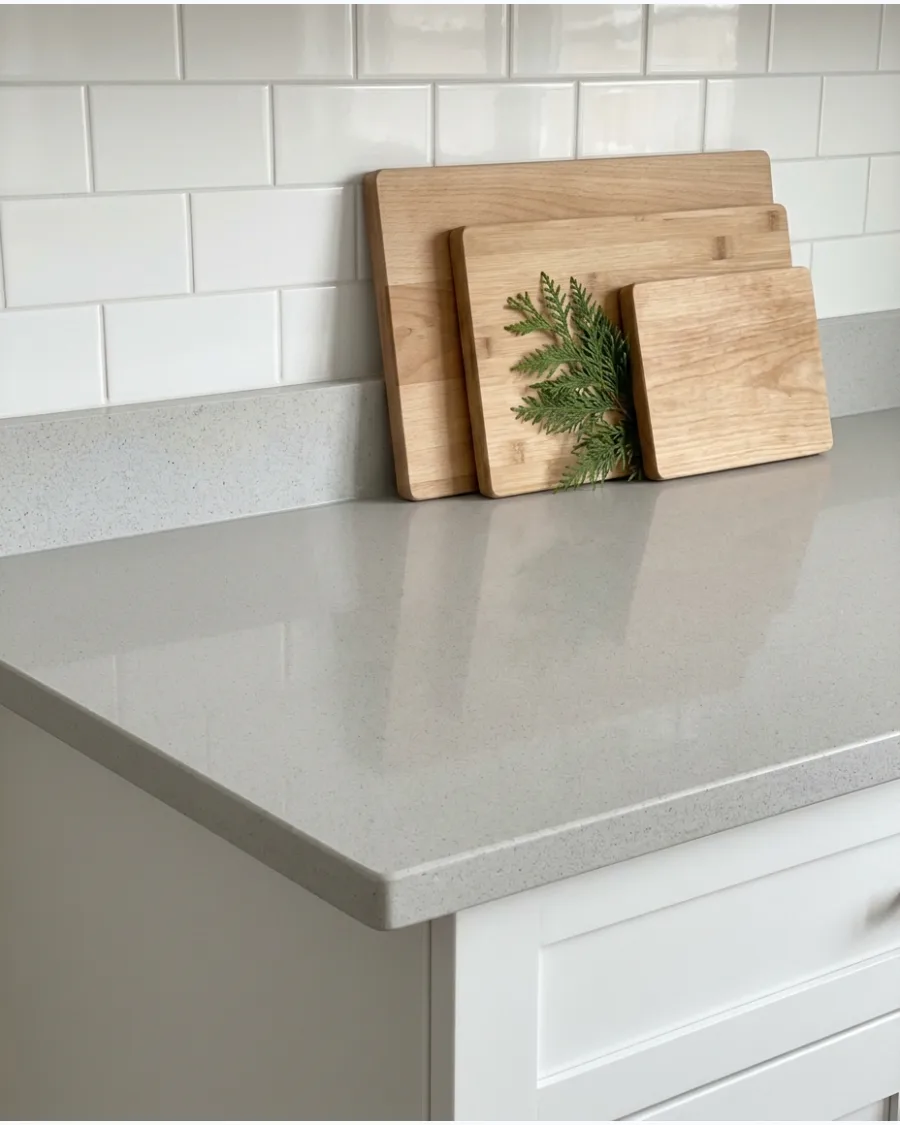
Lean multiple wooden cutting boards against the backsplash to add warmth and texture to the kitchen. Slide a single sprig of fresh cedar or pine behind the front board for a pop of holiday green. This decor is flat and space-saving, leaving plenty of room for actual food preparation.
- Foraged greenery from the backyard is a free and fragrant option.
- Lean the boards in a staggered, overlapping pattern for a layered look.
- Use high-quality faux greenery if you want a look that lasts all month without shedding.
Most people skip this: Wash and thoroughly dry foraged branches to avoid bringing tiny outdoor bugs onto your food surfaces.
43. Christmas Dish Soap Tray
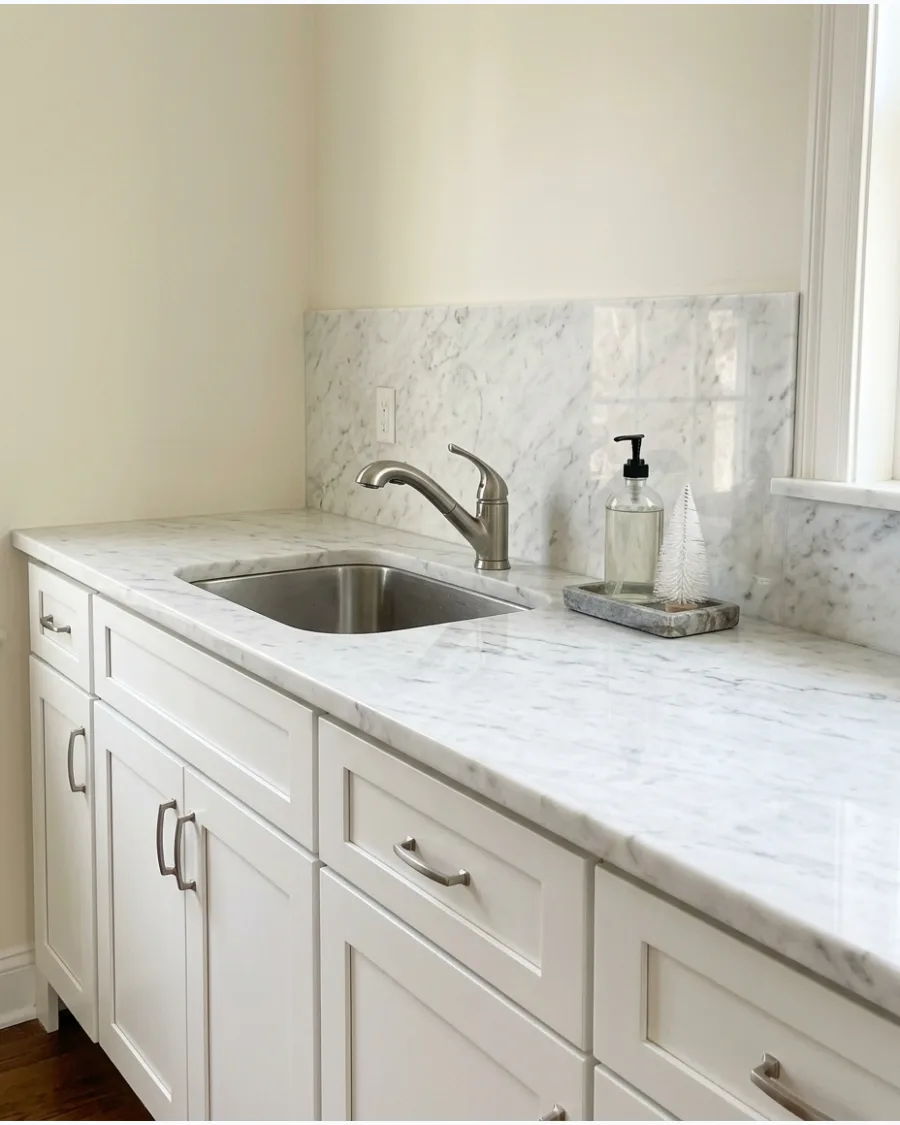
Set your everyday soap dispensers on a small riser or stone tray beside the sink. Place one tiny bottle-brush tree next to the soap to make a daily chore feel more festive. It keeps the sink area organized and catches drips before they hit your countertop.
- Small stone or wood trays typically cost between $10 and $15.
- Place the tray directly behind or beside the faucet for easy access.
- Choose a tray with small rubber feet to prevent water from getting trapped underneath.
Best shortcut: Use a small ceramic saucer or a marble coaster if you do not have a dedicated kitchen tray.
44. Festive Salt and Pepper Station
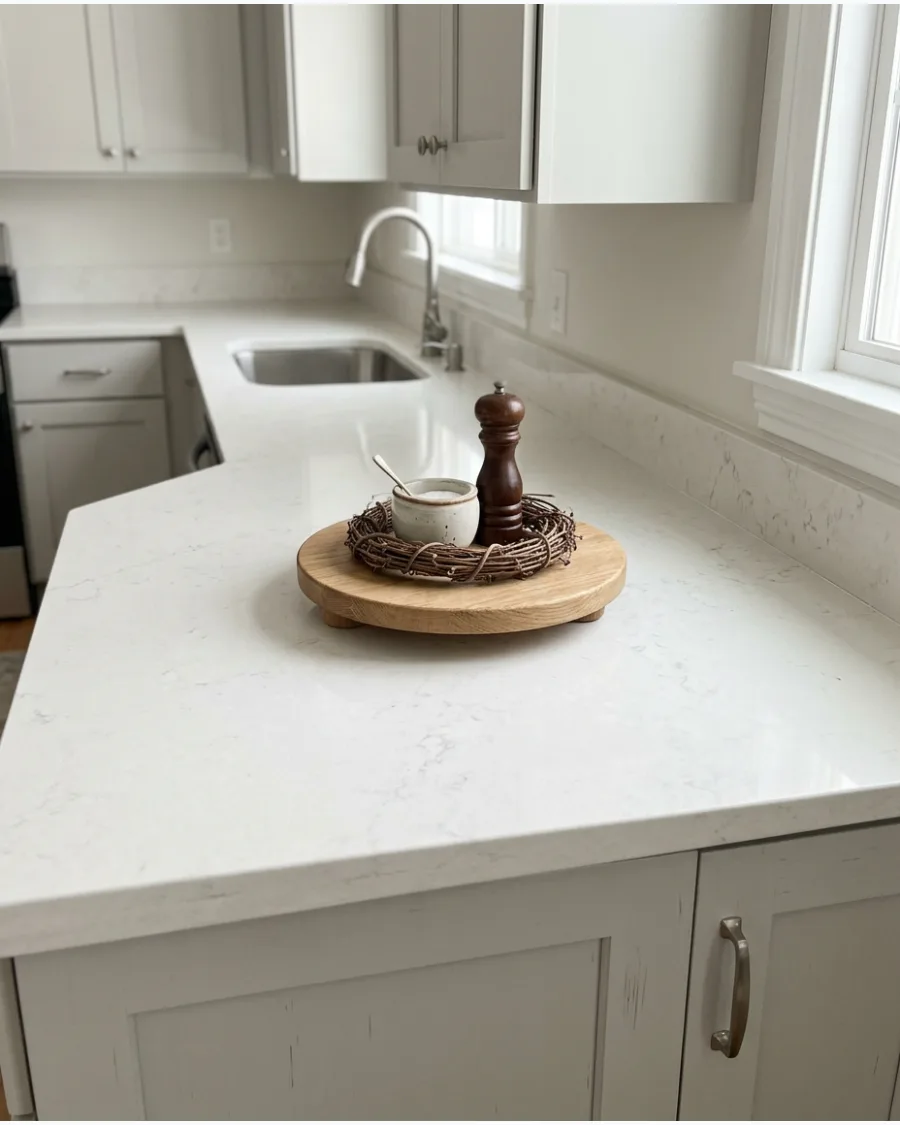
Keep your most-used seasonings together on a small wooden board or pedestal. Tuck a miniature wreath or a tiny pinecone into the arrangement to ground the holiday look. This turns a messy pile of spice jars into a deliberate and festive design choice.
- Miniature wreaths can often be found in the dollhouse or craft section of stores.
- Group your items in odd numbers like three or five for better visual balance.
- Use a tray with a small lip to keep salt grains or peppercorns contained.
Quick win: A small sprig of fresh rosemary looks like a tiny evergreen tree and smells wonderful near your cooking oils.
45. Christmas Cookbook Counter Display
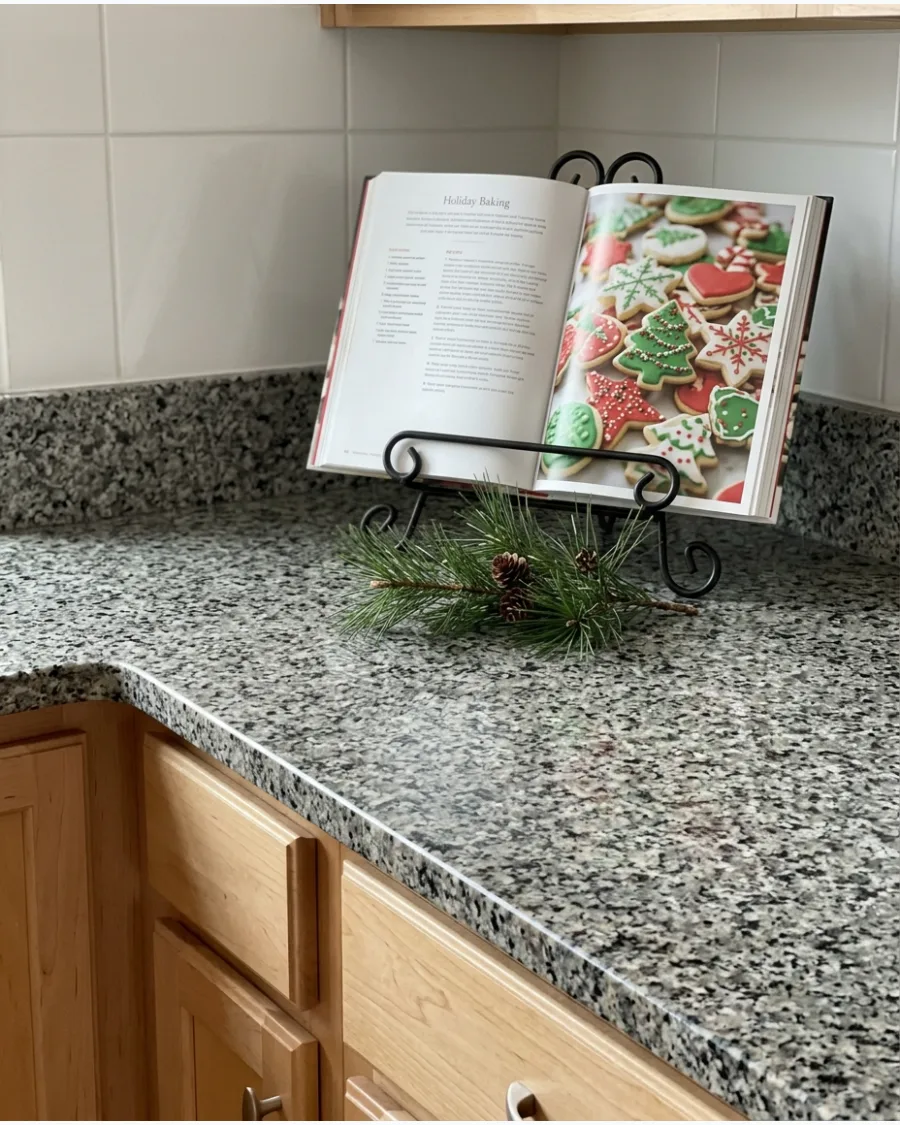
Prop up a cookbook with a beautiful holiday cover on a metal or wooden stand. Add a small sprig of greenery to the base of the stand to soften the hard edges of the kitchen. It acts as temporary art while keeping your favorite seasonal recipes ready for holiday baking.
- Use a sturdy stand you already own to save money.
- Position the book away from the stove to avoid grease splatters or heat damage.
- Switch the page every few days to keep the visual display fresh and interesting.
Most people skip this: Use a book with a spine color that matches your kitchen's existing accent colors for a cohesive look.
46. Holiday Tea Towel and Cutting Board Corner
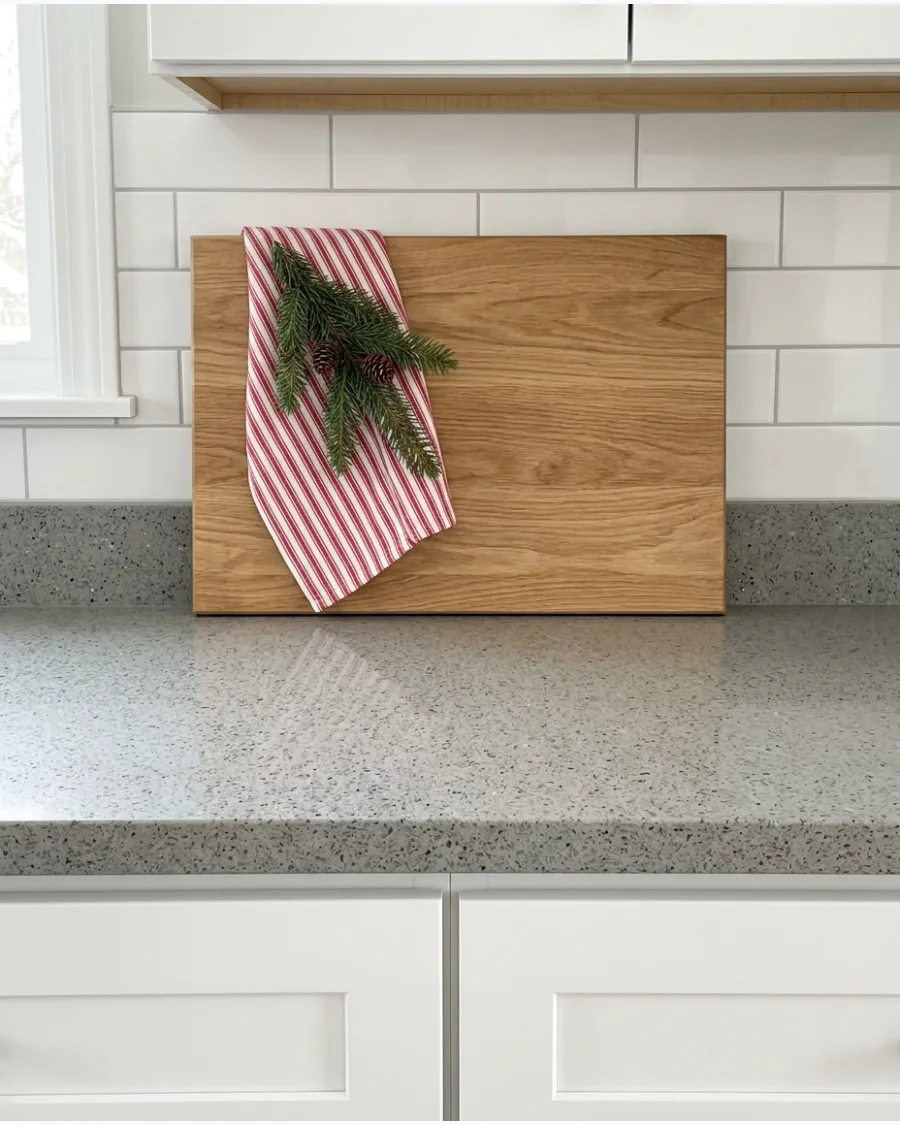
Layer a festive tea towel over the edge of a large cutting board leaning against the wall. Tuck a small evergreen branch into the fold of the towel for an easy and inexpensive layered look. This adds soft texture to a room that is usually full of hard surfaces like stone and tile.
- High-quality cotton or linen towels can be reused for many years.
- Drape the towel slightly off-center for a more casual and natural feel.
- Choose a towel with a simple stripe or plaid to avoid a cluttered appearance.
Best shortcut: Use a small binder clip on the back of the cutting board to hold the towel perfectly in place.
47. Christmas Bread Box Styling
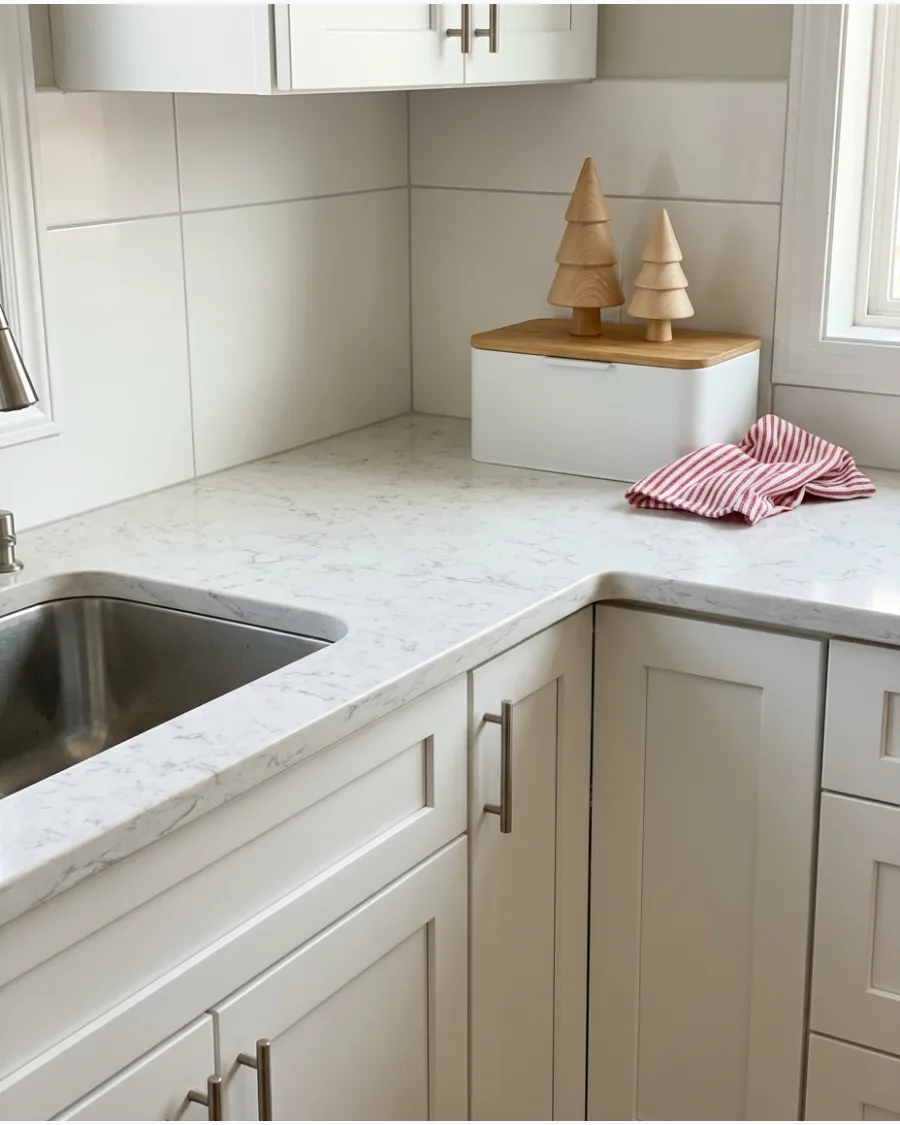
Use the flat top of your bread box as a miniature stage for holiday accents. Place two or three wooden trees of different heights on top of the box to add vertical interest to your counter. This utilizes vertical space that usually goes to waste in a busy kitchen.
- Wooden trees are durable, kid-friendly, and very easy to store.
- Keep the display simple so objects do not fall when you open the box lid.
- Use museum putty to secure the trees if the bread box moves during use.
Quick win: If your bread box has a curved top, place the trees on a small flat tray first to keep them level.
48. Festive Kitchen Canister Display
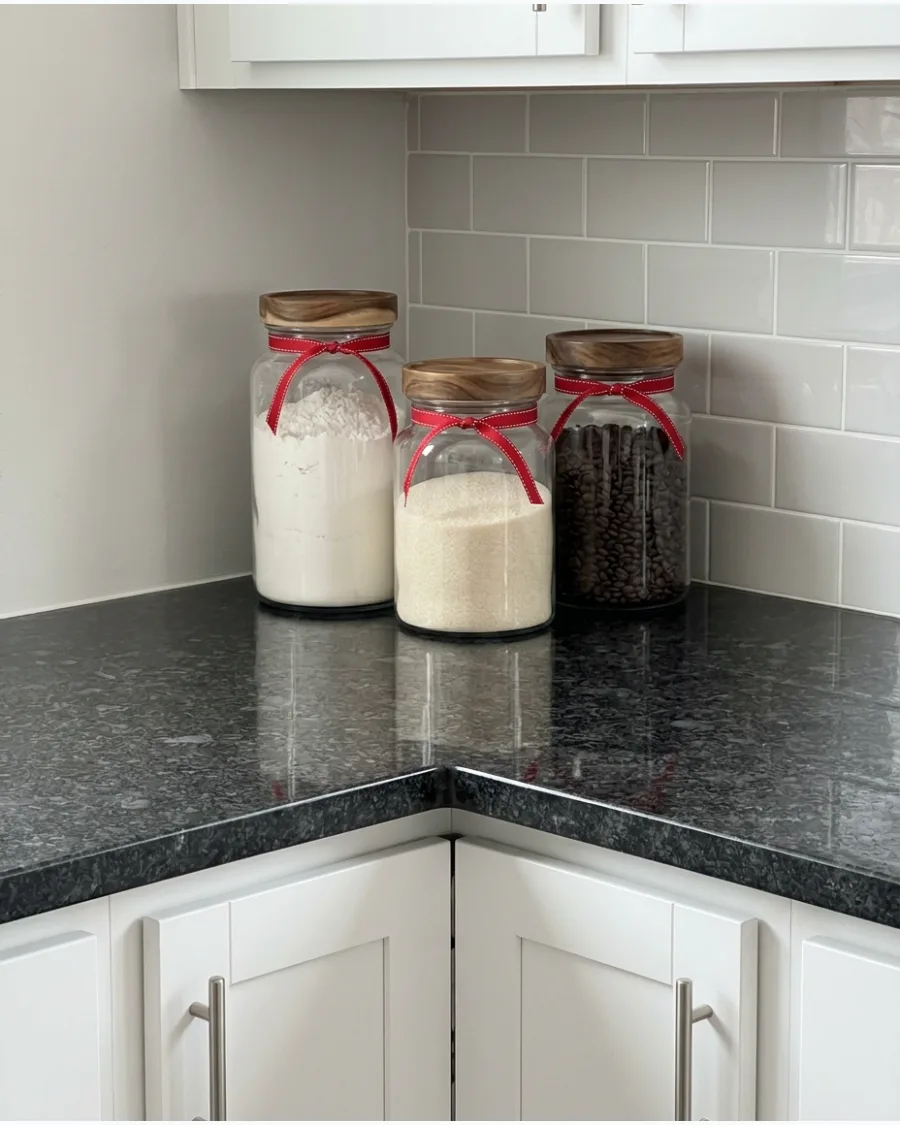
Give your flour and sugar jars a quick holiday makeover with simple craft supplies. Wrap a piece of red baker's twine or velvet ribbon around the lids to coordinate with your other holiday decor. It is a low-effort way to make everyday storage feel intentional and festive.
- Use leftover ribbon from your gift-wrapping supplies to save on costs.
- Ensure the ribbon is tied high enough that it does not interfere with the airtight seal.
- Label the jars with festive tags or chalk markers for an extra level of detail.
Most people skip this: Wipe the jars down with glass cleaner before adding ribbons so they sparkle under your under-cabinet lights.
CHRISTMAS LIGHTING AND SMALL-SPACE COUNTER IDEAS
49. Warm Fairy Light Countertop Corner
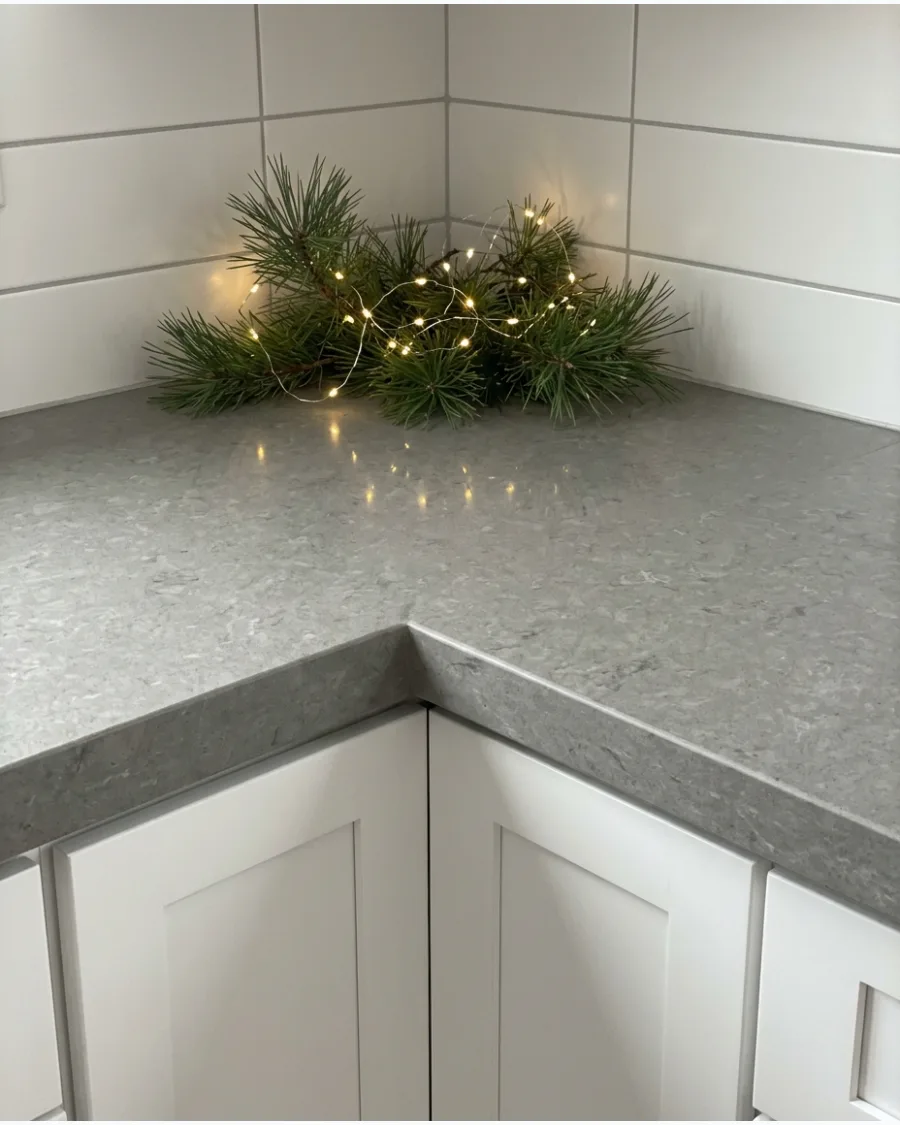
Brighten a dark kitchen corner with a strand of battery-operated fairy lights. Weave the lights through a small cluster of greenery or ceramic houses to create a soft evening glow. This adds warmth to the room during long winter nights without needing a nearby outlet.
- Look for fairy lights that include a built-in automatic timer.
- Hide the battery pack behind a large canister, jar, or cutting board.
- Use warm white bulbs rather than cool blue ones for a cozy, inviting feel.
Best shortcut: Use the 'timer' setting so the lights turn on automatically at dusk every day without you touching them.
50. Mini Lamp Christmas Countertop
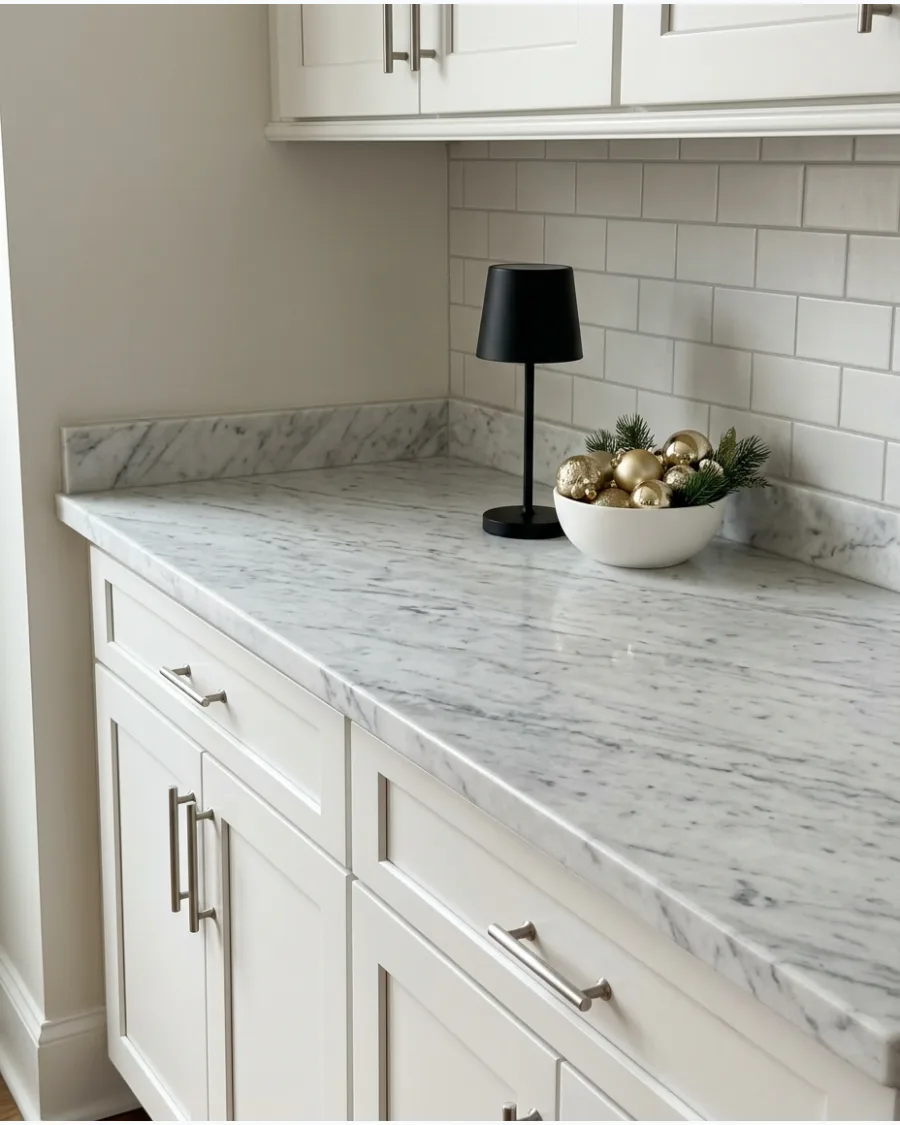
Place a small cordless lamp on your counter to create soft mood lighting for the holidays. Set the lamp next to a bowl of ornaments or a small evergreen to highlight your holiday display. This creates a high-end look that mimics professional kitchen styling used in luxury homes.
- Rechargeable lamps are perfect for kitchen islands that do not have outlets.
- Choose a lamp with a dimmable feature to adjust the brightness at night.
- Keep the lamp away from the sink area to avoid any potential water damage.
Quick win: A lamp with a warm-toned shade makes the whole kitchen feel more like a living space and less like a utility zone.
51. Flameless Candle Christmas Counter
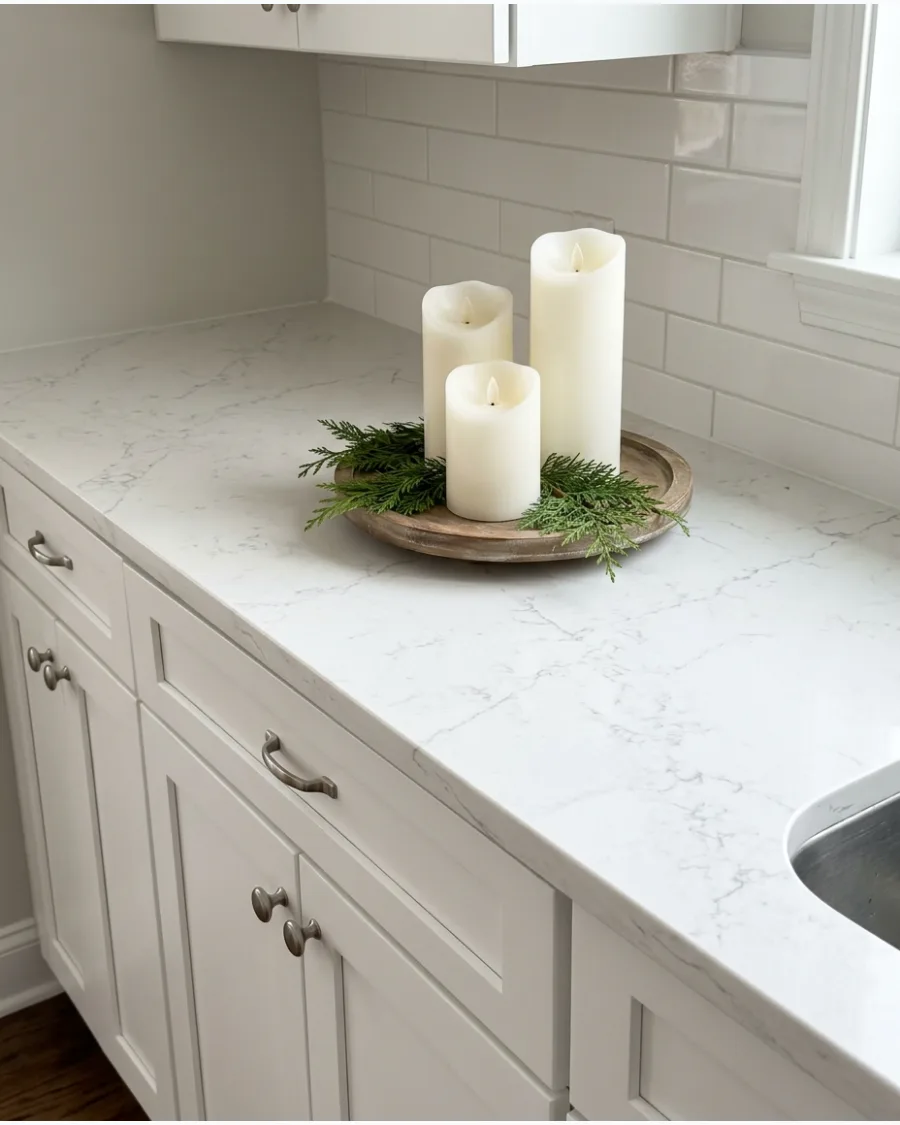
Grouping battery-operated candles with greenery provides a warm glow without the risk of an open flame near dish towels or food. These candles often come with timers, so the kitchen lights up automatically every evening.
Place the candles on a small riser to keep the greenery from touching any damp spots on the counter.
- $15-$30 for a set of LED candles.
- Set the timers for 5 PM to enjoy the glow all evening.
- Works well in dark corners or near sinks where real candles are unsafe.
Quick win: Choose flickering LED candles with a wax-like finish for a more realistic look.
52. Under-Cabinet Christmas Garland Glow
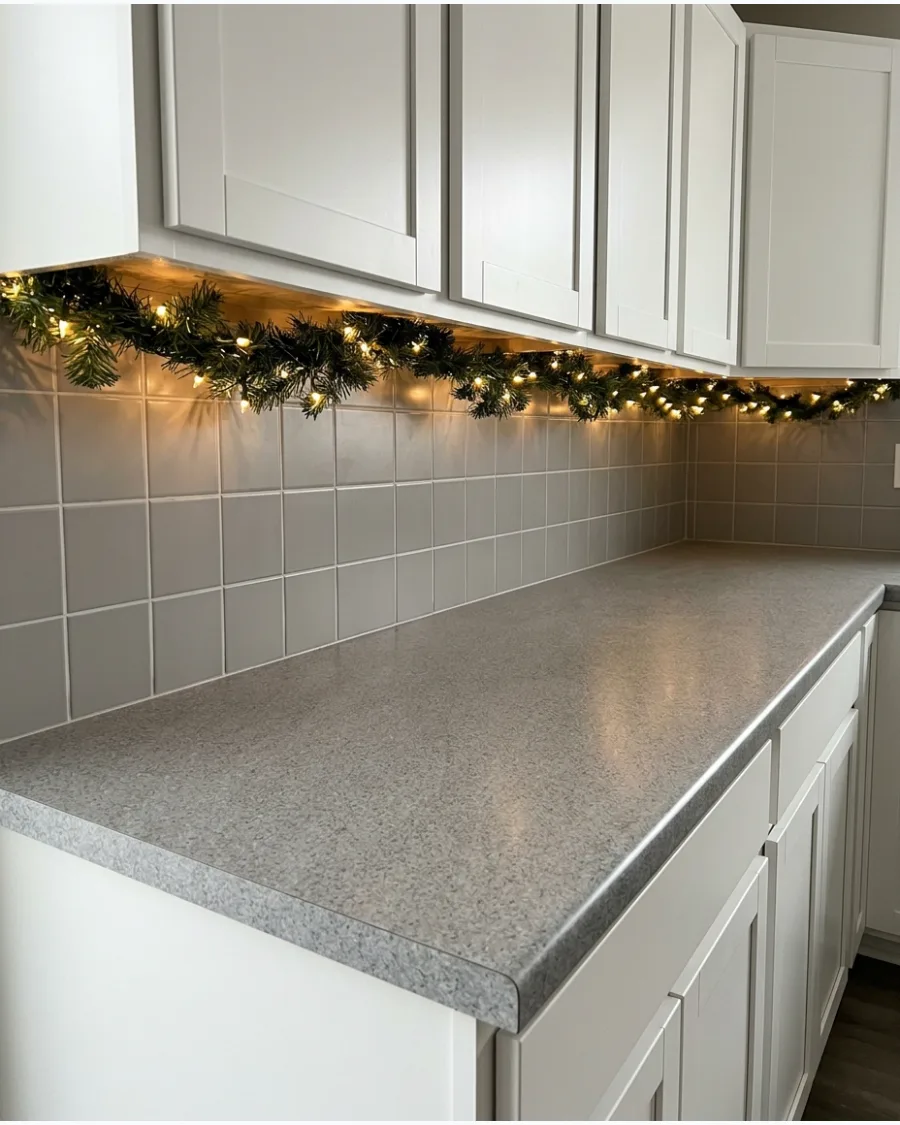
Tucking a thin strand of greenery along the underside of cabinets keeps your workspace completely open for chopping and mixing. Adding a string of tiny fairy lights creates a soft ambiance that bounces off the backsplash.
Secure the garland with small adhesive clips to prevent it from sagging over time.
- $10 for adhesive clips and $20 for lightweight garland.
- Use battery-operated lights to avoid messy cords near outlets.
- Perfect for small kitchens with limited counter depth.
Most people skip this: Use fairy lights on a silver wire because the wire is easier to hide within the needles.
53. Christmas Decor Above the Counter Instead of On It
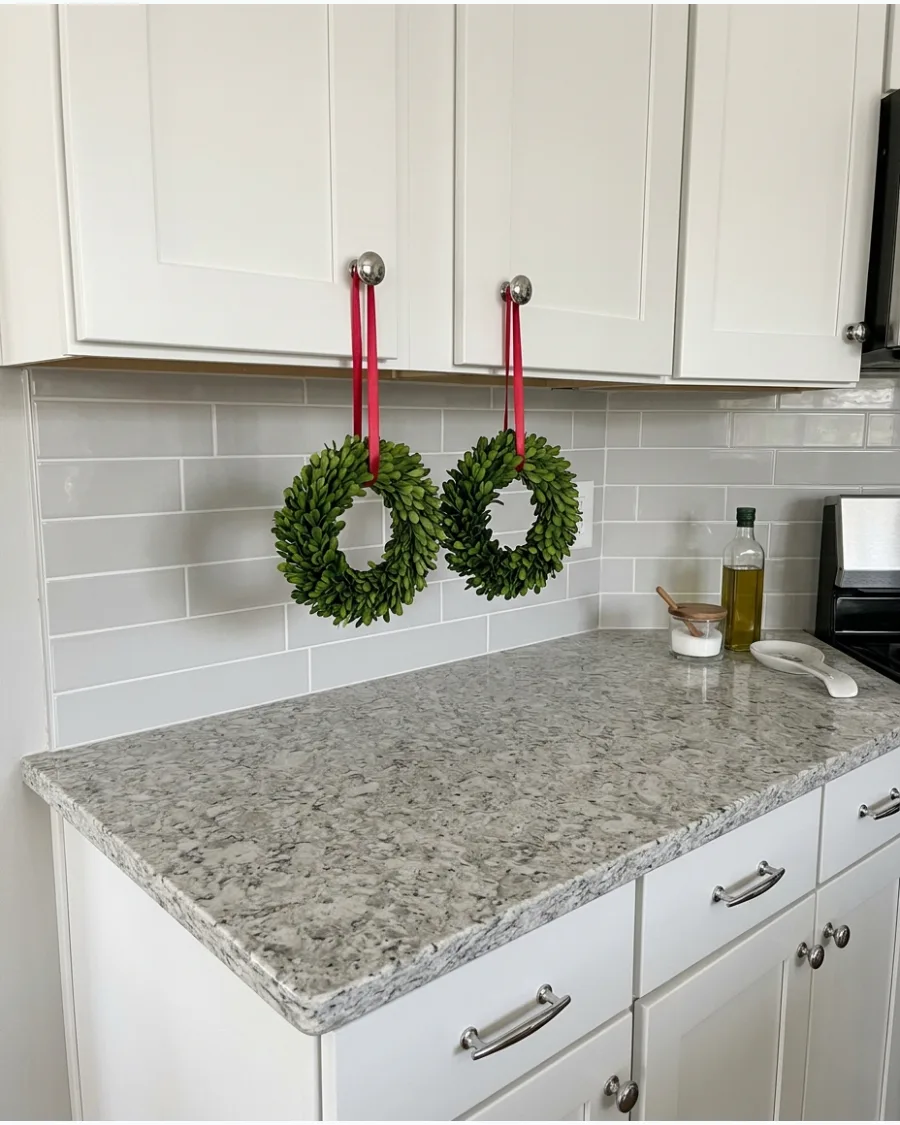
Hanging small wreaths or ornaments from the bottom of upper cabinets or open shelving adds vertical interest. This strategy moves the holiday cheer up and out of the way of your daily coffee maker or toaster.
Use festive ribbon to hang lightweight items so you can easily adjust the height.
- Under $20 for ribbon and mini wreaths.
- Tie ribbons to cabinet hinges or use removable hooks on the inside of doors.
- Ideal for renters who cannot drill into walls or cabinets.
Best shortcut: Use double-sided mounting tape on the back of ribbons to keep wreaths from swinging when doors open.
54. One-Corner Christmas Countertop Display
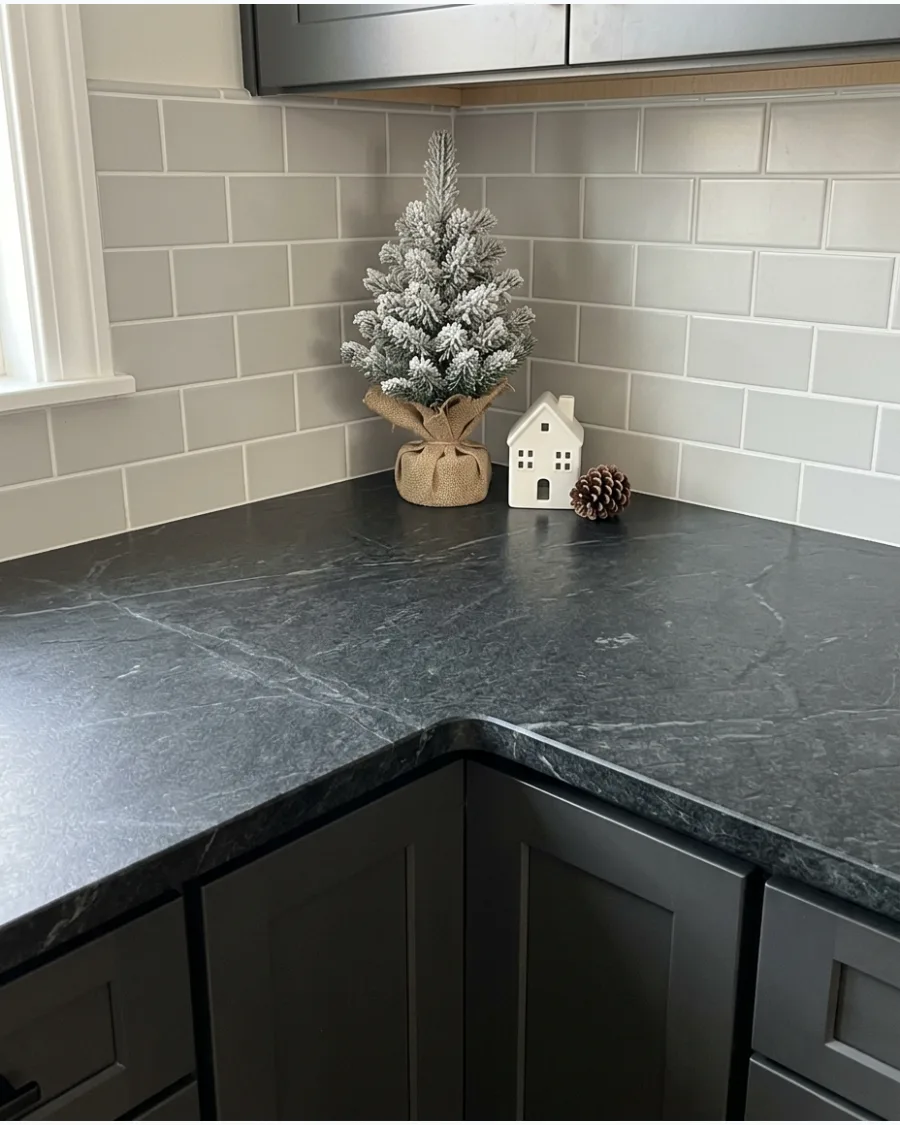
Concentrating your decor into one specific corner leaves the rest of the counter free for actual kitchen work. A mix of a mini tree, a decorative house, and a candle creates a high-impact focal point without cluttering the entire room.
Keep the largest item in the very back of the corner to maximize the available prep space in front of it.
- $30 for a complete vignette set.
- Group items in odd numbers like three or five for a balanced look.
- Great for galley kitchens where every inch of counter space matters.
Quick win: Place a small mirror behind the corner display to reflect the lights and make the space feel bigger.
2026 CHRISTMAS COUNTERTOP STYLE IDEAS
55. Cozy Vintage Christmas Countertop
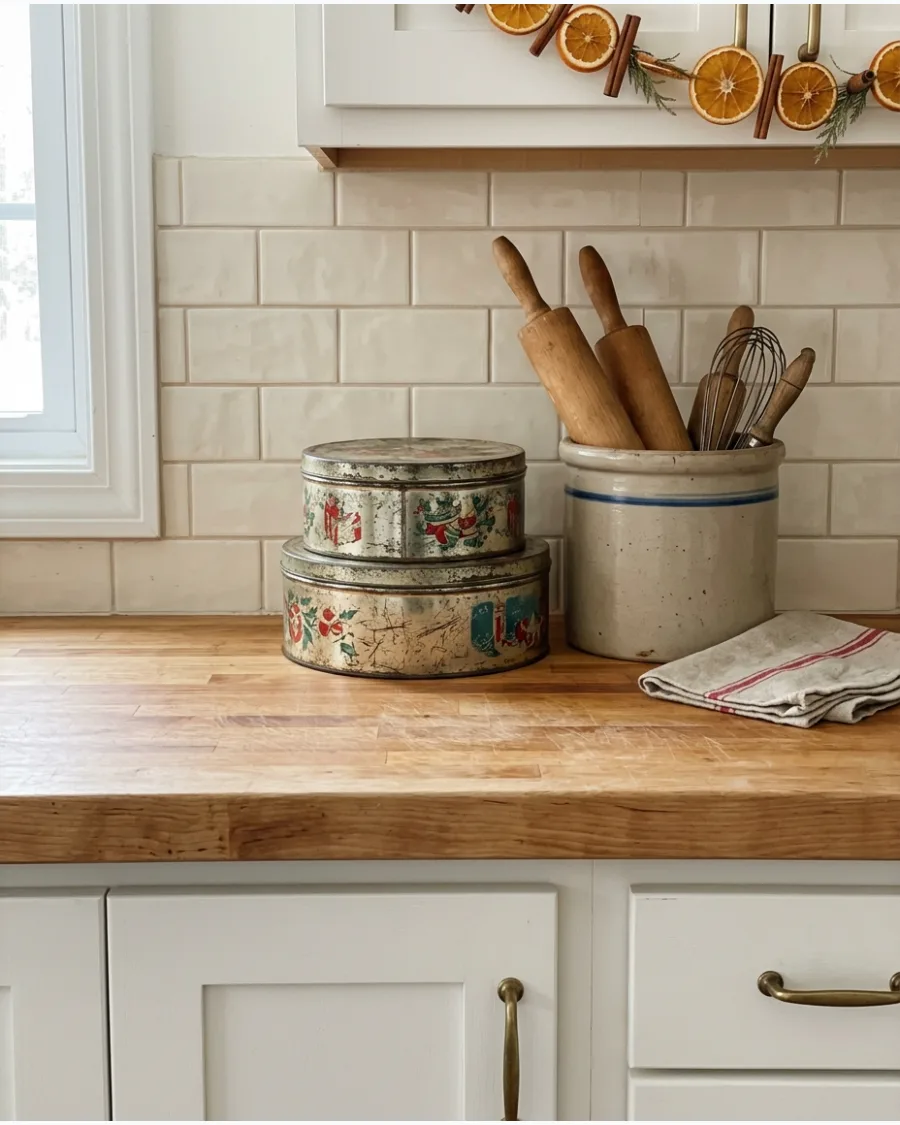
Combining old-fashioned cookie tins with thrifted crocks brings a sense of history to a modern kitchen. These items are often sturdy and functional, serving as excellent storage for holiday baking supplies.
Stack two vintage tins of different sizes to add height without taking up more width on the counter.
- $5-$15 at local thrift stores or flea markets.
- Clean vintage tins thoroughly before storing any unwrapped food inside.
- Mixes well with modern stainless steel appliances for a collected look.
Best shortcut: If vintage tins are rusty inside, use them as decorative covers for plastic storage containers.
56. Grandma-Core Christmas Kitchen Counter
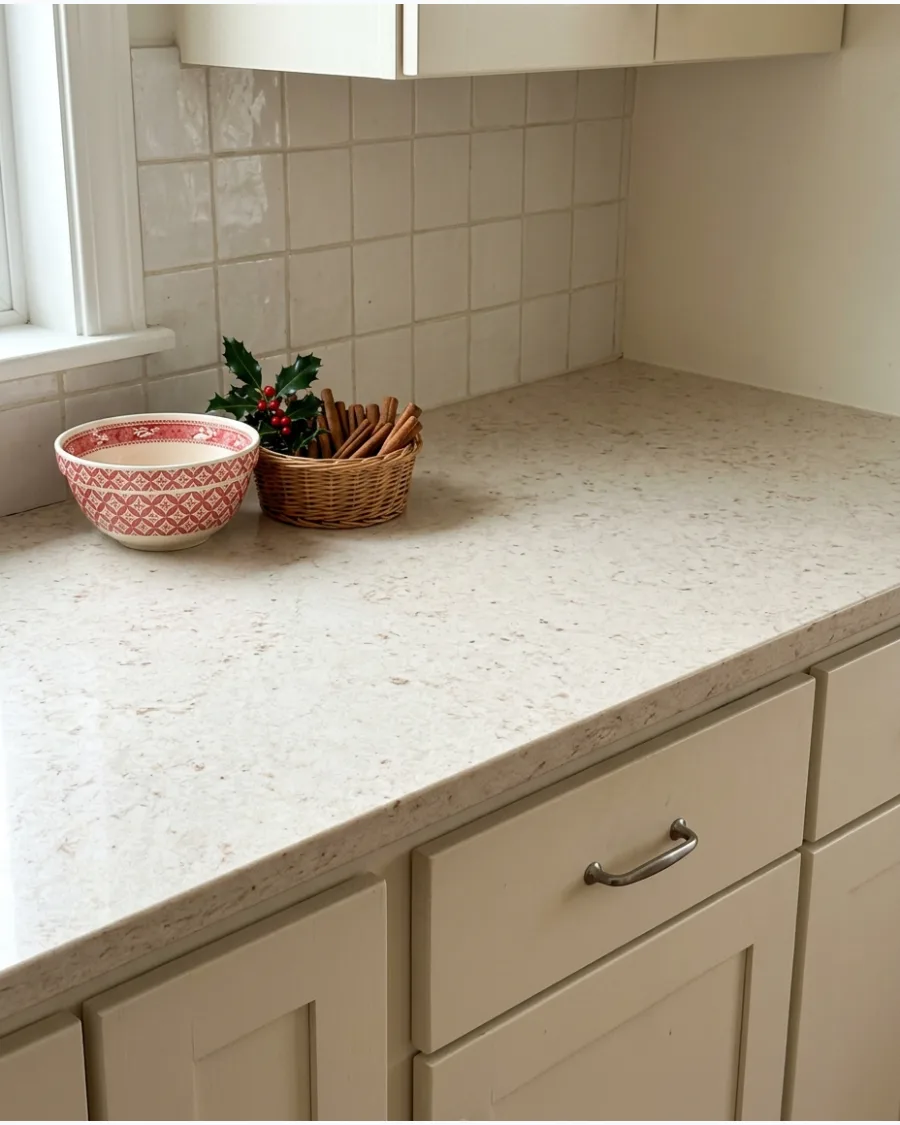
This style focuses on patterned ceramics and handmade touches that feel warm and lived-in. Traditional red accents and classic baking tools like a ceramic flour sifter make the kitchen feel like a holiday workshop.
Drape a cross-stitched or embroidered towel over the edge of a basket to soften the look of the counter.
- $20-$40 for specialty ceramics.
- Look for transferware patterns in red or green for a classic feel.
- Works best in kitchens with warm wood tones or cream cabinets.
Most people skip this: Scents matter for this style, so tuck a few real cloves into the greenery for a natural kitchen aroma.
57. Scandinavian Christmas Countertop
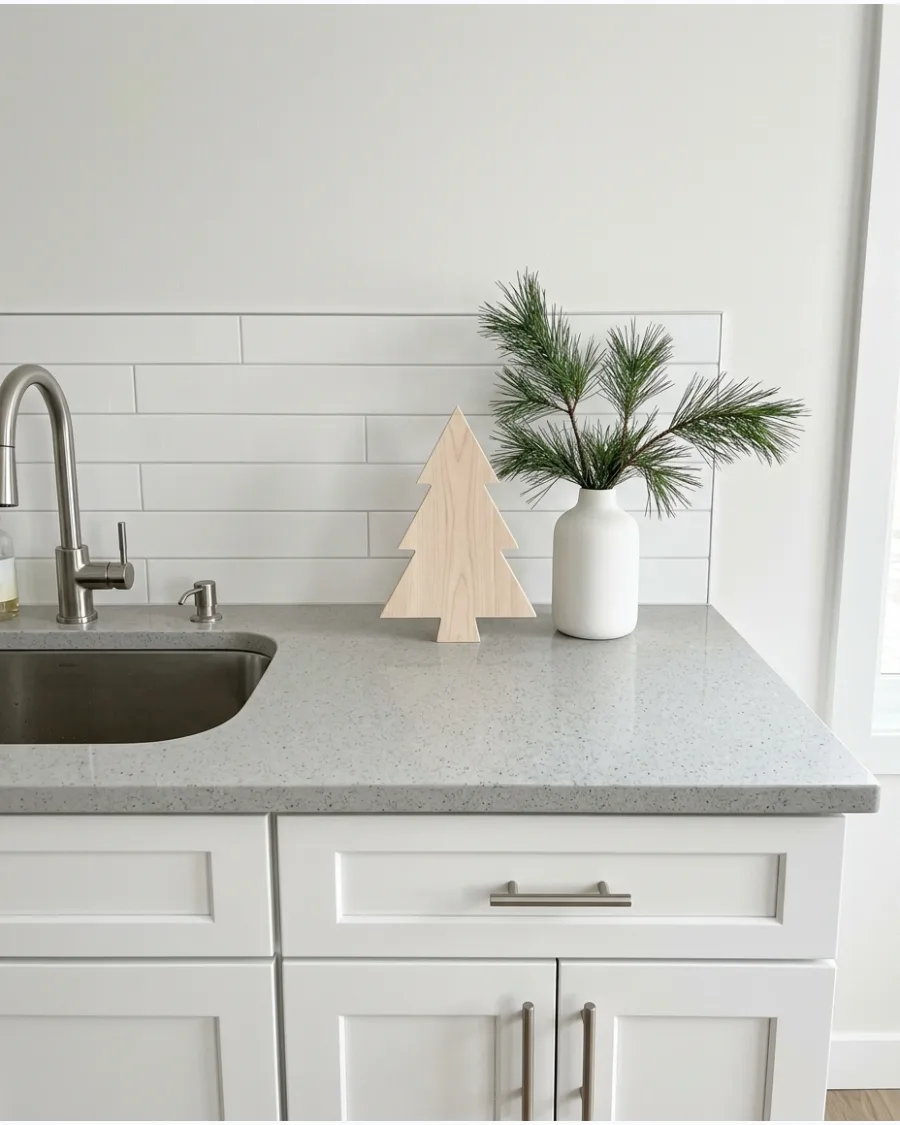
Nordic decor relies on pale wood, simple white shapes, and natural greenery for a minimalist festive feel. This look is perfect for those who want a clean kitchen that does not feel overwhelmed by bright colors.
Choose a single wooden tree or a paper star to serve as a quiet but intentional center-piece.
- $15 for wooden or paper accents.
- Stick to a palette of white, wood, and forest green.
- Ideal for modern or contemporary kitchens with clean lines.
Quick win: Use unvarnished light wood items to keep the texture feeling organic and authentically Scandinavian.
58. Burgundy and Brass Christmas Countertop
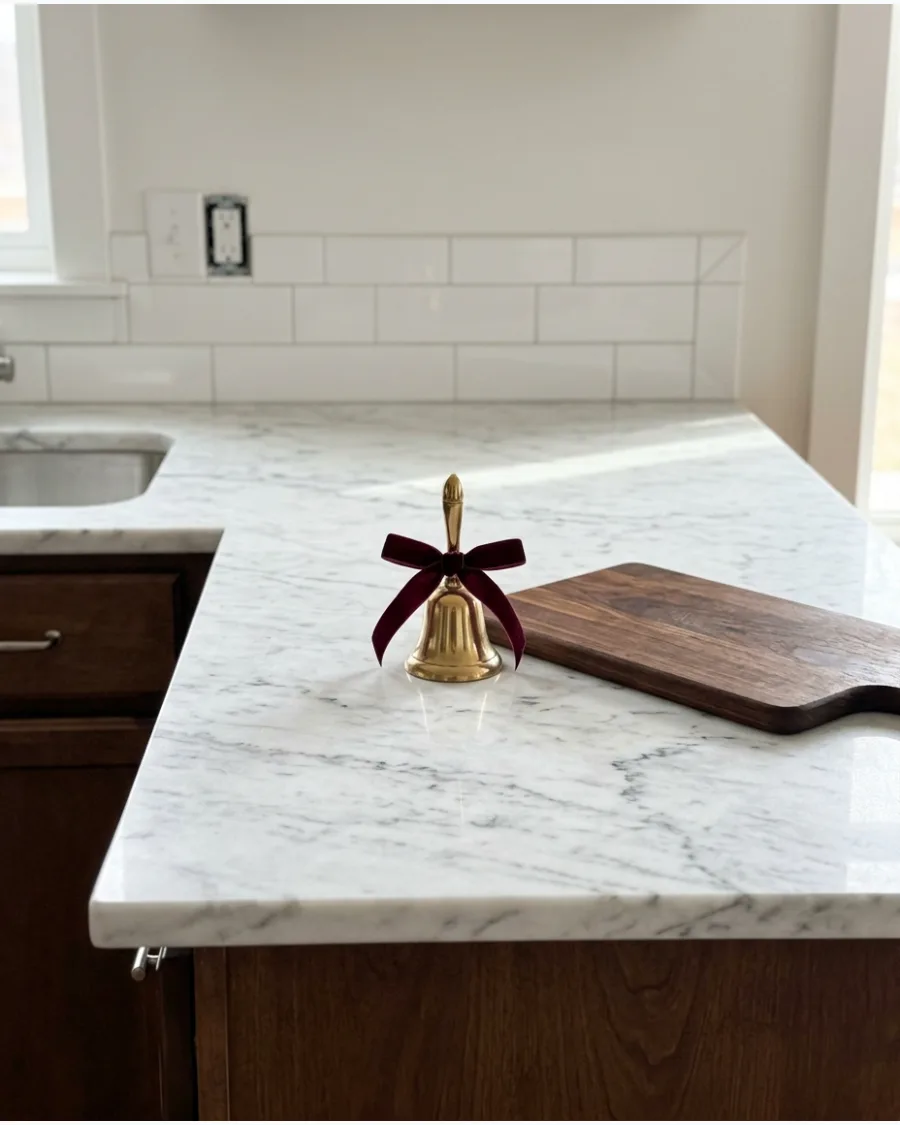
Deep burgundy ribbon paired with brass bells offers a sophisticated alternative to the usual bright red. The dark tones feel rich and elegant, especially when reflected in the polished surfaces of a kitchen.
Tie a velvet burgundy bow around the neck of a brass pitcher or bell for an instant upgrade.
- $25 for quality velvet ribbon and brass accents.
- Use antique brass finishes to avoid a look that is too shiny.
- Pairs beautifully with dark green foliage like magnolia leaves.
Most people skip this: Use wired velvet ribbon so you can fluff the bows and keep them from looking flat in a busy kitchen.
59. Classic Red and Green Christmas Countertop
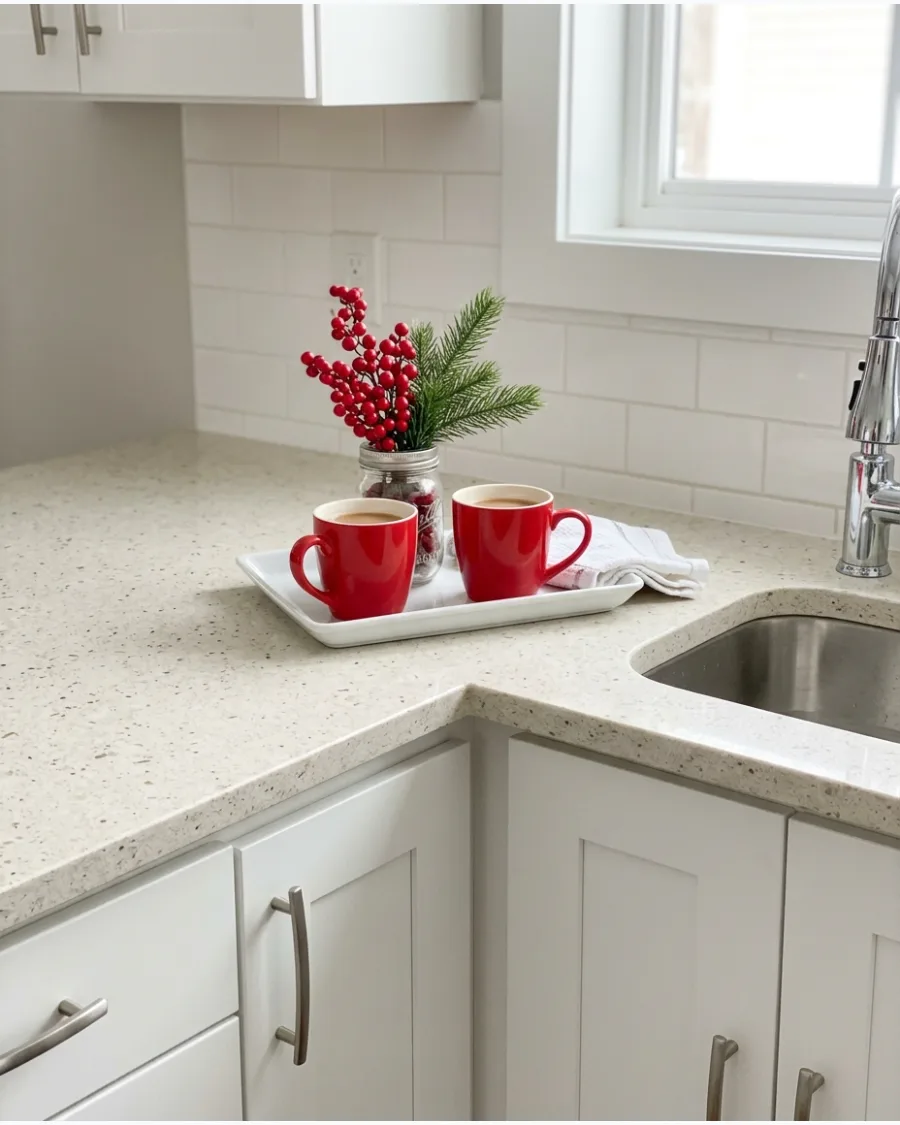
You can never go wrong with the timeless combination of evergreen branches and bright red berries. This look is easy to achieve by scattering a few red-handled mugs or berry sprigs across your main coffee or prep station.
Group these traditional items on a simple white tray to keep the color from feeling scattered.
- $10-$20 for basic mugs and berries.
- Use artificial berries to avoid the mess of real fruit dropping on the counter.
- The most recognizable and cheerful holiday color scheme.
Best shortcut: Buy a single bunch of artificial berries and snip them into smaller pieces to spread the color through different zones.
60. Curated Collected Christmas Countertop
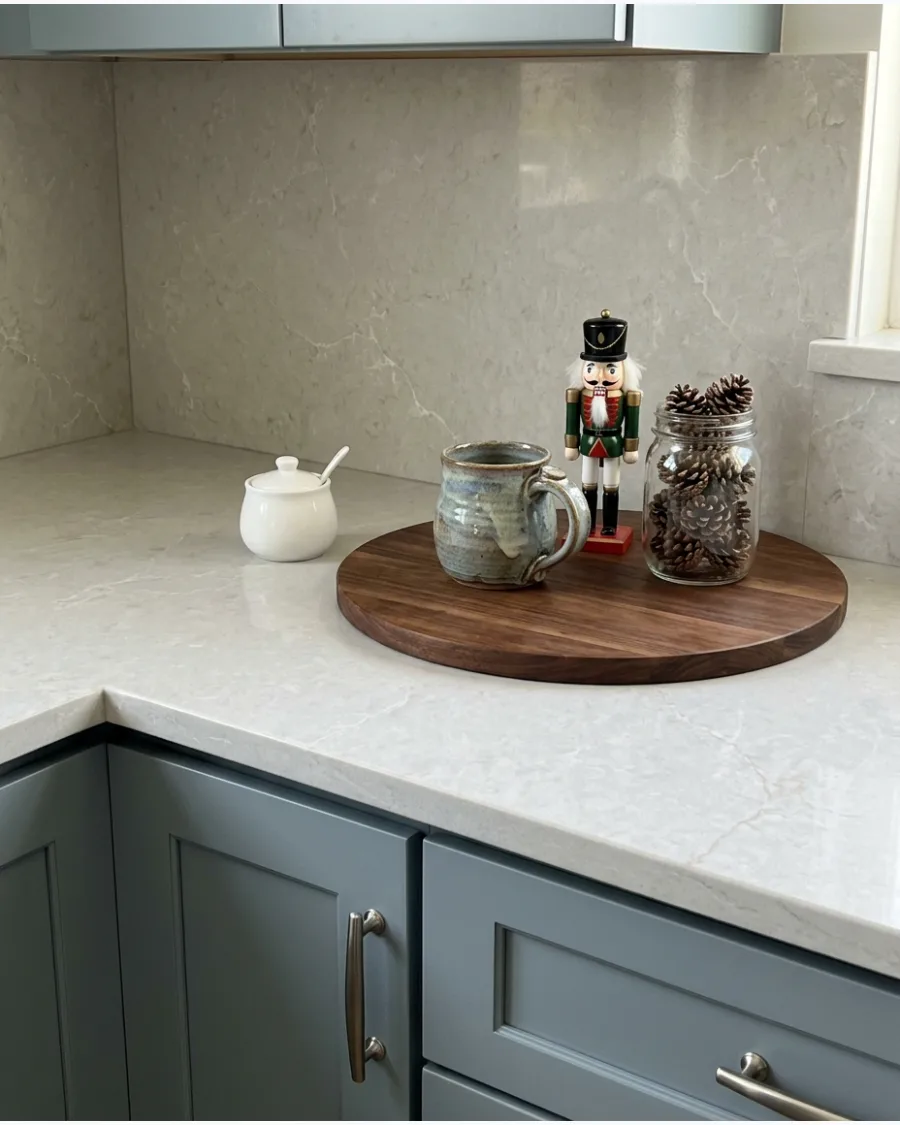
A curated display mixes inherited pieces with new favorites to tell a personal story. This approach feels more authentic than a store-bought set and allows you to showcase items that actually mean something to you.
Layer different textures like smooth glass, rough wood, and soft greenery to make the collection feel cohesive.
- $0 (use items you already have).
- Focus on varying the heights of the objects to keep the eye moving.
- Perfect for families who have a mix of old and new decorations.
Quick win: Use a hero object—the one with the most sentimental value—as the tallest or most central piece in the group.
Frequently Asked Questions
How do I decorate my kitchen counter without losing workspace?
Use decorative trays to group your holiday accents, which makes them easy to move when you need more prep space. Focus on utilizing corners or the area directly under cabinets to keep your main workspace clear and functional.
What are the best food-safe Christmas decor ideas for counters?
Display bowls of seasonal fruit like oranges or pomegranates alongside glass jars filled with fragrant cinnamon sticks. You can also use a tiered stand to organize festive holiday mugs, keeping them accessible yet decorative.
How can I make my bathroom counter feel festive but clean?
Simply swap your everyday essentials for seasonal versions, such as holiday-scented hand soaps in festive dispensers. Add a small sprig of fresh evergreen in a bud vase to provide a touch of nature without cluttering the vanity.
Is it safe to put Christmas lights on a kitchen counter?
Yes, but it is best to use battery-operated fairy lights to avoid safety risks near water sources. These eliminate messy cord management and provide a warm, festive glow without needing an available outlet.
How do I style a tiered tray for Christmas?
Create a balanced look by placing taller items like bottle brush trees on the bottom tier to ground the display. Fill the upper levels with smaller ornaments and accents to ensure the arrangement feels cohesive and visually appealing.